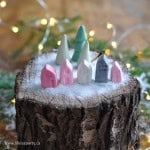
Polymer Clay House Christmas Village
Equipment
- home oven
Ingredients
- polymer clay
- matchstick
- lollipop stick
- knife
- parchment paper
- baking tray
Instructions
- Working on a piece of parchment paper, because the colour from the clay tends to leave residue on a work surface and transfer to the next colour you work on. Take care to make sure your hands and tools are clean when you switch colours too. Begin my kneading your clay and softening it. Use your fingers to form a cube shape for the base of the house and then flatten the top into a roof to make your polymer clay miniature house.
- Make different houses in slightly different colors, and different sizes; some shorter, some taller, some wider, and some smaller for variation. Make them about 1-1.5 cm wide, and about 2 cm tall at the peak of the roof.
- To add the details of the windows and doors use the end of a matchstick. One small square for a window, or four small squares together, or a line of three. For the round window, use the end of a lollipop stick. To make the doors, use the side of a matchstick. Or two together for double doors. To make the rounded door, use a lollipop stick to make the round top, and the matchstick to make the straight section.
- Make trees using green polymer clay and roll it into a cone shape.
- Bake the clay according to the package directions, in your oven, on a parchment lined baking tray.
- Once cool arrange your village and sprinkle with glitter or faux snow.
