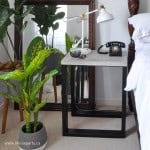
DIY Concrete Side Tables
DIY Concreate Table With Steel Legs
Equipment
- Saw
- Drill
- Caulking Gun
- Sander
Ingredients
- Steel Furniture Legs
- Matte Black Spray Paint
- Concrete Mix
- Melamine Board
- #6 Wood Screws
- Silicone Caulking
- Diamond Sanding Pad
- Lead Anchors
- 1 " Pan Head Wood Screws
- PL Premium Construction Adhesive
- Concrete Sealer
Instructions
- The first thing you need to create is your forms for the concrete table top. We made our side table tops 24" by 17". The length was based on the size of the legs. We wanted the legs to be flush with the concrete top. The forms were made from a piece of melamine. It's nice and smooth and creates a really nice smooth finish on the table top, compared to regular wood forms. We highly recommend using melamine for the forms for a beautiful finished table top as your end result.
We made our tops 1 ½" thick, the same thickness as the table legs for a cohesive look. - Begin by cutting the edges for the form. We made two tables at once, so we cut three 17" long strips, that were 1 ½" thick. We made our two forms together so the long sides edge pieces were just over 60" to accommodate two 24" sections, plus the thickness of the form edge.
- Next lay out the first long side of the mould and drill guide holes through the form edge and right through the bottom so that you can screw it together from the back side with #6 wood screws. Use a square clamped into place to make sure your corners are perfectly square for your concrete mold. Pre-drill and screw into place the rest of the form edges.
- Now to finish the moulds, caulk the inside seams with the silicone caulking, applying a silicone bead around the edge, and then smooth out the edges. Since whatever you leave on the inside of the concrete form will transfer into the finished concrete top impression, take some care to make sure it's as smooth as possible on the seams. The silicone caulking will need at least three hours to set.
- Now you can mix your concrete. Follow the manufacturer's directions on the bag of concrete. Mix well, this step is very important. We used a drill attachment, and mixed our concrete in an empty bucket. The drill attachment is the perfect tool for this process, since the concrete is heavy and hard to mix thoroughly by hand. Make sure you get all the way to the bottom of the bucket when your mixing.
Because our tables were quite small we mixed the entire thing at once, but you could do it in small batches and do one table at a time if you wished. - Fill your moulds with the wet concrete mixture. Use a trowel to smooth out the top. Use a rubber mallet to gently give the sides of the form a good tap, to help get rid of air bubbles in the concrete mixture. The next step, another trick (Shaun knows all the tricks) is to use a palm sander or orbital sander along the edges of the top of the form, just for the vibrations to also help get rid of the air bubbles in the cement mixture. Be sure to smooth the top and get it as level as possible.
- Let the concrete tabletop set for 3 - 5 days.
- Remove the form edges by removing the screws and gently prying it off the melamine. Take care not to force it, since it could crack or break still at this point. Use a wet diamond sanding pad along the edge to smooth it a little bit around the rough edges, if needed.
- For the legs, wipe them down with varsol to remove any grease. Spray paint the table base with several coats in matte black.
- To attach the legs to the top piece, first mark out the screw holes on the bottom of the concrete table top. We only used the holes furthest from the edge to lessen the chance of cracking the concrete. Drill holes for the lead anchors into the concrete, taking care since it's still fragile at this point. We were a little worried as we drilled the holes into the concrete. Ours wasn't quite set enough, probably because of colder night temperatures when we made it. If you let is set the whole 3-5 days though it should be fine. Of course do this part carefully though, you don't want all your hard work to be wasted by cracking anything here. Then cut the tops off the lead anchors to make them shorter, and use the PL Premium Construction Adhesive to glue them into place in the drilled holes. Next, add some PL Premium Construction Adhesive to the top edge of the table leg, and then glue and screw the leg into place. Again, take care since this is another time when you could crack the concrete. Then add the second set of legs and set up your table.
- The final step is to apply a sealer to the concrete tabletop. Let the concrete cure for a full 28 days and then apply the clear coat sealer to the top of the table. (I haven't sealed it yet, but I will once the cure time is up.)
