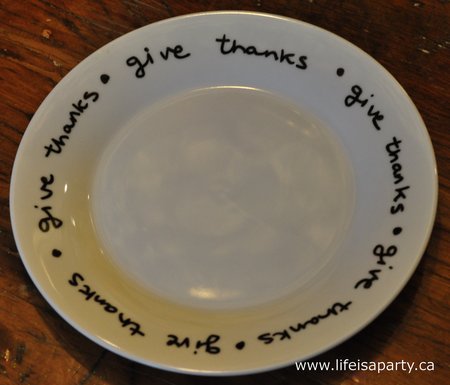
Give Thanks DIY Plates: These DIY plates are easy and inexpensive to make for Thanksgiving or any other holiday. Use a special pen to add permeant writing to any ceramic piece.

These DIY plates were inspired by a shopping trip. A while ago I was walking around Crate and Barrel, drooling over all the pretty things, like you do, when I noticed their cute "give thanks" side plates. I really liked them and thought they'd be really nice for Thanksgiving, but they were too expensive for me.

I had seen on pinerest a few times, how people were using permanent Sharpie markers to write on china, and thought this might work to make my own. After a little more research, it looked to me that this method was hit and miss at best. I decided to use a ceramic marker for a more permanent effect.
Materials:
- inexpensive white side plates
- decor art glass paint marker in black
- oven

How To Make Your Own DIY Plates:
This project is really easy. Basically you use the marker to write around the edge of the plate.
The hardest part of the project was figuring out the spacing of the words around the plate. With a little practise and a template to line up the dots between the words, it came together.
You can remove the design if you're not happy with it before it's baked. You can try the writing and if you're not happy with it just wash it off and begin again.

After the design is finished the plates need to sit 4 hours. Then the plates get baked for 40 mins -according to the manufacturers instructions.
They need to start out in a cold oven and be left to cool completely in the oven afterward. All the instructions are on the glass paint marker.
One word of caution: the marker also says that it isn't food safe. All the pictures of it being used show it on plates, glasses and cups. So, I guess the key is to only place the design on places where food will not come in direct contact. I thought these were fine, because the writing was just on the rim of the plate.

After the plates have been baked and cooled the writing should be permanent. They recommend hand-washing, so that's what I did.
UPDATE: I've had these plates for years and use them for every Thanksgiving. I always hand wash and never put them in the dishwasher. The writing still looks perfect.
The Finished Plates
I used the plates for my Silver Thanksgiving table. I love how they turned out.

At first, I did consider using a silver pen. In fact the pens come in a whole range of colours, including gold just like the inspiration plates. In the end, I decided that even though silver would have looked great this year, next year if I use oranges and browns for my thanksgiving table, the black writing would make the plates more re-usable.

I have lots more ideas for Christmas and other holidays. This idea is great since it's so versatile, turned out great, and was really inexpensive. The whole project was under 20 bucks. You can't go wrong for that, even if you only use them once a year!

With Give Thanks DIY Plates, life really is a party!
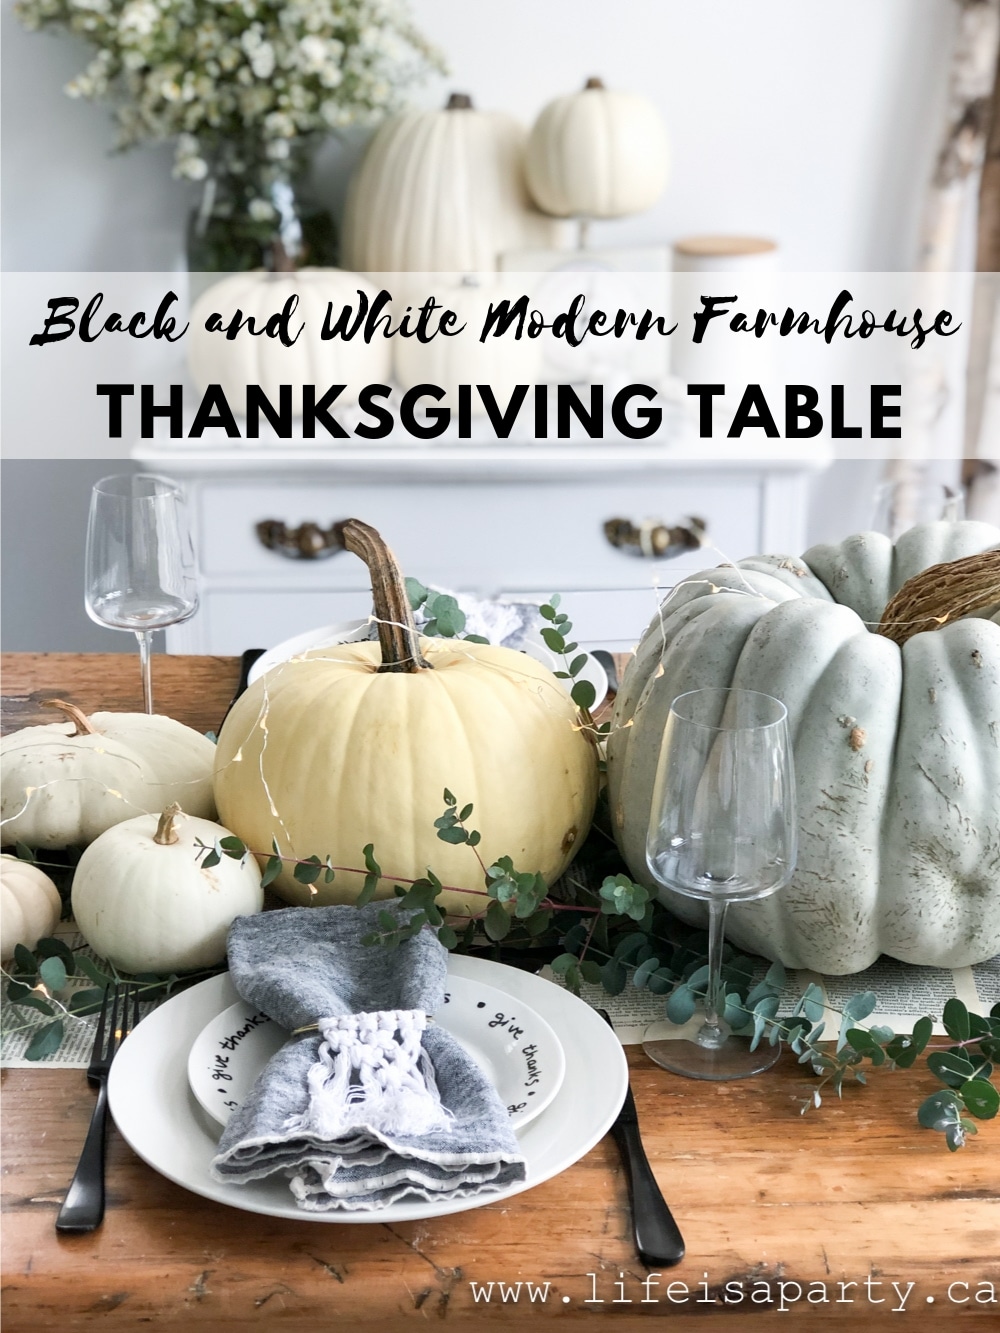
You might also like our Black and White Modern Farmhouse Thanksgiving Table here.
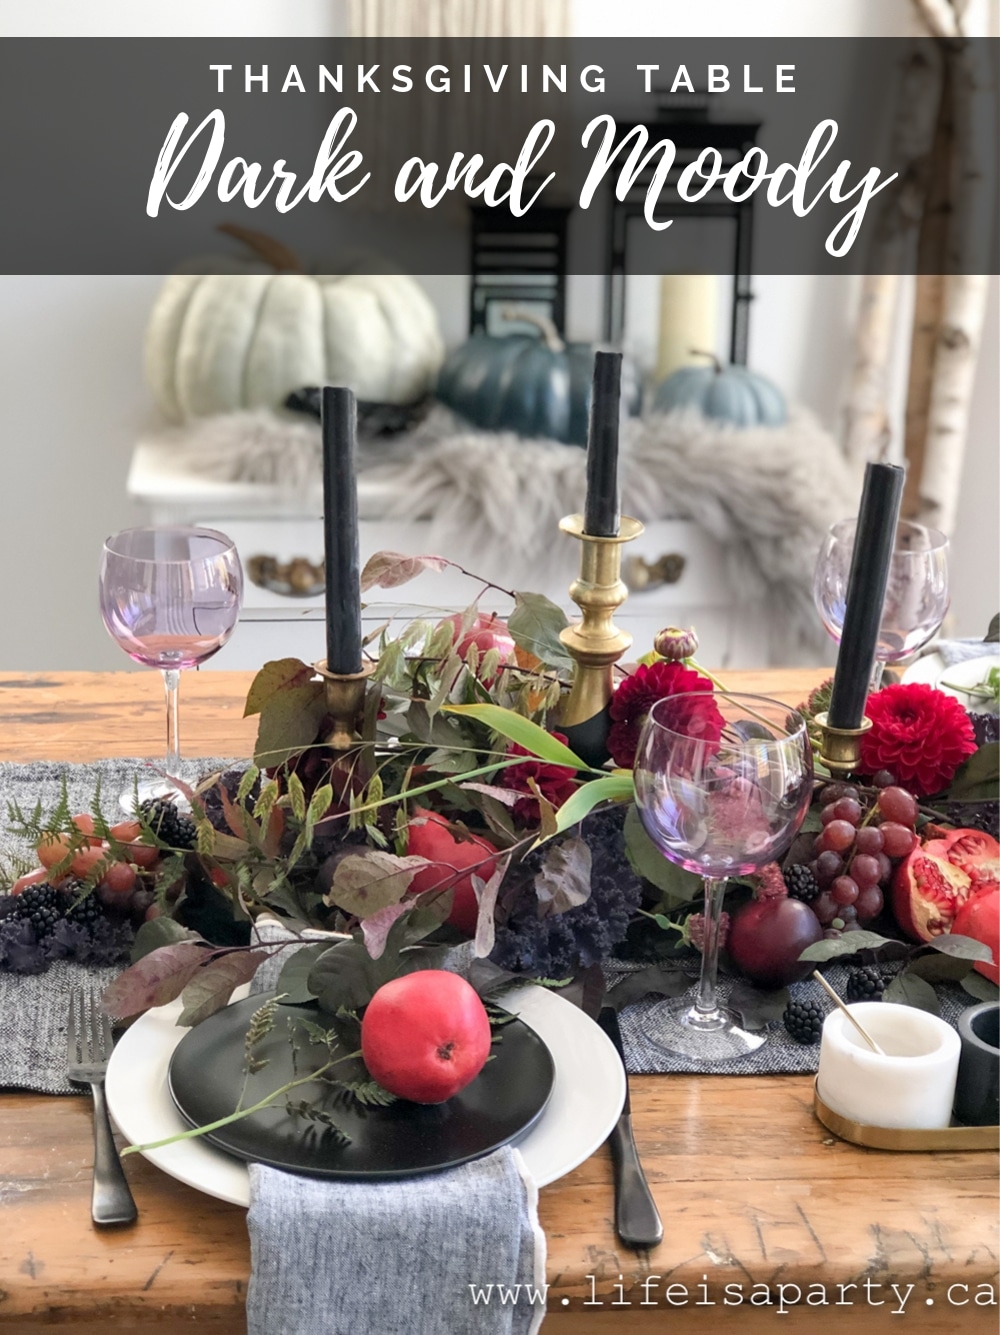
Also check out our Dark and Moody Thanksgiving Table here.
You might also enjoy our Vintage Botanical Scientific Thanksgiving Table here.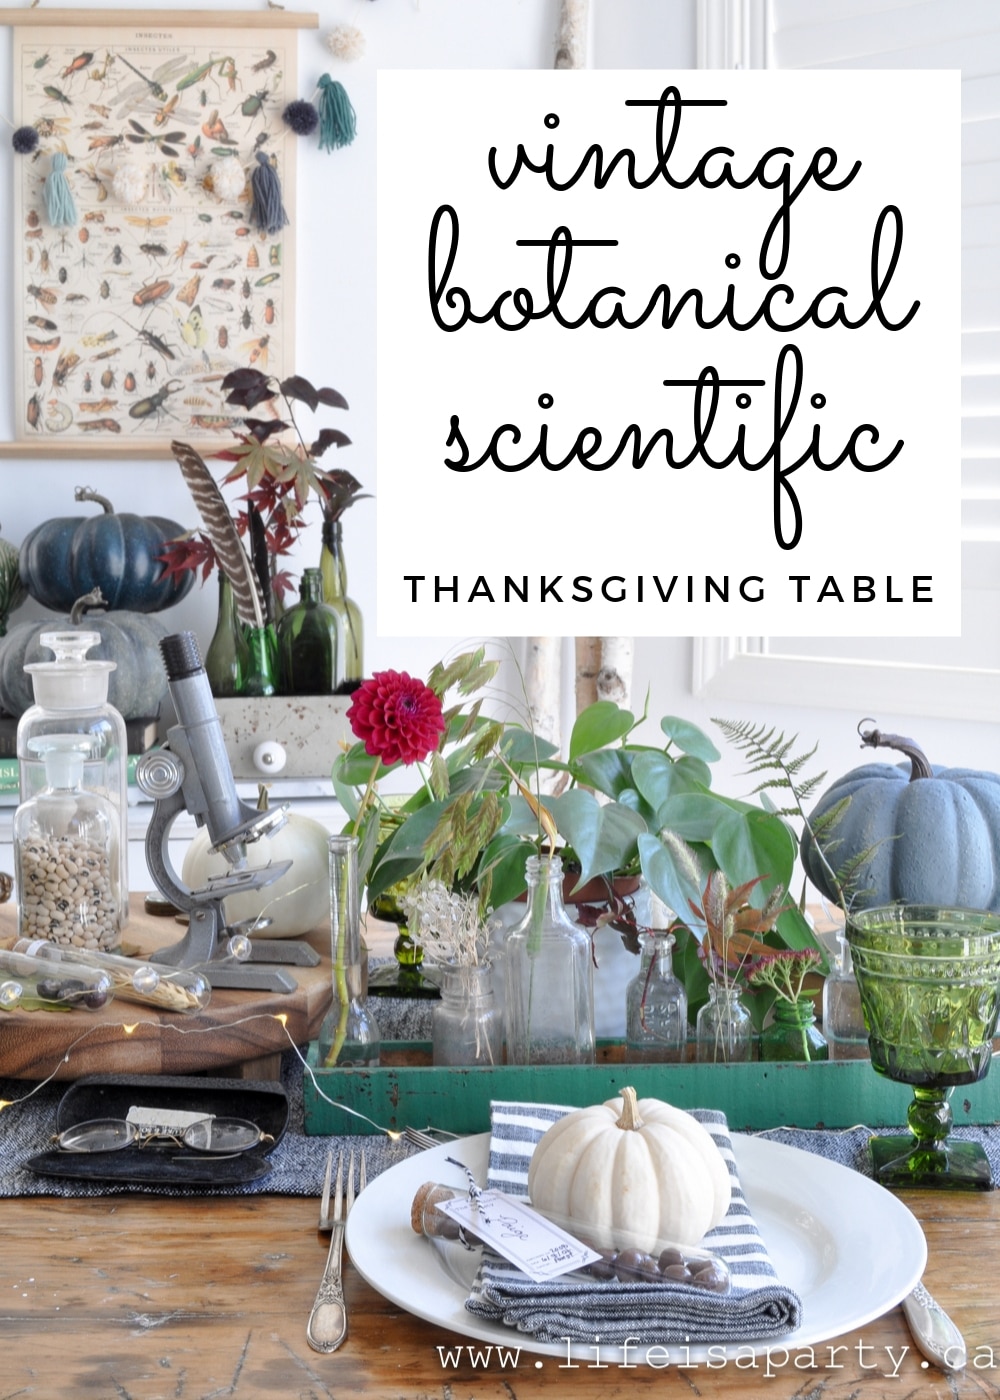


dnr says
Ann, that sounds perfect. Best of luck with the project.
Dannyelle
Ann says
I found perfect plates with wide rim at WalMart for $.88! The brand is Better Homes and Garden. I can't wait to try.
Bettye says
always i used to ead smaller posts that as well clear their
motive, and that is also happening with this article whic I amm
reading here.
dnr says
Hi Jane,
So glad to hear you tried it! The Rosh Hashanna plates sound really great. Thanks for letting me know, and the great tip too.
Dannyelle
Chava says
I bought plates at the dollar store and wrote happy new year in many languages for the holiday of rosh Hashanna. Looks cute but unfortunately my handwriting is not a as nice as yours. I also found if I wrote it first with a dry erase marker I could get the spacing right and it just wipes off.