How To Paint Buffalo Plaid Walls -easy weekend DIY to add drama to any space by painting buffalo check plaid on a feature wall.

Jump to:
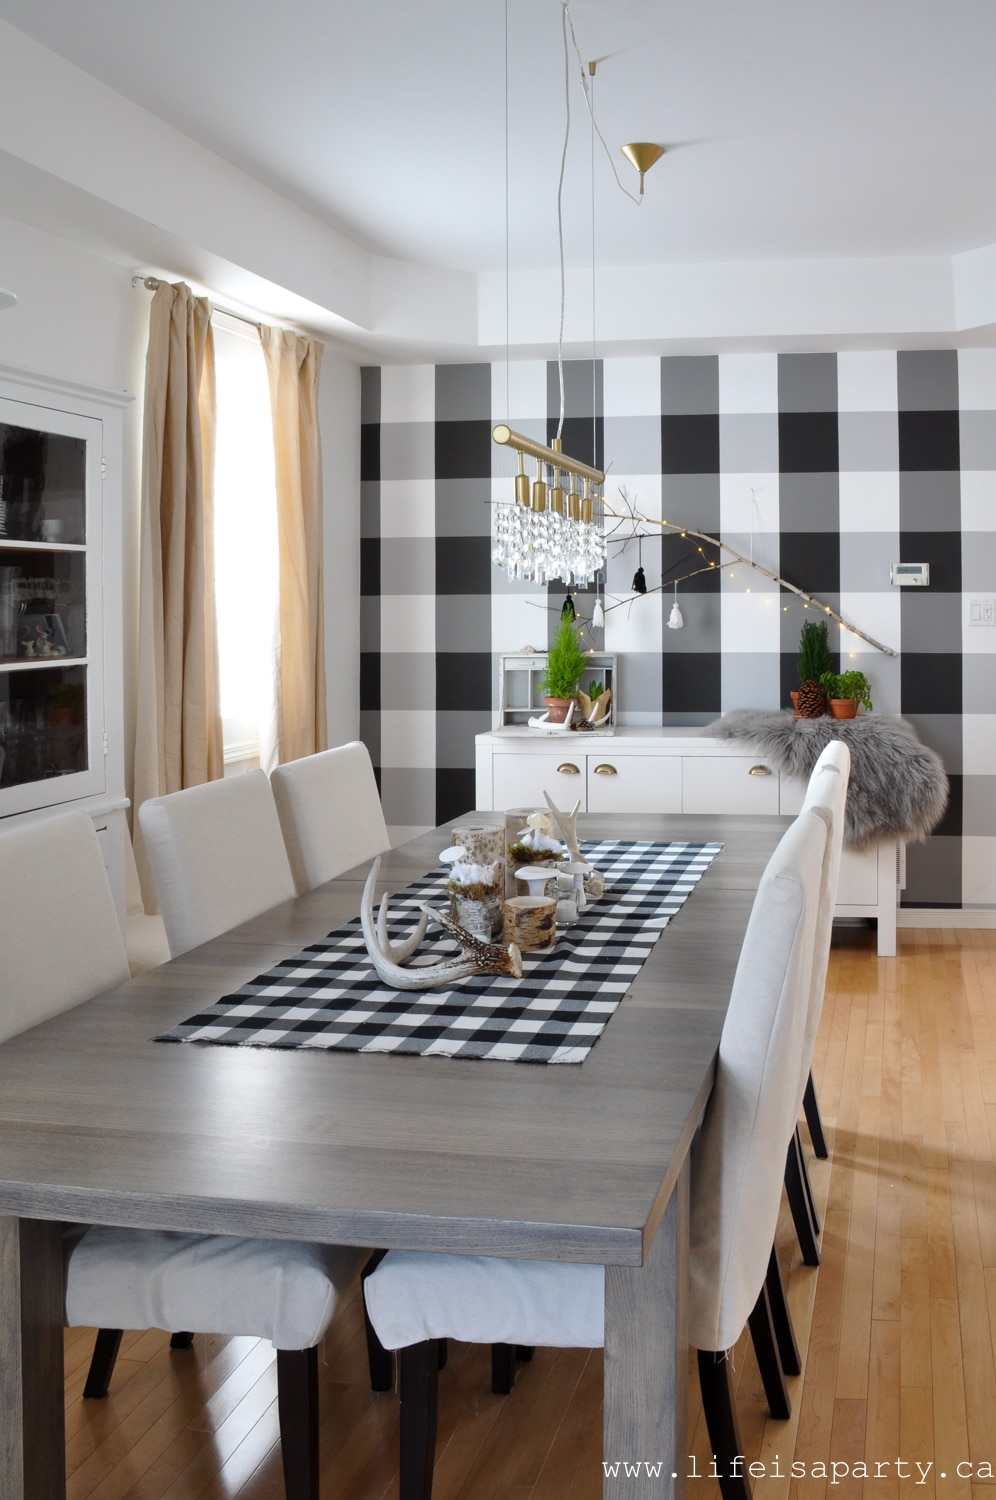
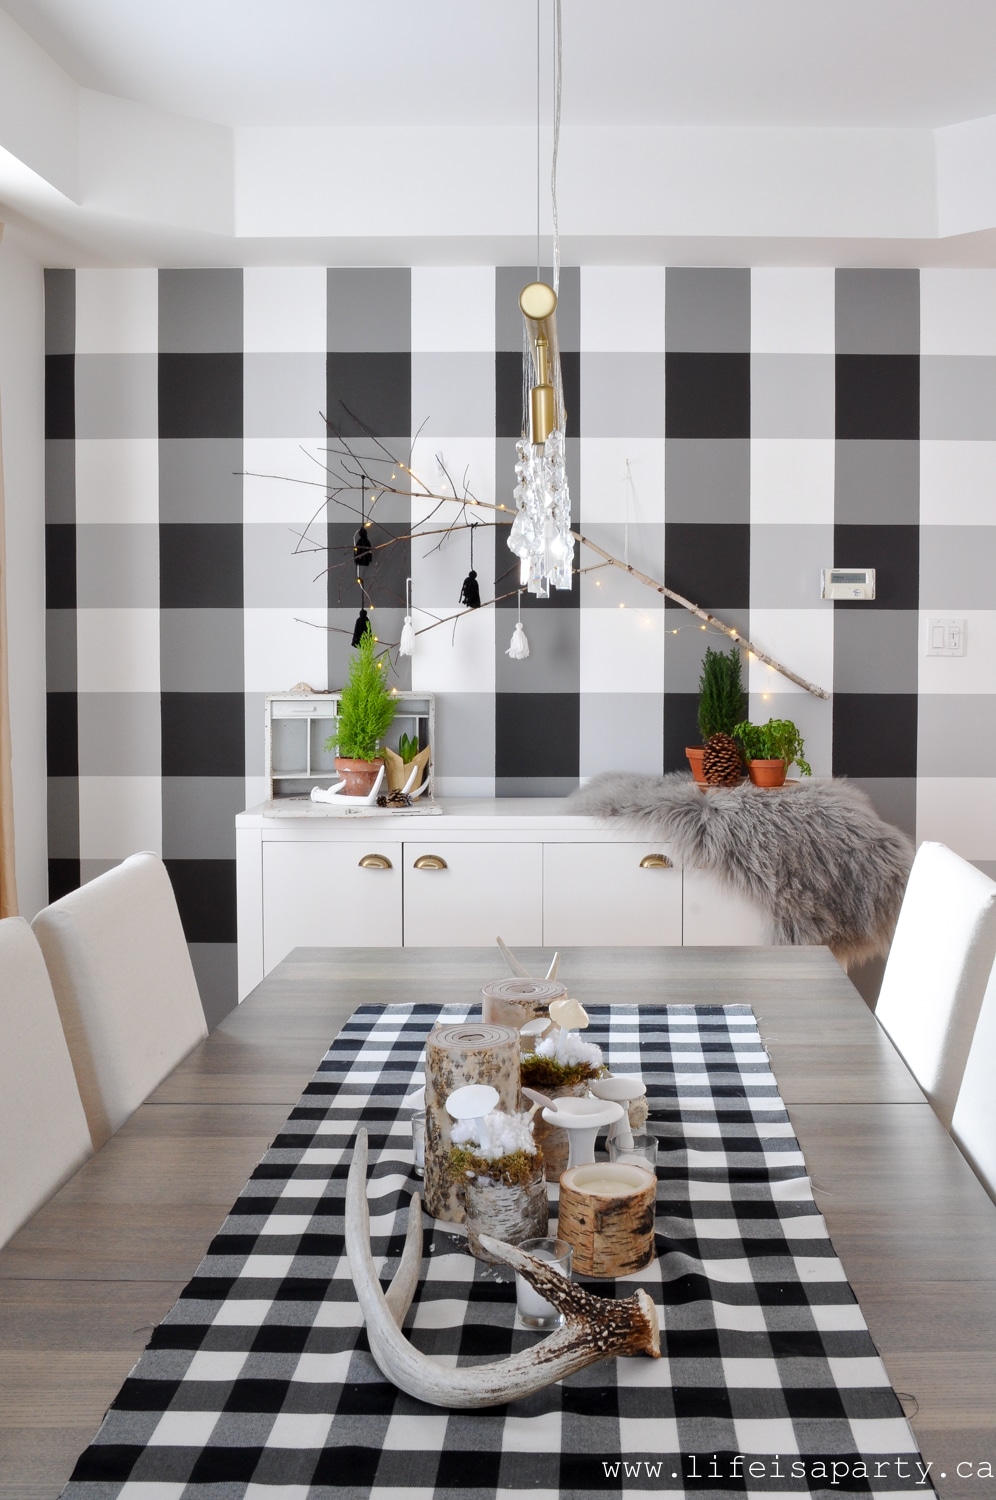
I love my dining room and thought it would be fun to add a plaid painted feature wall to create a little drama. I love that this Buffalo Check wall is done with paint, and only took a weekend to create. It adds so much to the room and was a great weekend DIY project. Changing your home decor with a little paint is such a fast, economical way to create a big impact.
Choosing The Colours
About a year ago, I redecorated my dining room and changed all the dark furniture and beige walls to white -read about the big dining room makeover reveal with a before and after here. What a huge difference it made. I painted the room in Para Paints JoJo Whitewash. I have loved the clean white that's made the room feel so bright and airy.
When I decided it was time to add a little more drama to the room, I knew I still wanted to keep the room neutral. I have loved being able to mix and match any colour for any season. I've also fallen in love with this seasons hottest trend -Buffalo Check!
I feel like the black and white plaid painted wall in buffalo check are so fresh feeling. It adds lots of interest and texture but is still neutral and goes with everything. If you're a fan of buffalo check, it a really great way to add some big impact to a space.
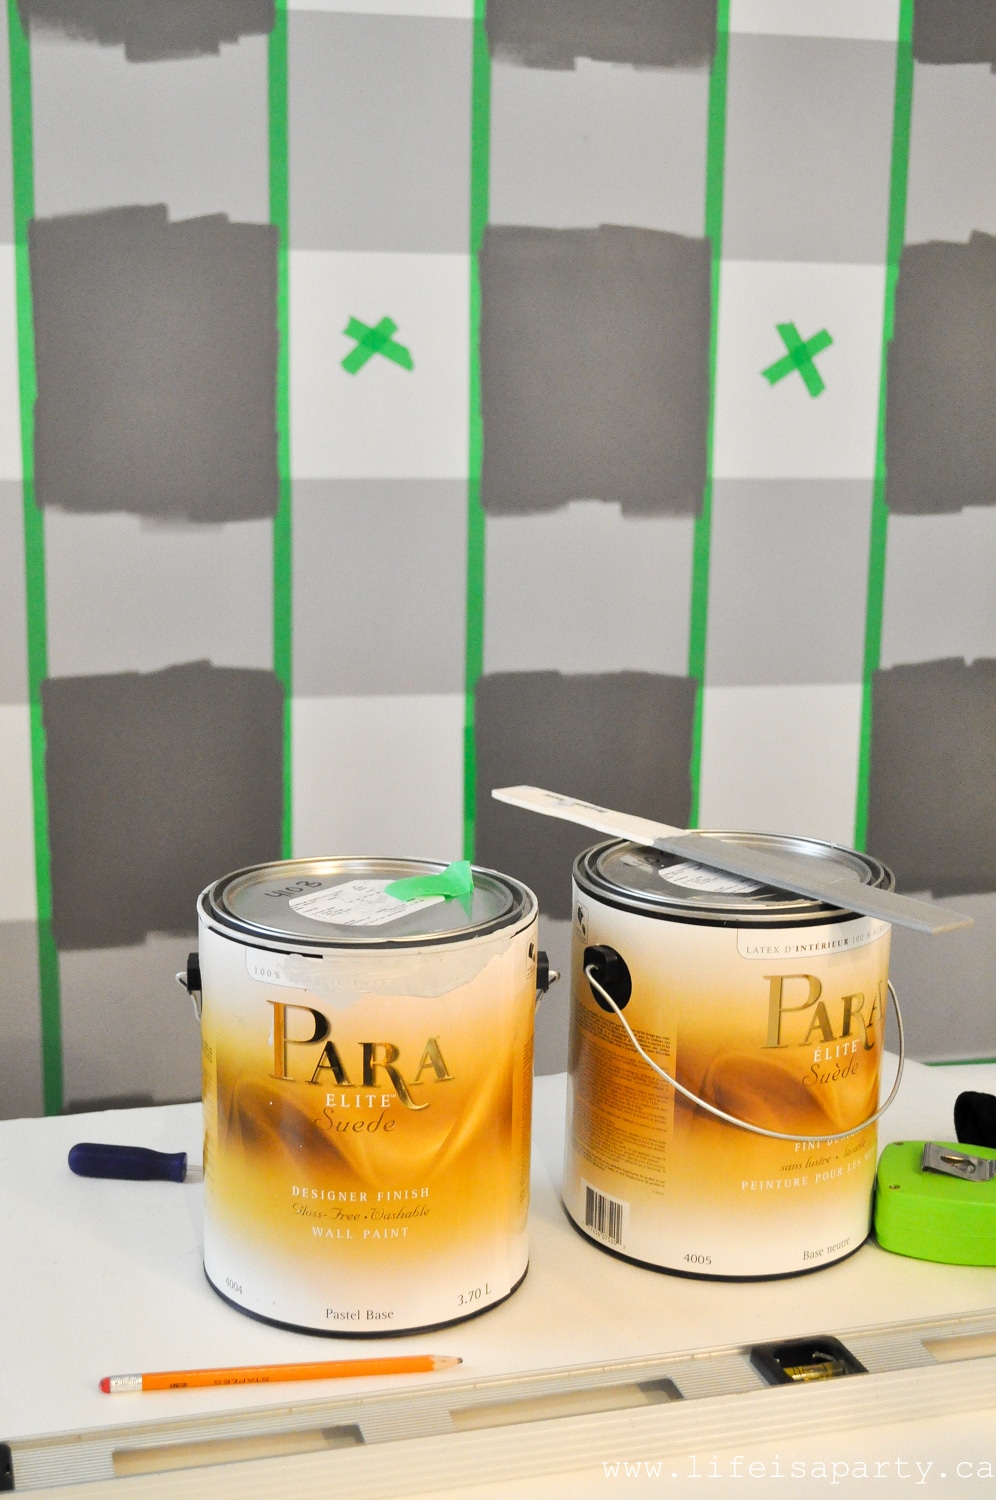
When it came time to choose the greys and black paint to go with JoJo Whitewash. In the paint store, I used a fan deck to complete my choice. Para makes it's easy by putting difference shades that go together on the same paint sample. I went with 410B, 410D, and 410G. We kept the white JoJo Whitewash as our base color.
Materials:
- PF17 JoJo Whitewash Para Paint
- 410B Titanium Para Paint
- 410D Grey Tote Para Paint
- 410G Raven Wood Para Paint
- Painters Tape
- Laser Level
- Pencil
- small roller and tray
- paint brush
How To Make Plaid Painted Walls in Buffalo Check
Square Size
1. Start out your plaid painted walls by deciding on the size of your squares -I went with 10 inches because I wanted them to be large and have a large impact. My walls were already painted with Para paint PF17 JoJo Whitewash, but if yours are not, you'll need to start by painting the walls in the white paint as a base coat.
Marking It Out
2. To mark out your buffalo check pattern, use a laser level to make a straight lines 10 inches down from the top of the wall, and used painters tape to mark it out. This will give you a full square at the top of the wall. Remember to put your first piece of tape on the outside of the first line, and then measure down from the top of the tape another 10 inches. Also, remember to push your tape down firmly to help prevent the paint from bleeding underneath.
We used a laser level to place our tape lines. This makes the job so much easier than a regular level would be. We didn't need to mark out a pencil line for ours, which was great because then we didn't need to worry at all about them showing through the paint, or erasing them afterward.
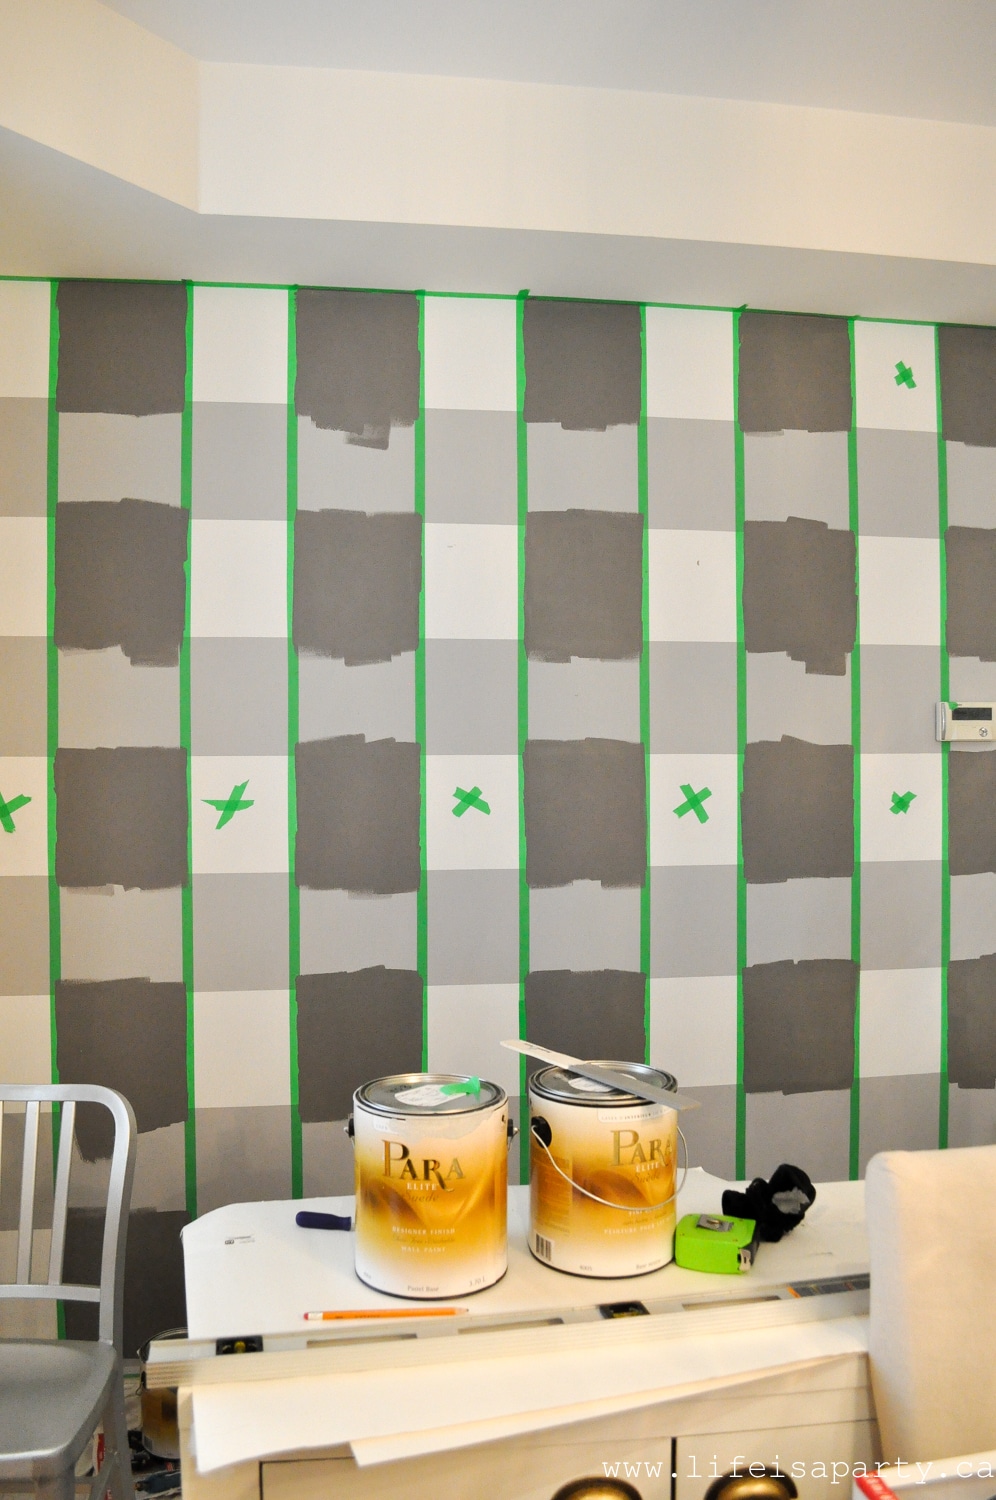
3. Mark the second line with painters tape, taking care to place it on the inside of the stripe. When it comes time to paint you will only paint every other stripe with gray paint, so the tape must be on the outside of each alternating stripe to insure that the strips are even afterwards. It will look uneven to begin with, and you might find it helpful to mark the stripe that is not being painted with an "X" of tape so you don't get confused.
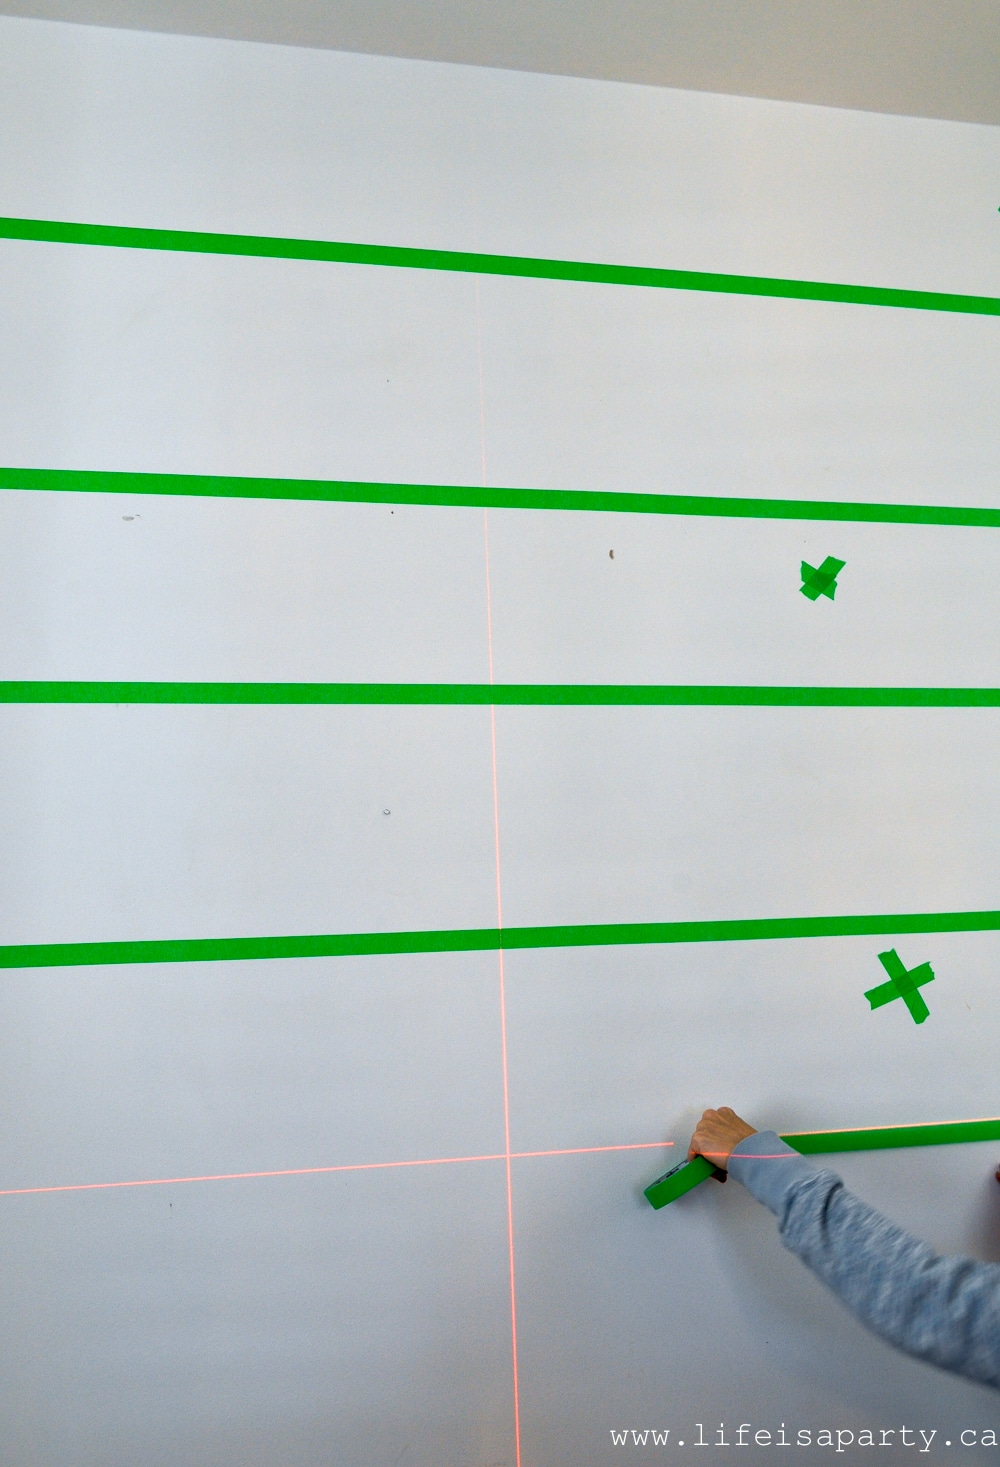
4. Next, you will mark out the vertical lines every 10 inches. I used a pencil to mark these, and then taped them after the horizontal stripes were painted. Start by finding the centre of the entire wall vertically with a tape measure, and then measure 5 inches out on each side to centre your first square. Use the laser level to create a straight line down and mark them on the wall in very light pencil every 10 inches apart.
Let's Get Painting
5. To paint your first stripe, choose your lightest color of grey, Para paint 410B Titanium, stir it well and apply 2 coats of paint with a small foam roller, or small paint brush. Letting it dry several hours in between coats. Remove the painters tape from the horizontal lines.
Waiting In-between
6. I waited over night to let the first stripes dry before beginning the vertical stripes. Begin by adding painters tape to the vertical lines that you've already marked out with pencil, taking care to place the tape on the outsides of the stripes again so that they are even when the tape's removed. Use painter's tape to mark the stripes you are not painting with an "X" again so you don't get confused.
Because the spots where the two stripes intersect will be painted black, for the next step you can just paint the other squares to cut down on the thickness of the paint in those inserting squares. These stripes (squares) were painted with 410D Grey Tote -two coats.
7. Let the Grey Tote dry for several hours or over night but do not remove the painters tape. Add tape to the intersecting squares, again on the outside to create the 10 inch squares. Paint these intersecting squares with the final color, 410G Raven Wood. After two coats remove each piece of painters tape, and reveal the buffalo plaid design.
As a final step once all the tape is removed, you may have to do a few touch-ups in any spots where your tape wasn't pushed down firmly enough. Remember though it doesn't have to be perfect. Tiny imperfections won't be noticeable once the whole thing is done and your furniture is back in place and the room is put back together.
Top Tips For Plaid Painted Walls:
Taping
A few little tips I'd suggest -be sure to push down your tape firmly so that the paint doesn't bleed underneath. If you do have a tiny bleed, you can always touch it up with an art brush after the wall is all finished.
Laser Level
Also be sure to use a laser level. If you don't have one, see if you can borrow one from someone for this job. The laser level makes marking out the lines SO much easier than it would have been with a regular level. This is definitely the easiest way to mark out the straight lines of tape.
Helping Hands
And, if you can get a friend to help you it goes so much quicker with two people to mark out the lines. One person can set up the level each time and the other can place each strip of tape, or hold a long straight edge on the wall for marking out the pencil lines.
Marking Your Squares
It really is a good idea to mark the squares you're not painting with a small piece of tape or two to make an "x". It's tricky to keep track of what you're doing, especially after staring at this for hours, so use the little tape trick to keep it simple. You really want to paint in the right place.
Timing and Touch Ups
One other consideration -when you're taping over the fresh paint you want the fresh paint to be dry enough so that it won't be damaged by a strip of painter tape. But you also don't want to leave the strips of tape on so long that it damages the layer beneath it. So it's a calculated risk. Be sure to use actual painters tape and not masking tape to mark out your buffalo plaid pattern. Remember also that you can always do small touch ups if the tape strips do damage the paint underneath at all.

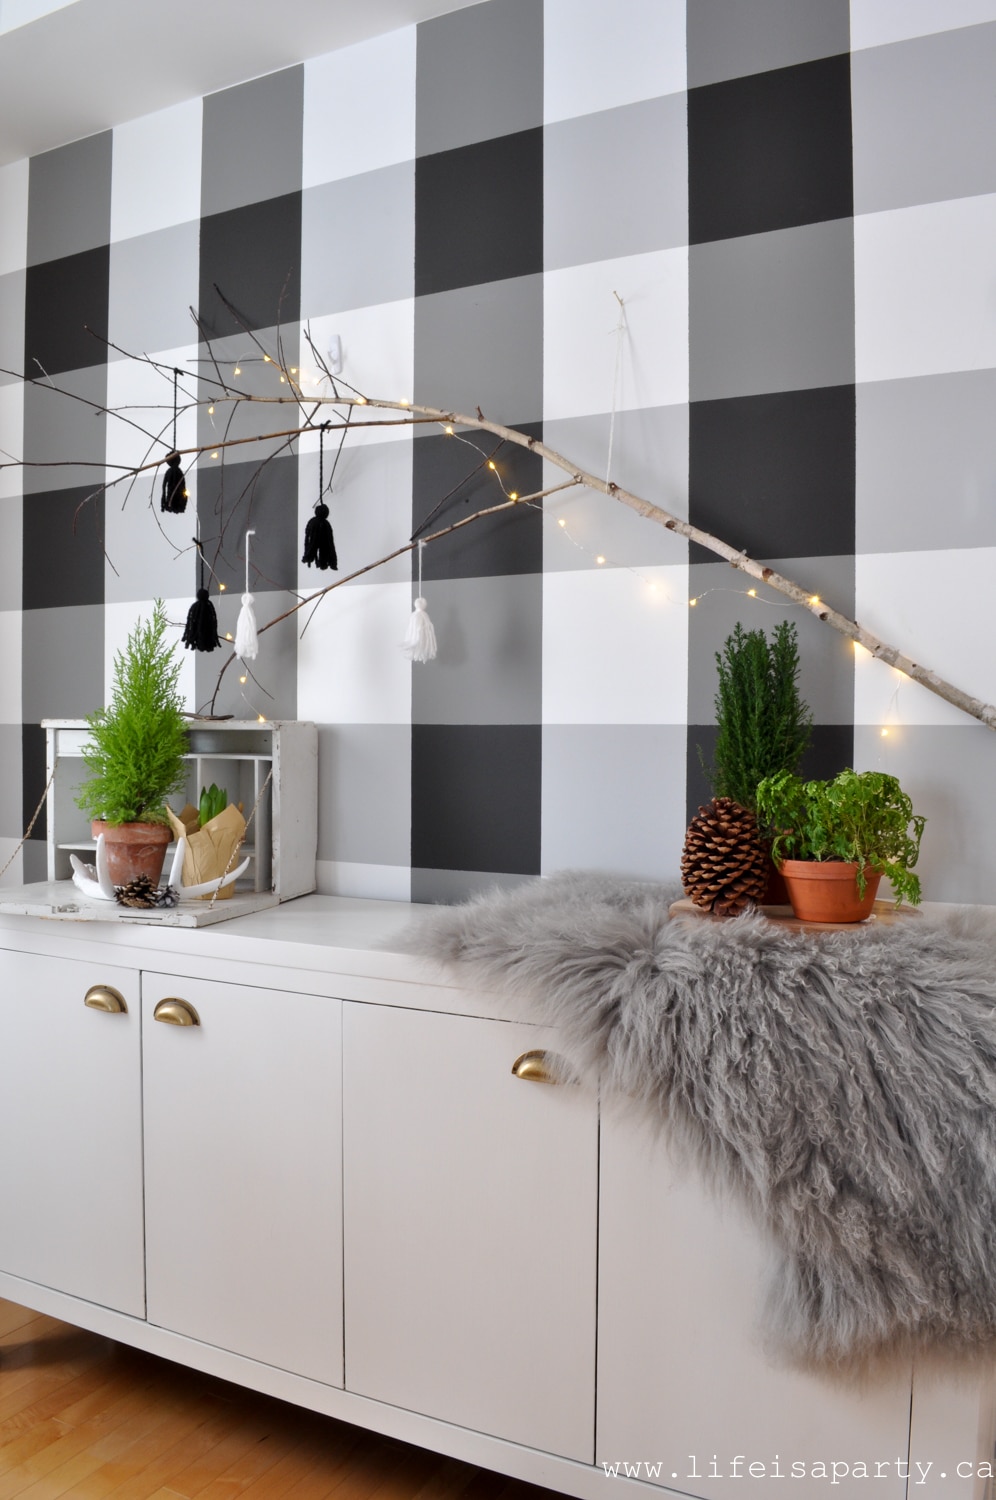
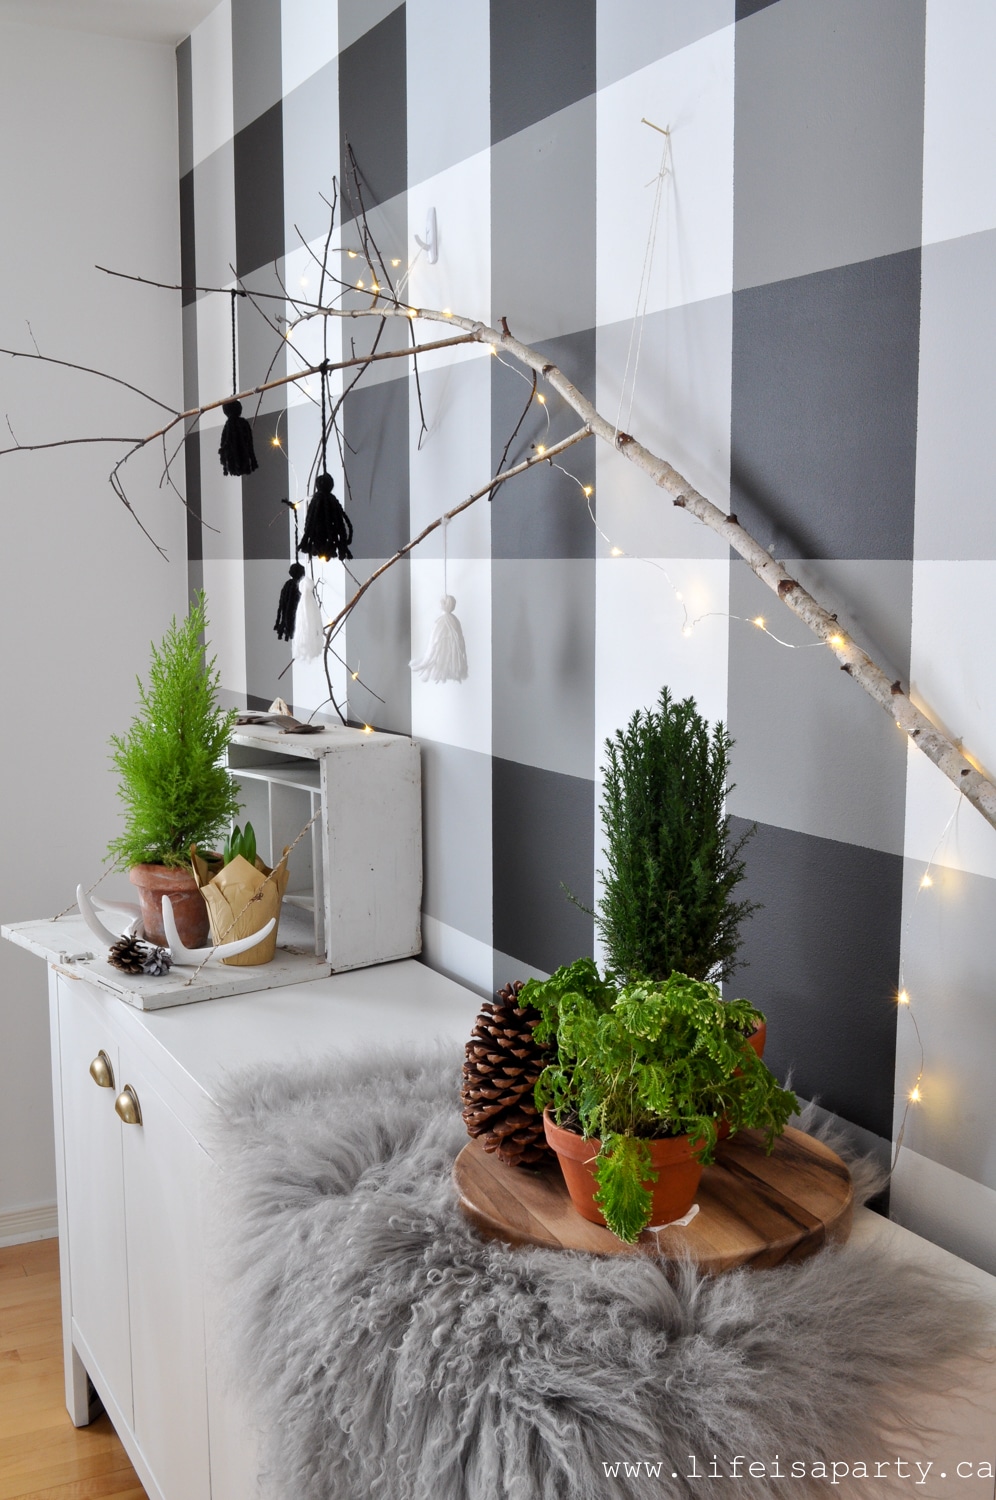
I didn't want to add art that would compete with my new buffalo check feature wall so I decided on a pretty birch branch with lights and yarn tassels. A large mirror would be a great choice too.
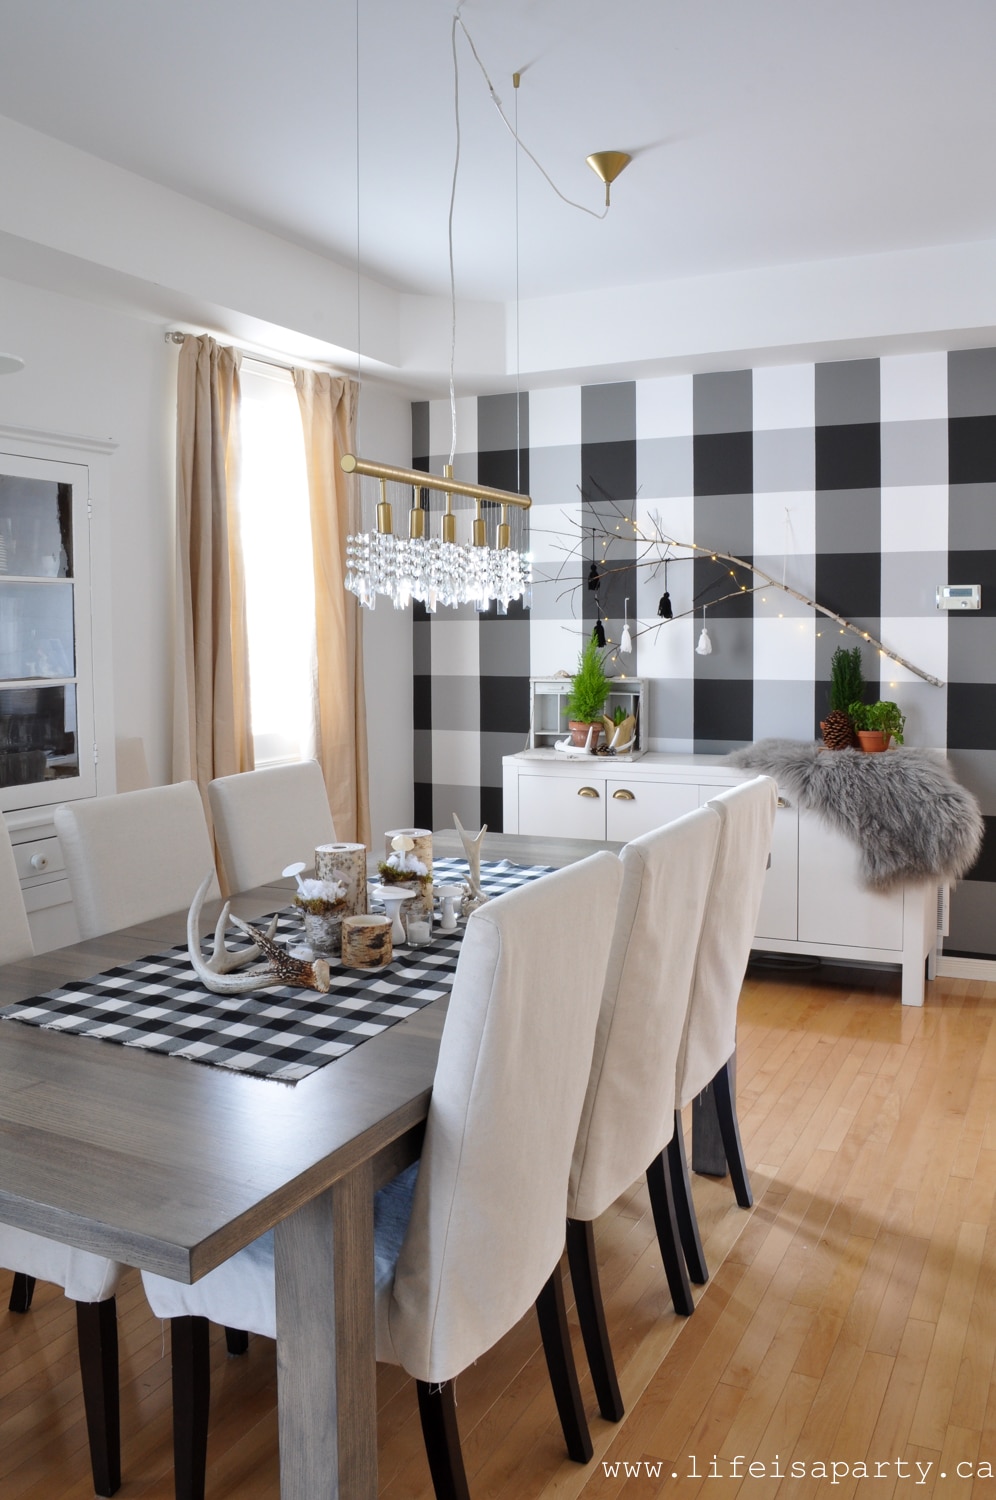
One of the things I love about this wall treatment is that it's not permanent. It will be easy to paint over whenever we're ready for a change. I am excited about decorating with lots of buffalo check for the holiday season -see our buffalo check black and white Christmas decor here.
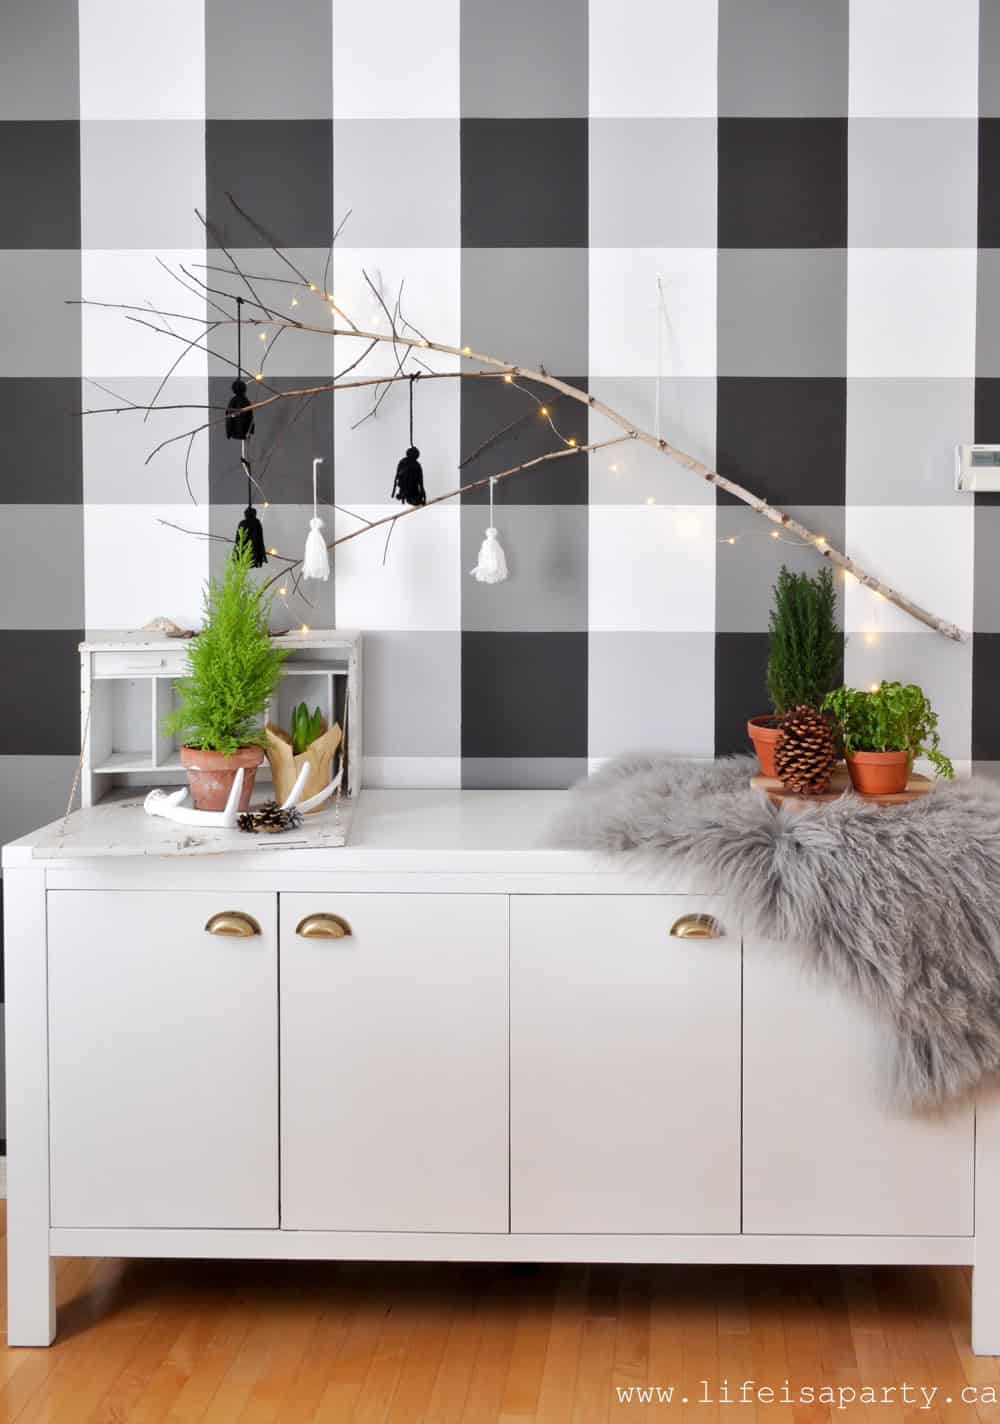
With a Black and White Buffalo Check Plaid Painted Wall Treatment, life really is a party!
More Inspiration
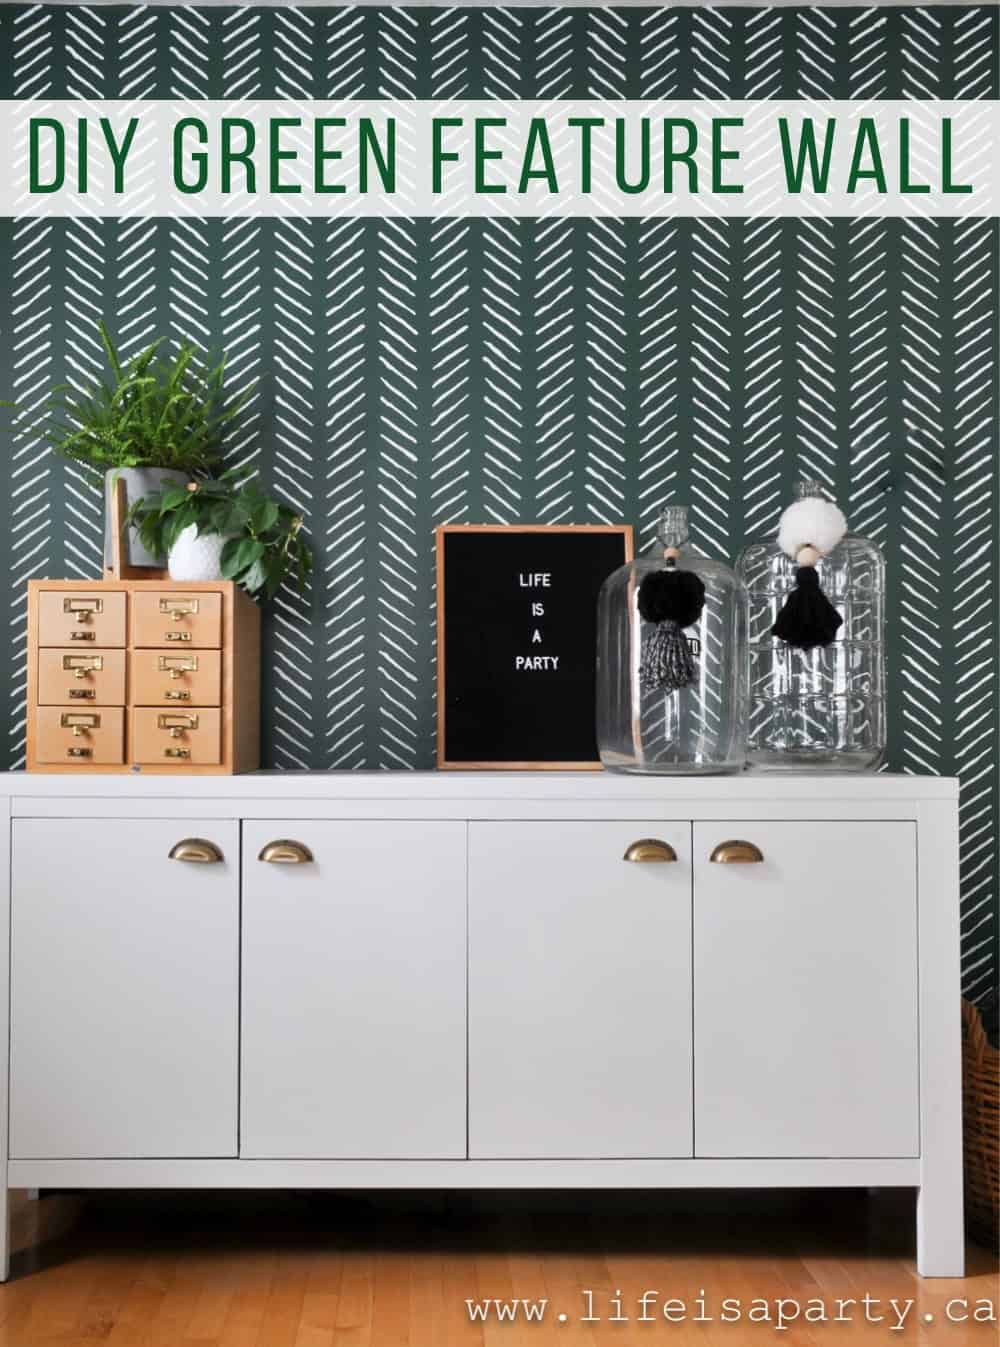
You might also love our Green Feature Wall post.
Also check out Black and White Boho Office Makeover here.
You might also like Rustic Scandinavian Makeover Reveal.


Leave a Reply
You must be logged in to post a comment.