Furniture Makeover: use paint to transfer old furnture pieces and give them new life. Easy step by step guide for the beginner.


It's Week Three of the The One Room Challenge, and this week I'm sharing my furniture makeover. I made-over the three large pieces in the dining room. If you missed Week One -The Plan you can catch up here, or Week Two -The Parson Chair Slipcovers here.
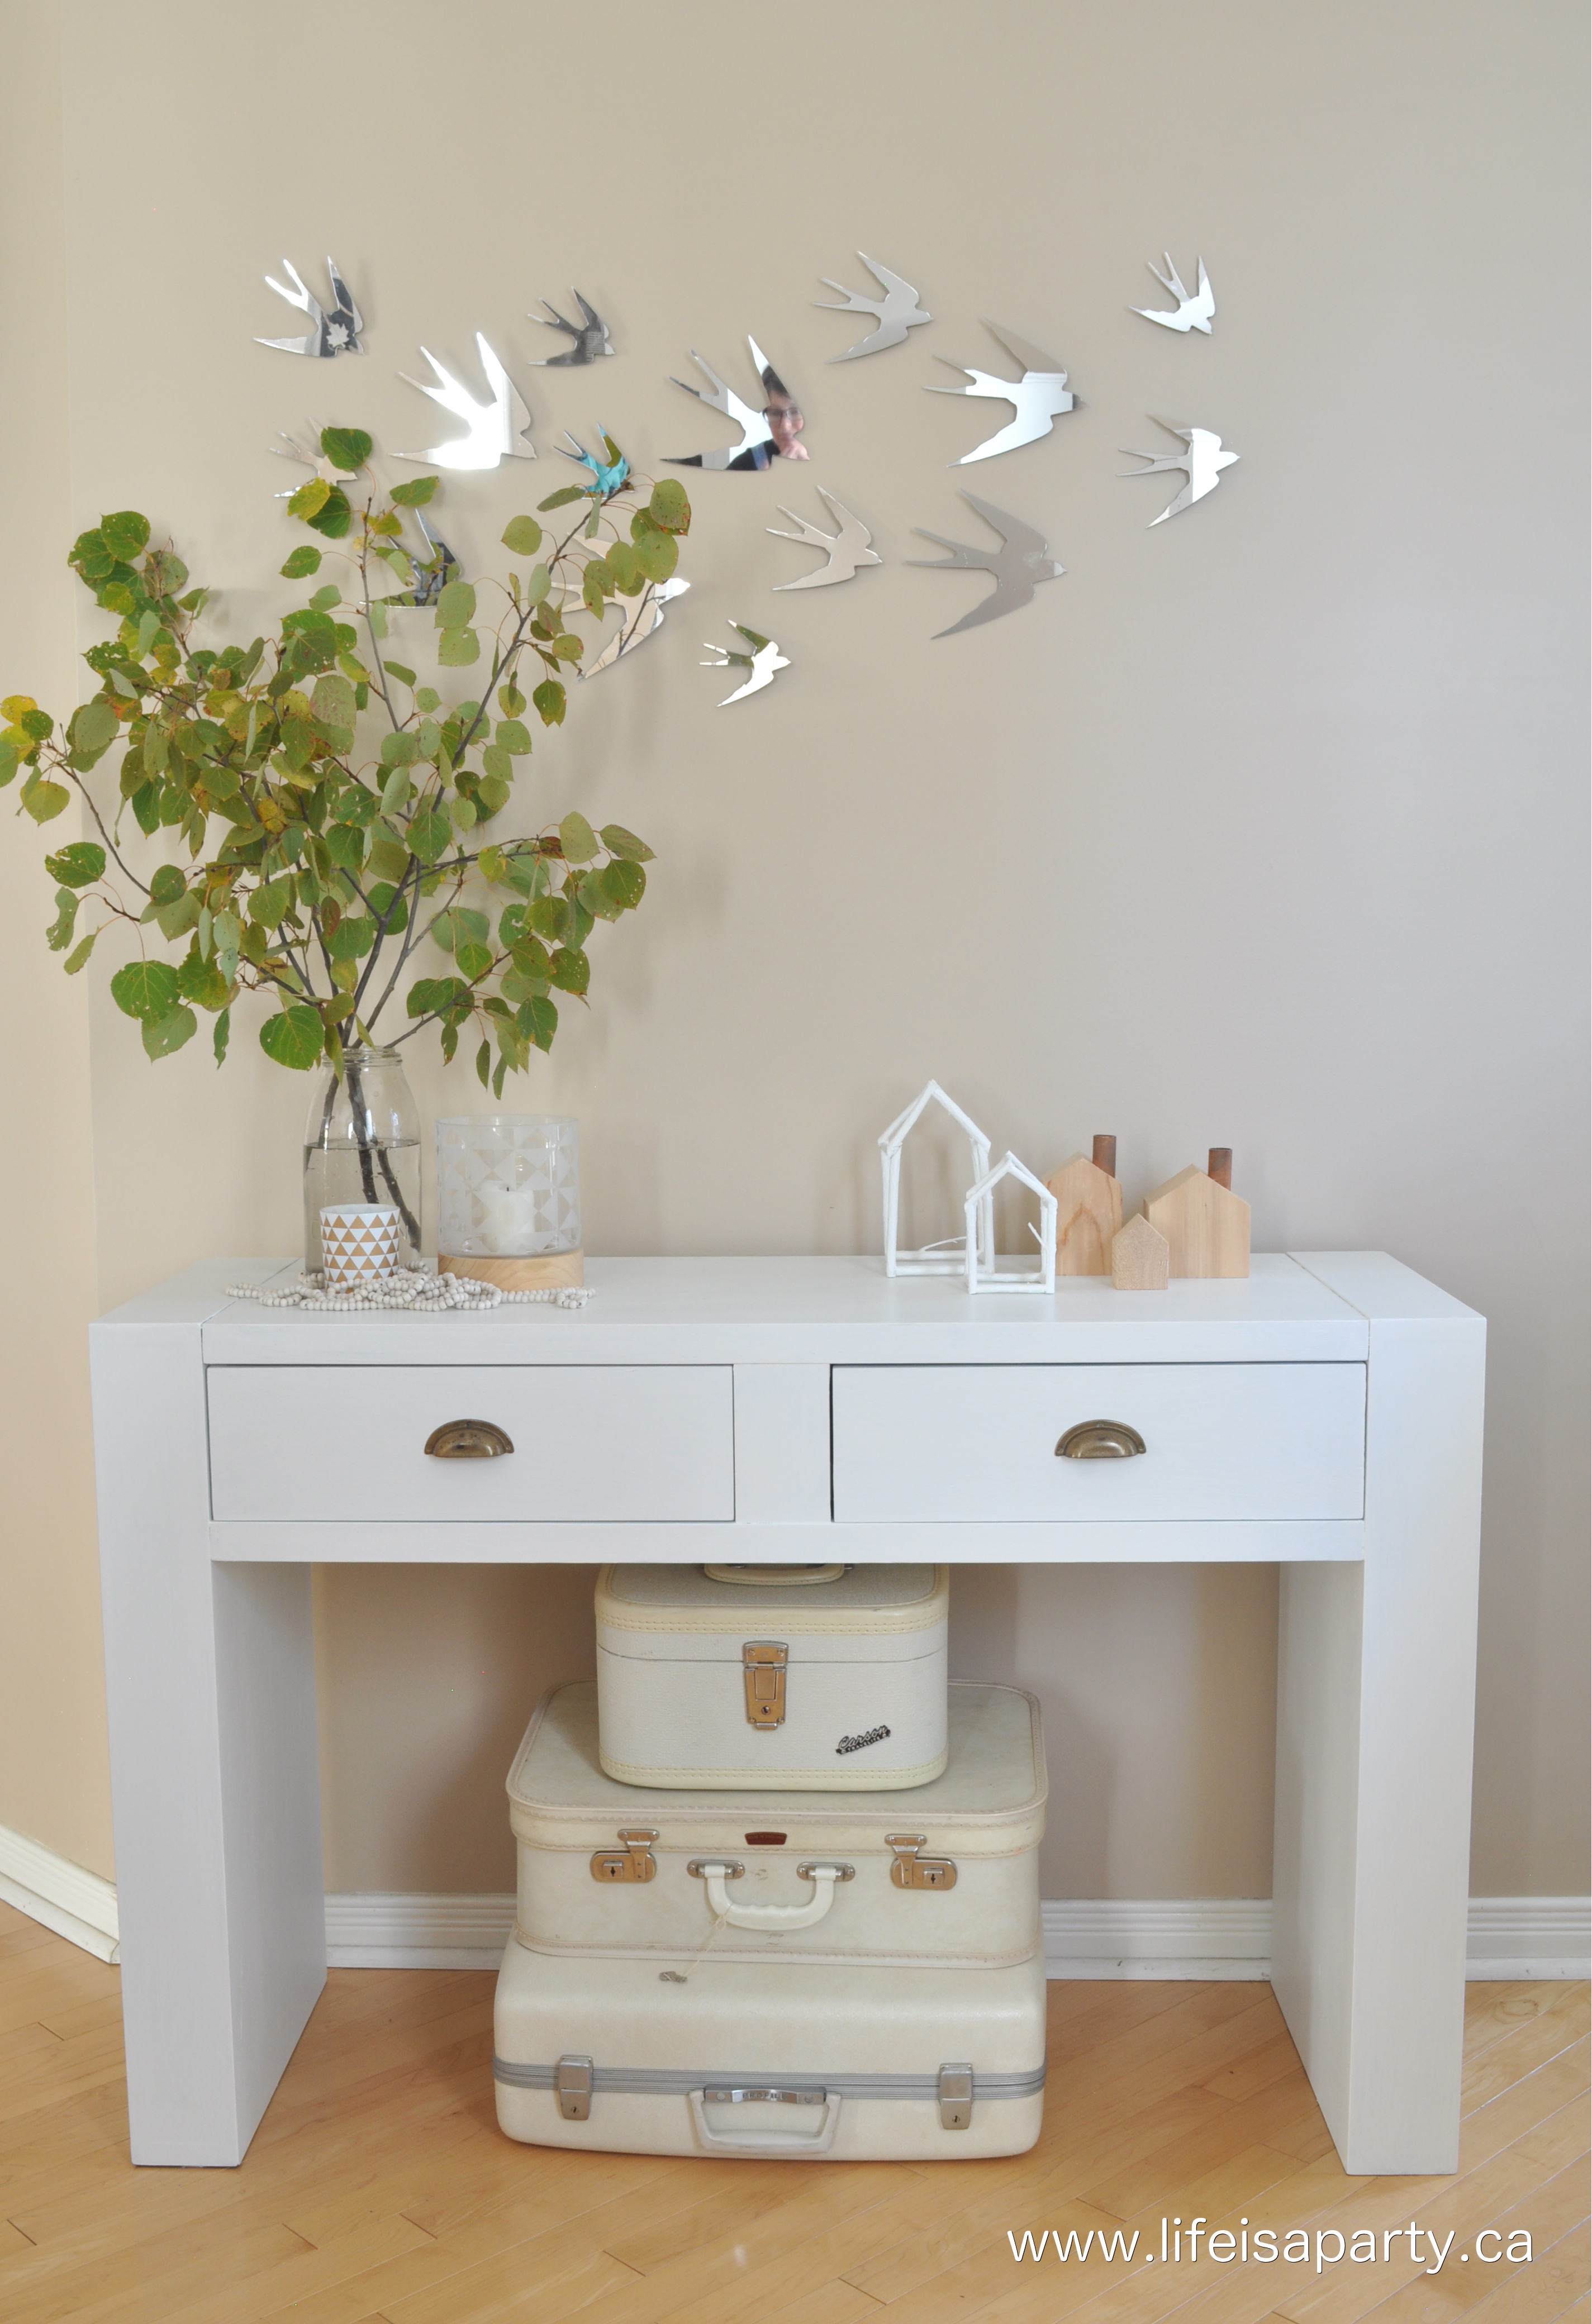
We’ve had the buffet and the console table for about 10 years, we bought them when we first moved into the house. We were so excited to have a dining room in this house, and I couldn’t wait to decorate it and start having people over! When I bought them I was going for a more modern, contemporary vibe than we’d had before. It has served us well, but when I decided to update the dining room to more of a Rustic Scandinavian feel, I knew I wanted to really lighten things up, and that the black furniture wouldn’t work anymore.
To Sell Or To Paint?
I considered buying new pieces, but trying to sell old furniture is a pain, and you never seem to get much out of it. Even though I’m a novice, I decided it was worth the risk to try to paint them all white. I'm so glad I did, because I love how they turned out. It saved us a lot of money to reuse our old furniture, and it really didn’t take me very long either.

Furniture Makeover Materials:
- sandpaper
- palm sander
- paint brush
- Fusion Mineral Paint in Casement
- Beeswax Finish
- Clear Tough Coat
How To Paint Old Furniture
1.Sand and Prep
I started with giving all three pieces a sand. For the console table, I went over it with some fine sandpaper and my palm sander, it was just a really quick job to give the paint some grit to stick to. I wasn’t trying to remove the black stain, I was just roughing it up ever so slightly. It really was about a 10-15 min. job, and then I wiped it down with a damp cloth to remove any dust.

The buffet was the piece I was the most worried about. It was black and shiny, and sanding it felt a little bit like blasphemy. But after the first pass of the sander I was committed and I just went for it. I removed the handles first, and then sanded it with a medium grit sandpaper, then went over it again with the fine grit, just trying to remove some of the high shine and give the Fusion Mineral Paint a good base to stick to.

The china cabinet was my Grandmother’s and my Mom had it refinished for us as a wedding gift. It worked great in our old house in the kitchen, but at this house it needed to go in the dining room, and the wood just didn’t go with everything else. We decided then to paint it black. The black served us well, and now it was time to paint it white. Again, I just did a light sanding to prep it and removed the handles.
2. Paint
Then it was time for the paint! I used Fusion Mineral Paint. I love this paint. It’s so easy to use -minimal prep, goes on really smoothly, and a leaves a beautiful finish. It’s also low VOC so I didn’t even have to take the pieces outside, I just opened the window. And soap and water clean-up -which I also love.
I chose "Casement rel="nofollow" " white as the colour and I'm really pleased with it.

A great little tip I found on the Fusion website and tried out was using a piece of plastic wrap over the lid. In the past, I’ve had trouble getting the lid off after it's been resealed. This little tip kept the paint from sealing it shut, and I highly recommend you try it.

The first night I got everything sanded, and the first coat of paint on all three.

It took 3-4 coats in total to cover my pieces, since they were so dark before. I managed to get all three pieces completely painted the next day, and then let them dry over night so they’d be ready for the finishing step.

3. Top Coat
The last step was to add a top coat. On the console and buffet, since they have flat tabletop surfaces I used Fusion Tough Coat. I loved working with this, it was so easy to apply, just rub on with a damp cloth.
On the china cabinet I used the Beeswax Finish, just to give it a smooth satin finish.
4. Handles
When they were all done it was time to add the handles back. I had forgotten how awesome the handles on the china cabinet were. They were painted all black when I painted the cabinet originally, but under that black paint two were ceramic and one was a really pretty brass and ceramic. I chipped the paint away with my fingers, and now they’re my new favourites.

On the buffet, I used a gold rub to update the handles….but I’m thinking of switching them out to match the console since I so love the brass cup handles I added to it.

I had to drill new holes for the new brass cup handles, and that was probably the most stressful part of the entire project. But they turned out great.

It was fun styling it with some Rustic Scandinavian pieces. I can’t wait until the whole room is done.

Since these black pieces of furniture weren’t so bad to start with, I was more than a little nervous to begin these big pieces. They were ok black, and I liked them, but now I love them. I’m so glad I took the risk.
Before and After

I’m going to save the big reveal of the other two pieces until the final reveal of the whole dining room -in just 3 more weeks.
I’ve still got the room to paint, and the dining table to refinish along with all those finishing touches, but so far, so good.
With the Black Furniture Makeover done, life really is a party!
From Week One To The Final Reveal
You can catch up on my other projects for the One Room Challenge here:
Disclosure: Fusion Mineral Paint kindly supplied materials for this project, but the opinions -as always, are my own. Thanks for supporting the brands that make Life is a Party possible.


Laurie @ VinYet Etc says
We painted a black cabinet white last year and the difference it made to the piece was amazing, but the way it brightened the whole room blew my mind! These have turned out amazing!
Jen @ Noting Grace says
Ah the power of paint! Loving the transformation! Looking forward to seeing the big reveal!
jen says
Wow it's amazing what paint can do! This looks completely different! I'm loving where this is going!
dnr says
It's looking so much brighter in the dining room, so glad I was brave enough to do it.
Dannyelle
dnr says
Thanks Jen, let's paint all the things! lol.
Dannyelle
dnr says
Thanks Jen, truly amazing want paint can do, indeed.
Dannyelle
Melanie says
Fantastic job!! I think they all look amazing. Bright white can be really challenging to paint, so way-to-go for getting such a professional finish! So glad you're loving Fusion--it is amazing stuff! Enjoy your new space 🙂
dnr says
Thanks Melanie, I was amazed at the transformation myself, appreciate your kind comments so much.
Dannyelle