DIY Floating Kitchen Shelves: Want the look of large floating kitchen shelves but can't afford them? DIY them with plumping supplies and 1" x 12" boards.

Jump to:
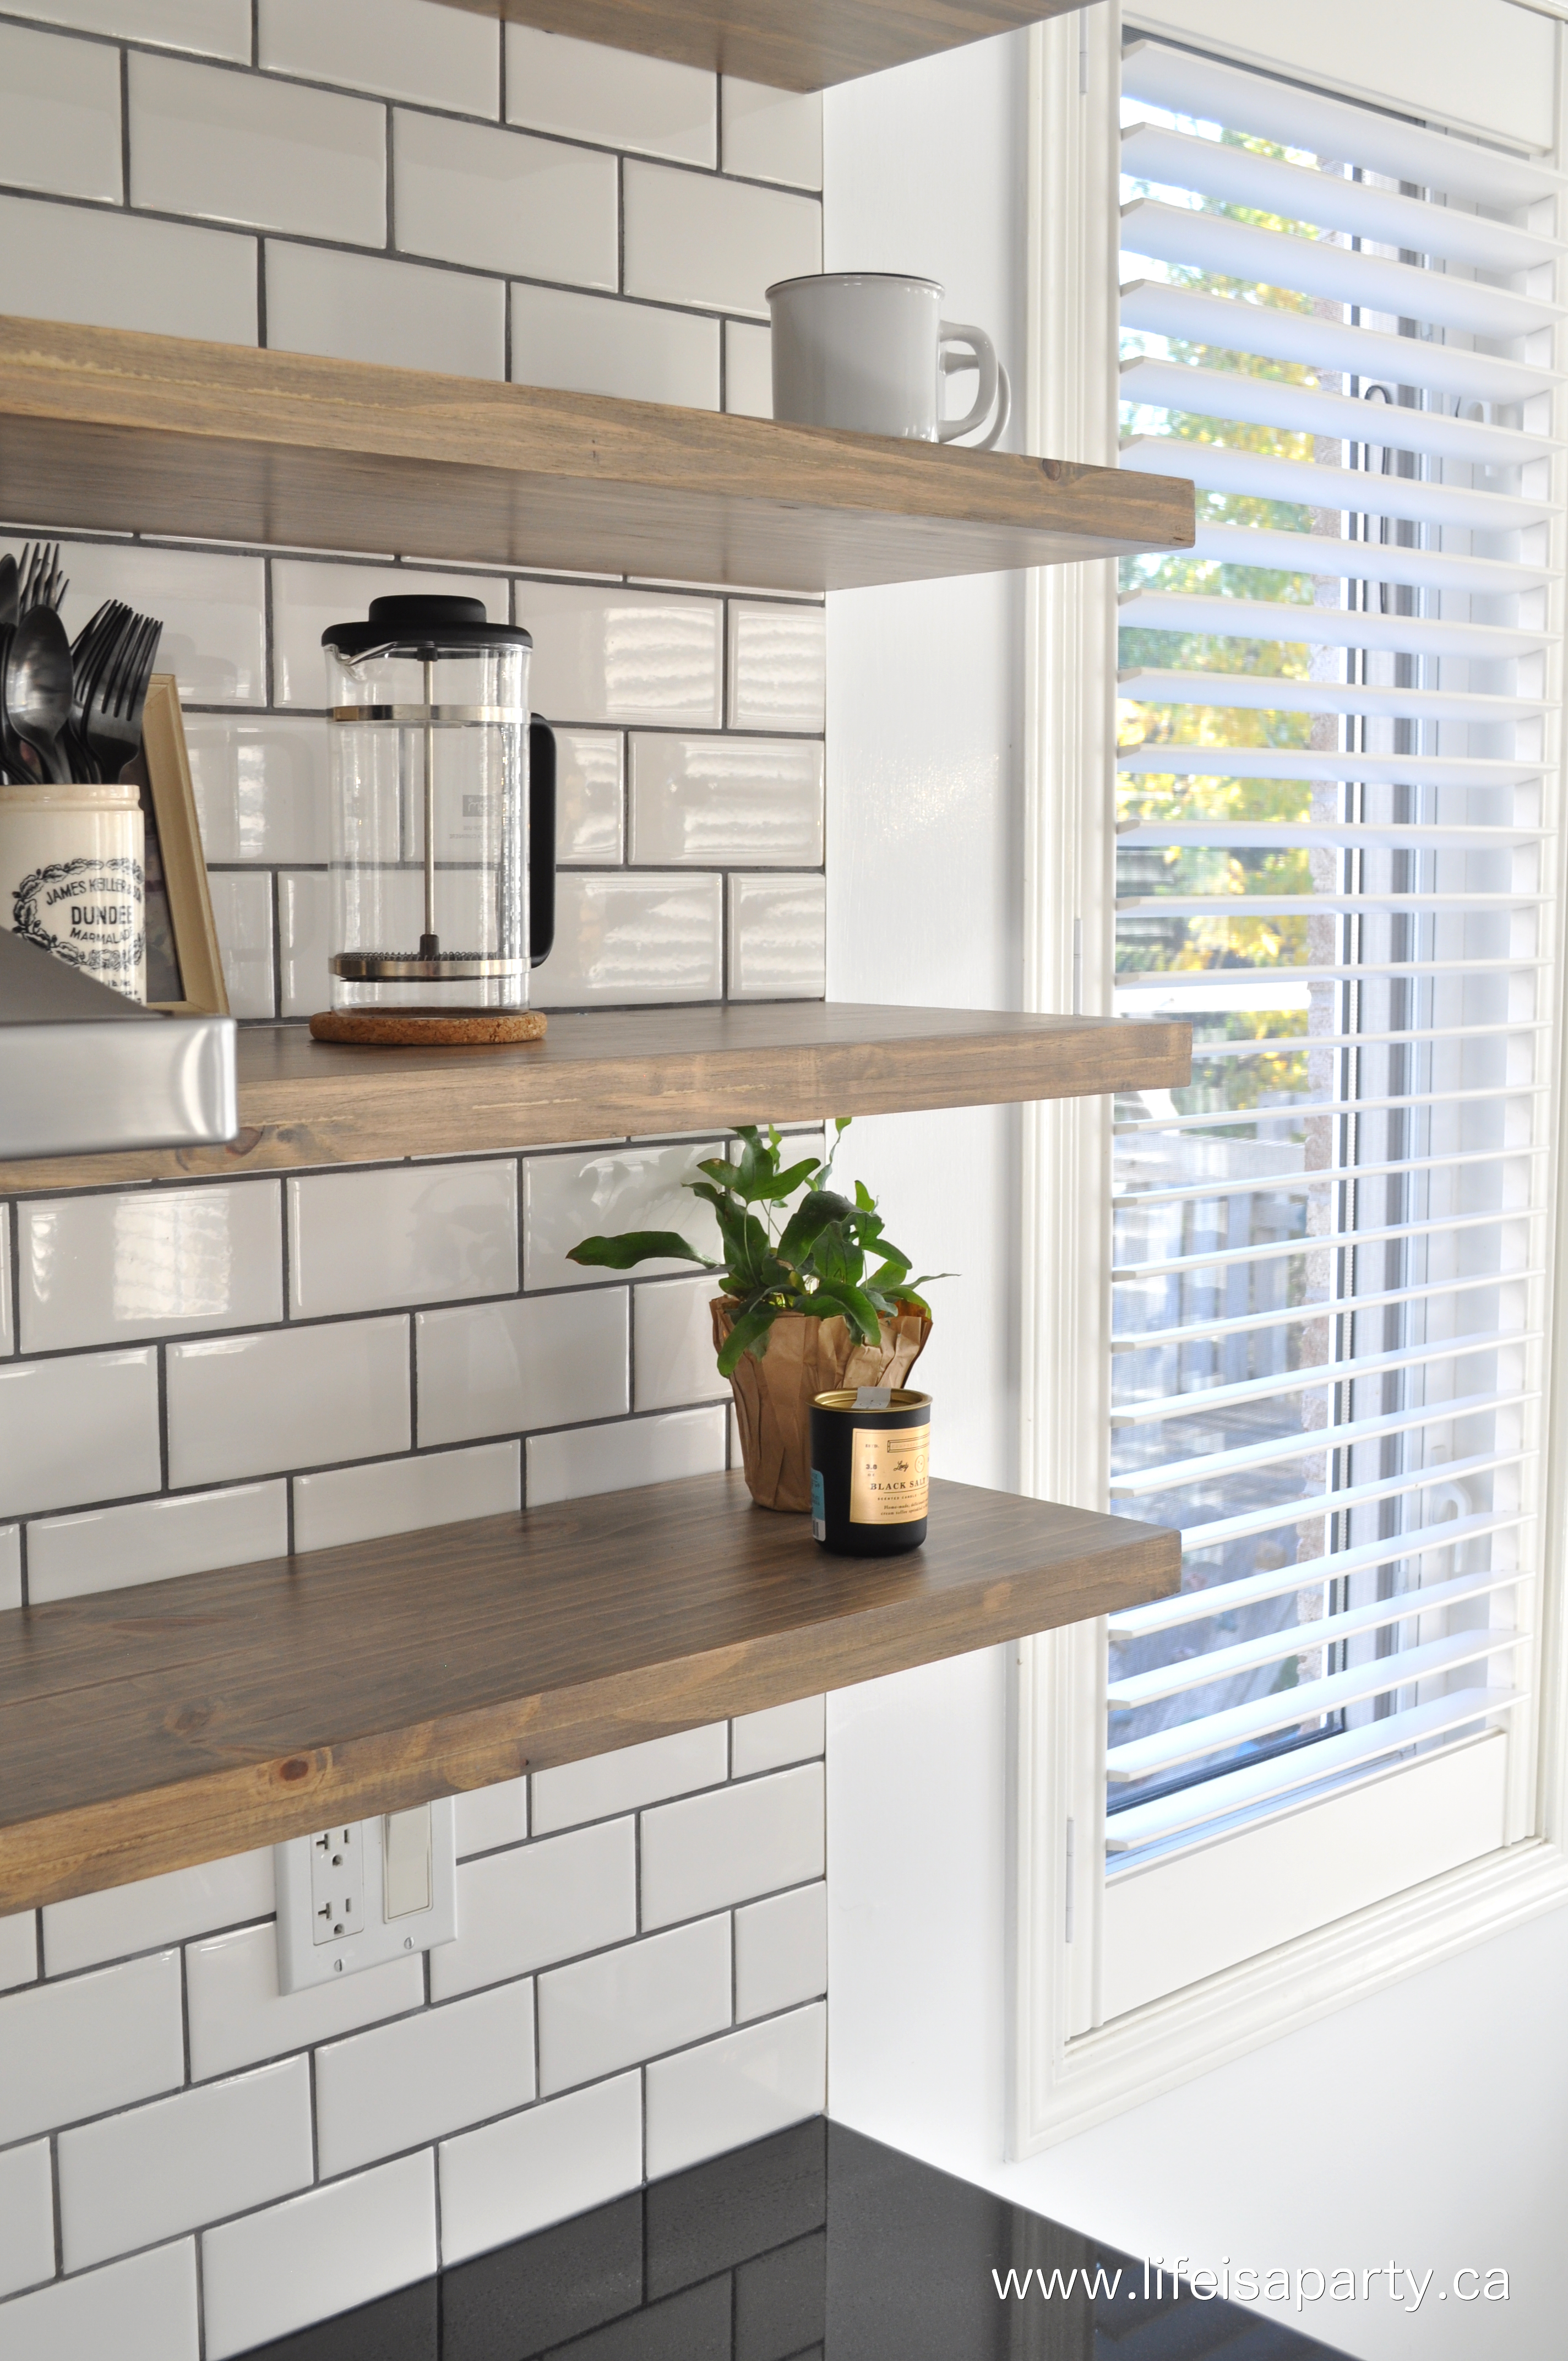
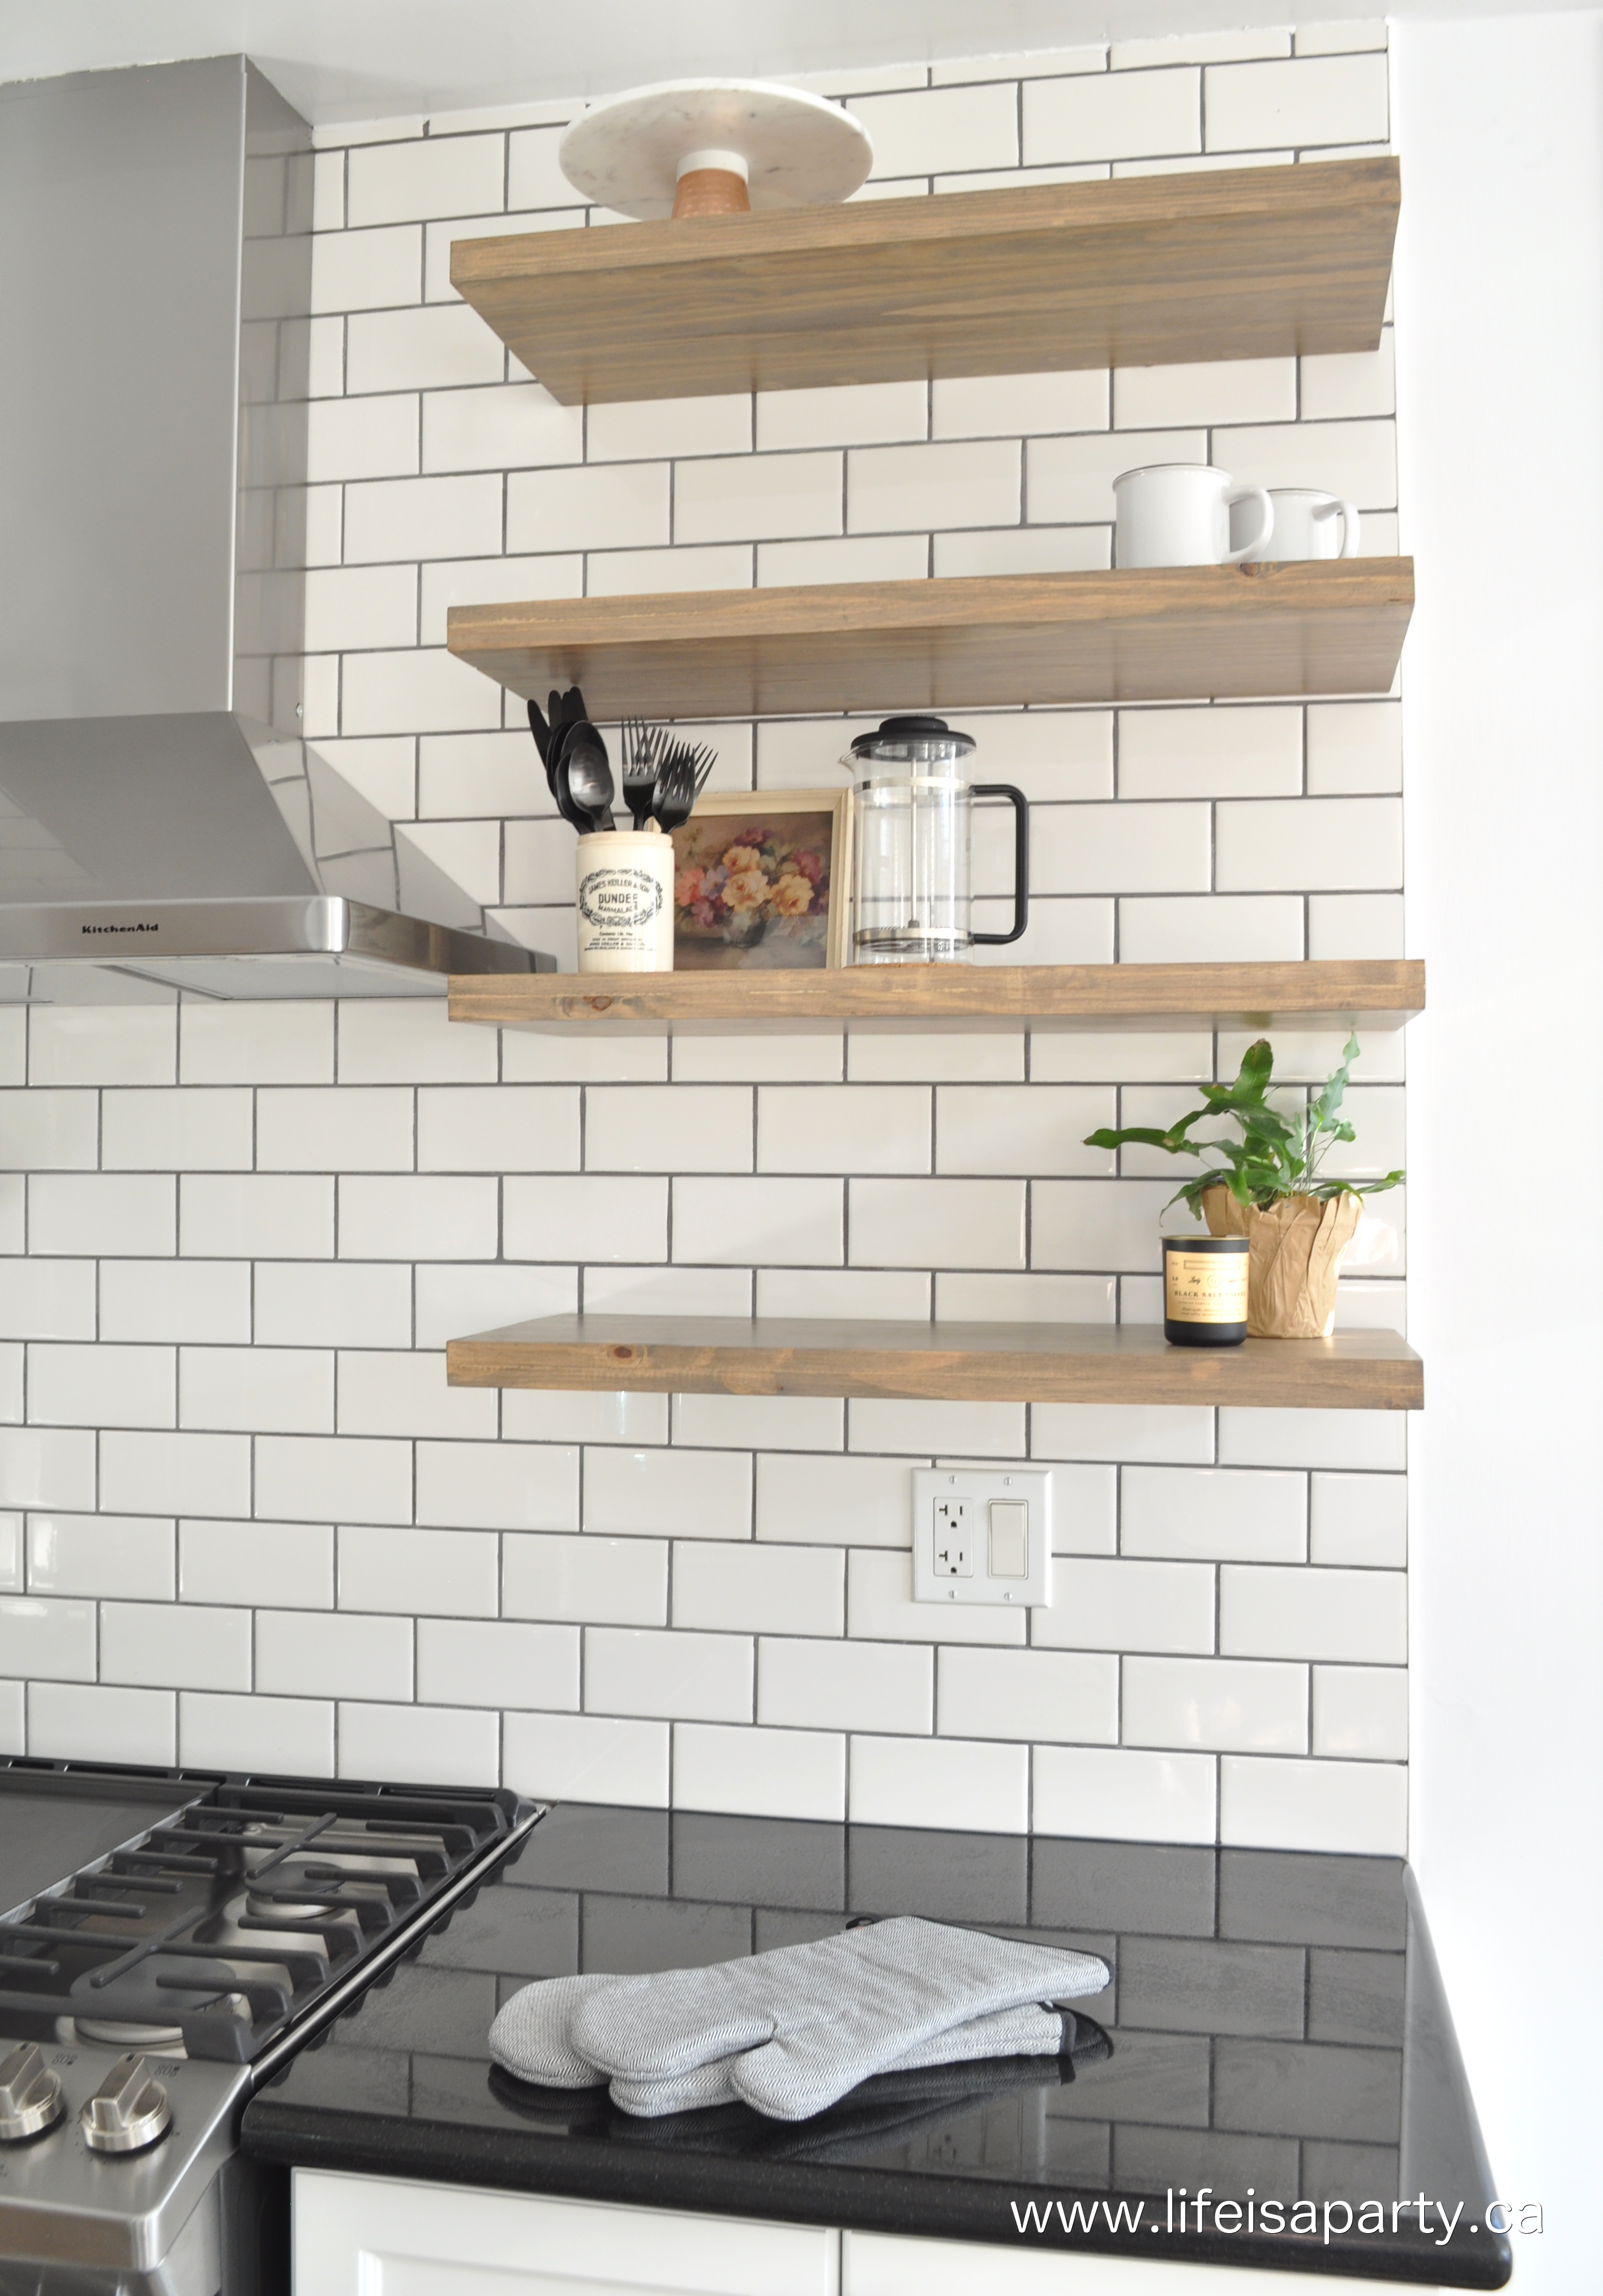
Today I'm sharing my Affordable DIY Large Floating Kitchen Shelves for my Kitchen Makeover. This shelf project turned out amazing and looks so great in our kitchen. We love open shelving and I'm so glad we removed our upper kitchen cabinets and added in these wall shelves.
It's week 6 of this 7 week makeover for this fall's One Room Challenge. Be sure to check out all the other bloggers progress at Calling It Home. I've been making over my kitchen and it's almost done. Next week will be the big reveal, and I cannot wait to show you how great it looks!
If you missed any of my updates you can catch up here:
The Kitchen Before and Inspiration -Week One
Installing Backsplash Tile in a Kitchen
Black Dipped Paint Brass Candlesticks
Modern Farmhouse Kitchen Makeover Reveal
DIY Floating Kitchen Shelves
This week I'm excited to tell you how to DIY large floating shelves and do it on a budget. During my design process I decided that I wanted to take down my existing upper cabinets on either side of my range hood and replace them with open shelving. I felt like it would be a great update to the kitchen and as someone who likes to change their decor often I thought it would be a great spot for display. Since we were creating the shelves as a replacement for our upper cabinets we knew we would need them for extra storage and we'd need as much space as possible to accommodate everything that was in the cabinets before. I was also planning to change our existing backsplash to subway tile, and thought that extending it up the entire wall behind the new floating shelves would look great.

Adding Reinforcement to the Wall
My brother-in-law Shaun of Benjamin Tileworks is a contractor and he did all the building for this project for me. The first thing we started with was removing the old tile backsplash in the kitchen and in the process we damaged the drywall. We ended up having to replace it, so while the walls were torn apart, we added in some reinforcements for the shelves. I knew I'd be using the shelves for all my heavy plates and dishes and didn't want to be worried about it ever falling down under so much weight. If you're building open shelves in your kitchen, we highly recommend taking the time to anchor them into the studs like we did.

Shaun notched out the wall studs and added in some more 2 x 4 wood support boards in our predetermined locations of the shelves, so that he'd be able to attach our metal support piece directly into it for added support. After the blocking was added to reinforce the wall anchor spots, we added our new drywall over top. This was such a good idea to do while we had the wall open anyway. Now we won't have to worry about the weight of all the dishes.

Materials:
- ½" galvanized flanges (2 for each shelf)
- ½" x 6" long threaded pipes (2 for each shelf)
- 1 ¼" diamond drill bit
- 1 x 12 pine boards cut to 28" lengths -or whatever length you need (2 for each shelf)
- wood glue and clamps
- router
- drill
- ⅛" x 1" metal screws (2 for each shelf)
- sandpaper
- wood conditioner
- wood stain
- polycrylic sealer
Creating the Shelf Supports
To create the floating shelf supports we used plumbing supplies. We thought about a lot of different options for the floating shelf supports. We had trouble finding anything large enough. The floating shelf supports we could find were only for a 6" deep shelf. I knew I needed 12" deep wood shelves in order for them to be deep enough to hold dinner plates.
We did find some larger ones that were handmade in a little shop online, but they would have been very expensive for our 8 shelves as each needed two supports, for a total of 16 supports. We thought about having some custom welded for us, but again it would have been very pricy for 16 supports. In the end Shaun came up with the idea of using inexpensive plumbing supplies, and it worked out great.
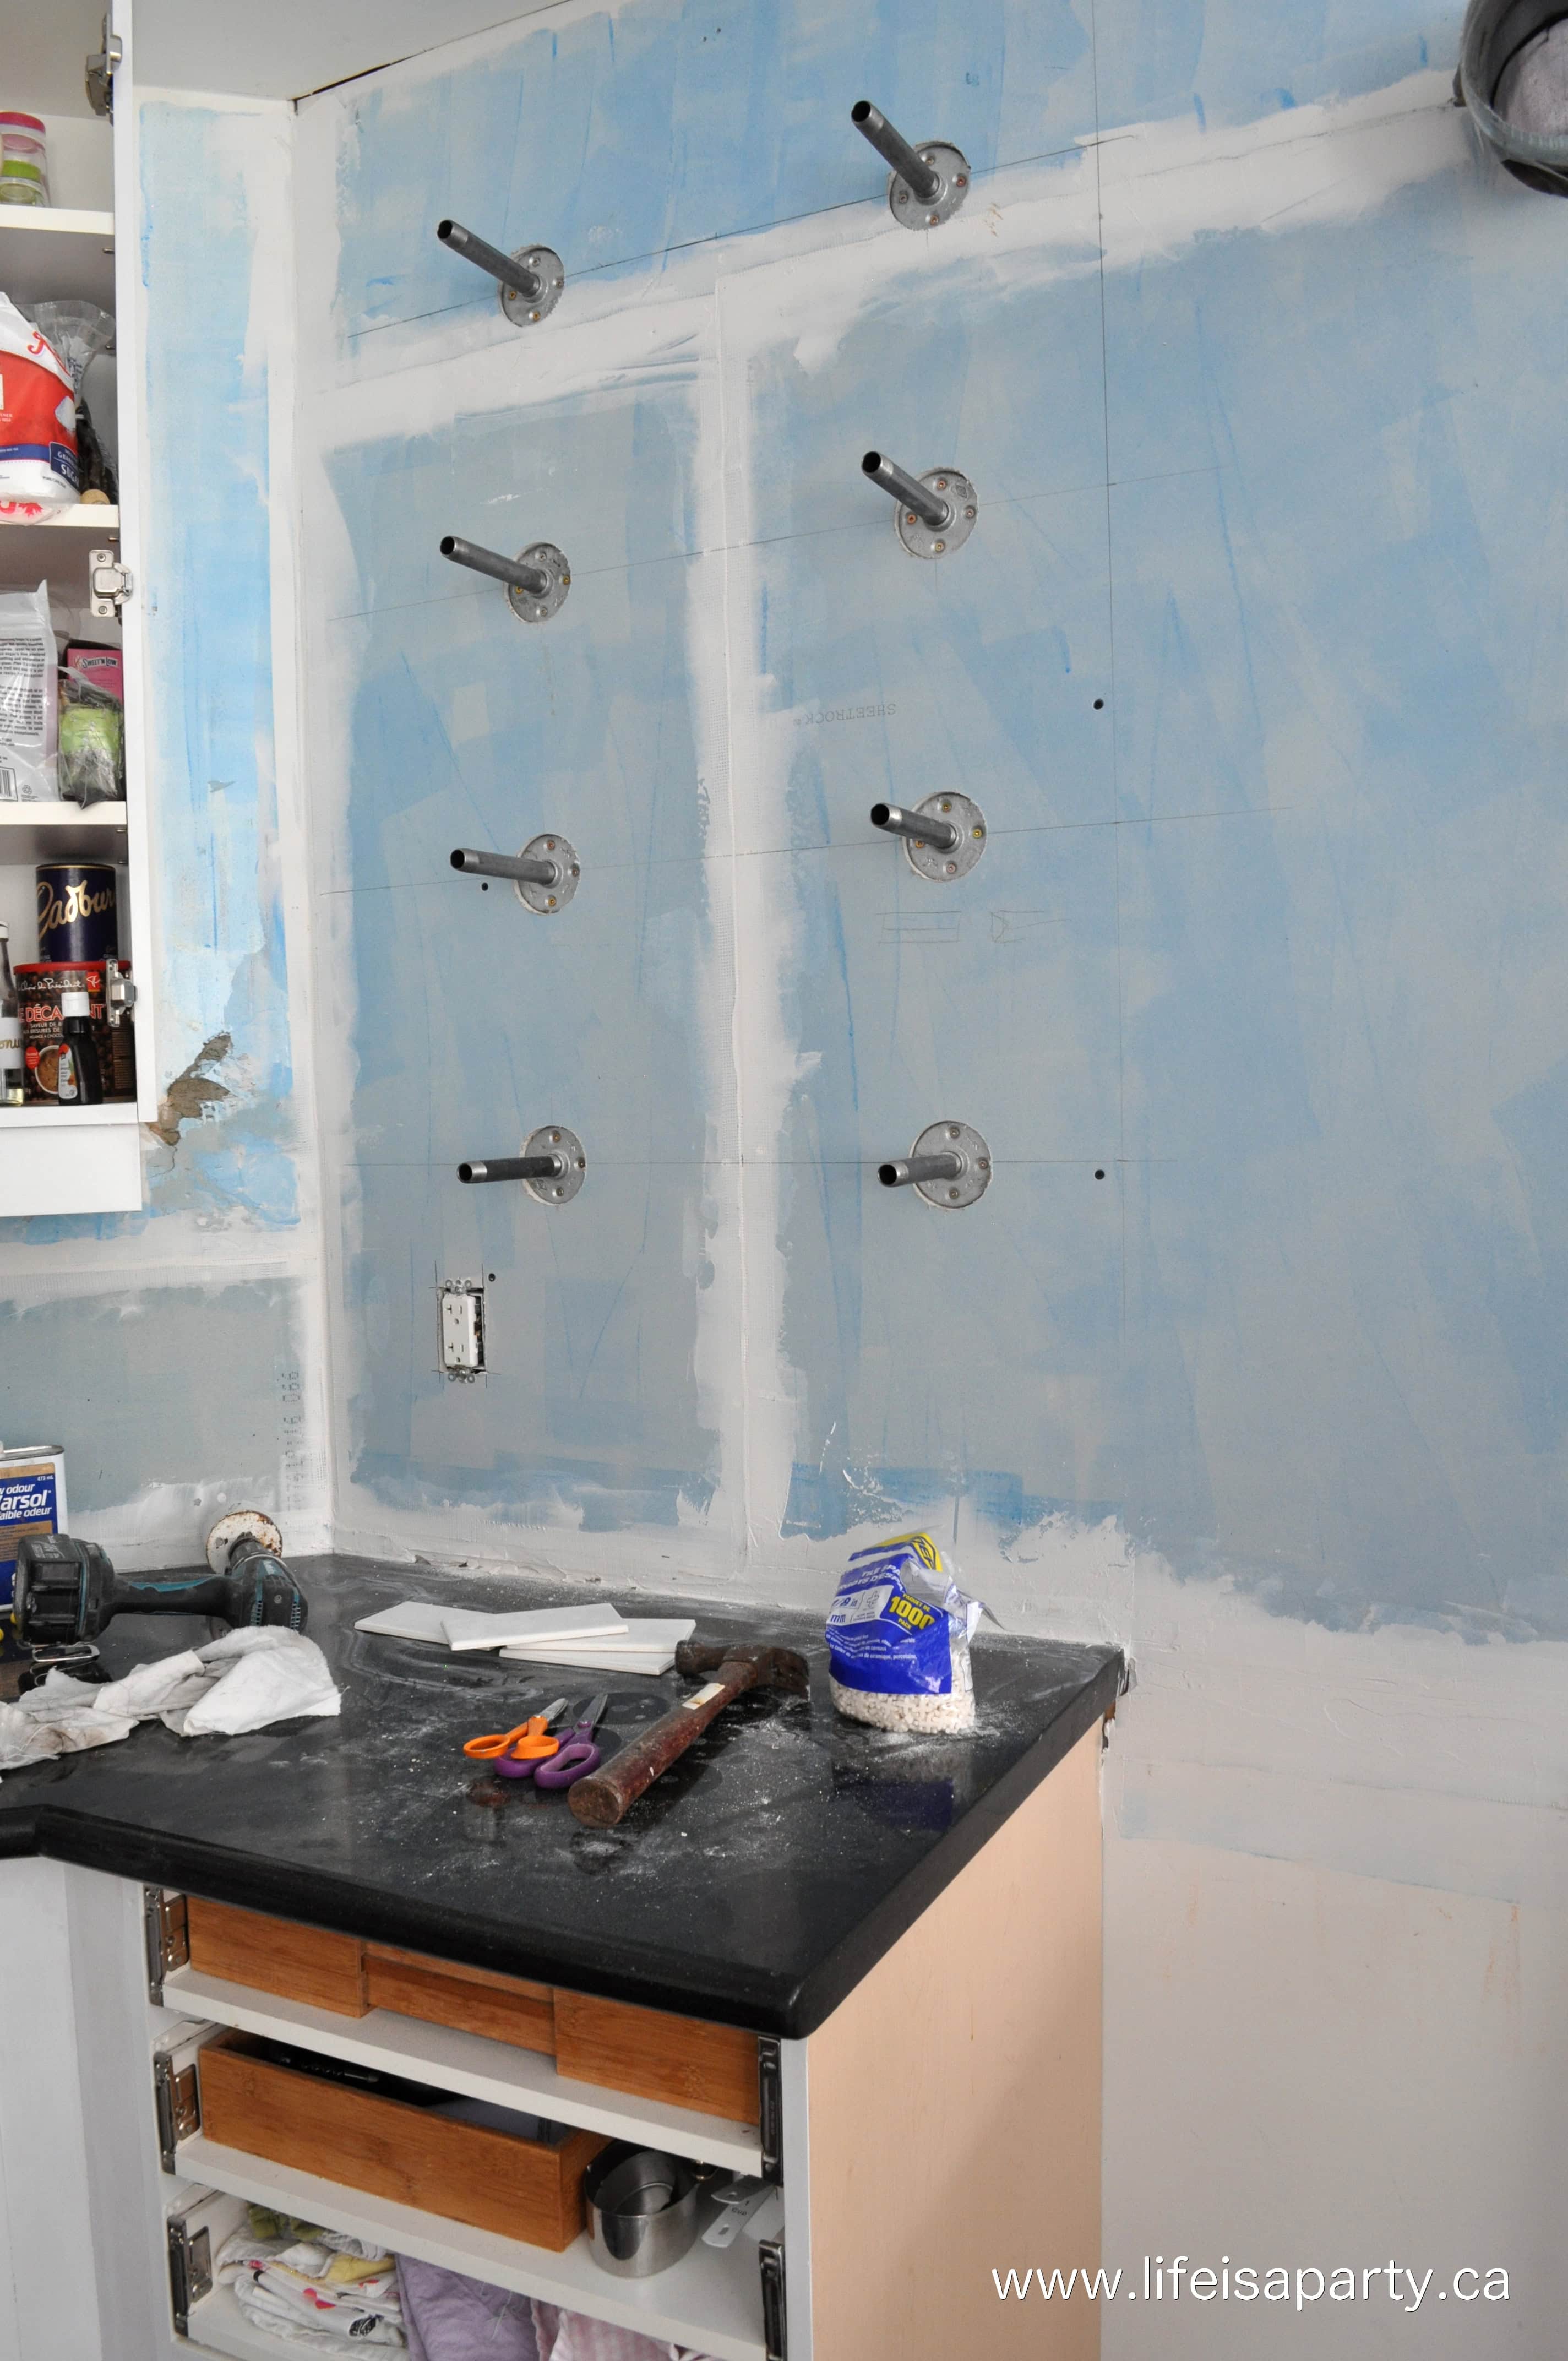
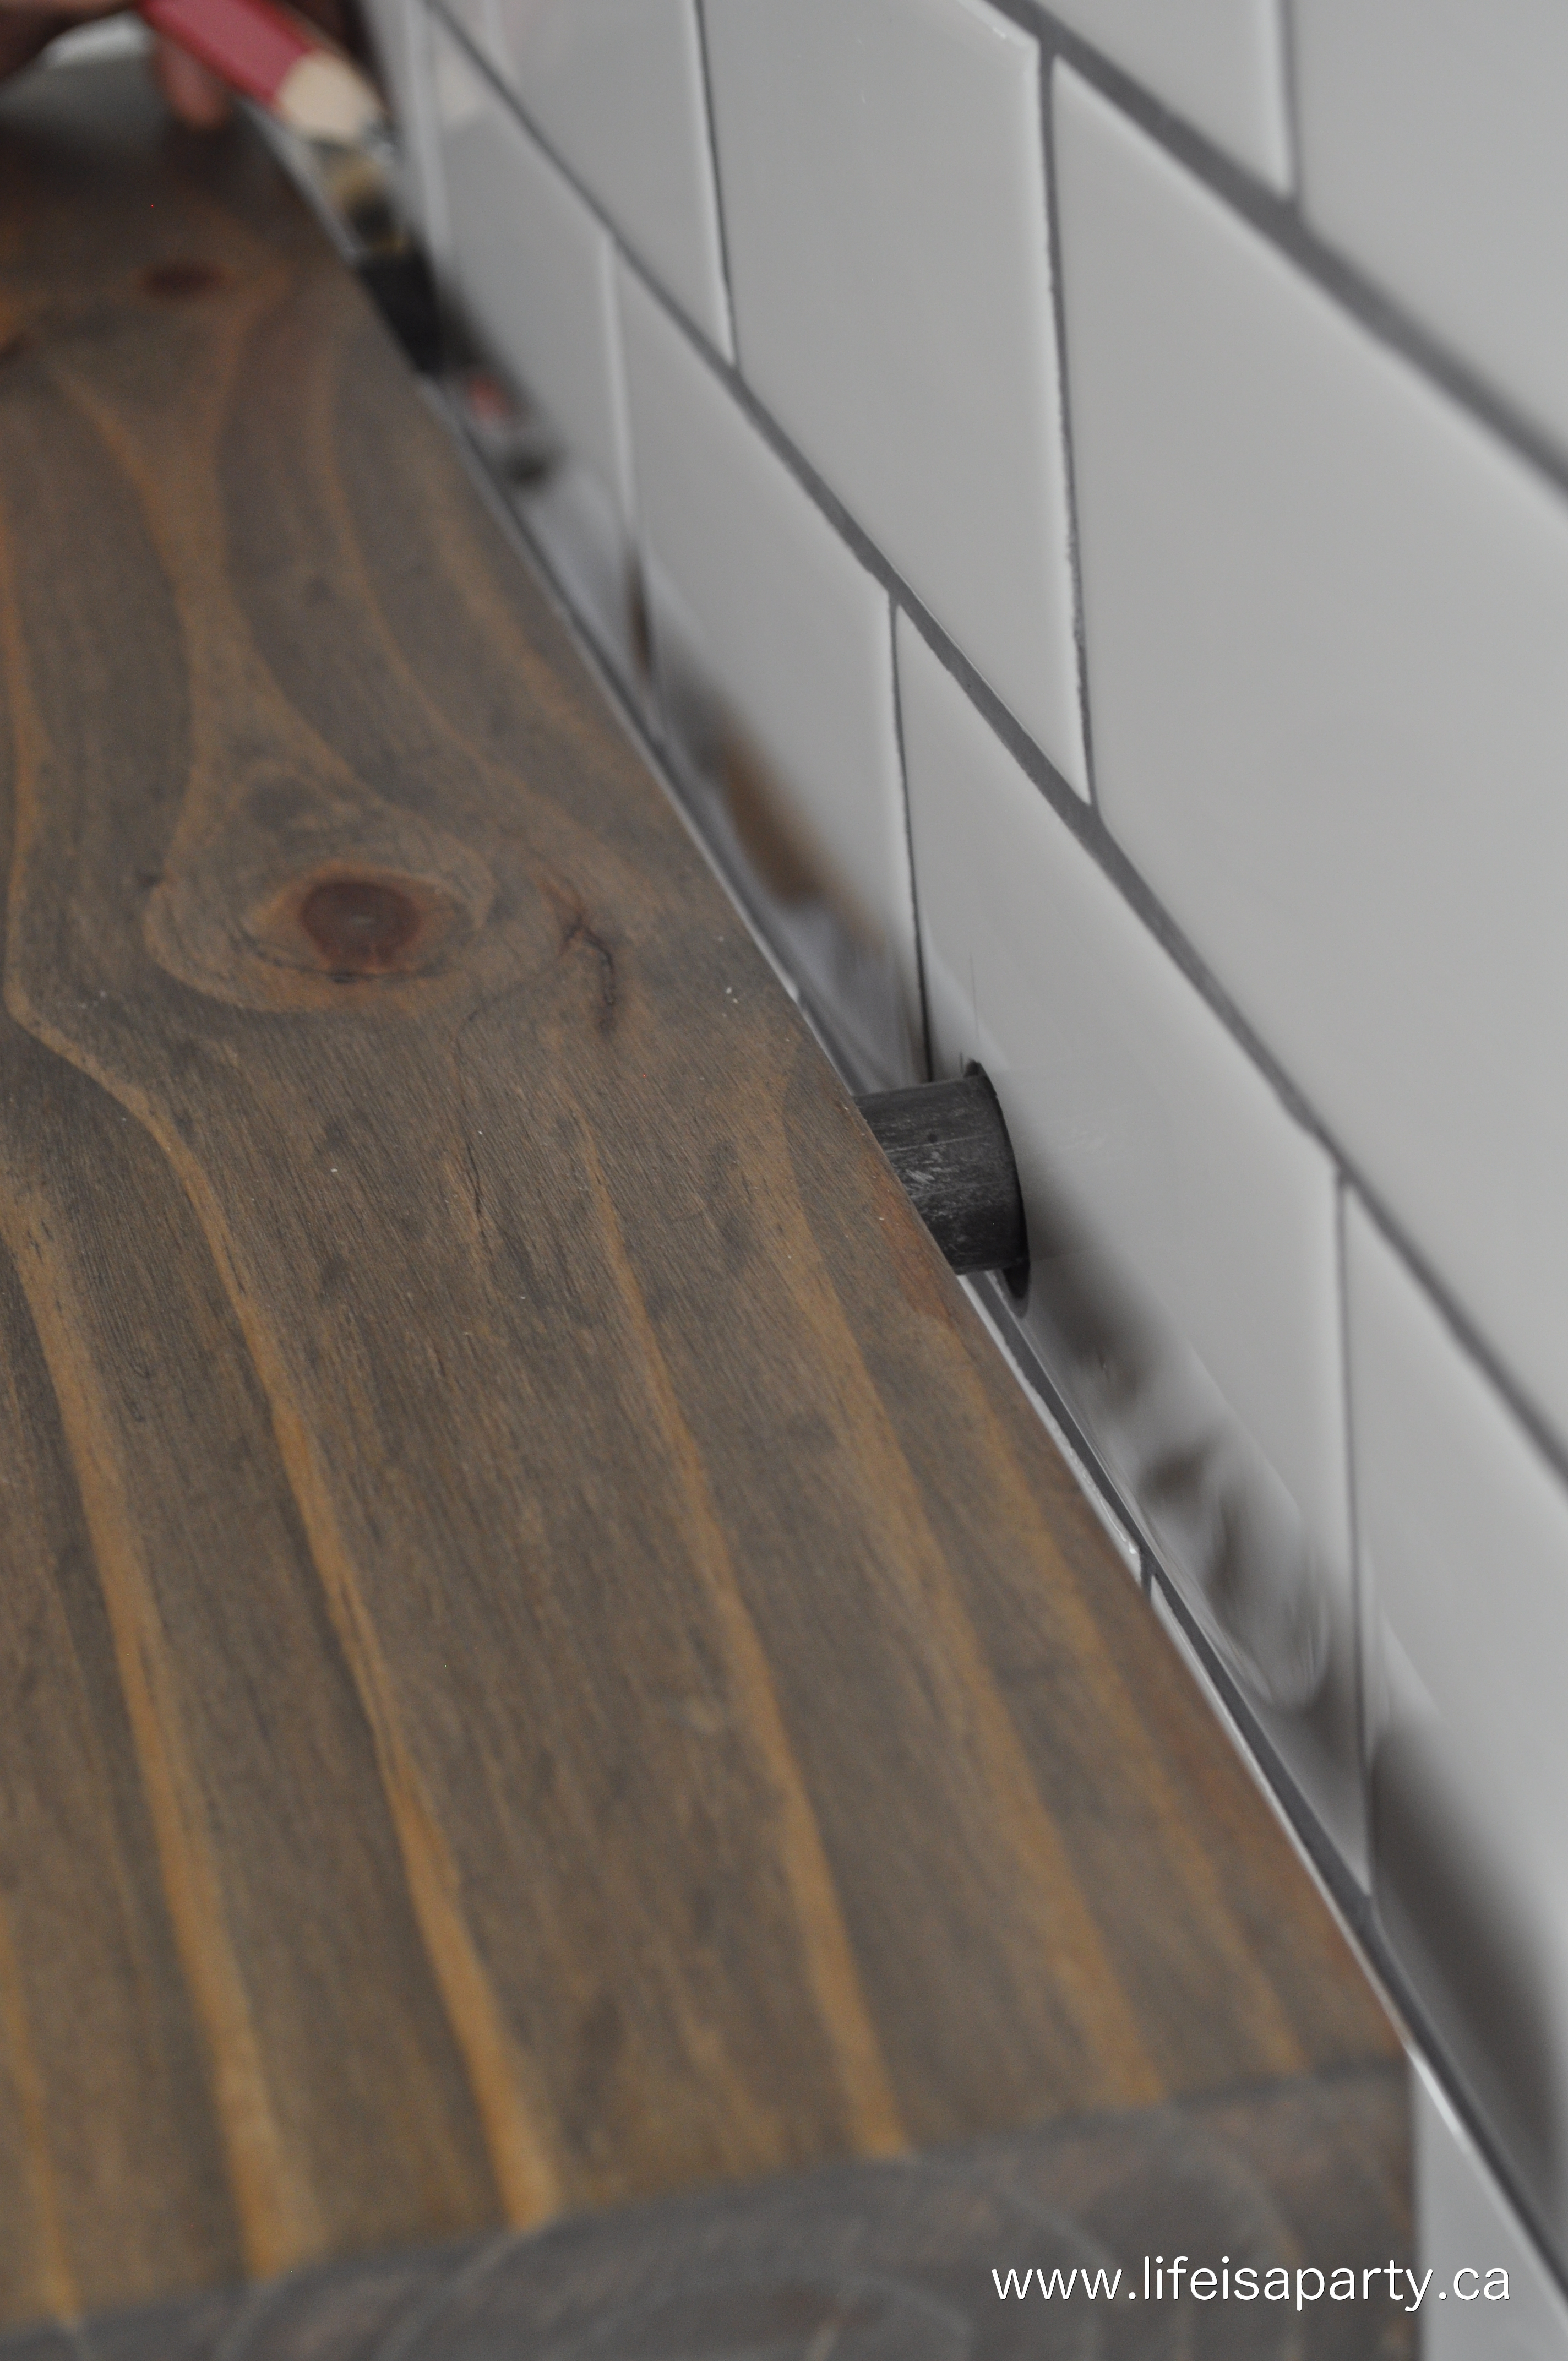
We used ½" galvanized flanges and screwed ½" x 6" long threaded pipes onto them as the shelf supports. Shaun then used a 2 ⅛" hole cutter in a drill to cut the drywall out and attach the support to the wall where it had been reinforced. Shaun used a level to make sure that all the pipes were level and straight at this stage.

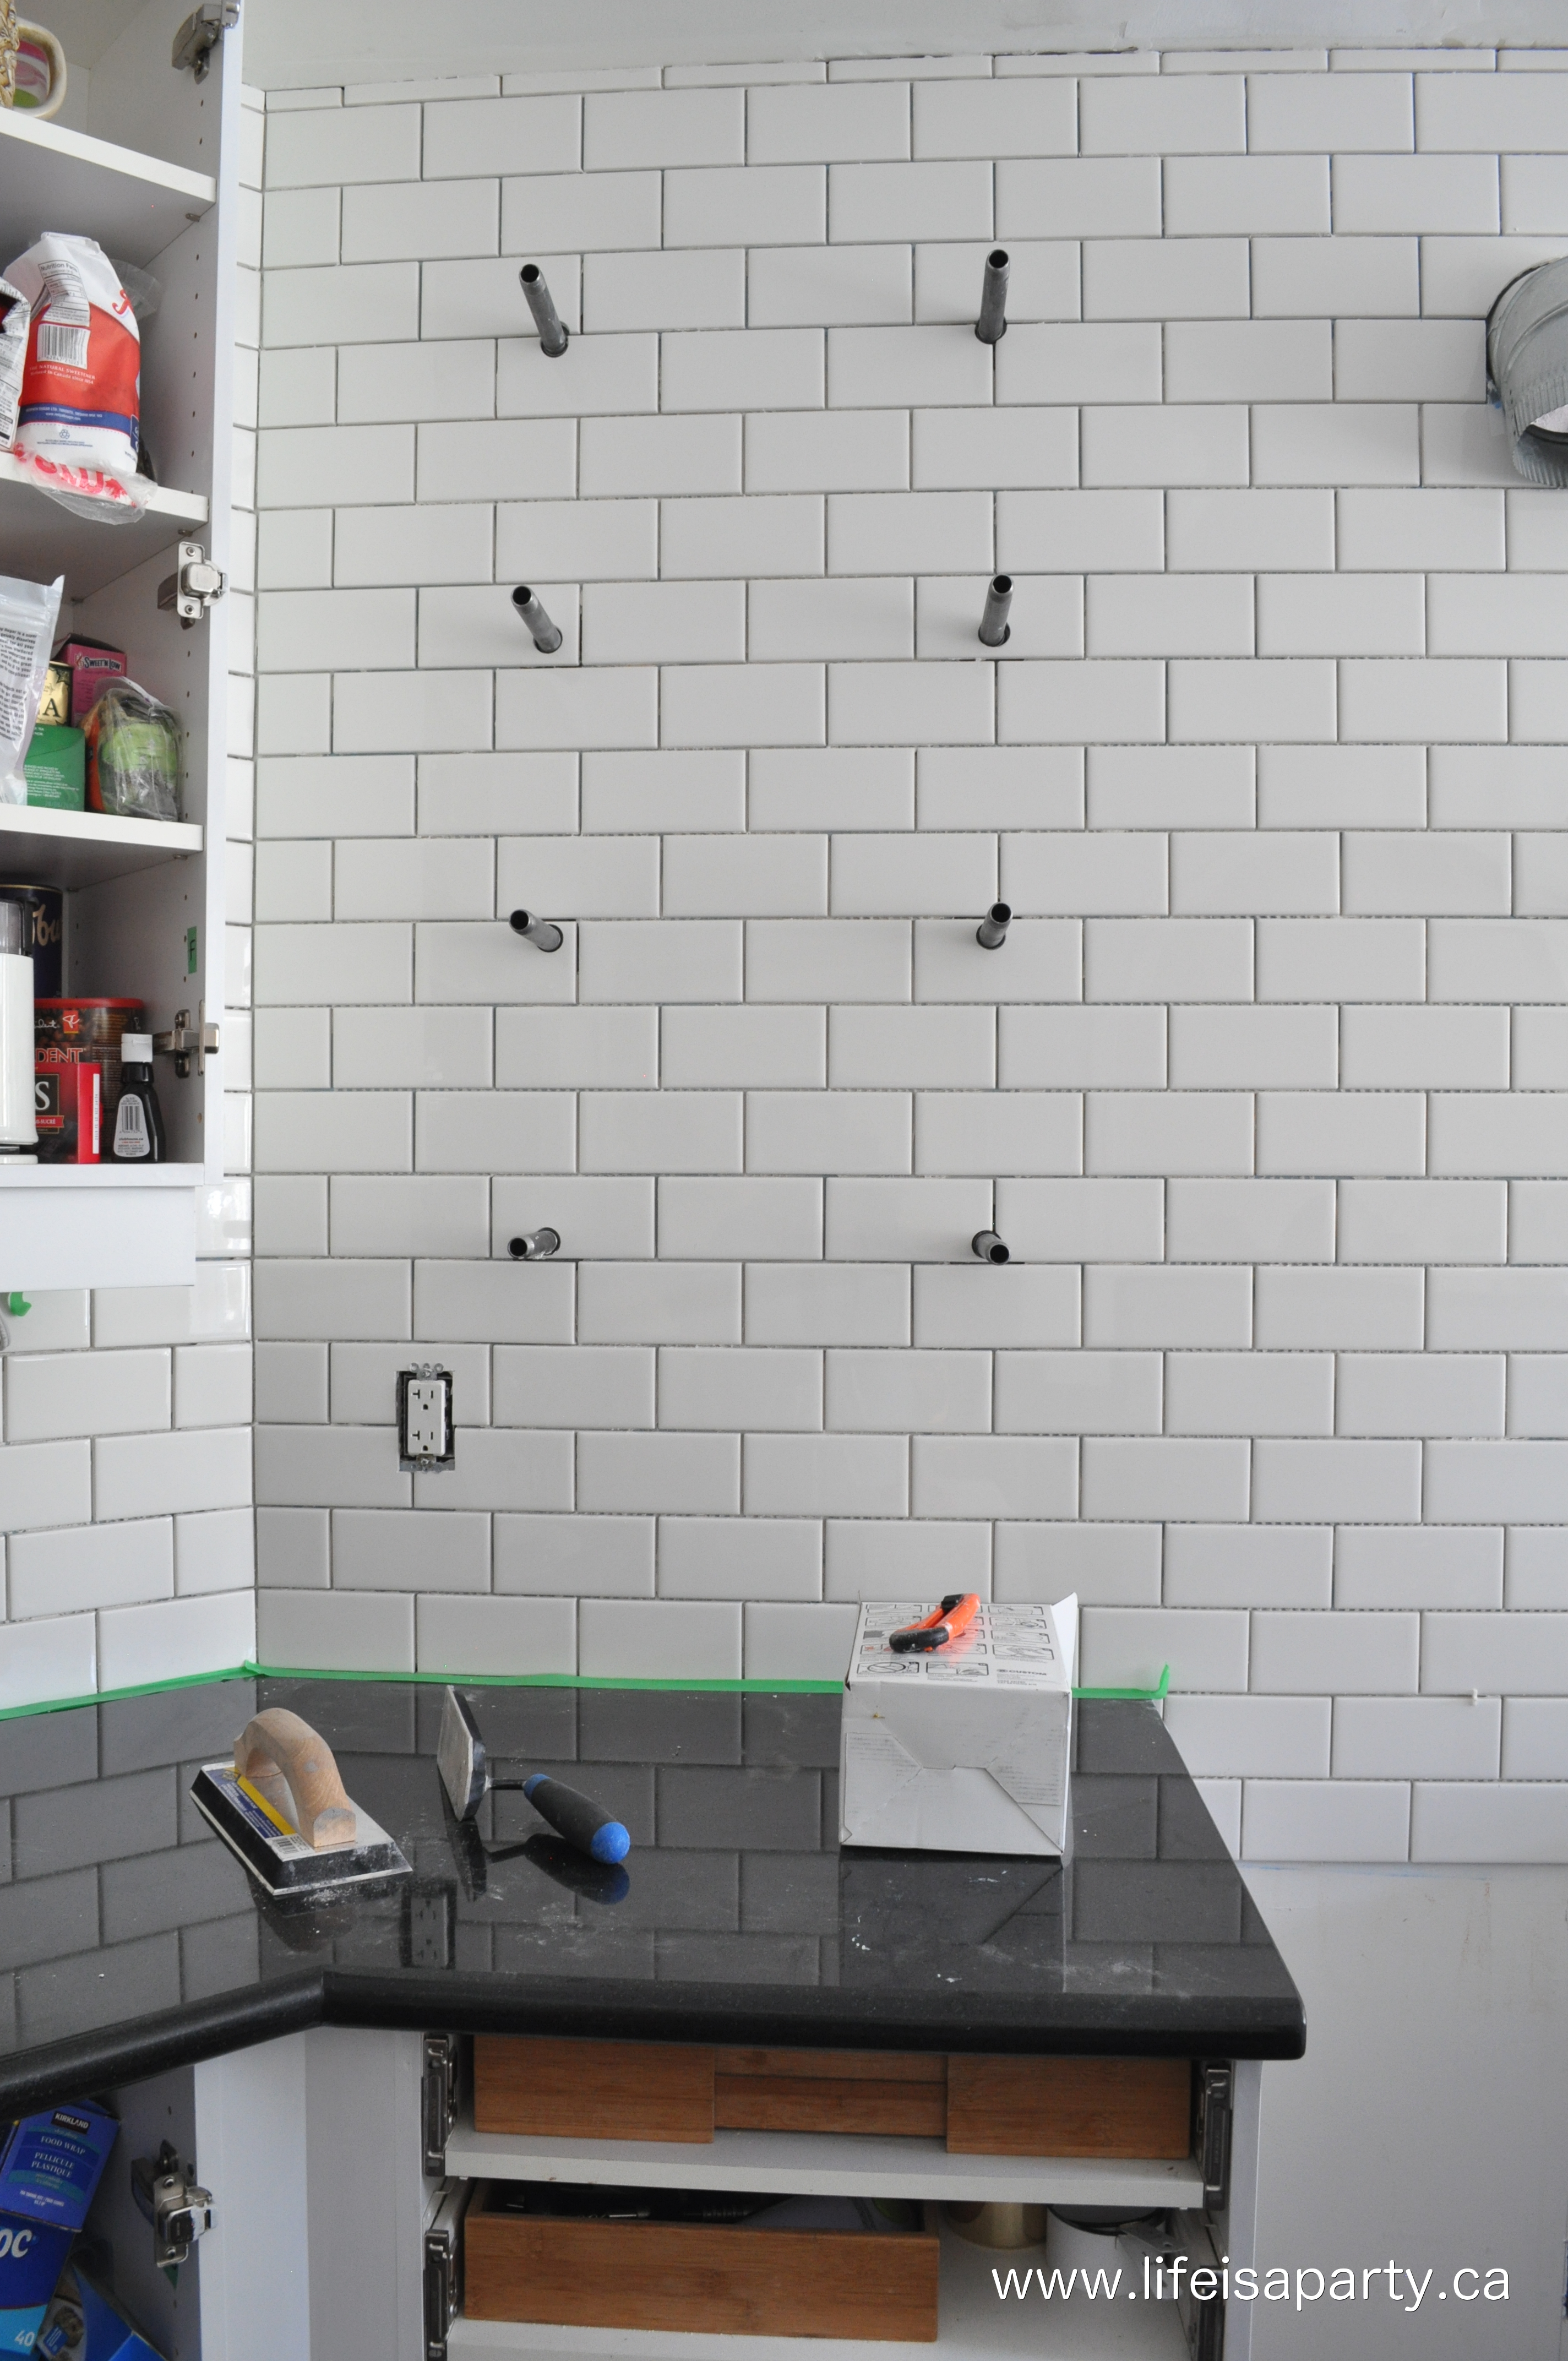
When we did the tiling, we were able to tile over the entire thing, and not have to worry about the bracket base sitting up above the tile. We tiled right up to the pipe shelf support, and then Shaun used a 1 ¼" diamond drill bit for the tile to cut out a hole for the pipe to go through for a really clean finished look.
Building the Shelves
To make the actual shelves we picked up some 1 x 12 pine boards and cut them to 28" lengths. Shaun used a router to cut channels for the posts on each side. Then two of the boards were glued together with wood glue and clamped together to create 2" shelves, with routed holes in the back to accept our pipe shelf brackets.
We wanted the finished shelves to be a 2 inches thick. Shaun could have used 2" inch piece to create solid wood chunky shelves, but we didn't think that was the best choice for a couple of reasons. It would have been difficult to drill perfectly straight holes into the back for the pipes to fit into. If the holes weren't perfectly straight the shelves won't have been level.
It was also much cheaper to buy the 1 x 12 inch boards, and it really looks great, so it was a real win-win.
We choose pine as our type of wood for the shelves because it's inexpensive, looks great stained, and is available at any major hardware store.
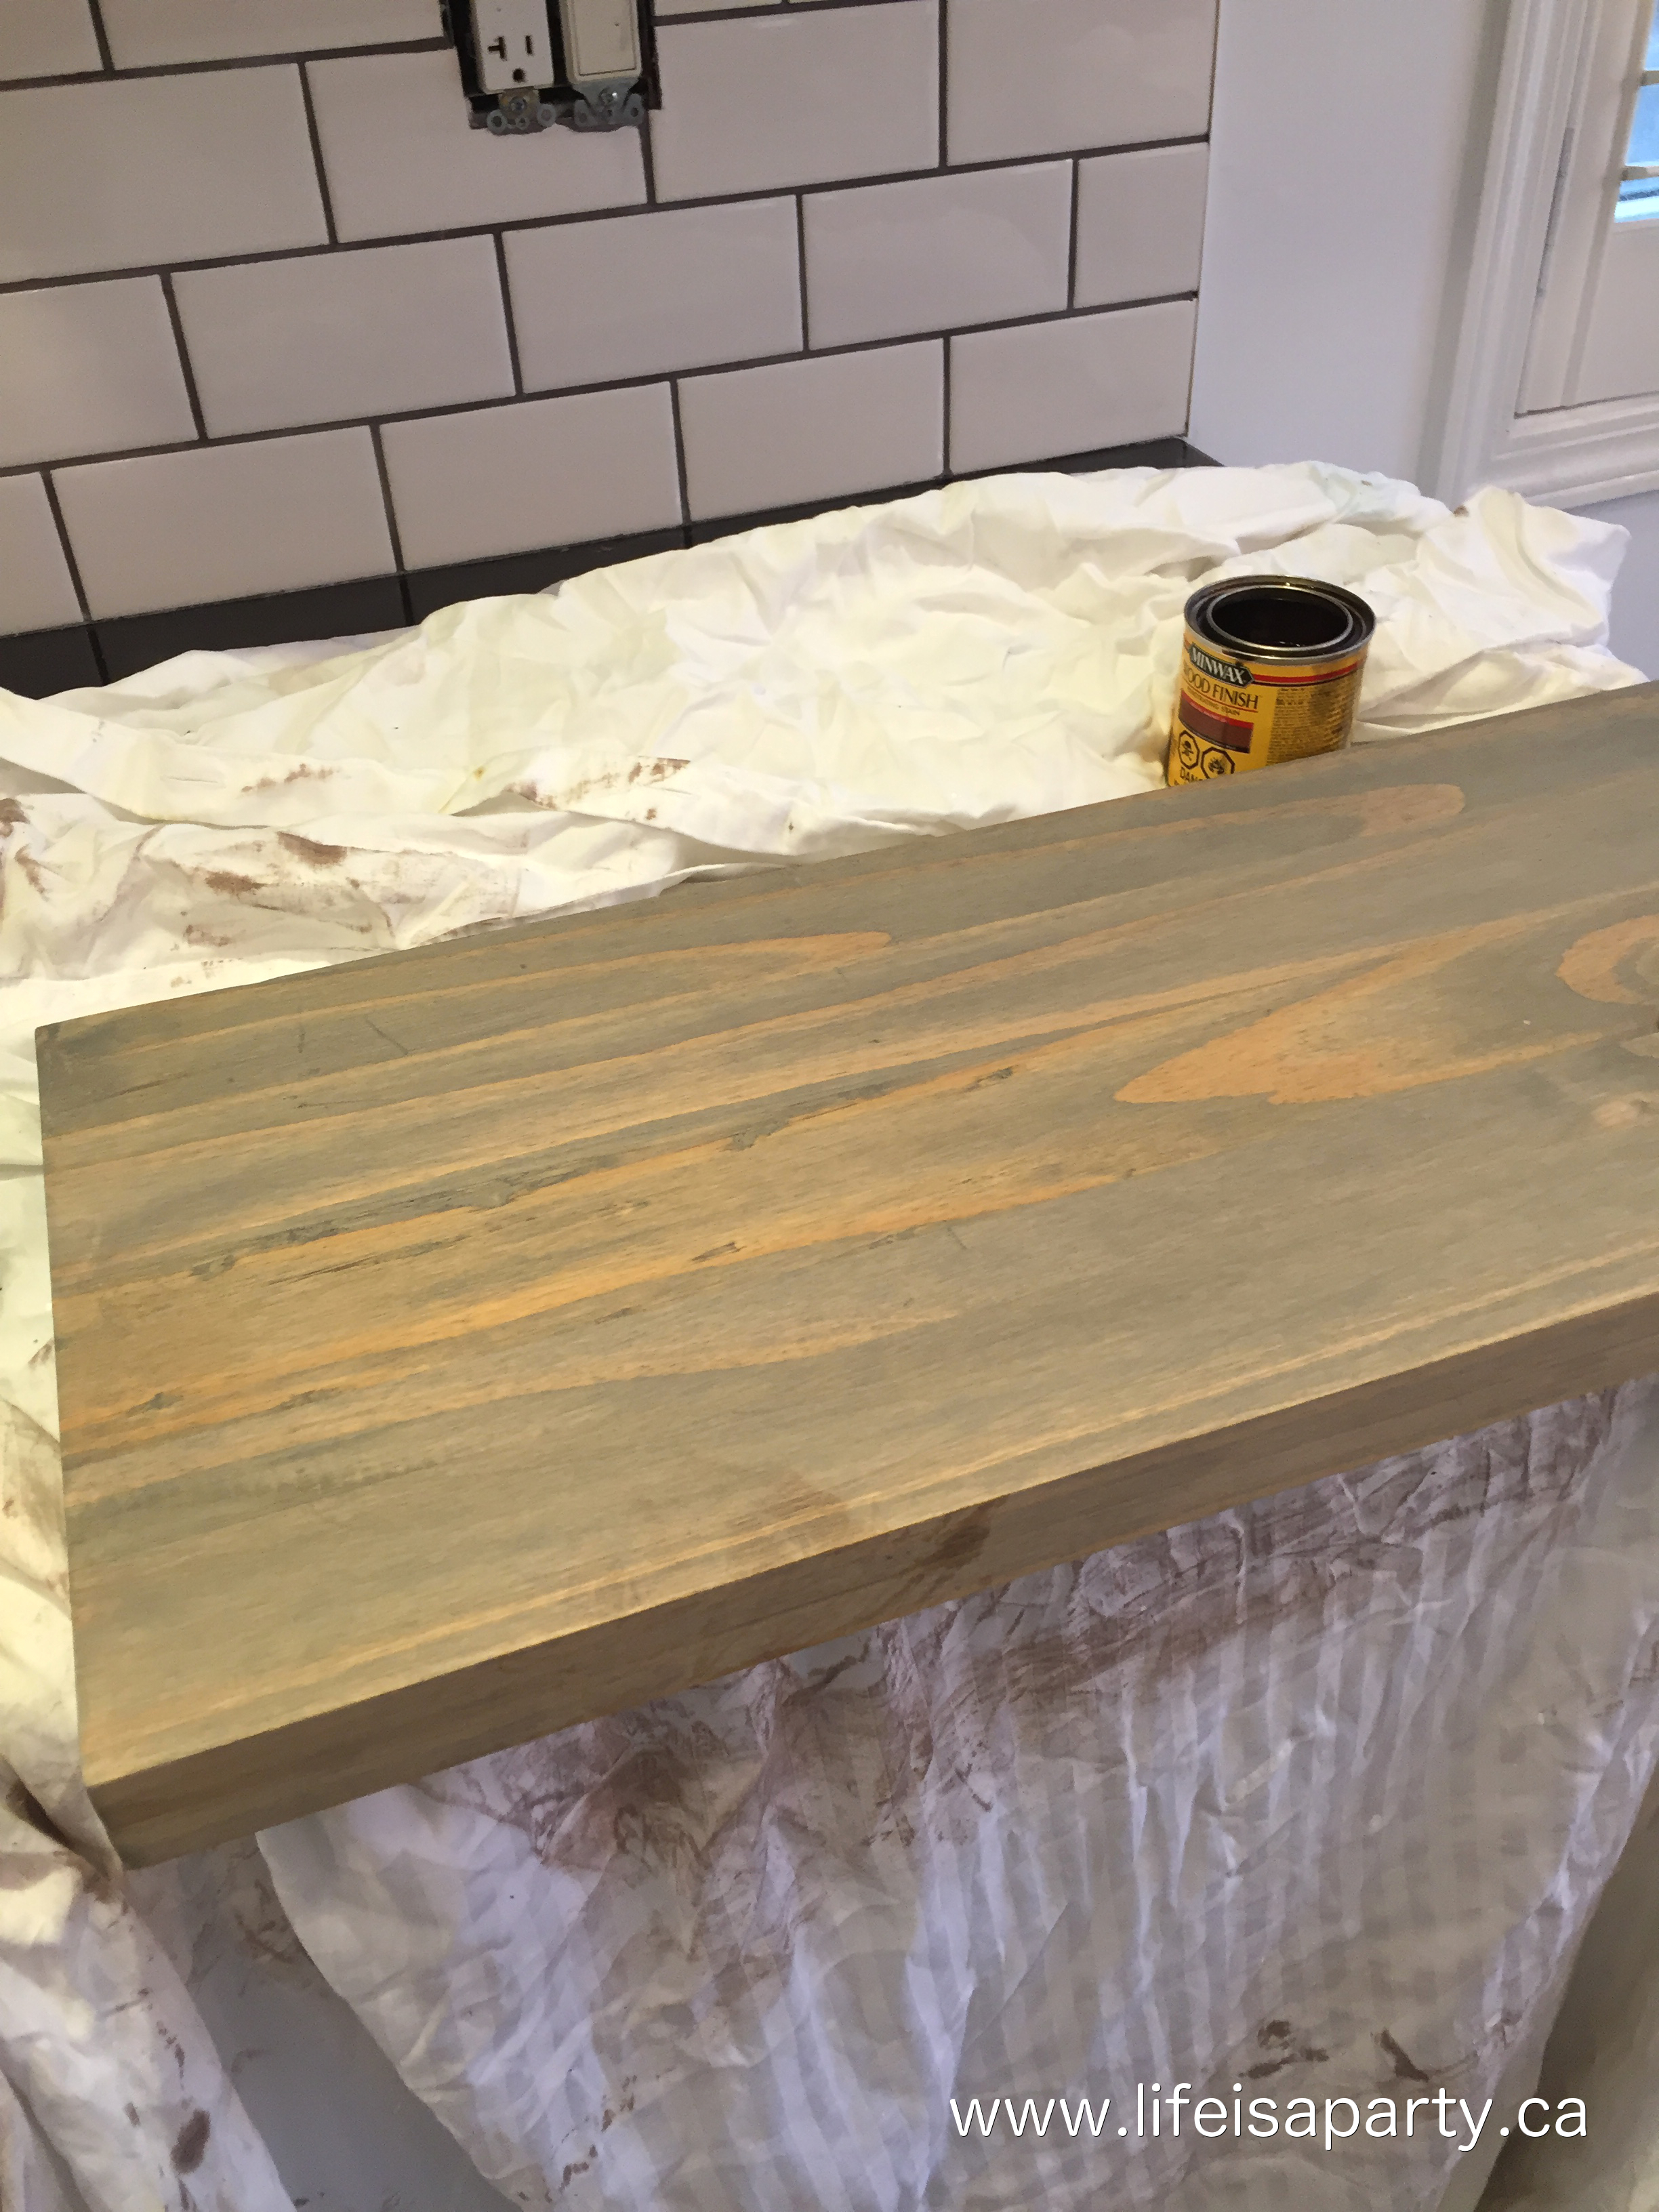
Staining The Floating Shelves
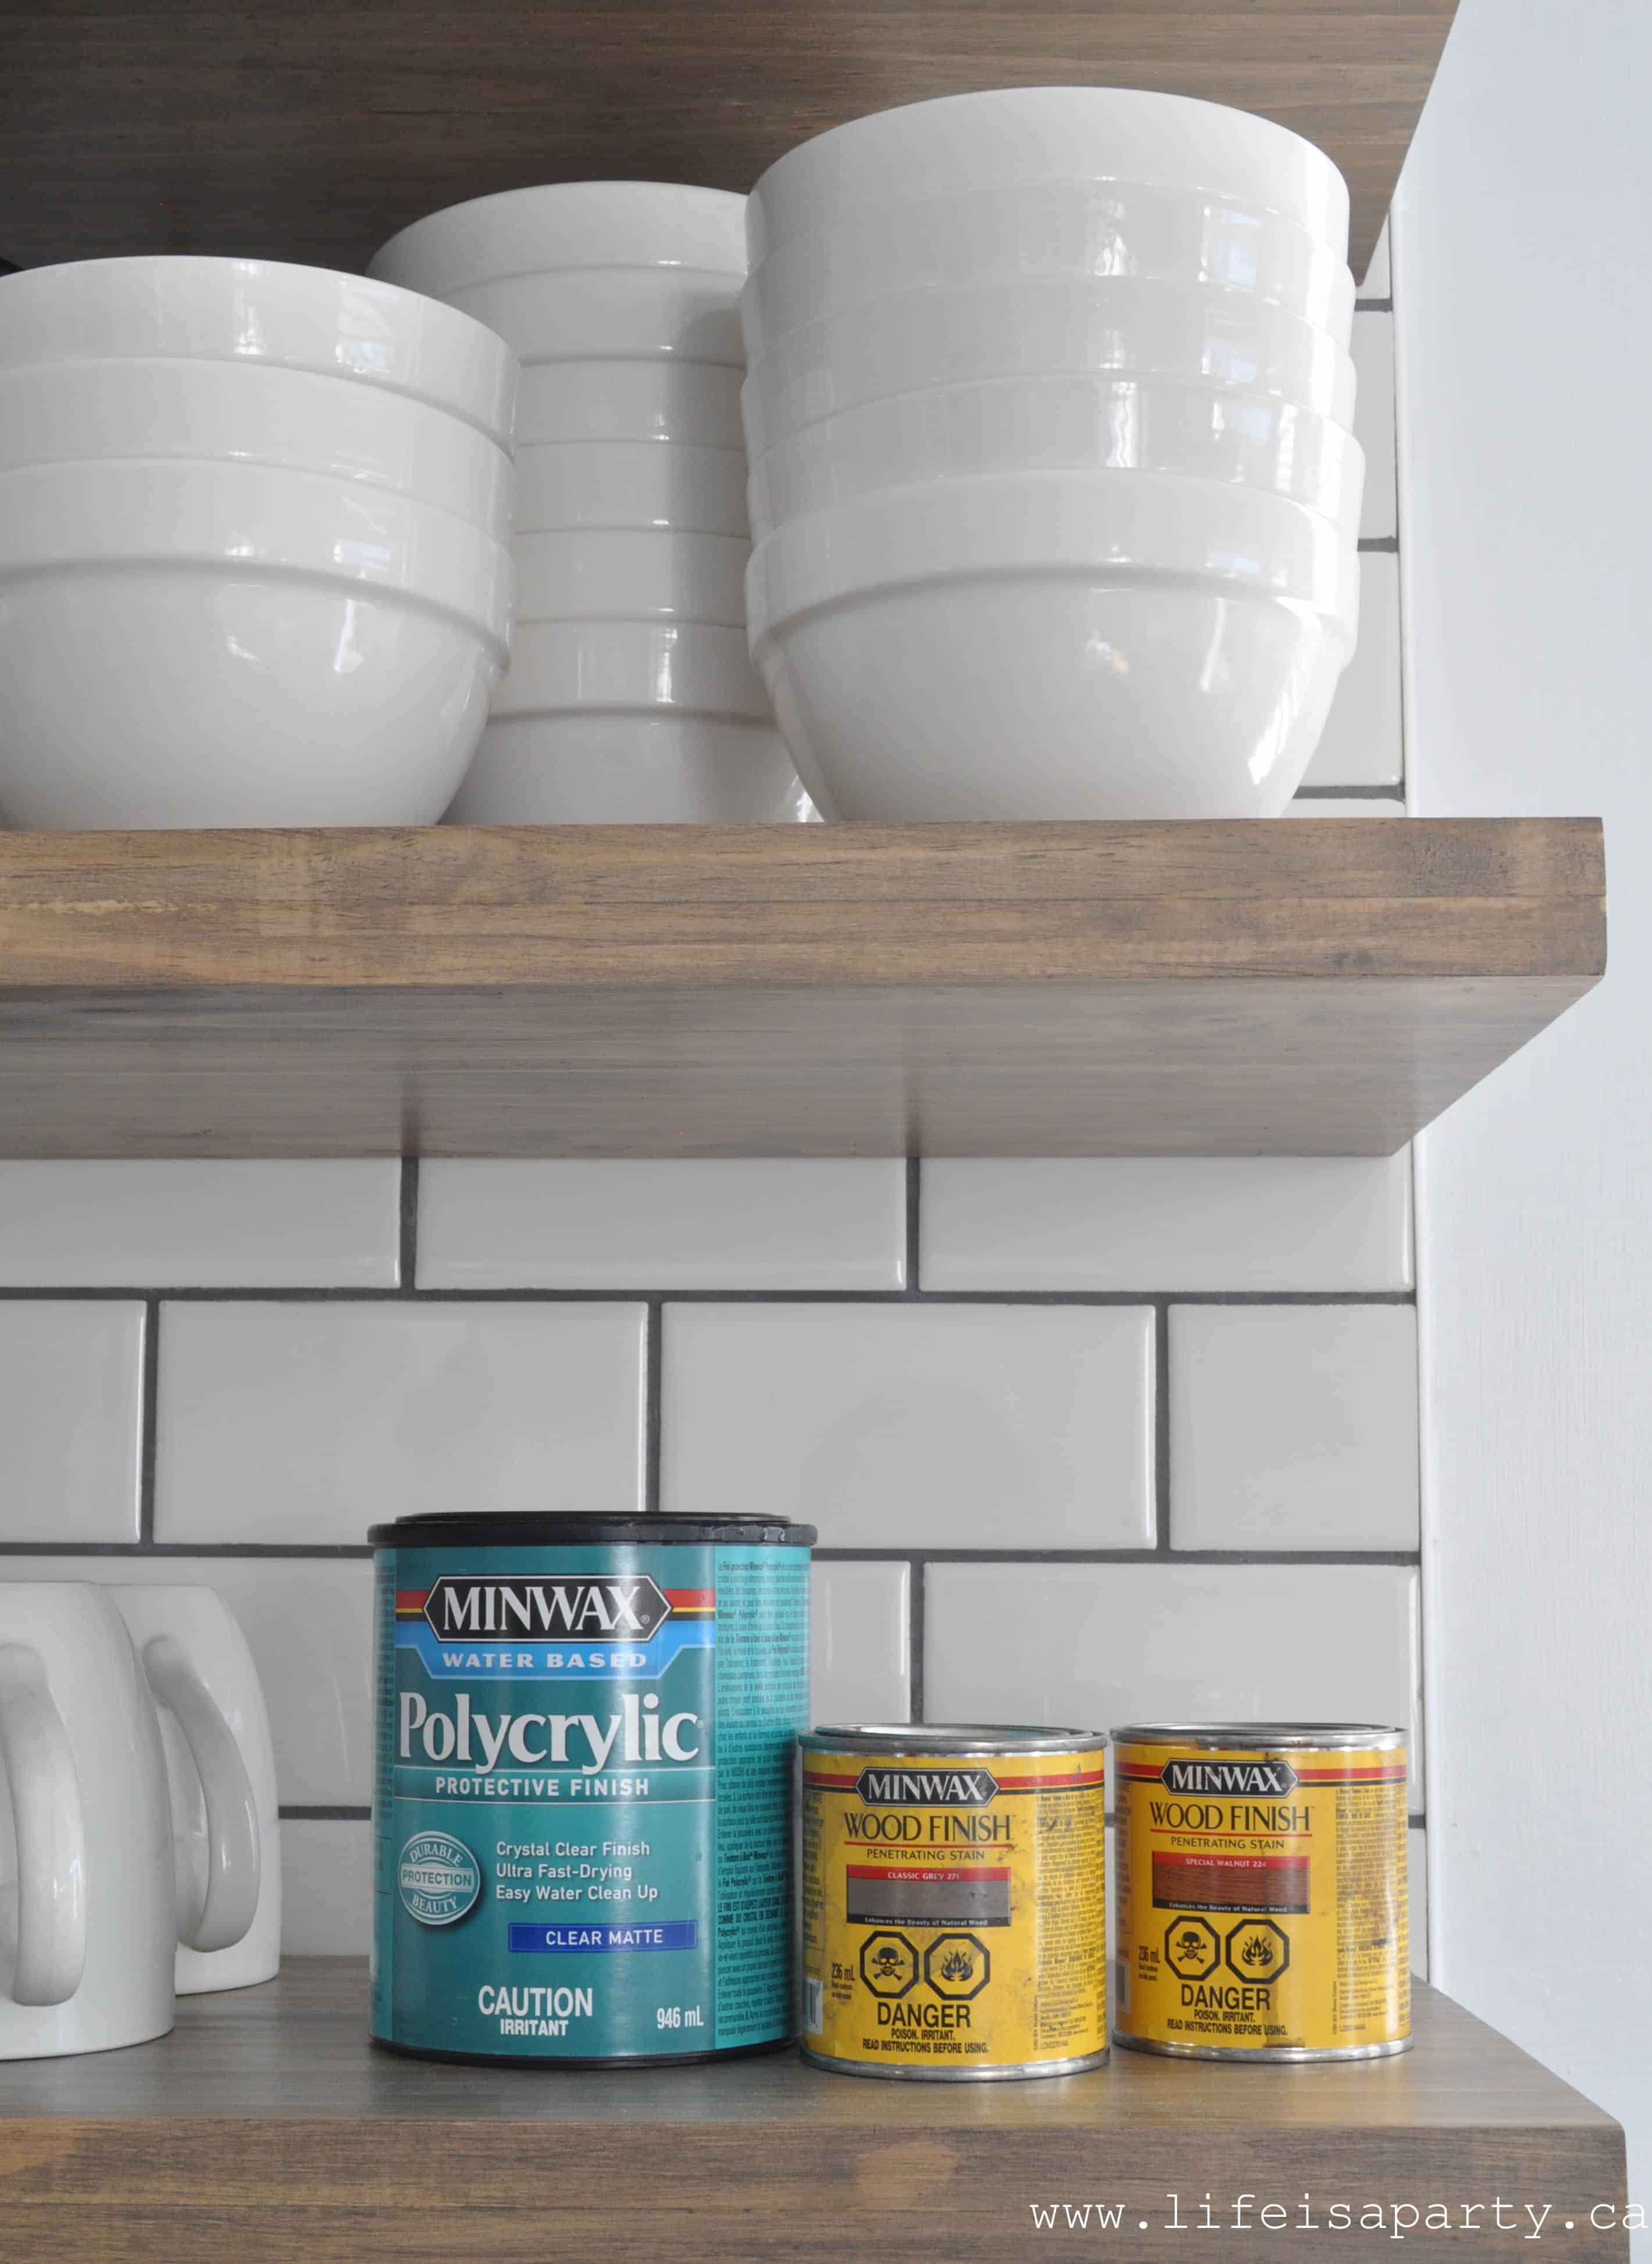
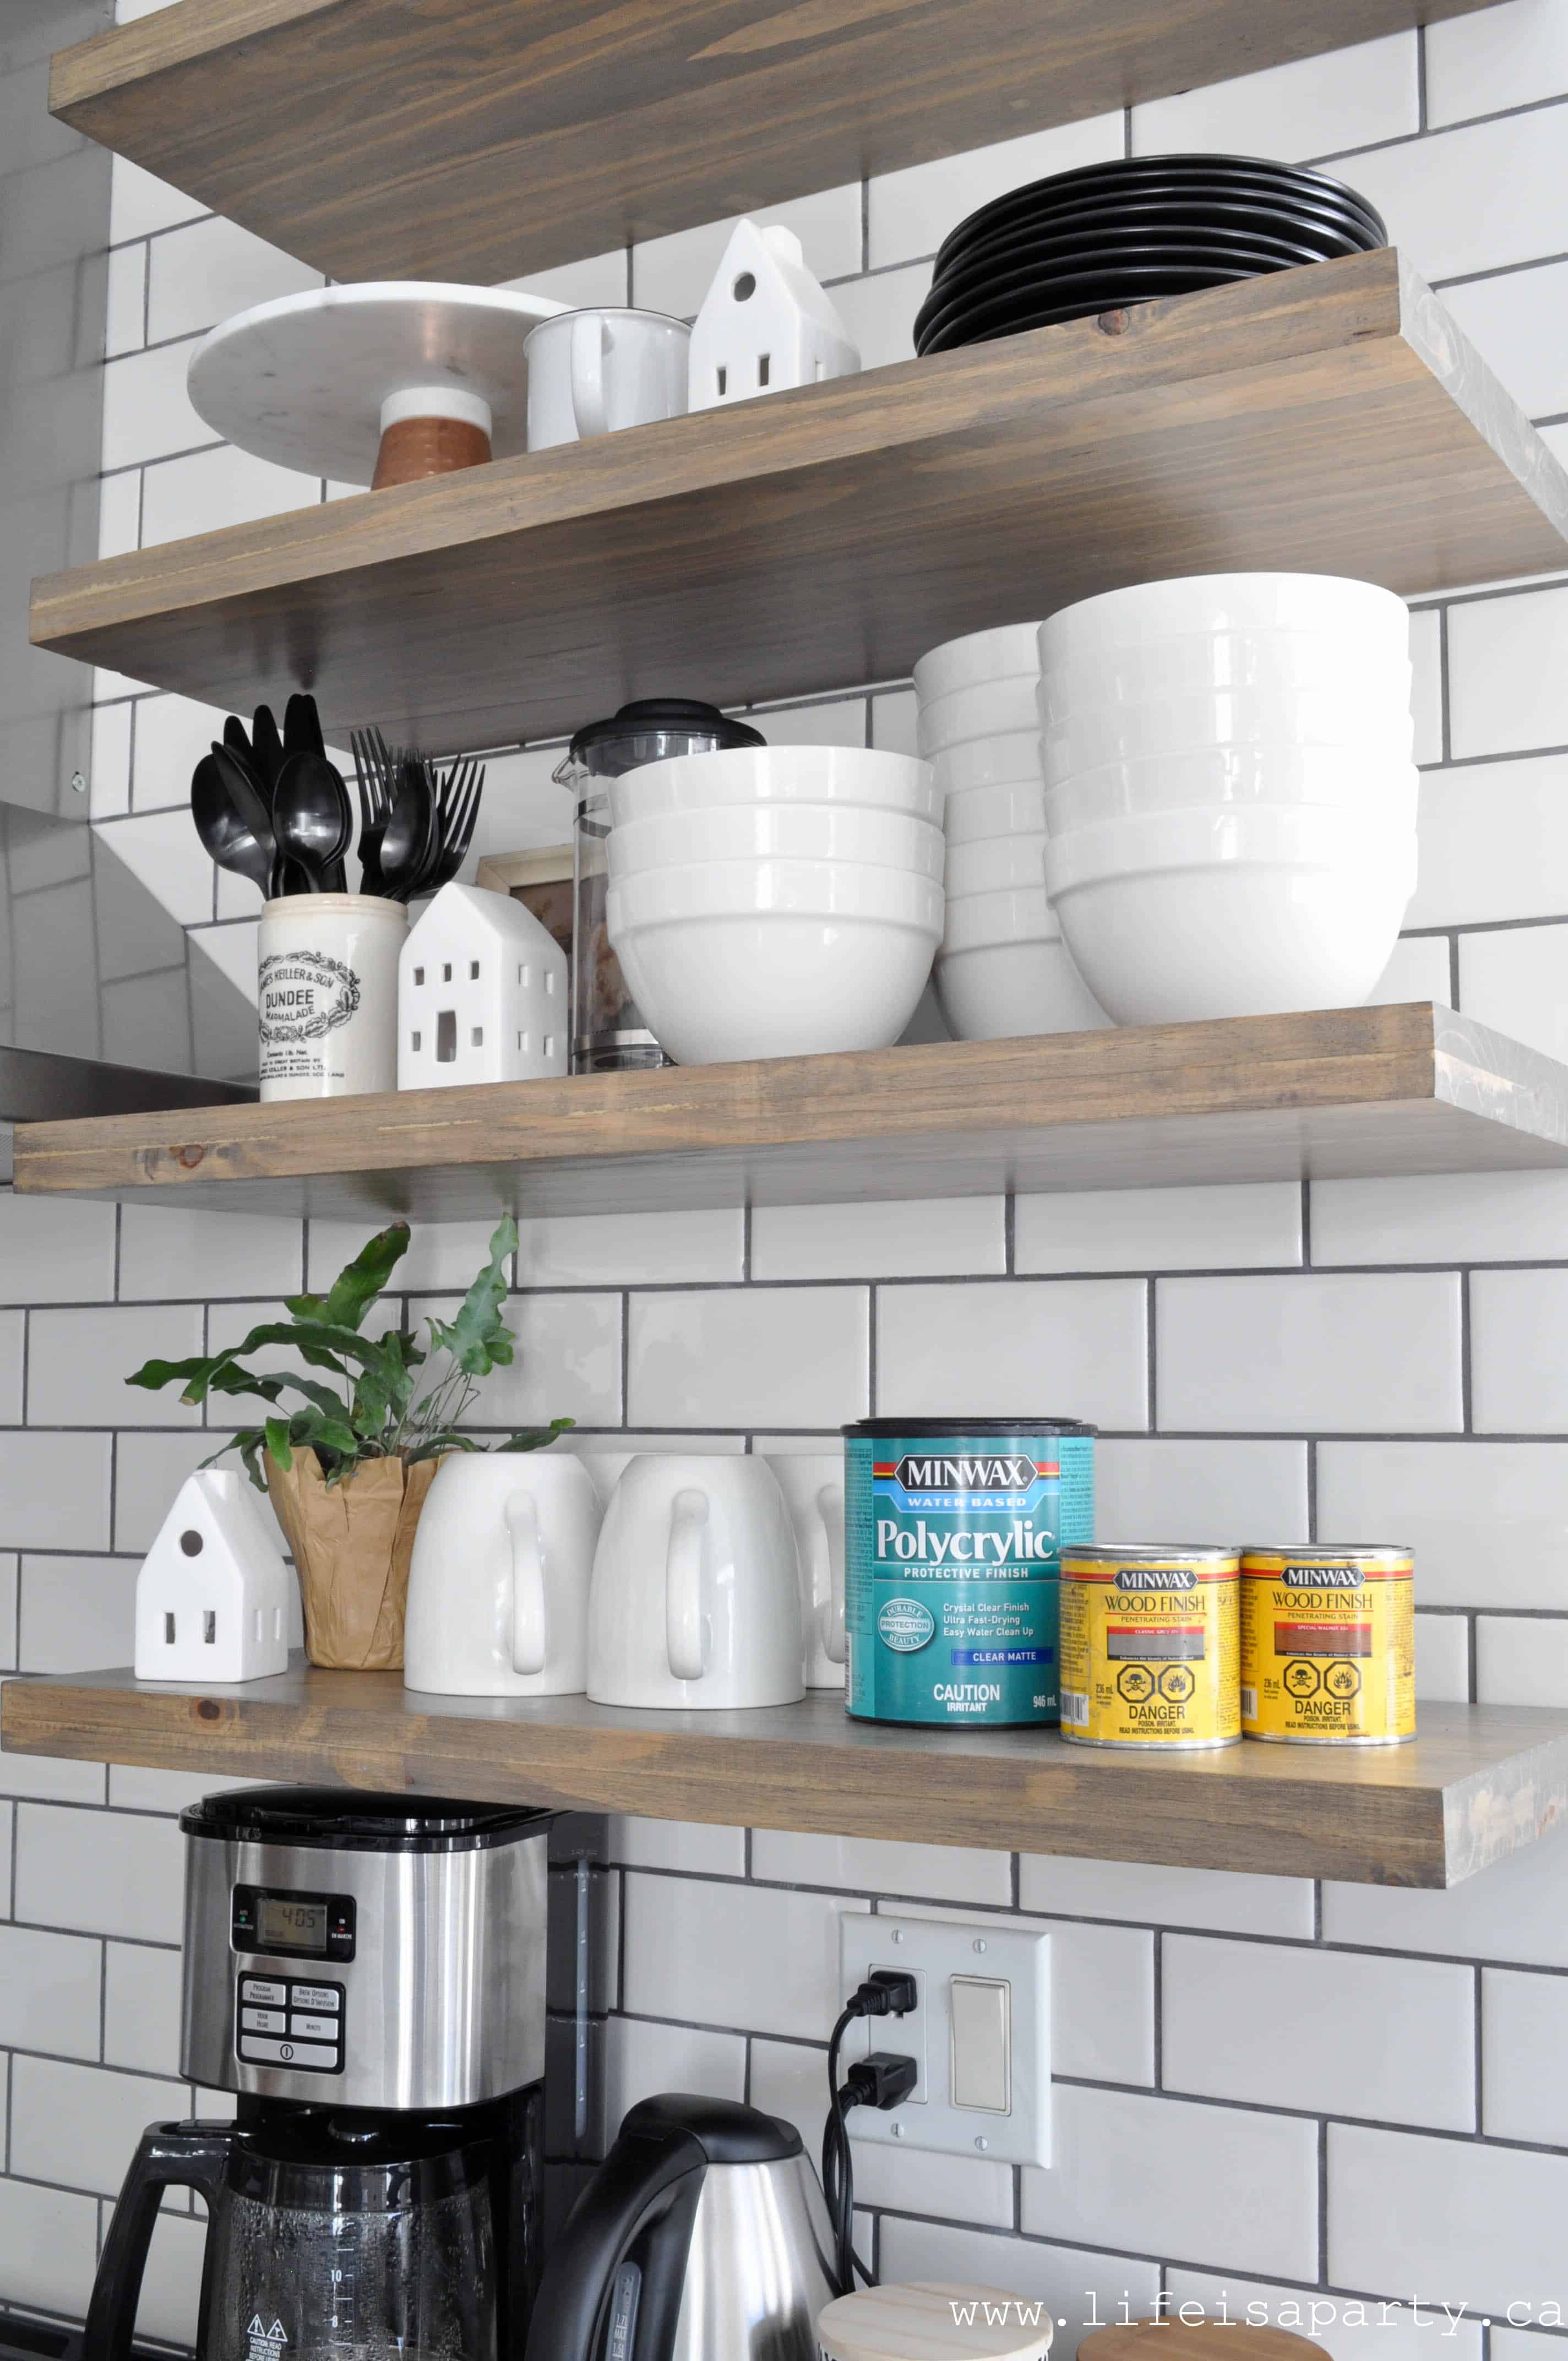
The next step was sanding the shelves. We then conditioned the wood with Minwax Pre-Stain Wood Conditioner, since we were working with pine and it accepts the stain more consistently when the wood is pre-conditioned. Then it was time to stain the wood. The stain color I used was a combination of two different stain colors. I used Minwax Classic Grey and followed that with a light layer of Minwax Dark Walnut to add a bit more brown. After the stain was dry on the pieces of wood, I sealed it with a top coat of Minwax Polycrylic giving each shelf three coats. I love using the Polycyclic Protective Finish because it has a matte finish and doesn't look yellow at all when it dries. The soap and water clean up is a real plus too.
Installing the Shelves
Shaun installed the shelves on the back wall. He started by making minor adjustments with a dry fit and getting the shelves perfectly level with some small wood shims around the pipe brackets where needed to make them absolutely perfectly level.
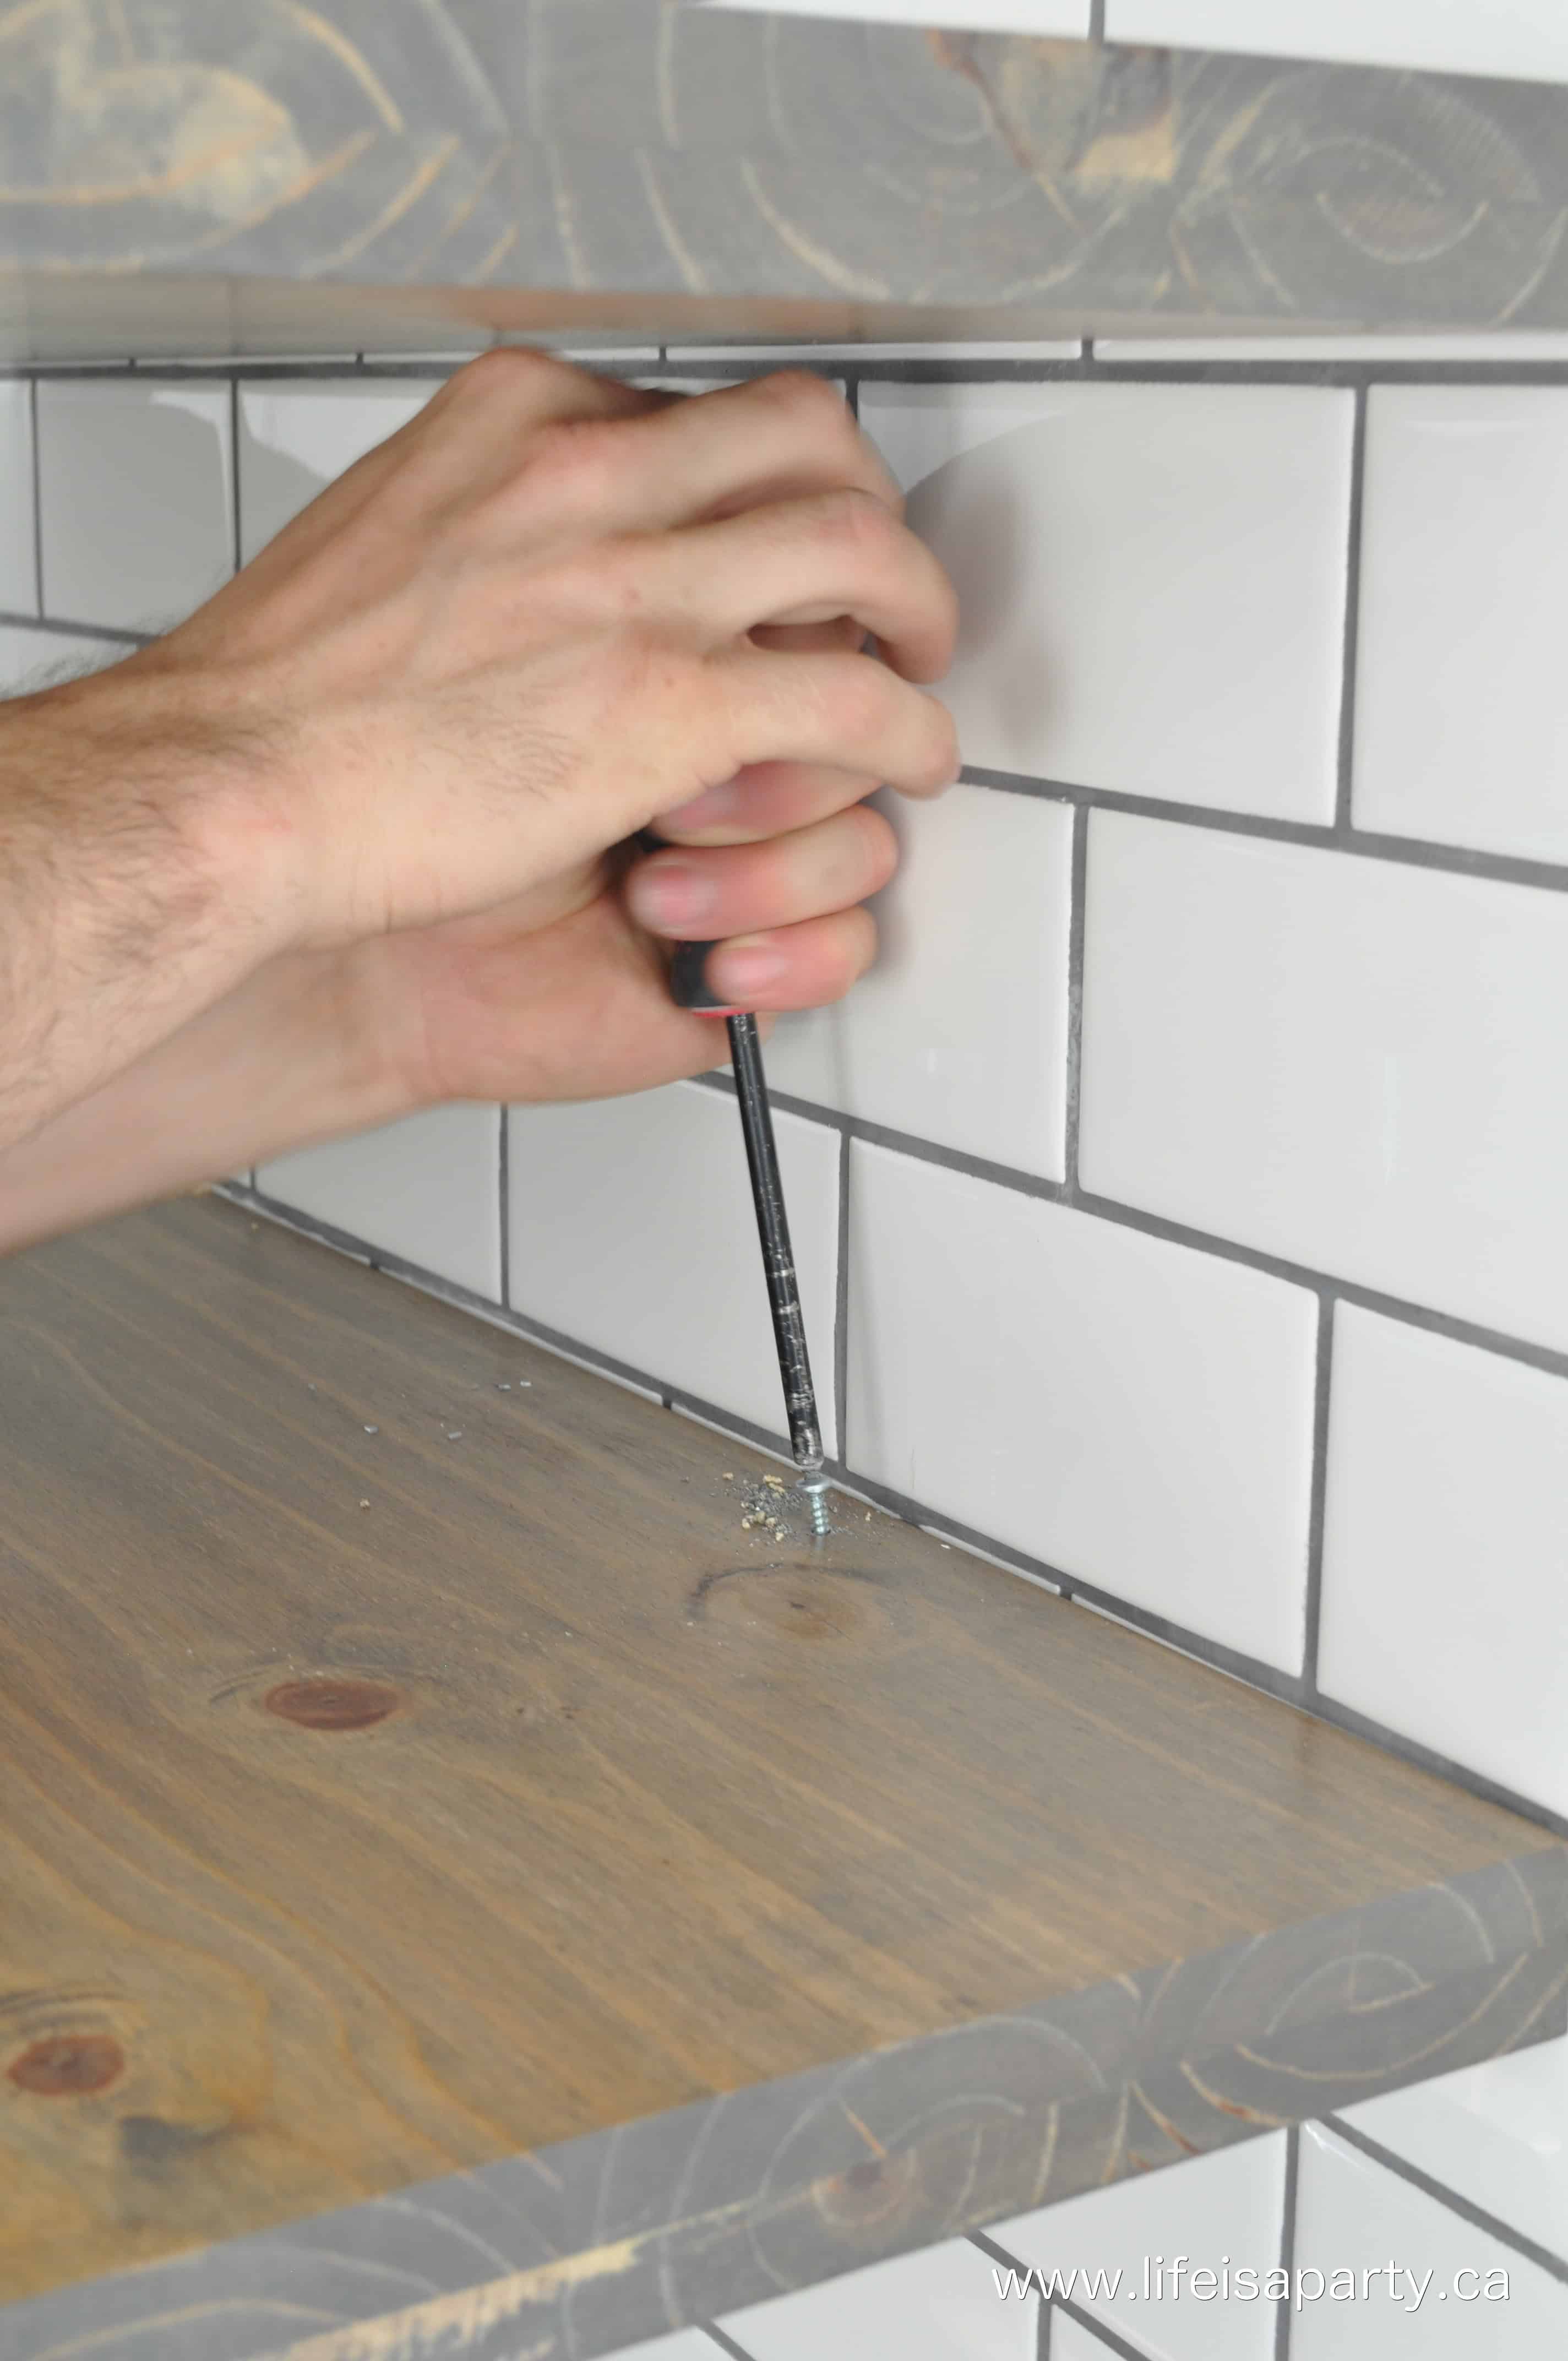
The next step was to secure the shelf to the pipes, he drilled a hole through the top of the new shelf and into the top of the pipe.
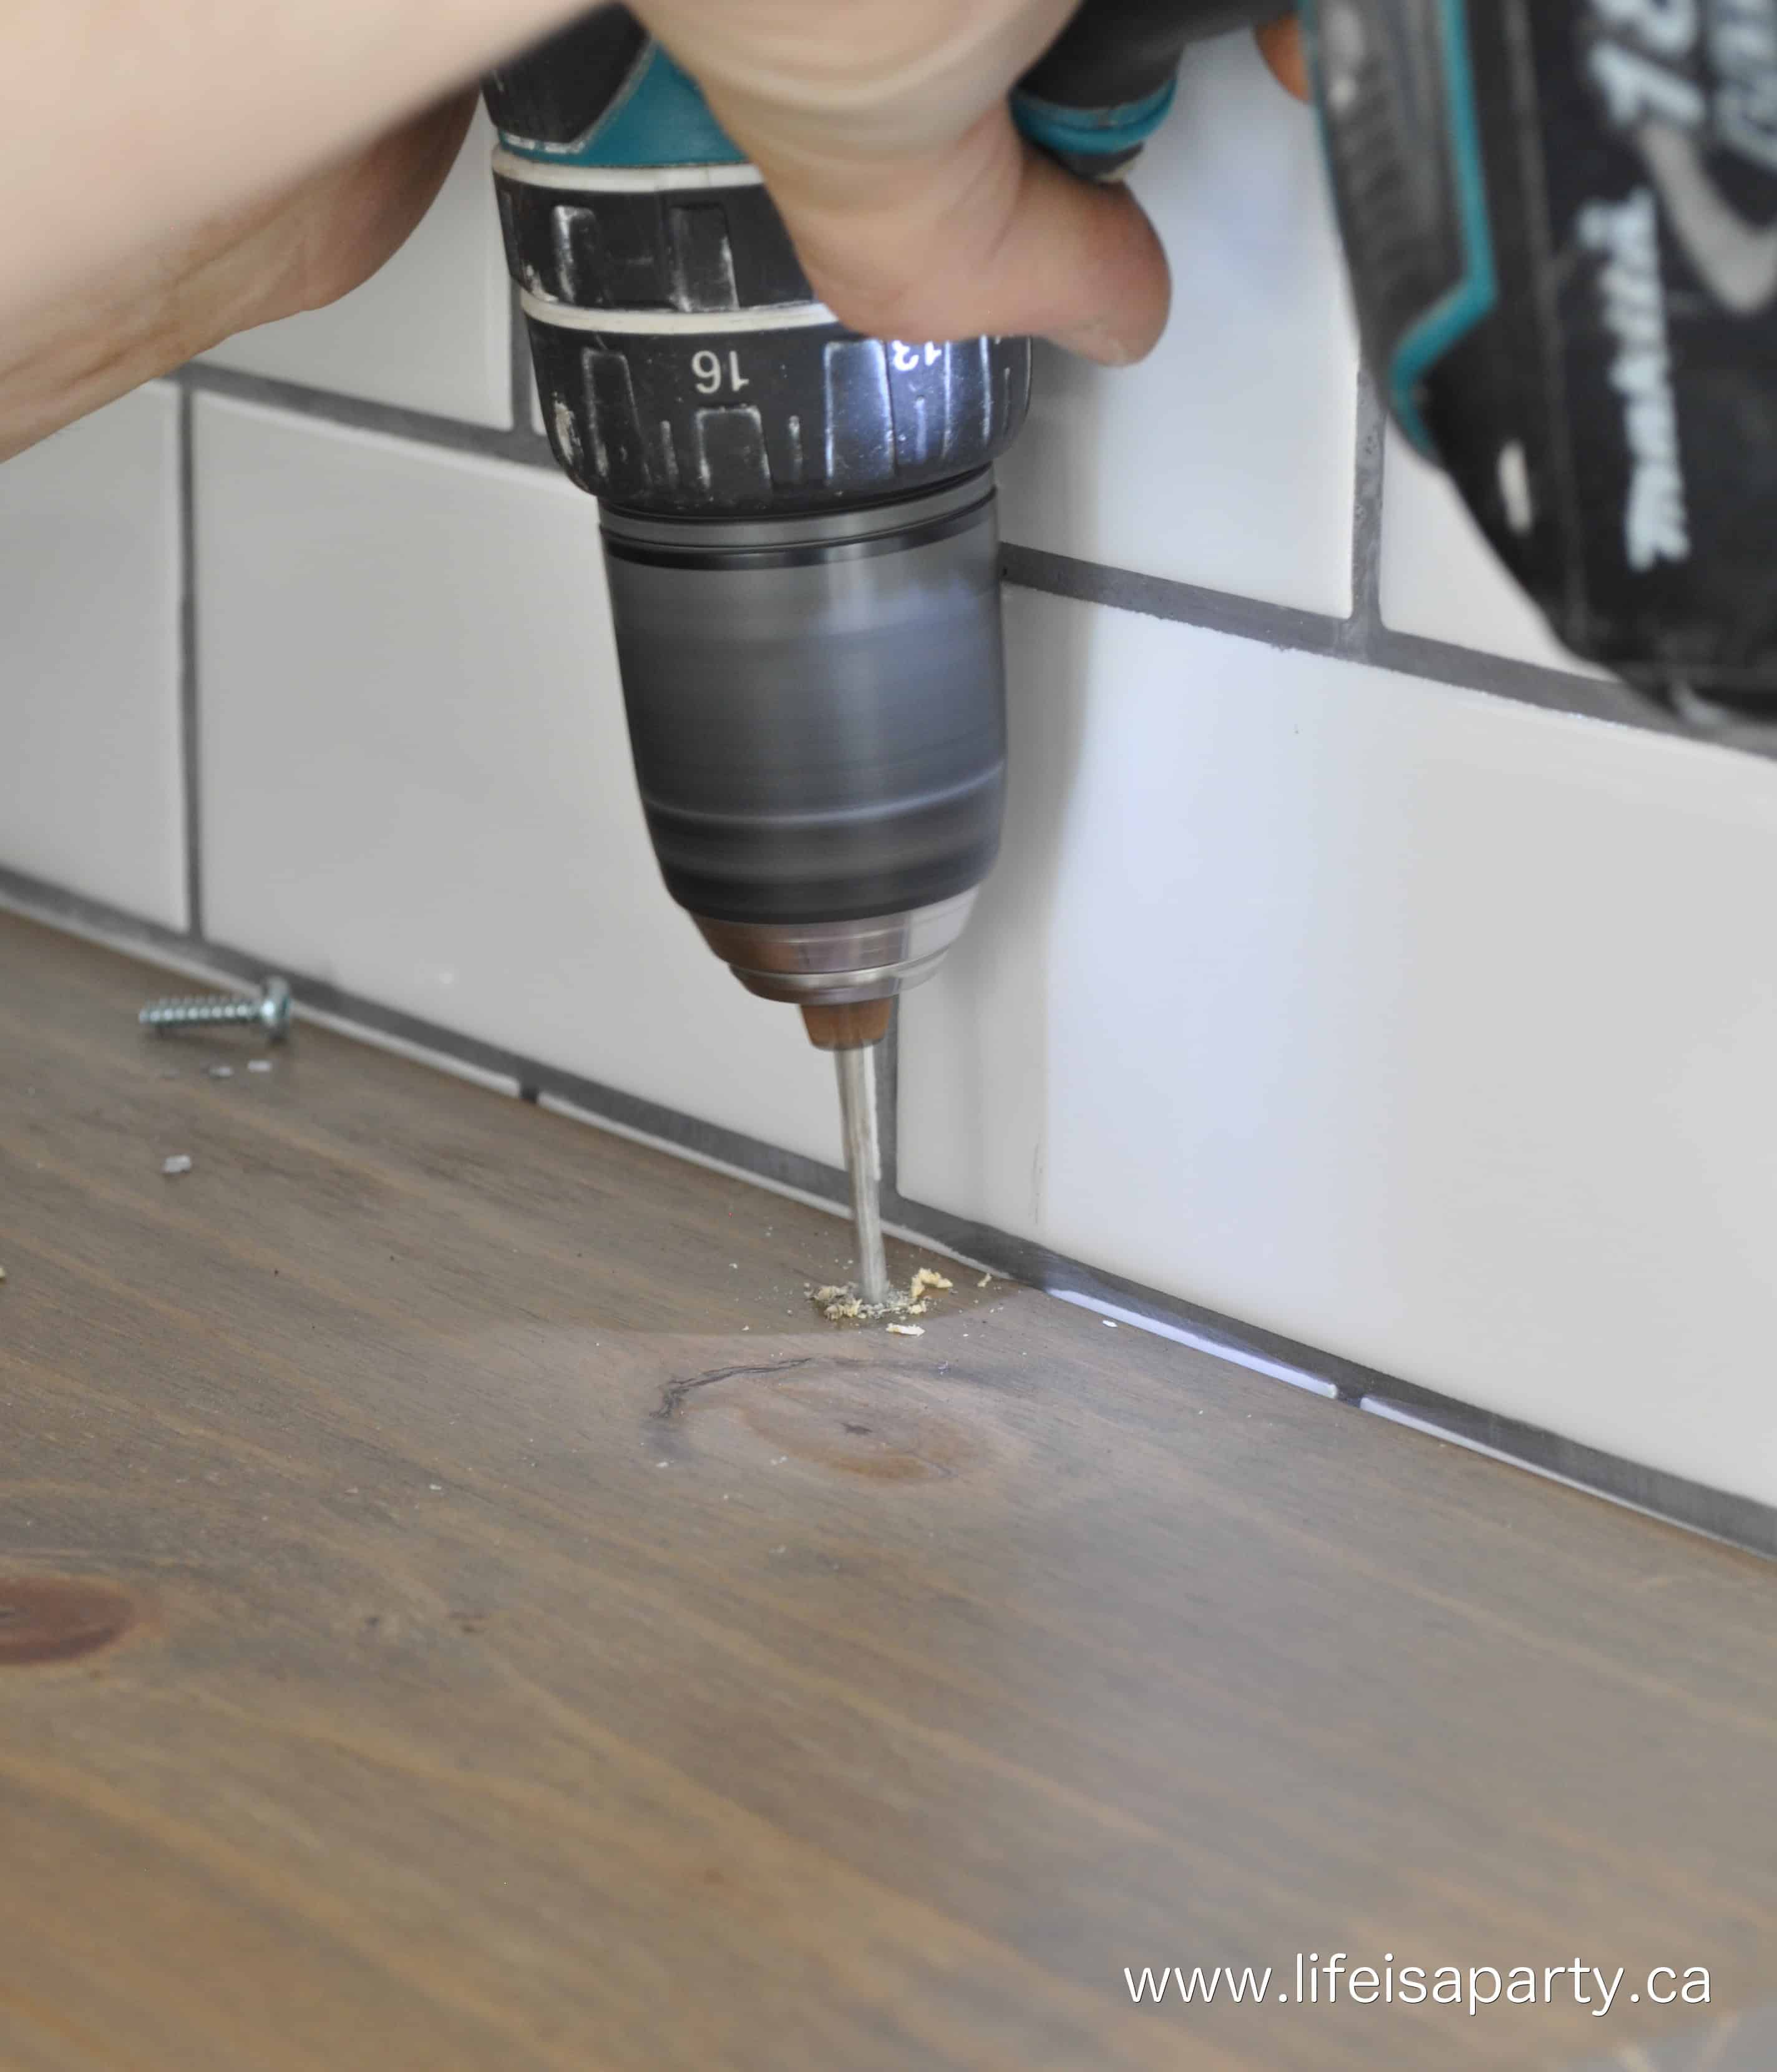
He screwed ⅛" x 1" metal screws into each of the metal brackets to hold the shelf firmly in place. Since the bottom long shelves are at eye level, he secured them from the bottom of the shelves so they won't be visible. The rest are done from the top so they're not seen either.
Equipment
- Saw
- router
- Drill
Materials
- ½ " galvanized flanges 2 for each shelf
- ½ " x 6" long threaded pipes 2 for each shelf
- 1 ¼ " diamond drill bit
- 1 x 12 pine boards cut to 28" lengths -or whatever length you need 2 for each shelf
- wood glue and clamps
- ⅛ " x 1" metal screws 2 for each shelf
- sandpaper
- wood conditioner
- wood stain
- polycrylic sealer
Instructions
- To create the shelf support attach two ½" galvanized flanges to a wall stud, making sure they're level with each other, and then screw a ½" x 6" long threaded pipe on to each one.
- To make the shelf, use two 1 x 12 inch pine boards. Use a router to route out a ¼" deep x 6" long channel in the same position on each side of the board, on both ends of the shelf. Then sandwich them together with wood glues and clamps to dry, and creating a hole in the finished shelf for the shelf bracket.
- Give the glued shelves a sand with fine grit sandpaper. Be sure to wipe them down to remove any sanding dust. Next apply wood conditioner to the wood shelves. Next stain the wood in a stain color of your choice. We combined two stains to achieve the color we wanted. Lastly seal the shelves with a polyacrylic sealer. We did three coats of the sealer for added durability.
- To install the shelves, slide them on to the shelf brackets. Make any minor adjustments necessary with small wood shims to make sure they're perfectly level, Then secure the shelf by drilling a hole through the wood shelf and into the metal pipe support, and then adding a metal screw right through the wood and into to the metal pipe to secure it.
Shelf Love
I love the Minwax stain colours. The greyish shelves look great with the dark grey grout from the backsplash.
Shaun did an amazing job of making my vision come to life on a budget with this great project. Using the plumbing supplies and the 1" x 12" pine boards really helped our budget. If you're trying to create a similar look but need to do it on a budget, I hope this DIY project idea helps you as well. The floating shelves would be great in your kitchen, dining room, laundry room, or living room.
The finished shelves in our kitchen are now the perfect place for displaying all our kitchen items, and we are so glad we could do it on budget. I'm so glad we were able to remove the old cupboards and replace them with these gorgeous DIY floating shelves on a budget. These, along with the new subway tile backsplash are probably very favourite change to the kitchen for our kitchen makeover. They have a huge impact on the space, and were definitely worth doing to create the look we're after.
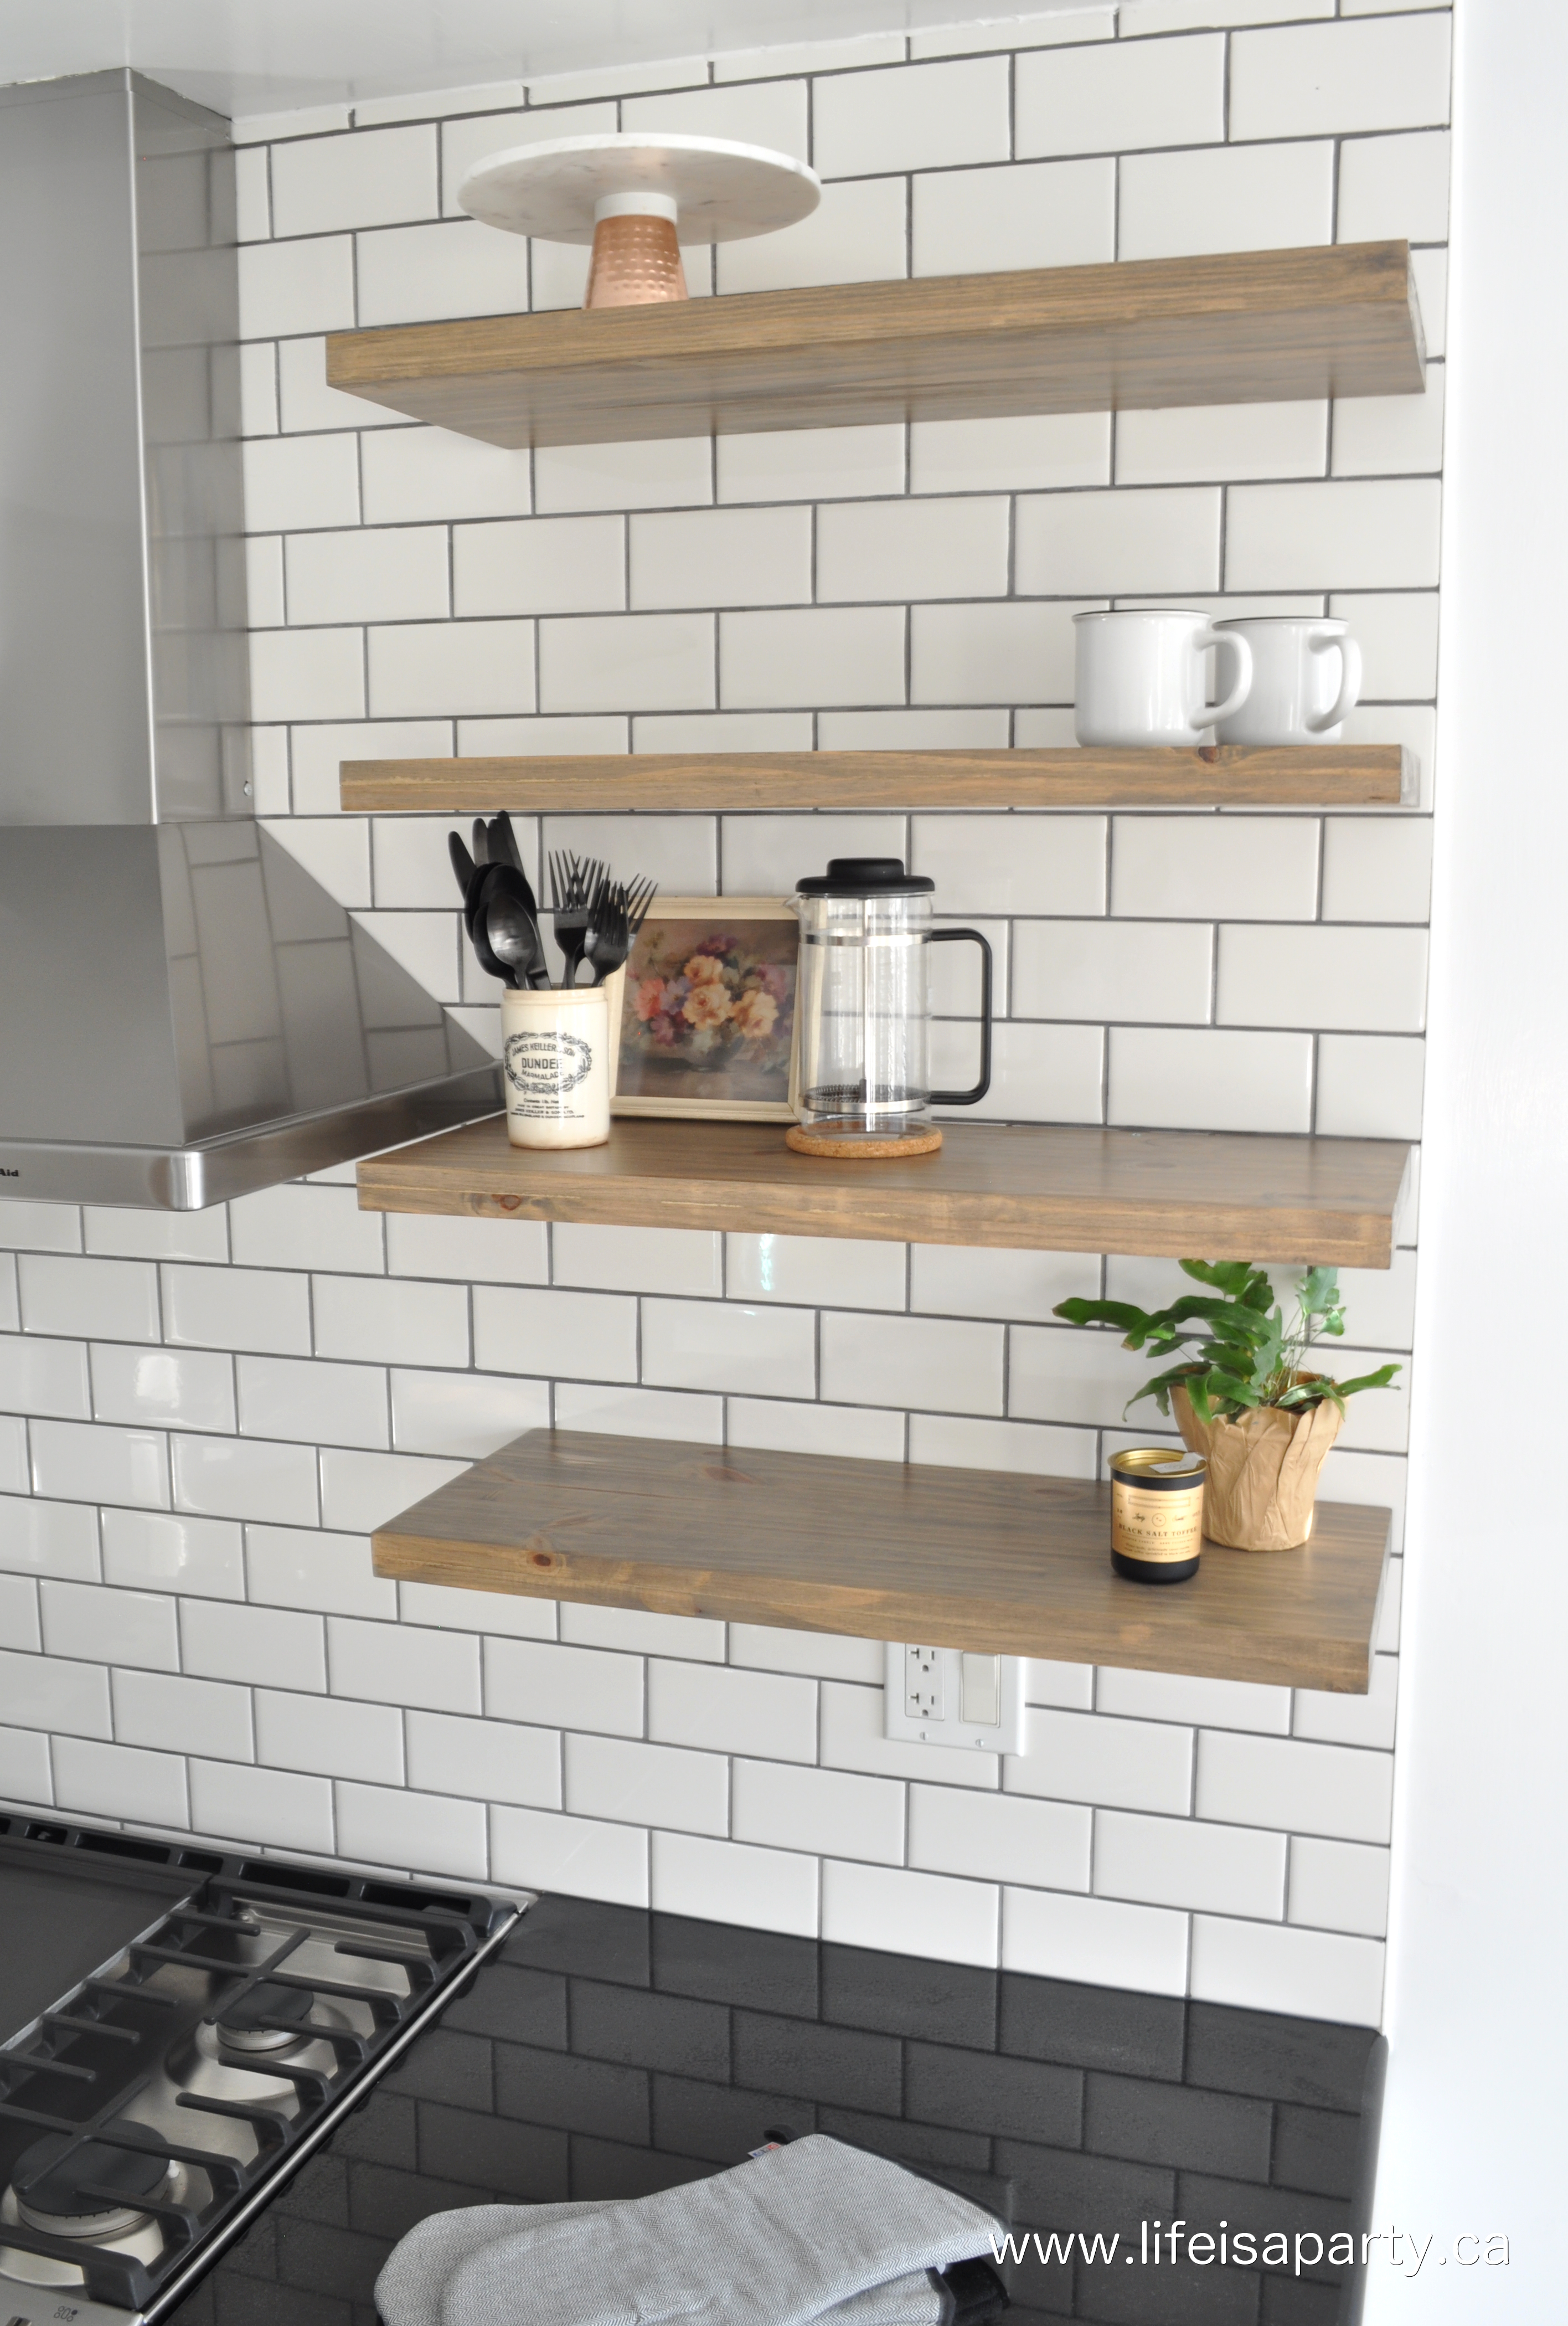
The new shelves look amazing, and I am having so much fun styling them with all our kitchen dishes, home decor, and finishing touches.
Dust Problems
I few people mentioned a worry about the dishes on the open shelving getting dusty, because they're not stored in a cupboard. I think that because these are our everyday dishes that most of them will get used so often that dust won't be a problem. Perhaps if things were sitting on the shelves and unused most of the time, this might be a concern. And you might want to consider it before installing open shelves in your own kitchen.
Kitchen Reveal Coming Up
Next week is the big reveal of the finished the kitchen. I can not wait to share it with you. It has definitely been worth all the hard work, and having our house in a bit of chaos for the last six weeks. Follow me on Instagram and check out my stories for some sneak peaks of the finished kitchen.
With new Modern Farmhouse Affordable Large DIY Floating Shelves, life really is a party!
I'm working with some amazing brands on my One Room Challenge Kitchen Makeover, and I'm so grateful. I've received products or discounts, but as always, all opinions are my own. I'm so happy to be partnering with Home Depot, Wayfair Canada, GE Canada, Benjamin Tileworks, Lagostina, Smith Sprayers, Lee Valley Tools, Delta Faucet, Krylon, Minwax, and Hamilton Beach.


dnr says
Thanks Lindi, I'm sure you'd have a ball styling them too -and they would look amazing!
Dannyelle
dnr says
Susie, thanks so much.
Dannyelle
dnr says
Thanks Casey, sometimes necessity is the mother of invention. 😉
Dannyelle