How To Make DIY Velvet Acorns: use real acorn caps, stretch velvet, and wooden skewers to create the acorn point.

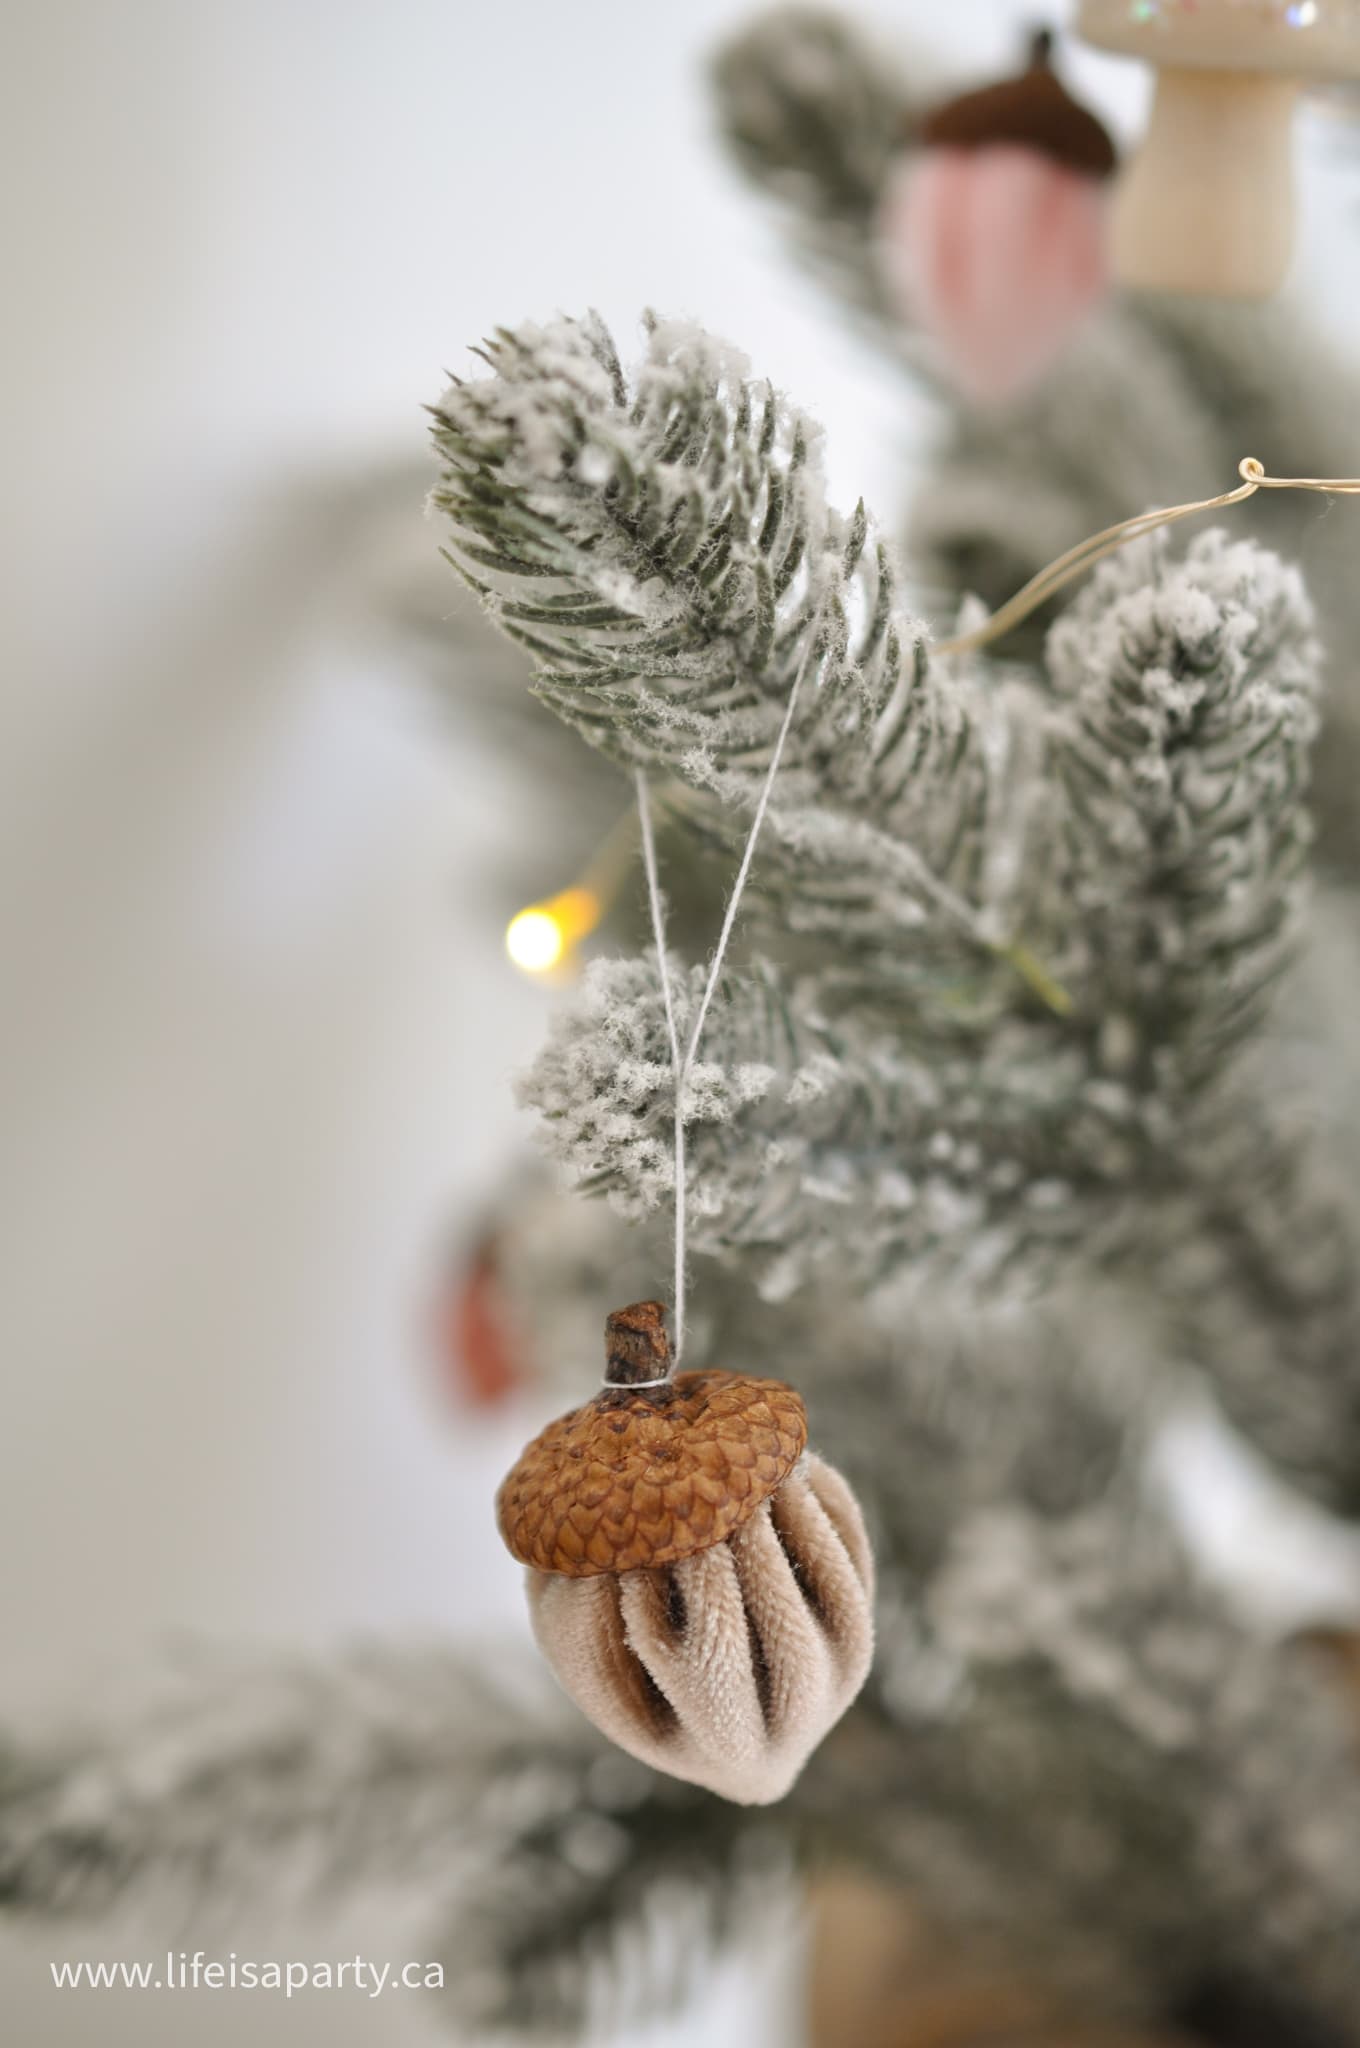
These DIY velvet acorns are the perfect addition to your home decor. I used some of them as Christmas ornaments. They're also gorgeous in a small bowl as seasonal decor for the Christmas or the fall season. If you love acorns too, be sure to check out these acorns I made out of old Easter eggs too.
These velvet acorns also be lovely as a simple garland, or used to decorate a napkin ring for a fall or holiday table. These are so much fun to make that they're a little addictive. The combination of the natural elements with the real acorns and the rich texture of the velvet and beautiful colors makes them such a favorite craft for this time of year.
The Velvet
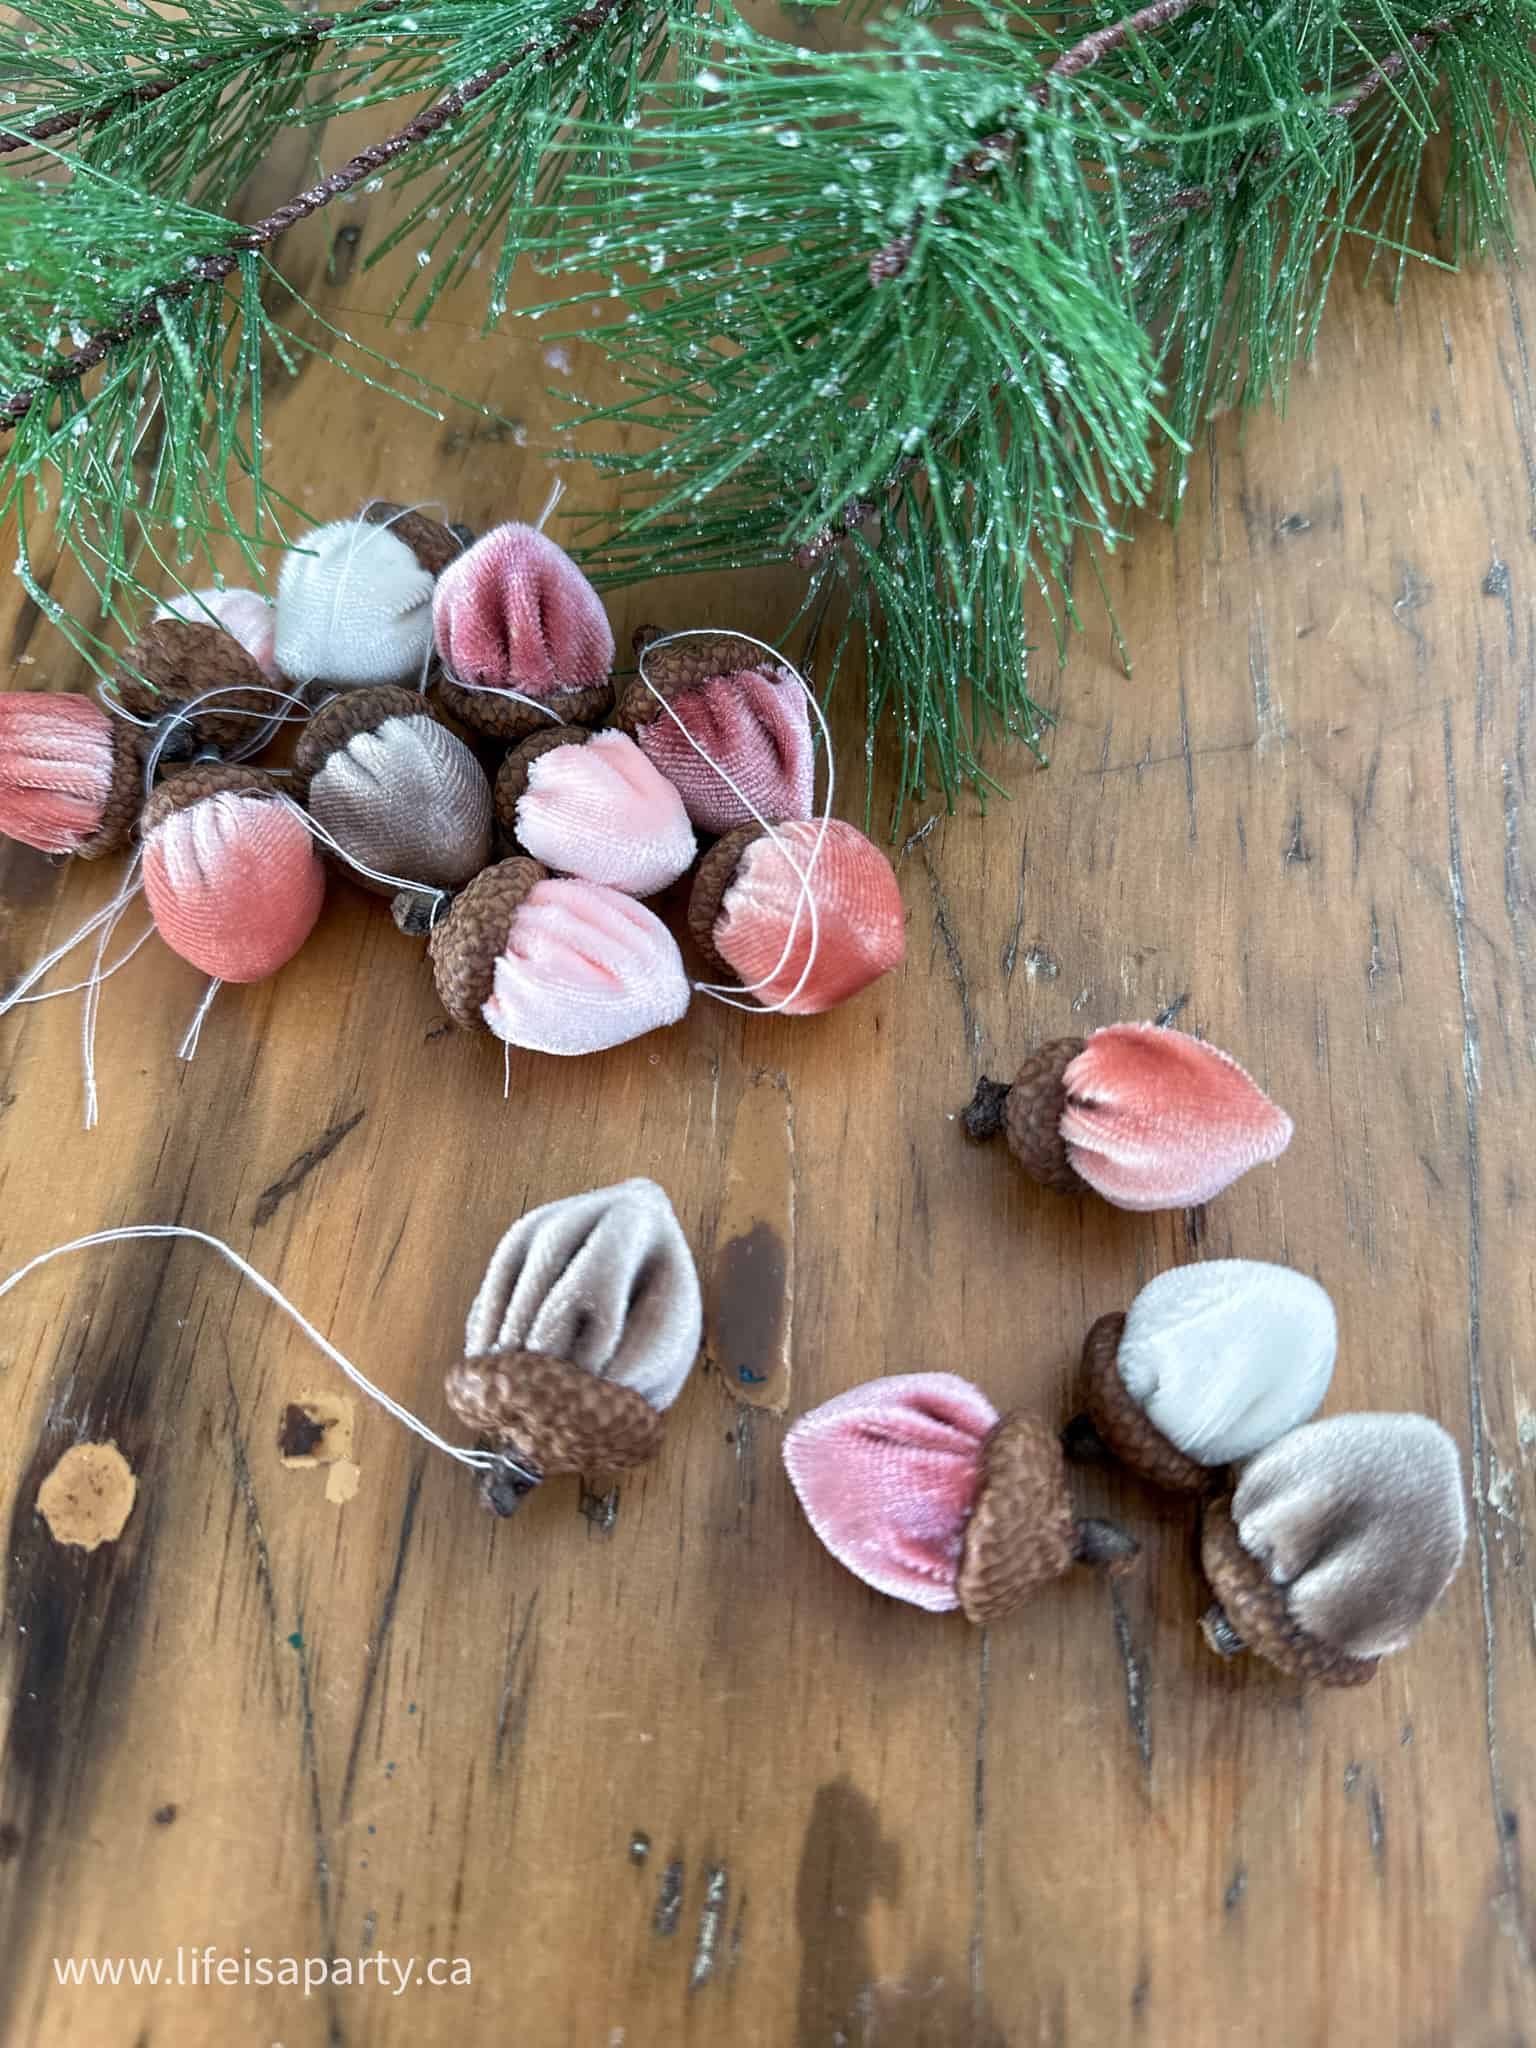
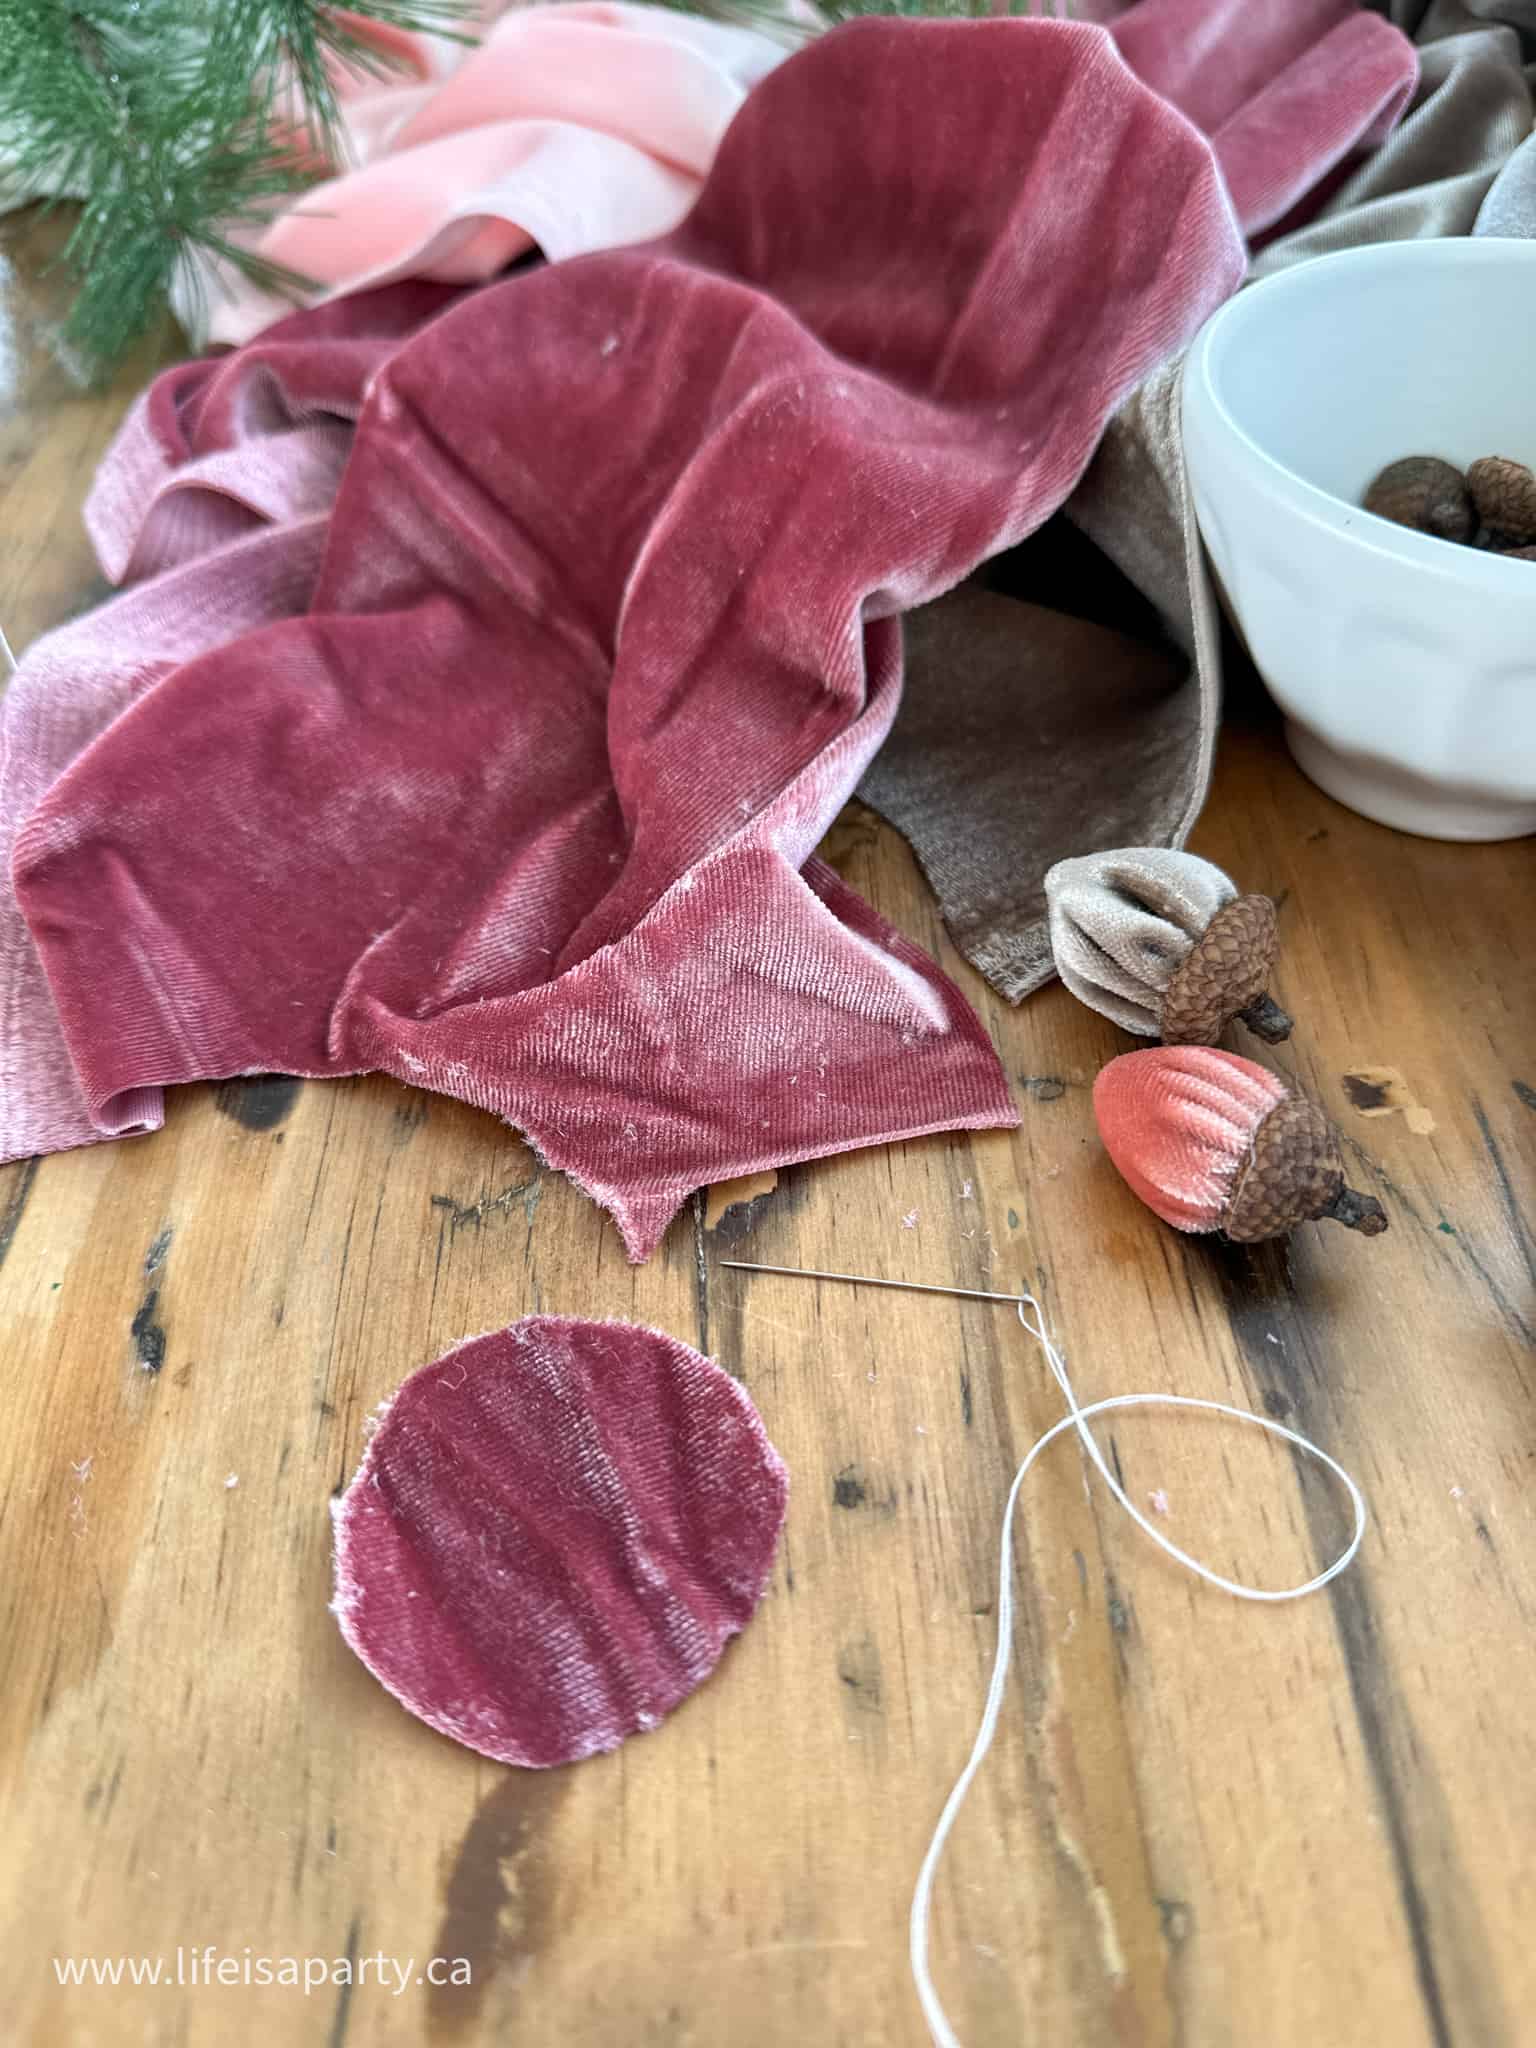
We used some beautiful stretch velvet is an assortment of lovely colors. Our stretch velvet is from Fabric Wholesale Direct. They have an amazing assortment of beautiful colors in stretch velvet. We used pink, dusty rose, champagne, peach, and off white to make our fabric acorns, and all the colours look so great together. We used some shades of pink, but fall colors would be beautiful for a touch of autumn too. Make them to match your own fall decorations, or Christmas decorations, or personal style.
The stretch velvet works really well for this craft. It has some give and you can create some tension which helps create the point at the end of the acorn. Regular velvet would be hard to work with, and hard to maneuver into the signature acorn point at the end. The stretch velvet also doesn't fray, so it's easy to work with, and you can do your stitching very close to the edge.
Making The Acorn Points
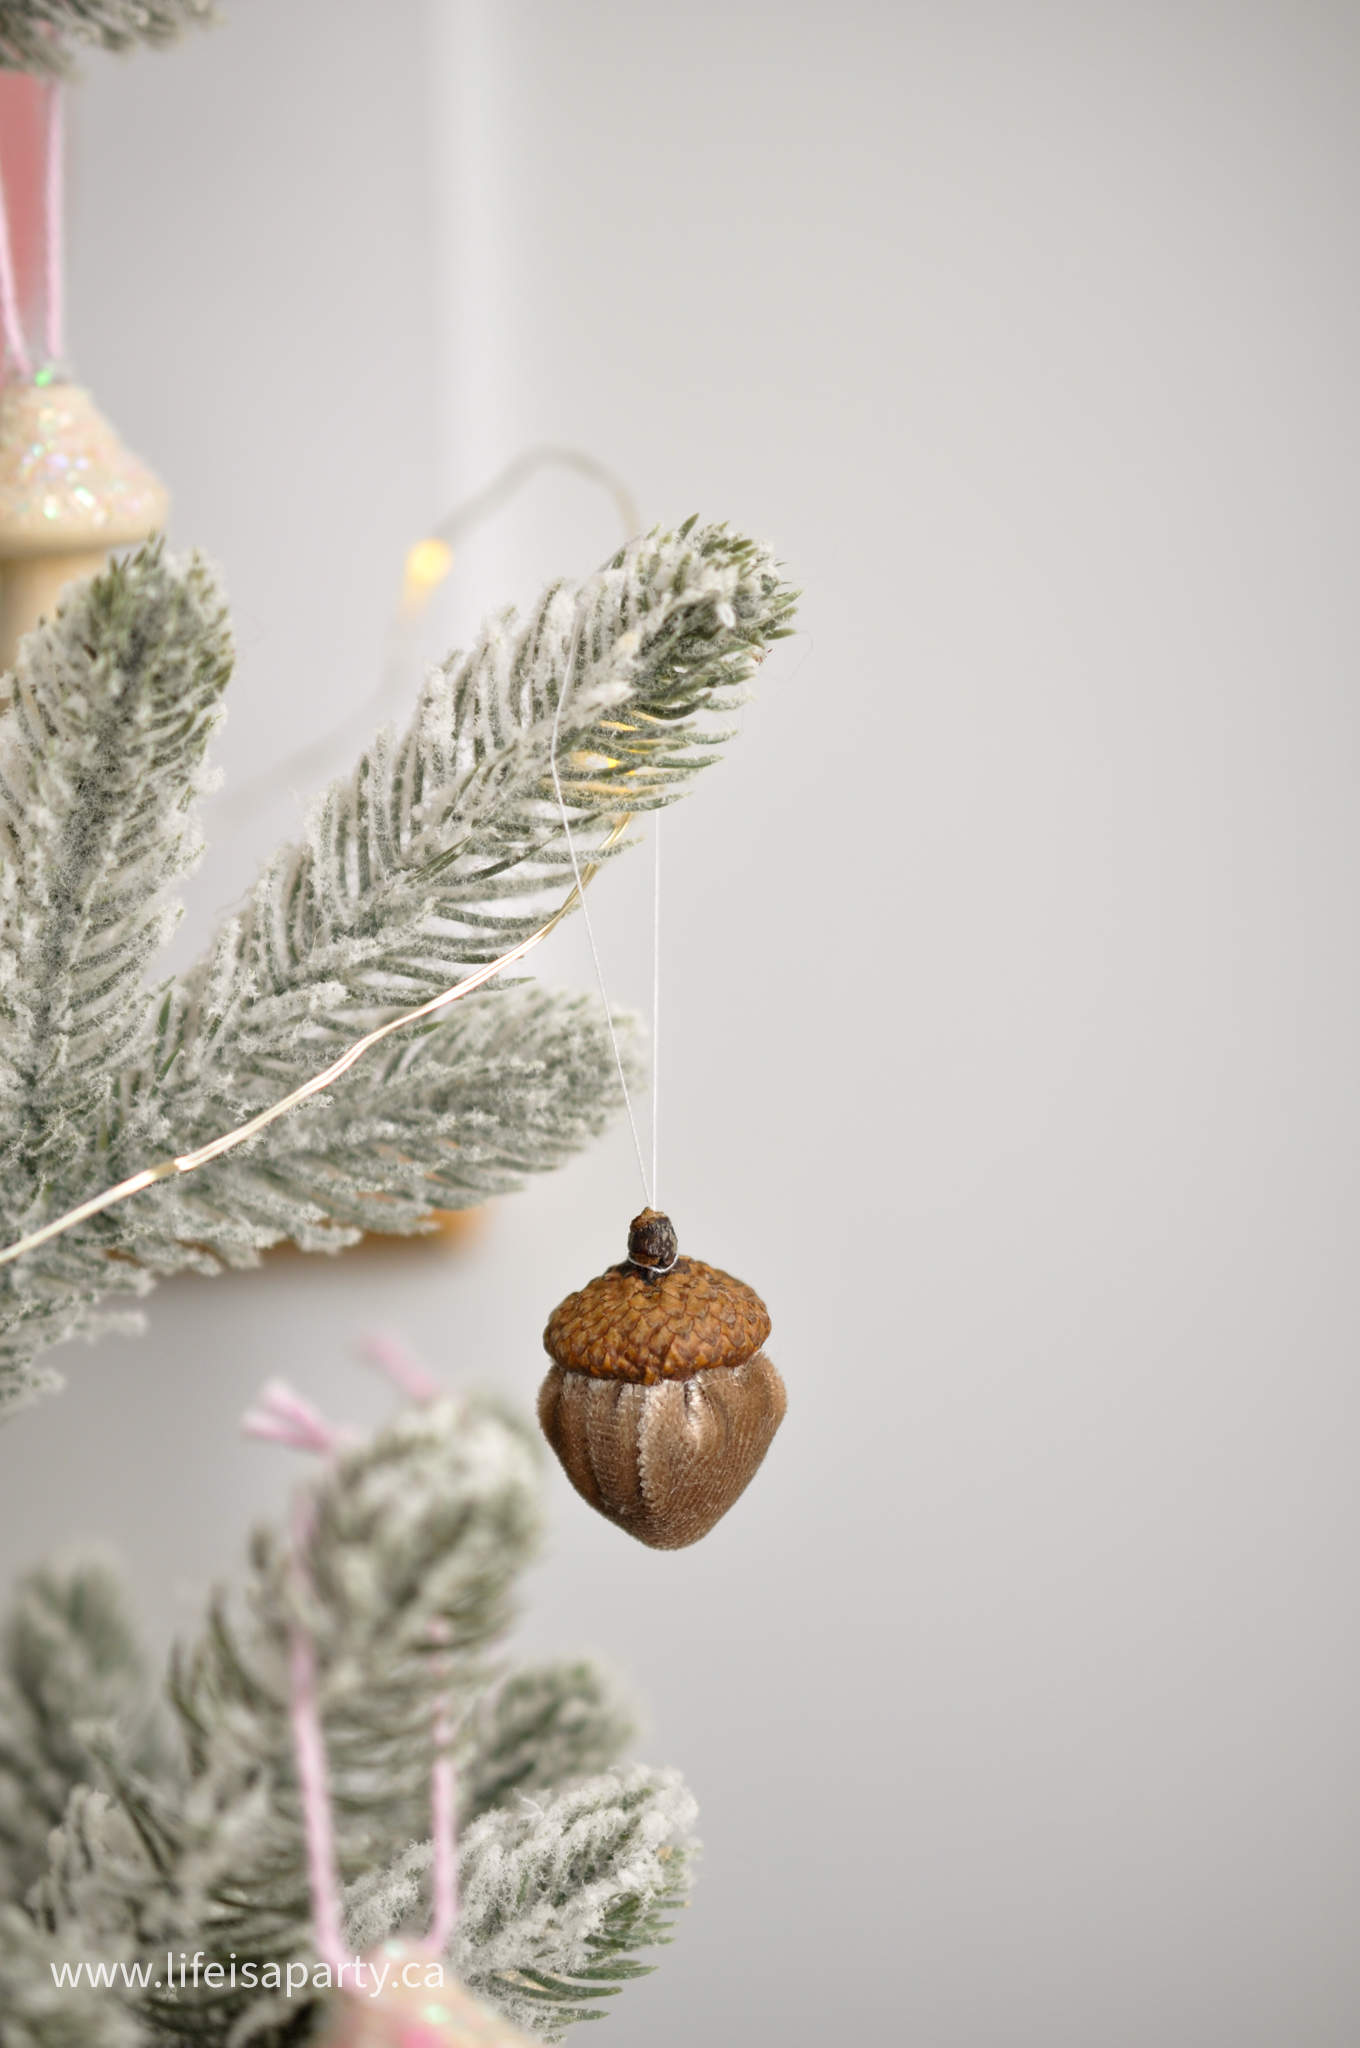
The secret to making the true acorn shape with the slight point on the end is using a wooden skewer inside to create the tip. Without the tip these faux acorns can be too round, and end up looking like little mini velvet pumpkins.
Real Acorn Caps
The caps on our acorn crafts are real acorn caps. In the autumn season look for some oak trees, and you're sure to find some acorn caps. You won't need the acorn nut for this craft, just the acorn top. If your acorns are fresh, and not dried out, you can remove the cap of the acorn, and spread the little acorn hats out on a cookie sheet and put them in a low oven for about 20 minutes or so to help make sure they are dried out.
Materials:
- acorn caps
- hot glue
- hot glue gun
- stretch velvet
- thread
- wooden skewers
- stuffing
DIY Velvet Acorns
Acorn Caps
Begin by collecting some acorn caps. Look for them below oak trees. If you want to hang the acorns like I did, be sure to choose acorns that have stems on the top that you can tie a thread to for hanging. If you are just displaying your acorns in a bowl, then you don't need to use acorns with stems. You only need the cap fo the acorn for this craft. If they're dirty, give them a wash and let them dry before using them.
Sewing The Bottom
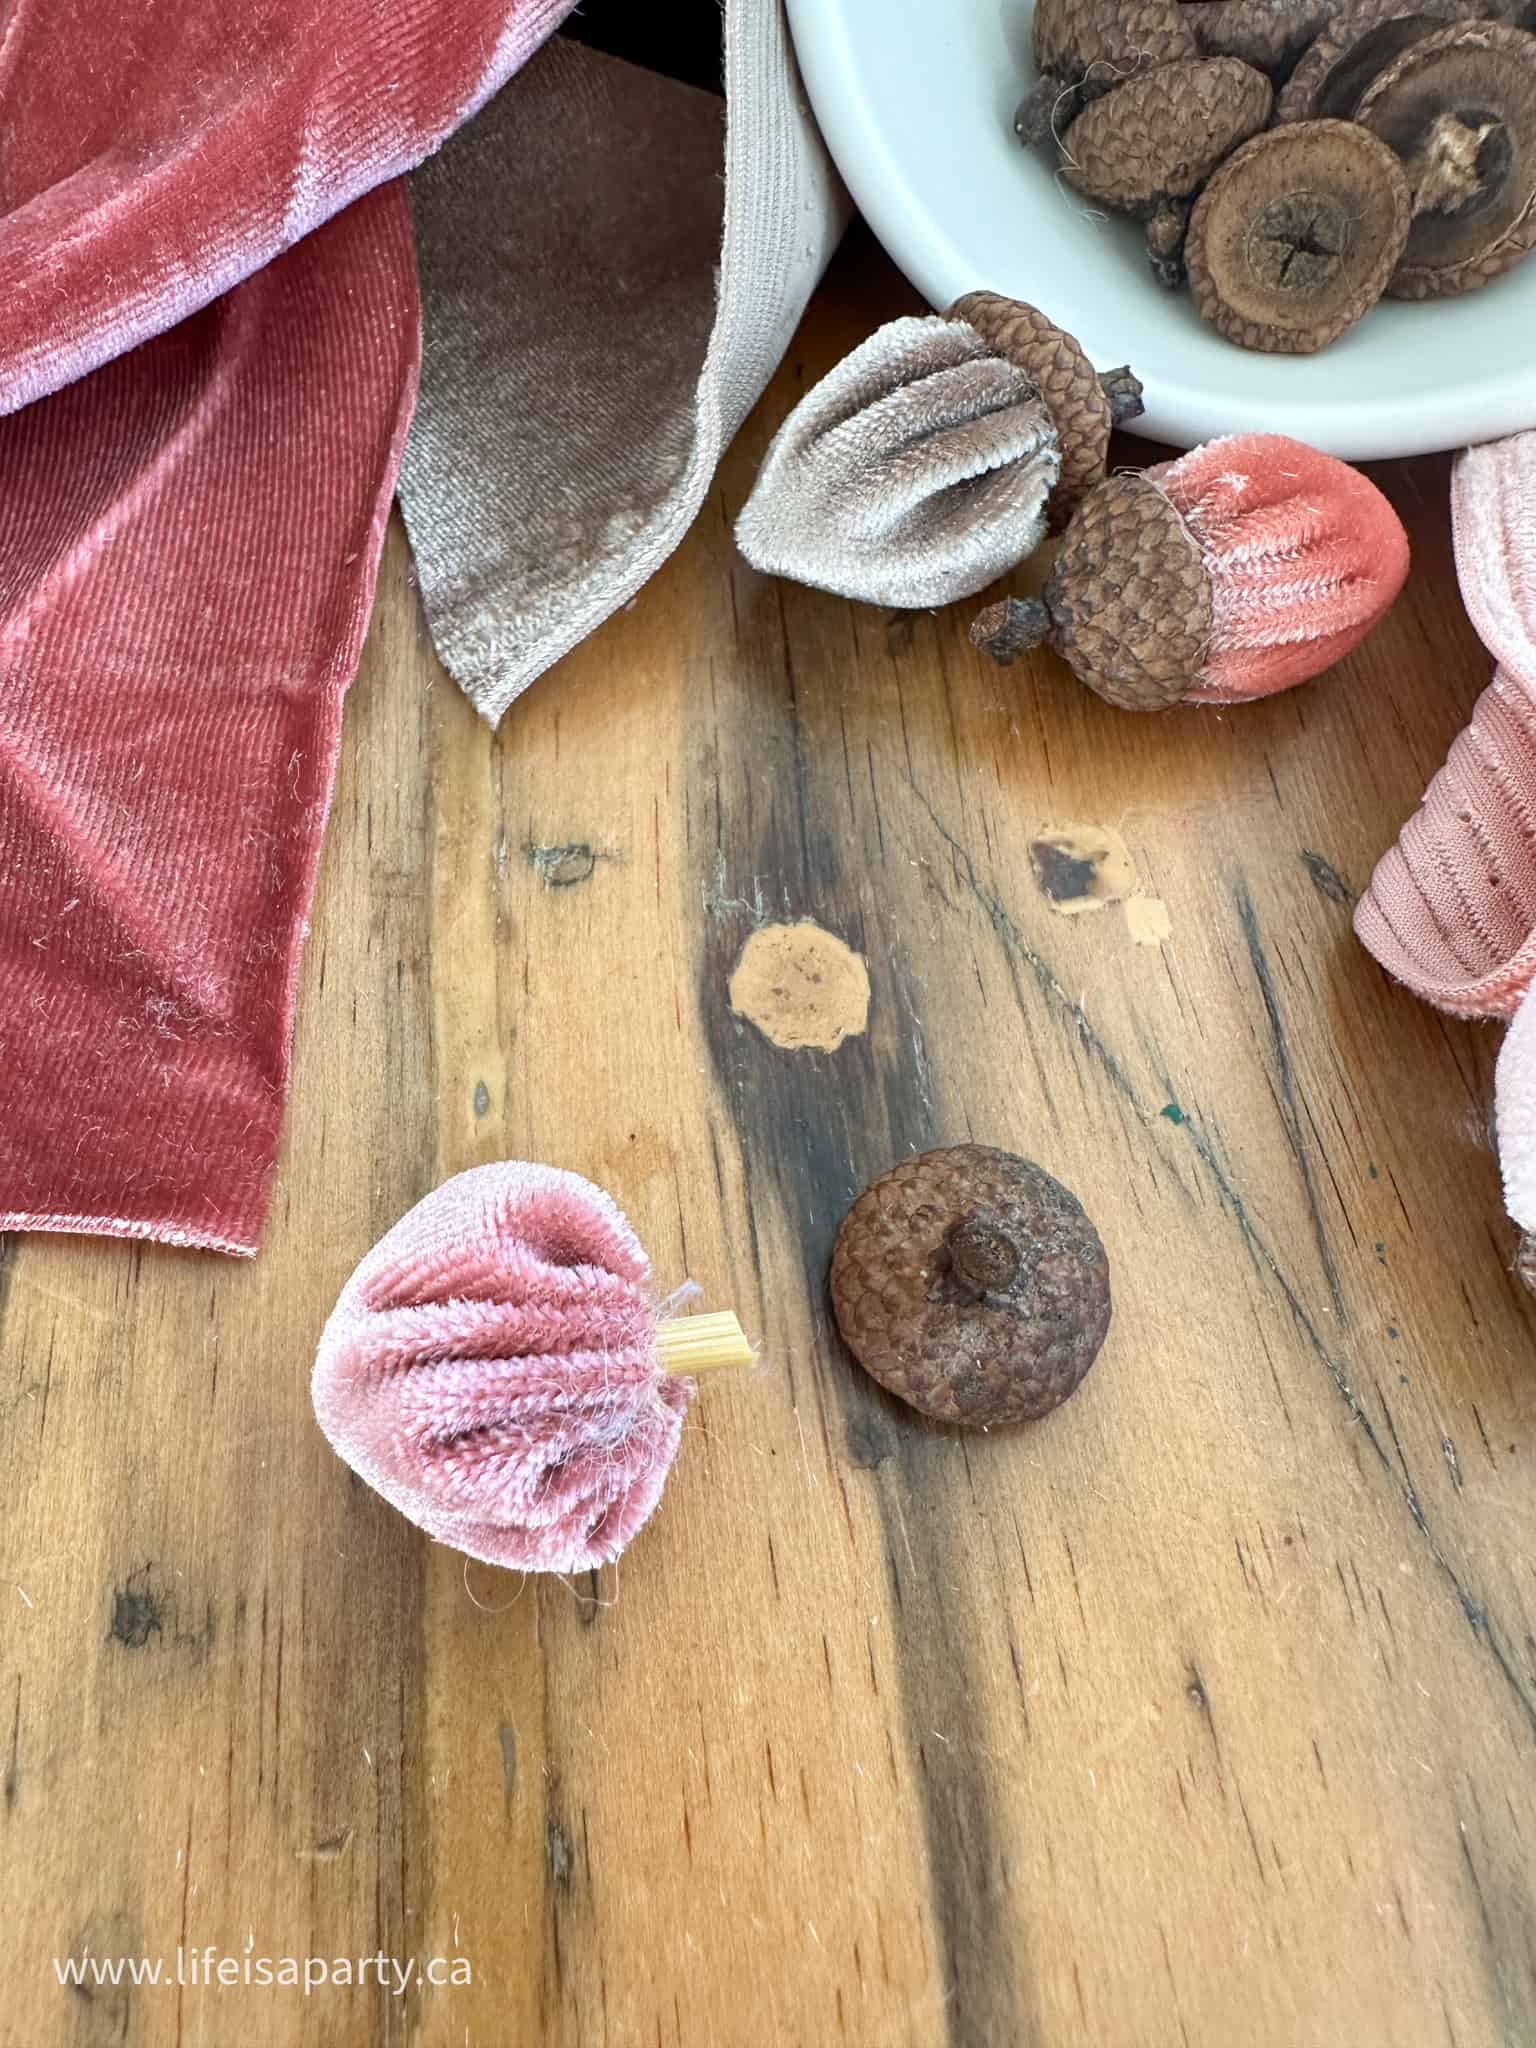
To make the bottom piece of the acorn choose some beautiful colors of stretch velvet. Cut the velvet into a small circle. For our acorn caps a 3.8 cm diameter circle was the perfect size. You may need to adjust it slightly if your acorn caps are a little larger or smaller than ours were.
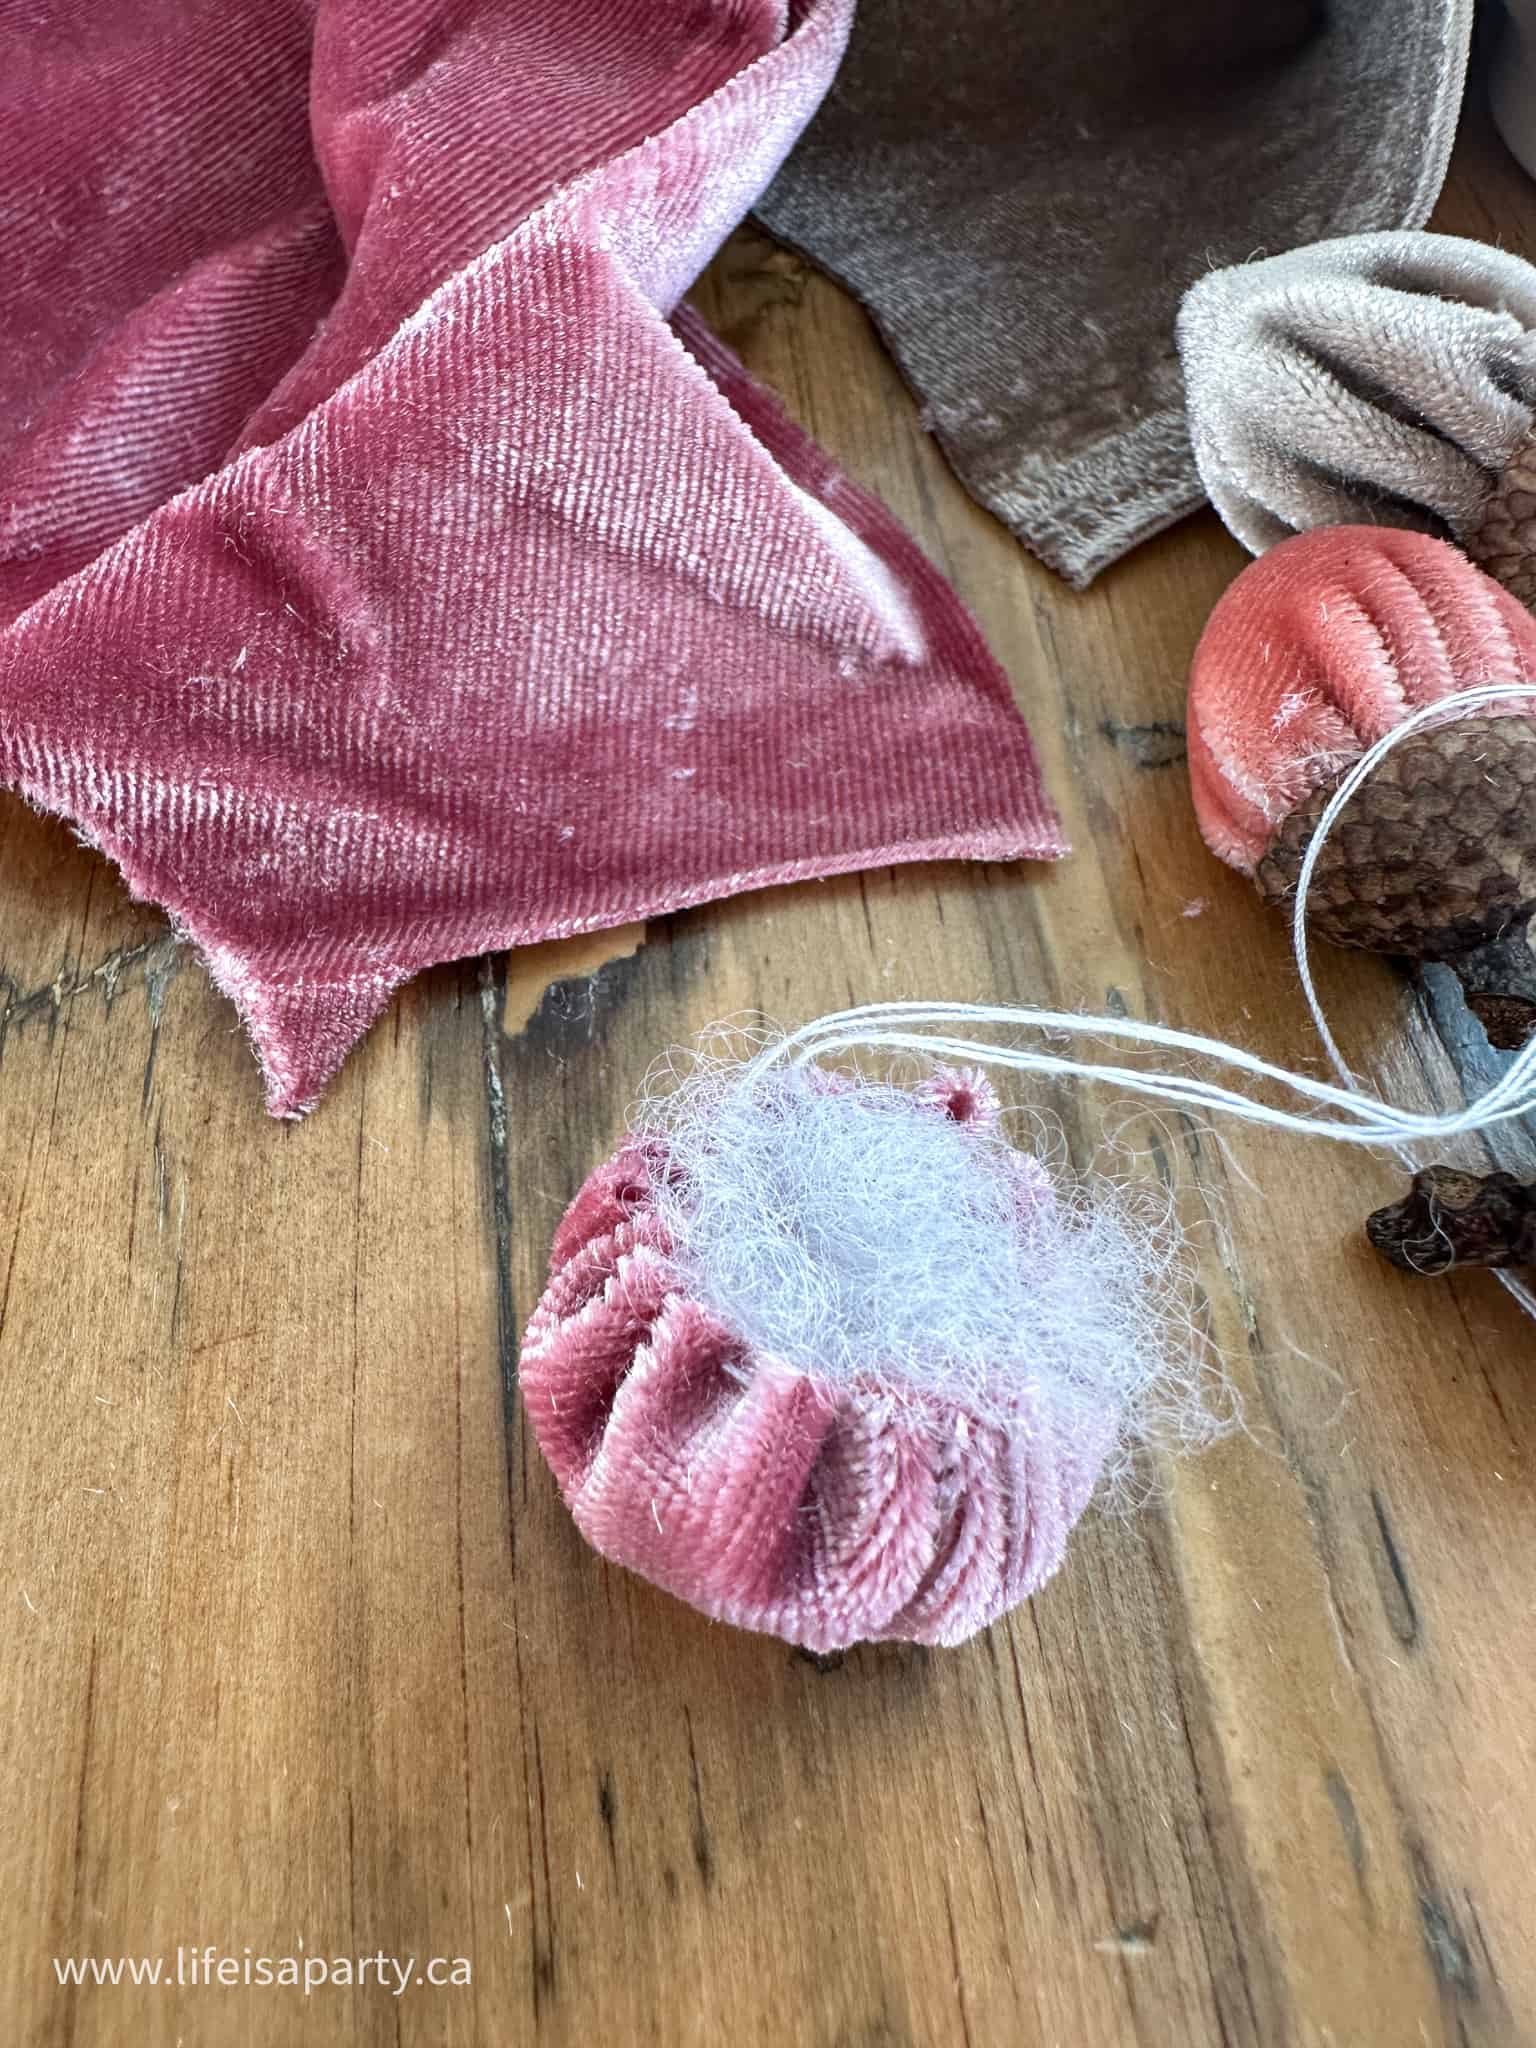
Once the circle of velvet is cut out, the next step is sewing the acorn bottom. You want to create a running stitch around the perimeter of the circle, quite close to the edge. Leave a long end of the thread at each end, so that it's easy to pull it together, and gather the velvet together from the bottom of the acorn.
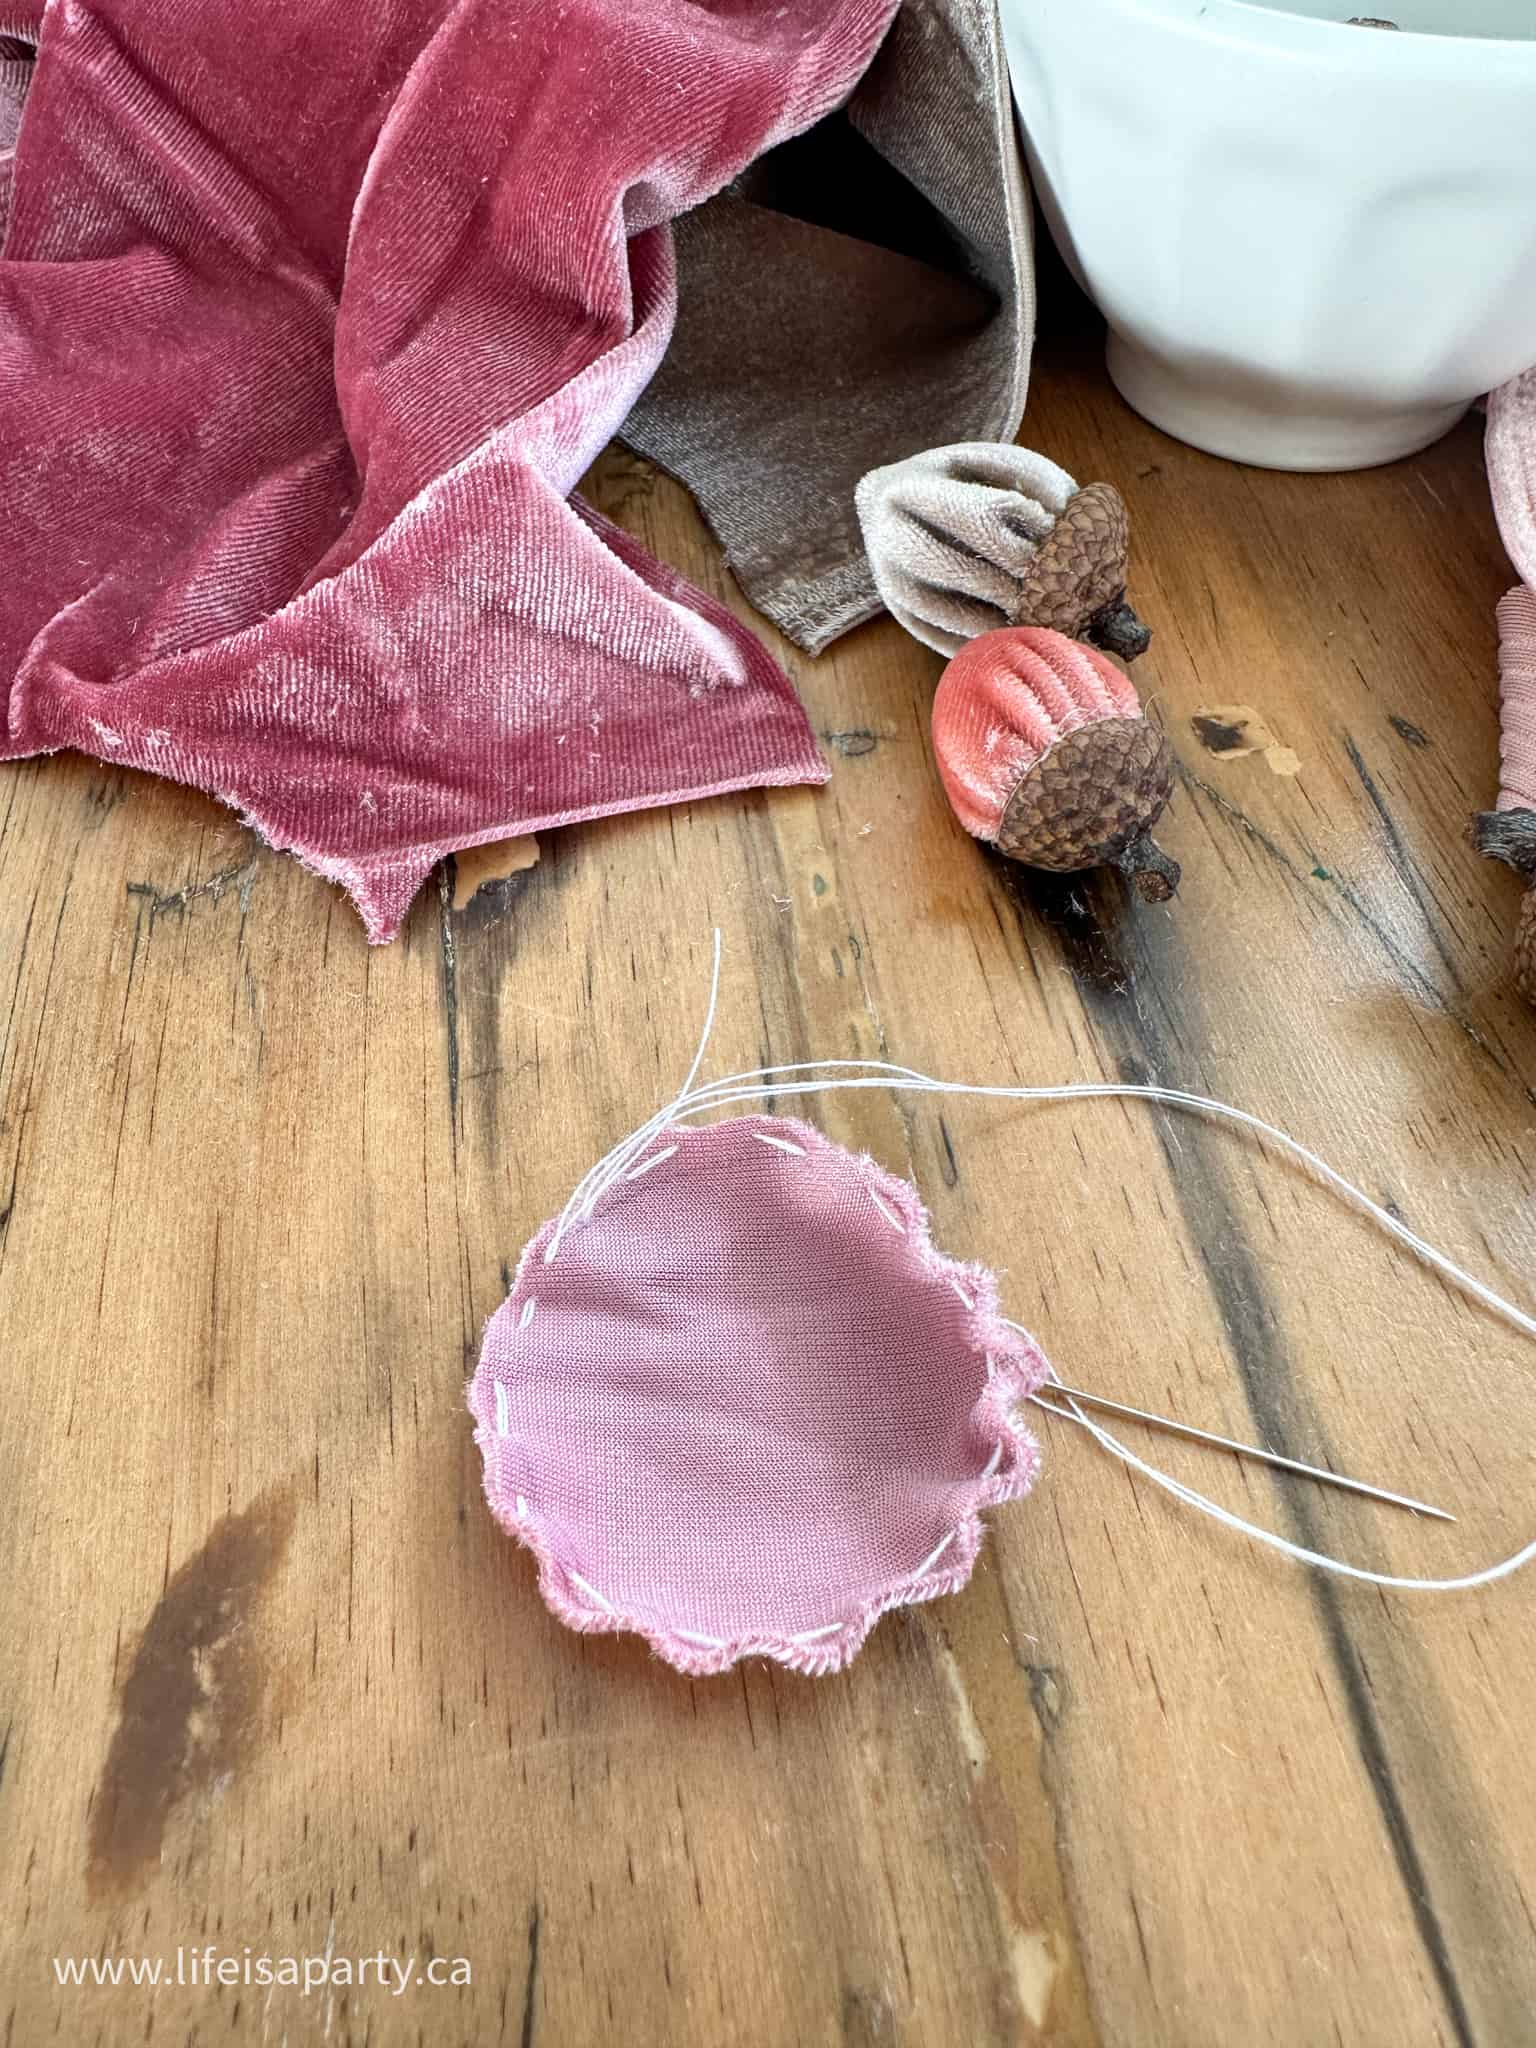
Gather the bottom velvet piece together in stages, beginning by only gathering it slightly, and then stuffing it with a small amount of stuffing or even cotton balls. You don't want to over stuff it.
Creating The Pointy End
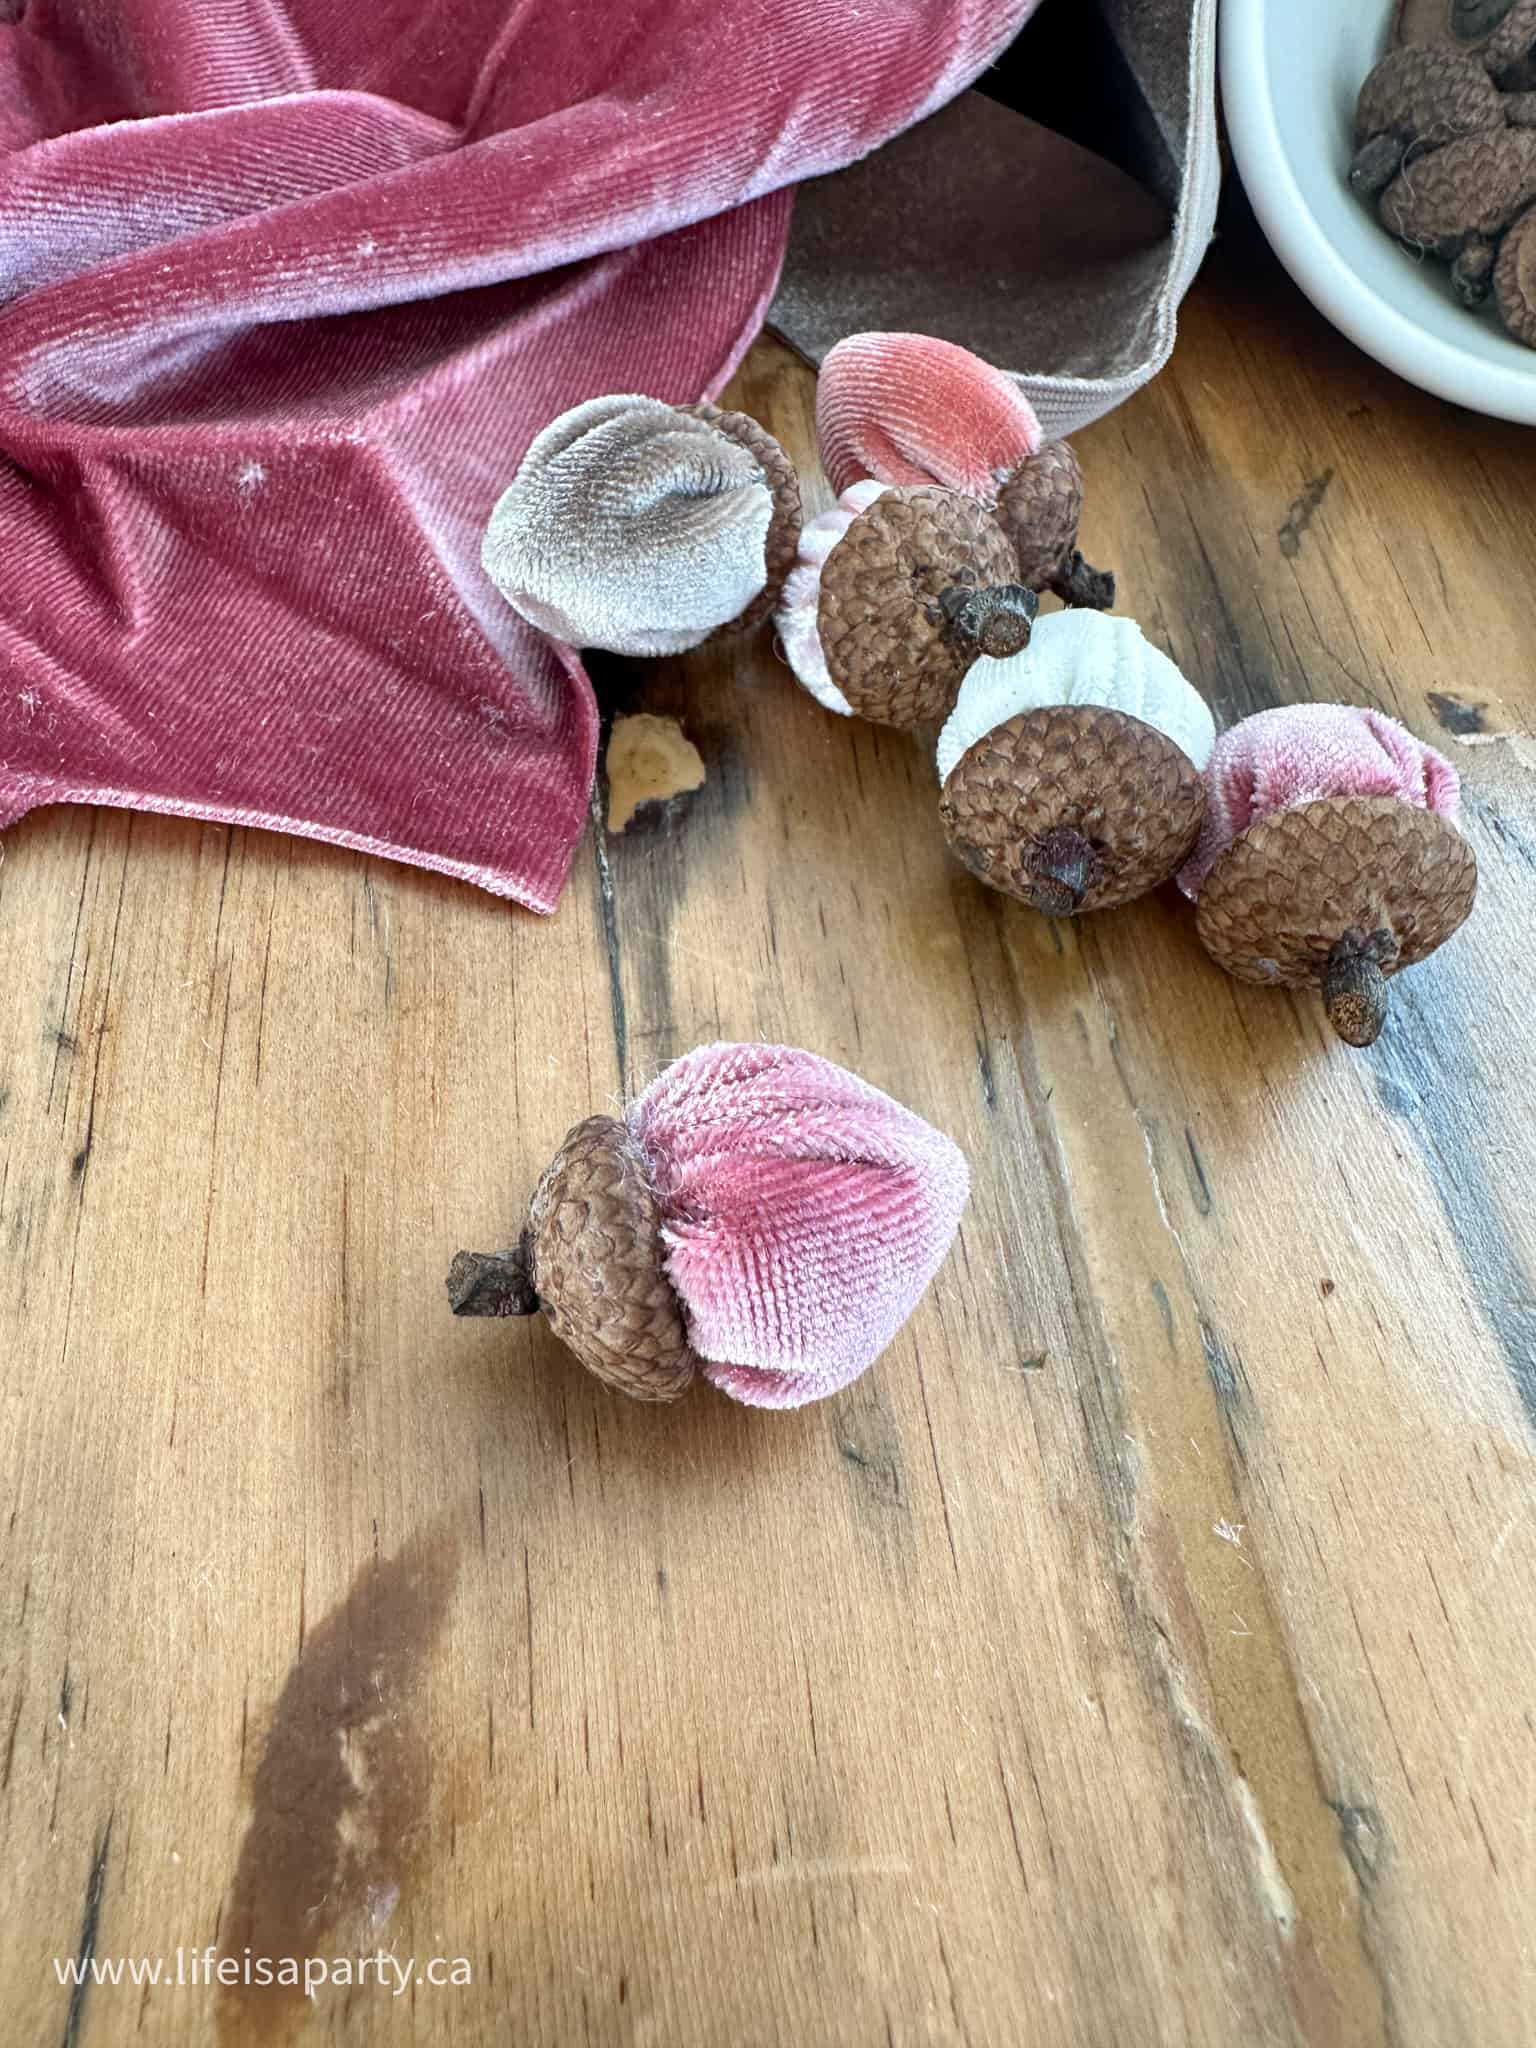
Next, you will push a wooden skewer through the stuffing and all the way to the bottom of the fabric. Then you will carefully fully gather the acorn, pulling the threads all the way, until tight, and tying them off, leavin the end of the wooden skewer sticking out of the end.
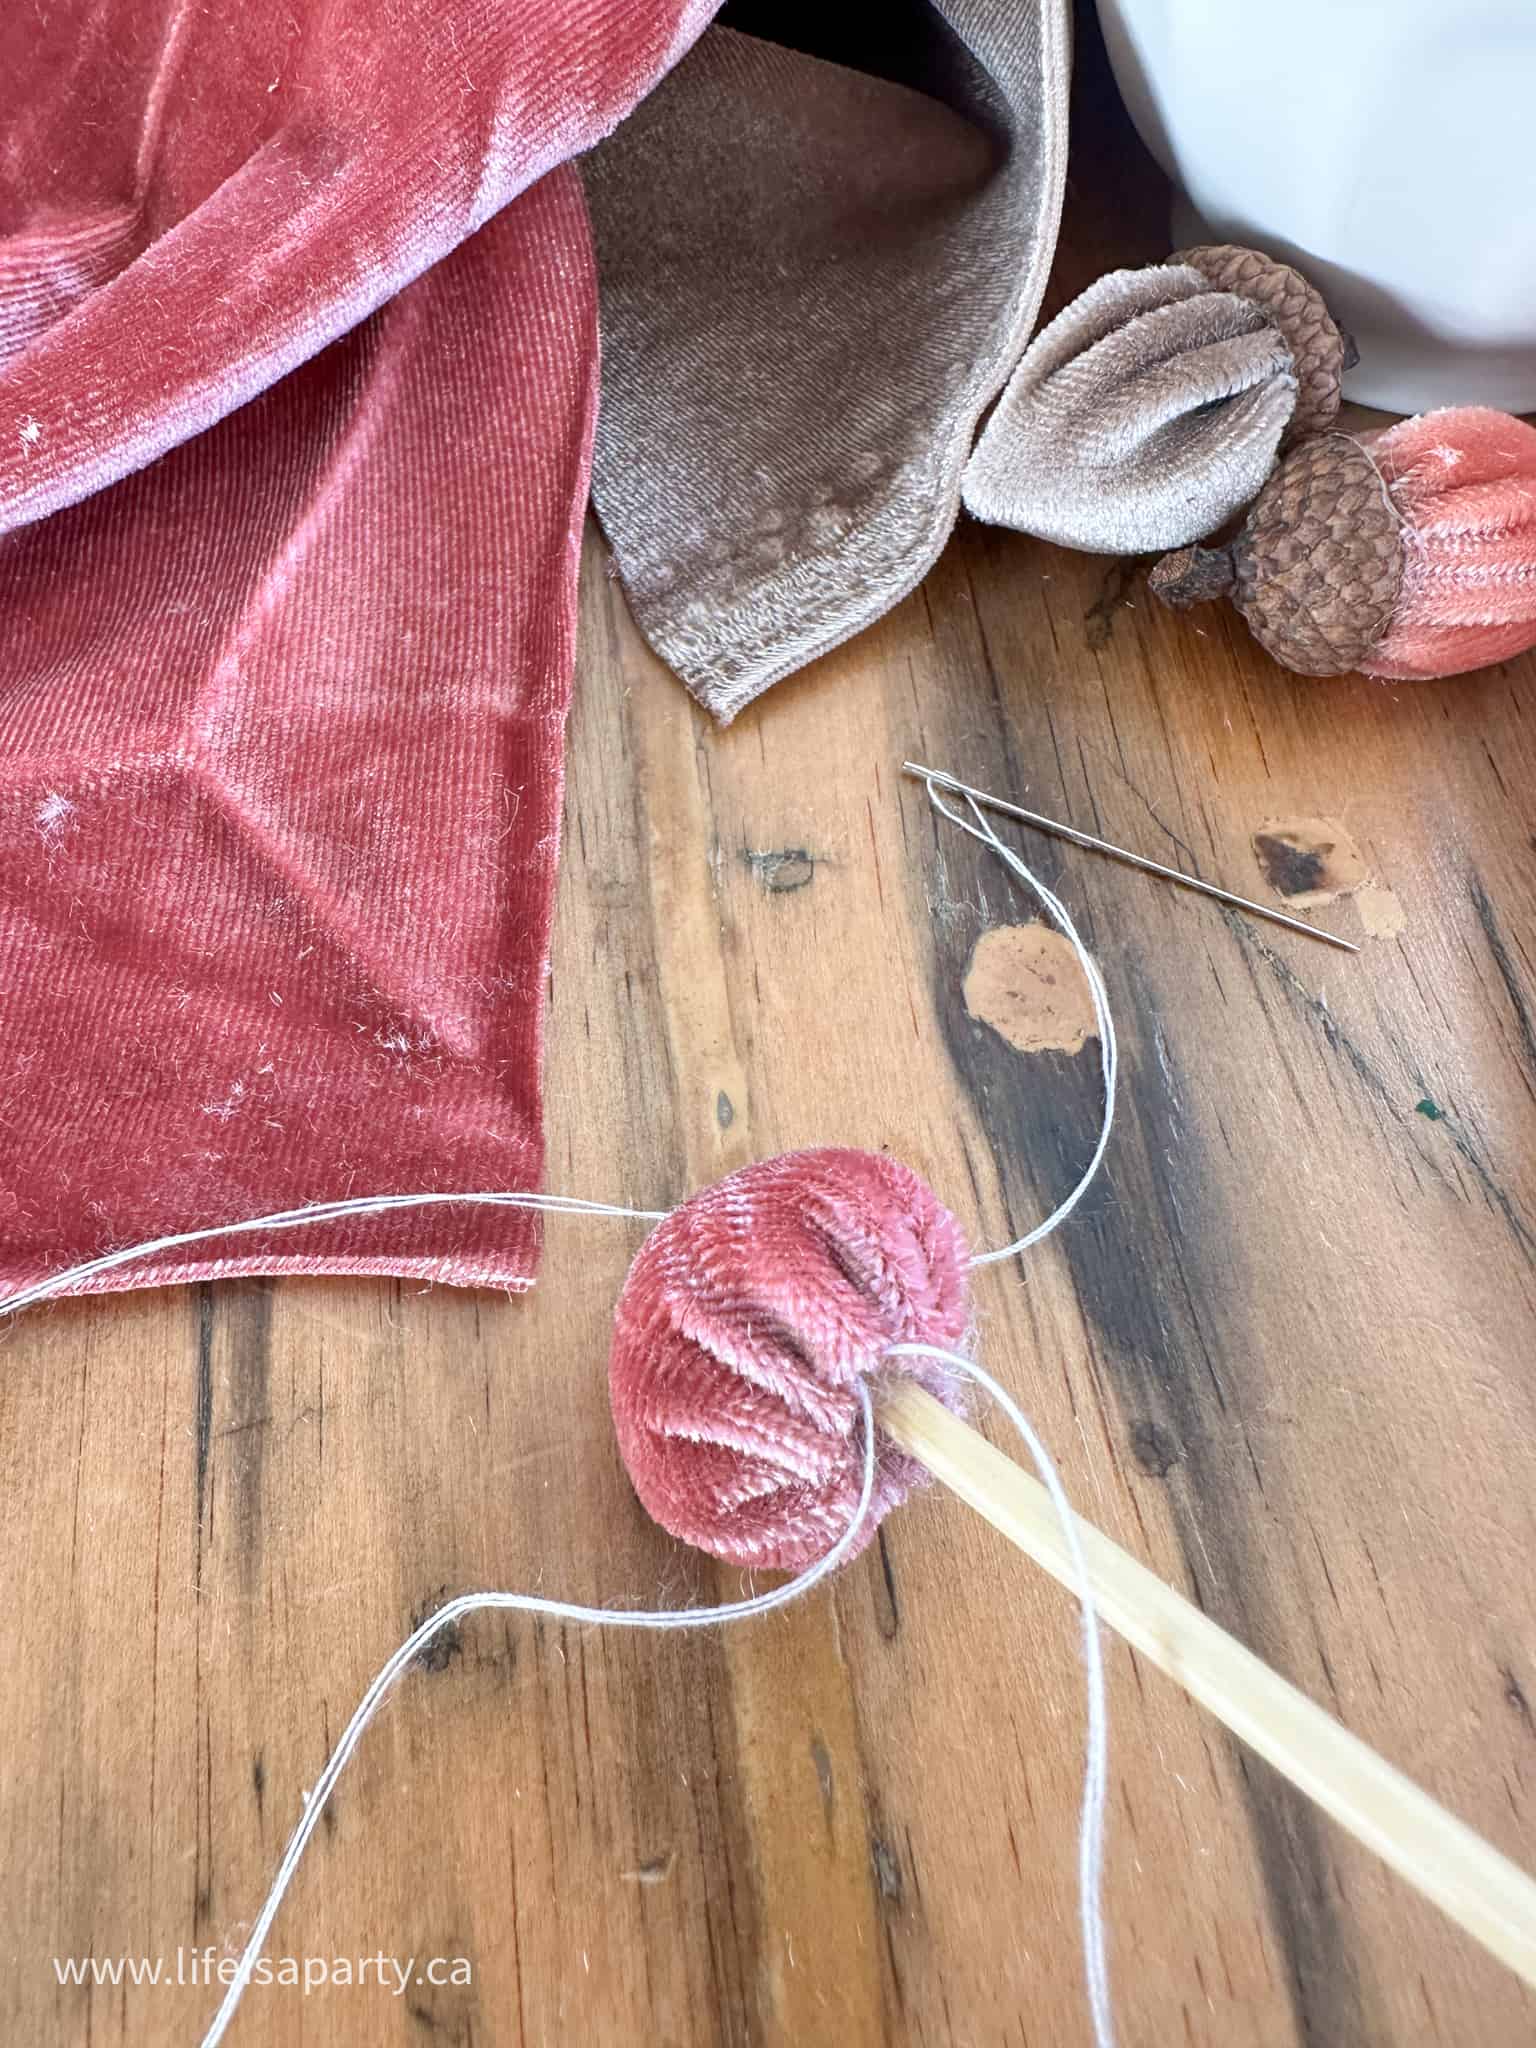
Next you will cut off the wooden skewer with some garden clippers, leaving some sticking out of the top. You will need to adjust the length according to your acorn cap. The acorn cap should press against the end of the skewer and maintain the point shape. You don't want the skewer too long, or it would be visible. Leave it just long enough to fit within the acorn cap, but also stick out enough to create the point of the acorn shape as the skewer is pressing against the inside of the acorn cap.
Attaching The Cap To The Bottom
To attach the acorn cap to the velvet, use your glue gun to apply a bit of glue to the inside of the acorn cap. You want to press the bottom on to the cap, making sure the raw edge of the velvet is contained within the cap, and hold it firmly while the small amount of glue sets. You don't want to use too much glue, as you don't want a little glue to show beyond the acorn cap. Hot glue works better than craft glue for this step because you need the glue to set quickly and hold strongly even with the pressure of the wooden skewer pushing against it on the inside.
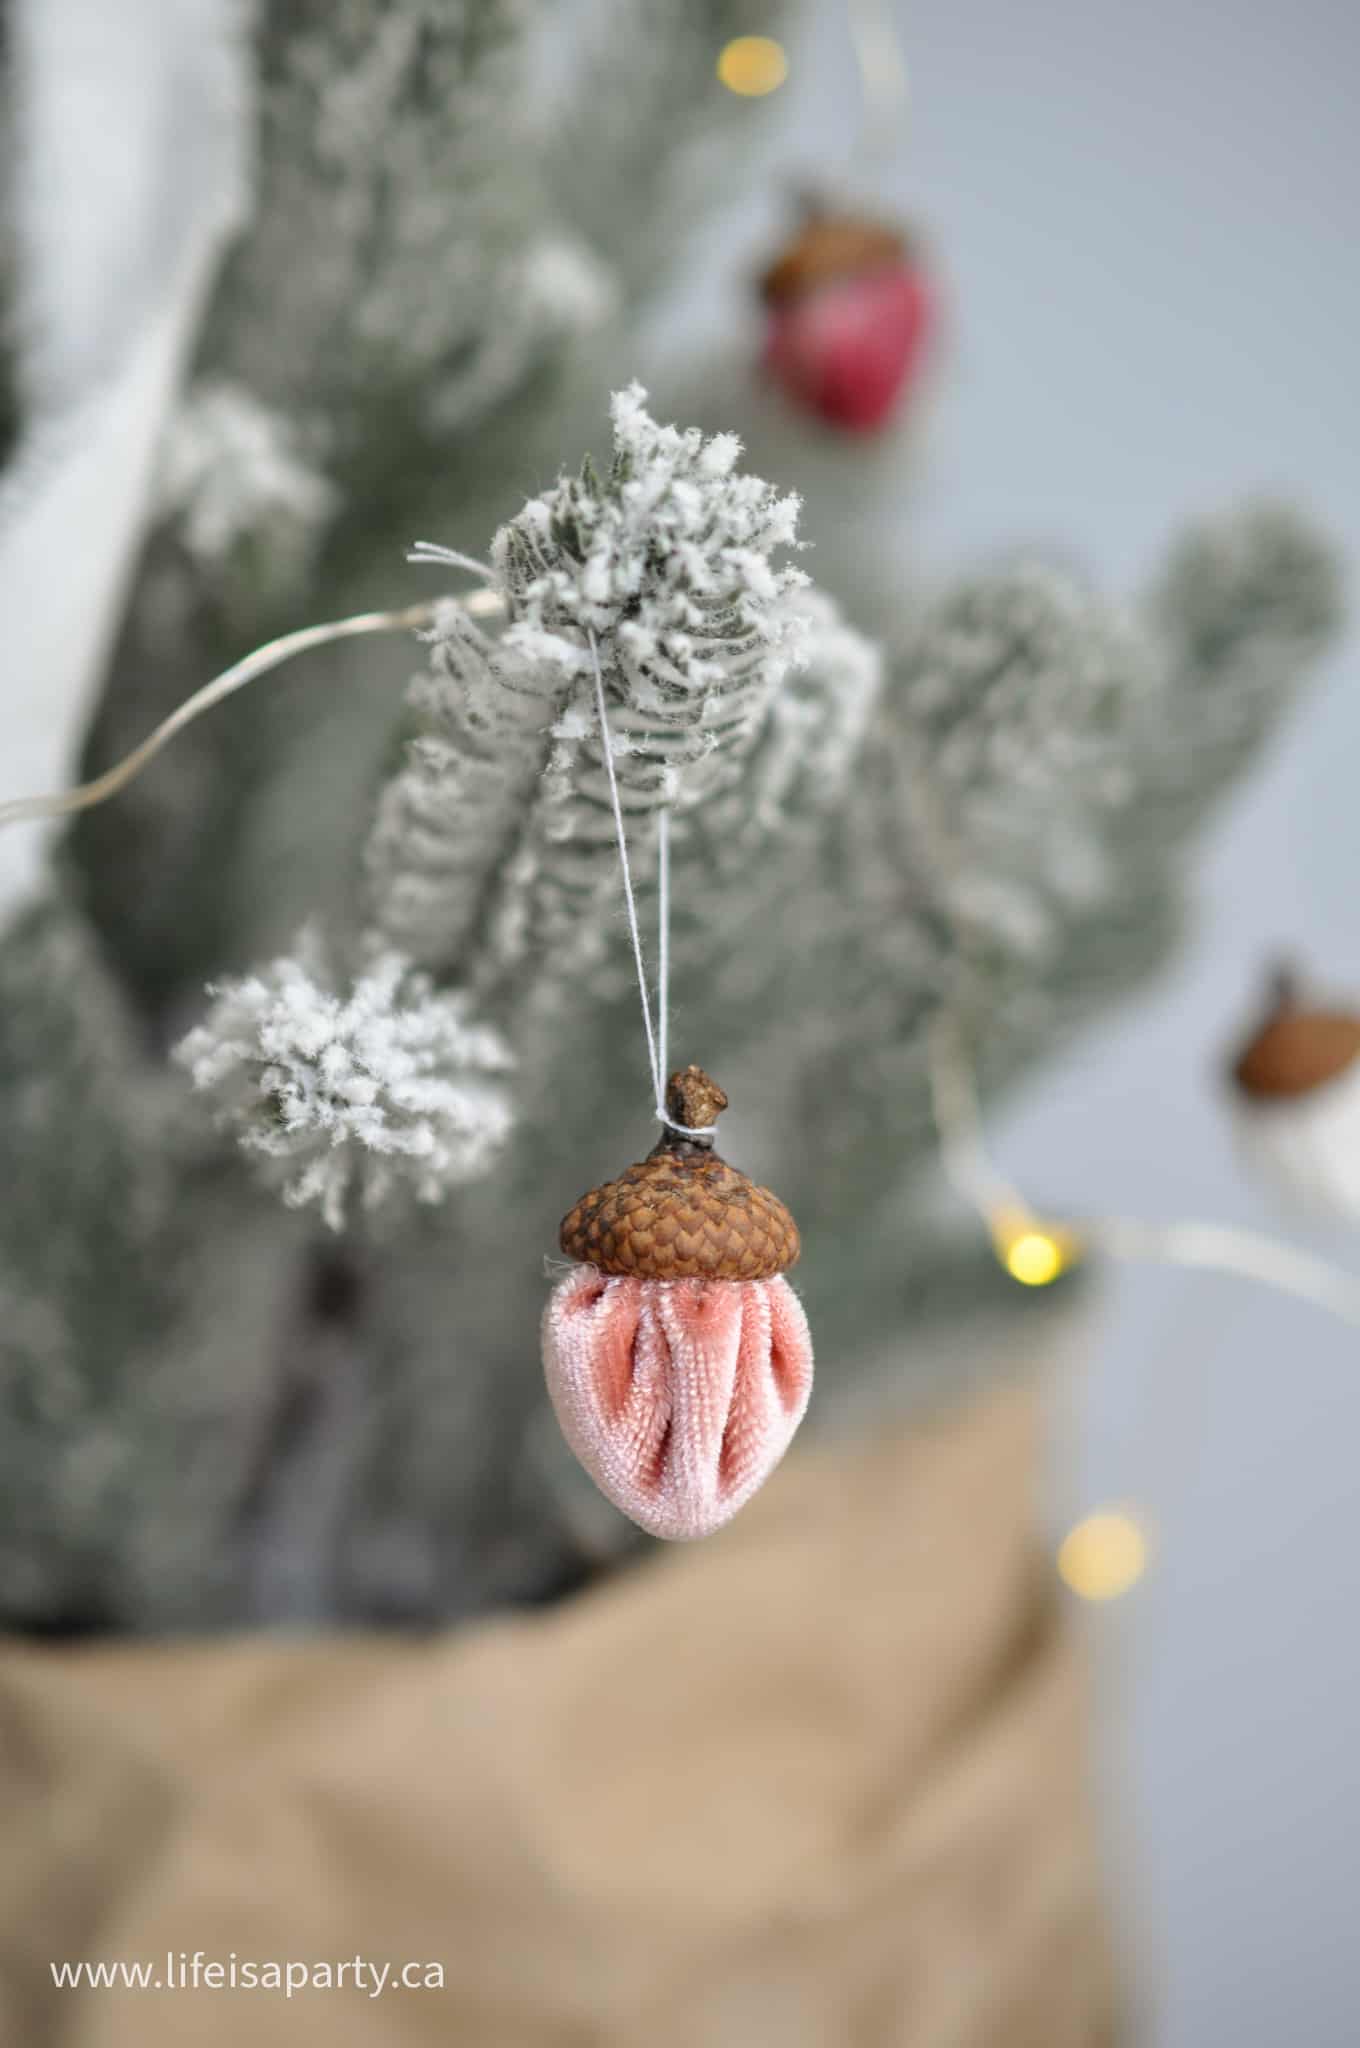
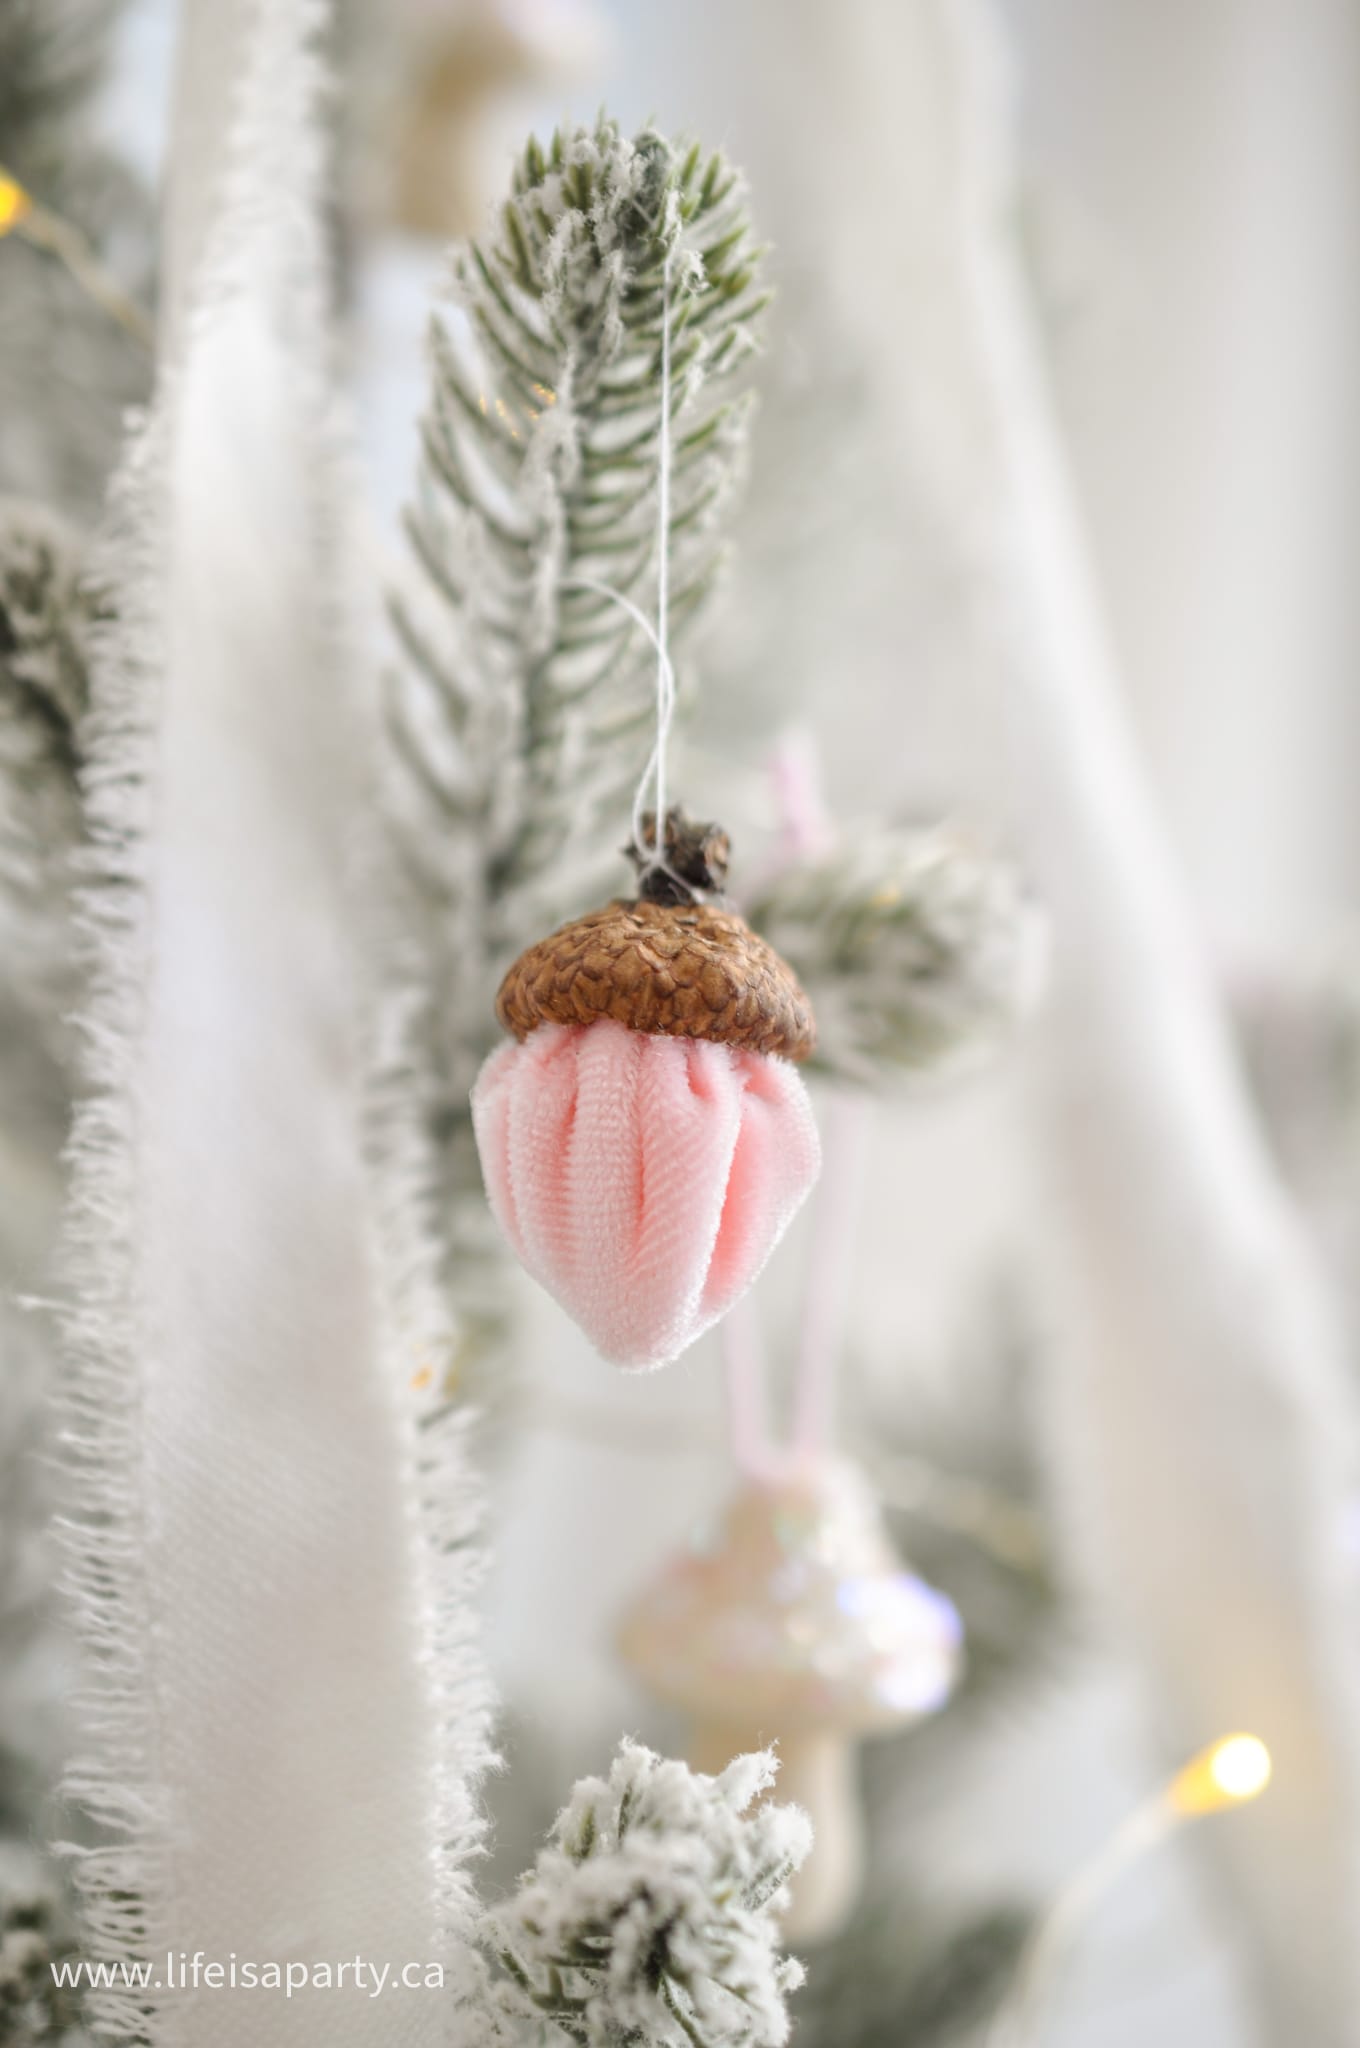
Hanging The Acorns
Once the glue is set the acorn is finished. If you want to create acorn ornaments like I did, tie a thread onto the stem of the acorn to hang it from. You can then tie those threads to some ribbon or baker's twine to create a garland, or leave them plain and display them in a small bowl. The possibilities are endless for how to display these little fall treasures.
Equipment
- Glue Gun
- Needle
- scissors
Materials
- Acorn Caps
- Hot Glue
- Stretch Velvet
- Thread
- Wooden Skewers
- Stuffing
Instructions
- Begin by collecting some acorn caps. You only need the cap fo the acorn for this craft. If they're dirty, give them a wash and let them dry before using them.
- To make the bottom piece of the acorn choose some beautiful colors of stretch velvet. Cut the velvet into a small circle. For our acorn caps a oooo inch diameter circle was the perfect shape. You made need to adjust it slightly if your acorn caps are slightly larger or smaller than ours were.
- Once the circle of velvet is cut out, the next step is sewing the acorn bottom. You want to create a running stitch around the perimeter of the circle, quite close to the edge. Leave a long end of the thread at each end, so that it's easy to pull it together, and gather the velvet together to from the bottom of the acorn.
- Gather the bottom velvet piece together in stages, beginning by only gathering it slightly, and then stuffing it with a small amount of stuffing or even cotton balls. You don't want to over stuff it.
- Next, you will push a wooden skewer through the stuffing and all the way to the bottom of the fabric. Then you will carefully fully gather the acorn, pulling the threads all the way, until tight, and tying them off, leavin the end of the wooden skewer sticking out of the end.
- Next you will cut off the wooden skewer with some garden clippers, leaving some sticking out of the top. You will need to adjust the length according to your acorn cap. The acorn cap should press against the end of the skewer and maintain the point shape. You don't want the skewer too long, or it would be visible. Leave it just long enough to fit within the acorn cap, but also stick out enough to create the point of the acorn shape as the skewer is pressing against the inside of the acorn cap.
- To attach the acorn cap to the velvet, use your glue gun to apply a bit of glue to the inside of the acorn cap. You want to press the bottom on to the cap, making sure the raw edge of the velvet is contained within the cap, and hold it firmly while the small amount of glue sets.
- Once the glue is set the acorn is finished.
Video
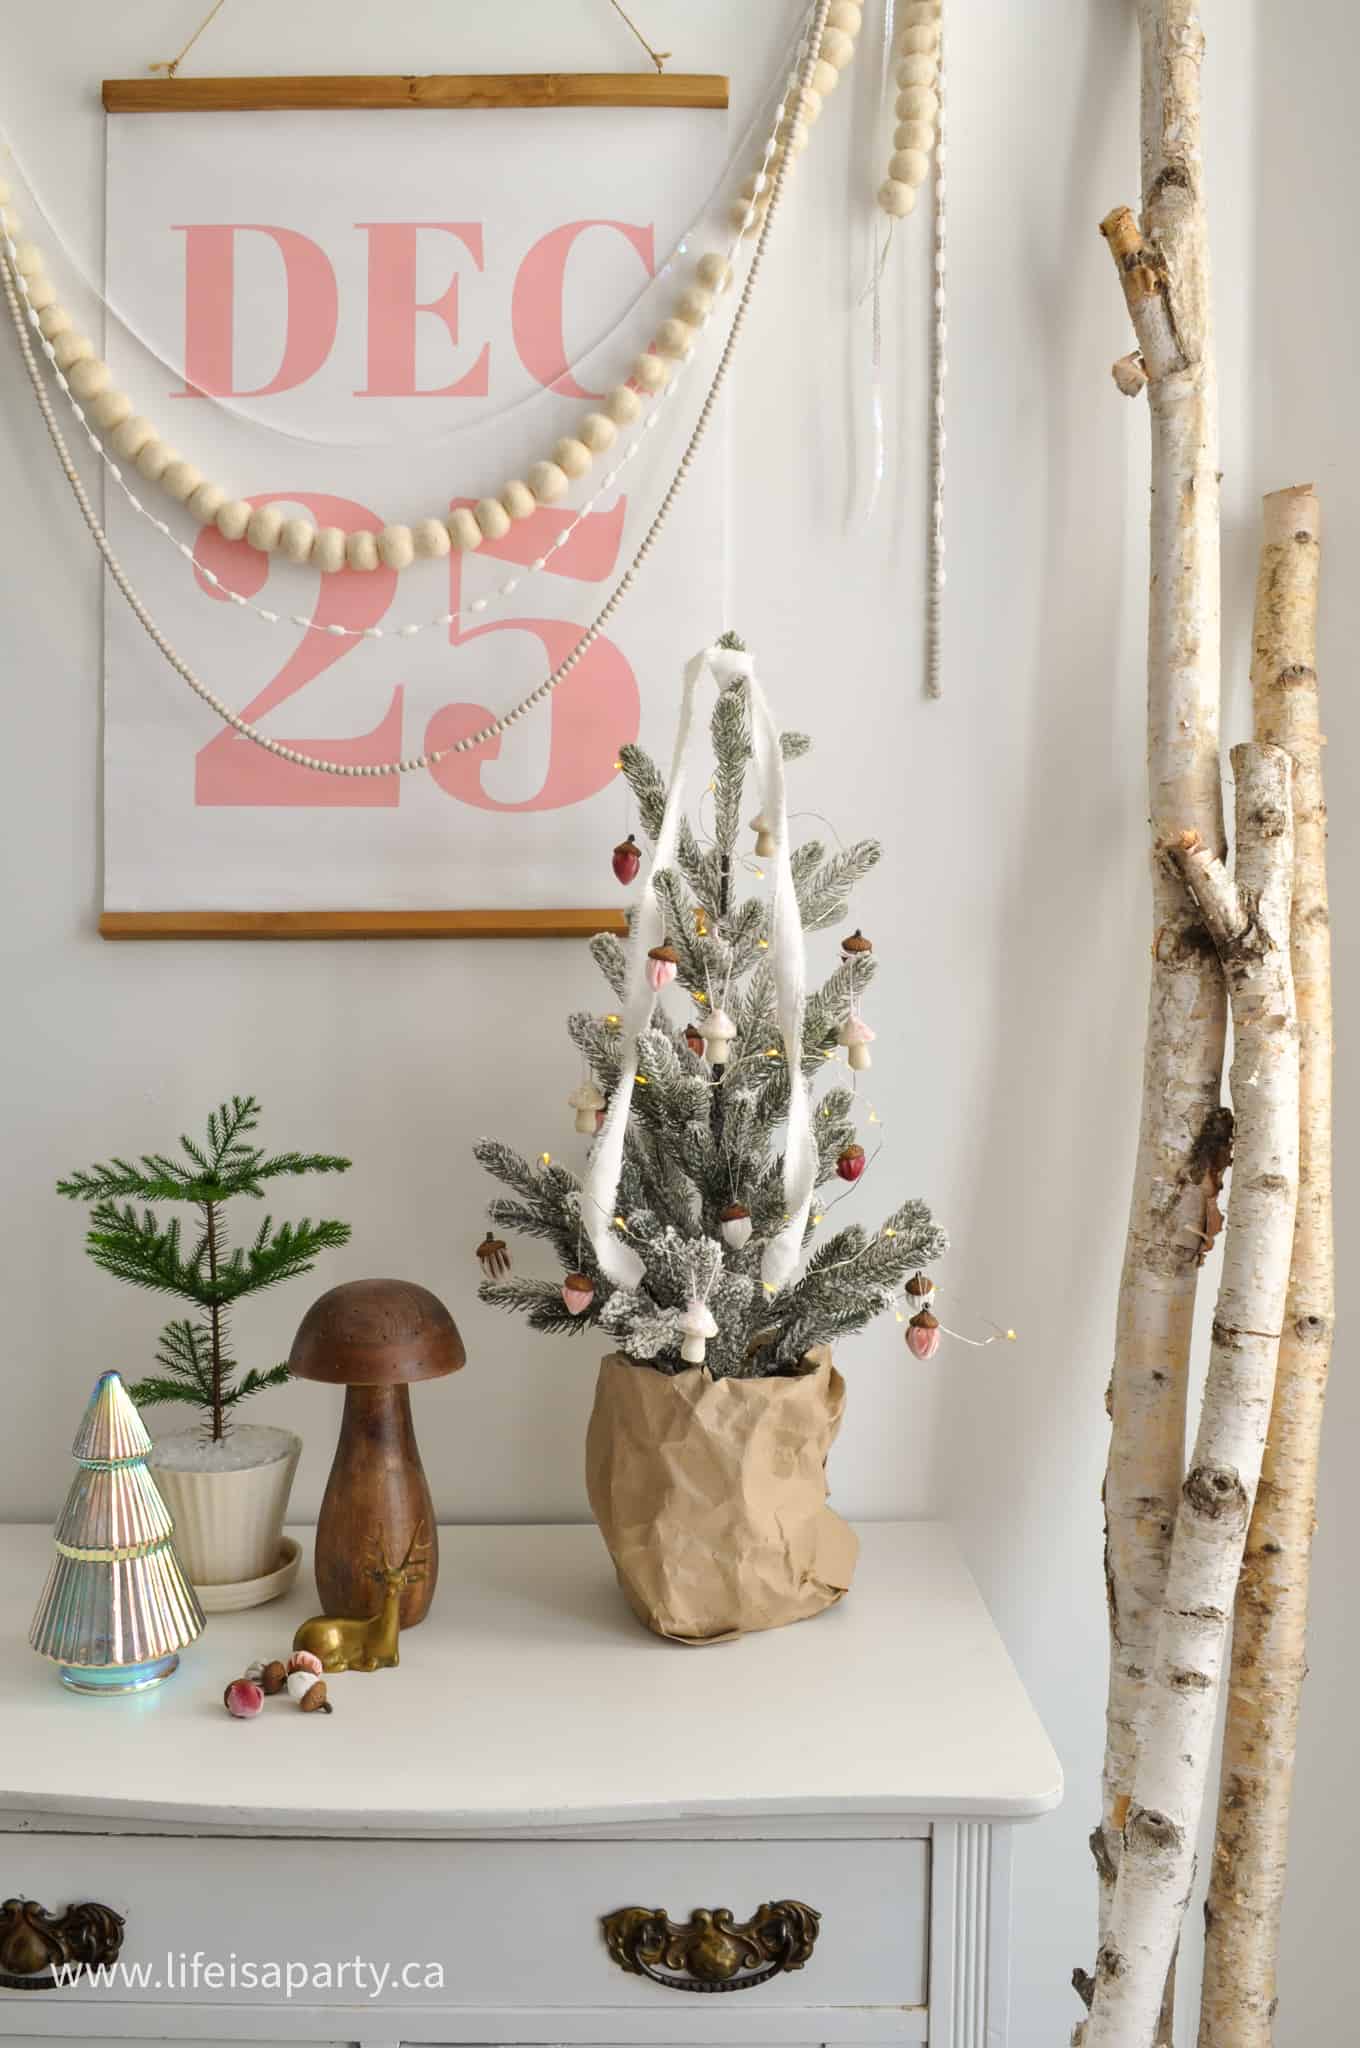
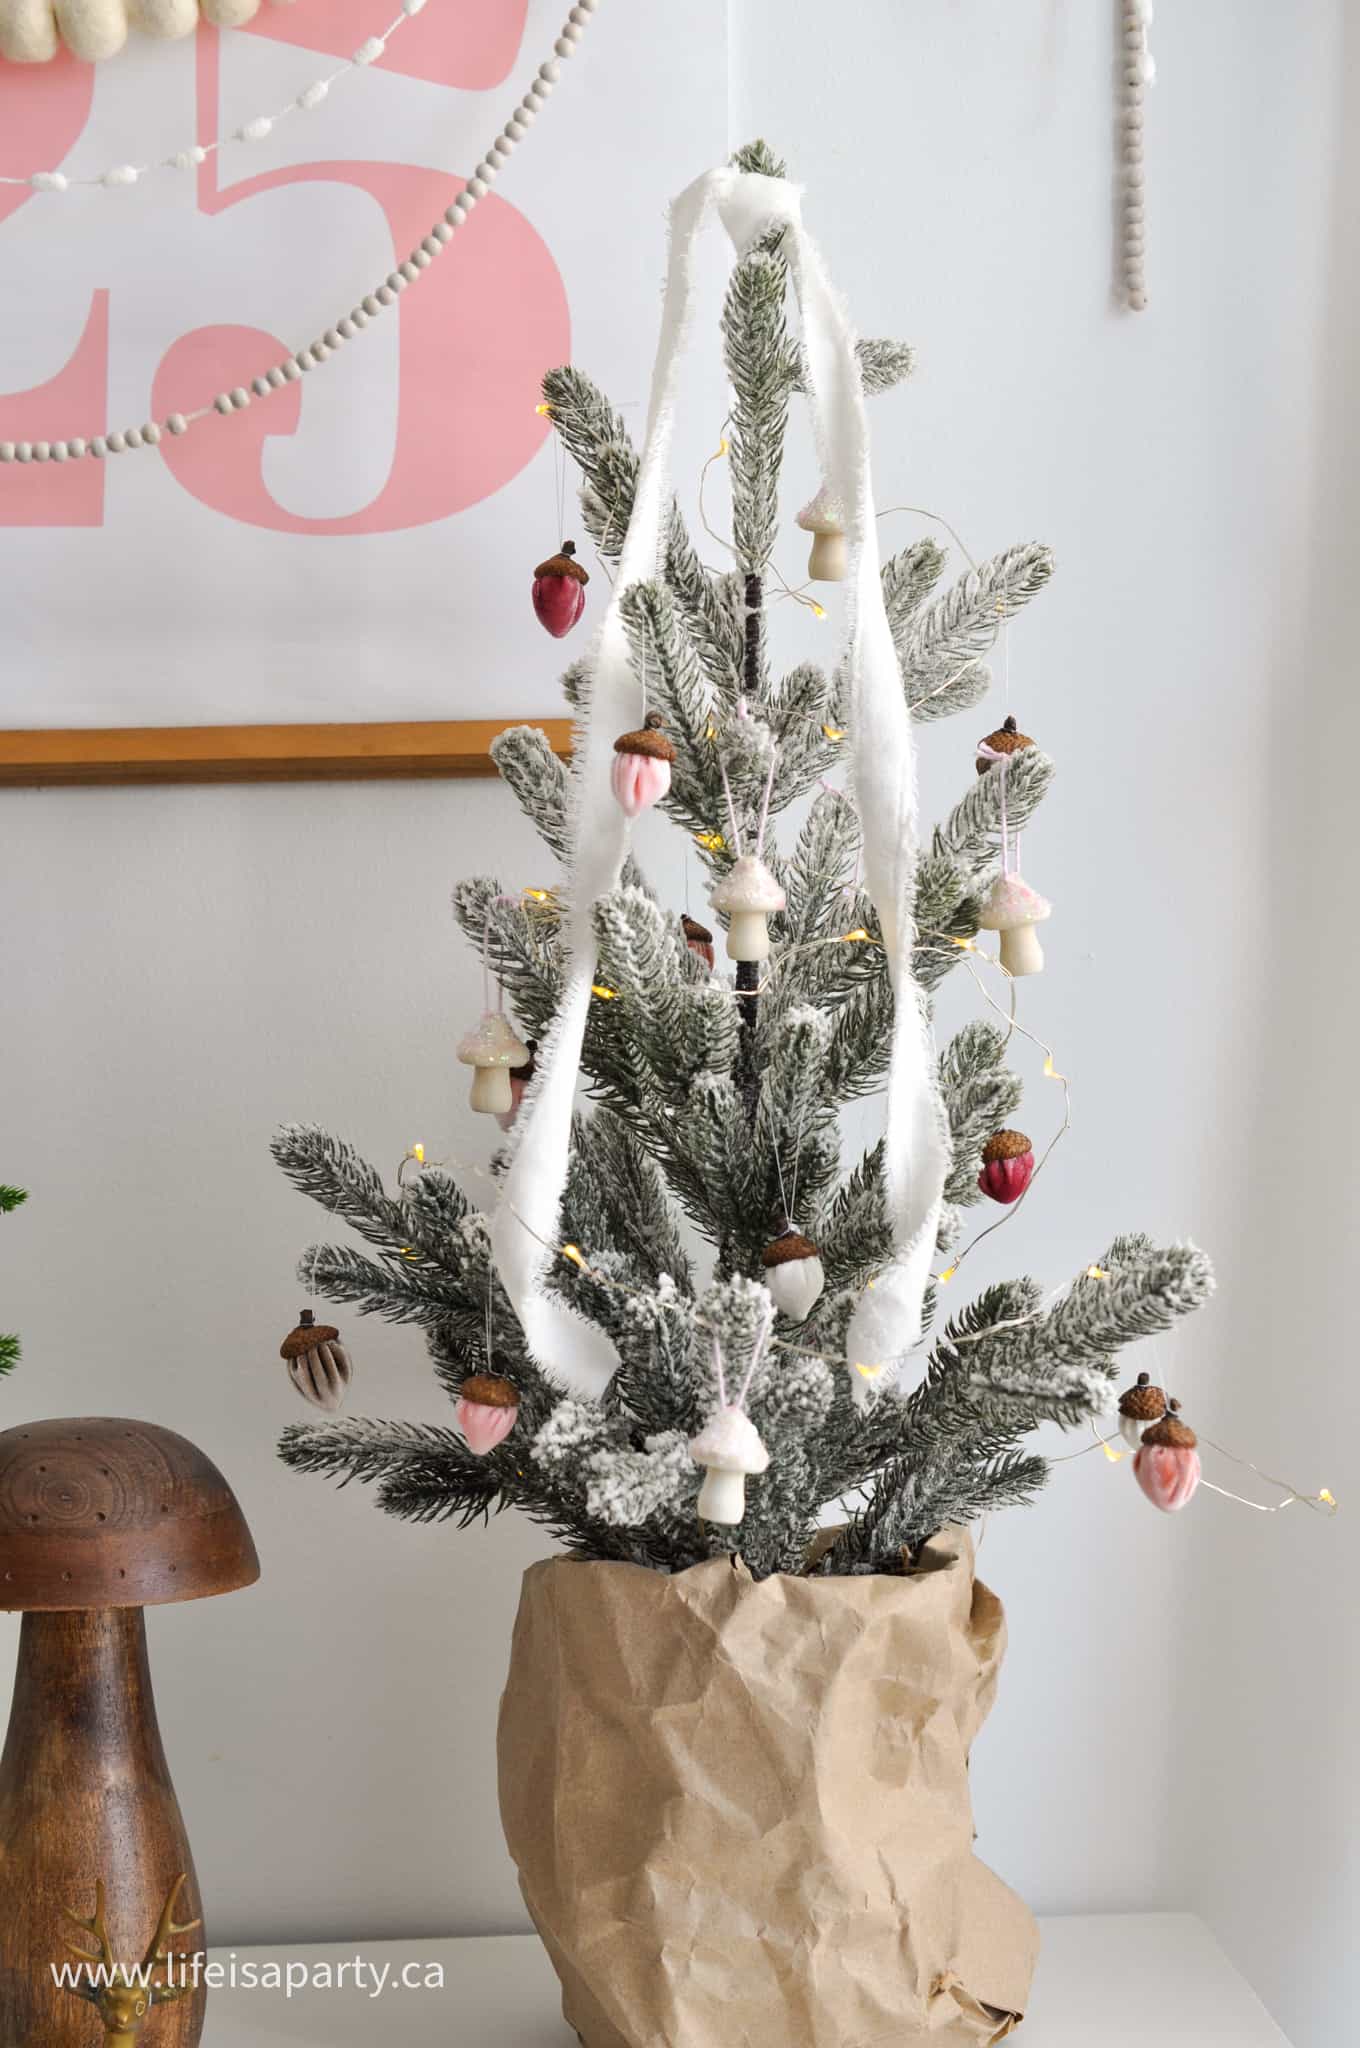
These DIY velvet acorns are a little bit fiddly because they're quite small, but this really is an easy DIY project, and they're so sweet. I used mine as ornaments for a simple little woodland inspired Christmas tree. We paired them with some little mushroom ornaments and ribbon for our tree. They'd be really beautiful hung on to some tree branches in a vase also. These are such a great way to bring some of the outdoors in, and make such beautiful decor in your living room, or anywhere in the fall or for the holidays. Make them in beautiful colors as an easy way to add a pop of color to your living space. You could even add some glitter to the acorn caps, it you wanted to.
With these beautiful DIY Velvet Acorns, life really is a party!


Dannyelle Nicolle-Ramjist says
These little acorns are the cutest, and the perfect addition to your fall or Christmas decor.