How To Spray Paint A Light Fixture: step by step instructions on how to spray paint a chandelier to give it new life.

I decided that I wanted to spray paint my chandelier to give it a makeover this week. Spray paint has to be one of the cheapest, most effective, and easiest way to update home decor. A little spray paint can work wonders, and it's a DIY project anyone can do.
When I first bought this chandelier five years ago I loved it, I mean lovvvvvved it! We had moved into our new house and had a dining room for the first time -this dining room, and I was excited to have a place to hang an amazing chandelier. Today I'm sharing how to spray paint a light fixture with all my tips.
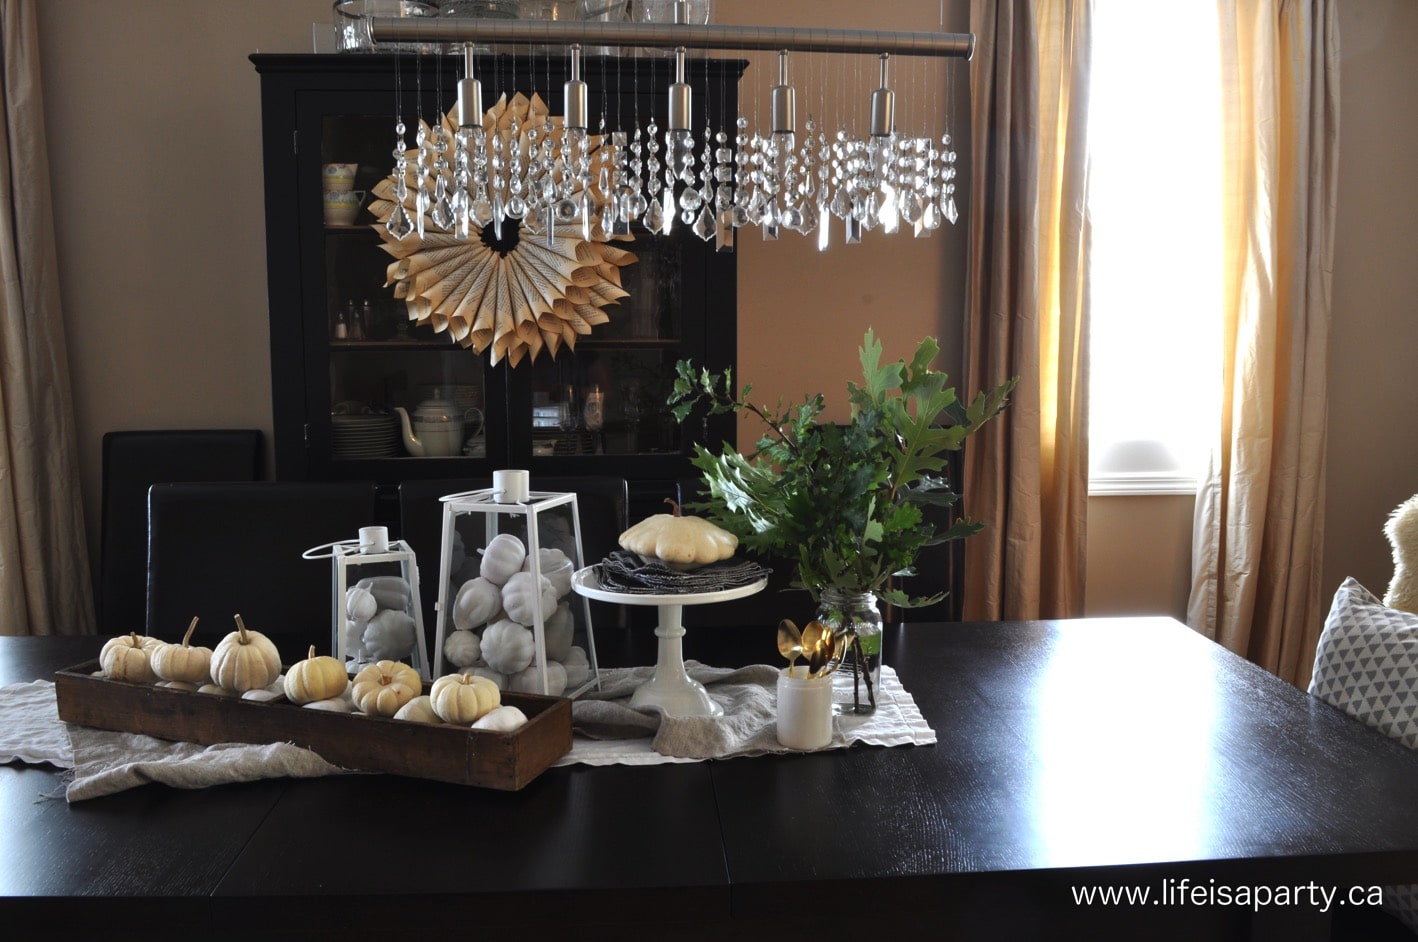
But ten years after buying this light, the spark was gone. I still really liked the light, but it was the wrong color and didn't feel quite as special. And then I had this idea of spray painting it gold! I'm a big fan of Australian design shows, and keep seeing these amazing statement gold light fixtures. This was my way of creating my own whole new look for my old light. I still loved the shape of this fixture, and this was the perfect way to change the look of my old chandelier and turn it into something that looked a new light fixture with just a few coats of spray paint.
This week, as part of the One Room Challenge -where I makeover my dining room in six short weeks, I tackled the light fixture. You can catch up on my other projects for the One Room Challenge here:
- How To Sew A Parson Chair Slipcover
- Black Furniture Makeover
- The One Room Challenge Dining Room Reveal
How To Spray Paint A Light Fixture
I have to say I hummed and ha-ed about it quite a bit. I had that problem of not hating the light as it was, and the fear of ruining it.
I've done lots of projects with spray painting in my day. I've had many, many, many success stories. But I've also had my fair share of not so great spray paint moments. Are you with me?
Let's see, there was the time I didn't shake the can long enough and the paint was all gritty. There have been over sprays where paint got where paint wasn't supposed to be. I have also had drip marks from spraying too heavy a coat. There have been weird reactions to spray painting plastics that don't like spray paint. I have also even created the occasional gloomy messes.
So I knew going in that there were certain spray paint risks to be considered, and I knew I needed this piece to come out perfectly.
So I did all the things you're supposed to do, and today I want to share them with all with you so that you can have a great spray paint result too and avoid all the common issues. For this job we're not taking any short cuts, we're doing all the things you're supposed to do.
Prepping to Spray Paint the Chandelier
1.Take Off All The Removable Parts
I began by removing all the crystals, and while I was at it, I gave them a good cleaning by washing them all in hot soapy water. You can use a damp rag to clean any dust off of the rest of light too. This will help the paint adhere and help to create a nice smooth finish on the entire light fixture.
2. Tape Off Areas
Next, I taped off all the light bulb fixture parts, and the electrical cord, and the hanging wires, using some painter's tape that I could easily remove later.
When we took the light down, I made sure that all the removable parts were removed to spray paint separately so they wouldn't get stuck together.

3. Hang It For Spraying
When I took the light out to the garage to spray paint it, I made sure it was freely hanging so that there'd be less chance of drips, or missing spots, or the paint pooling on the spots that are touching the ground. Be sure to cover the background with an old drop cloth like I did to protect your space from over spraying. This step is really worth the trouble. It gives a much nicer end result than spraying this on a flat surface and moving it in between coats to get the other side and angles.

4. Spray Parts Separately
I set the individual pieces on to little plastic caps to lift them off the surface so they would be no marks where they were touching the work surface. Again, this is a little extra work, but well worth the trouble for a much better result.
5. Shake Paint Well
And then I shook and shook and shook the can of spray paint. For three minutes, which is a surprisingly long time when you're shaking. Lots of time we don't shake the paint long enough, and that means it's not mixed properly and can give a bad result. Also always spray paint in a well-ventilated area. We had the garage door open while painting.
6. Paint Many Thin Coats
I painted about eight really thin coats of paint, forcing myself to stop after a thin coat and not over do it and risk drips. Eight times I want back after 15-30 minutes of dry time, shook the can for 3 minutes again, and applied another thin coat of paint. Again, this is something that is hard to make yourself do, but the results are so worth the extra effort. No drips is the look we're after, and doing many light coats is the way to achieve it.
7. Use Rub and Buff On Non-Sprayable Parts
In between coats, I used some antique gold rub and buff on the metal parts of the hanging crystals and made them a little more gold too. This method worked really well and is great way to paint any spots old fixtures where you can't spray paint.

After the light was all dry, it was time to reassemble it. We hung it up and added the crystals back on. Lastly we screwed in some new light bulbs and we were so happy with the results. All my careful work and following the simple steps paid off! The light is gloriously gold, without any drips, brush strokes, or globs at all.

I love the new gold light, it just looks updated and fresh, and on trend. Painting the light make a huge difference. I'm really glad that I did spray paint the chandelier. It was an affordable way change the look of the entire fixture. This is such an easy way to give an old metal light fixture new life.

I found it funny that when I was doing a little research on-line and searching for spray painted lights that they were all going from brass to silver, or black. Now things have shifted back, and gold, antique brass, rose gold, and copper are all on the rise, and only a spray paint can away. You can update your own old light, or look at thrift stores for one you can give a makeover to. This would also be great for old bathroom fixtures or powder rooms too.

Things are really coming along with the One Room Challenge. The last major project to go is to refinishing the dining room table. I'm a little nervous about this one too, but I'll be starting it tomorrow and sharing it and all the finishing touches next week in the big Week Six Final Reveal. Wish me luck.
With a new Gold Statement Light, life really is a party!


dnr says
Charmaine, hope it turns out great. Good luck!
Dannyelle
Charmaine says
Well done it looks absolutely fantastic. You’ve inspired me to do mine. I was nervous but I will give it a go instead of hunting for a brand new gold version of what I already have. Many thanks. Keep up the good work xx
dnr says
Tonya, thanks so much. It's held up beautifully and I still do love the gold!
Dannyelle
Tonya LaChance-Bufano says
Looks beautiful! Has it held up? Are you still loving the color? What color is it?
dnr says
Hi Kim,
Sorry it took me awhile to respond, I had to go hunting for the can and see what I used, lol. I'm pretty sure it was Rust-oleum Metallic in gold. Hope this helps.
Best of luck,
Dannyelle
Kim says
It looks gorgeous! What brand of gold spray paint did you use?
dnr says
Thanks Diane!
the cape on the corner says
i love how lighter and brighter it is in here. the painted walls really make the gold chandelier pop, too.
b
Diane says
Love, love, love!!! And you're absolutely right- the trend is back to gold!
dnr says
Thanks Christina, we're getting there. 😉
Dannyelle
Christina says
It looks spectacular! All your careful work definitely paid off!
Heather says
Love how this turned out, looks terrific!