Simple Wedding Cake and DIY Wood Wedding Cake Topper: make your own simple and rustic 1 tier wedding cake and Cricut cake topper.

Jump to:
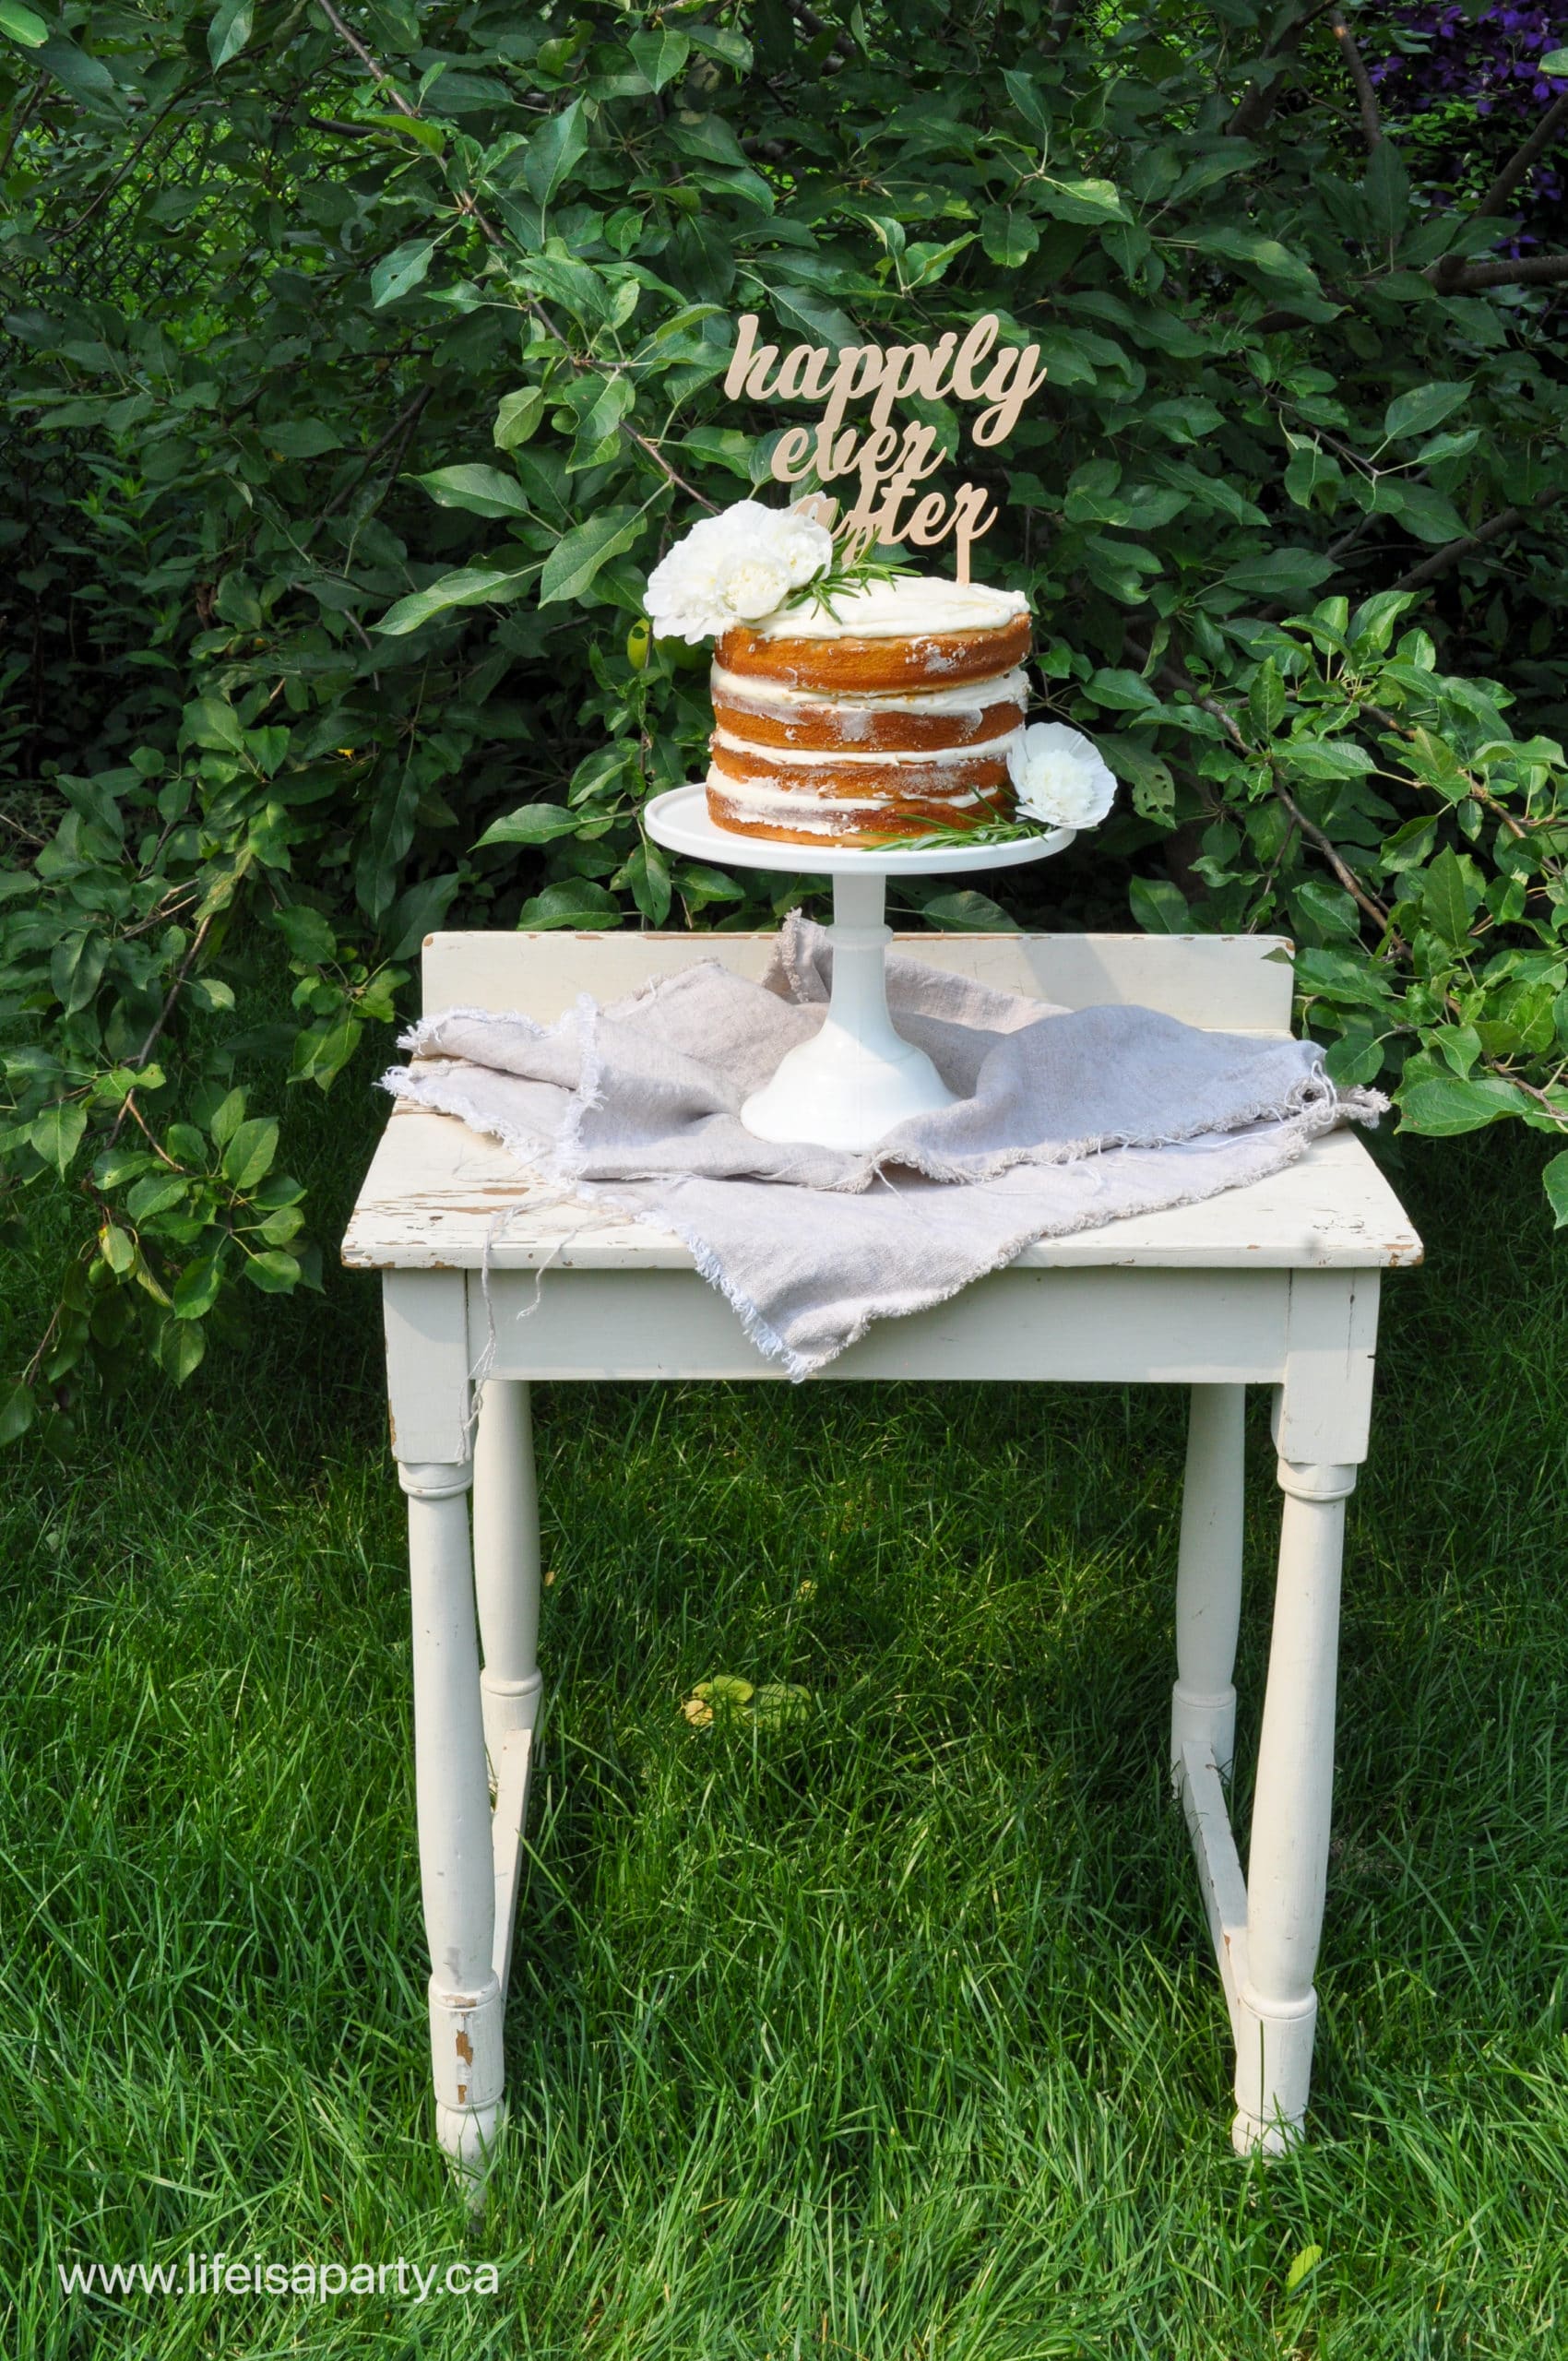
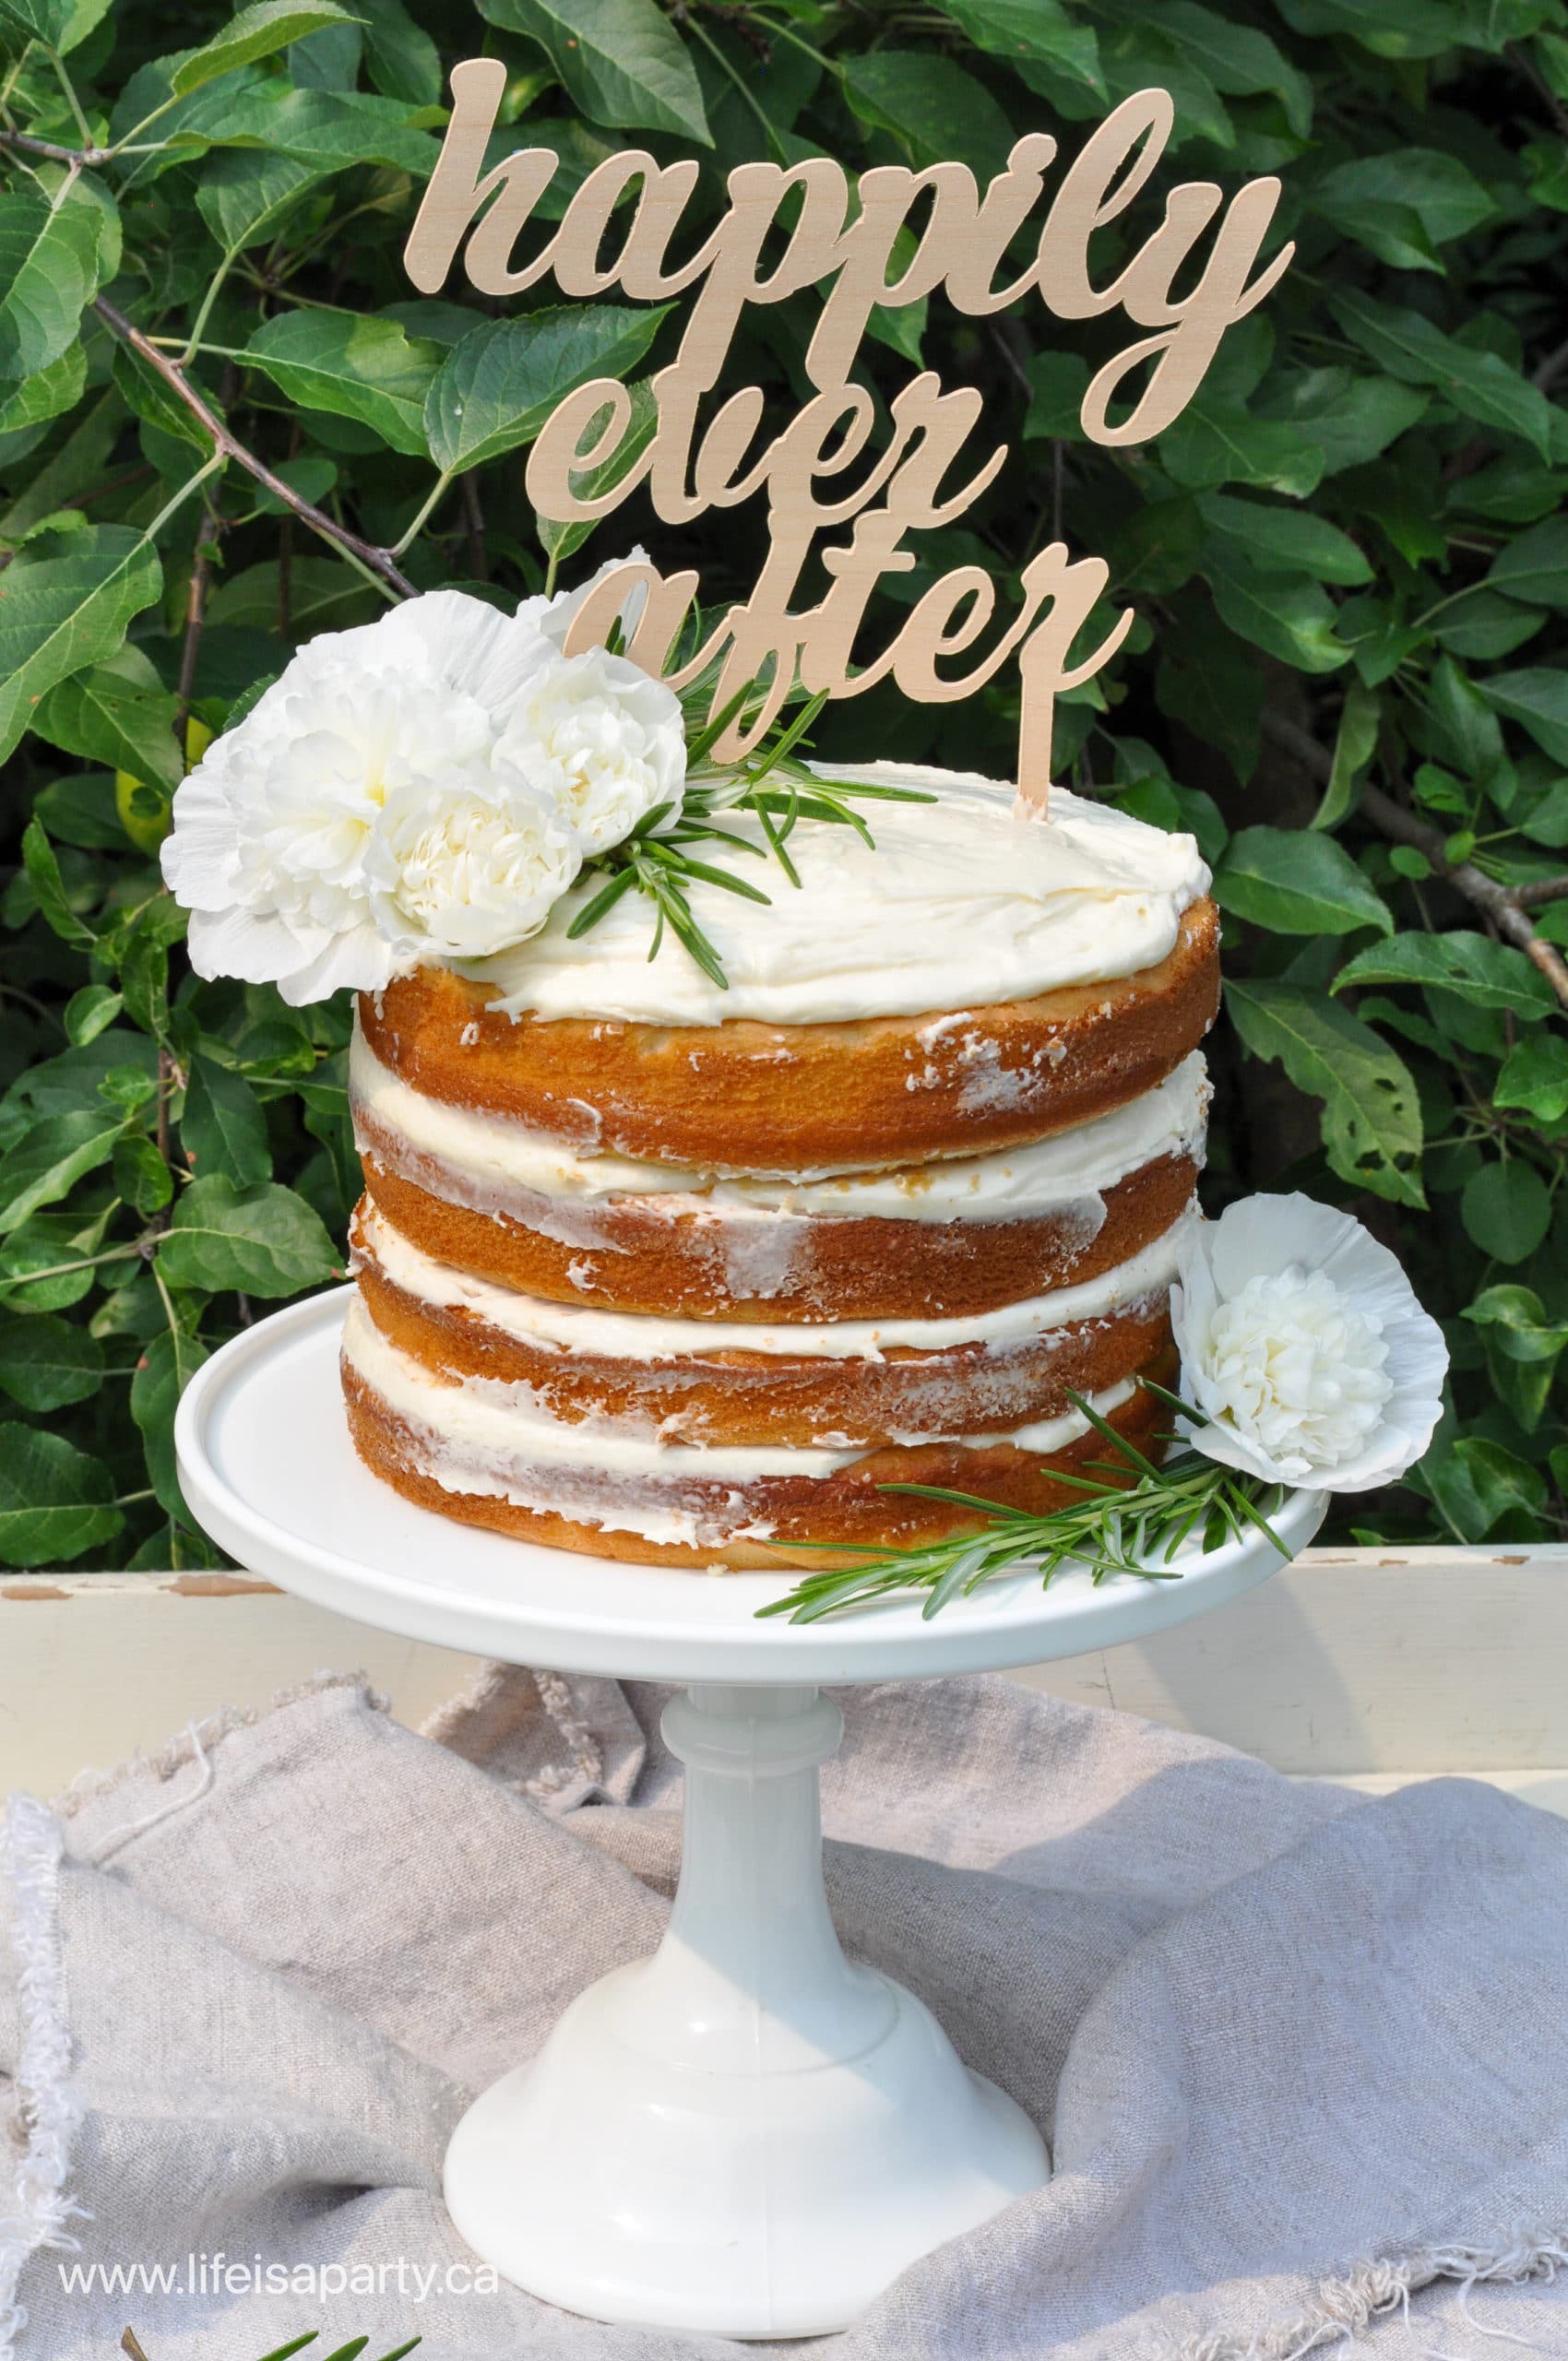
I love the trend in weddings these days for simple and rustic. This DIY wedding cake and Cricut wood wedding cake topper were pretty simple to put together and definitely really inexpensive too. I created the wood wedding cake topper with my Cricut machine. I love that it can cut wood, and that you can customize it to say anything you'd like. It's a great way to add a personal touch to your special day. The DIY cake topper turned out great and would be perfect for your a simple wedding or a special bridal shower for DIY brides.
Because you can personalize the cake topper, it's a great option not just for a wedding day. Make a custom cake topper for any special occasions. It's a great option to create a beautiful cake for a birthday, anniversary, baby shower, or any special day. It also makes a special keepsake.
The Cake
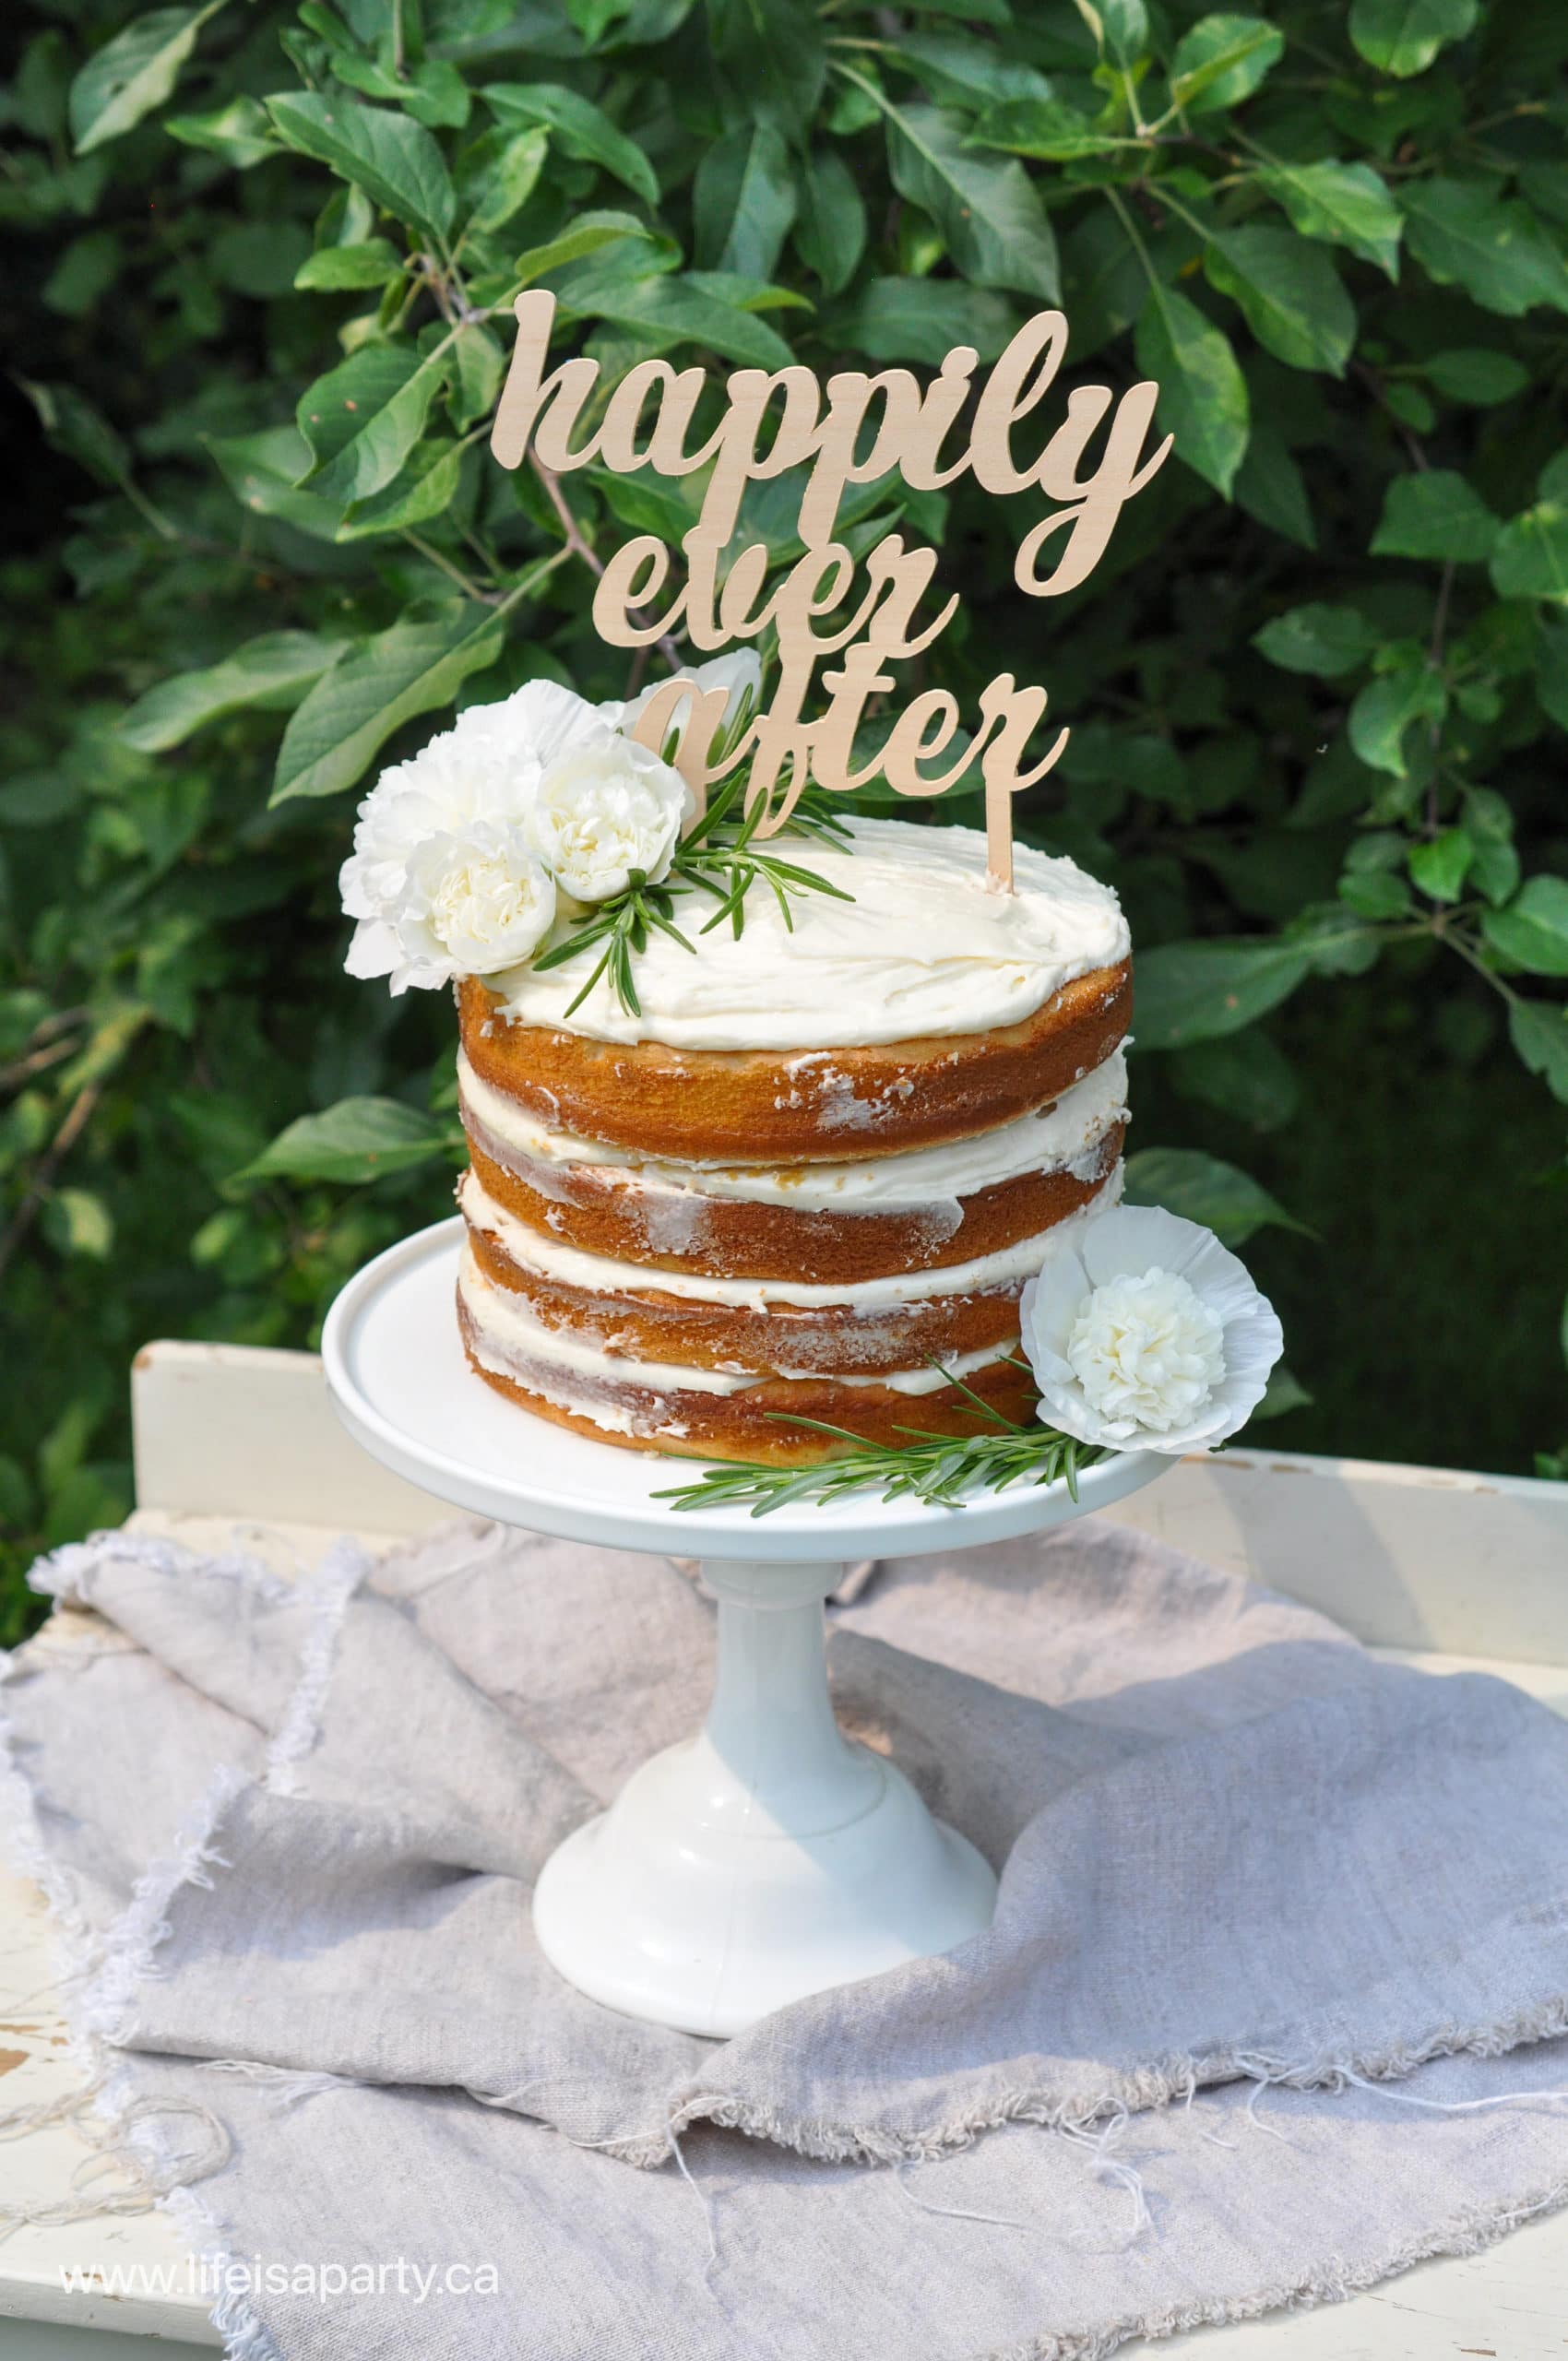
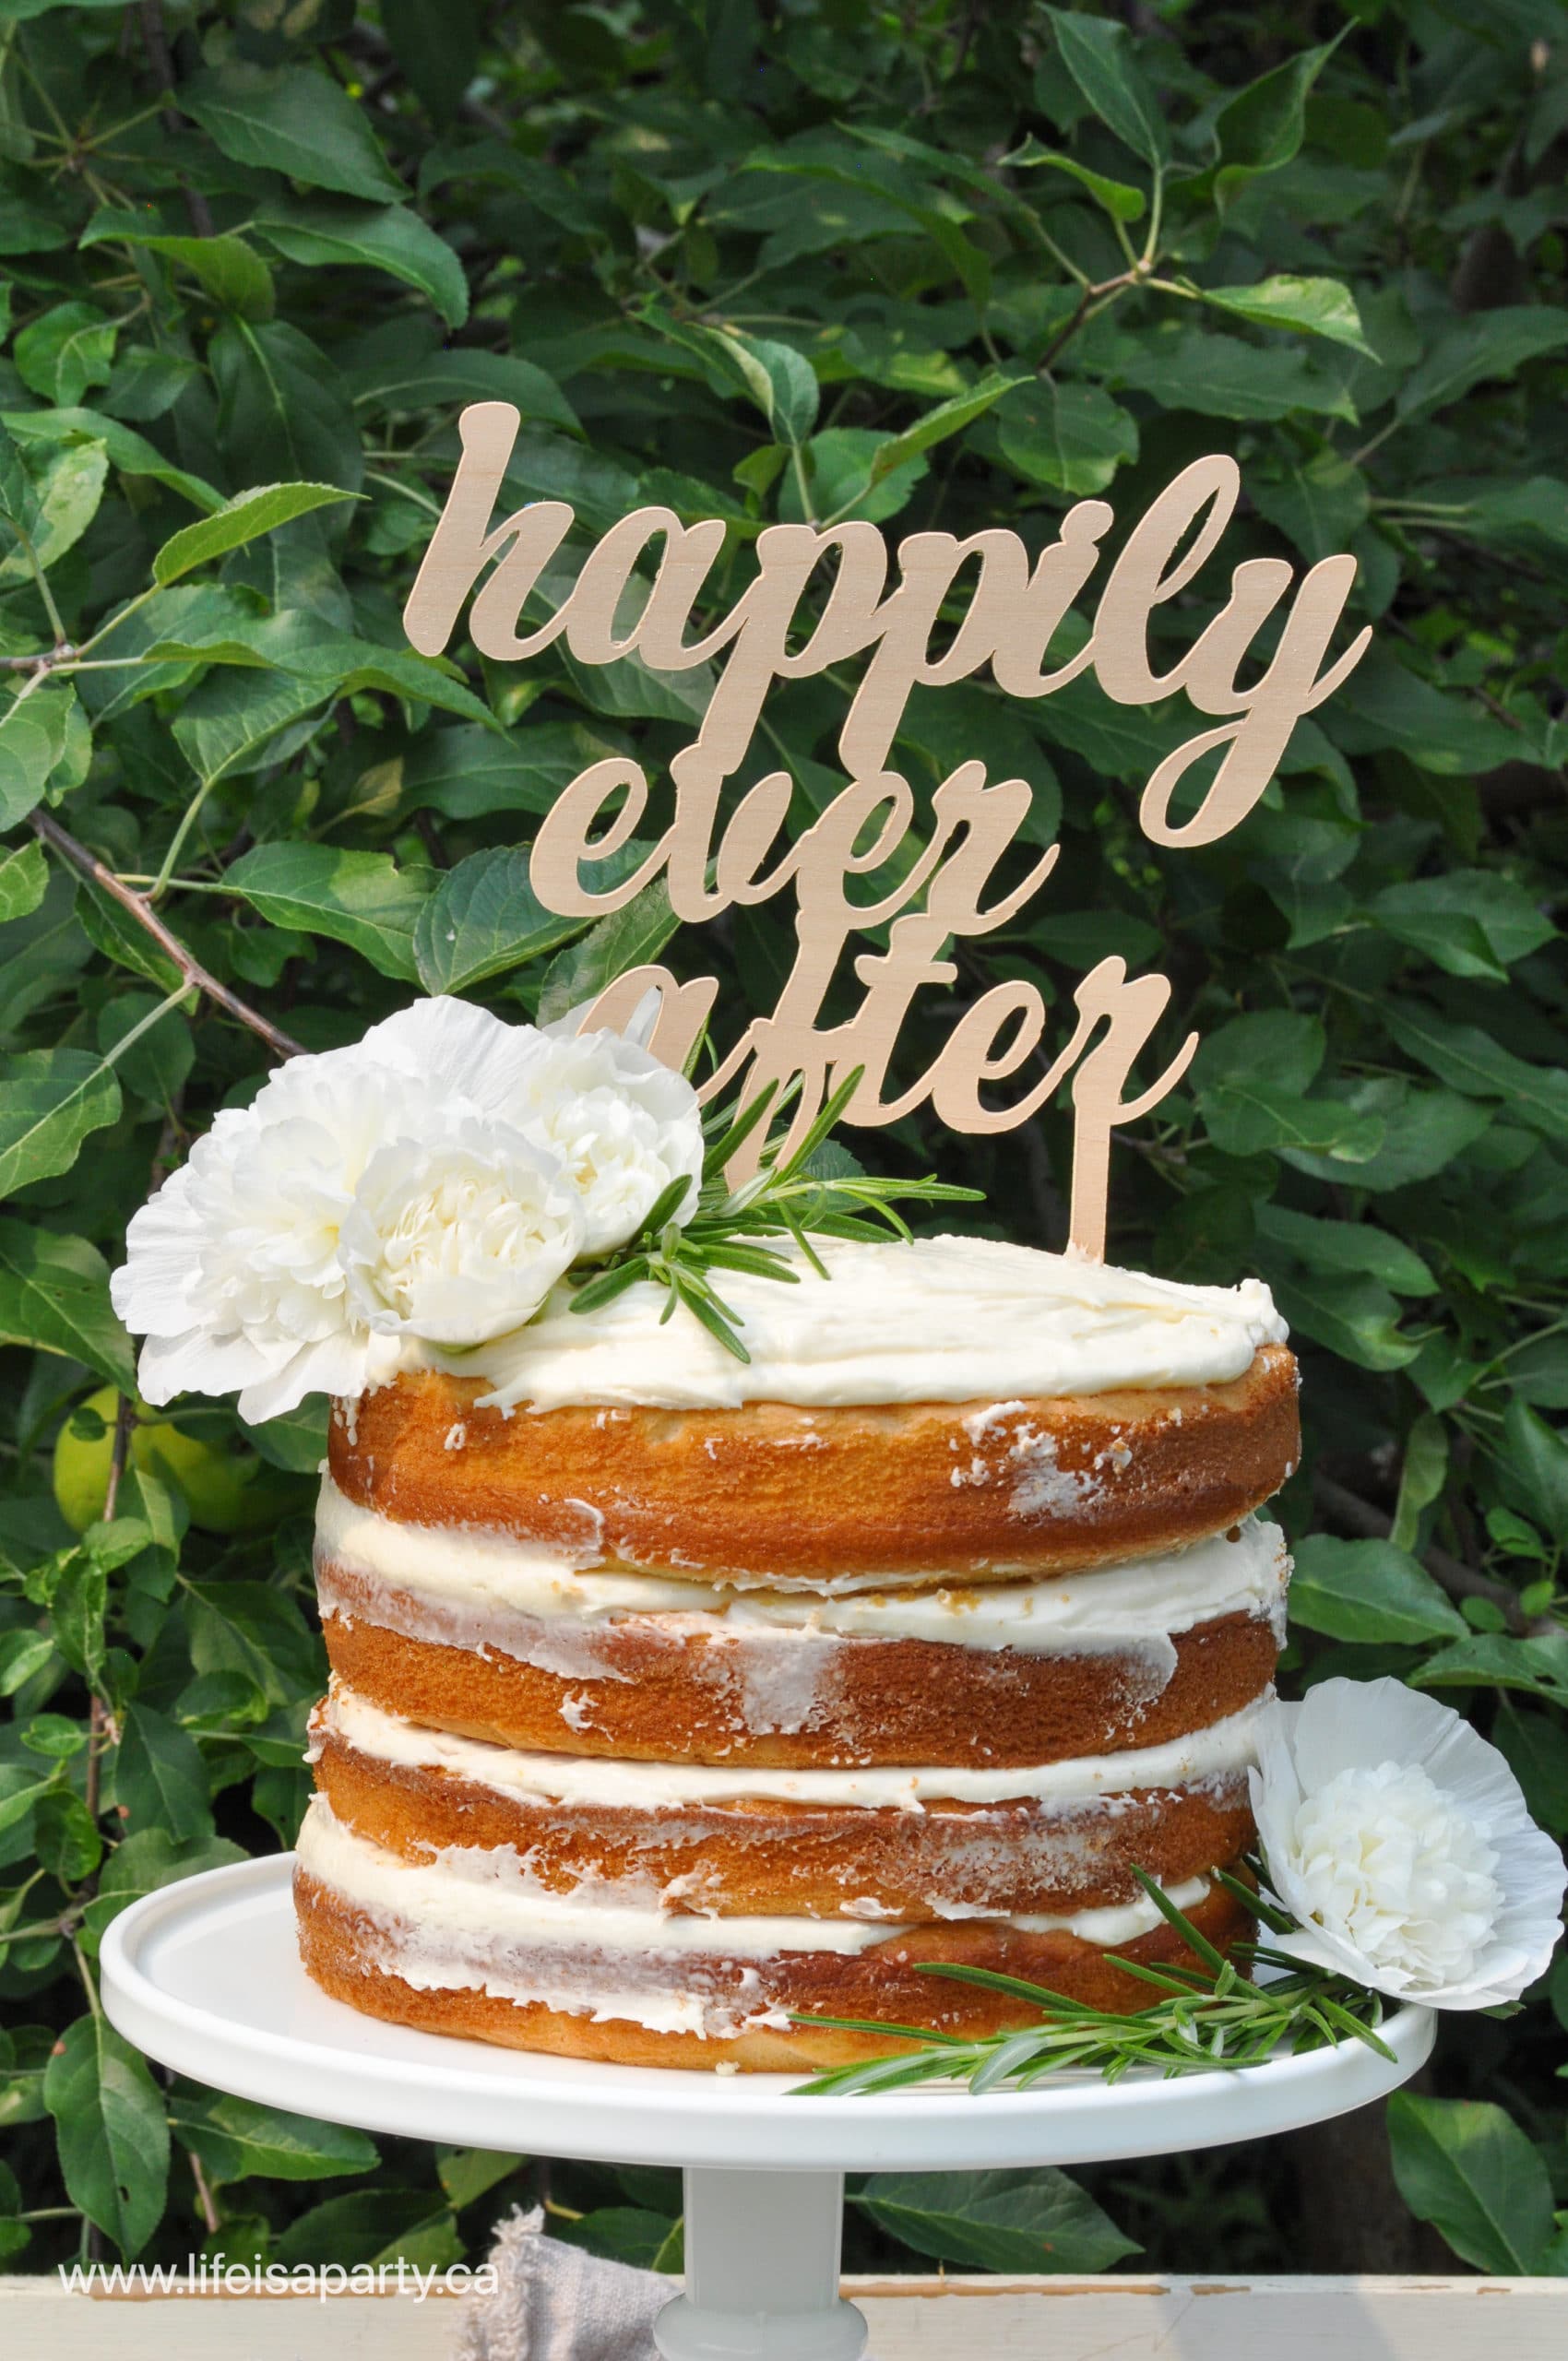
The simple cake is as basic as it gets -and that's exactly what you need if you're busy putting together your own wedding cake or wedding shower cake. I used two white cake mixes, and some homemade buttercream icing. We made ours a naked cake, again so simple. Another great option is to pick up some inexpensive plain white cakes at the grocery store. If there are no plain cakes at the grocery store, you can scrape the icing off, and add some white icing to create the look you want. This cake is perfect for the bride and groom who love simple and rustic. This is simple enough to do the day before your wedding day.
Tips for Cutting Wood with a Cricut Machine
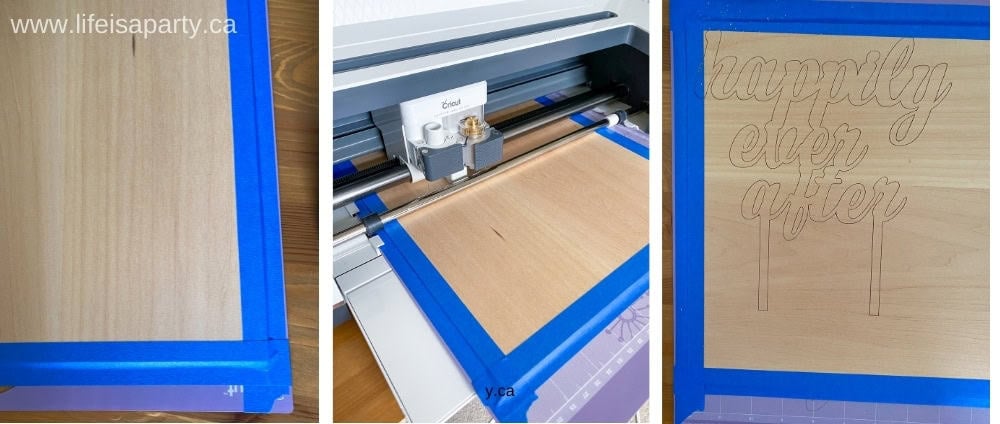
We made the custom wedding cake topper on our Cricut machine. There's a few tips I'd love to share with you for working with wood, that might make the process go a little more smoothly.
1. Choosing Your Font
If you're designing your own cake topper in Cricut Design Space choose your font carefully. We wanted a script so that we could connect all the letters in our words to make a solid piece, but some fonts with thinner lines would not be a good choice to cut out in wood. The letter lines need to be at least ⅛" thick for the best results. We used the Cricut font Retro Script, and it worked great. Love Create Celebrate has a great video tutorial if you want to design your own topper.
2. Checking Your Wood Is Cut Through
Be sure to check that the topper is cut all the way through before unloading your project from the Cricut machine. You can test this by gently pushing down on the cut piece to see if it moves. You might also be able to remove any small circular inner pieces from the letters. If it isn't cut through add more passes before you unload the mat. This part is key, it has to be before you remove the mat from the machine. After you remove it, you can't add more cuts, because it won't line up properly.
3. Doing Touch Ups with the True Control Knife
Also, once you remove the mat, if you have a few spots that aren't cut through, use the Cricut True Control knife to cut through any spots that need it.
4. Using Wood Glue
If you unfortunately have a few delicate pieces of the cake topper break, you can glue them back on with a tiny amount of wood glue.
5. Cutting Against The Grain
Against the grain on the wood sheet is stronger than with the grain. We aligned our wood piece with the grain running side to side, rather than up and down to give those connections between the letters a little extra strength.
6. Extra Wood For Practise
It took us two tries at making the cake topper, so you might want a few extra sheets of wood. On our first attempt we had too many passes, and the cake topper broke. Lastly on the second attempt we did the same amount of passes and it wasn't cut all the way through so we had to add some, and touch up some spots with the knife afterward. It might take a few tries to make your project, so it's great to plan on having some extra material, just in case.
How To Make A Wood Cake Topper With Your Cricut
Equipment
- Cricut Maker
- Cricut Knife Blade
- Strong Grip Cutting Mat
- Cricut True Control Knife
- Self-Healing Mat
Materials
- Cricut Bass Wood
- Masking Tape
- "Happily Ever After" Cut File
Instructions
- Begin by opening our free "Happily Ever After" cut file in Cricut Design Space, and choose the "Make It" option.
- Use a strong grip cutting mat and line your wood up in the top left corner. Use masking tape around the outside of the wood to tape down the edges, and give it extra hold.
- Next, make sure your Cricut has the knife blade inserted.
- Follow the prompts on the Cricut to cut out the cake topper. Note -wood takes many passes, so it takes a little extra time to cut out.
- Next, once your topper is finished cutting, but before you remove the mat from the Cricut machine, check to make sure that it's cut all the way through. Genty push down on the wood to see if the cut piece is free, or try and remove any of the inner circle pieces from the letters. If they pop out, then remove your mat from the Cricut. If they don't, then choose to add more passes, and then check again until it's completely cut through.
- Once your mat is unloaded, carefully remove the masking tape. Next gently remove the cake topper. Take care because it's fragile, especially any small end pieces of the letters.
- Lastly, if you notice it's not cut all the way through in some spots, use the cricut true control knife and the self-healing mat to cut through any attached pieces. If your cake topper breaks at all, you can use tiny amount of wood glue to reattach any small pieces that need mending
Once your topper is finished, use the two wood posts to insert it directly into the top of your wedding cake. We decorated our cake with a few fresh flowers and rosemary too. This is one of my favorite wedding DIY projects. Using your cutting machine and some bass wood, this is a really budget-friendly idea for your big day.

This wedding cake was really simple to make, but the DIY wood wedding cake topper really takes it to the next level. This cake is perfect for the bride and groom who love a simple rustic vibe, and it's very inexpensive to make yourself if you have a Cricut machine.
With a simple DIY wedding cake and wood cake topper, life really is a party!
More Inspiration
We also used this beautiful wood cake topper as part of our Cinderella Dinner and Movie Night. This simple wedding cake was the perfect centre piece for our party. Therefore check out all the details for the Cinderella party here.
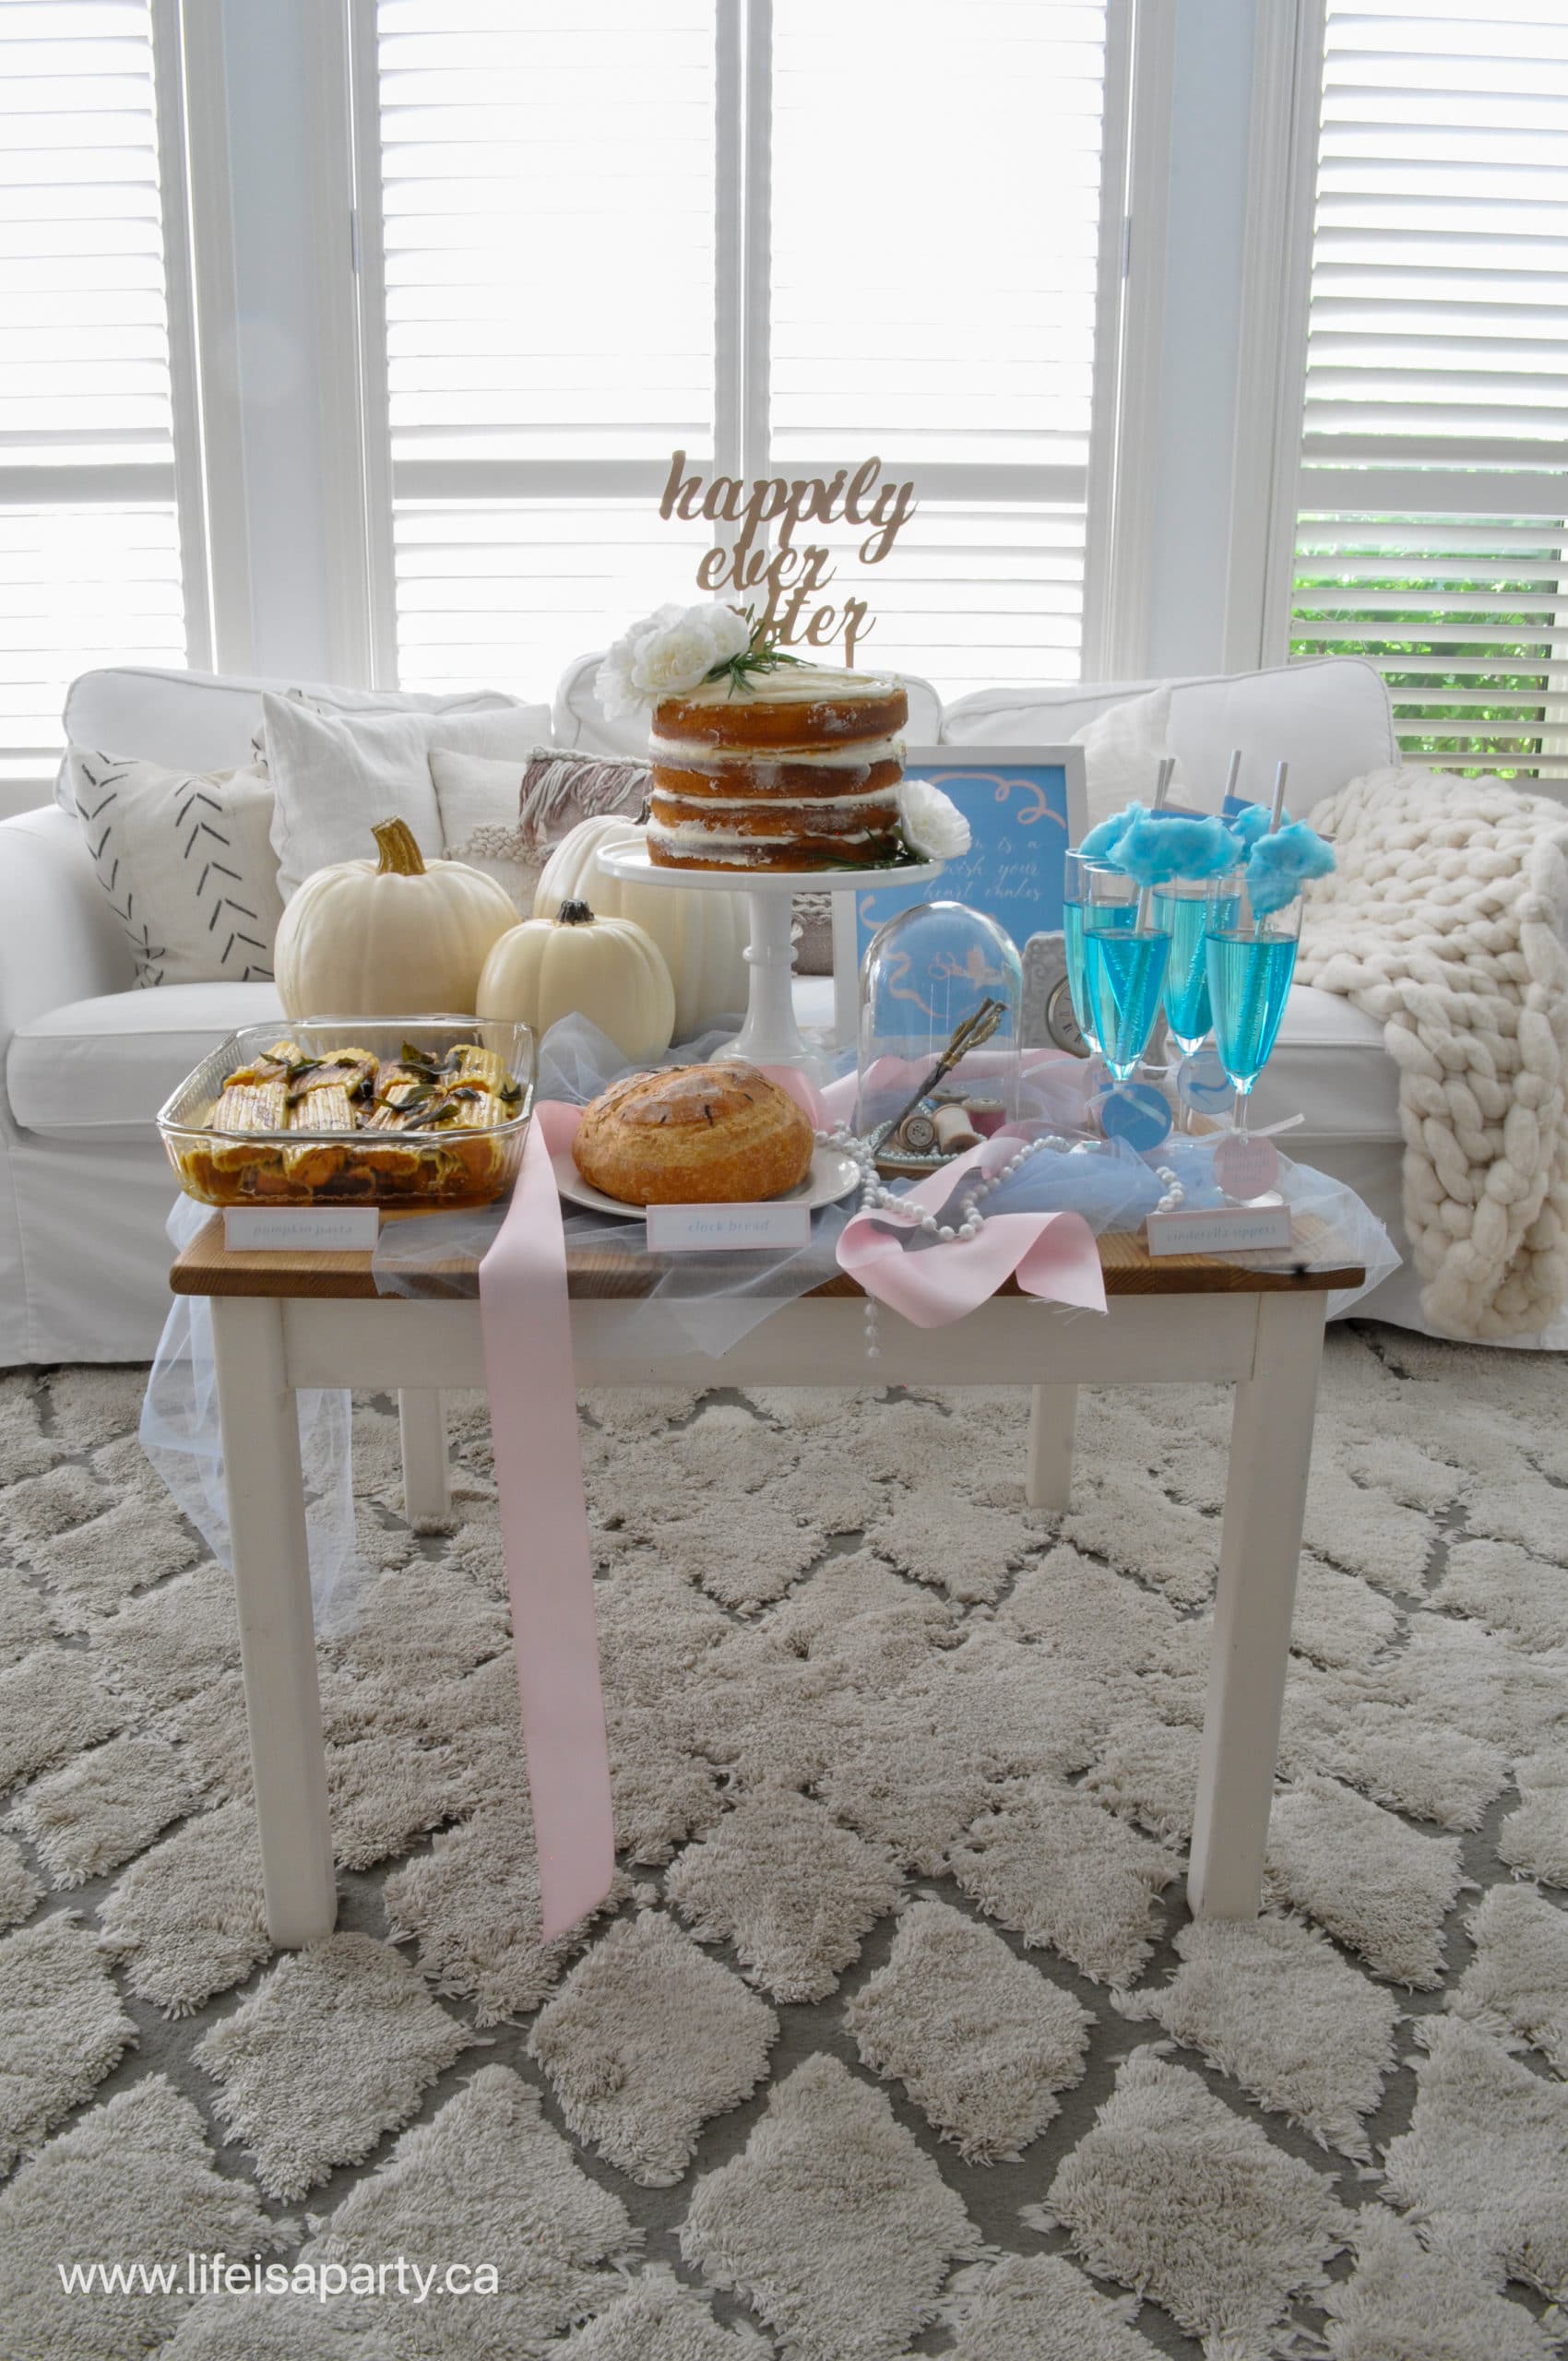
This project was part of our Cinderella themed Disney Princess Dinner and Movie Night -check out all the details about the whole party here.
Disney Princess Dinner and Movie Toolkit
Love Disney Princess dinner and movie nights? Buy our Disney Princess Dinner and Movie Toolkit. The Toolkit includes 6 different Disney Princess movie nights with menus, all the recipes, inspiration, and printables for each one. Check out more about the Disney Princess Dinner and Movie Toolkit by clicking here.


Leave a Reply
You must be logged in to post a comment.