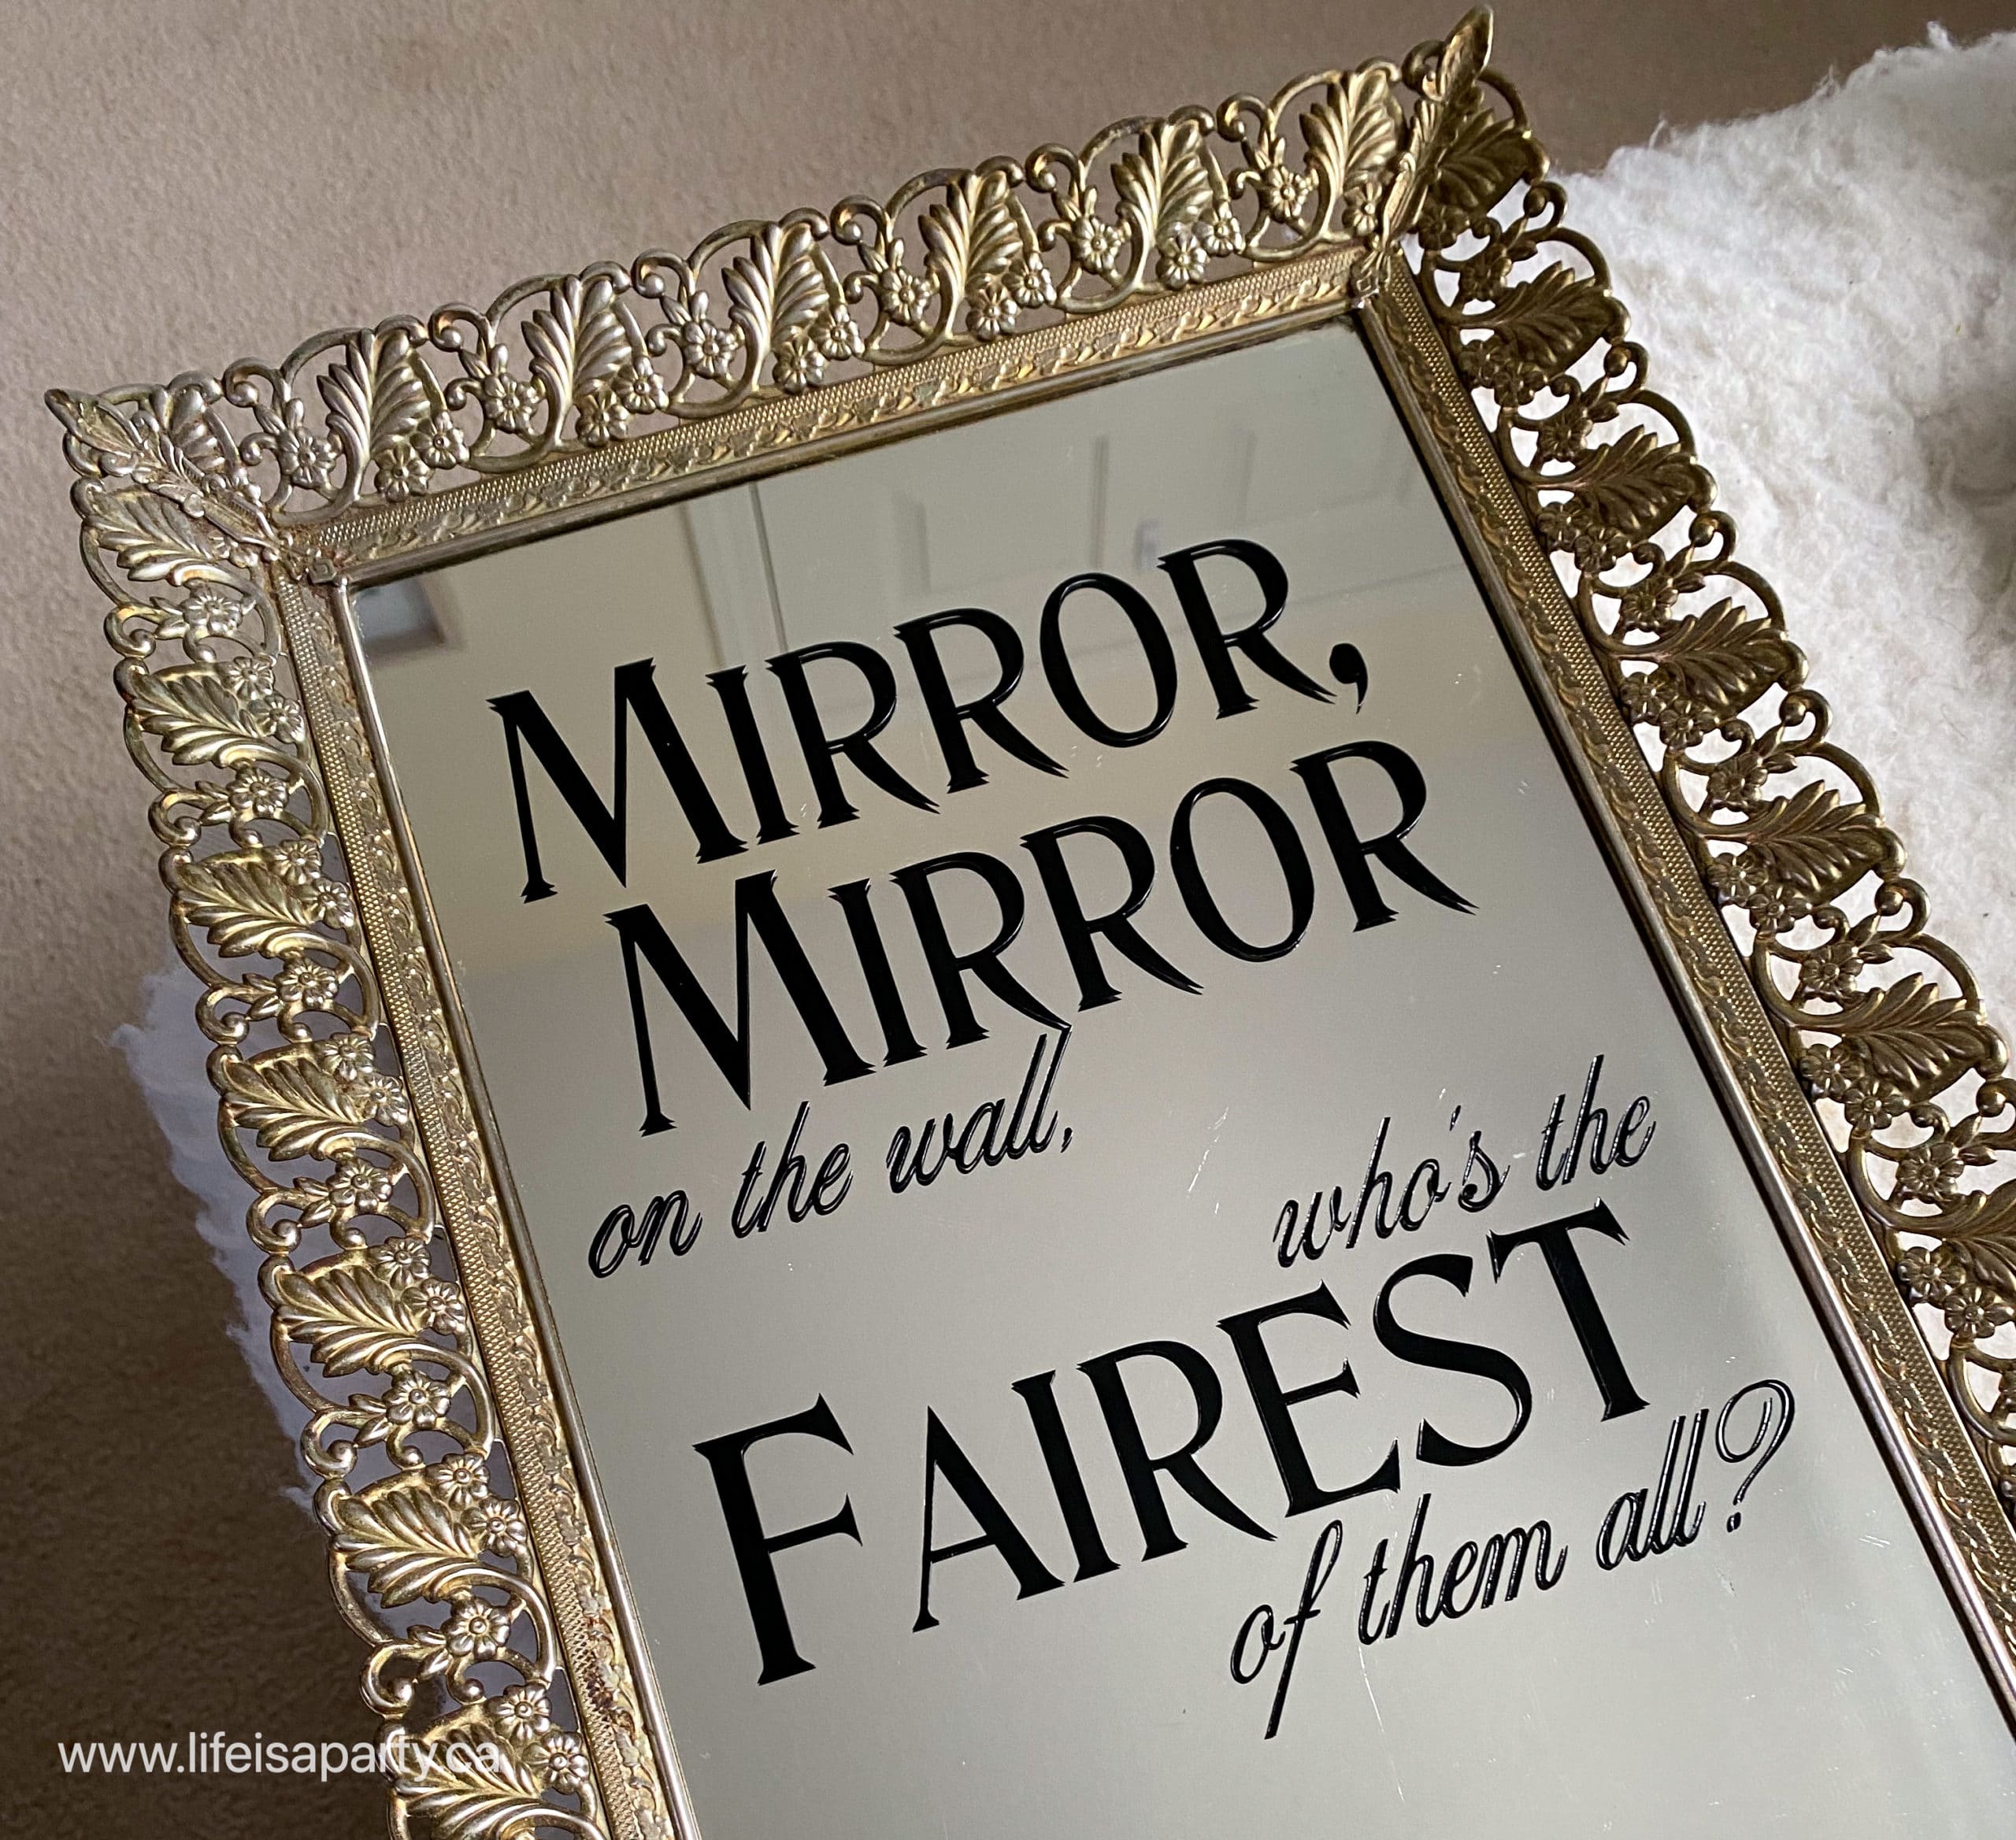
Snow White Party Decor -DIY Mirror, Mirror: use Cricut vinyl to add mirror, mirror on the wall, who's the fairest of the all?

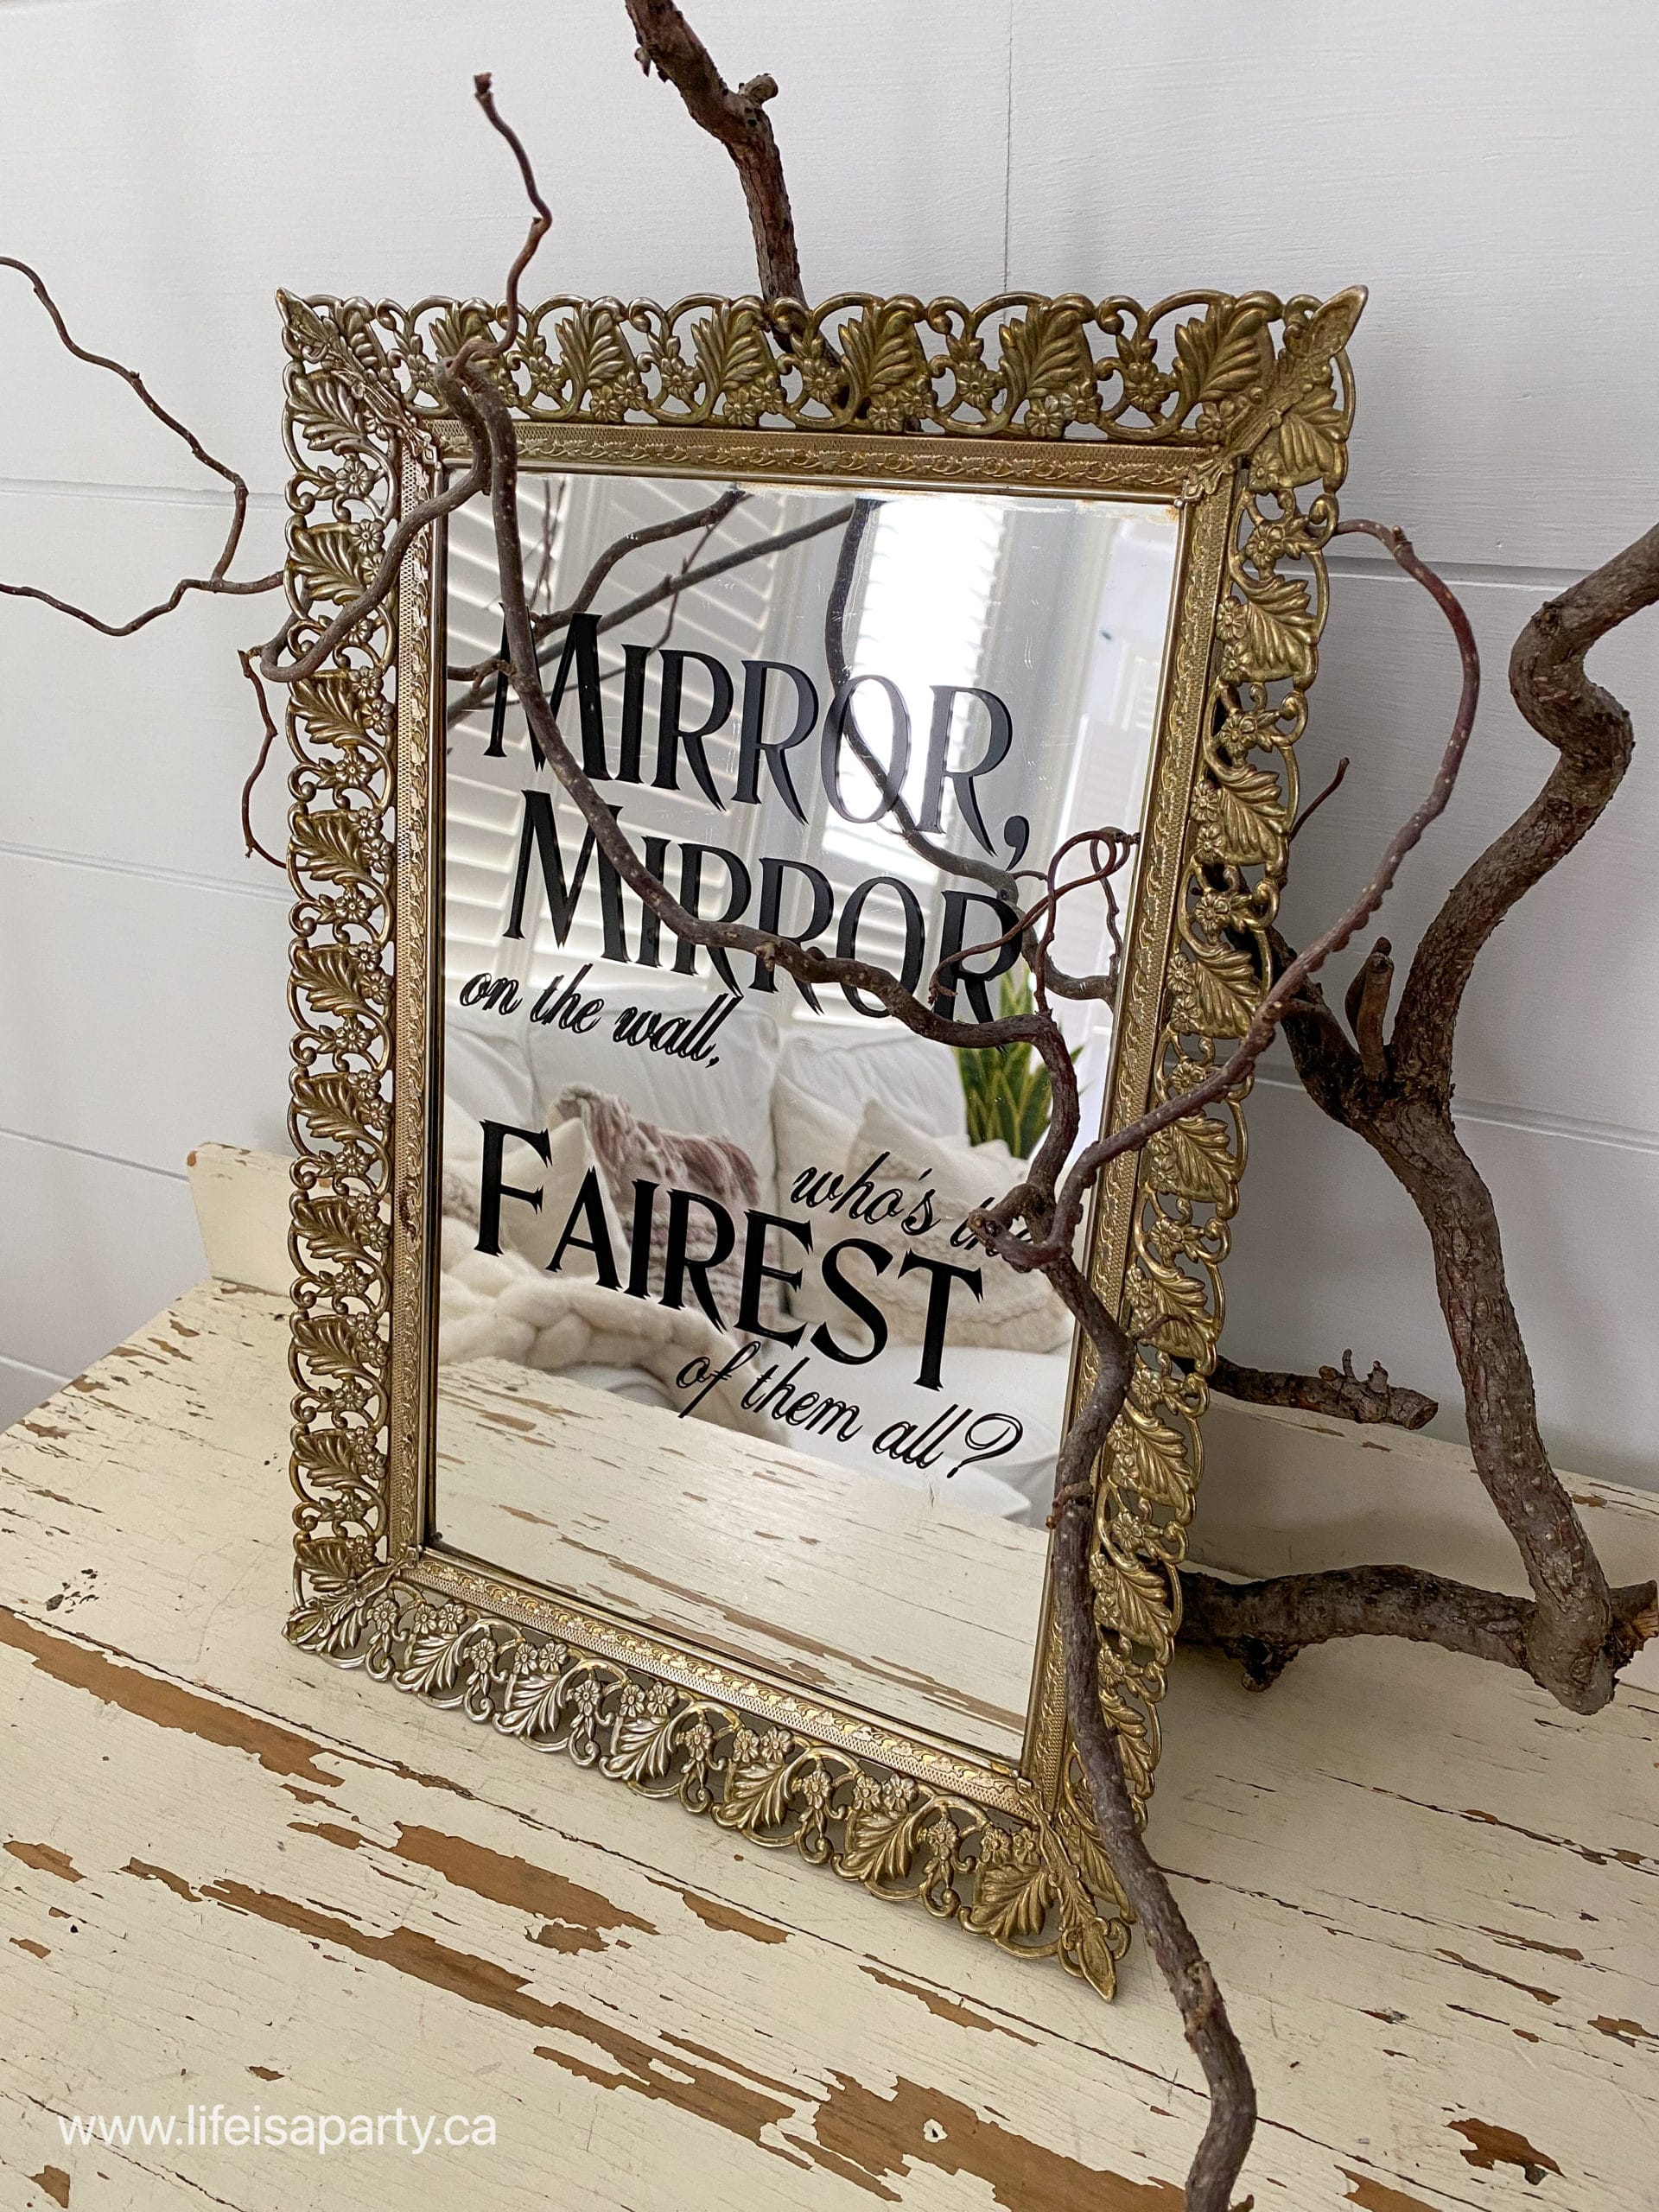
You couldn't really have a Snow White and the Seven Dwarfs themed party without including the famous mirror, mirror on the wall. We made a simple and really cute version with our Cricut machine. Using the Cricut we cut out some vinyl and applied to a thrift store vintage mirror. It was really easy to make, and it turned out great. The mirror was such a great addition to our Snow White Dinner and Movie Night -see all the details of the party here if you missed it.
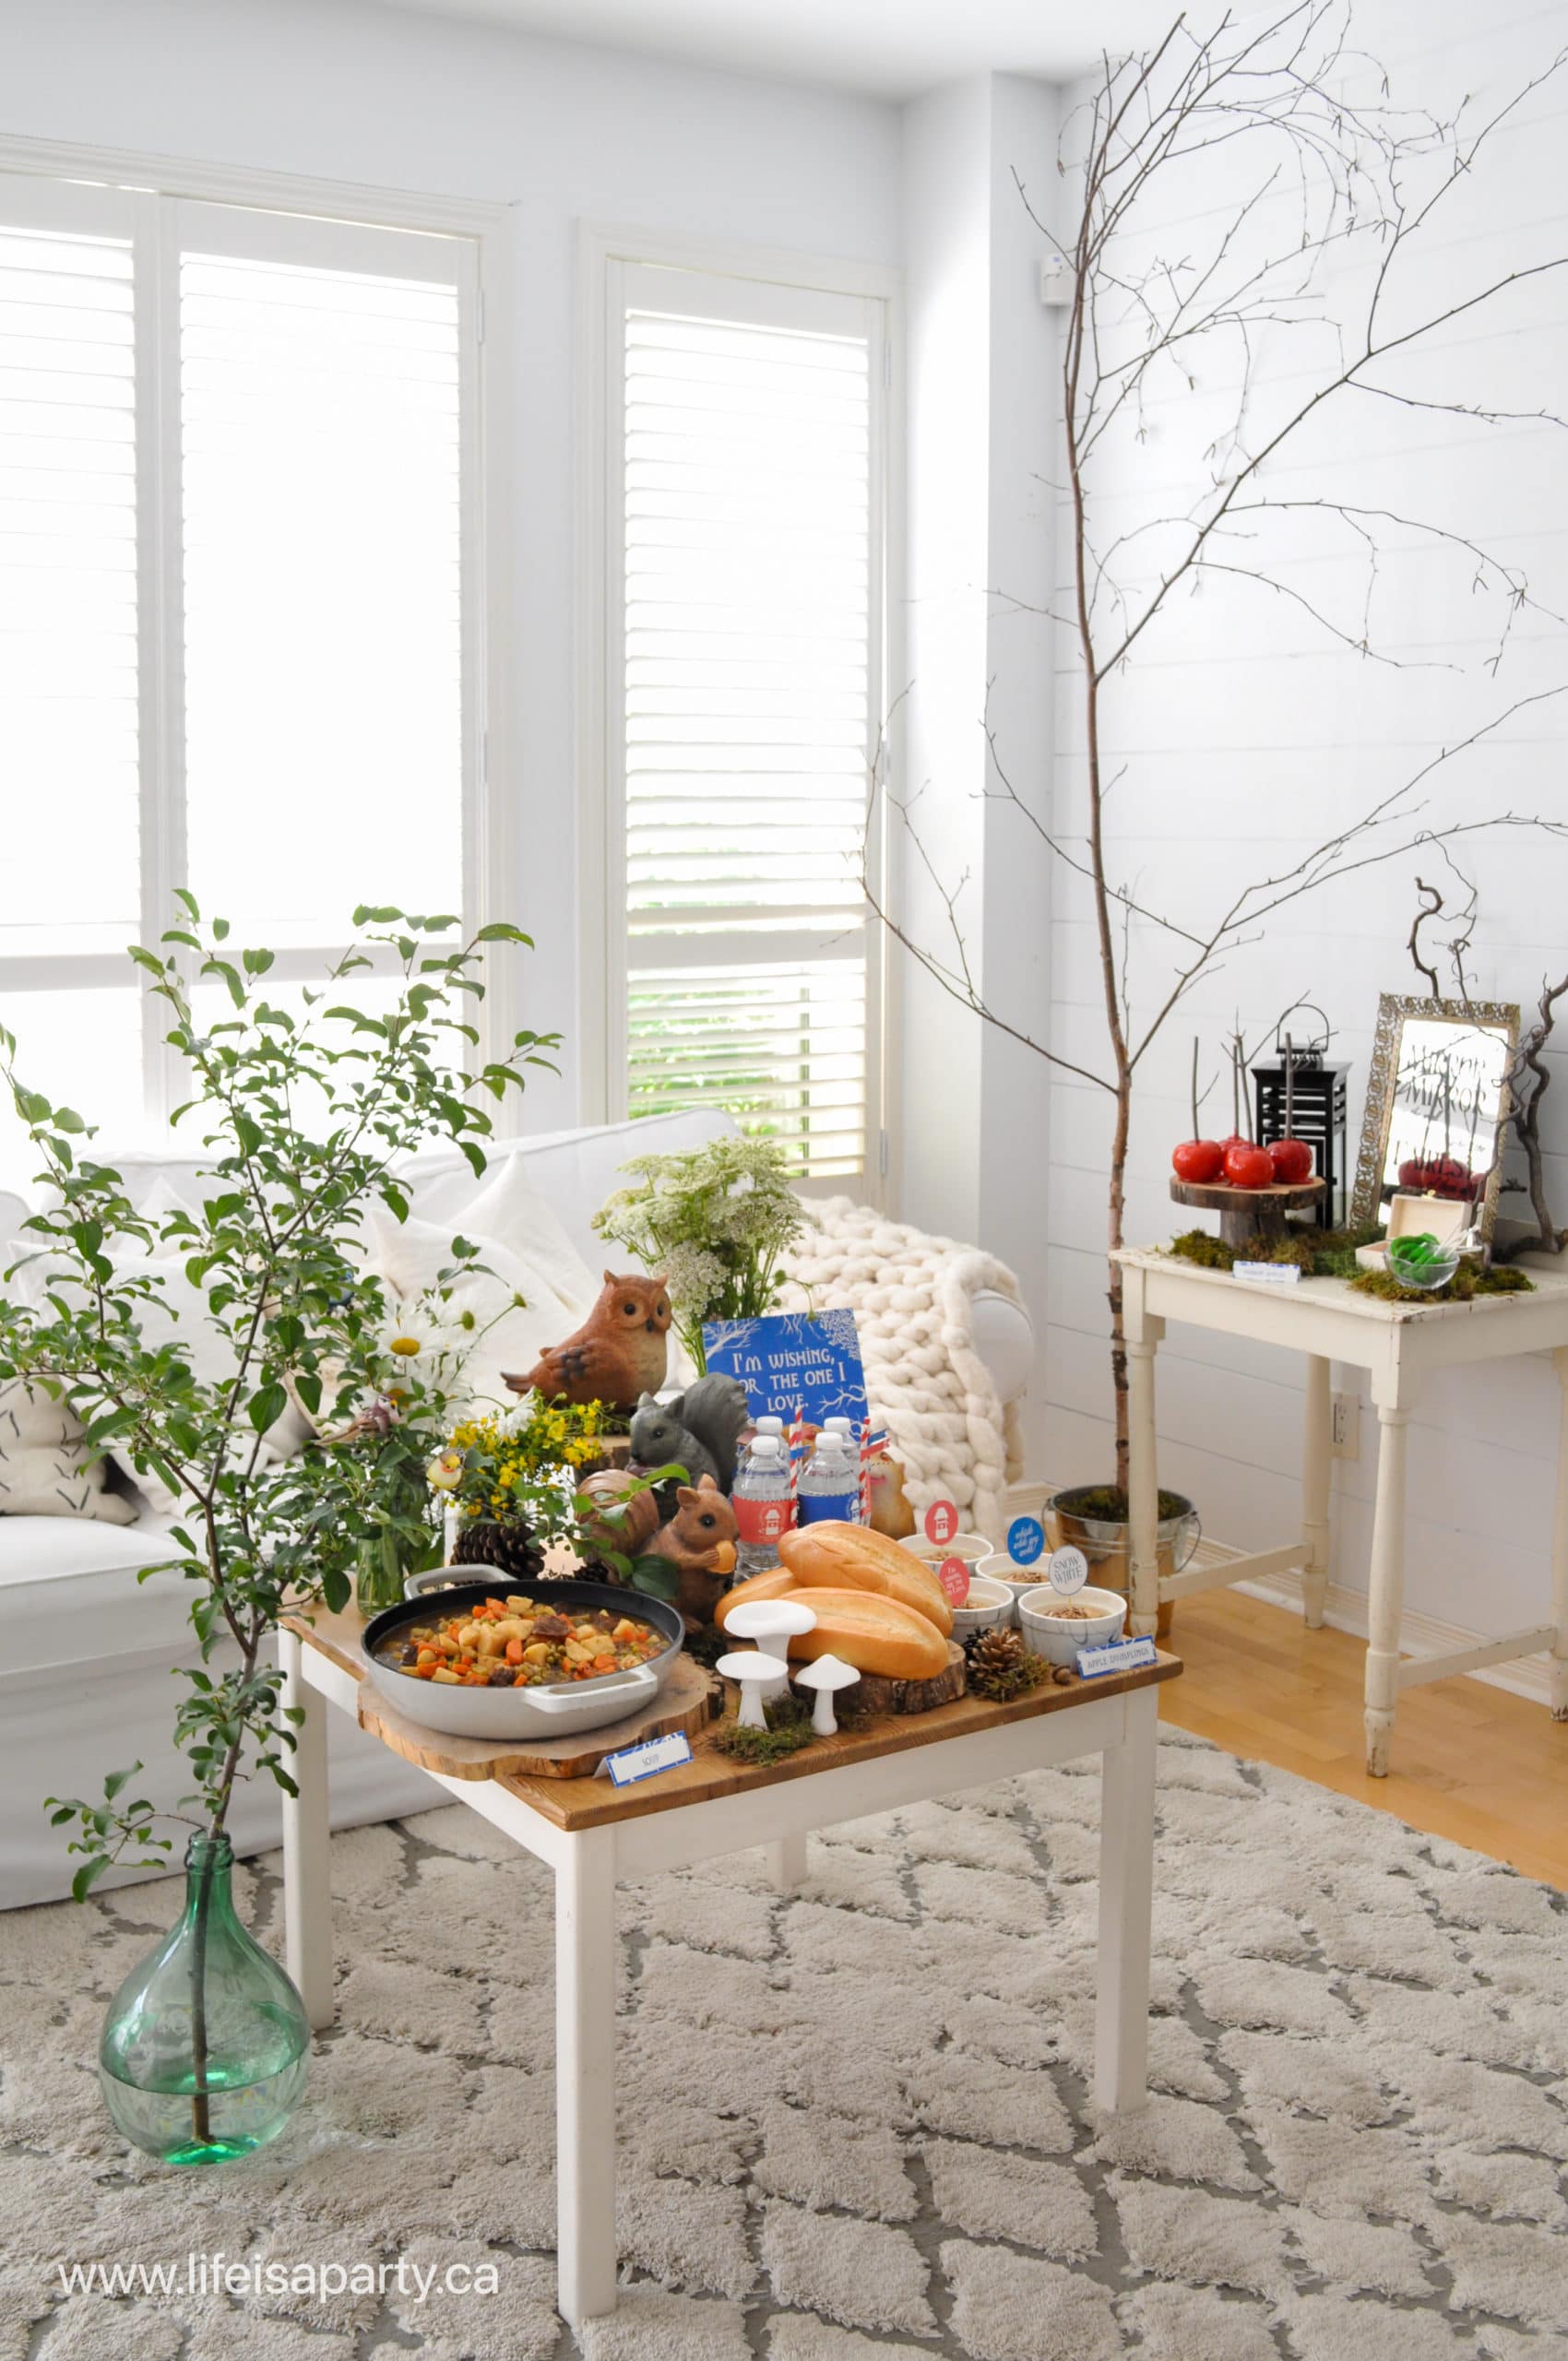
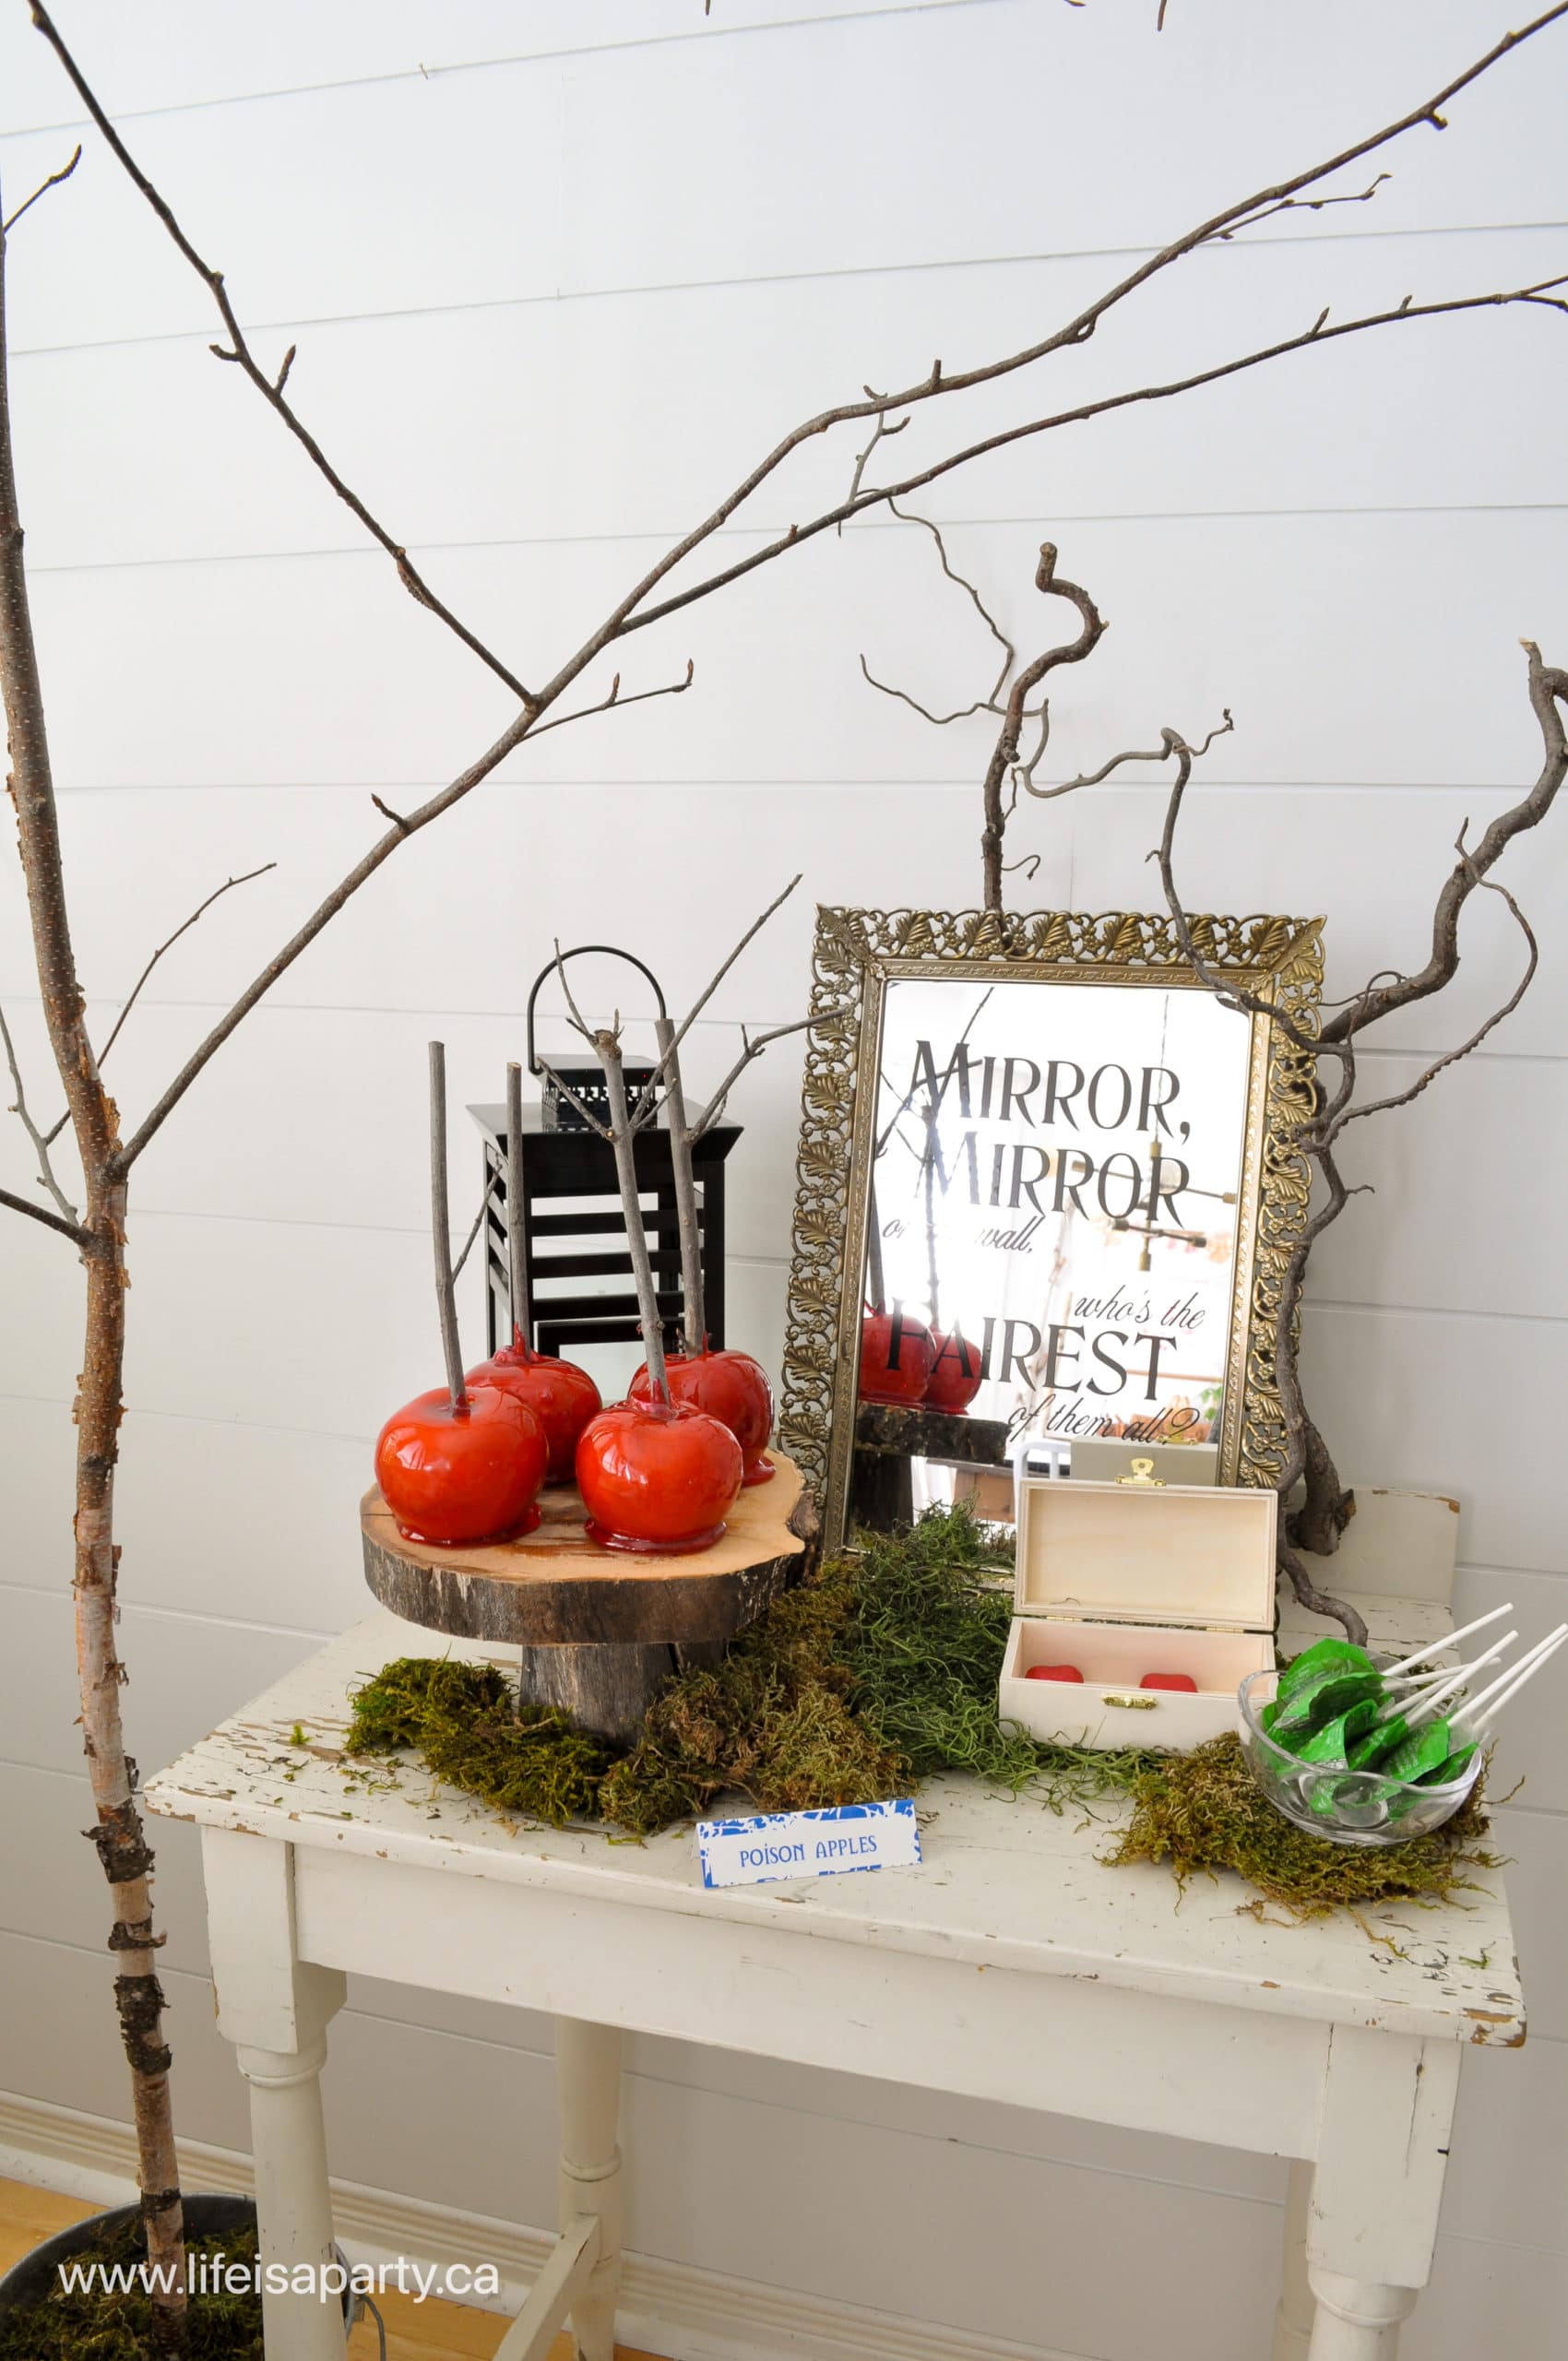
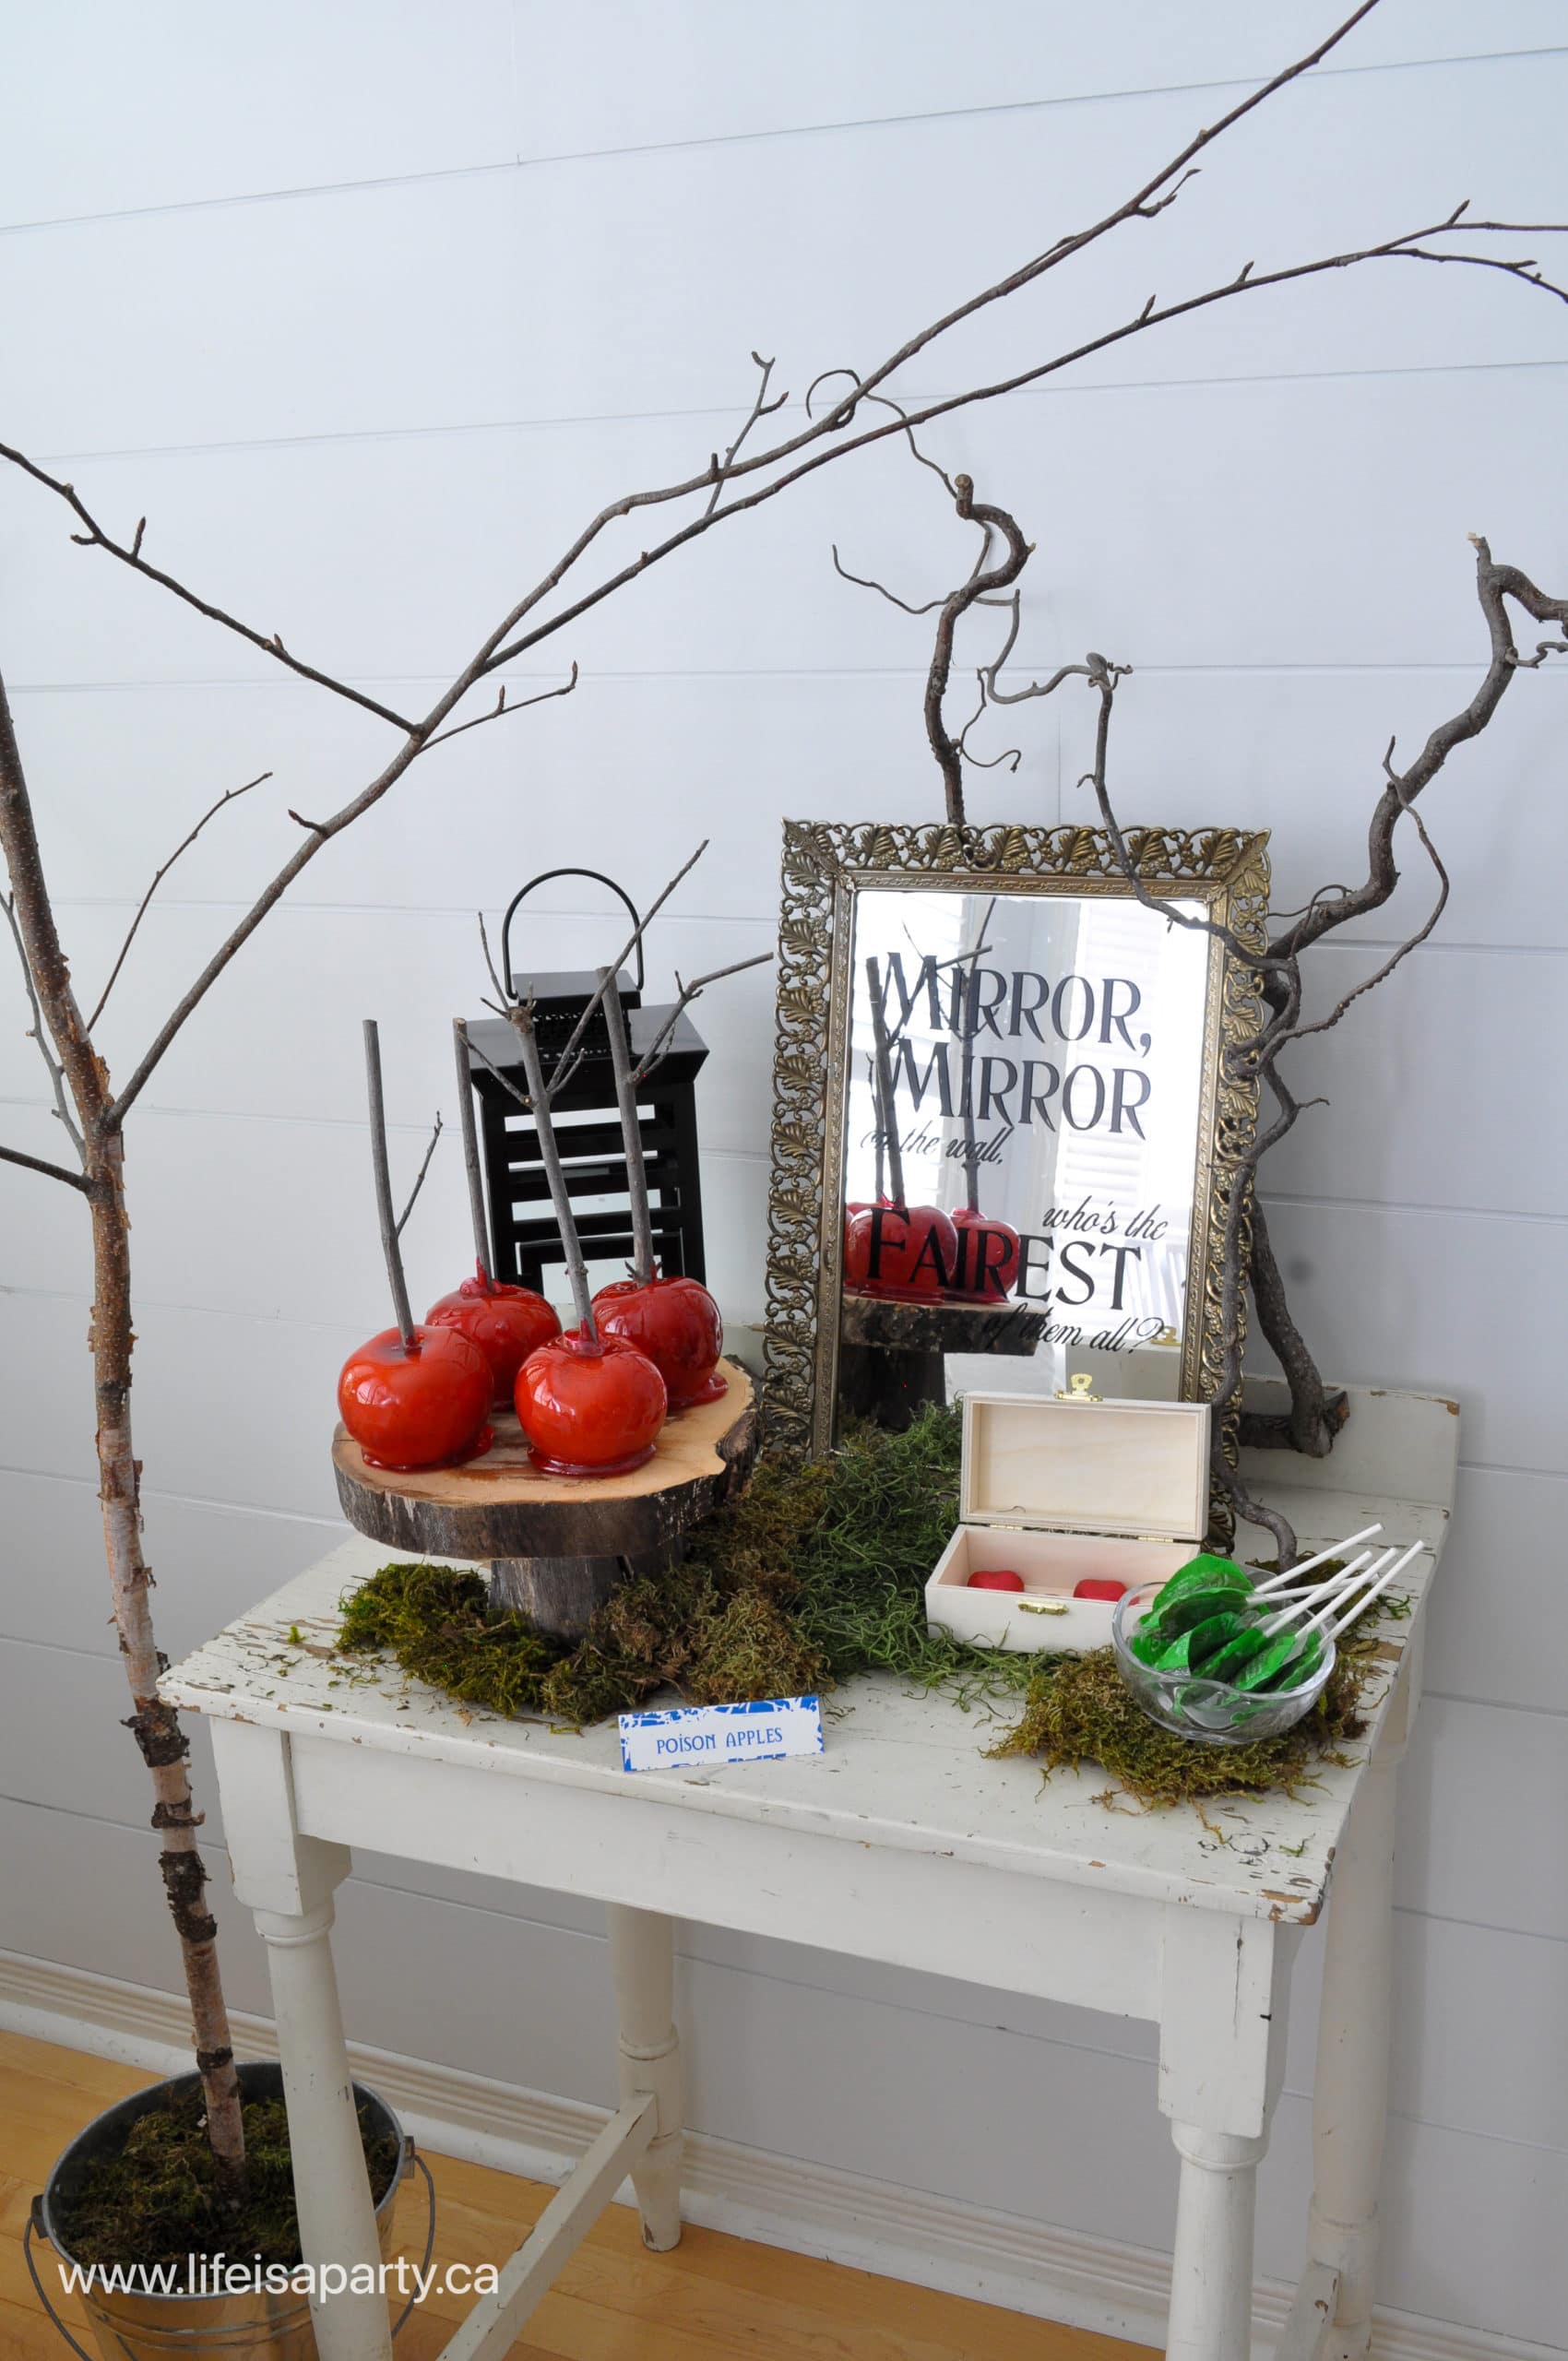
I thought it would be fun to create a more spooky area with a little dessert table and our poison candy apples for our Snow White party. The famous mirror was the perfect backdrop. I didn't have a vintage mirror that would really fit the bill, but then I remembered that I had a mirrored tray that might work. We some wire on the back of the mirror and hung the tray on the wall and it was perfect -along with some spooky fairy tale looking tree branches.
If you didn't have a mirror that would work, the thrift store or an online market like Facebook would be a great place to look for an inexpensive wall mirrors for your DIY magic mirror. And you can use removable vinyl for this project, so that if you ever change your mind and want it back to the original, you can just remove the vinyl letters and have a normal mirror again. Another cute option would be to use a hand mirror. Just adjust the letters to a smaller size to fit a smaller mirror.
Materials
- Cricut Removable Vinyl
- Mirror, Mirror PNG From The Free Resource Library
- Transfer Tape
- Mirror
- Cricut Machine
- Cricut Standard Mat
- Weeding Tools
How To Make a Snow White Mirror
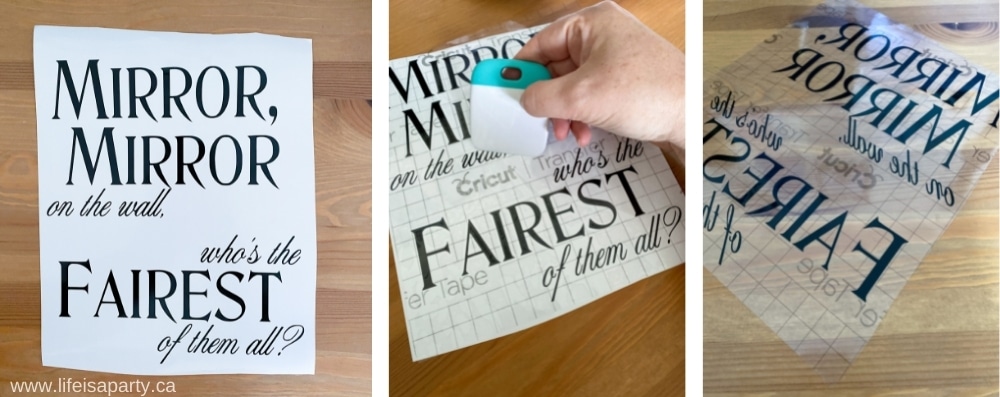
We designed a " Mirror, Mirror on the Wall, Who's the fairest of us all?" text png to use on our mirror. If you'd like to use it you can download from our Free Resource Library. It's free to all our blog subscribers. Subscribe below for free instant access.
Once you have the file downloaded from our Free Resource Library, you can upload it into Cricut Design Space. Or make your own templates in Cricut Design Space choosing any font you like.
We used black non-permanent vinyl to make our mirror, incase we want to remove it later and change it back to a regular mirror. Look for it at the craft store with the regular permanent vinyl. If it's your first time working with non-permanent vinyl, it's easy to work with, and cuts pretty much exactly like regular permanent vinyl. The non-permanent vinyl holds really well, but makes it easy to remove, without sticky residue if want to remove it later, and it's a great choice for projects like this one.
We used a standard grip mat to cut it out and the non-permanent vinyl cutting setting. After cutting it out, we removed the vinyl from the mat, and weeded it using the weeding tools. After the wedding is finished apply the transfer tape to the vinyl and use the transfer tape to add the vinyl to the mirror. Use the scraping tool to burnish the vinyl onto the mirror, and then slowly and carefully remove the transfer tape leaving the vinyl on the mirror and revealing the finished project.
Snow White Party Decor -DIY Mirror, Mirror
Equipment
- Cricut Machine
- Cricut Standard Mat
- Weeding Tools
Materials
- Cricut Removable Vinyl
- Mirror Mirror Cut File
- Transfer Tape
- Mirror
Instructions
- Get the free Mirror, Mirror PNG file from our Free Resource Library.
- Download it, and then upload it into Cricut Design Space. Adjust the size to fit your mirror.
- Choose the "Make It" option. And following the prompts in Cricut Design Space, add you black non-permanent vinyl to the standard grip mat and load it into the Cricut. Choose premium vinyl as your material. Cut out the design.
- Next remove your vinyl from the mat, and weed it using the weeding tools.
- Apply the transfer tape to the vinyl.
- Use the transfer tape to add the vinyl to the mirror.
I love this spooky addition to the party. Our mirror turned out great, all it needs is an evil spirit to dwell in it and tell us how the fairest in the land really is. This corner of the room has all the evil queen vibes now -including the little box with Snow White's heart in it from the woodsman (even if it is chocolate).
This DIY Mirror, Mirror is the perfect addition to our Snow White party decor!
This projects was part of our Snow White themed Disney Princess Dinner and Movie Night -check out all the details about the whole party here.
Disney Princess Dinner and Movie Toolkit
Love Disney Princess dinner and movie nights? Buy our Disney Princess Dinner and Movie Toolkit. The Toolkit includes 6 different Disney Princess movie nights with menus, all the recipes, inspiration, and printables for each one. Check out more about the Disney Princess Dinner and Movie Toolkit by clicking here.


Leave a Reply
You must be logged in to post a comment.