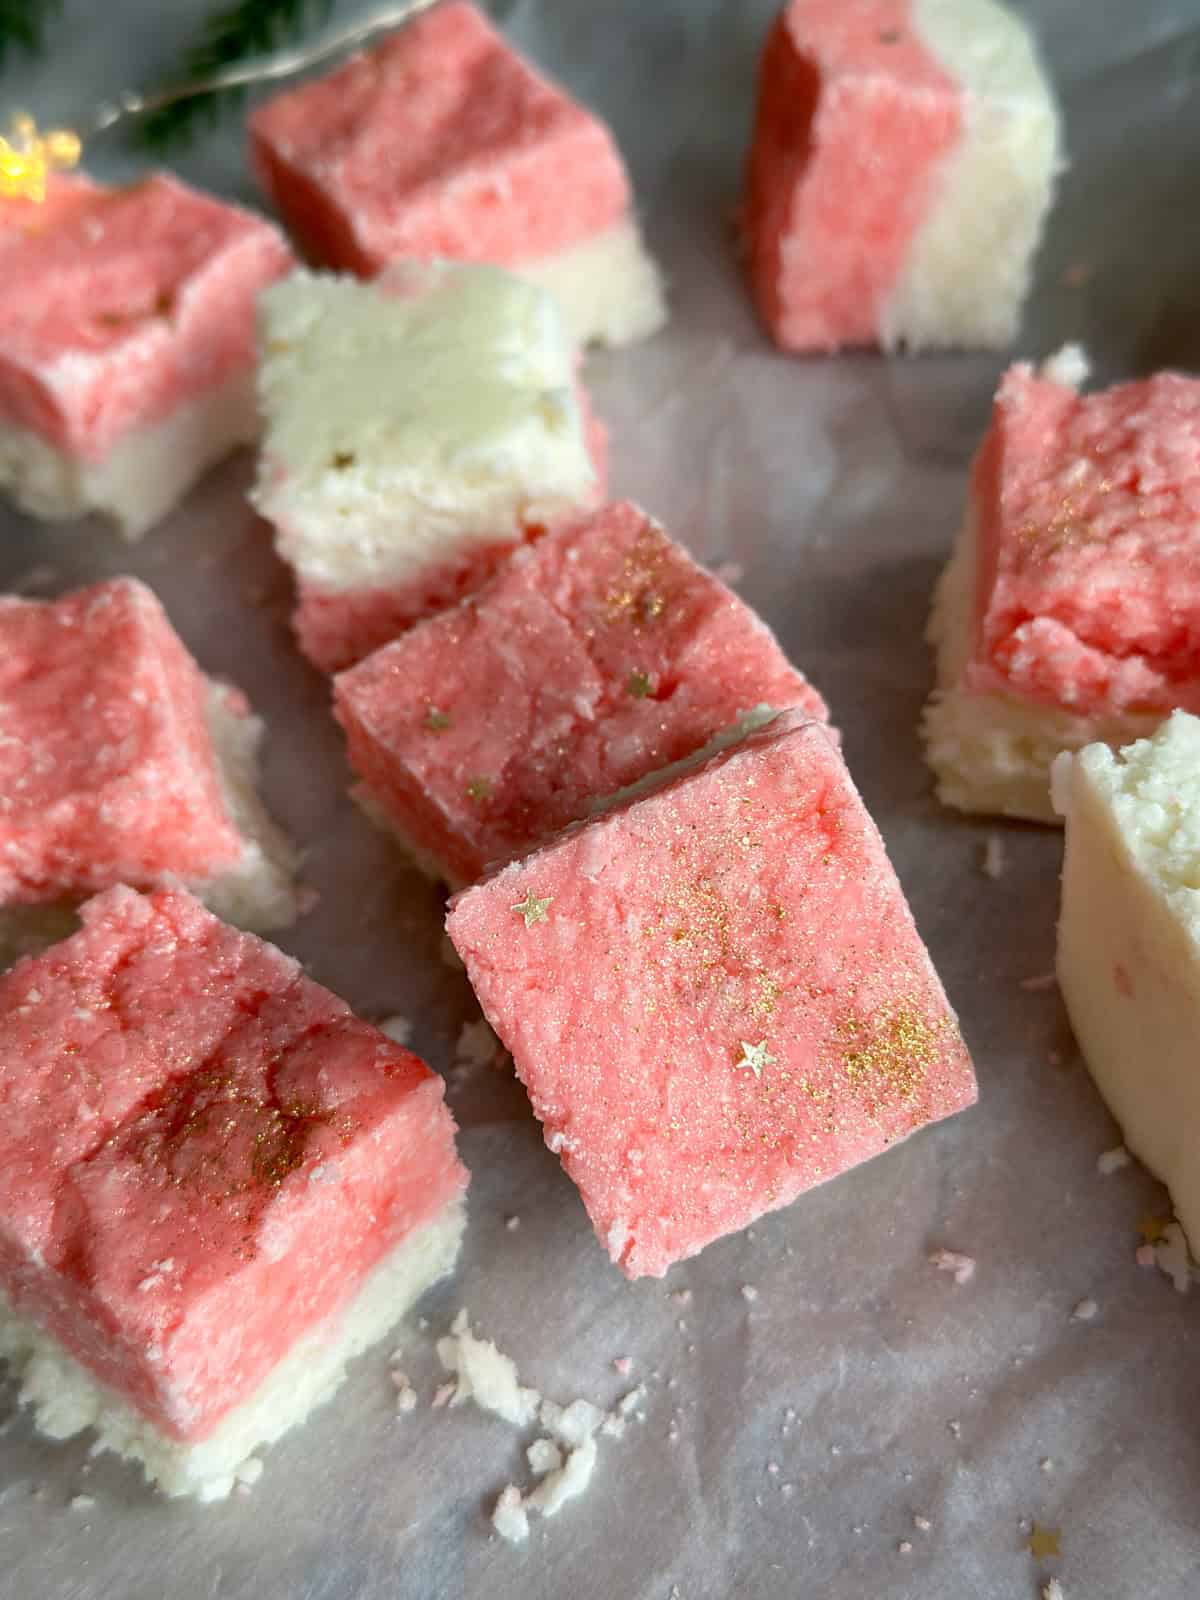
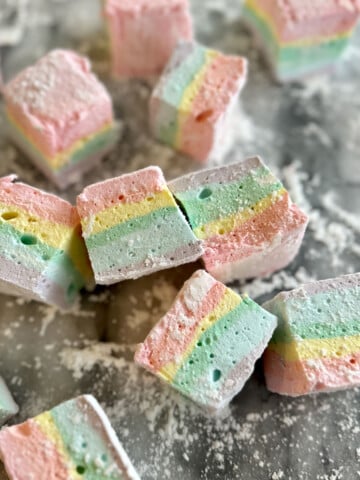
This coconut ice is a sweet, nostalgic treat with beautiful pink and white layers that's perfect for holiday gifts, Harry Potter parties, or anytime you want a simple no-bake dessert. Made with just 5 ingredients and ready in 2 hours, this classic candy is as easy as it is delicious.
A Quick Look At This Recipe
- 📋 Recipe: Easy Coconut Ice
- ⏲️ Time: 10 minutes to prepare, 2 hours to set
- 👪 Servings: 8 x 8 baking dish, 36 pieces
- 🔪 Difficulty: Easy
- 💭 Top Tip: This no bake is great to make with kids, makes a lovely gift too.
Why You'll Love This Recipe
- So simple to make. Just five ingredients and a stand mixer, no bake
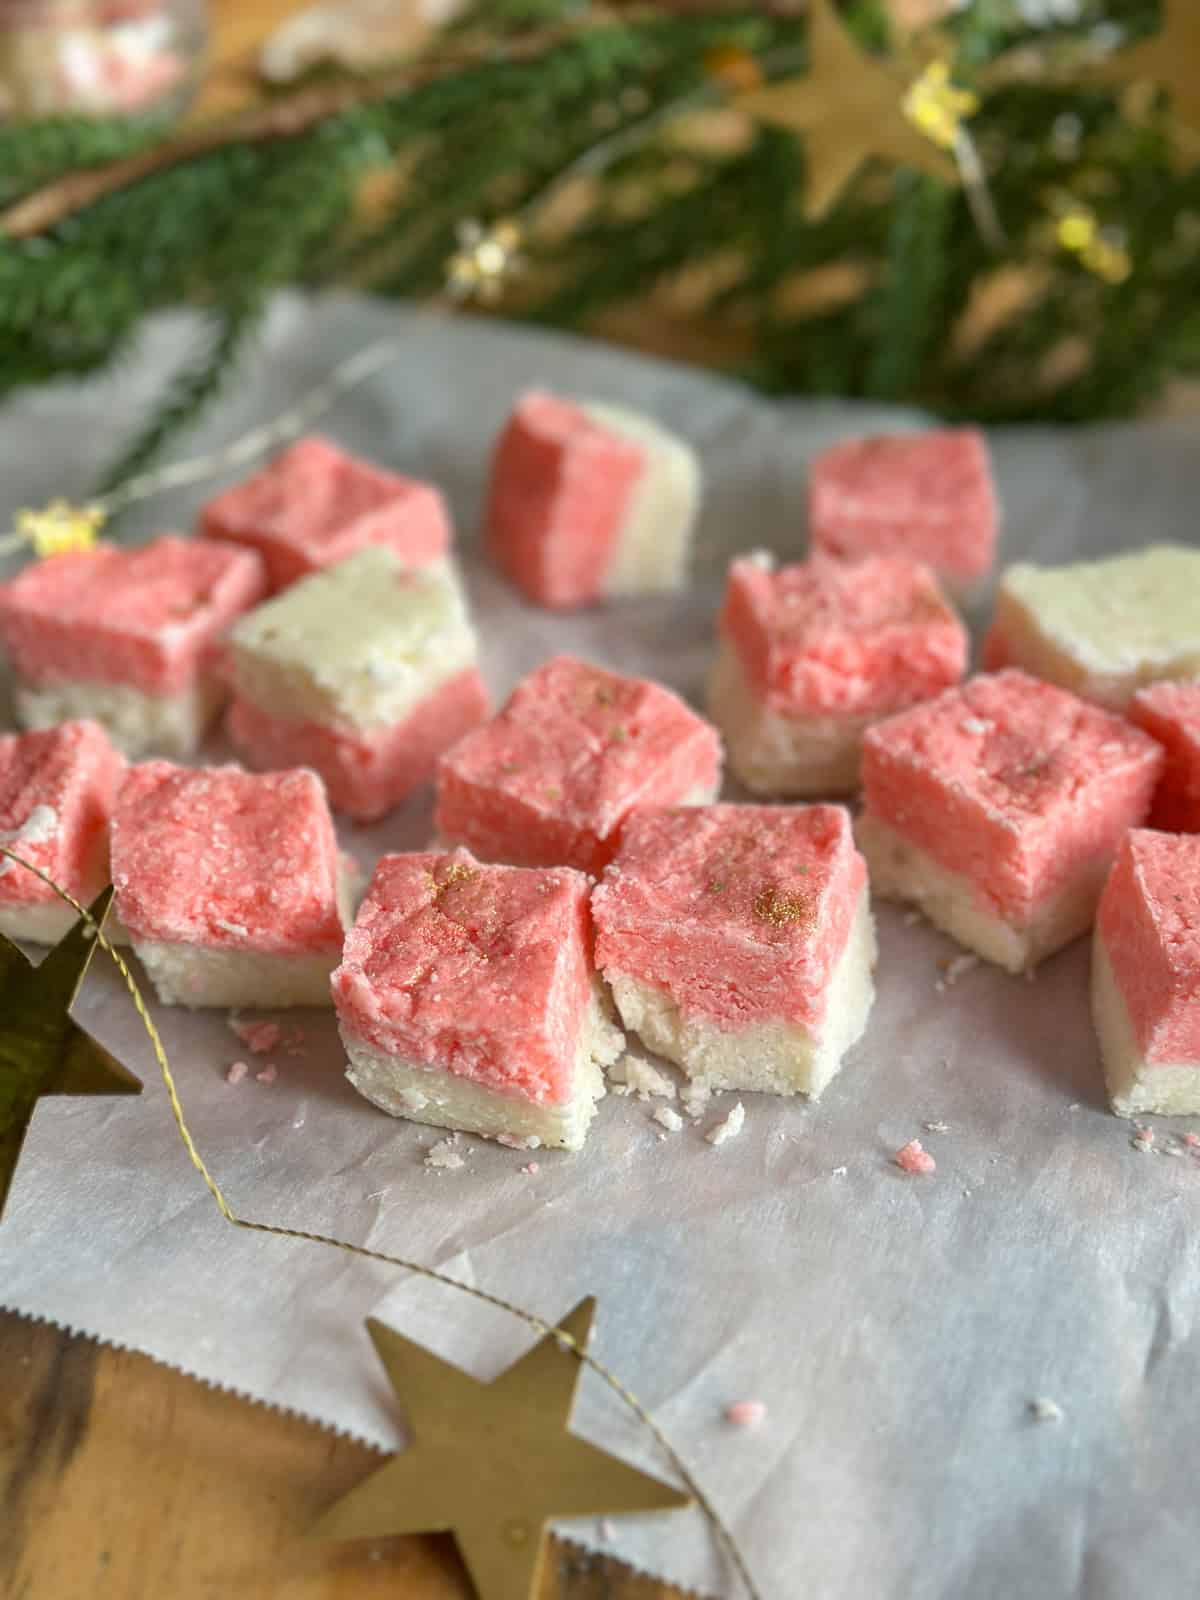
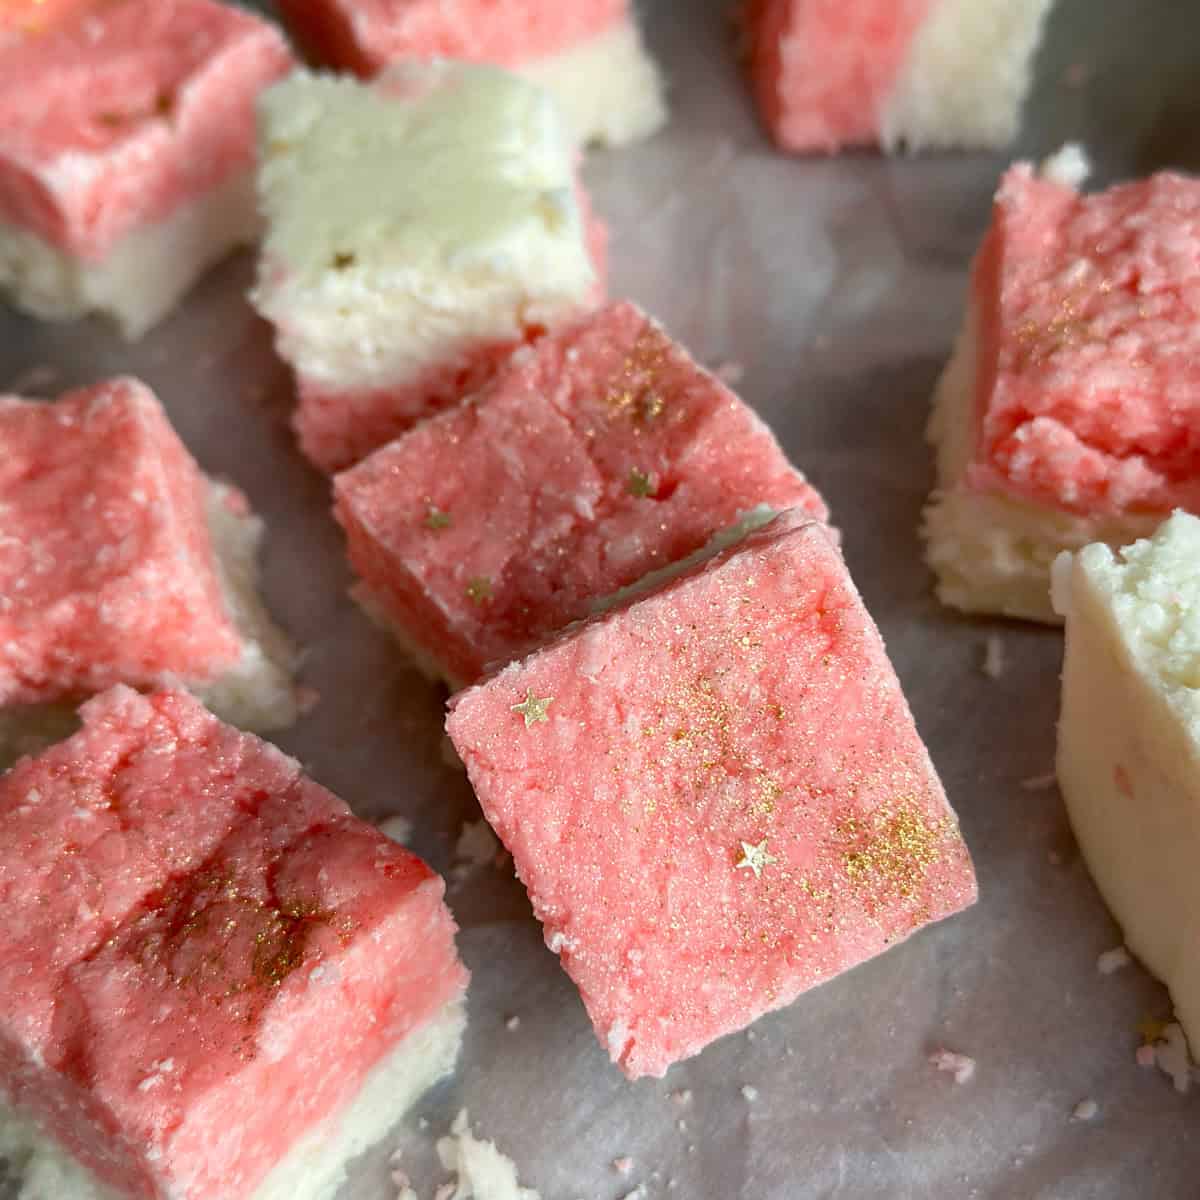
- Beautiful presentation. The pink and white layers look stunning and festive for any celebration.
- Perfect for gifting. These sweet squares package beautifully for holiday treats or party favors.
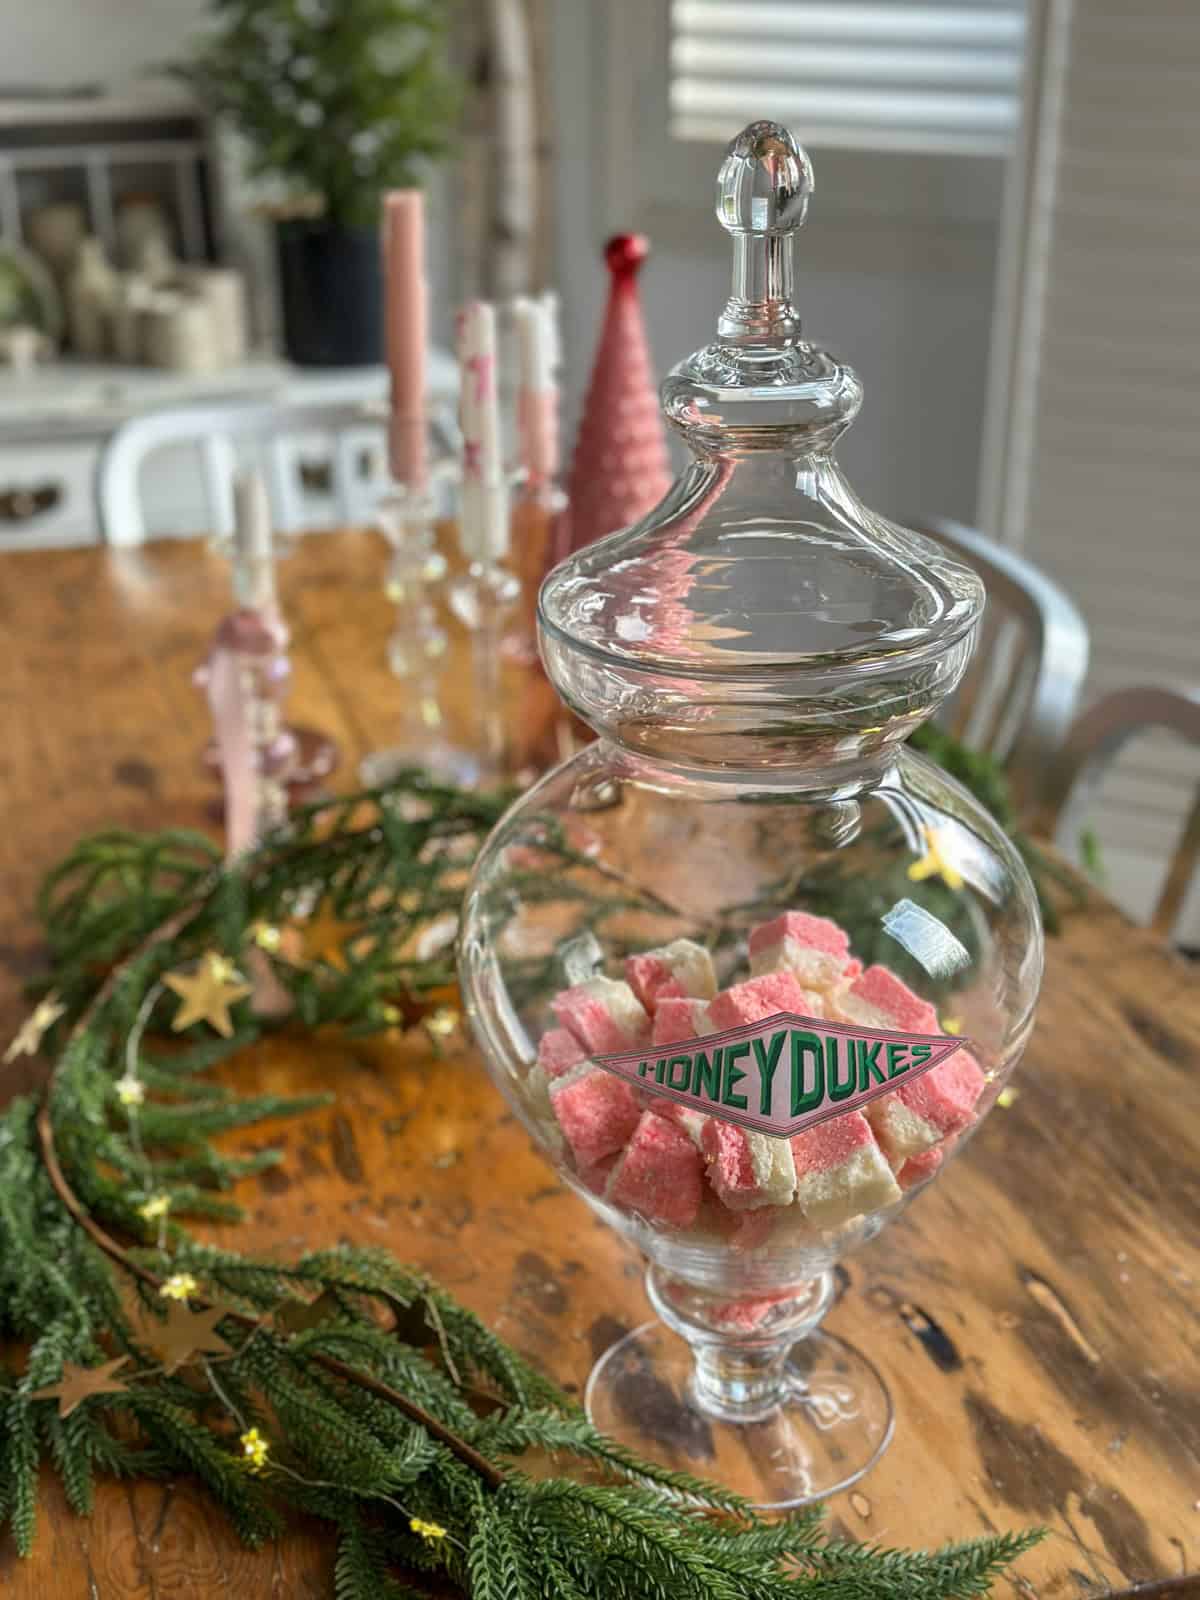
- Harry Potter approved. Inspired by the sweets from Honeydukes, this treat is perfect for themed parties, or any Harry Potter fans.
What makes coconut ice so special is its simplicity. With just a handful of ingredients and no complicated techniques, you can create a treat that looks impressive and tastes amazing. The texture is slightly grainy from the sugar, wonderfully chewy from the coconut, and just sweet enough to satisfy any candy craving.
We made this coconut ice for our Harry Potter Honeydukes sweets cart, where it fit right in alongside chocolate frogs and Bertie Bott's Every Flavour Beans. Coconut ice is mentioned in the Harry Potter books as one of the treats available at Honeydukes, the magical sweet shop in Hogsmeade. If you're planning a Harry Potter party or movie night, this authentic treat brings the magic to life. See it all in our Harry Potter Christmas tree post here. It also was featured at our Harry Potter themed Christmas Party. You might also like our Harry Potter Snacks and Treats, and our DIY Harry Potter Decor and Free Printables. Also check out our recipe for Mrs. Weasley's Chocolate Walnut Fudge.
What Is Coconut Ice?
Coconut ice is a sweet, chewy confection made from shredded coconut, sugar, and condensed milk. This no-bake treat has been a beloved candy popular in the UK, Australia, and New Zealand. The traditional version features two distinct layers in pink and white, creating a beautiful presentation that's perfect for celebrations and gift-giving.
Ingredients
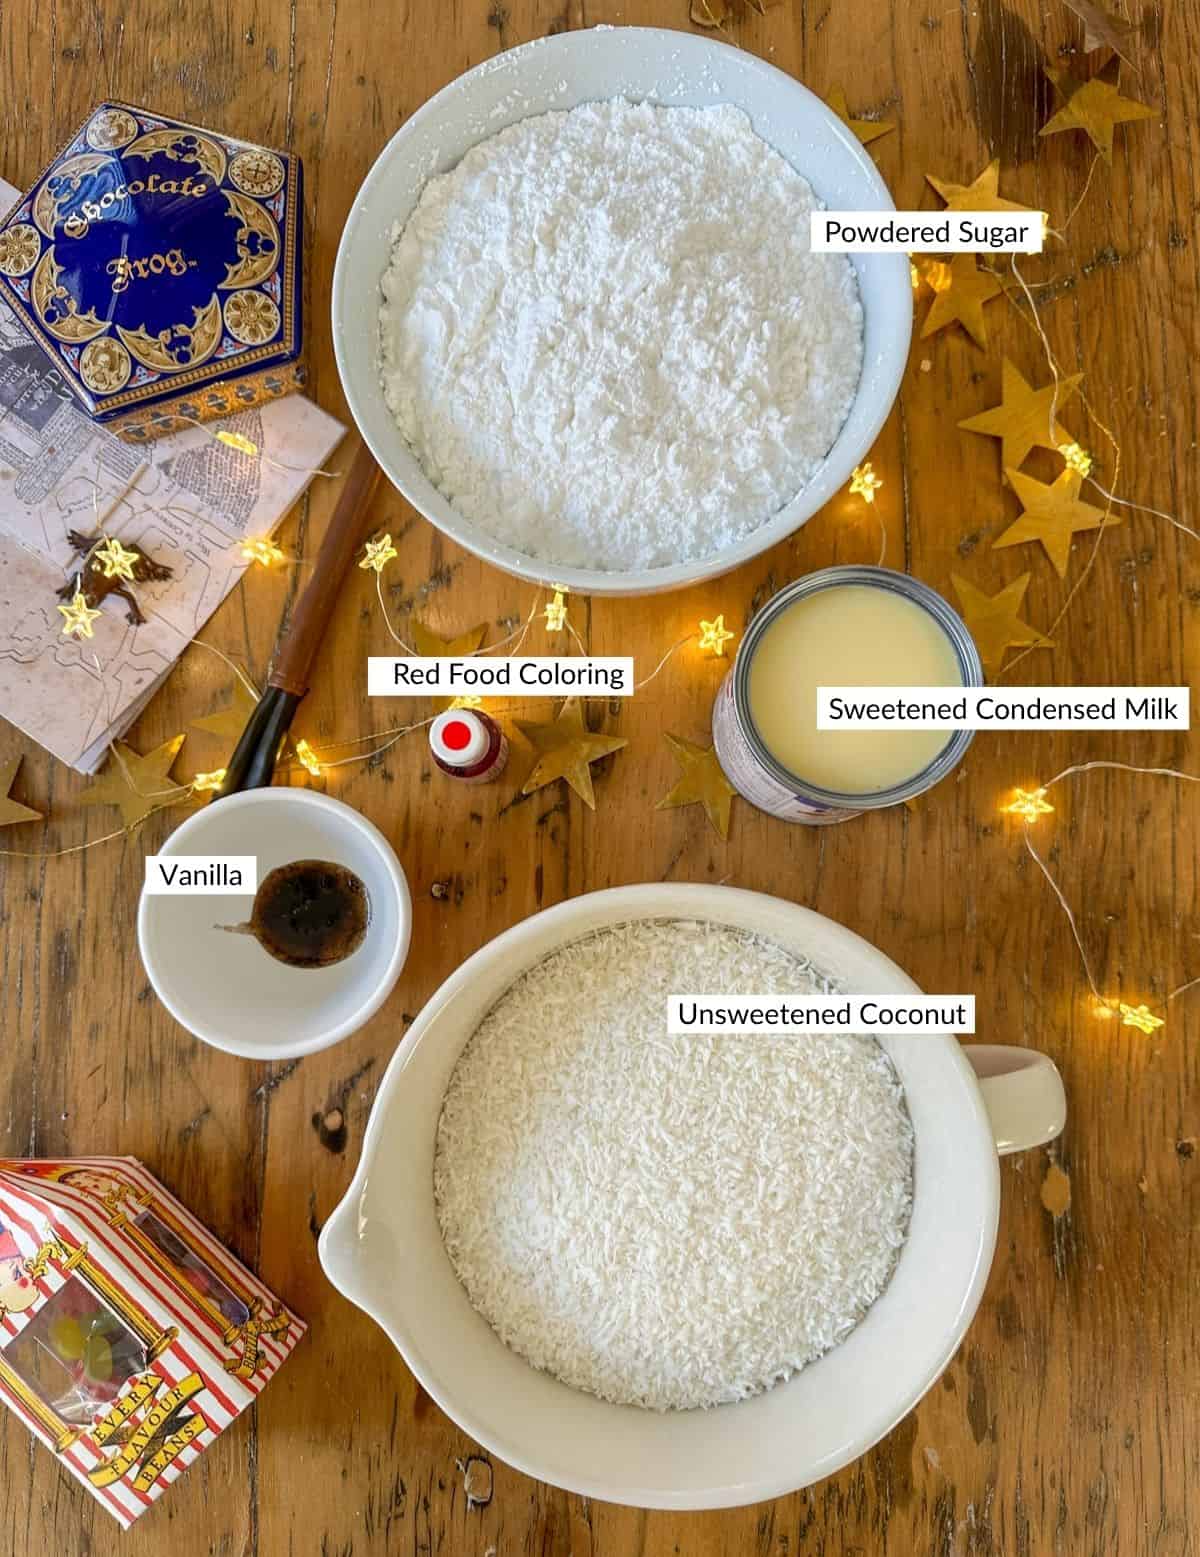
- Sweetened Condensed Milk creates the base and provides sweetness and binding power. The thick, creamy consistency helps hold everything together while adding great flavor. Make sure to use sweetened condensed milk, not evaporated milk, as they're very different and this recipe will not work with evaporated milk.
- Unsweetened Shredded Coconut gives this candy its signature texture and flavor. You can find it in the baking aisle near other coconut products. Don't substitute sweetened coconut, as the recipe is already quite sweet.
- Powdered Sugar (also called icing sugar or confectioners' sugar) provides structure and that classic slightly grainy texture. The fine texture of icing sugar distributes evenly throughout the mixture and helps the candy set properly.
- Vanilla Extract adds to the flavor. Pure vanilla extract works best, but imitation vanilla works as a substitute.
- Red Food Coloring creates the traditional pink layer. Gel food coloring gives the best color, but liquid food coloring works too. Start with just 2 drops and add more if you want a deeper pink.
- Optional: Star Sprinkles and Edible Glitter add a magical finishing touch, especially if you're making these for a Harry Potter party or special celebration.
How To Make Coconut Ice
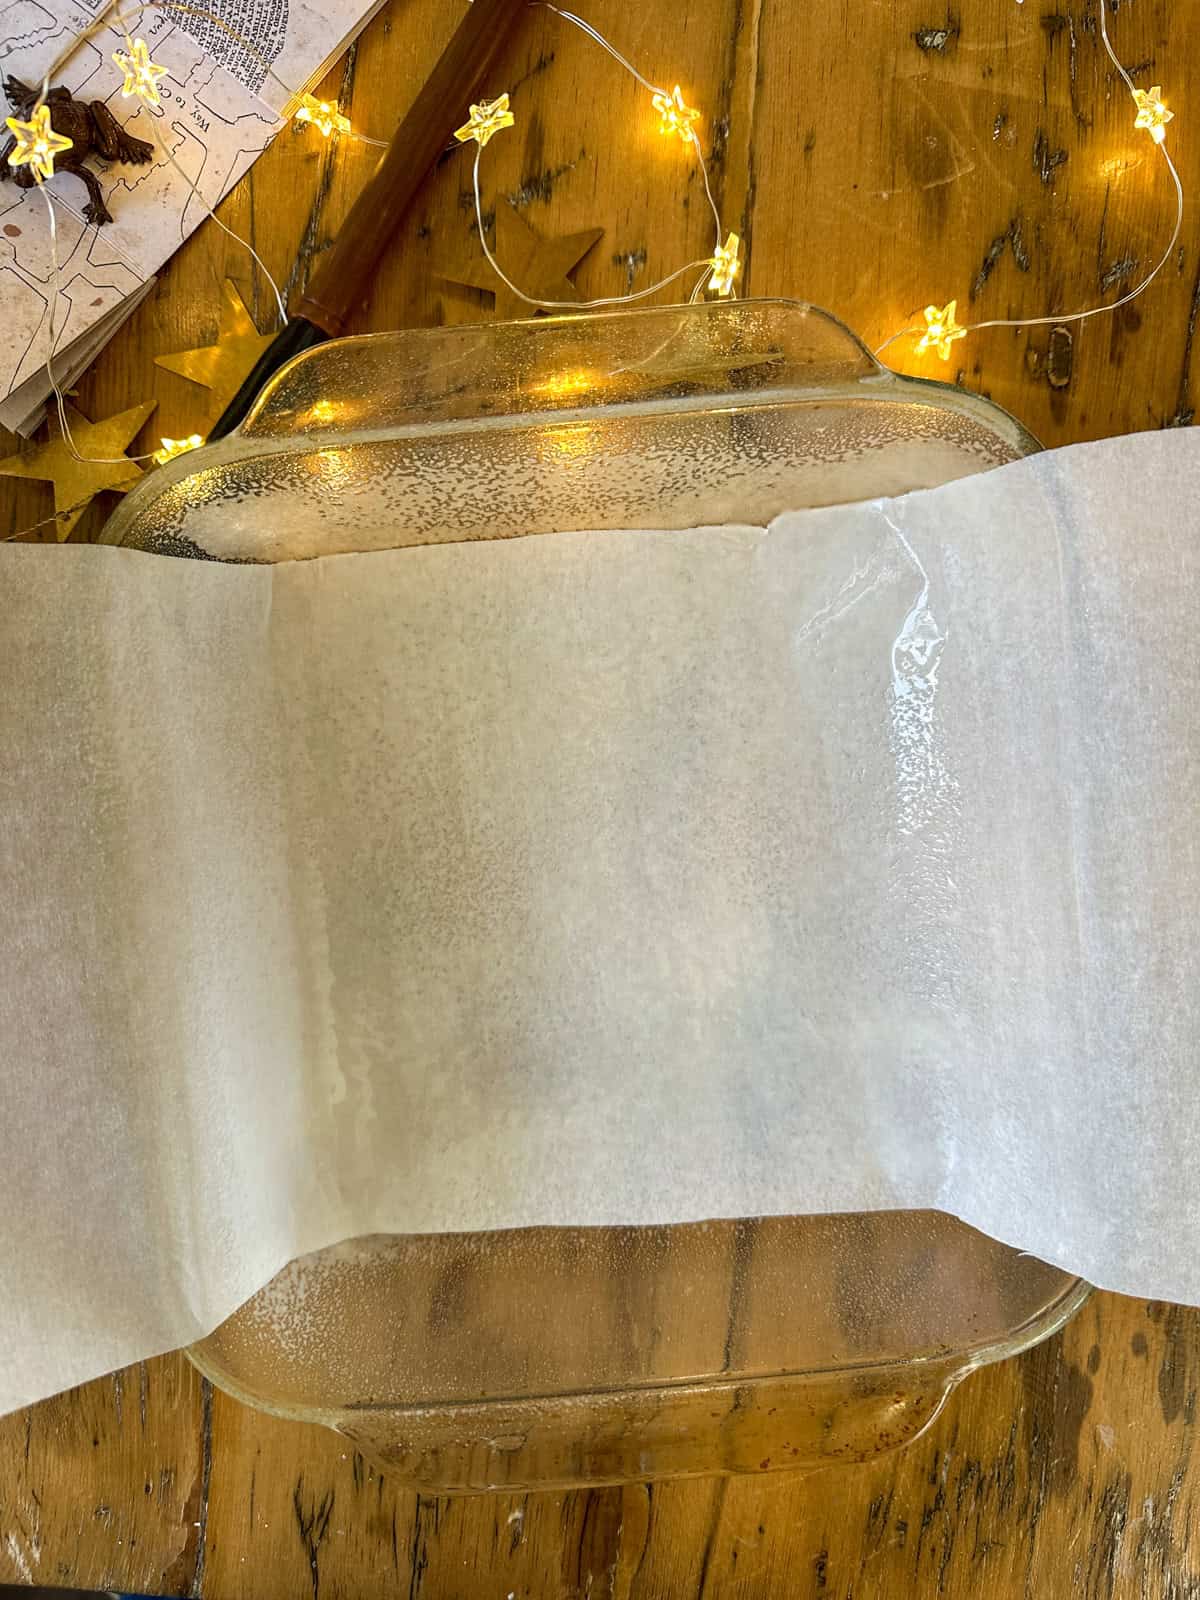
- Step 1: Prepare Your Pan Line an 8x8 inch baking dish with parchment paper, making sure the paper comes up the sides for easy removal later. Spray the parchment paper lightly with cooking spray. This step makes removing and slicing the coconut ice so much easier.
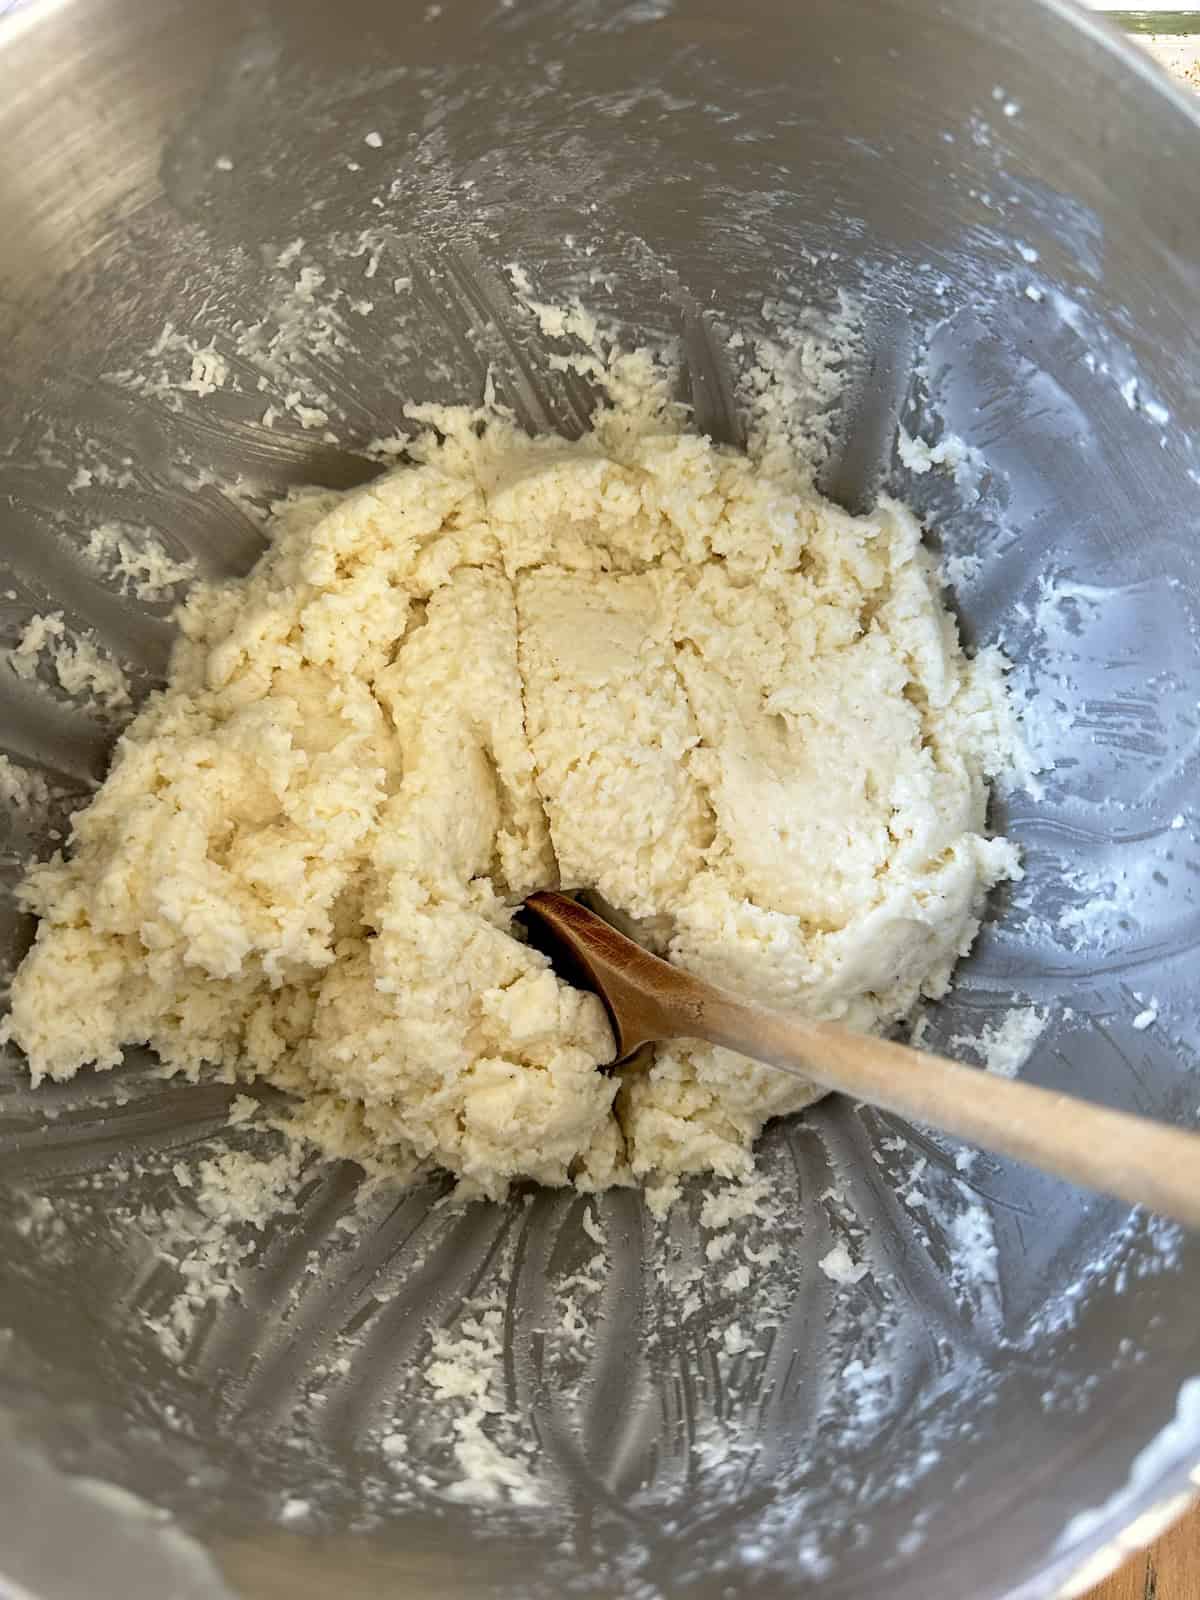
- Step 2: Mix The Base In the bowl of a stand mixer, combine the condensed milk, unsweetened coconut, powdered sugar, and vanilla. Mix on medium speed until everything is fully combined and the mixture is thick and sticky. This takes about 2 minutes. The mixture should hold together when pressed.
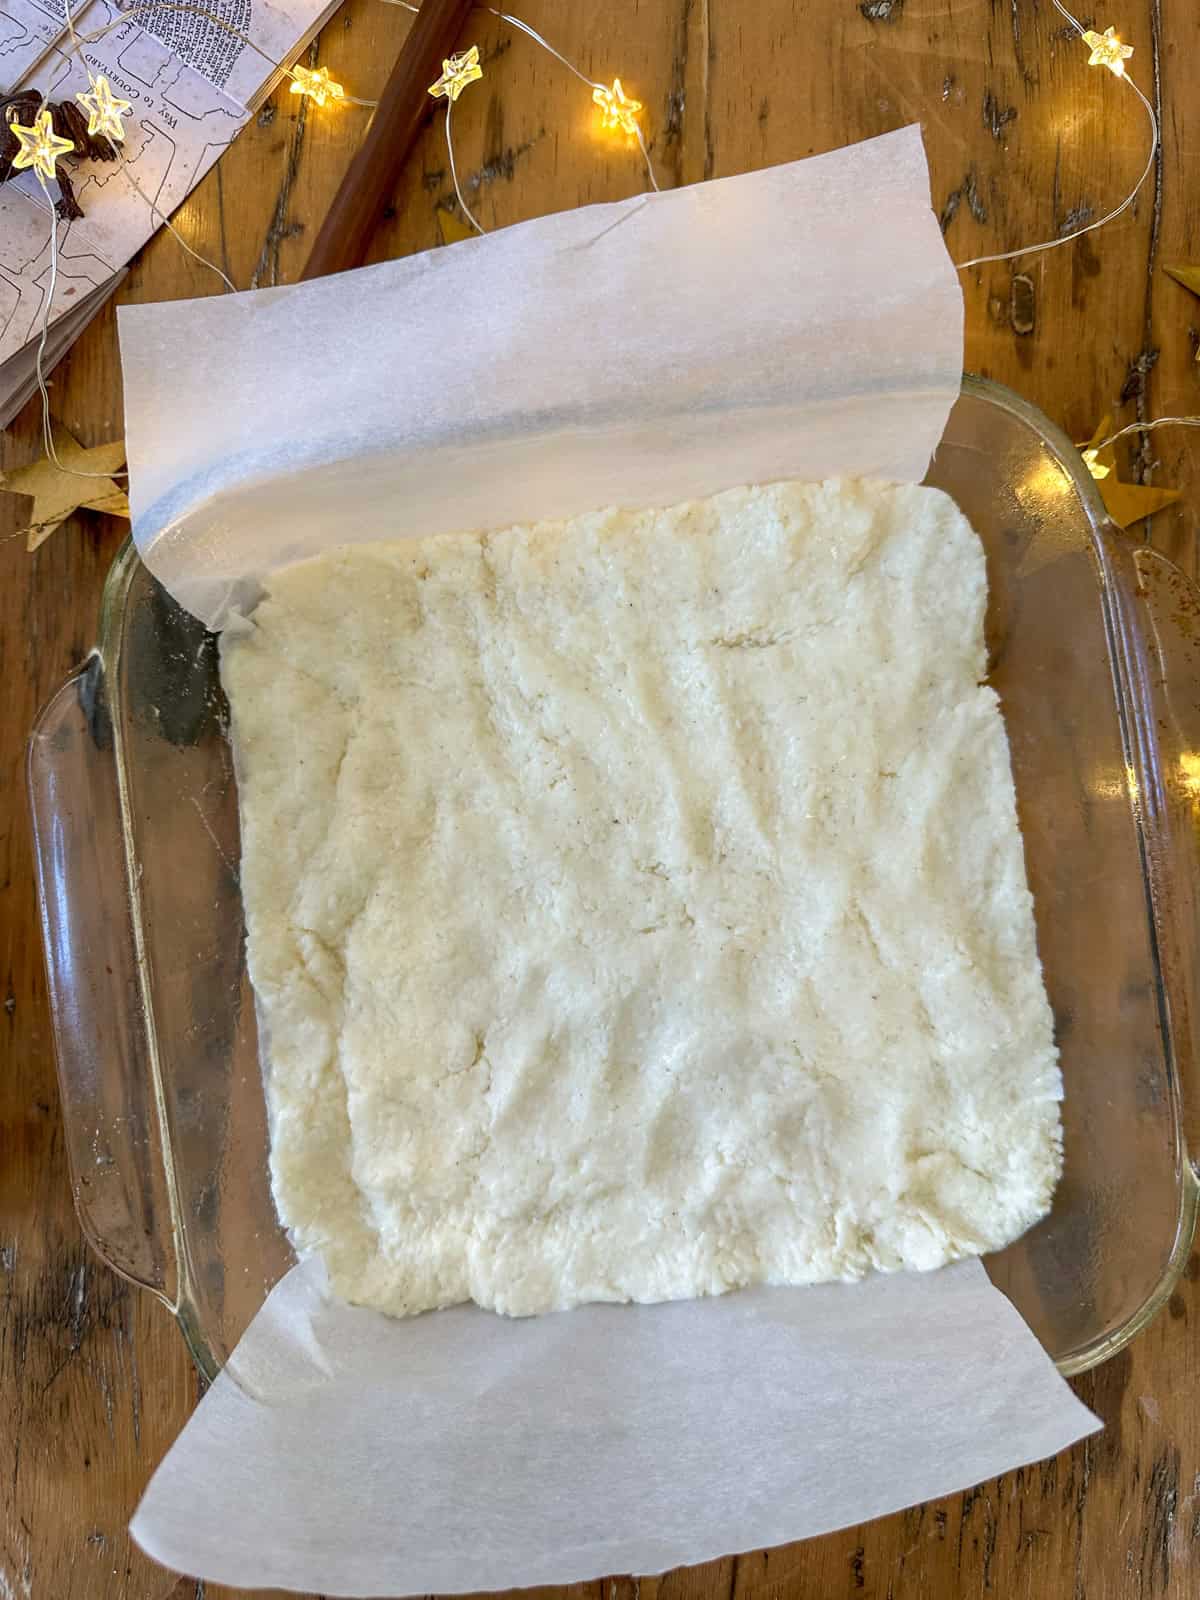
- Step 3: Press The White Layer Transfer half of the mixture to your prepared baking dish. Using clean hands or the back of a spoon, press it firmly into an even layer across the bottom of the pan. Make sure it's packed down well and reaches all the corners. The more evenly you press this layer, the better your final result will be.
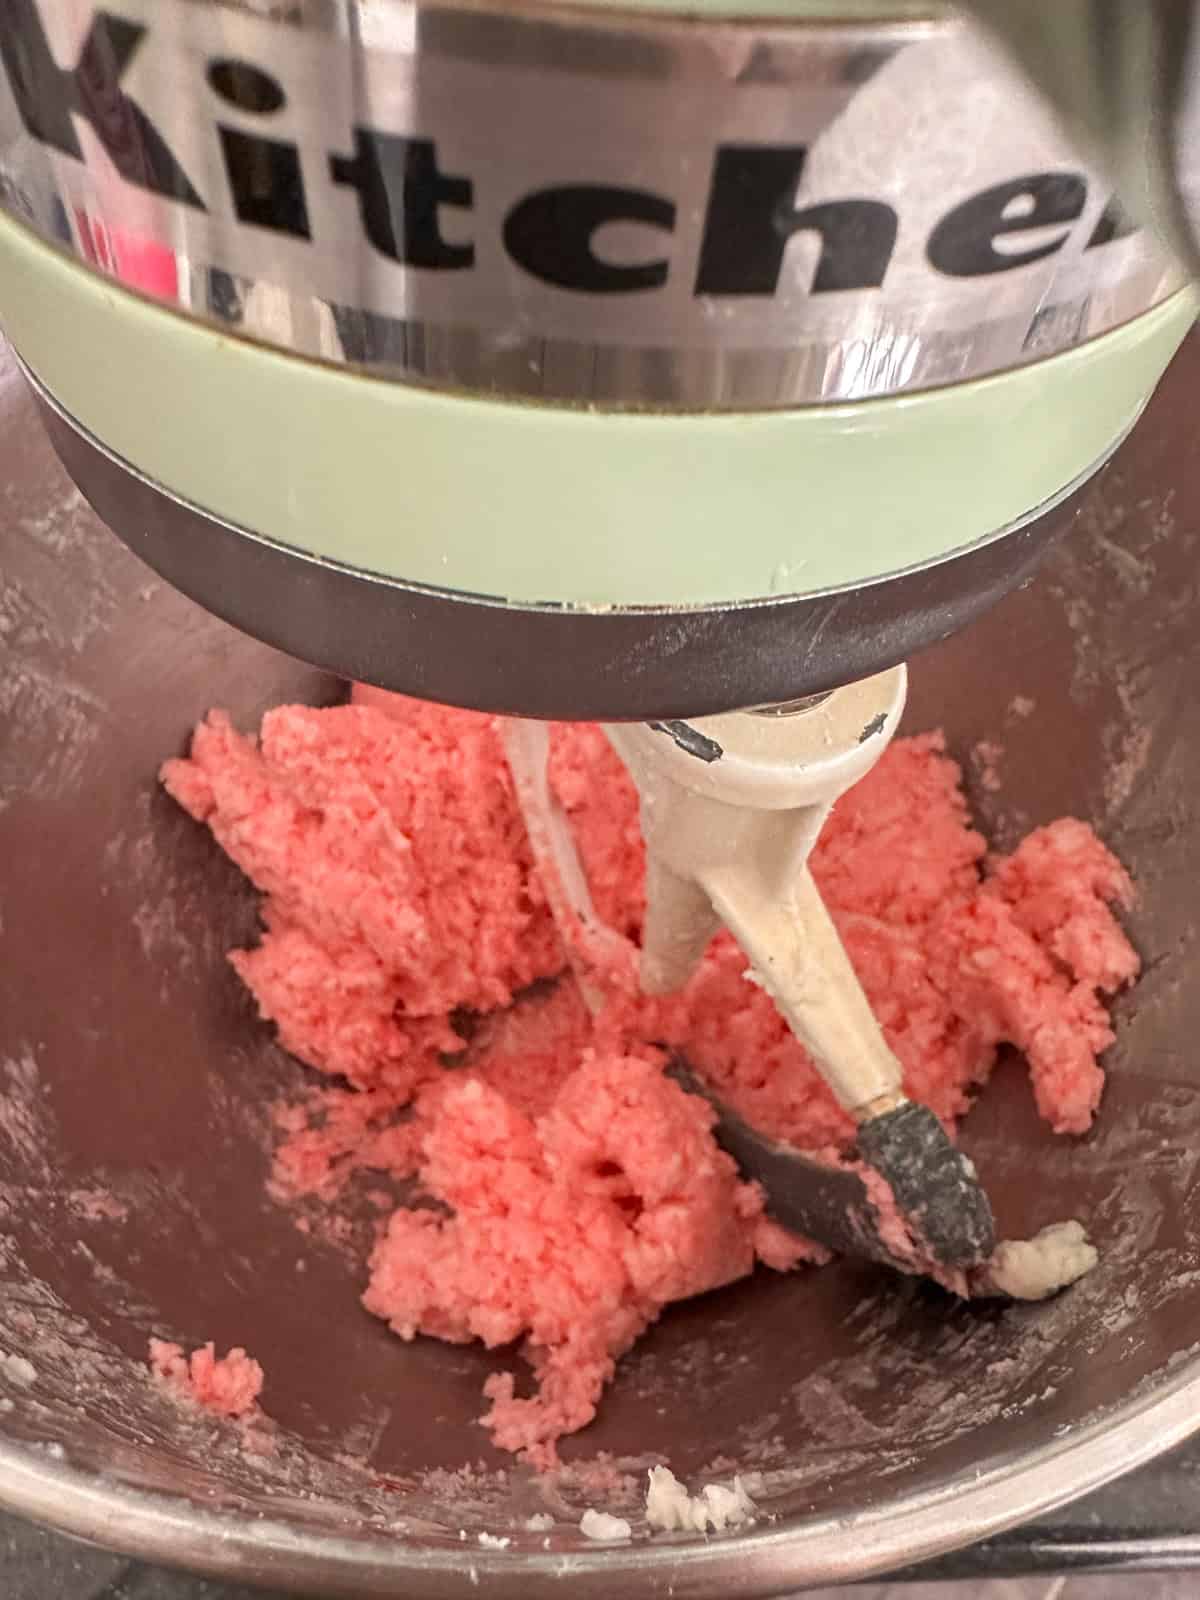
- Step 4: Color The Pink Layer Add 2 drops of red food coloring to the remaining mixture in the stand mixer bowl. Mix on medium speed until the color is fully combined and you have a uniform pink shade. If you want a deeper pink, add one more drop of food coloring and mix again.
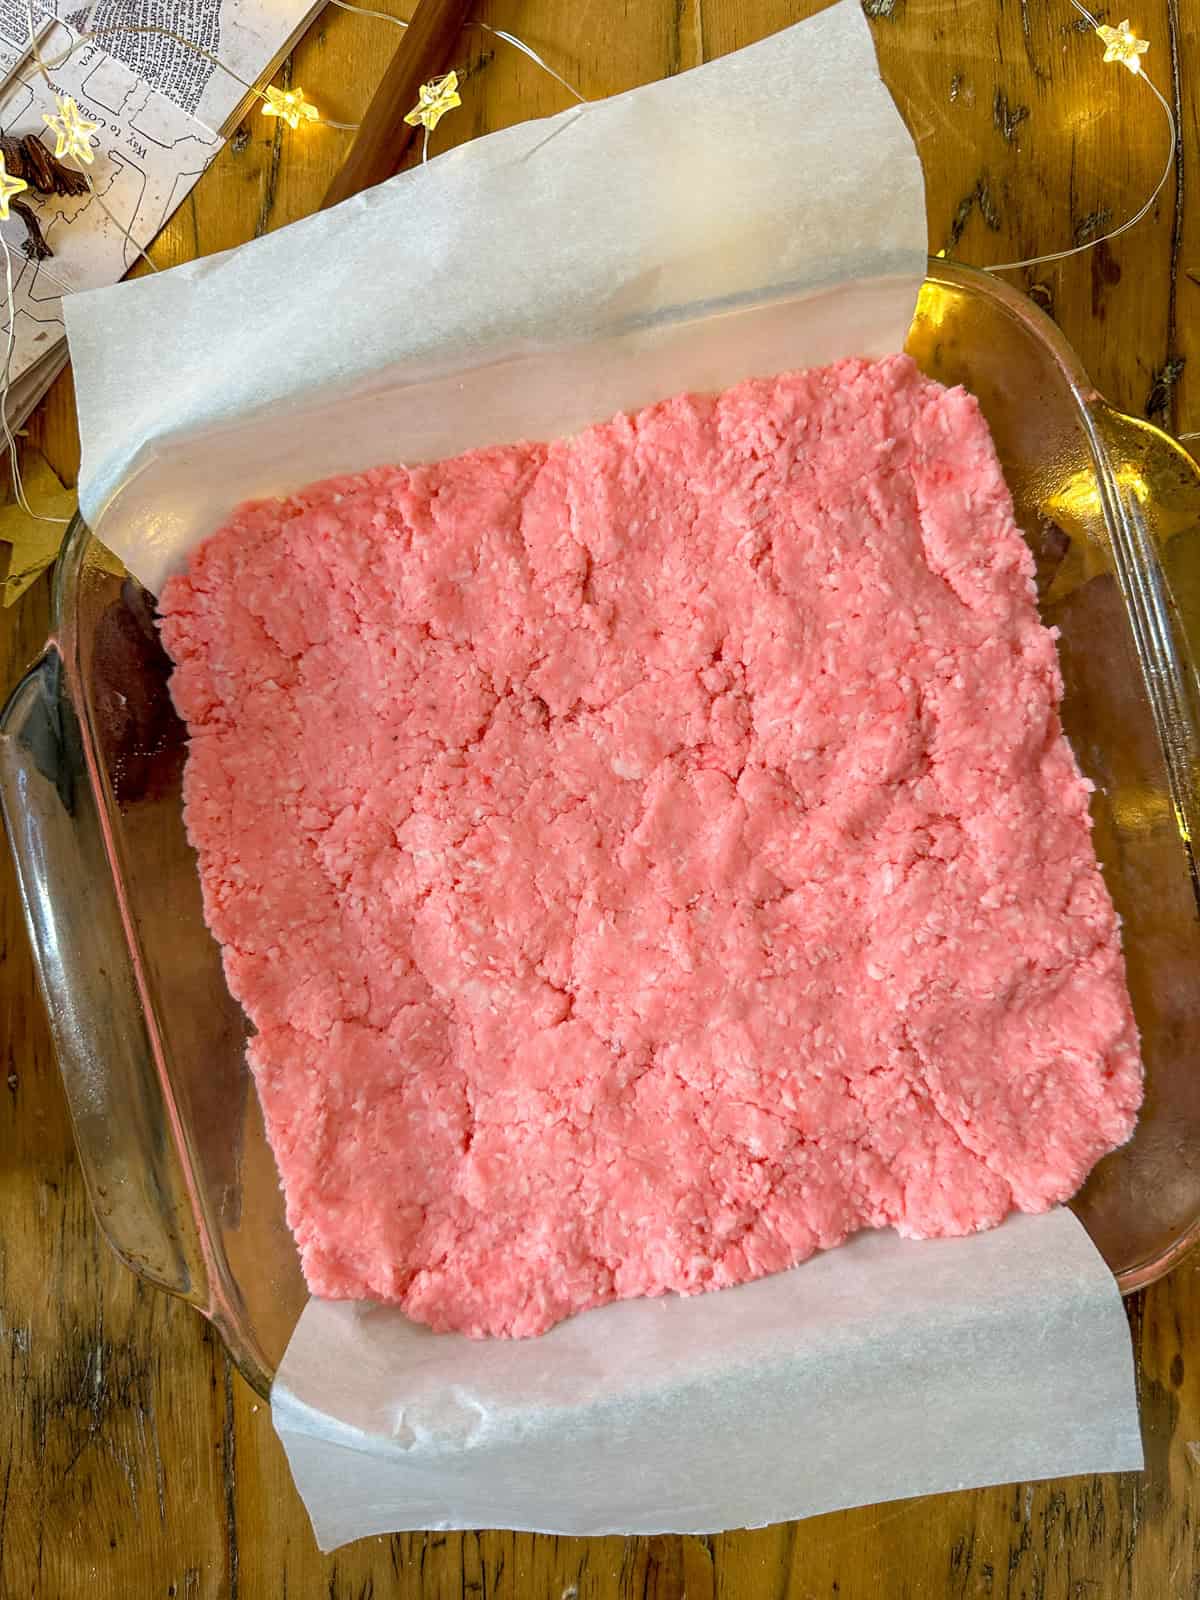
- Step 5: Add The Pink Layer Press the pink mixture evenly over the white layer in the baking dish. Again, press firmly and make sure the layer is even across the entire surface. If you're adding star sprinkles or edible glitter, gently press them into the top now while the surface is still slightly sticky.
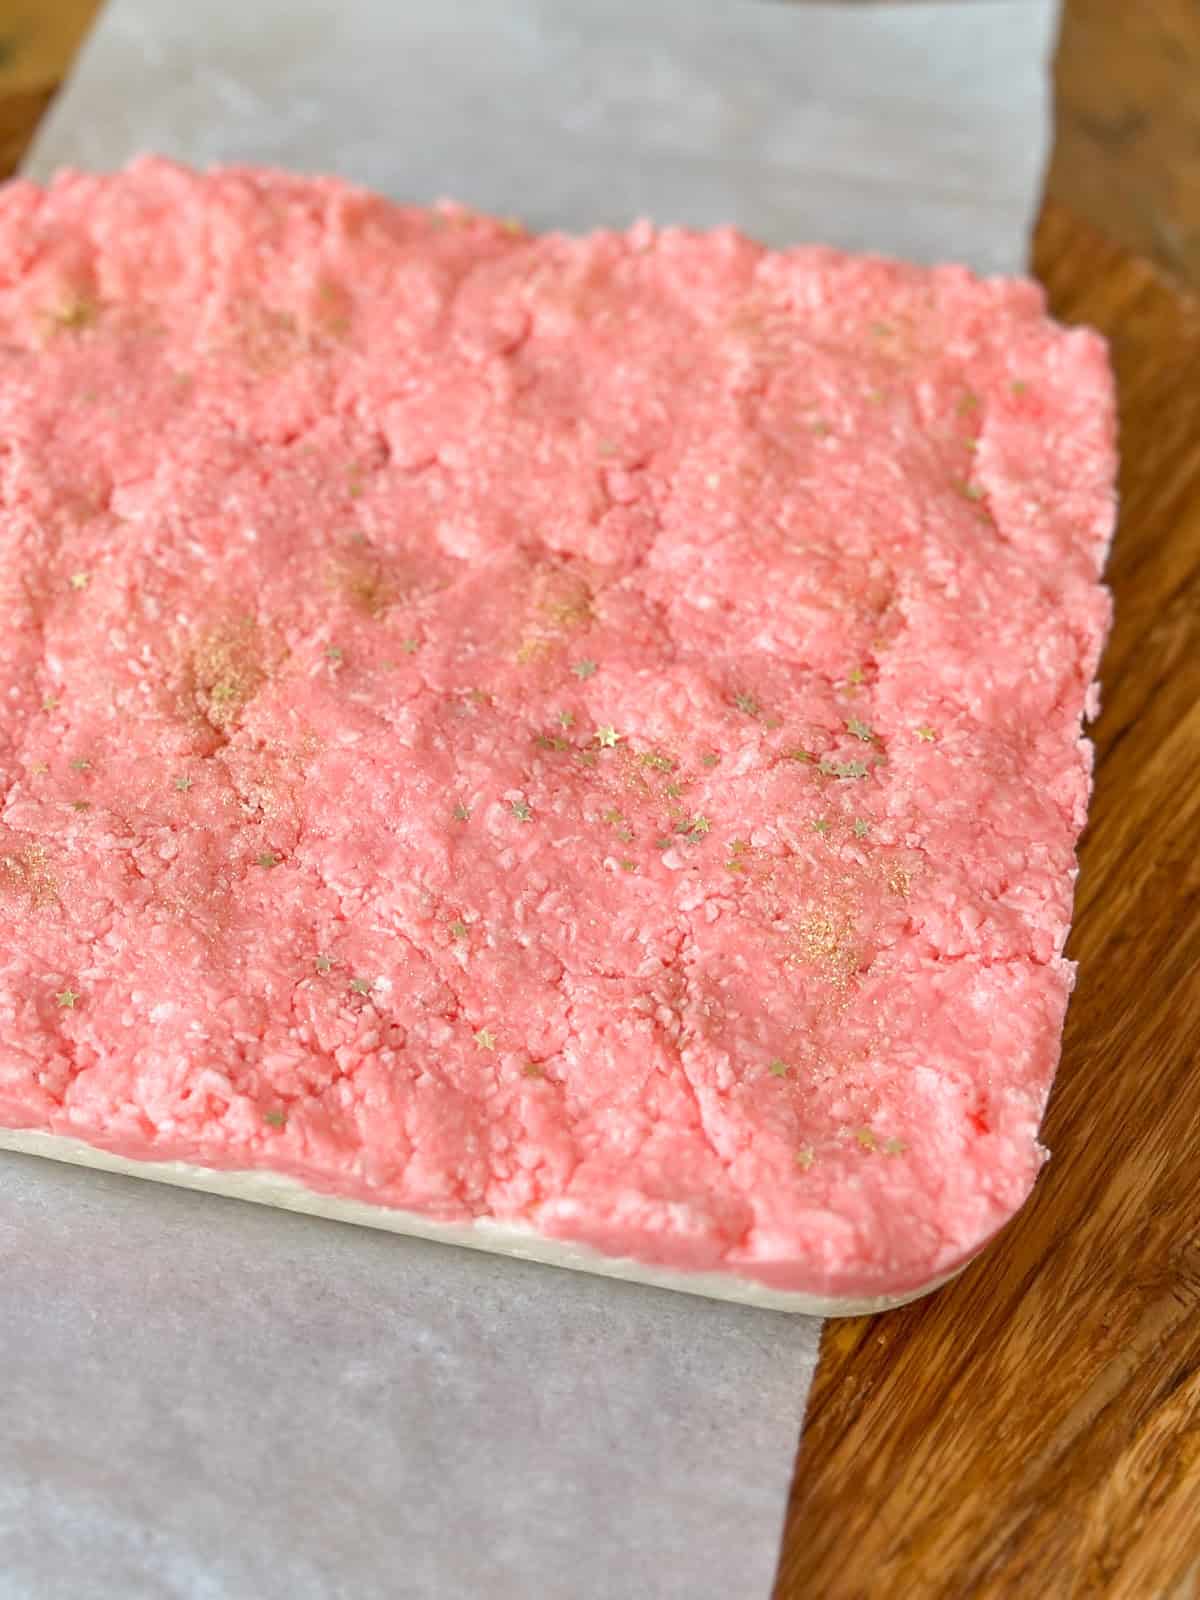
- Step 6: Chill Then Slice Cover the dish and refrigerate for at least 2 hours. Remove the coconut ice from the pan by lifting the parchment paper. Place it on a cutting board. Using a sharp knife, cut into 36 even pieces (6 rows by 6 rows).

Expert Tips
- Press firmly. The key to beautiful, clean layers is pressing each one firmly and evenly into the pan. Don't be shy about really packing it down.
- Chill completely. Resist the urge to cut into your coconut ice too soon. A full 2 hours in the refrigerator ensures clean slices and prevents crumbling.
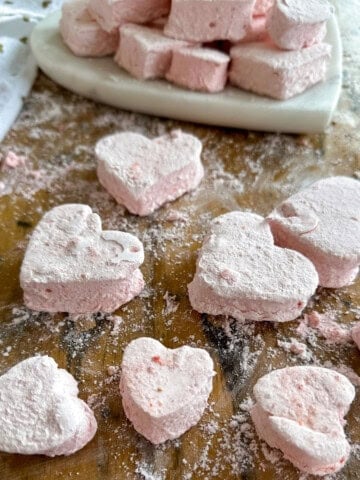
- Customize your color. While traditional coconut ice is pink and white, you can make this treat match any theme. Try blue for a winter wonderland party, green for Christmas, or keep it all white for an elegant look.
Frequently Asked Questions
Yes. You can mix the ingredients by hand using a sturdy wooden spoon, though it will require more elbow grease. The mixture will be quite thick and sticky, so be prepared for a bit of a workout.
If your coconut ice isn't setting properly, it likely needs more chilling time. Make sure to give it a full 2 hours (or more) in the refrigerator. Also make sure you used condensed milk and not evaporated milk by mistake. This recipe requires condensed milk.
It's best to stick with unsweetened desiccated coconut. Sweetened coconut will make the final result overly sweet and can affect the texture since it's usually moister.
Store your coconut ice in an airtight container at room temperature for up to one week. For longer storage, keep it refrigerated for up to 2 weeks. You can also freeze coconut ice for up to 3 months. Let it come to room temperature before serving for the best texture.
Absolutely. Try adding a drop of peppermint extract to the pink layer for a festive twist, or replace the vanilla with almond extract or rose water for a different flavor profile.
More Homemade Candy Recipes You'll Love


If you try this Coconut Ice or any other ideas on my blog, leave a rating and let me know how it went in the comments below. Thanks for visiting today!
Recipe
Coconut Ice
Ingredients
- 1 can (14 oz) sweetened condensed milk
- 3 cups unsweetened shredded coconut
- 3 cups powdered sugar
- 2 teaspoon vanilla
- 2 drops red food coloring
- Optional: star sprikles and ediable gold glitter
Instructions
- Line an 8x8 inch baking dish with parchment paper and spray with cooking spray.
- In the bowl of a stand mixer, combine condensed milk, coconut, icing sugar, and vanilla. Mix on medium speed until fully combined and the mixture is thick and sticky.1 can (14 oz) sweetened condensed milk, 3 cups unsweetened shredded coconut, 3 cups powdered sugar, 2 teaspoon vanilla
- Transfer half of the mixture to the prepared baking dish. Press firmly into an even layer across the bottom, making sure to reach all corners.
- Add red food coloring to the remaining mixture in the stand mixer. Mix on medium speed until the color is fully combined and uniform.2 drops red food coloring
- Press the pink mixture evenly over the white layer in the baking dish. If using sprinkles or edible glitter, gently press them into the top now.Optional: star sprikles and ediable gold glitter
- Cover and refrigerate for at least 2 hours, or until firm enough to slice cleanly. Remove from pan by lifting the parchment paper. Place on a cutting board and cut into 36 even pieces (6 rows by 6 rows).

Dannyelle Nicolle-Ramjist says
I not even a coconut lover and I love this recipe. It's so quick and easy to make and has a great texture and flavor. I hope you enjoy it.