DIY Star Garland: easy craft using polymer clay and gold wire to create a beautiful star garland for Christmas decorating.

Jump to:
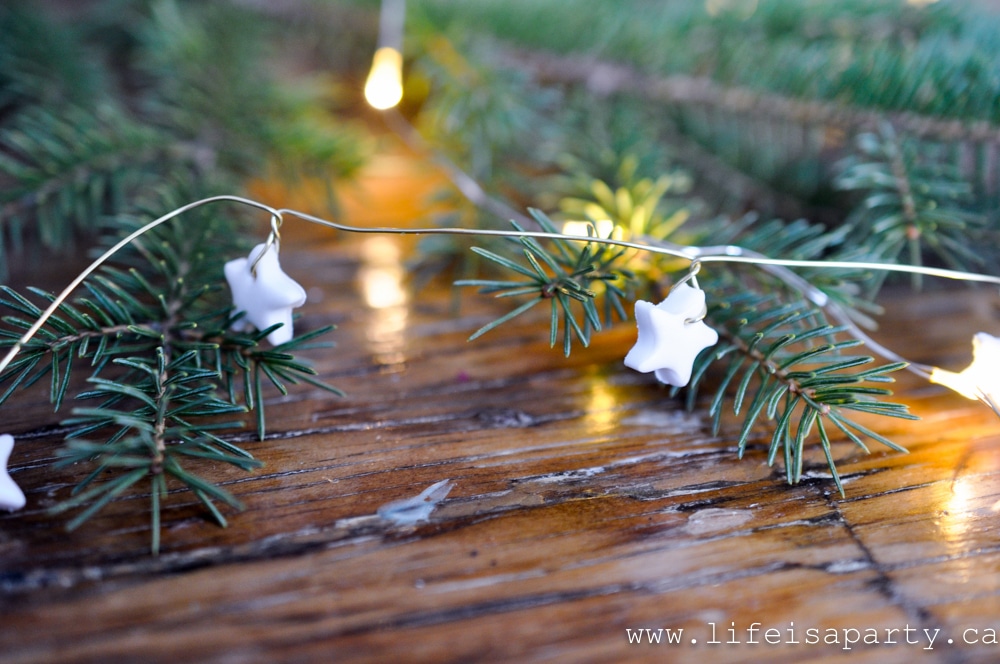
It's beginning to feel a lot like Christmas! I'm excited to share this fun and easy DIY Star Garland today. I used polymer clay to make the the small stars. This homemade garland turned out so cute and is a great addition to our holiday decor. These are perfect for your Christmas tree, wrapped around a Christmas package or used with greenery for your Christmas garland.
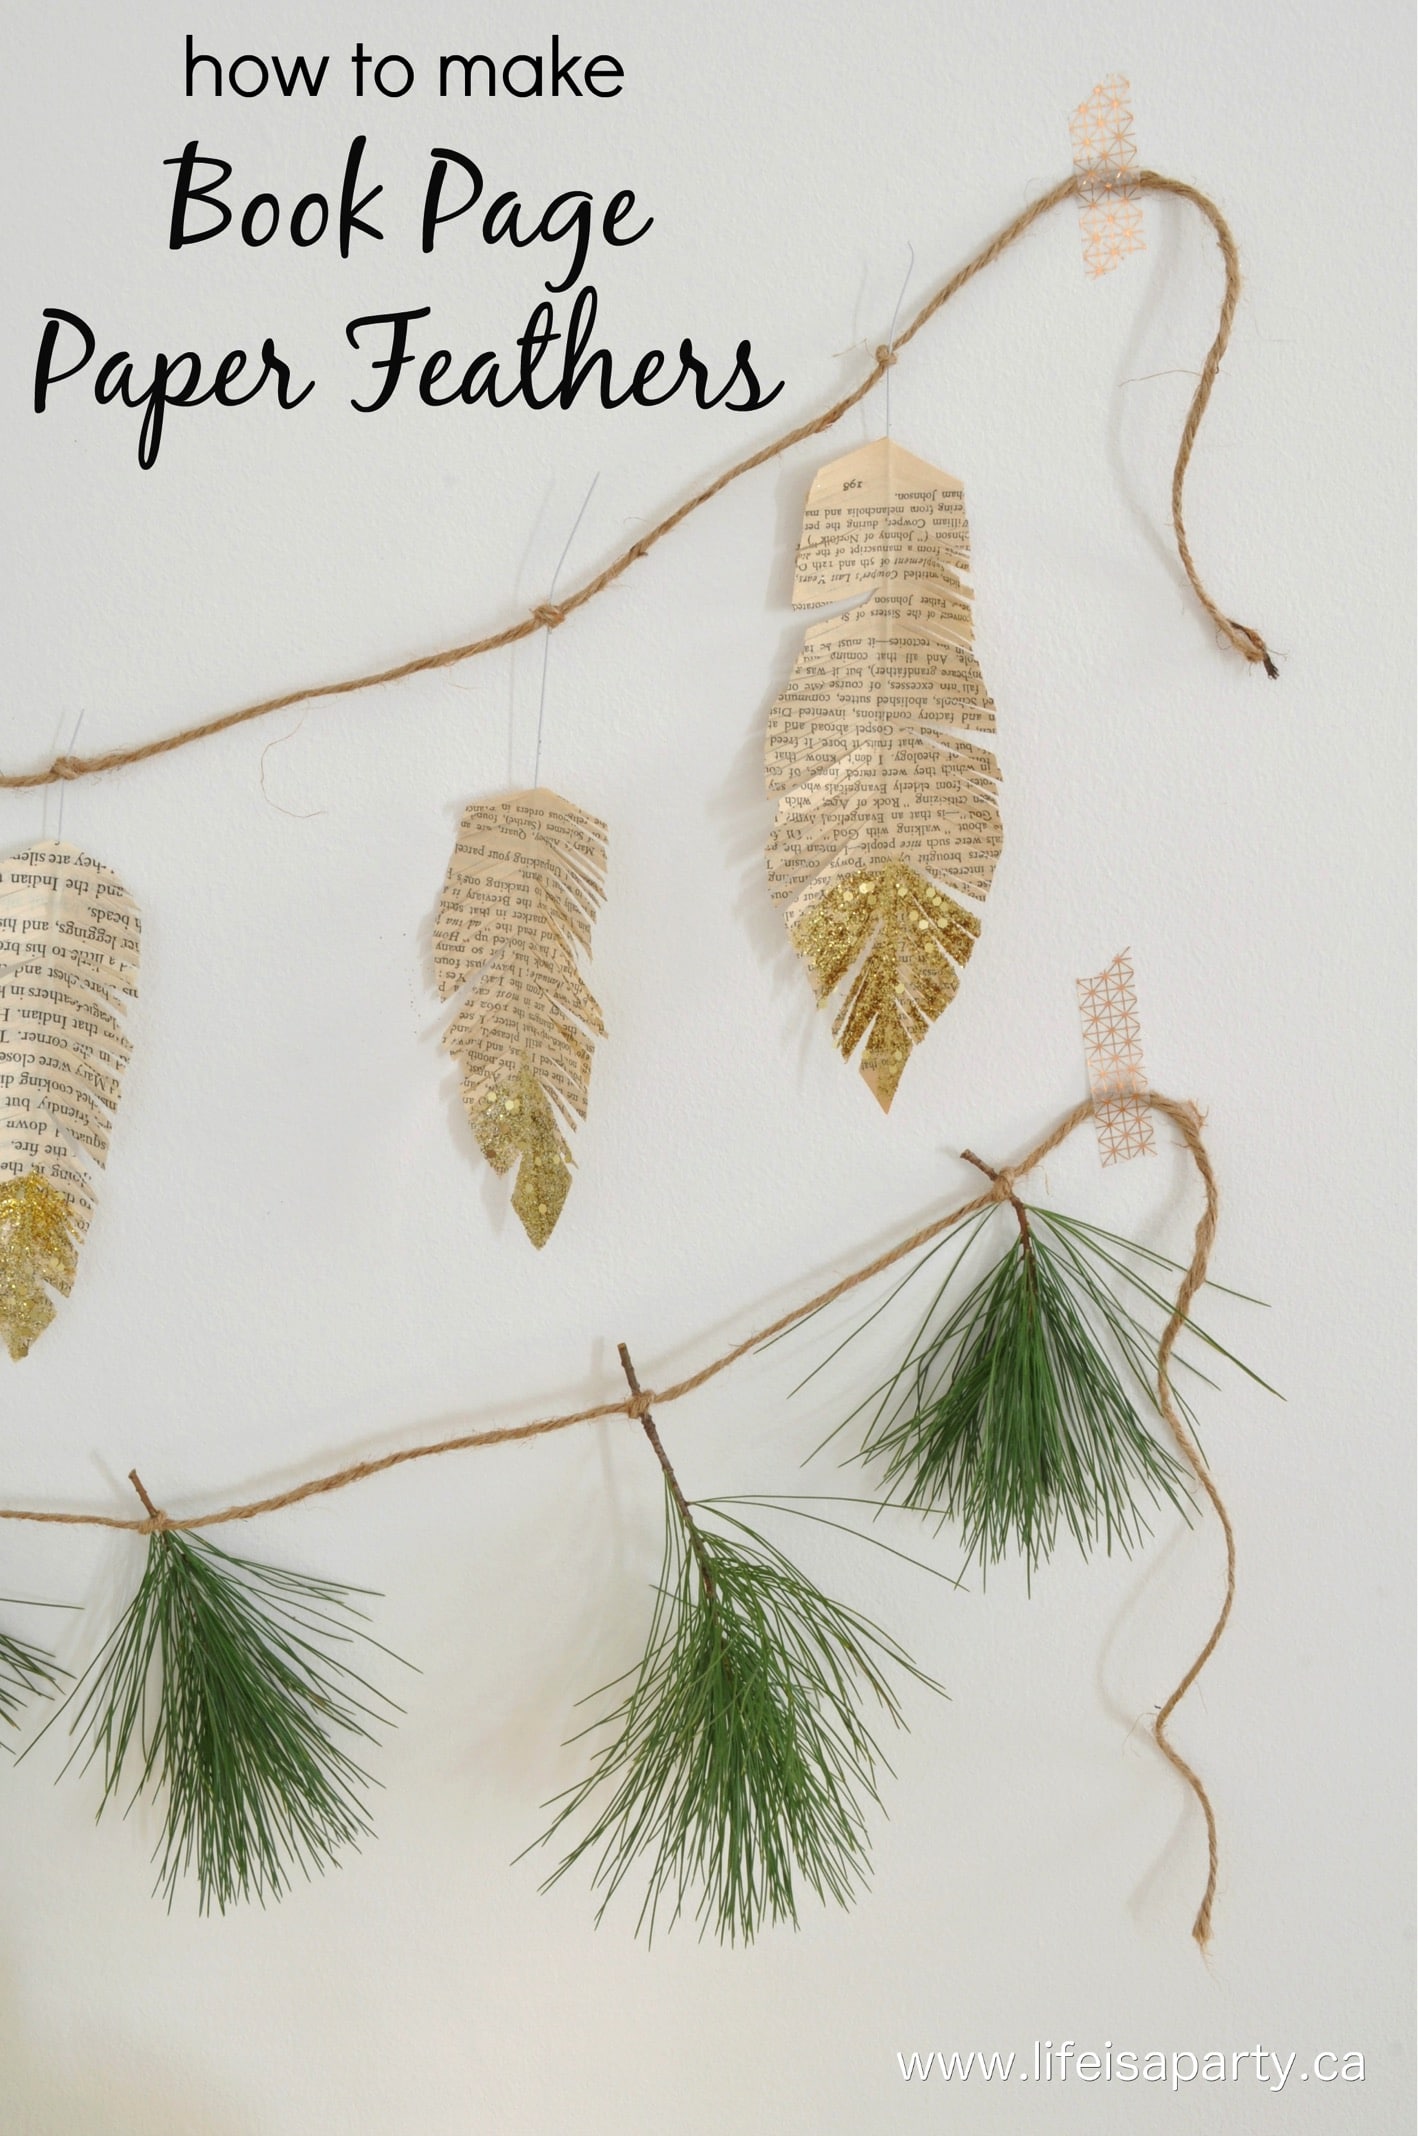
You might also like our DIY Paper Feathers, or DIY Birch Wreath.

Handmade Christmas Decor
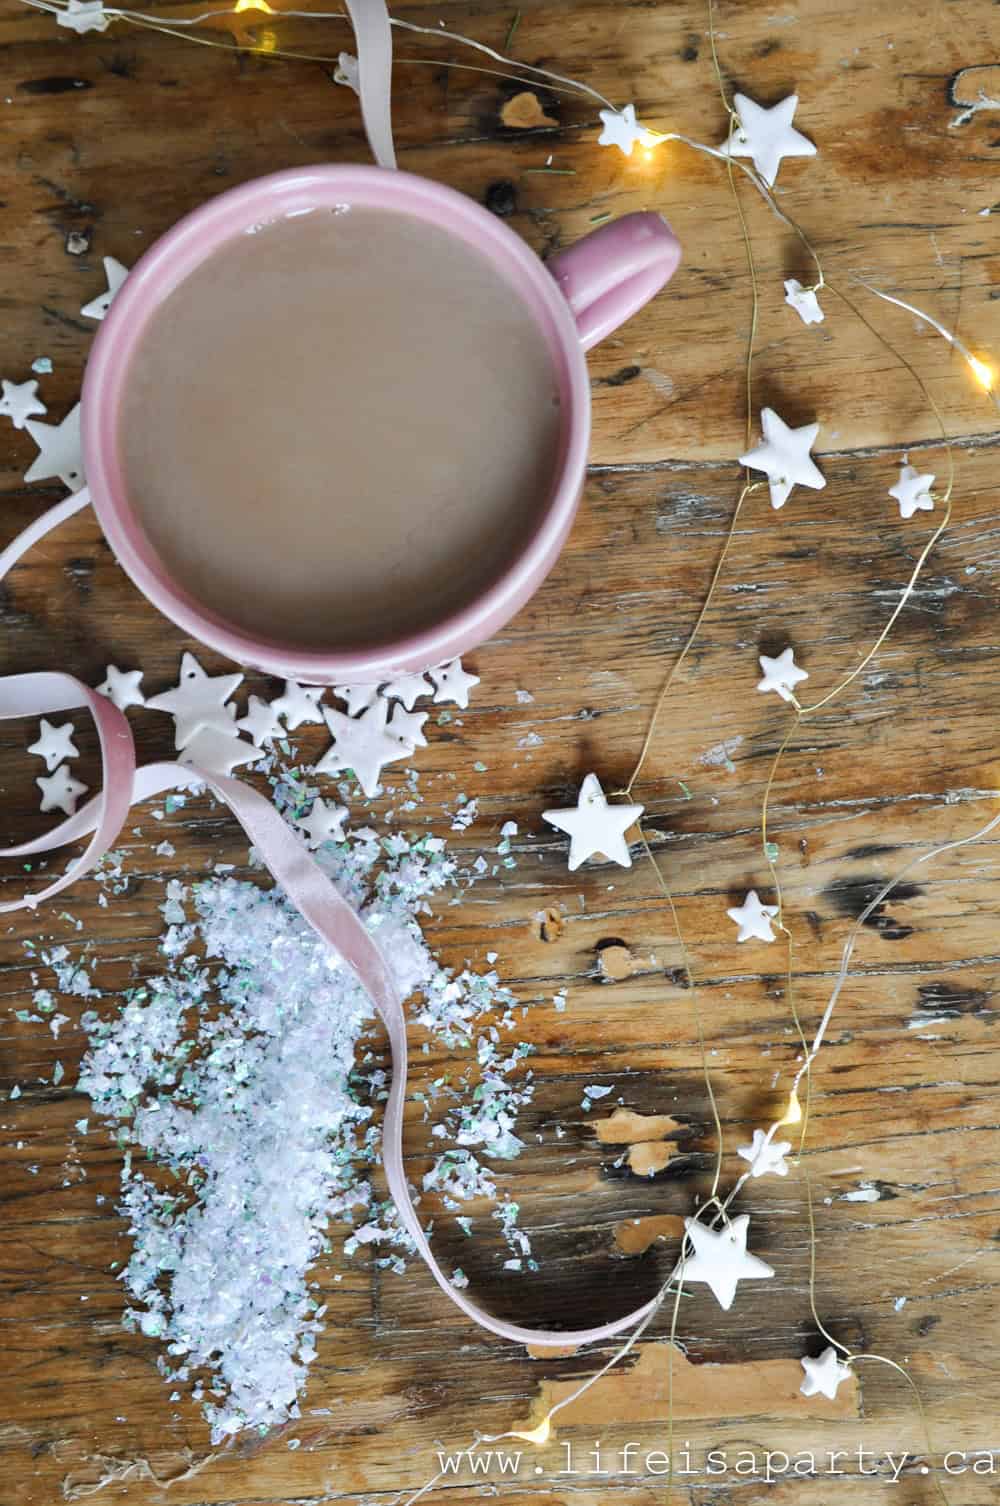
This year I think we're all home more than usual and craving some fun homemade Christmas projects. I made the stars for this DIY star garland out of polymer clay, and then painted with some iridescent paint for a little extra sparkle -but you could always skip this step for a more rustic feel. I made this garland for Christmas, but you could also make it for memorial day or the fourth of july and make your own star garland in different colors. Change the star colors to red, white, and blue for independence day. These pink ones would even be sweet decor for a baby showers.
I strung the stars with some gold wire. The wire works really well because it holds them in place perfectly, and adds its own sparkle to the project too. You could use silver wire, if you prefer, or white.

DIY Star Garland Materials
To make this project you'll need:
- polymer clay (white and pink)
- dowel or small rolling pin
- parchment paper
- small star cookie cutter
- toothpick
- baking sheet
- iridescent paint
- fine gauge gold wire
How To Make A DIY Star Garland
Making The Stars
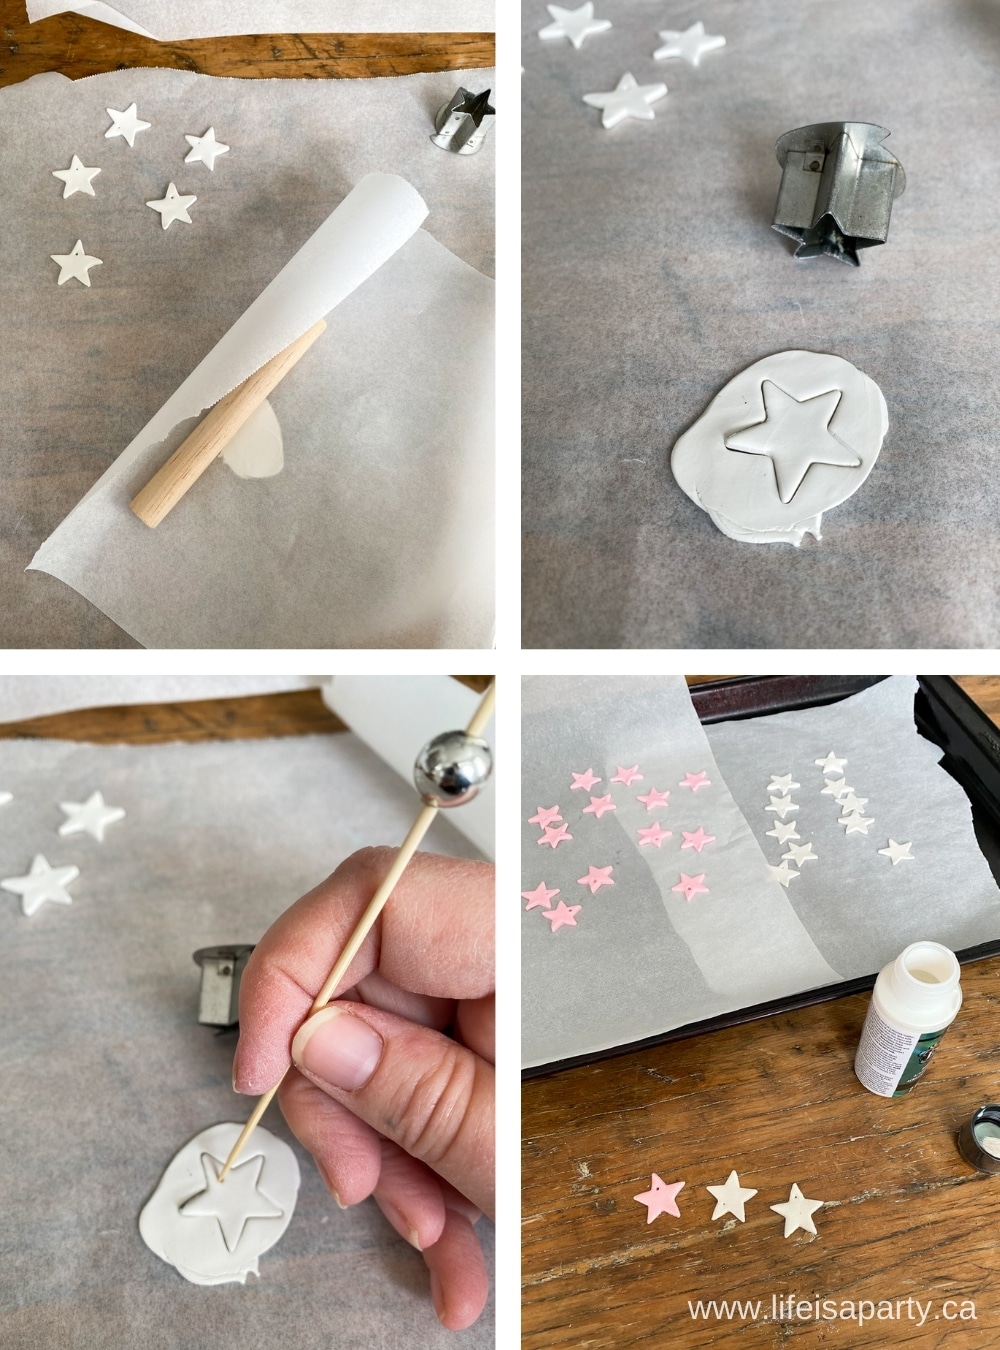
Begin by kneading the polymer clay until it's soft and pliable. Work on a piece of parchment, especially with the white polymer clay, because it picks up bits from any surface really easily, and marks the clay. Cover the polymer with a second piece of parchment and roll it out flat with a rolling pin or dowel to about 1/16 th of an inch, or your desired thickness.
Use a small star cookie cutter to cut out star shapes. The cookie cutters I used were about 1 inch and ½ inch in size. These aren't actually cookie cutters, they're much smaller than cutter. They're polymer clay cutters. Look for them in the craft store, with the polymer clay supplies.
Transferring The Stars
Because the stars are so small it's difficult to transfer them once they're cut out without damaging the star points, so I found the best way was to remove the extra clay from around them, and leave them in place on the parchment paper.
Before baking, your last step is to create a small hole in the point of the star shape for the wire. I used a small toothpick for this.
Baking Your Stars
To bake your star, place your parchment paper full of stars on a cookie sheet and bake in the oven to harden them, according to the manufactures directions for baking temperature and time.
Painting
Once the stars are baked and cooled, paint one side of them with the iridescent paint. Once dry, flip them over and paint the back side.
Making The Garland
To make the garland cut a length of about 4 ft of wire at a time, and thread on one tip of the star at a time. Twist the wire several times around the star, and then leave a gap of 1 ½ inches to 2 ½ inches between each star to create a chain of stars. Wire works much better than a long piece of string for this because it's easy to twist around the stars and hold them in place easily.

Equipment
- dowel or small rolling pin
- oven
Materials
- polymer clay white and pink
- parchment paper
- small star cookie cutter
- toothpick
- baking sheet
- iridescent paint
- fine gauge gold wire
Instructions
- Begin by kneading the polymer clay until it's soft and pliable. Work on a piece of parchment, to keep the clay clean. Cover the polymer with a second piece of parchment and roll it out flat with a rolling pin or dowel to about 1/16 th of an inch, or your desired thickness.
- Use a small star cookie cutter to cut out star shapes. Remove the extra clay from around the stars, and leave them in place on the parchment paper.
- Next, create a small hole in one tip of each star for the wire, using a small toothpick.
- To bake your star, place your parchment paper full of stars on a cookie sheet and bake in the oven to harden them, according to the manufacturer's directions for baking temperature and time.
- Once the stars are baked and cooled, paint one side of them with the iridescent paint. Once dry, flip them over and paint the back of each star.
- To make the garland cut a length of about 4 ft of wire at a time, and thread on one tip of the star at a time. Twist the wire several times around the star, and then leave a gap of 1 ½ inches to 2 ½ inches between each star to create the star garland.
This project is really easy and so fun to create. It would be a great project to do with kids too, because it's kind of like playing with play dough. If you don't like your first attempt you can redo it over and over before you bake it and make it permanent.
You could make these in any colours to fit your Christmas decor also. I chose white and pink, but all white, or gold would be really lovely too.
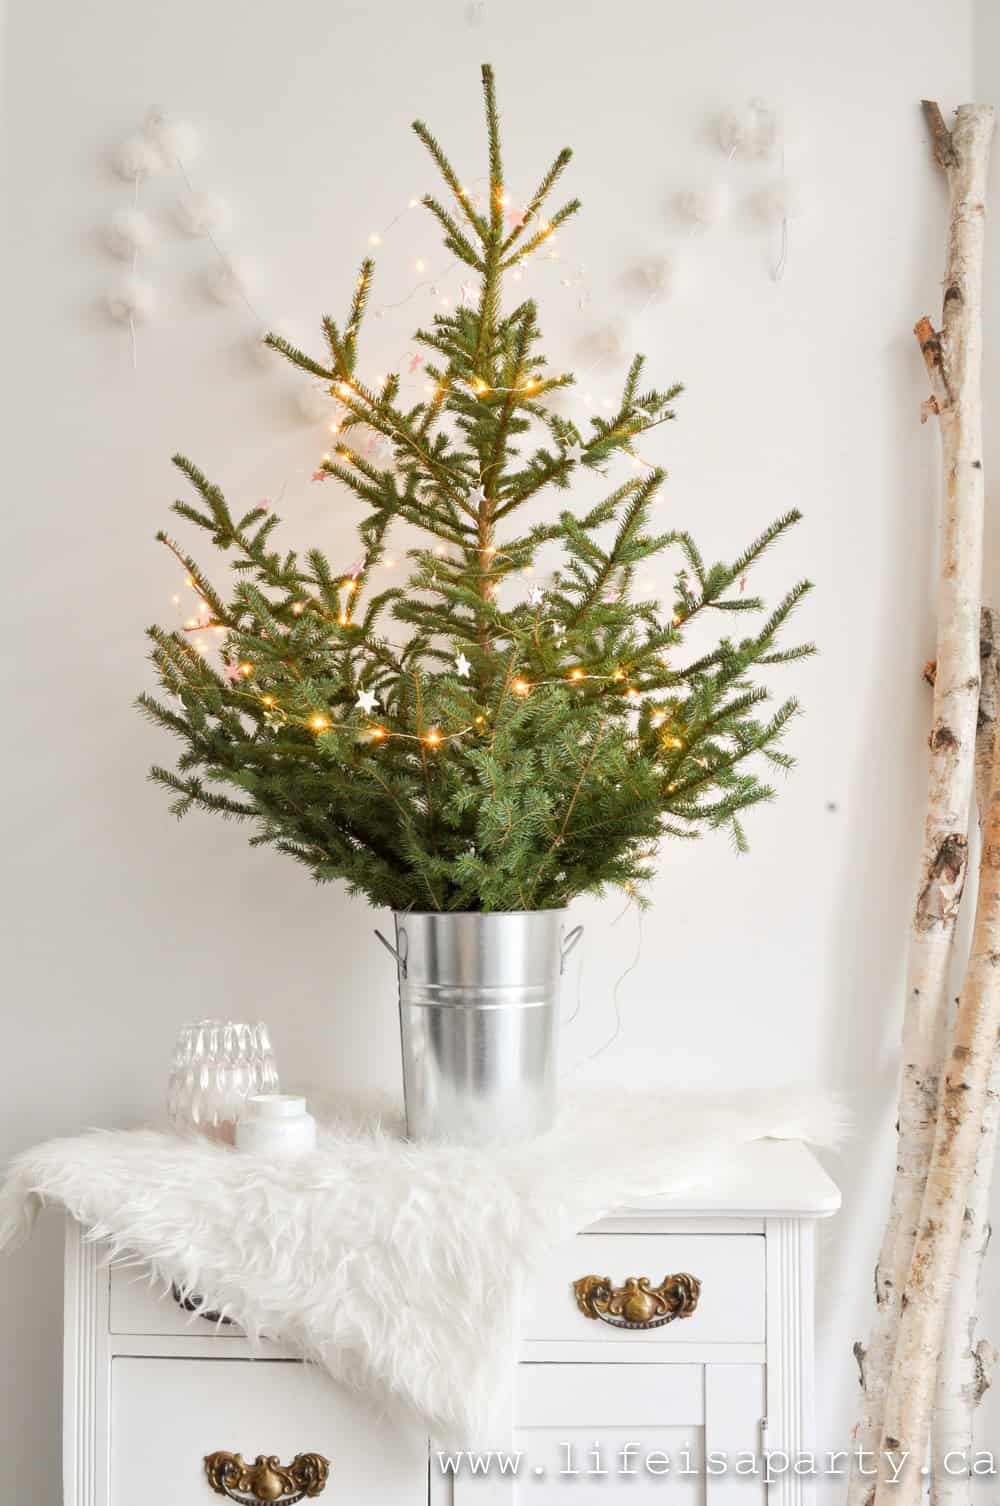
We made my garland in two different sizes, and used it in several different places. I kept the two sizes of stars as separate garlands, but you could mix them if you prefer. It looks beautiful on a small tree in my kitchen. I'm even adding it to my star garland and mantel too. It would even look great layered with ribbon and used on a present, or attached to your own gift tags.
This project is a great way to add some homemade decor to your Christmas decorations this year. And there are so many fun options of how you could make it and where you could use it.
With this beautiful DIY star garland, life really is a party.
More Christmas Ornament Inspiration
Also check our Book Page Paper Feathers here.
You might also like our Concrete Star Christmas Ornaments here.


dnr says
Hi Michele, sorry no printable for this one. But it's pretty simple, so I hope it all goes well for you.
Dannyelle
Michele says
Hi,
These are gorgeous! I can't wait to make them!! Do you have an easy, printable "How-to guide/recipe" for the making the star garland? I'd like to print it out instead of scrolling through my computer screen as I'm making it and I'm not sure if I can do that.
Thanks for posting this 🙂 ,
Michele
Naush Samama says
Oh Wow !! All such creative ideas. We used to make ornaments with salt-dough as well.
Naush
Sarah @ The DIY Mommy says
Oh my! Your garland is just adorable!
Ashley Mills says
These are adorable! LOVE IT.