Bunny Treat Bag: Linen Easter Bunny Drawstring Bag to sew, includes a free pattern and full tutorial on how to make it.

Jump to:
Easter is coming, and so for this month's #12MonthsofDIY Fabric Challenge, I thought it might be nice to make something for spring.
These adorable Bunny Treat Bags were a quick sewing project to put together, and are perfect for your Easter celebrations.
The Linen Fabric
I made them out of some lovely linen fabric. Before I started sewing with the linen, I pre-washed it a couple of times in hot water with some white vinegar, and then I dried it in a hot dryer to soften it. This method worked great, and made the fabric lovely and soft. Also I love its rustic wrinkled look. Here’s how I made the Bunny Treat Bags.
Bunny Treat Bag Materials:
- Linen Fabric
- White Thread
- Thin Ribbon
- Black Embroidery Thread
- Small Black Buttons
Instructions:
Free Bunny Treat Bag Pattern
1. The free pattern for our adorable treat bags is available to subscribers in our free resource library. Just subscribe below for our instant access.
Print the free pattern and then cut it out. Then pin it to the fabric and cut out two pieces for the bag, and four pieces for the ears.
Time To Sew
2. Secondly, pin two of the cut out bunny ears together and sew with a ¼” seam allowance, leaving the bottom open, so you can turn them right-side-out. Next repeat with the other ear. Then, use a pen or chopstick to help you turn the ears right-side-out. (I used linen so there was no right side or wrong side of the fabric, if you use something else take care to sew the wrong sides together for the ears and the bag so that when you turn the seams to the inside of the pieces the good side of the fabric is showing.)

3. Next, pin the bag pieces together, and sew taking special care to not sew the top, as marked on the pattern, starting and stopping about an inch and a half from the top, on both sides. This will be where we thread the drawstring through the bag.

4. Then use an iron to press the ¼ inch seam open at the top of the bunny bags edges, and then stitch around it, on both sides of the bag.

Add the Ears
9. Now fold down the top of the bag, to create the channel for the drawstring. Pin in place. Then on one side, pin in place the ears that have been turned right-side-out already. Next, carefully sew around the seam at the top of the bag.
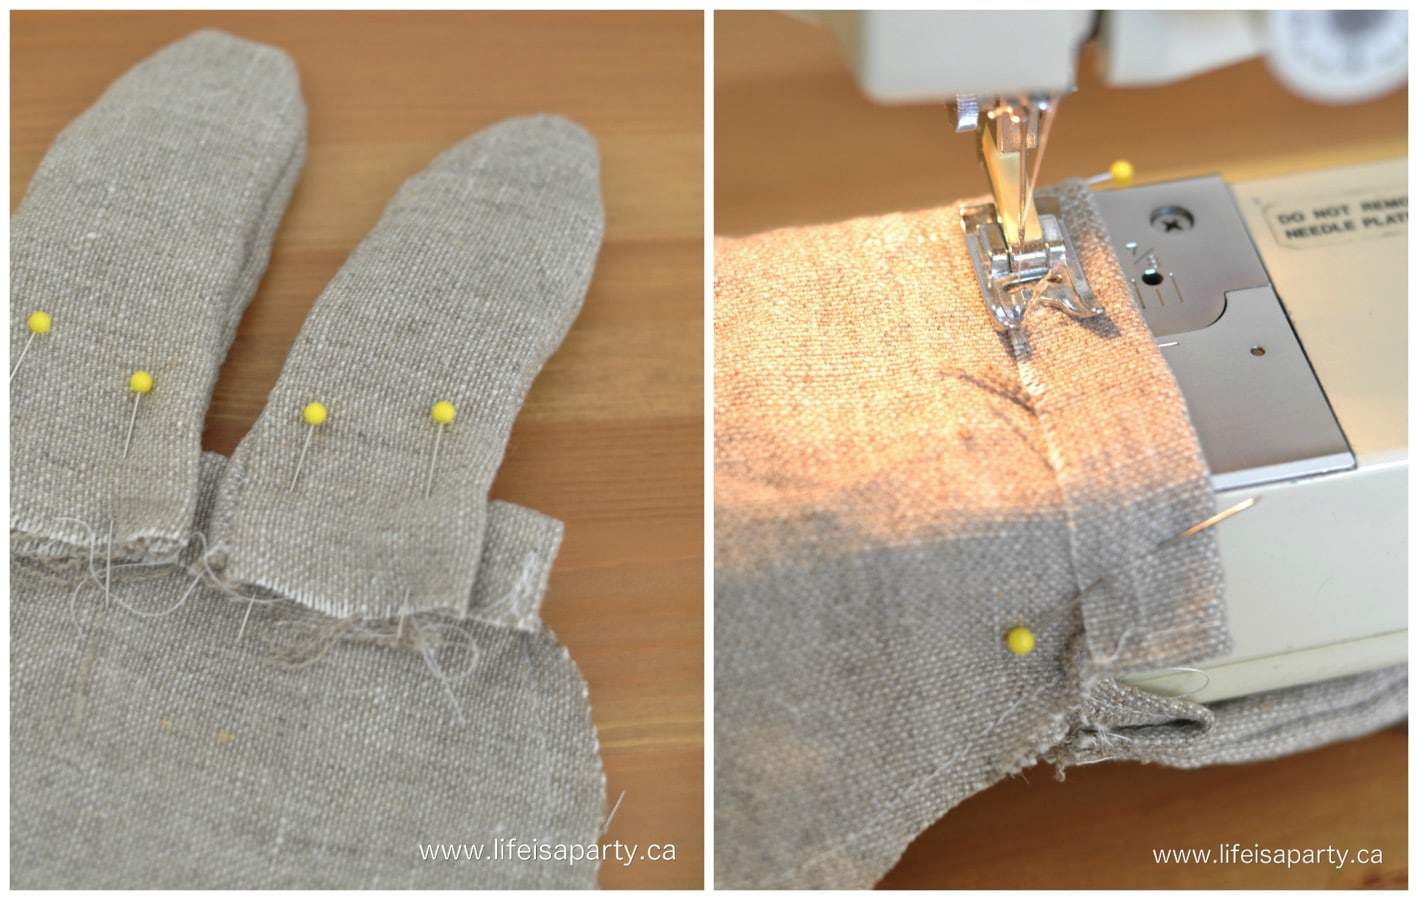
10. The next step is to turn the bag right-side-out. Now cut two pieces of ribbon or twine for the drawstring. Thread one through each side, and tie in a knot, using a safety pin to help you thread it through the channel.

Add the Sweetest Bunny Face
11. Lastly, use the black embroidery thread to stitch an X for the little bunnies mouth, and sew on the two black buttons for eyes for the sweet bunny face.
Another option is to sew a cute pom pom on to the back as a bunny tail.


Equipment
- Sewing Machine
- iron
Materials
- Linen Fabric
- White Thread
- Thin Ribbon
- Black Embroidery Thread
- Small Black Buttons
Instructions
- Print the free pattern from our free resource library, and then cut it out. Pin it to the fabric and cut out two pieces for the bag, and four pieces for the ears.
- Secondly, pin two of the cut out bunny ears together and sew with a ¼” seam allowance, leaving the bottom open, so you can turn them right-side-out. Next repeat with the other ear. Then, use a pen or chopstick to help you turn the ears right-side-out. (I used linen so there was no right side or wrong side of the fabric, if you use something else take care to sew the wrong sides together for the ears and the bag so that when you turn the seams to the inside of the pieces the good side of the fabric is showing.)
- Next, pin the bag pieces together, and sew taking special care to not sew the top, as marked on the pattern, starting and stopping about an inch and a half from the top, on both sides. This will be where we thread the drawstring through the bag.
- Then use an iron to press the ¼ inch seam open at the top of the bunny bags edges, and then stitch around it, on both sides of the bag.
- Now fold down the top of the bag, to create the channel for the drawstring. Pin in place. Then on one side, pin in place the ears that have been turned right-side-out already. Next, carefully sew around the seam at the top of the bag.
- The next step is to turn the bag right-side-out. Now cut two pieces of ribbon or twine for the drawstring. Thread one through each side, and tie in a knot, using a safety pin to help you thread it through the channel.
- Lastly, use the black embroidery thread to stitch an X for the little bunnies mouth, and sew on the two black buttons for eyes for the sweet bunny face. Another option is to sew a cute pom pom on to the back as a bunny tail.
Ideas on how to use your Bunny Treat Bag
I liked the rustic, soft look of the un-ironed linen, but if you wanted a more crisp look you could iron the finished bag.
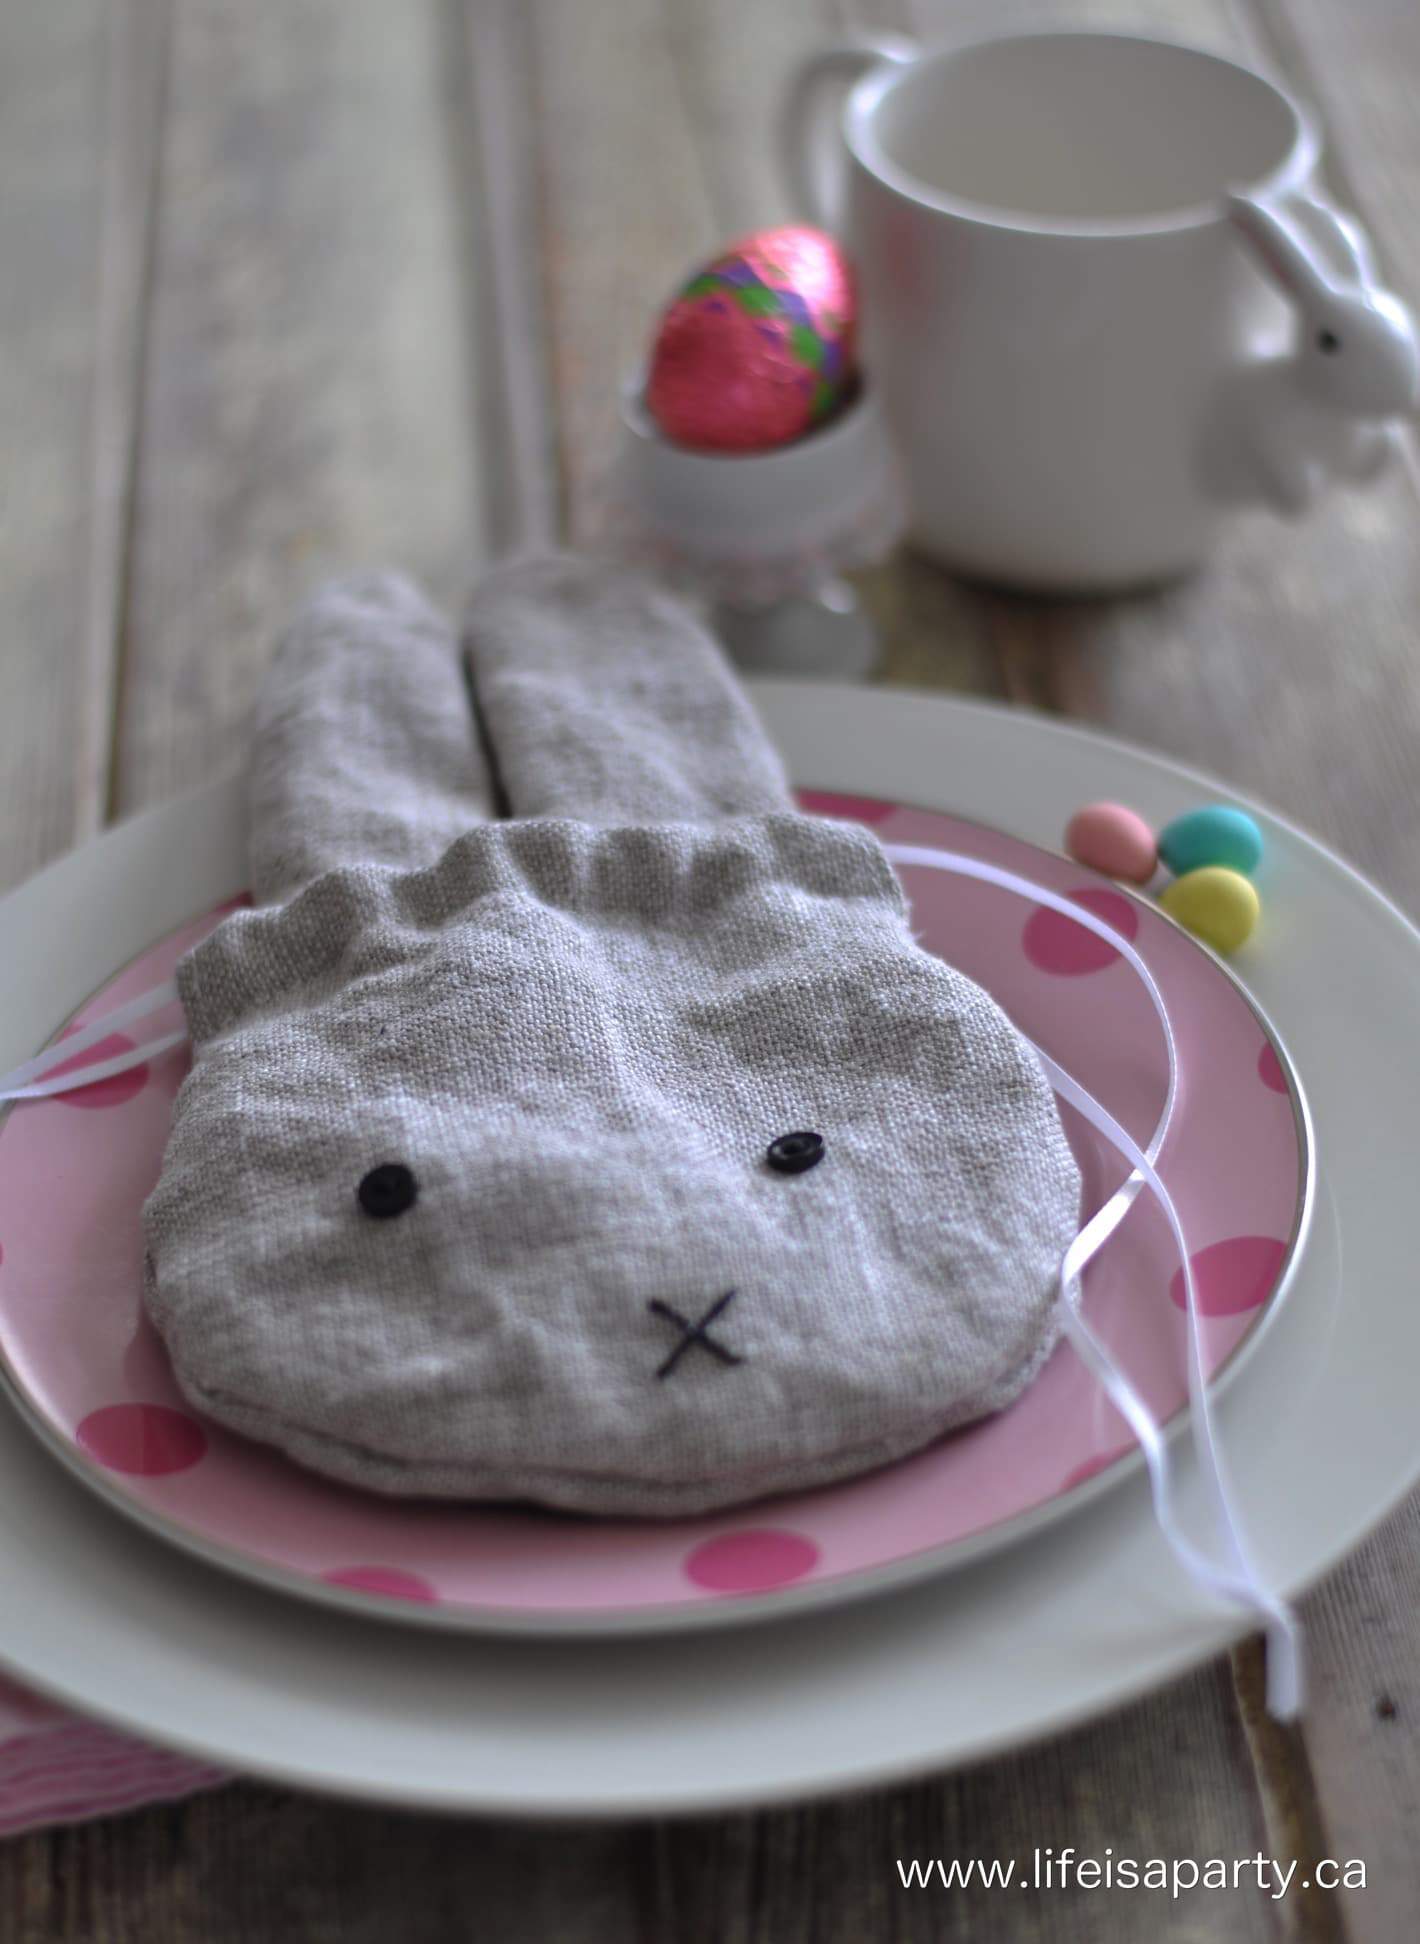
I thought these would be really sweet for an Easter table filled with Easter goodies and gifts. What little girl or boy won’t want to find one of these waiting for them…or grown up for that matter.

We filled ours with Easter treats, like chocolate and plastic eggs. You could add gift tags with a names to use them as place cards for the table too. They'd also be a really cute addition to any Easter basket.

These would even be cute as a little purse for a little girl, and they're just the right size.

This step-by-step tutorial makes this a easy project for anyone who can sew.
With a sweet little Linen Easter Bunny Treat Bag, life really is a party!
More Easter Inspiration
You might also like our Bunny Bait Easter Trail Mix here.
Also check out How To Make Cement Easter Eggs here.
You might also enjoy Nail Polish Marbled Easter Eggs here.


dnr says
Thanks Joann, bet you could whip one up. 😉
Dannyelle
Joann @ Woman In Real Life says
I love this! And I totally agree that it would be a special treat for any age. I want one! 😉
Jo
dnr says
thanks Ariel, and thanks for the shares too. 😉
Dannyelle
dnr says
Thanks Jen, there's something so cute about bunnies, lol.
Dannyelle
dnr says
thanks Laurie!
dnr says
Thanks Thea, I usually think of myself as someone who can't really sew, but it's not that hard after all, lol.
Dannyelle
Thea says
Oh my gosh! These are so adorable. I love this idea far more than the traditional Easter basket. Having a bunny bag like this would be a keeper for a long time! Excellent tutorial with excellent photographs!
Laurie @ Vin'yet Etc. says
That's just adorable! I'd love to have one filled with Easter goodies!
Jen @ Fresh Crush says
Such a great idea, and so adorable!
Ariel says
This is freakin adorable! I will definitely be sharing this bad boy.