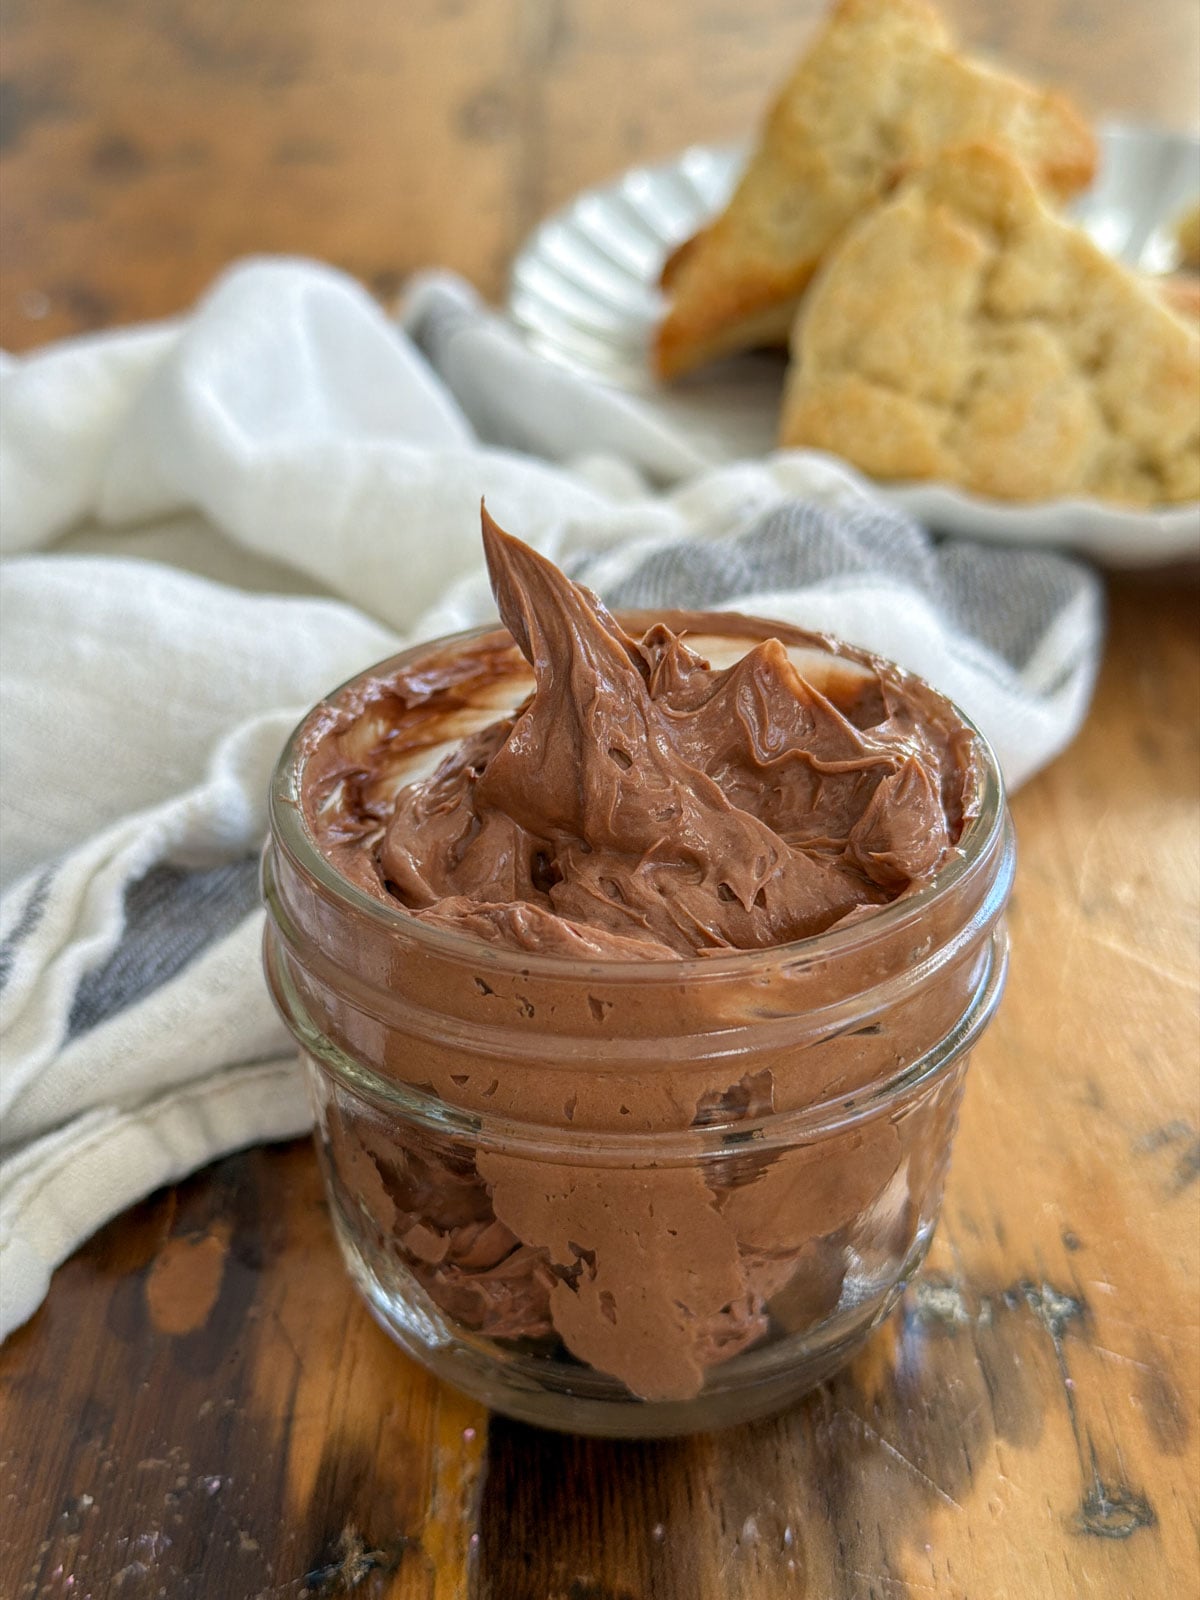
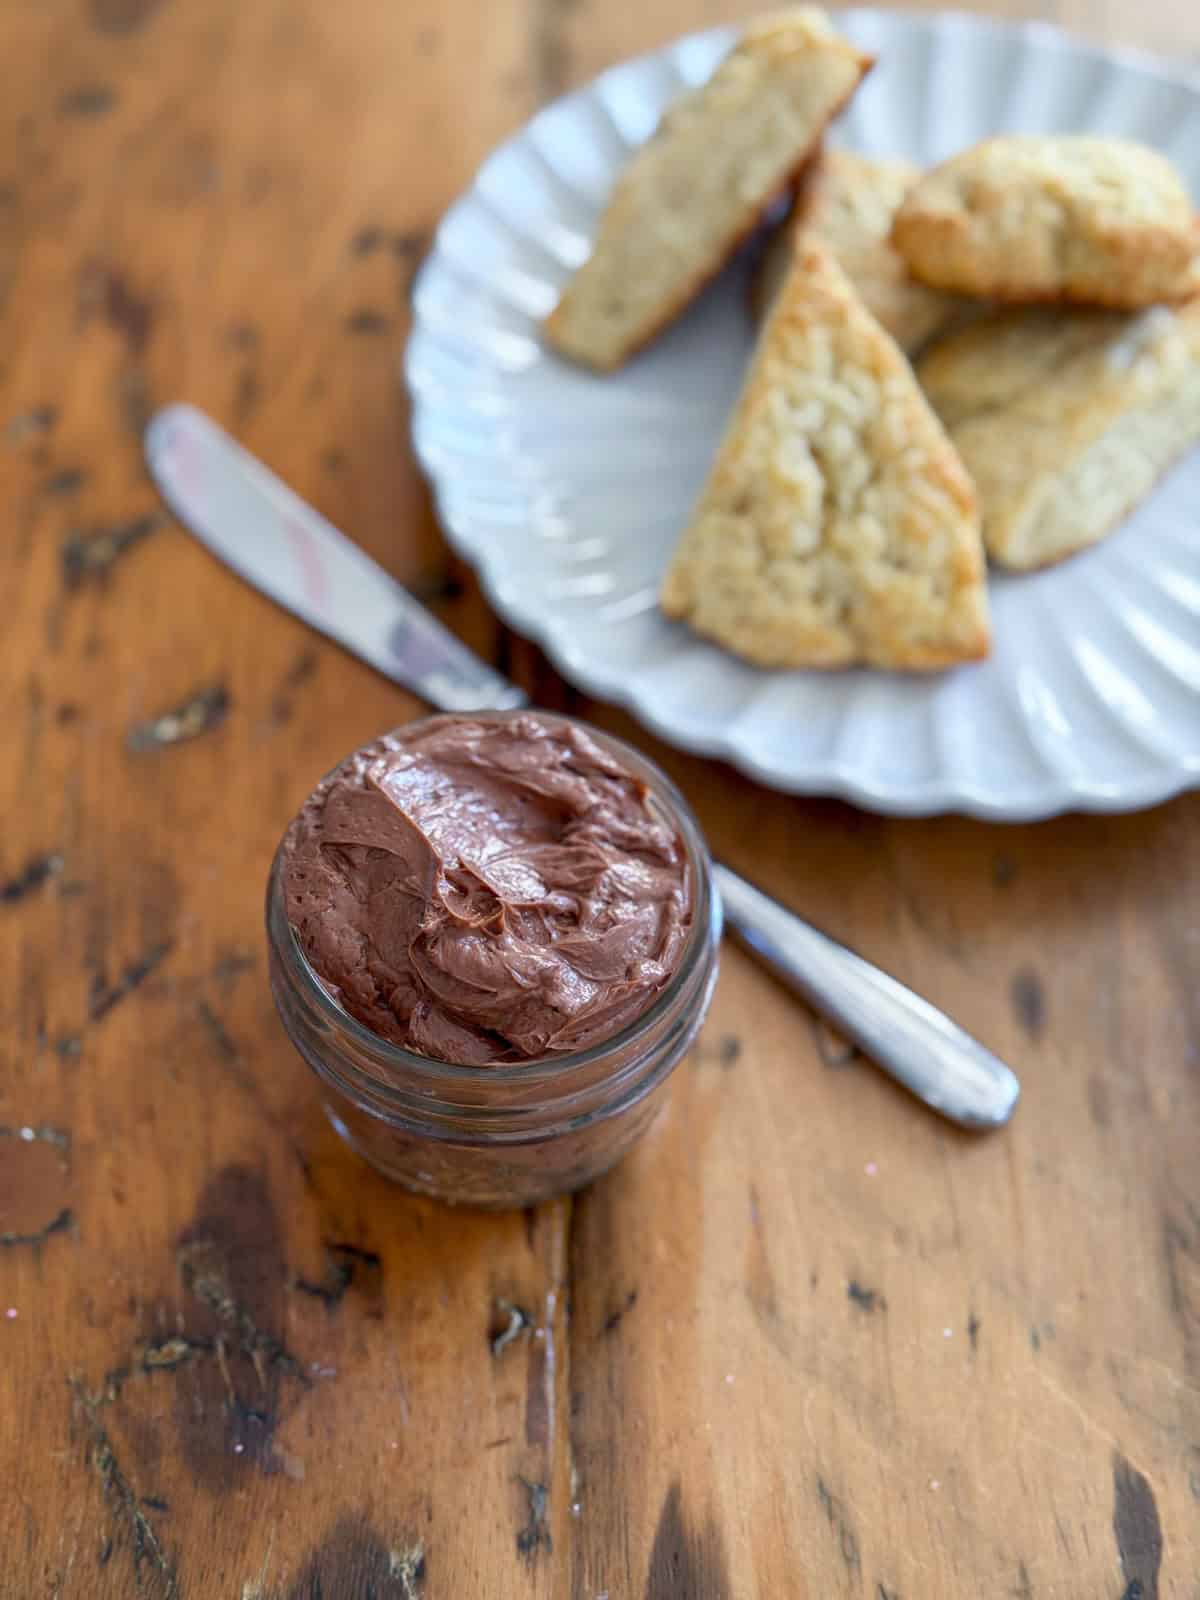
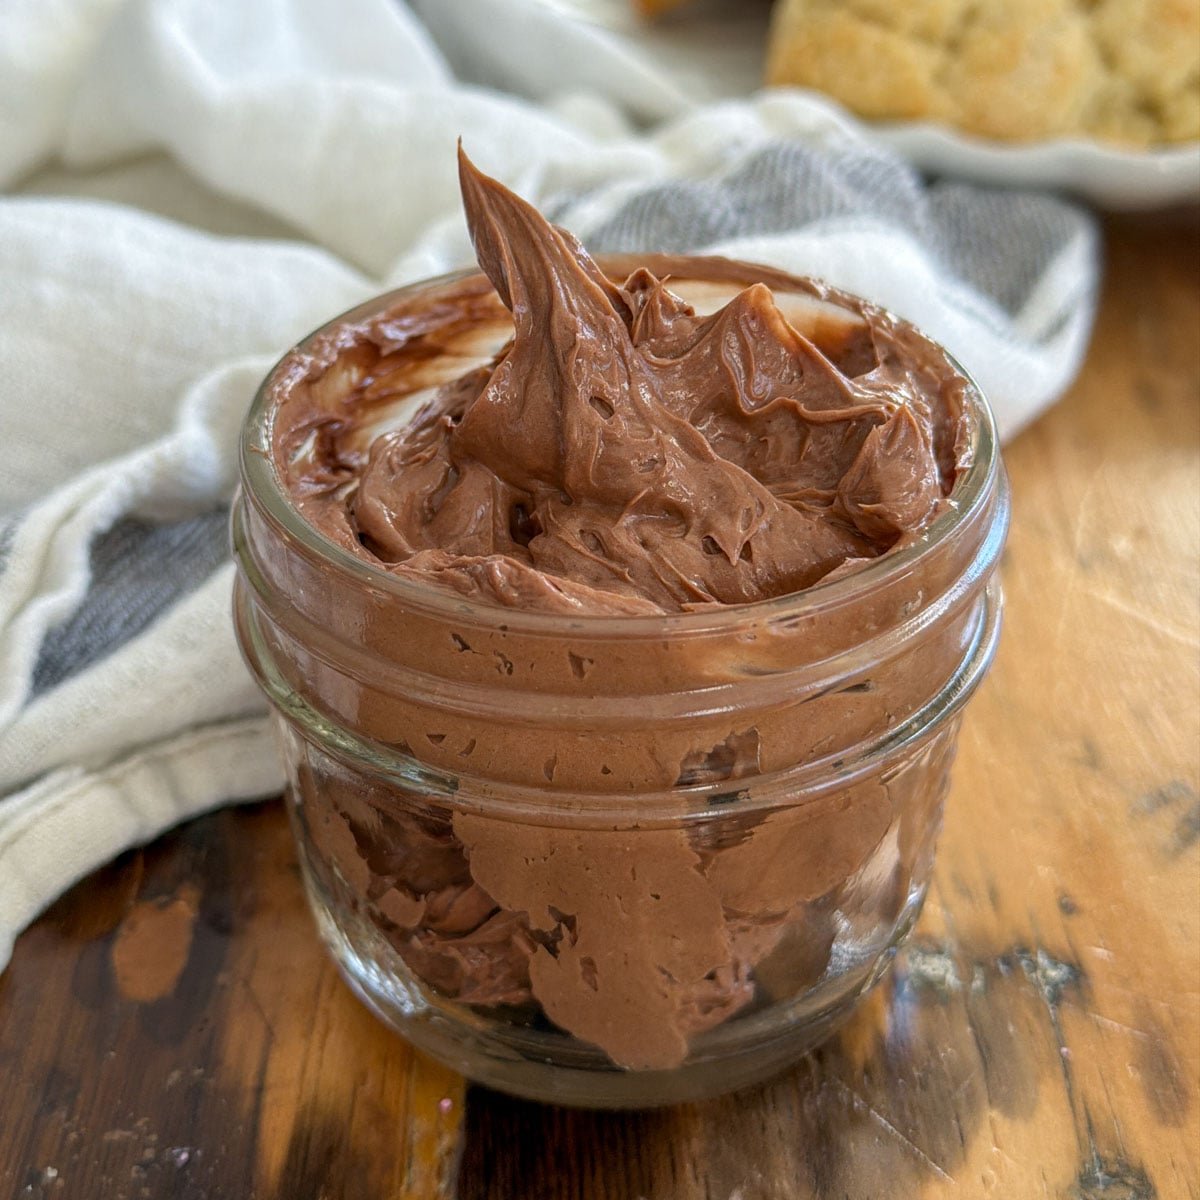
This chocolate butter is rich, deeply chocolatey, and so smooth you will want to eat it straight from the jar with a spoon. Made with a double chocolate method that eliminates every trace of graininess. Spread it on warm toast, scones, waffles, or croissants and watch it melt into something genuinely extraordinary.
Quick Look
- 🍫 Recipe: Whipped Chocolate Butter
- ⏲️ Ready In: 15 minutes
- 👪 Servings: 16 tablespoons
- 🔪 Difficulty: Easy
- 💭 Top Tip: Bloom your cocoa powder in a small amount of melted butter before adding it to the whipped butter. This one step is the secret to a perfectly smooth texture with absolutely zero graininess, a problem that plagues lots of other chocolate butter recipes.
Why You'll Love This Recipe
- The double chocolate method combines melted chocolate chips and bloomed cocoa for the deepest most complex chocolate flavor.
- Blooming the cocoa in butter rather than liquid eliminates graininess completely.
- Light and whipped rather than dense, it spreads beautifully.
- Just lightly sweet so the chocolate flavor is the star rather than the sugar.
- Made with salted butter so no additional salt is needed.
- Keeps in the refrigerator for up to one month and freezes beautifully.
The Most Luxurious Chocolate Butter You Have Ever Tasted
There is a moment when you spread chocolate butter on a warm piece of toast and realize this is one of the best things you have ever eaten. Not because it is complicated. Because it is perfect.
Most chocolate butter recipes use cocoa powder alone or melted chocolate alone. Both approaches have problems. Cocoa powder alone can produce a slightly gritty texture that never fully dissolves into the butter fat, no matter how much you whip it. Melted chocolate alone gives you richness and sweetness but lacks the deep pure intensity that only cocoa can provide. This version uses both and the combination produces something neither achieves on its own.
The real secret though is the blooming technique. Instead of mixing dry cocoa powder directly into the butter, which is where the grittiness can come from, we bloom the cocoa first in a small amount of melted butter. Blooming opens up the cocoa particles and fully hydrates them in fat, releasing more flavor and ensuring a completely smooth result. It is the same principle bakers use when blooming cocoa in hot water for brownies, but here we use melted butter instead so we are not introducing any water into the recipe at all.
The result is a butter that is light and whipped, deeply chocolatey, and completely smooth with zero graininess. We tested it at our bread and butter toast party as part of a collection of six compound butters and it was one of the most popular choices of the evening.
Our full compound butter recipes guide covers all six compound butters from the toast party with tested recipes and make-ahead timelines. You might also love our strawberry butter for a beautiful fruity alternative, or our whipped honey butter for the simplest two ingredient compound butter you will ever make.
Ingredients
Here are a few notes on the key ingredients before you get started. Full quantities are in the recipe card below.
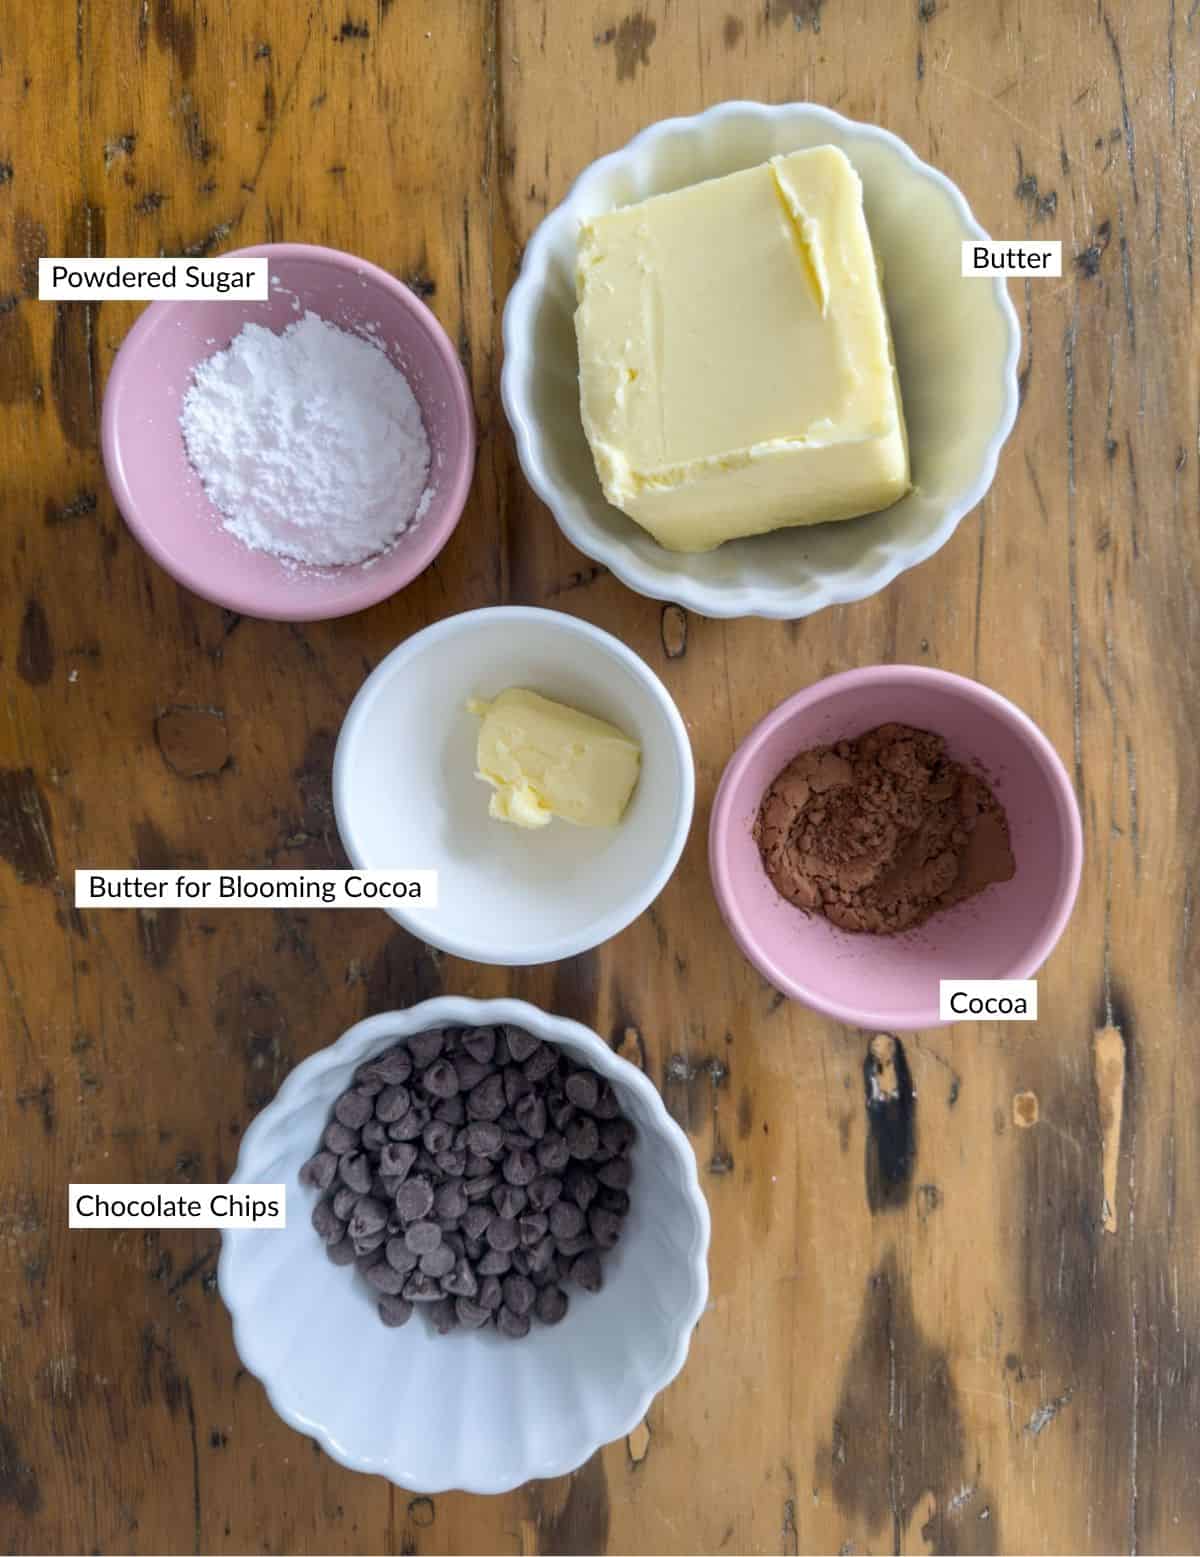
- Salted butter: We use salted butter as the base in this recipe and we do not add any additional salt. The salt in the butter provides exactly the right balance against the chocolate and the powdered sugar, and it enhances the chocolate flavor without making the butter taste salty. If you only have unsalted butter, add a small pinch of fine sea salt in Step 2.
- Semi-sweet chocolate chips: Semi-sweet chocolate gives you rich chocolate flavor and just enough sweetness without tipping the butter into overly sweet territory. Good quality chocolate makes a meaningful difference here, so use a brand you enjoy eating on its own.
- Unsweetened cocoa powder: This is the second layer of chocolate flavor and it is what gives the butter its depth and intensity. The blooming technique we use here transforms the cocoa completely. There's no graininess, just pure rich chocolate flavor. Stir the cocoa into the melted butter for blooming to get rid of any small lumps.
- Powdered sugar: A small amount of powdered sugar rounds out the sweetness and helps everything come together smoothly. We use just 2 tablespoons which keeps the butter firmly in chocolate territory rather than dessert territory. Powdered sugar rather than granulated is important here because it dissolves completely without any graininess.
How to Make Chocolate Butter
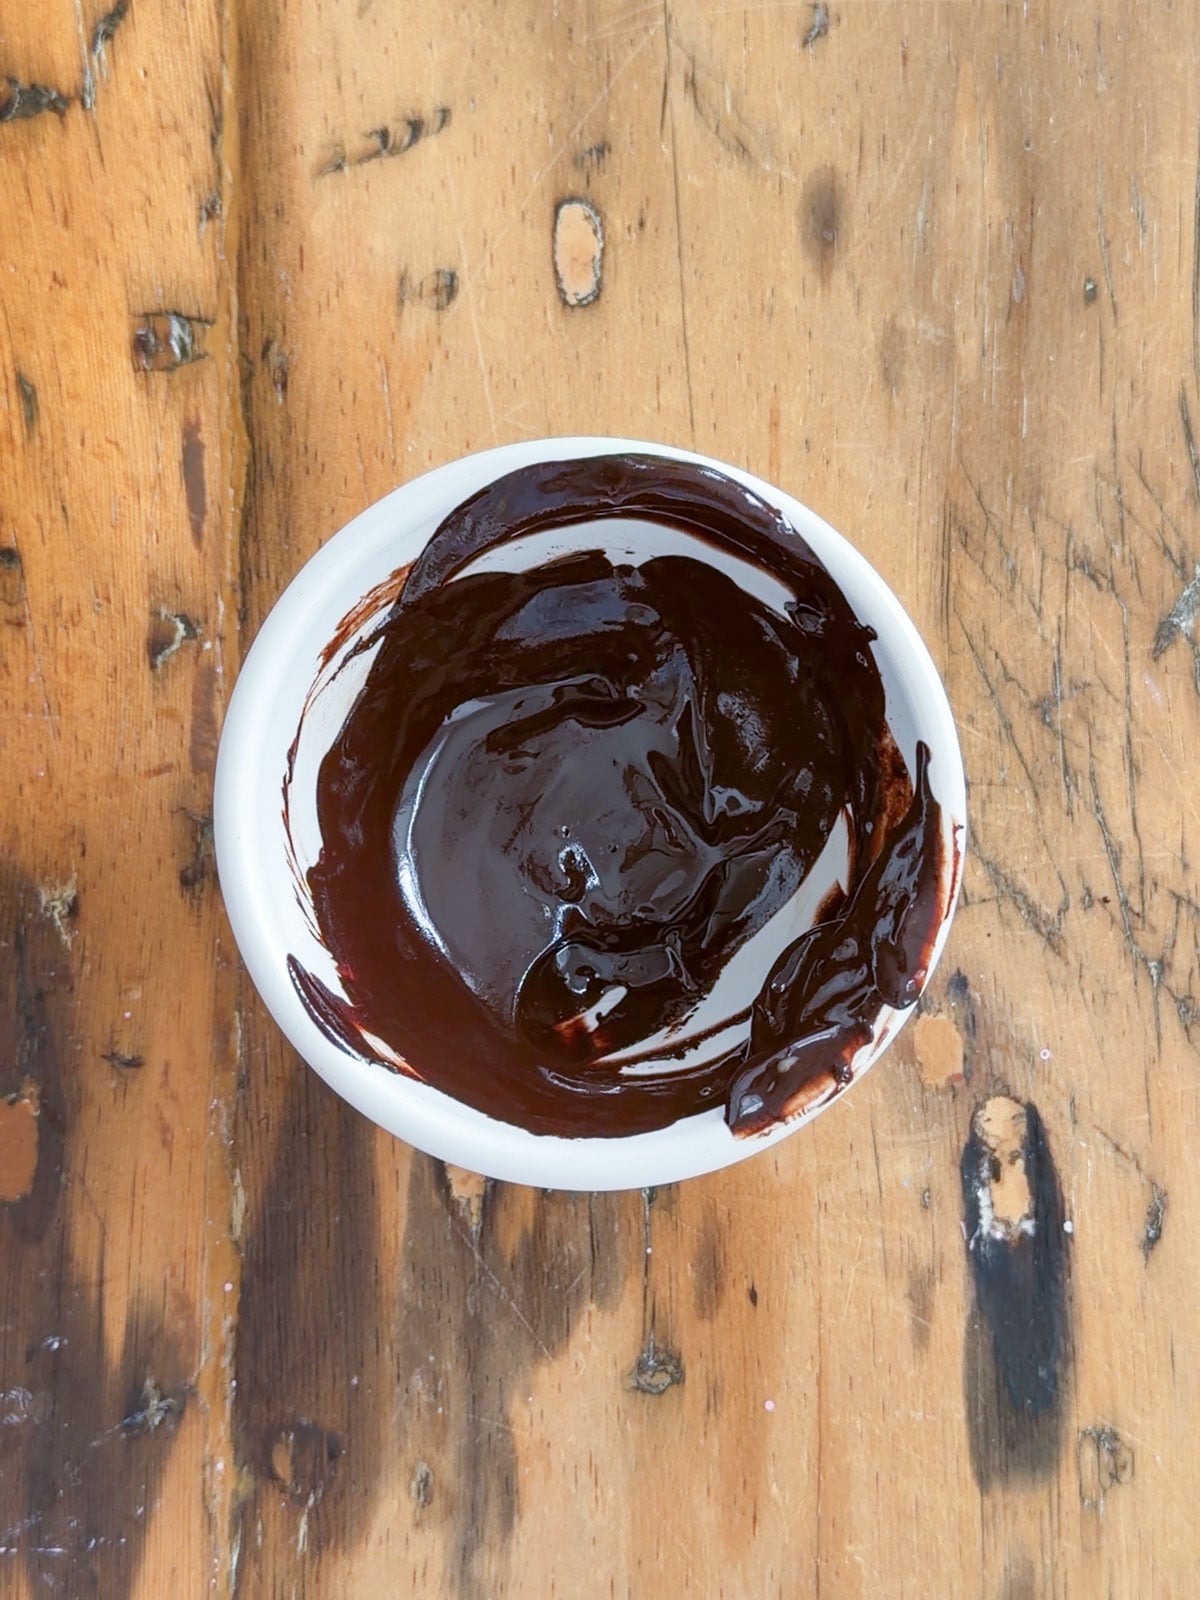
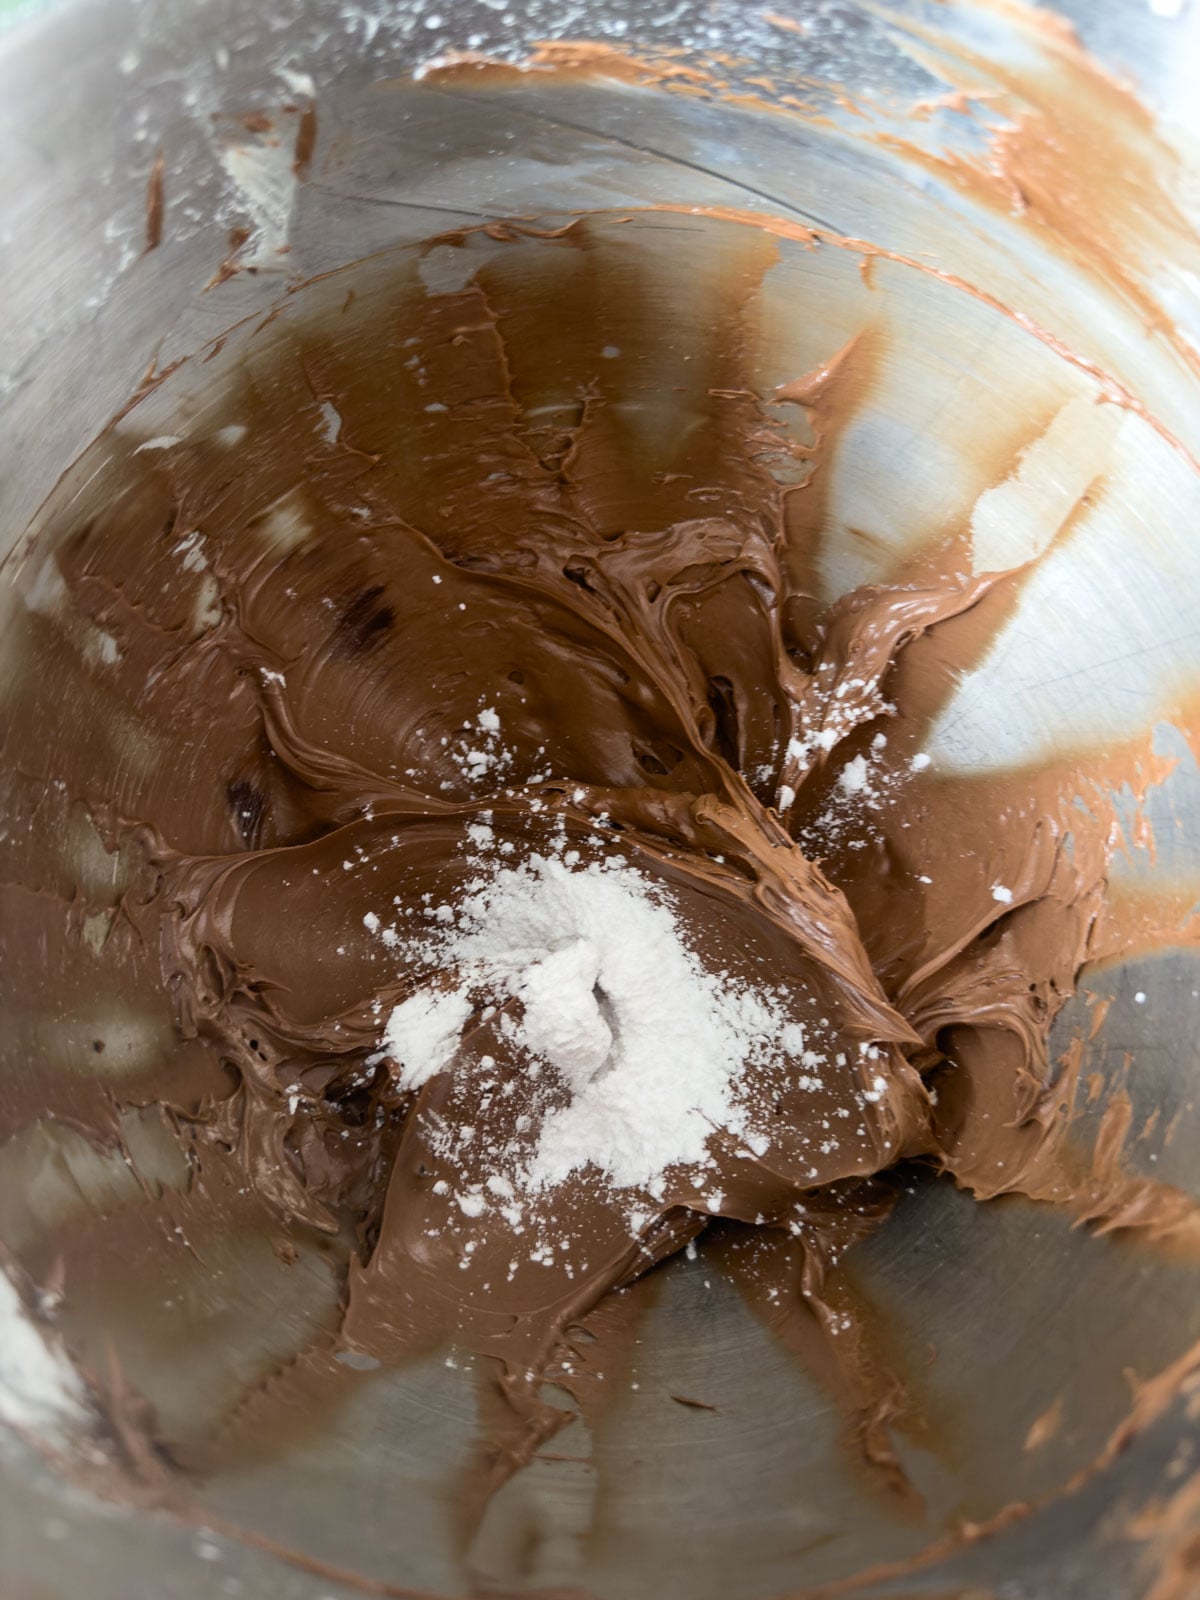
- Step 1: Bloom the cocoa. Place 1 tablespoon of unsweetened cocoa powder in a small bowl. Melt 1 tablespoon of butter separately and pour it over the cocoa while it is still warm. Stir together into a smooth paste. Set aside to cool completely to room temperature before proceeding.
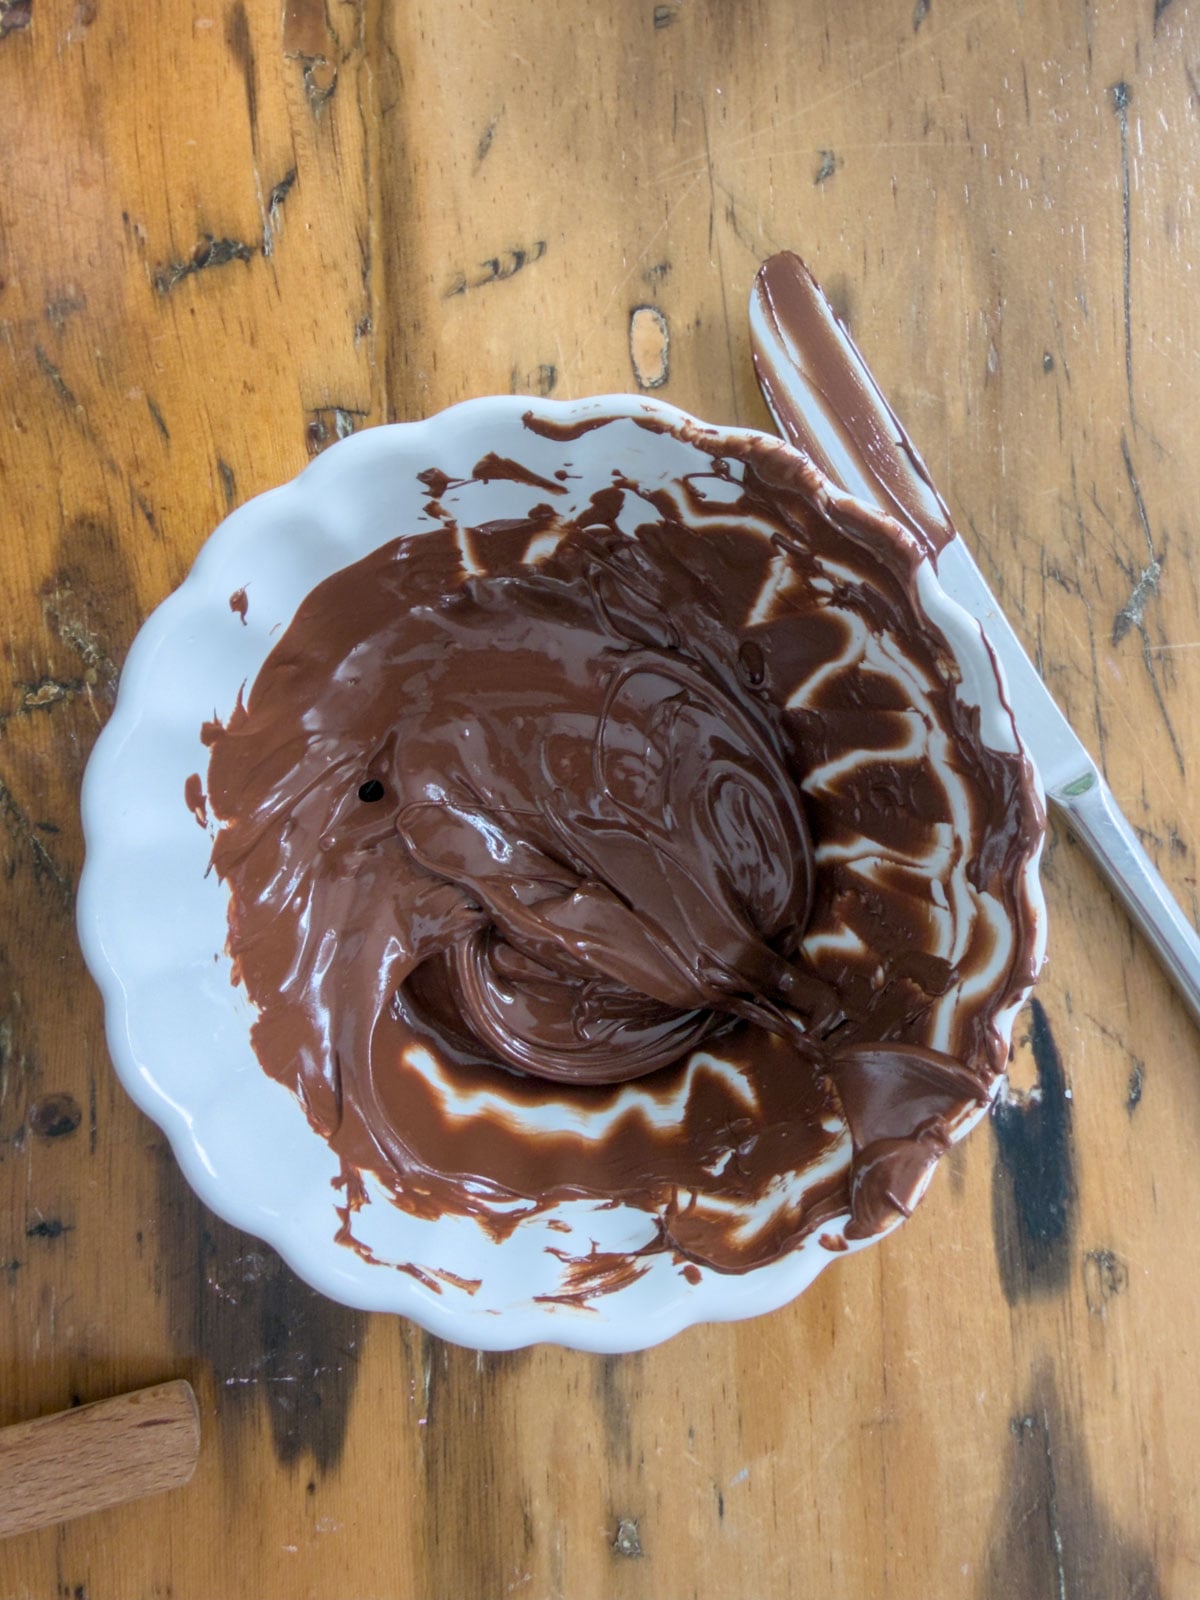
- Step 2: Melt the chocolate chips. Place the chocolate chips in a small microwave-safe bowl and melt in 30-second intervals and 50% power, stirring between each, until just melted and smooth. Set aside to cool. This is important. If the chocolate is too hot, it will melt the butter and you will end up with a greasy separated mess. If it is too cool, it will begin to set and be lumpy. Test the temperature on your wrist, it should not feel hot or cold.
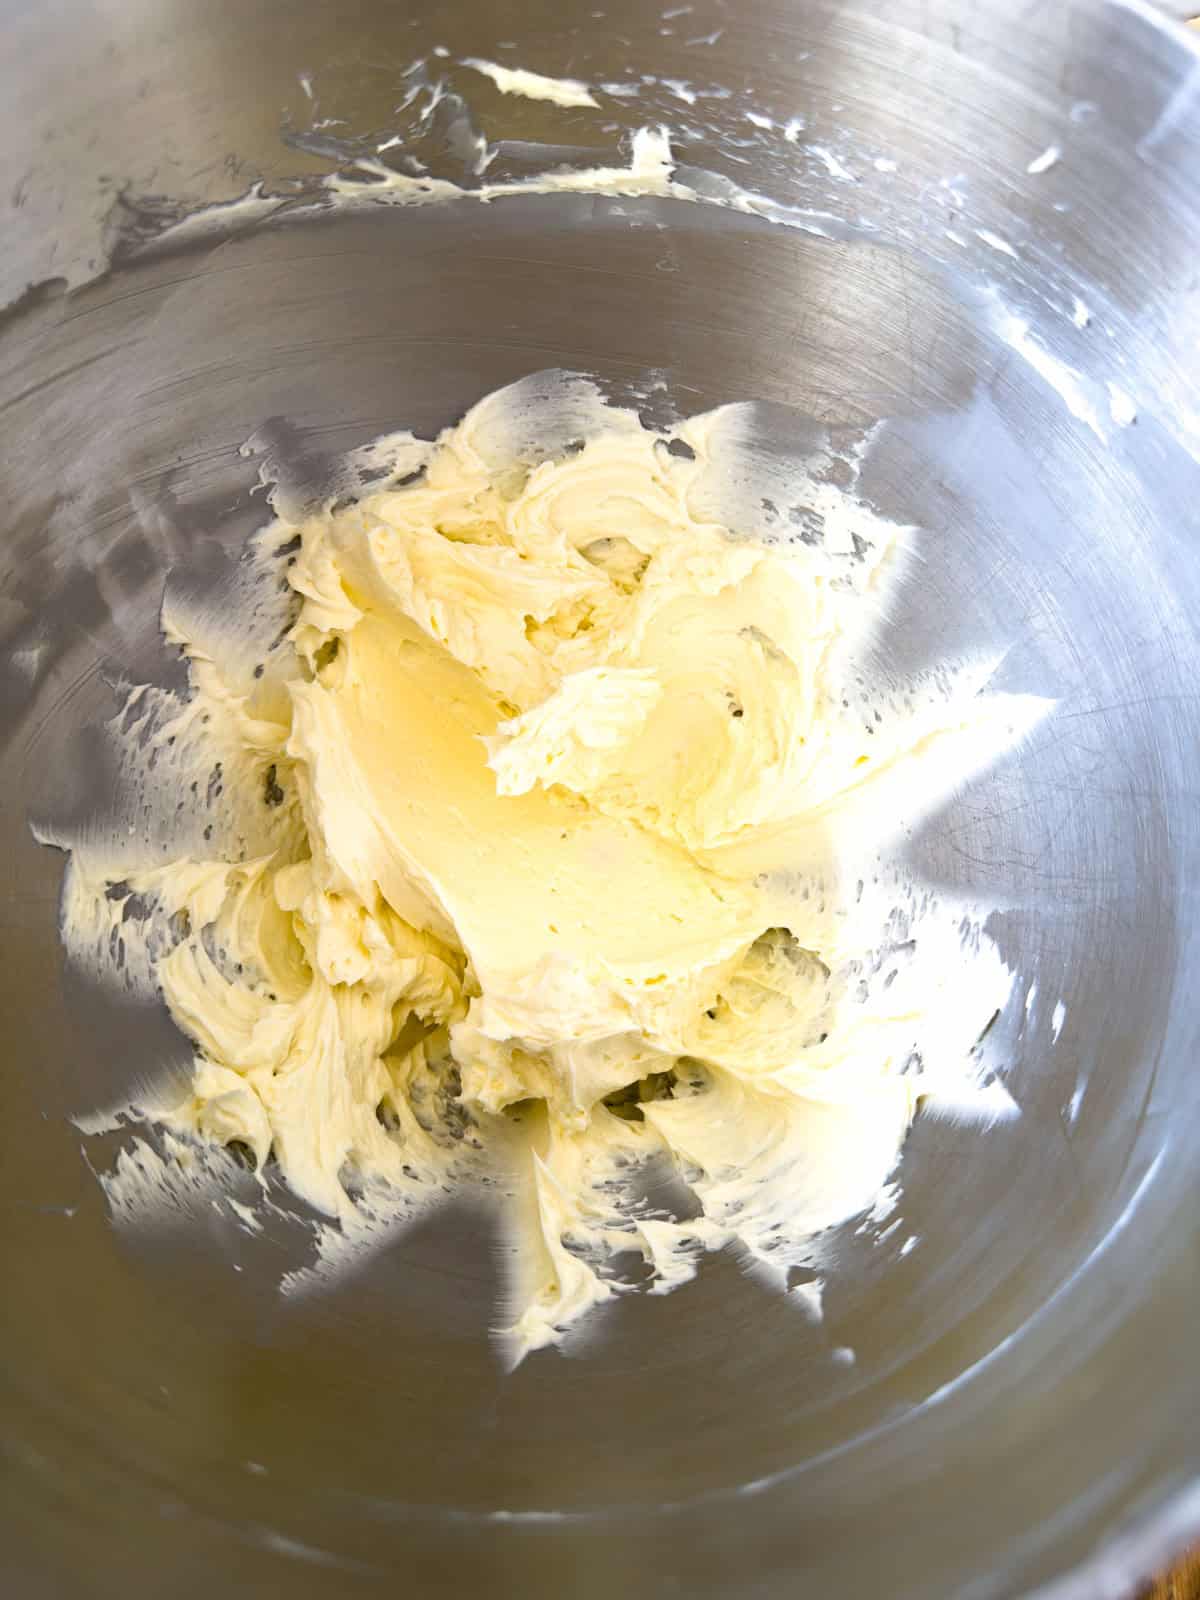
- Step 3: Whip the butter. Place the room temperature butter in the bowl of a stand mixer fitted with the paddle attachment, or in a large bowl if using a hand mixer. Whip on medium high speed for 3 minutes until very light, pale, and fluffy. The butter will change color and increase in volume.
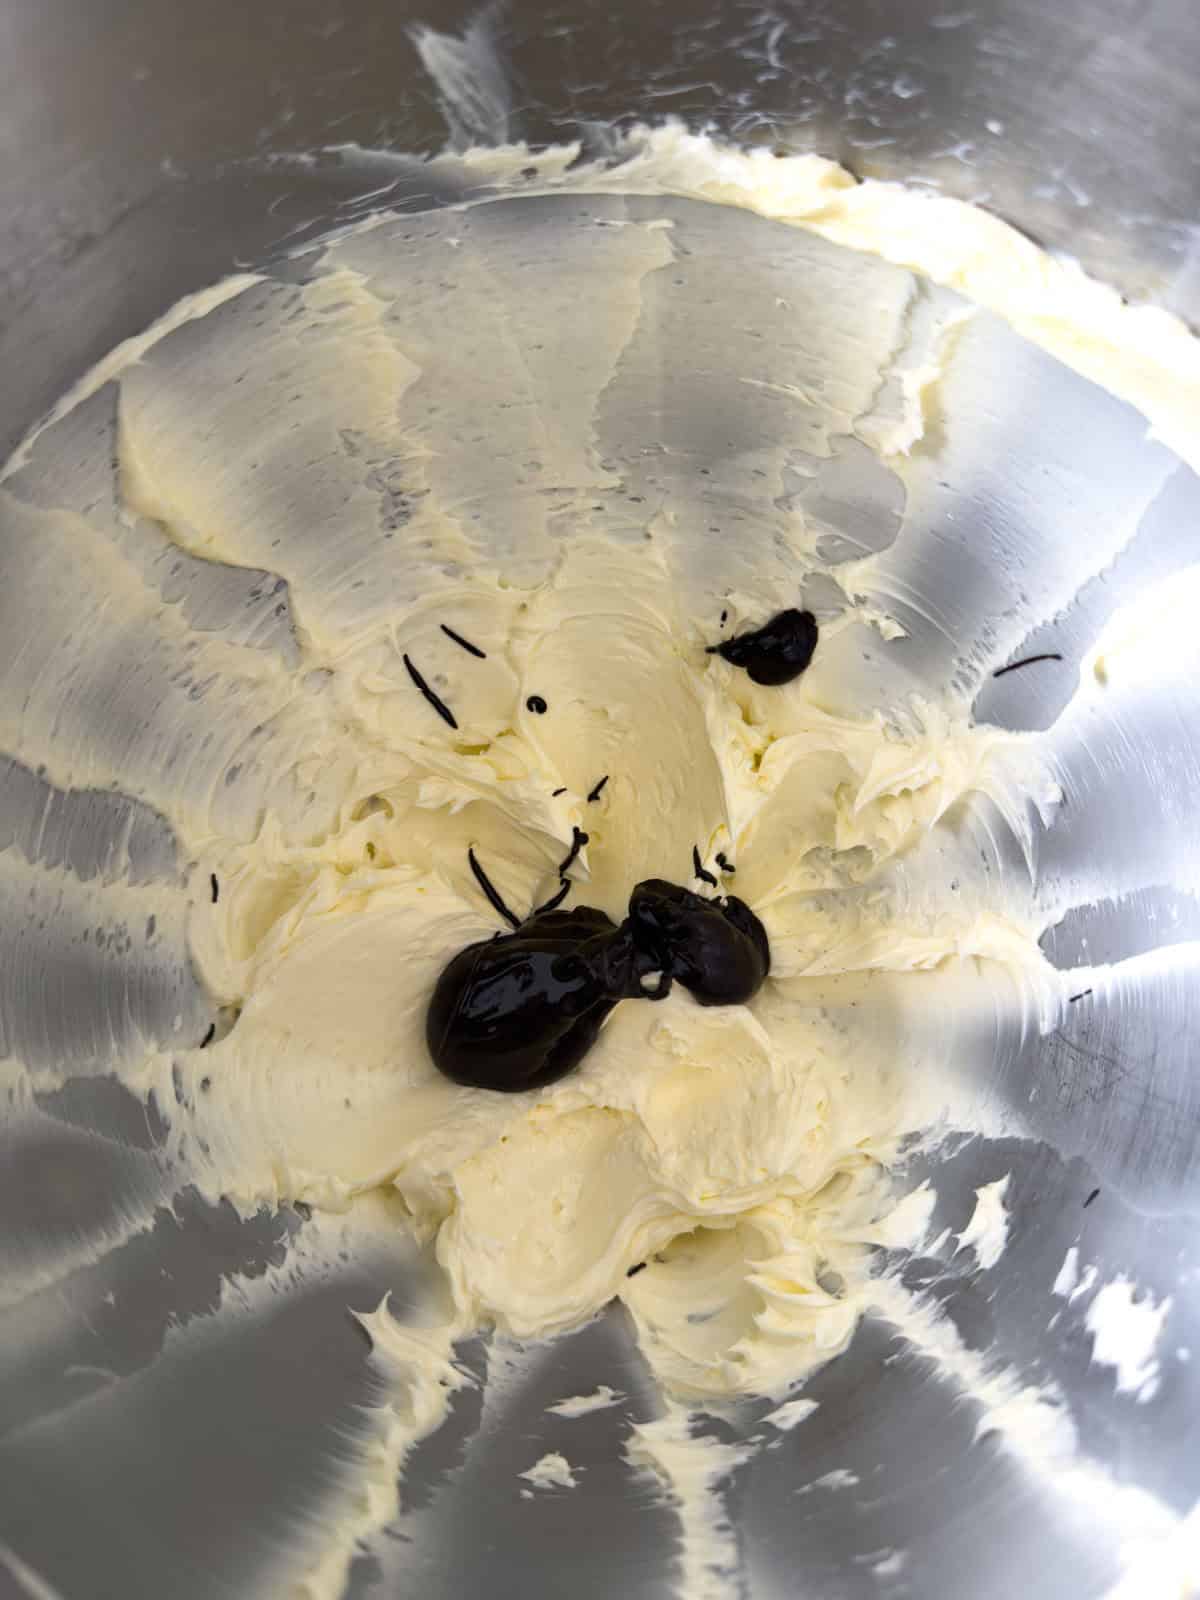
- Step 4: Add the cocoa paste. Add the cooled cocoa paste to the whipped butter and beat on medium speed until fully incorporated and smooth, about 1 minute.
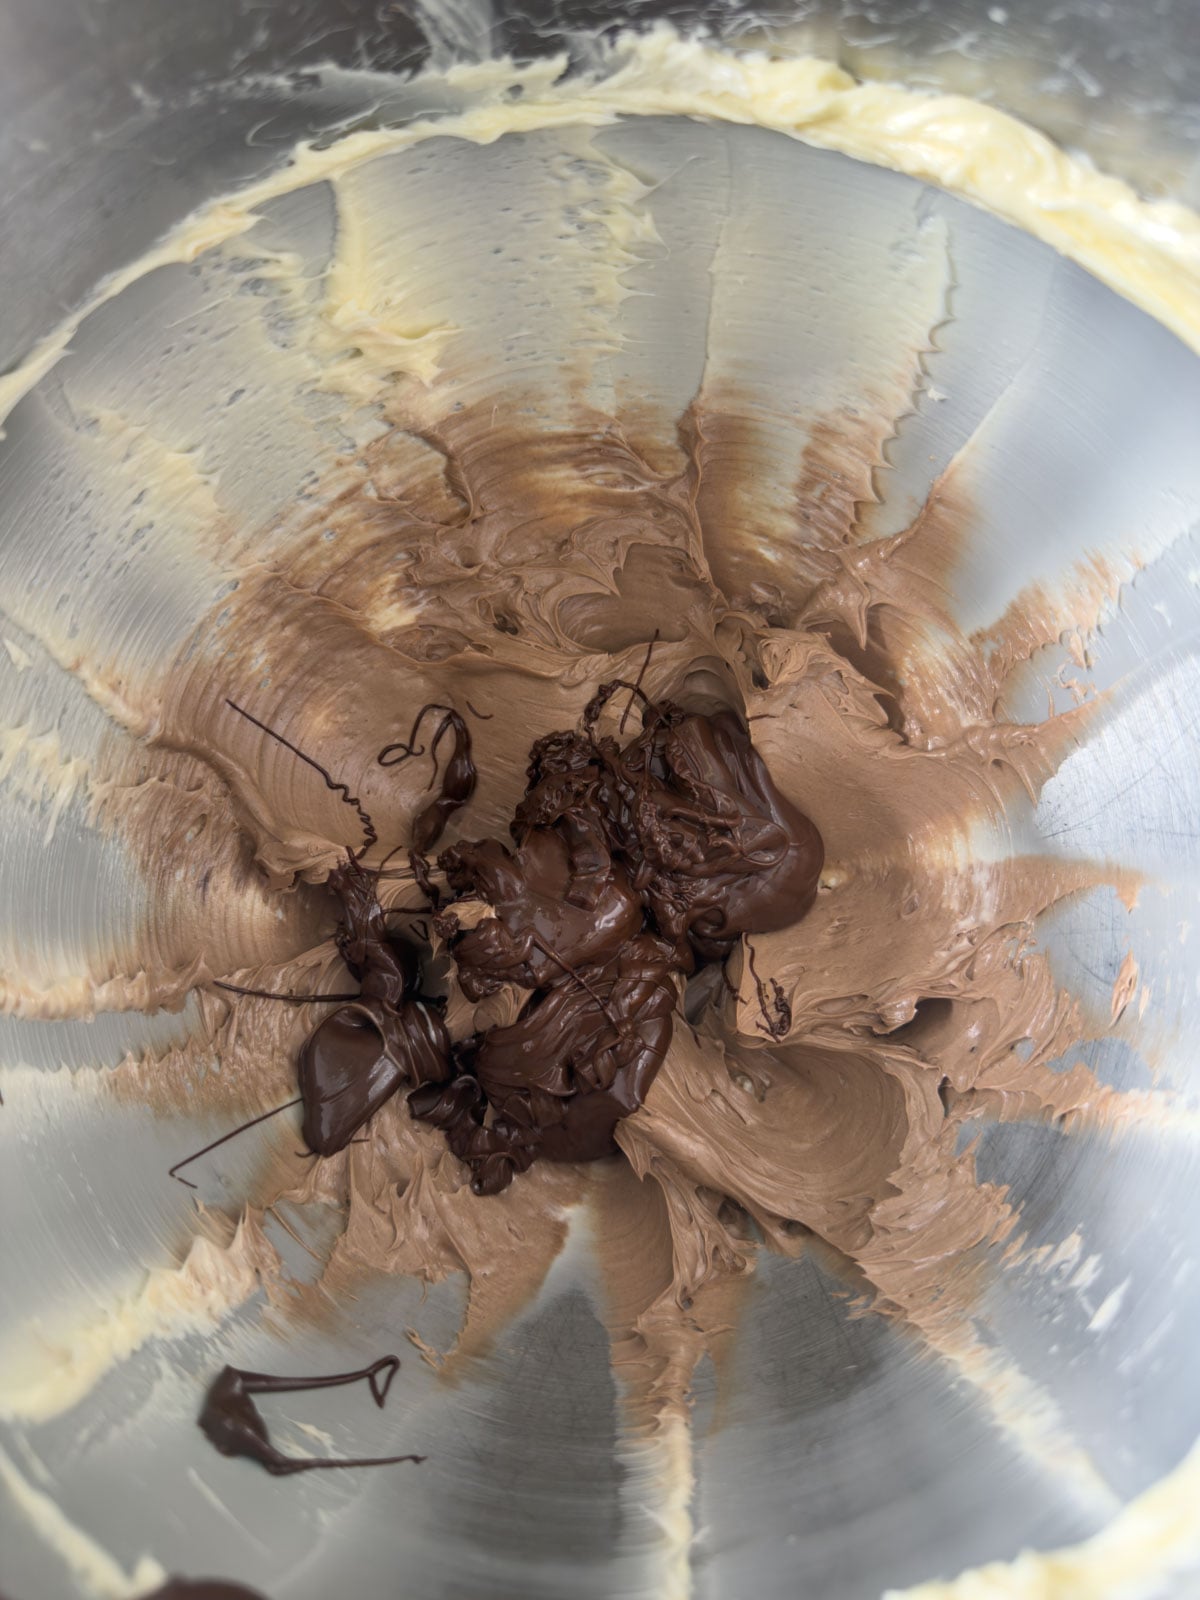
- Step 5: Add the melted chocolate. Add the cooled melted chocolate to the butter mixture and beat until fully incorporated and smooth, about 1 more minute. Scrape down the sides of the bowl as needed.
- Step 6: Add the powdered sugar. Add the powdered sugar and beat on medium speed until fully incorporated. The finished butter should be light, smooth, and deeply chocolatey. Transfer to a clean jar or shape into a log by placing on a piece of parchment paper, rolling tightly, and twisting the ends to seal. Store in the refrigerator. Remove about 30 minutes before serving so it softens to a beautifully spreadable consistency.
Expert Tips: Temperature Is Everything
- The single most important thing to get right in this recipe is the temperature of the melted chocolate before you add it to the butter. Too hot and it will melt the butter fat and cause the whole mixture to separate. Too cool and it will start to set in streaks before it can incorporate evenly.
- The wrist test is the most reliable way to check. Hold the bowl against the inside of your wrist. It should feel neutral, not warm nor cool. At that temperature the chocolate will flow into the butter smoothly and incorporate beautifully without causing any problems.
- If the chocolate starts to firm up while you are working just give it a very brief 10 second warm in the microwave and test again. You want it fluid but not warm.
Variations
- Dark chocolate butter: Substitute dark chocolate chips for the semi-sweet for a more intense less sweet result. This variation is particularly beautiful on croissants and brioche where the richness of the bread can stand up to the deeper flavor.
Frequently Asked Questions
Graininess in chocolate butter almost always comes from cocoa powder that has not been properly hydrated before being added to the butter fat. Dry cocoa particles do not dissolve easily in fat and leave a gritty texture no matter how long you whip. The blooming technique in this recipe solves this completely by hydrating the cocoa in warm melted butter before adding it to the whipped butter you eliminate graininess entirely.
Separation usually happens because the melted chocolate was added when it was still too warm. Hot chocolate melts the butter fat and breaks the emulsion. Make sure your melted chocolate has cooled to neutral wrist temperature before adding it to the whipped butter.
You can but the result will have less richness and depth than the double chocolate version. The melted chocolate chips contribute a creaminess and complexity that cocoa powder alone cannot replicate.
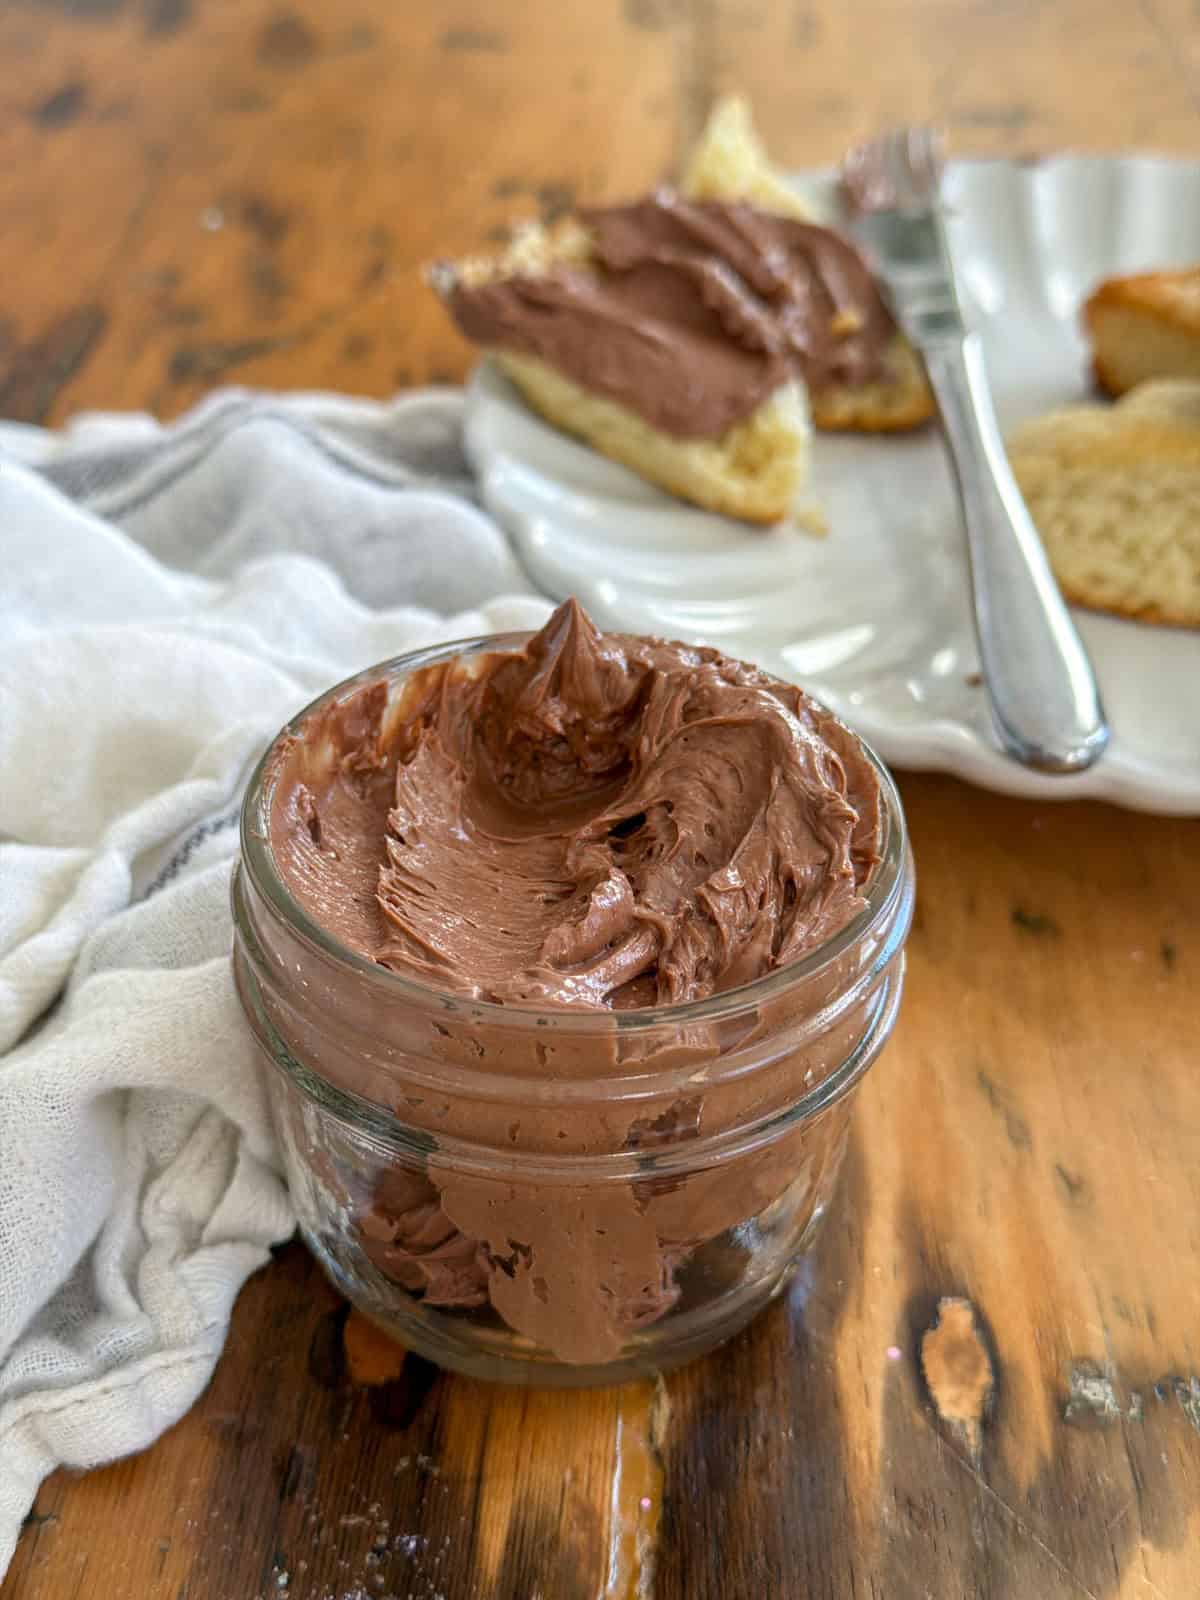
Our favorite pairings are warm scones, brioche toast, croissants, waffles, and warm sour dough bread.
You can but milk chocolate is significantly sweeter and will produce a noticeably sweeter butter. If you use milk chocolate reduce the powdered sugar to 1 tablespoon and taste before adding more.
Up to one month in the refrigerator. Up to three months in the freezer wrapped tightly in parchment. Remove from the refrigerator 30 minutes before serving to soften to a spreadable consistency.
More Compound Butter Recipes You Will Love


If you try this chocolate butter or any other recipe on my blog please leave a star rating and let me know how it went in the comments below. Thanks for visiting today!
Recipe
Chocolate Butter
Video
Ingredients
- 1 cup salted butter room temperature
- ½ cup semi-sweet chocolate chips
- 1 tablespoon cocoa powder
- 1 tablespoon butter melted
- 2 tablespoons powdered sugar
Instructions
- Place the sifted cocoa powder in a small bowl. Pour 1 tablespoon of warm melted butter over the cocoa and stir into a smooth paste. Set aside to cool completely to room temperature.1 tablespoon cocoa powder, 1 tablespoon butter
- Melt the chocolate chips in 30 second microwave intervals, at 50% power, stirring between each, until just smooth. Set aside to cool to neutral wrist temperature, it should feel neither warm nor cool against your wrist.½ cup semi-sweet chocolate chips
- Place 1 cup of room temperature butter in the bowl of a stand mixer or large bowl if using a hand mixer. Whip on medium high speed for 3 minutes until very light, pale, and fluffy.1 cup salted butter
- Add the cooled cocoa paste and beat on medium speed until fully incorporated, about 1 minute.
- Add the cooled melted chocolate to the butter mixture and beat at medium speed until fully incorporated and smooth, about 1 minute. Scrape down bowl as needed.
- Add the powdered sugar and beat until fully incorporated. Transfer to a clean jar or roll into a log in parchment paper, twisting the ends to seal. Store in the refrigerator. Remove 30 minutes before serving to soften to a spreadable consistency.2 tablespoons powdered sugar
Notes
- If using unsalted butter add a small pinch of fine sea salt in Step 3.
- The cocoa bloom can be made ahead and stored at room temperature until ready to use.
- Temperature is everything in this recipe. Make sure the melted chocolate has cooled to neutral wrist temperature before adding to the butter or it will cause separation.
- Store in a sealed jar in the refrigerator for up to one month. Freeze in a parchment wrapped log for up to three months.
- Dark chocolate variation: Substitute dark chocolate chips for a more intense less sweet result.


Dannyelle Nicolle-Ramjist says
The texture and taste of this easy recipe is amazing!