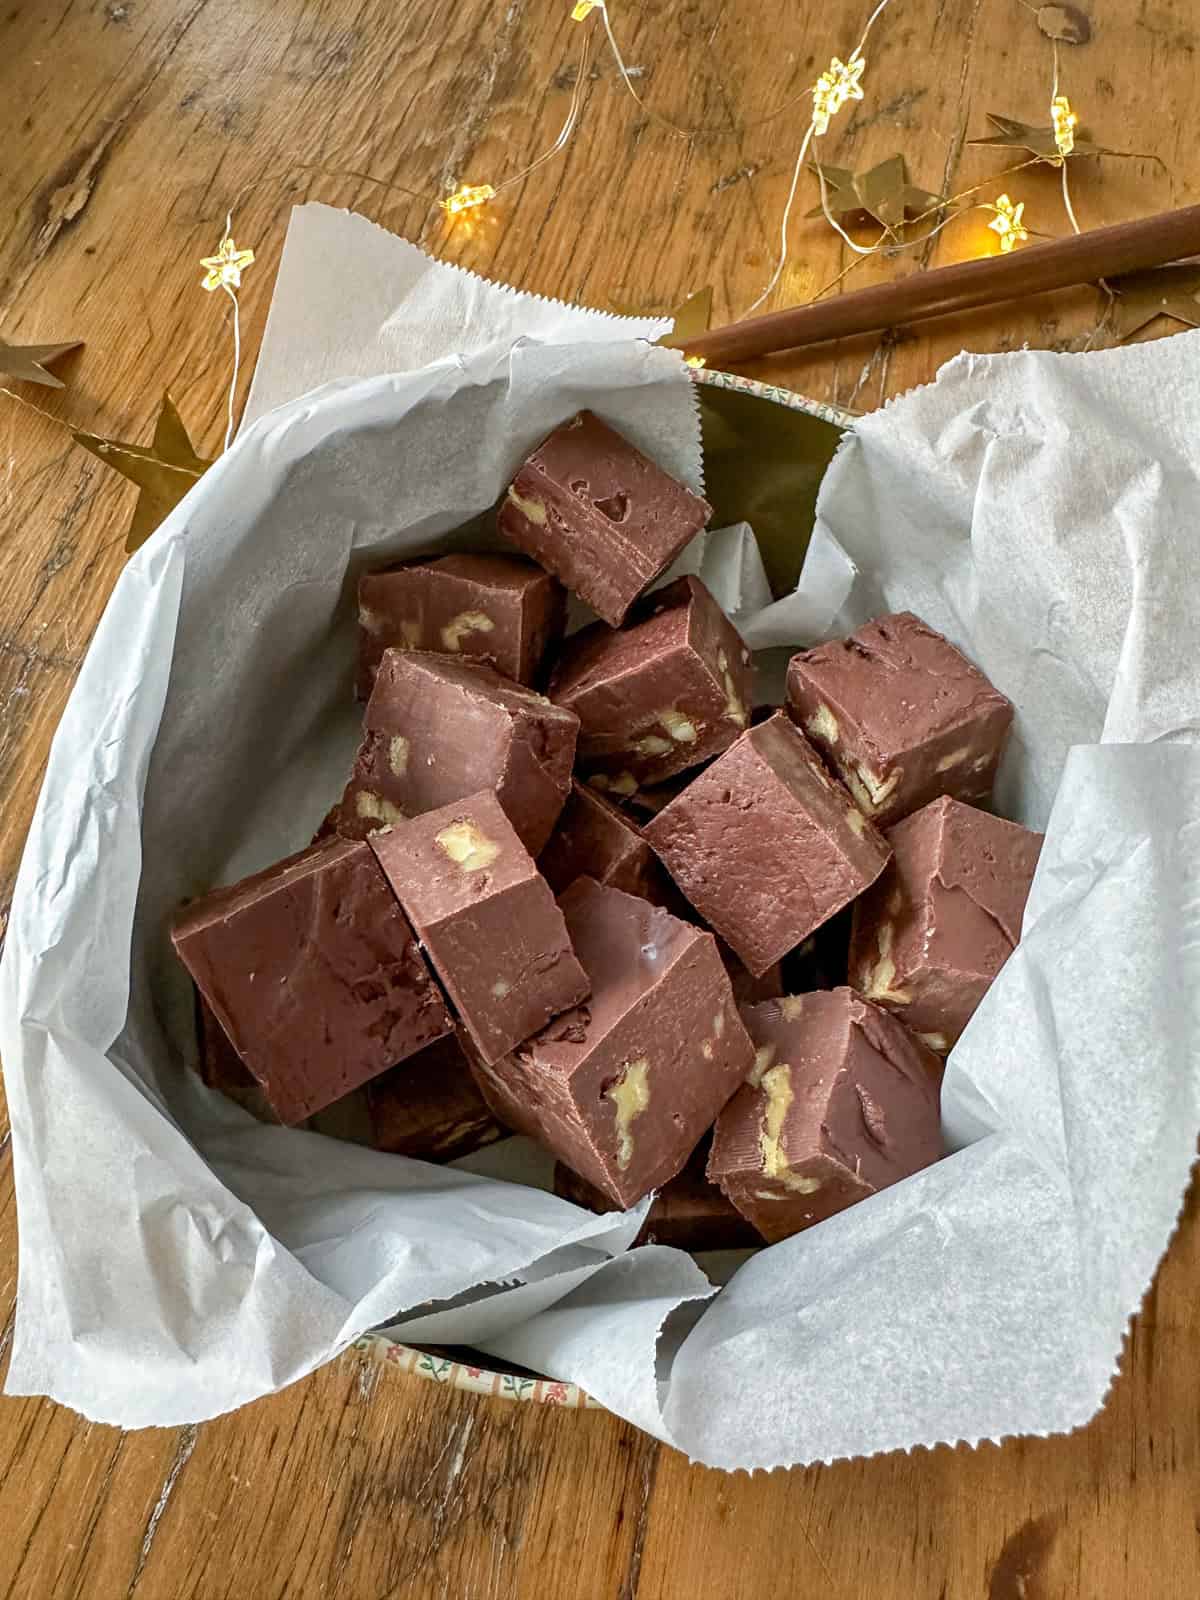
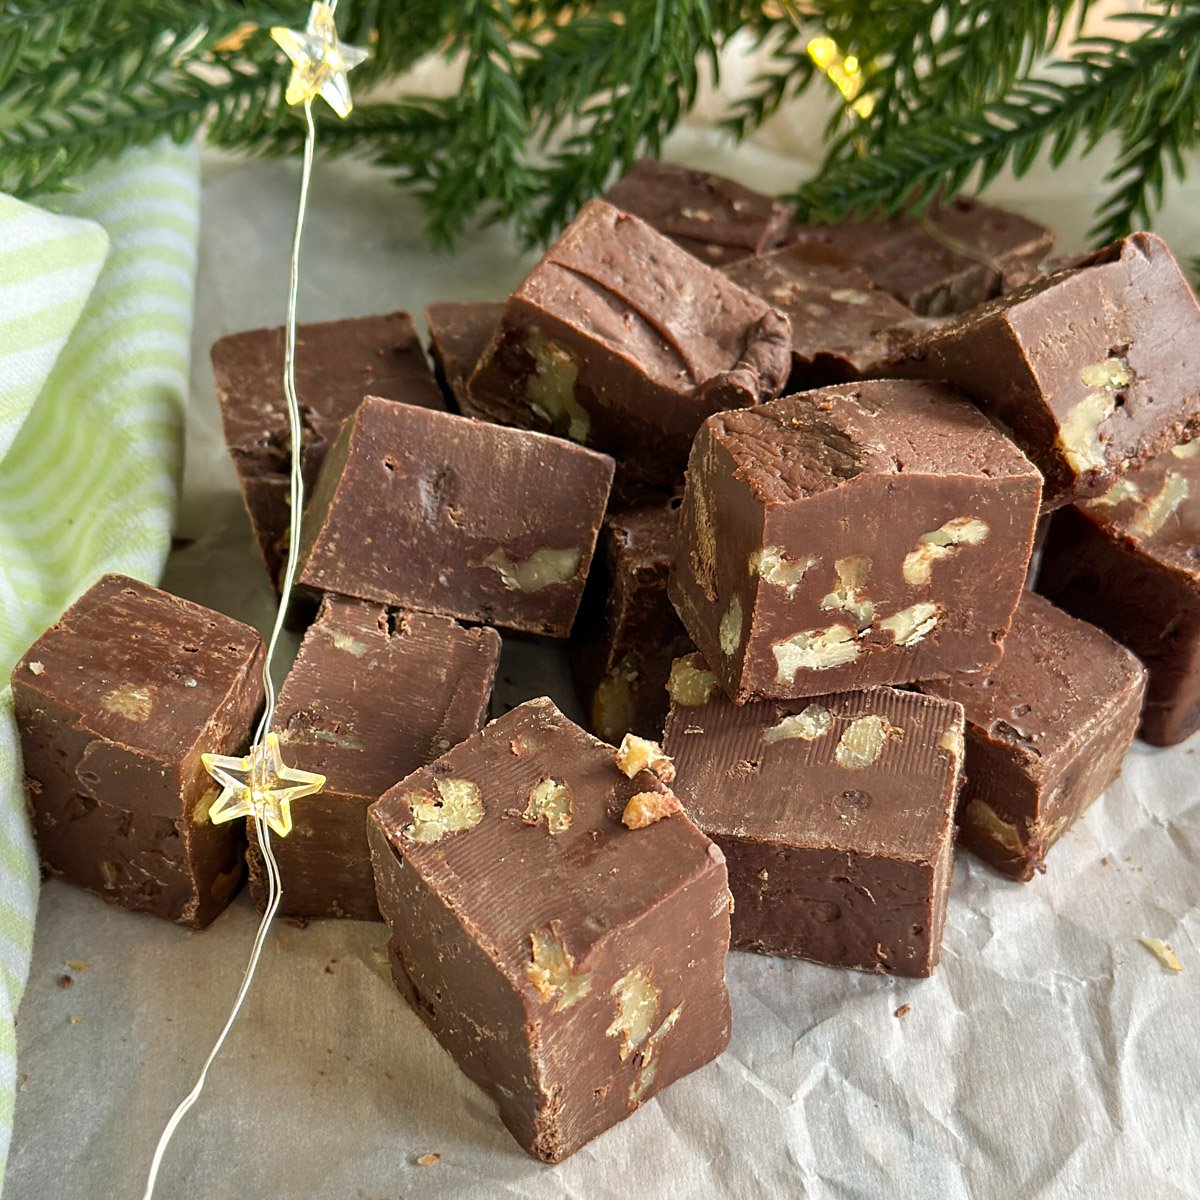
This chocolate walnut fudge is a rich, creamy treat with crunchy toasted walnuts that's incredibly easy to make. Using just 5 ingredients and a simple microwave method, this condensed milk fudge is ready in about 10 minutes of active time. Perfect for holiday giving, Harry Potter parties, or anytime you want to share homemade chocolate fudge with the people you love.
A Quick Look At This Recipe
- 📋 Recipe: Easy Chocolate Walnut Fudge
- ⏲️ Time: Preapared in just 10 minutes, with 2 hours to set
- 👪 Servings: 8 x 8 baking dish, 36 pieces
- 🔪 Difficulty: Easy
- 💭 Top Tip: Toast your walnuts first to bring out their flavor and add extra crunch to every bite of this chocolate fudge.
Why You'll Love This Chocolate Walnut Fudge
- Incredibly simple. This condensed milk fudge comes together in just minutes with no candy thermometer or stove required.
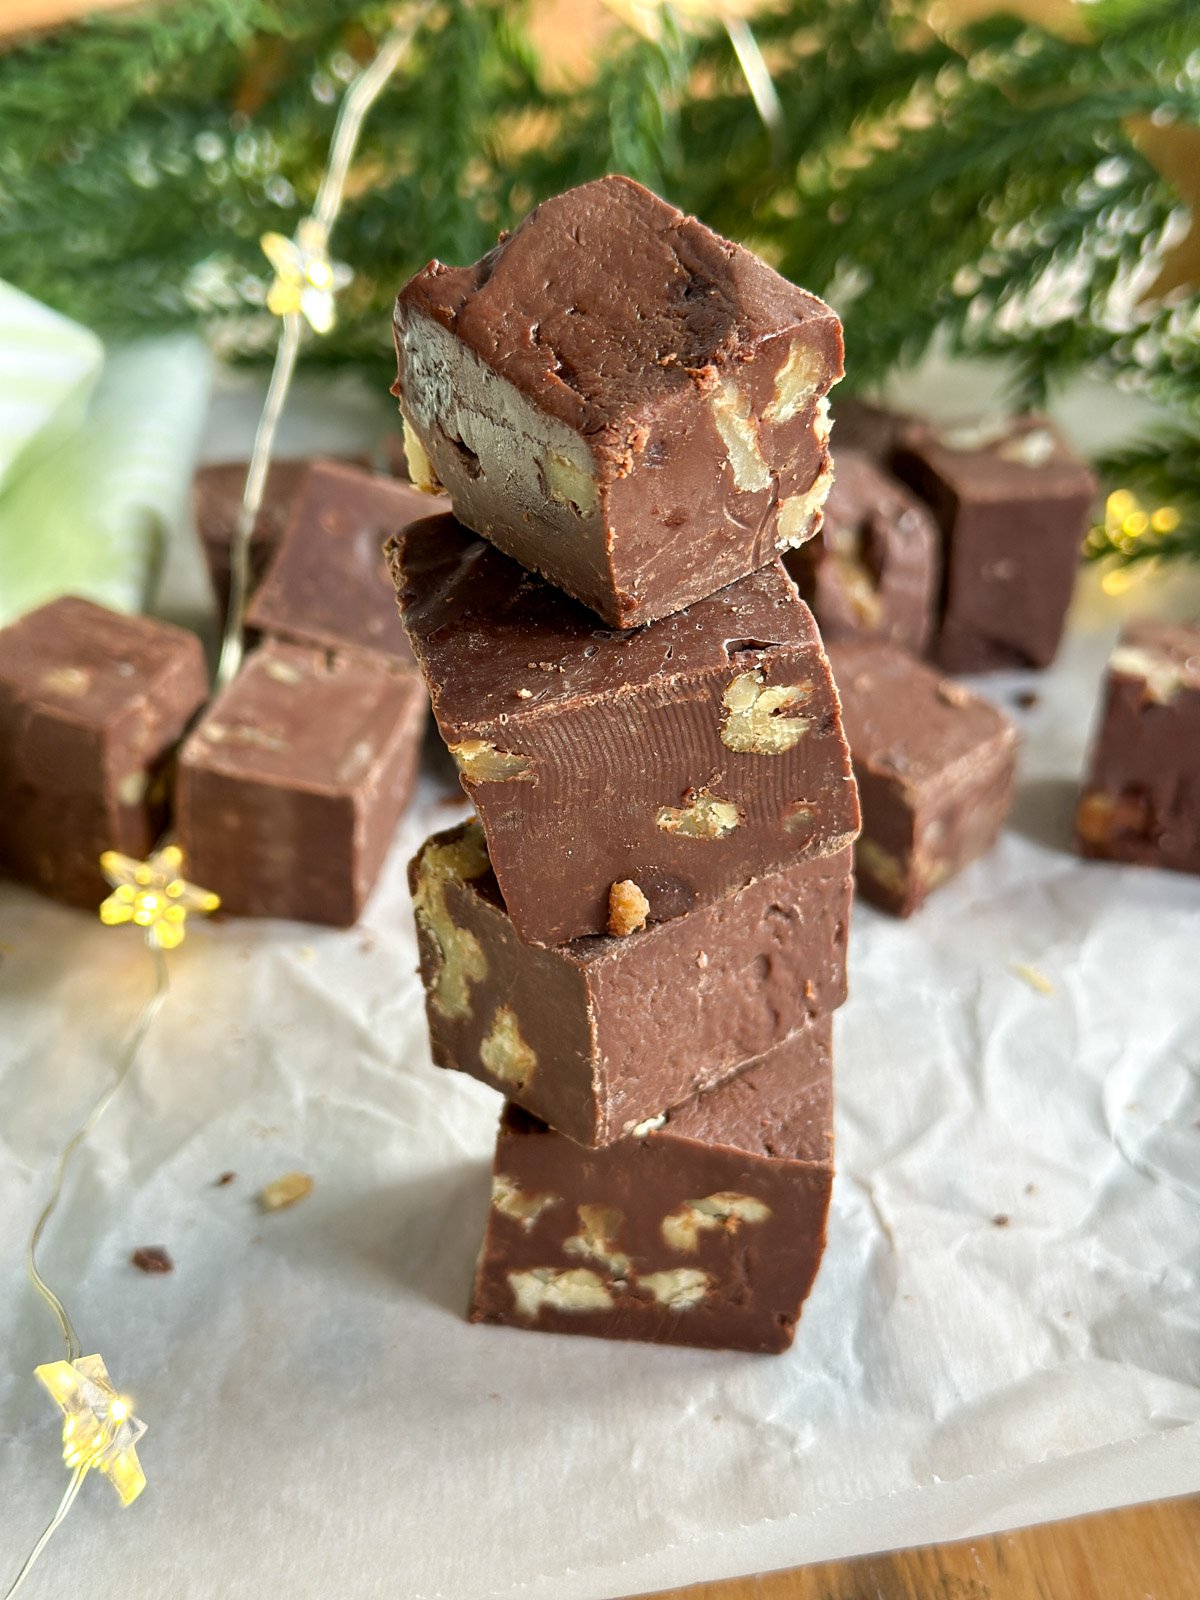
- Rich and indulgent. Creamy chocolate fudge with crunchy toasted walnuts in every piece.
- Perfect for gifting. These chocolate walnut squares package beautifully for holiday treats or party favors.
- No fuss microwave method. This easy fudge recipe takes all the guesswork out of candy making.
- Inspired by Harry Potter. Based on Mrs. Weasley's gift to Harry, this recipe brings book magic to life.
Jump to:
Chocolate walnut fudge is a rich, creamy candy made with chocolate, sweetened condensed milk, and toasted walnuts. This classic combination creates a firm yet creamy texture with satisfying crunch in every bite. Unlike traditional fudge recipes that require a candy thermometer and careful temperature monitoring, this easy chocolate walnut fudge uses a simple microwave method that delivers perfect results every time.
The toasted walnuts are what make this chocolate fudge extra special. Toasting brings out the natural oils and deepens the nutty flavor while creating a crispy texture that contrasts beautifully with the smooth chocolate. The addition of sea salt is equally important, enhancing the chocolate flavor and creating that addictive sweet and salty balance that makes this fudge impossible to resist.
This condensed milk fudge recipe has been a favorite for generations, perfect for holidays, gifts, or anytime you want a homemade treat that tastes impressive but comes together in minutes.
The Inspiration: Mrs. Weasley's Christmas Gift
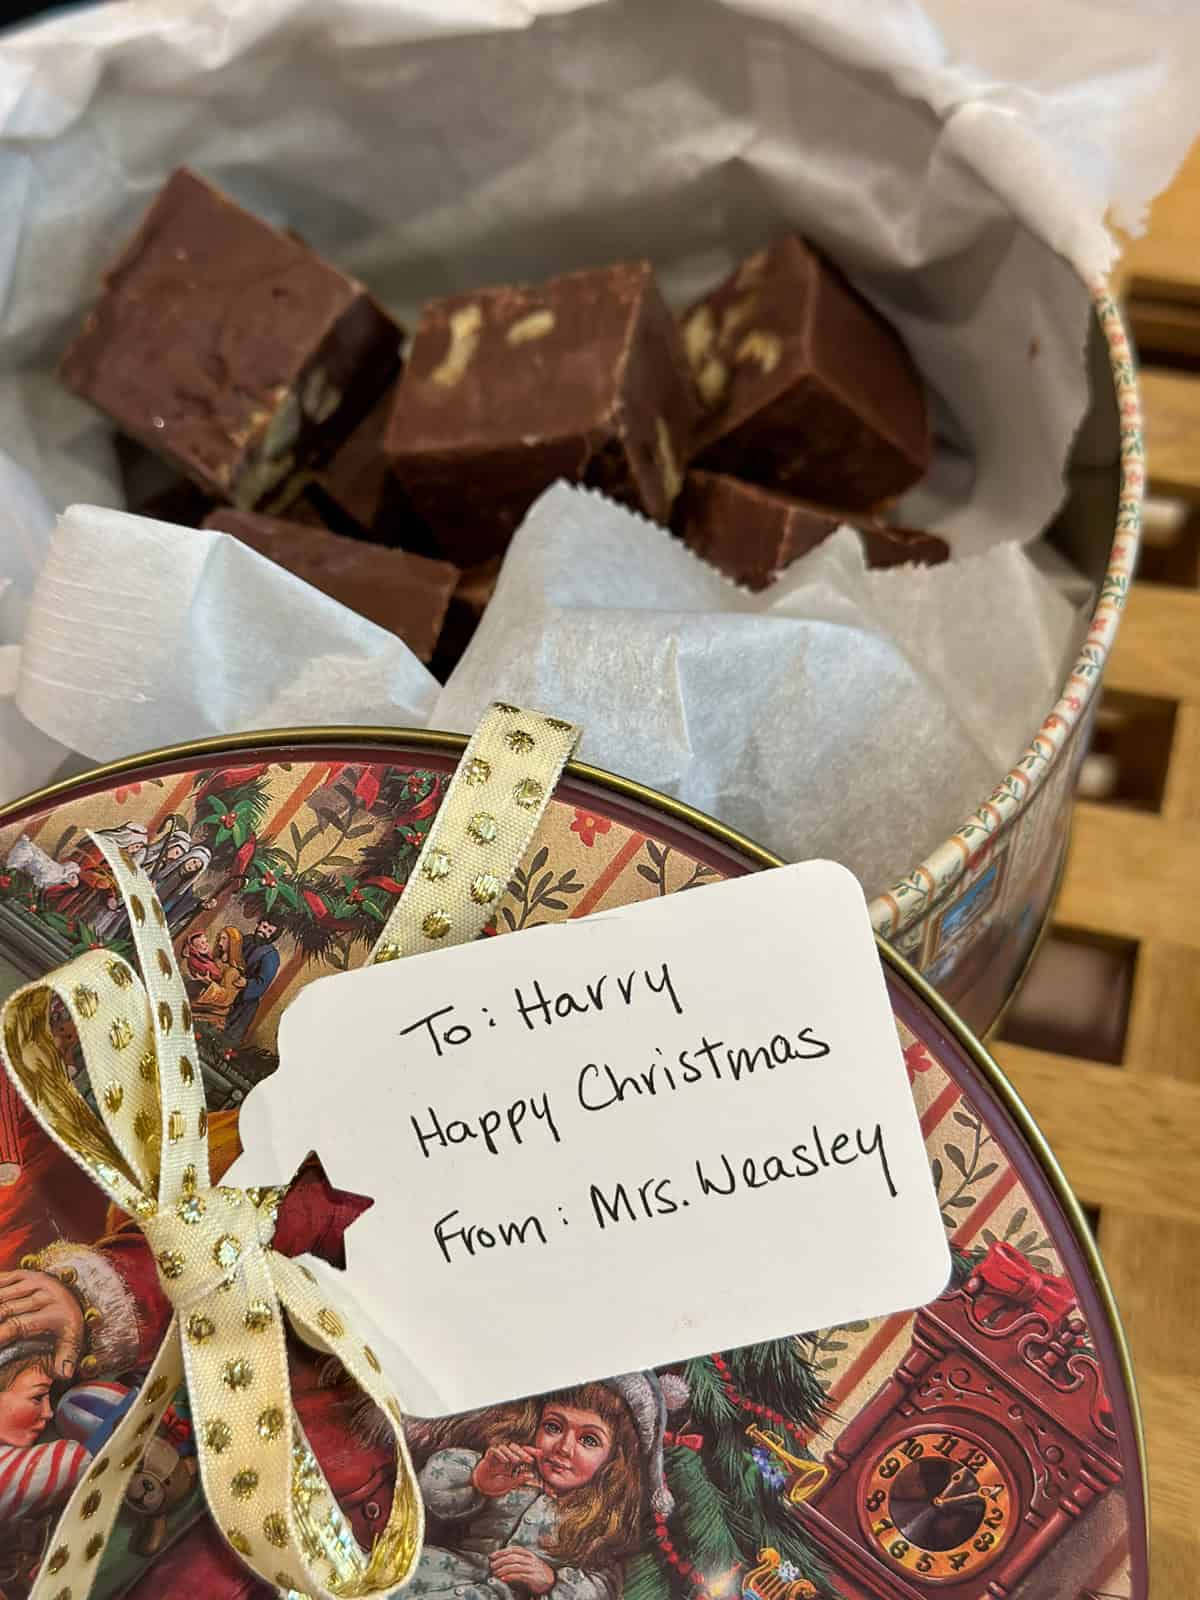
In Harry Potter's first year at Hogwarts, he experienced something he'd never known before. Christmas morning brought him an unexpected gift from Mrs. Weasley. Inside a package was a homemade sweater she'd knitted herself and a large box of homemade fudge. What a special gift this was for a boy who'd never received a real Christmas gift before.
The books don't tell us what flavor Mrs. Weasley made, but knowing her warm, loving personality and her talent for home cooking, chocolate walnut fudge feels exactly right. It's the kind of treat a caring mother would make, with love in every square. This recipe honors that beautiful moment when Harry realized he was finally part of a family who cared about him.
Whether you're making this chocolate fudge for your own family, packaging it as holiday gifts, or creating a Honeydukes inspired spread for a Harry Potter party, this simple recipe is perfect. You might also love our Harry Potter Christmas tree decorating ideas and our collection of Harry Potter snacks and treats for more magical inspiration. The fudge also made an appearance at our Harry Potter Christmas Party. Also check out our Honeydukes inspired Coconut Ice recipe.
Ingredients For Chocolate Walnut Fudge

- Walnuts: They add wonderful crunch and nutty flavor to this chocolate fudge. Toasting them first in a dry skillet brings out their natural oils and deepens their flavor while making them extra crispy. You can substitute pecans if you prefer, or leave the nuts out entirely for smooth chocolate fudge.
- Sweetened Condensed Milk: it's the secret to easy microwave fudge. This thick, sweet milk creates a creamy base that sets up perfectly without any temperature testing or candy thermometers. Make sure you're using sweetened condensed milk, not evaporated milk, as they're completely different products.
- Semi-Sweet Chocolate Chips: These provide rich chocolate flavor that's not overly sweet. The semi-sweet variety balances perfectly with the sweetness of the condensed milk. You can use dark chocolate chips if you prefer a deeper chocolate taste, or milk chocolate for something sweeter.
- Vanilla Extract: It rounds out the chocolate flavor and adds warmth. Pure vanilla extract gives the best flavor, but imitation vanilla will work in this recipe.
- Sea Salt: Enhances all the flavors and balances the sweetness. This is one of the most important ingredients in this chocolate walnut fudge recipe. Just a small amount makes the chocolate taste richer and more complex, while also bringing out the natural flavor of the walnuts. The sweet and salty combination is what makes this fudge so irresistible. You can use regular table salt if that's what you have on hand, but sea salt gives the best flavor.
How To Make Chocolate Walnut Fudge
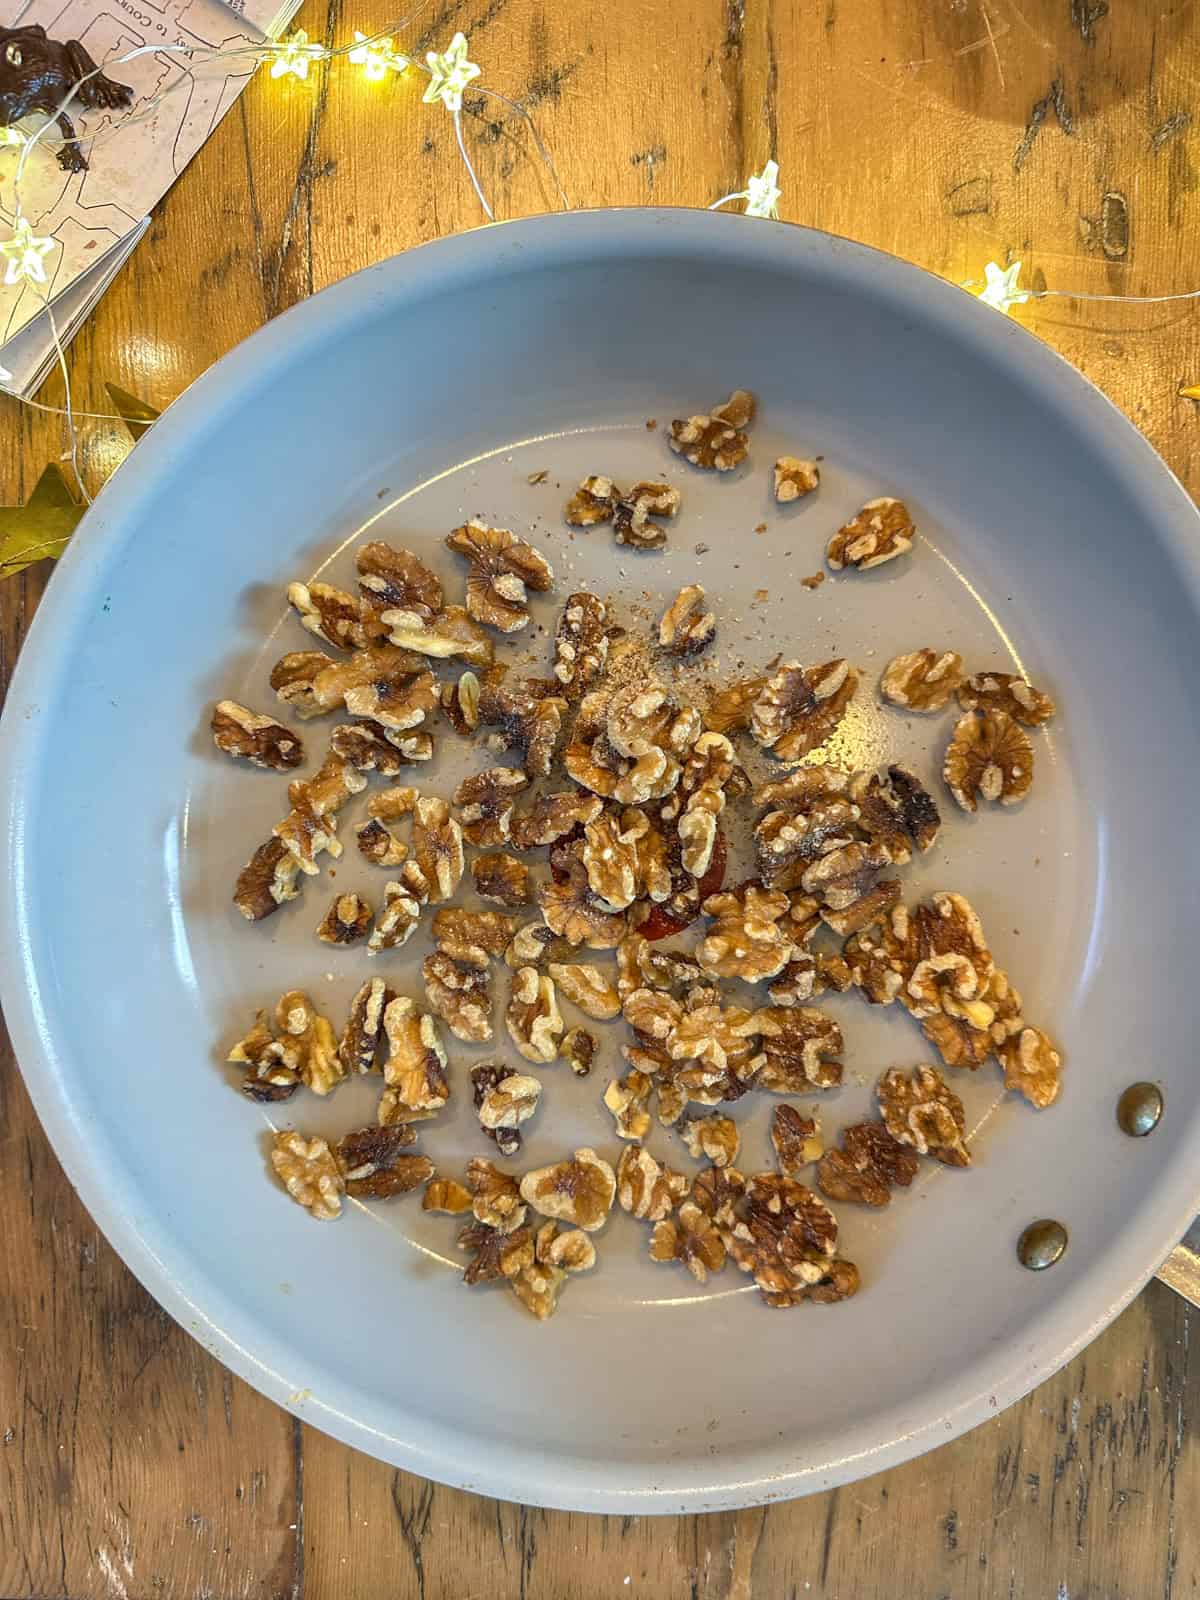
- Step One: Toast The Walnuts Place the walnuts in a dry skillet over medium heat. Toast them for 3 to 5 minutes, stirring frequently, until they're fragrant and lightly golden. Watch them carefully as they can burn quickly. Once toasted, remove them from the heat and set aside to cool slightly.

- Step 2: Combine Ingredients In a large microwave safe bowl, combine the sweetened condensed milk, semi-sweet chocolate chips, vanilla extract, and sea salt. Stir everything together briefly. The chocolate chips don't need to be mixed in completely at this stage.

- Step 3: Microwave In Intervals Microwave the mixture at 50% power for 1 minute. Remove and stir well. The chocolate will start to melt but won't be fully smooth yet. Microwave again at 50% power for another minute, then stir. Repeat this process until the chocolate is completely melted and the mixture is smooth and glossy. This usually takes 3 to 4 intervals total. Using 50% power prevents the chocolate from scorching and gives you more control over the melting process.
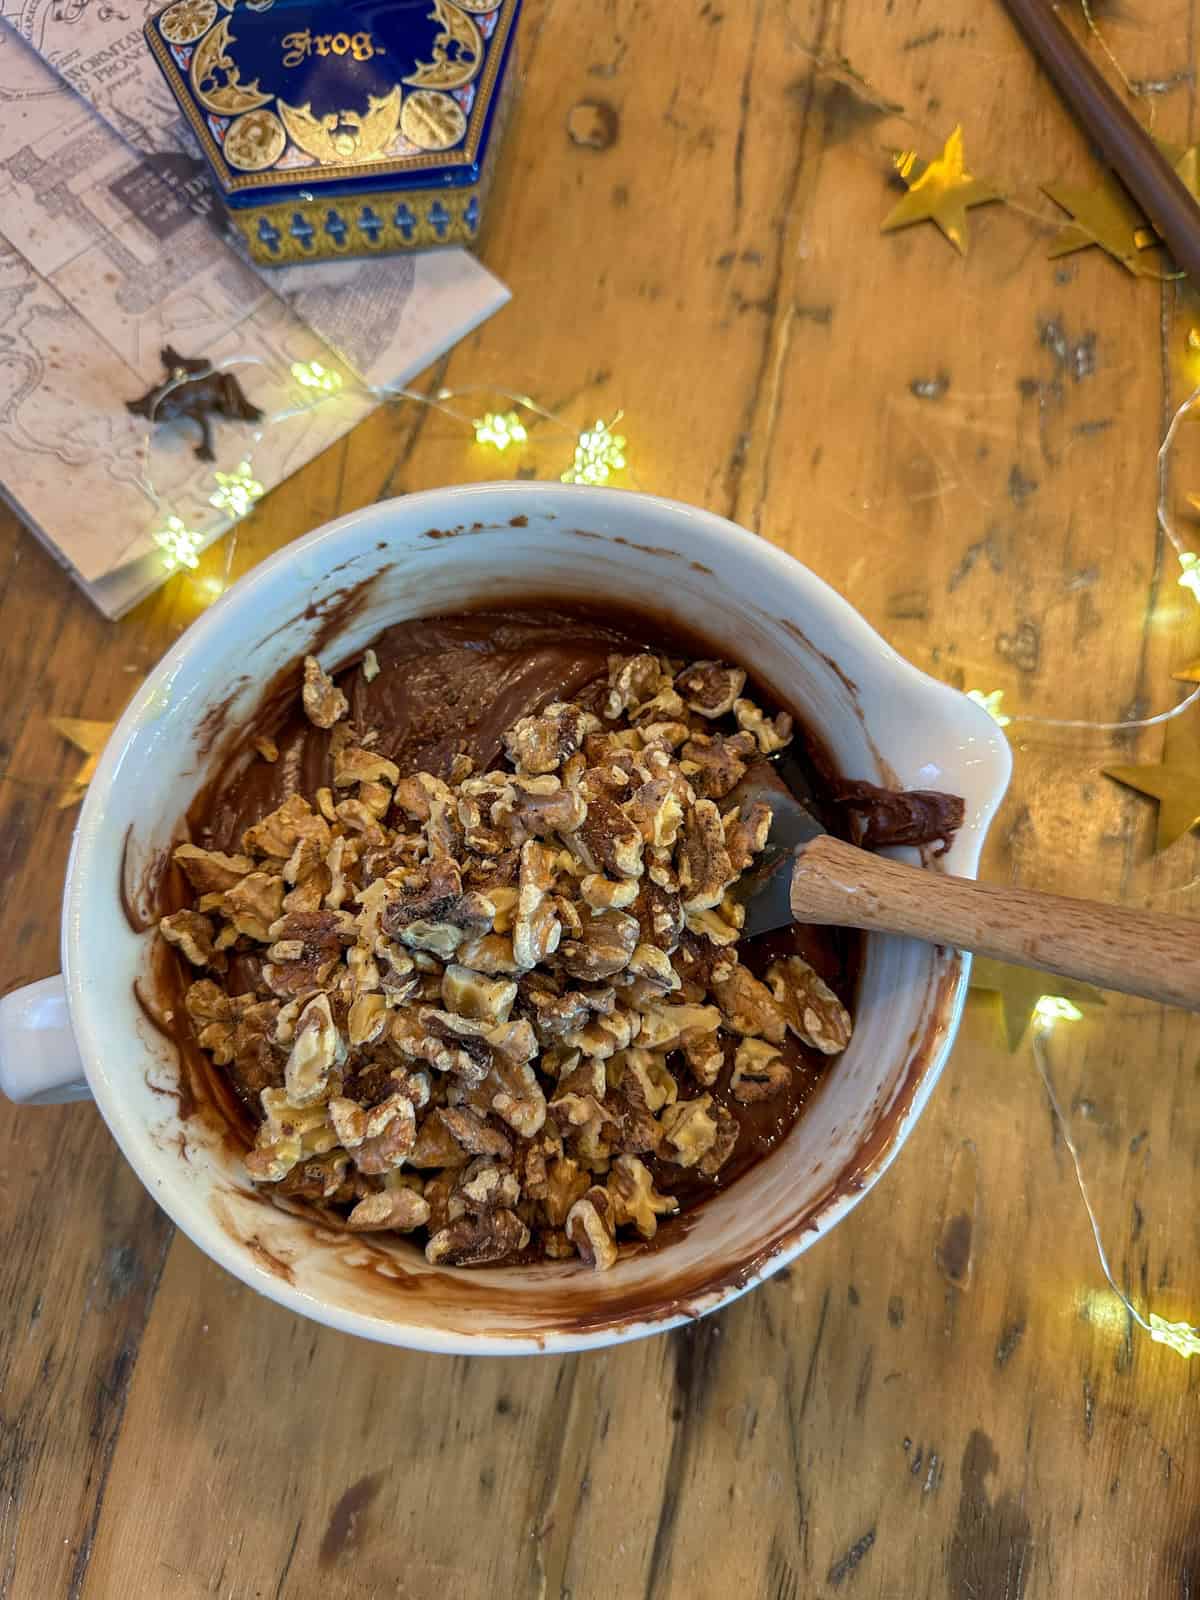
- Step 4: Add The Walnuts Stir the toasted walnuts into the melted chocolate mixture until they're evenly distributed throughout. Make sure every spoonful of fudge will have some crunchy nuts.
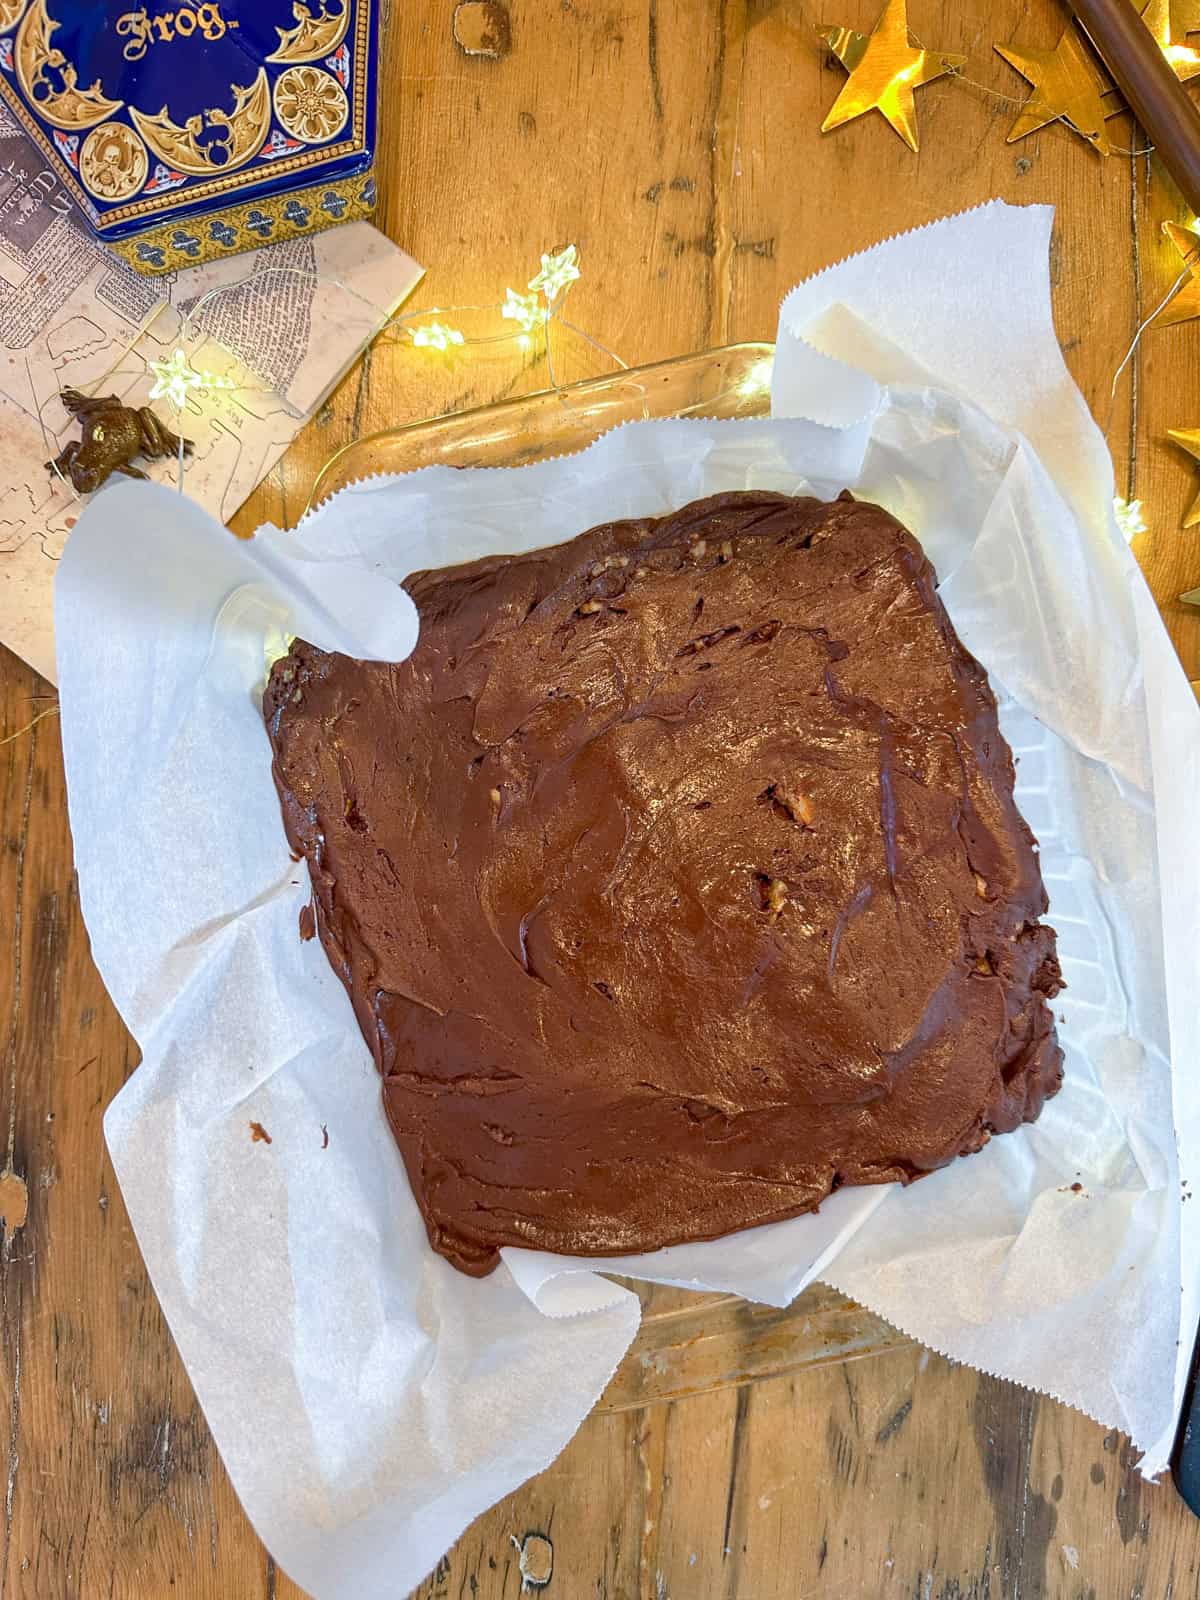
- Step 5: Pour Into Pan Pour the fudge mixture into a parchment lined baking dish. Use a spatula to spread it evenly into all the corners. Smooth the top as best you can, though it doesn't need to be perfect.
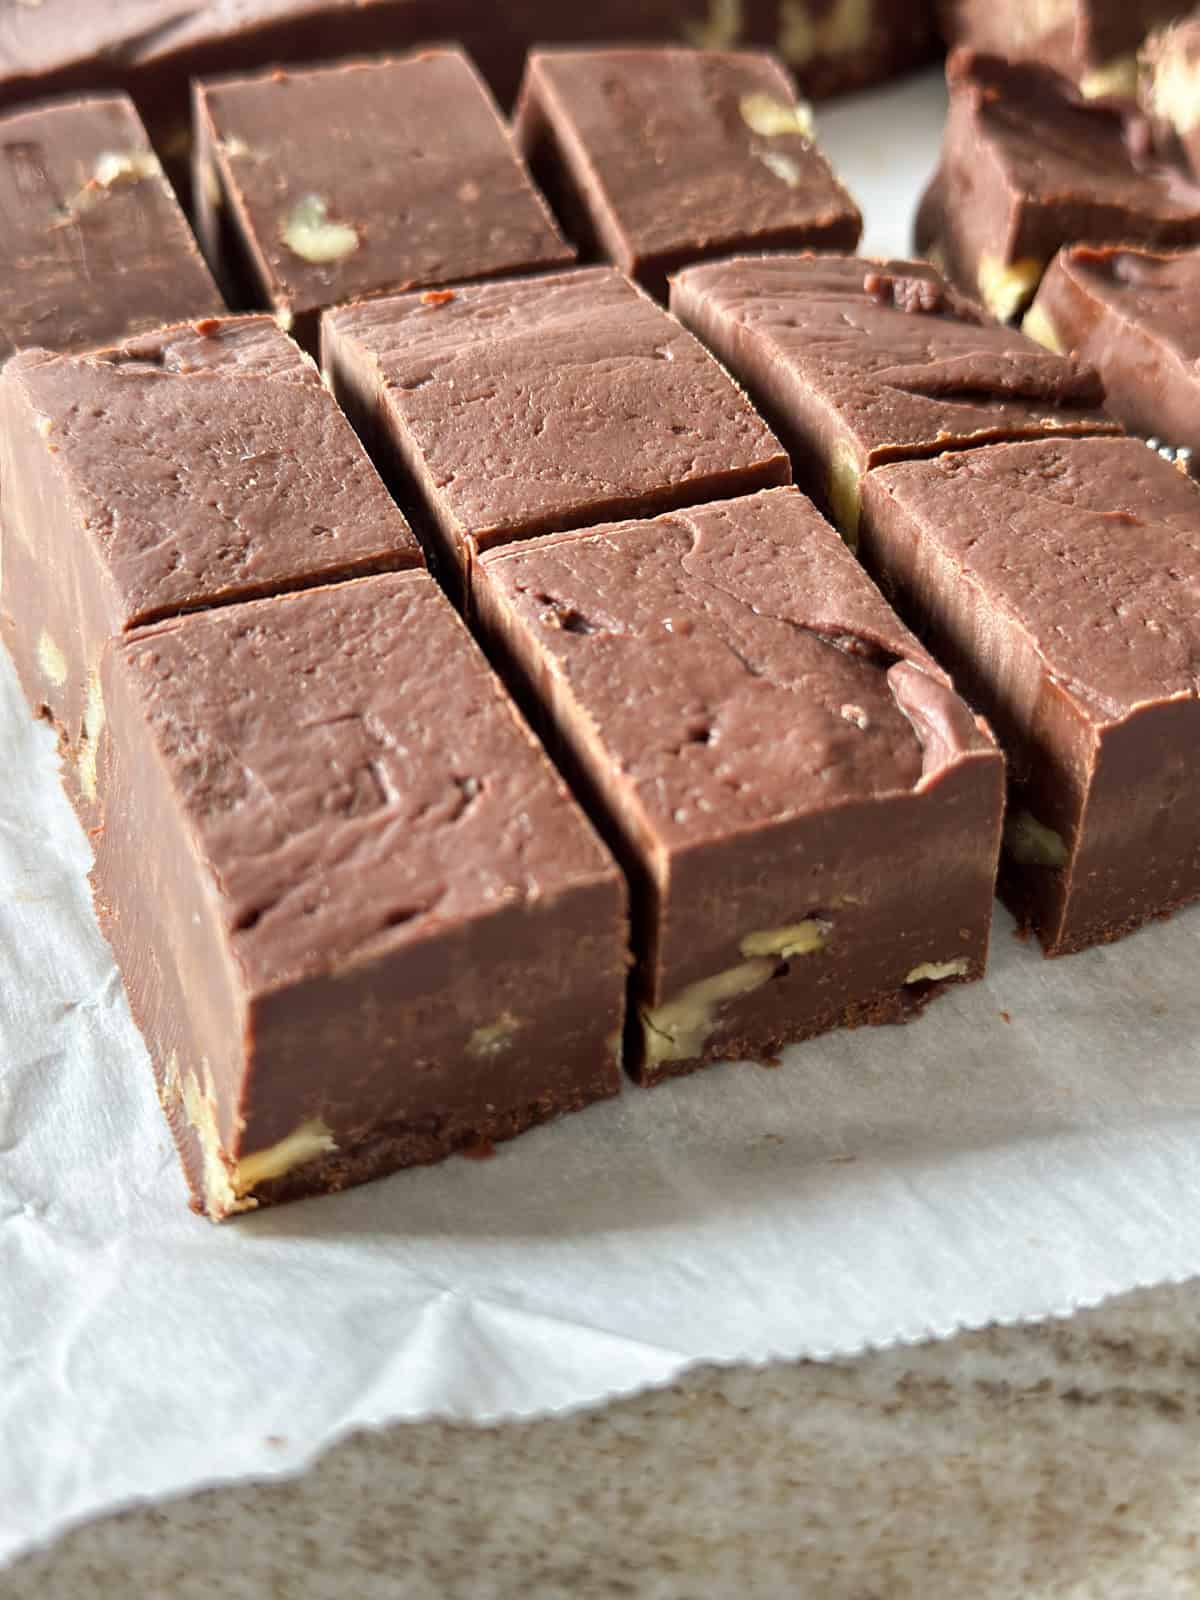
- Step 6: Let It Set and Cut Into Squares Allow the fudge to set at room temperature for about 2 hours, or refrigerate for 1 hour if you're in a hurry. The fudge is ready to cut when it's firm to the touch and doesn't leave an indent when you press it gently. Once set, lift the fudge out of the pan using the parchment paper overhang. Place it on a cutting board. Using a sharp knife, cut into 36 even squares (6 rows by 6 rows). For the cleanest cuts, wipe your knife clean between slices.
Expert Tips For Perfect Chocolate Walnut Fudge
- Don't skip toasting the walnuts. This is the secret to extraordinary chocolate walnut fudge. Toasting the walnuts for just a few minutes transforms them completely, bringing out their natural oils and creating a rich, deep flavor with extra crunch. Raw walnuts simply can't compare. This step only takes a few minutes but makes a huge difference in the final result.
- The salt is essential. Don't reduce or skip the sea salt in this recipe. Even though it seems like a small amount, salt is what makes good chocolate fudge taste amazing. It enhances the chocolate flavor, brings out the nuttiness of the walnuts, and creates that perfect sweet and salty balance. The salt also prevents the fudge from tasting one-dimensional or overly sweet.
- Use 50% power in the microwave. This lower power setting melts the chocolate gently and evenly without scorching. Rushing this step with full power can cause the chocolate to seize or burn. Patience here means smooth, creamy fudge every time.
- Stir between each interval. Even if the chocolate doesn't look fully melted, stirring helps distribute the heat and ensures everything melts evenly. Don't rush to microwave again until you've stirred thoroughly.
- Line your pan well. Letting the parchment paper hang over the sides of your pan makes removing the fudge effortless. You'll be glad you took this extra second when it's time to slice. An 8x8 inch pan gives you nice thick pieces, but a 9x9 inch pan works too if you prefer slightly thinner chocolate walnut fudge.
- Be patient with setting time. Fudge that hasn't fully set will be difficult to cut cleanly. Give it the full 2 hours at room temperature, or speed things up with an hour in the refrigerator.
- Clean cuts matter. For professional looking squares, wipe your knife clean with a damp cloth between each cut. This prevents the chocolate from smearing and gives you neat, bakery-worthy edges.
Frequently Asked Questions
Absolutely. Simply leave out the walnuts for smooth, creamy chocolate fudge. You could also add other mix-ins like mini marshmallows, crushed candy canes, or dried cherries.
Yes. Pecans, almonds, or hazelnuts would all work beautifully in this chocolate fudge recipe. Toast them the same way you would the walnuts for the best flavor. Some people also love using salted peanuts for an extra salty-sweet combination.
Yes. Double all the ingredients and use a 9x13 inch baking dish instead of an 8x8 inch pan. The microwave melting time may need to be increased slightly, so watch carefully and stir between intervals until fully melted.
An 8x8 inch pan gives you nice thick pieces of fudge. A 9x9 inch pan also works if you prefer slightly thinner squares. For a double batch, use a 9x13 inch pan.
Full power can overheat the chocolate quickly, causing it to seize (become grainy and hard) or scorch. The lower power setting gives you more control and ensures smooth, creamy chocolate walnut fudge. If your microwave doesn't have a 50% power setting, use the defrost setting or microwave in shorter 30 second bursts, stirring between each one.
This usually happens when the chocolate gets too hot. Make sure you're using 50% power and stirring well between each interval. Remove the bowl from the microwave while there are still a few chocolate chips visible and stir until they melt from the residual heat. If your chocolate does seize, try stirring in a teaspoon of vegetable oil to smooth it out.
The fudge is ready to cut when it's firm to the touch and doesn't leave an indent when you press it gently with your finger. If it still feels soft or sticky, give it more time. After 2 hours at room temperature, it should be perfectly set.
You can, and many people love the extra salty flavor throughout the fudge. If using salted walnuts, you might want to reduce the sea salt in the recipe slightly, though the amount is already quite small so it's up to your taste preference.
You can, though the microwave method is easier. To use the stovetop, combine the ingredients in a double boiler over simmering water, stirring constantly until the chocolate melts completely. Then proceed with adding the nuts and pouring into the pan
Store your fudge in an airtight container at room temperature for up to 2 weeks. The airtight container is important to prevent the fudge from drying out. If you live in a very warm or humid climate, you can refrigerate it, though this may make the texture slightly firmer. For longer storage, freeze the fudge for up to 3 months.
Yes. Make sure to place in a freezer safe airtight container. Frozen chocolate fudge will keep for 2 to 3 months. When you're ready to enjoy it, thaw it slowly in the refrigerator overnight, then bring to room temperature for the best texture.
This usually means the chocolate wasn't fully melted and combined with the condensed milk. Make sure you microwave long enough that the mixture becomes completely smooth and homogeneous before adding the nuts. If your fudge is still soft after 2 hours, pop it in the refrigerator for another hour or two.
More Candy Recipes To Try


If you try this Chocolate Walnut Fudge or any other ideas on my blog, leave a rating and let me know how it went in the comments below. Thanks for visiting today!
Recipe
Chocolate Walnut Fudge
Ingredients
- 1 cup walnuts
- 1 can (14oz) sweetened condensed milk
- 3 cups semi-sweet chocolate chips
- 2 teaspoon vanilla extract
- ¼ teaspoon sea salt
Instructions
- Toast the walnuts in a dry skillet over medium heat for 3 to 5 minutes, stirring frequently, until fragrant and lightly golden. Remove from heat and set aside. This step is crucial for developing the best flavor in your chocolate walnut fudge.
- In a large microwave safe bowl, combine the sweetened condensed milk, chocolate chips, vanilla extract, and sea salt.
- Microwave at 50% power for 1 minute. Stir well. Continue microwaving in 1 minute intervals at 50% power, stirring after each interval, until the chocolate is completely melted and the mixture is smooth. This usually takes 3 to 4 intervals total. The chocolate should be glossy and fully combined with the condensed milk.
- Stir the toasted walnuts into the melted chocolate mixture until evenly distributed throughout the fudge.
- Pour the chocolate fudge into a baking dish lined with parchment paper and spread evenly with a spatula.
- Let the fudge set at room temperature for 2 hours, or refrigerate for 1 hour if you're in a hurry. Once set, lift the fudge out of the pan using the parchment paper. Cut into 36 squares (6 rows by 6 rows) with a sharp knife, wiping the knife clean between cuts for neat edges.


Dannyelle Nicolle-Ramjist says
This fudge is so quick and easy to make and only a few ingredients. The flavor and texture of this fudge is great. I hope you enjoy it.