DIY Velvet Mushroom Craft: make your own Anthropologie inspired velvet mushrooms perfect as decor, or as an ornament.

Jump to:
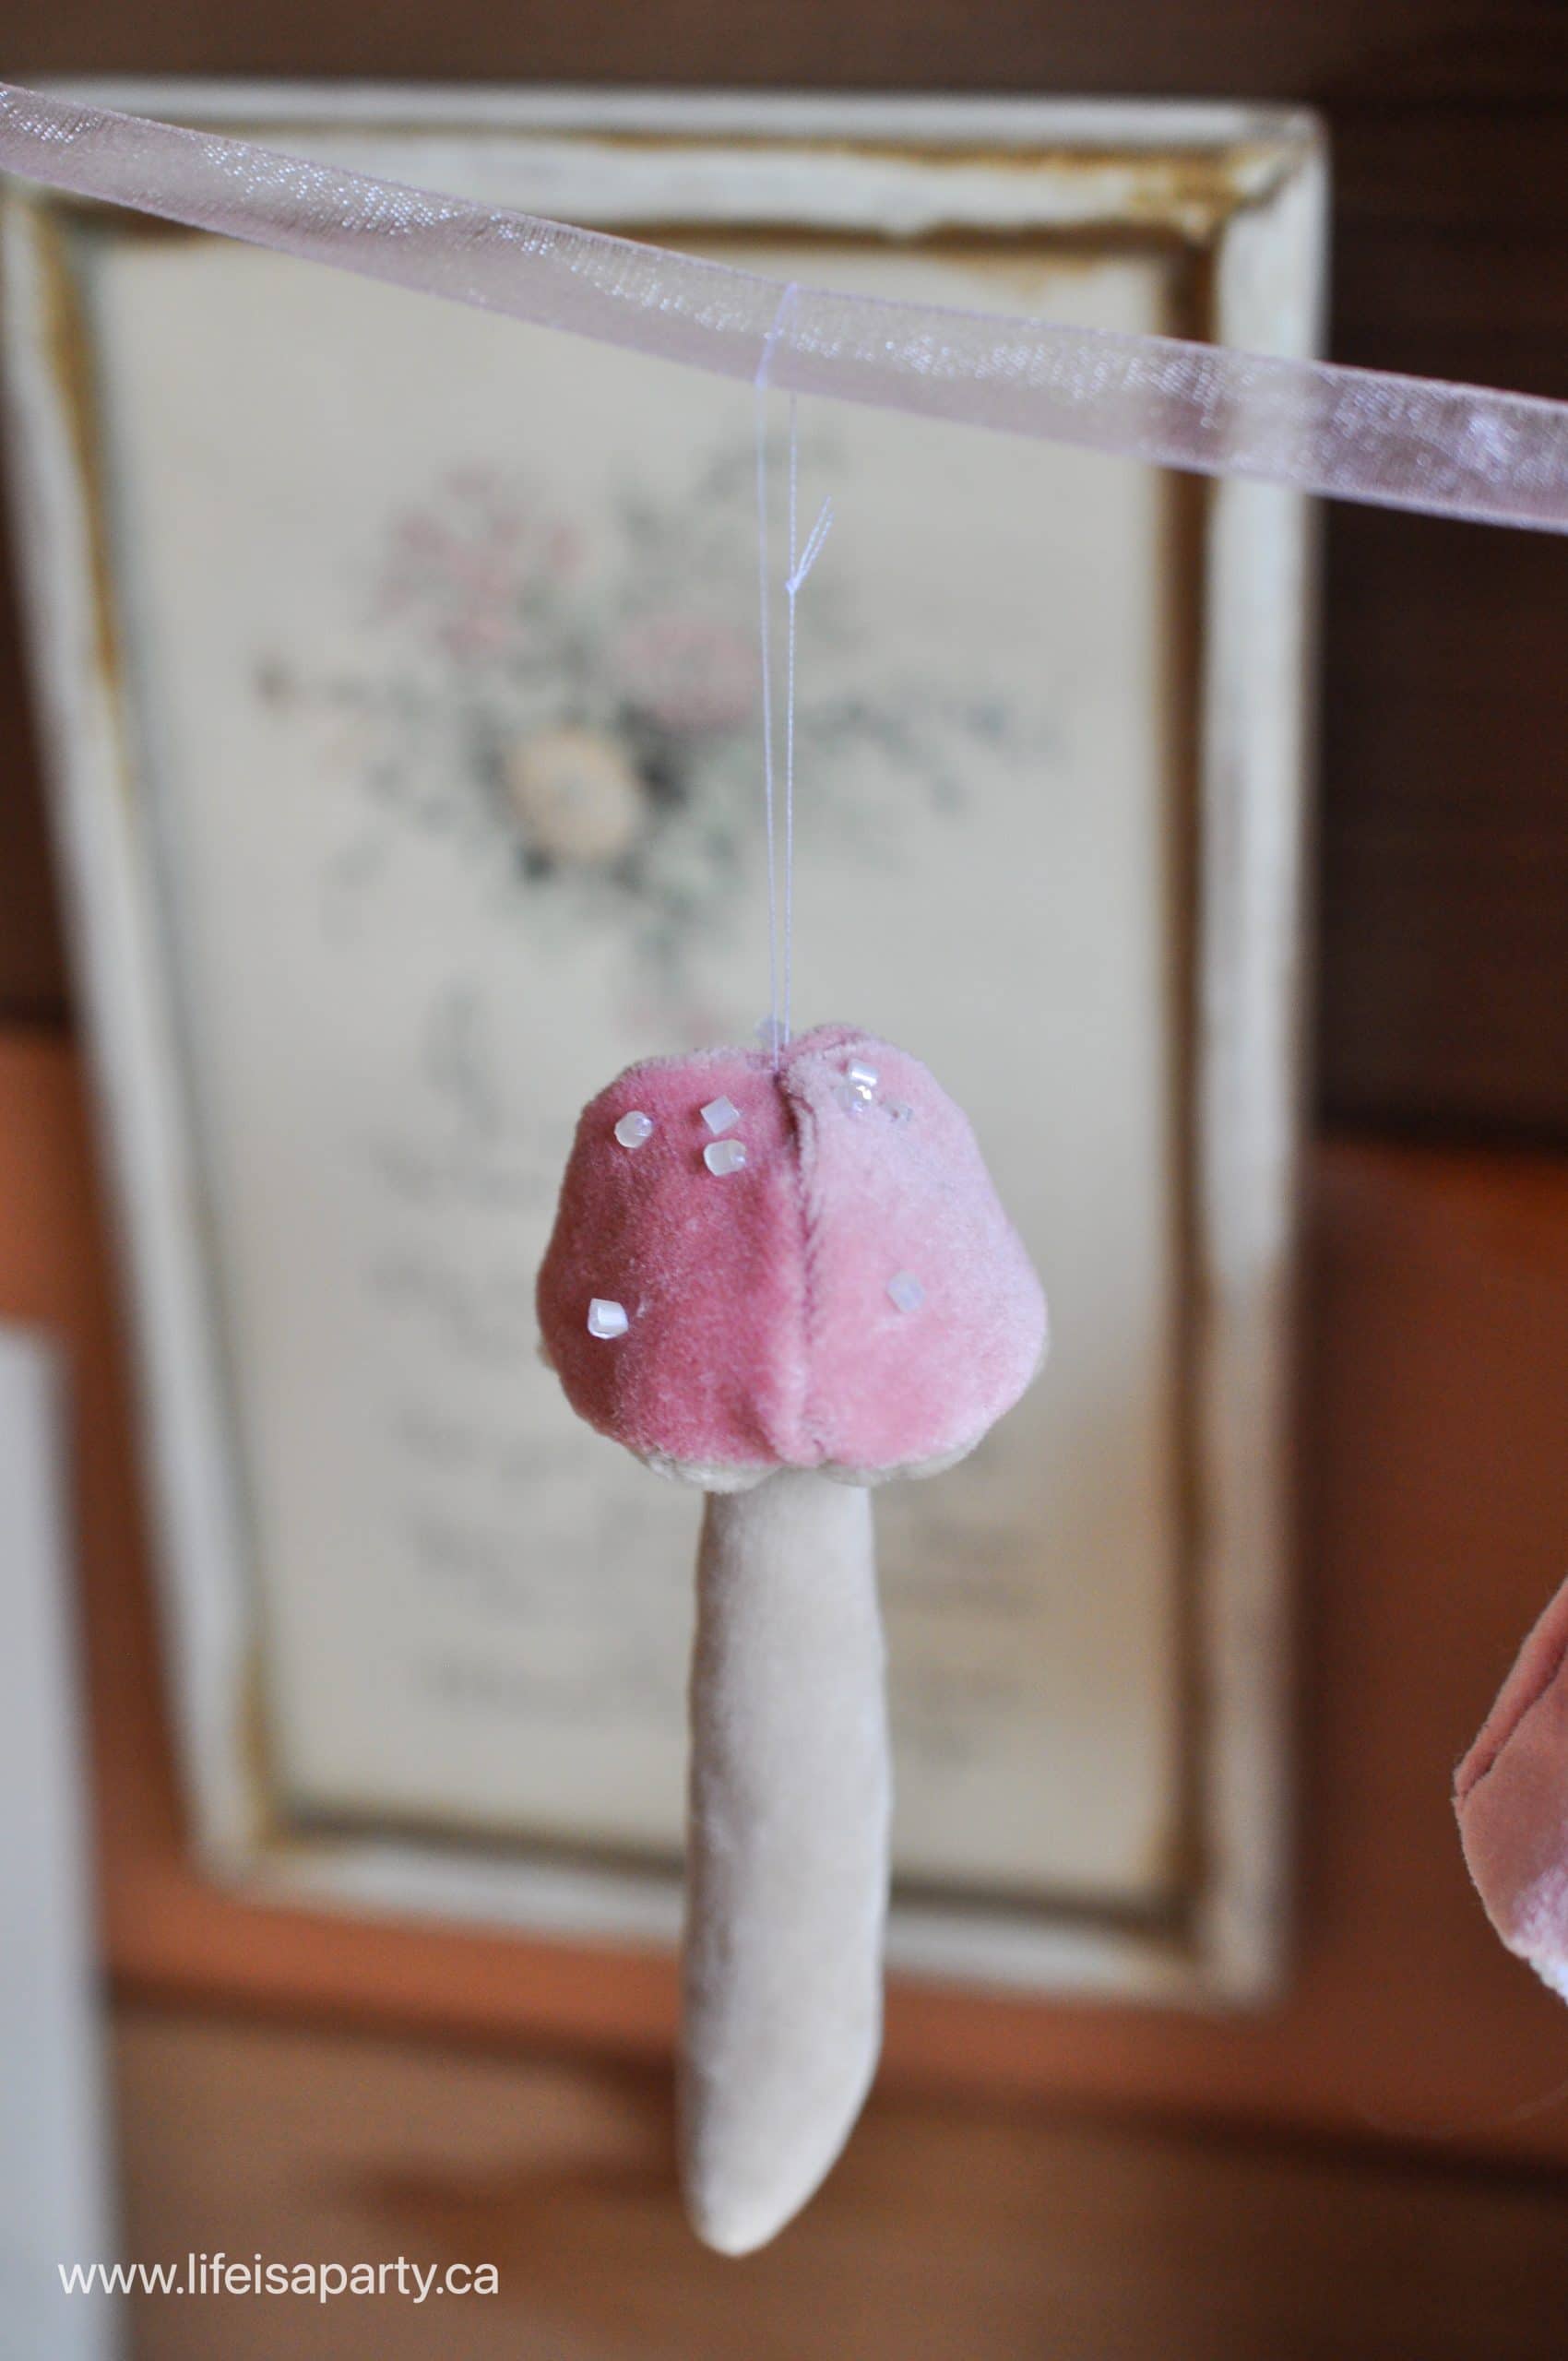
This DIY Velvet Mushroom craft is a fun, and quick sewing project. I was inspired by the Antropologie ones that were available this past Christmas. My version is quick project, and really fun to make. These DIY fabric mushrooms are beautiful as a Christmas tree ornament, but also pretty anytime of year.
You might also like our Toy Felt Cookies, or How To Make A PInecone Wreath.
Velvet Mushrooms
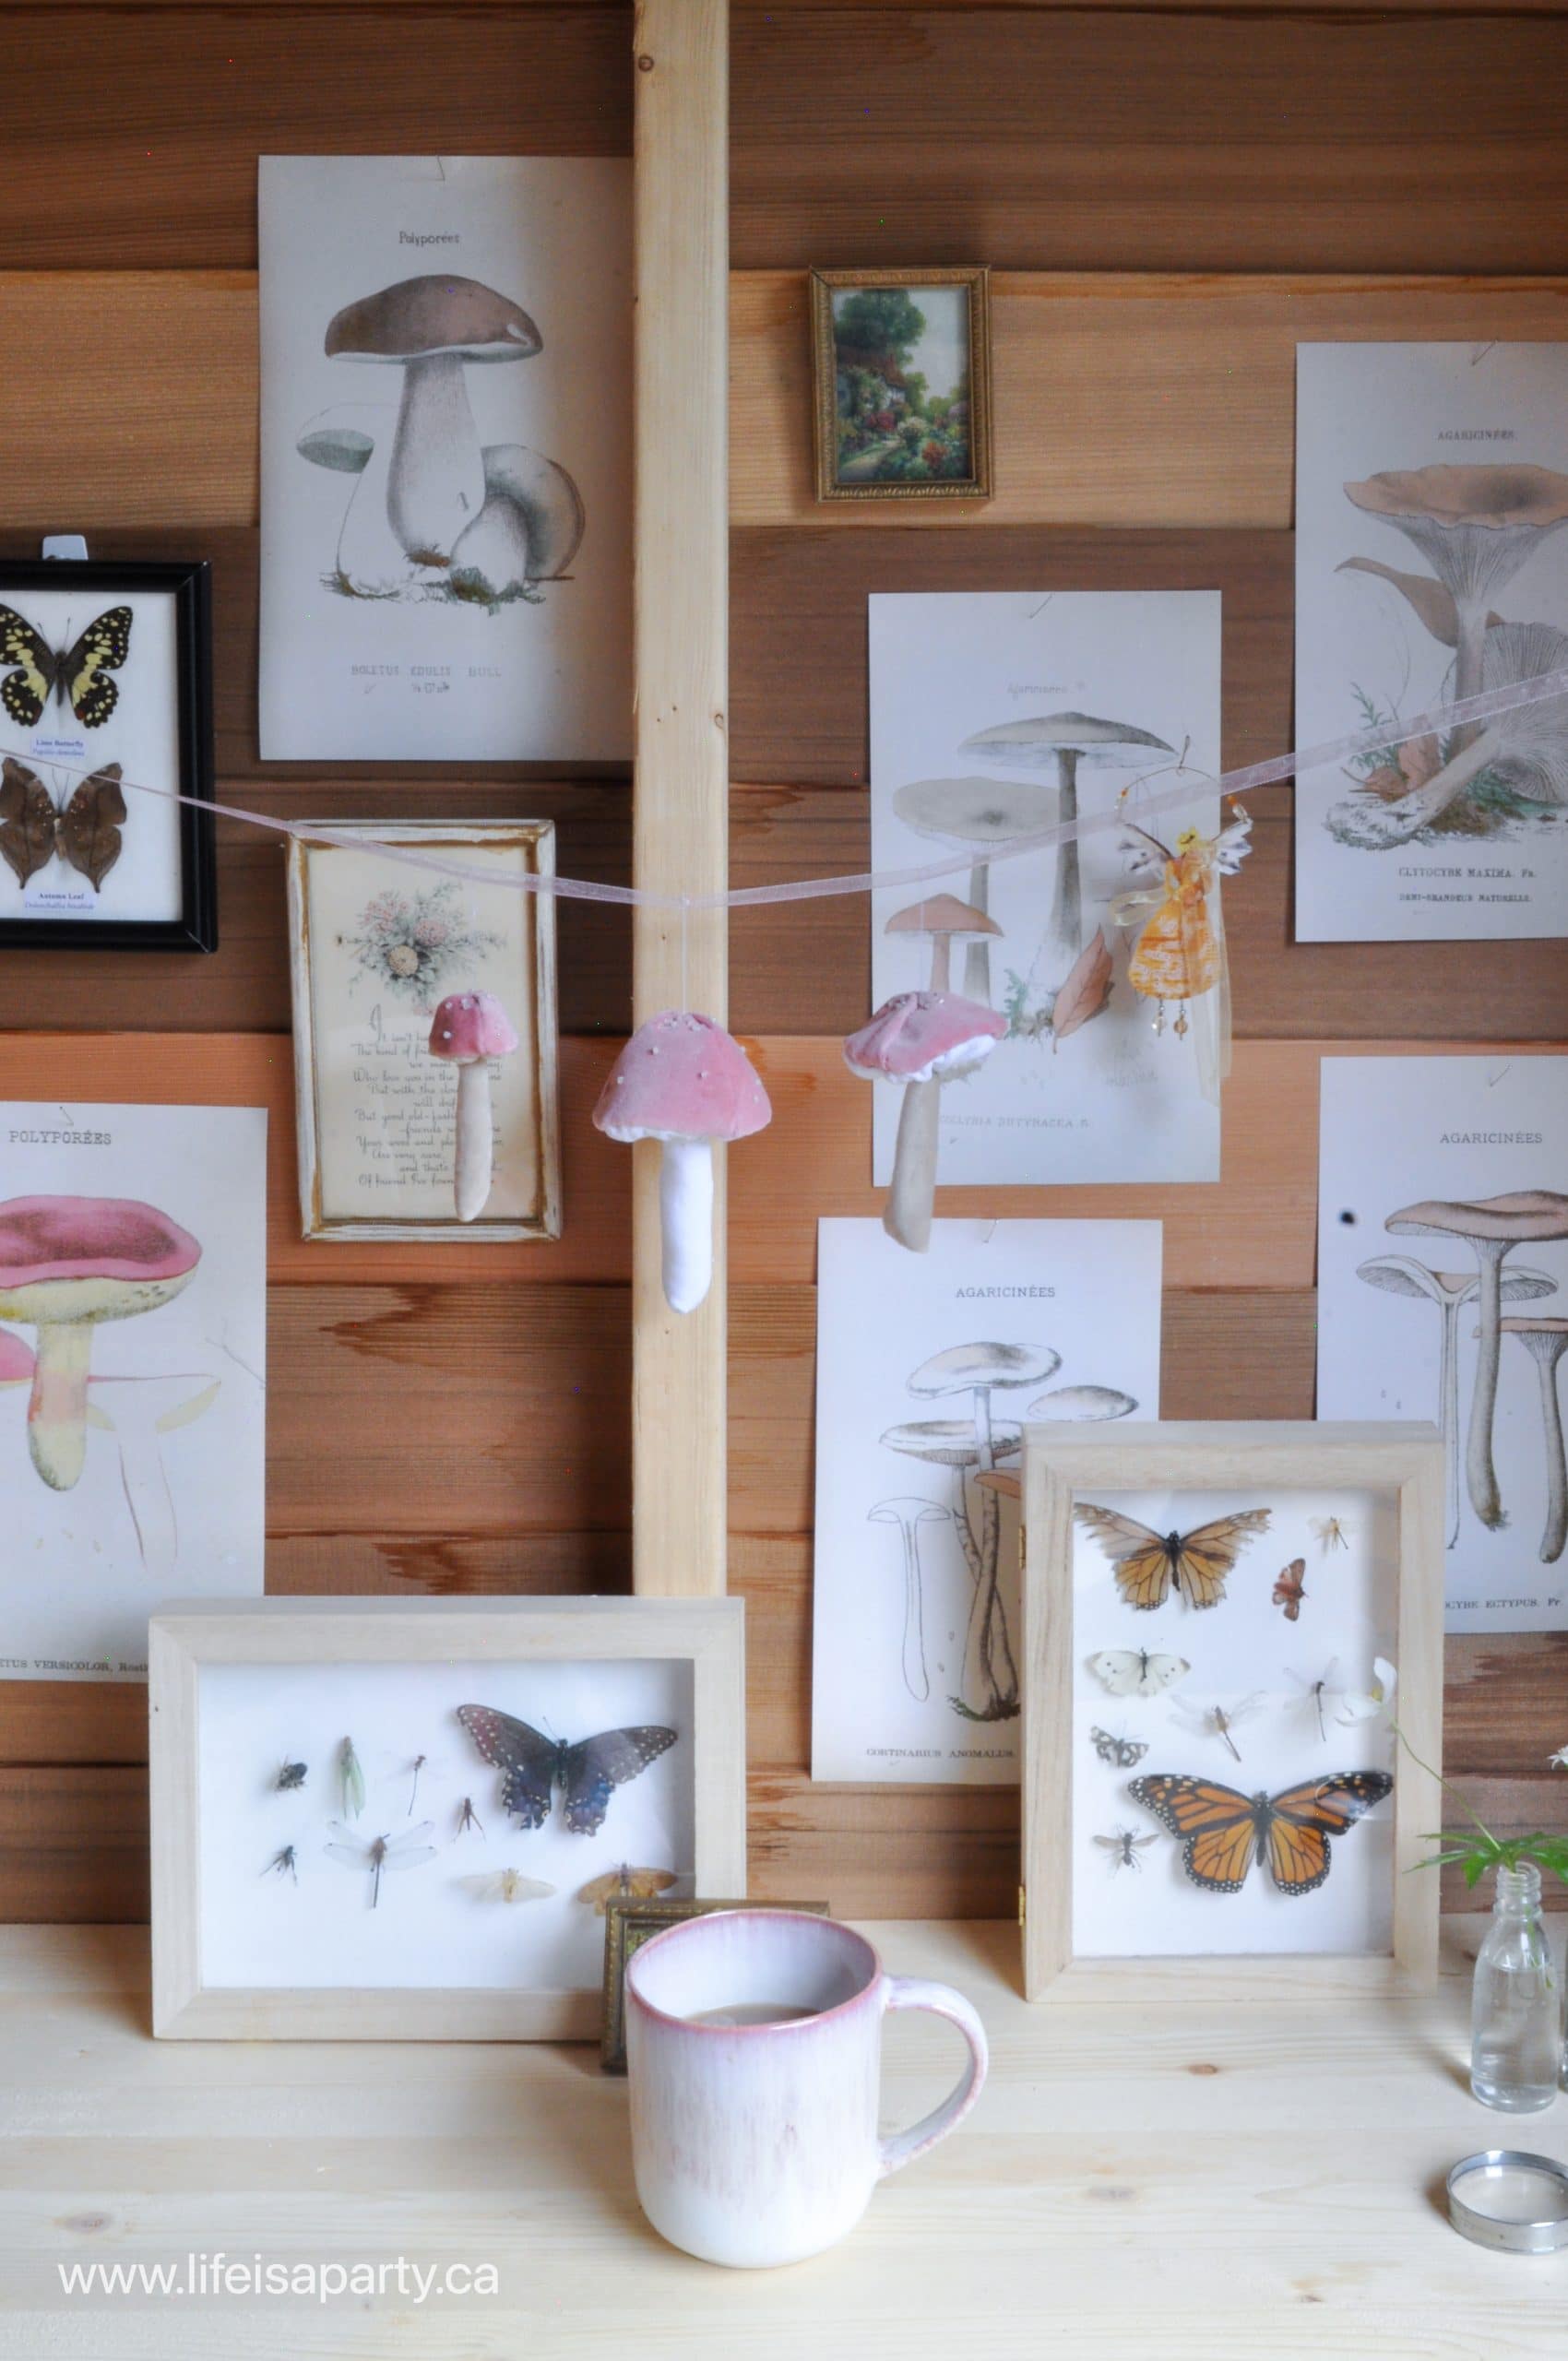
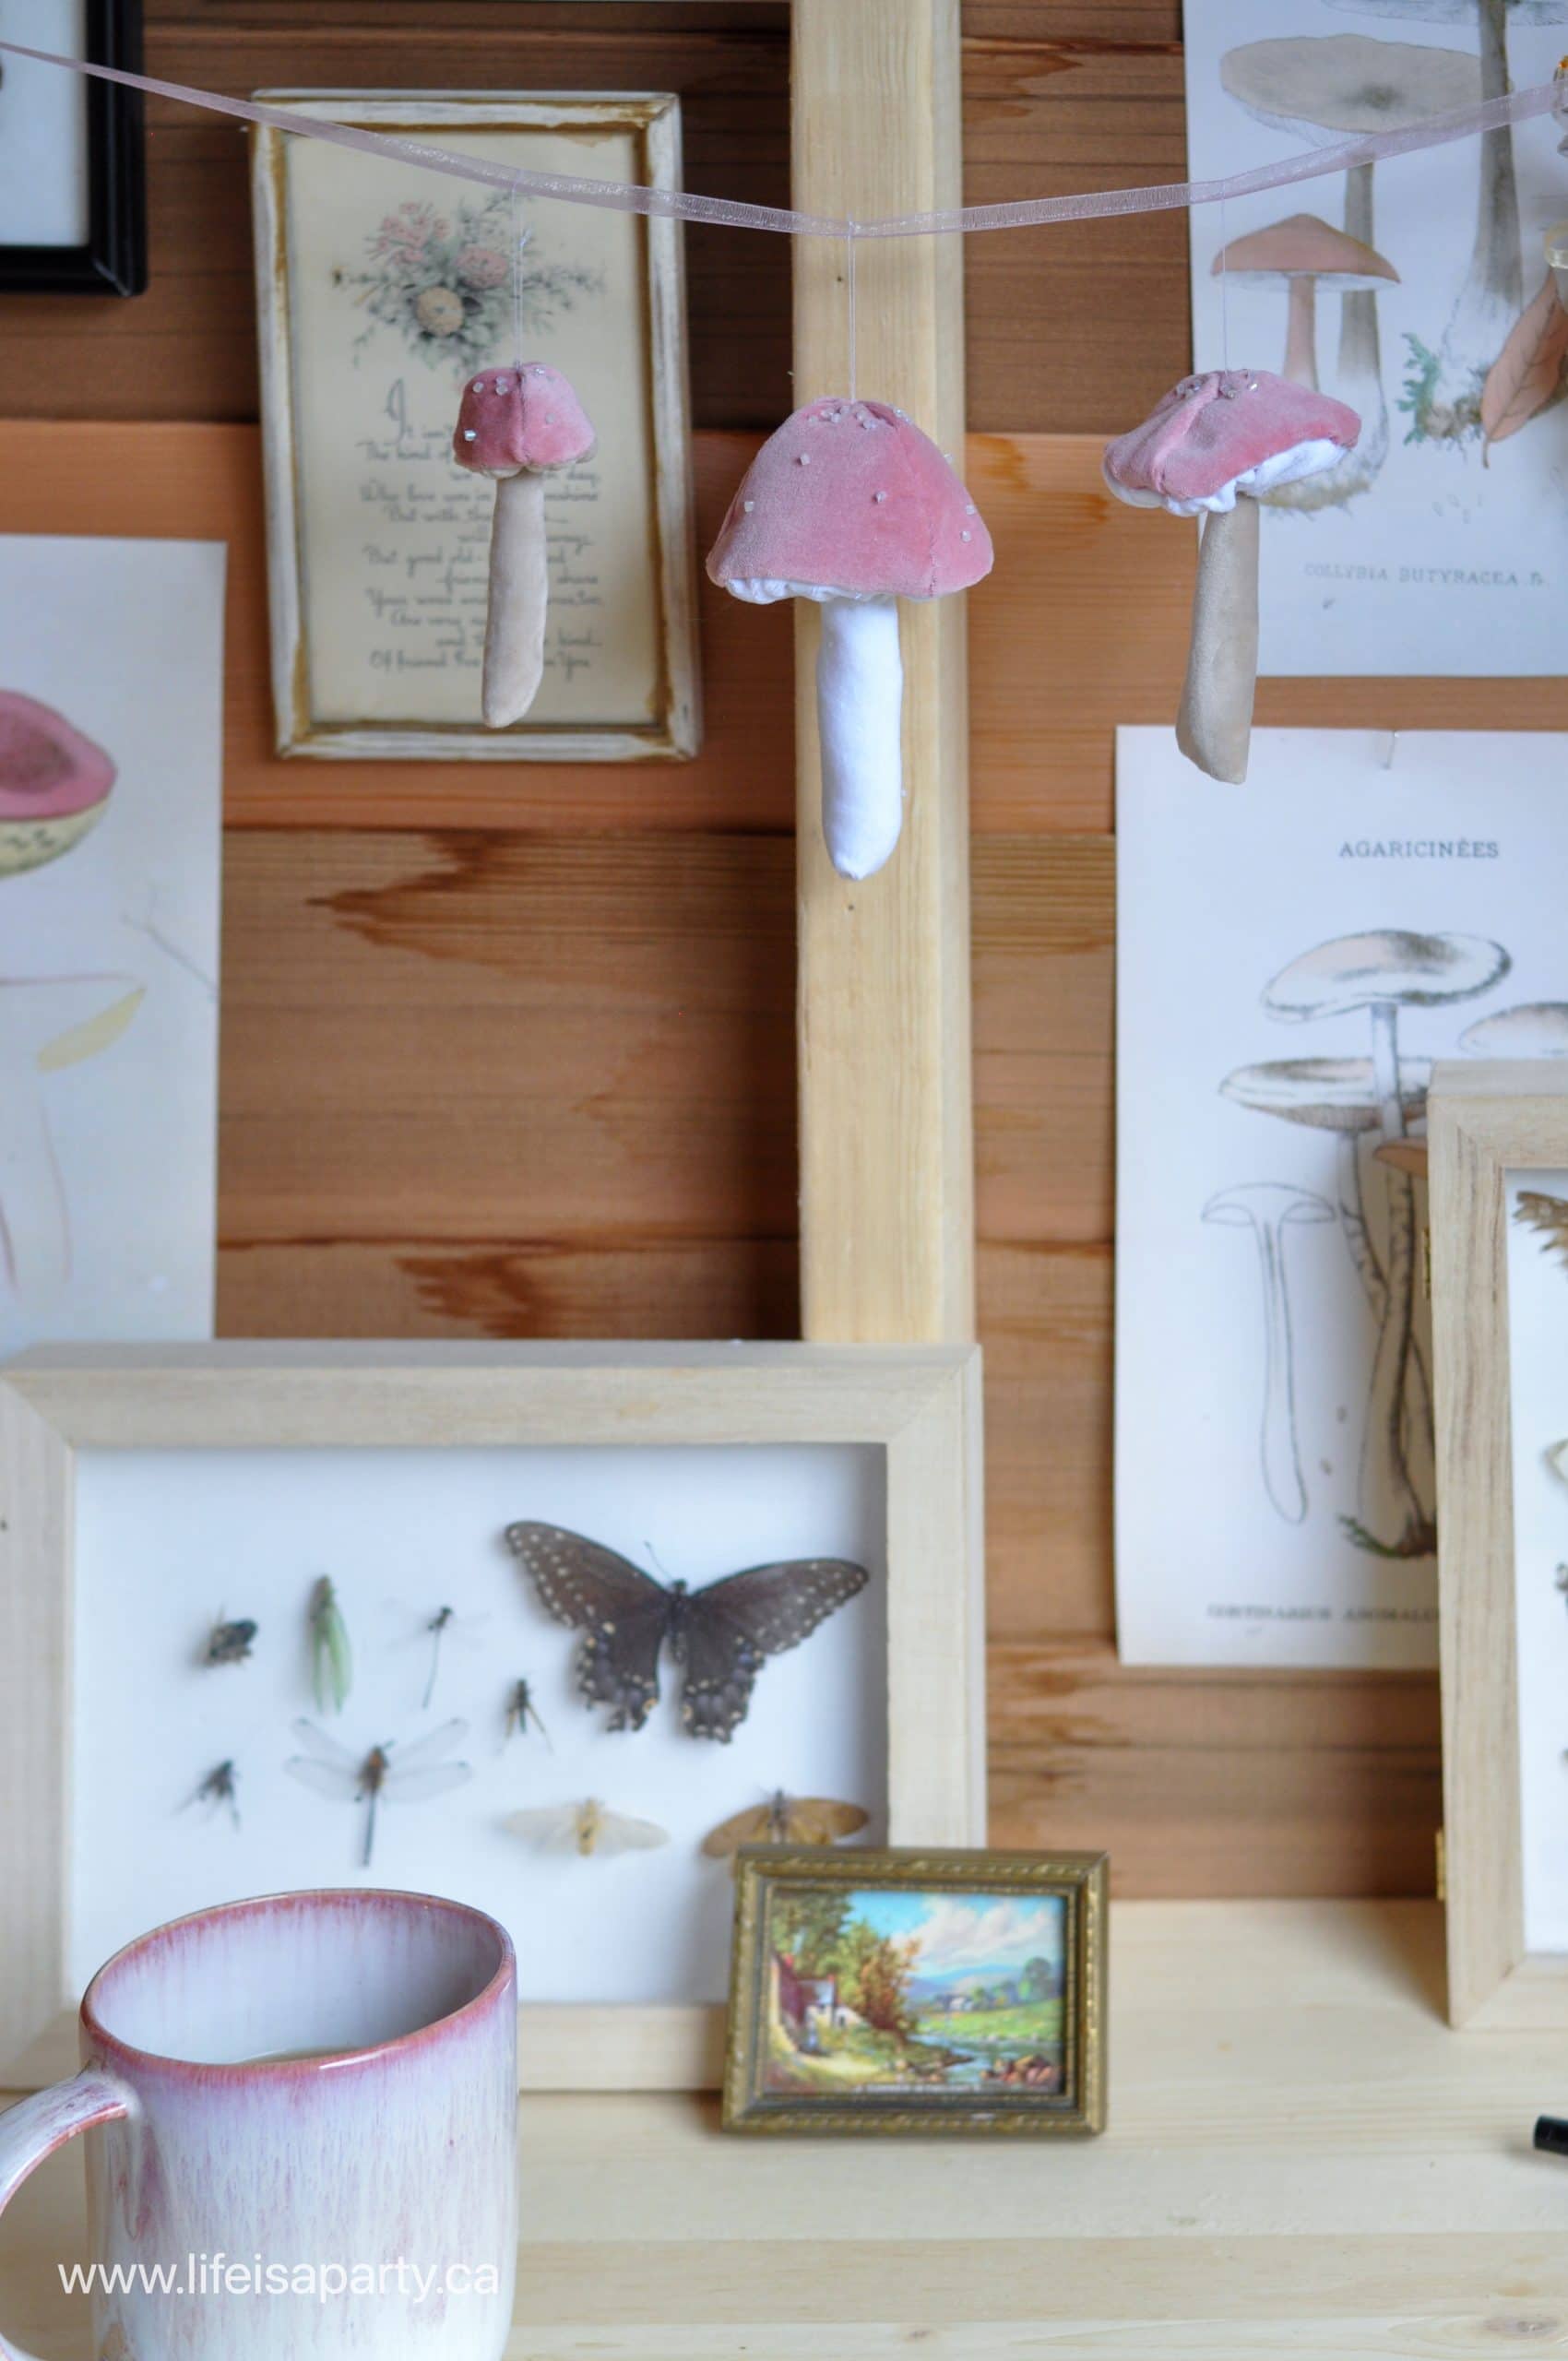
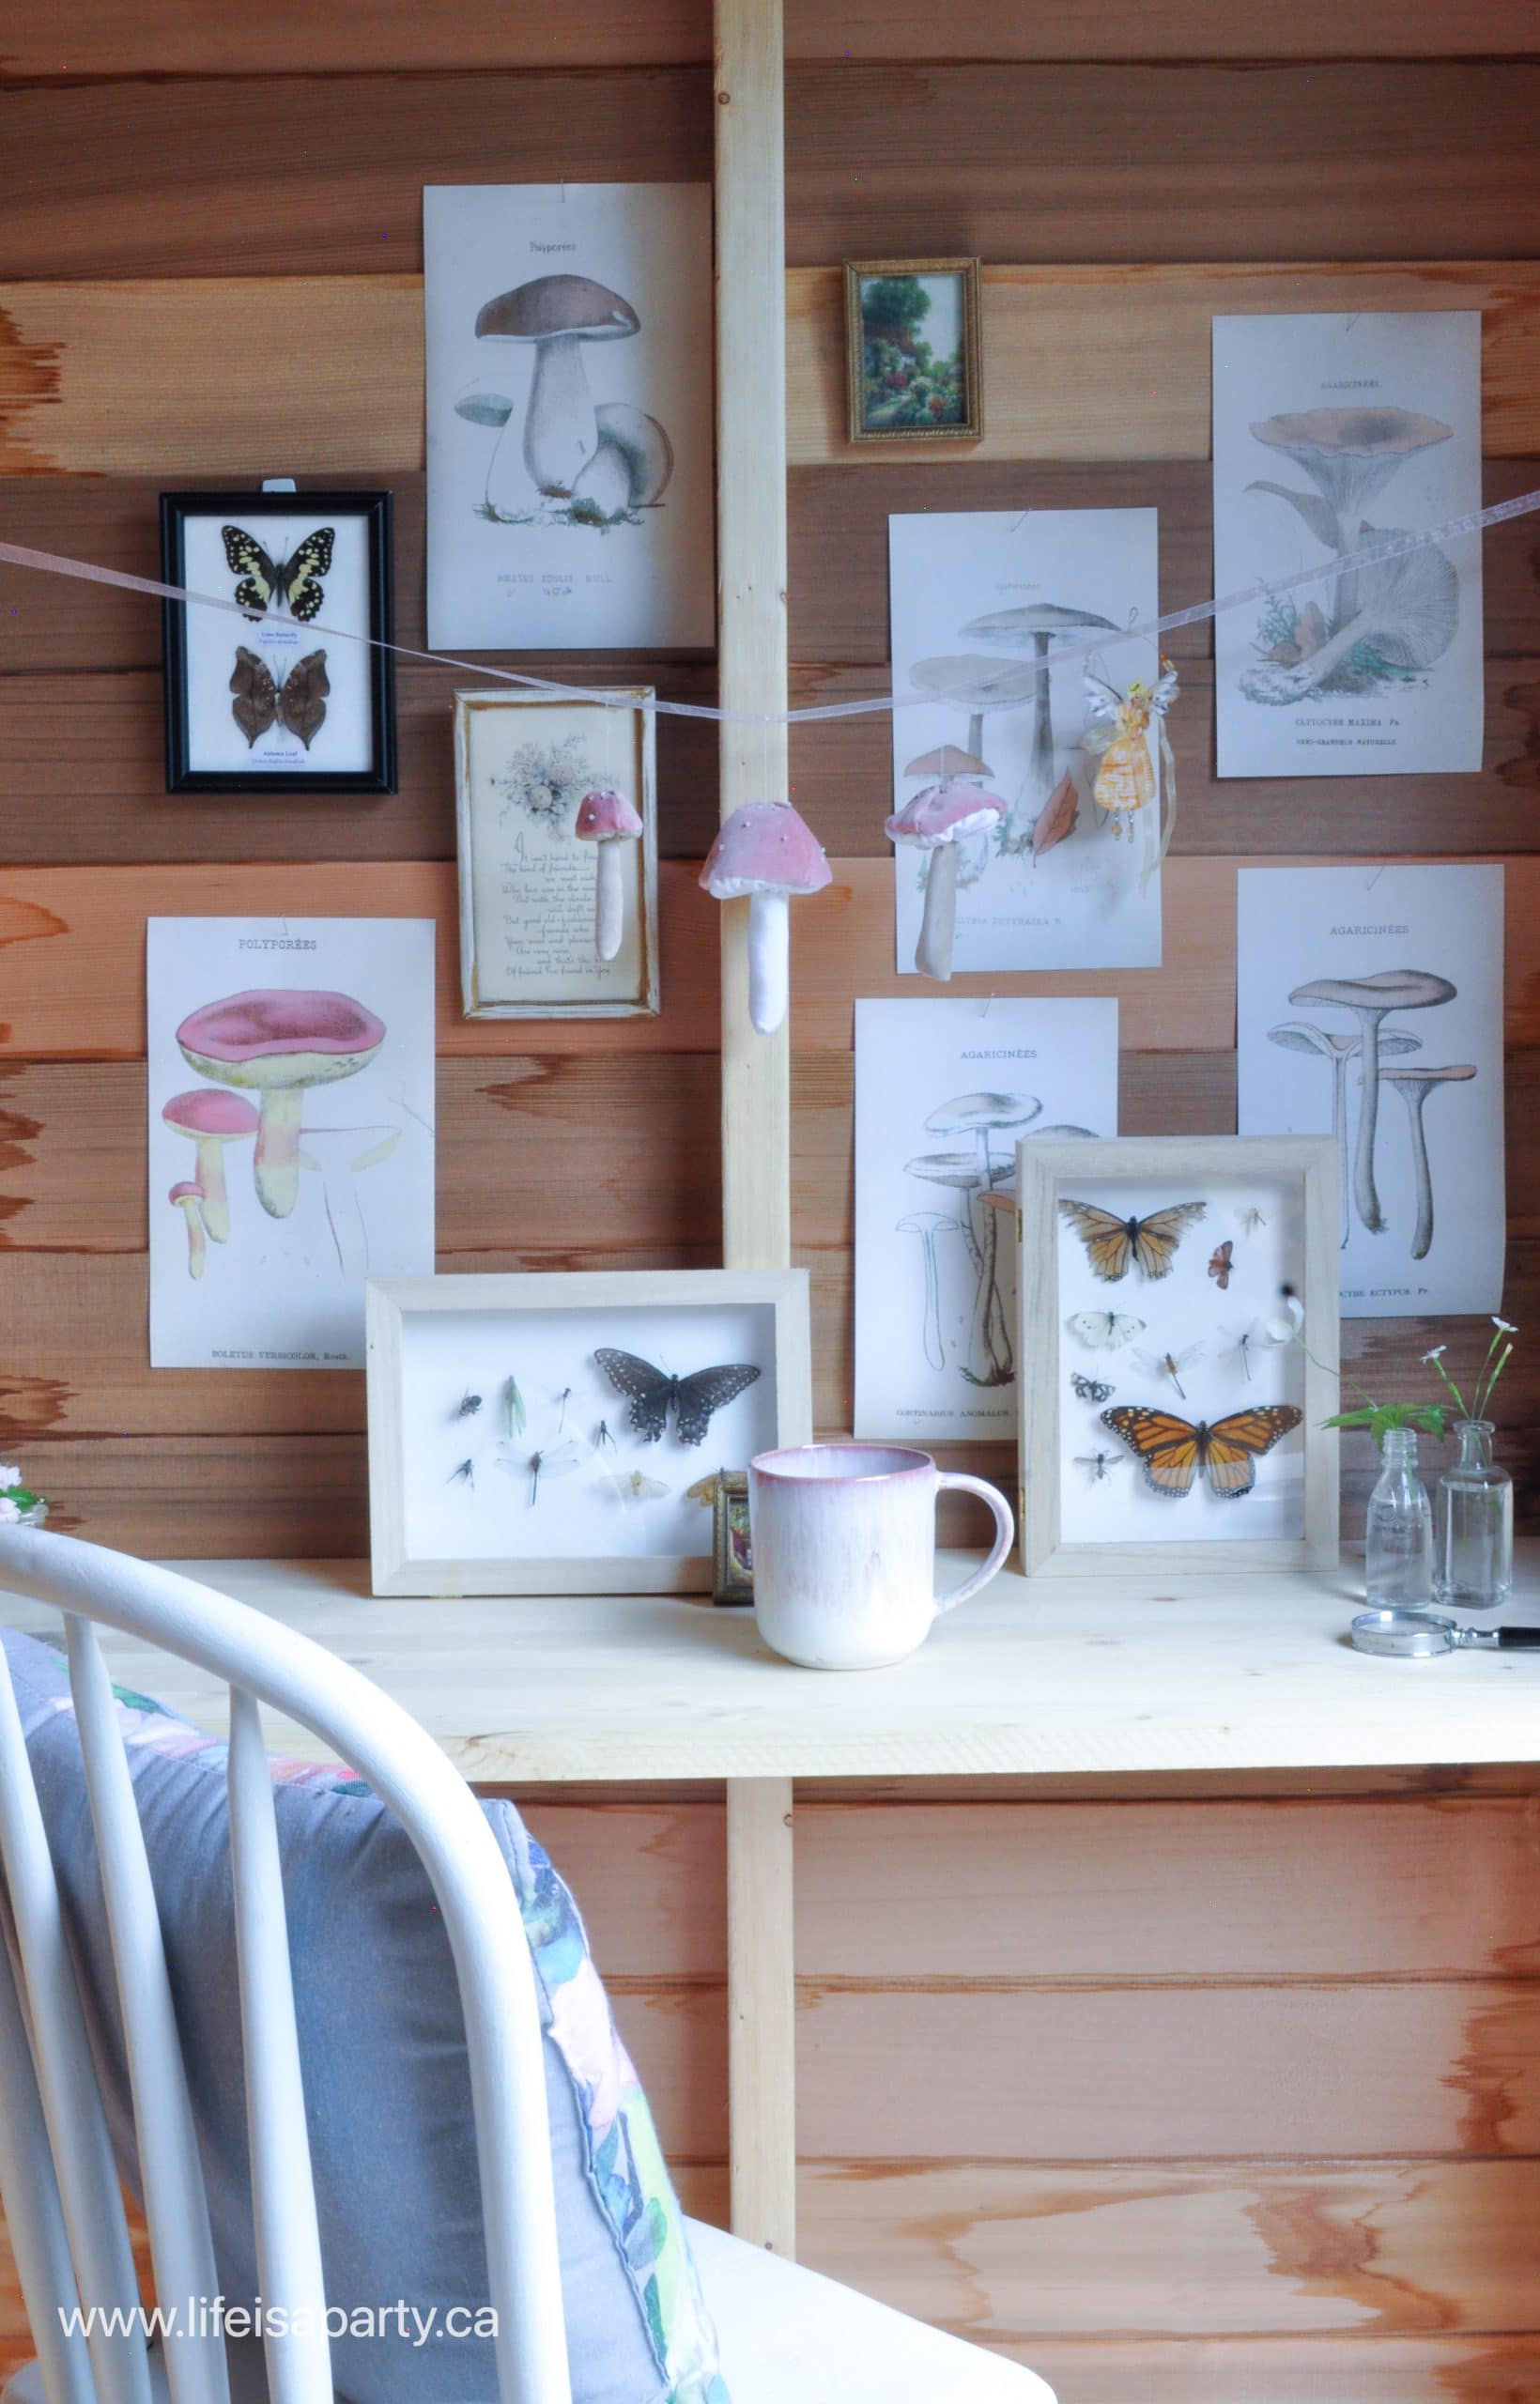
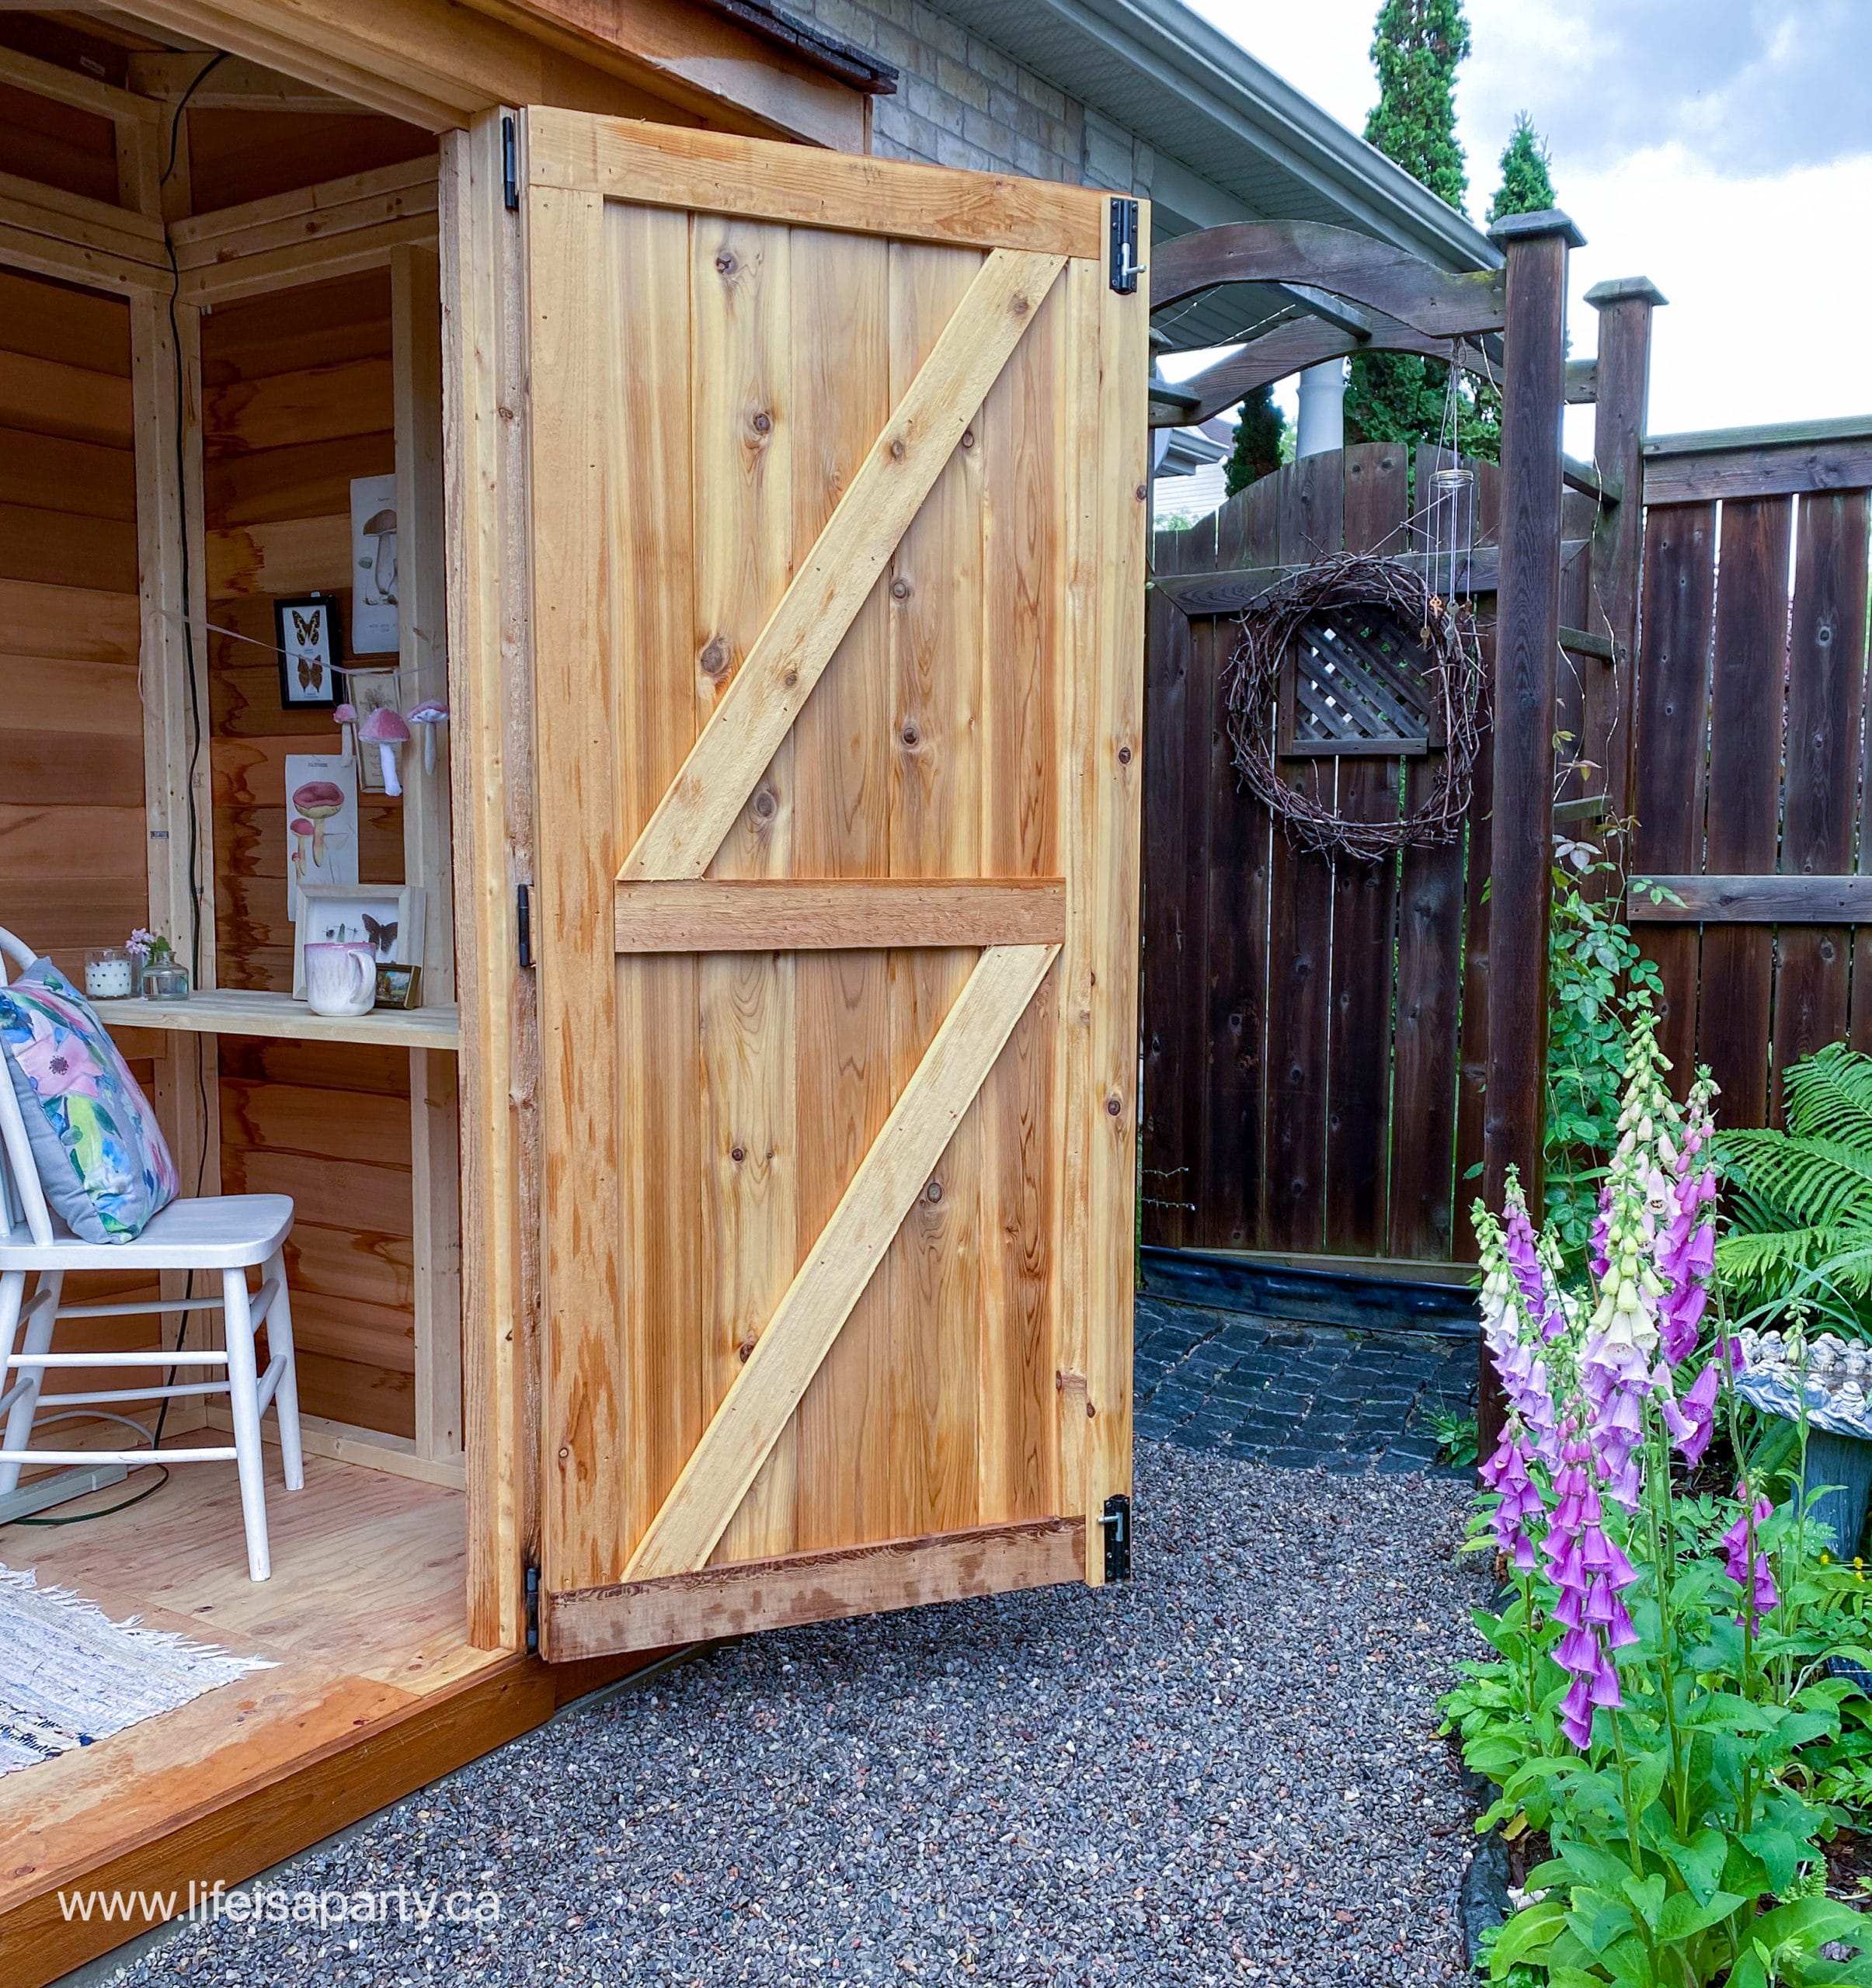
I made three of these sweet velvet mushrooms and used them to create a velvet mushroom garland that I hung in my tool shed. There's lots of fun ways you could use them. I thought that they'd be really sweet in the tool shed with some beautiful vintage mushroom botanical prints. It feels like the perfect spot to do a little computer work, or garden planning.
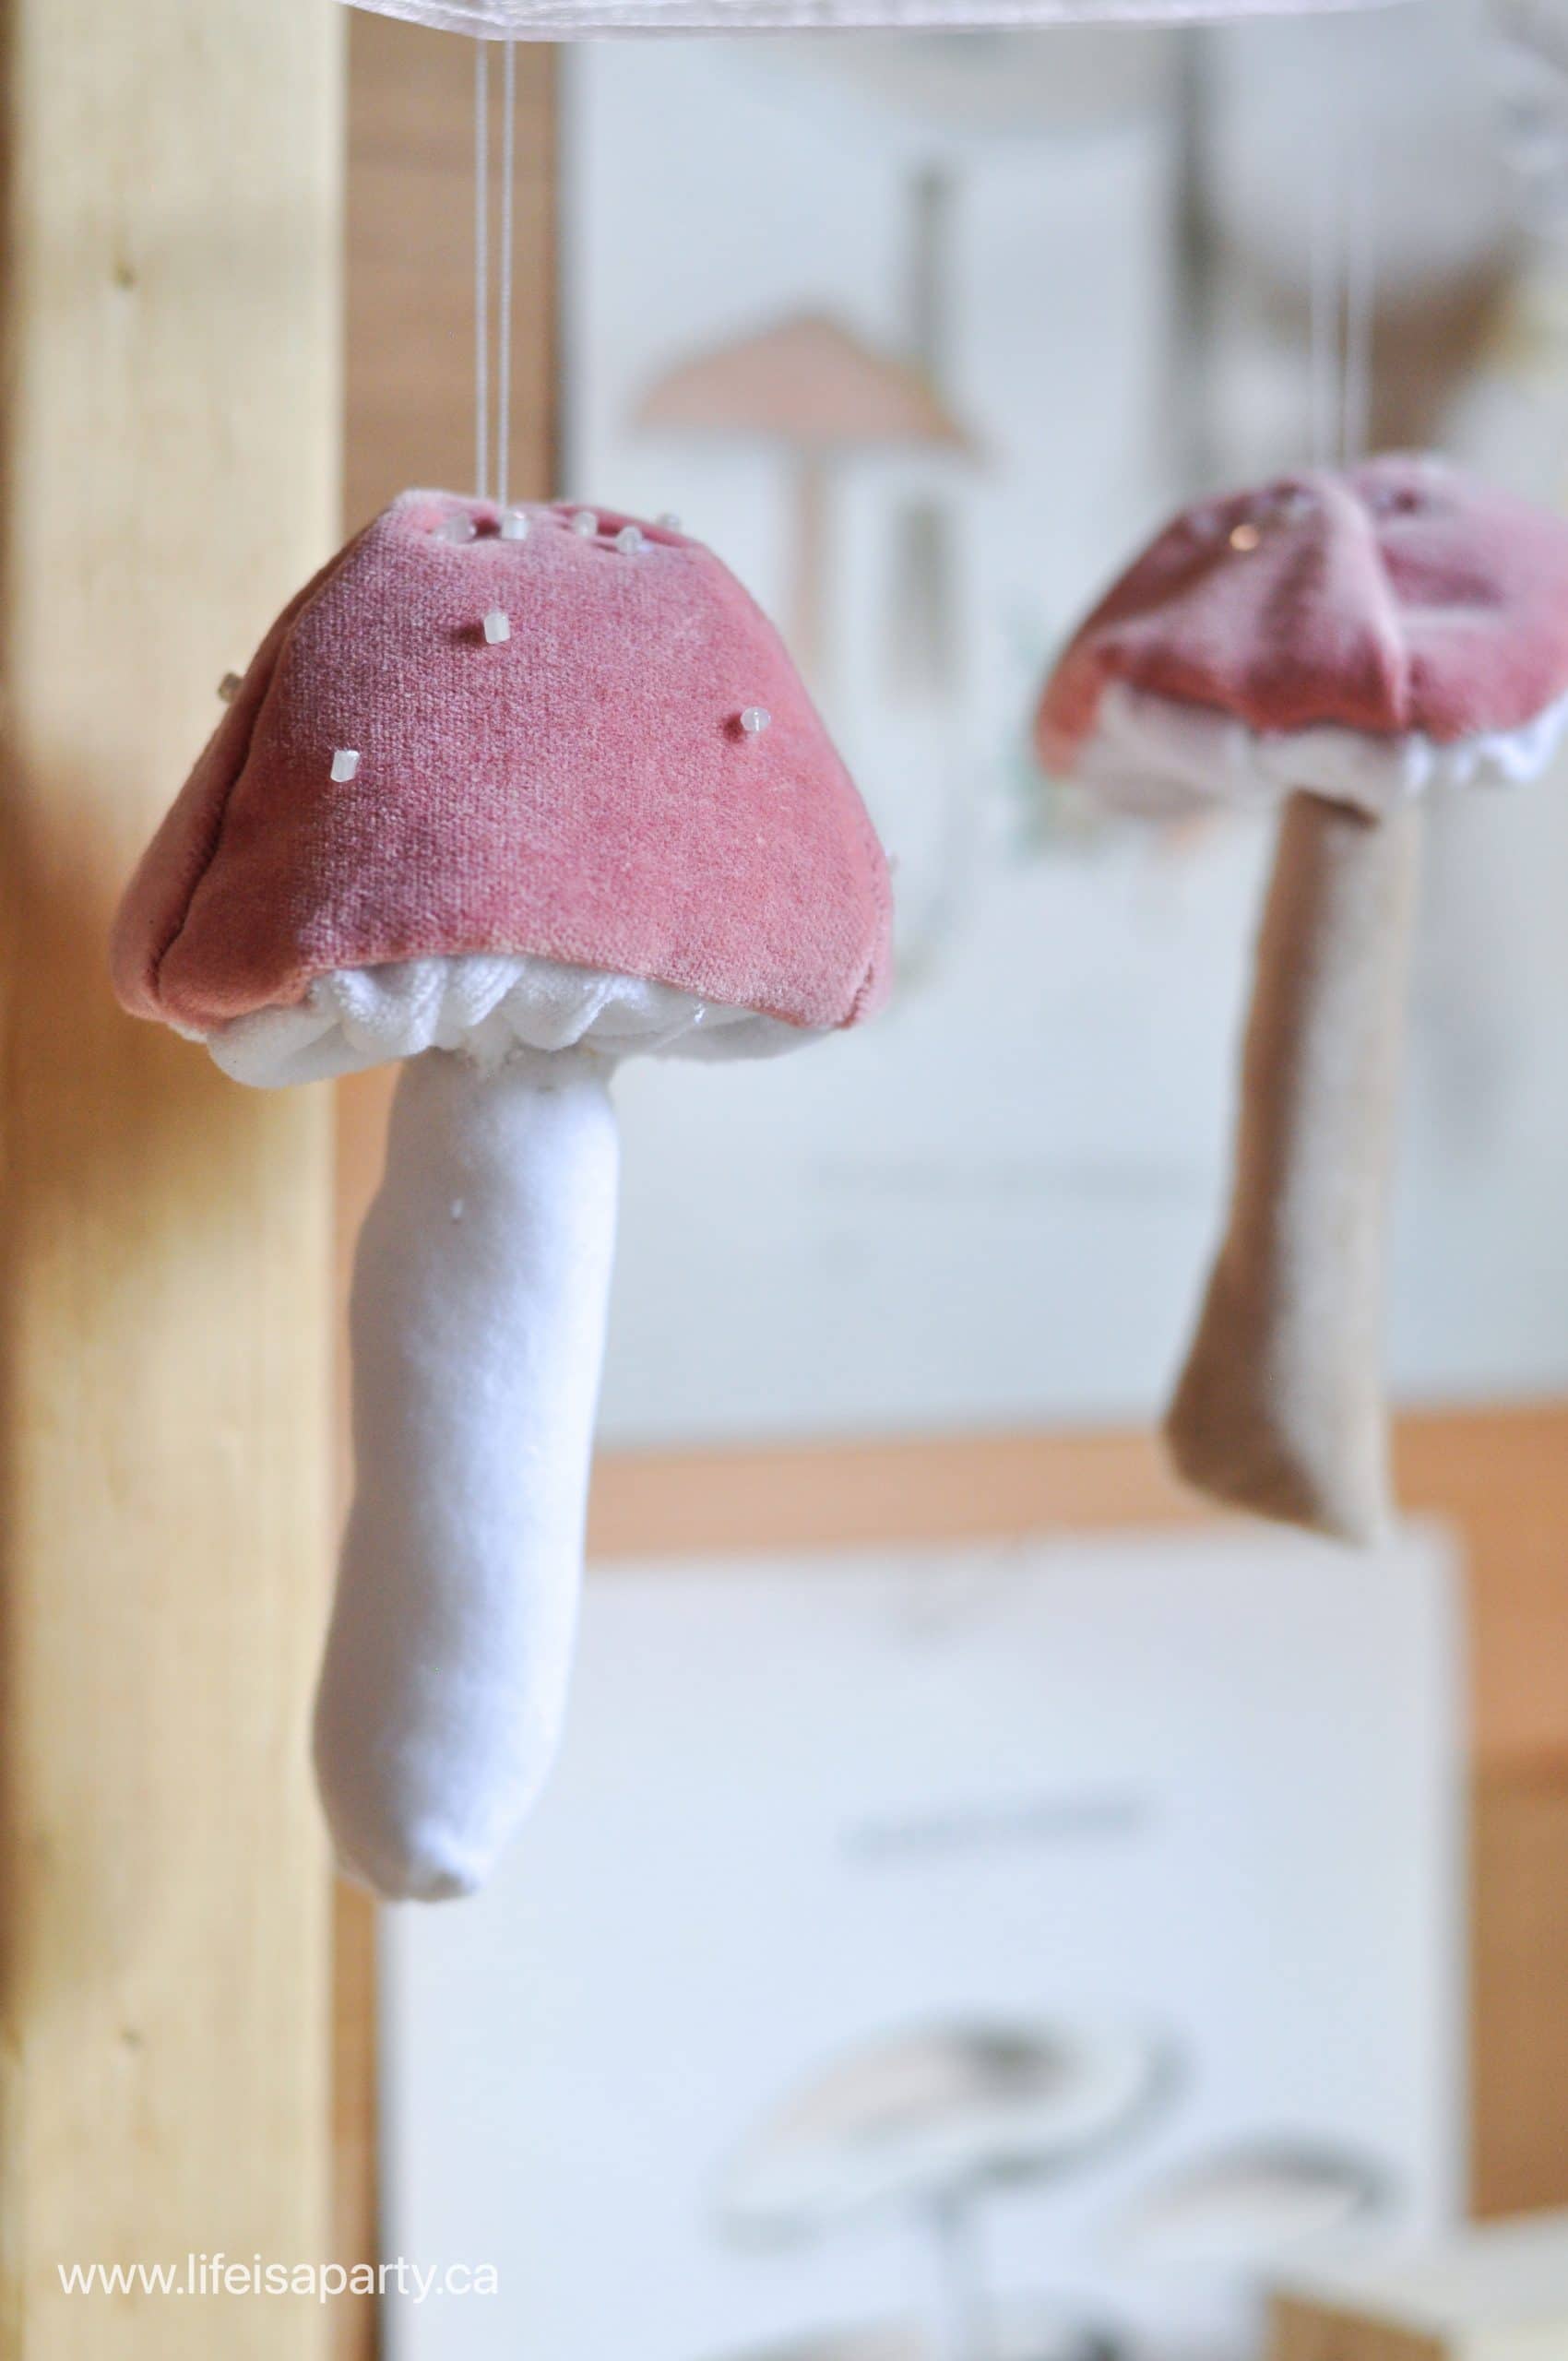
They'd also be gorgeous in the fall season as part of your fall decor. I've made mine pink, but you could create them in a variety of colors. They add a touch of whimsy to any season. Of course they're perfect for Christmas too. You might want to make the top of the your mushroom cap in the traditional red fabric for Christmas. My Christmas decor has had lots of pink the last few years, so these are perfect. That's one of the great things about making your own, you can choose any color to match your own decor.
I used some pink, white, and beige velvet to create these mushrooms. You could make them with velvet fabric in any colors. I went looking in my craft stash for these colors. The pink was actually upcycled from an old velvet blazer, which is a great tip. If you're out thrifting, keep an eye out for old velvet that you could reuse.
DIY Velvet Mushroom Materials:
- mushroom cap pattern (free for subscribers in our Free Printable Library -subscribe below for access)
- pink velvet
- beige velvet
- white velvet
- white thread
- needle
- stuffing
- beads
- chopstick
How To Make A Velvet Mushroom
This soft velvet mushroom requires a little hand sewing. It's nothing complicated, and the sewing is easy enough for a beginner. It is a little bit fiddly, because the pattern pieces are quite small, but it is not complicated. The step-by-step tutorial with photos should make it a great project for any one at a moderate sewing skill level. It uses simple supplies, and you can make your own unique design by changing the colors, or beads.
Sewing The Mushroom Cap
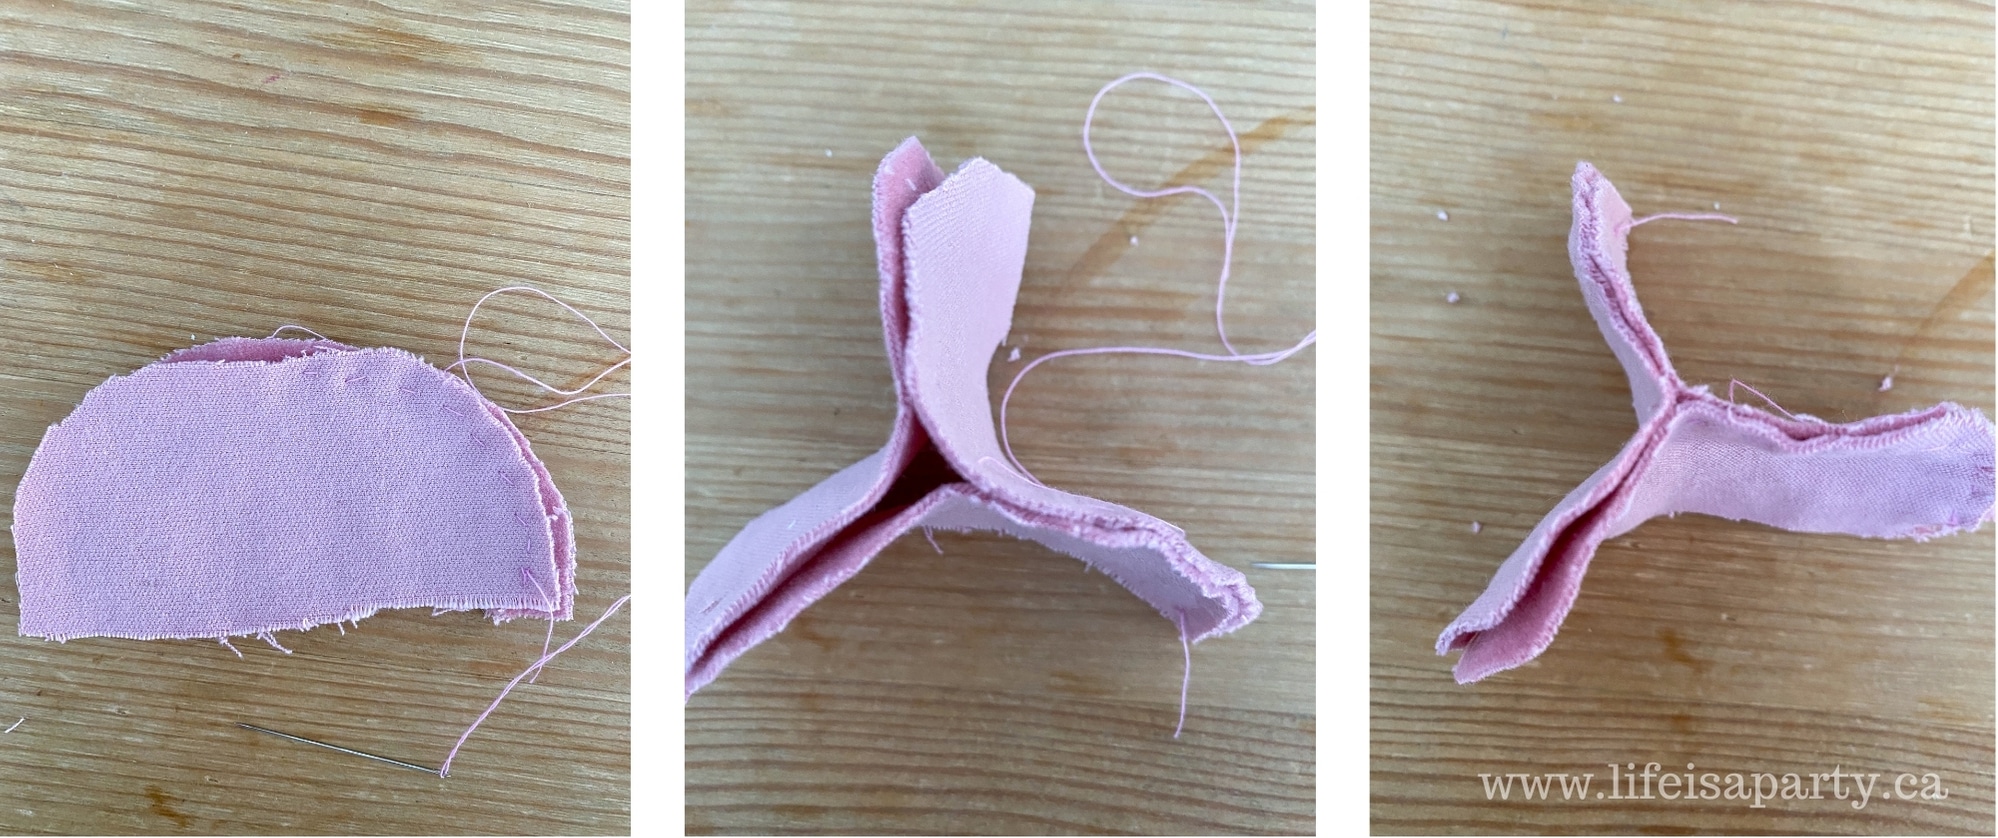
Our mushroom top is made out of three different pieces. This helps create the curved dome. Cut three matching pieces of pink velvet to create the mushroom cap, using the pattern. Sew the three pieces together. Start with two matching pieces, back to back, with the velvet facing inward and sew halfway, stopping in the very middle. Next fold the top piece in half and add in the third piece, also with the velvet facing in. Continue sewing the top piece onto the third piece to finish the semi circle. Next sew the other two pieces together to finish the mushroom cap.
To get the free mushroom cap pattern, subscribe here and gain instant access to it in our Free Printable Library.
Adding Mushroom Spots
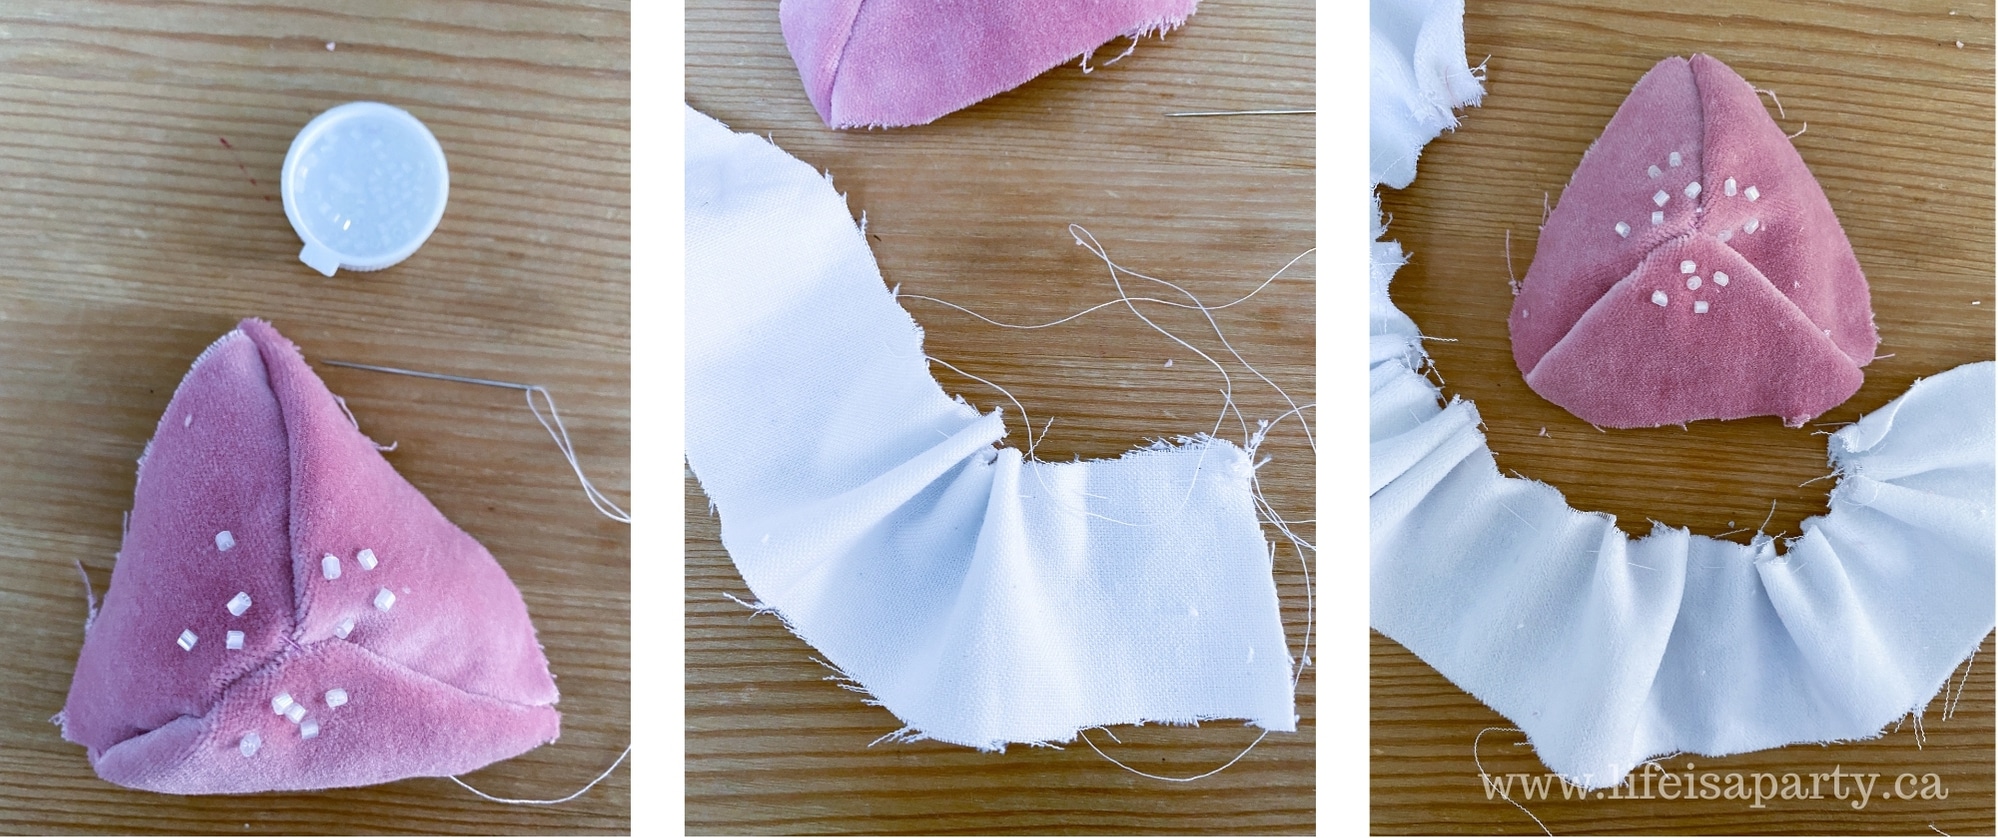
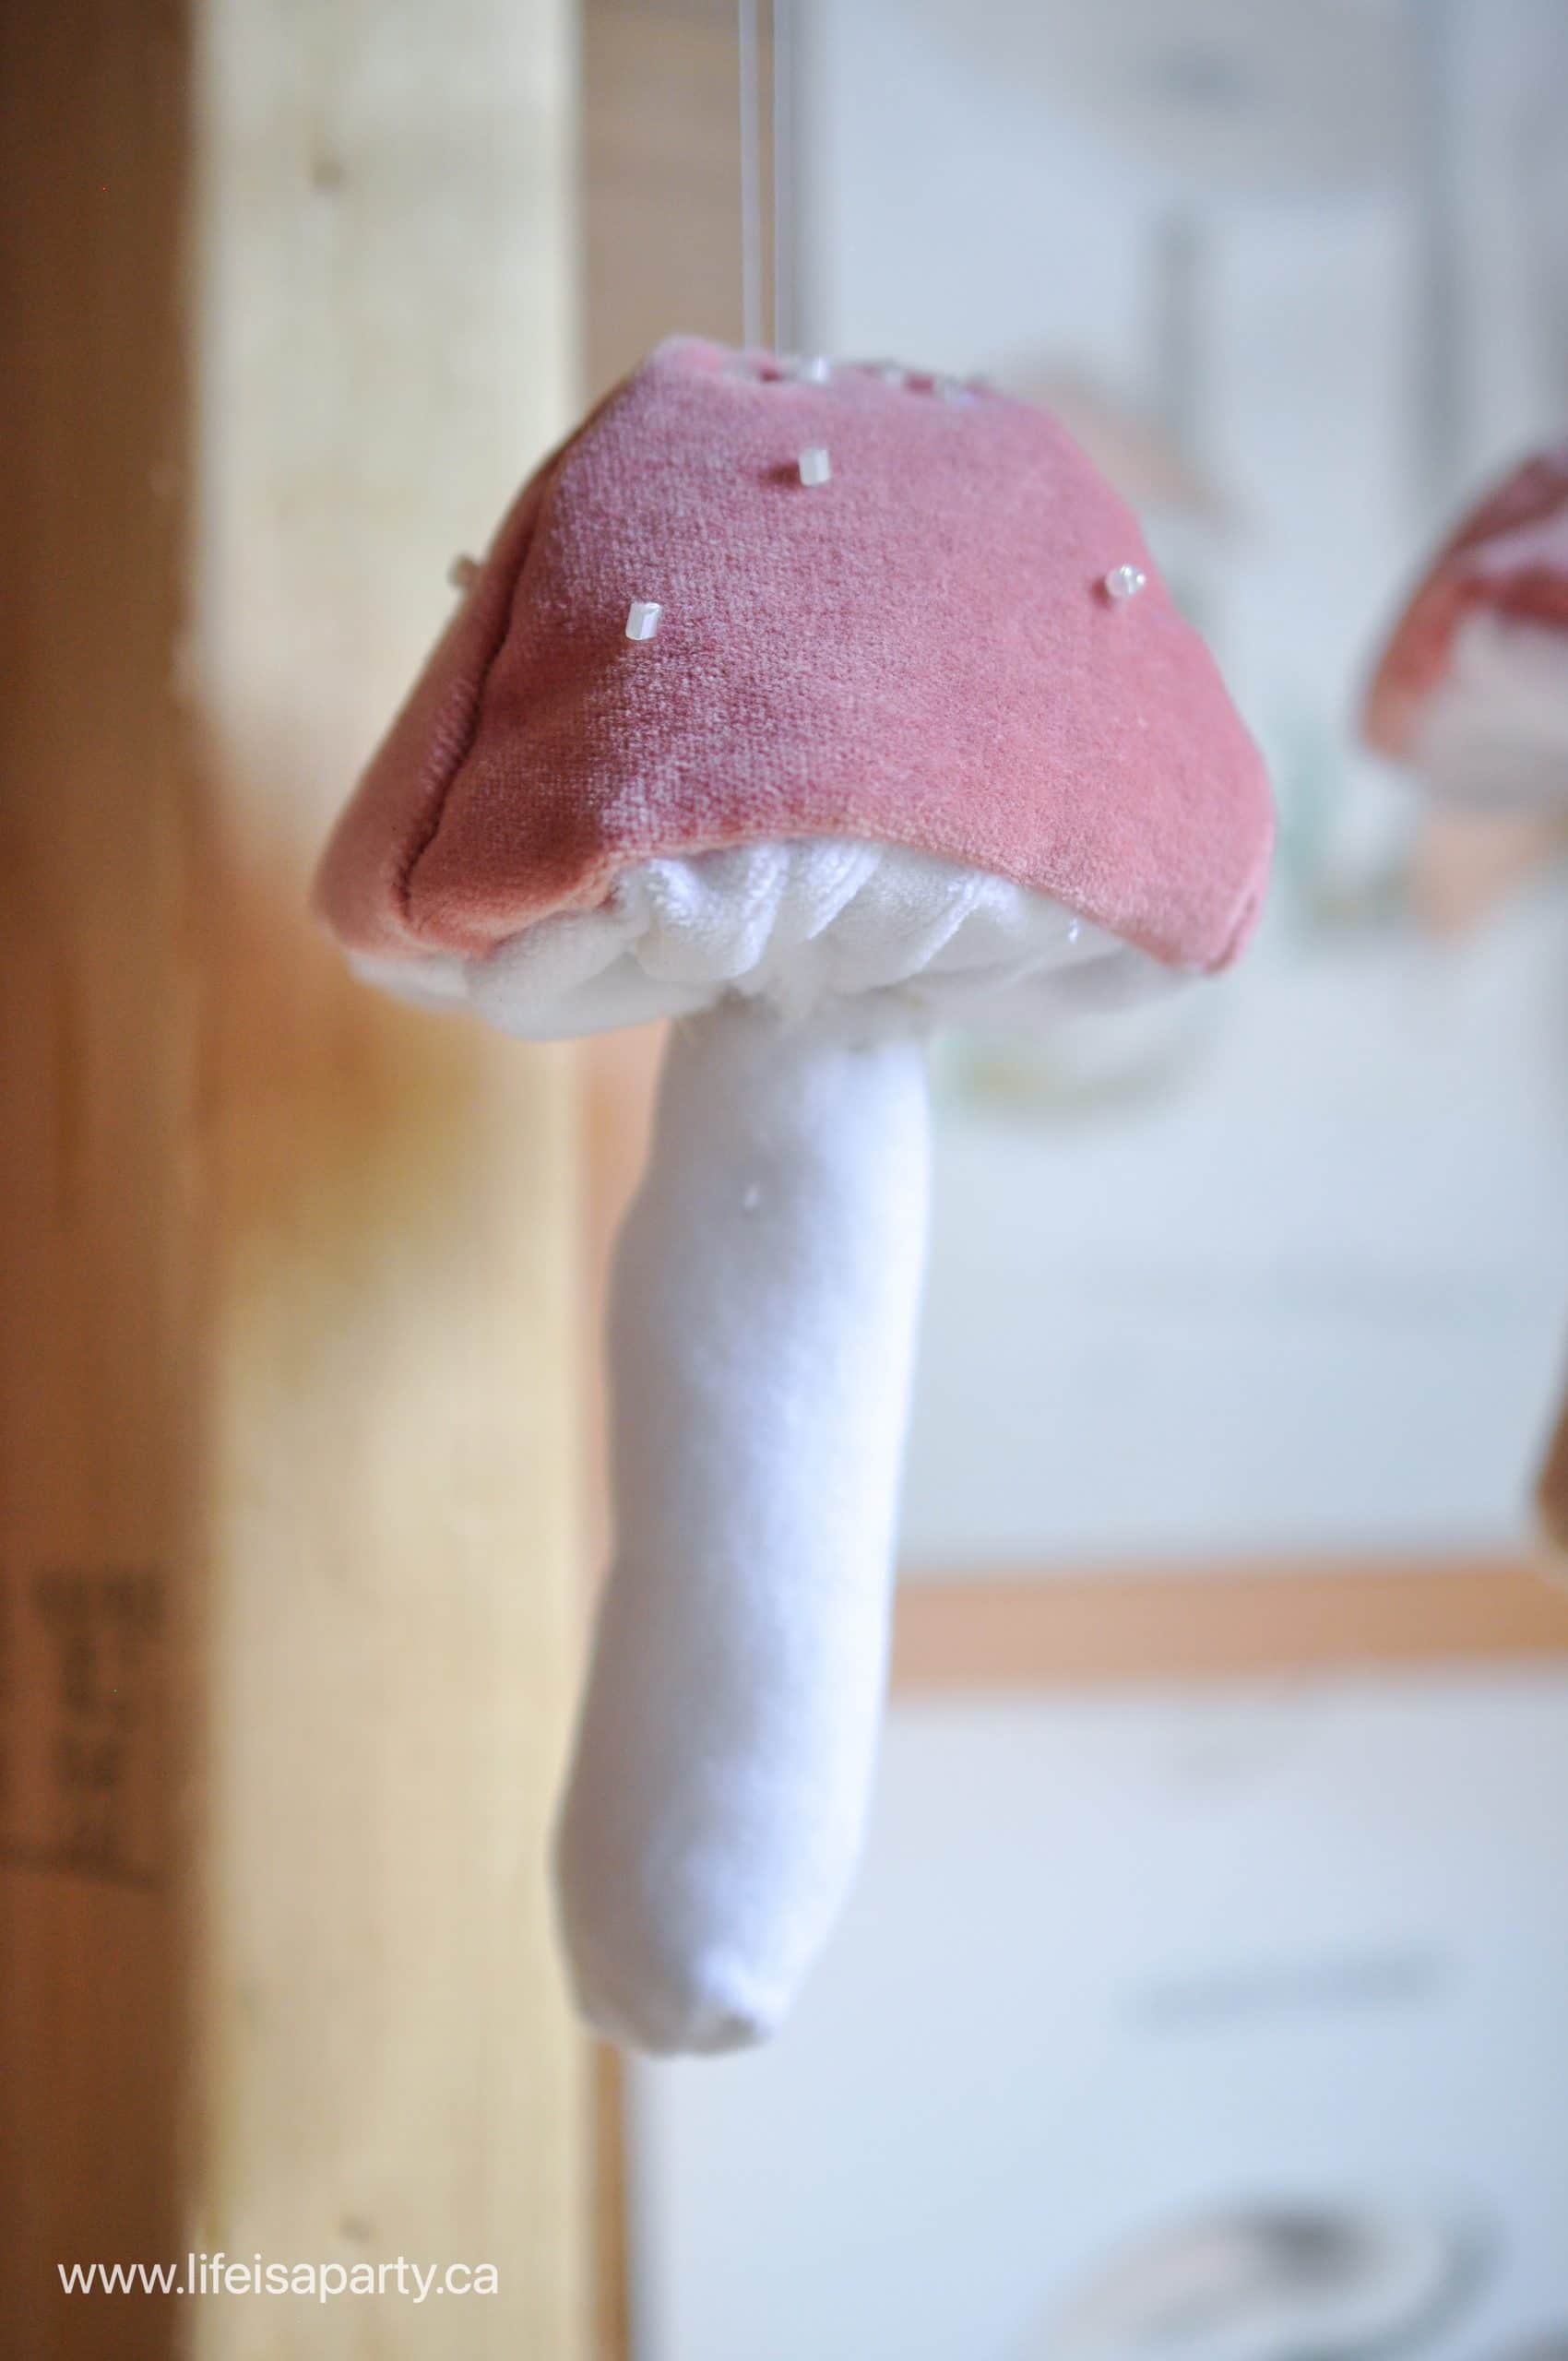
Next, sew some small beads on to the top of the mushroom cap. We used small white glass seed beads for our small dots. You could use different sized or colors depending on the look you're after. Even sequins would work well. Or leave the beads off all together. Another option is to use embroidery floss and embroidery small french knots on the top of your mushroom cap for the mushrooms spots. Or choose to leave the mushrooms spots off altogether.
Making The Mushroom Gills
To make the inside gills of the mushroom, cut a strip of white velvet that's about 1 ½ inches wide. Sew a long running stitch on one side of the velvet strip, and slightly gather the material all the way along. Measure the gathered fabric around the outside of the mushroom cap to get the perfect length, and then cut it to length, and tie off the running stitch.
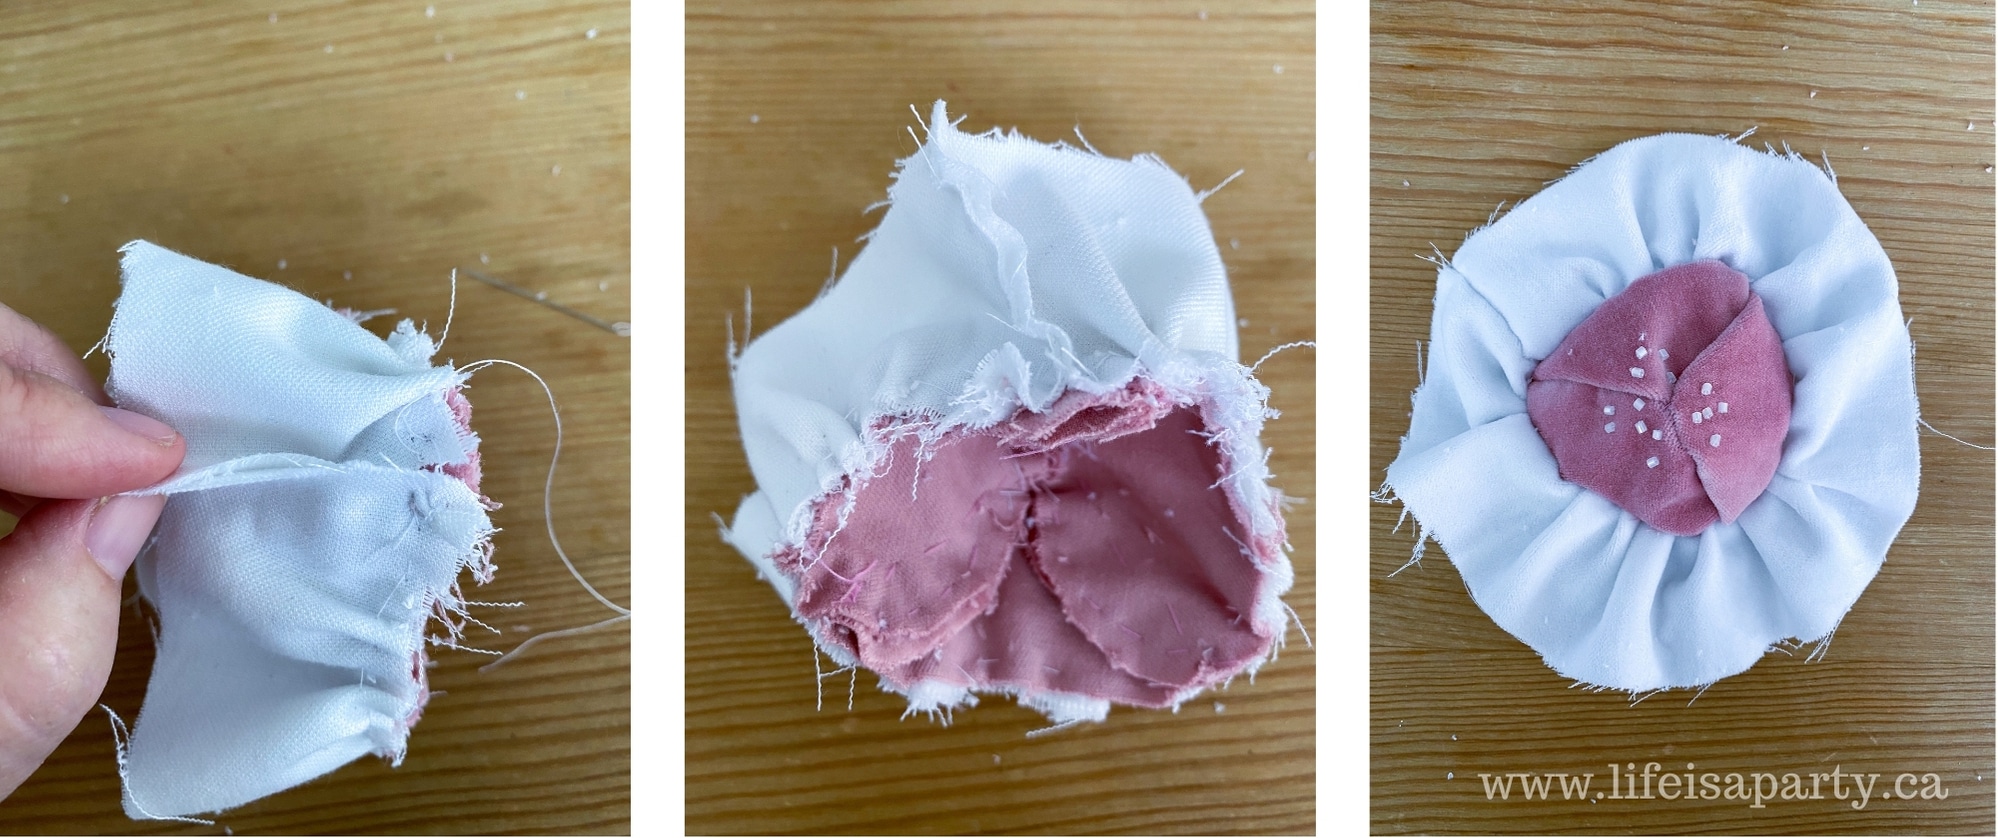
Sew the strip for the mushroom gills to the mushroom cap outer edge, with the good sides of the velvet facing each other. Finish it by sewing the side seam together.
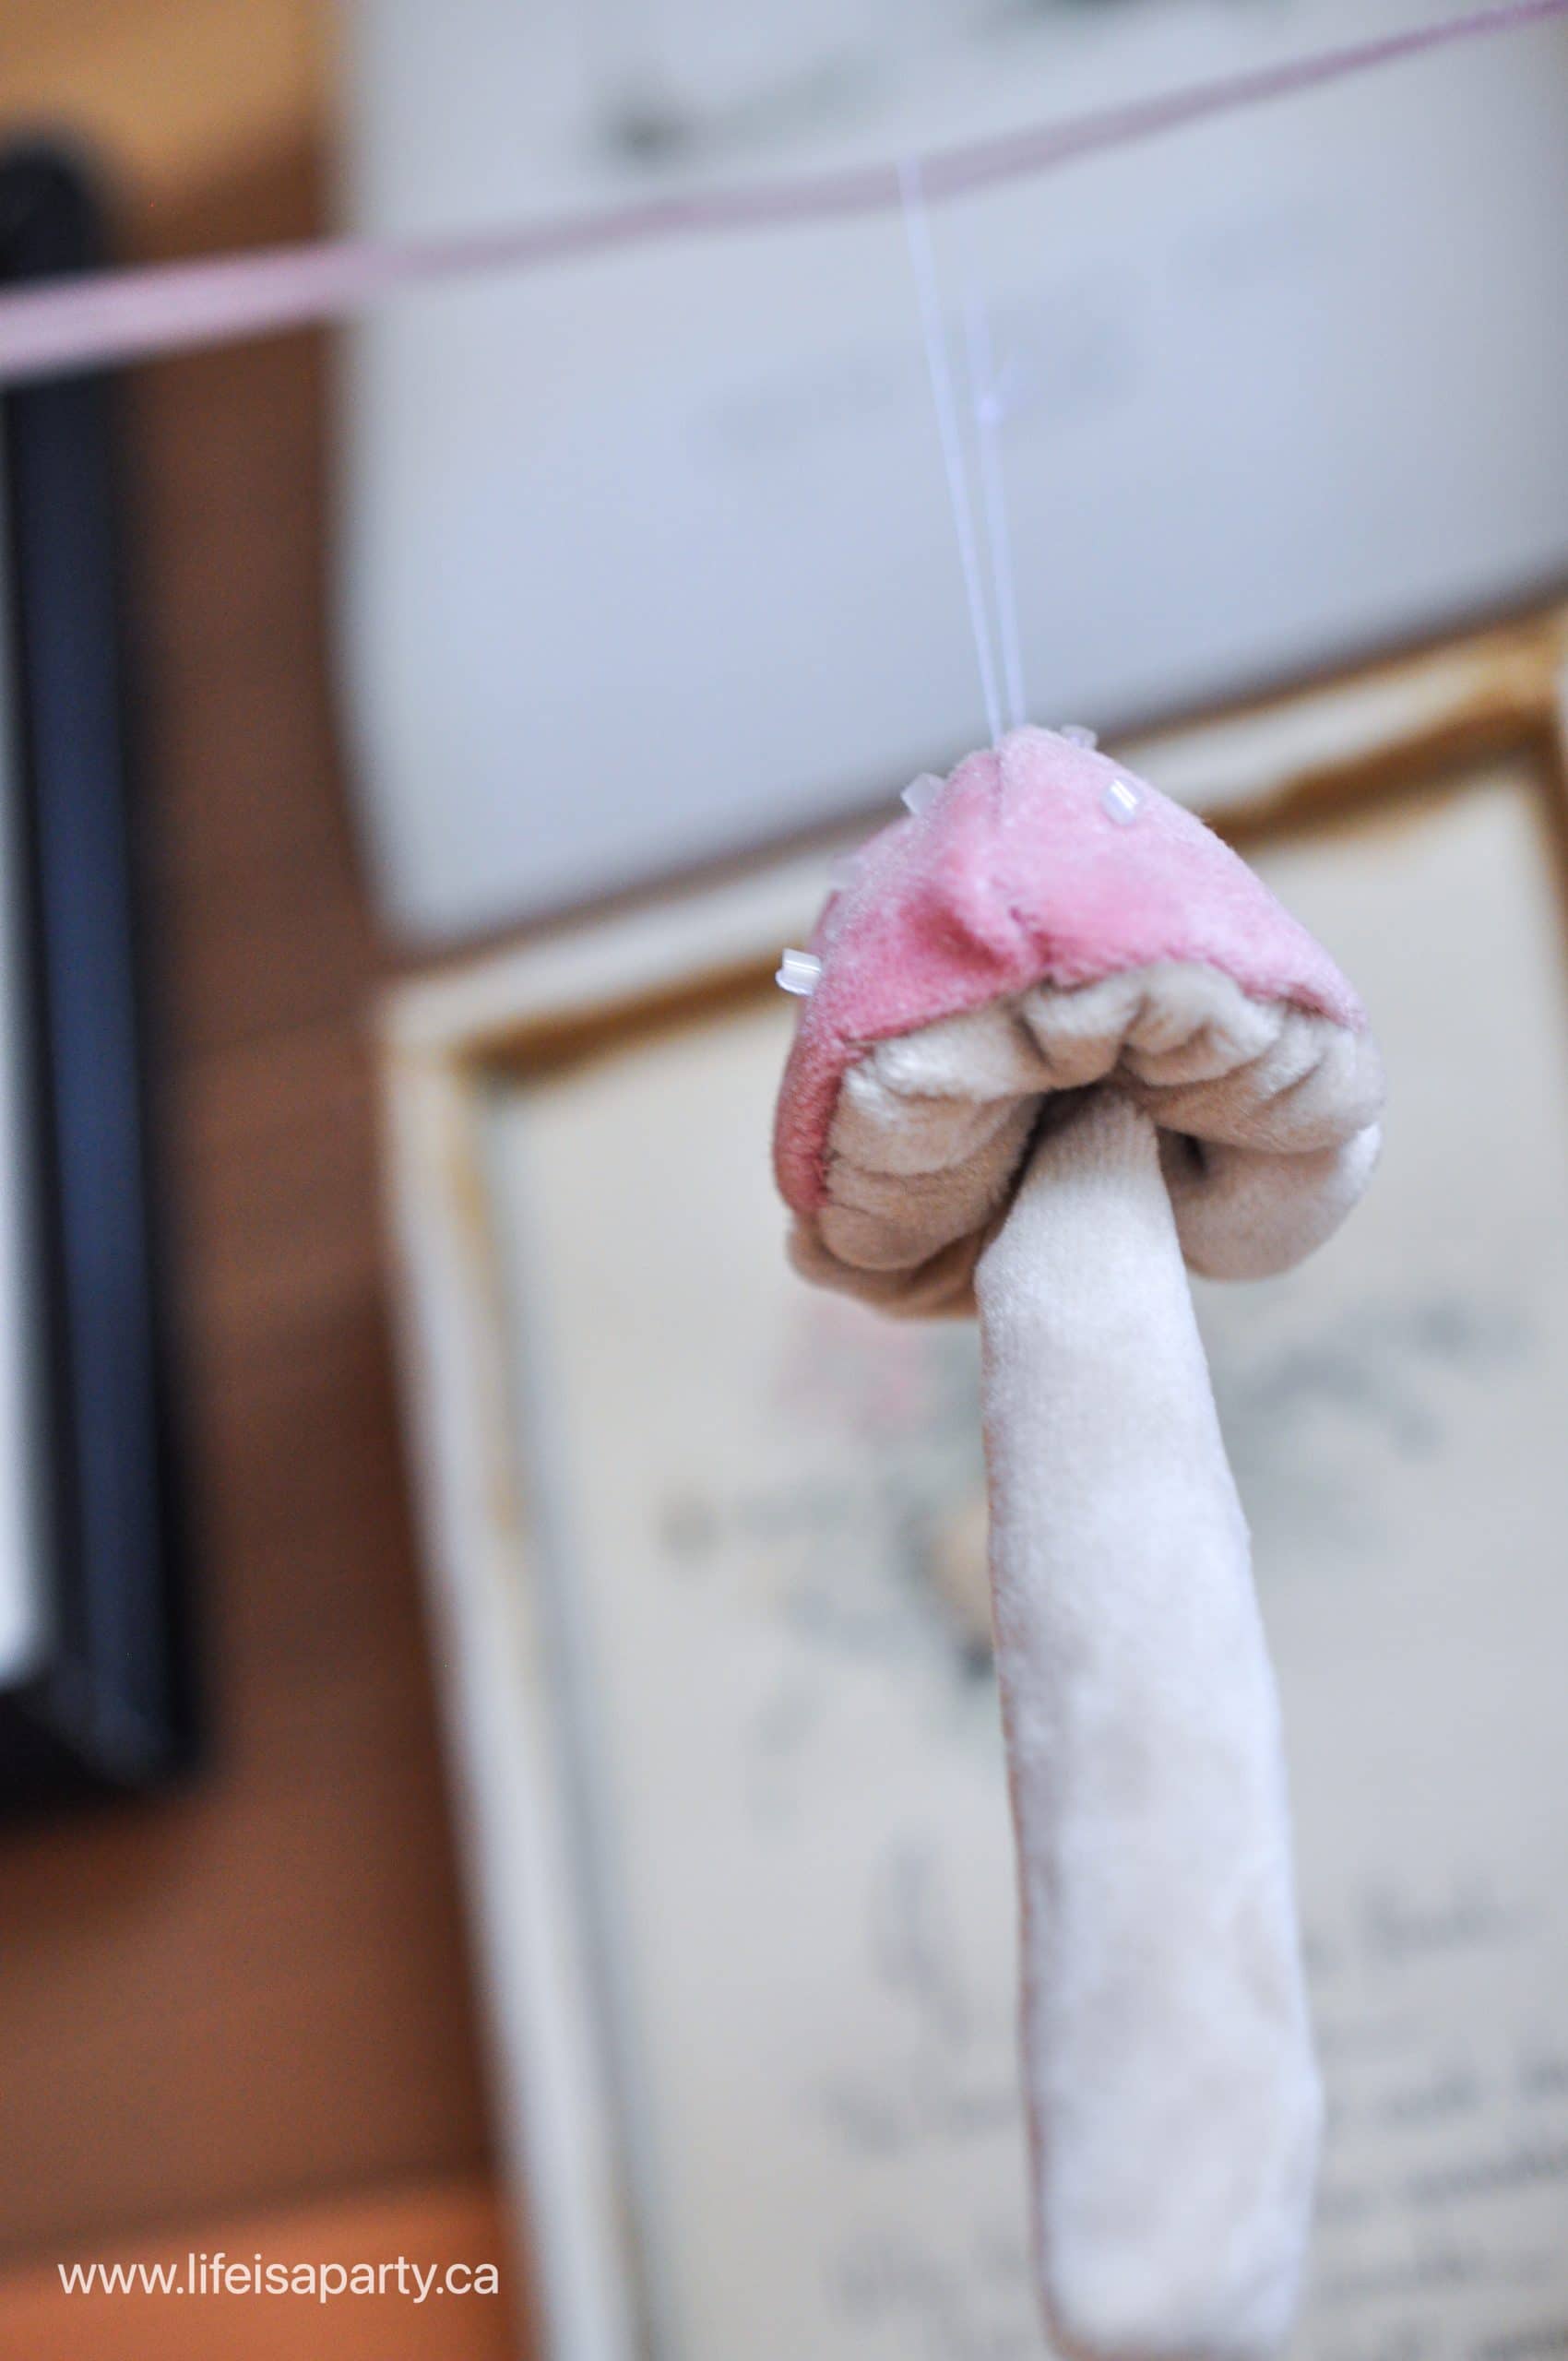
Trim the excess fabric of the gill piece slightly, if necessary, so that the length is enough to nearly meet in the middle. Then stitch a running gathering stitch along the other white velvet edge, and gather it tightly to create the mushroom gills. Finish it by tying it off tightly, and trimming and loose threads.
This step is the most fidley. It requires a bit of adjusting as you go. It really creates a beautiful effect.
Making The Stem
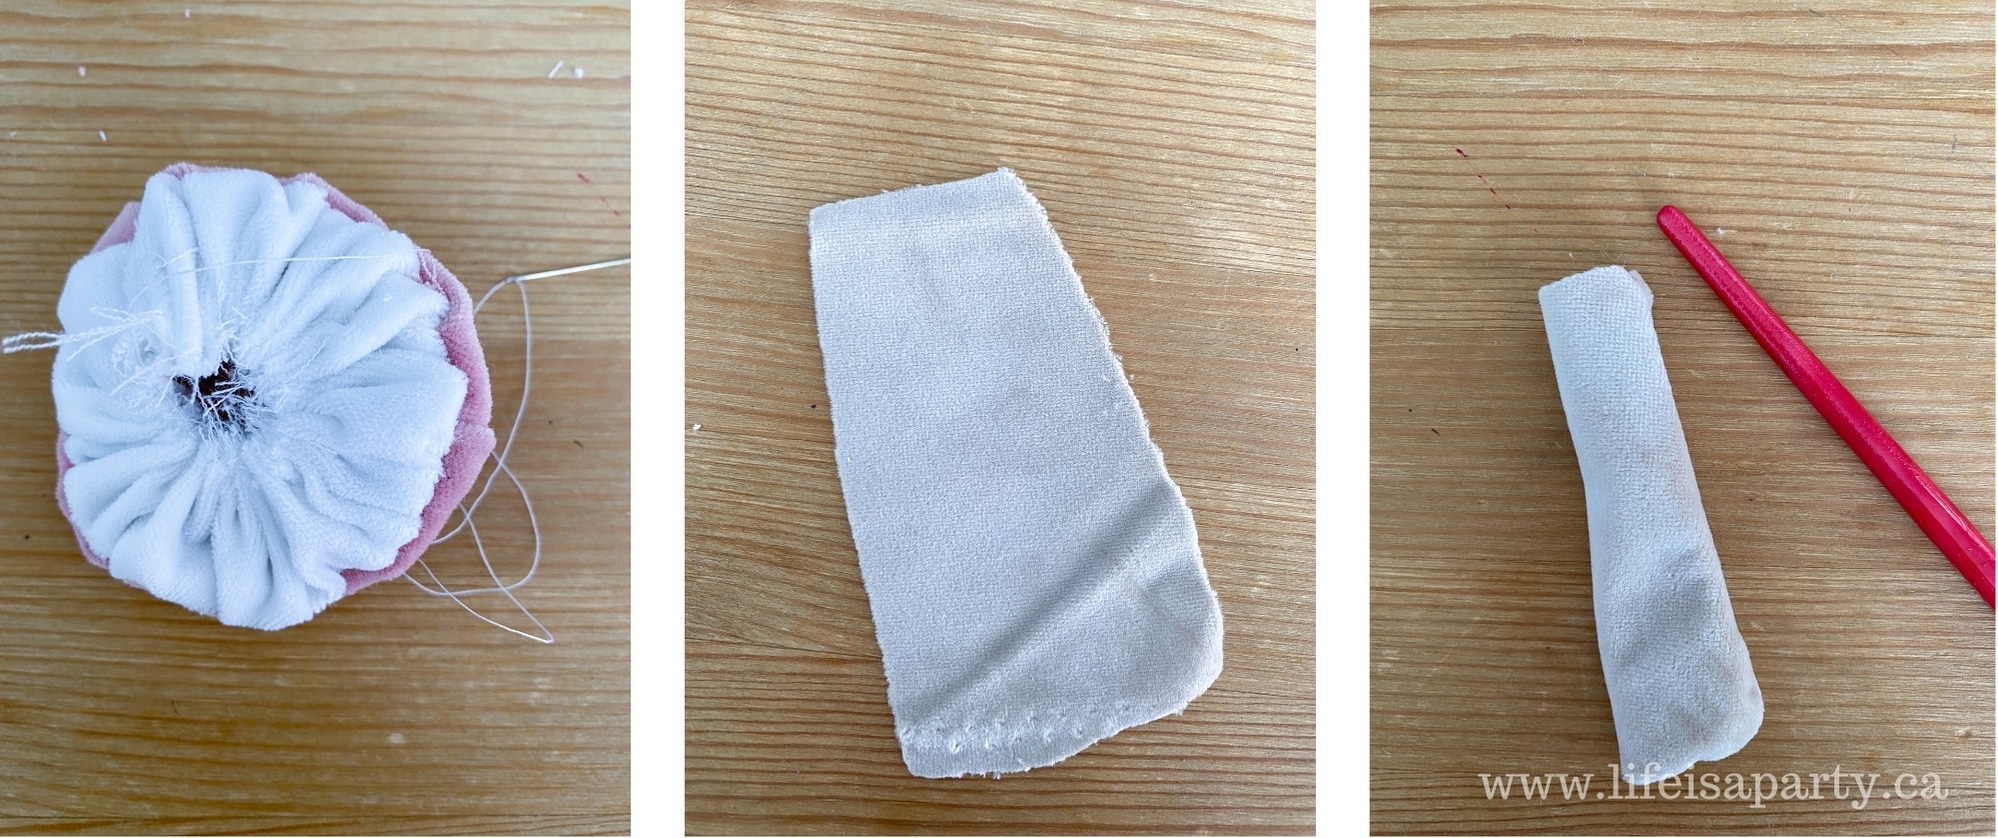
To create the mushroom stems, cut a small piece of beige velvet into a rectangle shape. We're going to fold it along one side to create the stem tube shape. Stitch it together with the velvet sides facing in. Use a chopstick to help turn it right-side out. Stuff it with stuffing. Finally sew the unfinished bottom of the stem to the bottom of the mushroom cap.
Equipment
- Needle
- chopstick
Materials
- mushroom cap pattern free for subscribers in our Free Printable Library -subscribe below for access
- pink velvet
- beige velvet
- white velvet
- white thread
- stuffing
- beads
Instructions
- Cut three matching pieces of pink velvet to create the mushroom cap, using the pattern. Sew the three pieces together. Start with two matching pieces, back to back, with the velvet facing inward and sew halfway, stopping in the very middle. Next fold the top piece in half and add in the third piece, also with the velvet facing in. Continue sewing the top piece onto the third piece to finish the semi circle. Next sew the other two pieces together to finish the mushroom cap.
- Next, sew some small beads on to the top of the mushroom cap.
- To make the inside gills of the mushroom, cut a strip of white velvet that's about 1 ½ inches wide. Sew a long running stitch on one side of the velvet strip, and slightly gather the material all the way along. Measure the gathered fabric around the outside of the mushroom cap to get the perfect length, and then cut it to length, and tie off the running stitch. Sew the strip for the mushroom gills to the mushroom cap, with the good sides of the velvet facing each other. Finish it by sewing the side seam together. Trim the gill piece slightly, if necessary, so that the length is enough to nearly meet in the middle. Then stitch a running stitch along the other white velvet edge, and gather it tightly to create the mushroom gills. Finish it by tying it off tightly, and trimming and loose threads.
- To create the mushroom stems, cut a small piece of beige velvet into a rectangle shape. We're going to fold it along one side to create the stem tube shape. Stitch it together with the velvet sides facing in. Use a chopstick to help turn it right-side out. Stuff it with stuffing. Sew the end of the stem to the bottom of the mushroom cap.
Mushroom Art and Botanical Decor
These little mushrooms turned out so cute. They're perfect for my little tool shed. I was able to find some free printables for some vintage botanical drawings of mushrooms here. I printed them and pinned them up for the perfect backdrop for my DIY velvet mushrooms. You can read all about how we created this garden and built the little garden shed here.
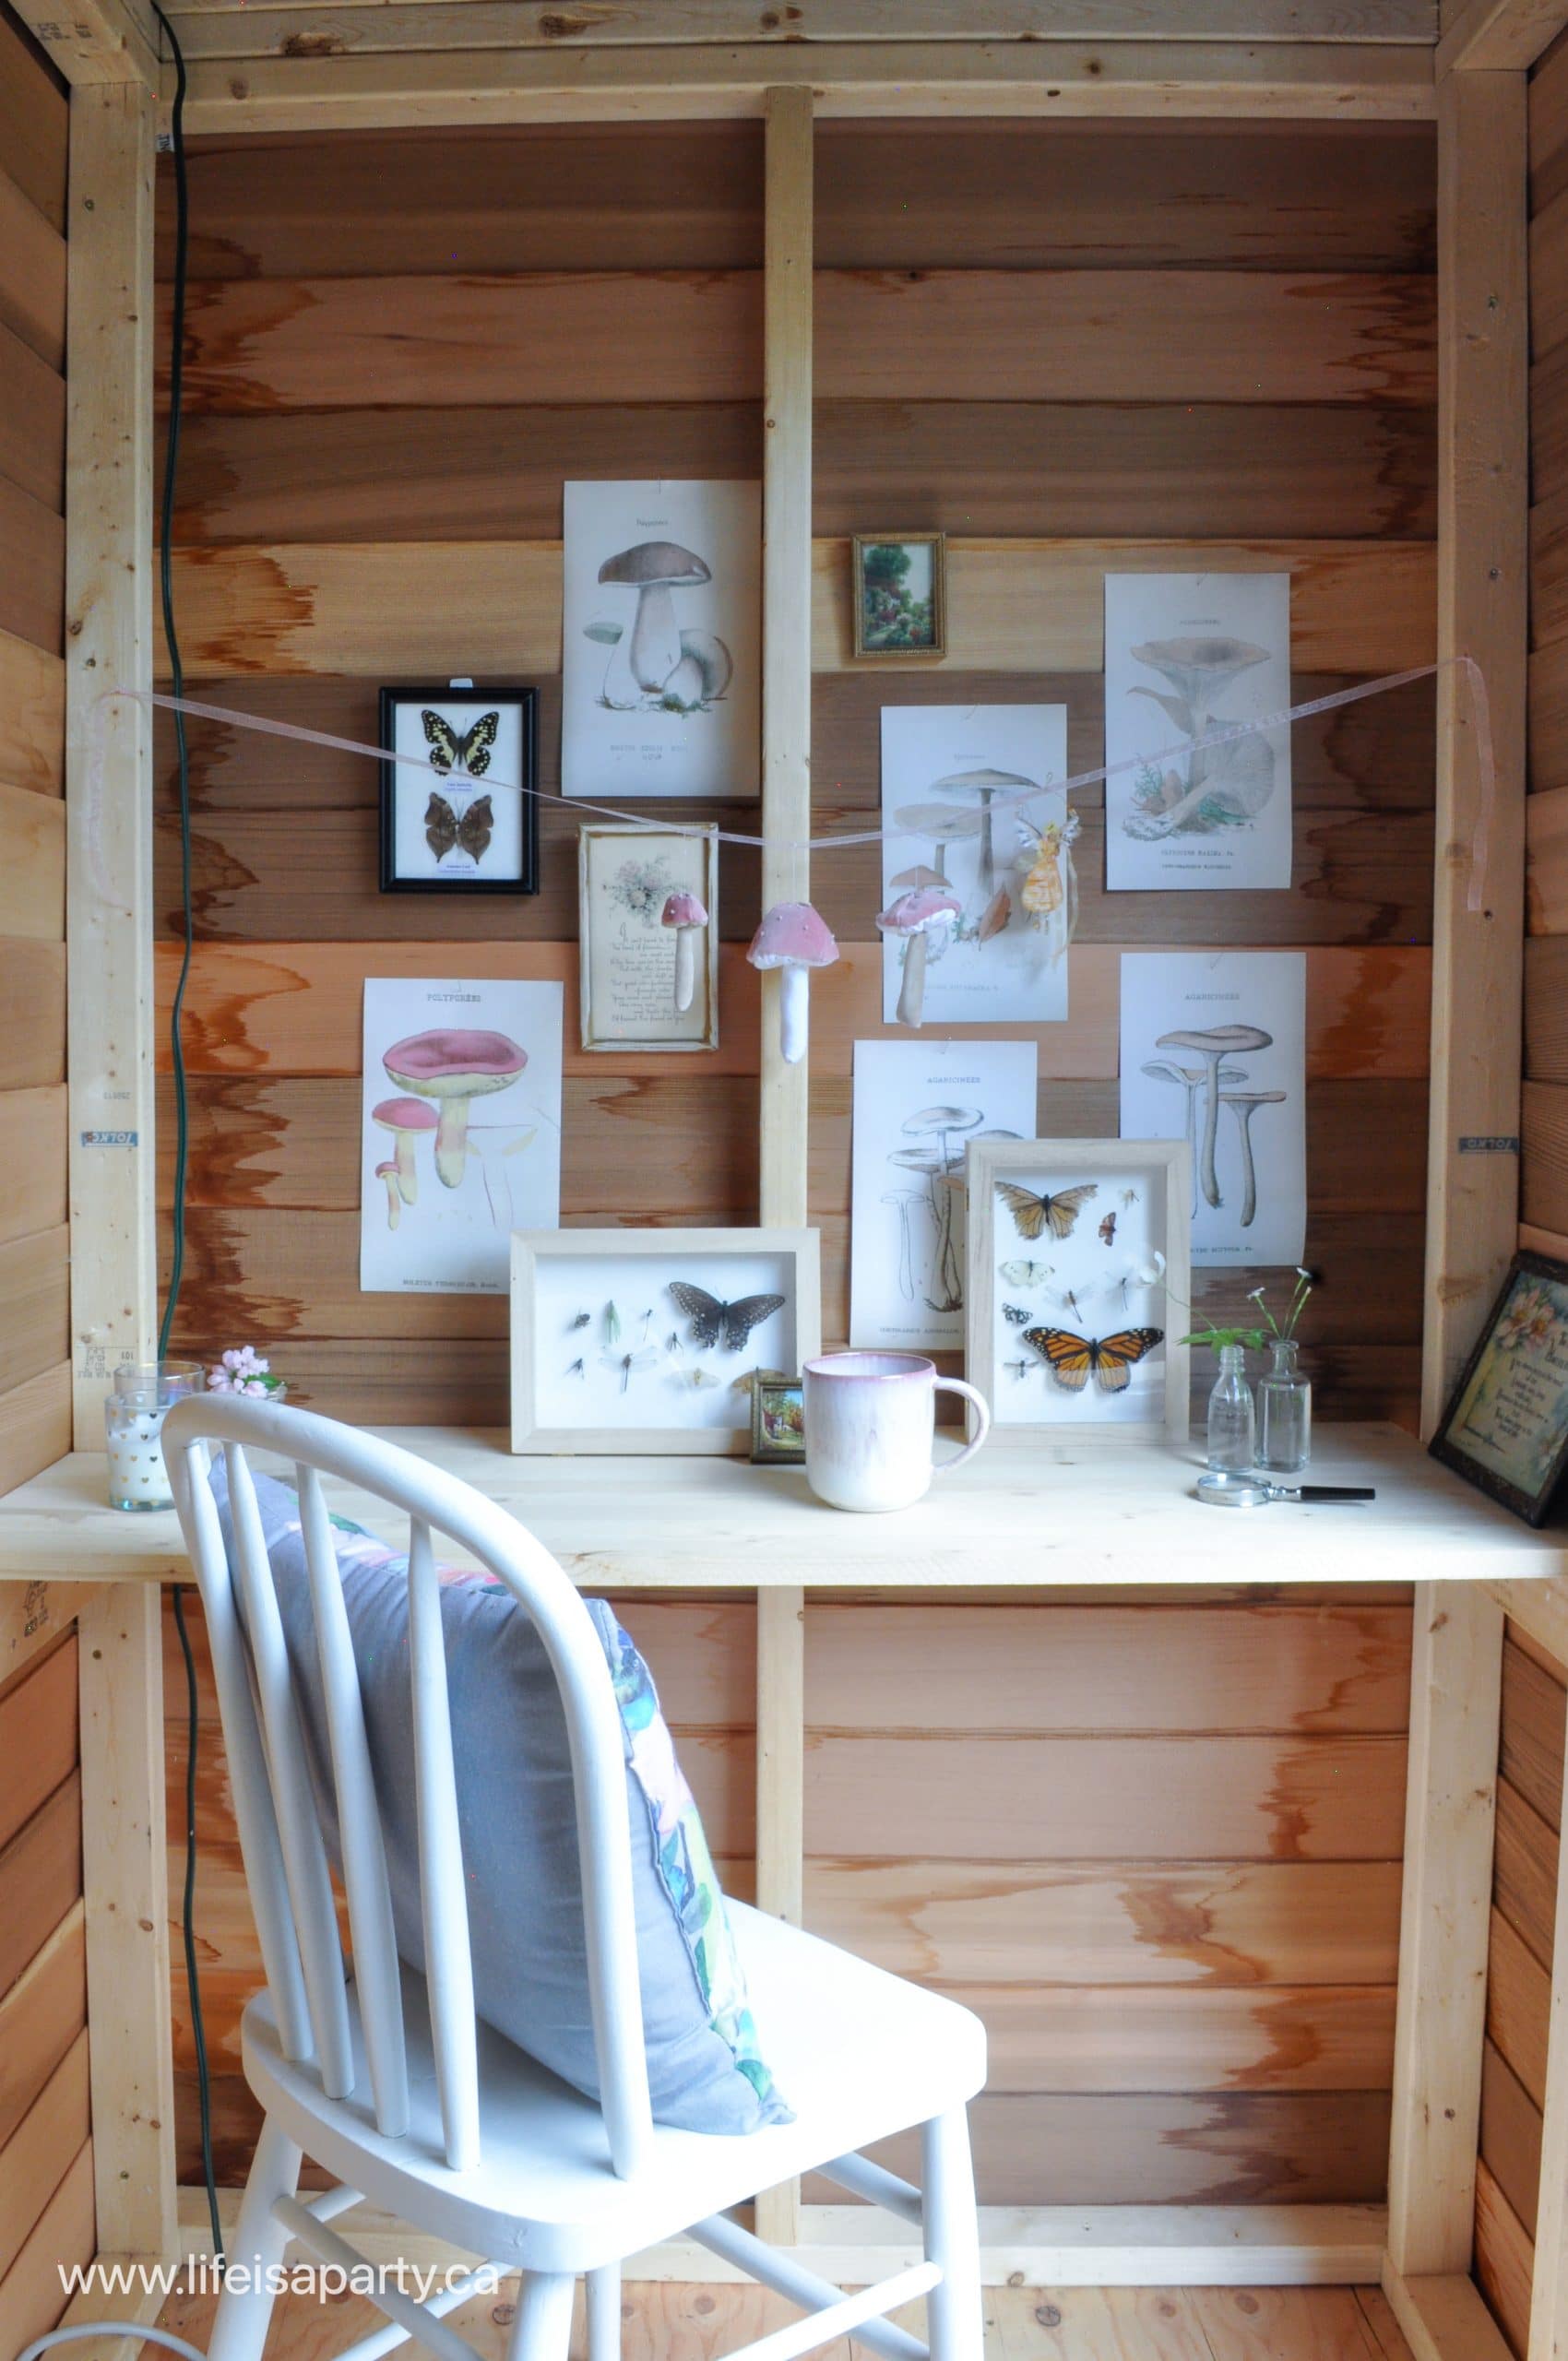
This is one of my favourite little spots. Perfect for a little computer work.
These would be adorable in a kids room or nursery, or just as part of any botanical themed decor. The Anthropolgie version that helped inspire this craft were used as Christmas decorations, which would be beautiful too.


Norma says
Oh my goodness! This velvet mushrooms are the cutest thing ever!!
Krista says
These are the cutest!! I love the little beads on top!
Jo-Anna says
SO cute Dannyelle! I love all of the details you've put into this area of your yard...you've inspired me to take a better look at a similar space in my own backyard and see how I can transform it into a beautiful space, instead of a storage space that it is now!
Christy James says
These are so cute and so is your garden shed! XOXO