DIY Paper Christmas Star Decoration: this easy craft is perfect for Christmas. Make any size or colour, add mini holes, paint and glitter.

It's always fun to make some homemade Christmas decorations. These paper Christmas stars are fun to make, and use materials that you probably have on hand already. These stars are perfect for the holiday season. I'll be using these as part of my own Christmas decorations this year. They'd also be really fun for New Year's Eve.
Simple Origami
Origami stars can be a little bit tricky to put together at first, but the results are so stunning. These step by step instructions should make it easy to create these. Once you make a few and get the hang of it they're very easy. You can make them in any size you like, or a mix like we've done here. Make larger ones for a more dramatic look, especially when lit up with fairy lights. Imagine one at the top of the tree, with holes and some lights inside. And the smaller stars are really cute.

This simple craft is a great one for the whole family to make together, and simple enough for kids, once you get used to making them. Try making them in different colors, or using festive papers from the craft store.
Materials
To make these Christmas stars you will need:
- paper or card stock
- scissors
- glue stick or school glue
- glitter
- mini hole punch hole punch
How To Make 3D Stars
Square Paper
1.Start out with a square piece of paper. You can use any colour you like, regular paper, or card stock or scrapbook papers with pretty patterns or glitter all work well. Heavier cardstock is harder to fold, but holds its shape the best after it's finished. Our smallest squares of craft paper were 6 cm by 6 cm, and they went up from there.
Folding Paper
To create our star shape, begin by folding the paper in half. Keeping the fold edge at the top, next, fold the top left corner down to the bottom edge to make a crease, then unfold , and fold the bottom left corner to top and make a crease.
2. Where the two creases meet is the mark where you next fold the top right corner to.
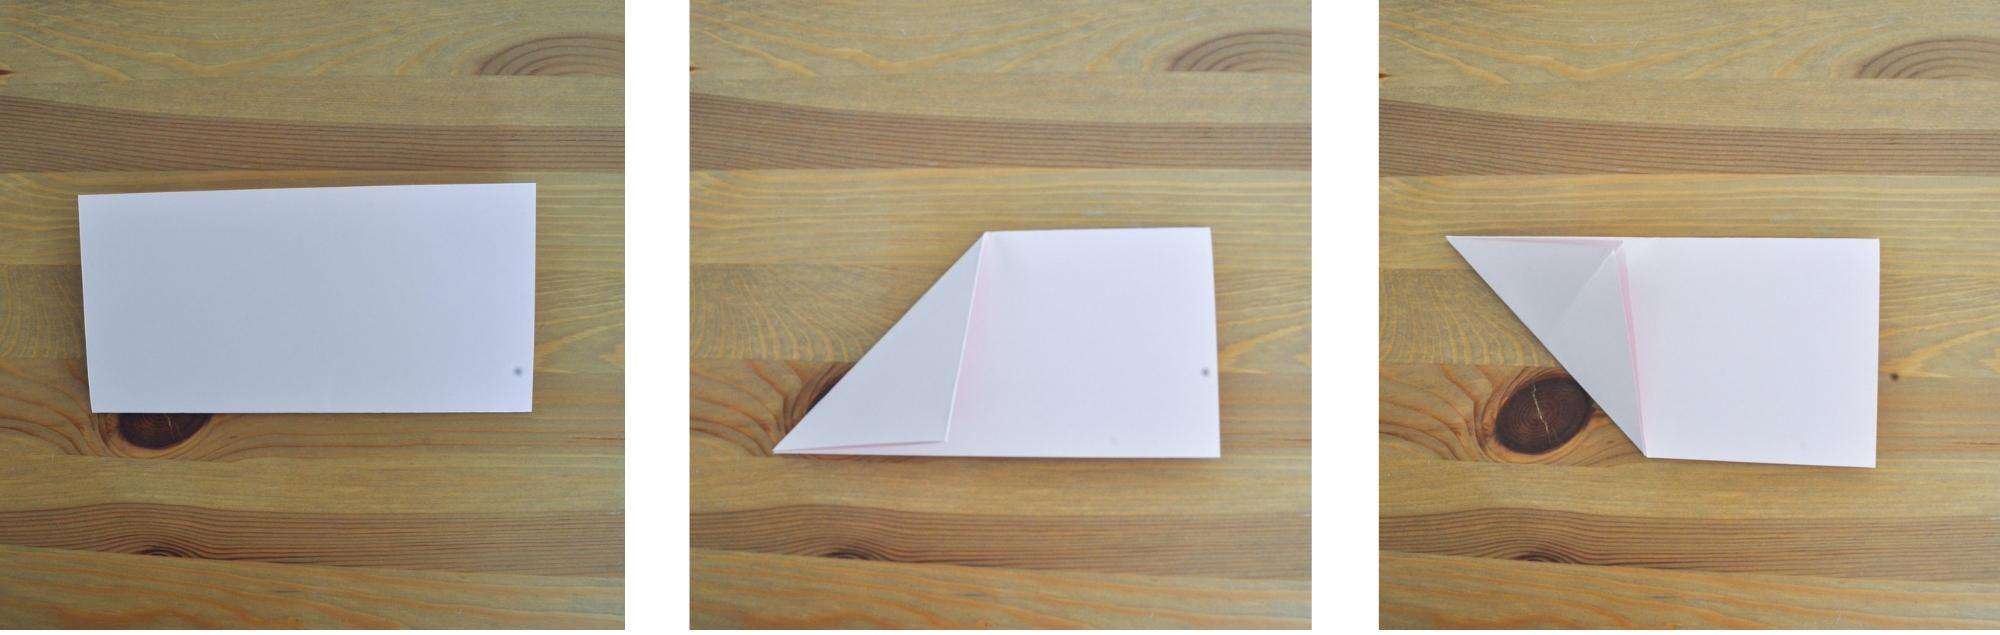
3. Now take that same right corner and fold that flap back on itself to line up with the edge.
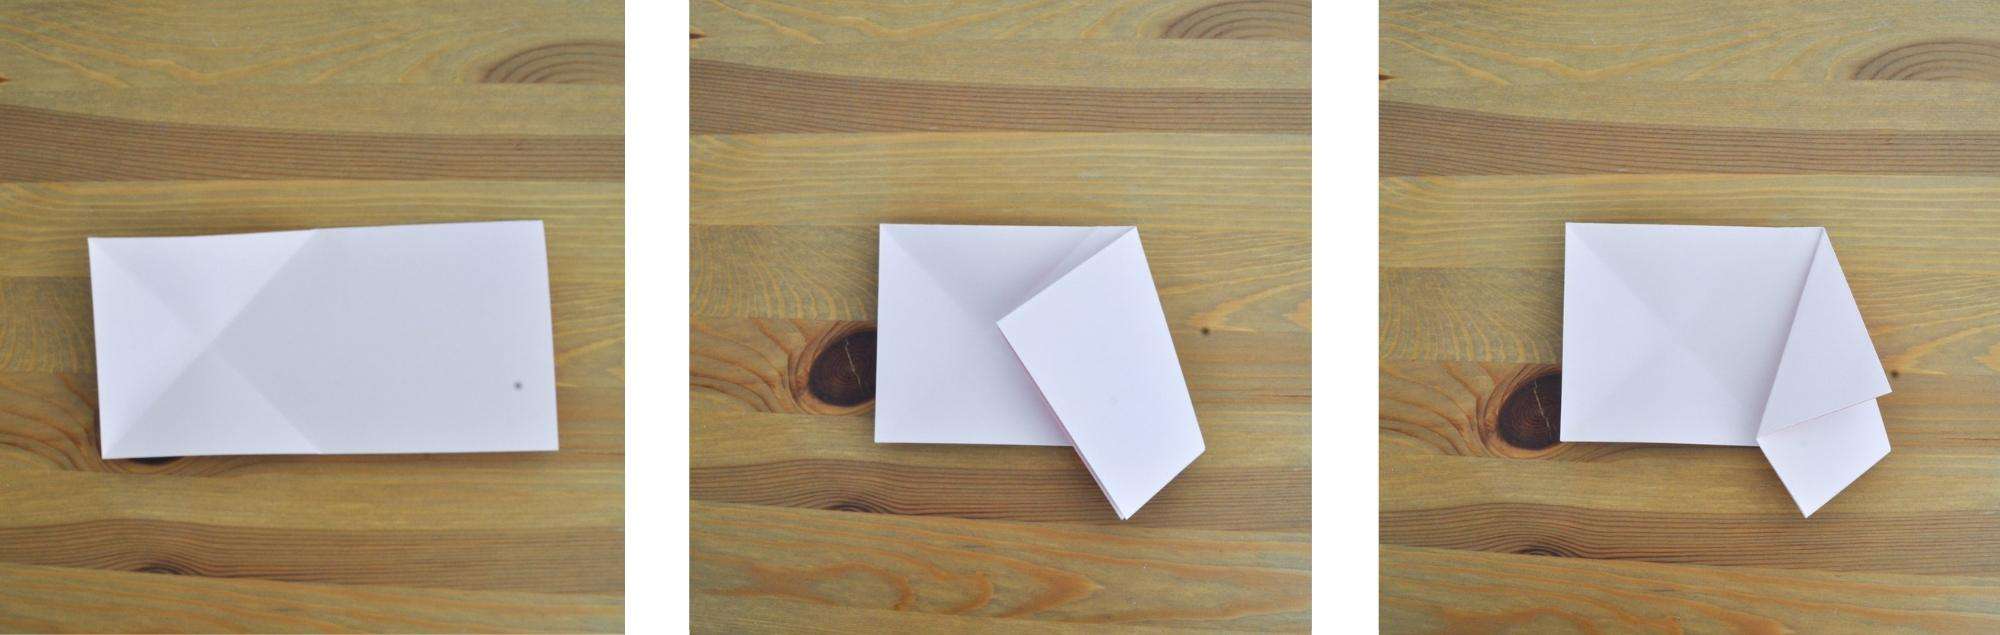
4. Next, fold the whole piece in half along the middle folds.
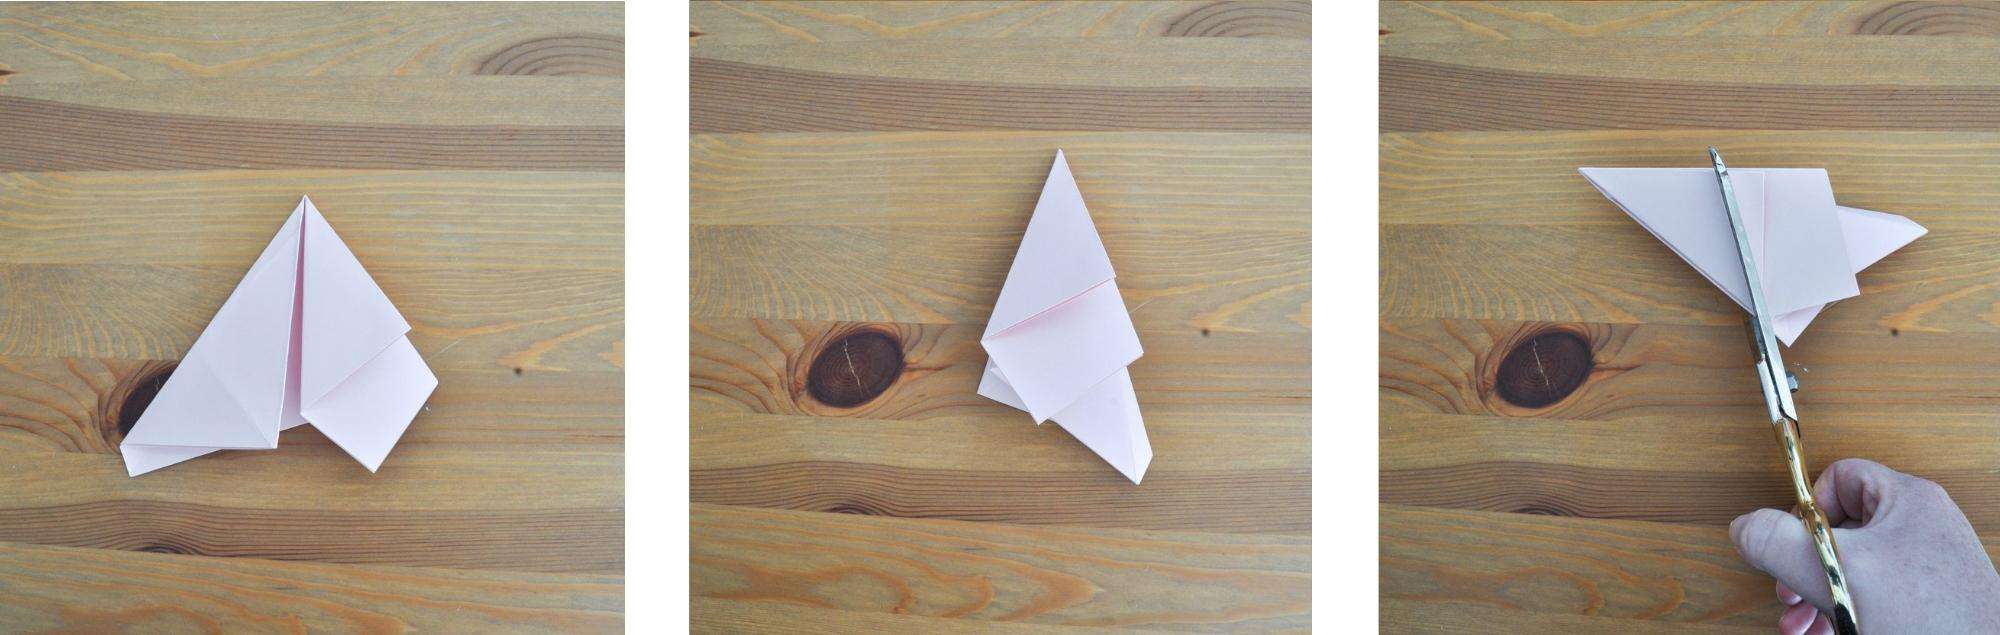
Cutting The Point
5. Finally, use a pair of scissors to cut a straight line, as shown in the image. The greater the angle of the scissors, the pointier the star will be, Experiment after making your first star, to see what angle is your favourite.
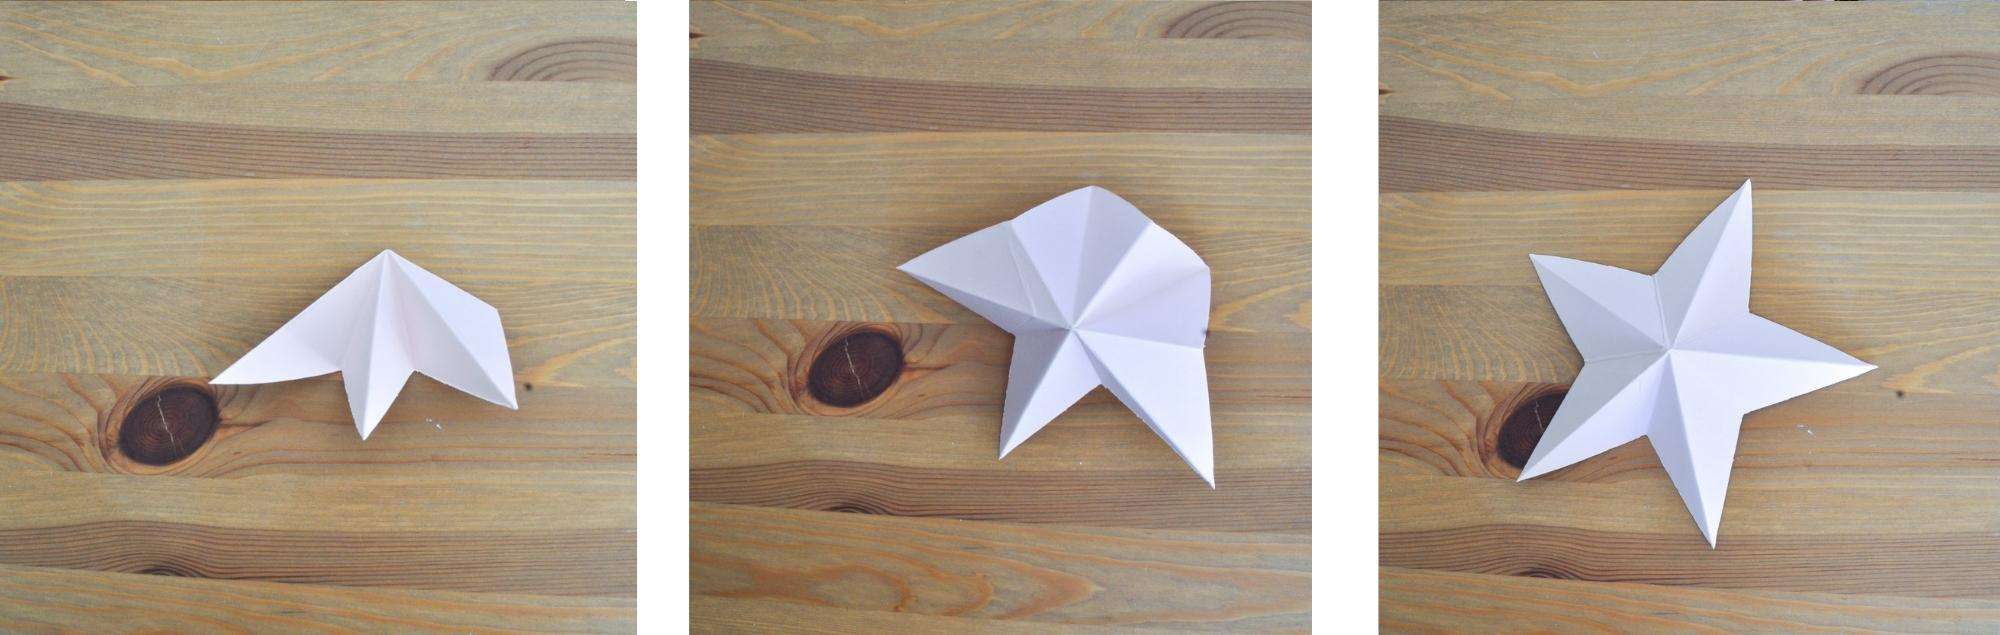
6. Unfold the star and reverse the fold lines where necessary to form the points of your star.
Decorate With Holes, Paint, and Glitter
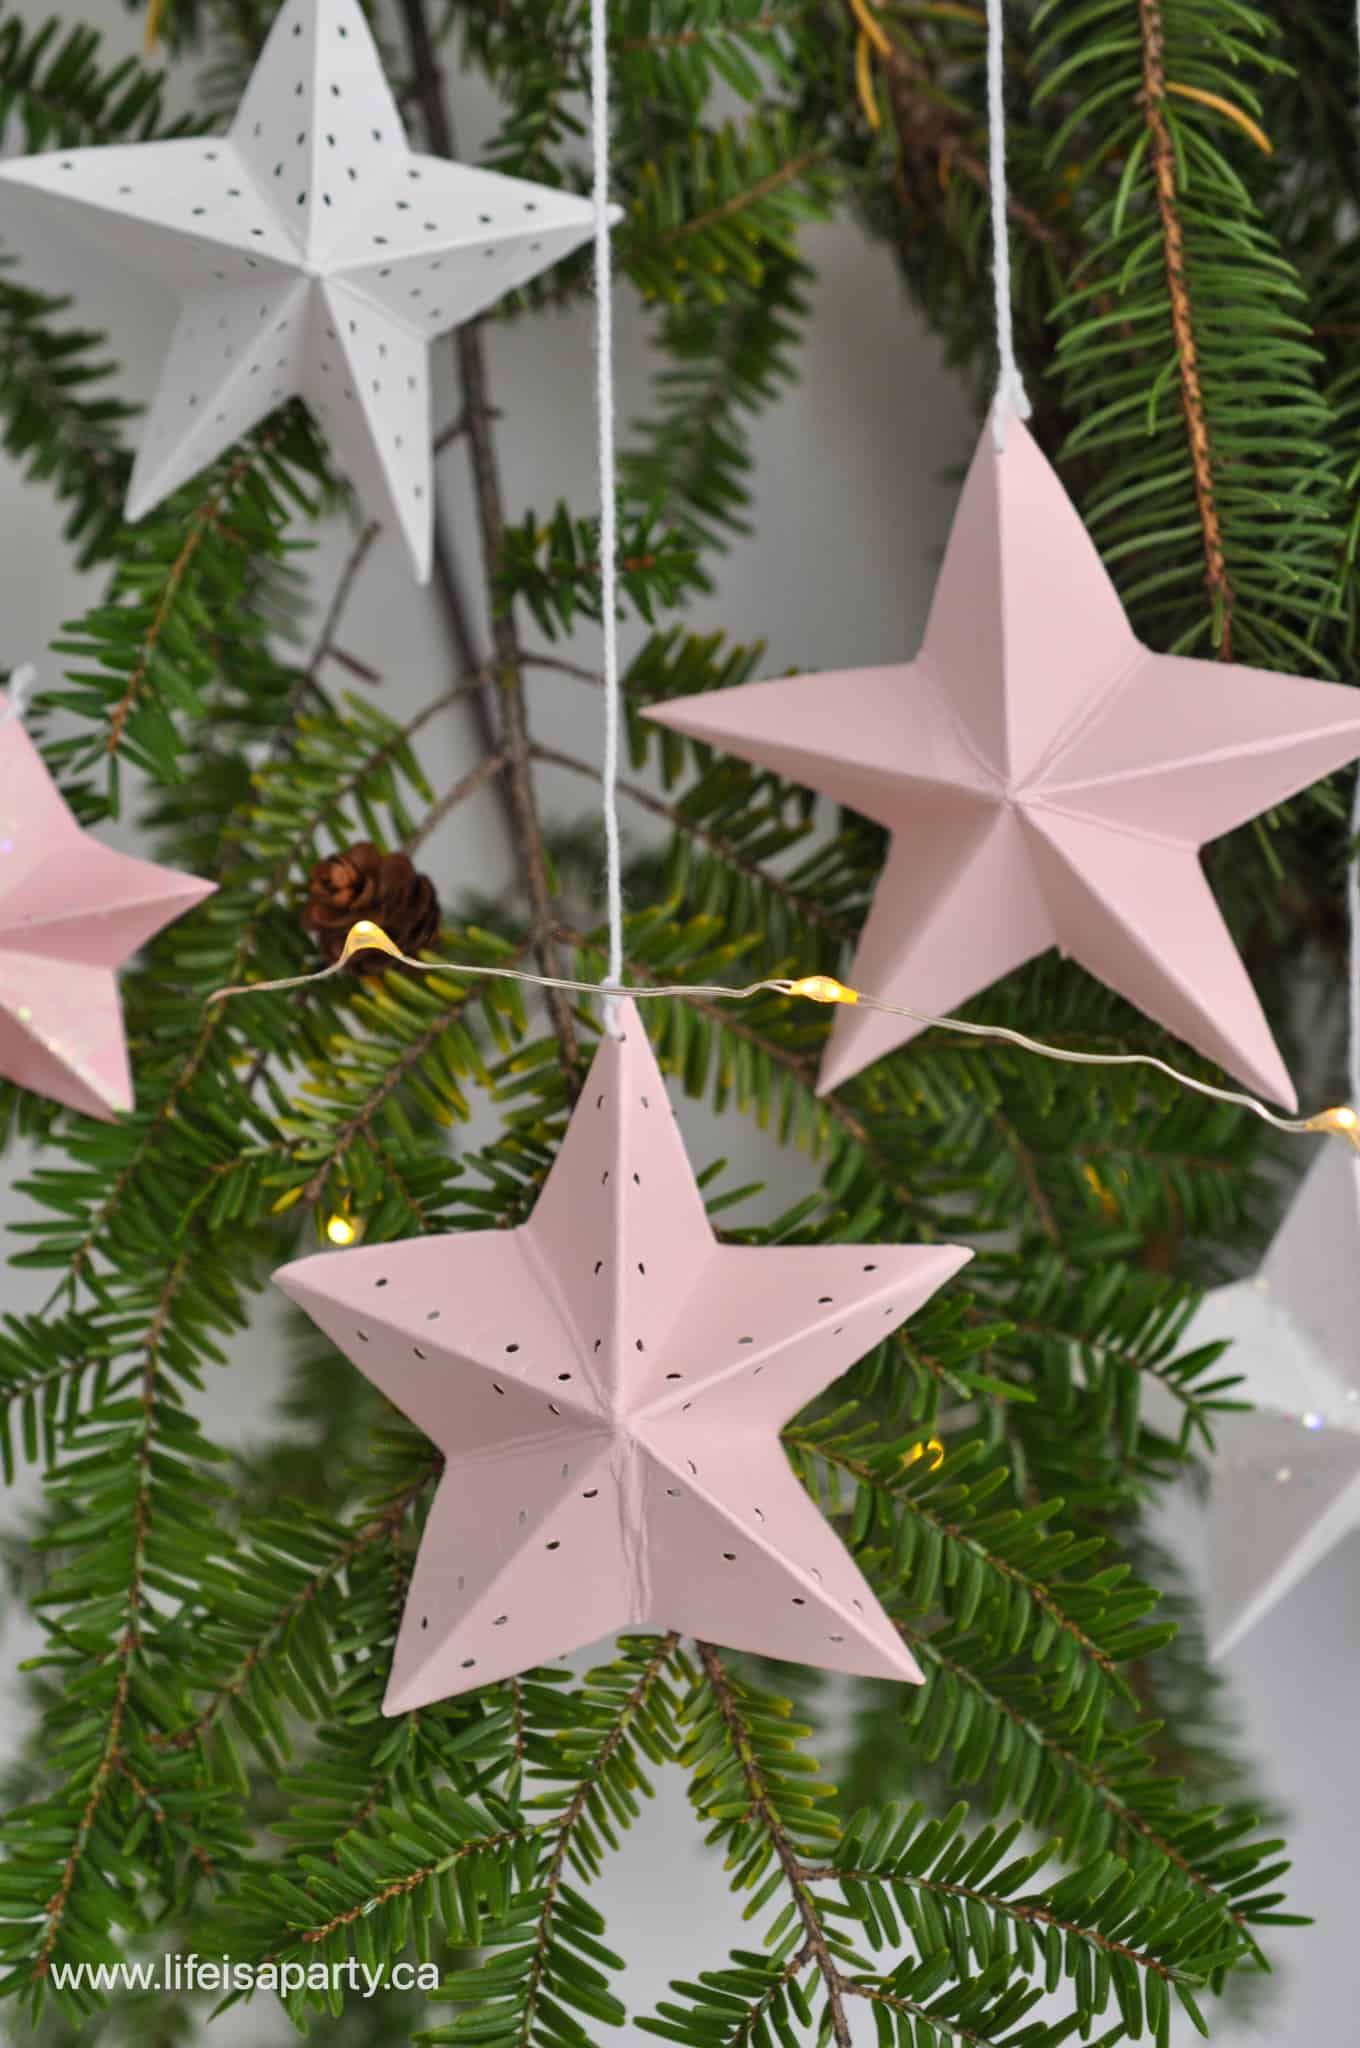
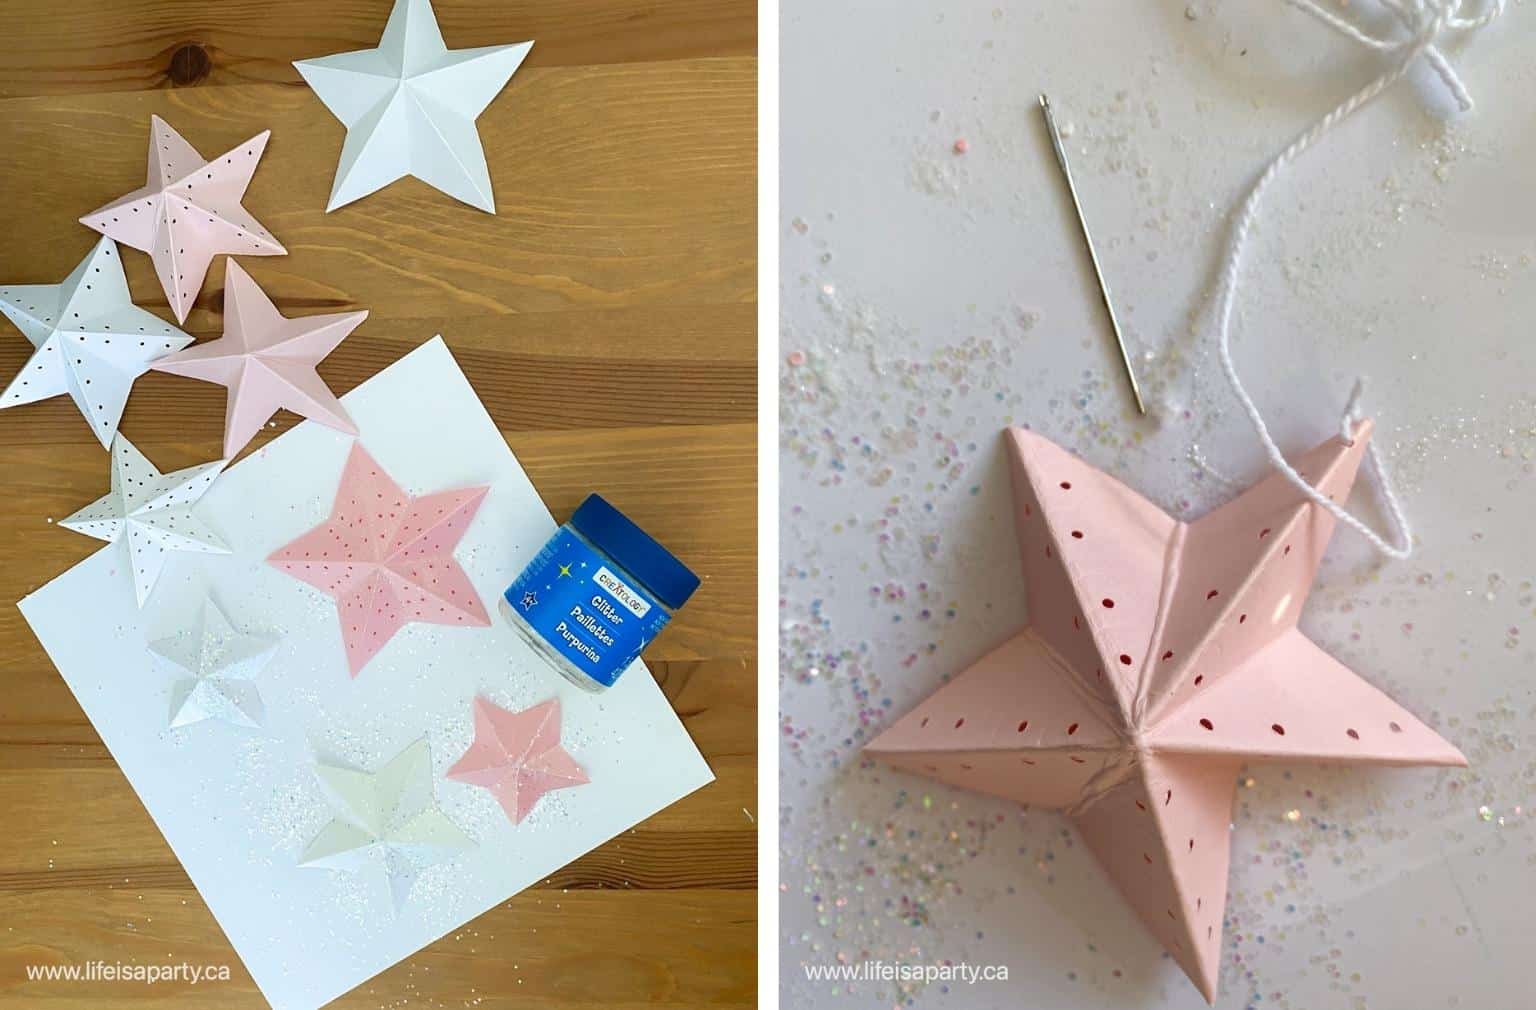
7. You can also use a hole punch to add some pattern to your star. I used a mini hole punch to create a lacy look to some of my stars by folding each point of the star, and punching through two layers at once to create a pattern. Iridescent paint added a little sparkle to some. Glitter paint would be pretty too. I added some glitter to some with some glue and glitter sprinkled on top.
Hanging Stars
8. To make the stars into hanging Christmas decorations, I added a mini hole to one point at the top of the star and used a darning needle to thread some cotton string through it. You could also choose to make double sided ornaments by making two stars the exact same size, and a hot glue gun to attach two together. To make a tree topper, use the same method but with larger stars.
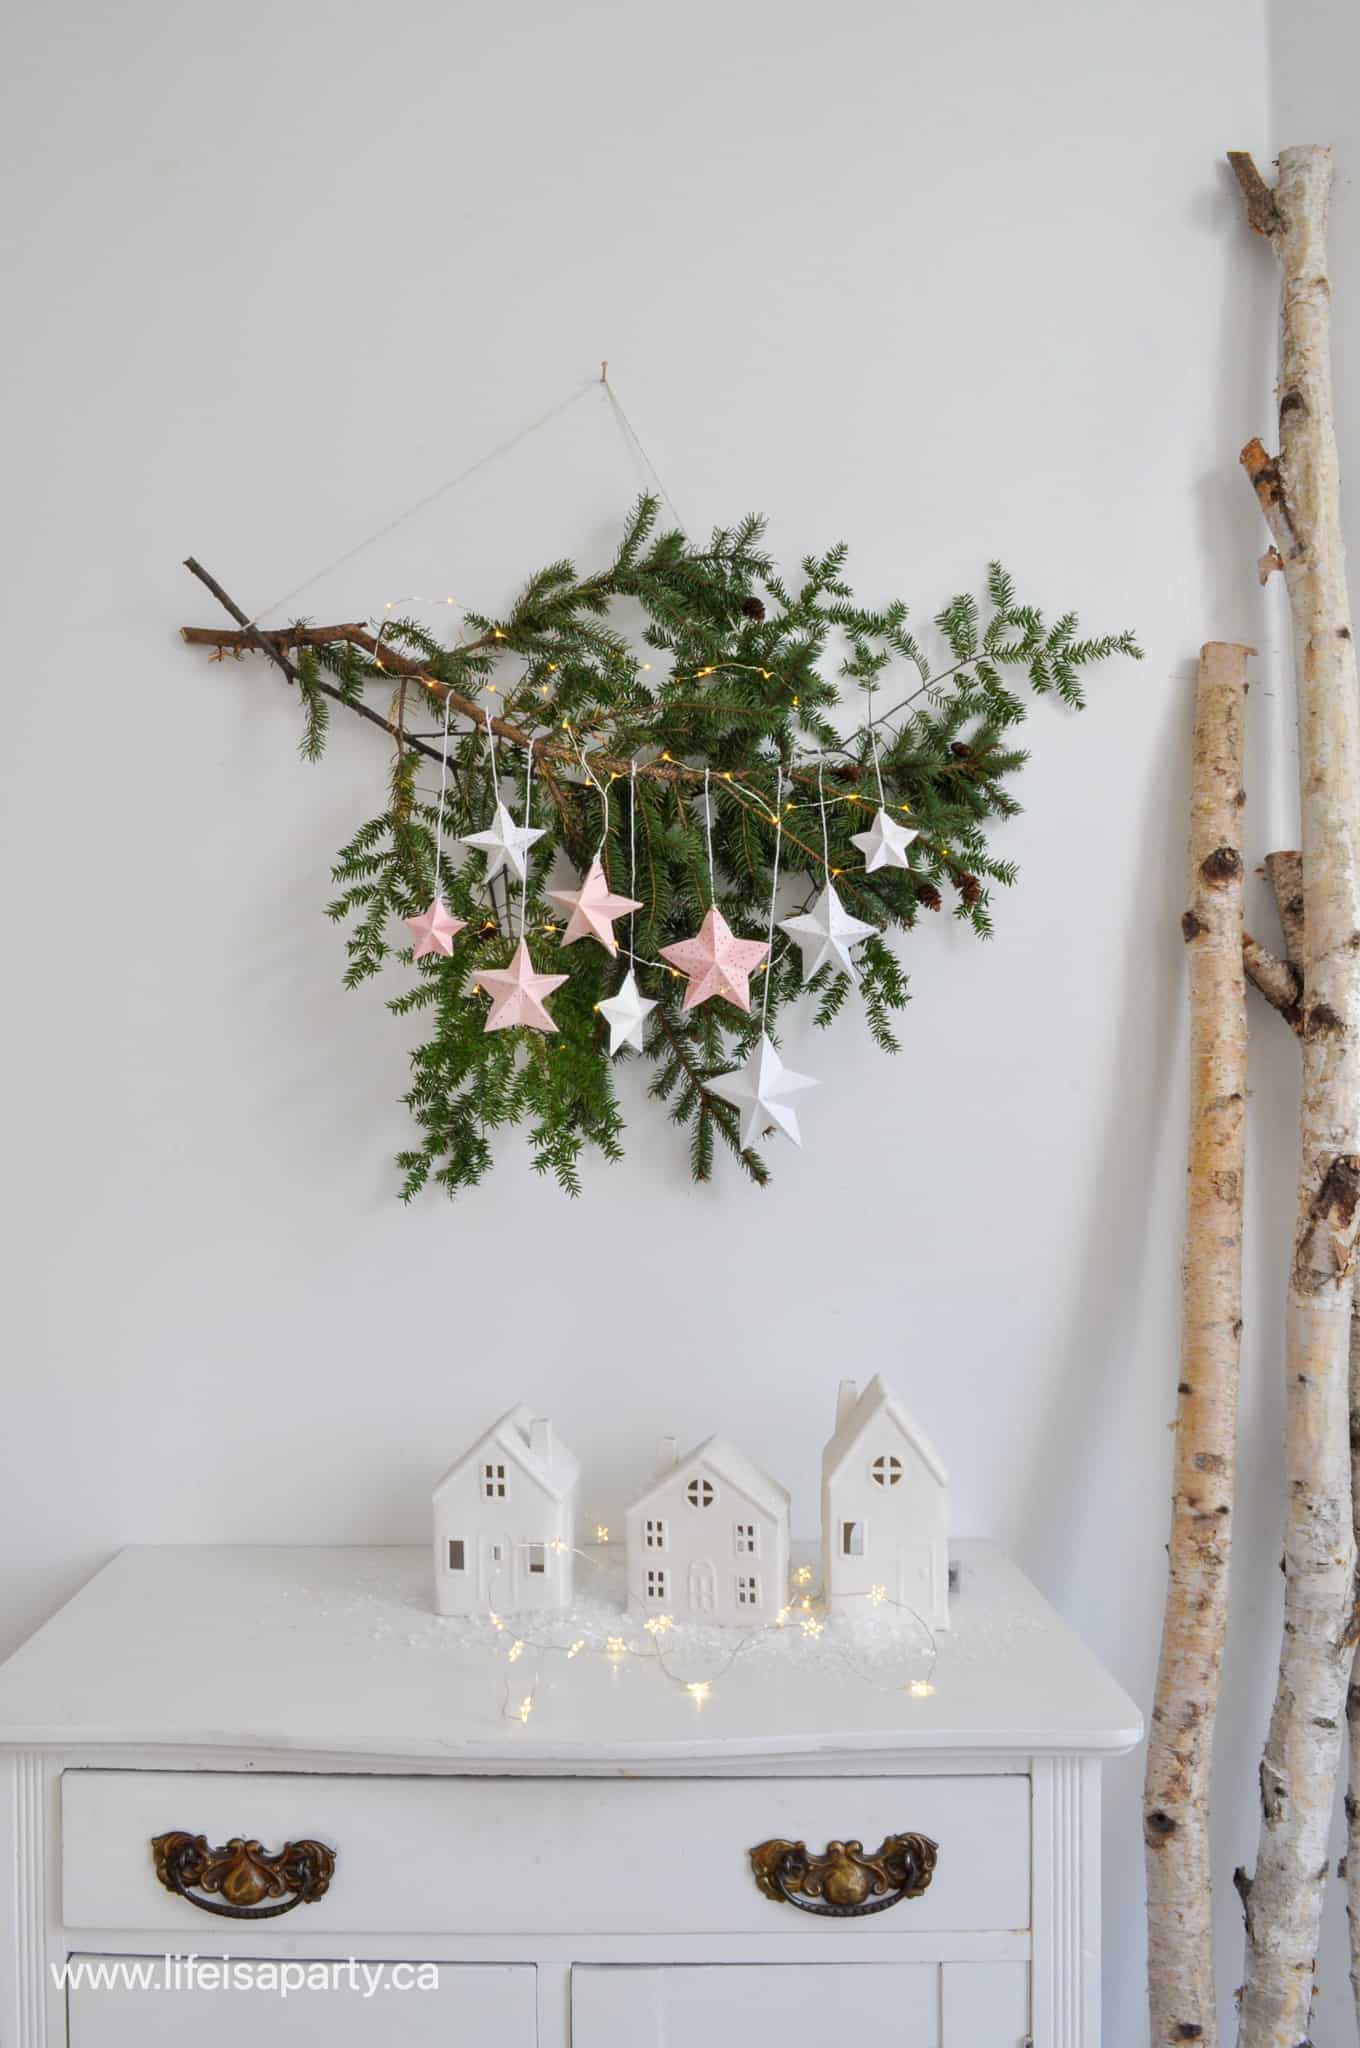
How To Display The Paper Star Decorations
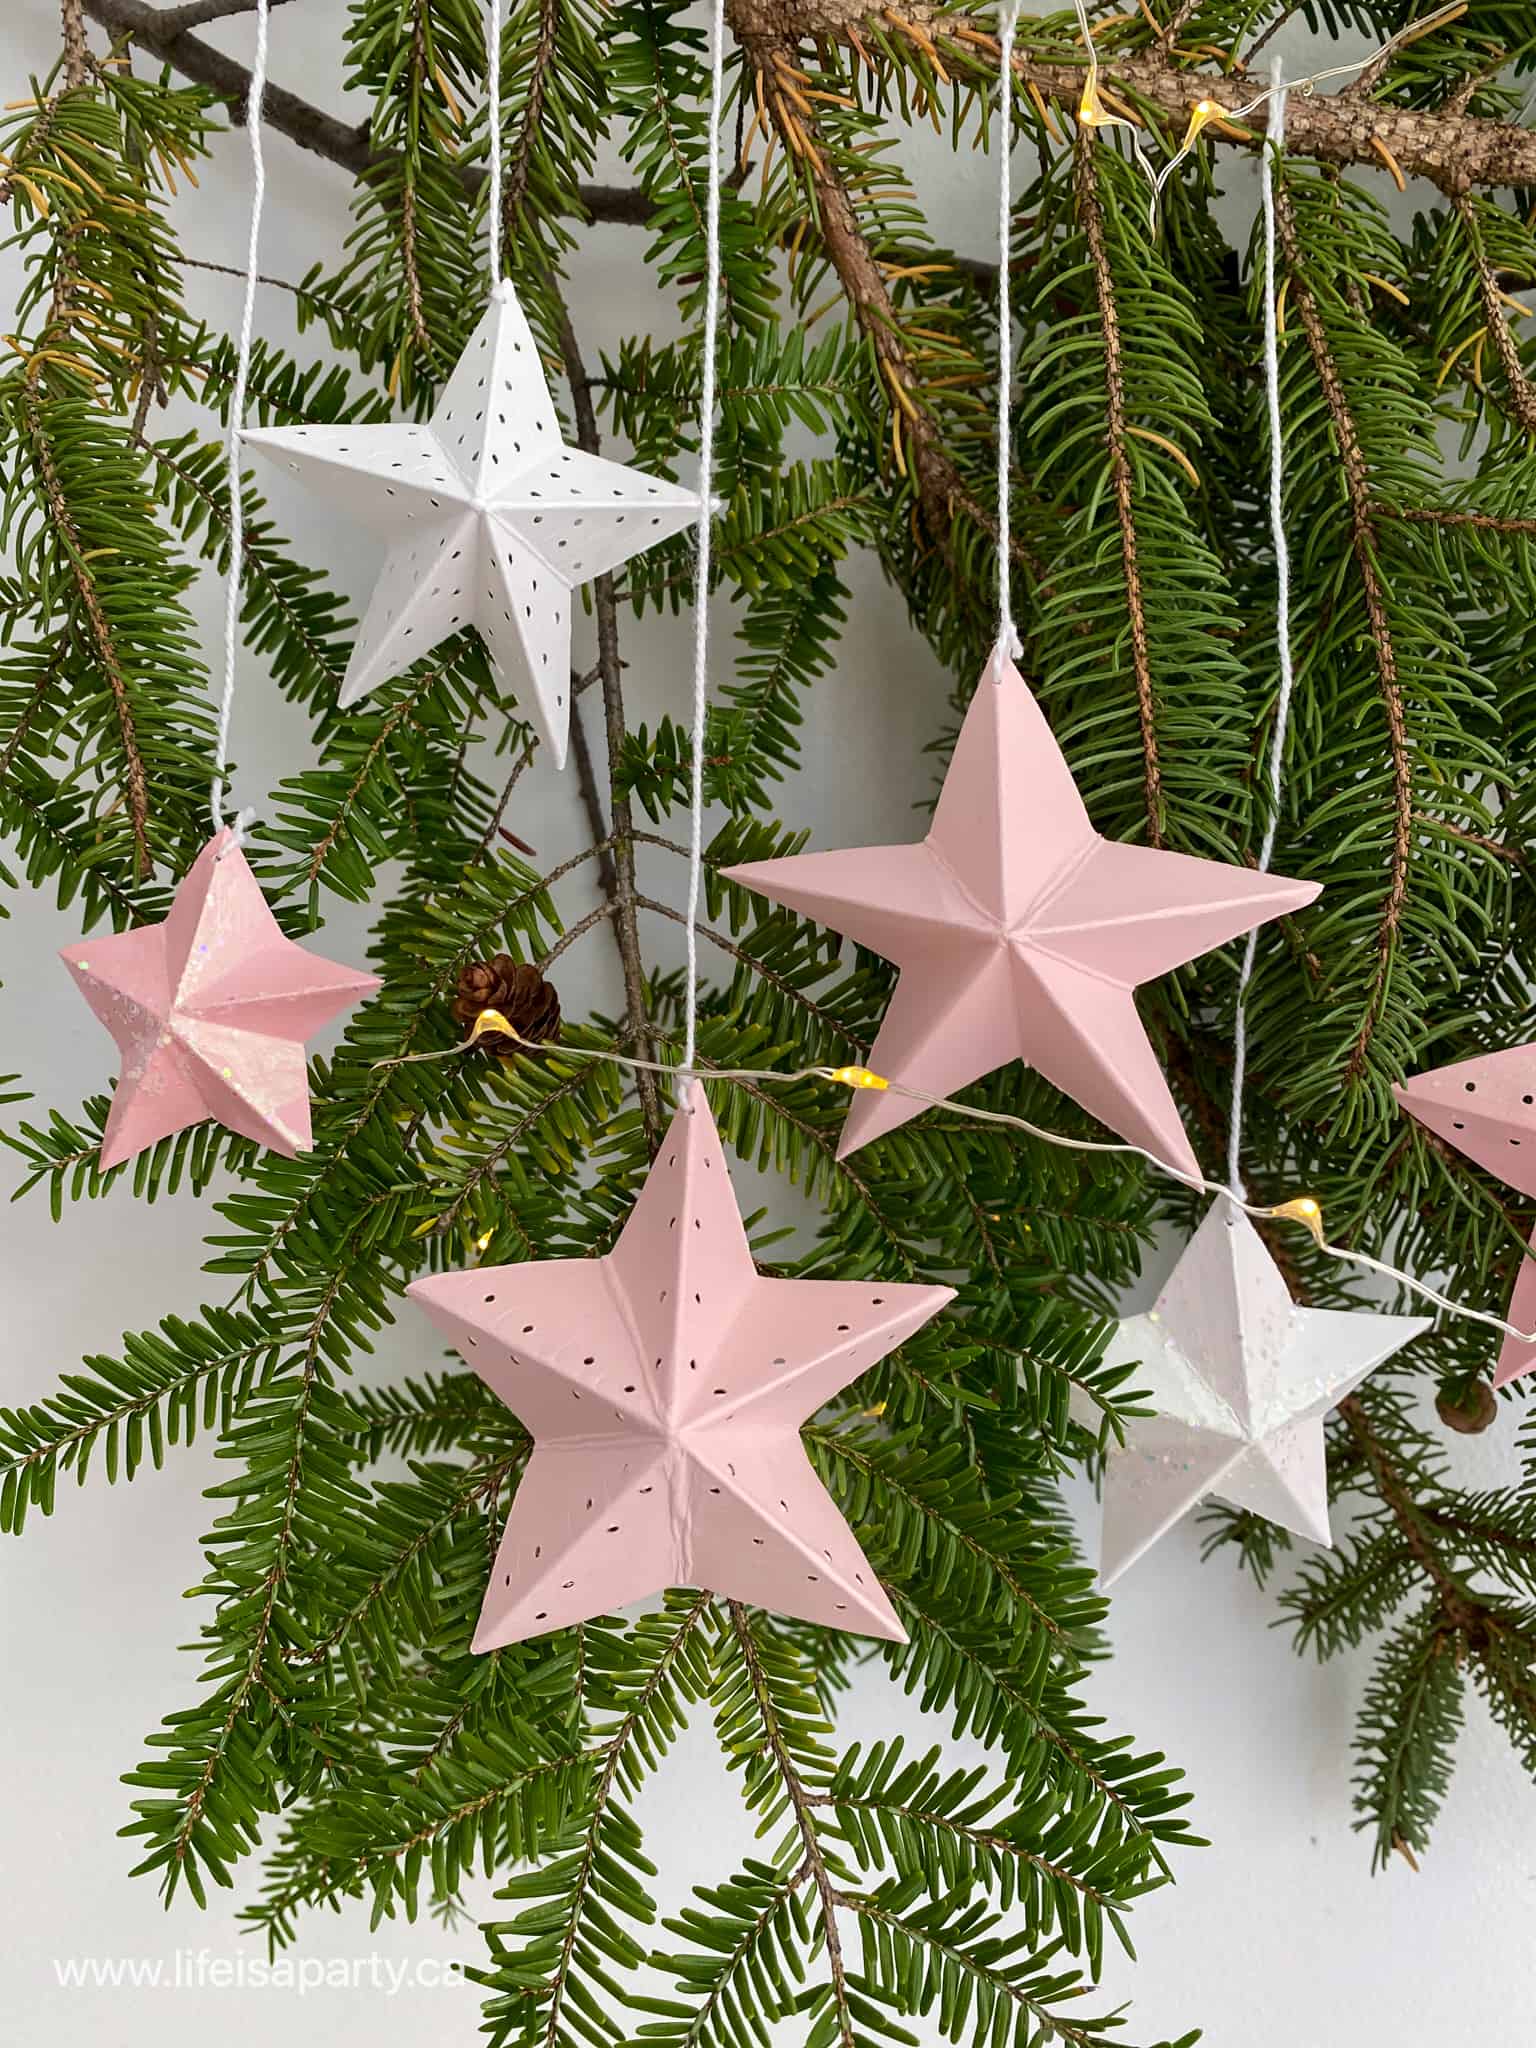
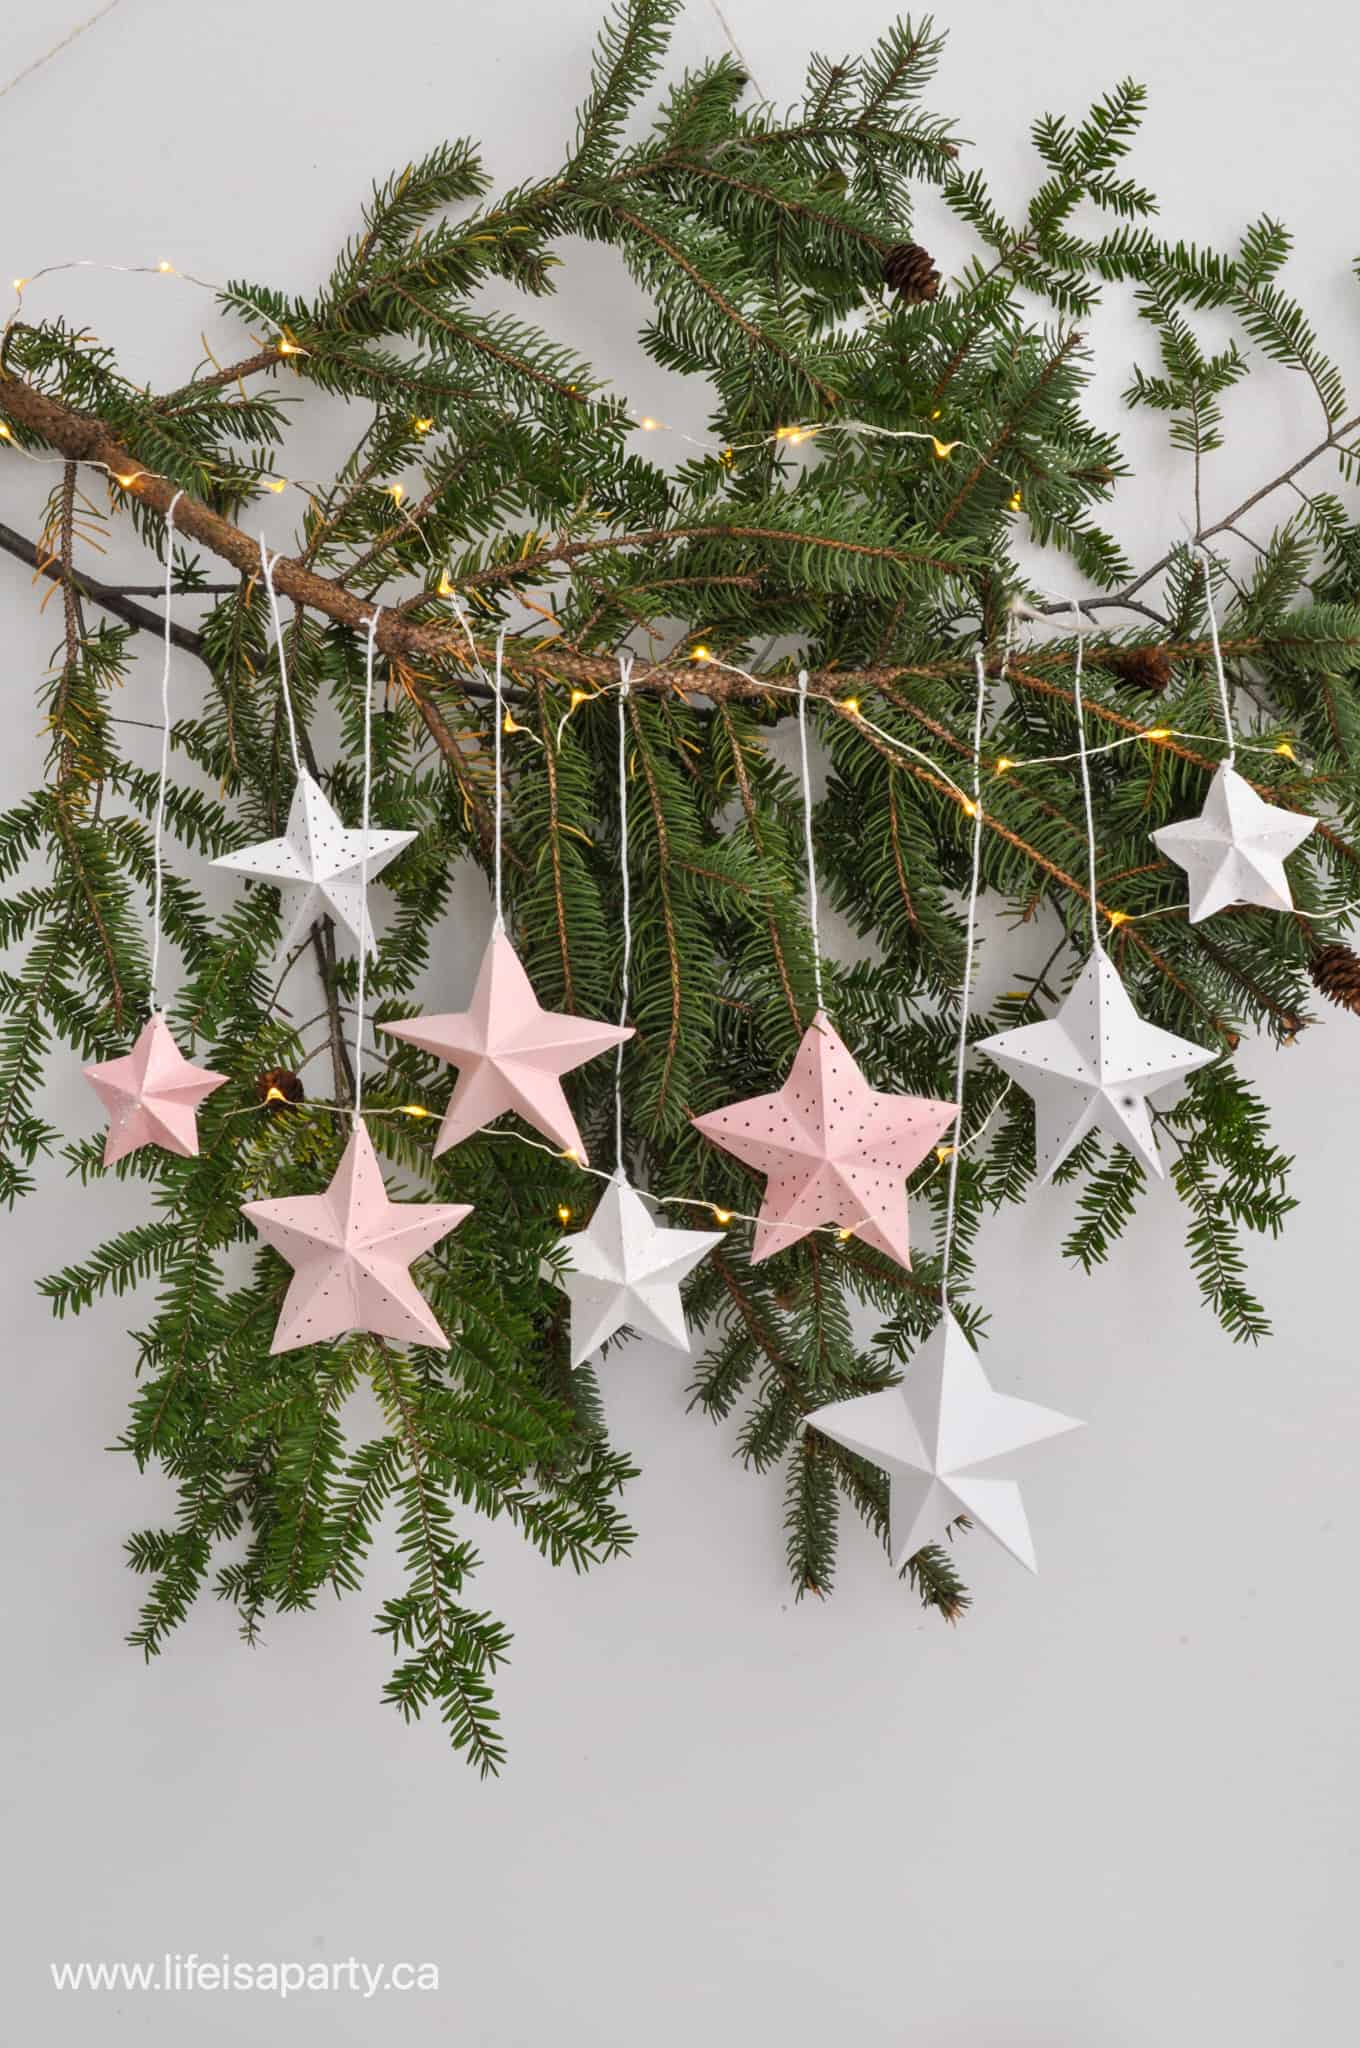
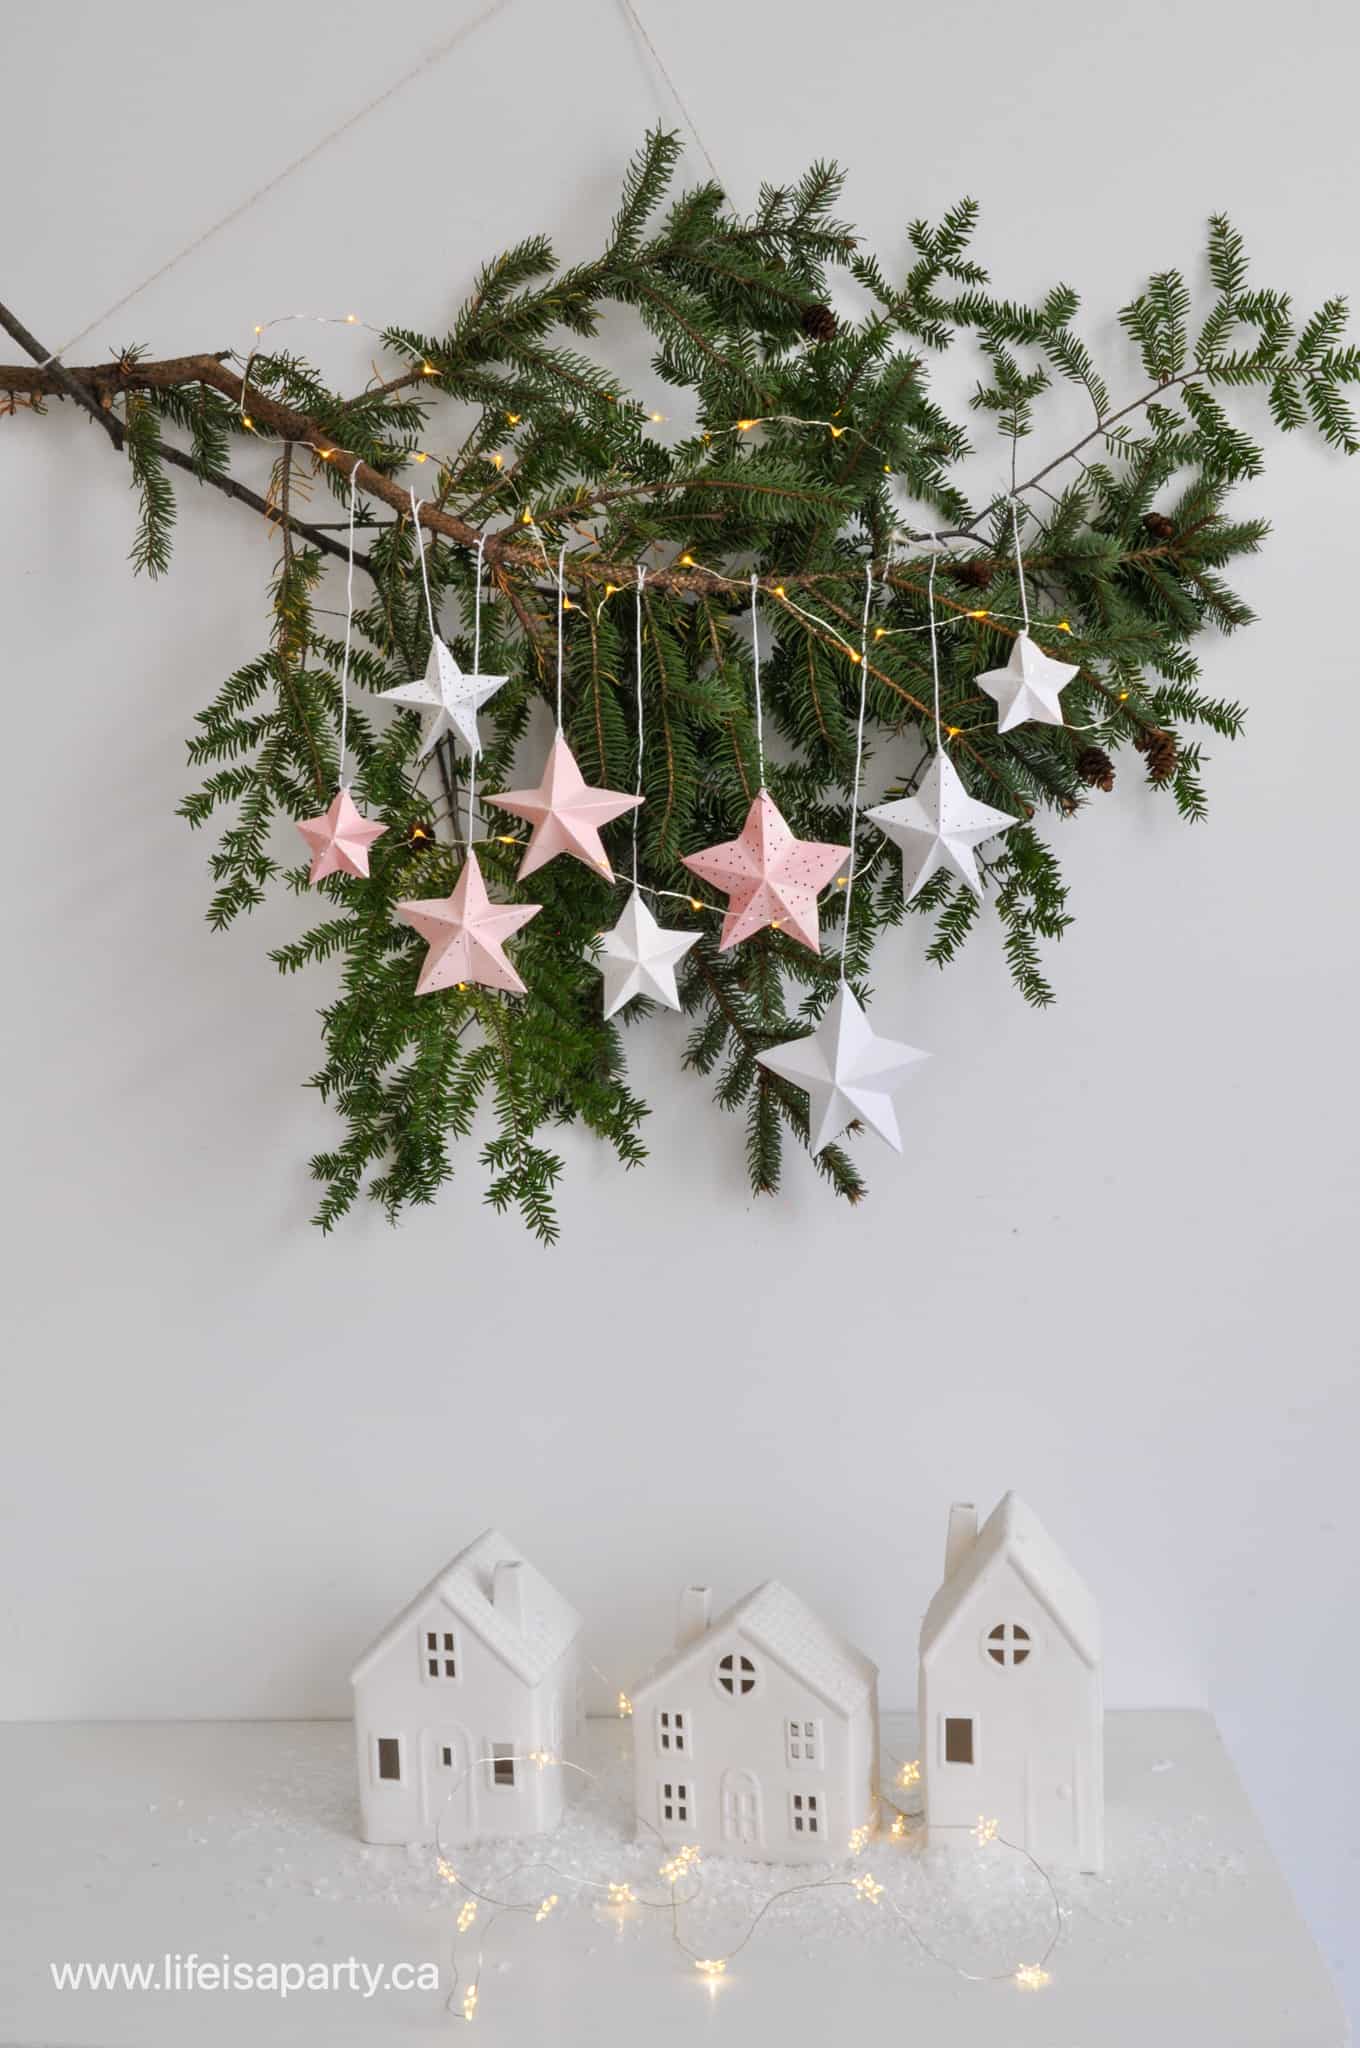
There's so many ways you could display these paper stars decorations at this wonderful time of year. The large ones would make really pretty Christmas tree toppers. They're also gorgeous hanging from a tree branch at different heights to make a wall hanging for the Christmas season, like I've done here. Small ones would look great on a Christmas tree, wreath, or tucked into a garland over your living room mantel. I made a few stars from paper bags and a Froebel star last year, and these would look amazing mixed together with them too. They'd also be cute as gift toppers. There's so many ways to use them this time of year.
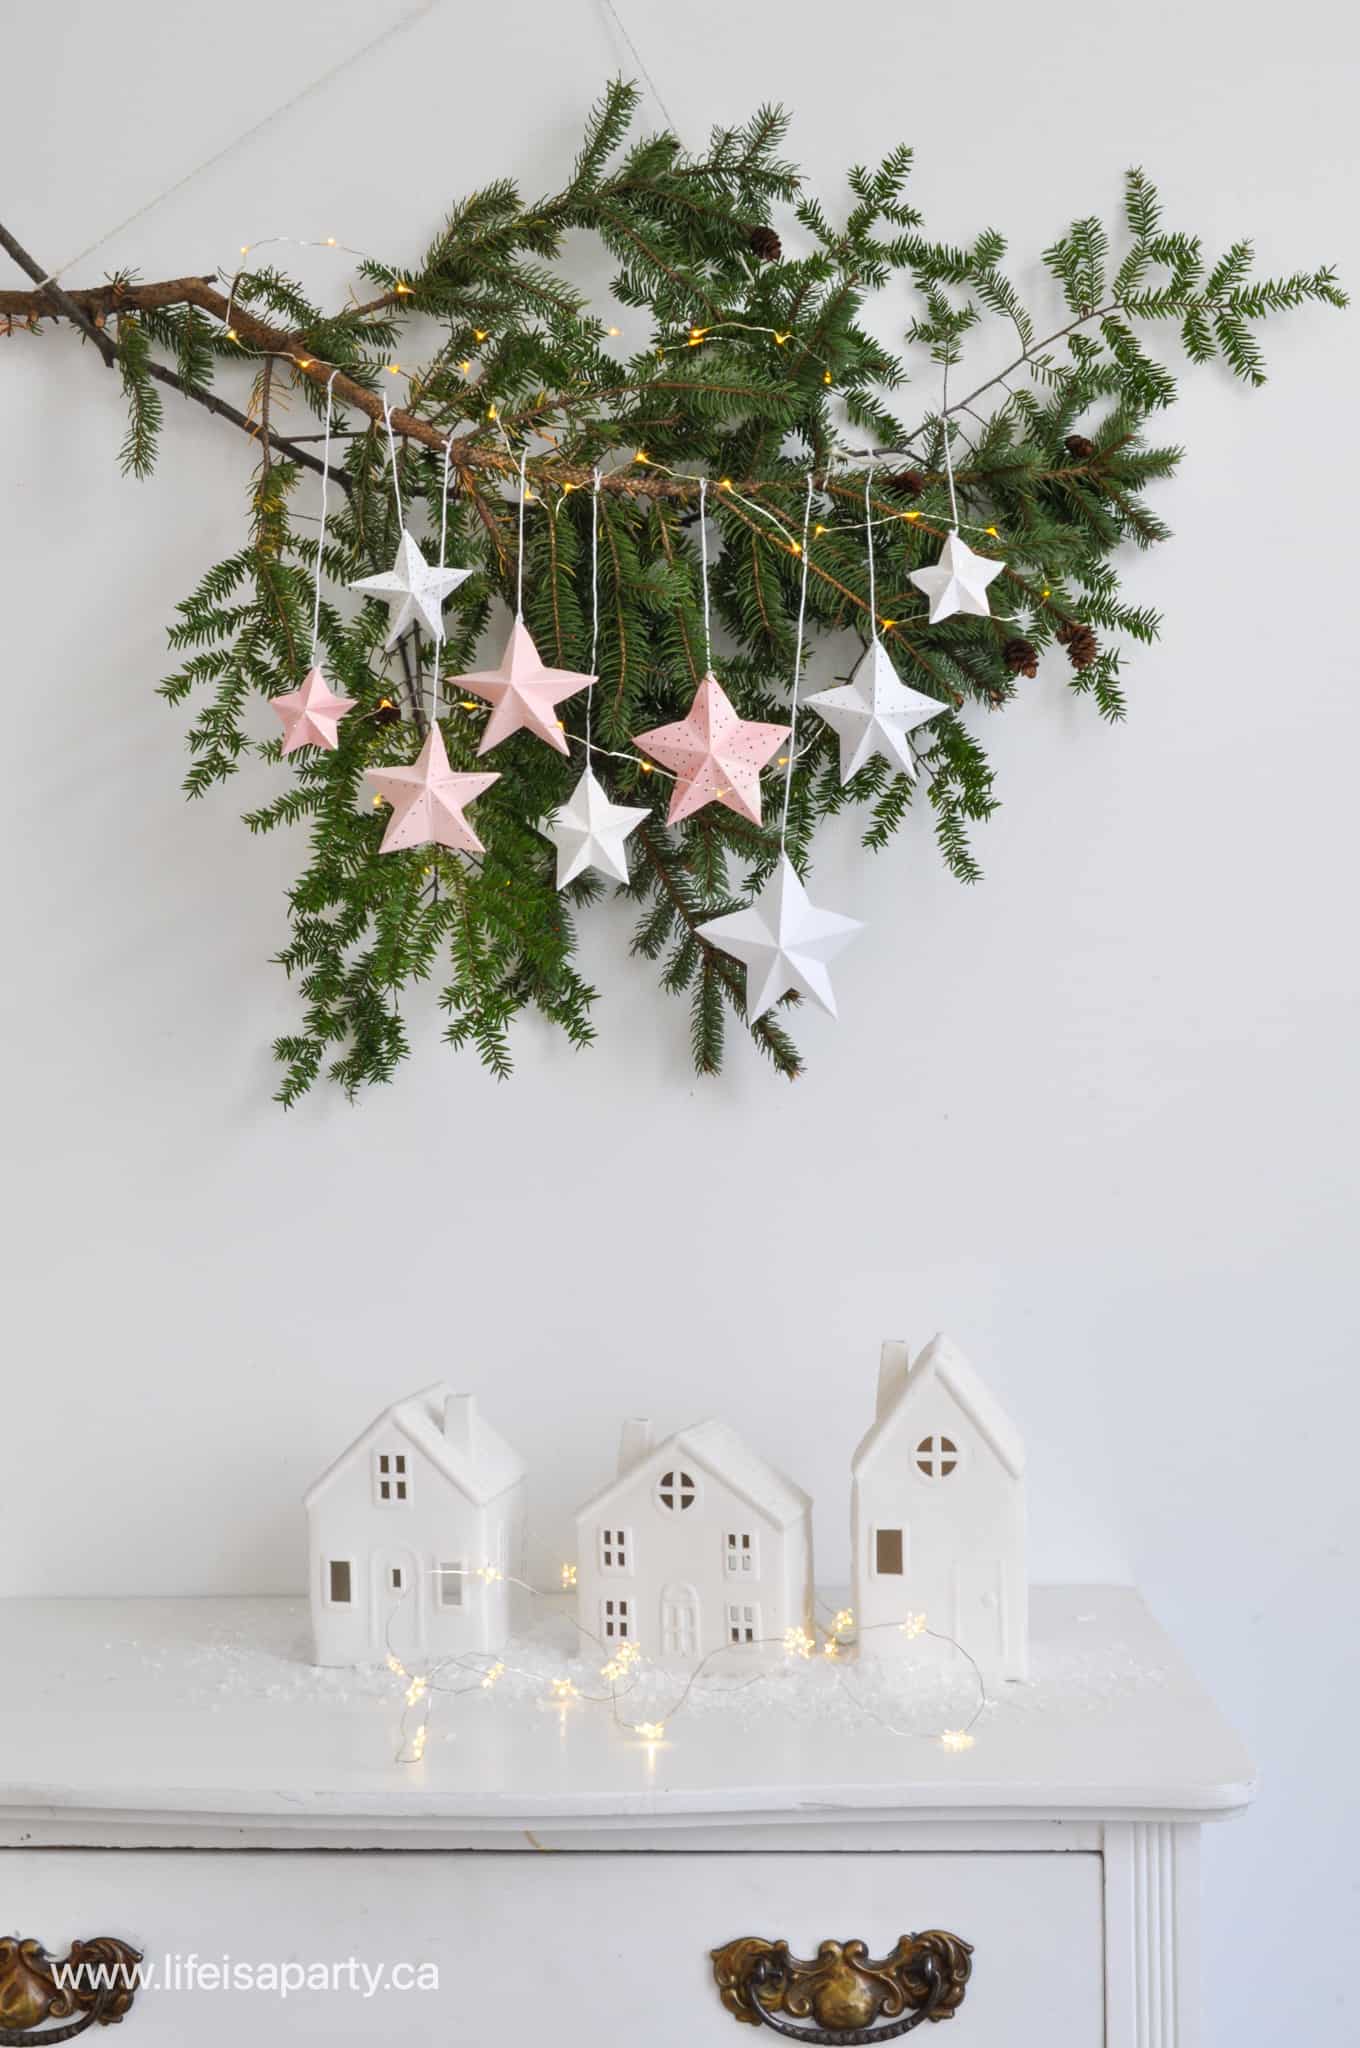
Wall Hanging
To make my wall hanging, I found a few evergreen branches, and tied them with some twine to hang them on the wall. Next, I tied string to my stars, and hung them at various heights. Lastly I added some fairy lights for a little sparkle. These look so pretty at night.
Equipment
- paint brush
- mini hole punch hole punch
- scissors
- darning needle
Materials
- paper or card stock
- glue stick or school glue
- glitter
- iridescent paint
- cotton string
Instructions
- Start out with a square piece of paper. You can use any colour you like, regular paper, or card stock or scrapbook papers with pretty patterns or glitter all work well. Heavier cardstock is harder to fold, but holds its shape the best after it's finished. Our smallest squares of craft paper were 6 cm by 6 cm, and they went up from there.
- To create our star shape, begin by folding the paper in half. Keeping the fold edge at the top, next, fold the top left corner down to the bottom edge to make a crease, then unfold , and fold the bottom left corner to top and make a crease.
- Where the two creases meet is the mark where you next fold the top right corner to.
- Now take that same right corner and fold that flap back on itself to line up with the edge.
- Next, fold the whole piece in half along the middle folds.
- Finally, use a pair of scissors to cut a straight line, as shown in the image. The deeper greater the angle of the scissors, the pointer the star will be, Experiment after making your first star, to see what angle is your favourite.
- Unfold the star and reverse the fold lines where necessary to form the points of your star.
- You can also use a hole punch to add some pattern to your star. I used a mini hole punch to create a lacy look to some of my stars. I also painted some with irredicscnet paint, and added glue and glitter to some.
- To make the stars in to hanging Christmas decorations, I added a mini hole to one point at the top of the star and used a darning needle to thread some cotton string through it. You could also choose to make double sided ornaments by making two stars the exact same size, and a hot glue gun to attach two together. To make a tree topper, use the same method but with larger stars.
These paper Christmas stars are so fun to put together, and there's so many different ways you could use them. They're also very inexpensive to make, and a great craft for kids or a group.
 With pretty paper Christmas stars like this, life really is a party!
You might like our Book Page Paper Feathers Tutorial here.
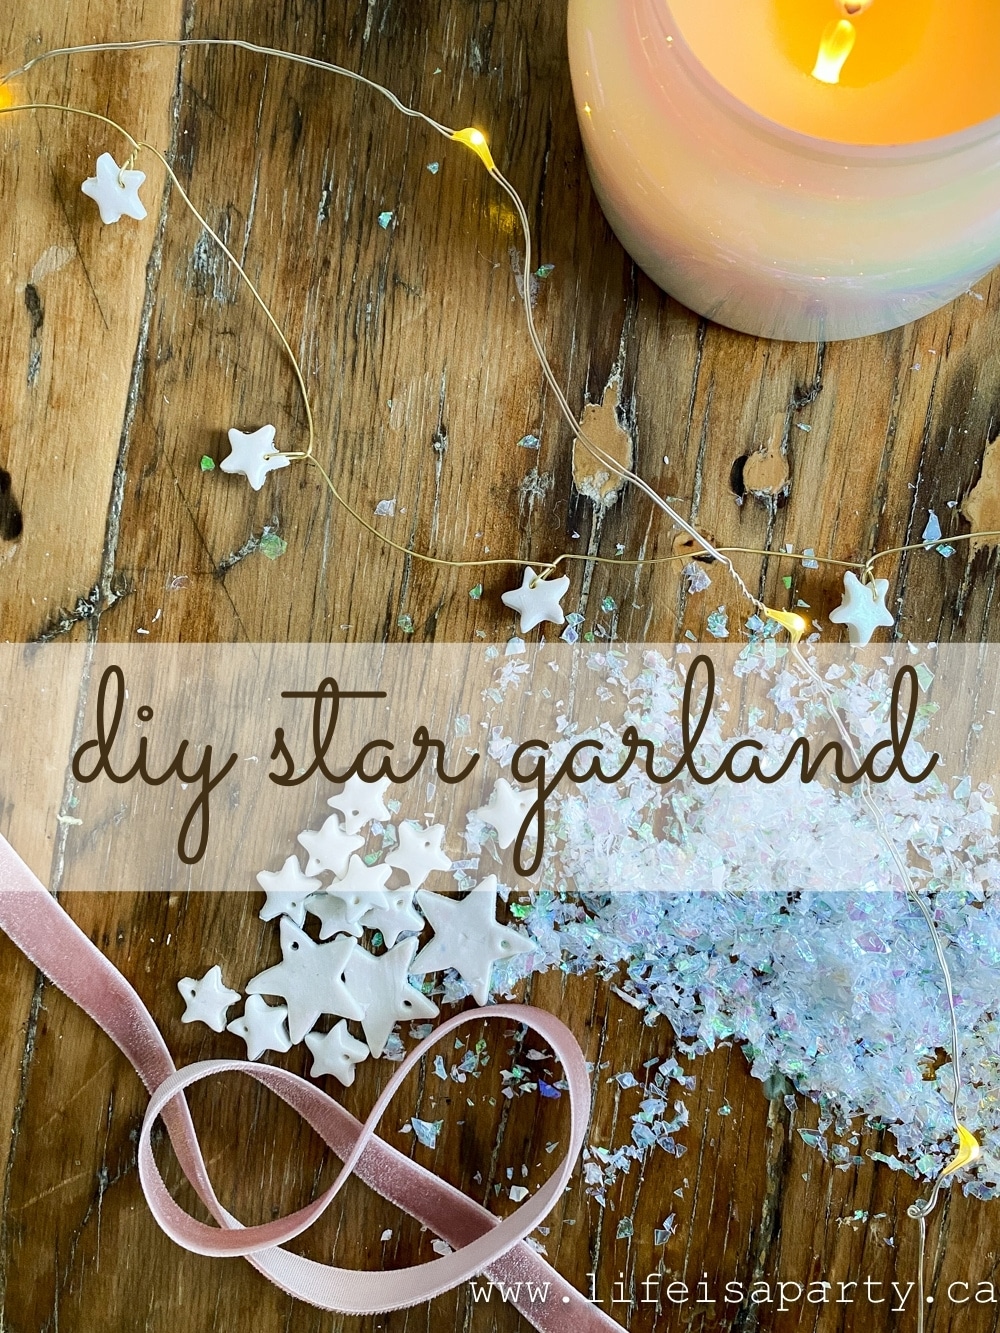
Also check out our DIY Star Garland here.
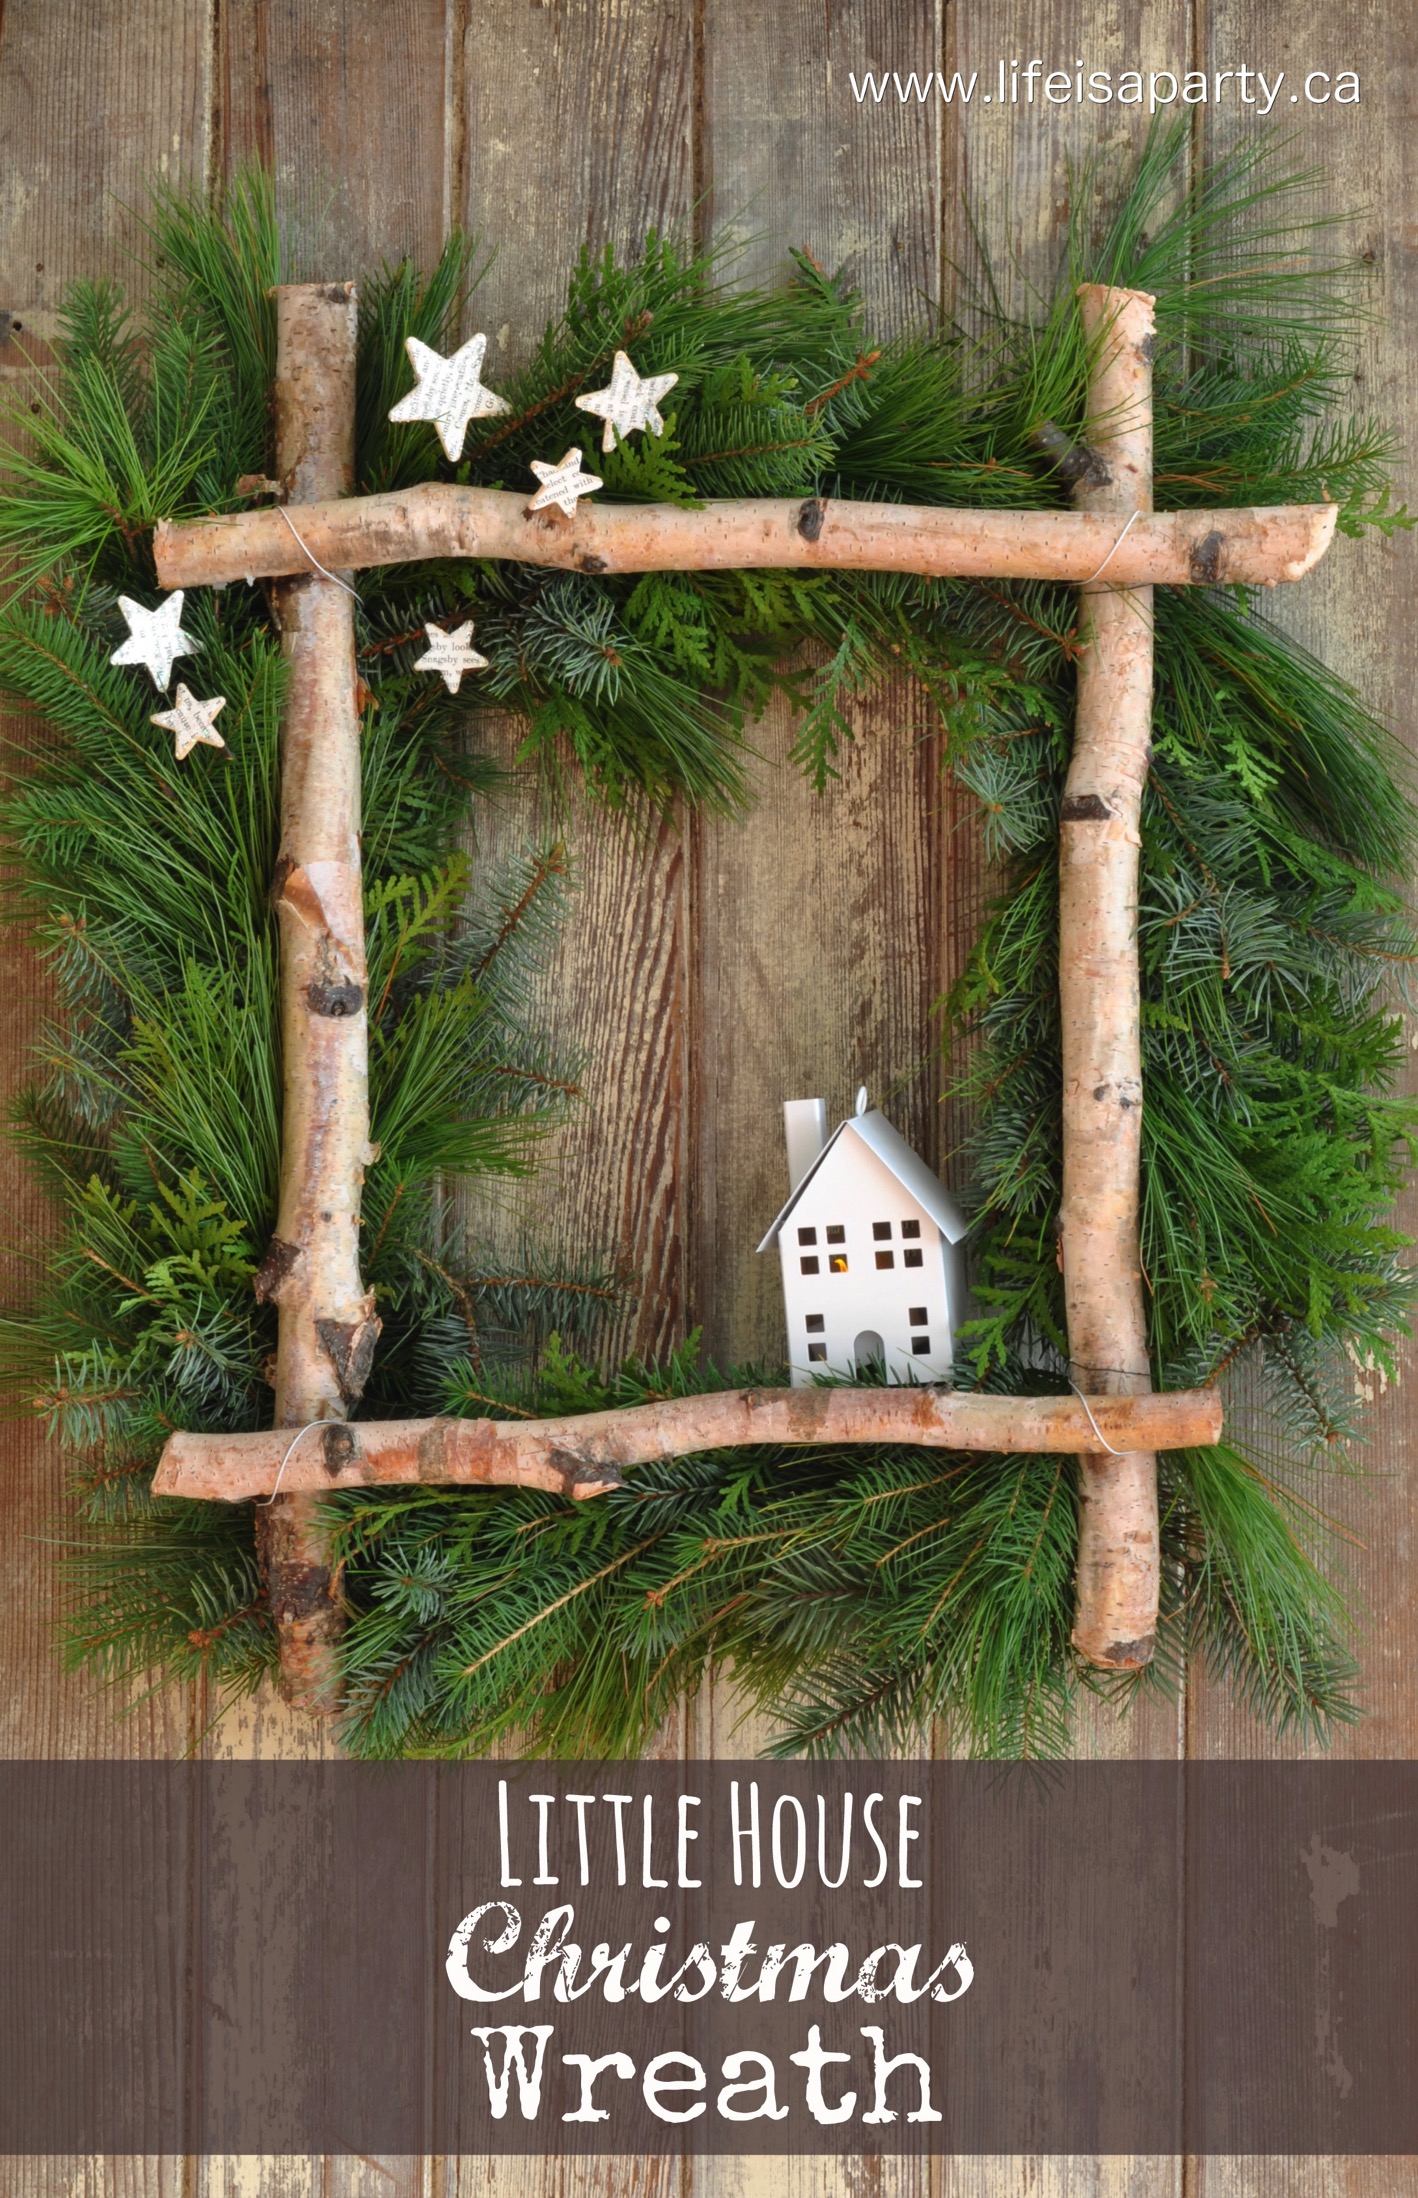
You might also like Little House Christmas Wreath here.


Jo-Anna says
These are gorgeous Dannyelle! I love love how you hung them with the fairy lights and tree branch...so pretty!
Lindi says
These are so pretty! I love the nordic style of them - I would totally make the same ones! Love them 🙂
Jenn says
So cute! I can't wait to try these!
Brendt Blanks says
Oh, friend, these are so lovely!
I am inspired to make these for our holiday home this year.
Thank you so much for sharing, and love being on these blog hops with you!
xoxo,
Brendt