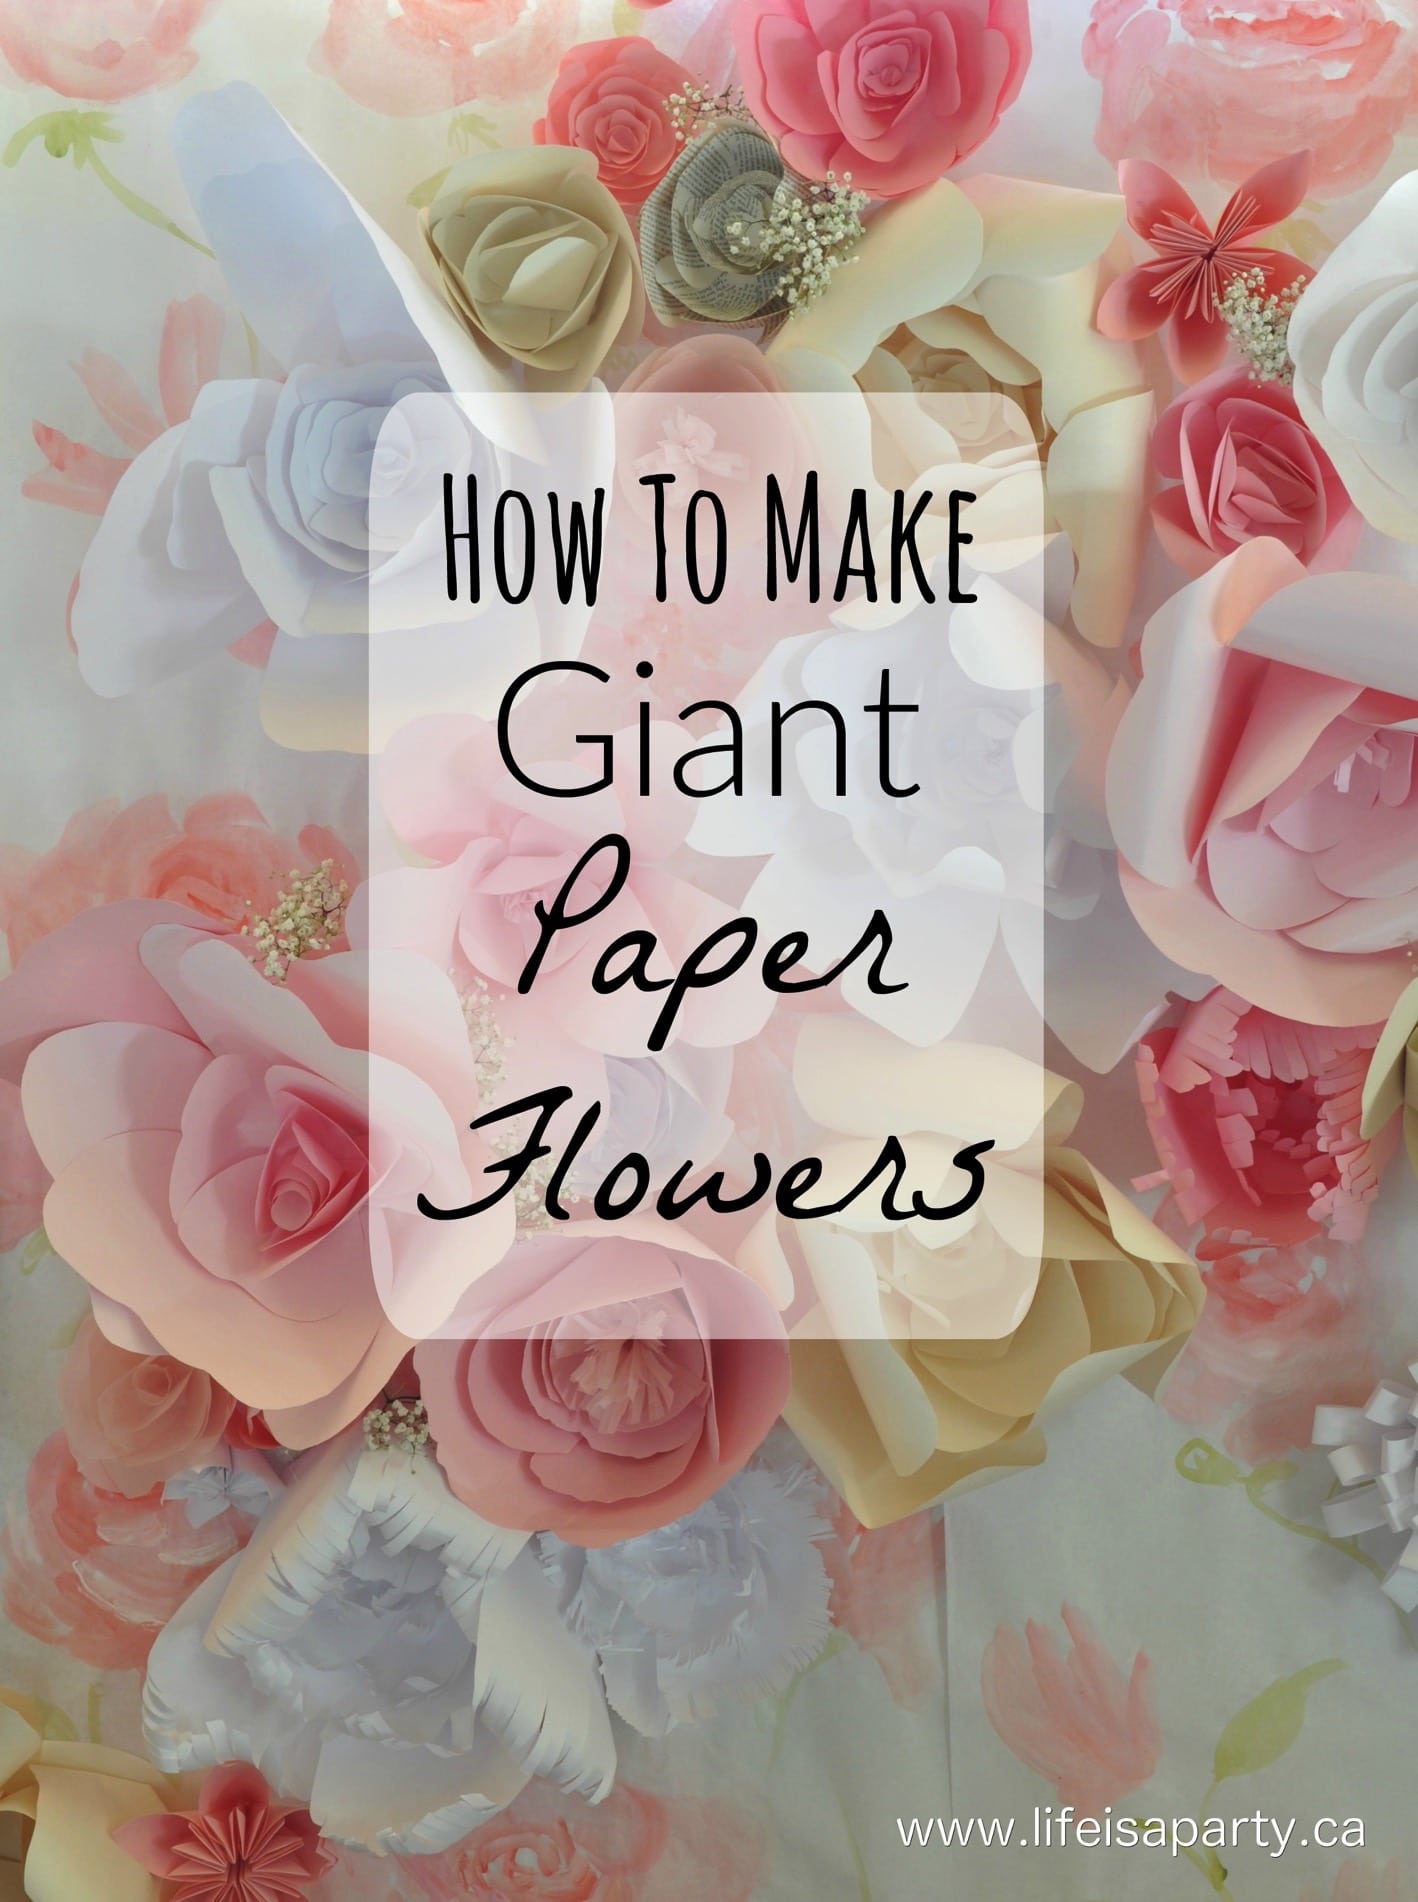
How To Make Giant Paper Flowers: see how to turn regular paper into beautiful and inexpensive flowers, from large to small in a video tutorial. This easy DIY is perfect for a wedding, shower, or home decor.
If you've ever wondered about how to make giant paper flowers for yourself, or for a special event and worried that they're too hard to make, let me reassure you they're not, and show you how to make them.
I've made these a few times, and although time consuming for sure, they aren't difficult or expensive to create. These DIY paper flowers are so perfect for creating big impact on a small budget. With nothing more than paper and some hot glue, you can transform any space into a beautiful indoor garden. We used ours to create a gorgeous backdrop for an event or as party decor. It created great atmosphere, and was a really fun photo backdrop too. You might want to create something similar for a wedding area, for bridal showers or for baby showers or for decor for any special events.
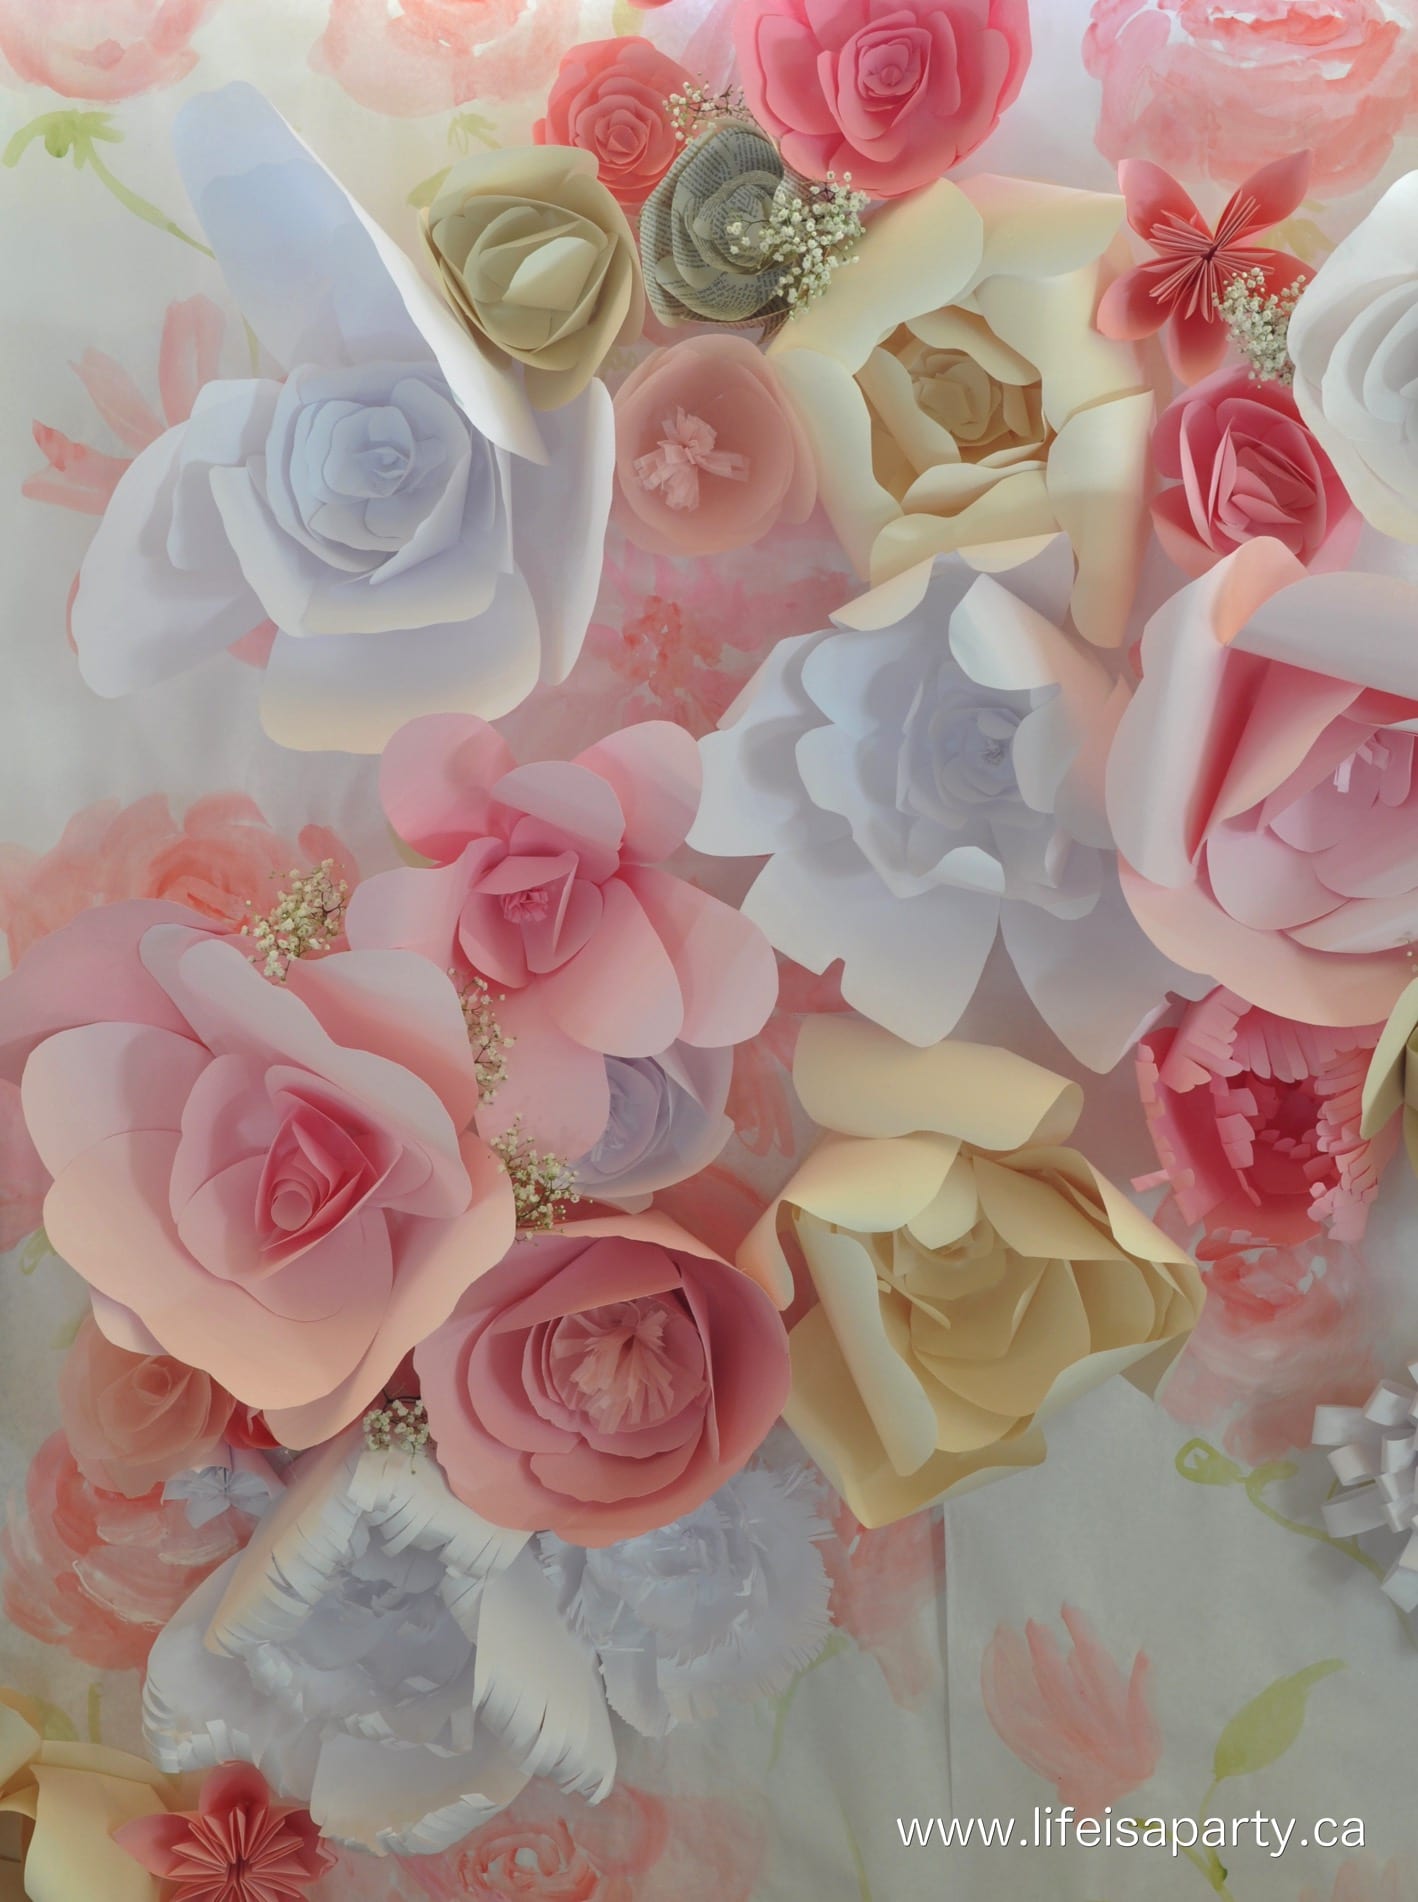
Petal Designs
Start by looking at images of real flowers and looking at the shape of an individual flower petal. Let this shape inspire you. Make all the petals on one flower the same basic shape, with only slight variation. Each group of each size of petal will be the same basic shape, just smaller or larger. Don't vary the basic shape of the petals on the same flower, only the size.
Different flowers can and should have slightly different shaped petals to add interest to your wall. Try changing up the how round or pointy the petal is, if the edge is smooth or bumpy, or more heart shaped or rippled. You can add slits along the edge of the flower petal shape to create a fringe, have large or small waves, or keep it smooth all to add variation to your different flowers.
Choosing Your Paper
We used lots of different papers and card stock for our flowers. I suggest using one type of paper per flower. Regular white copy paper works well and is inexpensive. You can also use paint to add colour to the basic white paper for interest. Try using water colours, or acrylic craft paint, either before or after the flower is constructed.
You can also use different colours of copy paper. Try also using rolls of paper, or brown kraft paper as inexpensive options. You can also upcycle book pages for a fun look too.
Coloured scrapbook paper or cardstock works well too and can add a pop of color. It's available in more colours and the weight of the paper makes the flowers a little more stiff. If you're making a large flower wall the variation in textures adds interest. It can be quite expensive to use scrapbook paper or cardstock, so it's a good idea to use these ones a little more sparingly if you're doing a large wall project, or buy it in bulk in large packs to save money.
Paper Flower Making Video
This process is easy to explain when you can see each step, so be sure to watch our step-by-step tutorial video below:

Equipment
- scissors
- hot glue gun
Materials
- paper
- hot glue
Instructions
- Cut Your Petals
The first step is making your largest petals. Our large petals size was determined by the size of our 8 ½ x 11 paper size. We made the largest outer petals we could using the whole sheet of paper. Cut out 5-6 petals of that largest size. You can make one petal template of each size and cut the rest to match it.
Next make a slightly smaller petal size, and again make 5-6 matching flower petals of that size.
You're going to do this whole process for about 5 different sizes of petals, with some large petal sizes, medium petals, and smaller petals, making each one slightly smaller, and making 5-6 petals of each size, that will all be used to make one of the giant flowers. In the end you will have about 5 x 6 = 30 cut petals in total for one flower.
Each petal should have a small slit cut in the centre of the bottom of the petals, this will allow us to add dimension to the petals when we glue them.
Also cut out one large circle in the same paper, to use as the circle base of the flower to glue to. - Glue Each Petal To Create Dimension
Now give each individual paper flower petal some dimension. Add a little hot glue to right beside the slit in the bottom edge of the petal, and then glue the other side, overlapped on top of it. Do this for each petal. - Gluing Your Flower Together
Start creating the flower by hot gluing the largest set of petals to the outside of the circle base. Add a line of hot glue to the base of the petal and then add them to the circle base. Space them as evenly as possible all around the circle. Then glue the set of the next size down of petals to the base in a circle just inside the largest petal set. Do this all the way down to the second smallest petals. Depending on the center of your flower that you want to create, you may want to save the small petals for that. - Creating The Center of the Flower
The simplest option for the flower center is to create some petals that look like they're just opening up. To do this take your smallest petals and cut the slit in the bottom of the petal a little deeper than the rest. This allows you to fold the paper really tightly together. When you put a few of these glued in an overlapping pattern in the center of your flower it will look like a beautiful rose center.
You can also make something that looks more like a stamen in the centre. Use a rectangle of paper and cut long slits almost to the bottom all the way along, and then roll up the paper. You can use a pencil to curl the fringe and then glue this piece into the center of your paper flower. Try changing the width of the fringe for a different look, or the length of the fringe pieces, or the direction it's curled in. - As a final touch to the giant flowers, you may want to curl some of the edges of the petals, either inward or outward. You can use a pencil, or the handle of a wooden spoon to help with this step. Take care not to crease the paper as you work.
Creating A Paper Flower Wall
You will need a lot of paper flowers for your paper flower wall. You can estimate if you have enough by laying the out together on a flat surface or table. Be sure when you are making them to make them in various sizes. Make some very large ones, and some smaller ones to add interest to the final display. You will also want to vary the style and make different shapes of them, use different kinds of paper and cardstock, and use different colours. Do choose colours and paper that go together and will create a cohesive look all together when you're finished.
If you're using your large paper flowers as a backdrop for an event like we did, then the final step is to set them up. We transported our flowers carefully in large clear garbage bags. We adhered our flowers to large sheets of paper and hung those on to the wall. You can also try using poster board, or even a thin sheet of plywood that can be leaned against a wall. The advantage of using something other than a wall is that you can use hot glue to hang them and not worry about any damage.
If you're sticking your flowers directly to the wall as wall decor you can use a combination of masking tape and command strips which should leave no damage behind when you remove them.
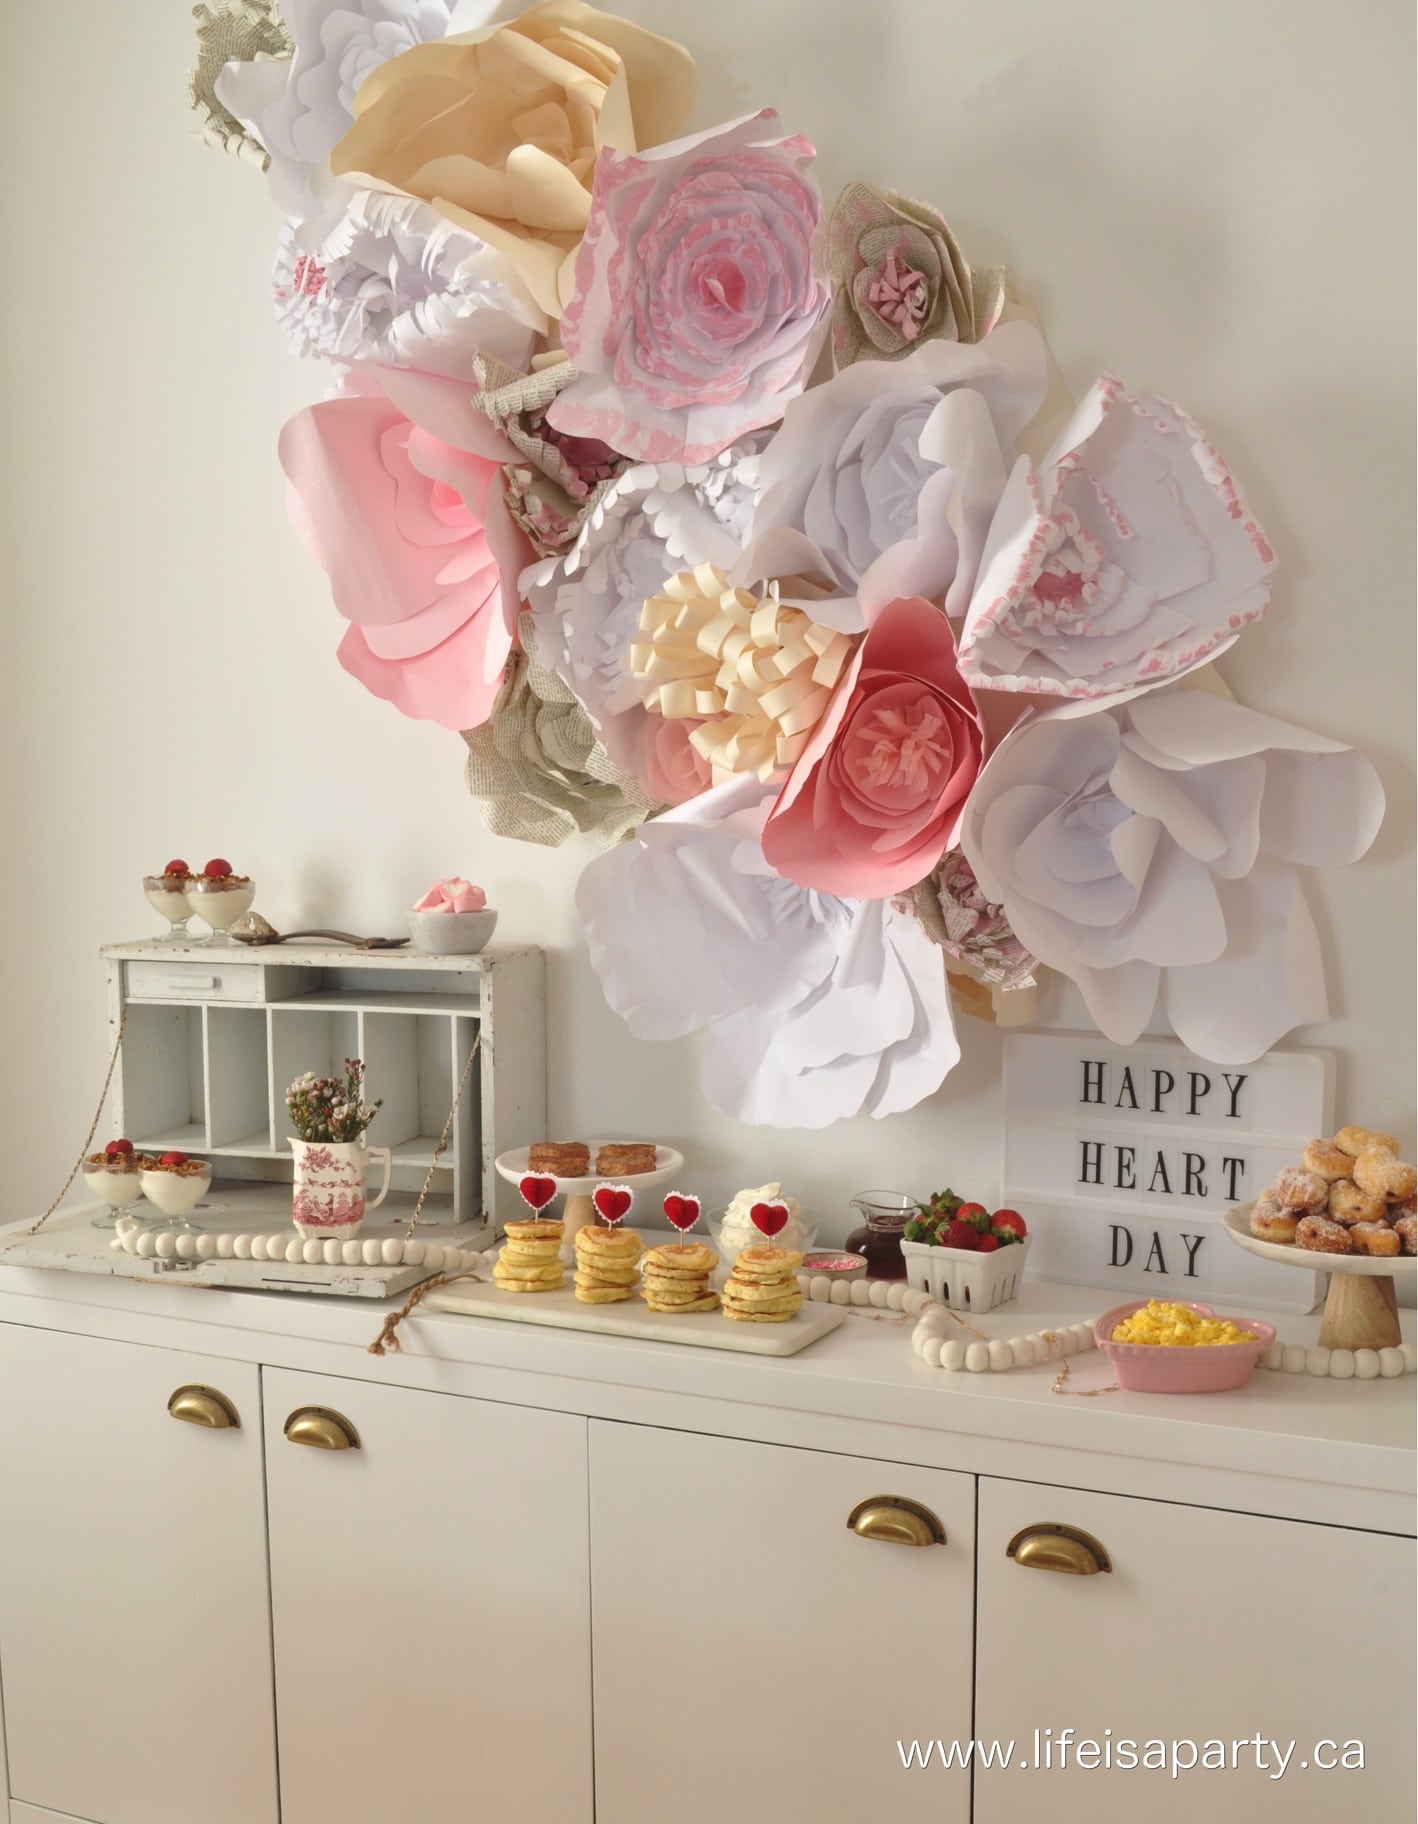
When you're arranging your flowers, start by placing your largest flowers first, and then fill in with smaller ones. Tty to alternate with different styles of flowers, different sizes, and different colours of paper and cardstock. We used a combination of pink, cream, book page and white flowers for our display. Also, we tucked some sprigs of real baby's breath into our display and painted a few flowers on the paper background.
Should I Use A Cutting Machine For This Project?
I actually think it's easier to cut these giant flowers out by hand, rather than using a Cricut machine and svg files. I love my Cricut, but it would actually take so much longer to load and unload the machine for this project than it would to just cut them out by hand. Also the natural variation of cutting them out by hand actually makes the flowers look better and more natural. The petals really don't have to be perfect, and in nature all the individual petals are slightly different. You can find designs for smaller flowers in Cricut Design Space, but for these larger flowers I think it's actually much easier to just cut them out by hand.
Paper Flower Templates
I've resisted the urge to provide you with a template for this project because honestly you don't need one. Your flowers will look more realistic with out a pdf template where every single petal is the same. When you're making huge paper flowers, the variation and in-perfect look is actually exactly what you want. The basic petal shape is so basic that you really don't need a template. Just play around until your happy with your basic shape, and then once you've made a few start making some variations. Trust me, you don't need a template for this. You can do it.
Other Ways To Use Giant Paper Flowers
These paper flowers really are a lot of fun to create, and a chance for you to get really creative with all kinds of different petal shapes, centres, and paper choices.
And there are also lots of different ways to use them. 
I love using the paper flowers to decorate for a party. Here they are over a Valentine's Day Breakfast as a pretty backdrop to the buffet.
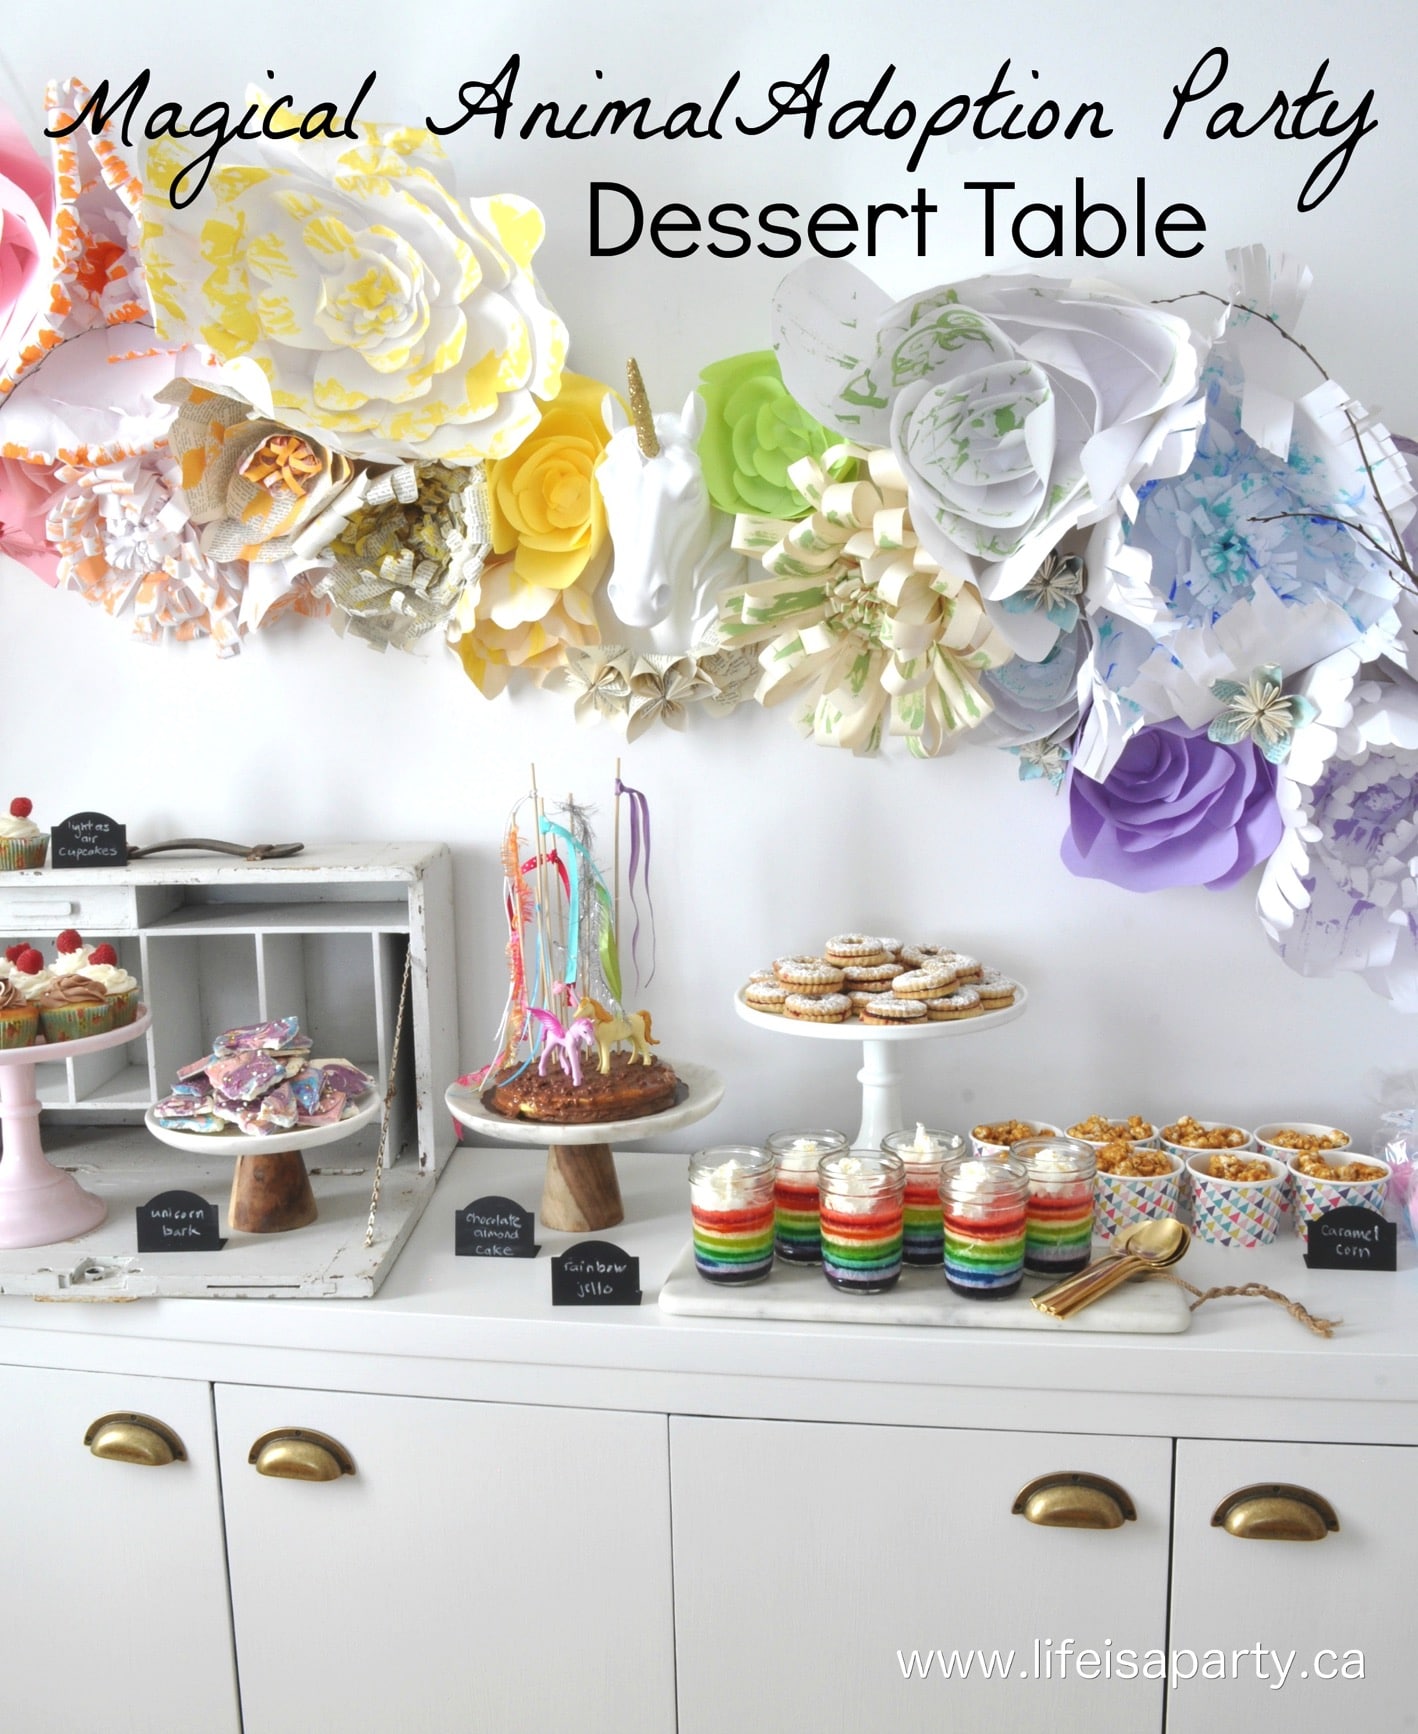
And here I used them to make a rainbow backdrop for a Rainbow Unicorn Dessert Table for my daughter's birthday party.
If you've ever wondered how to make paper flowers, now you know how easy it is! And they are so versatile too.
With inexpensive and easy to make giant paper flowers, life really is a party!
More Inspiration
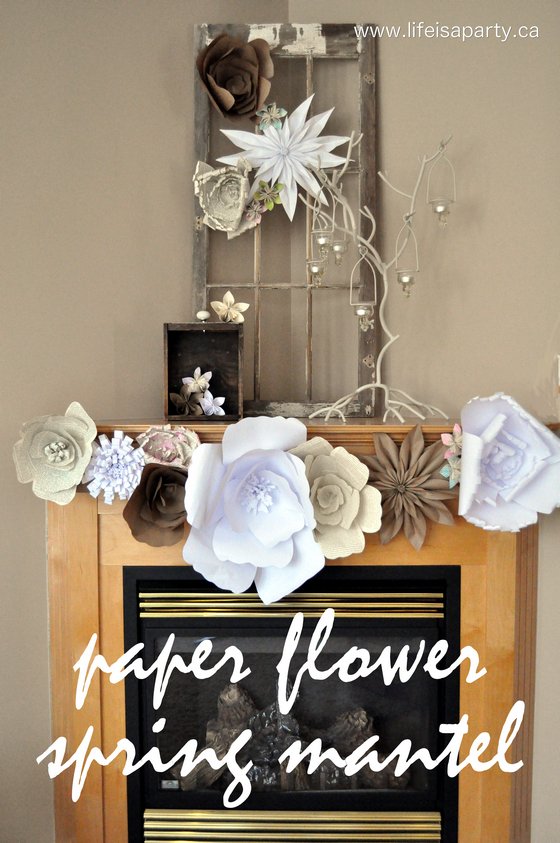
You might also like our paper flower spring mantel post here.
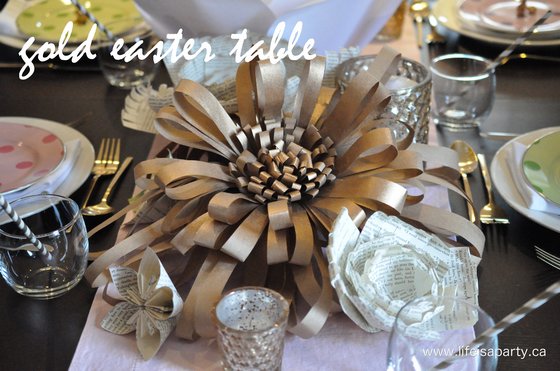
You might also enjoy our Gold Easter Table with Paper Flowers here.


dnr says
Hi Kathi, I've used everything from light weight vellum, to regular paper, to card stock and it all worked fine. I'd probably start with regular paper though. Best of luck,
Dannyelle
Kathi Bales says
What weight of paper is the best?
Lourdes says
How can I o obtain your book?
dnr says
So glad you like them Lilian, thanks for the lovely comment.
Dannyelle
Lilian says
These giant paper flowers are fabulous! What a great and inexpensive way to decorate for a wedding shower, a birthday party or even a summer BBQ. Thanks so much for this post!
dnr says
Hi Constance, a couple tips for you. You might need to make them a little more full -so make more petals of each size, and also you might need to make the petal size difference more gradual. "Looked like a flower pot" sounds to me like maybe the outer petals were a lot taller than the next row, so maybe make your petal sizes get only slightly smaller for each row, down to the middle. Hope this helps, best of luck to you!
Dannyelle
Constance Prince says
Thank you for showing me again how to make them they are so fun to make but when I make them it turns out looking different to me. The last one I made looked like a flower pot with flowers in the middle Well I will try it again just watching you. Thanks again
cynthia kiy says
I really like the ideas and the clear way in which you explained how to do. Your site is very pretty.
dnr says
Thanks May, I love comments like this! I hope yours turn out amazing, happy wedding.
Dannyelle
May Chin Lim says
Thank you so much. You make it look so easy and fun! I had always been afraid to do these but after watching your video I am more confident and will do this for a friend's wedding. Thanks a lot
dnr says
Thanks Kait, for sure give them a try, they're easy.
Best of luck,
Dannyelle
Kait says
These are so pretty! I've always wanted to give them a go, but never knew how to make them. Thanks for sharing.
xo, Kait.
Teacups & Things