These homemade strawberry marshmallows are soft, fluffy, and bursting with real strawberry flavor. Made with freeze-dried strawberries, they turn a beautiful natural pink without any artificial colors or flavors. If you've never tried homemade marshmallows, you're in for a treat. They have an amazing melt-in-your-mouth texture that store-bought versions just can't match.
Quick Look
🍓 Recipe Name: Strawberry Marshmallows
🕒 Ready In: About 6 hours 30 minutes (30 minutes active, 6+ hours setting time)
👪 Yields: 36 marshmallows (cut into 1.5 x 1.5 inch squares)
📖 Dietary Info: Gluten-free, no artificial colors or flavors
⭐ Why You'll Love It: Naturally pink marshmallows with intense strawberry flavor from real fruit.
Why You'll Love This Recipe
- Actually doable -If you can use a candy thermometer and a stand mixer, you can make these! The freeze-dried strawberry method is simpler than making a compote.
- Real strawberry flavor -No artificial strawberry flavoring here. The freeze-dried strawberries give these an intense, authentic strawberry taste that's absolutely delicious.
- Naturally pink -The gorgeous pink color comes entirely from strawberries. No artificial dyes needed.
- Perfect for gifting -These look stunning packaged in clear cellophane bags or mason jars. They're my go-to homemade Valentine's gift.
- Multiple occasions -They're perfect for Valentine's Day, Mother's Day, summer strawberry season, baby showers, or any pink-themed celebration, hot chocolate, s'mores, or for a strawberry lover.
Jump to:
Homemade marshmallows are in a completely different league from store-bought. They're softer, fluffier, and actually taste like something. And these strawberry marshmallows? They're even better. The freeze-dried strawberries give them an incredible strawberry flavor that tastes like actual fruit, not artificial flavoring.
I made these for my Galentine's Day tea party this year, and they were absolutely perfect. Served alongside tea sandwiches and petit fours, these pink marshmallows looked beautiful and tasted even better. Several friends asked for the recipe, so here we are!
The best part? These look impressive but are surprisingly straightforward to make. You don't need any fancy techniques or hard-to-find ingredients. Just a stand mixer, a candy thermometer, and about 30 minutes of active time. The marshmallows do need to set for at least 6 hours, so plan to make these the day before you need them.
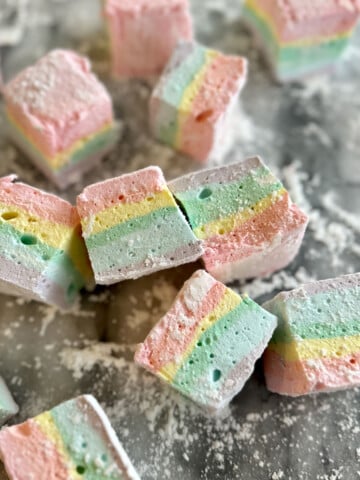
If you love marshmallows, you should also check out our Coffee Marshmallows, Bailey's Marshmallows, Marshmallow Mug Toppers, and Rainbow Marshmallows Recipe.
Ingredients
Exact measurements in the recipe card below.
- Freeze-Dried Strawberries: This is what makes these marshmallows special. You'll need ¾ cup of freeze-dried strawberries (not fresh or frozen). Look for them at the dollar store, or grocery store or online. You'll process them into a fine powder. The concentrated strawberry flavor is incredible, and it gives the marshmallows that beautiful natural pink color. Reserve 1 tablespoon of the strawberry powder to add to your coating mixture for an extra pop of flavor and color.
- Unflavored Gelatin: You'll need 3 packages (21 grams total). This gives marshmallows their signature bouncy, fluffy texture. I use Knox brand, which comes in boxes of four packets.
- Light Corn Syrup: This prevents crystallization and keeps the marshmallows soft and tender.
- Vanilla Extract: Adds classic marshmallow flavor that complements the strawberry beautifully.
Equipment
- Candy Thermometer: This is absolutely essential. You need to heat the sugar syrup to exactly 240°F for marshmallows that set properly. A clip-on candy thermometer is easiest because you can attach it to the side of your saucepan, just make sure it isn't touching the bottom of the pan for an accurate temperature.
- Stand Mixer: The marshmallow mixture needs to be whipped for 12 to 15 minutes. A stand mixer with a whisk attachment is really the only practical way to do this. You could technically use a hand mixer, but your arm will be very tired.
- Food Processor: You'll use this to grind the freeze-dried strawberries into a fine powder. A high-powered blender also works.
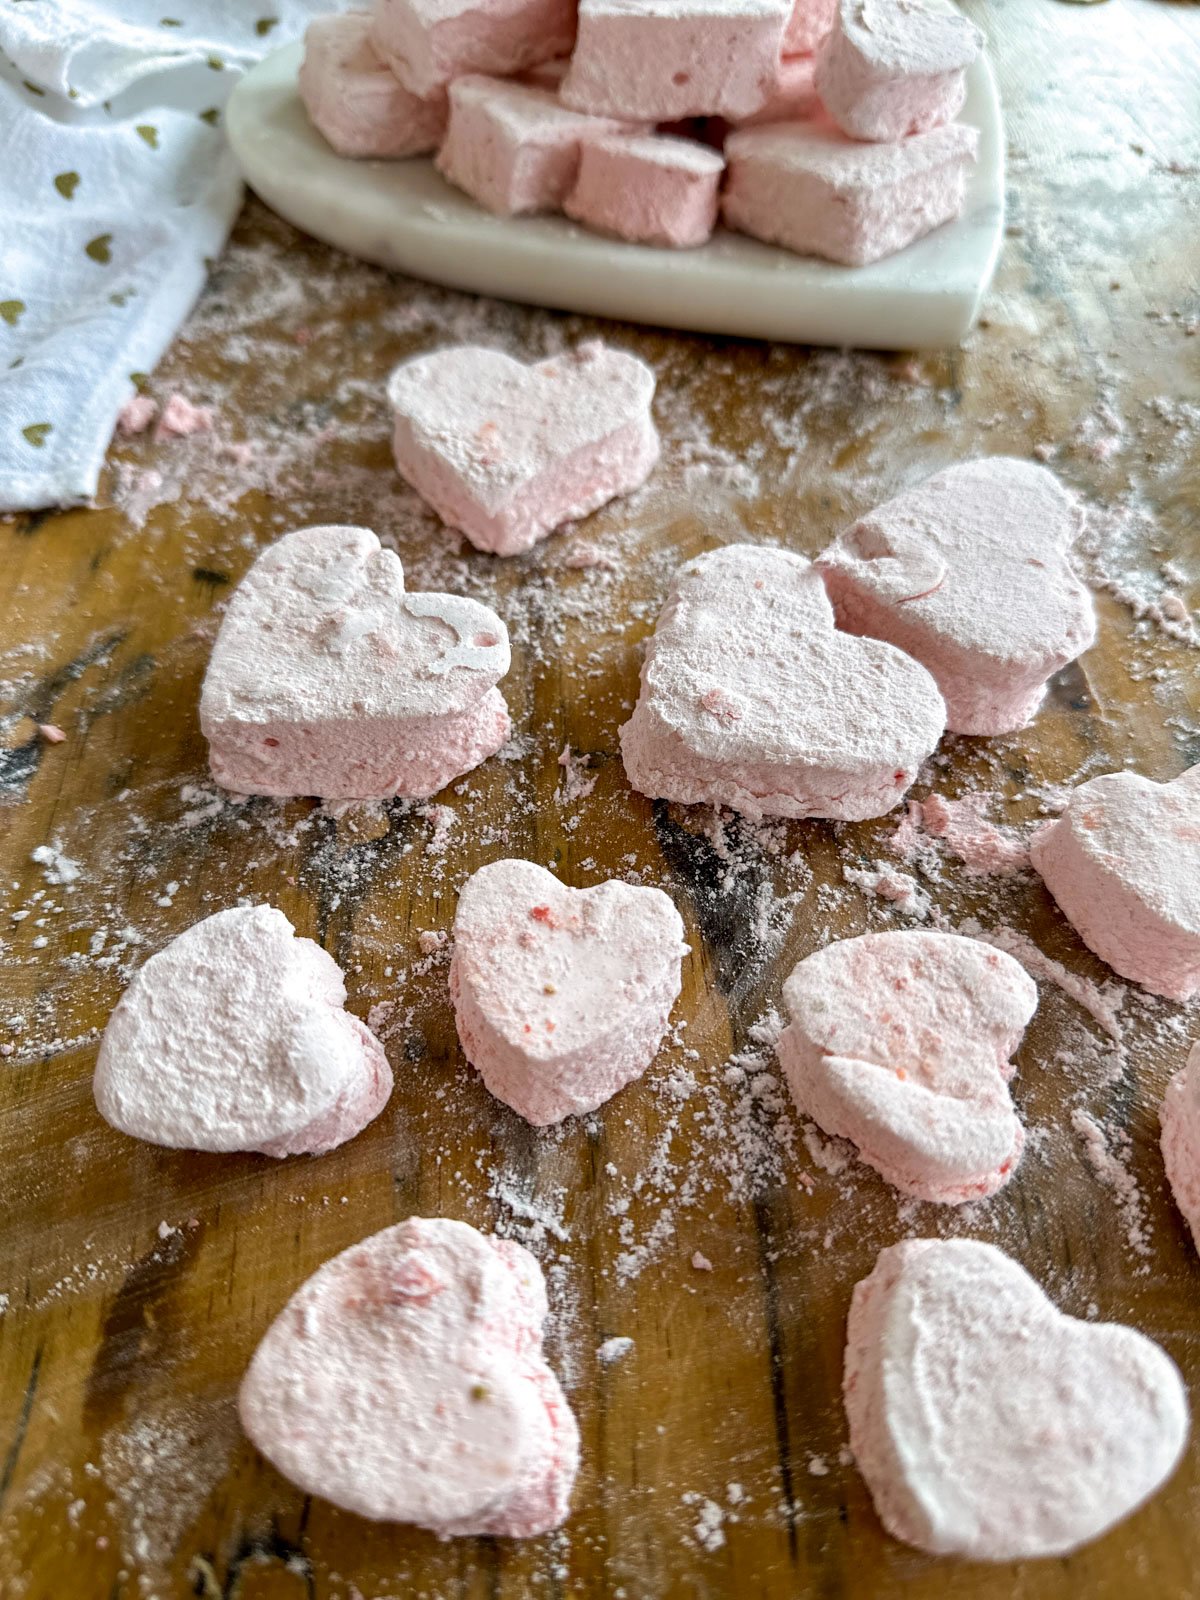
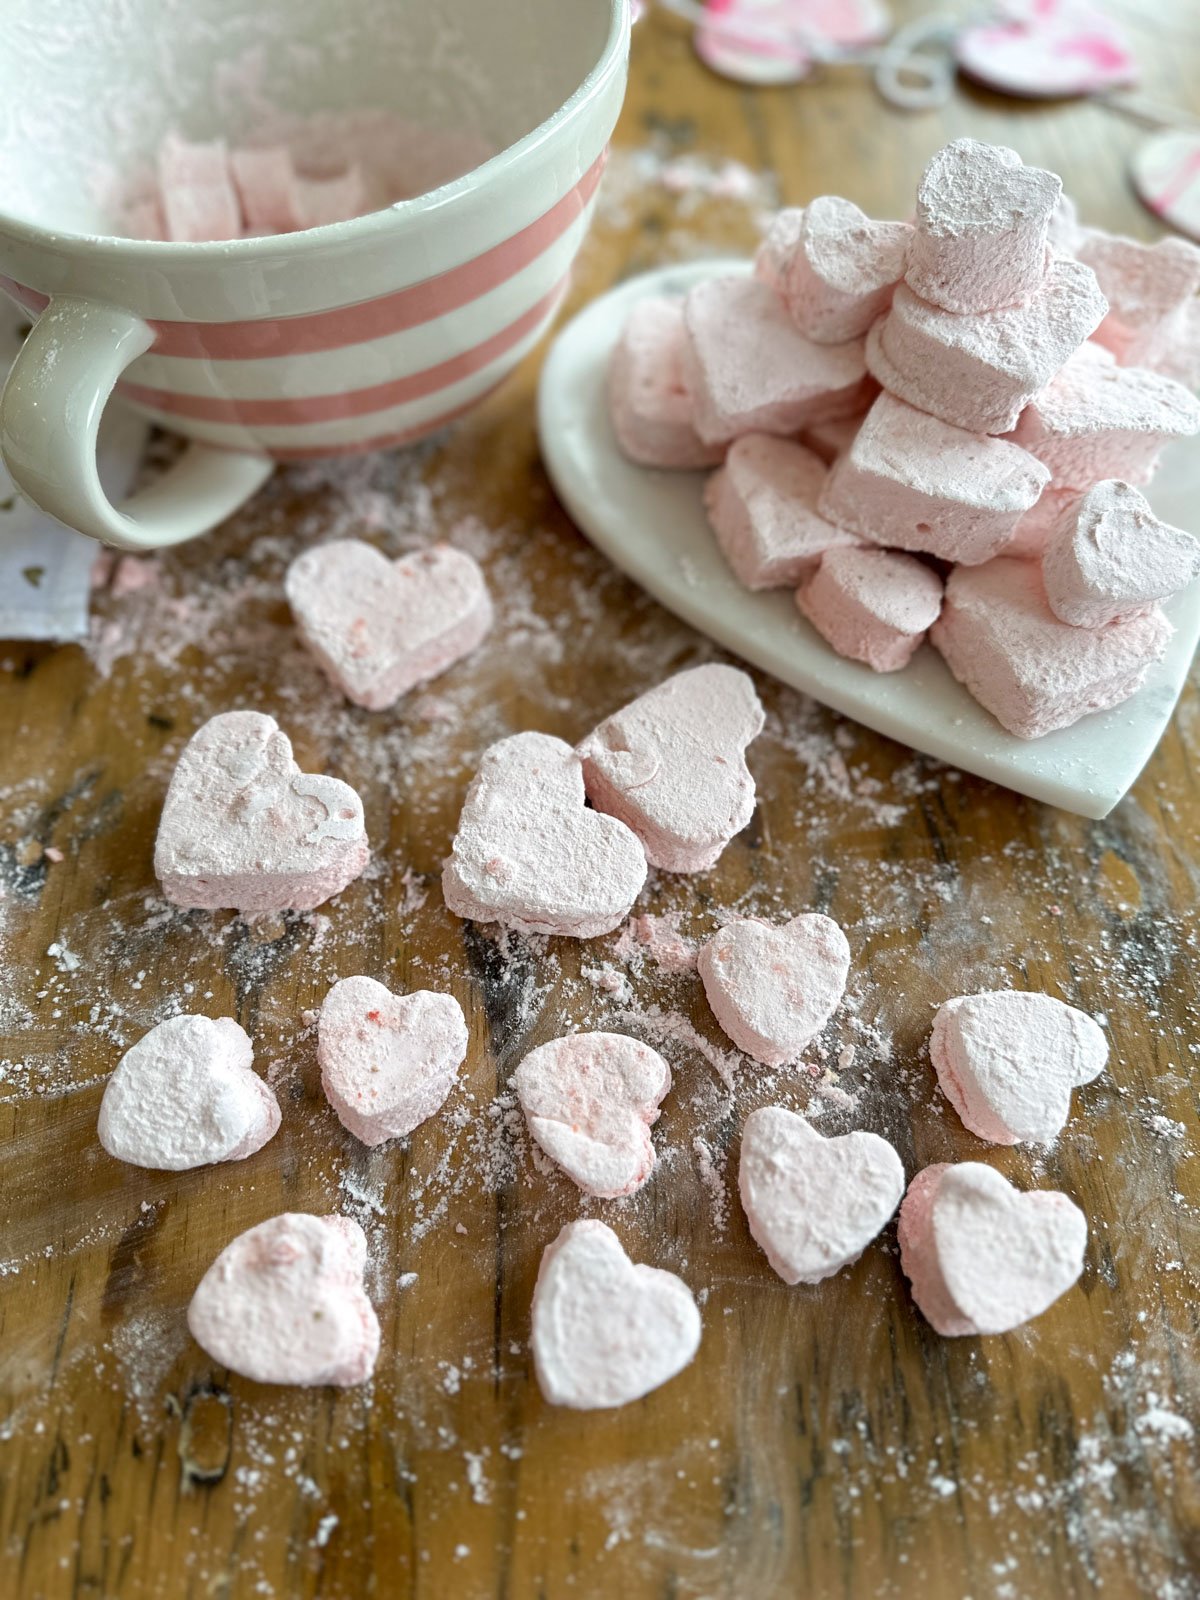
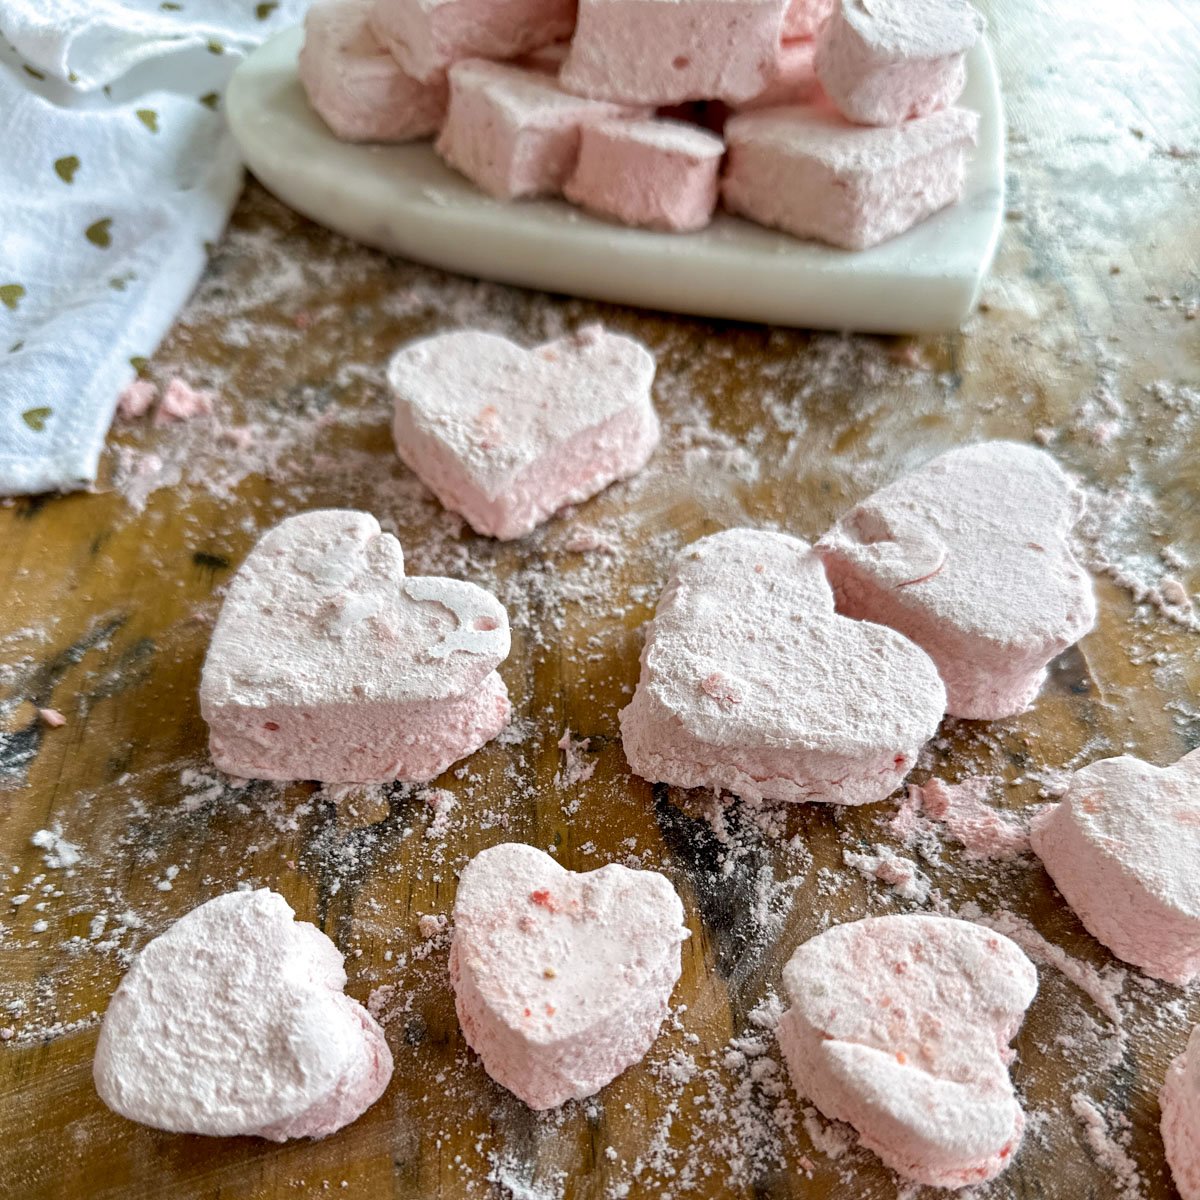
- Cookie Cutters: I used heart shaped cookie cutters in two sizes to cut these out. You can also make them square, cut with a sharp knife or pizza cutter.
How to Make Strawberry Marshmallows
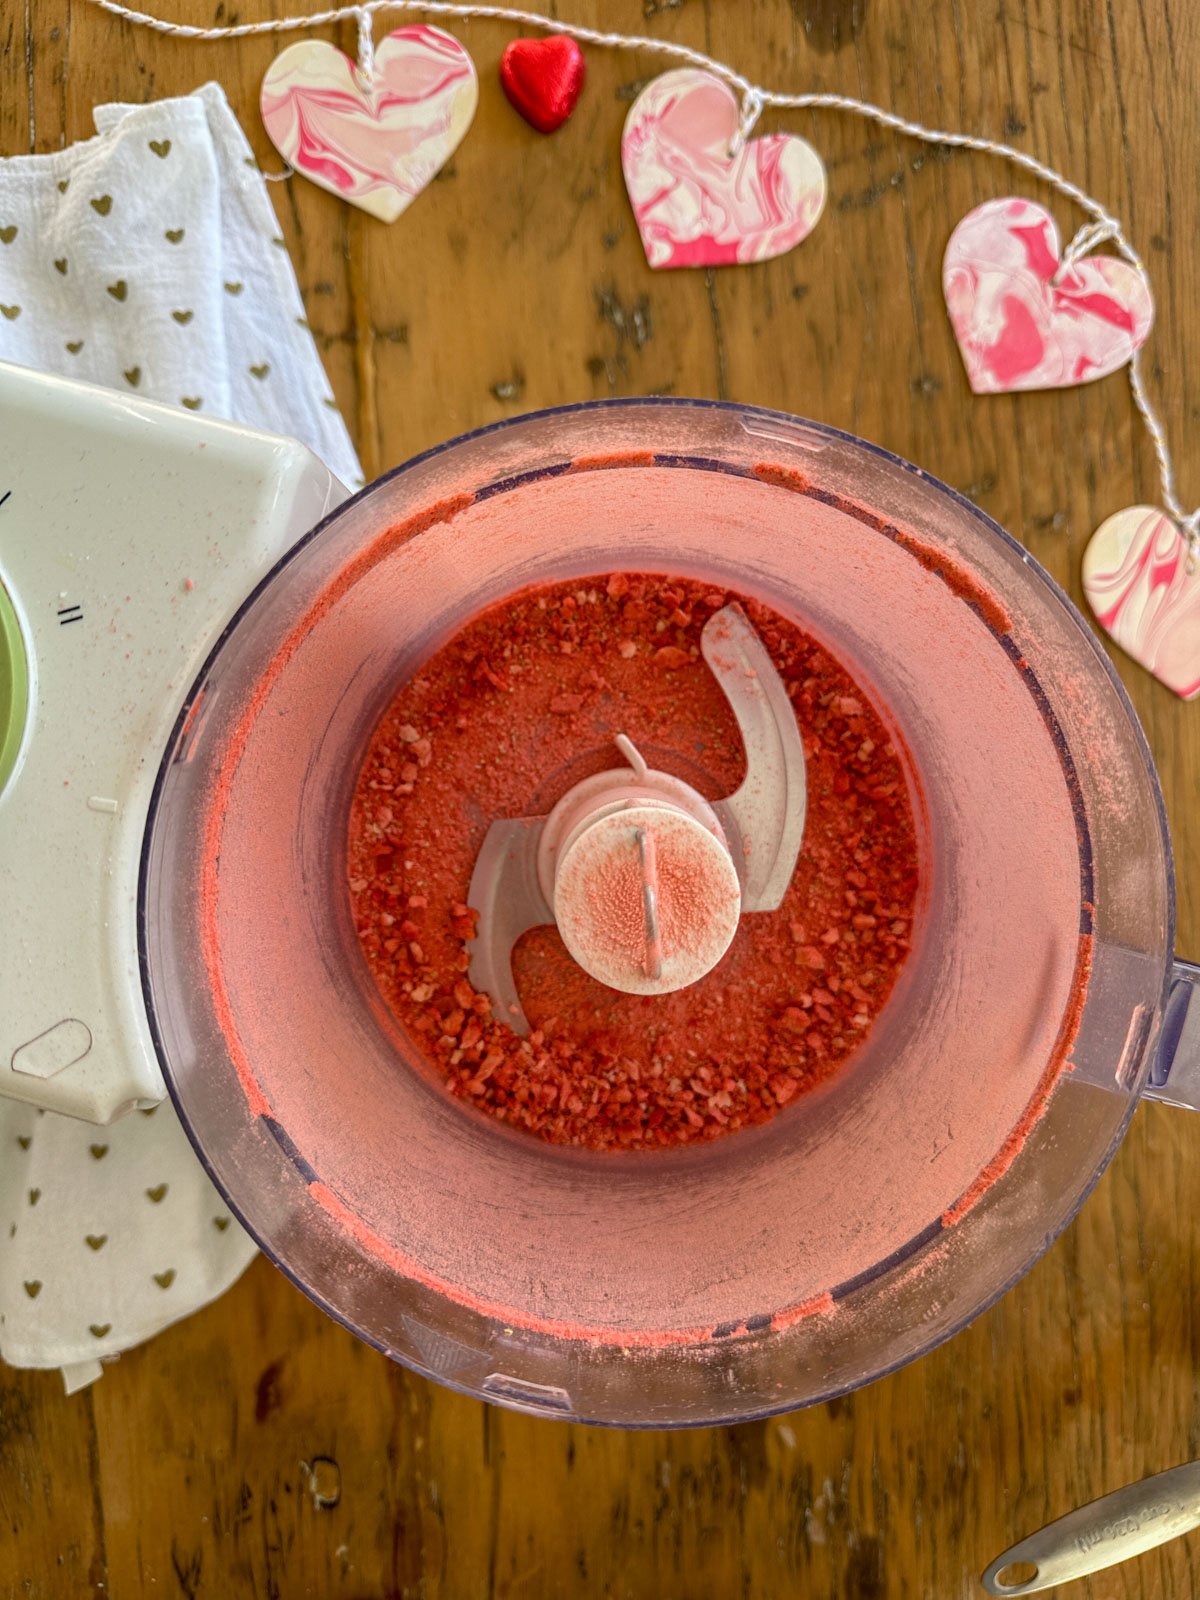
- Step 1: Make the strawberry powder. Add the freeze-dried strawberries to your food processor and pulse until you have a fine powder. You should end up with about ⅓ cup of powder. Reserve 1 tablespoon for the coating mixture and set the rest aside.
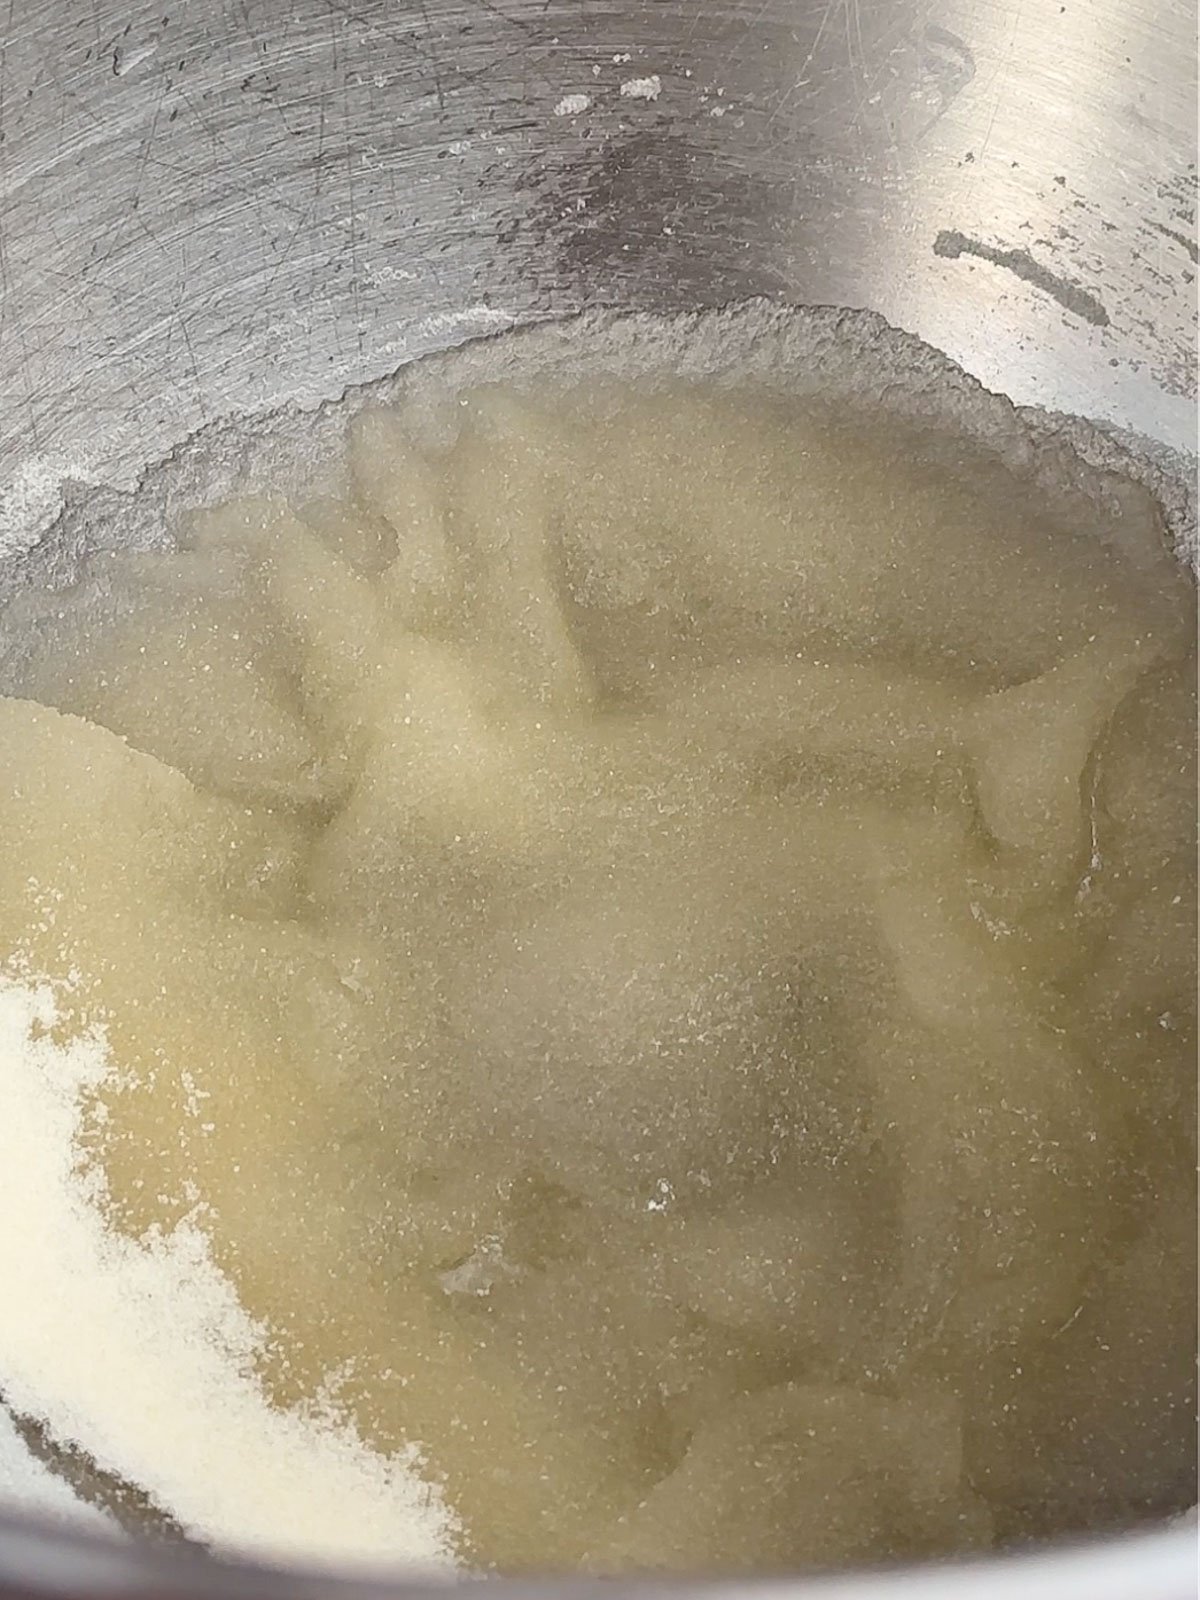
- Step 2: Bloom the gelatin. Pour ½ cup cold water into the bowl of your stand mixer fitted with the whisk attachment. Sprinkle the gelatin evenly over the water and let it sit while you make the syrup. The gelatin will absorb the water and swell up, which is exactly what you want.
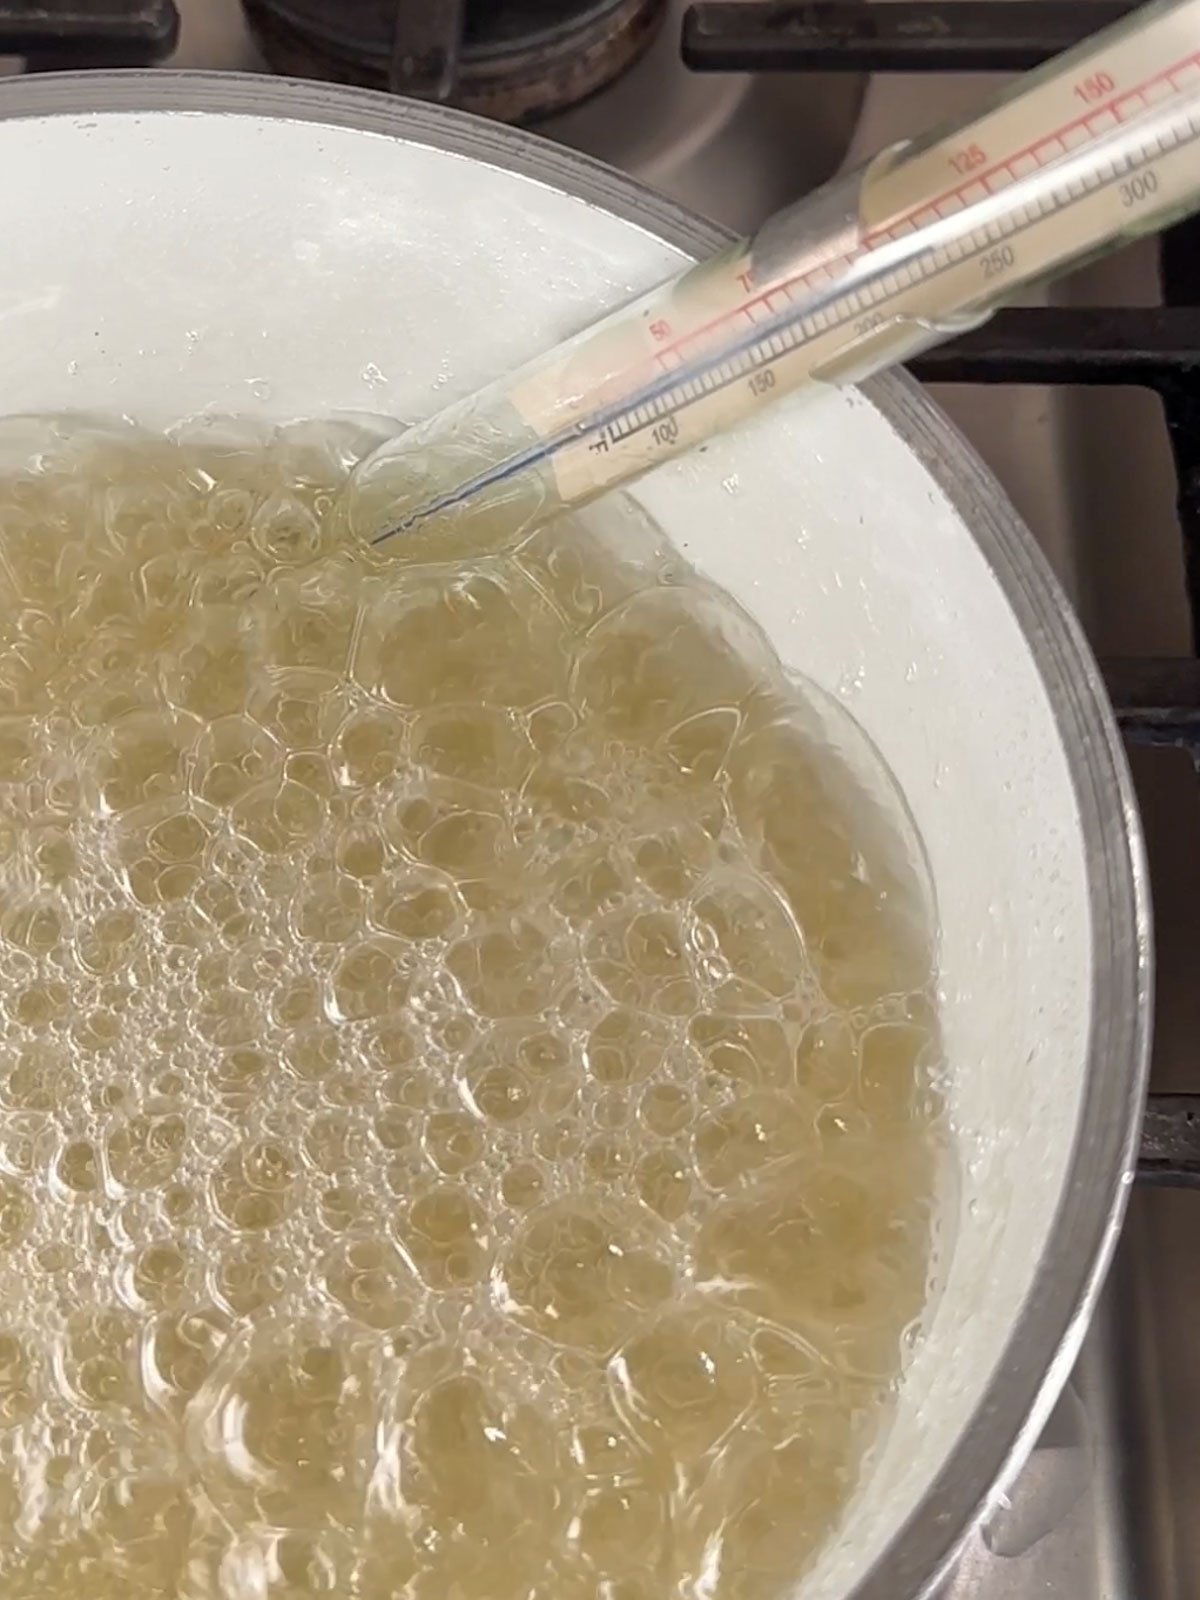
- Step 3: Make the sugar syrup. In a medium heavy-bottomed saucepan, combine the sugar, corn syrup, salt, and remaining ½ cup water. Cook over medium heat, stirring until the sugar completely dissolves. Once the mixture starts boiling, stop stirring. Clip your candy thermometer to the side of the pan (make sure it's not touching the bottom) and cook until it reaches exactly 240°F. This takes about 7 to 10 minutes. Watch it carefully as it gets close to temperature.
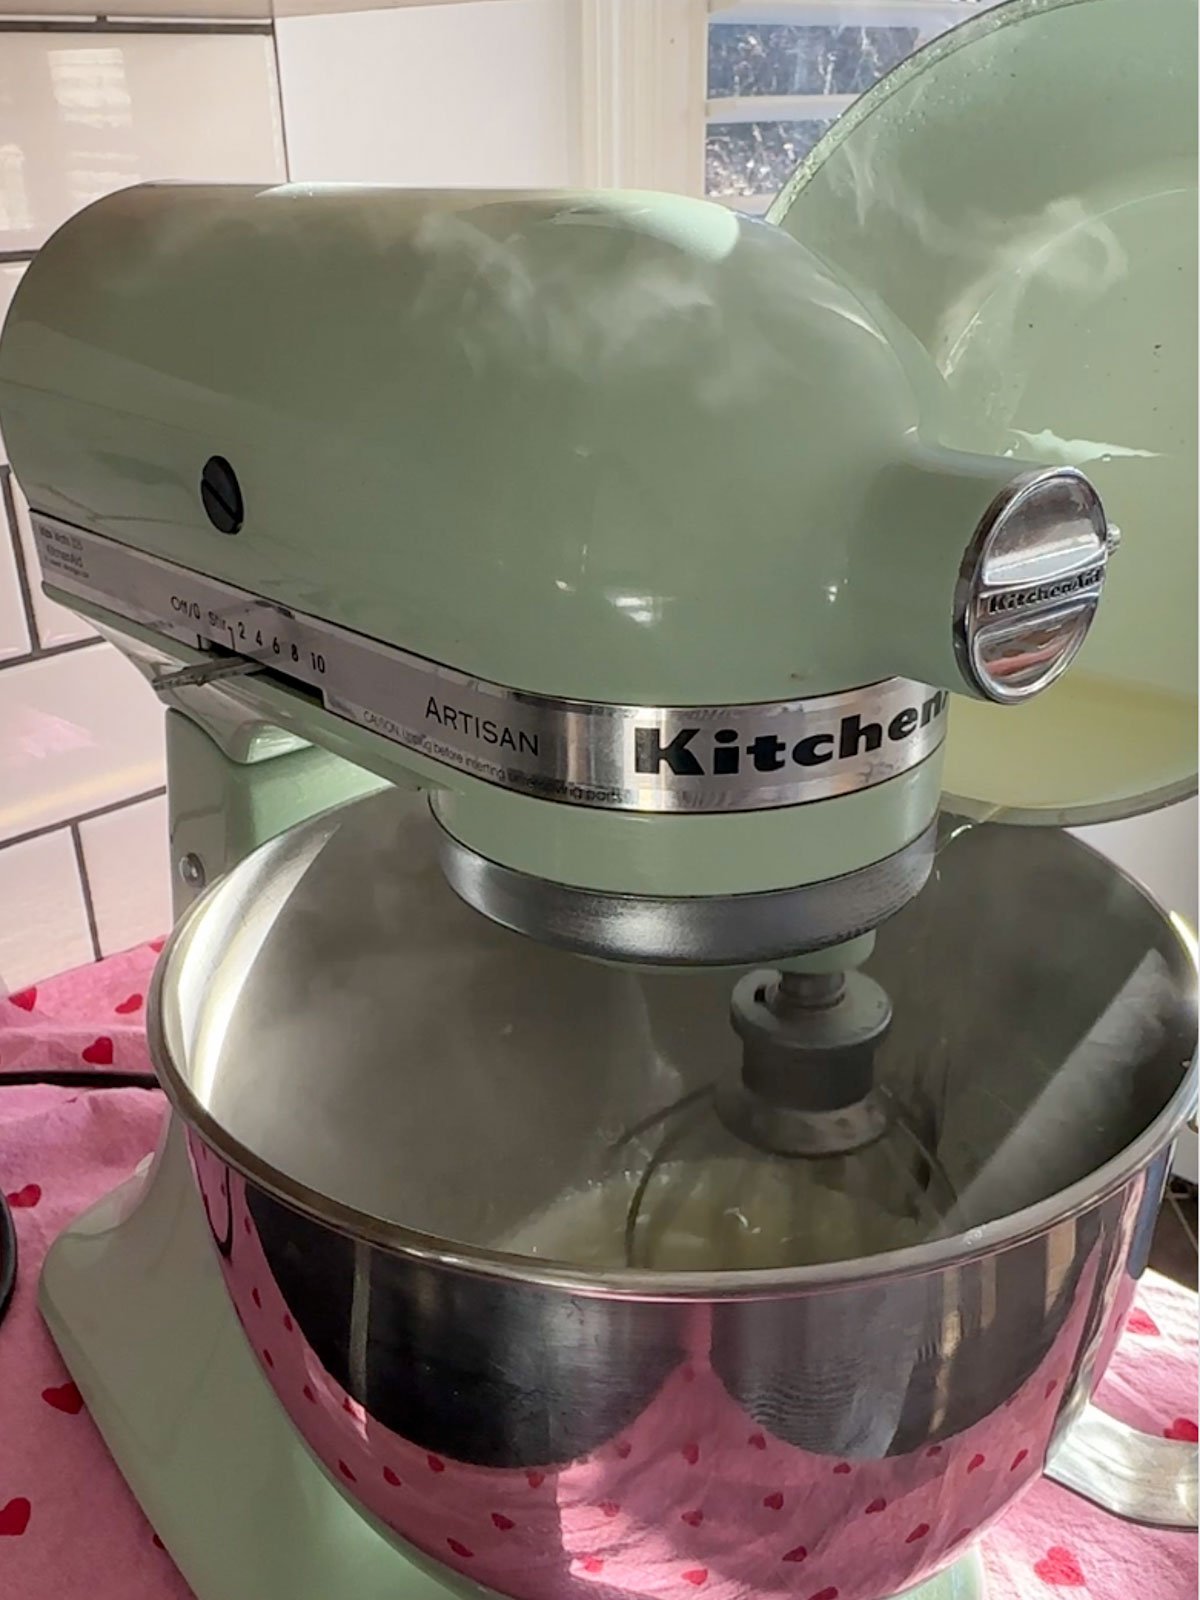
- Step 4: Whip the marshmallows. With the mixer running on low speed, carefully pour the hot sugar syrup down the side of the bowl into the bloomed gelatin. Go slowly to avoid splashing. Once all the syrup is added, turn the mixer to high speed and let it whip for 12 to 15 minutes. You'll know it's ready when the mixture is very thick, glossy, and white, and the outside of the bowl feels just barely warm instead of hot.
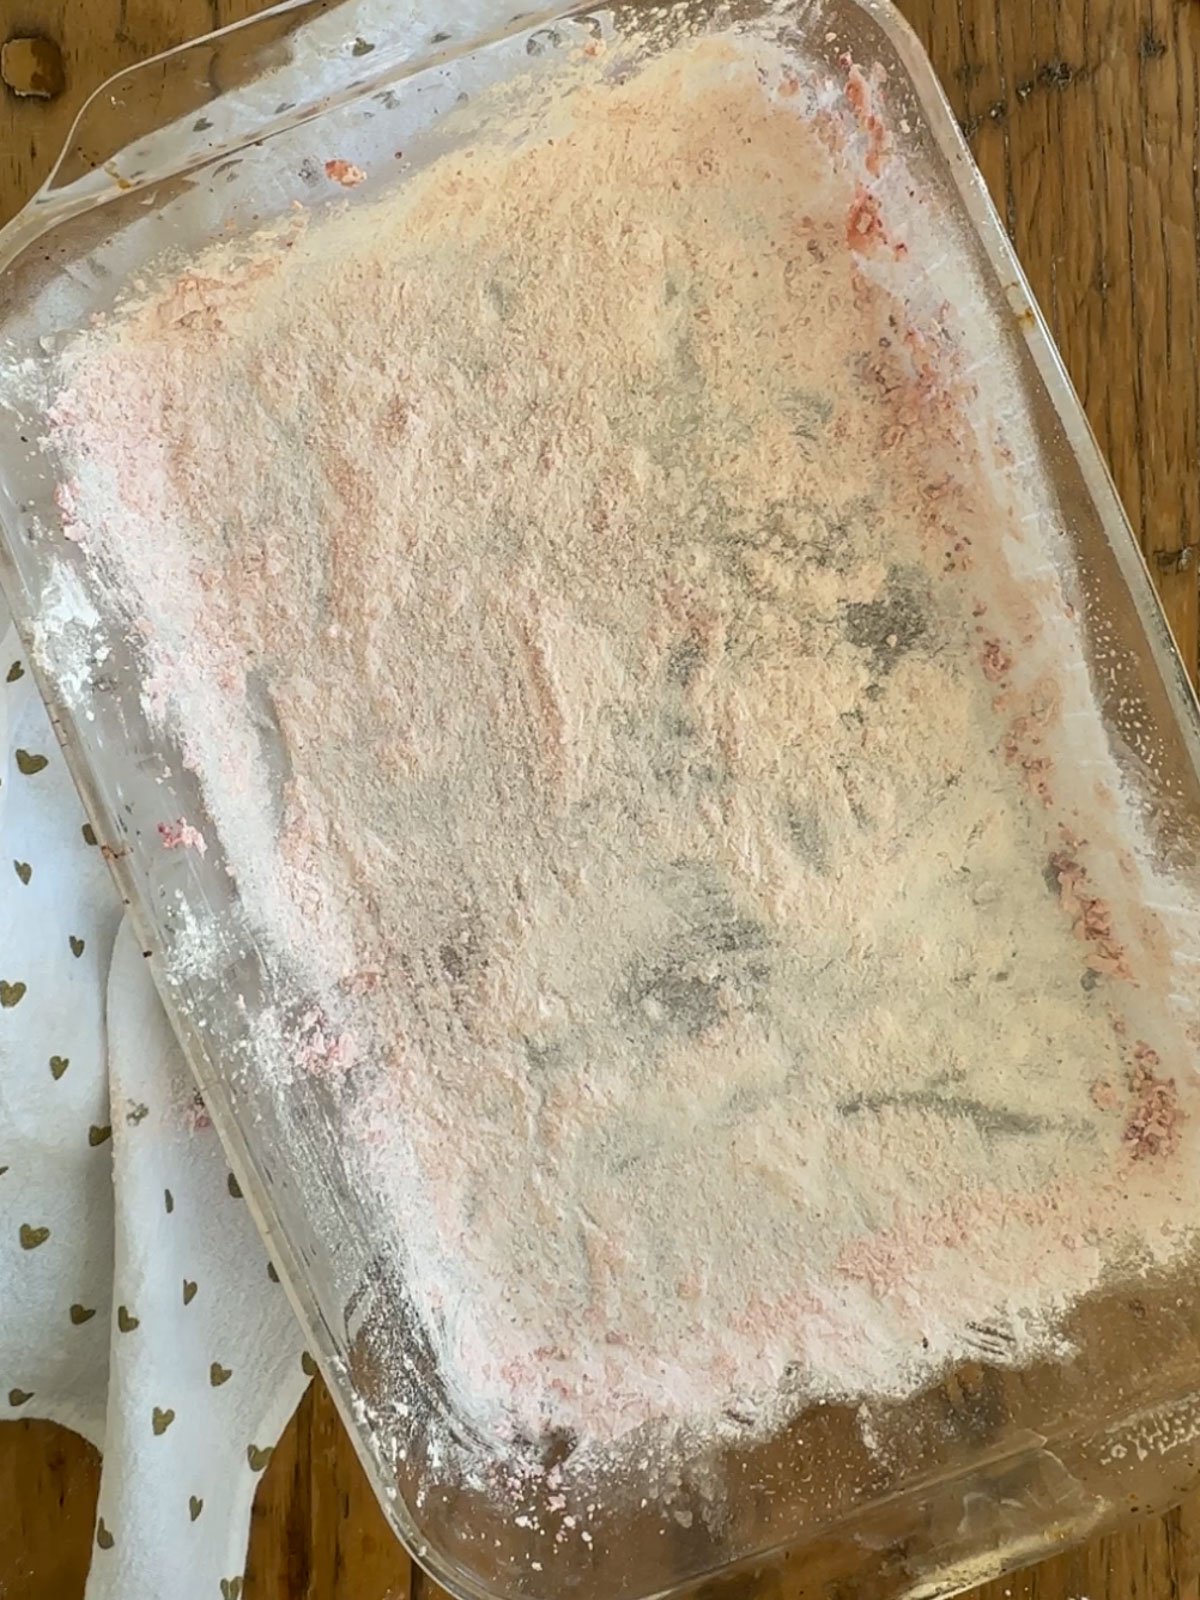
- Step 5: While the marshmallows are whipping, prepare your pan. Spray a 9x13 inch baking pan with baking spray. Combine the powdered sugar, cornstarch, and that reserved 1 tablespoon of strawberry powder. Sift a generous layer over the bottom and sides of the prepared pan.
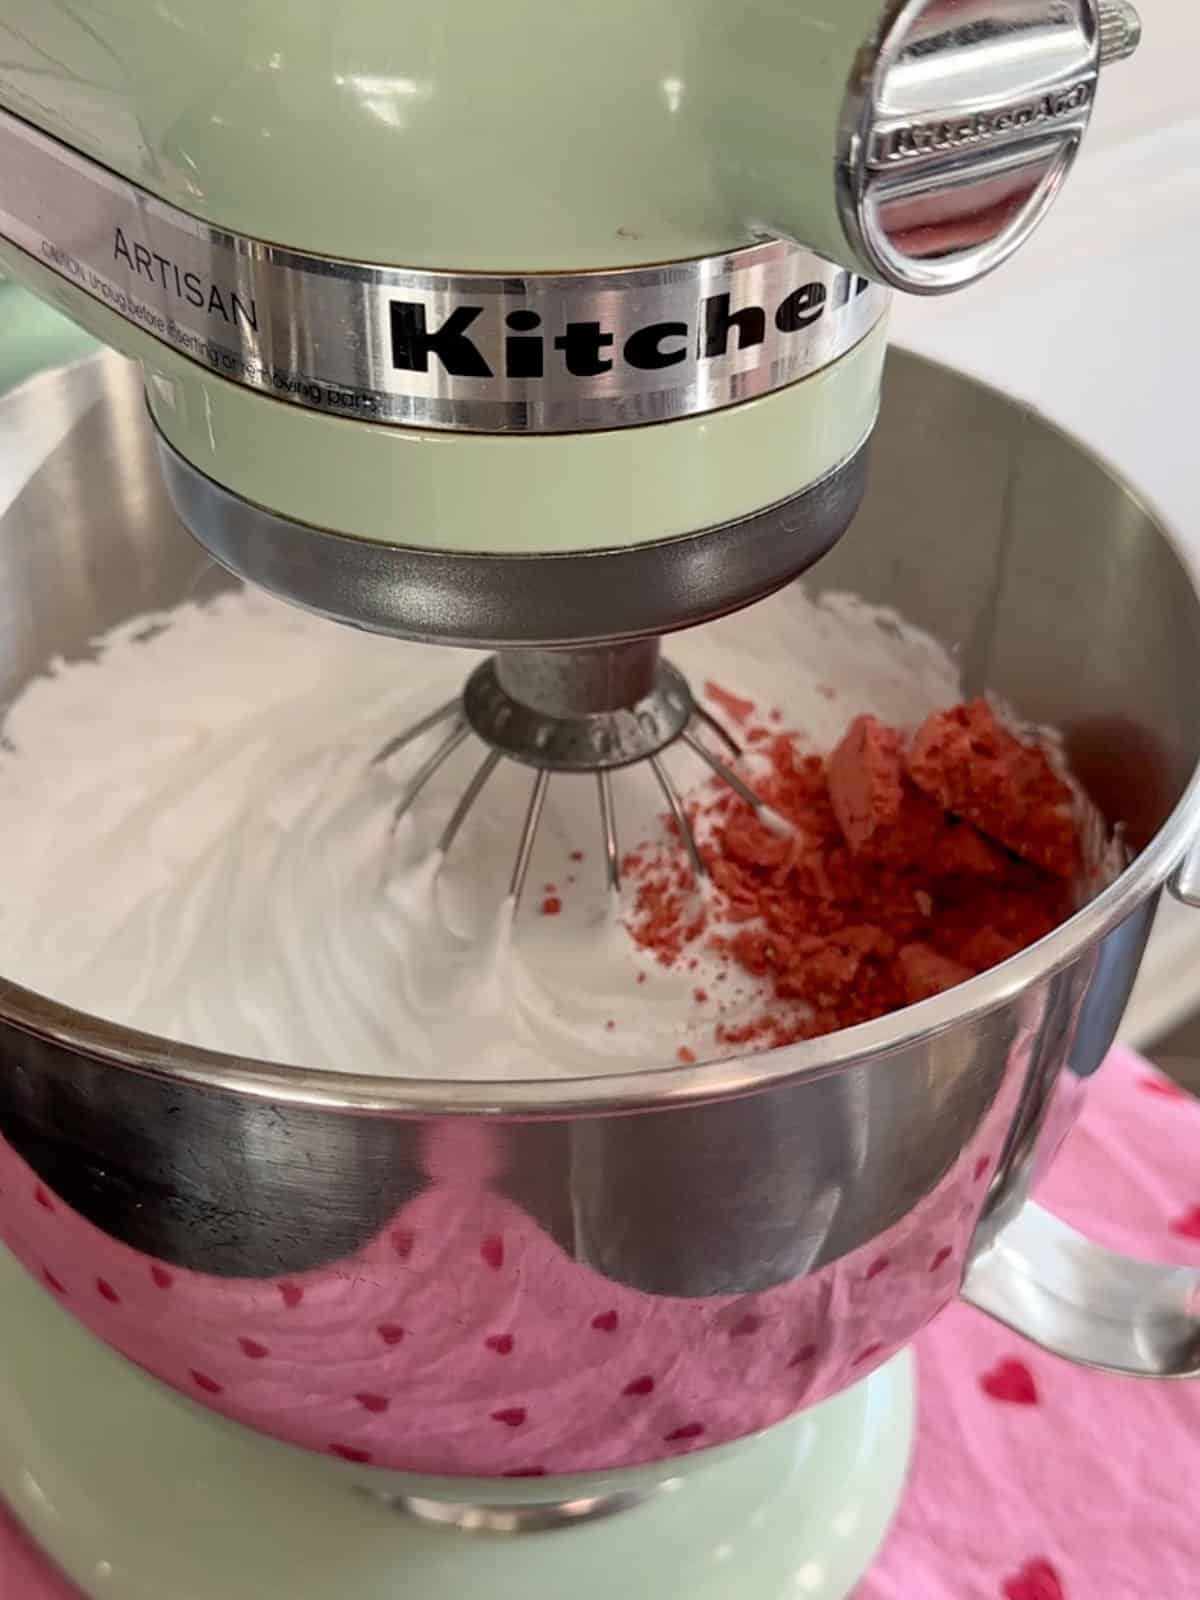
- Step 6: Add the strawberry powder. In the last minute of whipping, add the vanilla extract and the reserved strawberry powder (not the tablespoon you set aside for coating). Let it mix until the color is evenly distributed and the mixture turns a beautiful pale pink.
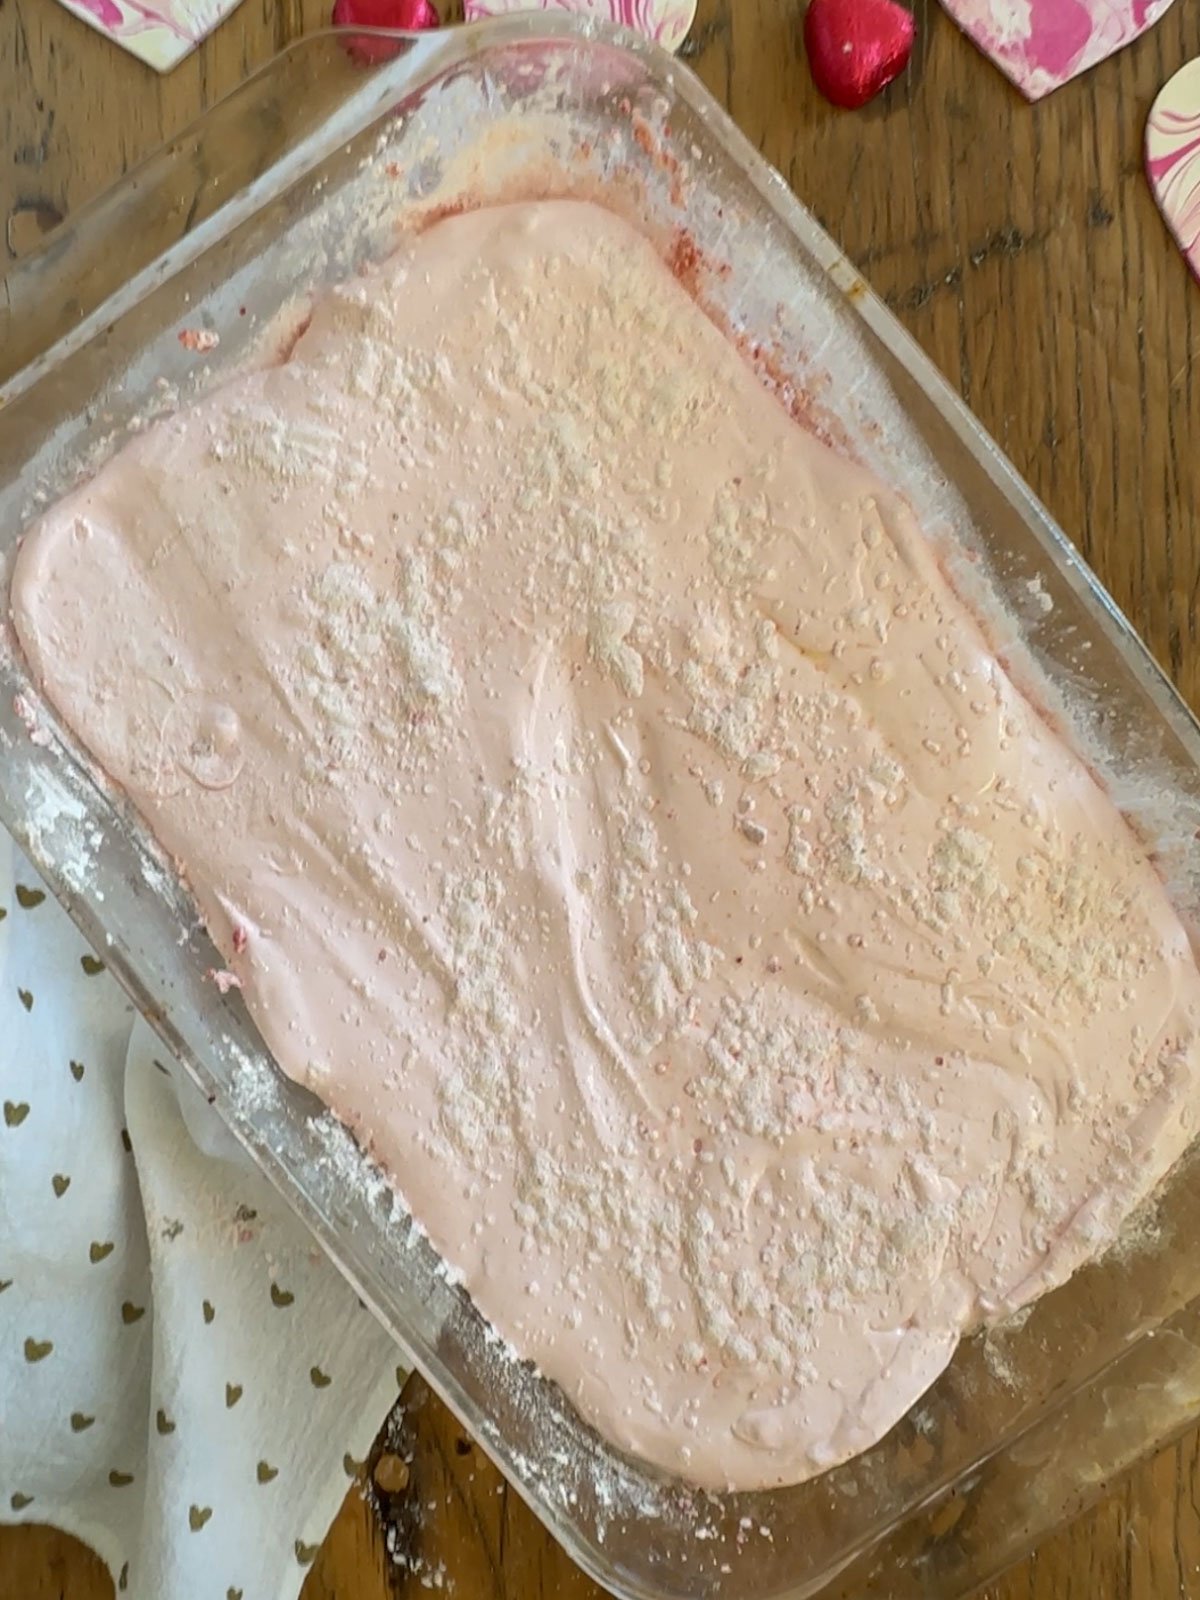
7. Step 7: Transfer and set. Working quickly (the mixture starts to set as soon as it stops whipping), pour the marshmallow mixture into the prepared pan. Use a greased spatula to spread it evenly into the corners. Sift more of the coating mixture generously over the top. Let the marshmallows set uncovered at room temperature for at least 6 hours, or overnight for best results.
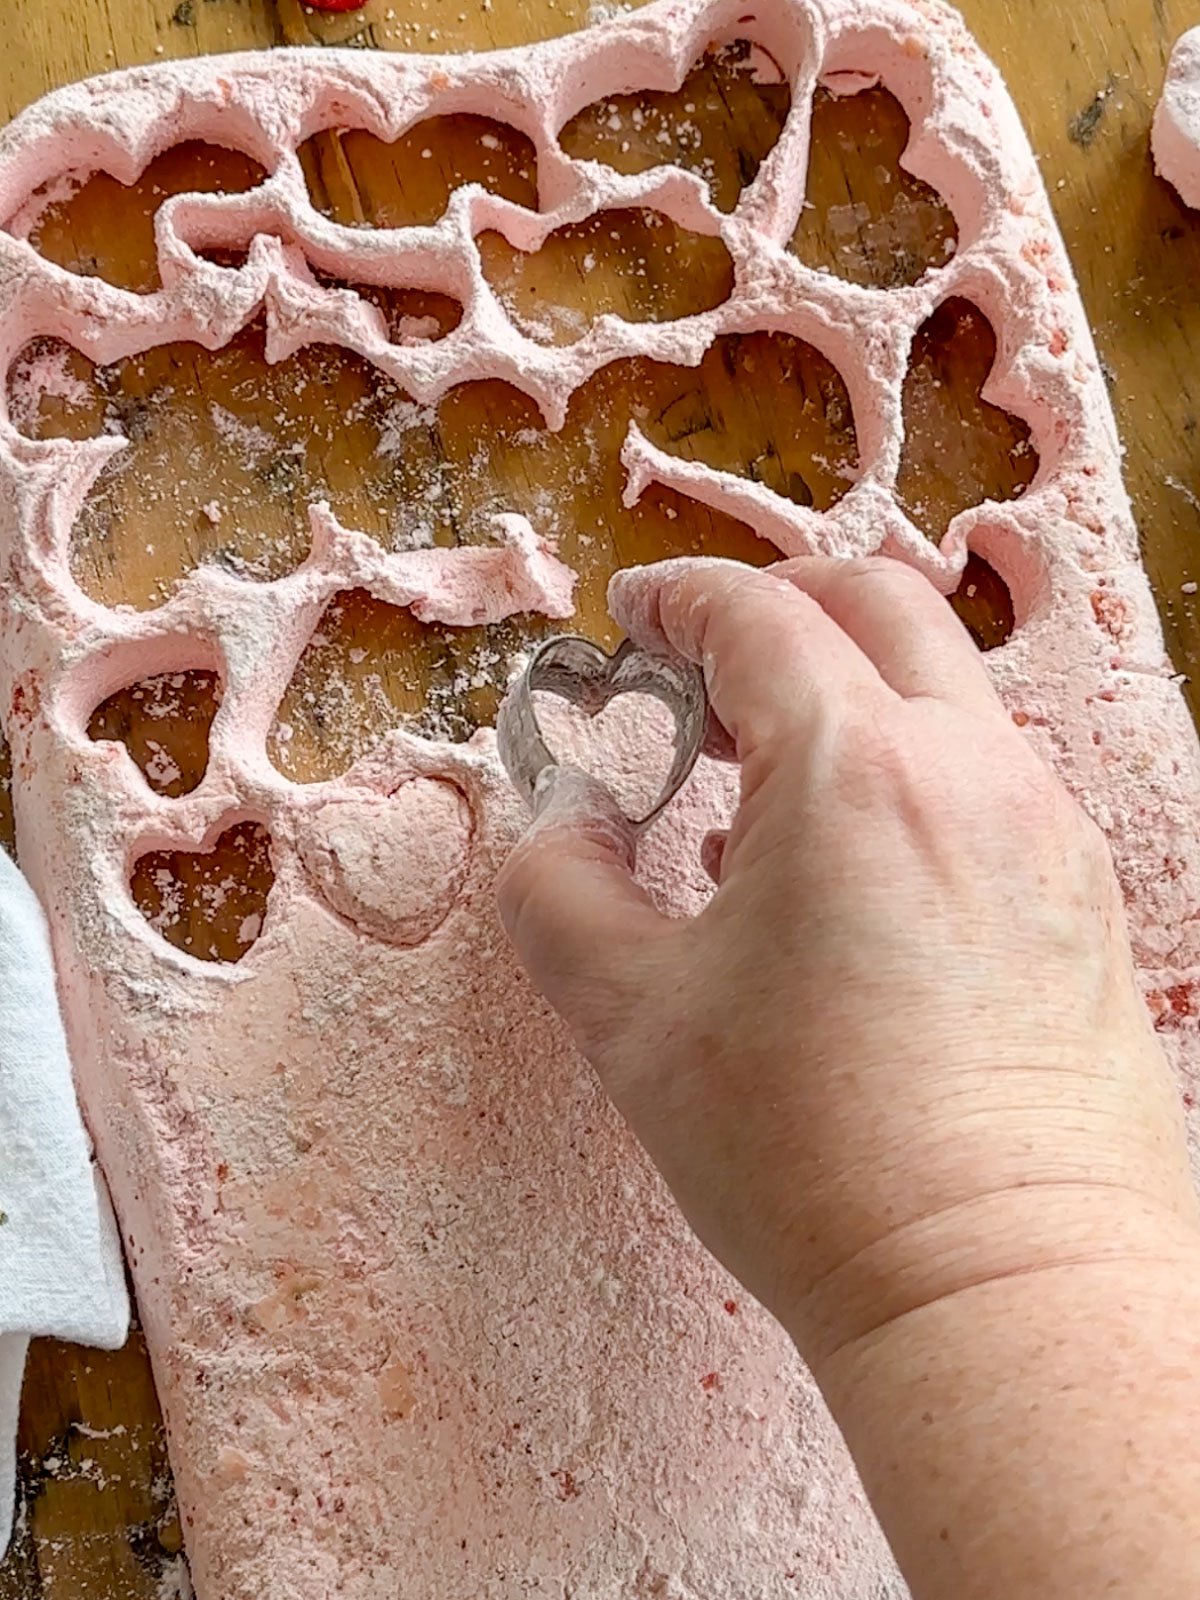
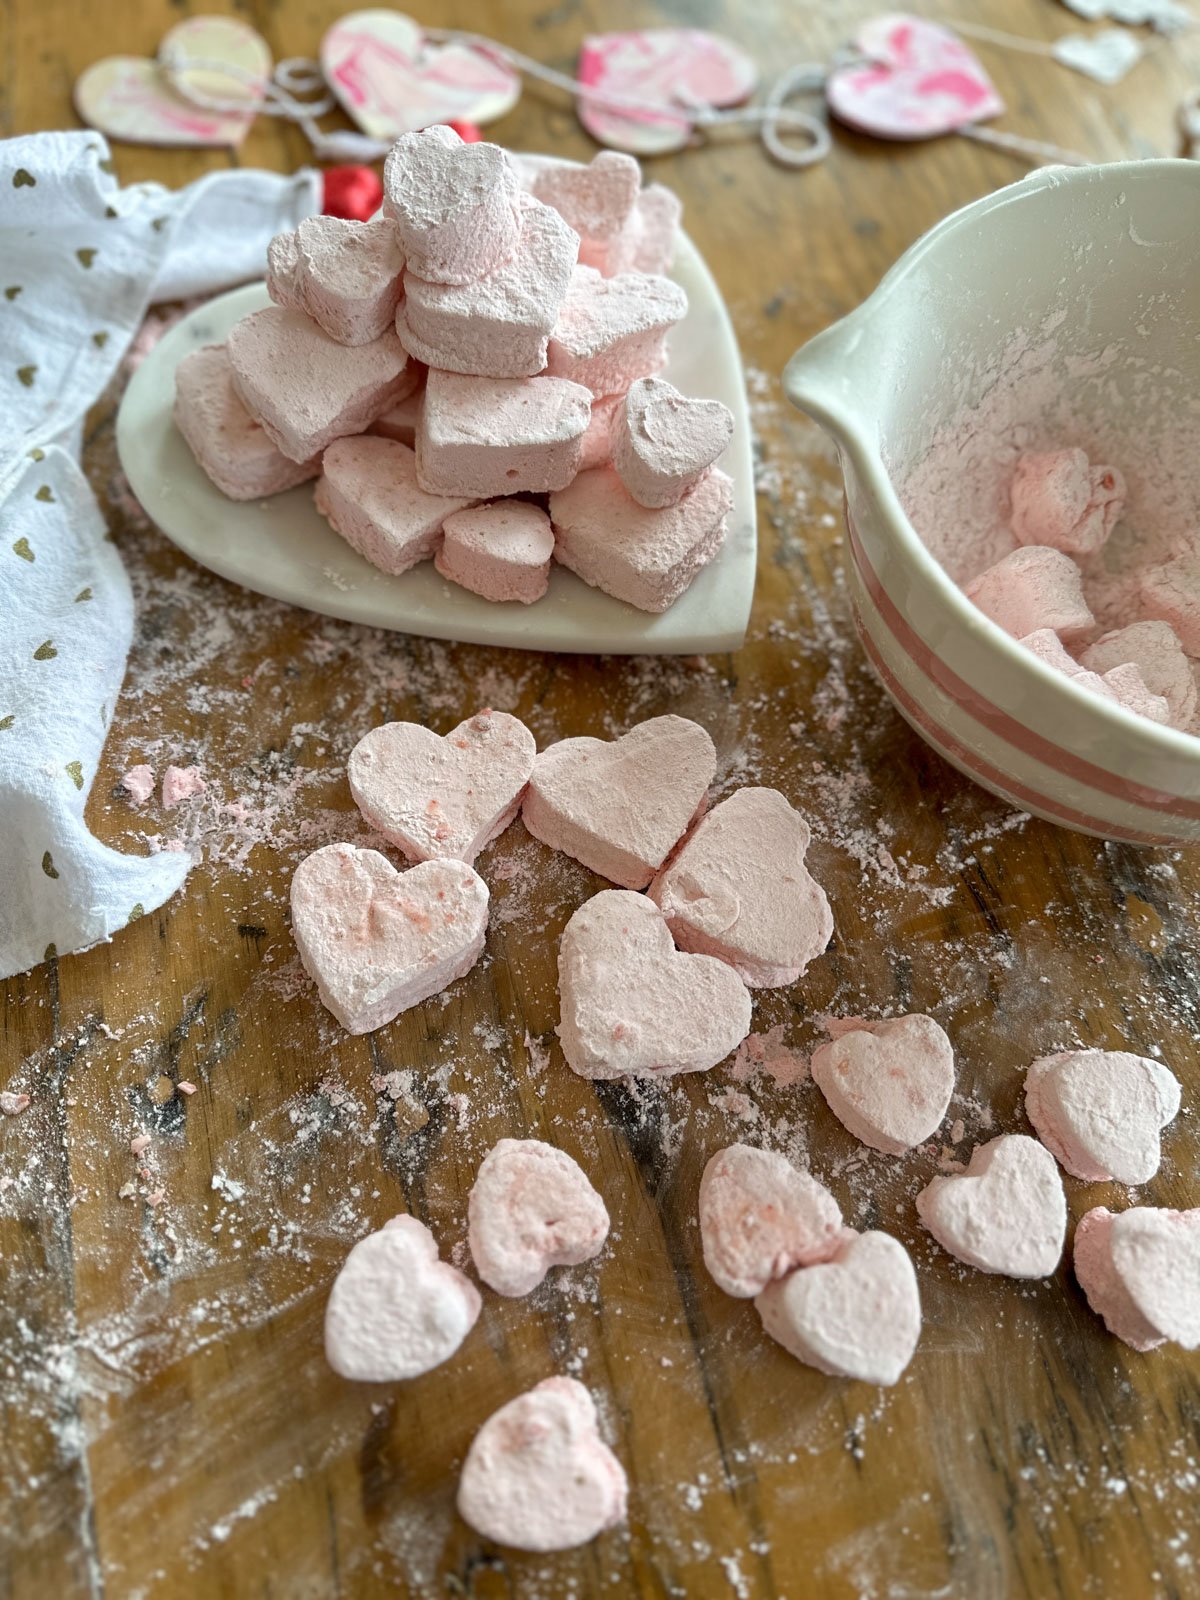
8. Step 8: Cut and coat. Turn the marshmallow slab out onto a cutting board lightly dusted with the coating mixture. Using a cookie cutter sprayed with non-stick baking spray, cut out shapes. (I used heart-shaped cutters for Valentine's Day.) Dip the edges of each marshmallow in the coating mixture to cover all the sticky sides. If you want squares, cut with a sharp knife or pizza cutter instead.
Expert Tips
- Use a candy thermometer. I can't stress this enough. Accurate temperature is the difference between perfect marshmallows and a sticky mess or a tough, chewy disaster. The sugar mixture must reach exactly 240°F. If you're new to using a candy thermometer, make sure it's clipped to the side of the pan and not resting on the bottom for an accurate reading.
- Whip for the full time. It really does take 12 to 15 minutes for the marshmallow mixture to reach full volume and the right consistency. Don't stop early. You're looking for a mixture that's thick, glossy, and forms stiff peaks when you lift the whisk. The bowl should also feel barely warm to the touch instead of hot.
- Process the strawberries finely. The more finely you grind the freeze-dried strawberries, the better they'll distribute through the marshmallows. You want a powder, not chunks. Pulse in short bursts and scrape down the sides of your food processor.
- Work quickly after whipping. Once you stop the mixer, the marshmallow mixture starts to set. Have your pan ready and your spatula greased before you finish whipping so you can transfer the mixture immediately.
- Coat your cutting tools. Marshmallows are sticky! Spray your knife or pizza cutter with non-stick cooking spray before cutting. If it gets sticky during cutting, wash it in warm soapy water, dry it, and re-spray.
- Let them set completely. Don't try to cut them early. The full 6 hours (or overnight) is necessary for them to firm up properly and hold their shape. I usually make these in the evening and cut them the next morning.
Variations and Serving Ideas
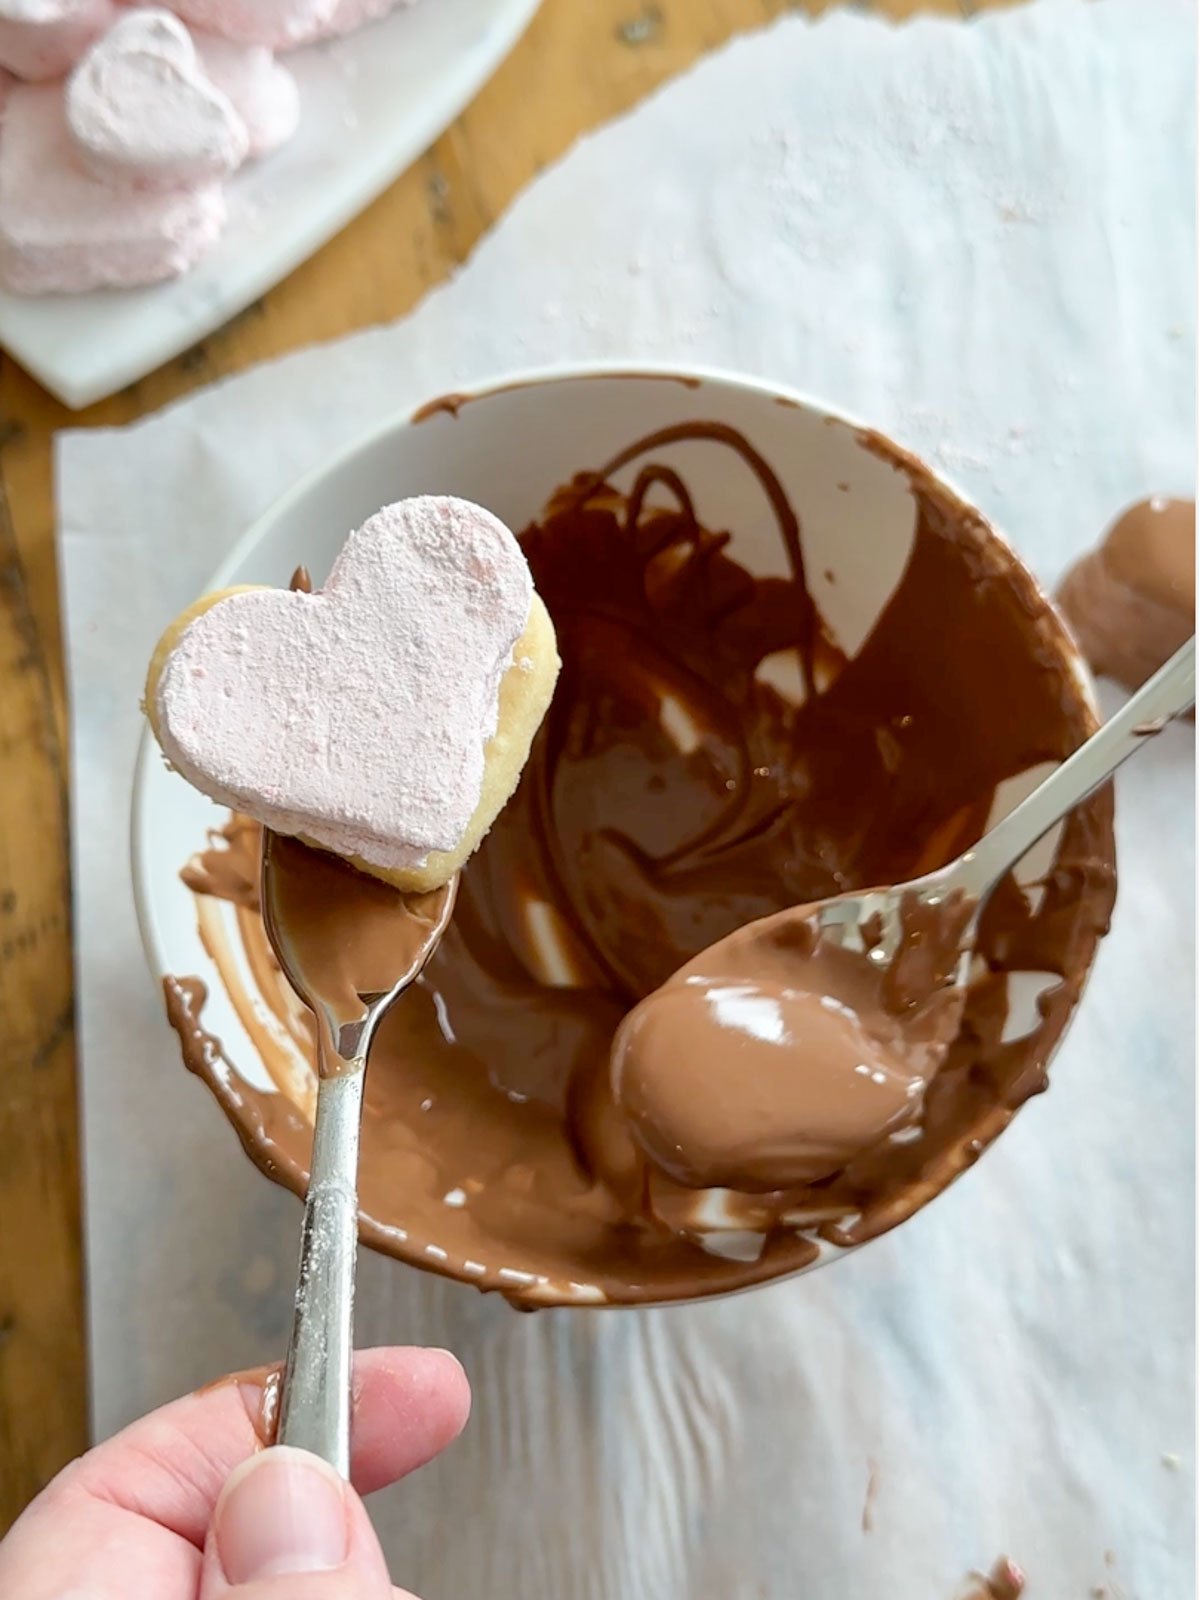
- Chocolate-dipped strawberry marshmallows: Melt good quality chocolate and dip one side of each marshmallow. Let them set on parchment paper. These are absolutely divine and perfect for Valentine's gifts.
- Strawberry s'mores: Use these for the most delicious s'mores ever. The strawberry pairs beautifully with chocolate. Graham cracker, dark chocolate, and strawberry marshmallow toasted over a fire? Yes, please. Or use on a s'mores charcuterie dessert board.
- Hot chocolate toppers: Float these on top of hot chocolate for a strawberry hot chocolate treat. They melt beautifully and add a subtle strawberry flavor. Or add to a hot chocolate charcuterie board.
- Gift packaging ideas: Package in clear cellophane bags tied with ribbon, layer in small mason jars, or arrange in gift boxes with tissue paper. These make wonderful Valentine's Day gifts, Mother's Day gifts, or party favors.
- Other berry flavors: Try this method with freeze-dried raspberries, blueberries, or blackberries. Each creates a different beautiful color and flavor.
- Strawberry shortcake marshmallows: Add ½ teaspoon of almond extract along with the vanilla for a flavor reminiscent of strawberry shortcake.
- Heart-shaped marshmallows: Use a heart-shaped cookie cutter to cut these for Valentine's Day. You'll get fewer marshmallows, but they look adorable.
- Dessert boards: Add these to dessert boards for tea parties, Valentine's gatherings, or baby showers. The pink color is so pretty and they're a fun textural element.
- Chocolate Fondue: Use these as dippers for milk chocolatte fondue!
Storage
- Best storage method: Keep marshmallows in an airtight container at room temperature. A glass or plastic container with a tight-fitting lid works perfectly.
- How long they last: Homemade strawberry marshmallows stay fresh for up to 3 weeks when stored properly at room temperature. They're at their absolute best within the first week, though. The strawberry flavor stays strong throughout.
- Can you freeze them? Yes! Freeze in an airtight container for up to 3 months. Thaw at room temperature before serving. I've tested this and they maintain their texture beautifully.
- Gifting storage tips: If packaging these as gifts, store them in cellophane bags tied tightly with ribbon, or layer them in small mason jars with tight lids. They look gorgeous and stay fresh.
- Keep them dry: Marshmallows don't like humidity. Store them in a cool, dry place away from moisture. Don't refrigerate them, as the moisture in the fridge will make them sticky.
Frequently Asked Questions
I developed this recipe using freeze-dried strawberries because they have concentrated flavor and no water content, which is ideal for marshmallows. The lack of moisture means they won't interfere with the marshmallow's ability to set properly. For this recipe, freeze-dried strawberries are what I've tested and know works beautifully.
Look for them at the grocery store, dollar store, or you can also order them online. Look for packages that are just strawberries with no added sugar or ingredients.
You could technically use a hand mixer, but I really don't recommend it. You'll be holding the mixer for 12 to 15 minutes, which is exhausting. A stand mixer is worth it for this recipe.
Not at all! That's what makes them so special. The freeze-dried strawberries give them a real, authentic strawberry flavor that tastes like actual fruit. They taste like real strawberries, because they're made with real strawberries.
Absolutely! These actually need to be made ahead since they require 6+ hours of setting time. Make them 1 to 2 days before your party for the best texture and easiest cutting.
Yes! They toast beautifully over a campfire or with a kitchen torch. The strawberry flavor is amazing with chocolate in s'mores. Just remember that homemade marshmallows are a little softer than store bought, and can slip off a toasting fork, so be careful.
Yes! You can increase the freeze-dried strawberries to 1 cup for more intense flavor. Just remember to reserve some for the coating mixture.
You can also make these in a 9x9 inch pan. They will be thicker, which is perfect for cutting into squares with a sharp knife or pizza cutter. We like them a little thinner when cutting with a cookie cutter, so that's why we suggest the 9x13 pan, but if you're slicing them a 9x9 pan is better.
More Marshmallow Recipe Inspiration


If you make these Strawberry Marshmallows, please leave a rating and let us know how it went in the comments below. Thanks for visiting Life is a Party today!
Strawberry Marshmallow Recipe
Recipe
Homemade Strawberry Marshmallows
Equipment
- candy thermometer
- stand mixer
- sharp knife, pizza cutter, or cookie cutters for cutting marshmallows
Ingredients
- 3 x 7 g packages unflavoured gelatine 3 x 7 grams = 21 grams total
- 1 cup very cold water divided
- 1 cup white corn syrup
- 1 ½ cup white sugar
- ¼ teaspoon salt
- 1 teaspoon vanilla
- ½ cup cornstarch
- ½ cup powdered sugar
- non-stick cooking spray
- ¾ cup freeze dried strawberries -divided
Instructions
- Process freeze-dried strawberries in a food processor until you have a fine powder. Reserve 1 tablespoon for coating mixture. Set remaining powder aside.¾ cup freeze dried strawberries
- Pour ½ cup cold water into the bowl of a stand mixer fitted with the whisk attachment. Sprinkle gelatin evenly over water and let sit while you make the syrup.3 x 7 g packages unflavoured gelatine, 1 cup very cold water
- In a medium heavy-bottomed saucepan, combine sugar, corn syrup, salt, and remaining ½ cup water. Cook over medium heat, stirring until sugar dissolves. Once boiling, stop stirring. Clip a candy thermometer to the pan and cook until the mixture reaches exactly 240°F, about 7 to 10 minutes.1 cup very cold water, 1 cup white corn syrup, 1 ½ cup white sugar, ¼ teaspoon salt
- With mixer on low speed, slowly pour hot sugar syrup down the side of the bowl into the gelatin. Once all syrup is added, turn mixer to high speed. Whip for 12 to 15 minutes, until mixture is thick, glossy, and white, and bowl feels barely warm.
- While marshmallows whip, spray 9x12 inch pan with non-stick cooking spray. Combine powdered sugar, cornstarch, and reserved 1 tablespoon strawberry powder. Sift generously over bottom and sides of pan. A 9x13 pan is perfect for cutting with cookie cutters, as it makes thinner marshmallows. For square marshmallows you can use a 9x9 pan and cut squares 1.5 x 1.5 inchs.1 teaspoon vanilla, ½ cup cornstarch, ½ cup powdered sugar, non-stick cooking spray
- In the last minute of whipping, add vanilla extract and reserved strawberry powder (not the tablespoon set aside). Mix until color is evenly distributed.1 teaspoon vanilla, ¾ cup freeze dried strawberries
- Pour marshmallow mixture into prepared pan. Use greased spatula to spread evenly. Sift more coating mixture generously over top. Let sit uncovered at room temperature for at least 6 hours or overnight.
- Turn marshmallow slab onto cutting board dusted with coating mixture. Using knife or pizza cutter sprayed with non-stick cooking spray, cut into 1.5 x 1.5 inch squares. Toss each marshmallow in coating mixture to cover all sticky sides. Store in airtight container at room temperature.
Video
Notes
- Candy thermometer is essential for success. Must reach exactly 240°F.
- Freeze-dried strawberries (not fresh or frozen) are required.
- Whip for full 12 to 15 minutes for proper texture.
- A 9x13 pan makes thinner marshmallows perfect for using cookie cutters to cut out, a 9x9 pan makes thicker marshmallows perfect for cutting into squares with a sharp knife or pizza cutter.
- Can be frozen in airtight container for up to 3 months.

Dannyelle says
These are soft and fluffy, have the perfect stawberry flavor and pink color and are easy to make!