If you've been wondering how to make a pinecone wreath, this step-by-step DIY tutorial shows you exactly how to do it. Using real pinecones, a wreath base, and hot glue, you'll learn how to prepare, assemble, and decorate your wreath for fall, Christmas, or winter décor.

Jump to:
Why You'll Love This Craft
- It's easy to make and looks great.
- We've updated the 90's version of this pinecone wreath your mom had with simple white spray paint.
- You only need some collected pinecones, wreath from, and hot glue to make this.
- Make this project in about hour, plus some wait time for drying pinecones and spray paint.
I wanted to make a pinecone wreath for my front door for fall and for Christmas to add a festive touch, and give it a more modern spin -as in not the Christmas version from the 90's. Did your mom have one too?
To make it a little more up-to-date, I spray painted it white, and added a really simple ribbon. This whole project only costs $10-$15 and looks great!
You might also like our DIY Crescent Moon Wreath, How To Make A Birch Wreath, Mini Macrame Christmas Ornaments, or Acorns Made From Easter Eggs Craft.
Materials:
- Wreath Form: I like the flat wood base kind for this wreath, it's a little easier to work with than the wire forms and gives you a great surface to hot glue the pinecones to.
- Pine Cones: We used pinecones from a red pine tree. Collect some small pine cones and medium pine cones, to fill in the wreath well.
- Hot Glue Gun and Glue Sticks
- White Spray Paint: We love how the white spray paint gave this wreath a more modern look, but you can also leave it natural if you prefer.
- White Ribbon: We kept it monochromatic with a simple, long white ribbon.

Variations
- Natural Pinecone Wreath: If you prefer a natural pinecone wreath, you can skip the spray painting step. Instead, spray your finished wreath with a matte varnish to preserve it.
- Different Color: We love the look of our wreath in white, but you could make this wreath in any color that suited your taste or decor, including something more festive for the holidays.
- Festive Bow: You could add a festive bow to your wreath instead of a neural ribbon, especially during the holidays.
- Square Wreath: This pinecone wreath would also look great as a square or rectangle. Look for a square or rectangular shaped base to use if you prefer.
- Different Varieties of Pinecones: We really liked the look of using all one type of pinecones, but if you prefer, you could try using different varieties together to give you a mix of shapes and sizes, or use all one of a different variety than we chose.
How To Make A Pinecone Wreath
Step 1: Gather Your PInecones and Dry Them
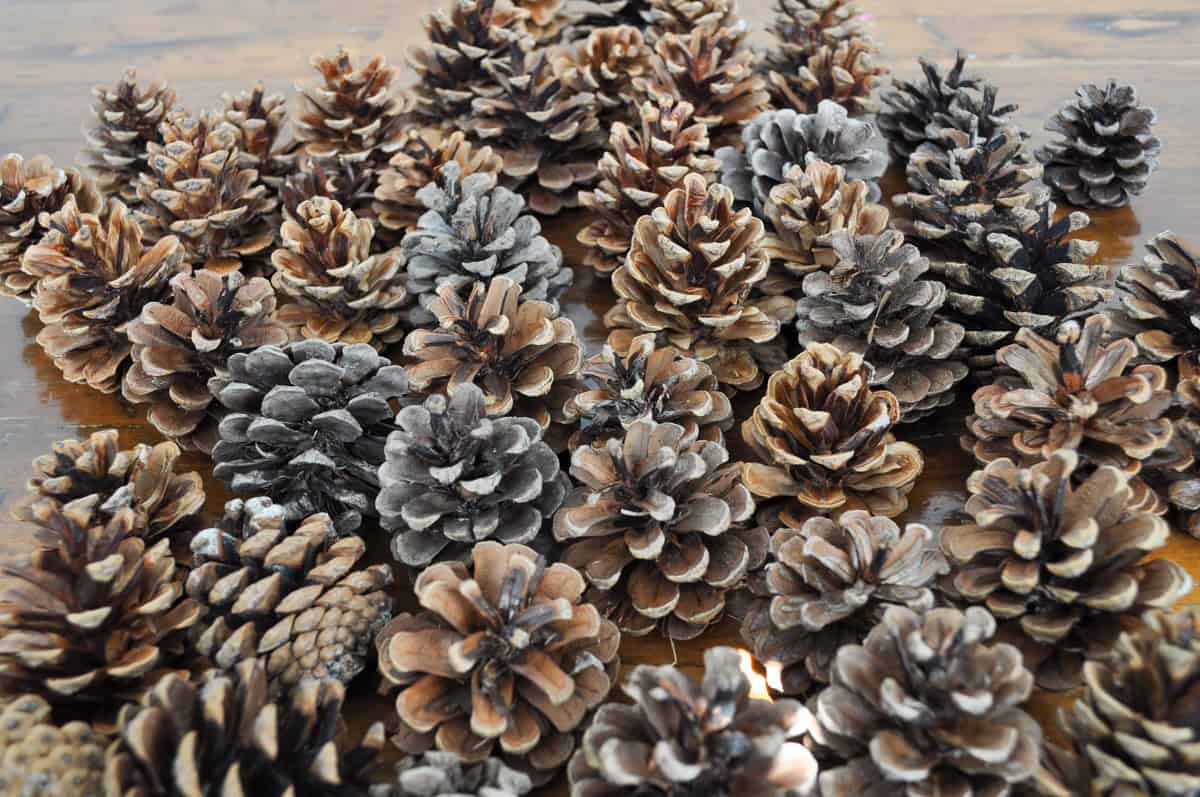
Look for pinecones in small and medium sizes. A variety of sizes makes it easier to fill in gaps and holes. Parks and forests are a great place to search for them.
We used pinecones from a red pine tree for our wreath. They're perfect if you can find them because they're nice and round and not too elongated. Pinecones usually fall around the end of September if you're looking for them. You can also shop for pinecones online if you don't have any available for you to collect.
Once you've collected them, you can lay them out to dry and fully open if they're closed up at all.
Expert Tip: To speed up the drying process, put the pinecones on a parchment paper or foil-lined cookie sheet to protect it from the pine sap. Put the baking sheet in the oven at 200F for about 30 minutes, or until the pinecones fully open.
Bugs: This oven treatment should also kill any bugs that might be hiding in the pinecones. Alternatively, some people like to put their pinecones in a bucket of water with some bleach to kill anything that might be living in them. Fill a large bucket with water, add about ½ cup of household bleach, add pinecones and put a small plate on top to keep them submerged. Drain and rinse them after about an hour soak, and then dry them in the oven.
Step 2: Prepare Your Wreath Form
For the next step find a 12 inch wood wreath base. The wood is perfect for using with hot glue and easier than using a wire frame, and wiring each individual pinecone.
A foam wreath isn't sturdy enough for this project. Pinecones are heavy en masse.
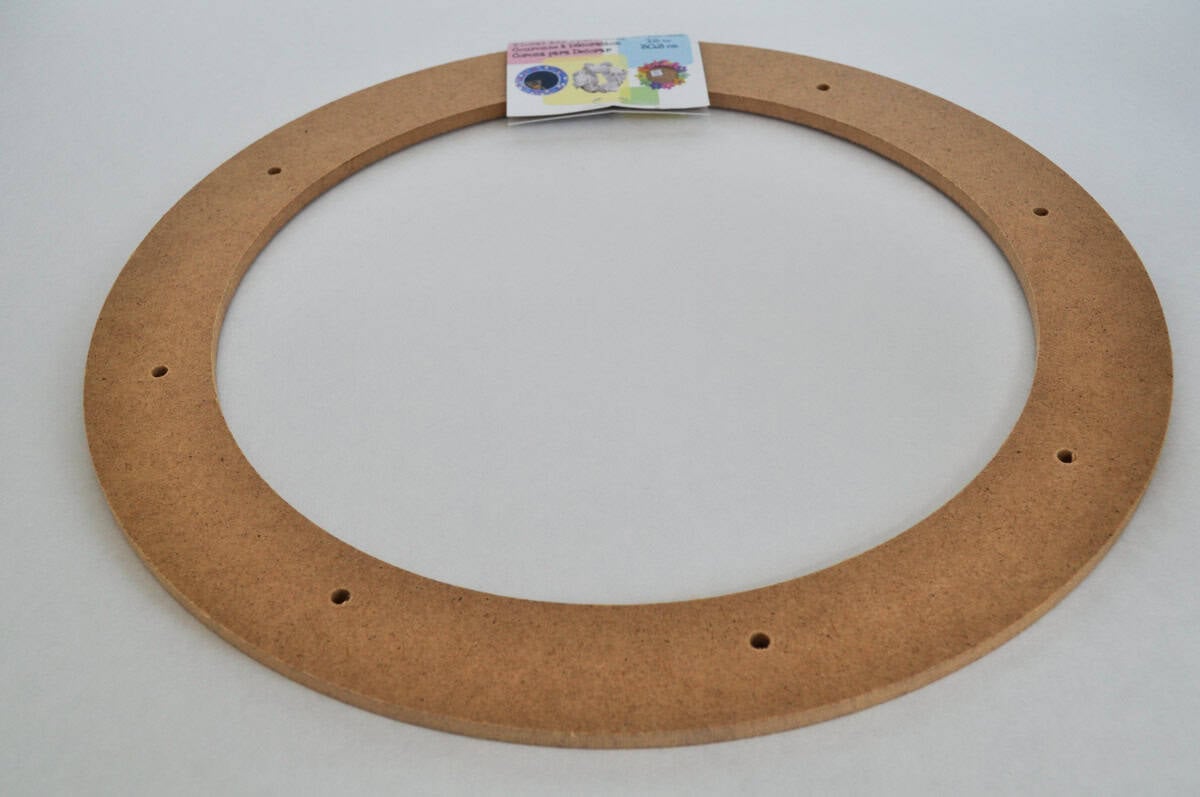
Don't forget to add a piece of twine or wire to one of the holes to make a wreath hanger on the back before you start glue on the pinecones.
I wish I had spray painted the wreath base before I started adding the pinecones, but you can benefit from my mistake, and spray your base first. Spray painting the base would have been a better way to make sure it was entirely covered. Although you will spray paint the whole wreath later, it's a bit tricky to get into the deep nooks and crannies after the pinecones are all added on.
Step 3: Add The Pinecones
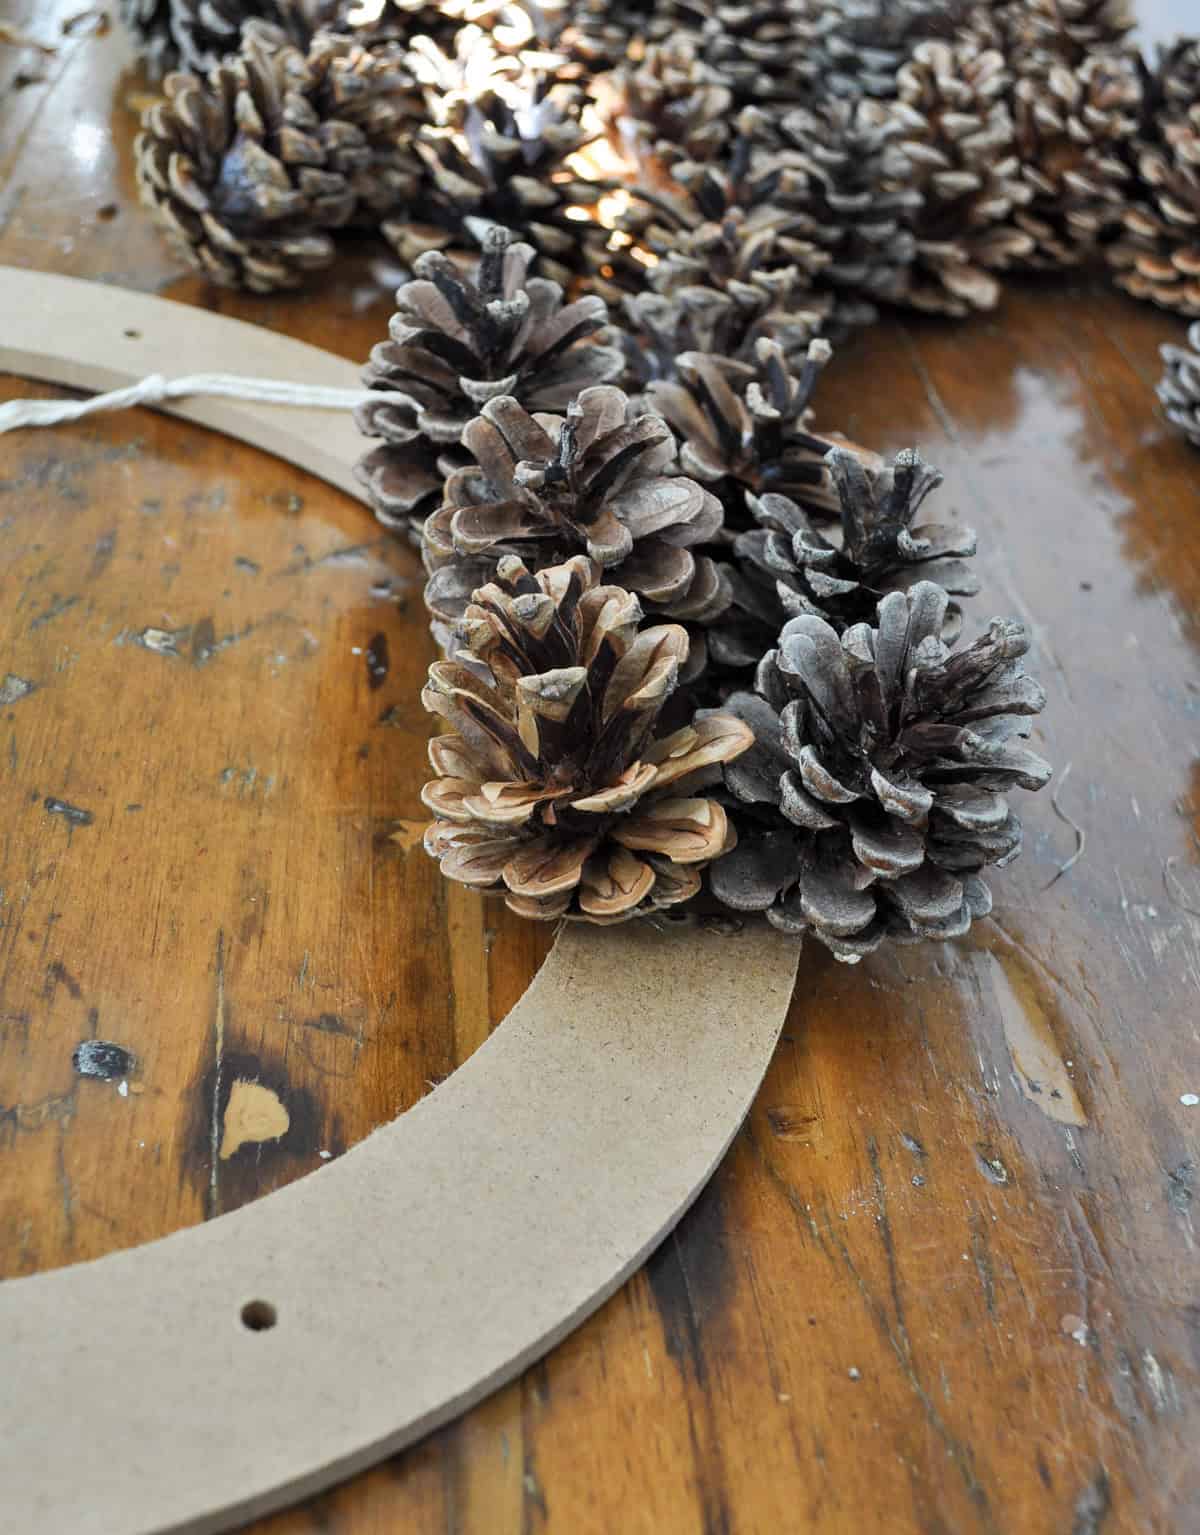
I went with two rows of pine cones as a base for my diy pine cone wreath, creating an inner ring and an outer ring out of medium pinecones.
The next easy step was to fill in a row of smaller pinecones on top.
To attach the pine cones to the wreath form, use a lot of hot glue at the base of the pine cone. Don't worry too much about it showing, since you're going to spray paint it all afterward.
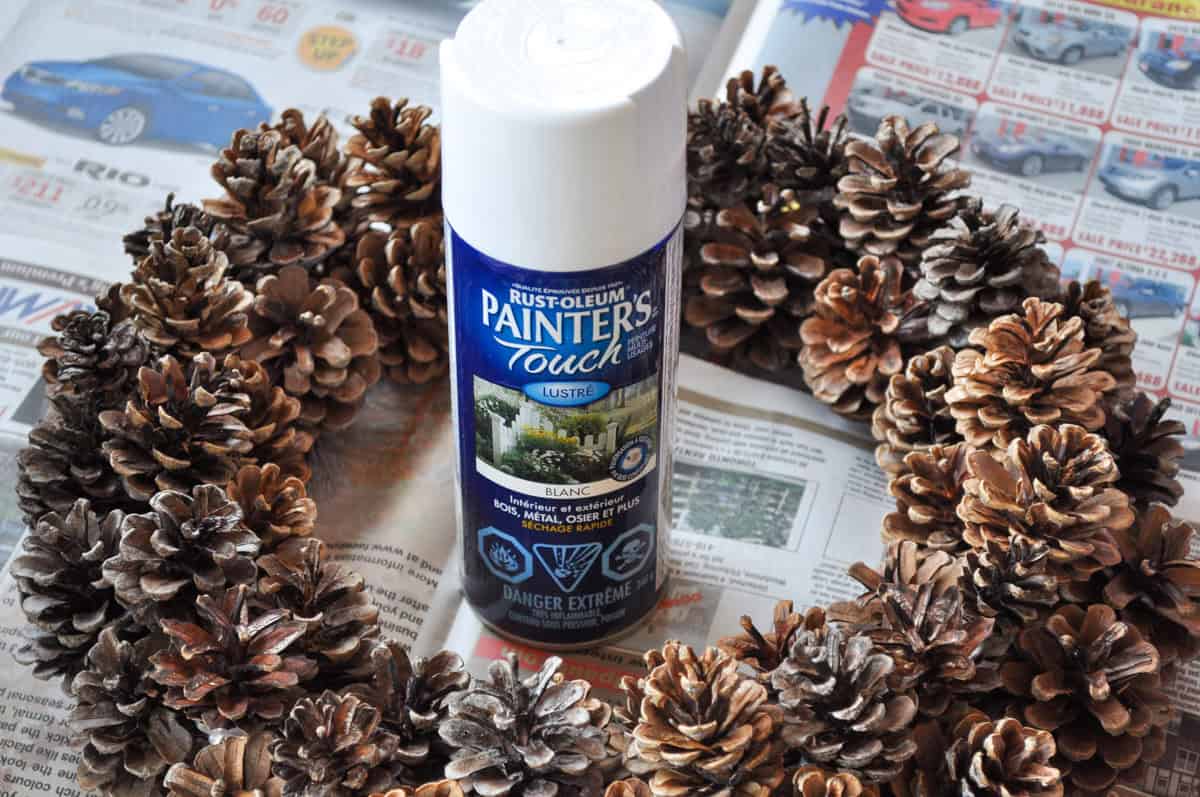
Step 4: Spray Painting The Wreath
Then it's time to spray paint the pinecone wreath. I am slightly obsessed with spray paint. Spray painting anything all one color seems to immediately make it look more modern, and it's a great way to give traditional Christmas crafts like this one a new spin.
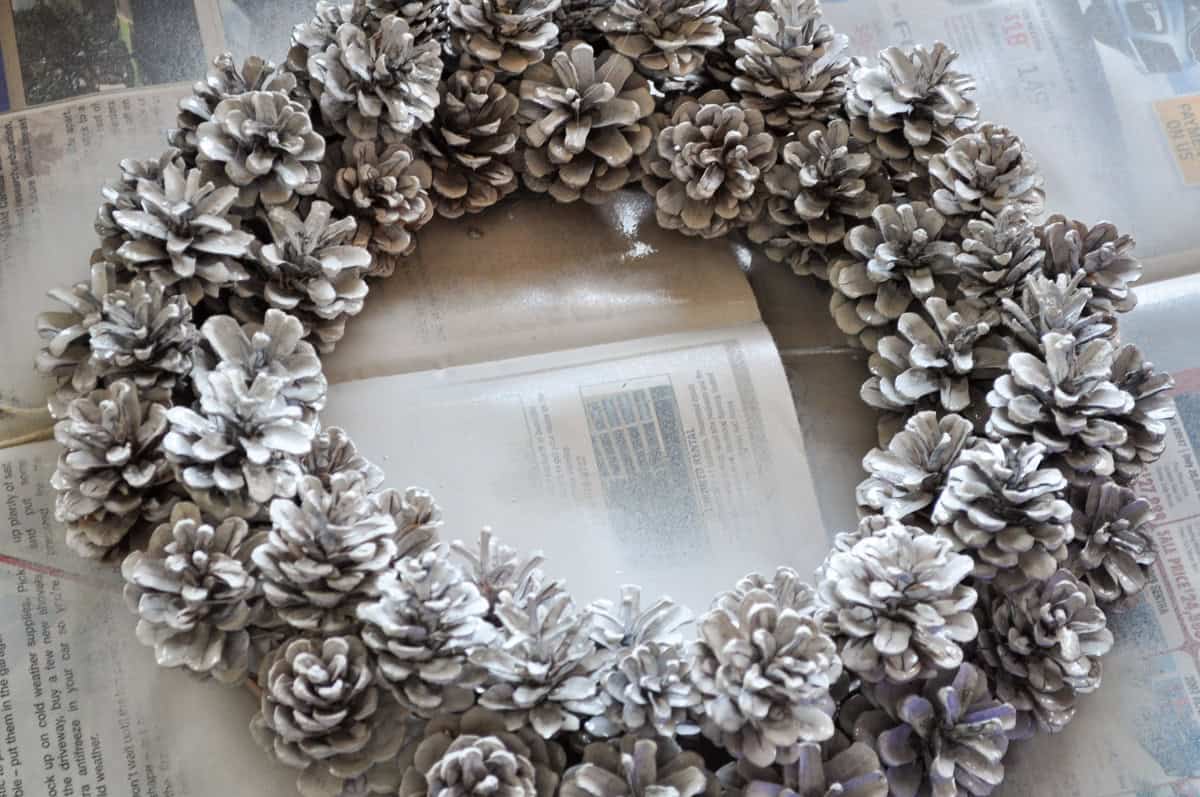
Here it is after one coat of white paint.
Spray paint with many, many light coats for best coverage and to avoid drips, although pinecones are very forgiving.
You will definitely want to use spray paint for this job and not acrylic paint, so that it can get into all the nooks and crannies of the pinecones.

Step 5: Add A Ribbon
And then the best part, I tied on a long, white grosgrain ribbon.
I think it's less fussy than a bow and again makes it feel more up-to-date and modern.
Perfect Wreath for Fall or Christmas
This would is perfect as part of your fall, Christmas, or winter decor.
We used our wreath outside. Our front door is protected from extreme weather conditions. Also, the spray paint helps preserve outdoor wreaths, and keeps the pinecones from closing up if they become wet.
With a new wreath made of pinecones to enjoy, life really is a party!
Storing Your Wreath
We recommend storing your wreath when it's not in use in a wreath container or plastic bin. These are great for protecting your wreath from being squished and from dust. Over time, your wreath might need some minor repairs. Check it over at the beginning of a new season, and reglue any pinecones that have become loose.
Frequently Asked Questions
We used about 60 pinecones from a red pine tree, that were medium and small sizes to cover a 12 inch wreath form. It will vary depending on the size of your wreath form and the size and variety of your pinecones.
You will want to make sure your pinecones are completely dry and open to make a wreath. Place pinecones in a warm, dry place to have them open. To dry pinecones faster you can place them on a foil or parchment paper linned baking tray in a 200F oven for about 30 min.
To keep your pinecones preserved and open, you can spray paint them, or if you prefer a natural finish, spray them with a matte varnish spray.
Over time, the hot glue on the pinecone wreath may dry and let go. Each season, before putting your pinecone wreath out check it over, and reglue any areas that have become loose. If necessary touch up the paint as well to keep your wreath looking fresh for a long time.
More Wreath Inspiration


If you try our tutorial on How To Make A PInecone Wreath or any other ideas on the blog please let me know how it went in the comments below and give us a star rating. Thanks for visiting today!
PInecone Wreath
Equipment
- hot glue gun
- Hot Glue
Materials
- 1 Wood Wreath Form
- 60-75 Small and Medium Pinecones
- 1 can White Spray Paint
- 1 piece White Ribbon
Instructions
- First step, go and your pinecones. We used red pine for ours. They're perfect if you can find them because they're nice and round and not too elongated. Once you've collected them you can lay them out to dry and fully open if they're closed up all. To speed up the drying process, put the pinecones on a parchment paper or foil-lined cookie sheet to protect it from the pine sap. Put the baking sheet in the oven at 200F for about 30 minutes, or until the pinecones fully open.
- Add a piece of twine or wire to the back of your wood wreath form to make a hanger. Then spray paint your wreath form white and let it dry.
- Add an inner and outer row of medium pinecones to the wreath base using hot glue. Next, fill in a row of smaller pinecones on top.
- Spray paint your wreath. Many light coats gives you the best coverage, and avoids drips.
- Once your wreath is dry, tie on your ribbon, hang, and enjoy.


Joann says
I'm going to try to make the wreath on the door. I'm not very smart so I hope I can do it. I have to go to the craft store and get that cardboard and I have to put the pine cones in water and bleach and dry them for a few days. I think it's best. Maybe I can paint them before I put them on that cardboard. Would it be best and paint the cardboard too before? Thank You
dnr says
Susan, best of luck, I'm sure it will turn out great!
Dannyelle
Susan says
This is just what I want to make. I collected pine cones from a bachelor's front yard and I want to make him a wreath out of them. Since his front door is dark, I wanted a light one and this one is perfect. I sure hope I can follow your instructions. Thanks.
dnr says
Hi Jean, I didn't bake or bleach my pinecones. If they're very wet they'll be closed but a little time indoors and they should open up. You can bake them a little to make them open more if they're not open, but it's not a necessary step. I didn't have any trouble with the hot glue holding up. Maybe after a couple years I had to reapply some glue for some loose ones.
Hope this helps,
Dannyelle
Jean Craig says
I have read that you have to bake and bleach the pinecones before you use them. Really put a damper on my plans! Did you do that?? Does the glue hold up outdoors??
Samantha says
Did the pinecones hold with the hot glue outside? I did a project with hot glue and the rocks started to fall off (maybe because of the smooth surface).
dnr says
Hi Barbara, They're mostly faux pumpkins from the craft store, they come in white.
Best of luck,
Dannyelle
Barbara says
The wreath is great but I love those wonderful white pumpkins: are they spray-painted too?!?
Thanks a lot
Barbara
dnr says
Hi Lisa,
I found the ring at Michaels craft store, best of luck.
Dannyelle
Lisa says
Where can I find the ring?
dnr says
Hi Ruth, I don't remember what size wreath ring this was...maybe 12", whatever fits your own door would be a good choice. The pinecones are just regular pinecones...maybe a couple inches in diameter, but anything would do, you'd just have to add more or less to fill in your form.
Best of luck,
Dannyelle
Ruth says
What size ring did you use & what size were the pinecones?
Valerie@Occasionally Crafty says
I love spray painted pinecones, and I think the white makes them looks so elegant! Thanks for sharing at The CSI Project challenge this week!
Marta says
I love it....it's so beautiful ^_^
Thanks for sharing
Hugs
Marta
darla says
Your entire arrangement looks wonderful and an easy change for Christmas.