How To Connect Cursive Letters On Cricut: learn how to use letter spacing and ungroup letters to connect letters in Cricut Design Space.
Jump to:
- How To Connect Cursive Letters On Cricut YouTube Video
- Kerned Fonts vs. Unkerned Fonts
- Do I Need To Worry About This With A Kerned Font?
- Unkerned Fonts
- Adjusting Letter Spacing Of The Whole Word
- Adjusting The Spacing Of Individual Letters
- Combining Adjusting The Letter Spacing Of Whole Word And Individual Letter Adjustment
- Welding The Letters Together
- Troubleshooting Connecting Cursive Letters
- How Do I Curve The Text?
- Where Is The Unweld Button?
- More Helpful Cricut Posts
If you've ever added a cursive font to your Cricut Design Space canvas and noticed that the letters weren't touching this tutorial will teach you everything you need to know to connect them. Don't worry you can use any pretty script font, cute font, font style, or fancy script font you like with great results with these simple beginner methods in this free tutorial.
How To Connect Cursive Letters On Cricut YouTube Video
Prefer to learn by watching? Check out the YouTube video below to see exactly how to do it.

Kerned Fonts vs. Unkerned Fonts
Kerned text means that that the spacing between the letters has been automatically adjusted to look pleasing. Unkerned texts are not adjusted.
Do I Need To Worry About This With A Kerned Font?
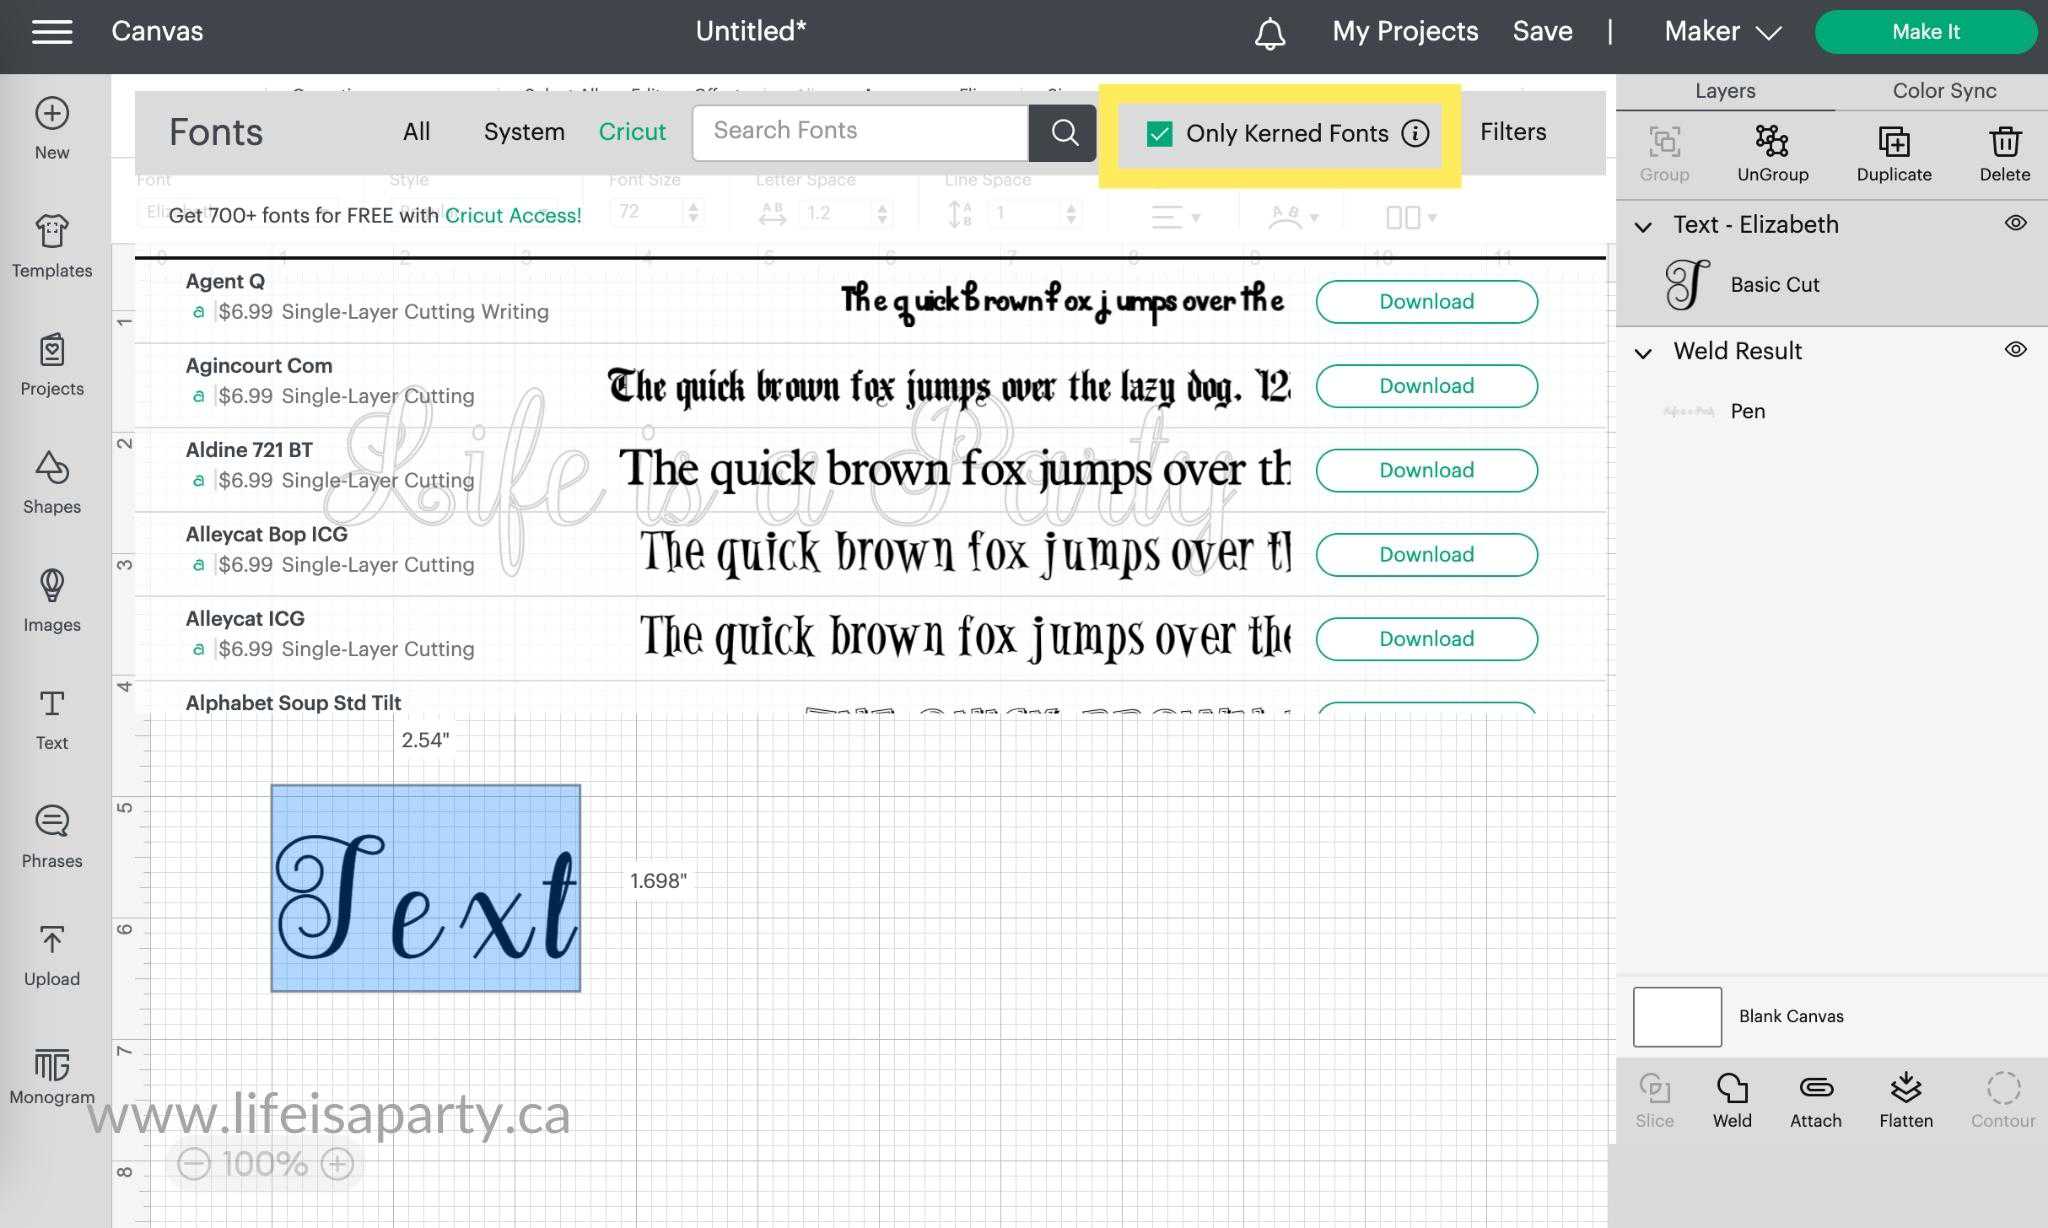
Lots of cursive fonts in Cricut Design Space are kerned, and when you add them to your canvas the letters will already be spaced out perfectly and touching. When you cut out these letters, they will automatically cut out all as one word. If your font is already kerned in Cricut Deisgn Space you'll be able to skip all the steps below. You can filter for only kerned fonts when you're choosing your font. To do this, click on the font, and then make sure the "only kerned fonts" box is checked, so that Cricut will only show those options.
Unkerned Fonts
There are still some unkerned cursive Cricut fonts though that you might see if you don't have the "only kerned fonts" filter box checked under fonts, or if you upload free fonts you may also have unkerned fonts, where you will have to manually adjust the lower case letters so that they are touching and then weld the letters together before cutting so that it cuts out as all one word rather than individual letters. There are a few different ways to adjust the letter spacing, and it's very easy to do, and doesn't take much time.
Whether you are cutting out words or using the writing feature with a pen, you'll want to make sure that the letters are connected together first.
Adjusting Letter Spacing Of The Whole Word
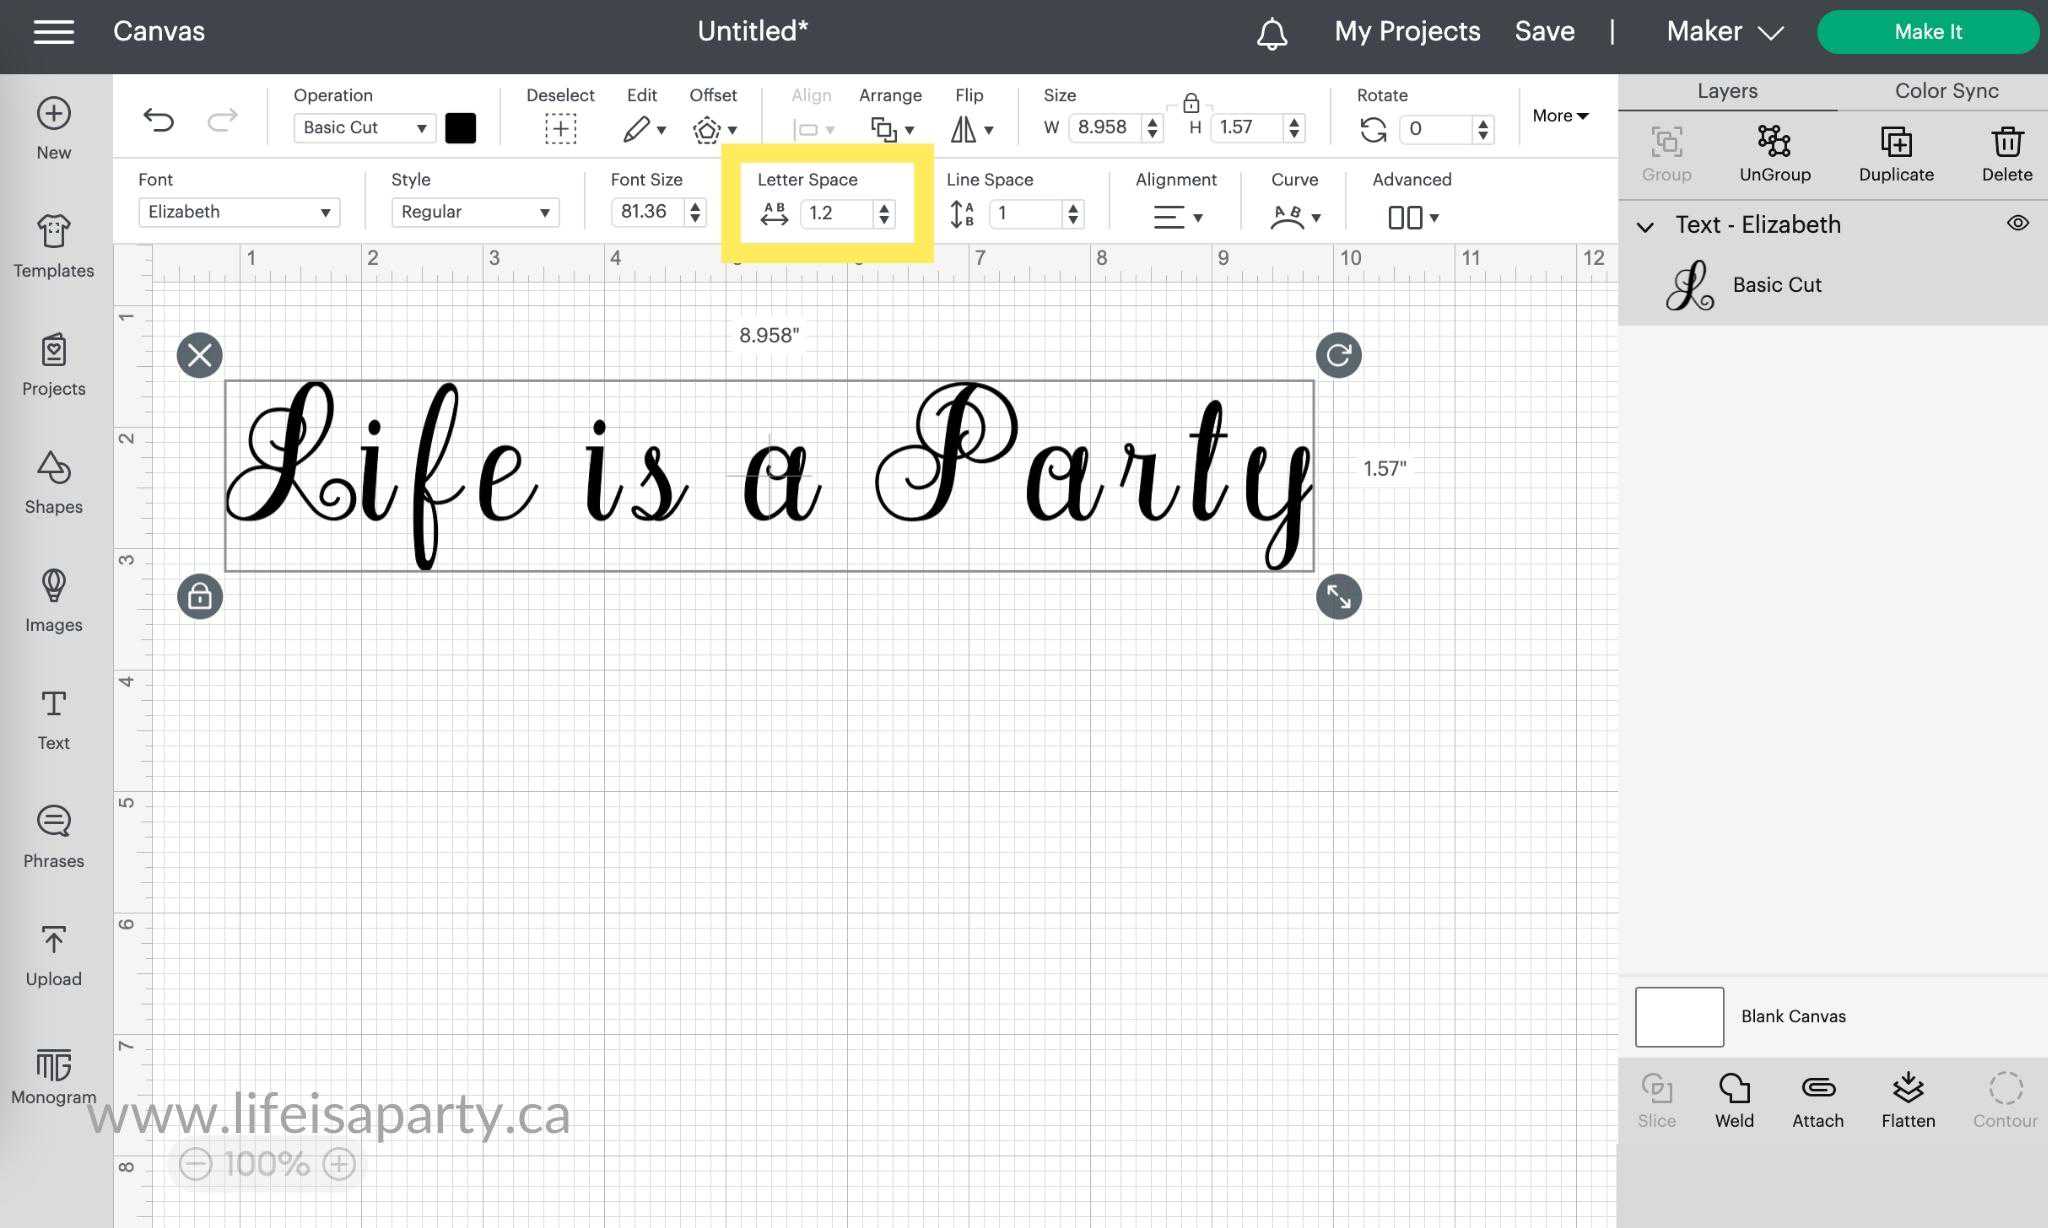
The first thing I like to do is to adjust the letter spacing of the entire word of a script font. You can use the letter spacing tool in the text edit menu at the top of the screen in desktop, between the font size and the line spacing tool. The letter spacing tool will equally adjust the spacing between the letters of the entire word. If you can't see the text edit menu bar, you need to first make sure a text box is selected. Adjust the letter spacing up and down arrow button. Adjust the spacing until the font tails are touching and where you like them. Don't forget to weld the script text together to cut them out as all one word and not individual letters.
Adjusting The Spacing Of Individual Letters
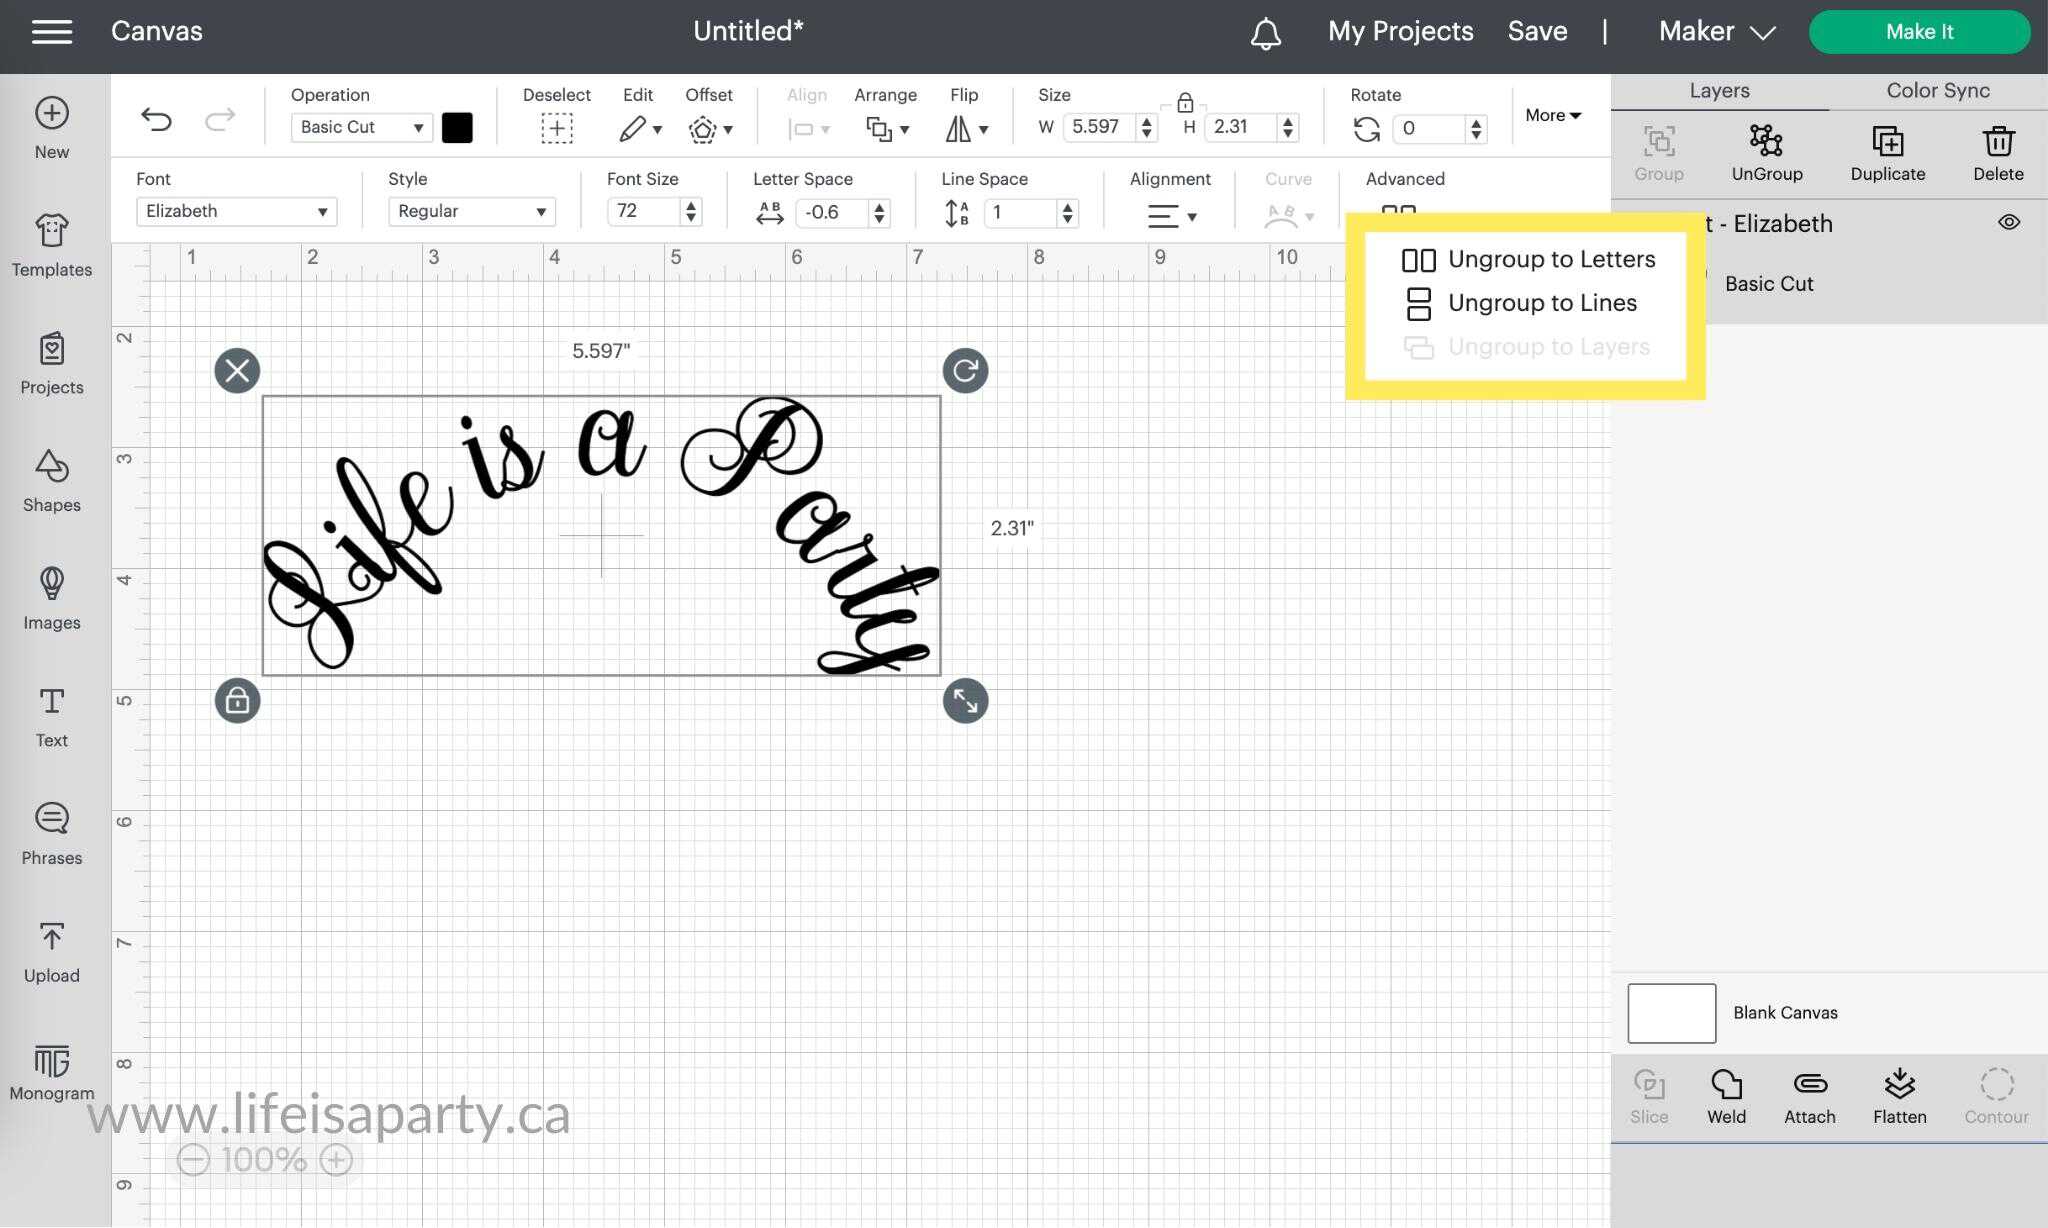
You can also adjust the spacing of individual script letters within a word. To do this, make sure the word is selected and click on advanced at the right hand side of the text menu on the top toolbar of your canvas in desktop. Then choose Ungroup To Letters.
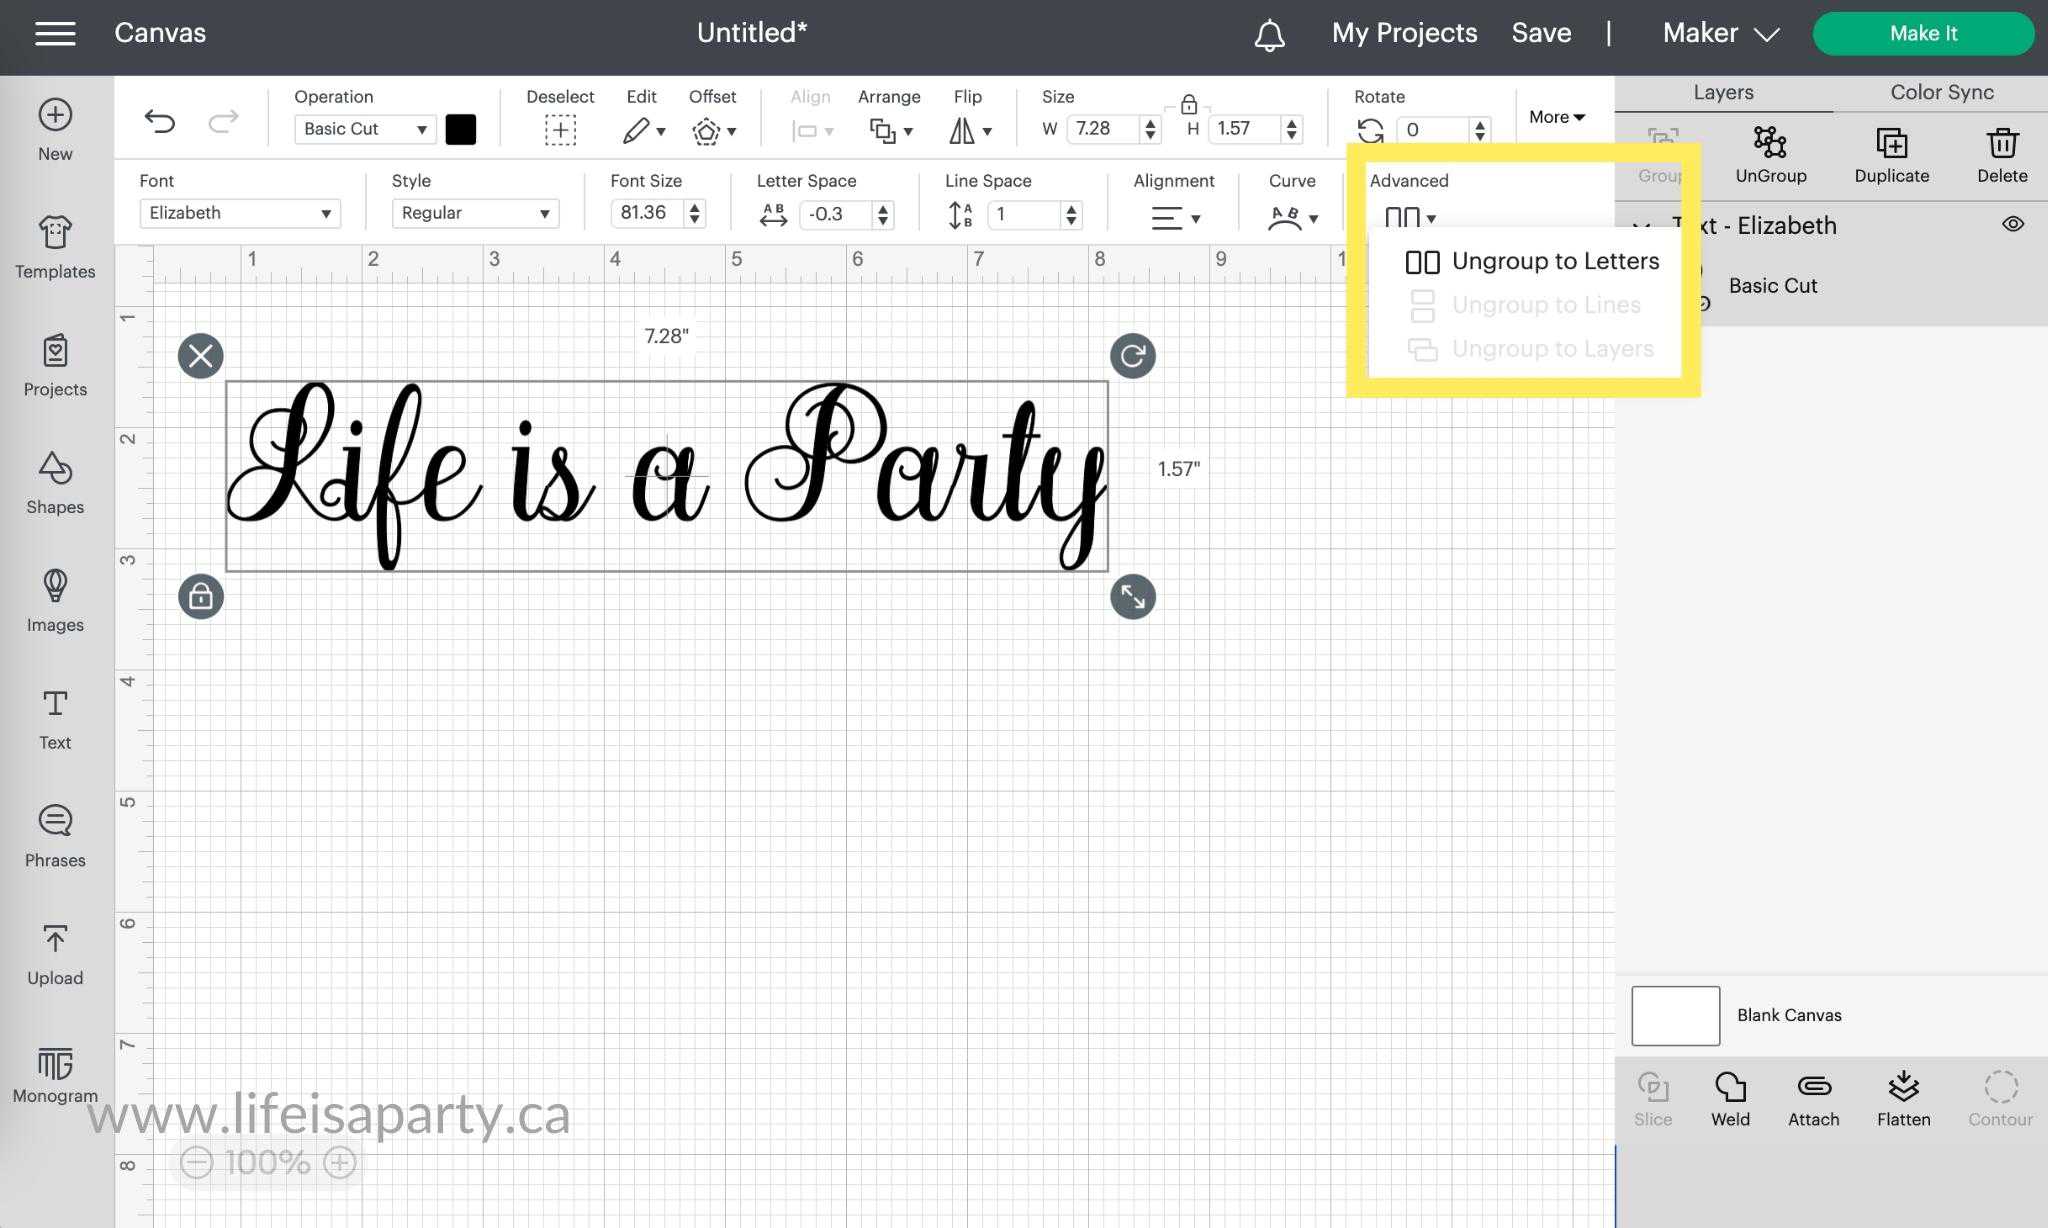
Now you can click on the individual letters and adjust each letter space by itself. Don't forget to weld them together afterwards if you want them to cut out as all one continuous word and not individual letters.

Tips On How To Connect Cursive Letters On Cricut:
- start your adjustments in the middle of the cursive text word and work outward so that you don't have to move every single letter
- use the left and right arrow keys on your keyboard to adjust the letters from side to side. This the best way to keep the letters aligned on the bottom.
Combining Adjusting The Letter Spacing Of Whole Word And Individual Letter Adjustment
I usually begin adjusting a word with using the letter spacing tool, and getting the word adjusting so that most of the letters are touching and in a position I'm happy with. Then secondly I usually ungroup the individual letters and fine tune the spacing by adjusting individual letters as needed. I find using both methods together gives the best and easiest results.
Welding The Letters Together
If you don't weld the newly spaced letters together, even though they are touching they will still cut out as individual letters.

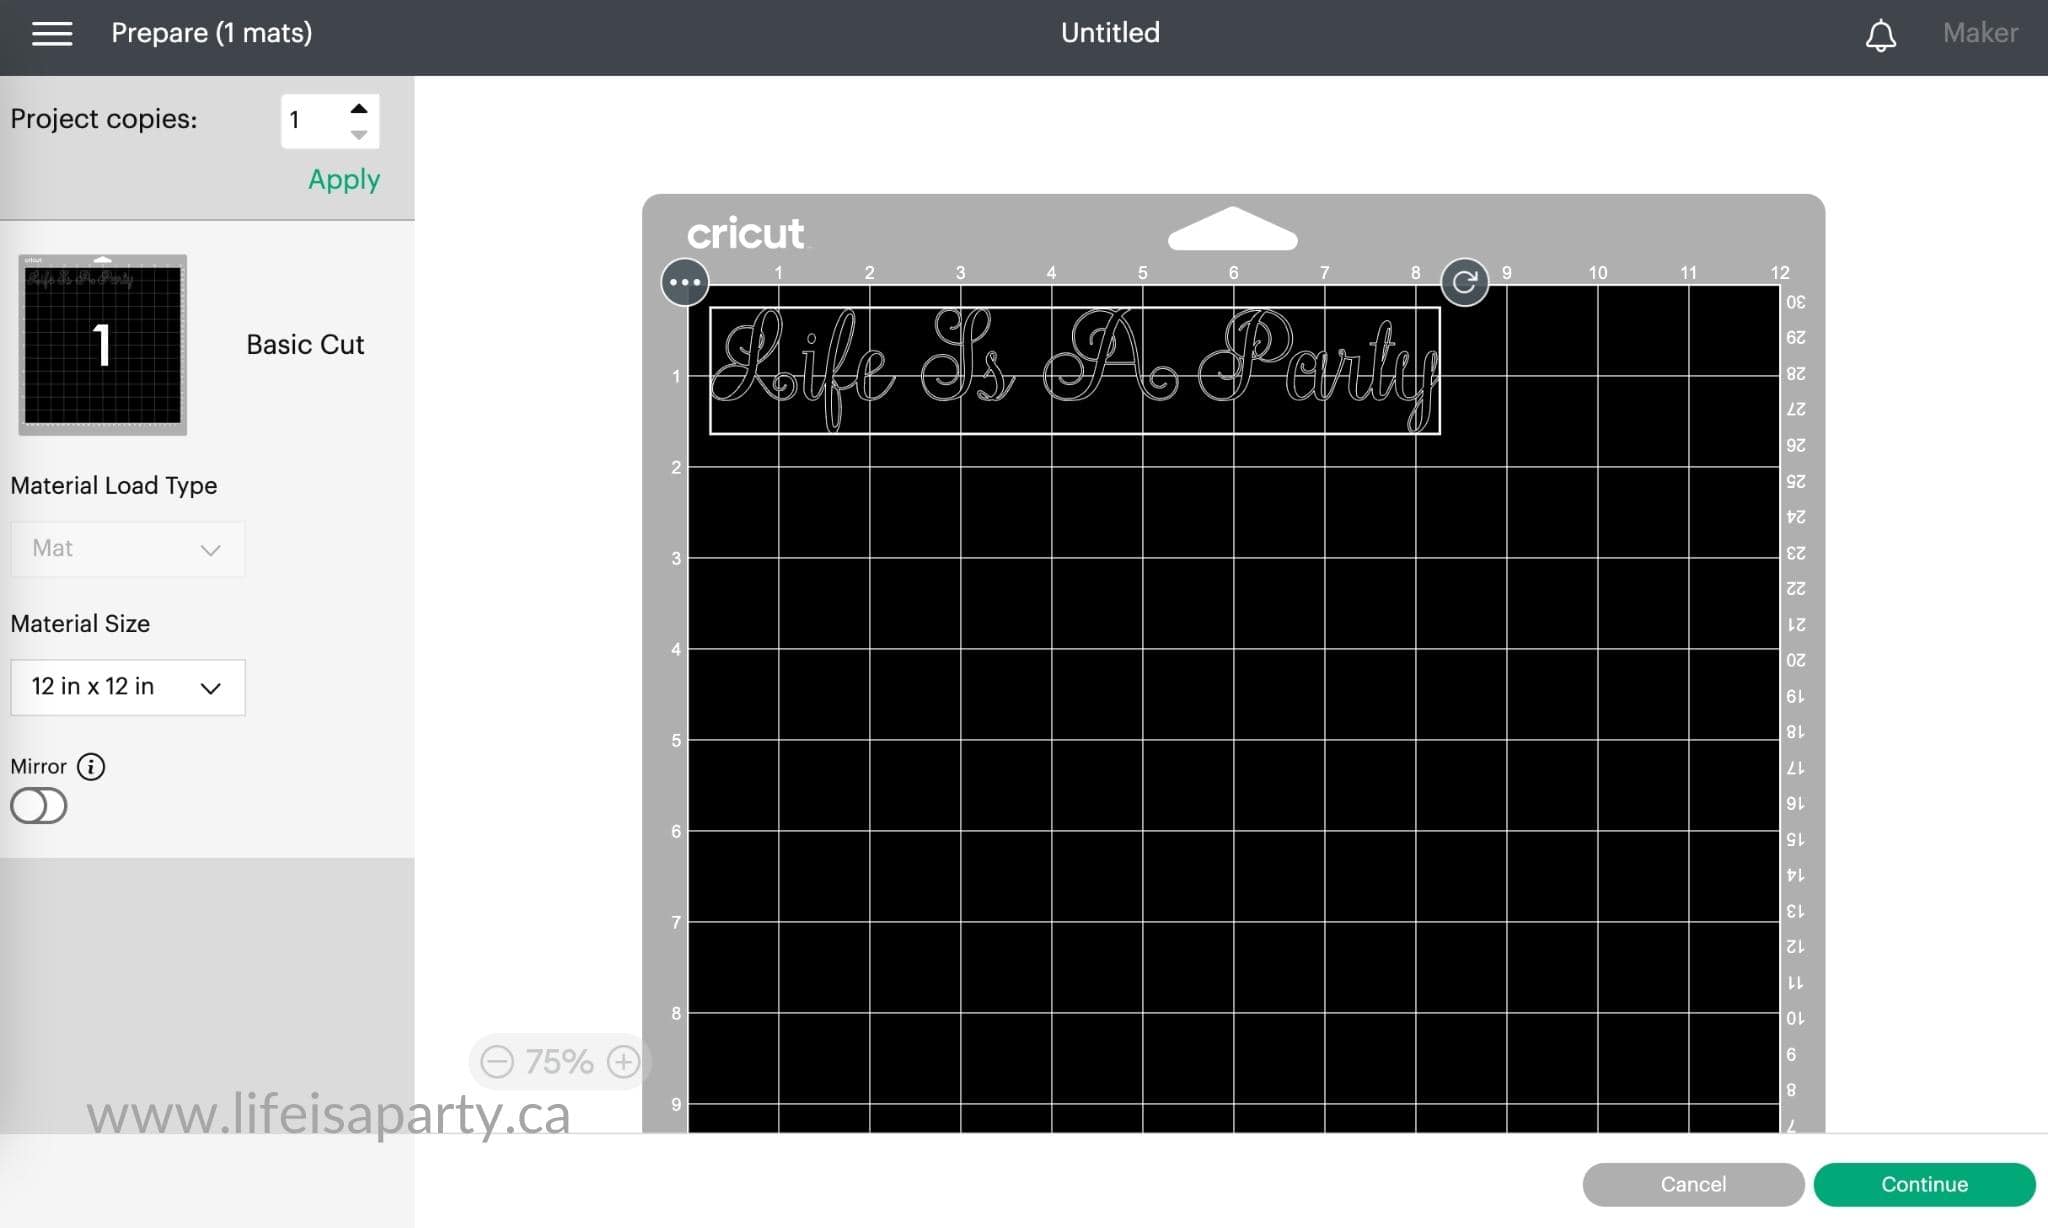
If you want the word to cut out as a single word, without cut lines between letters you must first use the weld tool to join them together. Don't forget this important final step. The easiest way to check your work is to look on the cut preview screen for any overlapping cut lines to make sure you haven't forgotten before cutting out on your Cricut machine.
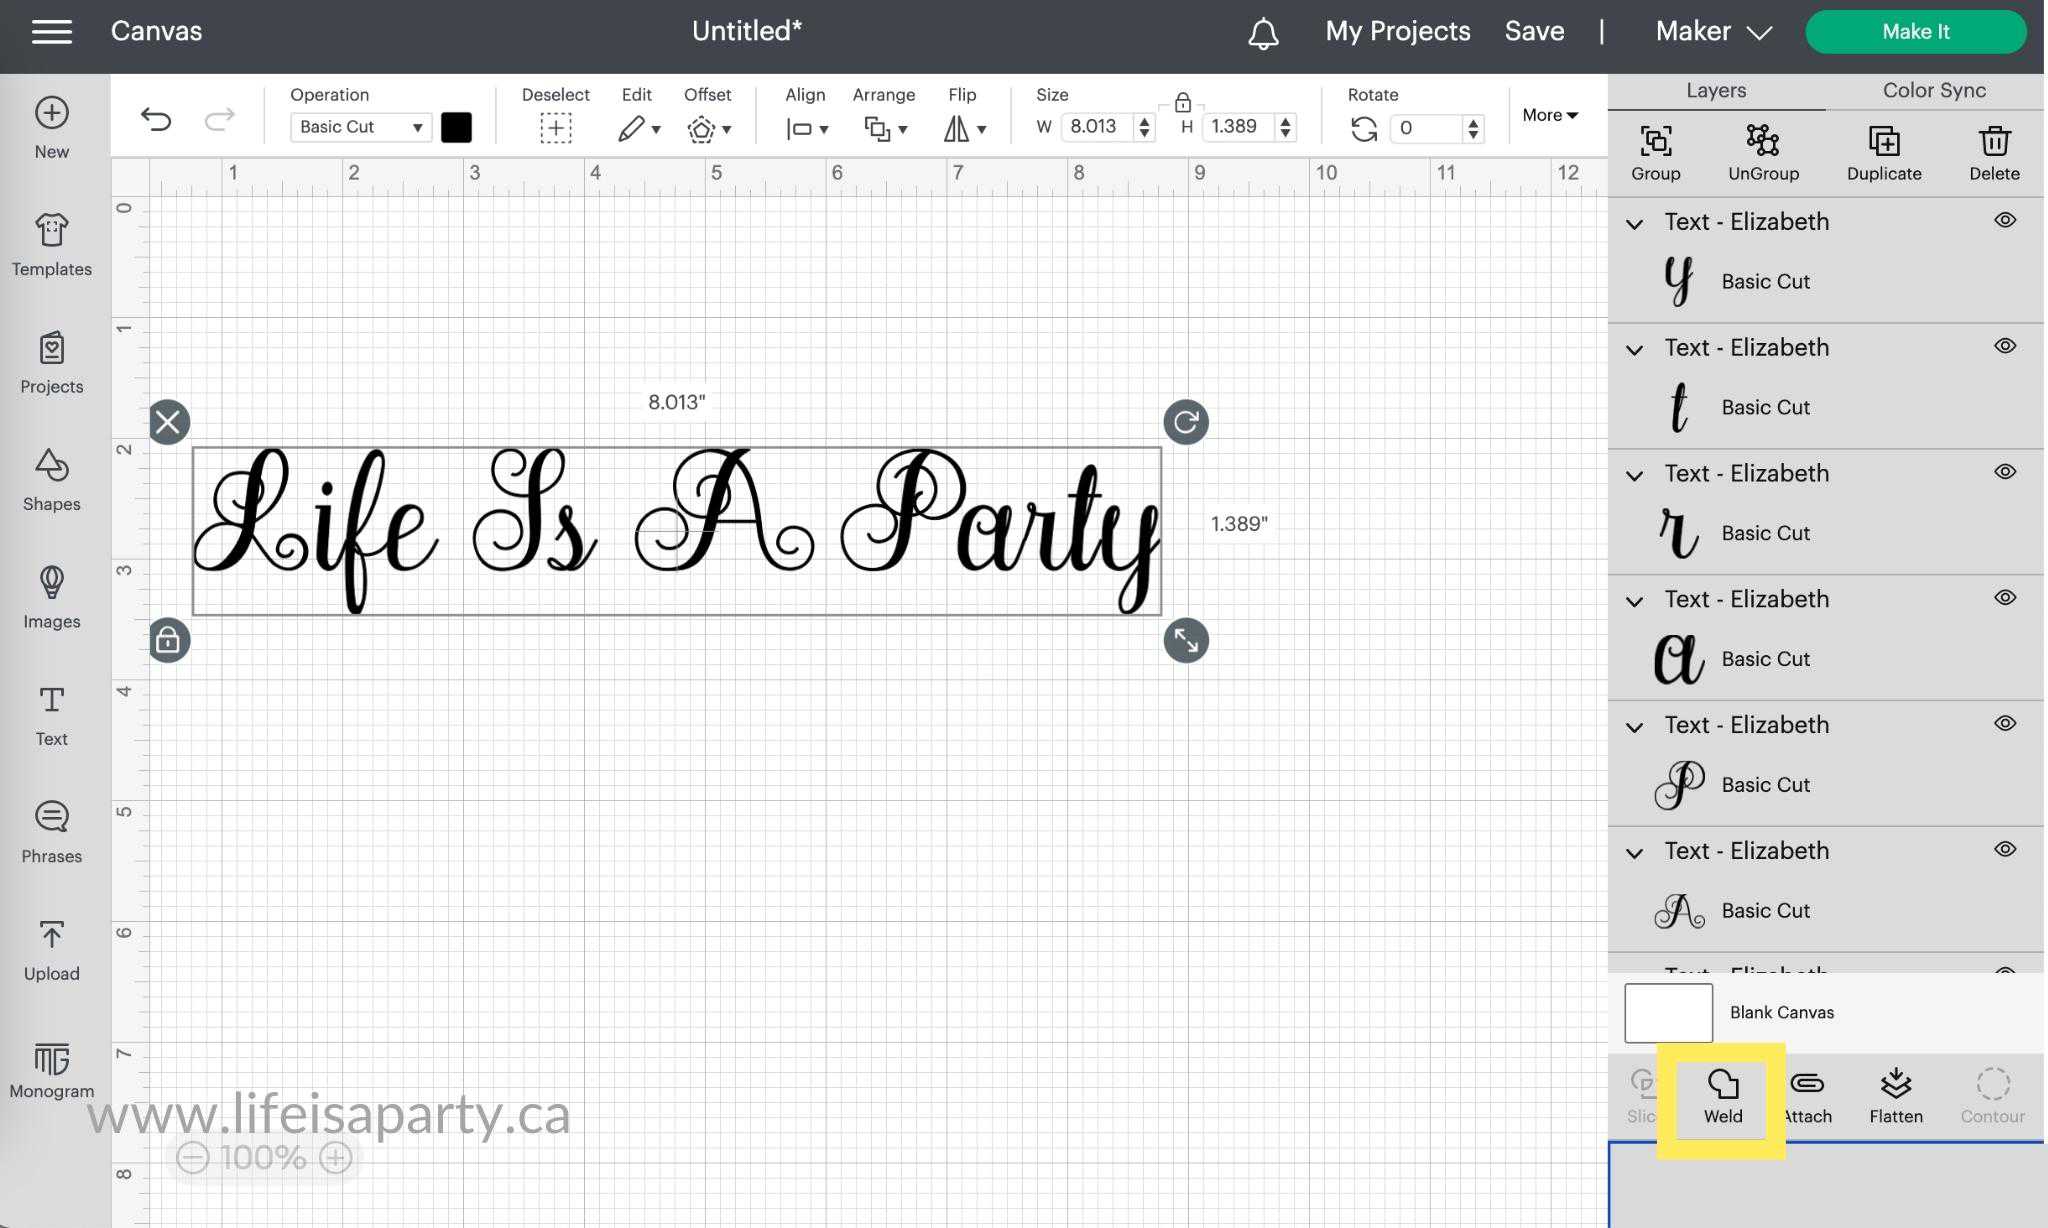
To use the weld feature to weld a word together select the entire word by holding down the shift key and dragging a selection box around it with your mouse. You can also use the select all button at the top of the canvas in desktop if it's the only item on your canvas. You can also select it by holding down the shift button and clicking on each letter in the layers panel. Once your word is selected, click on the weld button at the bottom of the layers panel in the lower right corner of your canvas in desktop.
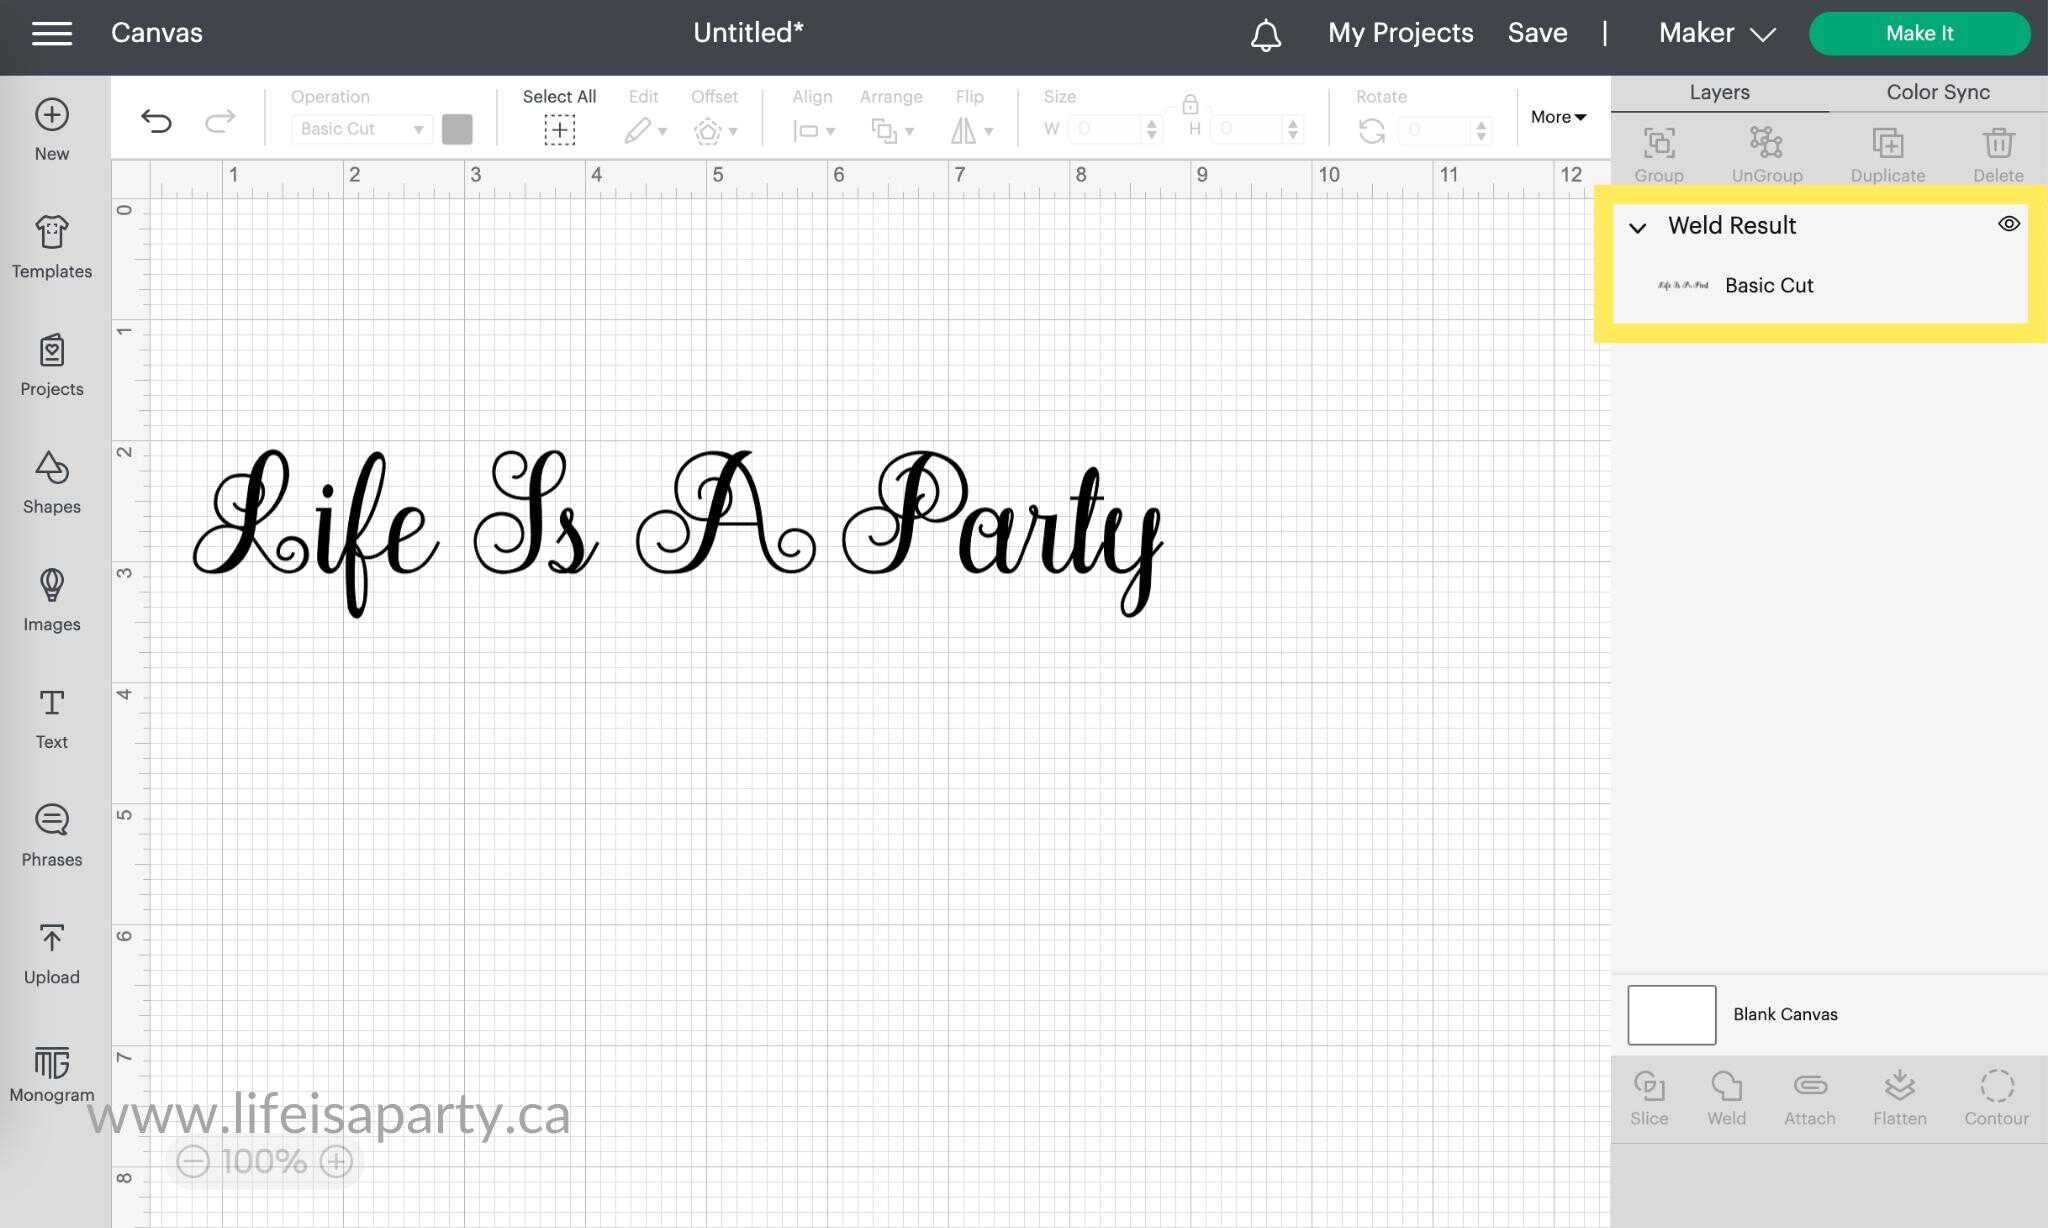
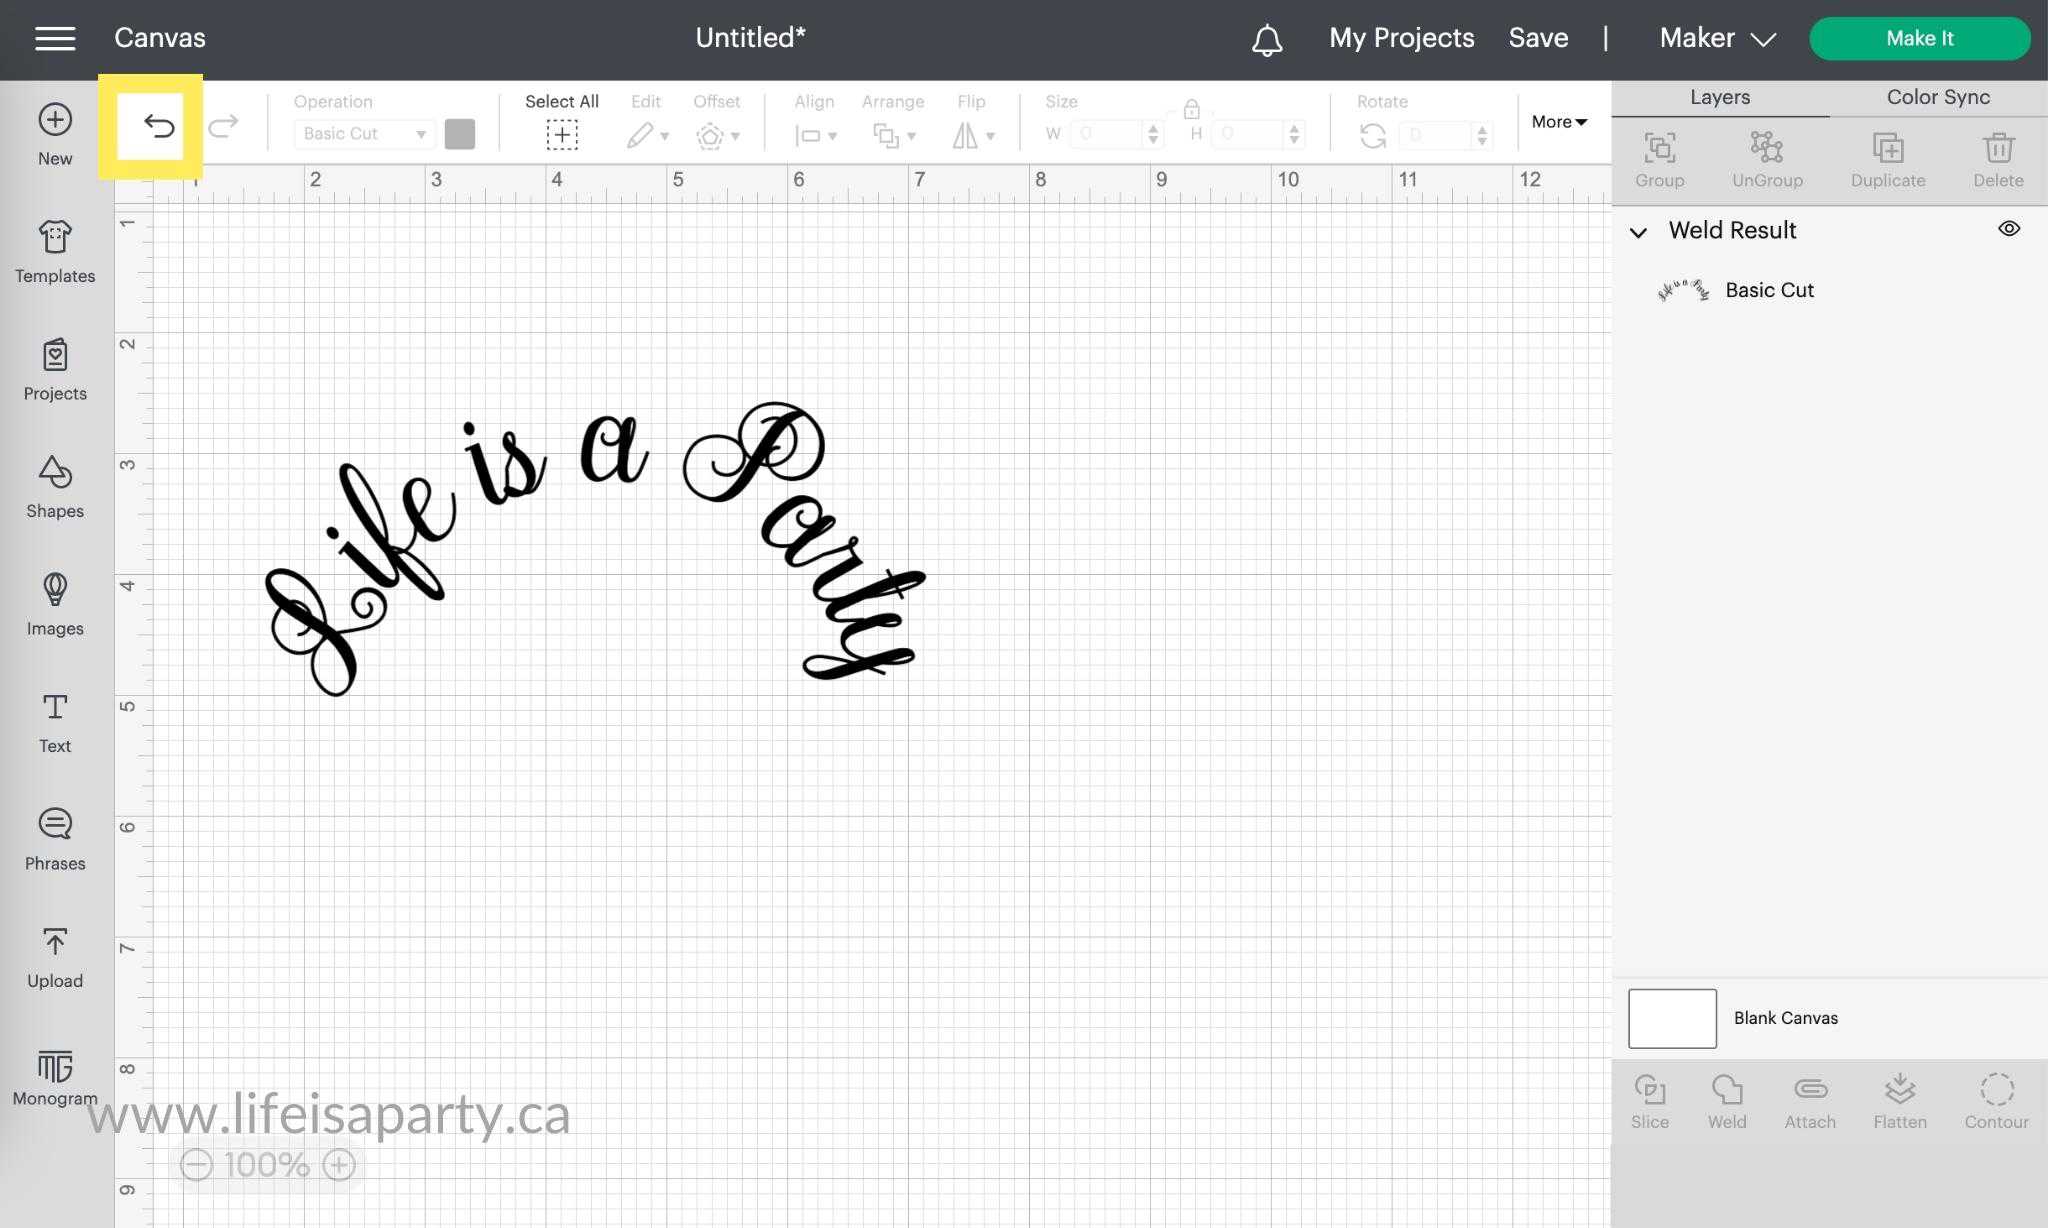
Once it's finished it will say weld result in the layers menu.
Now when you go to Make It, you will see on the cut preview screen that each of the letters will cut out all together as one word.
Troubleshooting Connecting Cursive Letters
Why Did The Loops Fill In When I Weld?
Sometimes if a font is quite small, the loops will fill in when you weld it together. If this happens, use the undo button to unweld the word. Next, make the word much lager with the scale button or font size. Now with the whole word still selected, weld the word again. It should weld together without filling in any loops. You can now adjust the size of the font back to the smaller size.
Why Did My Word Cut Out As Individual Letters?
You forgot to weld your letters together. Don't forget to select all the letters of your word and weld them together. This is like super gluing all the individual letters together and will ensure that each word cuts as all one piece.
I Moved Each Letter And Now My Text Isn't Lined Up At The Bottom
If you move each individual letter with your mouse, it can sometimes be hard to line up the text horizontally. You might have thought that you could use the align feature. But, it unfortunately doesn't work for this if you have any letter included with downward strokes, like g or p for example. If you use align bottom, the downward stoke letters will be moved to far up. So how do you fix this problem? The answer is to adjust the spacing of the individual letters using only the left and right arrows on your keyboard. That way they only adjust from side to side, and stay in place horizontally.
How Do I Curve The Text?
If you want to curve the text of unkerned cursive letters that needs to be attached and welded, you will have to do it before ungrouping to individual letters. The curve text function in Cricut Design Space is only available to you before you ungroup the letters. After you ungroup the letters the curve function will disappear from the text edit menu at the top of Cricut Design Space.
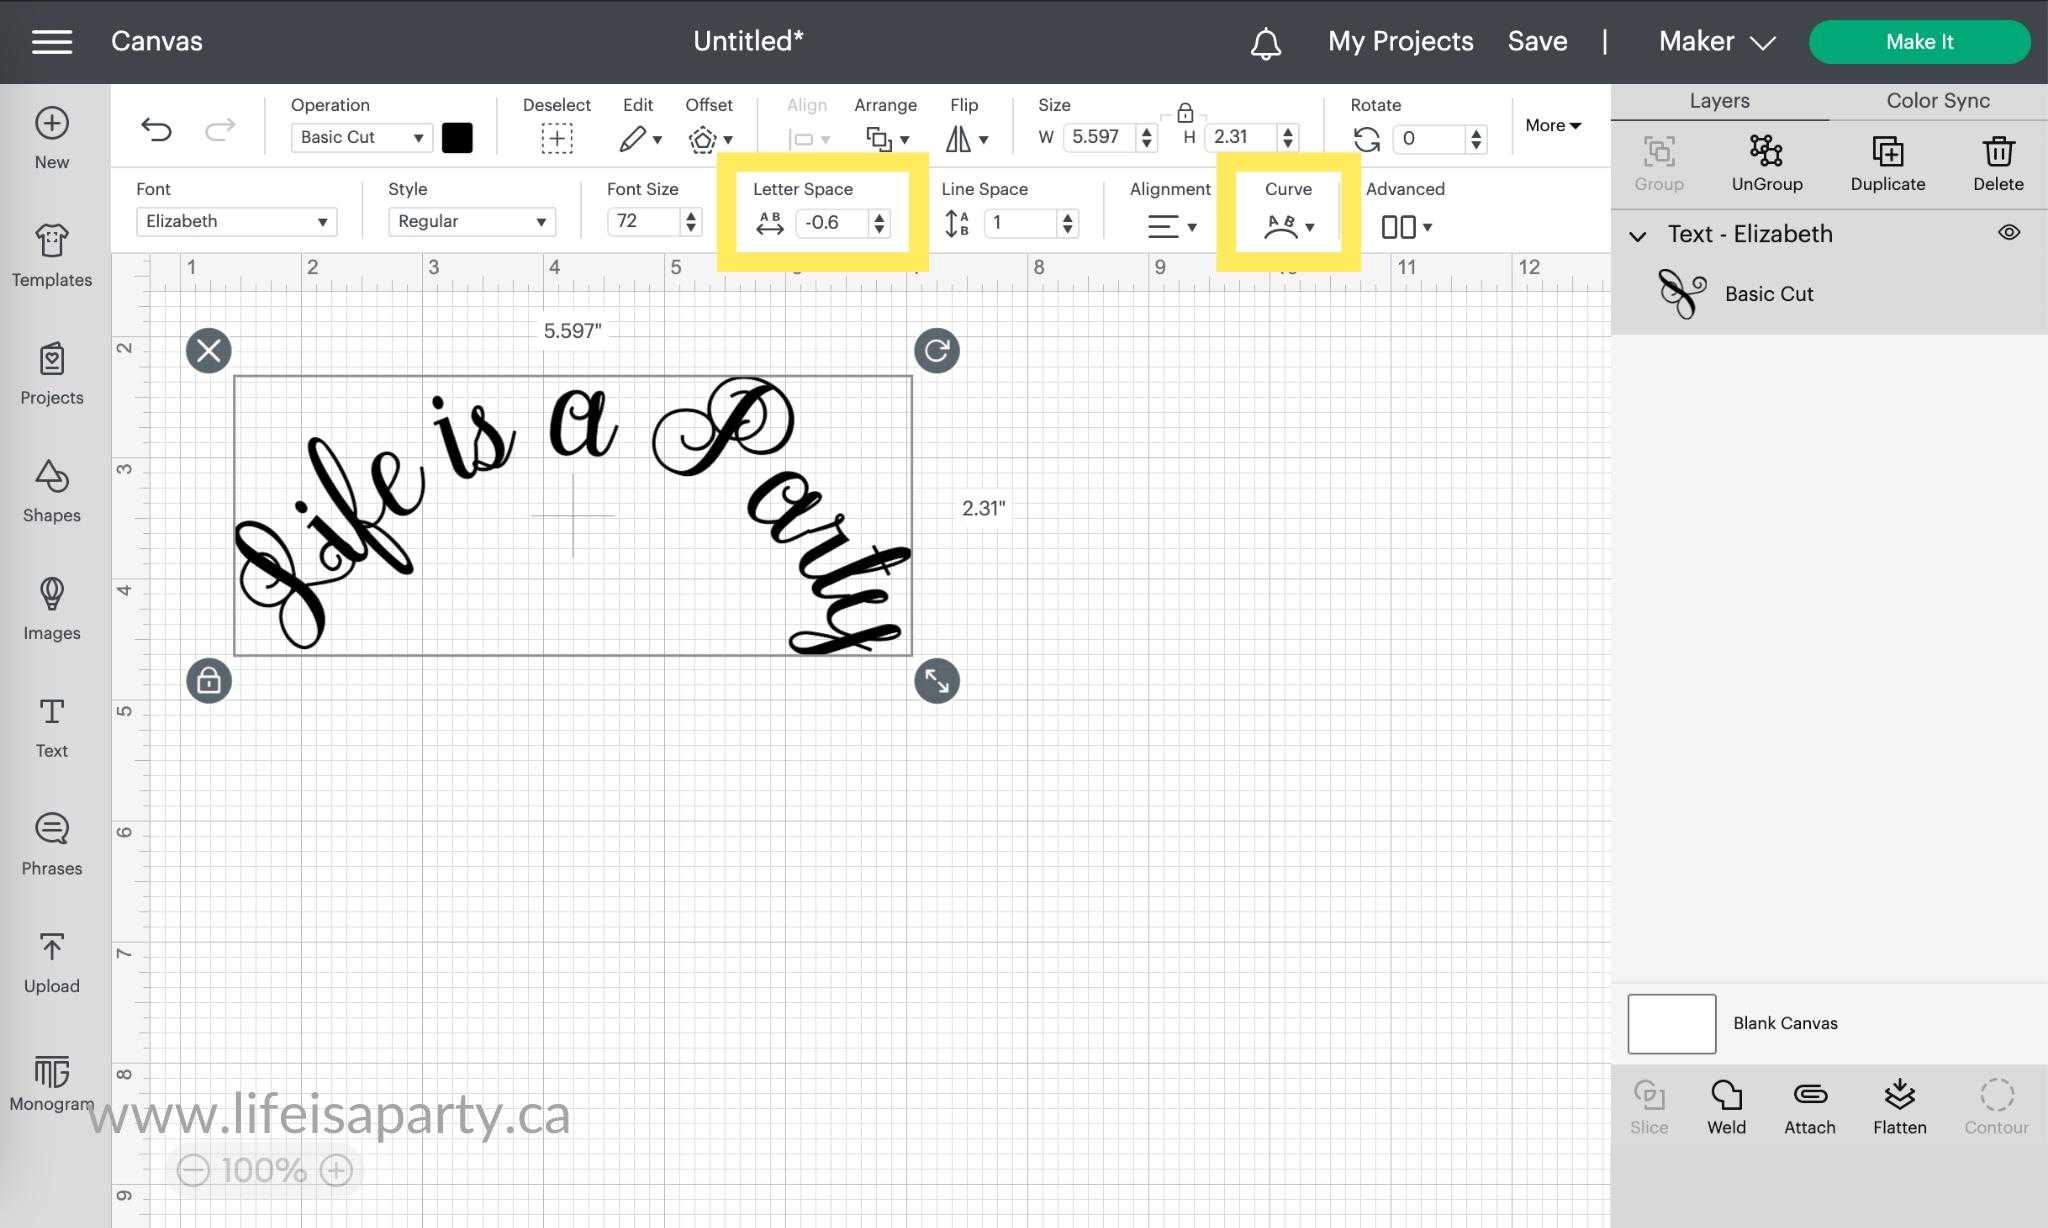
It can be slightly difficult to adjust the curve to your desired amount when the letters are spaced out. Begin by adjust the letter spacing and curve until you are happy, and then choose to ungroup and adjust individual letters lastly for some fine tuning. Once you are happy don't forget to weld the letters together.
Where Is The Unweld Button?
There is no unweld function in Cricut Design Space. You can use the undo button to go back if you decide to you want to unweld. Unfortunately this only works while you are editing in Cricut Design Space. If you open a saved project, you will not be able to use the undo button to reverse the weld function. Read this entire blog post all about how to unweld and what options you have here. It is sometimes helpful to think of weld as similar to permanent glue. It can not easily be undone.
I hope this tutorial on how to connect cursive letters on Cricut has been helpful and that your feeling confident to use letter spacing, and ungrouped letters to create exactly what you want to in Cricut Design Space.


Leave a Reply
You must be logged in to post a comment.