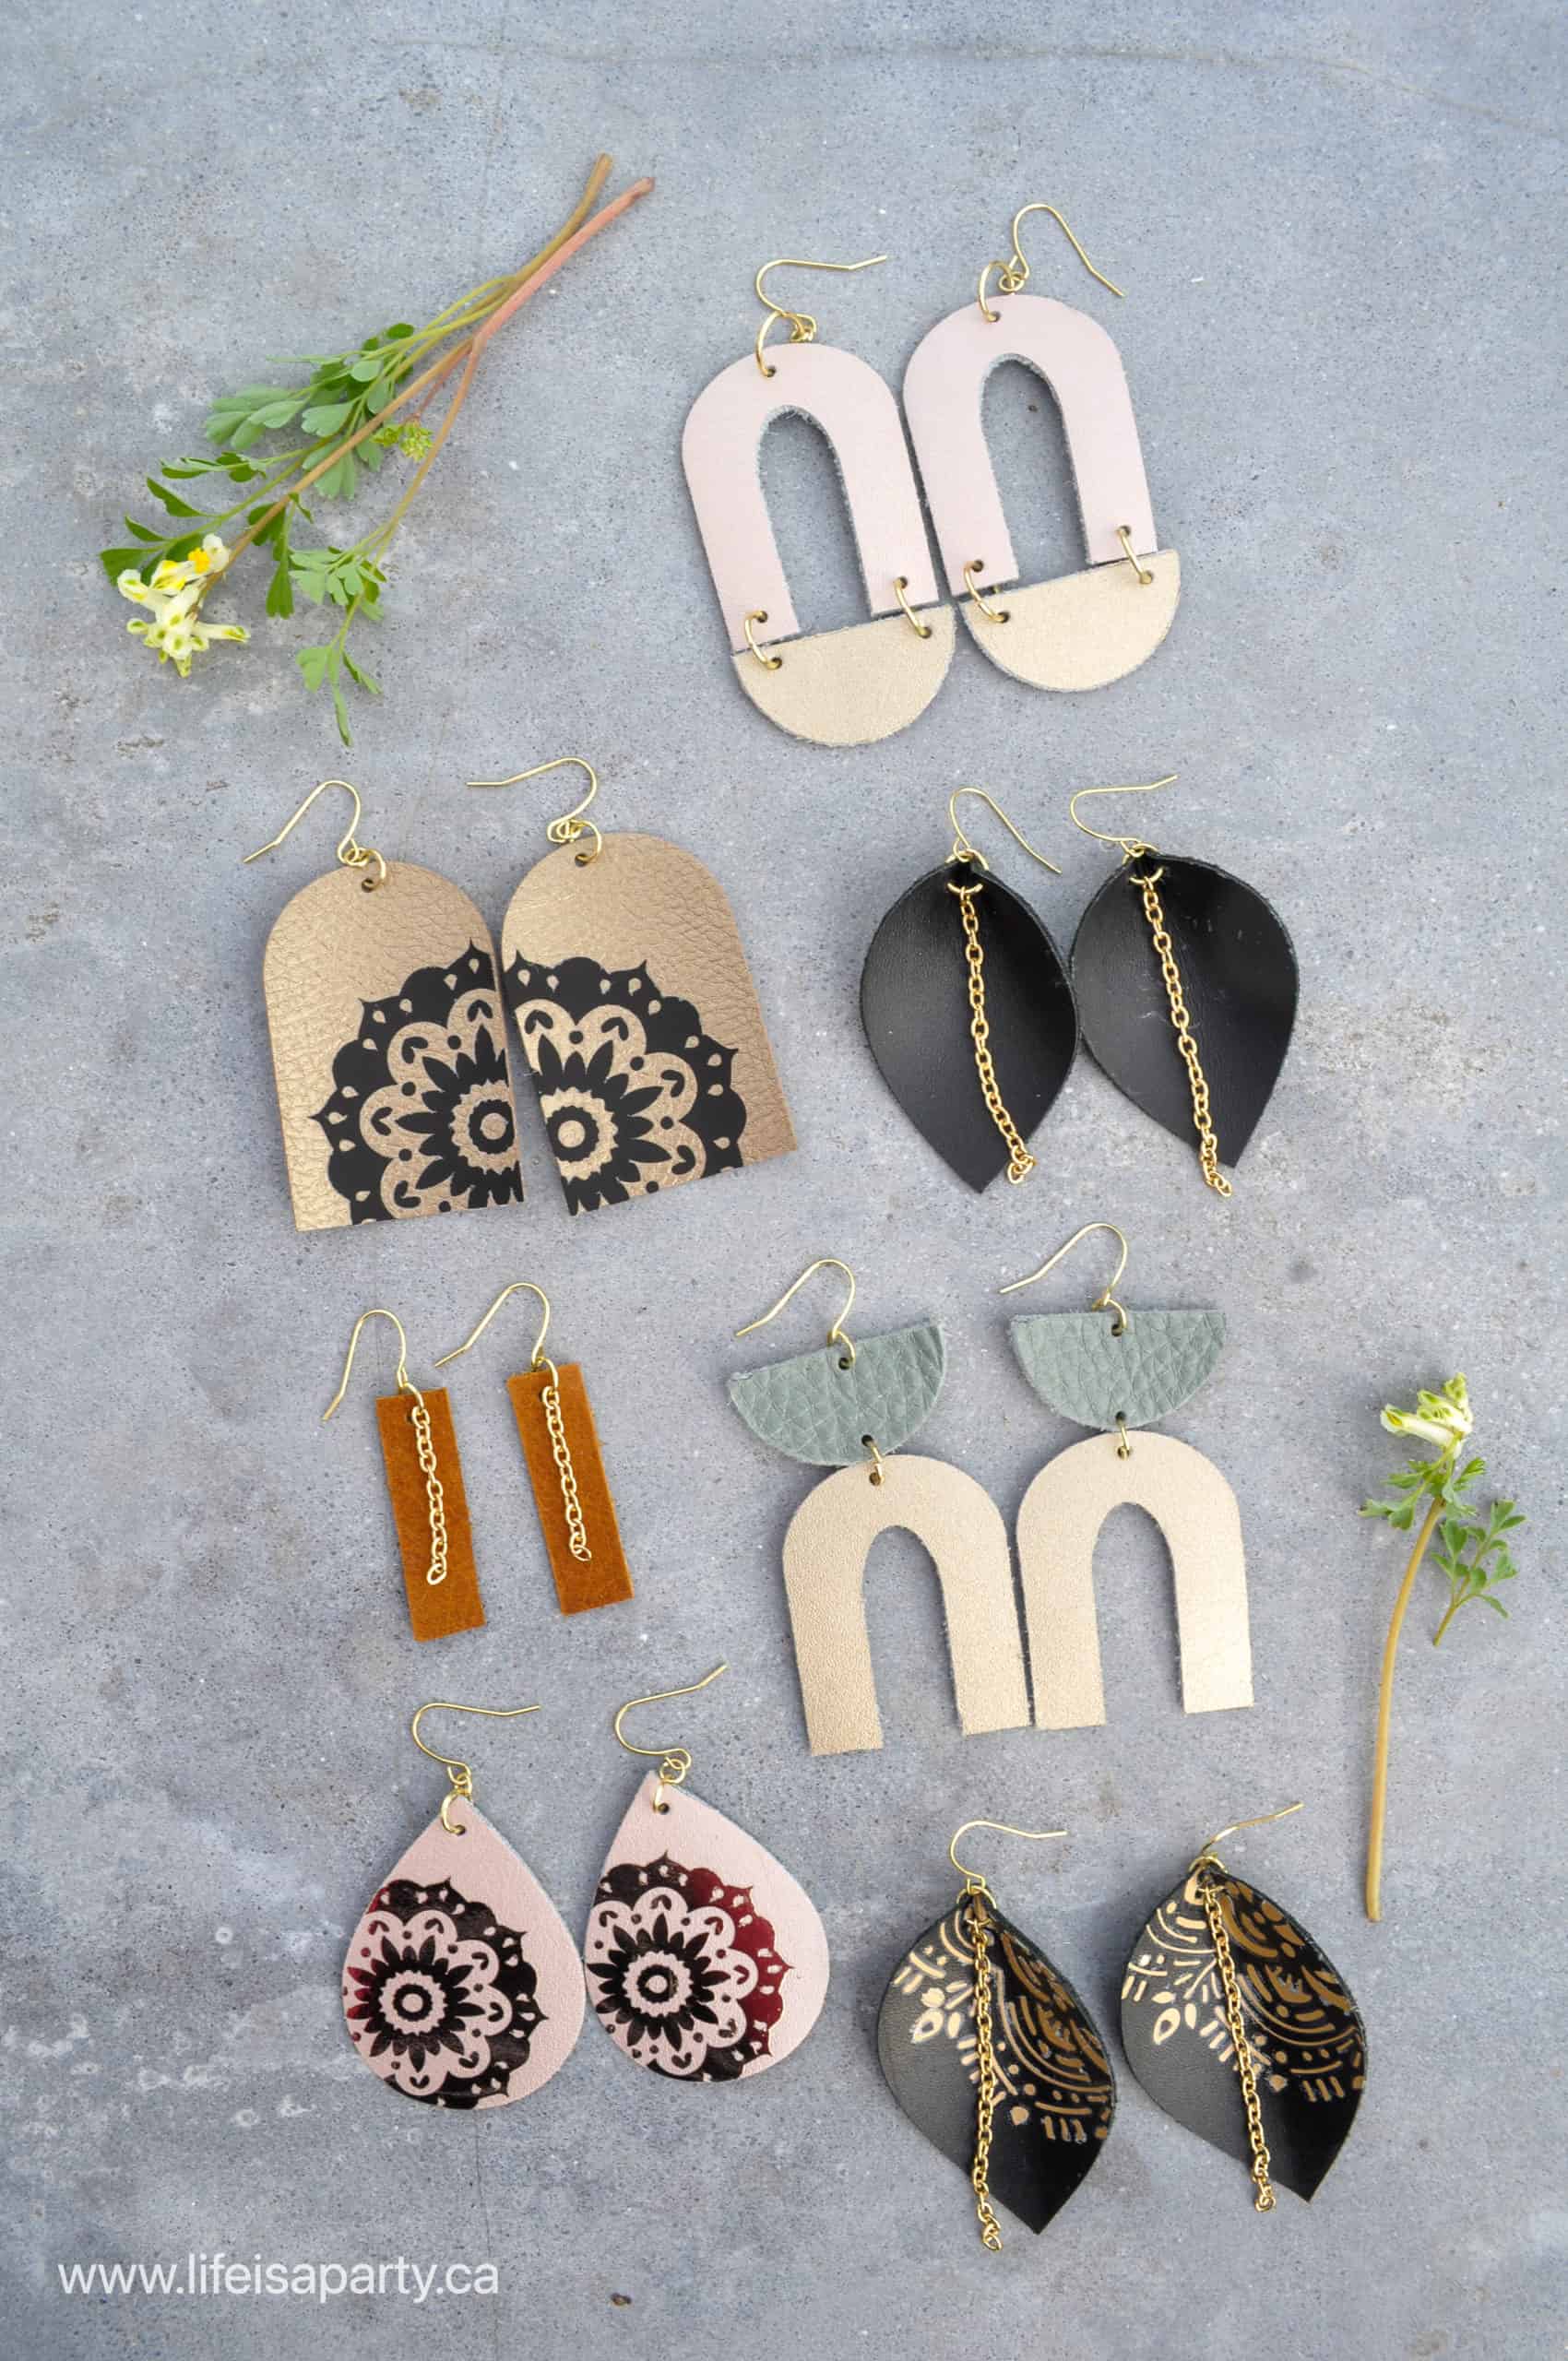
Make beautiful one of kind earrings with your Cricut machine. See how to design leather & faux-leather earrings in Cricut Design Space, cut, add iron-on vinyl, and assemble.

Jump to:
Why We Love This Craft
- These are fun to make, with all different colors and styles to match your fashion.
- You can use leather or faux leather.
- Add in other materials like iron-on vinyl or chain for even more looks.
- Handmade Cricut ear ring are great for yourself, to give as gifts, or to sell.
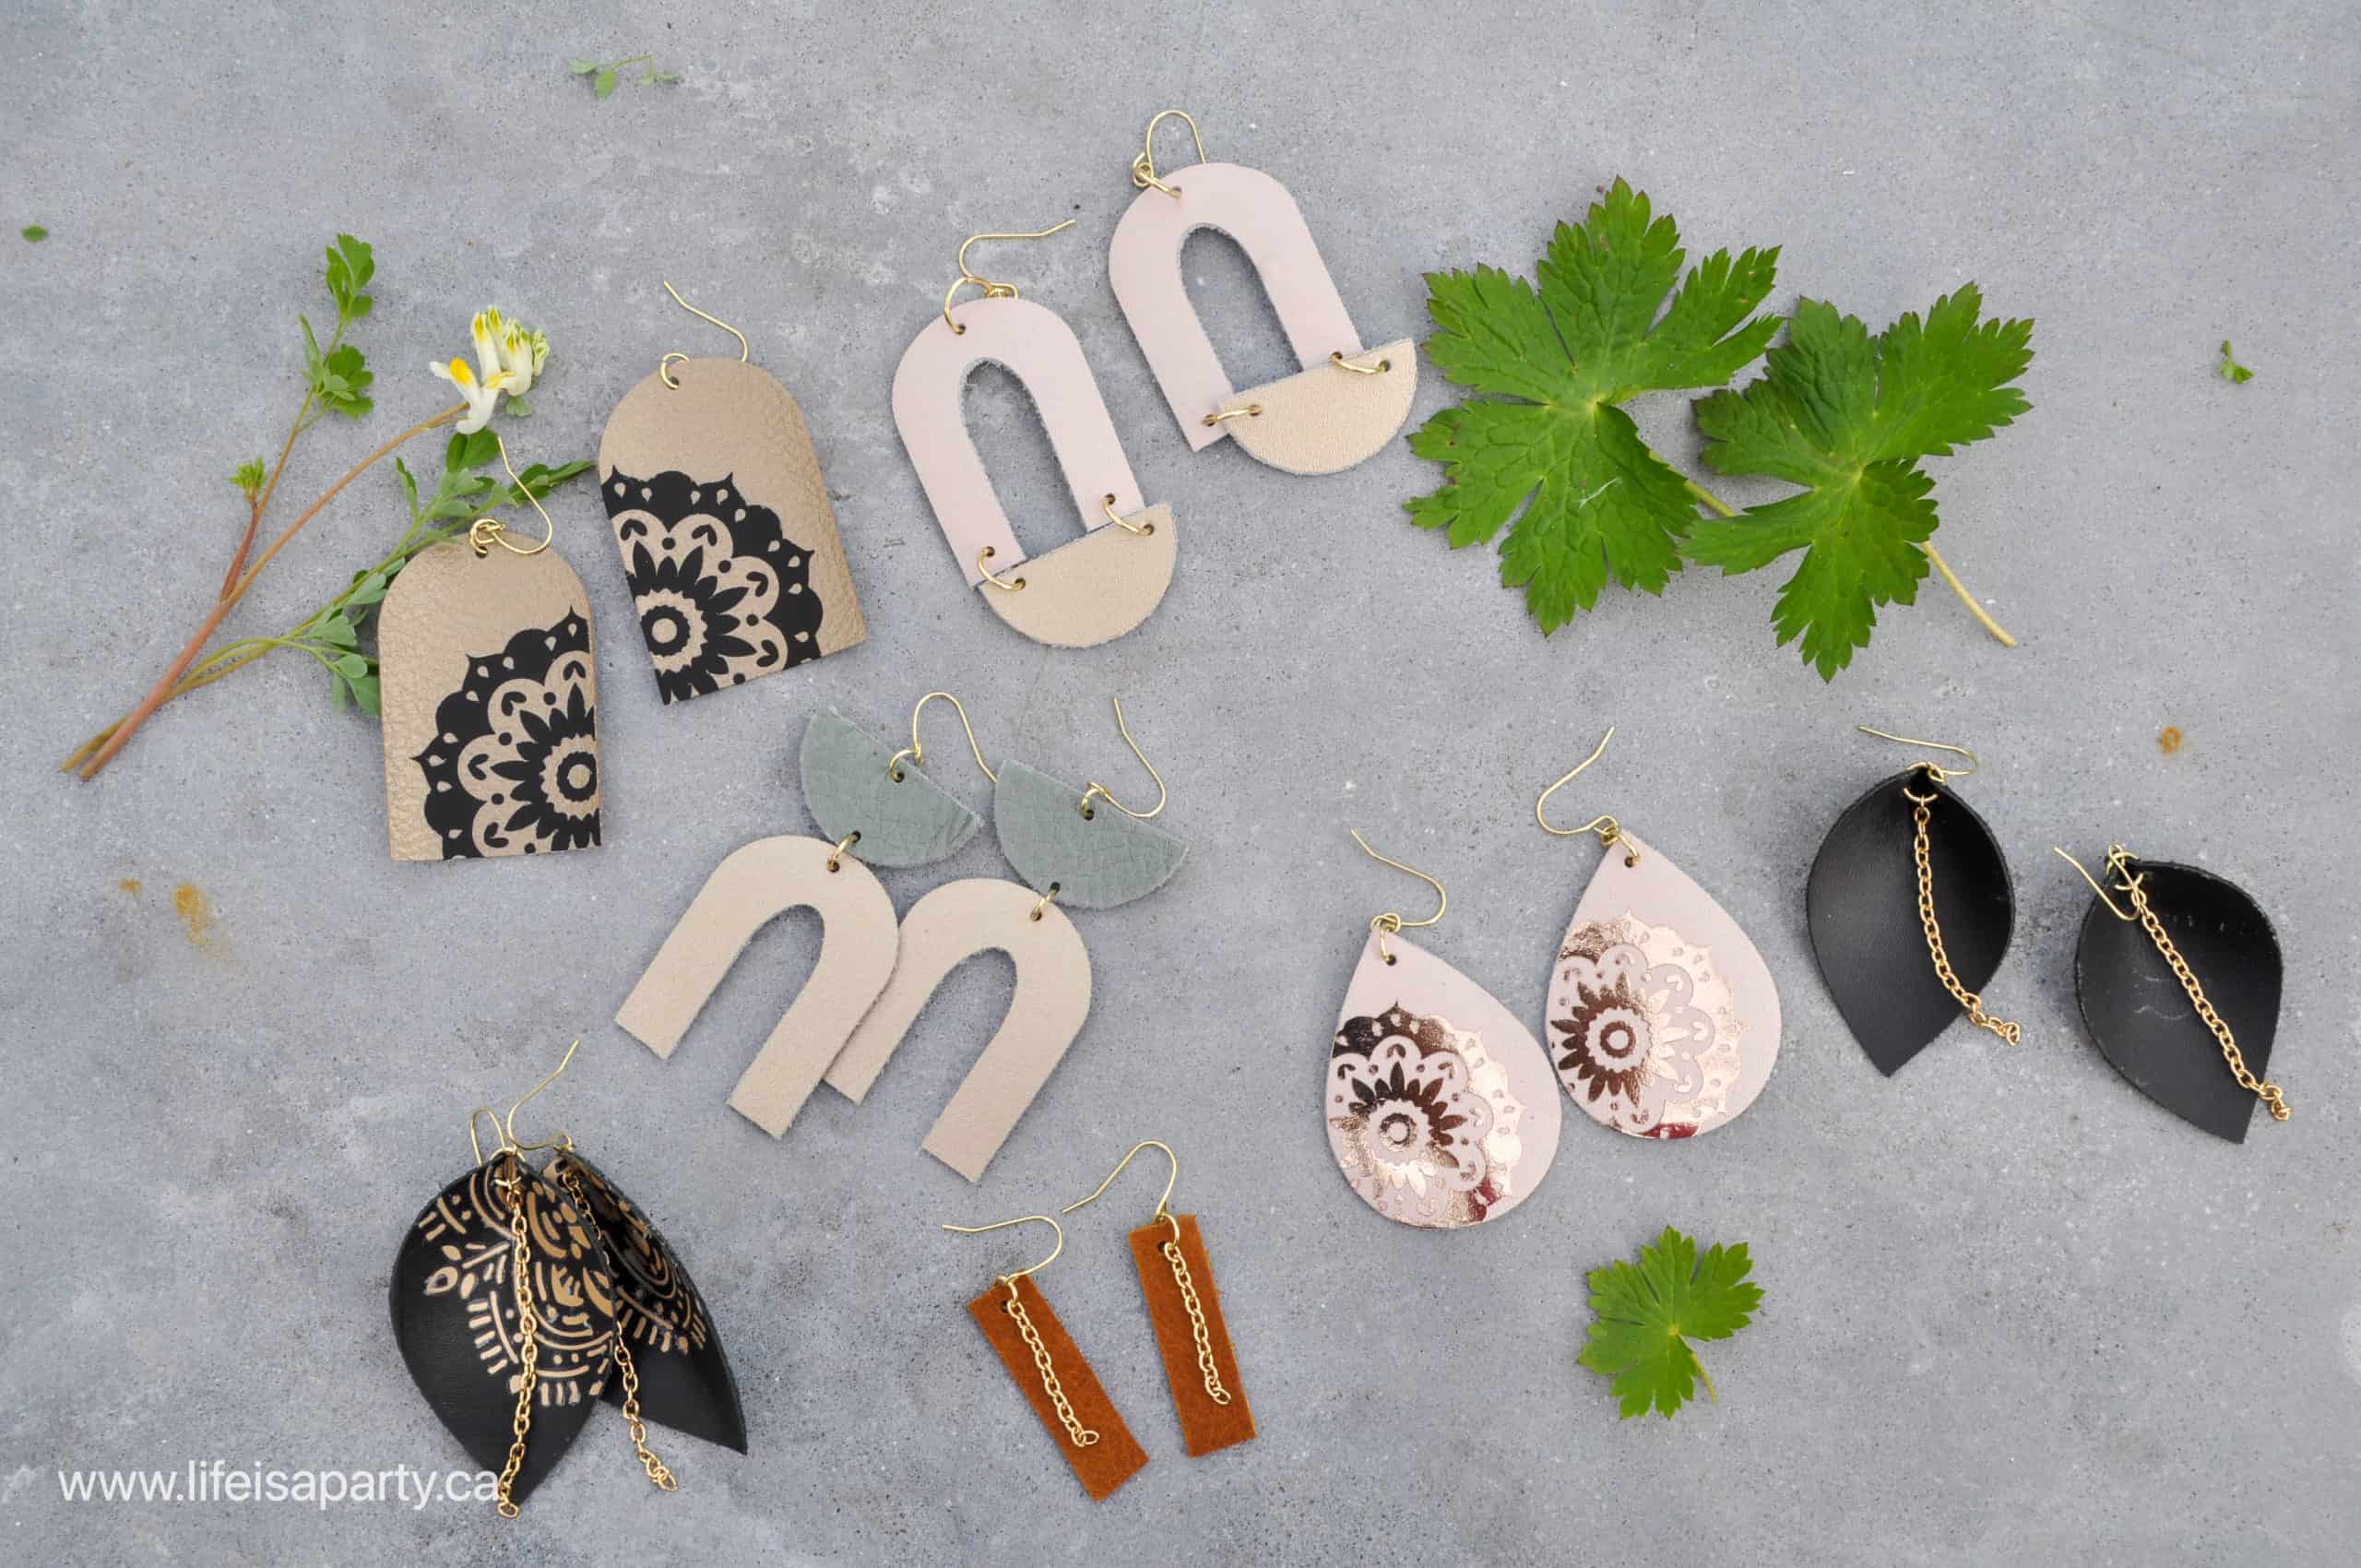
Cricut earrings are a simple project to make and there are so many ways you can combine materials to make endless combinations. We're using Cricut leather for ours, but there is faux leather available too. There are many different colours you can use as well. We also added some Iron-On vinyl to ours, which increases the possibilities for different colour combinations and patterns.
Materials:
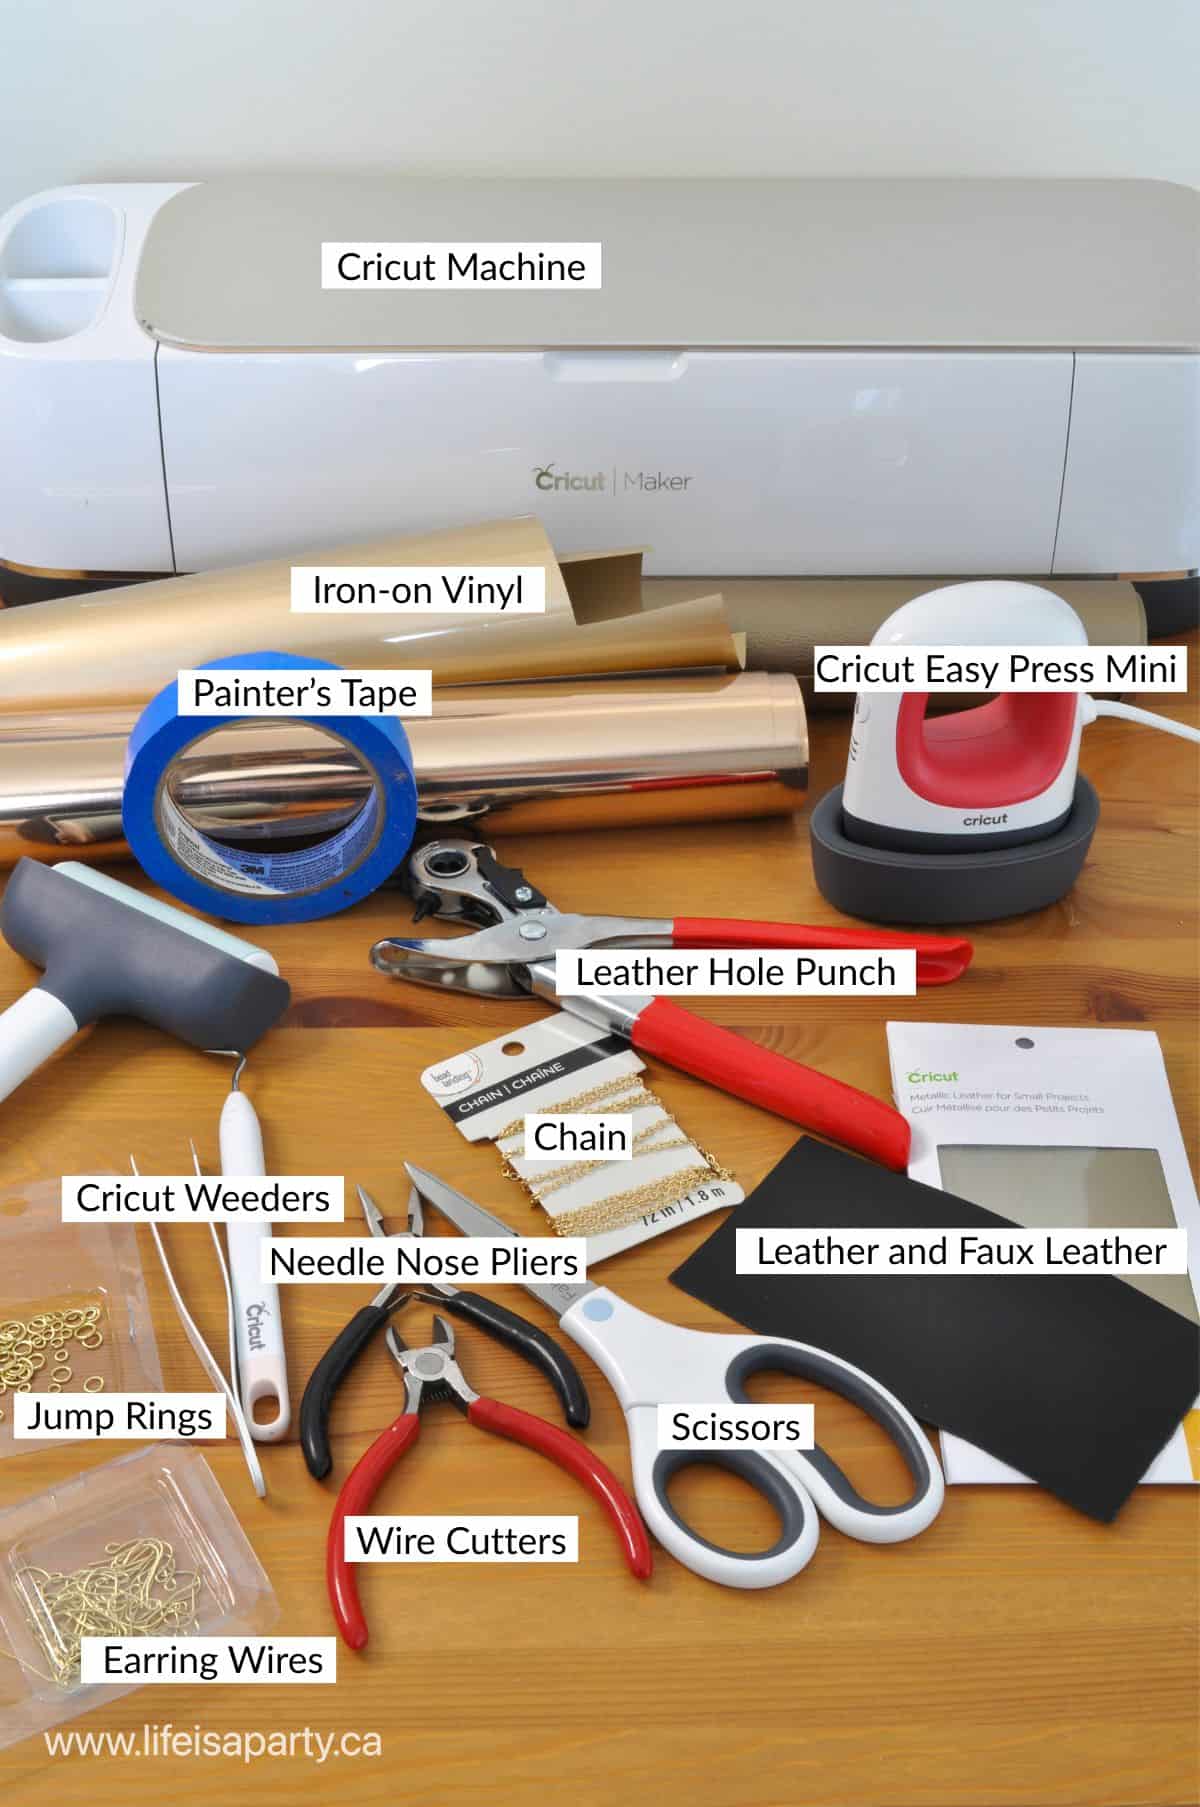
- Cricut Maker machine: I used my Cricut Maker machine to make this project with the deep cut blade to cut out the leather. You can also use the Explore with the deep cut blade. If you have a Cricut Joy, you will have to use the faux leather and the fine point blade for this project.
- Cricut deep cut blade
- strong grip mat
- painter's tape: Use the paint's tape to help hold the leather to the mat for cutting.
- leather or faux leather: Cricut makes leather and faux leather that you can use for this project. You can also look for leather at craft stores or on-line.
- sharp scissors: These are just for trimming any fuzzy edges of the back of the leather after it's cut into shape.
- earring wires
- jump rings: Look for different sizes, small, medium, and large.
- chain: This is optional to add some interest to your earrings. Choose whatever thickness and silver or gold that you prefer.
- needle nose pliers
- wire cutters: These are for cutting the chain to the right length.
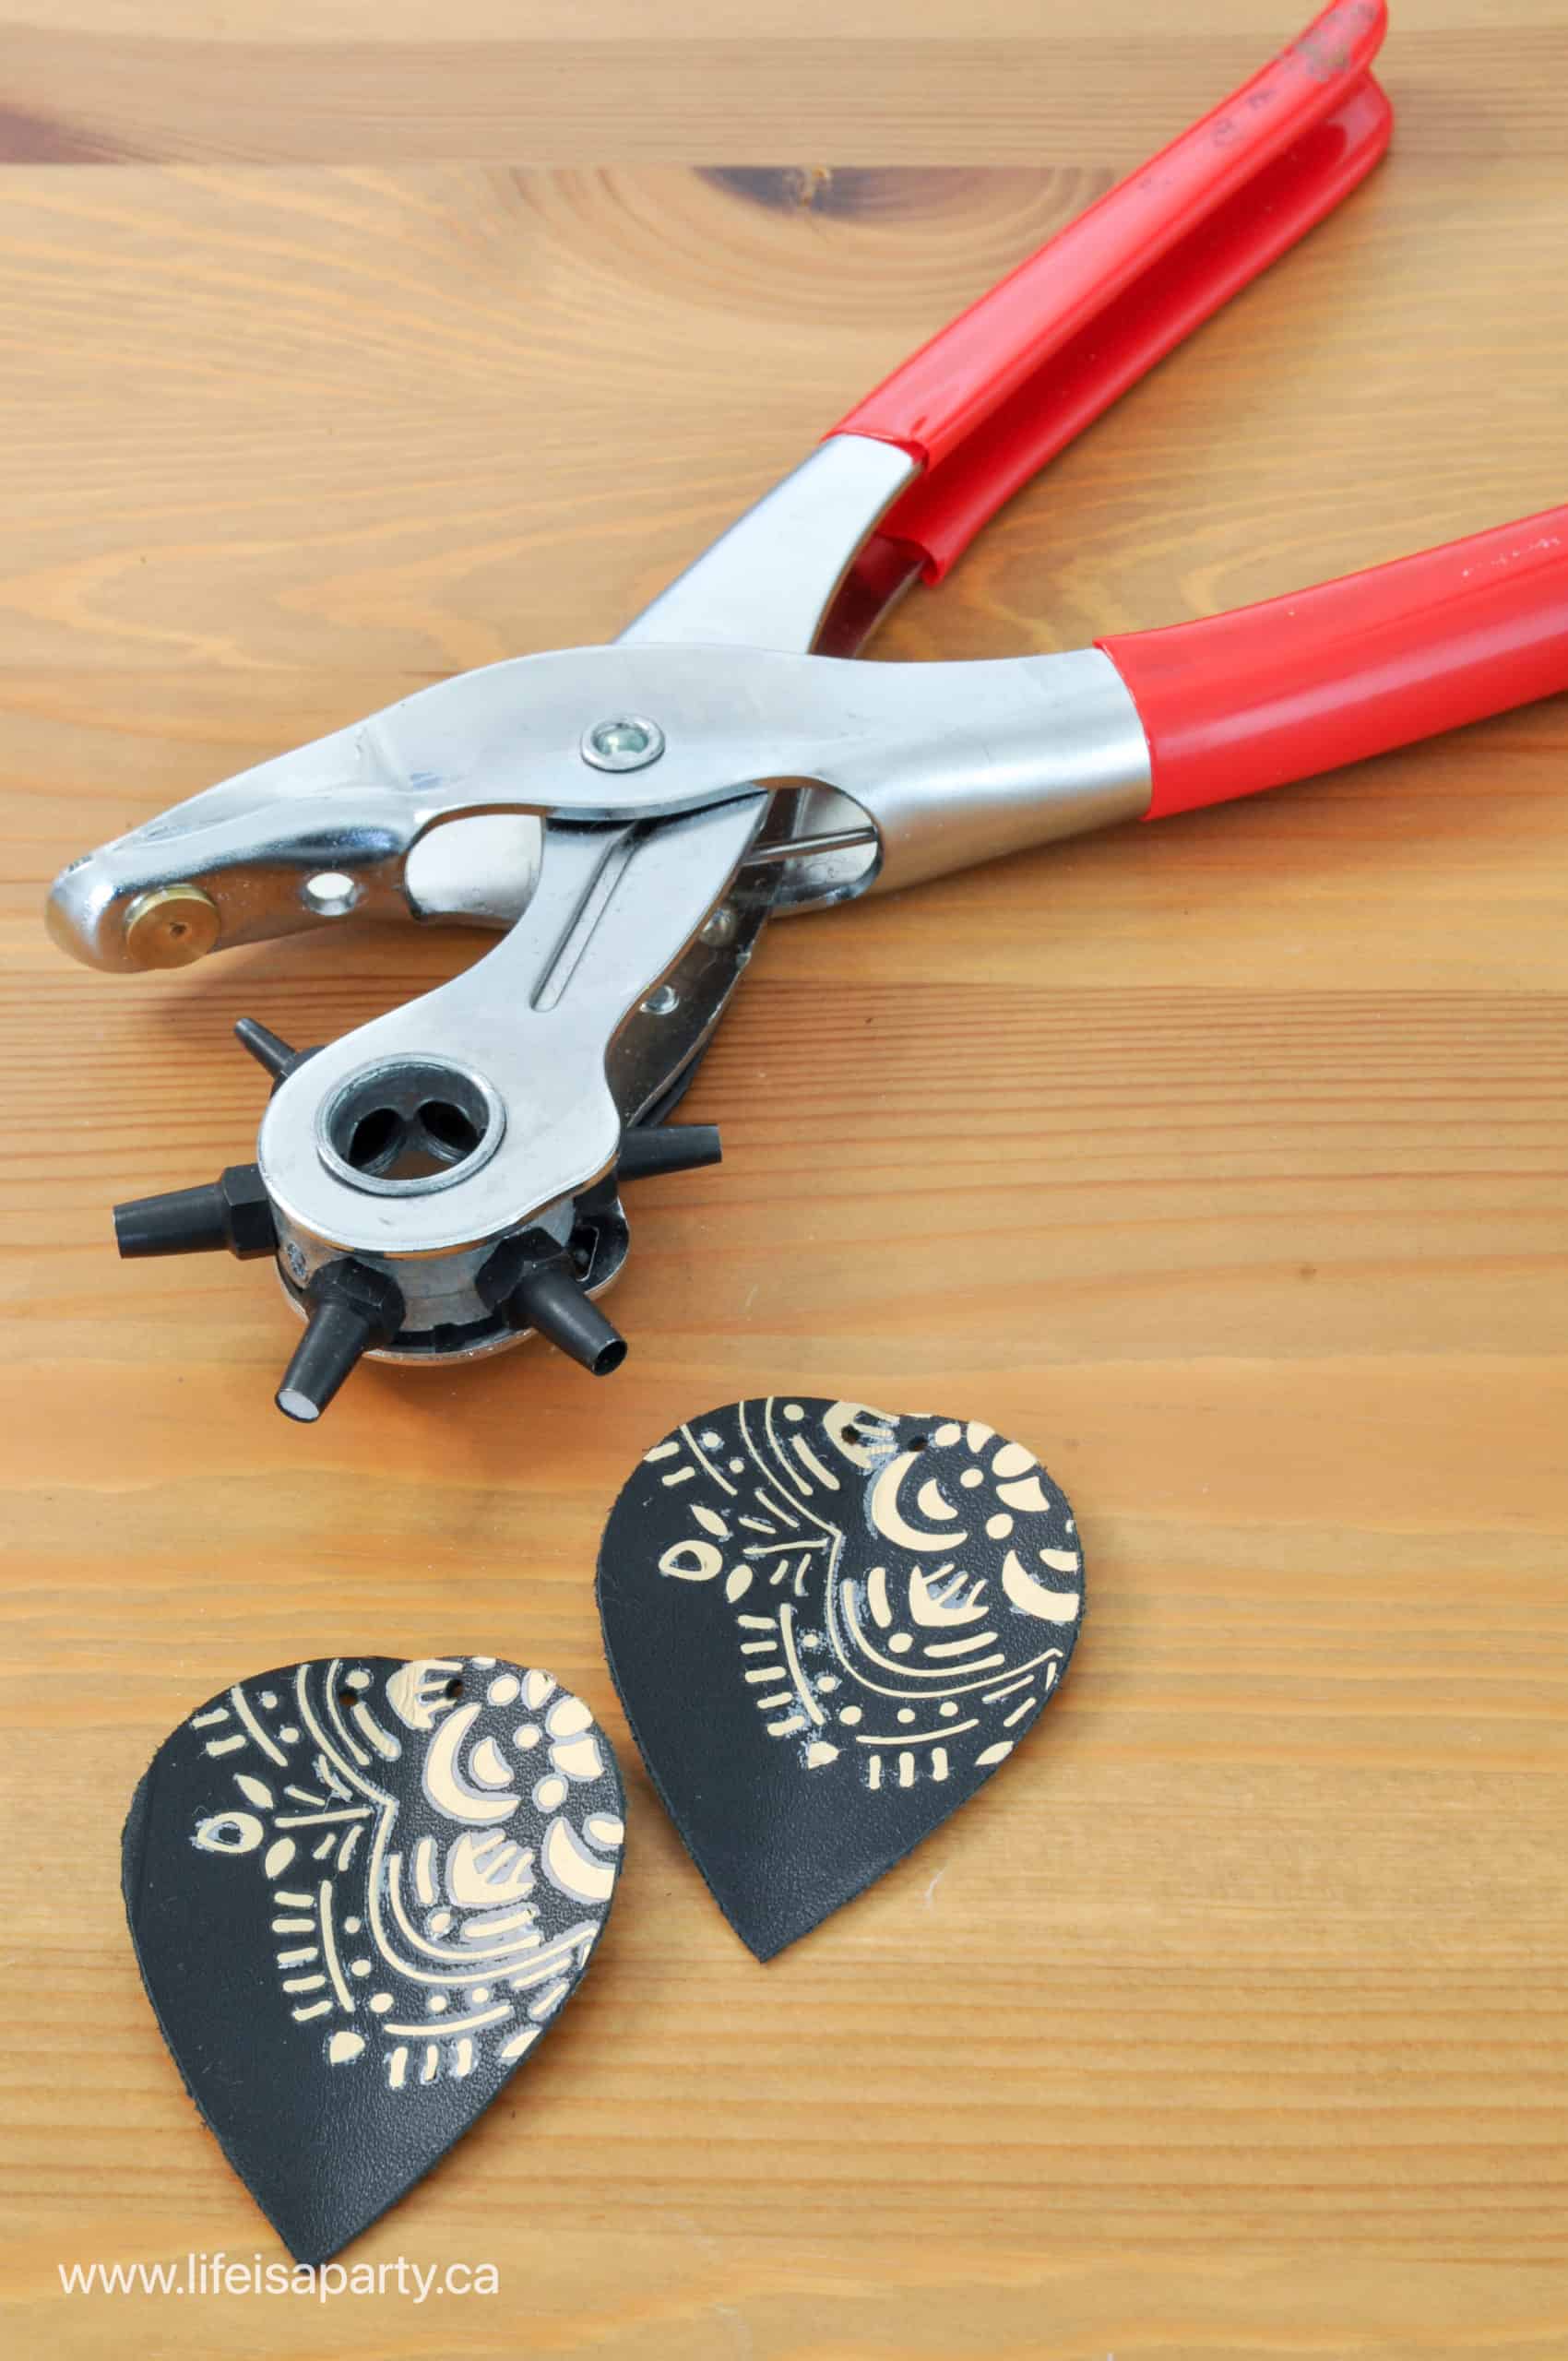
- leather hole punch: Earrings need a hole in the top to connect the earring findings too. I didn't include these as part of my design. Most of my earrings are cut out of real leather, using the Cricut Maker machine, and knife blade. This tiny hole is too fine to cut out well with real leather and the knife blade.
I used a leather punch for this step. It's similar to a paper hole punch, but stronger and with more hole size options. You can pick one up at a craft store.
If you were making faux leather earrings, you might want to include the hole at the top, and any other holes you were using to connect pieces together as part of your design in Design Space. Faux leather can be cut with a regular fine point blade, and can make these kind of small detailed cuts. If you are including these are part of the design, add a small circle from shapes and position it and size it to fit. Select the earring and the circle and click the slice button. Delete the original circle, the cut out circle, so that you're left with the earring with the hole in the top.
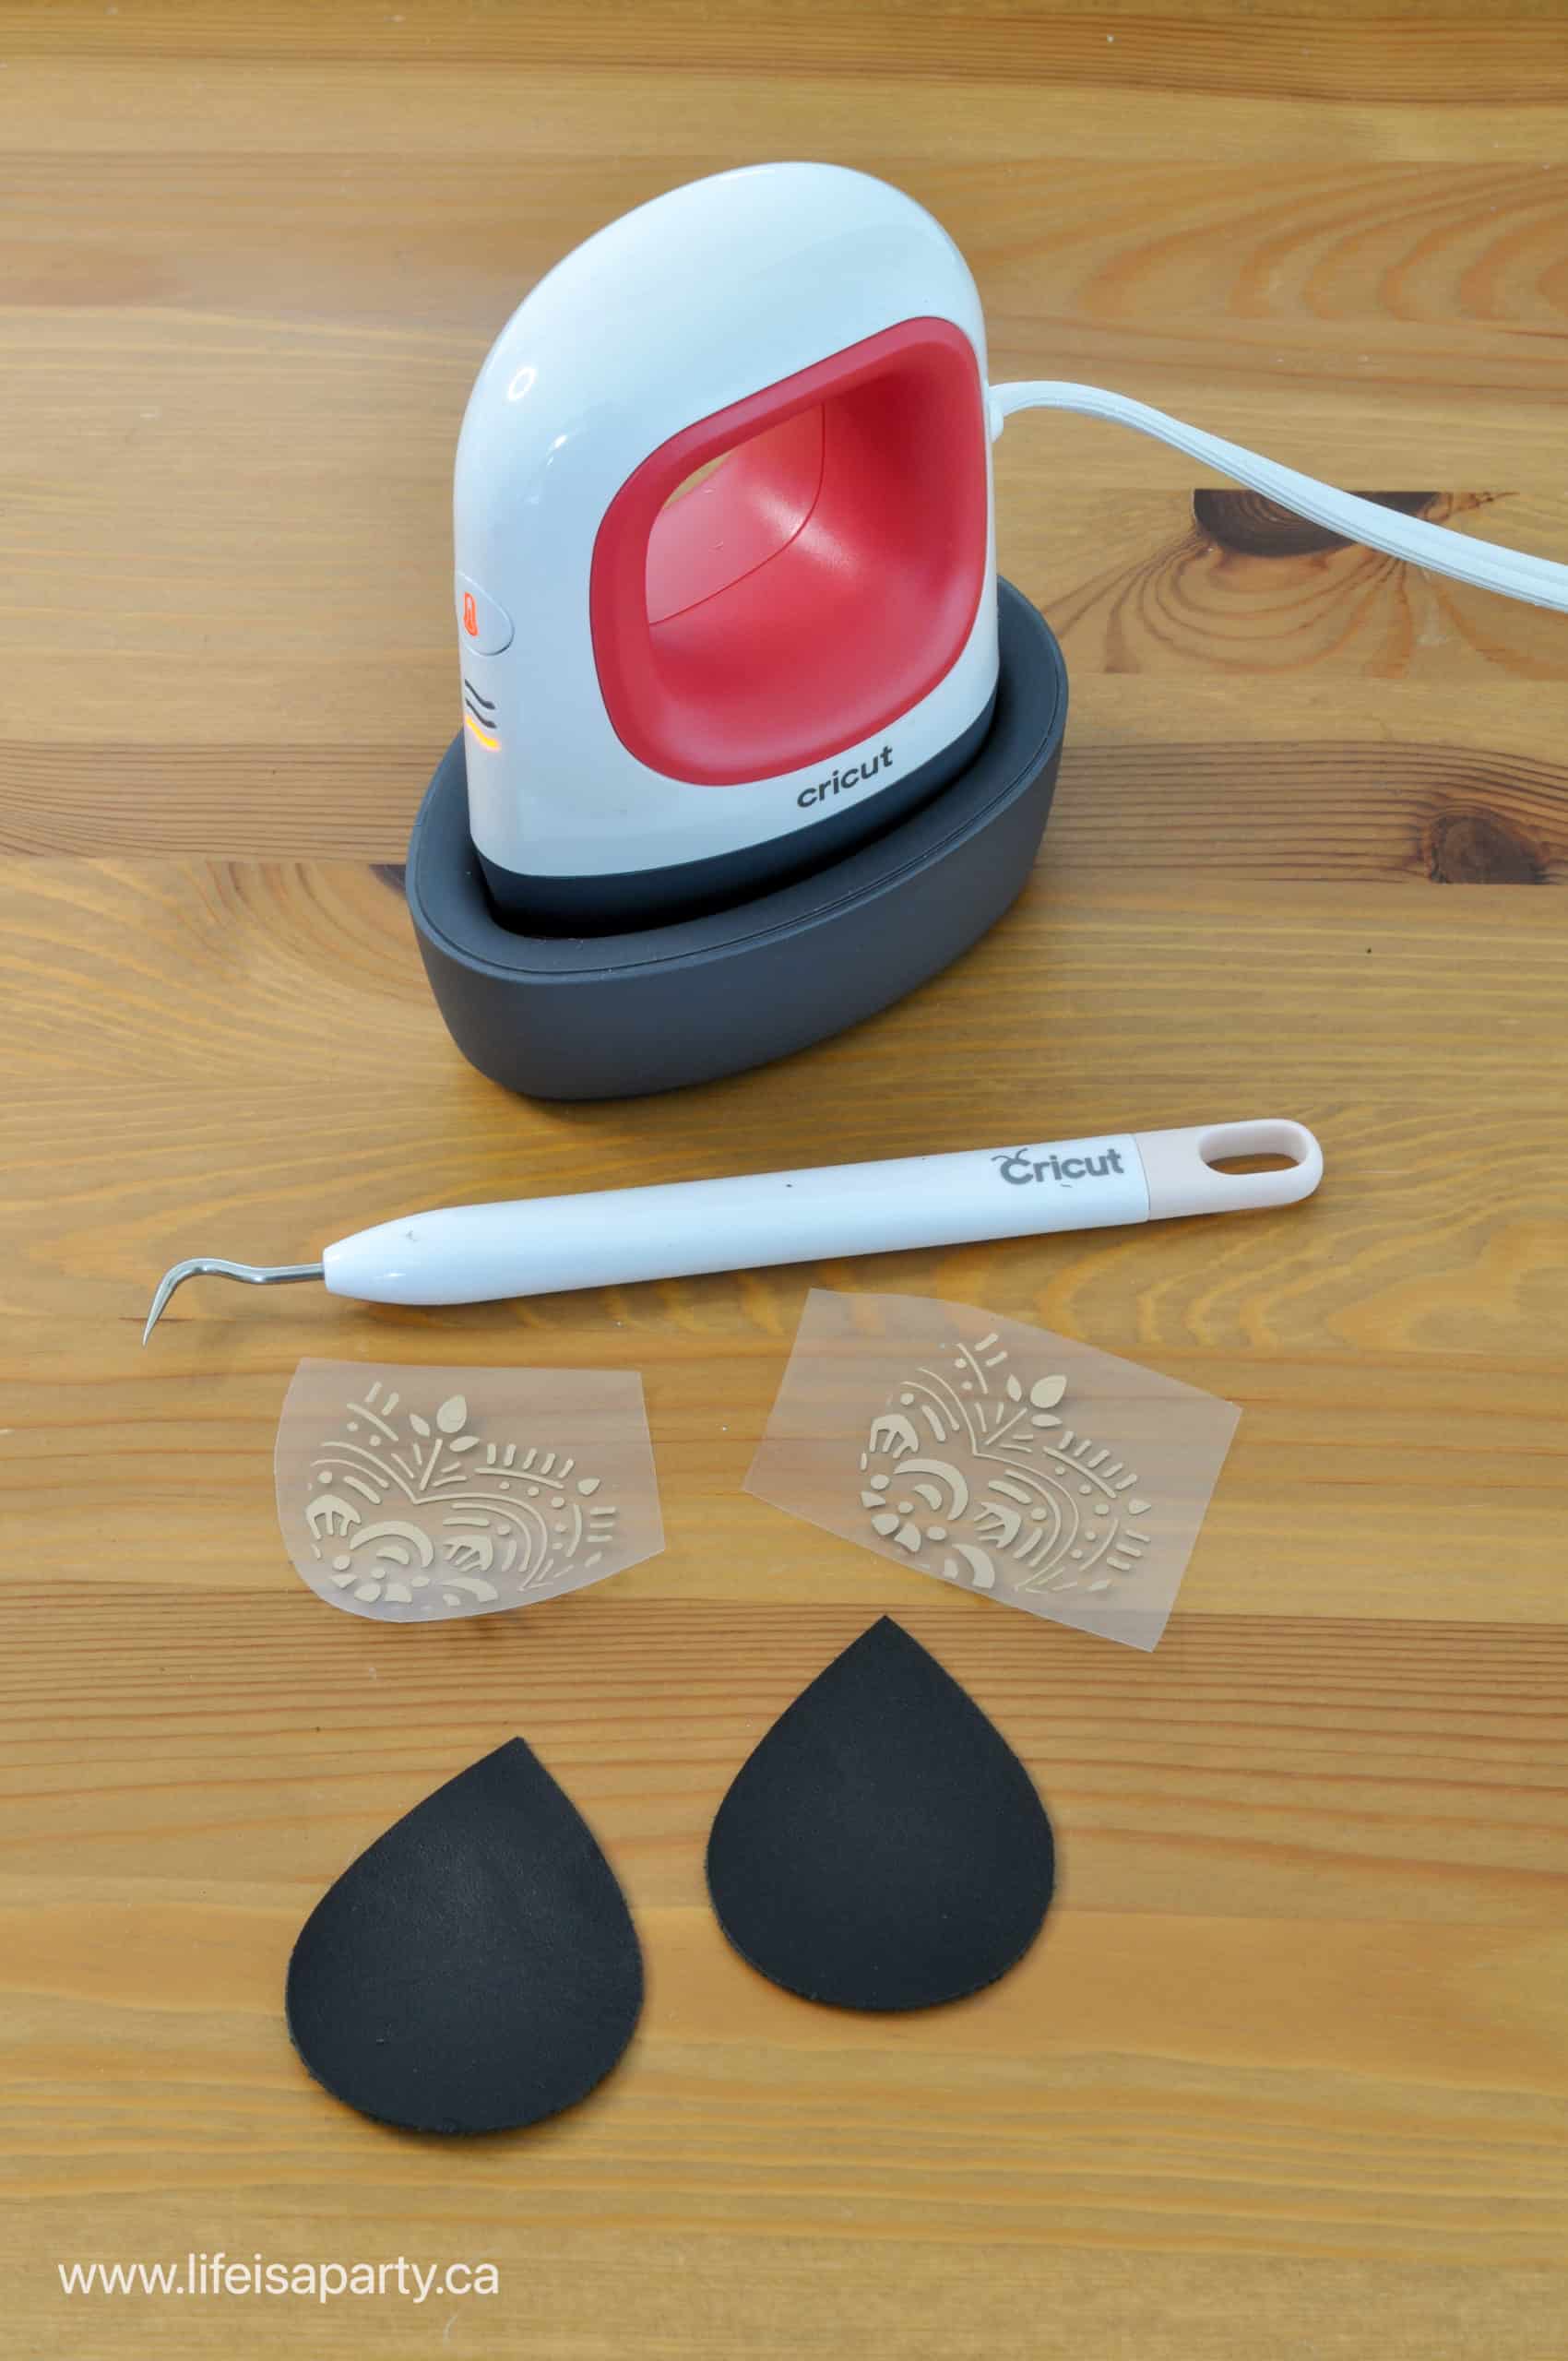
- Cricut easy press mini: The easy press mini worked great for this project. Check the Cricut Heat Guide for guidance on timings and settings. If you don't have an easy press mini, you can also use a regular iron for this step.
- iron-on vinyl: We used shiny gold and mat gold, but you can use whatever colors you like.
Watch the Video On How To Make Earrings With A Cricut
If you prefer to see how to make the earrings, check out the YouTube video below.

Design Your Earrings
Start by opening a new project in Cricut design space to create your earring design. You can either choose from some of the earring projects in ready made projects, or design your own cricut cut file using simple shapes.
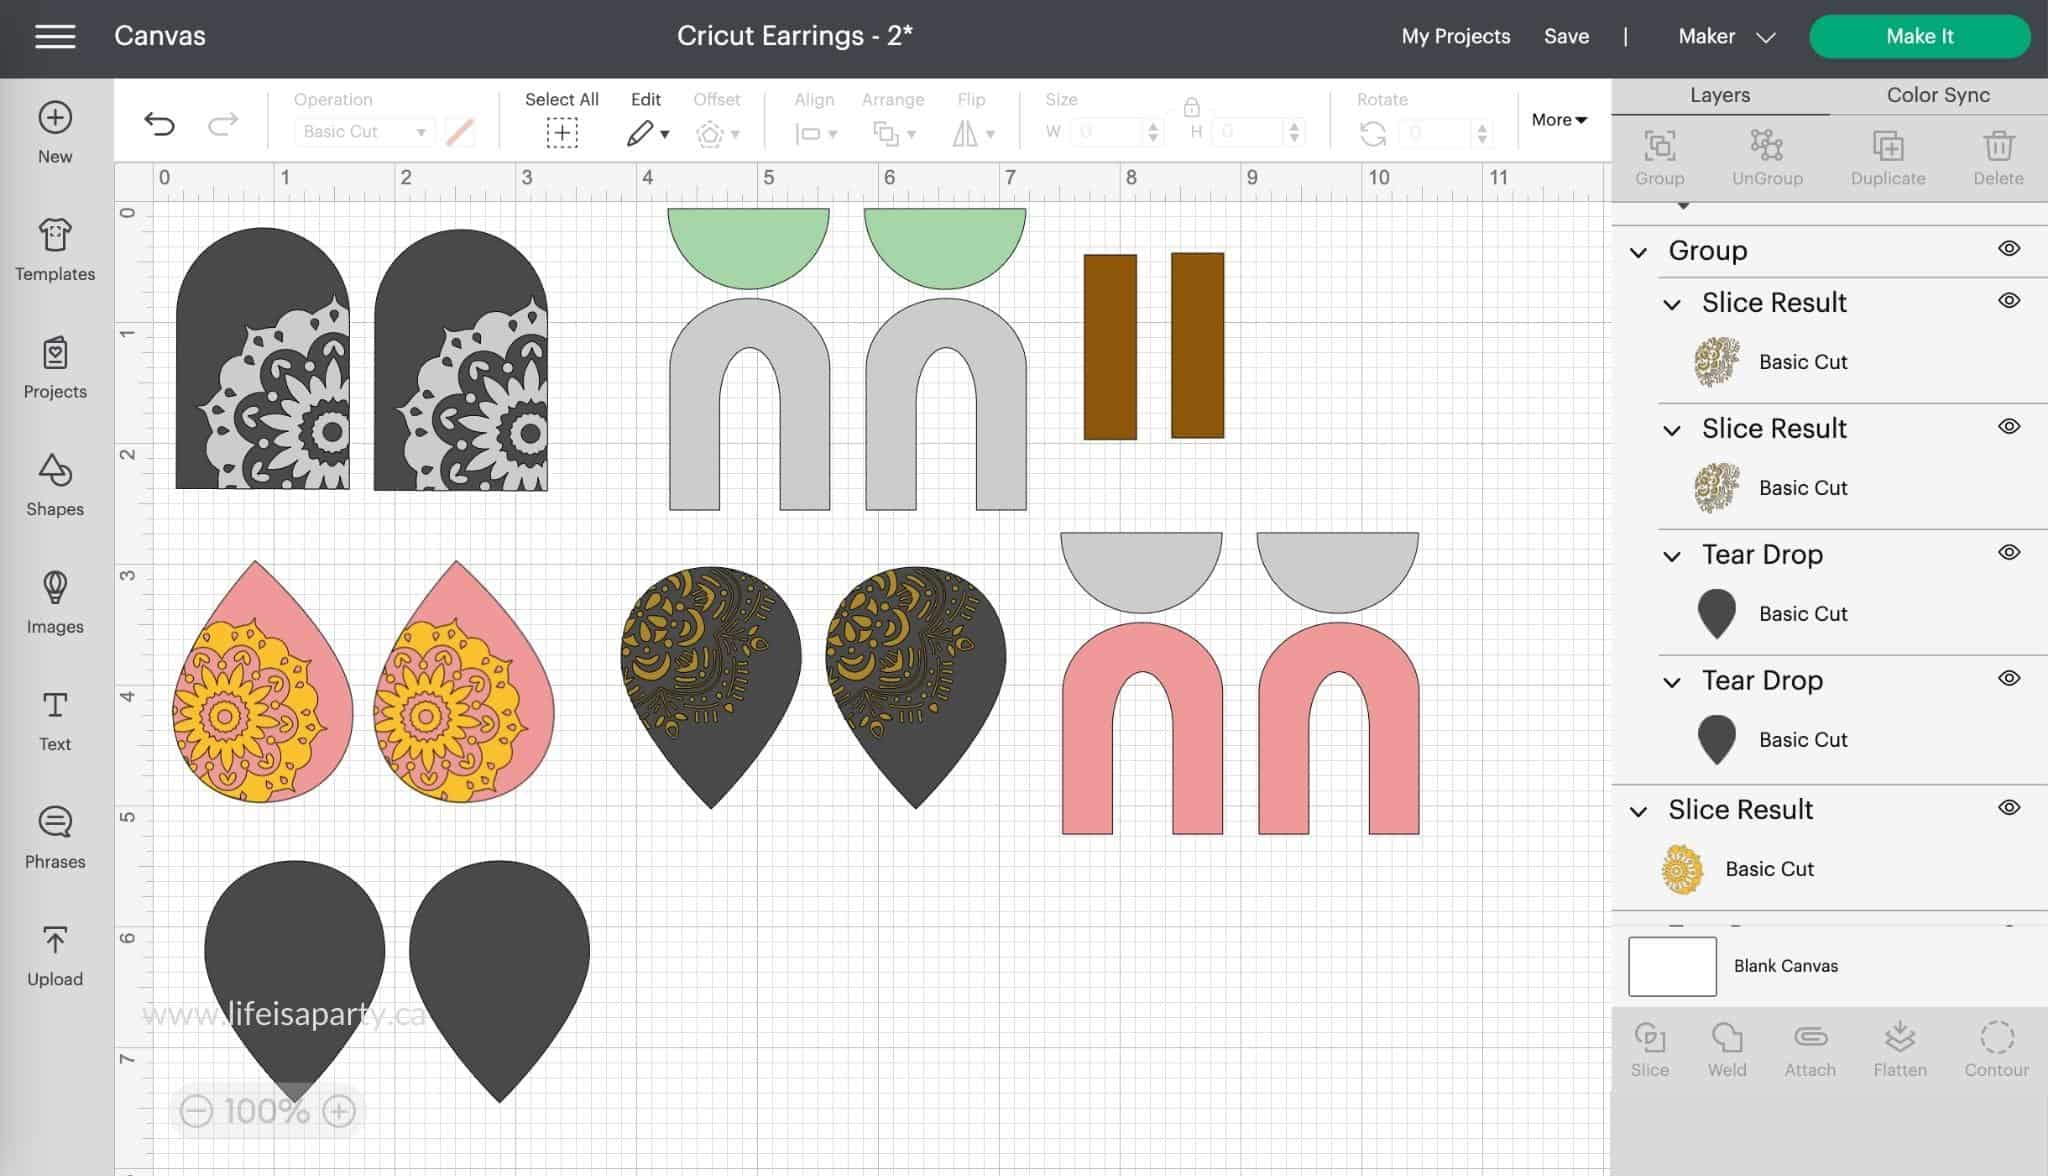
To design your own, go to the shapes button on the left side on desktop, and choose one or more different shapes for your earrings. We made a few designs and used the semi-circle, square, teardrop, and arches. Play around with different sizes and combinations until you're happy with it. You might want to think about joining several shapes, as well as using different colours of genuine leather or faux leather or faux suede. Make some in larger or a smaller size, depending on your preferences.
Rectangle Earrings:
Start with a square from the free shapes and adjust to 1.5 x .43
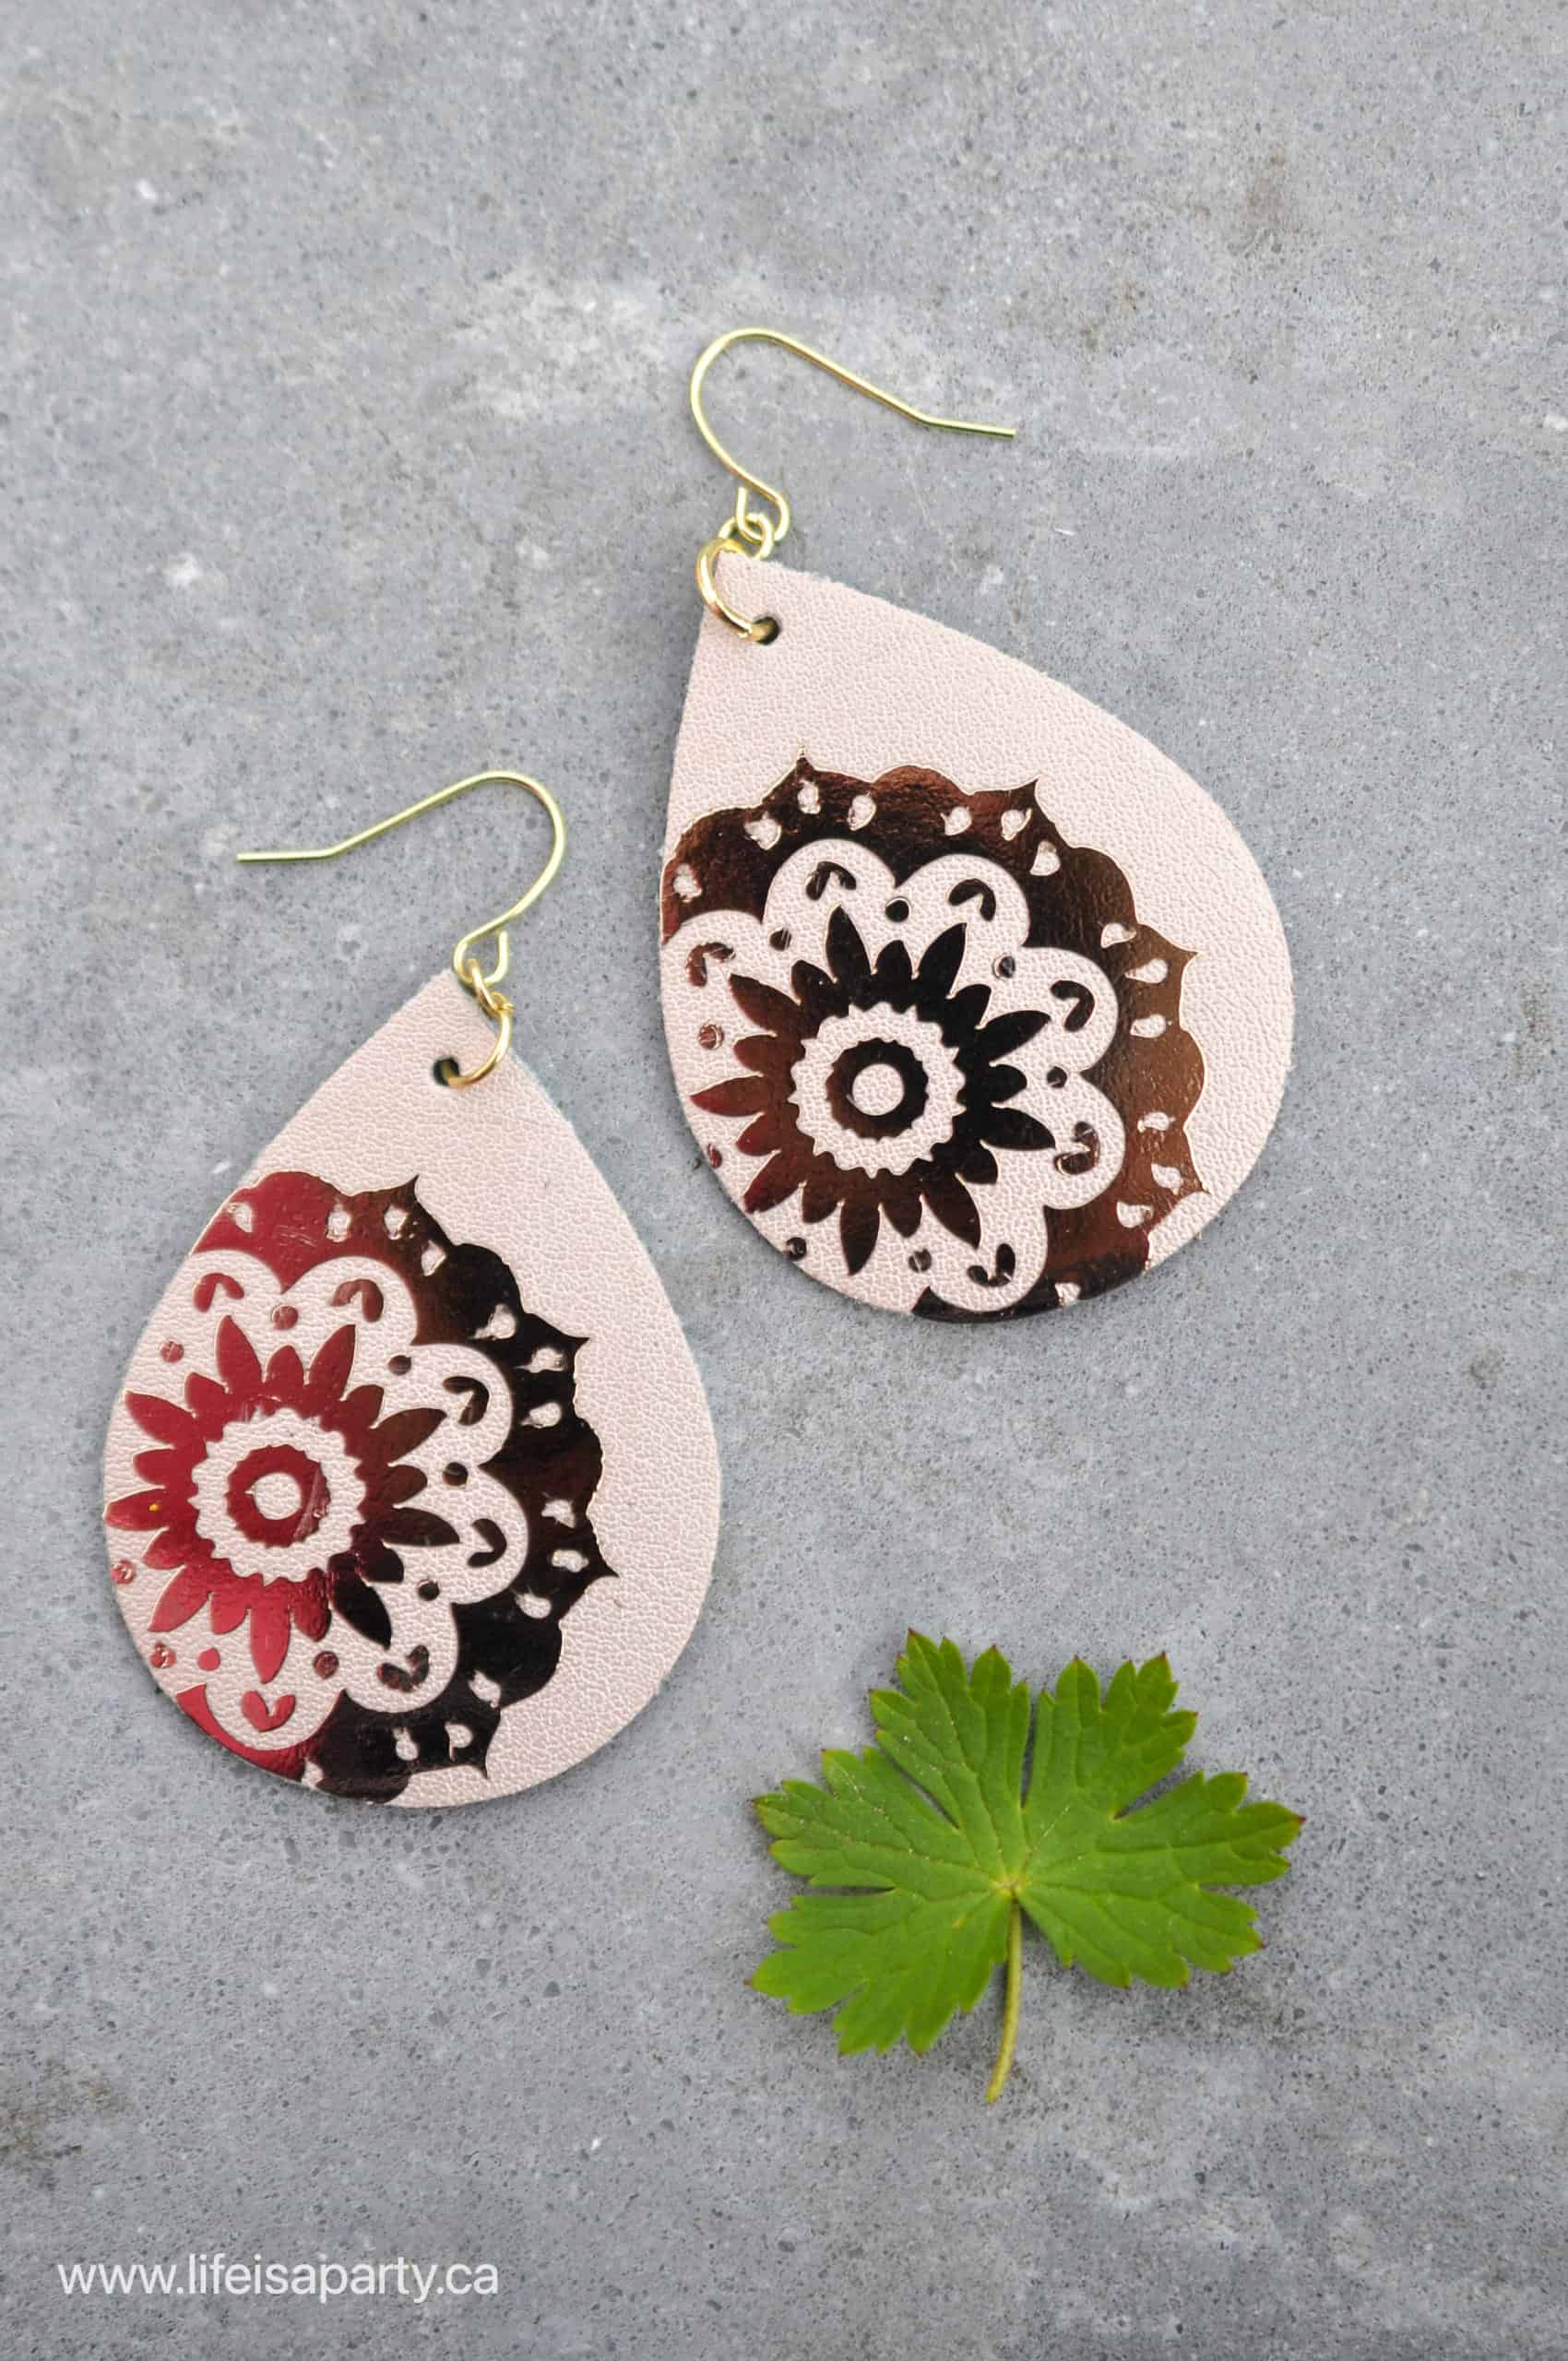
Teardrop Shape Earring:
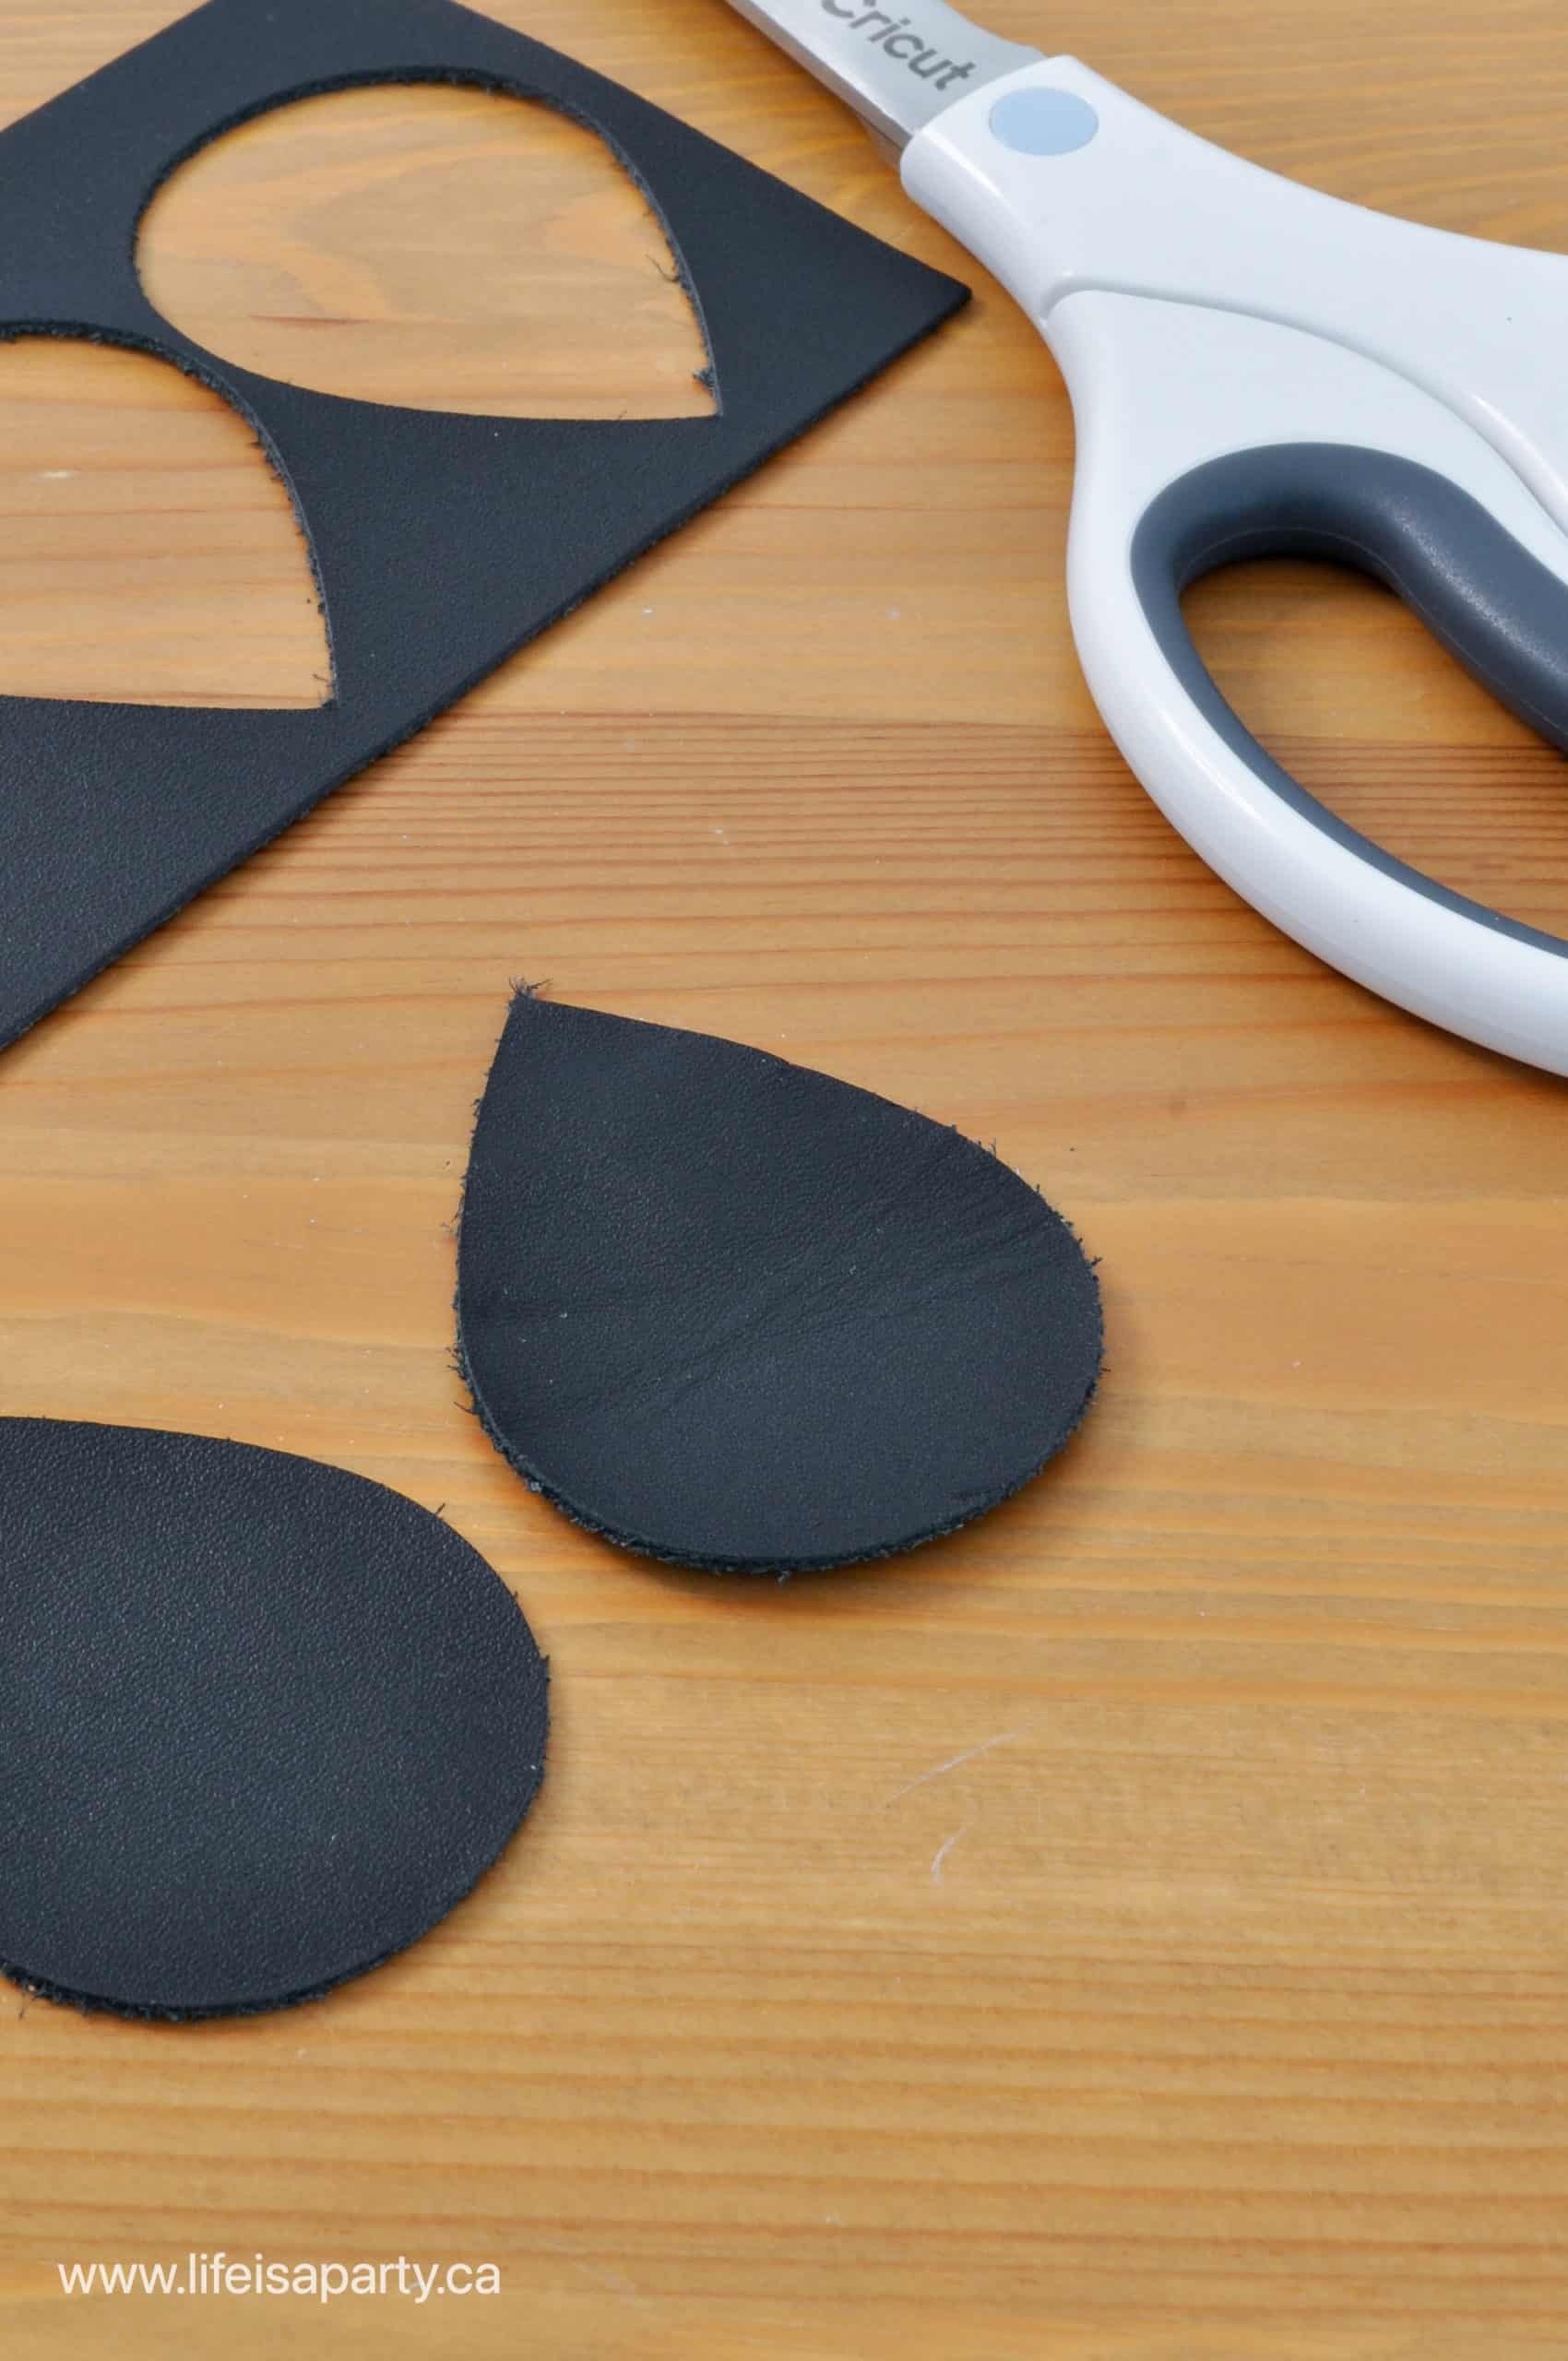
Add a teardrop from the shapes and adjust to 2 inches long.
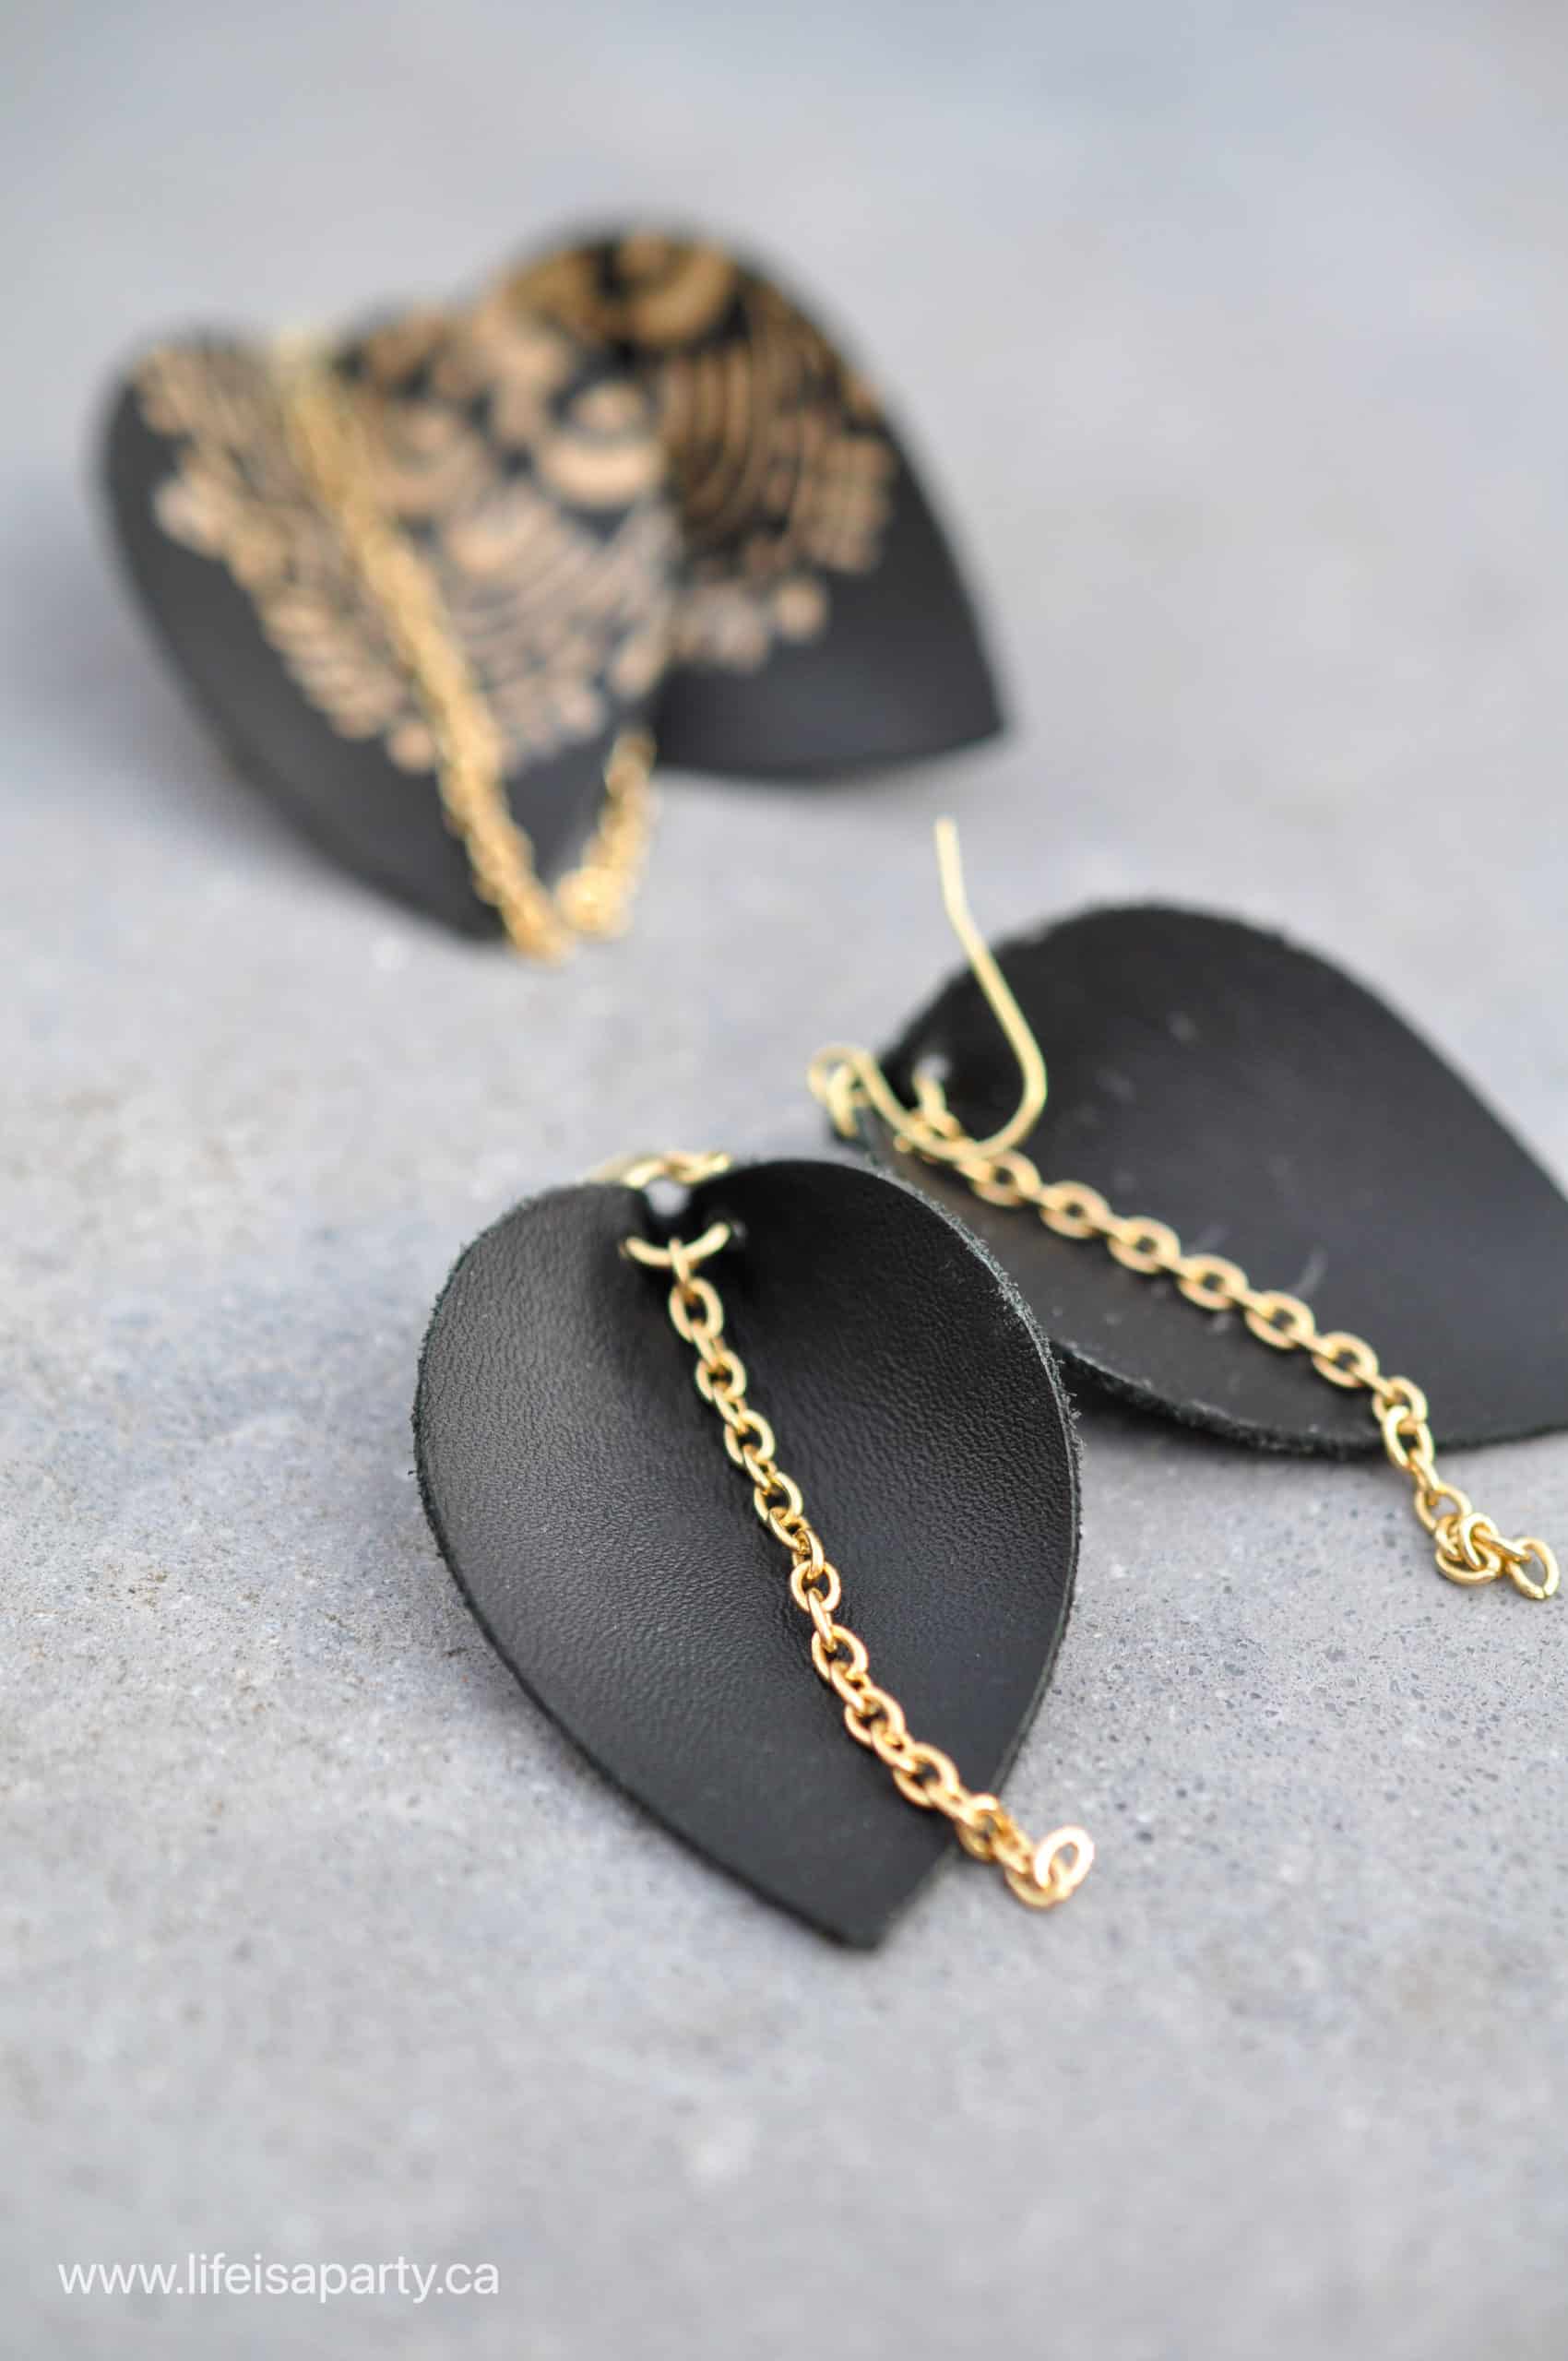
Inverted Pinched Teardrop:
Add a teardrop from the shapes and adjust to 2 inches long, rotate the shape 180 degrees.
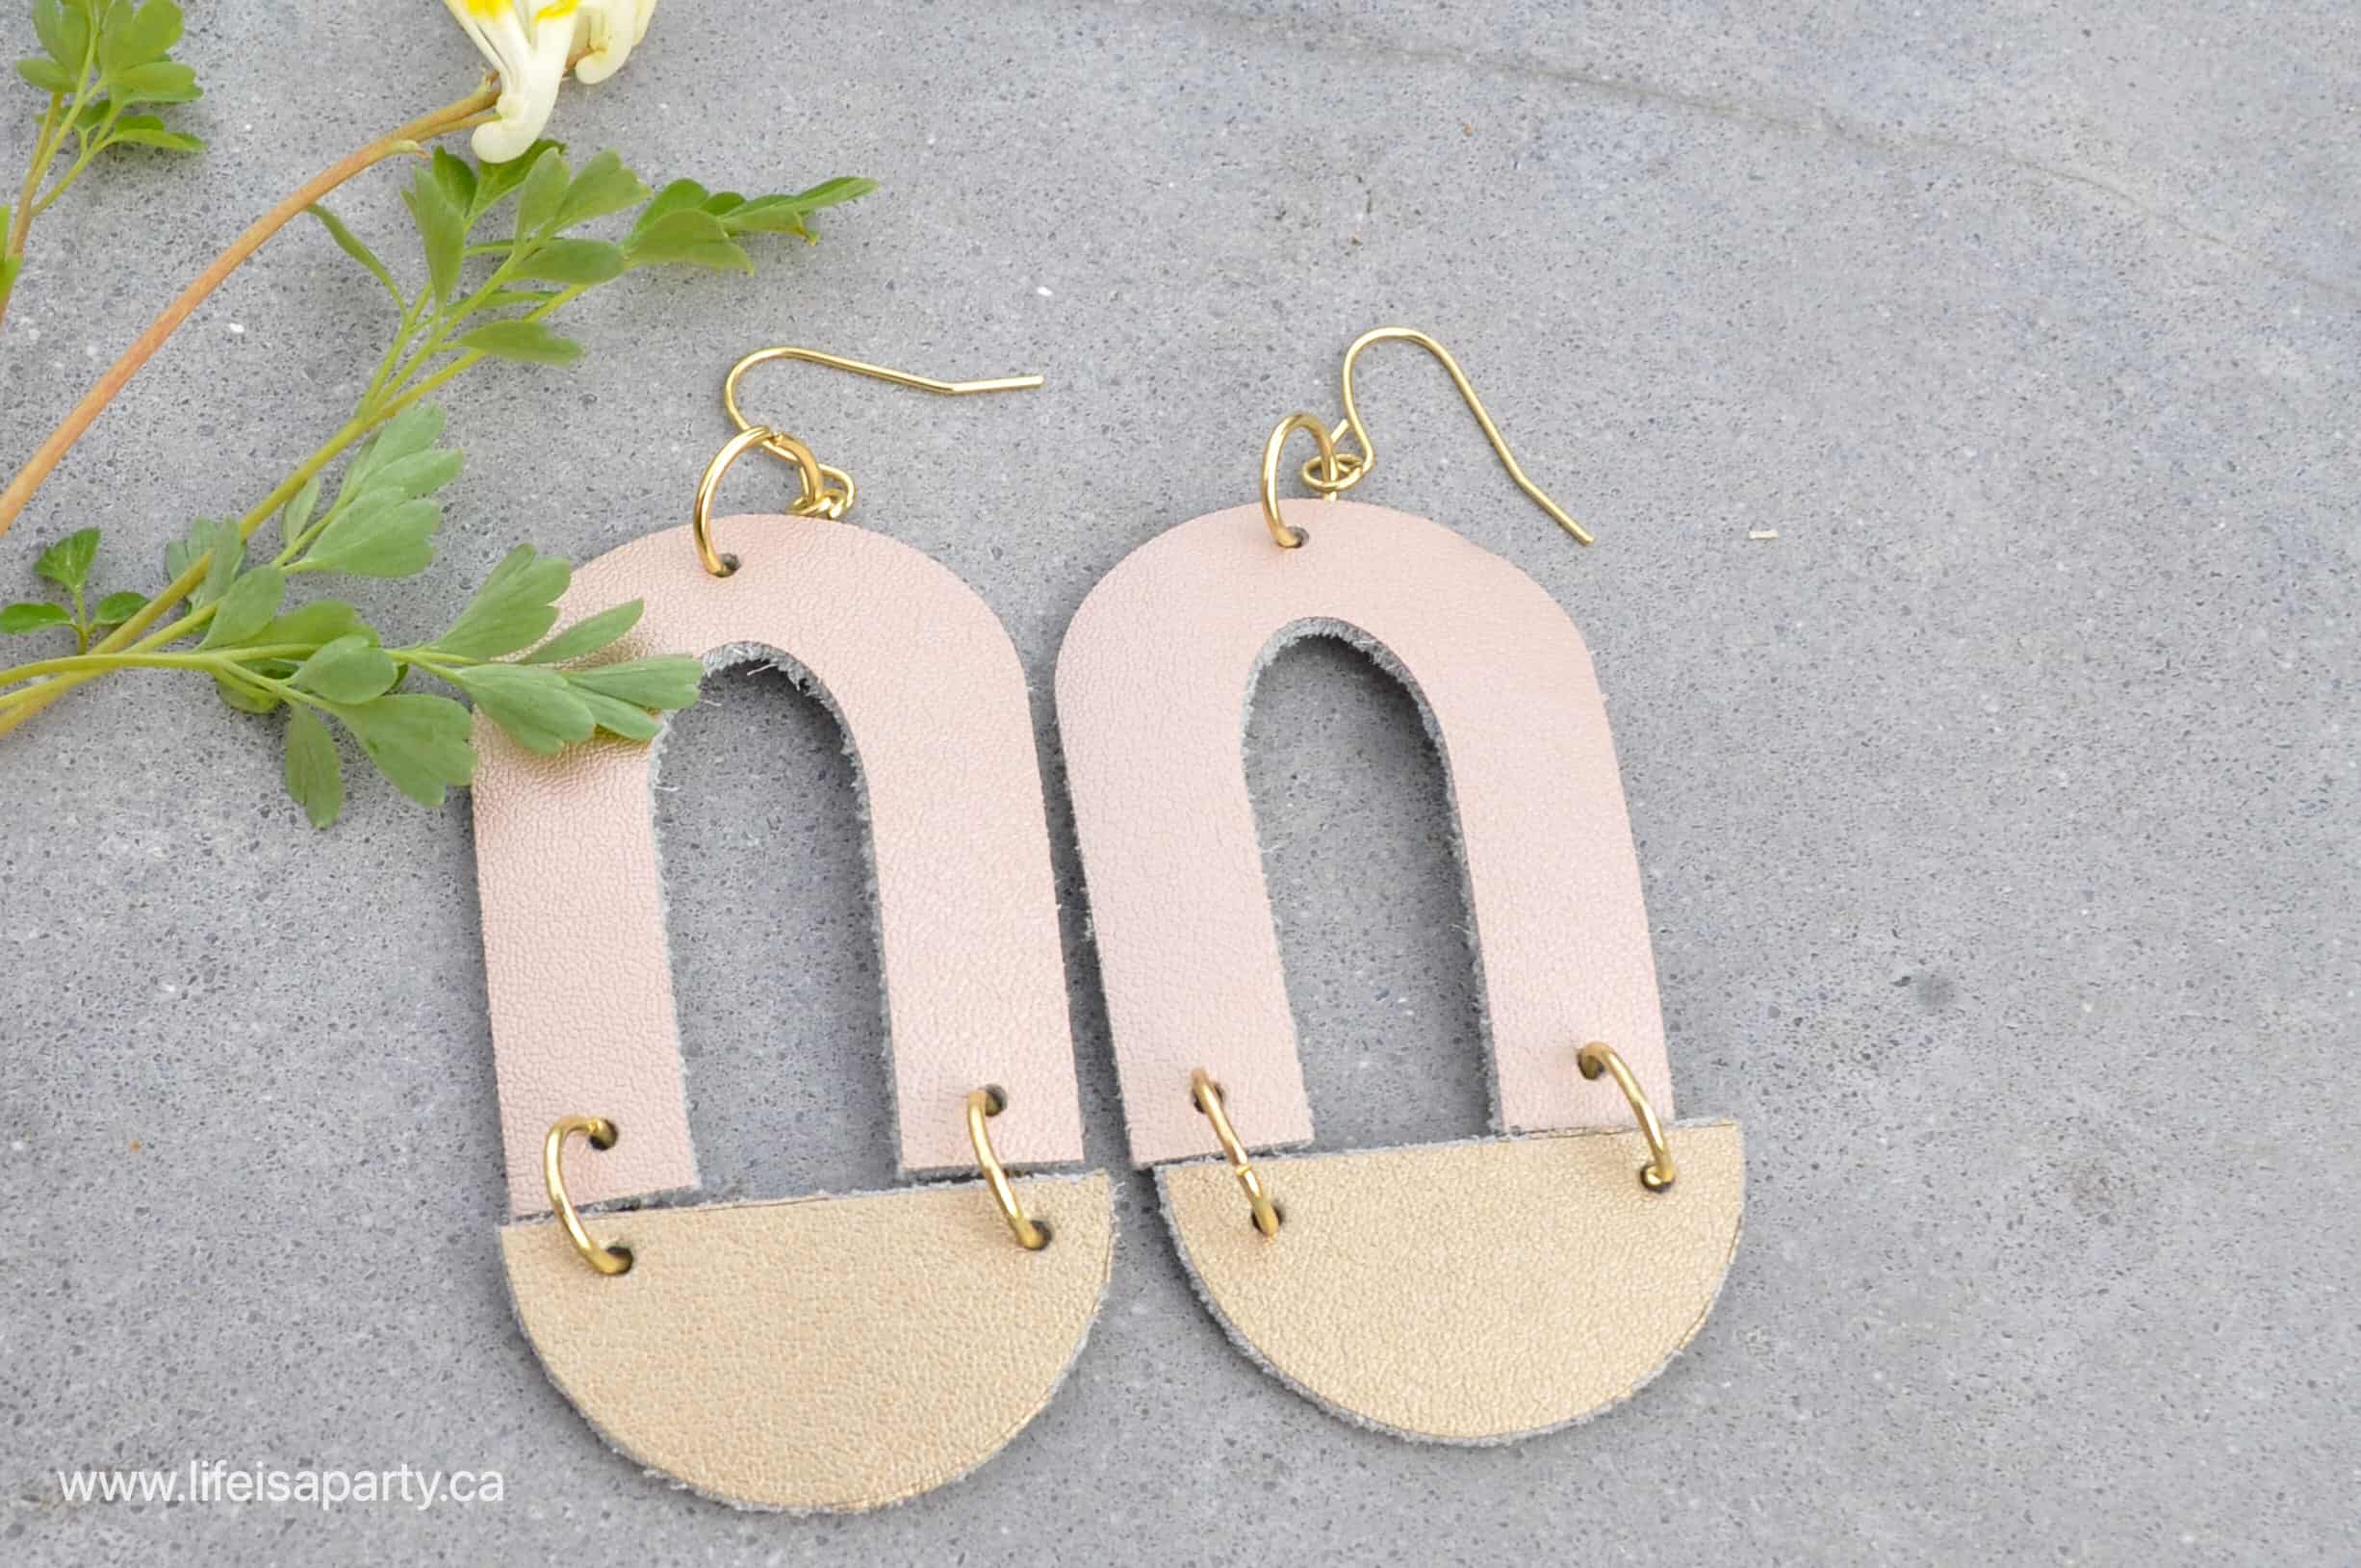
Arch and Semi Circle:
Start with the solid arch. Duplicate and make a smaller one. Use align to centre it horizontally. Select both arches and use the slice tool to cut out the centre. Delete the extra pieces. Add a semi-circle, and rotate it 270 degrees. Make the semi-circle the same width as the width of the arch. The finished size for the arch is a height of 1.75", with a width of 1.324" and the semi-circle is 1.324 wide and 0.667 tall.
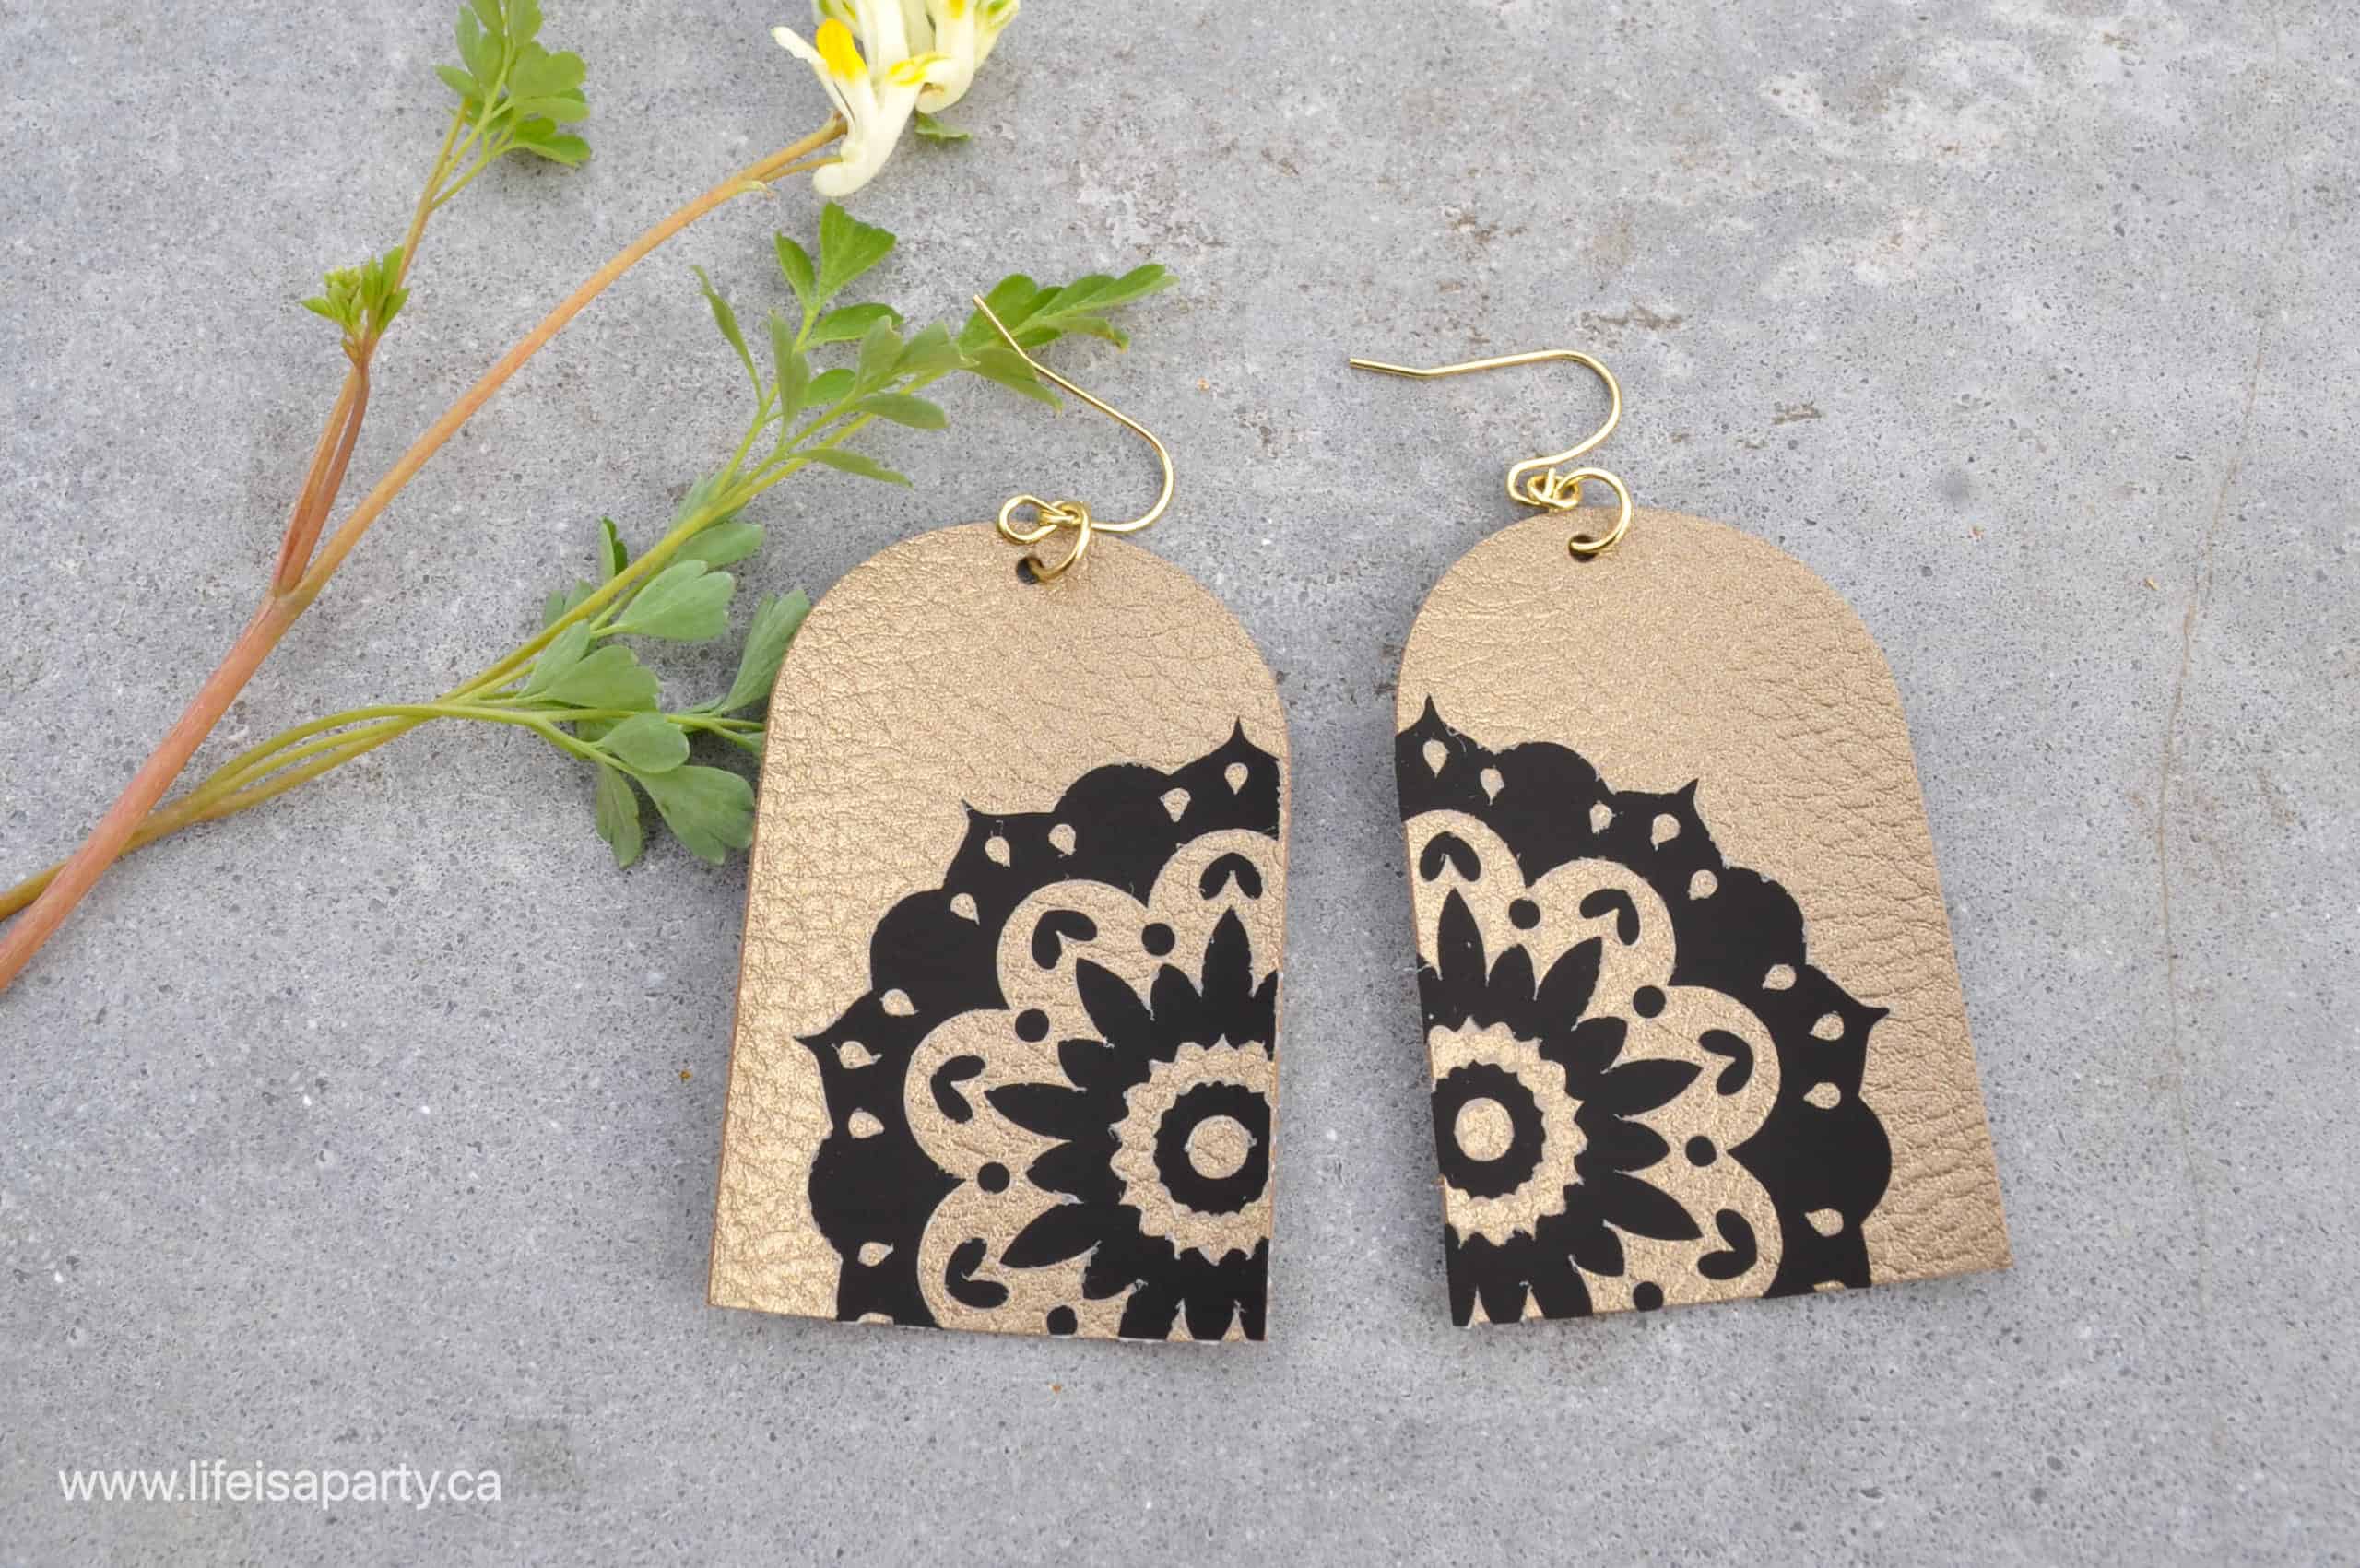
Solid Arch:
Add an arch shape from the shapes, size 2.2 x 1.45"
Design The Iron-On Vinyl Overlay
For some of our earrings, we added some heat transfer vinyl on top of the leather. This is a fun way to add more detail and different layers to your earrings. You can choose any colour of iron-on vinyl, including foil iron on, which add a little sparkle. Combining the different material adds a lot of interest to the earring design.
To create our iron-on vinyl overlay we started by searching for "mandala" in images. Look for ones that are not too fine and detailed because it will be really difficult to weed, when it's made small enough to fit onto an earring. The larger and chunkier the lines, the easier it will be to weed and work with.
We choose Mandalas #M4A771F6 and also Mandalas #M4A771F6 (from Cricut Design Space).
Once you've chosen your image lay it over your earring shape and change the colour to gold -or whatever colour you choose, and then play around with size and rotate the mandala until you're happy with the design. I liked it off-centre and oversized. Next, select the mandala and the earring in the layers panel and slice. Delete the extra layers, so that you're left with the exact pattern to fit the earring.
Once we're completely happy with the design, we'll use the duplicate button to make an exact copy so that we have a full pair of earrings cut out that match perfectly.
Cutting Out The Earrings and Vinyl
Leather
I cut out most of the earring shapes in real leather using the Maker cutting machine and a the knife blade.
You can also cut out leather on the Cricut Explore or Cricut Explore Air using the deep point blade.
I love the weight of the leather, and how it hangs, as well as the texture and natural variations. I didn't find the leather hard to work with, although you may find it helpful to do a test cut first. There are many different kinds of leather to work with. Choose different colours or even metallic leather for a little bling.
Settings
When you're ready to make your earrings, click on the Make It button on the top of the canvas. This will bring you to the cut preview screen. Make sure everything looks right and that the sizing looks good on the mat, then press the continue button.
Next you set your Base Material. Click on Browse All Materials, and type leather in the search bar. You will see lots of different leather options.
I chose the Tooling Leather 4-5 oz. material settings for my cuts, which uses the knife blade in the Maker.
The genuine leather uses the deep cut blade, and is compatible with the Explore and the Maker.
Real leather varies greatly in thickness, so it can be a little tricky to know which settings to use on your Cricut. Here's a few tips:
- use a small ruler to measure the thickness of your leather piece
- before unloading your cutting mat from the machine, check to make sure it's cut through. If it isn't press the cut button again, and keep doing this until it's cut through.
- do a small test cut before cutting out your whole project so that you don't waste materials.
- cut out one set of earrings at a time, and adjust the settings for the next cut if you find it over or under cut the previous set.
Preparing The Cutting Mat
Use the stronggrip purple mat for cutting leather and tape the outside of the leather onto the cricut mat with painter's tape.
Take some care though, I found that some of my leather was marked by the painters tape. Either flip the leather over, or apply the tape with a very thin overlap to avoid this problem. Note that I found a more clean cut with the leather good side up.
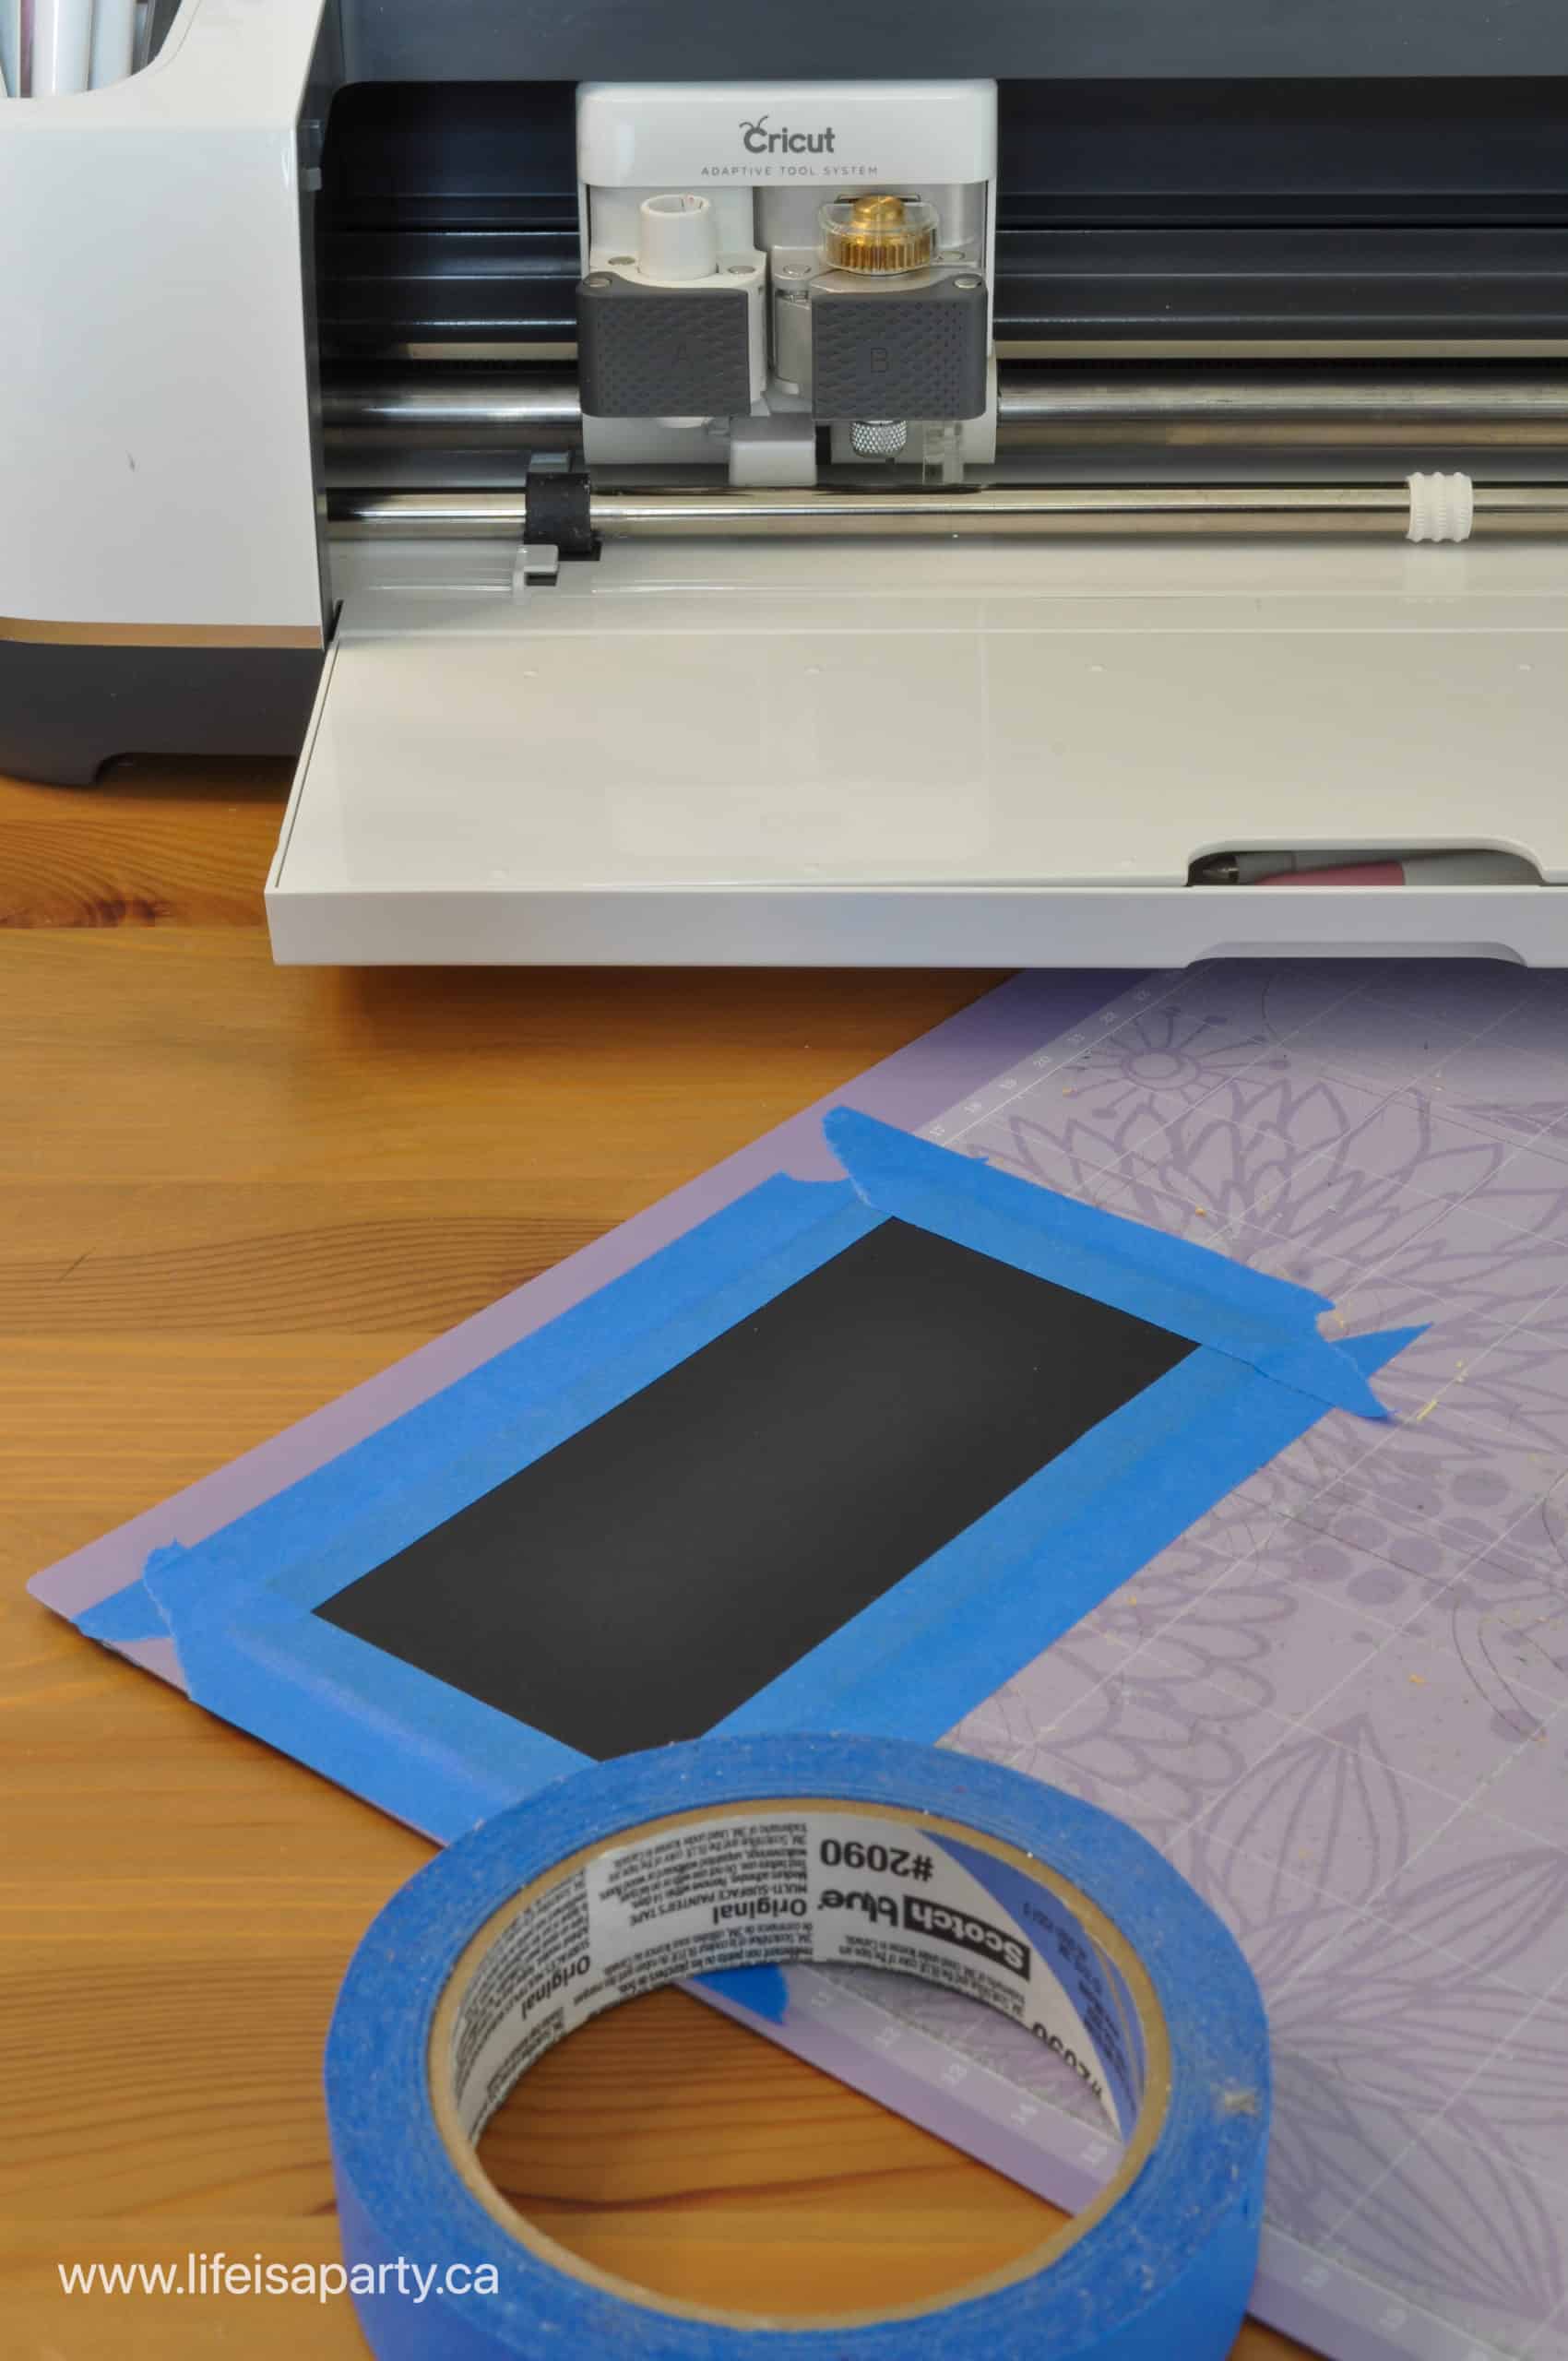
The leather may leave a lot of debris on your mat, so use an older stronggrip mat for this job if you have one. You can clean the mat afterward with your scraper and the baby wipe or dish soap method afterward -read more about how to clean your mats here. Some people also like to cover their mat with transfer tape before cutting something messy like leather. That way, when you are finished you just peel off the transfer tape and are left with a clean mat underneath. This might be something you'd like to try.
After cutting the leather, you may need to trim any frayed edges with some sharp edges to clean them up slightly. Cut just the frayed bits, taking care not to cut into the shape.
Faux Leather
You can also make these earrings out of faux leather. It's very similar to leather but much thinner and easier to cut. It's a great option if you'd like to make these earrings with a Cricut Joy, because you can cut it with a regular fine point blade. You can also cut the faux leather with a regular green standardgrip mat.
Some people don't like the back of faux leather, and cut out an extra and glue them together with a glue like E600, or cover the back with iron-on vinyl. You can also leave it plain, which ever look you prefer.
Iron-Vinyl
To cut out your iron-on vinyl, use the iron-on vinyl setting on the Cricut and make sure your fine point is in place. Use a standard grip green mat, and apply the vinyl backing side or shiny side down.
Once your iron-on is cut out it's time to weed it. Use the weeding tool to remove the negative pieces from the design. This can be tricky with such small pieces, so take your time, and make sure to work in good light.
Applying the Iron-On
We used our Cricut Easypress Mini to apply the iron-on, you can also use a household iron -see Cricut's heat guide for settings.
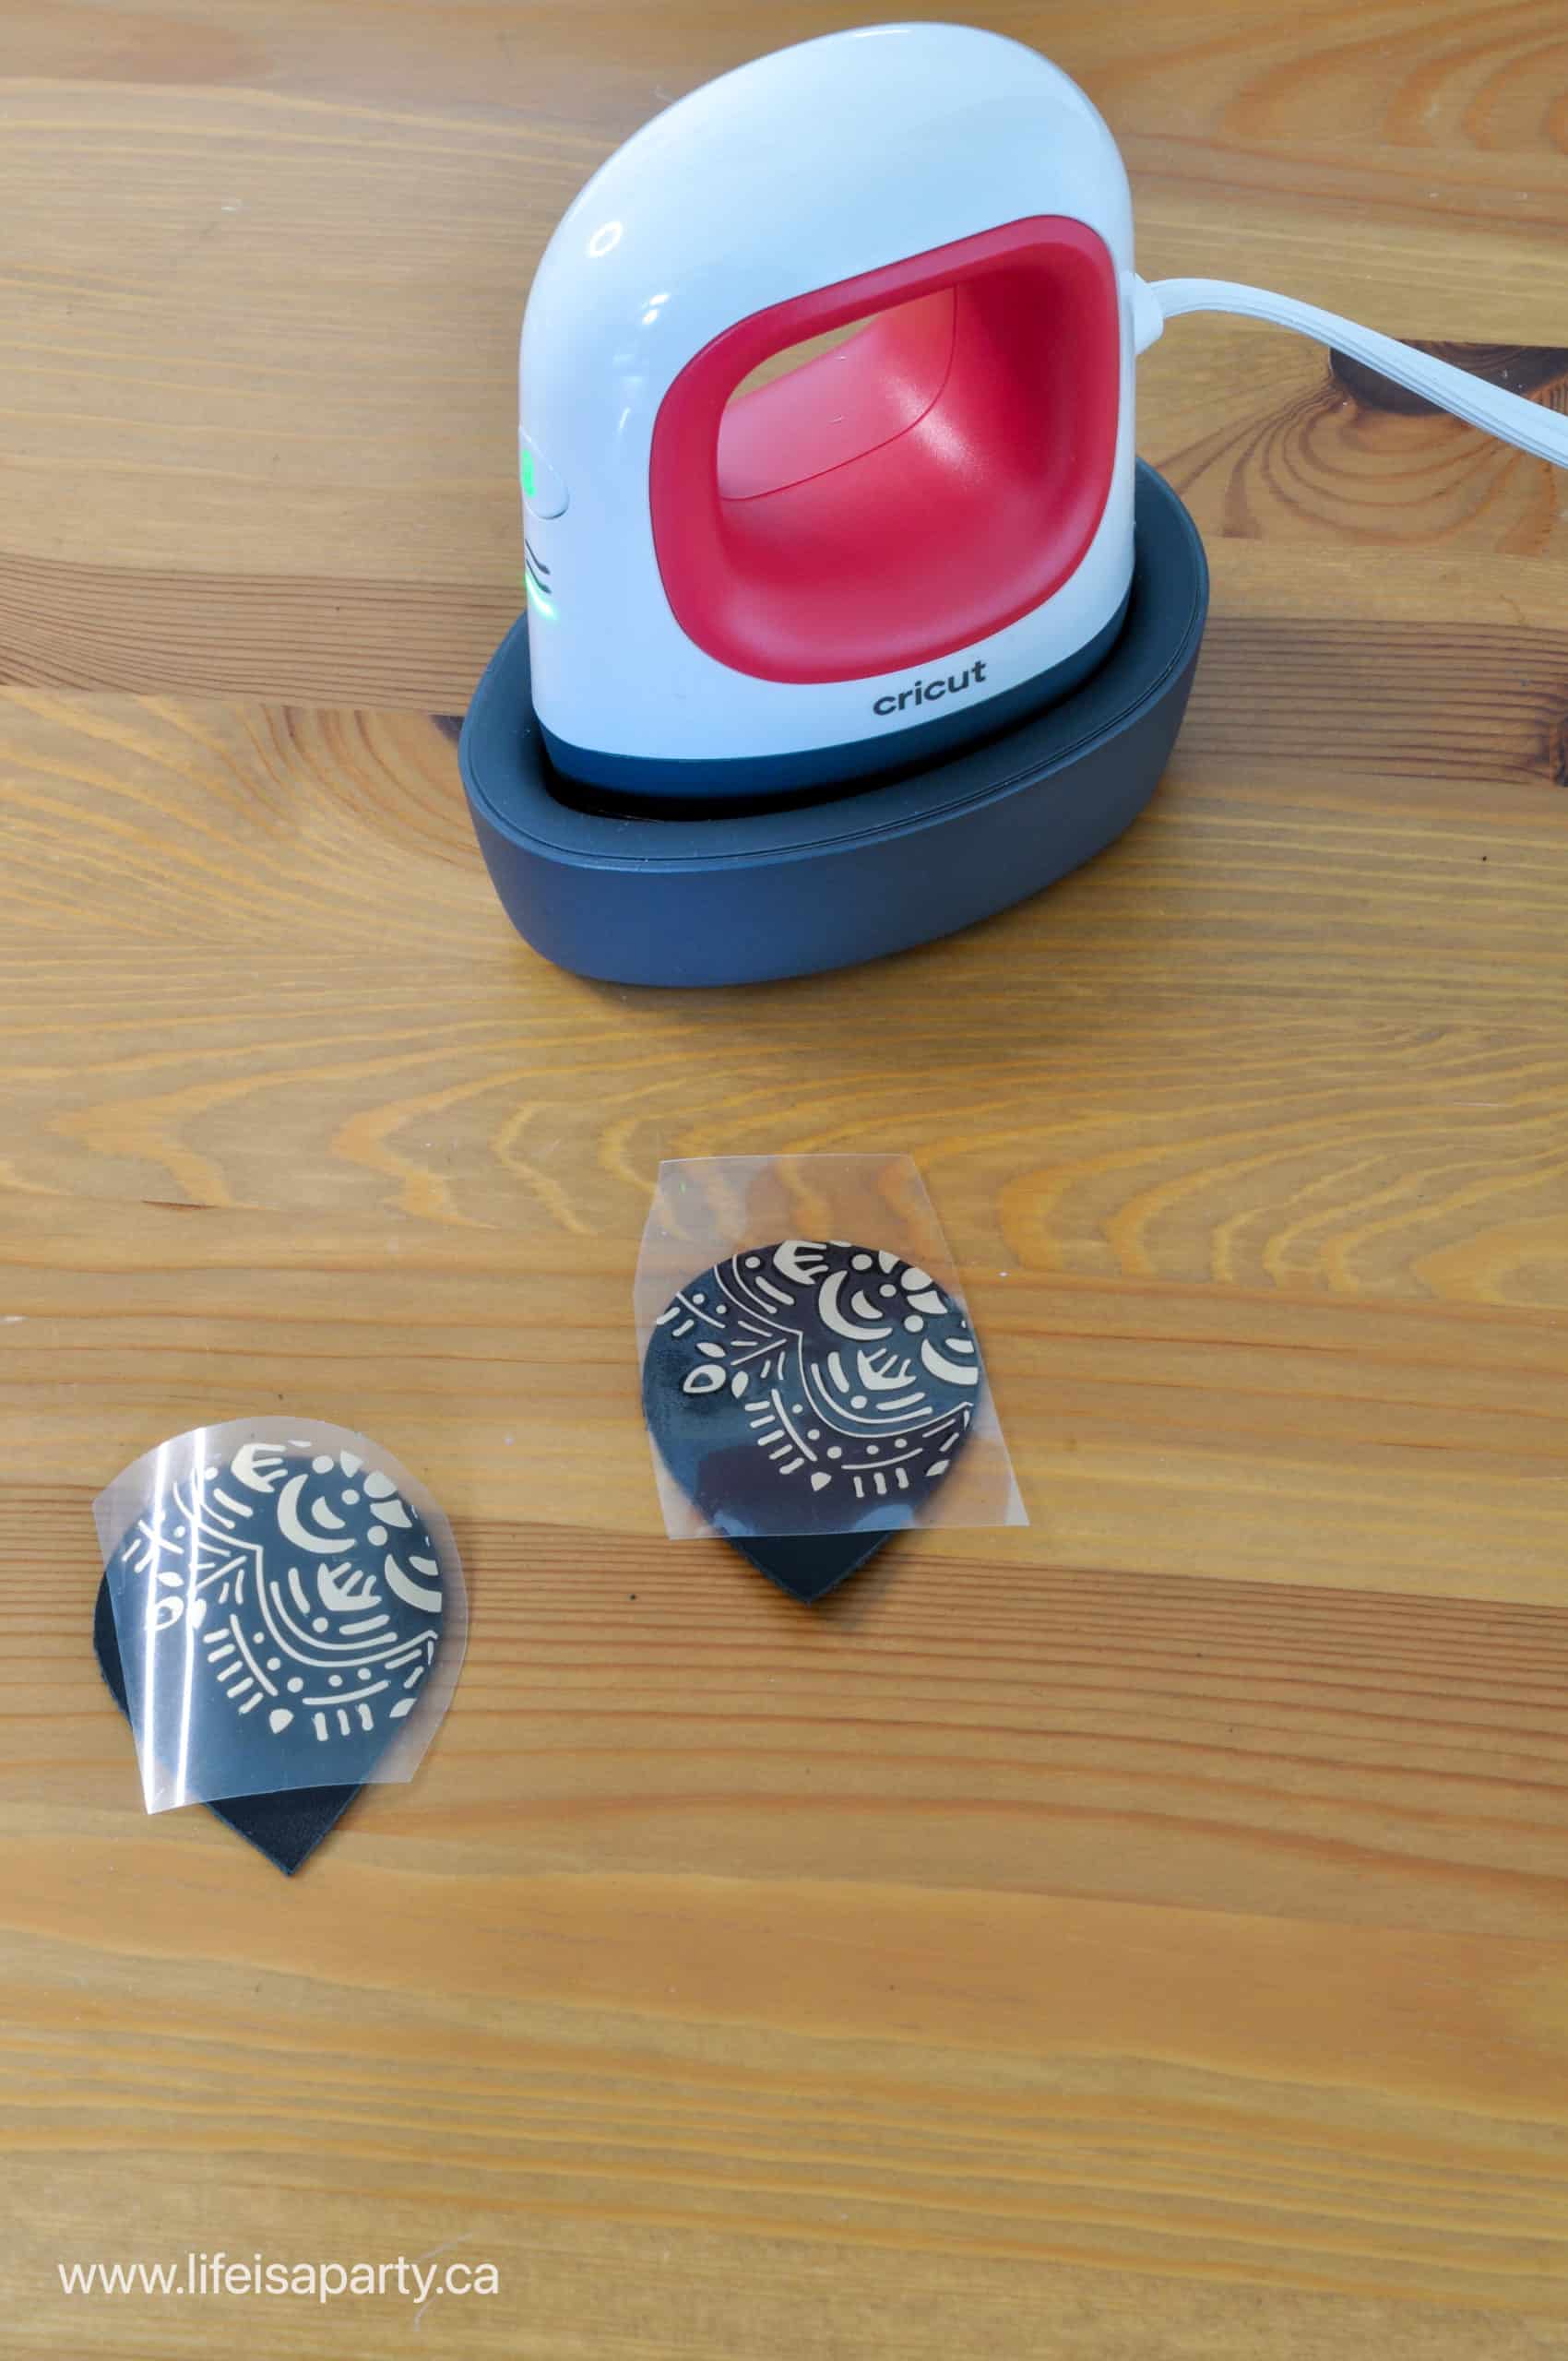
Set the Easypress Mini to low, and wait for the light to turn green when it's ready to use.
Align your iron-on vinyl and use the Easypress Mini for about 10 seconds to apply the design. Wait for it to cool, and then carefully peel off the backer sheet.
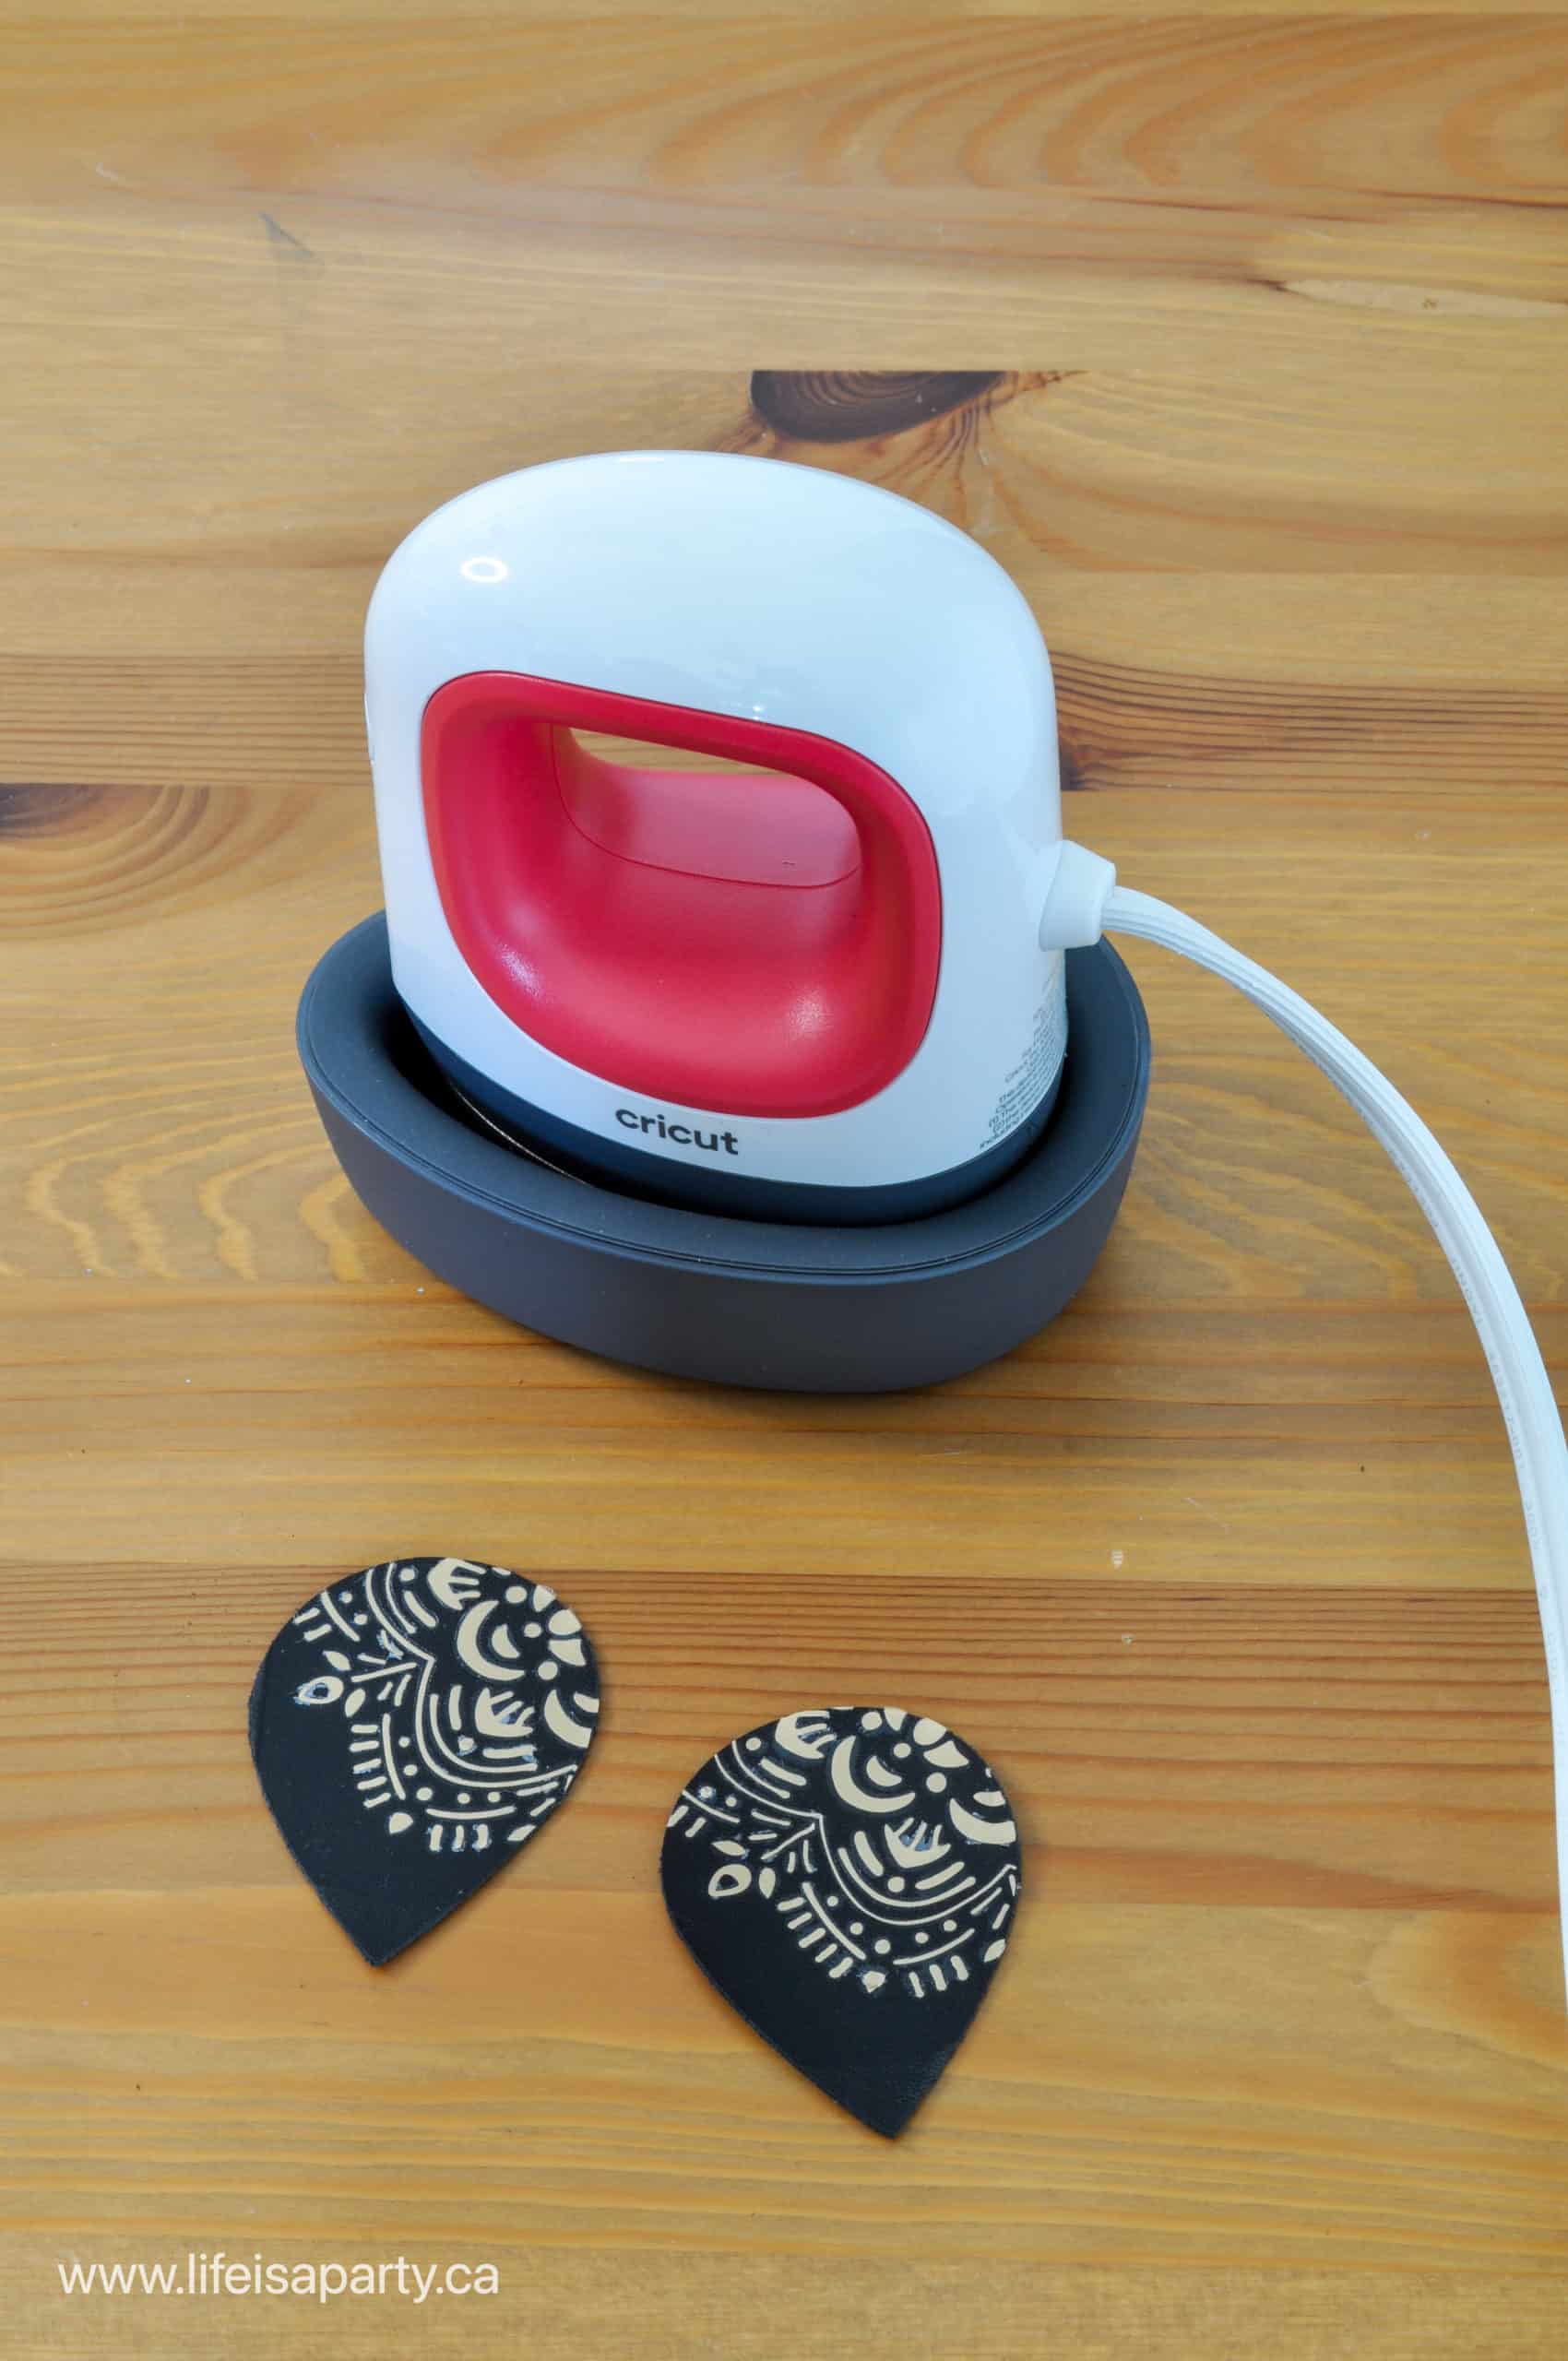
The heat guide suggested a much longer pressing time, but we found it was too long and created ghosting -where the glue had over melted and oozed out around the design leaving a white line around it. My advice is to practise with scrap pieces of leather and iron-on and work out the best timing for your materials.
If you under press the iron-on it won't stick to the leather, and will peel off with the backing piece. You can always press it more if you have this problem.
If you over press the iron-on it will create the ghosting effect where there's a white outline of glue, or it won't stick to the leather and will come off with the backing piece. If you've got ghosting you can usually remove the excess vinyl by heating it up again and carefully peeling it off of the leather. You can then try again with a new piece.
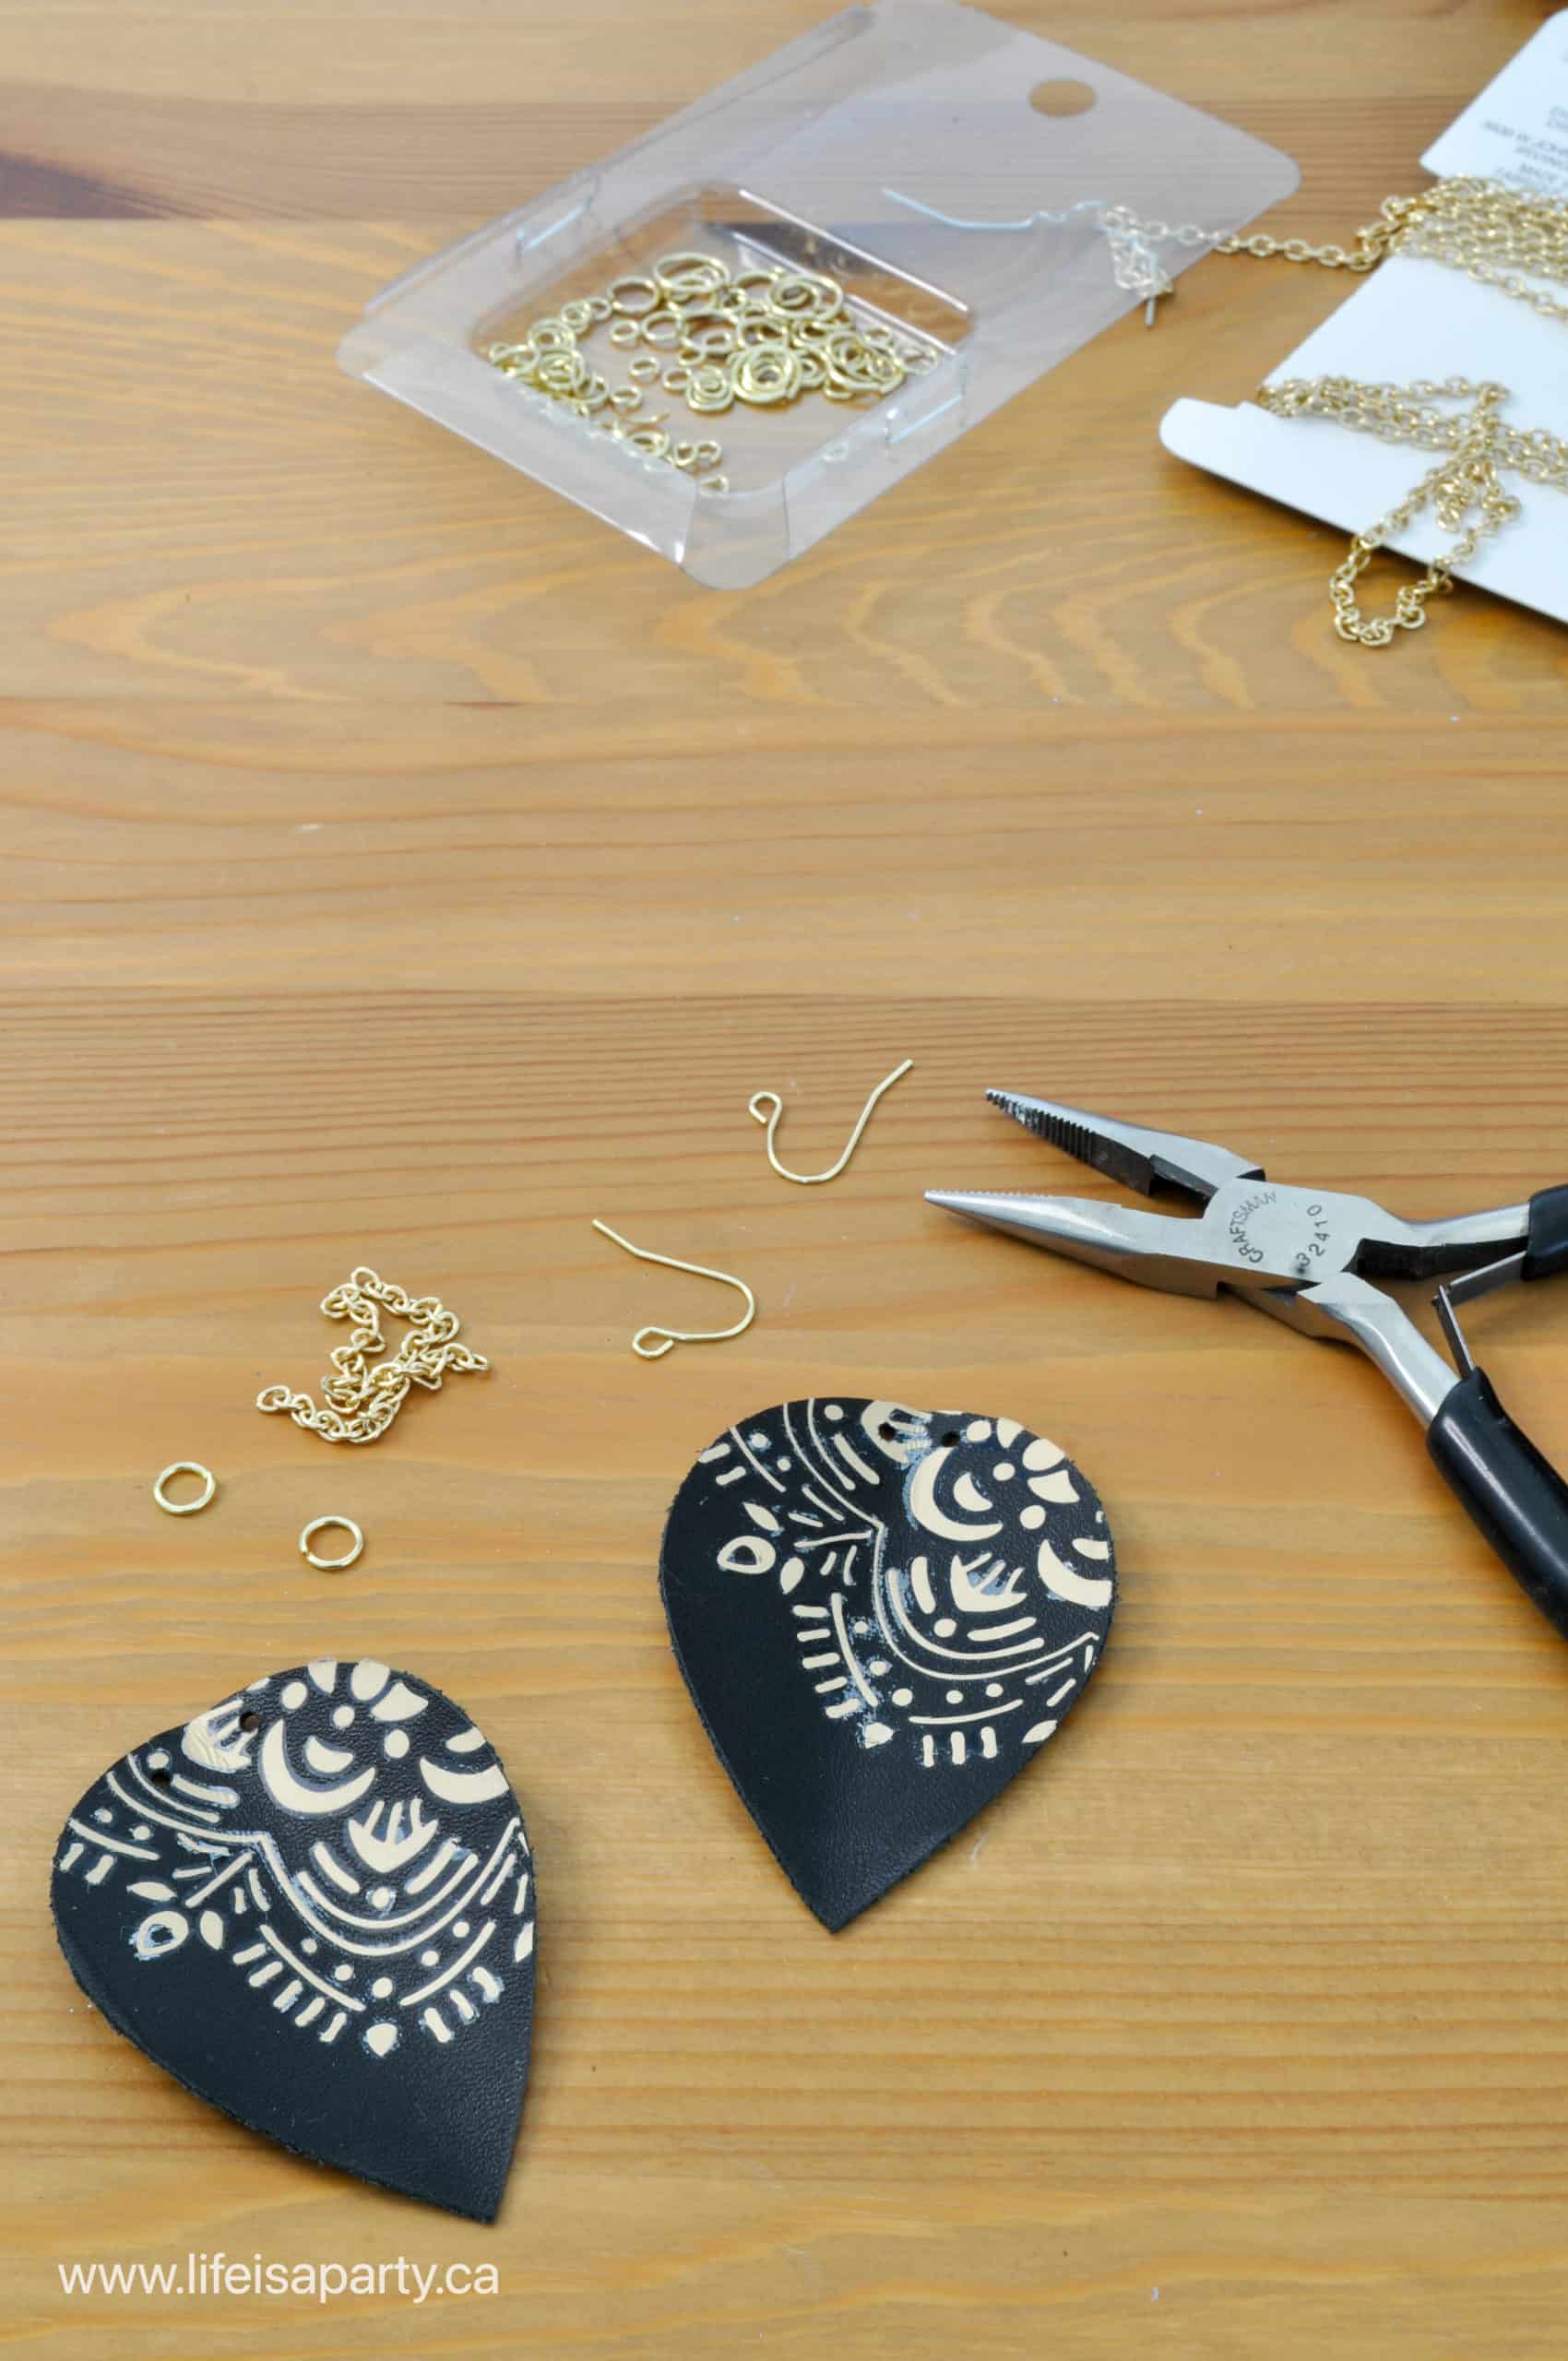
Assembling The Earrings
To put the DIY leather earrings together you will need some earring hardware including jump rings, the earring hooks, chain, needle nose pliers and wire cutters.
Jump Rings
To open the jump rings, use two sets of needle nose pliers to grasp each side and twist the ring in opposite directions. Use jewelry pliers to close the ring by twisting it back together in the same way.
Leather Punch
For all of the earrings, except for the inverted pinched teardrop, and the arch and semi circle earrings, begin by creating the hole in the top of the earring with the leather punch. As a general rule you want the hole to be placed at a depth of about half of the depth of the jump ring you're using, from the edge of the leather. We used assorted jump rings that came in a small, medium, and large, and adjusted the spacing of where the hole in the leather was accordingly.
Hanging Direction
A word about hanging direction as you begin to actually put the earrings together. There are several styles of earring wires to choose from, I went with the really simple earring wire style, but choose whichever you prefer. When you're putting the earrings together, you will want to make sure that the finished earring hangs so that it faces outward. This will depend on the direction of and how many jump rings you use. Every jump ring changes the direction. If you don't want extra jump rings, you can also twist the actual earring wire. Use your small needle nose pilers and twist the direction of the hanging loop on the ear wire, if you want to avoid adding extra jump rings to turn the hanging direction of your earring. This will make more sense when you start putting the earrings together.
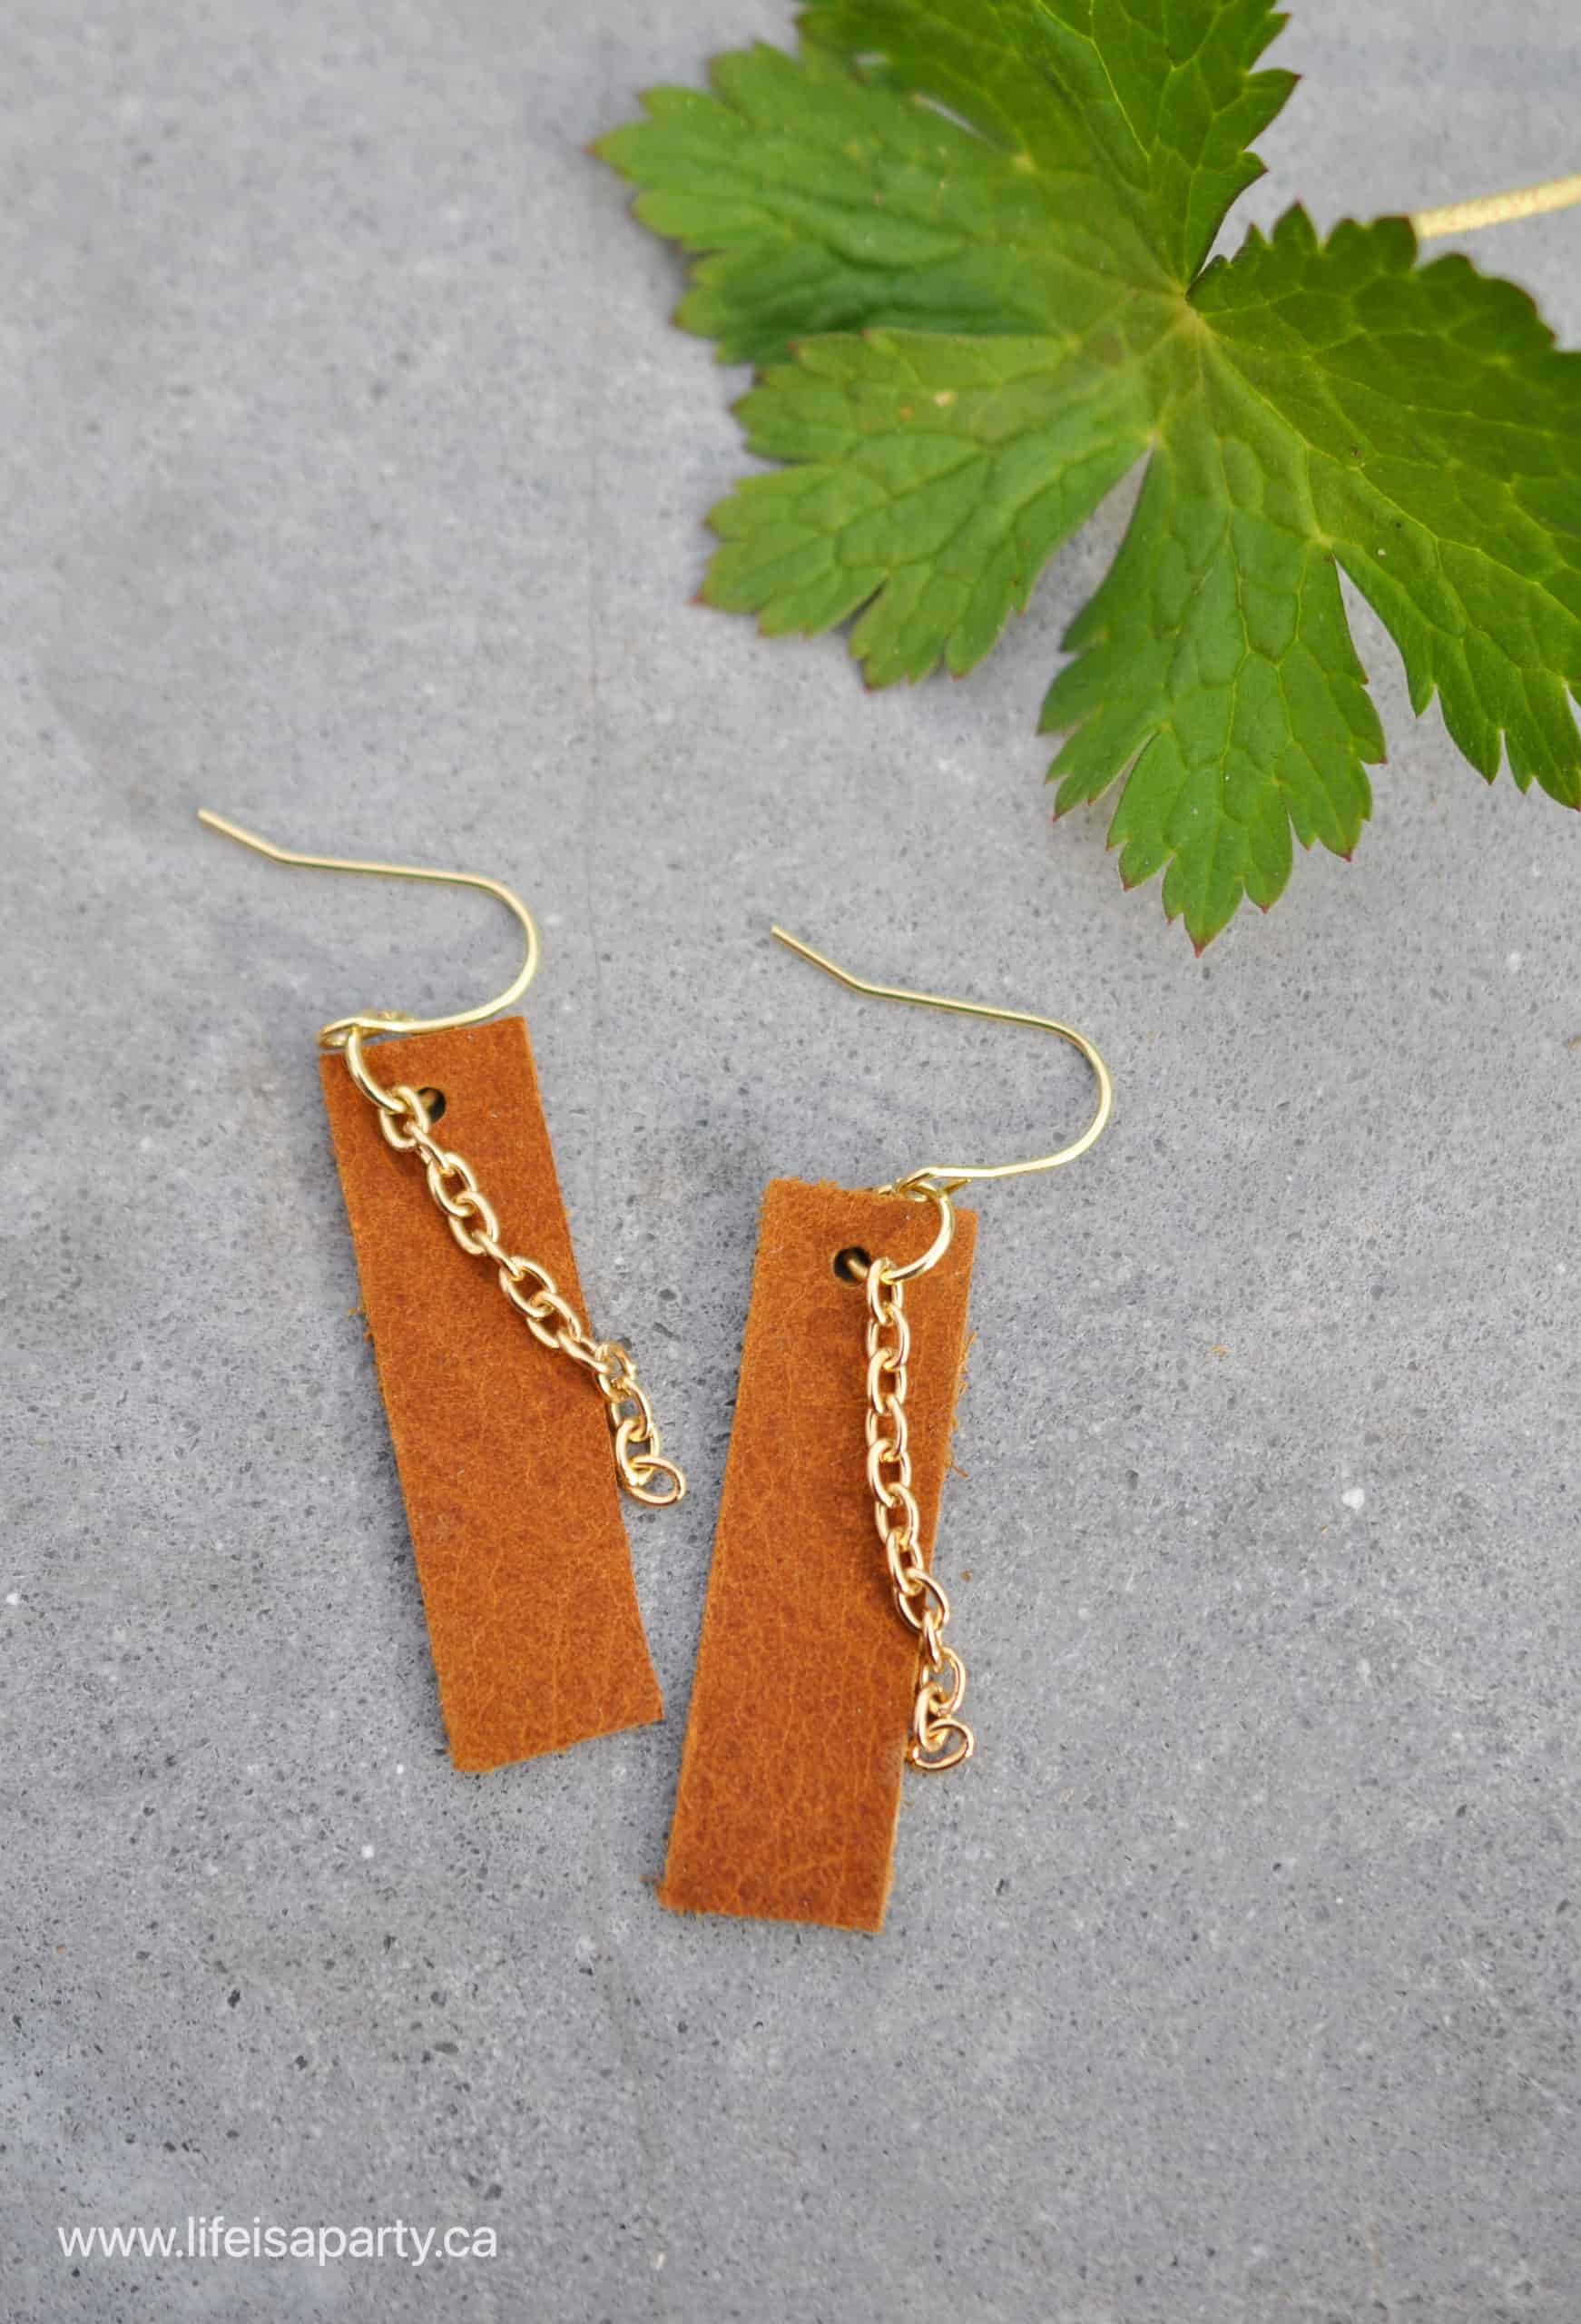
Rectangle Earrings:
To put together the rectangle earrings, use the pliers to twist the direction of the earring wire, and add a medium jump ring ring to the top hole in the earring, along with a piece of chain. Cut two matching lengths of chain with wire cutters to your prefered length, longer or shorter than the leather rectangle.
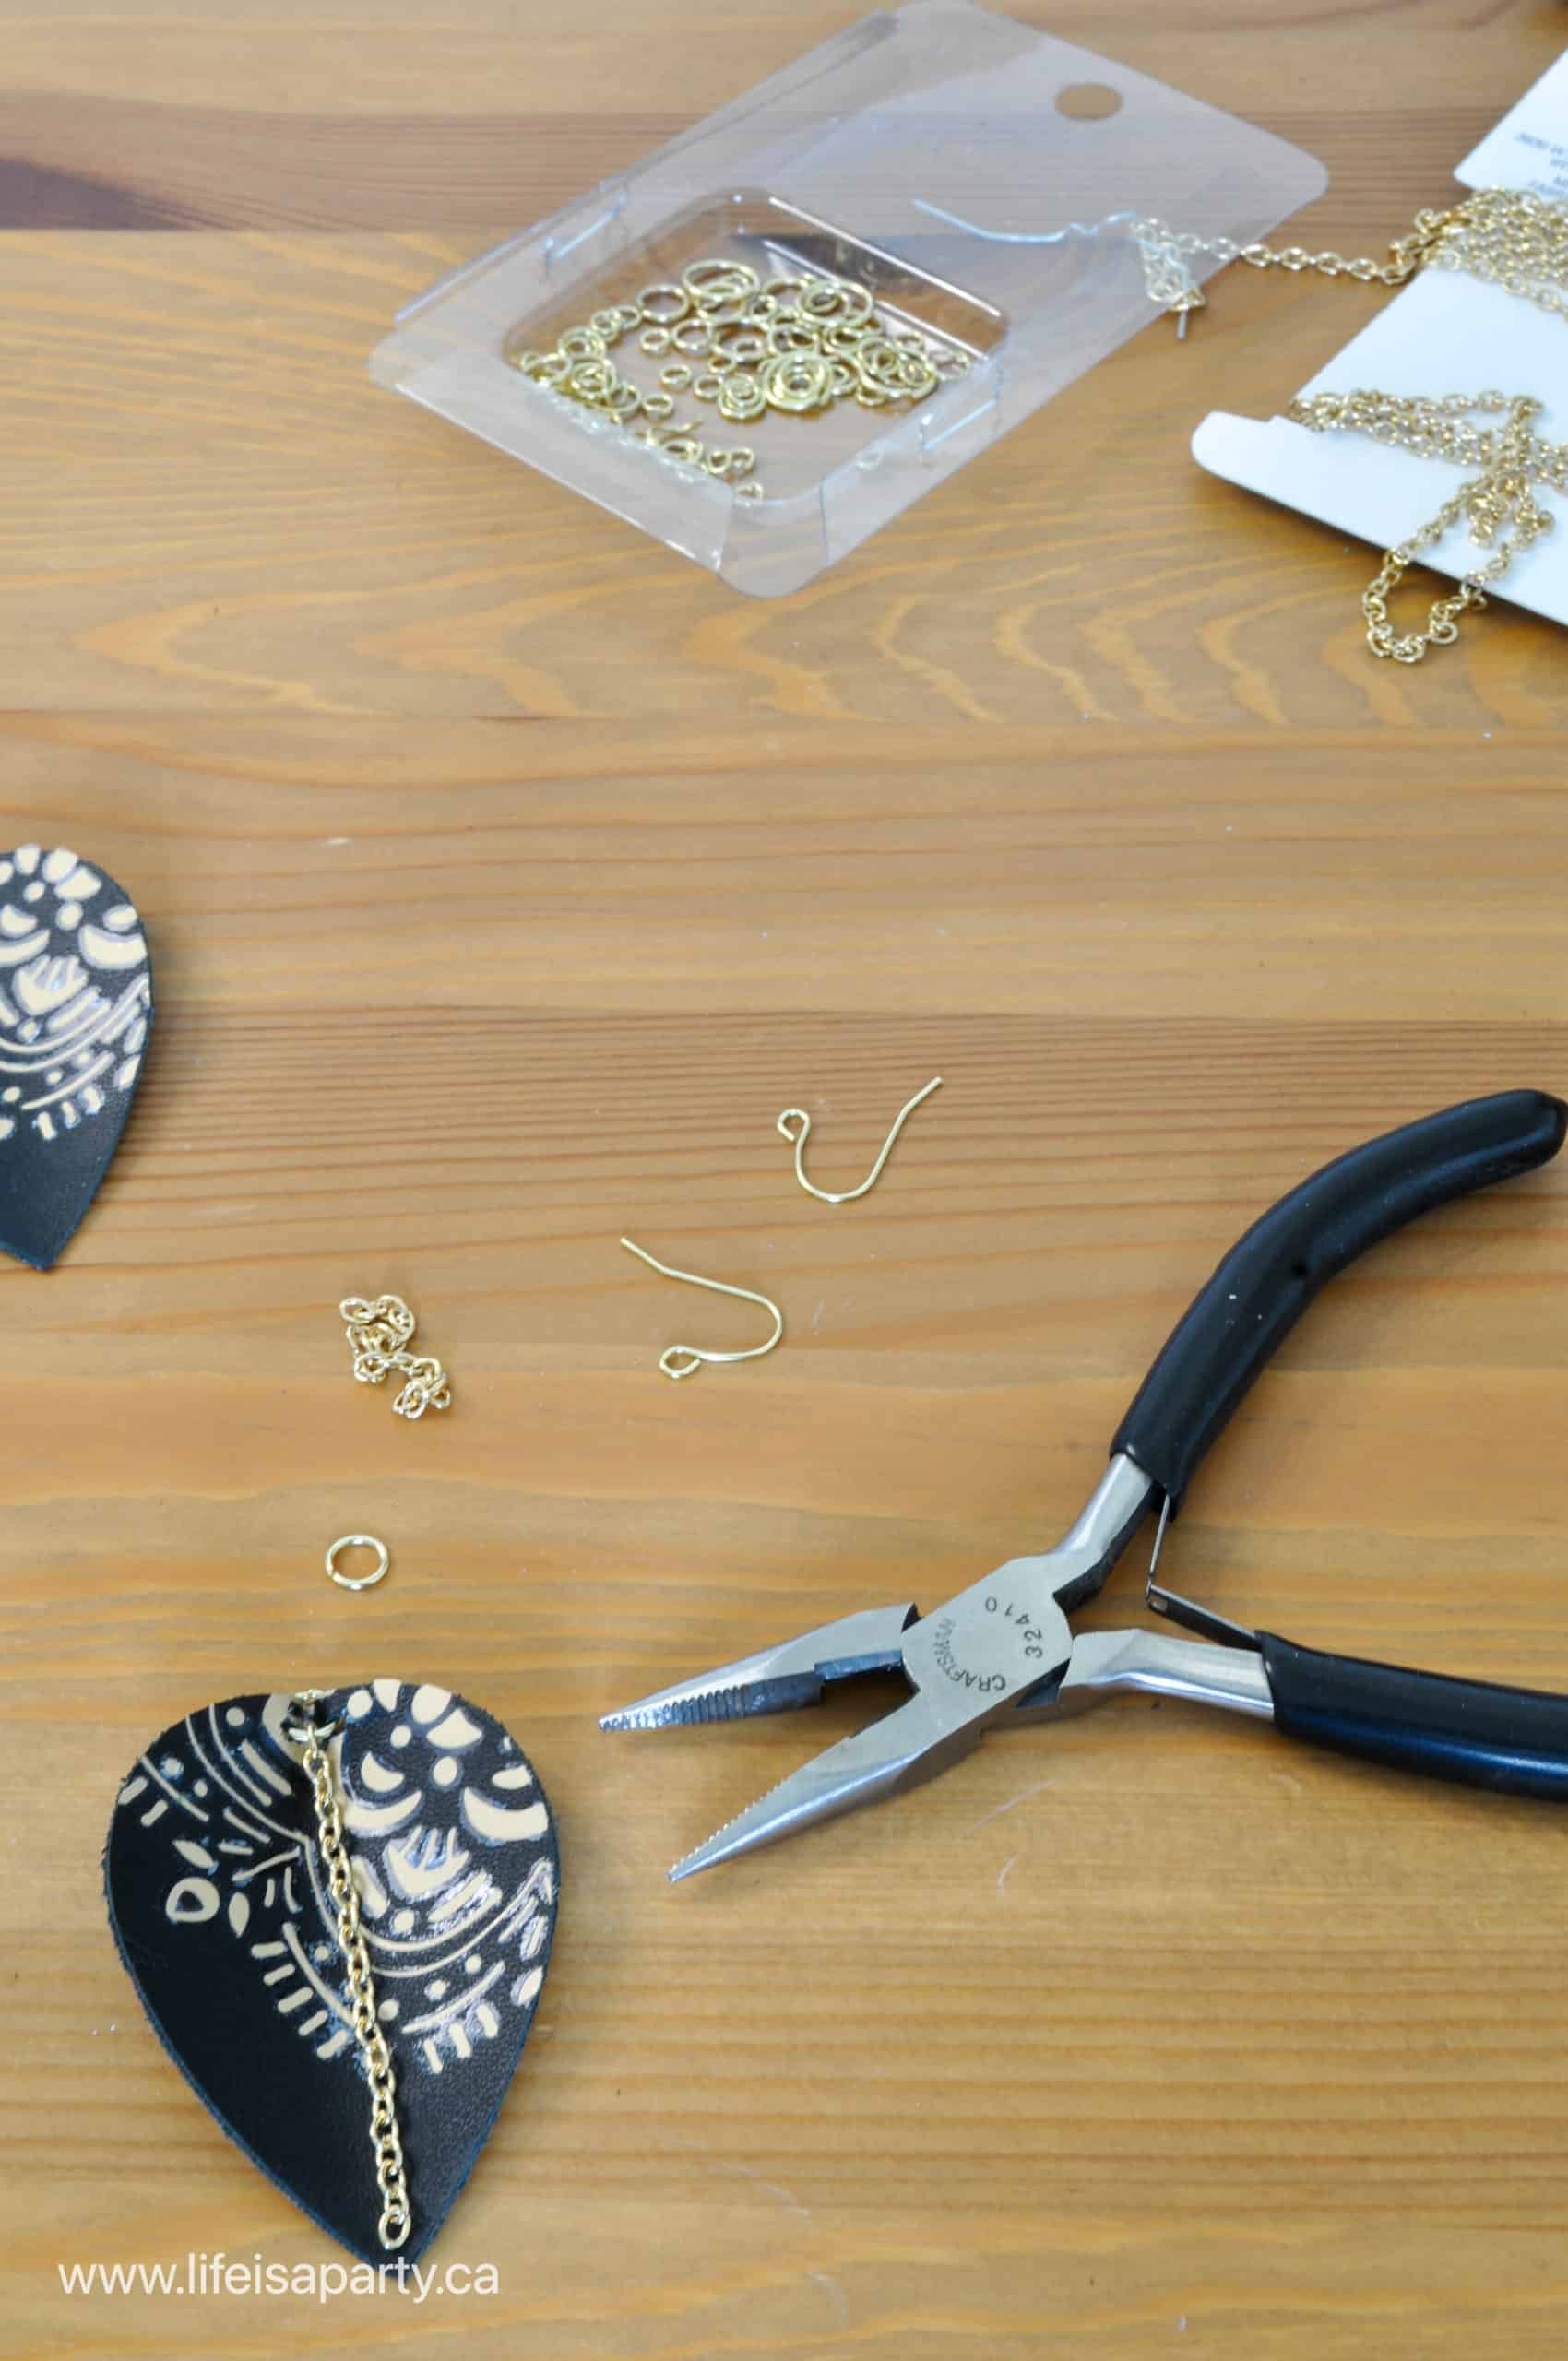
Teardrop Shape Earring:
To assemble the popular teardrop shape earring with the vinyl overlay, use a medium jump ring to the leather piece, and then a smaller jump ring to attach it to the earring wire.
Inverted Pinched Teardrop:
To make the inverted teardrop earrings, you want to make two small holes at the top of your earring about 1 cm apart using the leather punch, these will be used to pinch the leather together. Cut two matching pieces of chain, slightly longer than the earring. To assemble the earring, put a medium jump ring through the first hole, the chain, the second hole, and the earring (in that order), then close the jump ring.
Top Arch and Bottom Semi Circle:
For the earrings with the arch on top, and the semi circle on the bottom, use the leather punch to create one hole at top of the arch, and two holes at the bottom, one on each side. Take care to centre the holes, as you want the earrings to be well balanced. You can create a paper template of the earring, and fold it in half at each stop to find the exact centre spot for the holes if you want to. For the semi circle, make two holes on the flat side, lined up with where they'll attach to the arch piece.
To put it all together, use a large jump ring at the top of the leather arch, into a small jump ring, and then into the ear ring wire. Next, attach the semi circle to the bottom of the arch with two large jump rings.
Top Semi Circle and Bottom Arch:
For these earrings, start by making an earring hole in the top and bottom of the semi circle piece. You will want to take care to make sure these are centre, so that your earrings hangs well when it's put together. You can use a paper template, folded in half to help if you need to. Next punch a hole in the top of the leather arch, again right in the centre.
Now the final step is to attach the semi circle to the earring wire with one large jump ring. Twist the ear wires to make it hang straight. Next, use another large jump ring to attach the arch to the bottom of the semi circle.

Solid Arch:
Use a medium jump ring in the faux leather arch, then a small jump ring to attach them to the earring wire.
Customize
You can play around with the sizes and number of jump rings, as well as the chain you use to create any look you love. There's no right or wrong way, just have fun and enjoy the creative process. There is no end of different ways of putting together combinations of leather and faux leather in different colors, vinyl top layer colours, or jewelry finding metal finishes. Cricut jewelry is my new favourite hobby. It's such an easy project and has such amazing results.
Use these as your own earrings, or give them to friends and family as great gifts. These are also the easiest way to create gorgeous earrings to match any outfit. I hope the step by step tutorial on how to make earrings with a Cricut has been helpful. With beautiful earrings like these, life really is a party!
More Cricut Posts


If you have tried any of these Cricut Earring Ideas or any other ideas on my blog please let me know how it went in the comments below. Thanks for visiting today!
Cricut Ear Rings
Equipment
- Cricut cutting machine
- Cricut Knife Blade
- Strong Grip Mat
- Cricut Easy Press Mini
- leather hole punch
- Needle Nose Pillers
- Wire Cutters
- sharp scissors
Materials
- Leather, Suede, or Faux Leather
- Iron-On Vinyl
- Painter's Tape
- Jewlery Chain
- Earring Wires
- Small and Medium Sized Jump Rings
Instructions
- Start by opening a new project in Cricut design space to create your earring design. You can either choose from some of the earring projects in ready made projects, or design your own cricut cut file using simple shapes.To design your own, go to the shapes button on the left side on desktop, and choose one or more different shapes for your earrings. We made a few designs and used the semi-circle, square, teardrop, and arches. Play around with different sizes and combinations until you're happy with it. You might want to think about joining several shapes, as well as using different colours of genuine leather or faux leather or faux suede. Make some in larger or a smaller size, depending on your preferences.Rectangle Earrings: Start with a square from the free shapes and adjust to 1.5 x .43Teardrop Shape Earrings: Add a teardrop from the shapes and adjust to 2 inches long.Inverted Pinched Teardrop Earrings: Add a teardrop from the shapes and adjust to 2 inches long, rotate the shape 180 degrees.Arch and Semi Circle Earrings: Start with the solid arch. Duplicate and make a smaller one. Use align to centre it horizontally. Select both arches and use the slice tool to cut out the centre. Delete the extra pieces. Add a semi-circle, and rotate it 270 degrees. Make the semi-circle the same width as the width of the arch. The finished size for the arch is a height of 1.75", with a width of 1.324" and the semi-circle is 1.324 wide and 0.667 tall.Solid Arch Earrings: Add an arch shape from the shapes, size 2.2 x 1.45"
- To create our iron-on vinyl overlay we started by searching for "mandala" in images. Look for ones that are not too fine and detailed because it will be really difficult to weed, when it's made small enough to fit onto an earring. The larger and chunkier the lines, the easier it will be to weed and work with.We choose Mandalas #M4A771F6 and also Mandalas #M4A771F6 (from Cricut Design Space).Once you've chosen your image lay it over your earring shape and change the colour to gold -or whatever colour you choose, and then play around with size and rotate the mandala until you're happy with the design. Next, select the mandala and the earring in the layers panel and slice. Delete the extra layers, so that you're left with the exact pattern to fit the earring.Once we're completely happy with the design, we'll use the duplicate button to make an exact copy so that we have a full pair of earrings cut out that match perfectly.
- Cutting Out The Earrings Leather: When you're ready to make your earrings, click on the Make It button on the top of the canvas. This will bring you to the cut preview screen.Next you set your Base Material. Click on Browse All Materials, and type leather in the search bar. You will see lots of different leather options. Real leather varies greatly in thickness, see the tips above to get the best cut.Use the stronggrip purple mat for cutting leather and tape the outside of the leather onto the cricut mat with painter's tape. Take some care though, I found that some of my leather was marked by the painters tape. Either flip the leather over, or apply the tape with a very thin overlap to avoid this problem. Note that I found a more clean cut with the leather good side up. The genuine leather uses the deep cut blade, and is compatible with the Explore and the Maker.Faux Leather: You can also make these earrings out of faux leather. It's very similar to leather but much thinner and easier to cut. It's a great option if you'd like to make these earrings with a Cricut Joy, because you can cut it with a regular fine point blade. You can also cut the faux leather with a regular green standardgrip mat.
- Iron-Vinyl: To cut out our iron-on vinyl, use the iron-on vinyl setting and make sure your fine point is in place. Use a standard grip green mat, and apply the vinyl backing side or shiny side down.Once your iron-on is cut out it's time to weed it. Use the weeding tool to remove the negative pieces from the design. This can be tricky with such small pieces, so take your time, and make sure to work in good light.Applying the Iron-On: We used our Cricut Easypress Mini to apply the iron-on, you can also use a household iron -see Cricut's heat guide for settings.
- Rectangle Earrings: To put together the rectangle earrings, use the pliers to twist the direction of the earring wire, and add a medium jump ring to the top hole in the earring, along with a piece of chain. Cut two matching lengths of chain with wire cutters to your preferred length, longer or shorter than the leather rectangle.
- Teardrop Shape Earring: To assemble the popular teardrop shape earring with the vinyl overlay, use a medium jump ring to the leather piece, and then a smaller jump ring to attach it to the earring wire.
- Inverted Pinched Teardrop: To make the inverted teardrop earrings, you want to make two small holes at the top of your earring about 1 cm apart using the leather punch, these will be used to pinch the leather together. Cut two matching pieces of chain, slightly longer than the earring. To assemble the earring, put a medium jump ring through the first hole, the chain, the second hole, and the earring (in that order), then close the jump ring.
- Top Arch and Bottom Semi Circle: For the earrings with the arch on top, and the semi circle on the bottom, use the leather punch to create one hole at top of the arch, and two holes at the bottom, one on each side. Take care to centre the holes, as you want the earrings to be well balanced. You can create a paper template of the earring, and fold it in half at each stop to find the exact centre spot for the holes if you want to. For the semi circle, make two holes on the flat side, lined up with where they'll attach to the arch piece.To put it all together, use a large jump ring at the top of the leather arch, into a small jump ring, and then into the earring wire. Next, attach the semi circle to the bottom of the arch with two large jump rings.
- Top Semi Circle and Bottom Arch: For these earrings, start by making an earring hole in the top and bottom of the semi circle piece. You will want to take care to make sure these are centre, so that your earrings hangs well when it's put together. You can use a paper template, folded in half to help if you need to. Next punch a hole in the top of the leather arch, again right in the centre.Now the final step is to attach the semi circle to the earring wire with one large jump ring. Twist the ear wires to make it hang straight. Next, use another large jump ring to attach the arch to the bottom of the semi circle.
- Solid Arch: Use a medium jump ring in the faux leather arch, then a small jump ring to attach them to the earring wire.


Leave a Reply
You must be logged in to post a comment.