See how to make a light bulb flower vase. Turn your old burnt-out light bulbs into a hanging flower vase with this great upcycle.

Jump to:
Why We Love This Project
- It's free since we're upcycling burnt-out light bulbs.
- It's a great way to keep the lightbulbs out of landfill.
- They're really pretty!
Making a light bulb vase is an easy and free project. They're perfect for adding a little bit of whimsy to your space. They'd also be great as an inexpensive decoration for an event or party.
We love a craft that is a good upcycle. We reused materials to make these mason jar oil lamps, book page paper feathers, and these upcycled sweater mittens.
As a blogger, you sometimes find yourself doing unusual things. Yesterday I was out for a morning walk and as I walked I was peeking into all my neighbours recycling bins, looking for their old tin cans for another project I’ll share with you soon.
As I looked I saw someone had three lightbulbs in their recycling (can you even recycle lightbulbs?) and I remembered a project that I’d always wanted to give a try -Light Bulb Flower Vases. So, I grabbed them and brought them home.
Materials:

- Light Bulbs: We actually found these in our neighbour's recycling bin, it's a really great way to reuse them once they're burnt out. If you wanted to make a bunch of these vases you could ask your friends and family to save there's for you too.
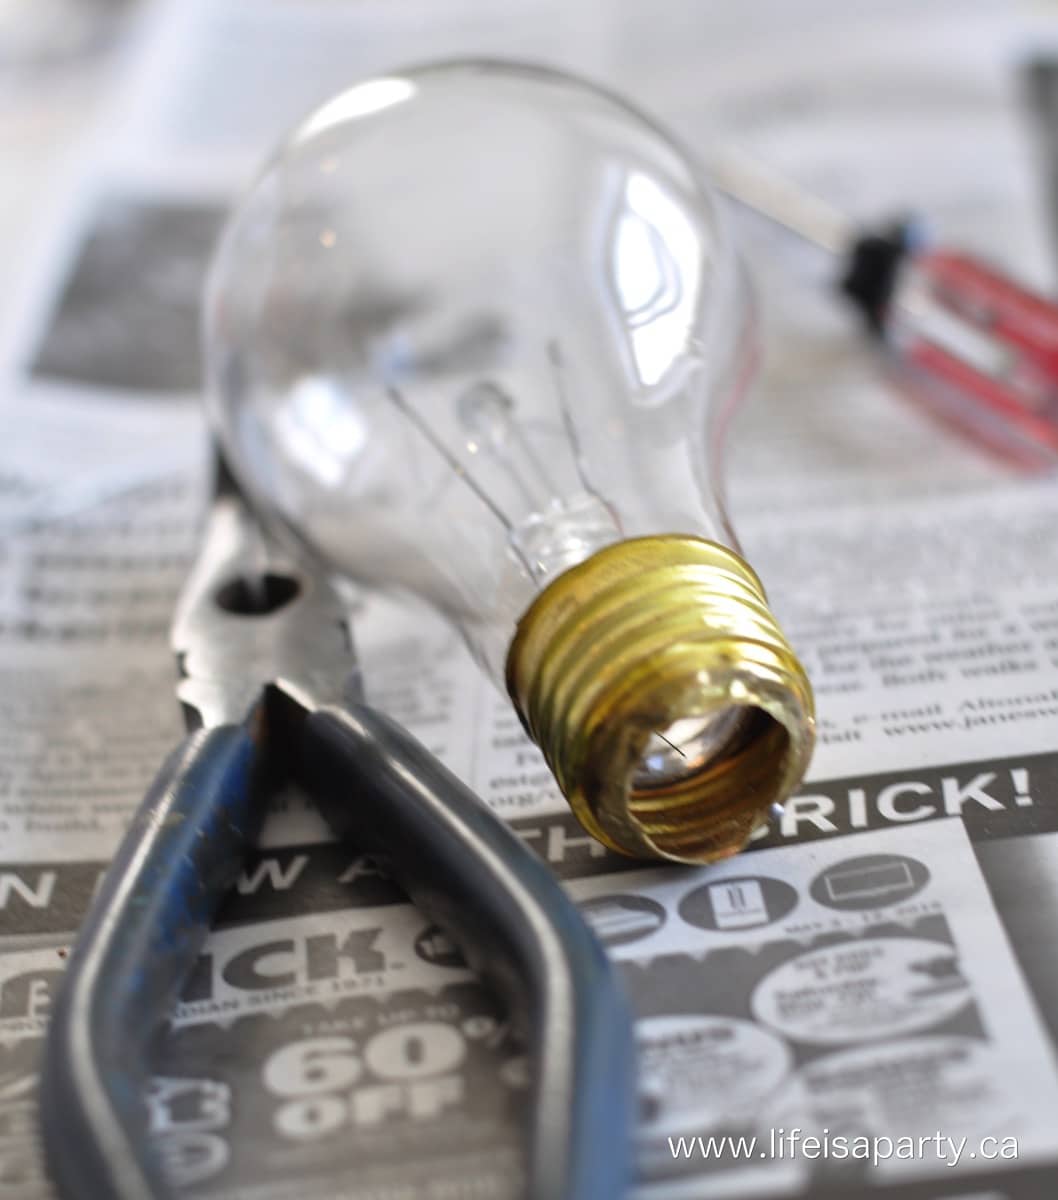
- Screw Driver: You will need this to help break out the inner parts of the light bulb.
- Gloves and Safety Goggles: Saftey first, especially when working with tiny bits of broken glass.
- Needle Nose Pliers: These pointy pliers will be easiest to get into the small opening at the base of the light bulb.
How to Make A Light Bulb Flower Vase
1. The first step is to remove the bottom of the light bulb using pliers. This project involves a fair bit of glass breaking, so it’s a good idea to wear gloves, safety goggles, and work in a plastic bag for easy clean-up, since the glass pieces are so small.

2. Once the bottom is removed, it’s time to break the thick black glass. I looked at quite a few tutorials for this, and most recommended using the pliers or a screw driver to get inside the small hole, and break it that way.
I used a metal skewer and twisted it around to try and crack the glass. Once I had it cracked, I worked the tip of the needle nose pliers in and tried to break it up so it would come out.
This is the hardest part of the whole the project, since you're trying to work careful so as not to break the bulb itself. Take your time and keep trying, bit by bit you’ll get it broken up and removed.
3. Next you need to break the inside glass part, I used a screw driver, again taking care not to break the bulb itself. You’ll need to use the pliers to break the little wires, and then shake it out of your opening.
I found it easiest to work inside the plastic bag, since there’s a lot of tiny pieces of glass. Once you have the insides all out, you're nearly finished.

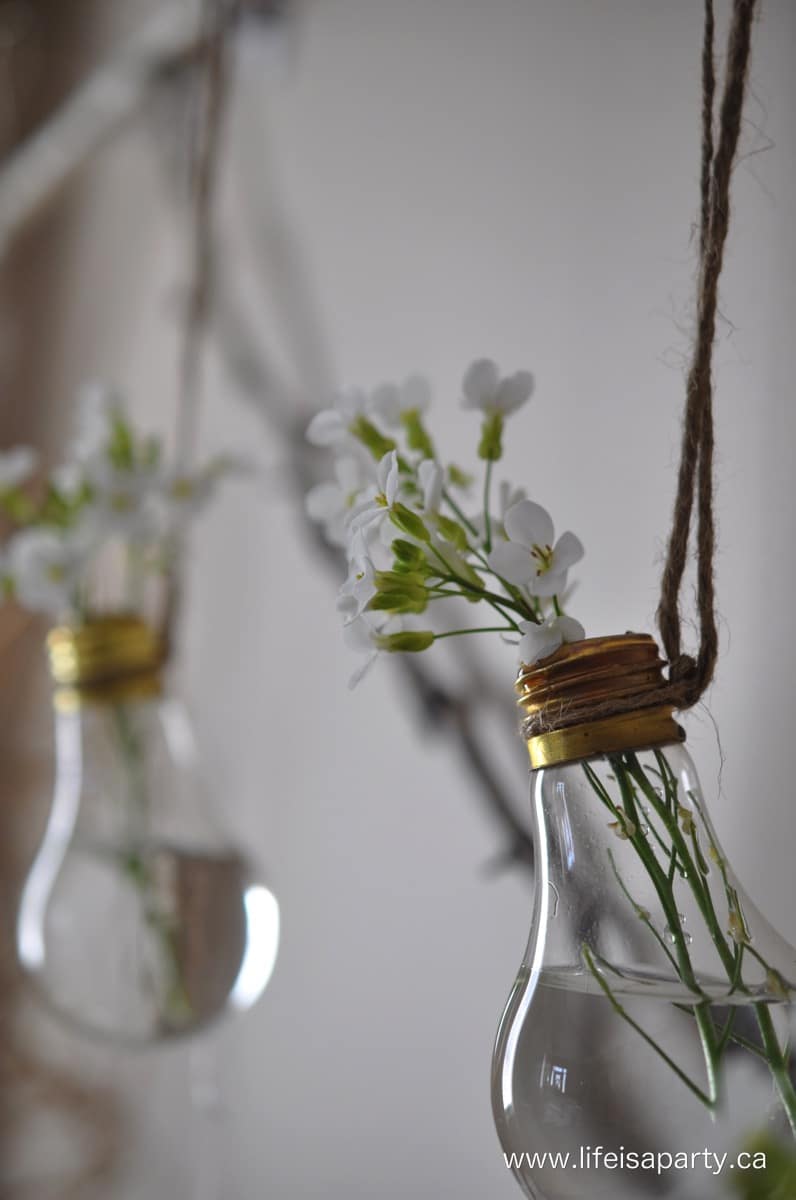
4. For my little vases, I used a some twine to hang them from a branch in my dining room.

I just picked a few pretty flowers from my garden and added a little water.

I love how they turned out.

So simple and so pretty.

With these pretty and inexpensive light bulb flower vases, life really is a party!
More Craft Inspiration
Frequently Asked Questions
This project works best with a clear glass light incandescent bulb. These also look great made out of vintage-style larger glass bulbs.
Yes, use any kind of small ring on the bottom to rest the vase in, or use stiff wire to create a support for the vase.
If you try making these Light Bulb Flower Vases or any other idea on my blog please leave a star rating and let me know how it went in the comments below. Thanks for visiting today!

Light Bulb Flower Vases
Equipment
- Screw Driver
- Gloves
- Safety Goggles
- Needle Nose Pliers
Materials
- Burnt-out Light Bulbs
- Twine
- Plastic Bag
Instructions
- The first step is to remove the bottom of the light bulb using pliers. This project involves a fair bit of glass breaking, so it’s a good idea to wear gloves, safety goggles, and work in a plastic bag for easy clean-up, since the glass pieces are so small.
- Once the bottom is removed, it’s time to break the thick black glass. Use the pliers or a screw driver to get inside the small hole, and crack the glass. Once it's cracked, work the tip of the needle nose pliers in and break it up so it can come out. This is the hardest part of the whole the project, since you're trying to work careful so as not to break the bulb itself. Take your time and keep trying, bit by bit you’ll get it broken up and removed.
- Next you need to break the inside glass part, I used a screw driver, again taking care not to break the bulb itself. You’ll need to use the pliers to break the little wires, and then shake it out of your opening.
- Since the light bulbs are round and won't sit on a flat surface, use some twine to hang them. Fill with water and flowers and enjoy.


dnr says
Betty, thanks so much. So glad you tried it it! Great idea to use floral scissors, thanks for the tip!
Dannyelle
Betty says
I’ve been wanting to do them forever. You explained it so well that I had to try it right away. The only difference is that I used floral scissors - pointed at the end and easy enough to break the inside. Super excited!!!
dnr says
Thanks Neelam 😉
Neelam says
Oh my! What a lovely idea! They look so pretty!
xx
Neelam
http://patternsandprosecco.com