Peach Party: easy peach themed party DIY decor, delicious peach dessert and peach drink recipe.

Jump to:
We put together the sweetest little peach party. This party is the perfect way to celebrate peach season with friends, with simple DIY party decor, and easy and delicious recipes that are so quick to put together. This is one of my favorite themes because the colors are so pretty and the fresh fruit is so delicious. These ideas would be perfect for any simple get together this time of year during peach season like birthday parties, a bridal shower, baby shower, or for a special first birthday party for your own princess peach.
I love the peach and pink colour scheme of this little get together. And if you love hosting parties as much as I do, then you probably love creating personalized party decorations to go with your theme too. We have some quick and easy fun ideas for some cute party decor to take your celebration to the next level.
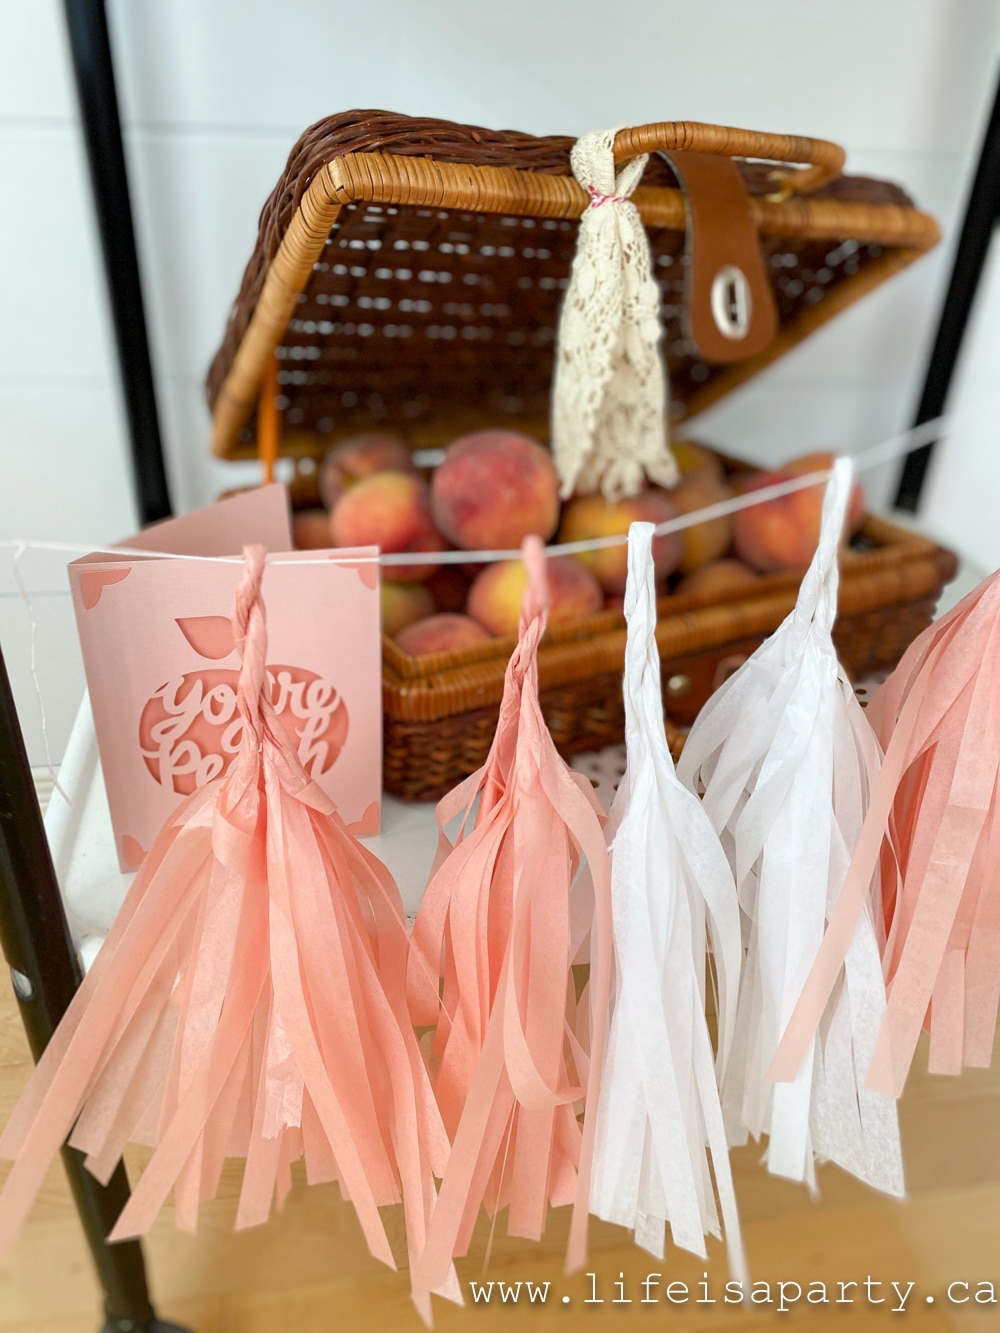
You're A Peach Invitation Card
A great way to set the theme for the party right away is with the "You're a Peach" party invitation card. We used the Cricut Joy blank insert card to create this pretty card to use as an invitation to our little get together. It would also be a great birthday card too.
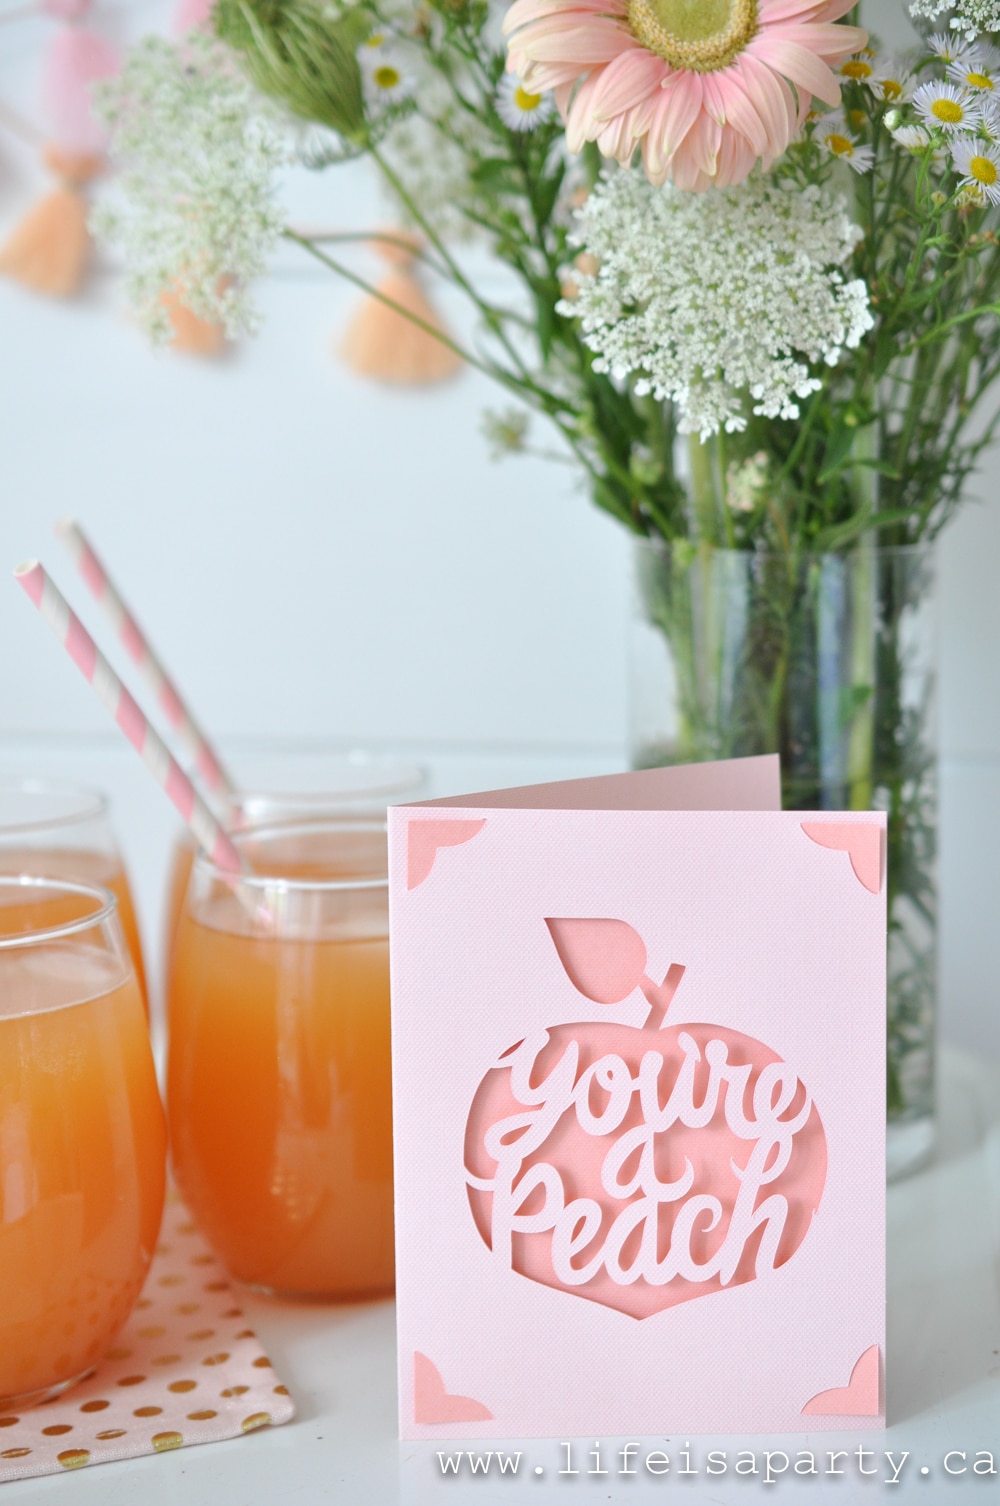
It's so easy to create with the Cricut Joy. Use the blank insert mat to complete this project in just one cut! You can access our "You're A Peach" Card Design here.
Peach Themed Party Napkins
This idea is so much fun. You can personalize plain, inexpensive napkins to fit any party theme. We used our "You're A Peach" design to create custom napkins for our peach party with our Cricut Joy and the smart vinyl. You can find our "You're A Peach" Sticker Design here.
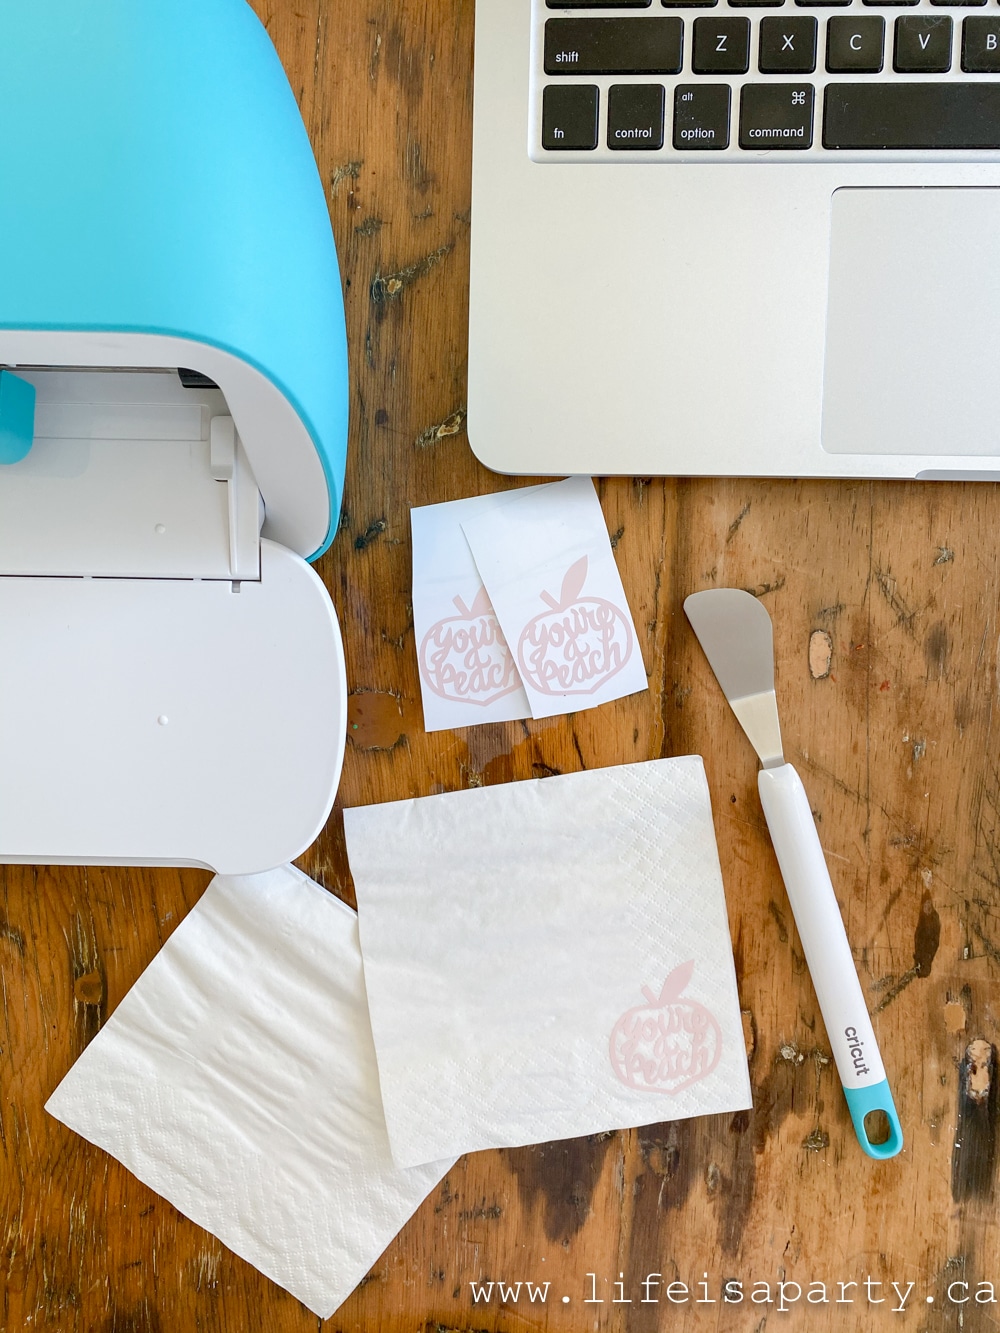
We used our vinyl sticker on napkins, but you could use them on almost anything for your party like cups, vases, votive candle holders, balloons or treat bags. The possibilities are endless to make your own gorgeous peach party decorations.
Or make cloth napkins by cutting out iron-on vinyl and then applying it with your heat press to cloth napkins you can use again and again.
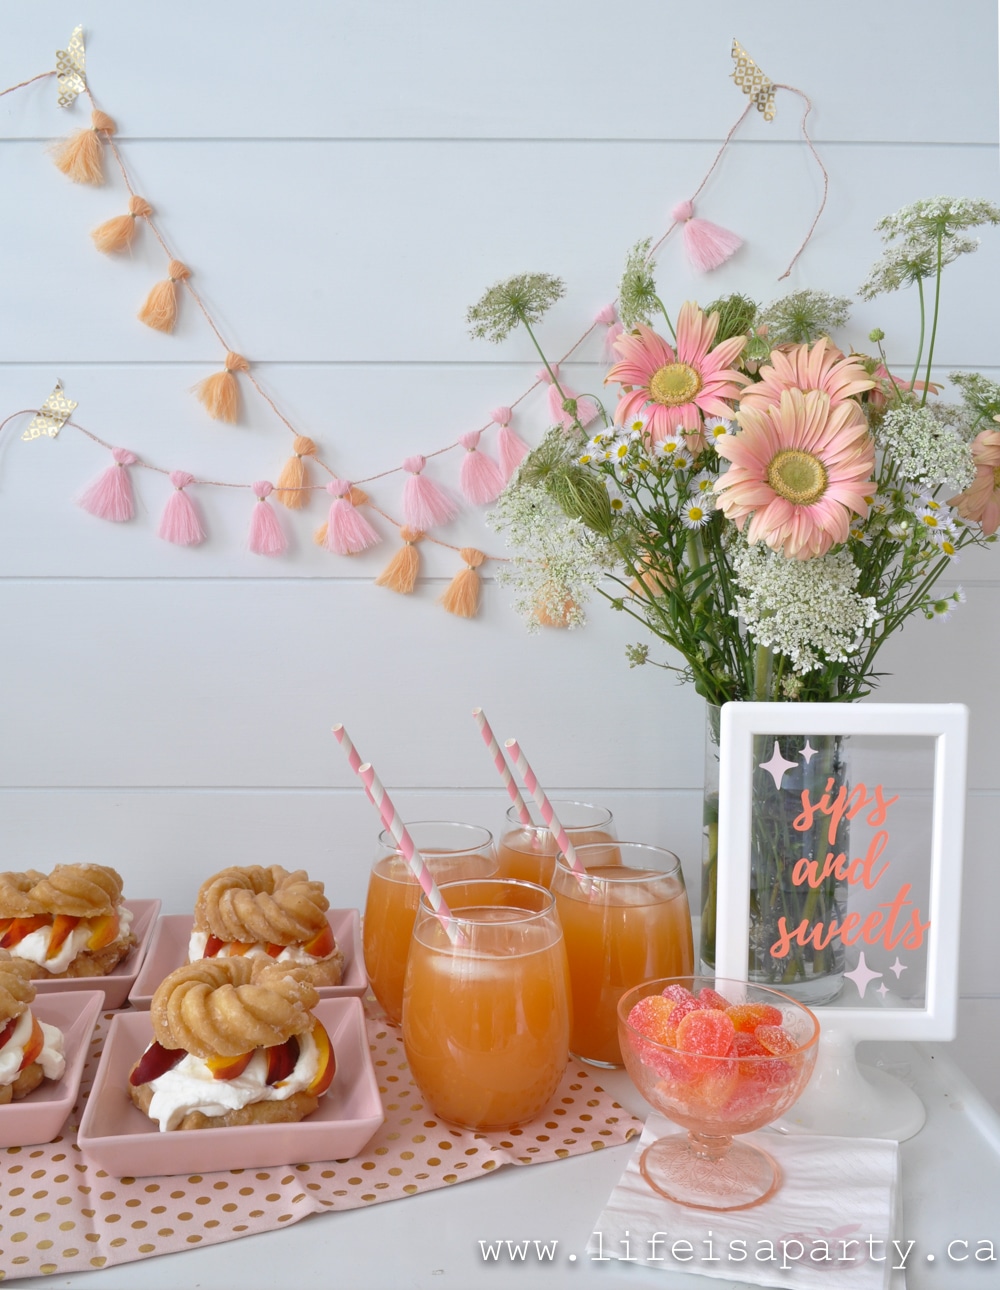
DIY Acrylic Sign
My favourite of all the custom peach party decorations that we made was the DIY acrylic sign. I started out with a simple IKEA frame. This was a much cheaper option than the blank acrylic signs at the craft store. Then I used the smart vinyl in my Cricut Joy to cut it out.
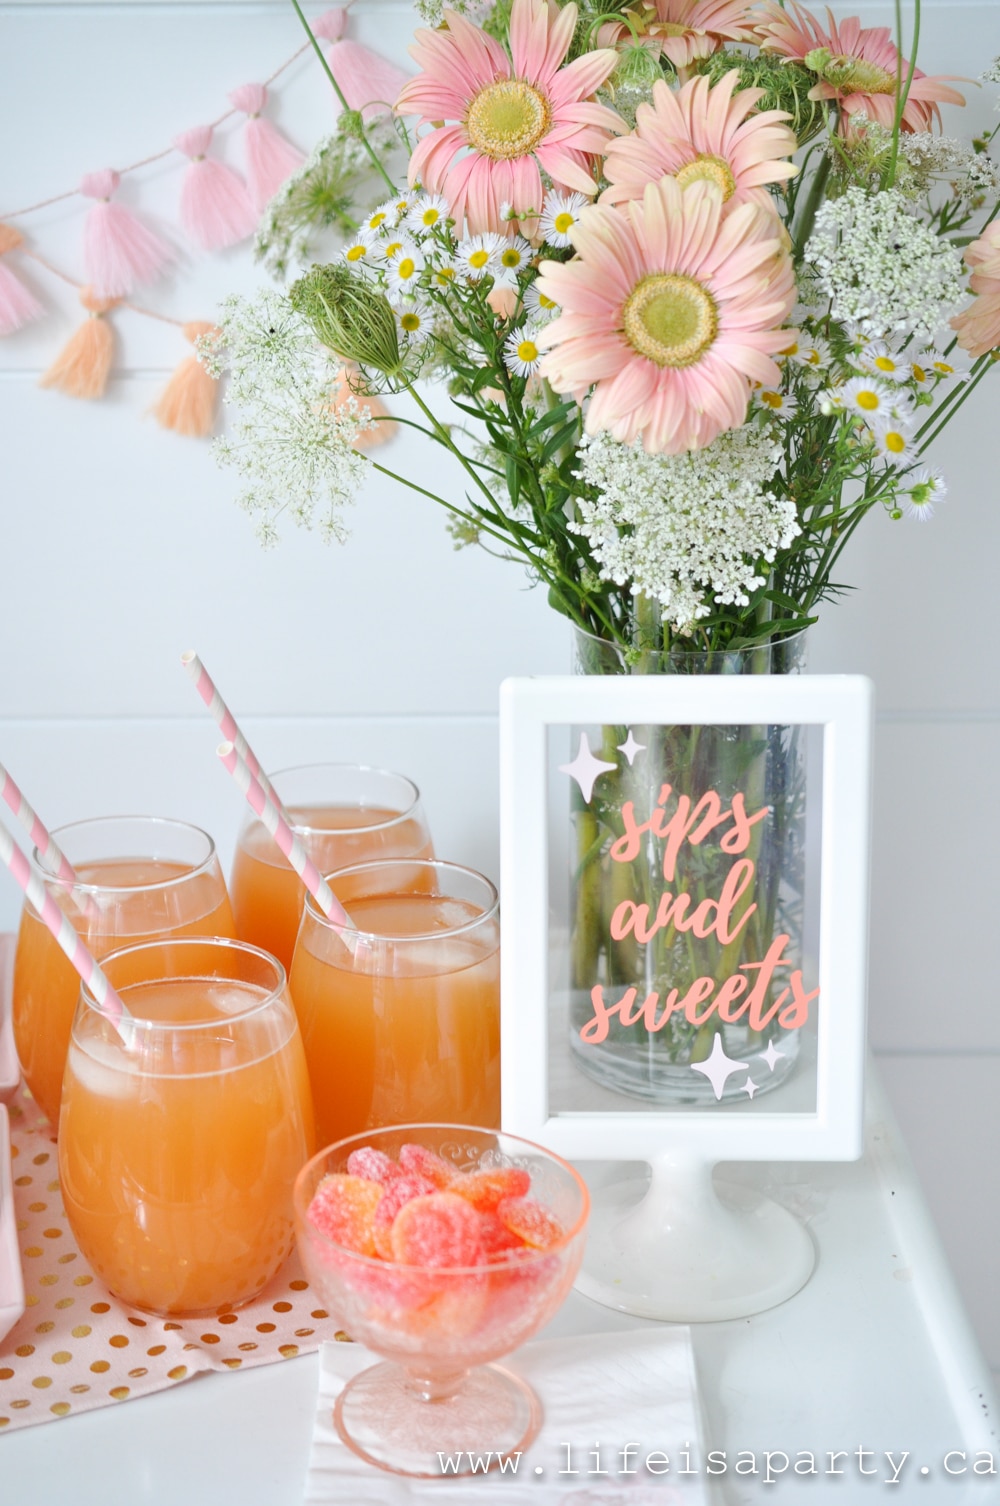
You can find our "Sips and Sweets" design here.
I love how this turned out, and I'm sure I will use this technique to create lots of inexpensive acrylic signs for parties in the future. It would be so perfect for any desert or buffet table, or as table numbers. Lots of possibilities.
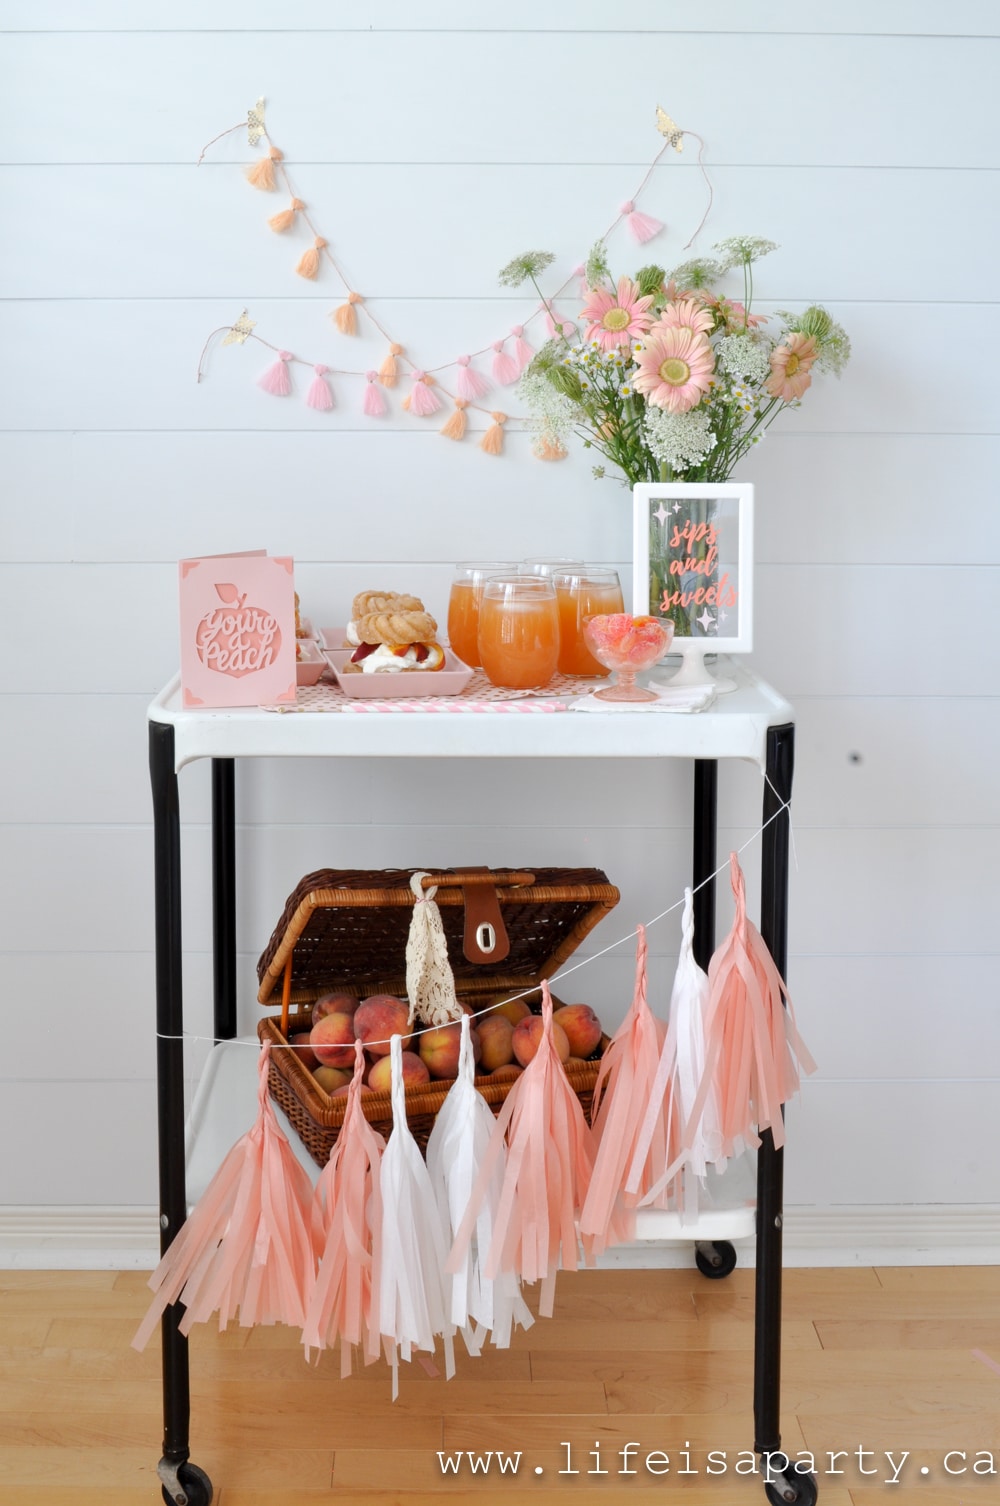
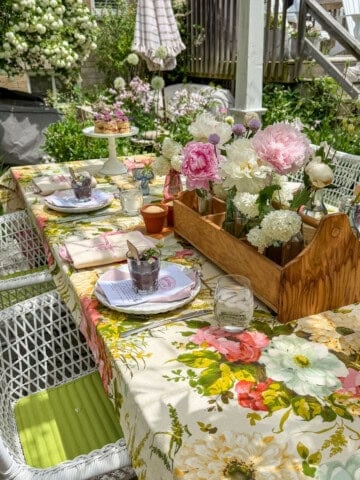
Peach Themed Party Set-Up
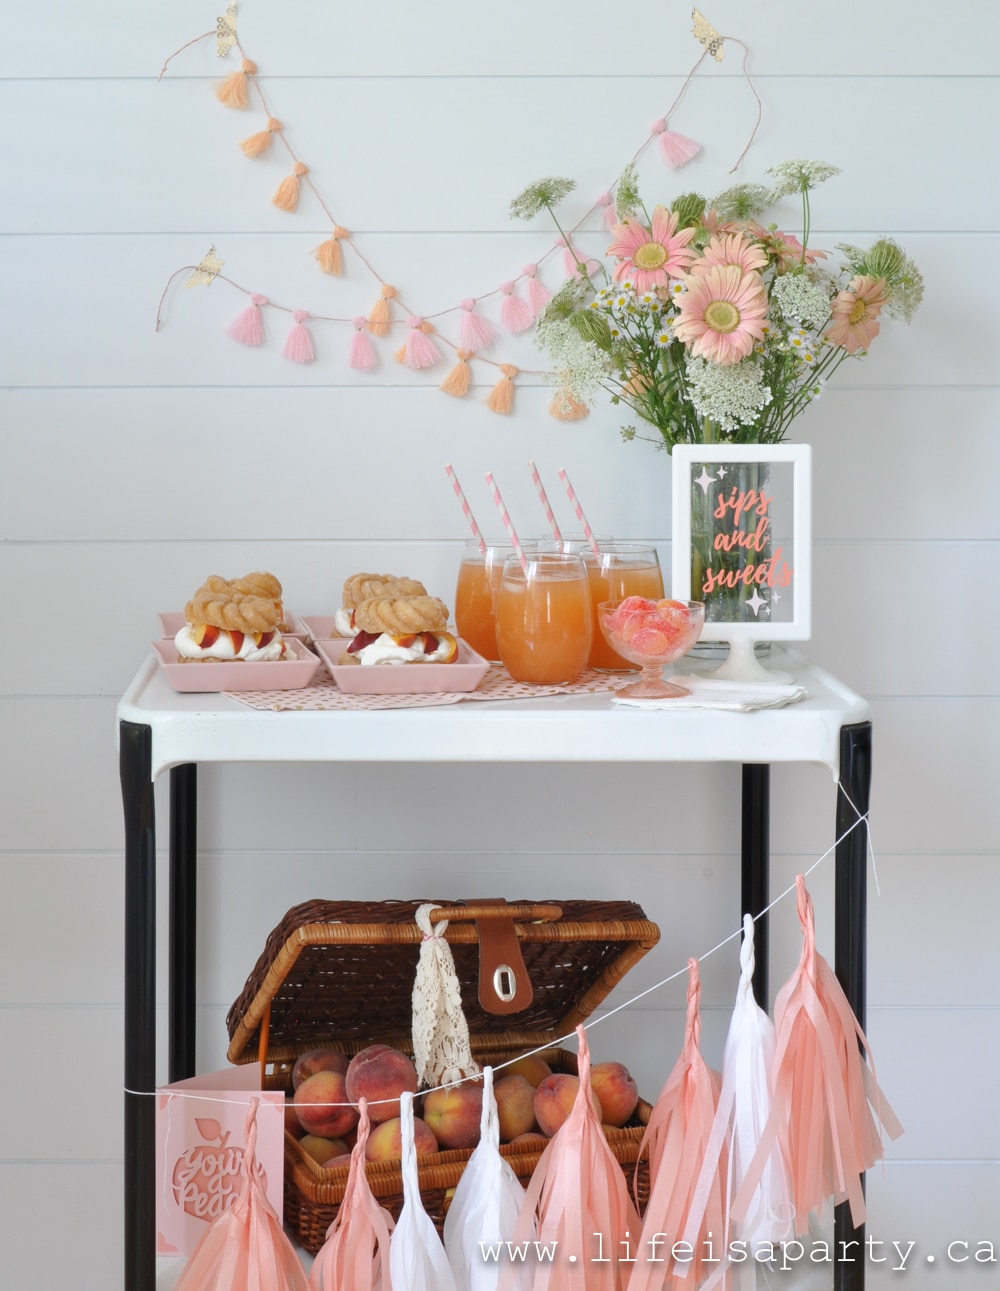
To set up the peach party dessert table I used our bar cart and added some peach and pink tassels, as well as some tissue paper tassels. This simple decor made our party space come to life. We used a combination of peach and pink colors for the color scheme of our peachy party.
We couldn't have a peach party without a big basket of full of fresh peaches, so I added some to the bottom of the cart in a vintage picnic basket. These are such a fun and easy super cute party decorations for this theme. What can beat the beauty of a peach?
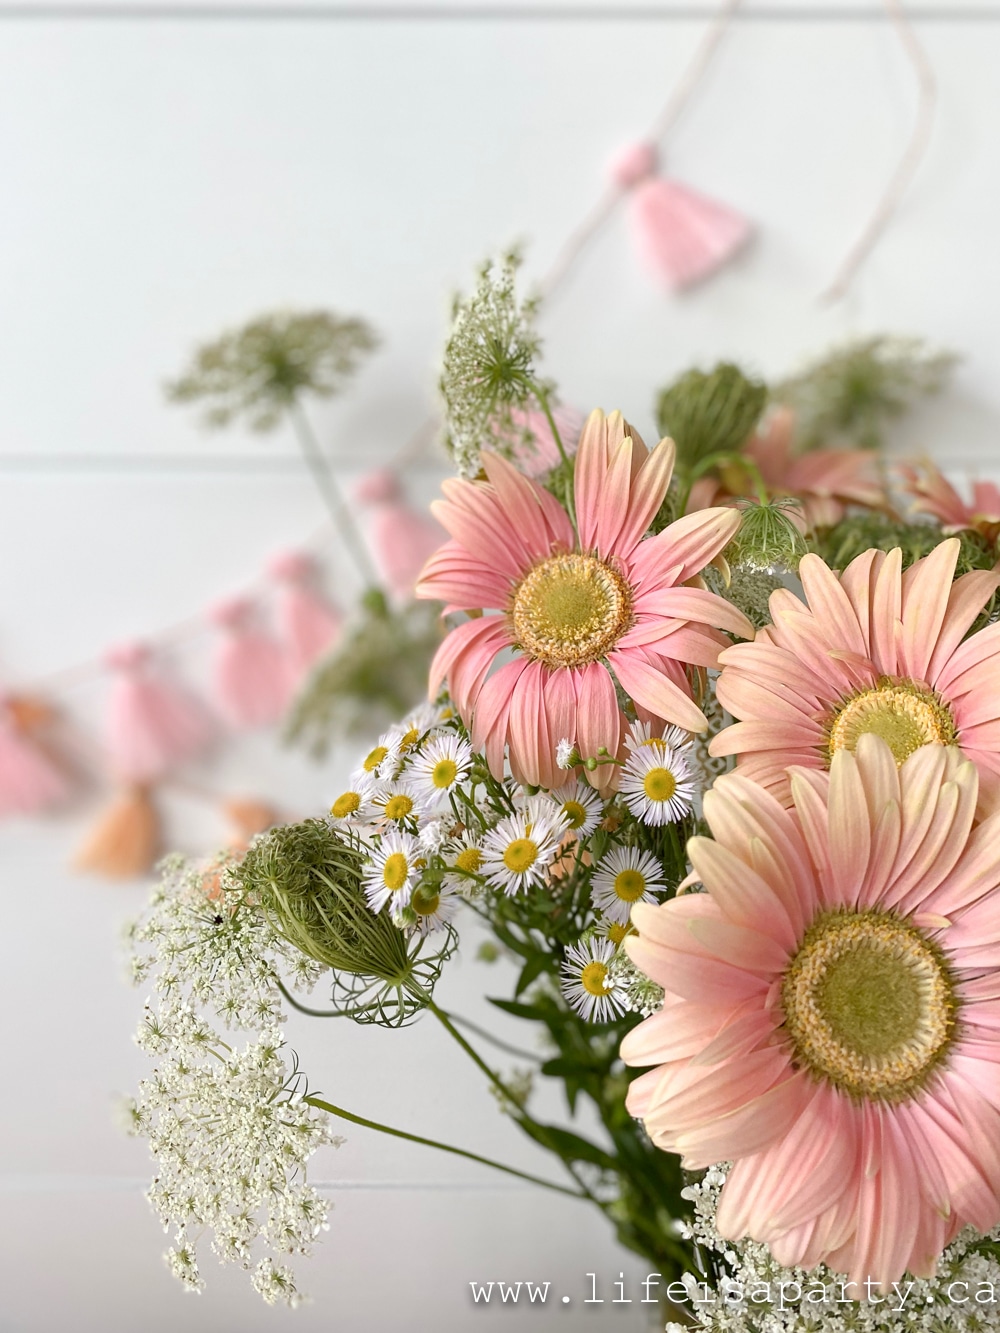
The flowers for our peach party theme are a combination of wild Queen Anne's lace, and some peach color gerbera daisies. I love how they turned out, and it was so pretty to combine the gerbera daisies for a real hit of peach color with the wild flowers.
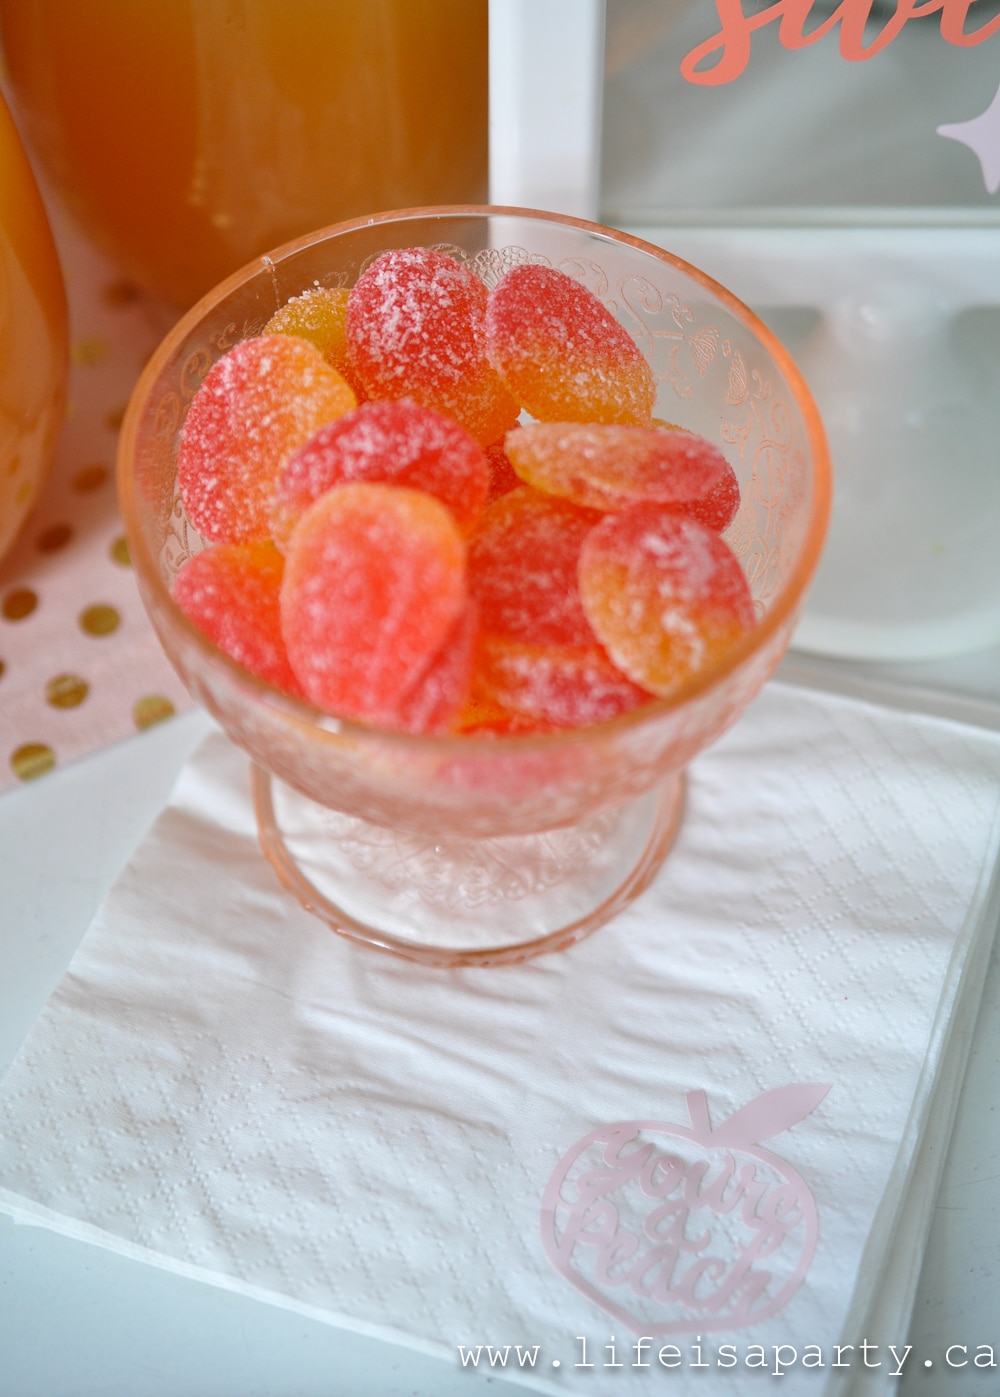
Did you spot our bowl of fuzzy peach candies -everyone's favourite around here, and so perfect for a peach theme. Little bags of these would make such a fun and easy party favors to go with the theme of peaches.
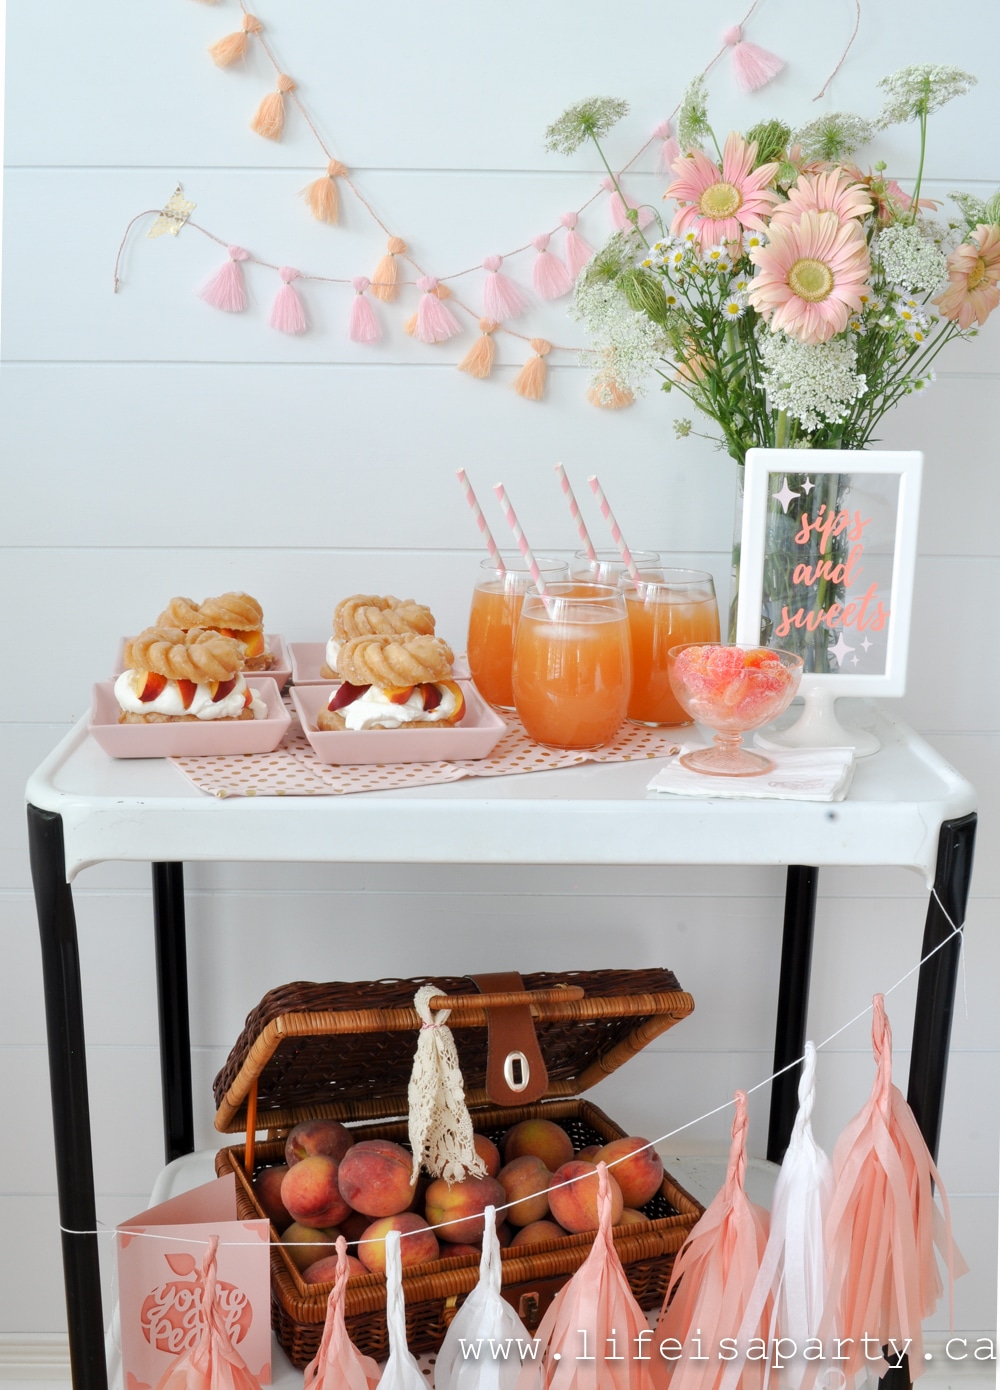
Donut Peach Shortcakes
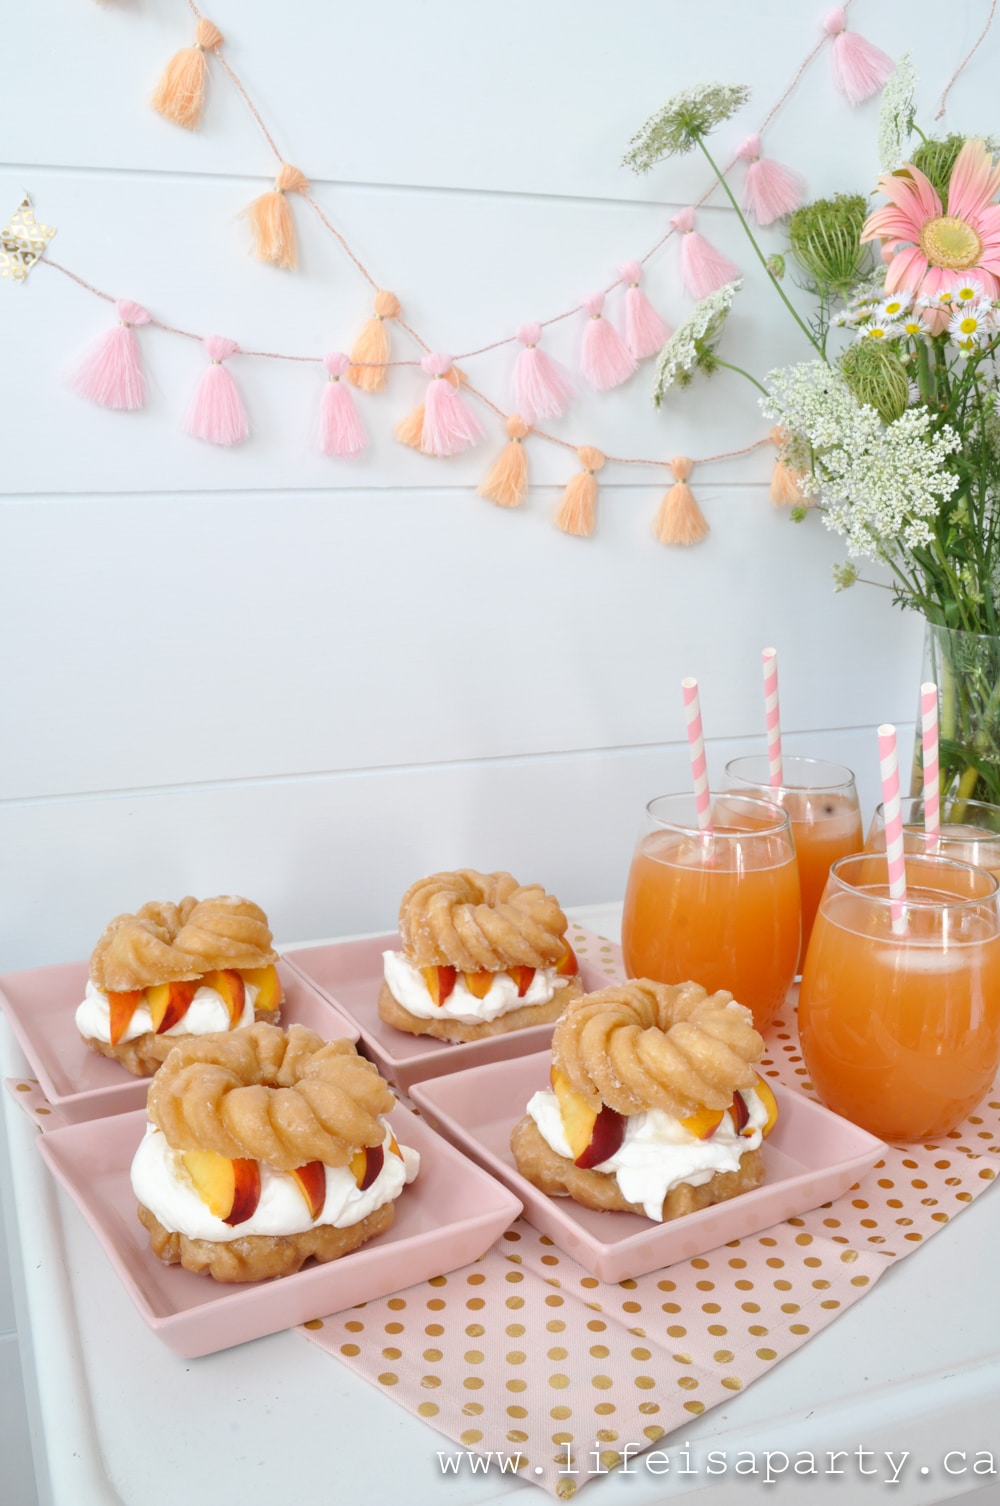
A few years ago I made some Donut Strawberry Shortcakes -see the recipe here. And they quickly became a family favourite. Since peaches are in season, I thought a peach version was a good idea. They were so delicious and so easy to make. They're the center of attention on our table, and look amazing for our party.
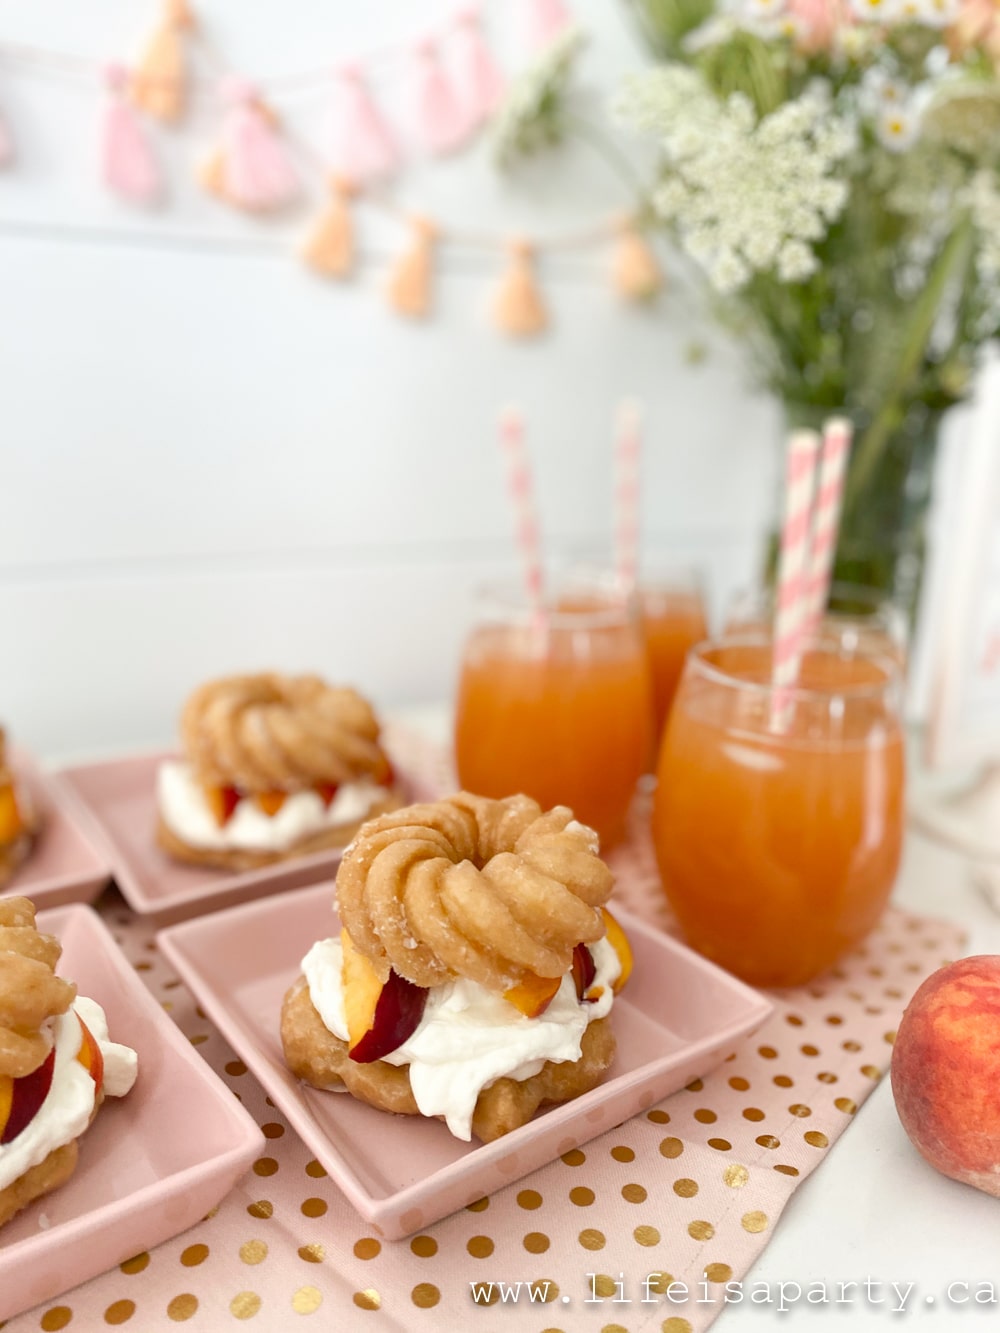
Here's how to you make them. Slice a honey cruller donut in half. Add some sweetened whipped cream, and some fresh peach slices. Add the top of the donut back on and enjoy! These are such a great idea because they're so easy and so delicious and the perfect addition for our peach theme.
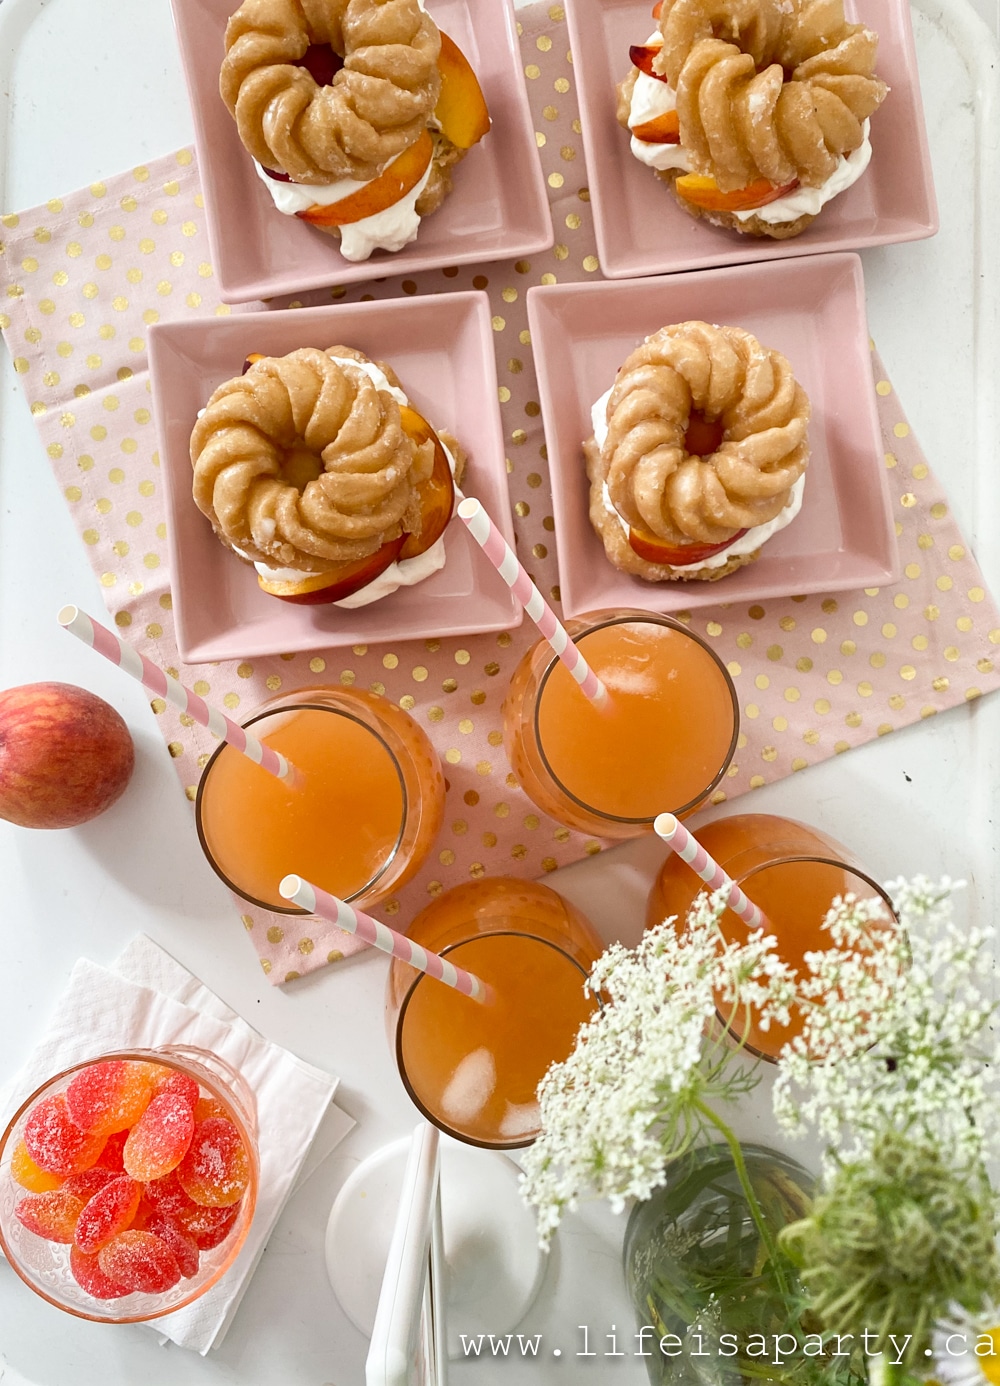
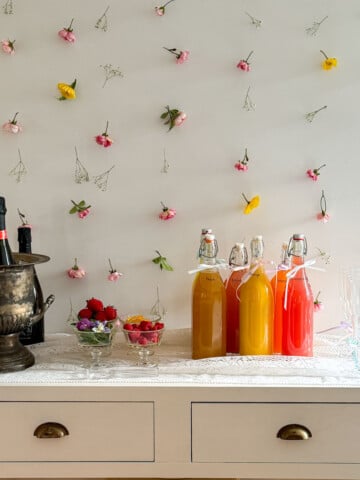
Peach Punch
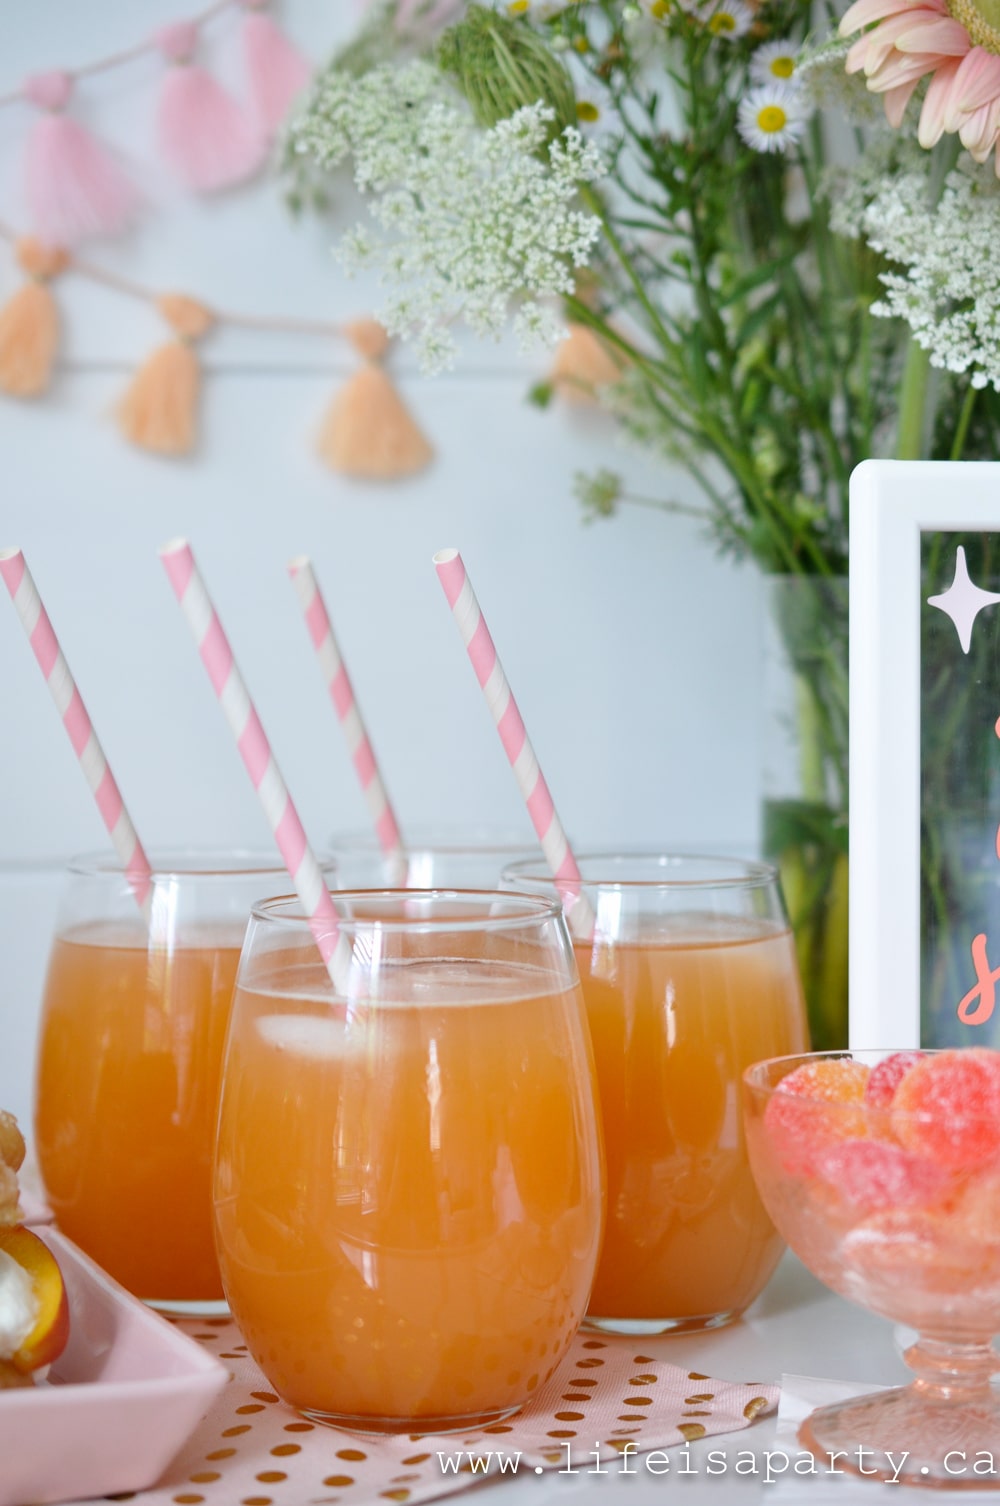
We made a really easy peach punch for our party too. To make the punch we poured:
- ⅓ of a glass of strawberry peach juice
- ⅓ of a glass of peach nectar
- ⅓ of a glass of sparkling water
This peach punch is so delicious. Want to make it alcoholic? Add some vodka for the adults. If you were having a larger get together you could serve this punch in a punch bowl or large beverage server with fresh peach slices and ice, so guests could help themselves throughout the party.
This peach party was so much fun to put together, and our friends loved all the pretty details, and the delicious food was a big hit. We had a great time. I love how simple and easy these party ideas were to make -from quick and easy recipes, to DIY party decor. This is the perfect theme for a fun get together. Keep it in mind for a baby shower theme, birthday girl, or bridal shower, or just for a great together with friends during peach season. This dessert would be the perfect ending to a dinner party too.
With a cute peach themed party like this, life really is a party!
More Peach Inspiration
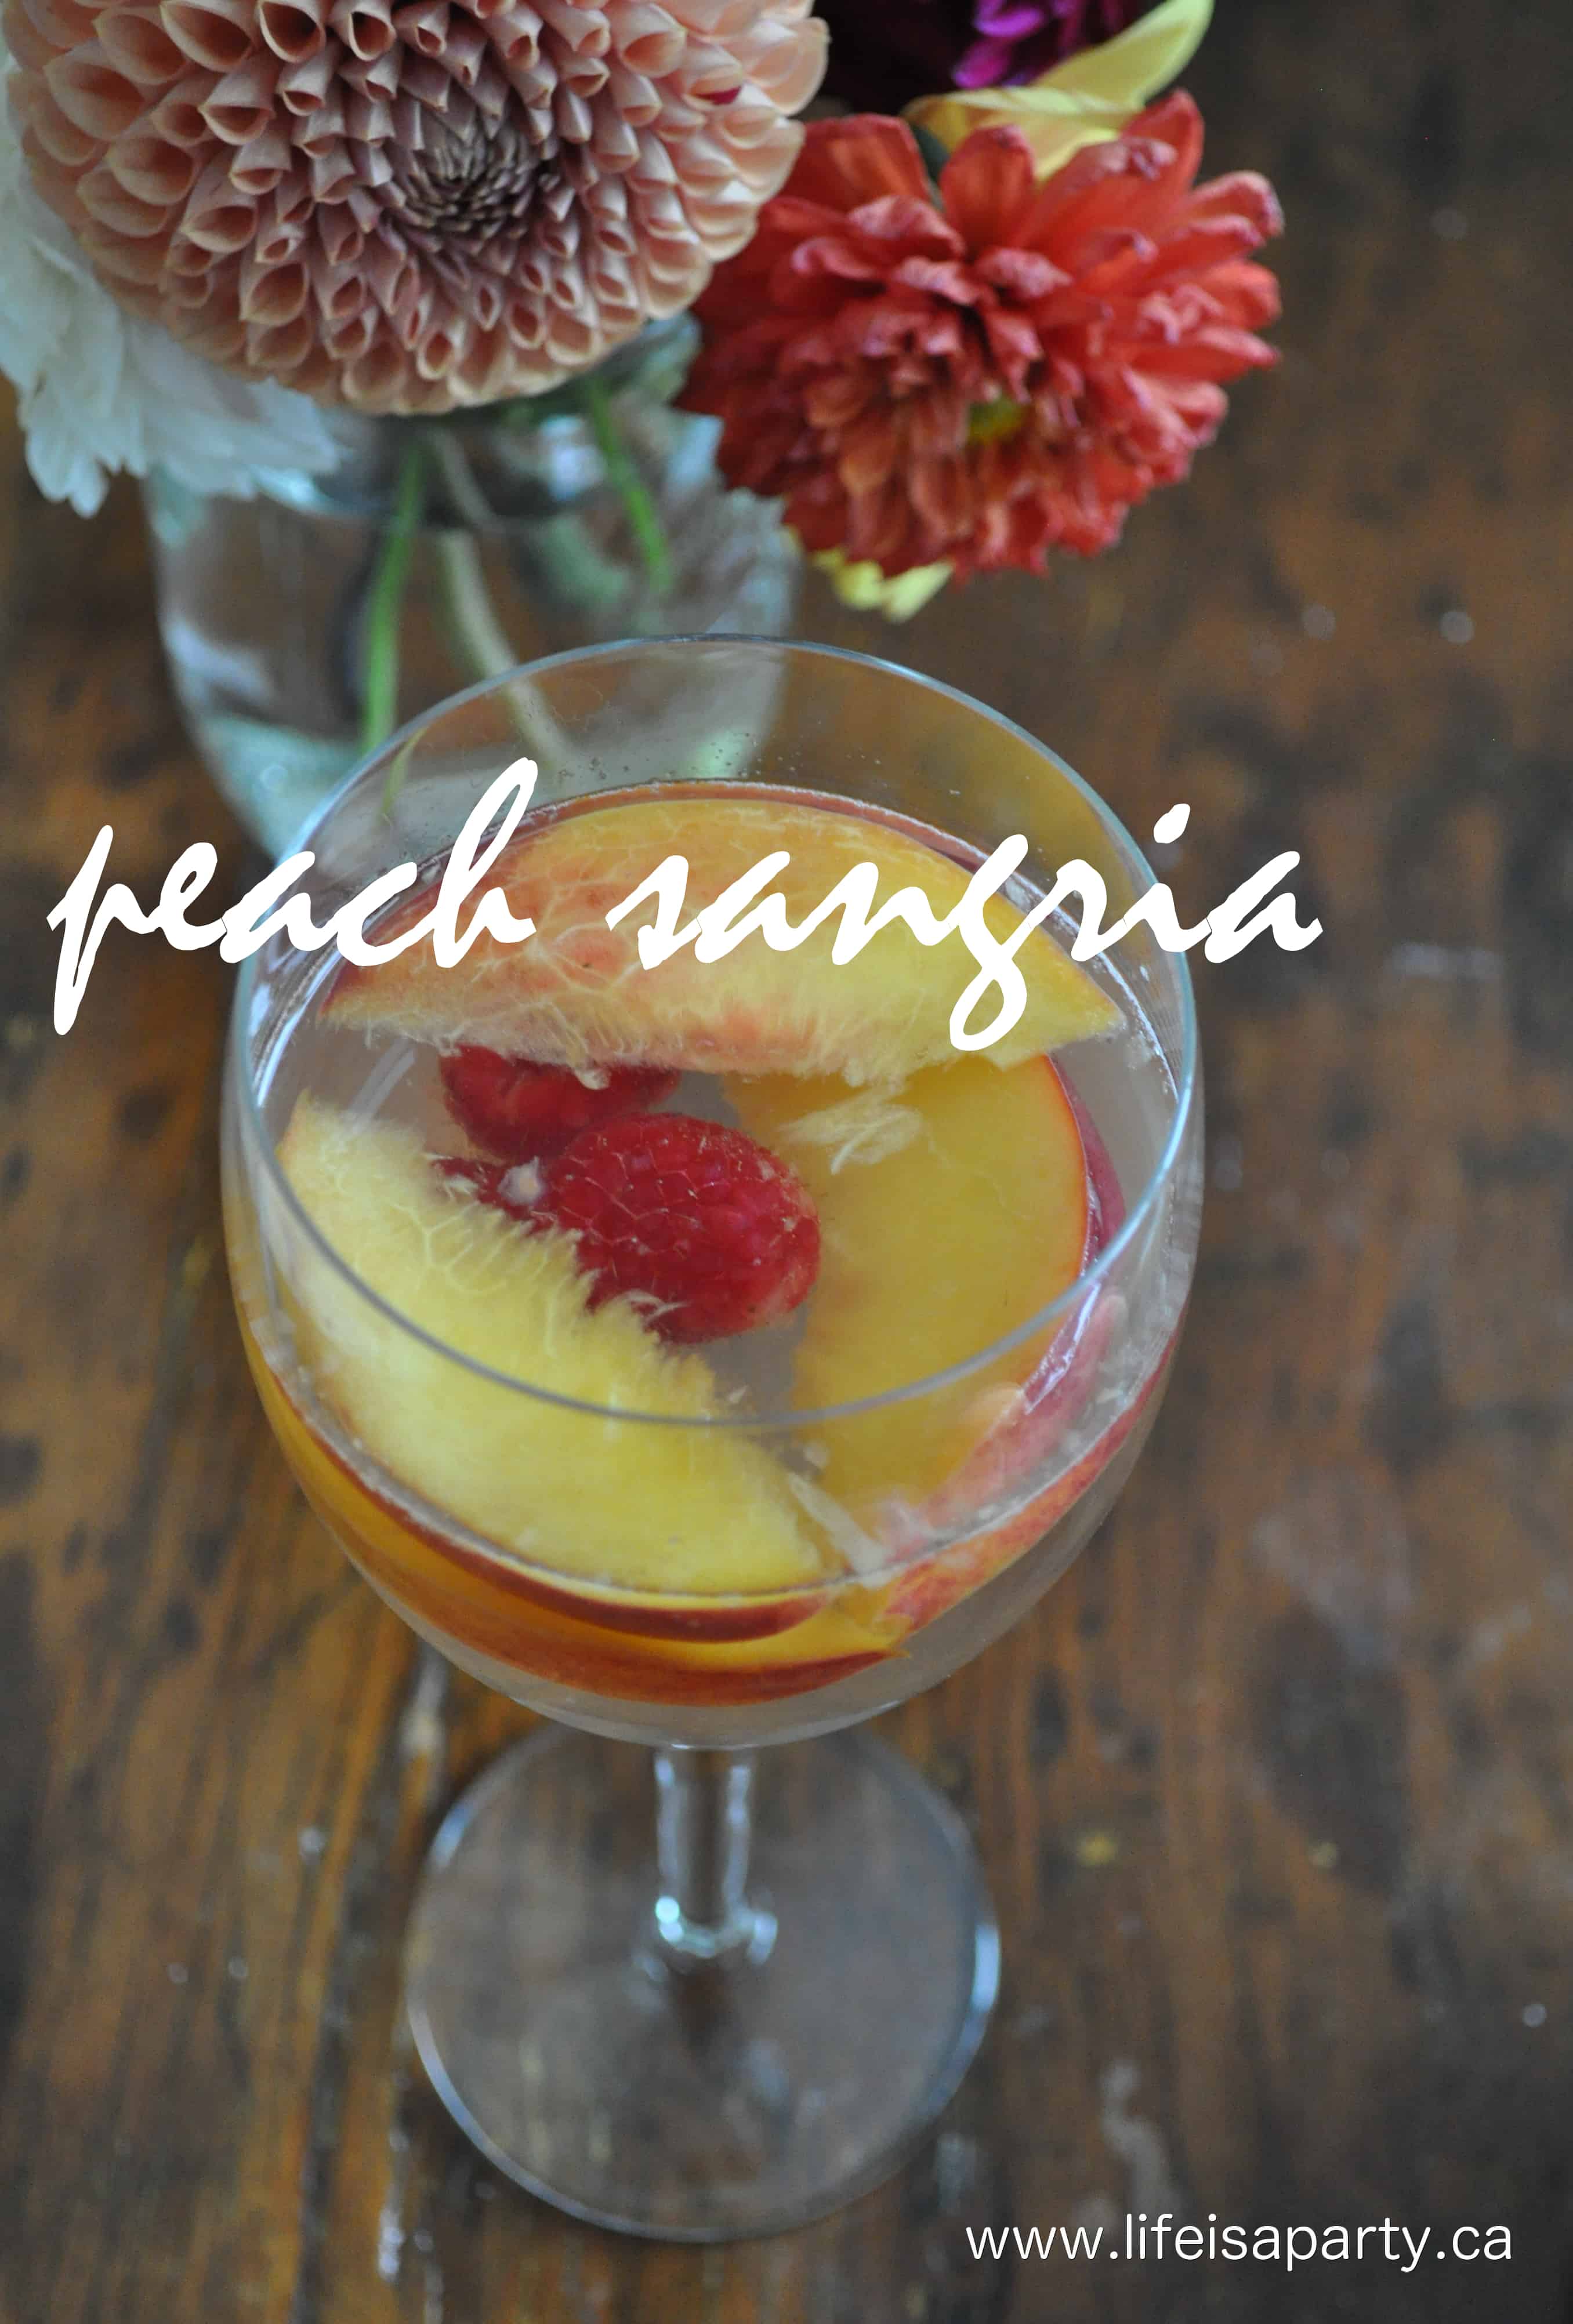
You might also like our Peach Sangria Recipe here.
Also check out our Peach Almond Crumble Muffin recipe here.

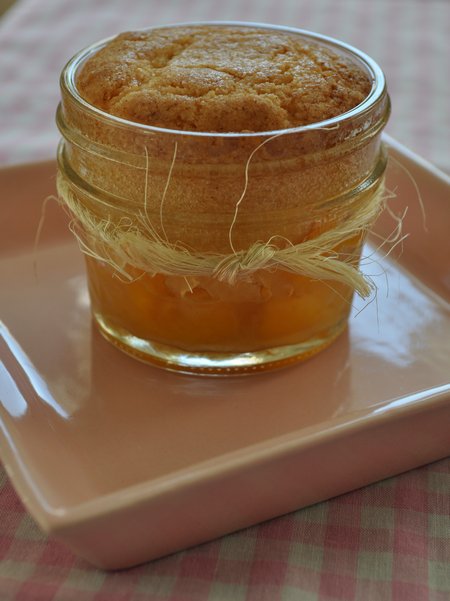
You might also enjoy our Peach Cobbler in a Mason Jar recipe here.

Leave a Reply
You must be logged in to post a comment.