This Moon Wreath is an fun DIY. Convert a round wire wreath base into crescent moon wreath adding your own grape vine and decorations.

Why You'll Love This Project
- It's perfectly magical for Halloween or fall.
- You can customize by spray painting the wreath black, leaving it natural, or painting a different color and adding your own decorations.
- It's really inexpensive to make using dollar store supplies.
"Love it! Very inspired to make my own. Thank you for sharing!" -Mitchell via Pinterest
Jump to:
I've noticed lots of crescent moon shaped wreaths lately, and fell in love with them. I thought it would be fun to DIY my own. Using grapevine and a round wire wreath form, we made our own moon shaped wreath base.
You might also like our Christmas Moon Shaped Wreath, Pinecone Wreath, DIY Birch Wreath, or these DIY Acorns.
I did see some grapevine crescent moon wreath bases at the craft store when I was shopping for a new wreath, but they weren't very crescent shaped, and they were quite expensive. You can make your own version that looks better and is cheaper.
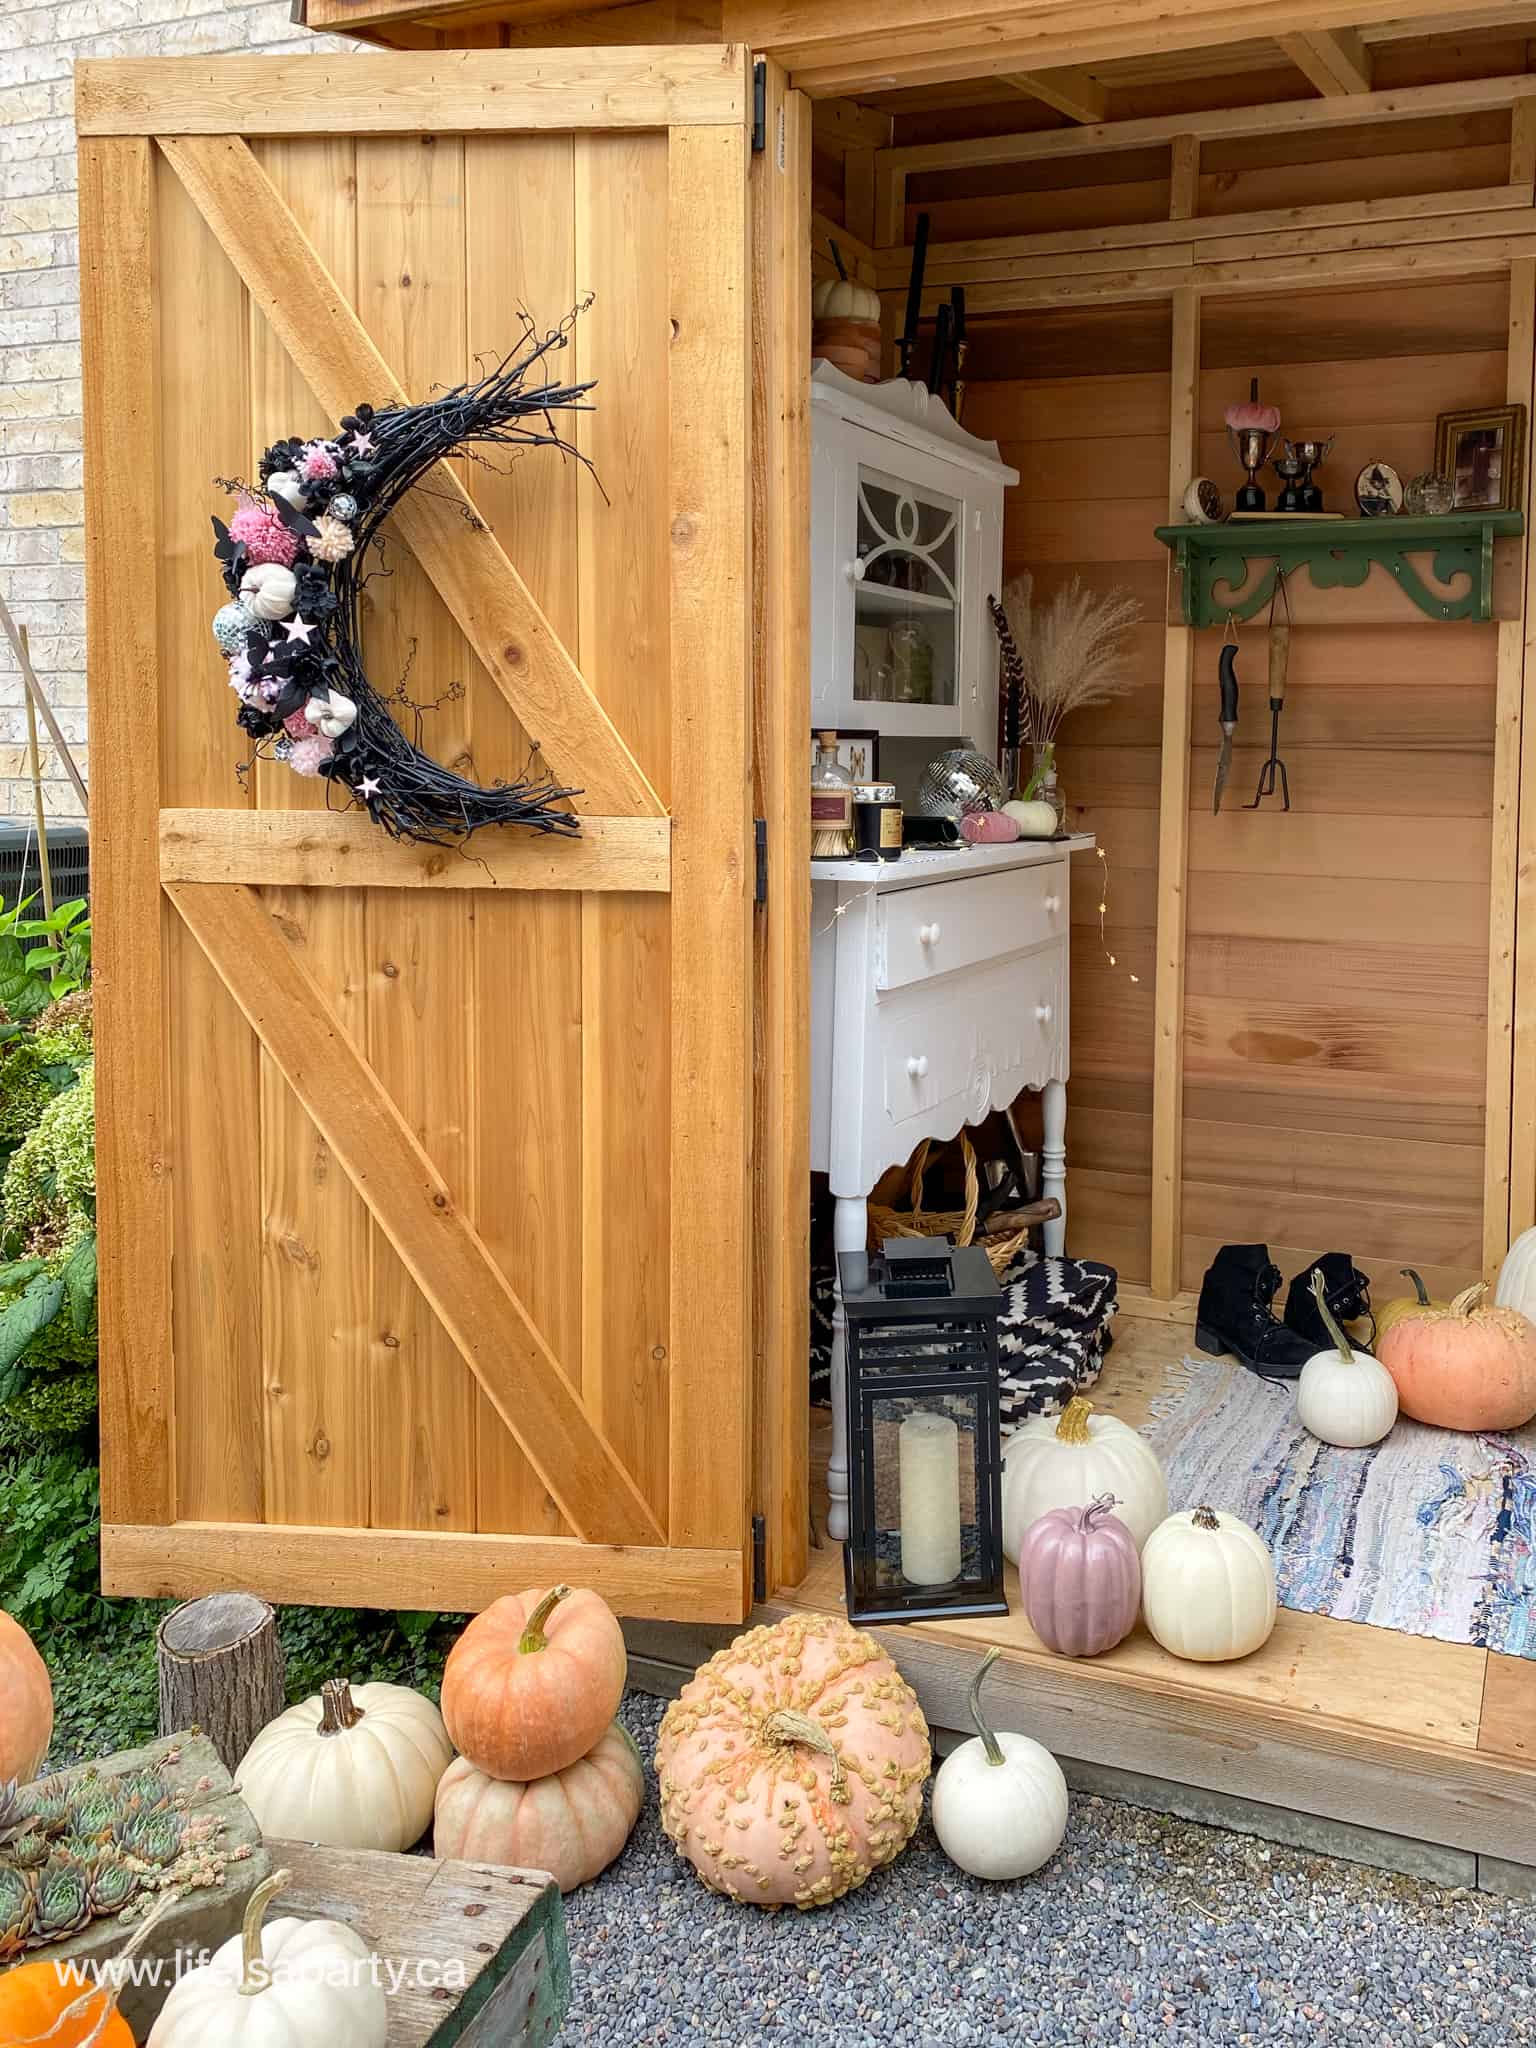
We used our moon wreath as part of our Halloween Witchy Garden Shed -you can check out more details about it here.
Materials:
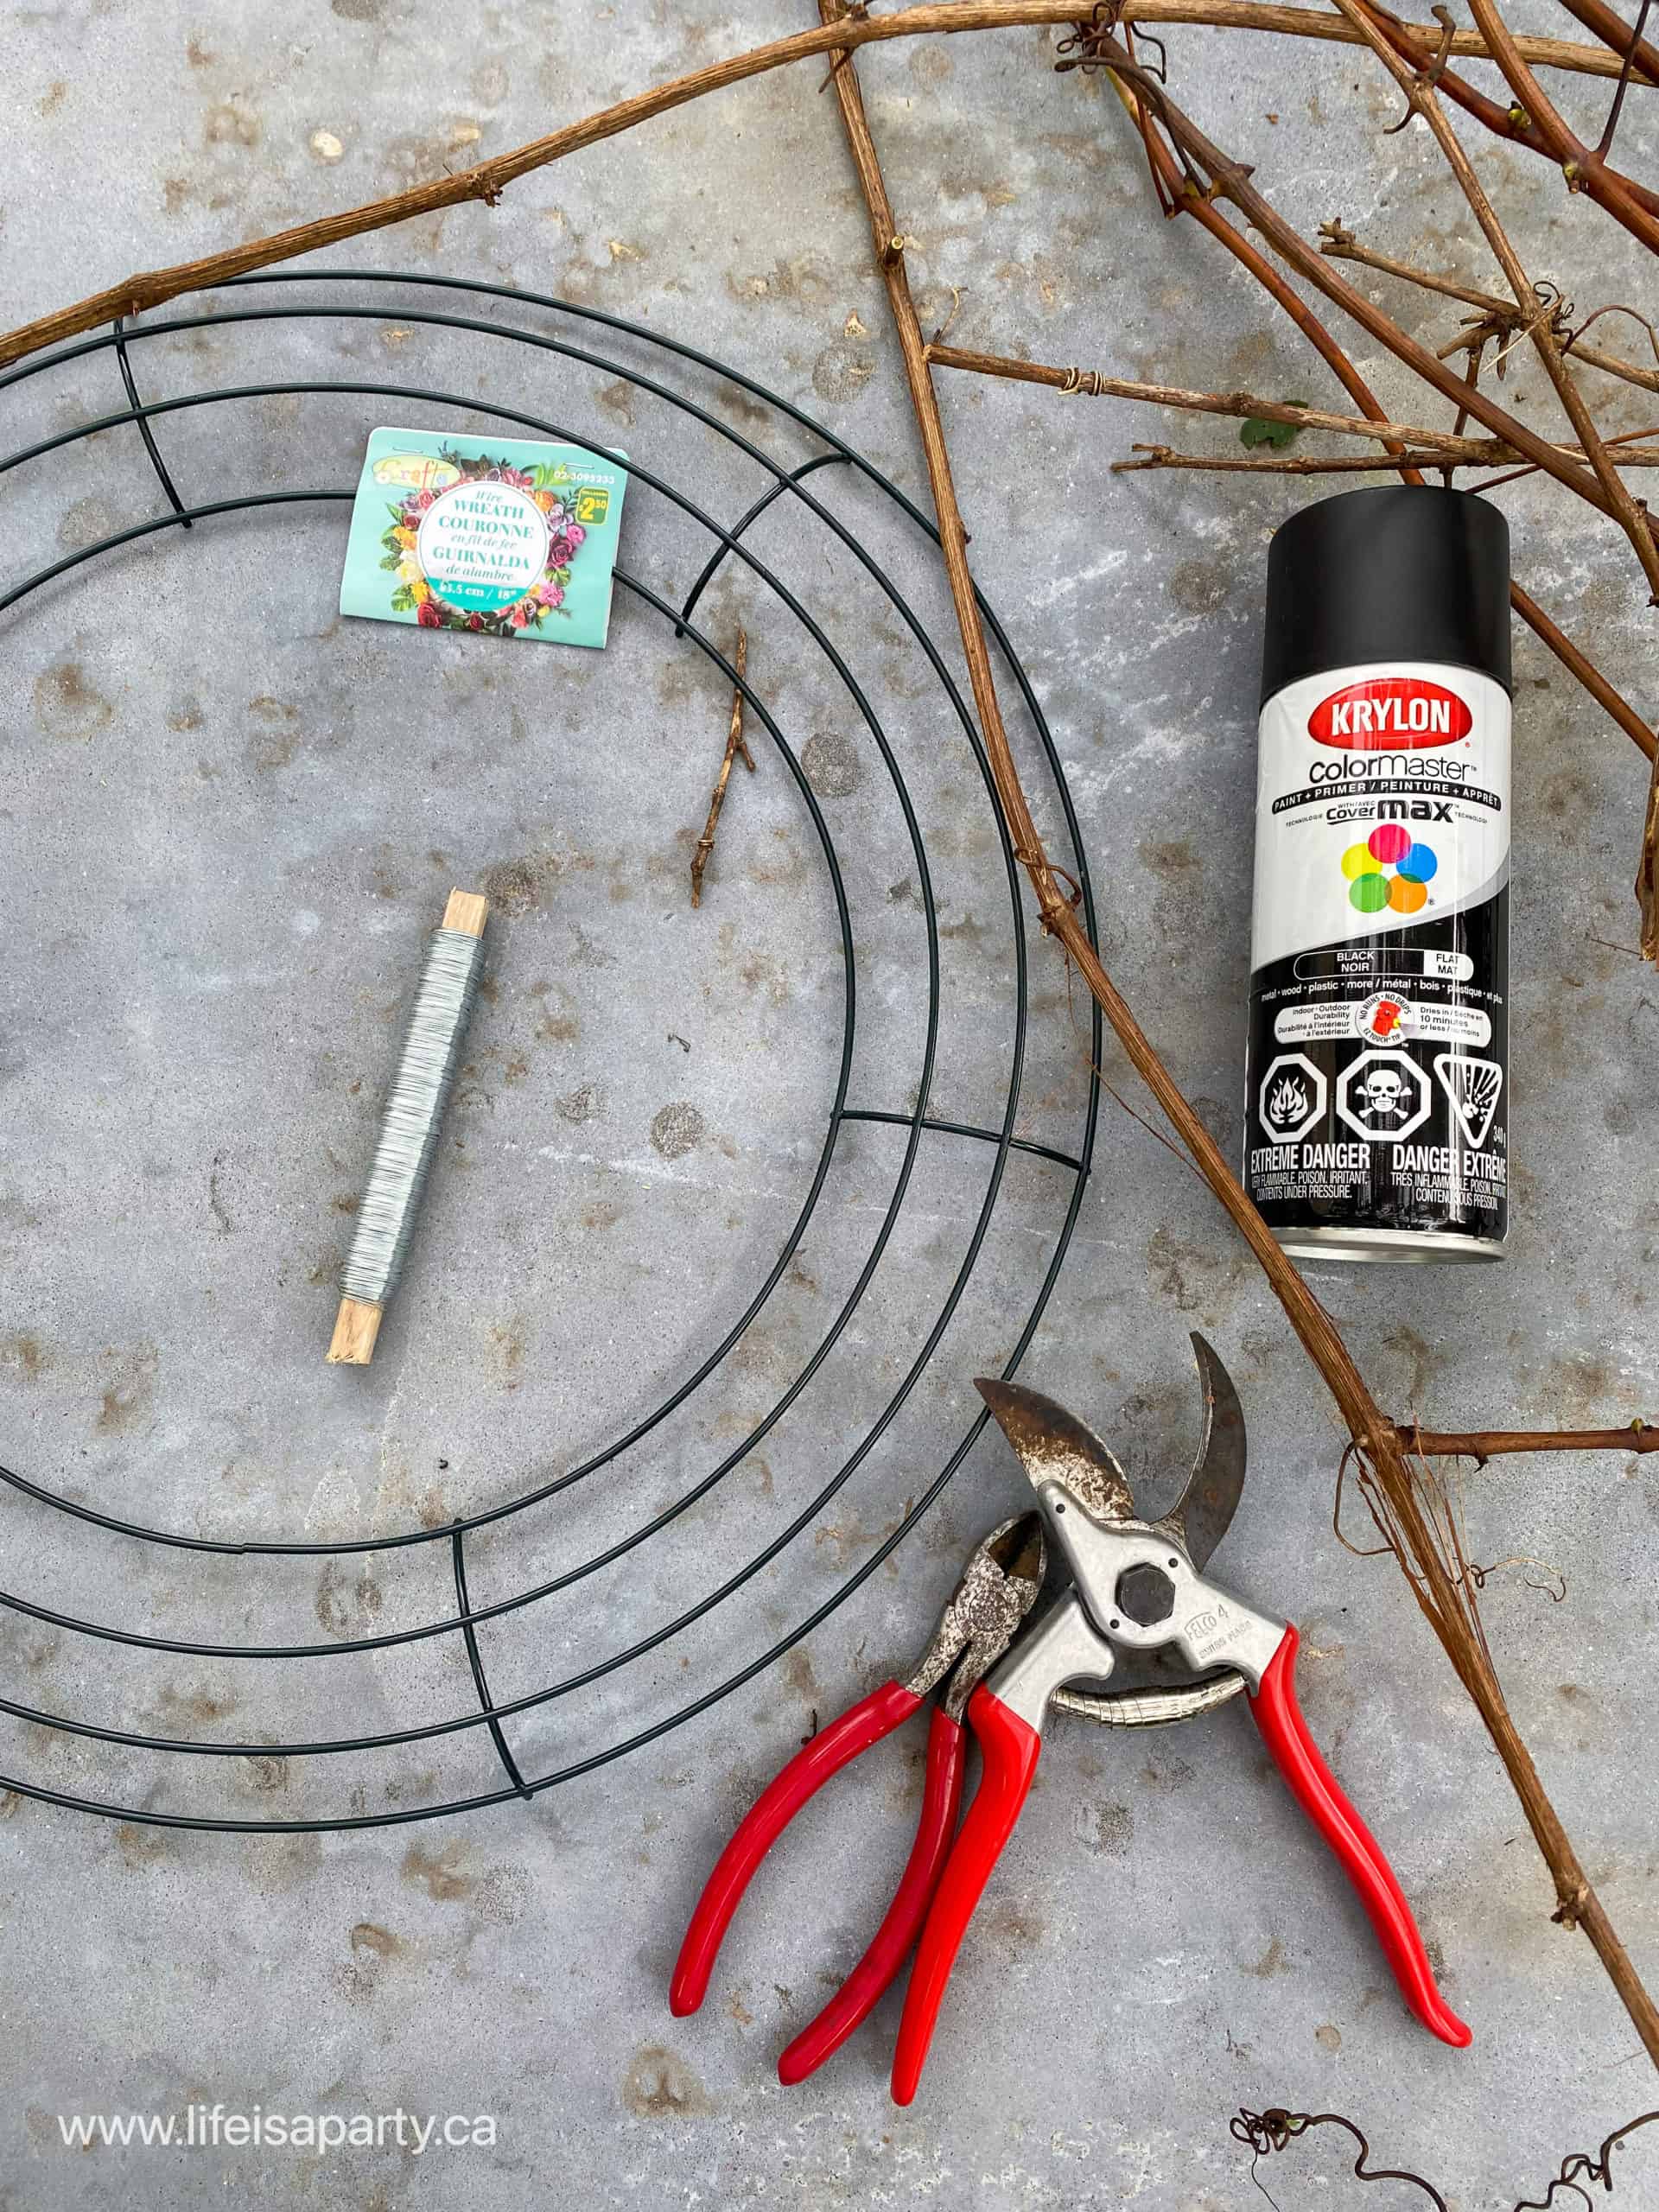
- Round Wreath Form: We're going to customize this form and turn it into a crescent shape.
- Grapevines: Look for these growing on fence rows.
- Fine Wire: You want something bendable and easy to work with. Since we spray painted our wreath the color of the wire didn't matter, but if you want to leave the grapevine natural, be sure ot use a brown colored wire that will blend in with it.
- Wire Cutters
- Garden Clippers: For cutting the grapevine.
- Black Spray Paint: Or whatever color you'd like your crescent wreath to be, or you could leave it natural.
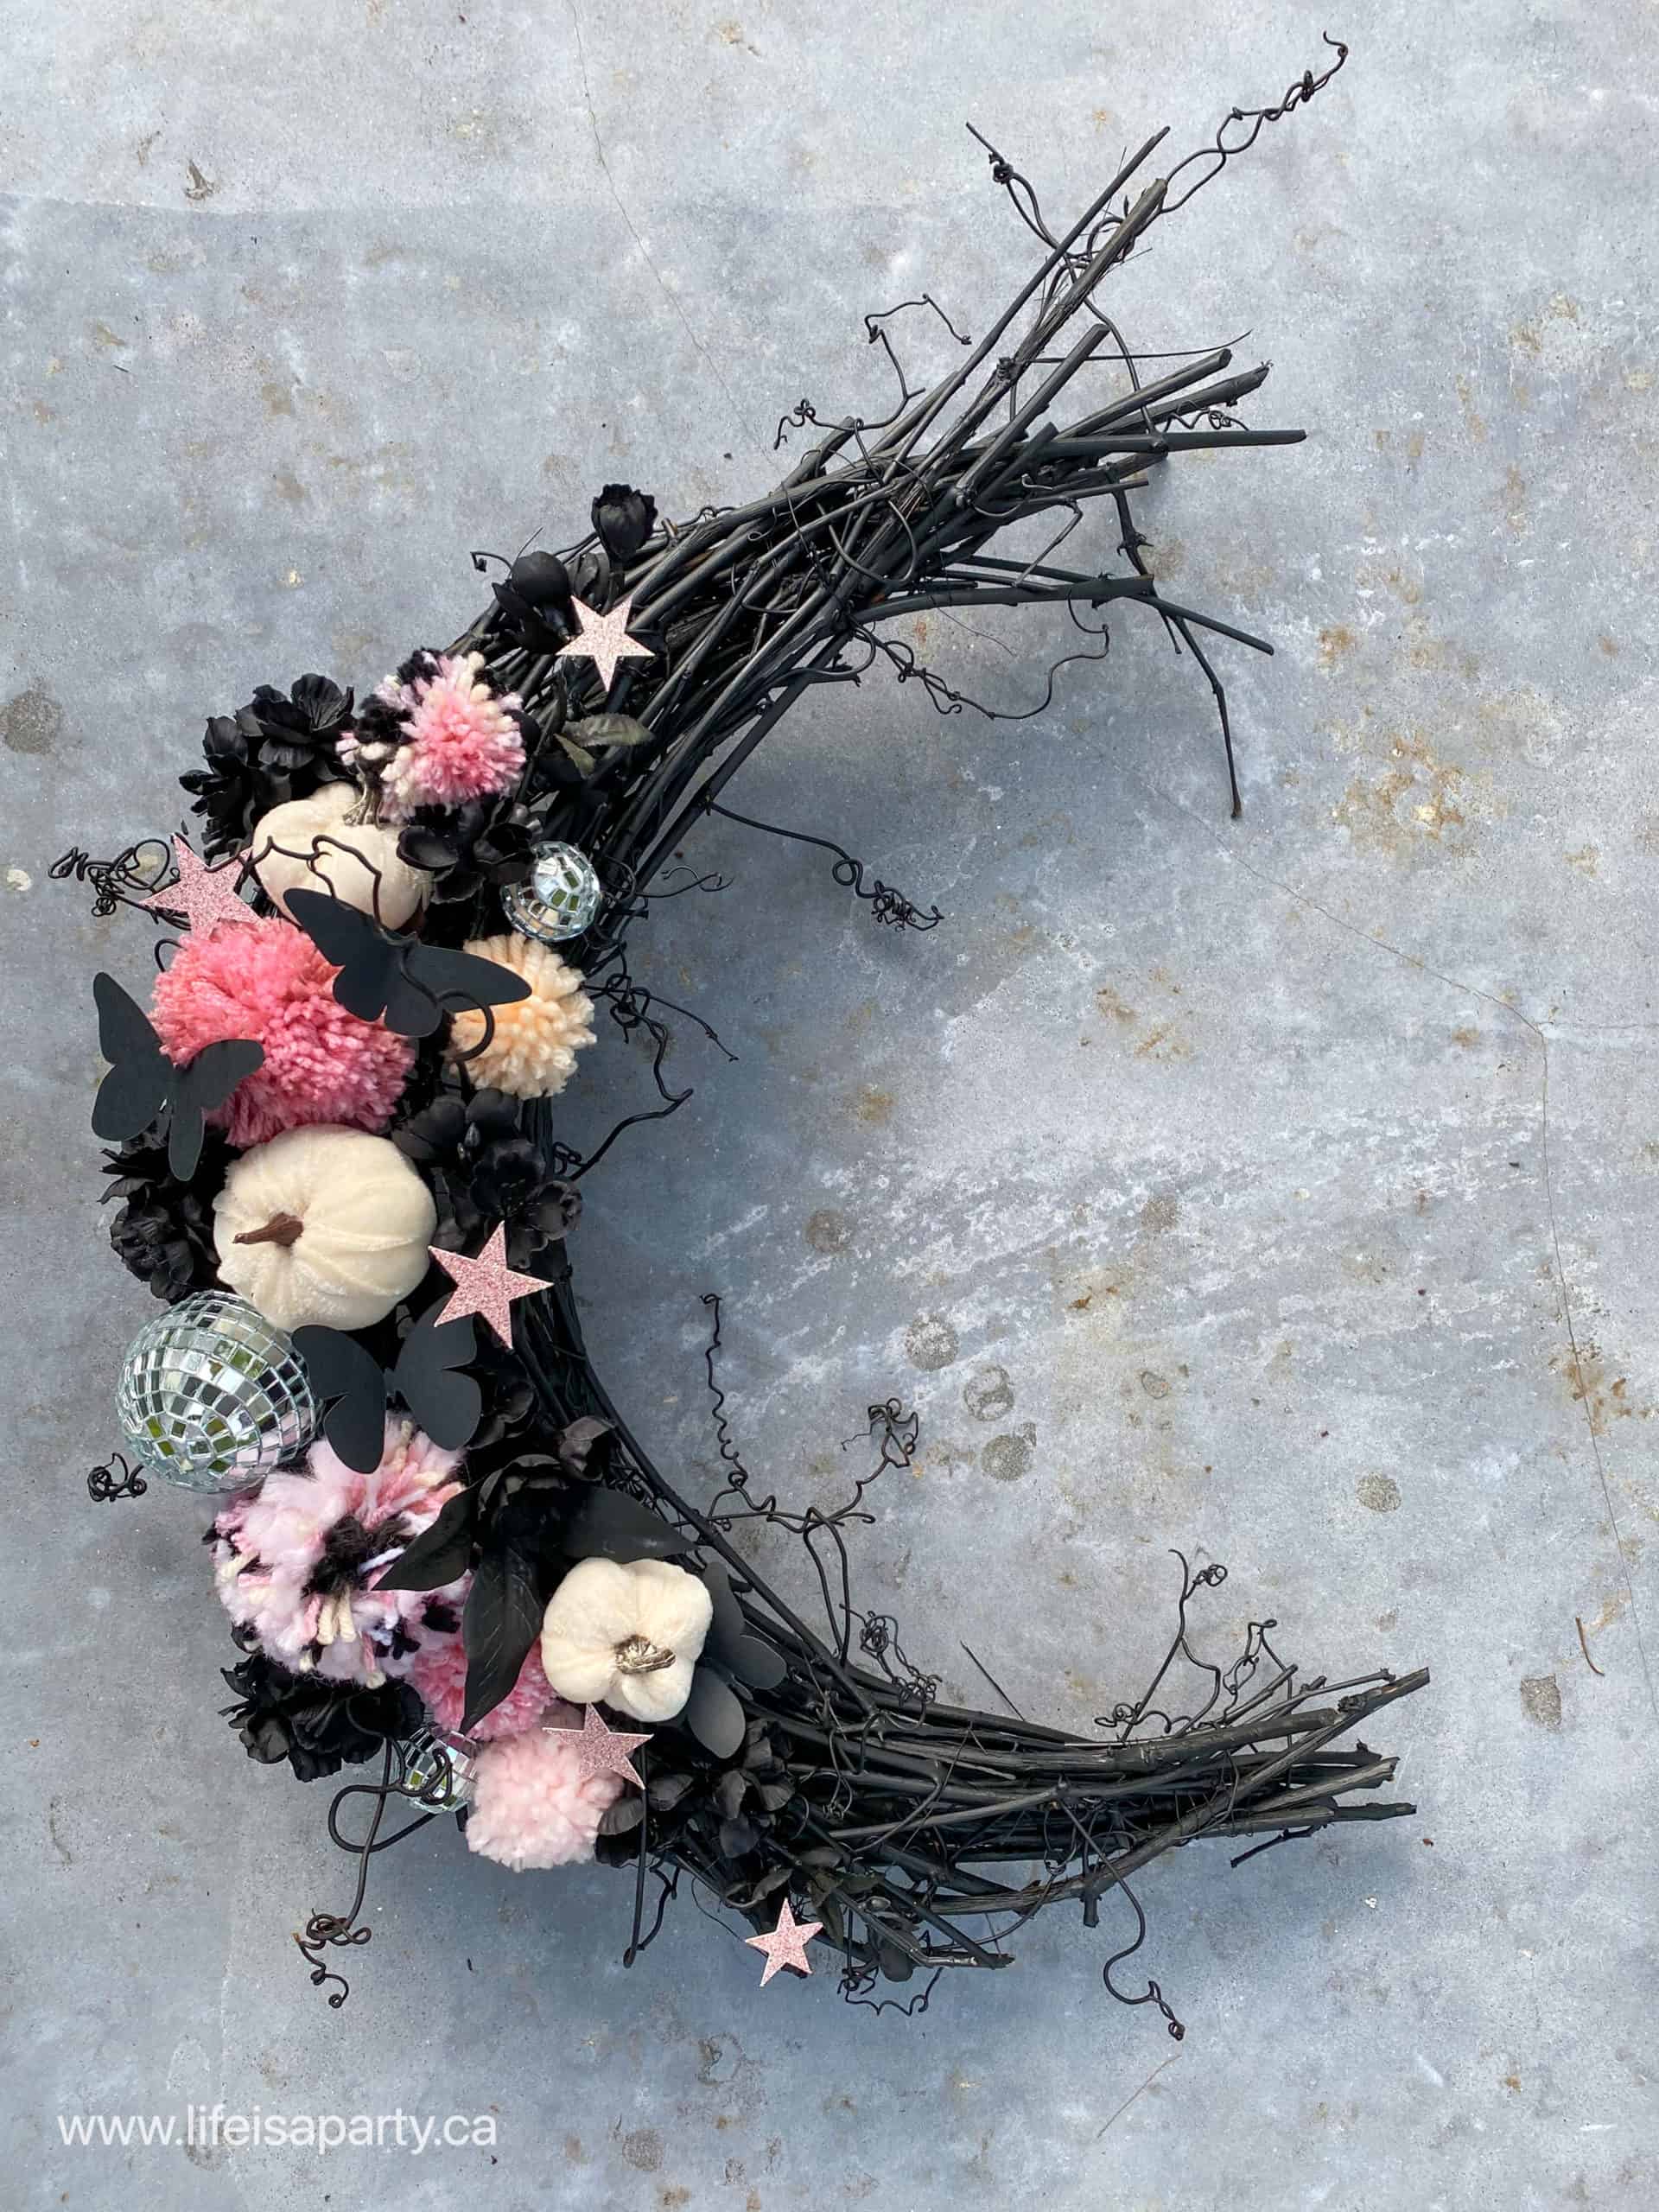
- Decorations For The Wreath: We used black faux flowers, yarn pom poms, disco ball ornaments, mini velvet pumpkins, back paper butterflies, and pink glitter stars.
- Hot Glue
Variations
If you don't have access to grapevine, you could use a different material like burlap strips, ribbon, mesh, or fabric to cover your wire wreath frame. Then add in faux florals, vines, and branches on top, securing them with hot glue to create your wreath base and add more embellishments on top.
How To Make The Crescent Moon Wreath Base
Step 1: Make the Crescent Wreath Form
I started with a regular round metal wreath form, and with a few simple steps I turned it into a moon wreath form. Pick up an inexpensive round wire wreath form from the dollar store. The first step is to cut out a section of the round wreath form. Use wire cutters to cut it. It does take a little muscle and perseverance, but you can cut through them.
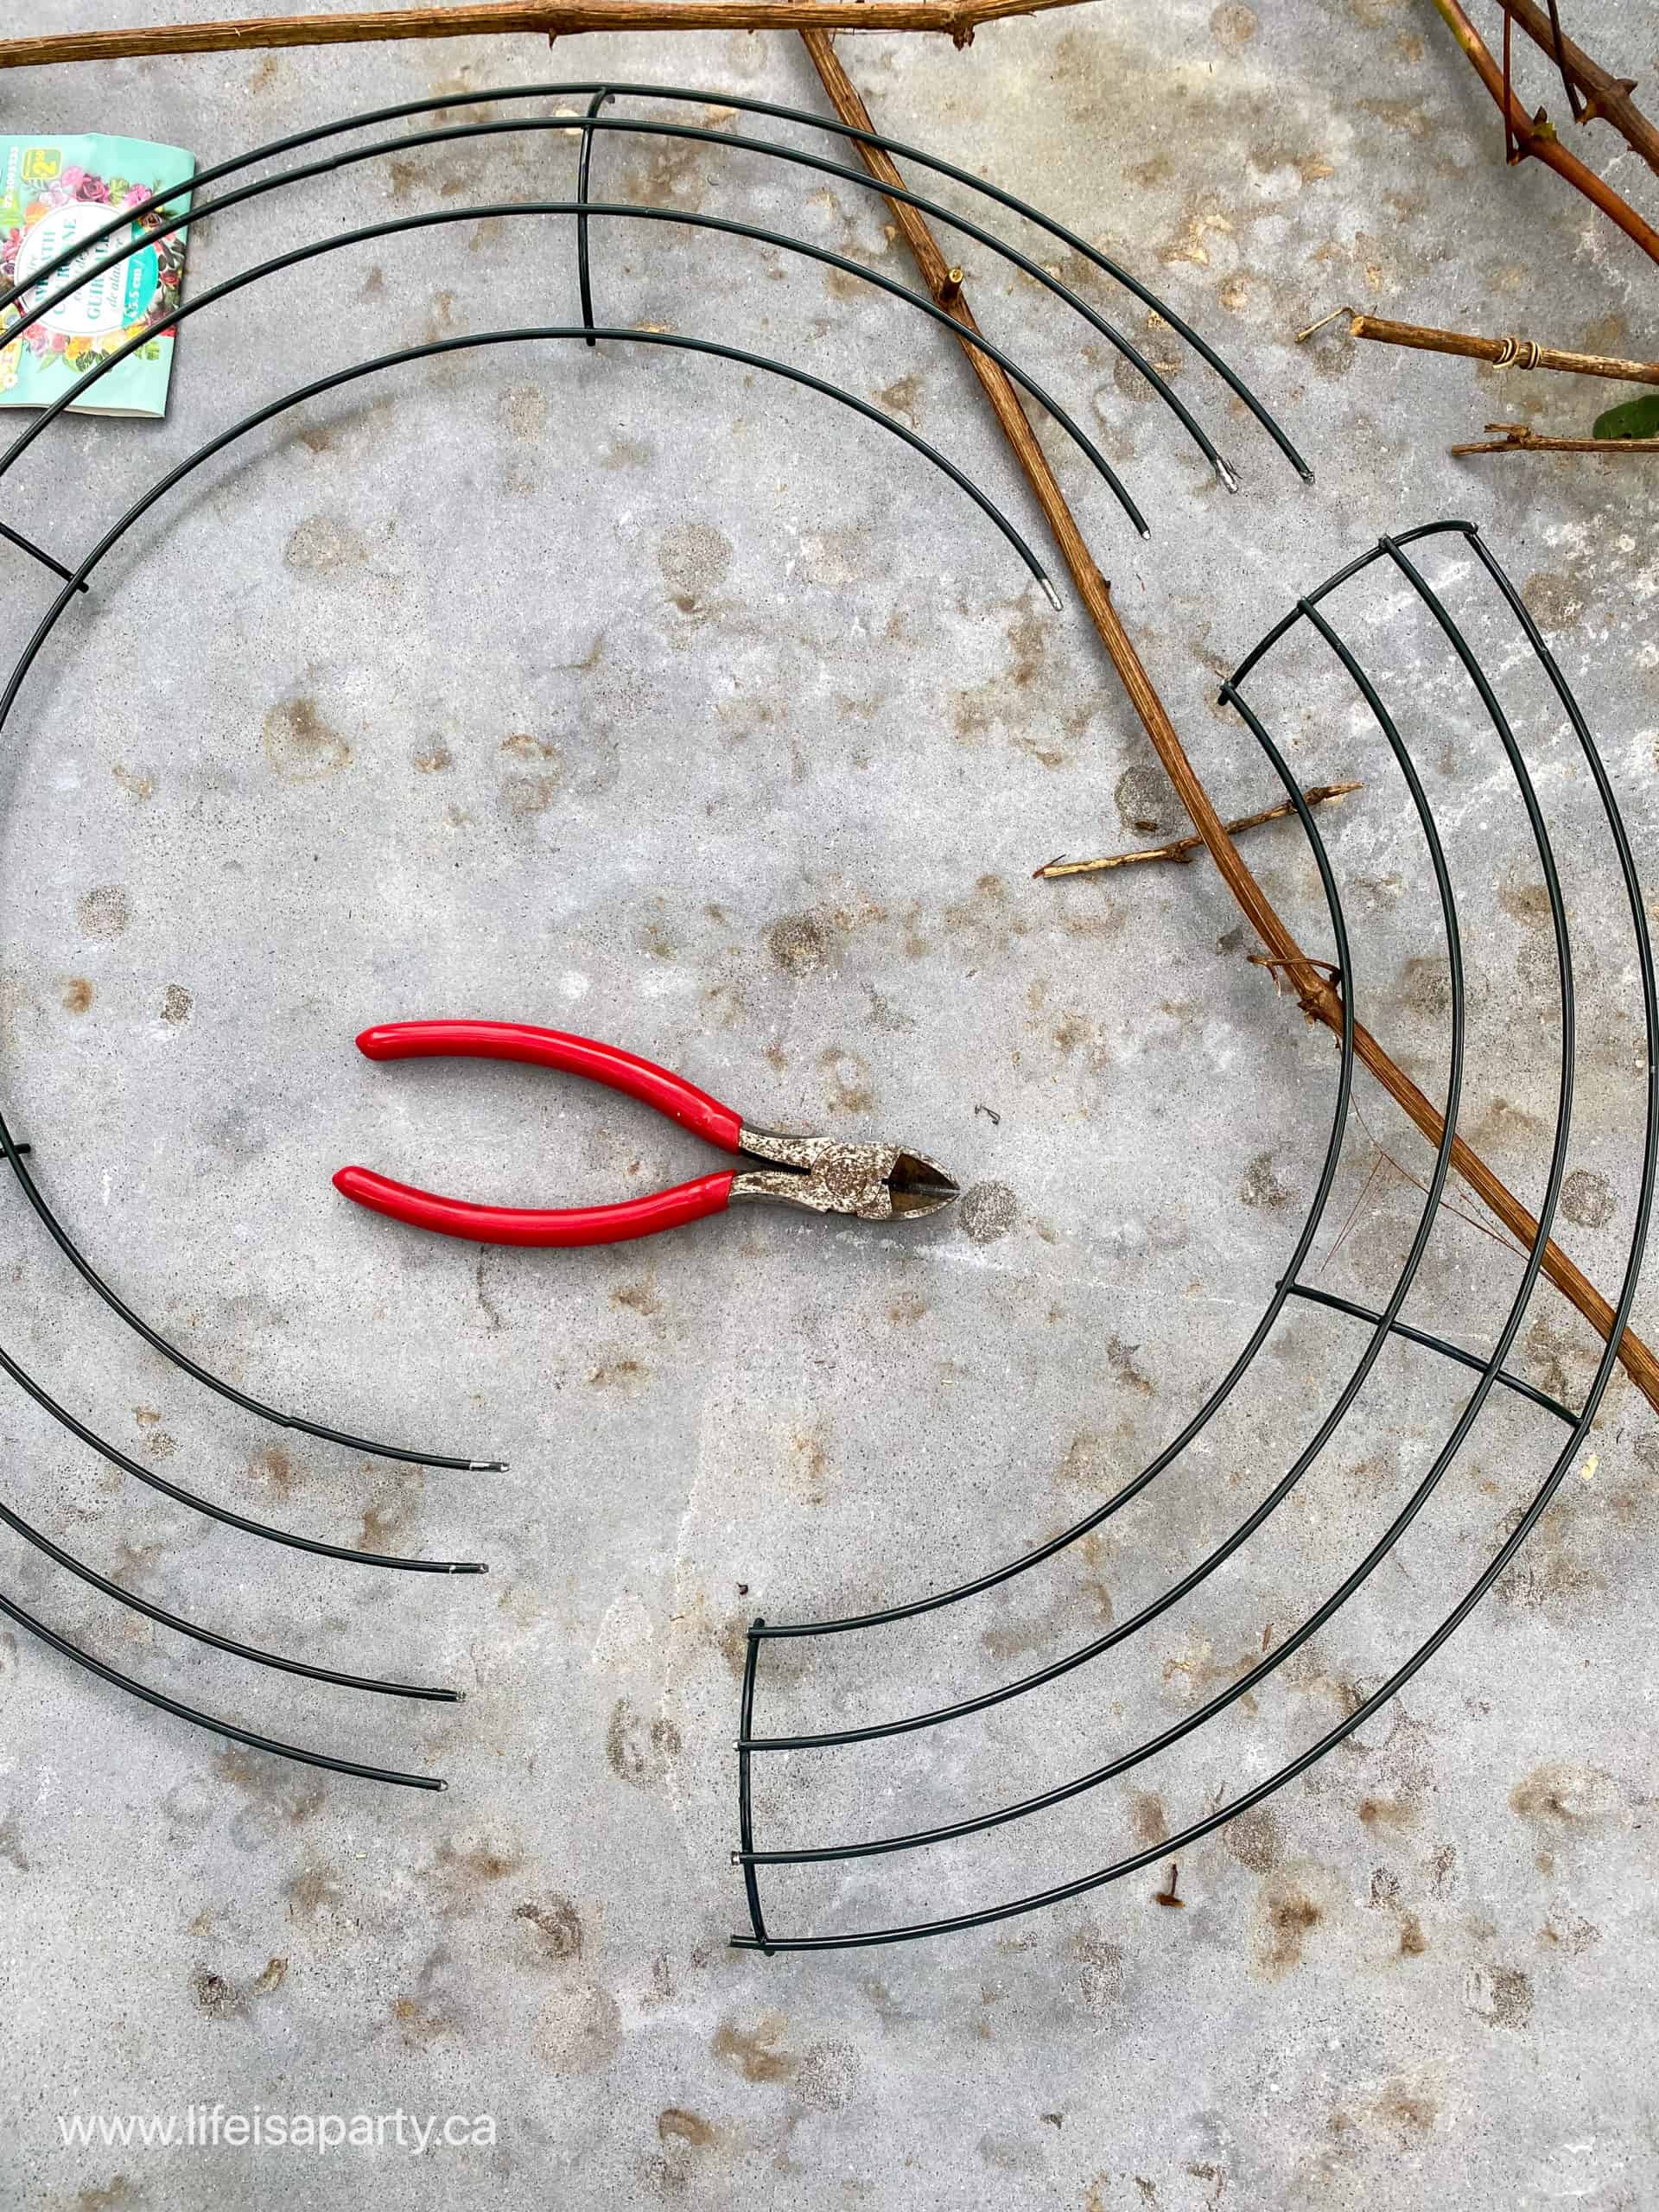
Once you have a section of the round wreath form removed, you can create your crescent shape. Use some floral wire to gather the ends of the wreath form together, and secure it tightly to create each end of the moon.
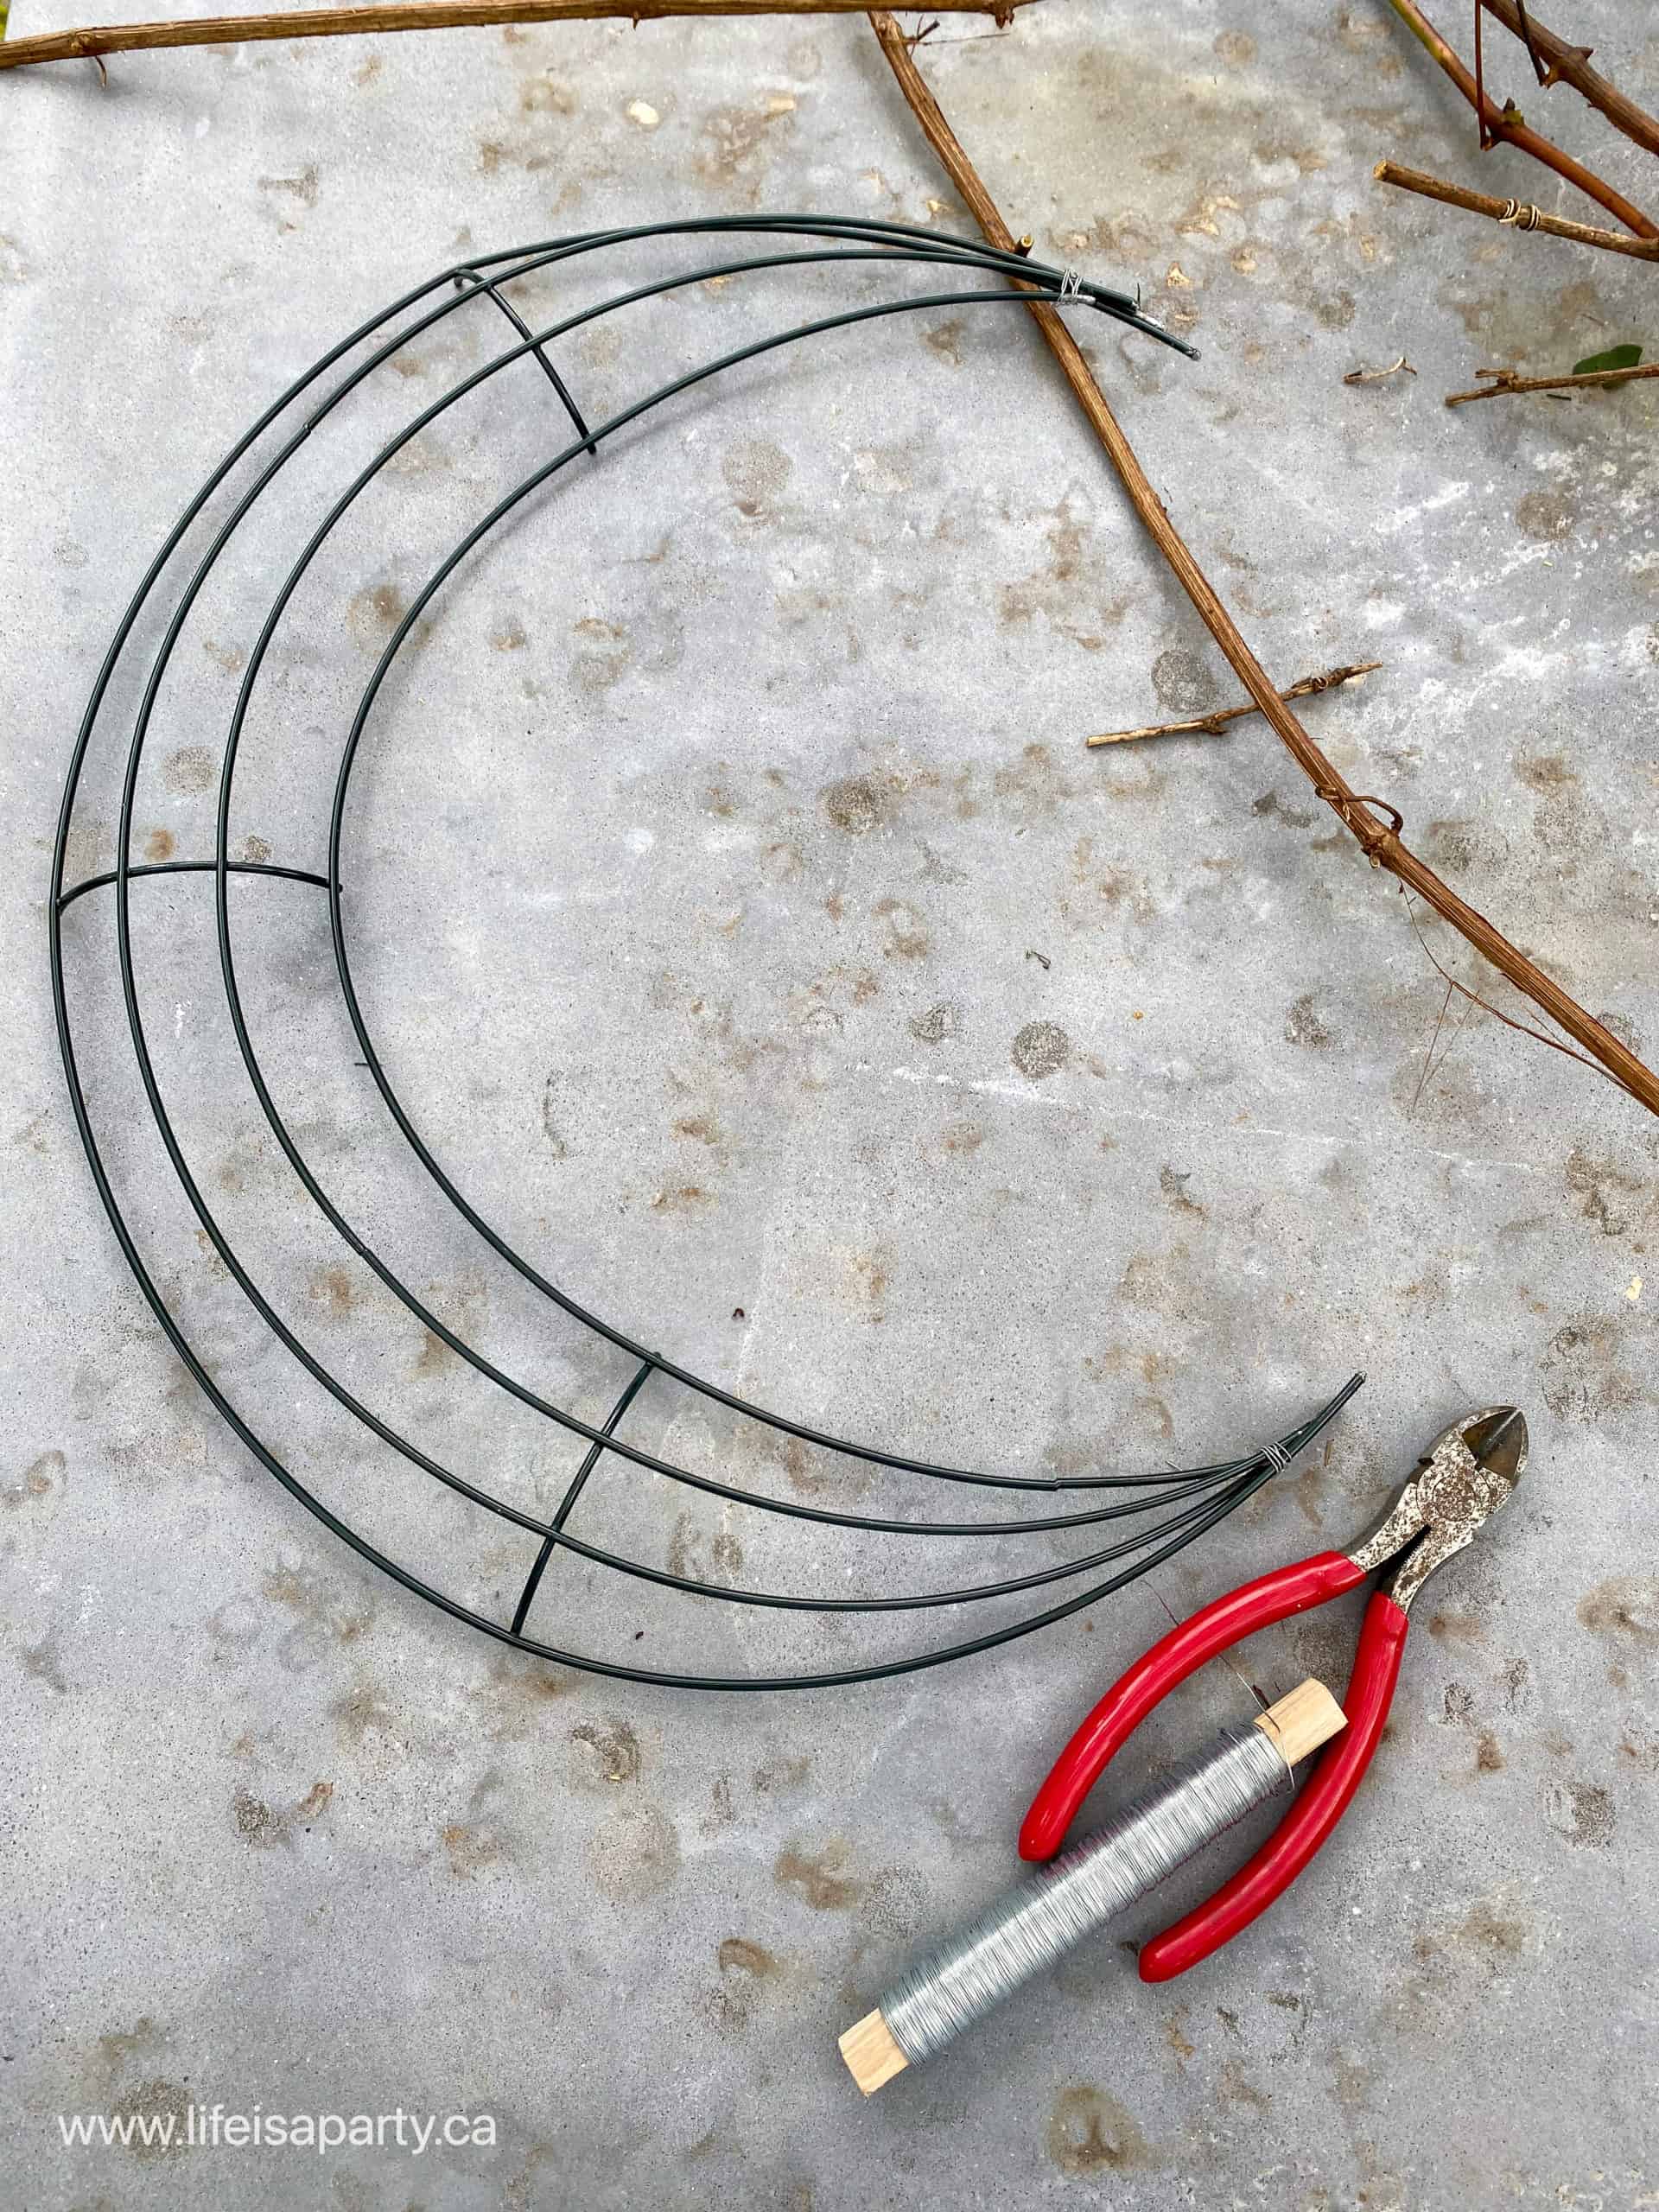
I wanted to make a black grapevine wreath, so I used the green wreath form I found and some silver coloured wire because I knew I was spray painting it all black once it was formed.
If you wanted to keep the natural brown grapevine colour, you could begin by spray painting your wreath form brown, and using brown wire to attach the grape vine.
Step 2: Adding the Grapevine
Next you begin to add your grapevine. I gathered my grapevine from a spot where it grows wild, and removed all of the leaves. There were lots of the twirly tendrils attached, which I think are my favourite part, so be careful not to break them off.
It's best to make your wreath within a few days of cutting the grapevine, because when you first pick the grapevine it's still really flexible and easy to bend.
If you were using older grape vine, you could soak it in water first to make it more flexible.
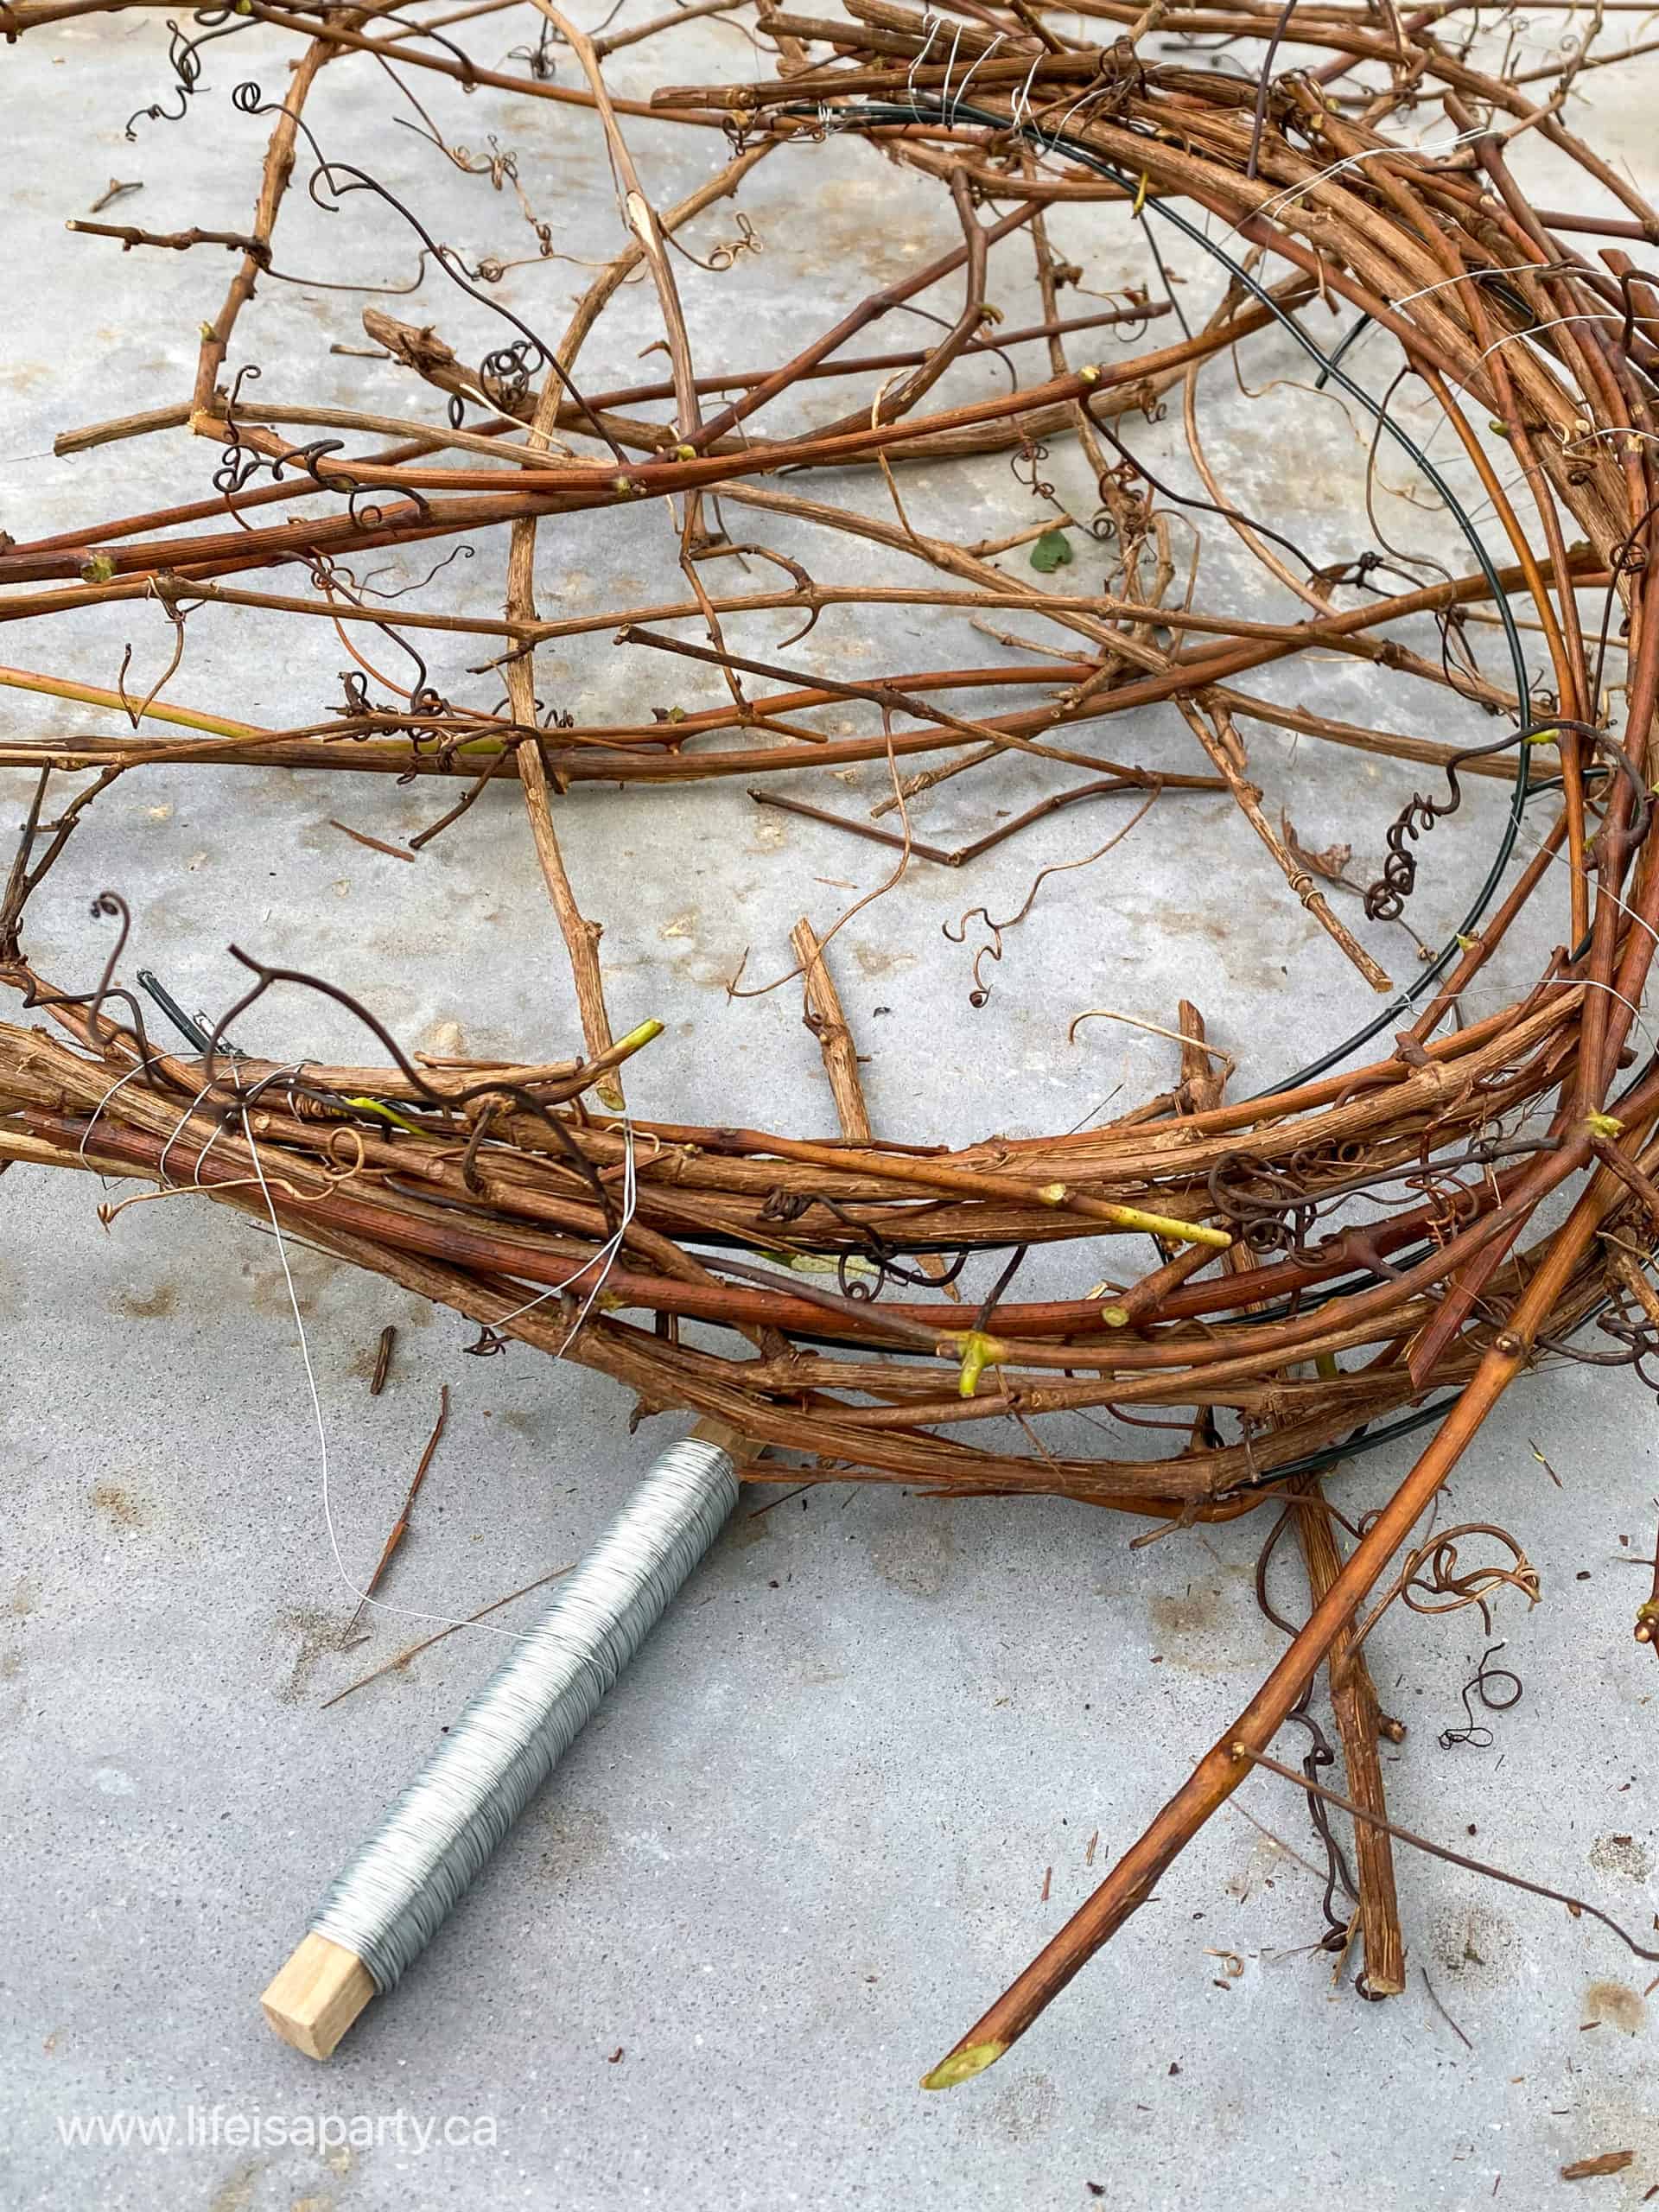
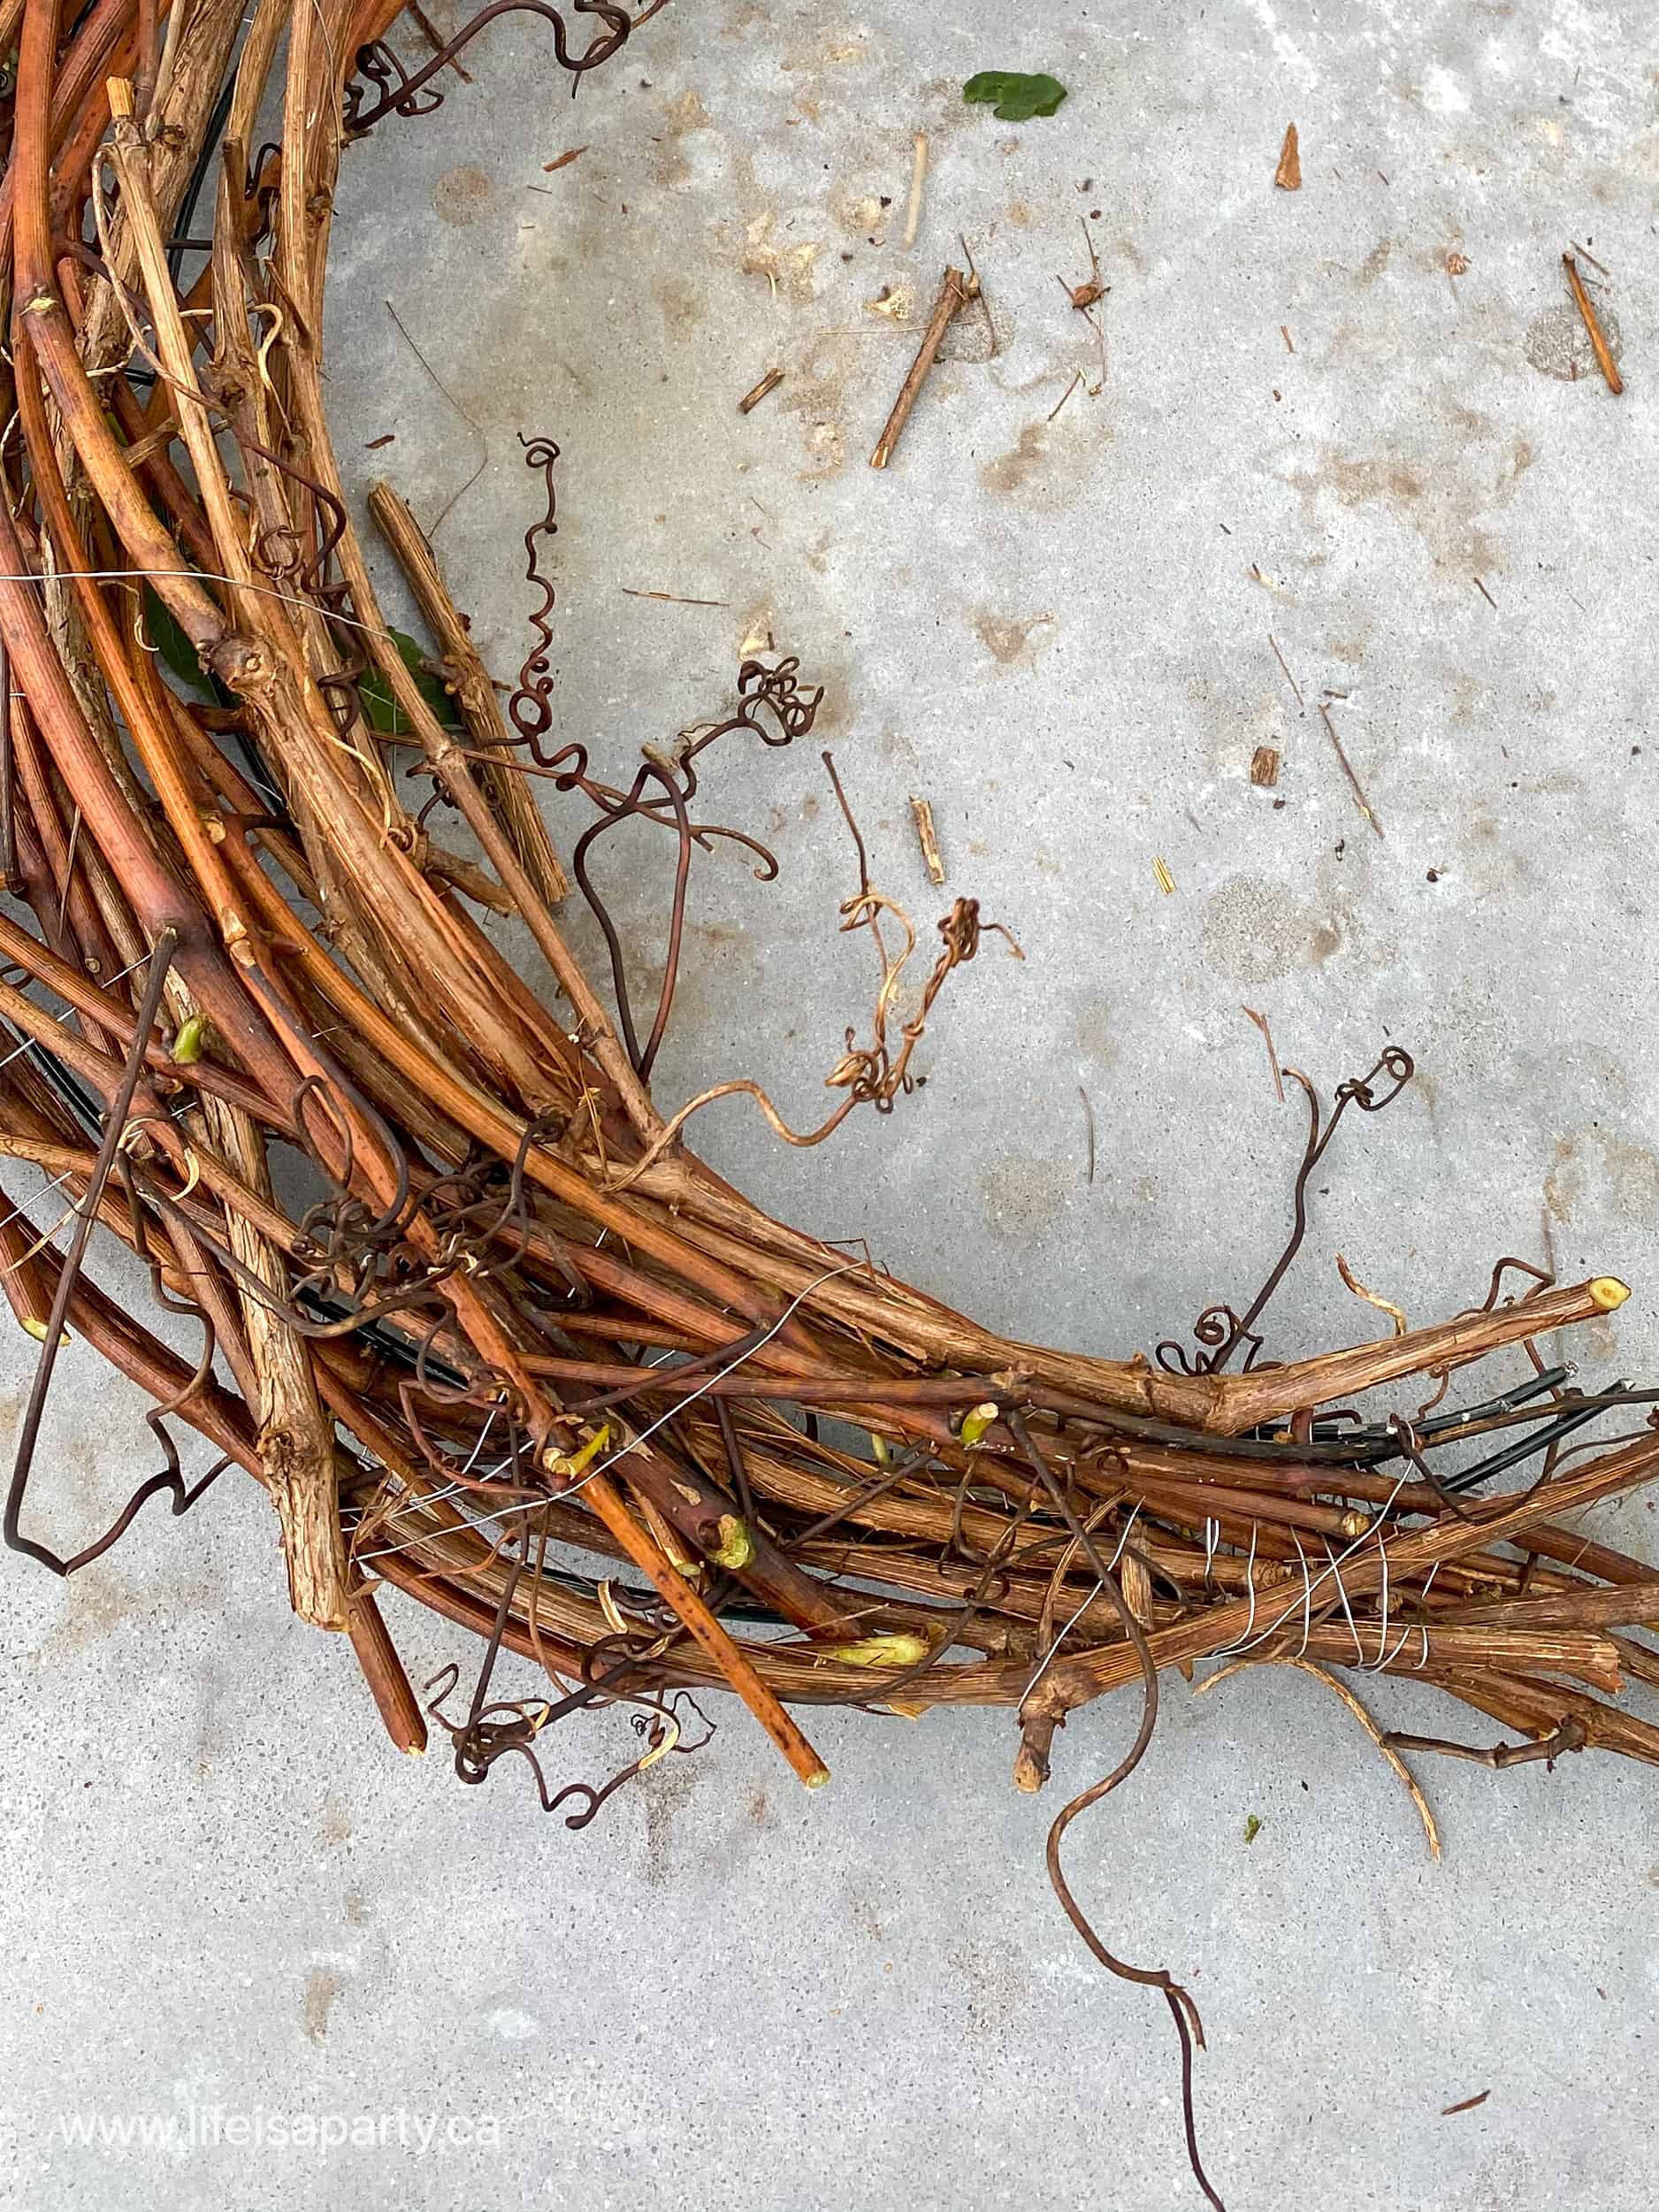
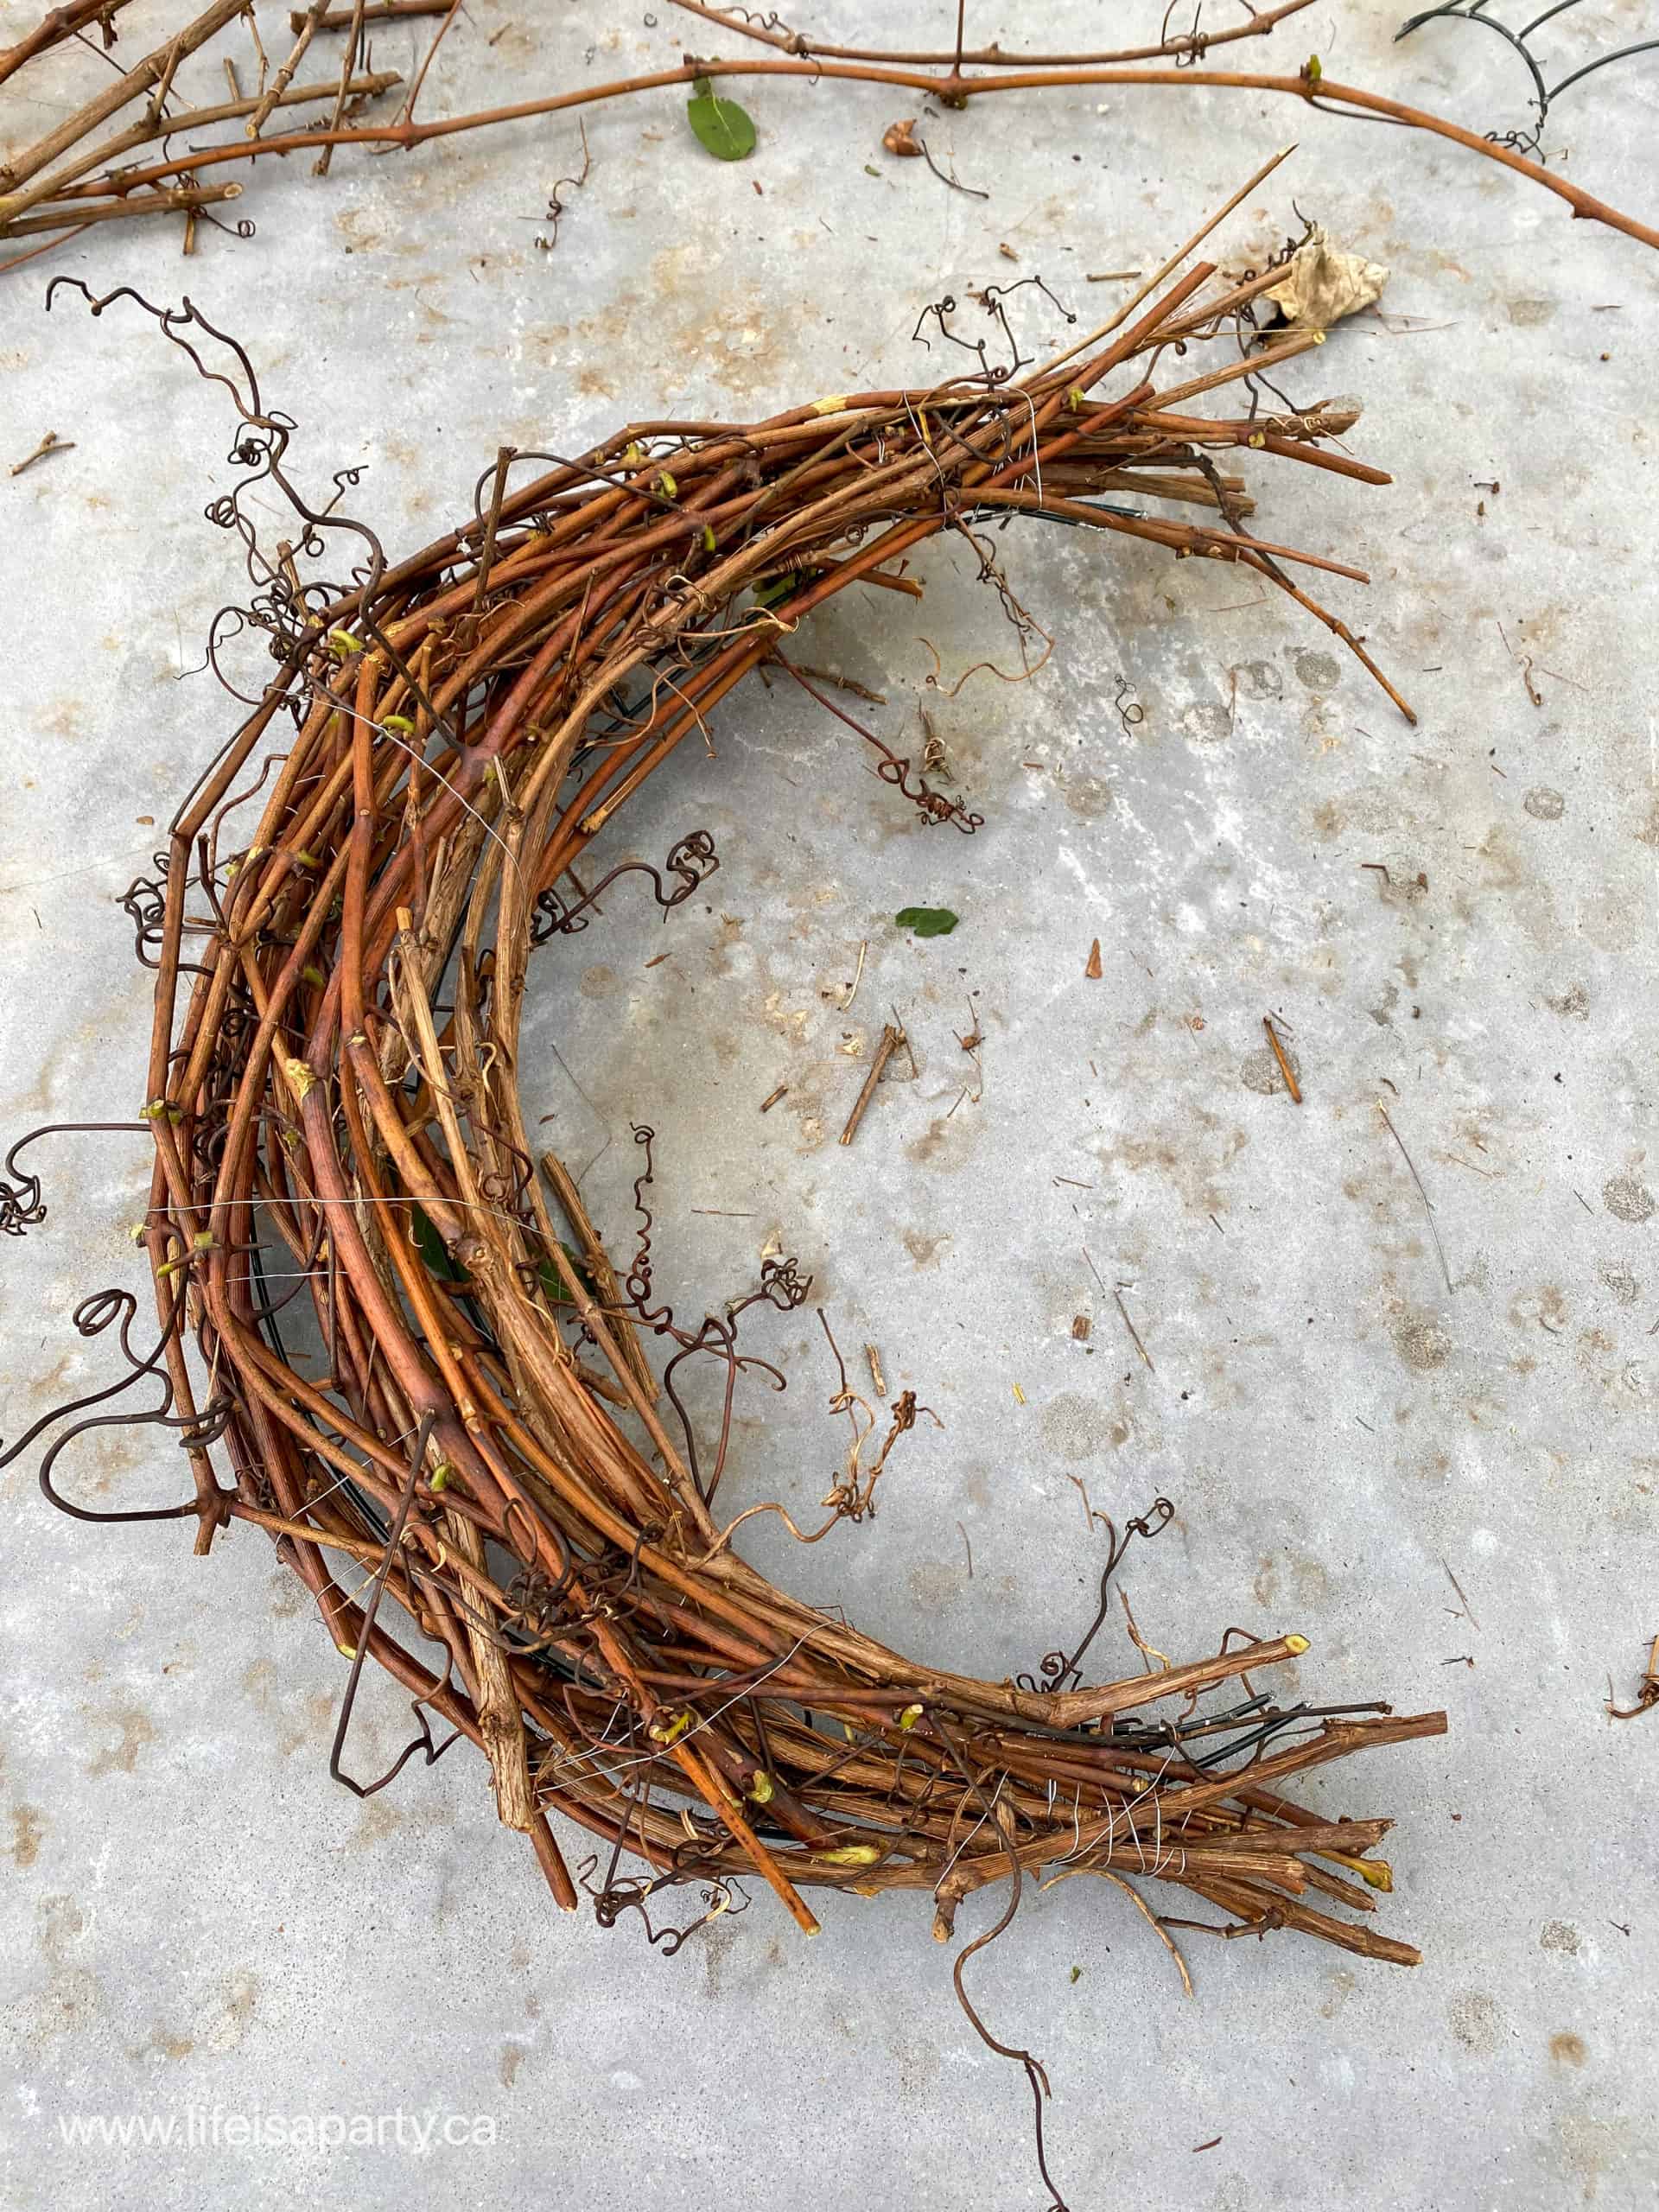
To add the grapevine to the wreath form, cut grapevine pieces to the right length and wire them onto the wreath from. As you go, you will want some pieces of grapevine that are shorter, to bulk up the middle section of the wreath. Try and tuck the ends into the wreath as you build it. Once it is how you like it wrap the wire around tightly and secure at the end.
You can also twist some wire to the back to create a wreath hanger.
Next, spray paint your wreath black. Remember to do several light coats to avoid dripping, and spray from different angles, and from the back for full coverage.
Step 3: Decorate Your Moon Wreath For Halloween
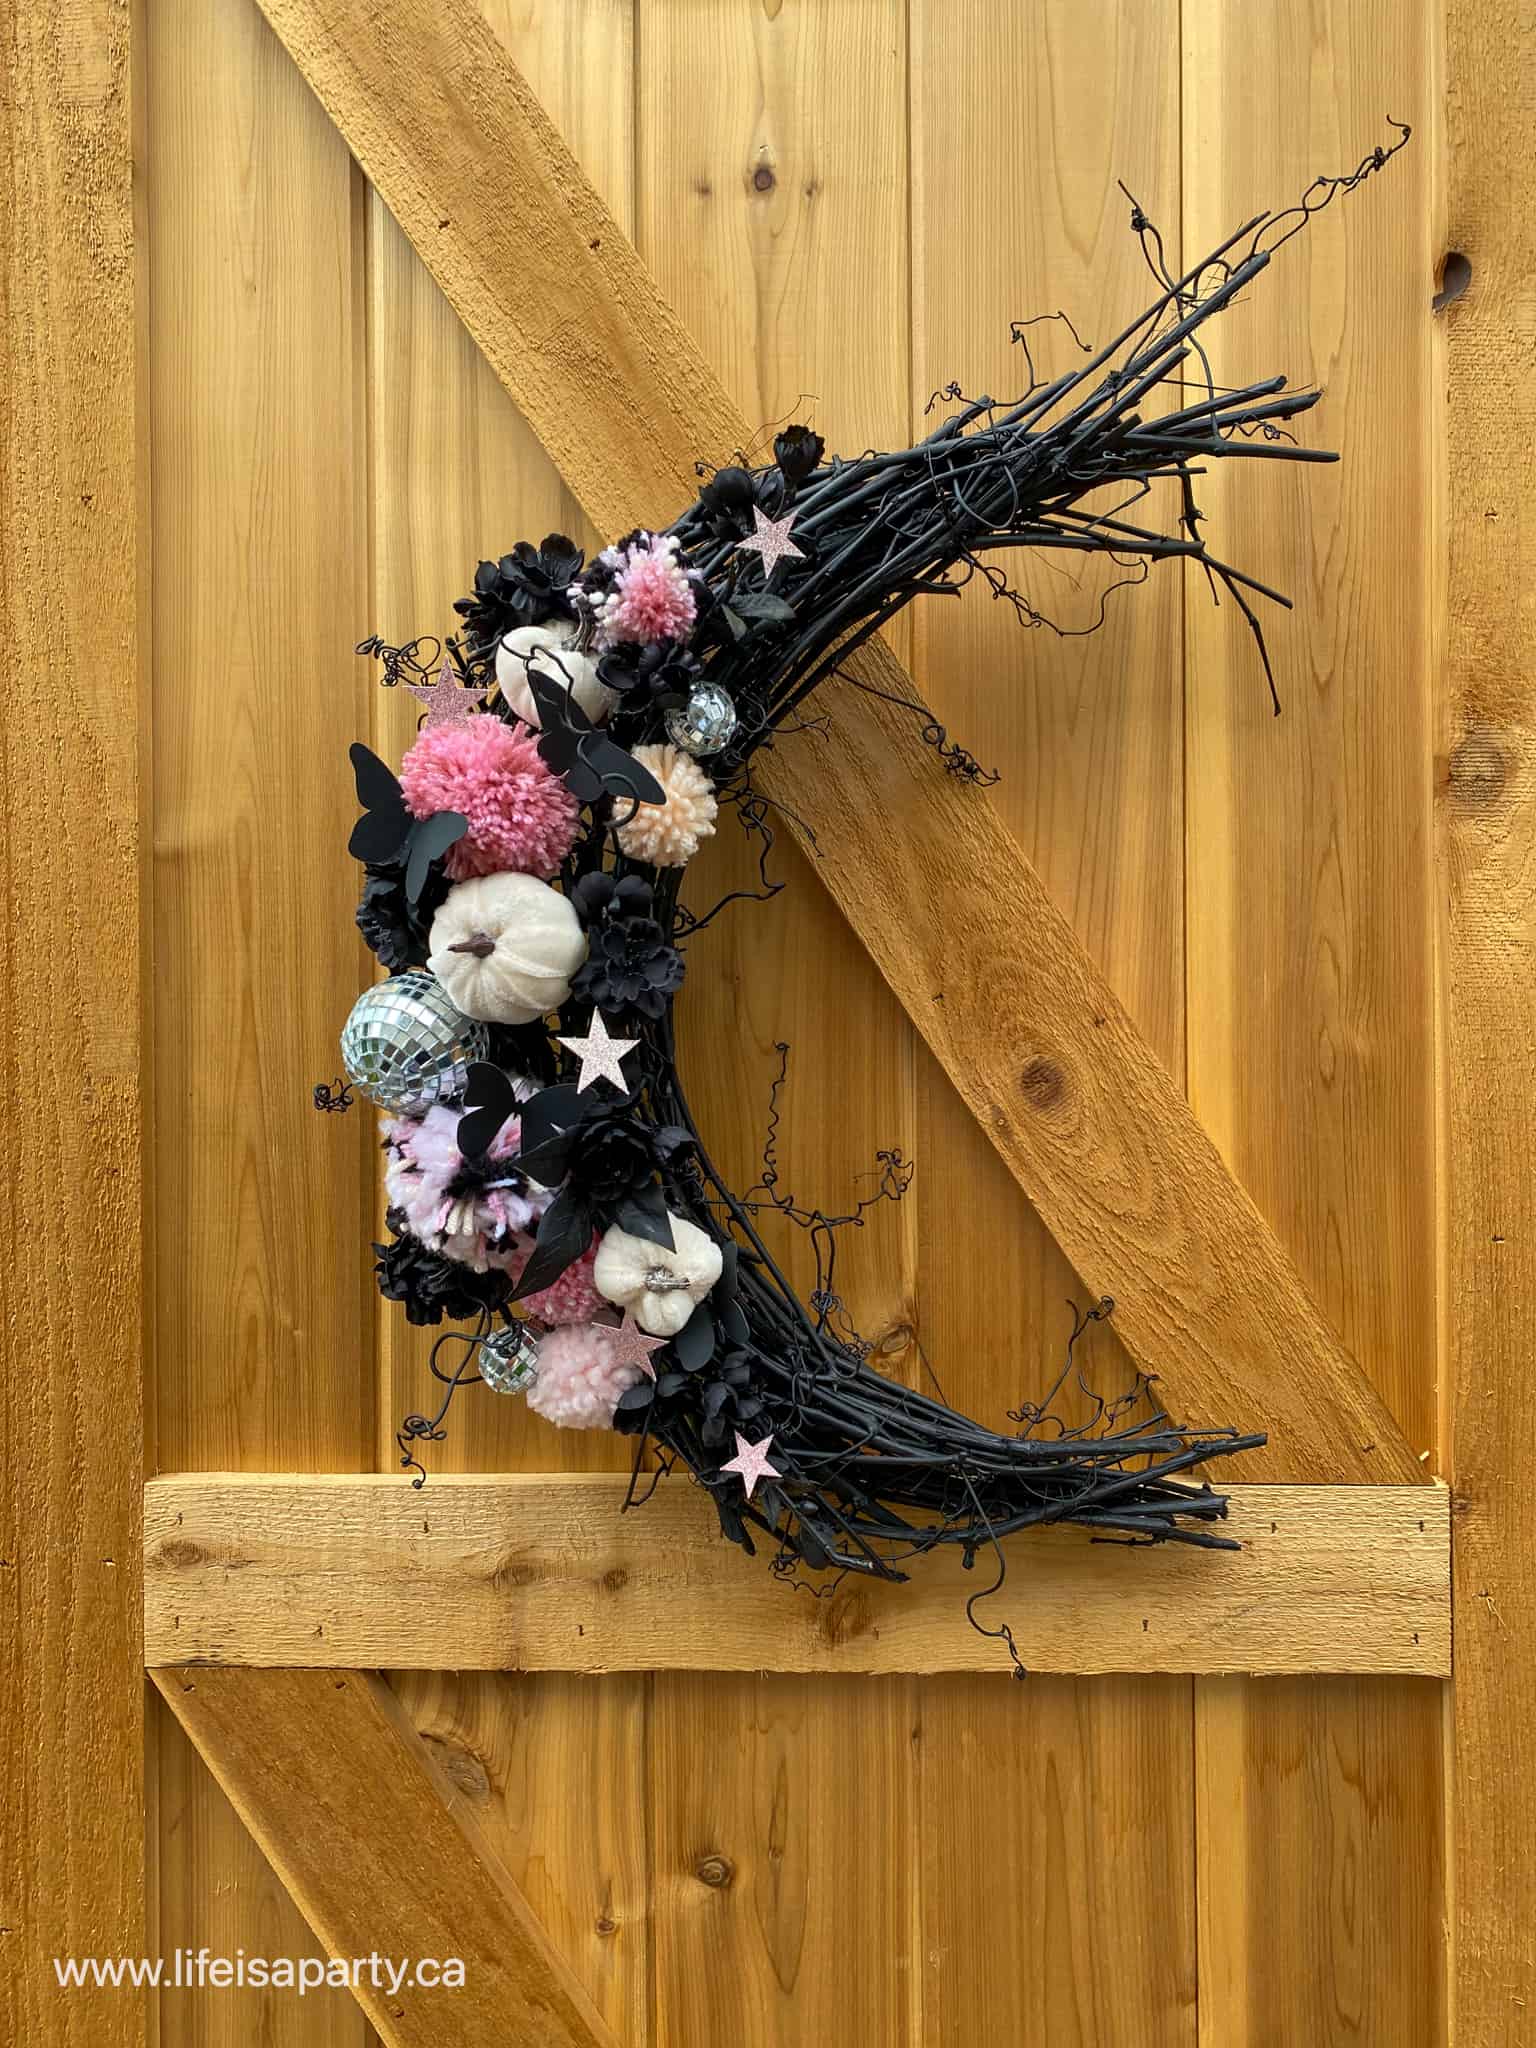
Once your wreath is dry you can embellish it in your own style to suit any occasion. We made a Halloween wreath.
I was inspired by Lifesfrostings, and used pink, peach and black yarn to make two sizes of pom poms. I also added some mini velvet pumpkins, black faux florals, and some mini disco ball ornaments. The artificial flowers are form the craft store, and I used some wire cutters to cut them into smaller flowers to decorate the wreath.
Lastly I embellished the wreath with some black paper butterflies, and pink glitter paper stars. To make the paper stars and butterflies more dimensional, I hot glued them to some black wire and wired them to the wreath, so they could stand out more.
This wreath is the perfect addition to a front door or a mantel. It's a great idea to use for Halloween season.

With an amazing DIY moon shaped wreath, life really is a party!
More Wreath Ideas


Freqeuntly Asked Questions
I picked the grapevine that grows wild in my area. Look for it along fence rows. And remove the leaves before making the wreath.
You can purchase a moon shaped grapevine wreath base online or at a craft store, and then paint it and embellish it yourself to make something similar. Or purchase grapevine garland and shape it into a wreath. Soak the grapevine in water to make it easier to work with.
I used wire cutters to cut the wreath form. It was a bit hard to cut, but I also found bending the wire back and forth helped it to snap off.
If you try this DIY Crescent Moon Wreath or any other idea on my blog please leave a star rating and let me know how it went in the comments below. Thanks for visiting today!
DIY Crescent Moon Wreath
Equipment
- Wire Cutters
- Glue Gun
- scissors
- garden clippers
Materials
- round wire wreath form
- fresh grape vine
- wire
- black spray paint
- pom moms
- mini pumpkins
- mini disco balls
- faux florals
- paper black butterflies
- glitter paper stars
Instructions
- The first step is to cut out a small section of the round wreath form. Use wire cutters to cut it. Once you have a section of the round wreath form removed, you can create your crescent shape. Use some floral wire to gather the ends of the wreath form together, and secure it tightly to create each end of the crescent moon.
- Next you begin to add your grapevine. Cut the grapevine pieces to the right length and wire them onto the wreath from. As you go, you will want some pieces of grapevine that are shorter, to bulk up the middle section of the wreath. Try and tuck the ends into the wreath as you build it. Once it is how you like it wrap the wire around tightly and secure at the end. Also, twist some wire to the back to create a wreath hanger.
- Next, spray paint your wreath black. Remember to do several light coats to avoid dripping, and spray from different angles, and from the back for full coverage. Let if dry fully before the next step.
- Start by adding two sizes of yarn pom poms, mini velvet pumpkins, black faux florals, and some mini disco ball ornaments. Use the wire cutters to cut the flowers to the right size. Use hot glue and black wire to attach the embellishments to the wreath. Lastly, we hot-glued some wire onto the black paper butterflies, and pink glitter paper stars. The wire means the butterflies and stars can stand out from the wrath and add dimension.


Dannyelle says
I love this wreath and bring it out every fall. It always gets lots of compliments.
Jenn says
What a creative idea! Love it!
jennifer hadfield says
This is so creative!! I pinned it to my halloween board to share 🙂
xoox