This DIY Acorn Craft is made from an Easter Egg and perfect for fall decorating. See how we used burlap and pinecones to create this beautiful and inexpensive fall decor piece.

Jump to:
Why We Love This Craft
- It uses simple supplies from around the house.
- It's inexpensive to make
- It looks beautiful and adds some charm to your fall decor.
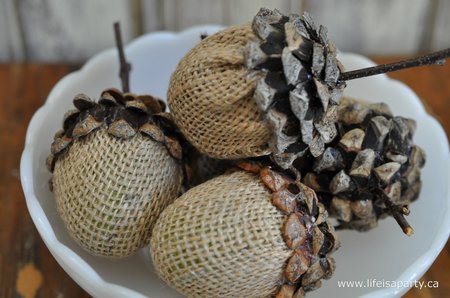
These DIY acorns are so cute and easy to make. They're an adorable acorn craft that you can use every fall in your decor.
They're made from inexpensive supplies, and the perfect way to create your own fall decoration when cooler weather arrives. I used mainly natural materials to create them. There is one supply though, that you might not have guessed.
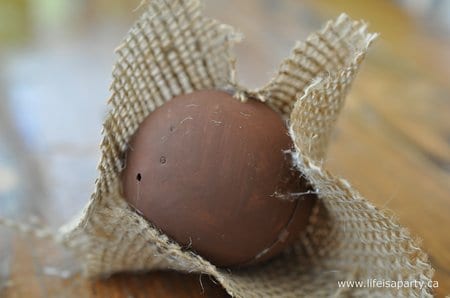
The secret to making the acorn shape is that underneath we used an old plastic Easter egg.
They turned out so cute, and would be the perfect beautiful things to add to your fall season decor.
You might also like our DIY Crescent Moon Wreath, Fairy Pumpkin House Village, or our Pinecone Wreath.
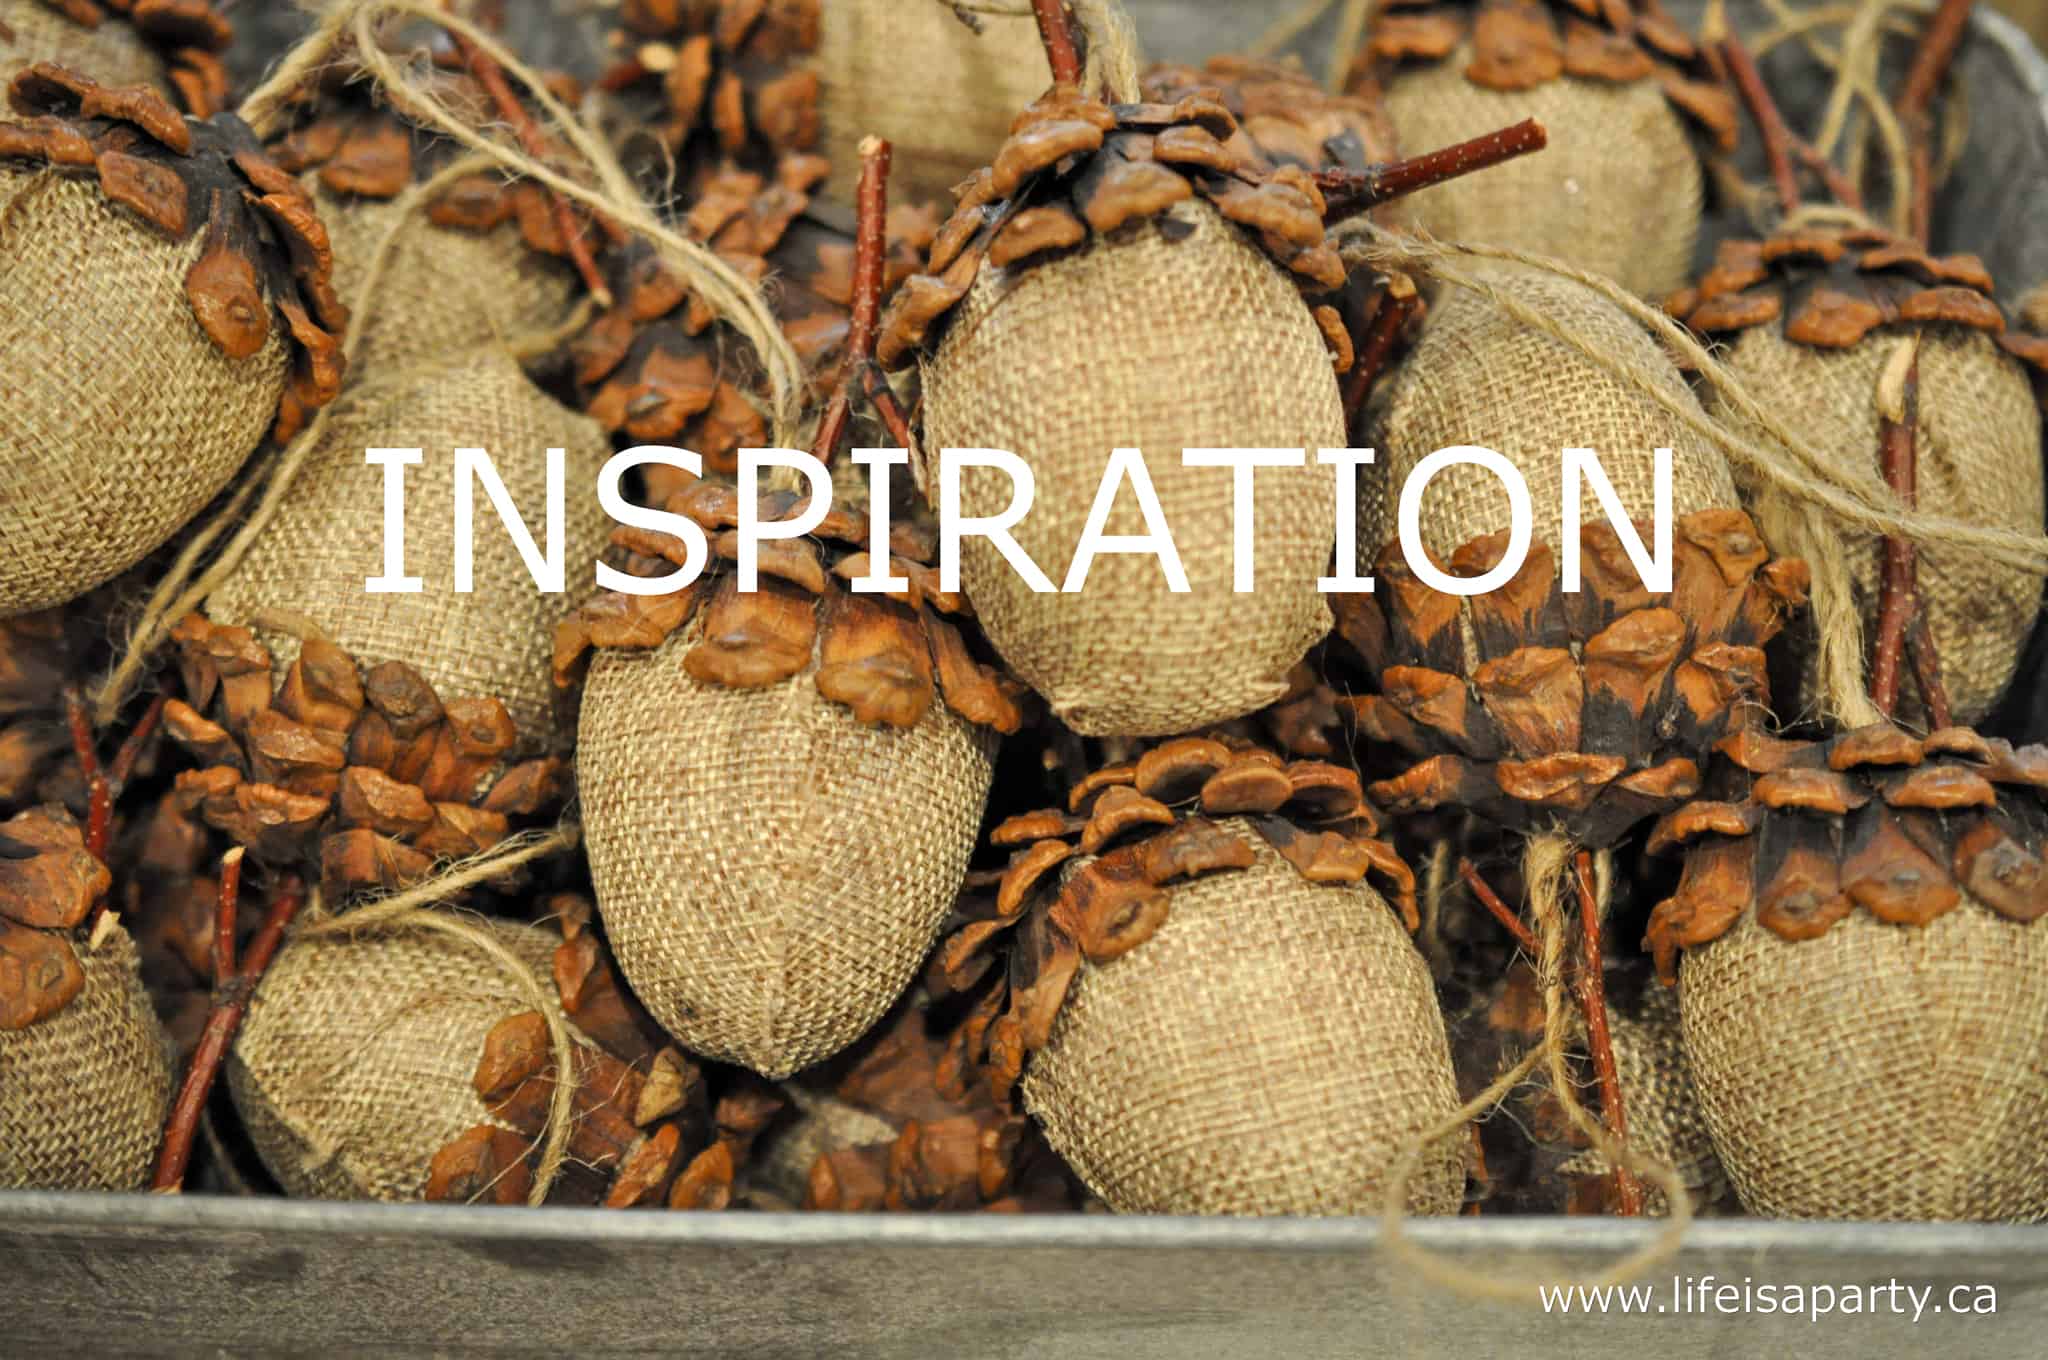
Inspiration
I saw these cute acorn crafts at one of my favourite gift shops a few weeks ago, and they inspired me to make my own.
You know that moment when you pick them up in the store and really look at them and think, with a twinkle in your eye, I could make these. ;).
I looked at the shape, and realized that I could use an Easter egg to create something similar. Then I couldn't wait to go home and spend a crafty morning experimenting.
The best part of this simple fall craft, is that you probably have some Easter eggs somewhere in your house already, that you can use.
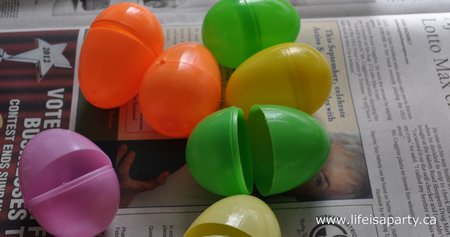
Materials:
- Plastic Easter Eggs -The regular size ones work great, but smaller ones good too.
- Brown Acrylic Paint
- Burlap -Choose one with a closed weave so that it covers well and doesn't fray too much as you work with it.
- Pine Cones -Larger ones work best for this craft.
- Hot Glue Gun and Glue
- Twigs -Use these for the top pieces, so not too big works best.
- Garden Clippers or Heavy Duty Scissors
Varations
You can experiment with different kinds of fabric on the bottom, like a plaid fabric or cordory in fall colors. I love the tops made from pine cone pieces, but another option is to use a piece of yarn, twine, or rope for the top portion. Use glue to secure it, and spiral it up to the top of the acorn for a fun look, that's a little easier than the pine cone pieces. You can also us experiment with other items to cover the top of the acorn like birch bark pieces, or moss.
How To Make The Acorns:
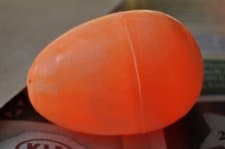
1. Paint The Eggs
To create the shape of the acorn, I decided to use Easter eggs. My kids thought it was pretty funny that I was yanking out the Easter egg box in the middle of fall decorating. Easter eggs are the fun secret to making these acorns.
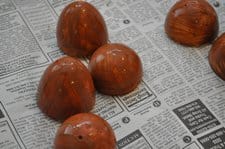
Since some of them were bright colours for my first step I used a little sandpaper to rough up their smooth surface, and painted with two coats of brown craft paint. You could also spray paint them if you wanted. Stay away from white paints, or anything that will show through the burlap. Or simply use Easter eggs that are already in fall colors that won't show through too badly, like orange, green, or yellow.
2. Add The Fabric
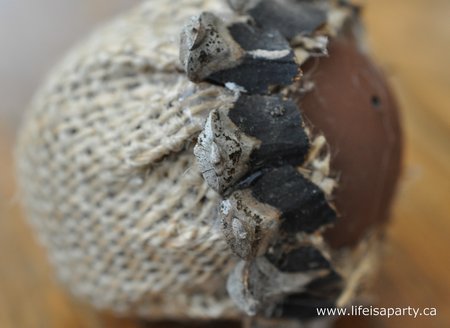
After the paint dried, I added a layer of fabric to create the bottom section of the acorn.
You want to cover just about ⅔ of the egg with the fabric. We don't need to cover the whole thing and make fabric acorns, just the bottom ⅔, which makes it a bit easier.
I started out with a very open weave burlap, but it didn't work well for this craft. It was fraying, hard to work with, and showed to much of the base underneath. So then I picked up some craft burlap at the craft store which is a tighter weave and tried again.
At the beginning, I started out trying to glue two panels of fabric to the base, like the inspiration acorn, with white craft glue. I found it dried really hard, and the frayed ends stuck up. I ended up hot gluing a circle of burlap around the egg. This worked the best for me.

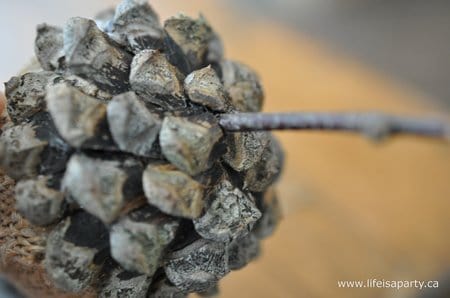
3. Adding The Pine Cone Pieces
Next was gluing on the pine cone pieces to create the top ⅓ of the acorn. I snipped them off with of the pine cones using some heavy scissors. Then, I hot glued them around the top.
I did about three layers. You want to start your bottom layer overlapping the burlap, to create a nice neat edge. Then glue them on like shingles, overlapping the top of the previous row as you go. I finished them off at the top with a little twig stem.
They were a bit fiddly, and I may or may not have thought a couple times "why didn't I just buy these". You need some good fine motor skills, because everything is quite small that you're working with.
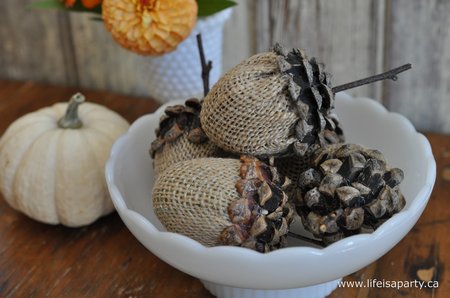
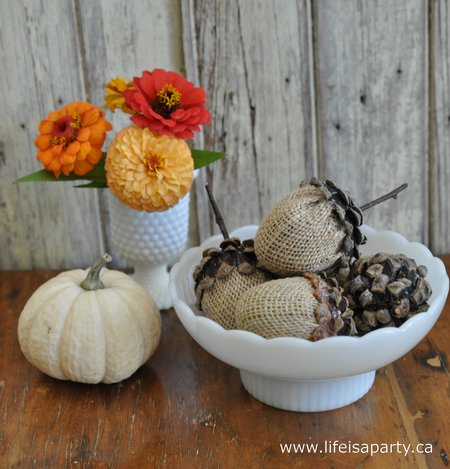
I made five, and grouped mine in a little bowl, but you could probably never have enough acorns when they're this cute. You could even use on an acorn wreath or hanging as a fall garland.
They're a fun easy craft to create this fall and use in your fall and Thanksgiving decor.
Christmas Decorations
These are great as fall crafts, but also a great addition to your Christmas decor our favorite season. Last year I tied some fishing line to the finished product and hung them on our Christmas tree.
Make them even more Christmas-y by adding some faux snow or glitter to your faux acorns for the holiday season. Just add some white glue to the acorn tops, and sprinkle some glitter or faux snow on top, to make these beautiful acorn crafts look a little snowy. These add a great woodland fairy folk vibe to your Christmas decor.
With an Acorn Craft Made From An Easter Eggs, life really is a party!
Frequently Asked Questions
If you don't have any in your stash, look for them on-line out of season.
If you're using burlap and it will show through then yes, unless your eggs are a suitable color, that you don't mind showing through. You can also use a plastic-friendly spray paint for this step, which is a bit quicker.
I found some near by out on a walk one day. If you don't have access to pinecones look for them online.
More Fall Project Inspiration


If you try this Acorn Craft or any other idea on my blog please leave a star rating and let me know how it went in the comments below. Thanks for visiting today!
Easter Egg Acorn Craft
Equipment
- hot glue gun
- Hot Glue
- Garden Clippers or Heavy Duty Scissors
Materials
- Plastic Easter Eggs
- Brown Acrylic Paint
- Burlap
- Pine Cones
- Twig
Instructions
- Since some of the Easter eggs were bright colours, paint with two coats of brown craft paint. Or start with colour like orange, or yellow.
- Add a layer of fabric over the egg to create the bottom section of the acorn. Cover just about ⅔ of the egg with the fabric. Use hot glue to hold the burlap in place.
- Next snip the tips of a pine cone off, using some heavy scissors. Then hot glue them around the top of the egg, taking care to overlap the fabric and create a neat edge. Layer the pine cone pieces like shingles. I did three layers.
- Finish off the very top by hot glueing a twig in place.


Jackie says
Very nice! Thanks!
Linda says
Fantastic!! Love them!
Denise... on a whim says
This is just about the cutest thing! How original and adorable these are!
Yvonne @ StoneGable says
LOVE LOVE LOVE THESE! Brilliant!
Jane says
Love these! Going to go hunt down those plastic eggs I bought post easter sale 🙂 Now where did I put them? xx
stephanie.rutledge@me.com says
Such a great idea! A perfect reuse of old Easter eggs!
littlevintagecottage says
Oh my goodness, these are SO cute! I love the little pinecone petal tops!! :o)
Tania
Mixed Kreations says
So very creative! I love those. I have a small wooden wagon that would look really cute full of these acorns. Thank you for sharing! Found your link at Cupcakes and Crinoline's burlap linky party. Pinning!
Linda
Jeannie says
Hands down the best use of old Easter eggs or pinecones EVER! for what it's worth
Stephanie S. says
I just found this on Pinterest and very impressive. I love it and will be making this fall. Thanks for sharing.
dnr says
Thanks Brittany, at the moment I'd just settle for winter ending! But spring and fall are my favs. too.
Dannyelle.
Brittany says
Just stumbled upon these on Pinterest--What an adorable and creative idea!I I wish fall was all year!