• Skip to primary navigation
  • Skip to main content
  • Skip to primary sidebar
Life is a Party
  • Recipe Index
  • Parties & Entertaining
  • Fall
  • Subscribe
  • Free Resource Library
menu icon
go to homepage
  • Recipe Index
  • Parties & Entertaining
  • Fall
  • Subscribe
  • Free Resource Library
subscribe
search icon
Homepage link
  • Recipe Index
  • Parties & Entertaining
  • Fall
  • Subscribe
  • Free Resource Library
×
Home

Christmas Front Porch

Christmas Front Porch

Nov 30, 2018 · 2 Comments

Christmas front porch

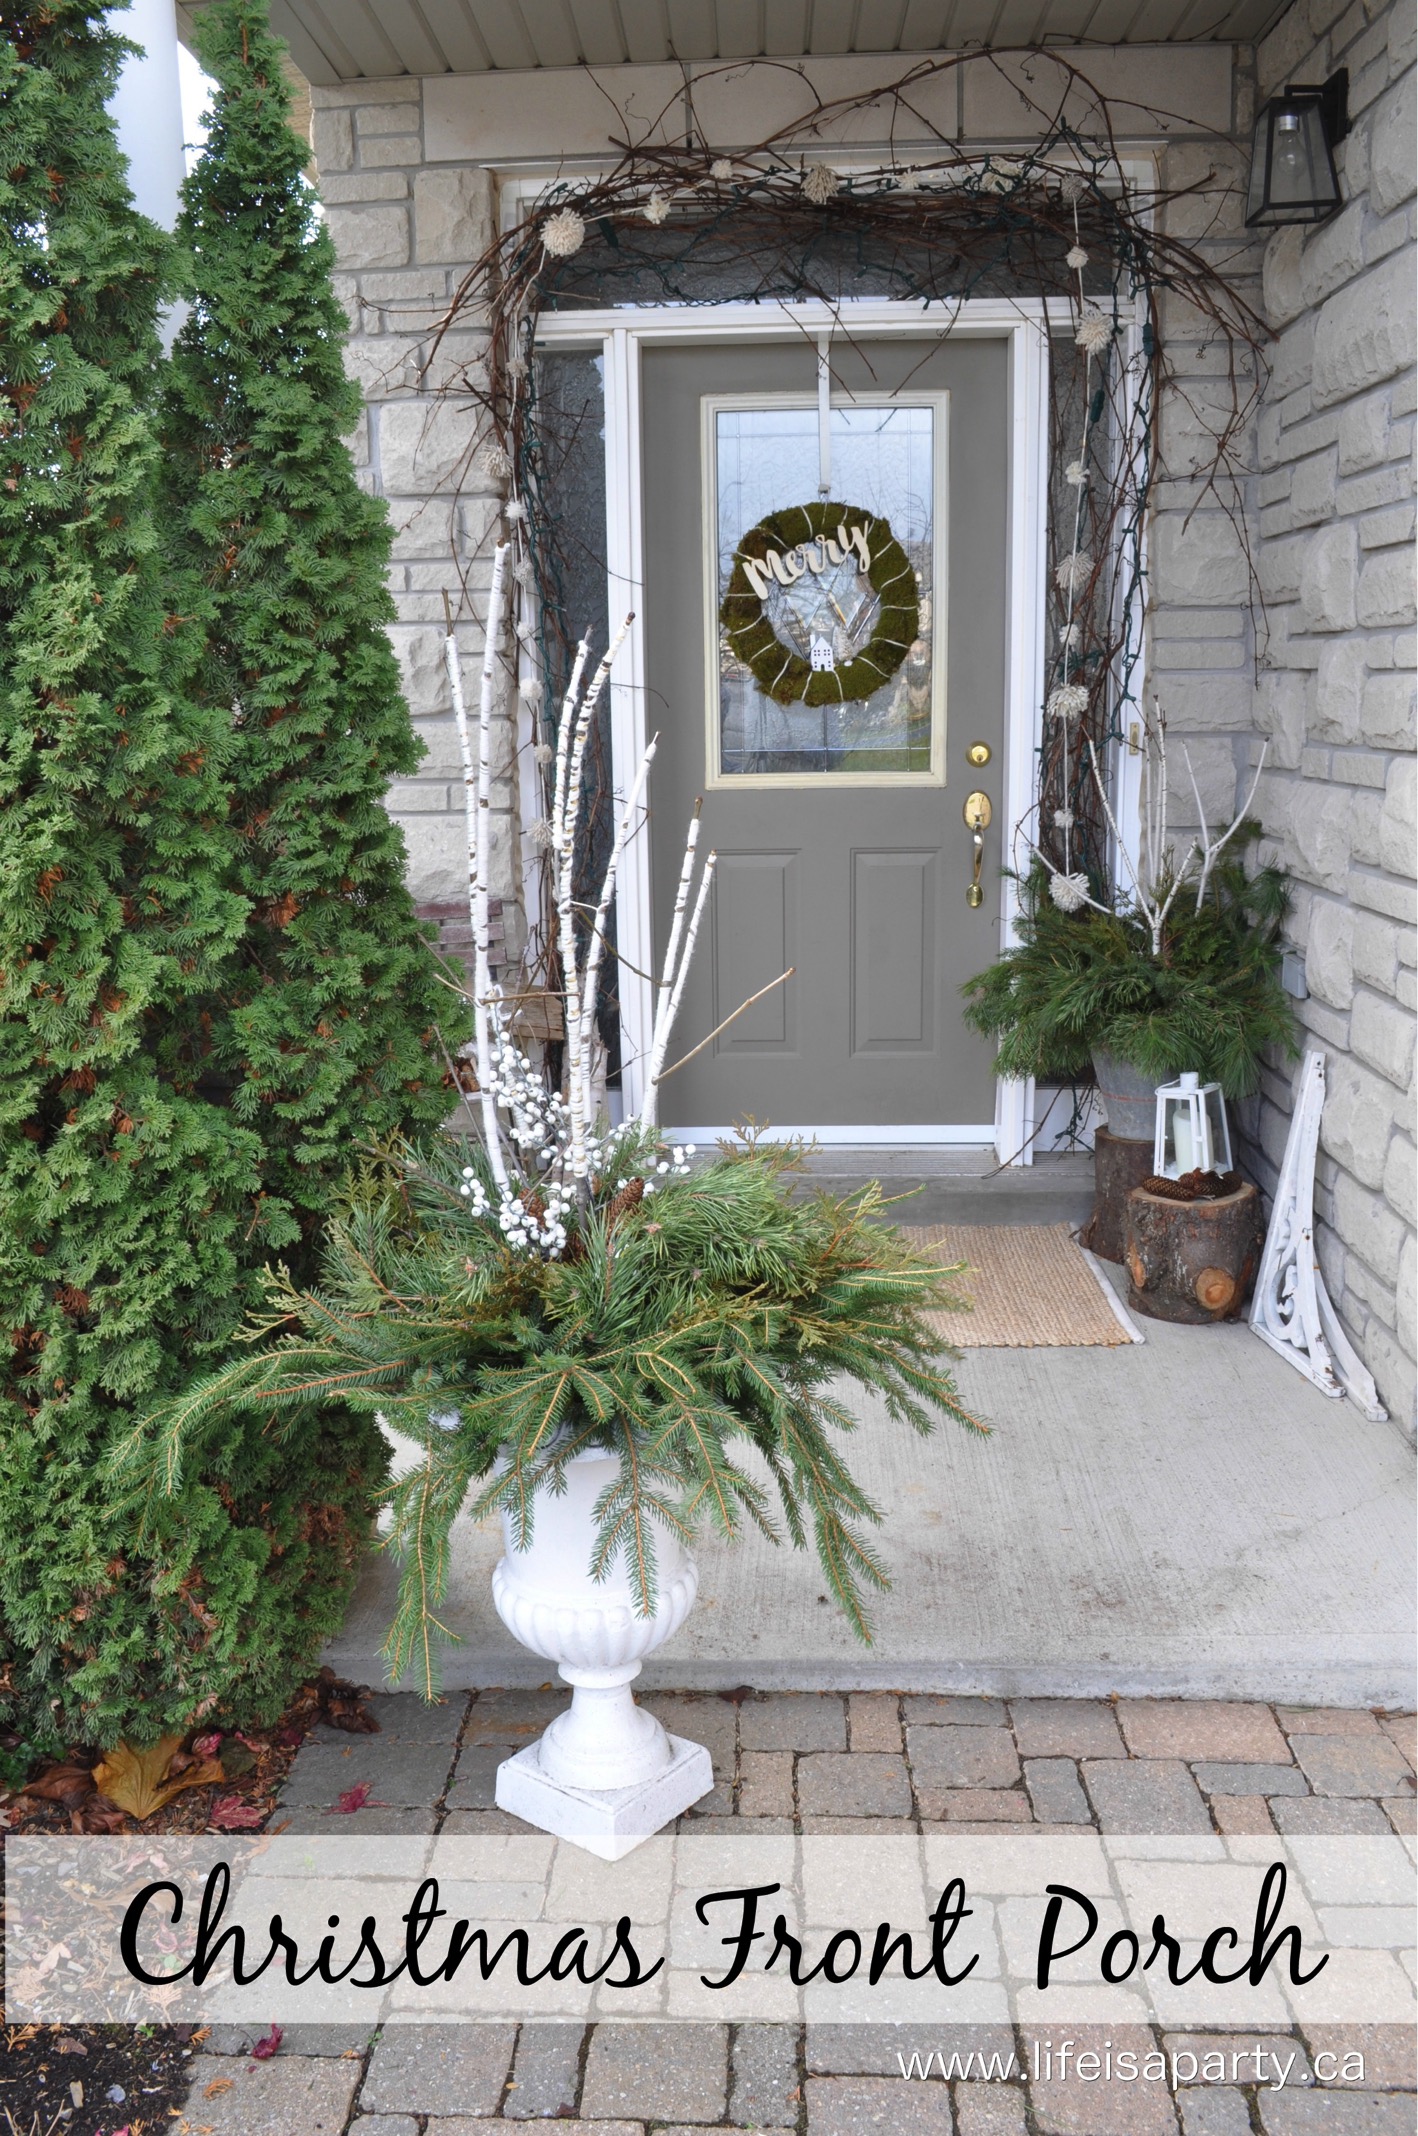
Christmas Front Porch: Rustic greens, large pinecones, and lots of birch logs create a rustic Scandinavian feel with brass lanterns for Christmas.

Christmas front porch
[feast_advanced_jump_to]

Garland and Greens

I love to decorate my front porch at Christmas.  It welcomes all our holiday visitors, and is like a little introduction of the holiday decor inside.
Christmas Front Porch

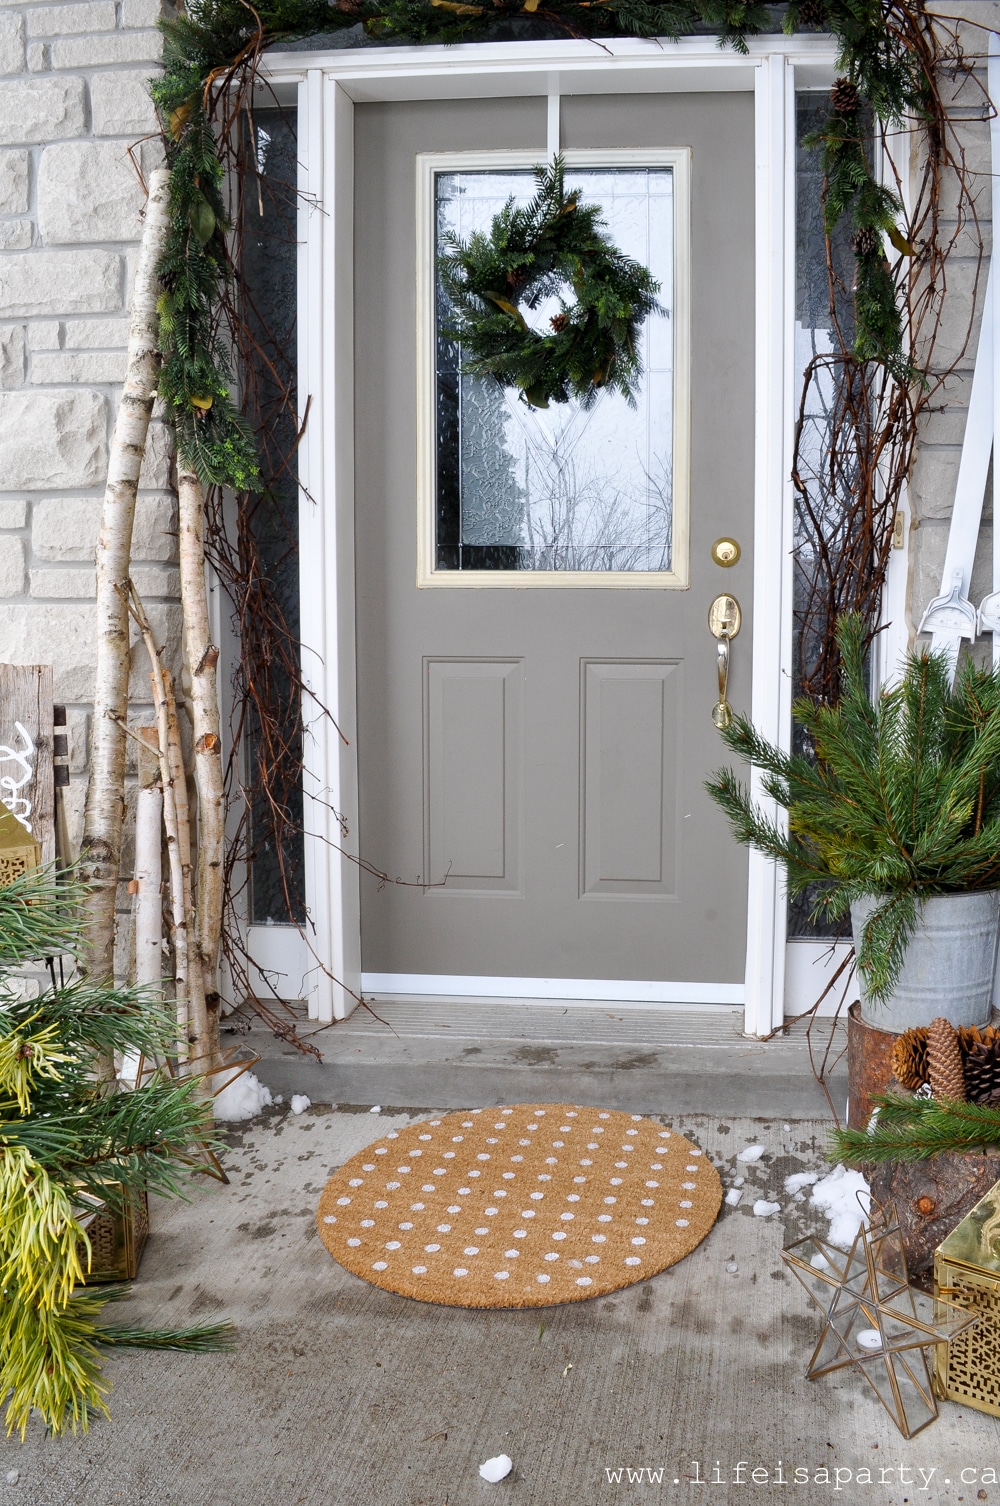
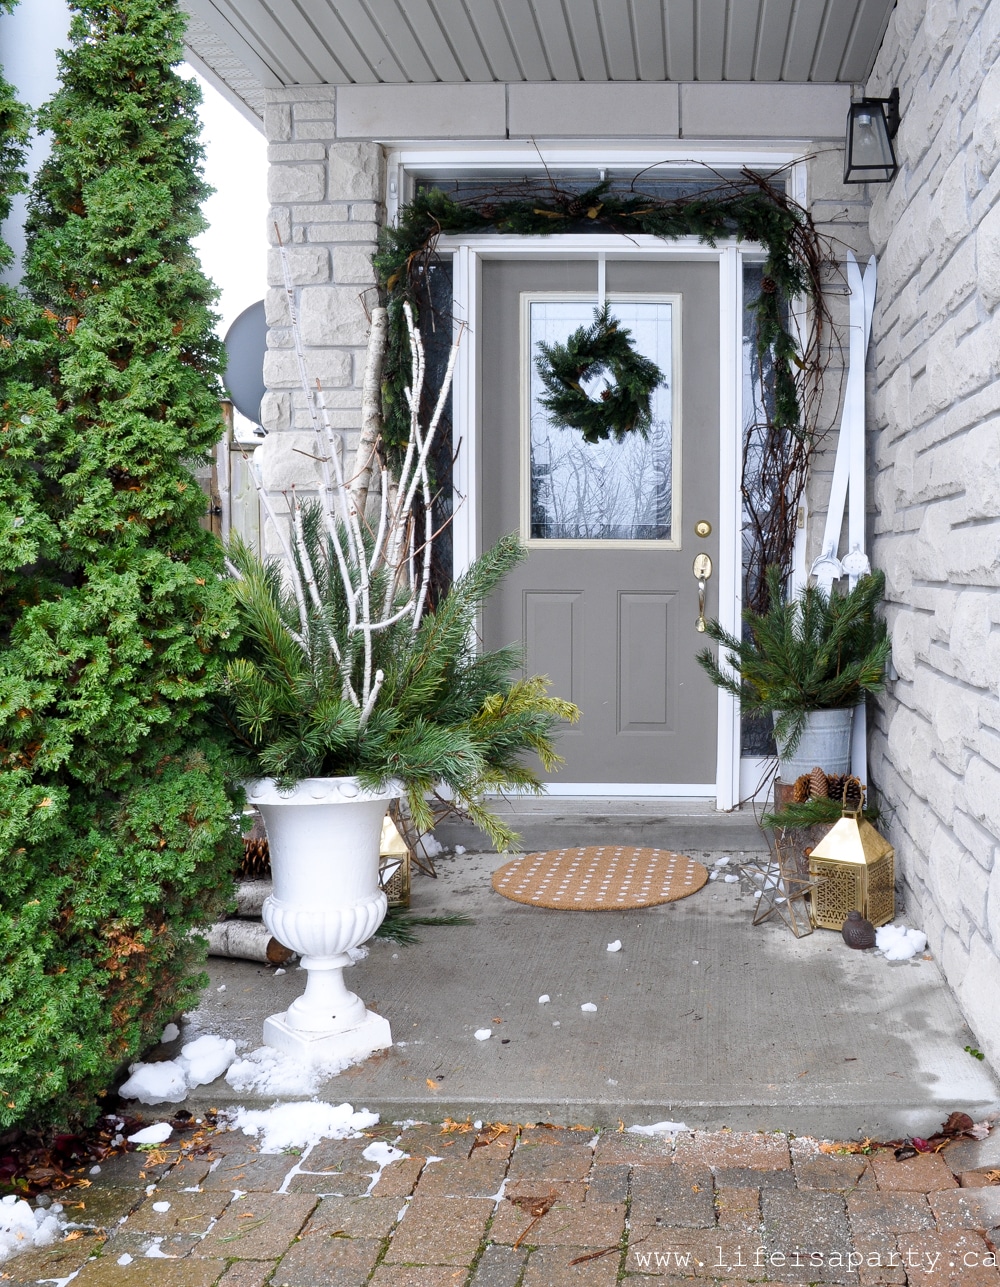
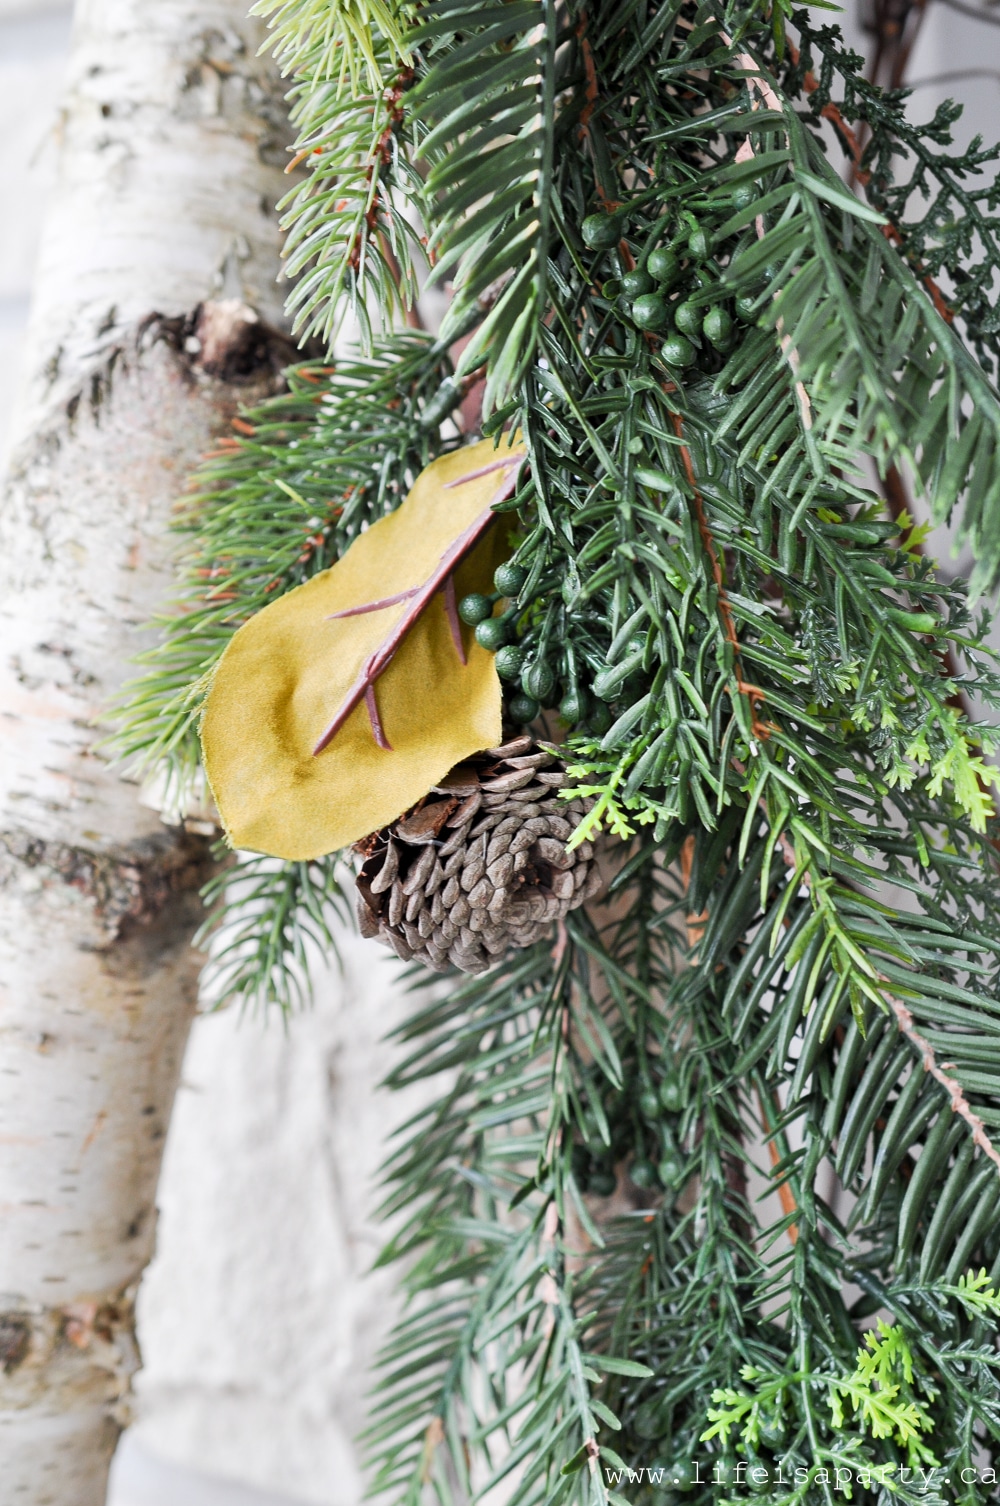
I started out by adding some garland around the door.  A few years ago I foraged for some grapevine in the woods, and for the last few years I've stored it in the garage in the summer and re-used it each winter.  It adds a real rustic feel.  It's held in place with some floral wire holding it to a few removable 3M large hooks.  I also layered on top of the grapevine some faux green garland and a matching wreath on the door.  I love the mix of greens it included, and the magnolia leaves, as well as the real pinecones.  It's nice having some faux pieces that look so realistic, and can be used year after year.
Christmas garland

Christmas front door ideasDoormat

In front of the door is the cutest doormat -I love that it's round, and I love the polka dots.  It kind of reminds me of snow.

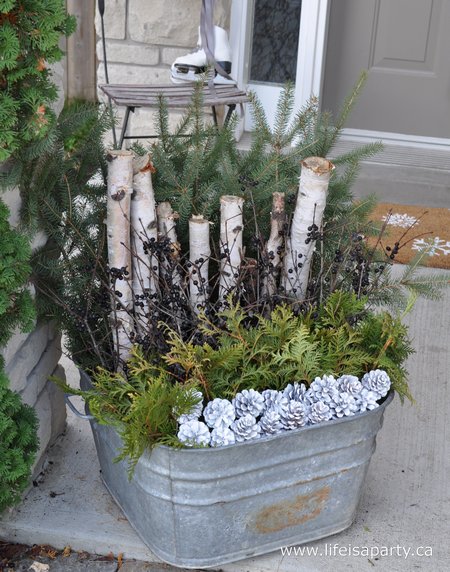
Beside the door is a really simple arrangement of pine in a vintage bucket.  The pine is some I collected in the woods.
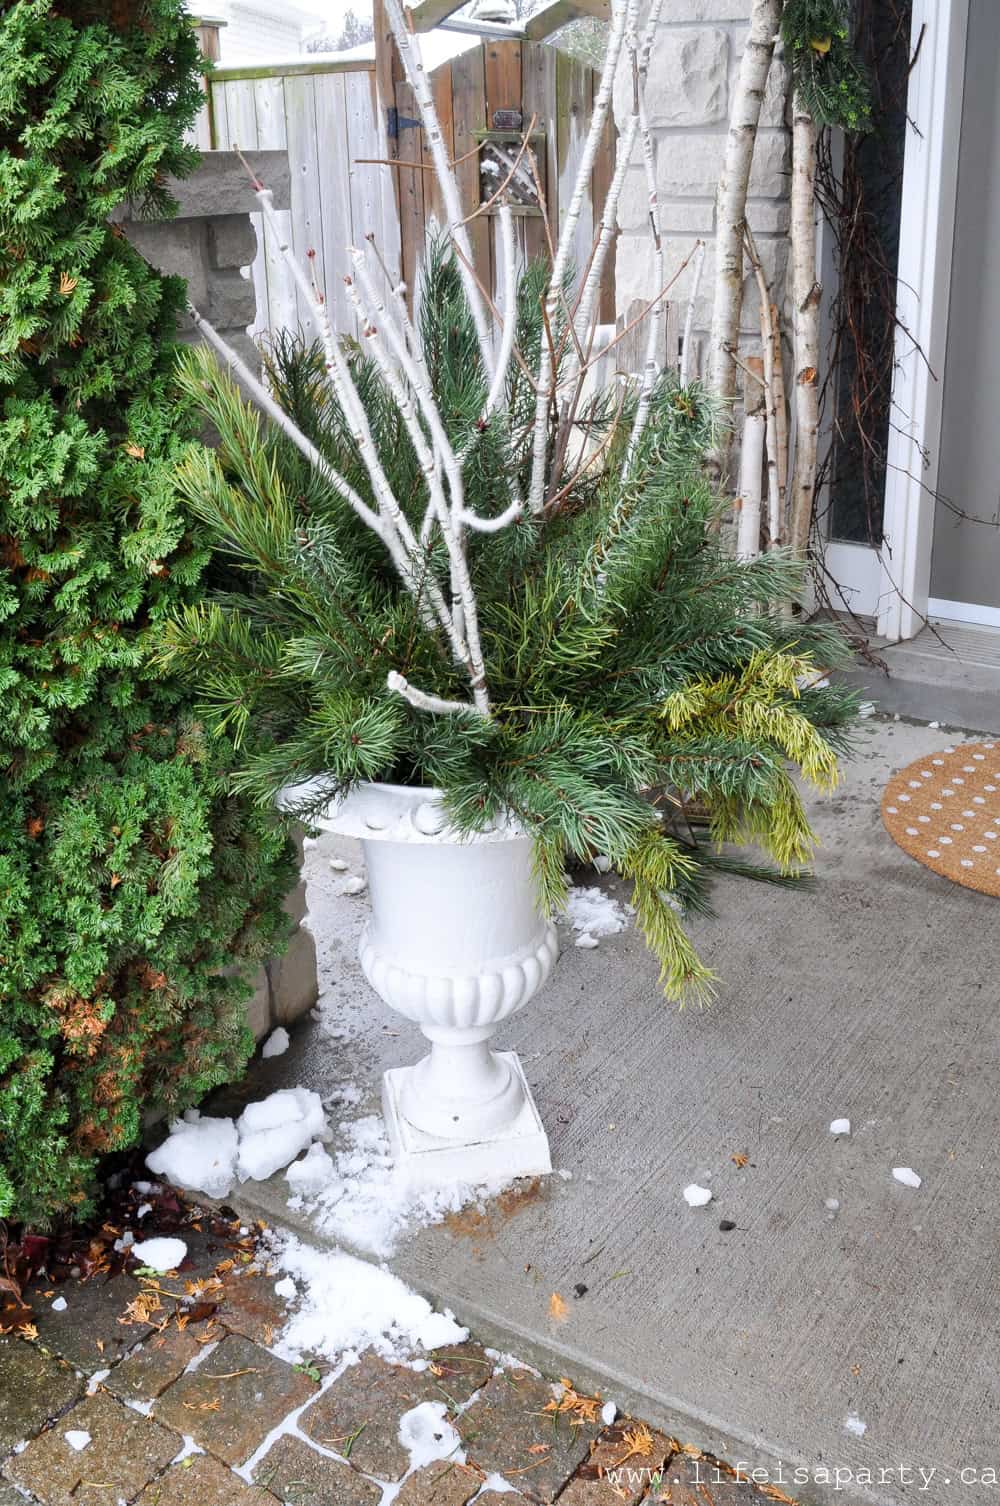
Christmas outdoor urn arrangementI kept the urn very simple this year too.  It's more foraged pine and some yarn wrapped branches in the middle.

Lanterns

The star of the show this year are the beautiful lanterns.
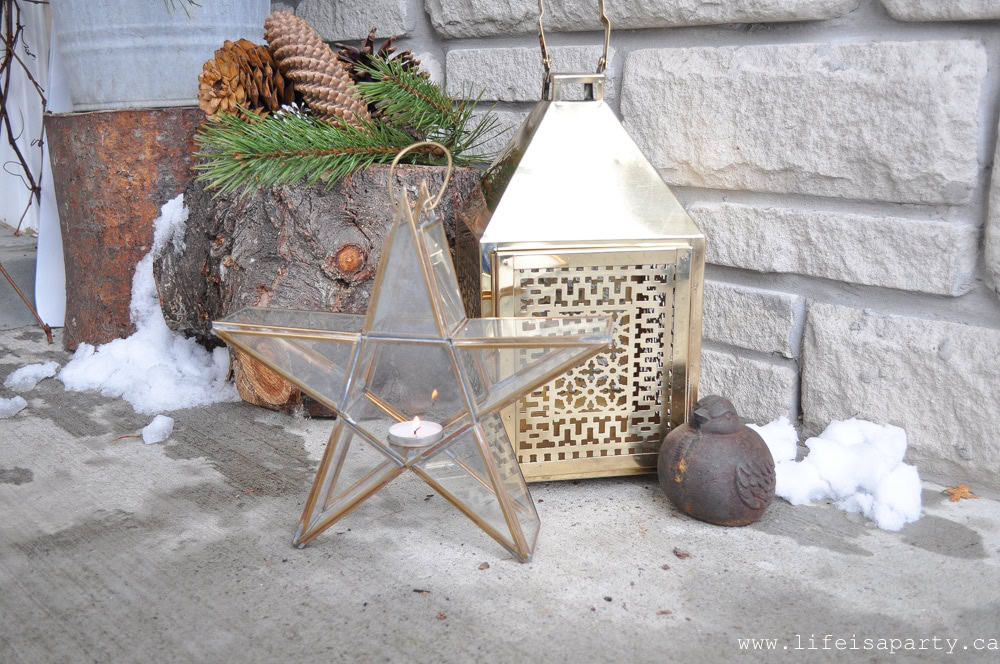
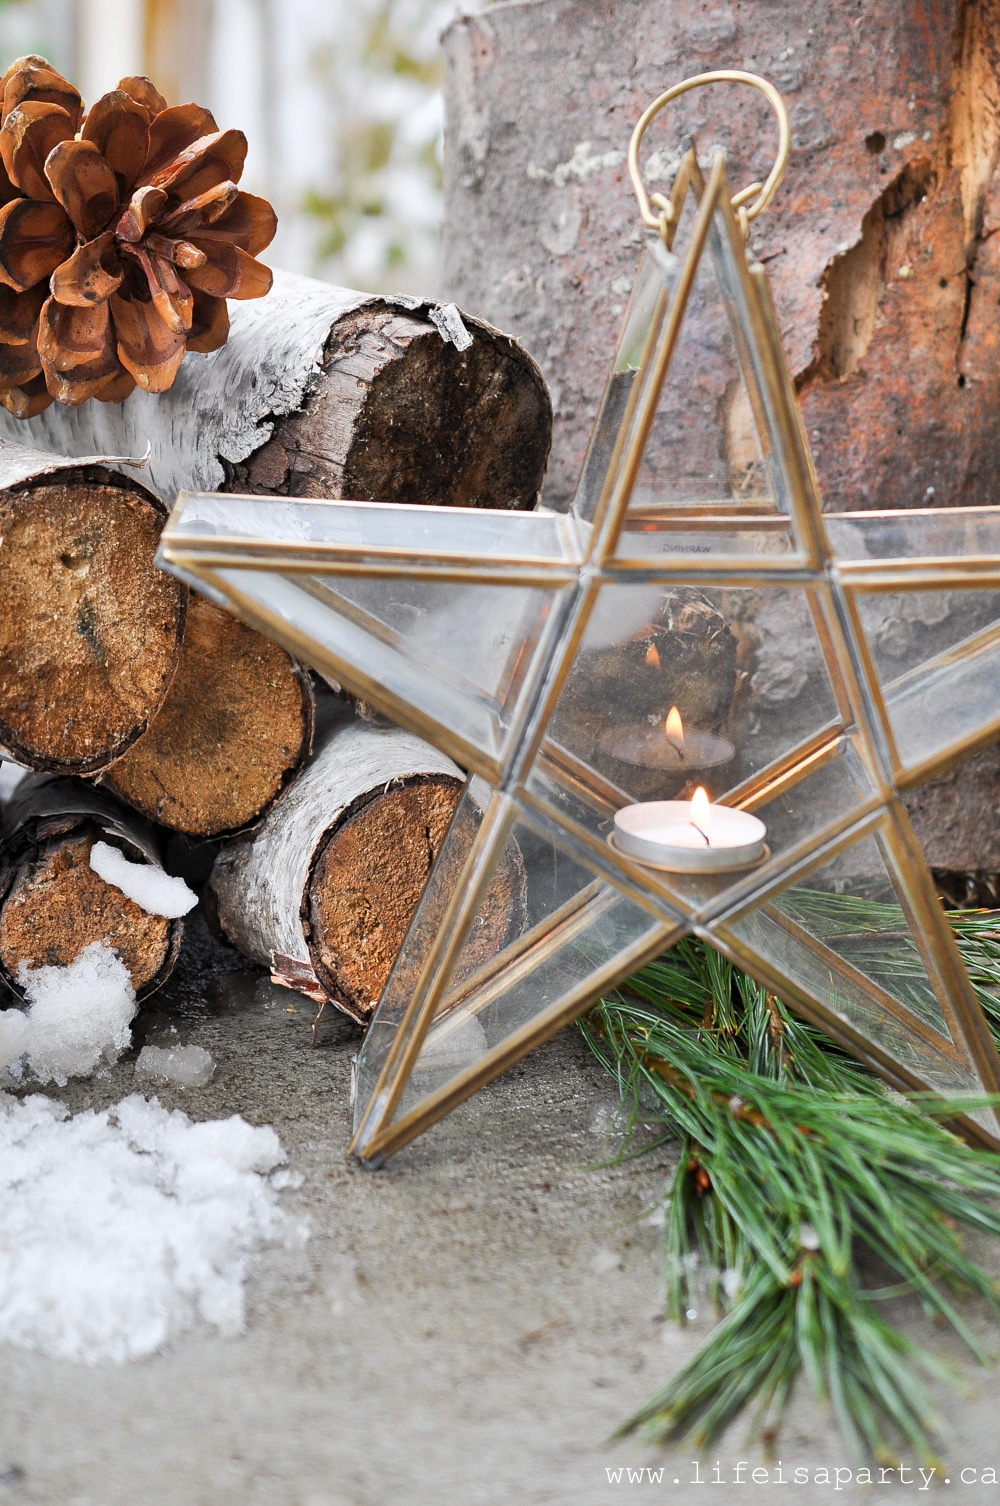
outdoor Christmas lanternsThe brass cutout lanterns  are gorgeous, and a real favourite of mine.  I paired them with these beautiful glass and brass star lanterns which are perfect for Christmas.
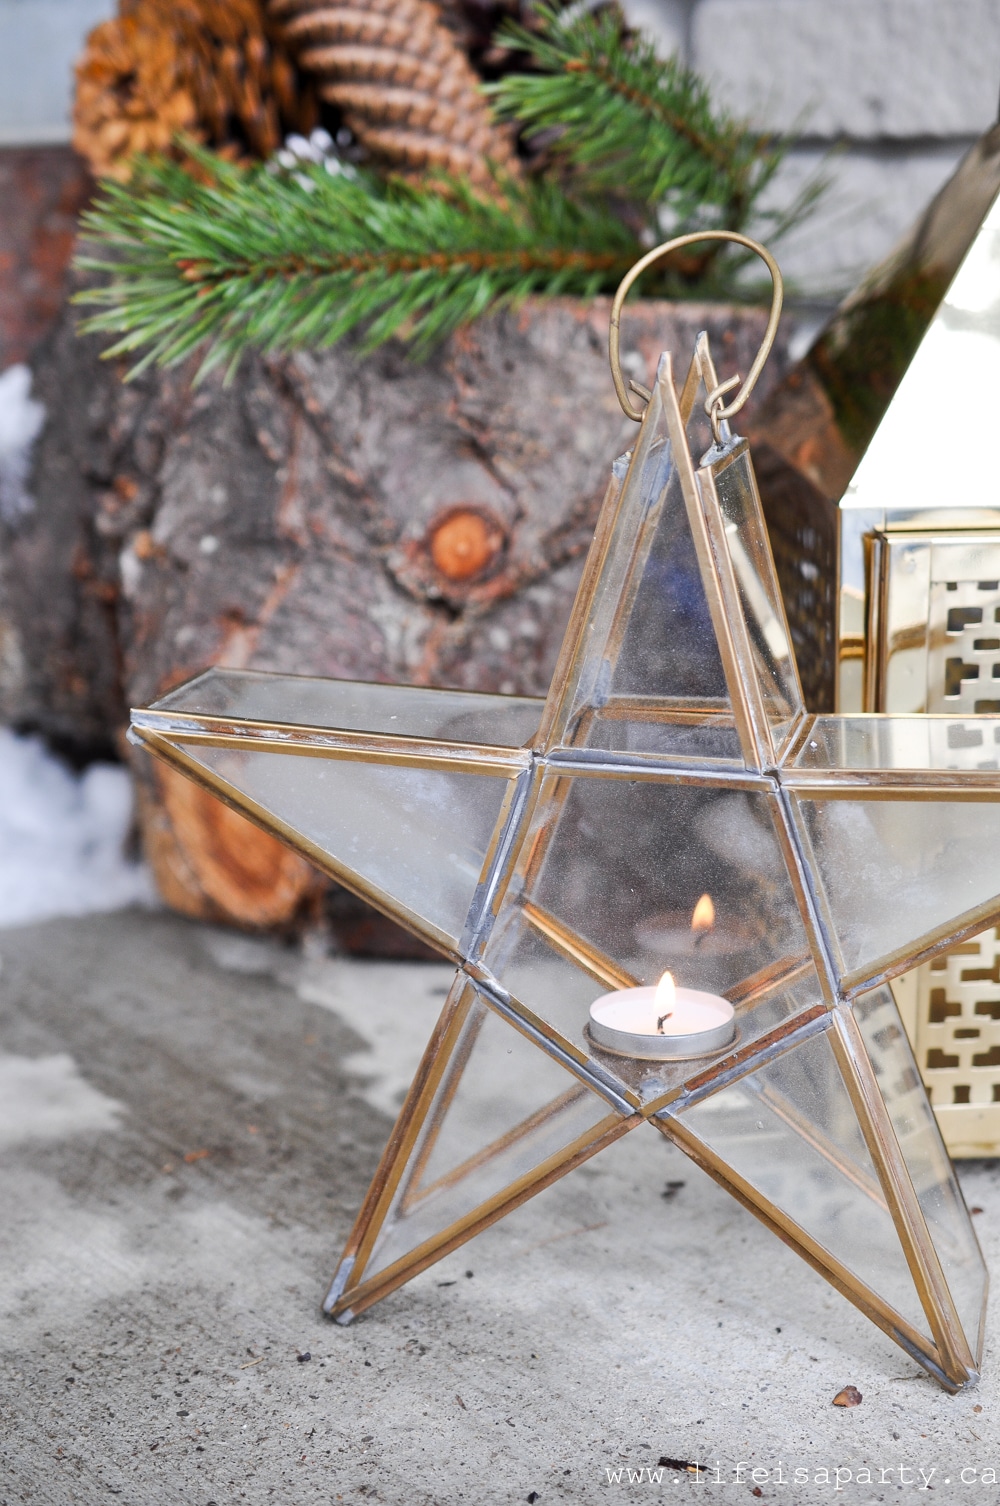
brass and glass star lanternAnd over on the other side of the door, a slightly larger grouping.
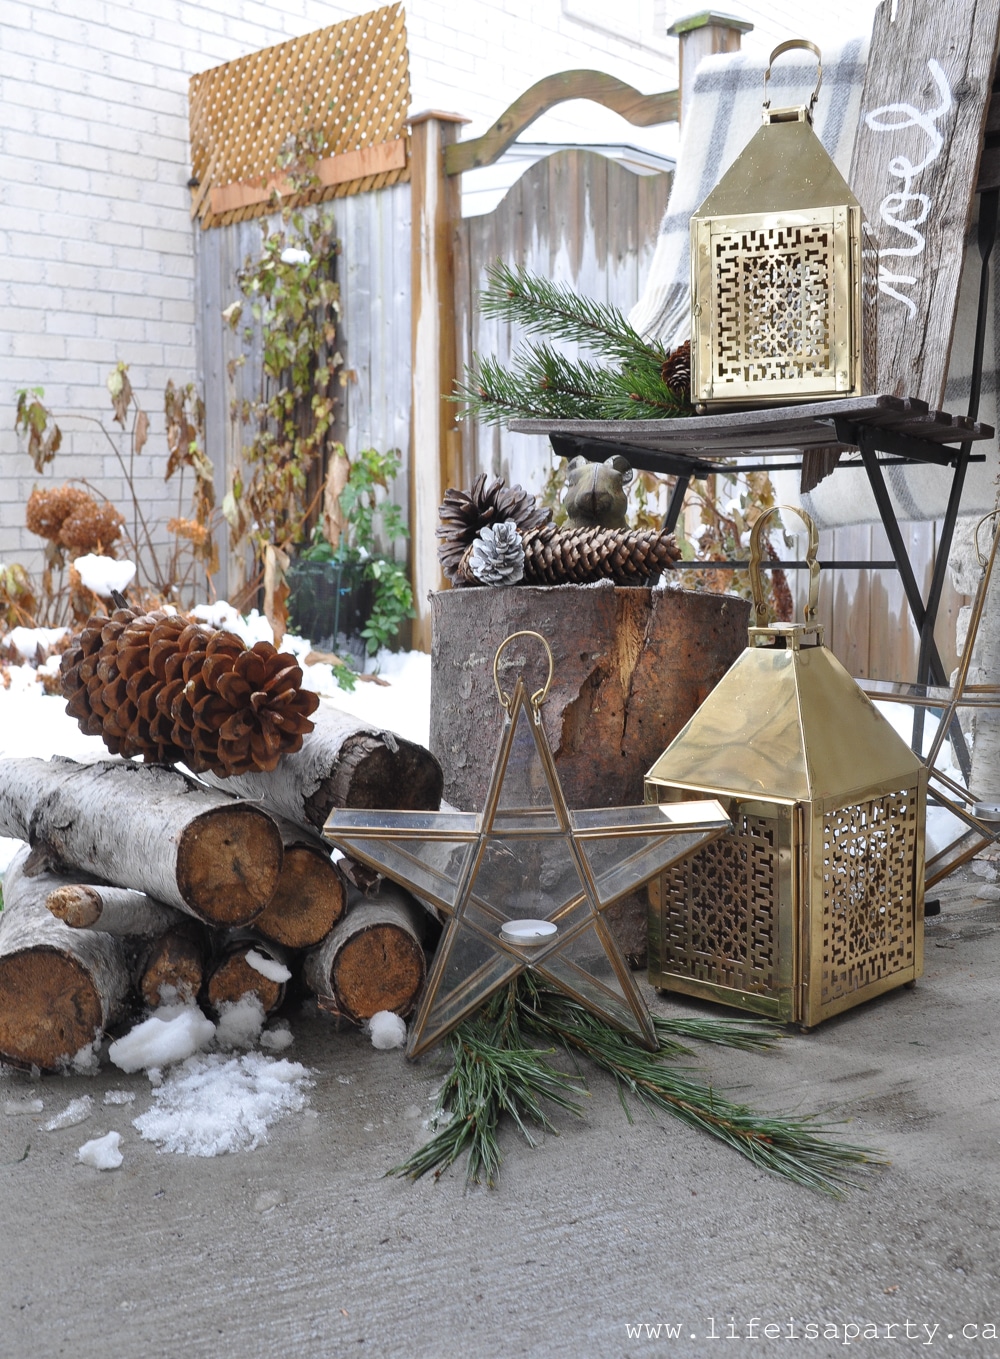
how to decorate your Front Porch for ChristmasI've styled the front porch with lots of logs, greens, and pinecones and I love how rustic it feels.

Christmas star lanternDIY Additions

The Noel sign is rustic little DIY from a few years ago.
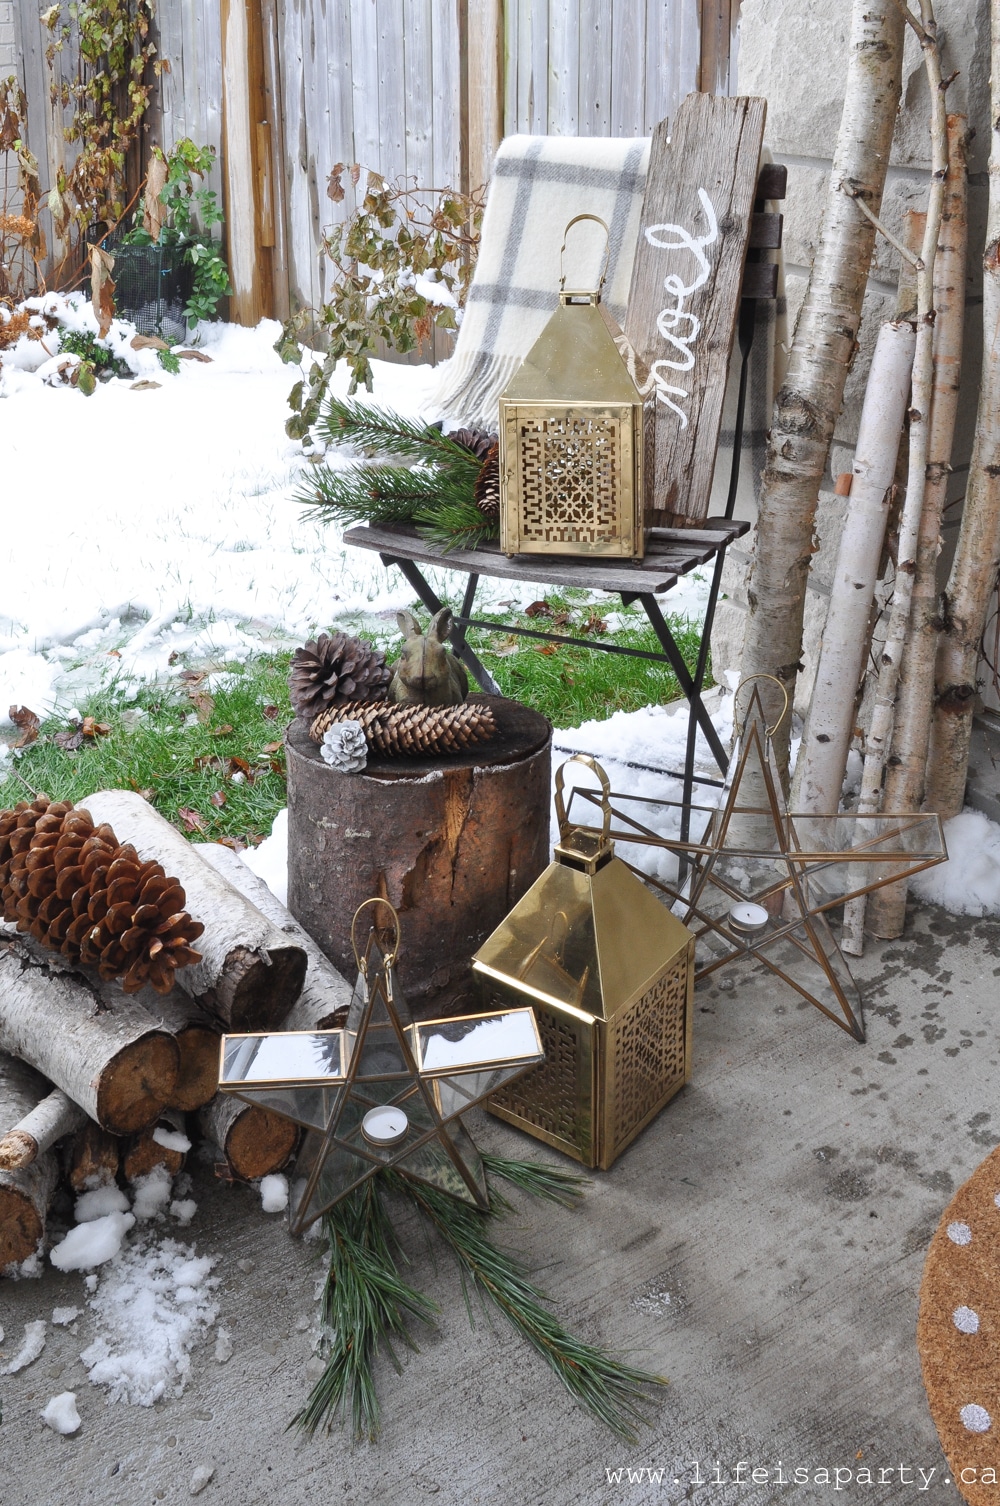
Christmas Front Porch ideas I found an old board on a walk from a decaying pallet and brought it home.  I used chalk to write my word and then went over it with a little craft paint.
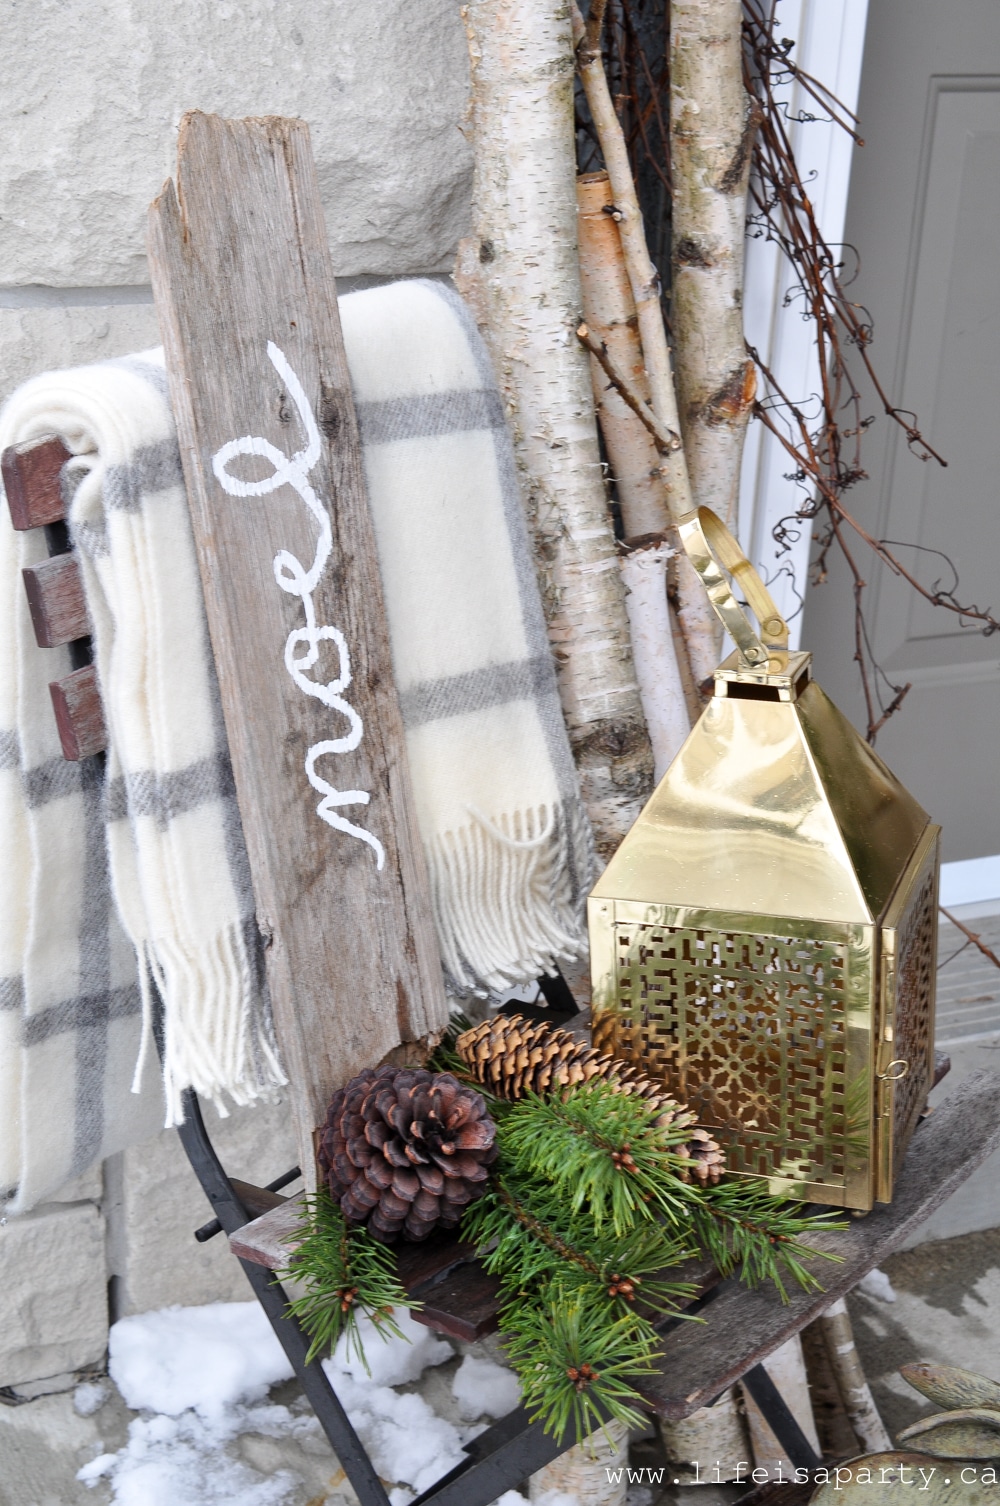
outdoor Christmas decorationsOver on the other side, one more quick DIY with the skis.
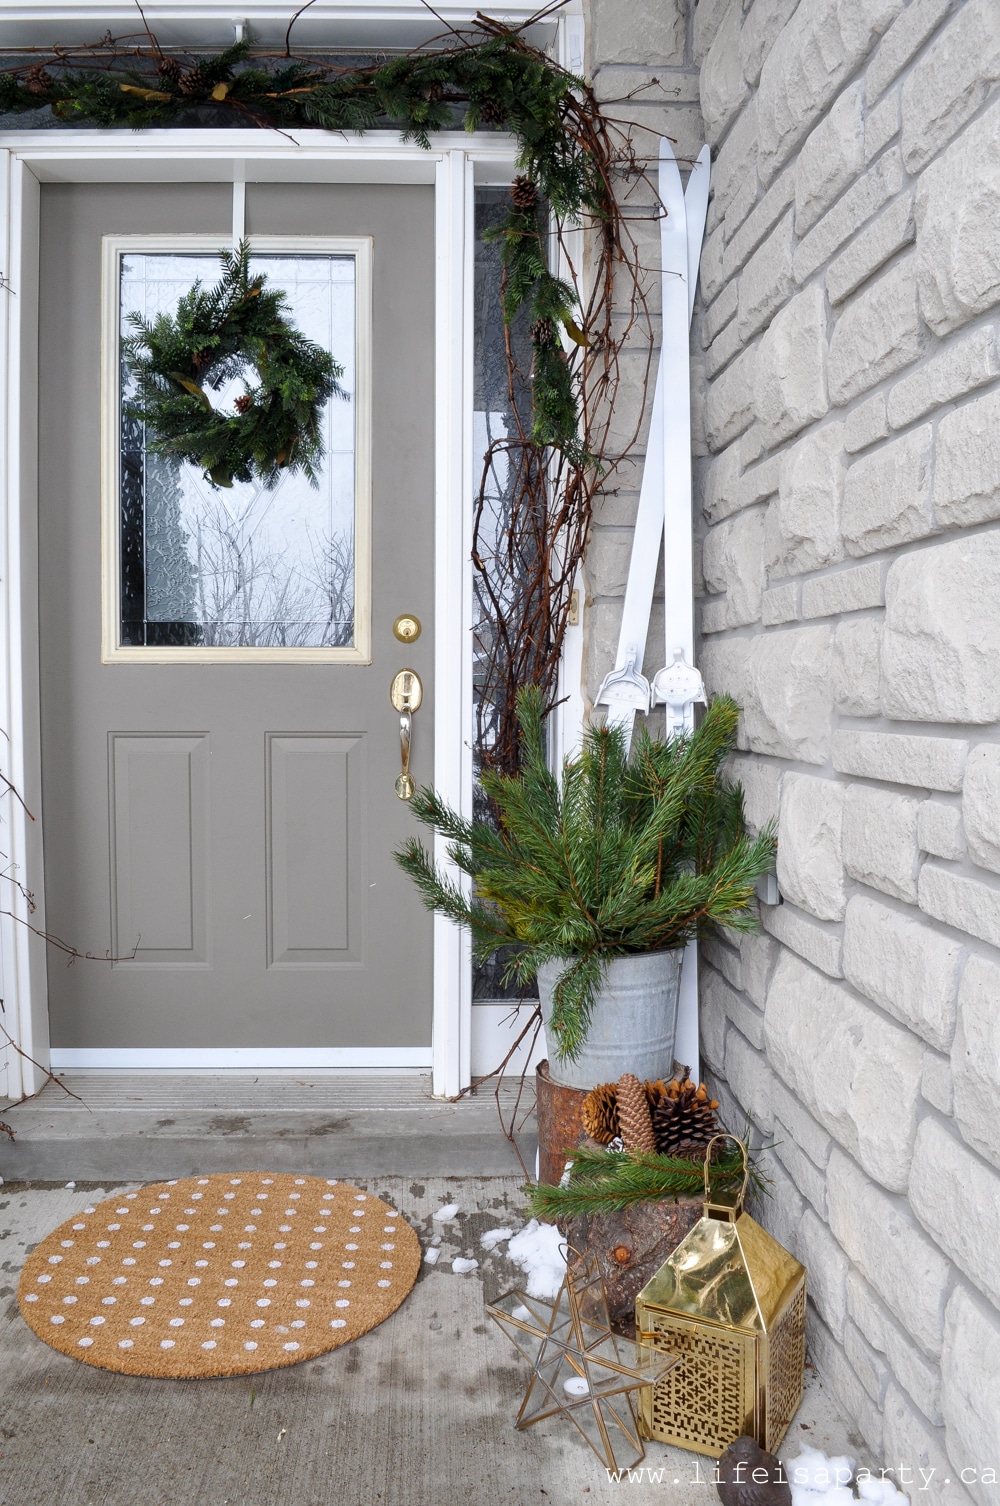
Christmas Front Porch decorating ideasI've been on the lookout for some affordable vintage skis for the last year or two, but with no luck.  I decided to DIY the look.  I found some really inexpensive skis at the thrift store and spray painted them white.  I'd still love some vintage wood ones, but these will do the job until then. 😉

Christmas Front Porch

I'm so happy with this welcoming spot, and how great the rustic elements looked with the beautiful brass lanterns -they help make the space feel festive and extra special.
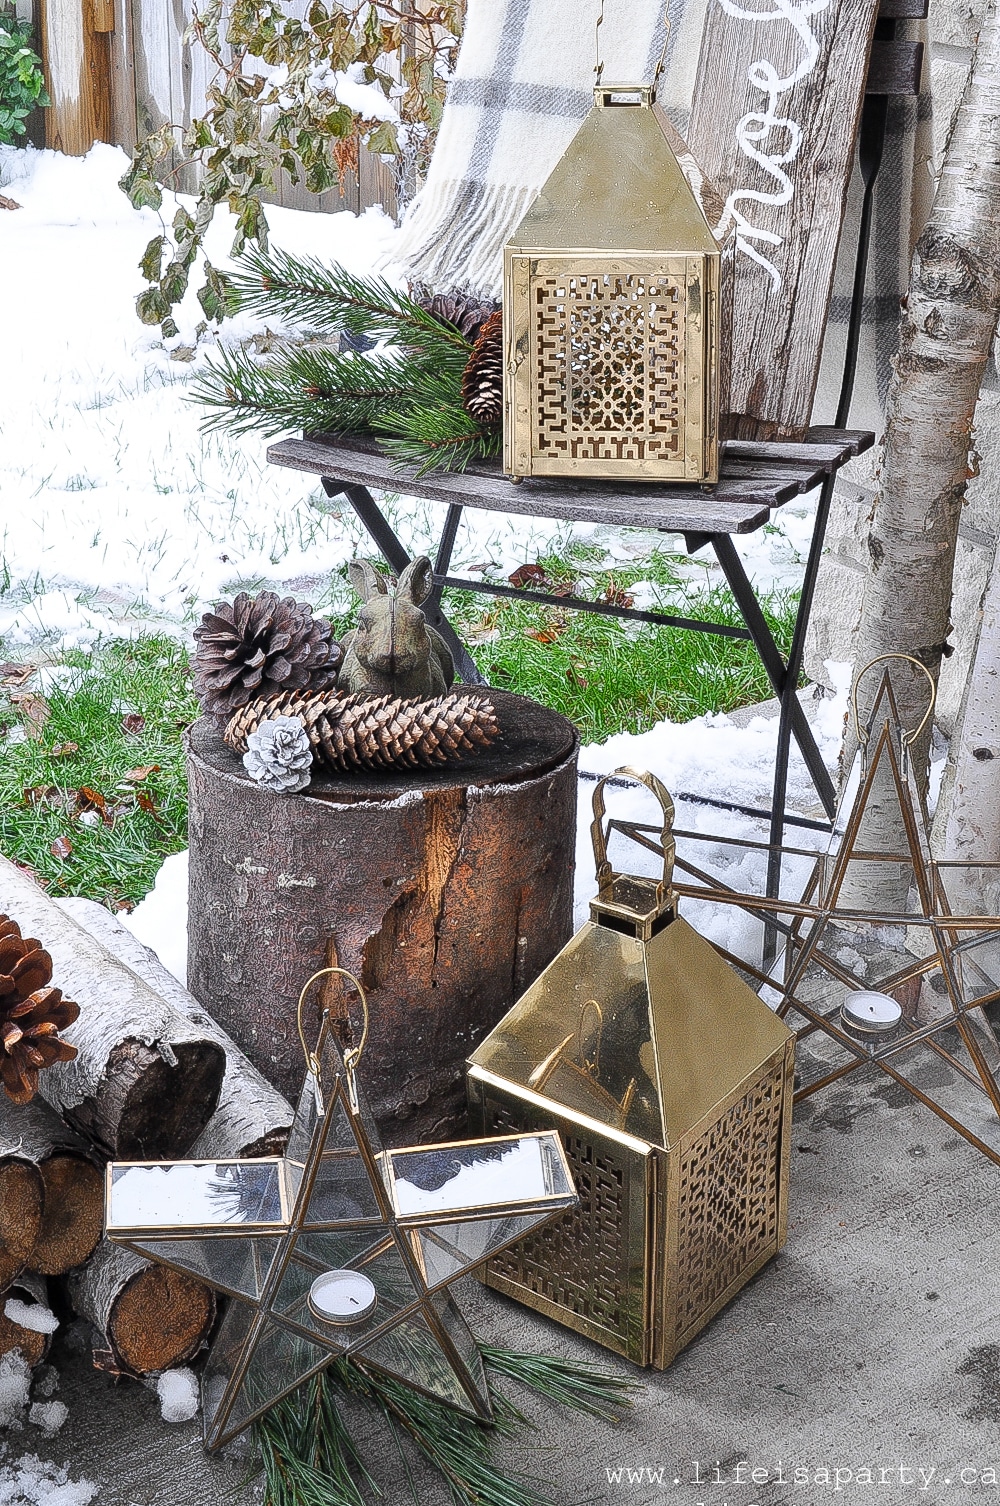
Christmas Front PorchWith a front porch all dressed up for Christmas, life really is a party!

More Inspiration

You might also like our Front Porch Decorating Ideas For Christmas here.
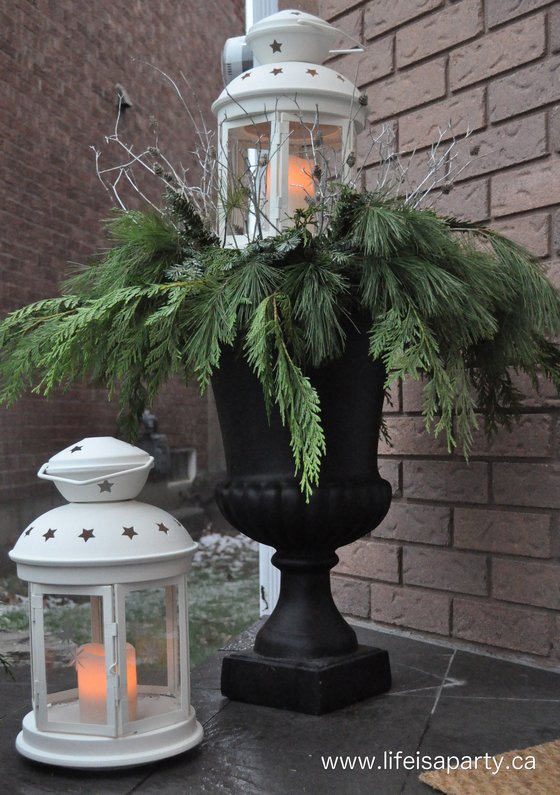
Also check out our Outdoor Christmas Decorating Ideas for the Front Porch here.
You might also enjoy our Christmas Outdoor Planter here.
How To Make Cheese Straws -Guyanese Recipe

Nov 27, 2018 · 11 Comments

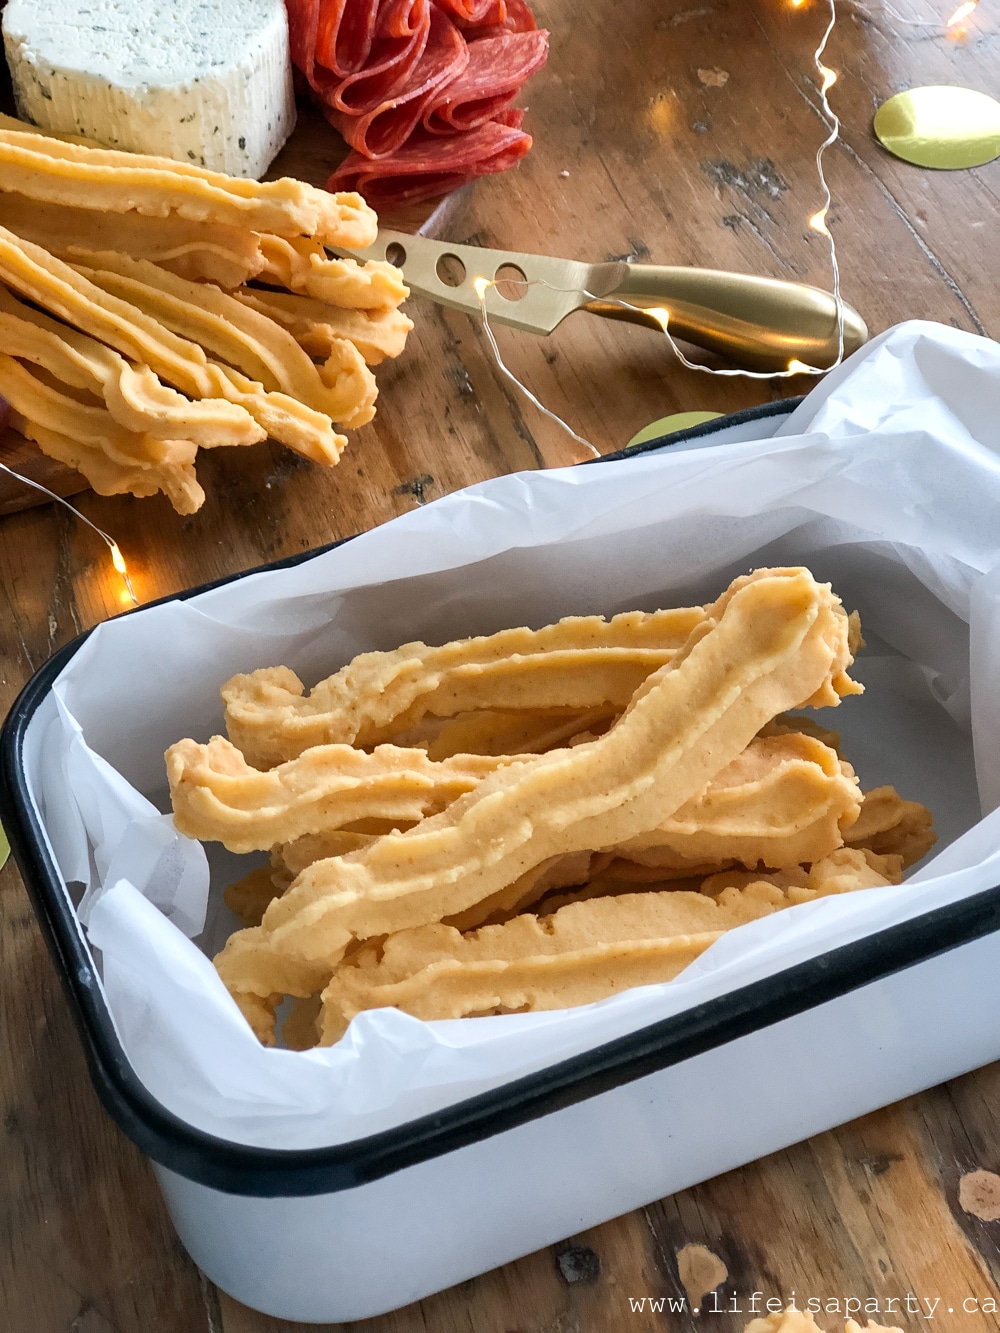
Homemade Guyanese cheese straws in a wihte tin.

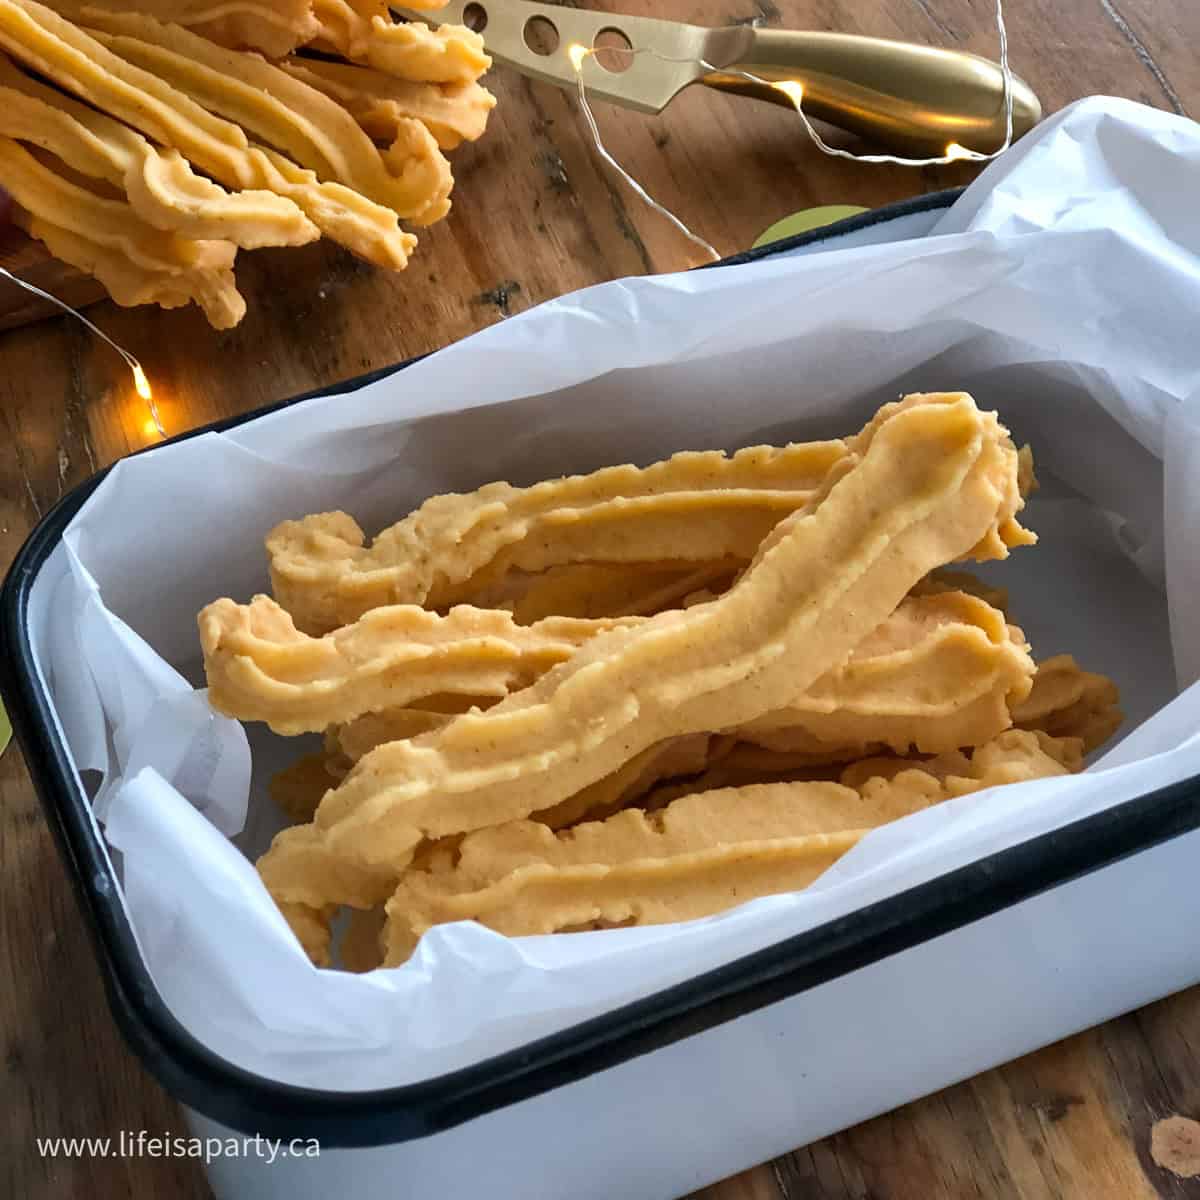
This homemade Cheese Straws Recipe is spicy, cheesy and delicious. These little savoury cheese shortbread straws are perfect as a cracker or snack, on a charcuterie board, or for gift giving.

How to make Guyanese cheese straws.
[feast_advanced_jump_to]

Why We Love This Recipe

  • These are crispy, savoury, and cracker like. Perfect for snacking on, or adding to a charcuterie board.
  • If you love shortbread, these are like a savoury shortbread with the same great texture and buttery flavor.
  • They have a little spice to them.
  • The sharp cheddar gives a wonderful cheese flavor.
  • They're great as homemade gift.

I first tried cheese straws one day when I was at a West Indian bakery.  My husband is from Guyana, and we would sometimes go there for some Guyanese treats. Guyanese cheese straws are like a savoury, spicy cheese shortbread.  They are buttery and crisp like the best shortbread, but also cheesy tasting, and then they have a little heat to them too.  

They're like a savoury cookie.  These cheese straws are kind of perfect.  They're basically cheese crackers, only better.  They often make an appearance at family gatherings, and if you're Guyanese they bring the best childhood memories, just like this no-cook hot sauce recipe. And if you love snacky food like this, try our truffle popcorn recipe here.

Homemade cheese straws in a white tin on a wood table with charcuterie board items.

The Perfect Homemade Gift

If you're looking for a savoury homemade gift for someone special, these spicy cheese straws are perfect.   A homemade food treat is a great gift -since lots of people don't have time to cook or bake these days, it doesn't add clutter to anyone's house, and tastes delicious! They would be a great addition to any Wine and Cheese Basket like this one.

Homemade cheese straws in a white tin with cheese in the background.

Ingredients

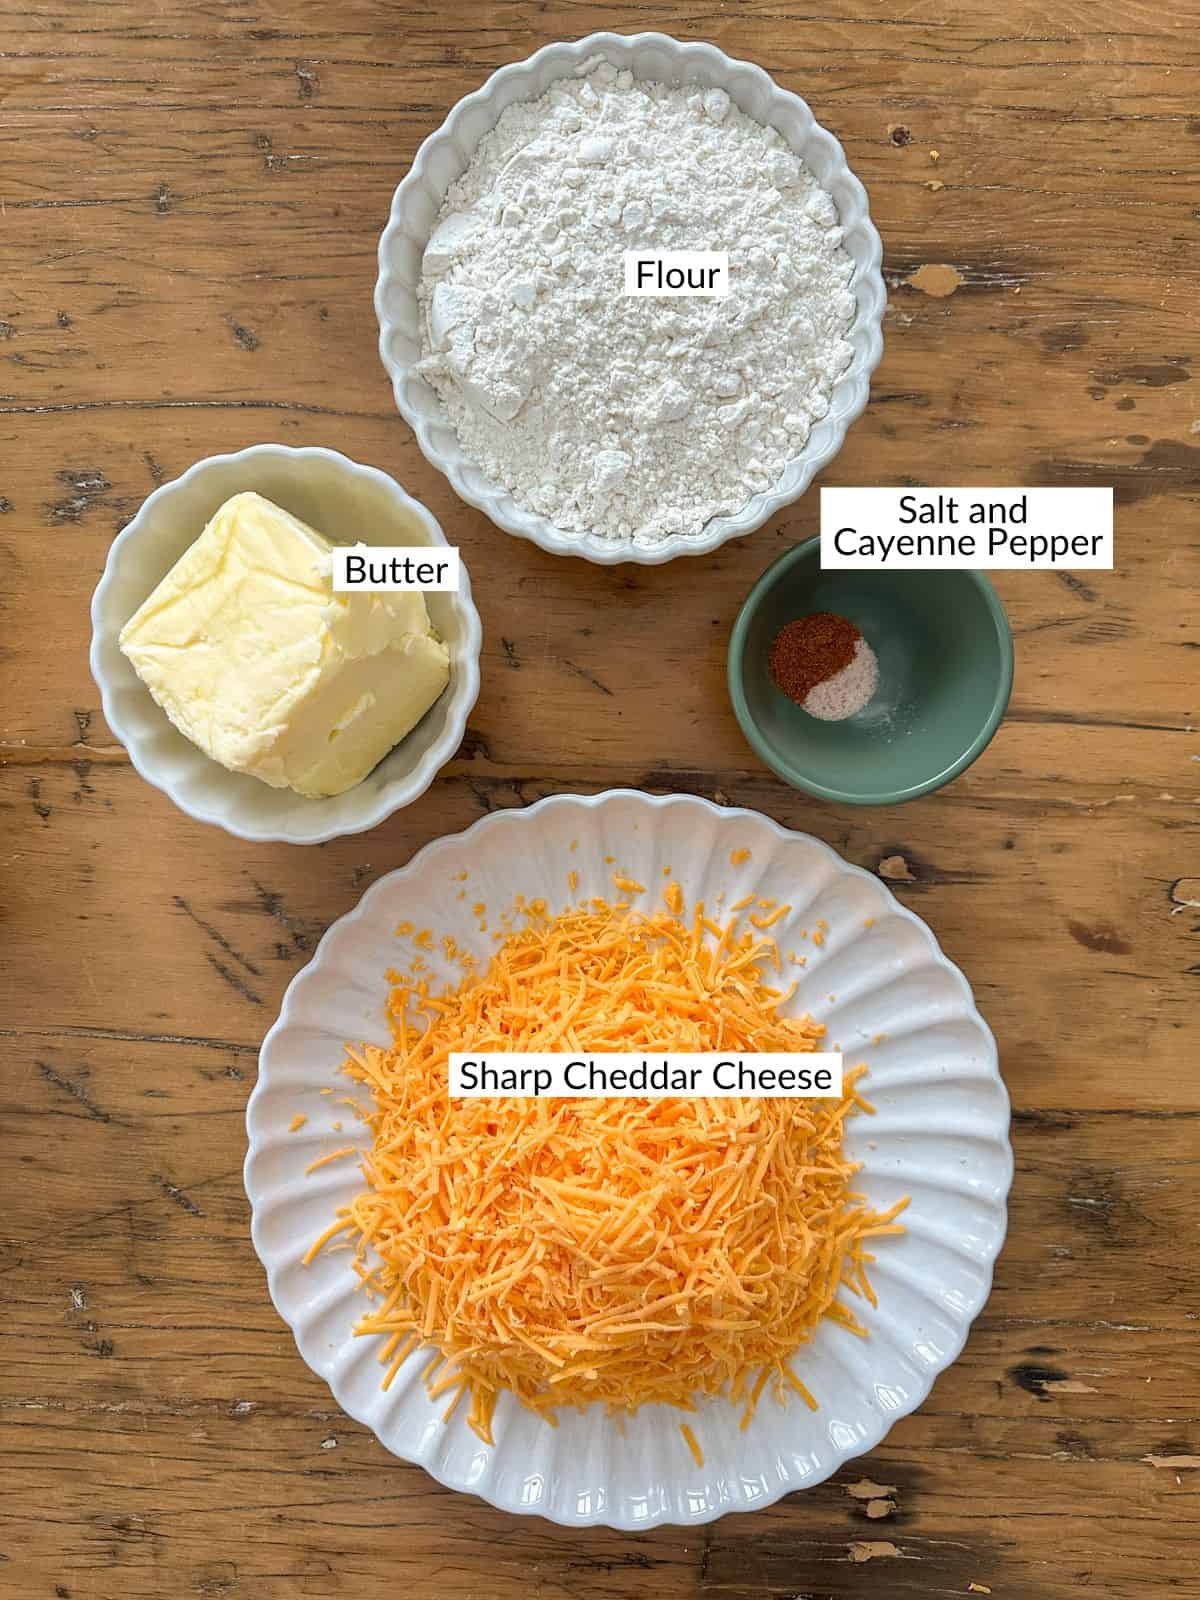
Cheese straw ingredients on a wood table.
  • Sharp Cheddar -This recipe is best with a sharp cheddar.  It helps create the best cheese flavor.  You want the sharpness of an old cheddar for the very best flavor.  If you don't use a sharp cheddar you run the danger of the cheese flavor getting lost and not standing out.
  • Real Butter -Since these crackers are very much like a shortbread cookie, real butter works best. The taste of the butter really comes through, so I won't recommend using margarine for this recipe. We make these with salted butter. If you are using unsalted butter for this recipe, increase the salt.
  • Cayenne Pepper -This is my mother-in-law's traditional Guyanese cheese straw recipe.  They always make them spicy.  The spice works so well with the cheese for this little crunchy snack.  I won't recommend leaving the cayenne pepper out of this recipe, because they might be bland without it.  You can reduce the pepper if you want to make a mild version. And if you like things really spicy you can up the cayenne pepper to suit your taste.

Variations

  • Herbs -You can add some fresh herbs to your cheese straws. Add 1 ½ tablespoons of freshly chopped herbs like rosemary and thyme to your dough for herbed cheese straws.

Equipment

Cookie Press: -A cookie press works really well to make cheese straws.  I think this is the easiest way, since the dough is quite thick.  You can also try using a piping bag to create the long strips -which you can see I used in the step by step photos below.  

Fit your cookie press or your pastry bag with a open star tip to create the cheese straws.  This pastry tip helps create the crunchy edges of the traditional star tube straw shapes.

If you don't have a cookie press or pipping bag you can alternatively roll out the dough on a floured surface with a rolling pin. Roll to about ⅛" thick and cut into long strips. Adjust your baking time to about 8-10 minutes or until just starting to brown on the edges.

Homemade cheese straws with charcuterie board items on a wood table with a bar set up in the background.

How To Make This Recipe

1. Preheat oven to 350 F

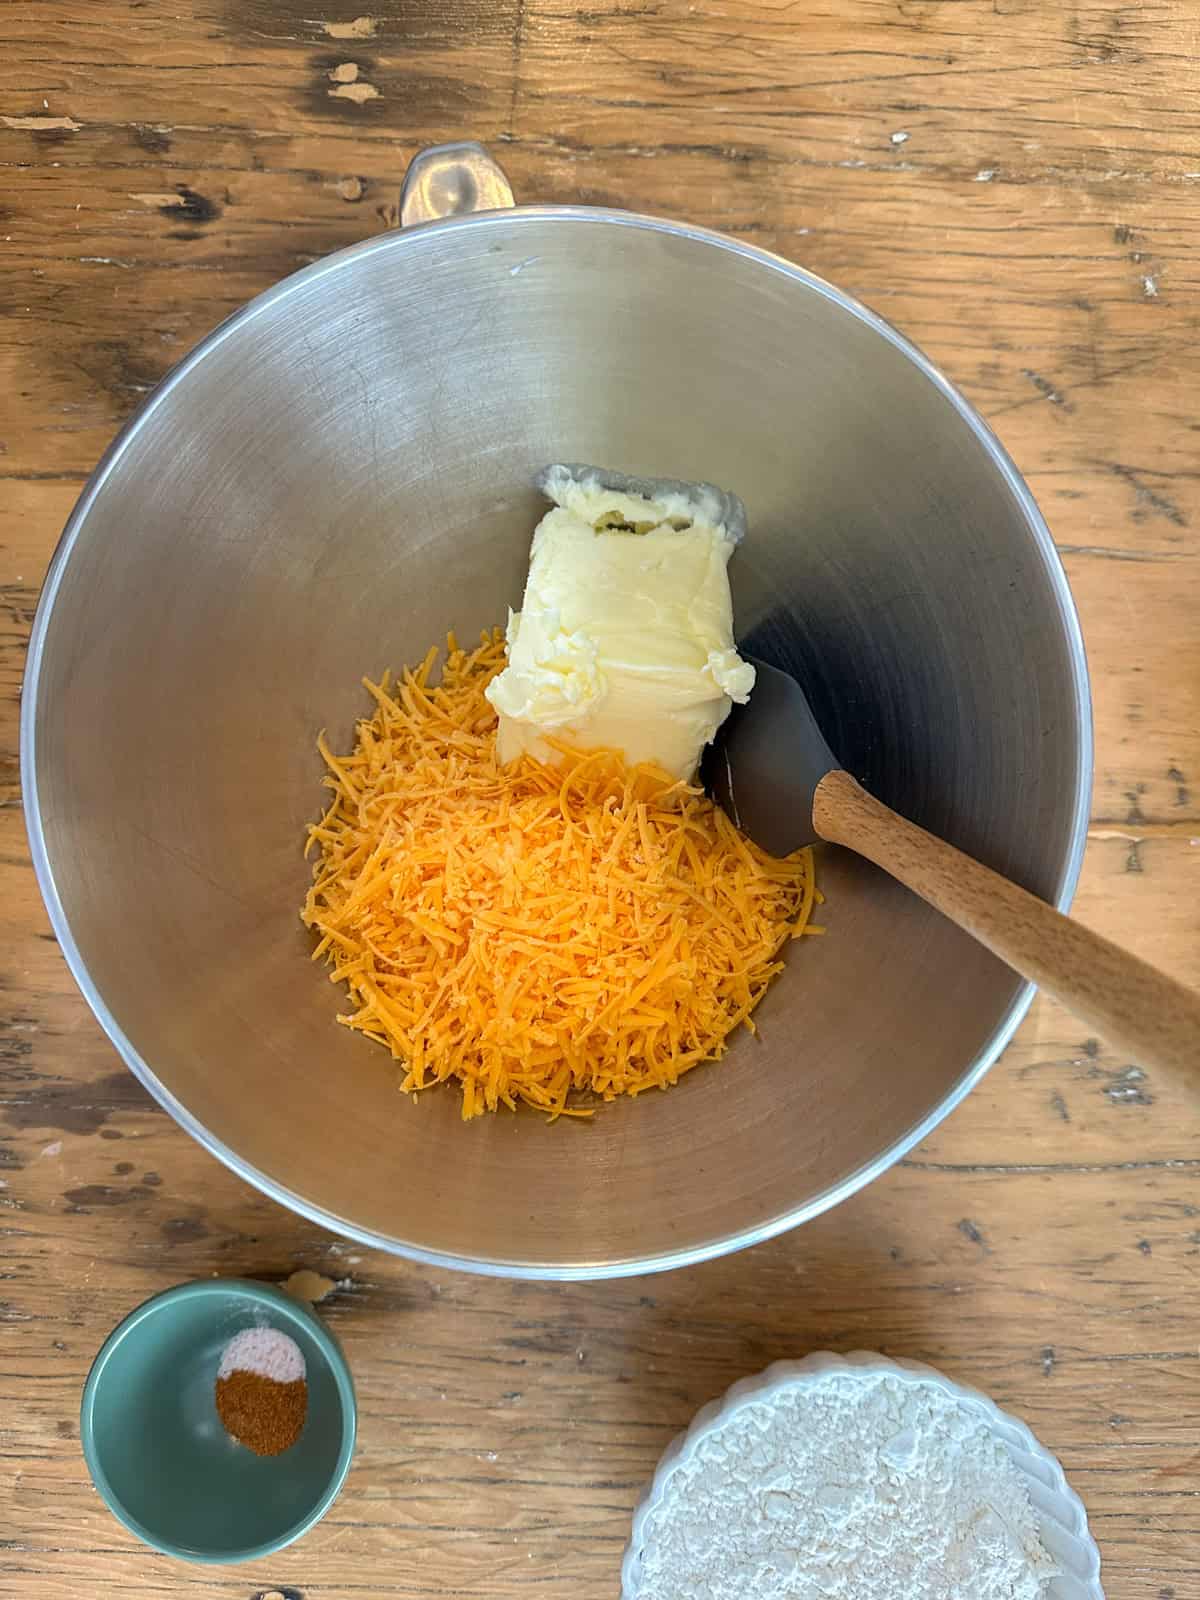
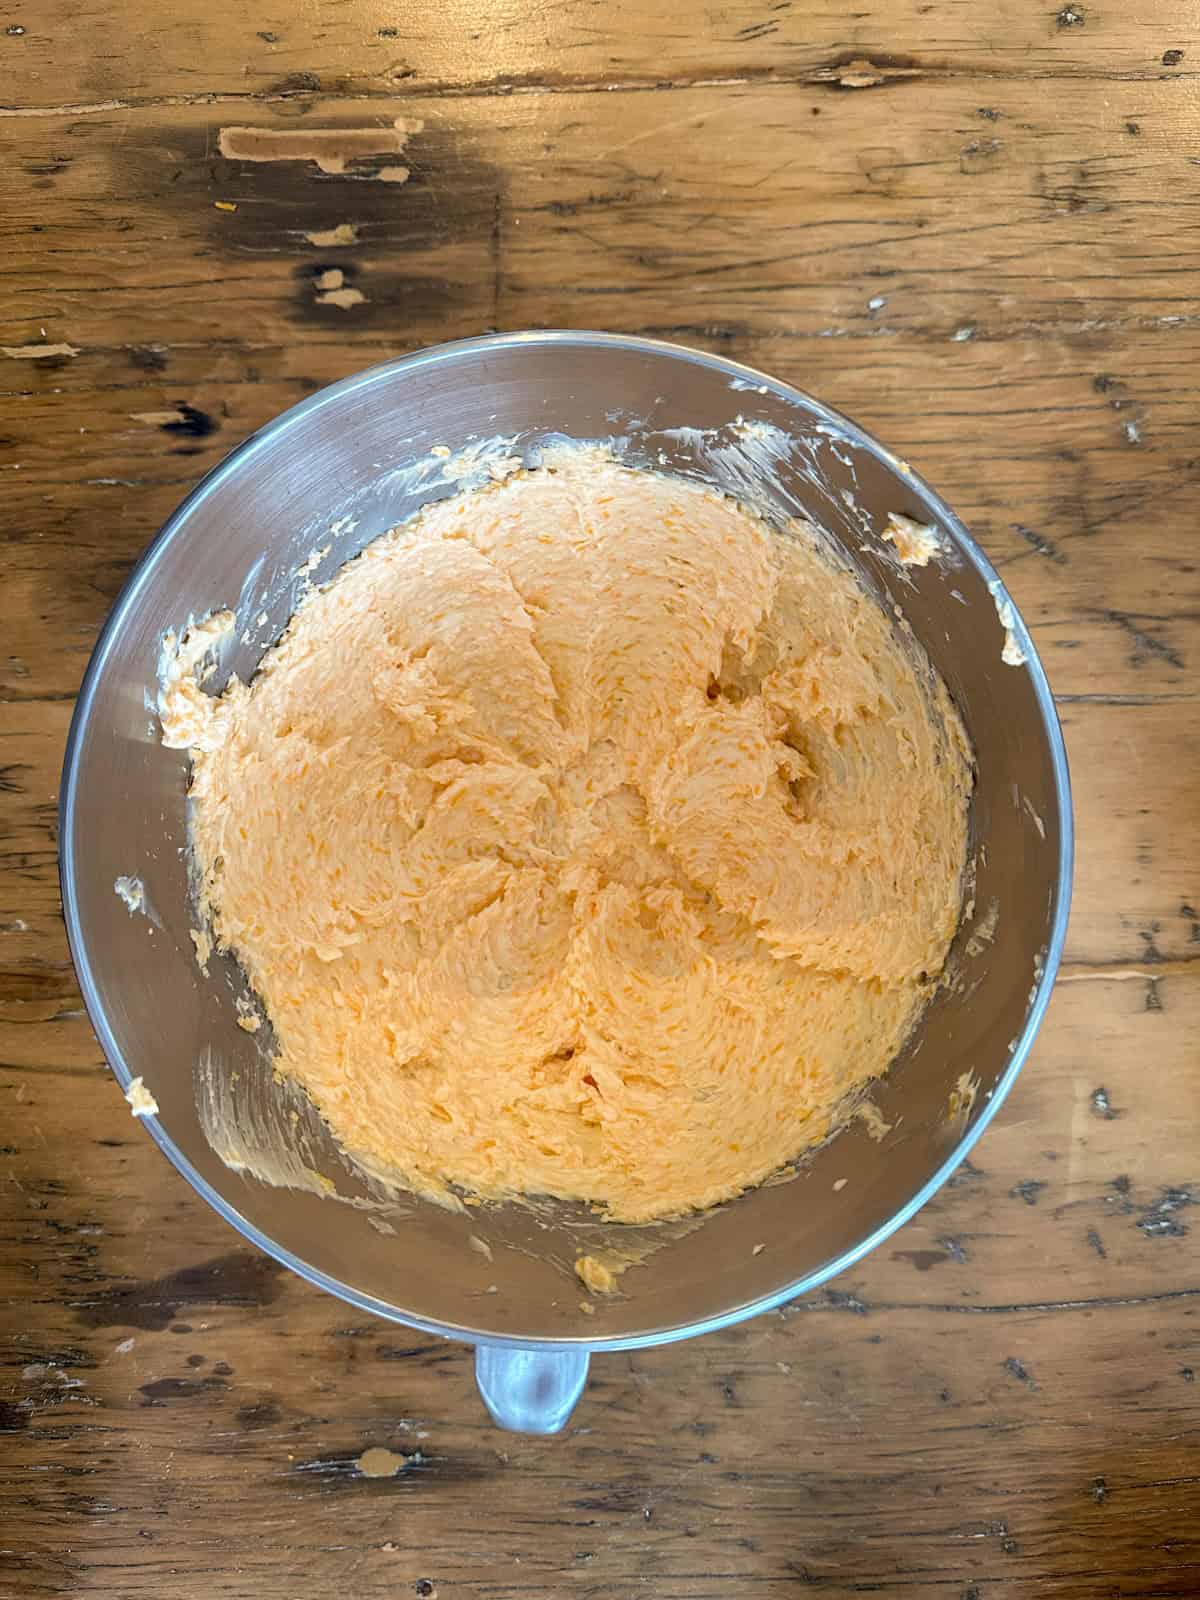
2. Grate cheese with the fine side of a box grater. In a stand mixer or using an electric mixer, cream together the room temperature butter and grated cheese, until the mixture is well mixed and fluffy.

Finely grated sharp cheddar cheese and butter in a stand mixer bowl.
Sharp cheddar and butter fully combined in the bowl of a stand mixer.

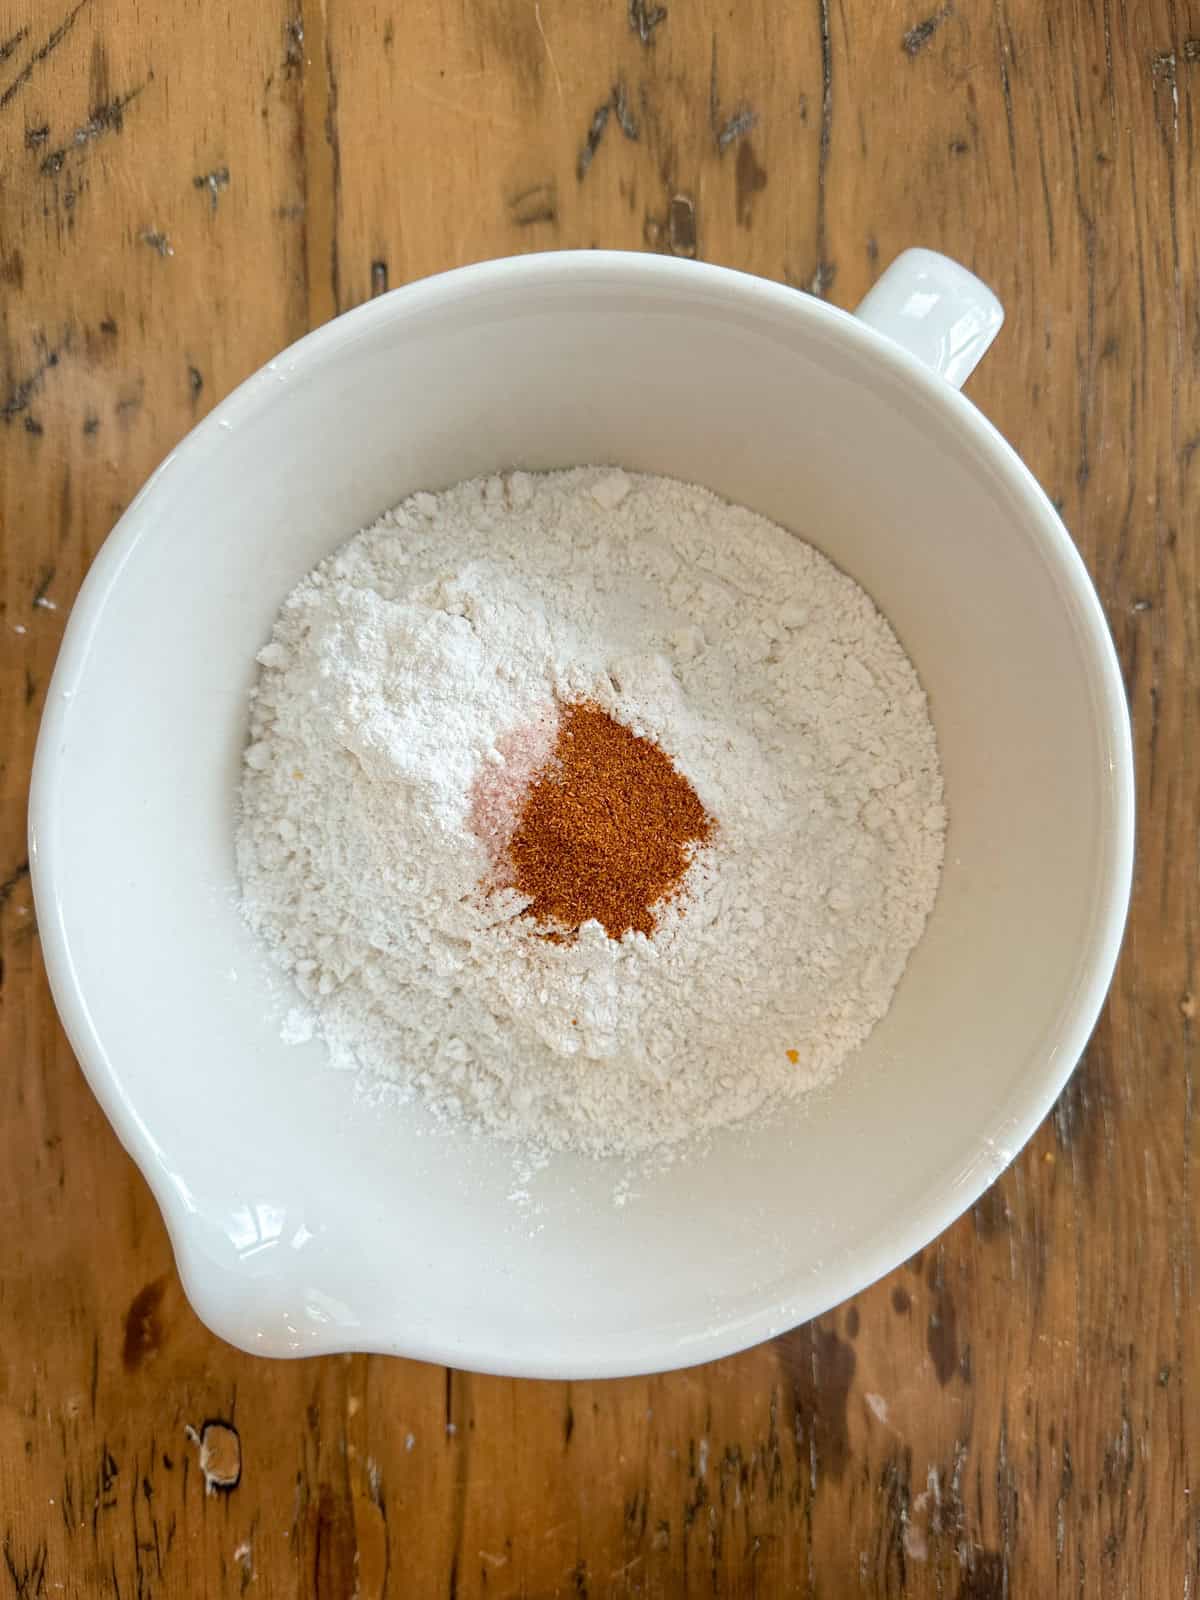
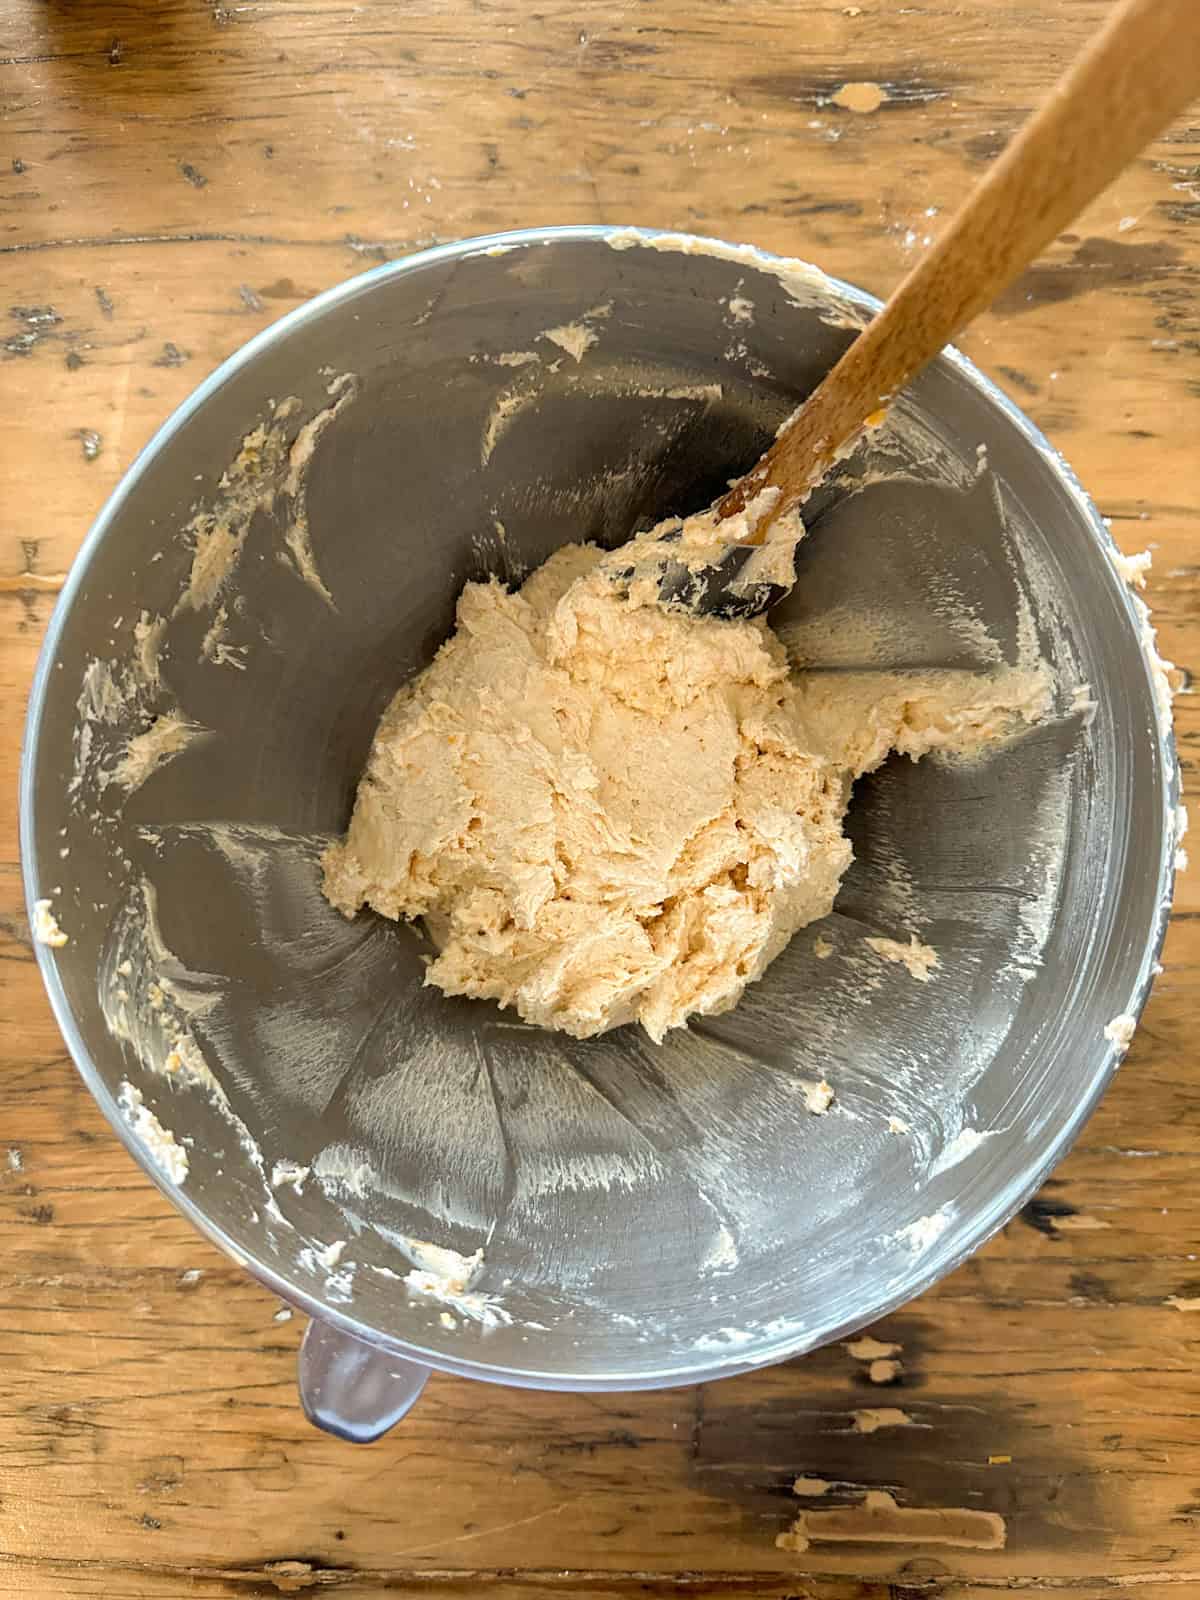
3. In another large bowl combine the flour, salt, and cayenne pepper -¼ teaspoon if you don't like it too spicy, or up to a ½ teaspoon if you like a lot of heat. Using a whisk, whisk together the flour, salt, and pepper to remove any lumps. Then slowly add the flour mixture to the butter and cheese mixture in the stand mixer.

Dry ingredients for cheese straws in a mixing bowl.
Dough for homemade cheese straws in a stand mixer bowl.

4. Beat the dough on high for about 5 min. until the dough is very creamy. Be sure to scrape down the sides and bottom of the bowl occasionally.

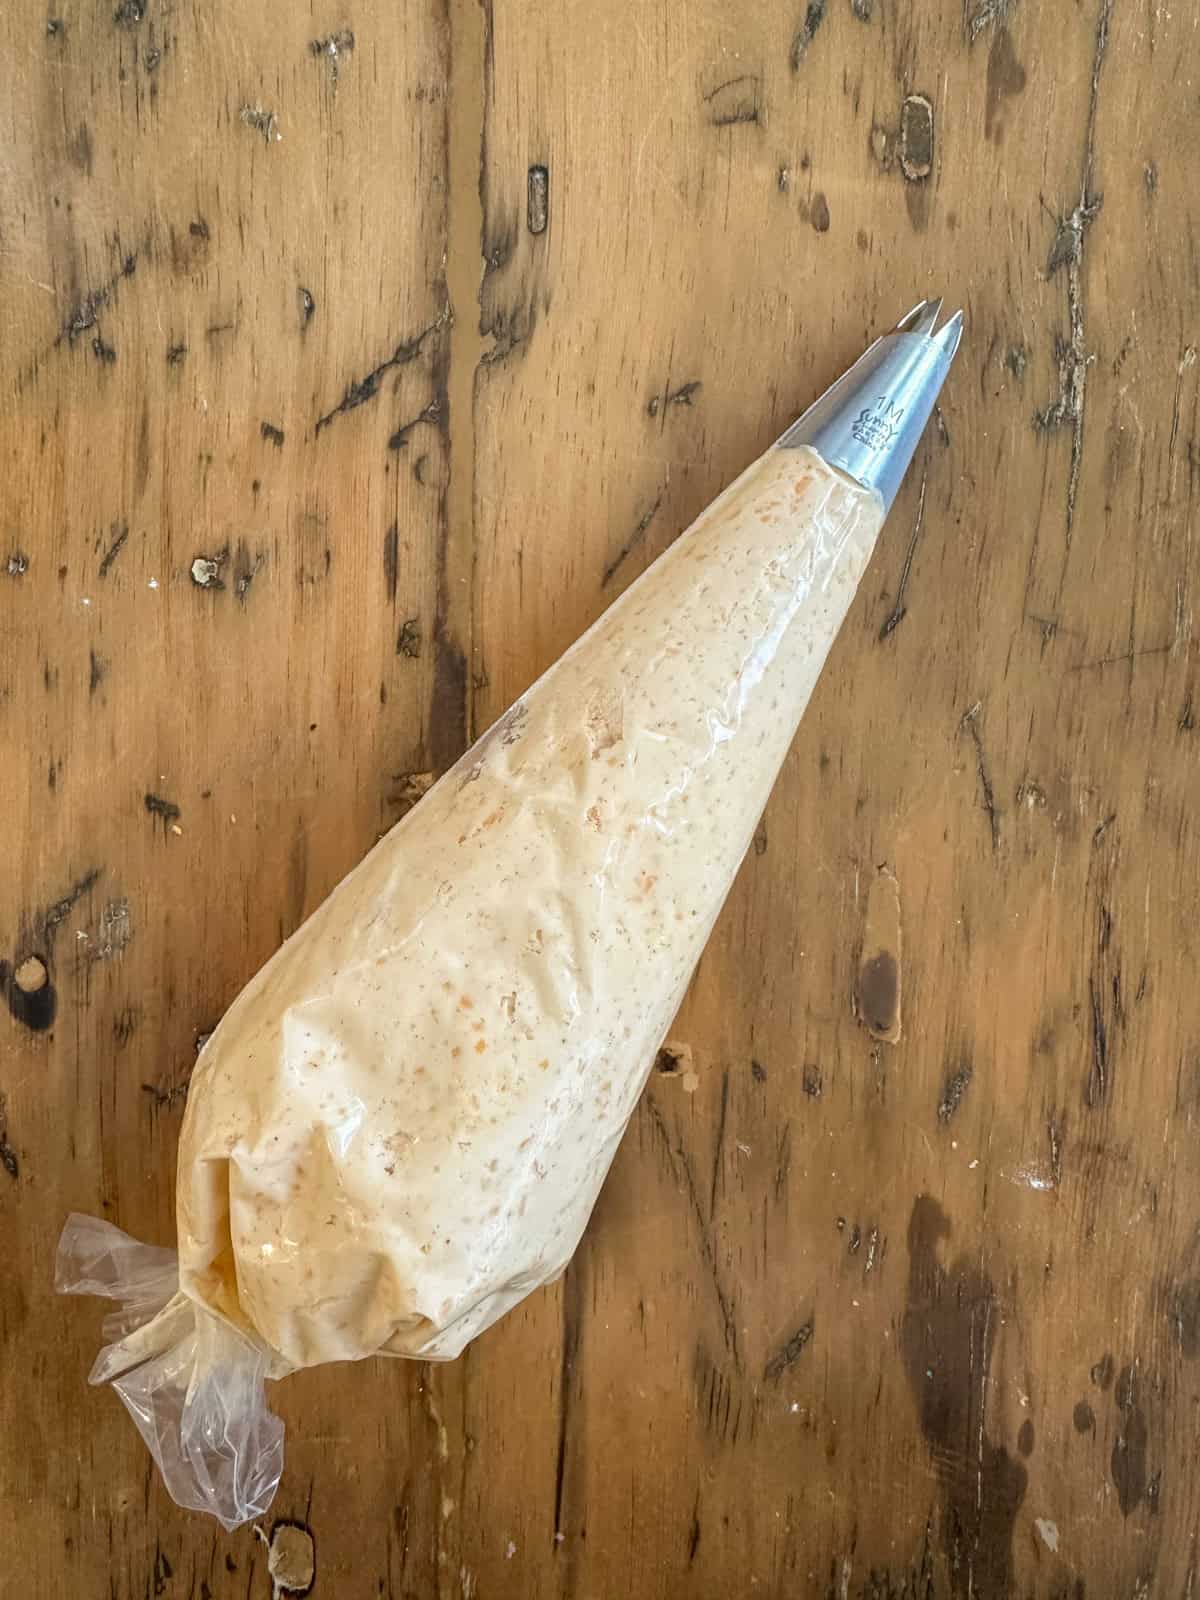
5. Put your dough in a cookie press, and pipe about 3-inch long straws onto an ungreased baking sheet.

Cheese straw dough in a piping bag.
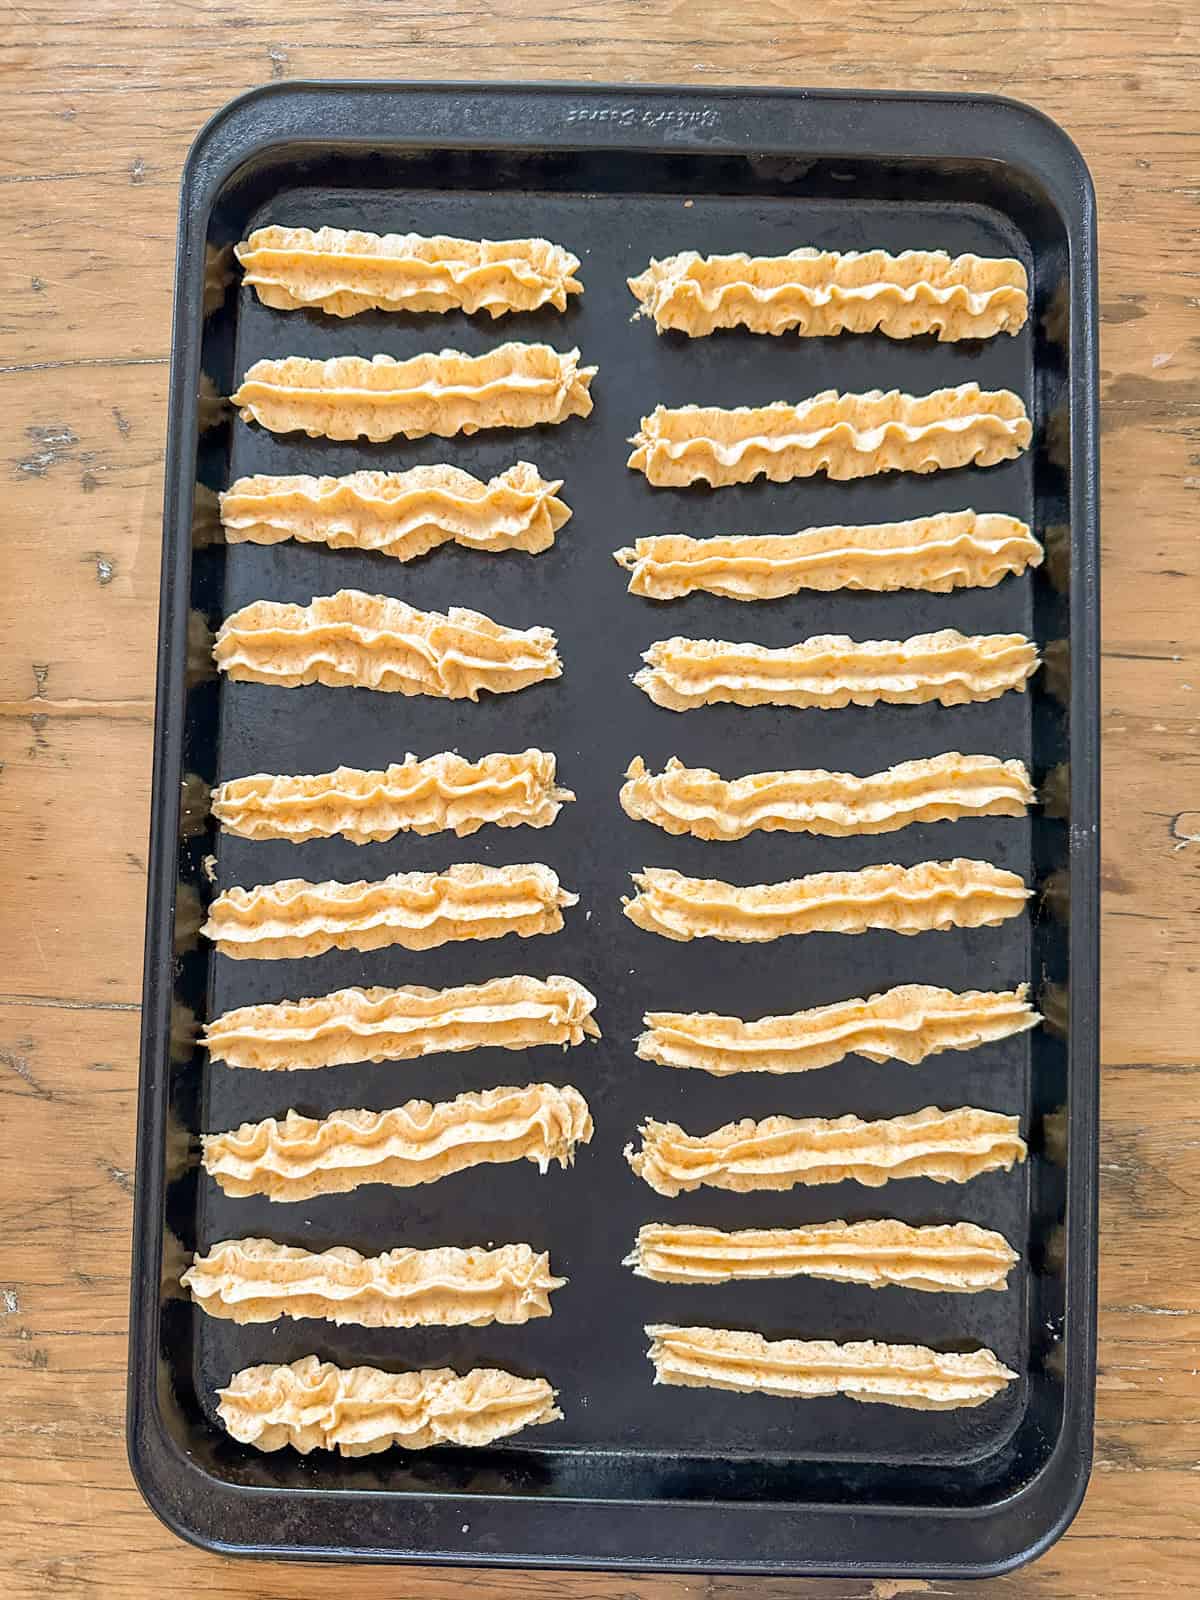
Cheese straws piped onto a cookie sheet ready to be baked.

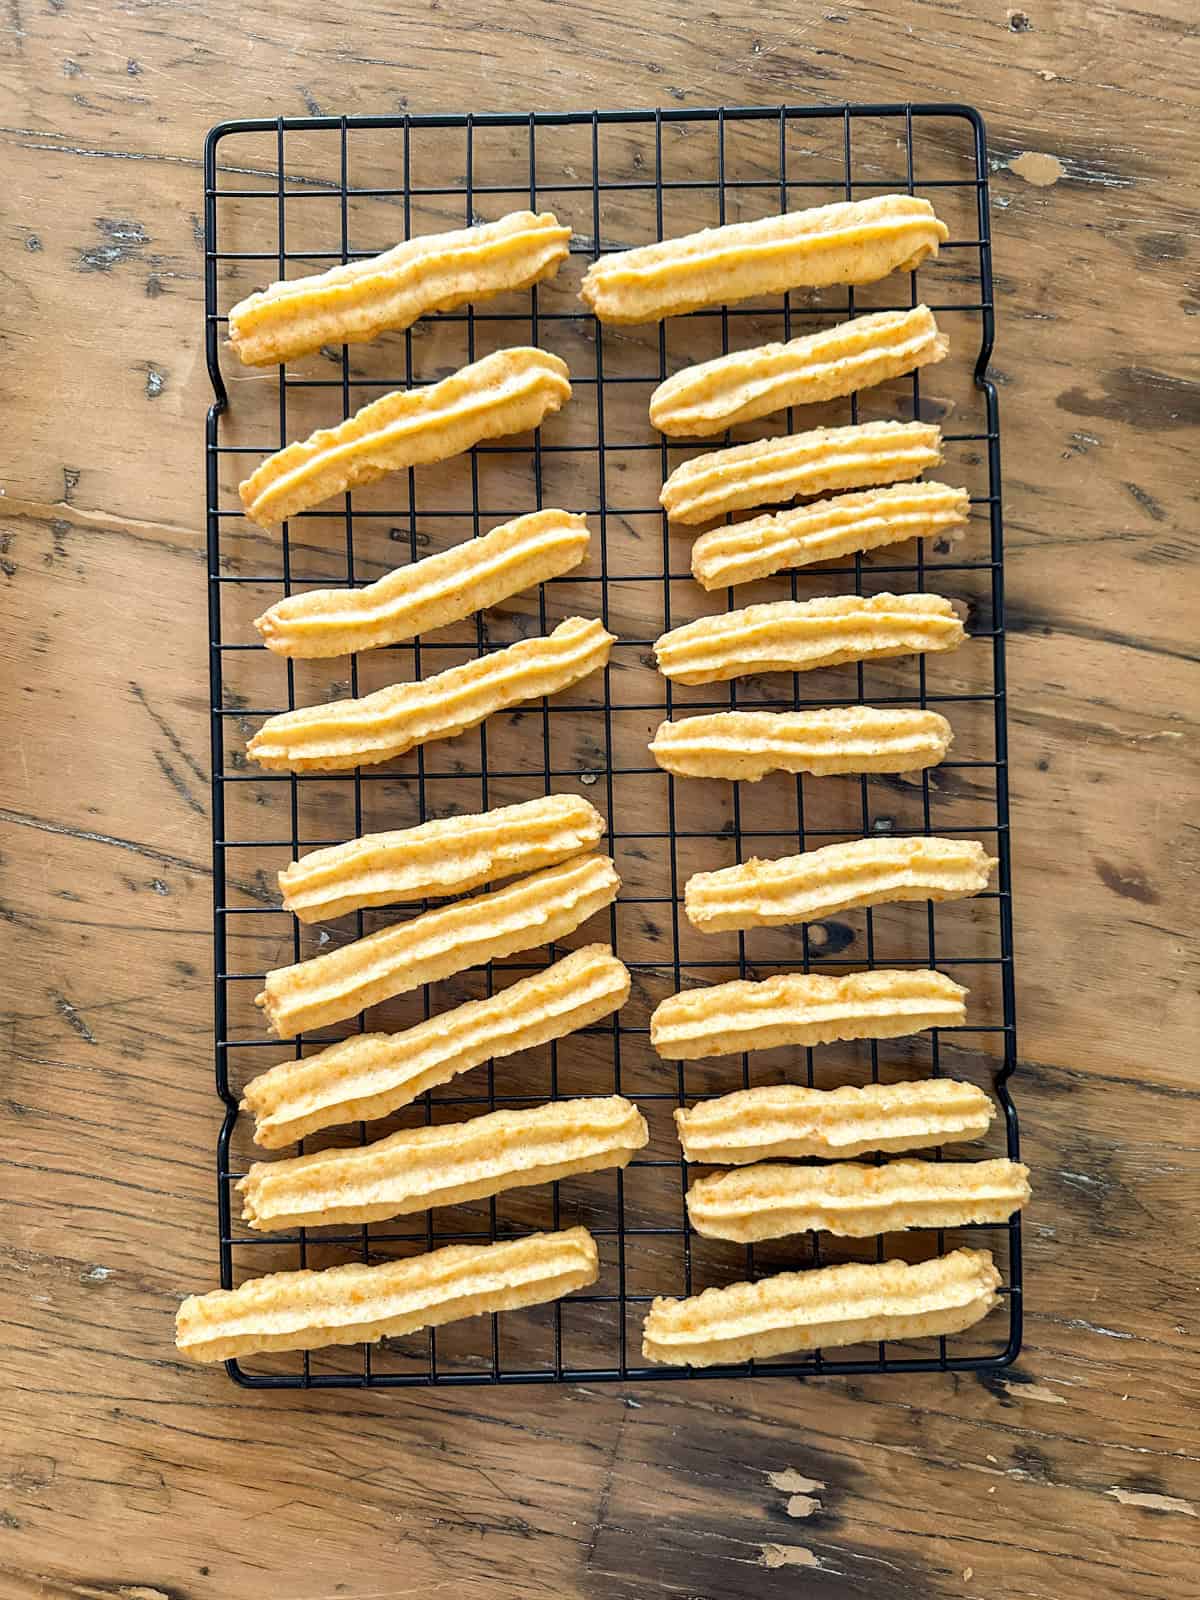
6. Bake 12-15 minutes in a preheated oven, until golden brown. Cool on wire racks.

Baked homemade cheese straws cooling on a wire rack.

Storage

Be sure to store your cheese straws in an airtight container to keep them nice and crisp. Store the cheese straws at room temperature, for 2-3 weeks.

Or freeze the cheese straws for up to 3 months. Alternatively, you can freeze the dough in an airtight container. When you're ready to make them thaw the dough, form into straws and bake.

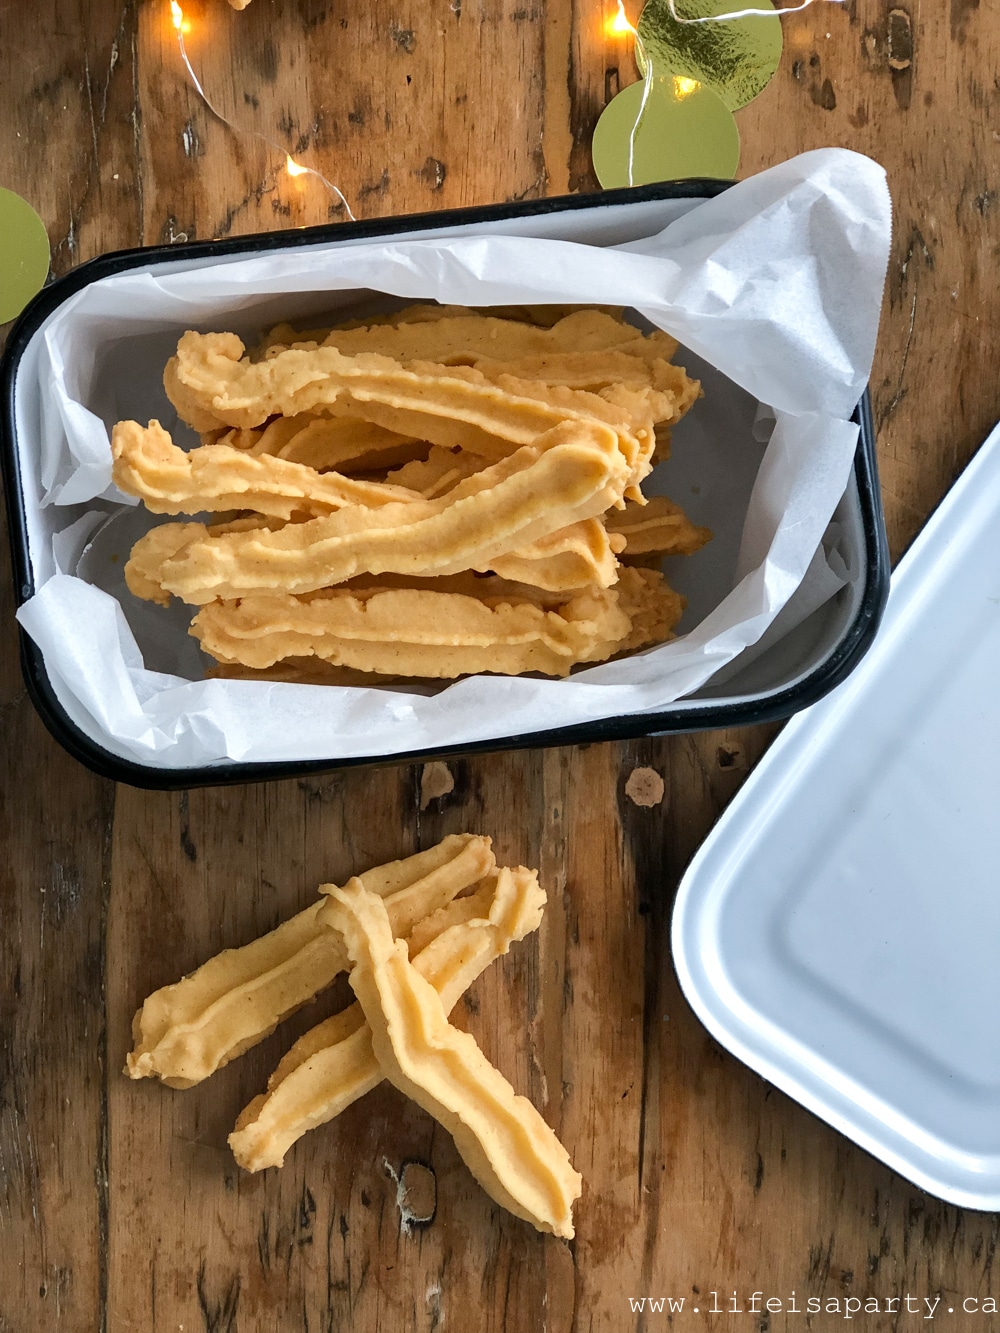
Cheese straws in a white and black tin on a wood table with some more on the table.

Serving

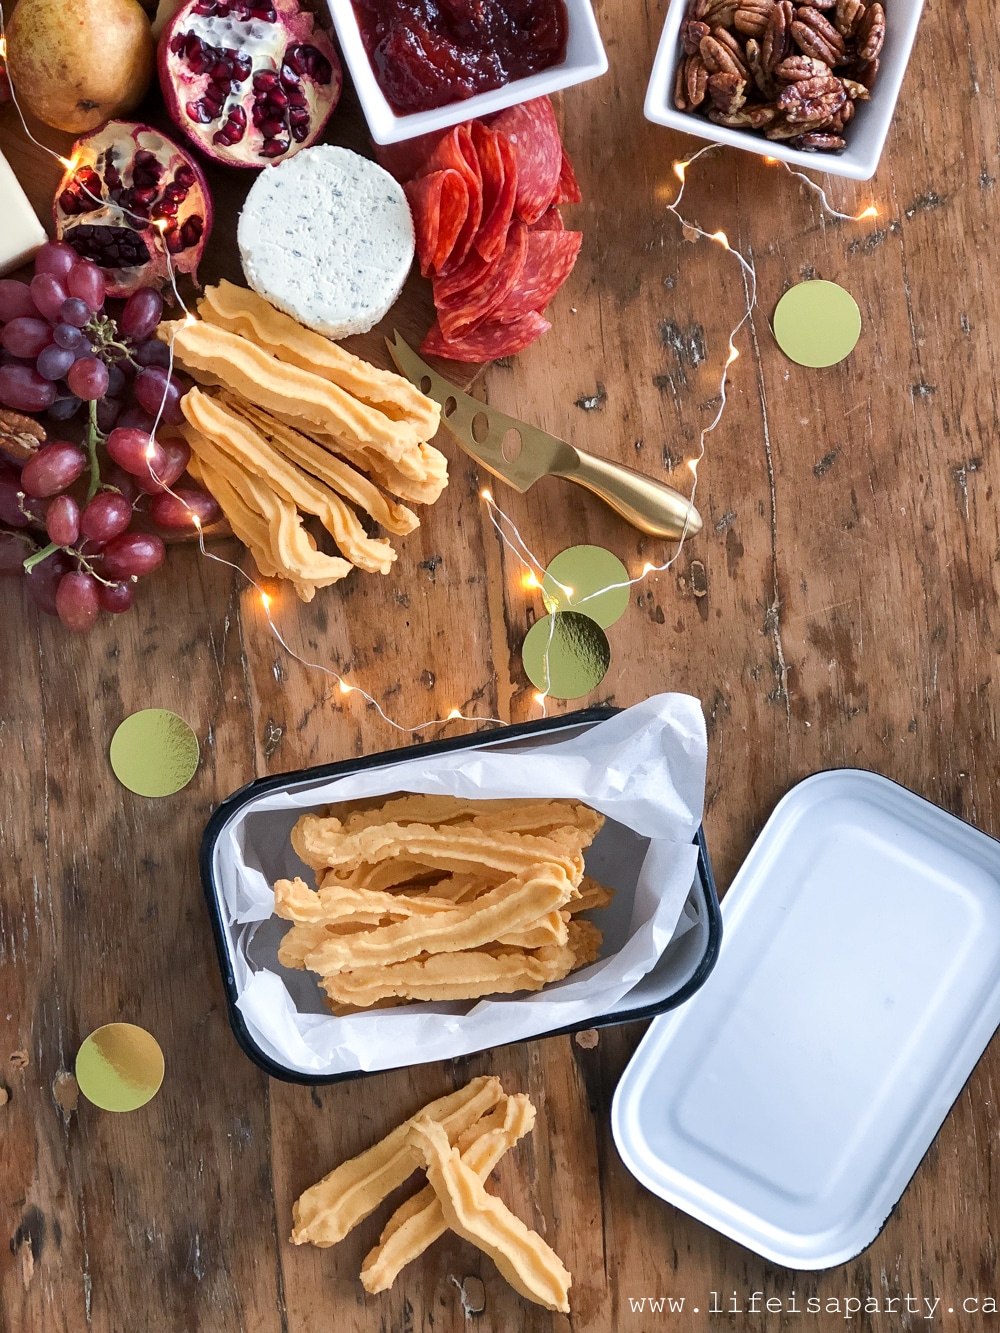
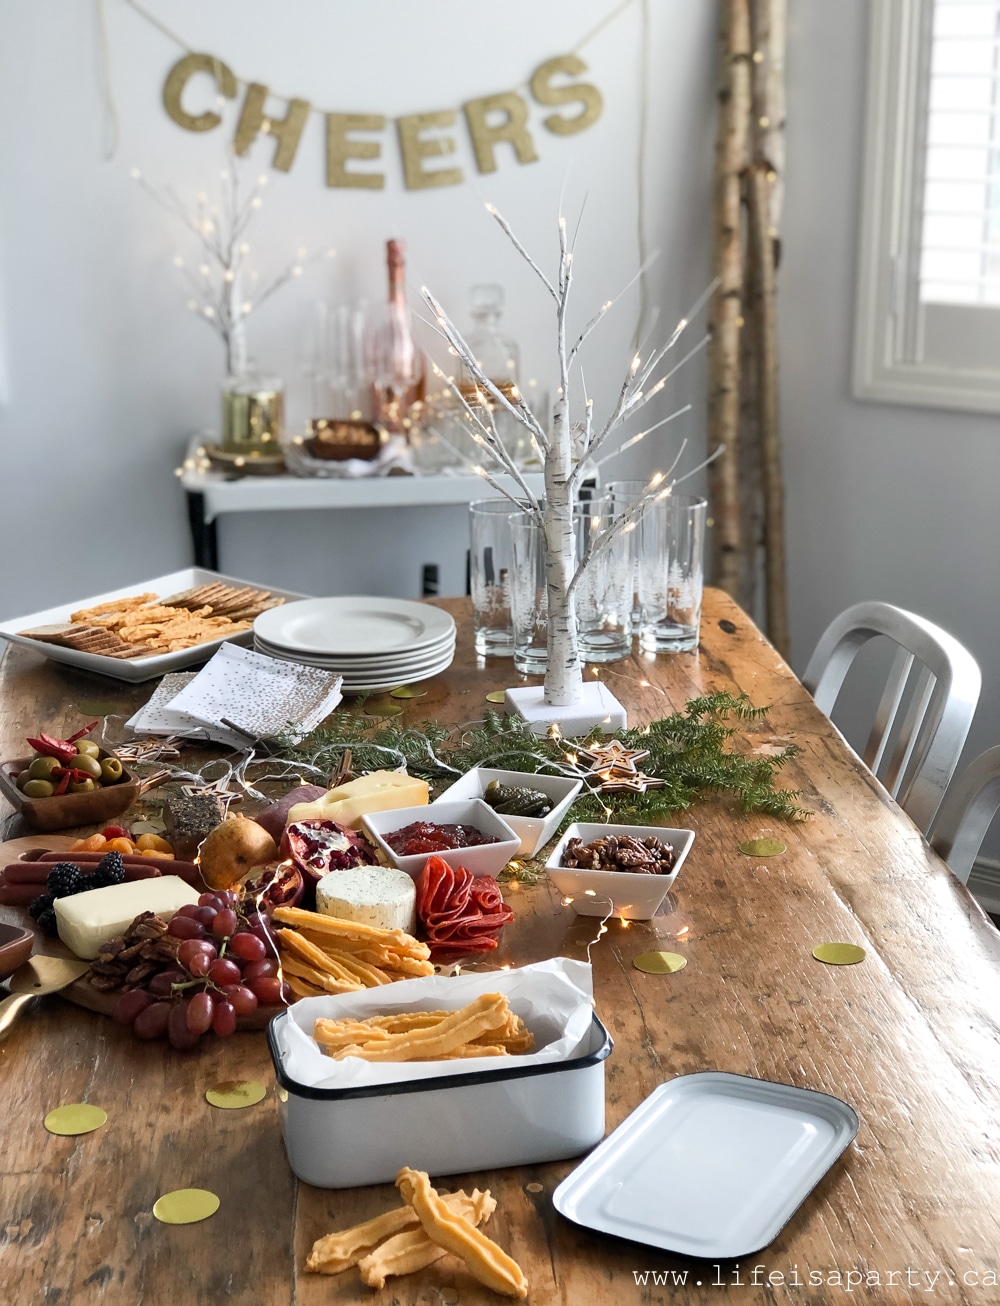
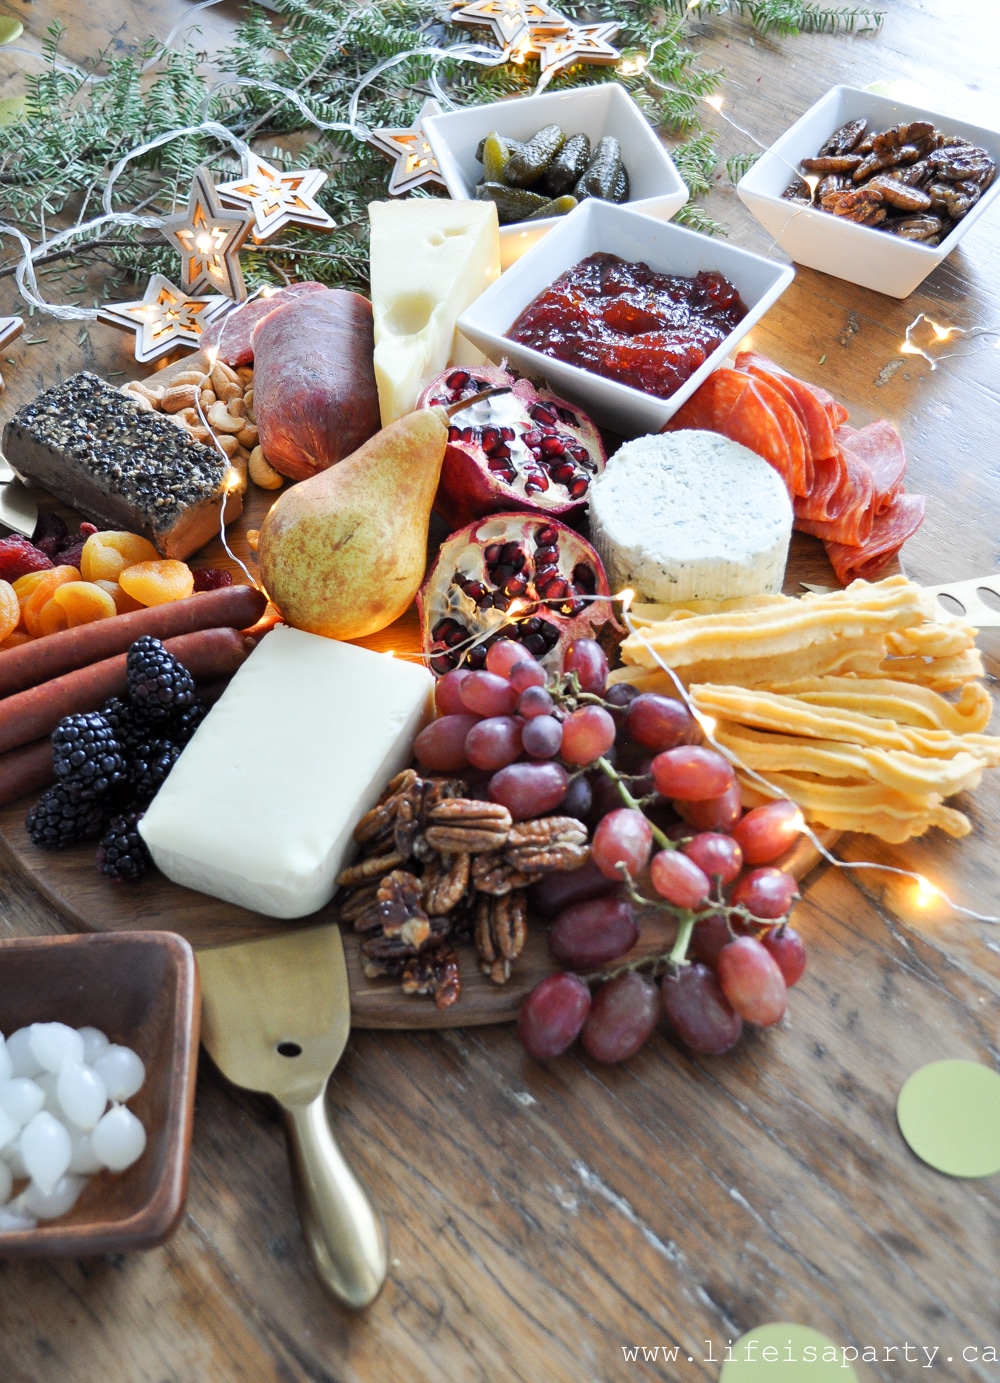
I used some of my cheese straws for a beautiful charcuterie board.  I love this style of entertaining over the holidays.  Create an amazing cheese board with something for everyone, and let guests help themselves throughout the whole party.

Tip: These cheese straws make a lovely homemade gift. Wrap them in clear cello bags with some ribbon and add to a bottle of wine for a wonderful hostess gift, or thoughtful homemade Christmas gift.

A charcuterie board with meats, fruit, cheese, and cheese straws.
Can I make cheese straws ahead of time?

Yes, make cheese straws a week ahead and store them in an airtight container, or the freezer a month ahead. Or freeze the dough ahead of time, and thaw, form, and bake later.

Can I make these without a cookie press?

Yes, you can make these without a cookie press. Use a piping bag with a star tip. Or, roll out the dough with a rolling pin to about ⅛ inch thick and cut with a knife into long strips. Adjust your cooking time to 8-10 minutes, depending on their size.

Why aren't my cheese straws crispy?

Don't underbake your cheese straws. They should be firm to the touch and just starting to brown on the edges when they're done. Also, be sure to cool your cheese straws on a wire rack. Store the cooled cheese straws in an airtight container.

Can I use pre-shredded cheese for this recipe?

We don't recommend using pre-shredded cheese for this recipe. Pre-shredded cheese has added ingredients that keep it from incorporating well into the dough. This recipe is best with freshly shredded cheese.

More Appetizer Recipes

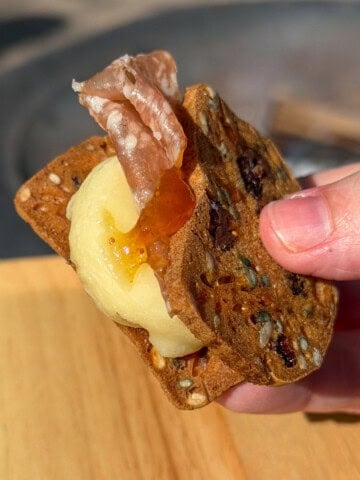
  • Melted cheddar and apple savory s'more held in hand with hot honey drizzle.
    Savory S'mores: 4 Campfire Combos
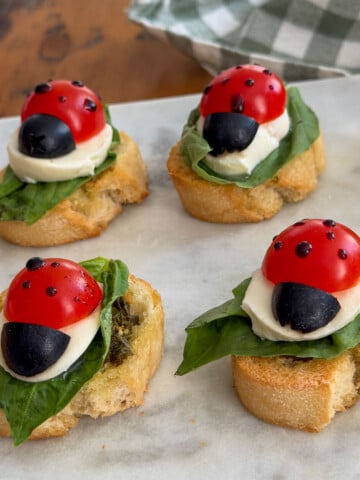
  • Ladybug caprese bruschetta on a basil leaf with mozzarella, olive, and balsamic glaze spots.
    Ladybug Caprese Bruschetta
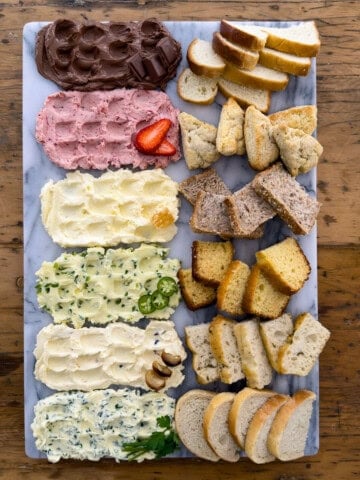
  • Overhead view of a compound butter board with six flavored compound butters in a row including chocolate, strawberry, whipped honey, jalapeño honey, roasted garlic, and garlic herb, each paired with its own bread on a marble board.
    The Ultimate Butter Board: 6 Flavored Butters and Bread Pairings
  • Truffle butter popcorn in a white bowl with a wedge of Parmesan cheese on a rustic wood surface.
    Truffle Popcorn

If you tried this Cheese Straw Recipe or any other recipe on my blog please leave a star rating and let me know how it went in the comments below. Thanks for visiting today!

Recipe

Homemade Guyanese cheese straws in a wihte tin.

Cheese Straws

Crisp and spicy savoury shortbread cheese straws.
4.77 from 13 votes
Print Pin Rate
Course: Appetizer
Cuisine: Guyanese
Prep Time: 10 minutes minutes
Cook Time: 15 minutes minutes
Total Time: 25 minutes minutes
Servings: 48
Calories: 72kcal
Author: Dannyelle Nicolle-Ramjist

Ingredients

  • 1 cup butter
  • ½ lb sharp cheddar cheese
  • ¼ teaspoon salt
  • ¼ - ½ teaspoon cayenne pepper
  • 2 cups all purpose flour

Instructions

  • Preheat oven to 350 F
  • Grate cheese with the fine side of a box grater.
    In a stand mixer or using an electric mixer, cream together the room temperature butter and grated cheese, until the mixture is well mixed and fluffy.
  • In a another large bowl combine the flour, salt, and cayenne pepper -¼ teaspoon if you don't like it too spicy, or up to a ½ teaspoon if you like a lot of heat. Using a whisk, whisk together the flour, salt, and pepper to remove any lumps. Then slowly add the flour mixture to the butter and cheese mixture in the stand mixer.
  • Beat the dough on high for about 5 min. until the dough is very creamy. Be sure to scrape down the sides and bottom of the bowl occasionally.
  • Put your dough in a cookie press, and pipe about 3 inch long straws onto an ungreased baking sheet.
  • Bake 12-15 minutes in a preheated oven, until golden brown. Cool on wire racks. Store in an airtight container.

Nutrition

Serving: 1Servings | Calories: 72kcal | Carbohydrates: 4g | Protein: 2g | Fat: 5g | Saturated Fat: 3g | Polyunsaturated Fat: 2g | Cholesterol: 15mg | Sodium: 73mg
Tried this Recipe? Tag me Today!Mention @LifeisaParty or tag #lifeisaparty!

With this Easy Cheese Straw Recipe, life really is a party!

Rustic Christmas Mantel

Nov 26, 2018 · Leave a Comment

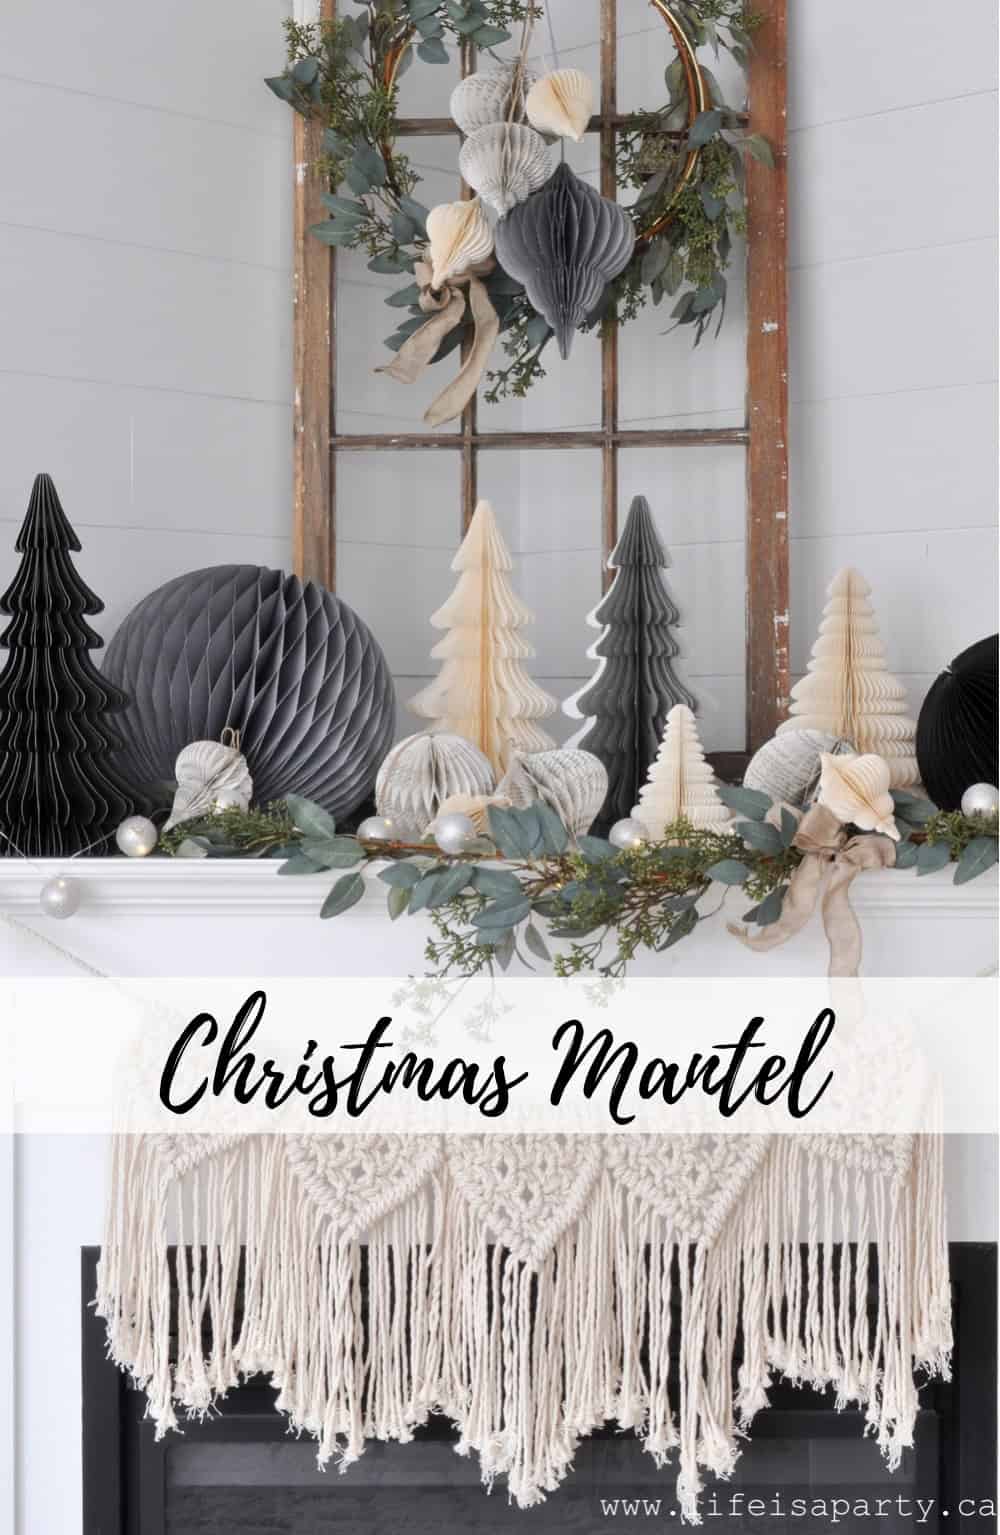
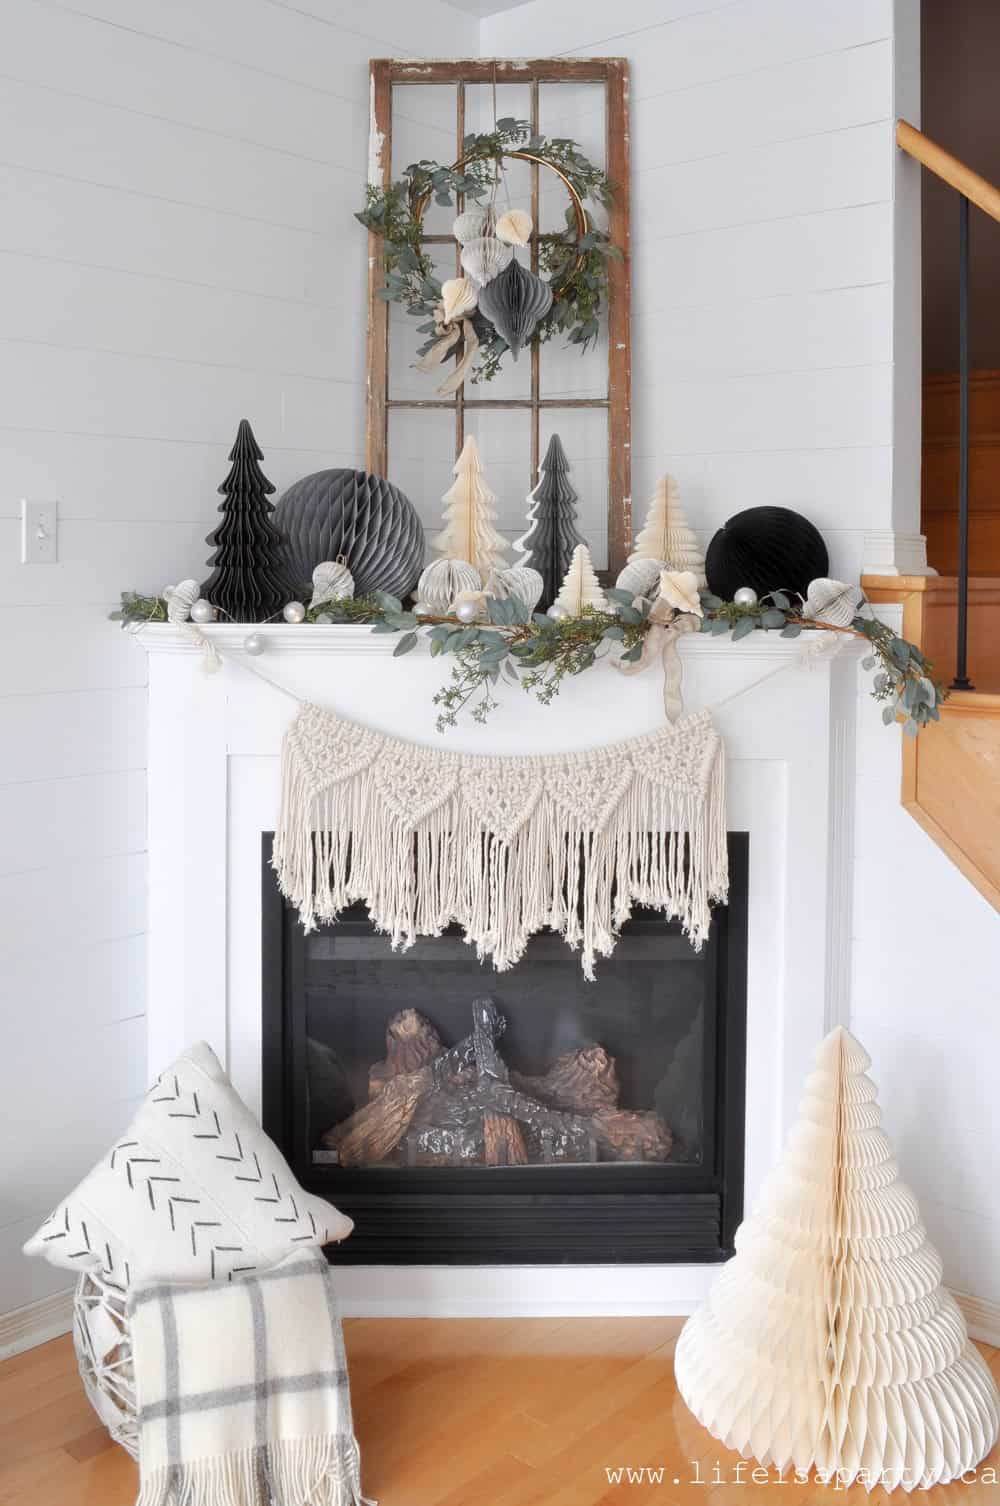
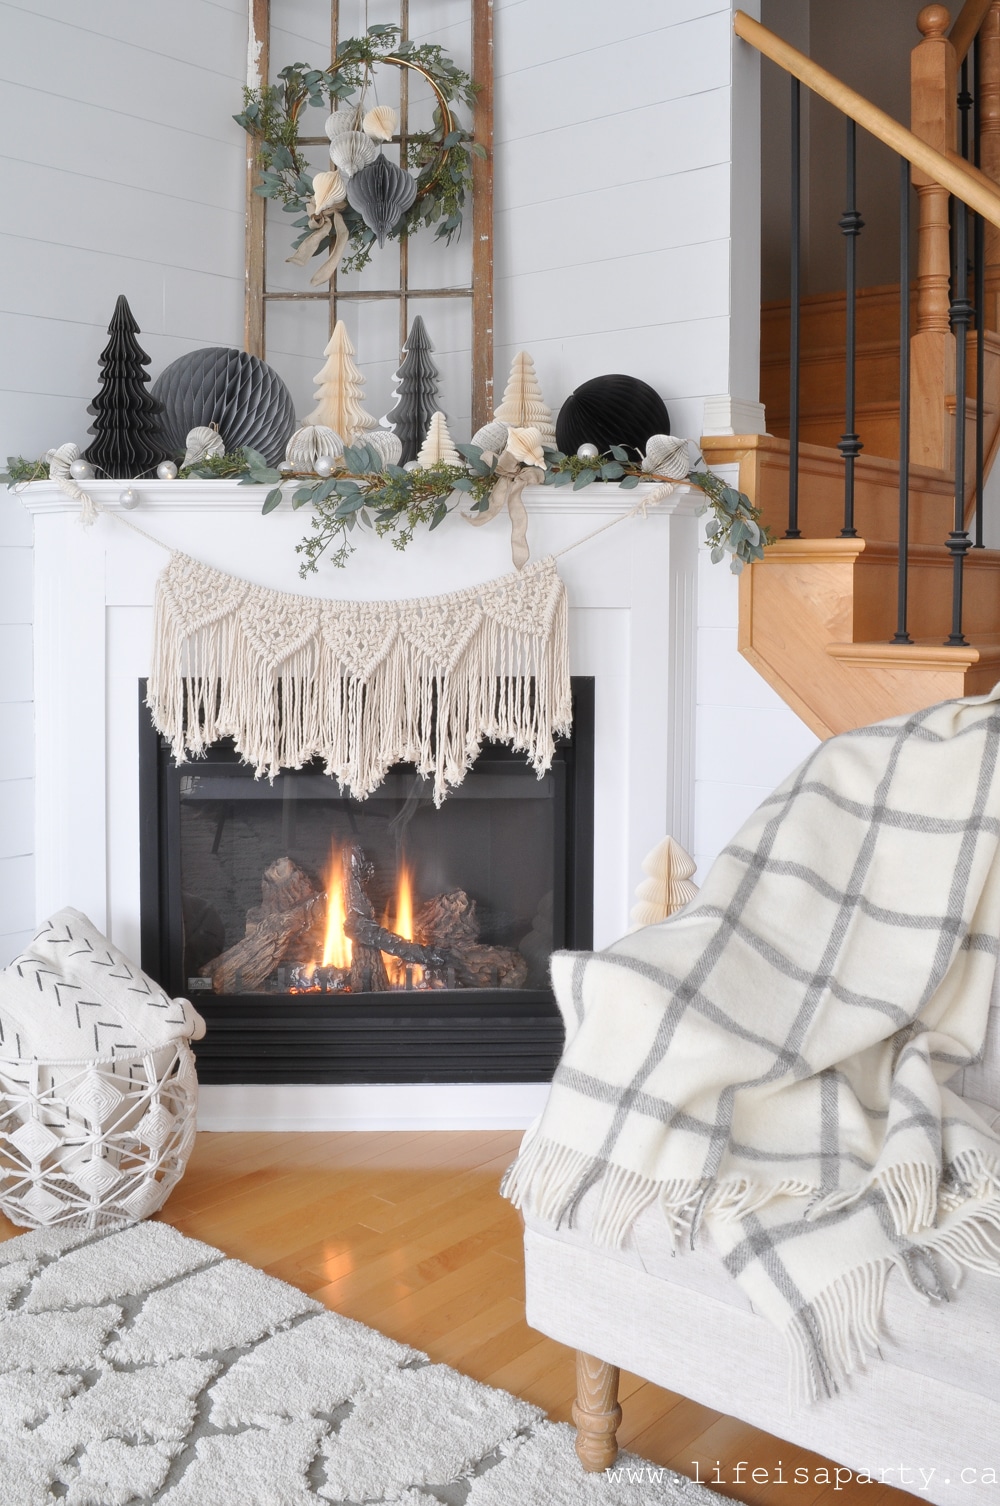
Christmas Mantel: beautiful paper honeycomb ornaments, balls, and Christmas tree decorations, combined with eucalyptus garland and twinkle lights.

Rustic Christmas Mantel: beautiful paper honeycomb ornaments, balls, and Christmas tree decorations, combined with eucalyptus garland and twinkle lights.
Rustic Christmas Mantel: paper honeycomb ornaments, balls, and Christmas tree decorations, with eucalyptus garland and twinkle lights.

I worked with Amara to put together this beautiful Rustic Christmas Mantel and I just love how it turned out.  

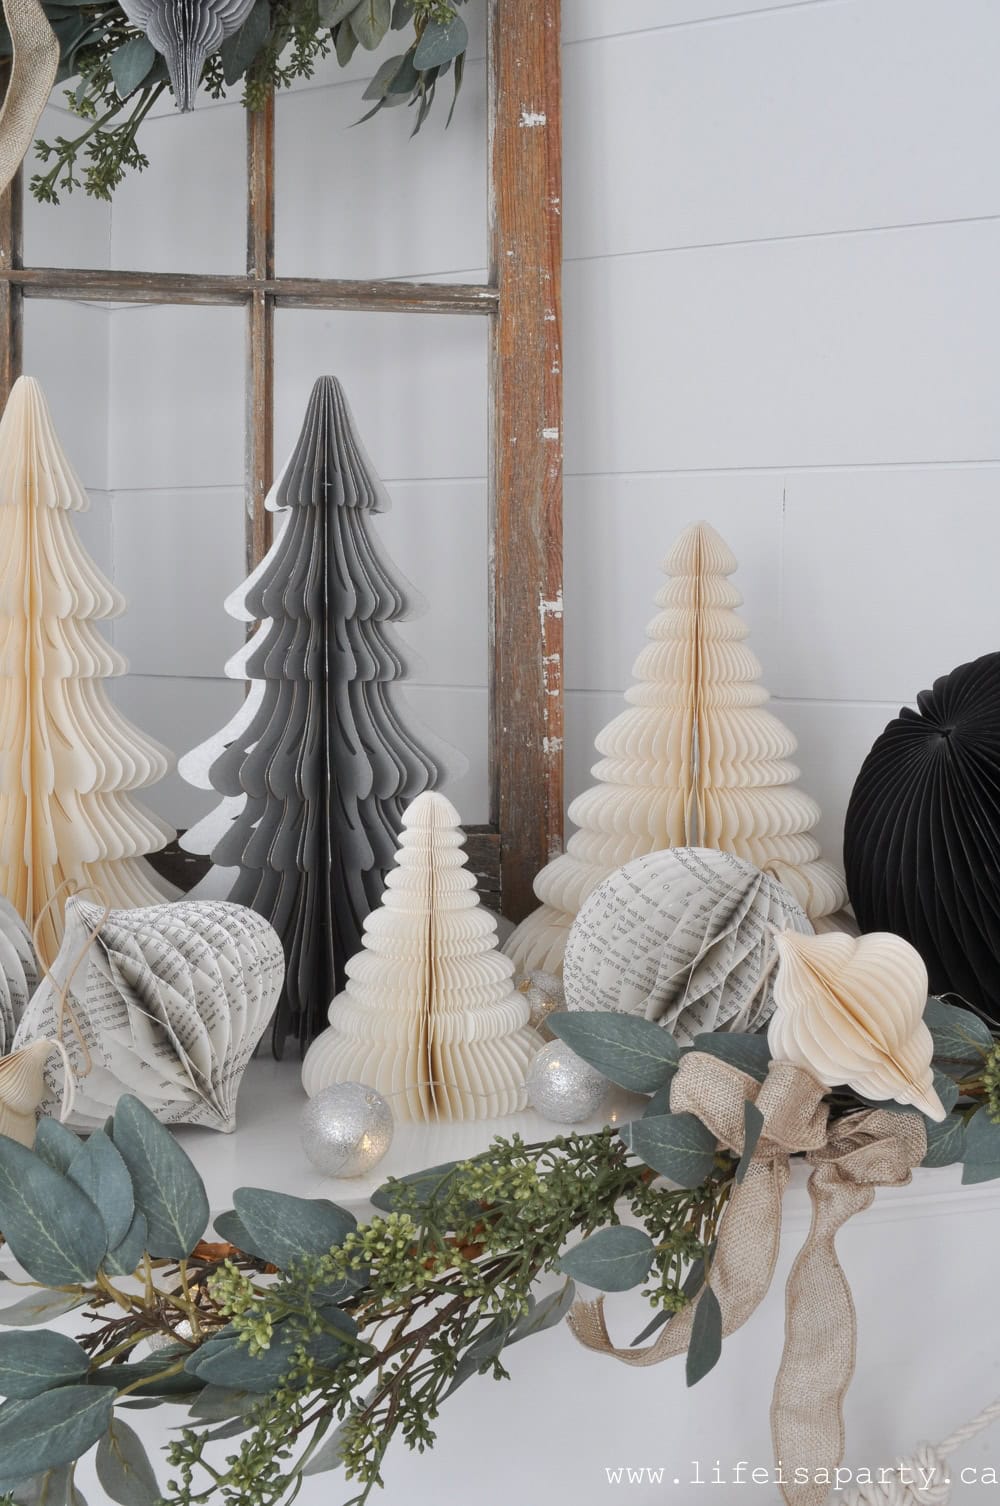
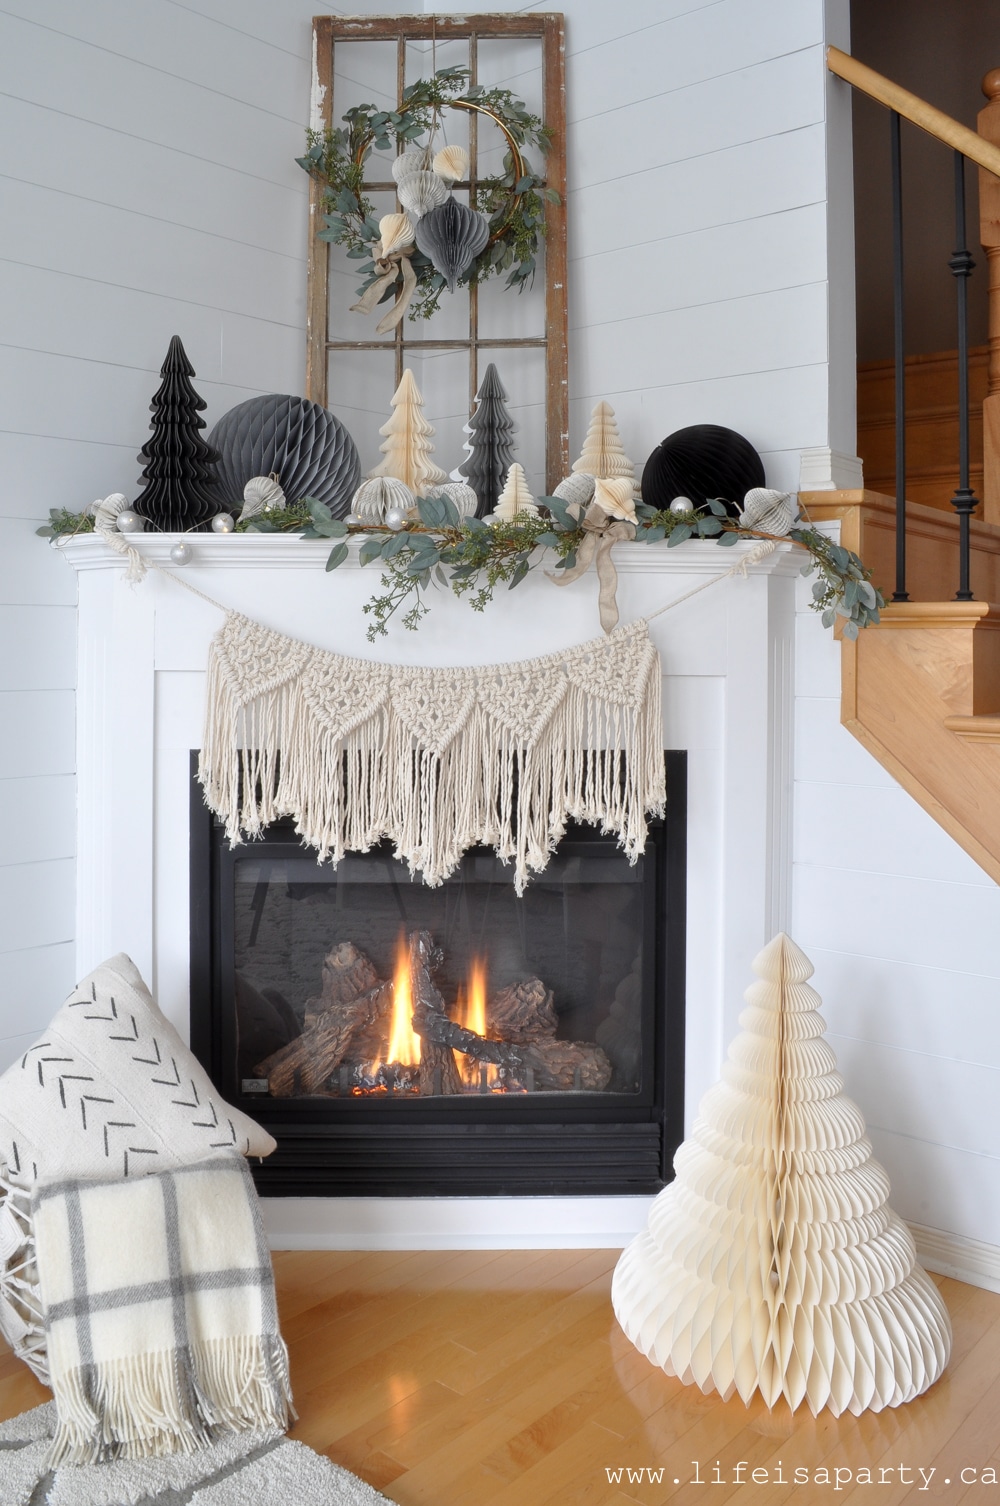
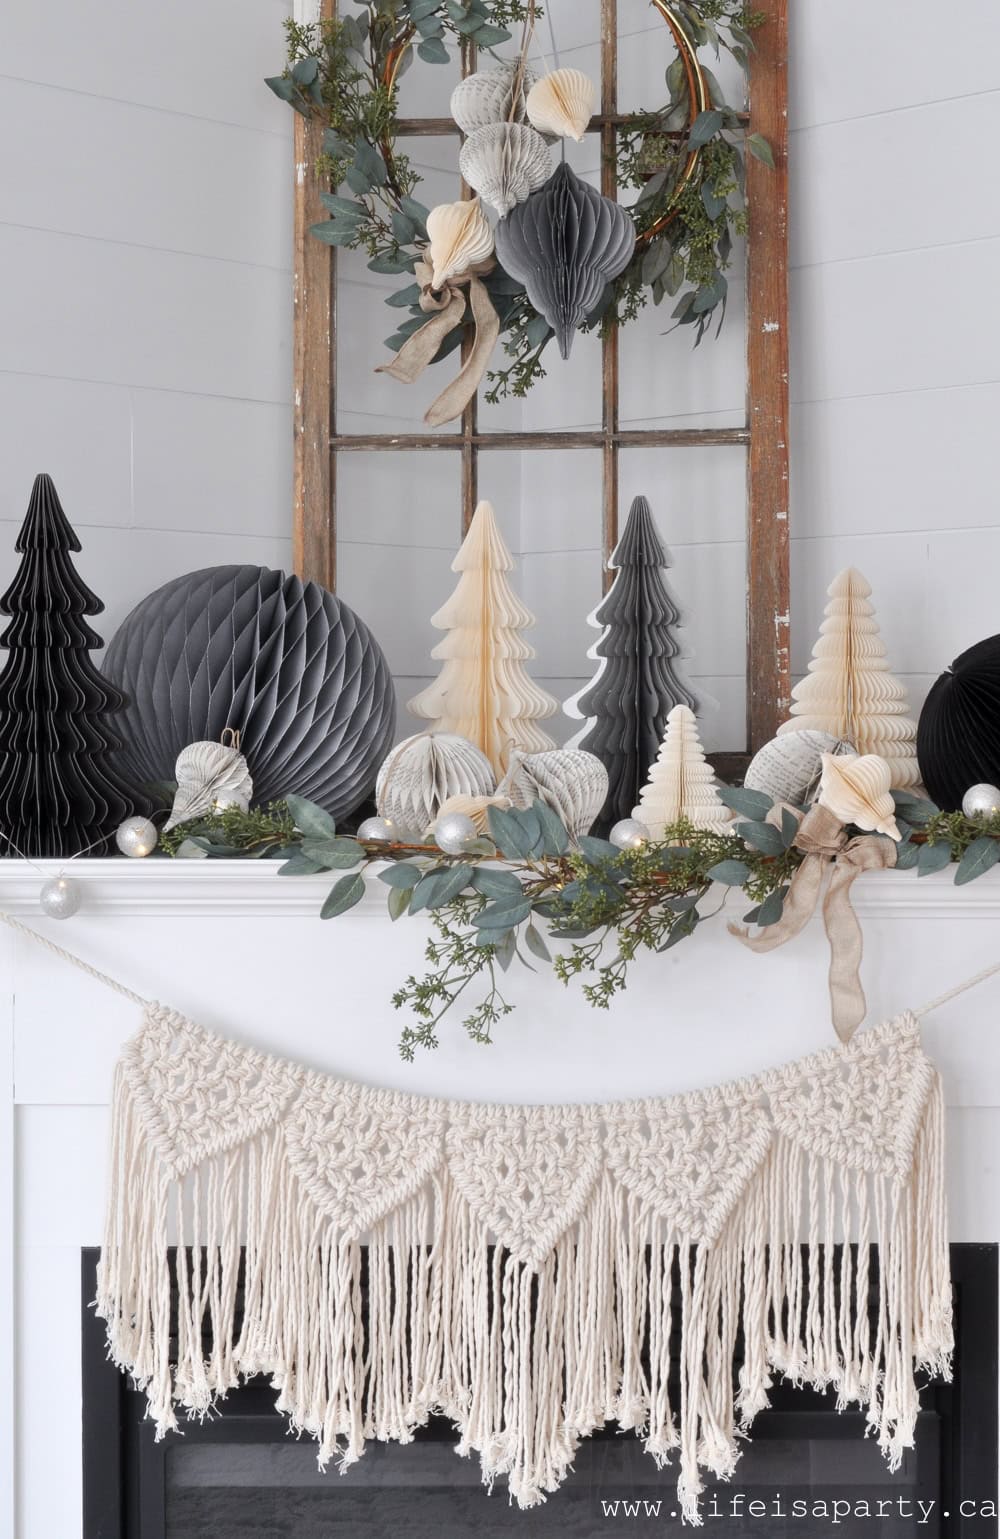
My starting point was their amazing paper ornaments and trees.  I love the Scandi vibe they give the mantel.  I went with a colour scheme of white, grey, and black -you know i love neutrals.  There's only a couple of black pieces, but they really help ground the whole look.

rustic Christams mantel

Paper Decorations

I used a couple of sets of their Christmas trees -the honey comb ones come as a set of three, with the largest one being on the floor.  The quality is amazing.

paper trees and Christmas ornaments

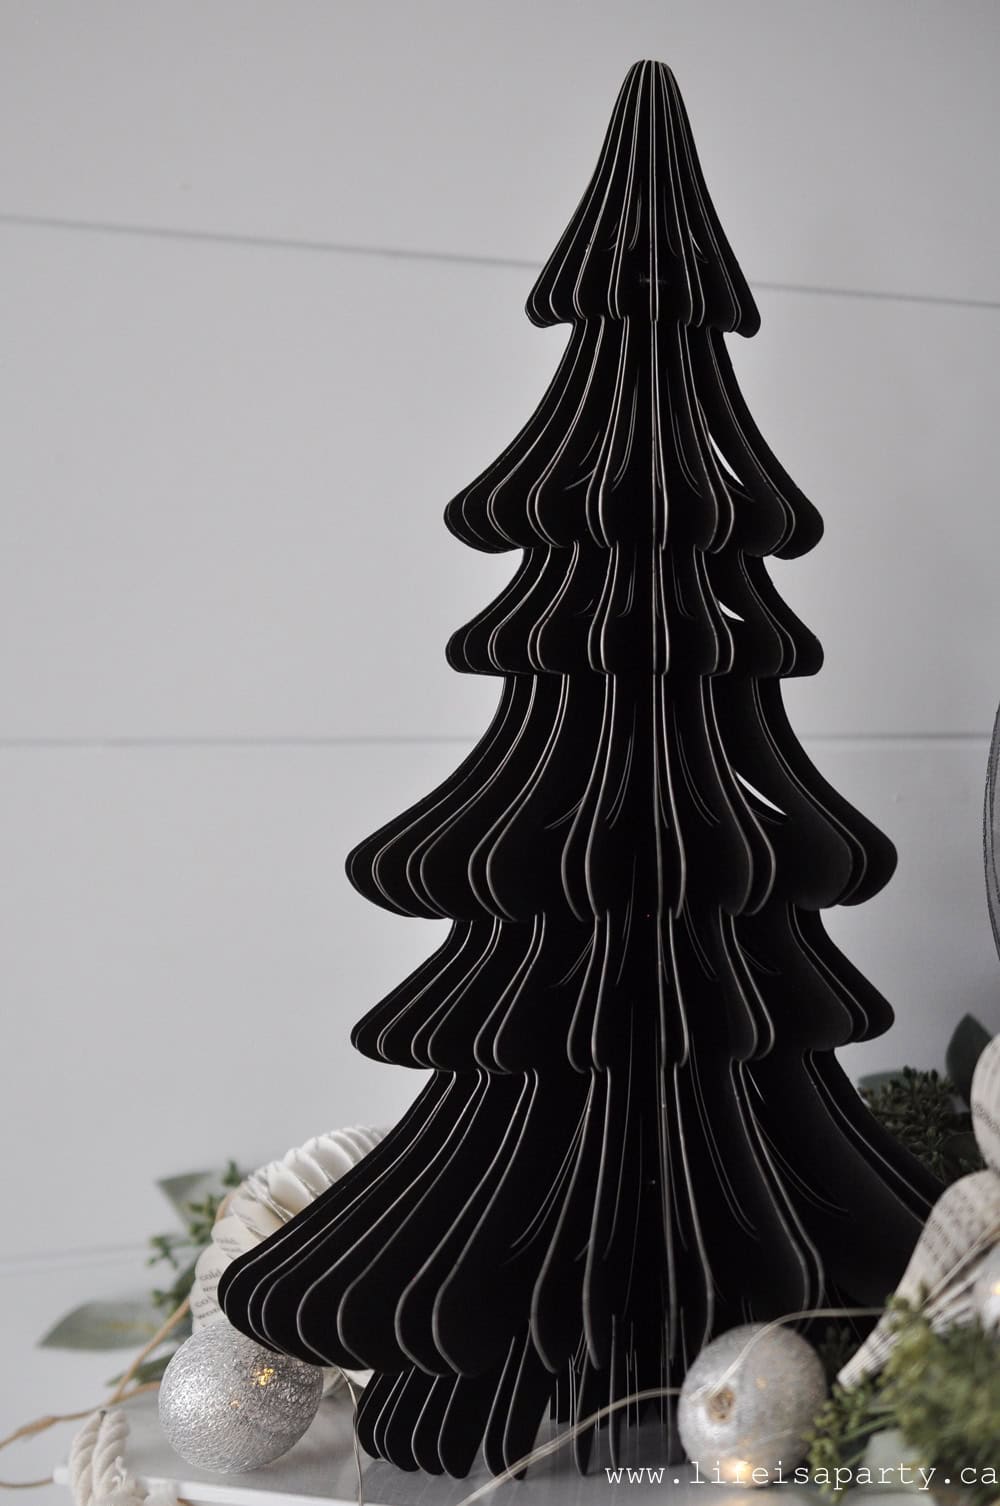
The other Christmas trees are made of cardstock.

black paper Christmas tree

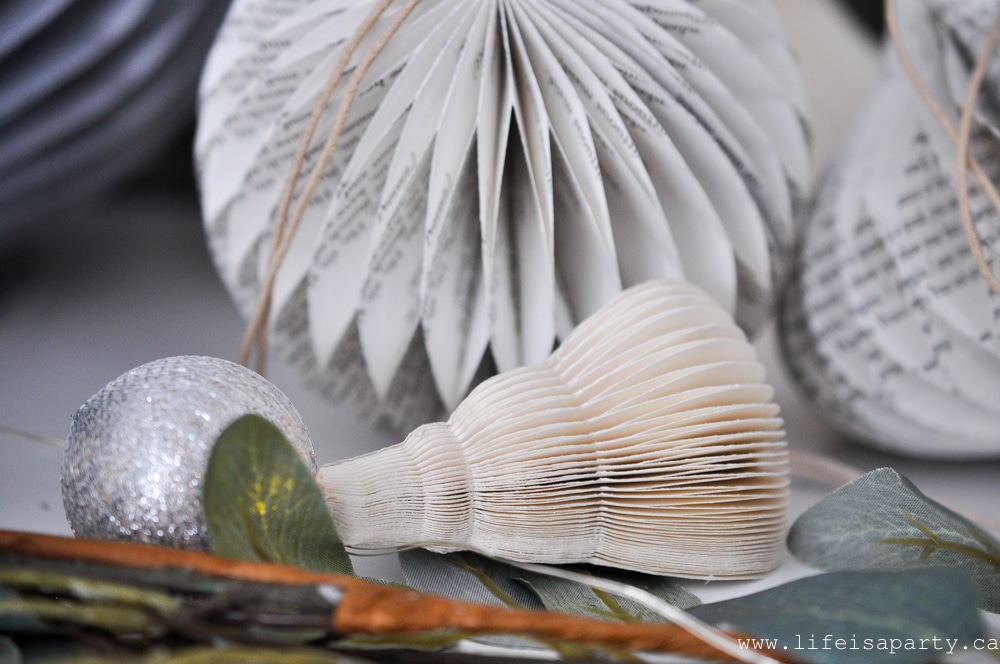
They also have the most beautiful ornaments.  I love that all the paper decorations fold flat for storage, and then open and hold together with magnets.

paper Christmas ornamentsThere are different shapes, sizes, and colours including this ivory set.
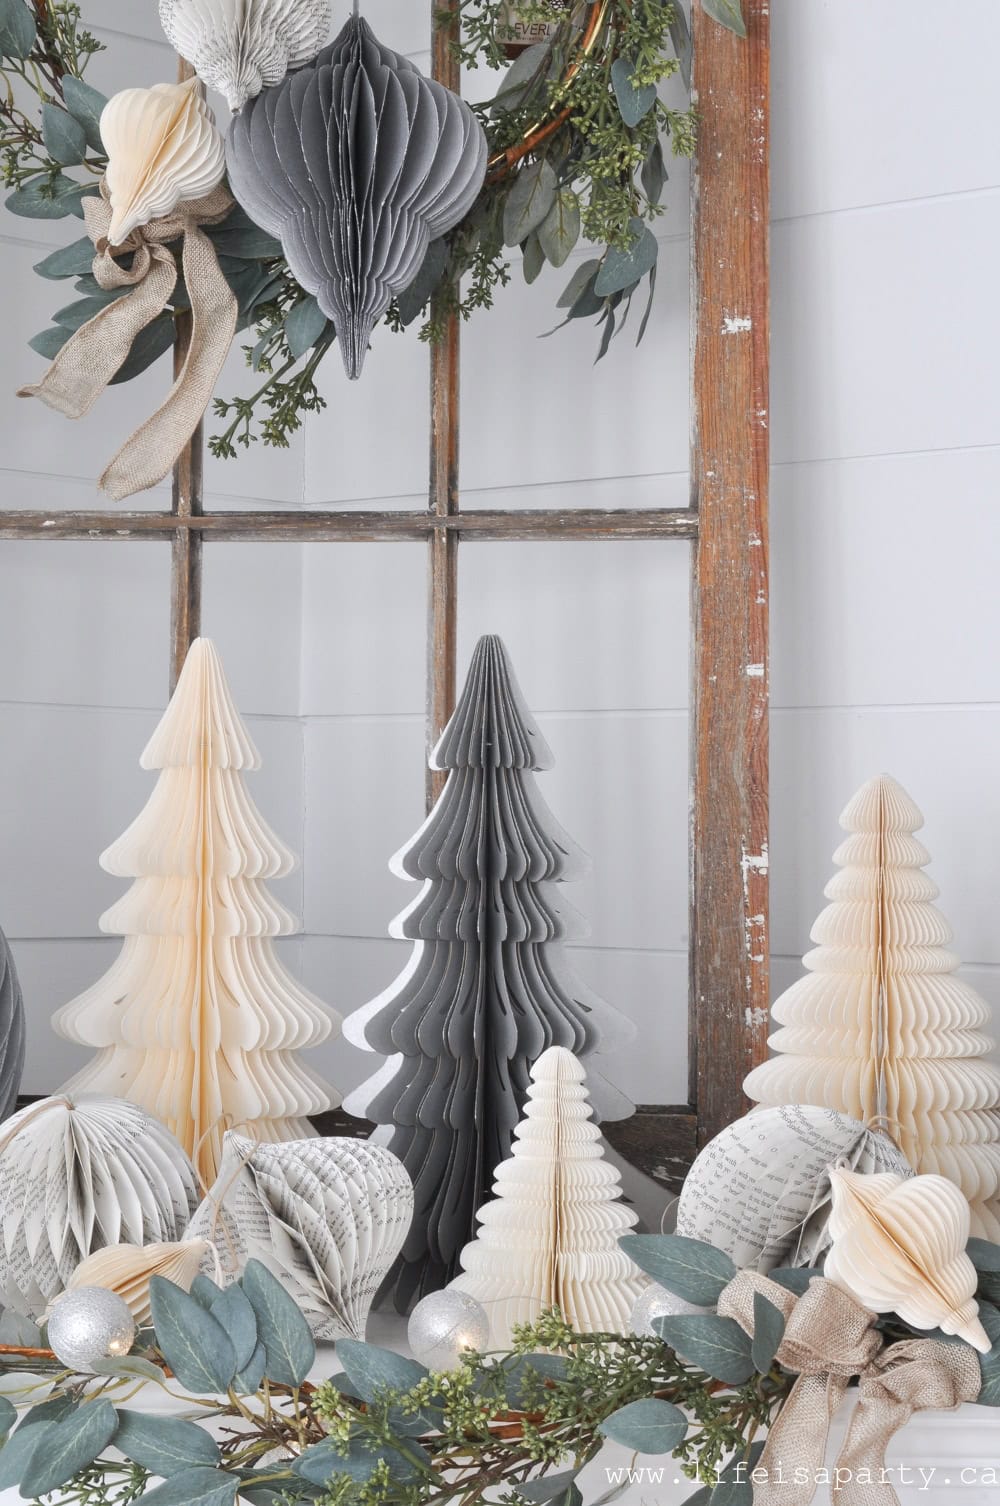
rustic neutral Christmas fireplace mantelI also added in some of the honeycomb balls for interest.  These are not your average tissue paper honeycomb balls.  These are made of cardstock and will last for years and years.  I especially love the silver honeycomb balls with glitter on the edges.
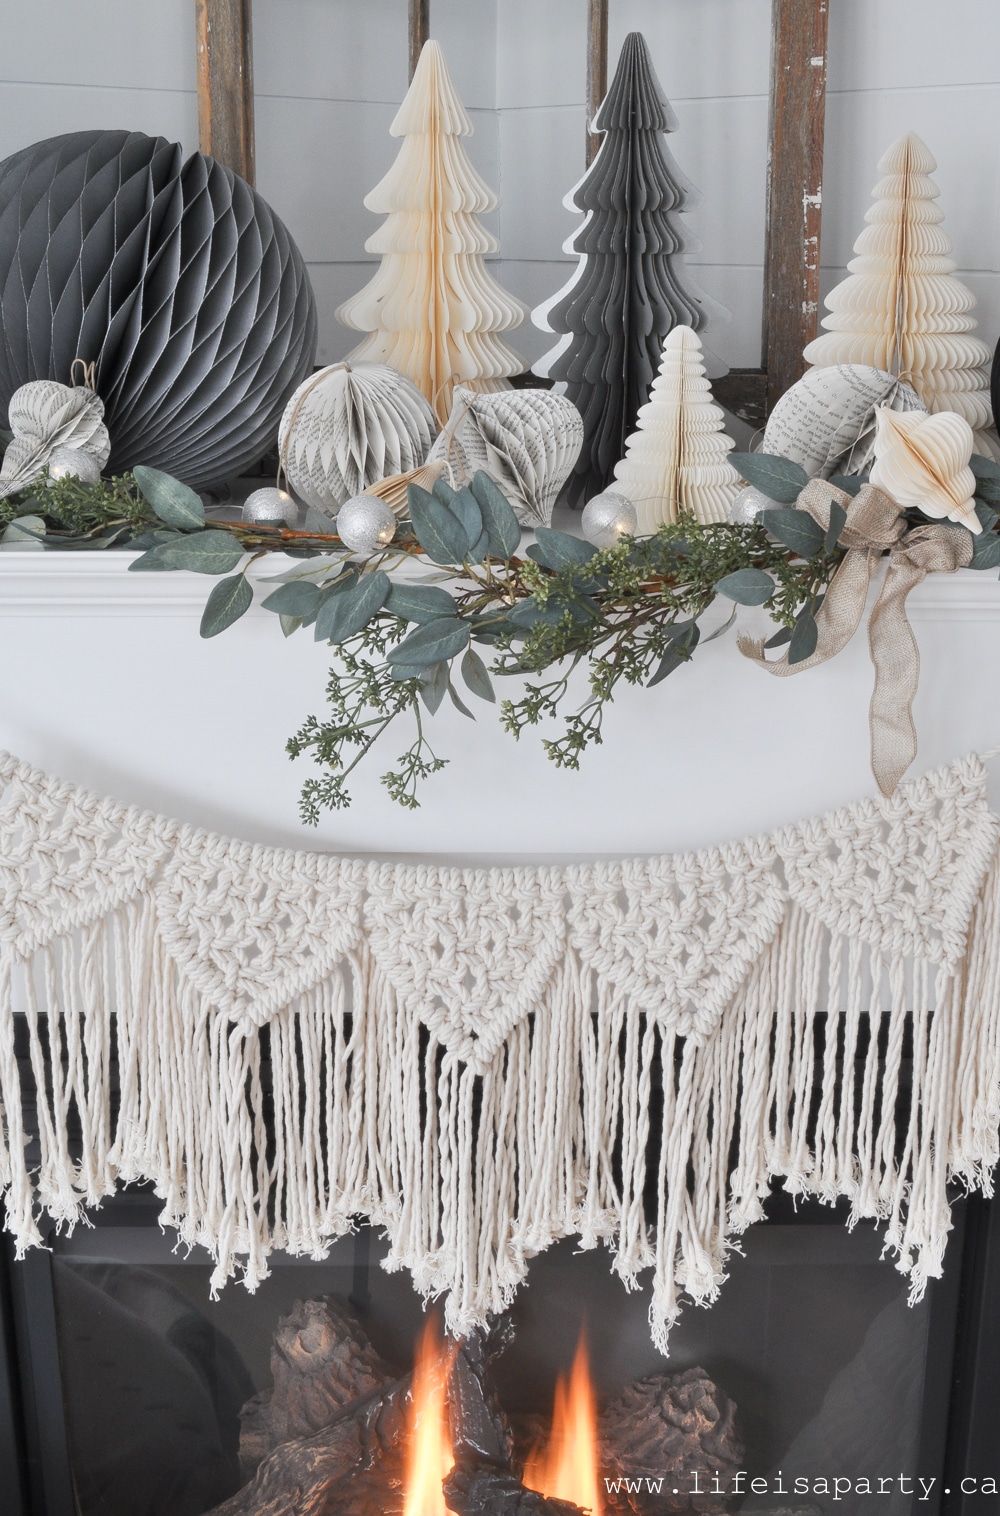
rustic neutral Christmas mantelGarland and Wreath

On the mantel I also added the Deco Sage Leaves Garland,  -love that it's seeded and so real looking.

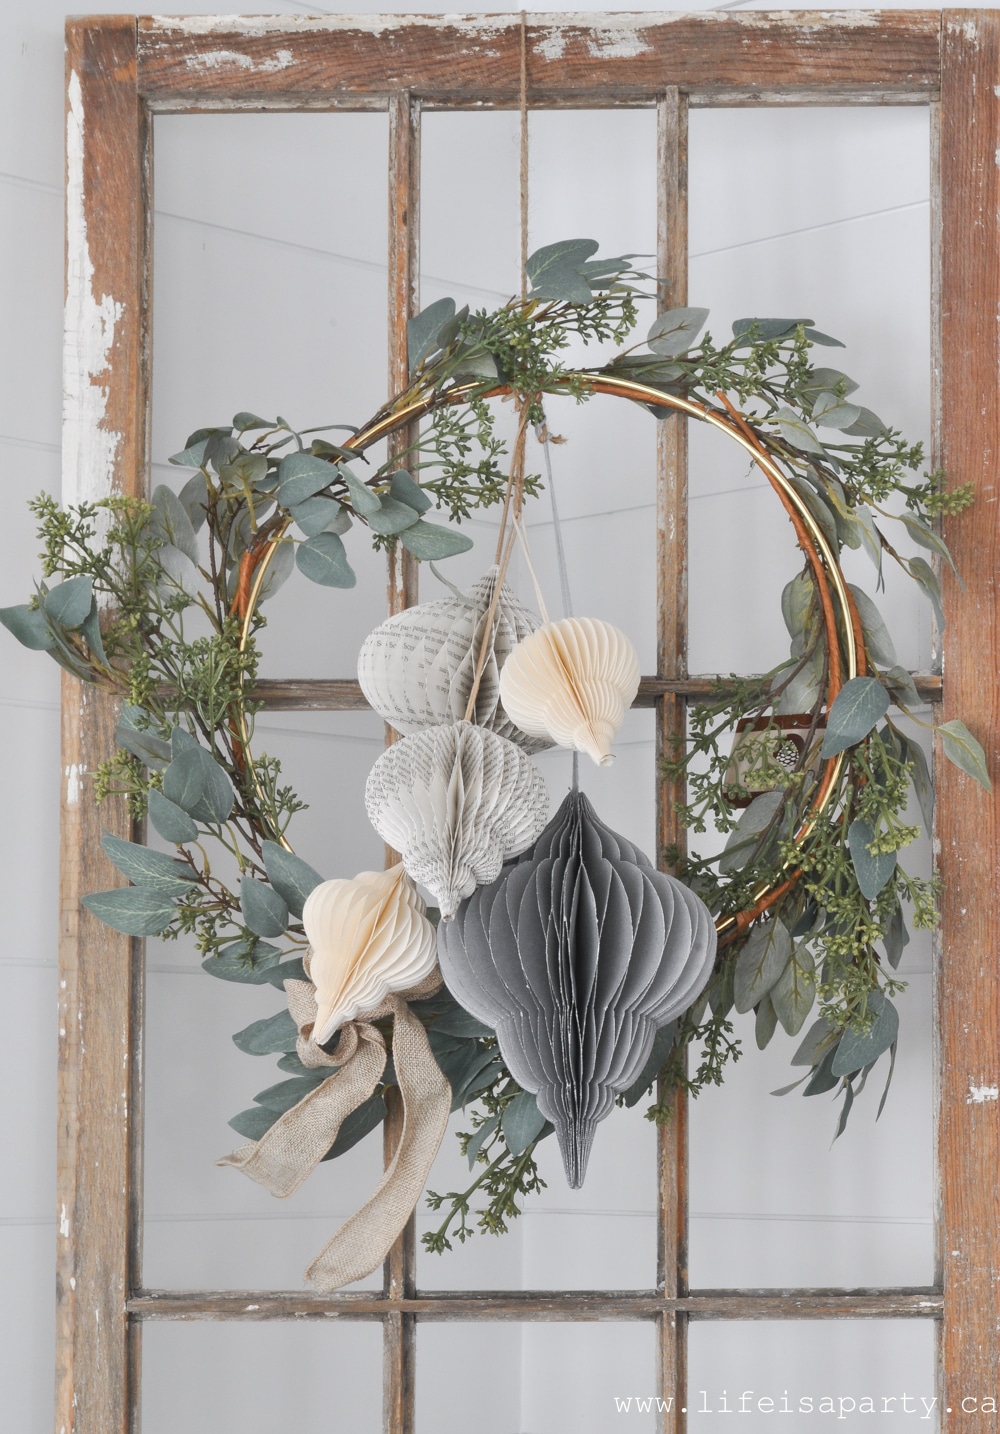
eucalyptus Christmas wreathI used a second garland to make a simple wreath.  I started with a gold hoop and wired the garland around.  In the middle I added another cluster of ornaments.  And they're all hung up on a rustic vintage window pane.  It helps add height to the mantel.
rustic Christmas mantel

Throw Blanket and Twinkle Lights

I also added in a new wool throw blanket in cream, for cozy nights by the fire this winter

rustic neutral Christmas mantel

The macrame garland is an easy DIY, you can see how I made it here.  I also added in a set of pretty silver lights for a little night time sparkle.

rustic Christmas mantel ideasI love how just a few simple paper ornaments make for such a beautiful Christmas mantel.
With a pretty Rustic Christmas Mantel like this, life really is a party!

This post is sponsored by Amara.  All opinions, as always, are my own.  Thanks for supporting the brands that make Life is a Party possible.

More Inspiration

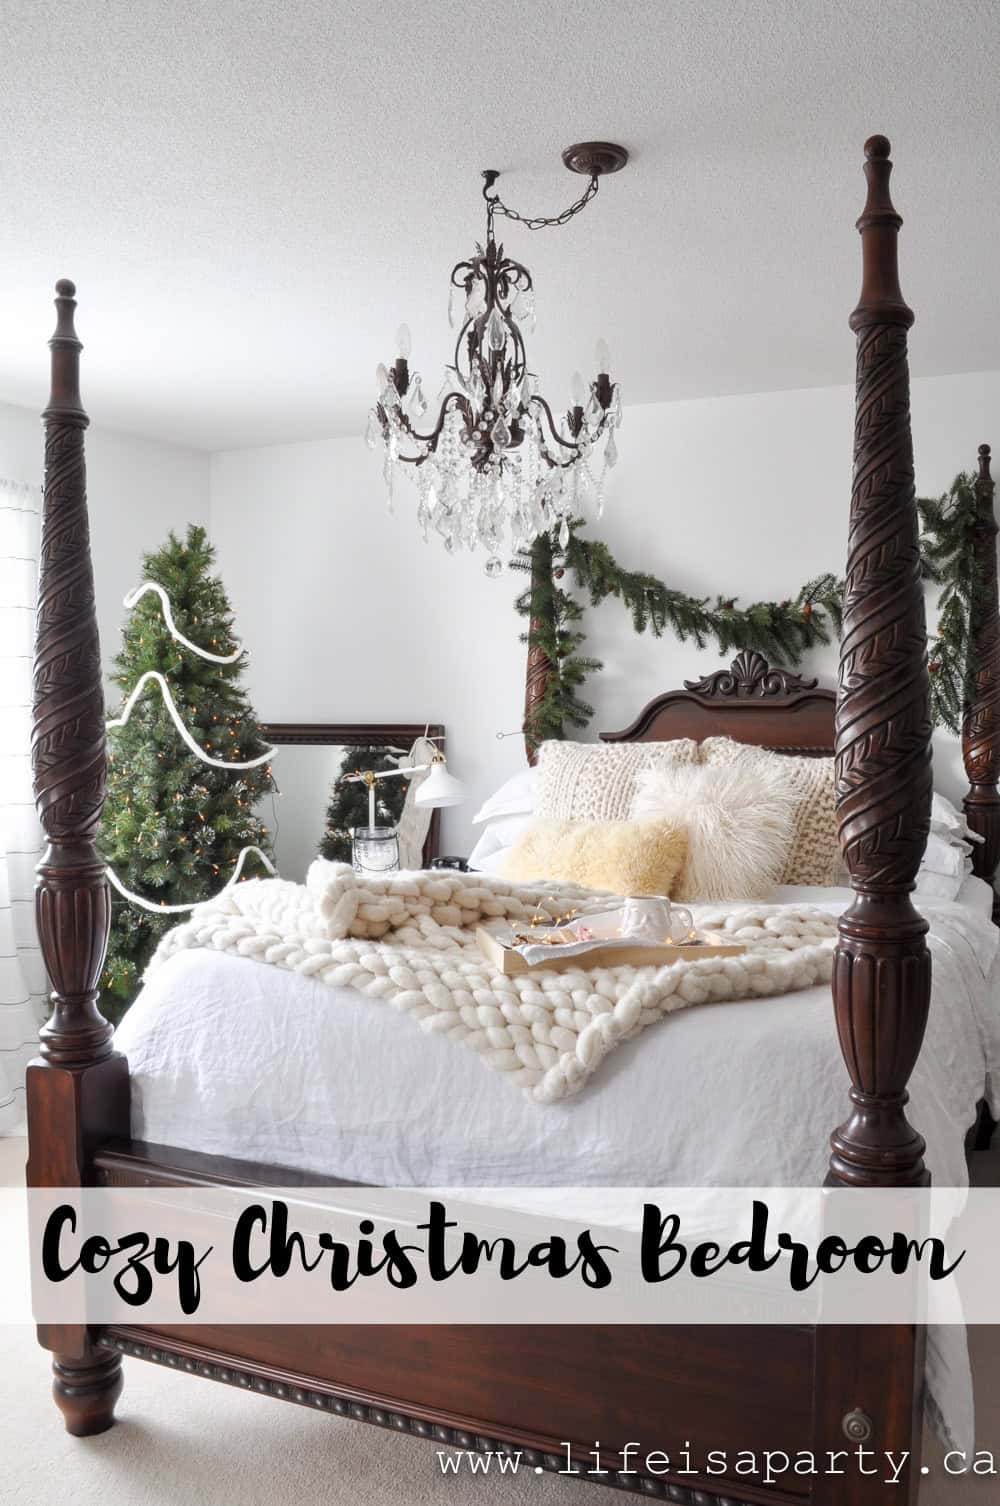
You might also like our Cozy Christmas Bedroom Tour here.

Cozy Christmas Bedroom: Linen and chunky knits, a Christmas tree, candles, and a Christmas gallery wall help create a cozy space for Christmas.

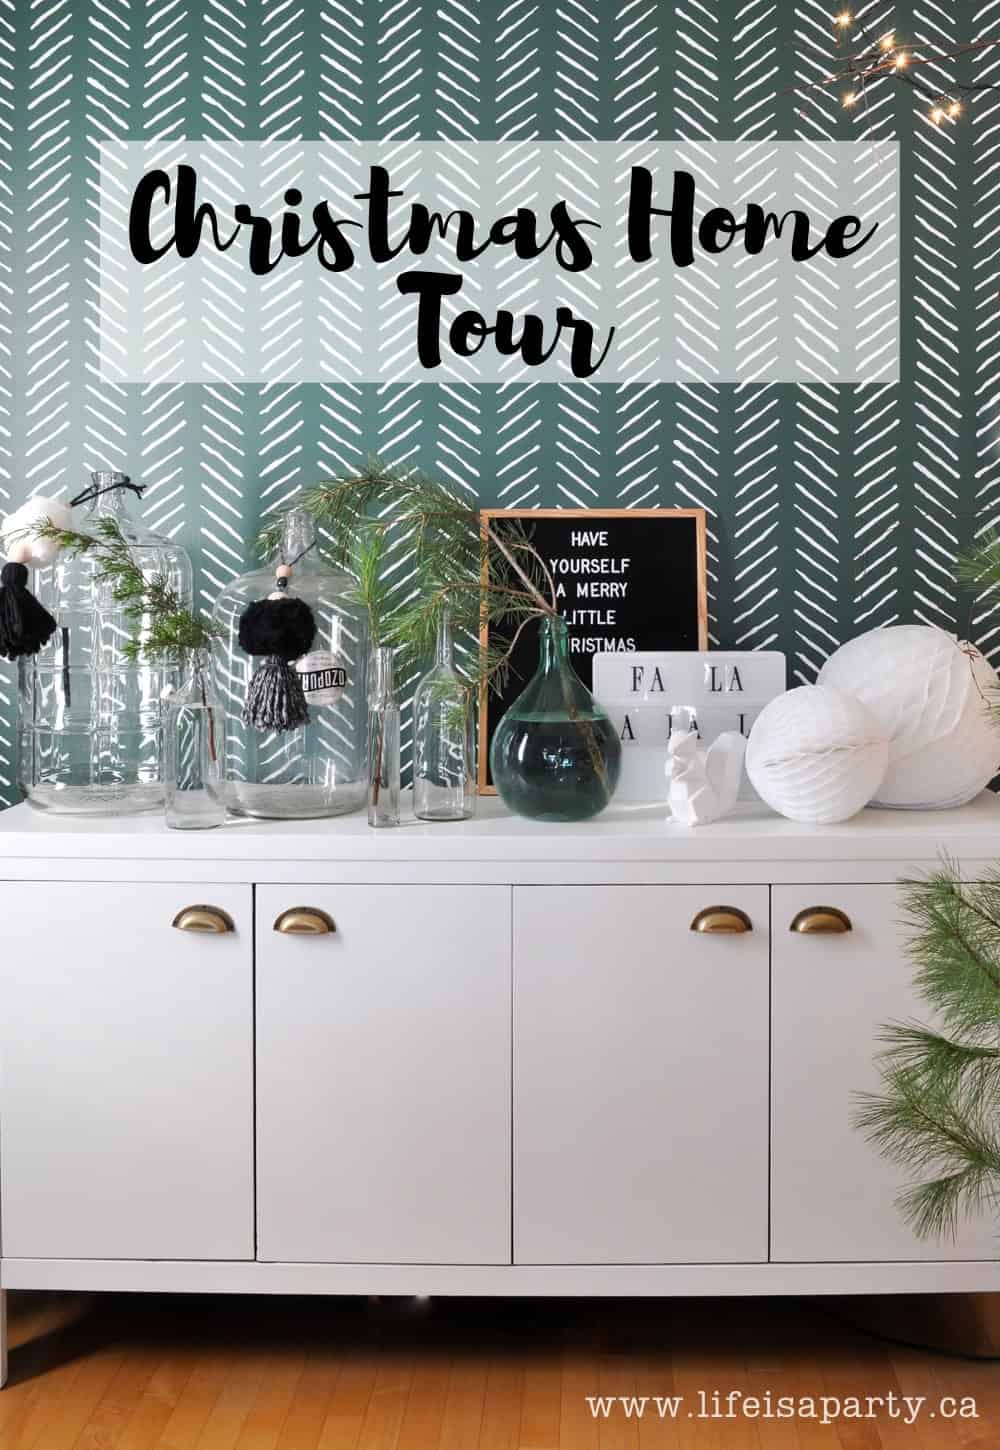
You might also like our Christmas Home Tour with Green Decor here.

Christmas Home Tour: Rustic Scandinavian Christmas Home Tour, with bit of modern boho.

You might also enjoy our Scandinavian Christmas Home Tour here.

Scandinavian Christmas Home Tour: Woodland Rustic Scandinavian Christmas decorations with lots of nature and forest inspired decor.

Boho Christmas Decor Ideas: Complete Guide with DIY Projects

Nov 23, 2018 · Leave a Comment

Boho Christmas decor ideas in black and white.

Transform your home with beautiful boho Christmas decor using natural materials, handmade touches, and layered textures. Includes complete room tour, DIY projects, and budget-friendly shopping tips.

Boho Christmas decor ideas in black and white.
[feast_advanced_jump_to]

A Quick Look

  • 🎄 Christmas Project: Boho Christmas decorating guide with room tour and DIY projects.
  • ⏲️ Decorating Time: Weekend project (2-3 days to complete a room).
  • 💰 Budget: Very budget-friendly with thrift finds and DIY projects.
  • 💭 Top Tip: Focus on texture and layering -mix macrame, wood, sheepskin, and natural elements for authentic boho style!

Why You'll Love Boho Christmas Decor

  • Effortlessly Beautiful -The layered, textured look feels collected over time, not perfectly styled.
  • Budget-friendly Approach -Thrift stores, DIY projects, and natural materials keep costs low.
  • Unique -Handmade touches and vintage finds mean no two boho spaces look the same.
  • Versatile Color Options - Works with neutral palettes, black and white, or vibrant colorful schemes.
  • Cozy and Welcoming -Natural materials and soft textures create the warmest holiday atmosphere.
  • Sustainable Decorating -Many elements can be reused, repurposed, or made from natural materials.
Bo Ho Christmas decor ideas from Life is a Party graphic.

Boho Christmas decor is one of my favorite decorating styles because it celebrates handmade touches, natural materials, and that perfectly imperfect layered look that feels warm and welcoming. After years of creating seasonal home tours and DIY projects, I've learned exactly what makes Christmas decor feel authentically bohemian - and it's not just about buying the right products.

In this complete guide, I'm breaking down everything you need to know about boho Christmas decorating. You'll learn the key elements that define boho style, how to decorate a boho Christmas tree, inspiring ideas from our own black and white boho family room tour, DIY projects to create your own decorations, and where to shop for boho decor on any budget. Whether you're going for traditional neutral tones or something more unique, you'll find inspiration and practical tips throughout.

If you love boho Christmas decor, you might also enjoy our Modern Boho Fall Mantel, Modern Boho Christmas Wreath, DIY Wood Ball Christmas Ornaments, or Pastel Colorful Christmas Living Room for more seasonal decorating inspiration.

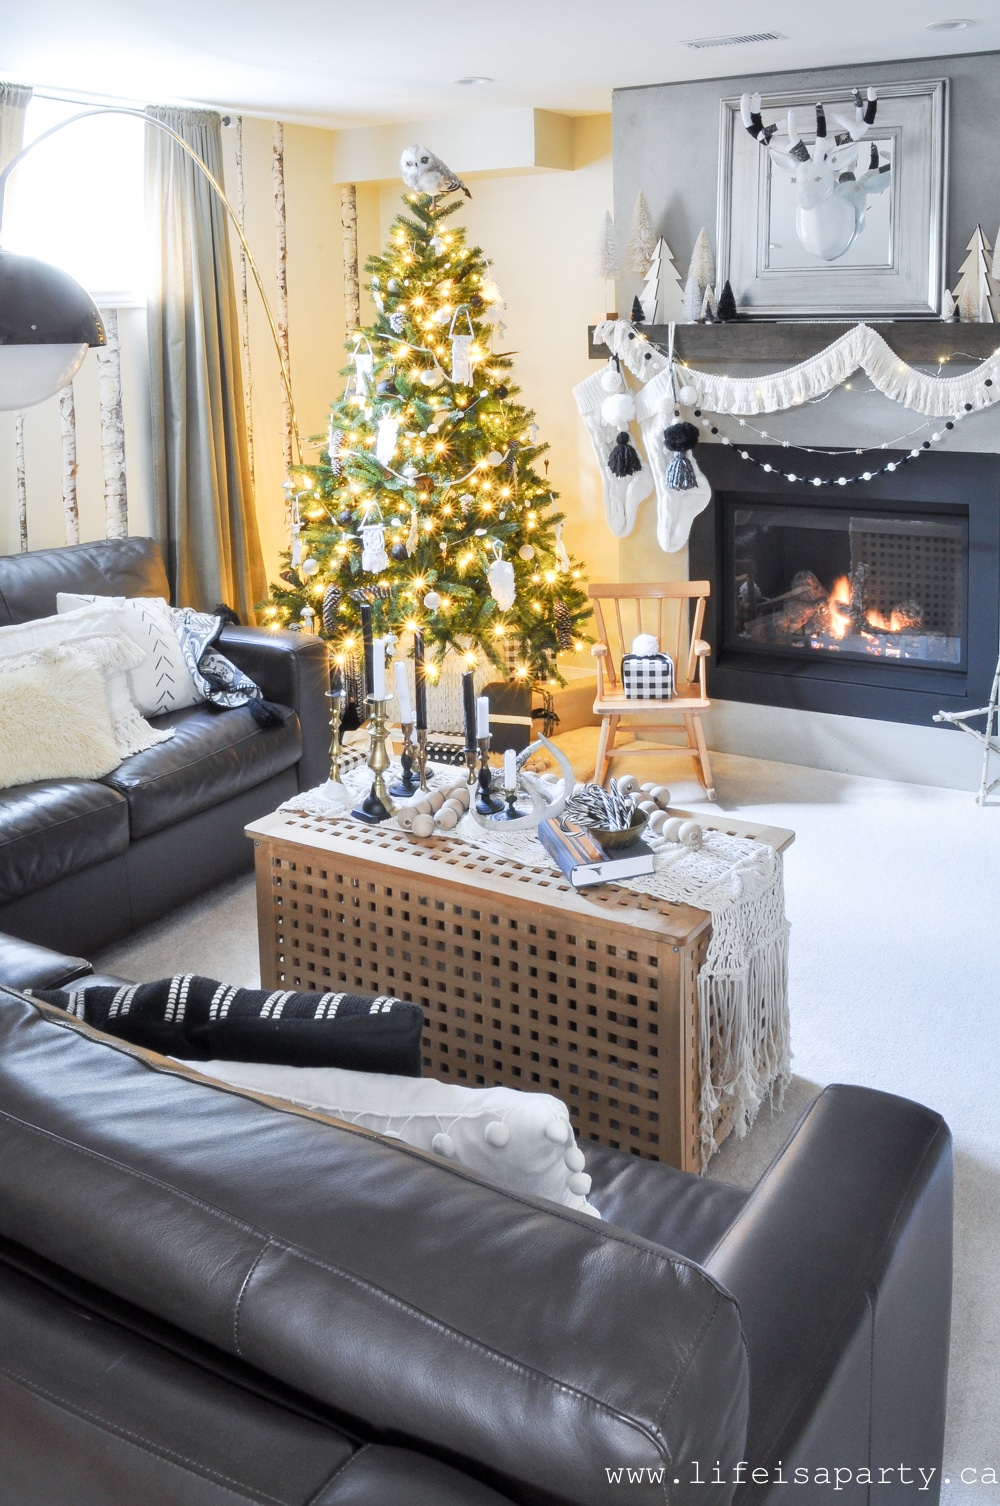
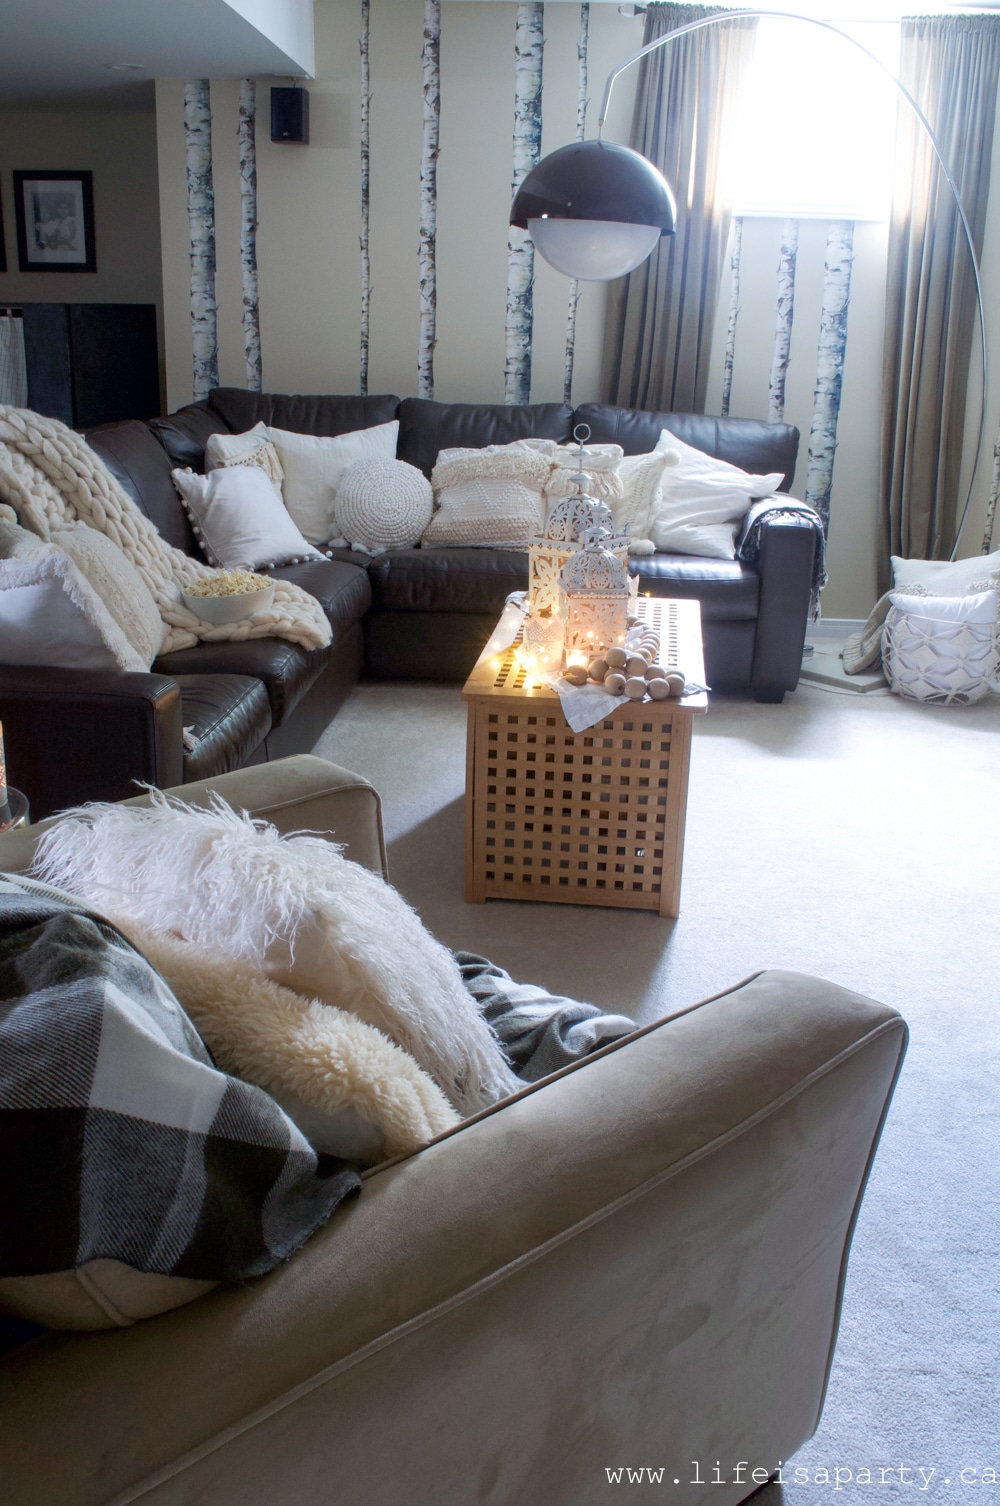
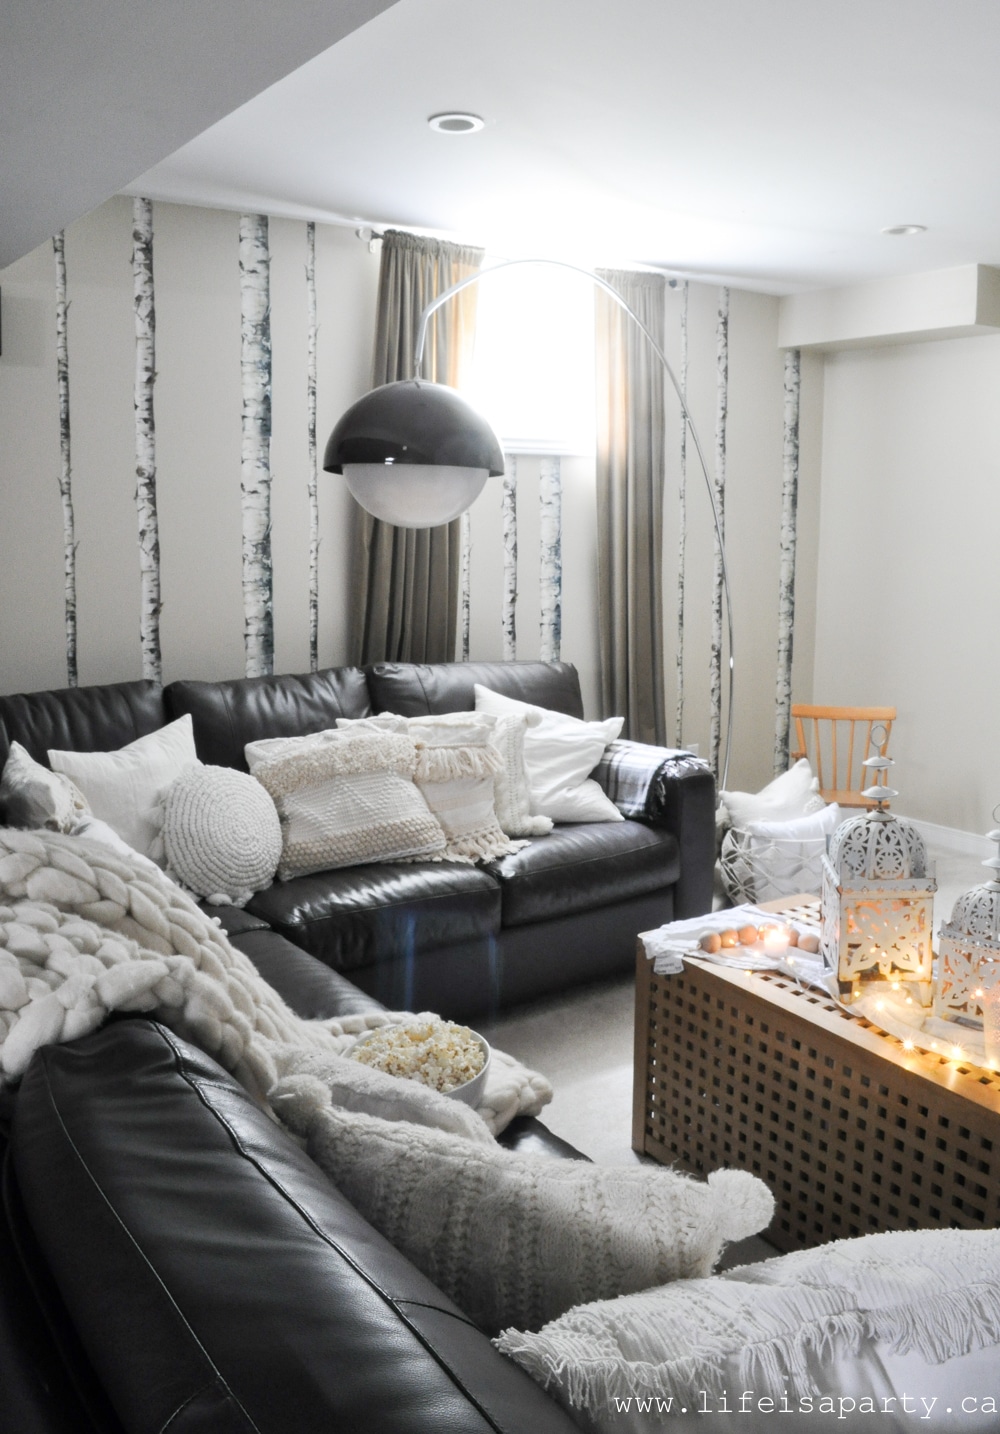
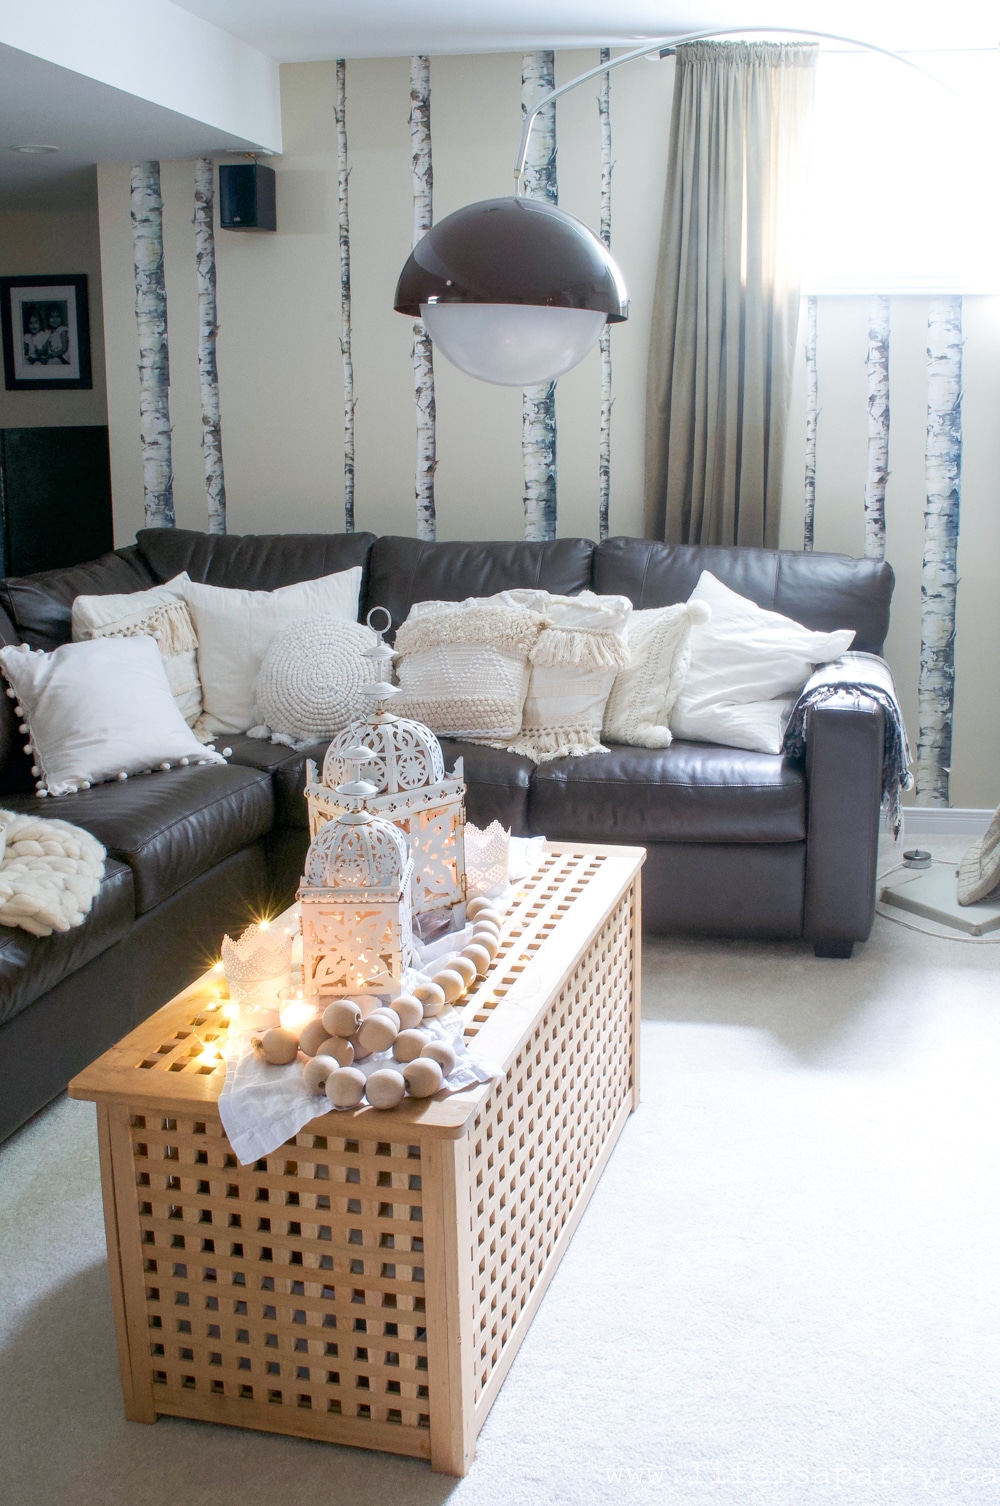
Brown leather sectional sofa with black and white cushions, and bo ho Christmas decor on the coffee table in front of it.

What is Boho Christmas Decor?

Boho Christmas decor blends bohemian style with holiday celebrations. It's characterized by natural materials, handmade touches, layered textures, and an effortless eclectic vibe that feels collected over time.

Unlike traditional Christmas decorating with its formal arrangements and matching sets, boho style embraces imperfection and personality. Think macrame ornaments instead of glass balls, wooden beads draped on trees, tassels and pom poms mixed with evergreen branches, and vintage finds alongside handmade treasures.

The bohemian approach to Christmas decorating celebrates:

  • Natural Materials: Wood, jute, rattan, feathers, dried flowers, pinecones, sheepskin, cotton, and other organic elements take center stage instead of plastic decorations.
  • Handmade and Vintage: DIY ornaments, thrifted finds, and handcrafted items add personal touches and unique character. Nothing feels mass-produced or cookie-cutter.
  • Texture and Layering: Multiple textures create visual interest, warmth and coziness. Macrame, woven textiles, fuzzy sheepskin, smooth wood, and rough natural fibers all layer together beautifully.
  • Global and Eclectic Influences: Boho style draws inspiration from many cultures and eras.
  • Relaxed and Collected: The overall vibe feels casual and lived-in, like you've gathered these beautiful things over time rather than buying everything new at once.
  • Versatile Color Palettes: Boho Christmas works with many color approaches. Neutral and brown schemes (creams, beiges, tans) are most common and create calm, cohesive spaces. Black and white boho (our choice!) offers dramatic contrast while staying neutral. Colorful boho embraces jewel tones, vibrant textiles, and global-inspired hues. Desert terracotta palettes feature warm rust, clay, and sand tones. Choose the palette that speaks to you, as long as you layer textures and natural materials, it will feel authentically bohemian.

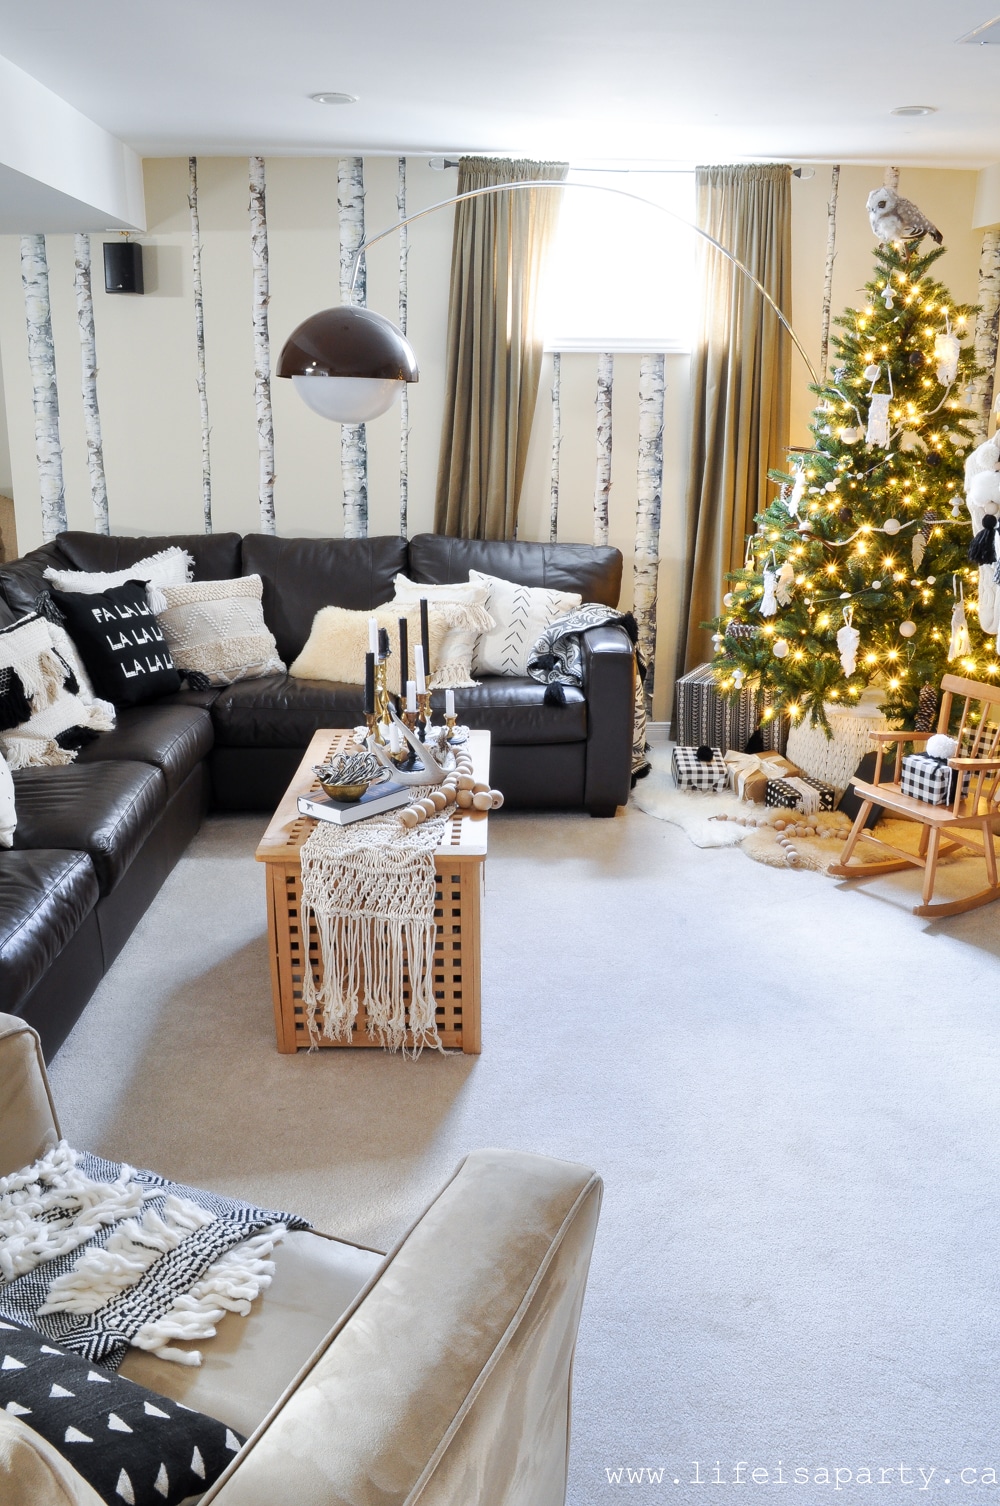
This year I created a black and white boho Christmas look in our basement family room, and it's become our favorite spot for movie nights and holiday gatherings. The space feels cozy, personal, and completely different from traditional red and green Christmas decor. It's so inviting and our favorite spot to be right now.

Boho inspired Christmas decor and Christmas tree in black and white.

Boho Christmas vs Other Christmas Styles

Understanding how boho differs from other popular Christmas decorating styles can help you create an authentic bohemian look.

Boho vs Farmhouse Christmas: Farmhouse style tends toward rustic wood, galvanized metal, and a more structured aesthetic. Boho is softer, more textured, and more eclectic. While farmhouse might feature buffalo check and clean lines, boho embraces tassels, macrame, and layered patterns.

Boho vs Modern Christmas: Modern Christmas decor emphasizes clean lines, minimal ornamentation, and metallic finishes. Boho is the opposite -maximalist layering, natural materials, and intentionally imperfect handmade touches.

Boho vs Traditional Christmas: Traditional Christmas uses formal arrangements, matching ornament sets, and classic red and green color schemes. Boho Christmas is more free-form, mixes diverse elements, and often uses neutral or unexpected color palettes.

The beauty of boho style is you can incorporate elements from other aesthetics. Mix in some farmhouse wood pieces, add modern brass candlesticks, or include traditional family ornaments. As long as you maintain that layered, textured, eclectic bohemian vibe, it works.

Key Boho Christmas Decor Elements

To create authentic boho Christmas style, focus on these essential elements:

1. Macrame and Textiles

Macrame is the quintessential boho material. Macrame wall hangings, garlands, ornaments, plant hangers, and tree skirts all add that distinctly bohemian touch. Woven textiles, tassels, fringe, and pom poms create similar texture and visual interest.

We made several macrame Christmas ornaments for our tree this year, and they're actually quite easy once you learn the basic knots. The handmade quality is what makes them so special.

2. Natural Materials

Wood, jute, rattan, feathers, dried flowers, pinecones, branches, and other natural elements are essential for boho style. These organic materials create warmth and connect your indoor space to nature.

Our DIY Wood Ball Boho Ornaments were simple to make and add beautiful natural texture to the tree. We also incorporated real feathers, pinecones we collected on walks, and birch branches throughout the room.

3. Neutral and Earthy Color Palettes

While boho can be colorful (more on that below), neutral palettes are most common. Think creams, beiges, tans, browns, natural wood tones, and soft whites. These colors create a calm, cohesive backdrop for layering textures.

We chose black and white for our boho Christmas -a less common but equally bohemian approach that creates dramatic contrast while maintaining the neutral, earthy feel.

4. Tassels and Pom Poms

These playful textural elements are boho signatures. Add tassels to stockings, garlands, gift wrap, and ornaments. String pom pom garland around trees, windows, and mantels. Mix sizes and textures for visual interest.

Our DIY Stocking Tassels transformed plain stockings into statement pieces. We also made tassels for gift toppers using yarn and wooden beads.

5. Vintage and Handmade Items

Thrifted finds and DIY projects give boho spaces their unique character. Shop secondhand for brass candlesticks, vintage textiles, wooden items, and unusual decorative pieces. Make your own ornaments, garlands, and decorations.

Most of our decor this year came from thrift stores (candlesticks, baskets, frames) or we made it ourselves. This kept our budget low while creating a one-of-a-kind look.

6. Plants and Natural Elements

Even in winter, plants and greenery are essential for boho style. Use real evergreen branches, eucalyptus, pampas grass, dried flowers, or even your houseplants as part of your Christmas decor. Natural elements bring life and organic beauty to the space.

We incorporated real evergreen branches, collected pinecones, and a few antlers we found on woodland walks. These natural touches enhanced the earthy, bohemian feel.

7. Global and Eclectic Touches

Boho embraces diverse influences. Moroccan lanterns, tribal patterns, vintage textiles from around the world, and eclectic collected items all work together. The key is mixing them with intention while maintaining overall cohesion through color palette and texture.

We included Moroccan-style lanterns on our shelves and mixed in a disco ball for unexpected eclectic fun. The well-traveled, collected look is essential to boho style.

How to Create a Boho Christmas Tree

The Christmas tree is the centerpiece of any holiday decor, and a boho tree has distinct characteristics that set it apart.

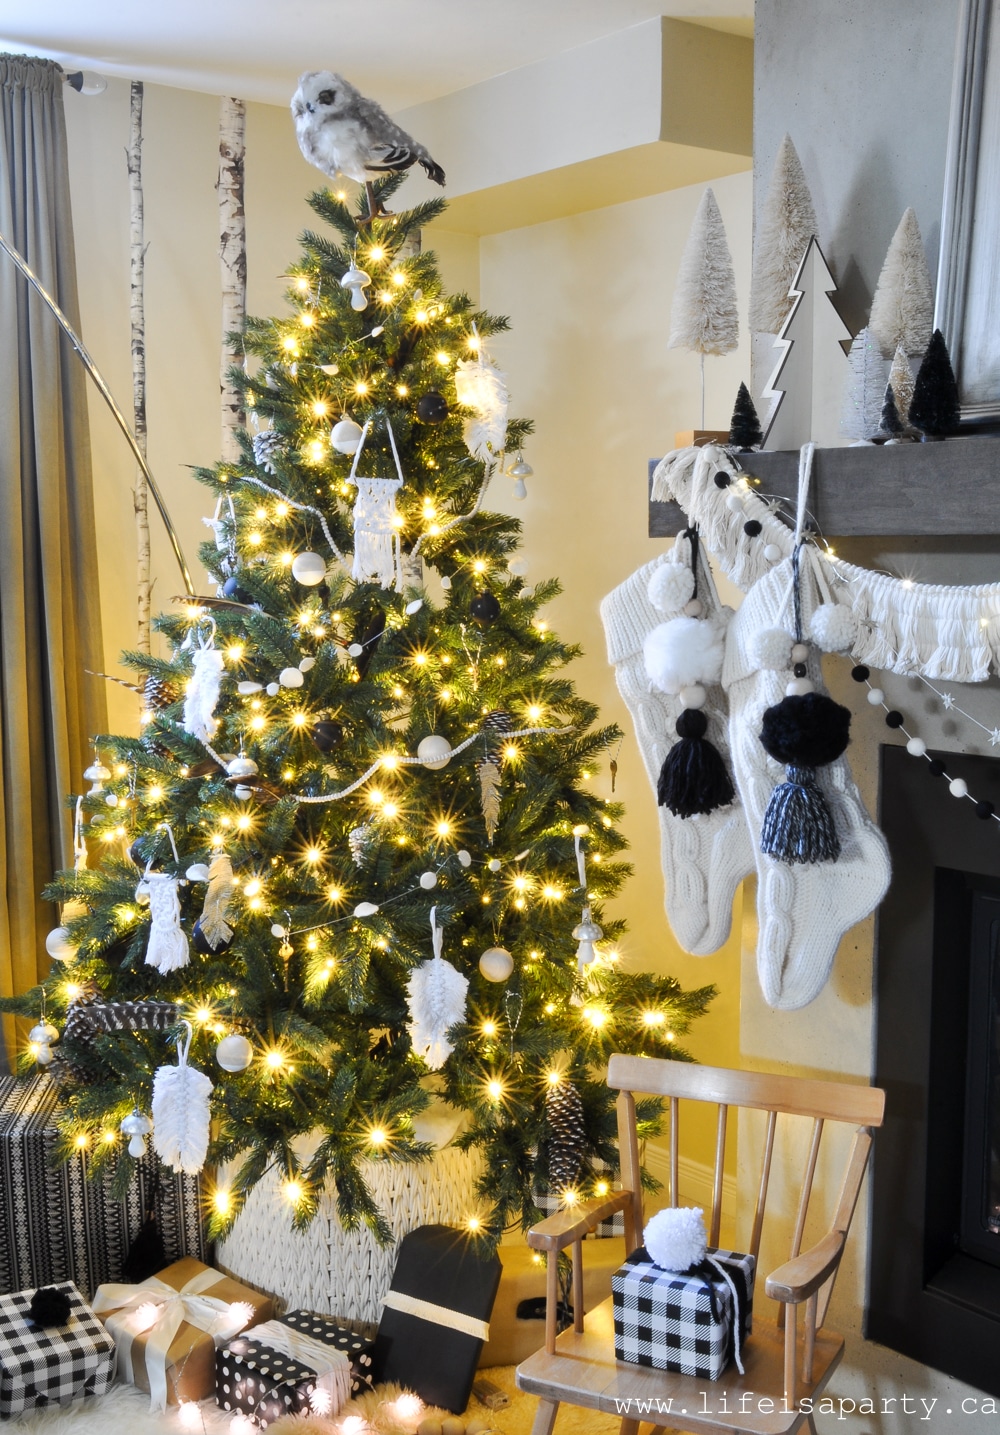
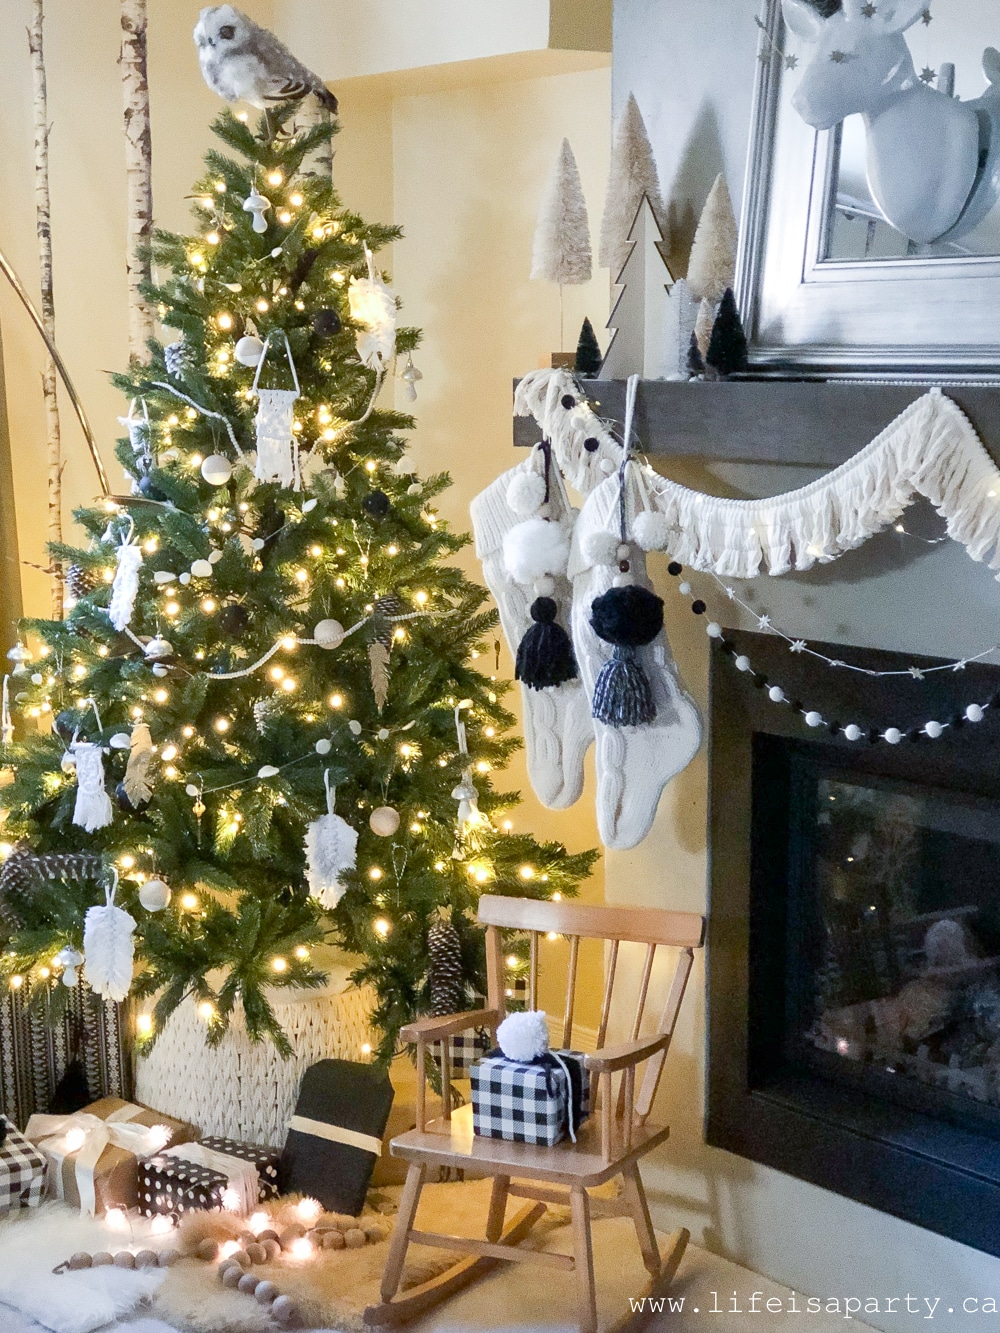
Boho inspired Christmas tree and fire place mantel with stockings hanging, in black and white.

1. Tree Selection

While any tree works, consider these boho-friendly options:

  • Real trees bring authentic natural texture and scent.
  • Undecorated branches in a vase for a minimalist boho approach.
  • Traditional green trees work perfectly as the base for all your decorations.

We used a regular green tree this year and focused on the ornaments and styling to create the boho look.

2. Boho Tree Base

Skip the traditional tree skirt. Instead, try:

  • Wicker or wooden crate
  • Large macrame basket (we used this and it's perfect!)
  • Woven basket or rattan planter
  • Sheepskin or faux fur rugs layered at the base
  • Natural jute or burlap fabric loosely arranged

We set our tree in a beautiful macrame basket and layered sheepskin and faux sheepskin rugs at the base for lots of texture. This alternative to a traditional tree skirt gives the perfect boho feel.

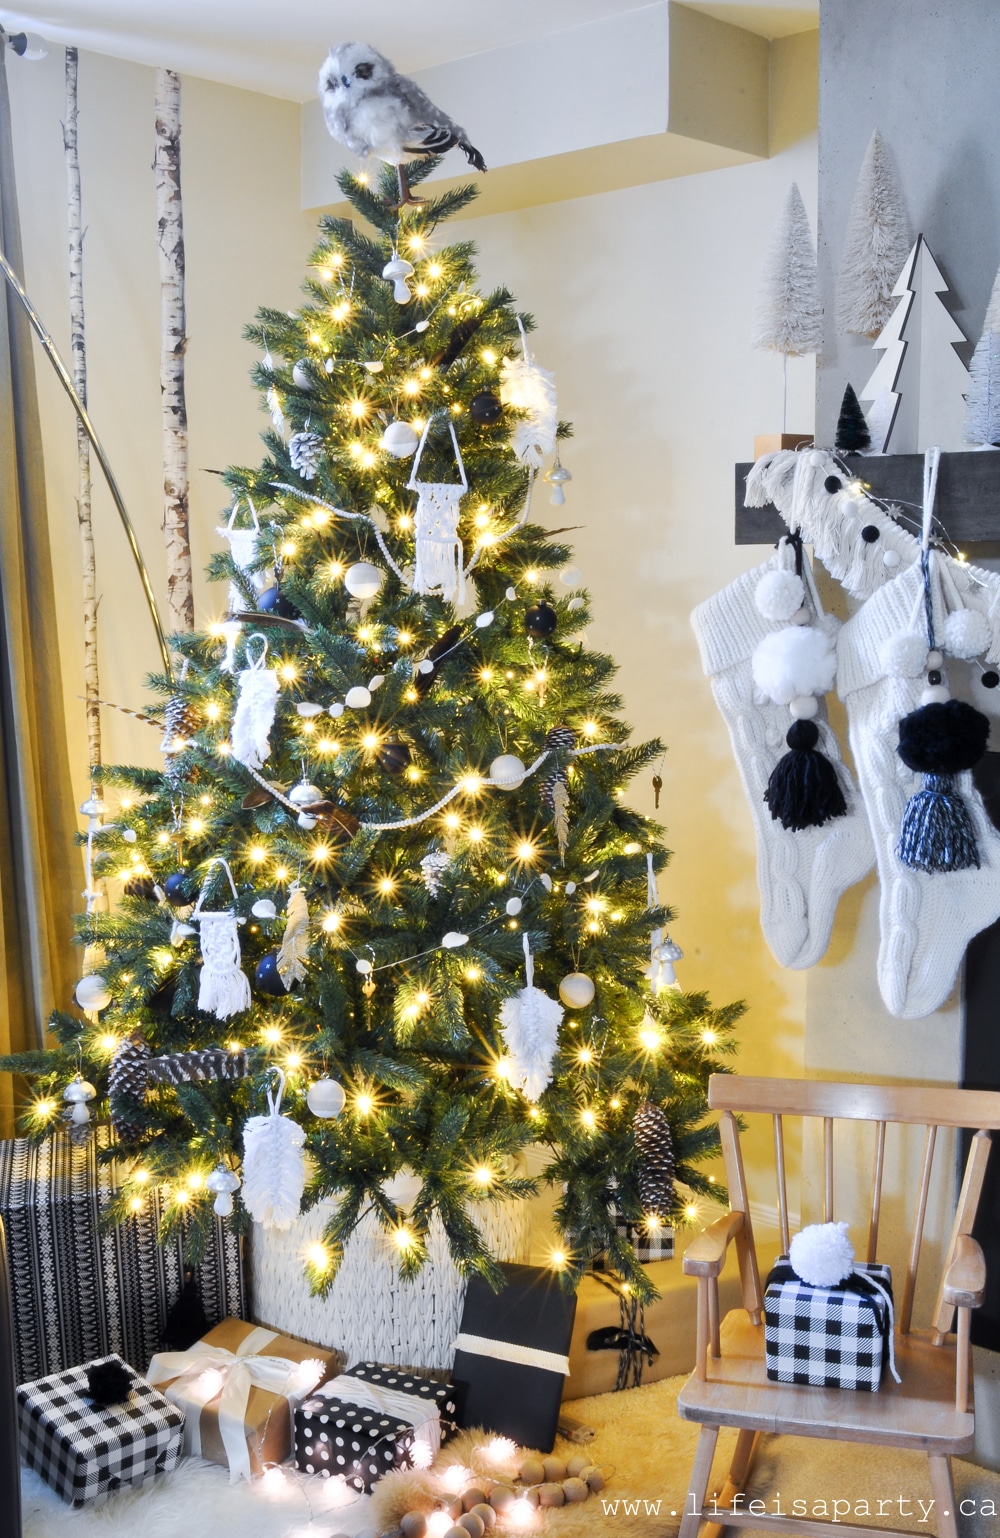
Boho inspired Christmas tree decorations in black and white.

3. Boho Tree Ornaments

This is where boho trees really shine. Focus on:

Natural Materials:

  • Wooden ornaments and beads
  • Pinecones (natural or painted)
  • Feathers tucked into branches
  • Dried orange slices
  • Cinnamon sticks tied with twine

Handmade Elements:

  • Macrame ornaments
  • Wood ball ornaments with tassels
  • Yarn pom poms
  • Hand-stitched fabric ornaments
  • Clay or salt dough creations

Textural Additions:

  • Tassels in various sizes
  • Pom pom garland
  • Wooden bead garland
  • Jute or cotton rope garland
  • Fringe garland

Eclectic Touches:

  • Vintage ornaments from thrift stores
  • Small brass items
  • Mirrors or glass in natural tones
  • Mushroom ornaments (very on-trend for boho!)
  • Animal figures (we used an owl as our tree topper)

We decorated with lots of natural and earthy ornaments like feathers, mushrooms, and pinecones alongside our handmade macrame and wood ornaments. The mix of textures and handmade quality creates that authentic boho vibe.

how to decorate a boho Christmas tree4. Tree Topper

Skip the traditional star or angel. Boho tree toppers include:

  • Large macrame piece
  • Pampas grass arrangement
  • Oversized pom pom and tassels
  • Natural branches or twigs
  • Unexpected items like owls or other natural elements

Our owl tree topper is a real statement piece and the perfect finishing touch for our tree with all the earthy elements. He's just a regular owl decoration that we wired onto the top of the tree, and he looks so perfect.

Black and White Boho Christmas Room Tour

Now let me take you through our basement family room transformation. This space is one of our favorite spots for hanging out as a family during the holiday season. It's so cozy with the fireplace on, and we often watch movies down here together, especially at Christmas time.

This year I thought it would be fun to do a black and white boho theme for the holiday decor, and I absolutely love how it turned out. Most of the projects were DIY, and by using a lot of decor I already had, this year's decor was very budget-friendly.

The Boho Christmas Tree

As I mentioned above in the tree section, we set our tree in a macrame basket with sheepskin rugs at the base. You can see all the ornament tutorials linked in the tree guide above. The owl topper and pinecone lights complete the look.

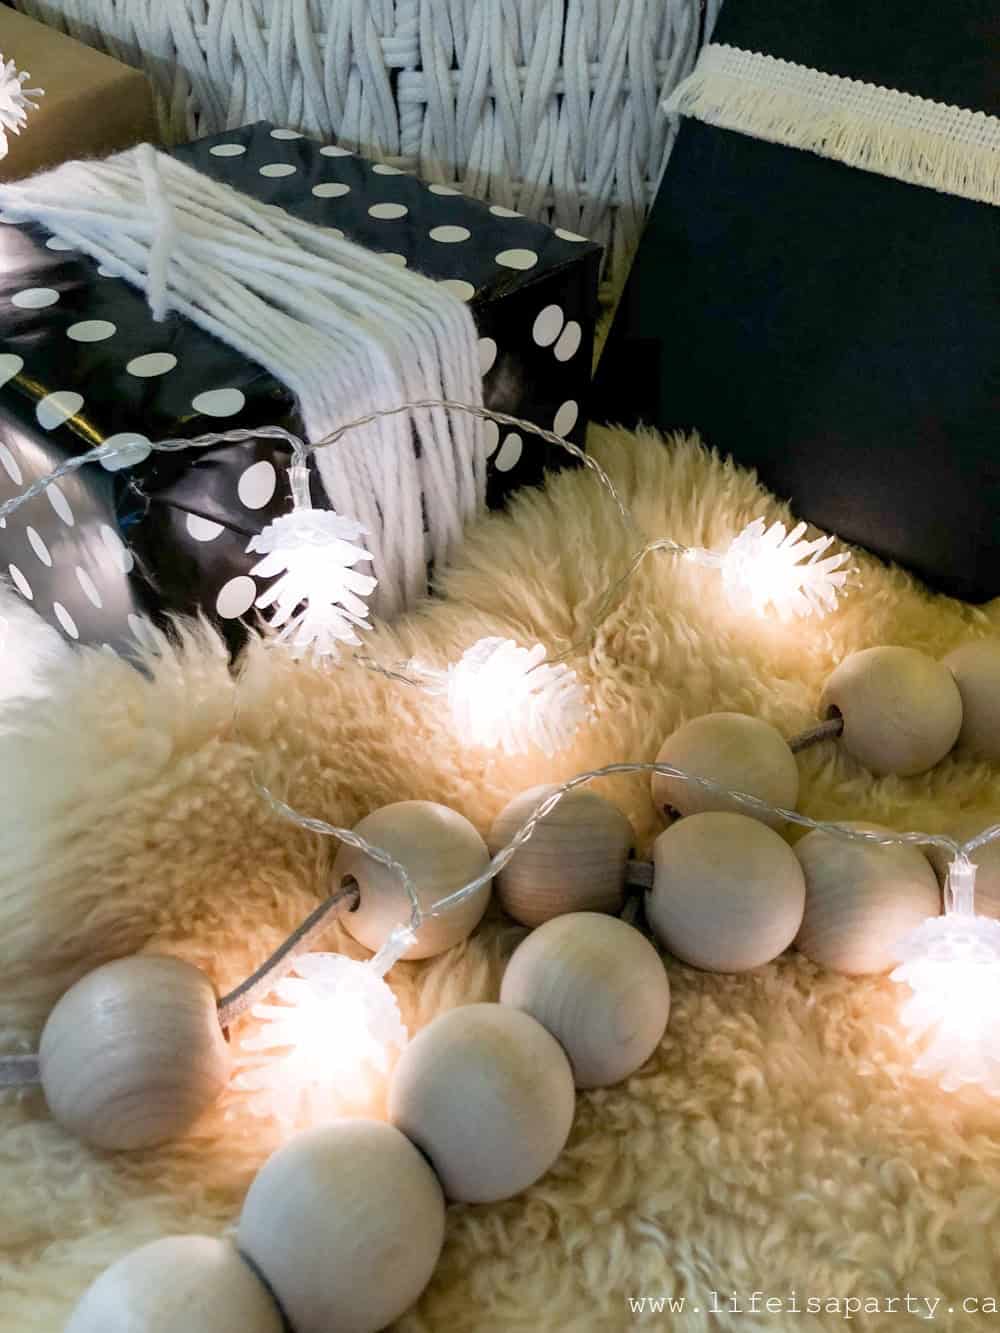
PInecone string lights and wood bead garland with Christmas presents for a boho-inspired Christmas.

I've wrapped all the presents in black, white, and kraft paper so far. I love using yarn as ribbon and little handmade tassels and beads as gift toppers. A feather tucked into the yarn and some extra tassel fringe look great too. The pinecone lights from the dollar store are scattered around the base -one of my favorite finds!

The Comfy Sectional

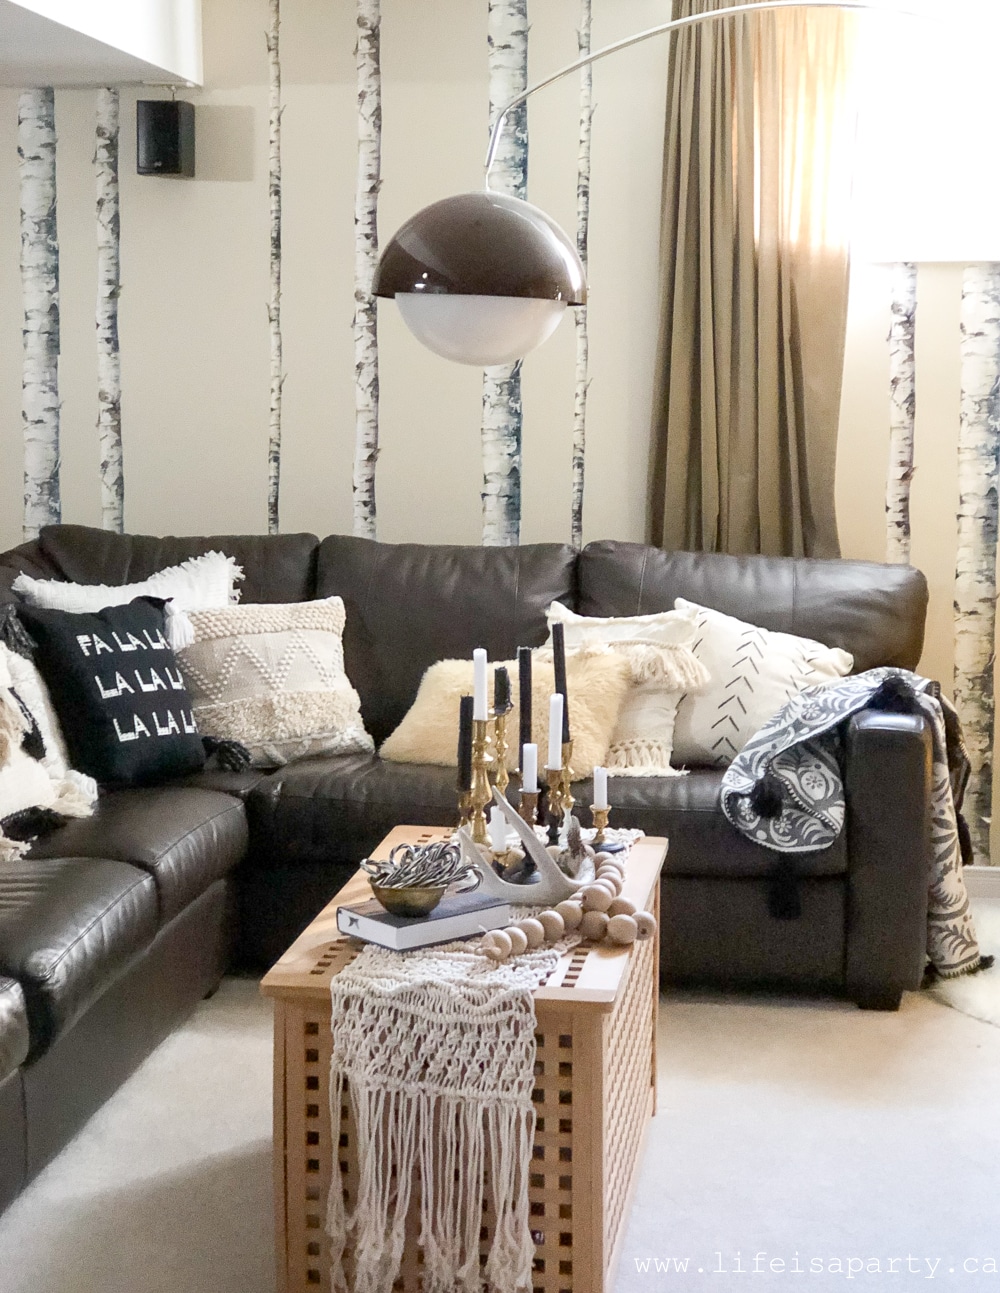
Over on our leather sectional sofa, we've piled on all the black and white cushions to go with our color palette. The throw pillows and blankets have lots of fringe, tassels, and pom poms for different textures that create that cozy boho vibe.

Bohemian inspired Christmas decorations in a living room, with a couch, coffee table, and Christmas tree.

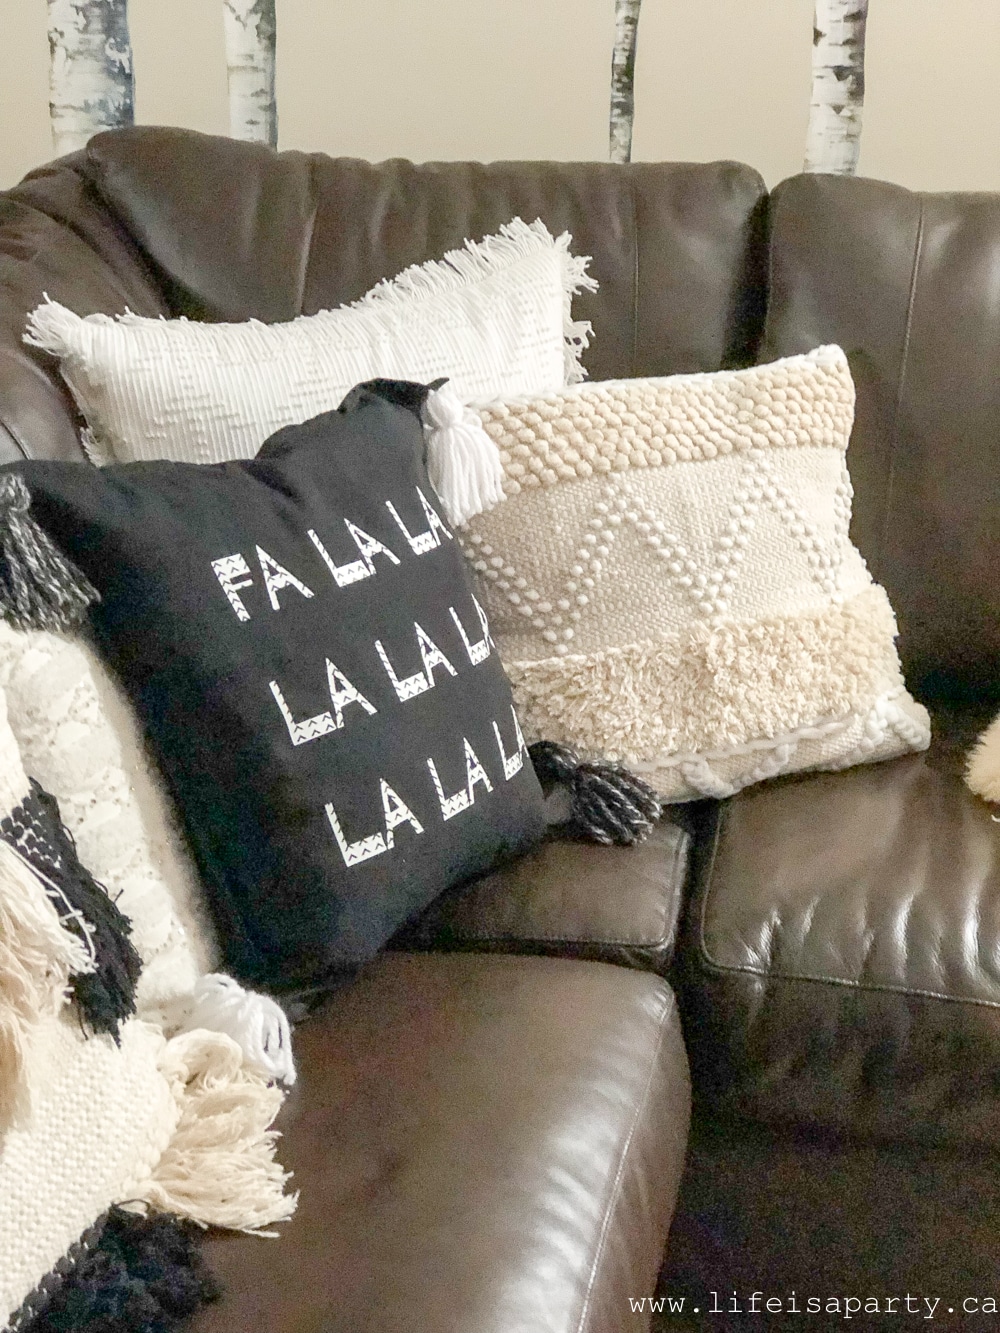
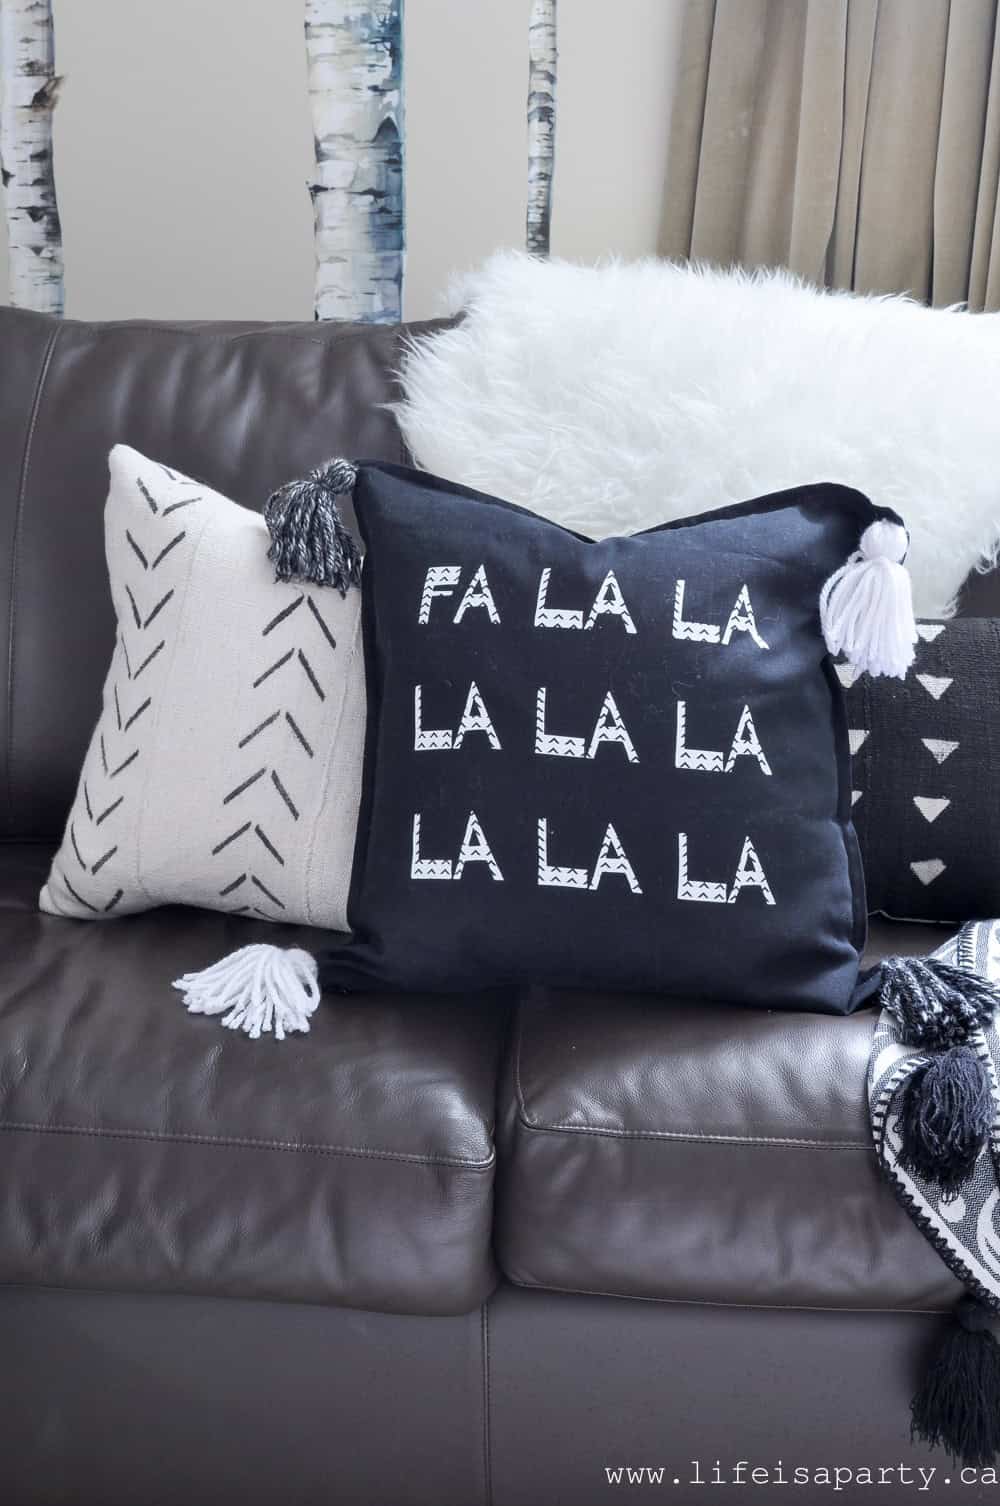
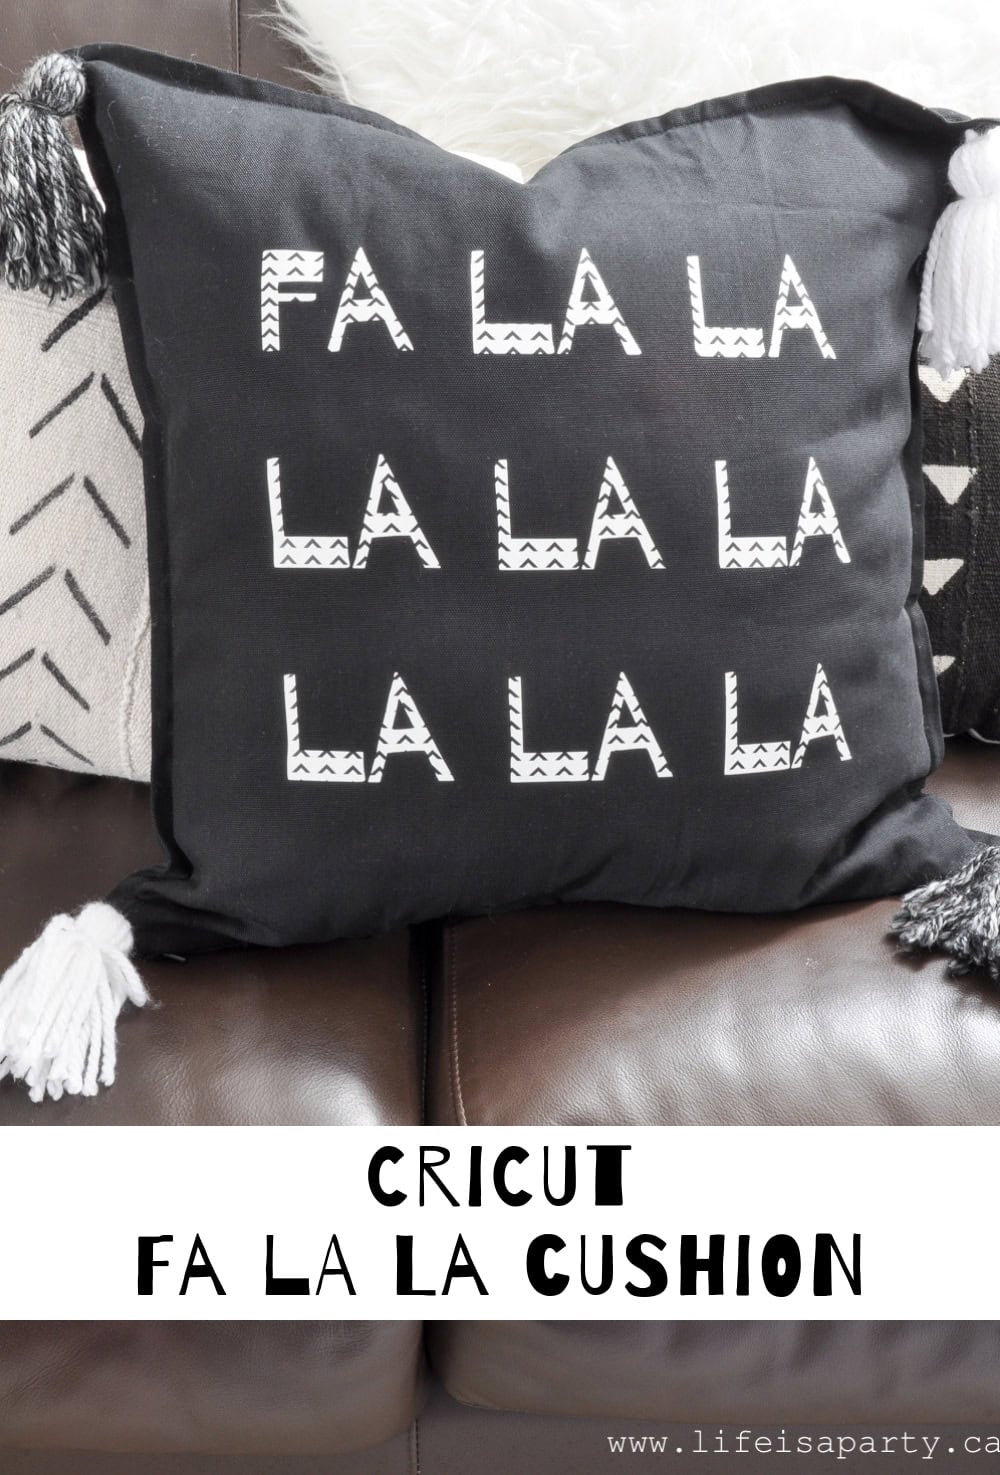
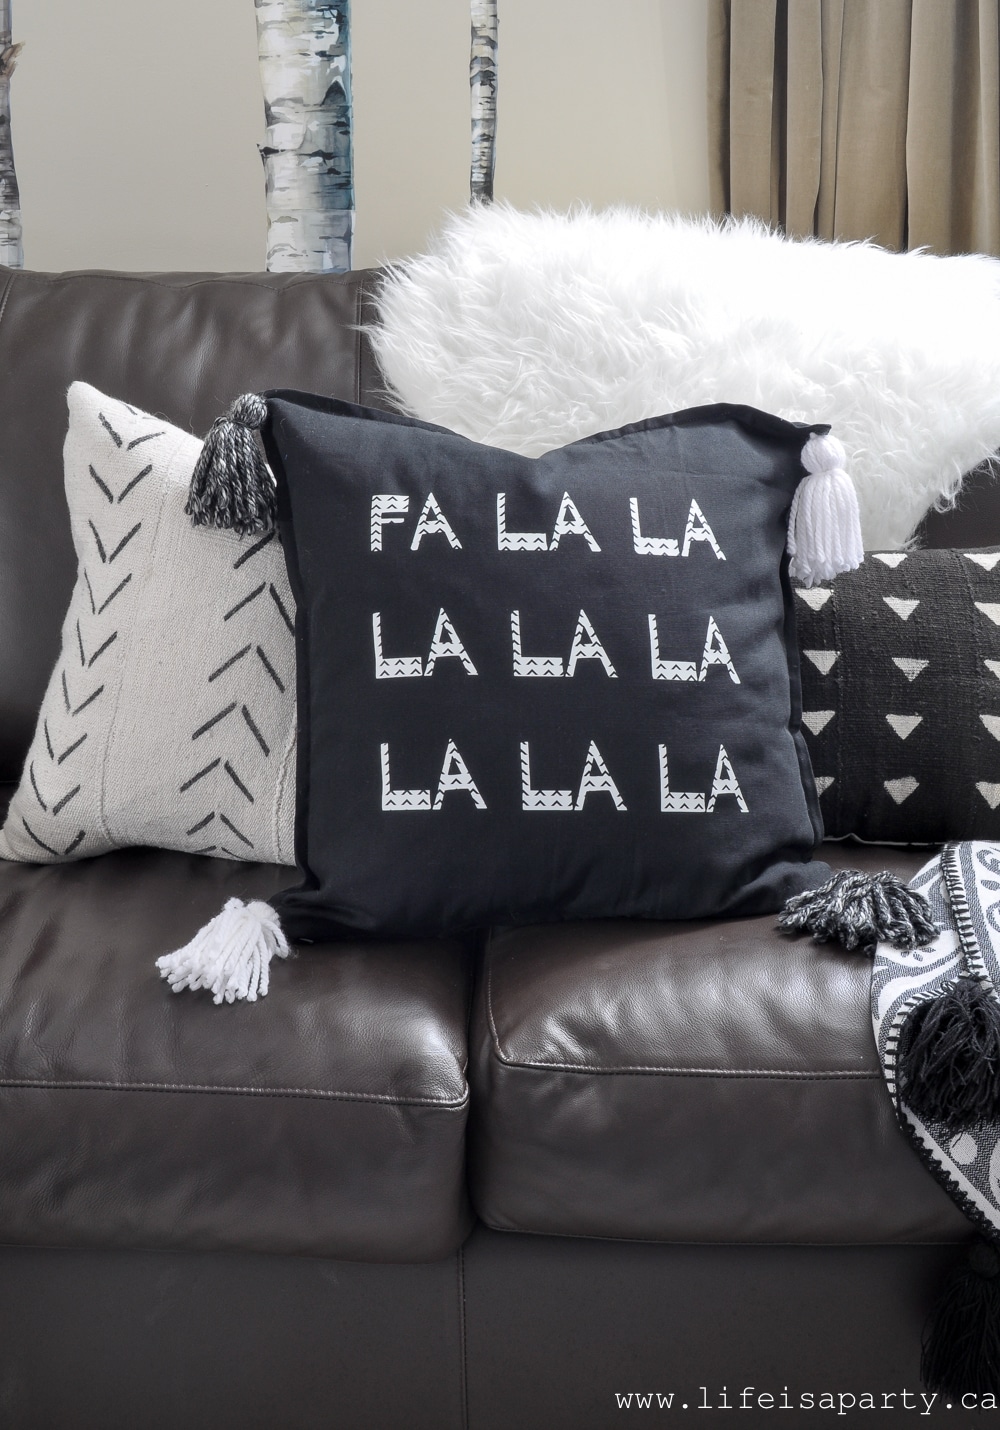
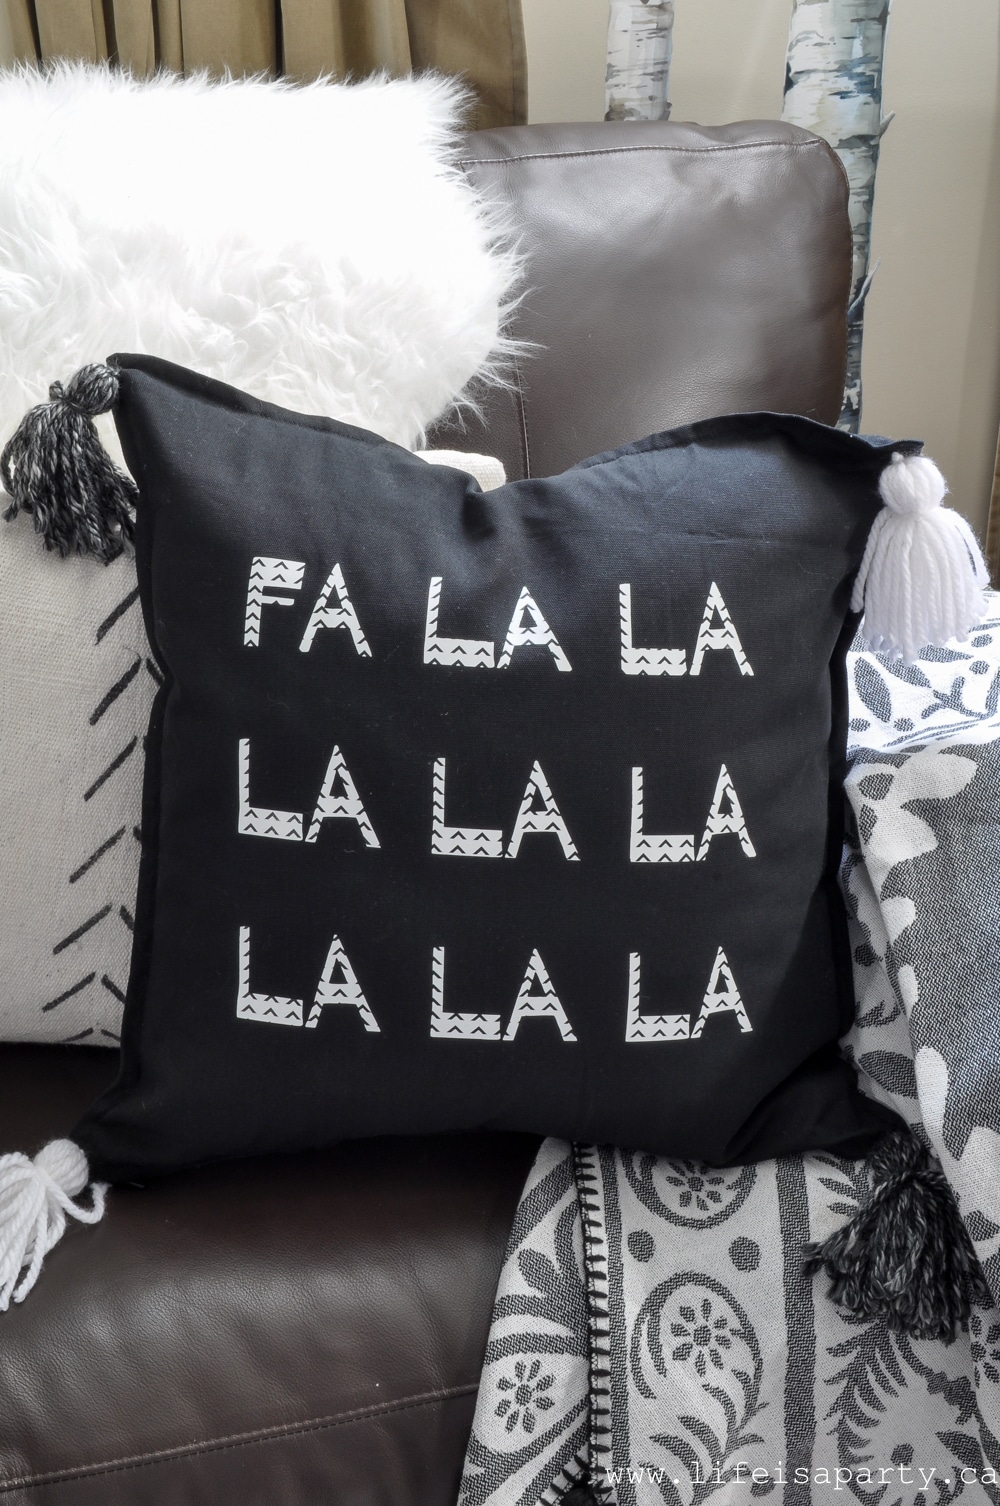
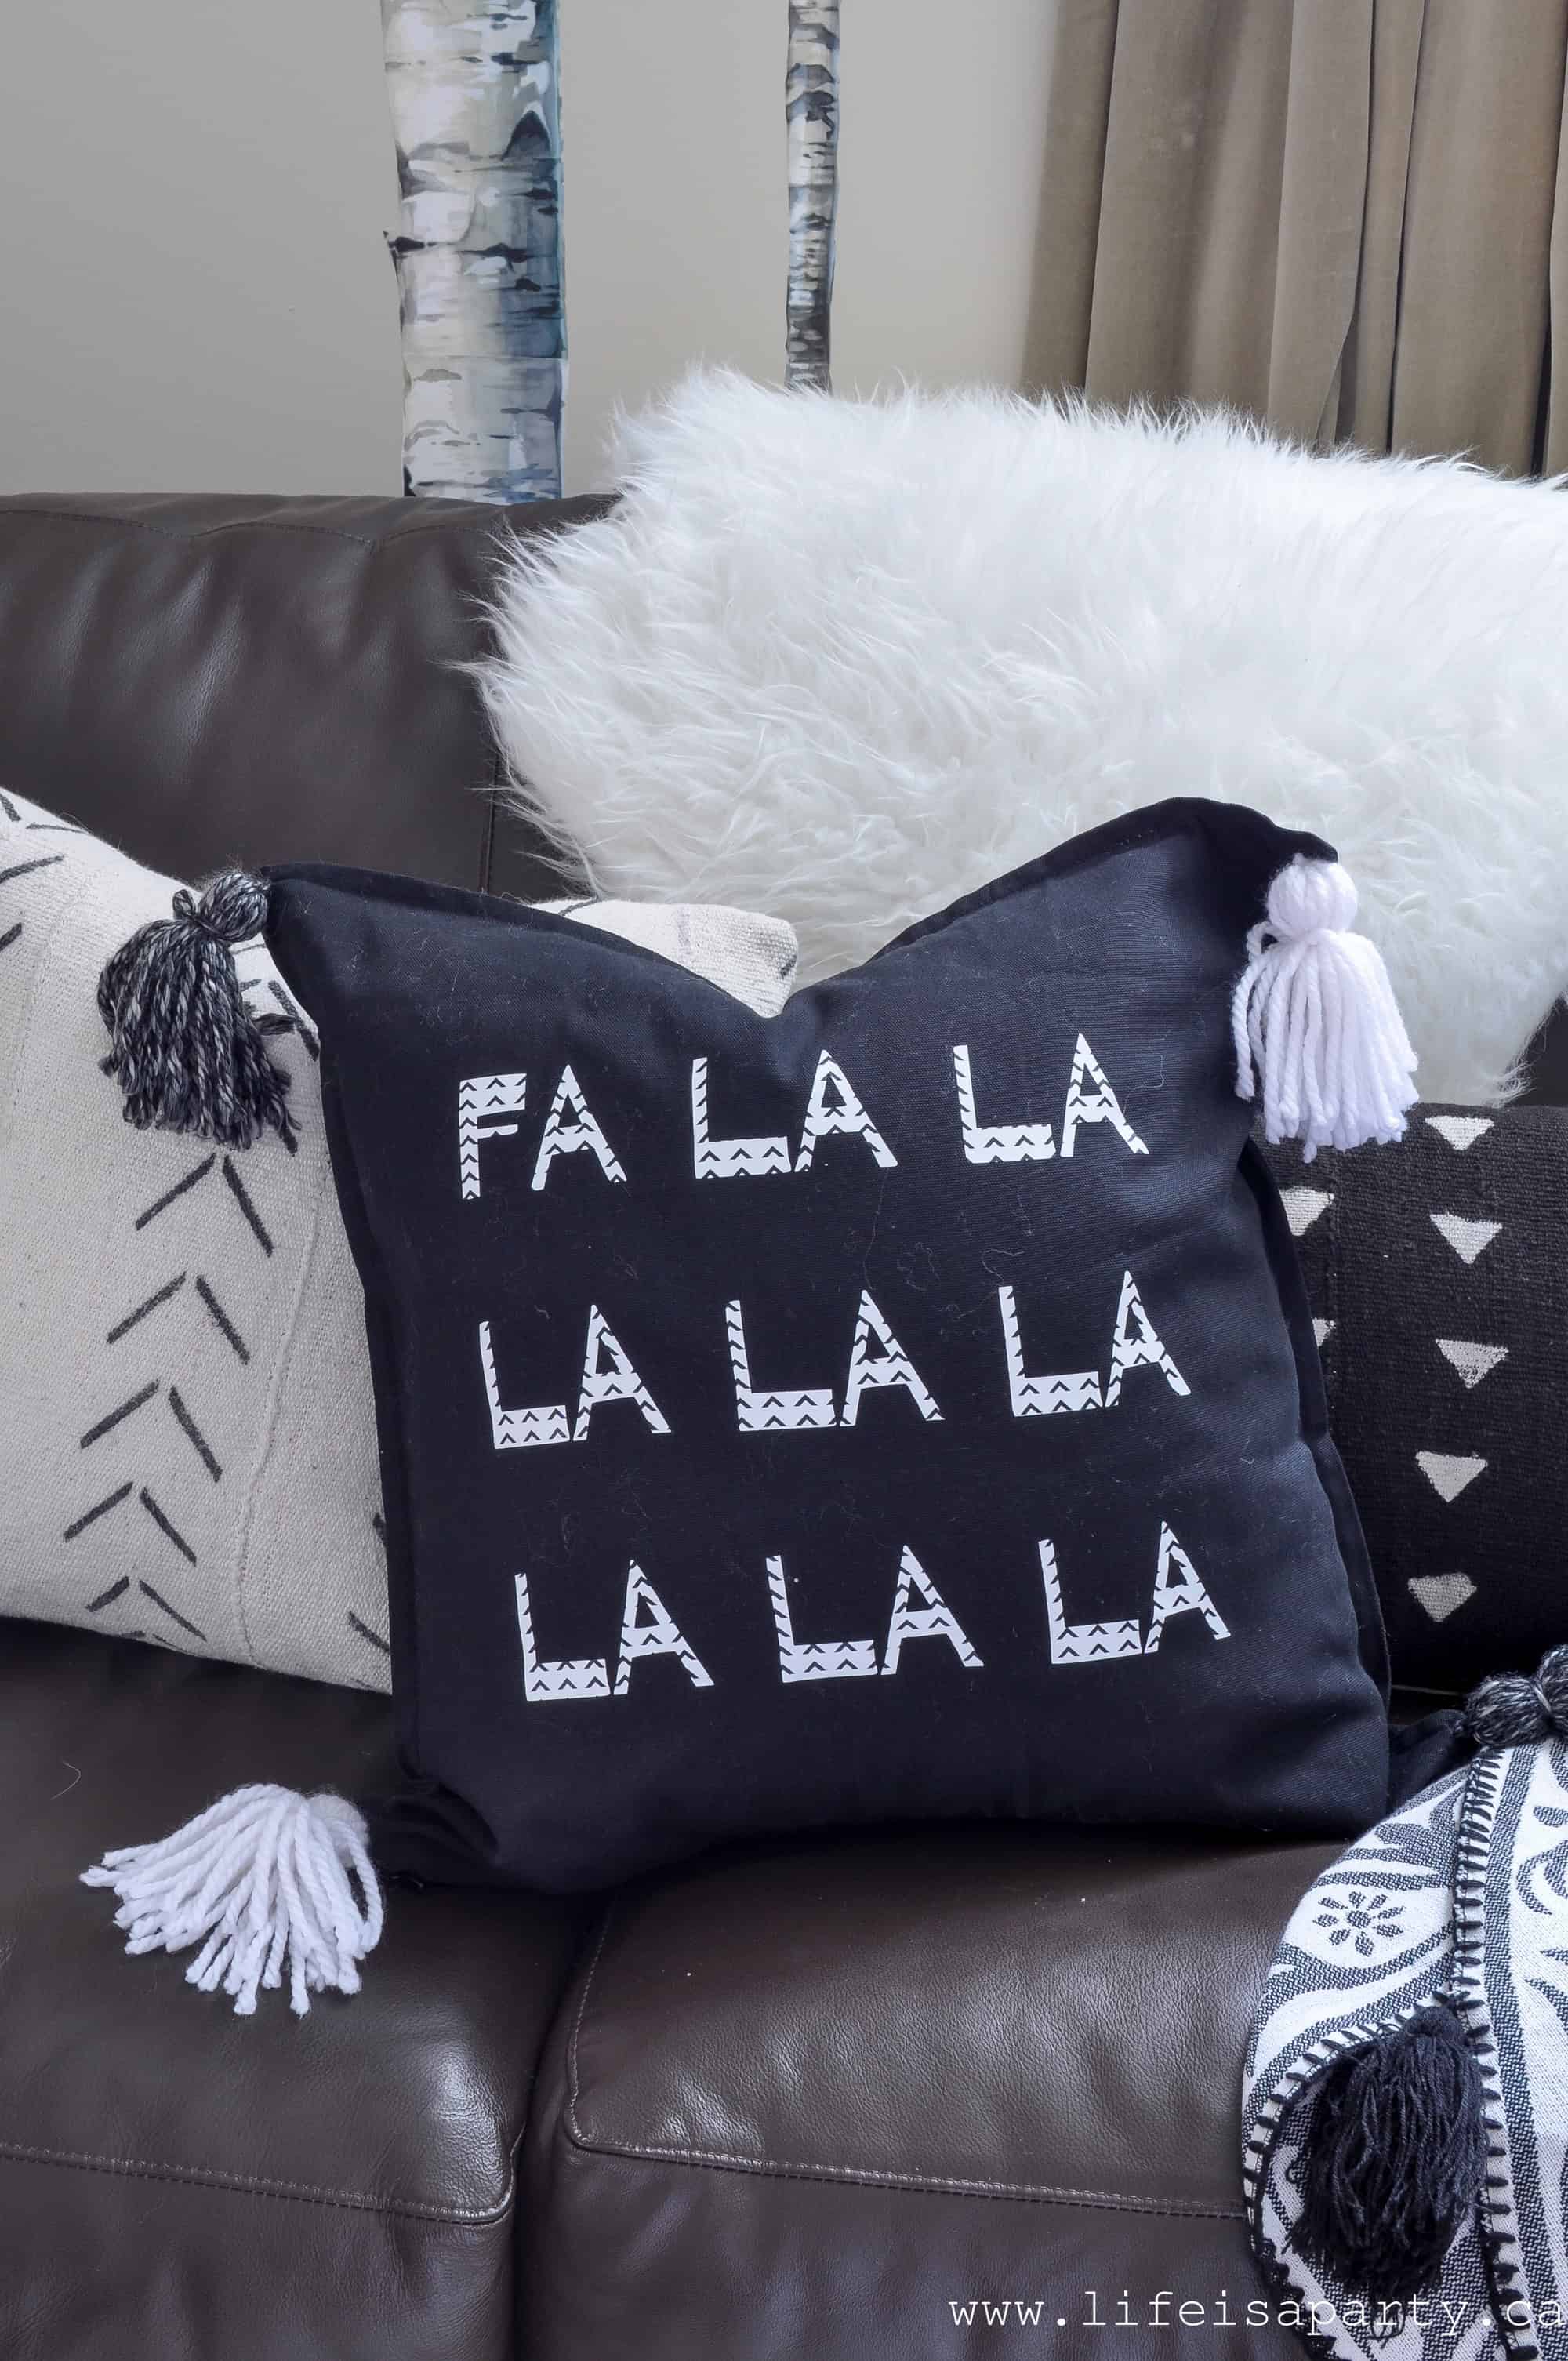
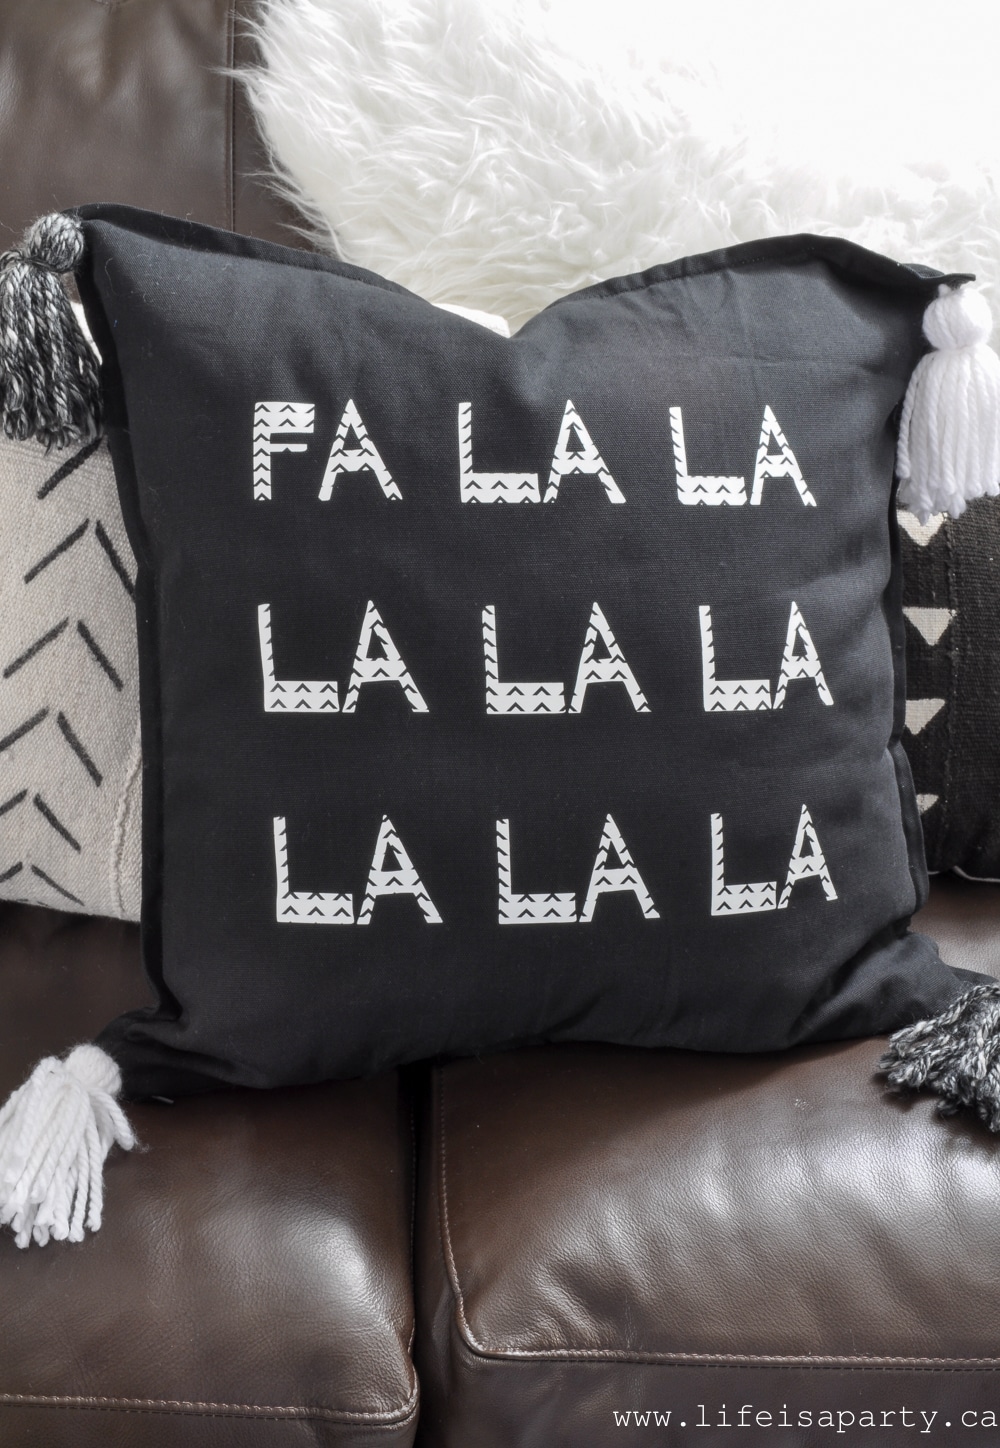
We made the fun "Fa La La" cushion and added some wooly tassels to it. You can see the DIY Christmas pillow made with the Cricut machine here.

Black and white boho-inspired Christmas cushions on a sofa.

Coffee Table Styling

In front of the sectional sits a toy box that doubles as our coffee table.

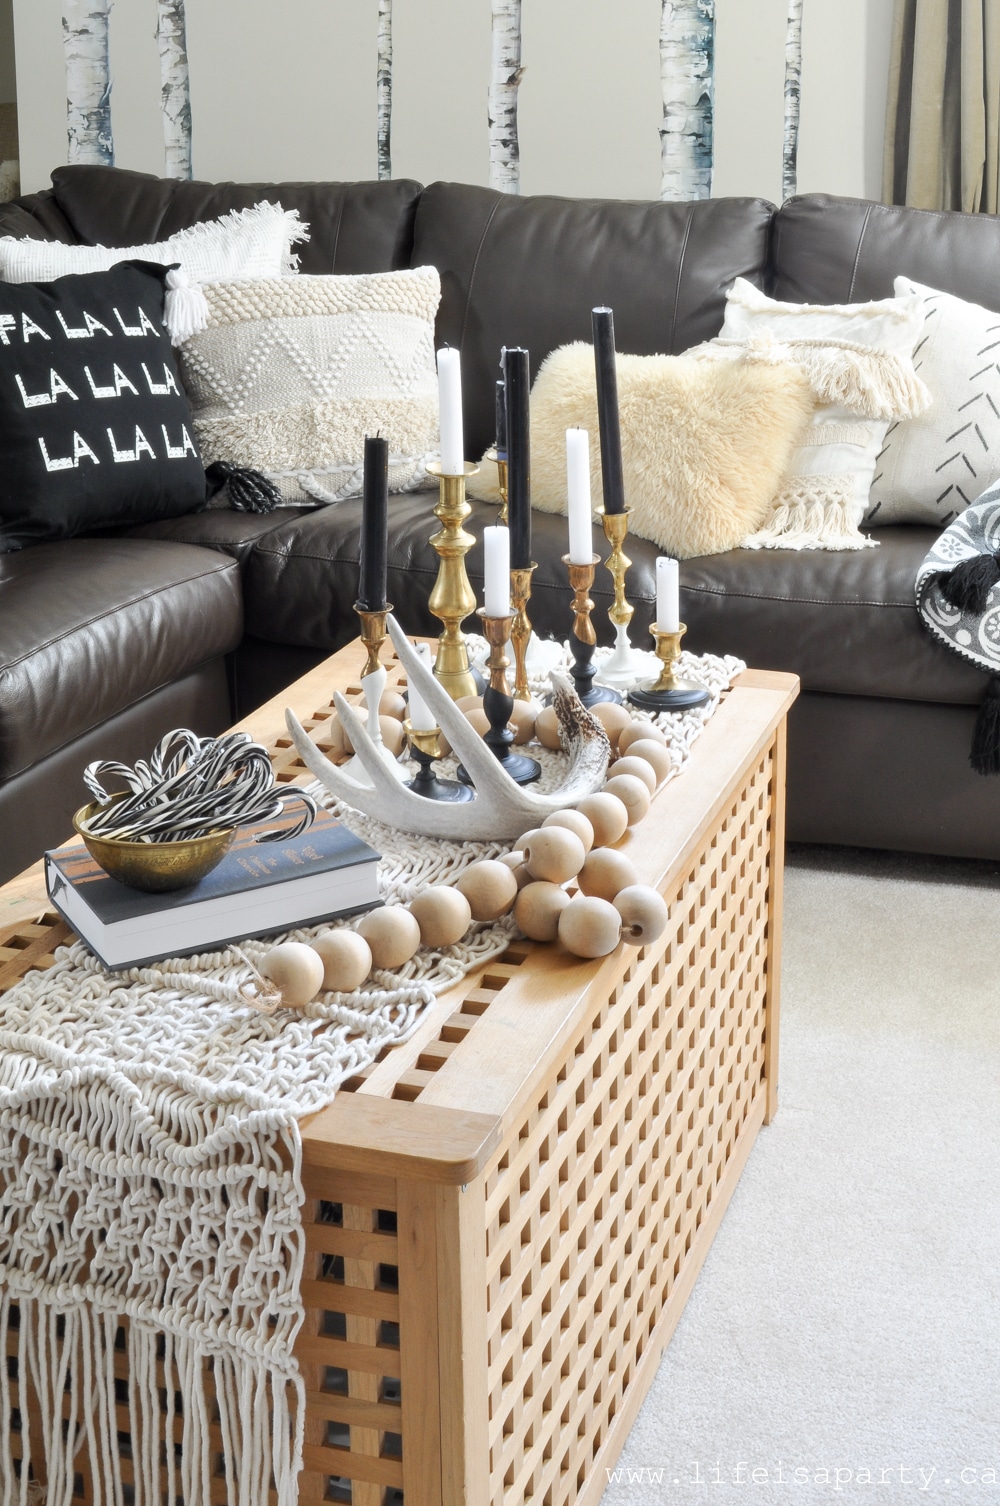
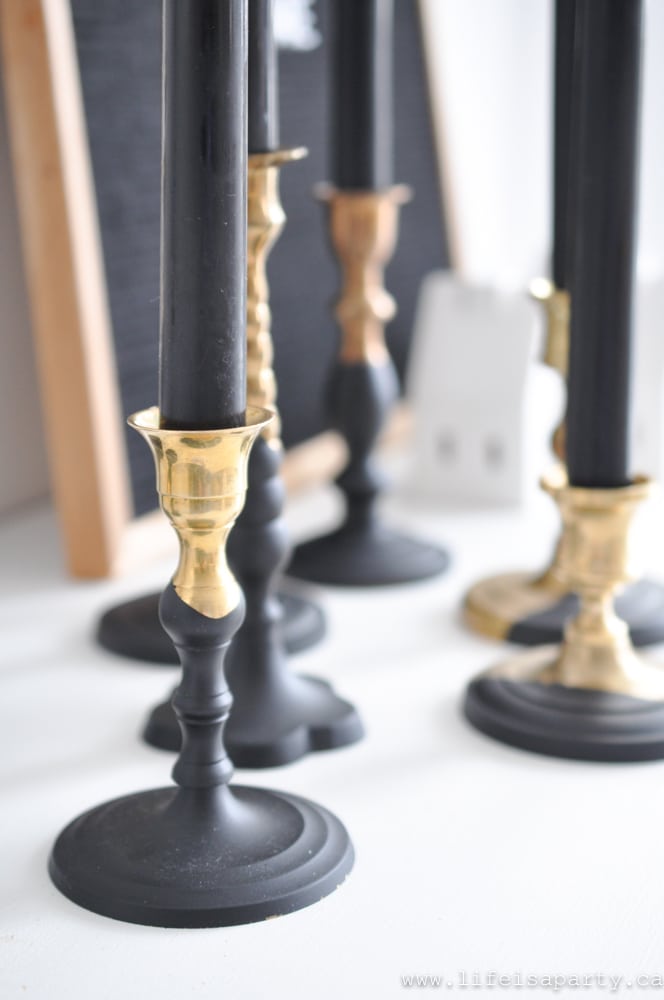
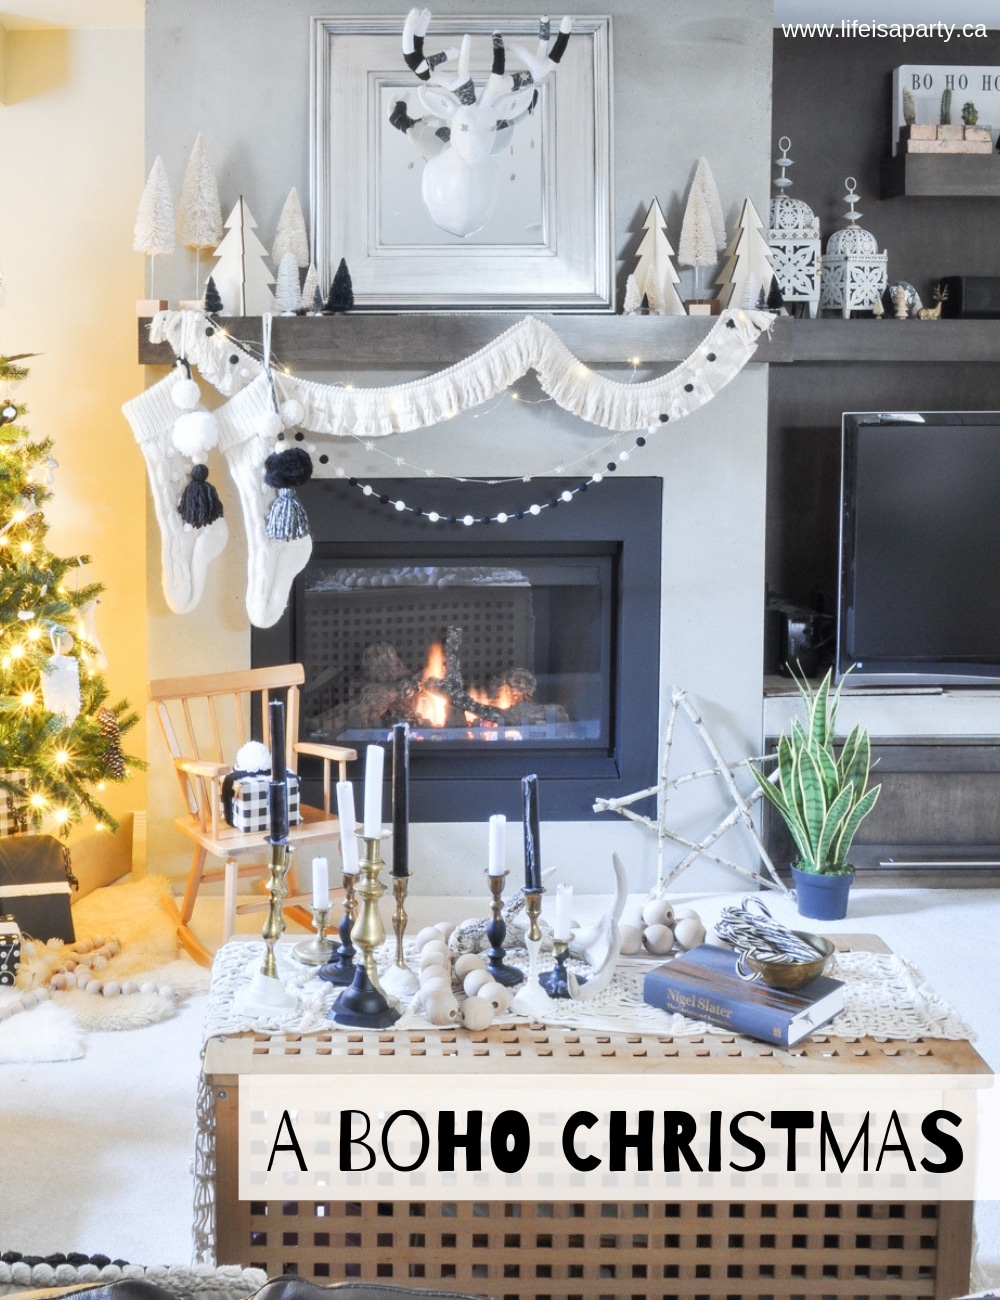
Boho Christmas Decor ideasI've layered on a handmade macrame table runner, then added lots of paint-dipped brass candlestick holders. I picked up all the candle holders at thrift stores and then painted them with a dipped effect - you can find the DIY Macrame Table Runner tutorial here. Lots of candles always add such a cozy feel to any space.
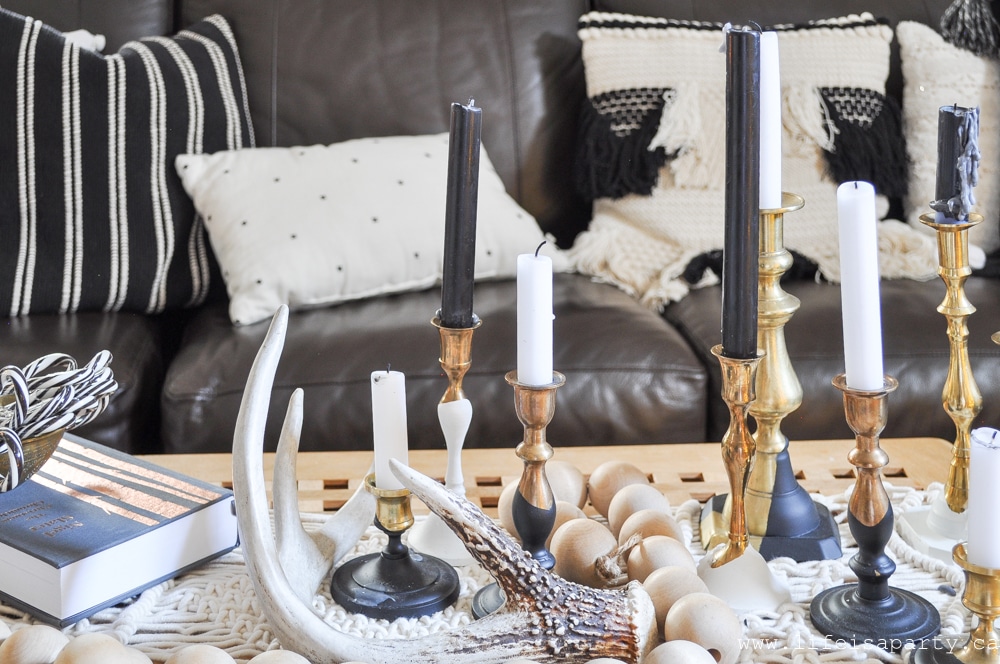
I've also added an antler we found on a walk in the woods and some wooden beads. Boho style loves to incorporate natural elements and natural wood, so these are both perfect.

Brass candlestick holders, wood bead garland, and real antler on a coffee table.

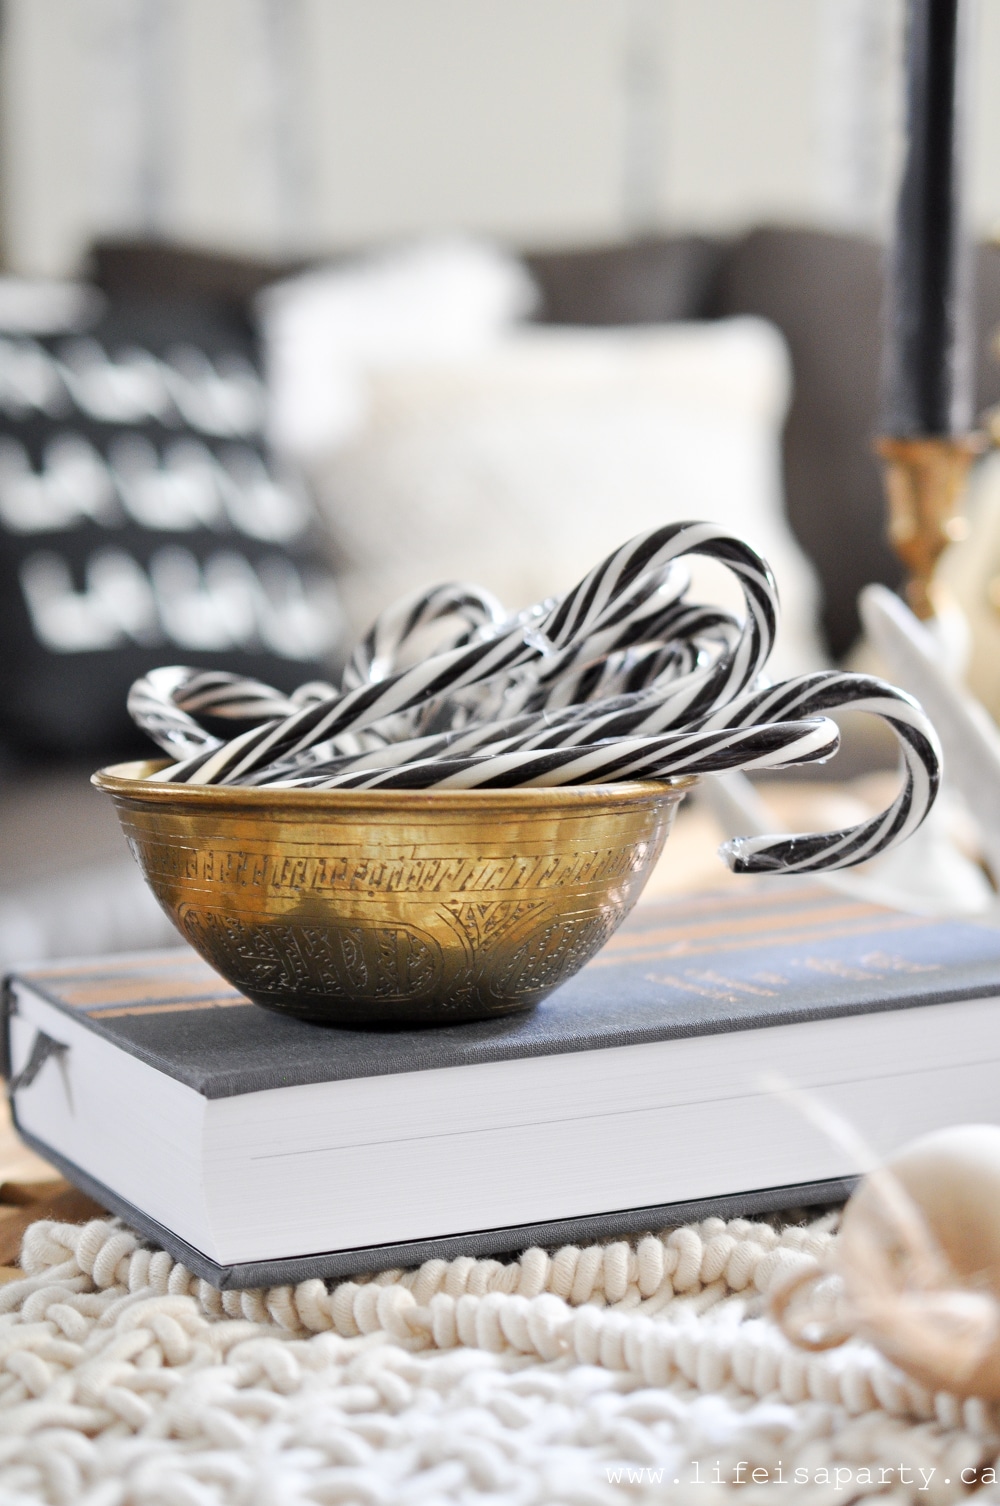
Boho often includes brass and copper, so the candlestick holders and this little brass bowl I found thrifting are perfect. I filled it with Oreo candy canes for a fun touch -the perfect black and white Christmas treat!

Vintage brass small bowl filled with black and white Oreo candy canes.

There's also a book waiting for me to read -Nigel Slater's "The Christmas Chronicles." It's the kind of cookbook you really can read, filled with daily entries, sweet stories, and recipes for a delightful winter. I'm looking forward to sitting down with it and a cup of tea soon.

Black and White Boho Fireplace Mantel

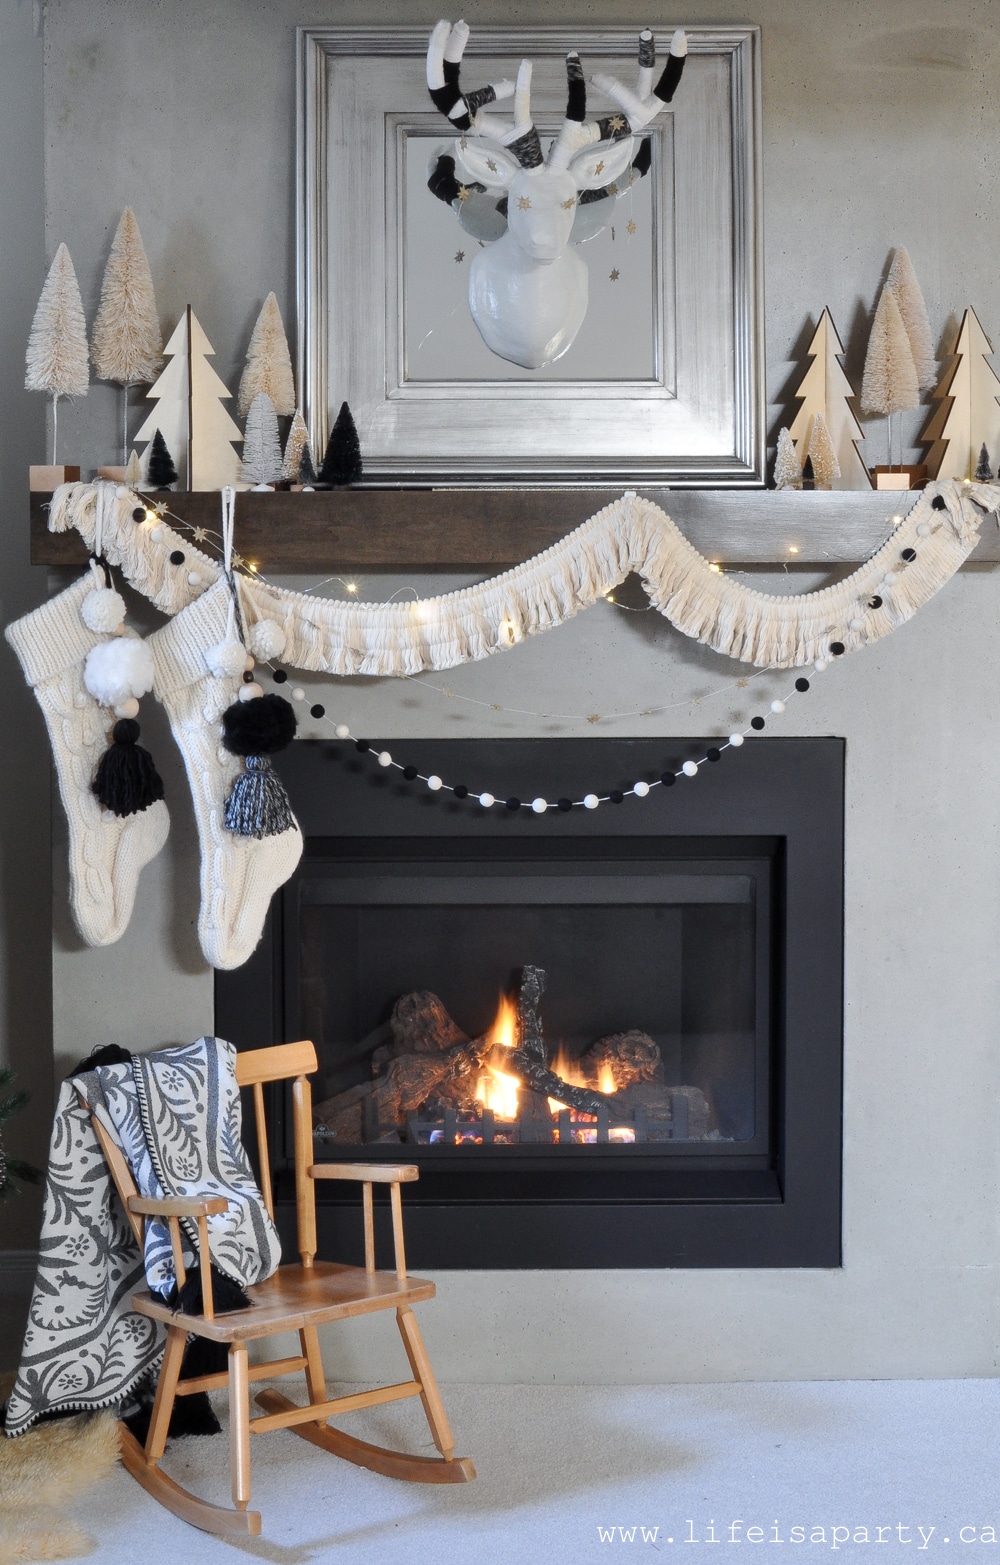
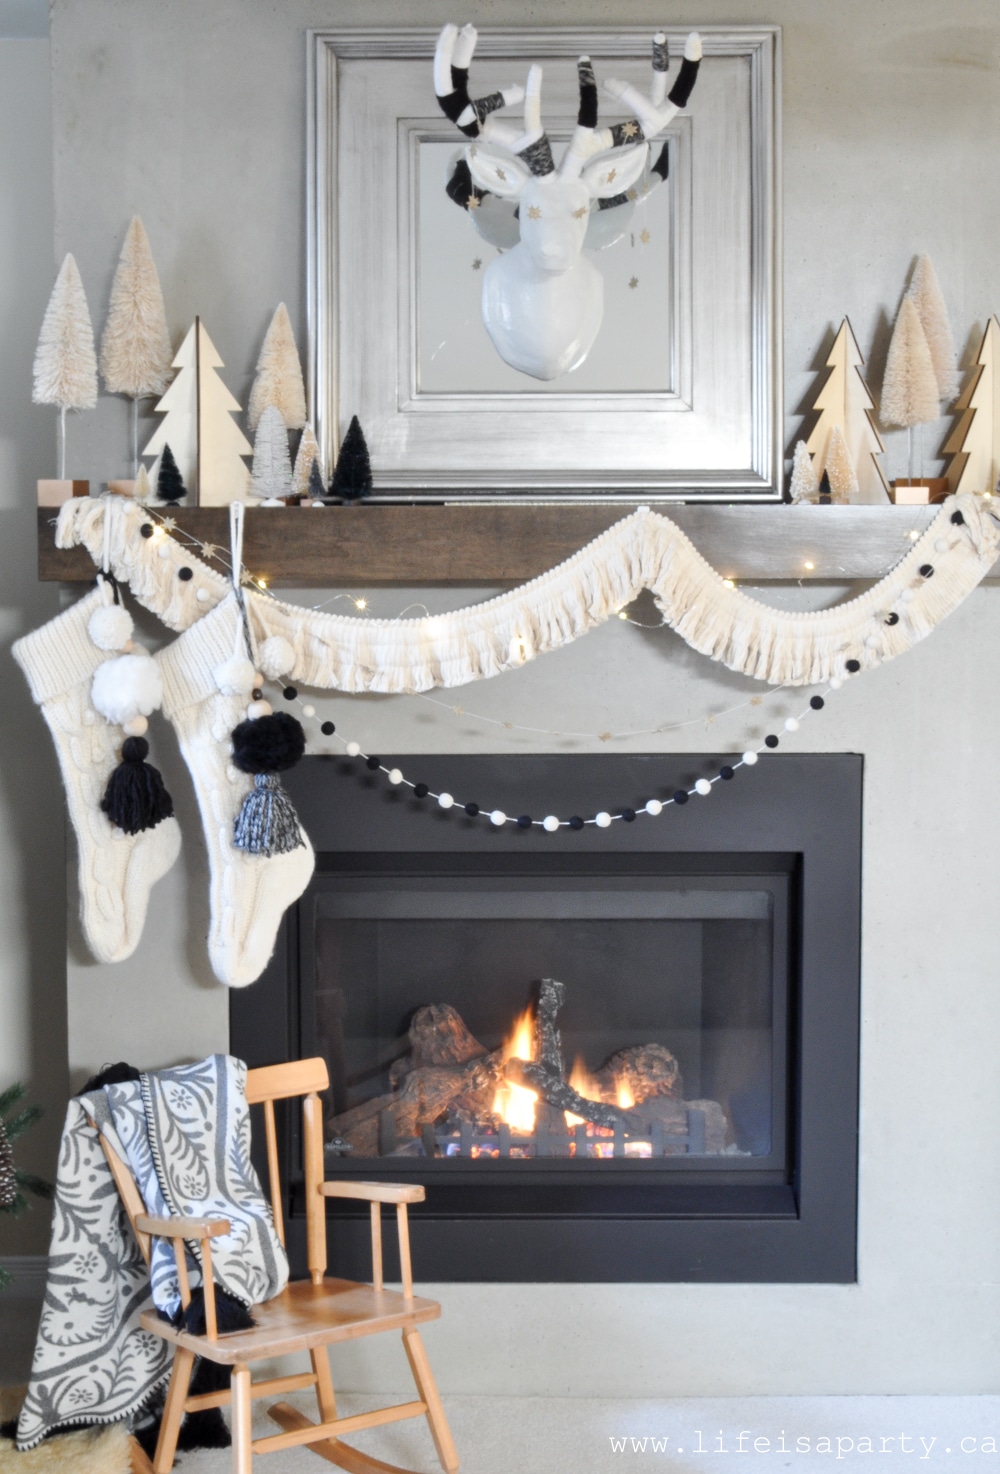
The fireplace is all dressed up for Christmas with lots of bottle brush trees and a beautiful full fringe garland. I used a lot of beige and broke it up with pops of black. The fringe is a great way to get the look of a macrame garland -look for it at your local fabric store and buy it by the yard to fit your mantel.

how to decorate with black and white for Christmas

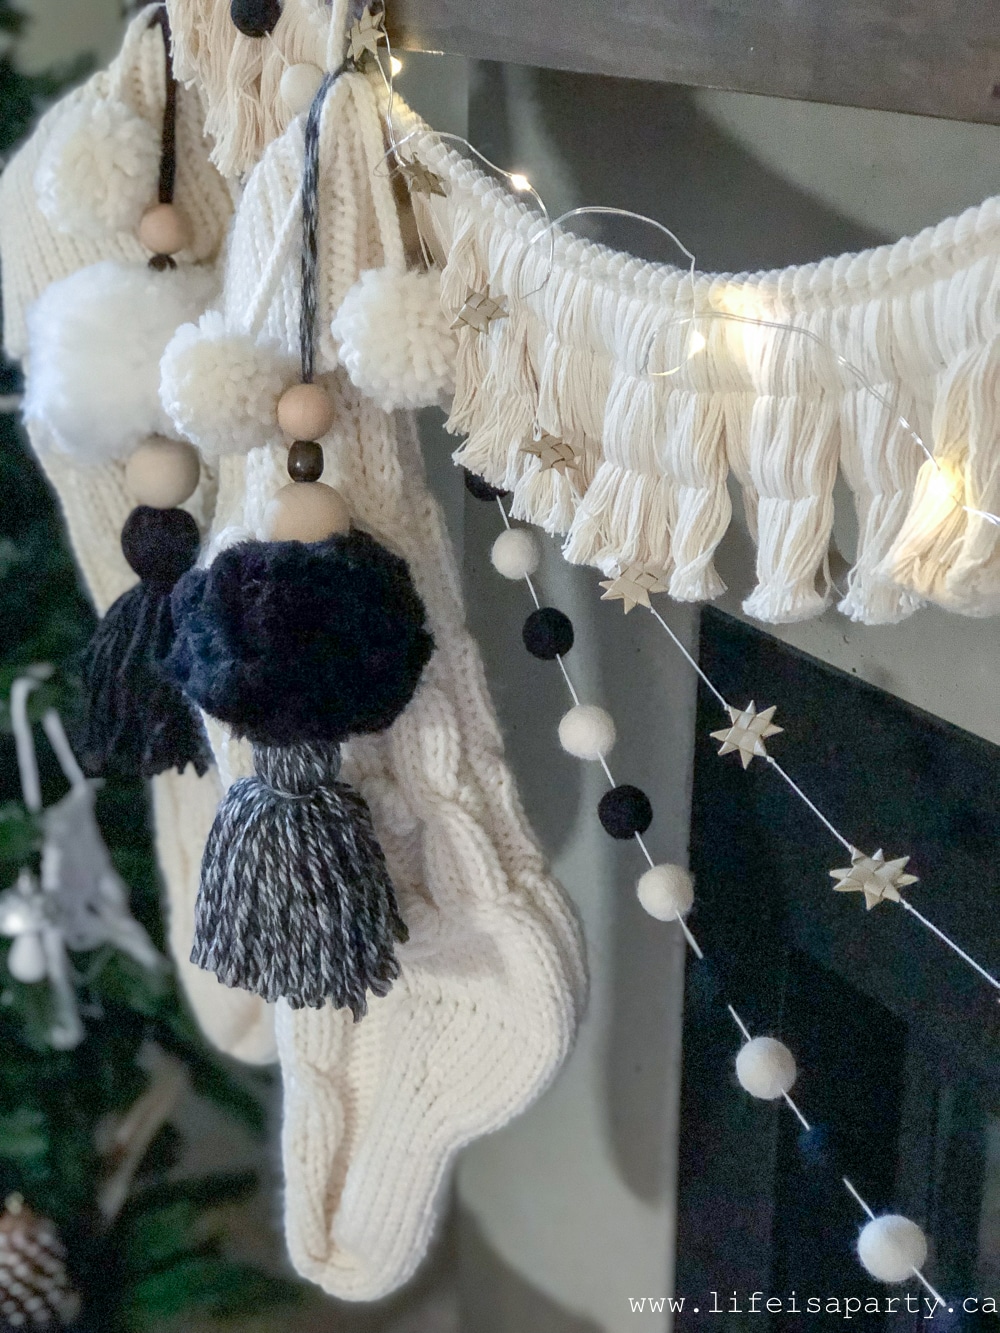
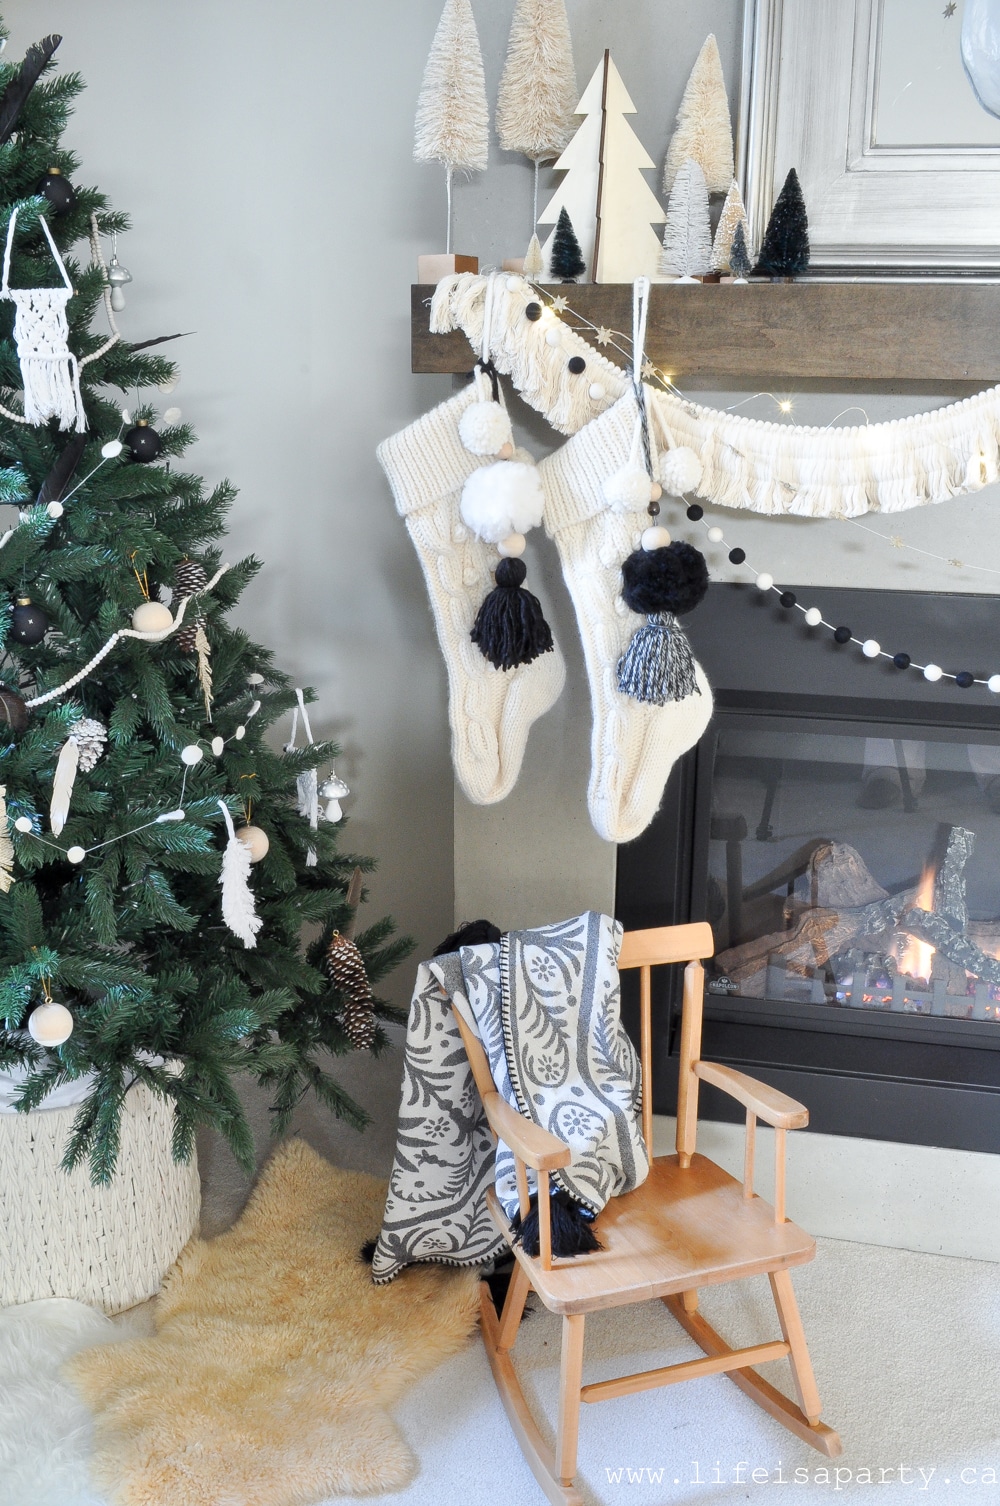
The stockings look great with their special tassels. I made the stocking tassels from yarn and wood beads. They're one of my favorite DIY ideas and perfect for adding boho charm.

Bohemian inspired chunky knit stockings hanging with tassels and garland on a fireplace.

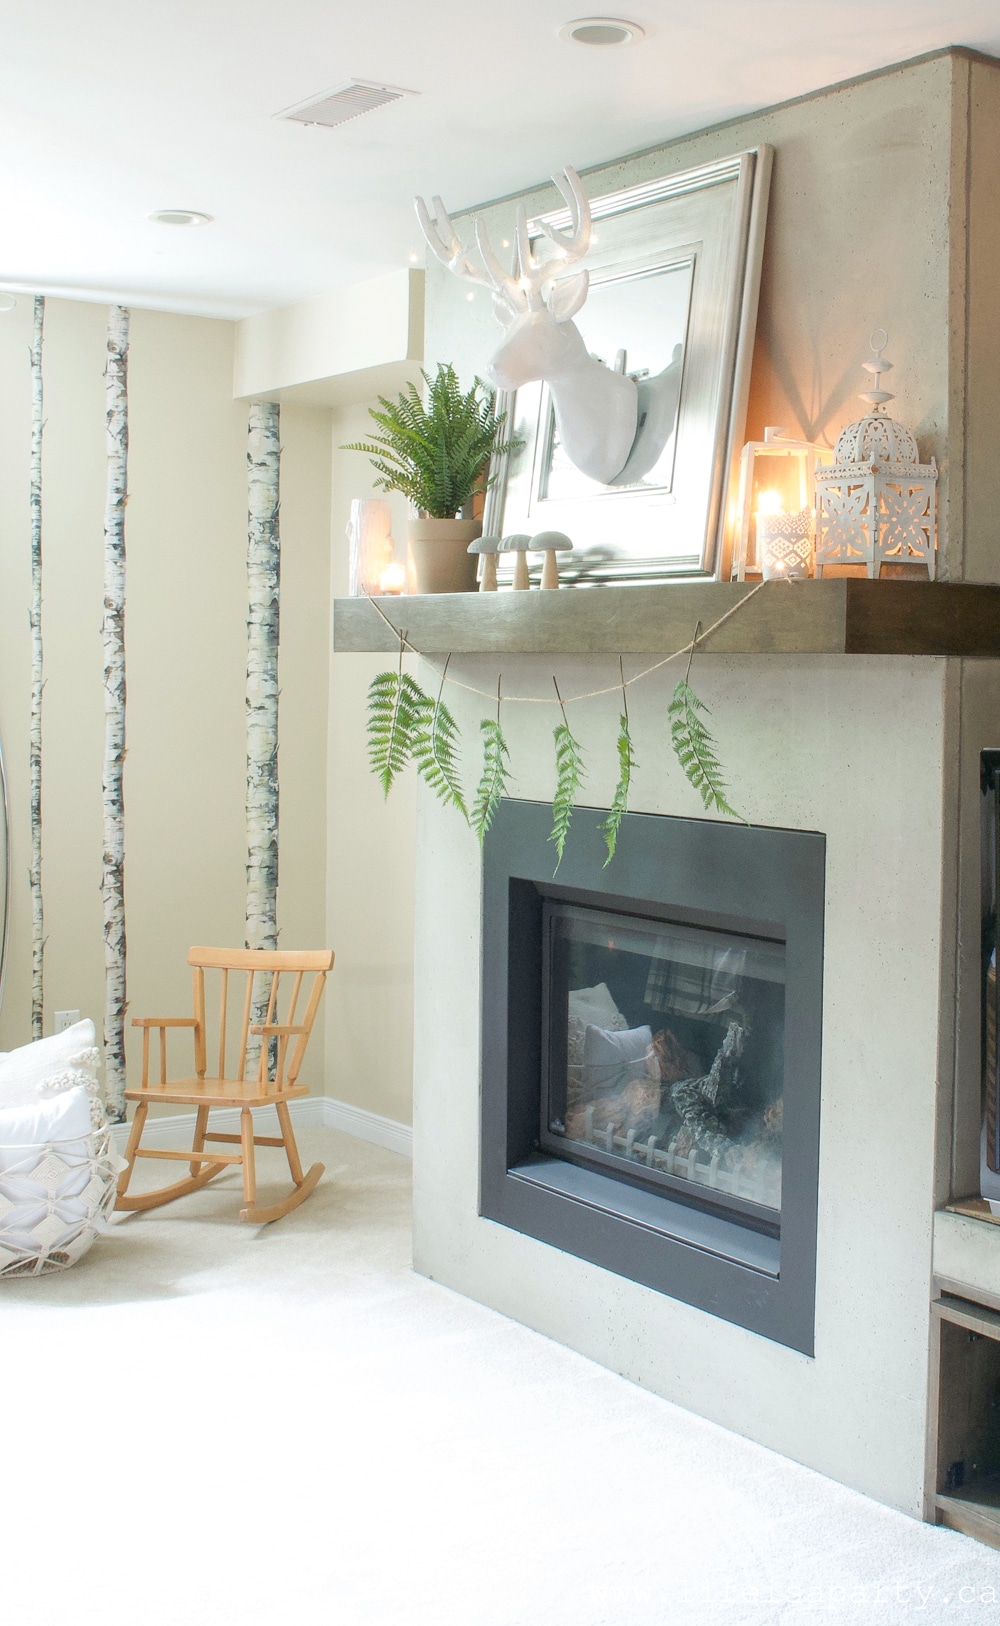
I love the paper mache deer head and his boho makeover. I wrapped the antlers in yarn to add texture, warmth, and interest. One of the great things about this makeover is that you can remove it later if you wish. You can read all the details of the Boho Christmas Mantel here.

Black and white Christmas decor on a fireplace mantel, with faux deer head.

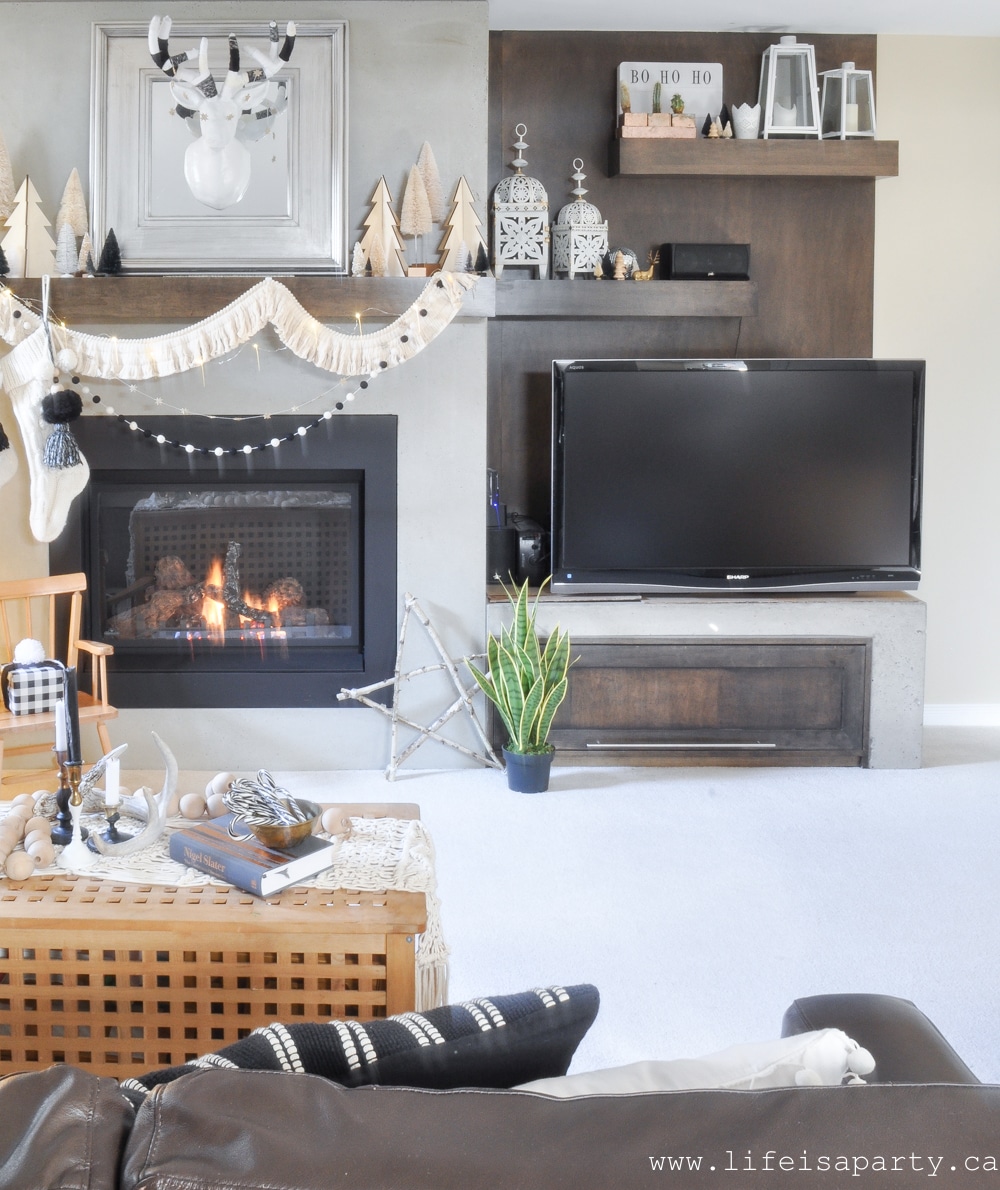
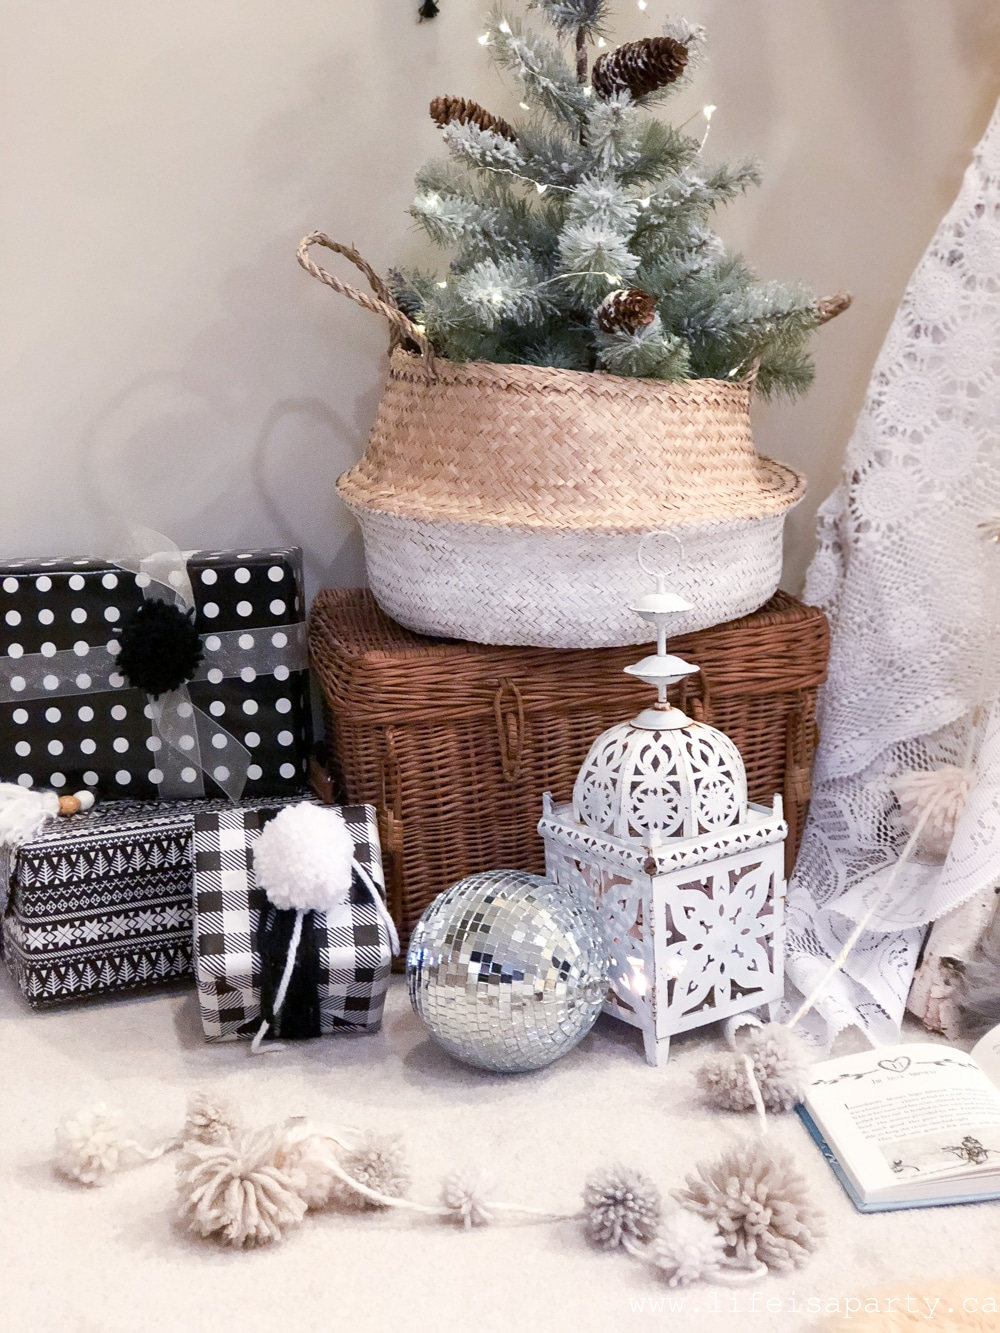
Beside the mantel, the shelves continue into a TV unit. I've decorated them with some beautiful Moroccan-style lanterns. A well-traveled, eclectic look is an important part of the boho aesthetic, so these lanterns are perfect. I've repeated the little bottle brush trees here and added in a disco ball for eclectic fun. Disco balls always feel like the perfect boho touch and are one of my favorite boho Christmas decorations.

Christmas fireplace mantel and tv unit decorated with boho Christmas decor.

The "bo ho ho" light-up box is another easy and fun addition to the space. And just a couple of plants because boho always equals plants as part of that earthy feel.

Reading Corner and Chair

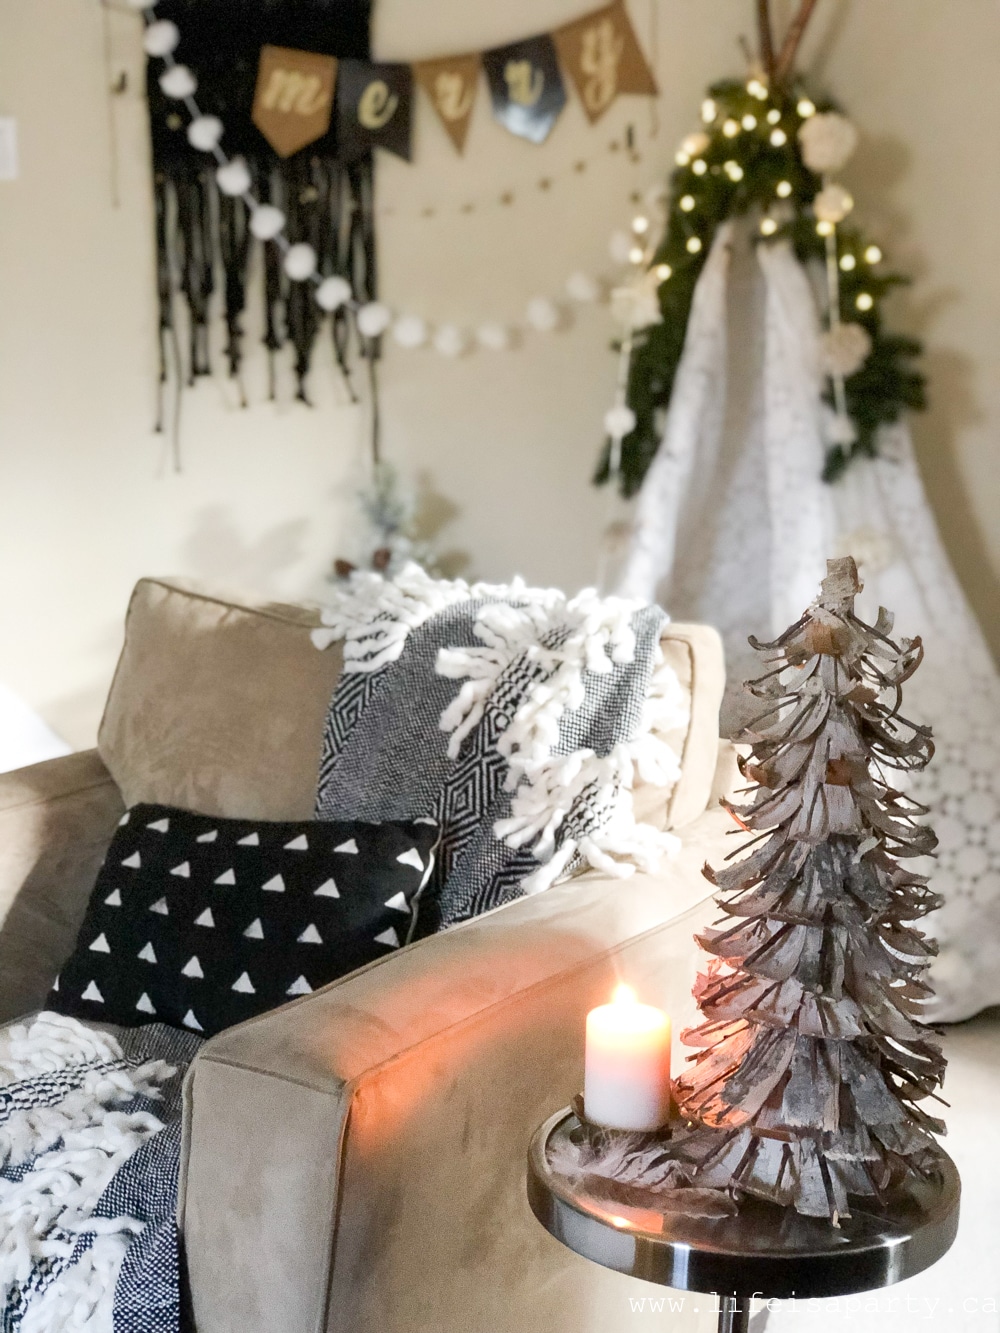
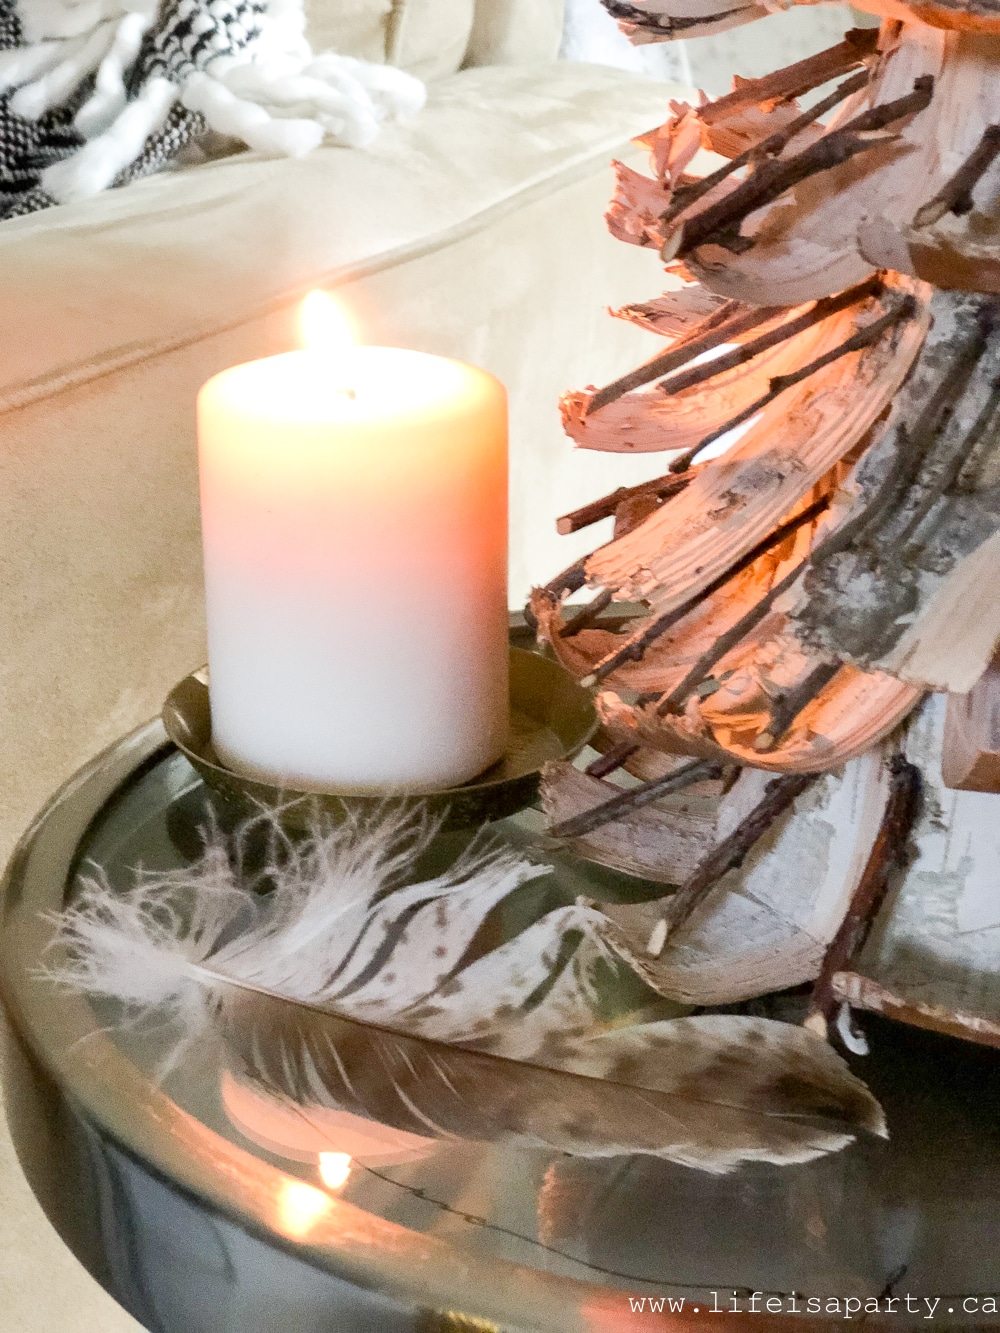
Beside the couch there's another comfy chair -a Kijiji find from years ago. It's warmed up with a pillow and blanket. On the side table sits a very simple arrangement of a birch bark Christmas tree, a candle on a vintage brass saucer, and a feather. Feathers are a great thing to include for a boho look.

Cozy boho inspired Christmas decor reading nook.
Cozy boho Christmas decor with feather, brass candle holder and birch bark Christmas tree.

Boho Reading Tent

Last but certainly not least, behind the chair we created a fun little play and reading nook. My girls have loved spending time here with Christmas books.

Boho inspired DIY reading tent decorated for Christmas.

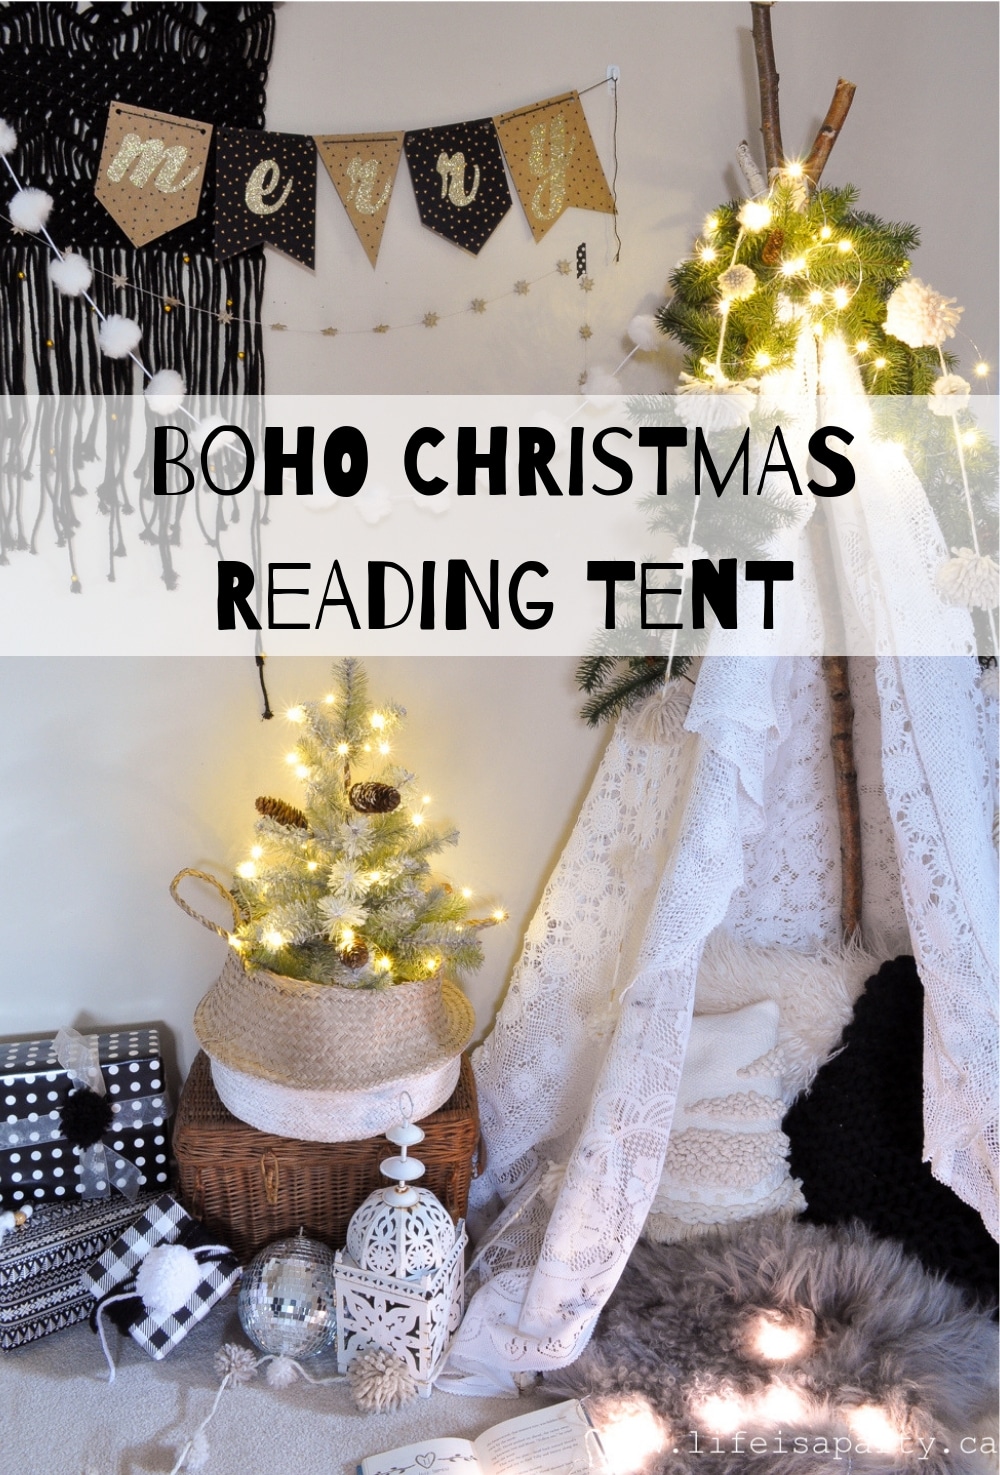
I made the little boho Christmas reading tent out of some tall narrow birch logs I cut down in the forest and a couple of vintage tablecloths. You can find the full tutorial for the DIY boho reading tent here. I think it's one of my favorite bohemian Christmas decor additions. The best part is that I put it together with items I already had, and I can disassemble it easily later on.

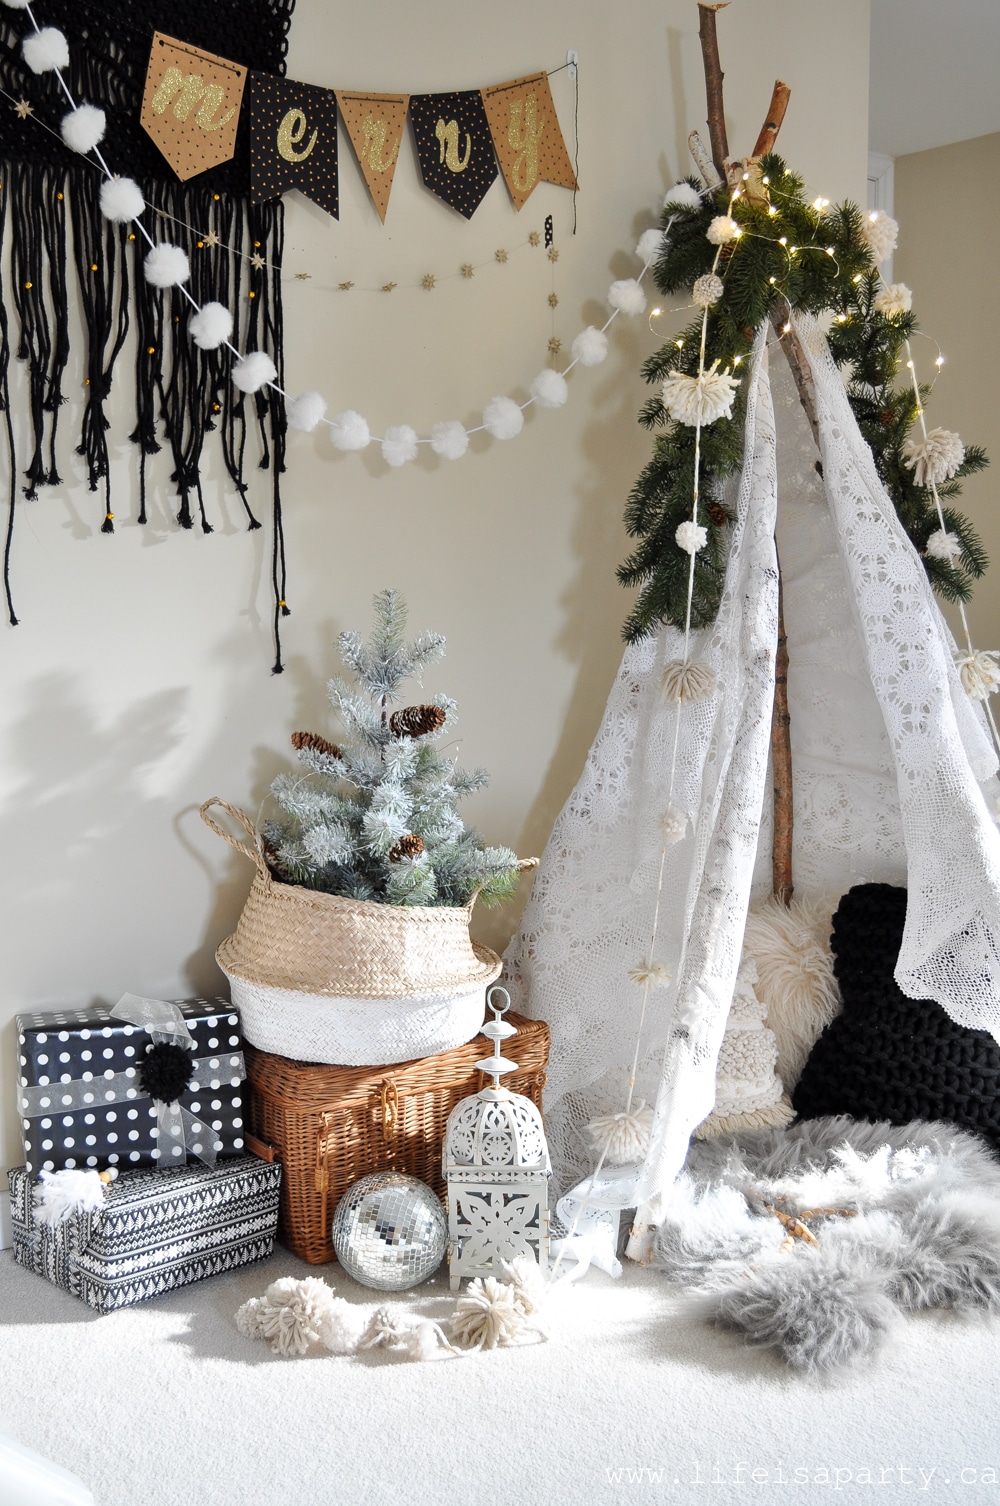
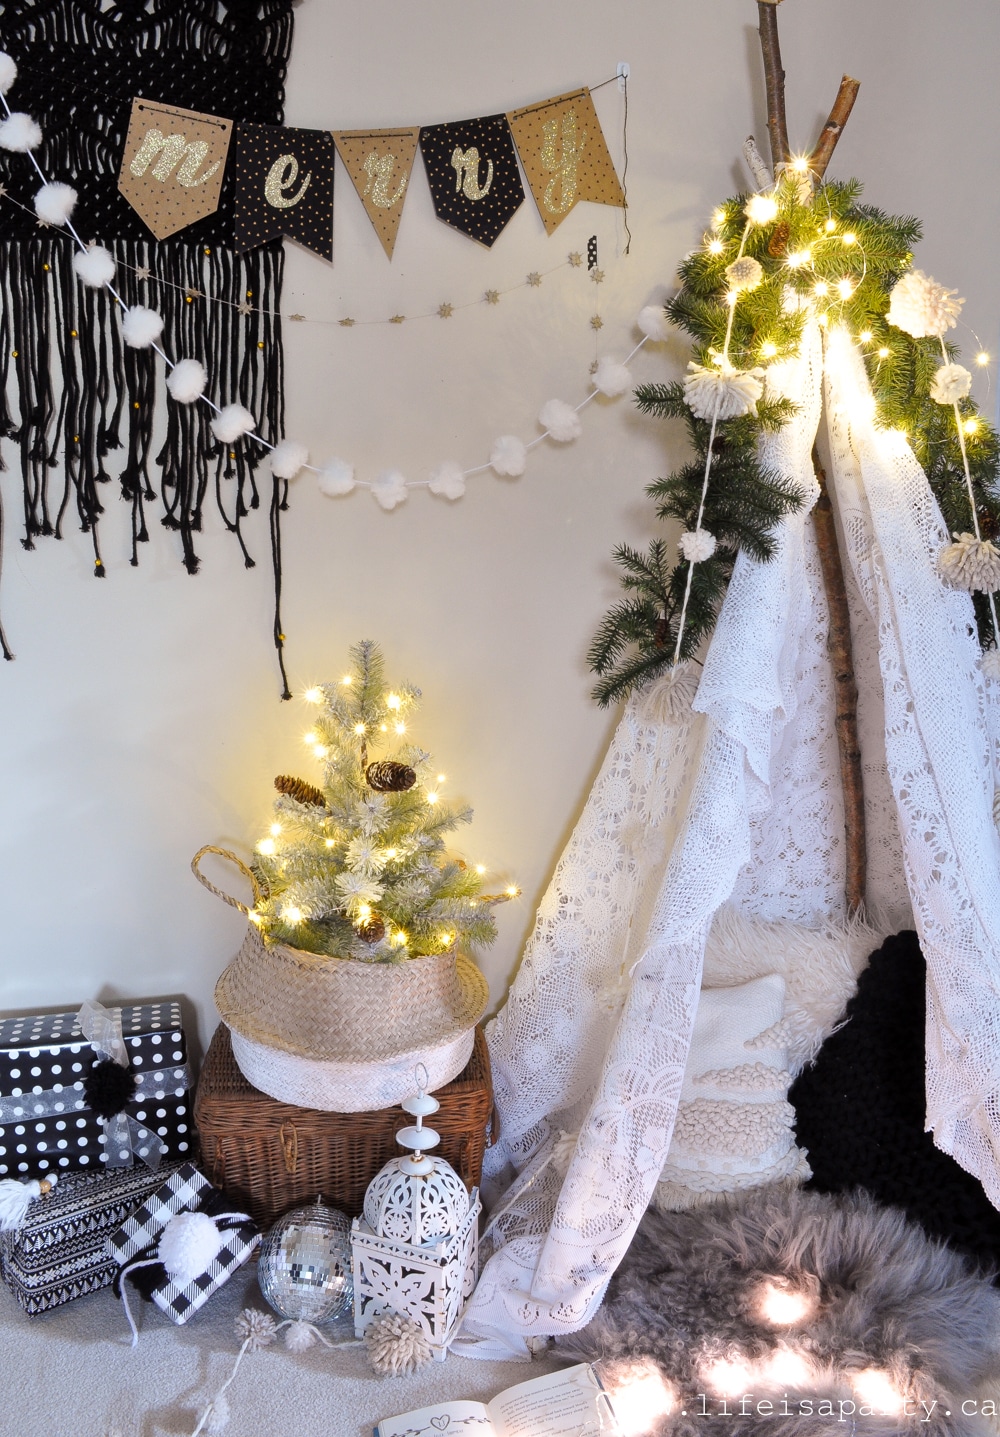
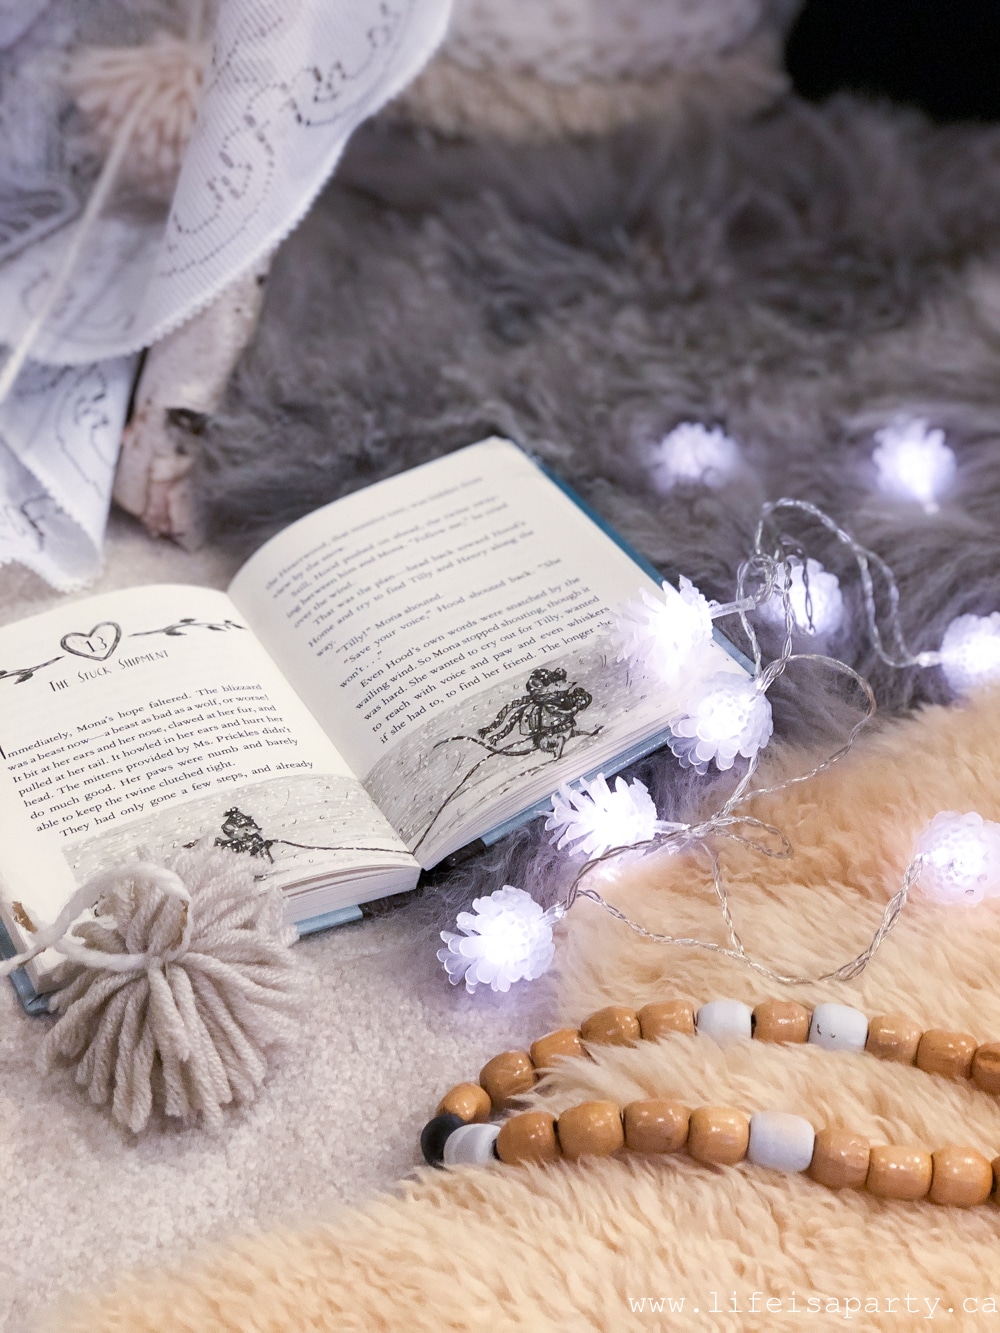
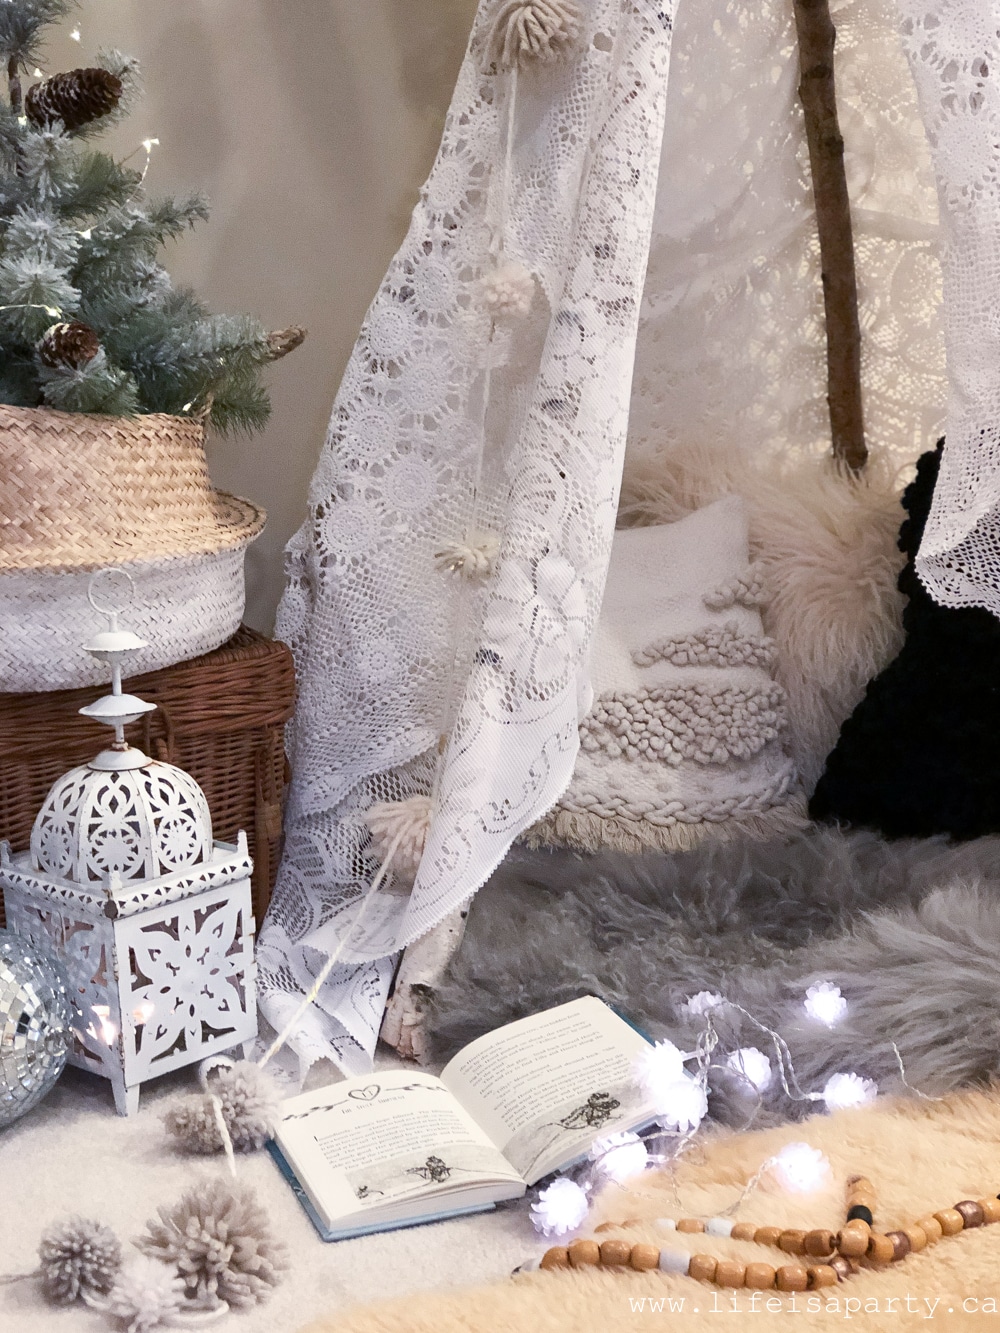
It was so fun decorating this little area. Small spaces are always the best for making cozy. I layered in cushions and a faux fur rug to make it warm and soft. I wrapped the tent in garland, fairy lights, and pom pom garland to make it magical and full of Christmas spirit.

Boho Christmas decor ideas, including wicker and rattan baskets, Moroccan lanterns, pom pom garland and mini Christmas tree.

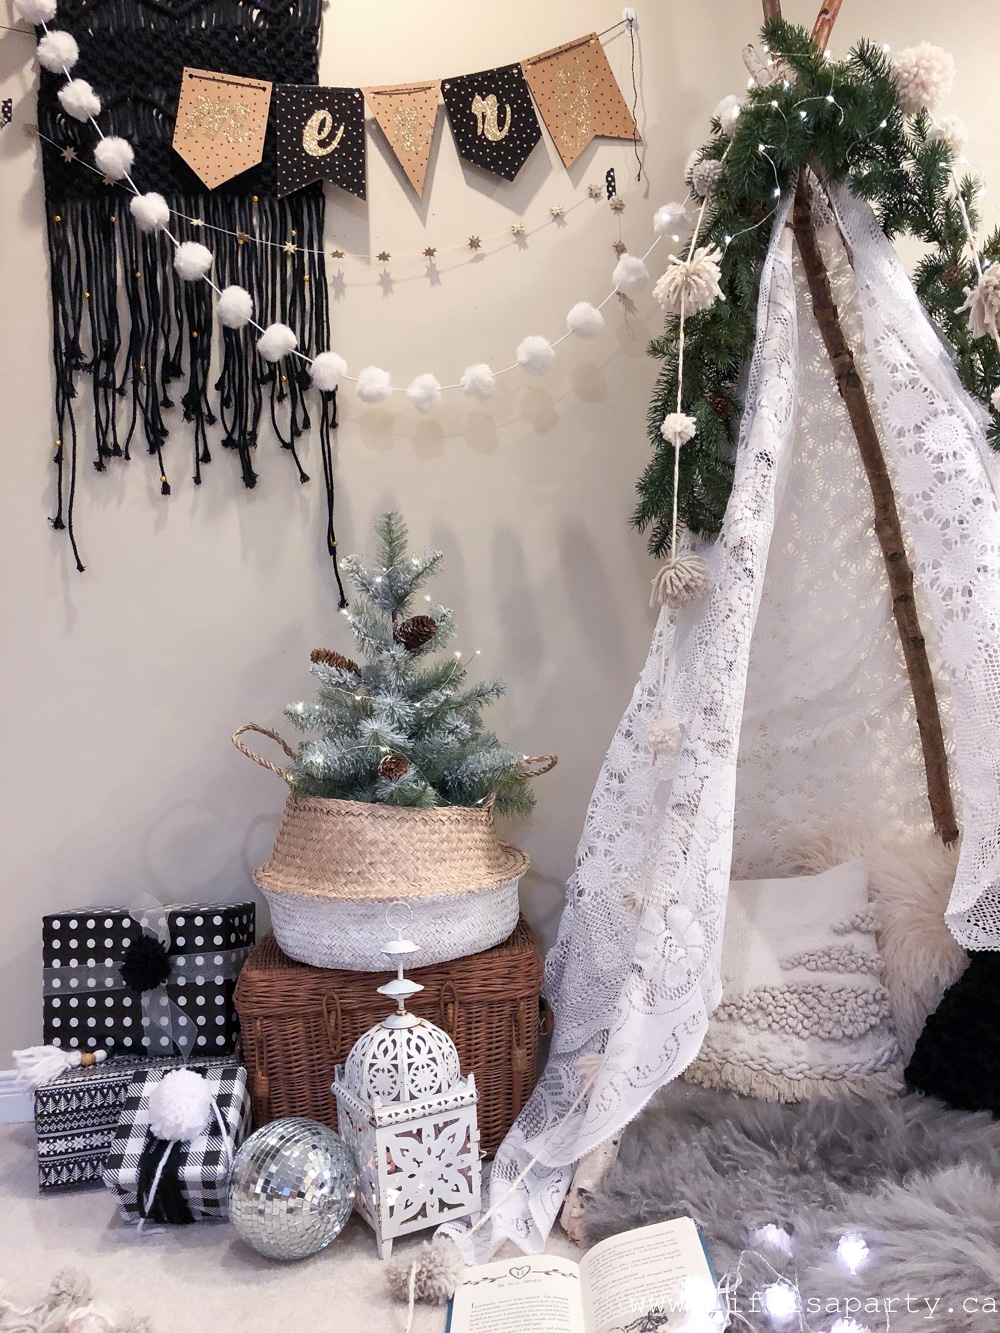
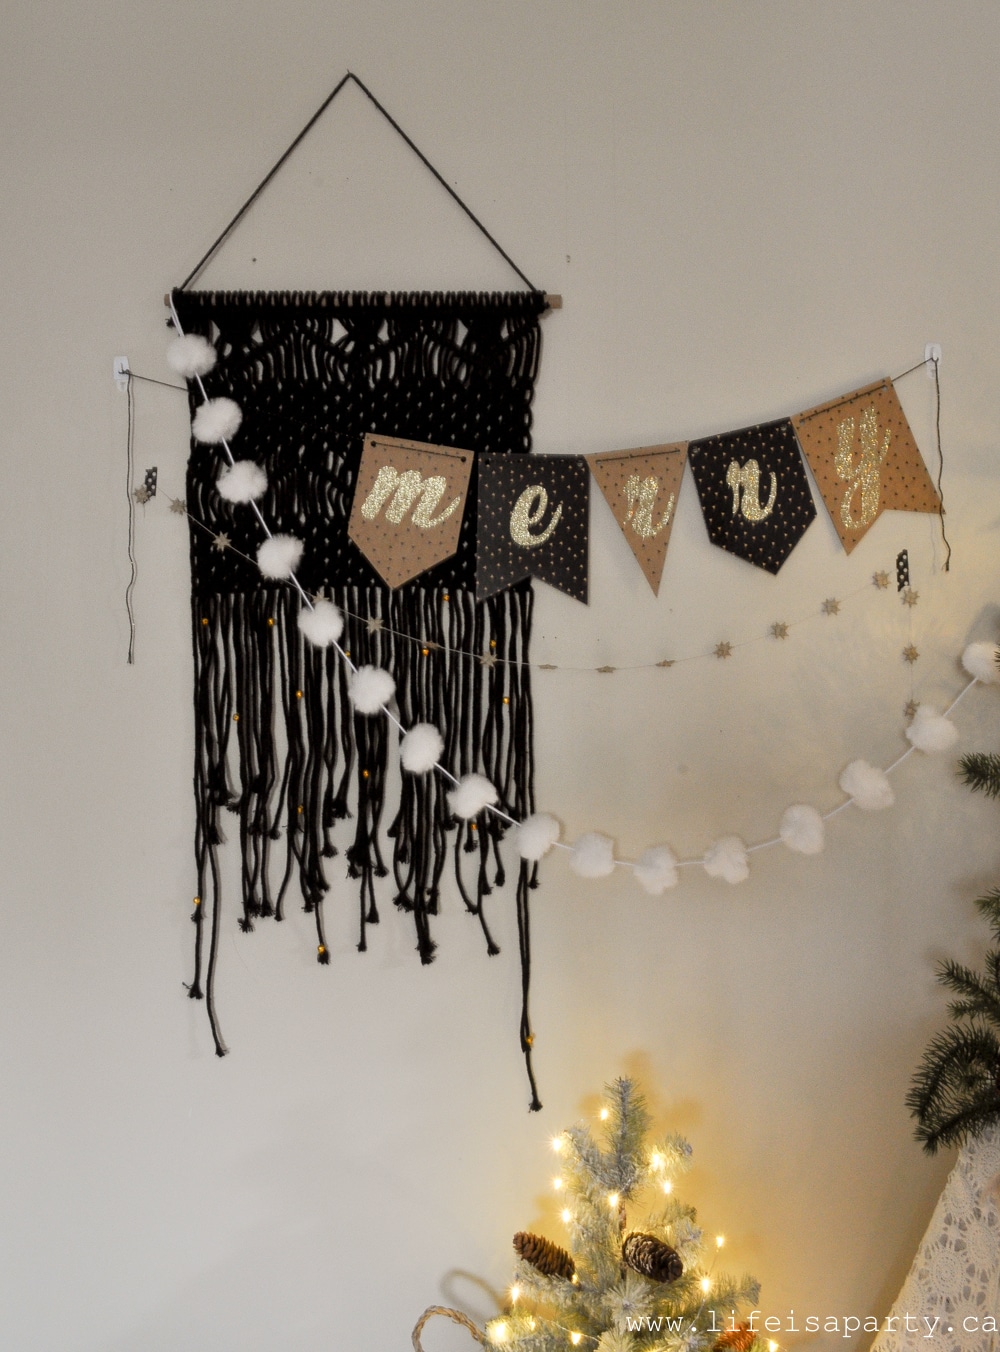
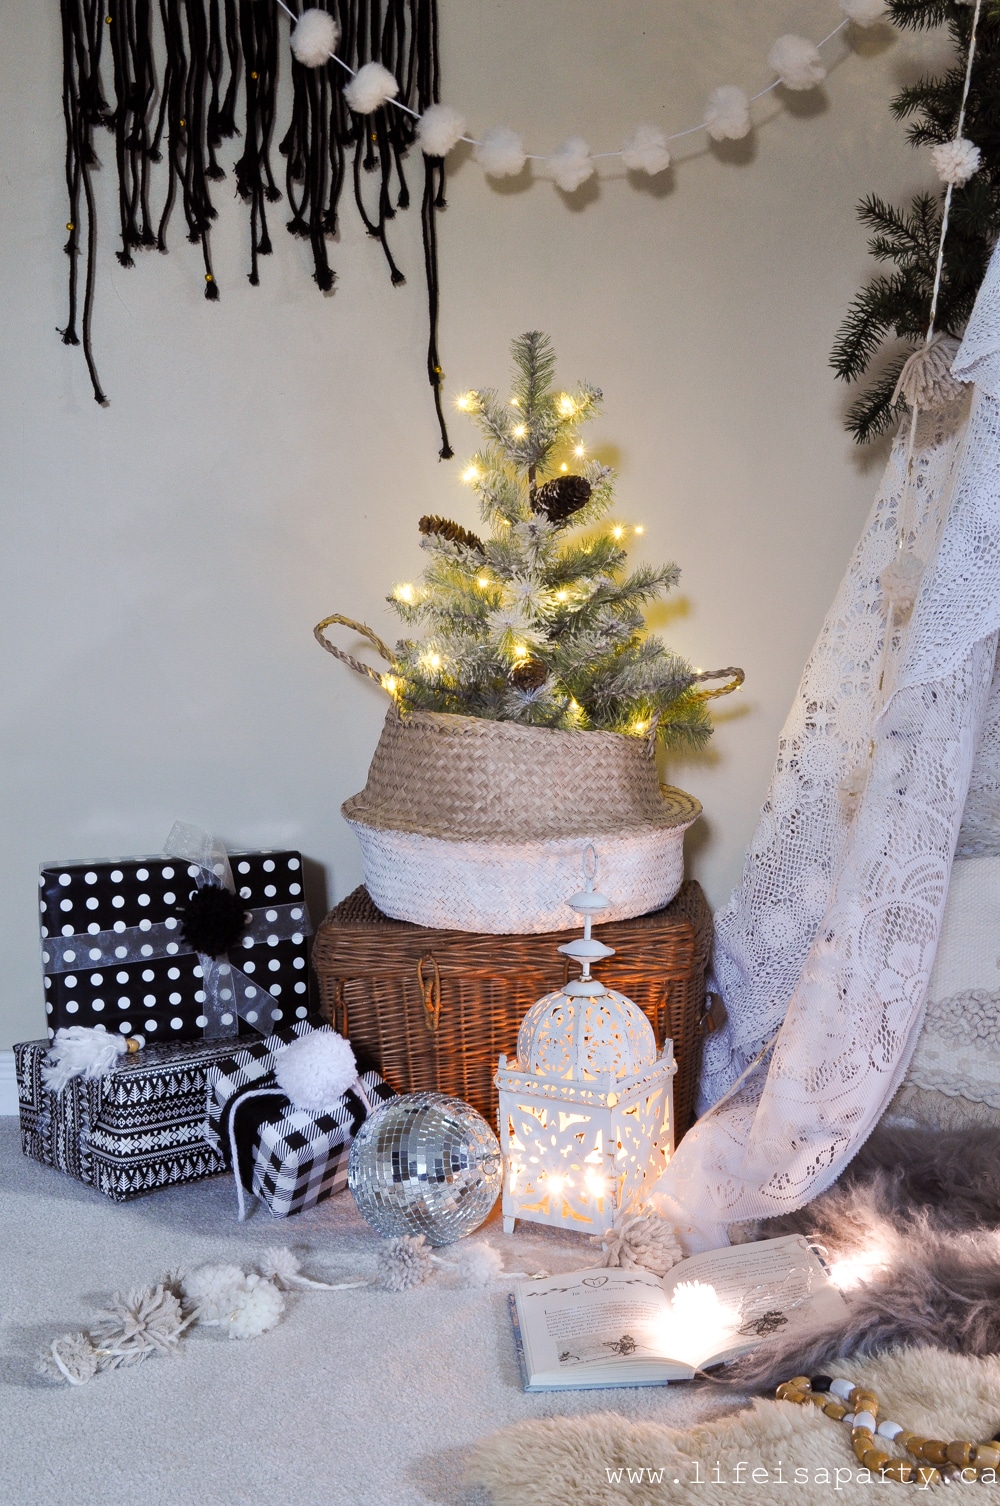
Beside the tent, I used a wicker picnic basket as a stand for a little snowy white Christmas tree. On the wall there's a really pretty macrame wall hanging from the store 5 Below, and I sewed on some little gold bells to dress it up for Christmas.

I layered in lots of different buntings too, from soft fuzzy pom poms to handmade straw stars. Layers equal boho, and there are lots of layers here.

DIY Boho Christmas Decor Projects

One of the best things about boho style is how naturally it lends itself to handmade projects. Here are all the DIY tutorials from our boho Christmas transformation:

Macrame Ornaments

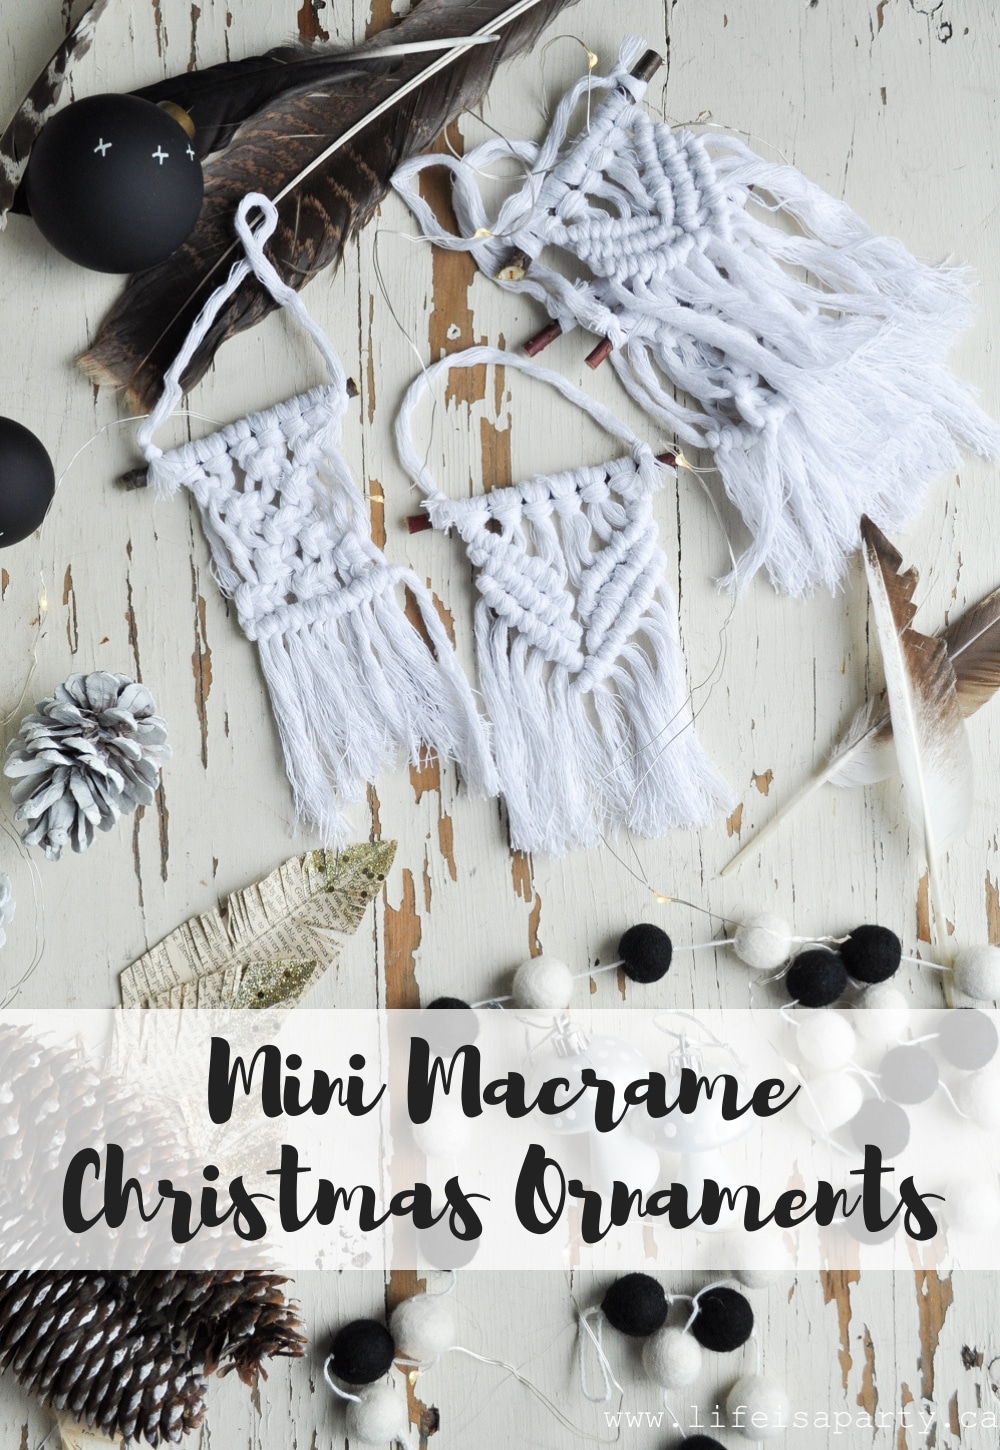
How to make mini macrame Christmas ornaments.

Learn to make beautiful macrame Christmas ornaments with basic knots. These add authentic boho texture to your tree and make thoughtful handmade gifts. Full macrame ornament tutorial here.

Wood Ball Ornaments

Easy DIY wood ball Christmas ornaments.

Simple wooden beads become stunning boho ornaments with the addition of paint. These are perfect beginner DIY projects. Wood ball ornament tutorial here.

Boho Christmas Mantel

Transform your mantel with DIY stocking tassels, yarn-wrapped antlers, and fringe garland. This project includes multiple DIY ideas you can mix and match. Complete boho mantel tutorial here.

Fa La La Cushion

Easy DIY Fa La La Christmas pillow.

Create a festive throw pillow with wooly tassels for your couch or reading nook. This adds personalized boho style to your seating areas. Fa La La cushion tutorial here.

Paint-Dipped Candlesticks

Easy DIY paint dipped brass candlestick holders.

Transform thrifted brass candlesticks with a modern paint-dipped effect. This simple technique creates custom decor for pennies. Paint-dipped candlestick tutorial here.

Boho Reading Tent

Build a magical reading nook using birch branches and vintage tablecloths. This showstopping project is easier than it looks and completely customizable. Reading tent tutorial here.

DIY children's boho reading tent.

All of these projects are beginner-friendly and use affordable materials. The handmade quality is what gives boho decor its authentic, personal feel.

Where to Shop for Boho Christmas Decor

Finding genuinely bohemian Christmas decorations can be challenging, but knowing where to look makes all the difference.

Thrift Stores and Vintage Shops

This is my number one shopping recommendation for boho decor. Thrift stores are gold mines for:

  • Brass candlesticks and brass items
  • Wooden items and carved pieces
  • Vintage textiles and macrame
  • Baskets in all sizes
  • Unusual decorative items with character
  • Mugs, vases, and containers -think pottery and texture.

Most of our brass candlesticks, the macrame basket for our tree base, and various decorative items came from thrift stores. Shopping secondhand keeps costs low while ensuring your decor is unique.

Craft and Fabric Stores

For DIY supplies and materials:

  • Hobby Lobby -Great for wooden beads, yarn, macrame supplies, and basic decor during 50% off sales.
  • Michaels -Similar selection with good sales.
  • Local fabric stores -Buy fringe, tassels, and textiles by the yard.

I found our fringe garland at a fabric store, bought by the yard to fit our mantel perfectly.

Dollar Stores

Don't overlook dollar stores for surprising boho finds:

  • Natural wooden items
  • Feathers and natural elements
  • String lights (like our pinecone lights!)
  • Basic craft supplies

Online Shopping

When you need specific items:

  • Etsy -Handmade macrame, vintage finds, custom ornaments.
  • Amazon -Pampas grass, macrame supplies, bulk wooden beads.
  • Target -Neutral decor with boho vibes during holiday season.

Nature

Don't forget the best free source - nature itself! Collect:

  • Pinecones
  • Interesting branches and twigs
  • Feathers
  • Evergreen clippings (ask at Christmas tree farms)
  • Interesting seed pods or natural items

We collected pinecones on walks, cut birch branches for our reading tent, and gathered various natural elements throughout the fall to use in our Christmas decor.

Budget Tiers

Low Budget (Under $50): Focus on DIY projects, thrifted finds, and natural elements. Make your own ornaments, buy secondhand containers and candlesticks, collect items from nature.

Mid Budget ($50-150): Add some purchased items like macrame garland, pampas grass, quality brass pieces, or special ornaments alongside your DIY projects and thrifted finds.

Higher Budget ($150+): Invest in statement pieces like large macrame wall hangings, quality sheepskin rugs, or curated vintage collections while still incorporating handmade touches.

Our entire family room transformation was very budget-friendly. By making many items ourselves and shopping thrift stores, we created a complete boho Christmas look without breaking the bank.

Frequently Asked Questions

What makes Christmas decor "boho"?

Boho Christmas decor is defined by natural materials (wood, jute, feathers, plants), handmade touches, layered textures, neutral or eclectic color palettes, and an effortless collected vibe. Unlike traditional Christmas decor with matching sets and formal arrangements, boho embraces imperfection, personality, and global influences. Key elements include macrame, tassels, vintage finds, DIY projects, and organic natural elements.

Can boho Christmas decor be colorful or does it have to be neutral?

Boho Christmas can absolutely be colorful! While neutral palettes (creams, beiges, browns) are most common, colorful boho embraces jewel tones, vibrant textiles, rich patterns, and global-inspired hues. You can also do black and white boho (like our room tour), desert terracotta tones, or any palette that speaks to you. As long as you incorporate natural materials, texture, and layering, it will feel authentically bohemian regardless of color choice.

Where can I find affordable boho Christmas decorations?

Thrift stores are your best bet for affordable boho decor - look for brass candlesticks, wooden items, baskets, vintage textiles, and unusual decorative pieces. Dollar stores often have wooden items and natural elements. Craft stores like Hobby Lobby and Michaels sell supplies for DIY projects at 50% off. Don't forget nature - collect pinecones, branches, and feathers for free. Making your own decorations is also very budget-friendly.

How do I decorate a boho Christmas tree?

Skip traditional glass ornaments and focus on natural materials and handmade touches. Use wooden ornaments, macrame pieces, tassels, feathers, pinecones, and wooden bead garland. Set your tree in a macrame basket or woven planter instead of a traditional tree skirt. Layer sheepskin or faux fur at the base. Use warm white lights and choose an unconventional tree topper like pampas grass, a large macrame piece, or a natural element like an owl.

What's the difference between boho and farmhouse Christmas decor?

Farmhouse Christmas tends toward rustic wood, galvanized metal, buffalo check patterns, and more structured arrangements. Boho is softer, more textured, and more eclectic with macrame, tassels, global influences, and intentionally layered imperfection. Farmhouse feels more organized and coordinated; boho feels collected and free-form. Both use natural materials, but boho adds more textile elements and handmade touches.

What are essential items for boho Christmas decorating?

Start with these basics: macrame pieces (ornaments, garland, or wall hanging), wooden beads and ornaments, natural elements (pinecones, feathers, branches), textured textiles (sheepskin, woven fabrics), tassels and pom poms, brass or copper candlesticks, neutral-toned items, and some vintage or handmade pieces. Layer these elements with varied textures to create authentic boho style.

More Boho Decorating Inspiration

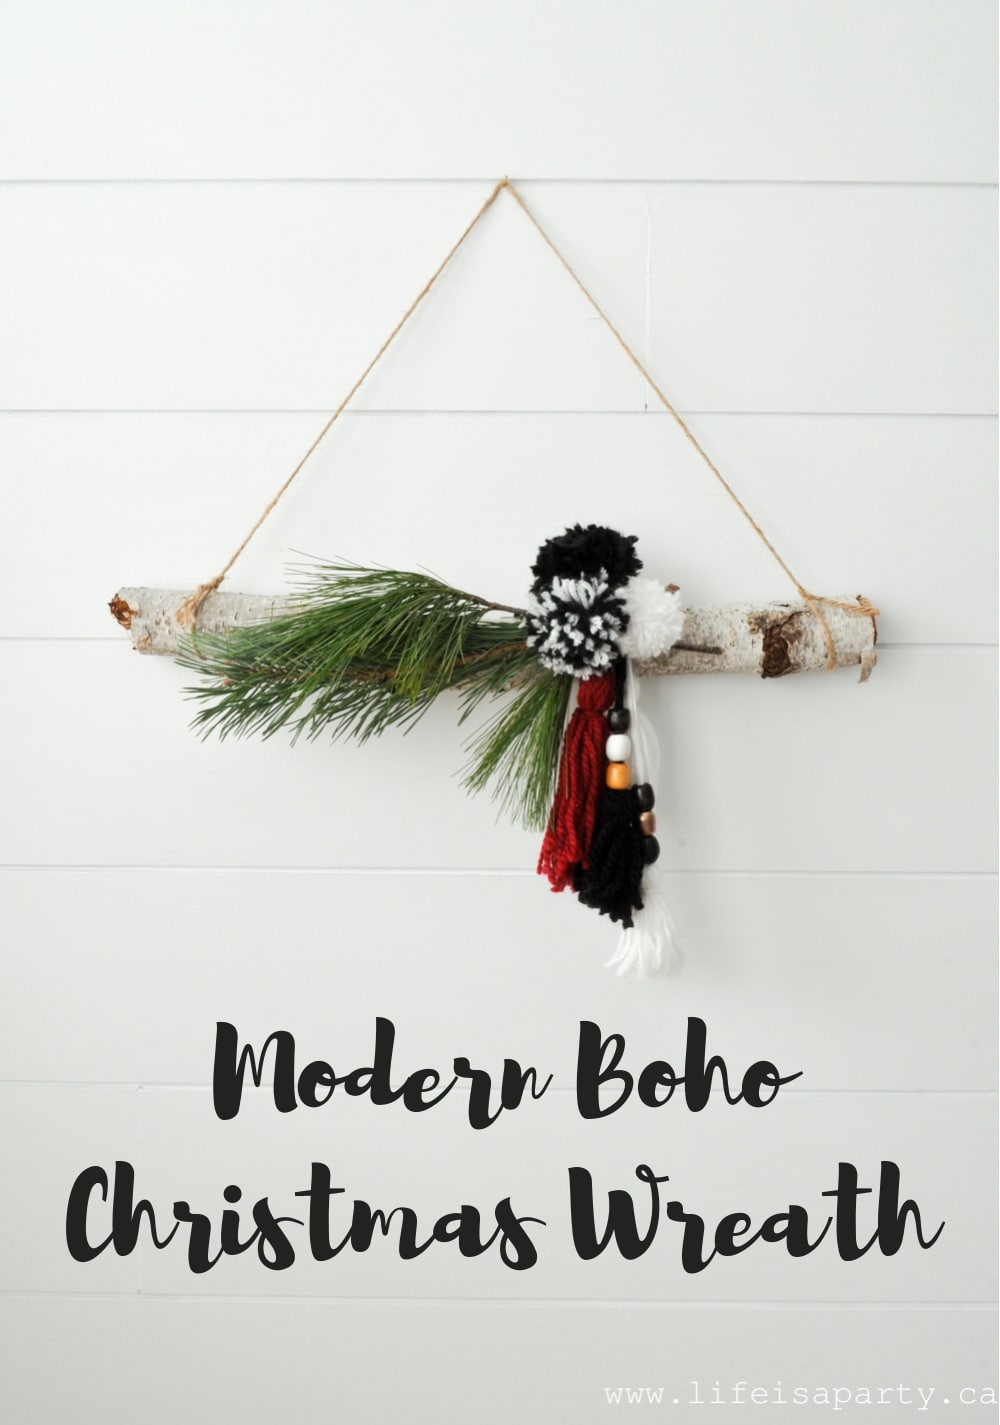
  • How to make a simple boho Christmas wreath with birch and tassels.
    DIY Modern Boho Christmas Wreath
  • Green Christmas decor ideas.
    Christmas Home Tour -Green Christmas Decor
  • Modern Boho fall mantel ideas.
    Modern Boho Fall Mantel Ideas
  • Boho fall thanksgiving table.
    Elements of Boho Style for a Boho Thanksgiving Table

If you try any of these Boho Christmas Decor Ideas or DIY projects from this guide, please let me know how it went in the comments below. Thanks for visiting today!

Boho Christmas Tree and DIY Macrame Feathers

Nov 22, 2018 · Leave a Comment

Boho Christmas tree and ornament ideas.

Boho Christmas Tree and DIY Macrame Feather Ornaments: black and white Boho Christmas Tree full of DIY ornaments, plus a full tutorial for macrame feathers.

Boho Christmas tree and ornament ideas.
[feast_advanced_jump_to]

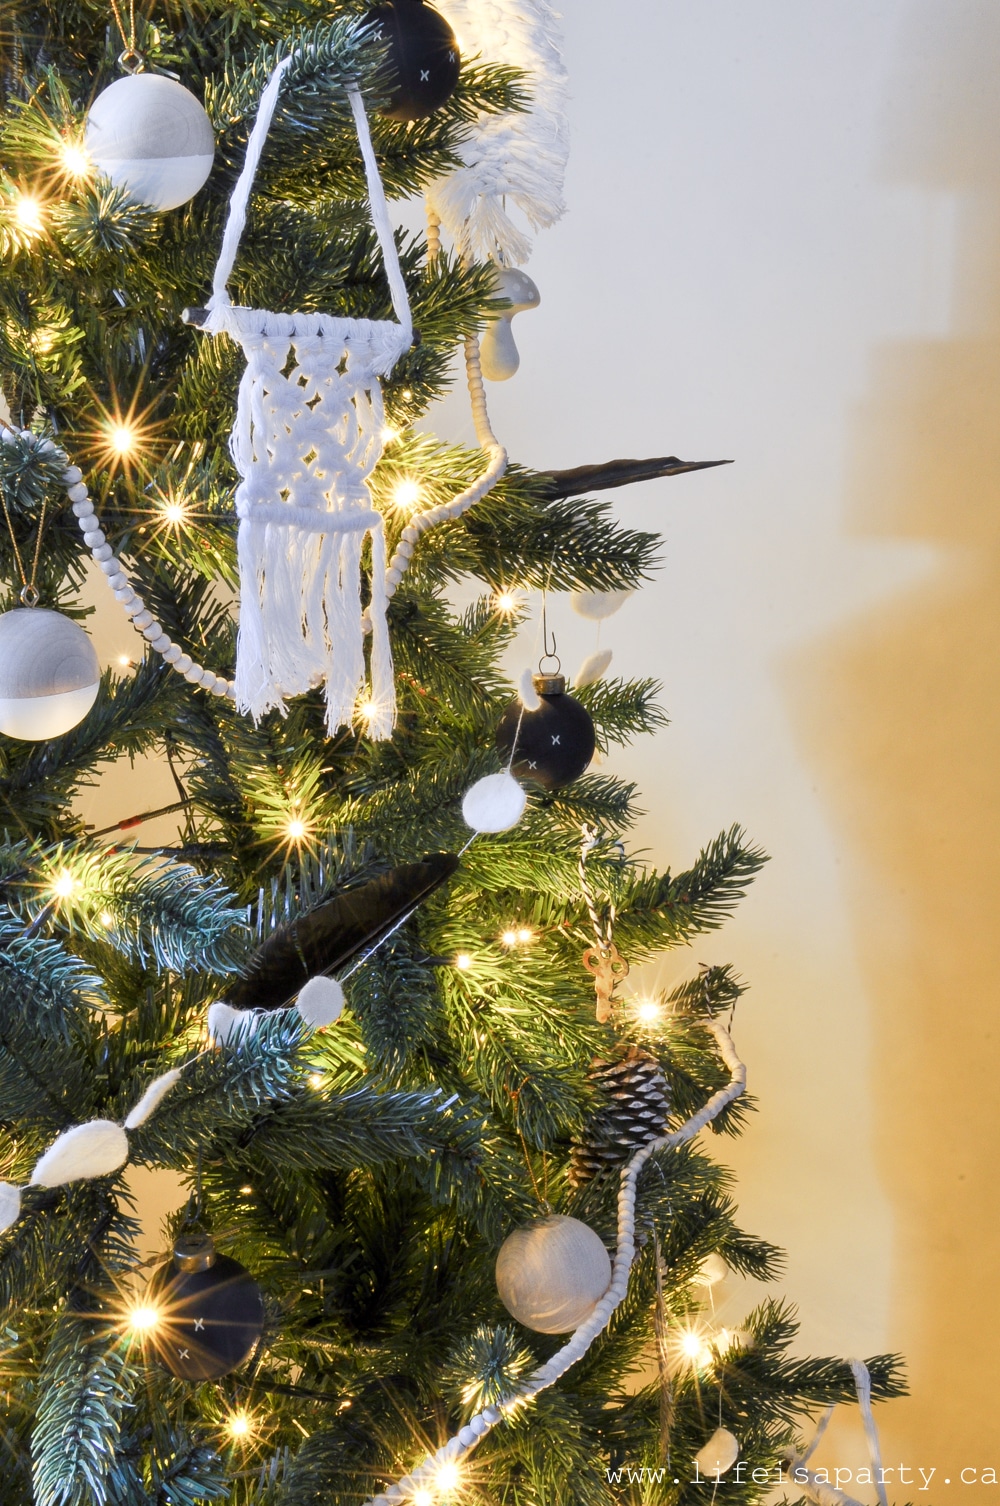
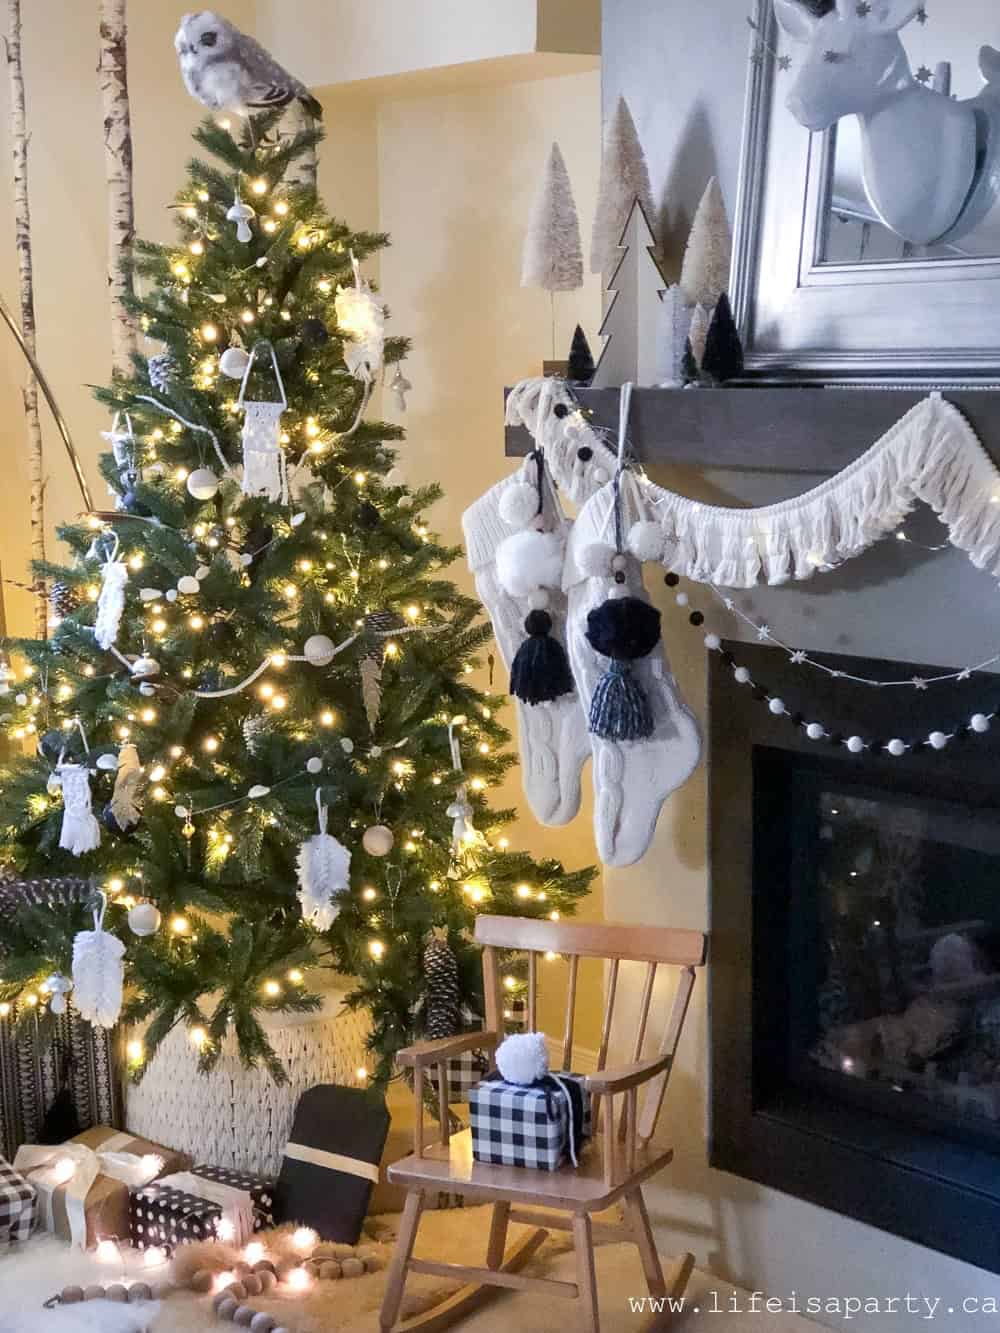
Today I'm sharing our Boho Christmas Tree for our Boho Christmas series.  The tree was really the first thing I thought of doing when we decided to go with a black and white boho theme for our Christmas decor in our basement family room this year.  So I'm so excited to share the Boho Christmas Tree with you today all decorated, as well as a fun and easy DIY Macrame Feather Ornament.

I love boho home decor and thought that the boho style would be perfect for a different theme for our Christmas decorations this year.  Our color scheme is simple black and white, with lots of earthy tones and natural wood for a rustic feel to our neutral Christmas decor.

The Tree

This beautiful tree is perfect for the space.  Our last tree was a hand-me-down of a hand-me-down.  Our new Green Spruce is a major upgrade!  This tree is pre-lit with 400 pretty sparkly twinkly lights.  I've never had a pre-lit tree before and I don't think I'll ever want to go back to stringing lights after this.  And the tree itself is so beautiful and real looking.  The boho look always includes lots of plants and things from nature, so this real looking tree is perfect.  It gives all the beauty of a real tree, without having your living room full of falling pine needles.

Boho Christmas Tree

We added a fun macrame basket to hold it in, and I think it looks great.  It's such a great alternative to a traditional tree skirt.  Around the tree we tucked a few sheepskin rugs -very a very boho feel.

The Boho Christmas Ornaments

There are an assortment of DIY boho Christmas ornaments on this tree.  I actually love the idea of having a few little easy projects to work on for those cold winter evenings by the fire and these ornaments are perfect little December evening projects.  I usually make sets of 4-6 of each kind and try to spread them around the tree.

Black and White Christmas Tree

Feathers

Let's start with some of the simplest decorations.  When you think boho vibe, you think feathers -so I tucked real large feathers into the tree everywhere.  They're easy to find at the craft store.  I love the look of them just tucked into the tree branches here and there.

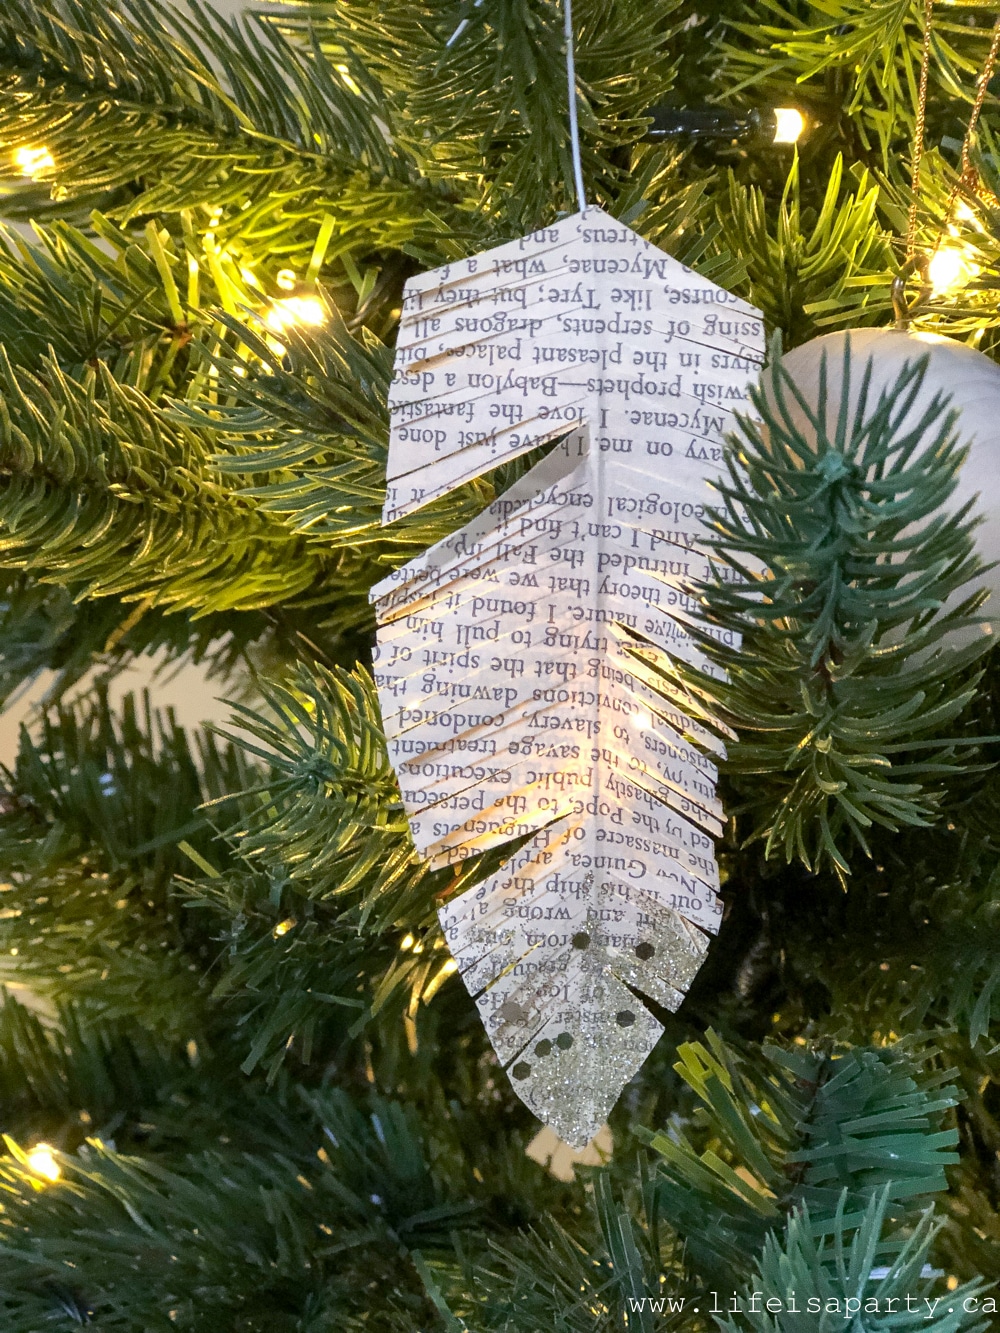
paper featherI made these book page feathers a few years ago -you can find a full tutorial here.  They're very simple to make, just an old book. some wire, glitter, and a few snips. I love how the little bit of gold glitter adds a little sparkle.  The neutral colors of the book pages worked well with our black and white look.

Boho Christmas Tree

Pinecones

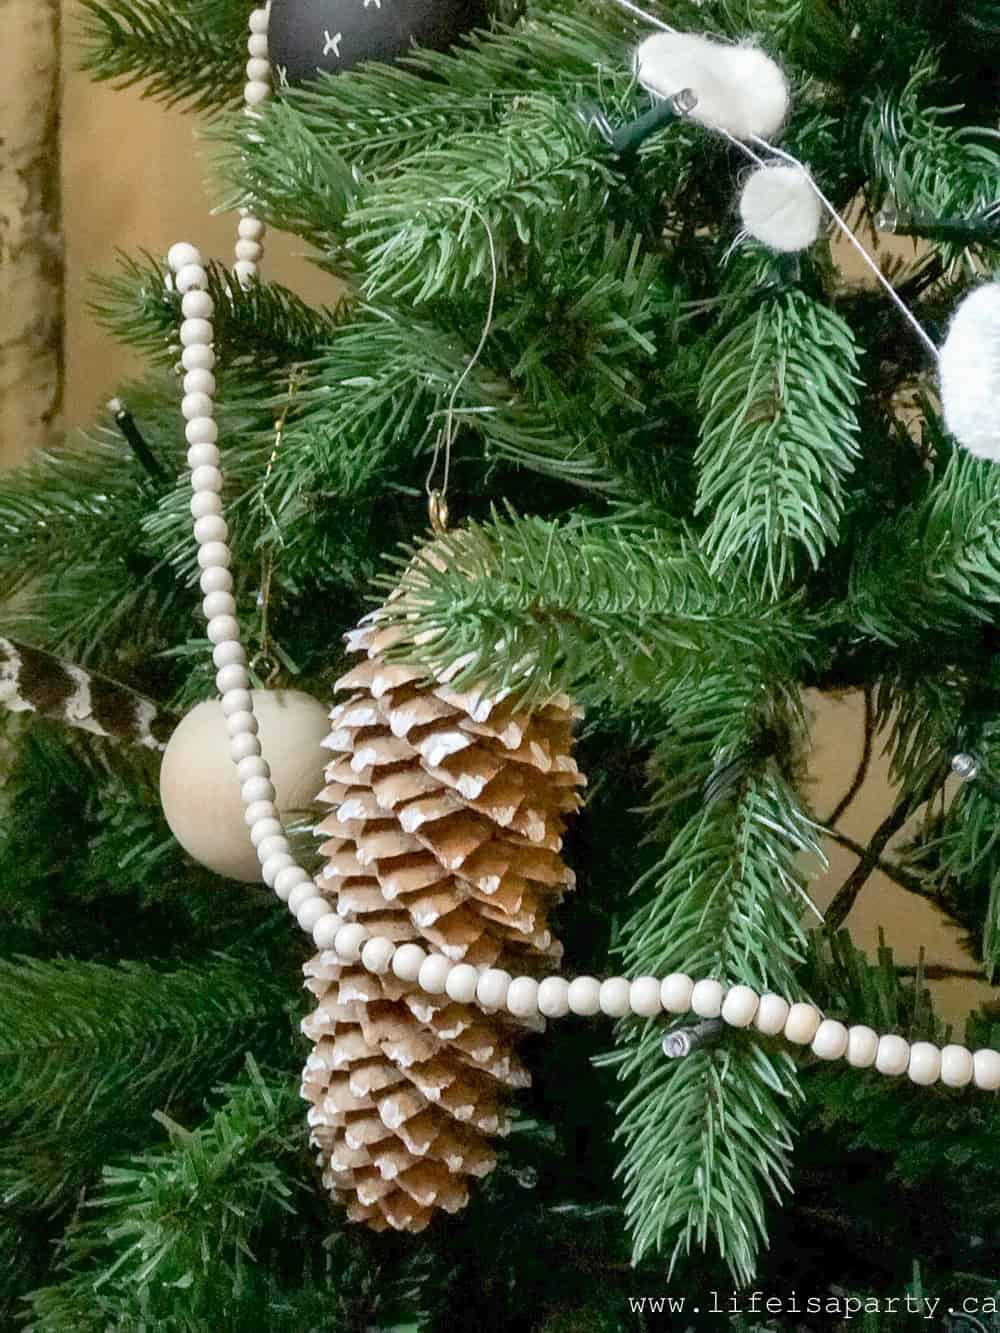
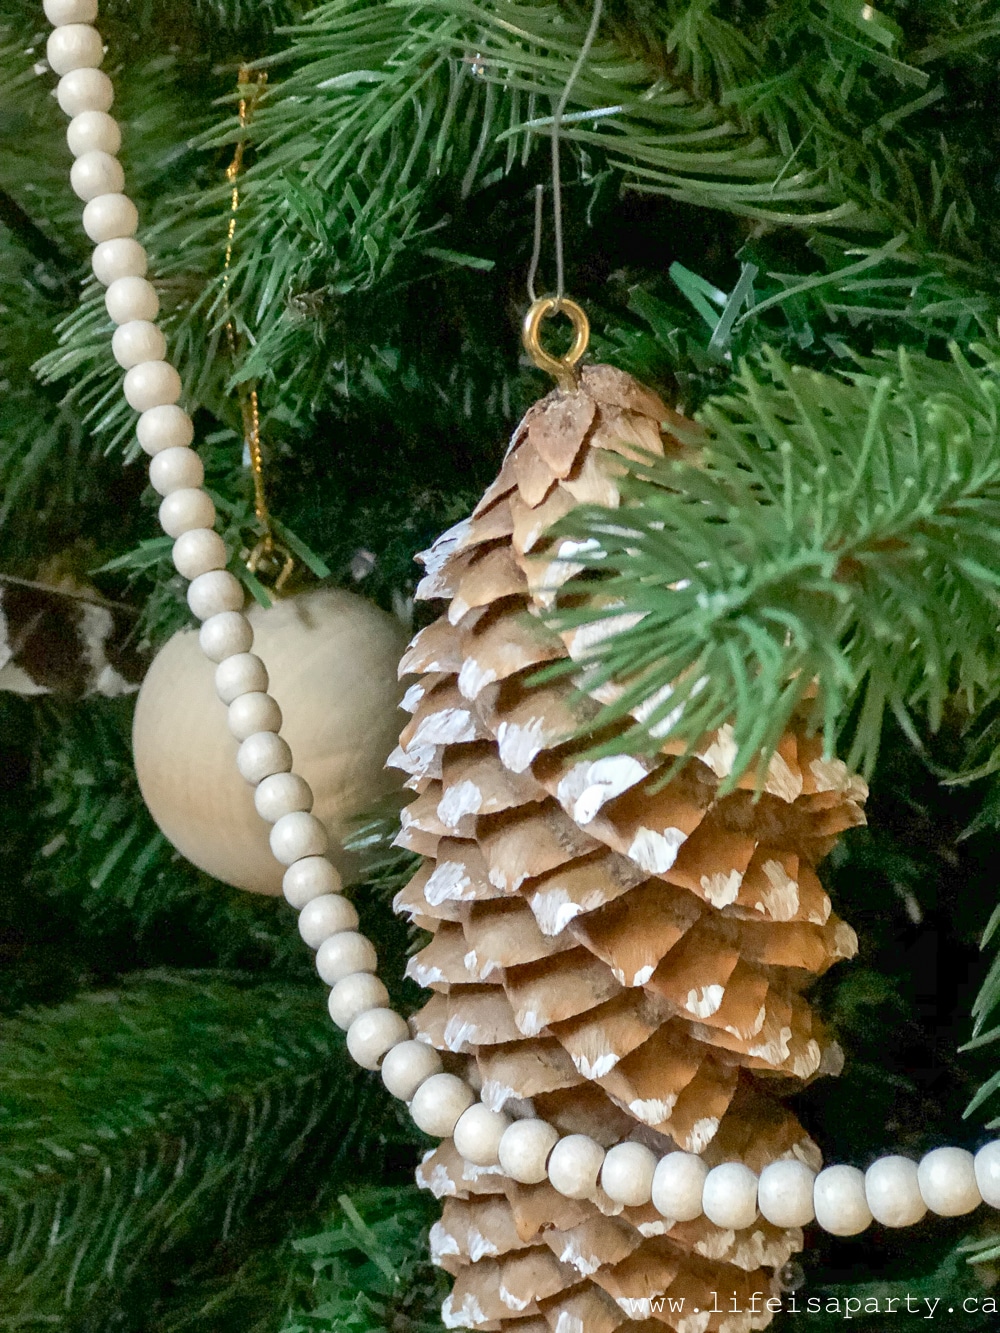
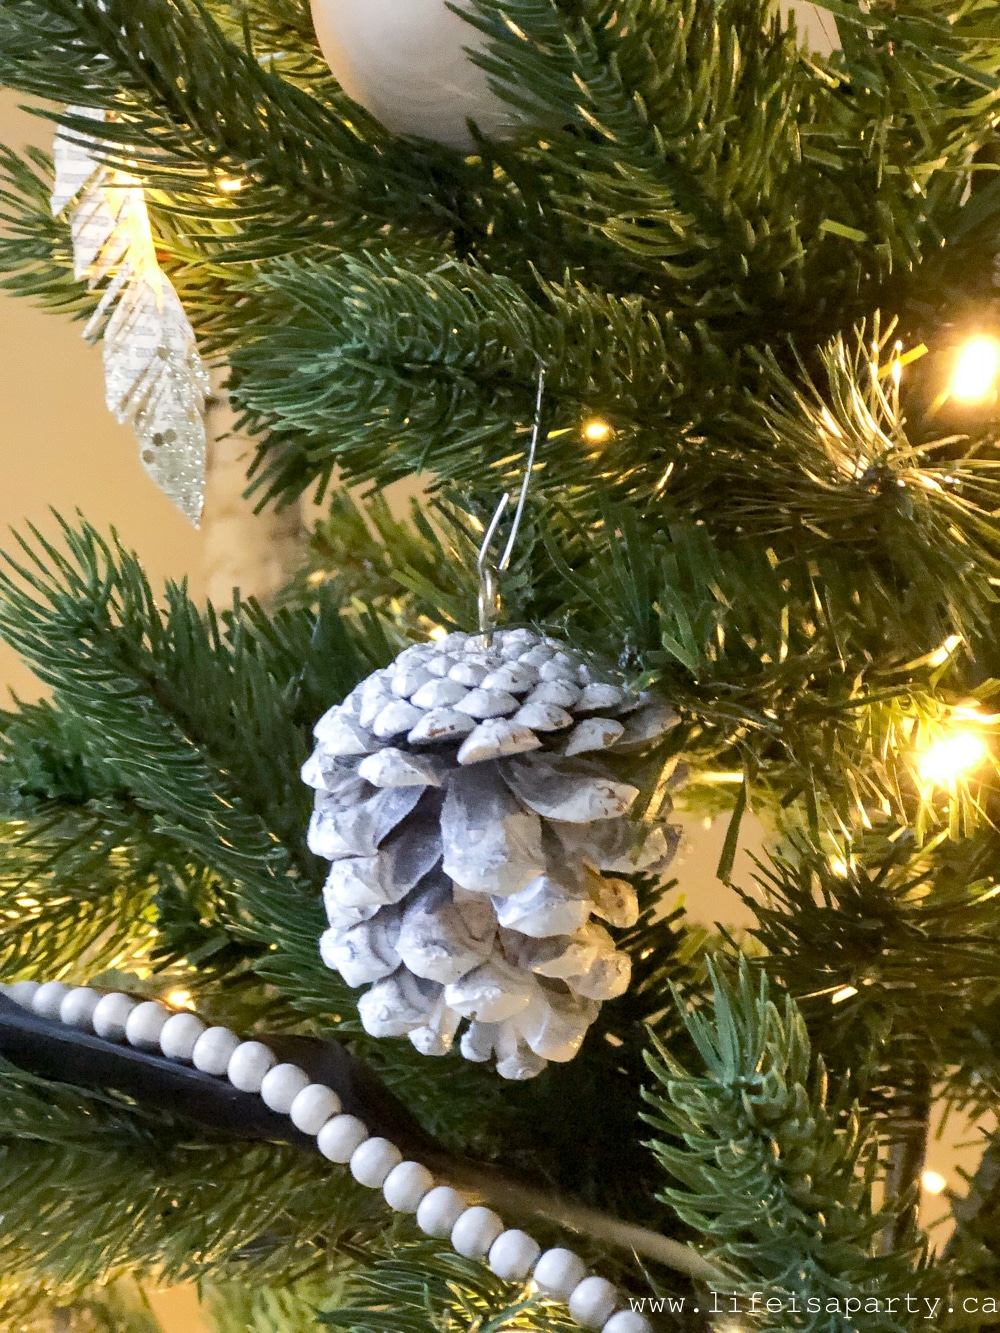
I also made these pinecone ornaments a few years ago.  The long ones have some acrylic paint dry brushed onto the tips to look like snow, and shorter ones are all painted.  To hang them I just added a little eye hook to the tops.  This is such an inexpensive and easy way to add some natural elements to your boho Christmas look.

painted pinecone Christmas tree ornaments
painted pinecone Christmas ornament

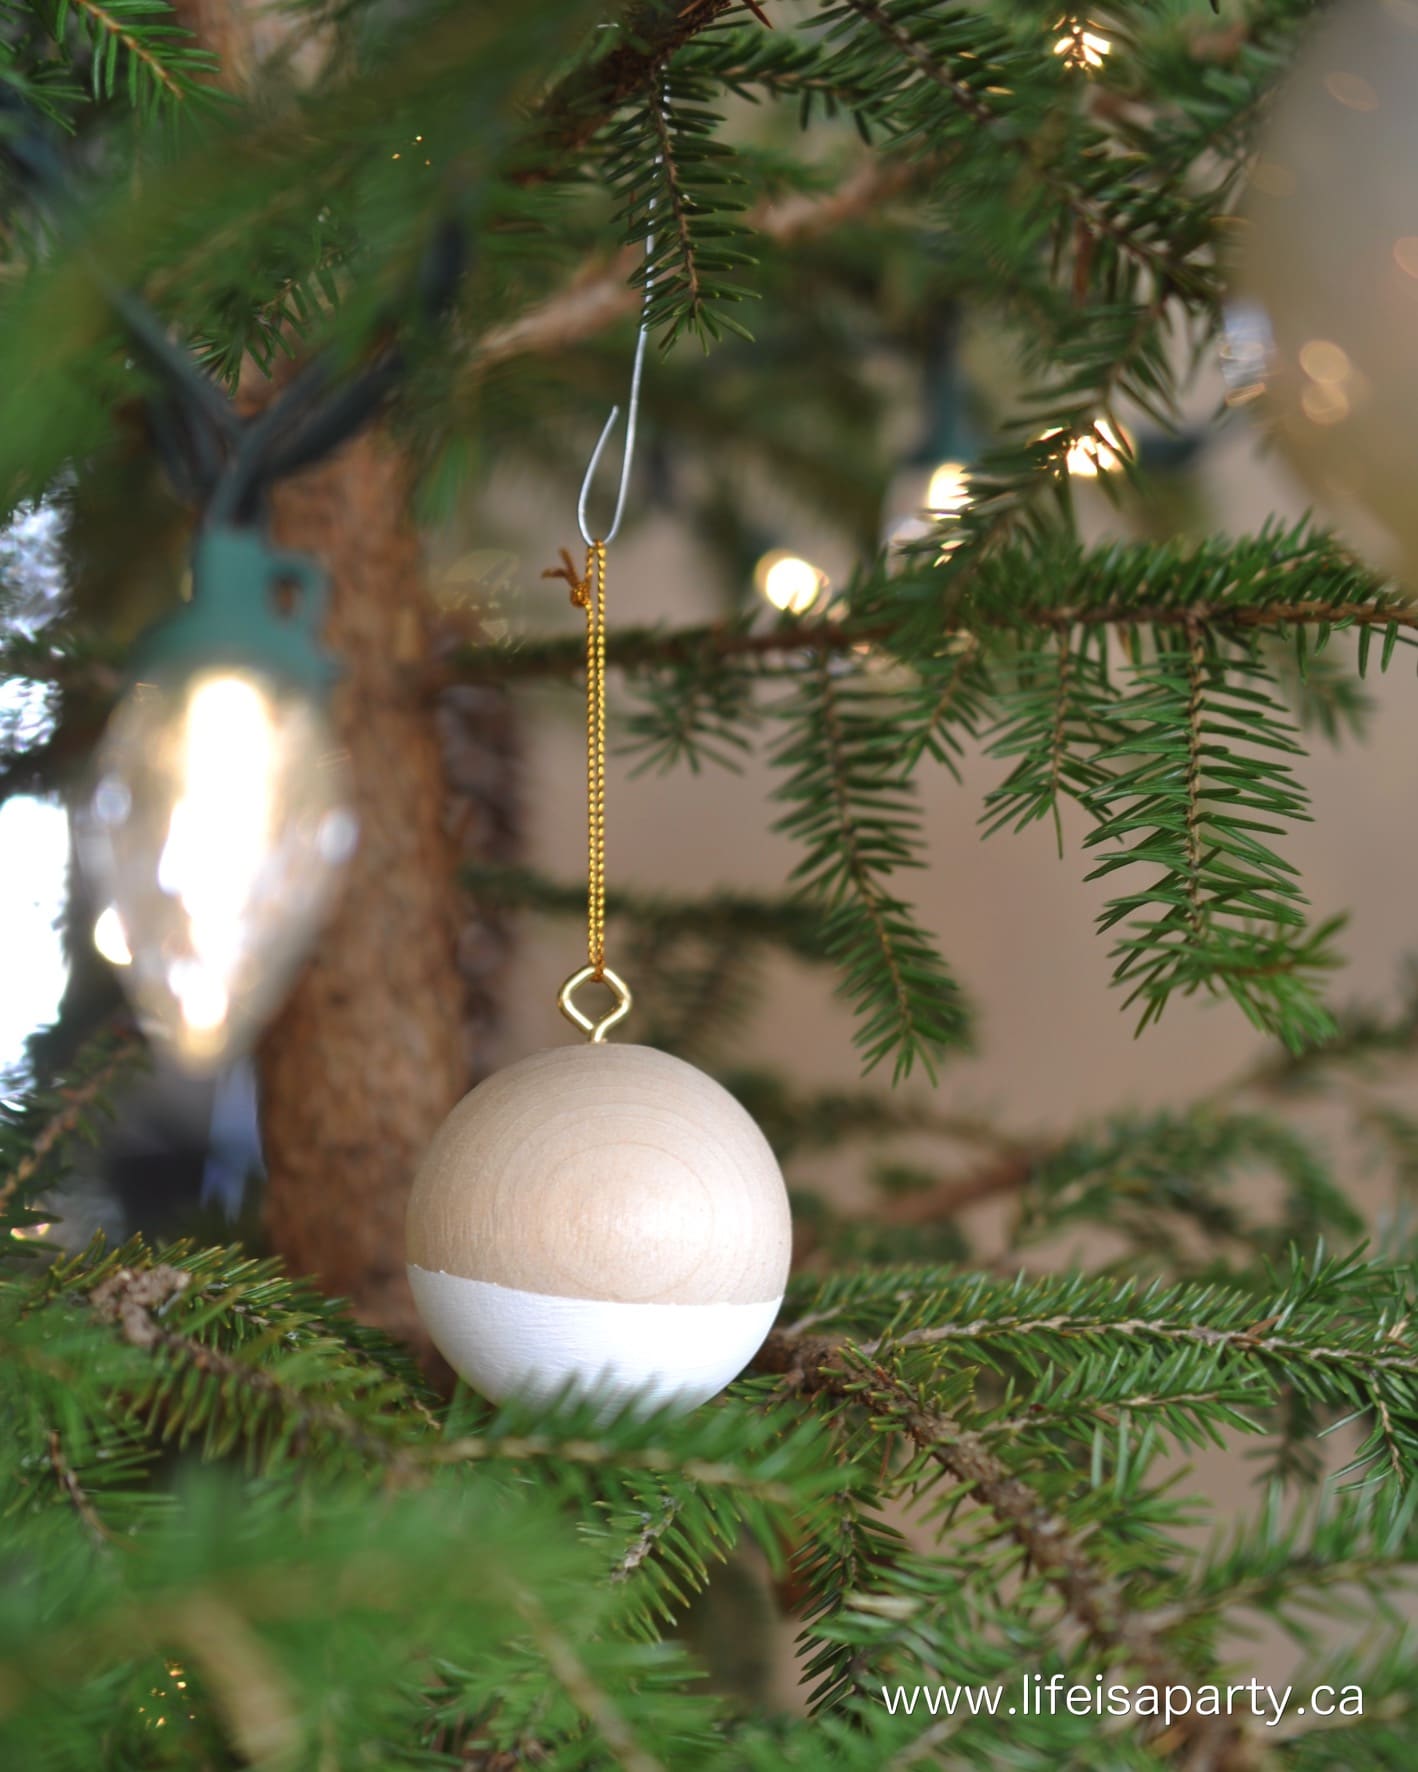
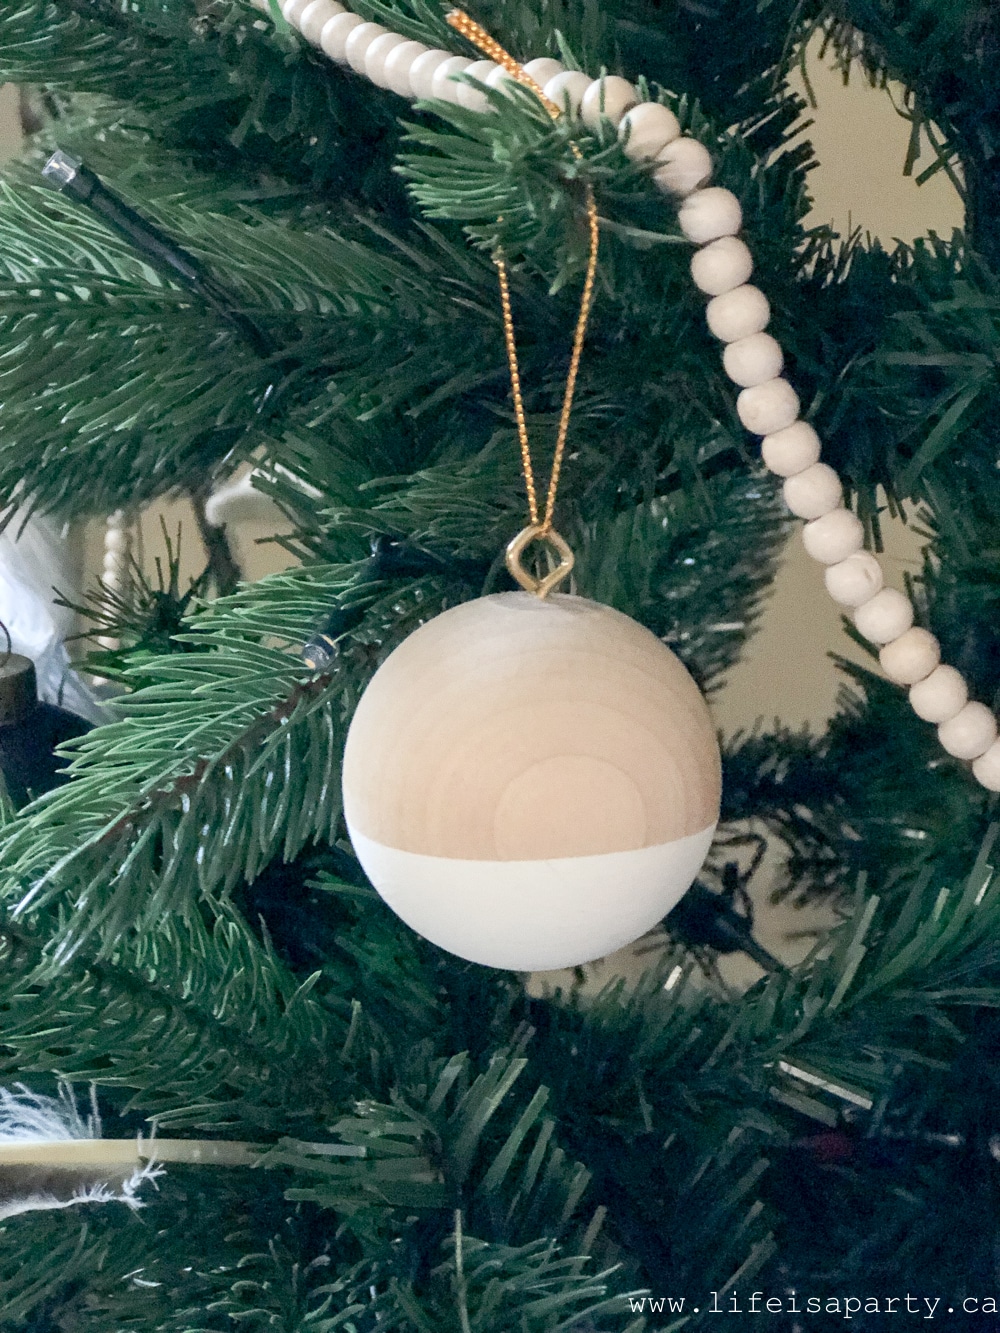
Another easy homemade addition are these wooden ball ornaments.

Boho Christmas ornaments

I started with wooden balls, and then painted them, and added eye hooks to hang. Find the whole wooden ball ornament tutorial here.

Boho often includes lots of texture and natural elements, so the feathers, pinecones, and real wood tick all those boxes.

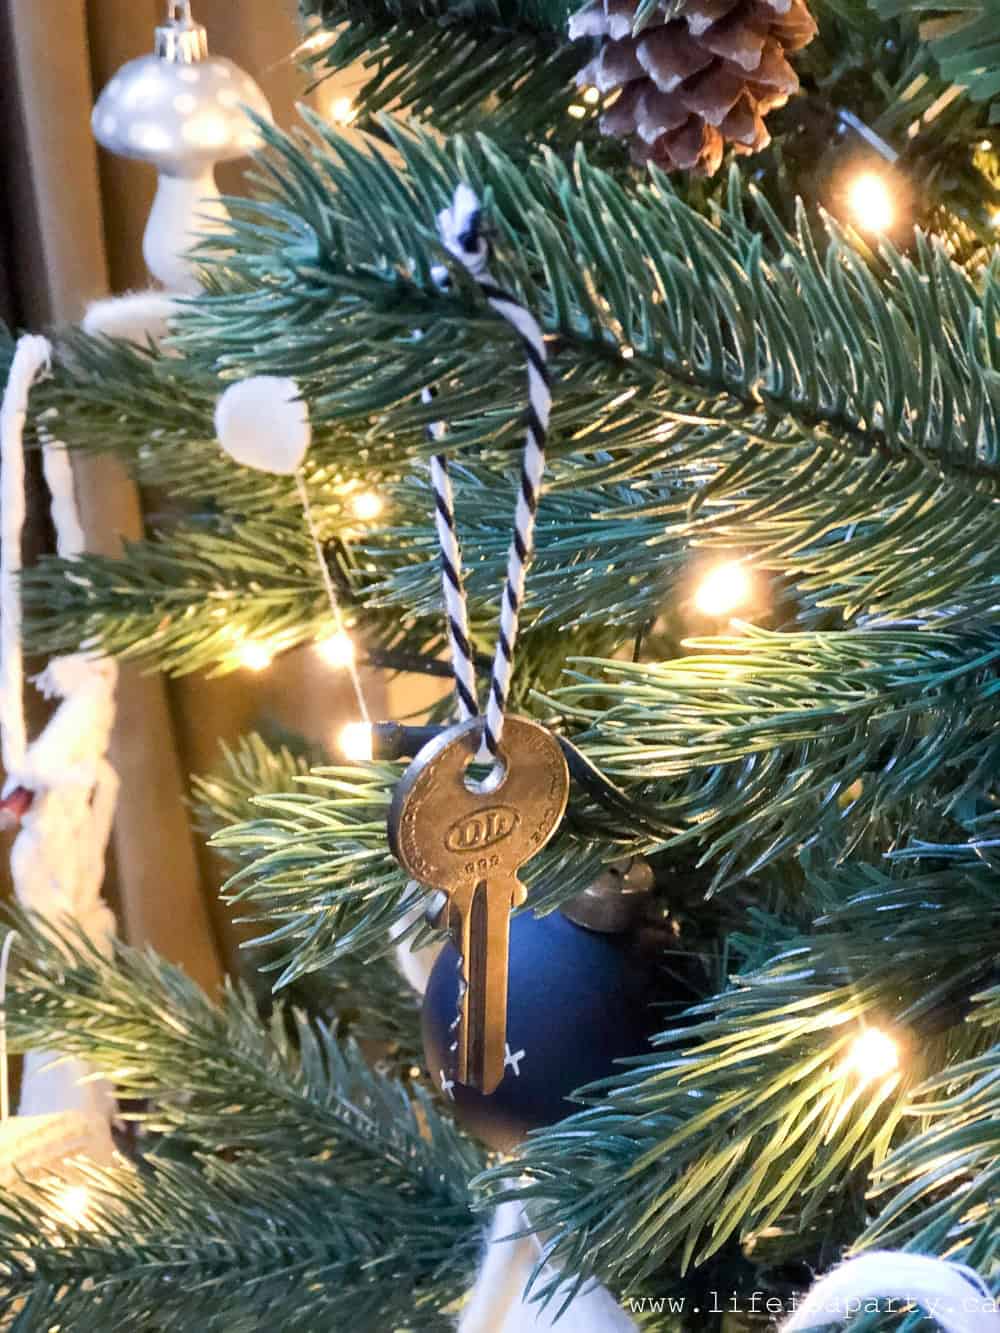
Keys

I also added a few little vintage keys to the tree.  I tied them with a little twine.  The boho look tends to feel very eclectic and collected over time and travels so the keys are a great way to add that element to the Bohemian Christmas tree.  Vintage ornaments are a favourite of mine, and this was the perfect boho version.

DIY Boho Christmas ornaments

DIY Macrame Christmas Ornaments

I also made some really beautiful macrame ornaments for this tree.  You can find the full tutorial for the mini macrame ornaments here.  Even if you've never done macrame, these are really simple to make if you want to make your own ornaments.  Boho often has that 1970's feel to it, so macrame is a great addition.  And they're so cute.

macrame Christmas ornaments

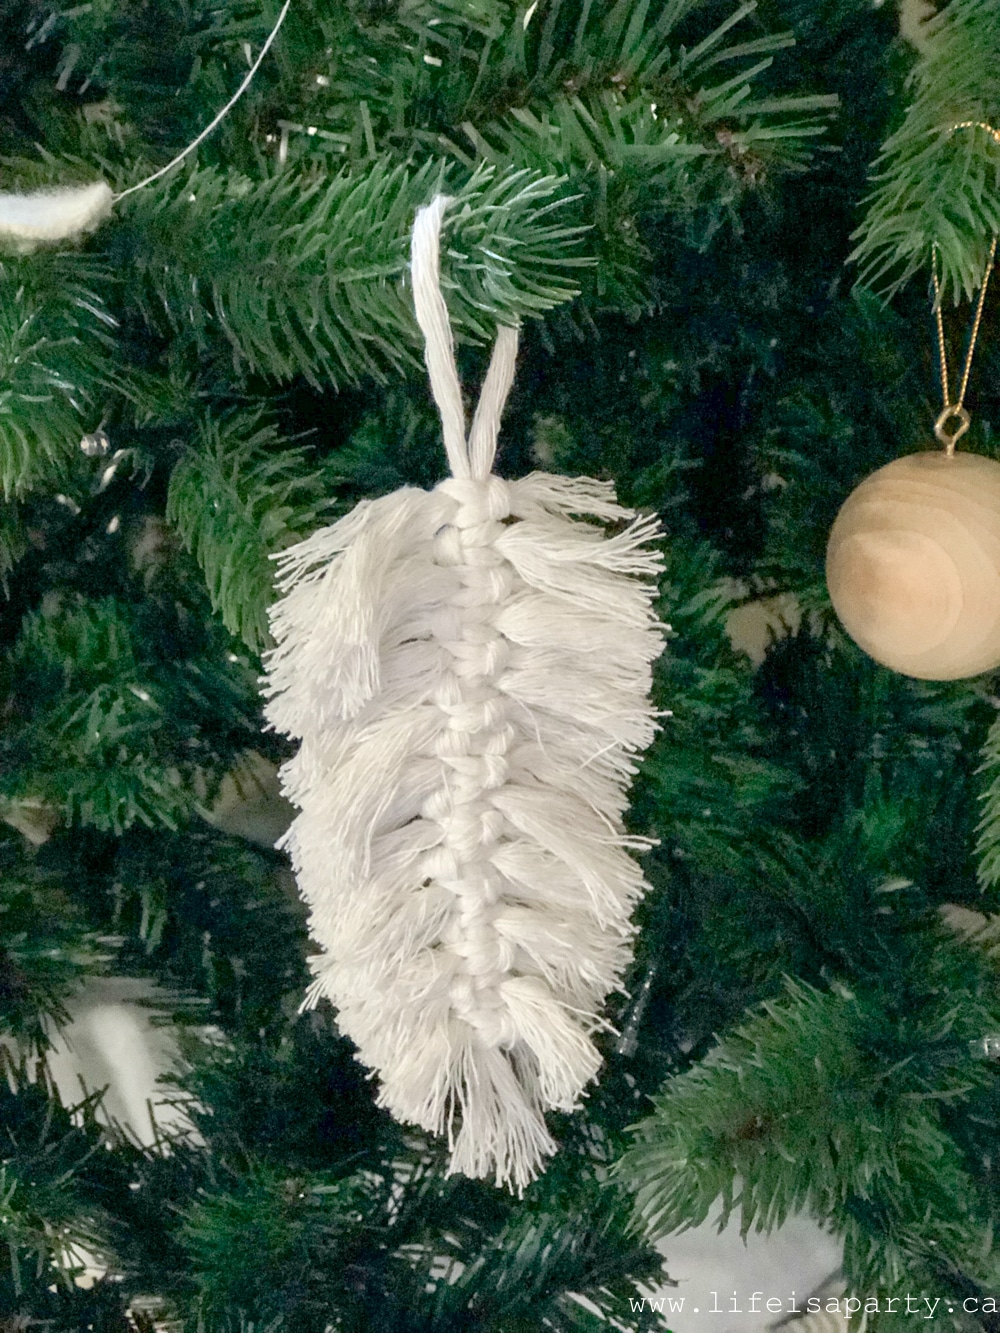
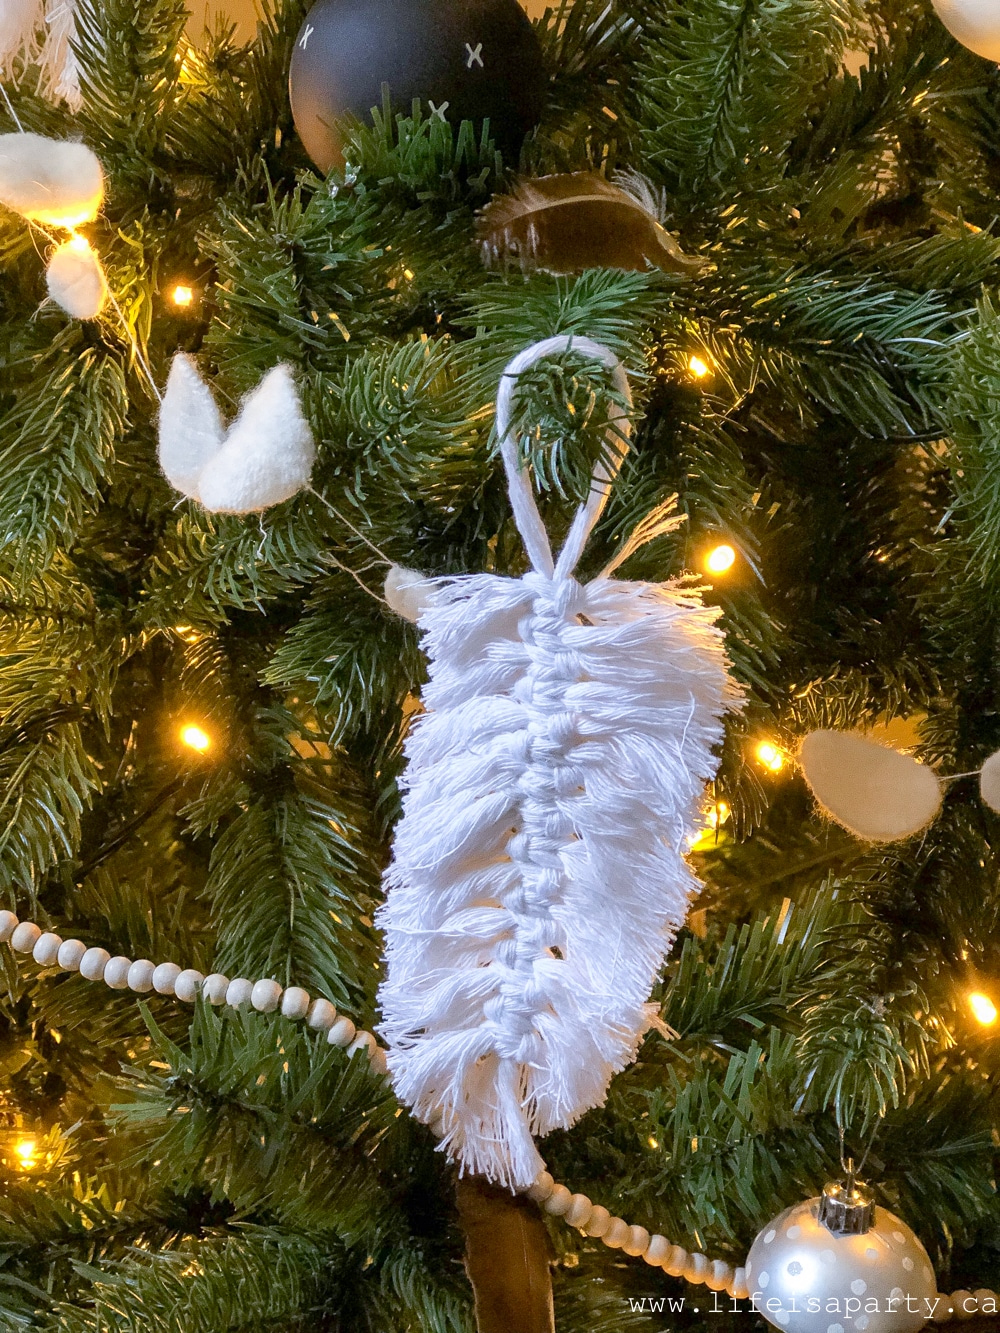
Today I want to show you these beautiful macrame feather ornaments with a step by step tutorial.

how to make a macrame feather

These are also really simple to make, even for a beginner who's never done macrame projects before, and they are a really sweet Christmas craft idea.

DIY Macrame Feather

I used three-ply rope from the dollar store, so I started by un-twisting it into single pieces of rope.  You will need one longer centerpiece of your feather, and then around 40 pieces coming off from it, 20 on each side.  You can make the side pieces slightly shorter, but remember if they're too short they're hard to work with, so easier to make them a little longer and trim the edges later.

macrame feather tutorial

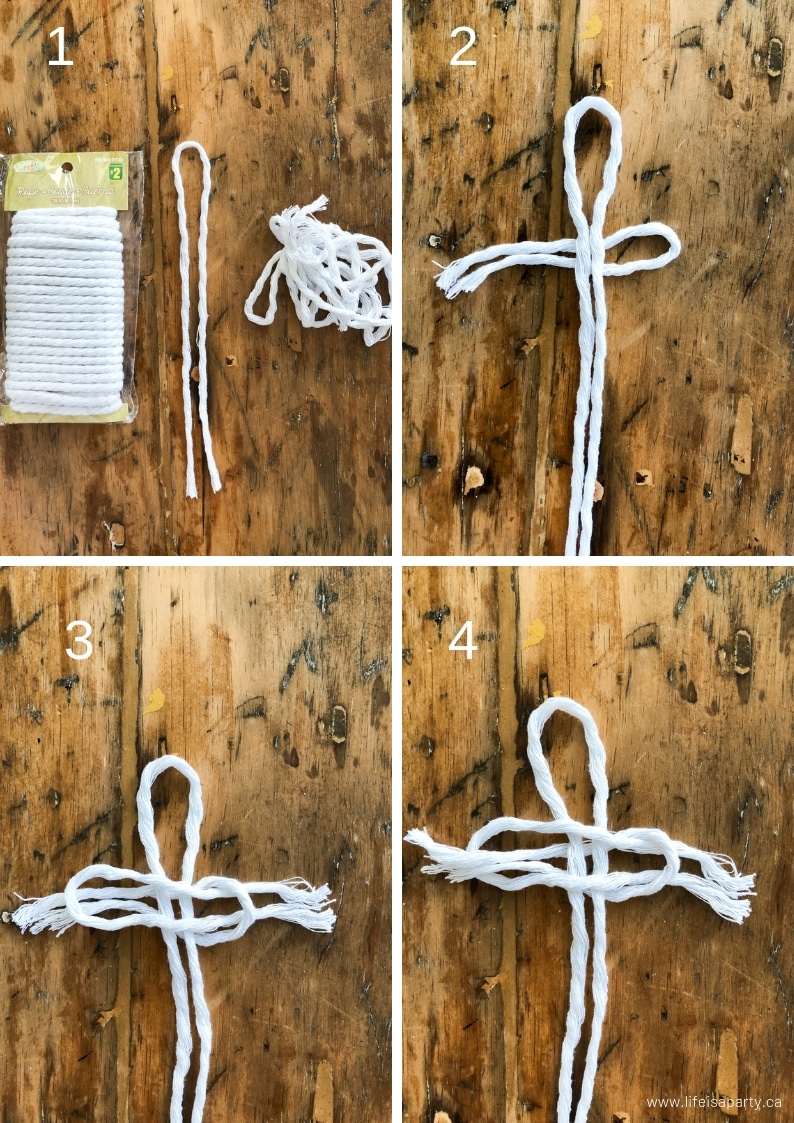
The First Knot

1. The first step is to start by lying down the centre piece of the feather, folding it in half, with the fold at the top.  This will become the top of the ornament for hanging it on the tree.

2. Then the next step was to lie the first side piece underneath of the centre one, also folded in half.

3. Next, bring another side piece folded in half, up through the loop of the other side piece.

4.  Now, put the end of the first piece through the loop of the second piece.

how to make a macrame feather

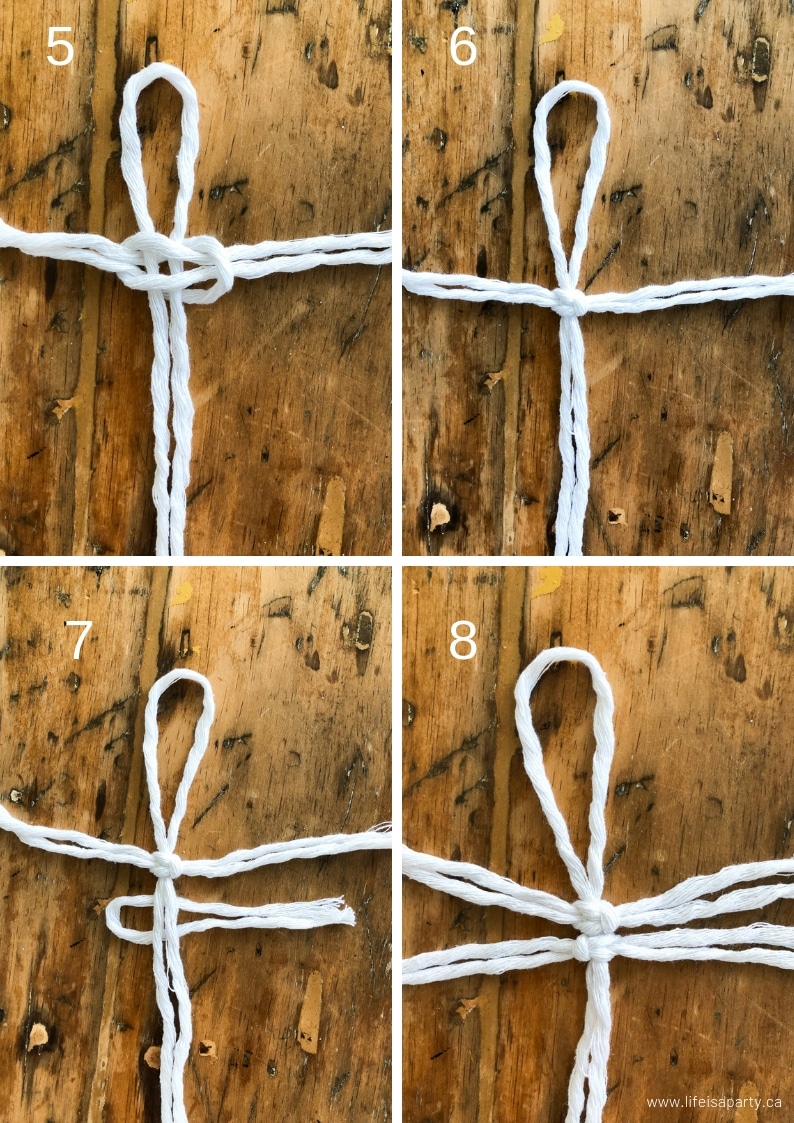
Finishing The Feather

5. Pull the ends to tighten up the knot.

6. You've made your first knot.

7.  Next, lie your side cord under the centre one again, but from the opposite side.

8.  Thread a second side piece through the loop, and put the other ends through its loop, just like you did the first time, and tighten into your second knot.

macrame feather

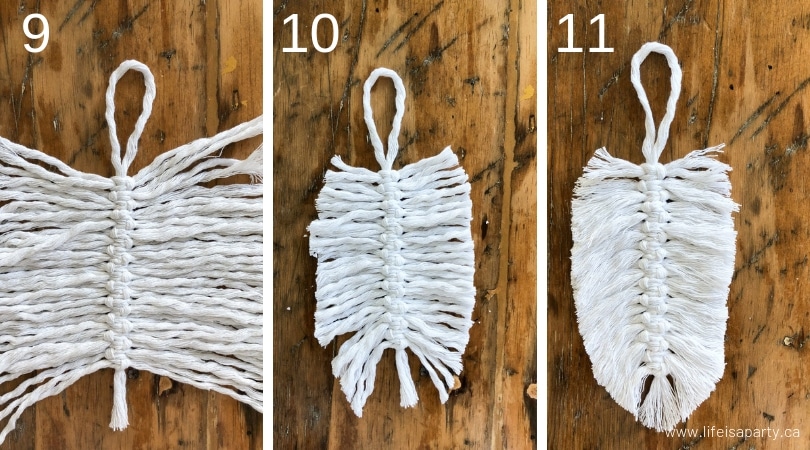
9. Continue all the way down the centre, alternating each side.  Pushing the knots up from the bottom of the centre piece to tighten them.

Trimming The Feather

10.  Trim the edges to make your feather shape.

11. Brush out the ends of the cords with a comb to create the fringe effect.

DIY Macrame Feather Ornaments

Recipe

DIY macrame feather

DIY Macrame Feathers

No ratings yet
Print Pin Rate
Cook Time: 15 minutes minutes
Total Time: 15 minutes minutes
Author: Dannyelle Nicolle-Ramjist

Materials

  • macrame cording
  • comb

Notes

  1. Start by lying down your centre piece folding it in half, with the fold at the top. This will become the top of the ornament for hanging it on the tree.
  2. Then lie the first side piece underneath of the centre one, also folded in half.
  3. Next, bring another side piece folded in half, up through the loop of the other side piece.
  4. Now, put the end of the first piece through the loop of the second piece.
  5. Pull the ends to tighten up the knot.
  6. You've made your first knot.
  7. Next, lie your side cord under the centre one again, but from the opposite side.
  8. Thread a second side piece through the loop, and put the other ends through its loop, just like you did the first time, and tighten into your second knot.
  9. Continue all the way down the centre, alternating each side. Pushing the knots up from the bottom of the centre piece to tighten them.
  10. Finally, trim the edges to make your feather shape.
  11. Brush out the rope with a comb to create the fringe effect, and retrim any spots that need it.

I used the Macrame Feather ornaments, on the tree, but they'd also be great as present toppers.  I have seen them used as keychains or on the side of a bag or purse almost like a tassel too, so you might not want to put these away after Christmas. 😉

black and white Boho Christmas Tree Finishing Touches

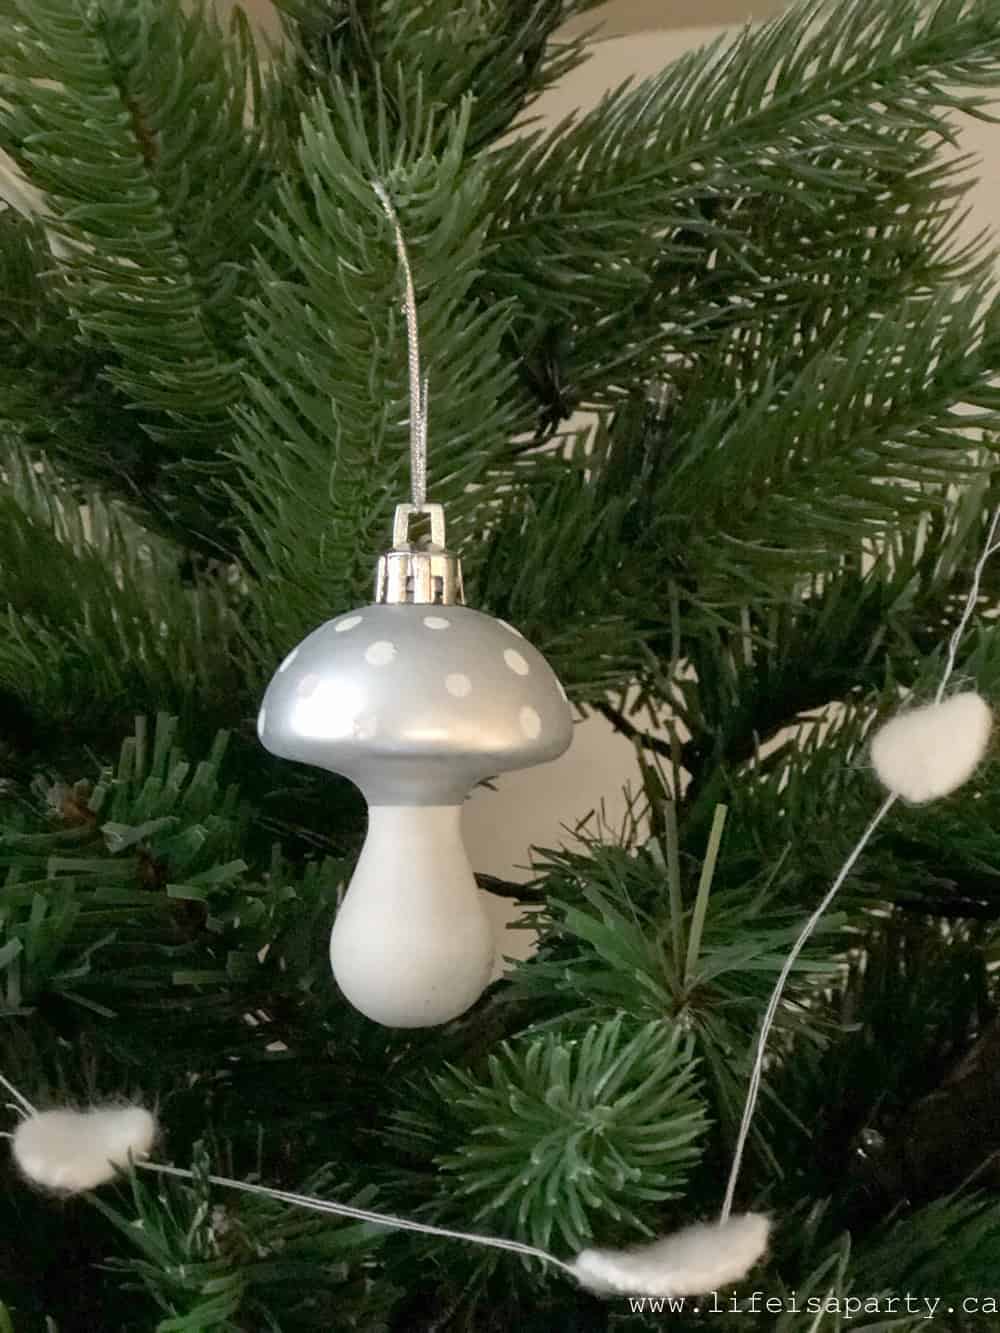
To finish the tree off, there are some pretty black ball ornaments with little x's on them I picked up last holiday season, and some little silver mushrooms.  I kind of have a thing for mushrooms -and they're so 70's they feel boho to me.  They're a great idea to incorporate into your boho Christmas decorating.

Boho Christmas Tree

Garland

You can also see here this fun garland. It's made out of some old white wool sweaters that I felted by washing in really hot water, then cut into little circles and stitched into a garland on the sewing machine. Find the felted circle garland tutorial here -one of my very oldest posts from when I first started blogging with terrible photos, but good instructions. 😉  I like the way the garland is kind of like pom poms, but a little different.  You could create a similar look with a felted ball garland.  Look for felted balls at your local craft store.

I also added a garland made with wooden beads to the tree.  The wood beads add some more great texture, and a natural element.  Garland is always a great way to finish off a tree.

Tree Topper

Lastly, on the top of the boho tree I added a little stuffed owl.  It felt kind of perfect to finish things off.

I hope this inspires you to DIY a few of your ornaments this year, and try a boho look for your holiday decorating this year.

Boho Christmas Tree and DIY Macrame Feather Ornaments: black and white Boho Christmas Tree full DIY ornaments, plus a full tutorial for macrame feathers.

You can see the reveal of the whole room here, and you can see how all our best boho Christmas decor ideas came together.  The decorated living room feels so beautifully cozy, and warm.  I can't wait to spend lots of December nights here in front of the fire with my family watching Christmas movies, wrapping presents, and reading.

With a beautiful Boho Christmas Tree to enjoy, life really is a party!  Merry Christmas

More Christmas Inspiration

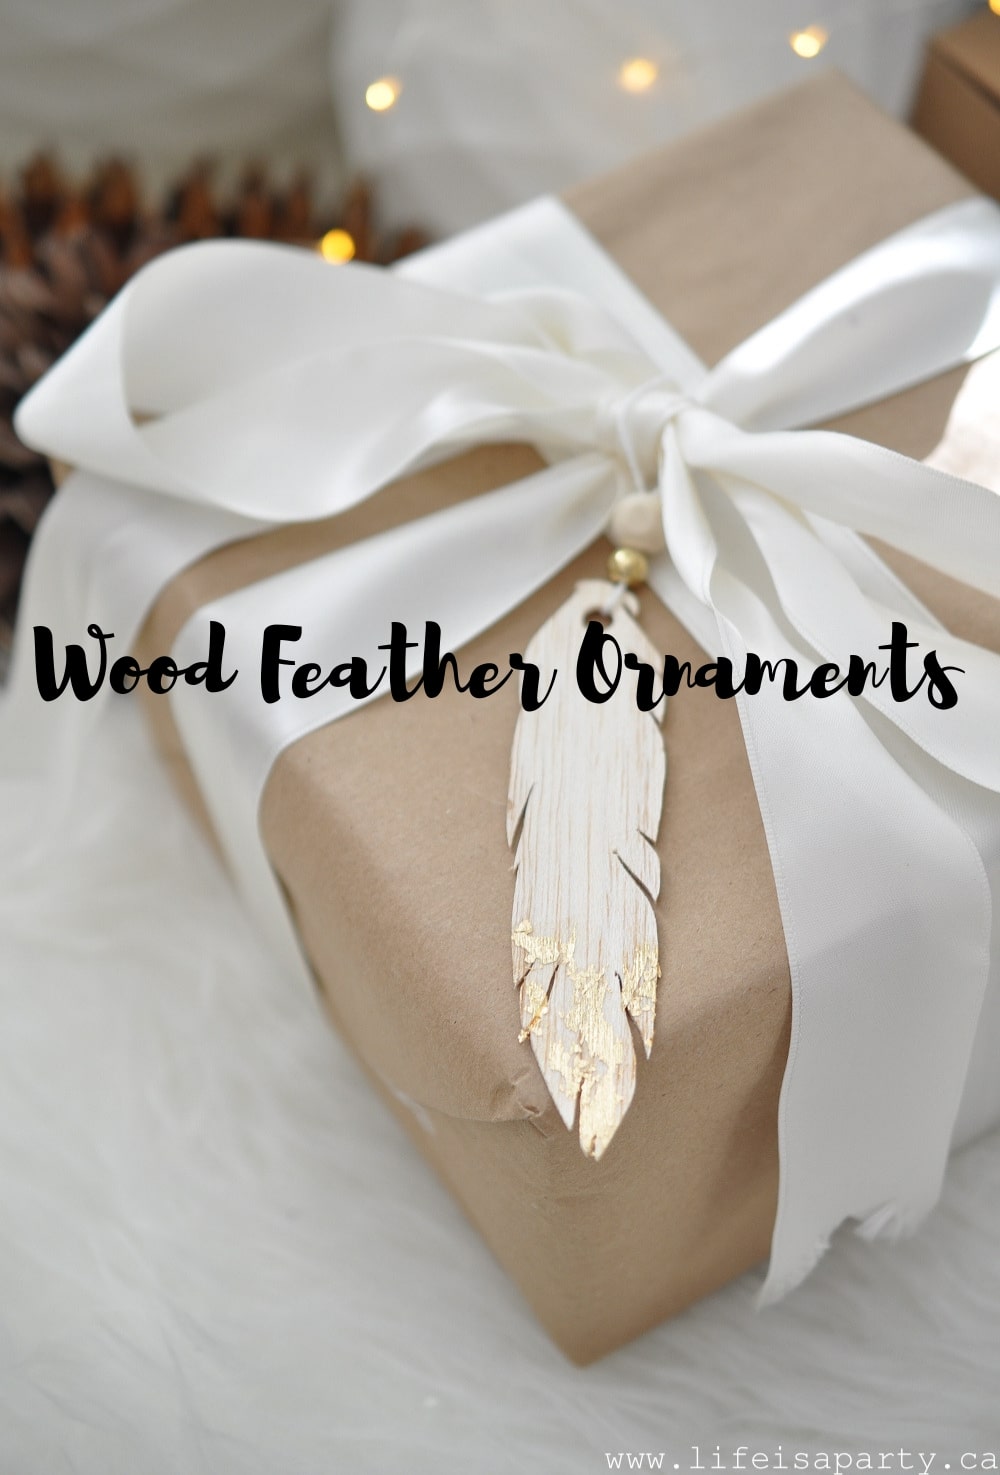
You might also like our Wood Feather Ornaments here.

Cricut Wood Feather Ornament: see how to cut wood using your Cricut machine. Includes a free cut file for this wood feather Christmas ornament.

Also check our our Mini Macrame Christmas Ornaments here.

Mini Macrame Christmas Ornaments: Easy DIY Macrame Ornament tutorial, perfect for the beginner. No macrame experience required.

You might also enjoy our Modern Boho Christmas Wreath here.

Cricut Fa La La Pillow

Nov 21, 2018 · Leave a Comment

Cricut Fa La La Pillow: this fun holiday pillow is easy to DIY with your Cricut machine, and some handmade yarn tassels.

Cricut Fa La La Cushion: this fun holiday cushion is easy to DIY with your Cricut machine, and some handmade yarn tassels.

Welcome back to my Boho Christmas Week!  Today is day three and I'm sharing a fun Fa La La Pillow that I made with my  Cricut.  It's perfect for our Black and White Boho look this Christmas. 

I absolutely love how this little cushion turned out, and it really was a quick and easy project.  It's been a lot of fun partnering with Cricut and using the Cricut Maker for some really beautiful projects this Christmas -did you see my Fair Isle Sweater inspired candle holders?  For this project I got to use the Easy Press with Cricut's Iron-On material.

Cricut Fa La La Cushion: this fun holiday cushion is easy to DIY with your Cricut machine, and some handmade yarn tassels.

Materials:

  • Cricut Maker
  • Easy Press
  • Heat Pad
  • Patterned Iron-On Material
  • Design Space Fa La La Pattern
  • Cricut Tools
  • Plain black cushion cover
  • yarn tassels
  • darning needle

How To Make a Fa La La Pillow

We started out my designing the Fa La La... in design space.  You can access my design here.

Cutting It Out

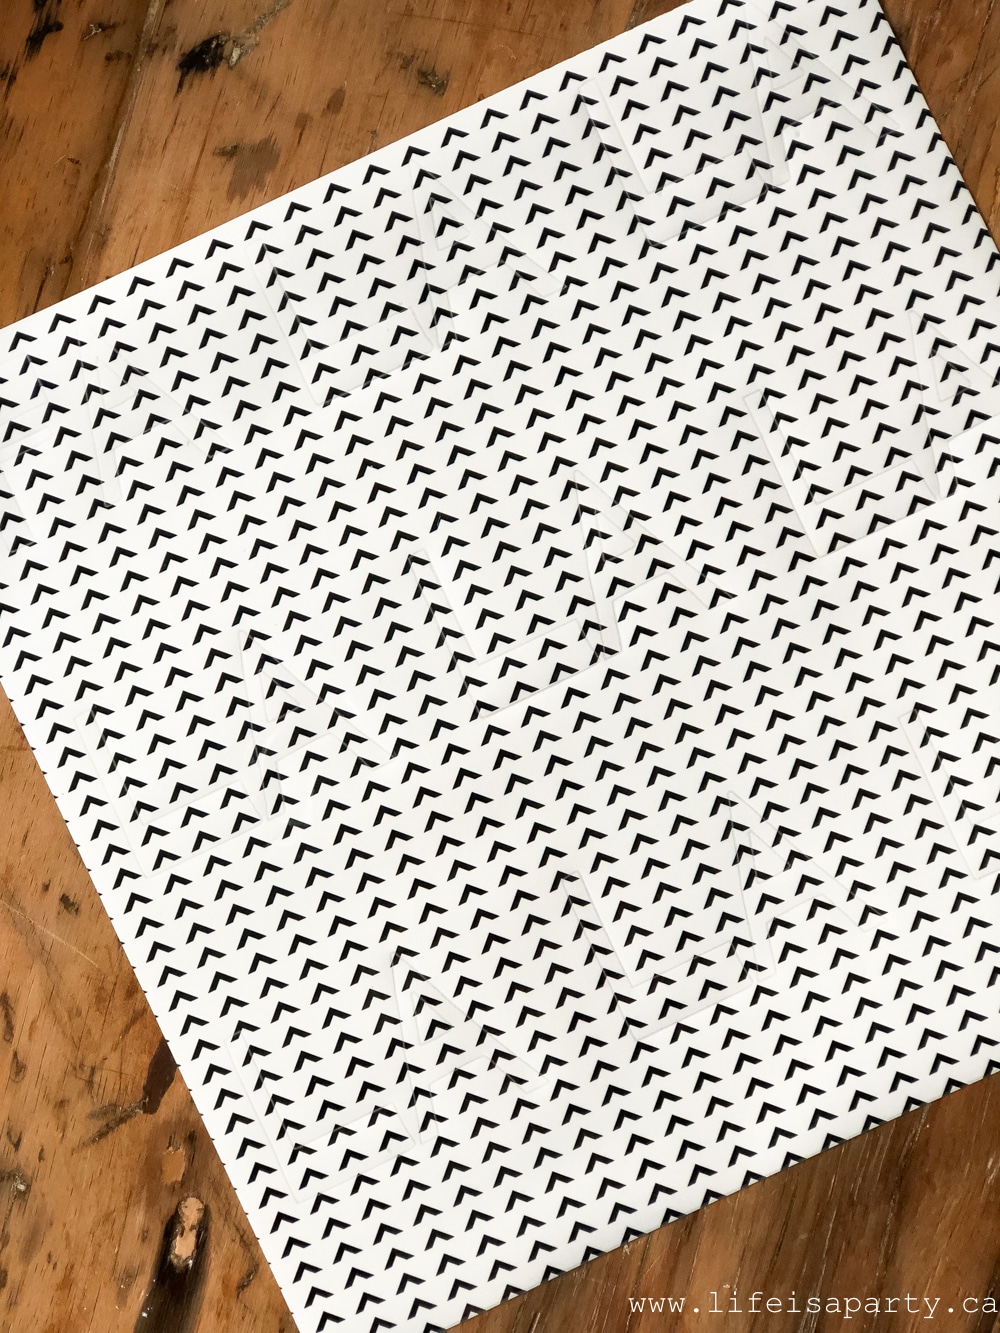
We used Cricut's patterned iron-on material, and chose this fun black and white pattern.  I love how it kind of has the mud cloth feel to it.

Cricut Fa La La Cushion: this fun holiday cushion is easy to DIY with your Cricut machine, and some handmade yarn tassels.

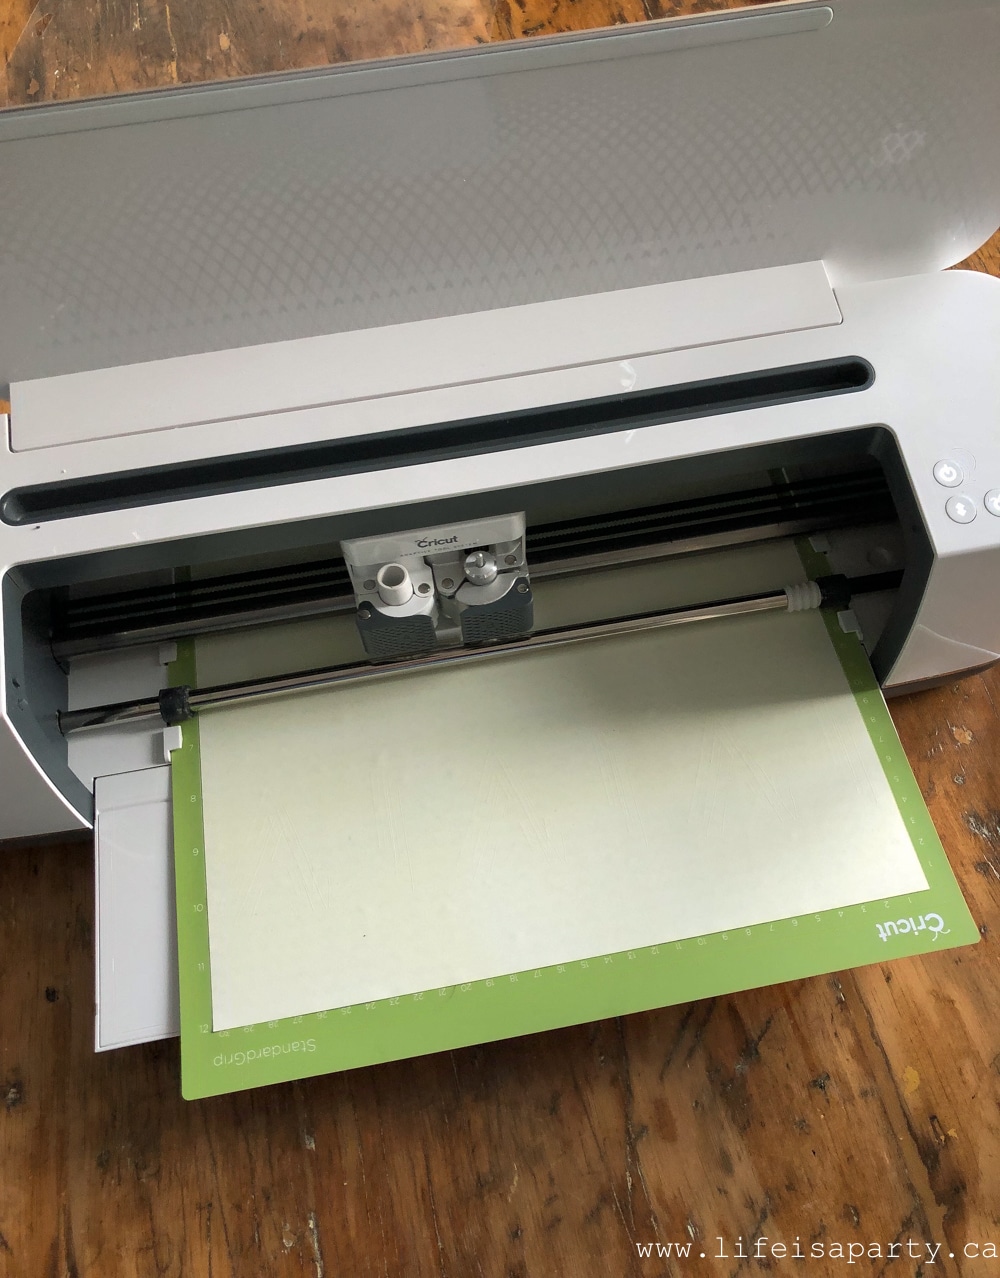
Following the instructions from Cricut, just lay it shiny side down on your regular grip Cricut mat, and select patterned iron-on as the material on the Cricut.  Be sure to select mirror before cutting, so that once it's ironed on the letters will be facing the right way.  Using the regular blade the Cricut cuts out the pattern perfectly.

Cricut Fa La La Cushion: this fun holiday cushion is easy to DIY with your Cricut machine, and some handmade yarn tassels.

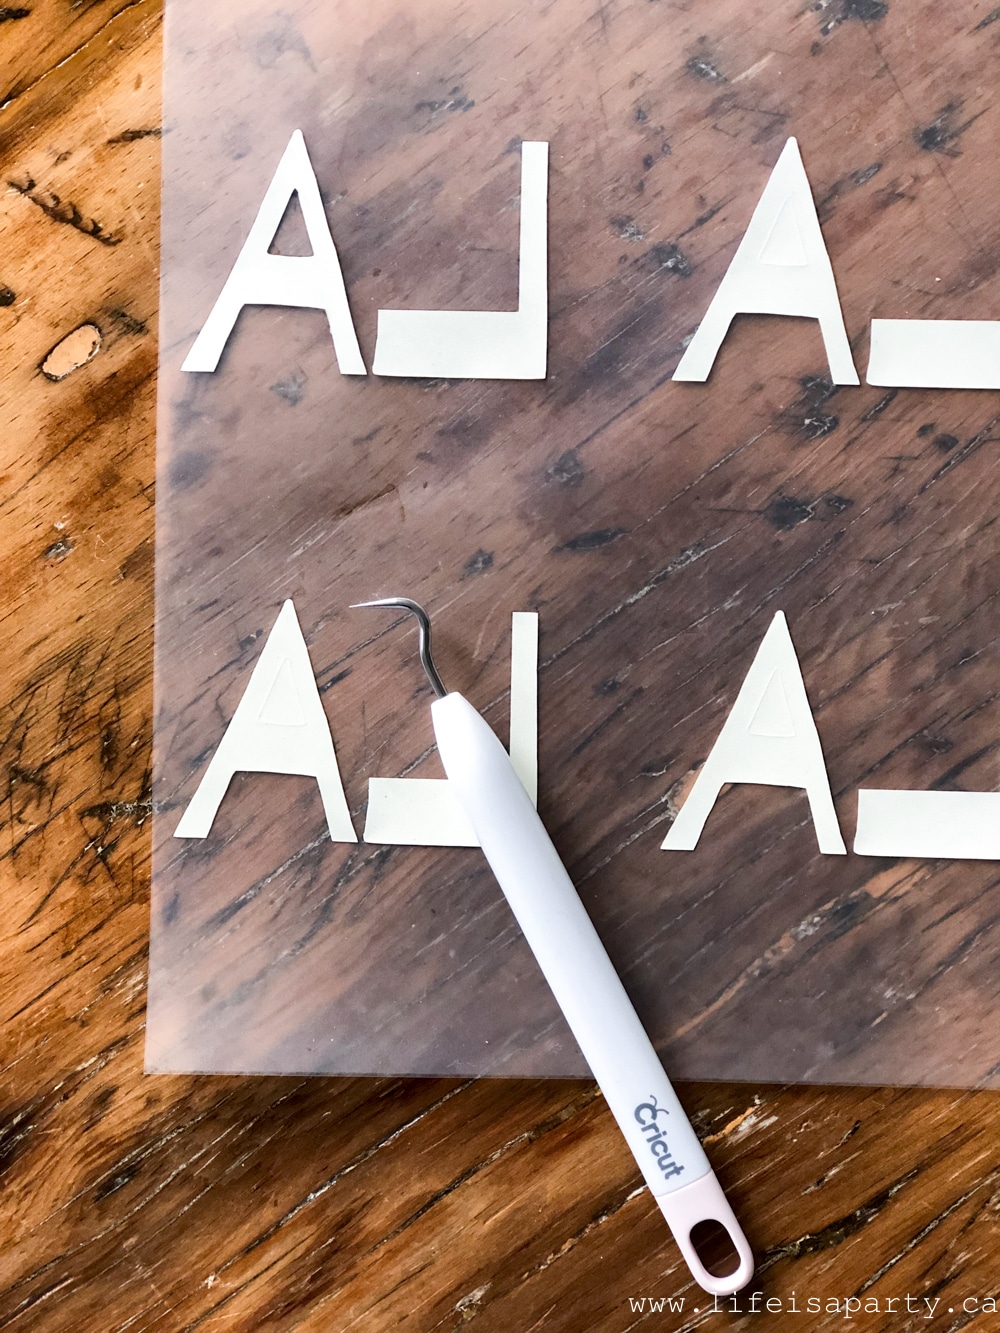
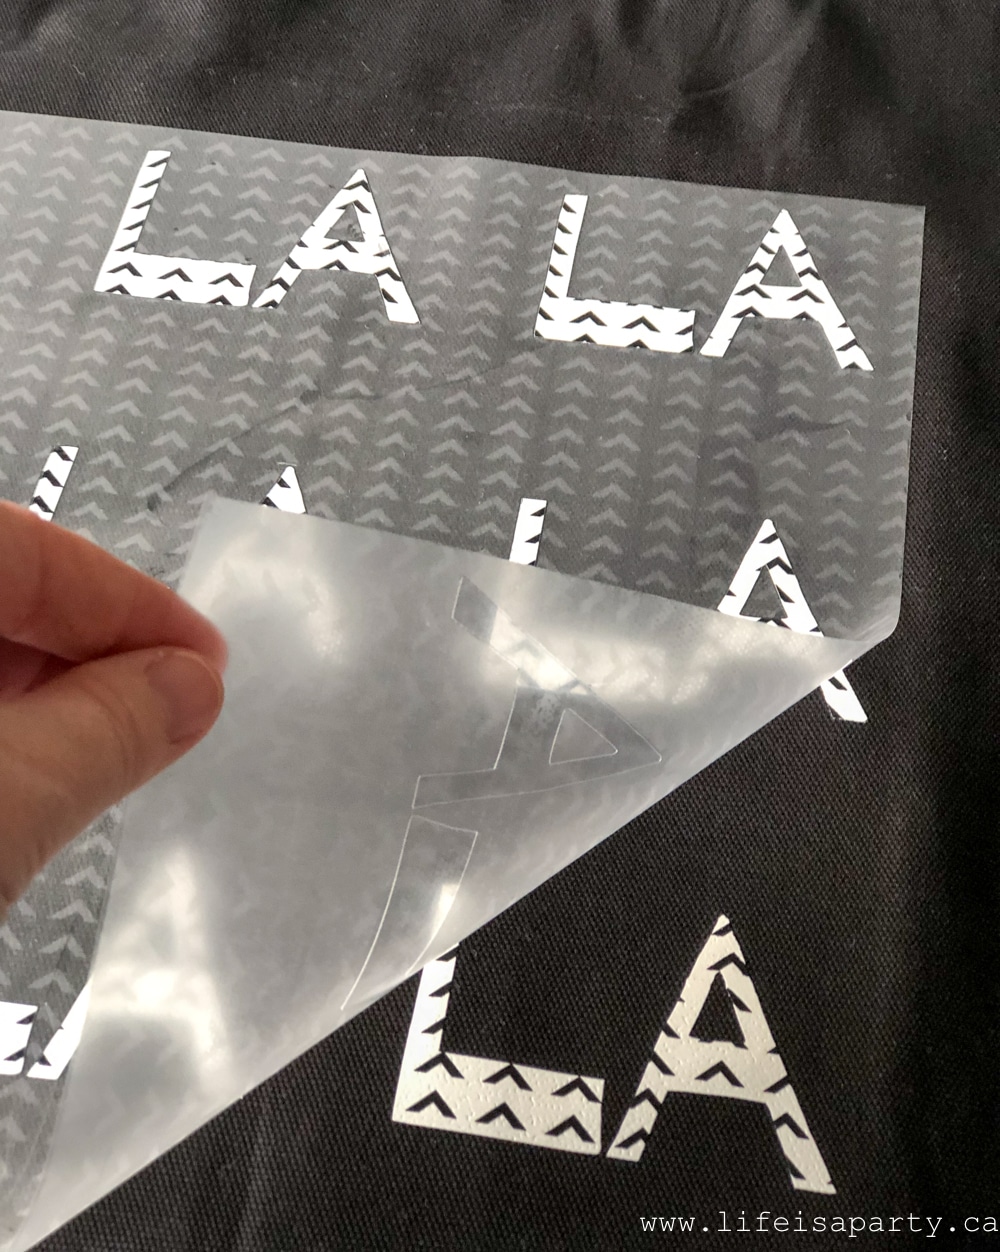
Next remove the iron-on material from the cutting mat, and weed the excess materials using your Cricut tool.

Cricut Fa La La Cushion: this fun holiday cushion is easy to DIY with your Cricut machine, and some handmade yarn tassels.

Time to Iron-On

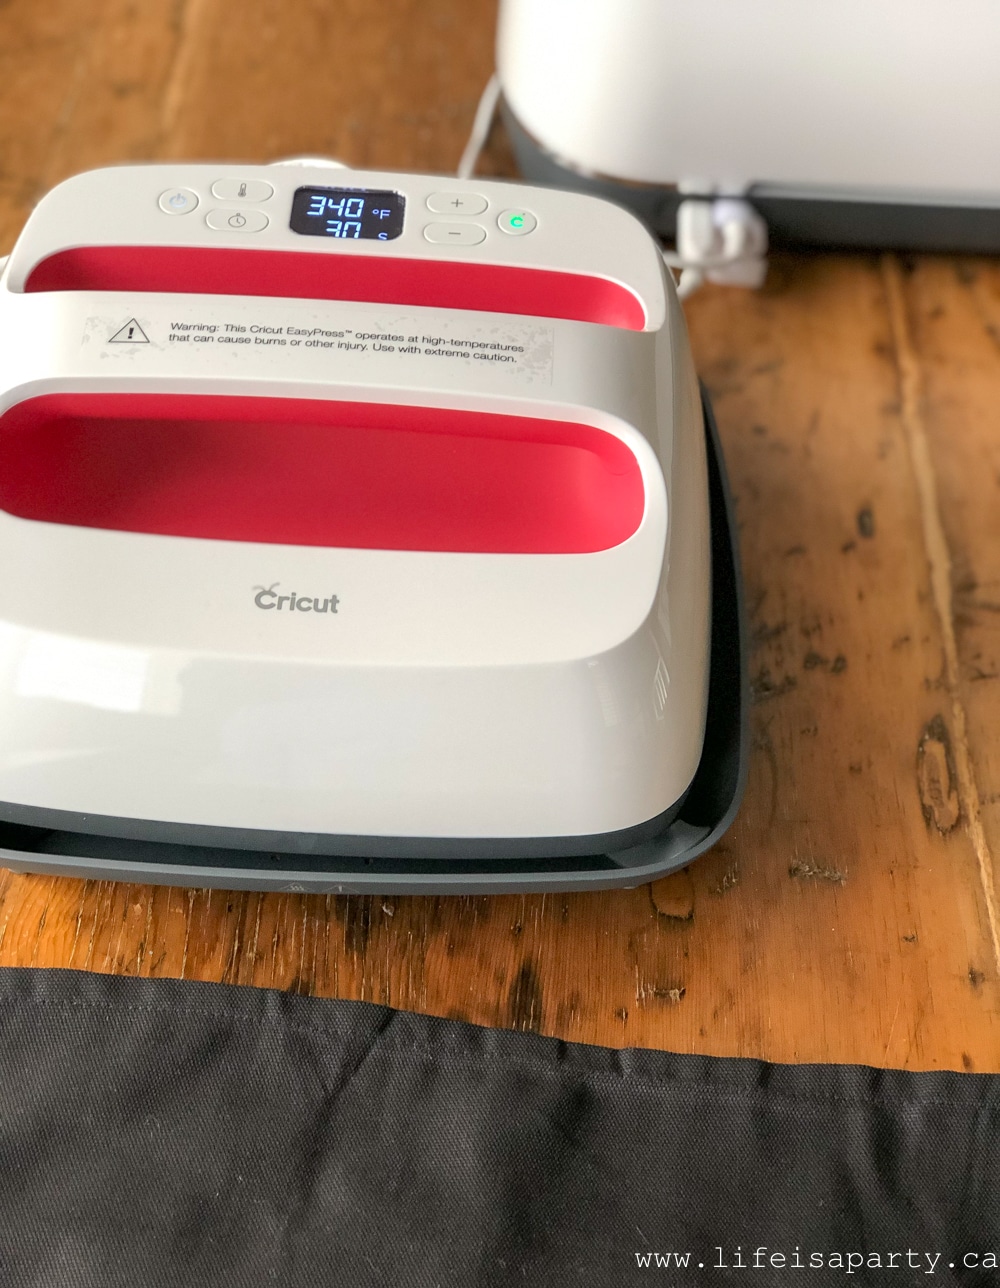
Now heat up your easy press to 340 F, and wait for the green light to appear to indicate it's heated up.

Cricut Fa La La Cushion: this fun holiday cushion is easy to DIY with your Cricut machine, and some handmade yarn tassels.

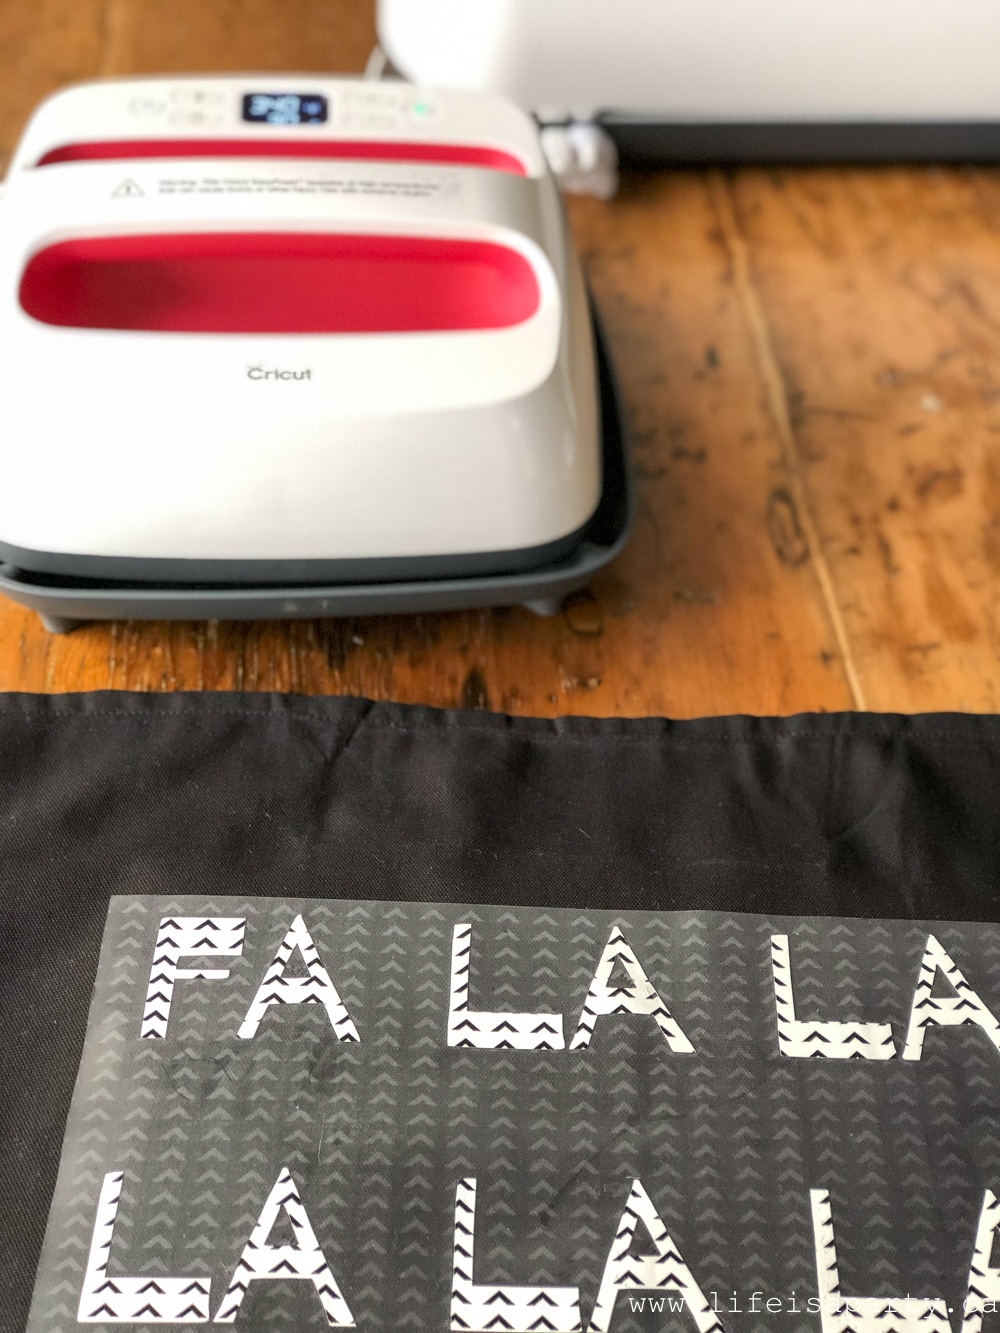
Using your Cricut Easypress mat, heat up your cotton cushion cover for 5 seconds, and remove any wrinkles from it.  Now apply your iron on material and arrange it so it's centred on the cushion.

Cricut Fa La La Cushion: this fun holiday cushion is easy to DIY with your Cricut machine, and some handmade yarn tassels.

Next apply the Easypress for 50 seconds with firm pressure.  Then flip it over and apply the Easypress again with firm pressure for 15 seconds.

Once it's cool, peel off the liner piece.

Cricut Fa La La Cushion: this fun holiday cushion is easy to DIY with your Cricut machine, and some handmade yarn tassels.

Add Some Tassels

I made some yarn tassels and attached them to the four corners of the cushion with a darning needle.

Cricut Fa La La Cushion: this fun holiday cushion is easy to DIY with your Cricut machine, and some handmade yarn tassels.

That's it, all done.  Quick and easy.  I love how this cushion turned out.  I asked one of my girls afterward if she liked it, and she said "you made that, it looks like you bought it." Ha.  That's what I thought too. 😉

You could do so many versions of this pillow with different words, for the holidays or for everyday.  The tassels were a fun and quick addition, I thought pom poms would be cute too.  The possiblities for this are pretty much endless.

Cricut Fa La La Cushion: this fun holiday cushion is easy to DIY with your Cricut machine, and some handmade yarn tassels.With a beautiful Fa La La Pillow, life really is a party.

If you missed our Boho Christmas Reading Tent check it our here.

Boho Christmas Reading Tent: See how to make an inexpensive reading tent fort for kids with birch poles and an old table cloth.

You might also like our Black and White Boho Christmas Mantel here. 

Boho Christmas Mantel: Black and White Modern Boho mantel with lots of tassels, pom poms, fringe, bottle brush trees, stockings and garland.

Also check our  our Boho Christmas Tree.

Boho Christmas Tree and DIY Macrame Feather Ornaments: black and white Boho Christmas Tree full DIY ornaments, plus a full tutorial for macrame feathers.

Boho Christmas Fireplace Mantel Decor

Nov 20, 2018 · 8 Comments

Boho Christmas fire place mantel black and white.

Boho Christmas Mantel: Black and White Modern Boho mantel with lots of tassels, pom poms, fringe, bottle brush trees, stockings and garland.

Boho Christmas fire place mantel black and white.
[feast_advanced_jump_to]

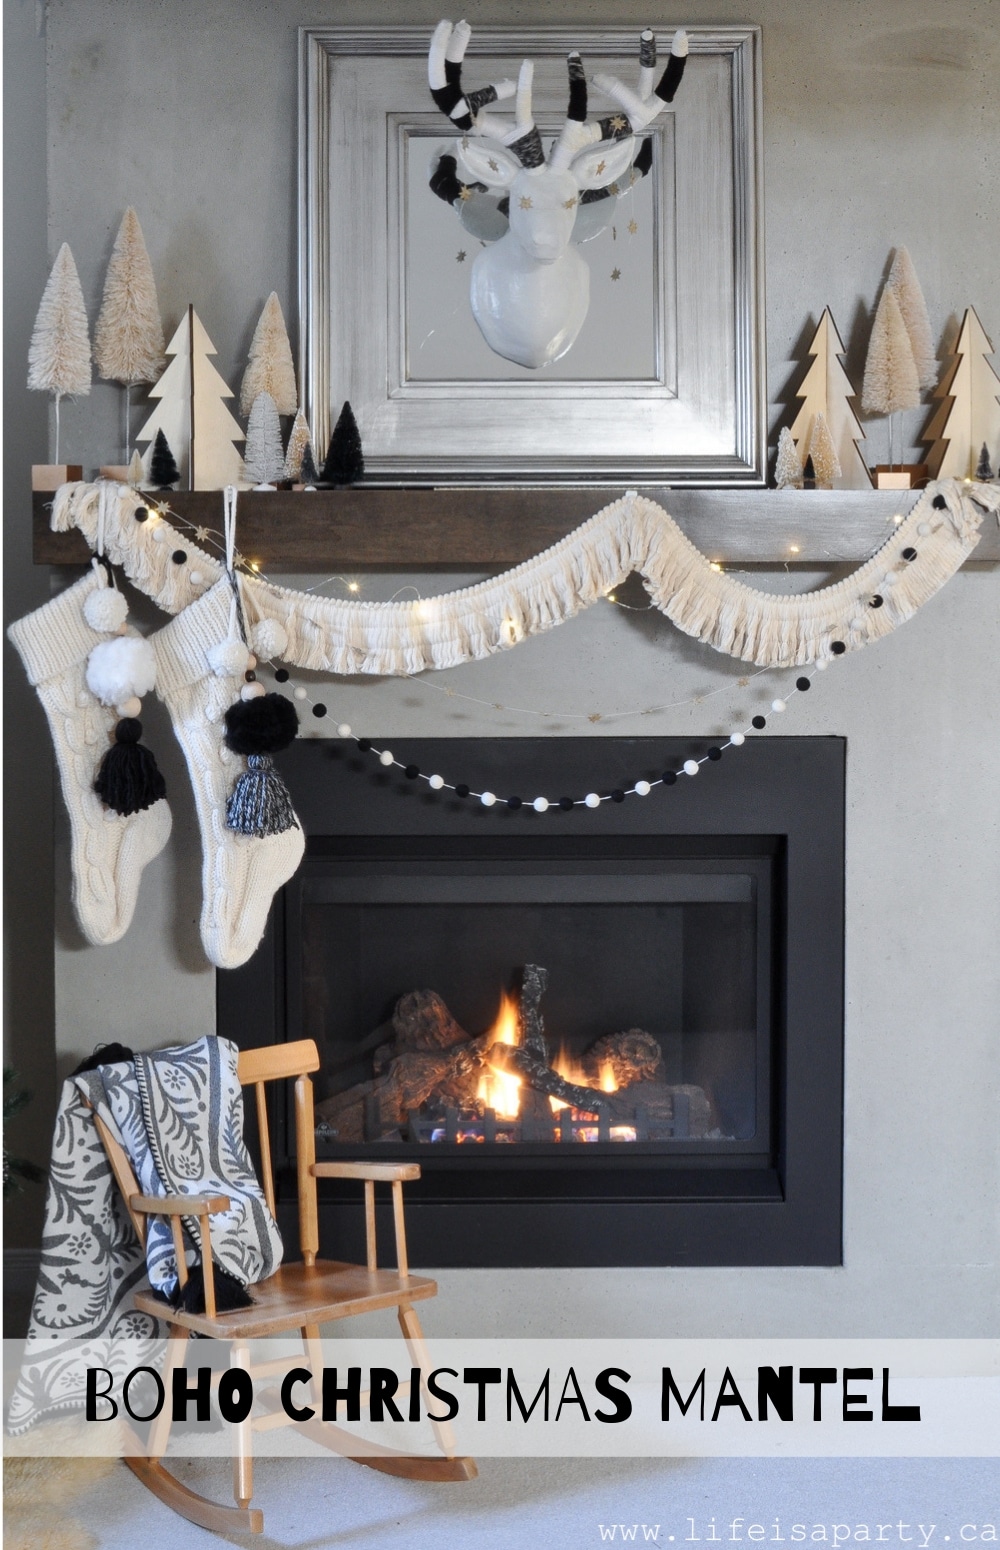
One of my favorite parts of holiday decorating is to create a beautiful festive Christmas mantel.  If you love boho decor, I think you'll love this. Our boho Christmas mantel in neutral colors of black and white is perfect for the Christmas season.  I used lots of DIY Christmas mantel projects, and I hope it gives you lots of Christmas mantel decor ideas for your own Christmas fireplace.

Bo Ho Christmas

My basement family fireplace is a real favourite of mine.  We moved into this house when it was just about 8 months old, which meant that it was new, but all the finishes were already picked of course.  For the most part it was very neutral.  A few things won't have been my choice, but I could certainly live with them.  But when we moved in the basement was un-finished.  We saved up for a while, and decided it should be our first major project in the house.  We had a three year old and baby, and we knew we wanted a big family room, playroom, tv watching, gathering space.

Boho Christmas Mantel

My brother-in-law worked for us on weekends, and finished the entire space.  It was the first place that I really got a chance to design.  I had the idea of making the fireplace surround out of concrete, and wood veneer.  My amazing brother-in-law was up for the challenge and created this amazing fireplace for us, bringing my design dream to life.  I love it.  I loved it when we put it in about 10 years ago (wow, time flies fast) and I still love it.  It has lots of drama, is modern, and a little unexpected.  And, it's always fun to decorate for the holiday season.

black and white Boho Christmas Mantel

Black and White Boho Christmas Mantel

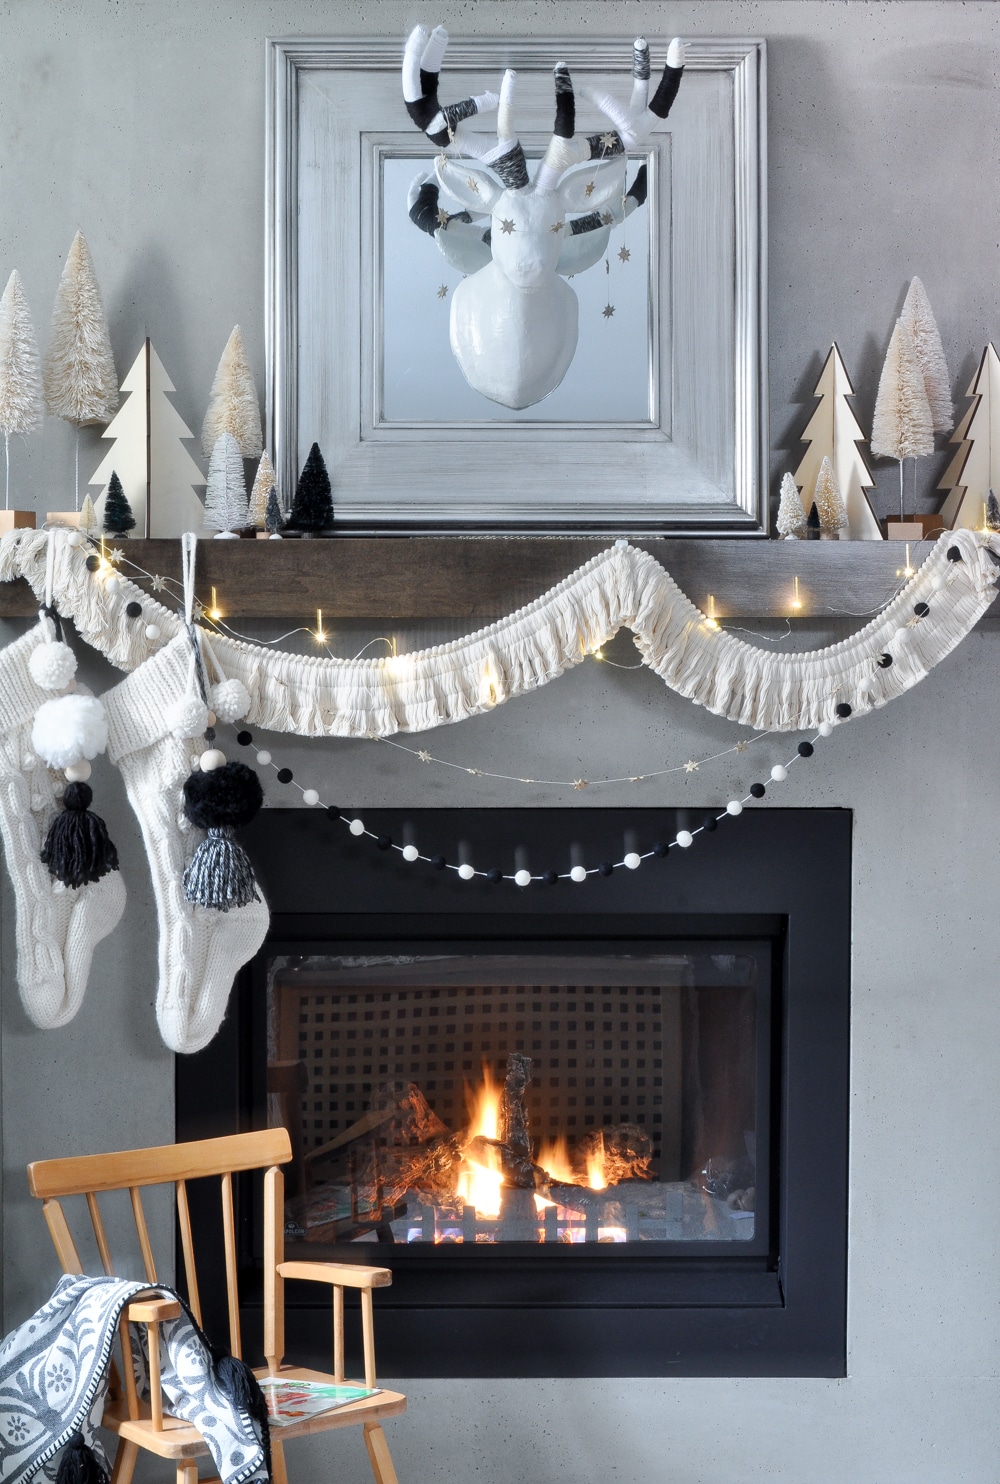
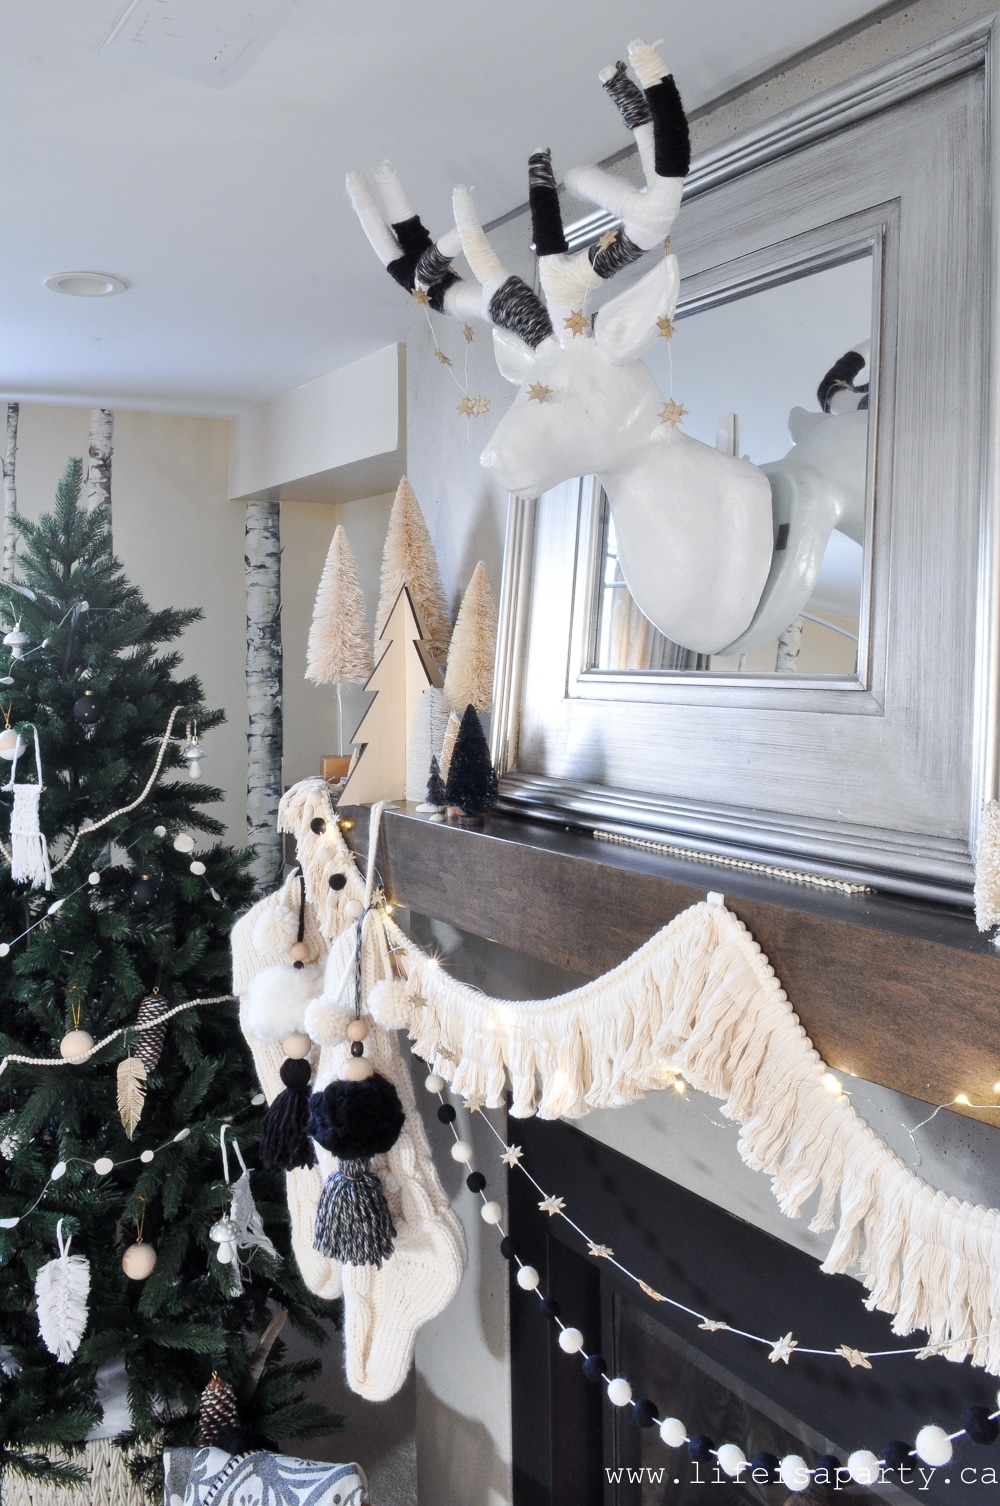
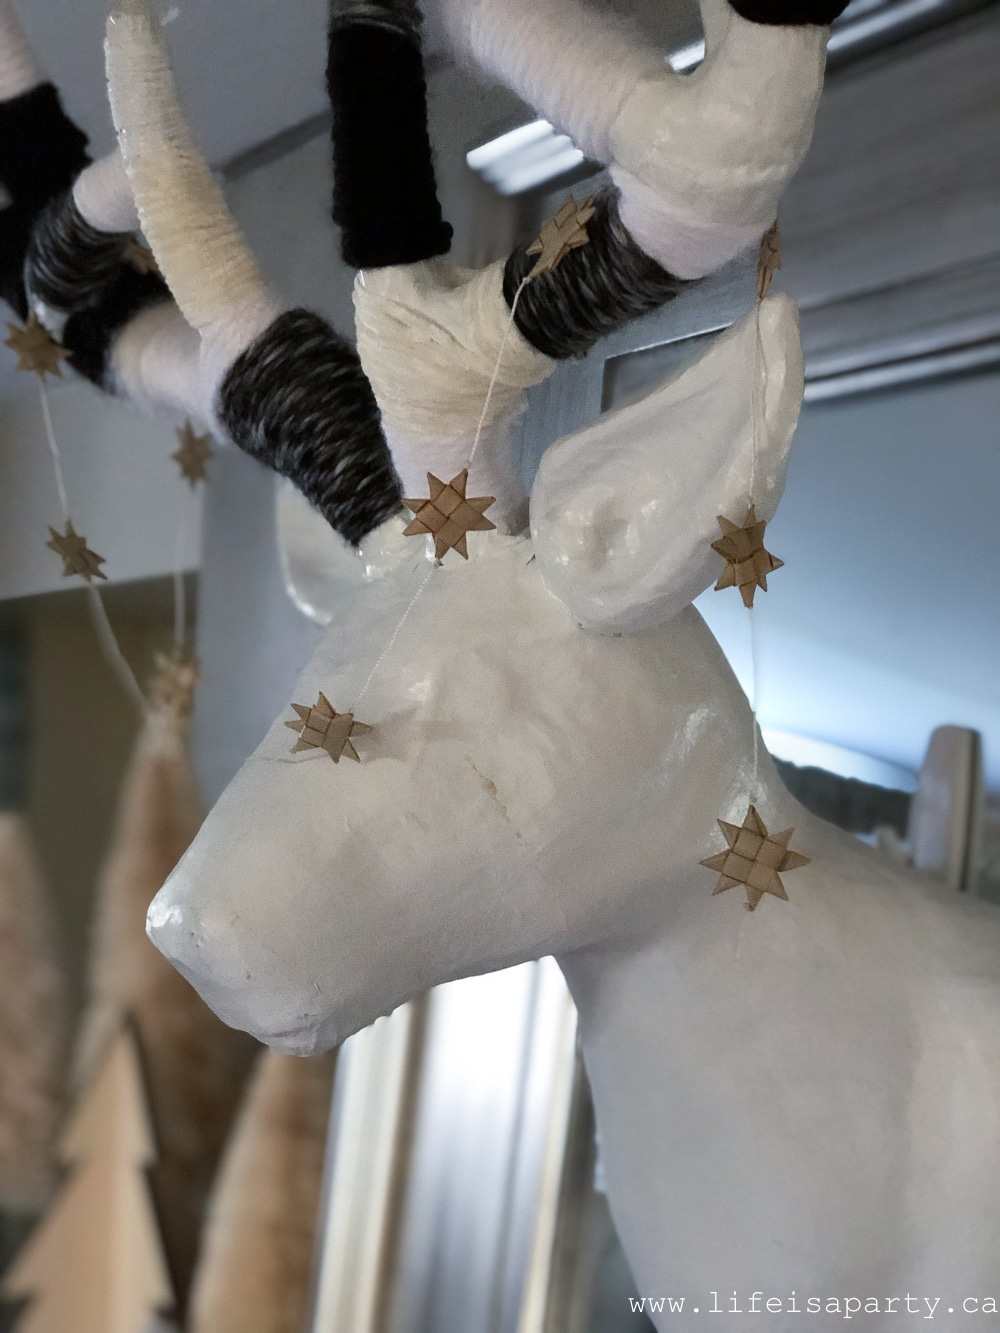
This year we're doing Modern Boho with a black and white color scheme for Christmas in the family room.  My first project for the fireplace mantel was giving my deer head a little makeover.  The deer head is made of paper mache that I spray painted white years ago.  He still feels perfect for Christmas.  He got a bit of a boho makeover by wrapping his antlers in different black and white yarns.  It adds some fun texture, and was super easy to do.  I think this is a great idea for adding lots of texture to our focal point.

paper mâché deer head

One aspect of boho design is to add in well traveled vibe by adding treasures with a global influence.  Another element of boho design is adding lots of textures and natural elements.  This pretty star garland was bought at a shop where women from other countries can work on fair trade projects to help support their families.  It feels global, Christmas-y, and natural, and it adds texture -so it's ticking all the boxes. 😉

Boho Christmas stockings

Trees

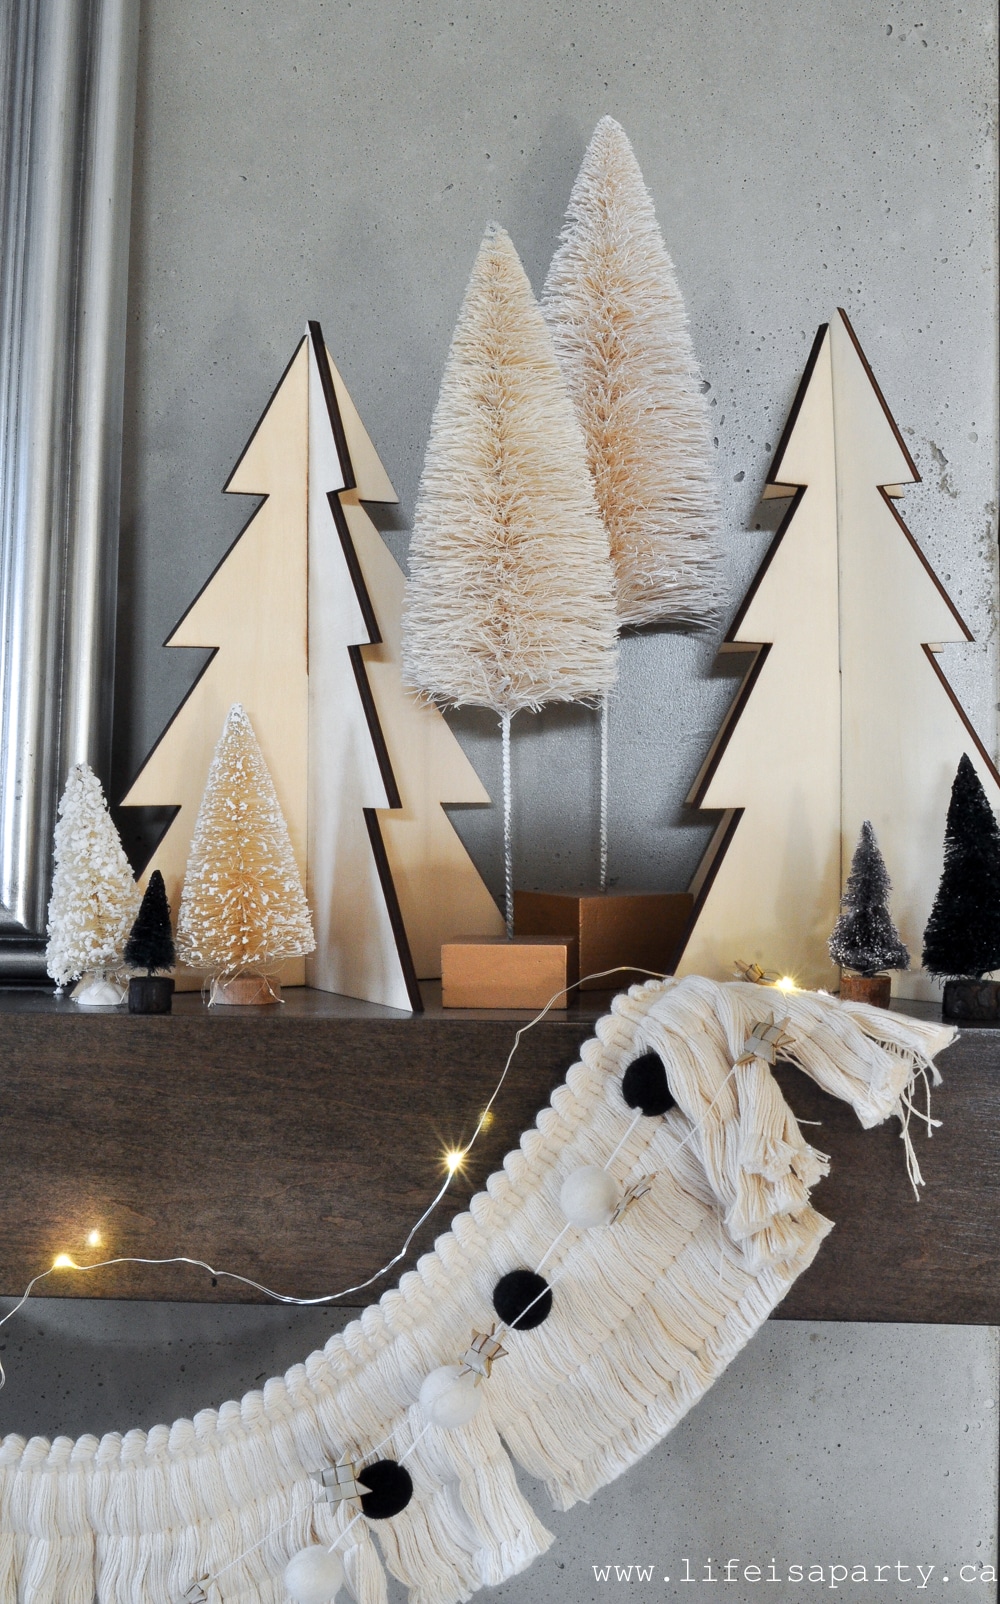
On top of the mantel I did a collection of bottle brush trees in our black and white color palette.

black and white Boho Christmas

I love the tall ones -picked up at Hobby Lobby on a recent cross border shopping trip.  The rest are ones I had in my Christmas boxes.  I wanted to add just a few black ones to bring it in, but couldn't find any black bottlebrush trees while I was shopping.  So, I DIY'd these ones.  They started out green, and I spray painted them black, and then added some black glitter.  I only needed a few to tie in the black here, so this DIY worked out great.  It's a fun and easy way to bring in the black.

black and White Christmas mantel

I also included a few fun 3-D Christmas trees in warm wood tones.  These are from a few years ago, but worked perfectly here.

Boho Christmas stockings

Christmas Garland

Fringe definitely feels very boho so it was the perfect main garland here on the mantel.  It's easy to find at the fabric store, and you can purchase it by the yard to fit your space.  It come sin lots of different designs and widths.  The natural colors are perfect for our color scheme.  A macrame garland would be a great choice here too.  But the fringe gives a very similar look to macrame, and it's much easier.  It's the perfect boho Christmas decor touch.  I also layered it with some black and white felt ball garland, and more of the straw stars.  And then I added one strand of twinkle lights for a little Christmas sparkle this time of year.

This layered garland choice is a great alternative to using fresh greenery.  It won't dry out with a roaring fire, and it's a great way to add lots of texture and interest.  Wood bead garlands would be a great addition.

I hung the garland with command hooks on the side of the fireplace.  These are a great idea.  They're inexpensive and easy to remove after Christmas with no marks left behind.

Boho Christmas stockings

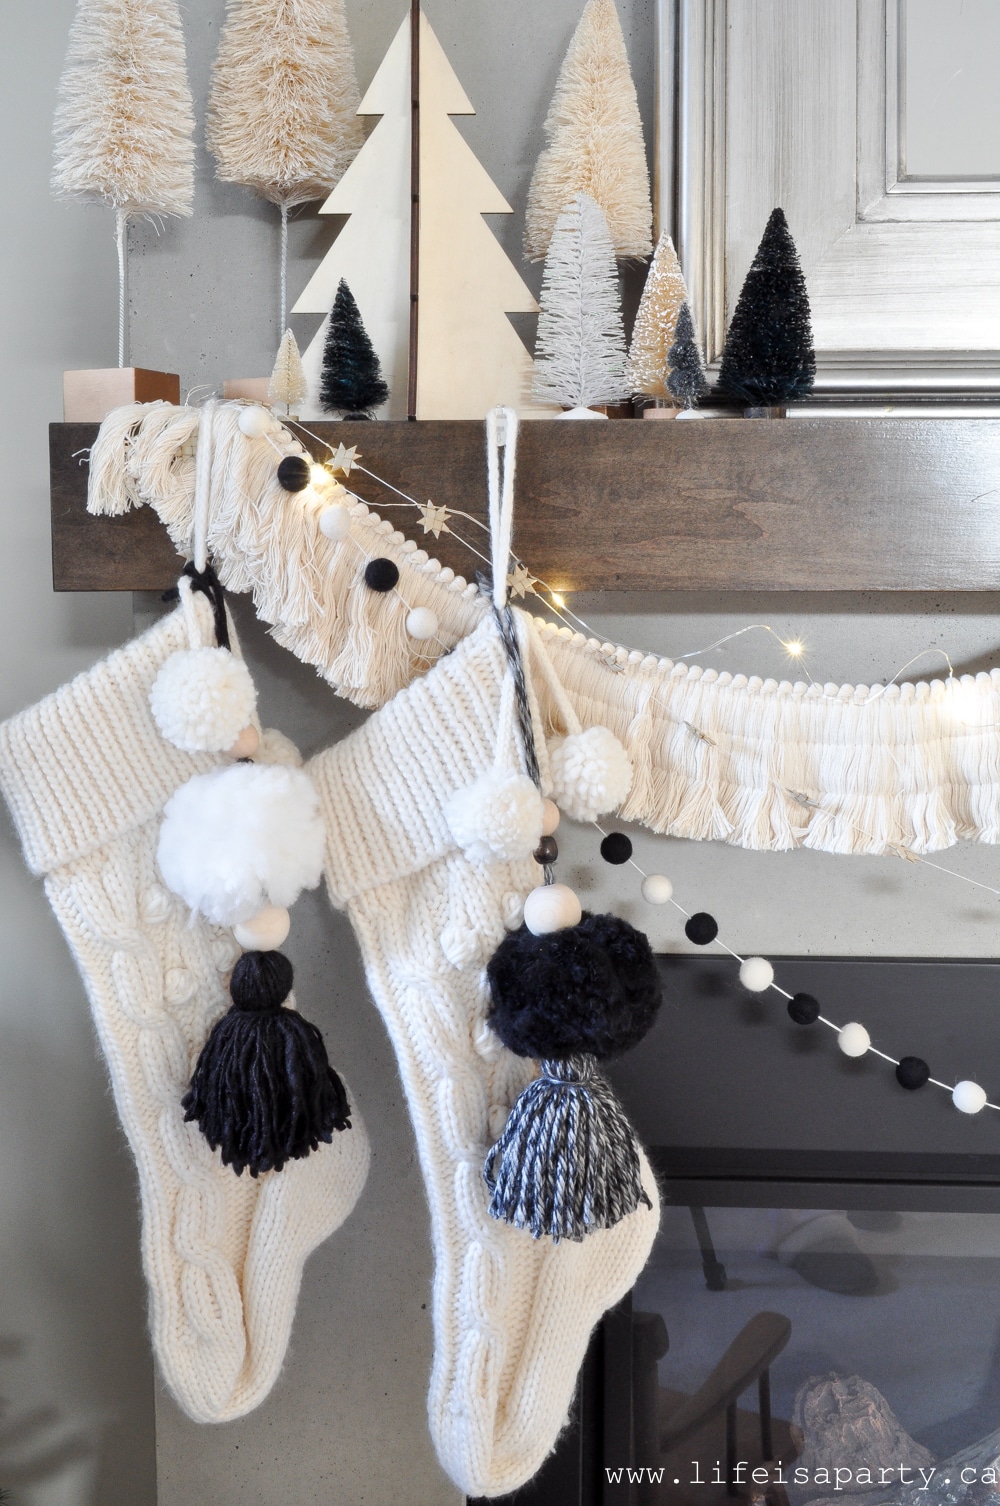
Boho Christmas Stockings

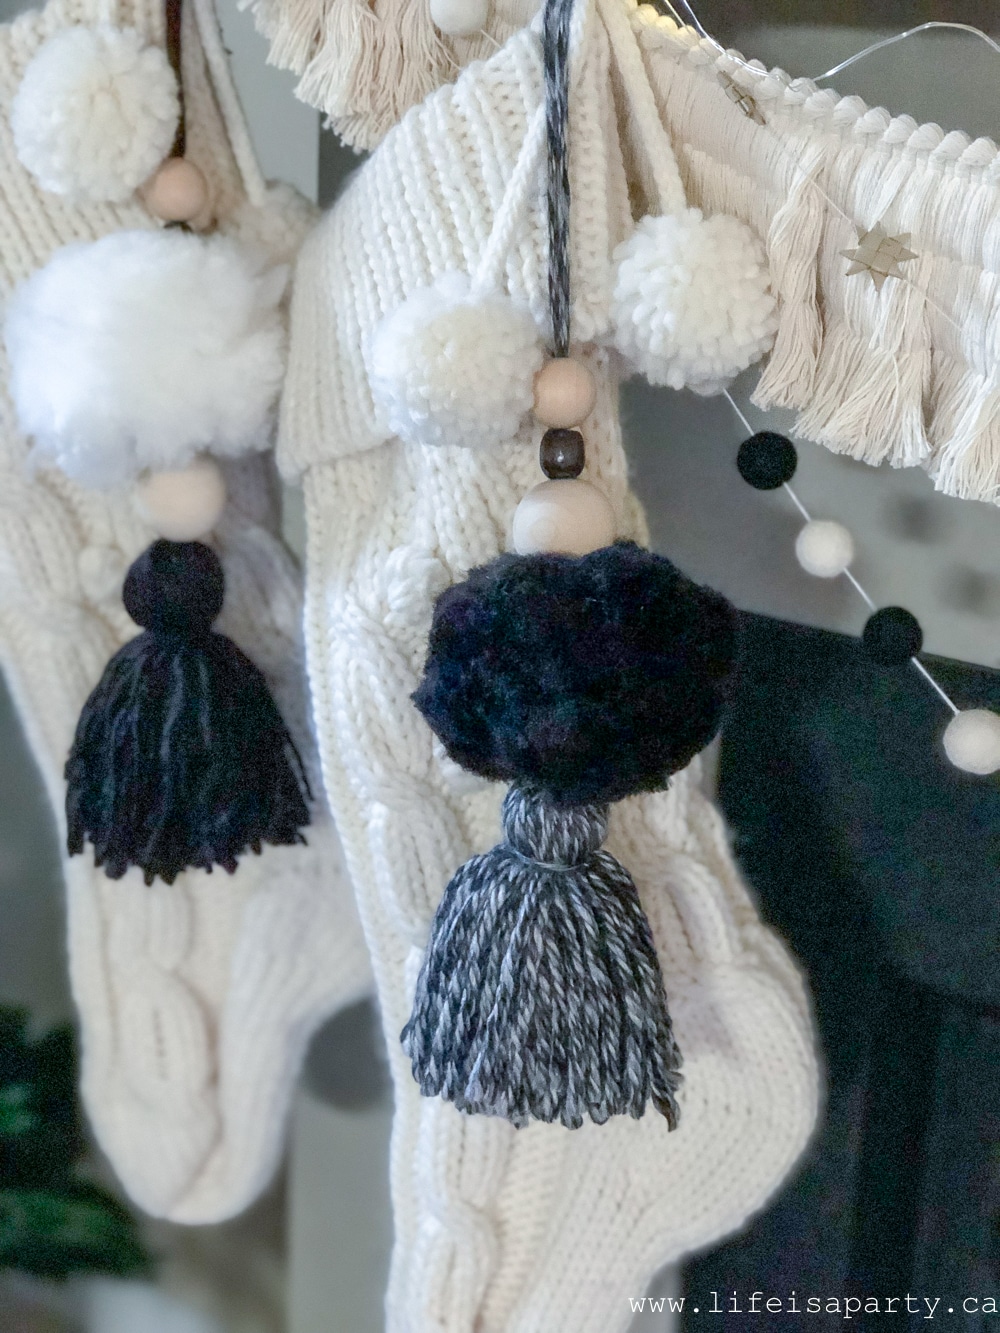
The DIY boho Christmas stockings are a favourite of mine.  I made the fun stocking tassels myself.  This was a fun way to add a boho touch to cable knit stockings.  For our pom pom stockings makeover I made a big tassel and big pom pom for each and threaded on some wooden beads.  These tassels would be a fun door knob tassels after Christmas time too.  A smaller version would be great Christmas decorations for the tree also.

black and white Boho Christmas

I love how this holiday mantel turned out -the black and white are fun, and a little something different.  This simple mantel display is full of texture, and interest, and the perfect festive touch for the holiday season.  This cozy Christmas mantel is one of my favorite holiday decorations.

Boho Christmas Mantel black and white

With a black and white Boho Christmas Mantel, life really is a party!

Be sure to check back tomorrow for the continuation of my Boho Christmas series.  I'll be sharing a fun DIY Christmas cushion for the couch.

More Inspiration

You might also like our Boho Christmas Tree here.

Boho Christmas Tree and DIY Macrame Feather Ornaments: black and white Boho Christmas Tree full DIY ornaments, plus a full tutorial for macrame feathers.

Also check out our Black and White Christmas Home Tour here.

You might also enjoy our Pastel Colourful Christmas Living Room here.

Colourful Pastel Christmas Family Room: Inspired by Anthropologie, with bottle brush Christmas trees, mercury glass, vintage ornaments, macrame, & pastel colours.

Boho DIY Play Tent

Nov 19, 2018 · Leave a Comment

DIY boho reading tent for Christmas.

Boho DIY Play Tent: See how to make an inexpensive reading tent fort for kids with birch poles and an old table cloth.

DIY boho reading tent for Christmas.
[feast_advanced_jump_to]

Today I'm excited to be sharing this sweet Boho Christmas DIY Play Tent with you. It's the first in a week-long series of posts all about our Boho Christmas. I'm decorating the basement family room with a black and white boho theme, and I thought it would be fun to share a different project each day, with the big reveal of the whole space on Friday -see the reveal of all the Boho Christmas Decor here.

A series of post on how to decorate with a Black and White Boho theme this Christmas.

This DIY play tent was a wonderful addition for Christmas, but would be great for any time a year.  We set it up our DIY indoor tent in our living room, but it would be great in a kids room or any play area.  Kids love it as a special reading nook, or for playing with as a camping tent or as their own fortress.  It's sure to give your children hours and hours of fun and many fond memories.

Is This The Right DIY Tent For You?

There's different ways to build a DIY kids play tent.  Our cute tent didn't take much time to create.  Our method was a very easy DIY.  I won't necessarily recommend this method if you're kids are very little and you're worried that the frame tent of birch poles might get knocked over and hurt them.  My kids are older, but also they're not overly rambunctious.  If you're worried about your kids rough housing and knocking it over than you might prefer a DIY tent made of PVC pipes, or with a dowel rod, or a canopy-style tent that hangs from a ceiling hook.  This version is super easy to make with little effort, and not a lot of time, and also something you can take apart easily and repurpose the elements without having to worry about storing a frame play tent.  It's also really inexpensive to create with things you have, or from the woods, or from the thrift store.  I love how it looks too.  For all those reasons it was the perfect addition to our boho Christmas decor this year.

This DIY tent is a fun little play fort for my kids and their friends, and also adds so much ambience to the room.  The first day it was made my youngest planted herself here with the twinkle lights and her book as soon as she got home from school and saw it.  It would also be a fun spot to put some Christmas presents.  My girls are just about out of the playing stage so I'm hanging on to all their final days of make-believe.

Reading Tent

It was super easy to build our homemade tent and cost me under $5 because I had some of the stuff, and was able to forage for some.  Even if you had to buy the birch poles, it's still a pretty inexpensive DIY activity.

DIY Play Tent Materials:

  • 5 birch tree poles, about 6 feet tall each
  • twine
  • safety pins
  • 2 lace tablecloths
  • pillows, sheepskin rug or throw blanket, fairy lights, Christmas greenery garland

How To Make a Boho Christmas DIY Play Tent:

Birch Poles

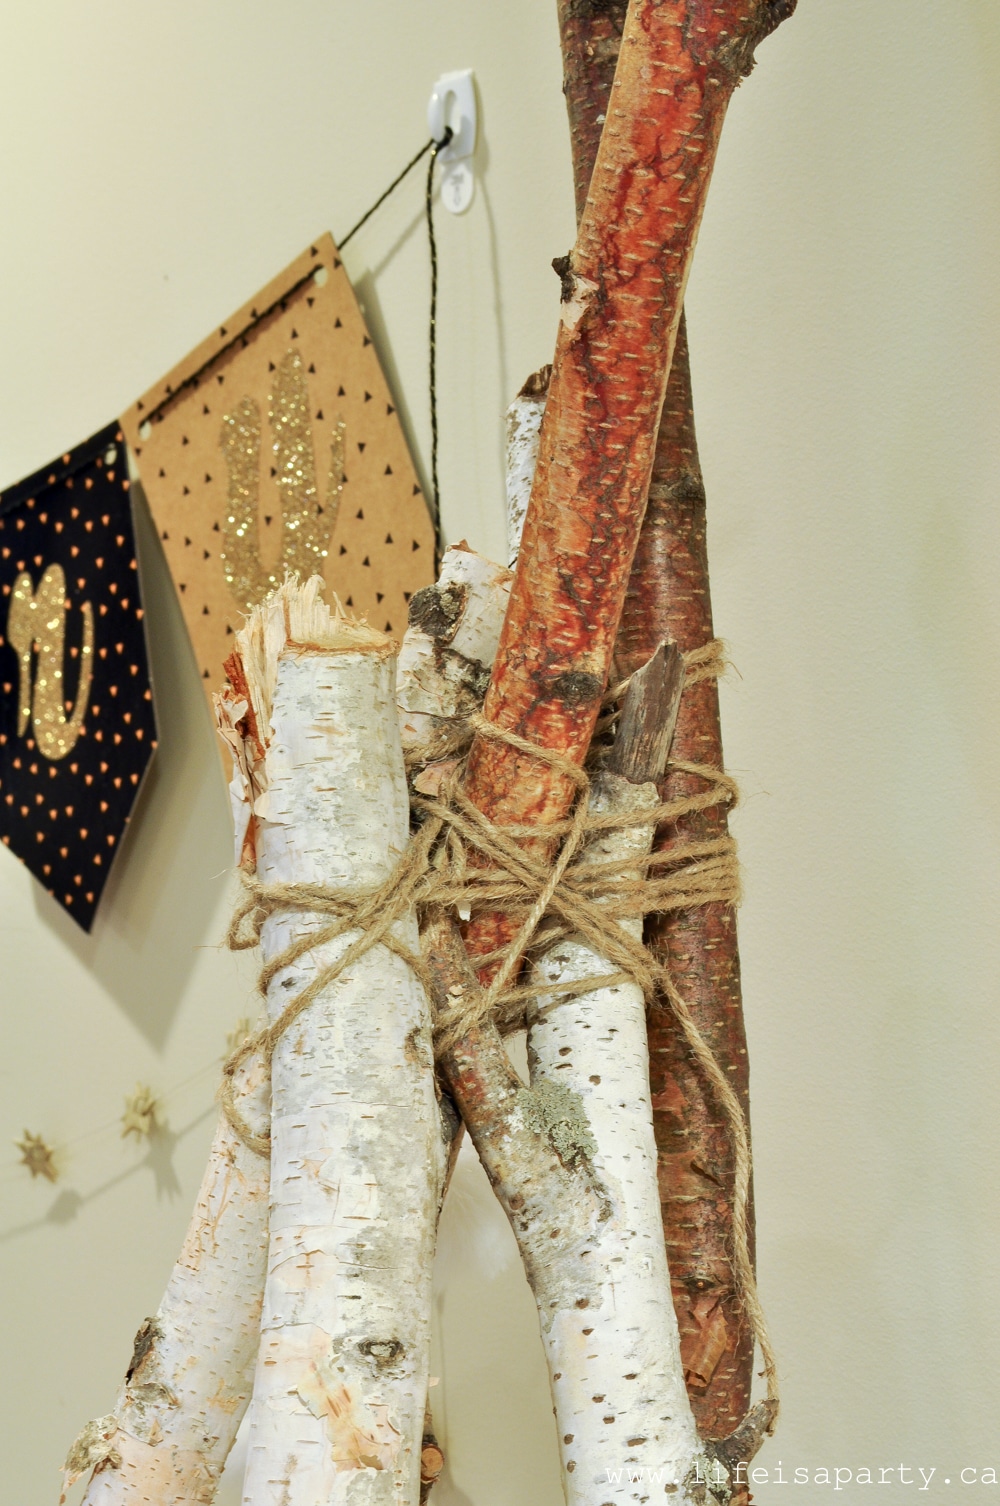
I started out with 5 birch poles, you could use 6 to make the tent a little bit bigger if you have enough room.  My poles were about 6 feet.  You could use shorter for a smaller tent.  I cut down the poles at a friends farm, but you could also purchase -look for ones used in Christmas outdoor pots this time of year.  I love the birch pole look.  You do want the thinnest ones, as they are somewhat heavy and you won't want them to topple over on any children.  You could also use wooden dowels from the hardware store for the frame of your kids' tent.

how to make a reading tepee

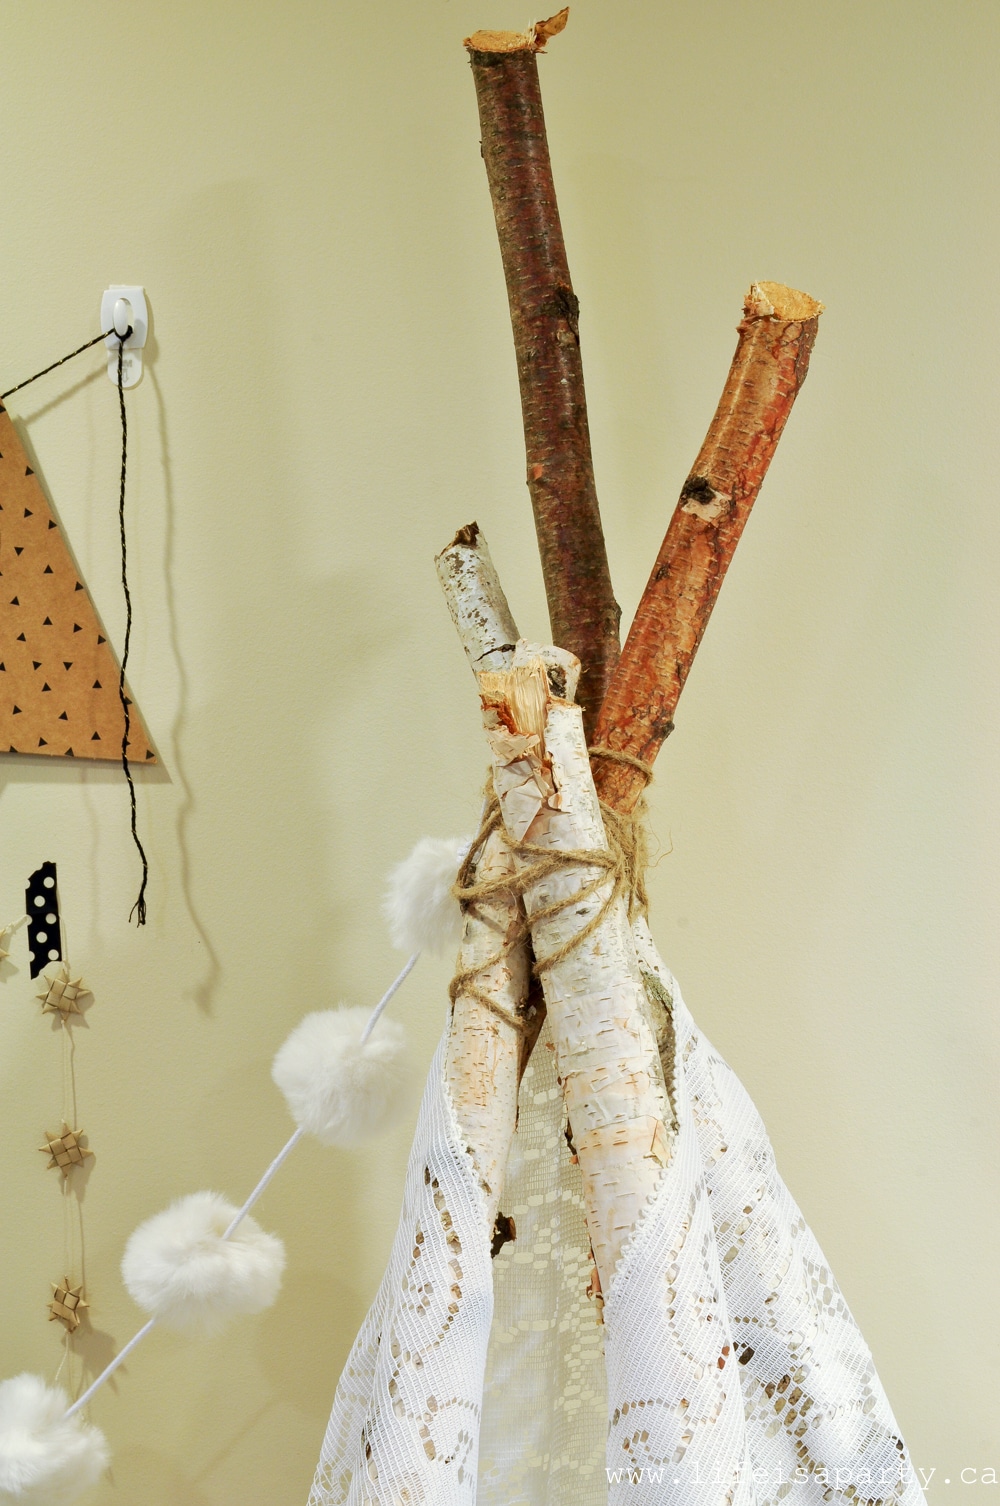
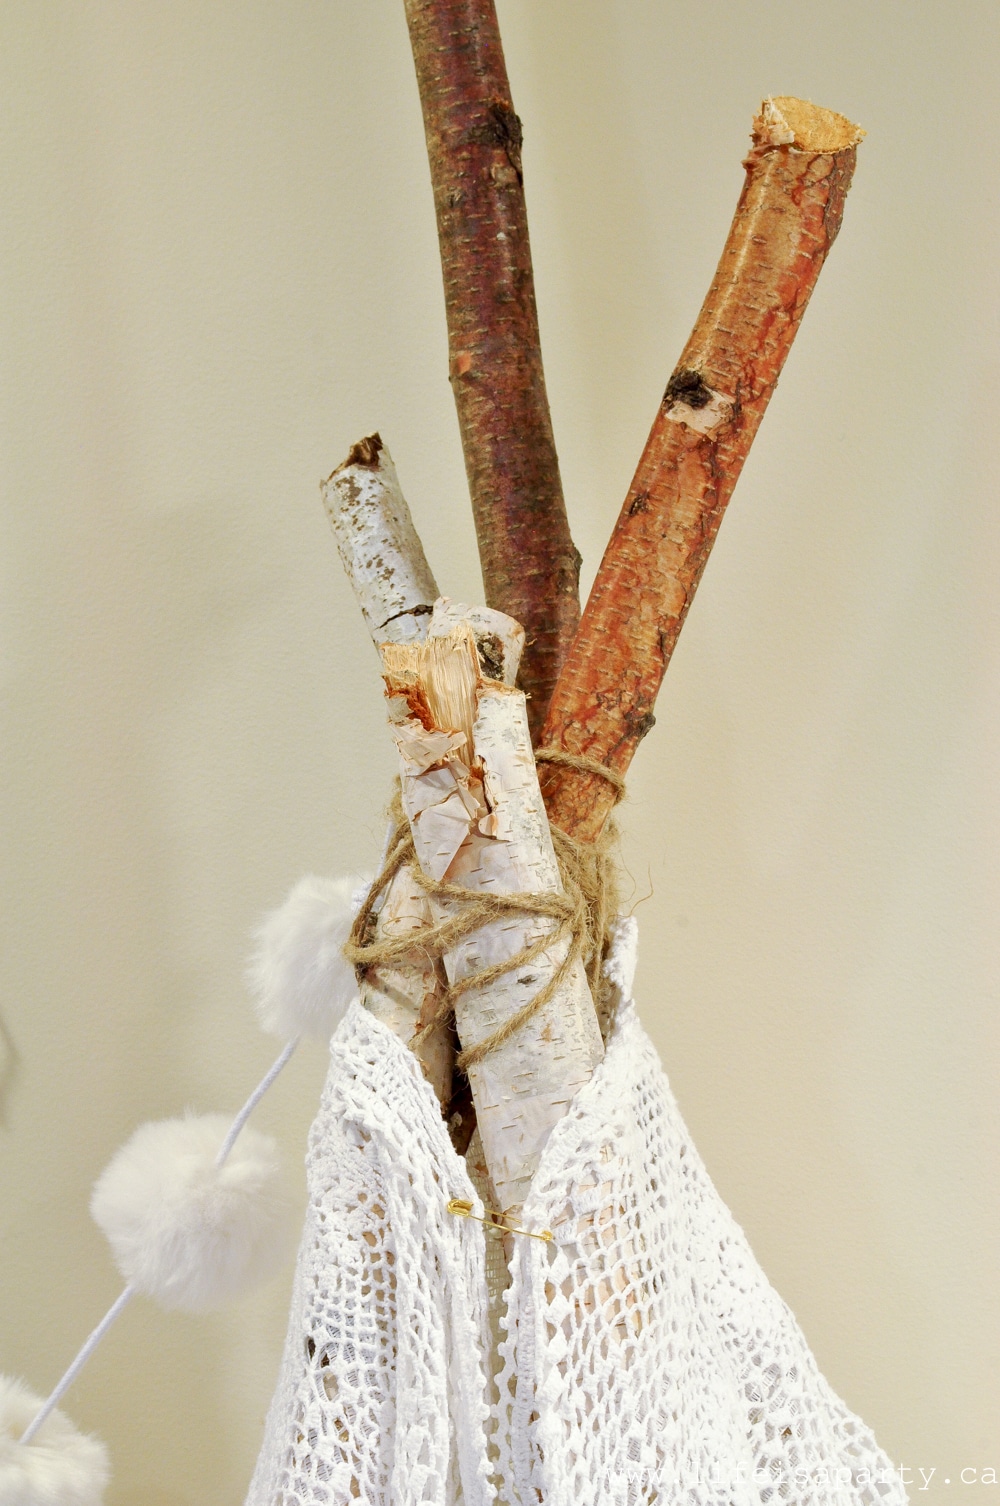
Form a circle about 3 feet in diameter with the poles and lean them in to meet at the top and form the tent shape.  Leave a larger space/opening between two poles at the front for the door.

reading tent with birch poles

Tying The Poles

Tie the poles together tightly with twine, taking care to loop around the poles and make them very secure. We did it the easy way and used just twine to hold the tent firmly together.  If your children are younger, or more active you might want to get out the power tools and pre-drill a hole through each pole at the top with a drill bit and thread the twine through the holes to make it even more stable.  Note that birch poles are a little heavier than dowel which these tents are often made of, so you want to take extra care to make sure it's secure so a little one is never hurt from the poles falling.

diy reading tent

Add the Table Clothes

Once the poles are all tied together, it's time to add the tablecloths to create the outside of the thent.  This little tent is a no-sew project.  No sewing machine or sewing skills required.  I used two vintage lace tablecloths and layered them.  One was an old one I had, and the other I picked up for under five dollars at the thrift store.  One table cloth wasn't quite enough fabric  to wrap around my tent, so I used two layered together.  It's really easy to get the tablecloths in place because the rough bark catches easily on the lace.  Secure the top of the tent with a simple safety pin or two.  Lace tablecloths are also a great choice because they don't really have a wrong side of the fabric, or raw edge of fabric to worry about, so they're really easy to work.  Alternatively though, you could also use a drop cloth, or bed sheets for this easy project.   I love how the vintage lace tablecloths look for our diy children's play tent.  

Finish the tent by tucking the tablecloth sides in around the bottom of the tent and fold back the front panel to form the door of your indoor play tent.

how to make a reading tent

Decorate the DIY Play Tent

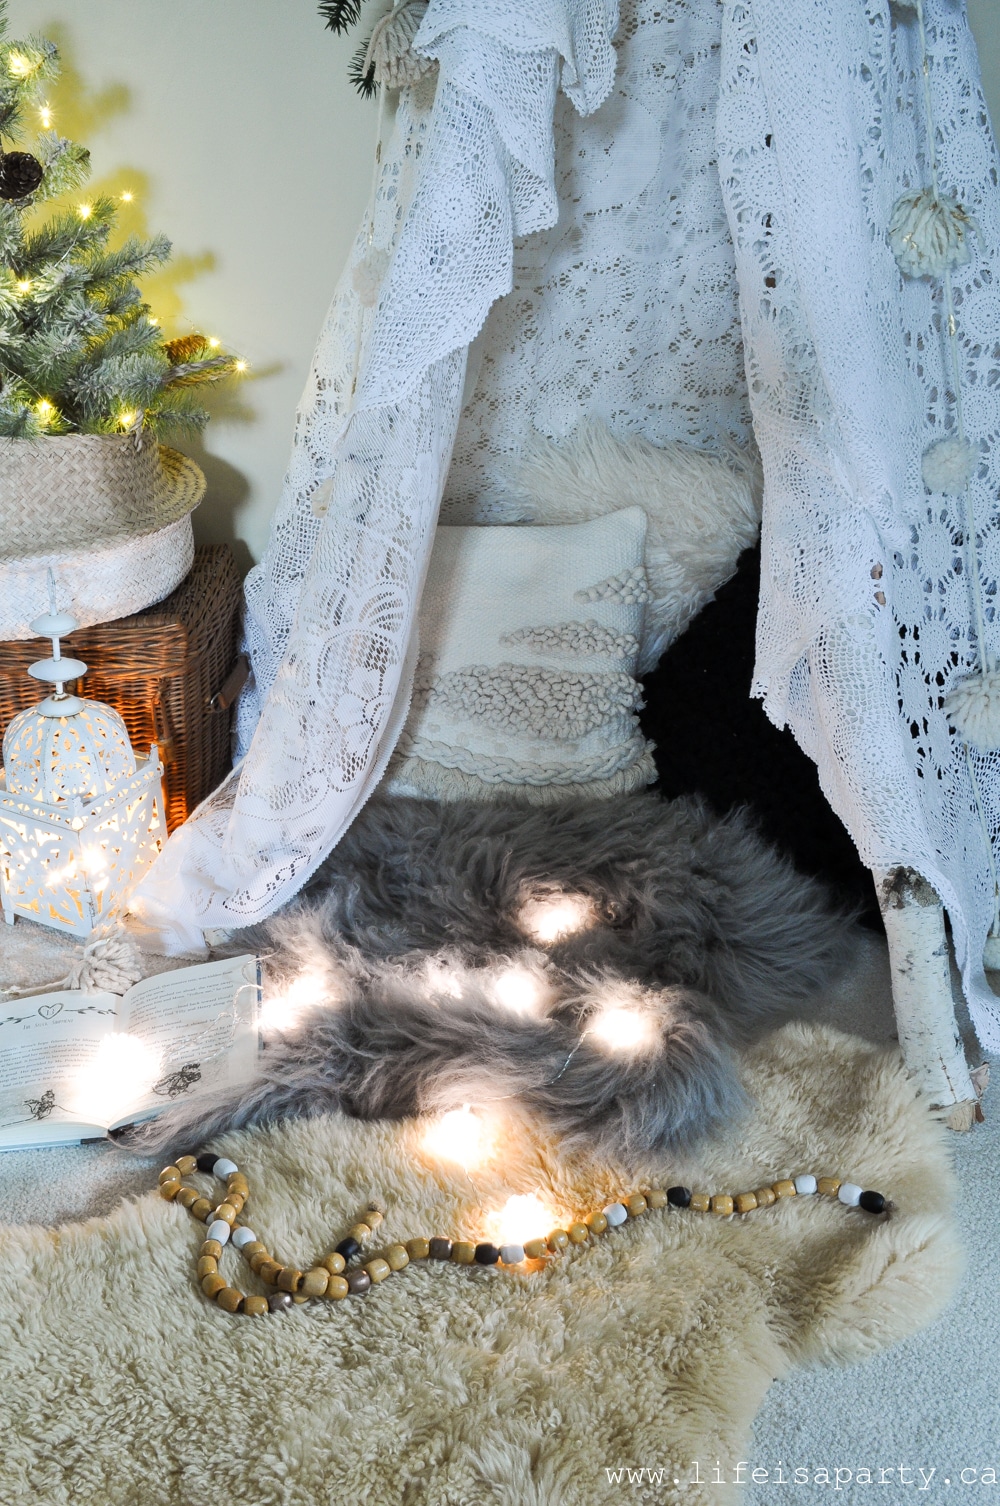
Now the fun part, add lots of soft cushions and sheepskin rugs, or throws inside.  This is such a great way to make the tent cozy.

how to make a no sew reading tent

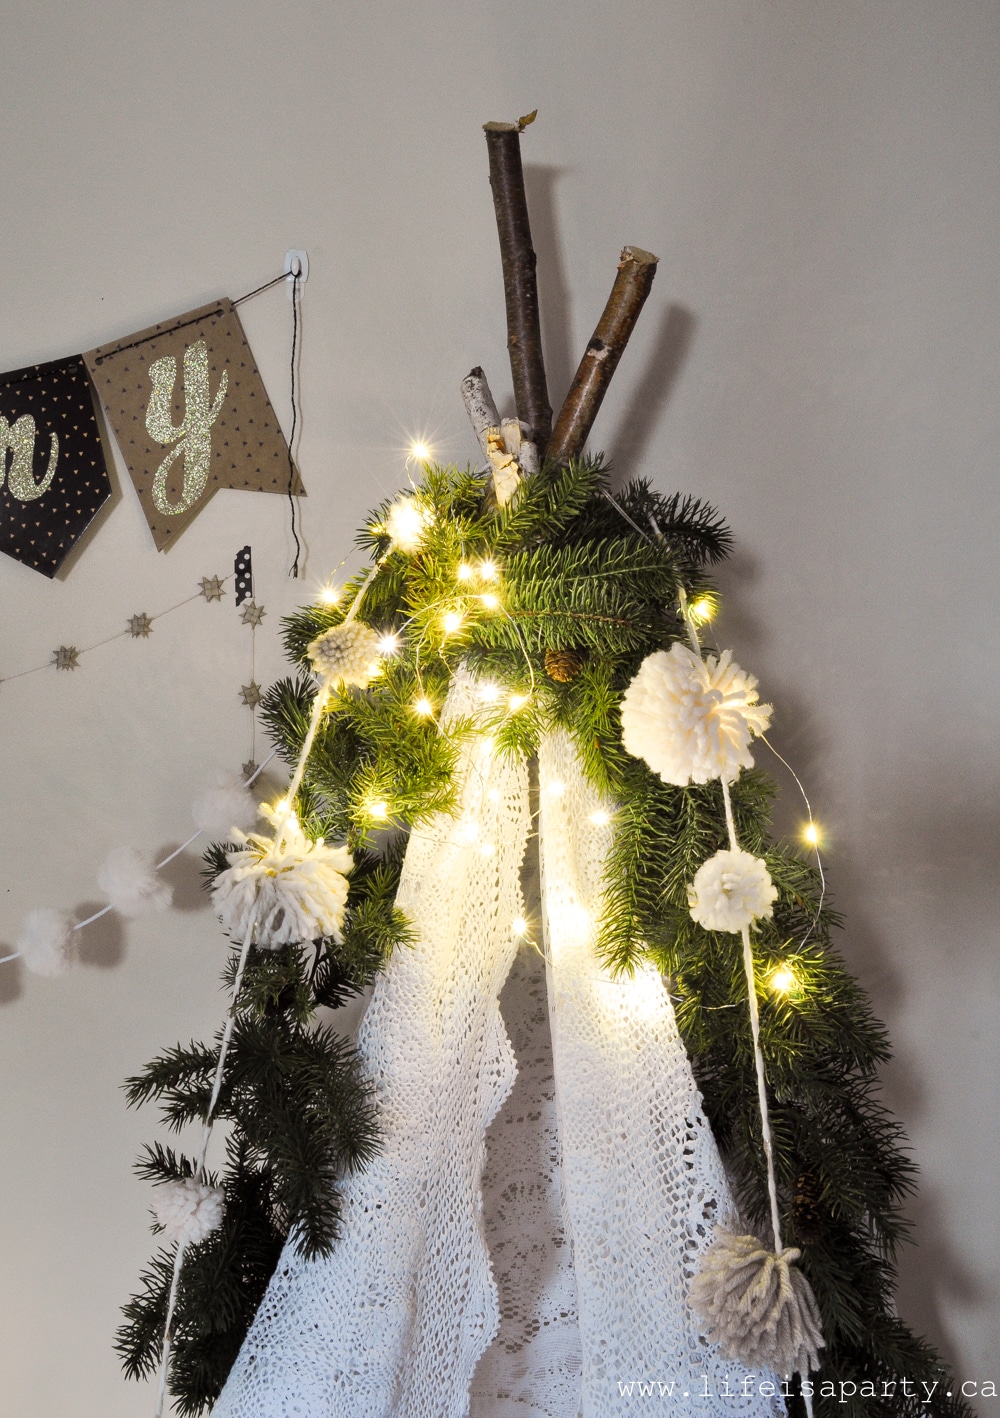
To decorate our tent, we wrapped the top with Christmas garland, fairy lights, and pom pom garland.   Some artificial flowers might be a fun touch too depending on your child's preferences.

Christmas reading tent

Recipe

Christmas reading tent made with birch poles and vintage lace tablecloths.

Boho DIY Play Tent

No ratings yet
Print Pin Rate
Cook Time: 20 minutes minutes
Total Time: 20 minutes minutes
Author: Dannyelle Nicolle-Ramjist

Materials

  • 5 birch tree poles about 6 feet tall each
  • twine
  • safety pins
  • 2 lace tablecloths
  • pillows sheepskin rug or throw blanket, fairy lights, Christmas greenery garland

Instructions

  • Start out with 5 birch poles, that are about about 6 feet long. Form a circle about 3 feet in diameter with the poles and lean them in to meet at the top and form the tent shape. Leave a larger space/opening between two poles at the front for the door.
  • Tie the poles together tightly with twine, taking care to loop around the poles and make them very secure.
  • Once the poles are all tied together, it's time to add the tablecloths to create the outside of the thent. Secure the top of the tent with a simple safety pin or two.
  • Decorate the inside of the tent with throw pillows and blankets and twinkle lights, You can also add some garland and lights to the outside of the tent.

You could also add a stack of new Christmas books inside of the tent.  The thrift store is a great place to find these really inexpensively.

reading fort

Creating the Black and White Boho Christmas Look

I had so much fun decorating this whole little space around our Christmas play tent.

boho reading tent

To make if feel even more boho, I added a fun macrame hanging to the wall. We add lots of garland and bunting to create a layered look.  Boho decor tends to include a global influence so this, and the Moroccan lantern are great additions to achieve the look.  We also incorporated a Christmas tree, and lots of fairy lights.

boho christmas decor

black and white boho christmas

DIY Play Tent Easy Take Down

If you're done enjoying this spot there's just a few simple steps to but it away.  The whole tent breaks down to take apart even more quickly than we put it up!  Remove your safety pin and take off the tablecloths, and then untie the twine and take the locks down -the easiest collapsible fabric play tent ever!  And you can rebuild it anytime you want.

how to make a reading tent with no sewing

inexpensive diy reading tent

This spot is the perfect place for kids to enjoy.  It's one of my favorite DIY projects, because it's inexpensive, quick and easy, and looks so sweet. 

With a fun little Boho Christmas DIY Play Tent to enjoy over the holidays, life really is a party!

More Boho Christmas Inspiration

You might also like our Boho Christmas post here.

Boho Christmas Decor: decorated for Christmas with black and whtie boho including lots of texture, tassels, pom poms, brass, wood, and twinkle lights.

Also check our out Black and White Boho Christmas Mantel here.

Boho Christmas Mantel: Black and White Modern Boho mantel with lots of tassels, pom poms, fringe, bottle brush trees, stockings and garland.

You might also enjoy our Black and White Boho Christmas Tree here.

Boho Christmas Tree and DIY Macrame Feather Ornaments: black and white Boho Christmas Tree full DIY ornaments, plus a full tutorial for macrame feathers.

Also check out our Mini Macrame Christmas Ornaments here.

Mini Macrame Christmas Ornaments: Easy DIY Macrame Ornament tutorial, perfect for the beginner. No macrame experience required.

DIY Fair Isle Christmas Candle Holders

Nov 14, 2018 · Leave a Comment

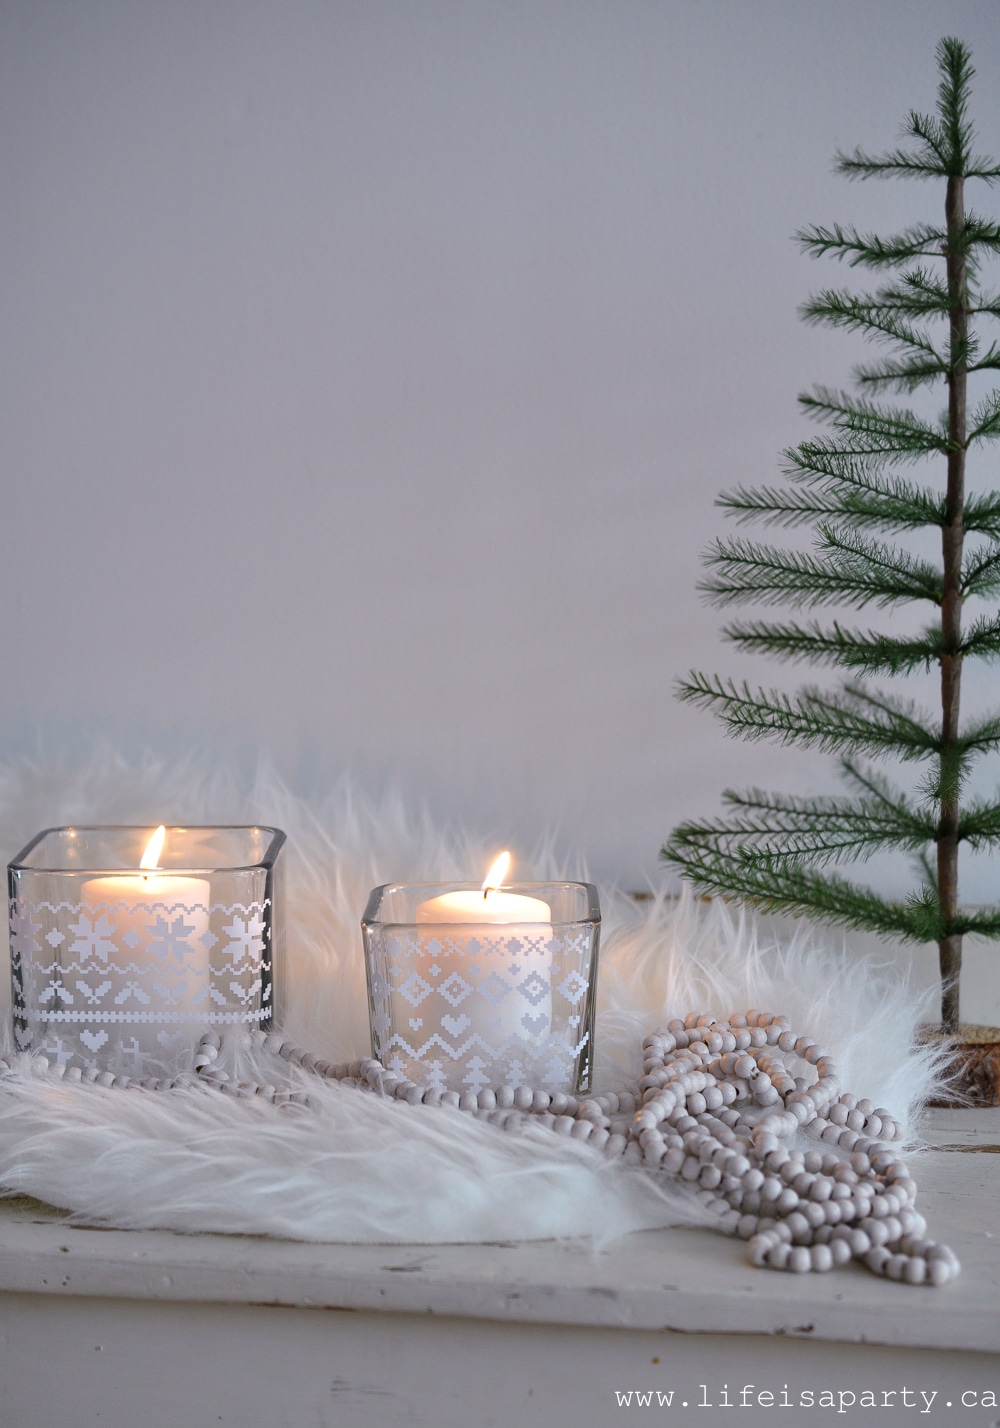
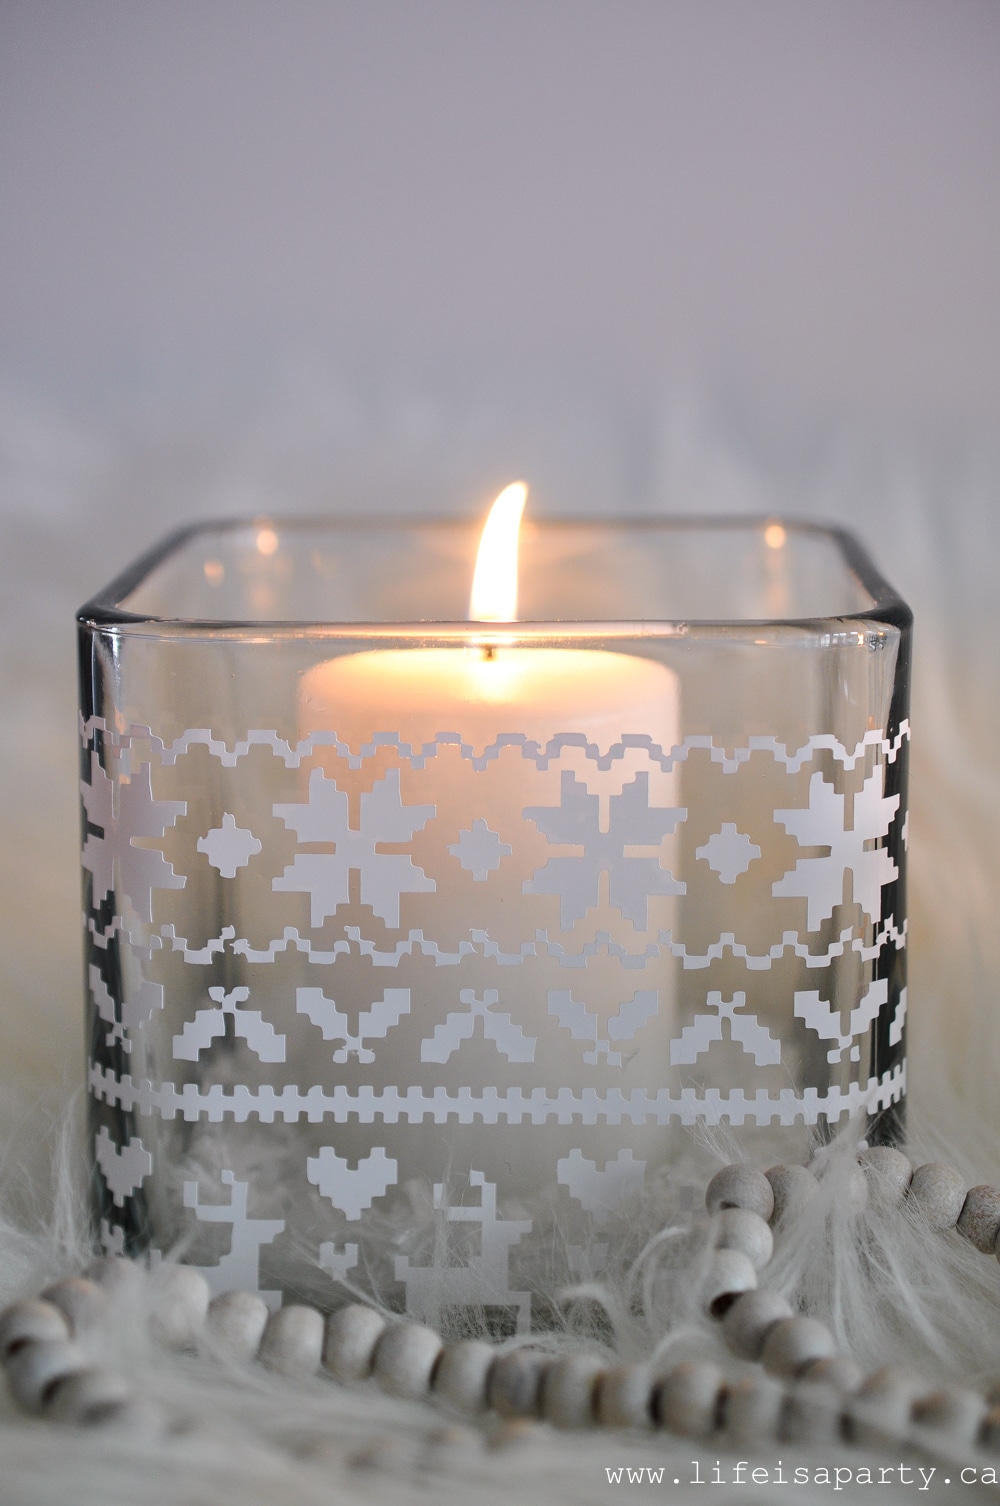
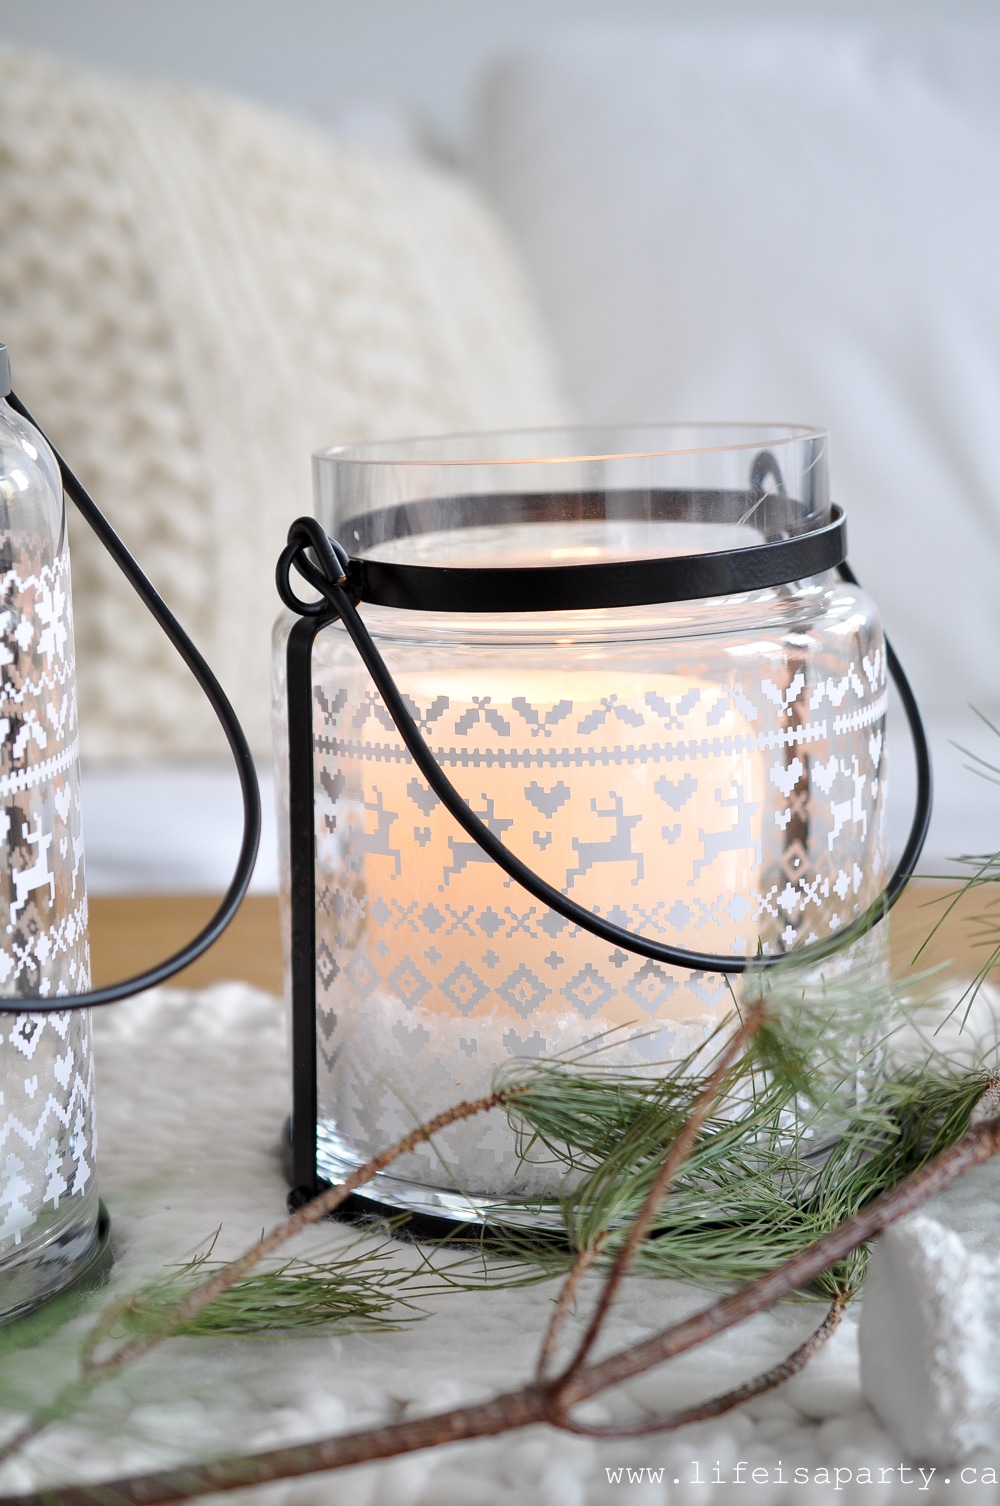
DIY Fair Isle Candle Holders: Use your Cricut to add a vinyl Fair Isle pattern to your candle holders. Free design space cut file included.

DIY Fair Isle Christmas Candle Holders: Use your Cricut to add a vinyl Fair Isle pattern to your candle holders. Free design space cut file included.

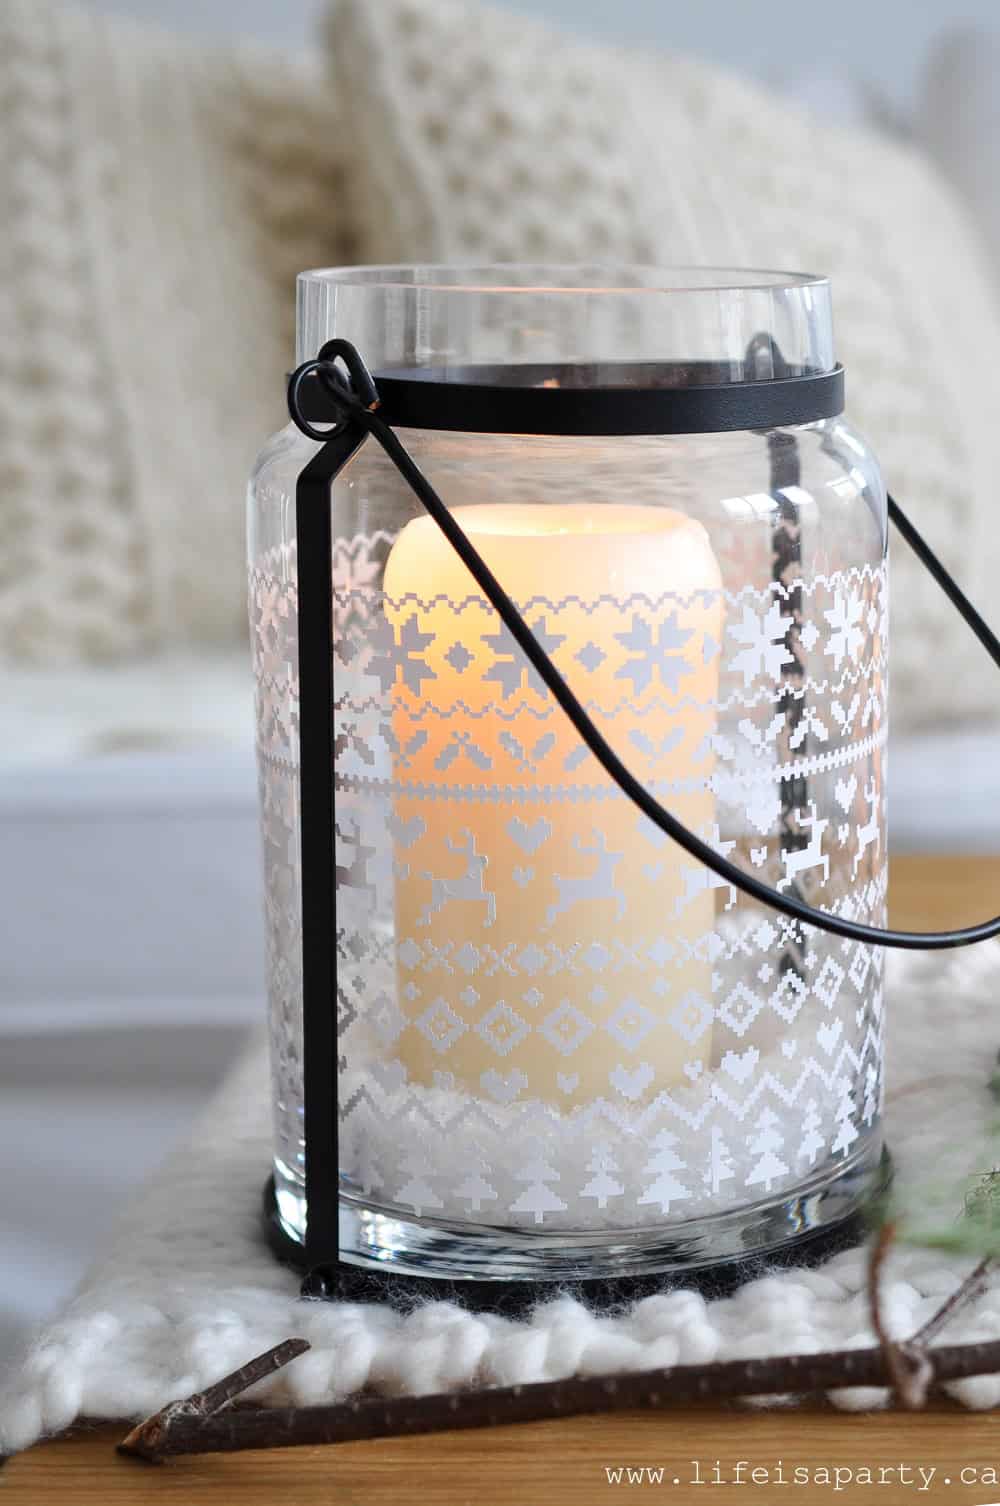
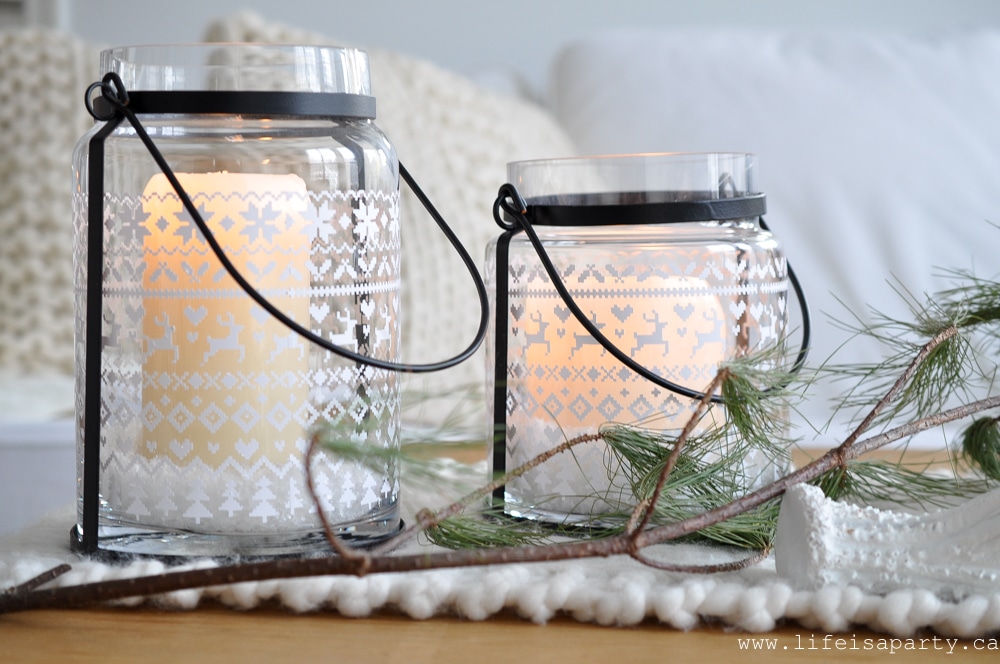
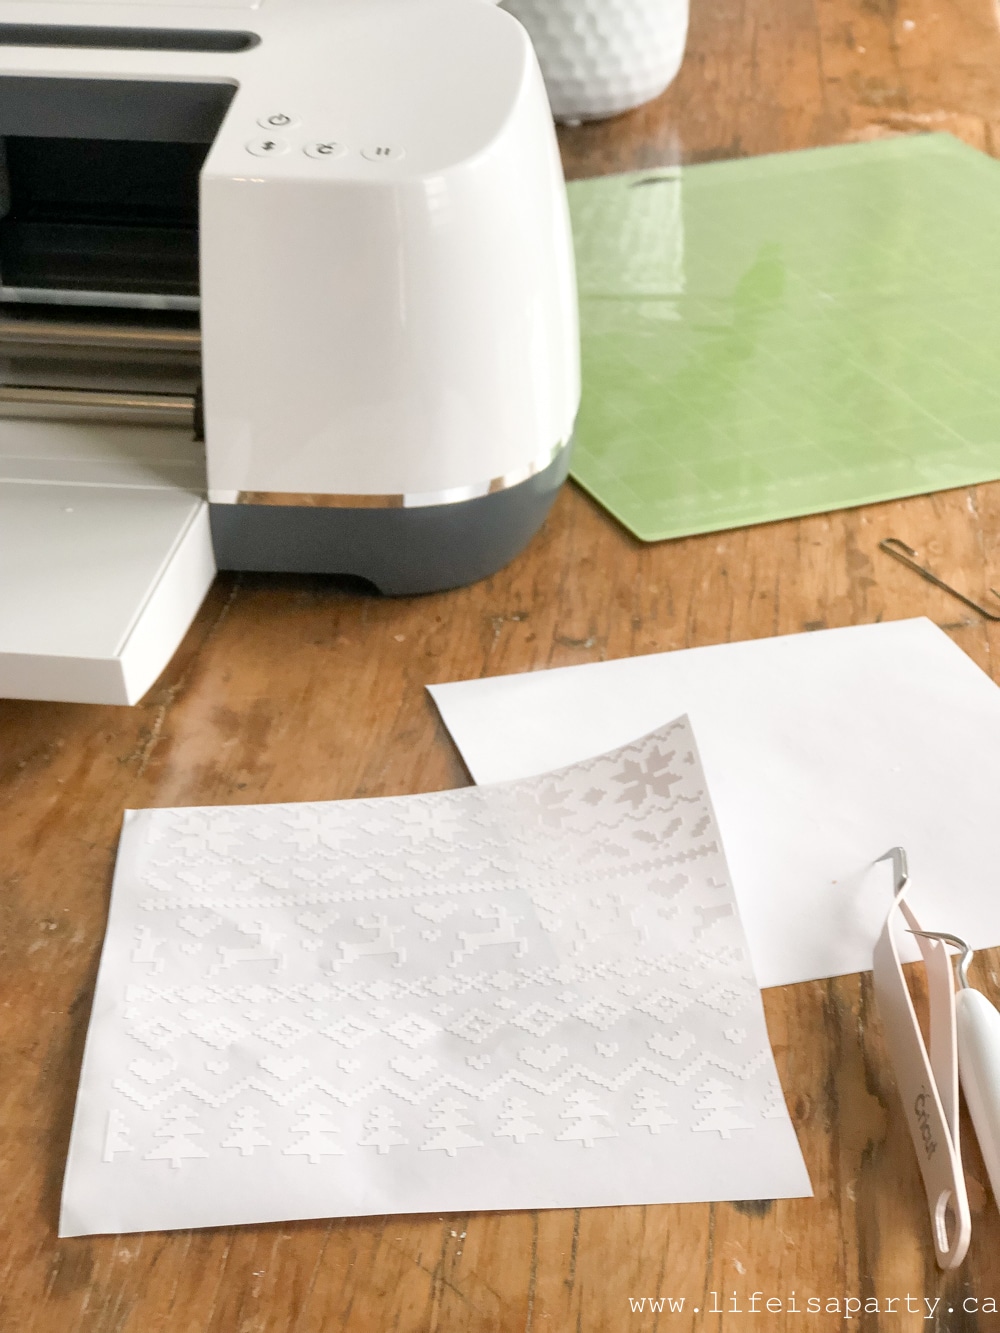
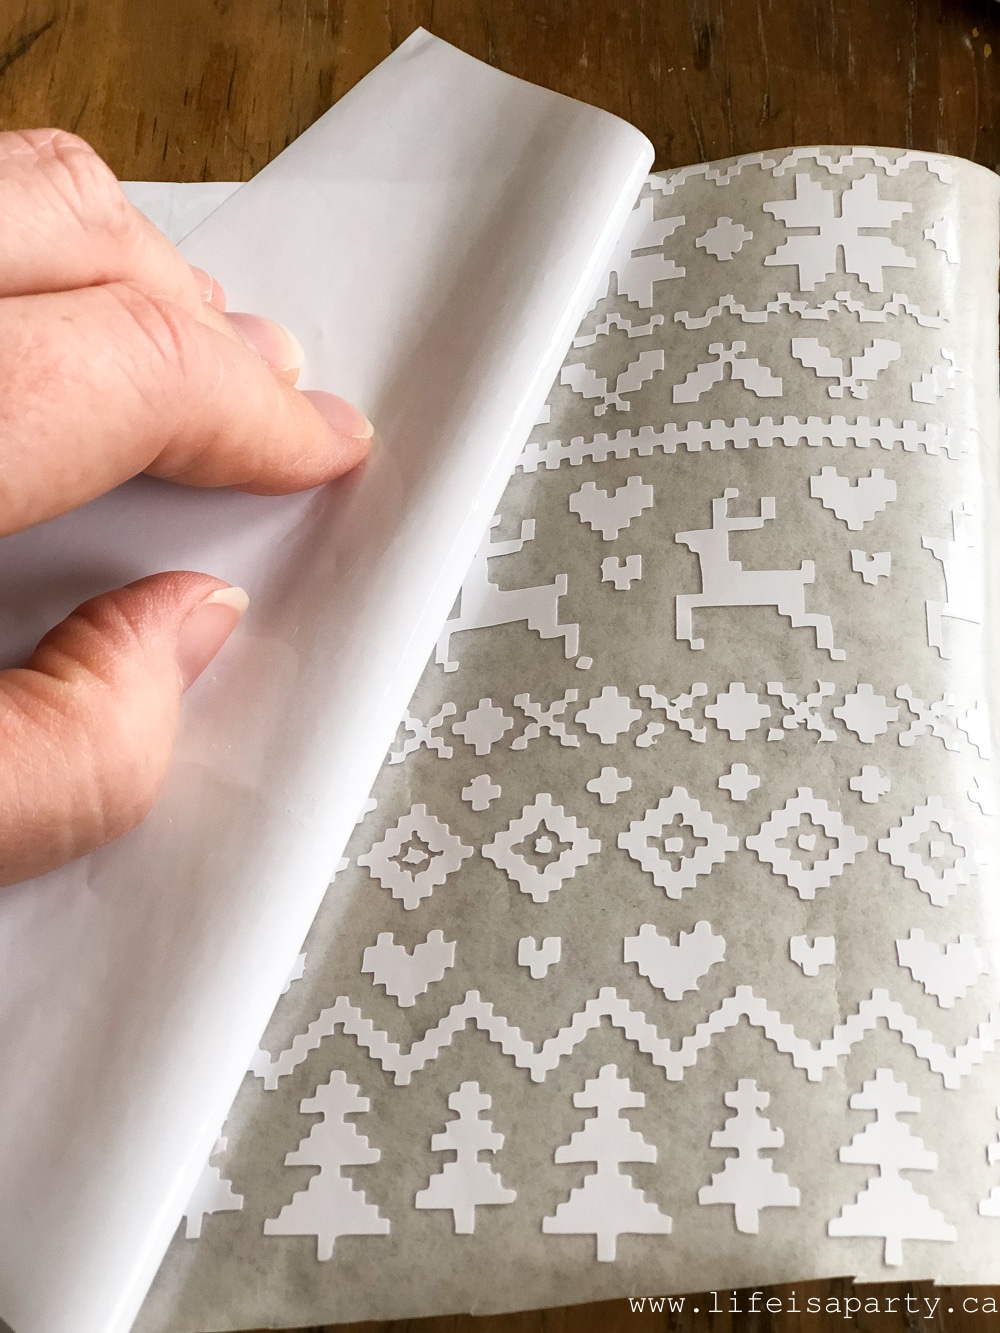
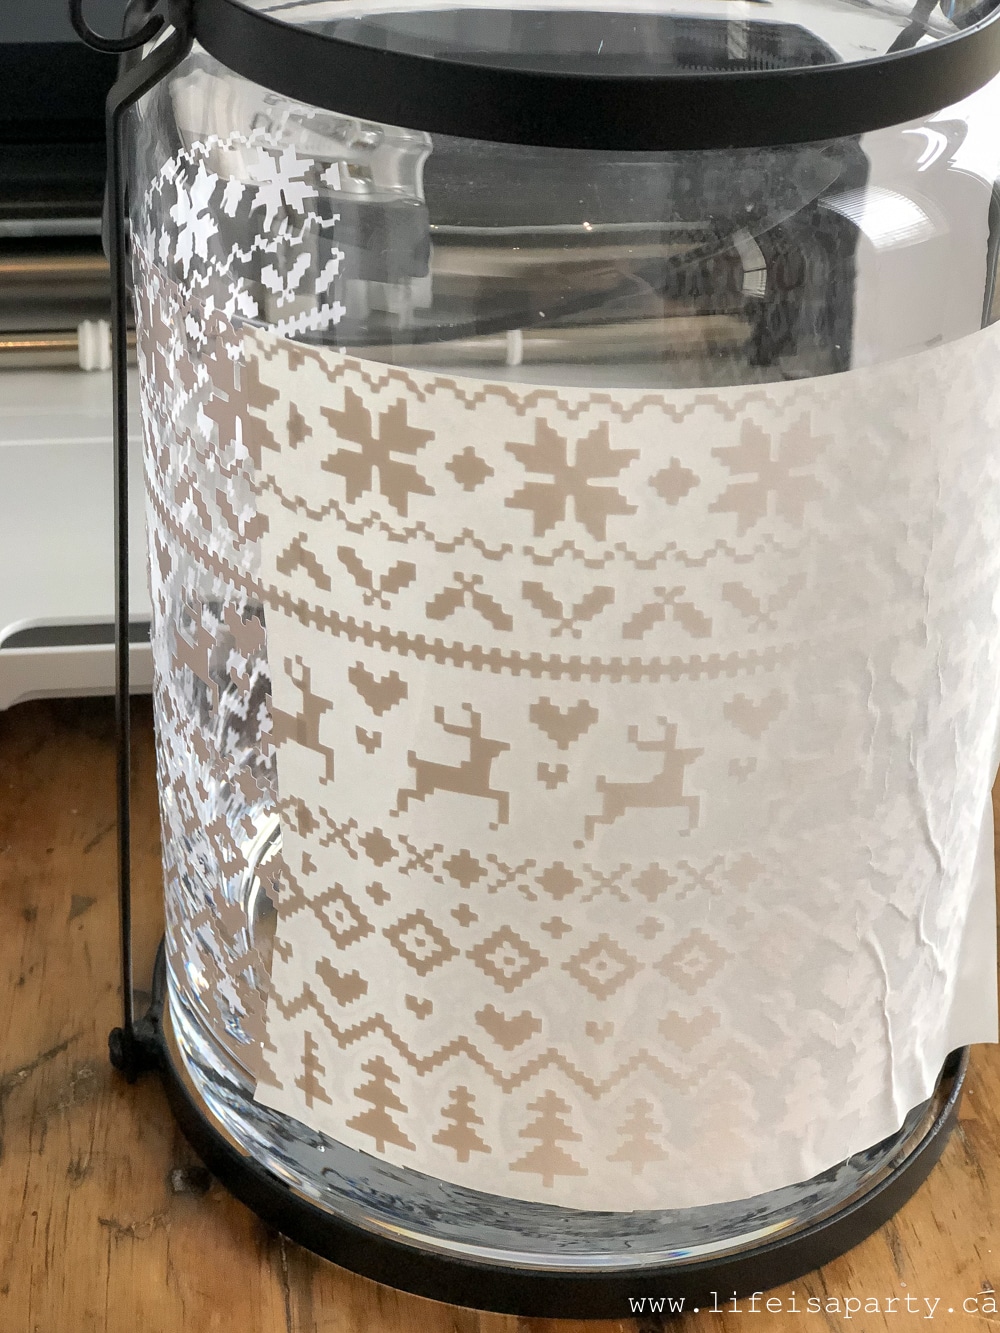
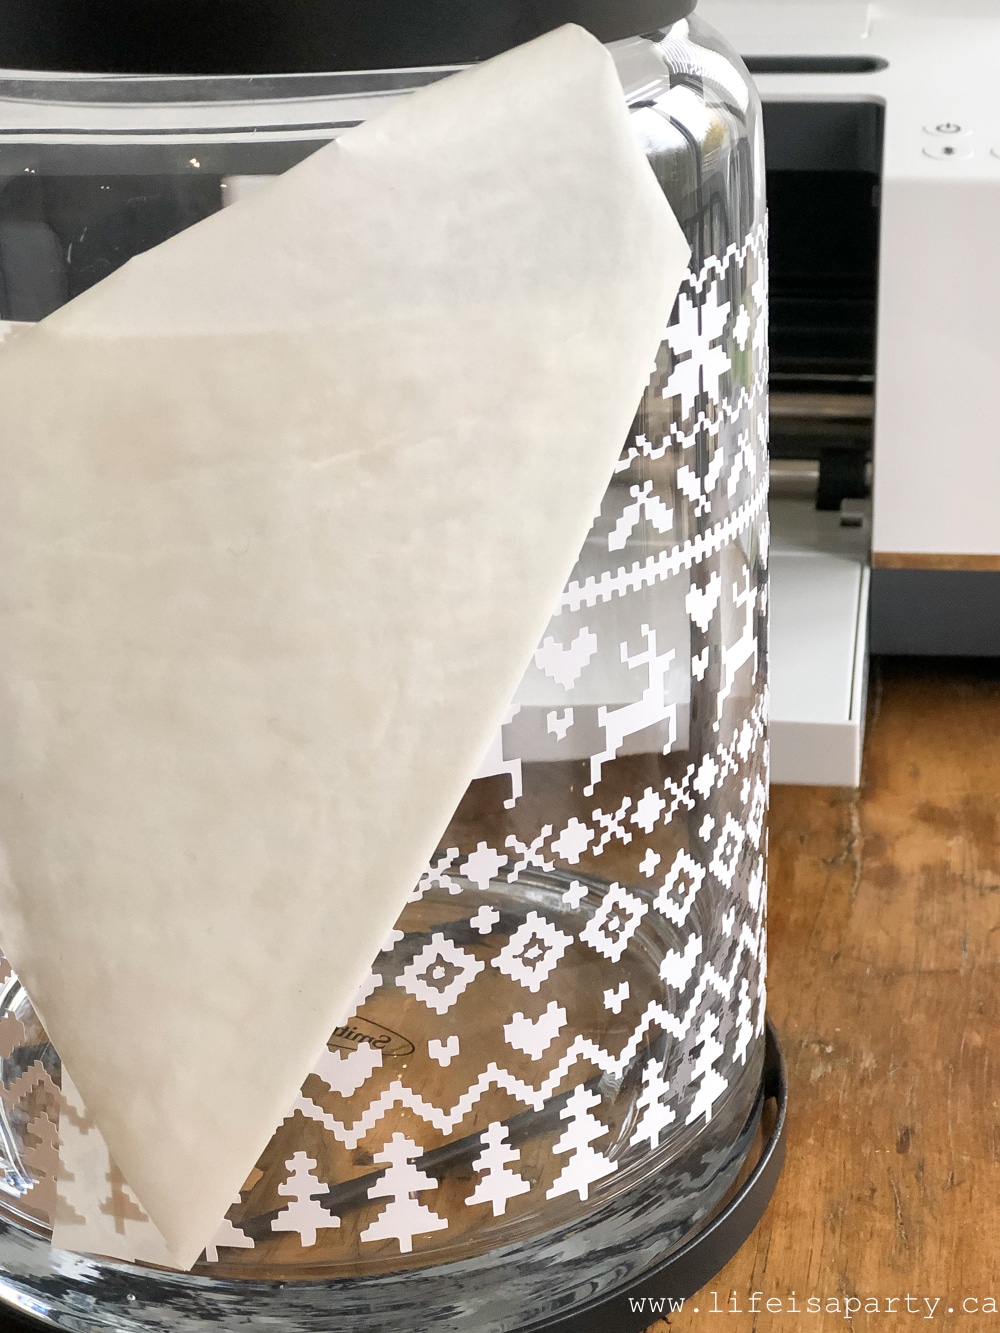
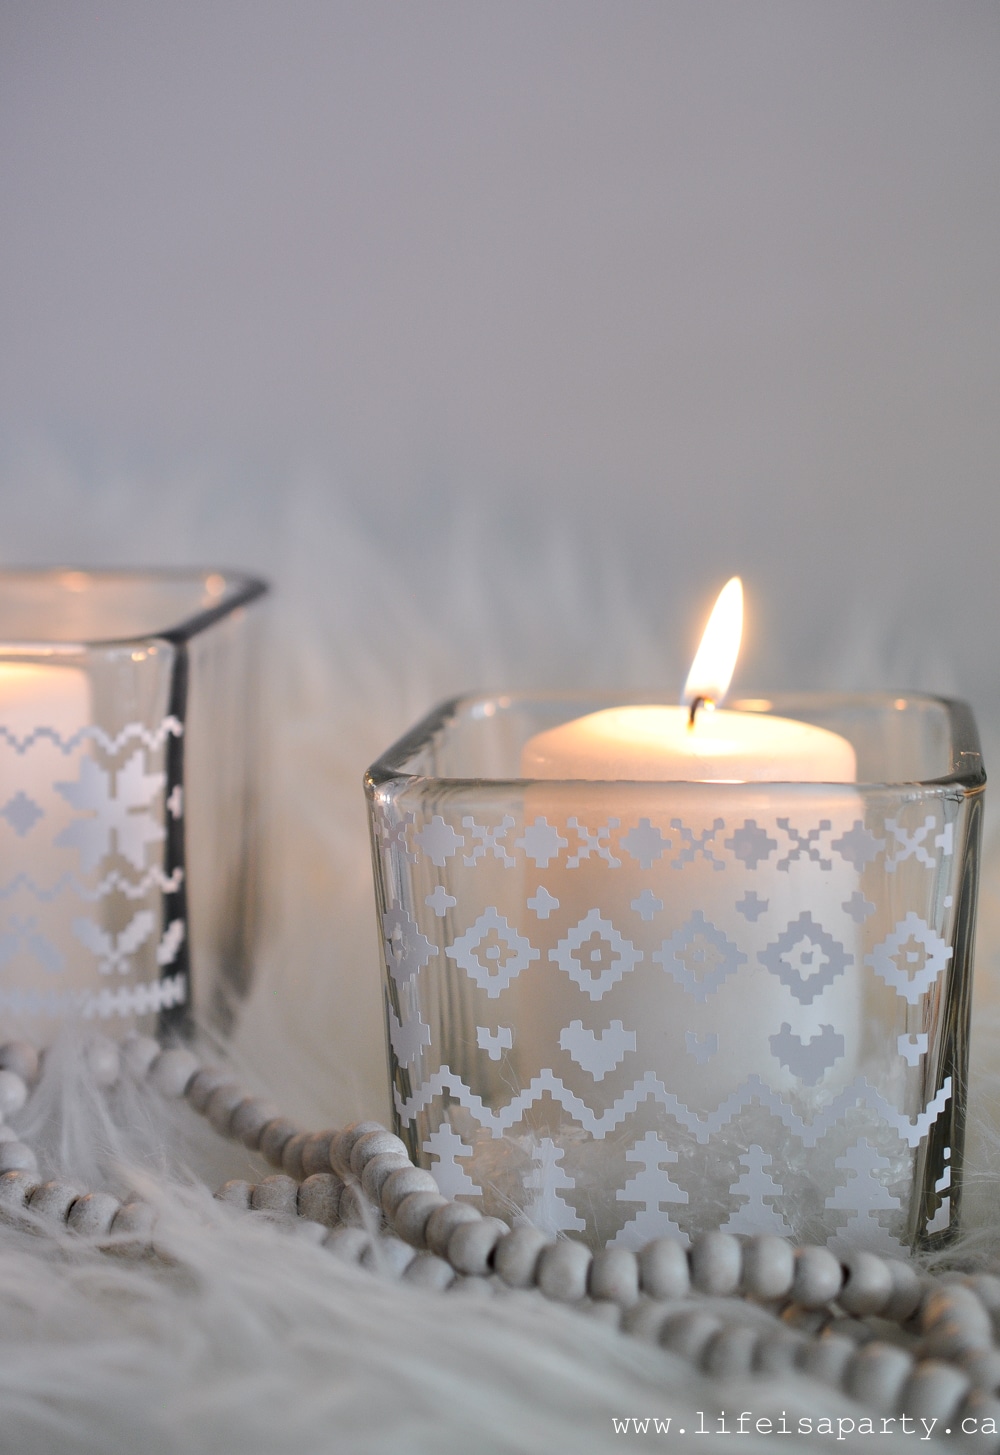
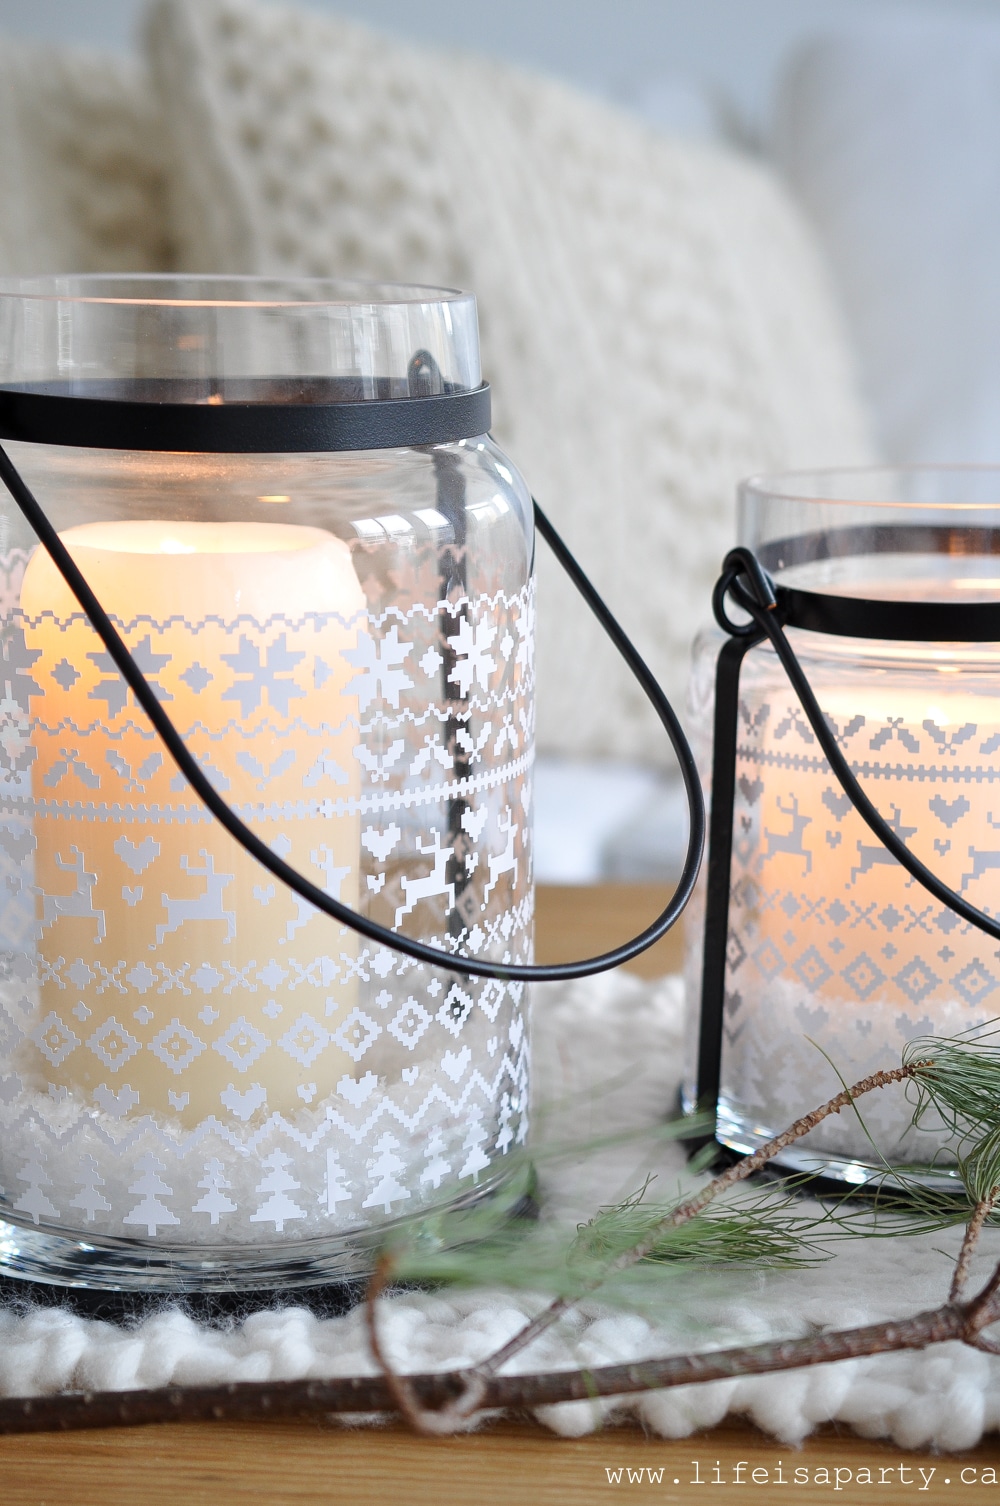
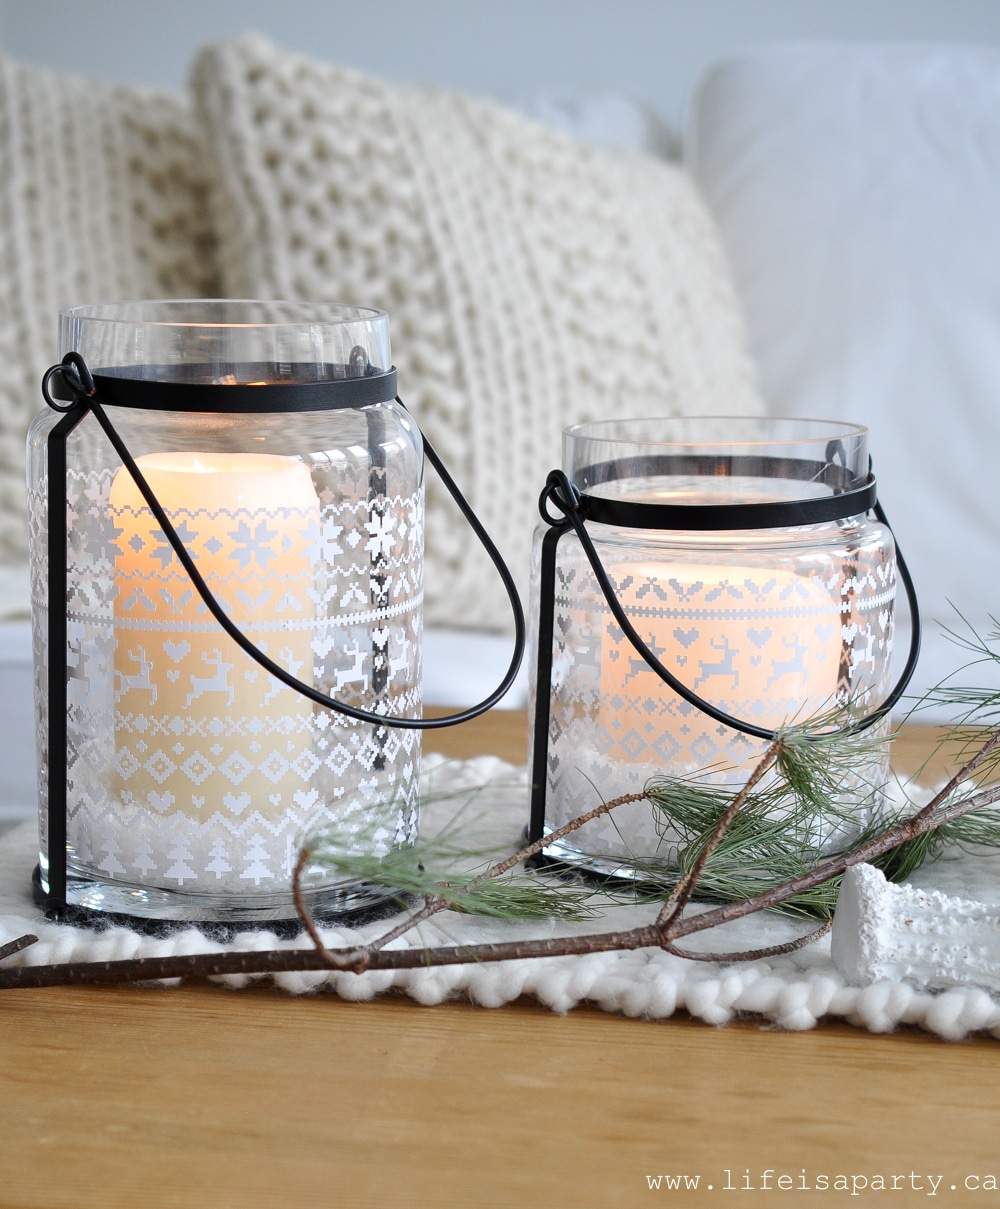
DIY Fair Isle Christmas Candle Holders: Use your Cricut to add a vinyl Fair Isle pattern to your candle holders. Free design space cut file included.The clocks went back last week because the days are getting shorter, and darker. They're also getting colder.  I thought these fair isle patterned lanterns were perfect to add a little warm and cozy feel.  Fair Isle is a traditional sweater pattern, and I thought it would be great as part of my Christmas decor.  I've chosen a pattern that's got a little Christmas feel to it with some trees, reindeer, and holly.  I love how these lanterns turned out, especially since I made them myself with my new Cricut Maker.

DIY Fair Isle Candle Holders

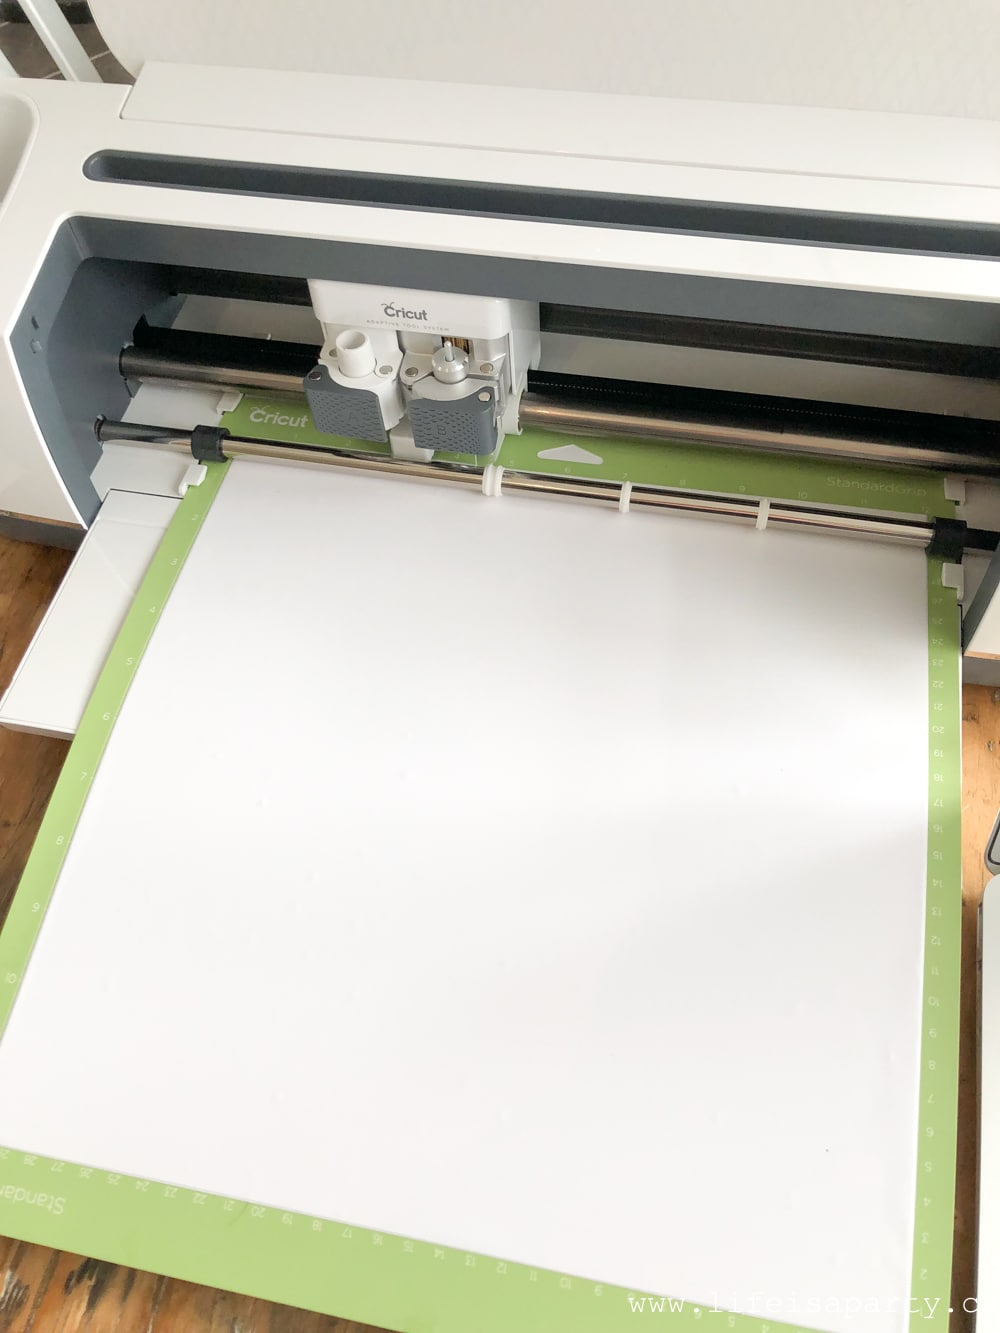
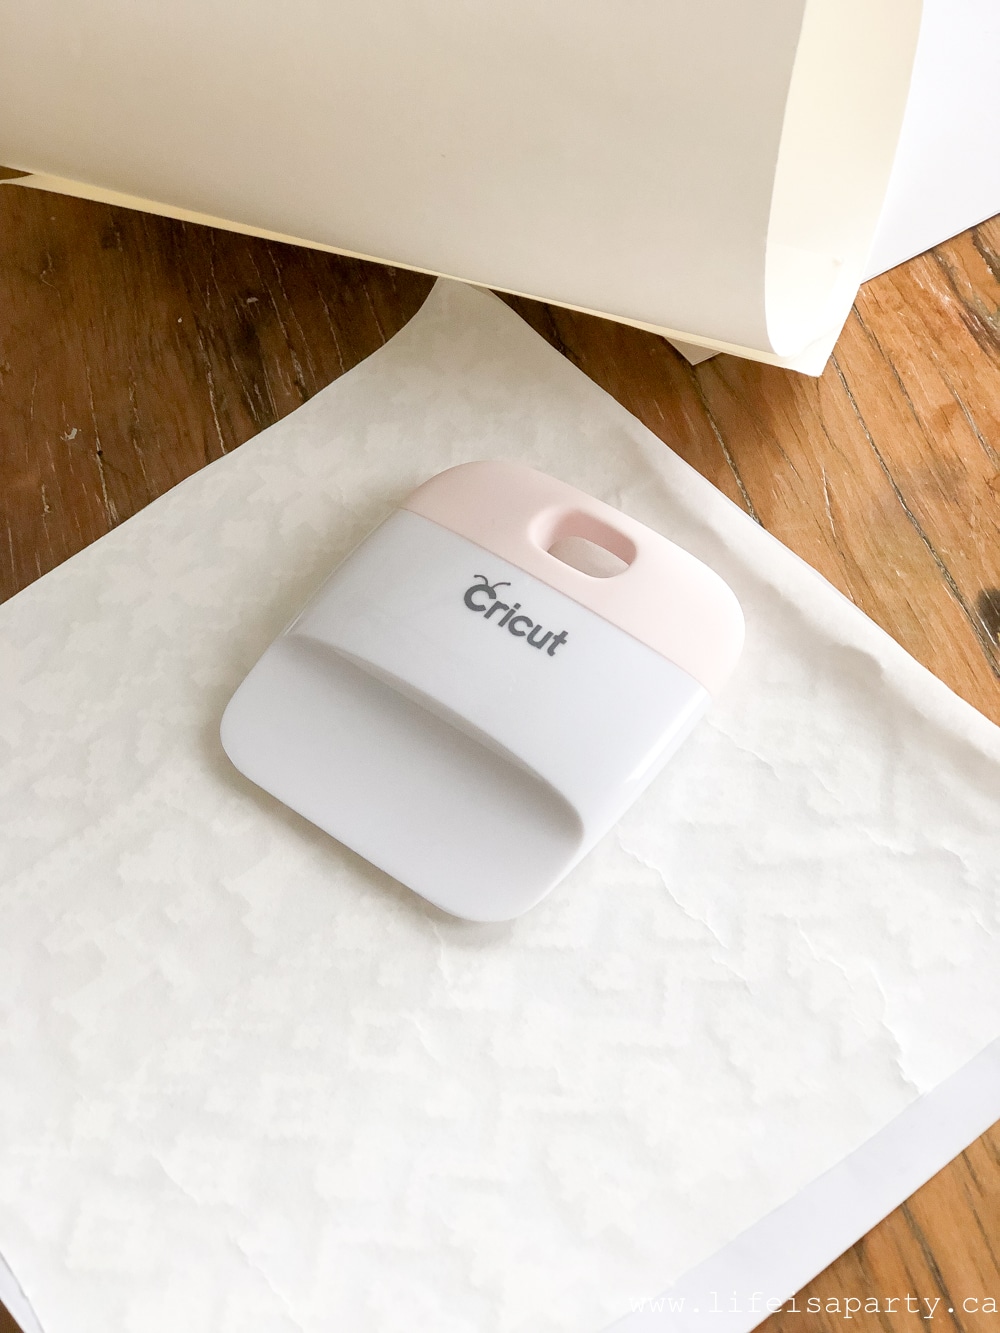
The Cricut Maker is a cutting machine, and perfect for any crafter. With this machine you can easily cut simple or complex patterns (like the one I made) in paper, vinyl, fabric, leather, and even wood. I've been having so much fun experimenting with my new machine, and I've been amazed at all it can do.  The potential of what you can create is truly only limited by your imagination.  It's so perfect for any creative you know -think best Christmas present ever. 😉

how to make a Fair Isle Candle Holder with your Cricut

For my first official project I made these candle holders.
Cricut Christmas Candle Holders

The small square ones were really  quite simple to make and a good project for a beginner.  The larger lantern style ones were a bit trickier, but I really love how they turned out.

DIY Christmas Candle Holders

Materials:

  • Cricut Maker
  • Standard Grip Cutting Mat
  • Cricut Vinyl -White or a colour of your choice
  • Transfer Tape
  • Cricut Tool Set
  • glass candle holders or lanterns with straight sides
  • Cricut Design Space File -Fair Isle Pattern

How To Make DIY Fair Isle Candle Holders

The Design

I started by importing a free fair isle pattern into the Cricut design space.  You can then play around with the sizing, depending on what you're making.  I repeated the pattern 4 times to fill up my vinyl sheet.  Make your own, or access my design here.

You could also experiment with different colours.  I love a neutral Christmas colour scheme, but these would look great in red, or green too if you like more traditional Christmas colours.

how to make Christmas Candle Holders

Cutting the Vinyl

Once you're happy with the design it's time to cut it out.  With your computer attached to your Cricut follow the prompts on the screen.

You will first choose your material, in our case vinyl.

Next you'll be prompted to make sure the fine point blade is inserted in the machine.  The clamp system makes it really easy to change the blade depending on what material you're cutting, and the machine will always tell you which one you should have in depending on the material you're cutting.

Then you'll be promoted to load the mat. To prepare it just stick your piece of vinyl on to it.

Then you'll hit the cut button and the machine will work its magic.

cutting vinyl with a Cricut machine

The cuts for this project are quite complex, so it does take a little while to cut out, but the results are amazing.

Once it's all cut and the mat is removed from the machine, you'll take the vinyl off the cutting mat and weed the pattern.  This is the process of removing the part that you don't want.  For this project there are a lot of fine details.

Cricut Maker Christmas project

Weeding Time and Transfer Tape

Christmas Cricut Project
Cricut vinyl

Once the project is weeded you'll use some transfer tape over the vinyl.  This step ensures that all the tiny pieces stay exactly where you want them when you transfer them to the lanterns.

DIY Fair Isle Candle Holders

Finally position the transfer tape on to the candle holder and burnish it into place.  Carefully peel off the transfer tape, leaving the vinyl on the candle holder.  This process is a little tricky because the pieces for this piece are so tiny and intricate.  Take your time and peel away the tape at a 45 degree angle.

Cricut vinyl on glass

For the small candle holders I only covered one side of the square candle holders.  Just use scissors to trim off any excess vinyl.

diy Christmas candle holders

For the large candle holders, I had to use 3-4 pieces of the pattern and match them up to make my way around the candle holder.  This process was a little fiddly, but the finished product was worth it.  This is where the straight sides of the candle holder are really important, since tampered sides would throw off the pattern and mean it won't line up.

DIY Fair Isle Christmas Candle Holders

Once the vinyl is on, add in a candle and some faux snow for the perfect little DIY Christmas decoration.  I love the sweater feel of the fair isle pattern, and the candle light is so perfect on these cold dark nights of winter.

DIY Fair Isle Christmas Candle Holders

With a DIY Fair Isle Candle Holder, life really is a party.
You might also like our Cricut Fa La La Pillow here.

Also check our 25 Christmas Projects You Can Make With Your Cricut.

25 Christmas Cricut Projects: inspiration and ideas for all your Christmas crafting with your Cricut machine using paper, fabric, metal, leather, and more.

You might also enjoy our Cricut Wood Feather Ornaments here.

Cricut Wood Feather Ornament: see how to cut wood using your Cricut machine. Includes a free cut file for this wood feather Christmas ornament.

Mini Macrame Christmas Ornaments: Easy DIY Tutorial for Beginners

Nov 13, 2018 · 11 Comments

DIY mini macrame Christmas ornaments.

Create beautiful macrame Christmas ornaments with this beginner-friendly tutorial! These mini handmade ornaments use just three simple knots and take about 30 minutes to make. Perfect for your tree, gift wrapping, or boho holiday decor.

DIY mini macrame Christmas ornaments.
[feast_advanced_jump_to]

A Quick Look At This Craft

  • 📋 Craft: Mini Macrame Christmas Ornaments (2 Designs)
  • ⏲️ Time: 30-45 minutes per ornament
  • 🎄 Difficulty: Beginner (no macrame experience needed)
  • 💭 Top Tip: Use a comb or hairbrush to create perfectly fluffy fringe at the bottom of each ornament!

Why You'll Love These Macrame Christmas Ornaments

  • Beginner-friendly with only three basic knots to learn.
  • Budget-friendly using dollar store rope and small twigs.
  • Quick to make once you get the hang of it (perfect TV craft).
  • Rustic charm with natural twigs instead of metal rings.
  • Gift-worthy as beautiful handmade ornaments or gift toppers.
  • Versatile decor for your tree, packages, or boho Christmas aesthetic.

Making your own macrame Christmas ornaments is easier than you think! These mini ornaments look absolutely stunning on our boho Christmas tree, and the best part is that you don't need any macrame experience to make them.

I originally planned these ornaments last year but ran out of time to perfect them. This year I found the perfect inexpensive rope at the dollar store (Dollarama for my Canadian friends), and they turned out exactly how I wanted. They're very affordable to make and relatively easy once you get the hang of it.

If you love handmade Christmas decor, you might also enjoy our DIY Paper Feathers, DIY Birch Wreath, Salt Dough Gingerbread Recipe, DIY Wood Ball Christmas Ornaments, or Boho Christmas Decor Ideas.

How to make a mini macrame ornament.

What You'll Learn

This tutorial teaches you three essential macrame knots that you'll use over and over in future projects:

  • Lark's Head Knot -attaching cords to your base.
  • Square Knot -the foundation of most macrame patterns.
  • Double Half Hitch Knot -creating diagonal lines and texture.

These basic techniques are beginner-friendly, and I'll walk you through each one with step-by-step photos. Once you learn these knots, they become second nature.

Materials for Macrame Christmas Ornaments

  • Macrame cord or rope (3-5mm thickness works best)
  • Small twigs (3-4 inches long)
  • Hairbrush or comb (for creating fringe)
  • Masking tape (optional, to secure to work surface)
  • Sharp scissors
  • Cord for hanging (embroidery thread, twine, or thin rope)

Choosing Your Cord

The right cord makes all the difference. I used 3-ply rope from the dollar store and unraveled it to single ply before starting. This gives you that beautiful, fluffy fringe at the bottom.

Cord options:

  • Twisted cotton rope -affordable, found at dollar stores, creates nice fringe
  • Braided macrame cord -smooth and easy to work with for beginners
  • Jute twine -rustic look, though can be scratchy on hands
  • Colored cord -create ornaments in red, green, or metallic for different looks

How much cord: Each ornament uses six pieces of cord, about 2 feet long each. Start with 15 feet total per ornament to have plenty to work with.

Alternative Materials

Instead of twigs, you could use:

  • Metal or wooden rings (though I love the rustic twig look)
  • Cinnamon sticks (3-4 inches) for a lovely scent
  • Small wooden dowels cut to size

Basic Macrame Knots Reference

Before we start making ornaments, let me introduce the three knots you'll use. Don't worry if they seem confusing at first. Once you tie each one a few times, they become automatic.

Lark's Head Knot

This knot attaches your cord to the twig. Fold your cord in half, loop it over the back of the twig, then pull the two ends through the loop. Pull tight. You'll repeat this six times to get all your cords attached.

Square Knot

This knot uses four cords. Take the left cord and create a "4" shape over the two middle cords. Tuck the left cord under the right cord. Then bring the right cord behind the middle two cords and up through the "4" opening. Pull tight. That's half of a square knot. Now reverse directions (make a backward "4" with the right cord) and repeat. That completes one square knot.

Double Half Hitch Knot

Hold one cord diagonally (your "lead cord"). Take another cord and loop it over and around the lead cord twice, pulling tight after each loop. The key is keeping that lead cord held firmly at an angle while you tie knots around it with the other cords.

How to Make Macrame Christmas Ornaments

Getting Started: Attaching Cords to Your Twig

Before making either ornament design, you need to prepare your base.

1. Prepare your twig
Cut a small twig about 3-4 inches long. If your rope is 3-ply like mine, unravel it first to create single-ply cord. This gives you better fringe later.

2. Cut your cords
Cut six pieces of cord, each about 2 feet long.

3. Attach cords with lark's head knots
Fold one cord in half. Place the folded loop over the back of the twig. Pull the two loose ends through the loop and tighten against the twig.

4. Repeat with all six cords. You now have 12 strands hanging down from your twig.

How to tie a lark's head knot.

How to make a mini macrame Christmas ornament.

Ornament Design #1: Square Knot Mini Macrame Ornament

This design uses square knots to create a classic diamond pattern. It's perfect for beginners because the square knot is one of the easiest macrame knots to master.

Row 1: Three Square Knots

1. Create the first square knot. Starting on the left, separate out the first four cords. Using the leftmost cord, create a "4" shape by bringing it over the two middle cords.

2. Tuck the end under the 4th cord.

3. Bring the 4th cord behind the middle cords and up through the "4" opening.

4. Pull tight.

How to tie a square not in macrame.

1. Now reverse directions. Take the cord that's now on the left and create a backward "4" (facing right).

2. Tuck it over the 4th cord.

3. Bring the 4th cord behind the middle cords and through the backward "4" opening. 4. Pull tight. You've completed one square knot!

How to tie a square knot.

1. Tie two more square knots
Use the next four cords to tie a second square knot.

2. Then use the final four cords to tie a third square knot. You now have three square knots in a row across your piece.

Row 2: Two Square Knots Offset for diamond pattern
3. Leave the first two cords hanging. Take the next four cords (cords 3-6) and tie a square knot. Take cords 7-10 and tie another square knot. Leave the last two cords hanging. You've created the offset that forms the diamond pattern.

Row 3: One Square Knot Center square knot
4. Skip the first four cords. Use the center four cords (cords 5-8) to tie one square knot. This creates the center point of your diamond.

How to make a mini macrame wall hanging for the Christmas tree.

Row 4: Mirror Row 2 -2 Square Knots

Repeat the pattern from row 2. Leave two cords out on each side, tie two square knots with the remaining cords.

Row 5: Three Square Knots Final Row
Repeat the pattern from row 1. Tie three square knots across all 12 cords.

Mini macrame ornament DIY.

Row 6: Half Hitch Border Create horizontal border
1. Take the first cord on the left and hold it horizontally across the piece (this is your lead cord).

2. With the second cord, tie two half hitches around the lead cord: loop over, through, and pull tight.

3. Do this twice.

4. Continue with each cord across the row, always tying around that first horizontal lead cord. Pull the lead cord to tighten everything.

How to tie a double half hitch knot.

Finishing the Ornament

1. Cut the hanging cords to your desired length (about 1-2 inches works well). We did a "v" pattern.

2. Use a hairbrush or fine-tooth comb to brush out each cord strand, creating fluffy fringe. Re-trim if needed to create a clean edge.

3. Trim the twig ends.

4. Cut a piece of cord about 6-8 inches long and tie it around one end of the twig for hanging.

How to make mini macrame Christmas ornaments.

Easy mini macrame Christmas ornaments.

The second of our macrame projects, I made was using the diagonal half hitch. It's another one of the basic knots, and much like the half hitch we used on the first DIY macrame Christmas ornaments , just at a diagonal.

Ornament Design #2: Diagonal Half Hitch Mini Macrame Ornament

This design creates a beautiful chevron "V" pattern using diagonal half hitch knots. It looks more intricate than it is, making it perfect for impressing friends while still being beginner-friendly.

After attaching your six cords to a twig (just like we did above), you're ready to create the diagonal pattern.

How to tie a lark's head knot.

The first cord will be your lead cord, holding it at a diagonal this time instead of horizontally, loop the 2nd cord up and over it, and through the hole you've created.  Then do that again with the 2nd cord to complete the half hitch knot.

1. Holding the lead cord firmly at a diagonal, tie a half hitch with the 3rd cord slightly lower down, on the diagonal of your lead cord.

Repeat this for the first 6 cords.

Then pick up the last cord, the 12th cord on the far right, and use it as the lead cord and tie half hitches from the other direction to meet in the centre.

Row 2-3

2. For row 2, repeat the same as row 1.  But this time when you meet up in the centre, you can use the cord from the other side to link the 2 sides of the "V" together.

3. To finish the ornament, trim the edges of the cord along the bottom, and brush out the fringe just like the first one.

4. Finally trim the twig ends and add a hanging cord to the top of the ornament.

How to make your own macrame Christmas ornament.

Finishing Techniques

The finishing touches make your macrame Christmas ornaments look professional and polished.

Creating Perfect Fringe

Brushing method: Use a fine-tooth comb or hairbrush to separate the cord fibers. Work slowly and gently to avoid pulling cords out of your knots. The more you brush, the fluffier and more feathered your fringe becomes.

Trimming tips: After brushing, the fringe may look uneven. Use sharp scissors to trim it into your desired shape. You can create:

  • Straight edge across the bottom
  • Downward "V" shape
  • Upward "V" shape
  • Curved scallop edge

Adding Hanging Cords

Cut a piece of macrame cord, embroidery thread, or twine about 6-8 inches long. Tie it around one end of your twig, creating a loop for hanging. You can also:

  • Thread it through the top of your macrame pattern
  • Use colored or metallic thread to add visual interest
Mini macrame Christmas ornaments.

Customization Ideas

Once you master these two basic designs, get creative with variations:

Color Options

Traditional Christmas:

  • Red and white cord for candy cane vibes
  • Green cord with gold beads
  • White cord for snowy elegance

Boho Christmas:

  • Natural beige or cream (my favorite)
  • Terracotta and cream combination
  • Dusty rose and sage green

Size Variations

Mini ornaments: Use shorter twigs (2 inches) and fewer rows for tiny tree ornaments
Large ornaments: Use longer twigs (5-6 inches) and add more rows for statement pieces
Wall hangings: Scale up significantly for macrame wall decor

Embellishment Ideas

Add personality to your ornaments:

  • Metallic thread woven through the pattern
  • Wooden beads threaded onto cords before knotting
  • Cinnamon sticks instead of twigs for scent
  • Dried orange slices attached to the top
  • Small bells tied into the fringe

To change the look of your final product, or to mix and match, try using different coloured pieces of cord. Use red to make red ornaments for a pop of color on your tree, or any colour that matches your Christmas decor. You could also try macrame yarn, or any thick and chunky piece of yarn in any colors.

Creative Ways to Display Your Macrame Ornaments

These handmade ornaments are so versatile:

  • On your Christmas tree: The obvious choice, but they look absolutely stunning mixed with other natural ornaments like wood slices and dried orange.
  • As gift toppers: Attach them to wrapped presents instead of a bow. Your gift becomes extra special, and the ornament is a bonus gift.
  • Create a garland: Make 6-8 ornaments and string them together for a boho Christmas garland over a mantel or doorway.
  • Window decorations: Hang them at varying lengths in a window for a beautiful display that catches light.
  • Napkin Rings: Use small versions as napkin rings for your Christmas dinner table.
  • Hostess gifts: Package 2-3 ornaments together in a small box as a thoughtful handmade gift.
  • Year-round decor: These look beautiful in a nursery or kid's room even after the holidays.
How to make mini macrame wall hangings.

Expert Tips for Perfect Macrame Ornaments

After making dozens of these ornaments over the years, here are my top tips:

  • Cord preparation matters. If you're using 3-ply twisted rope, unwind it to single ply before you start. This creates much better fringe and is easier to work with for small projects.
  • Keep tension consistent. The most common beginner mistake is tying some knots super tight and others loose. Aim for even tension throughout, and your pattern will look much more professional.
  • Use masking tape. Tape your twig to your work surface while you're knotting. This keeps everything stable and makes tying much easier.
  • Cut cords longer than you think. It's better to have extra cord to trim off than to run short. I always add an extra 6 inches beyond what I think I need.
  • Practice your knots first. Before diving into an ornament, practice each knot a few times with scrap cord. Once your hands understand the motion, the actual project goes much faster.
  • Dollar store cord works great. Don't feel like you need expensive macrame cord for these small projects. Dollar store rope works perfectly and unravels beautifully for fringe.
  • Make them in batches. Once you get the rhythm, these are perfect for making multiple ornaments in one sitting. Put on a movie and knock out a whole set.
  • Barbie-sized bonus! These are actually the perfect size for Barbie dollhouse wall hangings. My girls figured this out immediately and were eyeing them for their dollhouses!
DIY macrame Christmas ornament

Frequently Asked Questions

What type of cord is best for macrame Christmas ornaments?

For beginners, I recommend 3-5mm cotton rope or cord. Twisted rope (like I used from the dollar store) creates beautiful, fluffy fringe when brushed out. Braided cord gives a smoother, more polished look. Both work well, so choose based on the aesthetic you prefer.

Do I need macrame experience to make these ornaments?

Not at all! I designed this tutorial for complete beginners. If you can tie your shoes, you can learn these three basic knots. The step-by-step photos walk you through each knot, and once you practice a few times, they become second nature.

How long does it take to make one ornament?

Your first ornament might take 45-60 minutes as you learn the knots. Once you get the hang of it, you can finish one in 20-30 minutes. They're perfect for making while watching TV or as a relaxing evening craft.

Can I use different colors of cord?

Absolutely! Red and white cord creates a candy cane look, green cord feels traditional, and metallics add sparkle. You can even use a variegated (color-changing) cord for an ombre effect. The natural beige I used creates that rustic boho vibe I love.

Where can I buy macrame cord?

Dollar stores often carry inexpensive rope that works perfectly for small projects. Craft stores like Michaels and Hobby Lobby or Walmart have dedicated macrame cord sections. Online, Amazon has tons of options in different colors and thicknesses. For these small ornaments, one roll of cord makes many ornaments.

Can I use a metal ring instead of a twig?

Yes! Metal or wooden rings (1.5-2 inches diameter) work beautifully. I personally love the rustic look of twigs, but rings give a more polished appearance and are perfectly round. You can find small wooden rings at craft stores or online.

Why are my knots loose and uneven?

This usually means inconsistent tension. Try to pull each knot with the same amount of pressure. If knots slide around, pull them tighter before moving to the next one. Using masking tape to secure your twig while working helps maintain consistent tension.

Can I make these ornaments larger?

Definitely! Use a longer twig or dowel (5-6 inches), attach more cords (8-10 instead of 6), and add more rows of knots. The same techniques work for any size. Larger ornaments work beautifully as wall hangings or statement tree decorations.

Can kids make these ornaments?

Kids ages 8-10 and up can definitely learn these knots with guidance. It's a great fine motor skill activity. Younger kids might struggle with the dexterity needed, but they can help with brushing out the fringe and choosing colors.

What's the best way to hang these on my tree?

I used cord or embroidery thread tied around the twig. You can also use ornament hooks, though I prefer the handmade look of tied cord. For a rustic touch, use jute twine or natural string that matches your ornament.


More DIY Christmas Craft Ideas

  • Everlasting gingerbread houses made from gingerbread salt dough.
    Easy Salt Dough Gingerbread Recipe for Houses and Ornaments
  • Cricut gingerbread decor felt gingerbread house banner and gingerbread canister with vinyl gingerbread houses
    DIY Gingerbread Decor Ideas To Make With Your Cricut
  • DIY paper Christmas cloche cricut
    DIY Paper Christmas Cloche Lantern with Free Cricut Pattern
  • DIY velvet acorn
    How To Make DIY Velvet Acorns

If you try these macrame Christmas ornaments or any other craft ideas on my blog, please let me know how it went in the comments below. I'd love to see photos of your finished ornaments! Thanks for visiting today!

Recipe

DIY mini macrame Christmas ornaments.

How to Make Mini Macrame Christmas Ornaments

Create beautiful macrame Christmas ornaments with just 3 basic knots! Perfect beginner DIY tutorial with step-by-step photos for handmade boho tree decor.
No ratings yet
Print Pin Rate
Cook Time: 30 minutes minutes
Total Time: 30 minutes minutes
Servings: 2 Christmas Decorations
Author: Dannyelle Nicolle-Ramjist

Equipment

  • Hairbrush or comb
  • sharp scissors

Materials

  • macrame cord or rope (3-5 mm thickness)
  • 2 small twigs (3-4 inches long)

Instructions

Getting Started

  • Cut a small twig 3-4 inches long. If using 3-ply rope, unwind to single ply.
  • Cut six pieces of cord, each about 2 feet long.
  • Attach each cord to the twig using lark's head knots: fold cord in half, loop over twig back, pull ends through loop. You now have 12 strands.

Square Knot Ornament

  • Row 1: Separate first 4 cords. Create square knot by making "4" shape with left cord, tucking under right cord, bringing right cord behind middle cords through "4" opening. Reverse and repeat. Make 3 square knots across.
  • Row 2: Leave first 2 cords out. Tie 2 square knots with remaining cords. Leave last 2 cords out.
  • Row 3: Skip first 4 cords. Tie 1 square knot with center 4 cords.
  • Row 4: Repeat Row 2 pattern (2 square knots, sides left out).
  • Row 5: Repeat Row 1 pattern (3 square knots across).
  • Row 6: Hold first cord horizontally. Tie double half hitches with each cord around it.
  • Trim cords to 1-2 inches. Brush out fringe with comb. Trim twig ends and add hanging cord.

Diagonal Half Hitch Ornament

  • Take first cord on left as lead cord. Hold diagonally.
  • With second cord, tie 2 half hitches around lead cord (over, through, pull tight twice).
  • Continue tying double half hitches with cords 3, 4, 5, 6 down the diagonal.
  • Take last cord on right as lead cord. Hold diagonally opposite direction.
  • Tie double half hitches with cords 11, 10, 9, 8, 7 toward center.
  • Join lead cords in center with half hitch to complete V shape.
  • Repeat rows 11-16 for second V pattern. 18. Trim cords into V shape or straight edge. Brush fringe. Trim twig ends and add hanging cord.

Notes

  • Keep tension consistent. The most common beginner mistake is tying some knots super tight and others loose. Aim for even tension throughout, and your pattern will look much more professional.
  • Use masking tape. Tape your twig to your work surface while you're knotting. This keeps everything stable and makes tying much easier.
  • Cut cords longer than you think. It's better to have extra cord to trim off than to run short. I always add an extra 6 inches beyond what I think I need.

Small Laundry Room / Mudroom Makeover Reveal

Nov 7, 2018 · 28 Comments

Small laundry room mudroom makeover.

Laundry Room / Mudroom Makeover Reveal: From a chaotic and messy space to an organized and beautiful one with built-in lockers and storage solutions, shiplap, concrete, leather, brass and wood accents.

Small laundry room mudroom makeover.
[feast_advanced_jump_to]

The Laundry Room / Mudroom Makeover is finished!  I'm so happy with the results and so excited to share the full reveal!  Our main motivation for this makeover was to improve the function of this space, but my favourite part is how beautiful it turned out.

One Room Challenge

We did this DIY laundry room makeover / mudroom makeover as a guest participant in the One Room Challenge.  It's a six week challenge where bloggers make over one room of their homes and share the progress each week on their blogs and at the One Room Challenge website.

Before

Our Laundry Room / Mudroom has an entrance to the garage, and also a door into our dining room.  It's right at the front of the house, and completely visible from the front door and open concept dining room beside it if the door is open.  Whenever we have company I'm always the nagging wife and mother whisper yelling at my family to close the Laundry Room door!

The room was really a dumping ground for us. Of course it housed our washing machine and dryer so we could do the laundry, but it was also pretty much a really badly laid out and organized storage room.  We had a large utility sink that we never ever used as a sink because it was always full of other junk.  It pretty much always had a bag for the pool with swim gear and towel piled in it.  There was also sometimes laundry in there, and often a bag for thrift store donations. There were also lots of shoes, coats, and school bags in the room.  We also had a whole shelf of spray paint (DIY much?).  And lastly it was a bit of an extra pantry space for us for things we bought on sale or in bulk like pop, bottled water, and dog food.  Oh, and did I mention the central vac and all the cleaning and laundry supplies were in there too?  It was a bit of a dumping ground for the whole house.

Laundry Room / Mudroom Makeover before pictures

In the before picture you almost can't even tell there's a sink in this tiny laundry room / mudroom, lol.

The Plan

My goal for this small room was to make it way more functional with lots of storage, and add a little pretty too with pretty much a complete overhaul.  Here's what my mudroom / laundry room inspiration mood board looked like.

Removing The Utility Sink

The biggest change to the room was to remove the large utility sink.  It was actually a hard decision because who doesn't want an extra sink, and we wondered if we might regret it down the road.  We played with the idea of relocating it in our basement storage room at first.  I felt like that helped ease us into the idea.  In the end we removed it and immediately I could not believe how much bigger the space felt!  It made a huge difference and freed up so much space to create the built-in lockers.  Removing the sink was a real game changer.

Mudroom DIY lockers

Built-In Lockers

My brother-in-law Shaun from Benjamin Tileworks did all the building for us, and he did such a great job.  We worked with stock cabinets from Home Depot, and MDF and he was able to build and fit everything for a custom look.  If you were super talented you could for sure DIY it, but for me, sometimes you need to know your limitations and also not let them stand in the way of bringing dream spaces to life.  You can find our full tutorial on how to create your own mudroom lockers here.

Shaun was super easy to work with -as always.  And together we figured out where to add gables, and valances to customize everything to the space with new upper cabinets adding lots more storage space.

Concrete Bench

The first night I talked to Shaun about the project we started thinking about the seat for the bench and what wood to use for it.  Something not too soft so it would not scratch.  From there, he threw out the idea of a concrete bench.  It was a "you had me at hello" moment.  Then he had to figure out how to do it.  And do it on budget and within the time constraints of when he'd be here.  He and I have worked on some great concrete projects together in the past like this outdoor concrete table, and these  concrete side tables.  And I loved the idea of bringing some concrete into the mudroom / laundry space.

DIY Mudroom storageHe measured up for it the first day, and built the custom forms to create it for the space.  When it was dry and cured enough to install, it was a tiny bit nerve wracking.  Working with concrete always is since it's so heavy, and very breakable as you try to manipulate it into place.  But, his measurements were perfect and it went into place perfectly.  It's reinforced underneath with steel rods so it's also perfectly stable and worry free now that it's in.  We designed it so that it stuck out enough to be used as a seat to put your shoes on, but also so it can be stood on to reach the high cabinets above it.  It adds so much personality to the entire room.

Laundry Room / Mudroom Makeover

I love the colour, and texture it adds to the space, and certainly elevates the whole built-in.

Everyone Gets Their Own Spot

We designed the space so that my two kids and husband would each have a "locker" for their things.  I tend to use the hall closet, and since I work from home I don't have a bag everyday either. Now everyone can put their backpack, coats, and shoes in their spots.  This small change has made such a huge difference.

Mudroom Makeover ideas

I worked with Liberty Hardware and used their beautiful Heavy Duty 3 inch Coat and Hat Hooks.  I love the brass colour, and their classic shape -perfect for hanging up coats, scarves, and backpacks.

leather cabinet handles

Above the hooks there's open shelving with a cubby space where I added a basket for everyone.  They can use them for their hats and gloves, and anything else they want to keep track of.  I picked these up at Ikea because they were felt.  They'll be sliding in and out of the open shelves a lot, so I thought felt wouldn't scratch the paint work.  I also loved how the grey of the concrete was repeated and the brass button accent.

Laundry Room / Mudroom storage

The lockers are all built out of MDF, and the back is done in shiplap to add a little more texture to the space, and also give the hooks something solid to screw into.  I painted out the MDF with a fresh coat of white paint.  We used  Para Paints Melamine/Cabinet and Furniture Paint in Metropolitan WH04.  This paint was perfect for this job since it has a self levelling quality that makes it easy to apply, adheres to multiple surfaces, and is very scrubbable and washable.  Perfect for this high traffic spot.  I matched the colour to the cabinets.  You can read more about how we made the lockers here -DIY Mudroom Lockers.

Paint

I also used my favourite Para Paint WH03 Cloud White (formerly JoJo Whitewash) on the white walls.  It's the perfect light, bright white for any space.

small Laundry Room Makeover

Cabinets

In addition to coat and bag storage, I also really wanted to add some closed cabinets to this small laundry room makeover.

Laundry Room / Mudroom Makeover Reveal

We added cabinets above the lockers, and a strip of cabinets between the lockers and the washer and dryer.  I picked them up flat-packed and easily put them together one afternoon.  Shaun installed them and did an amazing job adding in valances and spacers to make everything look perfect.  We now have a cabinet for spray paint, some for cleaning supplies and a laundry closet spot for laundry supplies, and extra shelves for pantry items.  I feel so organized. ;). These DIY wall cabinets are a real game changers.

Leather Cabinet Pulls

And then to really elevate the space we added these amazing Walnut Studio leather cabinet pulls.  The original cabinets handles were so boring.  Changing out the handles for something designer is a easy DIY trick to add some personality to a space.

leather cabinet handles

They're a real favourite detail in the space and they certainly add a whole lot of personality.  The colour of the Hawthorne Leather Drawer Pulls in honey really helps to warm up the space.  All those hard surfaces could feel really boring and cold but these beautiful leather pulls add a little rustic organic feel, and the brass centres tie in with all the other brass and gold in the room perfectly.

Laundry Room / Mudroom Makeover

Washer and Dryer

Above the front load washer and dryer there was an awkward space with a bulkhead that meant we couldn't add a cabinet there.  Our solution was to do a built-in small shelf area and to repeat the felt baskets with four more. It makes the space usable for additional storage, and the baskets tie it in the cubbies really well.  This all got a matching fresh coat of paint, and turned out really well.

Laundry Room / Mudroom Makeover

The Accessories and Finishing Touches

I added in this beautiful vintage feeling Lonerock Dark Grey Runner from Wayfair.  Wayfair always has the perfect finishing touches for a space.  The runner has the loveliest little fringe on the ends.  I love the vintage feel, and the grey colour.  It also has a little bit of gold in it which ties in so well with the rest of the space, and was actually the inspiration for adding in brass, gold, and warm wood and leather tones to the space.  I love it so much, and it's one of my favorite parts of the room now.

Printable laundry room art

Art

I made the fun little art piece and shared it -along with two other Free Printable Laundry Room Art pieces here.  I hung one from a vintage hanger I found at the thrift store.  It's kind of perfect.  Adding finishing touches to room makeovers is always so much fun.

small Laundry Room Makeover ideasSince we can't use our sink for a laundry bin anymore, I picked up this little cutie with its faux leather handles and wipeable plastic type coating on the inside it was perfect.  I also love  that it can squish down and be put in a cabinet when we're not using it.

Laundry Room / Mudroom Makeover

Wood Letter Board

This cutie wood letter board is from This Little Estate.  Is it not the sweetest?   Love the colour and the size, and it was a perfect finishing detail in the space.  If you don't know Bethany and Art of This Little Estate you need to check them out.  They have a lovely blog and shop of their handcrafted  letter boards and signs.  In fact, Bethany has been working on a room  for this One Room Challenge too, so be sure to drop by and see her beautiful reveal too.

wood letter board

Hook Rack

This little spot was the perfect place to add another set of hooks and Liberty Hardware had the most beautiful one. Since we have no hanging rod, this gives us a great spot to hang up guests coats.  The Luxe 18 inch Hook Rack in white and champagne bronze is so pretty.

Laundry Room / Mudroom Makeover Reveal

The Light Fixture

Now I might just have saved the best til last...the light fixture.  When I decided to makeover this space I looked at Wayfair for a light, since they have so many beautiful ones.  The George Oliver 4-Light Sputnik Pendant is like the jewelry in the room.  I love the gold colour.  Also, the cool design and how each section is adjustable is so gorgeous.  I also love the white glass shades, and feel like they make it a little different from all the Edison bulb versions.

Mudroom Makeover

I did carefully measure to make sure the door to the garage and the door to the dining room won't hit it before I went ahead and ordered it.  What I forgot to consider was that the new cabinet doors might interfere.  And sure enough they did so we had to shift the light box over a bit.  It actually worked out for the best because with the new cabinets and built-ins going to the ceiling it made the old location look really off centre anyway. I feel like there's always few tweeks and re-designs along the way when your renovating your own home.  Luckily this one was. pretty easy fix.

Laundry Room / Mudroom Makeover

Was It Worth It?

This room had its challenges for sure.  It was a lot of work.  Things took a little longer than we thought they would.  It took a long time designing on the fly and making everything fit and look good.  The light box move was an added job.  The concrete was a little difficult timing wise, and tricky to work with.  The room was super hard to photograph because it has no natural light and is such a small space that it's hard to get far enough away from anything to get a good shot.  It was a chunk of money and stretched our small budget, since we hired help and weren't able to DIY it completely on our own.  Also it was the first room that we've made over more because of function than aesthetics  -although it's turned out to be so beautiful.

laundry room and mudroom DIY storage ideas

Having said all that though, it was definitely worth it -alright, completely worth it.  It's just going to be so much more functional, and in that will really improve our day to day routines around here.  I'm so, so glad we did it and I can't think of a better idea for the space than investing in making it function better and look amazing.

Laundry Room / Mudroom before and afterSponsors

I could not have done this room without some amazing sponsors.

An extra big thank you to all my amazing sponsors of this One Room Challenge.   As always, all opinions are my own.  Thanks for supporting the brands that make Life is a Party possible.  Special thanks to Wayfair, Para Paints, Benjamin Tileworks, Walnut Handcrafted Leather Goods, Liberty Hardware, and This Little Estate.

With a new Laundry Room / Mudroom that's beautiful and so much more functional, life really is a party!

More Inspiration

You might also like Kitchen Makeover here.

Also check out our Black and White Boho Office Makeover here.

Black and White Boho Office Makeover: whimsical wallpaper, a wood bead chandelier, art, drapes, and lots of plants give this office the perfect boho vibe.

You might also enjoy our Master Bedroom Makeover here.

DIY Modern Boho Christmas Wreath

Nov 6, 2018 · 13 Comments

How to make a simple boho Christmas wreath with birch and tassels.

Make the prettiest boho Christmas wreath that doesn't look like everyone else's. This easy 20-minute DIY uses a natural birch branch, yarn pom poms, and wooden beads for under $15. Change the colors and use it year-round!

How to make a simple boho Christmas wreath with birch and tassels.
[feast_advanced_jump_to]

A Quick Look At This Craft

📋 Craft: DIY Modern Boho Christmas Wreath
⏲️ Ready In: 20 minutes
🔪 Difficulty: Easy
💰 Budget: Under $15 (or nearly free with foraged materials)
🎨 Style: Modern Boho
💭 Top Tip: Forage your birch branch and greens make this wreath practically free. Use yarn scraps from your stash for an even more budget-friendly project!

Why You'll Love This Modern Boho Wreath

  • Budget-friendly at under $15, or nearly free if you forage materials and use yarn scraps.
  • Quick to make in just 20 minutes with simple techniques.
  • Unique asymmetrical design that stands out from typical round wreaths.
  • Works year-round by swapping greens and changing pom pom colors seasonally.
  • Perfect for gifting as a thoughtful handmade present.

We've combined modern boho style with a budget-friendly DIY to make the prettiest and easiest boho Christmas wreath. Instead of a traditional round evergreen wreath, or even a boho-inspired gold hoop wreath, we've gone with an asymmetrical birch branch. We love that it's unique, has so many boho materials like natural birch, greens, wood beads, pom poms and tassels and still feels festive and perfect for the holidays. But you can also change out the greens to flowers for spring, or fall leaves in autumn and add pom poms in the pastels or oranges to make this stunning wreath perfect for any season. And it's quick and easy to create, and very inexpensive too.

If you love this modern wreath idea, you might also enjoy our Little House Christmas Wreath with its rustic charm, our complete Boho Christmas Decor guide full of cottagecore styling ideas, or our Mini Macrame Christmas Ornaments that pair beautifully with this wreath's aesthetic, and DIY Wood Ball Christmas Ornaments.

Simple boho inspired Christmas wreath with birch branch, greens, pom poms and tassels.

What You'll Need

The beauty of this project is how flexible it is. You can forage, thrift, or buy new depending on your budget and time.

Materials

  • Birch Branch (2 feet long) -Forage in the great outdoors, find at craft stores ($3-5), or order online.
  • Twine or Hemp Cord -About 2 feet for hanging loops. Natural jute works perfectly.
  • Floral Wire -About 12 inches to attach greens. Green or brown blends best.
  • Fresh or Faux Greens -We used fresh white pine. Fresh lasts weeks and smells amazing. Faux means your wreath lasts forever. For spring, swap to flowers. For fall, try preserved leaves.
  • Yarn -Deep red, white, and black for Christmas. Raid your stash for scraps or thrift check out your local thrift store. Medium weight works best.
  • Wooden Beads -10-12 beads. We used natural wood, and spray painted a few white, black, and gold. Look for beads with holes large enough to thread yarn through. These were an upcycle from an old beaded seat cover, found at the thrift store.

Tools

  • Sharp scissors
  • Pom pom maker or cardboard (1 inch tall)

Budget Breakdown

Foraged Option: Branch (free) + Greens (free) + Yarn from stash (free) + Thrifted beads ($2) = $0-2

New Materials: Branch ($3-5) + Greens ($2-3) + Yarn ($6-9) + Beads ($2-3) + Twine/Wire ($2-3) = $12-15

How to Make a Boho Christmas Wreath

Step 1: Create Hanging Loops

Cut your branch to 2 feet. Position the most attractive bark side to face forward. Tie a piece of twine to each end of the branch.

how to make a Christmas wreath

Step 2: Attach Fresh Greens

Position your greens about one-third from one end. Wrap floral wire tightly around both greens and branch several times. Trim excess wire and tuck behind greens.

Wiring greens onto a birch branch with wire to make a wreath.

Step 4: Make Your Pom Poms and Tassels

You'll make three pom poms total.

Using Cardboard: Wrap yarn around 1-inch tall cardboard 50-60 times. Slide a 12-inch piece of yarn under all wraps on one side and tie very tightly (this becomes your hanging tail). Cut the wraps on the opposite side. Remove cardboard, fluff, and trim into a ball shape.

Using a Pom Pom Maker: Follow your tool's instructions.

Make four tassels. Wrap yarn around 2.5-inch cardboard 30-40 times. Slide a 12-inch yarn piece under wraps at the top and tie tightly (your hanging tail). Cut wraps at bottom. Wrap another piece of yarn 1 inch from top to create the tassel neck. Trim bottom evenly.

Easy DIY yarn tassels with wood beads attached to them.

Step 6: Add Wooden Beads

Thread beads onto the hanging strands of two tassels before attaching. Mix natural wood, white, black, and one gold bead.

How to make an easy and inexpensive boho Christmas wreath with a birch branch, tassels, pom poms, and wood beads.

Step 7: Attach Everything

Using the yarn tails, tie all pom poms and tassels to the branch near the greens (about one-third from the end). Layer at different heights for dimension. Trim excess yarn.

Expert Tips

  • Yarn Weight Matters -Medium weight creates pom poms with good body. Too thin looks sparse, too thick is hard to work with.
  • Fresh Green Longevity -Fresh evergreens last weeks outdoors in cold weather, 2-3 weeks indoors. Spritz with water to extend life or simply replace mid-season.
  • Outdoor Safe -This wreath handles typical winter weather beautifully. For very wet climates, place on a covered porch.

Seasonal Variations

Change the greens and pom pom colors to use this wreath year-round:

  • Traditional Christmas -Red, white, black with evergreens (what we made)
  • Winter Neutrals -Cream, tan, gray with eucalyptus
  • Spring Pastels -Pink, lavender, mint with fresh flowers
  • Fall Warm Tones -Orange, rust, brown with preserved leaves
  • Summer Brights -Coral, turquoise, yellow with tropical leaves or pampas

The birch branch base stays the same. You're only swapping colors and botanicals.

Frequently Asked Questions

Can I make this wreath without fresh greens?

Yes! Faux greens last forever, or skip them entirely for a minimalist look. Dried flowers or pampas grass also work beautifully.

How long does it take to make?

About 20 minutes total. Making the 3 pom poms and 4 tassels takes roughly 15 minutes once you learn the technique.

Where can I find a birch branch?

Craft stores sell them, also look at big box stores and hardware stores that sell fresh greens for the holidays. You can also forge on nature walks where permitted, or order online.

Can I use this wreath year-round?

Absolutely! Change the greens and yarn colors seasonally. The birch base works all year. Many people make several color sets and swap them out.

How do I store this wreath?

Remove fresh greens before storing and store flat in a box or bin.

Modern boho Christmas wreath made with a birch branch and decorated with tassels, pom poms and wood beads.

More Inspiration

  • DIY birch wreath made with fresh greens and birch logs.
    DIY Birch Wreath
  • Boho Christmas decor ideas in black and white.
    Boho Christmas Decor Ideas: Complete Guide with DIY Projects
  • DIY mini macrame Christmas ornaments.
    Mini Macrame Christmas Ornaments: Easy DIY Tutorial for Beginners
  • How to make an acorn out of an Easter egg fall craft.
    DIY Acorn Craft

If you make this Boho Christmas Wreath or any other craft on my blog, please let me know how it went in the comments below. Thanks for visiting today!

Recipe

How to make a simple boho Christmas wreath with birch and tassels.

Modern Boho Christmas Wreath

Modern Boho Christmas Wreath
No ratings yet
Print Pin Rate
Course: Christmas Crafts
Cook Time: 20 minutes minutes
Total Time: 20 minutes minutes
Servings: 1 Wreath
Author: Dannyelle Nicolle-Ramjist
Cost: $0 - $15

Equipment

  • Pom Pom maker

Materials

  • birch branch -about 2'
  • twine
  • wire
  • fresh greens
  • yarn -deep red white, and black
  • wooden beads

Instructions

  • Start by tying some twine to each end of your birch branch for hanging.
  • Add some Christmas greens -either fresh or faux with some wire. I used some fresh white pine for mine.
  • Make some pom poms and tassels with some yarn, using a pom pom maker or a piece of cardboard. To make the pom pom with cardboard, wrap yarn around a rectangle of cardboard that's about 1 inch tall. Tie a longer piece of yarn around the middle of the wrapped strands on one side, and cut the wrapped yarn in the center on the opposite side that it's tied. Then use your scissors to trim the pom pom into a ball shape. To make a tassel, wrap yarn around a 2 ½ inch piece of cardboard. Tie the wrapped yarn at the top with a long piece of yarn. Cut the wrapped yarn at the bottom. Then tie another piece about 1 inch from the top, around all the yarn pieces. Trim the bottom so that it's even. I used black and white, and a little red to make it Christmas-y. There are three pom poms on mine, along with 4 tassels.
  • I also added a few wooden beads to the 2 of the tassels in natural wood, white, black and one gold for a little Christmas sparkle. You could make these in any colours to match the rest of your Christmas decor. If you didn't want to add pom poms and tassels, you could try adding pinecones, berries, or bells with some hot glue, and tie on a traditional ribbon.
  • Attach the pom poms and tassels to your wreath with yarn or wire, about ⅓ of the way from the end of the birch branch.

Notes

Traditional Christmas - Red, white, black with evergreens (what we made)
Winter Neutrals - Cream, tan, gray with eucalyptus
Spring Pastels - Pink, lavender, mint with fresh flowers
Fall Warm Tones - Orange, rust, brown with preserved leaves
Summer Brights - Coral, turquoise, yellow with tropical leaves or pampas

Laundry Room Art Printables

Oct 31, 2018 · 2 Comments

Free printable laundry room art.

Laundry Room Art Printables: art for your laundry, three designs to choose from to add a little whimsy to the space, print on your home computer.

Free printable laundry room art.
[feast_advanced_jump_to]

Laundry Room Free Art Printables

I've been working on a Laundry Room makeover for sometime.  We've got a lot of the big projects finished and now it's time to think a little bit the special details.   I thought it would be fun to add some art to the space as laundry room decor.  I created a few fun free printable signs for the space.  They turned out so cute, that I think they're one of my favorite things in the new laundry room.  It's a small space, because it's a combination laundry room and mud room.  Which means that we are not just in here when we're working on loads of laundry, but that we walk through it everyday, so we wanted it to be not only functional, but cute as well since we end up spending a lot of time here.  

Laundry and dealing with dirty clothes isn't my favourite job, so the best way to deal with the amount of time you spend in the laundry room, is to add a cheeky sign that will put a smile on your face, or give you a laugh while you work.  And what busy mom, or dad couldn't use a smile as they do the never ending laundry?  So instead of just a laminated card of your laundry care symbols, how about the great addition of some printable art that makes you laugh?Laundry Room Art Printables

And this one because -ironing.

Laundry Room Art Printables
And last but not least, my favourite:

Laundry Room Art Printables

Vintage Clothes Hanger

I found some vintage clothes hangers and I thought they'd be a fun and very fitting way to display my fun sign.  The vintage hanger feels very farmhouse style, and perfect way to add some cute signs to this small laundry room layout.  These are easy to find at the thrift store, and really inexpensive.  They also up the cute factor of the room.  If you had a larger laundry room space you could hang a row of them with all the cute printables lined up across or up and down. 

Laundry Room Art Printables

I printed the art on some card stock with my home printer and hung it with the vintage clothes hanger.  To hang it on the wall I used a small nail, and some blue tack from the dollar store on the back of the art to keep it straight, command strips would work well too.  I think it's really cute and adds a little whimsy to the room.

Other Printing Options For The Free Printable Laundry Room Signs

If you don't have an at home printer, you can upload the art to an office supply store and have it printed there.  This also gives you the option of getting the laundry signs printed in different sizes, and making it larger, or even poster size, or just a small cute sign.

More Free Laundry Room Printables Hanging Options

You could also hang these free laundry room prints in some inexpensive white frames or black frames.  This would be a great way to add them to open shelving.  You could lean the frame against laundry supplies on the shelf like laundry detergent or dryer sheets in glass jars, for a fun pop of home decor.  This is the perfect way to make laundry day feel like more fun, and a little whimsy to your laundry space.  This is a quick project that doesn't take tons of time, but adds so much personality to your laundry area the easy way.

How Do I Get The Free Download

Good news!  Our free printables are available to all our blog subscribers.  Just subscribe below to our free newsletter, and gain instant access to all our fun free printables in our free resource library as soon as you subscribe.  Download the prints from there and enjoy.  (All our printables are for personal use only.)

With fun free printable laundry room wall art, life really is a party!

More Inspiration

You might also like our Laundry Room / Mudroom Makeover here.

Laundry Room / Mudroom Makeover Reveal: From a chaotic and messy space to an organized and beautiful one with built-in lockers and storage solutions.

Also check out our DIY Mudroom Lockers here.

DIY Mudroom Lockers: use standard off the shelf hardware store cabinets and MDF to create custom mudroom lockers and storage solutions.

You might also enjoy our Kitchen Makeover here.

Modern Farmhouse Kitchen Makeover -painted cabinets, white subway tile with dark grout, rustic wood shelves, & brass touches in a black and white makeover.

DIY Mudroom Lockers

Oct 24, 2018 · 12 Comments

DIY Mudroom Lockers using standard off the shelf hardware store cabinets and MDF to create custom mudroom lockers and storage solutions.

DIY Mudroom Lockers: use standard off the shelf hardware store cabinets and MDF to create custom mudroom lockers and storage solutions.

DIY Mudroom Lockers: use standard off the shelf hardware store cabinets and MDF to create custom mudroom lockers and storage solutions.

Prepping The Space

Before we built our DIY Mudroom Lockers, our small mudroom/laundry room was a mess.  The DIY lockers have helped us to get organized and find a place for everything.  They are so much more functional, and I wish we'd built our own mudroom lockers sooner.  Sometimes it's the little things like a functioning and organized space, that make all the difference.

We started out with a room dominated with a shoe rack in the corner and a few overflowing coat hooks on the back wall because we had no coat closet, and turned it into something so much better, with plenty of room for every family member to keep their things organized in their own lockers.  This small space also has the garage door, and a door into the dining room hall.  We don't have a closet beside our front door, so this area is our main entrance area from the garage and the main way we always enter the house.  This was a great way to make such better use of the space we had.  It's the perfect place for us to store coats, shoes, backpacks and more now, and one of the best parts is that it looks so much more clean and tidy now.

Our first thing we needed to do was make a space for the DIY mudroom lockers in the room.  The room is small, so we had to get creative with our mudroom design and building plans.  It's our back door entrance from the garage, and also has to function as a laundry room space.  We also used it to store our pantry overflow.  It had really turned into a disorganized drop zone.  We started by removing the laundry sink that we never used.  Some people might not want to remove something like this sink, and be worried about re-sale value.  At the end of the day though, it's seems more important to me to create a space that functions for you and your family.  It wasn't really a sacrifice for us to remove it, since we never used it for laundry.

mudroom lockers

Using Off The Shelf Cabinets

To create the mudroom locker cabinets at the top we used some standard off the shelf cabinets for our set-up, and added valences and gables to make them all look built in.  Using off the shelf cabinets were a great option.  They were easy to get, with no long time waiting for something custom ordered, and also the very cheapest option.  It was nice to include some closed storage for the lockers, so that everything isn't always on display.  These are great for some extra storage for things that we don't use all the time.  

For the top of the lockers, we used three small cabinets, and built an MDF valence to finish them off to the ceiling and create the built-in look.  The off the shelf stand cabinets from the hardware store were the cheapest and easiest option.  We had to work around the measurements that were available, so we used graph paper to create a plan on paper were we slotted in the available cabinets, and then worked around them.  On the other end of our lockers are a washer and dryer,  and we also added a tall bank of ready made cabinets for additional storage space there too.

The cabinets come from the hardwares store as flat packs. Once we had the upper cabinets put together and fixed to the wall, we filled in the spaces with MDF valances and gables to create a custom look. You could use hardwood plywood or pieces of wood for this, but MDF is cheaper, and since we were planning to paint everything, the MDF was a great choice.

Cubbies

Below the locker cabinets we built MDF cubbies, which hold a felt basket in each.  We were guided by the cabinet dimensions to divide the open space and create three lockers and cubbies with cubby dividers.  This spot is a great place for every member of the family to store their hats and gloves -since we live in Canada and dealing with cold snowy weather clothes is necessary for at least half of the year.  I choose felt baskets from Ikea and they work so well.  We can slide them in and out, and they don't scrap the paint at all because they're felt.

Mudroom lockers.

Below the cubbies is the main locker for each person.  We built three with some locker dividers, because that's what fit well in our small space.

Shiplap

After the top cabinets and cubbies were in place we added shiplap to the back of the locker wall of the locker section.  This added some interest and texture to the space.  It also acts as a reinforcement for the coat hooks and makes them a little stronger for things like backpacks.

DIY mudroom lockers

The Bench Top

The shiplap goes down to the top of the bench seat.  We did a custom concrete seat for our bench seat, but a piece of wood would work great too for the DIY mudroom bench.  The seat is supported from underneath so it looks like it's floating in the space.  This is the perfect spot to sit and put your shoes on.  It's also strong enough that we can stand on it to access the top shelf and cupboards above also.

DIY mudroom lockers
DIY mudroom lockers
DIY mudroom lockers

Once the bench seat was in place we added the divider board pieces to create the three lockers.

Painting and Finishing

After a little wood filler, sanding and chalking, it was time to paint all the MDF and shiplap.  I used Para Ultra Cabinet and Furniture Paint, Melamine Finish, WH04 Metropolitan.  I matched the paint color to the cabinets, and it whole thing looks great.  

We also had to seal the concrete bench.  Lastly we had to install the finishing touches which are my favorite things in the whole room.  We added hooks in each locker and add the leather cabinet pulls to the cabinets. These leather cabinet pulls from Walnut are so beautiful.  These are The Hawthorne Leather Drawer Pulls in Small.  The colour is honey, and the finish is brass.  The leather and brass helps adds some warm to the room, especially with the white and concrete.

The cubbies baskets are made of felt so they won't scratch the paint, and they also help add some warmth to the space.  And the gold on the baskets matches the rest of the gold in the room perfectly.  Love is in the details.

DIY mudroom lockers
DIY mudroom locker and storage space
DIY mudroom lockers, cubbies and storage

Why Didn't We Do This Sooner?

This project was a big one.  My brother-in-law Shaun did an amazing job throughout the whole building process.  We love it.  Removing the never used utility sink was such a good idea, to give us the room we needed to add in our own DIY mudroom lockers.  Our only wish is that we'd done it sooner.  It totally transformed the space and it's so much more functional.  For the first time since we moved in almost 15 years ago when this was a new house, we can leave the door open, because it looks so good and is always looking clean and tidy now.  The room dimensions are small, but we used the space so well with this makeover.  It was so worth the investment.  If you're thinking about something like this to transform your space I highly recommend it.  Not only is it more functional, it's also beautiful now.

With DIY mudroom lockers, life really is a party.

More Inspiration

See the transformation of the whole mudroom / laundry room in the makeover reveal here. Including the laundry area, where the washer and dryer are built in, plus extra cabinets and baskets for more overflow pantry storage.  Also see our DIY laundry room artwork, gorgeous lighting, and finishing touches.

Laundry Room / Mudroom Makeover Reveal: From a chaotic and messy space to an organized and beautiful one with built-in lockers and storage solutions.

Also get the Laundry Room Art Printables here.

You might also like our Kitchen Makeover here.

Modern Farmhouse Kitchen Makeover -painted cabinets, white subway tile with dark grout, rustic wood shelves, & brass touches in a black and white makeover.

DIY Faux Concrete Pumpkins

Oct 19, 2018 · Leave a Comment

DIY faux concrete pumpkin.

DIY Faux Concrete Pumpkins: easy DIY to transform inexpensive dollar store pumpkins with a faux paint finish, perfect for fall.

DIY faux concrete pumpkin.
[feast_advanced_jump_to]

These DIY faux concrete pumpkins are the perfect addition to your decor for fall.  I love the rustic industrial feel of concrete and adding it to my home decor.  For the last few falls I've dreamt of adding some concrete pumpkins to my decor.  

I've googled how to DIY some, and found that it's actually pretty complicated.  It would involve ordering or trying to make special pumpkin shaped mold to form the concrete in.  

I even tried to paint some faux pumpkins with regular concrete last year, but they were a definite, crumbly concrete fail.  So when I discovered some faux concrete paint a while ago, I thought this just might be my way to DIY the look I've been after.

How to make a faux cement pumpkin.

I used super inexpensive dollar store, and kind of ugly craft pumpkins and transformed them into gorgeous faux concrete pumpkins, and it was really easy.

DIY Faux Concrete Pumpkins: easy DIY to transform inexpensive dollar store pumpkins with a concrete faux paint finish.

Materials:

  • inexpensive foam craft pumpkins
  • textured concrete effect paint
  • paint brush
faux concrete paint

Instructions

  1. Paint pumpkins with concrete effect texted paint.  It will take several coats.
  2. If you'd like to create some variation, paint pumpkins overall with lighter colour, and while it is still wet add the darker colour to the pumpkins grooves. Blend as you go.
How to make a faux concrete pumpkin.

That's it, so simple and such a cool effect.  I painted two in the lighter colour and then added the darker colour to the pumpkin grooves for some dimension and variation.  The second one is just painted with the darker colour.

How to paint your faux pumpkin to look like concrete.
How to paint faux pumpkins to look like concrete.
How to paint your faux pumpkin to look like concrete.

With easy DIY Faux Concrete Pumpkins, life really is a party!

More Inspiration

You might also like our DIY driftwood pumpkins tutorial here.

Also be sure to check out our Fall Fairy Garden in a faux pumpkin here.

Fall Fairy Garden: How to make a sweet little Fall themed Fairy Garden with an easy to make fairy house, mushrooms, pumpkins, and miniature fall leaves tutorial.

You might also like our Acorn Craft tutorial here.

Pumpkin Cream Puffs

Oct 9, 2018 · 13 Comments

How to make pumpkin cream puffs with pumpkin filling and caramel sauce.

Pumpkin Cream Puffs: A cream puff filled with pumpkin pastry cream, whipped cream, and topped with warm caramel sauce for the perfect fall dessert.

How to make pumpkin cream puffs with pumpkin filling and caramel sauce.
[feast_advanced_jump_to]

This pumpkin cream puffs recipe is a real fall favourite.  They're perfect for fall entertaining.  If you're looking for something a little bit out of the ordinary then these are perfect.  There are a few different components to make, but they all come together into the perfect fall bite.  These pumpkin spice cream puffs are perfect for the pumpkin pie spice fan.  They're a nice twist on the classic cream puff recipe.  And they would be a perfect addition to your Thanksgiving desserts.  I also really like these for entertaining.  They're a little bit of an upgrade on a slice of pumpkin pie, and sure to impress.

Pumpkin Cream Puffs: A cream puff filled with pumpkin pastry cream, whipped cream, and topped with warm caramel sauce for the perfect fall dessert.

Pumpkin Cream Puffs

Traditional cream puffs are getting a makeover for pumpkin season.  You'll want to add this one to your collection of pumpkin recipes this fall.

Pumpkin Cream Puffs: A cream puff filled with pumpkin pastry cream, whipped cream, and topped with warm caramel sauce for the perfect fall dessert.

If you want something other than the traditional pumpkin pie, these are perfect.

People Love These

The first time I ever made these I made them for a fall dinner party.  My fairly proper guests loved them so much, that when they were finished one of them started to lick their plate.  The others then promptly started laughing, and joined in.  Next they all sheepishly asked for seconds.  Now that's a good dessert. 😉

Pumpkin Cream Puffs: A cream puff filled with pumpkin pastry cream, whipped cream, and topped with warm caramel sauce for the perfect fall dessert.

Can I Make These Ahead Of Time?

The puffs themselves are best eaten the day they're baked since they have a crisp consistency on the outside.  The other components can all be made ahead, and the sauce can be warmed up in the microwave just before serving.

Recipe

How to make pumpkin cream puffs with pumpkin filling and caramel sauce.

Pumpkin Cream Puffs

Traditional cream puffs are updated with fall with pumpkin cream and custard sauce.
No ratings yet
Print Pin Rate
Course: Desserts
Cuisine: American, French
Prep Time: 1 hour hour
Cook Time: 30 minutes minutes
Total Time: 1 hour hour 30 minutes minutes
Servings: 24
Calories: 182kcal
Author: Dannyelle Nicolle-Ramjist

Ingredients

Cream Puffs

  • 1 cup water
  • 6 tablespoon butter
  • ⅛ teaspoon salt
  • 1 teaspoon sugar
  • 1 cup flour
  • 4 eggs

Pumpkin Pastry Cream

  • 1 ¼ cup whipping cream
  • ⅔ cup pumpkin puree
  • ½ teaspoon ground cinnamon
  • ½ teaspoon ground ginger
  • ⅛ teaspoon ground cloves
  • 3 egg yolks
  • ⅓ cup sugar
  • pinch salt
  • 1 ½ teaspoon cornstarch
  • 2 tablespoon butter
  • ½ teaspoon vanilla

Caramel Sauce

  • 4 tablespoon butter
  • 1 cup brown sugar
  • ½ cup half and half cream
  • pinch Of salt
  • 1 tablespoon vanilla

Instructions

  • To make the pastry shells, first combine water, butter, salt, and sugar in a medium-sized saucepan and bring to a boil over medium-high heat. Remove the pan from the heat.
  • Add the flour to the pan and beat until everything comes together. Put the pan back on the heat and beat vigorously until everything is off the sides of the pan and a ball forms. The cream puff dough will lump together and there will begin to be a film on the bottom of the pan.
  • Next, transfer mixture into the bowl of a stand mixer and beat until it breaks up a little. Add the eggs one at a time into the dough, and beat until it all comes together. It might seem like it is not going to come back together, but keep mixing, and it will. Once all the eggs are added and the dough has come together, transfer it into a piping bag -or just a ziplock bag with the corner cut off.
  • Line a baking sheet with parchment paper -or spray with cooking spray. Pipe drops onto the baking sheet. Moisten your finger with water to smooth out the peaks on top.
  • Bake in a preheated 425 degrees F oven for 15 to 20 minutes. They will be golden brown and puffed when they're ready. Let cool on a wire rack before serving.
  • To make the Pumpkin Pastry Cream whisk together whipping cream, pumpkin puree, cinnamon, ginger and cloves in a medium saucepan. Bring to a simmer over medium heat.
  • Next, in a medium bowl, whisk together egg yolks with sugar and salt, then whisk in cornstarch until mixture becomes pale yellow and thick.
  • Slowly whisk about half of the hot cream into the egg mixture to temper, then return the yolk/cream mixture back to the saucepan and cook until thick and glossy.
  • Remove from heat and whisk in butter and vanilla. Transfer to a small bowl and press plastic wrap flush to the surface. Chill in the refrigerator until ready to serv.
  • For the caramel sauce, mix butter, brown sugar, half & half, and salt in a saucepan over medium low heat. Cook while whisking gently until thicker.
  • Add vanilla and cook another minute to thicken further.
  • To serve, slice each cream puff in half and fill with 1 tablespoon of creamy pumpkin filling, and 1 tablespoon of sweetened whipped cream. Replace the lid. Pour warm caramel sauce over the top and enjoy!

Nutrition

Serving: 1Servings | Calories: 182kcal | Carbohydrates: 16g | Protein: 3g | Fat: 12g | Saturated Fat: 7g | Polyunsaturated Fat: 4g | Cholesterol: 85mg | Sodium: 91mg | Sugar: 11g
Tried this Recipe? Tag me Today!Mention @LifeisaParty or tag #lifeisaparty!
Pumpkin Cream Puffs: A cream puff filled with pumpkin pastry cream, whipped cream, and topped with warm caramel sauce for the perfect fall dessert.

With homemade Pumpkin Cream Puffs, life really is a party!

Also check out our Pumpkin Blondies, a tried and true favourite!

Elements of Boho Style for a Boho Thanksgiving Table

Oct 2, 2018 · 2 Comments

Boho fall thanksgiving table.

Boho Thanksgiving Table: Elements of Boho Style like macrame, plants, natural elements, colour, and global influence to help you create a boho tablescape.

Boho fall thanksgiving table.
[feast_advanced_jump_to]

Canadian Thanksgiving is quickly approaching, and I wanted to share my Boho Thanksgiving Table with you.  Thanksgiving is a real favourite of mine.  I love the fall, and a turkey dinner, and my mom's pumpkin pie are always a high point.

how to set a boho thanksgiving table

This year I've done a Boho Thanksgiving Table.  I love the Bohemian style that's so on trend right now, and I thought it might be helpful if you're trying to create your own Boho Tablescape to break down some of the common elements.

Boho Thanksgiving Table: Elements of Boho Style like macrame, plants, natural elements, colour, and global influence to help you create a boho tablesacpe.

Elements of Boho Style

The first rule of boho is there are no rules.  The Bohemian style is carefree.  It's eclectic and fun without trying too hard.  There are elements of the carefree and the unusual.  Having said that though, the elements I've listed below might be a good starting point for you to achieve the look.  Include some, or all -completely your choice.

pampas grass boho centre pieces

Macrame

Boho style always includes lots of texture, and macrame is often an element.  Think 70's macrame, woven wall hangings, and tassels.  You'll see lots of rugs, pillows, and textiles in boho design.  For our table that meant starting with a beautiful handmade macrame table runner.

Boho Thanksgiving Table with macrame table runner

Plants

House plants are an important element to boho design.  They add a sense of life to any room.  Whether it's succulents, cactus, ferns, or tropical plants any of plants or a mix of them will bring that boho feel.  And the more plants the merrier, think indoor jungle.  For our table I've included a few different pots of plants on the table.

Boho Thanksgiving Table with macrame, feathers, plants, and pampas grass

Boho Thanksgiving Table: Elements of Boho Style like macrame, plants, natural elements, colour, and global influence to help you create a boho tablesacpe.

That 70's Vibe

So many boho elements remind us of all things 70's.  We don't want to look like it's off the set the a 70's movie, there's still got to be modern elements, but if it's got that 70's vibe it's probably got that boho vibe.  Vintage 70's items are becoming more and more popular, but even though they're on the rise, it's still the beginning of the trend so you should find them fairly easily at the thrift store, and inexpensively too -win, win!  My amber glass bottles with wild grasses are the perfect example.  I think my mom had these at some point in my childhood.

neutral thanksgiving table

Natural Elements -Wood, Feathers, Grasses, Wicker

Boho always includes natural elements.  For the table think of wood and wicker serving pieces.

Elements like feathers and whispy grasses are easy elements to include that feel instantly boho.  You might also add in some pinecones, or leaves for fall.  I've used a few different kinds of feathers just from the craft store.
Boho white pumpkins
cranberry sauce in a wood bowl

Elements like feathers and whispy grasses are easy elements to include that feel instantly boho.  You might also add in some pinecones, or leaves for fall.  I've used a few different kinds of feathers just from the craft store.

feathers in a amber glass bottle

Colour or Black and White

Boho style is often very colourful, and mixes lots of different colours all together.  But black and white boho is also another version.  Keep it black and white, go colourful, or do mainly neutral with a few elements of colour like our amber glass on this table.

Boho white pumpkins

Global Influence

There is often a global influence in boho design.  Look for elements like  Moroccan lanterns,  African mud cloth, or Indian inspired design.   I was inspired by some beautiful Hena pumpkins from Baba Souk -check out her tutorial and printable hena design patterns.   I made these ones for my boho Thanksgiving table from real pumpkins with a sharpie marker, and I love them as part of my Boho Thanksgiving Table.

boho pumpkins
boho thanksgiving tablescape

These are just some of the typical elements of boho style that might be part of a boho inspired tablescape, and I hope this is helpful in inspiring you if you're considering creating your own this year.

rustic thanksgiving boho table
boho thanksgiving tablescape ideas

With a Boho Thanksgiving Table, life really is a party!

More Inspriation

  • Dark and moody thanksgiving table.
    Dark and Moody Thanksgiving Table
  • thanksgiving table ideas
    Thanksgiving Tablescape Ideas
  • Fall leaf themed thanksgiving tablescape.
    Fall Leaf Thanksgiving Tablescape
  • Black and white farmhouse style thanksgiving table.
    Black and White Modern Farmhouse Thanksgiving Table

5 Ways To Make A Cozy Fall Bedroom

Sep 26, 2018 · Leave a Comment

Cozy Fall Bedroom: 5 simple ways to make your bedroom cozy for fall, like candles, layers, books, natural elements, and neutral decor.

Cozy Fall Bedroom: 5 simple ways to make your bedroom cozy for fall, like candles, layers, books, natural elements, and neutral decor.

Cozy Fall Bedroom: 5 simple ways to make your bedroom cozy for fall, like candles, layers, books, natural elements, and neutral decor.It's that time of year.  The air is getting colder, the leaves are starting to turn colour, and the days are getting shorter.  It's fall, and it's time to get cozy.  I added a few simple touches to my bedroom for fall to add to the cozy feel.

Cozy Fall Bedroom: 5 simple ways to make your bedroom cozy for fall, like candles, layers, books, natural elements, and neutral decor.1. Add Cozy Layers

Bring out all the cozy throws, the fur pillows, and the extra layers.

Cozy Fall Bedroom: 5 simple ways to make your bedroom cozy for fall, like candles, layers, books, natural elements, and neutral decor.

It's time to put your warm duvet back on the bed, and bring out that fuzzy wool blanket you love.  Layers add not only warmth to the space, but interest and texture.

Cozy Fall Bedroom: 5 simple ways to make your bedroom cozy for fall, like candles, layers, books, natural elements, and neutral decor.

2.  Candles And Twinkle Lights

With the days getting shorter and the nights getting longer, it's time to light a candle in the evening and turn on the twinkle lights.  Candles add so much ambience to a room.

Cozy Fall Bedroom: 5 simple ways to make your bedroom cozy for fall, like candles, layers, books, natural elements, and neutral decor.

And now a days with battery operated twinkle lights it's so easy to add a little sparkle to any space.  While you're at it, consider adding a dimer to your room to create the perfect glow, and make sure you have some great bedside lamps for reading.

Cozy Fall Bedroom: 5 simple ways to make your bedroom cozy for fall, like candles, layers, books, natural elements, and neutral decor.

3.  Bring Out All The Books

Snuggling up indoors means a cozy reading chair.  I've moved over this handsome grey wing back, and added in a little foot stool with some pillows for the fall.

Cozy Fall Bedroom: 5 simple ways to make your bedroom cozy for fall, like candles, layers, books, natural elements, and neutral decor.

It's time to dig into some reading this fall.  Remember those books you bought for your summer vacation but never actually got around to reading?  Now is the time to enjoy them, and some of your old favourites too.  Cuddle up for a bedtime story with the kids, and then once they're asleep spend the rest of the night with one of your favourites.

Cozy Fall Bedroom: 5 simple ways to make your bedroom cozy for fall, like candles, layers, books, natural elements, and neutral decor.

Cozy Fall Bedroom: 5 simple ways to make your bedroom cozy for fall, like candles, layers, books, natural elements, and neutral decor.4.  Add Some Natural Elements

One of my very favourite ways to decorate for any season is to bring the outside in.

Cozy Fall Bedroom: 5 simple ways to make your bedroom cozy for fall, like candles, layers, books, natural elements, and neutral decor.

For fall that means adding in some mini pumpkins to just about any space in your home will make it feel dressed for the season.

Cozy Fall Bedroom: 5 simple ways to make your bedroom cozy for fall, like candles, layers, books, natural elements, and neutral decor.

I've also added in these pretty grasses.  They grow near my house and I love how much texture they add to space.

5.  Keep It Neutral

Fall decor doesn't have to be all about the orange.  Pick up some white pumpkins for a calm, neutral fall feel.  Check out heirloom pumpkins and squash in whites, greys, and greens to work with your neutral decor.

I've also included some pretty book page leaves -see the tutorial here to make your own.

Cozy Fall Bedroom: 5 simple ways to make your bedroom cozy for fall, like candles, layers, books, natural elements, and neutral decor.

The velvet pumpkins are neutral too, and add some great softness.

Cozy Fall Bedroom: 5 simple ways to make your bedroom cozy for fall, like candles, layers, books, natural elements, and neutral decor.This bedroom is all ready for fall with these simple touches.

Cozy Fall Bedroom: 5 simple ways to make your bedroom cozy for fall, like candles, layers, books, natural elements, and neutral decor.With these simple 5 Ways To Make A Cozy Fall Bedroom, life really is a party!

More Inspiration

You might also like Fall Home Tour here.

Also check out our Neutral Fall Home Tour here.

You might also enjoy our Fall Home Tour here.

Fall Home Tour: With a nod to science this botanical scientific vintage decor brings the outdoors in, with lots of neutrals and mustard yellow.

Black and White Boho Office Makeover

Sep 18, 2018 · 5 Comments

Black and White Boho Office Makeover: whimsical wallpaper, a wood bead chandelier, art, drapes, and lots of plants give this office the perfect boho vibe.

Black and White Boho Office Makeover: whimsical wallpaper, a wood bead chandelier, art, drapes, and lots of plants give this office the perfect boho vibe.

Black and White Boho Office Makeover: whimsical wallpaper, a wood bead chandelier, art, drapes, and lots of plants give this office the perfect boho vibe.I love my little black and white office makeover.  You might remember that for my 40th birthday my husband arranged for him and my sister and brother-in-law and my little girls to transform his study space into an office for me and move his stuff down into the basement, all as a surprise while I was away for the weekend.

It was the most thoughtful, generous, kind gift I've ever received.  I absolutely loved it.  A few years on though, it was time to give the space a little bit of an update.  I decided I wanted to remove the pink accent colour and go with black and white for this space.  I wanted to add a little bit of a boho vibe and refresh it a little.

The Before

Here's what it looked life way back in June when I started this project.  After finishing the six week One Room Challenge and completely making over my bedroom in that time, and the master bathroom as a quick refresh before that, I wanted to take on the office and my white garden in the spring.  Well I finished the white garden makeover by the end of June, but this little office took its sweet time.  And I kind of liked it that way.  This might be the slowest makeover I've done, and you know what it had its advantages.  I was able to really think about each change I made, and take my time to find the perfect pieces for the room.  And now I LOVE it!

home office makeoverProblem Areas

In these photos the office is really quite a mess, but it does show off the problems really well.  The craft storage in the closet wasn't really working for us.  There was a ton of wasted space in there, since it was the builders basic closet set up for hanging clothes.  All those overflowing craft supplies were all over my desk.  Since it was difficult to find anywhere to really put stuff away, the desk was regularly covered in craft supplies, and too full to actually use.  The pink carpet had developed a wrinkle and no matter how many times I straightened it out it always seemed to end up wrinkled again.  The pretty shelves were overflowing too, and definitely needed an edit.  And the gallery wall felt like it needed a refresh too.  Most of all I just wanted to give the room a little special attention, add that boho vibe that I've been loving, and try out black and white in here since I've been loving it everywhere else in the house.

black and white office

The Black and White Office Makeover

I didn't actually buy any new furniture for this room.  The desk, shelves, and reading chair all stayed.  All I did was change up the drapes, light, accessories, organization, art, and add one wall of wall paper.  We didn't even paint.  Here's how we still made it feel like a huge change.

Getting Organized

One of the biggest changes had to be getting the closet organized.  I made some shelves for the closet and got everything organized and so much more functional.  It has made a huge difference.

organized office supplies

Now my girls and I can actually find what we need, and know exactly where to put it away when we're done.  This meant the desk could finally function as a desk again too!

Black and White Boho Office Makeover

I started out by flipping where the chair and desk were in the room.  They were fine where they were, but I wanted a change.  I also thought it would be nice to have the desk in the natural light of the window.

Black and White Wall Paper

I added in the new drapes, and loved them.  I picked them because I wanted to add a little pattern to the room.  The drapes didn't quite feel like enough pattern, and the room still didn't feel finished. Until, I added in the amazing wall paper.  This Meadow Animal Wall Paper by Brewster Homes in Charcoal  from Wayfair Canada has to be the most dramatic addition to the room.  The wall paper adds a real sense of whimsy to the room.

Black and White home office

I had never hung wall paper before, and I was a little nervous.  My ever patient best friend helped me hang it and it really wasn't too bad at all.  It turned out so well, and I'm so glad I added it to the room.

boho office

Adding In Plants

I knew I wanted to add some greenery to the room too, so I brought in a combination of faux and easy care plants.  Can you believe I've had the large cactus since I was in University doing my undergrad -also evidence that cactus will survive just about anything, lol, including lots of neglect.

home office desk

Since, as I said, I took my time with this makeover, I had time to find some accessories at the thrift store.  The paper organizer was found thrifting and the little batik box.  It holds a few office supplies, and I love the pattern.

how to set up a home office

Now that this room is done, it's become a favourite homework and project spot.

home office makeover

Over on this side of the small room we kept things simple.  My sister framed this picture of my first magazine feature for me, so it has pride of place.  I love the little boho touch with the doorknob tassel.  You might have noticed one on the stairs in my Fall Home Tour last week too -so easy to make, I might need to stop myself from putting them everywhere.

small office ideas

Shelfies

Over on the shelves, everything got a good edit.

small at home office ideas

I kept my favourites -the globes, some art, the milk glass, and some office supplies.  You can see my tutorial on how to make the twig houses here.

office book shelves

There were a few new additions, like these gorgeous succulents.

faux succulent arrangement

The colouring caddy we've had for ages, but it used to be forest green and really rustic looking.  I gave it a makeover with some black paint and now it fits this new scheme perfectly.  It's so handy for when my girls are doing homework and need to add some colour -organized and perfectly portable.

colouring caddy

The Chair and Gallery Wall

Over in the other corner of the room the white chair and footstool are everyone's favourite place to do homework, surf the internet, and read.

home office gallery wallThe little crate is the perfect spot to rest a cup of tea while you work.

black and white office makeoverThe gallery wall was a lot of fun to work on.

office reading nookThe gallery wall is a real mix -the new wall hanging for more of that boho feel was a clearance find.  I have a snap shot of me and my sister as kids, and an old art piece.  There's also a letterboard -work, work, work" indeed as we "keep calm and blog on". 😉

Free Printable

And one fun little addition with a printable I made -"maybe swearing will help".  My girls told me it was "inappropriate" so I knew it was perfect. 😉 You can download it as a free printable for yourself here.

maybe swearing will help free printable

home office reading nookThis gallery wall makes me smile, which is exactly what it's there for.

black and white office makeoverOnce I finally got the room to this stage it was feeling pretty perfect, except for the light.  There was nothing wrong with the track lighting that was there, but it didn't exactly feel right.  And then I found the perfect light, at the perfect price.  I wasn't too sure since I didn't really need it, but it was too pretty to return.

black and white office

The makeover is finally finished, and I have to say that I love everything in the room. It feels so perfect.  I love the black and white and I feel like it goes with the rest of the house now too.

how to makeover a small at home officeNow let's see if having a beautiful and organized workspace helps me get some more work done.

With a Black and White Boho Office Makeover, life really is a party!

You might also like our Mudroom / Laundry Room Makeover here.

Laundry Room / Mudroom Makeover Reveal: From a chaotic and messy space to an organized and beautiful one with built-in lockers and storage solutions, shiplap, concrete, leather, brass and wood accents.

Also check out our Modern Boho Bathroom Refresh here.

You might also enjoy our Black and White Kitchen Makeover Reveal here.

Modern Farmhouse Kitchen Makeover -painted cabinets, white subway tile with dark grout, rustic wood shelves, & brass touches in a black and white makeover.

Rustic Fall Home Tour

Sep 13, 2018 · 30 Comments

Fall home decor ideas.

Fall Home Tour: With a nod to science this botanical scientific vintage decor brings the outdoors in, with lots of neutrals and mustard yellow.

Fall home decor ideas.
[feast_advanced_jump_to]

I think fall is my favourite.  It just has so much going for it.  Fresh apples, pumpkin spice everything, cooler temperatures, and the best decor. 😉  

Botanical Scientific Decor

On fall weekends one of my favourite things to do is go for a walk in the woods with my family.  Like a kid, I love finding treasures like pinecones, and acorns and colourful leaves.  I think it's these fall walks in the woods that inspired my fall vintage scientific botanical decor theme.  I love to decorate by bringing the outdoors in.  Last year I was inspired by the idea of a botanist finding all kinds of seeds, plants, and treasures and bringing them home to study them.  Check out last years fall home tour here. I loved it so much that this year, I kept the story going.

I had so much fun looking for cool vintage decor pieces that helped tell the story of a romantic plant loving botanist who spends her days studying the plants she loves.  I've sprinkled little bits of science and lots of plants and seeds, and treasures found in nature throughout my decor.

neutral fall entry way

The Dining Room

Let's start at the front door, with the console table.  Our botanist has been working away here on her typewriter, and left her spectacles behind.

neutral fall decor
vintage spectacles glasses

Over on the dining room table, I wanted it to look like she's been working away, and pushed everything into the middle so she could eat at the table.

fall dining room decorI used this pretty vintage lace tablecloth in mustard yellow as a runner.  This neutral loving girl decided to add in a little of this  fall's it colour  -mustard yellow.  I've sprinkled little bits of it all over the main floor.  And I love it.

vintage botanical scientific decorThe table is almost a cabinet of curiosities.  There are lots of treasures for studying.  Oak leaves, and acorns which always make me think of fall right away, and a collection of mushrooms and fungi.  There's also antlers, feathers, and pretty pressed fall leaves.

rustic fall decornature inspired fall decorOne of my favourites on the table is this vintage microscope, found on kijiji by my sweet sister who knew I was looking for one to add to my science vibe last year.

vintage botanical scientific decor

botanical scientific decorAnd a new addition to the collection -this old notebook.  I found it in an old box at an antique fair this weekend -you might have seen it in my Instagram Stories (follow along there if you love behind the scenes and sneak peeks).

fall decor inspirationvintage magnifying glassI think she's been examining leaves and seeds with her magnifying glass, and measuring them with her little fold away ruler. 😉

vintage botanical decorLeaf Specimen Wall

She's been collecting lots of fall leaves, and the DIY buffalo check feature wall has become a catalogue display.

fall leaf backdropThese pretty leaves are taped up with little washi tape and the heavier ones have a straight pin holding them up.

fall leaf decorI love how it turned out.

how to decorate with fall leavesAmber Glass Collection

And on the buffet, one of my favourite new collections of amber glass.

pressed fall leaves

I've been picking them up at second hand stores as I see them, and the antique fair on the weekend.  I saw the pretty beads at a display of costume jewelry  there too, and thought they'd be a pretty addition to the display.

amber glass collectionFall Bar Cart

And one more fun area of the dining room, a bar cart all ready for fall entertaining.

fall bar cartI added a little more mustard yellow with these pretty amber glasses.  And on the lower shelf, there's a whole collection of vintage glasses.

fall bar cart ideasI thought it would be fun to add in some special drinks for fall.

fall drink ideas

I found some pumpkin beer and thought it would be fun to try with friends.  Cider is a favourite of ours so I got some of it as well.

pumpkin beerhow to style a bar cart for fallAnd just because cool fall nights might need a little warming up, a selection of whiskey too.

fall bar cartFrom the dining room we head into the living room.

fall home tourThe Stairs

This year I decorated the stairs for fall with a collection of pumpkins.

pumpkins on stairsAt the bottom of the stairs, a spot for a little table and a bowl of mini pumpkins and gourds. "Hello Gourd-geous" indeed.

hello gorgeous

The Living Room

Into the living room, and more pops of mustard yellow.

fall home tourIt really doesn't take too much of an accent colour to make a big impact.  I made the tassel swag that I hung over the banister with some wool and some large wooden beads, and I love the pop of yellow and the boho vibe.

neutral pumpkins on stairsAnd another really easy, inexpensive way to add an accent colour for fall was painting the bottom of this pumpkin with some mustard yellow craft paint.

paint dipped pumpkinFall Fireplace Mantel

The fireplace mantel is a real favourite this year too.  I continued the science botanist theme here as well.

neutral fall fireplace mantel

This vintage portable desk is an old find.  I think my botanist has had it out in the field to keep track of her papers, books,sketches, and water colours.

vintage botanical scientific mantel decorThe scientific glass is a mixture of new and vintage, and works perfectly as a vase.

fall mantel decorhow to decorate your fireplace mantel for fallI added lots of seeds and nuts to the display too.

vintage botanical scientific decorThe macrame swag is a DIY project from a few years ago, check out the post about how I made it here.

neutral autumn fireplace mantelMustard Yellow Accent Colour

The pretty pillows on the couch are where the whole idea of adding a little yellow started.

fall home tourMy favourite is the beautiful mud cloth pillow from Dwellissimo.

fall home tour ideasThe colour is amazing, the texture adds so much, and the pattern is perfect.

fall home tour mustard yellowI kind of love it.

mustard yellow fall home tourOn the table are a few more vintage finds.  I love how much character and interest they add to the space.

vintage keys

fall home tourMy side table stump tables -see how I made them here, are looking ready for fall with a little fern and squirel.

fall home tour ideasThis chair is a real favourite spot for just about everyone, including our dog Oscar.

fall home decor ideasThe Kitchen

Into the kitchen, the final room of the tour.

neutral fall kitchen decorI found this pretty knit runner at Homesense the other day.  It was still hot weather then, but I knew if I didn't grab it I'd regret it.  I brought it home and as soon as it turned a little cooler this week, I knew it was perfect for my fall decor.

white pumpkins centrepieceI love how fluffy and cozy it looks.  It will be perfect for Christmas and winter too.

I used a selection of pumpkins on top for a simple fall display.

white pumpkin centrepiece

Fall Hot Chocolate Station

Over on the little side cabinet, I've set up a hot chocolate bar for fall.

fall hot chocolate stationMy girls love having a hot chocolate on fall days after school, and this little hot chocolate bar complete with sprinkles and flavoured marshmallows makes it even more fun.

fall hot chocolate stationfall hot chocolate barKitchen Shelves

Over on the other side of the kitchen, I had so much fun decorating the open shelves for fall.  We gave our kitchen a makeover last November for the One Room Challenge so this is the first time I've had a chance to decorate it for fall.

kitchen shelves decorated for fall

There are a few more touches of yellow.

kitchen fall home tour
open kitchen shelves fall

It was fun finding a few more vintages touches with mustard and wood tones for fall to add to the shelves.  The leaf is a pressed one found on a walk and added to a little frame.

open kitchen shelves

The golden rod is from the little meadow spot behind our house and it's the perfect colour.

kitchen shelves with fall decor

I know winter is coming, and I will miss being able to pick flowers so easily.  Best to enjoy it while it lasts.

fall home tour

And that is my home all decorated with fall, with a little science in the mix, and the perfect amount of mustard yellow.  I hope it inspires you to bring the outdoors in, and add a few simple touches to embrace the season.  May there be many walks in the woods to collect fall treasures, and hot chocolates afterward for us all this fall.

mustard yellow fall home tour

With a home all ready for fall, life really is a party.
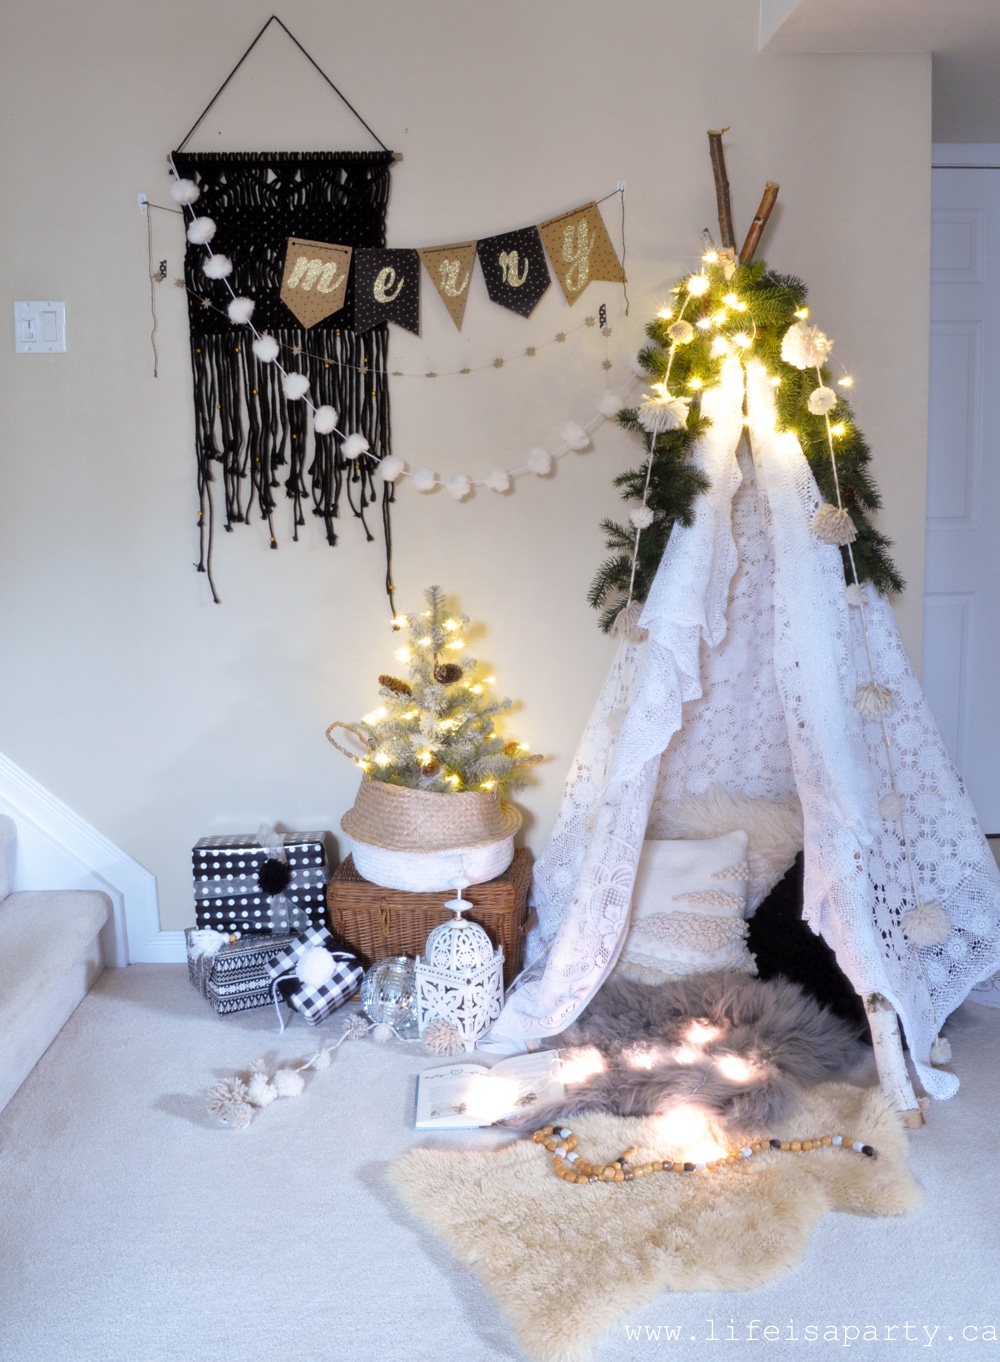
More Fall Home Tours

You might also like our Fall Home Tour 2019 here.

Fall Home Tour: Full of autumn decor ideas for Vintage Botanical Scientific Decor with Boho Maximalist Influence with lots of plants, insects, and pumpkins.

Also check out our 5 Ways To Make A Cozy Fall Bedroom here.

Cozy Fall Bedroom: 5 simple ways to make your bedroom cozy for fall, like candles, layers, books, natural elements, and neutral decor.

You might also enjoy our Fall Home Tour 2017 here.

Fall Home Tour -Vintage fall decor, botanicals, scientific decor and lots of natural elements to bring the outdoors in and celebrate the changing season.

Back to School Family Dinner

Sep 7, 2018 · 4 Comments

Back to school party ideas.

Back To School Party Ideas: start a family tradition of a back to school dinner on the first day of school. Lots of party decor ideas.

Back to school party ideas.
[feast_advanced_jump_to]

Start a Tradition

Every year it's a tradition in our family to have a special back to school dinner on the first day of school.  I always set a pretty themed table, make a nice dinner with an apple dessert, and look forward to hearing all about their days.  Today I'm sharing this years dinner full of back to school party ideas.

Back To School party ideas

It's not too late to have your own back to school celebration.  Consider having one this weekend with a "we survived the first week of school" spin.  Kids love traditions, love to be celebrated, and love to be the centre of attention (who doesn't?) so they love this special dinner.  My kids look forward to it every year. I have a feeling that even when they're in University we'll be doing some version of it.

back to school party decor ideas

Back to School Table Ideas

This year I went with a vintage science class room feel for the table.  Last fall I decided to decorate my house with a similar theme -it was like a botanists goes for walks in the fall and brings everything home with her to study vibe.  You can check out the fall home tour here if you're interested.  Anyway I had all this cool vintage science stuff so it was perfect.

Back To School Dinner

Book Page Runner

For the table, I started with a runner made from old book pages.  In the past I've sewn the pages together to make on of these or glued them, but this time as I was laying them out I realized they were fine just set on the table.  So that made my runner super easy.  The books are some old ones that I've picked up at the thrift store.

first day of school party

DIY Lined Paper Plates

My very favourite piece for this table just might be my special lined paper plates.

back to school party

I used some square plates from the dollar store that I already had.  Then I had the idea to use some edible markers to make the plates look like lined paper.

first day of school party

The dye in the markers is completely safe to eat, they're made for decorating food.  I free-handed some blue lines and then an inspecting red line.  You could even use a ruler if you wanted perfectly straight lines, but I like things a little wonky and hand crafted looking. 😉  As soon as the plates get wet the dye will wash off, including onto your diner (so if you have a kid who would not like blue dinner maybe swap out the plate for them).  The possibilities are really endless with this little plate hack -plates for all occasions!

Back To School Dinner

Pencil Boxes Cutlery Holders

Another fun little idea was to use pencil boxes to hold cutlery.

back to school party

I picked up these vintage looking little ruler pencil boxes at the dollar store, and they were perfect for holding our dessert spoon and fork.

Back To School party

To finish the placesetting, I used some cute little mini clipboards as napkins rings.  I picked these up at the dollar store too.

Back To School DinnerI used chalk to write our names.
back to school party ideas
Scientific Glass Vases

All along the centre of the table I used some of my vintage science pieces.

back to school partyMost of the lab glass I've picked up at antique sales, but there's some new pieces mixed in too.

back to school party decor ideas
Just for fun I added some sugar and salt to these glass containers to make it seem a little more science class-ish.
Back To School Dinner
Test tubes, and flasks make perfect vases.
Back To School decorationshow to have a back to school partyI also had an old microscope.  Look for them in the office section of your thrift store.

Back To School party ideasThese school supplies are new but have that vintage feel to them.

Back To School Dinner

Science Chalkboard

Over on the side, I added a little bit of a science classroom feel to the chalkboard -thanks to some inspiration on-line -google science wall paper. 😉

school themed party

The globe here and on the table are thrift store finds too.

Back To School Dinner party

I thought the vintage trophies were very back to school.  They brought back memories of those old trophy cases in school hallways full of silver cups engraved with students names from long ago.

school themed partyWe had such a lovely dinner, filled with every detail of my girls first days.

school themed partyI almost can't believe that one is high school -and there's only going to be three more dinners like this one after this!

Back To School party ideasThis years are speeding up!  All the more reason to cherish them and make all the memories.

first day of school family dinnerWith a Back To School Dinner to celebrate the first day of school, life really is a party!

More Back To School Party Ideas

Want more inspiration?  You might like these too!

Back to School Dinner 2017

2016 Back to School Family Dinner

Back To School Family Dinner 2015

Back To School Family Dinner 2014

A Midsummer Night's Dream Picnic

Aug 24, 2018 · Leave a Comment

Midsummer night's dream theatre picnic.

Midsummer Night's Dream Party: An individual boxed picnic to enjoy Shakespeare in the park, whimsical flower masks, and perfect boho picnic decor.

Midsummer night's dream theatre picnic.
[feast_advanced_jump_to]

Shakespeare in the park, and a beautiful picnic to enjoy with it makes for the perfect Midsummer Night's Dream Party! We ventured downtown to the Toronto's High Park this summer to see Shakespeare in the park.  It was our girls first experience with Shakespeare and we had such a wonderful time with our Midsummer Nights Dream themed party. We loved having a picnic together with themed entertainment.  Our city has plays all summer season in the park, and it was such a fun experience, and magical atmosphere for our themed event.

Midsummer Night's Dream Picnic

We boxed up our picnic early and left it in a cooler in the car while we enjoyed the park's playground, labyrinth, and free zoo.  Then just around dinner time we headed over to the outdoor theatre  to enjoy our picnic before the play started.  There were lots of other picnics happening too, as they encourage play goers to bring their own picnic to enjoy before the play begins, and create their own magical midsummer's eve.

The whole idea for the day actually came from my girls, and Maddie was all about putting together the perfect picnic for the ultimate midsummer night's dream party.  We went with our friends and truly had the perfect time together.  Today I'm so excited to share with you the next picnic in our summer picnic series -this one just might be the most beautiful so far.  😉

Midsummer Night's Dream party

The Picnic Boxes

For the picnic we put together the yummiest individual boxes.  We packed up some salad, bread, a little onion and goat's cheese tart-get the recipe here, and some rotisserie chicken for everyone.

Menu:

  • salad
  • bread
  • onion and goat's cheese tart
  • cold roasted chicken
individual boxed picnic

Midsummer Night's Dream PicnicThe little salad was a made with tomatoes from our garden and bocconcini.  In the bottom of a little mason jar I added a splash of olive oil and balsamic vinegar, and about a ¼ teaspoon of homemade pesto.  The on top of it I added some cherry tomatoes and mini bocconcini and finished it of with some salt and pepper.  Just before opening everyone gave their's a shake and they were perfect.

individual boxed picnic lunch

The chicken was the perfect easy addition for a picnic.  I picked it up at the grocery store, cut it up, and wrapped everyone's pieces in a little parchment paper.

Midsummer Night's Dream Picnic in the park

The tarts were made by Maddie the day before -she's so good at pastry!  If you didn't want to make your own pastry though, store bought frozen would be fine.  Cook your tart shells and then set aside.  Make caramelized onions on your stove top, and then before serving add to the baked tart shells, and tops with some goat's cheese.  These little tarts are so easy, and so delicious.  Find our recipe for the goat's cheese and caramelized onion tarts here -we just swapped out the puff pastry for pie pastry for our picnic.

boxed picnic lunch

I added a fresh buttered bun from the bakery too.

Midsummer Night's Dream Picnic party

Everything got packaged up in these perfect little paper boxes, lined with some parchment paper.

Midsummer Night's Dream Picnic ideas

We tied ours with twine and tucked in a little menu that Maddie made for the occasion.

how to pack a picnic for the park

We tucked our cutlery, napkins, and menu into some tiny little paper bags and tied them to the top.  It was perfectly portable, and so, so cute, and meant that we didn't need to place settings or plates at our garden party picnic.

theatre in the park bring your own picnic

Pansy Juice

In the Shakespeare's A Midsummer Night Dream play, the love potion is pansy juice so we thought it would be fun to make some simple labels for our pink lemonade. Since Shakespeare makes us think of books, we used book pages for the labels and it was the perfect addition.

Midsummer Night's Dream Pansy juice

Floral Masks

floral mask

My girls also made a mask for all the girls to wear.  In keeping with the play, they made them out of pretty flower petals rose petals, and leaves for an enchanted forest feel.  These were so sweet, along with some floral crowns.  Our flower crowns weren't made from real flowers but they were still a fun way to celebrate the beauty of nature.  Fairy wings would have been a sweet addition too, for the complete theme experience.

diy floral maskFor the floral masks, they found a template on-line and printed it on card stock to use as the base, and then added all the pretty fresh leaves and flower petals from our garden, and just hot glued them on.  the perfect finishing touch was a twig handle.  They turned out so pretty and whimsical and perfect for the evenings midsummer celebrations.

diy floral mask

Dessert

picnic dessert ideas

Dessert Menu

  • chocolate mousse
  • fresh fruit
  • cookies

For dessert we had some sweet delights.  I set up our desserts on top of one of the picnic baskets with some fairy lights, and some pretty flowers.  It was so pretty.  Maddie made some homemade chocolate mousse.

chocolate mousse in a mason jar

We served them in small mason jars, which made them perfectly portable.  And along with our mousse our friends picked up some delicious cookies at the bakery on the way for some more sweet things.

cookies for a picnic

We also brought along some fresh blueberries.

picnic dessert ideas

I tried to keep the menu manageable, so we didn't need to cook all day before.  There were a few  good short cuts with the rotisserie chicken and the bakery cookies, and we made just the goat's cheese and caramelized onion tarts and the chocolate mousse from scratch.

Midsummer Night's Dream Picnic Party

Setting Up The Picnic

We brought some beautiful blankets to make it cozy and everyone got a pillow which certainly helped to keep us comfortable after sitting there many hours enjoying the food and then the play.  We used a wagon to bring our stuff to the picnic, which worked out great.  Things like a little vase of flowers and twinkle lights helped add a little magic and fairy dust to our picnic.

Midsummer Night's Dream Party

Midsummer Night's Dream in the parkThe course of true love never did run smoothly, as exhibited in the play, but the evening sure did!  The girls all managed to stay awake and follow the plot of their first Shakespeare play.  We thought starting out with one that included fairies, like fairy king Oberon, and a magical theme and was a good plan. 😉 The day was a raging success, and I think it just might need to become a tradition that we do again next year.

Midsummer Night's Dream Picnic

With a Midsummer Night's Dream Party picnic, life really is a party!

More Picnic Inspiration

You might also like our French Inspired Picnic here.

Also check out our Swedish Inspired Midsummer Picnic here.

Swedish Inspired Midsummer Picnic:  Enjoy drinks, smorgasbord, and dessert all inspired by a traditional Swedish Midsummer menu.  Easy to create at home, and so delicious!

You might also like our British Inspired Picnic here.

British Picnic: our romantic English inspired British picnic food menu includes tea sandwiches, home-made scotch eggs, scones and cream, shortbread, empire cookies, custard creams, vintage decor and lots and lots of tea.

Quick and Easy Nectarine and Blueberry Galette

Aug 16, 2018 · 1 Comment

Nectarine and blueberry galette recipe.

Nectarine and Blueberry Galette: literally make in minutes with frozen puff pastry, so easy and the perfect way to enjoy fresh nectarines and blueberries.

Nectarine and blueberry galette recipe.
[feast_advanced_jump_to]

This little nectarine and blueberry galette was the loveliest little surprise.  I had some leftover puff pastry and decided to throw together a little tart.  Since nectarines and blueberries are in season and I had some already, they became the filling.  And what a perfect filling they were!

You might also like Mini Apple Crisp in a Mason Jar.how to make a Nectarine and Blueberry Galette

What Is A Galette?

A galette is a free form pie made without a tart tin.  It's pastry wrapped around a filling, in our case a fruit filling.  The difference between a pie and galette is that a pie is baked in a sloped sided pie plate, but a galette is baked on a baking sheet, with the pastry wrapped around the edges.  It tends to be much easier to make than a pie, because there is no top crust, and it doesn't need to be fitted into a pie pan, and no fussy crust-crimping around the outside either.  A galette is more rustic than a pie.  These free-form pies are sometimes called the lazy man's pie.  It is one of the easiest ways to make a quick pie.  Galettes are not always made with fruit filling.  You can also have a savory filling.  It's any free form pie.

Nectarines and Blueberries

We used nectarines and fresh blueberries for our galette.  It's the time of the year when they're both in season here, and they are great combination together.  We used sweet nectarines, you could use ripe peaches instead.  The often-overlooked nectarine is a great choice for this galette though because with it's smooth skin, you don't have to peel the fruit to make your pie filling.  Feel free to substitute peach slices for the nectarine slices if you wish to, but do be sure to peel the fruit if you choose to use peaches.

We paired the nectarines with blueberries.  The combination of blueberries and nectarines are such a great combination.  These summer fruits are delicious and juicy and so along with a little sugar to sweeten the fruit you will also need to add some flour to thicken the fruit juices.

Other Fruit Options

As already mentioned you could easily swap the nectarines for peaches in this recipe.  If you were using peaches though, be sure to peel them first.  You could really use any stone fruit in place of the nectarines.

We used blueberries with the nectarines, but any fresh berries would be delicious.  You could use strawberries, or raspberries in the place of blueberries and any of them would make a great flavor combination with nectarines.  If you change the berries, just use 1 cup of any other berry you like in place of the blueberries, or do a combination of berries.

Nectarine and Blueberry Galette recipe

Pastry

We used store bought puff pastry for our galette dough.  This the easiest way to make this quick dessert.  Look for an all butter pastry dough in the freezer section of your grocery store.  Follow the directions on the package for thawing the dough.  The puff pastry makes a perfect buttery crust, that's extra flakey and crispy, and puffs up when baked.  If you prefer you could use regular pie pastry instead of puff pastry.  Make pie pastry from scratch or pie already prepared dough in the refrigerated section of the grocery store, or frozen pie pastry in the freezer section of the grocery store.

To form the galette with the puff pastry, you first pile fruit mixture in the center of the dough in an even layer and then wrap the buttery pie crust around the fresh fruit filling to make a large circle.

Once the galette is formed and ready to bake on a large baking sheet covered with parchment paper, we brush the galette with some milk.  You could also use a egg wash made from beaten egg or some heavy cream.  This will help the pastry to brown.  And lastly the pastry is sprinkled with some coarse raw sugar.  The sugar adds some crunch to the flakey pastry, as well as sweetness.

Ice Cream or Whipped Cream

The nectarine blueberry galette is a wonderful combination of tangy, sweet, and juicy fruit combined with buttery and flaky pastry.  We love to serve it with a scoop of vanilla ice-cream or some sweetened vanilla whipped cream.  Both options add a wonderful vanilla creaminess to the dish, and are such a welcome addition.

easy Nectarine and Blueberry Galette with frozen pastry
frozen puff pastry Nectarine and Blueberry pie
Nectarine and Blueberry pie recipe

Serving Suggestion

Serve the blueberry nectarine galette with a scoop of vanilla ice cream, or whipped cream.  This galette recipe is best served the day it is made, but if you have leftovers store them in an airtight container or wrapped in plastic wrap at room temperature.

easy Nectarine and Blueberry GalettePerfect Summer Dessert

Take advantage of the nectarines and blueberries being in season and make a galette with delicious flaky crust, and the perfect summer fruit.  It literally only took a few minutes to put together and it was so, so good.  I used frozen puff pastry so it was super easy and so quick without the hassle of making the pastry.  This is the perfect way to enjoy stone fruit and fresh berries this summer.  This impressive dessert is perfect for entertaining too.  With just a little bit of minimal effort, this small amount of work is so worth it.  Nothing is better than a fresh slice of this delicious galette and a scoop of ice cream.  It's the perfect summer dessert.

Nectarine and Blueberry Galette with whipped cream

Make An Extra

One sheet of puff pastry makes a fairly small pie.  If you are baking for a larger group you may need to bake two.  Most puff pastry is sold in packages of two sheets, so it's very easy to make a second pie for a crowd if necessary.

Recipe

Nectarine and blueberry galette recipe.

Nectarine and Blueberry Galette

Easy store bought puff pastry and juicy fruit make this quick and easy tart.
5 from 1 vote
Print Pin Rate
Course: Dessert
Cuisine: American
Prep Time: 5 minutes minutes
Cook Time: 15 minutes minutes
Total Time: 20 minutes minutes
Servings: 1 Galette
Calories: 116kcal
Author: Dannyelle Nicolle-Ramjist

Ingredients

  • 1 sheet frozen puff pastry
  • 2 nectarines
  • 1 cup blueberries
  • 3 tablespoon white sugar
  • 1 tablespoon flour
  • ½ teaspoon vanilla extract
  • milk to brush on the edges
  • 1 teaspoon Demerara raw sugar to sprinkle over top

Instructions

  • Thaw puff pastry sheet according to package instructions. Lay out thawed puff pastry on a parchment paper lined baking sheet.
  • In a large bowl combine sliced nectarines, blueberries, white sugar, flour, and vanilla. Stir to combine. Pour the fruit mixture out in the center of the crust, with a 2-inch border.
  • Fold in the edges of the dough, around the fruit filling.
  • Brush the edges of the pastry with a little milk and sprinkle the whole galette with some Demerara sugar.
  • Bake at 450 degrees for about 12 -15 minutes until golden brown.

Nutrition

Serving: 1g | Calories: 116kcal | Carbohydrates: 21g | Protein: 3g | Fat: 3g | Saturated Fat: 1g | Polyunsaturated Fat: 2g | Cholesterol: 3mg | Sodium: 32mg | Fiber: 2g | Sugar: 16g
Tried this Recipe? Tag me Today!Mention @LifeisaParty or tag #lifeisaparty!
how to make a Nectarine and Blueberry pie

With Nectarine and Blueberry Galette, life really is a party!

More Recipe Inspiration

Want another great blueberry recipe?  Try these Blueberry Scones:

You might also like our Strawberry Pie recipe here.

Also check our our Easy Banana Cream Pie recipe here.

Unstuffed Zucchini

Aug 15, 2018 · 1 Comment

Easy unstuffed zucchini made with zucchini zoodles.

 Unstuffed Zucchini: the perfect quick and easy, one pot weeknight meal. We made cooking time quicker using zucchini zoodles.

Easy unstuffed zucchini made with zucchini zoodles.
[feast_advanced_jump_to]

It's almost time for Back To School.  It brings mixed feelings for many of us.  Now we must say goodbye to the lazy days of summer, with its more laid back routine and less of a strict schedule.

Back To School = Back To Busy

Back to school often means we must return to busy weeknights, and the beginning of teams and clubs again.  Sometimes those busy weeknights mean it's a little harder to get dinner on the table for our families.

how to make zoodles

We all want healthy options that don't take too much time and effort to prepare.  And we want delicious dinners that everyone in our family will eat.  Fall's cooler temperatures also mean a return to some of the classic comfort foods.

spiralized Zucchini zoodles recipe

This recipe for Unstuffed Zucchini is ticking all the boxes.  And on top of all that it's a one dish meal -to help with clean up.  If you love zucchini, you should also check out our easy zucchini pancakes.

Unstuffed Zucchini casserole

Traditional stuffed zucchini can take about 1 - 1 ½ hours to prep and cook, but this unstuffed zucchini version should be ready to serve in less than 30 min.  This is perfect for any busy weeknight.  We saved time by using zucchini noodles -zoodles instead of traditional large pieces of zucchini and were able to cut the cook time way back, without sacrificing taste.

Un-stuffed Zucchini casserole recipe

Un-stuffed ZucchiniRecipe Variations:

This recipe is so versatile too.  Sometimes I make it even faster by using leftover rice.  If you are eating low carb, leave out the rice and increase the zucchini.  And you could always switch the ground beef for ground chicken or turkey if you need to.

what to do with zucchini noodles zoodles
salad and bread

Serve this one pot dish with a salad and some bread for the perfect quick weeknight meal.  

Recipe

Easy unstuffed zucchini made with zucchini zoodles.

Unstuffed Zucchini

Quick and easy zucchini noodles with beef and tomato sauce.
5 from 1 vote
Print Pin Rate
Course: Main Course
Cuisine: American
Prep Time: 20 minutes minutes
Cook Time: 20 minutes minutes
Total Time: 40 minutes minutes
Servings: 6
Calories: 422kcal
Author: Dannyelle Nicolle-Ramjist

Ingredients

  • 1 lb ground beef
  • 2 teaspoon oil -divided
  • ½ cup uncooked rice or about 1 cup cooked leftover rice
  • ½ green pepper
  • ½ yellow pepper
  • 1 onion
  • 2 cloves garlic, minced
  • 1 cup mushrooms
  • 1 teaspoon Italian seasoning
  • salt and pepper
  • 2 medium zucchini
  • 2 cups tomato sauce
  • 1 cup grated mozzarella cheese

Instructions

  • Begin by browning the ground beef in 1 teaspoon of oil in the Dutch oven on medium heat on your stovetop. Once browned remove the meat and set aside.
  • If you are not using leftover rice, make your instant rice according to the package instructions and set aside.
  • While the beef is browning, dice the onion, and peppers. Slice the mushrooms and mince the garlic cloves. Using the spiral vegetable slicer, turn your zucchini into zoodles using the thick julienne setting.
  • Using the Dutch oven on medium heat, add the remaining 1 teaspoon of oil and sauté the onion, garlic, mushrooms and peppers for about 2 minutes. Add salt and pepper to taste, and the Italian seasoning. Add in the zucchini zoodles and cook until they are slightly soft, but not mushy for about 5 minutes. When the zucchini zoodles begin to lay flat they are about ready. Don't over cook -remember they will cook a little longer under the broiler.
  • Remove the pan from the heat and add back in the browned beef, the cooked rice, and the tomato sauce. Stir to combine.
  • Add grated cheese to the top of the dish, and place in the oven on the top rack on the broil setting to melt the cheese. Keep an eye on it so it doesn't burn, depending on the oven might take up to 5 minutes. Remove when the cheese is melted and bubbling. Enjoy!

Nutrition

Serving: 1g | Calories: 422kcal | Carbohydrates: 32g | Protein: 29g | Fat: 20g | Saturated Fat: 8g | Polyunsaturated Fat: 9g | Trans Fat: 1g | Cholesterol: 82mg | Sodium: 626mg | Fiber: 3g | Sugar: 6g
Tried this Recipe? Tag me Today!Mention @LifeisaParty or tag #lifeisaparty!

With Unstuffed Zucchini for a busy weeknight dinner, life really is a party!

how to make quick and easy stuffed Zucchini

More Recipe Inspiration

Check out our Easy Stuffed Zucchini with Ground Beef and Rice recipe here.

Easy Stuffed Zucchini: this easy recipe is made with ground beef and rice for a quick, healthy and hearty dinner.

You might also like our Mom's Easy Lasagna Recipe here.

Also check out our Butter Chicken Pizza Recipe here.

Butter Chicken Pizza: use frozen naan bread and jarred butter chicken sauce from the grocery store, for this quick and easy butter chicken pizza recipe.

You might also enjoy our Slow Cooker Beef Stroganoff recipe here.

Ice Cream Party Ideas: Sundae Bar, Activities & Decor

Aug 8, 2018 · 2 Comments

Ice cream party sundae bar with colorful toppings in mason jars and DIY cone backdrop.

Get 15+ tested ice cream party ideas from a professional celebrant including sundae bar setup, activities kids LOVED, DIY decorations, and budget tips. Perfect for birthdays or summer celebrations!

Ice cream themed party with ice cream buffet.
[feast_advanced_jump_to]

Quick Look:

  • 🎉Party: Ice Cream Party perfect for Birthdays, Summer, or any occasion
  • 🧑‍🧑‍🧒Best For: Adaptable for all ages from toddlers to adults, perfect for boys or girls
  • 🍦Party Food:  Make your own ice cream sundae buffet
  • 🧑🏽‍🍳Party Activities: Create your own real ice cream flavor, crafts, taste test, imaginary play ideas
  • 🛍️Party Favors: Ice Cream Sundae take-home kits, with their own homemade ice cream

Why We Love This Party

  • Universal appeal: Works for boys or girls, and almost any age.
  • Colorful and fun: Bright, cheerful decor.
  • Easy to find materials: Easy to find materials: Most supplies are available at dollar stores and grocery stores.
  • Delicious: You scream, I scream, we all scream for ice cream!
  • Flexible: Scale up or down depending on your budget and time.
  • Memory-making: Kids remember making their own sundaes and playing ice cream games for years.

Ice cream parties are one of my favorite themes to host because they're naturally joyful, work for all ages and genders, kids love them, the decorations are colorful and fun, and honestly, when you hand a child sprinkles and let them build their own sundae, you've already won.

This guide walks you through the practical details like how much ice cream to buy, which activities actually hold kids' attention, and smart setup tips, so you can focus on enjoying the celebration instead of second-guessing yourself, and making amazing memories with your friends and family.

Ice Cream Sundae Bar Setup

No ice cream party is complete without a show-stopping sundae bar. The ice cream sundae bar is the star of your party. Here's how to set one up that looks amazing and functions smoothly.

Ice Cream Flavors: How Much and Which Kinds

How Much Ice Cream Per Person: Plan for 2-3 scoops per guest (about 1 cup total).

For 15 guests: Buy 4-5 pints or 2 half-gallons or 2-3 Liters

Flavor Strategy:

  • Classic trio: Vanilla, chocolate, strawberry (safest bet for kids)
  • Fun additions: Cookie dough, cotton candy, cookies and cream
  • Budget tip: Look for small containers so you can offer variety without waste

Keeping It Cold: Use a galvanized tub or large bowl filled with ice cubes to keep smaller containers cold. For half-gallons, keep them in the freezer and bring out one at a time.

Ice Cream Toppings: The Complete List

We've tested these at multiple parties and they're always hits:

Ice cream buffet toppings with jars of different colored sprinkles.

Candy Toppings:

  • Mini M&Ms
  • Gummy Bears/Worms
  • Chocolate Chips
  • Crushed Oreos
  • Mini Peanut Butter Cups
  • Crushed Candy Bars (Kit Kat, Reese's, Skor)
  • Mini Marshmallows
  • Rainbow Sprinkles
  • Chocolate sprinkles

Nuts & Crunchy Add-ins:

  • Chopped Peanuts
  • Coconut
  • Toffee Bits
  • Crushed Waffle Cones
  • Graham Cracker Crumbs

Fresh Toppings:

  • Sliced Bananas (add last minute to prevent browning)
  • Strawberries
  • Maraschino Cherries

Sauces:

  • Hot Fudge
  • Caramel Sauce
  • Strawberry Sauce
  • Whipped Cream (keep refrigerated until serving)
Ice cream buffet toppings of gummies, mini marshmallows, chocolates and more.

Budget-Friendly Topping Tips:

  • Shop bulk bins for small quantities of expensive items like nuts and candy
  • Use mason jars or small bowls to display (makes even budget toppings look fancy)
  • Put toppings on a lazy Susan for easy spinning
  • Dollar store finds work beautifully when displayed in nice containers

For another creative ice cream presentation, try an Ice Cream Sundae Charcuterie Board. It's perfect for smaller gatherings!

Sundae Bar Display Setup

Ice cream buffet with a desert plate of waffle cones, mini ice cream cones, and chocolate dipped ice cream cones.

The Layout That Works:

  1. Ice cream first (in tubs of ice or on a designated table section)
  2. Bowls and cones next
  3. Toppings in the middle (organized on a lazy Susan or tiered stand)
  4. Sauces and whipped cream at the end
  5. Spoons, napkins, and cherries last
Ice Cream Party Activities: invent your own flavour of ice cream, make ice cream cone crafts, have an ice cream taste test, play ice cream shop, and more!
Ice cream party make your own ice cream sundae buffet.

Container Ideas:

  • Ice cream cone-shaped dishes for toppings (adds to theme)
  • Small ramekins for individual portions
  • Mason jars with scoops
  • Cute bowls from dollar stores

Pro Tip: Set up your sundae bar LAST. Have everything ready to go, but don't bring out the ice cream until you're 10 minutes from sundae time. This prevents melting and keeps the excitement high.

Ice Cream Party Activities & Games

The best ice cream party ideas include hands-on activities that keep kids entertained. These activities have been tested at real parties. I'm sharing what ACTUALLY worked, not just what looks cute.

1. Invent Your Own Ice Cream Flavor

Ages: 6+ (with supervision)
Time: 30-40 minutes
What Worked: Kids LOVED naming their flavors and took them home as favors

Ice cream party chef hats and aprons for a make your own ice cream flavor activity.

Step 1: Design the Label

Give each child a small container with a blank sticker label. Have them name their new ice cream flavor and decorate the label with markers and washi tape. We've had kids create flavors called "Rainbow Explosion," "Cookie Monster's Dream," and "Unicorn Surprise." The creativity is adorable.

Creating ice cream flavour labels at an make your own ice cream flavor party activity.

Materials for labels:

  • Small containers (4-6 oz)
  • Blank sticker labels
  • Markers
  • Washi tape
  • Stickers (optional)

Step 2: Mix the Flavor

Ice cream add-ins for a create your own ice cream flavor activity.

Start with a base of homemade or store-bought vanilla ice cream (soft serve consistency works best). Making homemade ice cream? This Strawberry Rhubarb Ice Cream is a unique flavor kids love. Let each child choose 2-3 mix-ins from your topping selection:

Sweet add-ins:

  • Nutella
  • Peanut butter
  • Chocolate sauce
  • Caramel sauce
  • Strawberry sauce
  • Jam

Mix-in options:

  • Crushed cookies
  • Candy pieces
  • Sprinkles
  • Fresh fruit
  • Mini marshmallows
Invent your own ice cream flavor party activity.

Pro Tip: Time your ice cream so it's soft but not melted. Too hard and kids can't mix it. Too soft and it becomes soup.

Step 3: Freeze It

Homemade ice cream for an invent your own ice cream flavor activity.

Pop the labeled containers into the freezer for the rest of the party. At the end, add them to each child's "Make Your Own Sundae" take-home kit. Parents LOVE this activity.

What Parents Said: "My daughter still talks about the ice cream flavor she invented at your party!"

2. Blind Ice Cream Taste Test

Ages: 5+
Time: 15-20 minutes
What Worked: Kids loved this activity, and it was a great "taste test" of different flavors for the make your own ice cream sundae bar later.

Ice Cream Party Activities: invent your own flavour of ice cream, make ice cream cone crafts, have an ice cream taste test, play ice cream shop, and more!

How to Play:

  1. Pair kids up
  2. One partner wears a blindfold
  3. The other partner feeds them small tastes of 3 different ice cream flavors
  4. The blindfolded partner guesses the flavors
  5. Switch roles and repeat with 3 different flavors

Best Flavors for Testing:

  • Round 1: Vanilla, chocolate, strawberry (easier)
  • Round 2: Mint chocolate chip, cookie dough, cookies and cream (harder)

Materials:

  • Small plastic cups, with numbers 1-6 written on with a marker
  • Spoons
  • 6 different ice cream flavors
  • Blindfolds (or ask kids to close eyes)
  • Paper for writing guesses

Pro Tip: Pre-scoop the samples into small numbered cups and keep them in the freezer. This makes the game move quickly and prevents ice cream from melting while kids take turns.

3. Pom Pom Ice Cream Cone Craft

Ages: 4+
Time: 20-30 minutes
What Worked: Kids could customize with their favorite colors

Ice Cream Party Activities: invent your own flavour of ice cream, make ice cream cone crafts, have an ice cream taste test, play ice cream shop, and more!

Materials:

  • Wood veneer cones (cut off pointed tip) or brown construction paper cones
  • Yarn in various colors
  • Pom pom maker or cardboard circles
  • Red yarn for cherry
  • Sequins for sprinkles
  • Hot glue gun (adult use only)

How to Make:

  1. Make a large pom pom for the ice cream scoop (or use pre-made pom poms for younger kids).
  2. Make a small red pom pom for the cherry.
  3. Glue the large pom pom into the cone.
  4. Glue the red pom pom on top.
  5. Add sequins as "sprinkles".

Time-Saving Tip: For parties with younger kids, pre-make the pom poms and just have them glue and decorate.

Ice Cream Keychain or Necklace Craft

Ages: 7+
Time: 30 minutes + 5 minutes baking
What Worked: Kids loved taking home jewelry they made

Polymer clay ice cream cone key ring craft.
Ice Cream Party Activities: invent your own flavour of ice cream, make ice cream cone crafts, have an ice cream taste test, play ice cream shop, and more!

Materials:

  • Polymer clay (brown/beige for cones, various colors for scoops)
  • Eye pins
  • Jump rings
  • Keychain rings or necklace cords
  • Wire cutters
  • Plastic knife with serrated edge
  • Baking tray and parchment paper
  • Small organza bags for finished pieces

How to Make:

  1. Shape a small cone from brown polymer clay
  2. Add 1-3 small balls of colored clay as ice cream scoops
  3. Use serrated edge of plastic knife to create texture on each scoop
  4. Add a tiny red ball on top as a cherry
  5. Insert an eye pin into the cone (adult supervision needed)
  6. Bake at 275°F for 5 minutes
  7. Cool completely
  8. Attach jump ring and keychain or necklace cord

Organization Tip: Line a baking tray with parchment paper and write each child's name beside their creation with a Sharpie. This prevents mix-ups.

5. Pretend Ice Cream Shop

Ages: 3-10
Time: 20-45 minutes (kids often play longer)
What Worked: Kids love to play, and this imaginative center was the perfect activity at the end of the party. The kids loved it and didn't want to leave.

Setup:

  • Play kitchen or designated serving area
  • Menu board (kids can help create)
  • Tables and chairs for "customers"
  • Order pads and pencils

Pretend Ice Cream Ingredients:

  • Tissue paper balls or cotton balls as ice cream scoops
  • Paper cones or real cones
  • Pom poms as sprinkles and cherries
  • Empty sauce bottles
  • Small bowls and spoons
  • Napkins

Props:

  • Toy cash register
  • Play money
  • Dress-up clothes (aprons, chef hats)
  • Serving trays

Want to see another version of pretend ice cream shop play? Check out this Ice Cream Birthday Party with cotton ball ice cream for younger kids.

What I Didn't Expect: Kids played this for the entire last half hour of the party, even with full bellies of real ice cream. The dramatic play element lets them process the whole party experience.

Additional Ice Cream Party Games

Ice Cream Cone Relay Race (outdoor): Pass a fake ice cream cone (pom pom on paper cone) between teammates without dropping it.

Ice Cream Bowling: Use empty ice cream containers as bowling pins, roll a ball to knock them down.

Pin the Cherry on the Sundae: Classic party game with an ice cream twist.

Ice Cream Trivia: Create age-appropriate questions about ice cream facts.

Ice Cream Party Decorations

These ice cream party decorations create the perfect Instagram-worthy backdrop for your celebration. They are budget-friendly and have serious visual impact. For more general birthday party decoration ideas that work across themes, check out our complete guide.

DIY Ice Cream Cone Backdrop

Ice cream party backdrop, and ice cream bufet.

This backdrop creates the perfect photo opportunity and makes your sundae bar look professional.

Materials:

  • Brown kraft paper (or large brown paper bag opened flat)
  • Honeycomb tissue balls in pastel colors (pink, mint, yellow, white)
  • One small red honeycomb ball for cherry
  • Tape or command strips

How to Make:

  1. Cut kraft paper into a large ice cream cone shape (wider at top, tapered at bottom)
  2. Use a pencil to draw crisscross lines for waffle cone texture
  3. Tape to wall behind sundae bar
  4. Open honeycomb balls halfway (not fully round)
  5. Attach balls above cone as "scoops" of ice cream
  6. Add red ball on top as cherry

Time to Make: 20-30 minutes
Budget: Under $15

Alternative: Use balloons instead of honeycomb balls for an even easier version.

DIY Ice cream party dessert table backdrop.

DIY Ice Cream Cone Bunting

Ice Cream Themed Party Decorations: easy, DIY, inexpensive and colourful ice cream decoations like our ice cream cone dessert table backdrop, and ice cream cone bunting.
DIY ice cream cone party decorations.

This is my favorite decoration because it's so cute and unexpected.

Materials:

  • Scissors
  • Honeycomb ball garland (dollar store)
  • Small wood veneer cones (disposable food containers)
  • Hot glue gun

How to Make:

  1. Cut pointed tips off wood veneer cones to make them look like ice cream cones
  2. Hot glue cones onto the bottom of each honeycomb ball
  3. Hang garland along mantel, doorway, or from light fixtures

Budget-Friendly Alternative: Cut cone shapes from brown construction paper instead of buying wood veneer cones.

Pro Tip: Make extras and hang individual ice cream cones from ceiling with fishing line for a floating effect.

Quick Decoration Ideas

Ice cream party with party table decorated for party.
ice cream party centre piece with ceramic ice cream cone and flower balls.
  • Table Runner: Use bright wrapping paper instead of tablecloths. Inexpensive, colorful, and easy cleanup.
  • Ice Cream Centerpiece: Fill ceramic ice cream cone containers with faux flower balls (carnations work perfectly). Simple and adorable.
  • Letter Board Messages: Display ice cream quotes like "You can't buy happiness, but you can buy ice cream and it's kind of the same thing."
  • Color Palette: Stick with pastel pink, mint green, yellow, and white with pops of red for cherries.
  • Balloon Garland: Create a pastel balloon garland with ice cream cone-shaped mylar balloons mixed in.

Party Favors & Loot Bags

"Make Your Own Sundae" Favor Kit

Ice cream party favours.

This is hands-down the most popular party favor I've ever given. Here's what makes it special: each kit includes the ice cream flavor the child invented at the party. Want to create a sundae kit as a gift instead of a party favor? See my complete Ice Cream Sundae Kit guide for gift-giving occasions.

What Goes in Each Kit:

From Bulk Bins (Budget-Saver):

  • Sprinkles in small cellophane bags with custom labels
  • Candy pieces in portioned bags or mini jars with ribbon
  • This is where repackaging expertise shines

From Regular Store:

  • Small bottles of chocolate and caramel sauce
  • Assorted ice cream cones and waffle bowls 4-6 total in a cellophane bag

The Homemade Ice Cream: Their custom flavor they created during the party

Time to Assemble: 45 minutes for 15 kits
Make-Ahead: Assemble 1-2 days before party. (Add the ice cream from the freezer that they make at the party as each guest is leaving.)

Repackaging Tips:

  • Buy sprinkles and candy from bulk bins and portion into small bags or spice jars
  • Use clear cellophane bags tied with colorful ribbon
  • Make your own labels with printable sticker paper
  • Use mini mason jars with fabric-topped lids for a premium look
  • The secret: presentation makes budget items look expensive

Additional Budget-Friendly Favor Ideas

Ice cream party favours of ice cream cone bubbles.
  • Ice Cream Cone Bubbles: Place in a basket by the door for kids to grab on the way out (dollar store find).
  • DIY Ice Cream Cone Crafts: Package the party crafts and add to favor bags.
  • Ice Cream Themed Coloring Books: Dollar store often carries these.

Party Food (Beyond Ice Cream)

Drinks

Party drinks of lemonade, bottled water and pop on a bar cart.

Keep drinks simple so ice cream stays the star:

  • Lemonade in a dispenser or individual bottles
  • Bottled water
  • Juices or sodas
  • Colorful paper straws (pastel colors match the theme)

Pro Tip: Set up a separate drink station away from the sundae bar to prevent congestion.

Main Meal Ideas

If hosting over a meal time, keep food simple:

  • Pizza (always a kid favorite)
  • Hot dogs or sliders
  • Veggie and dip platter
  • Fruit platter
  • Popcorn

Remember: Kids will fill up on ice cream, so don't over-prepare main courses.

Ice Cream Themed Desserts

Even though ice cream IS the dessert, these themed treats add extra fun.

Ice Cream Cone Rice Krispie Treats

Ice cream cone Rice Krispie treats.

What Makes Them Special: They look like ice cream cones but aren't cold or messy.

How to Make:

  1. Make rice krispie treats according to package directions
  2. Roll into small balls while warm
  3. Dip in melted pink candy melts
  4. Immediately add sprinkles and a red M&M "cherry"
  5. Press gently into mini ice cream cones
  6. Let chocolate set

Make-Ahead: These hold up great for 2-3 days in an airtight container.

Ice Cream Cone Cupcakes

Cupcakes baked in ice cream cones.

Instead of Birthday Cake: Bake cupcakes directly in ice cream cones for an adorable presentation.

How to Make:

  1. Stand flat-bottomed ice cream cones in muffin tin
  2. Fill cones ⅔ full with cake batter
  3. Bake according to cake recipe (watch carefully, they bake faster than regular cupcakes)
  4. Let cool completely
  5. Pipe frosting on top to look like soft-serve ice cream
  6. Add sprinkles and a candy cherry

Pro Tip: Use cake mix for convenience and save your energy for decorating. These are not a good make ahead, as the cone can become soft overnight, so bake them the morning of the party for the best taste.

Store-Bought Options

No shame in buying treats:

  • Ice cream themed cookies from bakery
  • Ice cream cone cake pops
  • Frosted sugar cookies shaped like ice cream cones
  • Ice cream themed cake from the bakery
Ice cream party buffet with ice cream cone backdrop.

Dietary Accommodations

Dairy-Free Options

Offer 1-2 non-dairy ice cream flavors:

  • Coconut milk-based ice cream
  • Oat milk ice cream
  • Sorbet

Important: Use separate scoops for dairy-free options and label them clearly.

Nut Allergies

If a guest has nut allergies:

  • Place nut toppings at the far end of the bar
  • Use separate scoops
  • Label everything clearly
  • Consider making it a nut-free party if the allergy is severe

Gluten-Free

Most ice cream is naturally gluten-free, but:

  • Offer gluten-free cones
  • Label toppings that contain gluten (cookie pieces, certain candies)
  • Have GF alternatives clearly marked
Ice cream party centerpiece with ceramic ice cream cones and faux flower balls.

Pro Tips

After hosting many children's parties over 15 years, here's what I've learned:

  1. Over-plan activities: Better to skip one than run out of things to do.
  2. The sundae bar saves everything: Even if other activities flop, kids love building their own sundaes.
  3. Take photos and video BEFORE and DURING: Photograph your decorations and table setups before guests arrive. Remember to take photos at the actual party. You can set reminders on your phone, or ask friends to take photos and videos during the party as well and airdrop them to you before they leave.
  4. Use phone timers: Set alarms for activity transitions so you stay on schedule.
  5. Pre-scoop option: For younger kids (under 6), pre-scoop ice cream into cups to speed up the sundae bar.
  6. Expect messes: Have wet wipes and paper towels everywhere.
  7. Memory over perfection: Kids remember having FUN, not whether decorations matched Pinterest perfectly.
Ice cream birthday party birthday girl.

Common Mistakes to Avoid

  • Bringing ice cream out too early: It melts. Set up everything else first, then bring ice cream out 5-10 minutes before serving.
  • Too many topping choices: 8-12 toppings is plenty. More than that overwhelms kids and creates waste.
  • Not enough spoons: Buy double what you think you need. They disappear.
  • No structure or timeline: Kids do better with a planned sequence of activities.
  • Forgetting about adults: If parents are staying, have coffee and seating available for them.

Ice Cream Party Activities: invent your own flavour of ice cream, make ice cream cone crafts, have an ice cream taste test, play ice cream shop, and more!

Frequently Asked Questions

How much ice cream should I buy per person?

Plan for 2-3 scoops per guest, which equals about 1 cup (250 mL) of ice cream. For 15 guests, buy 4-5 pints or 2 half-gallons (US), or 2-3 liters (Canada).

What are the best ice cream party games for kids?

The blind taste test is always a hit for ages 5+, and the pretend ice cream shop works amazingly for ages 3-10. Both have been tested at multiple parties and kids request them again.

How do I keep ice cream from melting at the party?

Use galvanized tubs filled with ice for smaller containers, and pop them back into the freezer when the buffet slows down. Most importantly, set up your sundae bar completely BEFORE bringing out ice cream.

What ice cream toppings should I include?

Stick with proven favorites: hot fudge, caramel sauce, whipped cream, rainbow sprinkles, chocolate chips, gummy bears, mini M&Ms, and maraschino cherries. That's 8 toppings that cover all the bases without overwhelming kids.

How far in advance can I prepare for an ice cream party?

Make decorations 1-2 weeks ahead. Bake ice cream cone cupcakes the morning of the party. Set up your sundae bar (minus ice cream) the morning of, and cover containers with plastic wrap until the guests arrive. Bring ice cream out 5 minutes before serving time. Assemble party favor kits 1-2 days before.

What's a good party favor for an ice cream party?

The "Make Your Own Sundae" kit is the most popular favor I've given. Include the ice cream flavor each child created at the party, plus small portions of sprinkles, candy, and sauce. Kids and parents both love this.

Can you have an ice cream party in winter?

Absolutely! Kids love ice cream year-round. Just host the festivities inside so no one is cold.

How do I handle a child with a dairy allergy at an ice cream party?

Offer 1-2 dairy-free ice cream options (coconut milk or oat milk based). Use a separate scoop for dairy-free ice cream to prevent cross-contamination. Most toppings are naturally dairy-free, but label everything clearly. Let the child's parents know in advance what you're planning.

What ages work best for an ice cream party?

Ice cream parties work for ages 4-12, with activities adapted for age. Younger kids (4-6) love the pretend ice cream shop and simple crafts. Older kids (7-12) enjoy creating their own ice cream flavors and the blind taste test. The sundae bar works for ALL ages.

More Ice Cream Inspiration

  • Ice cream charcuterie dessert board in the shape of an ice cream cone.
    Easy Ice Cream Sundae Charcuterie Dessert Board
  • Complete ice cream sundae gift basket with all toppings cones and accessories arranged and ready to give.
    How to Make an Ice Cream Sundae Kit Gift Basket
  • Ice Cream Birthday Party: homemade decorations, a pretend ice cream store with homemade cotton ball ice cream, ice cream games, and an ice cream sundae buffet!
    Ice Cream Birthday Party
  • homemade strawberry rhubarb ice cream
    Strawberry Rhubarb Ice Cream Recipe

If you use any of our Ice Cream Party Ideas or any other ideas from the blog, please let us know how it went in the comments below. Thanks for visiting Life is a Party today!

Swedish Inspired Midsummer Picnic

Aug 3, 2018 · 2 Comments

How to throw a Swedish inspired midsummer picnic.

Swedish Inspired Midsummer Picnic:  Enjoy drinks, smorgasbord, and dessert all inspired by a traditional Swedish Midsummer party menu.  Easy to create at home, and so delicious!

How to throw a Swedish inspired midsummer picnic.
[feast_advanced_jump_to]

We're celebrating Swedish midsummer eve with a traditional picnic and some Swedish foods all enjoyed outside for a picnic with friends and family.

I'm so excited to share my Swedish Picnic with you! We've been creating picnics inspired by different international cuisine this summer. Our first one was a British Inspired Picnic -check it out here.  And today, we're sharing our picnic inspired by Sweden and their traditional midsummer picnics.  

What is Swedish Midsummer?

Midsummer celebrates Equinox, or the longest day of the year, and in Sweden it usually involves a Midsummer party in the form of an outdoor picnic, flower crowns, and a great menu of traditional Swedish foods.  This usually takes place around the end of June.  It is often considered a magical time, and is celebrated to welcome the beginning of the summer from pagan times, and the season of fertility.  Young women would often wear wreaths of flowers in their hair.  Midsummer is one of Sweden's most popular holidays and big celebration of the summer solstice in most parts of Sweden.

Swedish Inspired Midsummer backyard picnicInternational Inspired Picnics

This midsummer meal was really pretty simple to put together.  A few months ago, I asked my Facebook readers "what keeps you from entertaining more?" The most popular answer was "my house".  Some felt overwhelmed by getting the house looking company ready, some didn't have enough space to entertain, and others felt they needed some major renos or redecorating before entertaining.  Those answers inspired this series of picnics.  The perfect solution to not entertaining at home is to go on a picnic with friends.

Swedish Midsummer PartyThe Setting and Decor

As is Swedish tradition, we set up this picnic in our backyard -which might work for someone who doesn't have enough space inside but has some outdoor space.  But you could also pack it all up and serve it at your local park too.  MIdsummer celebrations are usually outside.

Swedish Midsummer Party menu

I decided to go with a black and white theme for our midsummer table.  It's a real favourite of mine lately, but seemed perfect for the Scandinavian vibe.  I shopped my house for the pillows, and they really do make the chairs so comfy and perfect for lingering around our midsummer dinner.

black and white outdoor bench

We kept the table setting pretty and simple, with just a side plate, napkins, black cutlery, and a stemless wine glass for each guest.

black and white backyard Picnic

For flowers for our Swedish midsommar table, I picked some Queen Anne's lace and used some little glass bottles to add some around our smorgasbord. So pretty and summery.

Swedish Midsummer Party

Swedish Inspired Midsummer PicnicSwedish Inspired Midsummer Picnic Menu

The midsummer's eve menu was a lot of fun to put together to celebrate the arrival of summer, and something a bit different as we came up with our own version of a Swedish traditional menu.  I've never been to a Swedish picnic before -here or in Sweden, but after my research I knew I would like to!

Swedish Midsummer Party

To make things easy, we headed to Ikea for a lot of the picnic food since they have a great selection of Swedish cuisine. I did a little research on-line ahead of time, I had a good idea of the standard picnic fare for a Midsummer Swedish Picnic.  I learned all about smorgasbord.  

A smorgasbord is traditional Swedish fare, and always includes brown bread, butter, and a cheese board.  They usually include fish, like pickled herring, or fresh salmon, which we skipped.  We did include salmon.  Smorgasbords have come to include both hot and cold dishes and in North America are now usually referred to as buffets, and can be quite extravagant.

how to throw a Swedish Midsummer partyI was guided by the traditional smorgasbord for a Midsummer picnic, and also what was easily available here in Canada.  I did find lots of great additions on my trip to Ikea.  Here's what we picked up at Ikea, to make this picnic a little easier.

Swedish midsummer party food from Ikea

Drinks

  • Sparkling Pear and Sparkling Apple and Lingonberry Juice (Ikea)
  • lingonberry Syrup and Blueberry Syrup concentrate (Ikea)

Smorgasbord

  • Leek and Cheese Pie (Ikea)
  • Light Rye Bread
  • Dark Rye Bread
  • Crisp Bread Rye Crackers (Ikea)
  • Sliced Roast Beef
  • Cured Smoked Salmon (Ikea)
  • Jarlsberg Cheese
  • Havarti Cheese
  • Hard Boiled Eggs
  • Sliced Cucumbers
  • Cherry Tomatoes
  • Honey Mustard Sauce
  • Mustard Dill Sauce (Ikea)
  • Pickled Gherkins (Ikea)
  • Butter
  • Cucumber Salad
  • Boiled New Potatoes
  • Potato Chips -Plain and Sour Cream (Ikea)

Desserts

  • Daim Cake (Ikea)
  • Fresh Strawberries
  • Daim Chocolate Bar (Ikea)
  • Cookies with Raspberry Filling (Ikea)
what to serve at a Swedish Inspired Midsummer Picnic

New Potatoes

The only things I had to actually cook were the new potatoes -which were boiled and then I added butter and fresh dill to, and the cucumber salad.  The new potatoes were served hot and they were delicious.  Potato salad would be a great option too.

Swedish Inspired picnic food

Cucumber Salad

For the cucumber salad I sliced a cucumber very thinly and then made a dressing of ¼ cup of white vinegar, and 3 tablespoon sugar, and some fresh dill.  This cucumber salad was like a quick pickle and delicious with everything else we enjoyed for our midsummer day feast.  The main course was delicious and really easy to assemble with all the traditional foods we were able to find.

Swedish Inspired Picnic Menu
Swedish Inspired Midsummer party Picnic menu ideas

Cheese

I wasn't able to find authentic Swedish cheeses here, but found on line that a Jarlsberg or something similar and a soft cheese like Havarti were great substitutes.

Swedish Inspired Midsummer Picnic

I've never really cooked much with dill, but it seemed like a really prevalent addition for Swedish food.  I added it to the potatoes and the cucumber salad and we all really enjoyed it.

Swedish Inspired Midsummer Picnic menu

The glass bottle was picked up at Ikea too, and it's perfect for cold water.  Guest could have plain water or add in the blueberry or lingonberry syrup.  Stemless wine glasses were perfect for water, the juice mixture, or the sparkling juice.

Swedish Inspired Picnic drinksDessert

I also found on-line that sweet strawberries are a must for a midsummer picnic, either in a dessert like strawberry cake or on their own.  We loved our dessert tray, and just kept nibbling on the chocolate, strawberries, and cookies as we talked the night away at our own little Swedish midsummer celebration.

Swedish Midsummer Picnic DessertsThis theme was so fun to put together and it was fun trying to find some of the traditional food and celebrate the beginning of summer together.  I loved that it was little bit different, but there was still something for everyone -even the kids, to really enjoy.

It was great creating a true smorgasbord for our Swedish Midsummer party so everyone could help themselves.  And it was a real hit with the guests.  Such easy entertaining, where everyone lingers at the table and keeps going back for a little bit more, or try another combination.

Swedish Inspired Midsummer Picnic
how to throw a Swedish Inspired Midsummer Picnic

garden picnicWith a Swedish Inspired Midsummer Picnic, life really is a party!

More Inspiration

  • Daisy themed summer picnic party table with yellow and white striped tablecloth, daisy cake, daisy deviled eggs, floral pizza, and fresh daisy flower arrangements.
    Daisy Themed Party Ideas
  • Mushroom themed party picnic in backyard.
    Mushroom Themed Picnic Party
  • Cherry themed party table with food and cherry themed decor.
    Cherry Themed Party Ideas
  • Butterfly themed party ideas party table, food, and decorations.
    Butterfly Themed Party Ideas

Summer Table

Aug 1, 2018 · Leave a Comment

Summer table set with garden flowers.

Summer Tablescape -garden flowers in vintage bottles under glass cloches create a simple, easy summer table for entertaining.

Summer table set with garden flowers.
[feast_advanced_jump_to]

I love summer entertaining.  The produce is at it's best, the weather is great, and best of all those so many pretty flowers!  We picked some flowers from our garden for this pretty summer tablescape.  This neutral loving girl, got swept up with gorgeous colourful summer blooms and embraced all the colour of the season.

Summer Tablescape with garden flowers
Summer Tablescape with Garden Flowers

The flowers are all from our garden, and it was so much mixing and matching them, picking them, and arranging them.  The flowers really were the inspiration for the whole table.

Summer Tablescape

I used some pretty little vintage jars and made simple groupings of blooms.

Summer Table

For our flowers we used a combination of zinnias, cosmos, bachelor's buttons, black eyes susans, and cone flowers that where all blooming in the garden.

garden flowers in vintage bottles

They look so pretty and special under these glass cloches.    I just shopped my house and used a few that I already had.  


flowers under glass cloches

Mixing and matching the different sizes of cloches was really fun too, and added interest to the table.

summer table decorI used a simple and summery white linen runner on the table, and added in some pretty candles for a little candle light.  The finishing touch was a few pretty cosmos flower petals scattered here and there.

summer table ideasPlace Settings

For the place settings, I used my everyday white dishes, but dressed it up a little with pretty gold cutlery and glasses for this summer tablescape.

how to set a summer table


The simple paper napkins make entertaining easy and add a little more colour and pattern.

zinna flowerIt's all finished off with a pretty individual zinnia blossom at each place setting.  I think zinnias might be one of my very favourite flowers.


how to set a summer table

We grew these from seed, they're just an annual and so easy to grow.  And the more you pick them the more they bloom, so I'm picking away and enjoying them inside.

summer tablescape ideasI love the ease of summer entertaining, and creating simple centre pieces right from our own backyard flowers.  Do you grow your own flowers?  The farmer's market is a great source too.

Summer Table With a  pretty summer tablescape like this one, life really is a party!

You might also like our 3 Steps To An Easy Summer Table here.

Also check out our Geometric Pink and Gold Tablescape here.

You might also enjoy our Summer Dinner Party here.

Cozy Boho Summer Living Room

Jul 26, 2018 · 2 Comments

Cozy Boho Summer Living Room: lots of white textured pillows, white lanterns, candles, twinkle lights and woodland touches.

Cozy Boho Summer Living Room: lots of white textured pillows, white lanterns, candles, twinkle lights and woodland touches give this living room the perfect summer neutral boho look.

Cozy Boho Summer Living Room: lots of white textured pillows, white lanterns, candles, twinkle lights and woodland touches give this living room the perfect summer neutral boho look.Today I'm sharing our cozy boho living room refresh for summer.  Although you tend to think of spending cozy nights down there with a movie and the fireplace on during the winter, it's actually perfect for summer.Cozy Boho Living RoomIt's always so nice and cool and the perfect spot to beat the heat in the summer, especially after a long fun day in the sun.  It's a great spot to retreat too when it's just too hot outside, or for the evening after  enjoying the sun all day.

Cozy Boho Living Room

This room really is one of my favourites.  It's the first room in this house that I really designed myself.  I worked with my brother-in-law from Benjamin Woodworks to design the fireplace and he brought it to life.  I still love the wood and concrete we used almost 10 years later.  Back then wallpaper was just beginning to emerge again, and I used some wall decals to add the birch.  I still love the birch detail on the back wall, and it inspired this design.

Birch, Woodland, and Ferns

After adding lots of plants other places in the house, I knew I wanted to add some plants into this space.  But with the birch it seemed like succulents and palms weren't really the right fit.  I took my cue from the forest, and added some ferns for a summer woodland feel.

Cozy Boho Summer Living Room

I was going for a kind of boho, summery, white, glamping kind of a vibe and I'm really happy with how it turned out.

Adding Boho Inspired Pillows

To freshen up the space I added in some boho inspired textured pillows.  There's a combo of some I made -see the tutorial here, some plain linen, some really textured ones with lots of fun pom poms and fringe.  I kept it all white and cream, and I mostly used cotton and linen so it would feel a little lighter and fresher for summer.  It's amazing what a difference pillows can make to a space.

Cozy Boho Living RoomThis really looks like the perfect spot to curl up and beat the heat with a  movie and a bowl of popcorn in the afternoon.

Cozy Boho Summer Living RoomCoffee Table Wonderland

On my coffee table/toy chest I created a little twinkle light, candle, lantern wonderland.

white lanterns

I used a combination of old lanterns, and lacey tea light holders.

white lantern and twinkle lights


Then I wove a string of wire mini-lights around them.  It's like a magical fairy campground, but with no mosquitoes.  So pretty much perfect.

boho lanterns

The Fireplace

Over on the fireplace mantel, I kept my deer head friend, and added a few twinkle lights to his antlers.

summer mantelOn the shelves there's a combination of lanterns and candles that I already had.

Cozy Boho Summer Living RoomThe fact that they're all white really brings the space together.

Cozy Boho Summer Living Room

I added in a new set of little mushrooms.  I love the combination of the wood and concrete, and mushrooms fit the forest woodland feel perfectly.

cement and wood mushrooms

The fern garland is a real favourite in the room.

fern garland


I made it with a couple stems of faux fern.  I cut them down into individual pieces using some wire cutters, and used simple jute twine to tie them into a garland.

summer mantelSo simple, and so perfectly summer forest feeling.

Cozy Boho Summer Living RoomI added in some real white hydrangeas and ferns from my garden.

white hydrangeas But all the other ferns are faux, so supper easy, and no need to worry about watering during summer vacation.

Cozy Boho Living Room

Cozy Boho Living Room
Cozy Boho  Living Room

With a Cozy Boho Summer Living Room, life really is a party!

You might also like our Summer Home Tour here.

Boho summer home tour

Also check out our Late Summer Home Tour here.

You might also like our Mustard Yellow and Pink Summer Home Tour here.

Mustard Yellow and PInk Summer Home Tour: a neutral space gets some colour with yellow and pink decor including candles, flowers, pillows, and new art.

Brown Butter Raspberry Tarts

Jul 24, 2018 · 1 Comment

Browned butter raspberry tart recipe.

Brown Butter Raspberry Tarts: the perfect combination of gooey sweet filling, and tart fresh raspberries, with a really easy pastry.  Great for a beginner.

Browned butter raspberry tart recipe.
[feast_advanced_jump_to]

These brown butter raspberry tarts are a little hard to describe. They're sweet and gooey, a little like a butter tart, but then the raspberries are the perfect tart balance to the sweet.  I'd say they're pretty much perfection.  These would be the perfect addition to a tea party, or a sweet tray.  They'd make a lovely lunch or dinner dessert.  They're absolutely perfection along side a cup of coffee or tea.

Brown Butter Raspberry TartsThey're sooo good.

The first time I had them, I kept thinking about them and just how perfect they are.  A brown butter raspberry tart and cup of tea, is pretty much what dreams are made of.

how to make Brown Butter Raspberry Tarts

Ingredients

Pastry

This is actually a pretty easy pastry recipe, because it's done in the mixer, almost like a cookie recipe.  This is a great recipe for a beginner and makes a lovely sweet pastry perfect for tarts.

Filling

This filling is very similar to a butter tart -if you're Canadian you know exactly what that is. If not, it's a bit similar to the filling in a pecan pie -without the pecans.

Browned Butter

Browning the butter gives it a nutty flavor and depth. When the butter is browned the milk solids caramelize and it adds so much to this recipe. It's definitely worth the trouble.

Fresh Raspberries

The combination of the sweet filling with the tart raspberry in this recipe just cannot be beat. The whole greater than the sum of its parts. Fresh is best for this recipe.

Instructions

To make the tart dough, cream the room temperature butter and sugar together using a stand mixer fitted with the paddle attachment, until light and fluffy and pale yellow.

Add the eggs one at a time and beat until fully mixed.

Add the flour and sugar-egg mixture, and mix until it forms a dough.

Gather the dough into a ball and chill.

Dust the work surface with flour, and roll out dough with a rolling pin and cut out into tart shells. Press dough into a tart pan. Prick tart shells with a fork before baking.

Preheat the oven to 350, and position rack in the center of oven. Bake the empty tarts for 7-8 minutes, until the tartlet cases are lightly golden.

To make the filling, melt butter in a heavy small saucepan over medium high heat, and cook butter until the butter is a deep nutty brown and there are brown flecks on the bottom of the pan. The browned butter will foam up and then settle, and have a nutty aroma.

Brown Butter Raspberry Tarts

Whisk sugar, eggs, vanilla, and salt together in a bowl. Whisk the flour in gently, then pour in the browned melted butter in a steady stream continuing to whisk constantly.

Place 2 -3 raspberries in each tart shell, and pour filling over top.

Brown Butter and fresh Raspberry Tart recipe

Brown Butter Raspberry Tartshow to make Brown Butter Raspberry Tarts

Bake the tarts at 350 for 10 minutes until they are golden brown and the filling is set.

Let cool in the tart pan on a wire rack. Remove from the pans, and dust with powdered sugar before serving.

Brown Butter Raspberry Tarts recipe

Makes 20-22 tarts. Best eaten the day they are made, but leftovers can be stored in an airtight container.

Substitutions

You can use frozen raspberries for this recipe if you can't get fresh. You want to be careful not to add liquid though, so be sure to add the raspberries while they're still frozen or thaw and drain them first.

Brown Butter Raspberry Tarts
Storing The Tarts

These really are best eaten right away. On the first day when they're fresh baked, the pastry is perfectly crisp, and the filling is perfectly gooey.  It's a good idea to bake this tart recipe the day you need them.

The good news is, you can get ahead by making the dough the day before and wrapping it in plastic wrap and storing it in the fridge to roll out and bake the tart crust the next day.  You could also make the filling the day before.  Mix it up in a mixing bowl, and cover tightly and refrigerate.  When it's time to assemble the tarts, pre-bake the tart shells, add the deeply-flavored filling and the raspberries, and then bake again.

If you do have leftovers store them at room temperature in an airtight container.

Brown Butter and fresh Raspberry Tarts

Can I use frozen tart shells?

We love these easy pastry tart shells, but if you're in a rush you can substitute frozen pastry shells. Defrost them, prick them with a fork and pre-bake the tart shells, just like in the recipe.

Can I use this recipe for one large tart?

The quantities in this recipe are perfect for individual tart size. We've never tried to adjust the recipe for one large tart. We recommend making the smaller individual tart size with this recipe.

Can I use a different fruit?

We love the contrast of the tart raspberries with the sweet filling. If you want to try a different fruit, try to use something not too sweet like a sour cherry. Blueberries or strawberries might be too sweet. We haven't tried substituting the fruit, but please comment below if you try it.

Raspberry Tarts with browned butter filling

Recipe

Browned butter raspberry tart recipe.

Brown Butter Raspberry Tarts

Individual tarts filled with gooey and sweet brown butter filling and tart raspberries.
5 from 1 vote
Print Pin Rate
Course: Desserts
Cuisine: American
Prep Time: 20 minutes minutes
Cook Time: 20 minutes minutes
Total Time: 40 minutes minutes
Servings: 22
Calories: 155kcal
Author: Dannyelle Nicolle-Ramjist

Ingredients

For the Pastry

  • 7 tablespoon butter
  • ⅓ cup sugar
  • 3 eggs
  • 1 ½ cups all purpose flour

For the Filling

  • ½ cup butter
  • ½ cup sugar
  • 2 eggs
  • 1 teaspoon vanilla
  • pinch of salt
  • ¼ all purpose flour
  • ½ pint fresh raspberries about 1 cup

Instructions

  • To make the tart dough, cream the room temperature butter and sugar together using a stand mixer fitted with the paddle attachment, until light and fluffy and pale yellow.
  • Add the eggs one at a time and beat until fully mixed.
  • Add the flour and sugar-egg mixture, and mix until it forms a dough.
  • Gather the dough into a ball and chill.
  • Dust the work surface with flour, and roll out dough with a rolling pin and cut out into tart shells. Press dough into a tart pan. Prick tart shells with a fork before baking.
  • Preheat the oven to 350, and position rack in the center of oven. Bake the empty tarts for 7-8 minutes, until the tartlet cases are lightly golden.
  • To make the filling, melt butter in a heavy small saucepan over medium high heat, and cook butter until the butter is a deep nutty brown and there are brown flecks on the bottom of the pan. The browned butter will foam up and then settle, and have a nutty aroma.
  • Whisk sugar, eggs, vanilla, and salt together in a bowl. Whisk the flour in gently, then pour in the browned melted butter in a steady stream continuing to whisk constantly.
  • Place 2 -3 raspberries in each tart shell, and pour filling over top.
  • Bake the tarts at 350 for 10 minutes until they are golden brown and the filling is set.
  • Let cool in the tart pan on a wire rack. Remove from the pans, and dust with powdered sugar before serving.
  • Makes 20-22 tarts. Best eaten the day they are made, but leftovers can be stored in an airtight container.

Nutrition

Serving: 1g | Calories: 155kcal | Carbohydrates: 16g | Protein: 3g | Fat: 9g | Saturated Fat: 5g | Polyunsaturated Fat: 3g | Cholesterol: 63mg | Sodium: 85mg | Fiber: 1g | Sugar: 8g
Tried this Recipe? Tag me Today!Mention @LifeisaParty or tag #lifeisaparty!

Next time you're looking for a great tart recipe to make, give these a try.  I know you'll be glad you did as soon as you bite into one.  

With Brown Butter Raspberry Tarts, life really is a party!

More Recipes You Might Like

You might also enjoy our Butter Tarts with Raisins recipe here.

You might also enjoy our Nectarine and Blueberry Galette recipe here.

Nectarine and Blueberry Galette: literally make in minutes with frozen puff pastry, so easy and the perfect way to enjoy fresh nectarines and blueberries.

Homemade Scotch Eggs Recipe

Jul 19, 2018 · 1 Comment

Scotch eggs sliced in half showing the hard boiled egg center on a white plate.

Scotch Eggs Recipe: How to make home made Scotch Eggs, the perfect British snack or picnic food. Hard boiled eggs wrapped in sausage and breaded.

Scotch eggs recipe
[feast_advanced_jump_to]

Scotch eggs are the perfect snack or picnic food.  Traditional scotch eggs are a hard-boiled egg surrounded in a sausage meat mixture that is lightly breaded and fried.  It's perfectly portable and delicious served warm, room temperature or cold.

I first had a Scotch egg years and years ago, when I lived in the United Kingdom.  I was studying there.  A British friend invited me and another international student to her parents house for Easter break, since we couldn't make it home.  While we were there we went on a picnic one day, and my friend brought some homemade scotch eggs.

I'd never had a Scotch egg before, but was delighted to meet its acquaintance.  I thought the whole idea of a delicious hard boiled egg wrapped in sausage and breaded was pretty much brilliant.  Perfectly portable and so delicious.  And they are certainly a wonderful choice for a picnic.  They are also a popular British snack.  And they're also great served warm for breakfast.

How to make home made Scotch Eggs

I make this scotch egg recipe for picnics and tea parties, and knew they'd be great addition to recent British Picnic. I shared all the details of our British Picnic here, so be sure to check it out for some great ideas.

Hard or Soft Boiled Eggs

When I've had scotch eggs, they've always been hard boiled with firm egg yolks.  This version makes them a great portable food to eat on the go.  You can also make them with a soft boiled egg.  The soft boil version is usually done when they're served warm.  Obviously this makes them a little more messy for eating and you will need a plate and knife and fork to enjoy the soft-boiled eggs version without making too much of a mess with the runny yolk.

Sausage Meat

I used a mild Italian sausage for my scotch eggs because it's readily available where I live.  Honey garlic sausages would also be a good choice and are easy to find at the grocery store here in Canada.  You can use beef or pork sausage for this recipe.  Really any sausage meat you like best, you can use for this recipe.

Scotch Eggs at a picnicBritish inspired picnicThe last time we made Scotch Eggs I included them as part of the charcuterie board for our Spring Tablescape  someone requested the recipe so this time I took photos so I could share with you.

Scotch Eggs recipe
wrapping a hard boiled egg in sausage to make scotch eggs

Frying Your Eggs

I used a frying pan and about an inch of oil to pan fry my scotch eggs.  It's not necessary to get out the deep fat fryer and deep fry this recipe.  But you can make them in the deep fryer if you prefer to.  Heat the oil temperature to 350 degrees F.  We finished our pan fried scotch eggs off in the oven, but if you're cooking them in a deep fryer you can skip the oven and just make sure the sausage meat is fully cooked through before removing them from the hot oil.  

You can also use an air fryer to make scotch eggs.  Spray them well with oil, and cook at 375 degrees for about 6 minutes, then turn them over and cook an additional 6 minutes until they are golden brown and the sausage meat is fully cooked through.  The best way to test if your sausage meat is fully cooked is with a cooking thermometer.  Ground pork, or ground beef is fully cooked when it reaches 160 degrees F.  Be sure your sticking the thermometer into the sausage meat only and not the cooked egg when you're checking it.

making Scotch Eggs

These Scotch eggs are so perfect for summer picnics and eating on the go.  If you're making them for a picnic you can make ahead of time and store them in the fridge so they're ready for a picnic the next day.  Store them in an airtight container or plastic wrap.

Recipe

Scotch eggs sliced in half showing the hard boiled egg center on a white plate.

Scotch Eggs

Hard boiled eggs coated in sausage meat and breading pan fried to golden brown.
5 from 1 vote
Print Pin Rate
Course: Appetizers
Cuisine: British
Prep Time: 15 minutes minutes
Cook Time: 20 minutes minutes
Total Time: 35 minutes minutes
Servings: 6
Calories: 368kcal
Author: Dannyelle Nicolle-Ramjist

Ingredients

  • 6 eggs
  • 6 sausages I used mild Italian sausage
  • ¼ cup of flour
  • 1 egg beaten with a little water
  • ½ cup of breadcrumbs
  • vegetable oil for pan frying

Instructions

  • Begin by hard boiling your eggs. Bring the water to a boil and let them cook for 10 min. then remove them, run under cold water and remove the shells.
  • For the sausage layer, first remove the casing. Then use one sausage per egg. Flatten the sausage mixture, and wrap it around your cooked peeled eggs. Make sure your eggs are dry, because if not they sausage meat won't stick well and might come off later when you fry them.
  • Next is breading the sausage-wrapped eggs. Place your flour, egg and water mixture, and bread crumbs into three separate bowls. Dip them first in flour, then in the beaten egg mixture, and then into the bread crumbs.
  • To cook your Scotch eggs, pan fry them on each side until a deep golden brown in a frying pan with about a half an inch of oil over a medium-high heat. Turn the egg to create a crispy crust on all sides.
  • Once the Scotch eggs are browned all over use a slotted spoon to place your fried scotch egg on a baking sheet and finish in the oven at 350 for 10-15 min. until the layer of sausage is fully cooked.
    Serve warm, room temperature or cold.

Nutrition

Serving: 1g | Calories: 368kcal | Carbohydrates: 12g | Protein: 17g | Fat: 28g | Saturated Fat: 8g | Polyunsaturated Fat: 16g | Cholesterol: 258mg | Sodium: 713mg | Fiber: 1g | Sugar: 1g
Tried this Recipe? Tag me Today!Mention @LifeisaParty or tag #lifeisaparty!

I hope you'll try them and enjoy them.  This is one of those classic recipes that you will use again and again.  It's a real crowd pleaser too..

homemade Scotch EggWith home made Scotch Eggs to enjoy, life really is a party!

More Recipe Inspiration

You might also like our Irish Ploughman's Lunch here.

Also check out The Perfect Club Sandwich here.

You might also enjoy our Homemade Onion Rings recipe here.

Tea Party Picnic: A British Inspired Afternoon Tea by the River

Jul 17, 2018 · 2 Comments

Tea party picnic spread on a pink blanket beside a river.

A cozy tea party picnic by the river, with tea sandwiches, homemade scotch eggs, scones and clotted cream, and enough thrifted vintage charm to make it feel like a proper English afternoon tea outdoors.

British inspired picnic.
[feast_advanced_jump_to]

Quick Look

  • 🫖 Party: Tea Party Picnic
  • 📍 Setting: Riverside, in the woods
  • 👪 Serves: 4-6
  • ⏲️ Prep Time: Most food can be made or bought the day before
  • 💭 Top Tip: Real china tea cups turn a picnic into an unforgettable afternoon tea party.

Why You'll Love This Party:

  • Thrifted vintage pieces, wicker baskets, and mismatched teacups that make it feel special without spending much.
  • Works as a hot tea or iced tea, hot or cold day either way.
  • A full British tea menu with real homemade scotch eggs and custard creams cookies.
  • Easy to transport with a wagon and picnic baskets, even to a spot tucked in the woods.
  • Who doesn't love a tea party, and what could be better than a tea party in the most beautiful outdoor picnic setting?

Who doesn't love a tea party, and what could be better than a tea party in the most beautiful outdoor picnic setting? This summer I put together a British inspired tea party picnic, with a proper English menu of tea sandwiches, homemade scotch eggs, scones and cream, shortbread, custard creams, and vintage decor, right on the bank of the river with Heather, my friend from the UK, and our little girls. It felt only right to go full British with the menu, a little taste of home for her, right down to the scotch eggs and proper clotted cream.

Years ago I spent a year at school in England and I had a proper tea party for the first time. All these years later it's still my favorite way to celebrate. And turning it into a picnic on a beautiful summer day with friends, made something that was already great, the greatest ever!

If you love the idea of tea outdoors, you might also like our How to Host a Tea Party guide, or our Tea Party Food: The Complete Guide to Sandwiches, Scones and Sweets for even more recipe ideas.

British inspired picnic tea party beside a river
Scone with jam and clotted cream, part of a tea party picnic menu.

Tea Party Picnic Menu

A traditional afternoon tea follows three courses: savory finger sandwiches and bites first, then scones with jam and cream, and finally an assortment of sweets. Everything is meant to be delicate and bite sized, made for nibbling over conversation. For our tea party picnic, we leaned into a very classic British inspired menu and followed those same three courses, just packed up picnic style instead of served on a tiered stand.

Tea Sandwiches and Savory Bites

For an authentic afternoon tea picnic, start with tea sandwiches and savory bites. Ours included:

  • Mini sausage rolls, picked up from our favourite local bakery
  • Cucumber sandwiches (get our easy cucumber sandwich recipe here)
  • Egg salad on mini croissants (get our egg salad sandwich recipe here)
  • Homemade Scotch eggs (get the Scotch egg recipe here)
Egg salad sandwiches on mini croissants for a tea party picnic.

I packaged everything in paper bakery boxes for easy transport, along with a few vintage enamelware containers I had on hand. Store bought is always a fair option for a picnic, no one needs to make everything from scratch. Pack the sandwiches just before you leave and keep them in a cooler bag if you have any distance to walk. Same goes for the clotted cream, it holds up much better cold.

Flaky sausage rolls for a British tea party picnic.

The Scotch eggs were homemade, hard boiled eggs wrapped in sausage meat and coated in breadcrumbs, and they're a true British picnic classic. Portable, delicious, and always a hit. Find the Scotch egg recipe here.

Tea sandwiches and scotch egg for a tea party picnic.

No British bakery nearby, or don't feel like making scotch eggs from scratch? Many specialty British or import shops have a bakery counter with fresh scotch eggs, and often fresh or frozen sausage rolls you can bake at home. Either way, slice them into bite sized pieces before packing, easier to eat picnic style. Or keep it simple and stick to sandwiches, our Tea Party Food Guide has plenty more sandwich ideas to round out the savory course without any of the fussier items.

Picnic basket with tea sandwiches and sausage rolls for a tea party picnic.

Scones with Clotted Cream and Jam

No tea party picnic is complete without scones and clotted cream. We made our own scones. Find our Easy Food Processor Scones recipe here. We also brought along jam and clotted cream.

Clotted cream can be tricky to find, but many grocery stores now carry it, and whipped cream works well in a pinch.

British Picnic tea party scones
Scone with jam and clotted cream, part of a tea party picnic menu.

Drinks

No proper afternoon tea picnic goes without tea. We packed a thermos and sipped it alongside the sweets all afternoon, served in mismatched vintage teacups collected from thrift stores over the years. They weren't precious, so nobody worried about breaking one, but they added so much charm.

Since it was a hot day, I also packed lemonade in reusable glass bottles for the girls, more British than iced tea in my books. If you'd rather serve iced tea instead, it travels just as well in a mason jar or thermos. Instead of a bulky cooler, I used a galvanized bucket filled with ice, which worked perfectly and looked pretty too.

Lemonade bottles chilling in a bucket with shortbread cookies at a tea party picnic.
Lemonade bottles chilling in a galvanized bucket of ice at a tea party picnic.

Desserts

Everybody's favorite course of tea party has to be the desserts. What's a British summer without fresh strawberries? We piled them onto a cake stand alongside a mix of homemade and store bought treats.

Wildflowers and fresh strawberries styled for a tea party picnic.

There were also lots of baked treats.  When I picked up the sausage rolls at my favourite local bakery I also picked up some Empire cookies -a real favourite of mine.  And here's a great tip for your picnic planning -make it easier on yourself by picking up some of the food and not making everything yourself.

Empire cookies dusted with powdered sugar for a tea party picnic.

I picked up some Empire cookies at the bakery, along with some shortbread (or try our own Vanilla Shortbread Cookies recipe here).

Stack of shortbread cookies on a floral plate for a tea party picnic.

But the real star was the homemade custard creams. These are British cookies -or biscuits as they call them and they're buttery, delicately sweet, and the perfect companion to a cup of tea. Get my homemade custard cream recipe here.

Heart shaped custard cream cookies for a tea party picnic.

The Setting: A Picnic by the River

Picnic beside a river with blankets, cushions, wicker baskets, and food.

While I set everything up, our girls went paddling in the river, a very British term for wading, though by the end they were fully swimming. It kept everyone happily occupied while I got the tea party picnic ready and my friend watched our girls.

Four kids are swimming and playing in a river, one is sitting on a rock in the river.

I set up right on the riverbank, starting with a few pretty vintage wool blankets, perfect for sitting on. It's damp when you're picnicking, you might want to use a ground sheet underneath your blanket. Then I layered the prettiest vintage embroidered tablecloth from the thrift store over top. A tea party picnic is the perfect excuse to bring out every pretty vintage piece you own, and mixing it all together. Mixing and matching is exactly what gives it that cottagecore feel. Different florals, blankets in soft faded colours, cushions piled on top of each other, nothing coordinated too perfectly, is exactly the cozy look we were going for. That's what makes it feel special rather than staged.

The little details are what really set the stage. A cake stand for the sweets, a jar of fresh flowers, a stack of cushions to lean back on, these aren't strictly necessary for a picnic, but they're what turn a basic blanket-on-the-ground into something that feels like an occasion. We picked daisies and wildflowers growing right along the riverbank and tucked them into a mason jar, so the flowers were as wild as the setting itself. It's a bit of a luxury to bring along pillows and a cake stand, but so worth it for the prettiest possible picnic.

We used a wagon to haul everything down the path through the woods to our spot by the river. My favourite pieces to bring along are the wicker picnic baskets. I've collected from thrift stores over the years, they're sturdy enough for the walk in, and nothing says proper picnic quite like a wicker picnic hamper. Between the wagon and the baskets, even a fully styled tea party picnic tucked away in the woods isn't too difficult to set up.

The mismatched vintage teacups tie the whole look together too. Mine came from thrift stores over the years, picked up one or two at a time, never a full matching set. They're not precious, so nobody worries about breaking one, but they add more charm than a brand new set ever could.

What to Pack for a Tea Party Picnic

The hardest part of any tea party picnic is the packing. Sandwiches need a cooler to stay fresh, tea needs a good thermos to stay hot, and bakery boxes or reusable containers keep everything from getting squished on the walk in.

The easiest trick is choosing finger food that doesn't need to be cut or plated once you arrive, and pre-slicing anything that does.

Once the practical side is sorted, that's where you get to have fun. Real teacups and saucers instead of paper, mismatched vintage silverware, cloth napkins, a cake stand, cushions, a jar of fresh flowers, these aren't things a picnic needs, but they're what make it feel like an occasion instead of just lunch outside.

Mismatched vintage floral teacups and saucers at a tea party picnic.
picnic baskets beside a river
  • Vintage wool blankets and a vintage embroidered tablecloth
  • Wicker picnic baskets, and a wagon if you're carrying everything any distance
  • A small cooler bag for sandwiches and cream
  • A cake stand for the sweets
  • Mismatched vintage teacups, silverware, and real cloth napkins
  • Cushions and a jar of fresh flowers (foraged or store-bought both work beautifully)
  • A thermos for hot tea
  • A galvanized bucket filled with ice for cold drinks

A few practical extras worth tucking in: a plastic bag for dirty dishes so they don't make a mess in your basket on the way home, paper towels just in case, and bug spray and sunscreen if you're setting up anywhere near water or trees. Bring a garbage bag too, so you can leave your spot as pretty as you found it.

Tea party picnic spread with open basket, teacups, and lemonade by the river.
English inspired picnic food menu includes tea sandwiches, home-made scotch eggs, scones and cream, shortbread, empire cookies, custard creams, vintage decor and lots and lots of tea.

Frequently Asked Questions

Can I make a tea party picnic ahead of time?

Shortbread and custard creams can be made a day or two ahead. Scones are best made the day of if you can manage it, they're at their finest fresh from the oven, though they'll still be good the next day in a pinch. Sandwiches are best assembled the morning of, or right before you leave, and kept cool in a cooler bag until you're ready to eat.

What if I can't find clotted cream?

Whipped cream is a good substitute if clotted cream isn't available near you, though it's worth checking a specialty British shop and some regular grocery stores are carrying it now.

Do I need real teacups for a tea party picnic?

Not at all, but mismatched vintage teacups from the thrift store add a lot of charm for very little cost, and they don't need to match to look beautiful together.

Hot tea or iced tea for a picnic?

Either works well. A thermos keeps hot tea warm for hours, and iced tea travels just as easily in a mason jar. On a hot day, we usually go with lemonade or iced tea instead.

More Tea Party Ideas

  • Tea party table set for an adult tea party.
    Tea Party Food: The Complete Guide to Sandwiches, Scones and Sweets
  • Green gingham tablecloth with vintage teacups, candelabra, tulips and daffodils set for a Little Women party.
    Little Women Party: A March Sisters Vintage Tea Party
  • Winter tea party with snowflake decor and menu.
    Winter Tea Party: Snowflake Theme Decor and Menu
  • Tea party table set for an adult tea party.
    How To Throw An Afternoon Tea Party For Adults

With a tea party picnic to enjoy along the river with good friends, life really is a party.
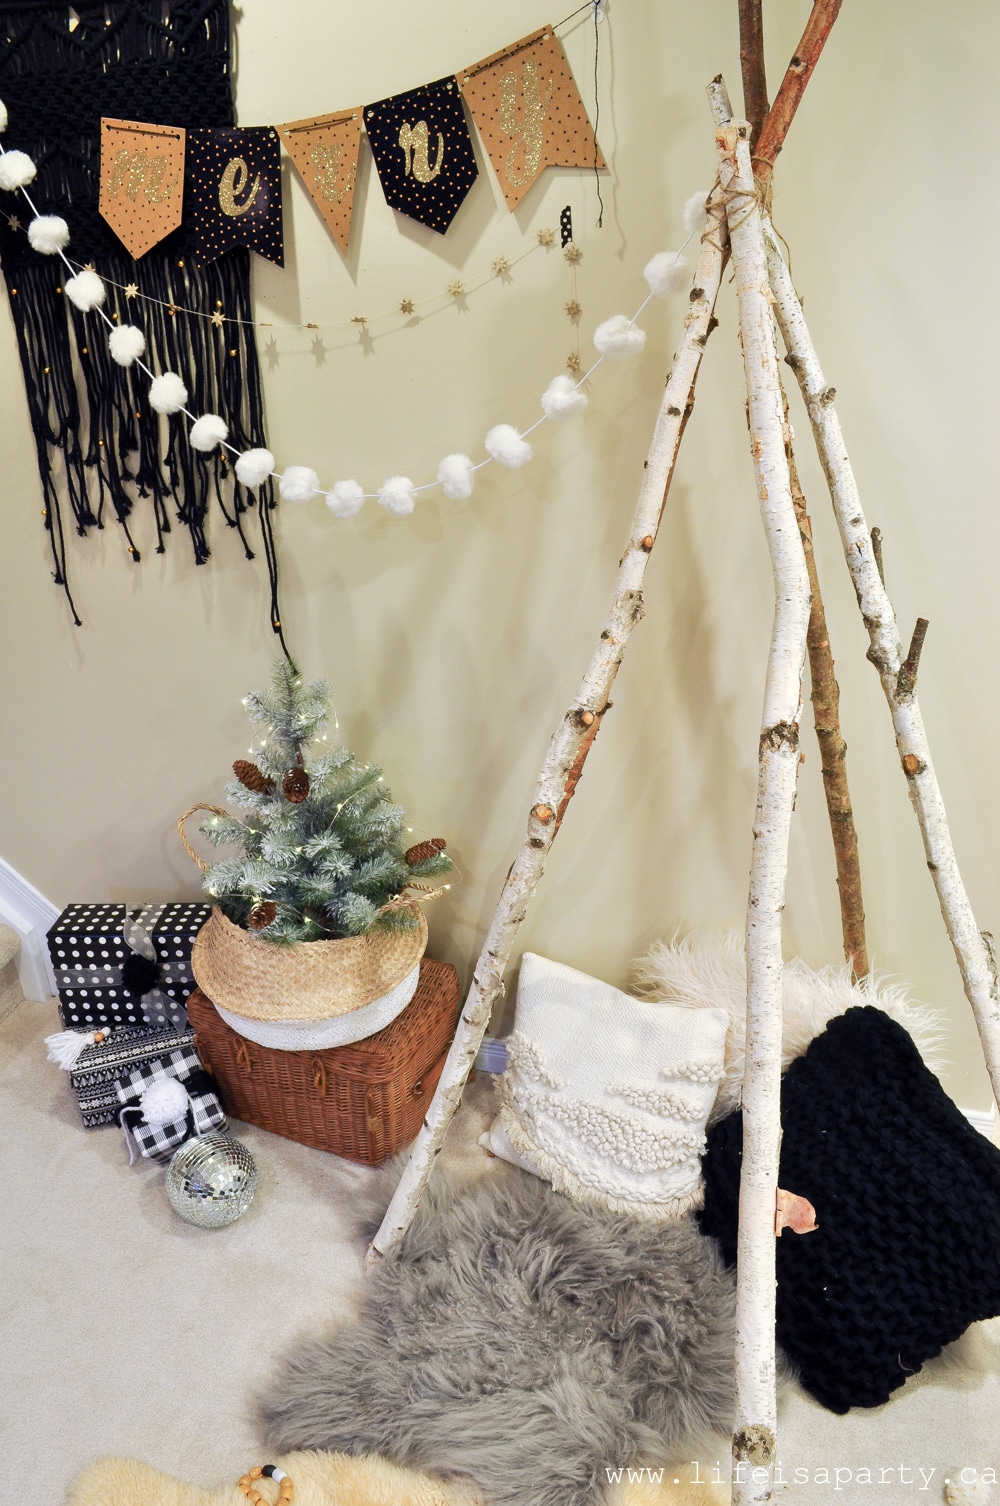
If you try this Tea Party Picnic or any other recipe on my blog please leave a star rating and let me know how it went in the comments below. Thanks for visiting today!

Black and White Garden

Jul 8, 2018 · 6 Comments

Black and White Garden -an old garden is refreshed with a new pea gravel seating area, and lots of black and white accessories and plants, including a garden of all white plants.

Black and White Garden -an old garden is refreshed with a new pea gravel seating area, and lots of black and white accessories and plants, including a garden of all white plants.

Black and White Garden -an old garden is refreshed with a new pea gravel seating area, and lots of black and white accessories and plants, including a garden of all white plants.

This black and white garden refresh was a labour of love.  It was over grown, and needed attention.  

The Old Garden

About eight years ago now -boy time flies, we did some work on our backyard.  The kids were little and we decided it was worth spending what we might have spent for a nice one week vacation on the backyard instead, since we could use it everyday.  We had a beautiful pergola built with a patio underneath of it for a dining area.  We also re-did our deck railing and added wide stairs to open the whole deck up more and connect it with the rest of the backyard.  And in the space between the pergola, the deck, the house, and the fence I created my white garden.  It almost feels like a little courtyard.

All White Garden

When I created the white garden I got the idea -I don't even remember where, that it would be fun to create a garden that was all one colour and I choose white.  Sometimes they were called moon gardens because the light of the moon could reflect off of the white flowers at night.  It really was a favourite space of mine.  And when my girls were little, I spent many nap times out there on my own weeding and puttering with the baby monitor in hand.  The other side of the yard was their play space with play houses, swings and a play structure, sand box, and kiddie pools in the summer, but the white garden was my little spot.

The Pathways

For the bones of the white garden I create two intersecting paths.  One connected the pergola with the back gate, and the other intersected it.  The paths created four quadrants and I filled them with perennial white flowers.

Over the years though, one of the paths had become quite over grown.

relaying flagstone garden paths

over grown garden pathsUnfortunately I laid the one path of large flagstones surrounded by small river rocks without any weed barrier underneath.  Shortly after laying it, I realized the mistake I'd made and thought someday I'd have to fix it.  Over the years, this path has required a lot of weeding.  Also over time the river rocks had worked their way into the soil and were mostly buried in the dirt.  

As well, everything in the garden has grown tremendously.  Somethings have flourish... ie started to take over, and others have died out.  Everything was just looking a little tired.  And since I haven't puttered away during nap time for quite some years (my girls are now 11 and 13) the whole area just needed some attention.

refreshing an old garden

The Black and White Garden Refresh

This spring my oldest daughter's Mother's Day gift to me was to help me fix up the white garden.  Our biggest project was to re-do the old path.  It was a big job, not difficult, but very time consuming.  We had to lift all the small river rocks from the path, dig them out of the dirt, and then wash them off.  We then lifted the large stepping stones, and laid the missing weed barrier cloth.  Then we had to relay all the rocks and stones. 

It took an extra long time to do, because we stopped part way through.  I had an injury on my leg and had to wait about 3-4 weeks for it to heal, so our spring project stretched well into the beginning of summer and into the heat wave last week which meant we could only work in the morning hours when it was shady.

If you've been following along on Instagram Stories, you've seen my progress day by day.  If you love to see behind the scenes and don't follow me on Instagram yet, make sure you do.  You can see exactly what I'm up to with all my little projects.

new flagstone and river rock garden pathways

new garden pathsThe New Seating Area

It wasn't just the path ways and plants that got a refresh.  We also decided to add a little sitting area in the white garden.  It really is such a lovely little garden, and in the morning it is nice and shady from the house.

pea gravel seating area in a small garden

Our yard is very sunny, and despite trying to grow vines over the pergola for the last eight years, we haven't managed much shade yet.  We've tried all sorts of different vines, and had lots of damage over the years from the wild rabbits from the forest behind our house that love to come into our yard and snack on my garden.  We feel like the grape-vine and the wisteria might just give us some real shade soon, and we've become more and more diligent about adding chicken wire to them in the fall and winter to protect them from the rabbits.  Here's hoping they really grow this summer!

pea gravel seating area in a small black and white garden

So I thought it would be nice to add a little seating area to an area of the garden that's already shady -at least in the mornings and create a spot to enjoy our morning coffee this summer.  To create a seating area, I had to expand the pea gravel path into a little patio area.  I removed some of the garden beside the old path, added more weed barrier cloth, and then added more pea gravel to create the little patio area.  It was really pretty simple to do.  I actually wish I'd done it sooner.

seating area in a small garden

It was a bit difficult to find the perfect little love seat for the spot.  I found everything here in Canada that I liked was out of my price range.  We ended up picking up this one at Target.  I was cross border shopping with my family and spotted it, but we didn't have room in our car to bring it home.  We thought we'd order it and have it delivered, but when we got home we realized this piece isn't available for shipping to Canada.  After looking around here I decided to make the 2 hour drive back to the US and pick it up.  We got the second last one in the store, since it went on sale.

Black and White Garden seating area

I have to say it was worth all the trouble.  It's the perfect size for the space.  I love the scandi design.

black and white garden seating areaAnd it's supper comfortable -nice and deep and cozy.  Also the price was right, even with the drive, and paying customs at the border, and the exchange rate.Black and White Garden with love seat and vintage bench coffee table

While I was at Target I also picked up the great black and white pillows.

garden fountain with cement birdsI already had the beautiful water feature, but it was in a different location, and this spot defiantly shows it off more.small garden area with pea gravel and river rock and flagstone pathways

I also added in this pretty little garden bench turned coffee table.  It was a rough piece picked up at a garage sale, but we've given it the prettiest makeover, that I'll be sharing with you tomorrow.  On top,  a little roasting pan is full of hens and chicks.old vintage roasting pan with succulents planted in itBlack and White Garden -an old garden is refreshed with a new pea gravel seating area, and lots of black and white accessories and plants, including a garden of all white plants.

I wanted to carry the black and white and boho feel from inside my house into the garden so I also made a few fun tassels.  I picked up a little black and white yarn at the thrift store, and made this easy garland of tassels and another of pom poms in the pergola space.  The yarn should do fine outdoors all summer, and it's such a fun and easy way to add a little boho vibe to the space.Black and White pom pops and tassel bunting for the garden

The Pergola

The pergola got a little sprucing up too.  The only new additions are the pretty hanging lanterns.  They're from IKEA.  They're made of fabric so they can withstand the rain, and are solar for the prettiest little glow at night.Black and White Garden -an old garden is refreshed with a new pea gravel seating area, and lots of black and white accessories and plants, including a garden of all white plants.

Black and White Garden pergola and dining areaOn the table a pretty new tablecloth from H&M Home.  I love more of that boho black and white feel.  I got the table all set up for a perfect snack.


Black and White Garden dining area and pergolaIt's such a lovely space for entertaining.

black and white garden dining areaI love to start a party off out here in the garden with appetizers, while we bbq, and then move into the air conditioning later for dinner.black and white garden picnic

Black and White Garden -an old garden is refreshed with a new pea gravel seating area, and lots of black and white accessories and plants, including a garden of all white plants.The Deck

I've carried the black and white up onto the deck too.

Black and White Garden refreshThis area has our Muskoka chairs on it and a nice outdoor rug, which is so soft underfoot.  The pots are all old enamel ware and metal pails, and washtubs.  I love their aged vintage feel.  We added holes to the bottoms for drainage and planted them up with black and white and white annuals.  I love how the black and white plants look together.  So simple, and so striking.deck with Black and White container Gardens in vintage metal tubs and pails

Years ago we invested in a simple, easy to install deck irrigation system.  You can read all about how we installed it here.  The plastic pipes run around the edge of the deck and the system is set on a timer.  Every morning at 7 am ours runs for 10 min.  You can set it for when ever and how ever long you like.  Now I never have to worry about forgetting to water the pots.  How many times did I invest in gorgeous annuals for the deck and then end up forgetting to water them?  Or going away and them all dying or half dying and looking horrible?

Black and White flower container GardensThis system is so worth it for me.  In the fall we just put the timer away, and blow out the water lines so they don't freeze.  In the spring we set it up again.  I really could not be happier with it.

Black and White Garden

white pergola dining area with curtains and solar lightsSo that's my black and white garden refresh.  It was a big job, that ended up taking ages to finish, but I'm so happy with it.  We're already enjoying coffee on the new love seat most mornings since finishing it.  We also have an upcoming party next weekend that I'm so glad the space is all ready for.  It really wasn't an expensive refresh, just a few new pieces, and lots of work -but so, so worth it!

You might also like our Summer Deck Makeover post here.

Also check out our How To Make A Fairy Garden House post here.

You might also like our DIY Cement Garden Markers post here.

DIY Mermaid Crowns

Jun 14, 2018 · Leave a Comment

How to make a mermaid crown.

DIY Mermaid Crown: use some shells, faux pearls, hair bands and hot glue to create your own beautiful Mermaid Crown. Perfect for dress up, or as part of a Mermaid Party!

How to make a mermaid crown.
[feast_advanced_jump_to]

We made an easy and fun DIY Mermaid Crown for our Mermaid Birthday Party. They were the perfect mermaid accessory and the girls loved making them and wearing them.

These are great for dress up.  These are the perfect finishing touch to your mermaid costume.  And for any mermaid themed party, a mermaid tiara is a perfect alternative to a birthday party hat or plastic crown.  These would also make great gifts to any mermaid lover.  We included ours as party favors for our mermaid themed party.  Our little mermaid loved them!

These are really fun mermaid crafts to do with older kids.  We used hot glue gun, so this is best done with older kids, or an adult helper for a little girl.  If you did want to use this as  kids' craft ideas, you might want to use low heat glue guns.

You can pick up most of the supplies at the dollar store, making this a really inexpensive craft to make.  We used an assortment of shells.  If you want more exiotic pieces like sea glass or small sand dollars which would both be a great addition, you might need to look at a craft store.  It's good to incorporate shells of different shapes and sizes for interest.  The Unicorn horns shells are a great to add some height to your crown design.

DIY Mermaid Crowns

Materials:

  • sea shells
  • hair bands
  • hot glue
  • pearls

how to make a mermaid crownHow To Make a Mermaid Crown:

We started by laying out a design of sea shells.  It's a great idea to pick a focal point for the center, and then fill out in a symmetrical pattern, repeating the pattern on each side.

how to make a mermaid crown

When we were happy with the design we hot glued them on to the hairbands.  Adding in some smaller shells, and smaller pieces like pretty faux pearls as the last step.

doy mermaid crownKeep in mind that you don't want anything poking downward at the base of your crown, that would be uncomfortable when you're wearing head band.  Also, when you're making your own mermaid crown you want the crown to be able sit on your head without tipping over and falling off, so keep your design balanced at the front of the crown.  The shells can get kind of heavy.

mermaid crown diy Also you can decide whether you want the hair band worn further back on your head and the design on the very top, or the hair band worn more forward and the design angled to sit up slightly like a mermaid princess crown.

Recipe

How to make a mermaid crown.

DIY Mermaid Crowns

No ratings yet
Print Pin Rate
Cook Time: 10 minutes minutes
Total Time: 10 minutes minutes
Author: Dannyelle Nicolle-Ramjist

Equipment

  • hot glue gun

Materials

  • assorted sea shells
  • hair bands
  • hot glue
  • pearls

Instructions

  • Lay out a design of sea shells. You may choose a focal point for the centre, and create a symmetrical pattern, repeating the pattern on each side.
  • Hot glue the sea shells the head band, starting in the middle and working your way out, with the large shells first, and then filling in with smaller shells and faux pearls. Take care that nothing is poking downward, and that the crown will balance and not fall off your head when it's finished.

    Optional: Finish off with some faux gemstones and glitter for a more sparkly look.
mermaid head bands

Experiment a little and see what you like. 😉

More Options

More great options are to add a little sparkle to your crown.  You could do this by incorporating in some sparkly pipe cleaners, or some small plastic gems and glitter for more of a princess look to your own crown.

doy mermaid crowns

We had so much fun creating these fun crafts.   These crowns were one of the best mermaid crafts we've done. They were such a fun addition to our mermaid party.  And the best part has been the added bonus of using them for dress-up play afterward.  

With your own beautiful DIY Mermaid Crown, life really is a party!

mermaid party crowns

More Inspiration

If you'd like some more mermaid ideas, check our our Mermaid Party Activities:

You might also like our Mermaid Party Foods:

Also check out our Aqua Themed Pool Party here.

Mermaid Themed Party Food Ideas

Jun 13, 2018 · Leave a Comment

Mermaid themed food ideas for a party.

Mermaid Party Food: Inspiration for a Mermaid Beach Picnic, with a themed Mermaid Dessert Table full of mermaid treats like eatable driftwood, pearls, treasure, and coral.

Mermaid themed food ideas for a party.
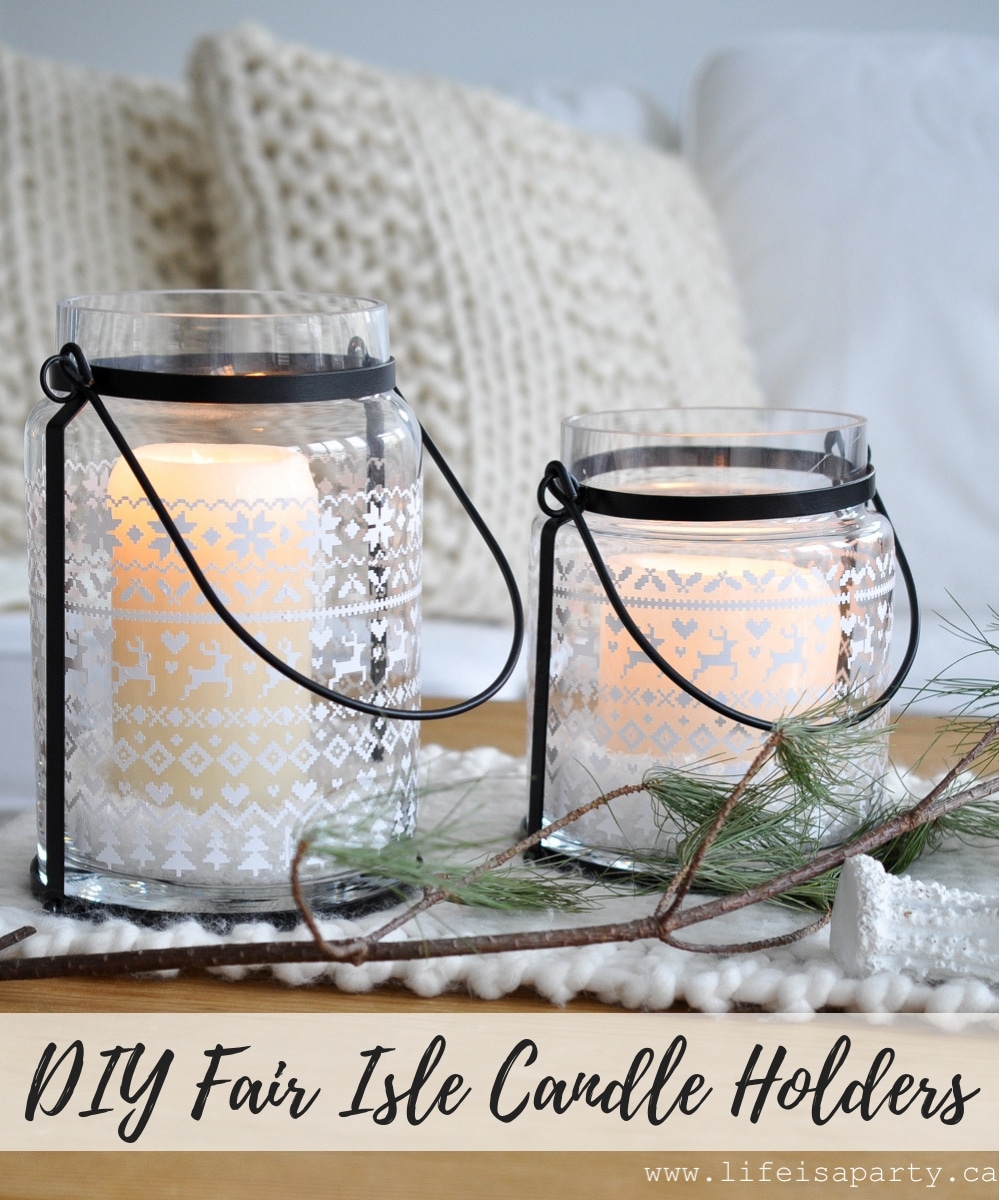
[feast_advanced_jump_to]

We had so much fun at our Mermaid Theme Party. Yesterday I shared the Mermaid party activities from the party.  Today the best part of the party -the Mermaid Themed Party Food including  the Mermaid Dessert Table.

We set everything up on the beach for our picnic, and all the rest of the activities that we shared yesterday were set up around it.  It was so much fun, and the birthday girl loved it.  We had lots of yummy food, and I'm excited to share all our mermaid birthday party food ideas with you today.Mermaid picnic on the beach party

Mermaid Picnic Table

To set up our picnic area for our mermaid themed birthday party, we started with the table.  It was a party table that has legs that screw on.  Instead of screwing the legs on, we used a couple of crates underneath it to create the perfect low picnic table, which was such a fun idea for the kids to sit it.

mermaid picnic on the beach

Around the table we set up some picnic blankets to sit on and lots of cozy cushions for lounging.  On the table I used a pretty aqua table cloth, and then we layered all things mermaid.  We found a little driftwood on the beach and then added some shells.  We also used some rustic rope.  For a centerpiece we used some aqua candle holders with some pretty beach pebbles inside.  This was the perfect centerpiece for our mermaid birthday party theme.

mermaid picnic sign

The rustic signs that we used for all the party activities were made from some old wood.  We used chalk to write the words on them, and then went over it with white craft paint.  These were such a great idea to add a little rustic charm to our mermaid party.

how to host a mermaid partyOver the table we made a cluster of pretty paper lanterns and hung them from the over head tree.  These looked so gorgeous over the table, and were a nice alternative to balloons, with no danger of popping, or need to pick them up at the last moment at the party store.

mermaid party food ideas with mermaid lunch boxes

Mermaid Picnic Lunch

Individual Lunch Boxes

One of my favorite mermaid party ideas was our individual picnic boxes.  For our picnic lunch, we made the cutest individual mermaid lunch boxes out of white gable boxes.

individual mermaid picnic lunches for a party

Everyone's lunch box had an aqua napkin and a cute wood spoon from the dollar store.  We used the end of a pencil to stamp some aqua dots on the spoon ends to create the perfect polka dot wooden spoons.  If you didn't want to stamp the ends, more of the mermaid washi tape on the spoon handles would be cute too.  Love is in the details.  We started with the white boxes and added some mermaid details with pretty mermaid washi tape, and some DIY tassels.

Mermaid Party Food: Inspiration for a Mermaid Beach Picnic, with a themed Mermaid Dessert Table full of mermaid treats like eatable driftwood, pearls, treasure, and coral.

For drinks we used our refillable glass bottles and made lemonade for everyone.  We put them on ice and guests could help themselves.

bucket of cold drinks for a mermaid partyInside our individual picnic boxes were our mermaid lunches.

Mermaid Party Food: Inspiration for a Mermaid Beach Picnic, with a themed Mermaid Dessert Table full of mermaid treats like eatable driftwood, pearls, treasure, and coral.

Mermaid Lunch Box Menu

  • ham and cheese sandwich
  • shell pasta salad
  • chips

We wanted a simple lunch that everyone (or mostly everyone since kids are a little tricky sometimes) would enjoy, that included some healthy options, before our mermaid dessert table.  I made ham and cheese sandwiches on croissants, and I had some condiments of the side for anyone who wanted them.  We also served a pasta salad -with shell pasta because that is definitely what mermaids eat. 😉  There was also a paper bag of potato chips for everyone too.Mermaid Party Food picnic lunch on the beach

Everyone having their own little box made it really easy, and then after lunch they could use the empty box to hold all their party favors.  They added their craft, mermaid crowns, water squirters, and candy to the boxes to take home.

Mermaid Dessert Table

After lunch it was time for everyone's favourite aspect of the party -the Mermaid Dessert Table.  What little girl won't love their choice of fun mermaid sweet treats.

Mermaid Party Food dessert table

Mermaid Dessert Table Set Up

We used a card table to set it up our sweet table.  The backdrop is made from some really inexpensive Ikea net curtains that we already had.  We hung the netting from a tree branch above the table.  To add the shells to the curtain we hot glued some little pieces of bendy wire to the back of each shell so we could hook them onto the net curtain and remove it afterward.  It worked great, and the shells looked so pretty hanging in the curtain.

Since it was the beach we kept things pretty simple but totally fun for dessert.

Mermaid themed cupcakes

Mermaid Treats

  • mermaid cupcakes with chocolate seashells
  • blue macaroon cookies
  • mermaid chocolate bark

We made some pretty seashell cupcakes.  I think cupcakes are a great alternative to a mermaid cake, since they're the perfect single serving size for little party guests, and you don't have to worry about needing to slice a mermaid birthday cake or about needing little mermaid plates and forks.  

The cupcakes were really easy to make and the star of the show.  We topped each one with blue icing and a chocolate shell to fit our sea theme.  I made the chocolate shells with a shell shaped chocolate mold.  To make them we used white chocolate and candy melts in aqua, blue, pink, and purple.   And we added a few "pearl" inspired sprinkles too.

Mermaid cupcake

We also made some homemade macarons with raspberry filling.  These adorable cookies were so delicious and making them from scratch meant we could use food coloring to make our mermaid cookies match our party color scheme.

Mermaid Party Food dessert table

As well we included our mermaid bark.  It was so pretty and so easy to make -find the mermaid bark tutorial here.  It's a good idea to keep the chocolate as cool as you can before serving.  We kept ours in a cooler until it was time to set up the desserts, and that worked really well.

Mermaid Party dessert table

Sweet Mermaid Food Ideas

We also thought it would be fun to include a whole bunch of mermaid inspired foods.  This is such a fun addition to any mermaid birthday parties.  

Mason jars made it easy to transport and set up this part at the beach.  Small bowls would work great too.  We used chalkboard labels to add mermaid names to all our sweet favorite mermaid party food ideas.  We included some little candy bags on the table so everyone could help themselves and take any extra home with them.  I have to say the girls loved making their own candy loot bags with all their favourites this way, adding a little bit of this and a little bit of that.  The make your own candy bag was a huge hit and lots of fun for the little party guests.

Mermaid themed party food desserts
Mermaid Candy Buffet

Here's what we included for our sea party food ideas:

  • Life rings -peach rings
Mermaid Party Food dessert ideas
  • Sharks -gummy sharks
Mermaid Party Food: Inspiration for a Mermaid Beach Picnic, with a themed Mermaid Dessert Table full of mermaid treats like eatable driftwood, pearls, treasure, and coral.
  • Mermaid Treasure -chocolate coins
Mermaid themed Party Food dessert and candy ideas
  • Coral -sugar rock candy
Mermaid Party Food candy ideas
  • Pearls -gum balls or white sixlets
Mermaid Party ideas
  • "Sea"cret Wishes -blue cotton candy
Mermaid Party Food dessert table
  • Driftwood -pretzel sticks for a salty snack
Mermaid Party Food: Inspiration for a Mermaid Beach Picnic, with a themed Mermaid Dessert Table full of mermaid treats like eatable driftwood, pearls, treasure, and coral.

and there was also some 

  • s'more goldfish crackers, because mermaids and fish.
Mermaid at heart dessert table

The Mermaid candy buffet food table was such a hit.  The girls loved it, and loved being able to take some treats home for later too.

Other ideas that would be great to include with your mermaid themed food are:

  • blue jello
  • Swedish fish
  • chocolate mermaid tails
  • blue jelly beans

We had so much fun enjoying our Mermaid party food with a picnic and finishing up with our Mermaid Dessert Table.  This was one of the best mermaid parties ever, and I hope the ideas help you have the best party you've ever had.  These mermaid food ideas would also be great for a little mermaid movie night.  Add all the mermaid themed snacks to your popcorn for the perfect themed movie night.

With Mermaid Picnic Food, life really is a party!

More Mermaid Ideas

Need some more Mermaid Party inspiration?  Check out our Mermaid Party Activities from yesterday's post, full mermaid birthday party ideas you'll love like mermaid outfits, mermaid decor, and activities

Mermaid Party Food: Inspiration for a Mermaid Beach Picnic, with a themed Mermaid Dessert Table full of mermaid treats like eatable driftwood, pearls, treasure, and coral.

You might also like our DIY Mermaid Crowns, our DIY mermaid tiara tutorial.

DIY Mermaid Crown: use some shells, faux pearls, hair bands and hot glue to create your own beautiful Mermaid Crown. Perfect for dress up, or as part of a Mermaid Party!

Be sure to check out our Beach Activities post too.

Mermaid Party -The Activities and Games

Jun 12, 2018 · Leave a Comment

Mermaid party activities at a mermaid themed beach party.

Mermaid Party Activities and Games: ideas for your mermaid themed party like dressing up, a craft, sandcastles, and a water fight.

Mermaid party activities at a mermaid themed beach party.
Mermaid Party

We were celebrating my oldest daughter Paige's 13th birthday. Perhaps we're at the end of themed parties now.  As she gets older I'm sure her and her friends ideas of fun will change and might not include themed birthday parties, but as they were all 12 and younger, we snuck in one more beautiful themed party for them.  Keep them young.  😉

My daughter loves to swim and so this beach themed party was absolutely perfect for her. It was so much fun planning it and even more fun at the actual party.  I hope you find some of these mermaid birthday party ideas helpful.
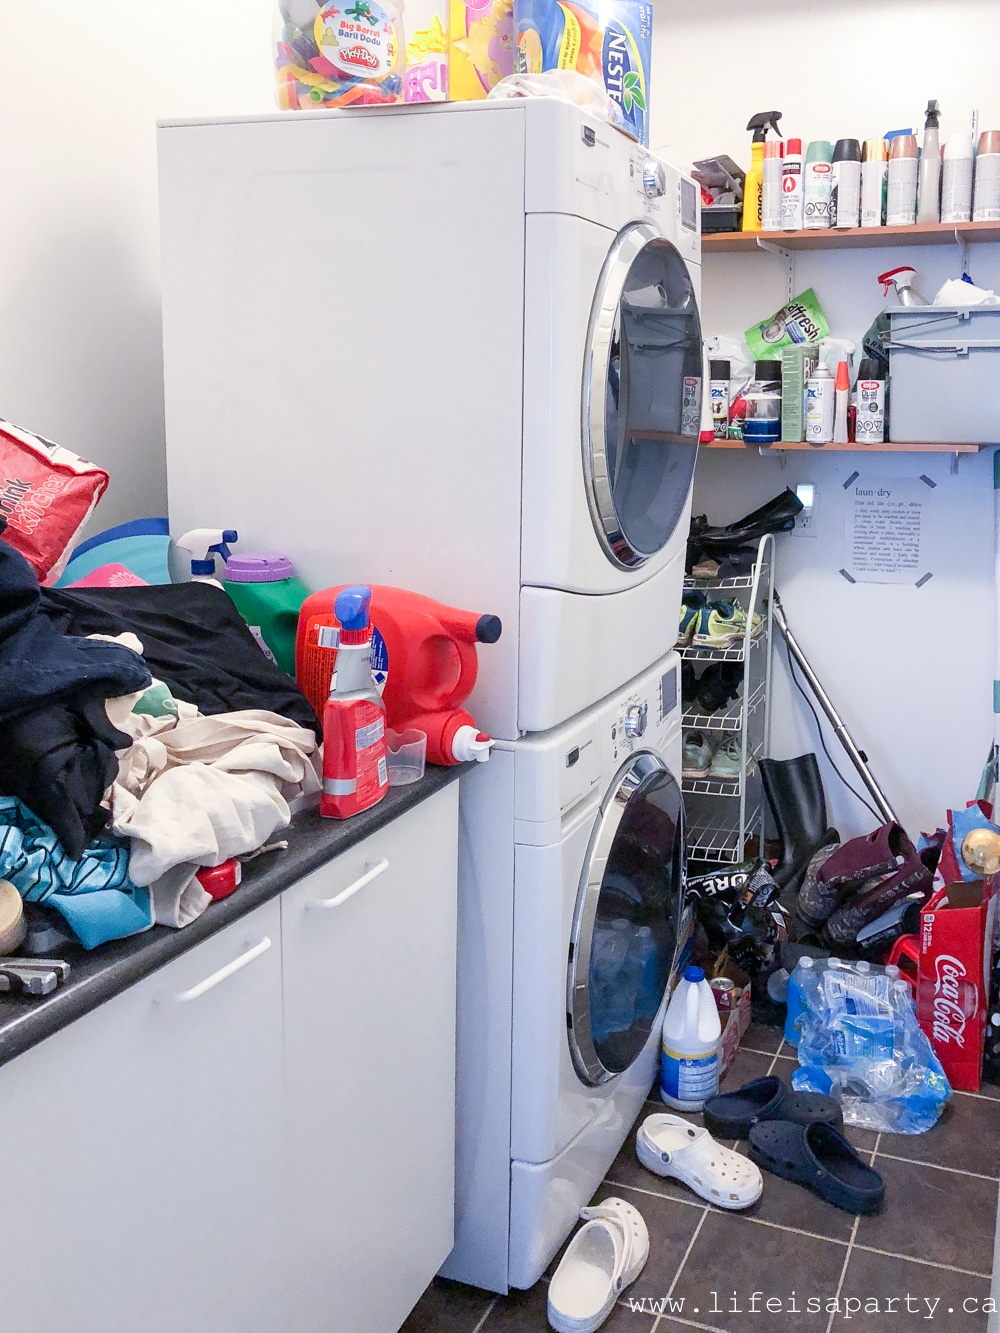
Beach Location

We live on the shores of lake Ontario, just outside of Toronto. We're about a 10 min. drive away from our closest beach. In the summer we love to go down to the beach for a walk or swim. And summer holidays usually involve at least one beach day a week for me and my girls, since there's so many nice lakeside parks and beaches near us.

For this party we scouted out a perfect spot with a few picnic tables in the morning, and got everything all set up early. The girls came around 11, and we had a great time playing and enjoying a beach picnic lunch together, and enjoying some themed games and activities.

If you don't live near the beach a pool party would be a great option for a mermaid theme party too.

Mermaids welcome sign

Mermaid-Themed Party Decor Ideas

The colour scheme for the party was aqua, Paige's favourite colour and the perfect colour for a mermaid party.  Choosing aqua also made it easy when we went looking for mermaid party supplies.  We hung up some beautiful bunting, and a lots of paper lanterns over the picnic party table hanging from the tree branches.  

We added in some garden flowers and weighed down our vases with beach rocks, which looked so pretty and kept them from tipping over in the breeze.  And we sprinkled sea shells all around too, that I picked up at the local dollar store.

There's lots more details about the picnic table set up here in Part II of the Mermaid Party -The Food.

Mermaid Party Activities and Games

Rustic Mermaid Signs

We also made some simple signs out of some old rustic boards for our mermaid themed party.  To make them, I wrote the words first in chalk and then with some white craft paint.  These rustic signs looked so beachy and added so much to the party area.  We used them to mark out different stations for the activities, which is always fun for a kid's party so that the kids can have an idea of all the fun activities you have planned for them.

mermaids welcome

Mermaid Party Activities and Games

mermaid party dress up

Get Your Mermaid On Outfits

Mermaid Party Activities and games

We made fun seashell mermaid crowns before hand -find the easy tutorial to make mermaid crowns here.  

Mermaid necklaces or bracelets would have been a great addition too.  If you're planning something similar you could set up a craft area with some beads, shell charms, and letter beads where the girls could create their own mermaid necklace or bracelet to include with their outfit too.  

One tip is to bring a small mirror so that the girls can see themselves in the different crowns.  The crowns are such a fun twist on traditional birthday hats for a party.

DIY Mermaid crown

Everyone got to pick one to wear for the party.  After the party they could each take theirs home with them. We also had a mermaid tail beach cover up for everyone. I found these on sale at an outlet mall, and grabbed 7 of them. I thought they were absolutely perfect for the party, and great party favors for the guests.  These were such a great way to get all the guests excited about the mermaid theme as soon as they arrived.

what to do at a mermaid party

Painting Mermaid Peg Dolls Craft

Mermaid Party Activities and Games

mermaid peg doll craft

This was a great activity for a party with guests of different age groups. My daughter and her school friends spent a long time painting theirs with lots of details on their little mermaids, and chatting away as they worked. The younger guests were done a bit more quickly and moved on to another activity, so this was a really good idea for a party with more than one  age group.  

After the paint dried, I put each one into the girls party bags to take home.

Mermaid Party Activities and Games

I love having lots of different activities where everyone can find something they love and your little guests can play the afternoon away at whichever themed activities they like best.

Sand Castle Building Mermaid Party Game

Mermaid Party Activities and Games

The kids could make whatever sand art they wanted, like sea creatures or a castle.  Again, some girls worked for a long time creating their perfect castle, adding a layer of seaweed, wishing stones, shells, and flags and others prefered to swim or play.  

You might also want to make this into a great game with small prizes for the best sand castle or sand creation. You could adult volunteers judge, or have the kids themselves vote for a winner.  If you're giving out prized, you might store them in a treasure chest to fit the theme, and let kids pick their favourite.
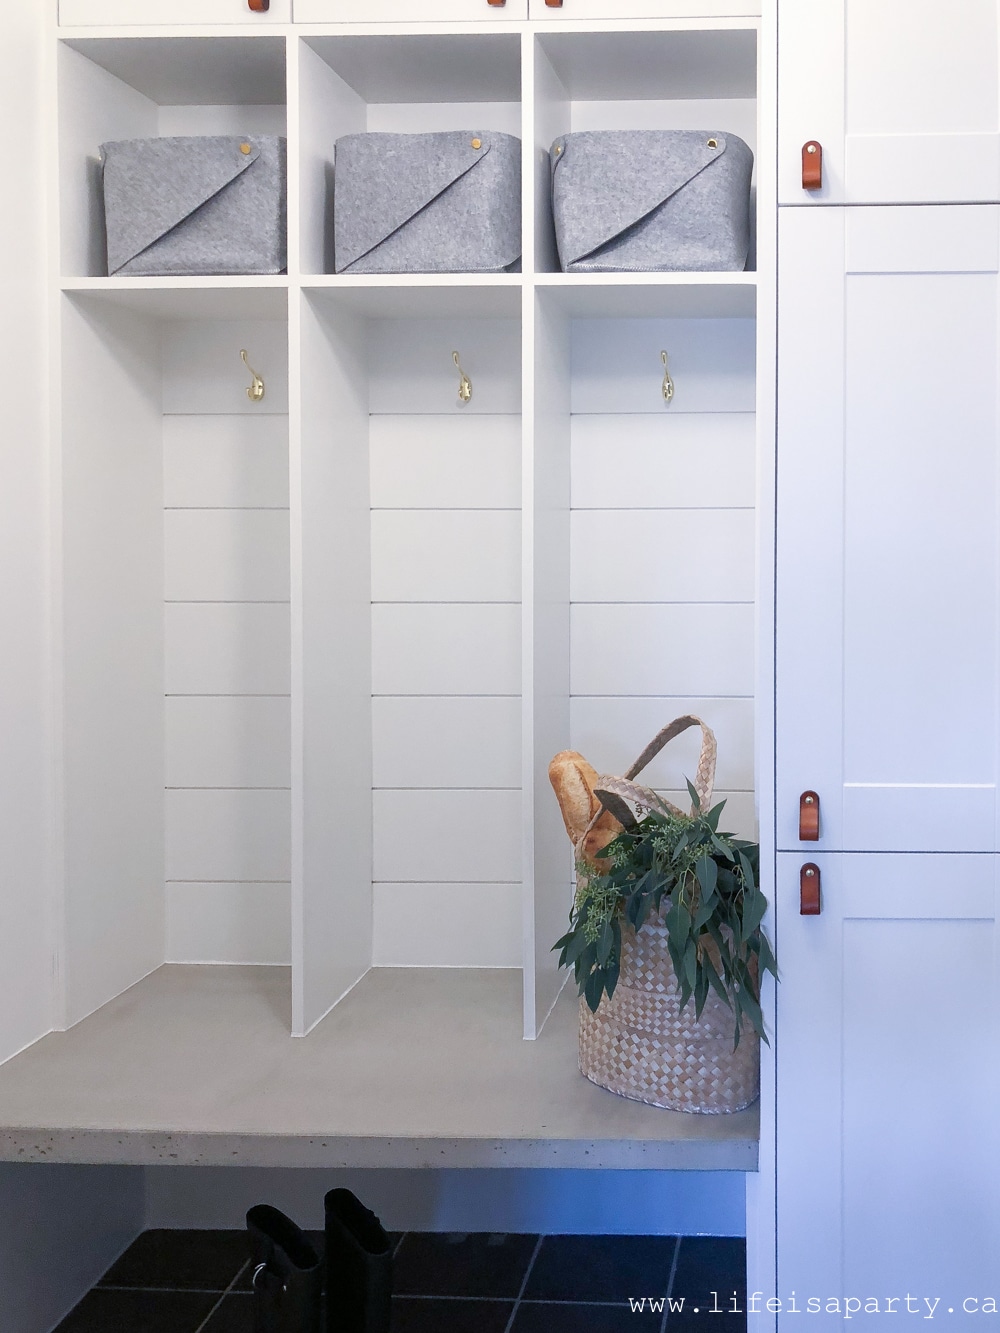
Mermaid Party sandcastle building

Water Fight Mermaid Party Game

Mermaid Party water fight game

We had a lovely lunch -which you can read all about here in our Mermaid Party -Part II.  Then it was time for a fun water fight! We bought some really fun water blasters from the dollar store that everyone could use for the party and take home after. This was a really fun mermaid party game.  The girls split themselves into teams.  They had a great time squirting and chasing each other in and out of the water.

what to do at a mermaid party
Mermaid Party

I hope some of these amazing ideas inspire your own fun mermaid games and activities, at your next mermaid party.  I hope they make it the best mermaid party ever.

With fun Mermaid Party Activities and Games, life really is a party!

More Inspiration 

  • Mermaid themed food ideas for a party.
    Mermaid Themed Party Food Ideas
  • Magical animal adoption agency party.
    Magical Animal Adoption Agency Party
  • Rock climbing themed party decor and menu ideas.
    Rock Climbing Gem Party
  • The Princess and the Frog party food table set up with food from the mvoie and DIY decor.
    The Princess and The Frog Party -Dinner and A Movie

Spring Table Decor Ideas

May 29, 2018 · 2 Comments

Spring Table Decor Ideas: this spring add some pink, marble, statement cutlery, gold and brass, and a mix of rustic and luxury.

Spring Table Decor Ideas: this spring add some pink, marble, statement cutlery, gold and brass, and the mix of rustic and luxury.

Spring Table Decor Ideas: this spring add some pink, marble, statement cutlery, gold and brass, and a mix of rustic and luxury.I wanted to share this pretty spring tablescape with you and some sprint table decor ideas.  

Spring Table Ideas

Now is the perfect time of year to gather some spring flowering branches and set a pretty table for spring entertaining.  I love how this table turned out and thought it might be fun to share a few ideas for your own spring tables.

Pink

Spring Table decor ideas

I'm a big fan of pink and it's especially perfect this time of year.   I like it mixed with lots of neutrals so it's not too sweet.  Here I've used pink in the napkins -un-ironed for a rustic feel, and the large pink glass vase.  I've added touches with the flowers or cupcakes too.

Spring Table decor ideas
how to set a spring table

Marble

We've seen lots of marble in home accessories over the last while.

Spring Table decor ideas

 I've added some marble to this table with these fun marble enamelware tin plates.  I love the pattern they bring to the table and the black and white is perfect.

Spring Table decor ideas

Statement Cutlery

If you're a regular reader of mine, you know how much I love this trend toward statement cutlery.  It really is like jewelry for the table.  We've seen gold, copper, black, and a mix of all of them.  This white and gold cutlery has to be some of the most beautiful I've ever seen.  It has the perfect weight, and as soon as you feel it in your hand you feel the craftsmanship.  It's also available in pink.  Be still my heart.  It's an investment to be sure, but if cutlery is your thing... it is a truly beautiful set.

how to set a spring table
Spring Tables decor ideas

Mix of Rustic with Luxury

I love the mix of the rustic frayed linen on the table and even the enamel plates, and the informality of no table-cloth  juxtaposed to the luxurious glassware with gold accents.  Don't be afraid to really mix and match, because it adds interest and depth to a tablescape.

Spring Tablescape

Brass and Gold

We've see the rise of gold and brass metals in home decor the last few years and it's still going strong.  I've included a pretty brass candle on this table.  The gold cutlery and gold on the glasses adds some warm sparkle too.

Spring Tables decor ideasWith a pretty Spring table decor ideas, life really is a party!

More Table Decor Ideas

You might also like our Rustic Casual Tablescape here.

rustic casual table.

Also check out our 3 Steps To An Easy Summer Table here.

Three Steps to an Easy Summer Table: learn how to start with the basics, add items for interest, and look in unexpected places to set the perfect table.

You might also enjoy Yellow and Pink Picnic Tablescape here.

Easy Chicken Salad Toast Cups

May 17, 2018 · 1 Comment

Chicken salad in a toast cup with onion sprout garnish.

Chicken Salad Toast Cups: use store bought rotisserie chicken and regular old white sandwich bread to make these easy and delicious tea sandwiches. Perfect for a tea party, picnic, or as an appetizer.

Chicken salad in a toast cup with onion sprout garnish.
[feast_advanced_jump_to]

Little cups made out of toast and filled with fresh chicken salad are a great party food to add to your tea party, luncheon, or picnic.  The crunchy toast cups are made out of regular white bread and a muffin pan.  And the fresh chicken salad is quick to make with a rotisserie chicken.  If you're a chicken salad fan, you will love this easy chicken salad cups recipe.

Love chicken recipes? You might also like our Honey Garlic Chicken Wings.

These little chicken salad bites are a real favourite of mine. I've been making them for ages, and they're an old standby for tea parties -and yes, we are those people who seem to have tea parties on the regular, lol.

They're really easy to make, and they always impress guests. They're also so good! You will want to make them the next time you're having a tea party.  They are perfect as part of the savory main course, along with finger sandwiches.

Chicken Salad in a bread Toast Cup

Memories of Girl Guides and Tea Gardens

The first time I had these little toast cups way back when I was a Girl Guide -which is the Canadian equivalent to a Girl Scouts..  I loved Girl Guides growing up.  It was such a great part of my life.  

Chicken Salad Toast Cups tea sandwiches

One of the things our unit did to fundraise was an annual bazar.  There were tables for shoppers to visit, like the plant table, the bake sale table, and the white elephant table.  There was also aways a tea garden.  We had a little menu of tea, tea sandwiches, and sweets and us girls with the help of our leaders were the waitresses.  

We always used to serve these toast cups with assorted salads in them -egg, tuna, or chicken.  And they were always a hit with customers -ie. our moms and grandmothers, haha.  I remember so fondly being in the back kitchen making more toast cups with my leader as we served.

how to make chicken salad sandwiches for a tea party

I don't think I ever made them at home growing up, but at some point I was hosting a tea party as an adult and remembered these.  I've been making them ever since, and everyone always loves them.

Chicken

The ingredient list for these chicken salad toast cups is quite simple.  I like to use a store bought rotisserie chicken to make my chicken salad.  It'a quick and the rotisserie chicken is always nice and moist.  I remove the bones and skin and cut the whole chicken in to large chunks.  It does make a large amount of chicken salad.  So if you want a smaller amount you could cook a chicken breast at home.  You could also make this chicken salad recipe using leftover chicken.

Toast Cups

The toast cups are made out of regular sliced bread.  I usually make them out of white bread, but you can do with with whole wheat if you prefer, or do a mix of both.  One slice of bread makes one toast cup.  I always use real butter for making the toast cups.  The flavor of the real butter really comes through.  I won't use margarine for this recipe, but you can use it if you prefer.

store bought rotisserie chicken salad recipe
how to make Chicken Salad
how to make toast cups

Storage and Serving

This is a great make ahead.  Make your chicken the night before serving and store in a large bowl covered with plastic wrap in the fridge.  Right before serving stir the chicken salad and if it's become a bit dry add a little more mayo and stir to mix it in.  

The toast cups will stay nice and crunchy for a day or two in an airtight container before you stuff them.  

Add the chicken salad right before serving.  I like to garnish the chicken salad cups with some onion sprouts, or alfalfa sprouts.  You could also use some green onions or chives for garnish.  

If you have a gluten free guest you could use lettuce cups to serve the chicken salad as a gluten free option.  Or make your toast cup out of gluten free bread.

You can also use these toast cups in different ways to serve egg salad, or tuna salad, but chicken salad is our very favorite way to fill these cute cups.  They're perfect for a tea party on a special occasion or as easy appetizers, or a great idea for a picnic.

My favourite is to have these toast cups with chicken salad, but you could use tuna if you like or egg salad as a vegetarian option.

toast cups
toast cups

These are perfect for a tea party, and would even be great for a picnic -just pack the salad and toast cups separately and assemble at the picnic.

Chicken Salad Toast Cups tea party sandwiches

Yesterday I shared my spring tea party and these were part of the tea party menu.

Recipe

Chicken salad in a toast cup with onion sprout garnish.

Chicken Salad Toast Cups

Crispy and buttery toast cups filled with creamy chicken salad.
5 from 1 vote
Print Pin Rate
Course: Sandwich
Cuisine: American
Prep Time: 20 minutes minutes
Cook Time: 30 minutes minutes
Total Time: 50 minutes minutes
Servings: 22 Toast Cups
Calories: 191kcal
Author: Dannyelle Nicolle-Ramjist

Ingredients

For the Chicken Salad

  • 1 whole rotisserie chicken chopped
  • 2 stalks of celery diced
  • ¼ red onion diced
  • salt and black pepper to taste
  • ¾ cup mayonnaise or miracle whip
  • ½ cup onion sprouts for garnish

For the Toast Cups

  • 1 loaf white sandwich bread
  • ½ cup butter softened

Instructions

  • To make the chicken salad, start by cutting up your whole rotisserie chicken and removing all the bones and skin. Dice any large pieces of the chicken and place in a large mixing bowl.
  • Chop red onion, and celery. Place in the mixing bowl with the chicken.
  • Add salt and pepper and mayo or miracle whip and stir through the chicken mixture to create a moist salad.
  • For the toast cups, butter both sides of a slice of bread, cut off the crusts with a sharp knife.
  • Push the bread into a muffin pan, by placing one finger in the middle of each side. This will create the little flower/cup shape.
  • Bake the toast at 350 for 20-30 until golden brown and toasted.
    Let the toast cups cool. Store in an airtight container until ready to serve. Will keep for a day or two if sealed.
  • To serve, fill the toast cups with chicken salad and garnish with some sprouts.

Notes

Feel free to add chopped radish to the chicken salad, or add chopped apple and walnuts for a different version.

Nutrition

Serving: 1g | Calories: 191kcal | Carbohydrates: 18g | Protein: 4g | Fat: 11g | Saturated Fat: 4g | Polyunsaturated Fat: 7g | Cholesterol: 19mg | Sodium: 293mg | Fiber: 1g | Sugar: 2g
Tried this Recipe? Tag me Today!Mention @LifeisaParty or tag #lifeisaparty!

With homemade Chicken Salad Toast Cups, life really is a party!

More Tea Party Recipe Inspiration

You might also enjoy our Turkey Sandwiches with Cranberry Mayo here.

Turkey Sandwich with Cranberry Mayo

Also check out our Easy Food Processor Scones recipe here.

Easy Food Processor Scones: easy and quick to make in your food processor, these flakey scones are perfect for a tea party, breakfast, or snack.

You might also like our Shortbread Cookies recipe here.

Spring Afternoon Tea Party and Plant Swap

May 16, 2018 · Leave a Comment

Spring tea party.

Spring Tea Party and Plant Swap: celebrate the beginning of gardening season with a spring tea party and plant exchange.

Spring tea party.
[feast_advanced_jump_to]
spring tea party table

The Victoria Day long weekend is the traditional time to start planting outside where I live.  I look forward to getting into my garden over the long weekend every year.  I love to get my planters planted on my deck, and put in our little veggie patch.  Over the years, it's become a bit of a tradition to kick off the season with a little spring tea party and plant swap over the weekend too.  My girl friends love it and look forward to it too.  It's such a perfect way to celebrate the new season together. 

The Tea Table

I set the table for our spring tea party with a white color scheme in mind.  I layered my vintage lace tablecloth, and then added lots of pretty white spring flowers in vintage bottles, and white dishes.  Look for pretty vintage pieces like the tablecloth at the thrift store and antique store.  They add a lot of charm to the table.  We set the table with small plates to enjoy our dainty meal together.  Dessert plates are perfect for this.   I like to keep the number of guests for this party quite small and intimate.  So we set up this get together in the kitchen, but for a larger group you could use your dining room, or if the weather is warm enough you could host this party outside.

white spring flower arrangements in vintage glass bottles

Such a simple and pretty spring centerpiece with some of the fresh flower arrangements from my garden.  It's the perfect time of year to pick spring blooms from your own garden to use on your table, and add a real feeling of springtime.

Party Favor

I thought it would be fun to do a little party favor for my guests to take home from the spring afternoon tea party so I made some little tiny bottles of wildflower seeds.

spring tea party table setting

I found an inexpensive box of mixed wildflower seeds, and then used a funnel to put them into these sweet little glass bottles with cork tops.

wildflower seed party favours
wildflower seed party favors

The labels are made from simple brown paper.  I put one at every place setting and everyone loved them this great idea.  Just a few easy steps to make the perfect little take home party favor.

diy wildflower seed favours
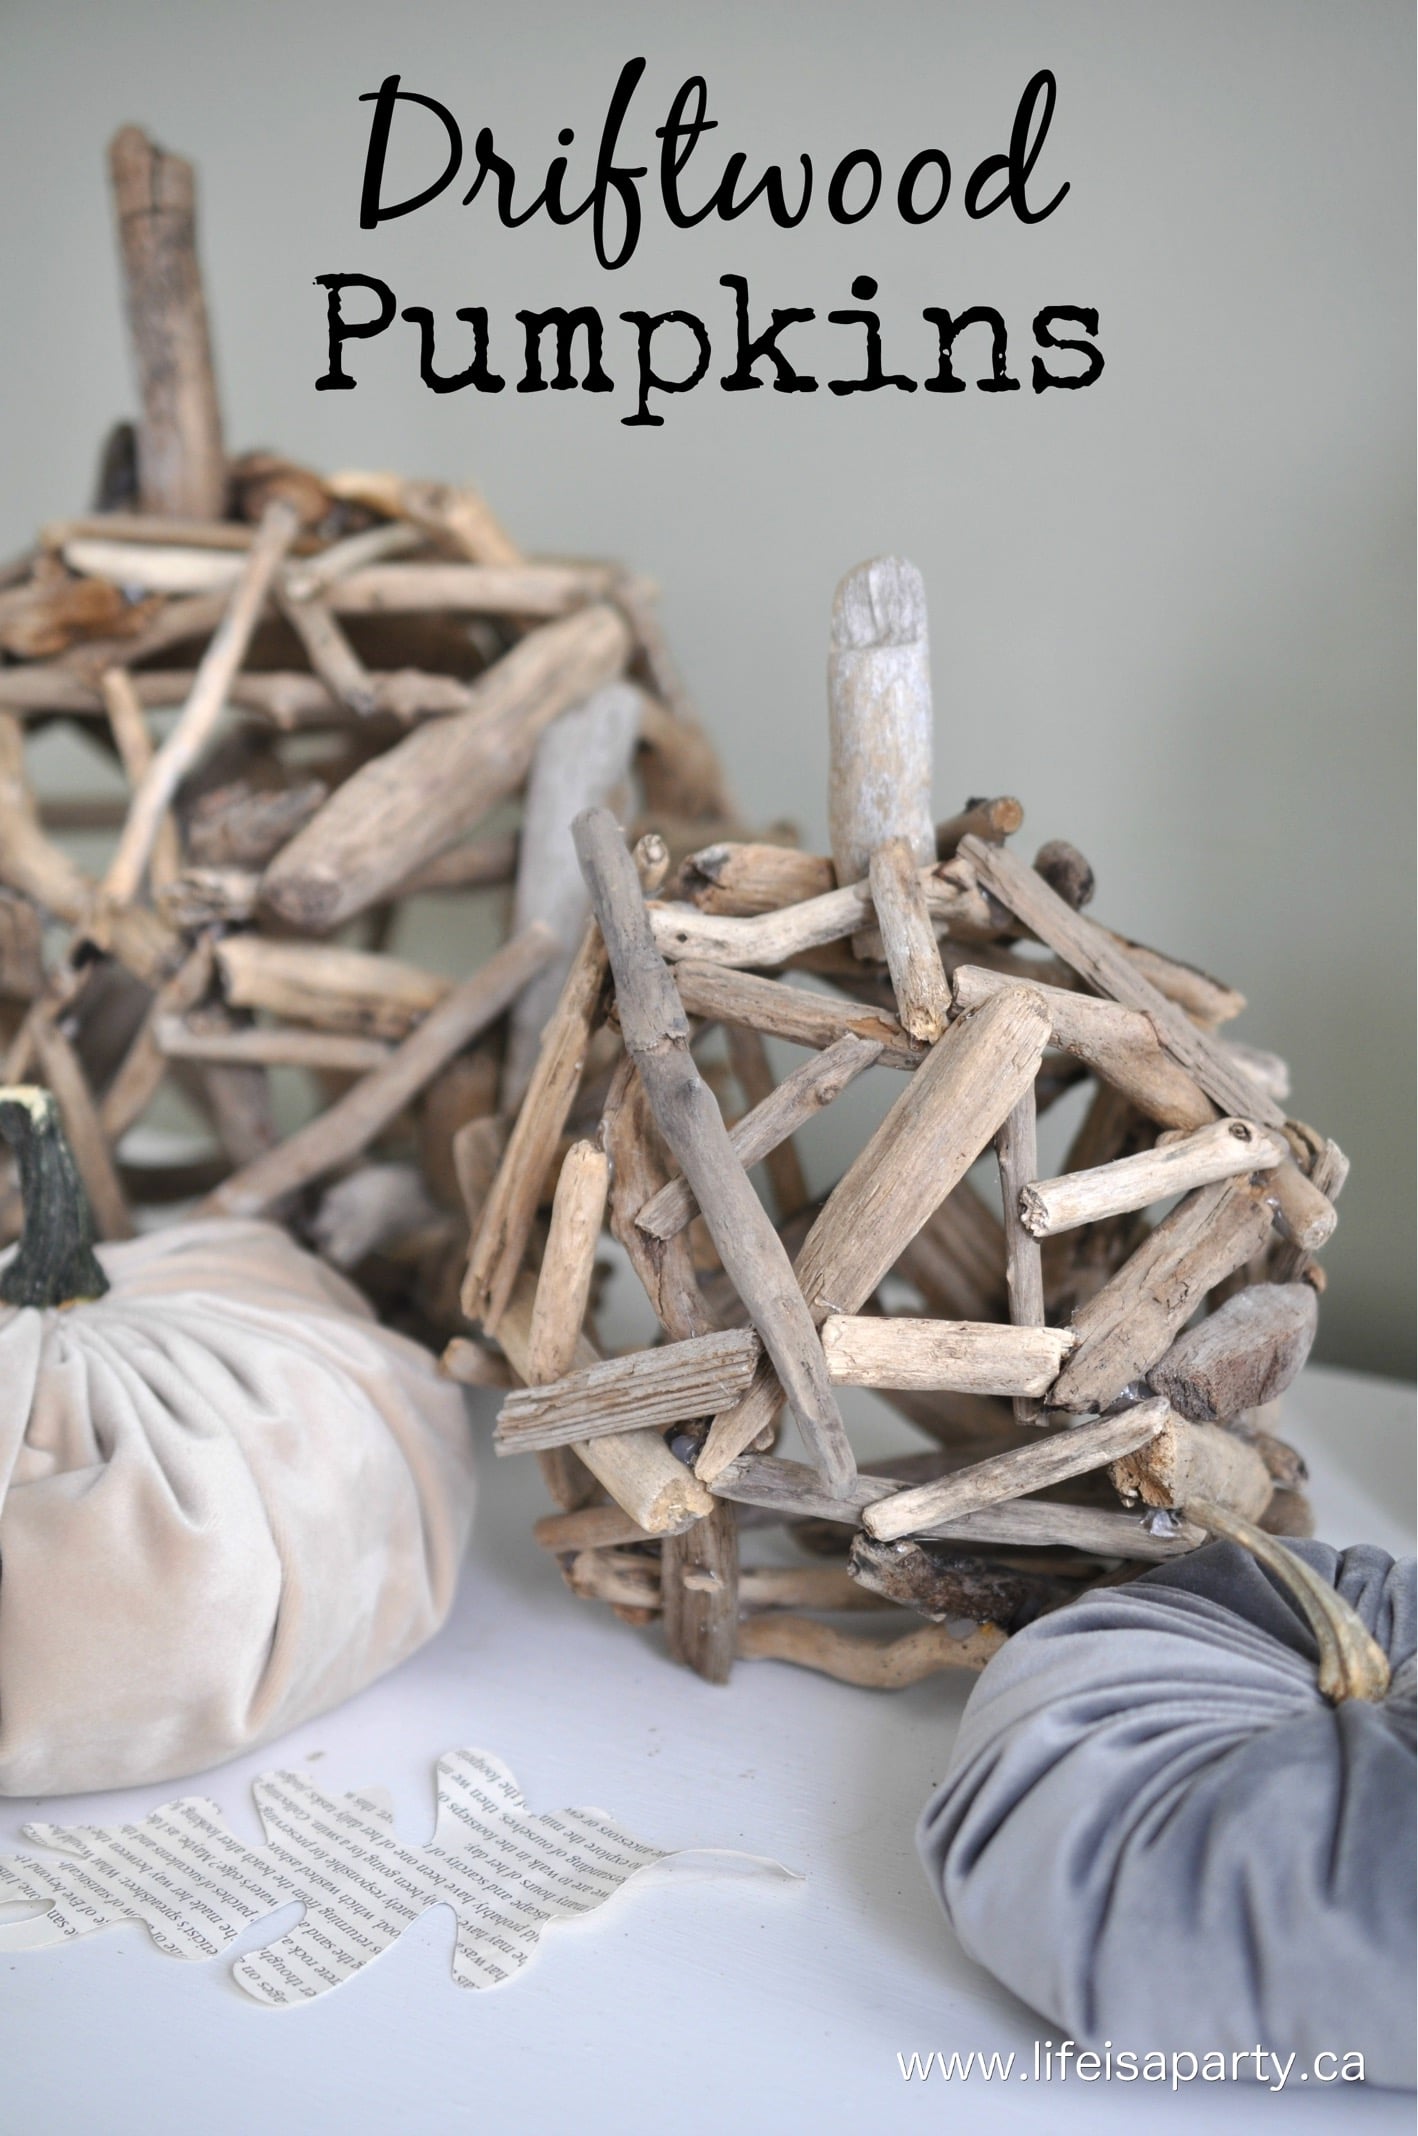
 

The Tea Bar

This year I set up the sweetest tea bar in the kitchen so guests could help themselves to their favourite tea.
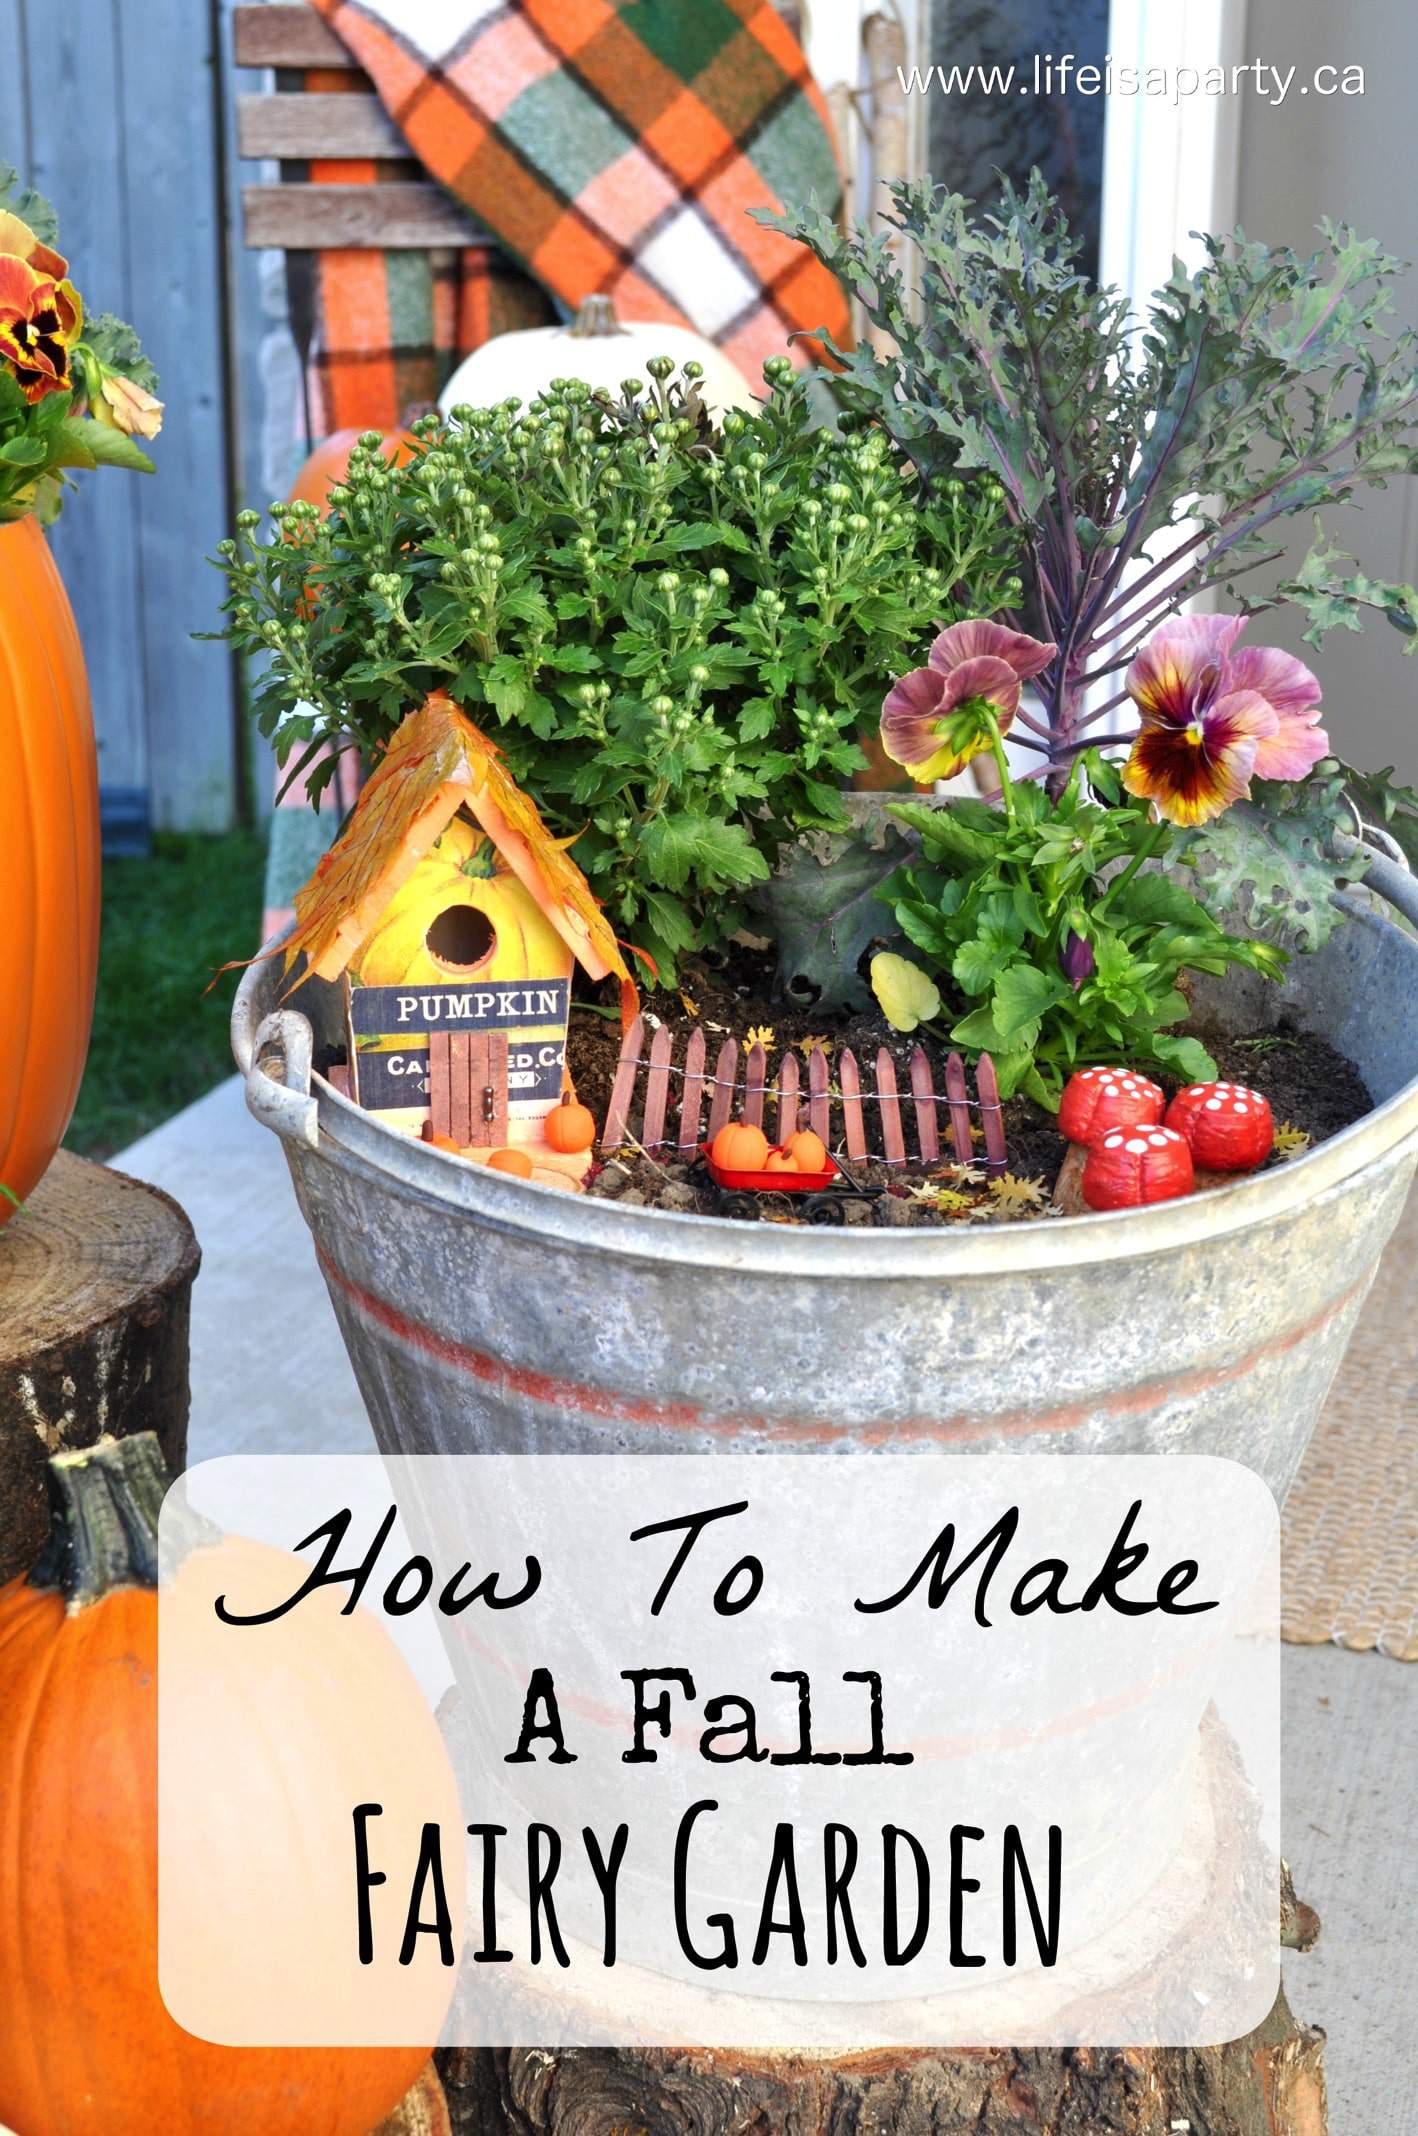
There was classic English Breakfast, and Earl Grey tea bags.  There was also Chamomile Citrus, Green Tea with Pomegranate, Lemon Ginger, and Pure Green Tea.  I had a variety of different tea pots and the kettle boiled so we could make various kinds for everyone, and keep those hot cups of tea coming throughout the afternoon together

tea party tea bar

Of course we also had some traditional tea accompaniments; milk, sugar, honey and lemon.

tea party tea bar

I used my vintage milk glass pretty tea cups.  Sometimes it's nice to get a little fancy with a pretty tea set, and tea party is perfect occasion for it.

white milk glass tea cup with tea steeping
white tea pot with tea bags
tea party decor tea sign
how to host a spring tea party

Everyone had so much fun choosing their tea and trying different flavors throughout the afternoon.

Tea Sandwiches

We started our tea party off with some savory treats.  It's traditional to begin an afternoon tea with tea sandwiches.  For our spring tea party we had:

  • cucumber and cream cheese finger sandwiches
  • egg salad tea sandwiches with lettuce on mini croissants
  • chicken salad in toast cups with onion sprouts

For the tea sandwiches we began with traditional cucumber and cream cheese.

cucumber tea sandwiches

I love to make these and cut off the crusts for a dainty high tea treat or little finger sandwiches.

mini croissants with egg salad and lettuce tea sandwiches

We also had some egg salad sandwiches on mini croissants.

chicken salad toast cup tea sandwiches

My favourite little tea sandwich though had to be the homemade chicken salad in toast cups.  You can find the recipe for these Chicken Salad Toast Cups here.  Every good tea party starts with some delicious little tea sandwiches.

scones and tea party desserts on tiered tray

Scones and Clotted Cream

Years ago, I got to live in England for 8 months.  One of the delights I'll never forget was going for a cream tea.  A cream tea consists of a beautiful pot of hot tea, and scones with butter, jam and clotted cream.  Scones are the traditional second course in an afternoon tea.  This sweet treat, just might be everyone's favorite party.

clotted cream for a tea party

It's hard to find clotted cream over here, but sometimes you get lucky.  If you can't find any you can always substitute some whip heavy cream, it's not quite as special but works in a pinch.

scone with jam and clotted cream

The Sweets

And every tea party should finish with some sweets.  Make your own, or pick some up at your local bakery, or do a combination.  It's nice to offer a varitey.  We had

  • cherry strudel slices
  • pineapple angel food cupcakes with whipped cream
  • raspberry thumbprint cookies
cream cheese and cherry strudel

I made a beautiful cream cheese and cherry strudel.

We also had some little pineapple angel food cakes.

silicone tea cup cupcakes

Aren't these tea cup cupcake holders the cutest? And we topped them off with some whipped cream.  A little cupcake is always a great addition to a tea party menu.

spring tea party ideas

There were also some delicious almond thumbprint sweet little cookies.  We served lots of the sweets together on a tiered tray, which we made by stacking two matching cake stands together.  We used the larger cake stand as a little base, and then stacked the smaller one right on top, which worked perfectly.  It's a lovely idea to have a variety of small items, so that guests can try a few different things.

For more ideas check out our complete tea party food guide.

raspberry thumbprint cookies

It was such a lovely afternoon together drinking  many, many cups of tea and enjoying all the food.  It was tea time afterall.

spring tea party ideas

The Plant Exchange

After our tea party, it was time to head outside to the garden for our plant swap.

The idea of plant exchange is to all bring one another a perennial plant from our gardens to share with each other.  You bring one plant for everyone and get to go home with as many new ones as well.  Some years everyone has had established gardens and shared some of their perennial babies or divided up a large perennial.  Other years, people with less established gardens have come and just picked up a new plant for everyone at the garden centre or even a package of seeds.  

I always try to invite a mix of old and new gardeners.  The new ones are full of enthusiasm and the old ones are full of wisdom.

how to organize a plant swap

I made a simple name tag for everyone with some cardboard tags and twigs.  This just makes it a little easier to arrange everything as everyone arrives with their plants to share.

plant swap ideas

As everyone arrived for the party, they added their plants to everyone's little groupings.  This is such a great way to share plants.

spring plant exchange ideas

We had so much fun enjoying an afternoon of exchanging plants, sipping tea, and enjoying treats together.  If you are a gardener, or your friends are, you might want to make this into a new tradition too.  I hope this gives you lots of sprint tea party ideas to use for your own spring tea parties.

how to host a spring tea party


With a lovely spring tea party and plant exchange to celebrate the beginning of gardening season, life really is a party!

More Tea Party Inspiration

You might also like How To Throw An Afternoon Tea Party For Adults here.

afternoon tea party for adults

Also check out How To Throw A Garden Tea Party here.

You might also like How To Host A Tea Party here.

Modern Boho Master Bedroom One Room Challenge Reveal

May 9, 2018 · 40 Comments

Modern boho master bedroom makeover.

Modern Bobo Master Bedroom: Black and white, lots of texture, and a mix of modern and traditional help give this room a European Modern Boho feel.

Modern boho master bedroom makeover.
[feast_advanced_jump_to]

I'm so excited to share my Modern Boho Master Bedroom One Room Challenge Reveal with you today.  I've been working on this room for six weeks, and I'm so glad it's finished.  You can check out past weeks here to catch up:

The Before and The Plan /  DIY Concrete Side Tables 

There's always that point in a makeover when you question yourself and wonder if it's going to work out how you hoped and if it was worth all the effort.  I'm happy to say at the end that I'm so glad I did it.

I said at the very beginning that I wanted to fall in love with this room again.  I honestly didn't know if I could.

bedroom makeover before pictures

We had to work around the large four poster bed.  I had made a little deal with my husband when we got married that he could pick the bedroom furniture if I could pick the living room furniture.  He loves traditional furniture and picked out this bedroom set.  I liked it, but never loved it.  Seventeen years later he still loves it, so it had to stay.

My work around was to treat it as a star of the room, to showcase it, and add contrasting modern furniture around it.  I thought of the way Europeans decorate with old heirloom pieces mixed with modern cool pieces.  That was my inspiration.  I was going for a European, Scandinavian, black and white, boho kind of a feel to the room.  And I think I got there in the end with my Modern Boho Bedroom.

4 poster dark wood bed with pillows

Let's start with the walls. We got rid of the tired beige walls and partnered with Para Paints to paint the room Cloud White WH03 (formerly JoJo Whitewash).  It made the room feel light and bright, and so much bigger, and perfect for my black and white boho master bedroom.

traditional four poster bed

Now onto the bed.  I love the finished look with all the new bedding!  It's so cozy and pretty.  I partnered with HomeSense for some of the accessories in the room, including the beautiful new bedding.  You really can not beat their quality, selection, and price.  They always have the latest, trendiest looks and the price is always amazing.  I had so much fun shopping for all the new pieces.

traditional four poster bed with modern pillows

I picked up some gorgeous Tommy Hilfiger sheets, and the Nicole Miller 100% linen duvet cover.  A linen duvet cover has been on my wish list for awhile now.  I love the softness, and feel of the linen.  We already had a white duvet cover but the linen is a definite upgrade.  A tip for making a traditional bed look a little more modern is to try monochromatic bedding.

Modern Boho black and white Bed

The bed is layered with lots of yummy pillows.  I used the beautiful linen pillow shams that came with the duvet cover and then layered in these gorgeous grey Euroshams.  The sutle pattern on them, and the grey helps break up all the white.

I also picked up this long bolster pillow at HomeSense.  The texture is great, and the tassel ends help add some of the boho vibe.  I love this Anthro look at a fraction of the price.

Boho pillows black and white

The two front pillows are a real favourite of mine.   They're both from Bobbie Made, a local maker with a shop on etsy.  They are so beautiful.  They add so much texture to the room and definitely some of that boho charm.  The cream one is woven and full of beautiful detail.  The black one is partly mud cloth.  I love the contrast of the cream and black and all the fringe.  These two pieces are so cool and a real cherry on top to the bedding pillowscape. (Is pillowscape a word?  It should be.) They really create the modern boho master bedroom feel I was going for.

traditional four poster bed with modern concrete side tables

Beside the bed are my amazing concrete side tables.  You can find the tutorial on how to make the DIY concrete side tables here.  These were the big project in the room, and I couldn't be happier with how they turned out.  We partnered with Home Depot to make them, starting with their amazing pre-made metal legs.  We painted them black and made the concrete table tops.  This is a great little DIY project for anyone who is a fan of concrete.  The contrast of the modern tables beside the traditional bed is perfect for my modern boho master bedroom.

boho plant grouping

I really love how they look next to the traditional bed -so much contrasting goodness.

modern concrete bedside tables

It's always fun to add a little vintage to any room.  I wanted the styling in this room to be a little on the masculine side and I thought a collection of vintage alarm clocks would be the perfect addition to a bedroom.  It was a lot of fun finding them, and I'm sure I'll add some more along the way.  They really do remind me of being a little girl in my parent's bedroom.  Every week night before he went to sleep my Dad would set the old alarm clock for work in the morning -not sure what he uses now, probably an iPhone, but these are sure full of charm.

vintage alarm clock collection

Over on the other side, another fun vintage find.  I picked up this old telephone at my favourite antique shop.

black vintage telephone

The greatest unexpected pleasure -the sound of the ring.  Every time I hear it, it makes me smile and remember my childhood.  And my 11 year old thinks dailing is so much fun, lol.

Modern Boho Bedroom plant grouping

 For more of the boho feel for our modern boho master bedroom, I wanted to add in lots of plants.  You might remember my recent refresh in the master bathroom, right beside this room, where I added lots of new plants.  I'm an aspiring plant lady.  But, I honestly don't have a great track record with house plants.  The perfect solution for the look without all the work and risk of real plants was to use some amazing faux plants.

faux house plant grouping

I partnered with Afloral for all the beautiful faux plants in the room.  They look and even feel so real.

faux house plant

The detail on them is amazing.

large faux house plant grouping

Grouped together they give an instant jungle feel -in a good way.  The plants are amazing, and so are Alforal's selection of pots and planters.  I love how the cement ones look next to the side table.  Some of the plants I choose were potted already, and some were branches that I put into a planter with some floral foam and some moss on top.  My biggest tip for ordering would be to use a measuring tape since it's hard to get the scale right on-line, and try to vary the final heights and leaf textures for a grouping.

boho plant display grouping

If you've ever worried about investing in a fiddle leaf fig and feared you might not be able to keep the finicky plant alive, or worried about the mess of watering and leaves on carpet, then these realistic faux ones are the perfect solution.  And the investment in great faux plants soon pays off after buying, killing, and then replacing a few real ones. 😉

grey leather modern wing back chair

I also added in a new chair on this side of the room.  We'd always talked about a leather chair for reading here, but never got around to adding one in.  When I decided to makeover the room I knew I wanted to finally add the perfect chair to the space.  I went with this faux leather modern wingback.  I liked the way the leather wingback was a nod to the tradtional furniture in the room, but I loved the way the grey and the really modern design with the exaggerated  wings made it really modern.

modern leather wingback chair grey

The layered pillows on the chair are from Amara, and the velvet one matches another on the bed.  I love the tassels and texture on the front pillow, and feel like it adds more of the boho feel to the room.

Modern Bobo Master Bedroom: Black and white, lots of texture, and a mix of modern and traditional help give this room a European Modern Boho feel.

In the background are the perfect curtains.

black and white stripped curtains

I tried a couple of pairs here and landed on these because they're airy and light, and add the perfect little bit of pattern with their black strip.  These curtains are from Homesense, where they have such a great selection at such great price points.  It honestly has me thinking about replacing the curtains in a few other rooms now too.

Modern Boho Bedroom: Black and white, woven wall hangings, a modern gallery wall, lots of plants, boho string lights, and tons of textured pillows give this room its European Modern Bohemian vibe.

At the end of the bed, between the door ways to the closet and the on suite there is a little wall that needed some art work.

bedroom art grouping with woven wall hanging
bedroom wall art grouping

The nude is another great piece from Minted.  I love how elegant she is.  And Bobbie Made sent me the most beautiful little woven wall hanging.  The detail is stunning.

woven wall hanging

Over on the other side of the room, is the dresser.

Modern Boho Bedroom: Black and white, woven wall hangings, a modern gallery wall, lots of plants, boho string lights, and tons of textured pillows give this room its European Modern Bohemian vibe.

It had to stay too, but it looks so great with the gallery wall above it now.  I took the large matching mirror off the back of it, and leaned it up against the wall on the other side of the room.  Breaking up the set helps it feel a little less traditional.

modern bedroom gallery wall

I worked with Minted for a lot of the pieces in the gallery wall.

Modern Boho Bedroom gallery wall art grouping

I also added in one new piece, a beautiful Ferrari print from Auto Artwork Shop. My sweet husband is a huge F1 Ferrari fan.  When we got married he had some expensive prints of red race cars.  For the most part they've found a home in his different studies over the years, but when he gave up his study for me to have an office to blog from a few years ago, those red Ferrari pictures never found a new home.  They're not really my aesthetic, but I found this one and it was perfect to include in the gallery wall.  The black and white photo of a vintage Ferrari car fit perfectly.  And he loves it.

vintage black fan

If you watch me on Instagram Stories you 'll know I had trouble deciding on this vintage fan.  At first I thought it was too big, but then I realized that with the scale of the bed the large size was actually a plus.

black vintage fan

It was a splurge, and I'd seen it in a  little antique shop about an hour from home, but I couldn't stop thinking about it.  When I finally decided to get it I phoned them and it was still there so my girls and I made a road trip day out of it and had a great time.

Modern Boho Bedroom: Black and white, woven wall hangings, a modern gallery wall, lots of plants, boho string lights, and tons of textured pillows give this room its European Modern Bohemian vibe.

On the dresser there are a few more treasures from Amara including the cute modern alarm clock, the copper glass box, and the pretty hexagon white tray.

Modern Bobo Master Bedroom

I am so very happy about the room and how it all turned out.  But I want to tell you there were a few compromises along the way.  I had hoped to add in a vintage feeling traditional rug in grey and white with a little black.  I just couldn't manage to find one I loved, in my price range, that shipped to Canada.  It would have added some more pattern, texture and layers to the room.  But I also know that rugs over carpet can be a pain -getting wrinkled and tripped over.  So I left it out for now.  If I do find the perfect one I may add it in later.

The other big disappointment was that at the last minute I couldn't replace the light.  I found the perfect one and was so excited when it arrived.  But unfortunately it was wired for the UK and won't work here in North America.  There wasn't time to find another one so we left the chandelier up.  It's a beautiful light and goes perfectly with the bed, but I do think a really modern one would have really helped with that modern / traditional contrast I was going for.  So I'll be on the hunt for the perfect light over the next little while.

Modern Boho Bedroom: Black and white, woven wall hangings, a modern gallery wall, lots of plants, boho string lights, and tons of textured pillows give this room its European Modern Bohemian vibe.

I share these two compromises with you only to help us all remember that making over a whole room in six weeks is challenging, and doesn't always come together exactly how we imagined.  This isn't some quick tv makeover show, it's real life where we run into problems sometimes, and out of budget sometimes.  Real life decorating tends to take time.  And while I really love the challenge of getting a room all done is six short weeks, sometimes that means a few compromises.  And I'm ok with that.  Just keeping it real.

Modern Boho Bedroom: Black and white, woven wall hangings, a modern gallery wall, lots of plants, boho string lights, and tons of textured pillows give this room its European Modern Bohemian vibe.

I really do love the room again.  And....it has me thinking about and energized to take on some more room updates.  At the end of the day I'm always amazed what some paint and new accessories can do for a space.  So I hope you're encouraged to tackle a makeover you've been thinking about for a while too.

Modern Boho Bedroom makeover

I really could not have brought this room together without some amazing sponsors. A special thanks to

Home Depot, Wayfair, HomeSense, Afloral, Amara, Para, Minted, Bobbie Made, Benjamin Wood Works, and Auto Artwork Shop.  All opinions are my own, as always.  Thanks for supporting the brands that make Life is a Party possible.

Modern Boho Bedroom: Black and white, woven wall hangings, a modern gallery wall, lots of plants, boho string lights, and tons of textured pillows give this room its European Modern Bohemian vibe.


I'm joining over 200 Guest Participants in the One Room Challenge so be sure to check out all their room reveals here.

With a new Modern Boho Master Bedroom, life really is a party!

DIY Concrete Side Tables

May 2, 2018 · 20 Comments

How to make DIY concrete side tables.

DIY Concrete Side Table: this sleek, modern concrete side table is an easy DIY project. Store bought legs and a poured concrete top create a custom look.

How to make DIY concrete side tables.
[feast_advanced_jump_to]

If you love simple, modern, clean lined concrete tables, but not the price of them in designer home decor stores, then you'll love this DIY version.  Create the look for a much lower price tag.  

When decorating my bedroom for the One Room Challenge, I wanted to add some more modern elements to the room to juxtapose the traditional four poster bed. When I couldn't find the tables of my dreams I decided to make some by doing this DIY concrete project.  I worked with Home Depot to create the concrete side tables of my dreams!  This DIY project turned out so well, I'm really in love with the new DIY concrete table.

One Room Challenge

It's Week Five of the One Room Challenge, and next week is the big final reveal of the room.  Today I'm sharing my favourite project of the challenge. The DIY Concrete Side Table turned out so great.

Miss any updates of our progress?  You can check out all the One Room Challenge weekly updates here:

The Before and The Plan /  Modern Boho Master Bedroom Reveal

how to make a concrete table

Materials:
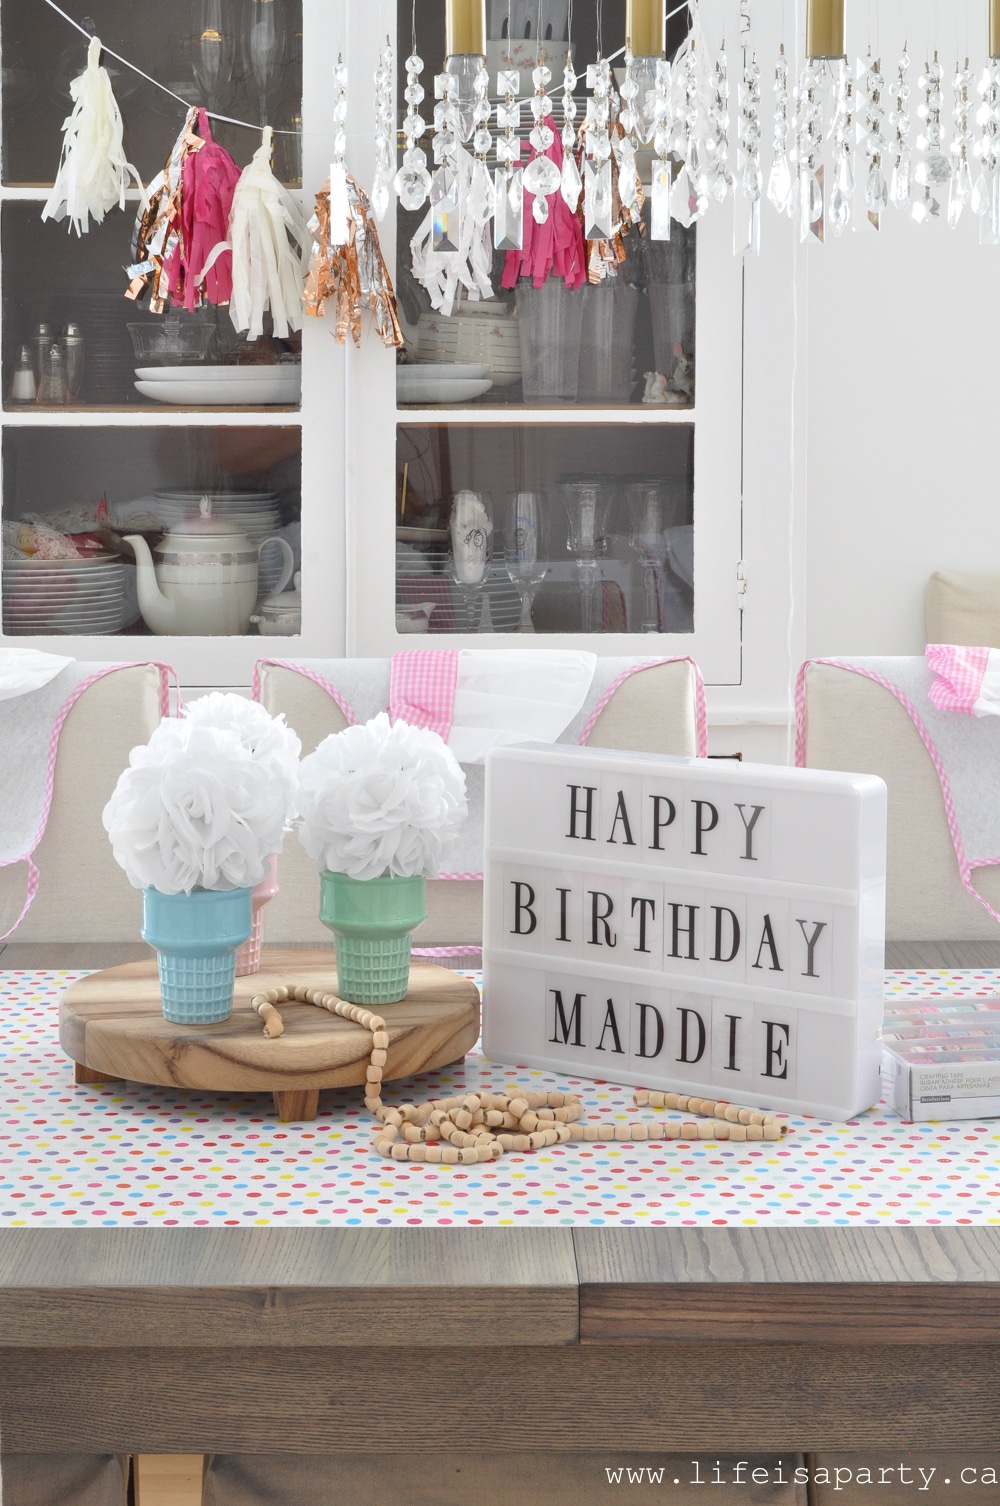
  • Steel Furniture Legs
  • Matte Black Spray Paint
  • Concrete Mix
  • Melamine Board
  • #6 Wood Screws
  • Saw
  • Silicone Caulking
  • Diamond Sanding Pad
  • Lead Anchors
  • Drill
  • 1" Pan Head Wood Screws
  • PL Premium Construction Adhesive
  • Concrete Sealer
DIY Concrete Side Table

How To Make A Concrete Side Table:

My amazing brother-in-law Shaun of Benjamin Tile Works is so good at any tile, wood, or concrete project.  He's helped me make so many DIY ideas come to life.  I really can't thank him enough for helping me bring my vision to life on these tables.  I usually come up with a concept and challenge him with how we can make it -and by we I mean I usually end up taking pictures while he does all the real work.  

He's done some concrete work for me in the past -he created my amazing basement fireplace surround, and even made these little concrete houses for me in the past.  He did a great job on these tables, and with these step by step instructions of what he did, I think any DIYer could make them.

Making The Concrete Forms

The first thing you need to create is your forms for the concrete table top.  We made our side table tops 24" by 17".  The length was based on the size of the legs.  We wanted the legs to be flush with the concrete top.  The forms were made from a piece of melamine.  It's nice and smooth and creates a really nice smooth finish on the table top, compared to regular wood forms.  We highly recommend using melamine for the forms for a beautiful finished table top as your end result.  
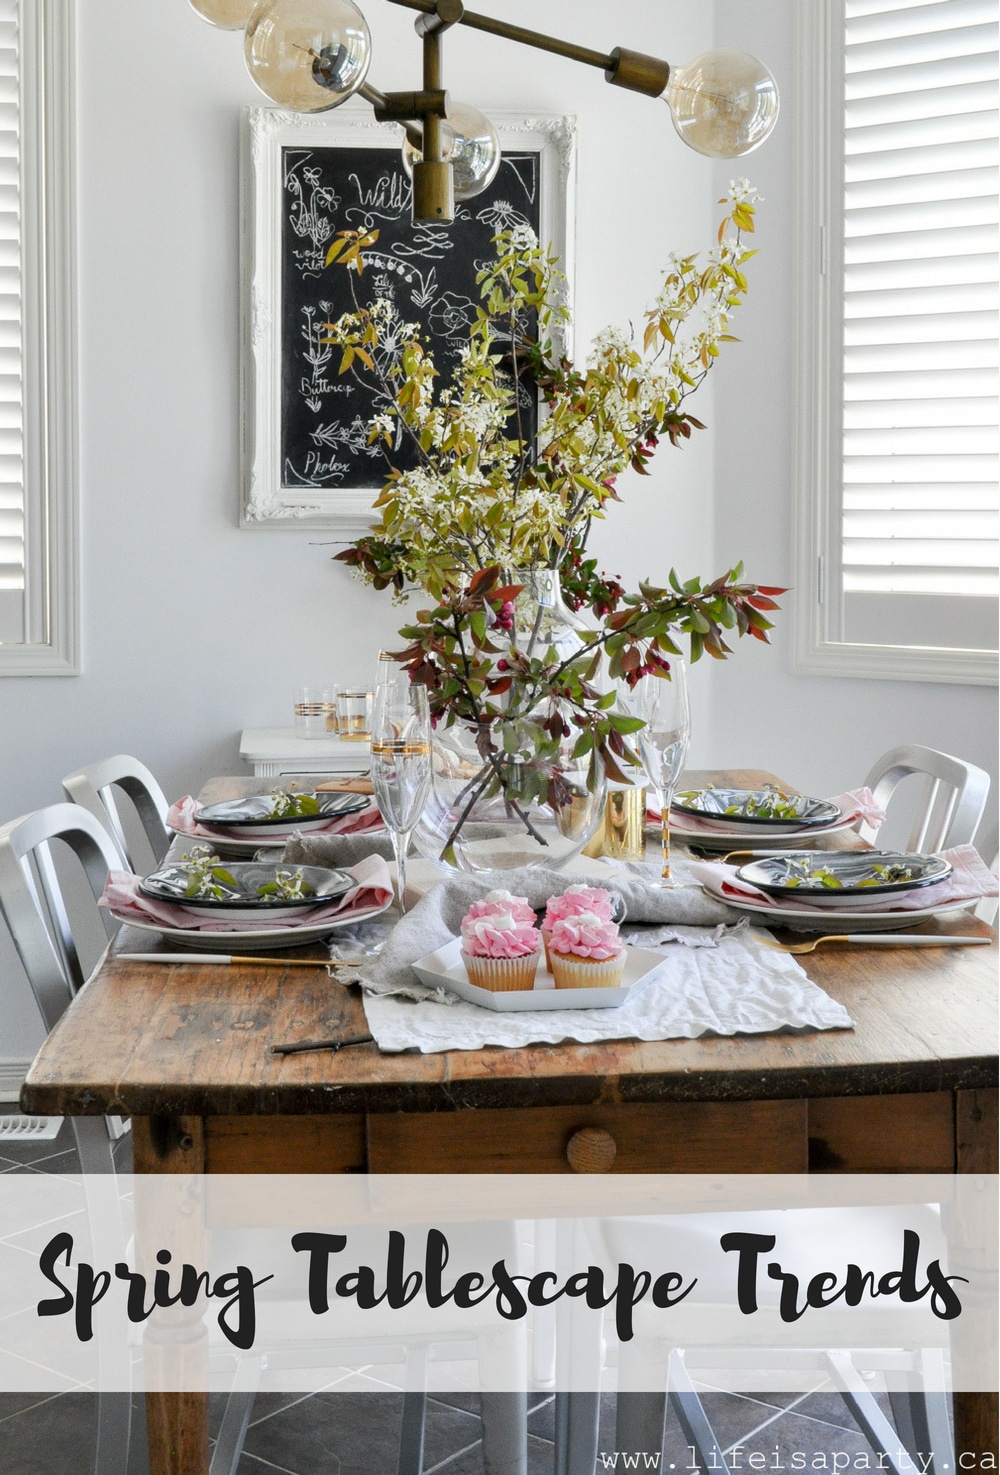
We made our tops 1 ½" thick, the same thickness as the table legs for a cohesive look.

DIY Concrete Side Table

Begin by cutting the edges for the form.  We made two tables at once, so we cut three 17" long strips, that were 1 ½" thick.  We made our two forms together so the long sides edge pieces were just over 60" to accommodate two 24" sections, plus the thickness of the form edge.

Next lay out the first long side of the mould and drill guide holes through the form edge and right through the bottom so that you can screw it together from the back side with  #6 wood screws.

DIY Concrete Side Table

Use a square clamped into place to make sure your corners are perfectly square for your concrete mold.  Pre-drill and screw into place the rest of the form edges.

concrete table moulds

Caulking The Forms

Now to finish the moulds, caulk the inside seams with the silicone caulking, applying a silicone bead around the edge, and then smooth out the edges. Since whatever you leave on the inside of the concrete form will transfer into the finished concrete top impression, take some care to make sure it's as smooth as possible on the seams.  The silicone caulking will need at least three hours to set.

DIY Concrete Table moulds

Preparing Your Concrete

Now you can mix your concrete.  Follow the manufacturer's directions on the bag of concrete. Mix well, this step is very important.  We used a drill attachment, and mixed our concrete in an empty bucket.  The drill attachment is the perfect tool for this process, since the concrete is heavy and hard to mix thoroughly by hand.  Make sure you get all the way to the bottom of the bucket when your mixing.  

Because our tables were quite small we mixed the entire thing at once, but you could do it in small batches and do one table at a time if you wished.

DIY Concrete Side Table

Pouring Your Concrete

Fill your moulds with the wet concrete mixture.  Use a trowel to smooth out the top.  Use a rubber mallet to gently give the sides of the form a good tap, to help get rid of air bubbles in the concrete mixture.

how to get the air bubbles out of concrete

The next step, another trick (Shaun knows all the tricks) is to use a palm sander or orbital sander along the edges of the top of the form, just for the vibrations to also help get rid of the air bubbles in the cement mixture.  Be sure to smooth the top and get it as level as possible.

how to make a Concrete table

Let the concrete tabletop set for 3 - 5 days.

DIY Concrete table top

Removing The Form

Remove the form edges by removing the screws and gently prying it off the melamine.  Take care not to force it, since it could crack or break still at this point.  Use a wet diamond sanding pad along the edge to smooth it a little bit around the rough edges, if needed.

how to make a concrete table top

Preparing The Steel Legs

For the legs, wipe them down with varsol to remove any grease.  Spray paint the table base with several coats in matte black.

painting metal table legs

Applying The Legs To The Table Top

To attach the legs to the top piece, first mark out the screw holes on the bottom of the concrete table top.  We only used the holes furthest from the edge to lessen the chance of cracking the concrete.

DIY Concrete Side Table

Drill holes for the lead anchors into the concrete, taking care since it's still fragile at this point.  We were a little worried as we drilled the holes into the concrete. Ours wasn't quite set enough, probably because of colder night temperatures when we made it.  If you let is set the whole 3-5 days though it should be fine.  Of course do this part carefully though, you don't want all your hard work to be wasted by cracking anything here.

Then cut the tops off the lead anchors to make them shorter, and use the PL Premium Construction Adhesive to glue them into place in the drilled holes.

DIY Concrete Side Table top

Next, add some PL Premium Construction Adhesive to the top edge of the table leg, and then glue and screw the leg into place.  Again, take care since this is another time when you could crack the concrete.  Then add the second set of legs and set up your table.  It's very heavy.

DIY Concrete Side Table

Sealing The Concrete Tabletop

The final step is to apply a sealer to the concrete tabletop.  Let the  concrete cure for a full 28 days and then apply the clear coat sealer to the top of the table.  (I haven't sealed it yet, but I will once the cure time is up.)

Recipe

How to make DIY concrete side tables.

DIY Concrete Side Tables

DIY Concreate Table With Steel Legs
No ratings yet
Print Pin Rate
Course: DIY & Crafts
Cook Time: 5 hours hours
Additional Time: 5 days days
Total Time: 5 days days 5 hours hours
Author: Dannyelle Nicolle-Ramjist

Equipment

  • Saw
  • Drill
  • Caulking Gun
  • Sander

Materials

  • Steel Furniture Legs
  • Matte Black Spray Paint
  • Concrete Mix
  • Melamine Board
  • #6 Wood Screws
  • Silicone Caulking
  • Diamond Sanding Pad
  • Lead Anchors
  • 1 " Pan Head Wood Screws
  • PL Premium Construction Adhesive
  • Concrete Sealer

Instructions

  • The first thing you need to create is your forms for the concrete table top. We made our side table tops 24" by 17". The length was based on the size of the legs. We wanted the legs to be flush with the concrete top. The forms were made from a piece of melamine. It's nice and smooth and creates a really nice smooth finish on the table top, compared to regular wood forms. We highly recommend using melamine for the forms for a beautiful finished table top as your end result.

    We made our tops 1 ½" thick, the same thickness as the table legs for a cohesive look.
  • Begin by cutting the edges for the form. We made two tables at once, so we cut three 17" long strips, that were 1 ½" thick. We made our two forms together so the long sides edge pieces were just over 60" to accommodate two 24" sections, plus the thickness of the form edge.
  • Next lay out the first long side of the mould and drill guide holes through the form edge and right through the bottom so that you can screw it together from the back side with #6 wood screws. Use a square clamped into place to make sure your corners are perfectly square for your concrete mold. Pre-drill and screw into place the rest of the form edges.
  • Now to finish the moulds, caulk the inside seams with the silicone caulking, applying a silicone bead around the edge, and then smooth out the edges. Since whatever you leave on the inside of the concrete form will transfer into the finished concrete top impression, take some care to make sure it's as smooth as possible on the seams. The silicone caulking will need at least three hours to set.
  • Now you can mix your concrete. Follow the manufacturer's directions on the bag of concrete. Mix well, this step is very important. We used a drill attachment, and mixed our concrete in an empty bucket. The drill attachment is the perfect tool for this process, since the concrete is heavy and hard to mix thoroughly by hand. Make sure you get all the way to the bottom of the bucket when your mixing.

    Because our tables were quite small we mixed the entire thing at once, but you could do it in small batches and do one table at a time if you wished.
  • Fill your moulds with the wet concrete mixture. Use a trowel to smooth out the top. Use a rubber mallet to gently give the sides of the form a good tap, to help get rid of air bubbles in the concrete mixture. The next step, another trick (Shaun knows all the tricks) is to use a palm sander or orbital sander along the edges of the top of the form, just for the vibrations to also help get rid of the air bubbles in the cement mixture. Be sure to smooth the top and get it as level as possible.
  • Let the concrete tabletop set for 3 - 5 days.
  • Remove the form edges by removing the screws and gently prying it off the melamine. Take care not to force it, since it could crack or break still at this point. Use a wet diamond sanding pad along the edge to smooth it a little bit around the rough edges, if needed.
  • For the legs, wipe them down with varsol to remove any grease. Spray paint the table base with several coats in matte black.
  • To attach the legs to the top piece, first mark out the screw holes on the bottom of the concrete table top. We only used the holes furthest from the edge to lessen the chance of cracking the concrete. Drill holes for the lead anchors into the concrete, taking care since it's still fragile at this point. We were a little worried as we drilled the holes into the concrete. Ours wasn't quite set enough, probably because of colder night temperatures when we made it. If you let is set the whole 3-5 days though it should be fine. Of course do this part carefully though, you don't want all your hard work to be wasted by cracking anything here. Then cut the tops off the lead anchors to make them shorter, and use the PL Premium Construction Adhesive to glue them into place in the drilled holes. Next, add some PL Premium Construction Adhesive to the top edge of the table leg, and then glue and screw the leg into place. Again, take care since this is another time when you could crack the concrete. Then add the second set of legs and set up your table.
  • The final step is to apply a sealer to the concrete tabletop. Let the concrete cure for a full 28 days and then apply the clear coat sealer to the top of the table. (I haven't sealed it yet, but I will once the cure time is up.)

Table Base Options

Aren't these side tables amazing looking?  I really love how they turned out and what they add to the room.  We have a really large bed so I used the regular table height 28" legs, but the legs do come shorter if you need something to be in scale with a regular lower bed, or a sofa.  The smaller ones would work great for living room side tables too.  You could also leave the legs as un-painted steel and just seal them for a more industrial look instead of painting them black.

I think the steel legs add to the industrial feel of the concrete tables that we were going for.  You could create a wood base for your tables.  This would reduce the cost of this DIY.  Check out this post where we made a large outdoor concrete table with wood legs for more inspiration.

Hairpin legs would also be another great option for this projects.

This table top is very heavy, so whatever you choose for your base, it definitely needs to be quite sturdy.

Can I Use This Table Outside?

Yes, you can use this table as an outdoor concrete table.  In order to maintain an outdoor side table, make sure that the concrete is sealed.  Also make sure the that the steel legs are painted with exterior paint so that they don't rust.  We recommend covering the table in winter to protect it from snow if you live in a cold climate.  Make a lower version of this table and use it as a beautiful outdoor coffee table.

DIY Side Table

This post is sponsored by Home Depot Canada.  As always all opinions are my own.  

I really could not have brought this room together without some amazing sponsors.  Check out the finished room reveal here.  A special thanks to

Modern Boho Bedroom: Black and white, woven wall hangings, a modern gallery wall, lots of plants, boho string lights, and tons of textured pillows give this room its European Modern Bohemian vibe.

Home Depot, Wayfair, HomeSense, Afloral, Amara, Para, Minted, Bobbie Made, Benjamin Wood Works, and Auto Artwork Shop.  All opinions are my own, as always.  Thanks for supporting the brands that make Life is a Party possible.

More Inspiration

You might also like our DIY Outdoor Concrete Table here.

DIY Concrete Outdoor Table: make your own high-end outdoor patio table from cedar and concrete for a fraction of the price of buying one.

Also check out How To Refinish Your Dark Wood Veneer Table here.

Also check out How To Paint A Buffalo Check Feature Wall here.

  • « Go to Previous Page
  • Page 1
  • Interim pages omitted …
  • Page 7
  • Page 8
  • Page 9
  • Page 10
  • Page 11
  • Interim pages omitted …
  • Page 21
  • Go to Next Page »

Primary Sidebar

Welcome!
Life is a Party is all about helping you celebrate everyday with great food, entertaining and party inspiration, and seasonal crafts and home decor inspired by the holidays.

More About Dannyelle

Trending Recipes

  • Mac and cheese with panko breadcrumb topping.
    Best Homemade Mac and Cheese with Panko Breadcrumb Topping
  • Homemade iced capps in glasses on a wood table.
    Tim Hortons Copycat Iced Capp Recipe
  • Dirt Pudding no cream cheese in glasses with candy rocks, and fresh mint that looks like a little plant.
    Easy Dirt Pudding Recipe without Cream Cheese
  • Easy 3 ingredient coconut milkshake recipe.
    Easy Coconut Milkshake Recipe
  • Easy food processor scones on a plate with jam.
    Easy Food Processor Scones
  • Fluffy small batch pancakes for two ready to serve on a plate with syrup.
    Easy Small Batch Pancakes For Two Recipe

Fall Ideas

  • Pumpkin shaped dinner roll recipe, with a herb stem.
    Pumpkin Shaped Dinner Rolls
  • Fall breakfast board
    Fall Breakfast Charcuterie Board
  • Halloween witch decorations
    Witch Halloween Decor
  • fall home decor
    Fall Decorating Ideas -Home Tour
  • Homemade pink candy apples on a cutting board.
    How To Make Pink Candy Apples
  • Pink Halloween party and decorations with pink treats snack table.
    Pink Halloween Party

Entertaining Ideas

  • Adult mermaid party table set on the beach with cake and shells.
    Adult Mermaid Party Ideas: A Beach Picnic Goodbye to Summer
  • Overhead view of tomato party table with pizza and appetizers.
    The Ultimate Tomato Party: A Tomato Girl Summer Garden Gathering
  • Camp themed party table with green gingham tablecloth, wildflowers, and Welcome to Camp banner.
    The Ultimate Camp Themed Party for Adults
  • Garden party table set under white pergola with vintage floral tablecloth, pink peony centerpiece in wooden tool caddy, white wicker chairs, and climbing white roses in background.
    Garden Themed Party
  • Complete mimosa bar setup on white console table with vintage silver ice bucket, labeled colorful juice bottles, small glass garnish bowls, and ribbon-tied champagne flutes on white lace tablecloth with flower wall backdrop.
    How to Set Up a Beautiful Mimosa Bar
  • Breakfast for dinner party table styled like a bed with star quilt tablecloth, gingham pillows, and cloud installation above.
    Breakfast for Dinner Party: Brinner Under the Stars
  • Recipe Index
  • Parties & Entertaining
  • Fall
  • Subscribe
  • Free Resource Library

Footer

back to top

as seen in:

Better Homes and Garden Logo
American Farmhouse Style logo.
Apartment Therapy logo.

About

  • Privacy Policy
  • About

Subscribe

  • Sign Up! for emails and updates
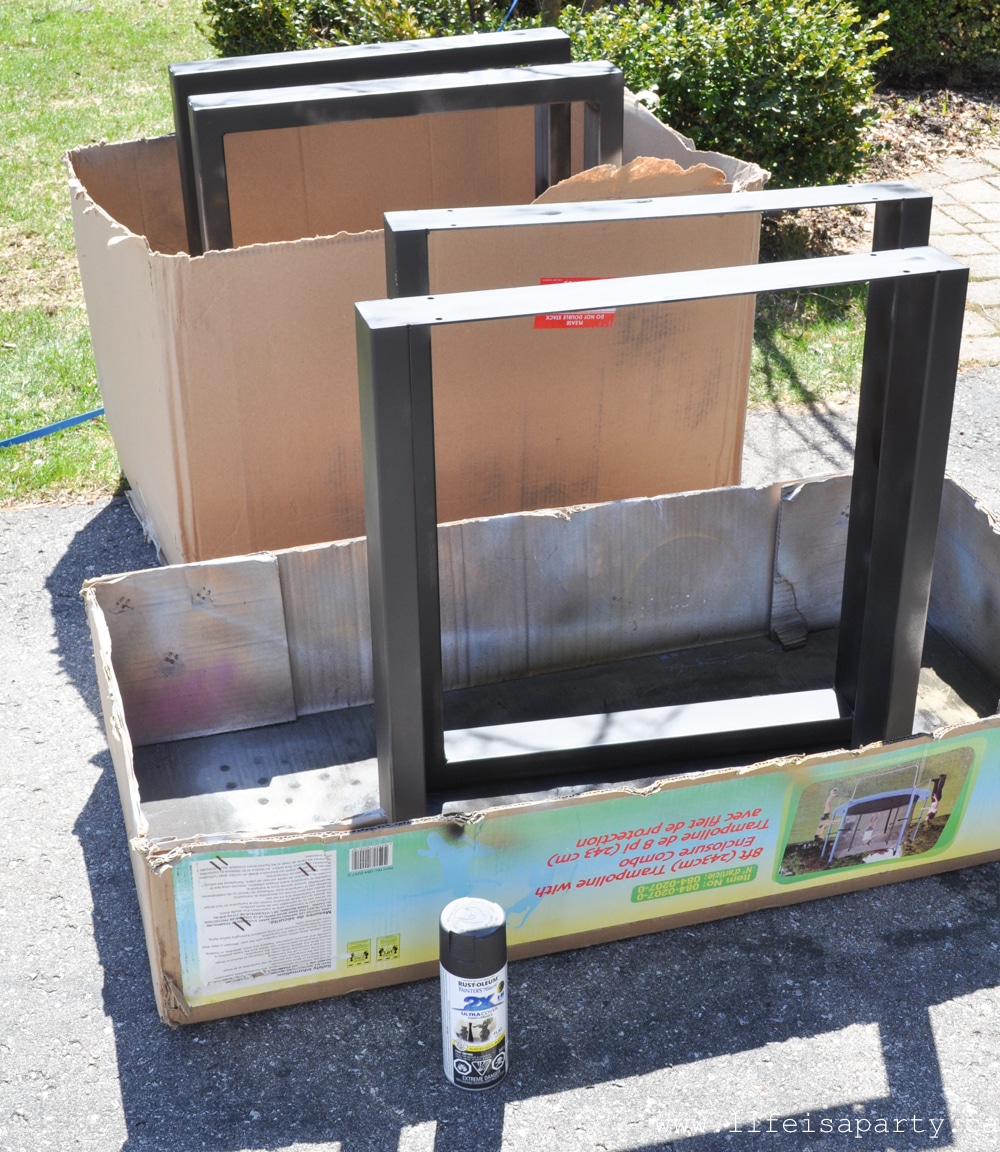
Contact

  • Contact

As an Amazon Associate I earn from qualifying purchases.

Copyright © 2025 Life is a Party

Share
Pin
Post
Share
Pin
Post

Rate This Recipe

Your vote:


A rating is required
A name is required
An email is required