• Skip to primary navigation
  • Skip to main content
  • Skip to primary sidebar
Life is a Party
  • Recipe Index
  • Parties & Entertaining
  • Fall
  • Subscribe
  • Free Resource Library
menu icon
go to homepage
  • Recipe Index
  • Parties & Entertaining
  • Fall
  • Subscribe
  • Free Resource Library
subscribe
search icon
Homepage link
  • Recipe Index
  • Parties & Entertaining
  • Fall
  • Subscribe
  • Free Resource Library
×
Home

How to Create a French Inspired Picnic Charcuterie Board

How to Create a French Inspired Picnic Charcuterie Board

Jul 24, 2019 · Leave a Comment

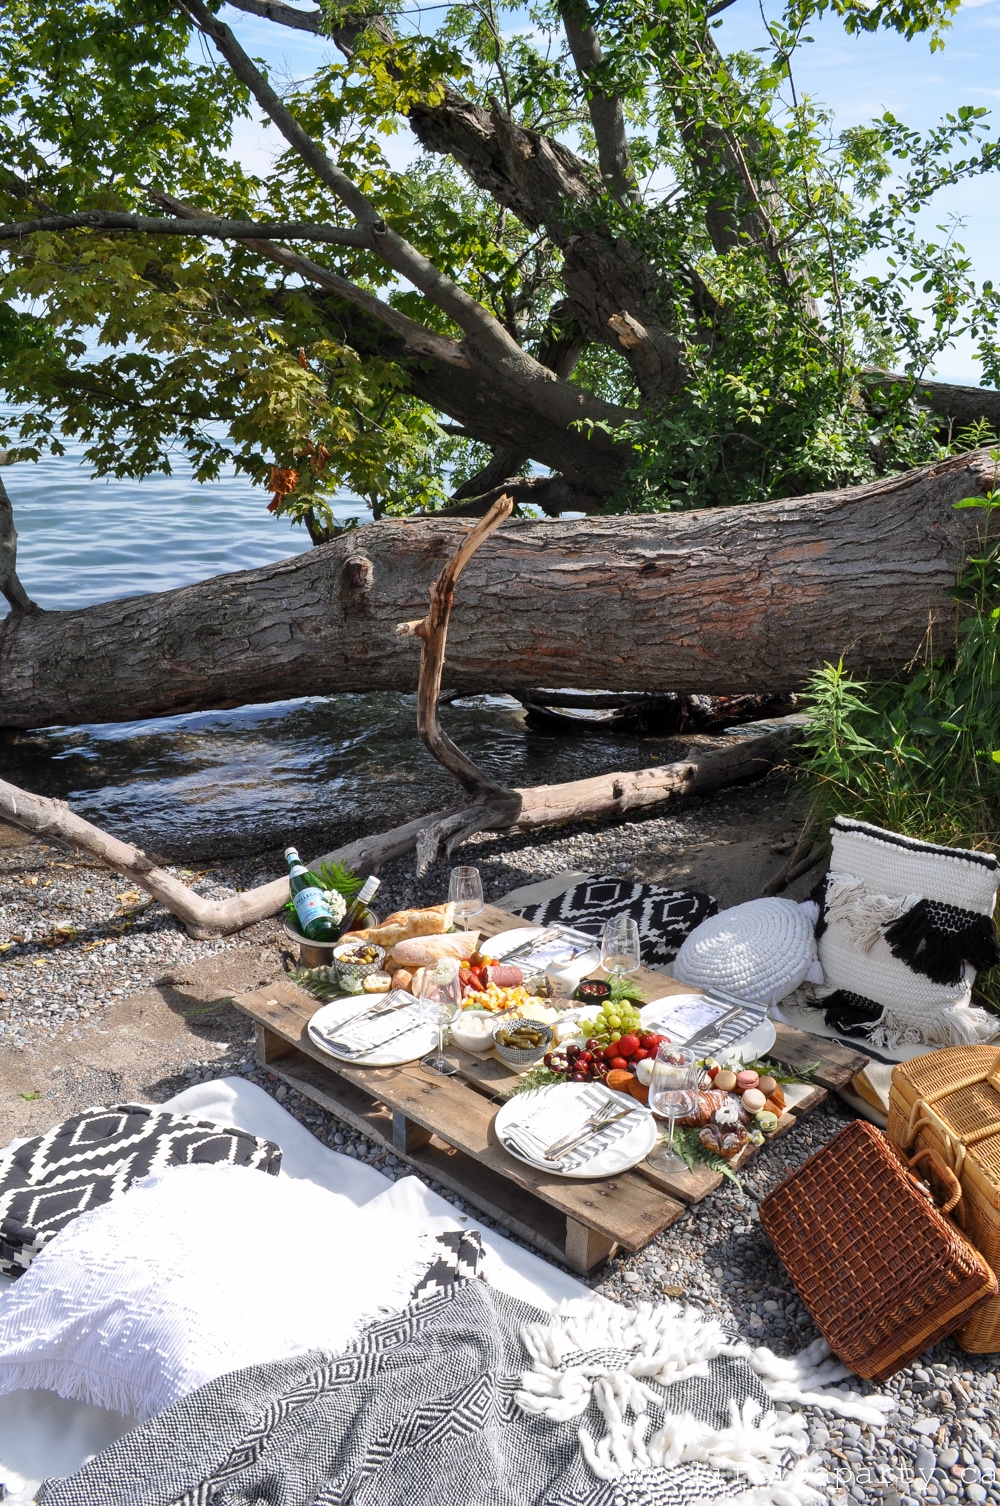
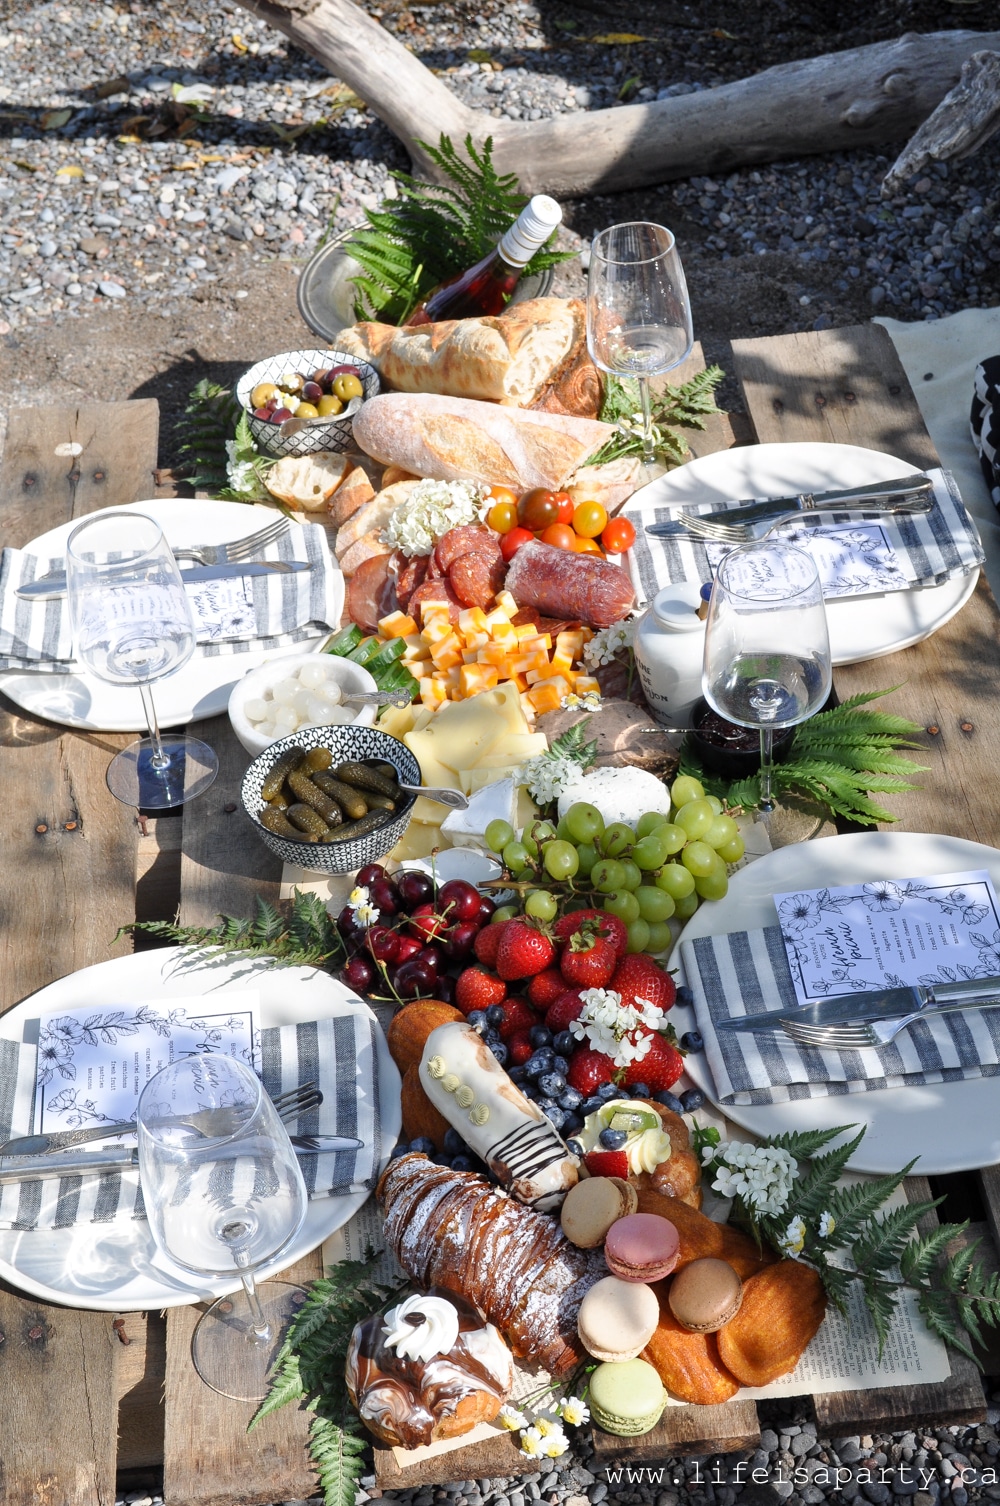
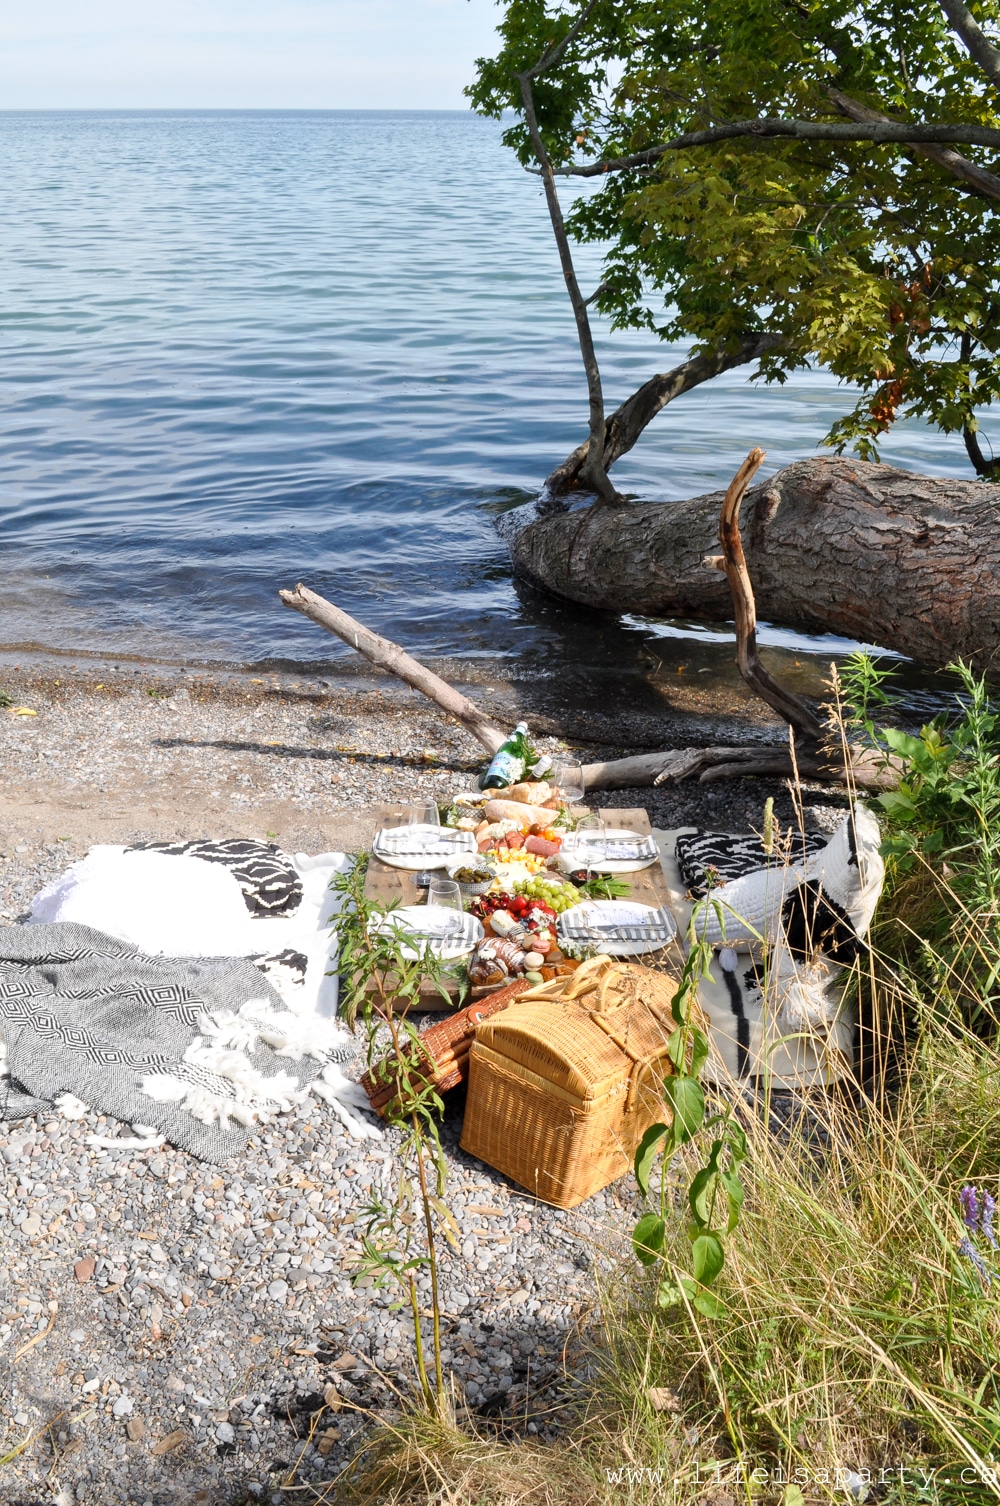
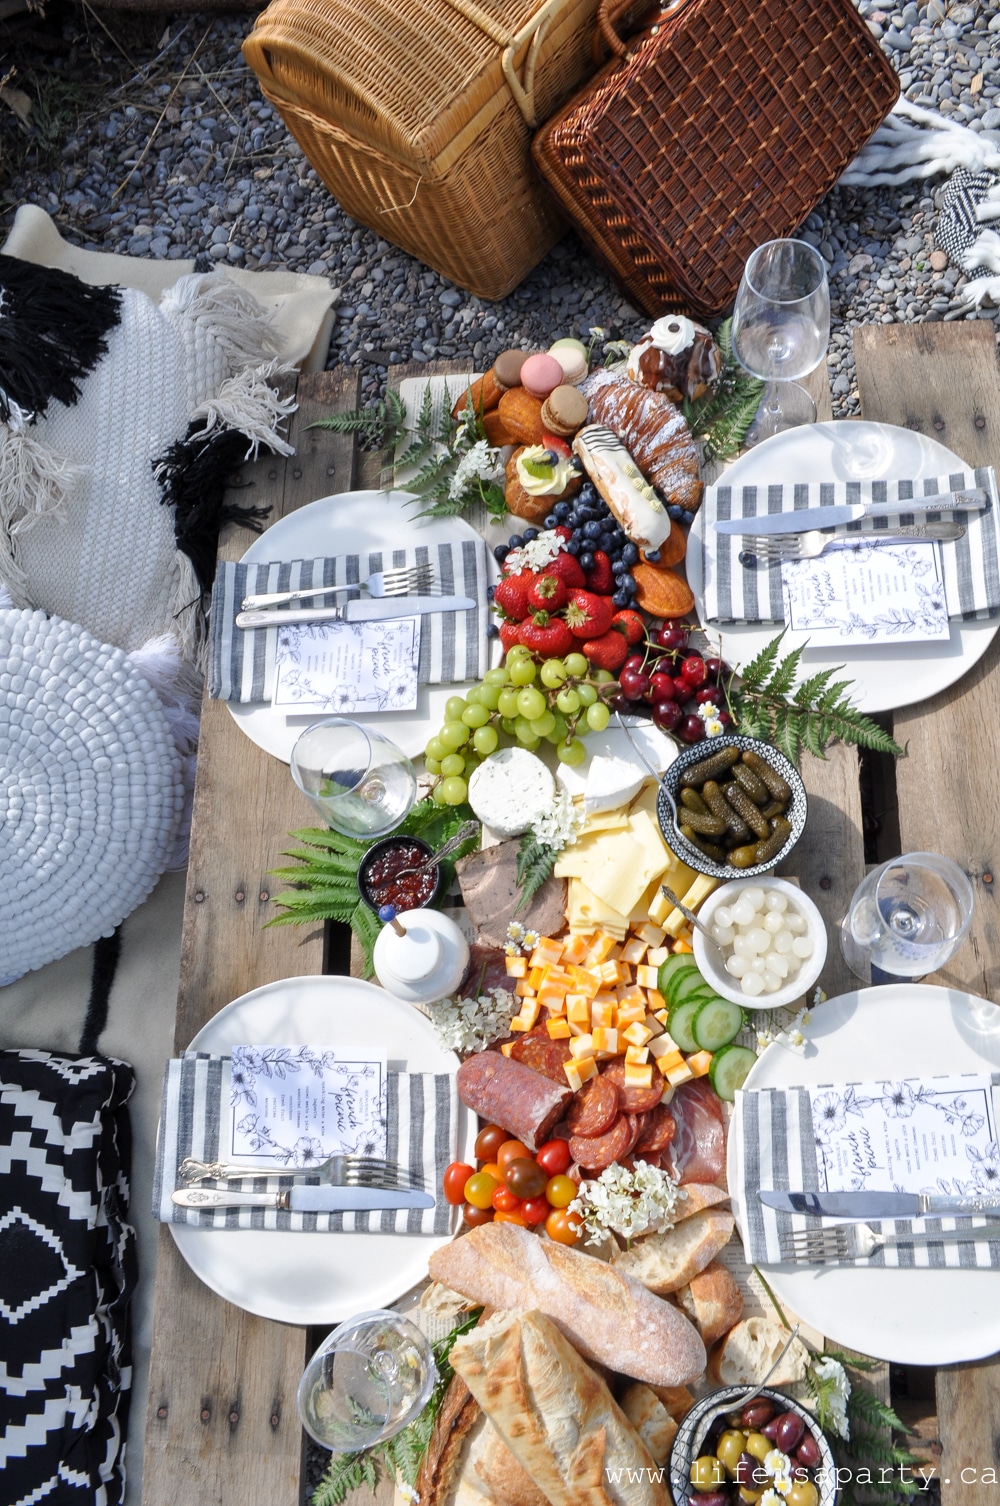
French inspired picnic charcuterie board on a wooden pallet table beside the lake with driftwood, black and white blankets, and wicker picnic baskets.

A picnic charcuterie board is one of the most beautiful ways to spend a summer afternoon. We created a French-inspired spread with baguettes, cured meats, cheeses, fresh fruit, and French pastries beside the lake, and it was the most perfect afternoon. Here is everything you need to create your own.

French themed charcuterie picnic set up beside the lake.
[feast_advanced_jump_to]

Quick Look

  • 🧀 Board: French inspired picnic charcuterie board
  • 🥖 Menu: Baguettes, cured meats, cheeses, fresh fruit, and French pastries
  • 🌿 Setting: Lakeside with a wooden pallet table
  • 🍷 Drinks: Rosé, sparkling water, and fresh lemonade
  • 🖨️ Free: Printable French picnic menu card included
  • 📋 Tip: Build your board on-site to skip the transport problem entirely

Why You'll Love This Picnic Charcuterie Board

  • A full French-inspired charcuterie spread with everything you need.
  • The pallet table trick that makes setup easy and beautiful.
  • A free printable French picnic menu card.
  • Beautiful lakeside setting ideas you can adapt anywhere.
  • Drinks suggestions to complete the experience.
  • Tips for packing and transporting if you are heading to the park.

There is something about a picnic charcuterie board beside the water that feels genuinely luxurious without being complicated at all. For this French-inspired afternoon we found a beautiful spot at the edge of a lake, set up a wooden pallet as our table, and laid out a spread of baguettes, cured meats, cheeses, cornichons, fresh fruit, macarons, and French pastries. Everyone had a swim first, and then we nibbled and talked and walked on the beach and it turned into the loveliest afternoon of the summer.

This picnic charcuterie board guide has everything you need: what to include for a French-inspired spread, how to set up a beautiful outdoor space, drinks to serve alongside, and practical tips for packing and transporting.

If you love outdoor entertaining you might also like our Mushroom Themed Picnic Party, our Daisy Themed Party Ideas, and our Strawberry Themed Picnic.
What Is a Picnic Charcuterie Board?

A picnic charcuterie board is a grazing board designed to be enjoyed outdoors. Instead of a formal sit-down meal, everything is laid out together on a board or flat surface for people to graze from as they relax. It is the perfect format for a picnic because there is no hot food, no timing to manage, and almost everything can be prepared ahead of time.

The French-inspired version is our favorite variation because it naturally lends itself to the best picnic foods: crusty baguette, a selection of cheeses, cured meats, cornichons, olives, fresh fruit, and something sweet from the patisserie.
Setting the Scene

The location really does most of the work for a picnic charcuterie board. We chose a beautiful spot beside a lake, which gave us a natural backdrop that no tablecloth or centerpiece could compete with.

I set up the table while the kids and my friends swam, which worked out perfectly.

The Pallet Table

Our favorite setup trick is the wooden pallet table, and it is the single most practical idea in this whole post. We set an old pallet directly on the ground as our surface. It keeps the food raised off the sand and grass, gives you a flat surface to arrange everything on, and looks genuinely beautiful. Look for old pallets from businesses near their dumpsters, and ask them if you can have one -they always say yes.

The Details

We surrounded the pallet with black and white blankets and cushions for guests to lounge on, and added a couple of wicker picnic baskets for the supplies.

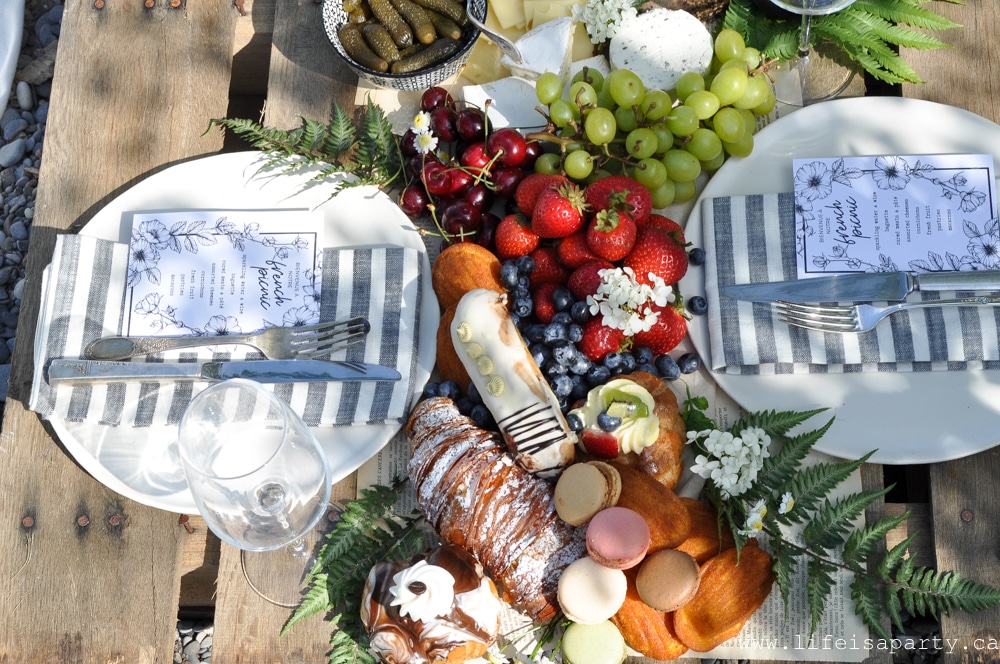
For a table runner we layered pages from an old French novel we picked up at the thrift store, topped with a sheet of parchment paper. It was such a simple and inexpensive nod to the French theme and it looked so beautiful under the food.

Ferns and a few flowers tucked throughout the spread picked up the natural surroundings and tied everything into the lakeside setting.

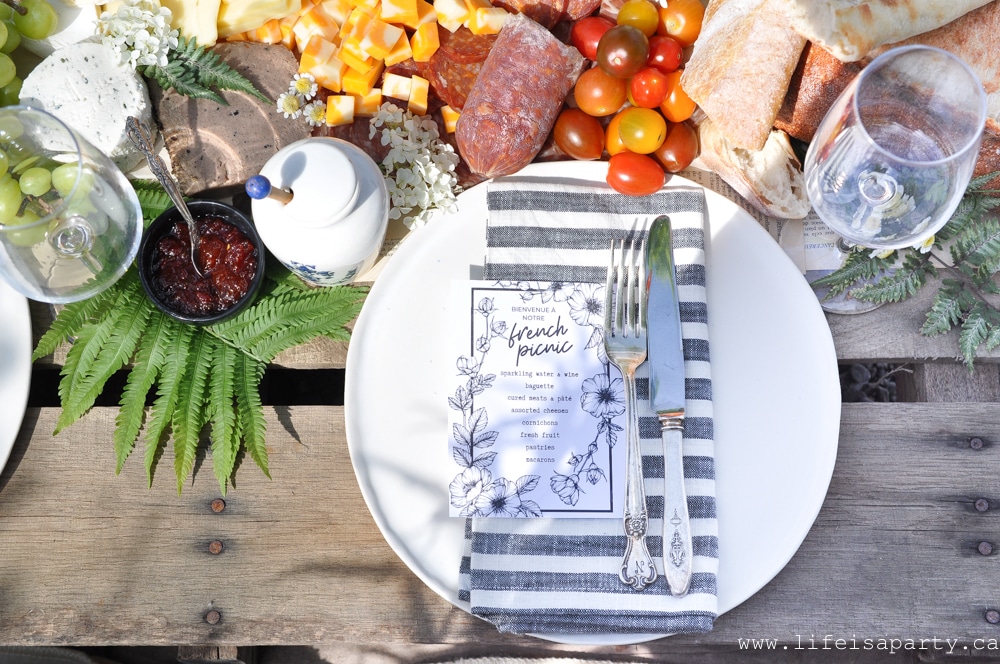
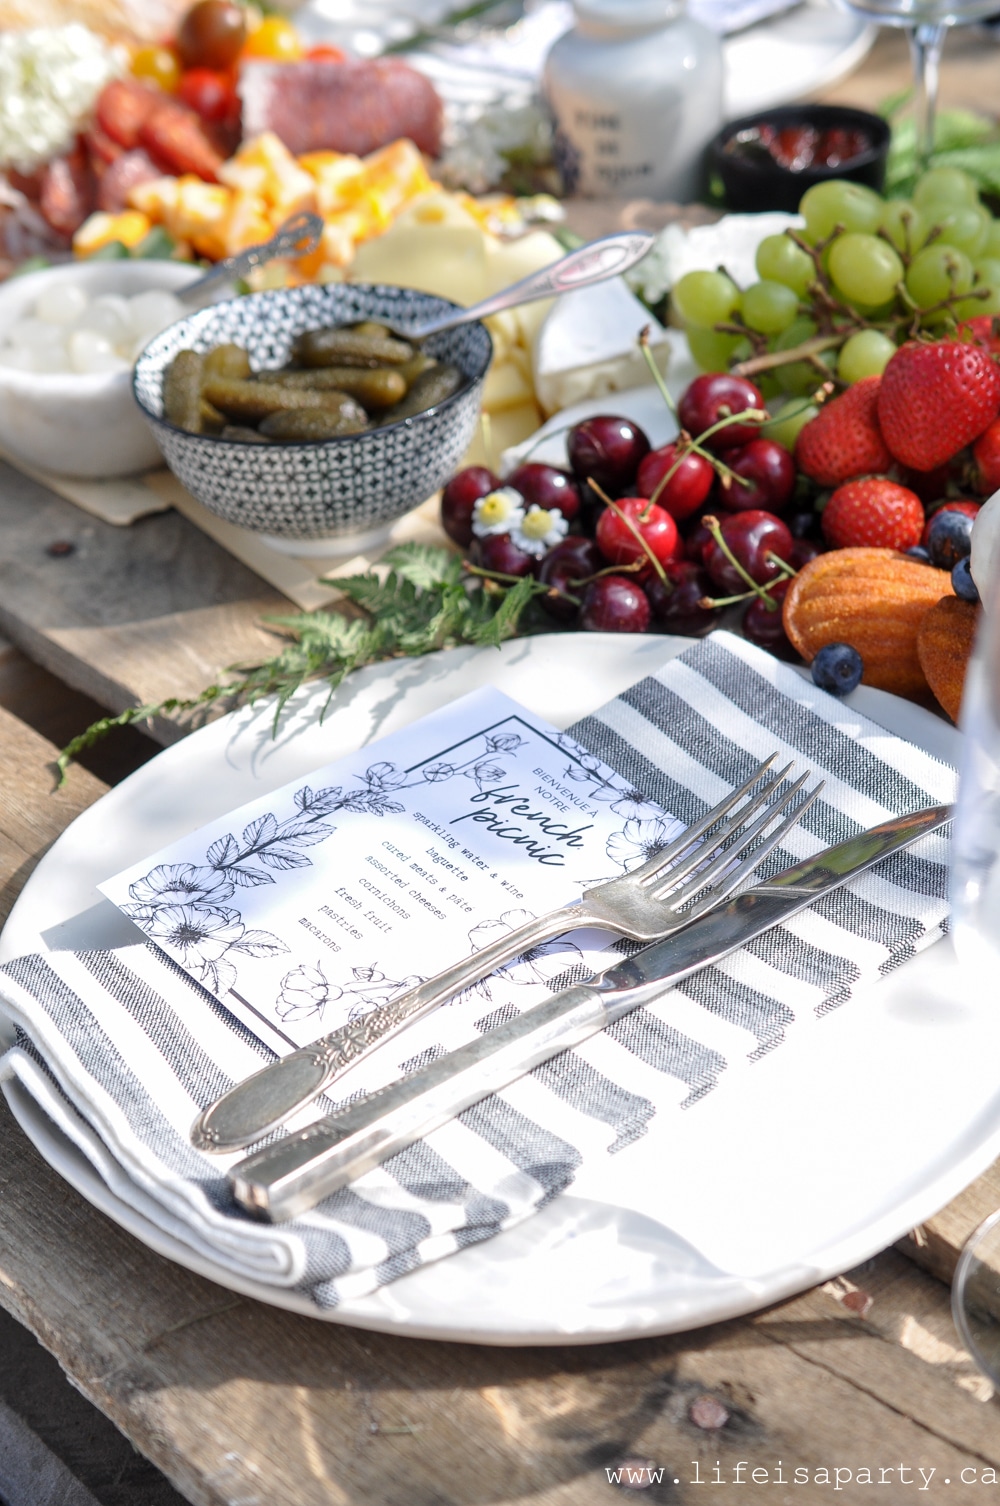
For place settings we used handmade clay plates from Argile, a small French Etsy shop whose name simply means "clay." I genuinely love these plates -the shape, the weight, and the soft white color felt like the most perfect fit for a French afternoon, or any afternoon.

We paired them with mismatched vintage silverware found at an antique fair, and real wine glasses, because the French would not have it any other way.

Expert Tip: Use real dishes, cutlery, and glasses for a picnic. It elevates the whole experience to a new level. Transport them in a sturdy picnic basket or crate, surrounded by towels or blankets, and remember to bring a plastic bag or two to bundle them in when they're dirty for the ride home.

Free Printable French Picnic Menu
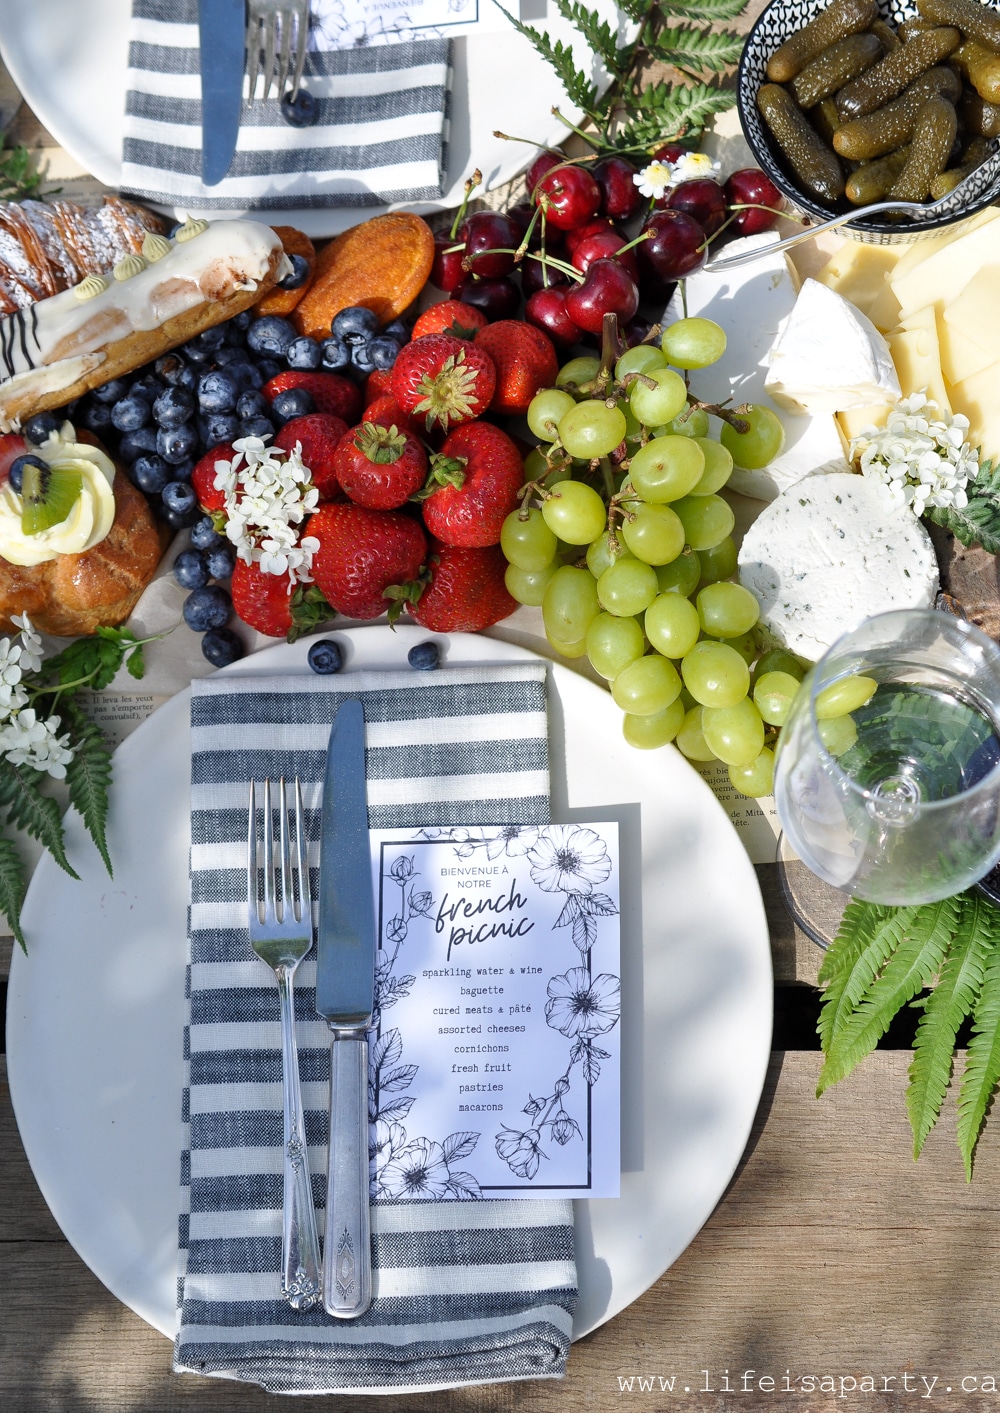
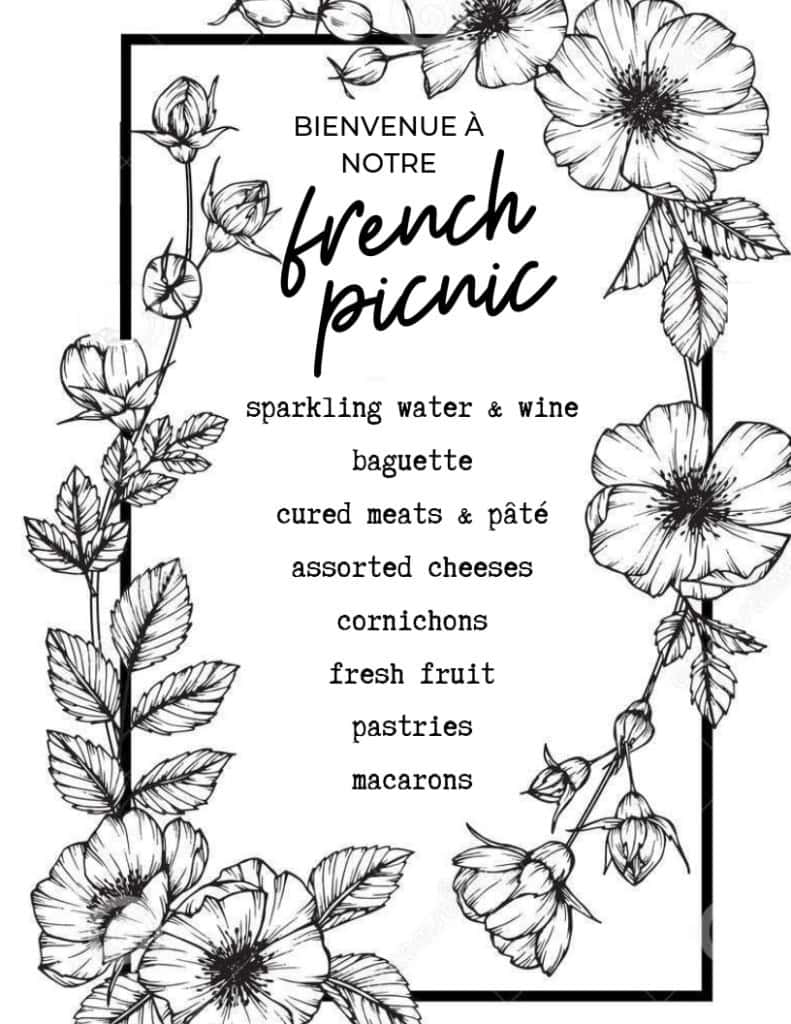
We designed a simple black and white French picnic menu card for each place setting. It added such a lovely finishing touch and tied the whole aesthetic together. You can grab the free printable in our Free Resource Library. Subscribe below for instant access.
What to Put on a French Inspired Picnic Charcuterie Board

The French approach to food is simple: the best ingredients, beautifully presented, enjoyed slowly. A French inspired picnic charcuterie board follows the same philosophy. You do not need to cook anything elaborate. You just need to shop well and arrange it all with a little care.

Here is everything we included on ours.

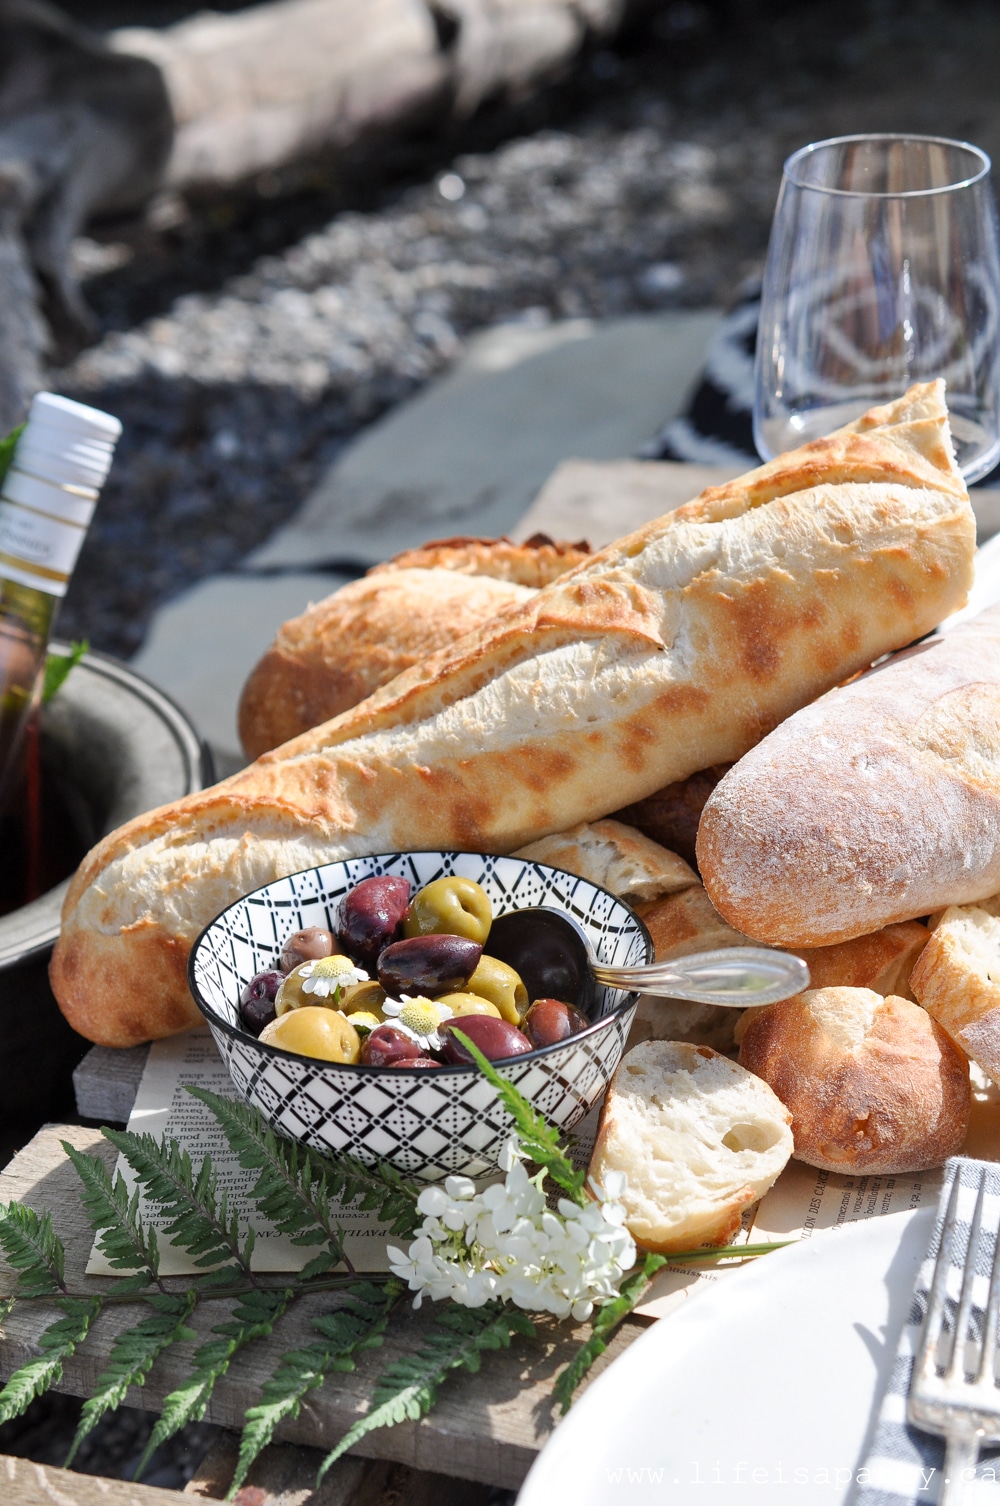
  • The Bread: Baguette is non-negotiable. Pick up one or two from a good bakery the morning of your picnic and slice most of it ahead of time, leaving a few pieces whole for the look of it. Fresh bread at a picnic is one of those details that makes everything feel more special.
  • Cured Meats and Pâté: We used a selection of sliced salami and prosciutto, along with pâté. These are the heart of the charcuterie component and they all travel beautifully. Look for two or three varieties with different flavors and textures so guests have something to explore.
  • The Cheeses: We included a mix of soft and firm cheeses: a whole Brie, Boursin, havarti, swiss, and cheddar. Aim for two or three different styles so there is something for everyone. A soft creamy cheese, a firm sliceable cheese, and something bold is a reliable combination. Keep them cool in your cooler until you are ready to set up.
  • The Accompaniments: Cornichons, mixed olives, pickled onions, a small pot of Dijon mustard, and a little jar of fig jam round out the savory side of the board. These small bowls and jars are what make a board look abundant and generous, and elevate every bite.
  • Fresh Vegetables: We added sliced cucumbers and cherry tomatoes for a fresh element alongside all the rich cheese and charcuterie. They are simple but they add color and a lighter note to the board.
  • Fresh Fruit: We piled on green grapes, strawberries, blueberries, and fresh cherries. Fresh fruit adds color and sweetness to the board and works beautifully alongside the cheese and charcuterie. Use whatever is in season and at its best.
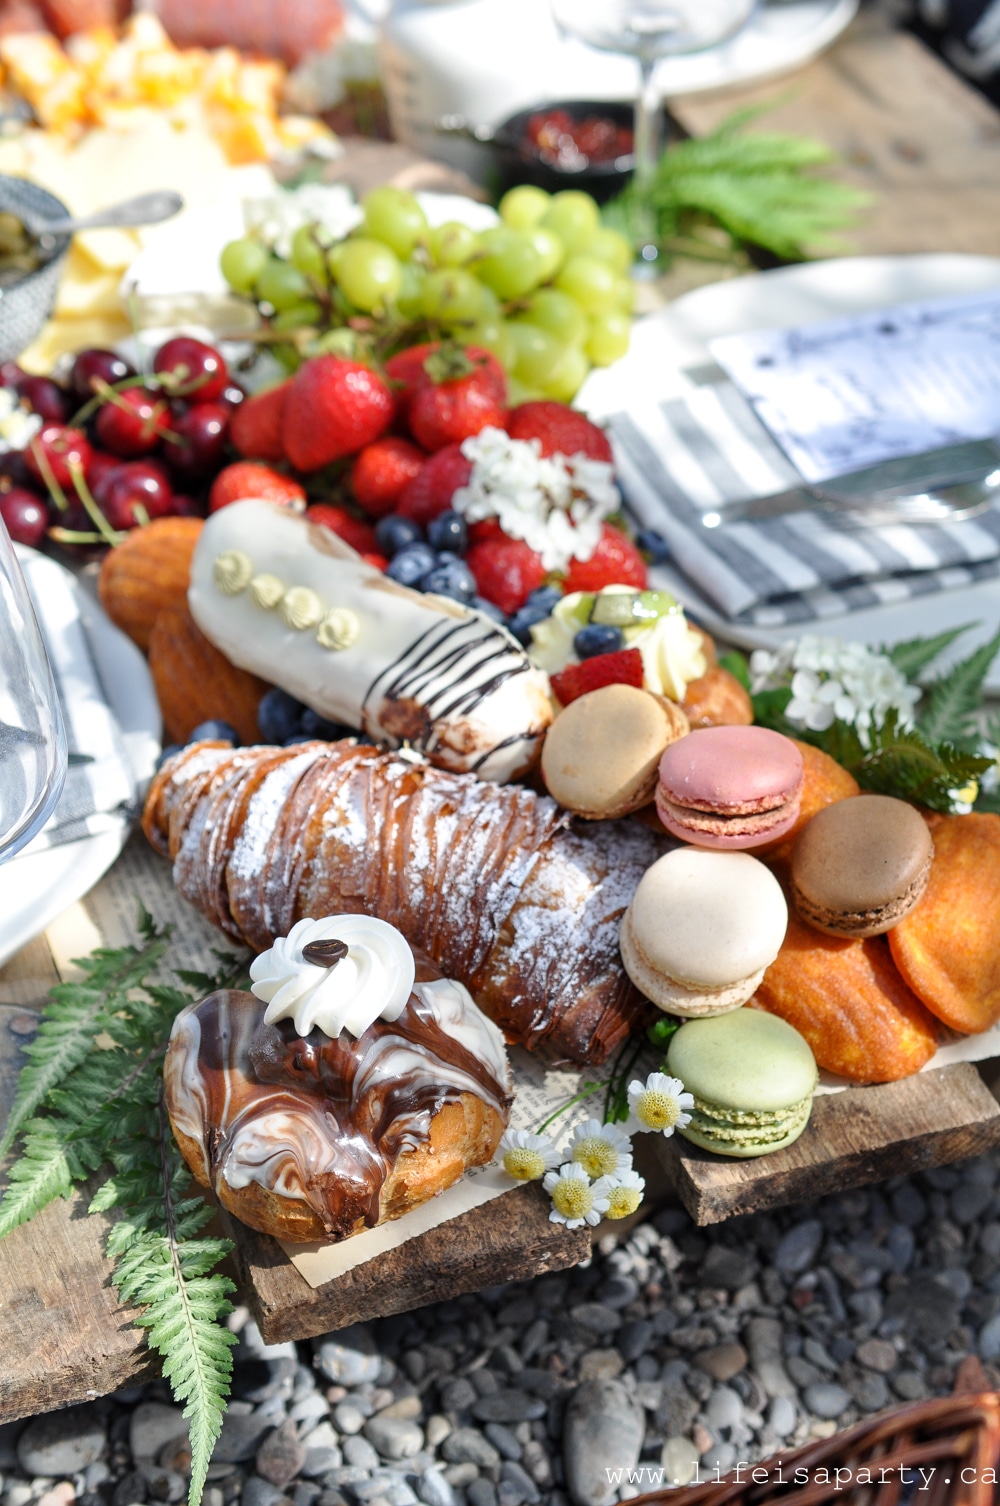
  • The Sweets: This is where the French inspiration really shines. We picked up a beautiful assortment from our favorite local bakery including macarons, assorted eclairs, and madeleines. If you have a good French bakery nearby this is the place to spend a little extra. The sweets are the finishing touch that turns a charcuterie board into a full afternoon.
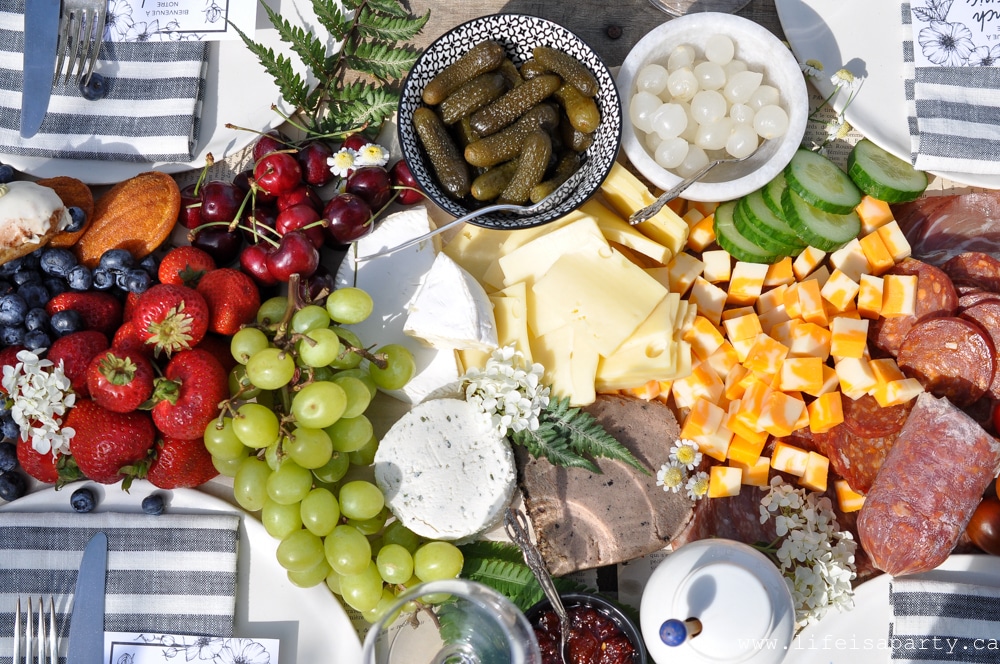
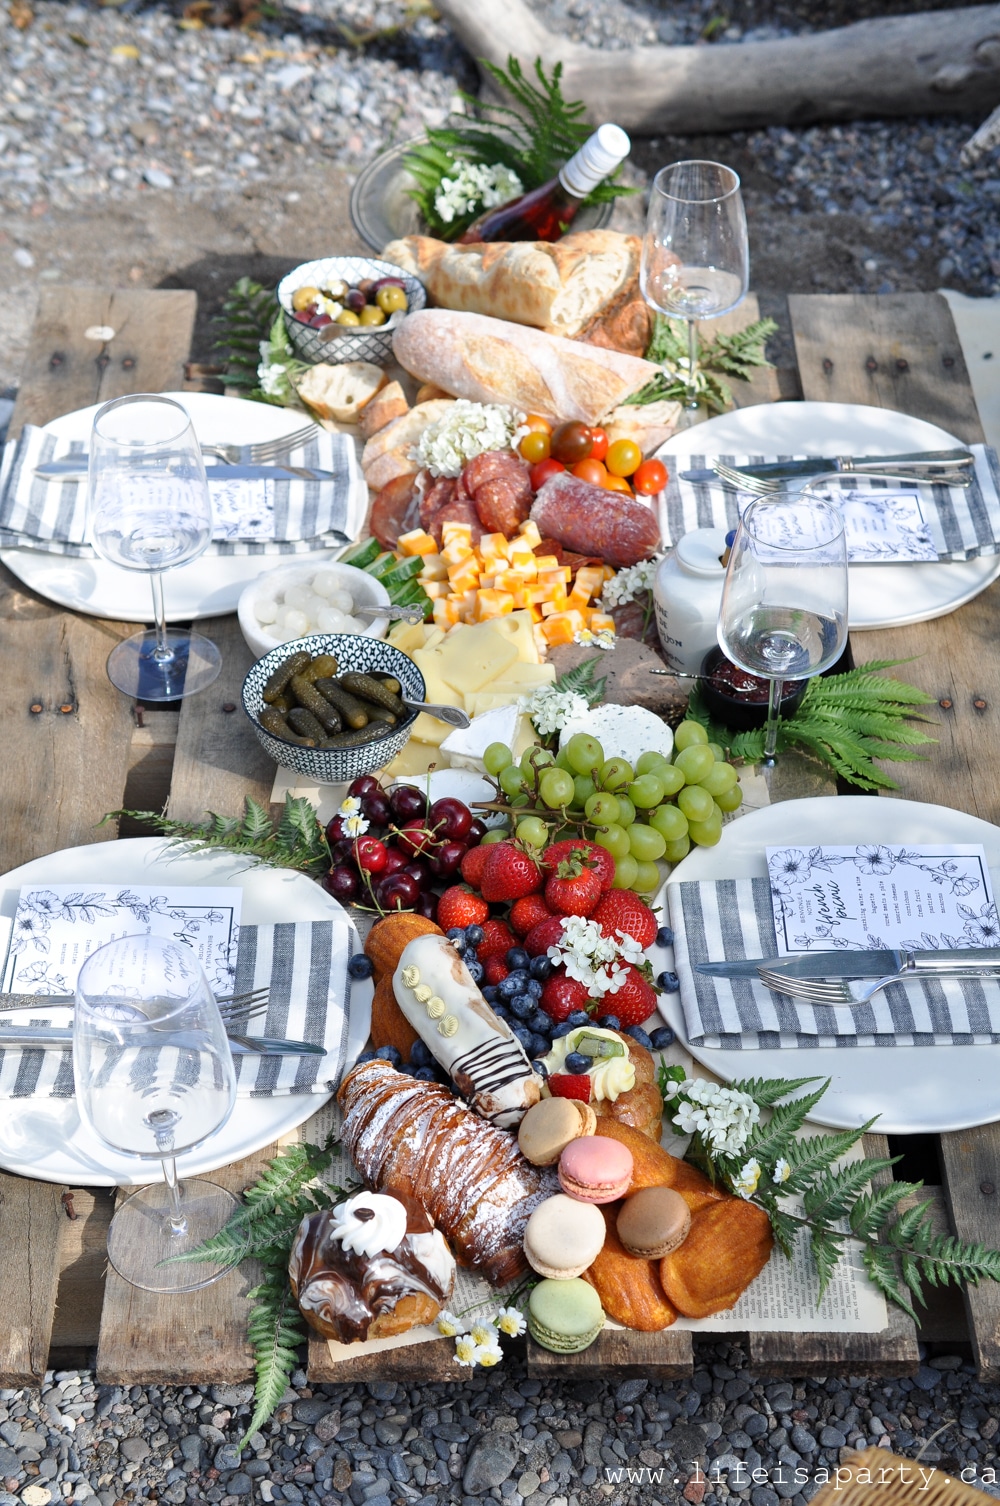
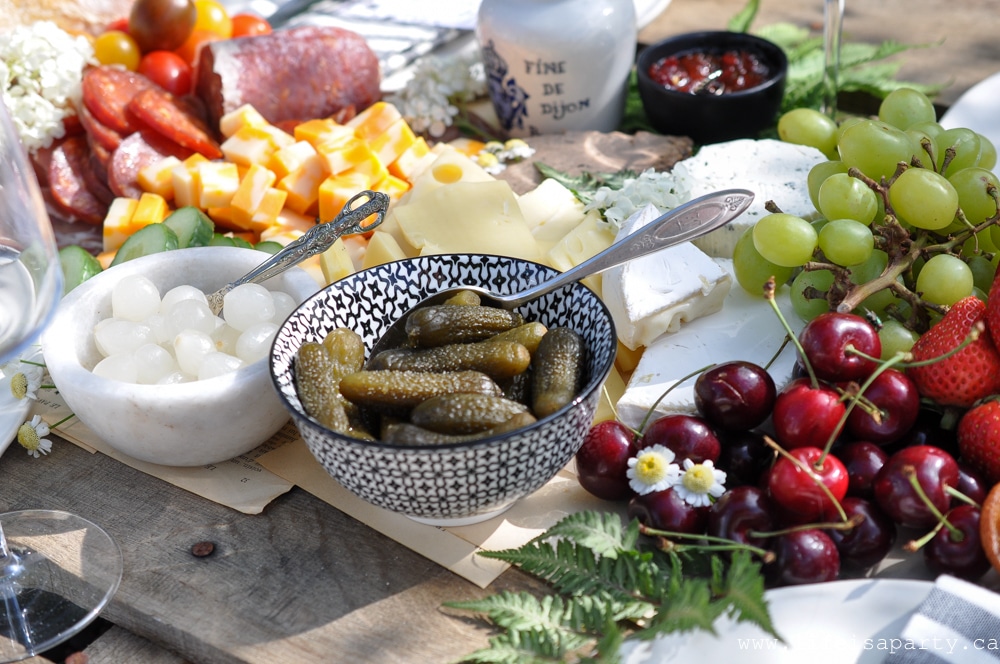
Savoury Charcuterie Board Items

Savoury Menu:

  • fresh baguette
  • olives
  • salami
  • prosciutto
  • pate
  • cheddar cheese
  • swiss cheese
  • havarti cheese
  • boursin soft cheese
  • brie
  • pickled onions
  • gherkin pickles
  • fig jam
  • grainy dijon mustard
  • cucumber slices
  • cherry tomatoes

The savory side of this board does most of the heavy lifting. The combination of crusty bread, rich cheese, salty meats, briny cornichons, and a little pot of mustard is essentially a French bistro lunch assembled on a wooden pallet at the edge of a lake. You can add or swap items depending on what looks best at your market that day.
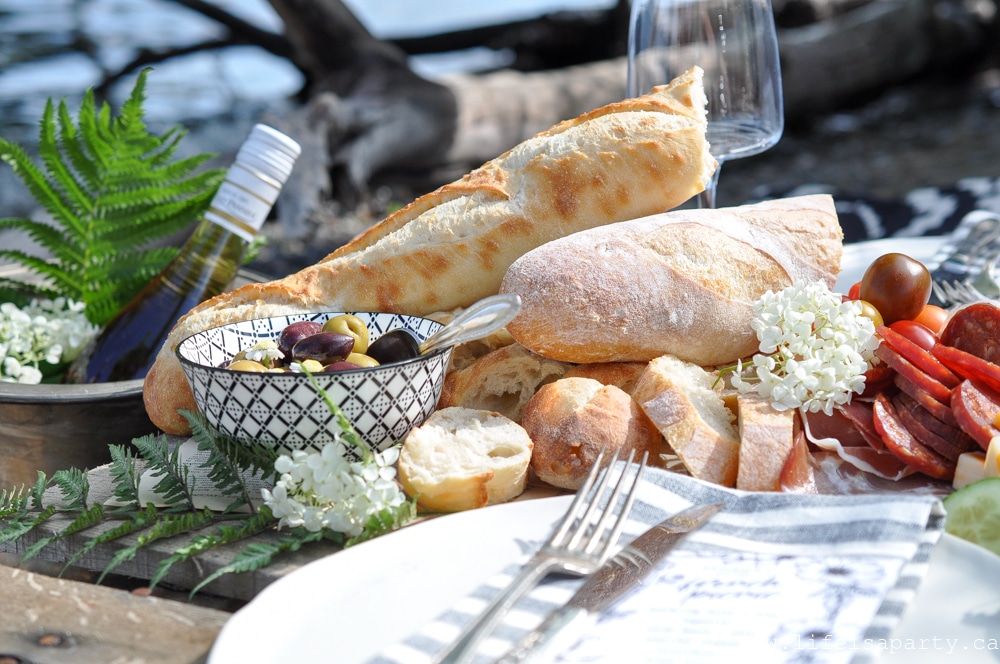
Charcuterie picnic with bread, meats, cheese, olives, and wine.

Drinks

  • Rose wine
  • Sparkling water
  • lemonade

A French-inspired picnic calls for a beautiful drink, and we kept it simple with three options: a chilled rosé, sparkling water with lemon, and fresh lemonade for anyone who wanted something non-alcoholic.

Rosé is the obvious choice and the right one. It is light, cold, beautiful in the glass, and it tastes like a French summer afternoon. Bring it in a cooler bag with plenty of ice and pour it into real wine glasses if you can manage the transport.
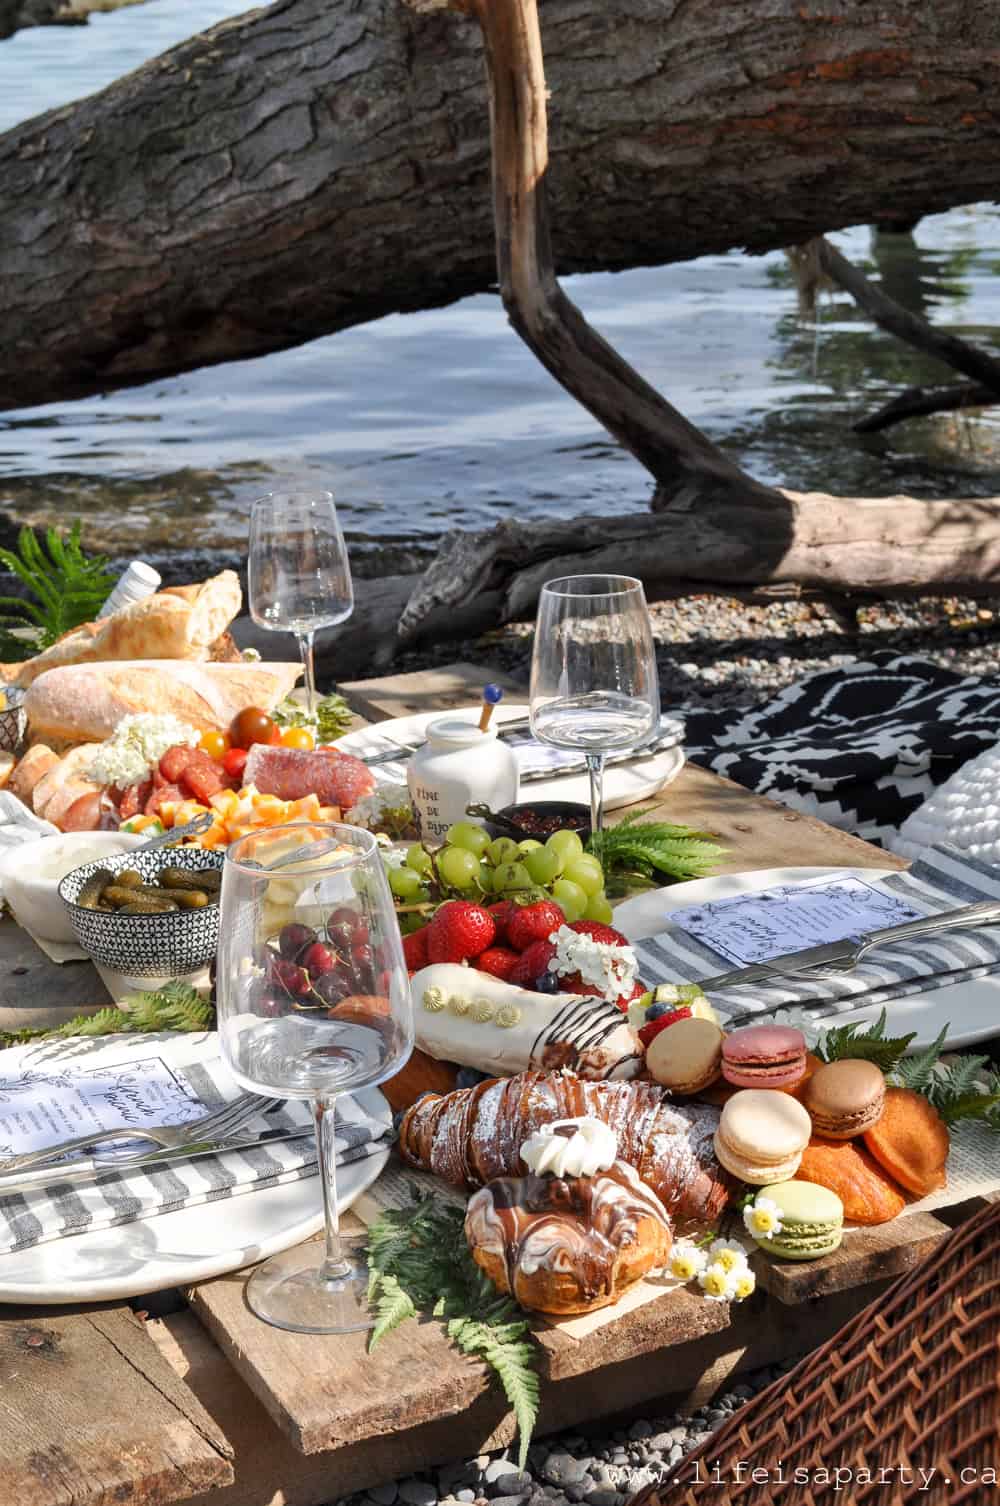
French inspired picnic charcuterie board on a wooden pallet table beside the lake with wine glasses, French pastries, fresh fruit, cured meats, and a fallen log and water in the background.

Sweet Charcuterie Board Items

Sweet Menu:

  • cherries
  • grapes
  • strawberries
  • blueberries
  • Madeleines
  • macarons
  • eclairs

The sweets are the moment that turns a charcuterie board into a full celebration. We sourced ours from our favorite local bakery and the selection made everyone a little giddy.

We included macarons in two or three flavors, assorted eclairs in different flavors, and madeleines. If you have a good French bakery nearby this is absolutely the place to spend a little extra. If not, most grocery stores carry madeleines and frozen eclairs that are perfectly good. Add a small pile of good quality dark chocolate would be a great addition too.
Packing Up Your Charcuterie Picnic

The easiest approach is to skip transporting the assembled board entirely. Pack everything separately and build it on-site once you arrive. It takes ten minutes and you will not spend the drive worrying about the brie sliding into the macarons. The key is to pre-slice the meats, cheese, veggies, and bread. Then, when you arrive, it's just a matter of assembling everything.

Here is how we packed ours:

  • Cheeses and meats in a sealed container in the cooler bag with an ice pack
  • Bread wrapped in a clean tea towel to keep the crust
  • Small items like cornichons, olives, and mustard in their original jars or small sealed containers
  • Fruit washed and dried at home, packed in a container
  • Pastries in a flat box or container so nothing gets crushed
  • Real dishes and glasses wrapped in the picnic blanket for padding -no bubble wrap needed
More Picnic Inspiration
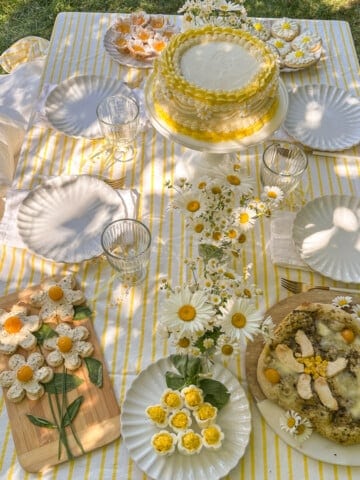
  • Daisy themed summer picnic party table with yellow and white striped tablecloth, daisy cake, daisy deviled eggs, floral pizza, and fresh daisy flower arrangements.
    Daisy Themed Party Ideas
  • Mushroom themed party picnic in backyard.
    Mushroom Themed Picnic Party
  • Cherry themed party table with food and cherry themed decor.
    Cherry Themed Party Ideas
  • Butterfly themed party ideas party table, food, and decorations.
    Butterfly Themed Party Ideas

Frequently Asked Questions

What is the best food for a picnic charcuterie board?

The best picnic charcuterie boards include a mix of textures and flavors: crusty bread or crackers, two or three cheeses, cured meats, something briny like cornichons or olives, fresh fruit, and something sweet. For a French-inspired version, baguette, Brie, prosciutto, cornichons, grapes, and macarons are all you really need.

How do you transport a charcuterie board to a picnic?

The easiest method is to pack everything separately and assemble on-site. Keep cheese and meats in a cooler bag, wrap bread in a tea towel, pack fruit in a sealed container, and protect pastries in a flat box. Build the board once you arrive. It takes ten minutes and everything stays in perfect condition.

Can you use real dishes at a picnic?

Yes, and it is worth the effort. Wrap plates in beach towels and blakets you will use for the picnic, and tuck them into your picnic blanket or a wood crate for transport. Real dishes make the whole experience feel special in a way that paper plates simply cannot. We used handmade clay plates from Argile and they were one of the most commented-on details of the whole afternoon. Remember to bring a plastic bag to tuck dirty dishes into after the picnic for the trip back home.

What drinks go with a picnic charcuterie board?

A chilled rosé is the classic choice and it pairs beautifully with both the savory and sweet elements of the board. Fresh lemonade and sparkling water with lemon are lovely non-alcoholic options that feel equally special.

Do you need a board for a picnic charcuterie board?

Not necessarily. We used a wooden pallet as our table and arranged the food directly on parchment paper over the French novel page runner. A large wooden cutting board, a slate board, or a clean flat tray all work beautifully. The key is a flat surface you can arrange things on.

If you try this French inspired picnic charcuterie board or any other recipe on my blog please leave a star rating and let me know how it went in the comments below. Thanks for visiting today!

It really was one of my favorite picnics we have ever done. I joked with the friends who helped me set up that I pay for their services in cheese platters, and we all agreed it was a beautiful arrangement. With a French inspired picnic charcuterie board beside the lake, life really is a party.

Stranger Things Party Ideas

Jul 18, 2019 · 2 Comments

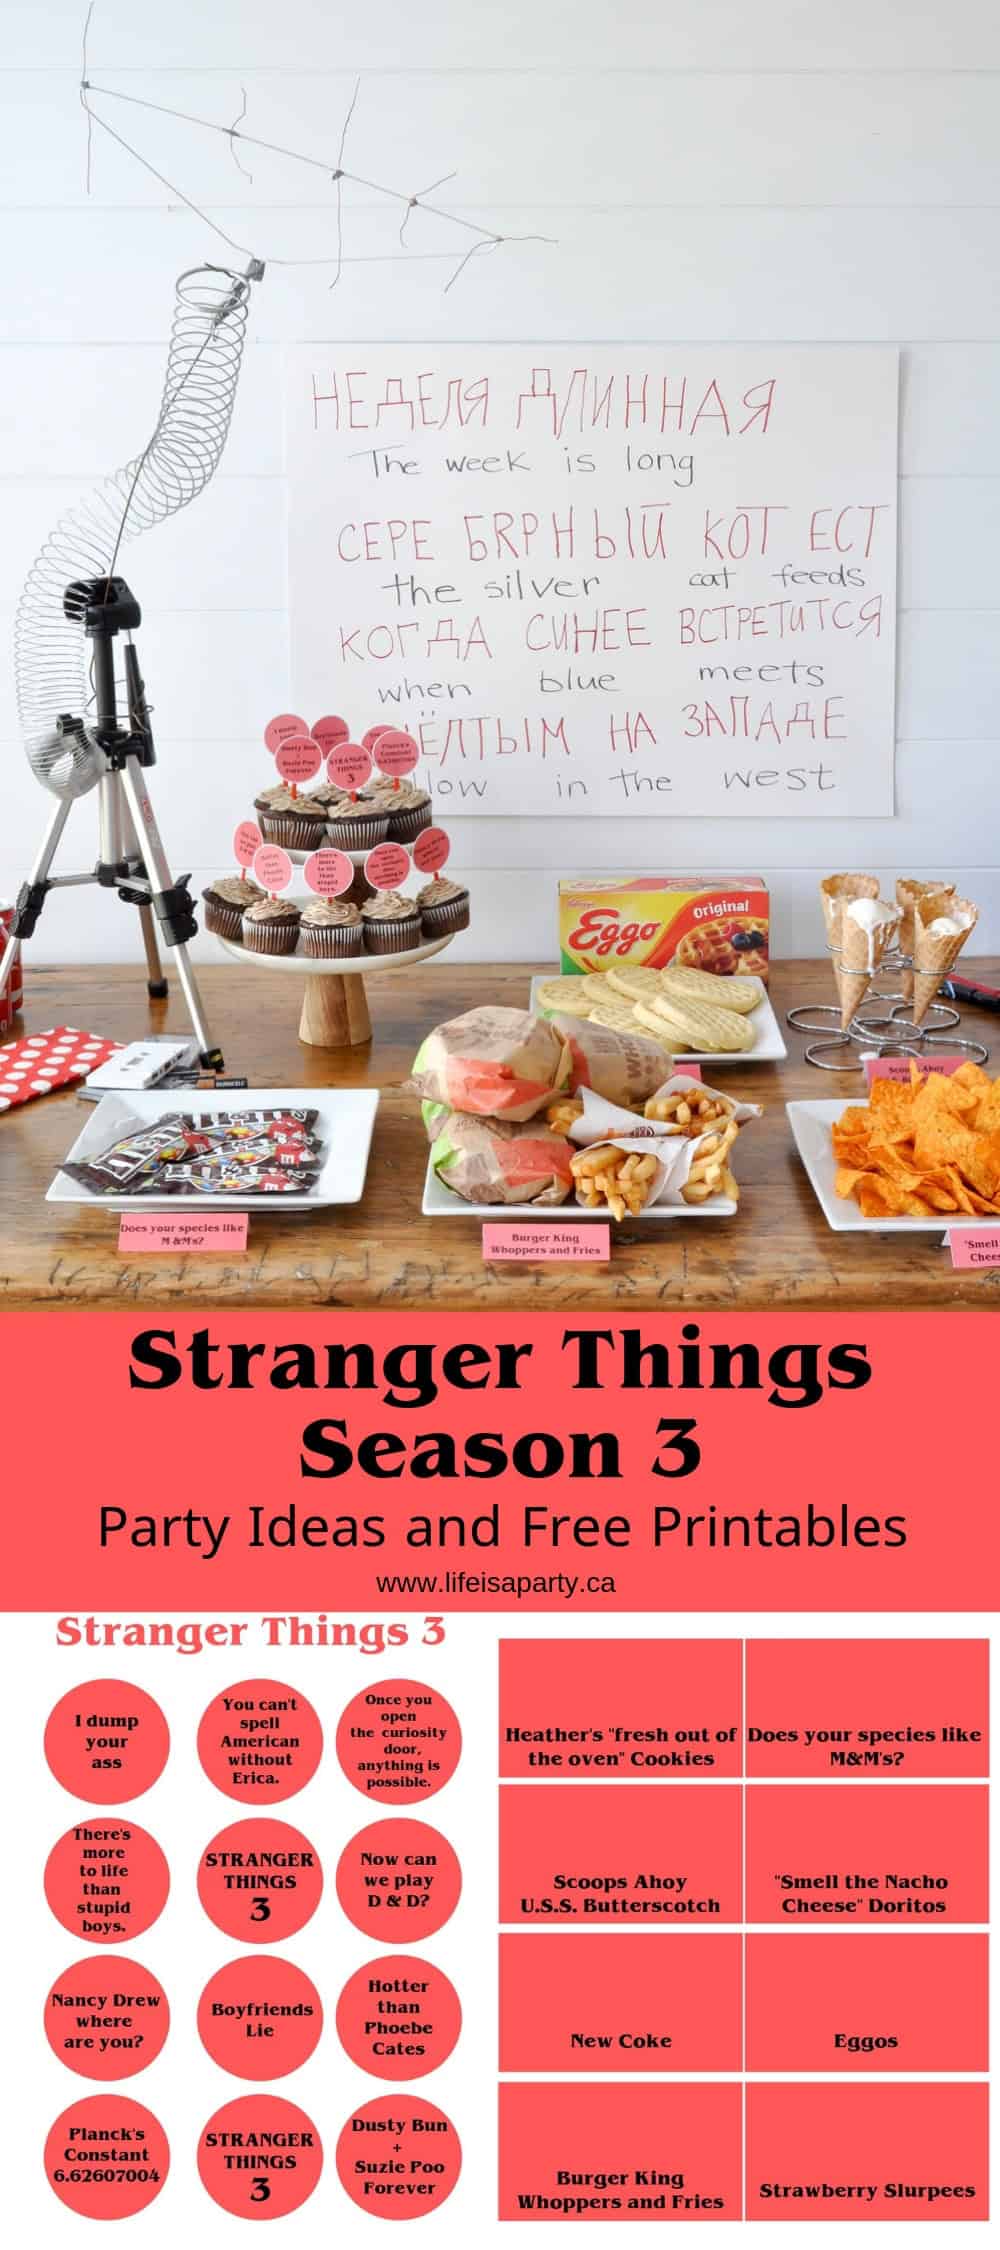
Stranger things party ideas and menu.

Stranger Things Party Ideas and Free Printables: Stranger Things themed party ideas, including free Party Printables, and themed food ideas.

Stranger things party ideas and menu.
[feast_advanced_jump_to]

There's a brand new season of Stranger Things, and I thought it would be fun to put together a Stranger Things theme viewing party. This is perfect to invite friends over to binge-watch season 4, or to celebrate your next birthday with a Stranger Things birthday party. I also can't think of a better way to celebrate Halloween than with a stranger things halloween party. Happy Halloween!

I've included some Stranger Things free printables available as an instant download at the end of this post. Send out some stranger things party invitations, or evites and get together for some fun. You might even want to invite party guests to dress as their favorite characters in stranger things costumes.

We set up a snack table in the living room, next to a big screen tv, perfect for enjoying while watching. The show always keeps everyone on the edge of your seat, with snacks nearby there's no need to miss anything. This is a great way to enjoy watching the next season.

Stranger Things Season 3 Party and Free Printables

Stranger Things Party Decorations

We took our inspiration from the show for the party decor. You could always invite guests into the upside down with the classic christmas lights, a fog machine, or castle byers decor. We were on the lookout for 80's decor at the local thrift shop to decorate our party.

The Radio Tower

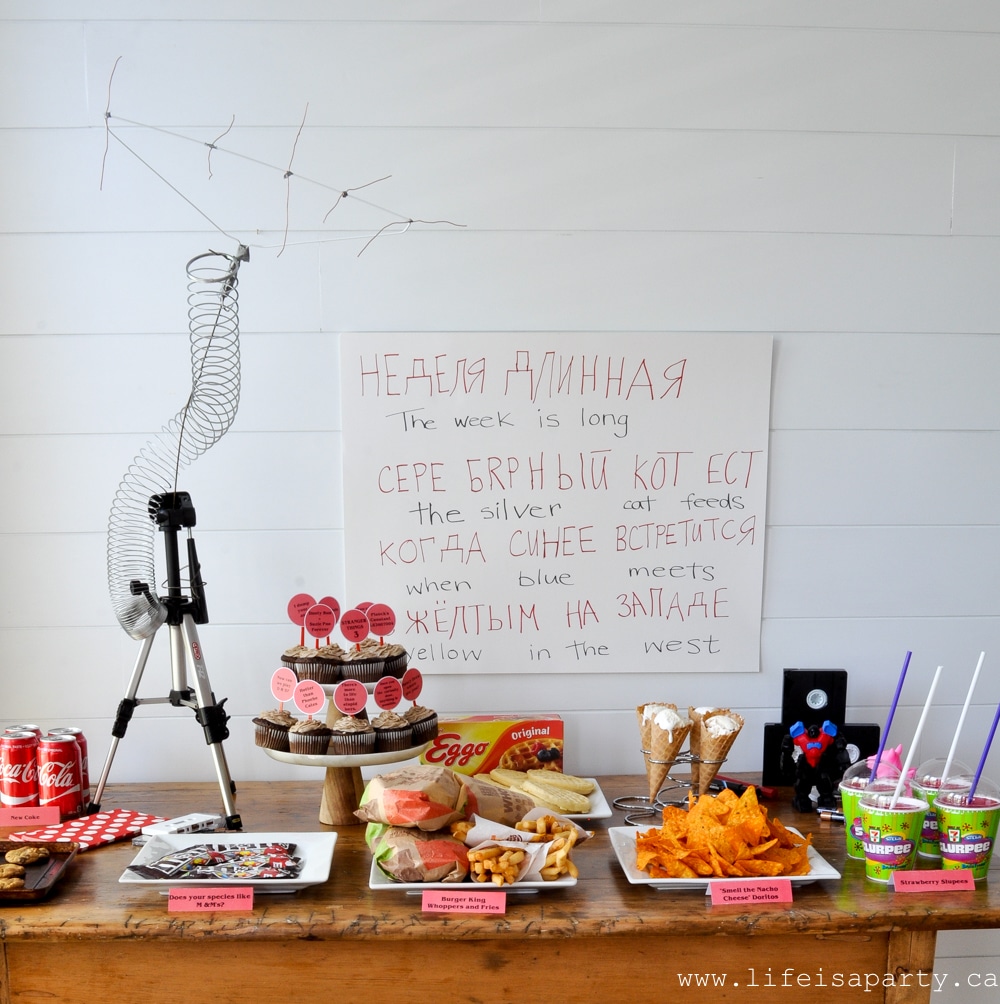
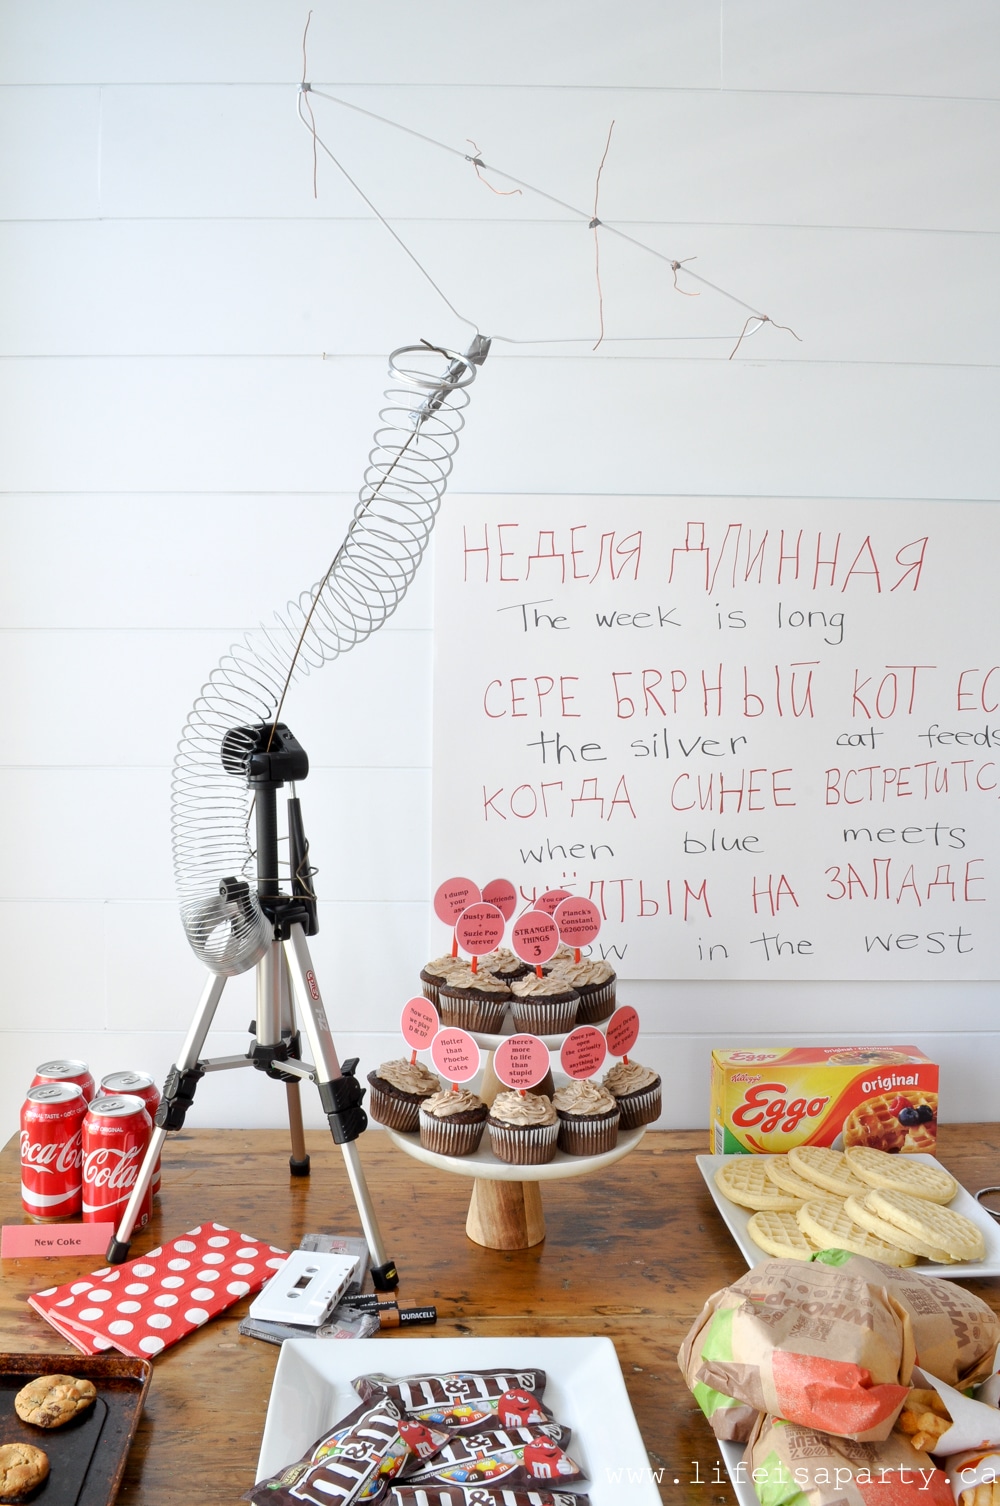
There's lots of fun details from season 3 that inspired the party table. One of my favourite parts is the mini radio tower party prop. This one was built as an DIY item. I used a mini tripod and added on a few coat hangers, some wire, and a slinky to create something that looked a little like the one that stranger things character Dusty builds so he can contact Suzie.

This is such a fun and easy backdrop for this great table of foods inspired by Stranger Things Season Three.

Stranger Things party decor ideas

The Code

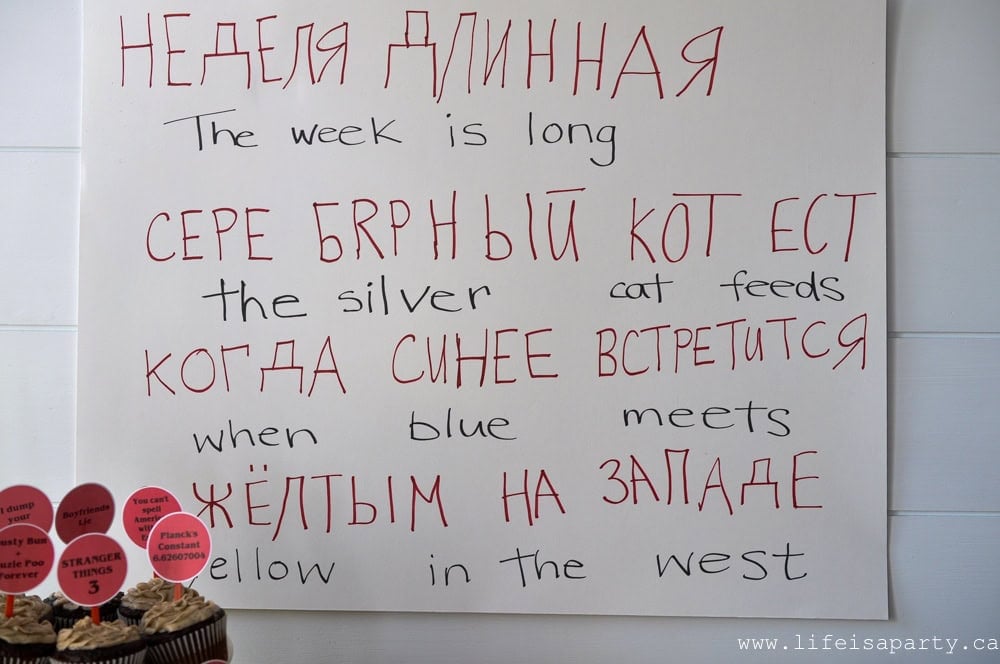
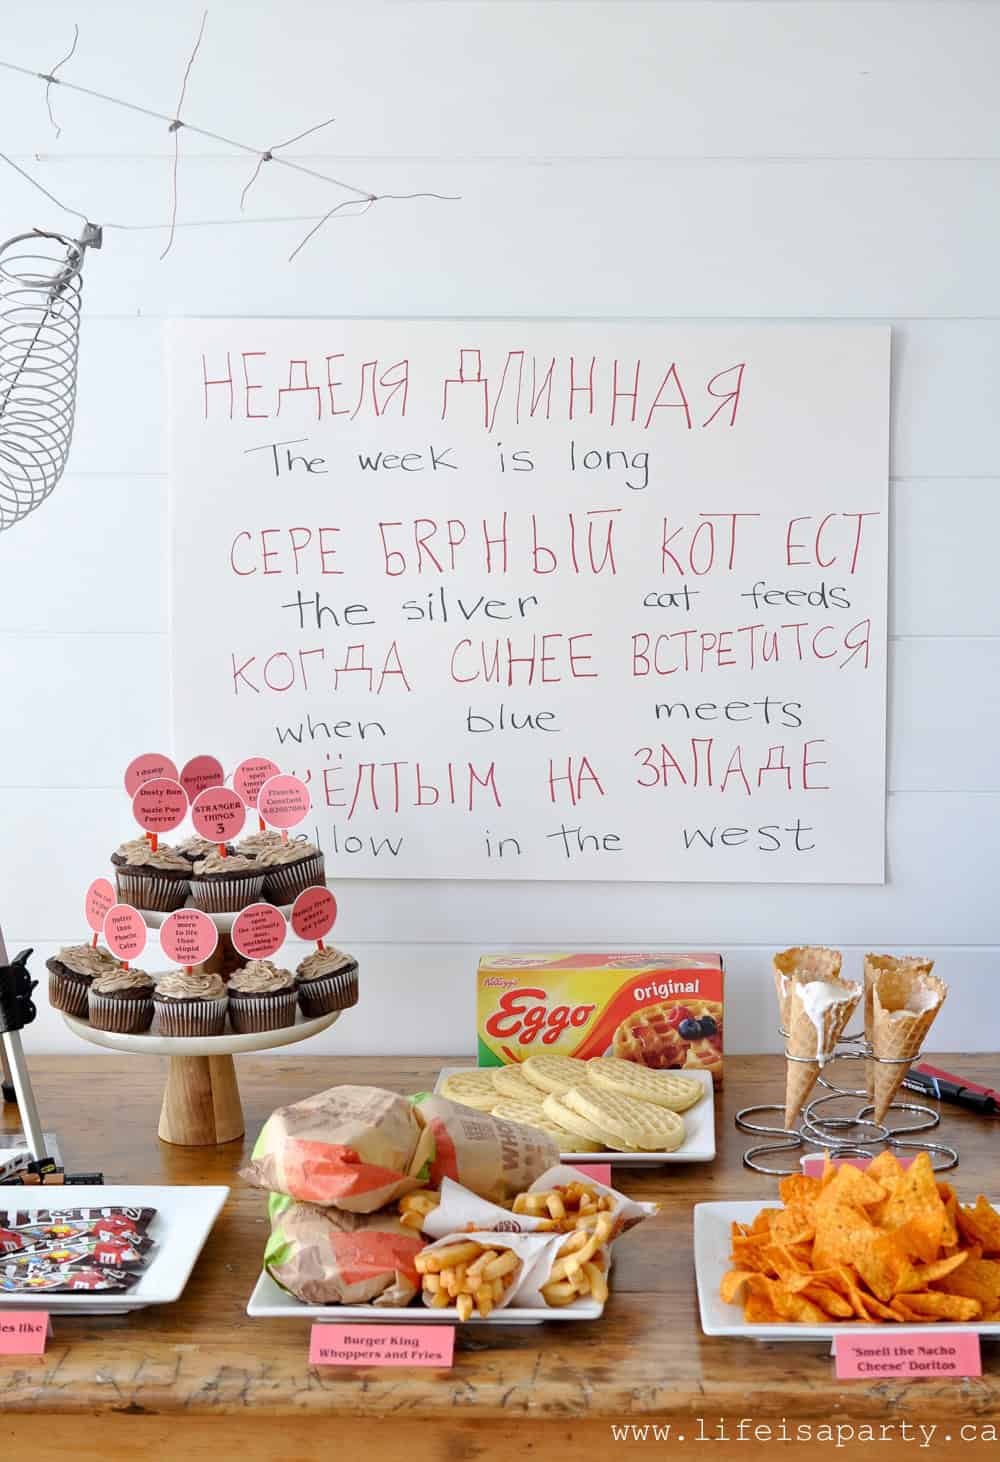
The other fun party decoration and food table backdrop is the Russian code. Inspired by the white board at Scoops Ahoy where Dustin, Steve, and Robin cracked the code... well mostly just Robin. 😉 I had the great idea to use an inexpensive poster board for mine, and it worked out perfectly. We love inexpensive party supplies!

Stranger Things 3 code poster

80's Inspired Decor

I used a few 80's inspired old cassette tapes full of 80s music and video tapes I found in my basement and the local thrift store and they were the perfect additions to the table. I also included some extra batteries for Dustin, a robot inspired by the ones that El makes follow Dustin out of his room, and a my little pony for the Erica and Dustin's big my little pony discussion in season 3. More ideas for epic stranger things party decor inspired by the 80's include:

  • cassette tapes
  • video tapes
  •  extra batteries
  • toy robot
  • my little ponies
  • a boom box
  • a bmx bike
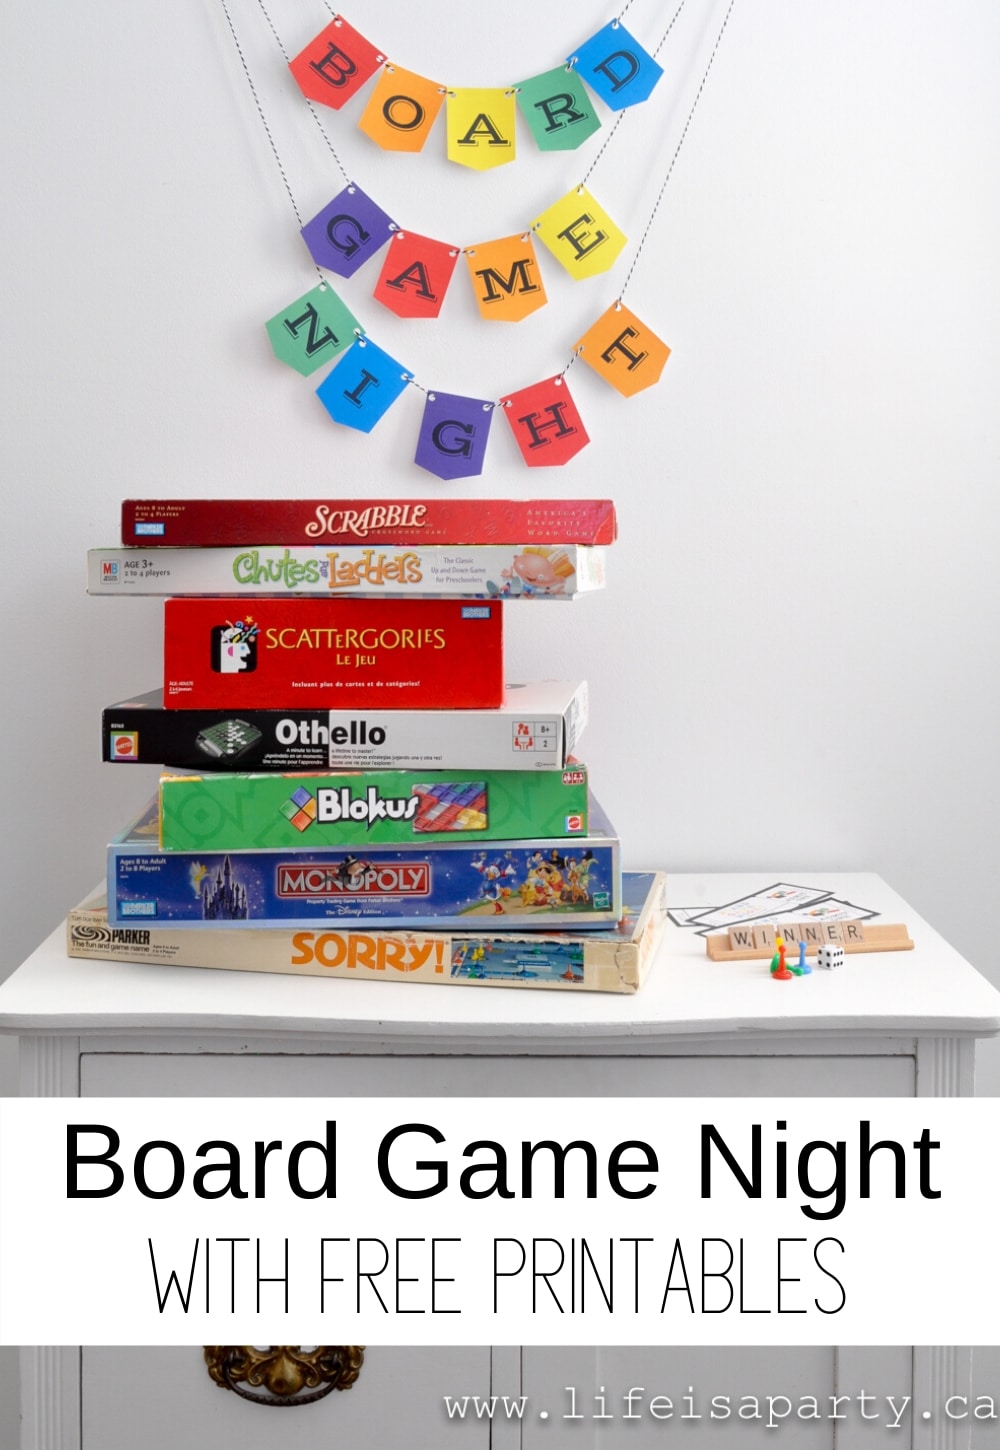
  • board games
Stranger Things party decor

Stranger Things Themed Party Food Ideas

All the food for the party was inspired by season 3. I made really fun free printable Stranger Things food labels. Just subscribe to our newsletter at the bottom of the post, and we'll send you access to our Free Stranger Things Printable food labels, and cupcake pics.

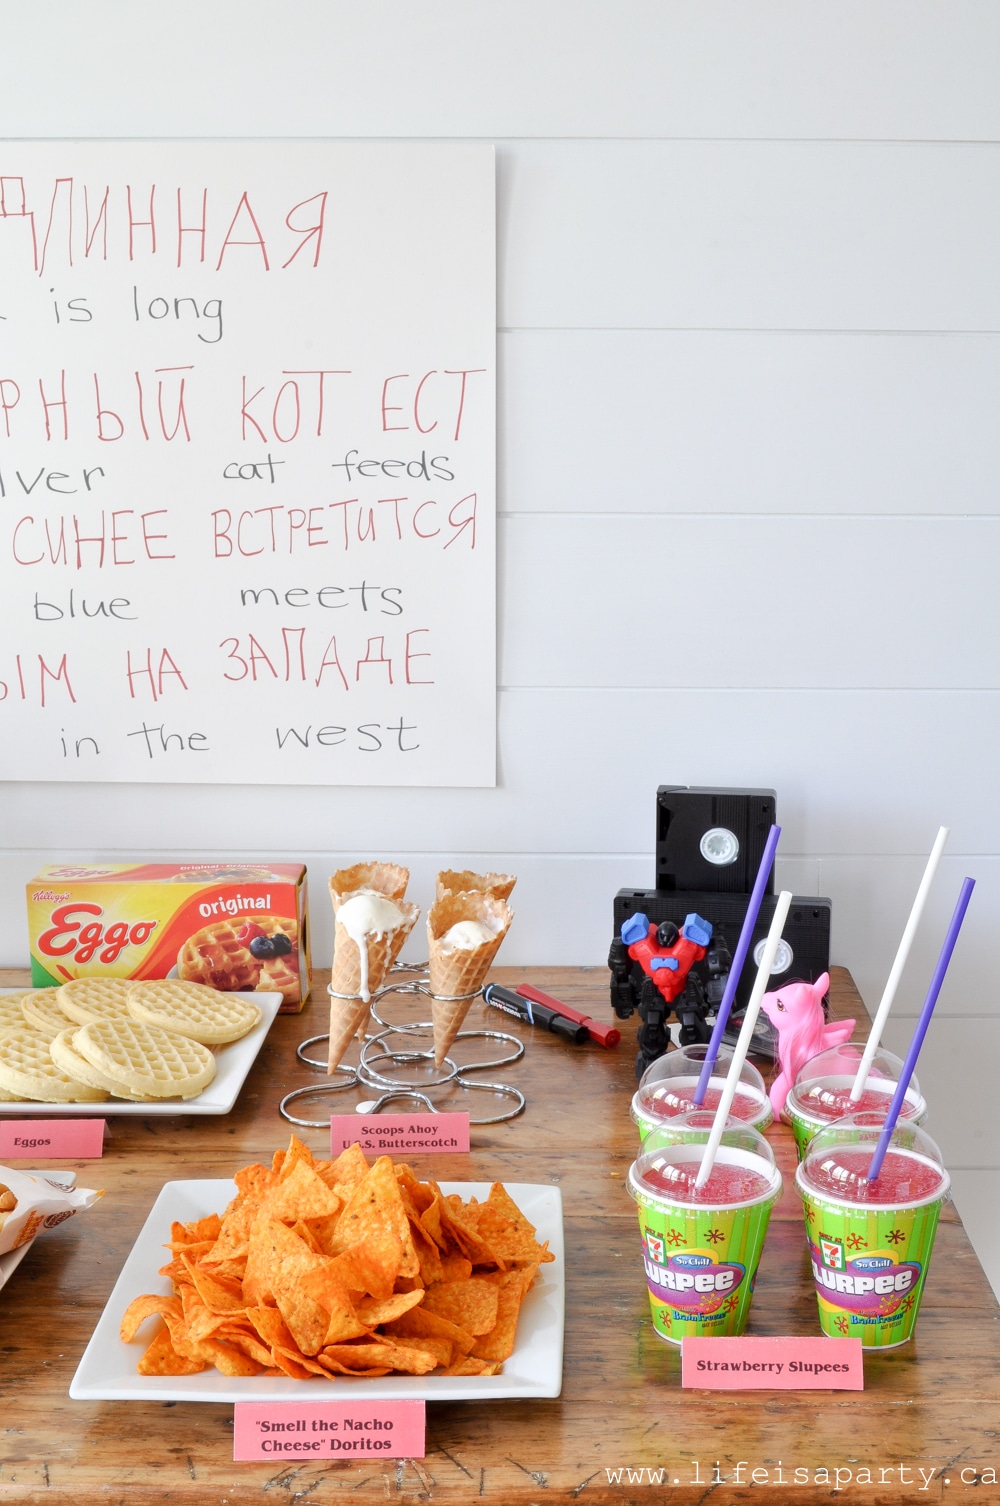
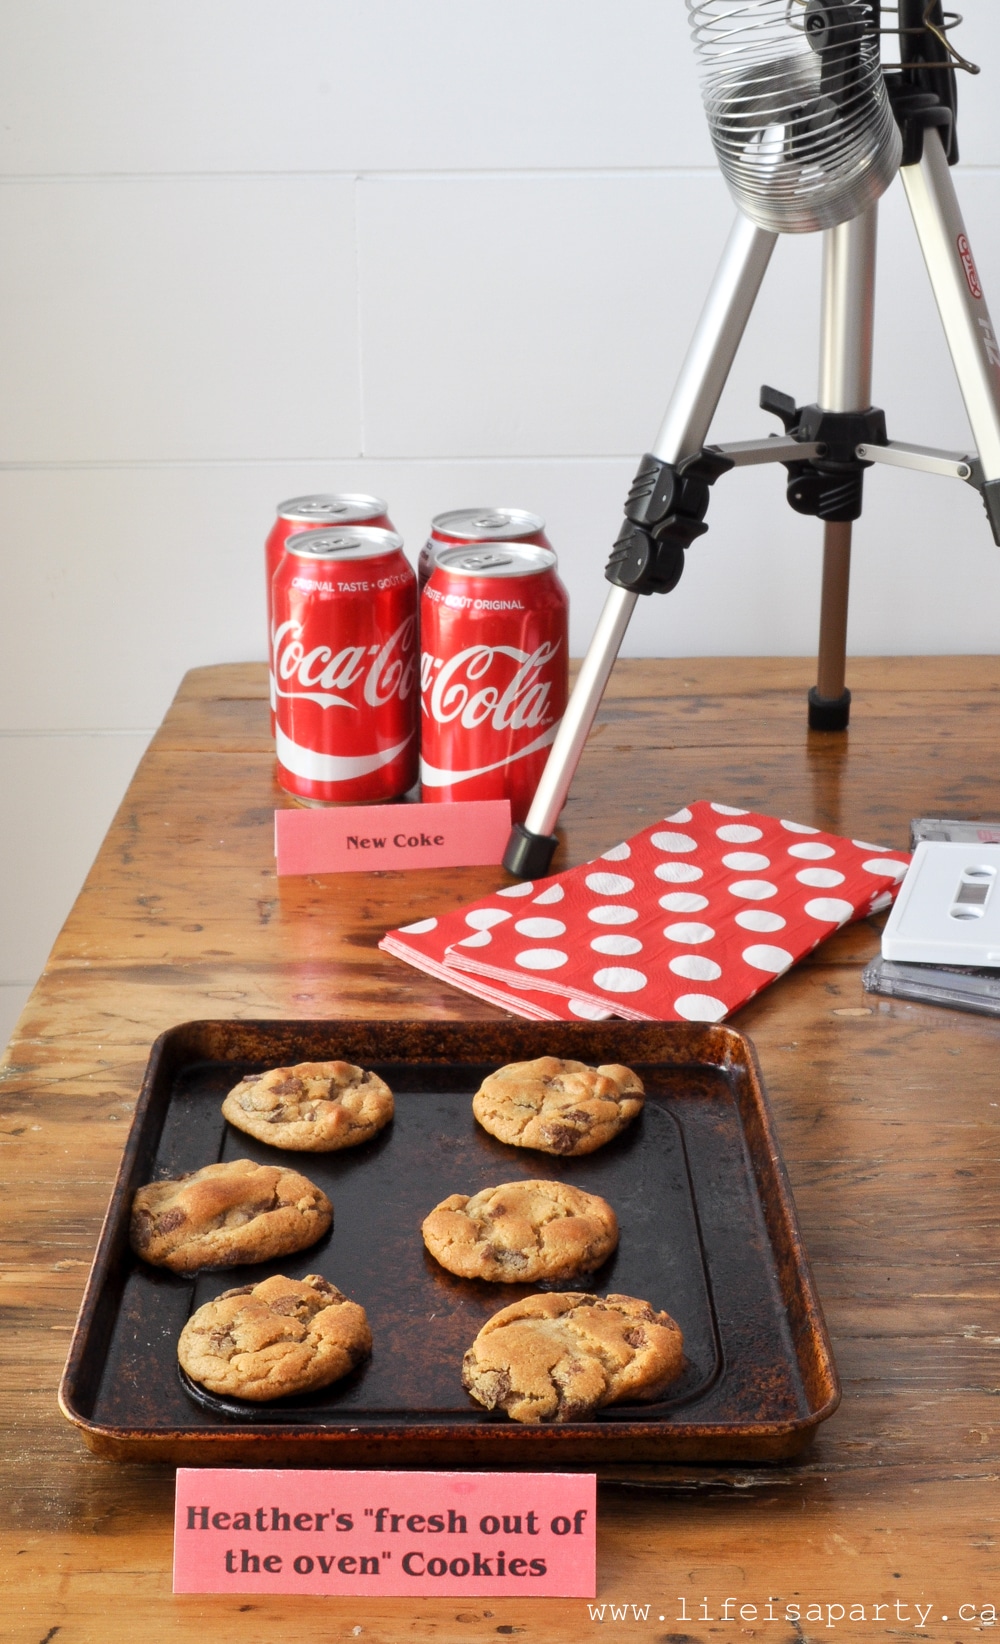
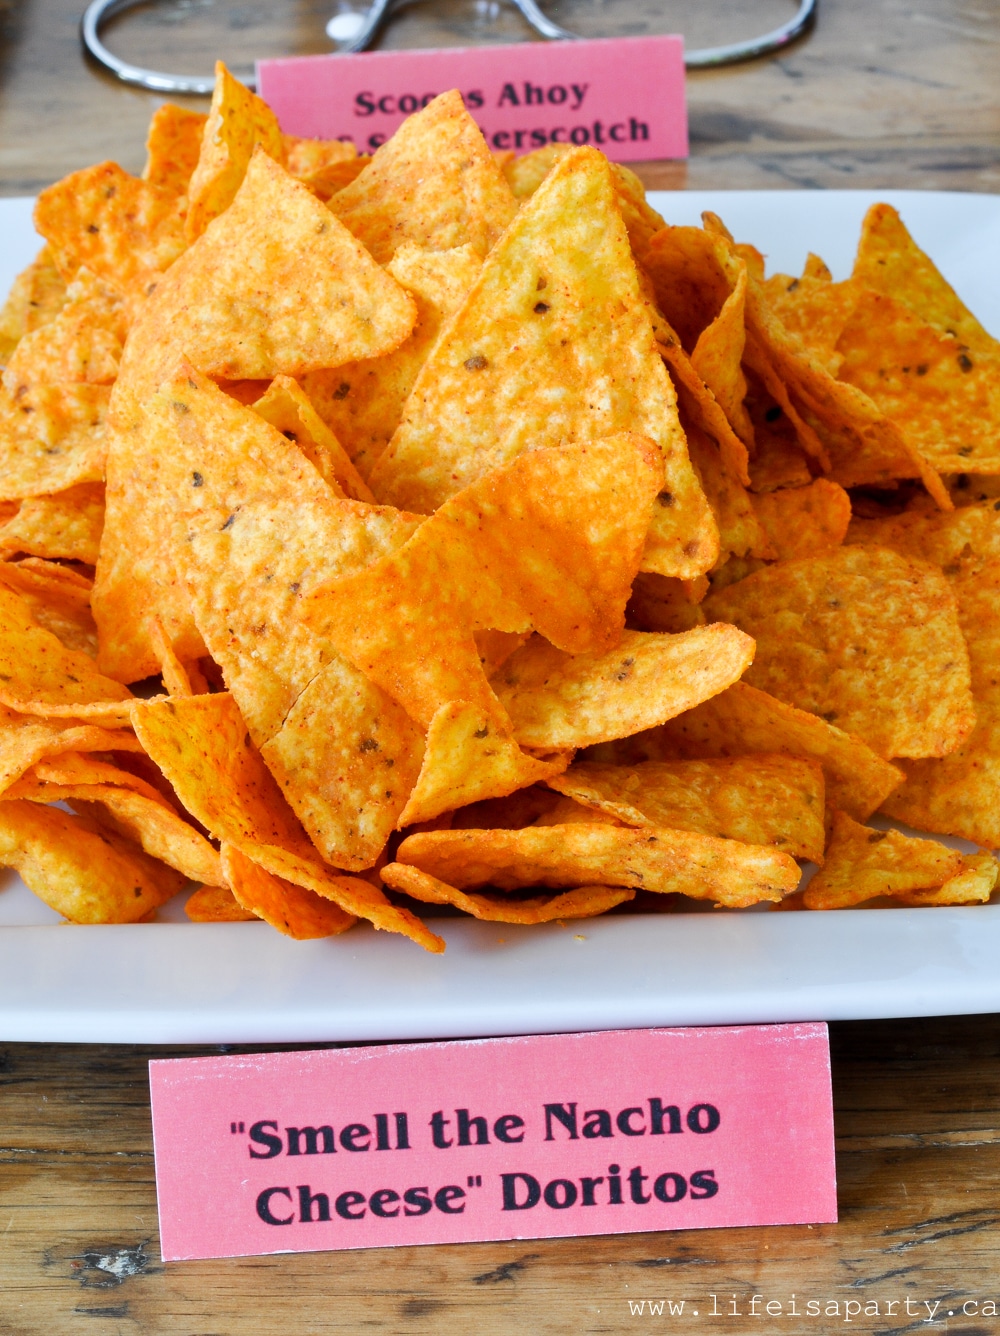
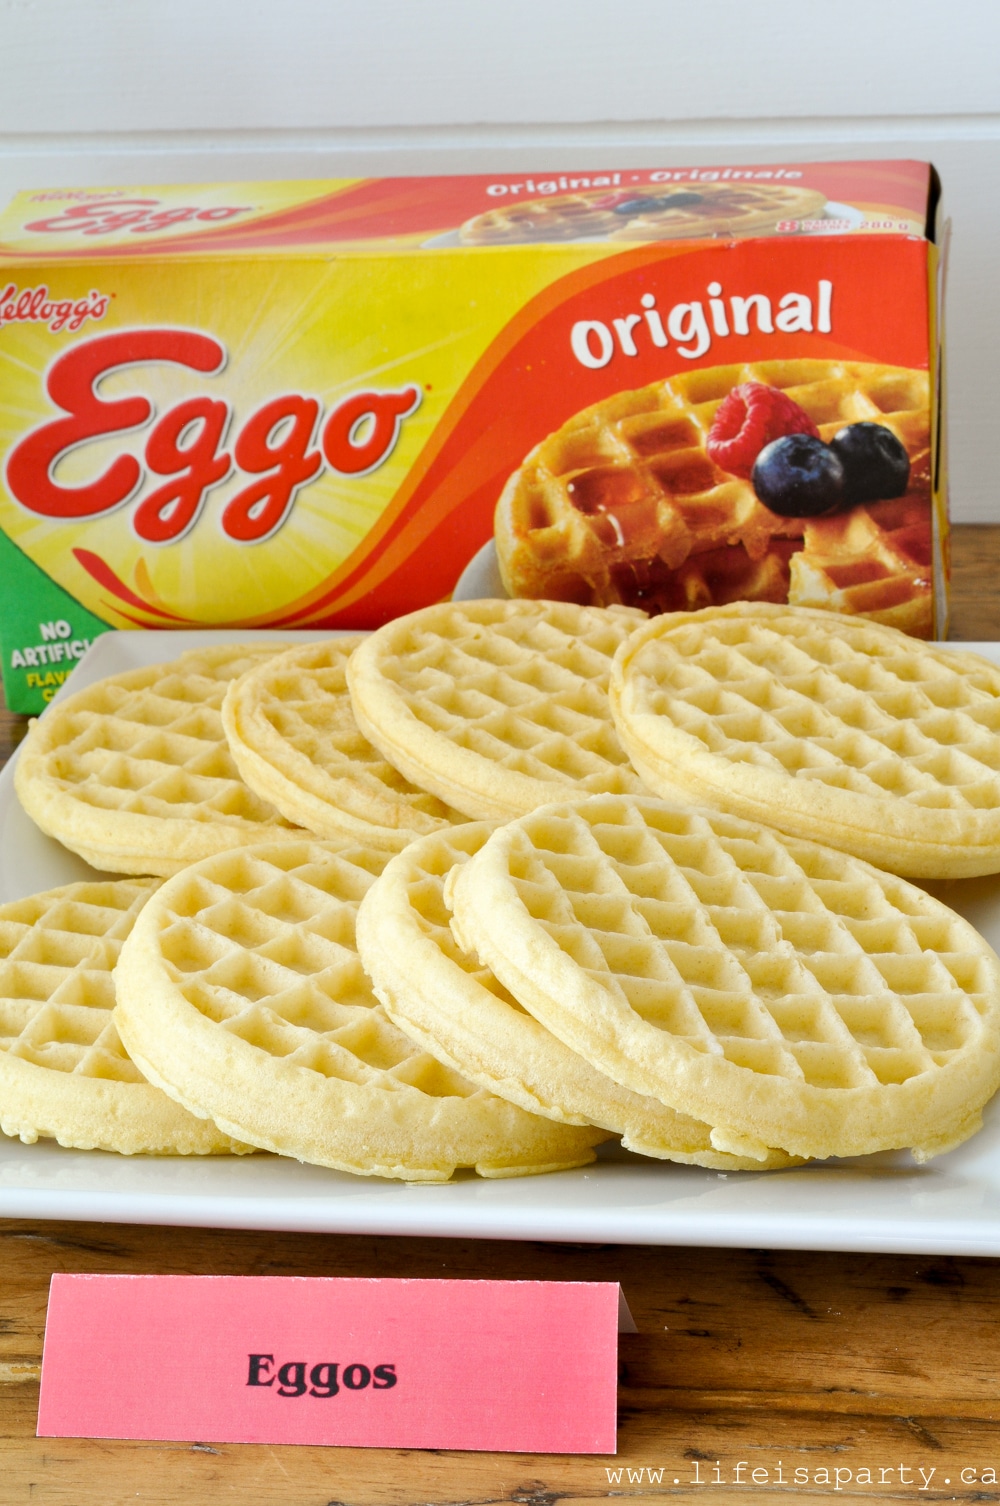
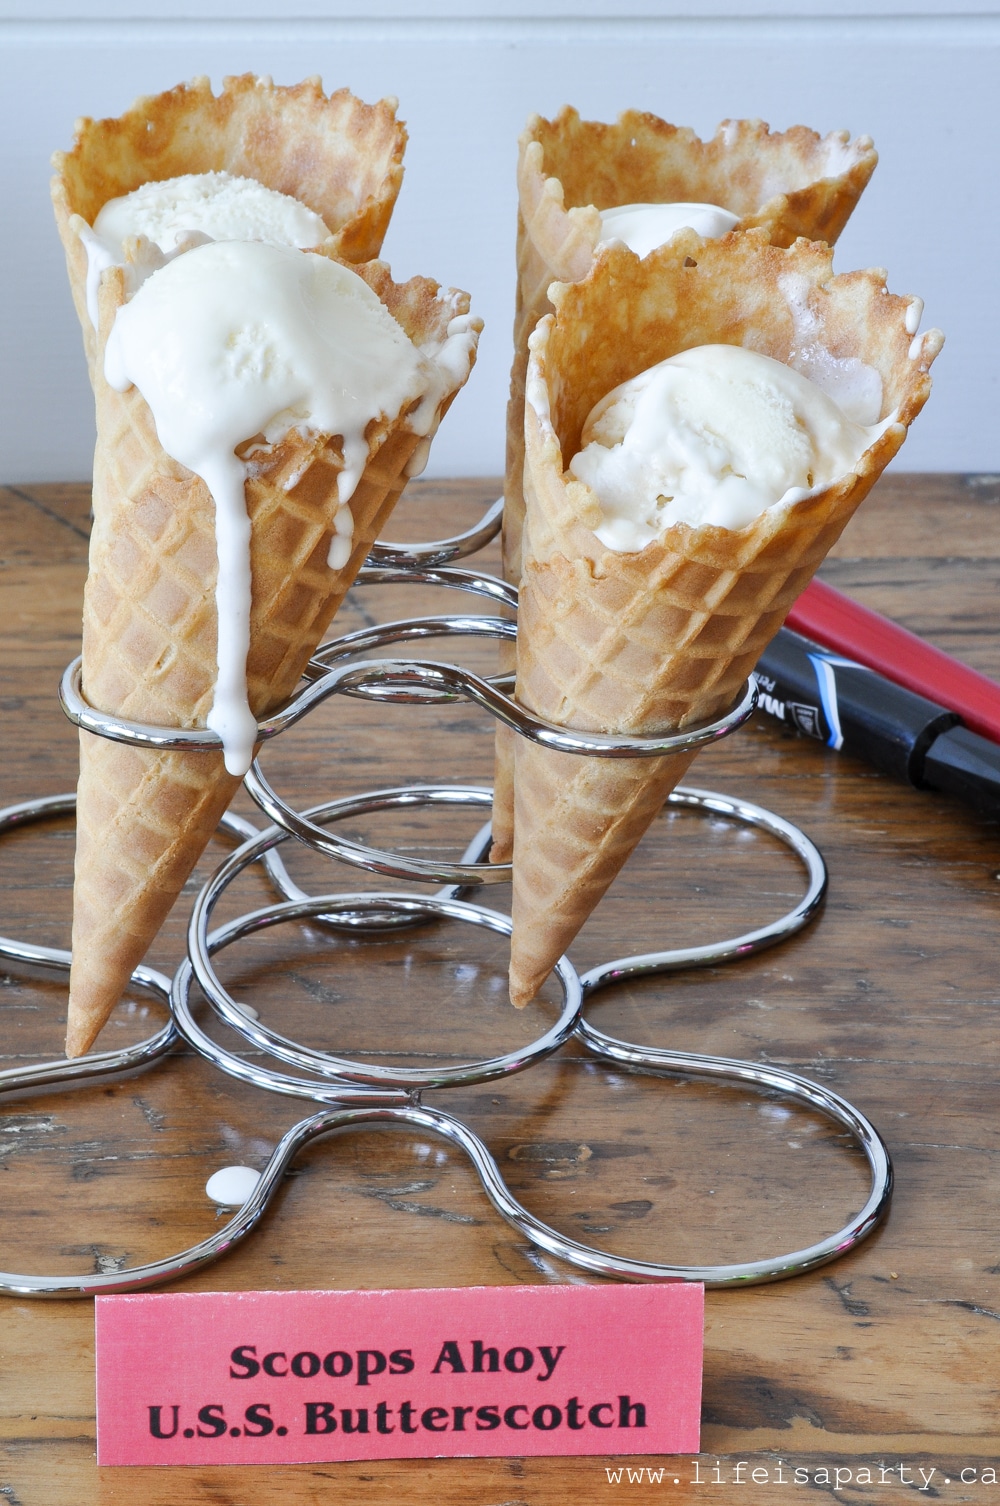
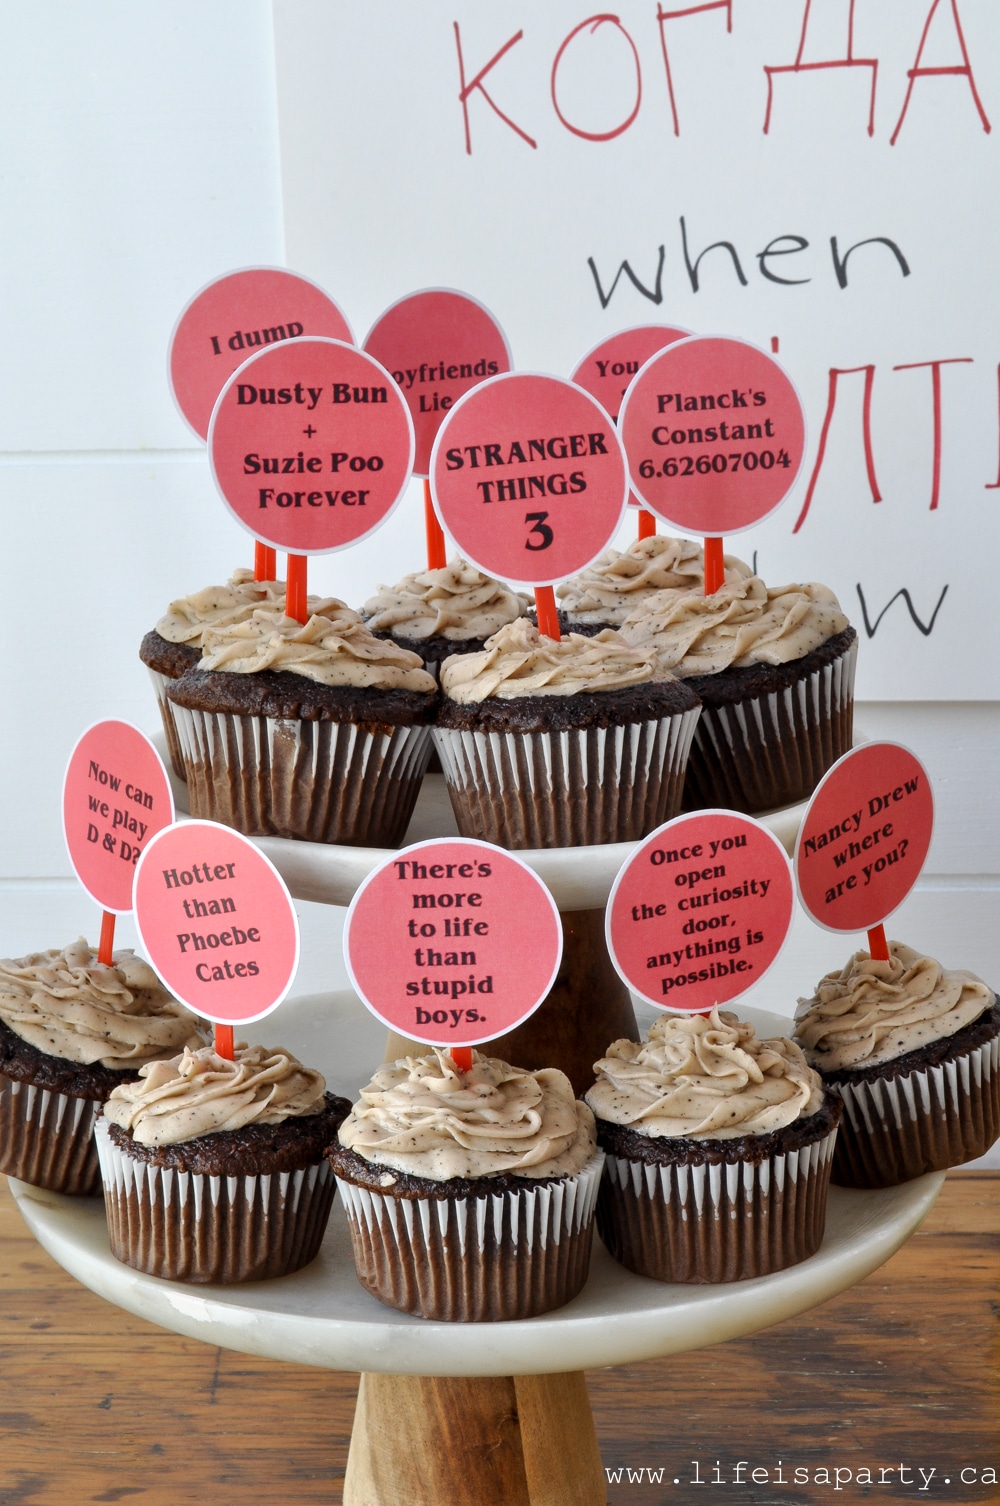
Some of the snacks were inspired by a character's favorite food. We couldn't leave out Seven's eggo waffles. Mini waffles or regular size with maple syrup are a crowd pleaser. You could even set up an entire eggo waffle bar. For our stranger things-themed party foods we took a lot of inspiration from season 3. Steve Harrington would love the Scoops Away USS Butterscotch ice cream. And we had to include some cookies with chocolate chips inspired by Heather's fresh out of the oven chocolate chip cookies. Instead of themed cake, we made simple cupcakes but decorated them with our printables that feature quotes and jokes from the show. These were so much fun for guests, and really easy to make. Another fun addition would be some chocolate pudding, from when Dusty screams out "Mike I found the chocolate pudding" in season 2. For our food table we included:

  • new coke
  • Heather's "fresh out of the oven" cookies
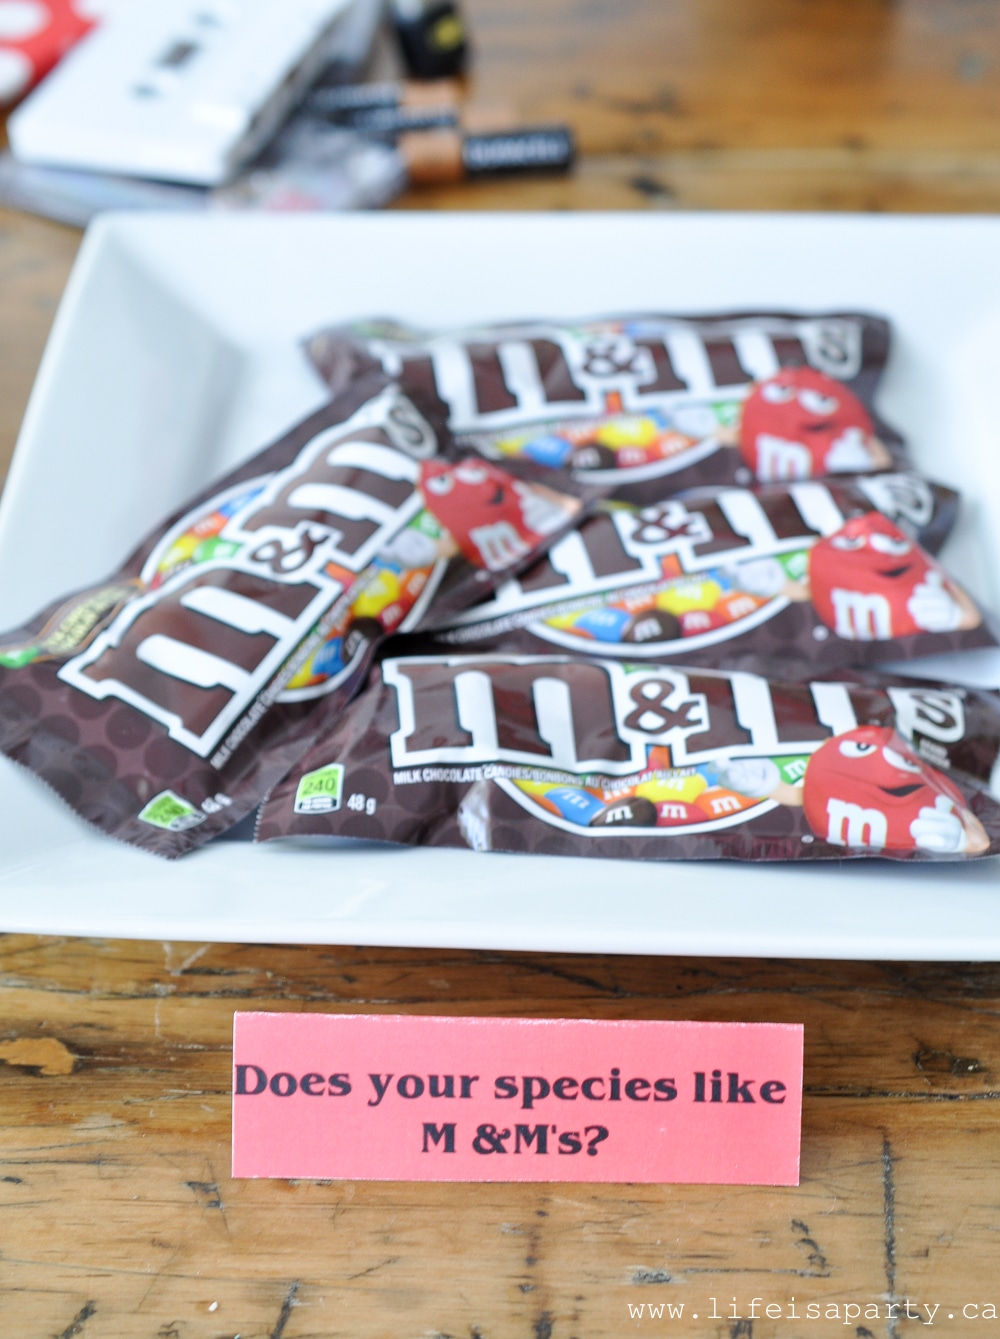
  • Does your species like M&Ms?
  • Scoops Away USS Butterscotch ice cream
  • Smell the nacho cheese Doritos
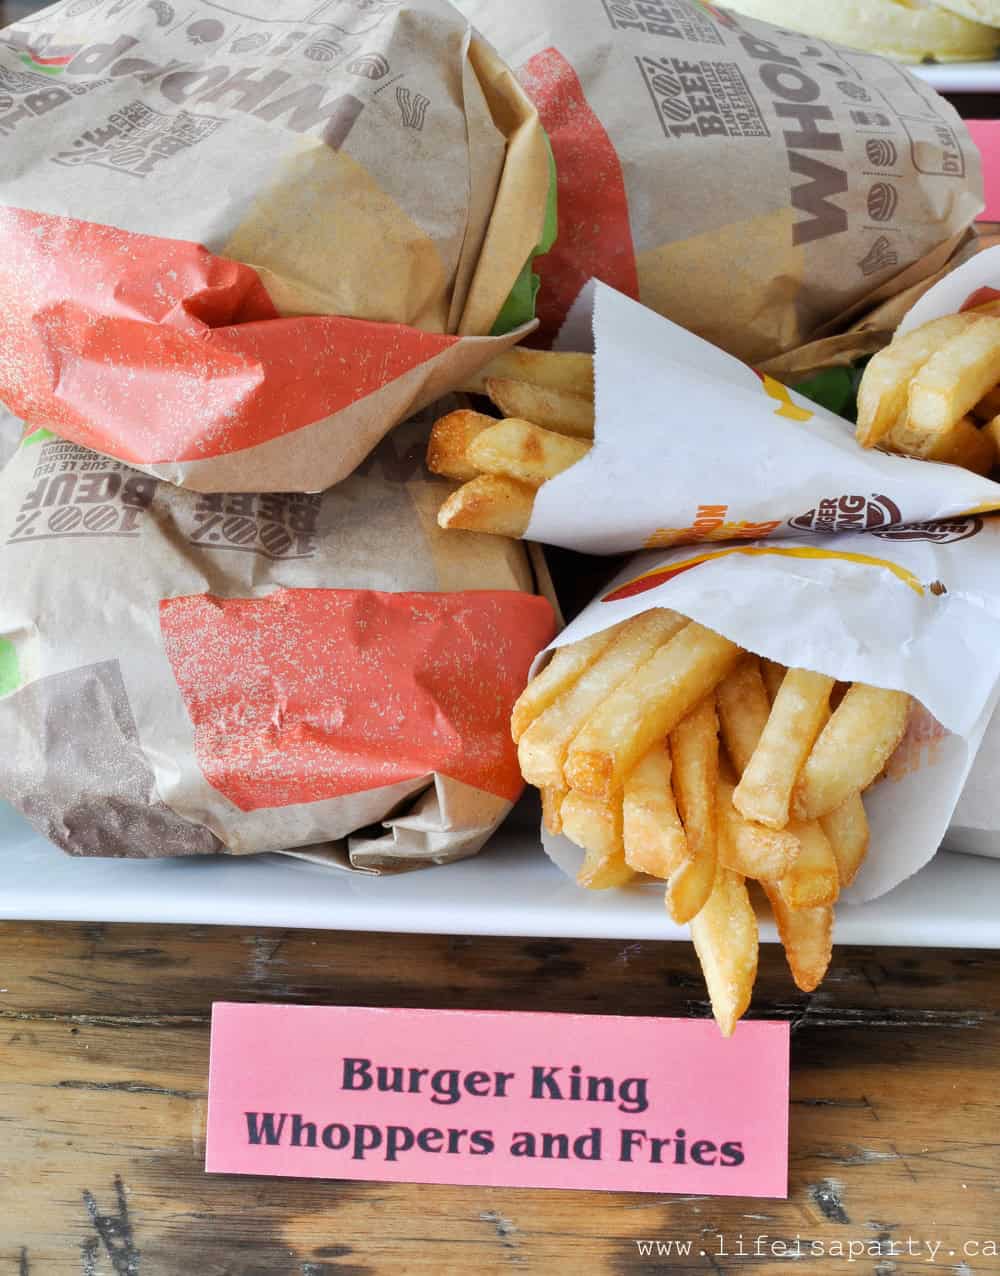
  • Burger King burgers and fries
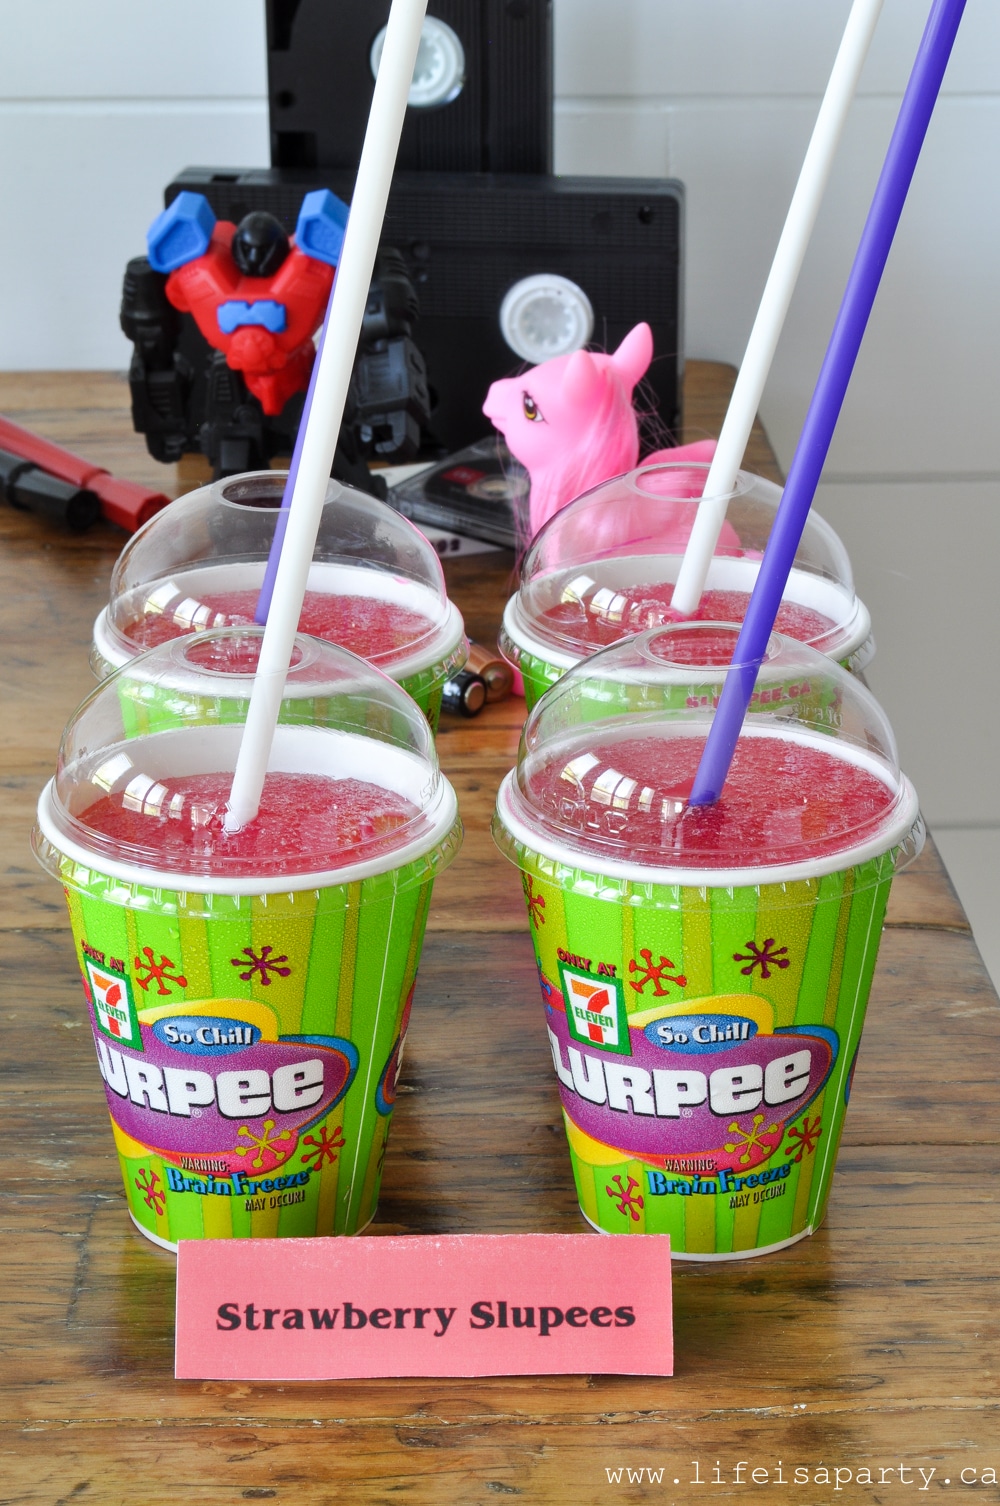
  • Strawberry Slurpees
  • Eggos

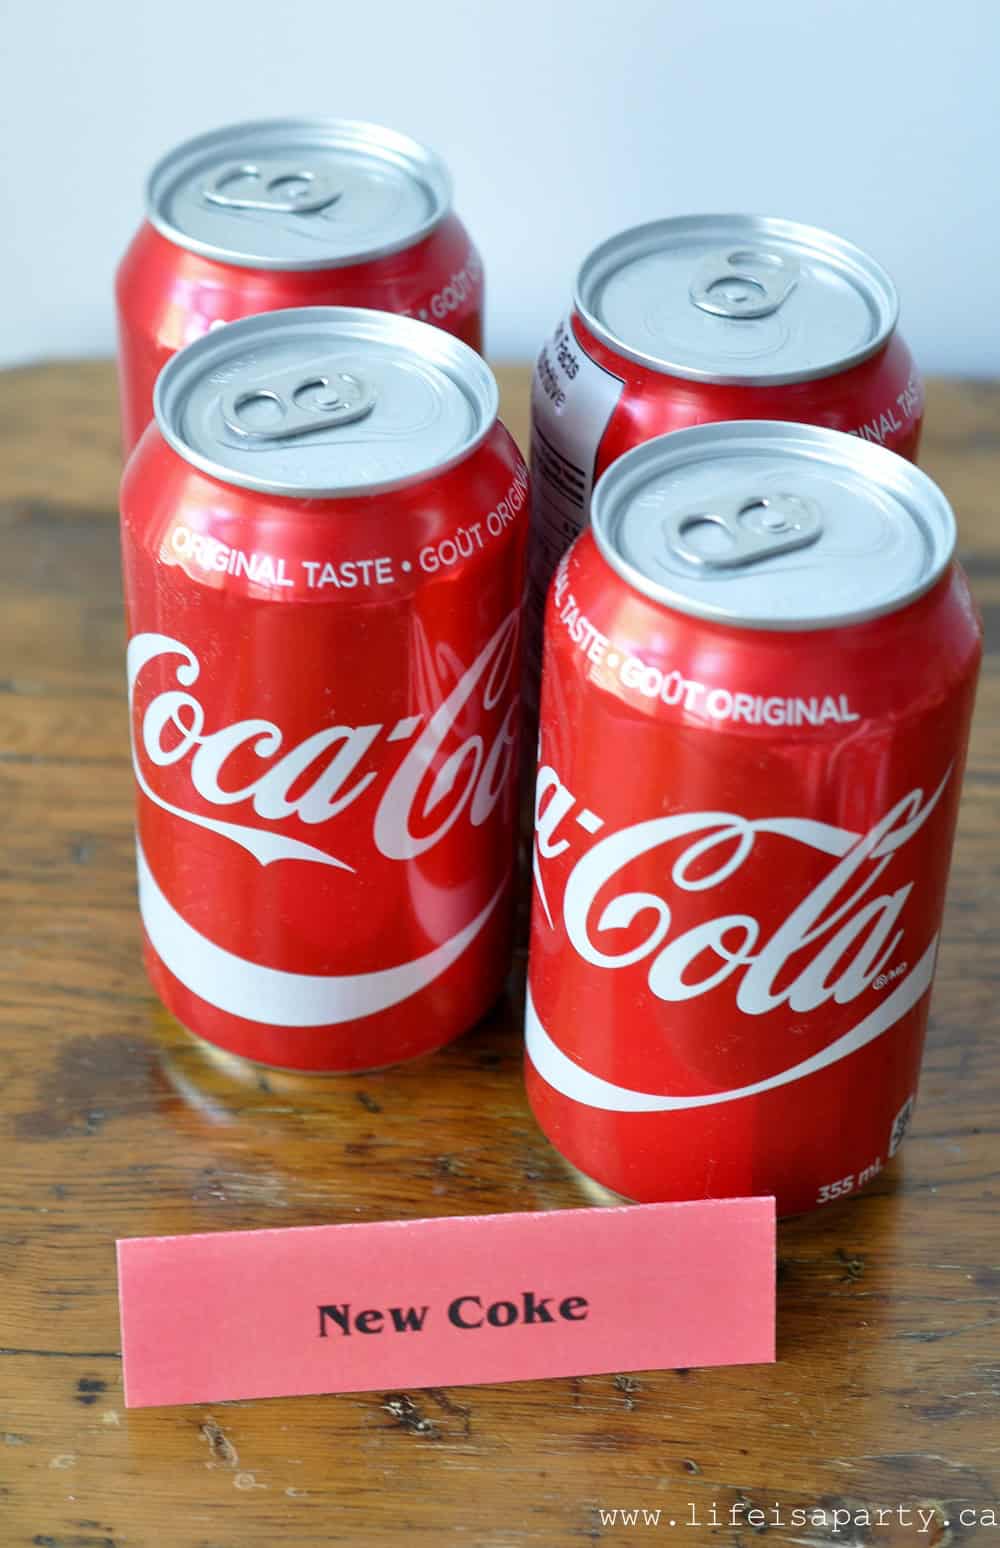
I loved how season 3 included "New Coke" and remember the summer it came out.  It would be fun for a party, but is quite expensive. I think it's good enough to print the label and serve up some Coke Classic.

Stranger Things 3 Party new coke

Remember the part in the season 3 where Billy is having dinner at Heather's parents house, and Eleven and Max show up, and Heather offers them some "freshly baked cookies"?  That scene inspired the cookies.

Stranger Things Party food ideas

Next is the "does your spieces like M&Ms"? These are from when Mike makes up with Eleven at the hospital while they're in the waiting room.

Stranger Things Party food ideas

We also served some "Burger King Whoppers and Fries" inspired by the meal Alexei requests when Jim, Joyce, and Murray are questioning him.

Stranger Things 3 Party food

And let's not forget the "Strawberry Slurpee" that was supposed to be Cherry.

Stranger Things food label free printables

We also included some "Smell the Nacho Cheese Doritos" inspired by Mike's line about his burps when El is spying on the boys.

stranger things party food nachos

It wouldn't be Stranger Things without some Eggos for Eleven.

Stranger Things eggo label free printable

And we had to include some "Scoops Ahoy U.S.S. Butterscotch" ice cream from Steve's drugged interrogation by the Russians. With our Scoops Ahoy printable label of course.

scoops ahoy printable food label

Stranger Things Printable Cupcake Pics

Last but not least we made some really fun Season 3 inspired cupcake pics with our favourite quotes on them. Have fun with friends remembering these lines like stranger things trivia.

  • Boyfriends Lie.
  • I dump your ass.
  • You can't spell American without Erica.
  • There's more to life than stupid boys.
  • Nancy Drew where are you?
  • Planck's Constant 6.62607004
  • Once you open the curiosity door, anything is possible.
  • Now can we play D & D?
  • Hotter than Phoebe Cates
  • Dusty Bun + Suzie Poo Forever
Stranger Things cupcakes

To make the cupcake pics, just cut out the printable with a 2 inch hole punch and glue to a toothpick.  These would also be really fun to use as a banner, or tie onto favour bags.

Stranger Things 3 Party and Free Printables: Stranger Things themed party ideas based on Season 3, including free Stranger Things 3 Party Printables.

This party was so fun to put together and really easy.  All the food was store bought, and a super yummy party menu too with a great mix of sweets and savoury.

Stranger Things 3 Party and Free Printables: Stranger Things themed party ideas based on Season 3, including free Stranger Things 3 Party Printables.
Stranger Things 3 Party food ideas and decor
Stranger Things 3 Party

I hope this inspires you to invite some fellow Stranger Things friends over and chat about your theories and enjoying watching the new season!

With all these great Stranger Things party ideas, life is really a party!

Instant Stranger Things Free Party Printables

To get instant access to the free Stranger Things Party Printables subscribe to our Newsletter below, and gain access to our entire Free Printable Library:

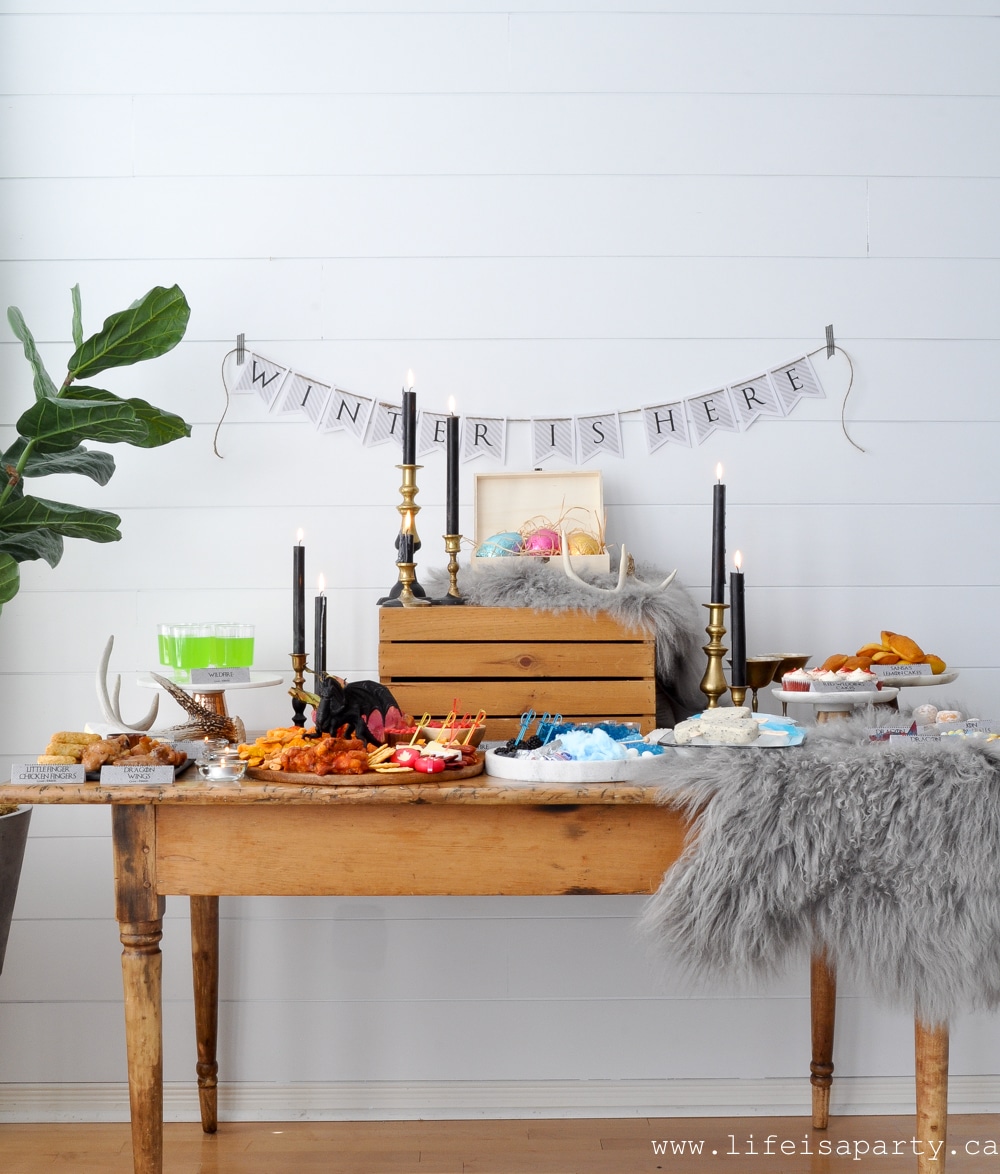
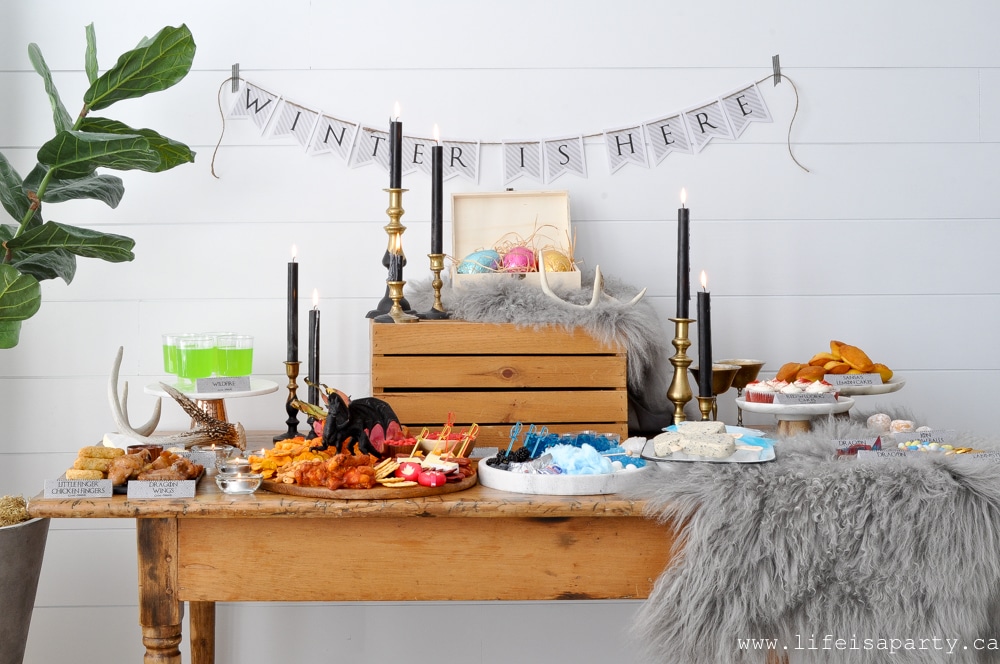
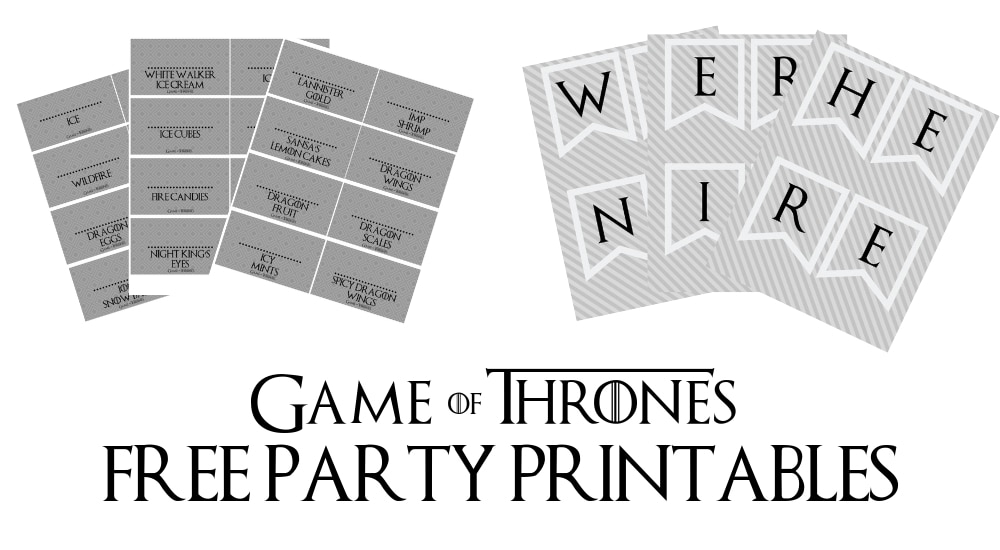
Want more party ideas like this one? Check out our Game Of Thrones Party with Free Printables:
Game of Thrones Party Food and Free Printables: Fire and Ice Snack Board, themed food with printable labels and "Winter Is Here" Banner.

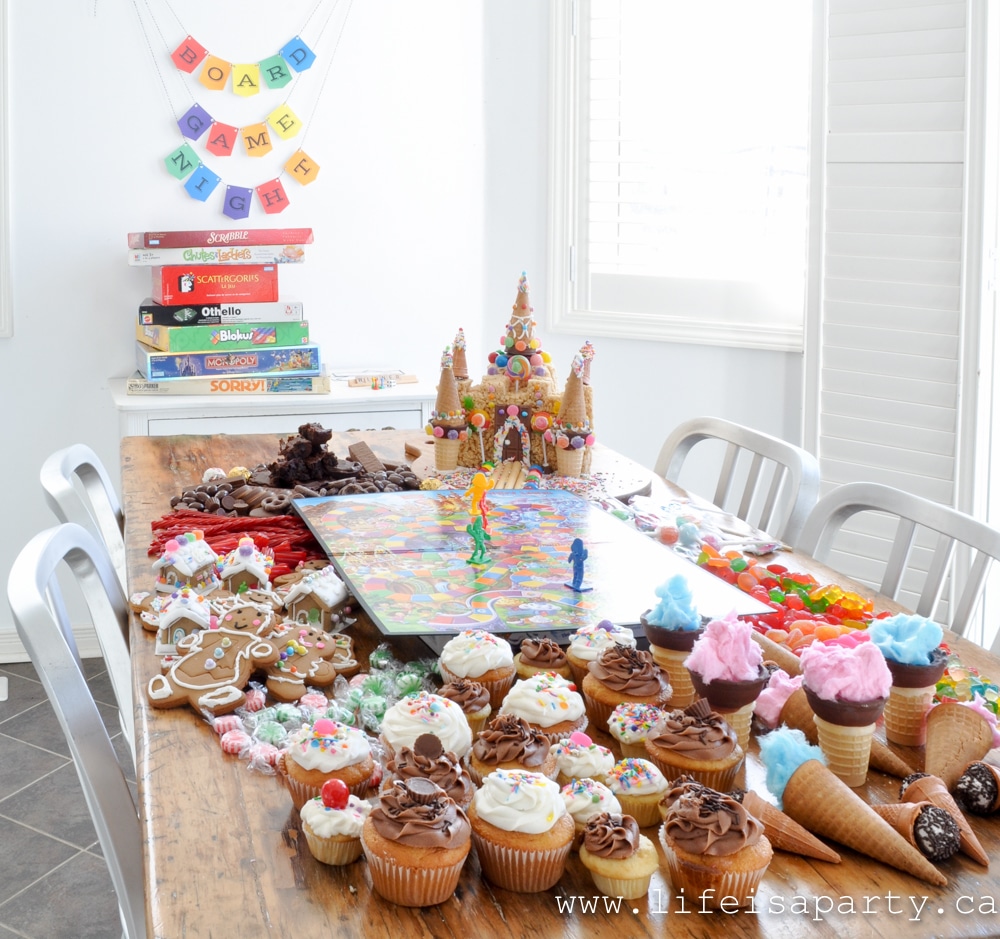
Also check out our Board Game Night here.

You might also like our Beer and Root Bear Tasting Party here.

Cricut Infusible Ink Coasters and Tote Bag

Jul 17, 2019 · Leave a Comment

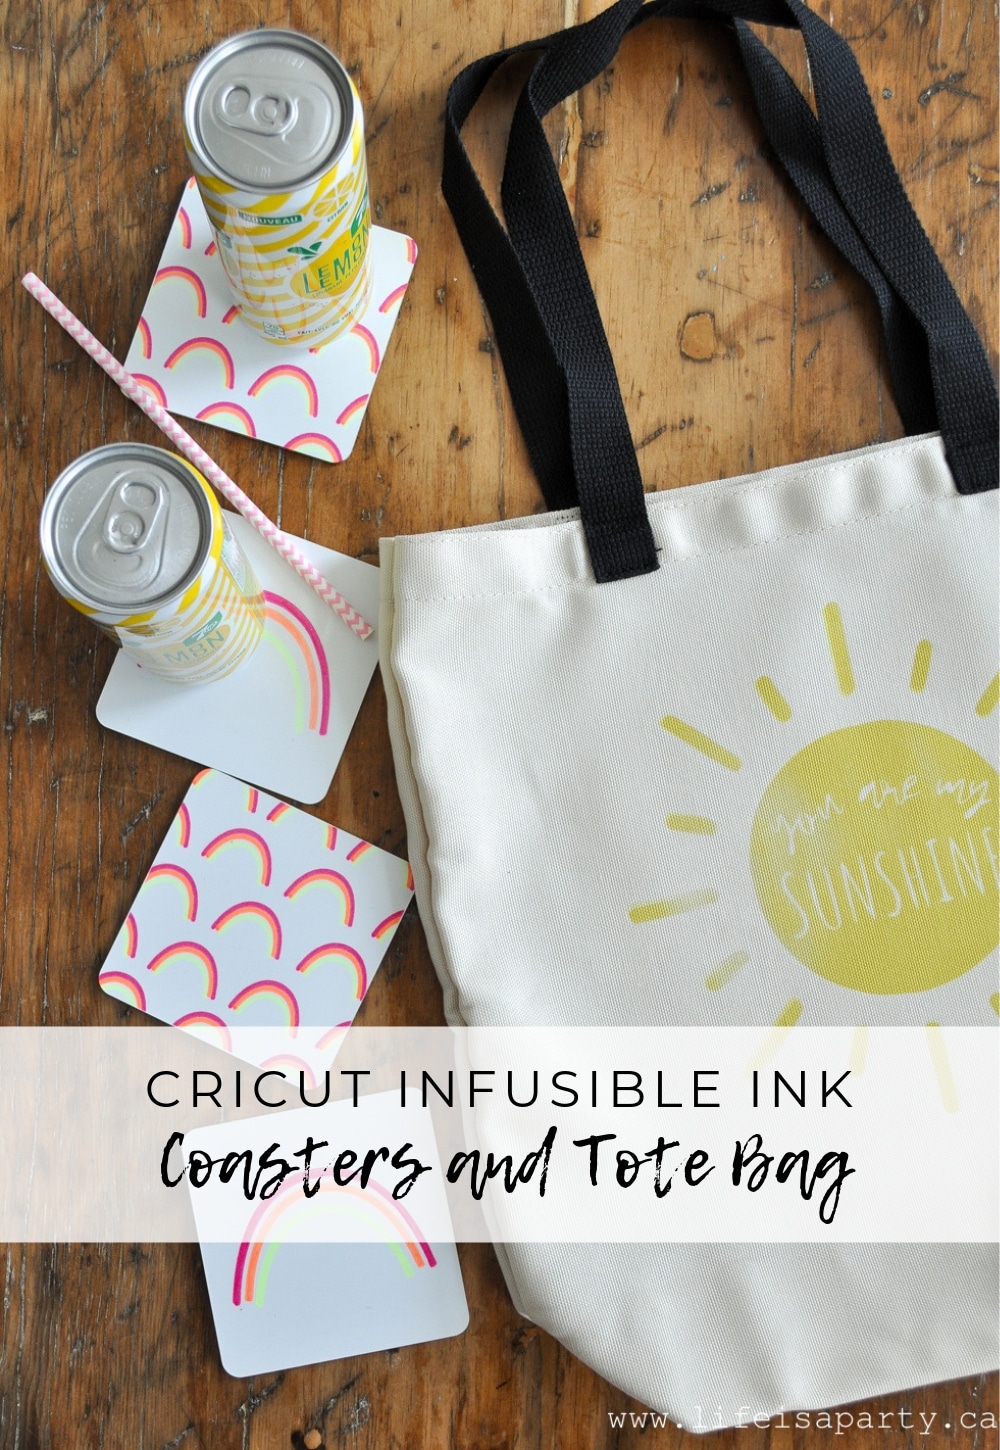
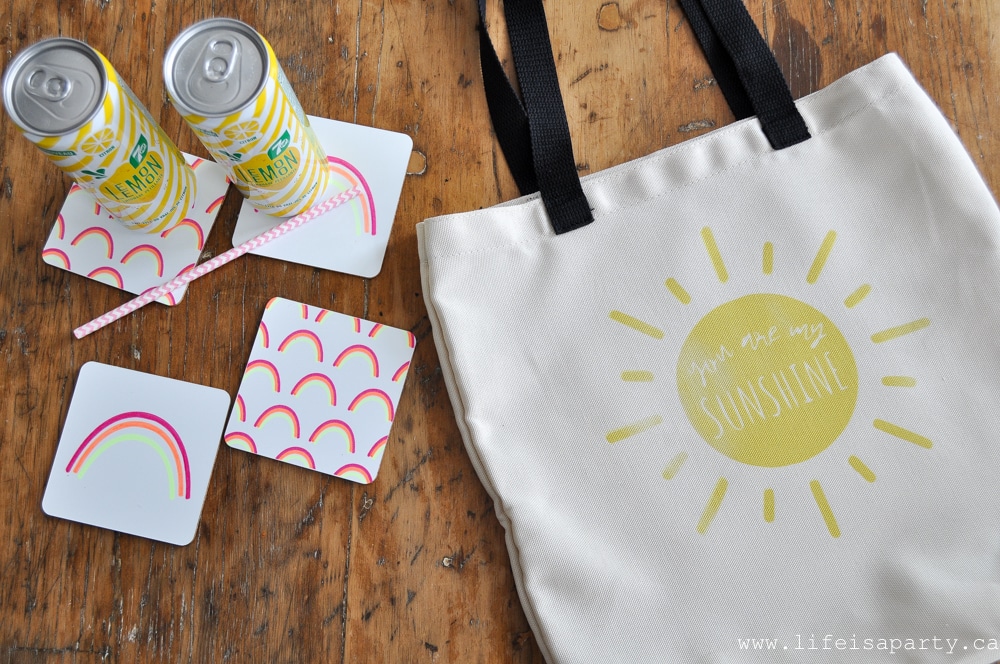
Cricut Infusible Ink Coasters and Tote Bag: create a "you are my sunshine" tote bag, or rainbow coasters with Cricut's new Infusible Ink.

Cricut Infusible Ink Ideas For Coasters and Tote Bag: create a "you are my sunshine" tote bag, or rainbow coasters with Cricut's new Infusible Ink.

Cricut Infusible Ink Ideas for Coasters and Tote Bag: create a "you are my sunshine" tote bag, or rainbow coasters with Cricut's new Infusible Ink.

This is a sponsored conversation written by me on behalf of Cricut. The opinions and text are all mine.


I'm excited to be working with the new Cricut Infusible Ink today to create some beautiful summer projects and give you some Cricut Infusible Ink ideas.  It really is an amazing product.  

Cricut Infusible Ink Ideas

Infusible Ink is an all-new system of Cricut DIY products. The ink literally infuses with the tote bag and coasters and creates the most professional looking results.  And it's easy and fun to use too. Unlike the vinyl, where artwork is attached on top of a base material using adhesive, an Infusible Ink transfer becomes one with the material itself. The results are bright and smooth transfers that never flake, peel, wrinkle, or crack. 

Cricut Infusible Ink Tote Bag

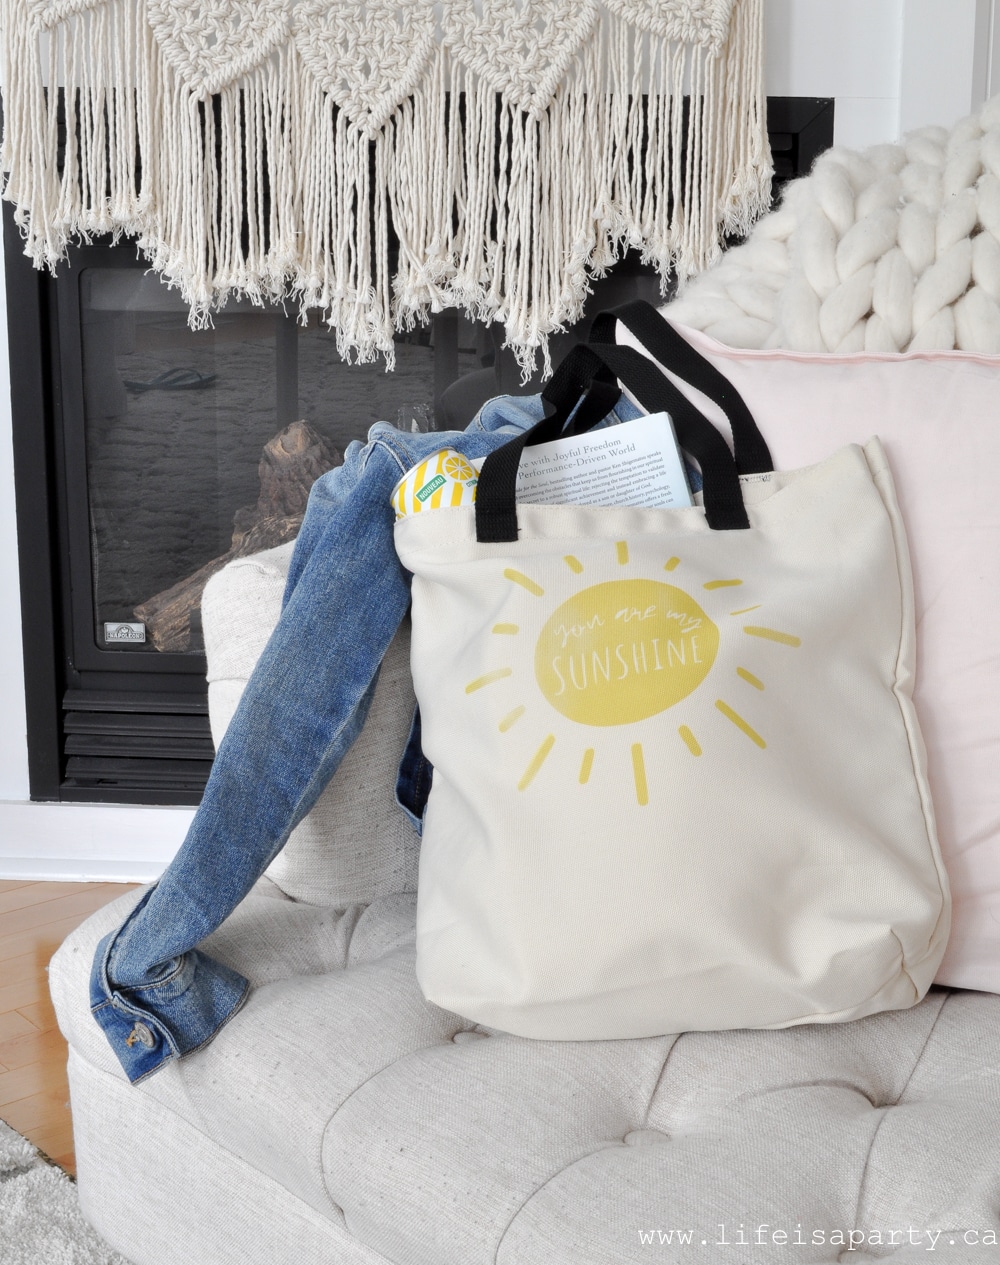
You Are My Sunshine Cricut Infusible Ink Tote Bag

I started with the "You are my Sunshine" tote bag.  Just like with any Cricut project, we were able to create our own design in Cricut design space and then cut out our pattern with our Cricut Maker.  You can find the pattern we created here.  We made our pattern 8 x 8 to fit onto our tote bag.

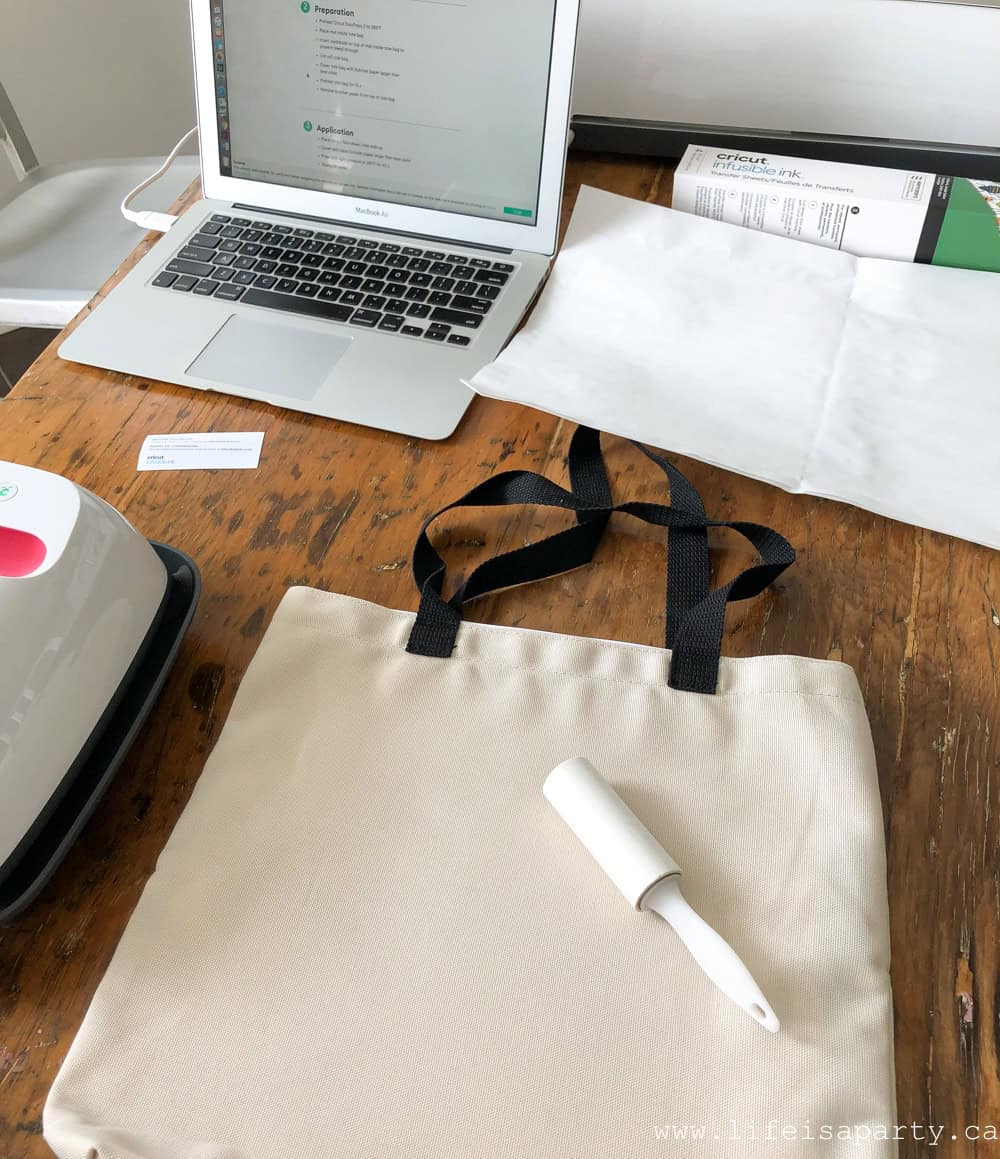
Tote Bag Materials:

  • Cricut cutting machine
  • Infusible Ink Transfer Sheet design
  • Cricut EasyPress 2
  • Butcher paper (included with the Infusible Ink Sheets when you buy them)
  • Cricut EasyPress Mat*
  • Cardstock 
  • Cricut Infusible Ink Compatible Blanks
  • Lint roller

Tote Bag Instructions:

1.We created our own beautiful design, you can find our "You are my sunshine" pattern here.

You are my sunshine

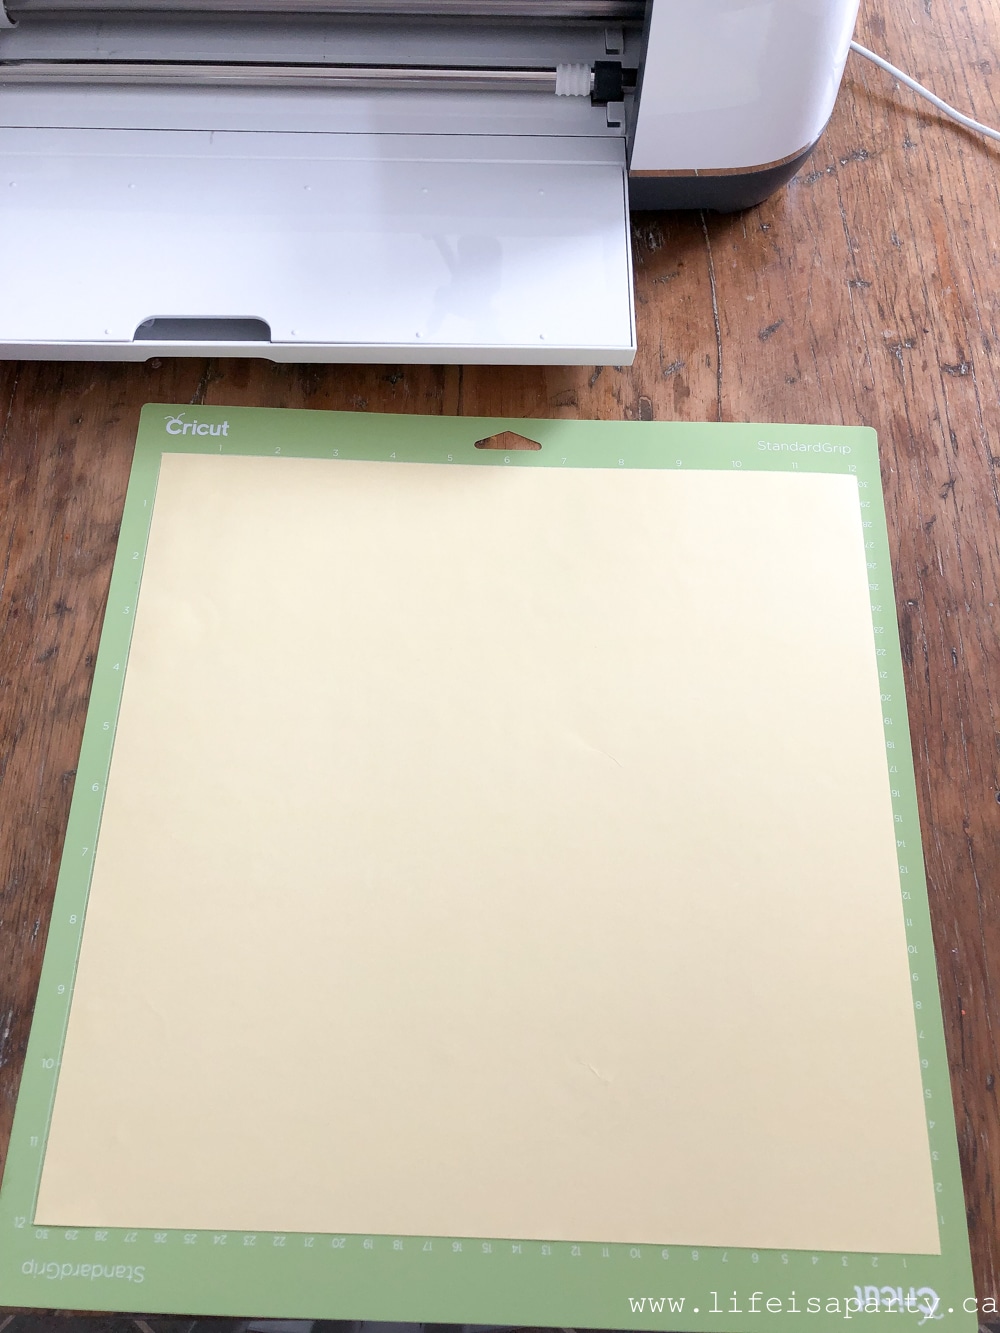
2. To cut out the design, place your Infusible Ink transfer sheet on a standard grip cutting mat, colour side up.

how to use Cricut Infusible Ink

3. Be sure to cut out the design in mirror, so that the writing will be perfect in the finished product.  Set your Circuit to cut an Infusible Ink transfer sheet, and cut your design.  Take care not to get finger prints on your ink transfer sheet while working with it.  Make sure your hands are clean and dry.

4. Weed the pattern, using tweezers if necessary.

5. Preheat Cricut EasyPress 2 to 385°F.

6. Place the Cricut Easy Press mat inside tote bag and insert the cardstock on top of the mat inside tote bag to prevent any bleeding through. Lint roll tote bag.

Cricut Infusible Ink ideas

7. Next, cover the tote bag with butcher paper larger than heat plate and preheat tote bag for 15 s using the Cricut Easy Press 2. Remove butcher paper from the top of tote bag.

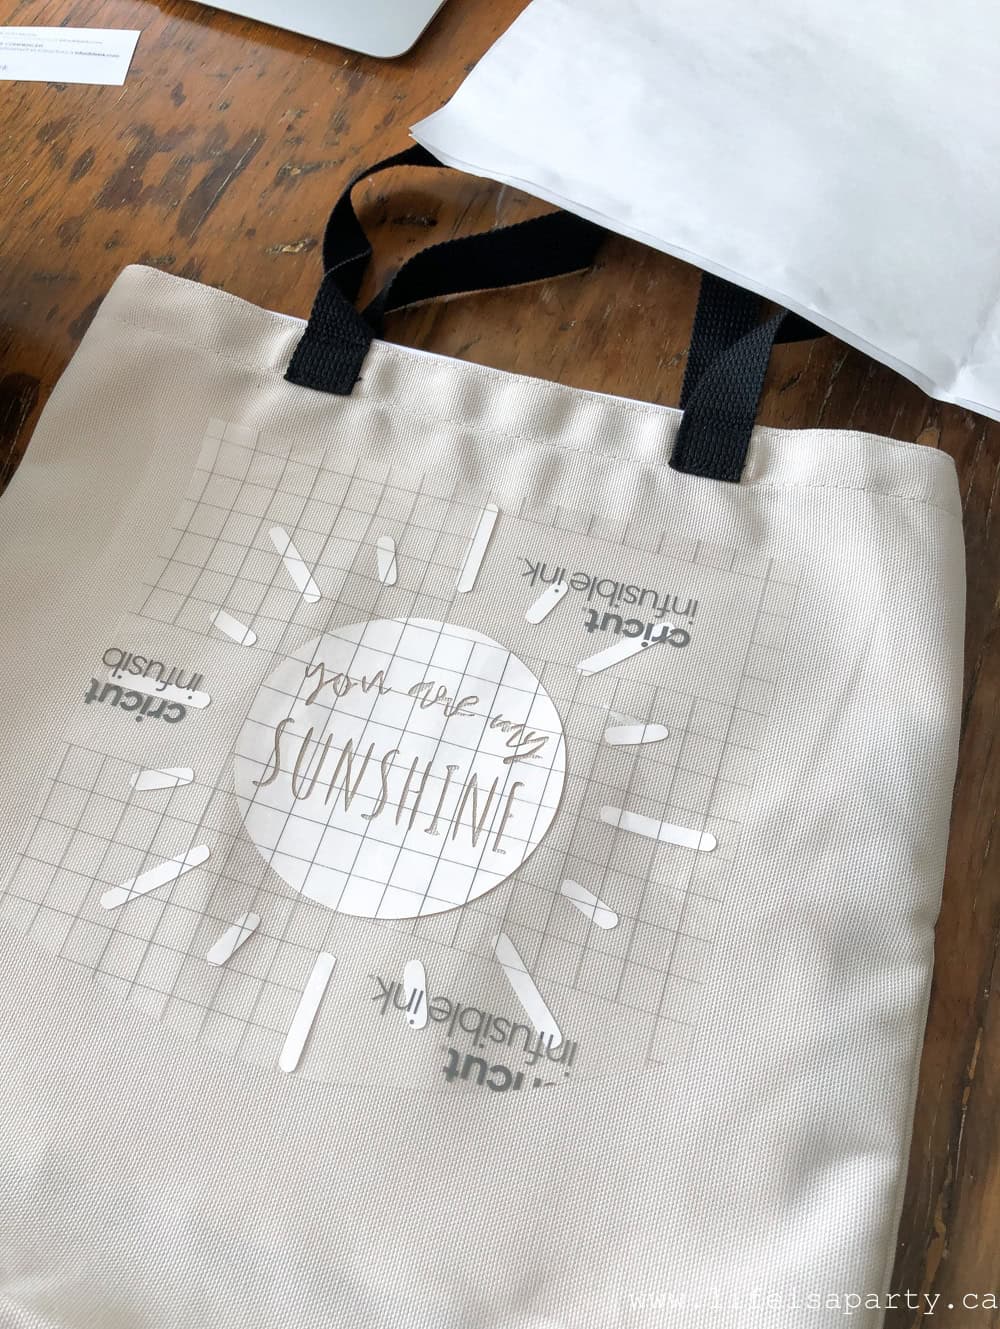
8. Finally, place the design face down, liner side up on top of the tote bag, and cover with clean butcher paper larger than heat plate.  Press it with light pressure at 385°F for 40 s  taking care not to shift the Easy Press 2 while you're pressing.  

how to make a Cricut Infusible Ink tote bag

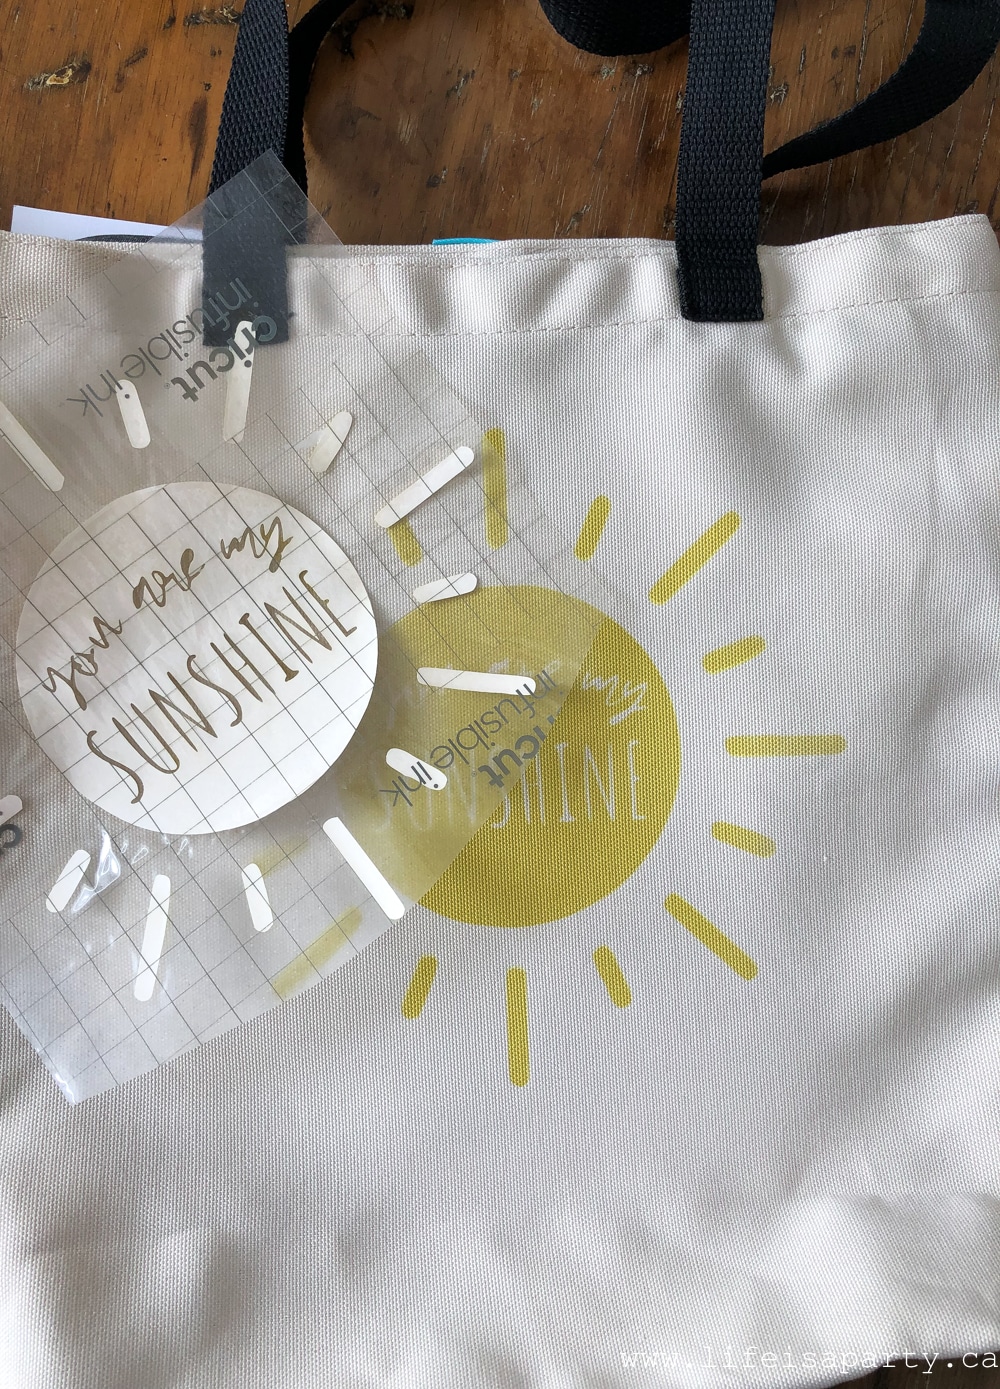
9. Slowly lift press.  Slowly remove the butcher paper.  Next, let it cool completely. Slowly remove liner.

DIY you are my sunshine tote bag

Sunshine and Rainbows

This little bag turned out so very cute.  I love the sunshine design, and the sunny yellow Infusible Ink is perfect for it.  Imagine us using this little tote all summer for trips to the beach, bringing home books from the library, or trips to the famers' market.  I love that the ink is actually infused right into the fabric, so there are no worries about the image ever wearing off, or lifting at all.

Cricut Infusible Ink ideas

We also wanted to make some fun summery coasters with the new Infusible Ink markers, and here's what we came up with -little rainbows!   I love how these coasters turned out, and how we could personalize the colours to fit our summer decor. The Easy Press 2 works perfectly with the infusible ink, since it can heat up to such high temperatures, and the timer makes it easy to get perfect results every time.

how to use Cricut Infusible Ink

Cricut Infusible Ink Rainbow Coaster Materials:

  • Cricut cutting machine
  • Copy paper
  • Cricut EasyPress Mat*
  • Infusible Ink Markers (Neon 1.0)
  • Cricut Square Coaster Blank
  • Heat Resistant Tape
  • Butcher paper (included with the Infusible Ink Sheets when you buy them)
  • Cricut EasyPress 2
  • Cardstock 
  • Lint-free cloth
how to make Cricut Infusible Ink coasters

Rainbow Coaster Instructions:

1. We created our coaster pattern in Cricut design space, you can find our pattern here.

2. Place regular copy paper on to a light grip Cricut cutting mat.  Select paper as the material, and follow the instructions on your computer -inserting the pink neon infusible ink marker first, then the orange one, and finally the yellow.  Unload the mat, and remove the paper from the mat.

Cricut Infusible Ink markers

3. Preheat the Cricut EasyPress 2 to 400°F.  Wipe tile with a lint-free cloth.  Don't skip this step or you may find that you permanently add marks to the coaster by mistake.  Cover the mat with butcher paper to protect surface.

4. Next, place the coaster glossy side up on the mat.  Place the design face down on top of the coaster and secure with the heat resistant tape, avoiding the image area, and wrapping the tape around the back of the coaster.

how to use Cricut Infusible Ink markers

5. Cover the coaster with clean cardstock.  Center machine, press with no pressure at 400°F for 60 s, then remove the press.  Remove the cardstock.

6. CAUTION: Coaster will be very hot. Let cool completely. Once cool, remove the design and tape from the coaster and enjoy.

Cricut Infusible Ink Marker Coasters

These Infusible Ink projects turned out so well.  I really love how professional they look.  And, the possibilities for creating with the new infusible ink seem pretty much endless.

DIY rainbow coasters

I hope you like these Cricut Infusible Ink ideas.  With it all sunshine and rainbow's around here, life is really a party!

Cricut Infusible Ink ideas

You might also like our 10 Tips For Cricut Design Space here.

10 Tips for Cricut Design Space -top tips as well as a Harry Potter inspired DIY hat for the Cricut Design Space Beginner

Also check out our Macrame and Cricut Felt Succulent Wreath here.

DIY Macrame and Felt Succulent Wreath: Easy Boho Wreath with Felt Succulents made with a Cricut, and simple Macrame hanger.

You might also enjoy our How To Make Cricut Heat Transfer Vinyl Napkins here.

how to make personalized napkins

Spray Paint Cutlery and Vase Makeover

Jul 11, 2019 · Leave a Comment

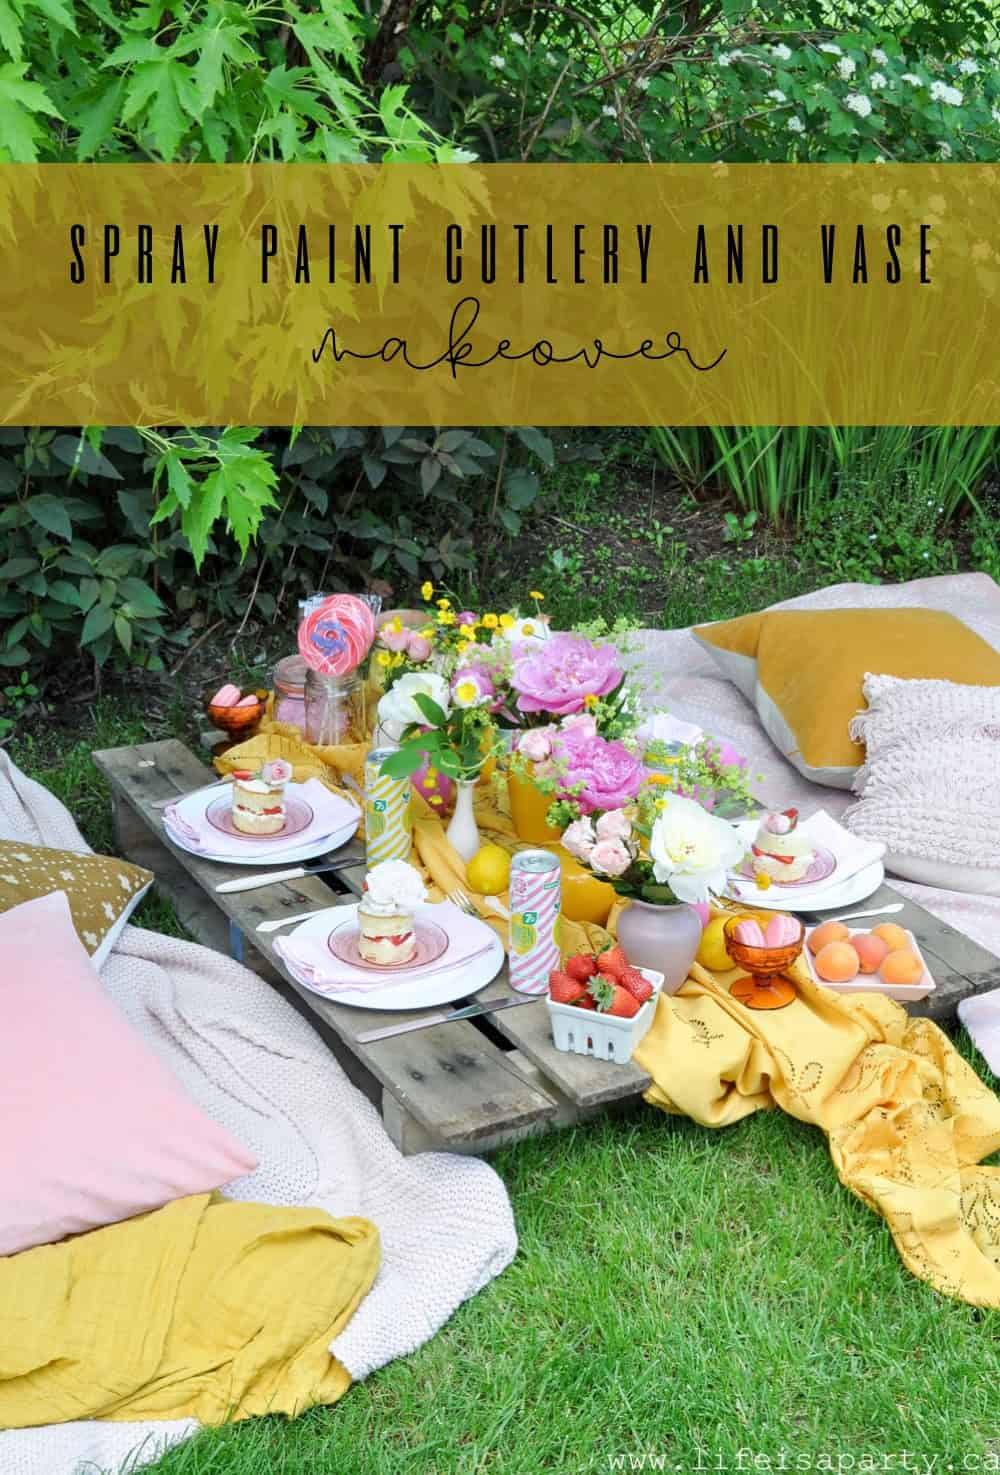
Spray Painted Vase Cutlery and Makeover: give inexpensive thrift store vases and cutlery new life with spray paint, perfect for entertaining.

Spray Painted Vase Cutlery and Makeover: give inexpensive thrift store vases and cutlery new life with spray paint, perfect for entertaining.

Spray Painted Vase Cutlery and Makeover: give inexpensive thrift store vases and cutlery new life with spray paint, perfect for entertaining.

I love entertaining and this spray painted vase and cutlery makeover is the perfect way to give some old mismatched cutlery and vases from the thrift store new life!  

Spraying New Life

Have you noticed all the different cutlery that's become available in the last few years?  We've seen cutlery come out in gold, black, rose gold, and handles in pastels, whites, you name it.  It's such a fun detail to add to a beautiful tablescape.  Like jewelry for a table setting.  So this DIY version is perfect, because you can customize it to any colour or combination of colours that you love, and it's super inexpensive to make.  It's always amazing what a little love and attention can do for an old cast off thrift store find, you just need a little imagination.

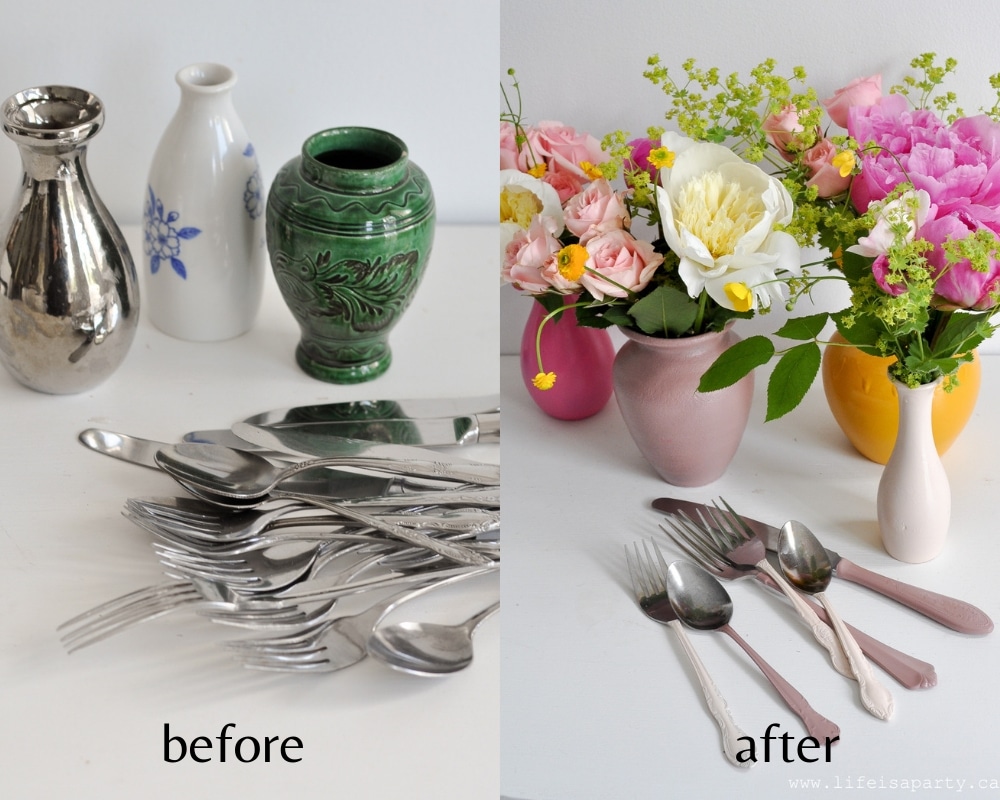
Spray Painted vases before and after

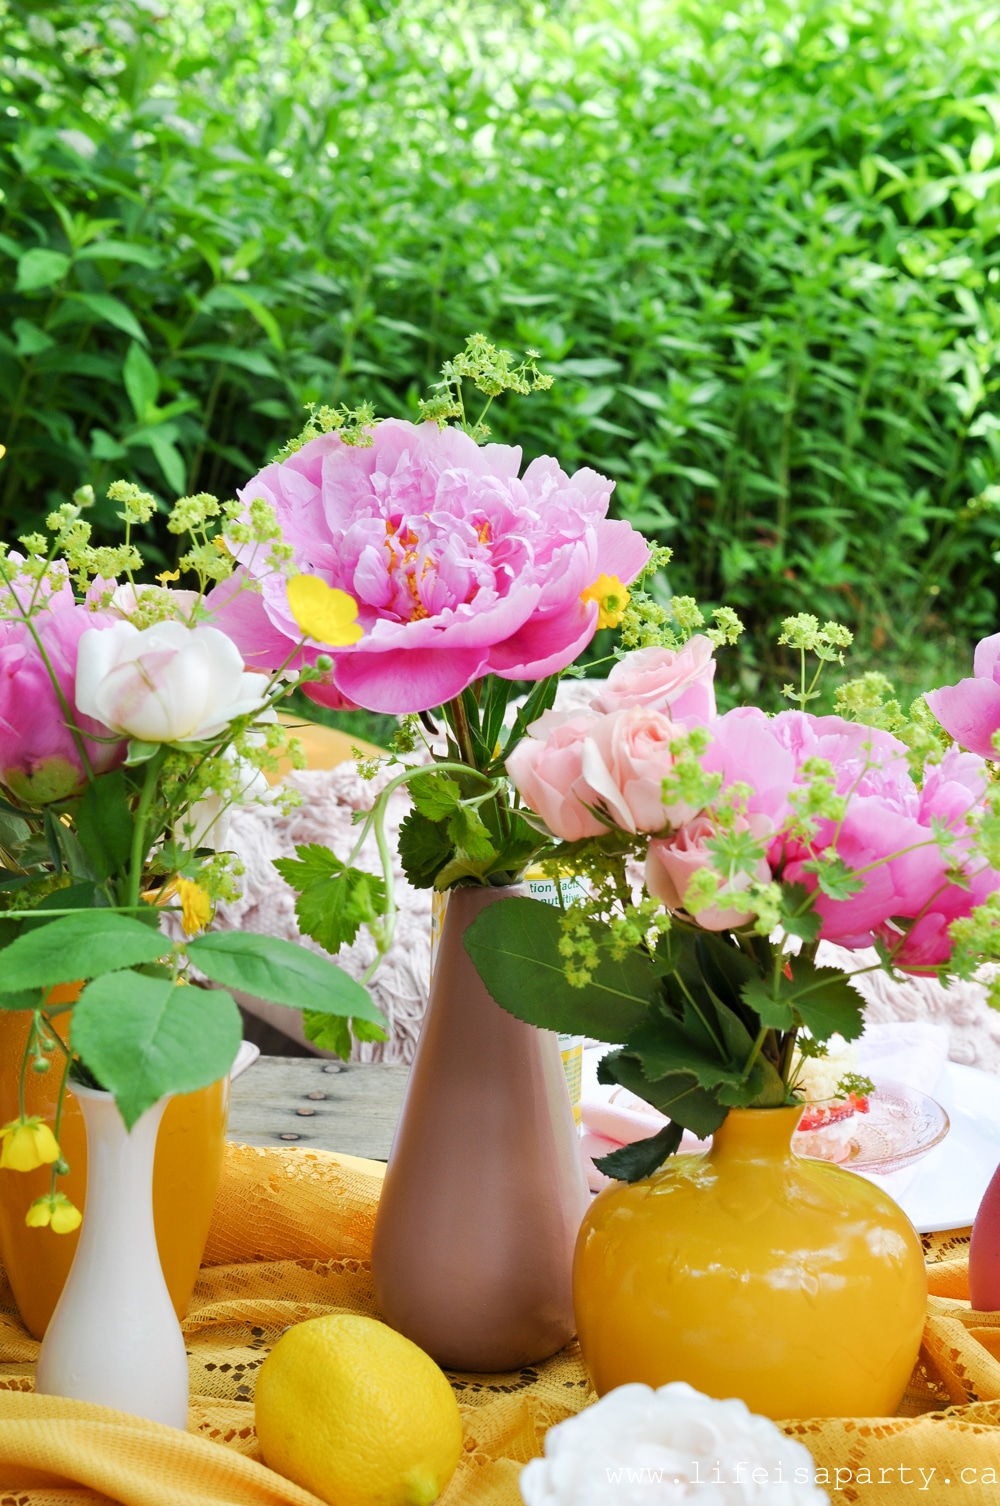
Once I had the idea to do the cutlery project, I thought it would be fun to do some spray painted vases in matching colours, and create a really beautiful tablescape.  

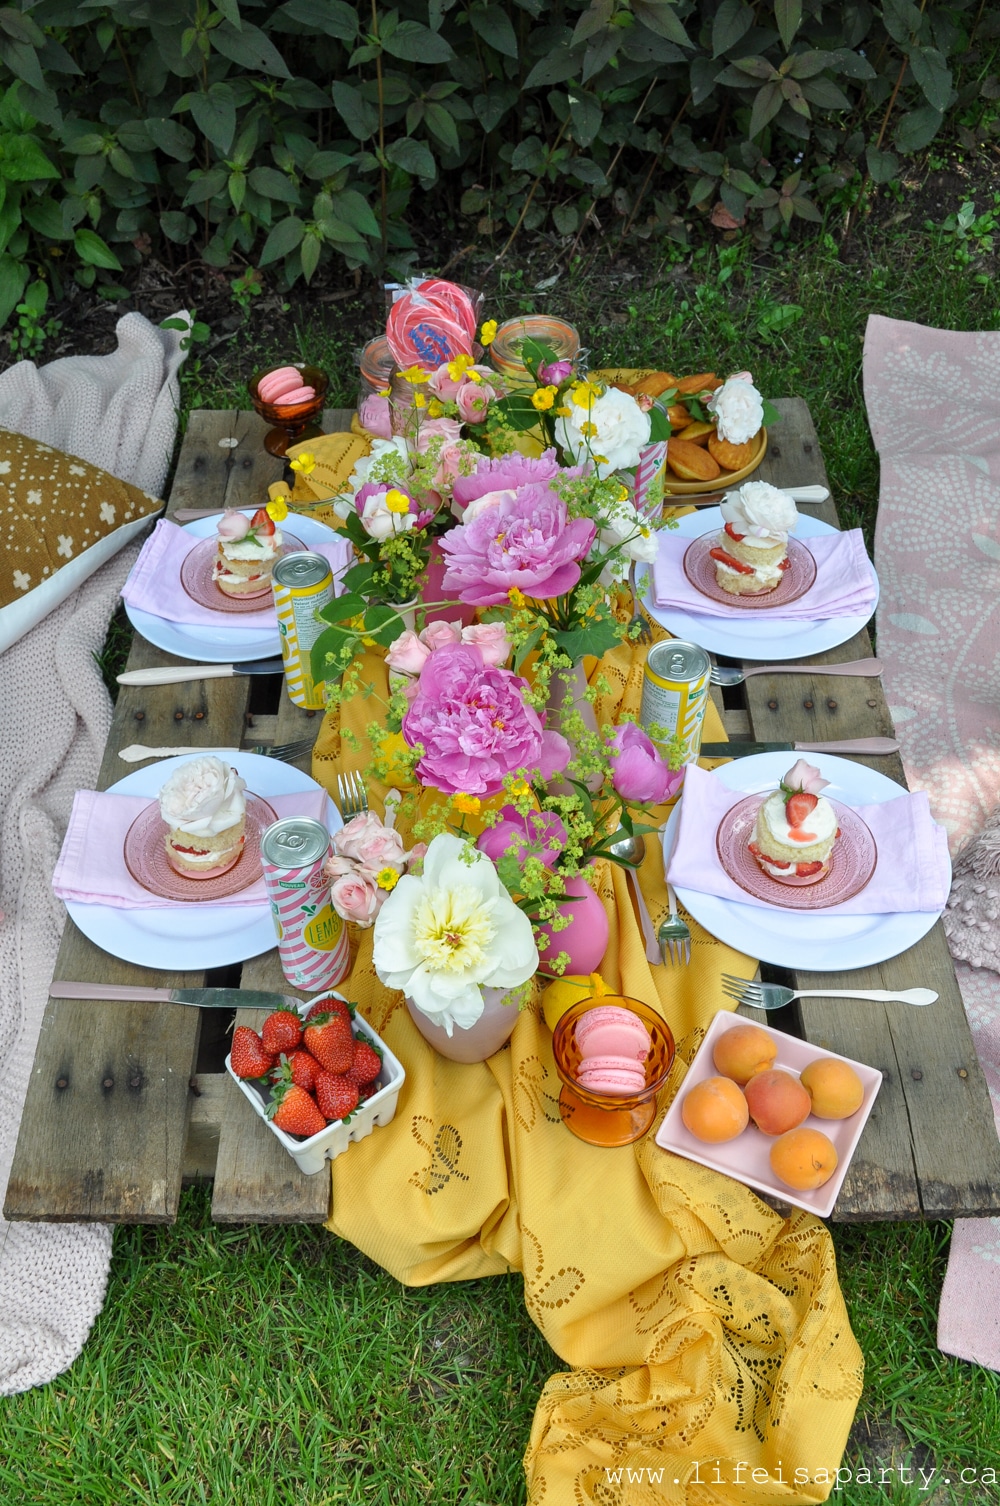
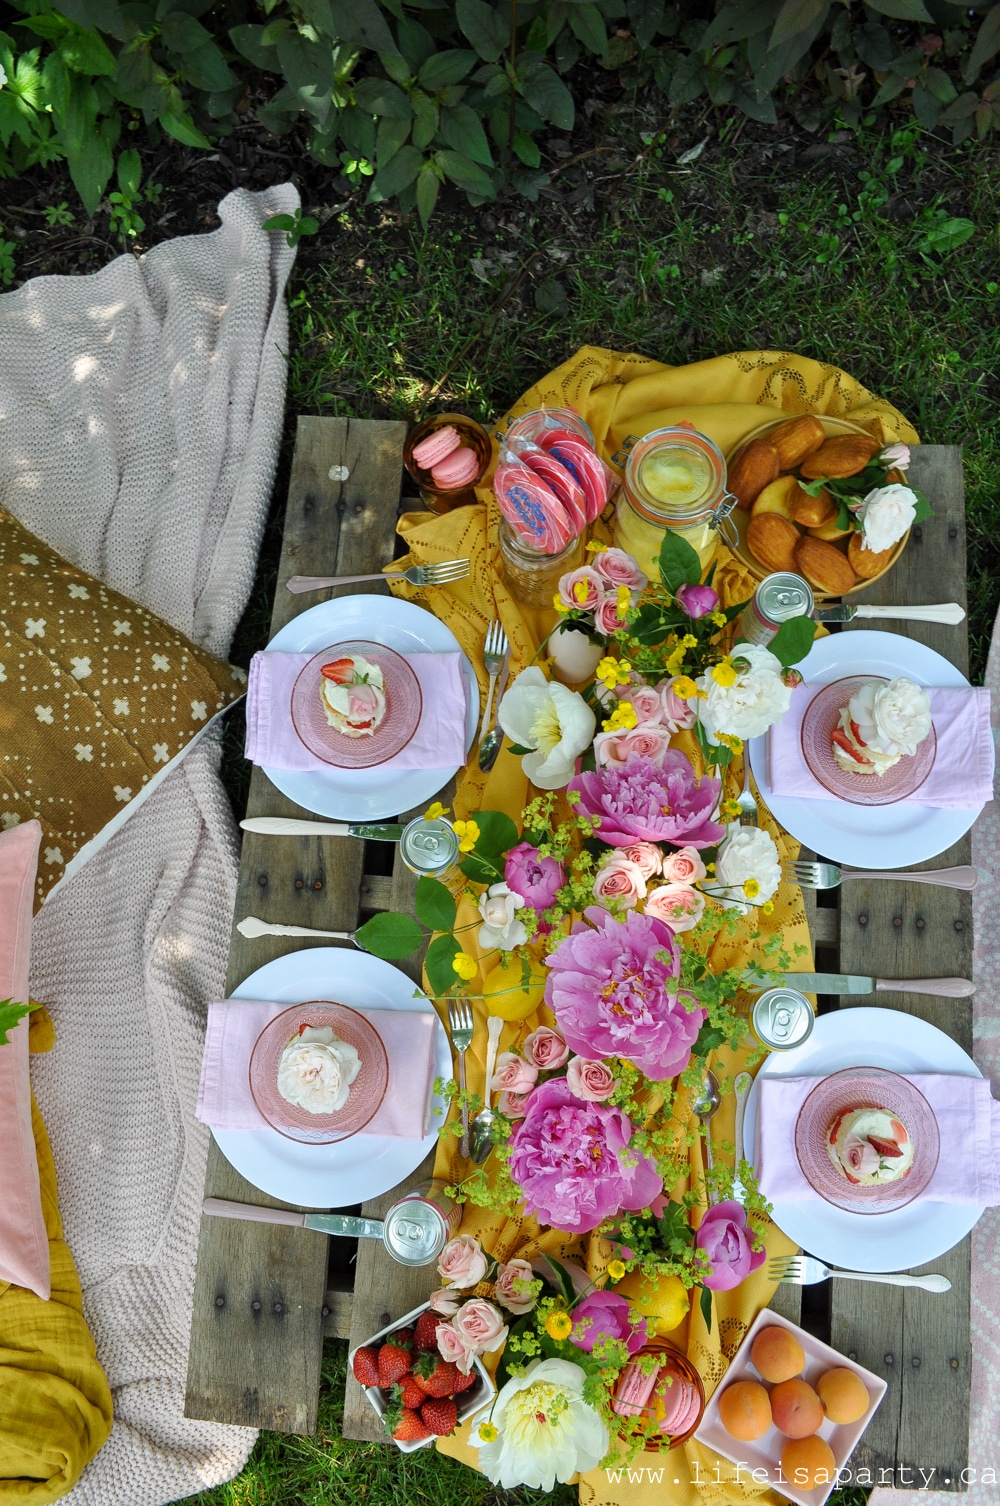
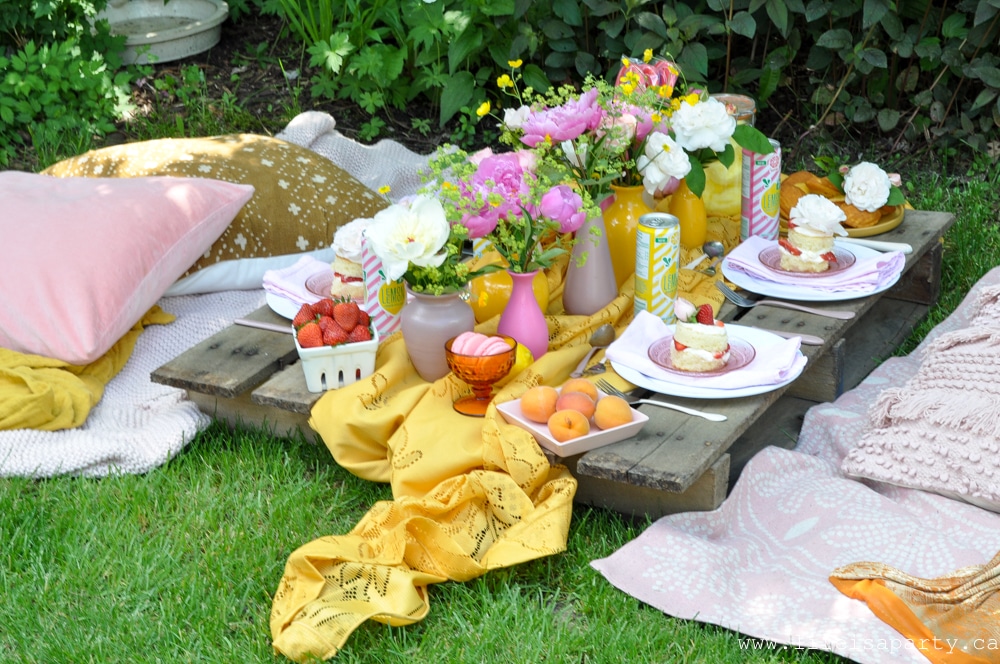
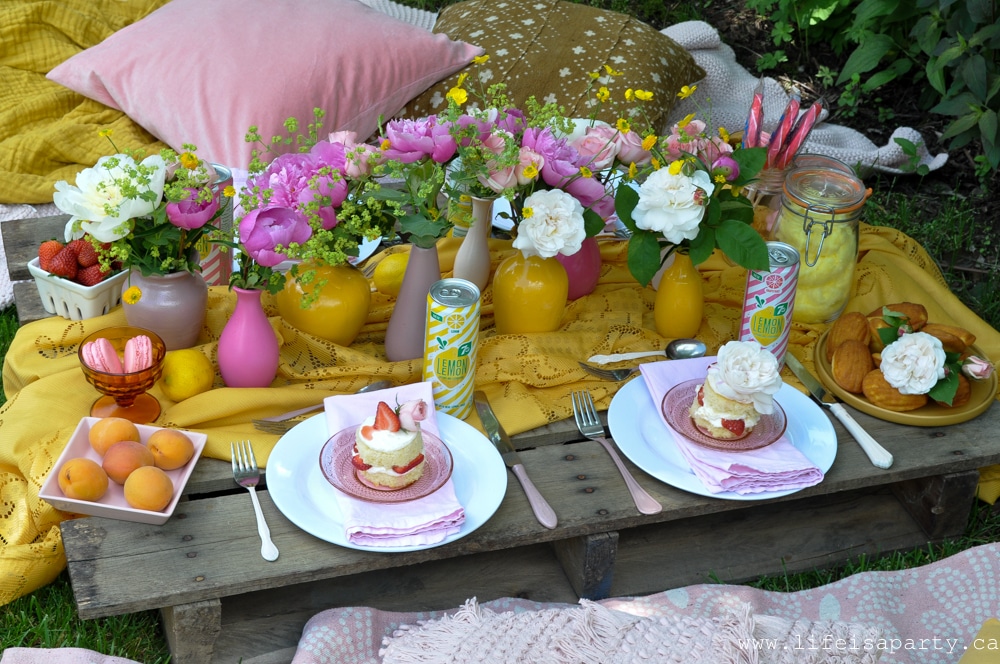
pink and yellow pallet picnic

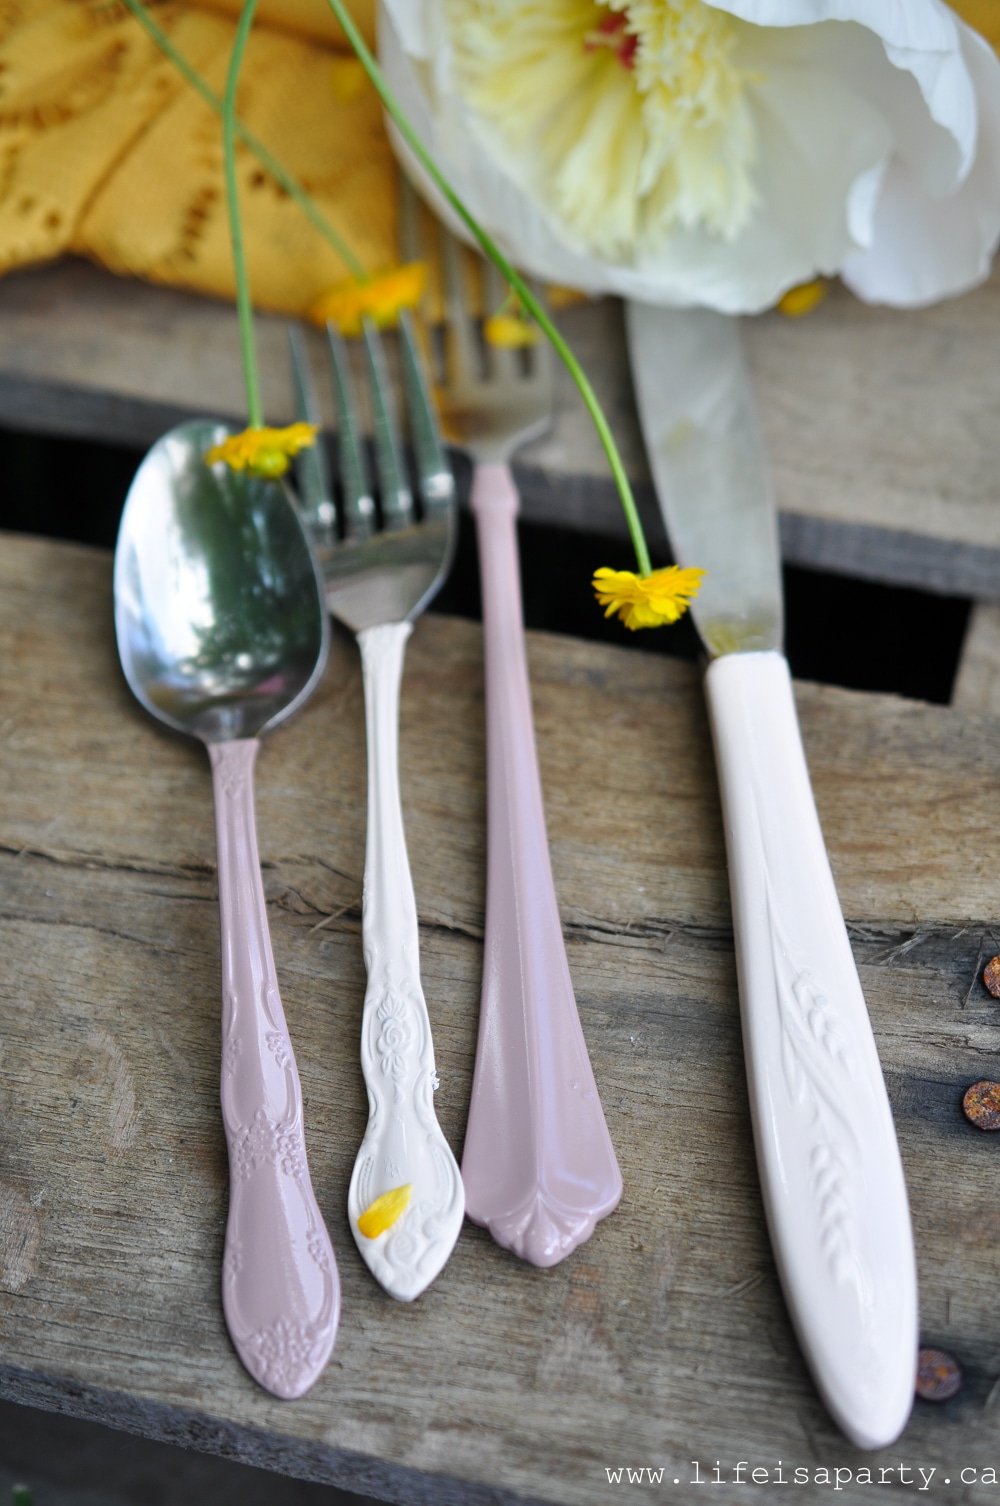
I shopped for my cutlery and vases at thrift stores.  I looked for mismatched cutlery, but tried to find ones that felt antique-ish and had curves, flowers, and swirls as part of the patterns on the handles.  They were very inexpensive.

spray painted cutlery

For the spray painted vases, since I wanted to create a grouping I looked for ones that were small, and different shapes to create interest.  I used ceramic vases.

how to spray paint vases

Materials:

  • Mismatched Cutlery
  • Old Flower Vases in various sizes and shapes
  • Gloss Berry PinkRust-oleum Painter's Touch
  • Satin Vintage Blush Rust-oleum Painter's Touch 
  • Gloss Marigold Rust-oleum Painter's Touch 
  • Gloss Pink Peony Rust-oleum Painter's Touch

Spray Painted Vase and Cutlery Makeover Instructions:

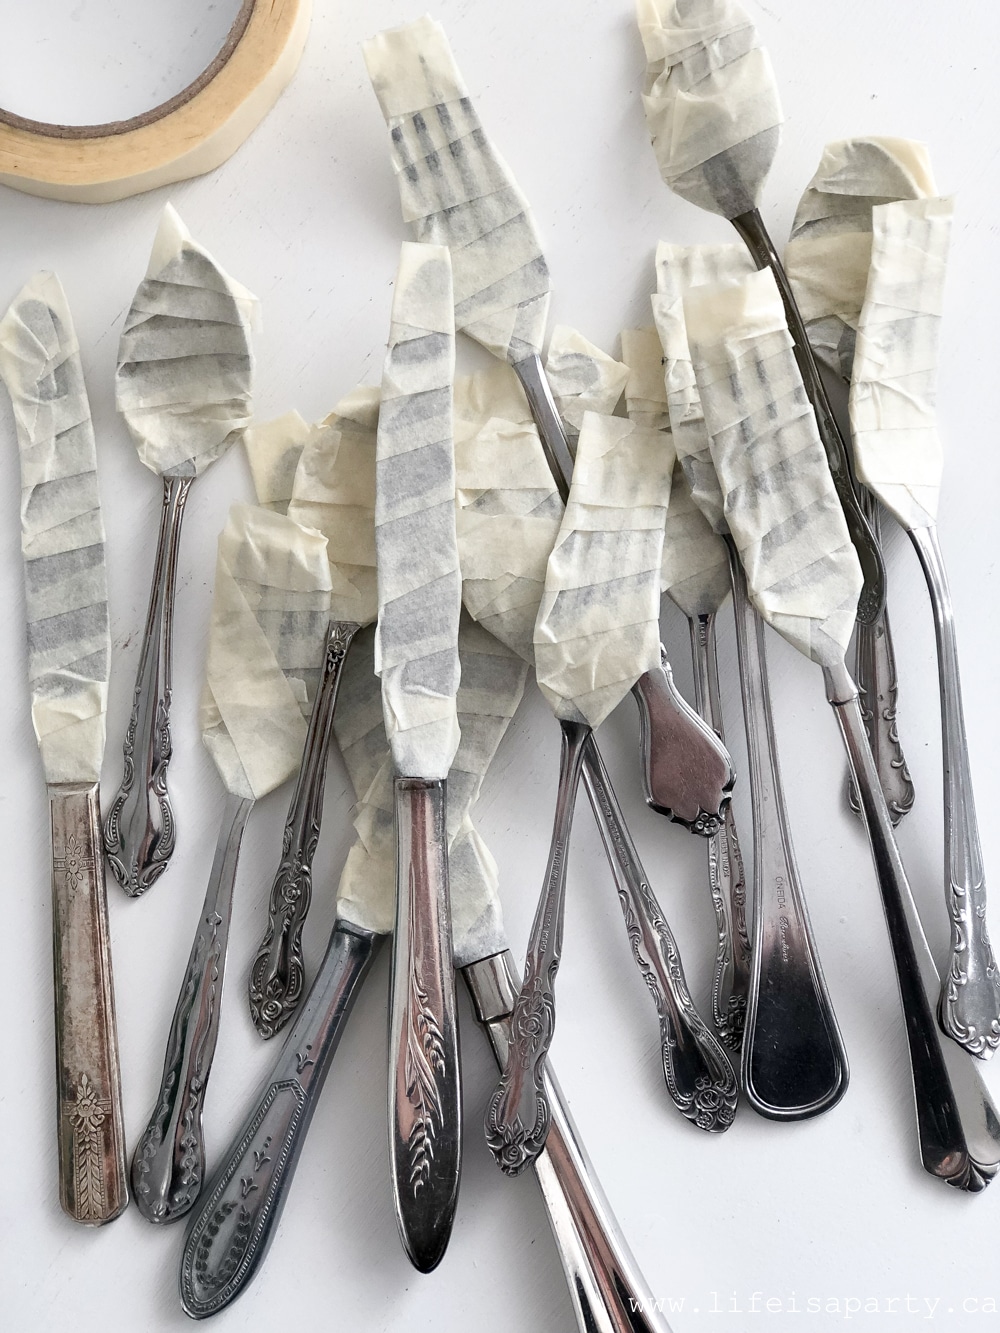
1. Clean cutlery and vases.  Tape off everything but the handles of the cutlery to ensure that they will still be food safe after painting.

how to spray paint cutlery

2. Spray paint the vases and cutlery handles with multiple light and even coats of spray paint, letting them dry in between, and turning them to cover them completely. 

3. Once dry, remove the tape from the cutlery and hand wash them before using (never put them in the dishwasher). Fill the vases with beautiful flowers, and set a gorgeous table.

Pink and Yellow Pallet Picnic, Dessert Picnic

This was a really fun project to create.  I really love that you could do this for any colour scheme that you liked or for a specific party. 

Mustard yellow and pink tablescape, pallet picnic, dessert picnic

The Picnic

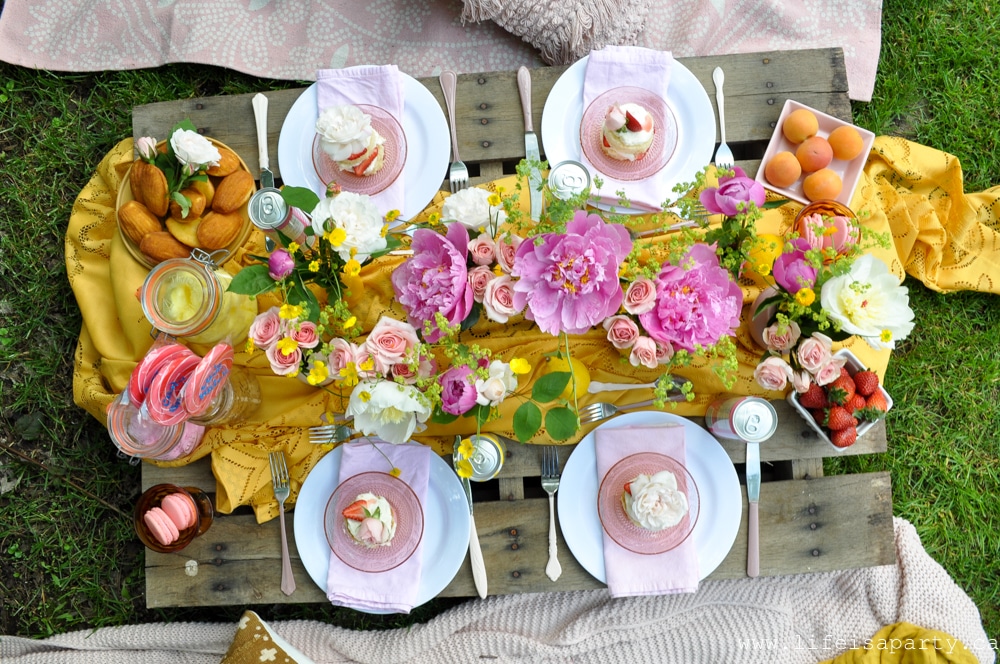
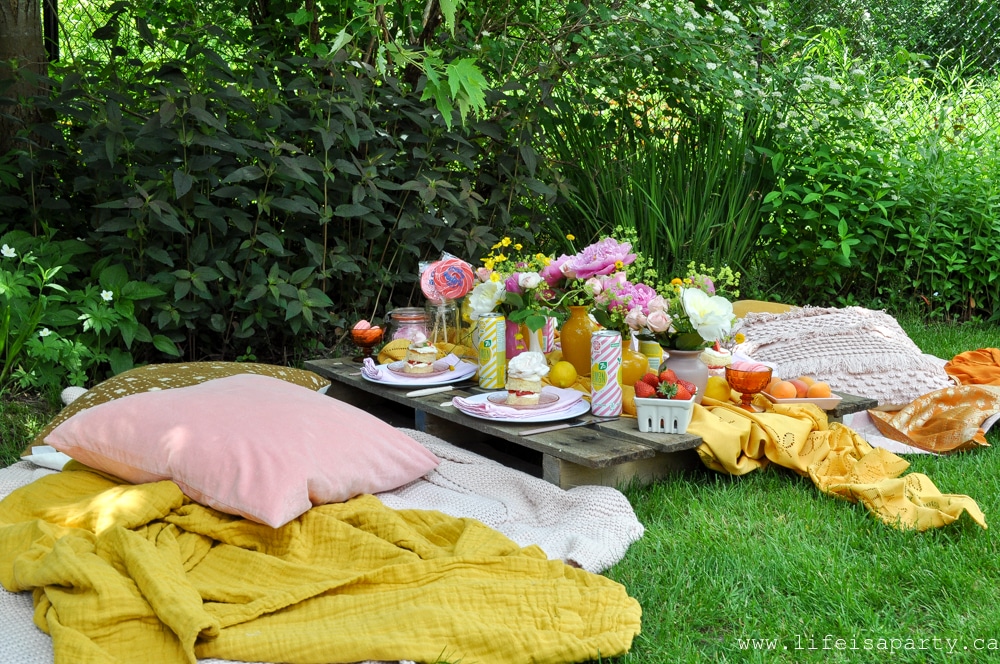
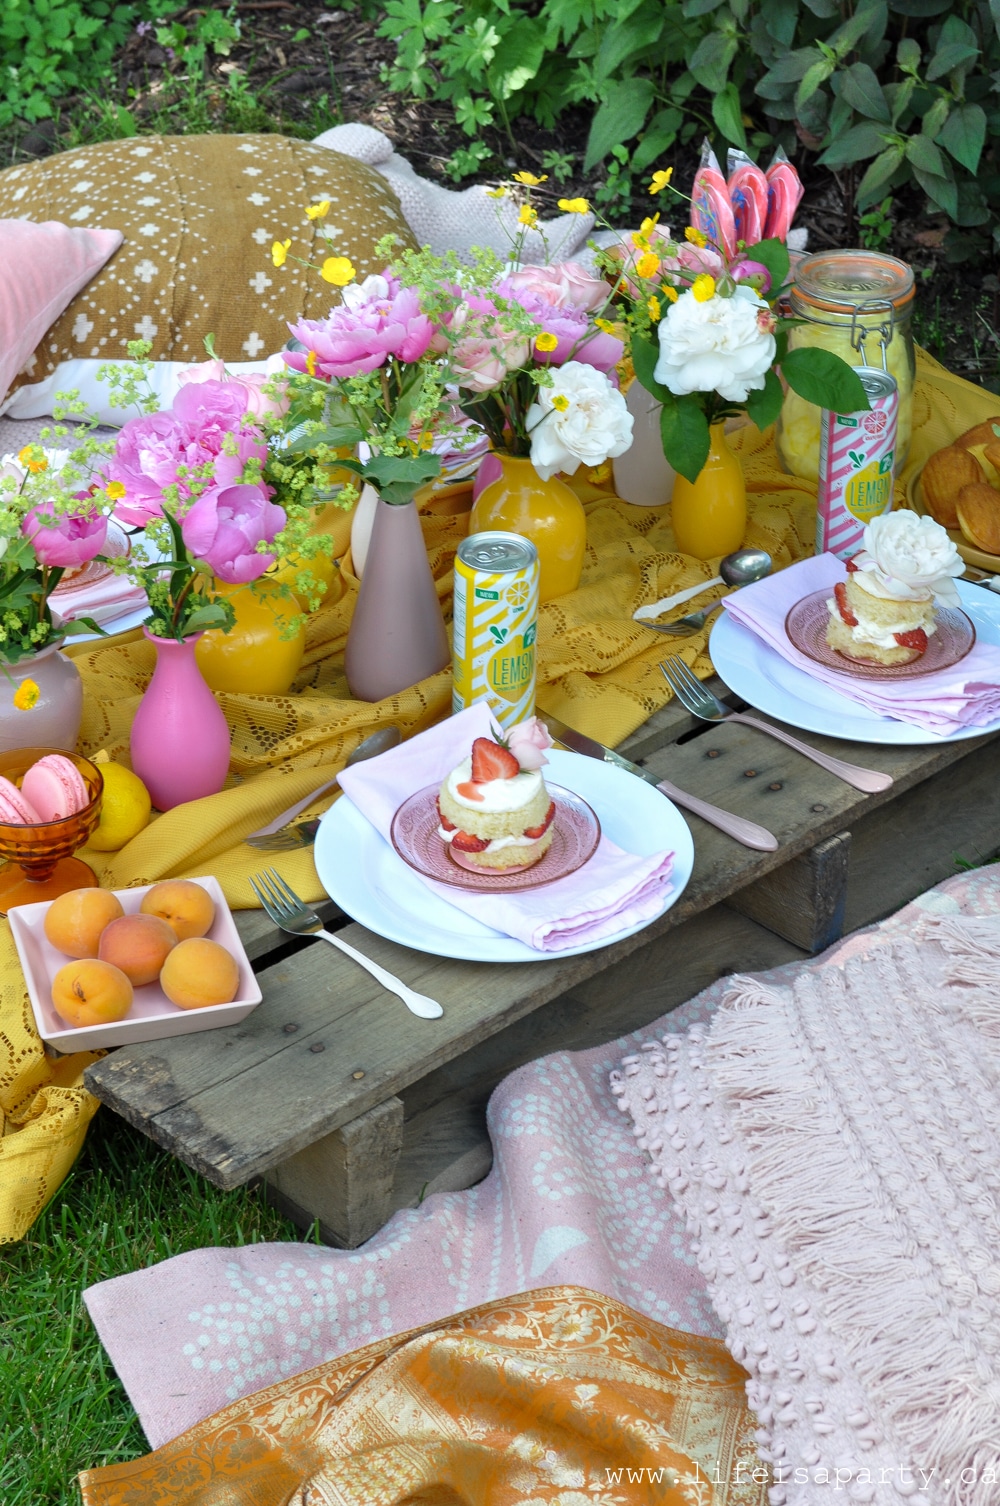
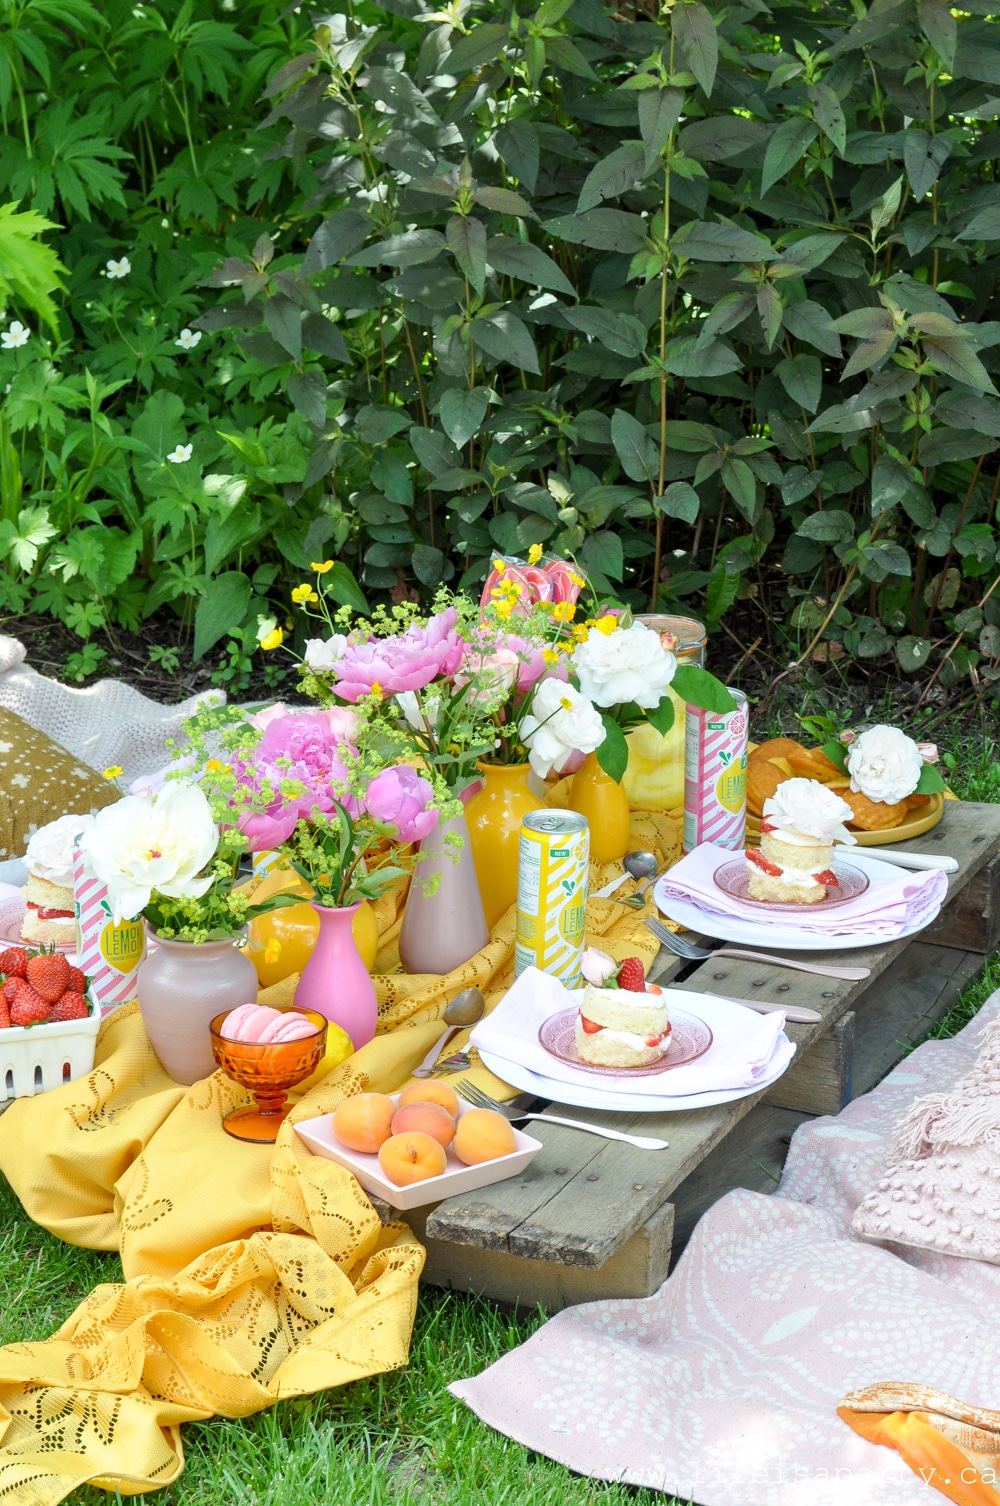
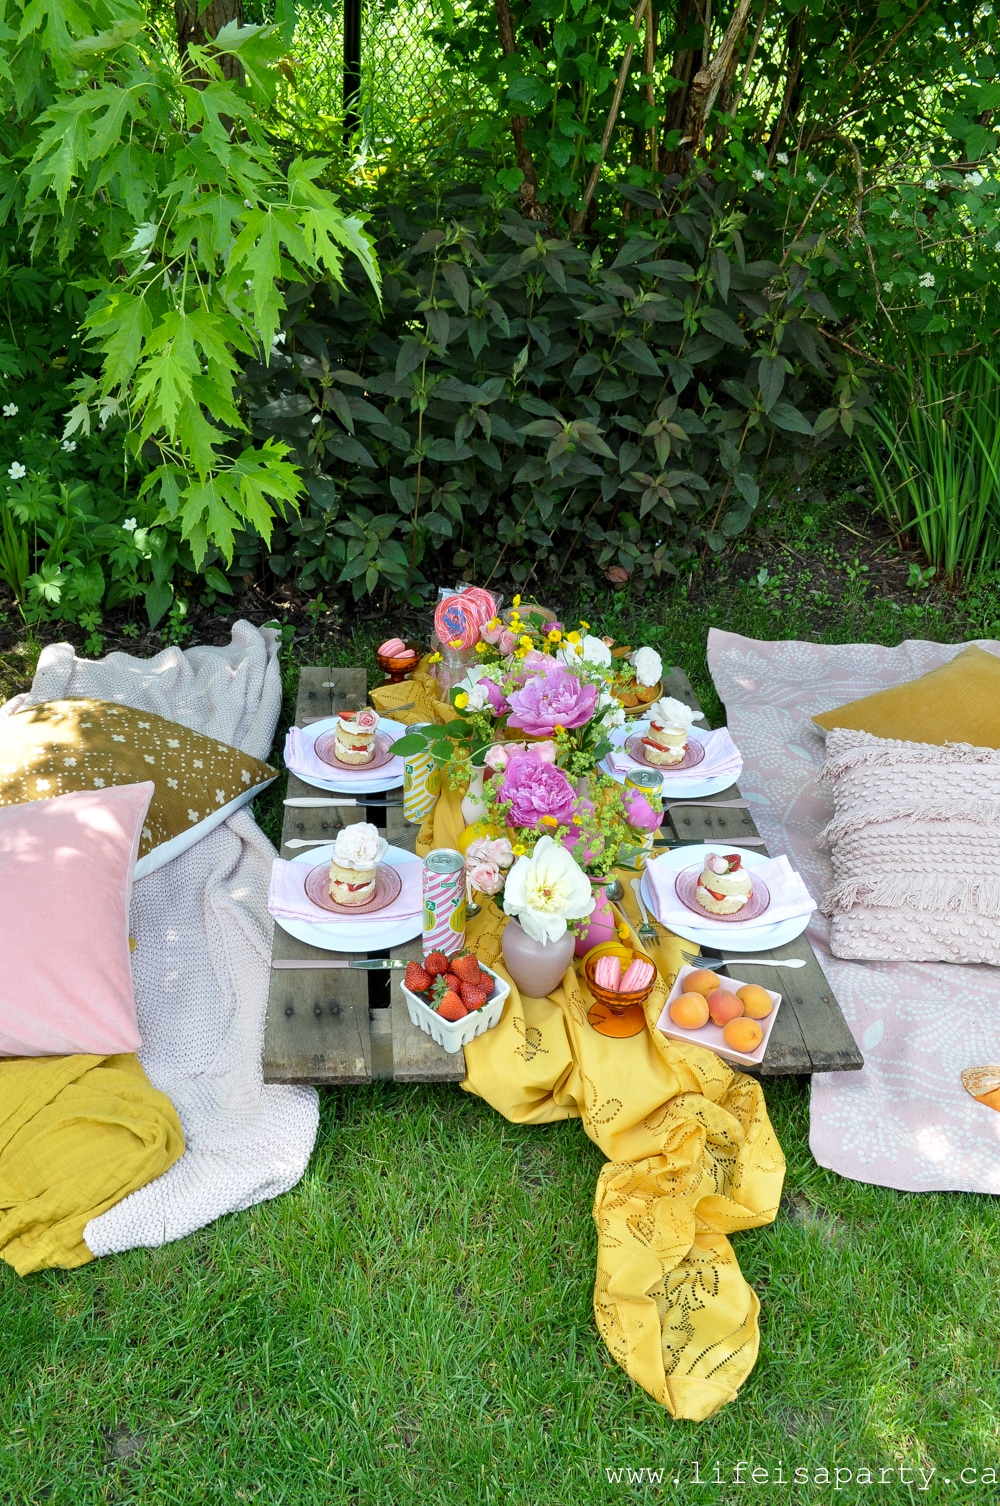
I set up my finished pieces for a fun backyard picnic.  I used a old palette as the picnic table, and incorporated lots of pinks and yellows for a really colourful, inviting space.  I've been loving all things pink and mustard yellow this summer -did you see how I used those colours in my recent home tour?  This combination outside was just perfect and felt so happy and celebratory.

Spray Paint Cutlery and Vase Makeover

In this shady corner of my yard we set down a rug and blanket and then piled on lots of pretty pillows, and throws.  It was so cozy and comfortable, and we sat here for ages chatting and enjoying our dessert picnic.

pink and yellow table

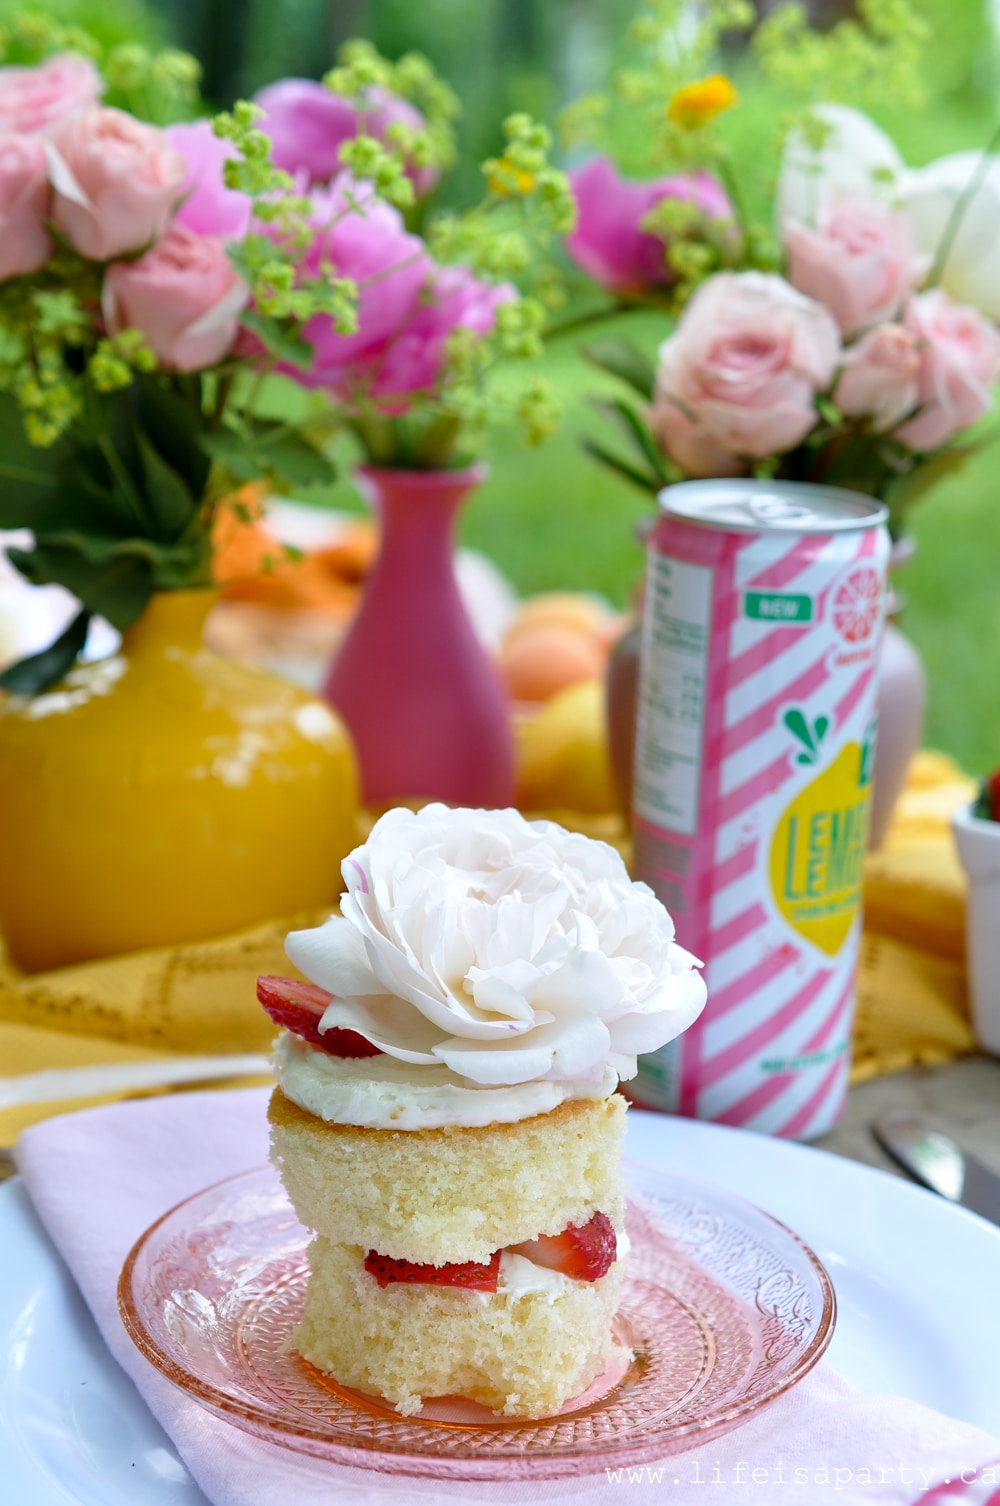
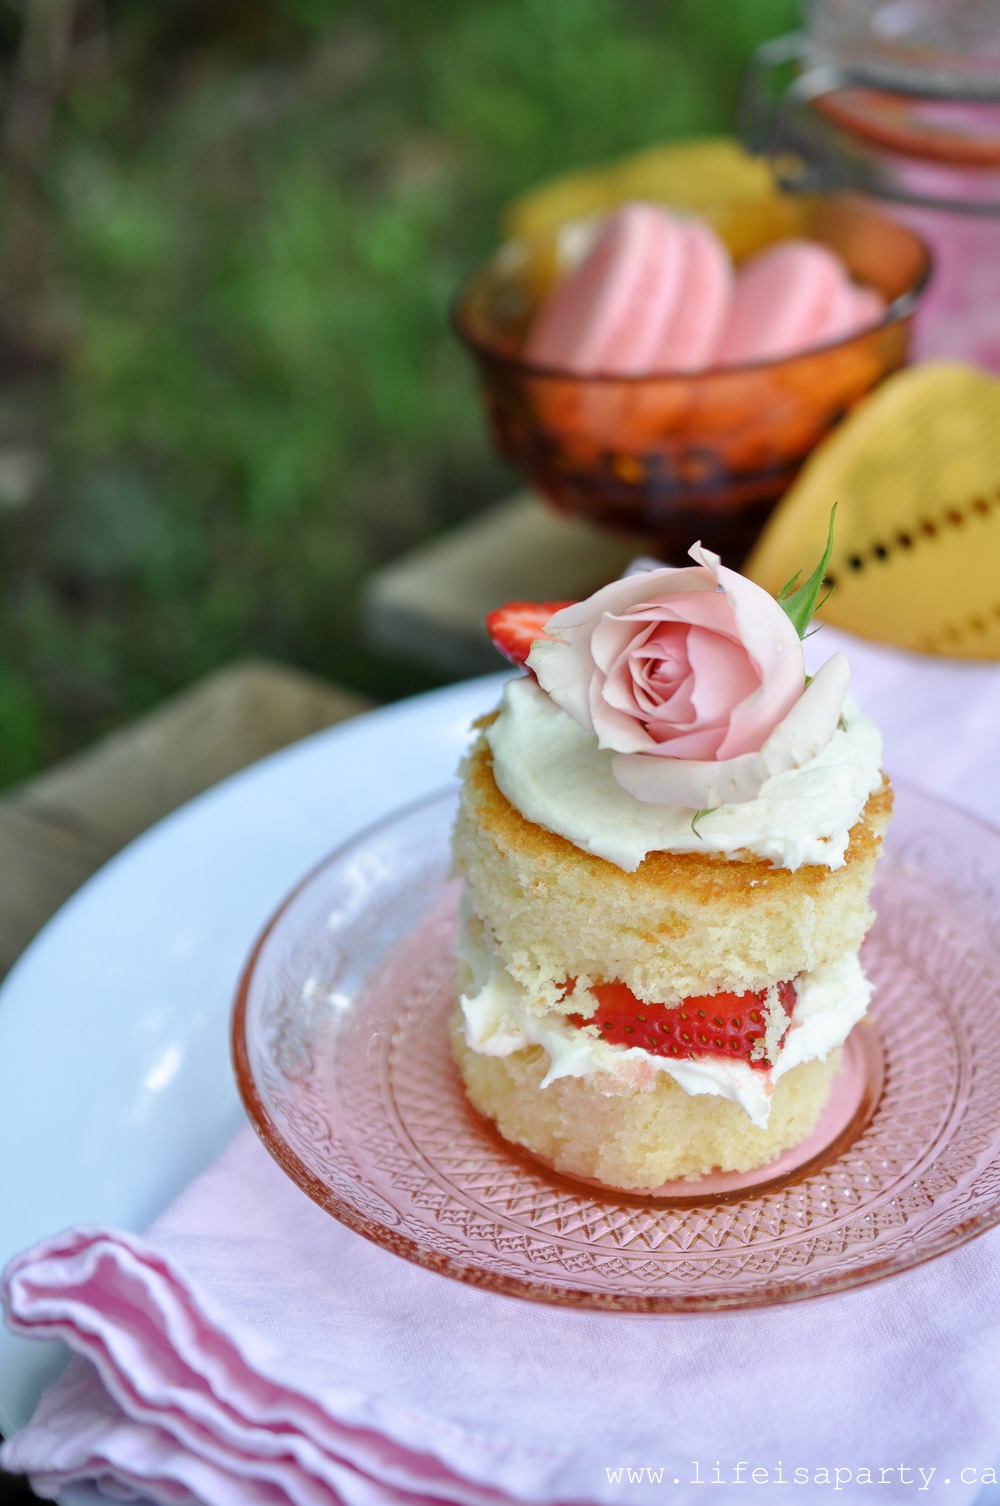
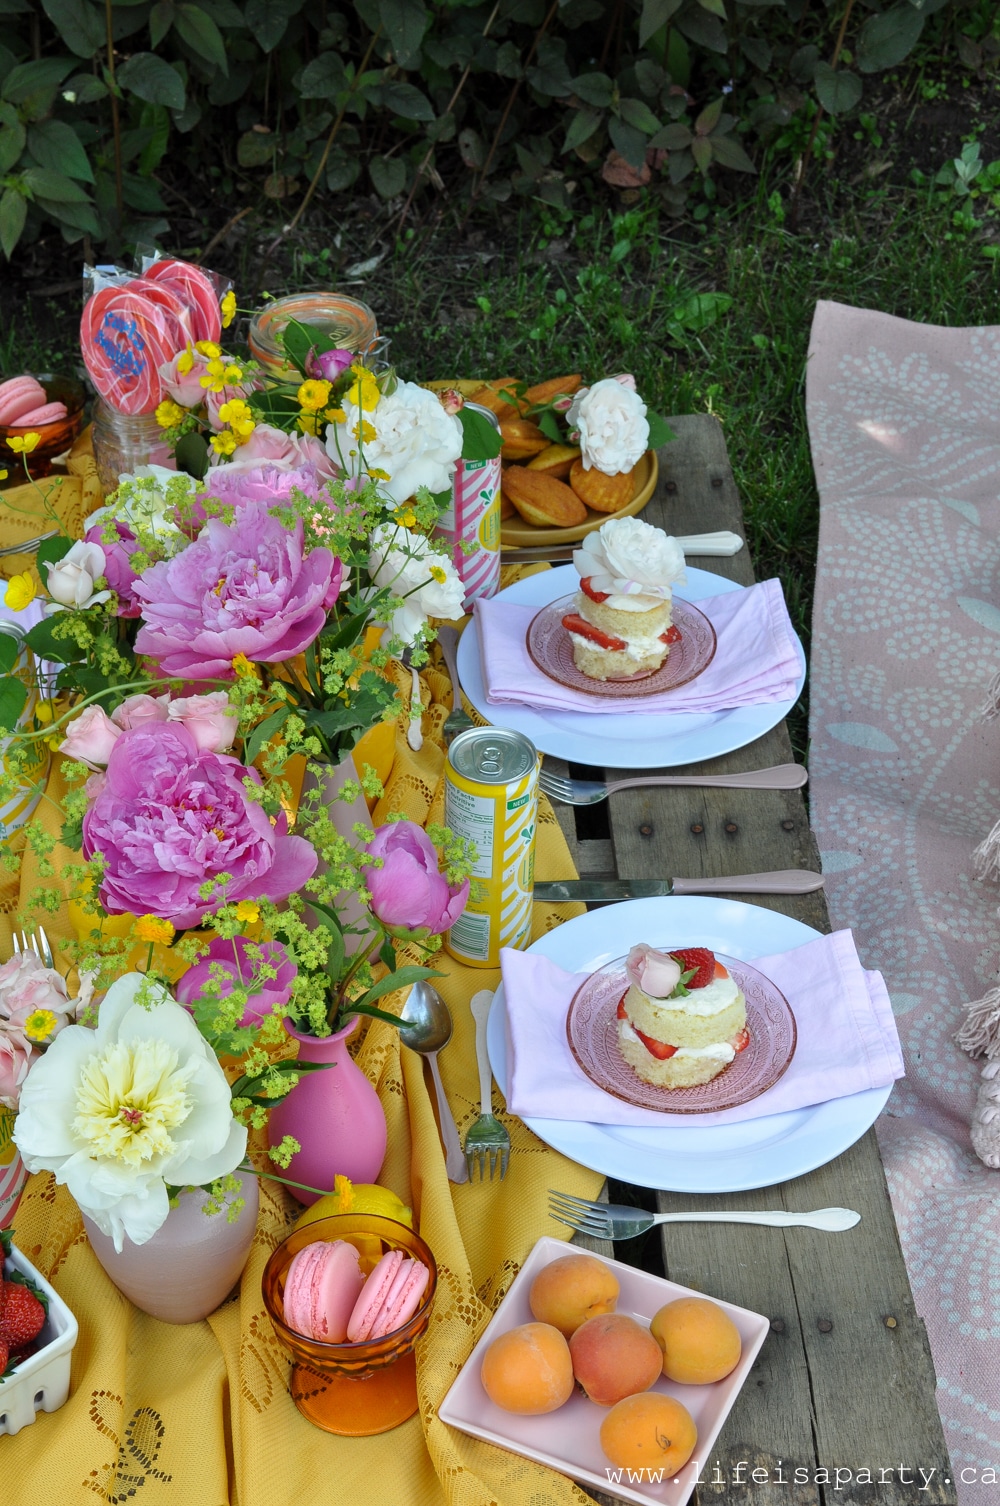
The pretty little cakes were easy to make.  I used a cake mix and then cut the rectangular cake into circles and stacked them with the most delicious vanilla buttercream and fresh strawberries.  

individual naked cake, strawberry shortcake,

We decorated them with flowers from the garden.  

individual naked cake topped with a fresh flower

For the rest of the menu we enjoyed fresh fruits, and lots of sweets.  

Pink and Yellow Pallet Picnic
backyard pallet picnic
Pink and Yellow picnic

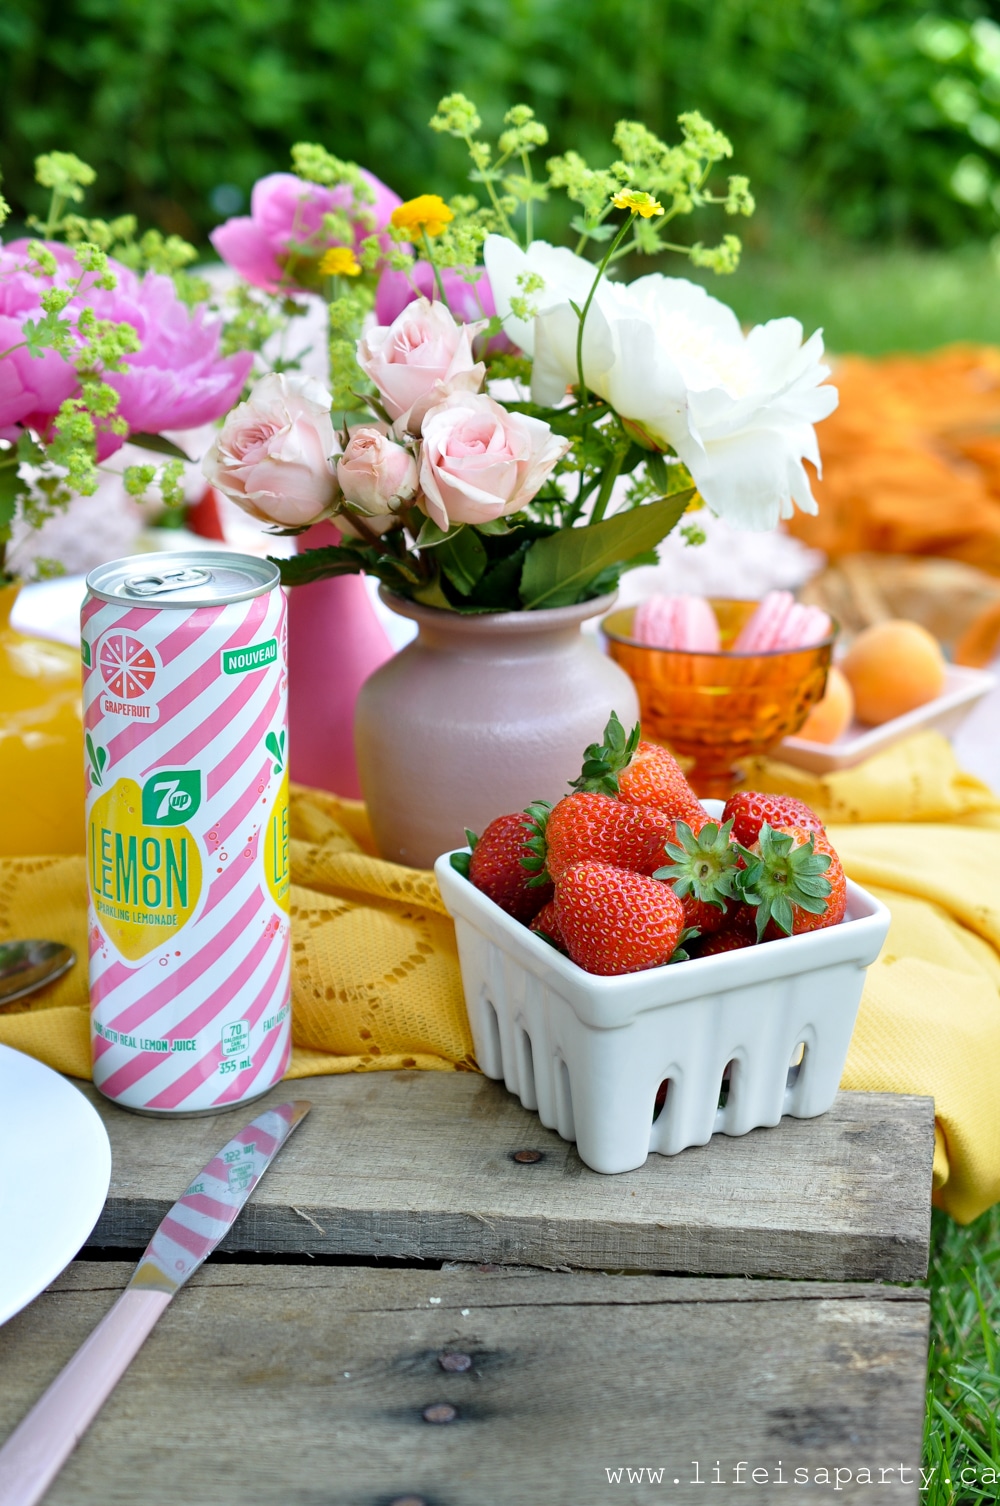
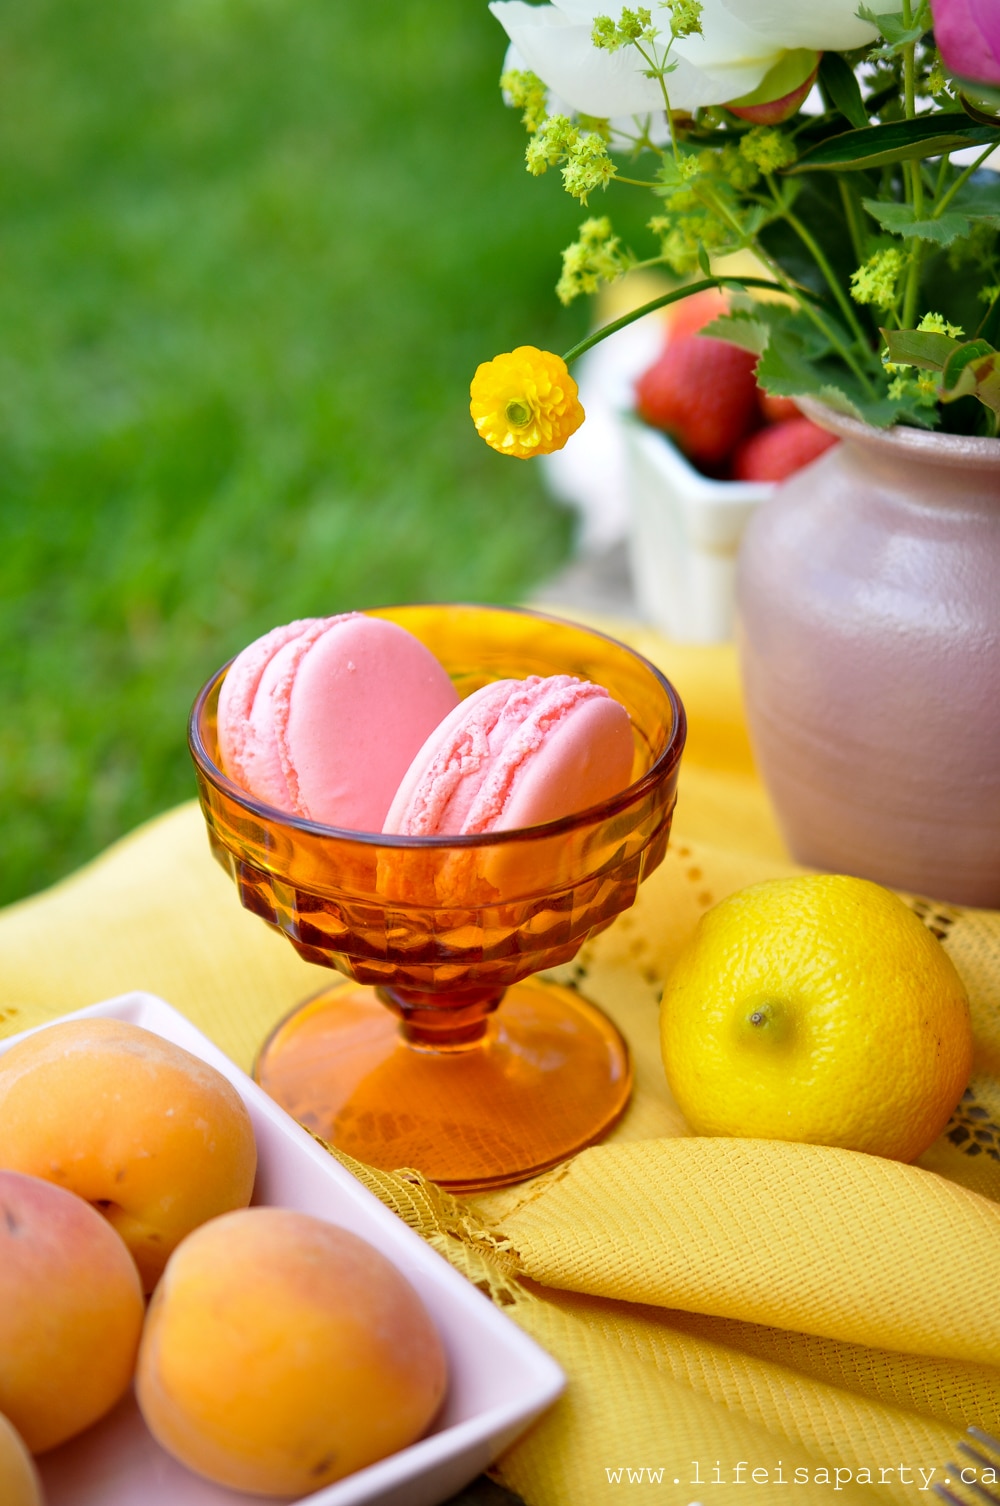
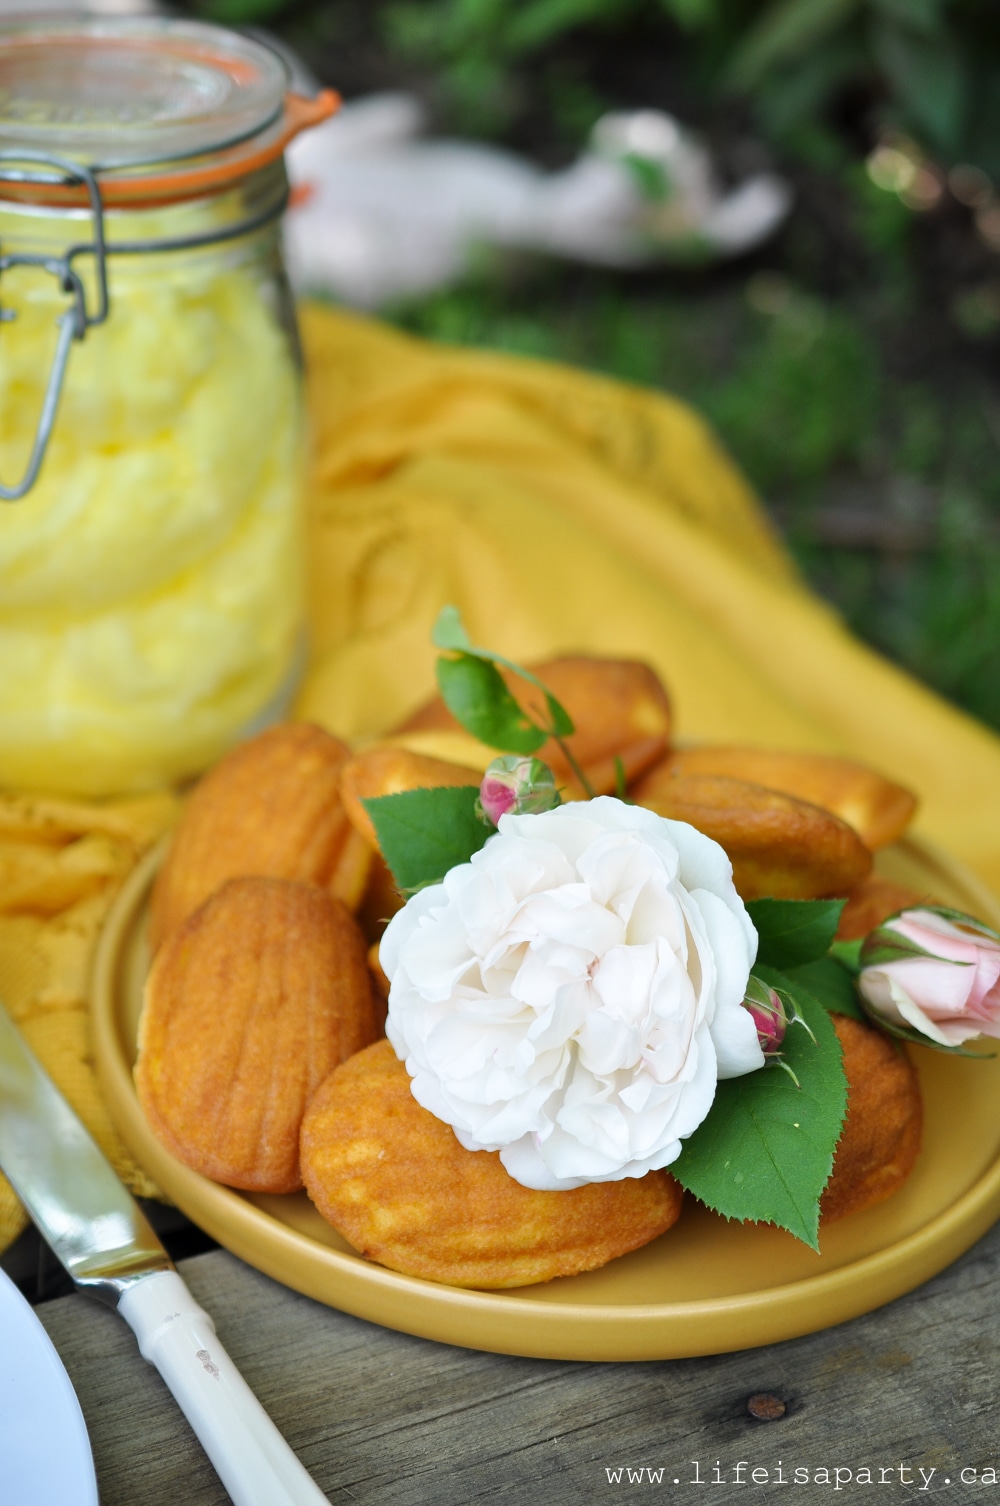
Macaroons were a fun and special addition.  Along with candy and madeline cookies, and the prettiest fizzy lemonades.  

Pink macaroons in a amber glass dessert bowl.
Madeline cookies
how to make a pallet picnic

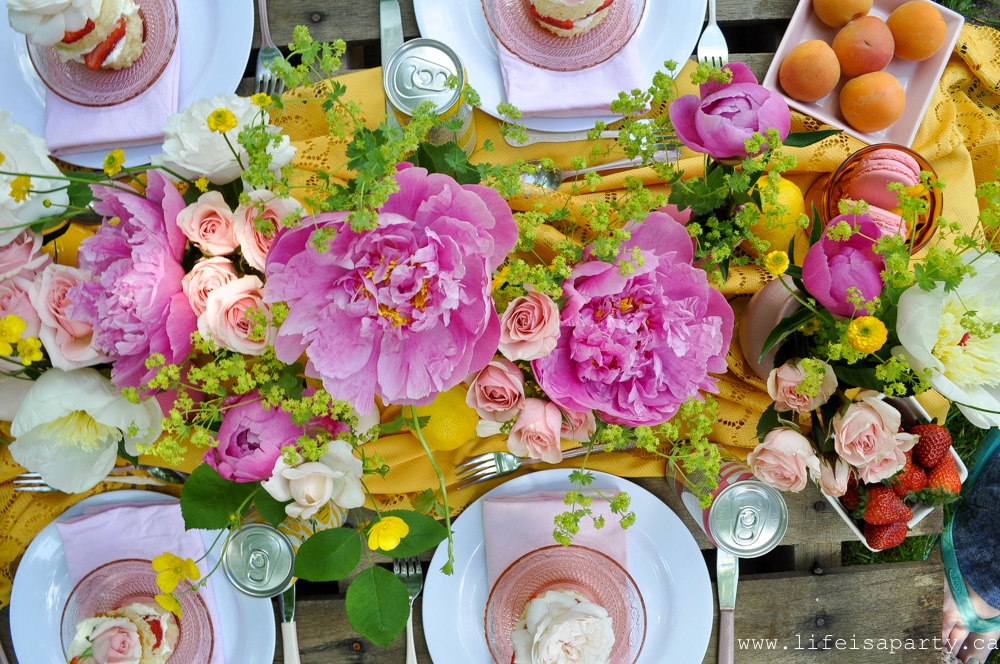
The vases lined the centre of the table and were filled with roses and peonies.  They looked so beautiful and full and the yellow and pinks together were just gorgeous.  I just loved how they turned out.

Pink and Yellow Tablescape

The cutlery was so pretty, mixed and matched together and a vintage feel to table, but in a modern way with the beautiful painted handles.  

Dessert Picnic
pink and yellow pallet picnic

I love how this picnic turned out, and the beautiful afternoon we had enjoying it.  It was really a simple inexpensive project, and so fun for anyone who loves to entertain and set a beautiful table -inside or out.

spray painted vasesWith a spray painted vase and cutlery makeover to create a beautiful picnic, life really is a party.
Disclaimer:  This post is sponsored by Rust-oleum Canada.  As always, all opinions are my own.  Thanks so much for supporting the brands that make Life is a Party possible.

You might also like our DIY Rainbow Book Art here.

DIY Rainbow Book Art: Using old books as a canvas this DIY rainbow art in mustard yellow and pink is fun to make and inexpensive.

Also check out our Ribbon Wall Hanging Tutorial here.

You might also enjoy our DIY Mason Jar Oil Lamps here.

Strawberry Rhubarb Ice Cream Recipe

Jul 4, 2019 · Leave a Comment

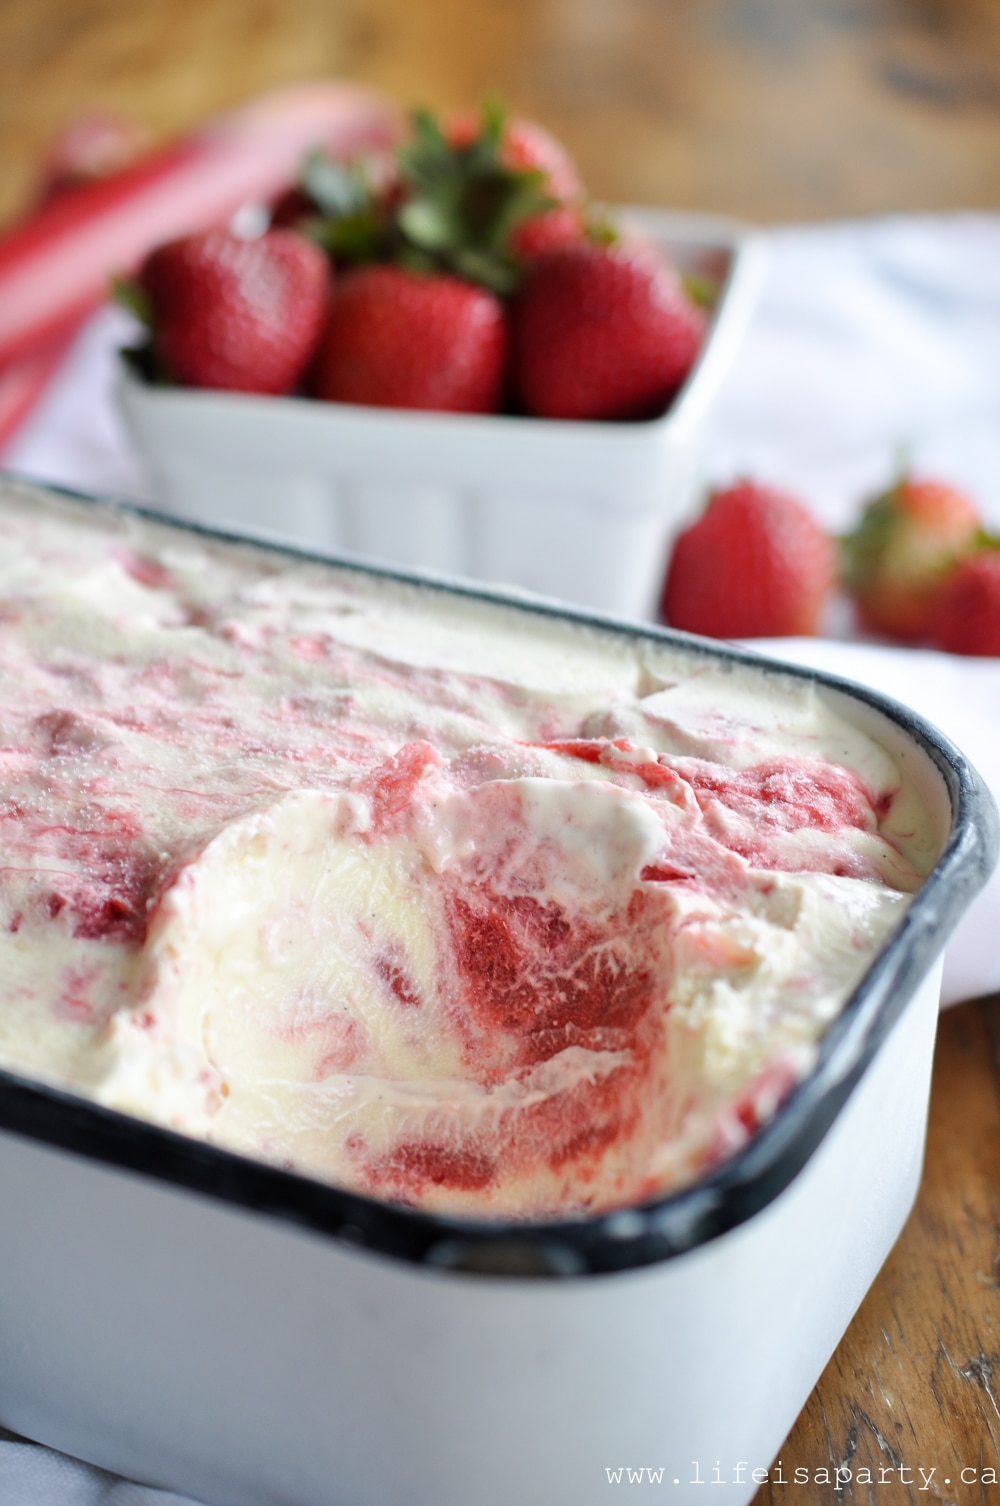
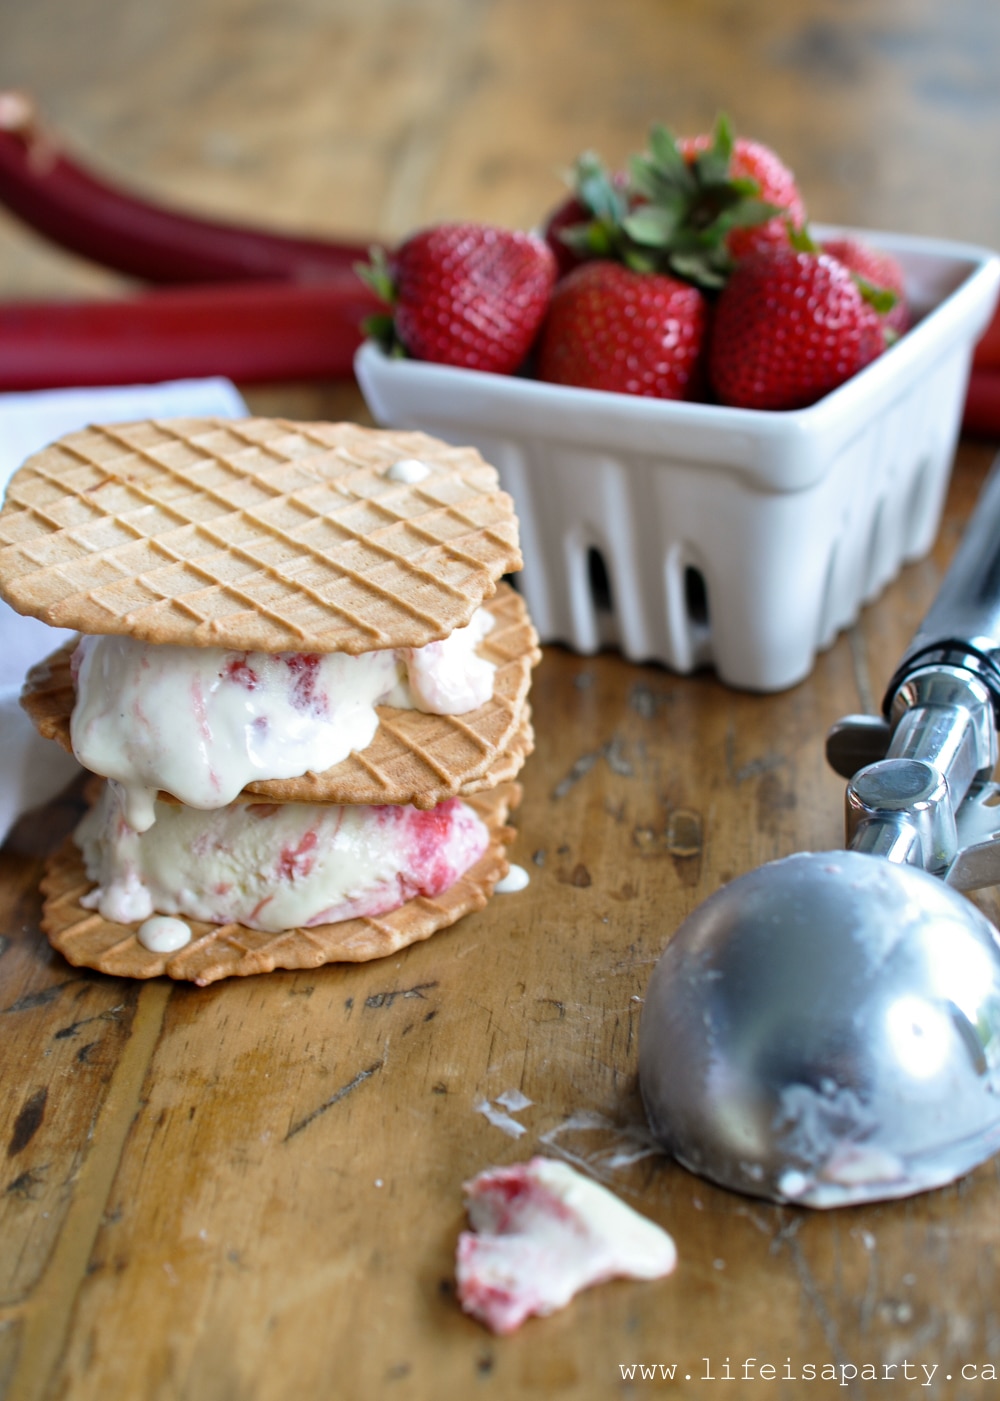
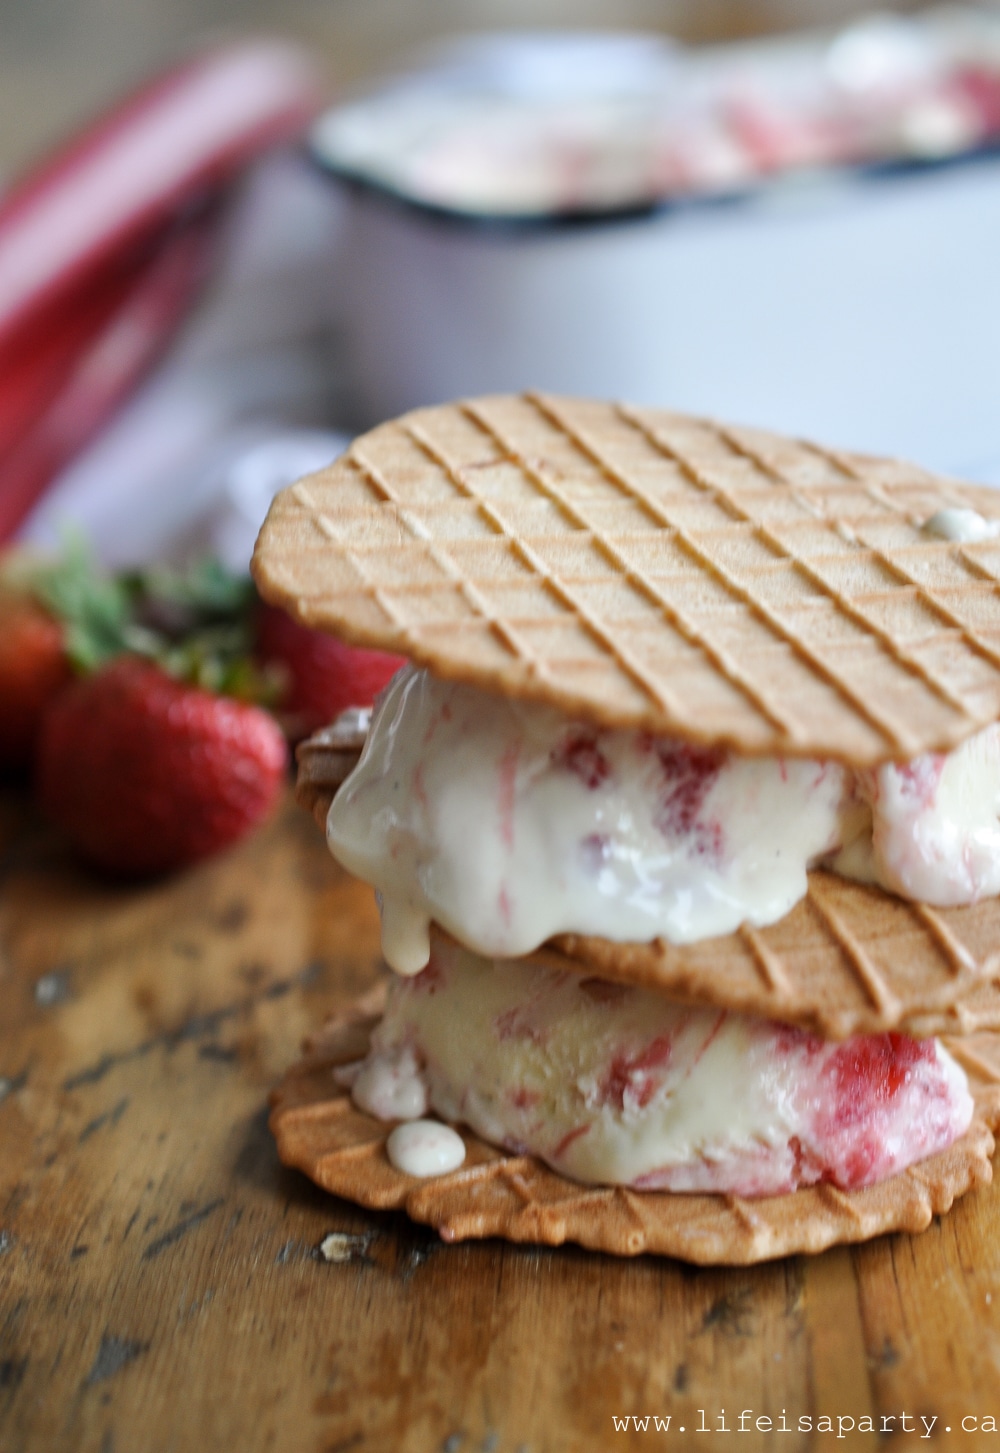
homemade strawberry rhubarb ice cream

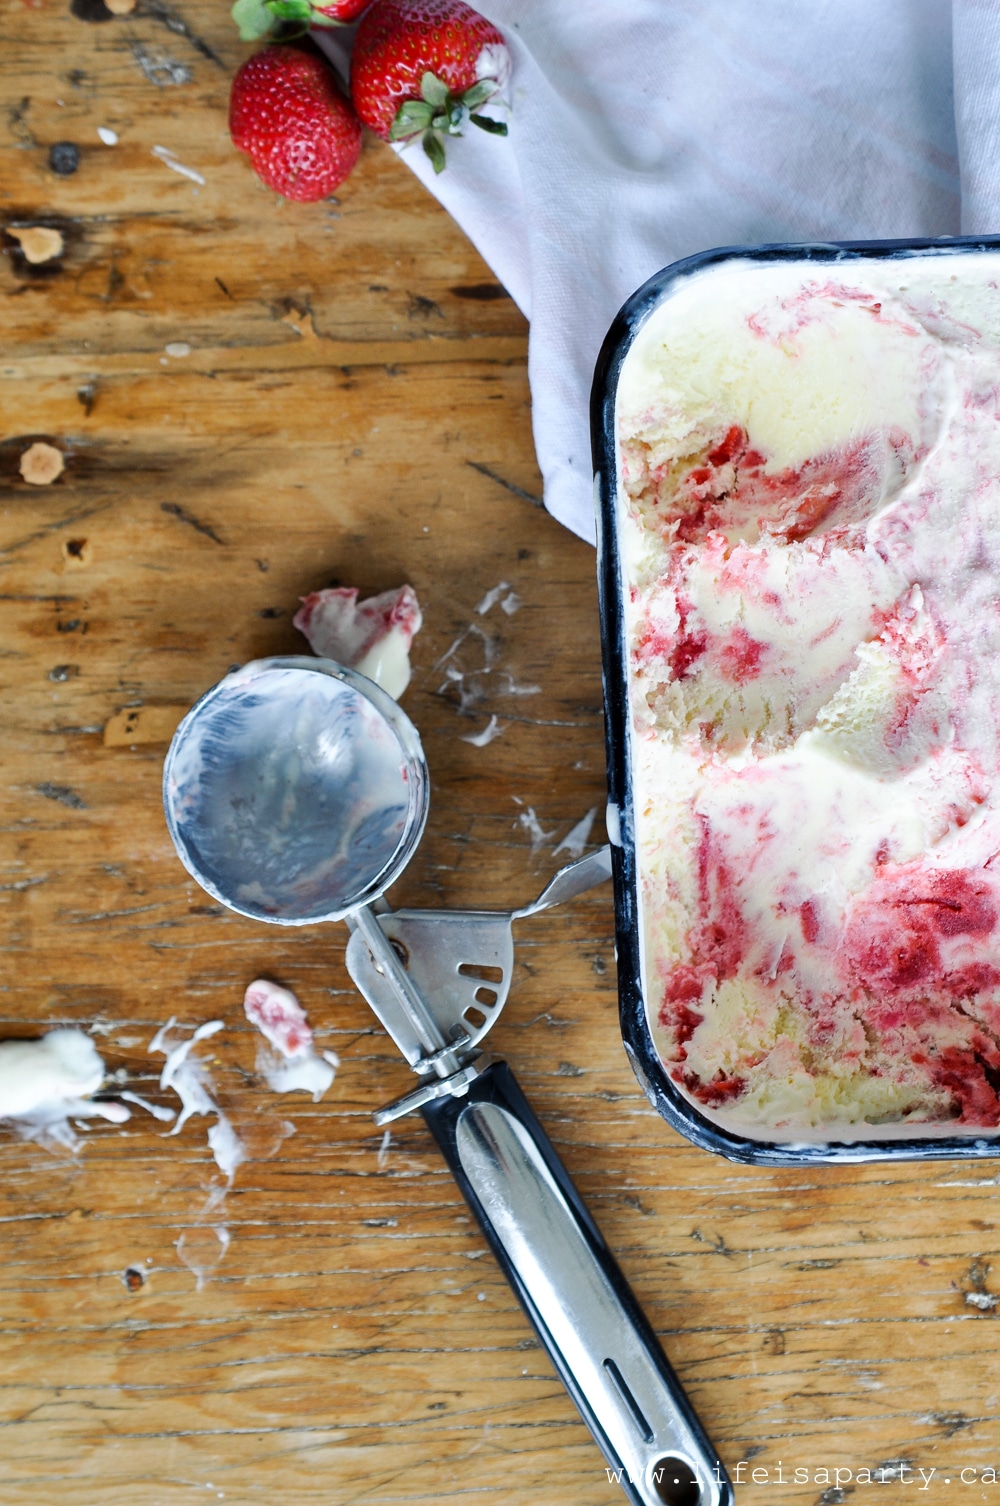
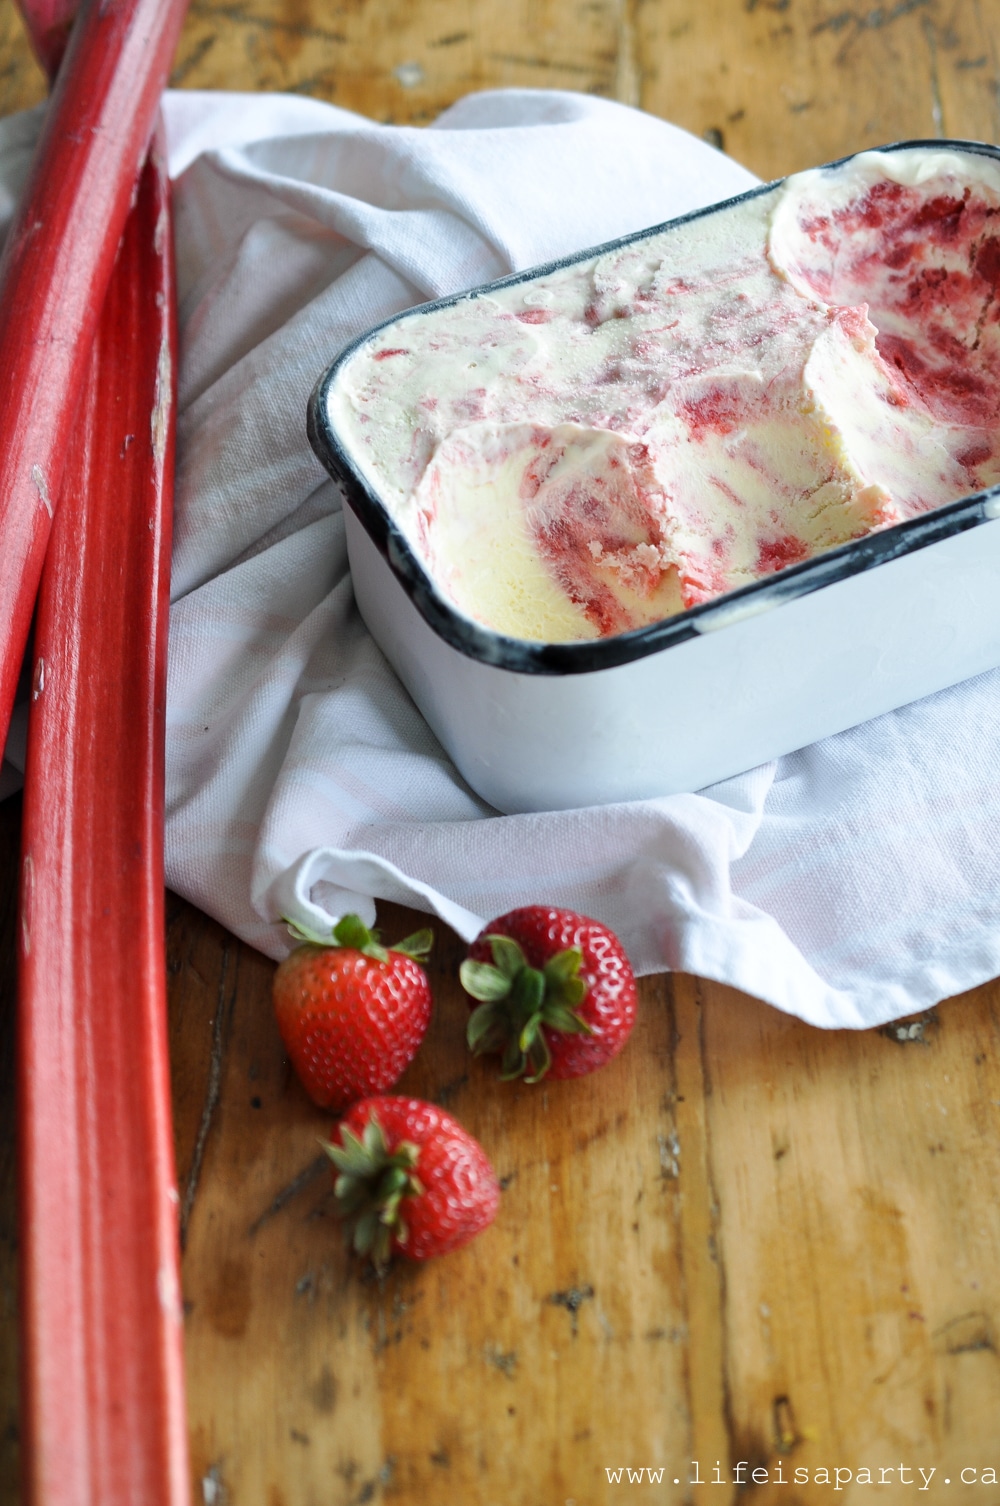
Homemade Strawberry Rhubarb Ice Cream Recipe: creamy vanilla base, with tangy rhubarb compote and sweet strawberry compote ribbons throughout.

homemade strawberry rhubarb ice cream
[feast_advanced_jump_to]

This Strawberry Rhubarb Ice Cream is so good, but the rhubarb is the star of the show, so maybe we should say Rhubarb Strawberry Ice Cream.  This ice cream just might be the best ice cream I've ever made -like ever!  If you're looking for great summer desserts, you will love it's creamy, sweet, tangy flavour.

Homemade Rhubarb and Strawberry Ice Cream Recipe

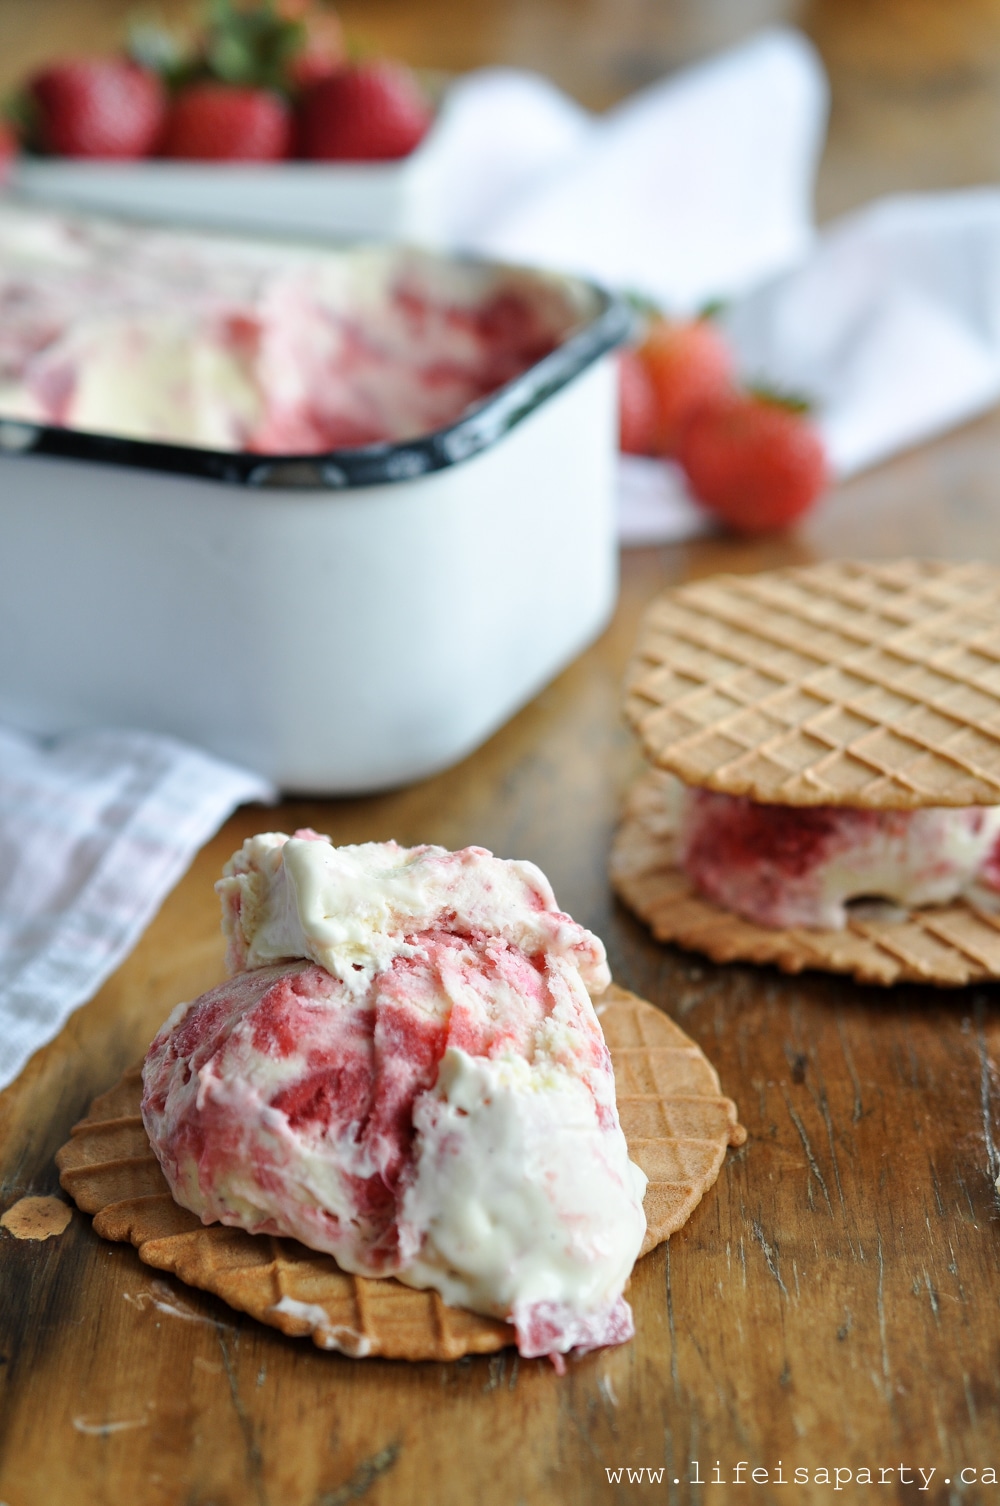
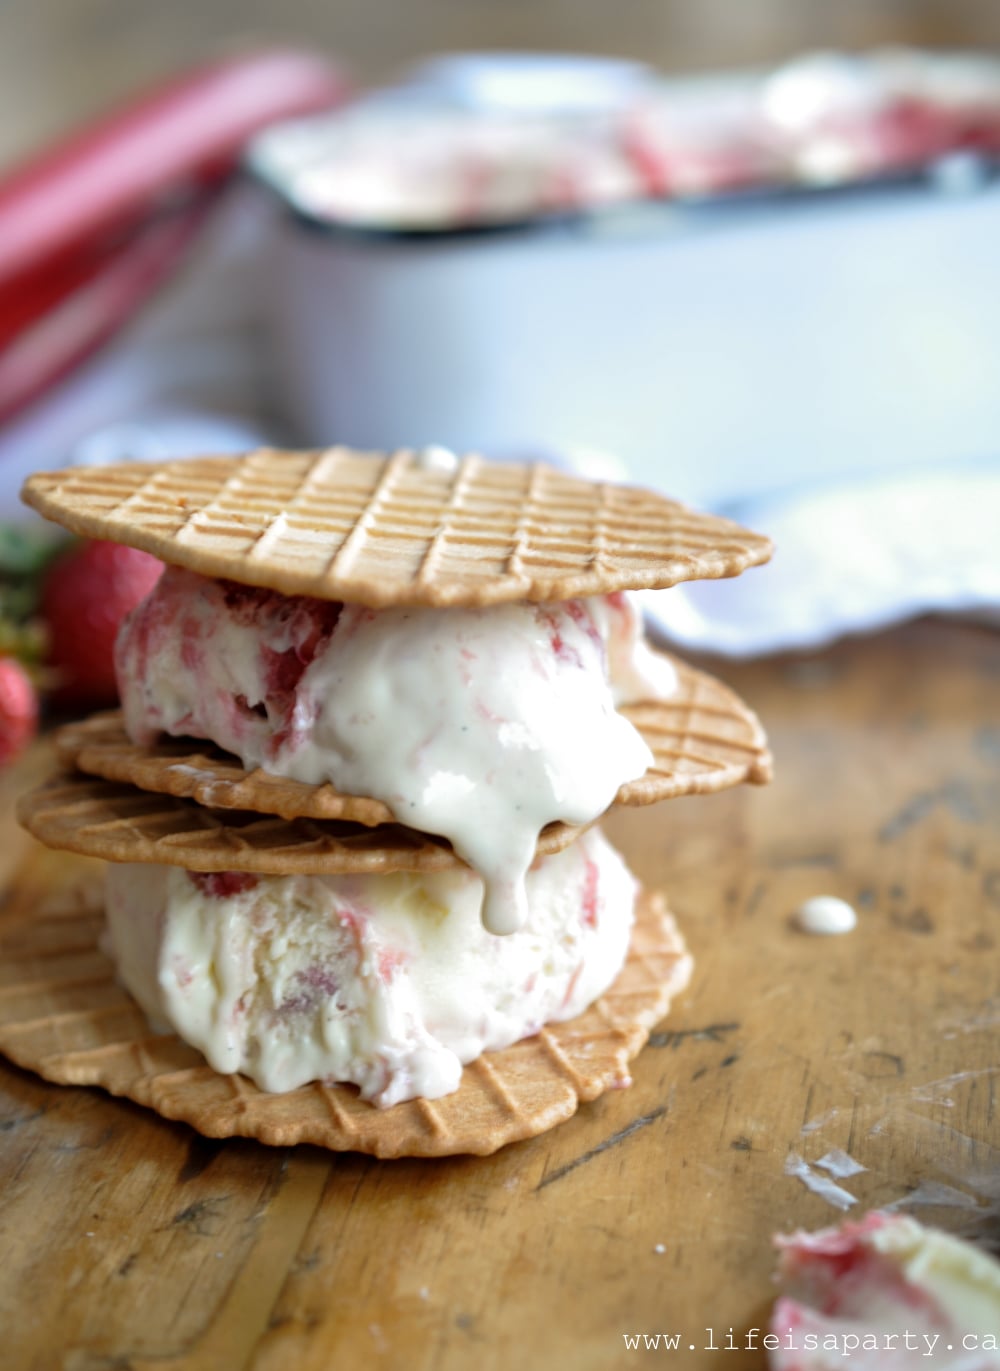
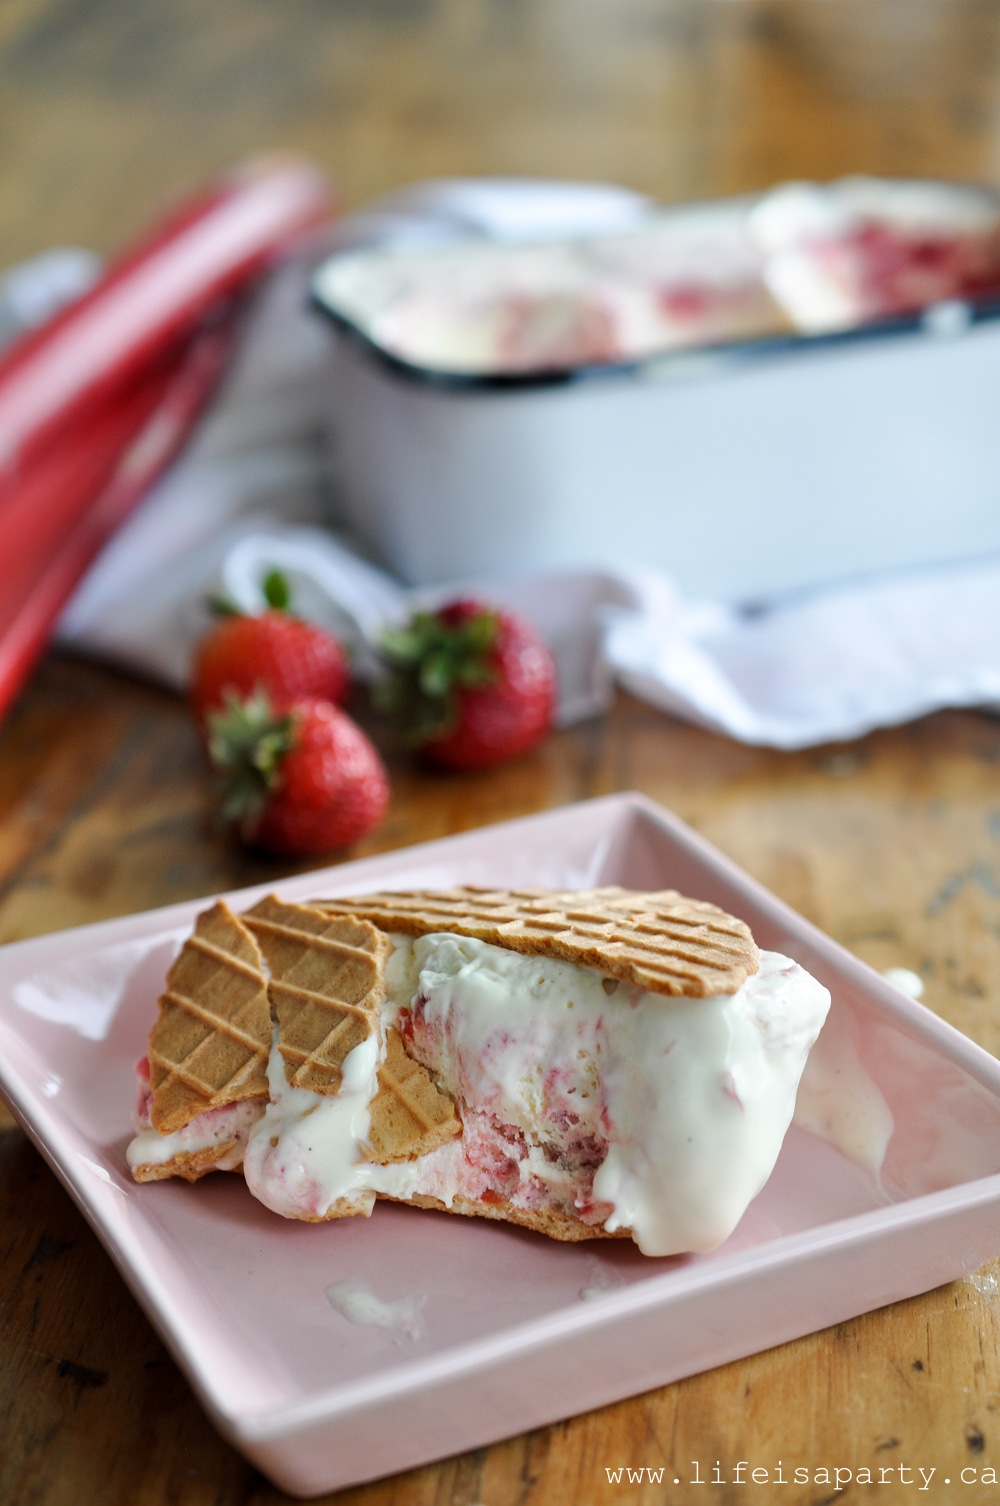
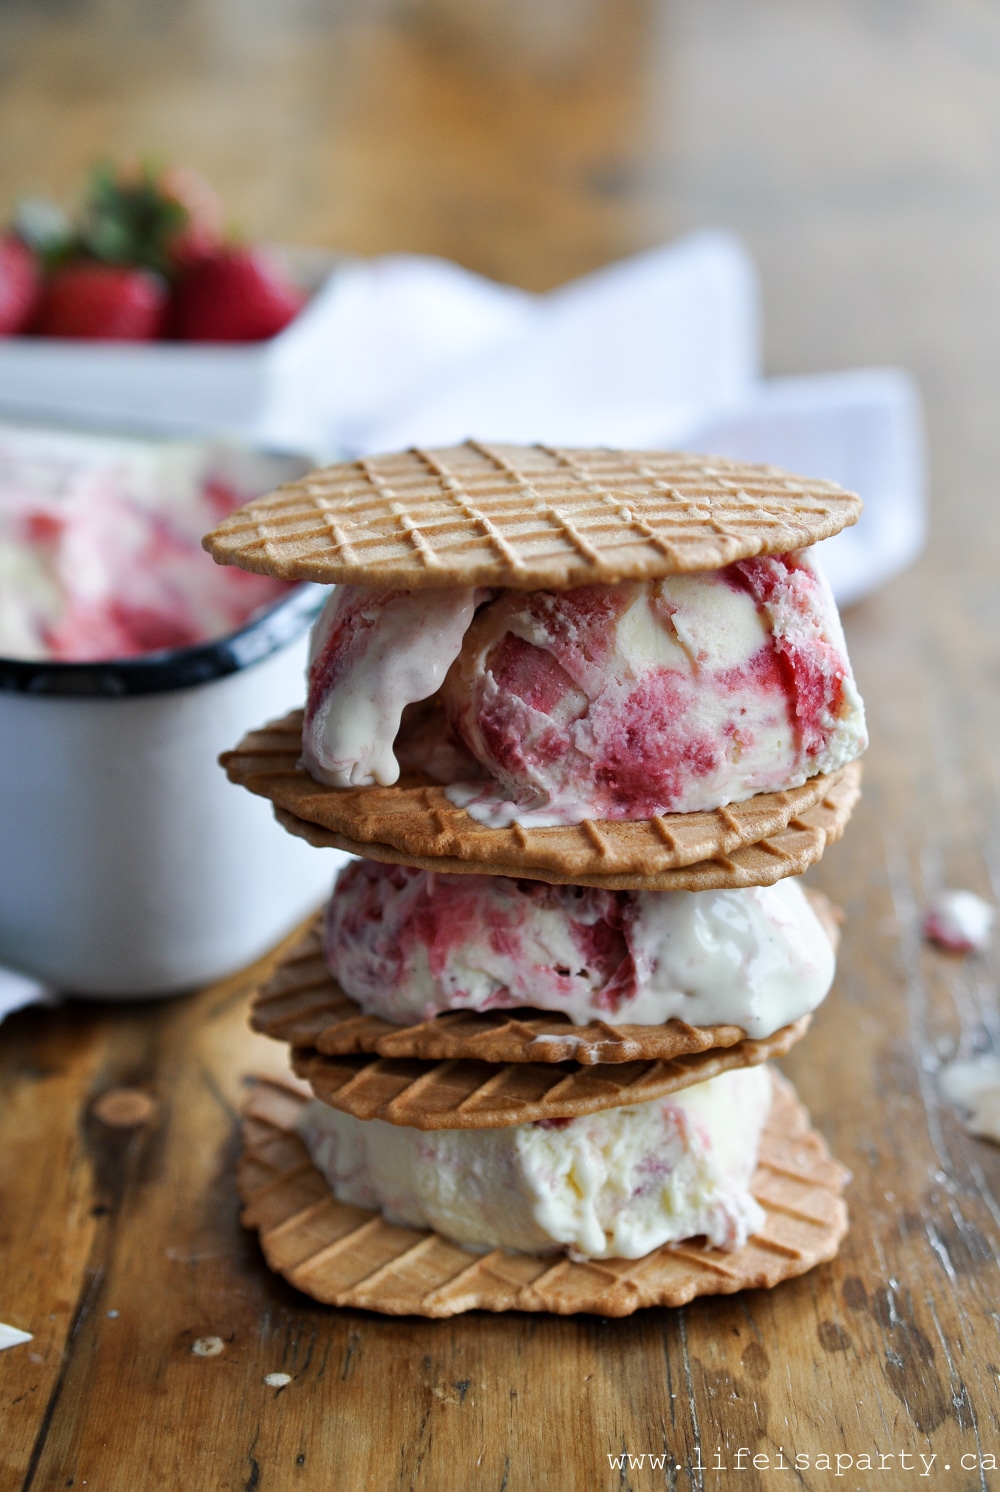
It's so perfectly creamy and smooth, and then with ribbons of tangy rhubarb, and sweet strawberries throughout that make it exciting in every bite.  We served ours in homemade waffle cone wafers to make Strawberry Rhubarb Ice Cream Sandwiches.

Strawberry Rhubarb Ice Cream
Strawberry and Rhubarb Ice Cream Recipe

Rhubarb and Strawberries

Rhubarb is a new love for me.  I didn't really ever have it growing up, but this year I can't get enough of it.  We even purchased a rhubarb plant for the garden to feed my new addiction in the future.  I just love that combo of sweet and tangy.  And speaking of perfect combinations, the tart rhubarb pairs so beautifully with strawberries.  It's a classic for a reason.

We used fresh rhubarb for our ice cream, but if you don't have fresh, you can substitute frozen rhubarb.  This is a great way to use this seasonal fruit.  Rhubarb season is about to become your favourite time of year.

Homemade Rhubarb and Strawberry Ice Cream Recipe

Let me warn you that this recipe does have a fair number of steps involved.  None are too complicated, but it is a fairly lengthy progress.  It is so worth it though.  I think this is my new very favourite recipe.

Strawberry and Rhubarb Ice Cream

You can add the strawberry rhubarb mixture that makes the beautiful pink color swirl into the vanilla ice cream base to suit your own personal taste.  Less is if you want more of the delicious vanilla base to come through -more rhubarb if you like it more tangy, more strawberries if you like it more sweet.  It really is the perfect combination of flavours.  This deliciously fruity ice cream is sure to become your new favourite.  Anyone with a sweet tooth will love it, especially during the summer heat.  This is the ideal ice cream for a rhubarb lover.  Next time you have a crop of fresh rhubarb, you should make this decadent strawberry rhubarb ice cream.

Strawberry and Rhubarb Ice Cream
Homemade Rhubarb and Strawberry Ice Cream
Strawberry Rhubarb Ice Cream

I don't think my new rhubarb plant will be ready to harvest this year.  So I'll be picking up some more rhubarb at one of my local grocery stores, or the farmer's market to make another batch of this amazing ice cream with fresh produce!  It will be especially good right now while our local strawberries are in season.  Your taste buds will thank you for trying this recipe.  I can't be held responsible for this ice cream becoming your very favorite flavor ever.

Recipe

homemade strawberry rhubarb ice cream

Strawberry Rhubarb Ice Cream

Creamy vanilla ice cream base with sweet and tart strawberry rhubarb ripple.
No ratings yet
Print Pin Rate
Course: Desserts
Cuisine: American
Cook Time: 30 minutes minutes
Additional Time: 6 hours hours
Total Time: 6 hours hours 30 minutes minutes
Servings: 4 cups
Calories: 521kcal
Author: Dannyelle Nicolle-Ramjist

Ingredients

For The Ice Cream Base

  • 3 cups half-and-half cream
  • 1 cup heavy cream
  • 8 large egg yolks
  • 1 ¼ cups sugar
  • 1 teaspoon vanilla extract
  • 1 vanilla bean

For The Rhubarb Compote

  • 2 cups rhubarb -cut into ¾ inch pieces
  • ⅓ cup sugar

For The Strawberry Compote

  • 2 lbs fresh strawberries hulled and cut in half
  • ⅓ cup sugar
  • pinch of salt
  • ¼ teaspoon vanilla
  • 1 ½ teaspoon fresh lemon juice

Instructions

  • Place the half-and-half and the heavy cream into saucepan, and heat over medium heat. Bring the mixture just to a simmer, stirring occasionally and remove from heat.
  • In mixing bowl whisk the egg yolks until they lighten in colour, then gradually whisk in the sugar. Temper the egg mixture by gradually adding small amounts of the cream, until ⅓ has been added. Pour in the remainder and return the entire mixture to the saucepan. Continue to cook over low heat, stirring frequently, until the mixture thickens slightly and coats the back of a spoon -reaching 170 to 175 degrees F.
  • Pour the ice cream base mixture into a container and cool at room temperature half an hour. Stir in the vanilla, and the inside scraping of the vanilla bean (or omit the vanilla bean and use 2 teaspoon of vanilla extract). Refrigerate the mixture 4-8 hours until the temperature is 40 degrees F or below.
  • To make the rhubarb compote, stir the rhubarb pieces and ⅓ cup sugar in a medium saucepan, and let sand off the heat about 10 minutes, until the rhubarb releases some of its liquid.
    Next bring the rhubarb mixture to a boil over medium-high heat, stirring occasionally. Reduce heat to medium and let simmer, stirring occasionally until the rhubarb pieces have broken down, about 5 minutes. Remove from heat, and let the cooked fruit cool. Set aside.
  • For The Strawberry mixture, combine strawberries, ⅓ cup sugar, pinch of salt, and 2 tablespoon of water in a small saucepan. Bring to a simmer over medium heat. Cook stirring occasionally until the strawberries begin to break down, and the juices thicken -about 15 minutes. Remove from the heat, and add vanilla and lemon juice. Let cool, and set aside.
  • Pour the cooled ice cream mixture into your ice cream maker and follow the manufacturer's direction to churn ice cream. When the ice cream is a soft serve consistency stir in ribbons of the cooled rhubarb and strawberry fruit mixture to taste. Place in an airtight container and freeze 3-5 hours before serving

Nutrition

Serving: 1g | Calories: 521kcal | Carbohydrates: 64g | Protein: 11g | Fat: 26g | Saturated Fat: 15g | Polyunsaturated Fat: 10g | Trans Fat: 1g | Cholesterol: 274mg | Sodium: 155mg | Fiber: 3g | Sugar: 58g
Tried this Recipe? Tag me Today!Mention @LifeisaParty or tag #lifeisaparty!
how to make strawberry rhubarb ice cream

With homemade Strawberry Rhubarb Ice Cream, life really is a party!

More Homemade Ice Cream Recipes

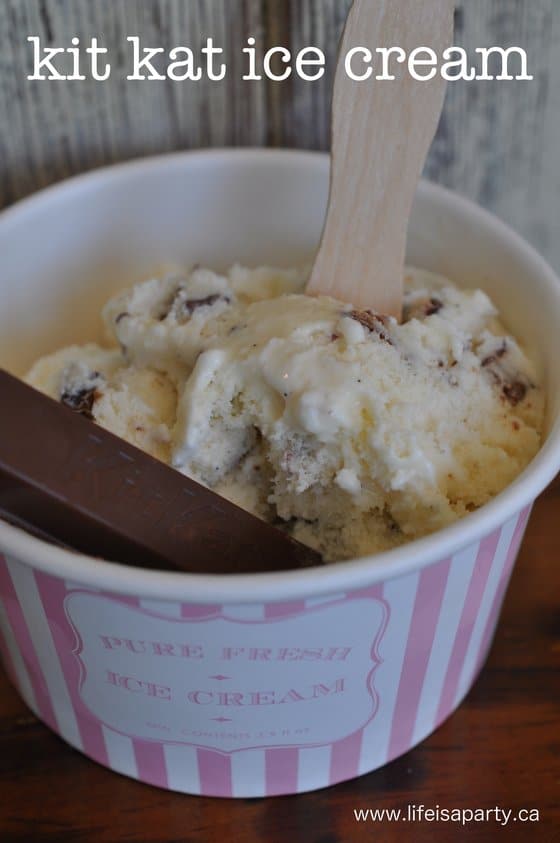
Want more homemade ice cram recipes?  Check out our Kit Kat Ice Cream Recipe here.

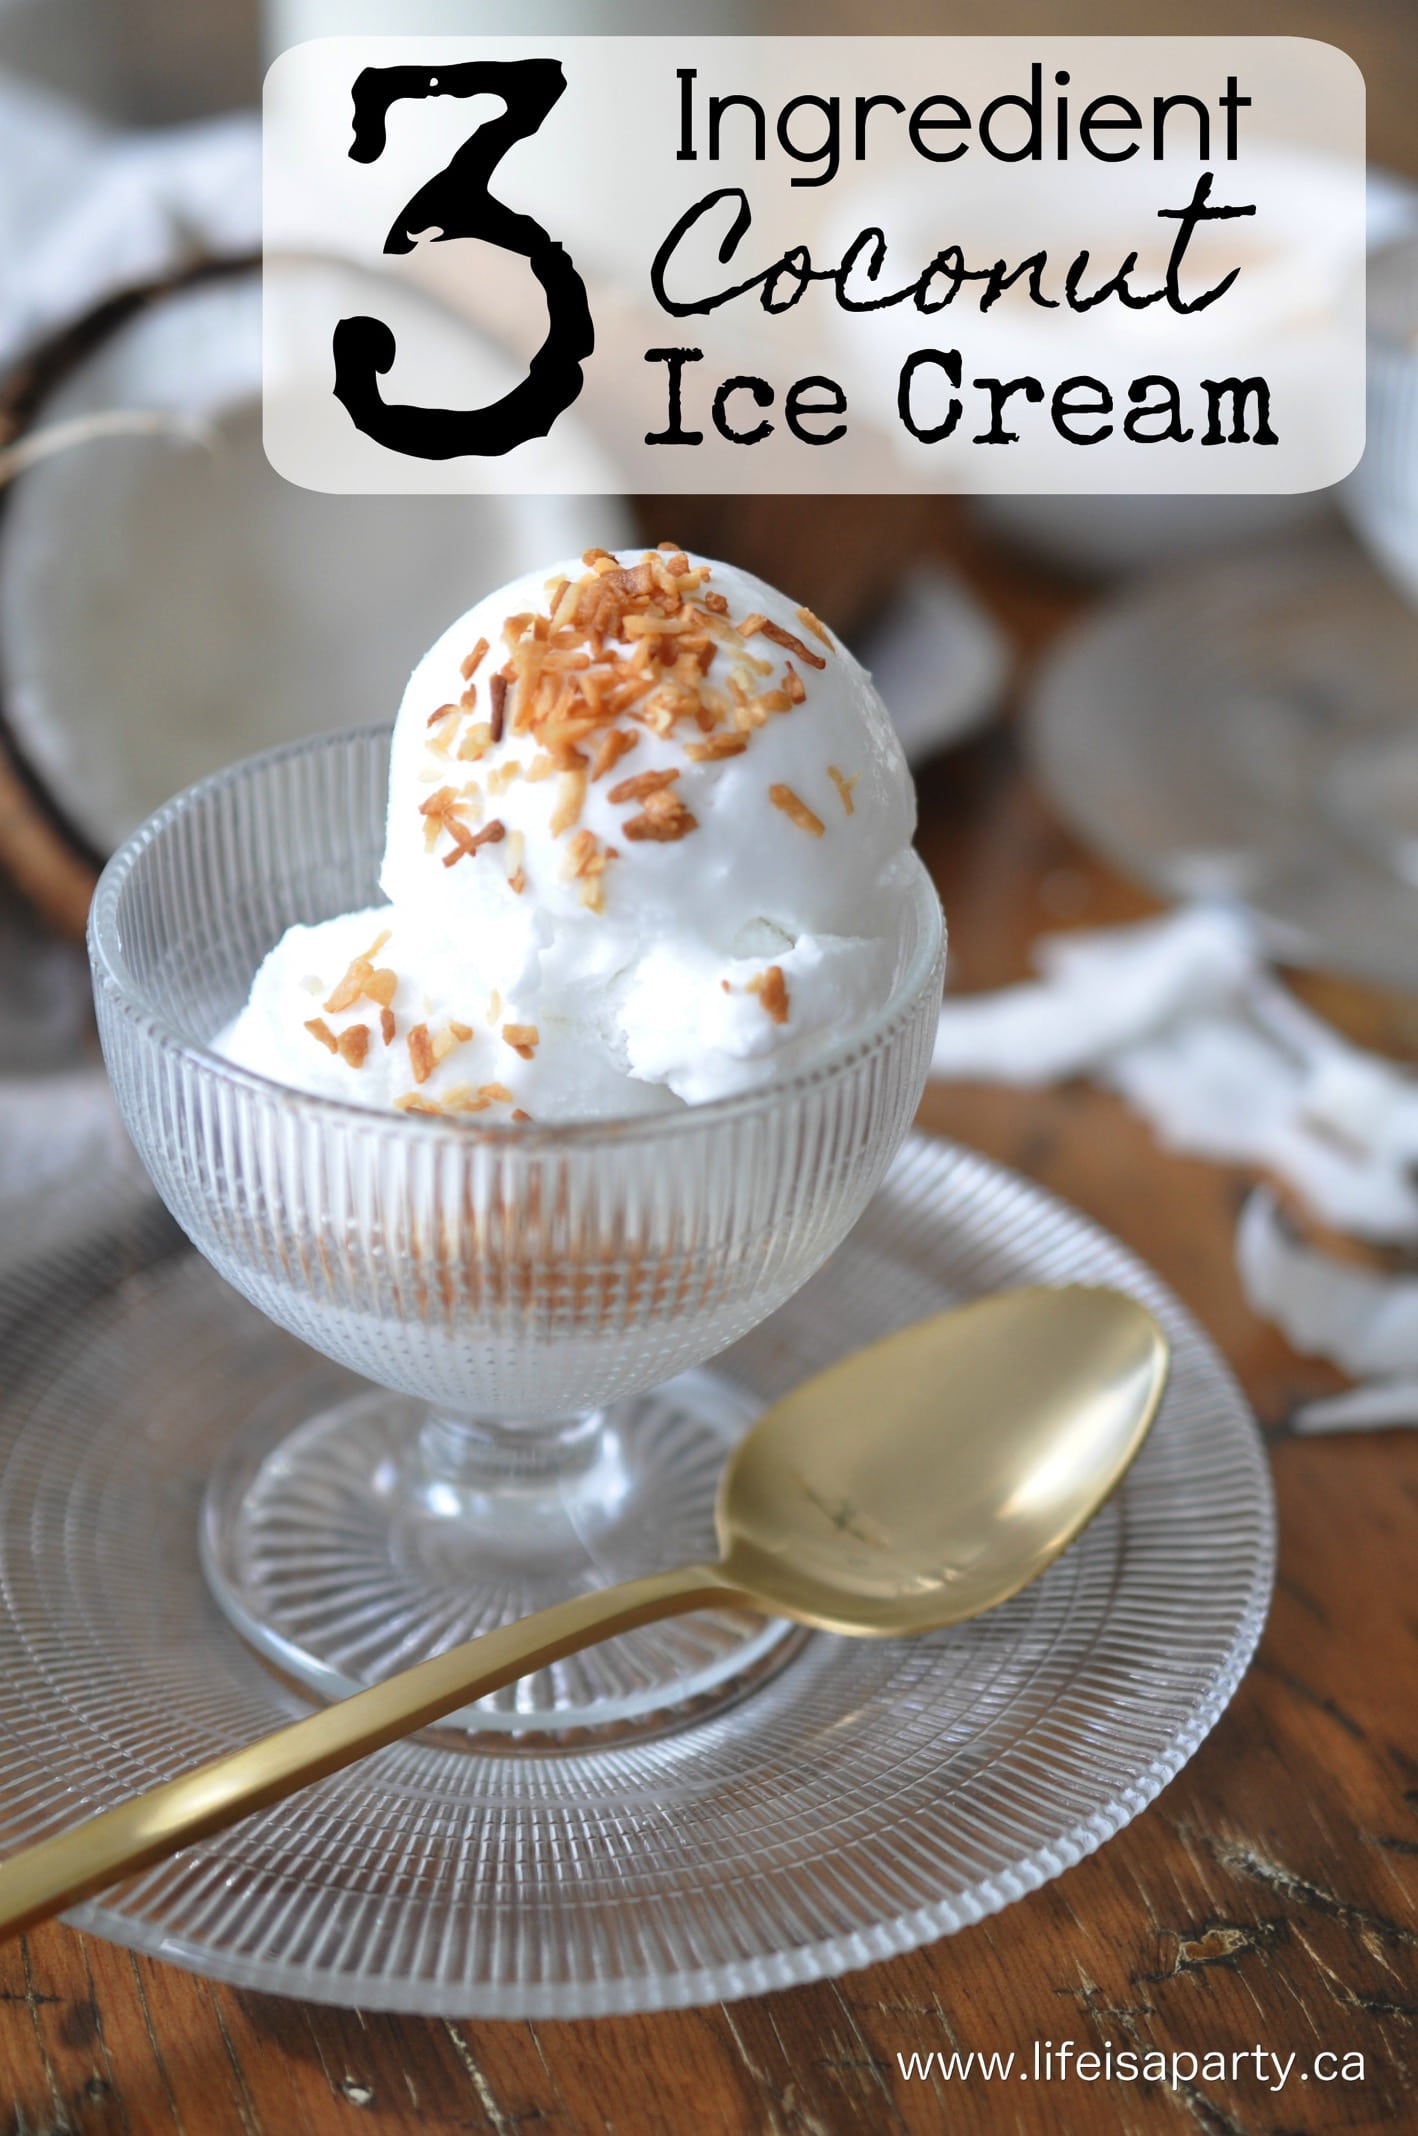
And our 3 Ingredient Coconut Ice Cream Recipe here.

You might also like Pumpkin Pie Ice Cream recipe.

Tim Hortons Copycat Iced Capp Recipe

Jun 26, 2019 · 2 Comments

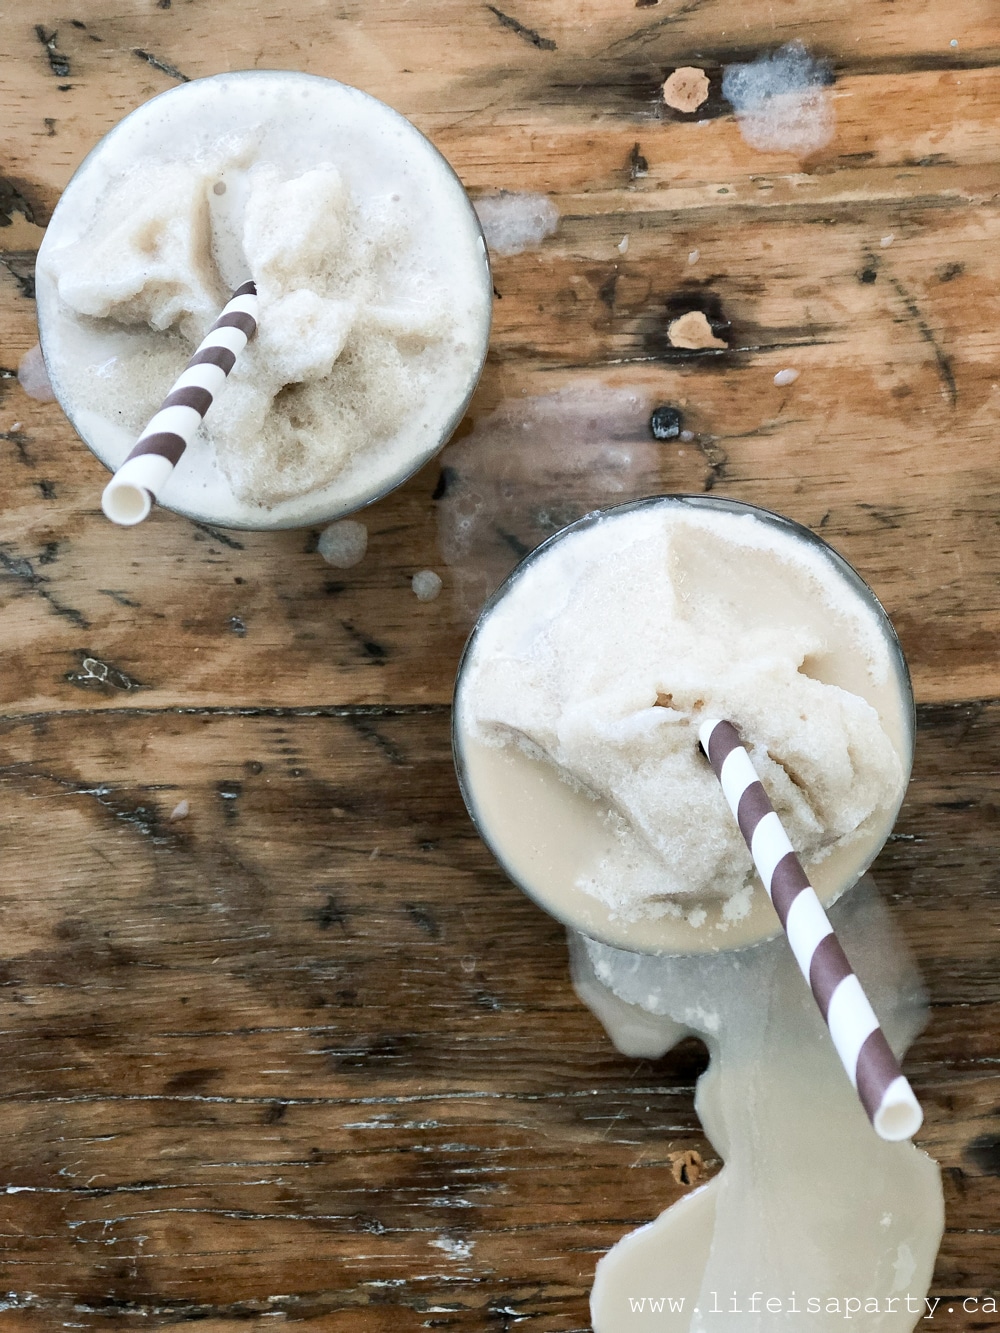
Homemade iced capps in glasses on a wood table.

Make this Tim Horton's Iced Cappuccino Copycat Recipe in regular or low carb low sugar version. It only takes a few mintues to make your favourite summer coffee treat at home, and save time and money with this easy and delicious recipe.

Homemade iced capps in glasses on a wood table.
[feast_advanced_jump_to]

Why We Love This Recipe

  • It's cheaper than Tim Hortons.
  • These are made with just a few ingredients that you probuably have on hand.
  • This recipe is quick. It only takes a few minutes make.
  • You can make it sweeter or less sweet depending on your preference when you make it at home.
  • Make it sugar free for a Keto friendly low sugar and low carb version, or switch out the cream for a lower calorie version.

When I decided to work on an at-home version of this recipe I was surprised by how easy it was to make at home.  It all comes together in a few minutes in the blender.  

My teenagers who seem to love any coffee beverage just love these in the summertime.  And you can actually make them at home, faster than you can go to Tim Hortons and pick one up.  And making them at home will cost you at fraction of the price, especially if you are buying them for your teens!  You will never need to go out for a Tim Hortons iced capp again.  

They're also perfect for entertaining and sure to impress your guests when you whip one up. They'd be a great additon to an at-home coffee shop party too. Love coffee shop drinks at home? Also check out our homemade gingerbread latte syrup recipe and our homemade hot chocolate mix recipe.

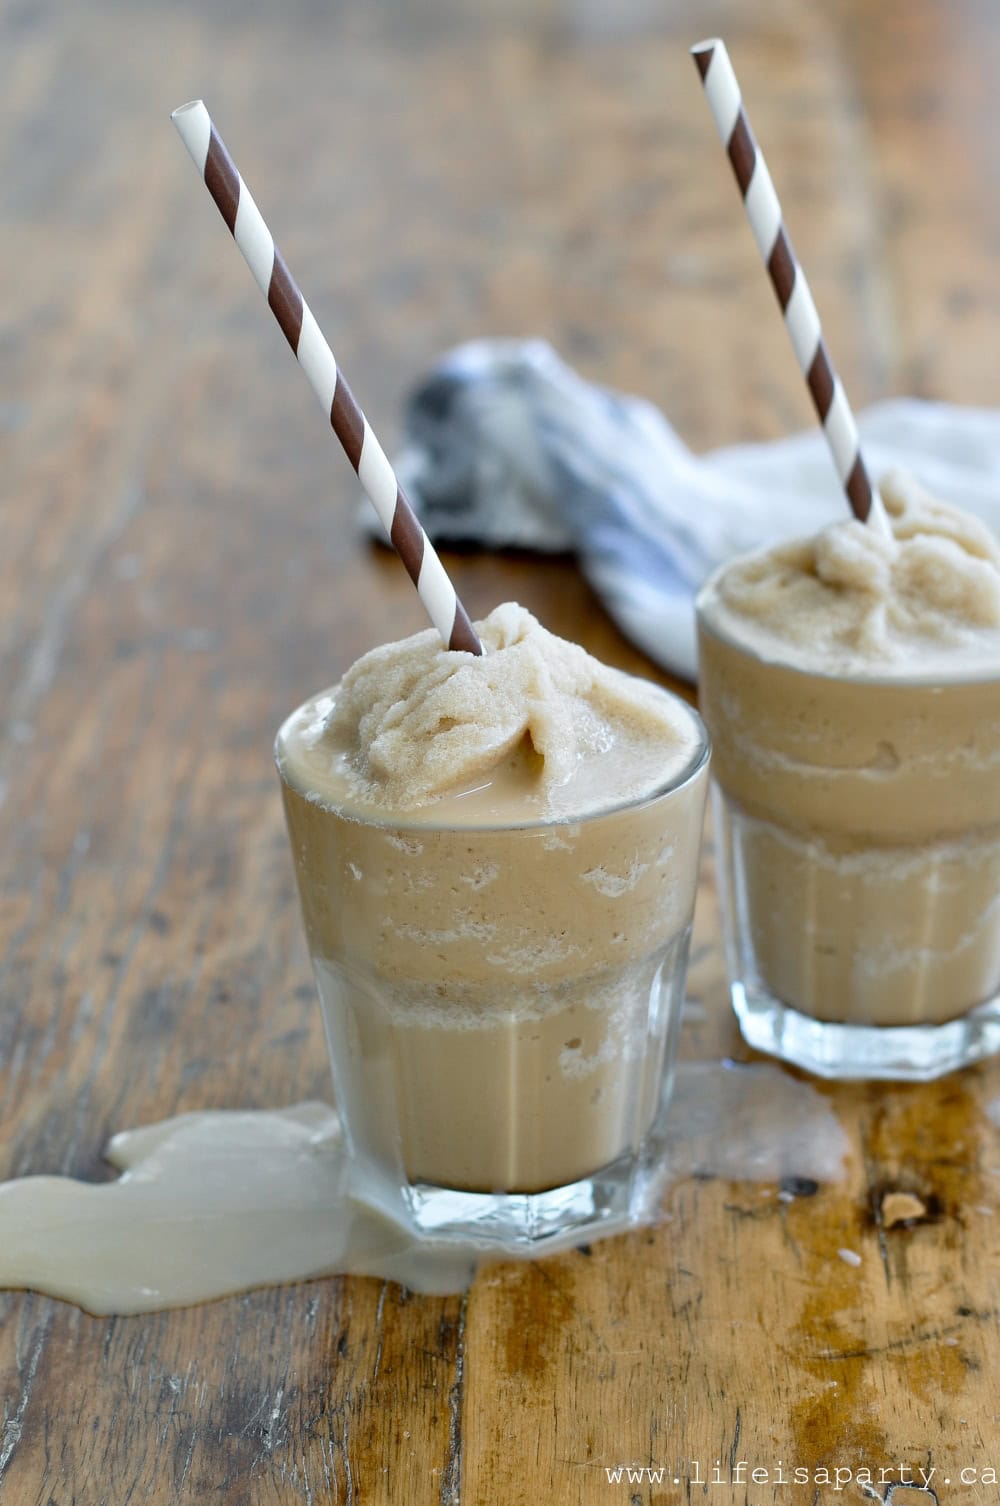
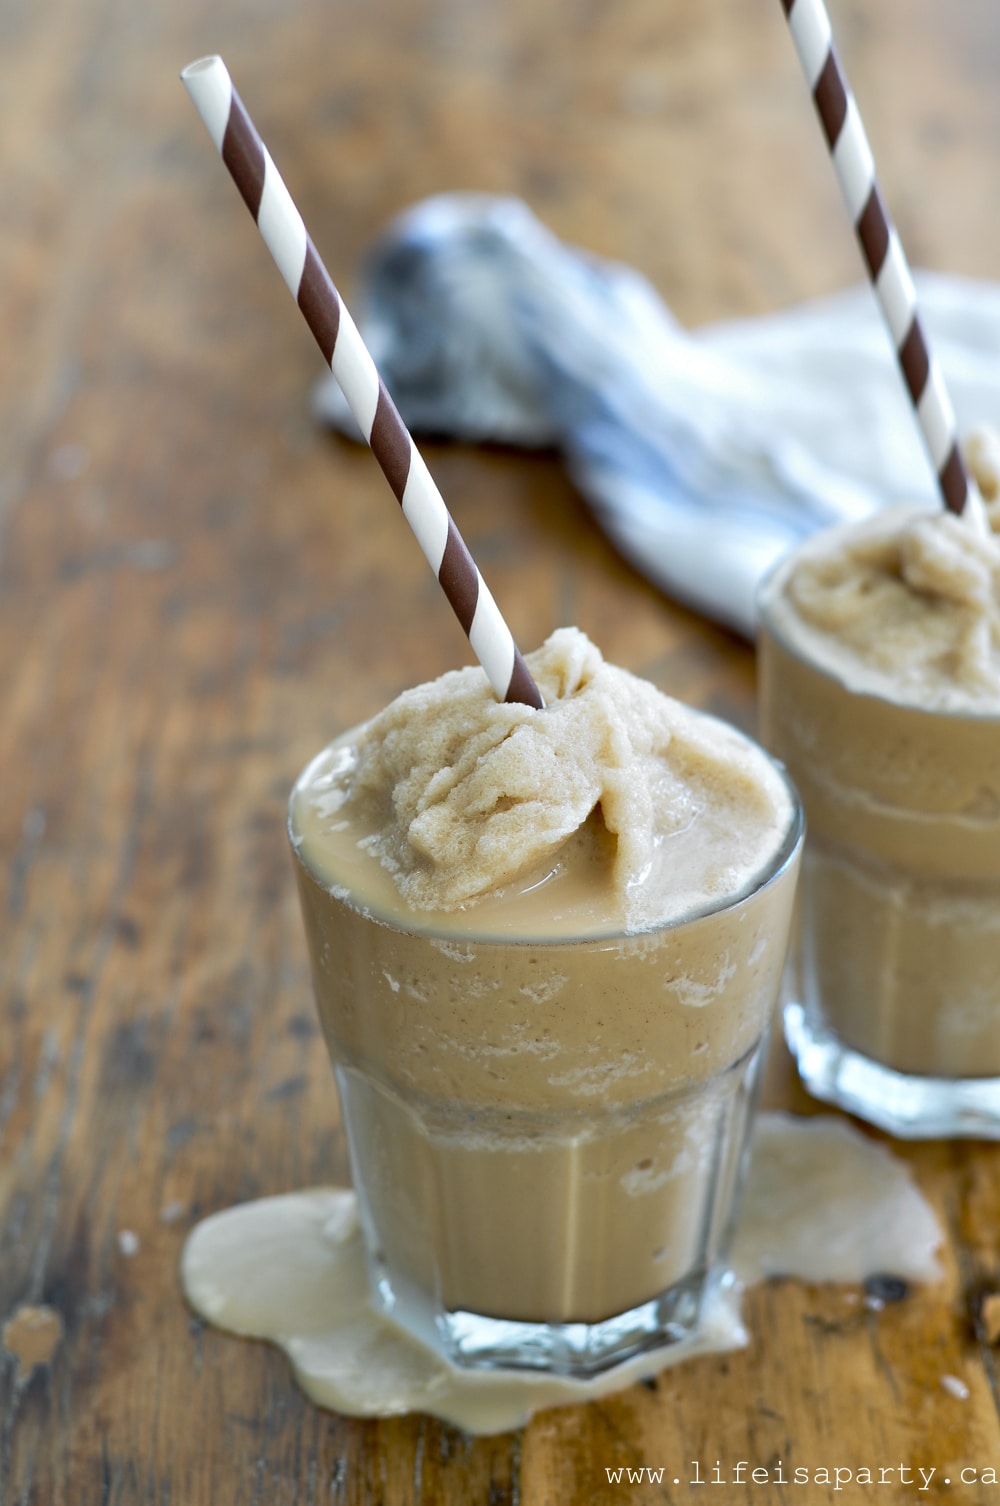
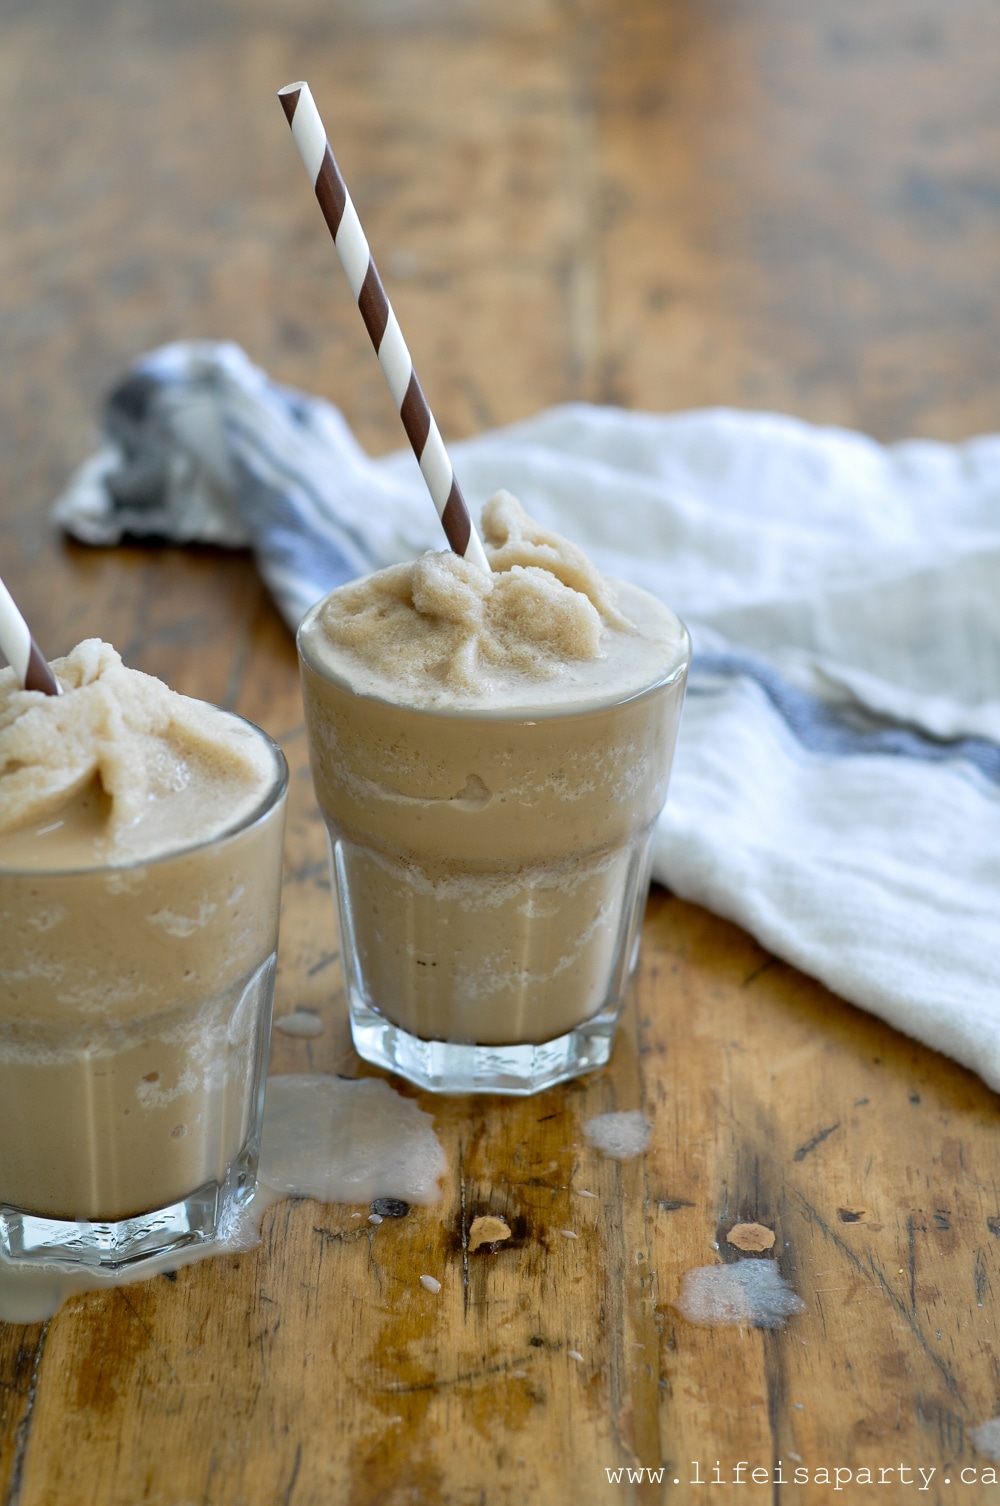
Easy at-home version of iced capps in glasses with striped straws.

I Love Ice Caps

I love a good ice cap.  Many, many years ago -I think when ice caps were relatively new I was a new teacher.  I had a very small class of 9 students in a private school.  Our last (and one of our favourite) units for English  was poetry writing.  Our culminating activity for the unit was our own poetry cafe.  My students were very excited to spend the whole period sharing their work with one another and creating our own cafe environment.

When we talked about a cafe they excitedly told me we should get ice caps because it was so hot out, they were so good, and it would be perfect for our cafe vibe.  I had never had one before.  On the day of the cafe I slipped out at recess and bought us all ice caps.  You would have thought I had given them the moon.  They couldn't believe it, and were so happy that I'd surprised them with this treat.  It set the tone for an amazing poetry cafe, and is still one of my very favourite memories of teaching.

I think every time I've had an ice cap since then, I've thought fondly of them, my first class.  I definitely missed this old favourite summer treat so I'm pretty excited to have an easy to make and delicious keto version to enjoy this summer.  And my kids are loving the regular version made at home too.

Ingredients

Iced capp recipe ingredients on a table.
  • Coffee : Use whatever coffee you love and brew it how you normally do.  I like a premium blend coffee made in a French press for the best coffee flavour, you can use a coffee maker instead, or a even instant coffee for your own version.  Next time you brew a fresh pot and have some leftover you can even pop it into the fridge and save it to make an iced capp later.

Expert Tip: You must use cold coffee.

If you use hot coffee the ice will melt and the iced capp won't have the thick creamy texture you love, it will be a bit watery -but still delicous.

  • Heavy Cream: The heavy cream in this recipe really gives the best creamy texture and flavor to your iced capp, and is the most like a real Tim Hortons iced capp.
  • Sugar: Regular sugar works great in this recipe. If you like your iced capp a little sweeter -because the Tim Horton's version is pretty sweet, just increase the sugar.
  • Vanilla: A little vanilla goes a long way in this recipe, and adds great flavor to the finished drink.

Substitutions

  • Using Milk Instead of Cream: Replace the cream with cold milk if you're looking for a lower calorie version with less fat content and not concerned about carbs.  Also if you have an allergy or dietary issues you can substitute almond milk or coconut milk or another non dairy milk alternative.  It will taste a little different but will still be delicious.
  • Chocolate Milk: You can also substitute the cream with chocolate milk for a chocolate version of your favorite iced coffee drink.
  • Sugar Free Keto Version: Switch out the sugar for sweetener and make a keto friendly low-carb version that only has a few carbs in it (depending on what brand of heavy whipping cream you use).  And if you are keto or low-carb, you probably already have all the ingredients on hand.  Some people add collagen and MCT oil powder -which you can do to make a frozen bulletproof coffee.  I liked it as is. For this recipe I used Monk Fruit Erythritol as the sweetener.  It can be used at a one to one ratio as a replacement for regular sugar.  Use my measurement as a guide, but adjust depending on whatever sweetener you prefer to use, and according to your own taste.  Even if you're not looking for a lower carb version, using sweetener also has fewer calories.
Homemade iced capps on a table with straws.

Equipment

You will need a blender to make this drink.  It whips up extra fast in a high-speed blender or magic bullet, but I had no problems making it in my regular blender that I use for smoothies all the time.

Tip: If you find your finished iced capp is a little icy, with small chunks of ice in it, you probably need to blend it a little longer to get it completely smooth.

Homemade iced capp on a table in a clear glass with a straw.

How To Make It

Adding coffee to a blender to make homemade iced capps.
  1. Step 1: Brew 2 cups of regular coffee and set it aside to cool, or put it in the fridge until it has cooled down.
All the ingredients in a blender ready to blended into homemade iced capps.
  1. Step 2: In a blender, combine ice, cream, sugar or monk fruit erythritol, vanilla and coffee.
Two homemade iced cappuccino drinks in clear glasses on a wood table.
  1. Step 3: Blend until smooth and completely combined. Pour into two tall glasses and enjoy.

Frequently Asked Questions

Why is my iced capp watery?

If you add hot coffee to the drink it will melt the ice and make a watery drink so be sure that it is cold before adding it.

Why is my iced capp icy?

If your iced capp has an icy texture with small chunks of ice it you didn't blend it long enough. Try blending it longer for a smoother drink.

Can I make this with milk instead of cream?

Yes. The texture of the drink will be less creamy and rich, but these are still delicious made with milk.

More Drink Inspiration

  • Easy 3 ingredient coconut milkshake recipe.
    Easy Coconut Milkshake Recipe
  • How to make a pumpkin spice milkshake.
    Pumpkin Spice Milkshake Recipe
  • homemade gingerbread latte syrup
    Homemade Gingerbread Latte
  • Gingerbread milkshake with homemade gingerbread syrup.
    The Best Homemade Gingerbread Milkshake Recipe

If you try this Iced Capp Recipe or any other recipe on my blog please leave a star rating and let me know how it went in the comments below. Thanks for visiting today!

Recipe

Homemade iced capps in glasses on a wood table.

Tim Hortons Copycat Iced Capp

Make your favourite frozen coffee drink at home.
4.81 from 21 votes
Print Pin Rate
Course: Drinks
Cuisine: American
Prep Time: 10 minutes minutes
Cook Time: 0 minutes minutes
Total Time: 10 minutes minutes
Servings: 2
Calories: 292kcal
Author: Dannyelle Nicolle-Ramjist

Equipment

  • blender

Ingredients

  • 2 cups brewed coffee
  • 4 cups ice cubes
  • ⅓ cup heavy whipping cream
  • 4 tablespoon sugar or monk fruit erythritol or favourite sweetener for the sugar free version
  • ½ teaspoon vanilla extract

Instructions

  • Brew 2 cups of regular coffee and let it cool in the fridge.
  • In a blender, combine ice, cream, sugar or sweetener, vanilla and cold coffee.
  • Blend until smooth and completely combined. Pour into 2 tall glasses and enjoy.

Notes

Make sure your coffee is cold before making this recipe, or the hot coffee will melt the ice and make a watery drink.
You can substitute milk for the cream, but the finished drink it will be less rich and creamy.

Nutrition

Serving: 1g | Calories: 292kcal | Carbohydrates: 41g | Protein: 2g | Fat: 14g | Saturated Fat: 9g | Polyunsaturated Fat: 4g | Cholesterol: 44mg | Sodium: 35mg | Fiber: 2g | Sugar: 37g
Tried this Recipe? Tag me Today!Mention @LifeisaParty or tag #lifeisaparty!

Easy S'mores Pizza Recipe

Jun 20, 2019 · Leave a Comment

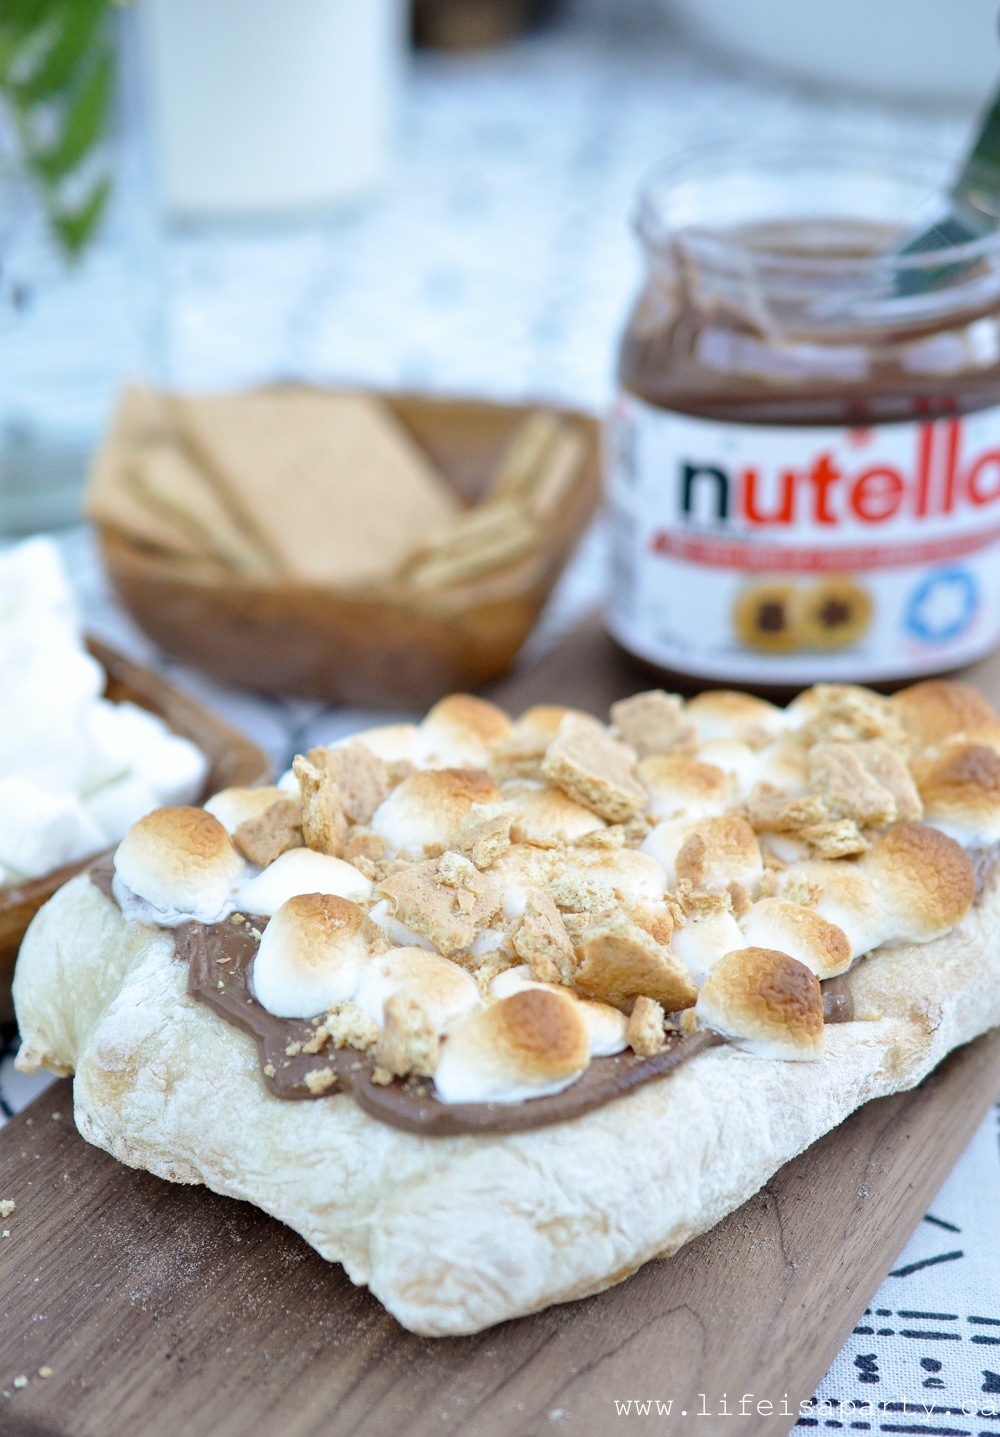
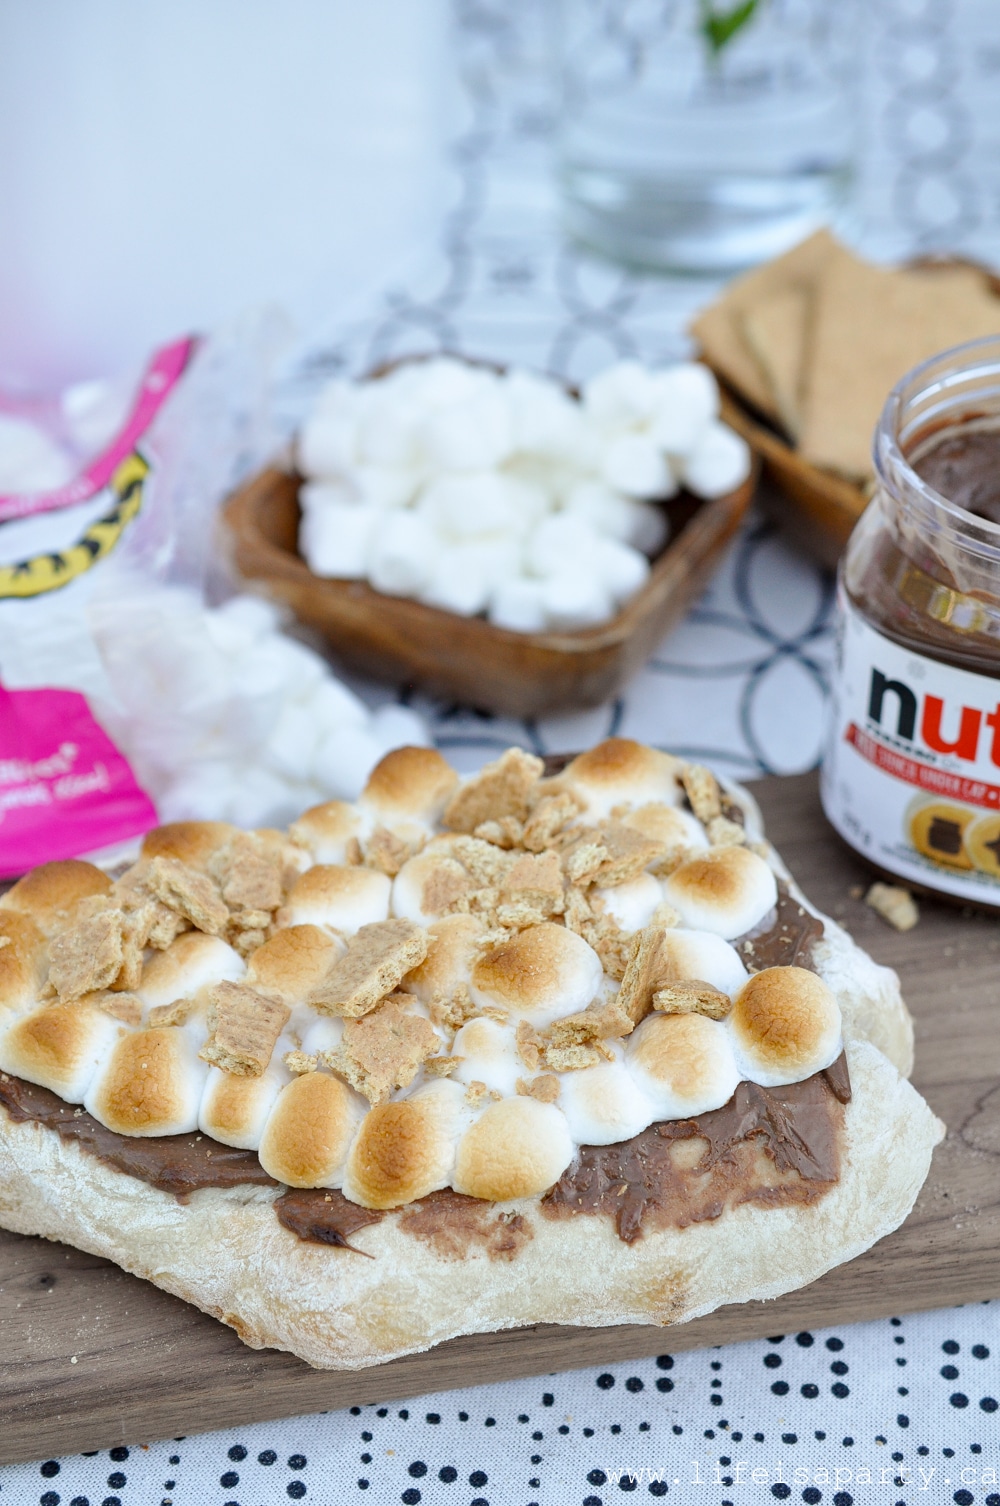
Golden pizza crust topped with Nutella and toasted marshmallows.

S'mores Pizza takes everything you love about the classic campfire treat and turns it into a shareable dessert pizza loaded with Nutella, toasted marshmallows, and graham cracker crumbles. We made ours in an outdoor pizza oven, but a regular oven works just as well, so this one's doable no matter what kind of kitchen you're working with.

Golden pizza crust topped with Nutella and toasted marshmallows.
[feast_advanced_jump_to]

Quick Look

  • 📋 Recipe: Easy S'mores Pizza
  • ⏲️ Ready In: 20 minutes
  • 👪 Servings: 1 large pizza (serves 6 to 8)
  • 🔪 Difficulty: Easy
  • 💭 Top Tip: Bake the crust on its own first, then add your toppings and pop it back in the oven. That two step method means a perfectly baked crust, and perfectly toasted marshmallows on top.

Why You'll Love This Recipe

  • It's a fun twist on a classic campfire treat, without needing an actual campfire.
  • You can make it in a pizza oven or a regular oven, so it works for backyard entertaining or a weeknight at home.
  • It comes together in about 20 minutes with just 4 ingredients.
  • It's endlessly customizable with fruit, nuts, or different kinds of chocolate.
  • It's a guaranteed hit with both kids and adults at any summer gathering.

For our backyard pizza party, I wanted to include a dessert pizza alongside all the savory ones, and since it was the middle of summer, s'mores felt like the obvious direction. We used our outdoor pizza oven for this one, and it toasted the marshmallows better than any campfire ever has, but I'll walk you through the regular oven version too, since not everyone has a pizza oven in the backyard.

If you love this s'mores pizza, you'll probably also love our s'mores trail mix for something you can throw together in five minutes, or our s'mores charcuterie board if you're hosting a bigger group and want a whole spread to graze on.

Ingredients

Exact measurements in the recipe card below.

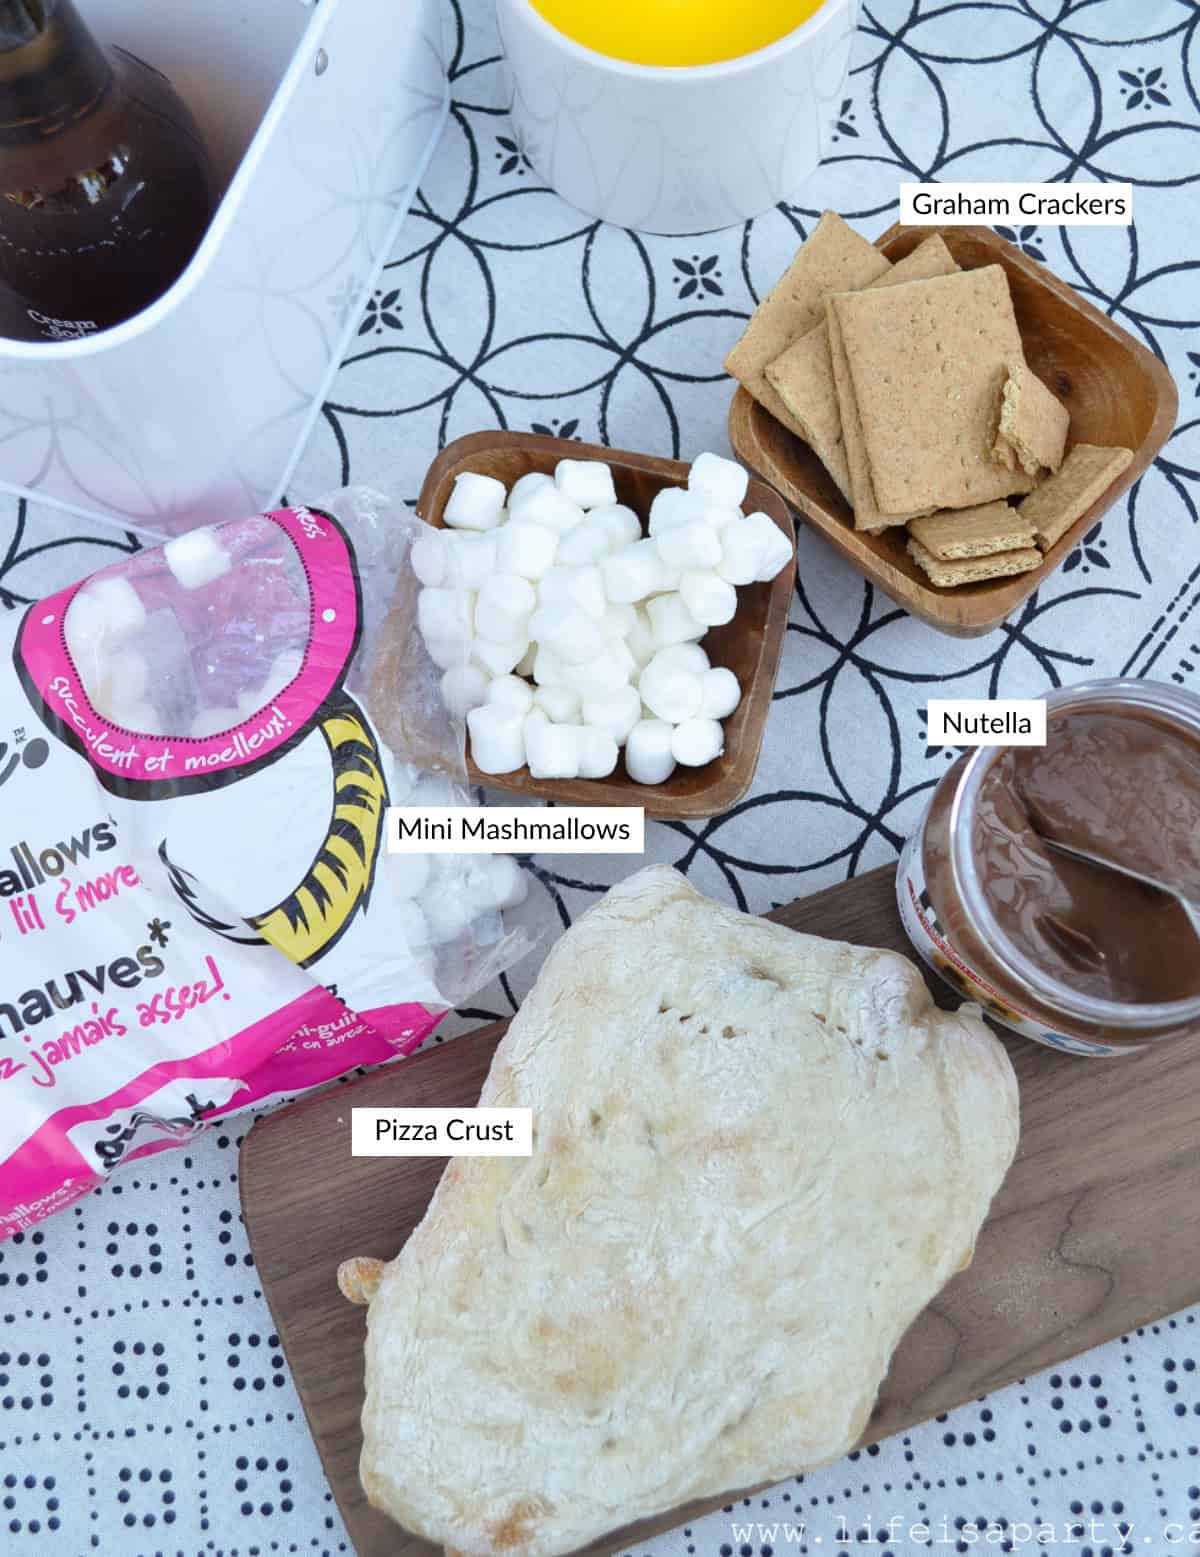
  • Pre-made Pizza Dough: store bought works great here, or make your favorite homemade version.
  • Nutella Hazelnut Spread: works really well as it spreads beautifully and is a crowd favorite, or use a good chocolate sauce, ganache, or melted chocolate chips if you're not a Nutella fan.
  • Mini Marshmallows: they melt faster and spread more evenly than large ones.
  • Graham Cracker Pieces: broken up pieces add the perfect crunch and classic s'more flavor.

Variations

Want to switch things up? Try adding sliced strawberries or bananas, toasted coconut, or slivered almonds for some texture and a fruity twist. A drizzle of peanut butter is also delicious with the chocolate and marshmallow, and if you're a dark chocolate fan, swap in dark chocolate chips instead of Nutella.

No pizza dough on hand? Naan bread or flatbread makes a great shortcut base if you want to skip the rolling altogether. It won't have quite the same pizza feel, but it's just as tasty and comes together even faster, which is a nice option for a weeknight version of this same treat.

How to Make S'mores Pizza

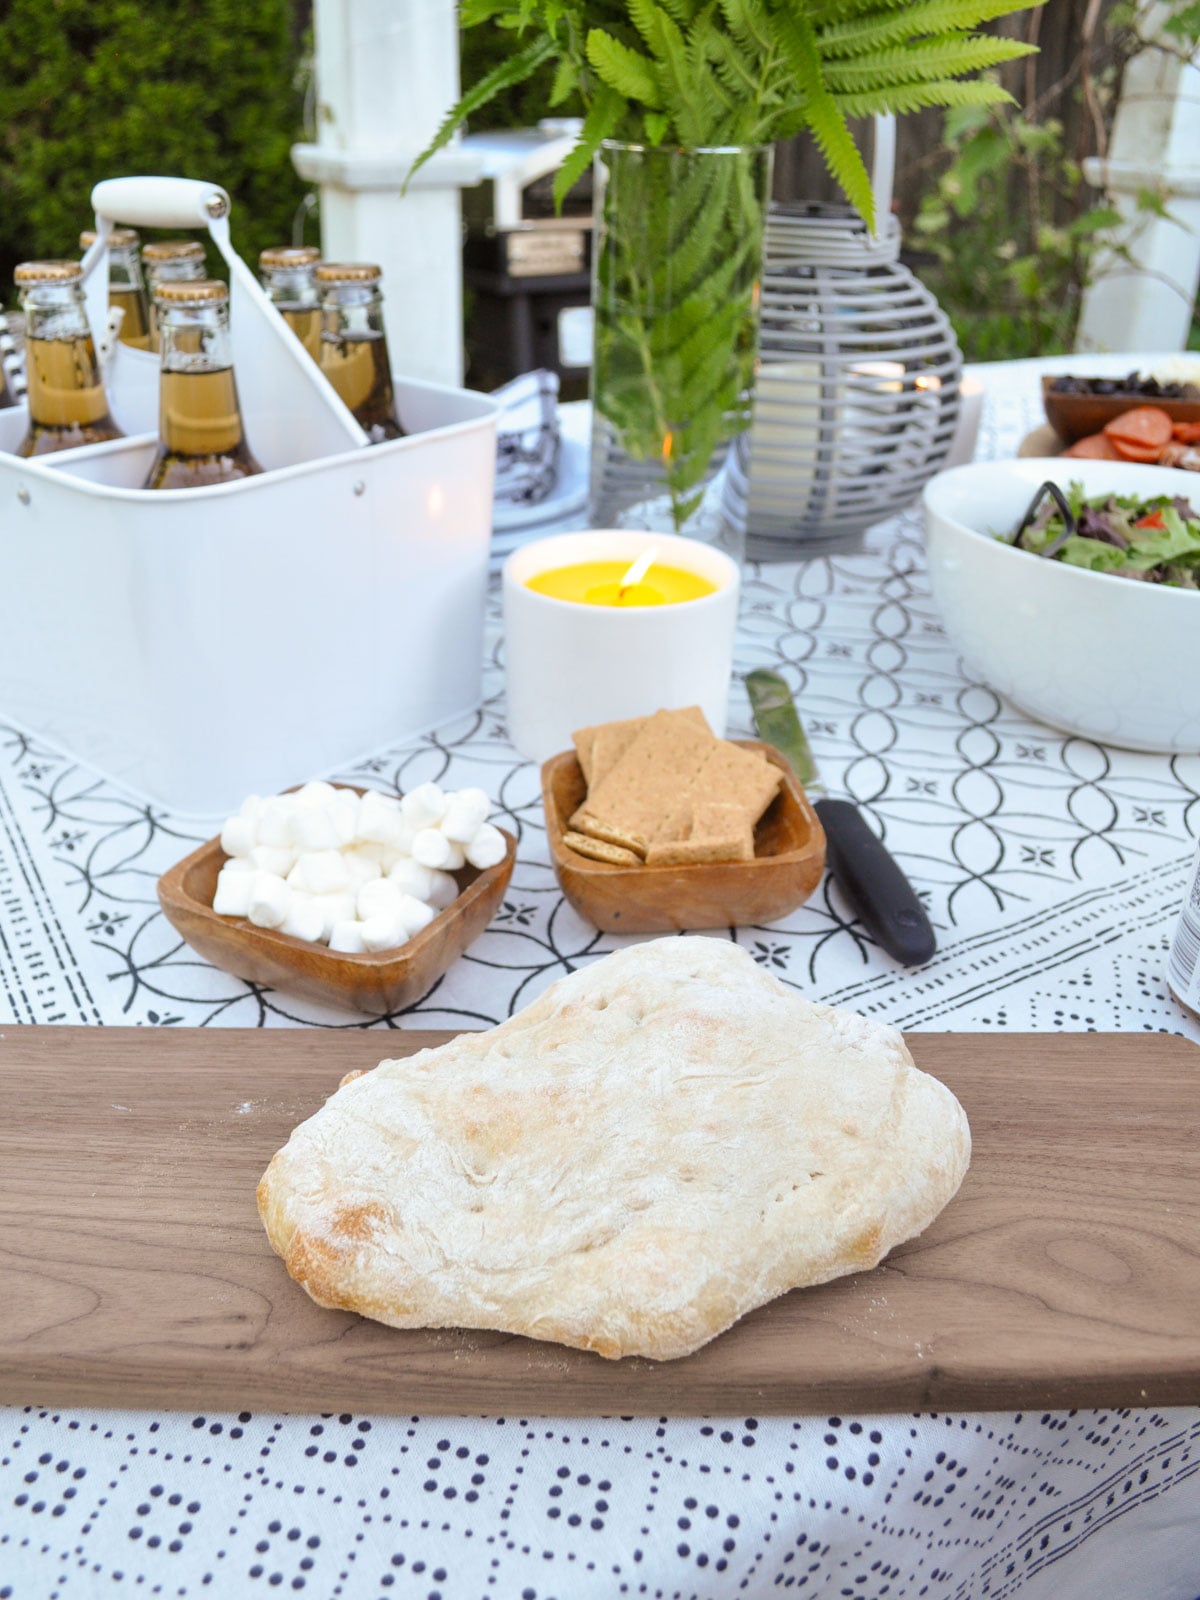
Baked pizza crust cooling on a wood board before adding s'mores toppings.
  1. Step 1: Flour your work surface and stretch or roll your pizza dough into a large round shape. If you're using a pizza oven, slide the dough onto your peel and into the oven at around 400 degrees. If you're using a regular oven, preheat it to 400 degrees and place the dough on a pizza pan or cookie sheet lined with parchment paper. Bake the crust until it's just turning golden, about 8 to 10 minutes in a regular oven, or a couple of minutes in a hot pizza oven. Don't let over cook it, since it's going back in later.
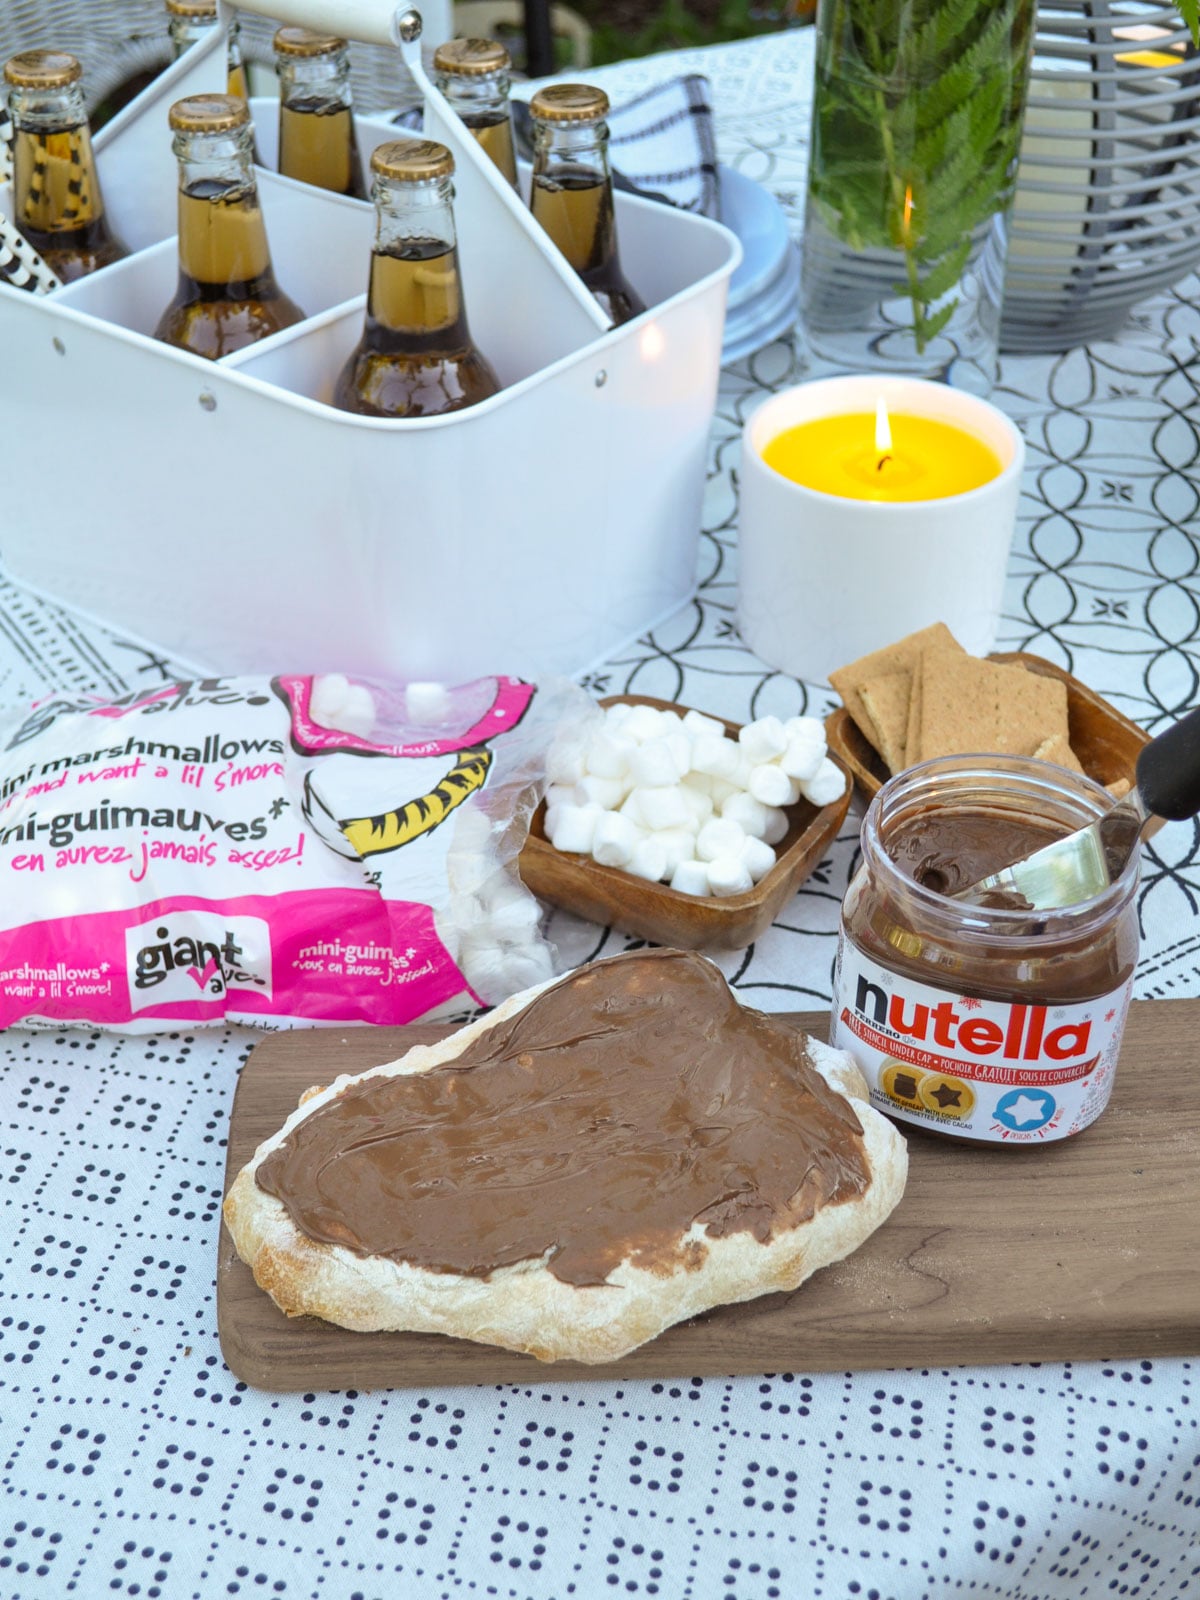
Pizza crust spread with Nutella hazelnut spread before adding marshmallows.
  1. Step 2: Remove the crust and spread a layer of Nutella over the top while it's still hot. The heat makes it easy to spread.
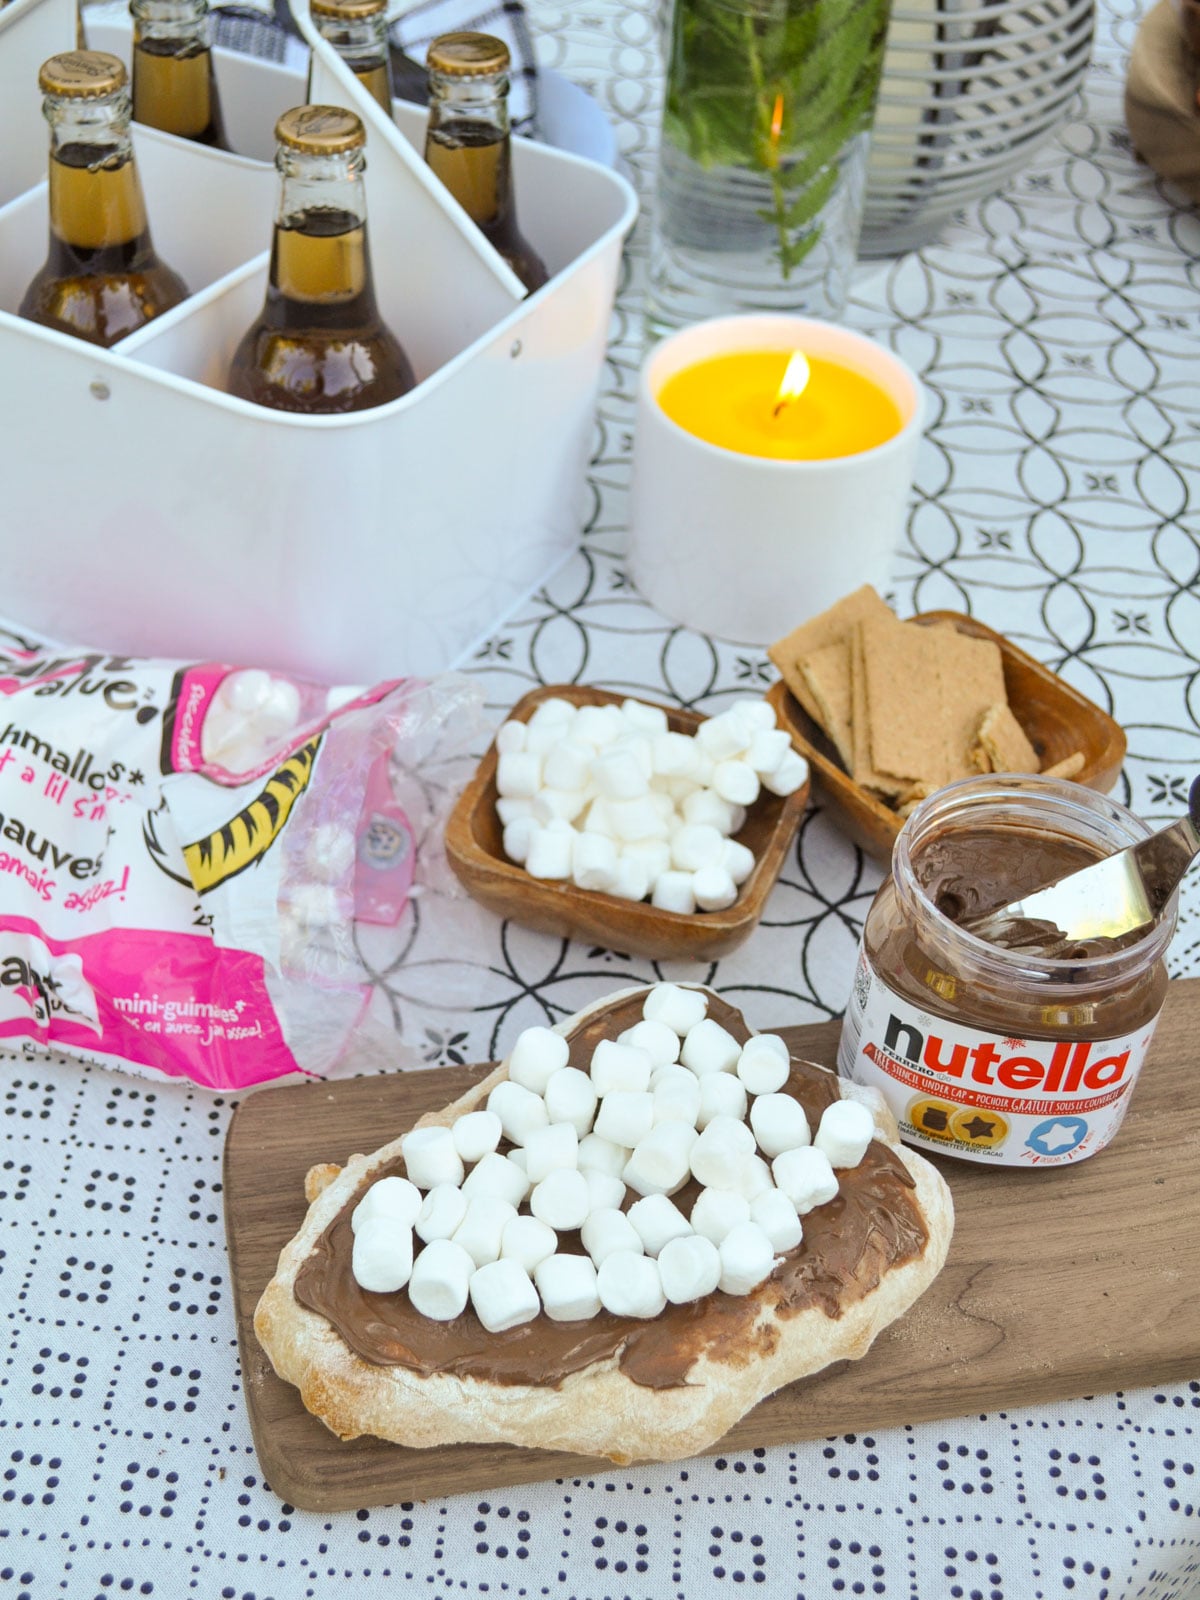
S'mores pizza topped with Nutella and mini marshmallows before baking.
  1. Step 3: Sprinkle the mini marshmallows evenly over the Nutella. Return the pizza to the oven for a few minutes to toast the marshmallows, or switch your regular oven to broil for 1 to 2 minutes. Marshmallows go from perfectly toasted to burnt fast under a broiler, so stay close and watch the whole time.
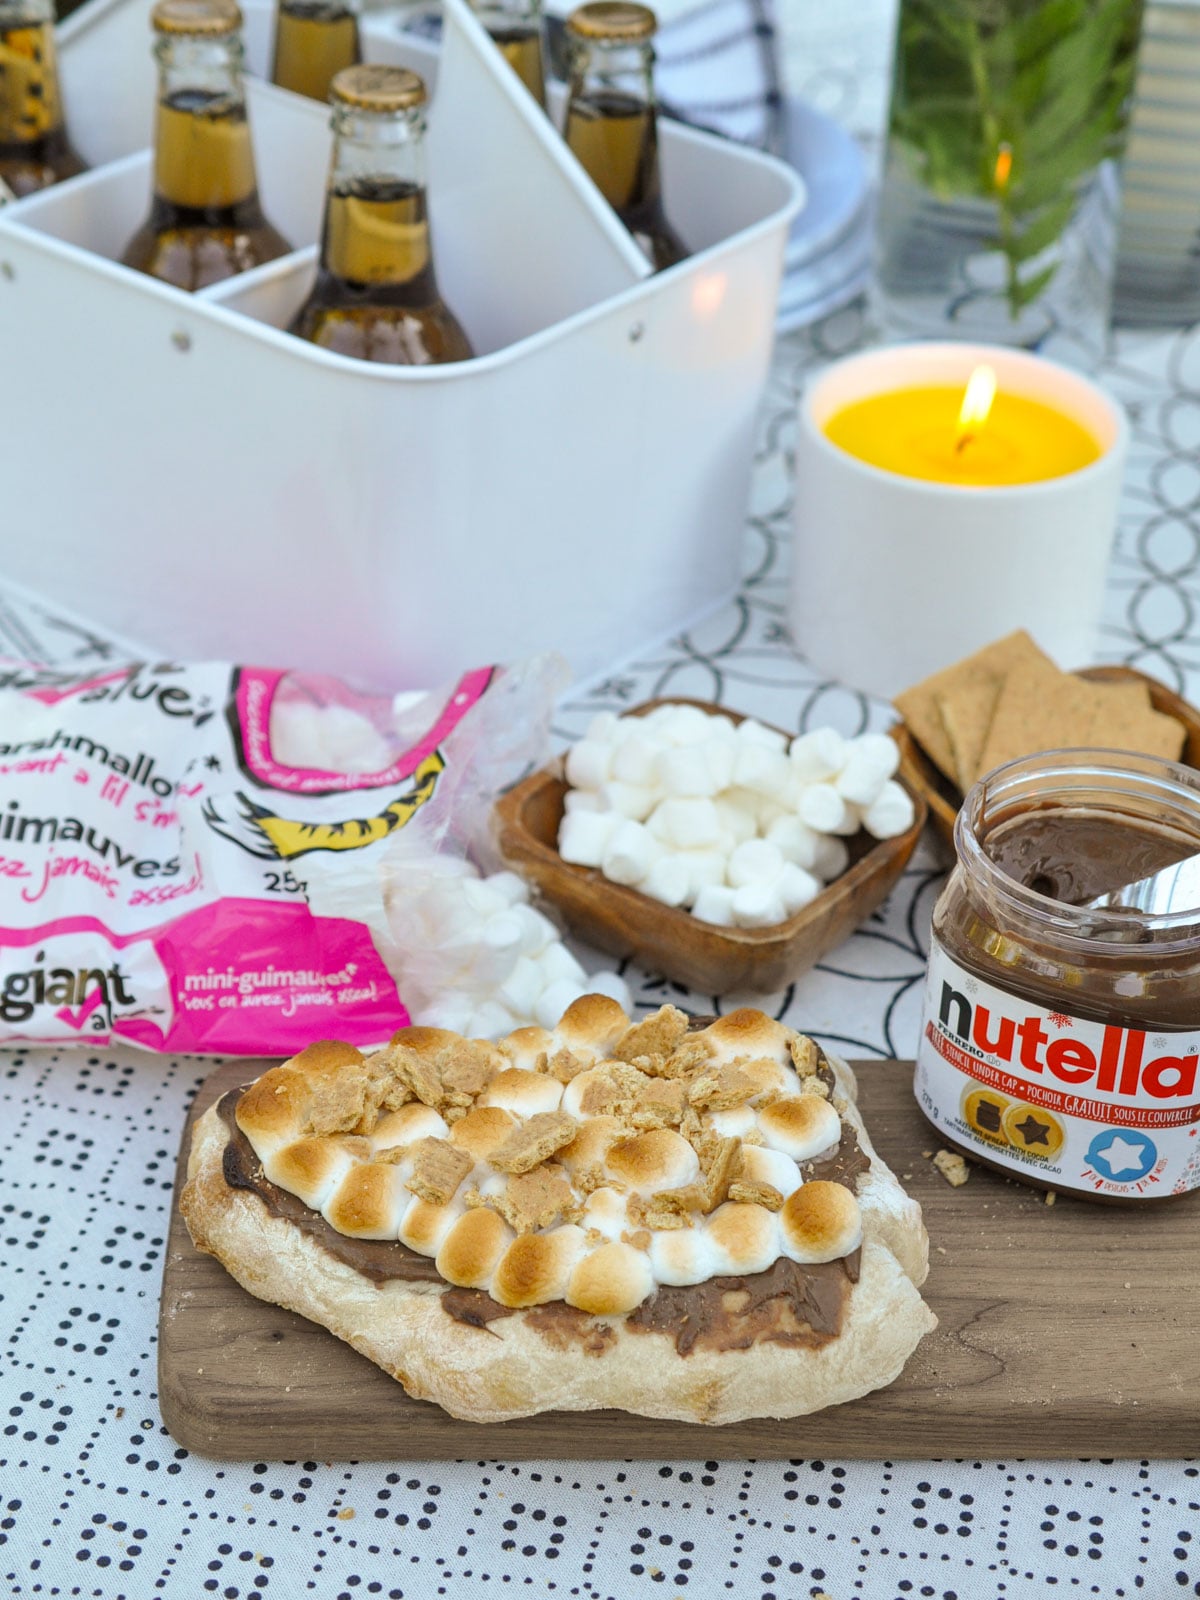
Finished s'mores pizza with toasted marshmallows and graham cracker pieces on a wood board.
  1. Step 4: Sprinkle crumbled graham crackers over the top, slice with a pizza cutter, and serve warm.
Toasted s'mores pizza with graham cracker crumbles on a wood serving board.

Expert Tip: Prebaking the crust on its own before adding any toppings is the step that makes this recipe work. Since Nutella and marshmallows won't hold up to a long bake time, this two stage method gives you a crust that's cooked through without turning your toppings into a burnt mess.

Storage

This s'mores pizza is really at its best served warm, right after the marshmallows come out of the oven. If you do have leftovers, store them covered at room temperature for up to a day. It won't reheat quite like fresh, since the marshmallows firm up, but a quick minute back in a warm oven will loosen things up again.

Golden pizza crust topped with Nutella and toasted marshmallows.

Frequently Asked Questions

Can I make this without a pizza oven?

Yes, a regular oven works well. Just preheat to 400 degrees, bake the crust until golden, then add your toppings and finish under the broiler for a minute or two, watching closely so the marshmallows don't burn.

Why do I need to bake the crust before adding toppings?

Baking the crust on its own first means you can fully cook the crust without burning the toppings, since those toppings only need a couple of minutes to warm through and toast.

What if I don't have Nutella?

A good chocolate sauce, ganache, or even melted chocolate chips or your favorite chocolate bar work well in its place.

More S'mores Recipes

  • S'mores charcuterie board with graham crackers, marshmallows and chocolate for summer entertaining.
    S'mores Charcuterie Board
  • Easy s'more trail mix in a glass jar, with a gift giving bag and white flowers.
    S'mores Trail Mix
  • Halloween smores board with Halloween cookies, marshmallows, chocolate and more!
    Halloween Smores
  • Stack of homemade coffee marshmallows showing mocha color and fluffy texture.
    Homemade Coffee Marshmallows Recipe
Finished s'mores pizza on a wood board with graham crackers and marshmallows alongside.

With delicious  s'mores pizza, life really is a party!

If you try this s'mores pizza or any other recipe on my blog please leave a star rating and let me know how it went in the comments below. Thanks for visiting today!

Recipe

Golden pizza crust topped with Nutella and toasted marshmallows.

S'mores Pizza

Your favorite treat of s'mores just became a pizza!
No ratings yet
Print Pin Rate
Course: Dessert
Cuisine: American
Prep Time: 5 minutes minutes
Cook Time: 12 minutes minutes
Total Time: 17 minutes minutes
Servings: 1 large pizza
Calories: 236kcal
Author: Dannyelle Nicolle-Ramjist

Ingredients

  • 1 package pre-made pizza dough
  • 1 cup nutella hazelnut spread
  • 2 cups mini marshmallows
  • ¼ cup graham cracker pieces

Instructions

  • Start by flouring and stretching out your pre-made ball of dough, or use a rolling pin to roll dough into a large pizza shape. If you're using a pizza oven, use the pizza peel paddle to put the dough into your pre-heated pizza oven. You want the oven to be around 400 degrees. If you are using a regular oven put your pizza crust onto a cookie sheet or pizza pan lined with parchment paper or sprayed with non-stick cooking spray, or a pizza stone. Cook the dough until it's just turning golden brown -don't over cook at this stage because we're going to put the pizza back in the oven later to finish it off.
    1 package pre-made pizza dough
  • Remove the pizza crust from the oven and spread a layer of Nutella on the pizza. The hot pizza crust will make the Nutella very easy to spread.
    1 cup nutella hazelnut spread
  • Top with a layer of mini marshmallows. Return the pizza to the oven for a few minutes to toast the marshmallows, or switch your regular oven to broil for 1 to 2 minutes, watching closely.
    2 cups mini marshmallows
  • Sprinkle some crumbled graham crackers over the top of the hot pizza. Slice with a pizza cutter and enjoy!
    ¼ cup graham cracker pieces

Nutrition

Serving: 1g | Calories: 236kcal | Carbohydrates: 32g | Protein: 3g | Fat: 11g | Saturated Fat: 8g | Polyunsaturated Fat: 2g | Sodium: 46mg | Fiber: 2g | Sugar: 23g
Tried this Recipe? Tag me Today!Mention @LifeisaParty or tag #lifeisaparty!

Backyard Pizza Party

Jun 19, 2019 · 10 Comments

backyard pizza party

Backyard Pizza Party: A gas outdoor pizza oven and a pizza charcuterie board for nibbling and to make-your-own-pizza is perfect for summer entertaining.

backyard pizza party
[feast_advanced_jump_to]

Pizza Party

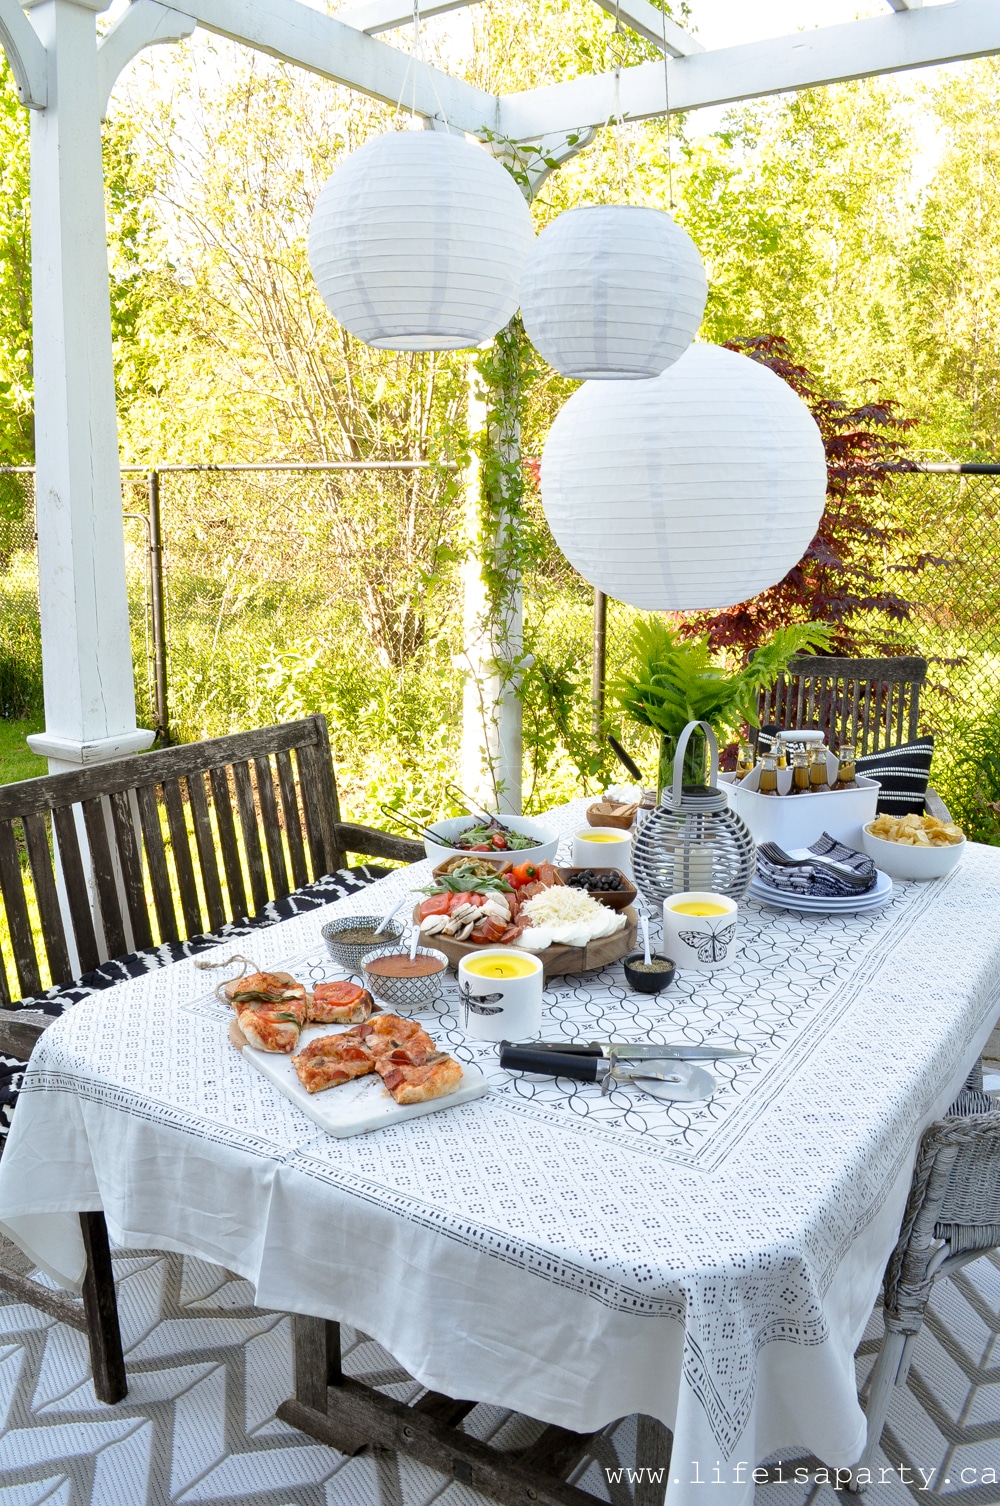
Who doesn't love a pizza party, and how much better can it get than outside in the summer using an outdoor pizza oven?  I'm so excited to share my backyard and patio with you from a recent pizza party that I worked on with Giant Tiger.  This is summer entertaining at its best!

Backyard Pizza Party

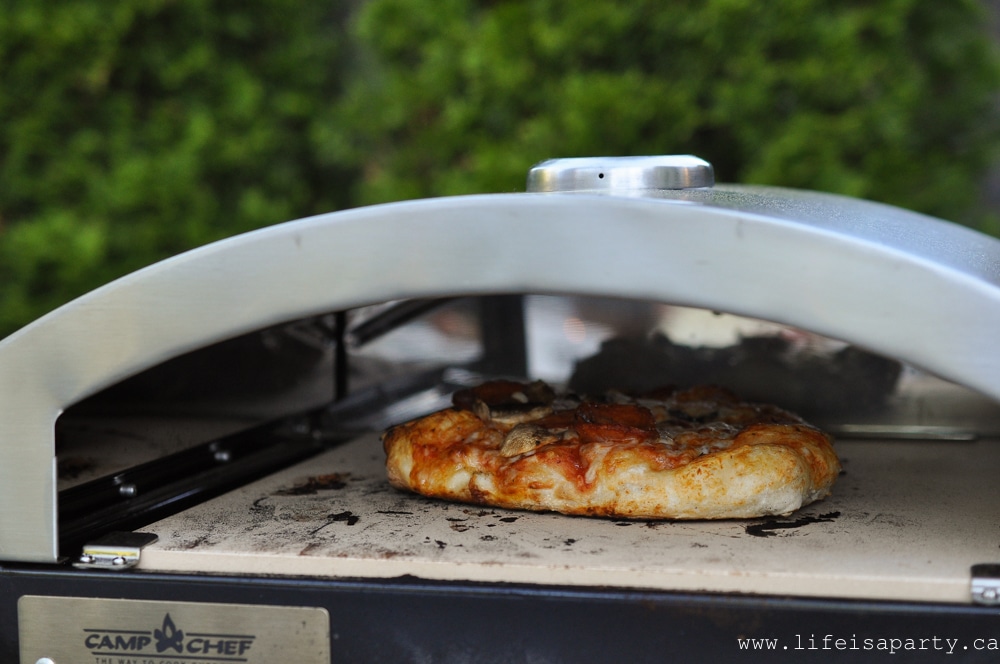
The idea for this backyard pizza party all started when I found an amazing gas outdoor pizza oven at Giant Tiger.  It goes on top of an outdoor camp stove so it's perfect for your backyard, or even to bring on camping trips.  And it cooks the best pizza.

outdoor pizza oven

If you've ever wanted an outdoor pizza oven for entertaining but didn't want to go to the trouble of building one, and then buying wood and burning it ahead of time to get to the perfect temperature, then this gas one is perfect for you.  It pre-heats in about 10 minutes, and cooks perfect crispy crust, and beautiful golden brown on top.  We are so happy with it, and have already cooked dozens of pizzas.  This may go down as the pizza summer -and I'm pretty excited about that. 😉

how to throw a Backyard Pizza Party
bbq Pizza Party

The Outdoor Space

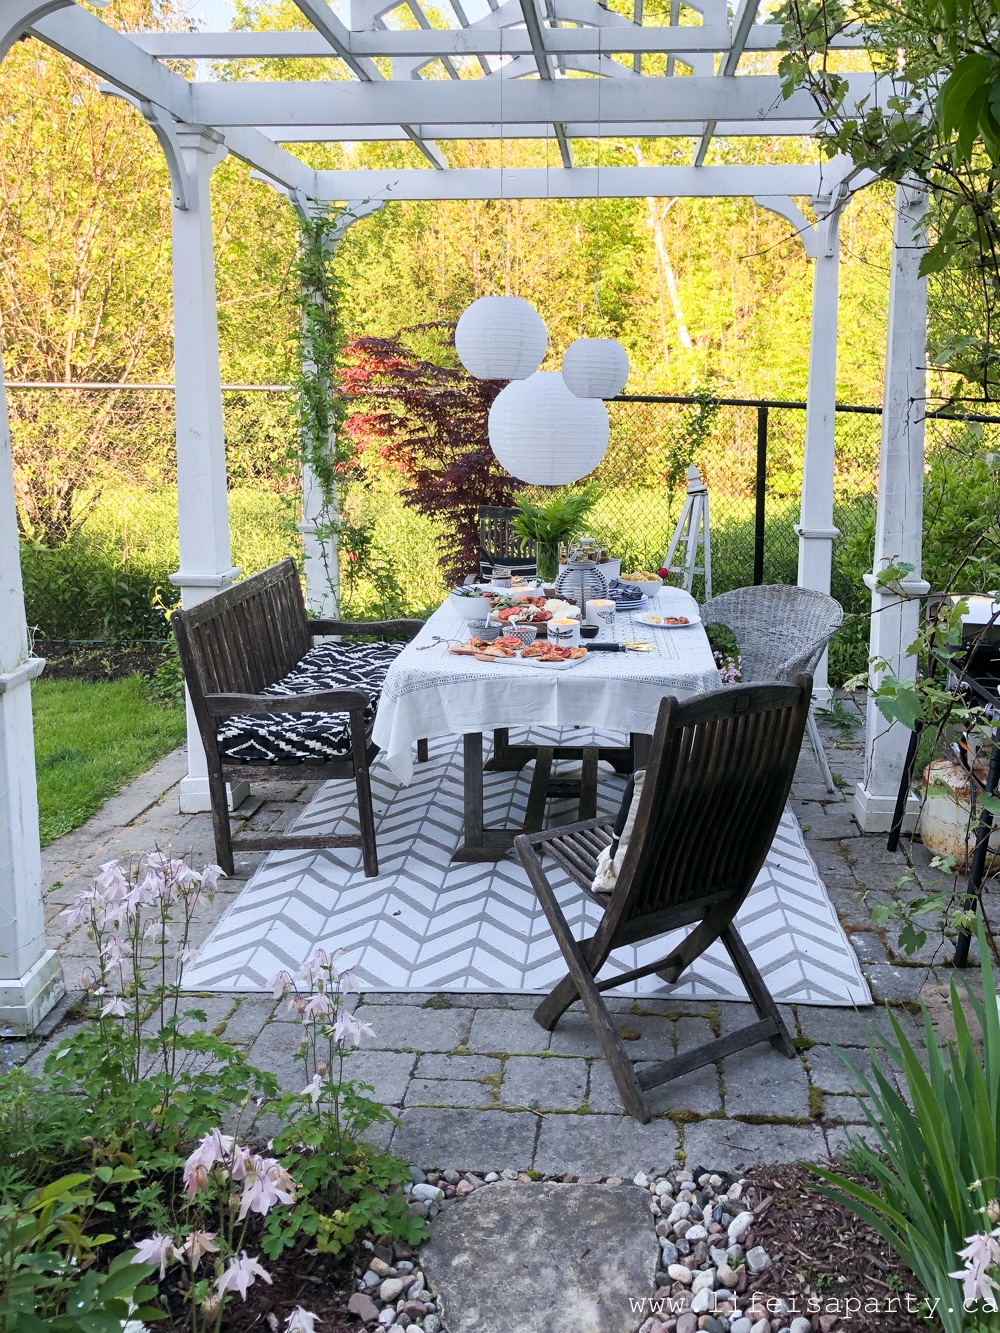
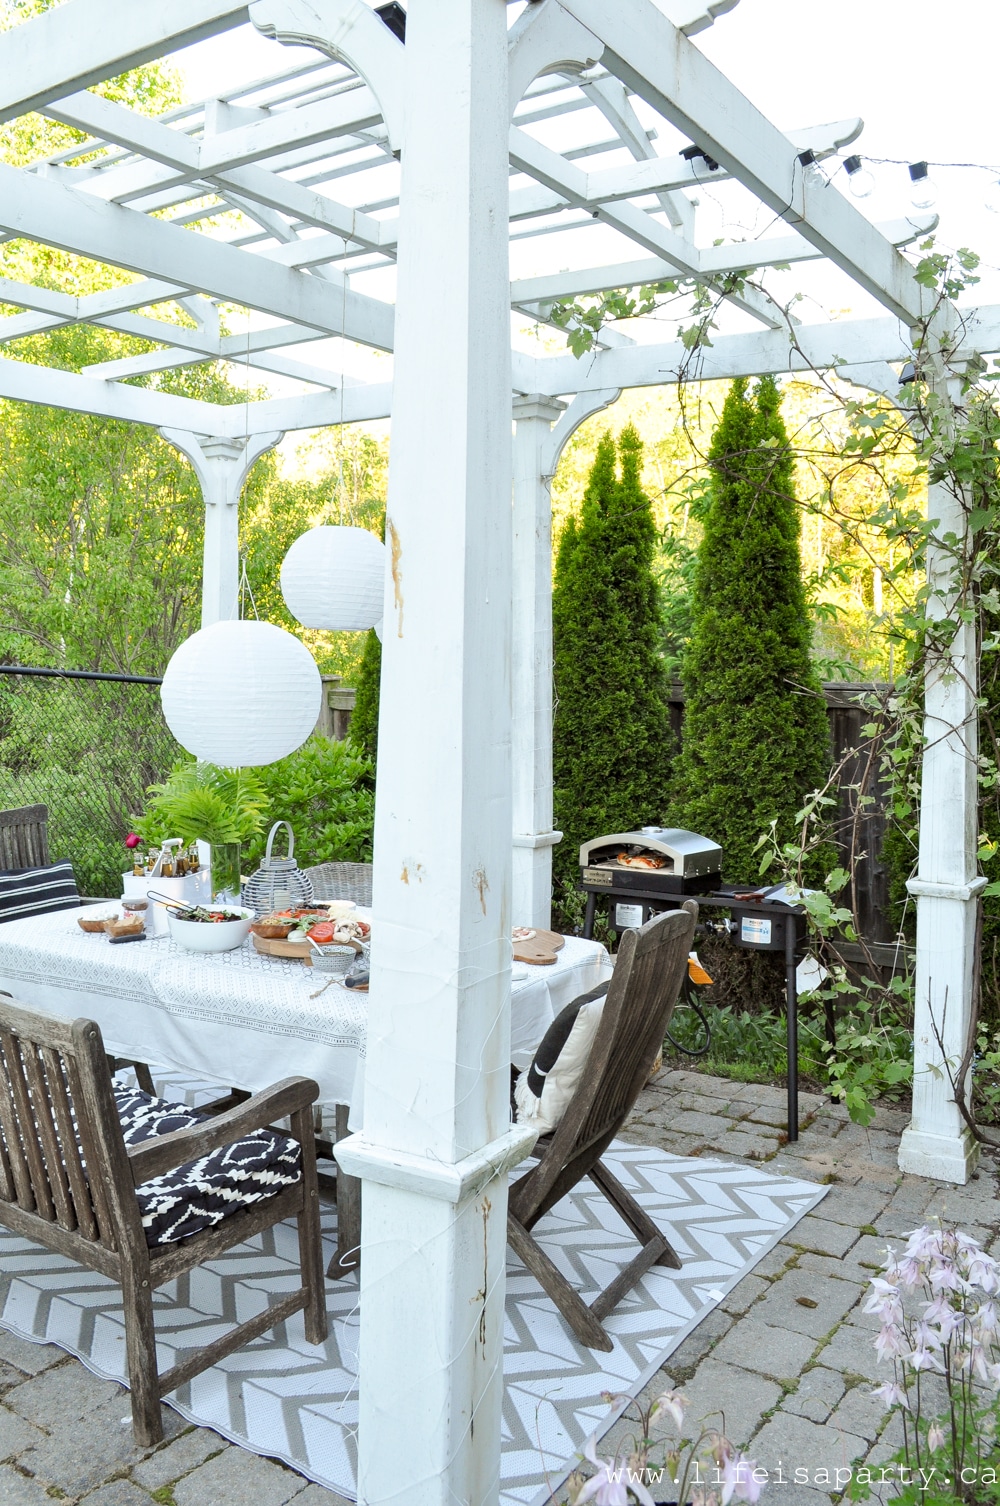
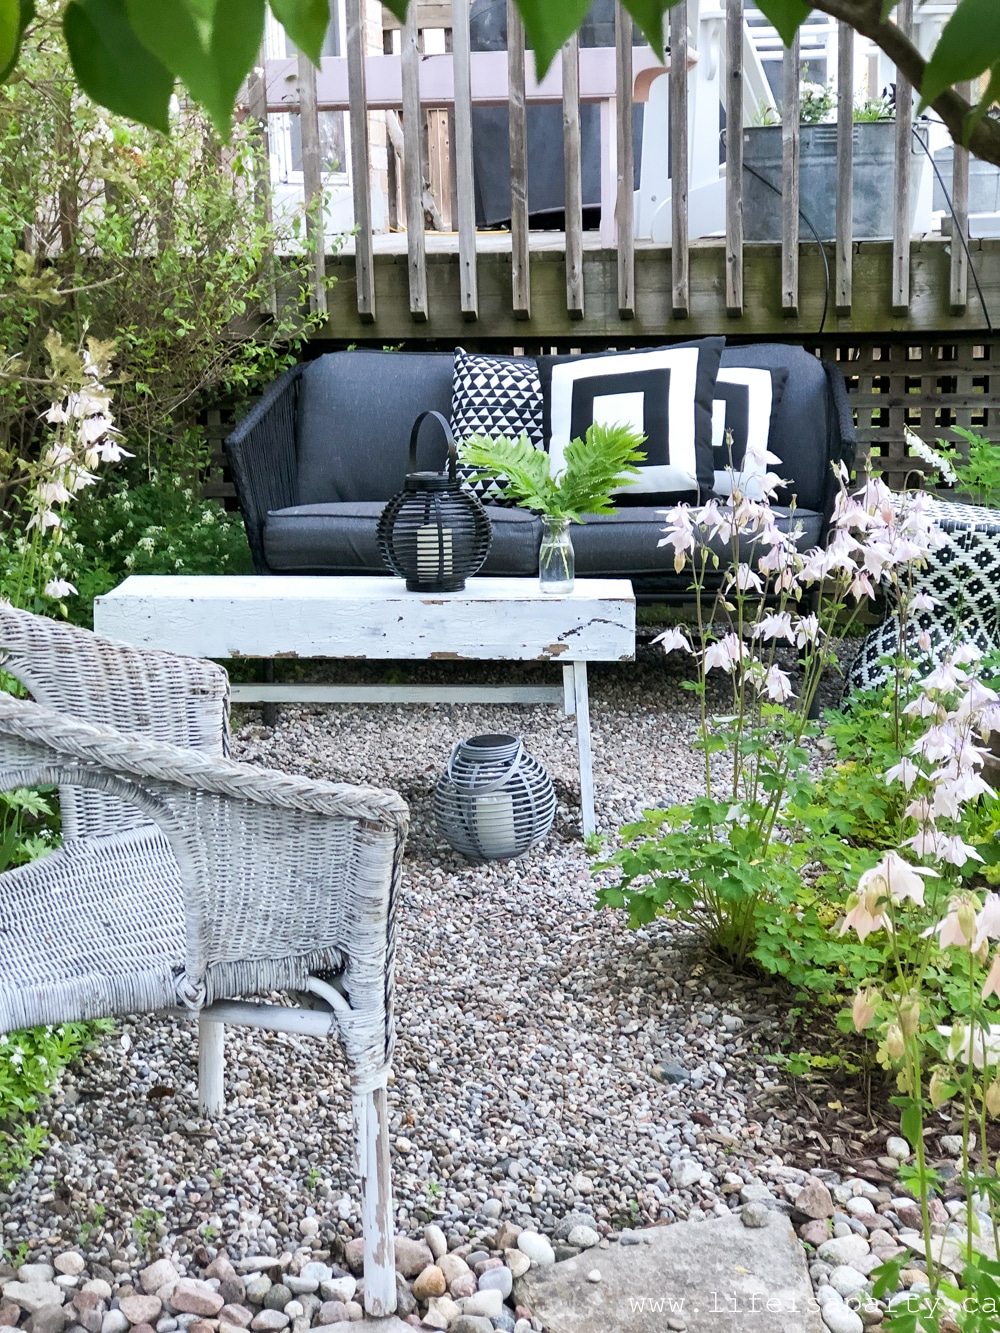
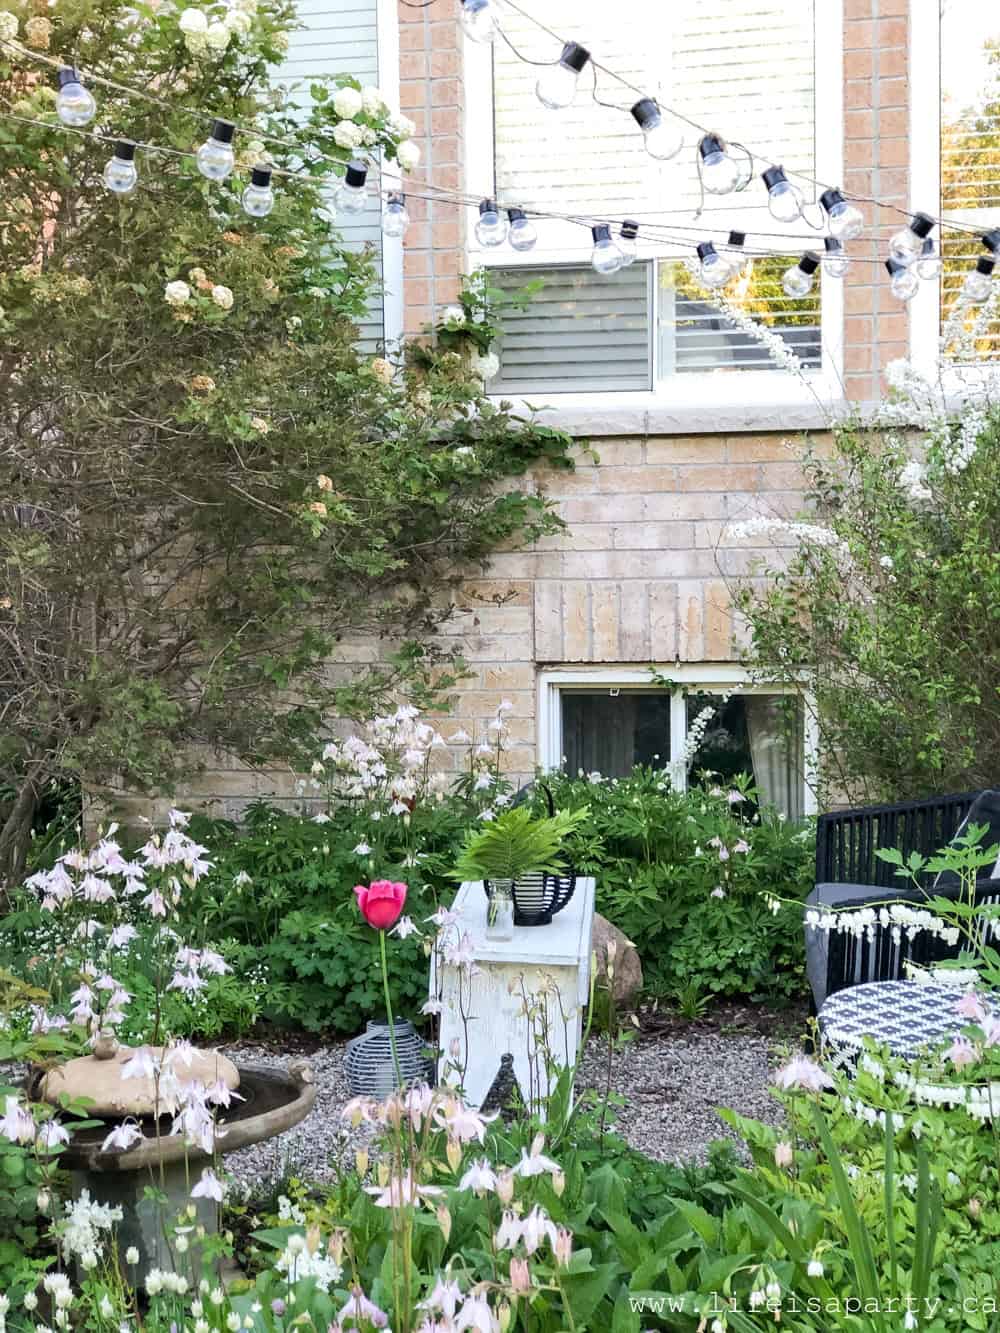
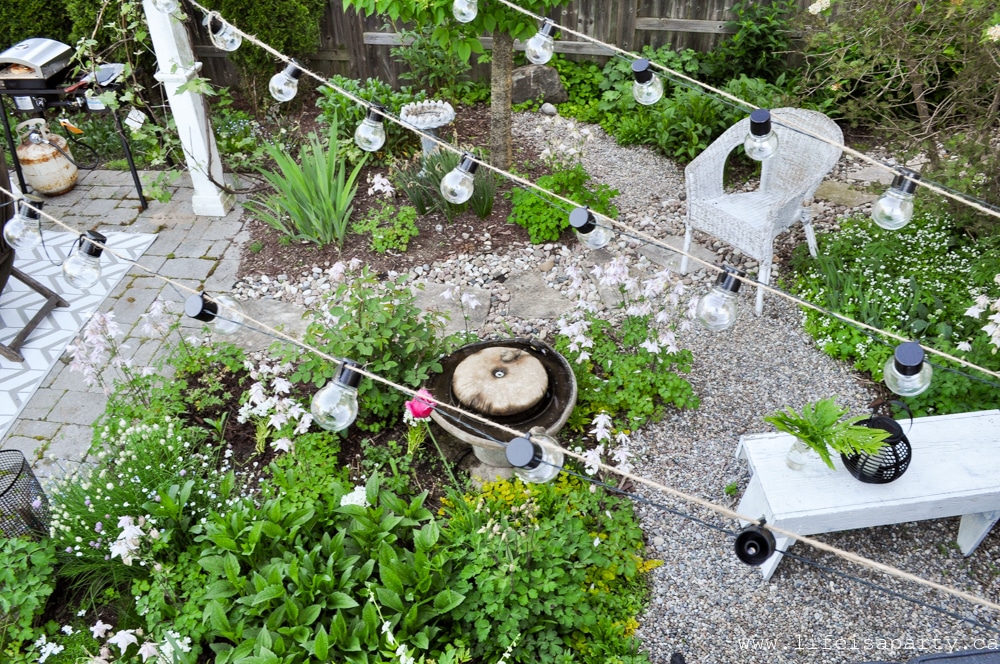
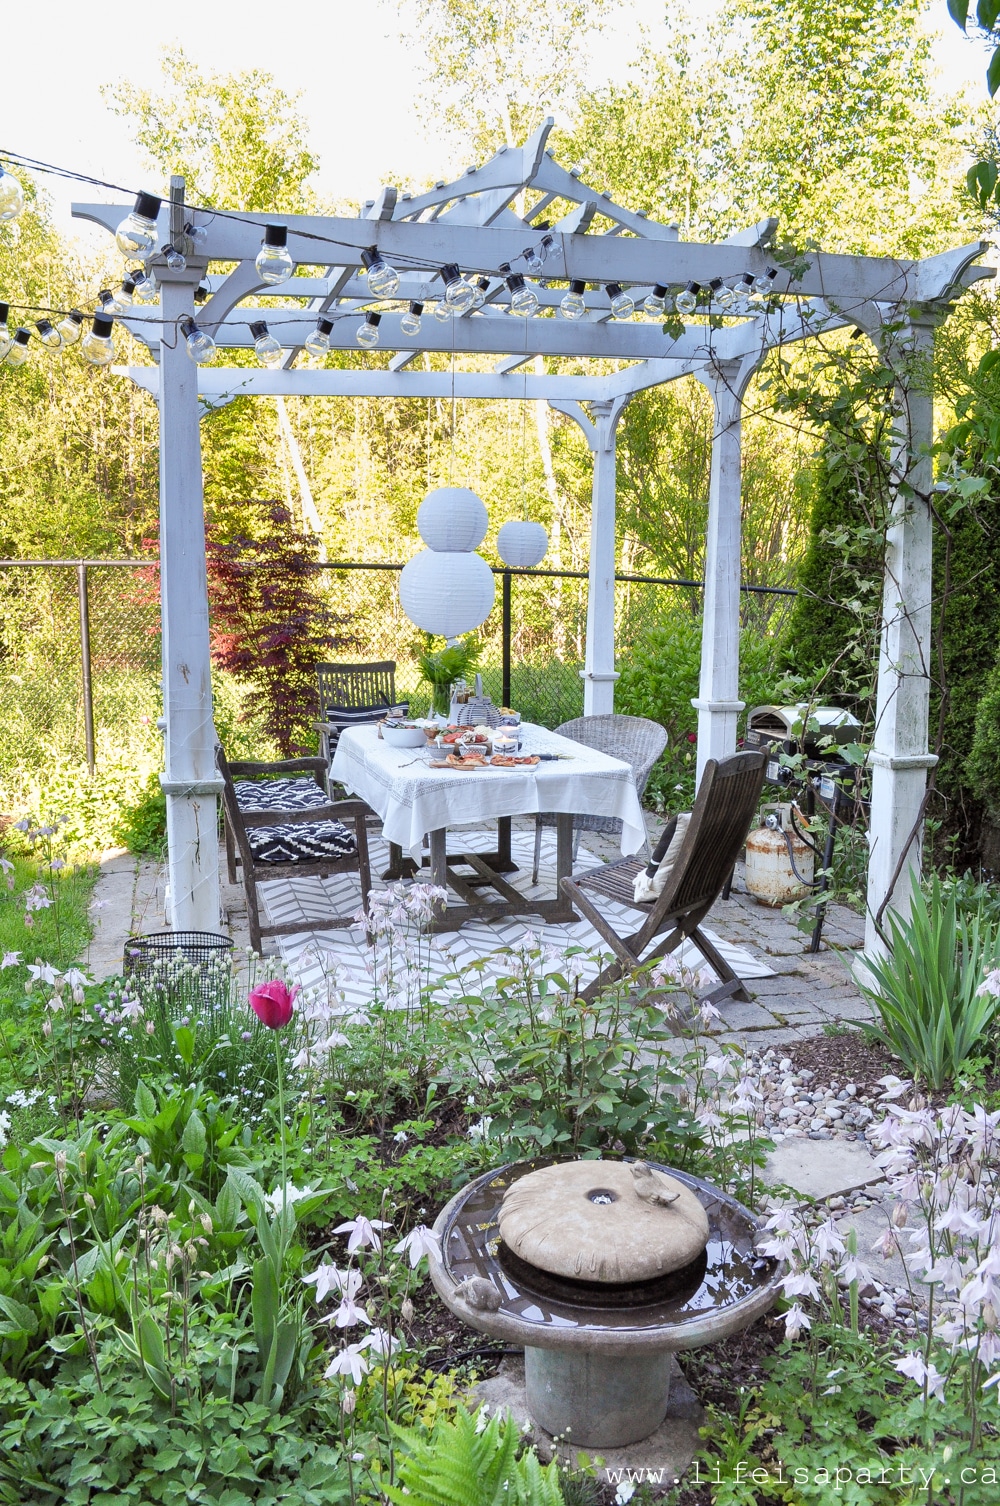
We built this pergola in our backyard quite a few years ago, and last summer we gave the white garden beside it a bit of refresh.  You can read all about it here.  My oldest daughter and I refreshed the paths and widened one into a sitting area.

black and white garden

We added a love seat and moved our little fountain over here and now this whole area is one of our very favourite spots.

garden with hanging lights

For our Backyard Pizza Party we added a few more great pieces to the space from Giant Tiger.  We picked up some string lights and strung them between the deck and patio.

backyard garden

They look so pretty and one of my very favourite features of the string lights is that they are solar.  No worrying about a spot to plug them in outside, or running extension cords.

Backyard Party

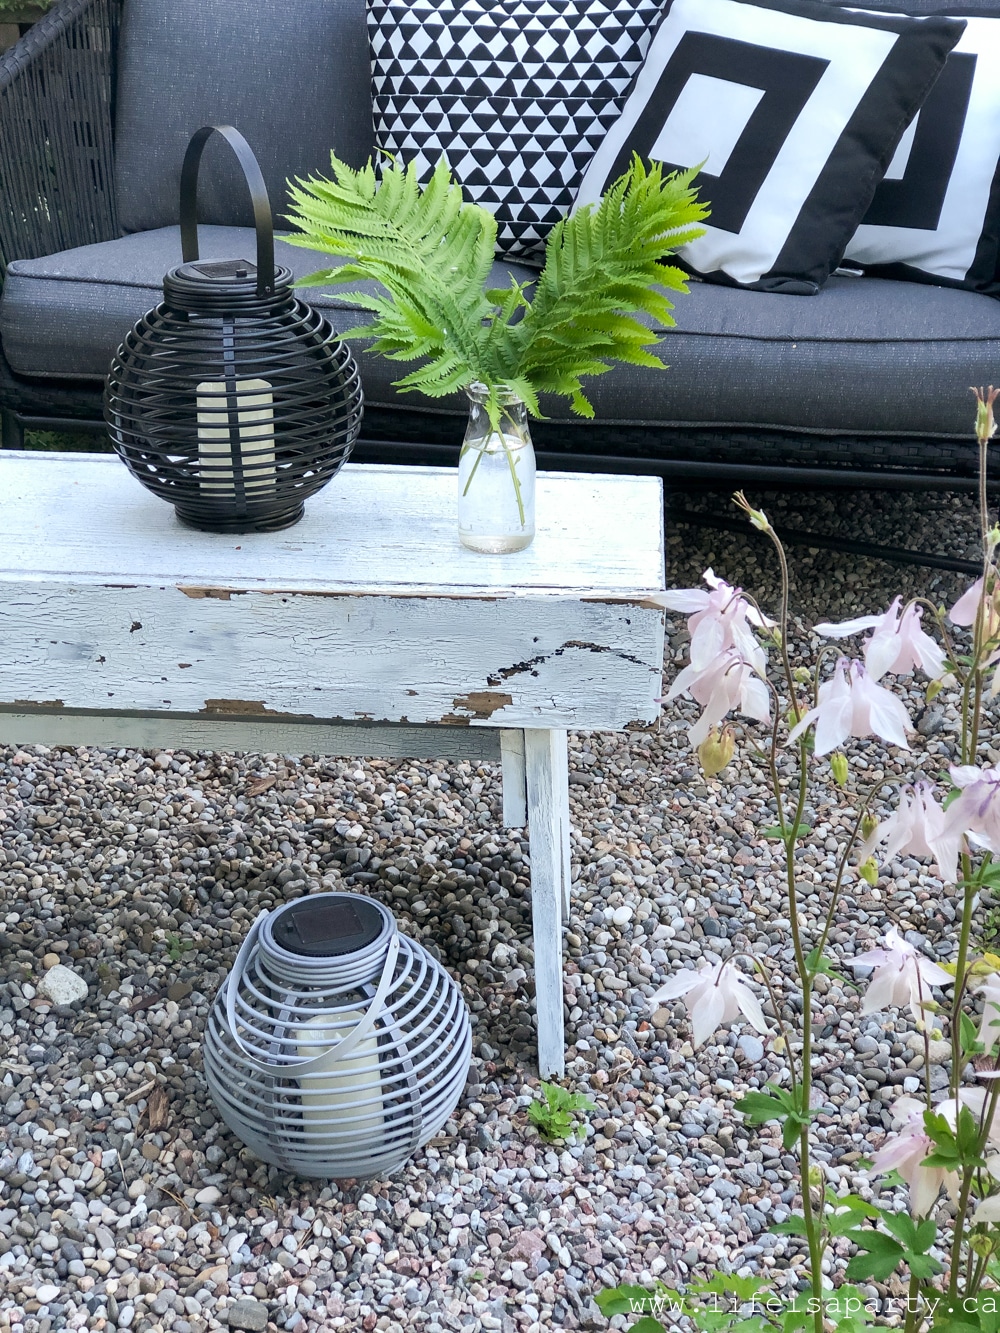
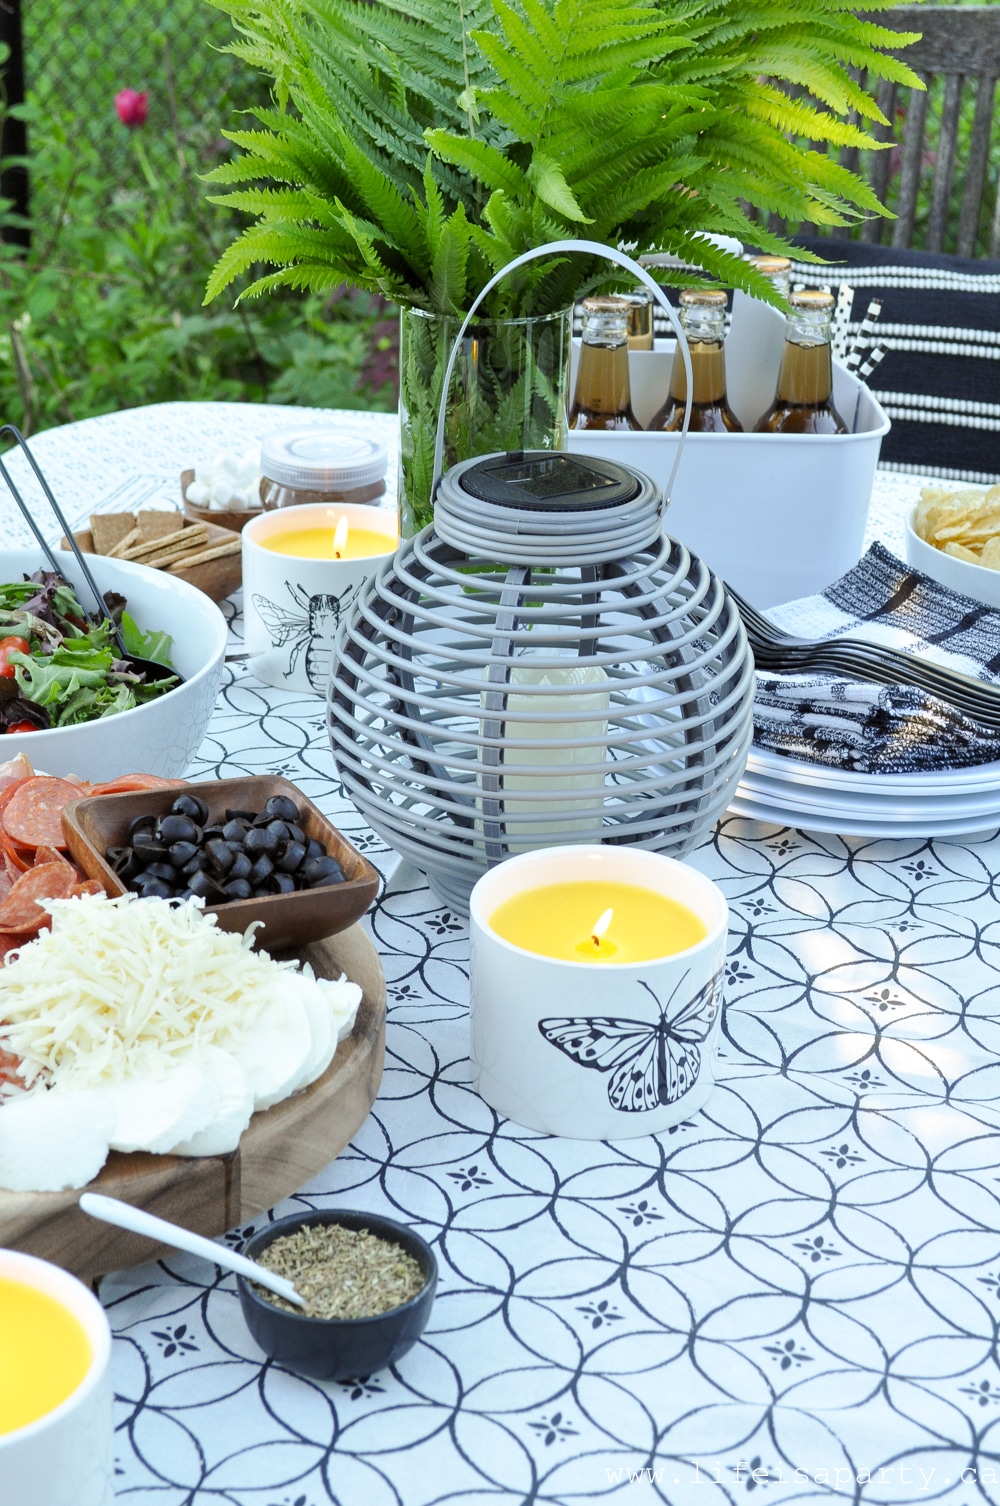
Over in the seating area we also added in some pretty solar lanterns.  They are so pretty, and I love that I don't have to worry about changing the batteries all the time.

black white garden with lanterns

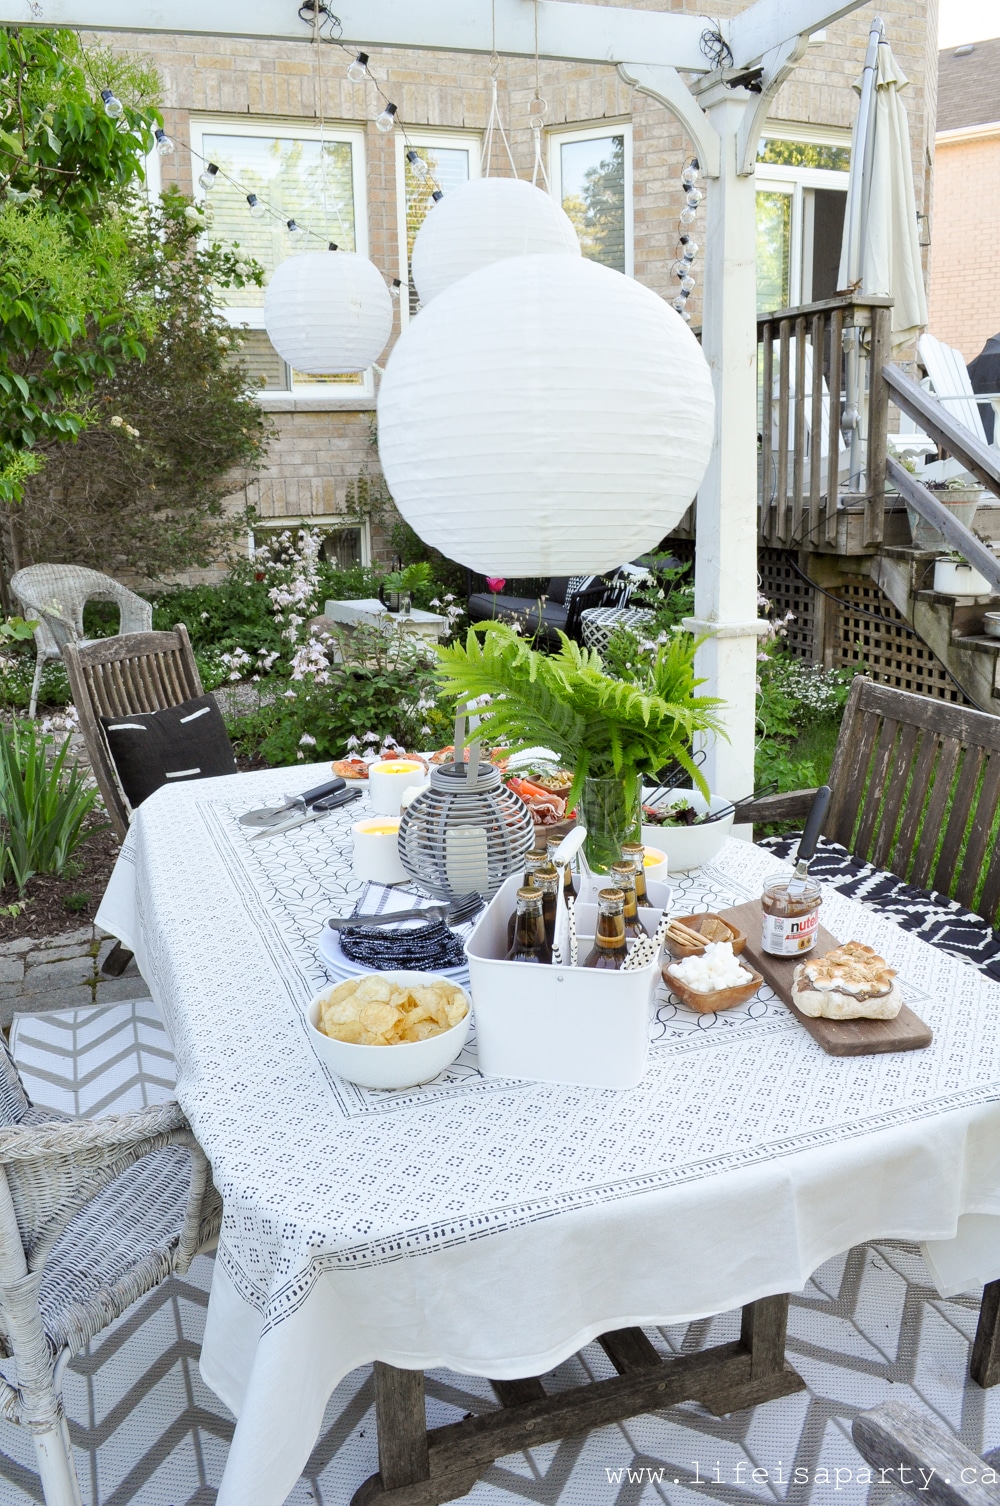
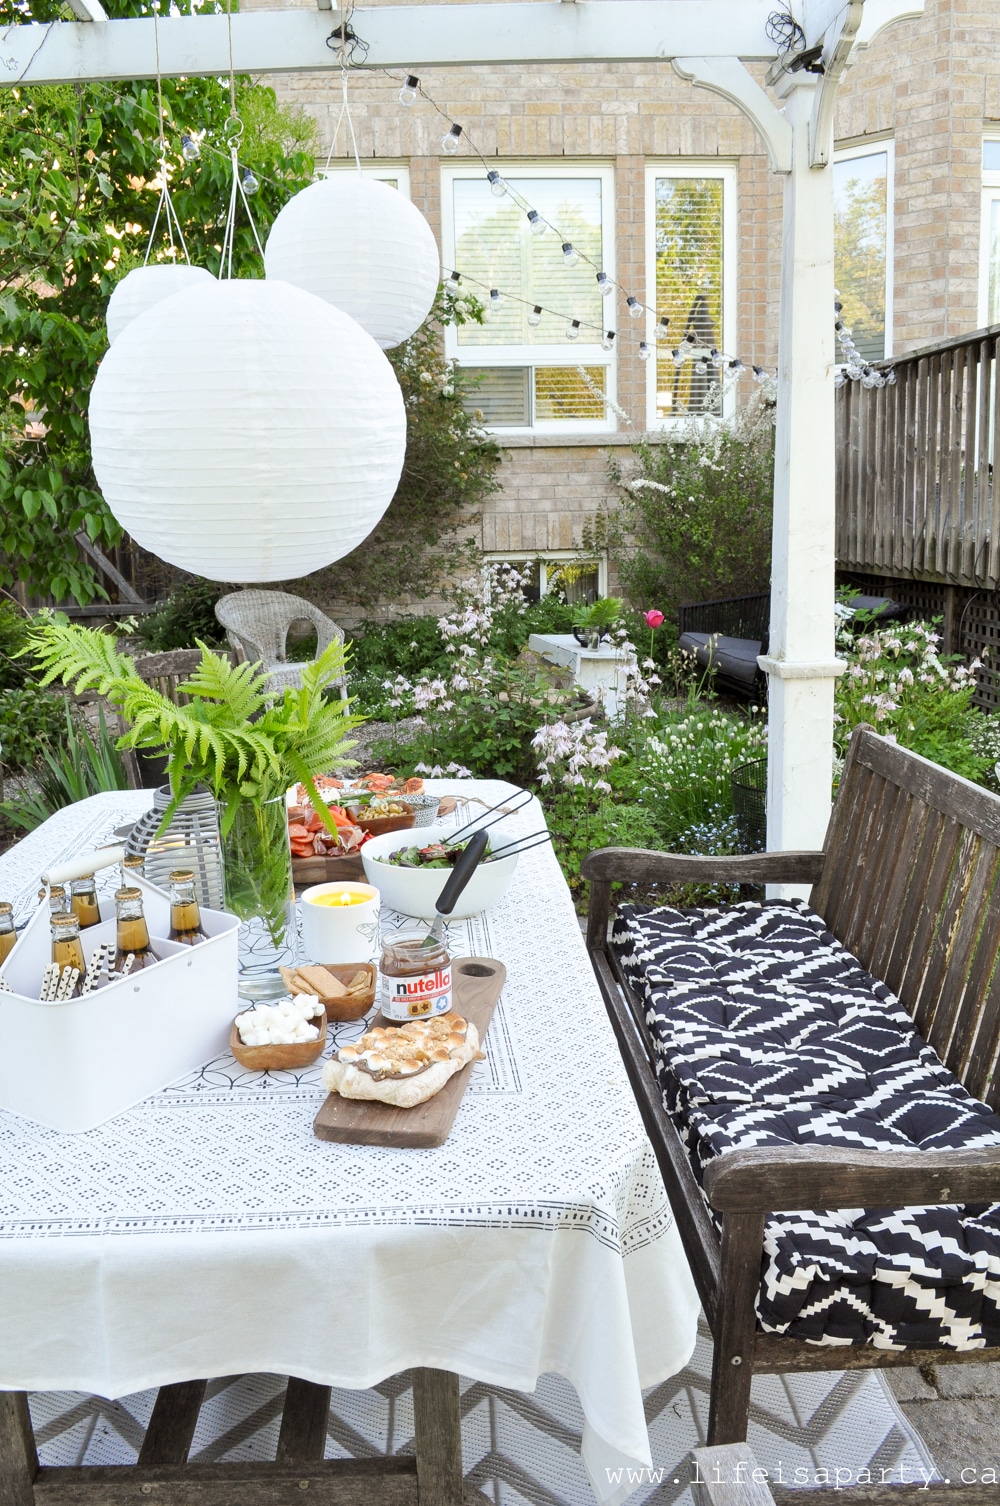
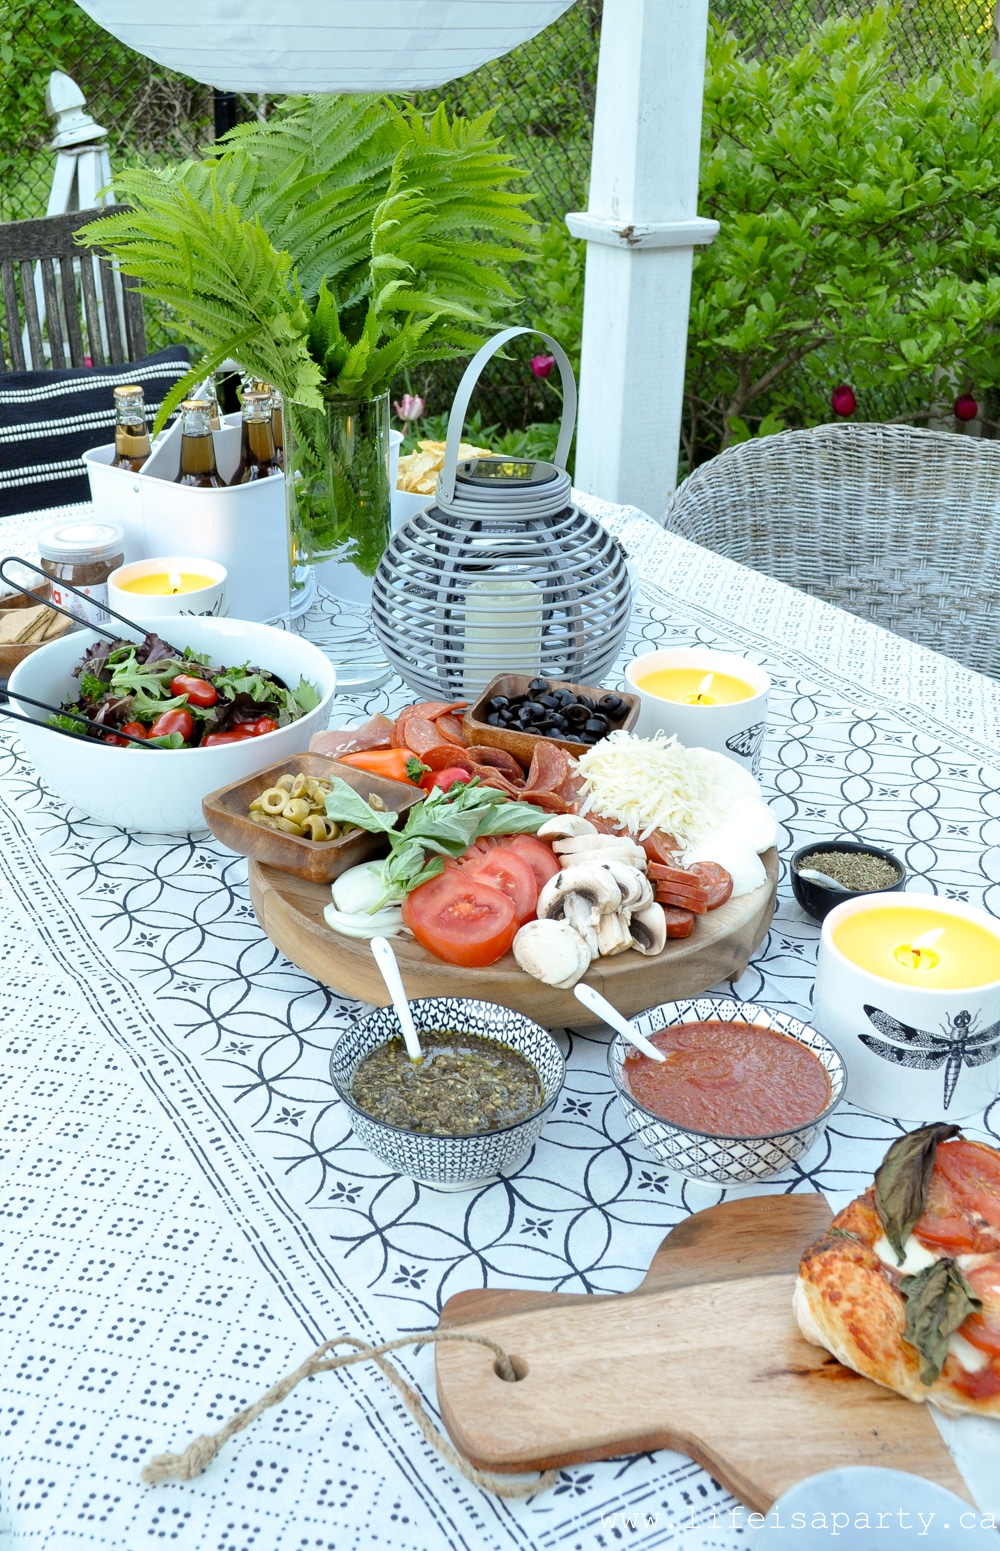
Under the pergola we set up the new pizza oven and set a really casual table.

Pizza Party

The Table Area

I love this kind of laid back summer entertaining where everyone can help themselves.  We invited friends over to join us and loved how people could sit where they wanted, the kids could enjoy the trampoline in between pizzas, and we could linger, cook, and chat the afternoon away together.

Backyard Pizza Party

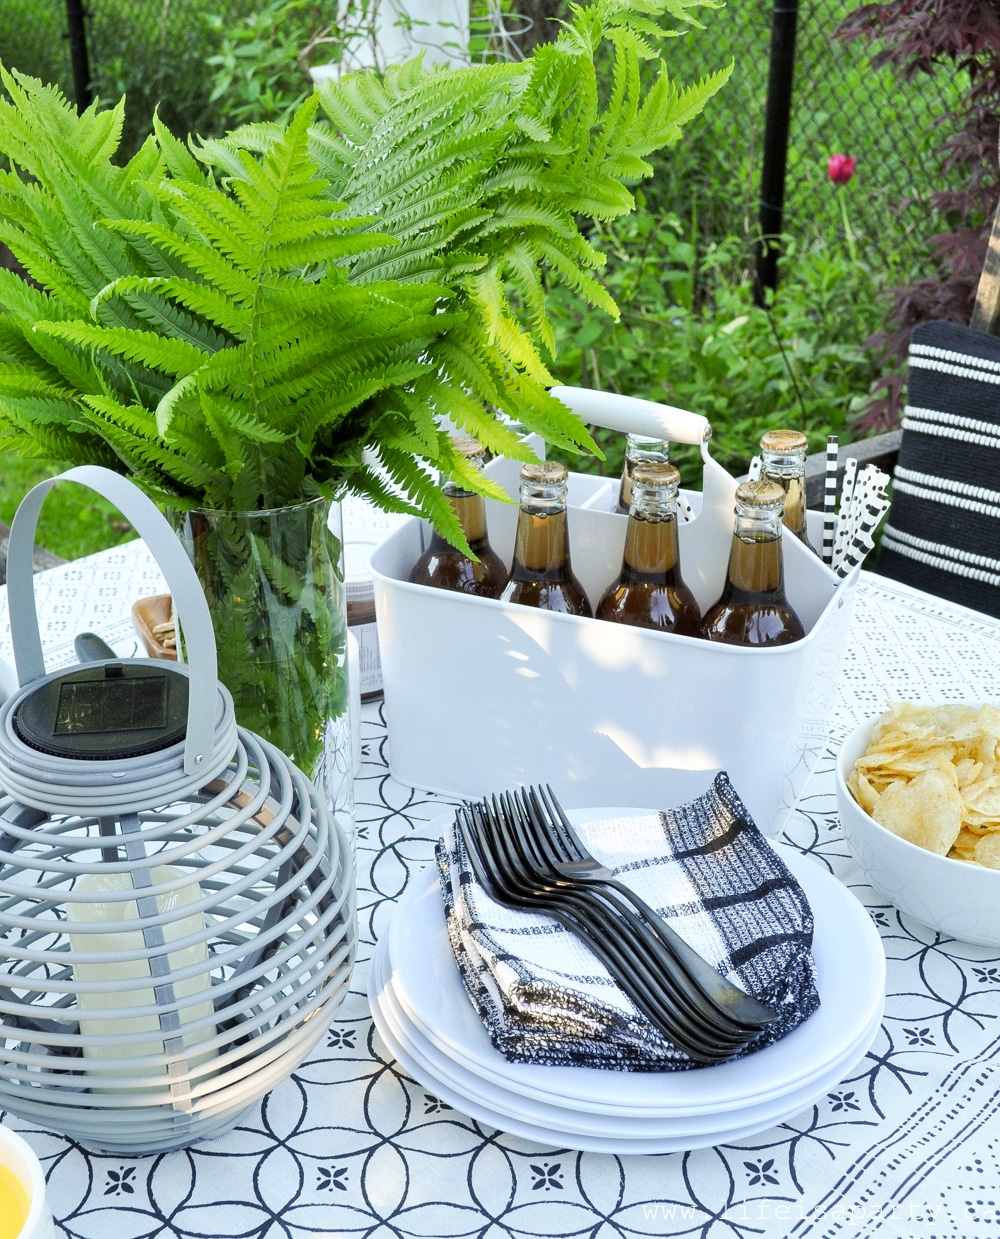
I love these new black and white seat cushions -great pattern and so comfortable.    They are for indoor use, but great to bring out for entertaining.

Pizza Making Party

I also picked up this beautiful and inexpensive outdoor rug.  It really brings the space together and feels so comfortable underfoot.

outdoor Pizza Party

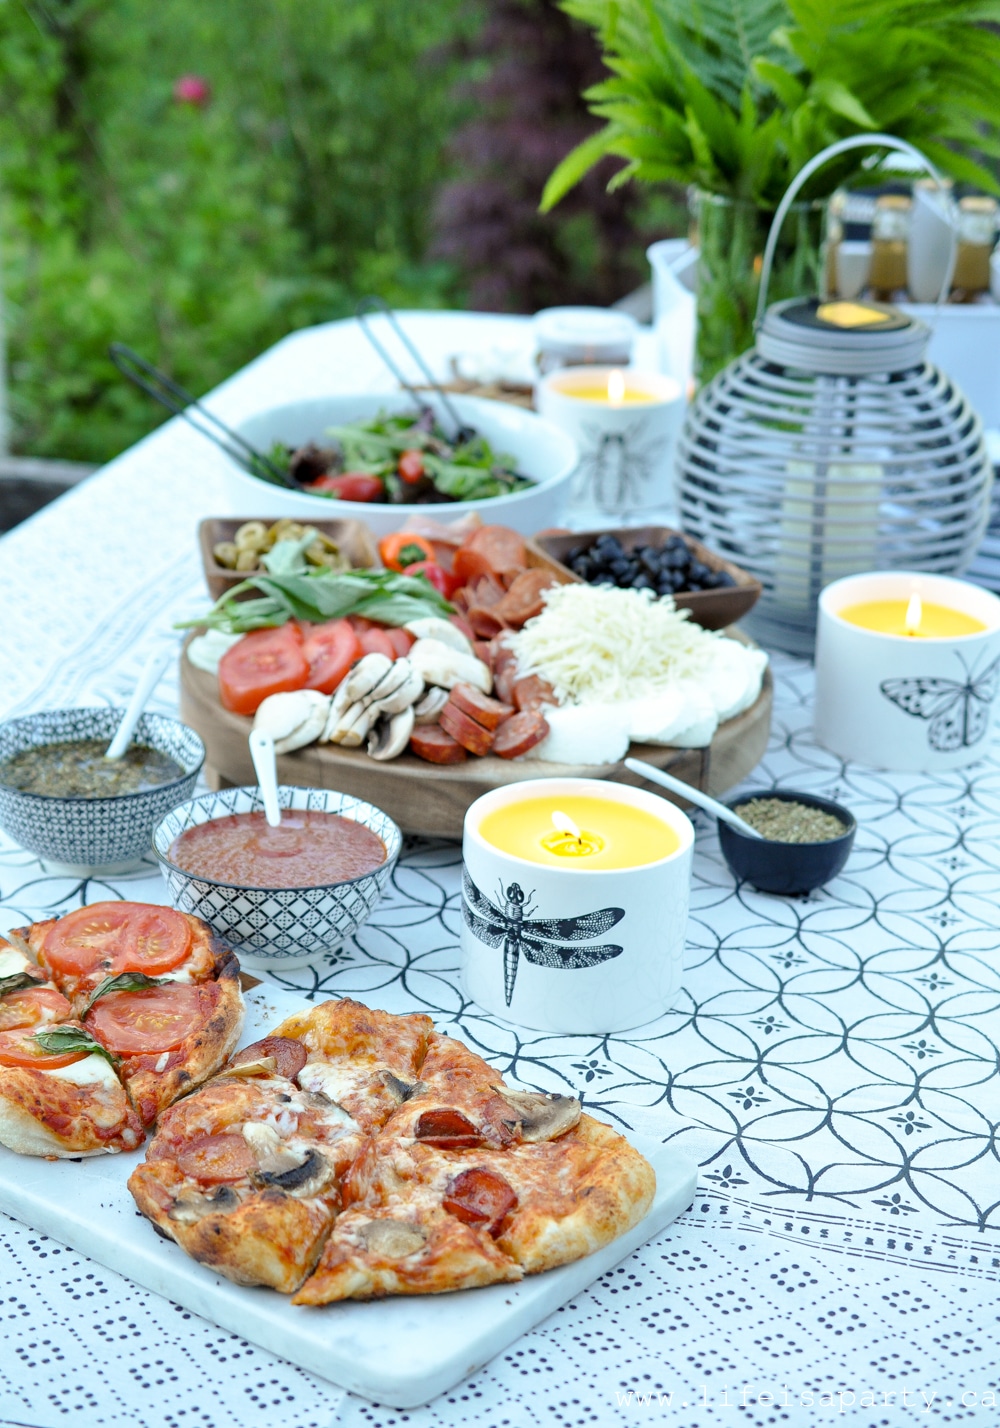
I also picked up some really pretty and effective citronella candles in store at Giant Tiger to help keep the bugs away.

Backyard Pizza

For the table we kept things really casual with some simple plates, and forks.  The napkins are actually just new black and white dish clothes.

black and white table

They're so perfect for casual entertaining, inexpensive, and more environmentally friendly than disposable ones.

Pizza Toppings and Food

make your own pizza party

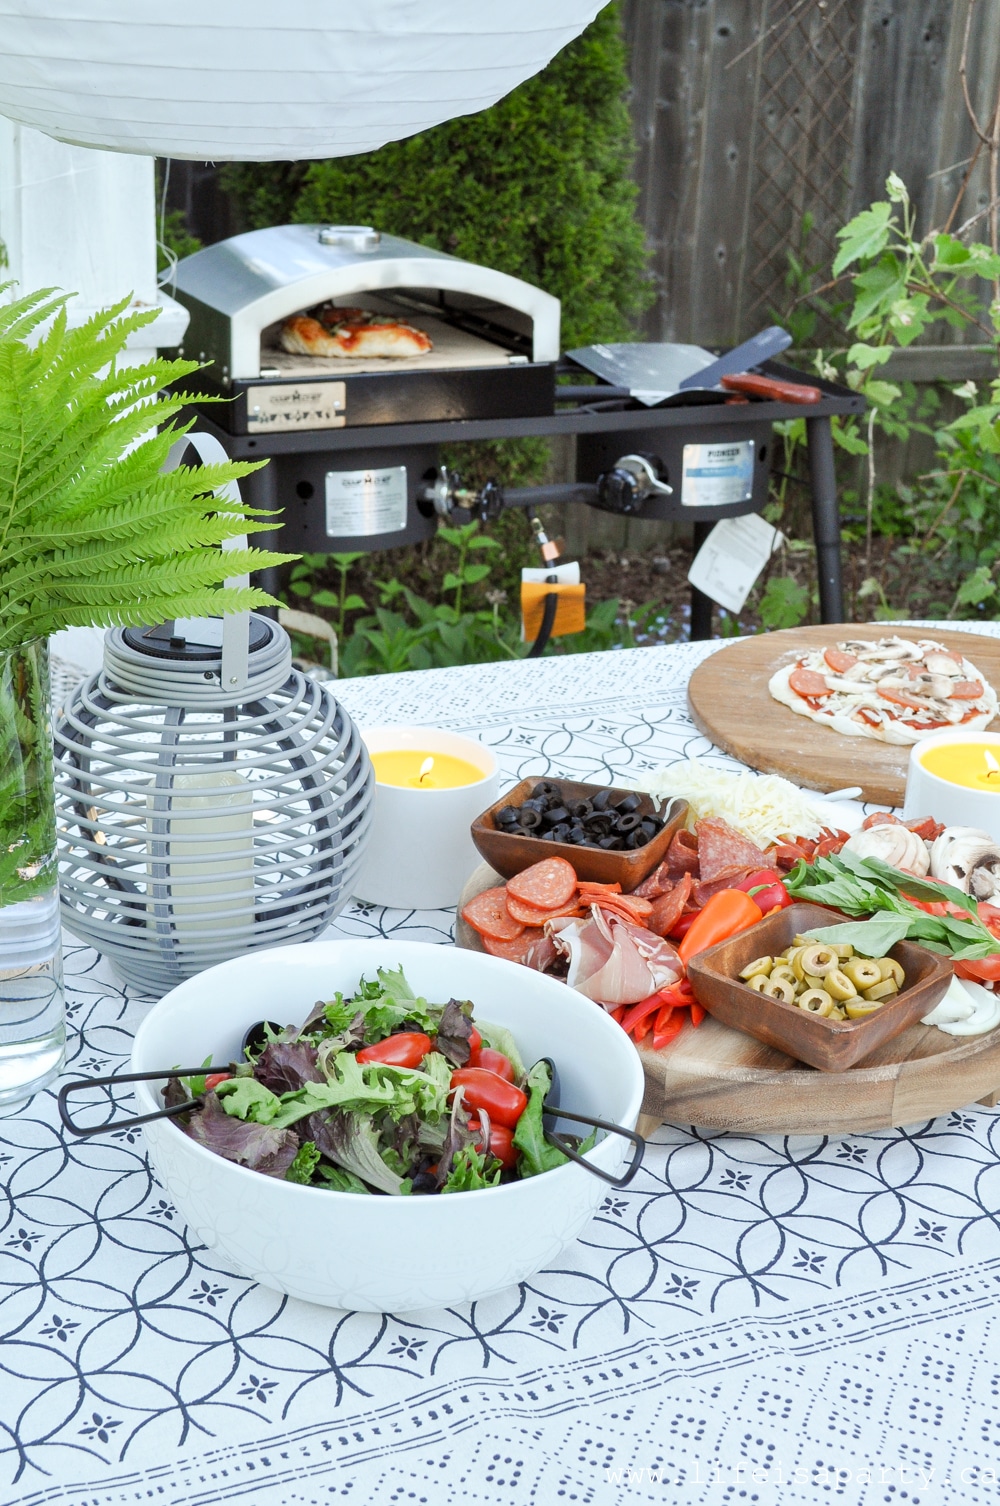
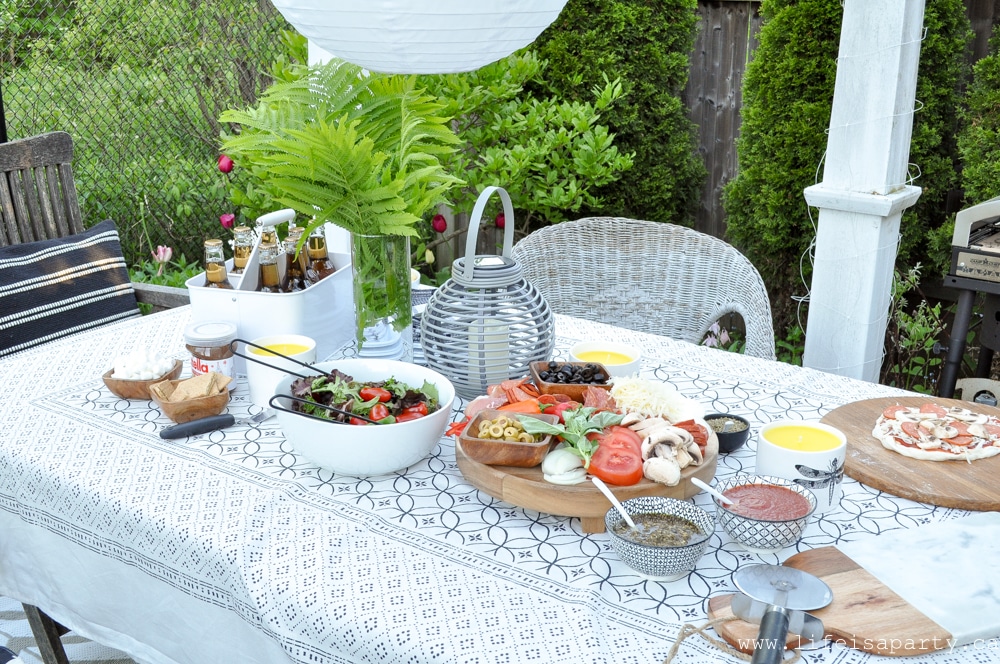
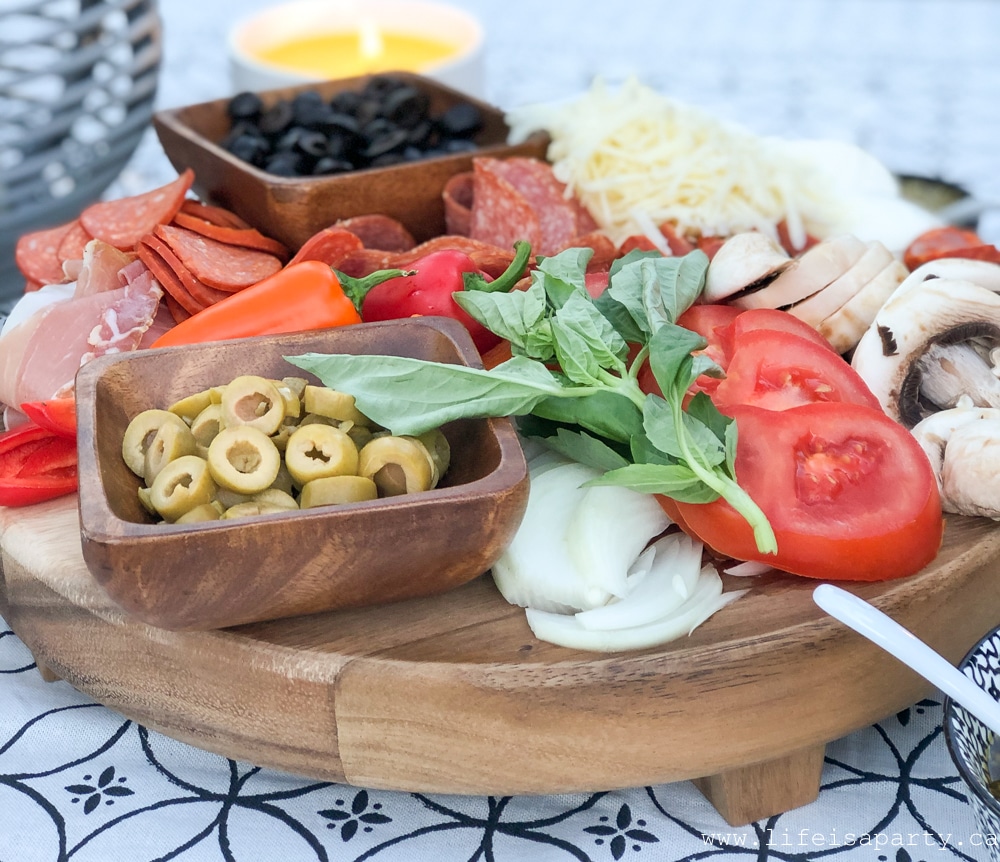
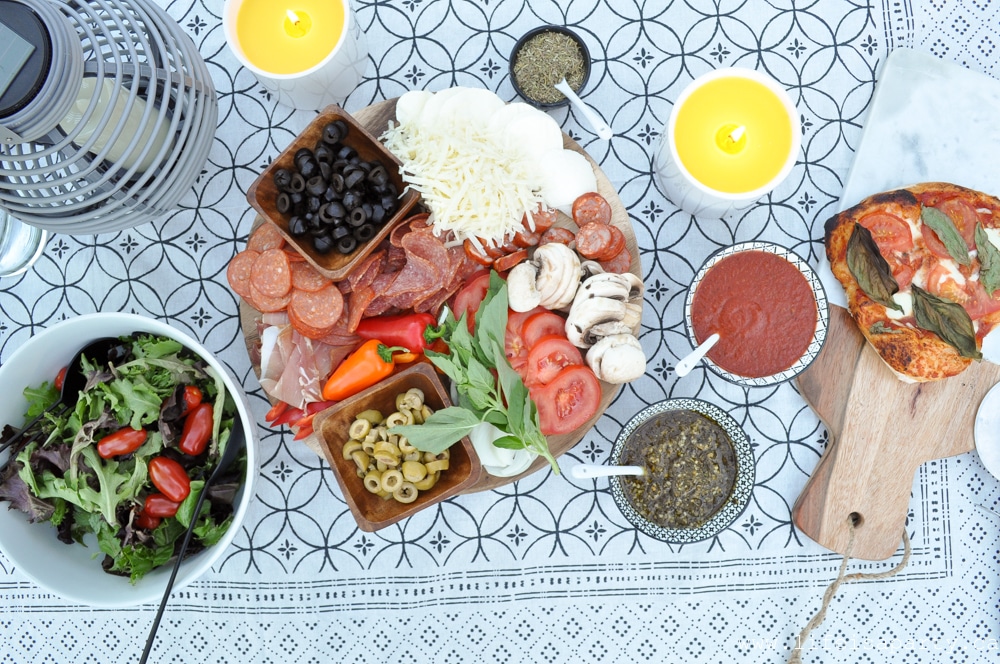
For the pizza I made a really fun pizza charcuterie board.  I love the idea that everyone can choose exactly what they'd like on the pizza, but also snack on the fixings throughout the party.

make your own pizza party

I included olives, tomatoes, mushrooms, onions, and little peppers.  Along with regular mozzarella, and bocconcini cheese and then an assortment of meats like pepperoni, spicy sausage, and prosciutto.

Pizza Party

I also had some pizza sauce, pesto, and italian seasoning in little bowls.  I stretched the dough out onto a pizza board so we could top the pizzas and cook them and start eating and keep cooking new ones all afternoon.

make your own  Pizza Party

The pizza was a huge hit.  There was a bit of learning curve, but once we found the perfect temperature for our thickness of dough (which was 400 and all written down in the pizza oven manual and recipe book) we were off.

salad

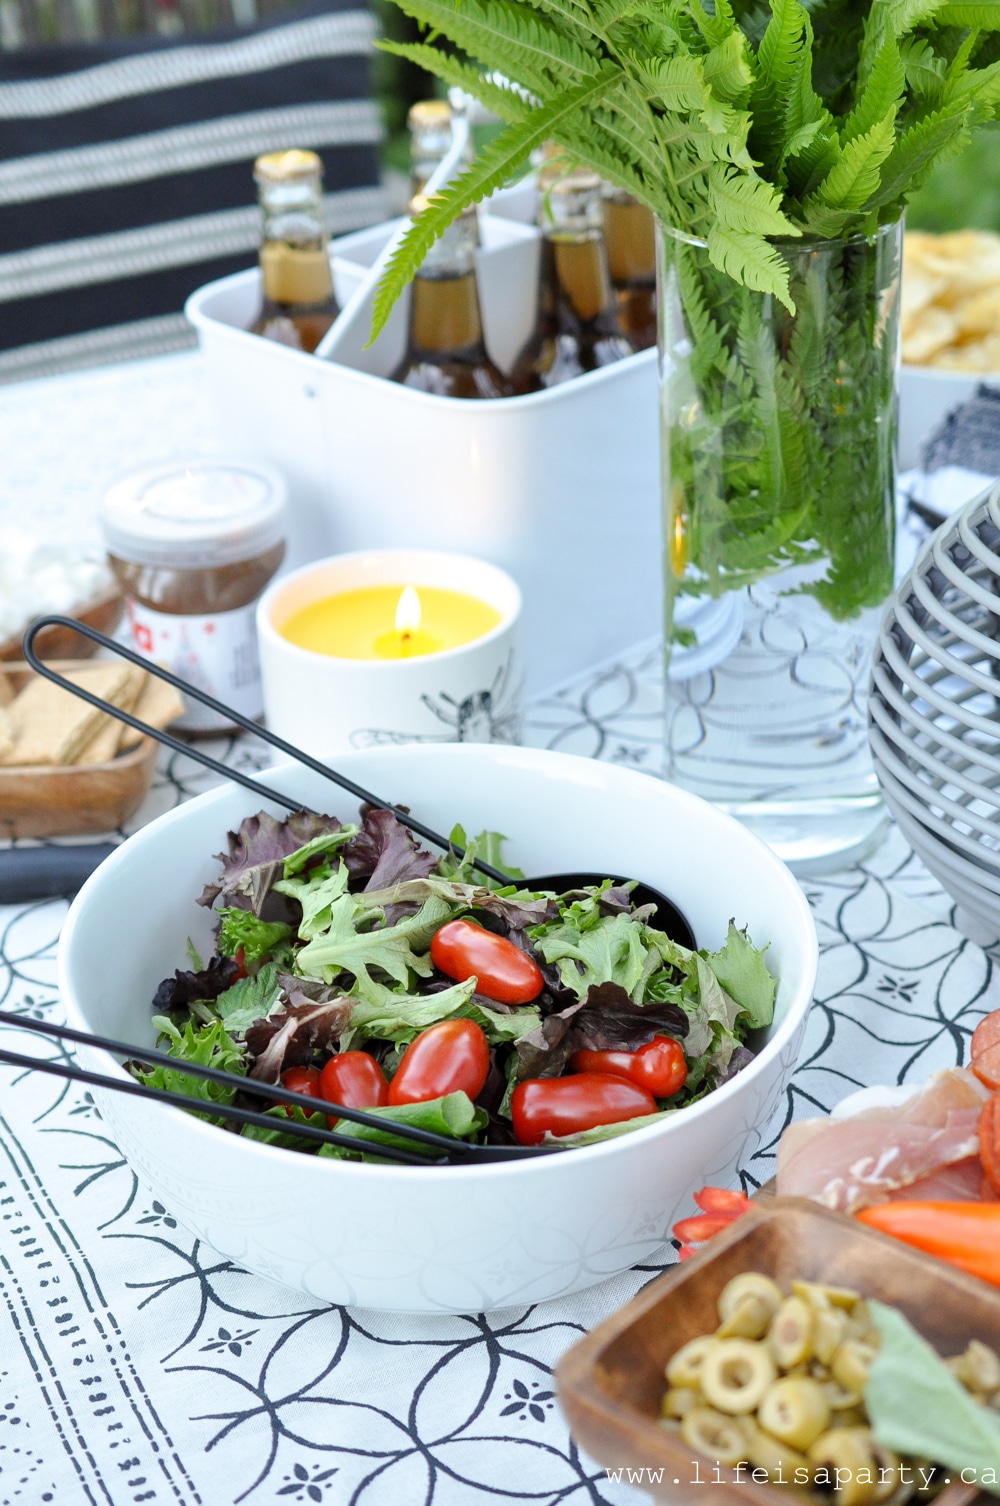
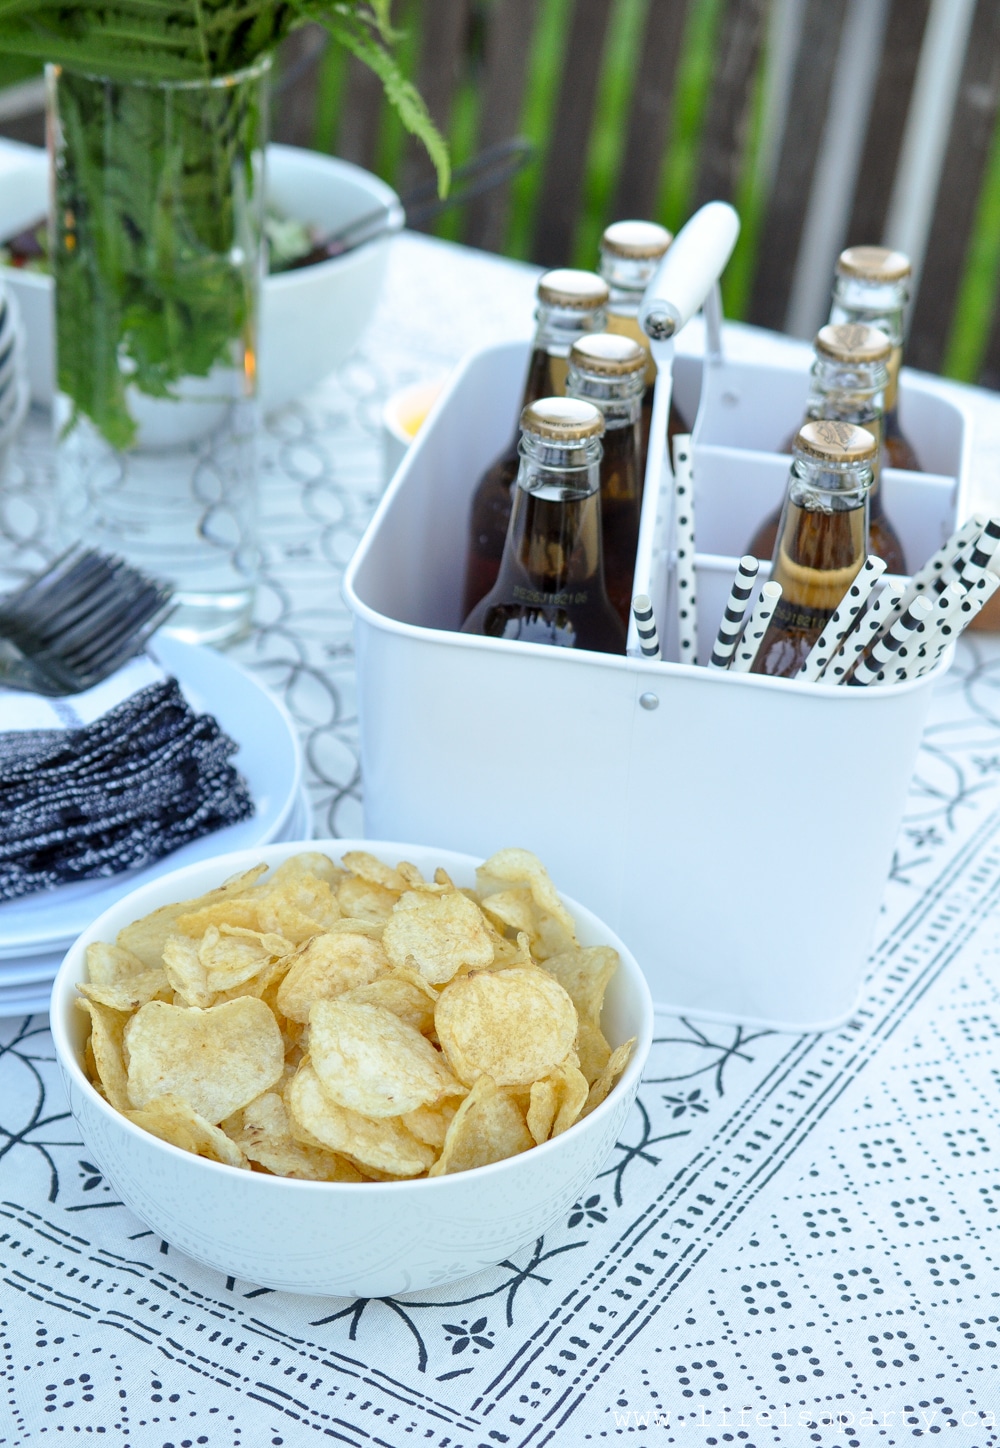
Along with the pizza I made a big salad, and put out some chips for nibbling.

drinks in a drink caddy

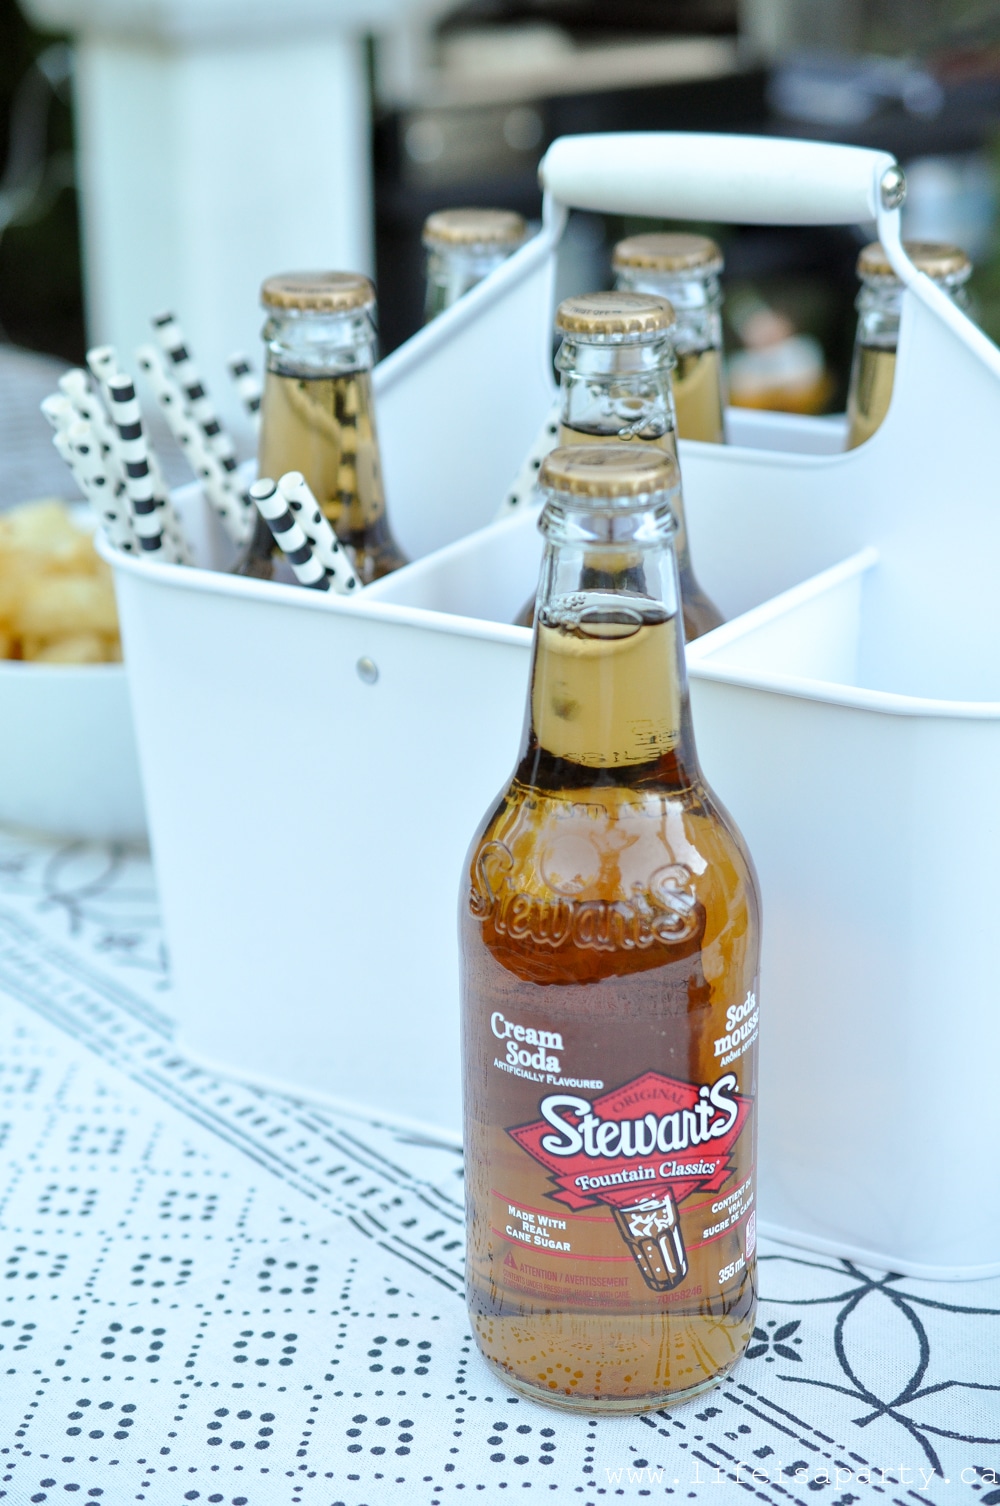
We love these cream soda's from Giant Tiger and they're perfect for entertaining, and feel like a bit of a summer treat.

cream soda bottle

For dessert we made the most delicious s'mores pizza.  It was loved by all and very quickly disappeared.  It's the perfect sweet finish to this pizza meal and feels like summertime treats and being outside with friends all wrapped into one.  You can find the recipe for the S'mores Pizza here.

smore dessert pizza

This party really was so perfect for easy summer entertaining.  I love that I could put everything out and we could all linger around the table together and help ourselves, and keep cooking all afternoon.  I'm looking forward to many more fun backyard pizza parties this summer.

Backyard Pizza Party

With a backyard pizza party, life really is a party.
More Inspiration

  • Backyard fiesta party ideas for decor and menu.
    Mexican Themed Party Ideas for a Backyard Fiesta
  • How to throw a Swedish inspired midsummer picnic.
    Swedish Inspired Midsummer Picnic
  • French inspired picnic charcuterie board on a wooden pallet table beside the lake with driftwood, black and white blankets, and wicker picnic baskets.
    How to Create a French Inspired Picnic Charcuterie Board
  • Mushroom themed party picnic in backyard.
    Mushroom Themed Picnic Party

Disclaimer:  This post was sponsored by Giant Tiger.  As always, all opinions are my own.  Thanks for supporting the brands that make Life is a Party possible.

Mustard Yellow and Pink Summer Home Tour

Jun 12, 2019 · 16 Comments

Summer home tour pink and yellow decor.

Mustard Yellow and PInk Summer Home Tour: a neutral space gets some colour with yellow and pink decor including candles, flowers, pillows, and new art.

Summer home tour pink and yellow decor.
[feast_advanced_jump_to]

I'm switching things up a little around here for summer.  This neutral loving girl is adding in some colour.  I've paired trendy mustard yellow with trendy pink, and I love how warm, and happy it's making our house feel. This summer it's yellow and pink decor for the win!

Mustard Yellow and Pink Summer Home Tour

Front Entrance

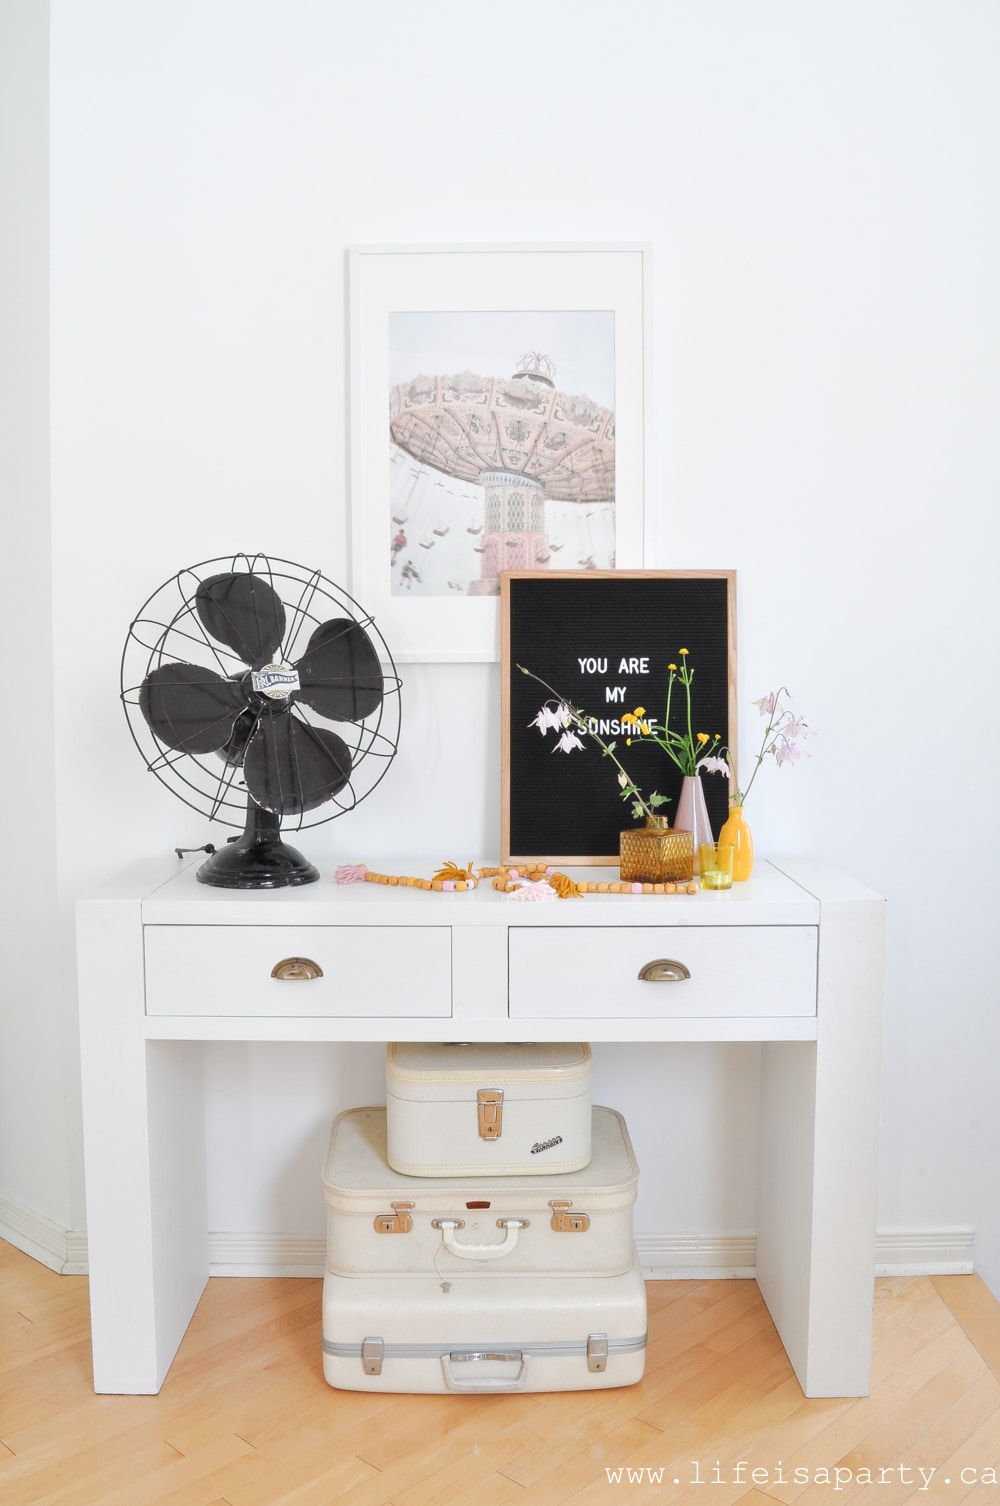
When you come in our front door, it leads into the dining room.  Our pretty console table by the front door is all dressed up for the season.  I had so much fun adding yellow and pink decor throughout my main floor for summer.

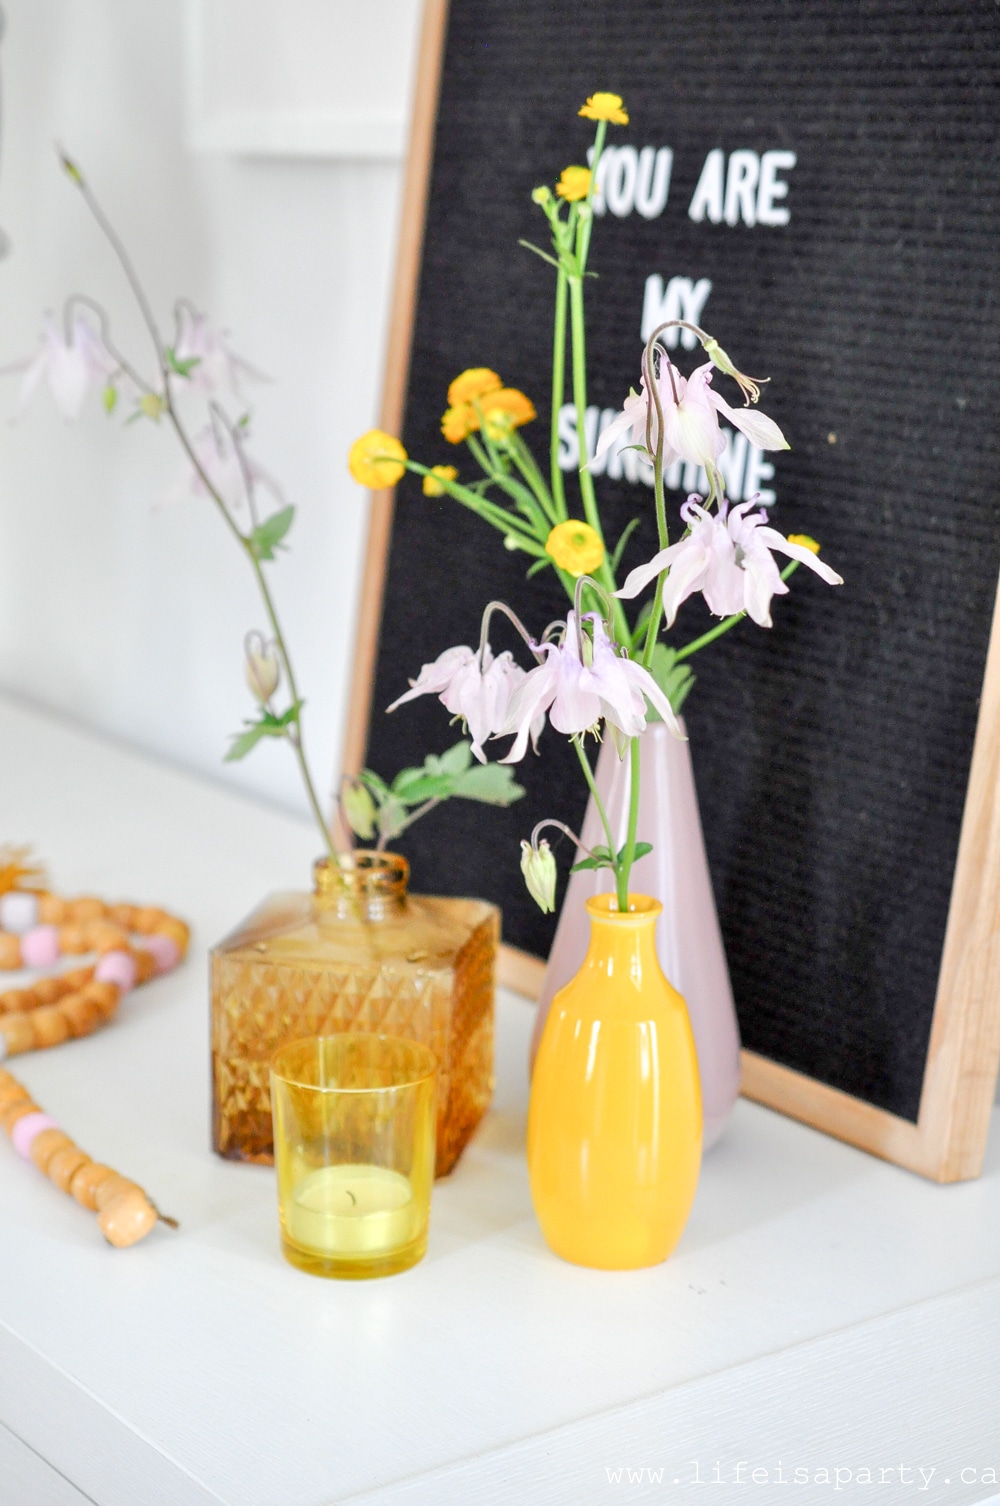
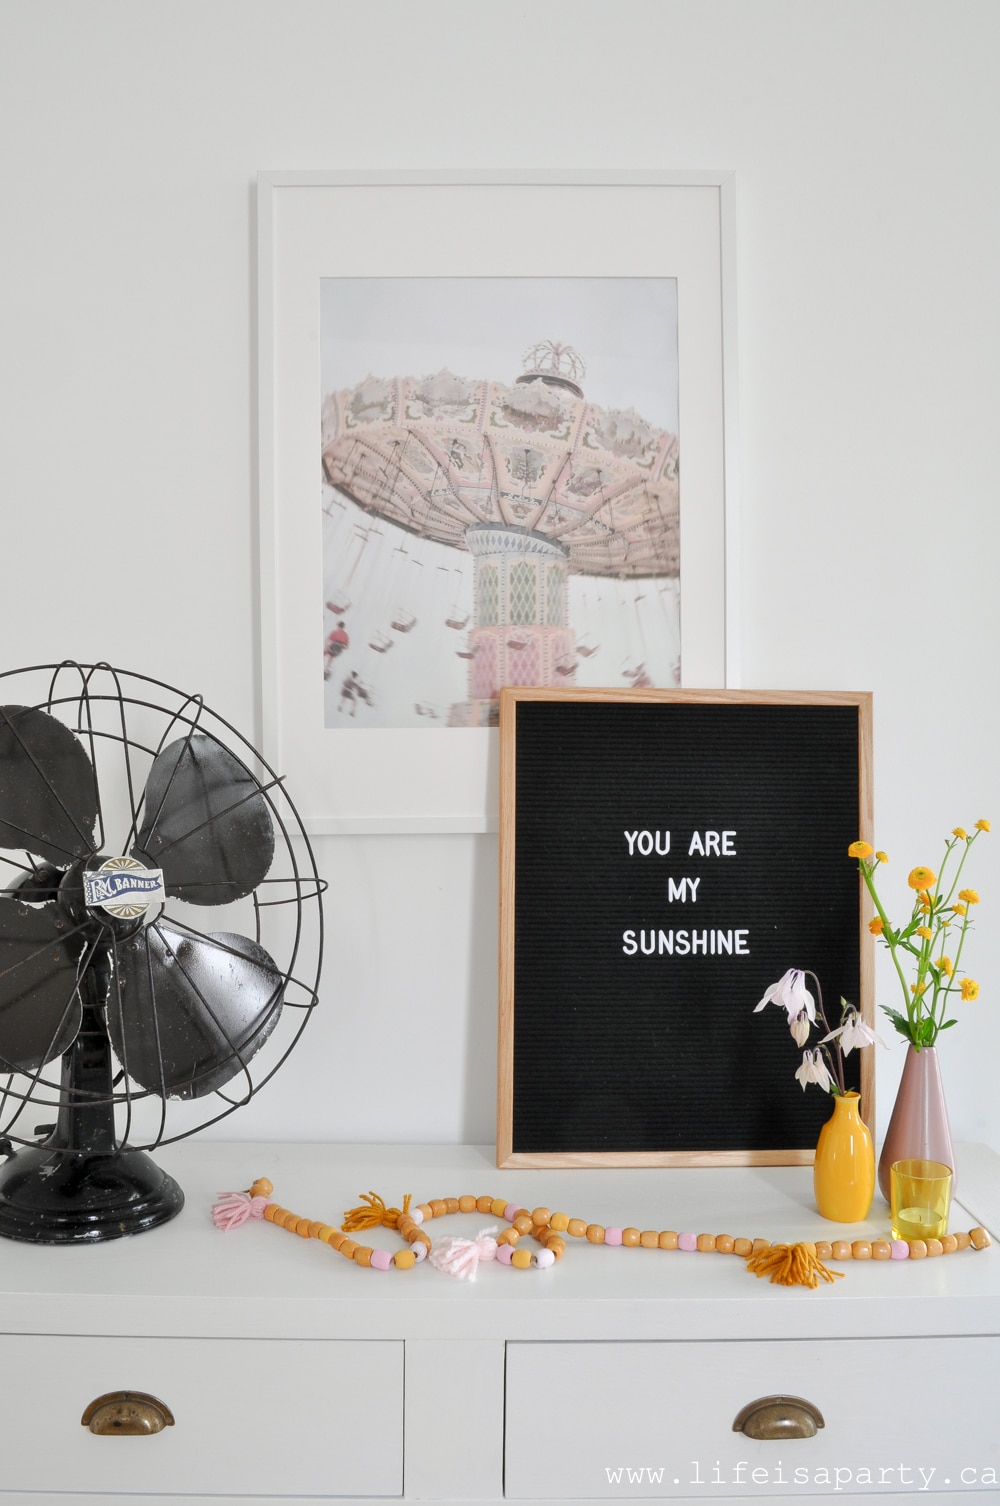
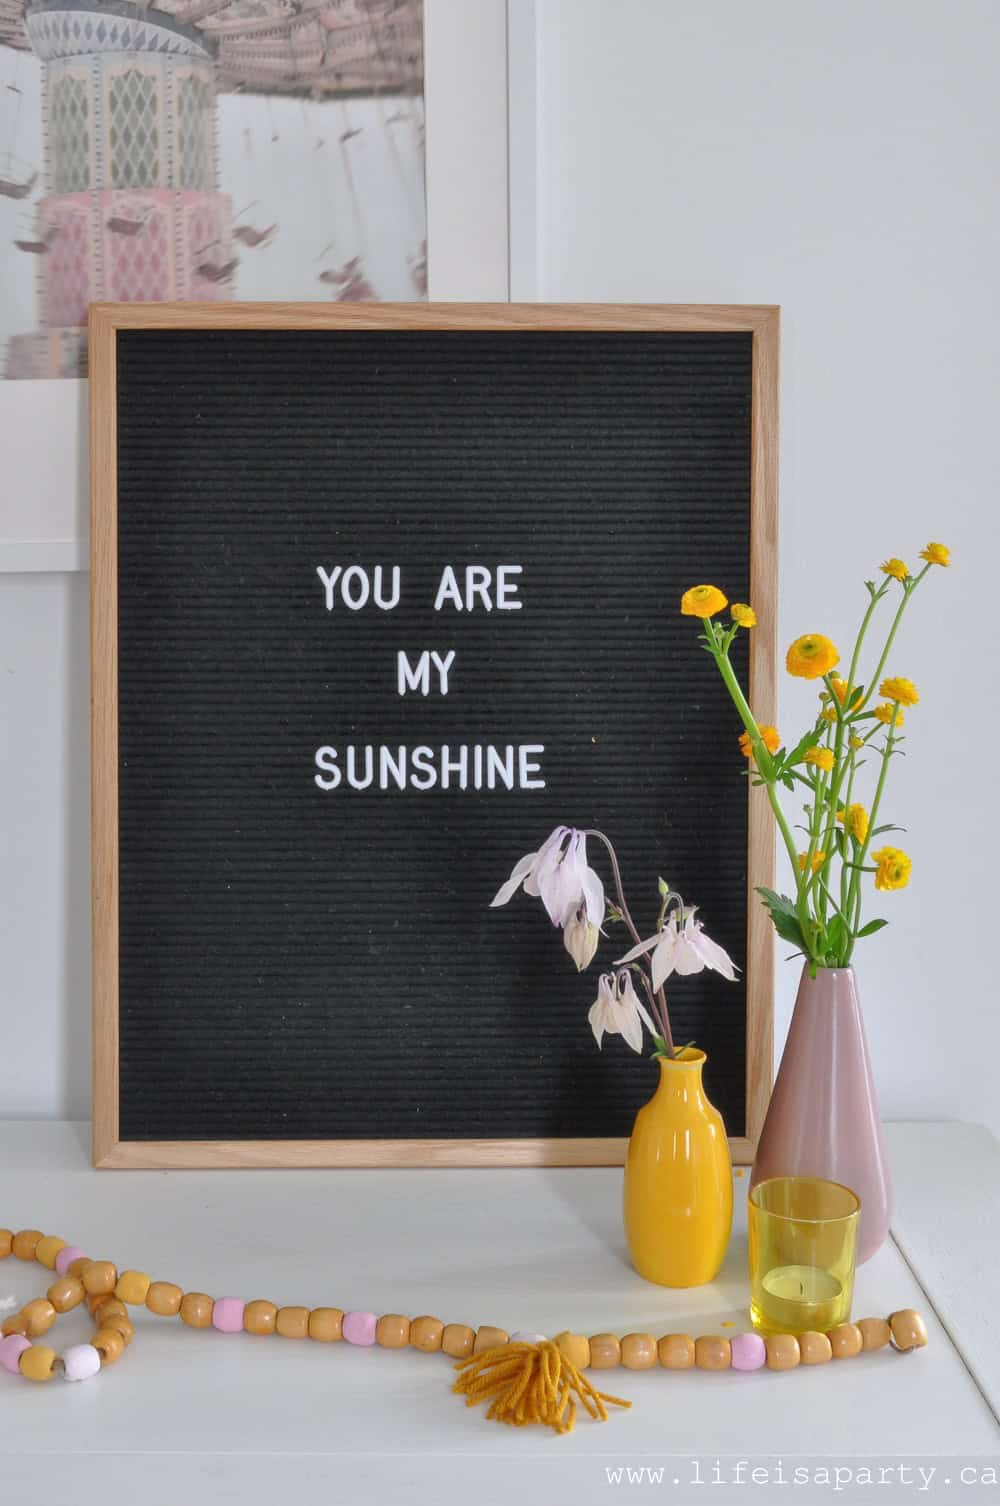
you are my sunshine letter board
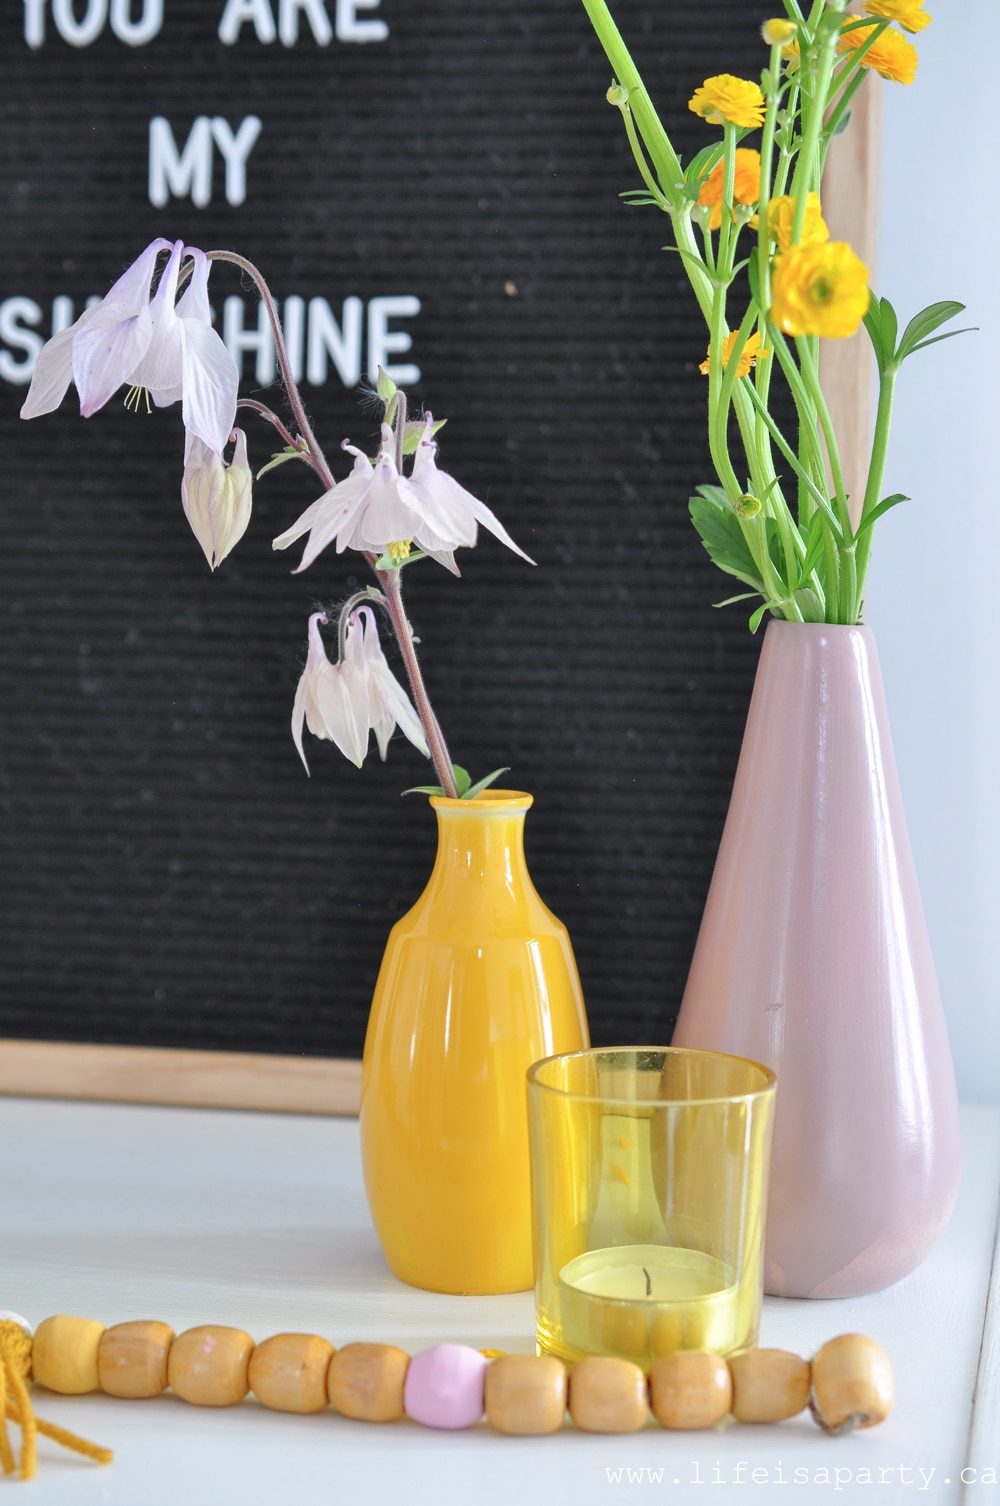
pink and yellow flowers

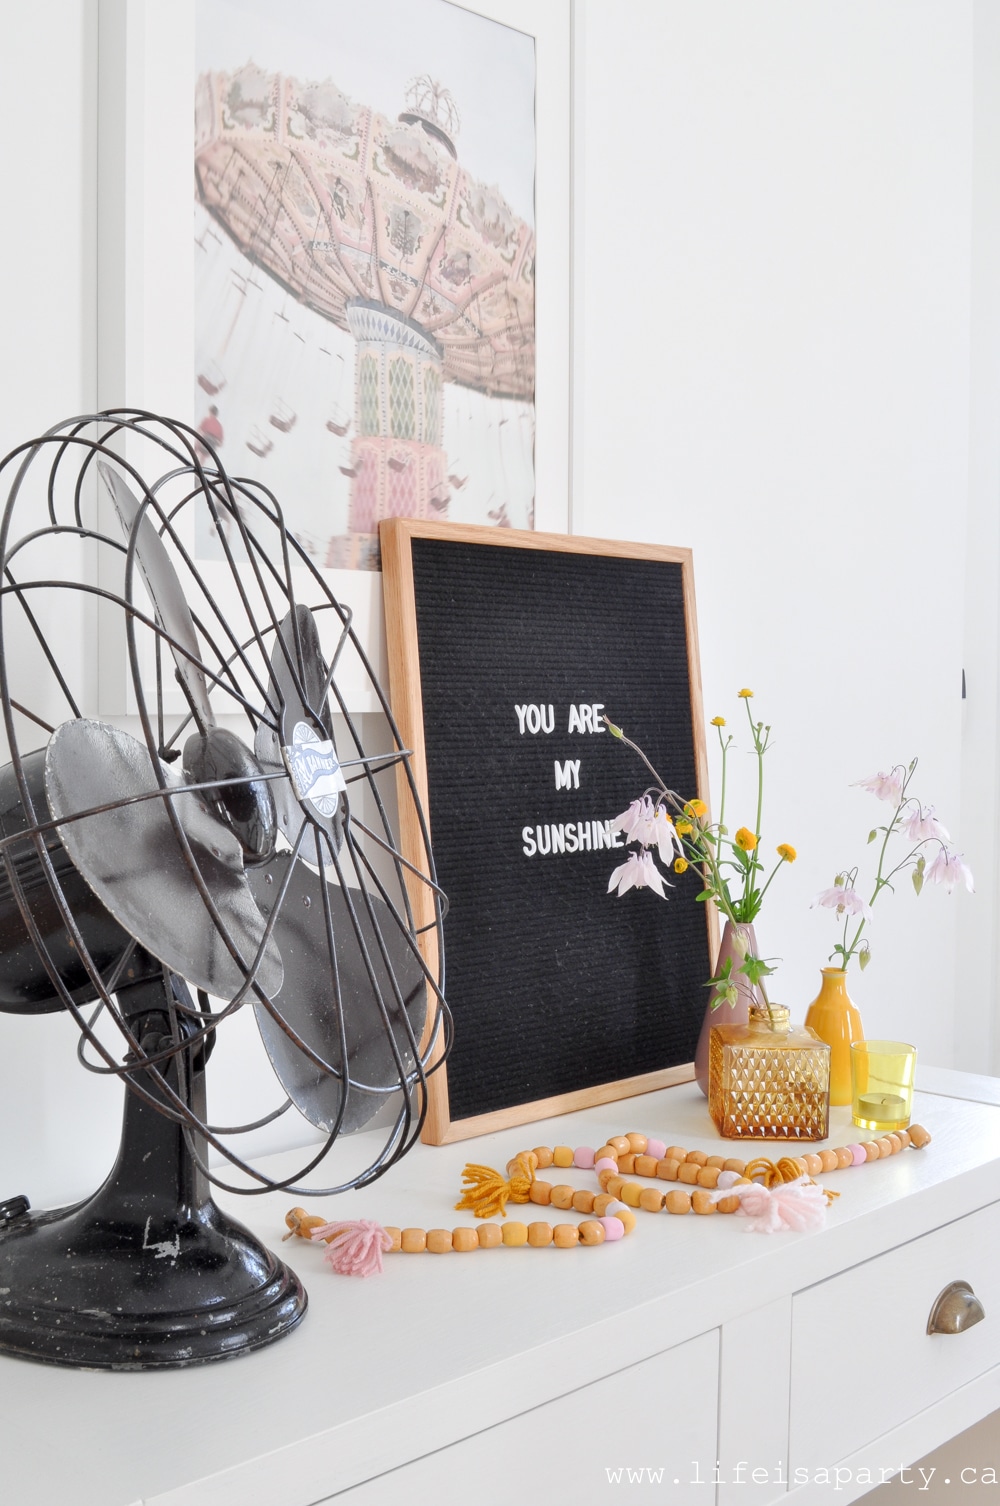
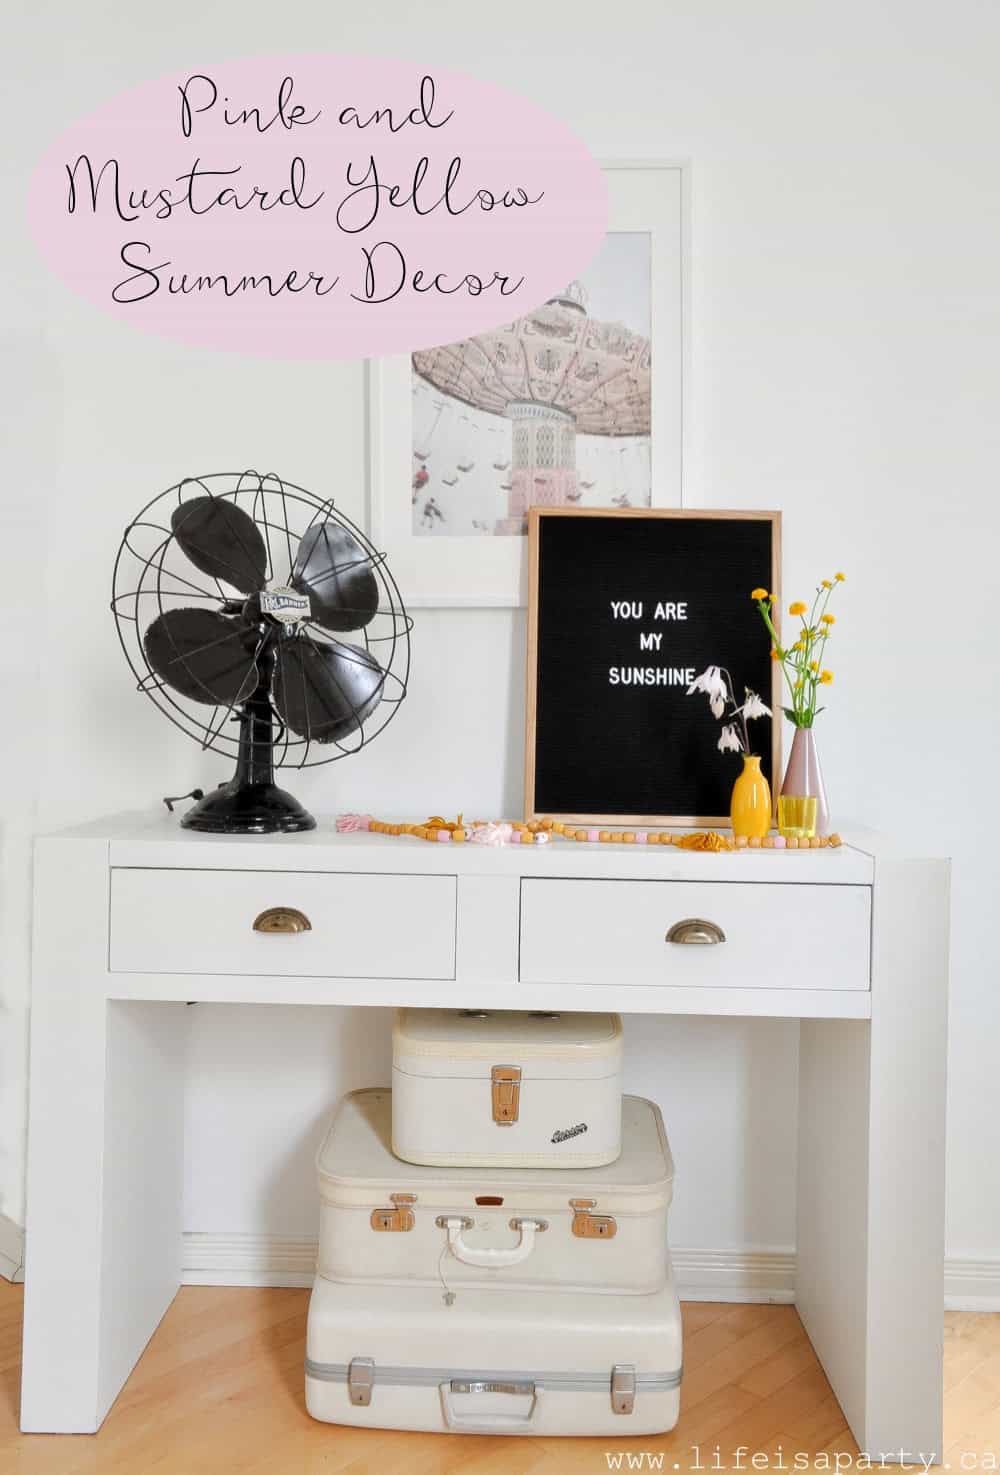
The beautiful art work is from JessaMaePhoto who has the prettiest etsy shop.  This Carnival Dreams piece is so fun and I love how summery it feels.  I also added in a vintage fan, some luggage, and some garden flowers for that perfect summer feel.

The Dining Room

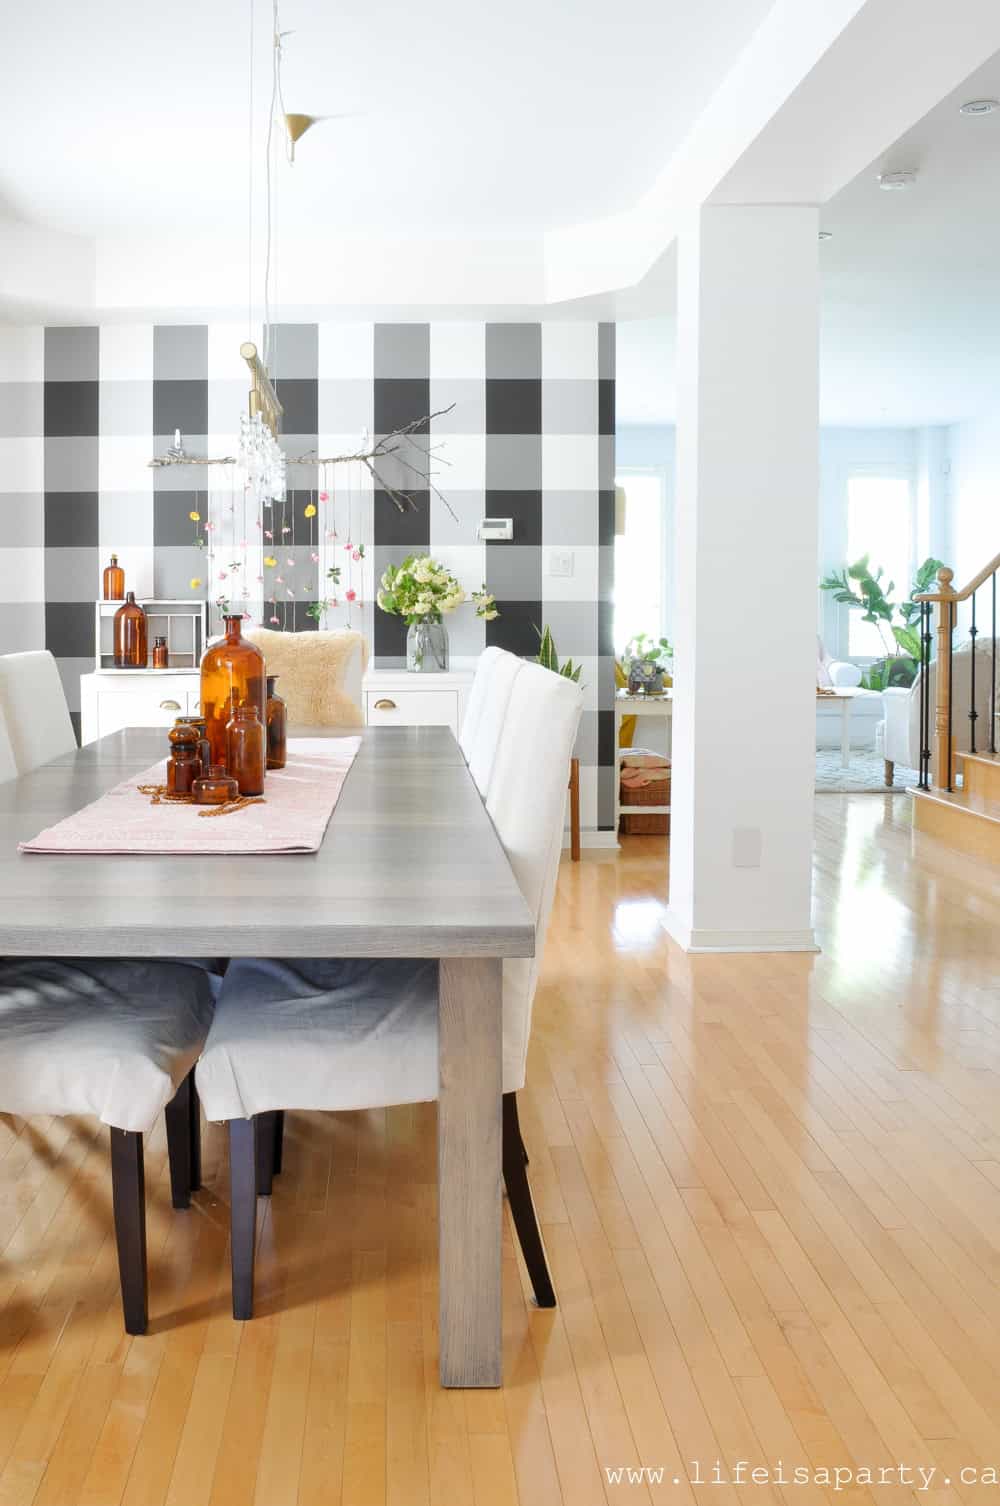
summer home tour dining room

Dining Room Table

I was inspired by some of my favourite Instagram accounts to try this pretty colour scheme.  Once I started looking, I began seeing this colour combo everywhere.  Mustard yellow couldn't be hotter right now.  And these colours would transition really easily into fall too.  I added lots of little touches -things like candles, vases, cushions, throws, and flowers.  Having a neutral base makes it easy to add in any accent colour.

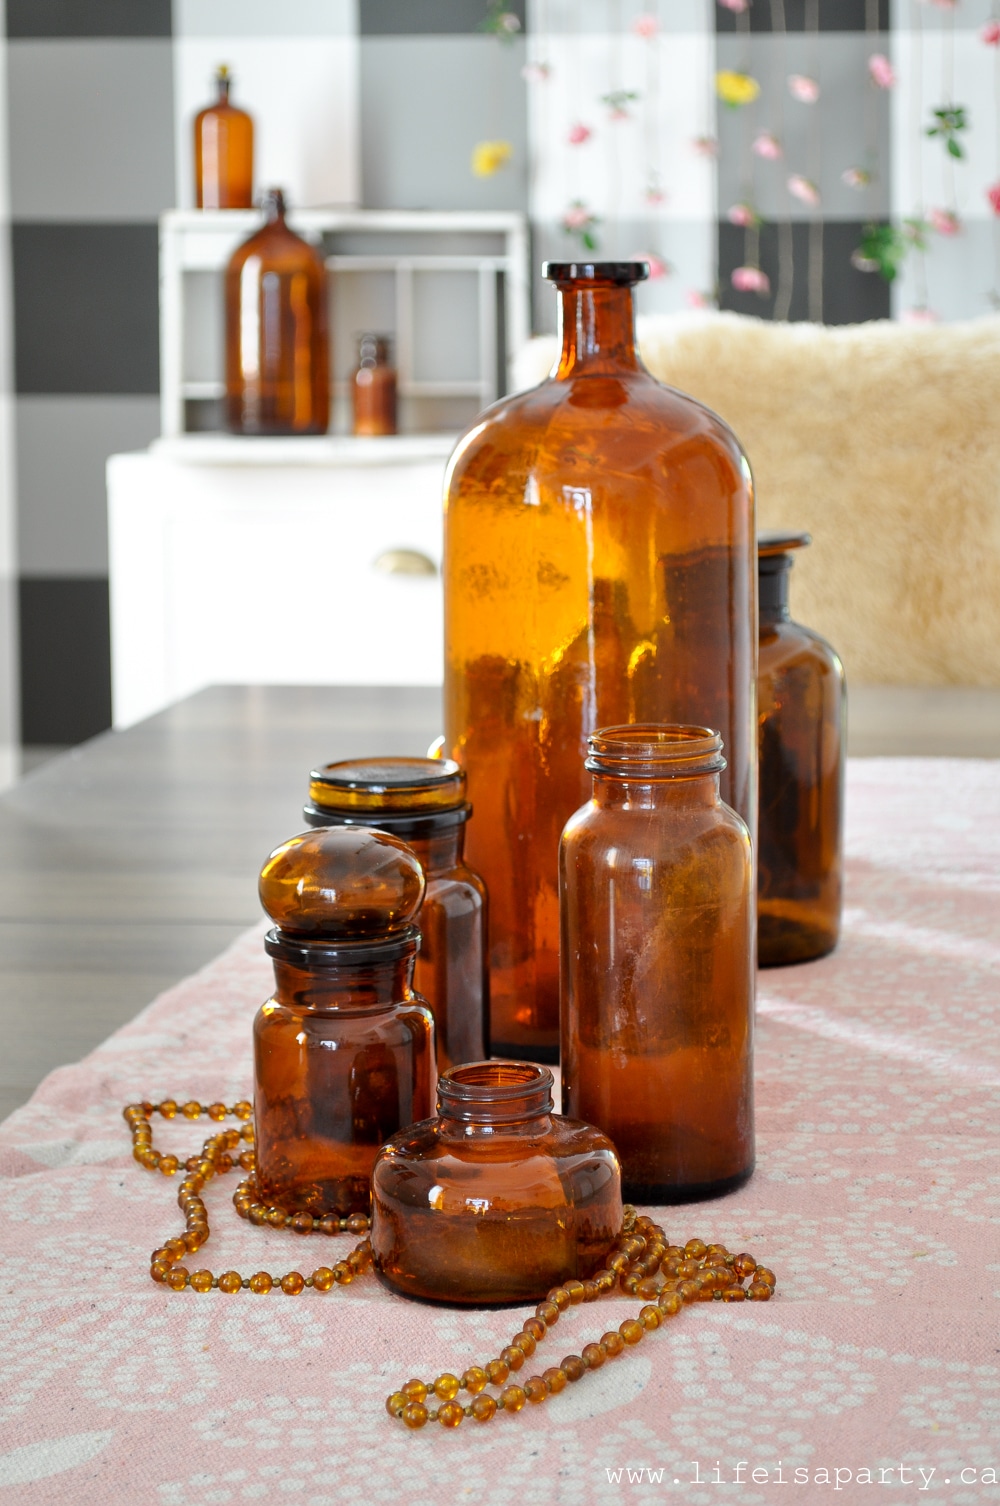
amber glass bottles

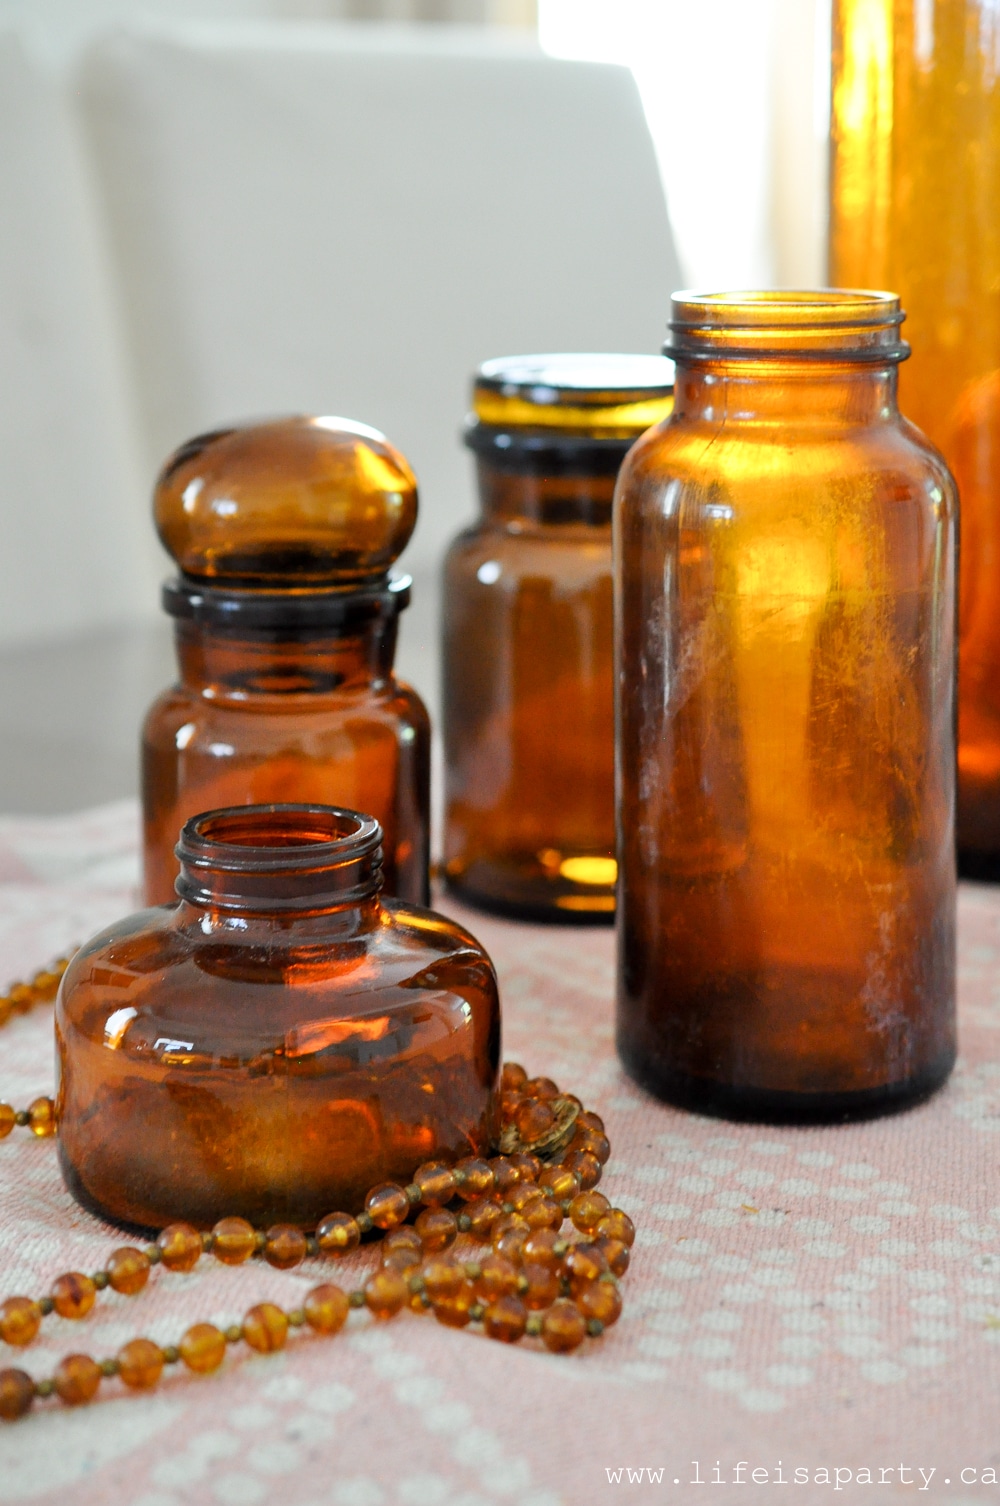
The dining room table is simple with a fun and inexpensive runner.  It's actually a very thin rug from Five Below that I folded in half and used as a table runner. 😉  I added my vintage amber glass collection here since it worked so well with the warm colour scheme.

amber glass bottles

Wall Hanging

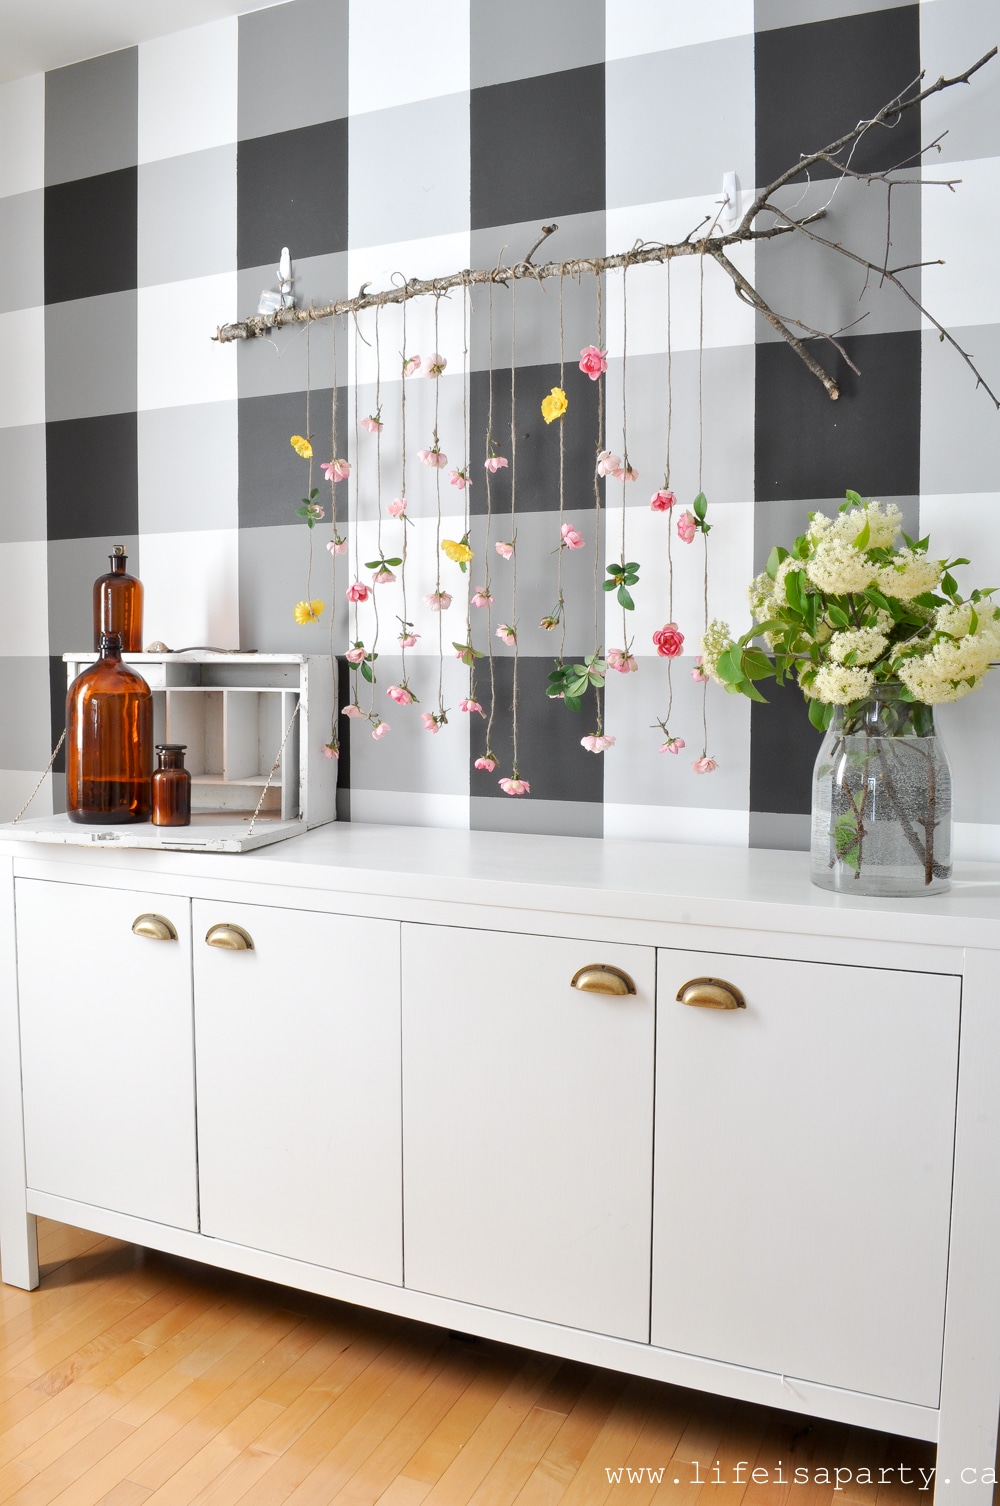
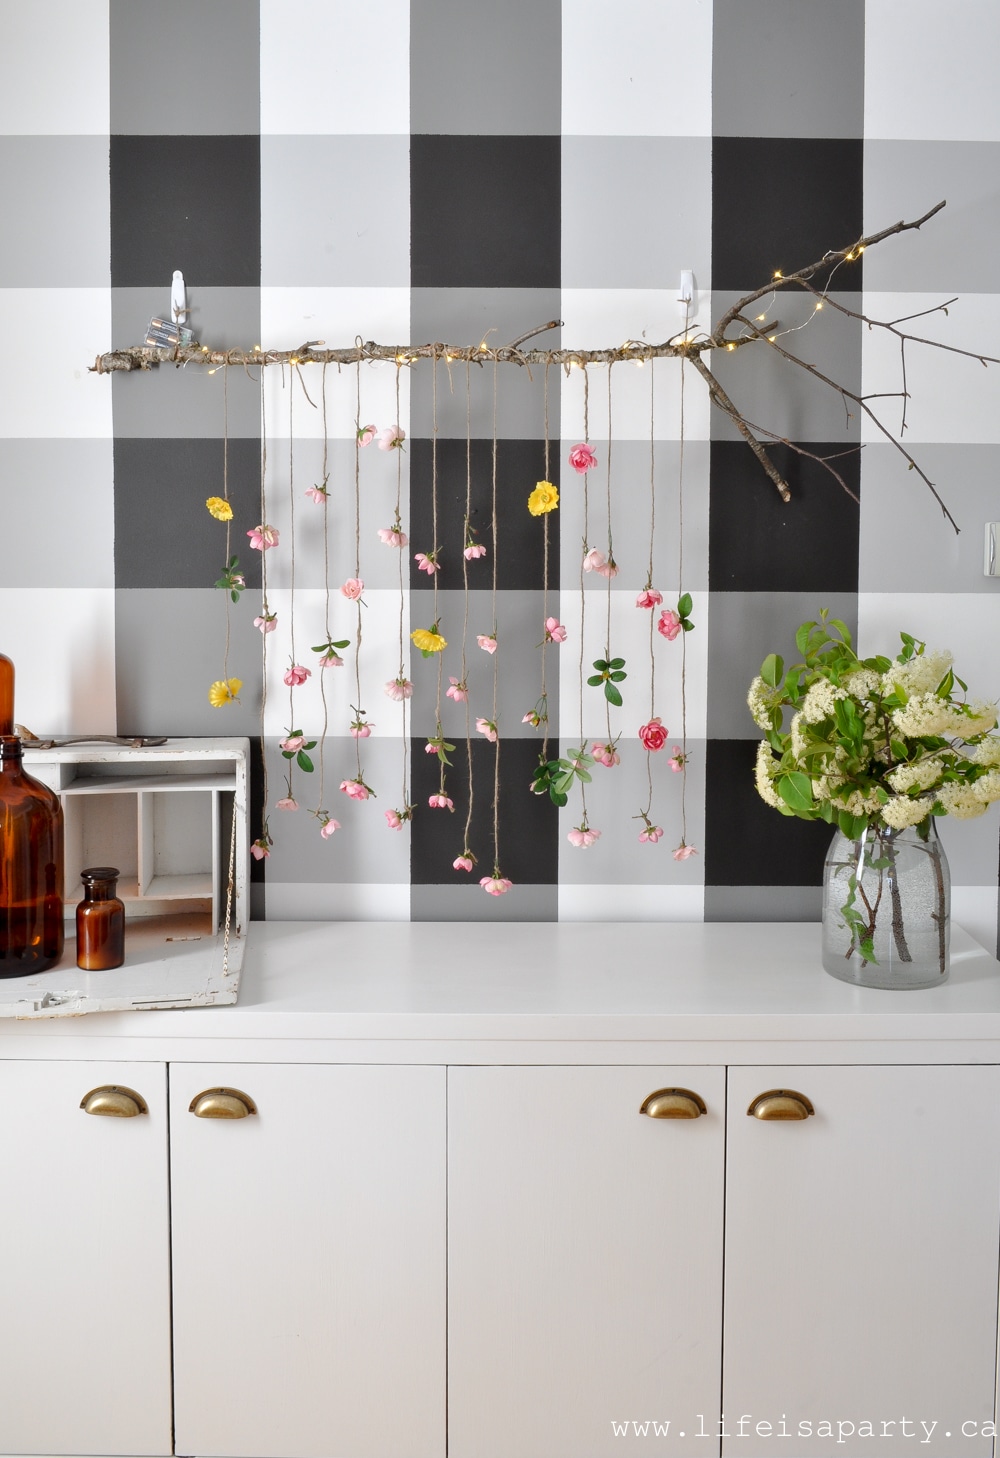
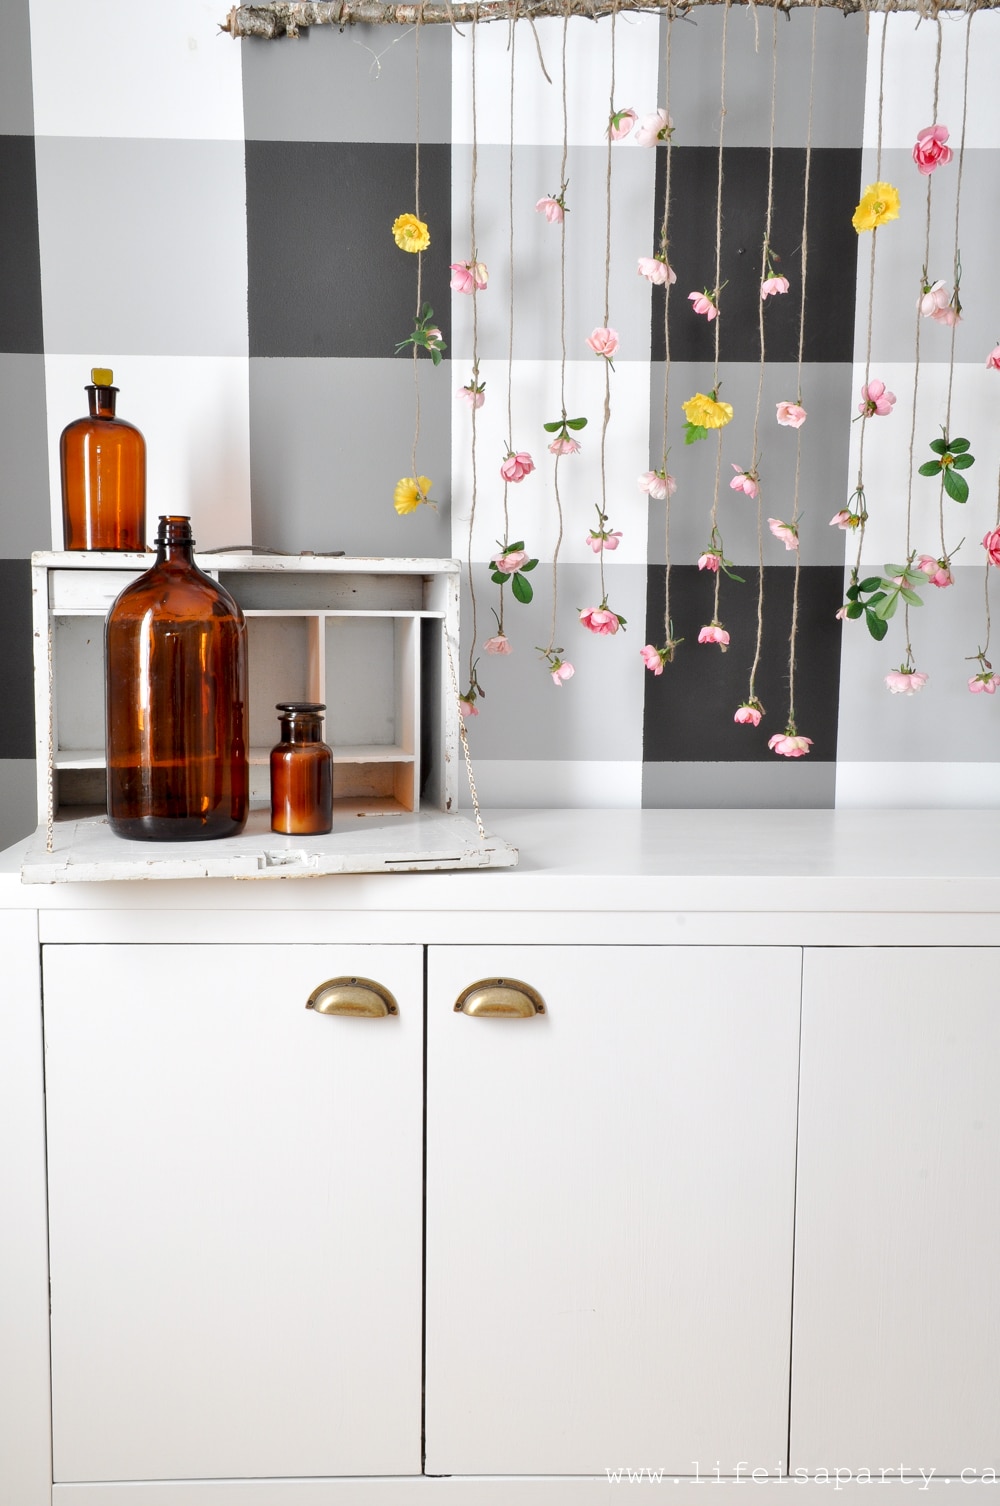
On the wall in the dining room I added this pretty branch wall hanging I DIY'd.

faux flower wall hanging

We did something really similar with fresh flowers for my daughter's birthday and it was so pretty that it inspired me to create a more permanent version.

yellow and pink decor
diy wall hanging

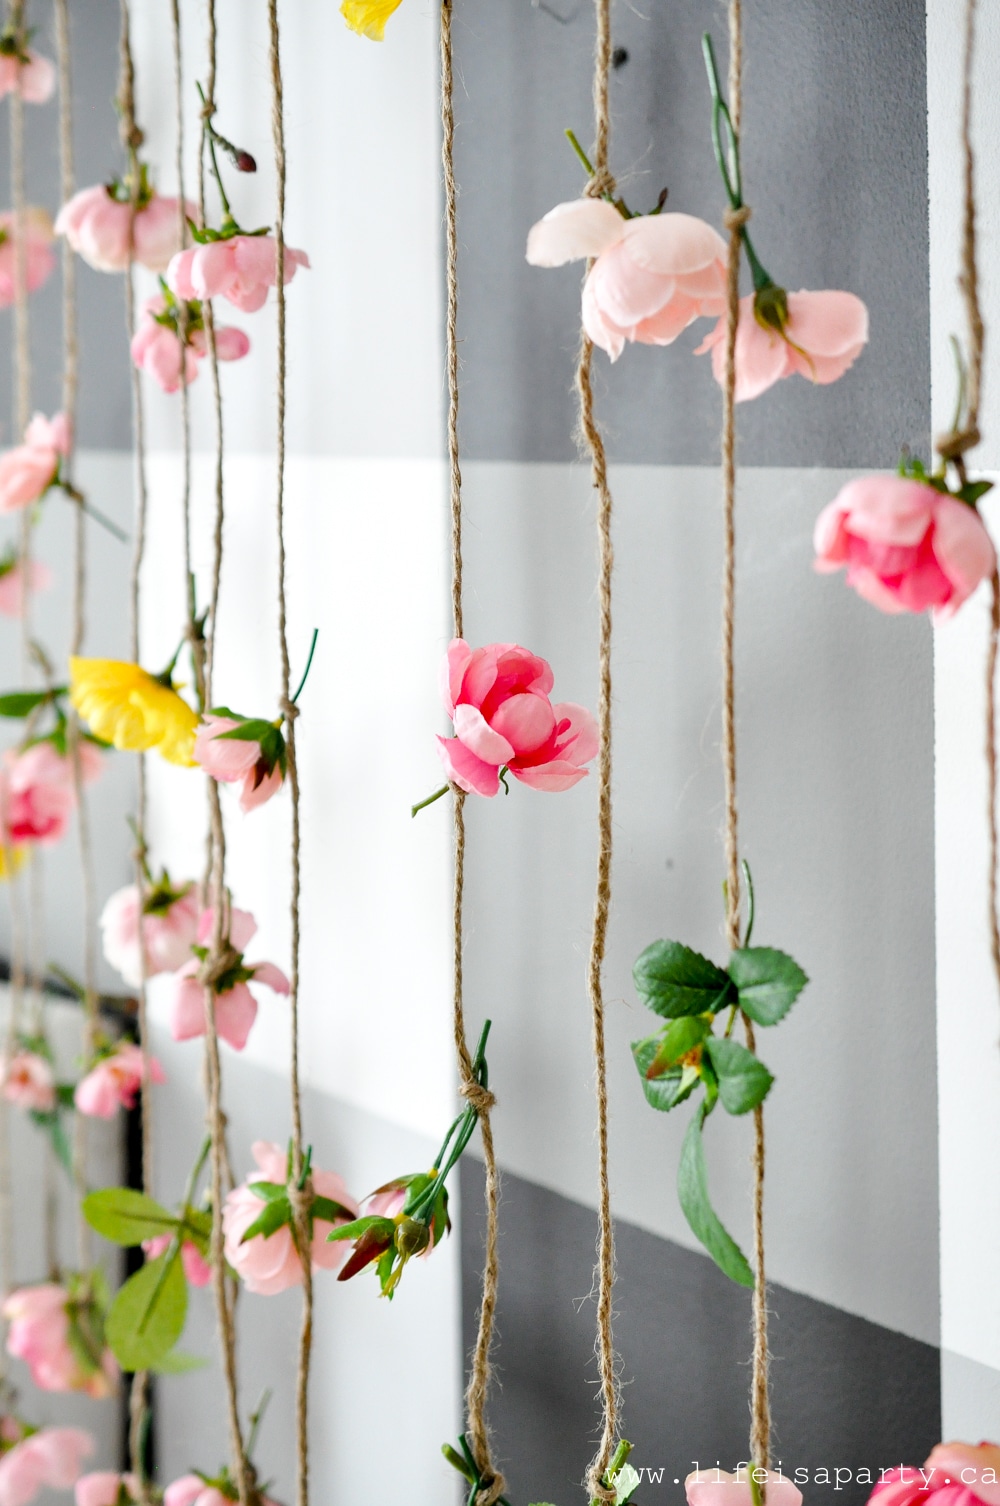
The flowers are from the craftstore, and strung with some twine.  I added some twinkle lights to the top.

hanging flowers

I'm excited for some more picnics this summer.  And two cute vintage picnic baskets are standing by, ready for duty as required.

yellow and pink decor for summer

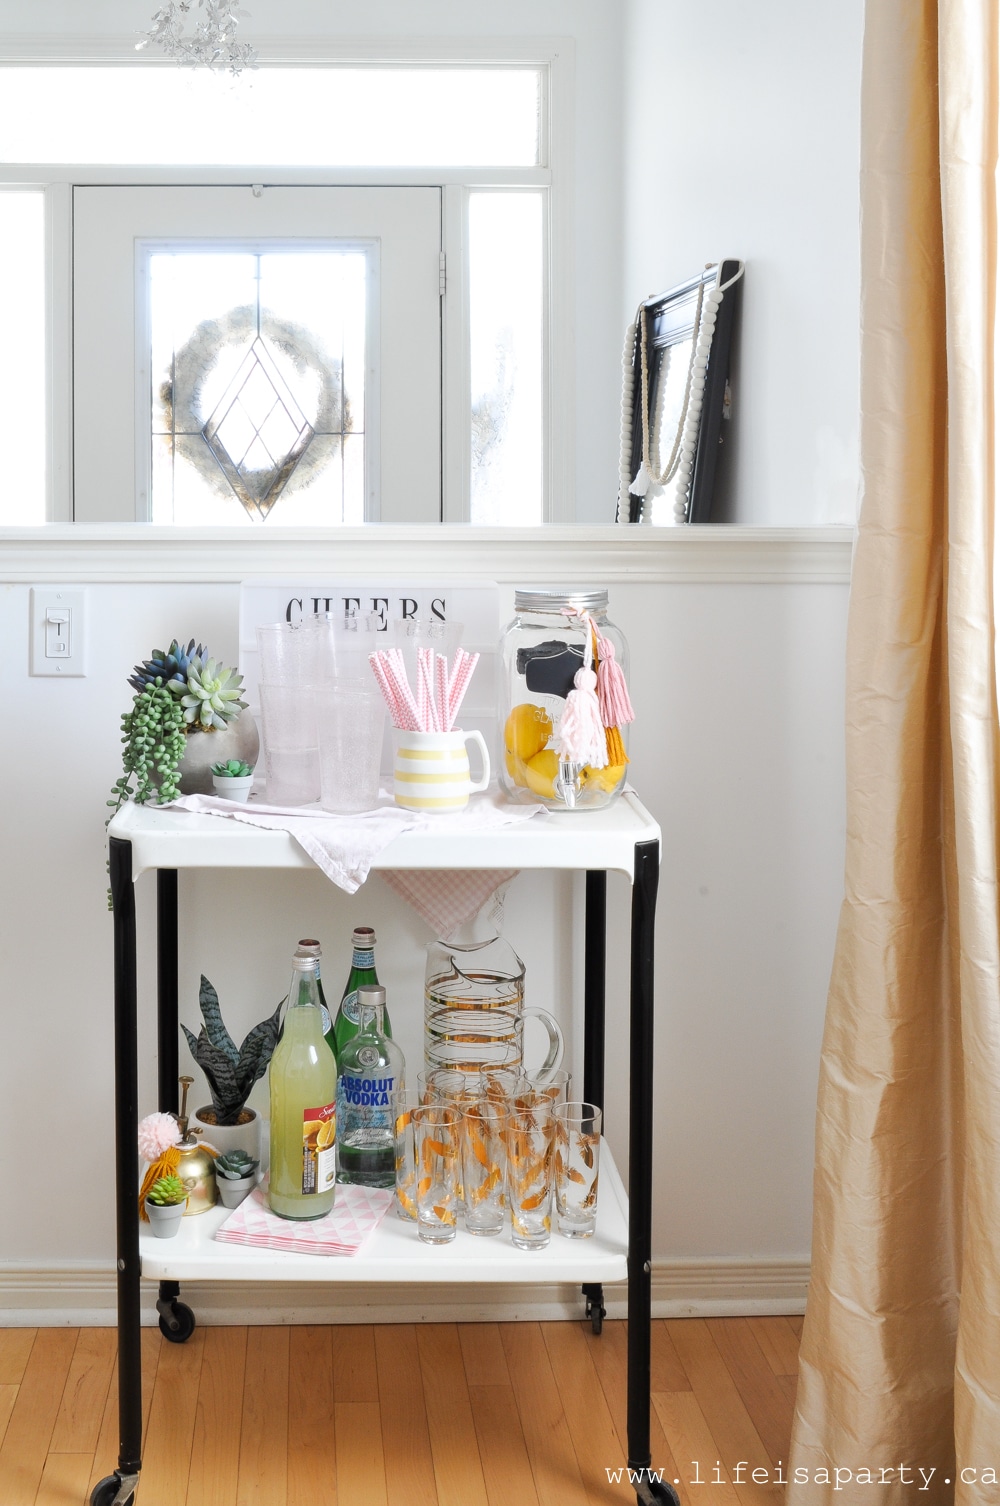
Summer Bar Cart

The little bar cart is all ready for summer too.

yellow and pink bar cart

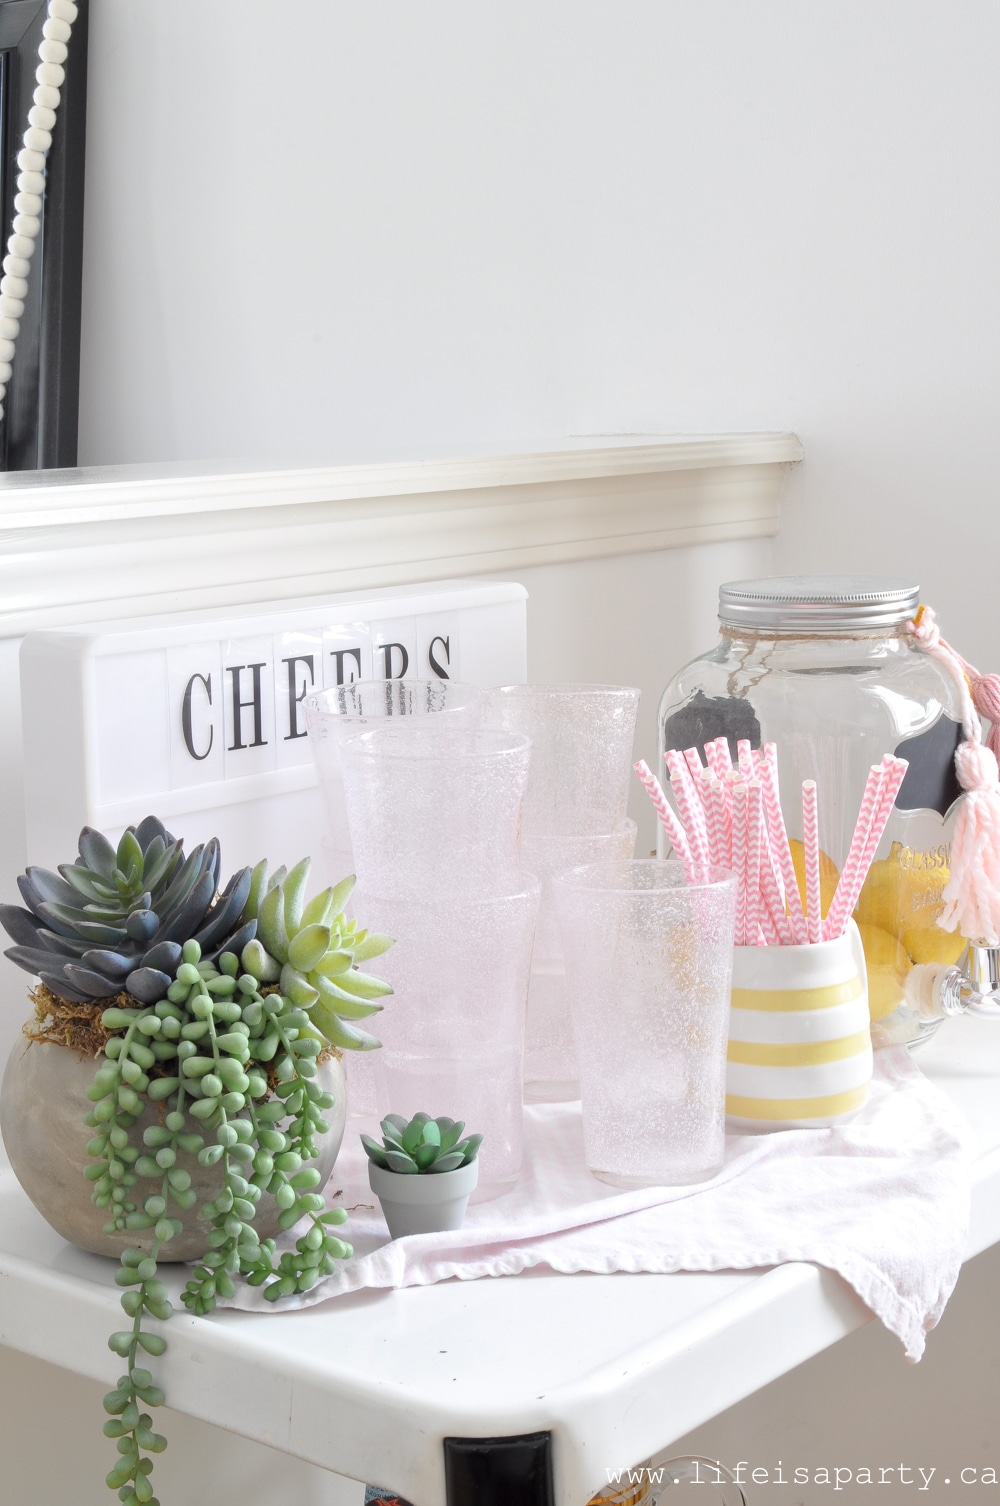
I've got the drink dispenser ready -filled with lemons for now.  My pink glasses and pretty paper straws make me want a lemonade.

pink and yellow bar cart
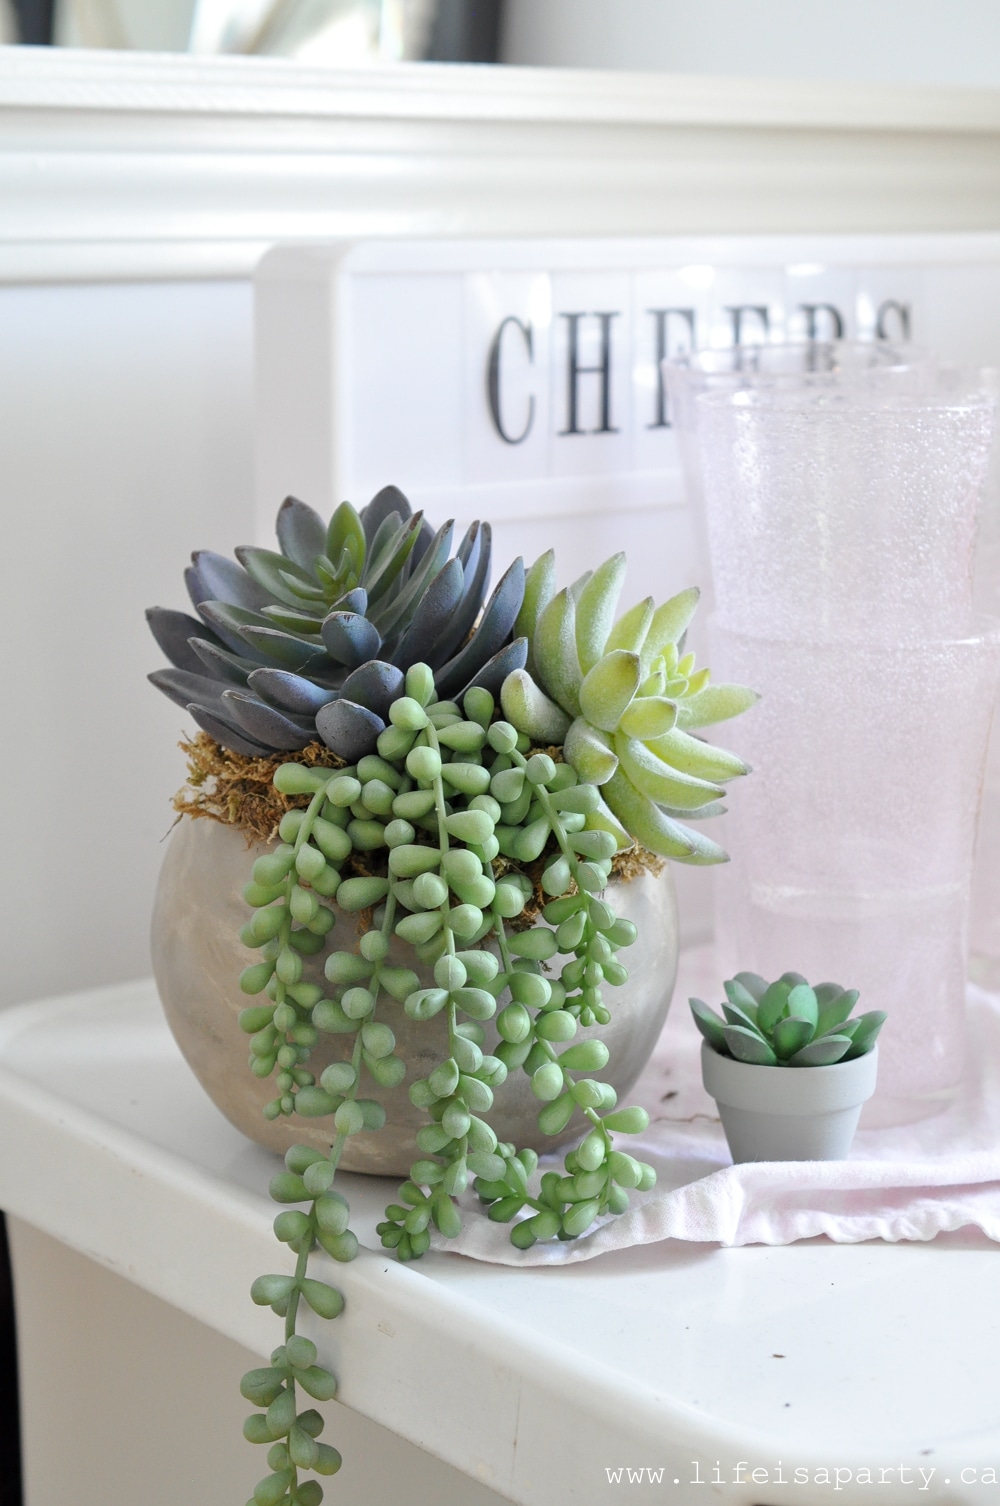
succulents in a cement container

From the dining room, we're led into the living room.

Yellow and Pink Deco in the Living Room

Summer Home Tour

This space is feeling so inviting with the pink and mustard yellow.

yellow and pink decor
Mustard Yellow and Pink Summer Home Tour

Fireplace

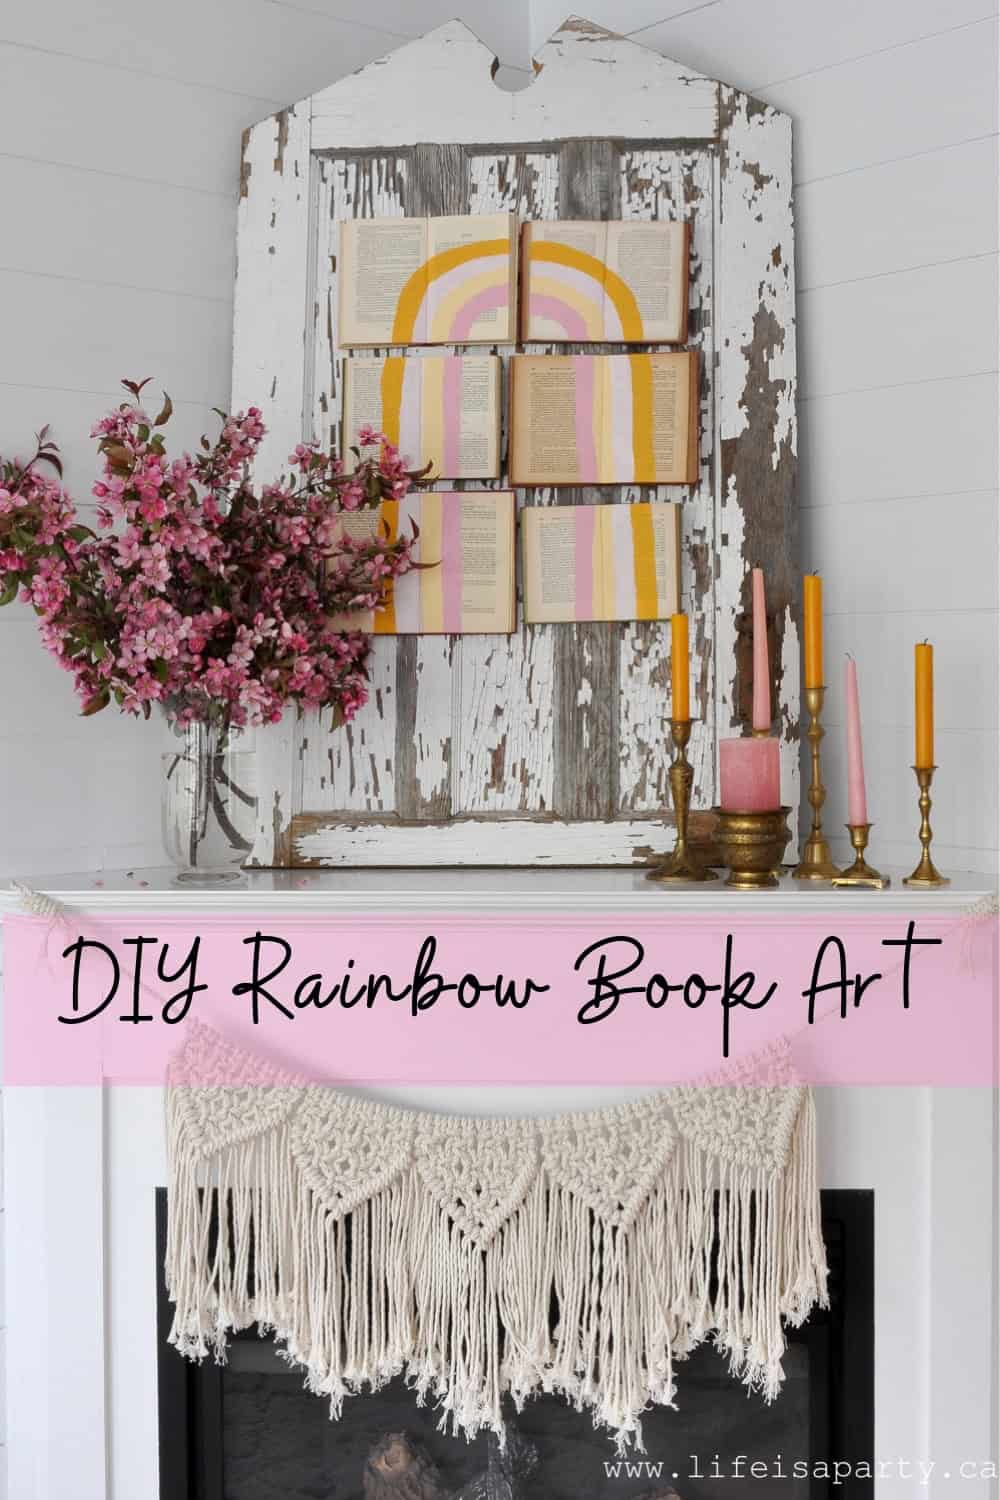
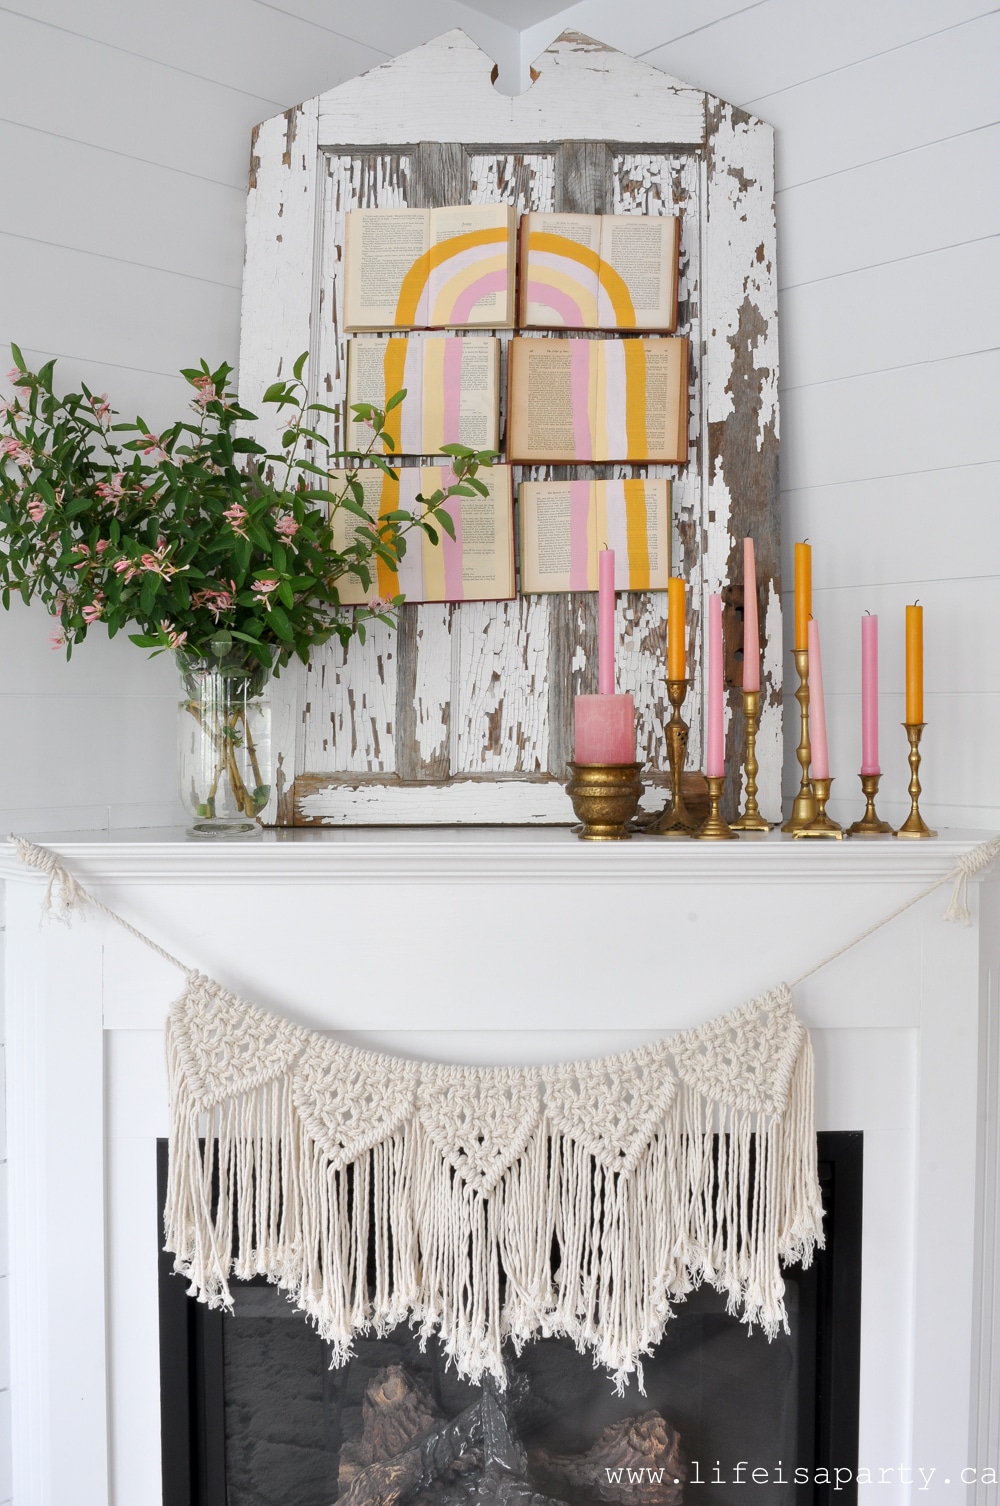
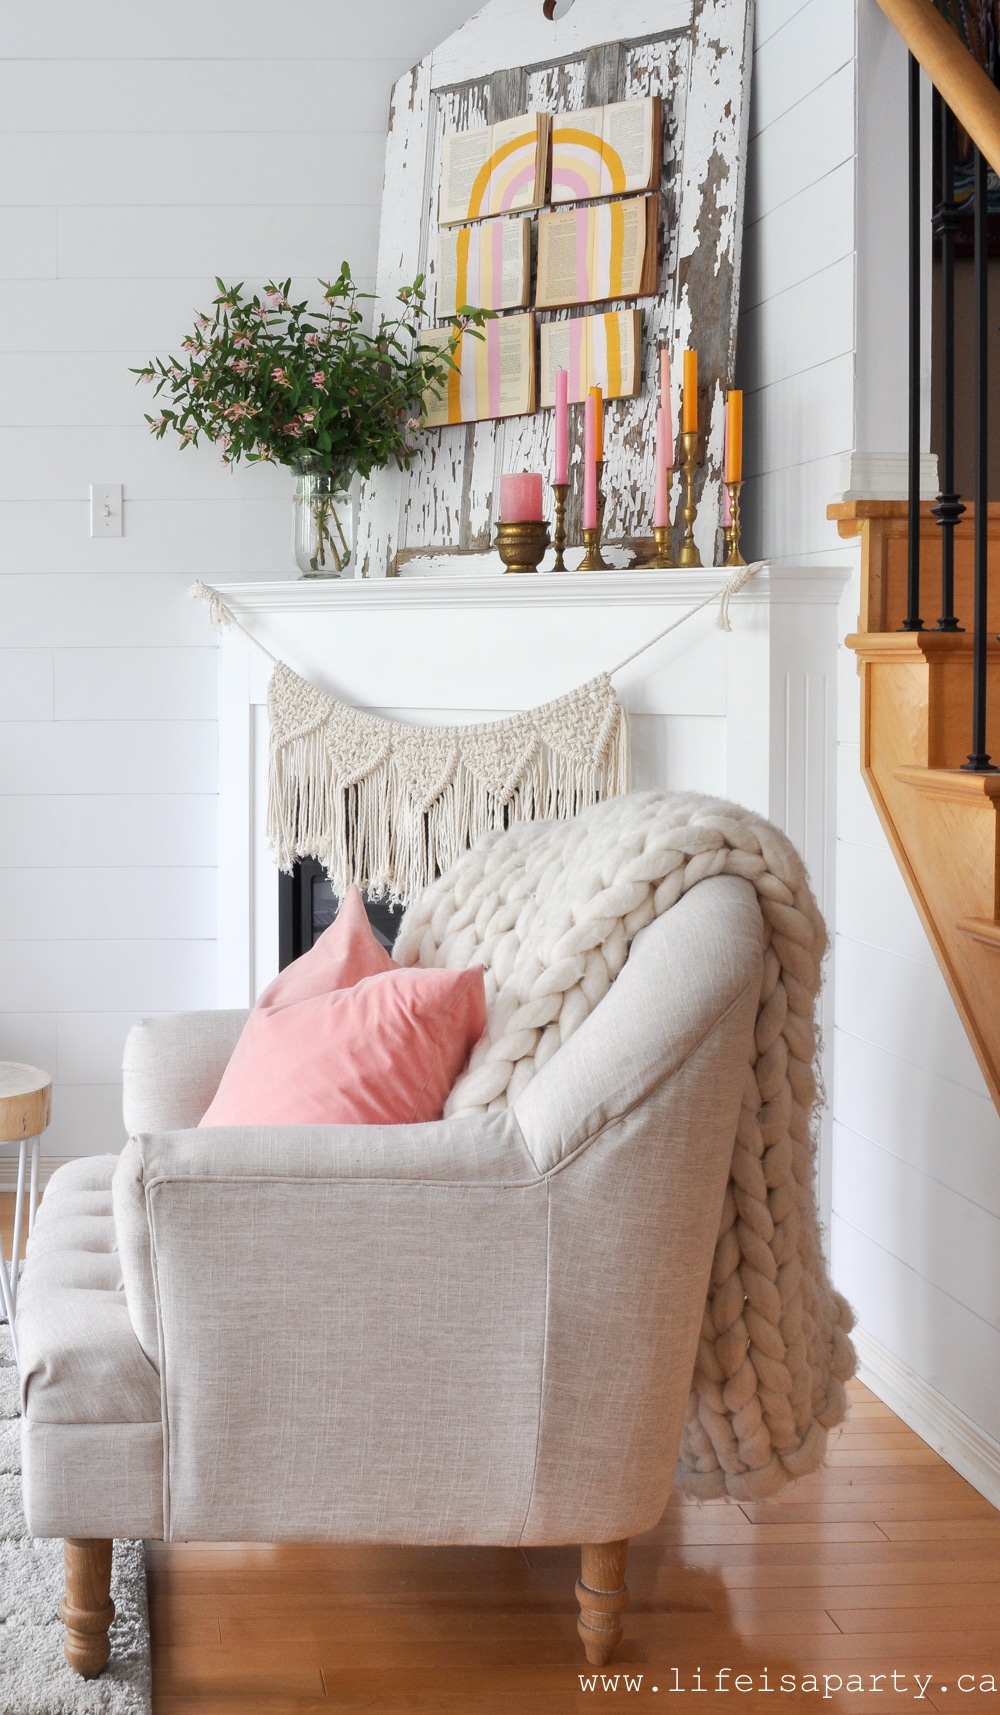
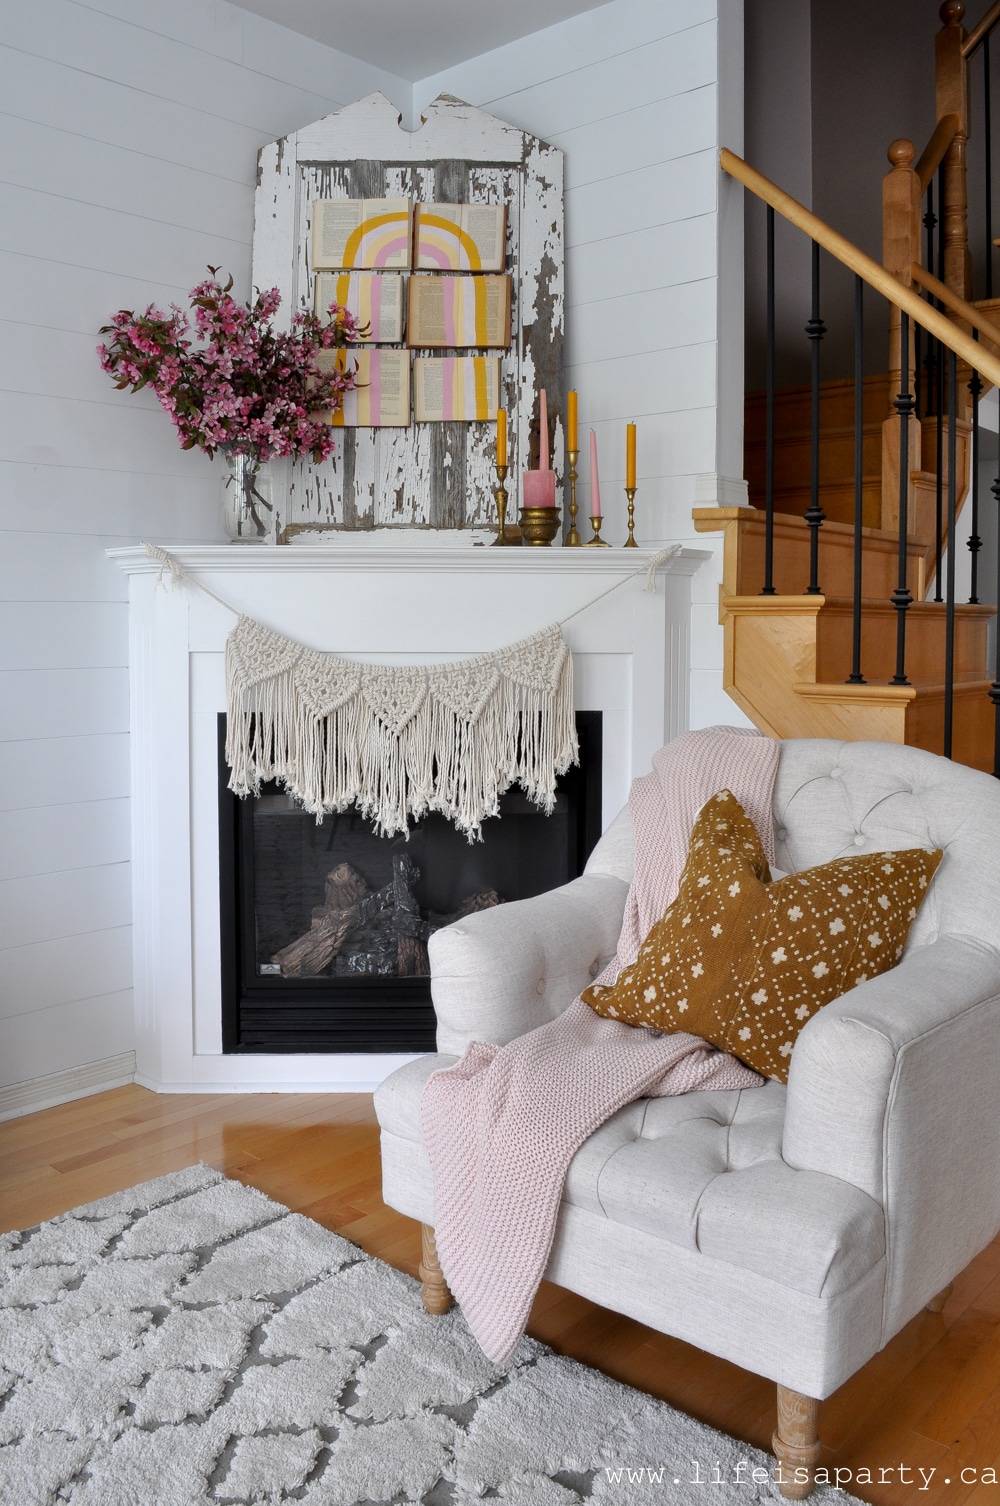
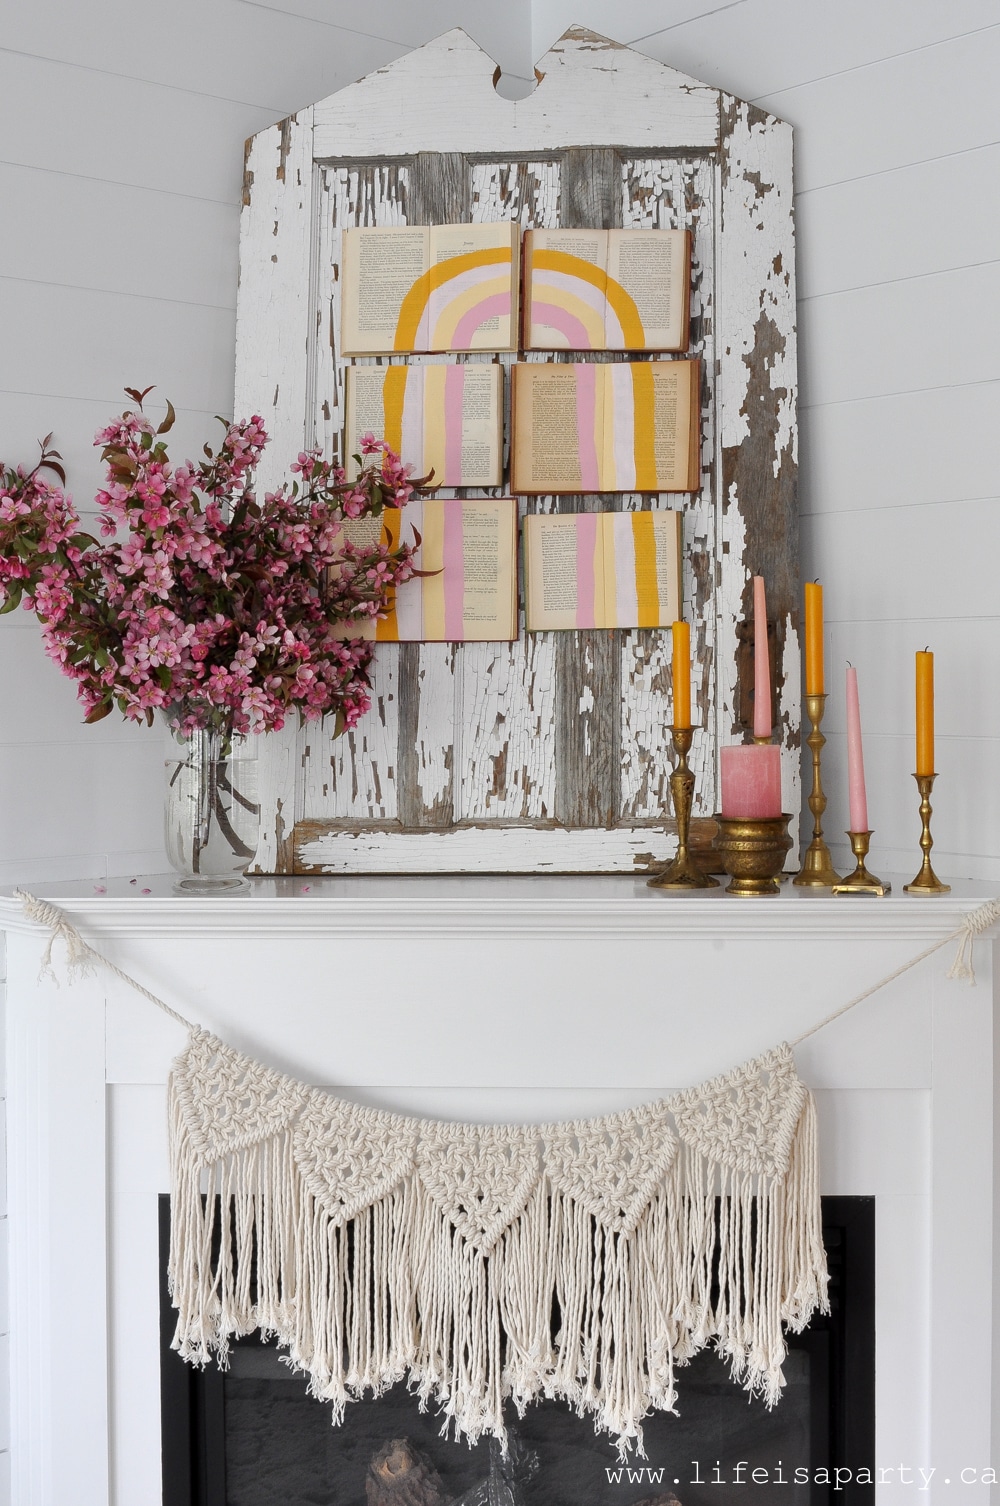
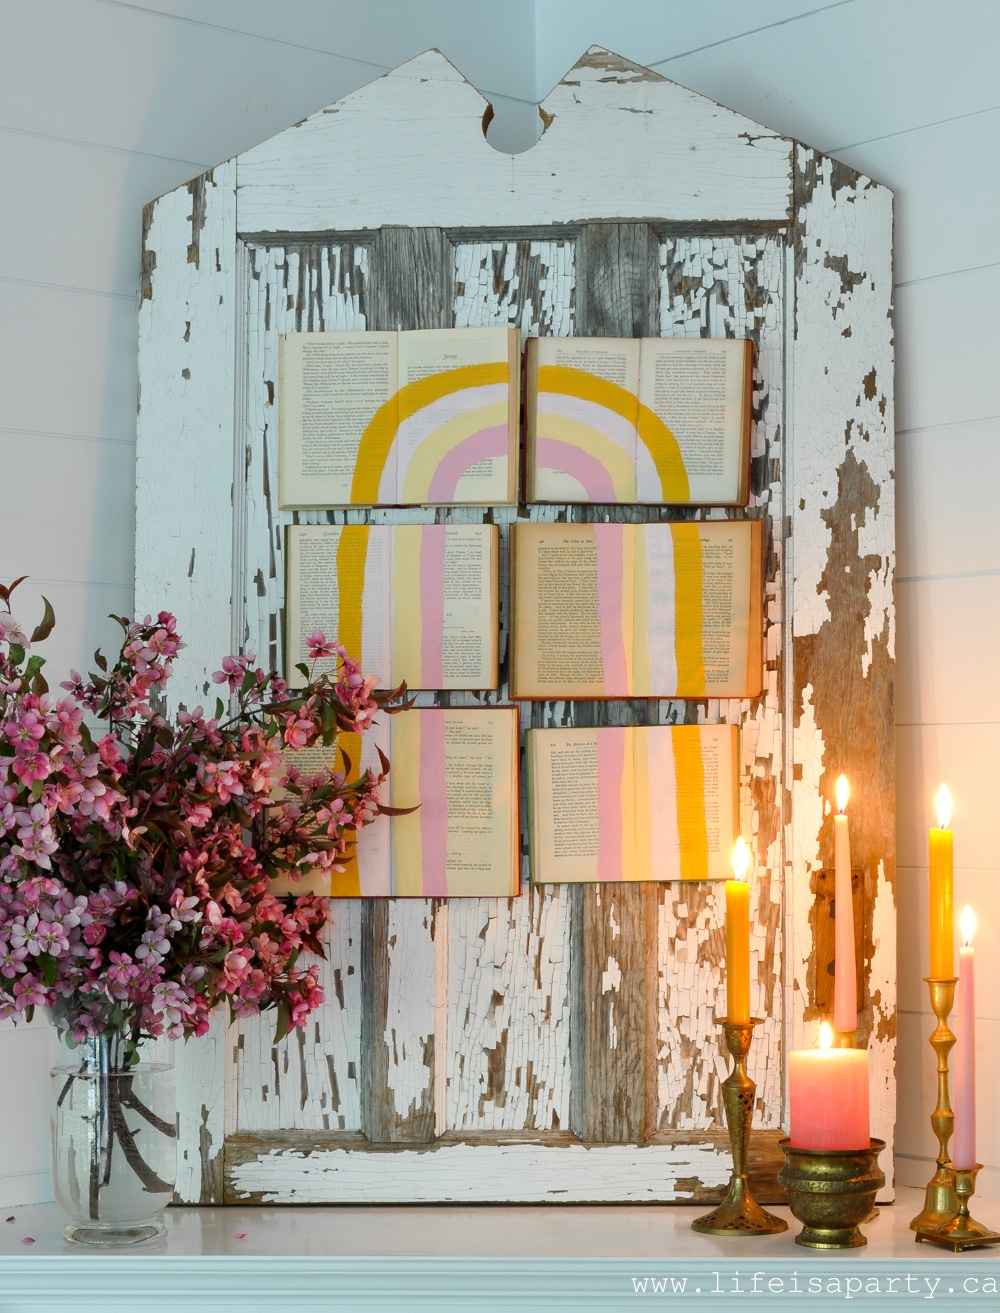
On the fireplace I made this fun DIY Book Art piece -you can find the whole tutorial on how I made it here.  I also added some pretty pink flowering branches.

summer mantel decor

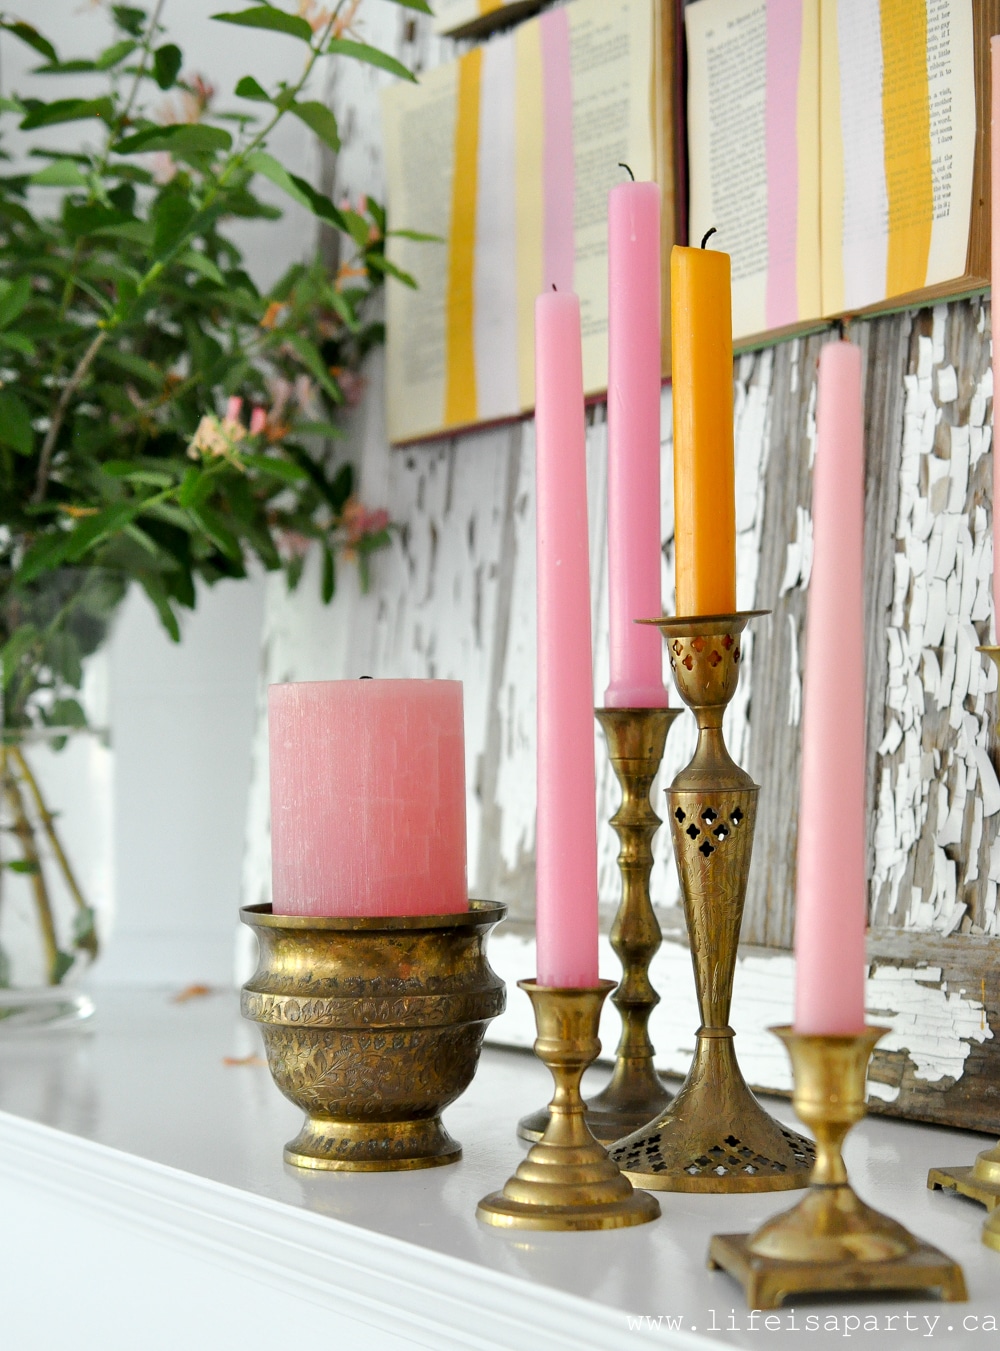
The brass candles and even the pretty coloured candle sticks are all thrift store finds and I love how they look here.

DIY rainbow art
brass candlesticks

Pillowscape

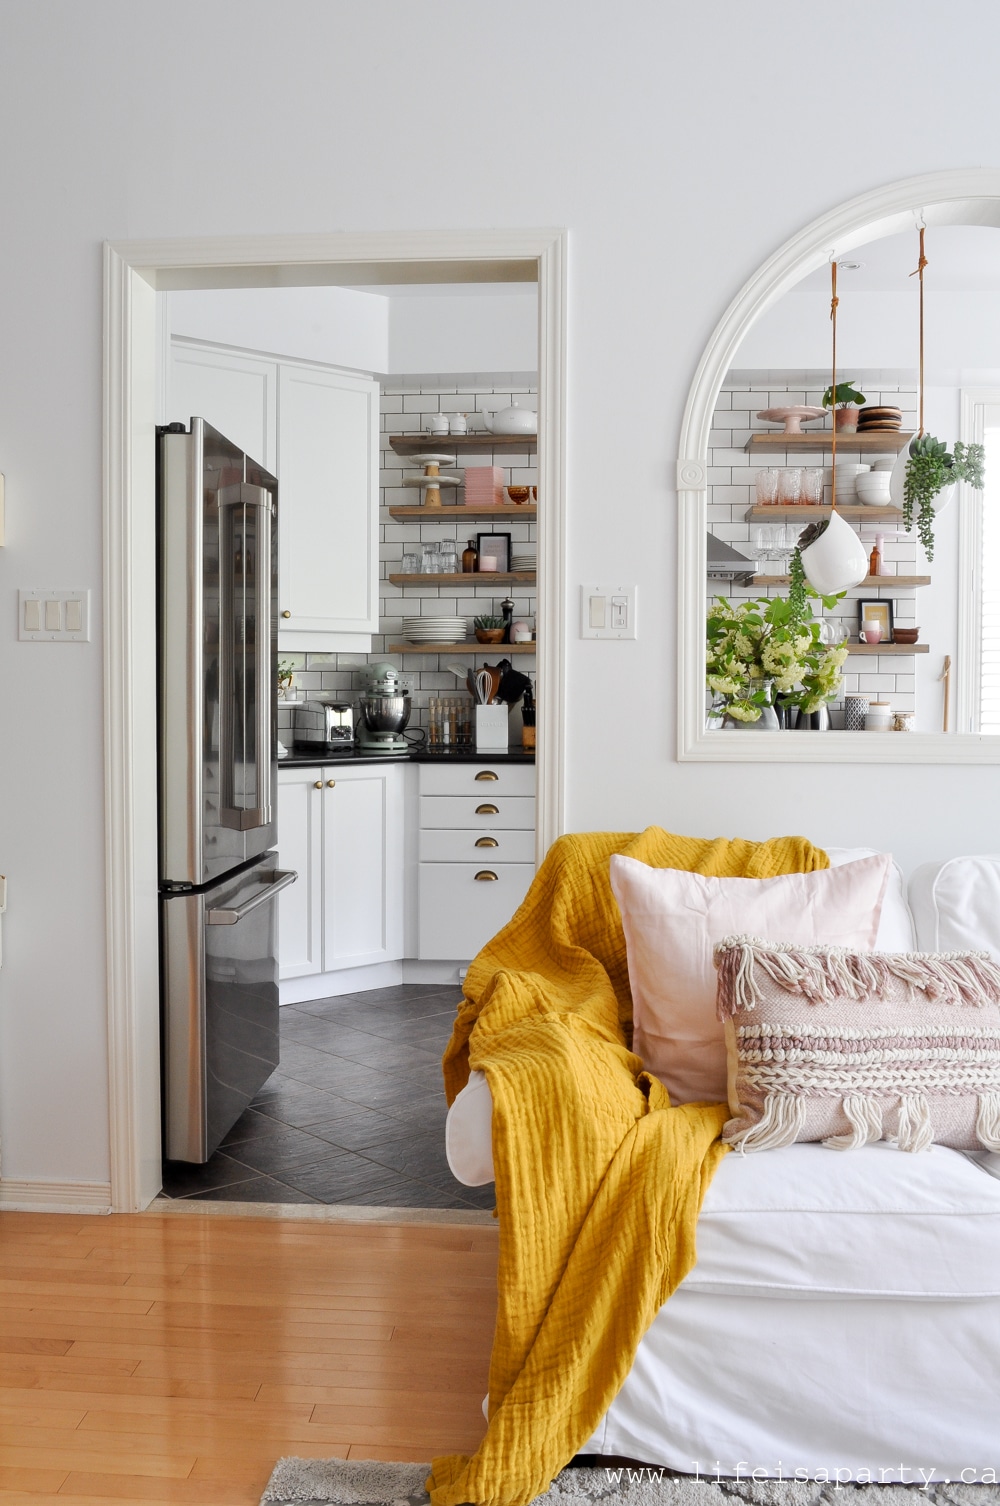
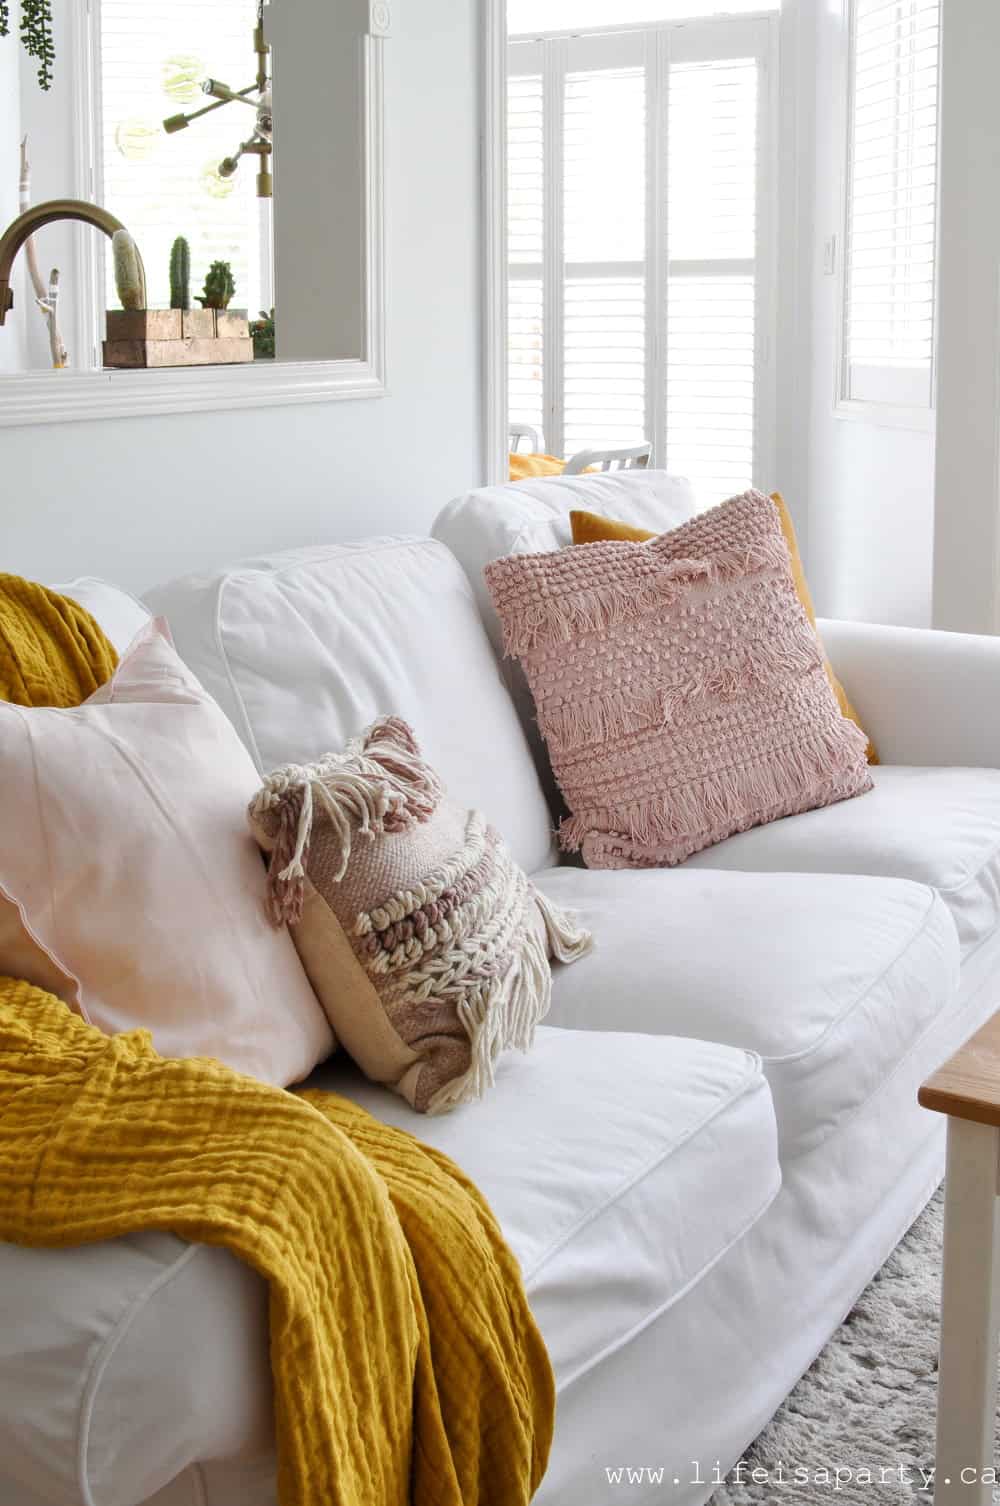
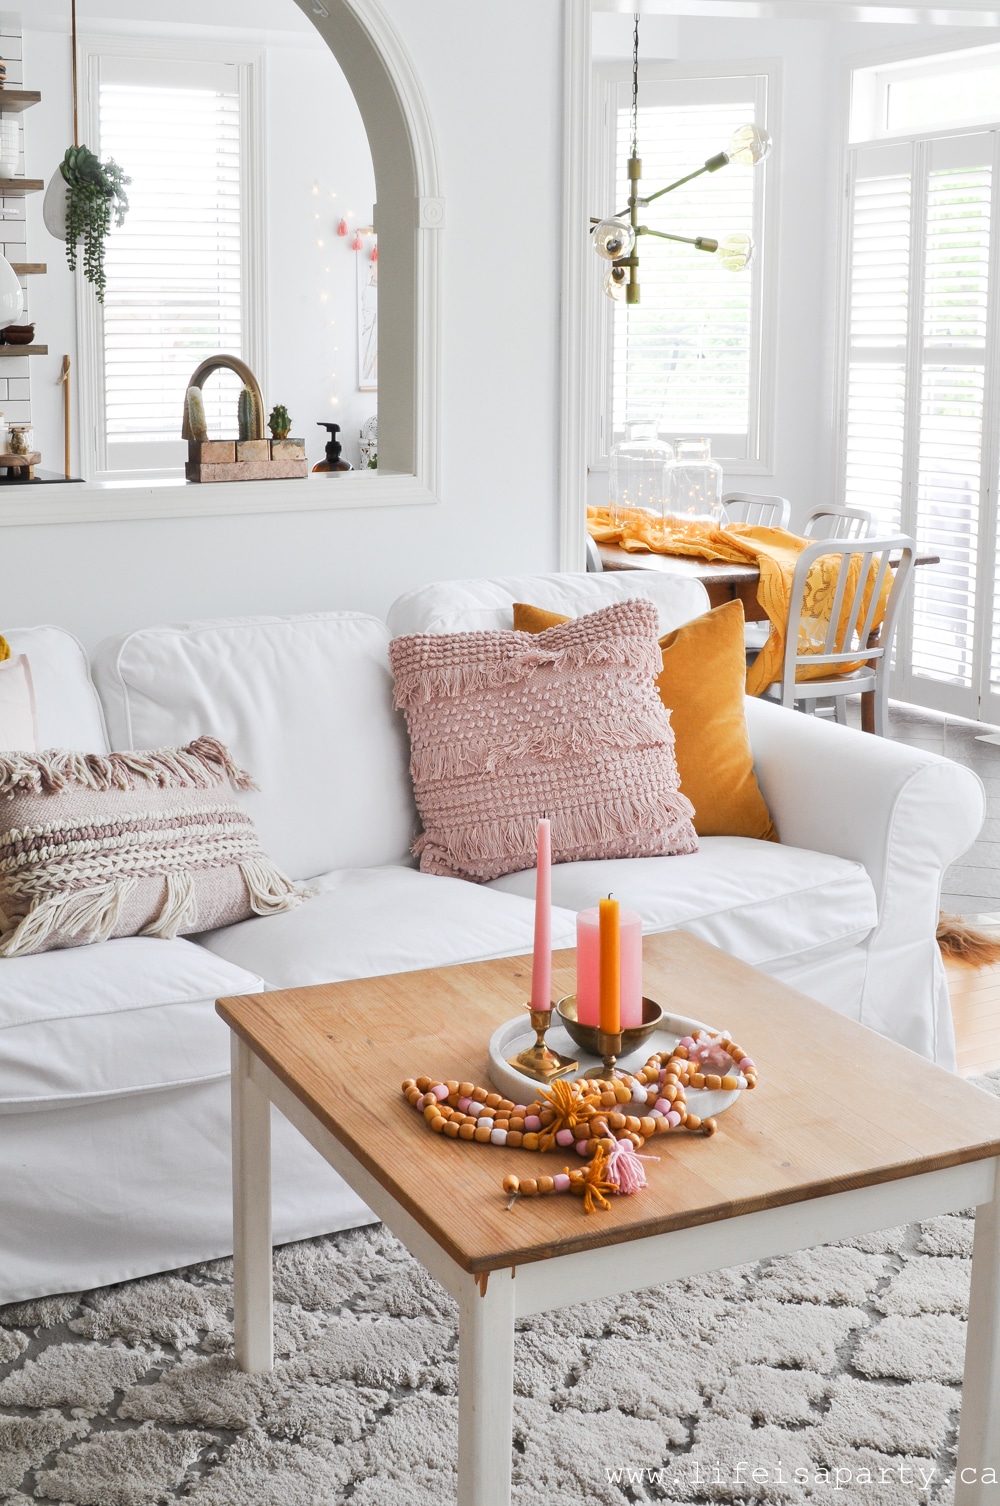
Over on the couch I added the most beautiful collection of pillows and an awesome throw blanket.

yellow and pink decor

I've actually wanted one of these light gauze cotton throws for ages and I love this beautiful colour.  This mustard blanket is so soft and cozy, and perfect for curling up in on a summer evening when the patio door is open and you're watching tv.  It's from Natures Sweet Creation.  Melissa has the most beautiful etsy shop, and so many amazing colours of gauze blankets to choose from.

Mustard Yellow and Pink Summer Home Tour

I've also added in lots of pretty pillows in pinks and mustard yellow.  

Summer Home Tour

 Summer Home Tour

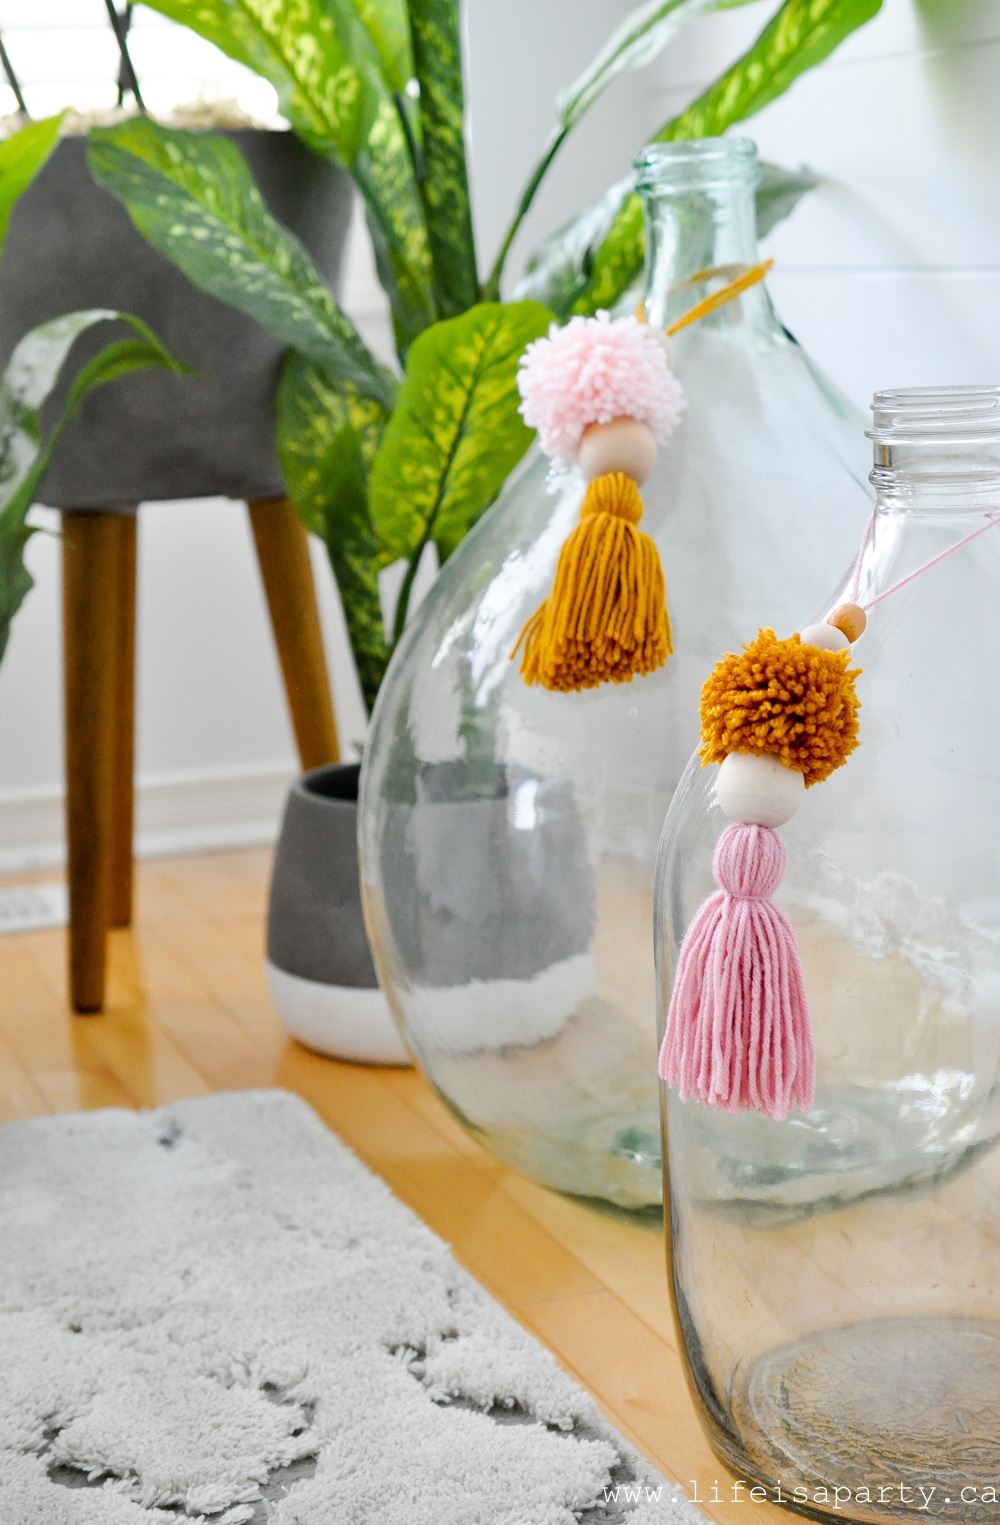
Over on the other side of the room, I added a few DIY tassels to my large glass bottles.

yellow and pink tassels

I love how boho they feel, and how it's a chance to add another little pop of colour and texture to the space.

Mustard Yellow and Pink Summer Home TourKitchen

Eating Area

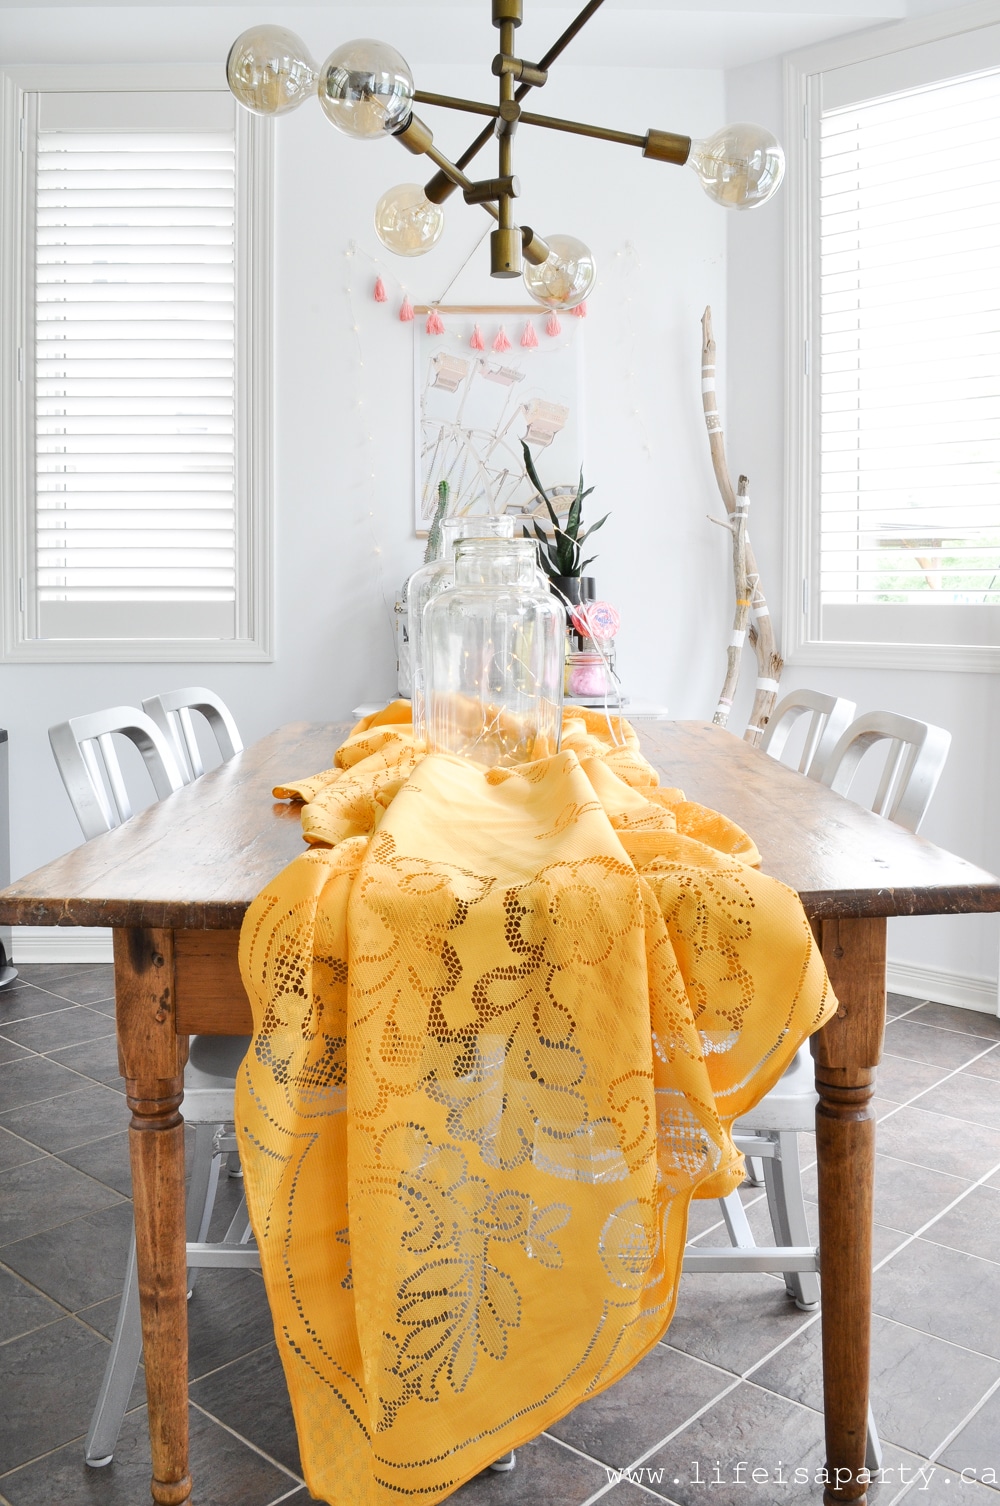
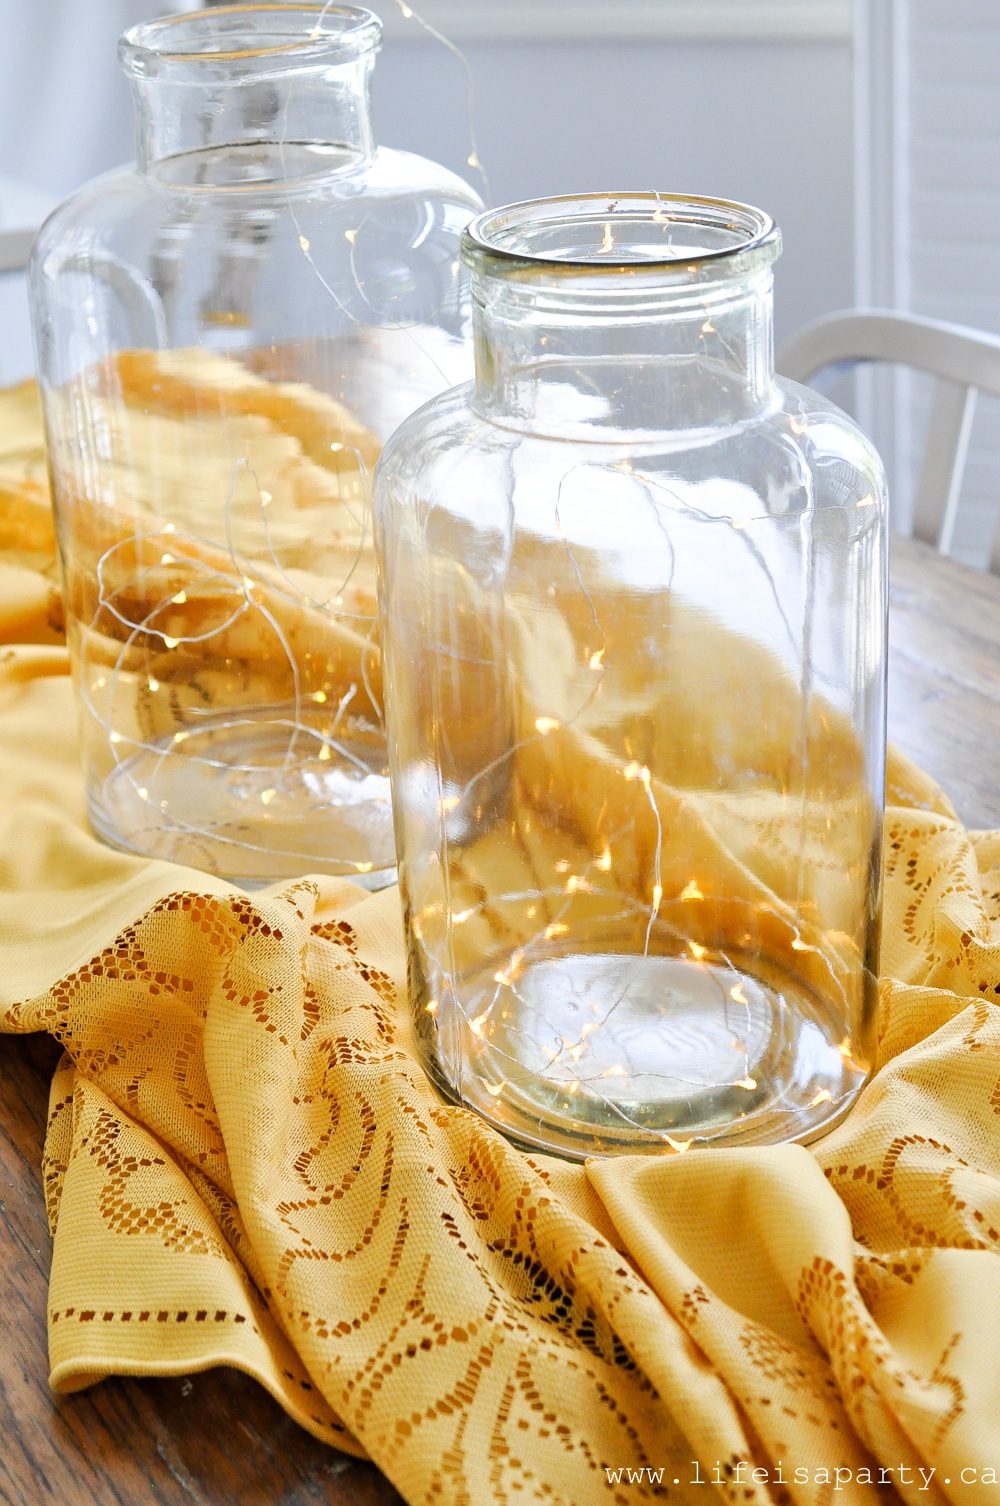
Over into our kitchen, I've added this fun vintage lace table cloth to the table along with my vintage Hungarian Pickle Jars, filled with some mini lights.

Mustard Yellow tablecloth

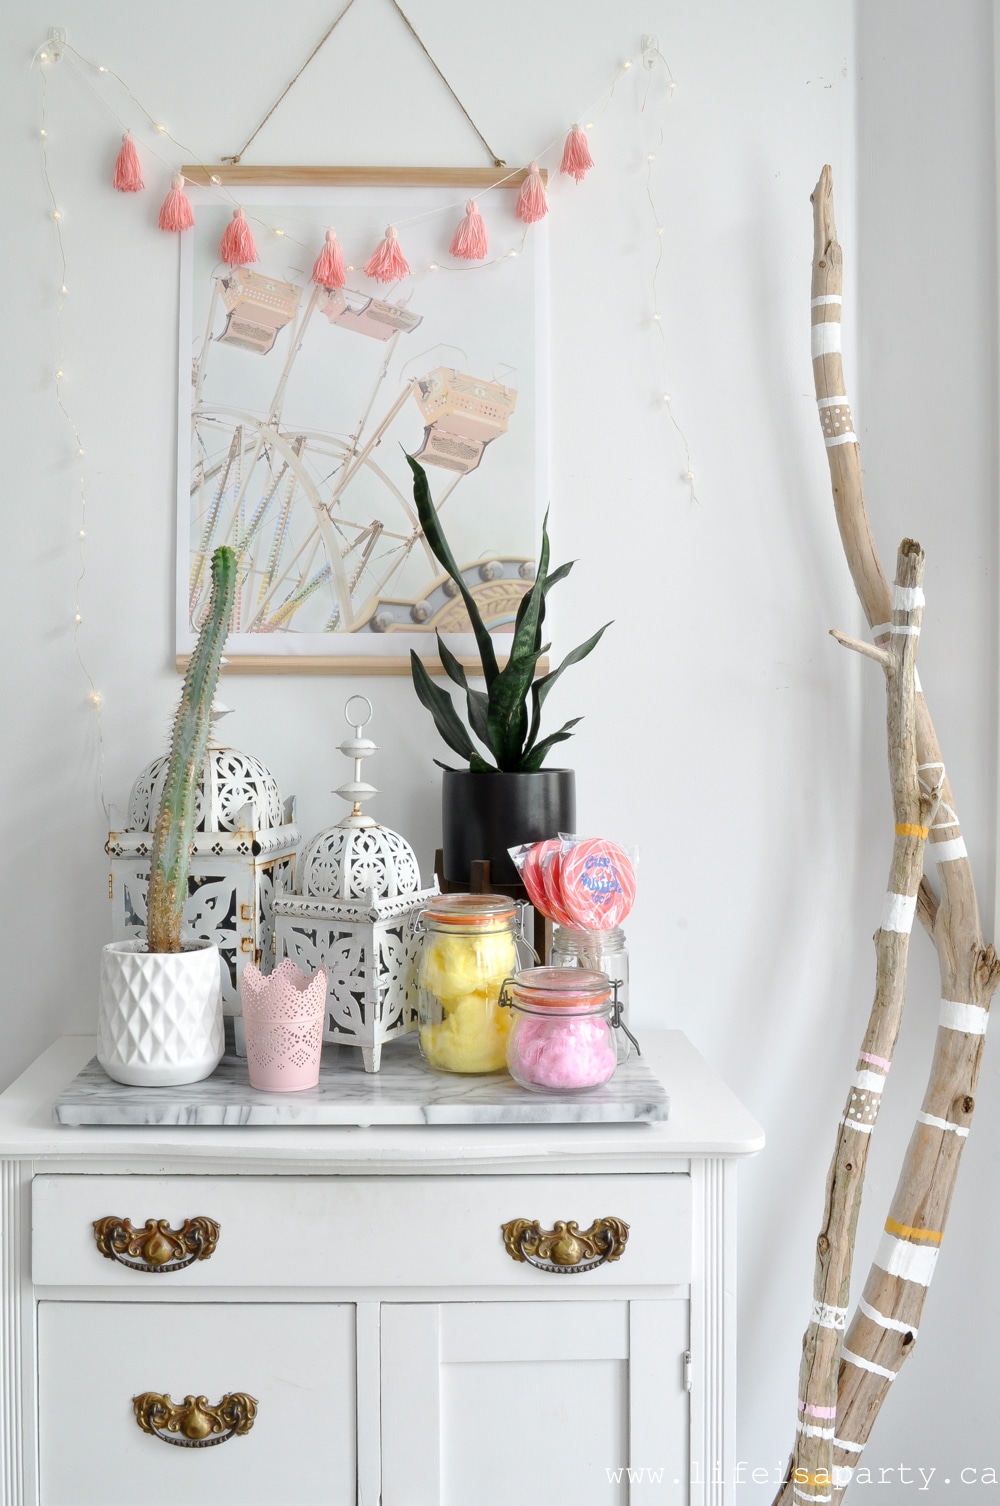
glass jar lanternsAnd on the other side of the kitchen table, this little spot has become a favourite of mine to change a bit with each season.

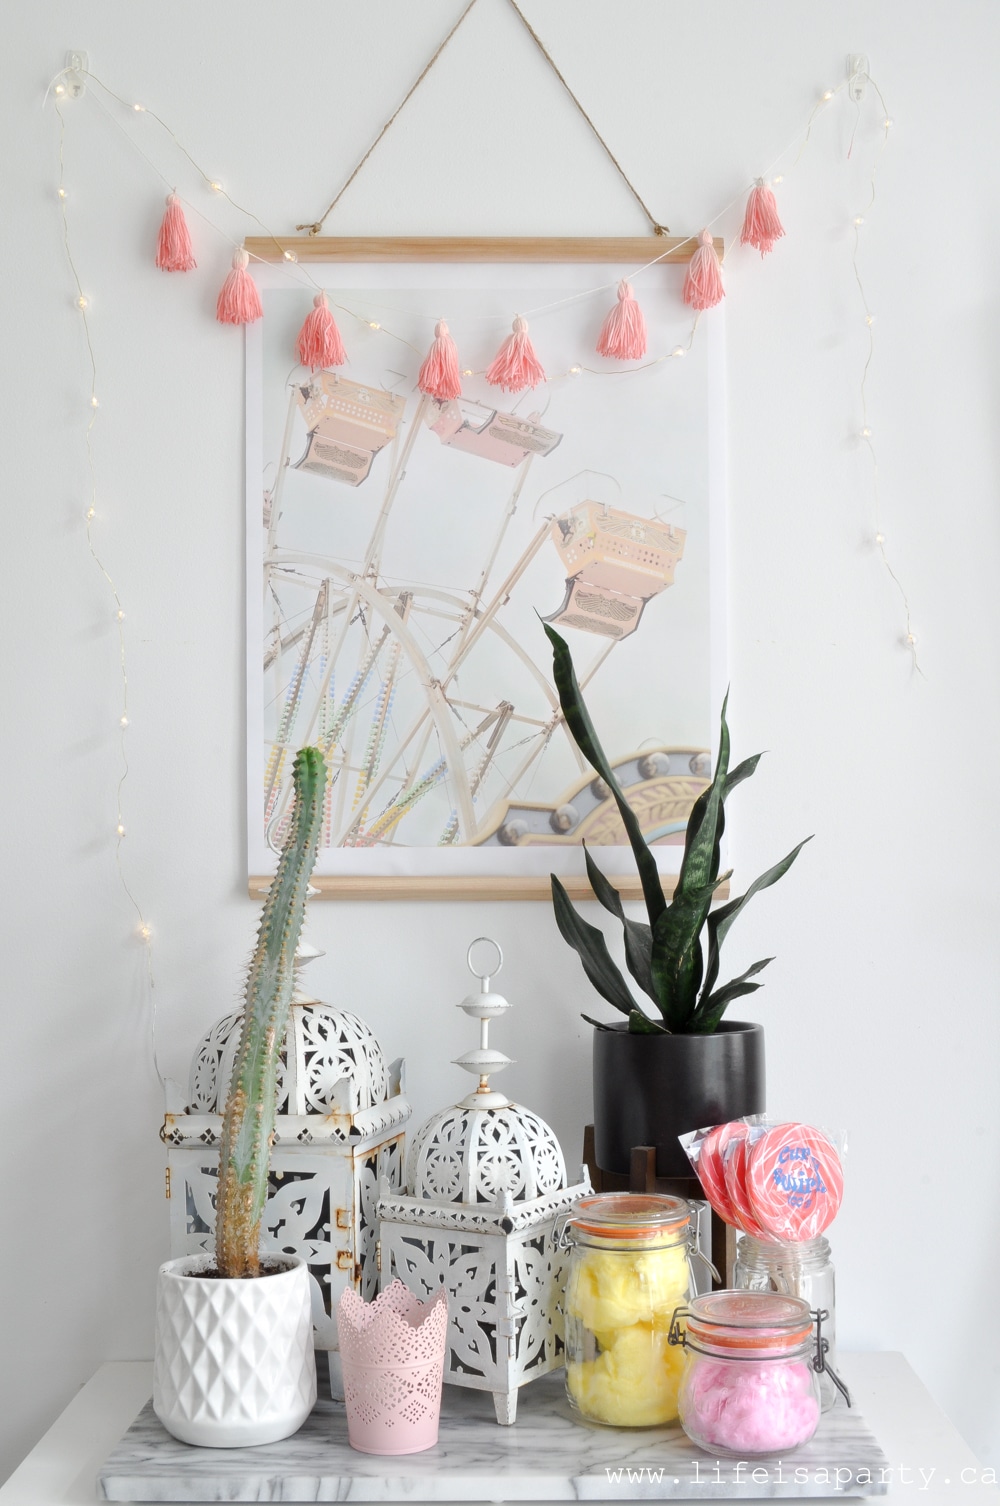
mustard yellow and pink decor ideasThe driftwood sticks are some that I painted a couple of years ago -you can see the whole tutorial here.  I covered up some blue paint with my mustard yellow and they were perfect for this year's colour scheme.

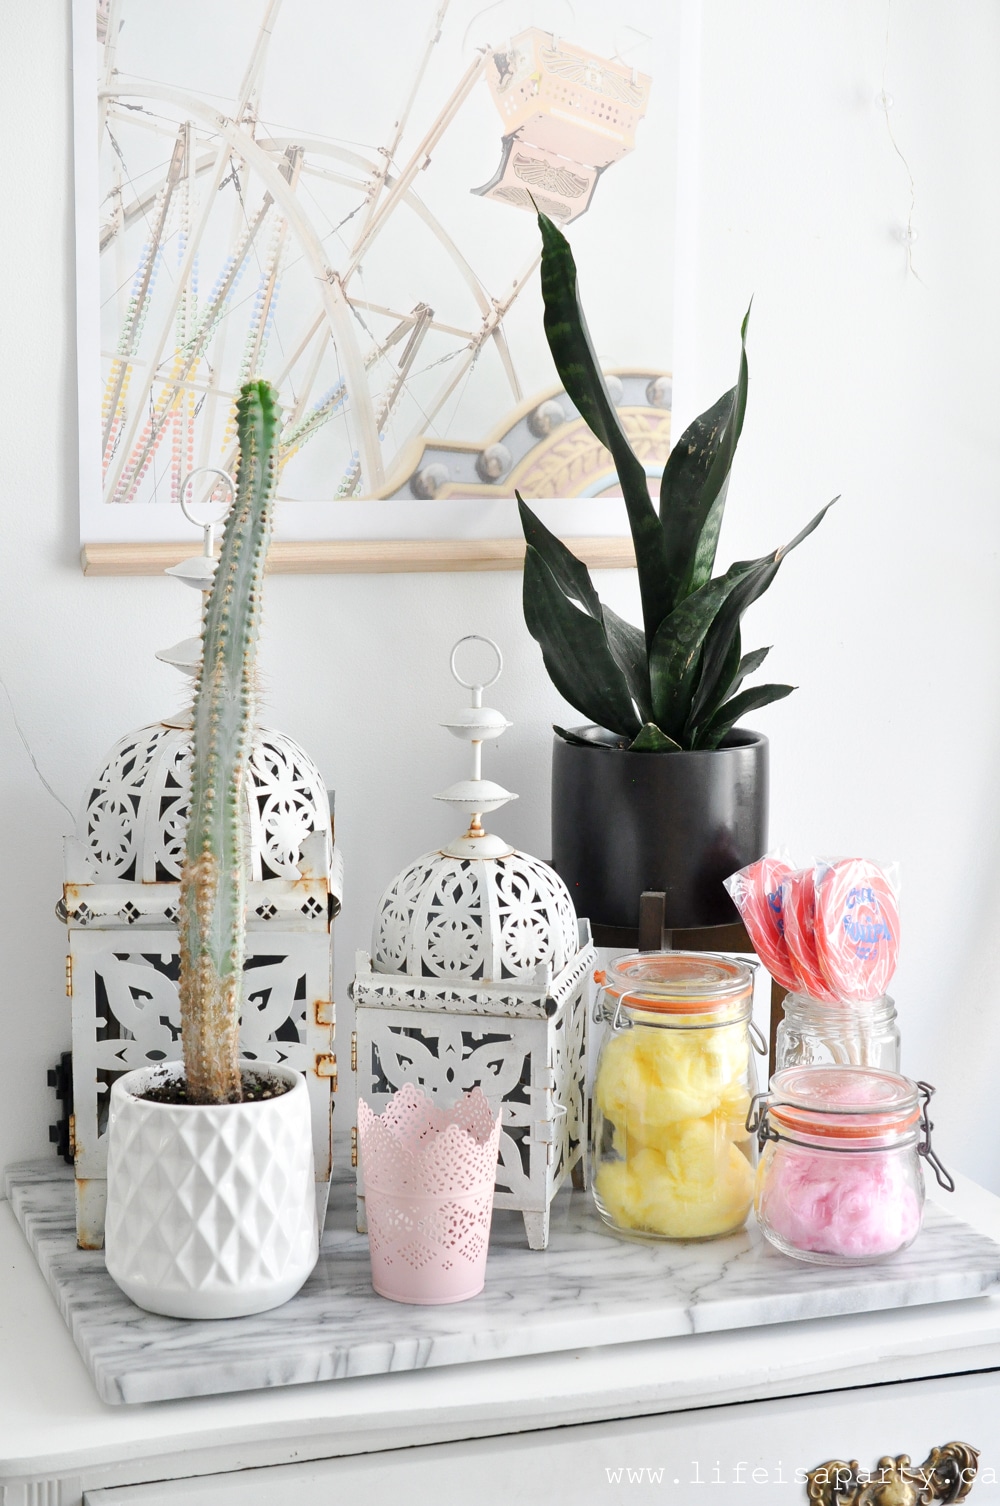
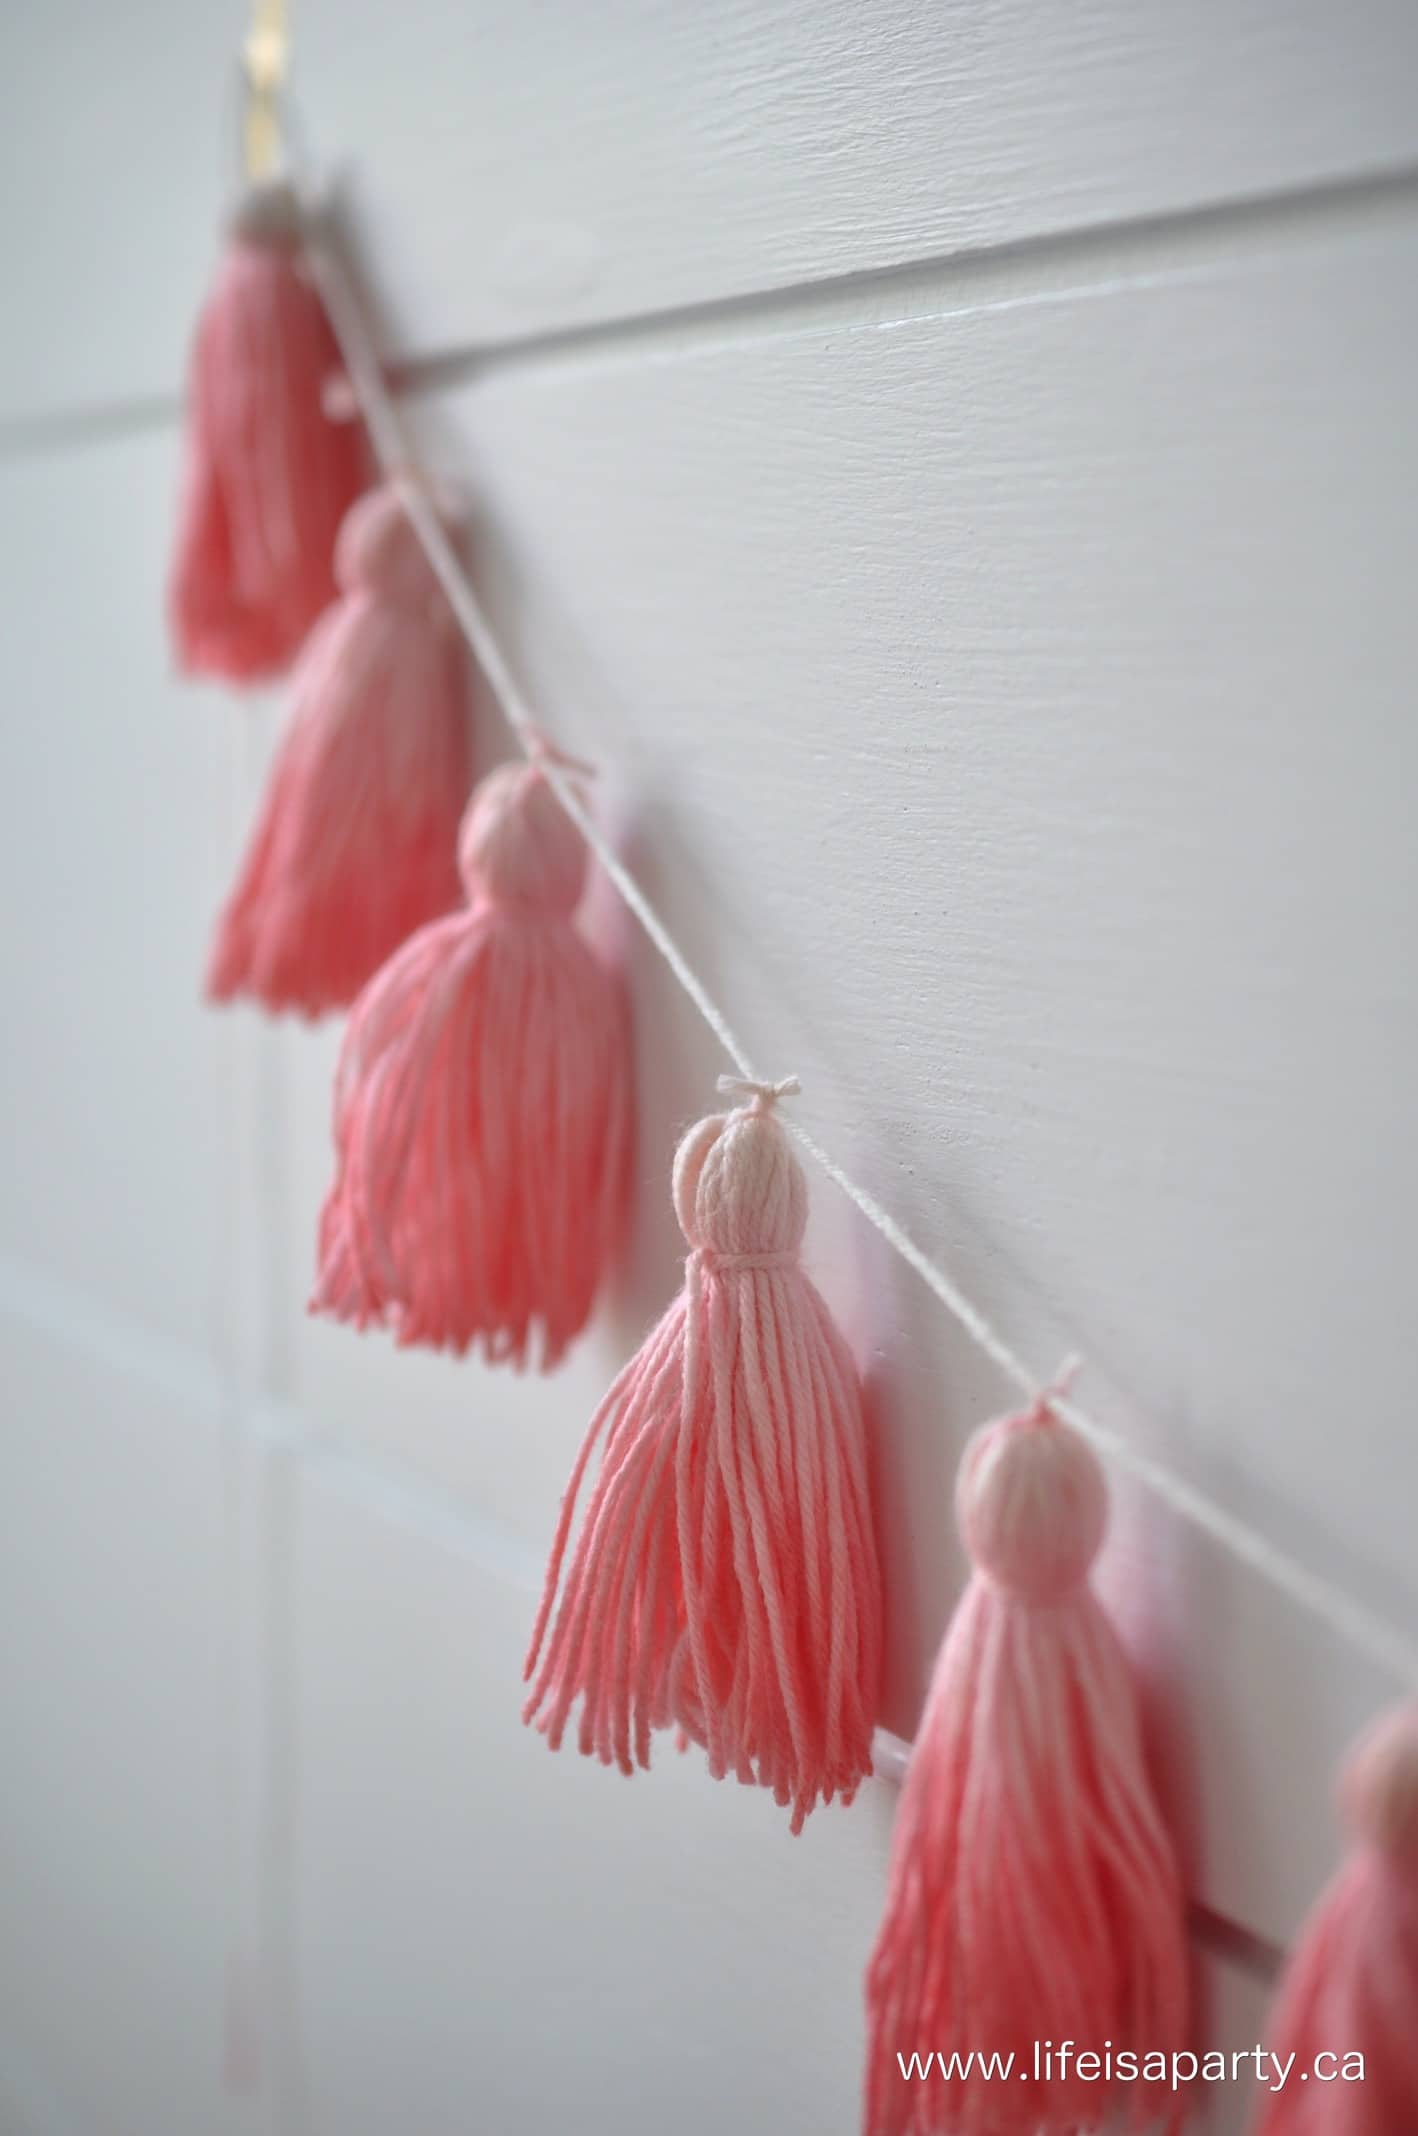
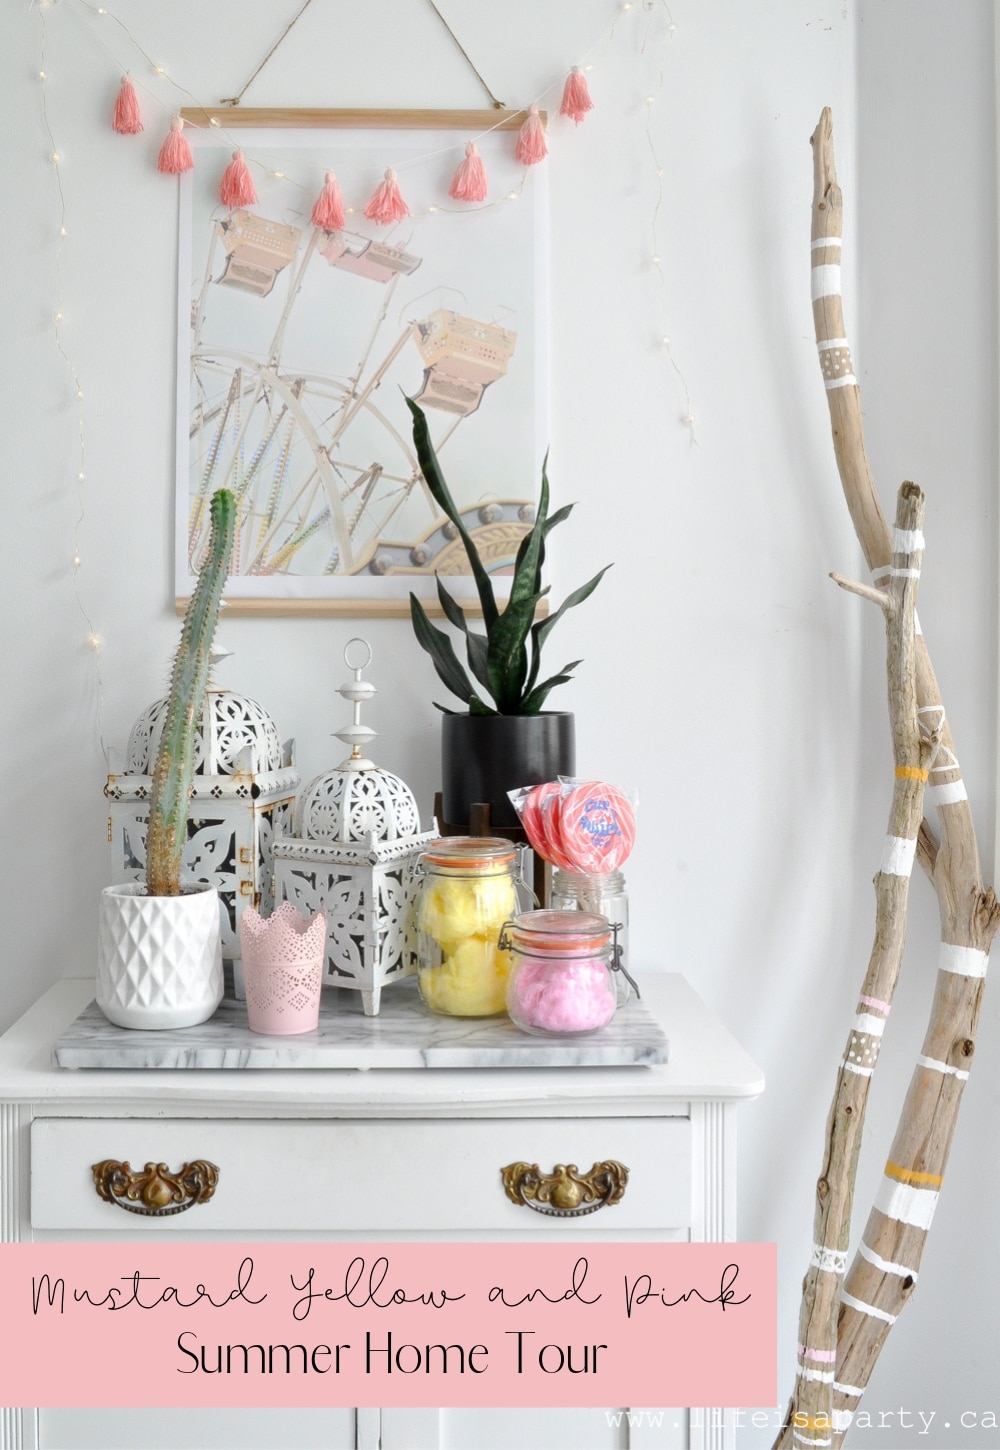
Mustard Yellow and Pink Summer Home TourThe art piece is from another from JessaMaePhoto, the same as the dining room piece.  It fits our colours perfectly and the ferris wheel certainly feels like summer. On top of the art I layered on some lights inspired by the round bulb ones on any ferris wheel or midway ride at night.  These fun tassels made of cotton string and dip dyed in kool-aid -find the whole tutorial on how I made the tassels here.

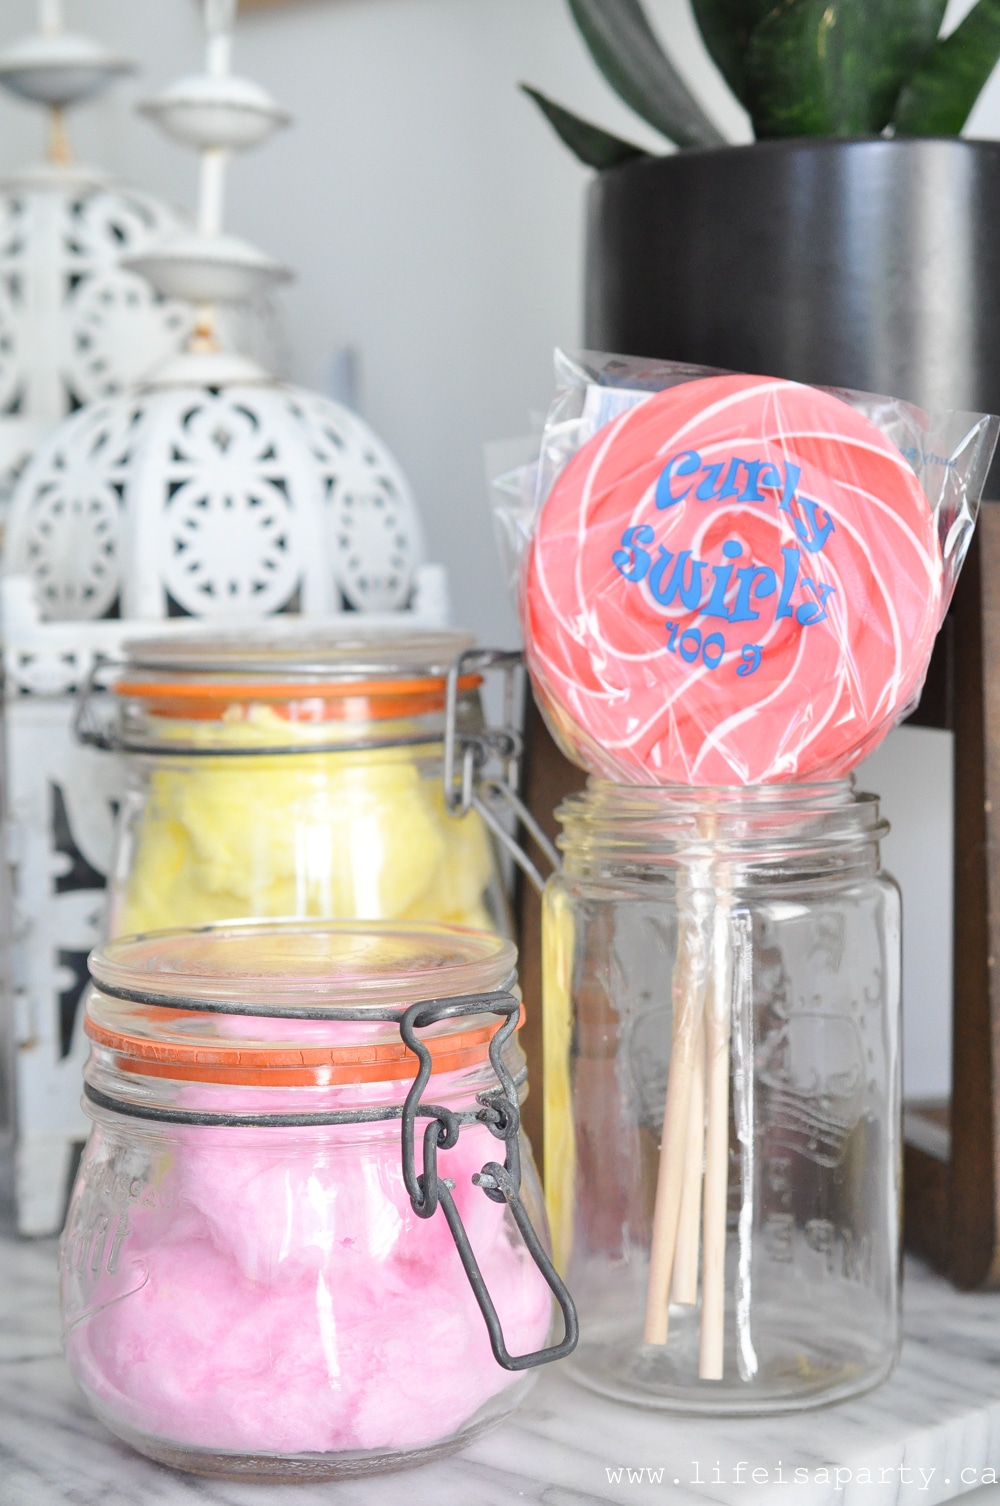
cotton candy and lollipopsIn keeping with the fair theme, I added a few classic fair treats -cotton candy, and giant lollipops!

Yellow and Pink candy

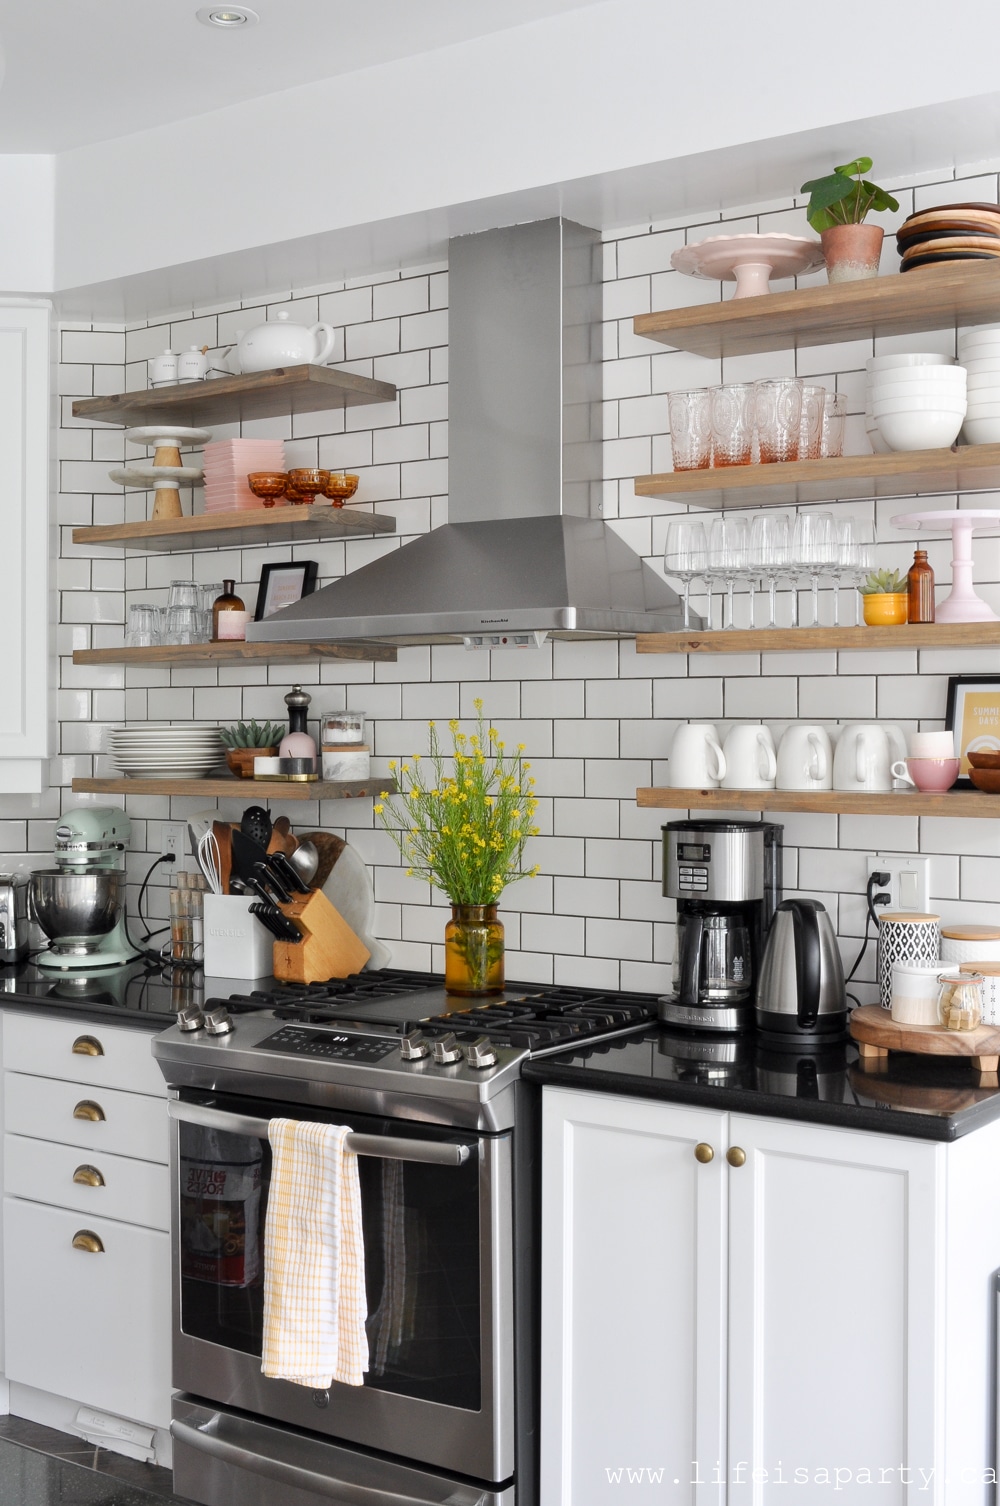
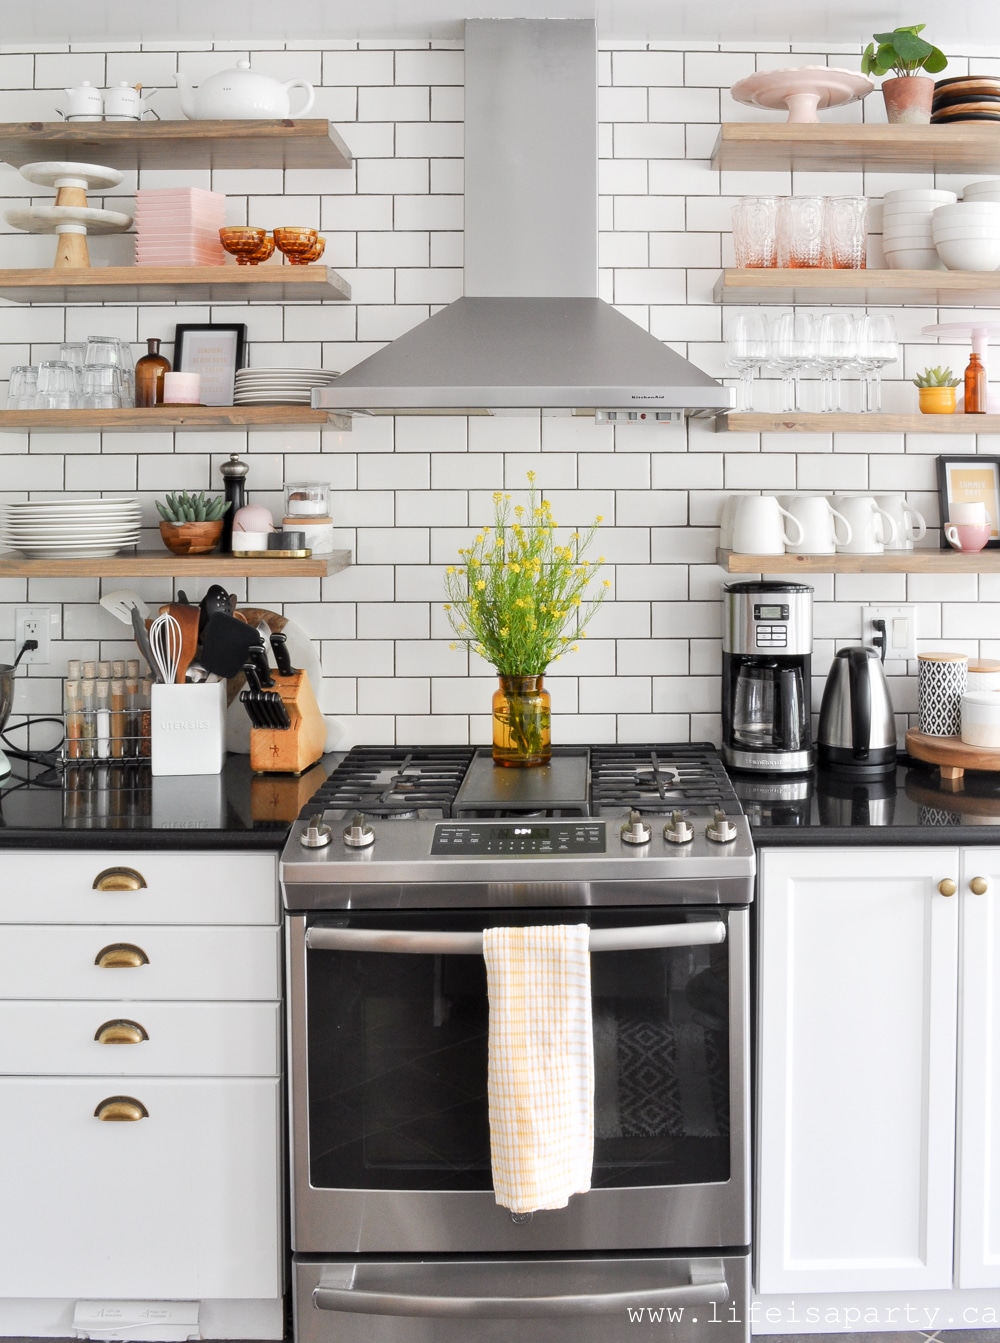
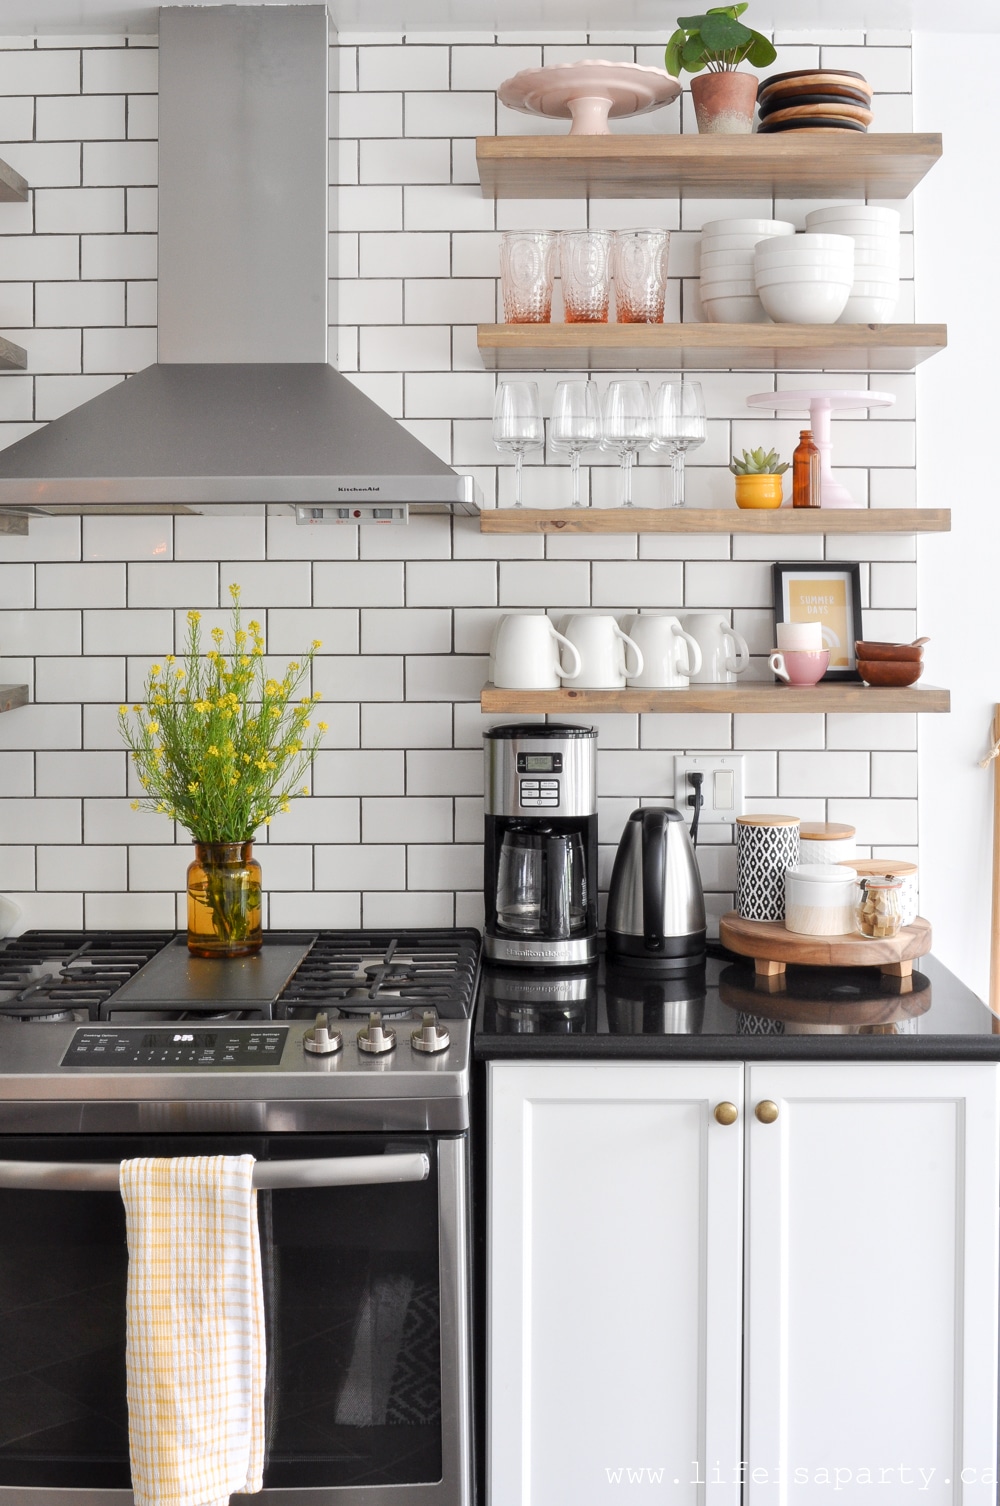
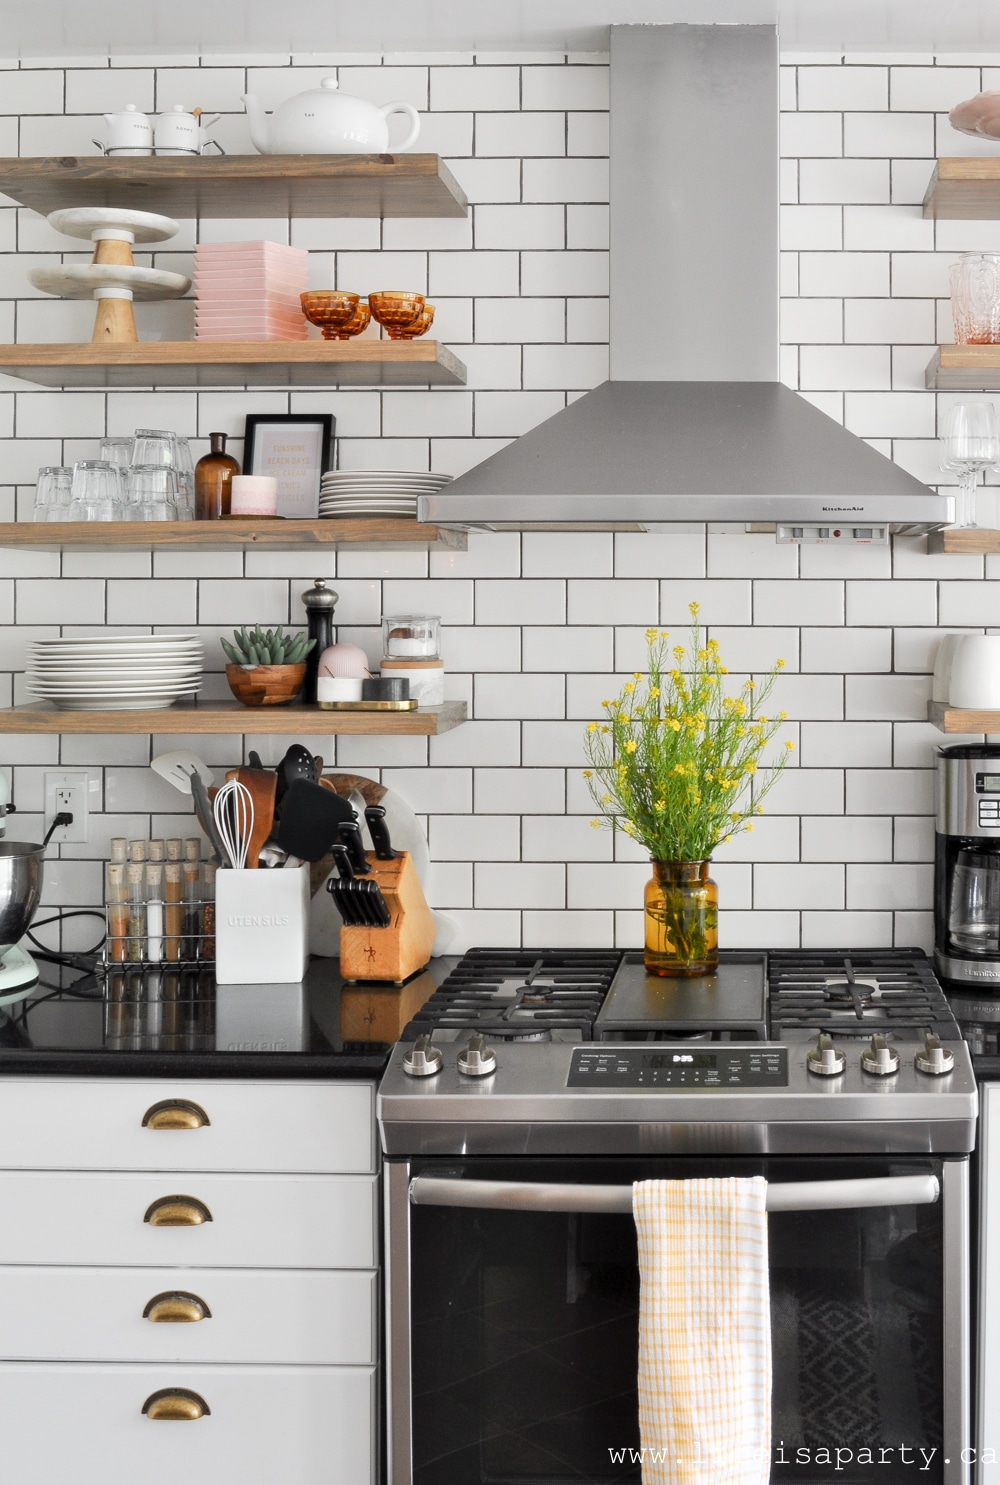
Over on the other side of the kitchen, I added some mustard yellow and pink decor touches to our open shelves.

open kitchen shelves

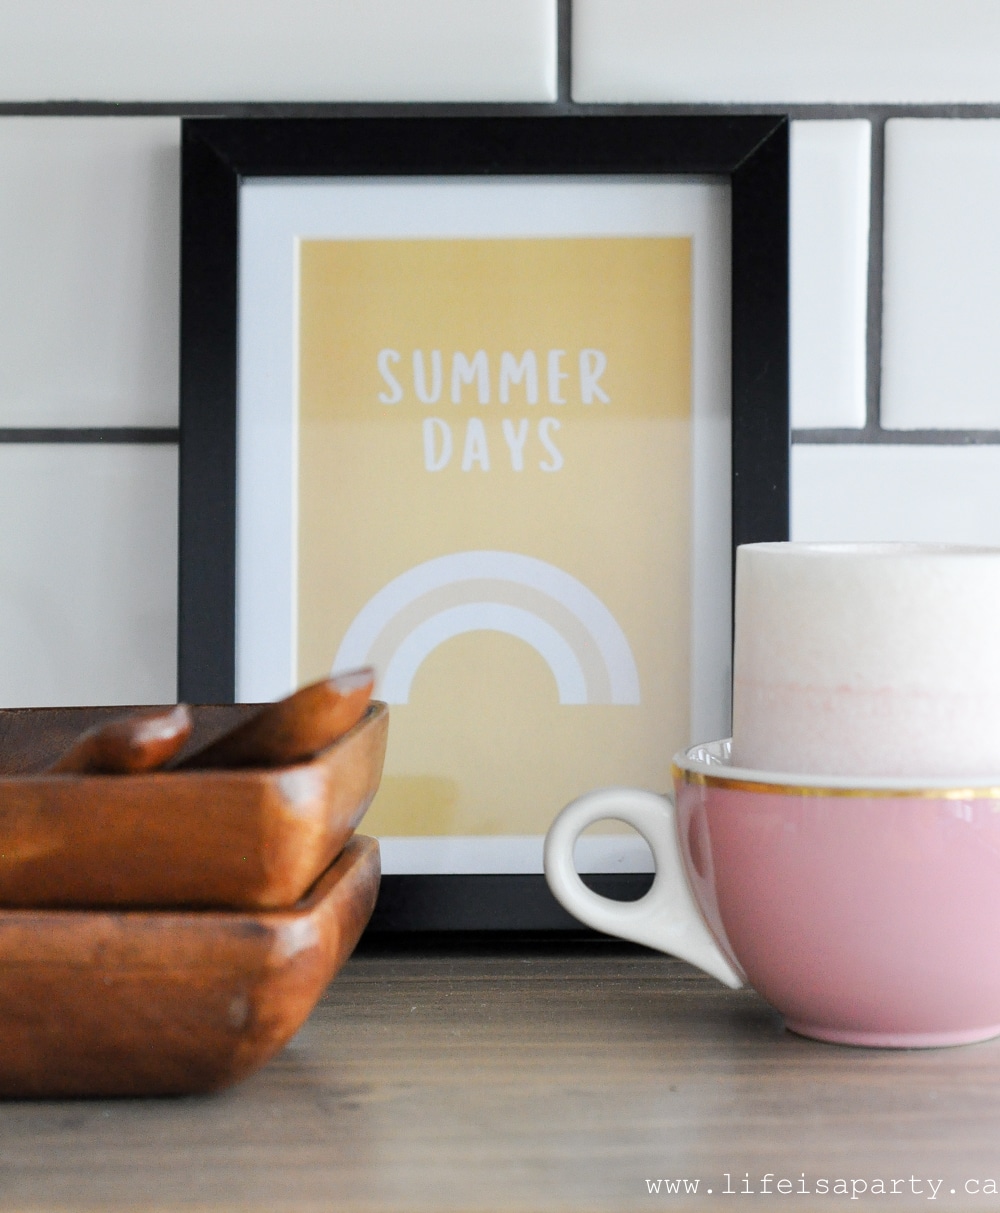
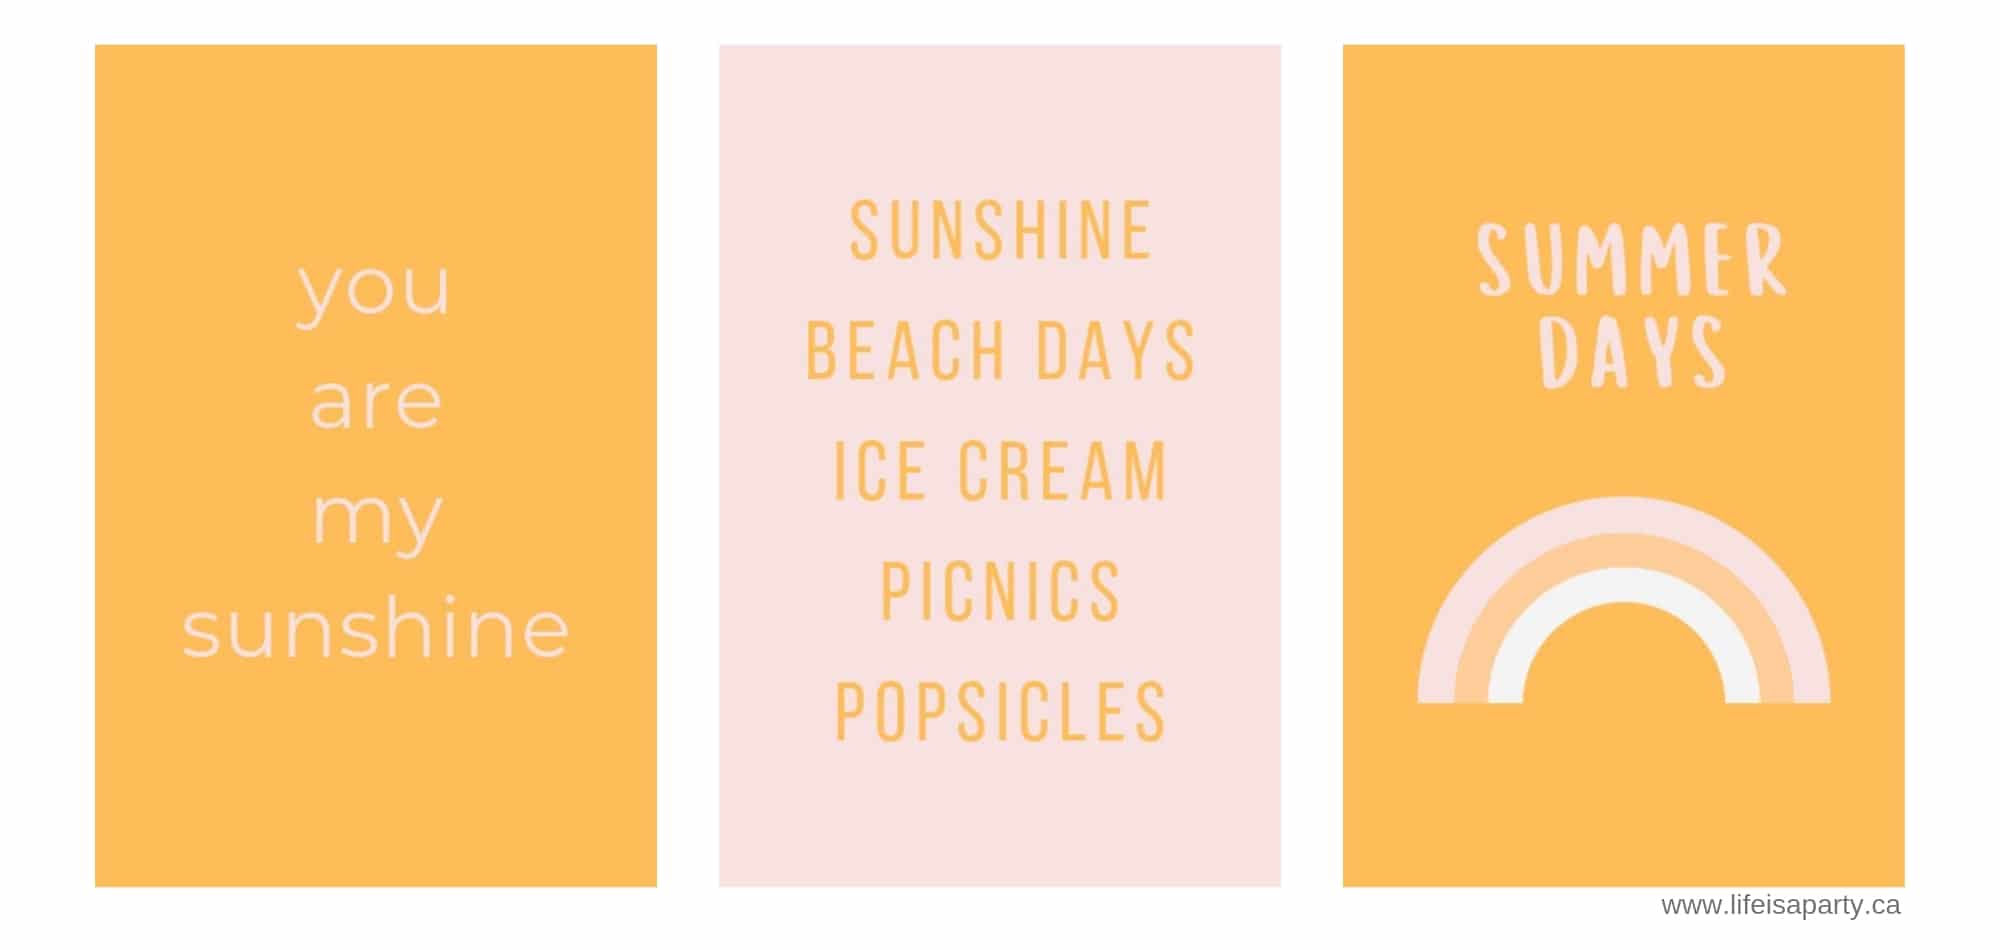
kitchen shelves with yellow and pink decorFree Summer Printables

I love adding seasonal touches to these shelves, and for this one my daughter made me some pretty printables.

rainbow free printableYou can download the printables for free as a thank you gift for subscribing to our free newsletter.  They're such a fun and inexpensive way to add some of that pretty pink and mustard yellow to your decor for summer too.  Subscribe below for instant access to these printables and more.

Free Summer Printables Mustard Yellow and Pink

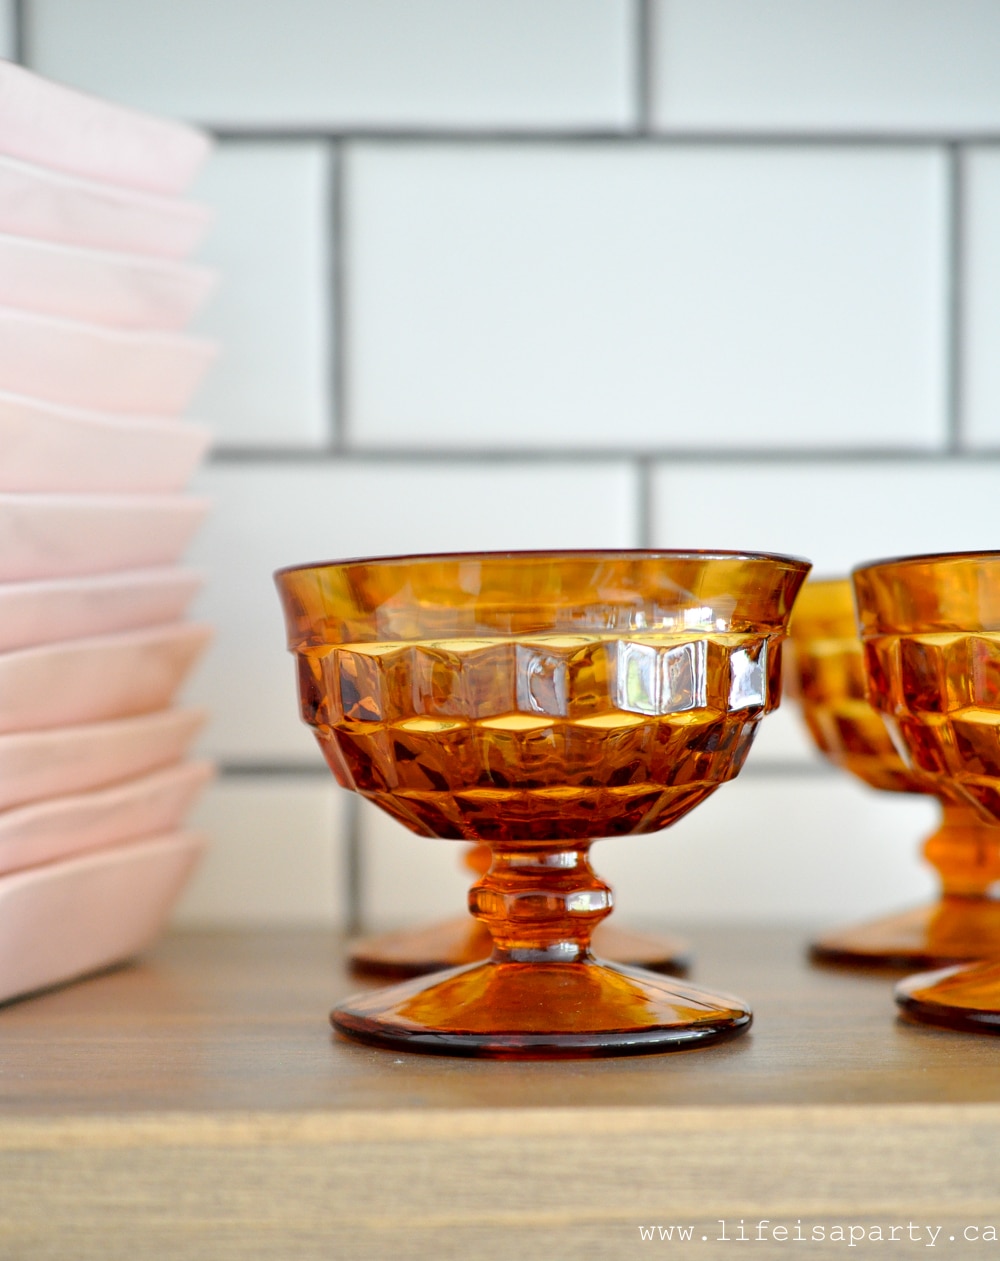
Mustard Yellow and Pink Summer Home TourAnother fun addition to the shelves were these pretty amber glass dessert bowls I found out thrifting last week.  Perfect for some after dinner ice cream this summer.

Mustard Yellow and Pink Summer Home Tour

vintage yellow glass footed dessert bowls

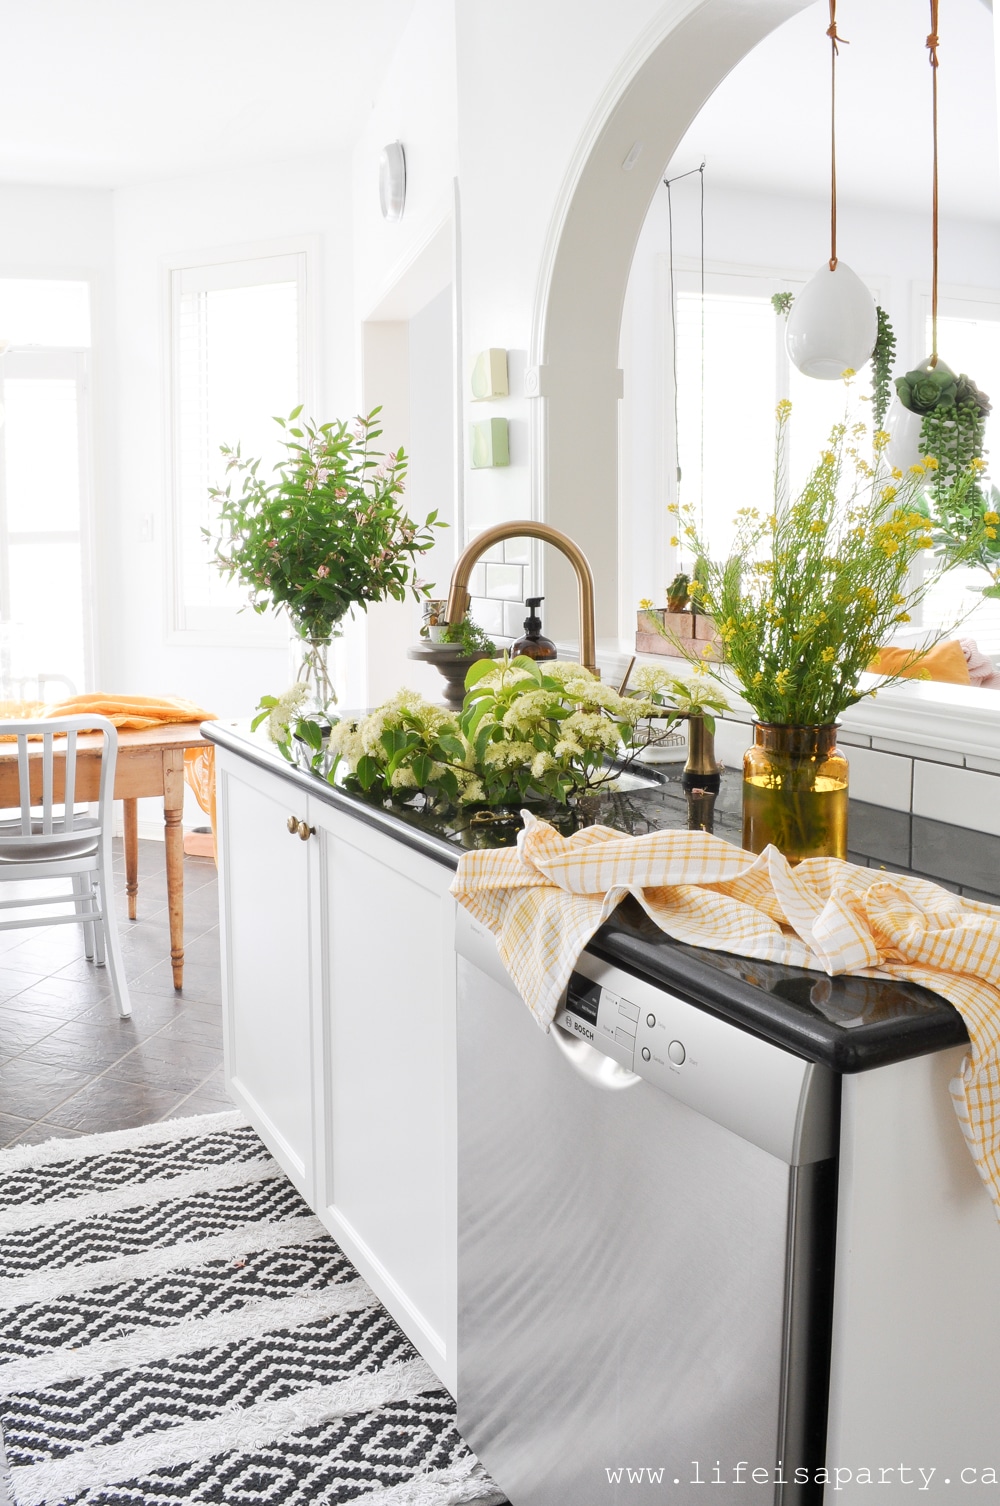
Summer Home TourOver on the other side of the kitchen, you can see some pretty wild flowers and branches that I used in my decor.

Mustard Yellow and Pink Summer Home Tour

Thank you so much for coming by for my house tour.  I hope it offers you a little inspiration.  With a house all ready for summer, life really is a party!

More Inspiration

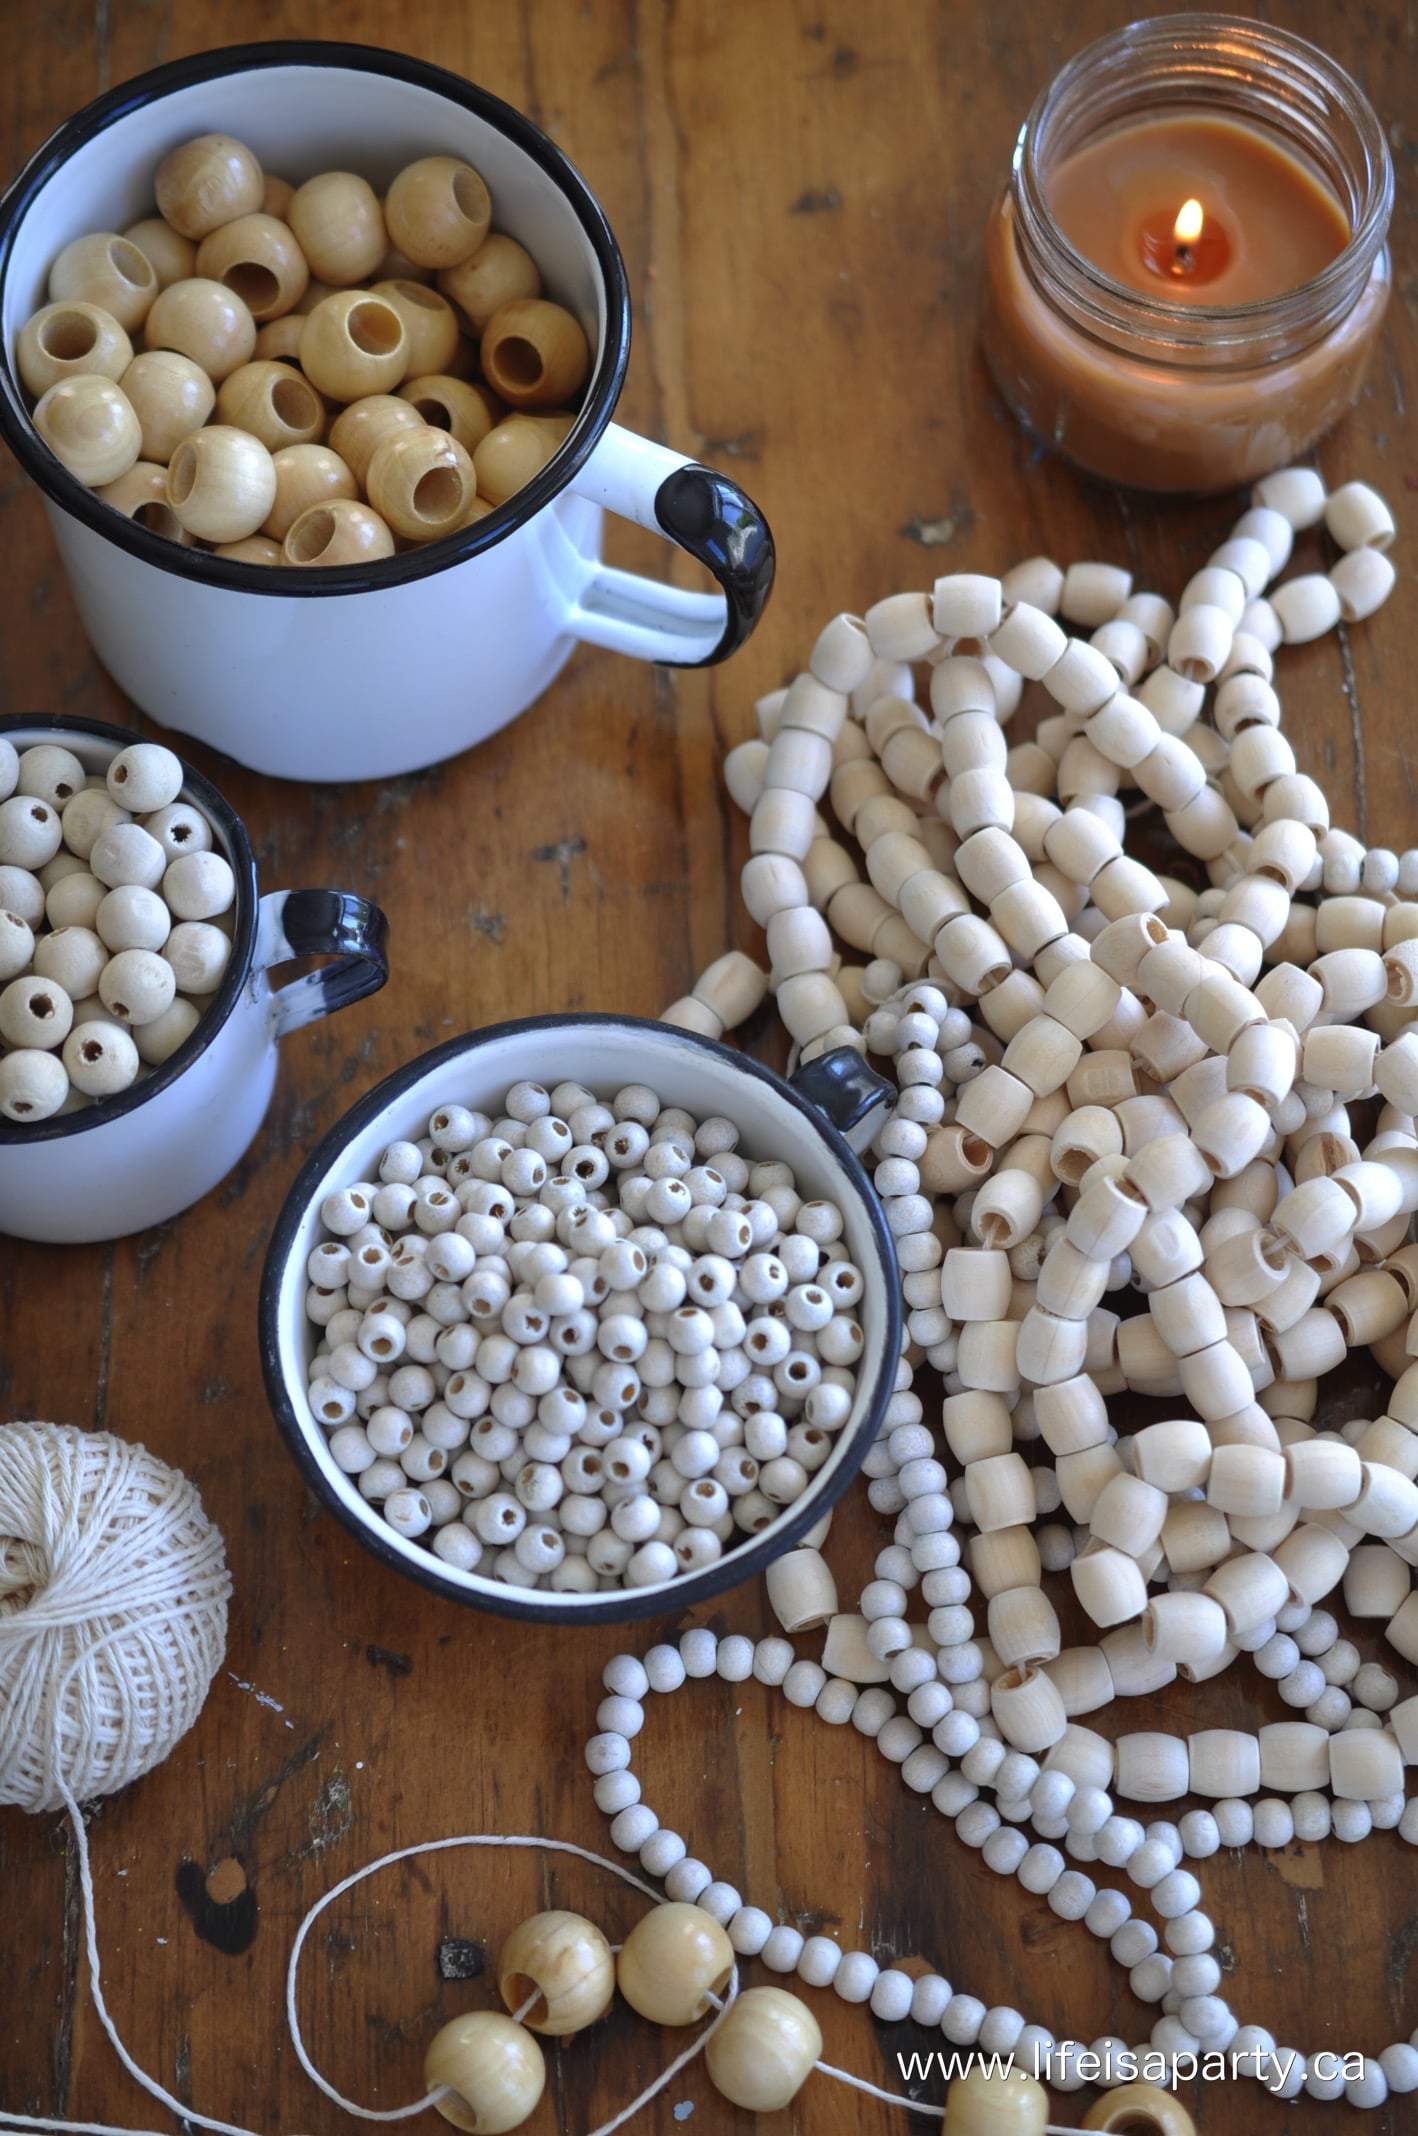
You might also like How To Make Wood Bead Garland With Yarn Tassels here.

Also check out our Kool-Aid Dip Dyed Tassels here.

You might also enjoy our Mason Jar Oil Lamps tutorial here.

Mason Jar Oil Lamps

And don't forget to subscribe to our newsletter and receive our beautiful mustard yellow and pink summer printable as a free thank you gift, as well as access to our whole library of free printables.

Pink and Mustard Yellow Summer Decor

Jun 5, 2019 · 3 Comments

pink and yellow summer decor ideas

Pink and Mustard Yellow Summer Decor -tips for changing your decor seasonally and adding fun and interest to your space with a pop of colour.

pink and yellow summer decor ideas
[feast_advanced_jump_to]

Changing my decor seasonally is one of the things I really love about having a neutral base.  It's easy to change up a few things like art, throw pillows, and candles, to create a fresh new look.  This summer I'm loving the combination of different shades of pink and mustard yellow.  It feels fun and fresh for summer. I've put together a few tips to help you create your own summer look in your home.

Pink and Mustard Yellow Summer Decor

Add Summery Images and Objects

This whole summer vignette, which is in my entrance way, was really inspired by this beautiful artwork.  I found it at JessaMaePhoto in her etsy shop.  I wanted something with some of my summer colours in it, and that felt like the season.  This Carnival Art piece ticks all the boxes and makes me want to go to a summer fair, and stay out late on the rides and eating cotton candy like I did as a kid.

The fan and summer garden flowers seem like the perfect summery additions as well.

vintage black fanShop Your House

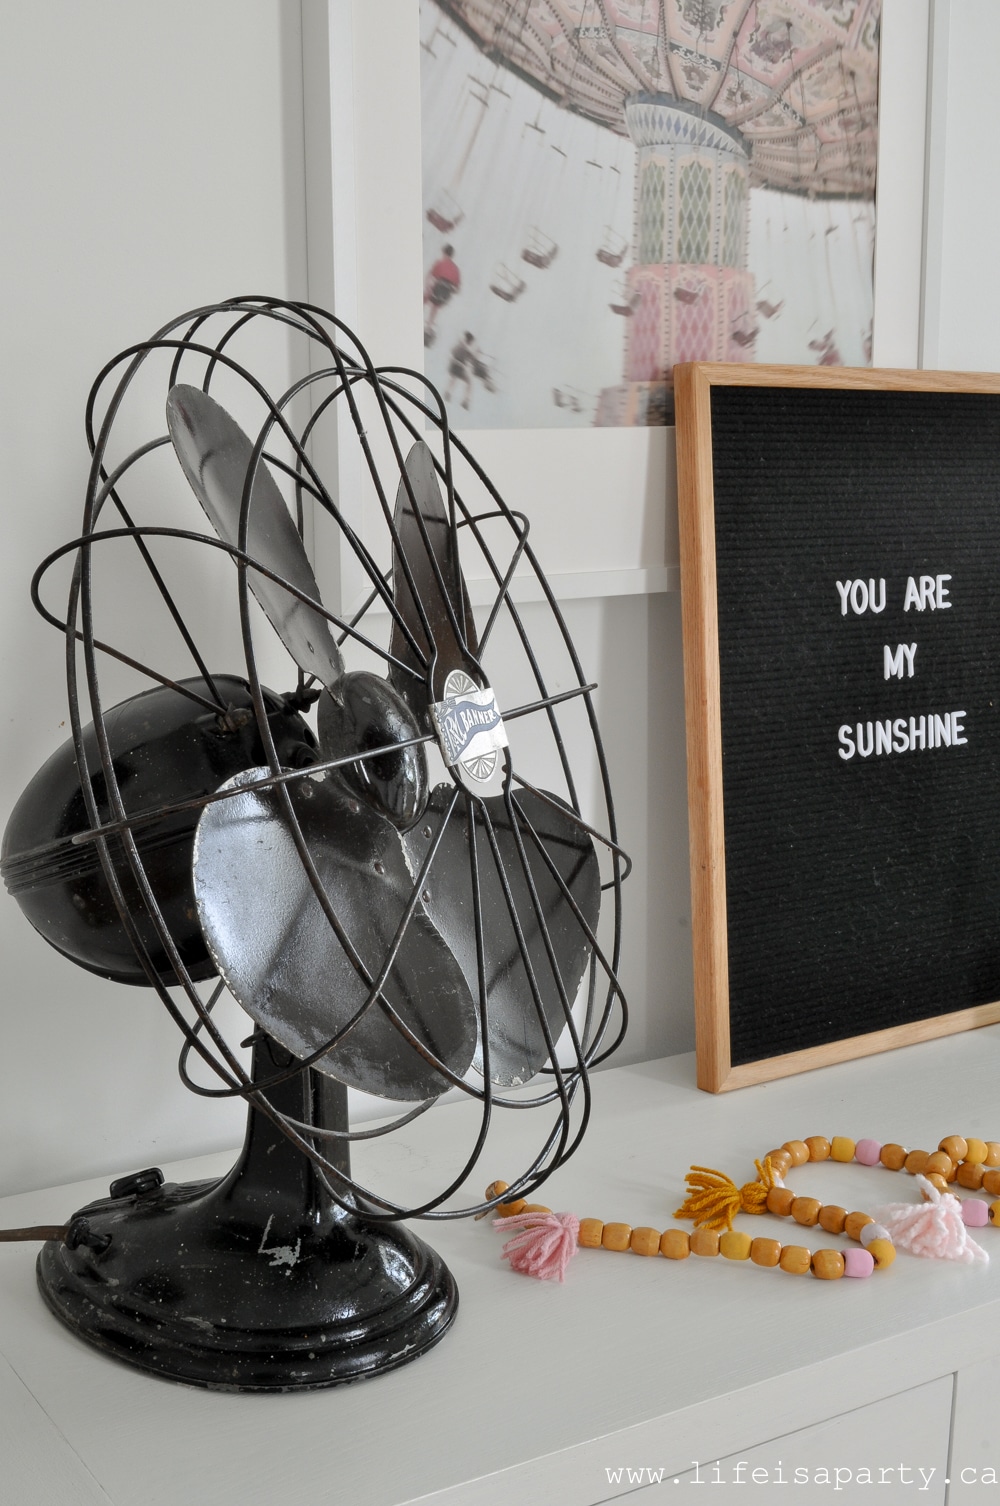
For the rest of this look I shopped my house.  This beautiful vintage fan has been up in my bedroom since I re-did it for the One Room Challenge last spring -see the reveal here.  It's such a great old piece, and feels like summer, so it was perfect for this summery vingette.

Add Sentiment and Interest With Vintage Finds

Not only did I already have the fan, but it's the perfect vintage piece to add to this vignette.  I always find a vintage piece or two helps a vignette feel collected over time and layered.  It also feels a little sentimental.  I have so many memories of hot summer days in my Grandma's kitchen and dining room.  She loved to cook which made the rooms even hotter in summer and there was no air conditioning in her old farm house.  The fan was always on.  The sound of any old fan always makes me think of her.

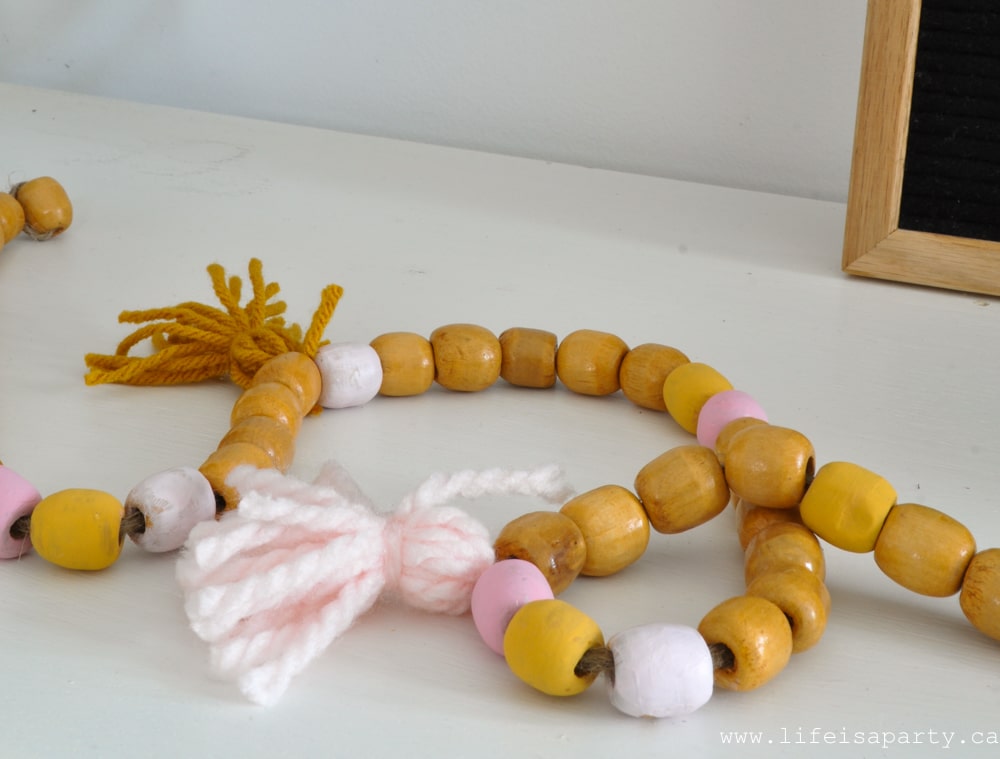
Pink and Mustard Yellow wood bead garlandAdd Some Texture

The pretty bead garland adds a little texture and touch of my summer colours of pink and mustard yellow.  It was really inexpensive to make and an easy DIY.  Since wood beads can get expensive, I actually used an old wood bead car seat cover that I found at a garage sale for the beads.  I took it apart to use the beads.  I used some craft paint to colour just a few and randomly strung them.  Then I made a few yarn tassels in the same colours and added those as well.

you are my sunshine letter board

You are my sunshine seemed like the perfect summery message on my letter board.  I like how the wood trim works with the beads, and the wood floor too.

Pink and Mustard Yellow flowers

Add A Pop Of Fun Colour For Summer

This pink and mustard yellow colour scheme is a new one for me, and so far I love it.  It feels fresh and fun for summer.  To add a little more of my favourite summer colours, I actually spray painted these little thrift store vases -more on that coming soon.  The pretty flowers are from my garden, and another great way to add a pop of colour to any decor.

This fun summery vignette was fun to put together, and the perfect welcome to our home by the front door.  I hope my tips are helpful.

More Inspiration

You might also like our Mustard Yellow and Pink Summer Home Tour here.

Mustard Yellow and PInk Summer Home Tour: a neutral space gets some colour with yellow and pink decor including candles, flowers, pillows, and new art.

Also check out our DIY Rainbow Book Art here.

DIY Rainbow Book Art: Using old books as a canvas this DIY rainbow art in mustard yellow and pink is fun to make and inexpensive.

You might also enjoy our Pink and Yellow Picnic here.

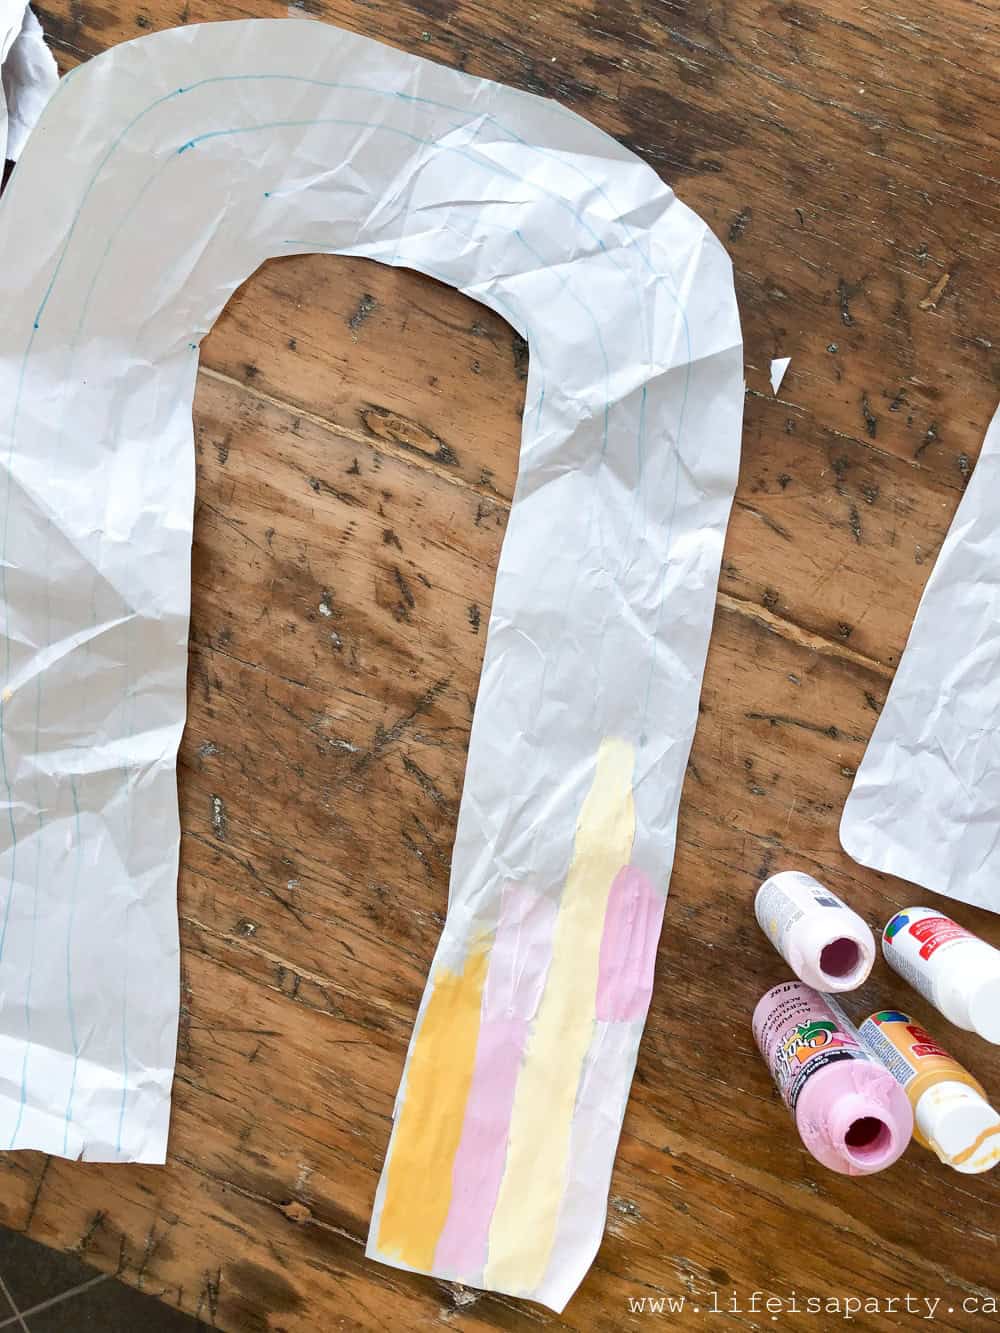
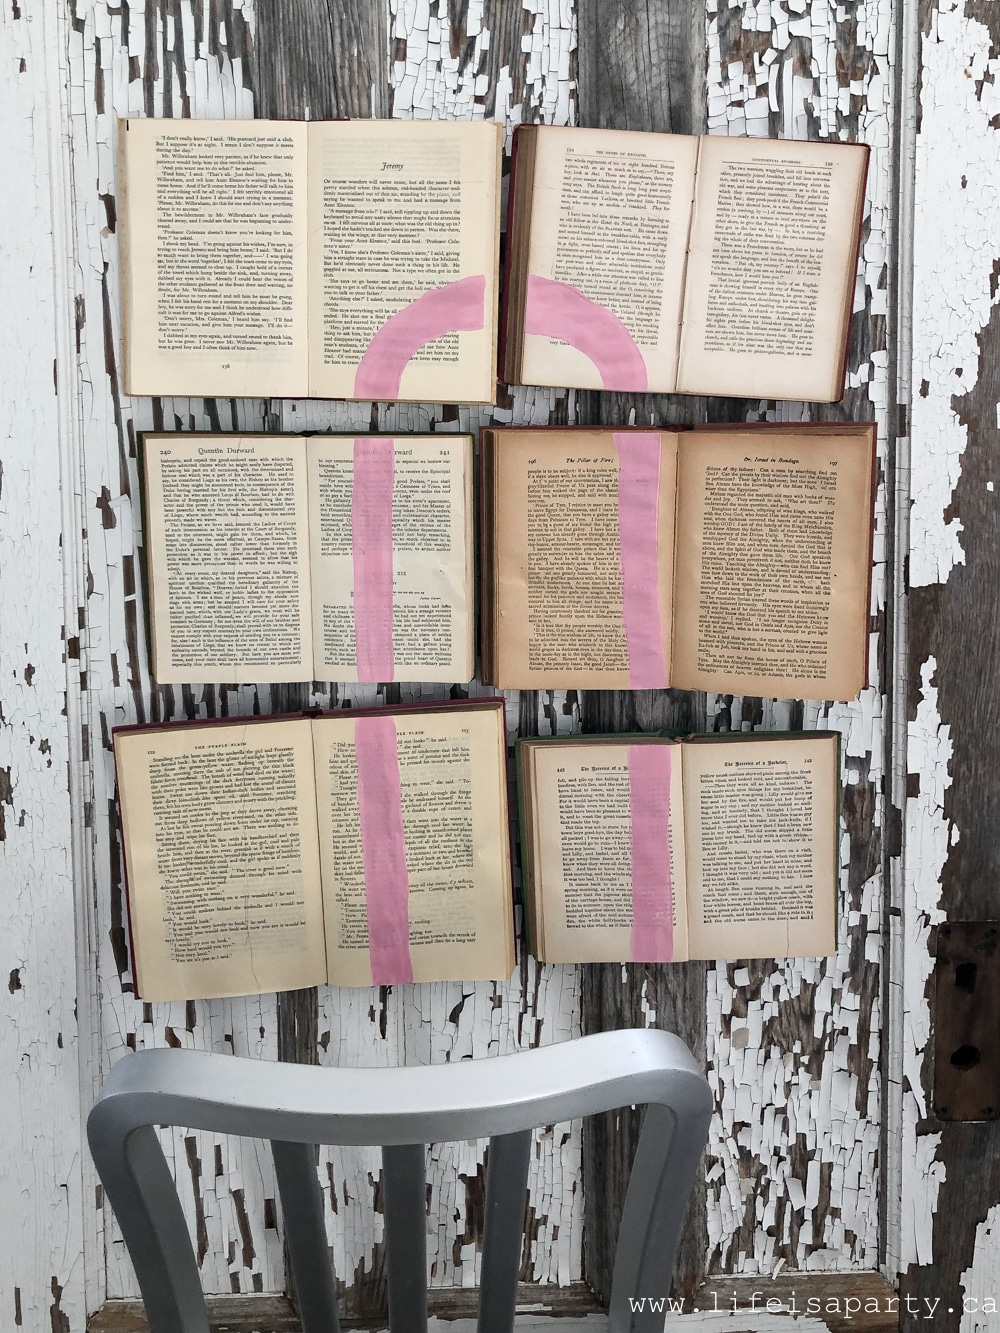
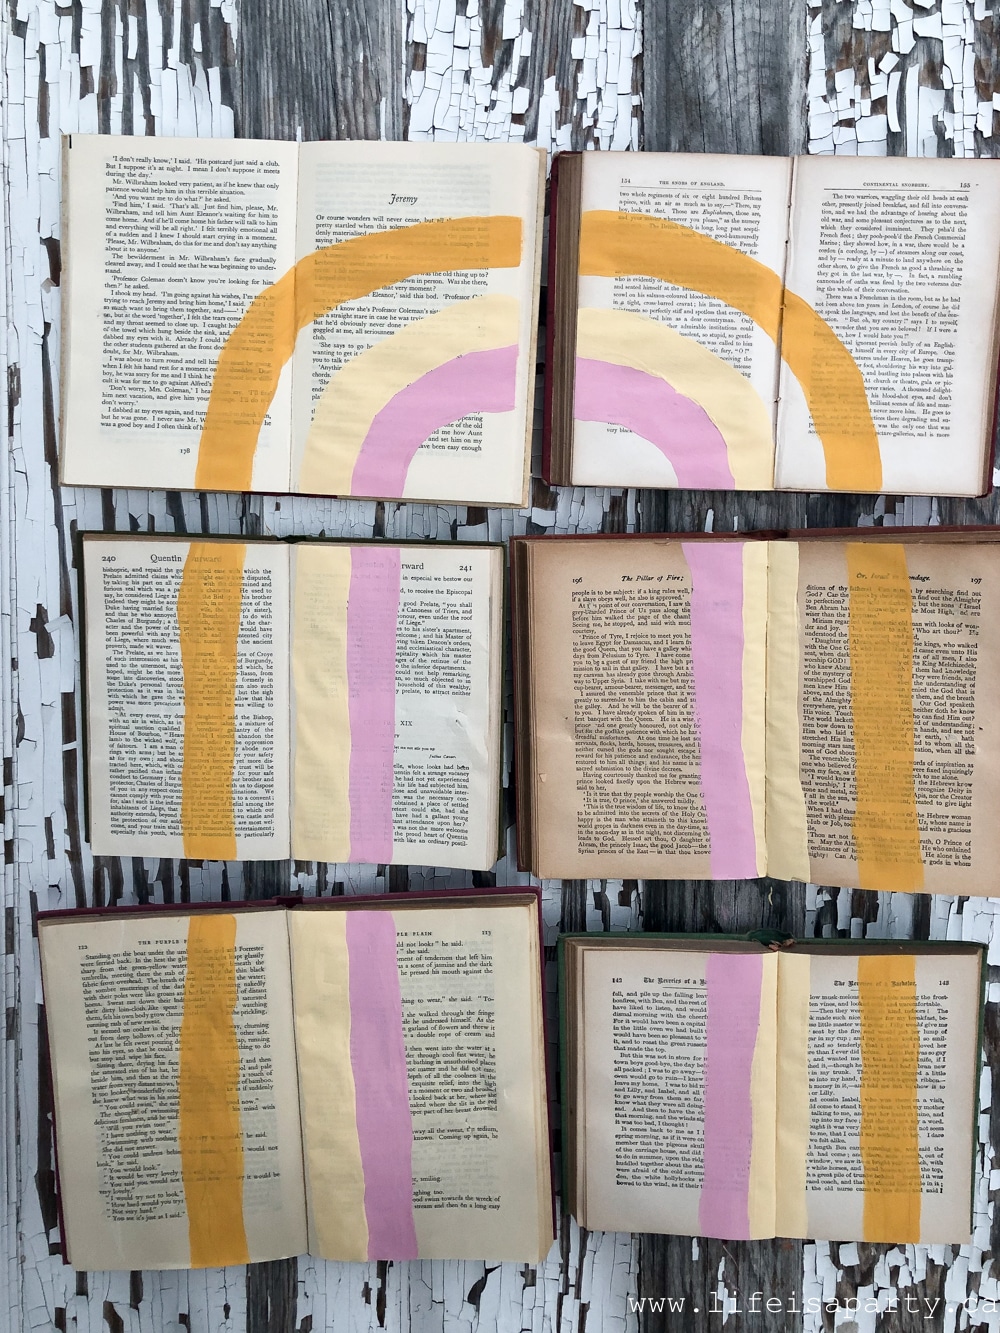
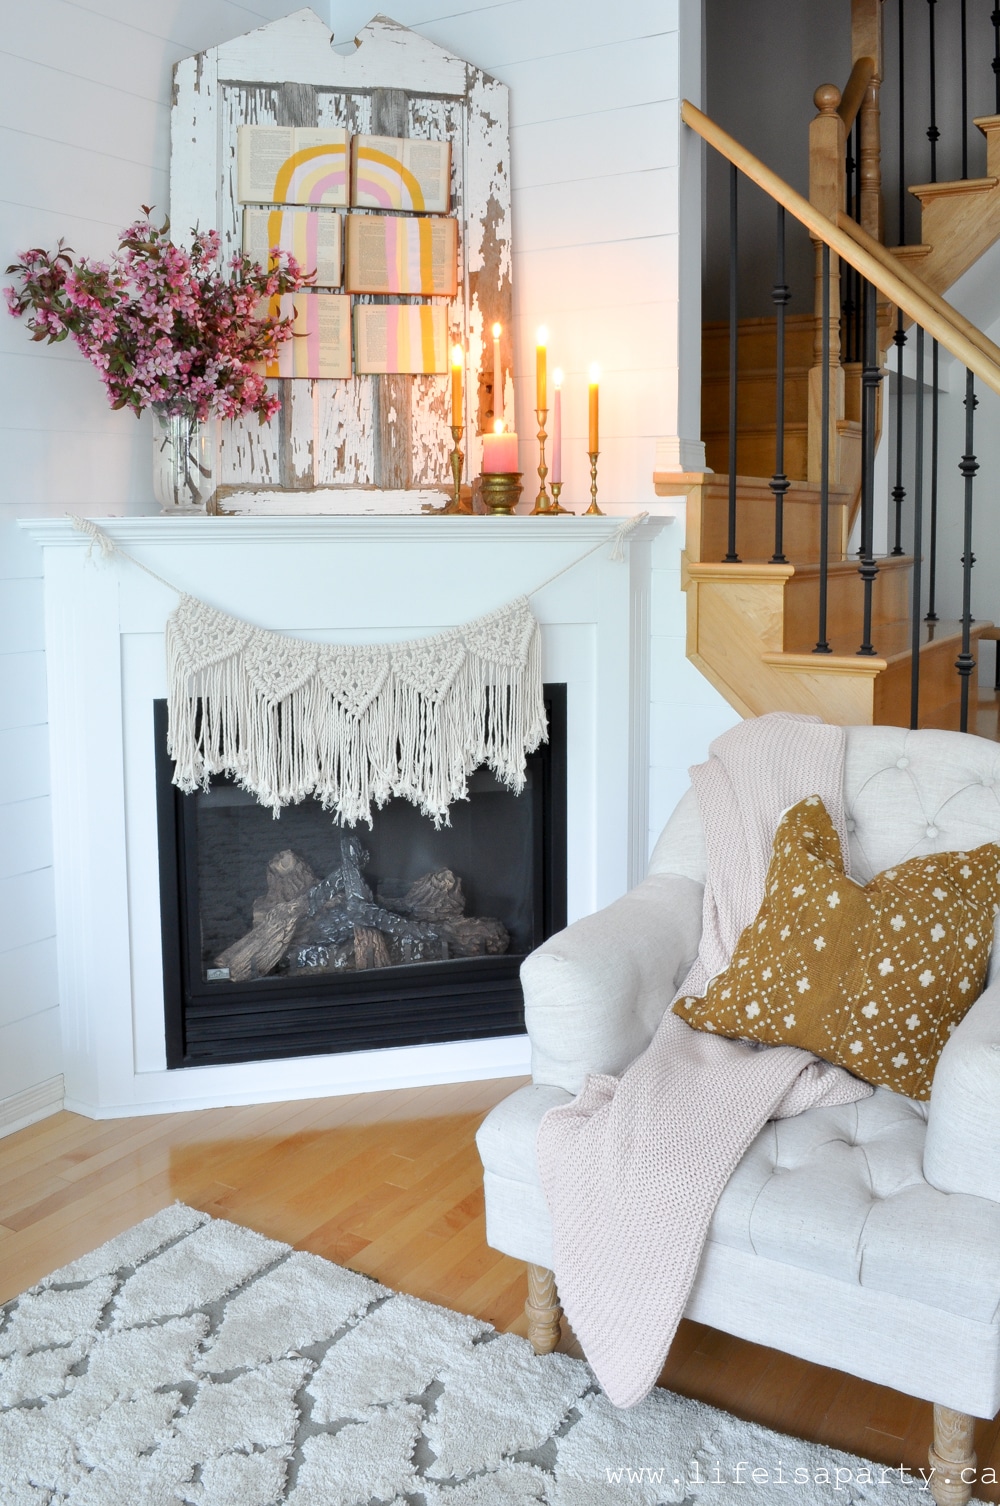
DIY Rainbow Book Art

May 29, 2019 · 4 Comments

DIY Rainbow Book Art

DIY Rainbow Wall Art: Using old books as a canvas this DIY rainbow art in mustard yellow and pink is fun to make and inexpensive.

DIY Rainbow Book Art
[feast_advanced_jump_to]

I'm excited to share my DIY Rainbow Wall Art with you.  This was such a fun art piece to create, and I really like how it turned out.  The colours and rainbow are so cheerful and pretty for summer.

DIY Rainbow art

DIY Rainbow Wall Art Materials:

  • 6 vintage books
  • 3 paint sticks
  • hot glue
  • tacks
  • string
  • glue stick
  • paint -mustard yellow, dark pink, light pink, white
  • hammer
  • paint brushes

How To Make Rainbow Wall Art:

This project was actually a re-make of an old DIY.  Years ago I created this Deer Head Art -see the full tutorial here.  I loved it and had it up for quite a while.  When I took it down to do something else in the space, I stored it away.  When I was thinking about my summer decor, I had the idea to re-make it.  The hardest part of this DIY was locating the books -which I had stored "in a good place" and it took me a few hours of searching to find them.

book art

Preparing the Books:

I was working with the books from the deer head art, but if you were doing this project from scratch you first need to find 6 vintage books -thrift stores are a great source for these.  In order to keep the book open, I used a piece of a paint stick and hot glued it to the back of the book.

how to use an old book as a canvasTo hang the books, I used some small nails hammered into the books, and tied a string between them to hang from.  The nails in the back helped secure some of the pages as well, but I also needed to add tacks at the front to keep the pages together too.  Then I used a glue stick to glue the pages together at the front, and over the tack.

how to use a vintage book as an art canvas

Since I was working with the deer art books, I just flipped a few of the pages to get to blank ones, and glued those down.

how to use old books as an art canvasI decided I wanted to mount the books on this old rustic piece of a door.  Because I have a corner fireplace, mounting the books directly on the wall there won't work, so using the door was the perfect solution.  I thought it would be easiest to mount the books on the board before doing the rainbow painting.  That way there were no worries about the painting lining up afterward.  I used little finishing nails to hang the books on the old door.

Making A Rainbow Pattern:

how to make rainbow artI made a really simple pattern out of some old paper.  I drew my rainbow out roughly and then folded it in half  and cut it out so that both sides would match.

Painting The Rainbow:

I also tested out a few colours.  I wanted pink and mustard yellow.  The lighter mustard yellow is just half of the original colour and half white.

how to make your own rainbow wall art

I used a pencil to trace my pattern onto my books, and then painted my rainbow arches, allowing each colour to dry in-between so that the wet paint colours won't mix.

rainbow artIt was really simple to paint, and I love the final colour combination.  I'm doing a pink and mustard yellow colour scheme for summer and this area is looking perfect now.

DIY Rainbow art

This new piece looks perfect on my fireplace mantel.

DIY Rainbow Book ArtThis little spot is looking so cheery now and ready for summer!

pink and yellow rainbow artMore Inspiration:

You might also like our Mustard Yellow and Pink Summer Home Tour here.

Mustard Yellow and PInk Summer Home Tour: a neutral space gets some colour with yellow and pink decor including candles, flowers, pillows, and new art.

Also check out our Mustard Yellow and Pink Summer Picnic here.

You might also enjoy our Pink and Mustard Yellow Summer Decor here.

Pink and Mustard Yellow Summer Decor -tips for changing your decor seasonally and adding fun and interest to your space with a pop of colour.

Teacup Gardens

May 16, 2019 · 6 Comments

Teacup garden with small succulent plants and tiny DIY clay fairy houses and mushrooms.

This Teacup Garden is planted in some thrifted teacups and teapots. We added a whimsical touch with our miniature polymer clay houses and mushrooms. It looks like the sweetest and tiniest fairy village and it's so adorable!

Teacup garden with small succulent plants and tiny DIY clay fairy houses and mushrooms.
[feast_advanced_jump_to]

Why We Love This Project

  • It's a great way to use old vintage teapots and teacups.
  • We love succulents and this is such a cute way to grow them.
  • Succlents like dry conditions so they can thrive in a teacup, where other plants would not.
  • The clay houses and mushrooms add so much whimsy and charm to these teacup gardens.
  • The houses are an easy DIY and you can make them in any color you like.

These Teacup Gardens couldn't be cuter.  They're an update of the original Teacup Fairy Gardens I made a few years ago. They're very simple to make, and a really fun DIY. I love fairy gardens. Be sure to check out how to make a fairy garden, and how to make a fairy garden house also.

Teacup garden with vintage teacup, small succulent plants and tiny DIY clay fairy houses.

Teacup Fairy Village GardensI was inspired by some cute little pottery mini houses I saw, and decided to try and make my own version with oven bake clay.  They worked out really great and they were quite easy to put together.

Also I know from past experience that polymer clay holds up really well outside in damp, wet conditons, or in full sun.

polymer clay fairy houses and mushrooms.

Materials:

See more details in the How-To card below.

  • Oven Bake Polymer Clay -look for this at the craft store in any colors you like. Any brand is fine.
  • Toothpicks or Wooden Skewers -these will help the tiny pieces stay in place, without them they would fall over really easily.
  • Match Stick and Lollipop Stick -these are for making the doors and window indentations in the clay.
  • Vintage Teapot and Teacups -look for these at the thrift store, antique stores, or garage sales. The teapot I found was missing it's lid, so this was the perfect upcycle.
  • Potting Soil
  • Small Succulent Plants -we love succulents because they can tolerate dry conditions and thrive in teacups.
  • Small Rocks or Gravel -this is for the bottom of the teapot and teacups and also a top dressing. Succulents don't like to get their feet wet and with no drainage the rocks will help to lift the soil and roots of the plant up from the bottom of the container, where it might be wet after watering. Adding the rocks to the top of the soil looks great and helps the soil retain moisture.

Step 1: How To Make Miniature Fairy Houses

Use a small piece of oven bake clay and work it in your hands until it's soft.  Working on a piece of parchment paper, shape the clay into a cube with your fingers, and using the flat surface of the table and your fingers,  create the pointed roof on one end.

How to make a tiny polymer clay house using a match stick to create a door and the end of a lollipop stick to make a round window.

To create the windows and doors, use the end of a match stick to make small squares.  Use the long side of the match stick to create long doors.  And you can make circles using the end of a lollipop stick for round windows.

how to make miniature fairy houses from polymer clay

Insert a wooden toothpick into the house.

Bake according to package directions, taking care not to burn them.

When they're cool, they're ready to insert into plants.

Step 2: How To Make the Miniature Mushrooms:

how to make miniature mushrooms from polymer clay

Roll a small amount of soft clay around the toothpick.  Leave a gap at the pointed end to insert into the mushroom cap.

Create a mushroom cap using your fingers to mold it, and then insert the tip of the toothpick into it to attach it to its stem.

Back according to the package directions, again taking care not to burn them because they'll discolour.

When cooled, add them in your plant arrangements.

miniature houses and mushrooms from polymer clay

Step 3: Planting Your Teacup Garden

To make a teapot and teacup garden look for teacups at the thrift store where they are usually very inexpensive.

polymer clay fairy village

When you're making your fairy garden in a teacup or teapot it's a good idea to add some stones to the bottom of your container, since succulents don't like to be too wet, and they have no drainage holes.

fairy garden plants

Next add in your succulent plants.  I found some of my plants from the nursery were too big for my small containers, so I just divided them.  

To divide them look for natural separations and just pull them apart.  Leave as much soil around the roots as you can.  

This part can be a little nerve wracking, but just carefully go for it.  I did mine a few weeks ago and they look amazing, so I know it didn't damage them at all to divide them up.

fairy garden succulent plants

When you're placing your plants, be sure to leave a small place for your village.  Start by adding some fine pea gravel to the exposed soil.  This looks great, but will also help keep the plant moist.

Then, I added two or three houses to each one, and two or three of the mushrooms.

succulent fairy gardens
Teacup Fairy Villiage Gardens -use teacups and teapots to create these whimiscal miniature fairy gardens with polymere clay houses and mushrooms.

I love how whimsical and fun they are.

Teacup Fairy Village Gardens
miniature teapot fairy gardens

I also really like how you don't necessarily notice the houses and mushrooms at first in the little teacup gardens, until you take a closer look.  They're a little hidden away, just how I imagine the fairies like it. 😉

Teacup and teapot Fairy Village Gardens

Plant Care

Once these are done, enjoy them indoors or outdoors. Watering them regularly when ever they are dry, but take care not to overwater.  

fairy garden in a teacup

With these Teacup Gardens, life really is a party!

Frequently Asked Questions

How long will a teacup garden last?

If you plant your teacup with succulents it should last for years. Just be sure to water it when it's dry and not overwater it.

Where can I find vintage teacups?

Look for inexpensive vintage teacups at thrift stores, antique stores, garage sales, or on-line at places like Facebook marketplace or other re-sale sites.

How often do I need to water my teacup garden?

If the garden is outside it may need water more frequently. Water your teacup garden when it's dry, but take care not to overwater since there's no drainage and succulents don't like to be too wet. Indoors water about once a week.

More Fairy Garden Inspiration

  • Teacup garden with small succulent plants and tiny DIY clay fairy houses and mushrooms.
    Teacup Gardens
  • How to make a Christmas fairy garden.
    How To Make A Christmas Fairy Garden
  • How to make a fall fairy garden.
    Fall Fairy Garden
  • Fairy garden miniature picnic.
    Fairy Garden Picnic

If you try making one of these Teacup Gardens or any other idea on my blog please leave a star rating and let me know how it went in the comments below. Thanks for visiting today!

Recipe

Teacup garden with small succulent plants and tiny DIY clay fairy houses and mushrooms.

Teacup Garden

Plant a garden in a teacup with whimsical tiny clay houses.
No ratings yet
Print Pin Rate
Prep Time: 30 minutes minutes
Cook Time: 10 minutes minutes
Total Time: 40 minutes minutes
Author: Dannyelle Nicolle-Ramjist
Cost: $20

Equipment

  • oven or toaster oven
  • garden trowel

Materials

  • Oven Bake Polymer Clay any colors
  • Toothpicks or Wooden Skewers
  • Match Stick and Lollipop Stick
  • Parchment Paper
  • Vintage Teapot and or Teacups
  • Potting Soil
  • Assorted Small Succulent Plants
  • Small Stones or Gravel

Instructions

How To Make Miniature Clay Fairy Houses

  • Use a small piece of oven bake clay and work it in your hands until it's soft.  Working on a piece of parchment paper, shape the clay into a cube with your fingers, and using the flat surface of the table and your fingers,  create the pointed roof on one end.
  • To create the windows and doors, use the end of a match stick to make small squares.  Use the long side of the match stick to create long doors.  And you can make circles using the end of a lollipop stick for round windows.
  • Insert a wooden toothpick into the house.
  • Bake according to package directions, taking care not to burn them. When they're cool, they're ready to insert into plants.

How To Make the Miniature Mushrooms

  • Roll a small amount of soft clay around the toothpick.  Leave a gap at the pointed end to insert into the mushroom cap.
  • Create a mushroom cap using your fingers to mold it, and then insert the tip of the toothpick into it to attach it to its stem.
  • Back according to the package directions, again taking care not to burn them because they'll discolour. When cooled, add them in your plant arrangements.

Planting Your Teacup Garden

  • When you're making your fairy garden in a teacup or teapot garden, start by adding some stones to the bottom of your container, since succulents don't like to be too wet, and they have no drainage holes.
  • Next add in your succulent plants.  If your are too big for your small containers, divide the plants.
    To divide them look for natural separations and just pull them apart.  Leave as much soil around the roots as you can.  
  • When you're placing your plants, be sure to leave a small place for your village.  Start by adding some fine pea gravel to the exposed soil.  This looks great, but will also help keep the plant moist. 
    Then, I added two or three houses to each one, and two or three of the mushrooms

Notes

Look for vintage teapots or teacups for your garden at the thrift store, antique stores, garage sales, or online at places like Facebook Marketplace.
Look for succulent soil at the garden center for the best results.
Take care to water your teacup garden regularly, but not overwater.

5 Inexpensive DIY Party Decor Ideas

May 13, 2019 · Leave a Comment

5 Inexpensive DIY Party Decor Ideas: Use wrapping paper, washi tape, scrapbook paper, and vintage bottles to create your own party decor.

5 Inexpensive DIY Party Decor Ideas: Use wrapping paper, washi tape, scrapbook paper, and vintage bottles to create your own party decor.

5 Inexpensive DIY Party Decor Ideas: Use wrapping paper, washi tape, scrapbook paper, and vintage bottles to create your own party decor.These DIY party decor ideas have so much going for them. They're very inexpensive, and easy to make yourself. The other great thing about making your own is that you can customize it to any colour scheme or theme that you want.

DIY party decor ideas

1. Wrapping Paper Table Runner

Our first great idea, and the foundation for this whole tablescape is this fun wrapping paper table runner. Pick out a beautiful pattern and use it as an inexpensive, and colourful runner. It's great if you don't have linens that fit your theme or colour scheme, and it also makes clean up really easy.

wrapping paper table runner

2. Washi Tape Straws

Personalize your stripped paper straws with  washi tape. Choose a colour and pattern that works for your colour scheme and wrap it around a pretty paper straw. Trim the edge with a decorative V, and then use a black sharpie to add a personal message perfect for your occasion.

washi tape party decorations

3. Washi Tape Cake Bunting

This Washi Tape Cake Bunting is so simple and adds so much fun to the cake, it also helps tie everything together by repeating the washi tape, and the colour scheme.  

how to make your own cheap party decor

To make it just wrap a piece of tape around a piece of ribbon tied to two paper straws.  Then, cut the end of the tape into a V shape.  You can use any colours or patterns of tape to match with your party colours.

washi tape bunting

4.  Mini Paper Party Hats for Plastic Animals

Get out your glue gun for this fun and easy DIY.  

DIY cheap party decor

Make mini size party hats out of some simple scrapbook paper.  I recommend paper instead of card stock for this craft, since it's so tiny and the paper is more flexible and easier to make into a cone than card stock would be.  

DIY party decor ideas

Use your glue gun to secure the cone hats and add a little mini pom pom to the top.  To attach the party hats to the plastic animals, I used a little drop of hot glue, that should be easy to pull off afterwards.  We used cute forest animals, but farm animals or jungle/safari animals would be fun too.

toy animals in party hats

5.  Mini Vintage Glass Bottle Vases

Make mini vases out of  inexpensive vintage glass bottles.  These bottles were picked up for no more than $1-$2 each at an antique fair.  Look for them at antique stores as well.  Then use inexpensive grocery store flowers in them for a beautiful centrepiece.

vintage bottle vases

This party decor was so easy to put together, and you can customize it all for any colour scheme you like.  

cheap party decor ideas

With inexpensive DIY party decor ideas, life really is a party!


You might also like 5 Tips to Create a Pinterest Worthy Party on a Budget here.


May Bucket List

May 1, 2019 · Leave a Comment

Things to do in May bucket list.

May Bucket List: 10 lovely things to do in the month of May, to enjoy your spring and be intentional about fun family activities.

Things to do in May bucket list.

Happy May 1st!  More and more I've been learning that the best way to make sure fun things happen in our family is to plan for them.  Being intentional about creating great family memories and experiences is where it's at.  Without being intentional, often the time goes by and we realize we haven't managed to fit in all the great stuff we wanted to.  So I thought it would be fun to think about some really lovely things to do in May, and create a bit of a bucket list.

May Bucket List: 10 lovely things to do in the month of May, to enjoy your spring and be intentional about fun family activites.

Winter felt so long this year around here, and early spring has been quite cold, so I'm extra excited about the temperatures warming up in May and getting outside to have some fun with all these spring bucket list items.  Here's a list of things that I want to do this May.

1. Go see some cherry blossoms.

Last year for the first time ever, we went down to High Park in Toronto to take in the cherry blossoms.  It was pretty much magical.  Well worth the trip, and the crowds.  I went with my girlfriend and we took our four girls.  We all loved the cherry blossoms and then had a great time exploring the park, and enjoying their awesome playgrounds -and ice cream. 😉  It is definitely top of list for lovely things to do in May.  

Depending on where you live, it might be cherry blossom season for you too.  But even if it's not exploring a new park and enjoying the flowers, the playground, and getting ice cream with your family members and friends should be top of list this spring.

cherry blossoms

2.  Plant a garden.

May 24 is a long weekend here in Canada, and is the traditional garden planting weekend.  It's warm enough to plant things directly outside by then without fear of cold nights and frost killing off little seedlings that are just coming to life.  Years ago, when we moved to this house, one of the first things we did was put in a tiny little garden patch.  Every year we plant some herbs, veggies, and usually a few flowers.  There really is something pretty amazing about growing your own food.  Tomatoes are a favourite, and so are peas.  Over the years, my girls have loved being able to pick fresh peas and cherry tomatoes and eat them while they play outside.  

This year I have great plans for a pumpkin patch.  I saved some of the seeds from some of my gorgeous white and grey-ish pumpkins last year in the fall and I'm looking forward to seeing if they grow, and having lots of pretty pumpkins to decorate with in the fall.  We'll see how we go.  For sure we'll plant a few tomatoes and herbs too.  

DIY garden ideas on a budget.

Even if you don't have space to plant a garden, if you can fit in a few pots you can give gardening a try too.  A little herb garden is a great place to start.  Seeing things grow a little bit each day gives you a connection with nature that can't be beat.  The act of nurturing plants, watering them, and seeing them grow is not just a great way to teach kids about where food comes from, but somehow the act of nourishing and looking after plants is one of life's greatest simple pleasures.

3.  Go for a hike.

One of the great joys of having a dog has been getting outside more and going for some great walks.  We have lots of trails around where we live, and a favourite Saturday activity is to go for a hike.  After a long winter, it will be great to get outside -before the mosquitos get too bad.  This spring check out some local trails where you live.  Don't know where the hiking and walking trails are in your area?  Go online and search.  You may be surprised by what's available where you live that you never knew about before.  And have a look for things in near by towns as well.  Spring is the perfect time to go explore a new area as well.

4.  Cook something on the BBQ.

Who doesn't love a BBQ?  We've already had a few things the last few weeks, but we haven't yet had a proper BBQ, with grilled meats and salads.  This weekend we have one in the works for my sister's birthday.  For those of us who live in colder climates, it's time to get the bbq out again or uncover it from winter storage.  Give it good clean, and make sure you go get your propane tank refilled.  See if anything need replacing after the winter.  Set up your bbq tools.  Buy yourself a new bbq brush for cleaning the grill.  It's time for the great bbq chef in your family to come out of winter retirement, put their grilling apron back on, and fire up the grill for another season of flame broiled goodness!  Let the bbq-ing begin.

One of our favourites is this marinated grilled flattened chicken -see the recipe here.

marinated flattened chicken

And we also love this homemade BBQ sauce -it makes any grilled meat delicious, especially ribs.

homemade bbq sauce

5.  Go for a bike ride.

I do remember the thrill of feeling the wind in my hair as I rode around town on my bike as a kid.  My girls can't wait to get out on their bikes this spring.  There's something about the freedom of being able to go anywhere you want (sort of), and ride as fast as you want that is particularly thrilling for every 10 year old.  Am I right?  This can be a great family activity too.  Spring is the time of year to get the bikes out of winter storage.  Start by checking the tire pressure and pumping up any tires that need it.  Next make sure everyone has bike helmet that fits.  Another great idea is to invest in a bike rack for your car.  We found one really inexpensively at a garage sale.  It didn't come with a manual so we had to do a little googling to figure out how to actually properly attach it to our car and add on the bikes.  Once we figured it out though, we had a lot of fun using it to bring our bikes to different local trails and parks.  Exploring new areas on your bikes can be so much fun.  

Don't own bicycles or don't have enough for the whole family?  Look into renting them.  In many cities you can rent bikes by the hour and it's a great way to try new things and explore for the entire family.

6.  Have a picnic.

You know we love a good picnic around here.  There's a whole bunch of them on the blog, and we have plans for adding more this summer.  There is just something so special about creating a beautiful picnic, with delicious food and being able to transport it to any magical location.  Picnics really can't be beat.  We love going all out with a picnic and choosing a theme.  It's fun to create something really special.  We've had a great time coming up with themes, locations, menus and all the special touches.  But picnics don't have to be this elaborate at all.  Picnics are really about quality time with friends and family.  Invite someone you care about to enjoy a few hours together outside with some great food.  You don't have to cook at all.  Put together an easy picnic with salads, sandwiches and sweets.  You can make them, or make it even easier and pick the up already made.  Takeout is perfect for a picnic.  And a picnic could be as simple as grabbing a pizza and heading to the park.  We're fortunate to live on the shores of lake Ontario and it's a great destination for a picnic.  There's lots of great spots, with walking trails, picnic tables, and parking nearby.  Be sure to explore some picnic spots in your neighbourhood this spring.

It would be very hard for me to choose a favourite picnic from the ones we've put together in the past, but here are a few of the best ones we've had over the last few years.

Our Midsummer Night's Dream Picnic, where we packed a special picnic and went to an outdoor performance of the play.

Midsummer Night's Dream Picnic

Our backyard Swedish Inspired Picnic.

Swedish Inspired Midsummer Picnic

And our breakfast picnic.  Can you tell we love a picnic around here?

breakfast picnic

7.  Make homemade ice cream.

Have you ever made homemade ice cream?  It is a bit of work to make a good one, but there's just something about the anticipation of waiting while it churns that makes it all the more amazing tasting.  I also love that you can get really get creative and make any flavour you can think of.  

Don't have an ice cream maker?  Look for them on sale this time of year.  Also look for them second hand at thrift stores, or in online buy and sell group.  Your friends or family might have one gathering dust on shelf that they'd be willing to lend you.  Also, there are many recipes online for no churn ice cream that you can make even without an ice cream maker.  And if none of those ideas work you can always try making homemade popsicles instead in some really interesting and special flavors.

Here's a couple of our favourites -first this really easy three ingredient Coconut Ice Cream.

3 ingredient coconut ice cream

And one of our favourite ever -Kit Kat Ice Cream.

homemade Kit Kat ice cream

8.  Pick some flowers.

One of my very favourite things about the warmer weather is being able to go outside and pick a bouquet of flowers from your garden, or from a little foraging.  Spring blooms are so pretty.  A favourite of mine in the garden would be pretty spring blooms like tulips.  A favourite one to forage for would be crabapple blossoms.  This time of year when I'm driving I'm always noticing what's in bloom in the ditch.  I even make sure there's some clippers in the car, so that I can stop and pick a few wild flowers anytime I see them.  Of course, if you're foraging for blooms you need to gather responsibility.  Don't steal flowers from other people's property.  When you do pick wild flowers in their natural habitats, be sure to not over pick.  For many flowers the old blooms turn into seed.  These fall and scatter and ensure a new plant next year.  Be mindful when your picking to leave some behind.  

?In your own garden this time of year, it's so exciting to see things growing and coming into bloom.  I find for myself, since I live in a climate where we have real winters with snow and no flowers for months and months, I'm so enthusiastic for spring gardening.  I can never wait to get the garden center this time of year and I'm always wooed by what's in bloom.  My garden may have even become a little unbalanced because I just can't resist those pretty spring perennials as soon as the garden starts to come back to life.  It's also not too hot here in the spring, so it's the perfect weather to be outside.  By summer sometimes my enthusiasm is waning a little, and it sometimes feels too hot to be out in the garden for hours.  But in spring, I can spend whole days outside cutting things back, planting, and working in the garden.  And when I'm not out there, I like to bring the garden in with me, with some of those fresh blooms picked and giving me delight inside too.

spring flowering branches centrepiece

9.  Book a summer vacation or camp site.

It's not too late to book a summer vacation.  The kids will be off school, and it's the perfect time to get away.  If budget is a concern, think about camping.  Book yourself a campsite at any of the national parks, and enjoy the outdoors.  We've had so much fun camping and having outdoor adventures over the years, and doing fun activities. If you're not really a camper it's a great way to get out of your comfort zone and try something new.  It's especially great if you're a parent, because most kids love camping.  

Camping is one of those activities that you need a little equipment for.  Look for it on sale this time of year.  Considering the price of a hotel room, you can pick up things like a tent, air mattress, and sleeping bag for a pretty comparable price.  This is also a great thing to borrow from friends and family, especially if you're not too sure if camping is for you.  And better than borrowing is to go camping with the friends that have all the equipment.  Camping is made so much more fun by going with good friends.  Many camping places also have some other accommodations available like a yurt or cabin.  This can be a really great option too, especially if you're not really up for really roughing it.  You might have a better time if there's indoor plumbing.

One of my favourite fun camping activities is our campfire cinnamon rolls.

Another great summer vacation option is to book yourself a cottage.  There's lots of online booking places where cottage owners rent out their cottages for a week at a time.  It's probably not too late to book now for something later this summer, and start to look forward to it.  Better yet, book a large cottage and go with your a small group of friends, or another family.

It's also off season in the summer for traveling places like the carribean.  Now is the time to look for a summer deal to go somewhere tropical this summer.  It is really hot in the caribbean during the summer months, but if you're at a beach resort that has air conditioned rooms, will it really bother you that it's hot outside when your laying around the pool or beach all day anyway?  

I had a friend that had a rule to never let one vacation end without having the next one booked.  He loved to travel and liked to always have a trip planned to look forward to.  There is something about having vacation time to look forward to that tends to boost your mood.  

One more idea for travel this summer, especially if you're on a budget is to plan a road trip.  Save the cost of airfare and drive to a new city to explore.  Do you have an old friend, or a cousin who lives far away and has invited you to come visit?  Take them up on it.  Plan a road trip to visit them.  Do some googling ahead of time about what to do in their city and enjoy the planning process.  Find a water park, theme park, nature reserve, a restaurant with great reviews, or some great antique shopping in a small town on the way.  Plan some new experiences.  Gas up the car, and put on your favourite playlist and have some new adventures.

10.  Get a pedicure.

This one is pretty self explanatory.  There's nothing better than being sandal ready when the warm weather finally hits.  Choose a  really pretty, and summery colour of nail polish and enjoy a little pampering and self care.  Sometimes small things make a big difference.

I hope these cool bucket list ideas inspire some fun experiences for you this May.  Choose one or choose all ten things for your own bucket list.  This is such a fun way to remind you of all the fun things there are to do in the springtime.

Subscribe to our email list and receive this May Bucket List free printable as our thank you.  Print it off and hang it up on your fridge as a reminder for the whole month of May.

With a fun May Bucket List, life really is a party!

How To Build The Ultimate Pillow Fort

Apr 26, 2019 · Leave a Comment

How to build a pillow fort with pillows, blankets, and star decorations.

How To Build A Pillow Fort -make a magical pillow fort with fairy lights and starry decorations, and even star themed snacks. Perfect for family fun or date night.

How to build a pillow fort with pillows, blankets, and star decorations.
[feast_advanced_jump_to]

Did you ever make a pillow fort as a kid? I can remember making them with the dining room chairs, some blankets, pillows, and clothespins. My sister and I loved playing in them.  There's something about a pillow fort that makes a child's imagination run wild.  We used to spend hours and hours playing in forts we'd made.  Whether it was classic board games, or having a tea party, we loved them.  I'm excited to share some pillow fort ideas with you.

You might also like our Teddy Bear Party.

How To Build a Pillow Fort

I thought it would be fun to make a beautiful pillow fort in the living room and spend the night enjoying it with my family.  Pillow fort building is a great DIY project, made from everyday household items. 

I set up this one up in the living room for my girls, and they loved it when they got home from school and saw it -along with my dog Oscar who thought this ultimate pillow fort was a great place for a comfy nap.

dog in a pillow fort

There's different ways of building pillow forts and different pillow fort types.  This one was really quite easy to put together and it turned out so cute. I made this fort on my own and surprised my kids, but you could have them help with the pillow fort construction and that would be really fun too.

blanket fort

How To Make a Pillow Fort

Supplies:

  • rope
  • pillows
  • sheets
  • clothes pins or binder clips
  • blankets
  • star decorations

Finding the Perfect Spot

Begin by finding a good spot to build your fort.  When you're building a pillow fort, you want to have enough space to relax with a good book or for a cozy slumber party, but you don't want a fort that's too big.  A big fort is harder to build and they don't give the same cozy secret hideaway vibes.

Start With A Rope Ridge Pole

We built a fort with a ridge pole structure.  This is the easiest way to build a fort.  In a regular building this is a wood beam, in a tent it's the top ridge pole, for a fort we're using rope.  This is  the main structure of our fort.  You're going to want to attach this rope to something that can hold a little weight. This needs to be quite sturdy, probably not a job for a sticky hook.  We tied our rope between our staircase banister and our wood blinds.  

Create Your Walls

Once the rope is secured, use sheets or blankets, and attach the top of the blanket to the rope with clothespins to create your fort building -pretty old school.  You could also use binder clips for this. Sheets or lighter blankets work best for this part of the fort, rather than heavy blankets, because they're lighter and easier to work with.

You can use pieces of furniture to help create the wall structure to your fort.  My living room chair, ottoman, and couch arm worked well as supportive furniture for the fort walls.  You could also use some kitchen chairs, the back of the couch, or stiff pillows like seat cushions, or couch cushions.

indoor fort ideas

Once the walls of our sheet fort were made I added lots of pillows and throw blankets, as well as a camp mattress covered in bed linen on the floor of the fort to make it really comfortable and cozy.  You could also use couch cushions inside as your mattress.

Pillow Fort

Then I added some woolly blankets. The hanging pendant light was already hanging in the living room so I incorporated it into the tent and it was perfect.

how to make your own Pillow Fort

I also swagged some fairy lights and it helps the whole tent feel so magical.

Add Some Starry Decorations

To decorate the space I used some stars. The white star balloons were some I had already from a birthday party and they worked perfectly. I also added in a letter board with "star light star bright", and a few disco balls.

star light star bright pillow fort
star light star bright letter board

The star garlands are draped over the top. One is wood, and the other is book page stars stitched together on the sewing machine.  The Christmas garlands and the twinkle lights were some that I already had and worked perfectly with our star theme.

star decorations

Star Themed Snacks

I love a theme, and once I had the stars added to the fort, I thought it would be fun to make some star themed snacks.

star themed party food ideas

I started out with some simple champagne flutes, and added some gold sanding sugar to the rim. Just use a lemon to wet the rim and then put the sanding sugar on a saucer and dip the rim of the glass in.

I also made some really easy straws. The gold paper straws were perfect with an added book page star.  Just cut a little slit in the star and slide the straw through to attach it.  Then we filled them with a little ginger ale for the kids.

I was thinking it would be fun to watch a movie in the fort, so popcorn would be a perfect snack. I decorated some plastic cups with some star gem stickers, and some glitter washi tape.

Then I filled the cups with some white cheddar popcorn, and a few yellow candies and star sprinkles for my girls to enjoy with a little screen time in our blanket fort.

If your kids wanted to sleep in the fort, it would be a lot of fun to do a star themed breakfast. I used a star shaped cookie cutter to cut out some Nutella toast, and then added some really pretty sprinkles to one corner.

Another great option for breakfast would be pancakes, french toast, or even frozen waffles cut into star shapes too.

star party themed food
star themed party food

Family Fun or Date Night

I think our own pillow fort will be up all weekend, it's so cozy and magical inside. This is the perfect activity to do with your kids. Enjoy some family cuddles, quality time, a movie, a couple of books, or family board games in the fort.  Any little kid or big kid could have hours of fun enjoying imaginative play in a fort like this.

It's also the perfect spot for some quiet time on a rainy day.  How about curling up with a good book here in the perfect quiet space.  Grab some extra pillows and enjoy your own little retreat.

Or how about a romantic fort for date night? It's a great way to watch a movie together and curl up with some heavy quilts and snacks in your own blanket fort.  Or put on some music, light some candles, and pour a few glasses of wine and enjoy date night in your fort with someone special.

pillow fort date night

With a beautiful pillow fort in your living room, life really is a party!

More Ideas

  • Board game night party with candyland dessert table and decor.
    The Ultimate Board Game Night With Candyland Inspired Snacks
  • Chip charcuterie board with different chips, and salty snacks.
    Chip Charcuterie Snack Board
  • Free movie night printables including a free ticket, popcorn banner, food labels, and signs.
    Free Movie Night Printables
  • Outdoor movie night.
    DIY Backyard Movie Night Under The Stars Ideas

10 Tips for Cricut Design Space

Apr 24, 2019 · Leave a Comment

Tips for using Cricut Design Space.

10 Tips for Cricut Design Space -top tips as well as a Harry Potter inspired DIY hat for the Cricut Design Space Beginner.

Tips for using Cricut Design Space.
[feast_advanced_jump_to]

Years ago when I had my first Cricut, you had to use different cartridges with designs on them for all of your cuts.  The system is so different now.

With the Cricut Design space you can design anything on your computer and it's so flexible, then just connect it to your Cricut Maker and start cutting out your design.  The sky is the limit for creating designs now.  I wanted to share a few Cricut design space tips I've learned working on different projects.

10 Tips for Cricut Design Space

When you buy a Cricut Maker you'll have access to design space.  There are lots of free designs you can use there, or create your own.

10 Tips for using Cricut Design Space

10 Cricut Design Space Tips and Tricks

1. The templates in Cricut Design Space are really helpful.  When designing a T-Shirt, for example, use the template to help with size and placement of your design.  There are lots of different templates to choose from.

2. You aren't limited to what is available in Cricut design space when it comes to designs, you can upload your own images.  This makes it possible to create almost anything.  Time to get creative.

3.  The Cricut Design Space videos are worth watching to get you started with the program and give you all the Cricut design space tips you need to create anything you like.  Plus if you get stuck when working on a certain design, you can re-watch them as needed.

4.  You can start with a Cricut ready to make project and customize it in the Cricut Design Space, by deleting parts you don't want, or changing the size, etc.  This makes even the ready to make projects really flexible.

5.  When you're adding a font, attach the script font together in a word by decreasing the letter space between letters.  We decided to make a Harry Potter inspired hat for our trip to Universal this summer.  We added the words "I solemnly swear I am up to no good", and then decreased our letter space to -0.9 to attach the letters.

Adjusting Font Tips for Cricut Design Space

6.  Use duplicate to copy and paste part of your design.  We wanted to add some footsteps to our design so we started out with one set, and used duplicate to add more the exact same size.

Using duplicate in  Cricut Design Space

7.  Use group to move an entire section of your design all at once.  Once we had our footsteps all added in we grouped them  together to move them all together into the right location.

tips for using group feature in  Cricut Design Space

8.  Add different colours to your design here, to test out the final look.  You can cut out different aspects of the design in different colours if you want a multi-coloured final look.

10 Tips for Cricut Design Space

9.  Use the attach tool to keep your design in the exact location it appears in Cricut Design Space, so it doesn't change when you go to cut it out.  In our case, without it attached, the foot prints wouldn't stay in their location.

tips for grouping things in  Cricut Design Space

10.  If you're working with text and iron-on like we were here, be sure to turn on "Mirror" before cutting.  This will cut out a mirror image, and when you go to iron on the design it will be correct.

mirror cutting in Cricut Design Space

This little hat was quick and easy to make and will be such a fun piece to wear on our park visit.

Harry Potter cricut project

We'll make some t-shirts too.  I love that you can easily customize anything.

Harry Potter hat with Cricut

It's so much fun for kids and teens too -or their mothers. 😉

Harry Potter project for CricutNow I just need to get reading all the Harry Potter books.

how to make a Harry Potter hat with your circuit machine

Want to make your own "I solemnly swear I am up to good" Harry Potter inspired hat?  Use my free pattern here.

With these 10 Tips for Cricut Design Space, life really is a party!

This is a sponsored conversation written by me on behalf of Cricut. The opinions and text are all mine.

You might also enjoy 25 Christmas Projects You Can Make With Your Cricut here.

25 Christmas Cricut Projects: inspiration and ideas for all your Christmas crafting with your Cricut machine using paper, fabric, metal, leather, and more.

Also check out our Cricut Infusible Ink Coasters and Tote Bag here.

Cricut Infusible Ink Coasters and Tote Bag: create a "you are my sunshine" tote bag, or rainbow coasters with Cricut's new Infusible Ink.

Also check out our DIY Fair Isle Candle Holders.

Chocolate Charcuterie Board

Apr 21, 2019 · Leave a Comment

Chocolate charcuterie dessert board.

Attention chocolate lovers! You will love this chocolate charcuterie board perfect for your next party. Check out our tips on building your board, and ingredient suggestions.

Chocolate charcuterie dessert board.
[feast_advanced_jump_to]

Why We Love This

  • It looks amazing and brings the wow factor to entertaining.
  • It's very easy to put together with storebought chocolates and bakery bought baked good.
  • Chocolate, chocolate, and more chocolate -could there be any better reason to love it?
Donuts, chocolates, chocolate bars and cookies on an all chocolate dessert board.

My daughter loves chocolate, so we thought this would be a fun addition to her birthday party as part of dessert -and it was! Everyone loved it the dessert charcuterie board, and it was really fun to put together.

If you're a chocolate lover, you might also like our Easy Chocolate Brownie Trifle Recipe or Mini Egg Brownies.

You've heard of a meat and cheese charcuterie board, but dessert boards are becoming more and more popular. Strictly speaking, the classic charcuterie board refer to cured meat, but more and more the term charcuterie board is being used to refer to any collection of items served together on a board -even desserts for the sweet tooth. We've found that these kind of boards are the perfect way to elevate things and make a great addition to any special get together.

Tips for Assembling

There are no real rules when it comes to putting together a charcuterie board, especially a chocolate one. But there are a few tips to help you get started.

Chocolate macarons with chocolates and cookies in the background on a chocolate dessert board.

First of all, when you're shopping think about different shapes, sizes, and colours and try to get a variety.

Secondly, a board like this can get expensive. We looked at the dollar store and the bulk store for most of our chocolates. Remeber you only need small quantities of each kind of chocolate. Don't go overboard on buying too much of the same thing. It's more fun to have lots of variety.

Empty chocolate wrappers from a chocolate dessert board.

Ingredients:

Chocolate charcuterie dessert board labeled with ingredinets.

Here's what we used, to give you some chocolate charcuterie board ideas:

  • peanut butter cups
  • skor bar
  • twix bar
  • kinder egg bar
  • chocolate covered almonds
  • kit kat bar
  • chocolate covered pretzels
  • dairy milk with nuts
  • chocolate covered sponge toffee
  • cookies and cream bar
  • chocolate cappuccino almonds
  • turtles
  • ferrero rocher
  • chocolate wafer cookies
  • celebration caramel cookies
  • pirouette chocolate hazelnut cookies
  • mini nutella
  • mini chocolate donuts
  • chocolate macarons
  • mini nutella filled donuts
  • cannoli
  • toffifee chocolates
  • dark chocolate bar

I tried to include some of our favorite chocolate bars, chocolates, snacky items, cookies, and a few baked goods from the bakery as the main components.

It's nice to try and have a good variety. And there are certainly tons and tons of chocolate items that you could include. I didn't include any fresh fruit for our board, but you might want to consider something like fresh strawberries for your board.

A chocolate charcuterie board full of chocolate treats.

How To Build Your Chocolate Charcuterie Board

The Board

You'll want to begin with a board to use as the base. Look for the perfect size for your group. Use smaller boards for a smaller crowd, and something larger when there is lots of people. We used a round board for our base, but round, square, or rectangle are all great choices.

Start With Containers

I used three gold measuring cups as containers on my board. You could also use small bowls or ramekins. The bowls help define the board a little, and help coral small items.

Chocolate cookies, chocolates, and chocolate bars on a chocolate charcuterie board.

Add Height In The Middle

I used my measuring cup to stand up the pirouette cookies in the middle, and stacked up the wafer cookies. These two components were my starting place and helped create some drama and height in the middle of the board -and take this board to the next level.

Chocolate wafer cookies with a chocolate dessert board in the background.

Fan  Around A Container

Pro Tip: We fanned out some of the Celebration caramel cookies around one of the measuring cups, it helps add interest to the board.

Chocoalte cookies on a large chocolate dessert board.

Use Odd Numbers

In design, odd numbers of items add interest, so think about using groups of three, five, or seven of an item. I used three measuring cups, and three of most of the baked goods.

Chocolate wafer cookies and mini chocolate donuts on a large chocolate charcuterie board.
Chocolate cappuccino almonds and mini Nutella filled donuts on a chocolate charcuterie board.

Fill In The Outside Of The Board First

Use some of your items to create a border around the side of the board with them. Then just fill in the rest of the board. It makes building the board easier and looks great.

Large chocolate charcuterie dessert round board.

Use Different Sizes, Colours, and Textures

Try varying the colours, sizes, and textures that are right next to each other. Break up all the milk chocolate with some different flavors like white, and some dark chocolate. 

Adding in some baked goods gives some variation of texture and size and adds interest to the board.

Chocolate covered almonds, chocolates, cookies, and donuts on a chocolate charcuterie board.

The chocolate snack board was really a huge hit at the party. It added lots of drama, and a bit of excitement to the party, the girls couldn't wait to dig into all the chocolate! It was so much fun and definitely their favorite treat of the night.

Mini jar of Nutella on a chocolate charcuterie dessert board.

Frequently Asked Questions

How can you do this on a budget?

To keep costs down look for your favorite chocolate bars at the dollar store. Buy small quantities of chocolates at the bulk food store, to add lots of different kinds without breaking the bank. Add a few homemade or bakery bought baked goods for varation.

Can I make this ahead of time?

Assemble your board the day of the party and to keep the baked goods fresh be sure to wrap it tightly with plastic wrap until serving time.

What about the leftovers?

Have some small foodsafe goodie bags on hand so that your guests can help themselves to the leftovers to take home with them. Or use leftover chocolates and chocolate bars cut into bite sized pieces as a substitute for the chocolate chips in cookies.

More Chocolate Inspiration

  • S'mores charcuterie board with graham crackers, marshmallows and chocolate for summer entertaining.
    S'mores Charcuterie Board
  • Easy one bowl chocolate brownies cut into squares on a white plate.
    Easy One Bowl Brownies
  • Easy hot chocolate charcuterie board filled with hot chocolate mix, whipped cream, chocolate, marshmallows, and cookies.
    Hot Chocolate Charcuterie Board
  • milk chocolate fondue
    Easy Milk Chocolate Fondue Recipe

If you tried this Chocolate Charcuterie Board or any other idea on my blog please let me know how it went in the comments below. Thanks for visiting today!

Bunny Bait Easter Trail Mix With Free Printable Gift Tag

Apr 13, 2019 · Leave a Comment

how to make bunny bait Easter trail mix.

Bunny Bait Easter Trail Mix -trail mix, with some fun Easter additions like graham cracker bunnies, and Easter eggs, also a free printable Bunny Bait label.

how to make bunny bait Easter trail mix.
[feast_advanced_jump_to]

My family loves trail mix, so I thought it would be fun to make a special Easter Trail Mix this year.  This "Bunny Bait" is loaded with all the regular trail mix favourites as well as some fun Easter editions.

I love the idea of using this as a slightly less sugary, better for you choice for Easter egg fillers and Easter baskets.  It also looks great in a pretty glass container on your counter.  My experience is this Easter treat doesn't last long though, since this Easter snack mix seems to be a favourite with everyone.  How about a large bowl of this for Easter movie nights with the kids?  It's one of my favourite easy treats for special occasions in the spring.

If you love Easter treats, you should check out our Easter trifle with mini eggs also.

Easter Trail Mix in a tea cup

The Perfect Gift

The Bunny Bait is also perfect for gift giving.  Tie the snack mix up in a cello bag with one of our beautiful tags, or put some into a pretty mason jar.  Bring this fun treat as a hostess gift for an Easter gathering, or how about as a special gift for the Sunday School teacher, coach, or piano teacher this Easter holiday? This little sweet treat would be a fun addition to any class parties too this Easter season.  The possibilities are endless.  I'm sure whether you enjoy this special treat yourself, with family, or as a gift that you'll love it.

Bunny Bait free printable label

How To Make Bunny Bait Easter Trail Mix

What I really love about making your own Bunny Bait, is that you can customize the items to whatever your family loves.  As with most trail mixes, you want to do a combination of 

  • nuts and seeds
  • dried fruit,
  • some snacky treats like mini crackers and pretzels, 
  • and a few sweet Easter candy treats too.  

These simple ingredients combined, make such a great easy Easter trail mix recipe.  You'll also so want to remember to include some different colors to make the bunny bait trail mix more interesting.  It's a fun idea to take advantage of the pretty spring pastel treats that are always available at Easter and use at least some of the more colorful options.  There's so many fun seasonal treats that will make your Easter bunny bait recipe feel extra special for the season because they're items that you don't have all the time throughout the year, like Cadbury mini eggs.  You also want some variation of shape and texture and size.  Things like nuts are pretzel sticks are crunchy salty snacks, you want some dried fruit for its texture and sweetness.  Marshmallows bring another texture to your bunny bait recipe.

Bunny Bait Easter Trail Mix

Ingredient Ideas

Here's what we used for ours:

  • roasted salted peanuts
  • honey roasted peanuts
  • roasted salted almonds
  • dried pineapple
  • dried apricots
  • raisins
  • banana chips
  • coconut chips
  • yogurt covered raisins
  • pretzels
  • Annie's bunny graham crackers
  • Easter M&Ms
  • mini eggs
  • mini marshmallows

You could use any of these or use other nuts, fruits, or treats that you enjoy.  You can also do any ratio you like, adding more of what you love most.  Other ideas of things to add to your Easter mix are white chocolate chips, mini cadbury eggs, jelly beans, chocolate Easter eggs, festive sprinkles, and peanut butter Easter eggs.

Recipe

how to make bunny bait Easter trail mix.

Bunny Bait Easter Trail Mix

No ratings yet
Print Pin Rate
Prep Time: 5 minutes minutes
Total Time: 5 minutes minutes
Servings: 17 cups
Calories: 446kcal
Author: Dannyelle Nicolle-Ramjist

Ingredients

  • 1 cup roasted salted peanuts
  • 1 cup honey roasted peanuts
  • 1 cup roasted salted almonds
  • 1 cup dried pineapple
  • 1 cup dried apricots
  • 1 cup raisins
  • 1 cup banana chips
  • 1 cup coconut chips
  • 1 cup yogurt covered raisins
  • 2 cups mini pretzels
  • 2 cups Annie's bunny graham crackers
  • 1 cup Easter M&Ms
  • 1 cup mini eggs
  • 2 cups mini marshmallows

Instructions

  • To make the snack mix recipe, combine all your ingredients in a large mixing bowl to combine, and then store in an airtight container.

Nutrition

Serving: 1g | Calories: 446kcal | Carbohydrates: 65g | Protein: 8g | Fat: 20g | Saturated Fat: 9g | Polyunsaturated Fat: 10g | Cholesterol: 2mg | Sodium: 217mg | Fiber: 5g | Sugar: 45g
Tried this Recipe? Tag me Today!Mention @LifeisaParty or tag #lifeisaparty!
Bunny Bait in a teacup

Free Printable Gift Tag

We packed our Bunny Bait Easter Trail Mix in mason jars, and added these cute free printable labels.  You could also package it in treat bags for gift giving.  If you would like your own free printables, subscribe to our Newsletter below, and receive instant access to our Free Printable Resource Library.

Bunny Bait free printable tags
how to make Easter Trail Mix

To use the free printable gift tags, just print on your home computer or at an office supply store, cut out, and add to the fun snack mix for the a great easy gift.  This delicious Easter snack mix is the perfect treat.  It's easy to make and always a huge hit with friends and families.  Add this easy Easter treat to your own Easter celebration this year.

With this bunny bait Easter trail mix, life really is a party!

More Inspiration

If you love DIY Trail Mix, check out our Summer S'mores Trail Mix too.

You might also like our Chocolate Nest Cookies recipe here.

Also check out our Chocolate Mousse Easter Eggs here.

Game of Thrones Party Food and Free Party Printables

Apr 11, 2019 · 4 Comments

Game of thrones themed party food ideas and free printables.

Game of Thrones Party Food and Free Printables: Fire and Ice Snack Board, themed food with printable labels and "Winter Is Here" Banner.

Game of thrones themed party food ideas and free printables.
[feast_advanced_jump_to]

Who else loves the Game of Thrones? A Game of Thrones party with Game of Thrones themed food and free printables is a great theme for a get together. I had so much fun putting this Game of Thrones themed party together -complete with a party menu any Game of Thrones fan would love.  We had a fire and ice snack board, plus lots of other themed food ideas.  Plus, we've included free printable food labels, plus some other party printables you will love.
game of thrones party table

Fire and Ice Snack Boards

The final season of Game of Thrones is all about fire and ice, so we thought that was the perfect theme for a epic Game of Thrones party snack board.   We set this up for the premiere party for the final season of the tv show on sunday night.  This snacky menu would be great for any Game of Thrones party.  For the fire and ice snack board, on one side we've got all the snacks that are bringing the heat, and on the other side a feast of ice!

Fire

fiery dragon snack board with spicy foods
fire themed dragon snack board with spicy snacks

For the fire board I used a few different spicy snacks, starting with:

  • Cheddar Jalapeno Cheetos
  • Flamin' Hot Nacho Doritos
  • Spicy Plantain Chips
  • BBQ Peanuts
  • Buffalo Chicken Wings
  • Crackers and Cheese
  • Spicy Pepperoni Sticks
  • Dragon Fruit
  • Red Hot Cinnamon Candies
  • Hot Tamale Candies

spicy themed snack board with fiery foods and a dragon centre pieceI  wanted to include some crackers and cheese, so I used some marble cheddar and brie cut into triangles to reflect flames, and then used some Babybel Cheese with the outside wax cut out like a flame.  I used a few different crackers and then some spicy pepperoni sticks.

Game of Thrones dragon themed spicy snacks

For the fiery sweets I included a dragon fruit, some red hot cinnamon candies, and some hot tamale candies.  

And what would a fire board be without a dragon in the centre -this one I picked up at the craft store, and was the perfect creative way to add a little more heat to the fire side of the board. See more dragon themed food ideas here.

Game of Thrones Party fire and ice themed snack boards

Ice

Game of Thrones Party food icy snack foods

And then for the ice board, things got much cooler.  I used

  • York Peppermint Patties
  • Blueberries
  • Blackberries
  • Blue Jello
  • Clear, Blue, and White mints
  • Rock Candy
  • Blue Cotton Candy
  • Blue Freezies
  • Cookies and Cream Ice Cream Bars
ice themed snack board

I thought the little swords were perfect for celebrating the iron throne and the clash of kings.  

A couple of tips for the ice side -put your frozen treats on ice to keep them cold for the party.  Don't put your cotton candy out too early, and also don't put it beside anything wet, like the washed fruit or it will dissolve.  For the jello, I made it in a baking dish and used a knife to cut it into cubes and served it in mini plastic shot glasses.

I love how the ice board came out, so many pretty blues and whites, and really cooling after all that fire.  It was feast fit for a white walker.

Game of Thrones Party Food and Free Printables for ice themed foods

Fire and Ice Food Label Printables

I also created some printable labels for the fire and ice boards.  You can access all the free printables at the end of this post.  It was fun coming up with themed names like White Walker Ice Cream, Night King's Eyes, Ice Cubes, Icy Mints, White Walkers Breath, and for the Fire -Dragon Scales, Dothraki Jerky, and Fire Candies.

Game of Thrones Party Food fire and ice snack boards

More Themed Snack Ideas

Not only did we have our amazing fire and ice boards, we also included lots of other themed snacks.  I hope you have an empty stomach, because we've got all the cute food ideas .  The food labels and names were so fun to come up with.

game of thrones party food ideas

We made another platter with food themed after all our favorite characters.  We had "Brie of Tarth" cheese and crackers, "Imp Shrimp" for Tyrion Lannister, "Little Finger Chicken Fingers" for Petyr Baelish, and "Dragon Wing" Chicken Wings for all the dragons.

  • Brie of Tarth cheese and crackers
  • Imp Shrimp
  • Little Finger Chicken Fingers
  • Dragon Wing Chicken Wings

Wildfire

wildfire drinks and labelsI also served some "Wildfire" which was sports drink.  You could also add some vodka to make it into a cocktail.

  • Wildfire

Game of Thrones Party ideasGame of Thrones Themed Desserts

Over on the other side of the table we included some Game of Thrones themed desserts.

Game of Thrones desserts and free printable labels

The "Red Wedding Cakes" are mini red velvet cupcakes, and there were "Sansa's Lemon Cakes" for Sansa Stark and "Jon Snowballs" for Jon Snow, which are jelly donut holes.

  • Red Wedding Cakes
  • Sansa's Lemon Cakes
  • Jon Snowballs
  • Dragon Eggs
  • Lannister Gold
  • Dragon Glass
Game of Thrones Party Food free printable labels

And I also included some candies.  The "Dragon Eggs" are Easter eggs, the "Lannister Gold" are chocolate coins, and the "Dragon Glass".

Dragon Glass

The "Dragon Glass" is made of Jolly Rangers.  

I used mostly grape and a couple blue and red ones.  I melted them on a baking sheet sprayed in cooking oil.  Once they were melted I swirled the colours together with a toothpick, and then after it cooled and re-hardened, I broke it into shards.  

It turned out really cool looking, was easy to make, and tastes delicious too.  This was the perfect way to bring in the dragon glass that was so important in the final season of the show.

Game of Thrones Party Free Printables

Game of Thrones Decor

To create the feeling of fire and ice in the seven kingdoms, I used lots of candles and furs.  These brass paint dipped candle stick holders -see the tutorial here, were perfect.

Dragon Eggs

The Dragon Eggs are large chocolate Easter eggs from the dollar store.  The wood chest is also from there.  I added some straw and used the Dragon Eggs as a simple centerpiece for the party food table.

dragon egg centre piece

"Winter Is Here" Printable Banner & Game of Thrones Food Labels

winter is here free printable banner

If you'd like the "Winter is Here" free printable banner or the free printable Game of Thrones Food Labels for the themed foods and the Game of Thrones Fire and Ice Snack Boards just subscribe below to Life is a Party.  As a free thank you gift for subscribing to our weekly Newsletter, we'll give you immediate access to our Free Resource Library where you can download them and print them for your own watch party, birthday celebration, or themed party.

game of thrones free party printables

More Party Inspiration

You might also like our Stranger Things Party here.

Also check out Board Game Night here.

Green, Black and White Easter Table

Apr 5, 2019 · Leave a Comment

Easter table ideas

Green, Black and White Easter Table: 8 different place settings to give you lots of inspiration for setting an extra special Easter Table.

Easter table ideas
[feast_advanced_jump_to]

Easter is just around the corner, and I thought it might be fun to give you a little Easter table inspiration.

Green, Black and White Easter Table: 8 different place settings to give you lots of inspiration for setting an extra special Easter Table.I used green, black and white this year, but these ideas would work for any colour scheme.  I always think it's fun to add a little detail to each place setting and I've got 8 different ideas of what you could add to a place setting for Easter or spring to make it extra special.  Each place setting is different for this table -and I swapped a few extras out too, to give you lots of inspiration.  Choose your favourite and use it on the whole table, or mix and match.

Green, Black and White Easter Table: 8 different place settings to give you lots of inspiration for setting an extra special Easter Table.

I used my wood plates for this table -they come in three different finishes a light wood, darker wood, and black.  And they were the perfect stage for our little scenes.

Green, Black and White Easter Table: 8 different place settings to give you lots of inspiration for setting an extra special Easter Table.

I also used three different napkins for the table, just to give you more inspiration.

Green, Black and White Easter Table: 8 different place settings to give you lots of inspiration for setting an extra special Easter Table.

I've used black and white again this year for my Easter table -see last years black and white Easter table here, but also added in some green -just like I did for my spring home tour this year.

Green, Black and White Easter Table: 8 different place settings to give you lots of inspiration for setting an extra special Easter Table.

I've really been enjoying an eclectic boho feel lately.  It's maximalist, full, and interesting since there is always something new to look at.  It's perfect for spring and celebrating abundance after the stark days of winter.

Green, Black and White Easter Table: 8 different place settings to give you lots of inspiration for setting an extra special Easter Table.

It feels pulled together though by repeating elements.  Down the centre of the table there are potted plants, spring blooms, brass, Easter eggs, and the colour scheme of black, white, and green to tie everything together.  This is a great tip for making an eclectic look feel coherent -repeat different elements like colours (green, black, and white) and materials (wood, brass, glass, book pages, moss).

Green, Black and White Easter Table: 8 different place settings to give you lots of inspiration for setting an extra special Easter Table.

Each place setting is different to give you lots of different ideas and inspiration or your own table, but I have to admit it looks pretty fun, whimsical, and magical all together.

Green, Black and White Easter Table: 8 different place settings to give you lots of inspiration for setting an extra special Easter Table.

Plant Pot Bunny and Easter Eggs

Green, Black and White Easter Table: 8 different place settings to give you lots of inspiration for setting an extra special Easter Table.These little paper plant pots for starting seeds in inspired me to make a cute little bunny with them.  I cut the ears out of an old book page, and then used some oil pastel to add some pink to them.

Green, Black and White Easter Table: 8 different place settings to give you lots of inspiration for setting an extra special Easter Table.

The tail is made out of shredded book pages.

Green, Black and White Easter Table: 8 different place settings to give you lots of inspiration for setting an extra special Easter Table.

I drew a little face on the plant pot with a marker.

Green, Black and White Easter Table: 8 different place settings to give you lots of inspiration for setting an extra special Easter Table.

The ears and tail are attached with some hot glue.

Green, Black and White Easter Table: 8 different place settings to give you lots of inspiration for setting an extra special Easter Table.

These were really quick, easy, and inexpensive to make, so they'd be perfect for a larger gathering, to make one for each place setting.  Fill them up with some Easter eggs for a treat for each guest.

Green, Black and White Easter Table: 8 different place settings to give you lots of inspiration for setting an extra special Easter Table.

Miniature Potted Succulent

Green, Black and White Easter Table: 8 different place settings to give you lots of inspiration for setting an extra special Easter Table.

I love adding plants to a table because they really do add life, and these miniature succulents are perfect for each place setting.  These are actually faux and came in terracotta pots, which I painted grey.  The miniature cloche on top is the perfect finishing touch.

Green, Black and White Easter Table: 8 different place settings to give you lots of inspiration for setting an extra special Easter Table.

Paper Butterfly and Pussy Willows

Green, Black and White Easter Table: 8 different place settings to give you lots of inspiration for setting an extra special Easter Table.

This place setting is really quick to put together.  I found these beautiful paper butterflies at the dollar store.  The package included 30 of all different sizes.

Green, Black and White Easter Table: 8 different place settings to give you lots of inspiration for setting an extra special Easter Table.

I used one of the large butterflies on the side plate, and then added a little vintage bottle holding a few stems of pussy willow.

Green, Black and White Easter Table: 8 different place settings to give you lots of inspiration for setting an extra special Easter Table.

This one is so simple, I think it's one of my favourites.  And a whole table like this would be so beautiful.  You could do this for each place setting, and then incorporate some into a centre piece too.

Plastic Bunny Container

Green, Black and White Easter Table: 8 different place settings to give you lots of inspiration for setting an extra special Easter Table.

I found these bunny containers at the dollar store.  They look like chocolate, but they're actually fillable plastic containers.  I added a little black ribbon to tie with our colours.

Green, Black and White Easter Table: 8 different place settings to give you lots of inspiration for setting an extra special Easter Table.

Inside you could add some candy for each guest to enjoy.  Or here's another idea:  add some money inside for a surprise.  I thought it would be fun to put a dollar or two into all but one, and make one extra special with a larger amount like a $10 or $20 for one lucky guest.  I'd keep it a secret and see who sat in the lucky spot.

Green, Black and White Easter Table: 8 different place settings to give you lots of inspiration for setting an extra special Easter Table.

Asian Spoon Nest

Green, Black and White Easter Table: 8 different place settings to give you lots of inspiration for setting an extra special Easter Table.

These Asian spoons are just from the dollar store, and perfect for holding a little tiny paper nest and egg.  I made the nest from some shredded book pages -but Easter grass would work great too.  In the nest is a chocolate egg, and I've added a little butterfly on top, but it would be really cute without it too.  To tie in to our colour scheme, I added a little black ribbon as well.

Green, Black and White Easter Table: 8 different place settings to give you lots of inspiration for setting an extra special Easter Table.

Book Page Origami Bunny with Eggs

Green, Black and White Easter Table: 8 different place settings to give you lots of inspiration for setting an extra special Easter Table.

These sweet little origami bunnies aren't too complicated to make with instructions and video -I used this one from Gathering Beauty.  I made the origami bunnies out of an old book page.  These  bunnies are little baskets and perfect for holding some Easter eggs for each guest.  They're very inexpensive to make, but are a little time consuming.  I'm sure after a few though, it would get faster, and one on each place setting would make such a cute Easter table. 😉

Green, Black and White Easter Table: 8 different place settings to give you lots of inspiration for setting an extra special Easter Table.

Miniature Golden Bunnies and Carrots

Green, Black and White Easter Table: 8 different place settings to give you lots of inspiration for setting an extra special Easter Table.

These miniature cloches are usually meant to hold a dessert, but this little scene is perfect for Easter.  The plastic bunnies are from the dollar store and I've painted them with a little gold spray paint.  I used some moss underneath them.

Green, Black and White Easter Table: 8 different place settings to give you lots of inspiration for setting an extra special Easter Table.

I thought the gummy carrot candies were a fun touch to go with the rabbits.

Green, Black and White Easter Table: 8 different place settings to give you lots of inspiration for setting an extra special Easter Table.

Easter Egg and a Vintage Postcard

Green, Black and White Easter Table: 8 different place settings to give you lots of inspiration for setting an extra special Easter Table.

Since I wanted this table to be black and white, I thought it would be fun to cover some eggs in some old book pages. I used a craft egg from the dollar store to make this.  I cut strips of some old book pages, and then used regular glue and a paint brush to cover the egg.

Green, Black and White Easter Table: 8 different place settings to give you lots of inspiration for setting an extra special Easter Table.

The post cards are from a local antique store.  It must have been very common 100 years ago to send a postcard greeting at Easter, because there were lots of them, and they're so pretty.  If you couldn't find vintage ones you could use a free download and print some of your own on cardstock.

Green, Black and White Easter Table: 8 different place settings to give you lots of inspiration for setting an extra special Easter Table.

Sugar Cookies

Green, Black and White Easter Table: 8 different place settings to give you lots of inspiration for setting an extra special Easter Table.I picked up these sweet little Easter sugar cookies at the bulk store -but you could find some at the bakery or make your own.  I used two cookies since they were small and layered them on top of a paper doily.

Green, Black and White Easter Table: 8 different place settings to give you lots of inspiration for setting an extra special Easter Table.

It was so much fun putting all these ideas together for you.  It was really great to get creative, and the table turned out so pretty -think I can leave it this way until Easter?  I'm not sure if I can pick a favourite, each little idea turned out so cute.  I hope it inspires you to have some fun decorating your table, and have a little fun getting creative.

With a beautiful Green, Black and White Easter Table full of place setting ideas, life really is a party!

You might also like Black and White Easter Table here.

Also check out Finger Food Easter Brunch here.

Easter Finger Foods Brunch: the perfect, no fuss Easter brunch menu with breakfast finger foods and Easter table decor ideas.

You might also enjoy Woodland Easter Brunch here.

Easter woodland brunch.

BookPage Butterfly Spring Wreath

Mar 20, 2019 · 10 Comments

DIY butterfly wreath with book page butterflies and moss wreath.

BookPage Butterfly Spring Wreath: this simple and inexpensive DIY wreath is made by cutting your own butterflies out of old books.

DIY butterfly wreath with book page butterflies and moss wreath.
[feast_advanced_jump_to]

It's the first day of spring, and the weather is slowly starting to warm up. I thought this new BookPage Butterfly Spring Wreath was the perfect way to celebrate spring's official arrival. It was really quite easy to put together.

how to make a butterfly wreath

This wreath was a pretty simple idea -a moss wreath with book page butterflies.  Like most projects, I could picture it in my mind before I figured out how to create it.  And this was one of those very few occasions when the reality turned out better than I'd even imagined.  Don't you just love it when that happens?

Everything I used I already had, but you could make it really inexpensively too, since the books are just used books from the thrift store.

This wreath was a pretty simple idea -a moss wreath with book page butterflies. Like most projects, I could picture it in my mind before I figured out how to create it. And this was one of those very few occasions when the reality turned out better than I'd even imagined. Don't you just love it when that happens?

Everything I used I already had, but you could make it really inexpensively too with just a few craft supplies, since the books are just used books from the thrift store. It's quite an easy butterfly wreath to make too. I always love doing spring projects. Mother nature is great inspiration when everything starts to come alive again in the spring.

Materials:

  • large straw wreath
  • moss
  • hot glue gun
  • hot glue
  • old books, and some white paper
  • scissors

How To Make A BookPage Butterfly Spring Wreath:

how to make a spring wreath

The Wreath Base

1. Start by covering your straw wreath form with moss. You could also use a styrofoam wreath base for this project.  I used some moss that I had collected and was dried out and attached to the wreath with hot glue. I didn't cover the back of the wreath, since it isn't visible.

Book Page Butterflies

2. Next, I cut out some different shapes and sizes of butterflies out of some old book pages, that I ripped out of old second hand store books. To make the paper butterflies, I looked at a few different butterfly clip art images on-line for inspiration with the butterfly shape. Then I folded the book page in half, and drew the design with a pencil, and then cut it out with scissors. I liked cutting them out individually and free handing the pattern in pencil because it creates lots of variation, instead of having the same size and shape over and over.

making a butterfly wreath3. Once the butterflies were all cut out, I used hot glue to attach them to the moss. I made sure to add the largest butterflies to the middle, and had them get smaller and smaller out to the edges.

butterfly wreath

Hanging Ribbon

4. Lastly I attached a ribbon to the top of the wreath to hang it up. It was really simple to make, and a great way to welcome spring.

spring wreath with butterflies
butterfly wreath

Neutral or Colourful

Using book pages for the butterflies created a really neutral wreath, that works with any home decor. If you prefer more vibrant color for spring, you could water color your book page butterflies in different rainbow colors, or different shades of one color, depending on the look you're going for. Both different ways would be really beautiful options. Imagine it with the book page butterflies watercolored pink for a baby girls room.

diy butterfly wreath
butterfly wreath

I just love this little wreath, and it's perfect for spring decor, or on your front door if it's covered -keeping in mind that the paper is of course not waterproof.

It's made from just a few simple materials. If you're like me you might even have them around the house, or be able to find the moss in the woods, making this a fun project to do without even needing to visit any craft stores for supplies.

spring wreath ideas
spring wreath with butterflies

With a pretty BookPage Butterfly Spring Wreath, life really is a party!

More Spring Craft Inspiration

You might also like our Pussy Willow Wreath here.

Also check out our Stamped Spoon Garden Markers here.

You might also like our Cement Garden Markers here. Also check out our Teacup Fairy Garden here. You might also enjoy our Black and White Garden here.

You might also like our Mushroom Spring Wreath here.

Mushroom Spring Wreath

Spring Home Decor Ideas

Mar 13, 2019 · 9 Comments

Spring Home Tour: black, white and green decor for spring including lots and lots of plants, flowers, vintage and Easter touches.

Spring Home Decor Ideas: black, white and green decor for spring including lots and lots of plants, flowers, vintage and Easter touches.

Spring Home Tour: black, white and green decor for spring including lots and lots of plants, flowers, vintage and Easter touches.

One of my favourite things to do is add seasonal decor to my home.  It feels like it's been a long, cold winter, and although there's still snow on the ground here -just outside of Toronto, I'm happy for it to be spring at least inside.  😉  

This year I decided to add lots of green for spring to my existing black and white.  It really made the house feel alive and so spring-y.

The Dining Room

spring entry way

We have this little table in our entrance way.  I've had this typewriter for ages, but it was perfect for my green scheme this year.

Spring entry table with vintage typewriter

The little twig houses I made from sticks -you can find the tutorial here.  I love them with these little succulents inside.  They remind me of little green houses for spring.  I think I need to make a few more for here.

Dining Room Table

In the dining room I had so much fun adding lots of green and spring touches to the table.

spring table with plants

Spring dining room table centre piece with plants and eggsI started out with lots of green plants, and flowers.

black, white and green decor for spring on a dining room tableNext, I layered on some pretty string lights, and lots of spring touches like bunnies, eggs, and some cement mushrooms.

green moss rabbitscement and wood mushroomplants under glass cloches for springI did a mixture of real and faux plants, and I think it's hard to tell the difference.

My favourite touch is probably the vintage post cards.  I picked them up at my favourite antique mall, and they're so beautiful.  They definitely feel like treasures.

vintage easter postcard
Spring Home Tour: black, white and green decor for spring including lots and lots of plants, flowers, vintage and Easter touches.
spring centre piece with plants on a dining room table
succulents under a glass cloche

Spring Wreaths

At the end of the room on the checked wall, I did a series of wreaths for spring.  I first did these wreaths for Christmas, and liked them so much I changed them a little for Valentine's Day by adding lots of pink.  And now for spring, I've kept them going all dressed in green for spring.

spring wreath grouping
spring wreath grouping on a wall

To make them ready for spring, I added in some green pom poms and ribbon, and a few faux succulents.diy spring wreaths

And on the buffet, I kept things simple with just a wood dough bowl full of cotton thread.  It looks great against my DIY Buffalo Check wall -see how I painted it here.

wooden antique bowl full of spring

The large green demi john glass bottle is a new addition -a great on-line find for a bargain price.  I love the green glass.

Spring Home Tour: black, white and green decor for spring including lots and lots of plants, flowers, vintage and Easter touches.

Bar Cart

And on the other side of the dining room the bar cart is ready for spring too.

spring bar cart

bar cart styled for springI also did a trough of eggs for spring.  I added some old shredded book pages, and then a mix of beautiful moss, and green eggs.

vintage wood container full of Easter eggs

With the dining room feeling ready for spring, let's head into the living room.

The Living Room

letterboard quote

This little table is the sweetest spot.

letter board quote Walt Whitman

plantAbove the table, in the little house shelves I added a collection of vintage sewing supplies.

house shelves full of vintage sewing supplies
shelf of vintage sewing supplies

Into the living room

Spring mantel

Fireplace

You might have seen my fireplace, last week when I shared it. You can read more about my Spring Mantel here.

spring mantel with plantsI had fun adding lots more plants and green here too.

spring mantel with nature collection and plants

Over on the couch I added a few fun green velvet pillows.

Spring Home Tour with black, white and green decor
black, white and green decor for spring living room

My favourite additions to the coffee table are my bowls of buttons.

coffee table decorWith the dough bowl of cotton thread in the dining room, my vintage sewing supplies in the little house shelves, and my bowls of buttons here on the coffee table I've added lots of fun vintage textile pieces.  I love how much texture they add to the space.

bowls of vintage buttons, and vintage books

They are also a nod to celebrating International Women's Day this month, and reminding myself of how traditionally women have used buttons, threads, and needles to create, to mend, and to hold things together for so many.

spring living room decorOn the other side of the room, I've added lots of big plants, and it feels so nice for spring.  My dog Oscar has made himself at home. 😉

Havanese dog

Spring living room decorI'm also really in love with the large demi john jars.  I asked my sister to hunt some down for me for Christmas and she came through like a champ.  I added some fun tassels to them for that boho vibe that I love.

spring decor, living room chair and plantsOver in the kitchen, the plants continue.

The Kitchen

spring plant centre piece on a rustic wood kitchen table

You might have seen my DIY Miniature Sheep from a few weeks ago on the blog.  They're so sweet for spring.

green spring decor kitchen
DIY Miniature Sheep from polymer clay

Another favourite is this thrifted planter -love the green, filled with some spring bulbs.  They don't last long but they're so pretty!

kitchen table with spring flowers
white spring bulbs in a vintage green container

I loved the winter print I added to my kitchen for Christmas -see it in my Christmas home tour here. So for spring I found another great free printable image here, and had it printed as a coloured engineer's print.  It's so inexpensive (around $5) and adds so much to the space.

spring vignette with bunny posterI love how this little spot turned out.  The tassel bunting came with some peach tassels, but I just removed them and added a little bit of green to make it work in my space.

plants and rabbit spring artOver here, another mix of real and faux plants.

Spring decor in green

Open Shelves

And over on the other side of the kitchen, I had a lot of fun decorating my open shelves with a little green.

Spring kitchen open shelves

kitchen open shelves spring decorI had fun hunting for a few green treasures to add in for spring, like these pretty vintage bottles I found at the antique market.

kitchen open shelving
kitchen open shelves decorated for spring in green

vintage green bottlesAnd the sweet little lambs (and bunnies) look like they're vintage but are a recent purchase from Hobby Lobby -in case you want to look for some.

open shelves decorated for spring

Over on the other side, I added some pretty new green glasses, and more plants to tie with our theme.

wooden plates on open shelves
kitchen open shelving

All the little details are so fun to add for each different season.

kitchen pass through with hanging plants
kitchen with a plant on the counter

Plants, plants, and more plants -and I love it.

spring mantel and chair

I hope you enjoyed having a peek at my home all dressed up in green for spring.  I hope it inspires you to add a few plants to celebrate spring -even if they're of the faux variety. 😉

With green, black, and white spring home decor ideas like these, life really is a party!

St. Patrick's Night In -Dinner and Movie Ideas for St. Patrick's Day

Mar 11, 2019 · 2 Comments

St. Patrick's Day dinner and movie ideas for at home celebrations.

St. Patrick's Night In -Dinner and a Movie Ideas for St Patrick's Day: recipes, Irish drink ideas, and St. Patrick's Day Movie ideas.

St. Patrick's Day dinner and movie ideas for at home celebrations.
[feast_advanced_jump_to]

St. Patrick's Day this year falls on a Sunday, and it's perfect for a fun night in celebrating with some Irish food, Irish films, and Irish drinks.  Enjoy a night in with these food and St. Patrick's Day movie ideas.

Irish Drinks

The perfect night in starts with a nice drink -and since you're not driving we'll start at the bar cart.

St. Patrick's Night In -Dinner and a Movie Ideas for St. Patrick's Day: recipes, Irish drink ideas, and favourite top Irish films.

I love a sweet cider, and my husband loves a Guinness -both perfect for St. Patrick's Day.

St. Patrick's Night In -Dinner and a Movie Ideas for St. Patrick's Day: recipes, Irish drink ideas, and favourite top Irish films.

And perhaps after dinner, how about a coffee with a little Bailey's just to be festive?

St. Patrick's Night In -Dinner and a Movie Ideas for St. Patrick's Day: recipes, Irish drink ideas, and favourite top Irish films.

Dinner Ideas

Over the years I've made a lot of St. Patrick's Day inspired recipes to celebrate but here are some of my very favourites, all of which would be perfect to enjoy in front of the tv enjoying an Irish movie.

How about an Irish inspired ploughman's lunch?

St. Patrick's Night In -Dinner and a Movie Ideas for St. Patrick's Day: recipes, Irish drink ideas, and favourite top Irish films.

This Irish soda bread is easy to make and so good with butter, Irish cheddar, ham, apples, pickled onions, and hard boiled eggs.  Yum.  Get all the details and recipe to make your own Irish Ploughman's Lunch here.

St. Patrick's Night In -Dinner and a Movie Ideas for St. Patrick's Day: recipes, Irish drink ideas, and favourite top Irish films.

These Irish Inspired St. Patrick's Day Burgers are making my mouth water, just looking at the photo.  We made our own potato buns, and then added on top Irish style bacon, and Irish cheddar.

St. Patrick's Night In -Dinner and a Movie Ideas for St. Patrick's Day: recipes, Irish drink ideas, and favourite top Irish films.

Serve these, of course with potato chips, or fries and you pretty much have the perfect St. Patrick's Day meal.  Get the recipe and instructions for the St. Patrick's Day Burger here.

Another favourite of mine is this Steak ,Guiness, and Mushroom Pie.

St. Patrick's Night In -Dinner and a Movie Ideas for St. Patrick's Day: recipes, Irish drink ideas, and favourite top Irish films.

This rich hearty pie is perfect to slowly cook on a Sunday afternoon, and enjoy curled up in front of the tv.

St. Patrick's Night In -Dinner and a Movie Ideas for St. Patrick's Day: recipes, Irish drink ideas, and favourite top Irish films.

Get the recipe for the Steak, Guiness, and Mushroom Pie here.

Dessert

For dessert, make a banoffee pie, it's so, so good!

St. Patrick's Night In -Dinner and a Movie Ideas for St. Patrick's Day: recipes, Irish drink ideas, and favourite top Irish films.

This pie is made with a combination of bananas and toffee, and whip cream -yum!  You make the toffee by boiling a can of sweetened condensed milk for hours until it becomes beautiful and caramelized.  This pie is so good, and loved all over the United Kingdom.  Find my Banoffee Pie recipe here.

St. Patrick's Day Movie Ideas

Here's a list of movies that would be perfect for St. Patrick's Day.  Some are light, love stories.  Other's are stories of poverty and over coming adversity.  And others shed some light on the political issues in Ireland and all the heartbreak that they sometimes bring.

St. Patrick's Day Movie

The Commitments

This movie was a favourite of mine when I first saw it in 1991.  It's all about the formation of a soul band in Dublin Ireland.  The music in the movie is amazing.  Be warned though, this movie is rated R for language.

St. Patrick's Day Movie

My Left Foot: The Story of Christy Brown

This movie is based on the true story of Christy Brown, born with cerebral palsy in a poor working class family in Ireland in 1932.  He could control only his left foot, and used it to become an amazing artist.  This movie is sad at times, but an amazing story of overcoming adversity.  Critically acclaimed as well.

St. Patrick's Movie

Circle of Friends

If you'd like to watch a love story about a young Irish couple this is a nice movie.  Full of some great scenery, and great accents, a little heart ache too.  Nice coming of age story.

St. Patrick's Day Movie

Angela's Ashes

This might be my personal favourite of all my recommendations.  It's sad, and funny, and also based on a true story.  It's the tale of Frankie in his family, impoverished and living in Limerick Ireland, around 1935.  You might need some kleenex for this one, it's a bit of tear jerker.  It's based on Frank McCort's autobiography, and after watching it I went on to read more of his autobiographical work.

St. Patrick's Movie

Brooklyn

Another sweet coming of age story, this one takes place in 1950's Brooklyn, New York, and back home in Ireland.  A young women must choose where to build here life, and there are pulls on both sides of the Atlantic.

St. Patrick's Day Movie

In The Name Of The Father

The story of an Irish family that were falsely imprisoned for an IRA bombing in London that they did not commitment.  You'll be shocked at the level of discrimination and that such a thing could happen in 1974.

These are my top food and film pairings for the perfect cozy St. Patrick's Night In.  With a drink, dinner, and movie to celebrate St. Patrick's Day, life really is a party!

Spring Mantel

Mar 6, 2019 · 16 Comments

spring mantel ideas

Spring Mantel: How to use layers, repeated colours and materials, and different heights to create a beautiful boho spring mantel with lots of plants.

spring mantel ideas
[feast_advanced_jump_to]

Today I'm excited to be sharing my spring mantel.  This year I've been inspired to add lots of green and plants to may space, and it's making it feel so much like spring.

Although it snowed here again today, I'm confident that spring is really on its way.  I'm sure that in the next few weeks things will start to warm up here.  I'm already noticing that the sun is shining brighter, the days are getting longer, and I can hear the birds chirping more and more signalling spring.  Hopefully my spring decor inside will coax spring to make an appearance outside soon too.

Spring MantelSpring Mantel

This spring I've added some green to my black and white colour scheme and I'm loving it.  Because I have a corner fireplace, I usually start out with a bit of a backdrop.  This time I added an antique printers tray.

how to decorate your mantel for springInside the printers tray I added a few spring-y treasures, things like leaves, feathers, eggs, moss, and seeds.

printers tray with nature collectionTo create that back layer, I also added in a real nest in a twig.  It's in a vintage bottle.  In front of that back layer, I added in lots of plants.  The plants feel so fresh and alive, and really make it feel like spring.

natural Spring MantelI used a combination of real and faux flowers, and put them all in concrete style pots, which helps to tie it all together.

Spring Mantel ideasI mixed things up with a combination of succulents, spring bulbs, ferns and even tropicals.  The mix makes it feel fun, and I feel like as long as there are some bulbs mixed in, it still feels like spring.  I've added lots of plants all through the main floor for spring and can't wait to give you the whole tour next week.

how to decorate your mantel for springI was excited to use my new vintage jars that I received for Christmas on the mantel.  I added some moss to the bottom and then some candles.  The moss helps it feel like spring too.

Spring Mantel ideasI added a few other fun touches, like the beads and the little nest.  The nest and eggs help tie in the background piece.

nature inspired Spring MantelI wanted the mantel to have a bit of boho vibe and I feel like the planters and the macrame bunting really help create that feel.  You can find out how I made the macrame bunting here.

plant lovers Spring ManteI'm really loving the combination of greens, and pretty plants mixed with a few vintage pieces and a little boho for the perfect spring mantel.

boho Spring Mantel ideas

How To

Want to create something similar? Here are my tips.

Remember to decorate in layers for a really full look. Consider your background, middle ground, and foreground -my dark background with the printer's tray, and next, middle ground of plants and candles, and foreground of the wood beads, macrame bunting, and plant stand on the floor.

Repeat materials.  I've repeated the dark wood tones -plant stands, printers tray, nests, and rustic green ceramic finial.  Also, I've repeated the glass elements with the vintage jars, match jar, and cloche.  I've repeated the green with all different plants, leaves, and the ceramic finial.  I've repeated the white with the candles, flowers, and white wood beads.

For interest use lots of different heights.

Lastly, don't be afraid to play around.  This mantel evolved over a few days.  I added, took away, and played with it.  I am always taking photos for the blog, but it's a great tip to take a picture with your phone, and look at it.  It's amazing how you will notice things in a photo more easily.  Don't be afraid to make a mess too, the rest of the living room was covered in stuff as I added and removed different elements.

boho spring decorI hope you're inspired to add a little spring to your space.  With a spring mantel, life is really a party!

More Inspiration

You might also like our Spring Home Tour here.

Spring Home Tour: black, white and green decor for spring including lots and lots of plants, flowers, vintage and Easter touches.

Also check out our Butterfly Spring Mantel here.

You might also enjoy our DIY Pussy Willow Wreath here.

How To Make a Pussy Willow Spring Wreath: easy tutorial on how to use a grapevine wreath base and create a beautiful pussy willow wreath for spring.

DIY Miniature Polymer Clay Sheep

Feb 27, 2019 · 20 Comments

DIY miniature polymer clay sheet on a mossy rock.

DIY Miniature Sheep: full tutorial for these easy to make sheep, made from polymer clay and staples. A beautiful addition to your spring decor.

DIY miniature polymer clay sheet on a mossy rock.
[feast_advanced_jump_to]

It isn't quite feeling like spring outside around here yet, but hopefully in the next little while it will.  In the meantime, I'm starting to add some fun spring touches inside.  Just a few touches of green and fresh plants have already managed to lift my spirits a little.  And the cutest polymer clay sheep project.

miniature sheep
These miniature sheep full of sheep charm are the perfect touch for spring.

how to make miniature sheep

Inspiration

When I was a teenager someone gave me a very similar set as a gift.  It's quite a charming story really.  I was a part of a small country church.  And in the church was a man who was a mason.  He was thinking about how God is often called the good shepherd, and we're like sheep.  He fashioned some sheep for all the families in the church.  

Because he was a mason and worked with stone all the time, he fashioned them out of some beautiful rocks, with sheep made from putty, and the legs made from construction staples.  It was actually before my time, and I complemented his one day and he insisted I take them as a gift.  I love to bring them out every spring.  Over the years mine's become a little worn, the sheep were a little discoloured, and my set only had two sheep.

miniature sheep spring craft

I decided as a spring craft to make some new ones -a replacement for mine, and a few for good friends who would appreciate the story with the latest polymer clay sheep model.  Since it's still snowy I used the original stone, and a little new green moss.  When the snow melts all go looking in the woods, and find a few good stones for the ones for my friends.

DIY Miniature sheep

To make my sheep I used polymer clay, and they're really simple.  I love working making polymer clay projects.  It's inexpensive, and easy to work with and you can make such a variety of crafts with it.  I used white for my sheep, and added paint for the tiny faces.  Black polymer clay would be really cute to make a black sheep  to add to the flock too.  To soften the clay when you first start working with it, so that it's easy to sculpt you may want to make polymer clay slices and then roll them and knead the clay in your hands to make it pliable.

How To Make Miniature Sheep

Materials:

  • white polymer clay
  • wire
  • wire cutters
  • black craft paint
  • small paint brush

How To:

Sheep

Form the white clay into some little sheepish blobs.  I worried at first that they didn't look very sheep like, but I really loved how they looked in the end when there black faces and legs were added, so don't be too worried.  They should be kind of an oval, with a smaller head.  I formed some looking up and some looking down grazing on grass.

how to make miniature sheep from polymer clay

Lambs

And just for fun I thought it would be sweet to add some babies to mine too.  Spring always makes me think of lambs.  The lambs are made the same way, only there's a small size difference.  There's a photo with a ruler for size reference.

how to make miniature sheep

Legs

DIY Miniature Sheep

After the sheep bodies are formed out of clay, it's time to add the legs.  I cut small pieces of wire for each leg and pressed them into the soft clay.  Next stand them up and make sure the legs are even enough for the sheep to stand.

miniature sheep spring craft

Next, it's time to bake the polymer clay so it will be hard.  Follow the manufacturer's directions on the package.  I have to confess that the first two batches I tried I burnt, so for sure keep an eye on them.  They are quite small and can burn quite quickly.

Paint

Once they're baked and cooled, it's time to paint them.  Using a small craft brush, carefully paint the wire legs black, and a small dot for each cute sheep's face.

miniature sheep tutorial

Create a Scene

Lastly after the paint is dry you're ready to set them up in a sheep ring on the grass up on a hill.  I used a rock with some fine moss glued to it.  You could also make them as a miniature terrarium scene in a glass bottle with moss.

miniature sheep craft

I love how the sheep turned out and the addition of the little lambs.  I set them up on my table to be admired and surrounded them with green plants.  You might want to make sure to keep these out of the reach of children because the sheep are so tiny.   It really does feel like the a little taste of spring.  And if winter refuses to leave, we'll just have to make our own little inside springs like this, won't we.  I also think these sheep are perfect for St. Patrick's Day decor, since Ireland is a land of sheep grazing on rolling green hills.  This is one of my very favorite spring craft projects.

spring craft idea

This DIY was such a sweet reminder of an old friend, and I'm looking forward to gifting some of them as a great reminder of the shepherds love for us, just like he did.

miniature sheep

With DIY Miniature Sheep, life really is a party!

More Spring Craft Inspiration

You might also like our Faux Concrete Finish Bunnies here.

Also check out How To Make Cement Easter Eggs here.

You might also enjoy our Pussy Willow Wreath here.

DIY Valentine's Day Wreaths

Feb 14, 2019 · Leave a Comment

DIY Valentine's Day wreaths

Valentine's Day Wreath Ideas: wood embroidery hoops, brass rings and birch, decorated with pink pom poms, tassels, greens, and velvet hearts.

DIY Valentine's Day wreaths
[feast_advanced_jump_to]

Today I'm sharing some DIY Valentine's Wreath ideas.  These DIY wreaths are really easy to put together, and they'd be perfect for spring too, or in a little girls nursery, or as the backdrop of a dessert table at a wedding or shower.  Pretty much anywhere. ;). It's so fun to add some Valentine's day decor to your home for celebrating the season of love.  And in February when everything outside where I live still feels a bit cold, drap, and grey adding some pink or red colors is on of the easiest ways to add a little bit of cheer.

Valentine Wreath Ideas

I wanted to add a grouping of creative wreaths to my wall for Valentine's day.  We actually had a Christmas version of these up on this wall before and I loved them so much, I decided to make a Valentine's Day version of them.  It was such a great idea to change them up a little with some Valentines day touches.  These are such fun Valentine's day crafts to make.

Valentine's Day Wreath IdeasI love this grouping with 5 different beautiful wreaths all together.  Each wreath is a little different, but they're all super easy to put together.  This is a great way to decorate a large wall, where one small wreath would be too small for the smale.  We've grouped ours together for more impact.  We repeated some of the materials and the colours so that although they're all different, they all go together nicely.  Here's how I made them.

Yarn Valentine's Day Wreath

how to make a yarn wreath

For this first Valentines day wreath I started out with a plain gold ring wire wreath form.  Look for these at your local craft store, dollar store, Hobby Lobby, or Dollar Tree.  I also picked up some different colours of pink yarn for this whole project at the thrift store, a great inexpensive source if you want some different shades, and kinds.  Or you might already have a stash of yarn in your craft room that you can use for this craft project.  It's the perfect way to use up some old leftover yarn.

yarn and gold hoop wreath

For this simple wreath, I cut the yarn pieces to about 1 ½ ft long each, and each section has about 5 pieces of yarn each.  You can adjust the number based on the thickness of your yarn.  Then tie the yarn pieces onto the gold ring wire form using the larks head knot.  I tied 15 larks head knots for my wreath frame, but you can adjust according to the size of your ring and thickness of your yarn, to get the look you like.  I also included 1 section of white yarn for a little contrast.

This DIY Valentine wreath is so simple to make.  We made ours a pink wreath, but you could use different colors or shades of yarn for a different look.  It's such a fun Valentine's day decor idea, and so easy to put together.  This pretty wreath would so much fun to make with kids too, because it's so simple.

Valentine's Day Wreath ideas

Embroidery Hoop Valentine's Day Wreaths

I made two wreaths using wood embroidery hoops.  I bought two different sizes from the thrift store.  I also picked up a little bit of faux greenery.

Valentine's Day WreathI used some floral wire to attach the greens to the wreaths.  Use some wire cutters to cut your wire, and twist it securing it at the back of the wreath.  You could use a hot glue gun to attach the greens instead, but the beauty of using wire is that it's completely removable.  I think the wire is a better way to attach things because you can then so easily change your wreath for any season like I did with the these changing them from Christmas wreaths to Valentine's day.  It's a great way to upcycle your Christmas decorations.

how to make a hoop wreathFor these wreaths I also added some different chunky yarn pom poms and tassels.  I like the boho feel of a pom-pom wreath, and the pom poms were also less expensive than using lots of faux flowers. To attach them I just tied them on at the back.

how to make a hoop wreath

I made each adorable wreath a little different, but they all tie together with the greens and the yarn additions.

gold hoop wreath
Valentine's Day Wreath
Valentine's Day embroidery hoop Wreath

Velvet Hearts Valentine's Day Wreath

I also sewed a couple of little velvet hearts to add to a few wreaths.

Valentine's Day wood embroidery hoop wreath

These were so simple to make.  My sewing machine is broken sadly, so I just sewed them by hand.  They really only took  about 10 minutes each.

I started out with an old pink velvet jacket, but you could also just buy a small piece of velvet at the fabric store.  The first step is, using scissors or a rotary cutter, cut out two matching small hearts out of my piece of fabric.  If you're not great at hearts, make yourself a little pattern to follow out of construction paper or a small piece of cardboard.  Then, making sure the velvet sides of the fabric pieces are facing in, and sew them together.  Leave an opening at the side of the heart so you can stuff them.

how to make a velvet heart

Next, turn your heart right side out and stuff it.  Lastly, sew the hole closed and your little velvet heart is finished.

To attach it to the wreath I just stitched the center of the heart on at the back.  Don't worry if your heart isn't perfect, it won't be too noticeable once it's added to the wreath with everything else.  This is one of those great DIY projects to do while watching TV at night.  These little hearts turned out so cute.  They'd also make a great addition to your home decor as Valentine's Day decorations.  We added one with some greenery and a tassel, but a piece of ribbon would be a great option too and add a touch of romance.

Birch Branch Wreath

DIY Valentine's Day Wreath

My favorite cute wreath out of all the Valentine's day wreaths on the wall is this fun birch one. You can see how I made a Christmas version last year here.  It's a simple birch branch tied with some twine on each end.  Then I layered on top of the twine the beautiful yarn, so the weight of the branch won't stretch the yarn out of shape.  

The faux greens and silk flowers are attached with a little florists wire, and make this a romantic wreath.  Then I adding a pom pom, one of my velvet hearts, and a couple of tassels.  One of the tassels has a few wooden beads added in also.  I think I might make another version of this wreath for my front door, once the snow melts away.

Valentine's Day Wreath ideas

These Valentine's Day wreath ideas were really inexpensive to put together, and really a fun little DIY.  I love that you can get really creative and make them all a little different, and they look so good together.  The key to tying them all together to repeat some elements with each one.  It's such an easy way to make your own cute wreaths.  I hope these DIY heart wreath ideas inspire you to get creative for Valentines day.

More Wreath Ideas

A heart-shaped wreath would be a great addition to this grouping too.  Look for a heart-shaped grapevine wreath at the craft store and decor it with any other the elements that we've used on the other wreaths like faux greens, silk flowers, pom poms, pink ribbon or red ribbon and wood hearts or velvet hearts would all be a great choice for this Valentine wreath DIY.

With DIY Valentine's Day Wreath Ideas, life really is a party!

More Valentine's Day Inspiration

You might also like our Nail Polish Marbled Hearts here.

Also check out our Yarn Hearts here.

You might also enjoy our 3D Origami Hearts. 

Hosting Guests with Dietary Restrictions

Feb 12, 2019 · Leave a Comment

Menu ideas for guests with dietary restrictions.

Menu Ideas for Hosting Guests with Dietary Restrictions: ideas on how to accommodate guests who are vegan, keto, dairy-free, and gluten-free.

DIY Valentine's Day wreaths
[feast_advanced_jump_to]

Navigating hosting guests with dietary restrictions can be tricky for a hostess.  It sounds like the beginning of a joke -a vegan, keto, dairy-free, and gluten-free person walk into a bar...  At my recent Valentine's Day party I had guests that fit all four of these categories plus a few that had no dietary restrictions which made menu planning very difficult.  

Since vegan and keto are almost opposites, I knew I was going to have to get a little creative.  As a joke we asked Siri what to serve, and she responded nuts -pretty much the only thing everyone at the table would be able to eat, lol.
Menu Ideas for Hosting Guests with Dietary Restrictions

Waffle Bar Brunch

My party was for brunch, so I wanted to include breakfast foods.  So here's what I came up with -A Make Your Own Waffle Bar.  There was nothing that would meet everyone's needs so I realized I'd have to create different dishes for everyone.  I liked the idea of waffles because then at least we'd all be eating the same thing, just different variations.

vegan, keto, dairy-free, and gluten-free waffle bar

We made batter for regular waffles, keto waffles, and then one more that were vegan, dairy free, and gluten free all wrapped into one.

vegan, keto, dairy-free, and gluten-free waffle bar

My go-to brunch dishes are usually casserole dishes, things like french toast casserole, hash brown casserole, and quiche.  I love serving these because I can make them ahead, and they stay nice and warm, and don't need to be served immediately.  Since these dishes weren't going to work, but I didn't want to be cooking waffles at the last second and trying to keep them warm, I set up a "Make Your Own Bar".

vegan, keto, dairy-free, and gluten-free menu ideas

I set up my own waffle iron, and a borrowed one for the party -making sure to run one to an outlet in another part of the house with an extension cord so I won't blow a fuse.  The three different batters were made in the morning before guests arrived, and had them labeled for guests to help themselves too.  I turned on the waffle irons a little before we sat down so they could warm up.  For the first round of waffles I made some for everyone, and then after that guests helped themselves, which worked out great.

Topping Ideas

Along with the waffles, there were lots of toppings that worked for everyone's different dietary needs.  Everyone enjoyed the berries.  Then there were also nuts, and coconut that everyone could have.  I also had some sprinkles and chocolate chips for those who wanted.  I had some maple syrup, some chocolate and strawberry sauce, and also some sugar free syrup.  There were sausages and bacon for those who wanted as well.  There was unsweetened whip cream and butter as well.

what to serve vegan, keto, dairy-free, and gluten-free guests

Potluck

I also asked each guest to bring along to the party something that they could eat, that way I knew everyone had at least two options.

Menu Ideas for Hosting Guests with Dietary Restrictions

Drinks

For drinks we had coffee and tea.  I was sure to include almond milk, heavy cream, and sweetener along with the regular milk, and sugar.

brunch drinks

I set up a juice bar with different juices as well, but was sure to include some sparkling water too.

Menu Ideas for Entertaining Guests With Lots of Dietary Restrictions

Research Before Hand

It did take a little research on my part, to figure out a menu for hosting guests with dietary restrictions, but I know my guests really appreciated being accommodated.  I didn't have a keto or a vegan, dairy-free, gluten-free waffle recipe.  I looked on-line and found one of each, and everyone seemed to really enjoy them.  My advice would be don't be afraid to try something new.

Shop The Bulk Store for Unusual Items

Also, I didn't have all the ingredients for the recipes.  It can sometimes be really expensive to invest in special ingredients, especially if you feel like you'll never use them afterward.  Here's my tips -go to the bulk store and buy just want you need for the recipe, and for something like the almond milk that was only available in a large container that I won't use out, send it home with the guest you bought it for.

More Ideas

My party was for brunch, but I did have a few other ideas for menus when entertaining guests with lots of different dietary restrictions.

  • Salad Bar-lots of greens, fresh veggies and nuts, along with cheeses, hard boiled eggs, and meats, including some vegan cheese and tofu.  You could also include some breads or crackers on the side, including a vegan and gluten free option.
  • Pasta Bar-you could have different sauces like tomato, and alfredo and different pastas.  You could include regular pasta, but also a gluten free option, and zoodles -spiralized zucchini for a vegan and keto option.  Along with the pasta and sauce options I'd include some different meats -like meatballs, grilled chicken, and sausage.  For a vegan option you could have some vegan "meat" available too.   I'd also have some different sautéed veggies available like onions, peppers and mushrooms.  A large salad on the table, and some bread, including a gluten free bread option too would be a great addition.  Click here to see a pasta bar I but together in the past, that could easily be updated with some other options.
  • Sandwich Bar-I'd include deli meats and cheeses, along with a vegan "meat" and cheese option too.  Keto eaters would love to see some bacon as well.  I'd also include lots of veggie options like lettuce, tomatoes, peppers, sliced onions, alfalfa sprouts, pickles, and olives.  For breads be sure to offer one gluten free option.  And for keto guests, a low carb wrap, or large lettuce leaves to use as a wrap.  Then be sure to have lots of condiment options including mustards, and mayo.  A mayo made with olive oil is a great option for those eating keto.
  • Ice Cream Bar-dessert can be really challenging too with this many different restrictions.  You can find ice cream that is vegan, dairy-free (think rice cream), and keto friendly (look for low carb).  Once you have an ice cream for everyone, add in lots of fun toppings.  Chocolate syrup, a strawberry syrup, or a sugar free option would be fun.  Include lots of nuts, coconut, and berries since everyone can eat those options.  Candy toppings are fun too.  Whip cream is great too, made with sweetener or non-sweetened for the keto people.  And you could have coconut whip cream as a vegan option.

These are just a few fun ideas.  Bars and Make-Your-Own are definitely the way to go for a group with needs this varied.  Also don't be afraid to ask guests to bring something they can eat as well.  And if you're really stumped there's always take-out.  Having curry and don't know how to make a vegan one, ask at your favourite Indian restaurant and pick up a vegan one as example -sub in any dietary restriction here.

vegan, keto, dairy-free, and gluten-free menu ideas

A Place For Everyone At Your Table

It is definitely challenging to hosting guests with dietary restrictions and meet everyones different needs, and because of that I'm sure that sometimes those with lots of dietary restrictions don't get invited over for dinner all that often.  Because we want to always try our best to include everyone, and give everyone a place at the table, I hope these ideas help.  I have to say that although I have found it a little challenging and even intimating to accommodate everyone, when I've gone to the effort to do so the recipients are always so grateful.

Also, when I'm unsure or have a question about where to buy something that's unusual to me, asking the person is always really well received.  They're never annoyed that I don't know how to accommodate them, and always the opposite actually -completely grateful, blessed, and happy that I'm going out of my way to find something that will work for them.

In fact, one of my best stories about this kind of thing was when one of my girl friends was actually moved to tears by the effort that I'd made to make something really similar to what everyone else was having and still fulfilled her dietary needs.  She was so used to either not being invited, or having to bring her own food to get-togethers that she wept.  Hospitality is very powerful, and going the extra mile to accommodate everyone can have some amazing results.  Sometimes we're held back from including everyone because we sincerely don't know how, so I hope my brunch and other menu ideas inspires and empowers you to invite everyone to your table.

With Menu Ideas for Hosting Guests With Dietary Restrictions, life really is a party.
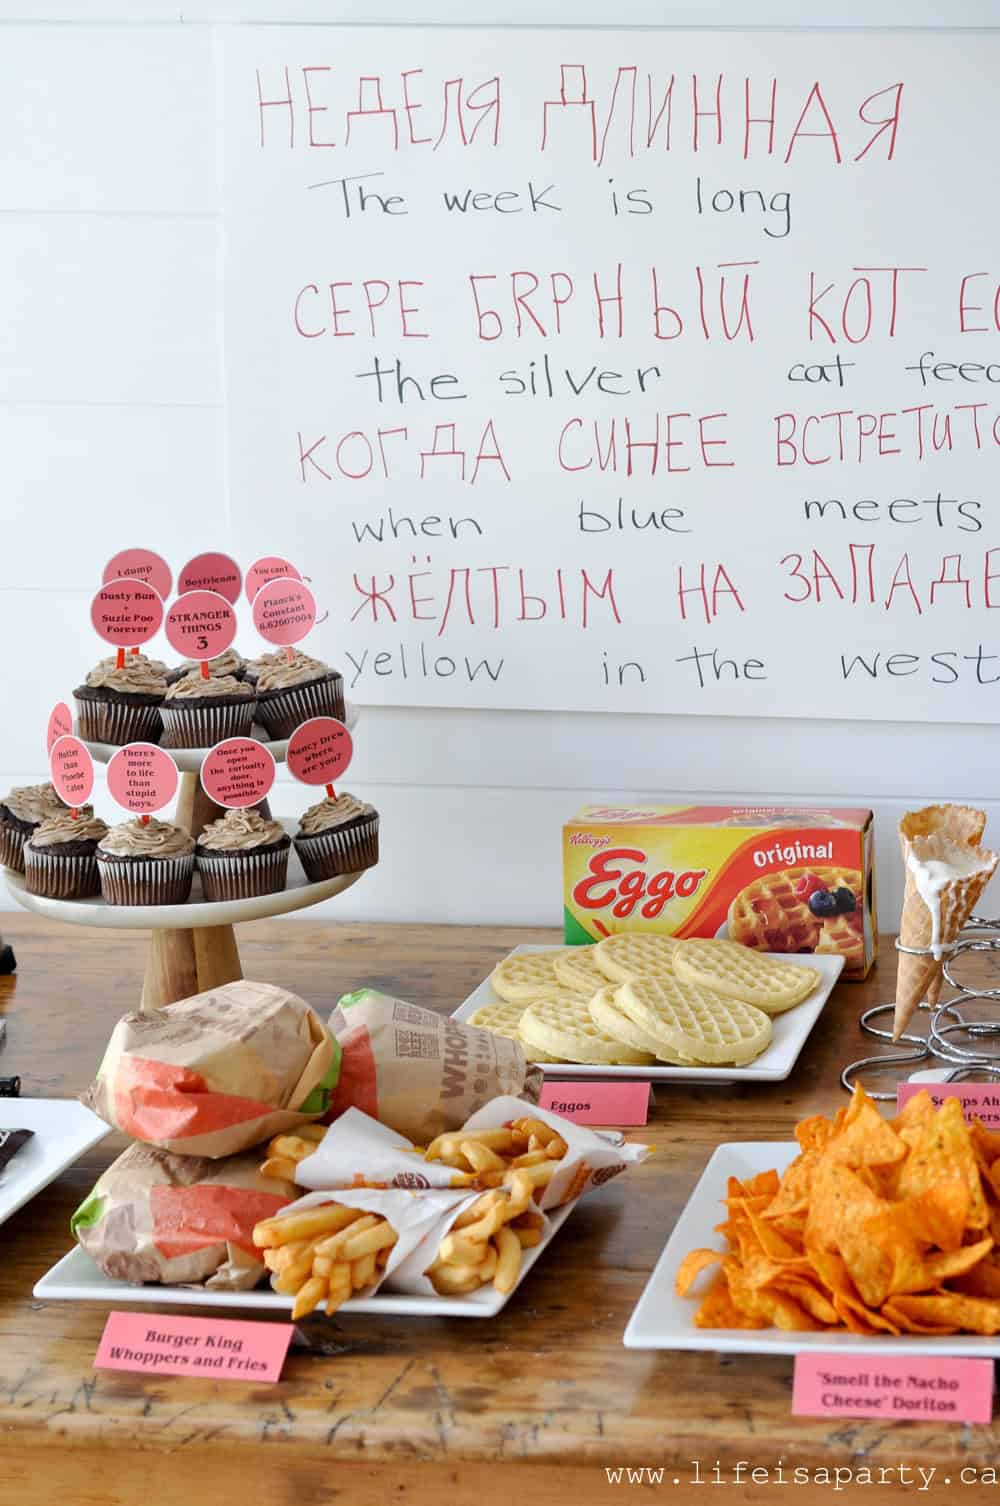
More Ideas

Also check out 5 Tips To Create Pinterest Worthy Parties on a Budget here.

Valentine's Day Eclectic Table

Feb 11, 2019 · 1 Comment

Valentine's Day tablescape

Valentine's Day Eclectic Table -Valentine's Day Table inspired by antique post cards and collected romantic treasures. Perfect for Galentine's Day.

Valentine's Day tablescape
[feast_advanced_jump_to]

I had the loveliest get together with some blogging girl friends last week and I wanted to share the beautiful Valentine's Day table.  I had so much fun putting this table together.  It's very eclectic and fun and I really love the way it came together.  It feels Victorian and collected and so pretty -perfect for Valentine's Day.
Valentine's Day Eclectic Table

Valentine's Day Postcards

It all started with finding some antique Valentine's Day postcards.  I found some Christmas ones in December, and went back in January to see if there were any Valentine's Day ones, and I even picked up some Easter ones to use later.  They were only $1 each and felt like finding treasure.

vintage Valentine on a Valentine's Day Table

If you wanted to create a similar look and couldn't find any antique Valentines, you could definitely find some free images on-line and make your own reproductions by printing them at home.

Valentine's Day Eclectic Table -Valentine's Day Table inspired by antique post cards and collected romantic treasures. Perfect for Galentine's Day.

Flowers

Of course we needed some flowers for Valentine's Day and I found some pretty sweet heart roses and put them into some vintage mason jars.

Valentine's Day Eclectic Table -Valentine's Day Table inspired by antique post cards and collected romantic treasures. Perfect for Galentine's Day.

Trinkets and Treasures

At the same antique mall on a different visit I found a few different sets of old keys and locks.  They seemed perfect for Valentine's Day to me and very "key to my heart".

Valentine's Day Table with heart shaped marshmallows and vintage keys
vintage keys and lock

My one other purchase for the table was lots of yummy Valentine's Day candies.  I knew I wanted to offer them in different vintage tea cups, so I went to the bulk store where I could buy lots of different kinds in small quantities.

conversation hearts in a vintage tea cup Valentine's Day tablescape
chocolates in a vintage pink teacup for Valentine's Day

The rest of the little treasures are things I shopped my house for.  I went searching for cute little treasures and found lots around the house.  The postcards definitely gave the table a Victorian and antique feel so I went with that.

Valentine's Day Eclectic Table -Valentine's Day Table inspired by antique post cards and collected romantic treasures. Perfect for Galentine's Day.

Story Telling

As I collected bits to added to the tablescape I was sort of thinking of a little story in my mind -and this is a little trick to styling.  I was imagining an old fashioned lady, working away on her Valentine's cards -writing some to send to others, and reading the ones she'd received.  There's a little sewing she might have been working on too, with her glasses and buttons.

Valentine's Day Table
Valentine's Day Eclectic Table with vintage tea cups
vintage Valentine's Day table

And then lots of her other treasures -the swans, the flowers, her keys.  And then lots and lots of teacups filled with treats.  I imagined it all pushed off the table and into the centre so she could come back to it.

Valentine's Day Eclectic Table -Valentine's Day Table inspired by antique post cards and collected romantic treasures. Perfect for Galentine's Day.

It's really fun to do a really detailed table like this, especially for friends who love decor and decorating, because as you're sitting there, lingering and chatting, there's so many interesting things to notice and enjoy.

vintage inspired Valentine's Day table

Place Settings

For the table setting I kept it pretty simple with white plates, pretty gold cutlery, and unironed pink cotton napkins.  I layered a pretty pink paper doily on top of each plate -it seemed perfectly old fashioned to tie in with everything else.

Valentine's Day Eclectic Table -Valentine's Day Table inspired by antique post cards and collected romantic treasures. Perfect for Galentine's Day.

This is my favourite table I've put together in a long time.  Hope it inspires a little Valentine's Day decorating for you too.

vintage inspired Valentine's Day table

Tomorrow I'll be sharing the menu from the party.  I had guests who were keto, gluten-free, dairy-free, vegan, and those that had no restrictions.  It was a little bit challenging to come up with a  menu that worked for everyone.  So I'll be sharing what I came up with tomorrow, and tips for entertaining guests with lots of different dietary needs.

With a pretty Valentine's Day Eclectic Table like this one, life really is a party!

You might also like our Valentine's Day Breakfast Party here.

Valentine's Day Breakfast: the perfect inspiration with decor and menu for celebrating Valentine's Day with family and friends.

Also check out our Simple Valentine's Day Decor Home Tour here.

You might also like Valentine's Day Pizza Party here.

Valentine's Day Pizza Party -DIY decorations, heart shaped pizza, mocktails, and a dessert pizza recipe make this the perfect family celebration.

Valentine's Day At Home Spa

Feb 9, 2019 · 4 Comments

Valentine's Day at home spa

Valentine's Day At Home Spa: surprise your tween or teen daughters with face masks, manicures, fancy refreshments, candles, and a bubble bath.

Valentine's Day at home spa
[feast_advanced_jump_to]

I set up a fun Valentine's Day At Home Spa for my daughters -one's a tween and the other is a teen.  I thought they would love it and they did.  It was the perfect Valentine's Day surprise for them.  If you have some little ladies in your life too, this might be a great idea for you.

Valentine's Day At Home Spa: surprise your tween or teen daughters with face masks, manicures, fancy refreshments, candles, and a bubble bath.

I set up the spa for them in our master bathroom.  It's quite a large space, so I add an ottoman to the middle of the room and some furry rugs.  Just for fun, there were some pillows and tassel bunting, and mini lights to set the scene.

Valentine's Day At Home Spa: surprise your tween or teen daughters with face masks, manicures, fancy refreshments, candles, and a bubble bath.

Candles and Music

Since my girls are older,  I also lit lots of candles for them to enjoy.

Valentine's Day At Home Spa: surprise your tween or teen daughters with face masks, manicures, fancy refreshments, candles, and a bubble bath.I also set up a speaker so we could play some music in the background for them.

Fancy Refreshments

Valentine's Day At Home Spa: surprise your tween or teen daughters with face masks, manicures, fancy refreshments, candles, and a bubble bath.

Valentine's Day At Home Spa: surprise your tween or teen daughters with face masks, manicures, fancy refreshments, candles, and a bubble bath.I wanted to have a couple of fancy refreshments for them, so we had some black cherry pop (one of our favourites)  in pretty champagne glasses.

Valentine's Day At Home Spa: surprise your tween or teen daughters with face masks, manicures, fancy refreshments, candles, and a bubble bath.And since it's Valentine's Day we also had to have some chocolates.

Valentine's Day At Home Spa: surprise your tween or teen daughters with face masks, manicures, fancy refreshments, candles, and a bubble bath.Spa Robes

Just like a real spa, we had these so soft, white robes waiting for them too.

Valentine's Day At Home Spa: surprise your tween or teen daughters with face masks, manicures, fancy refreshments, candles, and a bubble bath.Spa Treatments

The spa activities were really simple.  I had a tray of things ready for them to do their nails.Valentine's Day At Home Spa: surprise your tween or teen daughters with face masks, manicures, fancy refreshments, candles, and a bubble bath.

And I also picked up a couple of face masks for them at the drug store.

Valentine's Day At Home Spa: surprise your tween or teen daughters with face masks, manicures, fancy refreshments, candles, and a bubble bath.

I also put out some really pretty bath supplies.

Valentine's Day At Home Spa: surprise your tween or teen daughters with face masks, manicures, fancy refreshments, candles, and a bubble bath.I love these pretty glass jars holding bath salts, bath bombs, and rose petal soaps.

Valentine's Day At Home Spa: surprise your tween or teen daughters with face masks, manicures, fancy refreshments, candles, and a bubble bath.We added a pink bath bomb, some bubble bath, and some of the rose soap petals to the bath.

Valentine's Day At Home Spa: surprise your tween or teen daughters with face masks, manicures, fancy refreshments, candles, and a bubble bath.I love how it turned the water pretty pink.  There's also a few styrofoam hearts floating on top (picked up a the dollar store and such a fun addition).

Valentine's Day At Home Spa: surprise your tween or teen daughters with face masks, manicures, fancy refreshments, candles, and a bubble bath.

What could be better than a  soak in here, with a nice drink?

Valentine's Day At Home Spa: surprise your tween or teen daughters with face masks, manicures, fancy refreshments, candles, and a bubble bath.

Valentine's Day At Home Spa: surprise your tween or teen daughters with face masks, manicures, fancy refreshments, candles, and a bubble bath.The girls had a lot of fun enjoying their special Valentine's Day Spa, which might have also included doing each other's hair and makeup -one of their favourite pastimes lately. 😉

Valentine's Day At Home Spa: surprise your tween or teen daughters with face masks, manicures, fancy refreshments, candles, and a bubble bath.

Putting this girly surprise together for them was the perfect way to celebrate Valentine's Day.

Valentine's Day At Home Spa: surprise your tween or teen daughters with face masks, manicures, fancy refreshments, candles, and a bubble bath.

If your kids are younger, you could adjust it slightly for their age by doing the manicures and/or pedicures for them.  For younger kids it might be fun to include not only the styrofoam hearts for the bath, but also foam sheet hearts in pink and red, that would stick to the side of the bathtub when wet and be really great to play with.  Real rose petals and flowers in the bath are really beautiful too.

Valentine's Day At Home Spa: surprise your tween or teen daughters with face masks, manicures, fancy refreshments, candles, and a bubble bath.

The best part of the whole At Home Spa was seeing their faces when we surprised them, and they had so much fun enjoying it all.  Busy making memories over here.  😉  Hope it inspires you.

With a Valentine's Day At Home Spa, life really is a party.
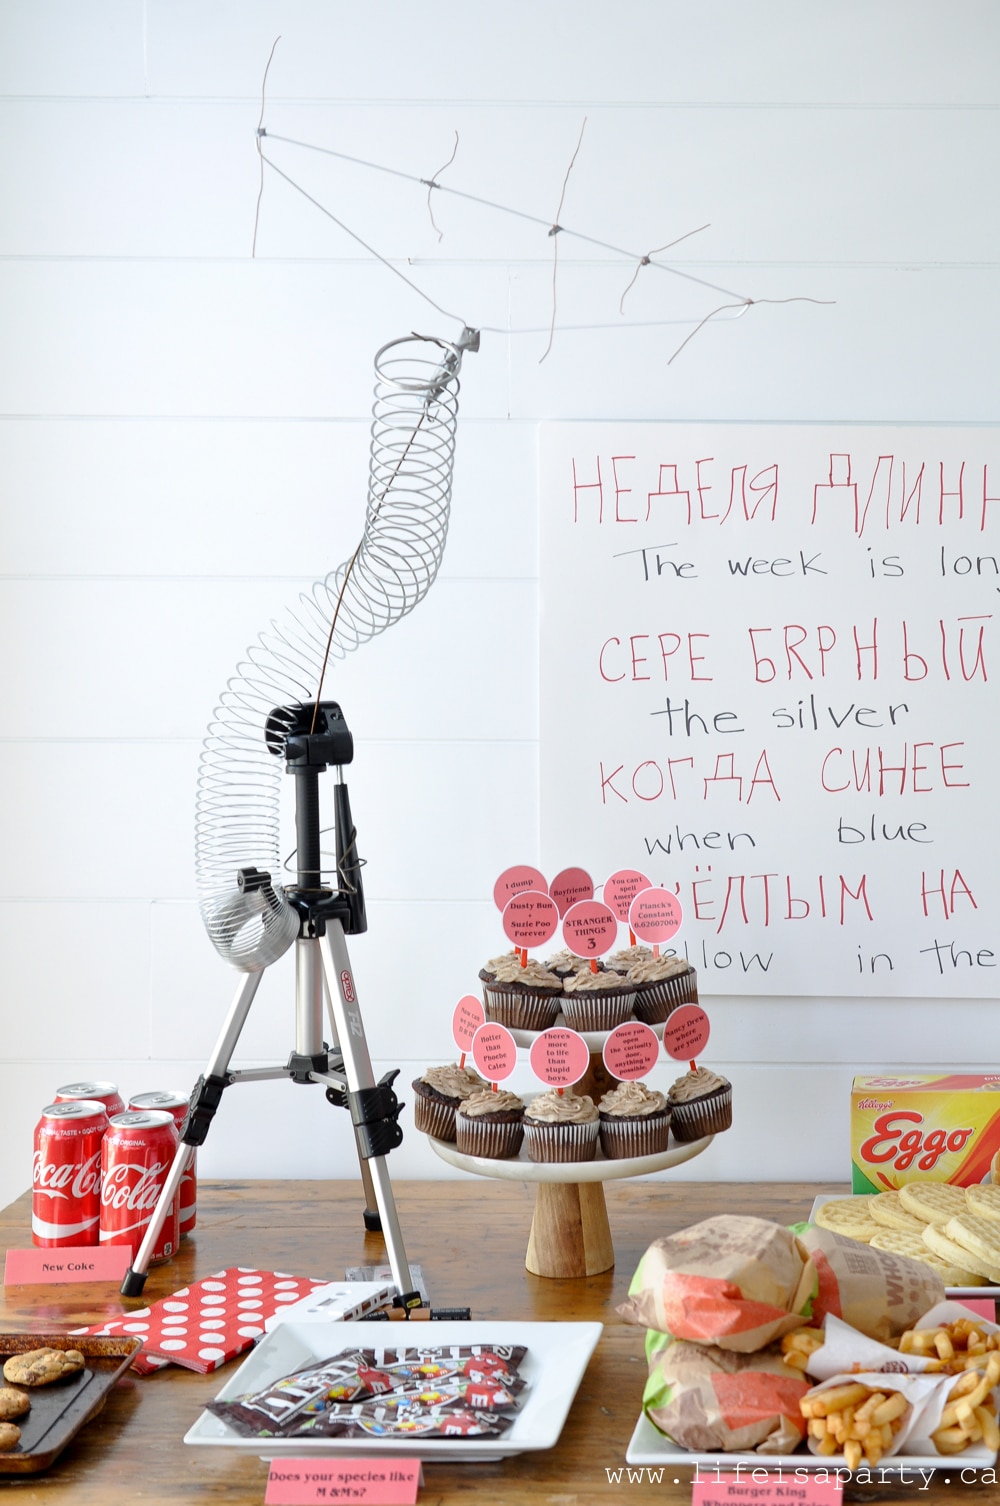
More Great Valentine's Day Ideas

You might like our Fresh Flower Chandelier here.

DIY Flower Chandelier: Easy to make,perfect for special occasions, the fresh flowers dry beautifully too. Perfect for Valentine's Day, weddings, or showers.

Also check out DIY Yarn Hearts here.

You might also enjoy 3D Origami Hearts here.

3D Origami Hearts -create your own origami hearts out of old book pages. Perfect for Valentine's Day decor, wedding decor, or a baby nursery.

10 Simple Ways to a More Joy Filled January -Beating the Winter Blues

Jan 11, 2019 · 1 Comment

10 Simple Ways to a More Joy Filled January -Beating the Winter Blues with 10 easy. inexpenisve activities guarenteed to add some happy!

10 Simple Ways to a More Joy Filled January -Beating the Winter Blues with 10 easy. inexpensive activities guaranteed to add some happy!

10 Simple Ways to a More Joy Filled January -Beating the Winter Blues with 10 easy. inexpenisve activities guarenteed to add some happy!

[feast_advanced_jump_to]

Struggling with the Winter Blues

The January Blues -or should we just say winter blues because God knows it's not over in January, hello February and March blues, the winter blues are real for many of us.  And they are a struggle for many of us.  After the height of Christmas and all those celebrations the thoughts of a long, cold, dark winter make many of us a little blue-sy.

Heading into this New Year, I have been thinking lots lately about the purpose of Life is a Party.  I want it to be a place that inspires us to Celebrate Every Day.  Celebrating Every Day has two meanings -celebrating more with lots of parties, but secondly to celebrate the every day mundane, and look for ways to make it more joy filled.  I've come up with a list of 10 Simple Ways to a More Joy Filled January -Beating the Winter Blues.  They're pretty simple, and not expensive, and hopefully extremely do-able.

10 Simple Ways to a More Joy Filled January -Beating the Winter Blues

1. Try a New Recipe

Try a new recipe.  Whether you're trying to change your eating habits in the New Year, or not, January is a great time to try a new recipe.  Go to the effort.  Buy all the weird ingredients -make a list, and just go for it.  That thing that you love getting at a restaurant but were never brave enough to try at home -try it.  There is a recipe for everything on-line. What's the worst that can happen?  It doesn't turn out.  There's always scrambled eggs, and the fun memory of trying something new.  Even better do it with someone else so that you can enjoy the fruits of your labour with them or laugh at what went wrong together.

Classic Cheese Cake

Cheese Cake Recipe Here

2.  Buy a Plant

Buy a plant.  Living here in Canada, there's no green or life outside right now.  There is something about seeing something living and growing that's life giving.  Pick up some bulbs and watch them grow each day, or try a house plant.  If it dies, it dies.  Enjoy its beauty while it lasts. It was probably no more expensive than some cut flowers.  And if it lives, it lives!

Plants and Candles

3.  Create Something

Create something.  Go ahead and make something with your very own hands.  Paint, sew, build a model, make some ear rings, try knitting, write a poem, take some pictures.  Just make something.  It truly makes you feel alive.

Yarn Hearts -Pink and White

Yarn Heart DIY Here

4.  Watch An Old Movie

Watch an old favourite movie.  The best part about getting old, is forgetting what happens in old movies, but remembering you like them.  Anyone with me?  Put on an old favourite, get in your pjs, pop some popcorn and enjoy.

Chunky Knit Blanket and Popcorn5.  Book Dinner with a Friend

Book dinner with a friend, or lunch, or even breakfast.  Meet them halfway between your houses.  And then go away with that great thought that you should do it more often -and do. 😉

6.  Read a Book

Read a great book.  I'm not the biggest reader myself, but there is something about reading a great book that is such a pleasure.  One that we usually reserve for vacation, beside the pool, or on the beach.  January needs a good book too.  And maybe a pina colada.

Old Book open on a Bed

7.  Go For a Walk

Go for a walk.  It's amazing what getting outside can do for you.  I live in Canada.  It's cold.  But, I was also raised in Canada and I own a few toques too.  Ever heard the expression "there's no such thing as bad weather, only inadequate clothing".  Dress warmly for the weather and enjoy the fresh air, and the beauty of nature.  It really does make you feel great.  And there's always warming up after with a hot drink to look forward to.

winter forest

8.  Clean and Organize Something

Clean something.  Organize something.  It's January, it's just the right thing to do.  And there is something about getting things cleaned up and organized that makes you feel amazing afterward.  There are seasons in life, and this is the purging, organizing, cleaning one so don't miss it.  And bring all your "no longer sparking joy" items to the second hand store because #savetheearth.

clean organized closet

9.  Invite Someone Over

Invite someone over to your house.  They're expereincing the long winter too and would probably love to come over for dinner or dessert, or just coffee.  Light some candles, open a bottle of wine, cook something really yummy and remember how much you actually really love your friends.  Remember they probably don't care if your house is perfectly tidy, that's just the lie we listen to and use as an excuse to not invite anyone in.  And you very rarely meet a truly happy, joyful hermit -just sayin'.  Inviting people into our homes, and ultimately our lives is the more joyful way.

10 Simple Ways to a More Joy Filled January -Beating the Winter Blues with 10 easy. inexpenisve activities guarenteed to add some happy!

10.  Have a Bubble Bath

Have a bubble bath.  There is something about the feeling of luxury, and care in taking a bubble bath which is good for the soul.  Put on some nice music, light some candles, and use that bubble bath that's been in the cupboard for ages.  Get all warm and cozy and clean.  Relax.  Be nice to yourself.

10 Simple Ways to a More Joy Filled January -Beating the Winter Blues with 10 easy. inexpenisve activities guarenteed to add some happy!

Bathroom Refresh Post Here

I hope some to these simple ideas resonate with you, and might help you create a more joy filled winter.  It's not a to-do list, just a happy little list of ideas that might make you a bit happier and more light filled during these winter months.  These won't solve your depression, and if that's you, you might need a little help from a doctor.  But if you're just struggling and looking for ways to create a bit more happiness, these ideas might help you get through these winter months.  I'll be trying to do some of them, and I'll be sharing some on Instagram.  I'd love to see some pics if you try any too -tag me on Instagram or share on our Facebook page and help spread a little light.

With all these fun ideas to inspire us, life really is a party.
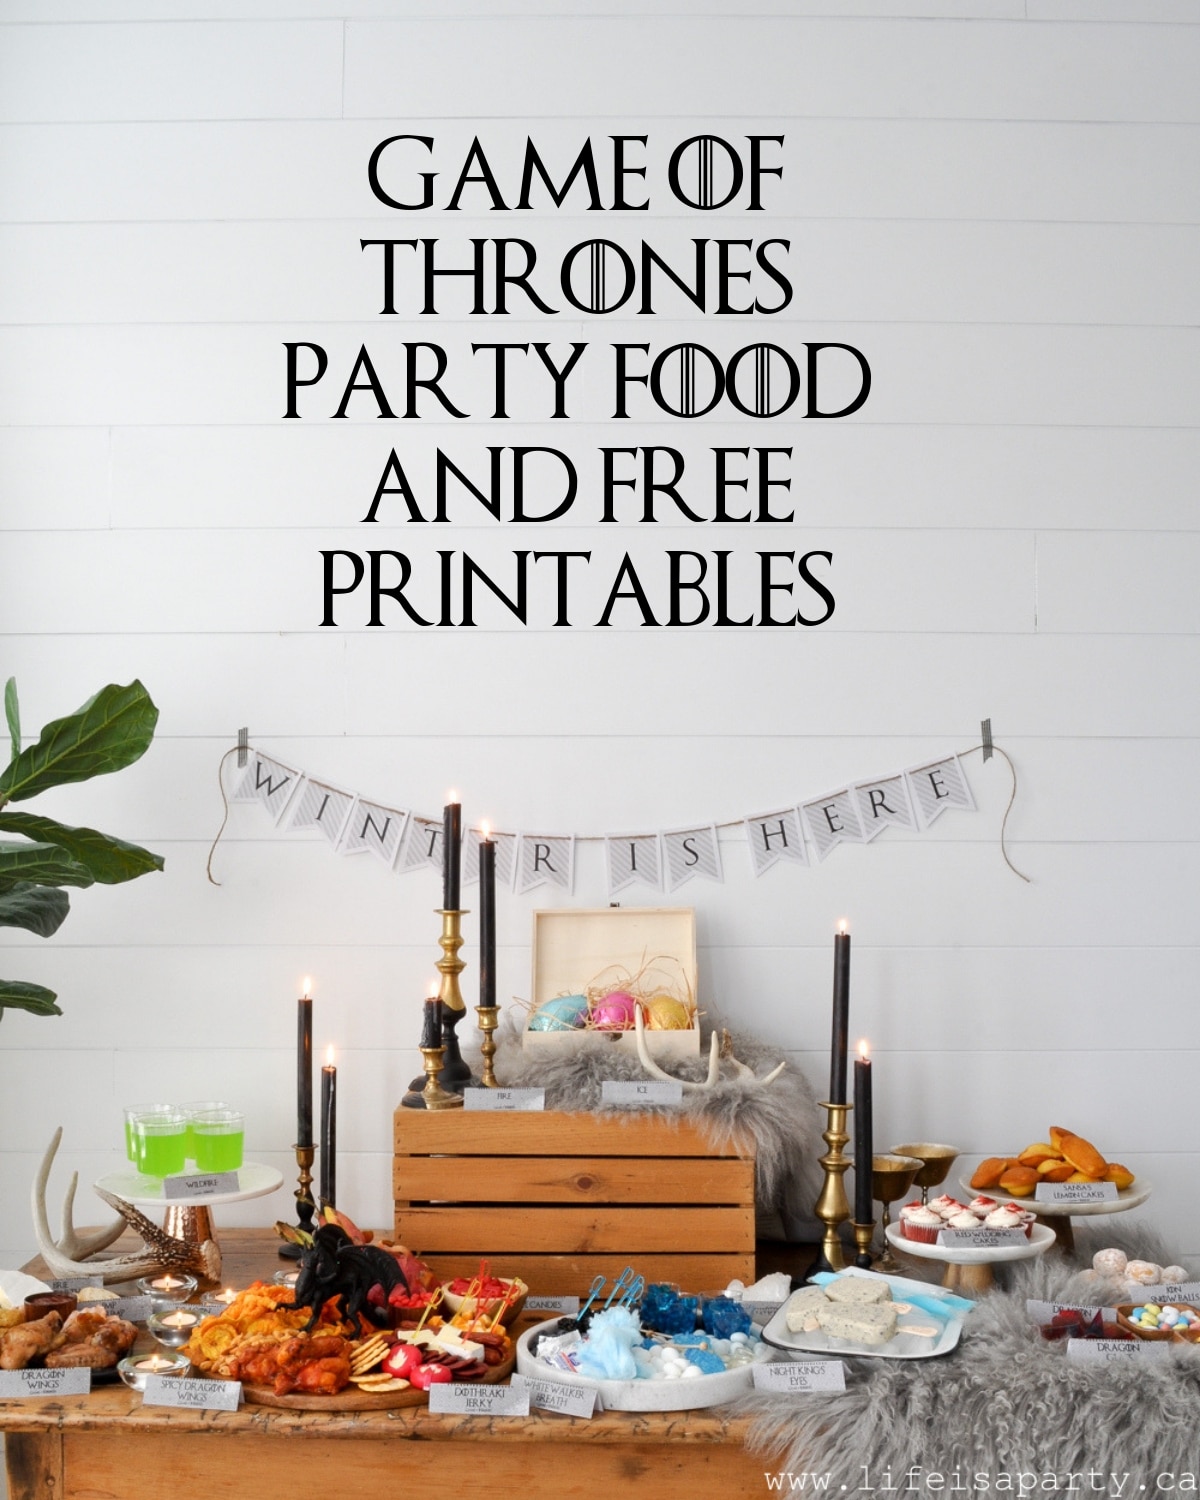
Easy Blackberry Sparklers Mocktail Recipe

Dec 18, 2018 · 5 Comments

Blackberry sparklers mocktails

Blackberry Sparkler Mocktail Recipe: fresh blackberries are pureed with sugar for this easy three ingredient mocktail.

Blackberry sparklers mocktails
[feast_advanced_jump_to]

These blackberry mocktails, are sweet, fizzy and the perfect festive drink.  Use fresh blackberries in this extra special mocktail, with the perfect about of sweet and sparkle.  This really is an easy drink to make with only three simple ingredients in it.  And using the fresh blackberries makes it taste so fresh.

Blackberry cocktail

It's so fun to celebrate the new year in, and what's more celebratory than a sparkly blackberry mocktail drink?  Even if your idea of celebrating is staying home in your pjs with takeout and Netflix, you'll love this drink. 😉

Blackberry cocktails

Fresh Blackberries

The blackberry mocktail is made with fresh blackberries.  We love that they're readily available at the grocery store around New Years, and the perfect fresh fruit to use in a delicious drink.  In the summer months look for fresh blackberries at the farmers market.  Look for large and juicy blackberries to make this drink from.  You can make one batch of the blackberry puree and use it make many drinks.  Just store the puree in the refrigerator and you can use it for several days as needed.  

To make our puree we used a food processor to puree the blackberries with some sugar.  You could also use a blender for this step.  And then to remove all the seeds, we passed the puree through a fine wire sieve.  We prefer creating the puree with sugar and then straining out the seeds over using muddled blackberries in the glass because it allows you to strain out the seeds of the blackberries.

If you're blackberries are sweet this should be the perfect amount of sugar to add, but if they are have more tart flavors, feel free to increase the amount of sugar to suit your taste.

how to make a cocktail with fresh blackberries

Mocktail Version

My kids loved the non-alcoholic mocktail version, and I'm pretty sure they'll be asking for it for the next few weeks.  This is a great option for kids or anyone who doesn't drink alcohol.  We always make sure to have a non-alcoholic drink available for anyone who prefers it.  It's nice if the non-alcoholic beverages are as special as the alcoholic options, and doesn't feel like an afterthought.  This sparkly drink definitely feels special.  This is also the perfect non-alcoholic option for a family dinner.  These flavorful drinks are sure to be a huge hit with kids or for dry January.

Alcoholic Version

You can easily turn this blackberry sparkler mocktail into a cocktail version by replacing the ginger ale with some sparkling wine or champagne. Both versions of this drink are totally delicious, but the alcoholic version gives you great options for a special happy hour drink.

Soda Pop

We used ginger ale as our soda pop to add some sparkle to our mocktail.  We love the flavor it adds.  But, you could use club soda, tonic water, mineral water, or fizzy water.  The sparkling water is a less sweet options, or add more sugar to the blackberry puree to compensate.  If you want a stronger ginger flavor you could try using ginger beer,

Blackberry puree cocktail mocktail
how to make blackberry puree
Blackberry Sparklers cocktail mocktail

Since blackberries are beautiful and readily available this time of year, this is the perfect drink for celebrating with!  The pureed fresh blackberries made the mocktail such a gorgeous color.  This easy mocktail recipe is sure to become a new favorite.  And it's also great as part of your summer drinks line up.  You'll want to serve this beautiful drink all year long.

Recipe

Blackberry sparklers mocktails

Blackberry Cocktails

Fresh blackberries make this easy and delicious drink.
5 from 2 votes
Print Pin Rate
Course: Drinks
Cuisine: American
Prep Time: 10 minutes minutes
Total Time: 10 minutes minutes
Servings: 20
Calories: 238kcal
Author: Dannyelle Nicolle-Ramjist

Ingredients

  • 1 pint blackberries about 350 grams
  • 1 ½ tablespoon quick dissolve sugar
  • ½ cup ginger ale per serving

Instructions

  • Rinse blackberries and place in a food processor. Process until completely pureed. Add sugar and combine.
  • Pour the blackberry mixture into a fine wire sieve and press it through with back of a wooden spoon to remove all the seeds.
  • To make the drink, place 1 - 1 ½ tablespoon of the blackberry puree in the bottom of a champagne flute and top with ginger ale for a non-alcoholic version. Garnish with a fresh blackberry.

Nutrition

Serving: 1Servings | Calories: 238kcal | Carbohydrates: 57g | Protein: 4g | Fat: 1g | Polyunsaturated Fat: 1g | Sodium: 12mg | Fiber: 15g | Sugar: 44g
Tried this Recipe? Tag me Today!Mention @LifeisaParty or tag #lifeisaparty!
fresh blackberries

Blackberry Sparklers drink ideaWith Blackberries Cocktails to ring in the New Year, life really is a party!

More Great Drink Inspiration

You might also like our Black Cherry Fizz drink here.

Also check out our Peach Sangria recipe here.

You might also enjoy our Apple Cider Martini recipe here.

Raspberry Almond Thumbprint Cookies

Dec 14, 2018 · 1 Comment

raspberry almond thumbprint cookies

Raspberry Almond Thumbprint Cookies: with an almond shortbread base, raspberry jam filling, and a drizzle of almond icing on top these cookies are perfect.

raspberry almond thumbprint cookies
[feast_advanced_jump_to]

It's the final day of our Christmas Cookie Week, and I'm sharing a real favourite of mine.  If you love raspberries and almond, like I do, you will love these Raspberry Almond Thumbprint Cookies.

Raspberry Almond Thumbprint Cookies: with an almond shortbread base, raspberry jam filling, and a drizzle of almond icing on top these cookies are perfect.

These delicious cookies are so good. They have a shortbread base, but it's made a little different with the addition of a little almond extract to the dough. And these have a great texture like classic shortbread cookies.

raspberry almond thumbprint cookie recipes

The teaspoon of jam is baked in these jam thumbprint cookies, and the final drizzle of almond flavoured icing is the perfect finishing touch. You could probably make these little cookies with any flavor of jam, but the raspberry filling makes these my favorite cookies.

How to make almond thumbprint cookies with raspberry jam.
Almond cookies with raspberry jam.

These almond raspberry thumbprint cookies are lovely for Christmas. The red raspberry jam in the center of the cookie looks so perfect this time of year for the holiday season, and the touch of almond extract makes these sweet cookies feel special too.

Raspberry thumbprint cookie recipe.
Raspberry almond thumbprint cookie with almond glaze.

These raspberry almond shortbread thumbprints are the tastiest cookies and are a great addition to any Christmas cookie plate if you're looking for holiday cookies. I hope you love them as much as I do. They'd also be great classic cookies for cookie exchanges.

Recipe

raspberry almond thumbprint cookies

Raspberry Almond Thumbprint Cookies

Almond flavoured cookies filled with raspberry jam, and drizzled with almond icing.
4.50 from 2 votes
Print Pin Rate
Course: Desserts
Cuisine: American
Prep Time: 20 minutes minutes
Cook Time: 15 minutes minutes
Total Time: 35 minutes minutes
Author: Dannyelle Nicolle-Ramjist

Ingredients

  • 1 ¼ cups butter room temperature
  • ⅔ cup sugar
  • ½ teaspoon almond flavor extract
  • 2 cups all purpose flour
  • ½ cup raspberry jam

For the Glaze:

  • ½ cup powdered sugar
  • ¾ teaspoon almond extract
  • 1-2 teaspoon milk

Instructions

  • In the large bowl of a stand mixer with the paddle attachment combine the butter, granulated sugar, and ½ teaspoon almond extract at a high speed until the mixture is light and fluffy.
  • Gradually mix in the flour and combine at a low speed until it forms a dough.
  • Form dough into 1-inch balls and place the small balls on ungreased cookie sheets about 2 inches apart. Use a 1 inch cookie scoop to make the job easier. Use your thumb or small spoon to make a thumbprint indent in the center of each cookie. Fill the indent with sweet raspberry jam, about a ¼ teaspoon jam per cookie.
  • Bake at 350F in a preheated oven for about 15 minutes until lightly golden brown. Cool cookies for about 1 minute on the cookie sheet and remove to a wire rack to cool completely.
  • To make the glaze combine the powdered sugar, almond extracts and milk in a small bowl and mix thoroughly. Drizzle over the cooled cookies and enjoy. Store in an airtight container.

Nutrition

Serving: 1Servings
Tried this Recipe? Tag me Today!Mention @LifeisaParty or tag #lifeisaparty!
Raspberry thumbprint cookie and cup of tea.

With home made Raspberry Almond Thumbprint Cookies, life really is a party!

Christmas Cookie Week

Be sure to check out some of the other cookies for Christmas Cookie Week, including our Brown Sugar Caramel Thumbprint cookies here.

Brown Sugar Shortbread Caramel Thumbprint Cookies: The brown sugar makes the shortbread rich and the oozy, gooey caramel centres are perfect.

And try our Toblerone Shortbread Browned Flour Cookies if you missed it here.

Toblerone Shortbread with Browned Flour -The "Famous Phipps Shortbread" with roasted flour, and Toblerone chocolate bar chunks.

Also, our tried and true Sugar Cookie Recipe here.

Sugar Cookies: Grandma's tested and true recipe will become your go-to recipe for soft and tender cut out sugar cookies you can decorate with icing.

And these easy and delicious Mincemeat Pinwheels.

Mincemeat Pinwheels: This quick and easy recipe uses jarred mincemeat and frozen puff pastry for a delicious addition to any Christmas dessert tray.

Easy Mincemeat Pinwheels with Puff Pastry

Dec 13, 2018 · 2 Comments

Mincemeat pinwheels with puff pastry.

Mincemeat Pinwheels: This quick and easy recipe uses jarred mincemeat and frozen puff pastry for a delicious addition to any Christmas dessert tray.

Mincemeat pinwheels with puff pastry.
[feast_advanced_jump_to]

These are Mincemeat Pinwheels are a family favourite around here.  On top of being really yummy, they are super easy.  So if you don't have time for making homemade mincemeat or pastry from scratch this holiday season, then this is the recipe for you.  It's super quick to make because we use store bought jarred mincemeat and frozen puff pastry.  

These are not your traditional mince pies, but they're so quick and easy, and something a bit different.  They're the perfect way to reinvent an old favorite, with this modern mincemeat pinwheel.  These are the perfect treat for holiday entertaining, a little nibble while you decorate and put up the Christmas trees with family, or to share during a visit, or add to your holiday cookie trays.

Mincemeat Pinwheels: This quick and easy recipe uses jarred mincemeat and frozen puff pastry for a delicious addition to any Christmas dessert tray.

Cookie Week

This is the fourth cookie for our Christmas Cookie Week -but strictly speaking it's not a cookie... not quite a tart either, or a Danish, or a square, we'll call it a Christmas Treat and leave it at that. 😉  It definitely will be a great addition to any cookie tray for the holidays

Mincemeat

Mincemeat is not as common here in Canada where I live, as it is in in the UK.  In fact, lots people don't even know what it is.  

Mincemeat is basically a mixture of chopped dried fruit.  It usually has an apple base with lots of raisins, currants, and citrus peel.  It also includes brandy and spices, and sometimes beef suet.

Originally, mincemeat always contained meat, thus the name, but now a days it doesn't even have to include beef suet. My family and I really like mincemeat, probably because we love any dessert with apples and raisins, and they're the best Christmas flavours. Look for a good quality mincemeat at the grocery store, in the baking aisle around the holidays.  This is also a great recipe to use part of a leftover jar of mincemeat.  Or if you do have your own mincemeat made from scratch it would be delicious in this recipe to.

mincemeat pastries made Into pinwheels with puff pastry

Pastry

Mincemeat tarts traditionally made into little tarts or pies during the festive season.  But this version is much easier than making pastry and forming tart shells.  Rather than making shortcrust pastry from scratch, we choose to use puff pastry instead.  It adds a wonderful crispy crunch which is the best part of these mincemeat pinwheels.  We used store-bought puff pastry for this easy recipe.  Look for the all butter frozen puff pastry in the freezer section of your grocery store.  Follow the directions on the box to defrost the puff pastry sheet.

We've made mini tasty mincemeat pinwheels using frozen puff pastry.  We the roll of puff pastry defrost, and then roll it out and cut it into even small squares.  Next, use a sharp knife to cut diagonal slits from each corner of the square towards the middle, but not all the way through.  Then you can add your tablespoon full of mincemeat into the center of each square.  Finally we fold one corner of each pastry triangle into the center and push them down in the center to hold them in place.  Bake these on a parchment paper lined large baking tray.  Once the puff pastry mincemeat tarts are cool give them a little dusting with icing sugar and enjoy.

easy alternative to mincemeat tarts
frozen puff pastry to make mincemeat pinwheels

These mince pie pinwheels are best eaten the day they are made, while the puff pastry is nice and crisp.  If you do have leftovers store them in an airtight container at room temperature.

how to make a mincemeat pinwheel with frozen puff pastry

If you want the mince meat pinwheels to have more of a golden brown color you can brush them with an egg wash before baking.  Just beat an egg and brush it over the top of the pastry before putting them in the oven and the egg will help the final pinwheels to be a darker golden brown when they're finished baking.

easy mincemeat pastriesI saw these puff pastry mincemeat pinwheels on a British cooking show many years ago, and it's so easy and so tasty, it's become a favourite Christmas recipe of ours.  It's a great way to make a quick version, with all the same great taste of normal nice pies, but none of the hard work.  And it's a great leftover mincemeat recipe to remember.

puff pastry mincemeat tarts

These Mincemeat Pinwheels are so quick to put together, they're literally prepared in minutes.  Keep unused mincemeat in the fridge and ready to use for the next batch.  These are the perfect quick and easy festive treats, and anyone who likes mincemeat will love these easy mincemeat pinwheels.

Recipe

Mincemeat pinwheels with puff pastry.

Mincemeat Pinwheels

Flaky store bought puff pastry filled with mincemeat filling.
No ratings yet
Print Pin Rate
Course: Dessert
Cuisine: British
Prep Time: 5 minutes minutes
Cook Time: 15 minutes minutes
Total Time: 20 minutes minutes
Servings: 9
Calories: 36kcal
Author: Dannyelle Nicolle-Ramjist

Ingredients

  • ½ cup mincemeat
  • 1 sheet frozen all-butter puff pastry thawed
  • 2 tablespoon powdered sugar

Instructions

  • Cut one sheet of thawed all-butter puff pastry into 9 even squares.
  • Add diagonal slits to the corners of each square, taking care not to cut the centre of the square.
  • Put each square of puff pastry onto a parchment paper lined baking sheet. Add about 1 tablespoon of the mincemeat to the center of each square. And fold in one corner of each triangle into the center to the center to form the pinwheel. Press the centre down quite firmly.
  • Bake at 350F for about 10-15 minutes until the pastry begins to turn golden brown. Remove from the oven and cool on a wire rack.
  • Once cool, sprinkle with powdered sugar and enjoy.

Nutrition

Serving: 1Servings | Calories: 36kcal | Carbohydrates: 3g | Fat: 2g | Saturated Fat: 1g | Polyunsaturated Fat: 1g | Cholesterol: 3mg | Sodium: 18mg | Sugar: 2g
Tried this Recipe? Tag me Today!Mention @LifeisaParty or tag #lifeisaparty!
mincemeat pastries for Christmas

With these easy mincemeat pinwheels, life really is a party!

More Christmas Cookie Inspiration

Be sure to check out some of the other cookies for Christmas Cookie Week, including our Brown Sugar Caramel Thumbprint cookies here.

Brown Sugar Shortbread Caramel Thumbprint Cookies: The brown sugar makes the shortbread rich and the oozy, gooey caramel centres are perfect.

And try our Toblerone Shortbread Browned Flour Cookies if you missed it here.

Toblerone Shortbread with Browned Flour -The "Famous Phipps Shortbread" with roasted flour, and Toblerone chocolate bar chunks.

Also, our tried and true Sugar Cookie Recipe here.

Sugar Cookies: Grandma's tested and true recipe will become your go-to recipe for soft and tender cut out sugar cookies you can decorate with icing.

Easy Cut Out Butter Cookies

Dec 12, 2018 · 1 Comment

Cut out butter cookies decorated with pink purple and cream flower buttercream.

These cut out butter cookies are the ones your grandma made for every holiday on the calendar. Tender, buttery, and perfectly melt in your mouth. Dress them up with icing and sprinkles or keep them simple with a dusting of coarse sugar before baking.

Cut out butter cookies decorated with flower buttercream beside a cup of tea
[feast_advanced_jump_to]

A Quick Look at This Recipe

  • 📋 Recipe: Easy Cut Out Butter Cookies
  • ⏲️ Ready In: 55 minutes
  • 👪 Servings: 72 cookies
  • 🔪 Difficulty: Easy
  • 💭 Top Tip: Flatten your dough into a disk before chilling so it rolls out much more easily.

Why You'll Love This Recipe

  • More buttery and tender than a classic sugar cookie thanks to the combination of two sugars.
  • Holds a clean cut edge so your shapes look beautiful straight out of the oven.
  • Simple pantry ingredients you almost certainly already have.
  • Perfect for decorating with icing, royal icing, or coarse colored sugar.
  • A great make ahead cookie. Bake days ahead and decorate when you are ready.

Grandma's Recipe

This is not actually my recipe. It is my grandma's. These were a favourite of hers, then a favourite of my mom's, and now they are a favourite of mine. I have made them hundreds of times for every occasion, Christmas, Easter, Halloween, birthday parties, and tea parties. They are the kind of recipe that just works every single time.

If you love simple elegant cookies you might also love our Vanilla Shortbread Cookies and our Toblerone Shortbread.

Cut out butter cookies decorated with flower buttercream in pink purple and cream on wood table.

What Makes These Butter Cookies Instead of Sugar Cookies?

It comes down to ratios and the type of sugar. Classic sugar cookies use a higher ratio of white granulated sugar to butter, which makes them sweeter and slightly chewier. These cut out butter cookies use a combination of white sugar and powdered sugar, which lets the butter flavor shine through rather than the sweetness.

The white sugar creamed with butter creates tiny air pockets that give the cookie a little lift and a lightly golden edge. The powdered sugar creates a tender, smooth, melt in your mouth crumb. Together they give you a cookie that is more buttery and delicate than a standard sugar cookie but sturdy enough to hold a clean cut edge and stand up to decorating.

Ingredients

Ingredients for cut out butter cookies including flour butter sugar eggs and vanilla.
  • Butter - use room temperature softened butter. It should hold an indent when you press it. This is where all the flavor comes from so use good quality butter.
  • White Sugar and Powdered Sugar - the combination of both is what makes these butter cookies rather than sugar cookies. See the section above for the full explanation.
  • Vanilla Extract - use pure vanilla extract not artificial. You taste the difference in a cookie this simple.

Variations

The base dough takes flavoring beautifully. Try any of these:

  • Almond: Swap the vanilla for ½ teaspoon of almond extract. Classic and delicious.
  • Coarse sugar: Skip the icing entirely and sprinkle with coarse colored sugar before baking. Simple, beautiful, and no decorating required.
  • Chocolate dipped: Dip baked cooled cookies halfway in melted chocolate and let set on parchment.

How To Make Cut Out Butter Cookies

Butter and sugars creamed together in stand mixer bowl for cut out butter cookies
  1. Step 1: Cream the butter and sugars. In a stand mixer fitted with the paddle attachment, combine the butter and both sugars. Beat until light and fluffy. This step is important - proper creaming creates the tender texture that makes these cookies so good. Do not rush it.
Eggs and vanilla added to creamed butter and sugar in stand mixer bowl
  1. Step 2: Add the eggs and vanilla. Add the eggs and vanilla and mix until fully combined.
Cut out butter cookie dough shaped into disk wrapped in plastic wrap for chilling.
  1. Step 3: Add the dry ingredients and chill. Add the flour, baking powder, and salt and mix until the dough just comes together. Do not overmix. Form the dough into a flat disk rather than a ball - this makes it much easier to roll out after chilling. Wrap tightly in plastic wrap and refrigerate for at least 30 minutes.
Cut out butter cookie dough cut into rounds with a scalloped cookie cutter.
  1. Step 4: Roll and cut. On a lightly floured surface roll the dough out to about ¼ inch thick for soft cookies or ⅛ inch thick for crispier cookies. Cut into shapes with your favorite cookie cutters. For less spreading, place the cut cookies on the baking sheet and refrigerate for 15 minutes before baking. This firms the butter back up after the warmth of rolling and cutting. Some spreading is completely normal and gives these cookies their homemade charm.
Baked cut out butter cookies cooling on wire rack overhead.
  1. Step 5: Bake. Bake on an ungreased cookie sheet at 350°F for 8 to 10 minutes until the cookies are slightly puffed and the very edges are just beginning to turn light golden. Do not overbake. They firm up as they cool.
Close up of cut out butter cookies decorated with pink and purple flower buttercream.
  1. Step 6: Cool and decorate. Cool completely on a wire rack before decorating. Ice with your favorite icing, royal icing, or a simple powdered sugar glaze and sprinkles.

Soft vs Crispy Cut Out Butter Cookies

The thickness of your dough controls the texture more than the recipe does.

For soft cookies roll the dough to ¼ inch thick and pull them from the oven as soon as the edges are just barely golden. They will look slightly underdone in the center and that is correct.

For crispy cookies roll the dough thinner, closer to ⅛ inch, and bake until fully golden brown.

How to Decorate Cut Out Butter Cookies

These cookies are a perfect canvas for decorating. A few options depending on how much time you have:

  • Coarse colored sugar before baking - the easiest option. Sprinkle on before they go in the oven. No icing required.
  • Simple powdered sugar glaze - mix powdered sugar with a little milk and food coloring. Spread over cooled cookies with a knife or the back of a spoon.
  • Royal icing - for more detailed decorating. Pipe an outline first then flood with thinned icing. This is the most beautiful finish but also the most time consuming.
  • Buttercream - a simple swirl of buttercream is lovely for a more casual look. This is the simple buttercream icing we used on our flower cookies and it was perfect. Simple Buttercream Icing - Allrecipes

Cut Out Butter Cookies for a Tea Party

These cookies are absolutely at home on a tea party table. Use a flower shaped cookie cutter and decorate with pale pink or lavender icing for the prettiest result. They look beautiful on a tiered tray alongside scones and finger sandwiches.

They also make the sweetest little party favor. Pack two or three into a cellophane bag, tie with a ribbon, and tuck in a tea bag. Your guests will love them.

We served these at our Little Women vintage tea party alongside easy food processor scones and they were a highlight of the table.

Storage

Store baked cookies in an airtight container at room temperature with sheets of parchment or wax paper between layers for up to 2 weeks. Iced cookies keep the same way.

Freeze baked cookies for up to 3 months. Freeze uniced cookies with parchment between layers. Thaw at room temperature before decorating.

Unbaked dough keeps in the fridge for 2 to 3 days wrapped tightly. Freeze dough for up to 3 months. Thaw overnight in the fridge before rolling.

Cookie Decorating Station

These are the perfect cookie for a decorating activity at a party. Bake the cookies ahead of time and set up a table with small plates of cookies, bowls of different colored icing, and sprinkles in the middle. A squeeze bottle works beautifully for younger decorators since the icing stays controlled. For adults this is such a fun activity at a bridal shower, birthday, or tea party.
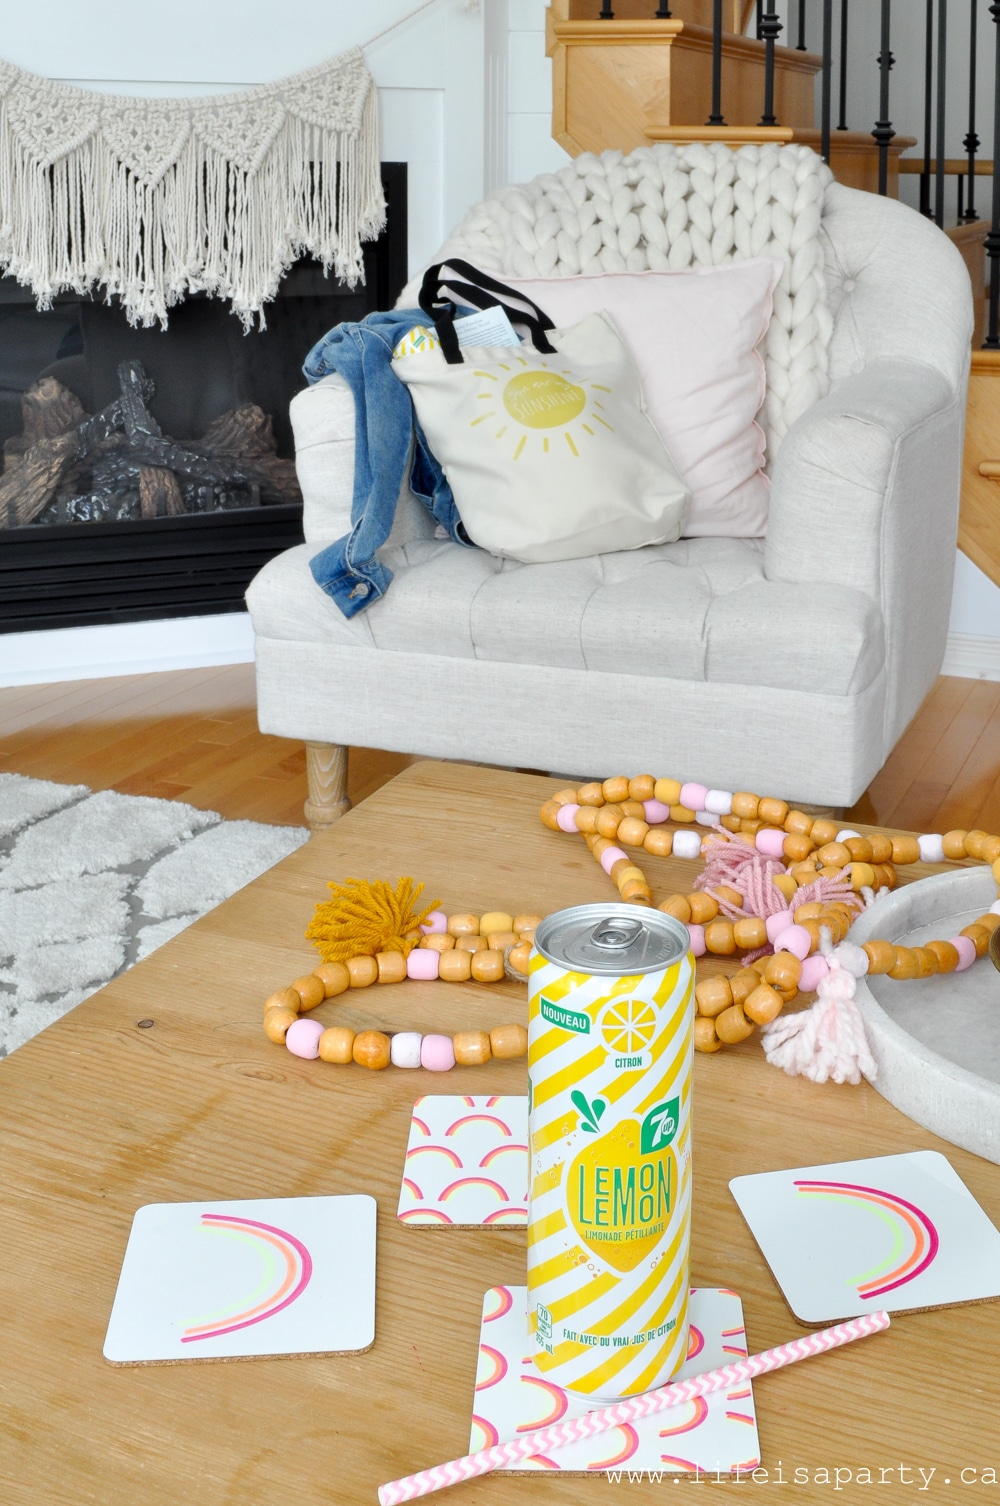
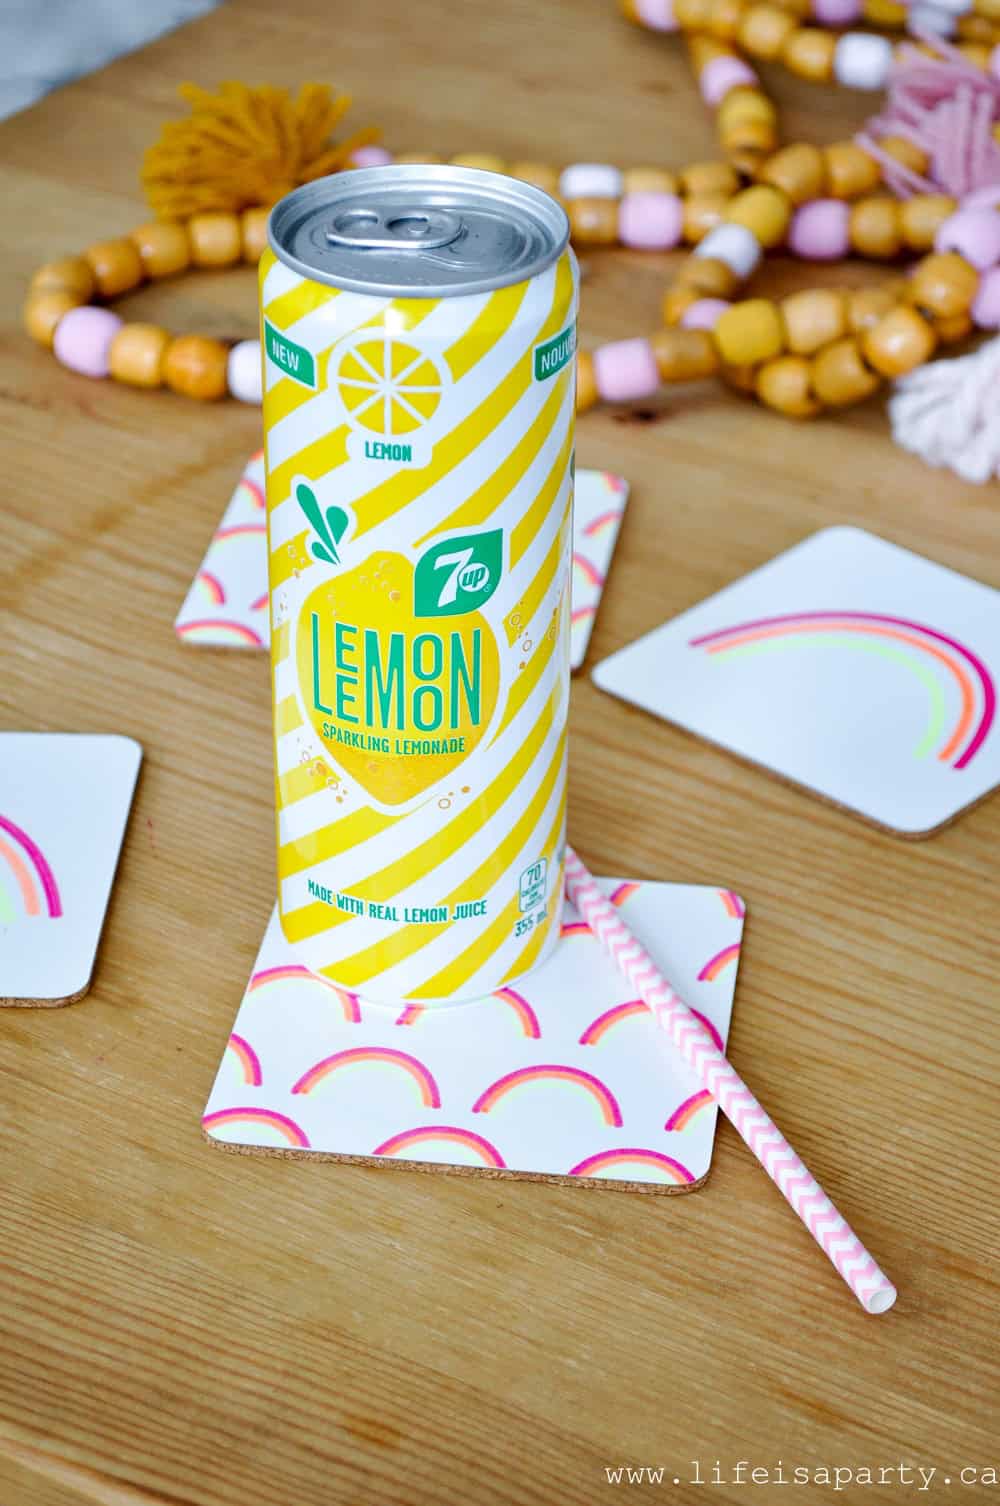
Expert Tips

  • Measure your flour carefully. Spoon it into the measuring cup and level off with the back of a knife. Too much flour makes tough cookies.
  • Go easy on the flour when rolling out the dough. Too much on your work surface gets worked into the dough when you reroll the scraps and makes them crumbly and tough.
  • Chill the dough before rolling out for the best results. And flatten it into a disk first so it is much easier to roll.
  • Soft room temperature butter is essential. It creams properly and creates that tender texture. Cold butter will not incorporate the same way.
  • Do not overwork the dough. Stop mixing as soon as it comes together, especially in a stand mixer, or the cookies will be less tender.
  • Use real vanilla extract not artificial. You taste the difference in a cookie this simple.
  • Freeze half the dough if you do not need a full batch of 72 cookies. It keeps for up to 3 months.
  • Make and freeze these fully iced ahead of a big party so you are not scrambling at the last minute. They freeze beautifully and taste just as good thawed

Frequently Asked Questions

What is the difference between butter cookies and sugar cookies?

Butter cookies have a higher ratio of butter to sugar and often use powdered sugar, which lets the butter flavor come through and creates a more tender melt in your mouth texture. Sugar cookies use more white granulated sugar which makes them sweeter and slightly chewier. These cut out butter cookies use both sugars for the best of both worlds.

Why do my cut out butter cookies spread in the oven?

Some spreading is completely normal and expected with butter cookies. For less spreading make sure your butter is properly softened but not melted, and refrigerate the cut cookies on the baking sheet for 15 minutes before baking to firm the butter back up.

Do I have to chill the dough?

Chilling is recommended but if you are in a hurry you can skip it. The dough will be a little softer and stickier to work with and the cookies may spread slightly more. At minimum flatten the dough into a disk before chilling so it rolls out much more easily.

How do I get clean edges on cut out cookies?

Make sure your dough is cold, your cookie cutters are sharp, and press straight down without twisting. Dip the cutter in flour if the dough is sticking.

How long do cut out butter cookies keep?

Store in an airtight container at room temperature for up to 2 weeks. Freeze for up to 3 months.

Can I make the dough ahead of time?

Yes. The dough keeps in the fridge for 2 to 3 days or in the freezer for up to 3 months. Thaw overnight in the fridge before rolling out.

More Ideas You Might Like

  • Tea party table set for an adult tea party.
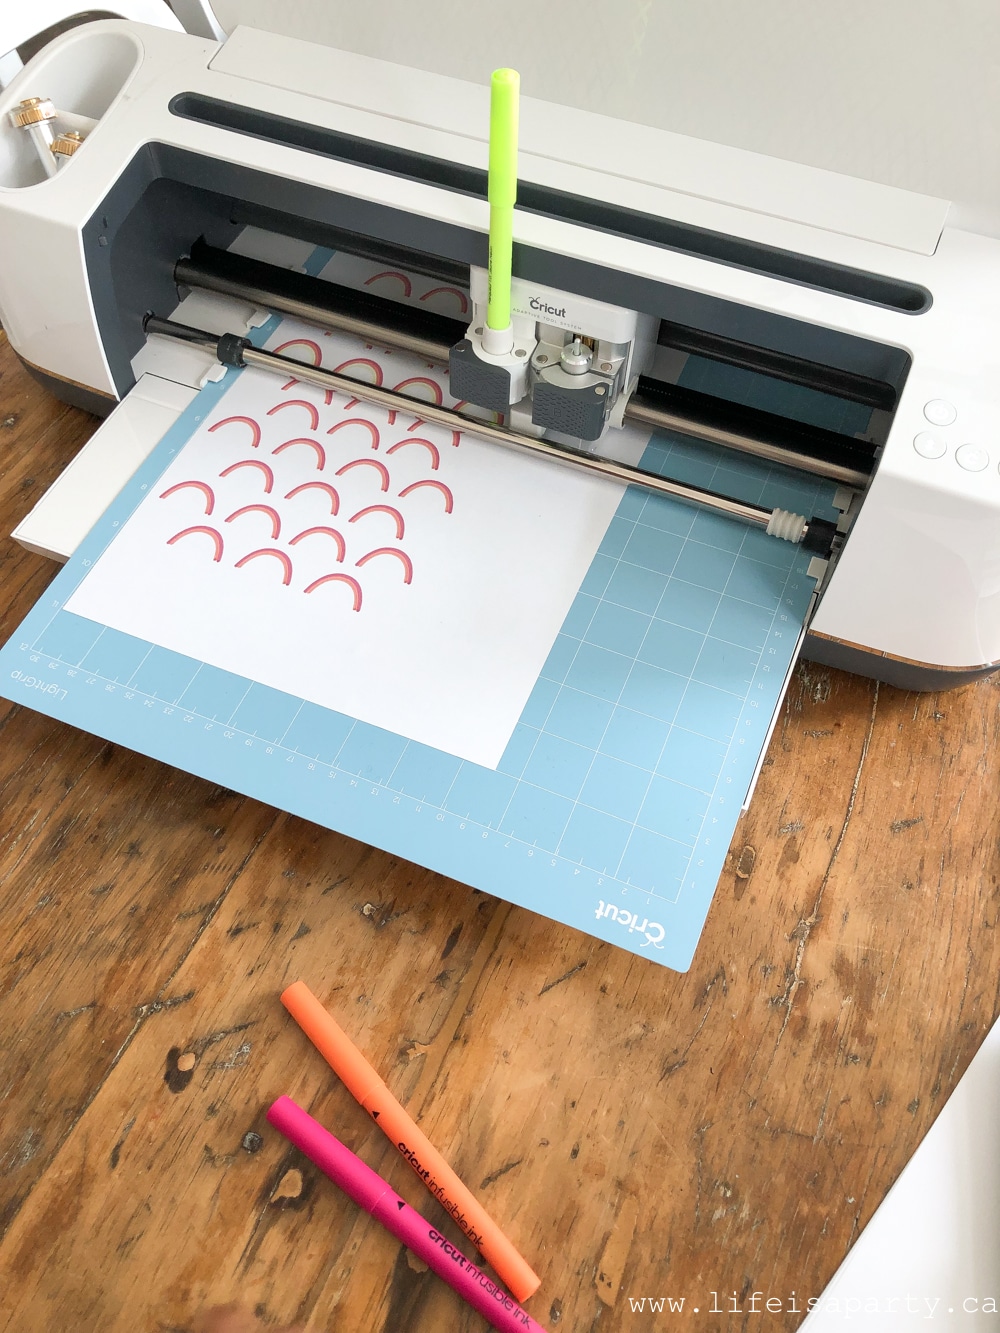
    Tea Party Food: The Complete Guide to Sandwiches, Scones and Sweets
  • Green gingham tablecloth with vintage teacups, candelabra, tulips and daffodils set for a Little Women party.
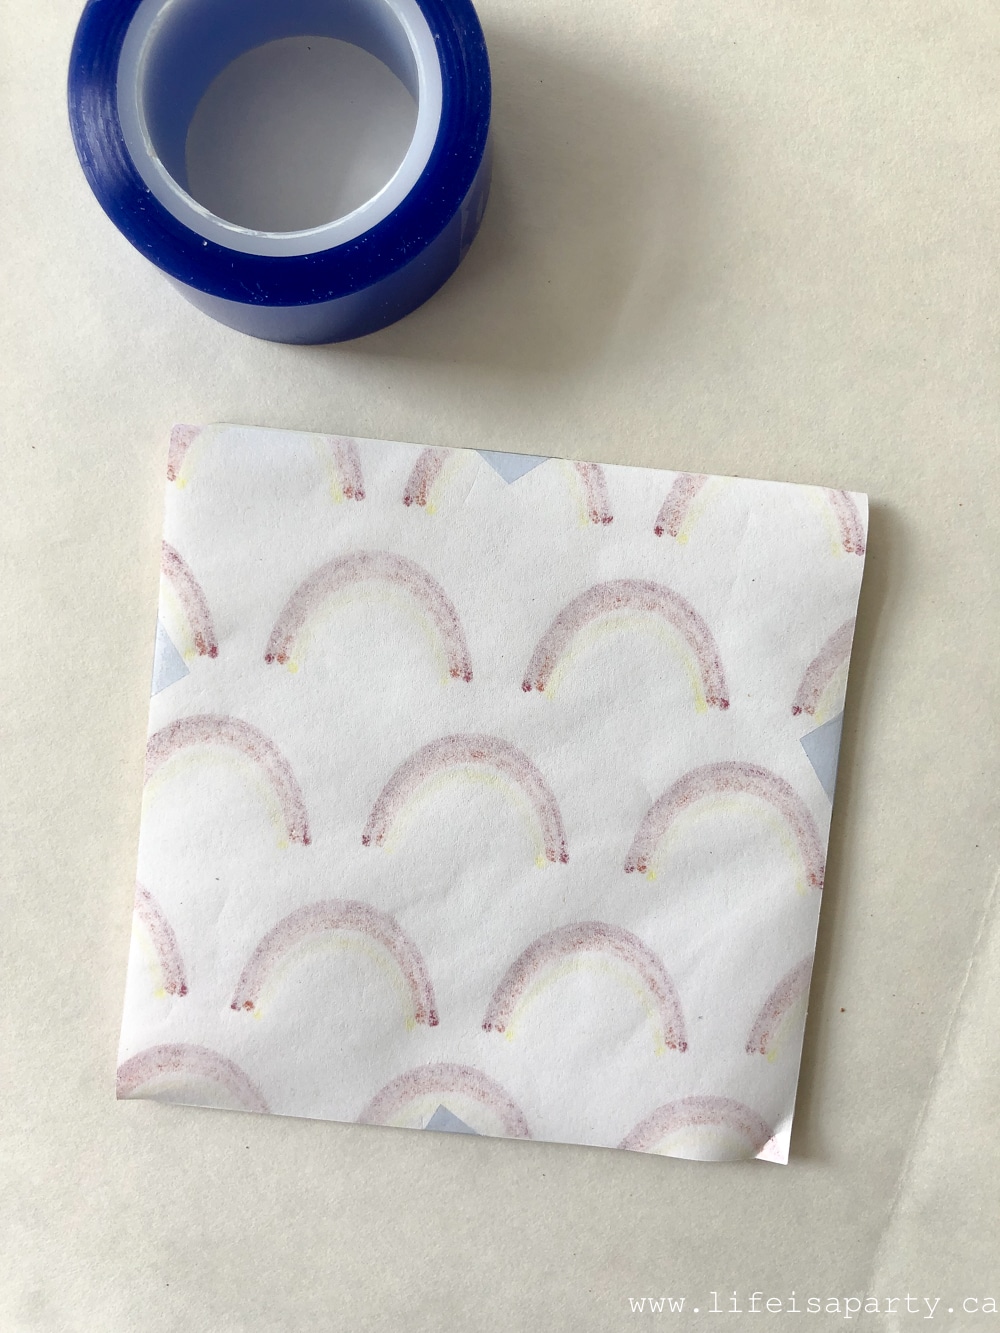
    Little Women Party: A March Sisters Vintage Tea Party
  • Winter tea party with snowflake decor and menu.
    Winter Tea Party: Snowflake Theme Decor and Menu
  • Tea party table set for an adult tea party.
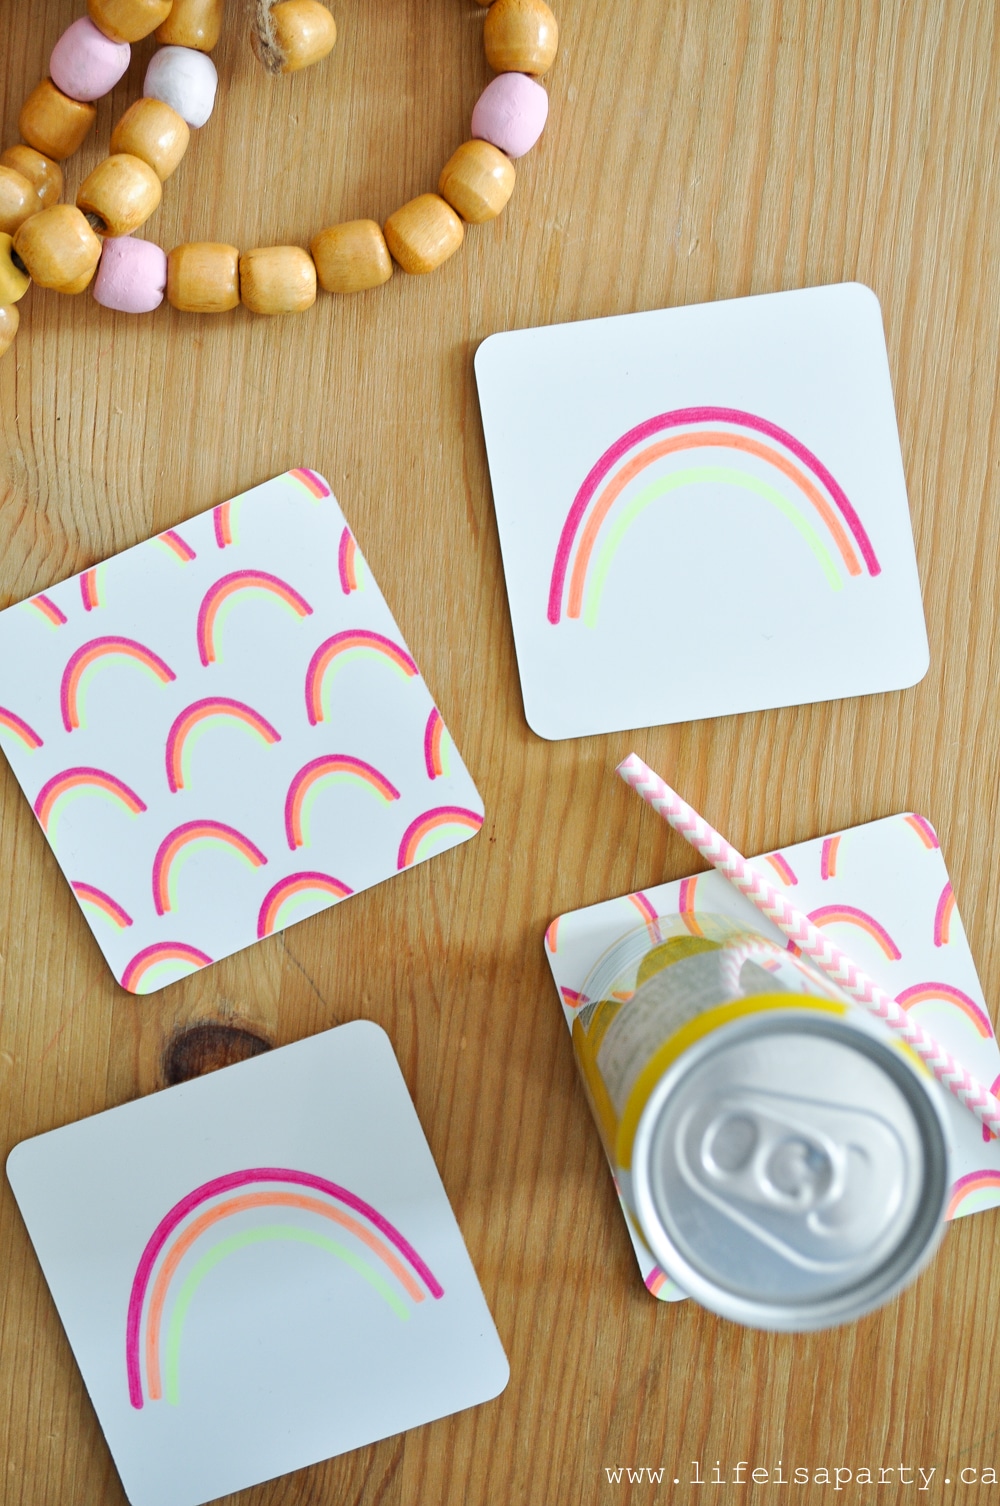
    How To Throw An Afternoon Tea Party For Adults

If you try these Easy Cut Out Butter Cookies or any other recipe on my blog please leave a star rating and let me know how it went in the comments below. Thanks for visiting today!

Cut out butter cookies with pink lavender and cream flower buttercream decorating overhead.

Recipe

Cut out butter cookies decorated with pink purple and cream flower buttercream.

Easy Cut Out Butter Cookies

Video

These easy cut out butter cookies are tender, buttery and perfectly melt in your mouth. Made with a combination of white sugar and powdered sugar for the best texture, they hold a clean cut edge and are perfect for decorating.
5 from 1 vote
Print Pin Rate
Course: Dessert
Cuisine: American
Prep Time: 15 minutes minutes
Cook Time: 10 minutes minutes
30 minutes minutes
Total Time: 55 minutes minutes
Servings: 72
Calories: 91kcal
Author: Dannyelle Nicolle-Ramjist

Ingredients

  • 1 cup butter room temperature
  • 1 cup powdered sugar
  • 1 cup white sugar
  • 2 eggs
  • 1 ½ teaspoon vanilla extract
  • 3 cups all purpose flour
  • 3 teaspoon baking powder
  • ½ teaspoon salt

Instructions

  • In a stand mixer fitted with the paddle attachment combine the butter and both sugars. Beat until light and fluffy.
    1 cup butter, 1 cup powdered sugar, 1 cup white sugar
  • Add the eggs and vanilla and mix until fully combined.
    2 eggs, 1 ½ tsp vanilla extract
  • Add the flour, baking powder, and salt and mix until the dough just comes together. Do not overmix. Form into a flat disk, wrap in plastic wrap and refrigerate for at least 30 minutes.
    3 cups all purpose flour, 3 tsp baking powder, ½ tsp salt
  • On a lightly floured surface roll the dough out to ¼ inch thick for soft cookies or ⅛ inch thick for crispier cookies. Cut into shapes with cookie cutters. For less spreading refrigerate cut cookies on the baking sheet for 15 minutes before baking.
  • Bake on an ungreased cookie sheet at 350°F for 8 to 10 minutes until just beginning to turn golden at the edges.
  • Cool completely on a wire rack before decorating.

Notes

  • Some spreading is completely normal with butter cookies. For the least spreading refrigerate the cut cookies on the baking sheet for 15 minutes before baking.
  • Store in an airtight container at room temperature for up to 2 weeks with parchment paper between layers.
  • Freeze for up to 3 months.

Nutrition

Serving: 1Servings | Calories: 91kcal | Carbohydrates: 13g | Protein: 1g | Fat: 4g | Saturated Fat: 3g | Polyunsaturated Fat: 1g | Cholesterol: 18mg | Sodium: 88mg | Sugar: 6g
Tried this Recipe? Tag me Today!Mention @LifeisaParty or tag #lifeisaparty!

Toblerone Shortbread with Browned Flour

Dec 11, 2018 · 12 Comments

Toblerone shortbread with browned flour.

Toblerone Shortbread with Browned Flour Toblerone Shortbread Cookies with Browned Flour -The "Famous Phipps Shortbread" with roasted flour, and Toblerone chocolate bar chunks.

Toblerone shortbread with browned flour.
[feast_advanced_jump_to]

These Toblerone Shortbread with Browned Flour Cookies are a favourite of ours.  I'm sure you will love these too, if you're a fan of shortbread, and of Toblerone chocolate bars.

Toblerone Shortbread Cookies on a marble tray with twinkle lights in the background.

This is the second cookie for our Christmas Cookie Week here at Life is a Party.  Be sure to check out all the amazing cookies from the week:
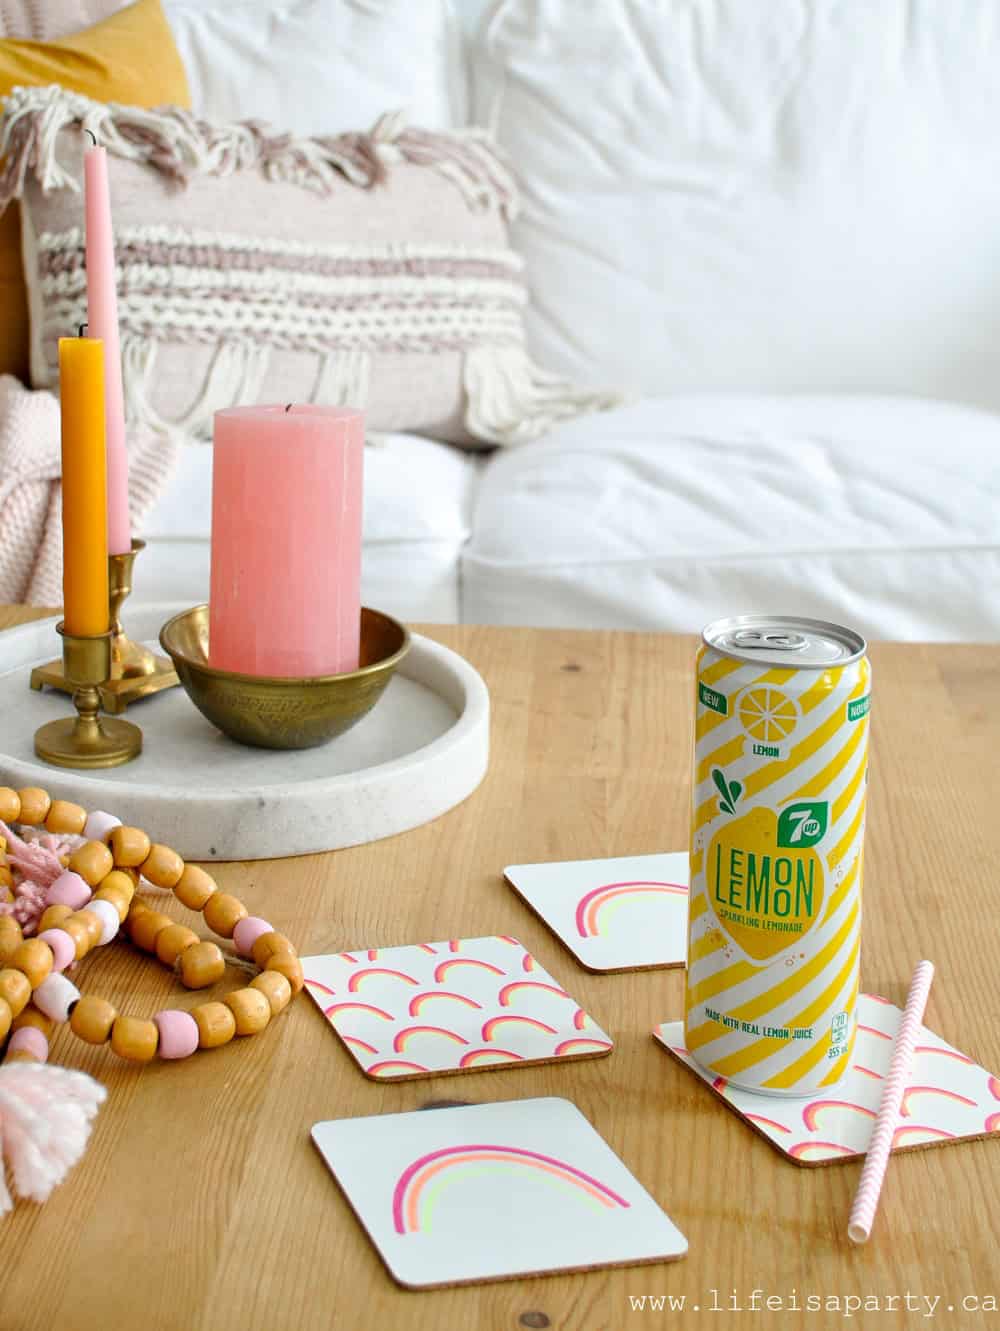
  • Brown Sugar Shortbread Caramel Thumbprints
  • Raspberry Almond Thumbprint Cookies
  • Sugar Cookies
  • Mincemeat Pinwheels
Christmas Cookie Week image of cookies

The first time I had these Toblerone shortbread cookies with browned flour was at church years ago.  A sweet lady brought them for a Christmas potluck, and they were so good.  I asked her for the recipe, and have since made them many times.  They have become a long time family favourite.

Toblerone Shortbread Cookies on a cutting board, with Christmas ornaments in the background

She said the original version of these beautiful cookies were from a well known bakery and called "Phipps Famous Shortbread" and that the recipe had been shared in the newspaper years ago.  She had cut it out and been making it ever since.

top down picture of Toblerone Shortbread and twinkle lights

Browned Flour

Before making the cookies, the flour is browned in the oven before it's added to the cookie dough.  Therefore it adds an amazing texture and nutty flavour to the cookies.  And the Toblerone, is the most delicious Swiss chocolate.  These will be a favourite as soon as you try them.

Why Brown The Flour?

Browned flour adds a nutty flavor.  It's more complex and adds depth to the dishes it's used in.  Toasted flour adds a soft silky texture to baked goods.  It also changes the color of flour, and therefore the baked goods.  Browned flour has a caramel brown color to it, and adds a brown color to the finished baked goods.  It's a relatively simple step and process, but it can add so much to a recipe.  

Is Brown Flour and Browned Flour The Same?

Brown flour is wheat flour.  It usually contains 85% whole wheat grains in it. Including part of the germ and bran gives brown flour it's color, and a slightly different taste than white flour.  

Browned flour or toasted flour is white flour that has been browned in a skillet or in the oven to toast it, and give it a caramelized brown color.

How Do You Brown Flour?

In our recipe we brown our flour in the oven, on a baking tray, using broil.  Flour can burn easily, so you have to watch it closely, and turn it often to make sure all the flour is browned.  You can also brown flour on the stove in a cast iron skillet in a dry pan over a medium heat, stirring it constantly and watching it closely so that it doesn't burn.

?You want to achieve an overall toasted medium brown color to the flour.  The darker the color, the more deep and nutty the flavor will be, but you don't want it so dark brown that it tastes burnt.

Toblerone

We used toblerone chocolate in our cookies.  Toblerone is a Swiss made chocolate with honey and almond nugget inside.  The Swiss are known for their quality chocolate.  Using Toblerone chocolate in these cookies is such a yummy addition. You can use regular Toblerone, or mini Toblerone bars in this recipe. If you don't have Toblerone though, you can substitute any chocolate you like, or chocolate chips.  If you prefer dark chocolate you can use it, or milk chocolate or semi-sweet chocolate depending on your personal preference.

cookie close up with a bite out of it and twinkle lights in the background

I hope you will try these amazing shortbread cookies with chunks of Toblerone and that they'll become a family favourite of yours too.  They're our favourite cookie especially during the holiday season.  Christmas eve these are the perfect delicious cookies to leave out for Santa.

Recipe

Toblerone shortbread with browned flour.

Toblerone Shortbread with Browned Flour

Crisp shortbread with Toblerone chunks.
4.60 from 10 votes
Print Pin Rate
Course: Desserts
Cuisine: American
Prep Time: 20 minutes minutes
Cook Time: 1 hour hour
Total Time: 1 hour hour 20 minutes minutes
Servings: 48
Calories: 156kcal
Author: Dannyelle Nicolle-Ramjist

Ingredients

  • 2 ½ cups all purpose flour
  • 2 cups butter softened
  • 1 cup fruit sugar
  • 1 cup rice flour
  • 1 lb Toblerone Chocolate

Instructions

  • To brown the all purpose flour, spread it evenly on an ungreased baking sheet and put it in the oven about 4-5 inches from the top, on broil. Watch it at all times, so it doesn't burn but is browned. Turn the flour with a spatula several times to brown it on all sides. Let cool, and then sift into a large bowl.
  • In the bowl of a stand mixer combine the room temperature butter and fruit sugar and beat until fluffy.
  • Add in the sifted browned flour, and rice flour to the butter mixture and combine until the dough comes together. Stopping to scrape down the sides of the bowl a few times, and taking care not to over mix the dough.
  • Chop the pieces of Toblerone candy bar into large chunks about the size of a sugar cube, and mix the chopped Toblerone into the cookie dough, until it's evenly distributed.
  • Spoon tablespoons of batter onto a cookie sheet and bake at 300F for 50-60 minutes. Cool cookies on a wire rack, and store in an airtight container.

Nutrition

Serving: 1Servings | Calories: 156kcal | Carbohydrates: 14g | Protein: 2g | Fat: 11g | Saturated Fat: 7g | Polyunsaturated Fat: 3g | Cholesterol: 22mg | Sodium: 66mg | Fiber: 1g | Sugar: 6g
Tried this Recipe? Tag me Today!Mention @LifeisaParty or tag #lifeisaparty!

Toblerone Shortbread with Browned Flour close up.With Toblerone Shortbread Cookies with Browned Flour, life really is a party!

Brown Sugar Shortbread Caramel Thumbprint Cookies

Dec 10, 2018 · Leave a Comment

Brown sugar shortbread caramel thumbprint cookies.

Brown Sugar Shortbread Caramel Thumbprint Cookies: brown sugar makes the shortbread extra rich with a soft caramel centre.

Brown sugar shortbread caramel thumbprint cookies.

These brown sugar shortbread cookies, are lovely and rich and crisp, buttery treat.  Adding homemade caramel sauce to the centre takes these cookies to the next level.  The perfect addition to your Christmas Cookie collection and sure to become a favorite. They're so delicious with a cup of coffee any time of year.   

I'm so excited to begin our Christmas Cookie Week, with today's cookie recipe.  I'll be sharing a different favourite cookie recipe everyday this week.

Brown Sugar vs. White Sugar Shortbread

The brown sugar adds an amazing depth of flavor that makes it even better than your average shortbread cookie recipe.  The brown sugar contains some molasses, and adds a real depth of flavor to this shortbread.  This easy brown sugar shortbread gets even better with the addition of homemade caramel centers.  Next time you're wanting a shortbread cookie, give this brown sugar shortbread cookie dough a try.

Christmas Cookie Week recipes

We love Christmas cookies.  I have such happy memories of my Grandma and her Christmas cookies.  In the days before stand mixers, dishwashers, and convection ovens she'd bake Christmas cookies for a week.  Through the Christmas season she'd always have a holiday cookie tray to offer us when we visited her.  This brown sugar shortbread cookie recipe is perfect for Christmas time and the addition of the homemade caramel center makes it extra special.

Brown sugar shortbread cookies with caramel.

This brown sugar shortbread recipe is so delicious.  The brown sugar adds a richness to the shortbread base, and the caramel stays perfectly oozy and soft.  This addition of brown sugar and caramel makes this one of these most delicious recipes, and perfect to try for the holidays.  If you love traditional Scottish shortbread, you'll love this amped up version.

Traditional shortbread is one of the easiest cookies to make.  These ones have the added step of the caramel, but it's so worth the extra effort.  The brown sugar shortbread cookies recipe itself is simple to make.  No rolling pin, cookie cutters, or cookie stamp required.  For this recipe just make easy dough balls, and bake cookies.

How to make brown sugar shortbread caramel thumbprints.
How to fill brown sugar shortbread cookies with caramel.

We've sprinkled our cookies with a little edible glitter to dress them up for  Christmas, because at Christmas everyone needs a little sparkle. 😉

Store these cookies in an airtight container, with parchment paper separating them, so that they don't stick together

Brown sugar shortbread.

Tips For Great Shortbread

Make sure you start with room temperature butter, that isn't cold.  Creaming the butter and sugar together very well is very important, and you must have room temperature butter to do it well.  You also don't want the butter to be melted, again it won't cream probably.  Room temperature is much better than trying to soften it in the microwave because you run the risk of it melting.

The biggest tip for making wonderful shortbread is to not overmix the dough.  Over mixing the dough can result in a tough cookie.  You want to cream the butter and sugar very well, and there is no danger of overdoing it at the creaming stage.  As soon as you add the flour to the butter mixture, it becomes dough, and at that point you have to be cautious about how much you mix it.  Mix it well, until it's fully combined, but as soon as the dough is well combined, and it's fully come together, then stop mixing it.

These cookies are just the first we'll be sharing with you for Christmas Cookie Week.  They make such a great addition to a holiday cookie plate or buffet. 😉

Cookie Week

More Ideas

These cookies are especially perfect for the caramel lover.  And if you have a chocolate lover too, these would be great with a  drizzle of melted chocolate over them also.  White chocolate would also be great too.

Another great option is to add a sprinkle of salt for the salted caramel option.

Caramel thumbprint cookies.

Recipe

Brown sugar shortbread caramel thumbprint cookies.

Brown Sugar Shortbread Caramel Thumbprint Cookies

This shortbread uses brown sugar instead of white with a caramel filling.
No ratings yet
Print Pin Rate
Course: Dessert
Cuisine: American
Prep Time: 20 minutes minutes
Cook Time: 30 minutes minutes
Total Time: 50 minutes minutes
Servings: 4 Dozen
Calories: 159kcal
Author: Dannyelle Nicolle-Ramjist

Ingredients

Dough

  • 2 cups butter softened
  • 1 ½ cups dark brown sugar packed
  • 1 teaspoon vanilla
  • 4 cups all purpose flour

Caramel Filling

  • ¾ cup sugar
  • ⅓ cup corn syrup
  • ⅓ cup whipping cream 35%
  • 3 tablespoon butter
  • 1 ½ teaspoon vanilla
  • ¾ teaspoon salt

Instructions

For the Dough:

  • In a stand mixer with the paddle attachment, or in a large bowl with a electric mixer, combine the butter, sugar, and vanilla extract until fluffy and light.
  • Add in flour, and combine until the dough comes together. Take care not to over mix.
  • Roll 1 tablespoon of cookie dough into a ball, and use a spoon handle or your thumb to create the thumbprint in the centre of each cookie. Bake on a baking sheet at 350F for 12-14 minutes until the edges of the cookies are golden brown. Allow to cool on a wire rack before filling..

Caramel Filling

  • In a pan combine sugar and corn syrup. Bring to a boil over medium-high heat without stirring. Use a pastry brush dipped in cold water to brush down the sides of the pan with cold water to help prevent crystallization. Boil 4 to5 minutes until the caramel is dark amber.
  • Remove from the heat and add the whipping cream, butter, vanilla and salt. The caramel will bubble, so take care with this step. Next, return the pan to a medium-high heat and cook while stirring until the caramel thickens slightly. Let cool for 5 minutes. (If the caramel becomes to cool and stiff to work with reheat.)
  • Spoon the warm caramel into the cookies. Let set at least 5 minutes. Optional, sprinkle the cookies with edible glitter

Nutrition

Serving: 1Servings | Calories: 159kcal | Carbohydrates: 19g | Protein: 1g | Fat: 9g | Saturated Fat: 6g | Polyunsaturated Fat: 3g | Cholesterol: 24mg | Sodium: 107mg | Sugar: 11g
Tried this Recipe? Tag me Today!Mention @LifeisaParty or tag #lifeisaparty!

More Cookie Inspiration

Check out the rest of our Christmas Cookie Week Cookies:

Toblerone Shortbread with Browned Flour

Toblerone Shortbread with Browned Flour -The "Famous Phipps Shortbread" with roasted flour, and Toblerone chocolate bar chunks.

Raspberry Almond Thumbprint Cookies

Sugar Cookies

Sugar Cookies: Grandma's tested and true recipe will become your go-to recipe for soft and tender cut out sugar cookies you can decorate with icing.

And our Mincemeat Pinwheels.

Mincemeat Pinwheels: This quick and easy recipe uses jarred mincemeat and frozen puff pastry for a delicious addition to any Christmas dessert tray.

Scandinavian Christmas Decor Home Tour -Part II

Dec 6, 2018 · 18 Comments

Scandi influenced Christmas decor ideas.

Scandinavian Christmas Decor Home Tour 2018 -Part II: Rustic Scandi design, with lots of white and natural elements and some vintage Xmas pieces too.

Scandi influenced Christmas decor ideas.
[feast_advanced_jump_to]

I'm so excited you're here!  Today I'm going to be sharing my living room, kitchen, study and bedroom all decorated with Rustic Scandinavian Christmas decor.
Scandinavian Christmas decor Home TourI shared the front porch, the mudroom, the dining room and our basement family room the other day, you can catch up with my Christmas Home Tour Part I here.

I love rustic Scandinavian Christmas decor, with lots of white, and natural elements like pine, birch, and pine cones.  I've enjoyed adding some fun vintage pieces in to this year.  I hope you enjoy.

Scandinavian Christmas Decor in the Living Room

Let's start in the living room all dressed up for Christmas.  I made the garland on the stairs with some pine I collected in the woods.  It does dry out fairly quickly, but there's nothing nicer than fresh pine at Christmas, worth cleaning up a few needles, or even a lot of needles. 😉

Scandinavian inspired Christmas decor

I've kept the tree really simple this year, and I really love it.

Scandinavian inspired Christmas decor treeI picked up some amazing yarn that comes already knit into a chain.  It would be great for a chunky knit blanket, but it also makes a gorgeous garland.  I love how simple and warm and fuzzy it is.

Scandinavian Christmas tree

The tree is decorated with some pretty white paper ornaments and a white glass balls in clear  -that's it and I love how simple it is.

Scandinavian Christmas tree

Inspired by the paper ornaments, I added a few paper balls to the bottom of the tree too on some sheep skin rugs.  The tree is in a  vintage galvanized tub.

Scandinavian Christmas decor living roomOn the top of the tree we've hung a paper star, and attached it to the ceiling which worked perfectly.

rustic Scandinavian inspired Christmas decorThe yarn garland inspired the warm white cozy theme for the rest of the room.  The couch is already for a Hallmark movie marathon. 😉

Rustic Scandi Christmas decorOn the table are the candle holders I made with the fair isle pattern, inspired by cozy sweaters.  The little lights are like mini snow globes with little white bottle brush trees in them.

Rustic Scandi ChristmasFireplace

Over on the other side of the room, is the fireplace.

Scandinavian inspired Christmas mantelThe fireplace is really simple, and cozy too.

neutral Scandi Christmas mantelI hung the stockings on a birch pole.  And added some fun stocking tassels for a little more texture.

neutral Scandi Christmas stockingsAnd at the bottom of the stairs a few more cute decorations.

Scandinavian Christmas decorI was inspired by a little light at Ikea with a hedgehog reading a book under a mushroom.  I created my own version and it couldn't be cuter.

neutral Christmas decorOn the wall above the table some little house shelves, dressed up with some simple bottle brush trees for Christmas.

neutral Christmas decor ideasAnd here my favourite seat in the house.

Scandinavian inspired Christmas tree
Neutral Rustic Scandi Christmas

My helper doing what he does best, keeping me company.  I think he's realized now that posing leads to dog treats, and he's becoming a very willing model. 😉

Rustic Scandinavian Christmas decor

Rustic Scandinavian Christmas Decor in the Kitchen

Over in the kitchen, things are pretty simple too.  Lots more white and a little bit of vintage added in.

Christmas kitchenOn the table a favourite of mine, an old wooden dough bowl full of vintage ornaments.

vintage Christmas balls in a wood bowlAnd the sweetest little gingerbread village that my girls made -you find the gingerbread recipe here.

mini gingerbread housesAnd also on the table are the sweetest little pine cone lights I picked up at Dollarama -love them.

pinecone twinkle lights miniI set up a little hot chocolate station here for cold days.

Christmas hot chocolate station buffetThis is a favourite spot of mine this year.  The beautiful print is an engineering print, the most inexpensive way to make a large poster, and I mounted it on some wood I had cut at the hardware store.

Christmas hot chocolate stationChristmas hot chocolate station barAnd over on the other side the shelves got a few special vintage pieces.

Christmas Home Tour kitchenkitchen Christmas Home Tour We love making Christmas cookies.  In fact next week we have a whole week of Christmas cookies to share with you, with a new recipe everyday, so be sure to come back and check it out starting Monday.

rustic Scandinavian Christmas decor open shelvesThese open shelves are a so fun to decorate for each season.  And I love my growing collection of vintage Christmas pieces.

Christmas open shelves kitchen
Christmas Home Tour open kitchen shelves
Christmas shelfie

Over on the other side, I'm in love with my new little deer teacups.

open kitchen shelves Christmas
Christmas kitchen decor

Over the sink I've replaced my usual succulents with some Christmas greens.

Scandinavian Christmas decor

Rustic Scandi Christmas tourAnd now let's go upstairs for a look.

Rustic Scandinavian Christmas Home TourThe Study

I recently re-did my study and now it's a very seldom empty.
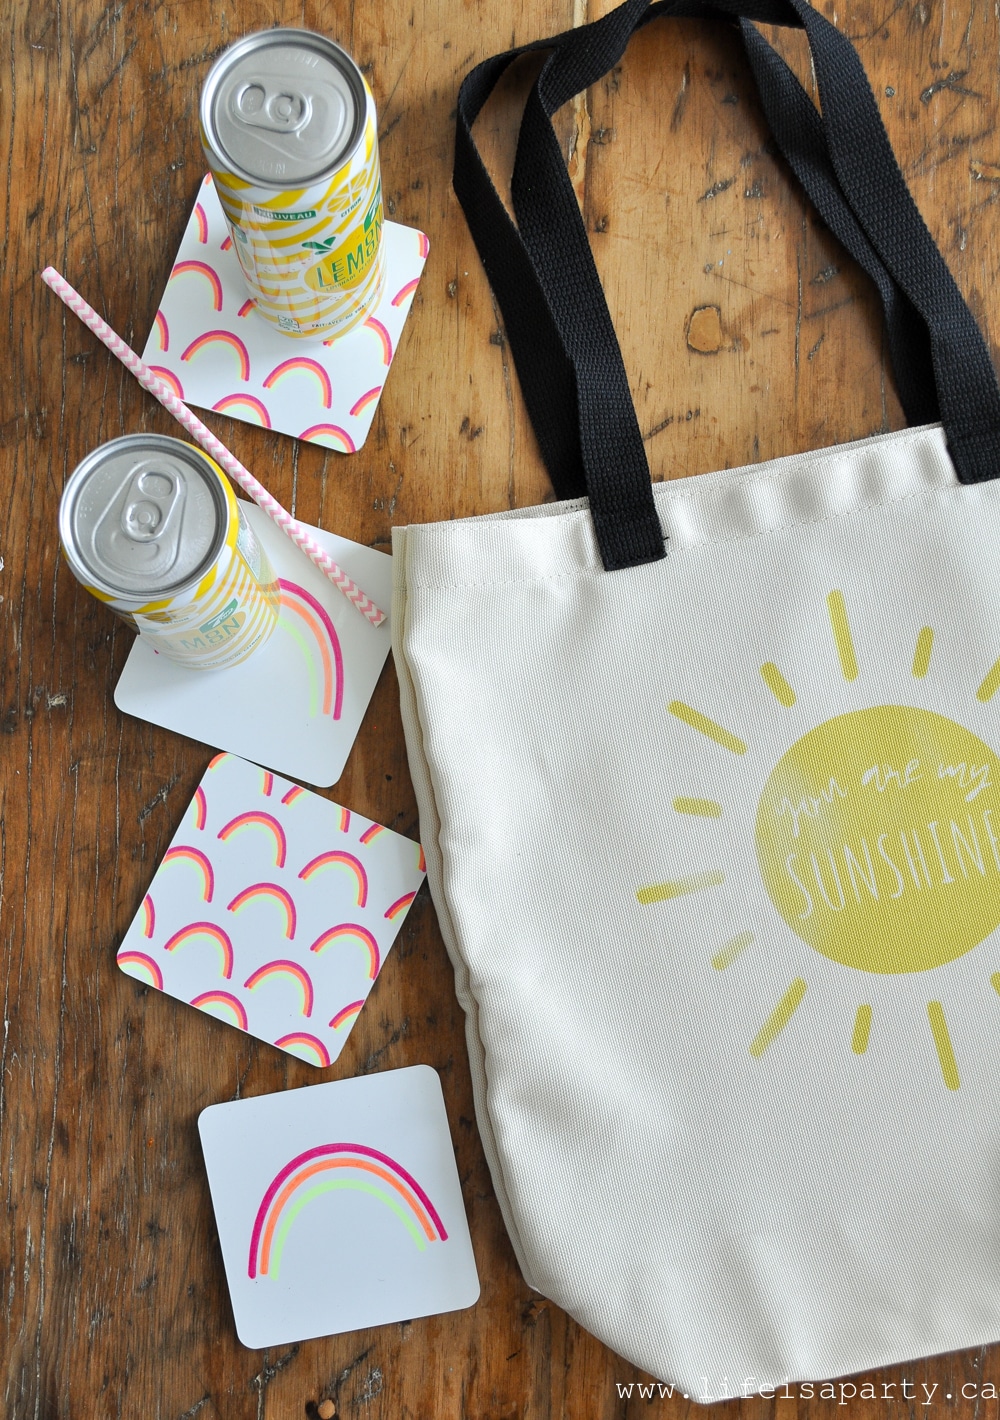
Christmas home officeI made this fun advent calendar for the whole family.  We were at the Lindt store one day, enjoying a free sample. 😉  We noticed how many different varieties there were and that you could buy them individually so we had the brilliant idea of making an advent calendar out of them and trying them all.  Everyday we all try a different one together and it's been such a yummy treat for us all.
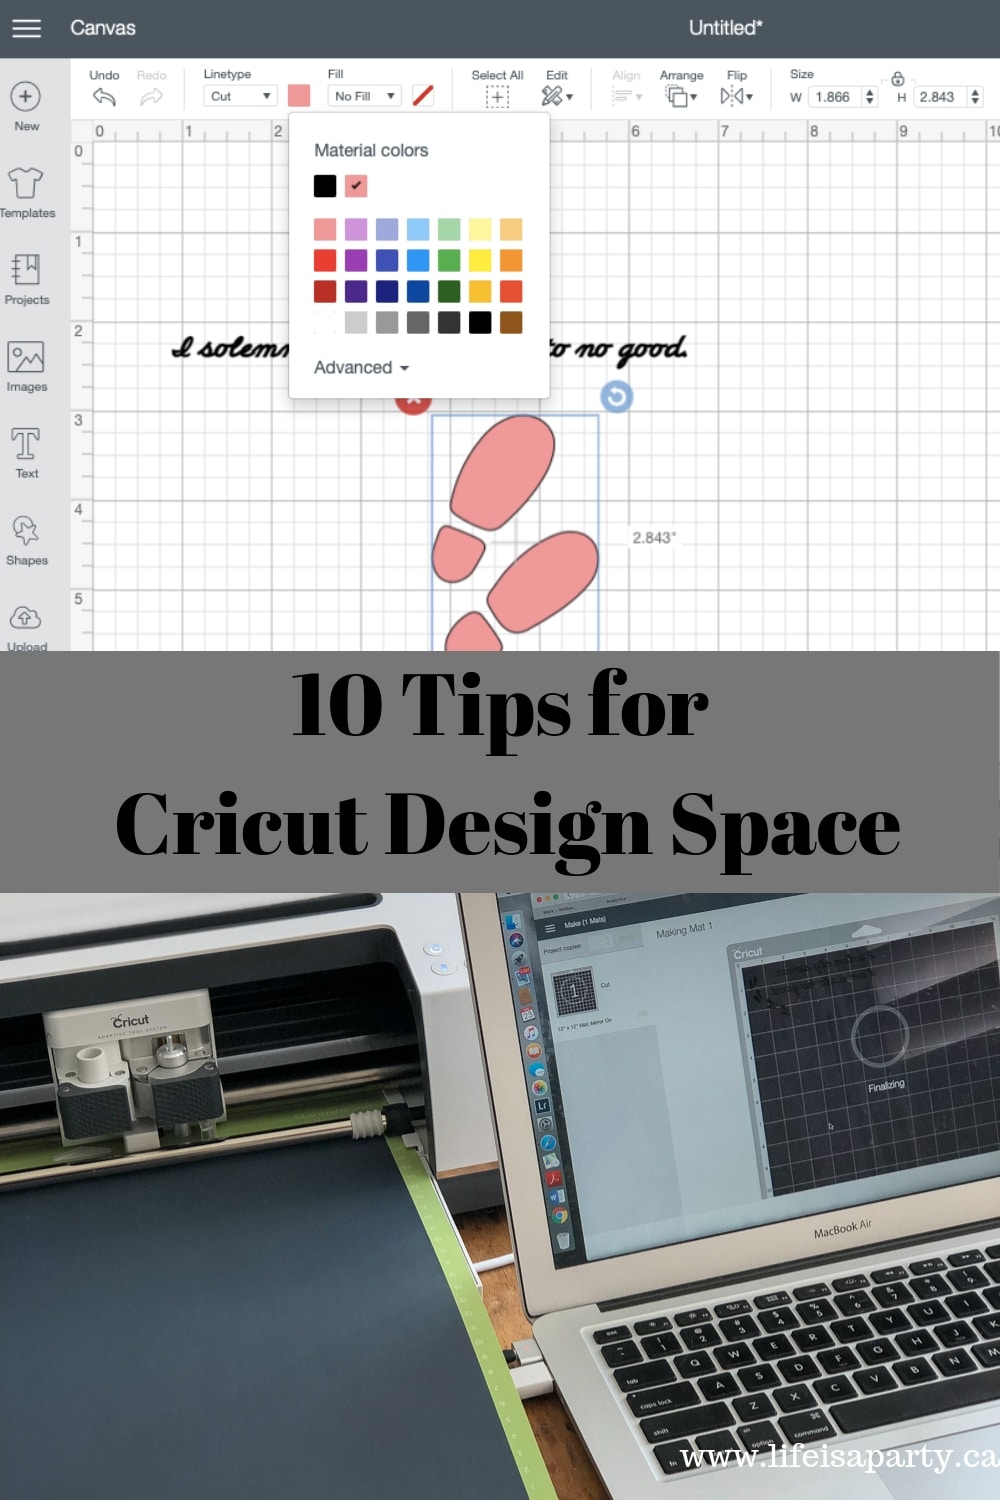
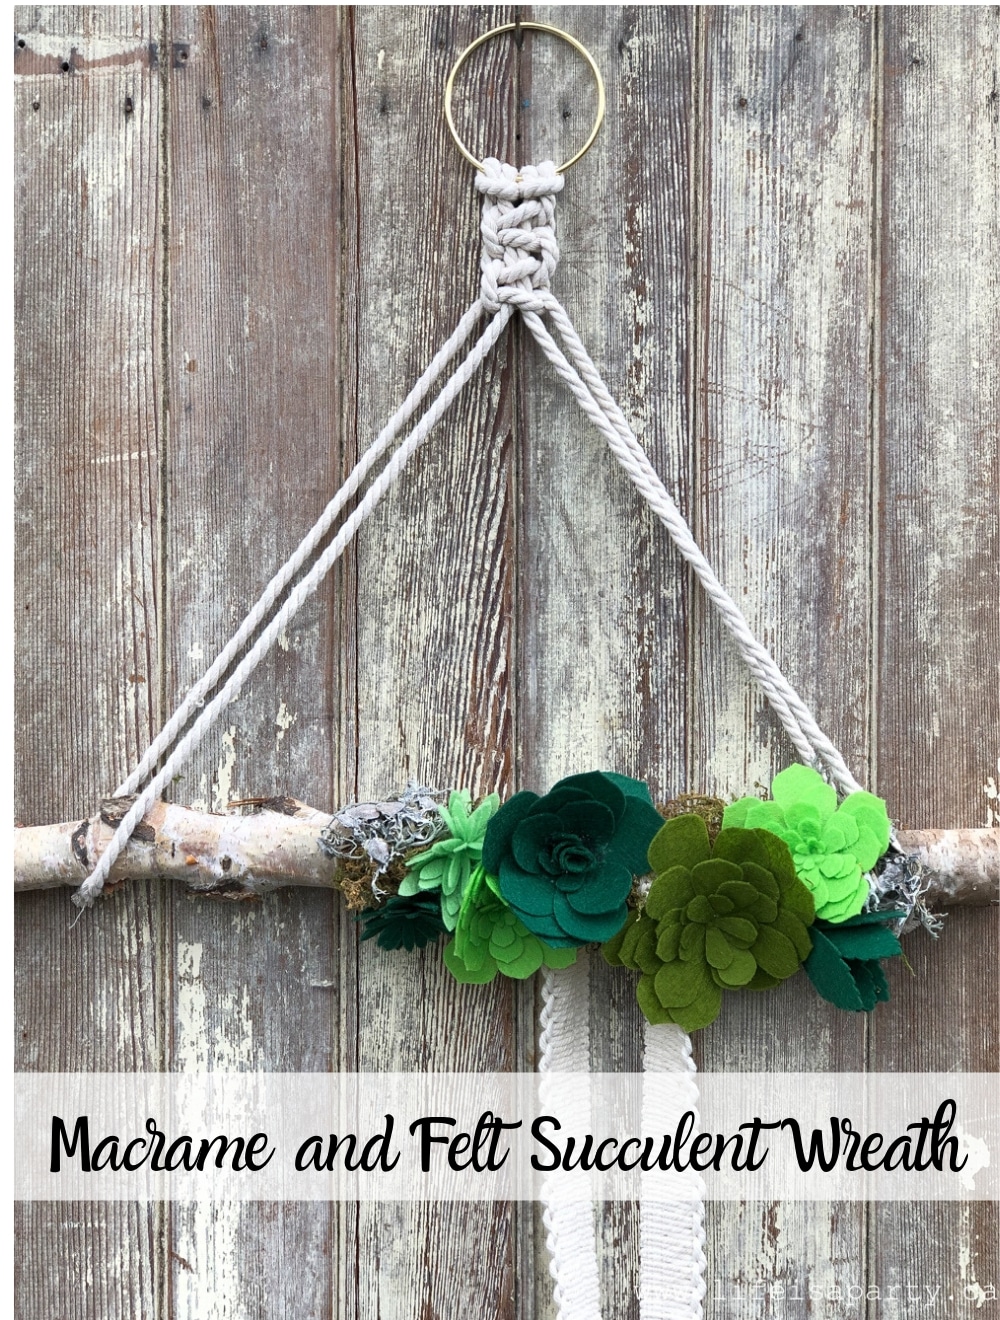
Scandinavian Christmas decor ideasThe chair is a great spot to curl up with a laptop.

Christmas home officeChristmas Home TourThe shelves got a little Christmas decorating too.

Christmas home office shelvesvintage milk glass and Christmas ballsAlways fun to add in a few more vintage pieces.

Christmas shelfieThis is a great spot for Christmas crafting and gift wrapping.

home office decorated for Christmas

The Bedroom

And lastly let me show our master bedroom.  I love how it looks I used lots of pretty green in here.

Christmas bedroom ideasI worked with Amara to add some special Christmas touches to this room.

Christmas tree in bedroomWe've never had a tree in here before and I have to say it's so beautiful and romantic at night all lit up.

Christmas bedroom decor

I also added in these pretty star lanterns -small and medium sized and the prettiest emerald green tea light holder.

rustic Christmas bedroom decor

Over the bed I added some gorgeous garland.  I love fresh, but in the interests of no pine needles in bed, we went with the is beautiful faux one.  This beautiful faux fur throw is making things extra cozy.

Christmas bedroom decorI've added some green cushions for Christmas -one dark corduroy, one velvet moss green square one, and the rectangular jade velvet one in front.

green Christmas decorAnd over on the other side of the bed, the gorgeous vase that set the whole colour scheme filled with some fresh hemlock one of my favourite Christmas greens since it's so delicate.  The pretty little bottle brush trees are from Ikea and look great in a little cloche.

Christmas bedroom decor

Over on the far wall a few more candles and sweet tree.

Christmas Home Tour bedroomChristmas bedroomI added an assortment of green vintage ornaments to this little black tree.

Christmas Home Tour bedroomThis room feels like the perfect little Christmas retreat, or spot for a bedtime story.

green Christmas decor
Christmas bedroom tour
Christmas Home Tour

This cozy spot is calling my name.

Christmas Home Tour bedroom

I hope you've enjoyed the tour, thanks so much for stopping by.

With the house all decorated for Christmas, life really is a party!

More Inspiration

You might also like our Scandinavian Christmas Home Tour here.

Also check out our Cozy Neutral Christmas Decor Family Room here.

You might also enjoy our Green Christmas Decor Home Tour here.

Cricut Wood Feather Ornament

Dec 5, 2018 · 2 Comments

How to make a wood feather with your Cricut.

Cricut Wood Feather Ornament: see how to cut wood using your Cricut machine. Includes a free cut file for this wood feather Christmas ornament.

How to make a wood feather with your Cricut.
[feast_advanced_jump_to]

These pretty Cricut wood feathers couldn't be any cuter.  And they were really simple to make with the Cricut Maker.  Yes you can even cut wood with your Cricut!
Cricut wood cutting

Materials:

  • Cricut Maker
  • balsa wood
  • Cricut cut file
  • Strong grip Cricut cutting mat
  • knife blade
  • masking tape
  • gold leaf
  • gold leaf adhesive
  • white string
  • gold beads
  • wood beads

How To Make Wood Feather Ornaments

To make the wood feather ornaments, connect your laptop to your Cricut Maker and go to the Wood Feather Cut file in design space.

Put the knife blade into the Cricut Maker.

how to cut wood with your Cricut machine

Attach the balsa wood to a strong grip Cricut cutting mat, and tape around the outside with masking tape for extra hold.

Cut out the feather with the Cricut Maker set to cut balsa wood -mine was balsa wood 3/32 inch.

Cricut wood cutting

Once cut, remove from the cutting mat.

diy feather ornament

To add the gold leaf, apply the adhesive to the bottom of the feather and wait for it to go tacky -follow the instructions on the adhesive for timing.  Apply the gold leaf, and remove any loose bits with a soft dry small paint brush.

diy wood feather ornamentAdd a string to hang it from, with a gold and a wood bead.

Cricut Christmas ornament

I love how these look on the Christmas tree, so delicate and pretty.

They also look beautiful to decorate a Christmas gift.  You could write the recipient's name on with a sharpie marker if you wanted to.

how to make a wood feather

These would make a beautiful handmade gift also.

Cricut Christmas ornamentWith these pretty wood feather ornaments, life really a party.

You might also like 25 Christmas Projects You Can Make With Your Cricut here. 

25 Christmas Cricut Projects: inspiration and ideas for all your Christmas crafting with your Cricut machine using paper, fabric, metal, leather, and more.

Also check our our Cricut Maker Christmas Pajamas here.

Christmas Favourite Things Pajamas: use your Cricut Maker and Infusible Ink to create personalized Christmas favourite things pajamas.

You might also enjoy our Cricut Fair Isle Candle Holders here.

Scandinavian Christmas Decor Ideas Home Tour -Part I

Dec 4, 2018 · 16 Comments

Scandinavian inspired Christmas decor ideas.

Scandinavian Christmas Decor Ideas Home Tour -Black and White Scandinavian design with a little boho. Lots of natural elements, cozy texture and Christmas twinkle lights.

Scandinavian inspired Christmas decor ideas.
[feast_advanced_jump_to]

I'm so excited to be sharing my home all decorated in Scandinavian Christmas decor ideas. I hope you'll come in and enjoy the tour.  Let's start with the front porch.

Front Porch

Christmas Home Tour 2018 -Black and White Scandinavian design with a little boho. Lots of natural elements, cozy texture and Christmas twinkle lights.I always feel like the front door is a little taste of what's to come inside.  I love rustic Scandinavian style, especially at Christmas.  Scandinavian style is all about bringing the outdoors in and decorating with whatever is seasonal.  At Christmas that means lots of things like birch, pinecones, and fresh greens.

Christmas Home Tour 2018 -Black and White Scandinavian design with a little boho. Lots of natural elements, cozy texture and Christmas twinkle lights.I've added some pretty brass lanterns this year too.  I especially love the stars for Christmas.

Christmas Home Tour 2018 -Black and White Scandinavian design with a little boho. Lots of natural elements, cozy texture and Christmas twinkle lights.Over on the other side a fun little DIY.  I couldn't find any beautiful antique skis at a decent price so, I took some old ones from a thrift store and spray painted them white for a nice neutral look to fit in with my decor.

Christmas Home Tour 2018 -Black and White Scandinavian design with a little boho. Lots of natural elements, cozy texture and Christmas twinkle lights.You can read more about the front porch here.  Now come on in and get warm. 😉

Mudroom / Laundry Room

Christmas Home Tour 2018 -Black and White Scandinavian design with a little boho. Lots of natural elements, cozy texture and Christmas twinkle lights.We just finished re-doing our mudroom / laundry room for the last One Room Challenge -read all about it here.  It's so much more functional and beautiful.  I couldn't resist dressing it up just a little for Christmas.

Christmas Home Tour 2018 -Black and White Scandinavian design with a little boho. Lots of natural elements, cozy texture and Christmas twinkle lights.And over on the other wall a little festive art that can stay up all winter, hung with a vintage clothes hanger.

Christmas Home Tour 2018 -Black and White Scandinavian design with a little boho. Lots of natural elements, cozy texture and Christmas twinkle lights.

And a little Christmas humour. 😉

Christmas Home Tour 2018 -Black and White Scandinavian design with a little boho. Lots of natural elements, cozy texture and Christmas twinkle lights.The mudroom opens into our dining room.

Scandinavian Christmas Decor Ideas in the Dining Room

Christmas Home Tour 2018 -Black and White Scandinavian design with a little boho. Lots of natural elements, cozy texture and Christmas twinkle lights.I kept the console table really simple with a little grouping of trees and some garlands.  I wanted the main floor to feel really cozy this year, so I went with lots of whites, neutrals and texture.

Christmas Home Tour 2018 -Black and White Scandinavian design with a little boho. Lots of natural elements, cozy texture and Christmas twinkle lights.The vintage typewriter is an old favourite.

Christmas Home Tour 2018 -Black and White Scandinavian design with a little boho. Lots of natural elements, cozy texture and Christmas twinkle lights.The rest of the room was inspired in part this year by these fun light up birch trees.

Christmas Home Tour 2018 -Black and White Scandinavian design with a little boho. Lots of natural elements, cozy texture and Christmas twinkle lights.Scandinavian Christmas Table

I've got the table all set for Christmas dinner.

Christmas Home Tour 2018 -Black and White Scandinavian design with a little boho. Lots of natural elements, cozy texture and Christmas twinkle lights.

Christmas Home Tour 2018 -Black and White Scandinavian design with a little boho. Lots of natural elements, cozy texture and Christmas twinkle lights.The table has a real rustic woodland Scandinavian vibe.  The centre piece is the beautiful birch trees, surrounded by some fresh pines and candles.

I used some rustic wood slice chargers, and layered on some festive napkins and these sweet little cloche ornaments.

Christmas Home Tour 2018 -Black and White Scandinavian design with a little boho. Lots of natural elements, cozy texture and Christmas twinkle lights.There are five different designs, and they're all adorable. I thought they'd be a really sweet take home gift for my dinner guests on Christmas day.
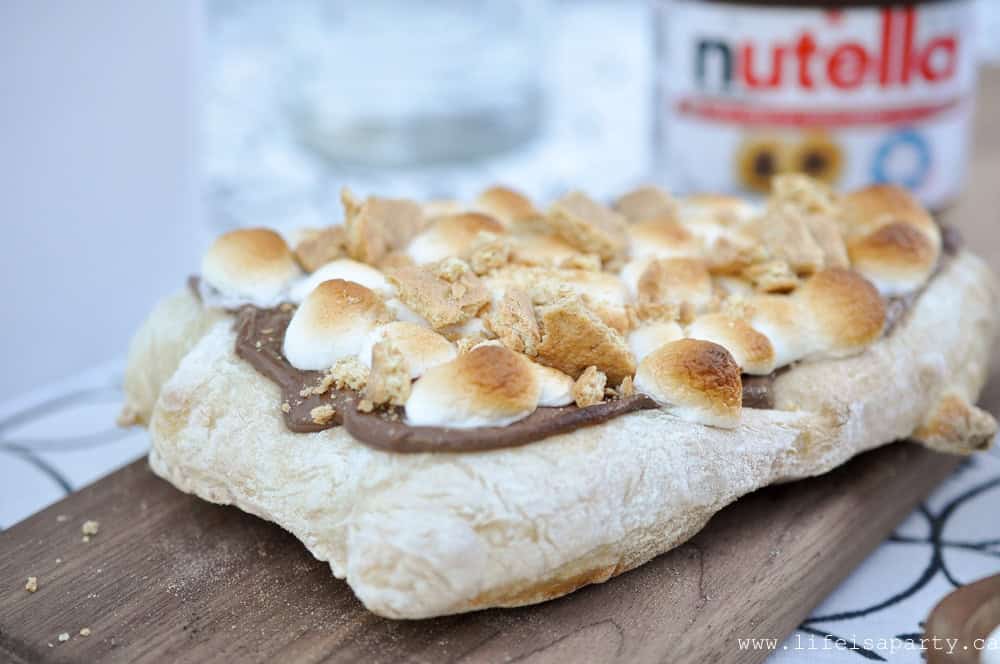
Christmas Home Tour 2018 -Black and White Scandinavian design with a little boho. Lots of natural elements, cozy texture and Christmas twinkle lights.I also love the glasses.  When I was a little girl, my parents had some that were very similar.  They were kept on some open shelves in the kitchen and I remember my parents only really using them for mixed drinks when they had friends over for card games.  These have little pine trees on them and deer and they're perfect for Christmas.

Christmas Home Tour 2018 -Black and White Scandinavian design with a little boho. Lots of natural elements, cozy texture and Christmas twinkle lights.Christmas Home Tour 2018 -Black and White Scandinavian design with a little boho. Lots of natural elements, cozy texture and Christmas twinkle lights.Buffalo Check Wall

My buffalo check wall at the end of the dining room is all dressed up for Christmas too.

Christmas Home Tour 2018 -Black and White Scandinavian design with a little boho. Lots of natural elements, cozy texture and Christmas twinkle lights.I made a series of wreaths for Christmas.  The birch one is the same as this DIY easy birch wreath here.

Christmas Home Tour 2018 -Black and White Scandinavian design with a little boho. Lots of natural elements, cozy texture and Christmas twinkle lights.Two were made with gold rings, and two with embroidery hoops.  They're updated from last year with their asymmetrical design, and some pom poms and tassels.  I love how they turned out and they were so simple to make.


Christmas Home Tour 2018 -Black and White Scandinavian design with a little boho. Lots of natural elements, cozy texture and Christmas twinkle lights.I set up my little Christmas village here too.  It's one of my very favourite Christmas decorations, and I love how they light up, and the little animals with them.

Christmas Home Tour 2018 -Black and White Scandinavian design with a little boho. Lots of natural elements, cozy texture and Christmas twinkle lights.Inspired by the birch on the table, I added a real one too.  This one was found in the woods.  I stood it up in the garage in a pail with some concrete for a few days, before I brought it in.  It's so simple and pretty with the twinkle lights on it.

Christmas Home Tour 2018 -Black and White Scandinavian design with a little boho. Lots of natural elements, cozy texture and Christmas twinkle lights.

And on the side a little collection of wood plates I found recently at the thrift store, dressed up with some pinecones, beads, and an antler.

Christmas Home Tour 2018 -Black and White Scandinavian design with a little boho. Lots of natural elements, cozy texture and Christmas twinkle lights.Bar Cart

Over on the other side of the room, our little bar cart is all set up for some Christmas cheer.

Christmas Home Tour 2018 -Black and White Scandinavian design with a little boho. Lots of natural elements, cozy texture and Christmas twinkle lights.Christmas Home Tour 2018 -Black and White Scandinavian design with a little boho. Lots of natural elements, cozy texture and Christmas twinkle lights.I've got a new decanter, and whiskey is on offer to warm up cold guests over the holidays.

Christmas Home Tour 2018 -Black and White Scandinavian design with a little boho. Lots of natural elements, cozy texture and Christmas twinkle lights.

From the dining room, I thought we'd head downstairs to our cozy family room.

Black and White Family Room

Christmas Home Tour 2018 -Black and White Scandinavian design with a little boho. Lots of natural elements, cozy texture and Christmas twinkle lights.This is a favourite spot of ours over the holidays for family movie nights, and curling up with new books and toys over the Christmas holidays.

Christmas Home Tour 2018 -Black and White Scandinavian design with a little boho. Lots of natural elements, cozy texture and Christmas twinkle lights.I've decorated with a black and white boho theme for Christmas, and I love how it turned out.

Christmas Home Tour 2018 -Black and White Scandinavian design with a little boho. Lots of natural elements, cozy texture and Christmas twinkle lights.The mantel is decorated with bottle brush trees -the few black ones got a little spray paint added to them.  The deer head is paper mache, and I wrapped the antlers in some yarn to add texture.  The fringe makes a fun garland, and the stockings are dressed up with some fun stocking tassels.  You can read more about our Boho Christmas mantel here.

Christmas Home Tour 2018 -Black and White Scandinavian design with a little boho. Lots of natural elements, cozy texture and Christmas twinkle lights.The tree looks great in its macrame basket, and with an owl as the topper.

Christmas Home Tour 2018 -Black and White Scandinavian design with a little boho. Lots of natural elements, cozy texture and Christmas twinkle lights.It's decorated with lots of DIY ornaments, like this DIY macrame feather ornament here.

Christmas Home Tour 2018 -Black and White Scandinavian design with a little boho. Lots of natural elements, cozy texture and Christmas twinkle lights.The coffee table is full of brass candle holders.

Christmas Home Tour 2018 -Black and White Scandinavian design with a little boho. Lots of natural elements, cozy texture and Christmas twinkle lights.I'm so looking forward to a little down time with a good book here over the Christmas break.

Christmas Home Tour 2018 -Black and White Scandinavian design with a little boho. Lots of natural elements, cozy texture and Christmas twinkle lights.Christmas Home Tour 2018 -Black and White Scandinavian design with a little boho. Lots of natural elements, cozy texture and Christmas twinkle lights.Over on the other side I've set up the sweetest little boho Christmas reading tent.  I won't fit in, but my girls will. 😉

Christmas Home Tour 2018 -Black and White Scandinavian design with a little boho. Lots of natural elements, cozy texture and Christmas twinkle lights.This spot is just so cozy and sweet. You can see how I made this DIY boho children's reading tent here.

Christmas Home Tour 2018 -Black and White Scandinavian design with a little boho. Lots of natural elements, cozy texture and Christmas twinkle lights.

You can see the rest of my home all decorated for Christmas here with Part II of the tour sharing the living room, kitchen, study, and our master bedroom here.

Christmas Home Tour 2018 -Part II: Rustic Scandi design, with lots of white and natural elements and some vintage Xmas pieces too.

With Scandinavian Christmas decor ideas,  life really is a party!

More Inspiration

You might also like our Green Christmas Decor Home Tour 2019 here.

Christmas Home Tour: Rustic Scandinavian Christmas Home Tour, with bit of modern boho.

Also check out our Pastel Christmas Living Room here.

Colourful Pastel Christmas Family Room: Inspired by Anthropologie, with bottle brush Christmas trees, mercury glass, vintage ornaments, macrame, & pastel colours.

You might also like our Black and White Christmas Home Tour here.


How To Make Gingerbread House Cookies

Dec 4, 2018 · 8 Comments

gingerbread house cookies

Gingerbread House Cookies: a classic gingerbread cookie recipe perfect for Christmas cookie ornaments or mini houses.

gingerbread house cookies
[feast_advanced_jump_to]

Gingerbread is a real favourite around here.  My husband and my kids love it.  What could beat the warm spices of everyone's favorite traditional Christmas cookie.  These cookies are perfect for celebrating the holidays.  We made the sweetest little gingerbread house cookies for hanging on the Christmas tree or giving as gifts.  And then we couldn't resist making some tiny little miniature gingerbread houses.  This gingerbread cookie dough is delicious and easy to work with, and perfect for making little houses like we did or gingerbread men.

Gingerbread

The familiar taste of gingerbread, spiced and crisp, is a sign of Christmas.  Gingerbread gets its name from ginger, but also includes cinnamon, cloves, and nutmeg to create the perfect spice combination.  Molasses also adds richness and along with the brown sugar helps to give the gingerbread its dark brown color and deep rich sweet flavor.

Gingerbread can be soft and chewy inside, or hard and crunchy.  Soft is a favourite of many for snacking and the harder version is favoured for building houses, because it is stronger and less likely to break.  Since our houses are tiny, or flat cookies we didn't have to worry too much about the strength of the hard dough.  This dough is somewhat in between hard and soft.  It's very delicious, and still strong enough for hanging flat ornaments and miniature houses.  If you want it to be softer you can roll it more thickly and bake it less time.  If you want it to be crispy roll it out slightly thinner and bake it a little bit longer.  

how to make gingerbread house cookies

Regular Icing vs.Royal Icing

Regular icing is made from butter and icing sugar and is a softer creamer icing.  Royal icing dries hard.  Many people prefer to use royal icing for constructing gingerbread houses and icing gingerbread cookies.  We prefer regular icing, purely from a taste point of view.  Royal icing is made from egg whites, or meringue powder and icing sugar.  It doesn't include fat, and the taste isn't as creamy and delicious.  

If you are making a full size gingerbread house using royal icing will make a huge difference to the construction.  It will be easier to build and more study.  But for the small pieces of our miniature gingerbread houses and gingerbread house cookies a better tasting easy buttercream icing is fine.  Depending on the size of your gingerbread creating, you may prefer to use a royal icing recipe for added strength.

Decorating

We also didn't add candy to our miniature houses or gingerbread house cookies.  I love the look of the gingerbread with the classic plain white icing.  We added lots of details like hearts, and dots, and curly cues to add interest.  Use different sized plain tips to create different looks on your cookies.  We used a plain tip for the outlines of doors and windows and roofs, and used a very fine tip to add the fine details like dots, hearts, vines, and patterns.

If you prefer you can use candy to decorate.  If you're making mini houses like us, or flat gingerbread house cookies try to find candy that is smaller in scale so that it fits the small houses well and adheres easily.  Look in the baking aisle for things like different sprinkles, non-pareils, dragees, and jimmies.  Also look for miniature chocolate chips, gumdrops, and other candies for decorating.  I love looking at the bulk food store, where there's lots of different options to choose from.

Gingerbread House Cookies

Storing The Cookies

If you wanted to store the cookies for snacking, keep them in a airtight container at room temperature.If you wanted to store the cookies for snacking, keep them in a airtight container at room temperature.

Gingerbread House Cookie ornaments

Gingerbread House Ornaments

To make the house cookies we cut out different house sizes using a knife, and then made a hole for hanging with a plastic straw.  You could of course also use a gingerbread house cookie cutter. Or if you want the houses to look the same you could make a gingerbread house pattern on cardboard and then use it to cut out the dough with a knife.

Gingerbread House CookieOnce the cookies are iced and the icing has had a chance to dry and fully set, it's time to add a string for hanging the gingerbread ornaments.  We used a little bakers twine to hang them.  Thin ribbon would also be lovely for hanging them.  Adding the hanging string to the cookies turns them into the prettiest Christmas ornaments.   They look so pretty as decorations for the holiday season on a traditional tree, or even on a branch.

my favourite gingerbread

Miniature Gingerbread Houses

The tiny houses are made from a miniature gingerbread house cookie cutter set.  Cut out a small gingerbread house pieces.  You need one of the front pieces, one of the back pieces, two side pieces, and two roof pieces for each mini gingerbread house.  To put the mini gingerbread houses together use some icing on the edges to put the base together and let the icing harden before trying to attach the roof pieces.  Let all the icing set fully before decorating the houses.

mini Gingerbread HousesMy girls actually decorated them all.  I think the students have exceeded the teacher now.  I was working on some last year, and then they came home from school and made some far more beautiful ones than I had.  This year I left it too them.

miniature gingerbread houseshow to make a miniature gingerbread housetiny gingerbread houseWe arranged them on a cake plate and added in a few cookie trees to create a tiny miniature gingerbread village.

mini gingerbread house Christmas villageThe plate is decorated with some coarse sugar, and then sprinkled with more powdered sugar to look like snow.  These make a beautiful centrepiece for the holidays.  They're also a lovely gift.  They look very sweet packaged individually in little cellophane bags and tied with ribbon on top for gift giving or as a package topper.  The cellophane bag helps keep them fresh longer.

Gingerbread House CookiesI love how these gingerbread house cookies turned out, and they're so delicious too.  The perfect Christmas cookie.  The hanging ornament gingerbread house ornaments look so beautiful on a Christmas tree.

Recipe

gingerbread house cookies

Gingerbread House Cookies

Make gingerbread house cookies to decorate your tree and mini gingerbread houses.
5 from 2 votes
Print Pin Rate
Course: Dessert
Cuisine: American
Prep Time: 20 minutes minutes
Cook Time: 15 minutes minutes
Total Time: 35 minutes minutes
Servings: 3
Calories: 100kcal
Author: Dannyelle Nicolle-Ramjist

Ingredients

  • 3 cups all purpose flour
  • ½ teaspoon salt
  • ¼ teaspoon ground cloves
  • ¼ teaspoon ground ginger
  • ¼ teaspoon ground nutmeg
  • ¼ teaspoon cinnamon
  • 6 tablespoon softened butter
  • ¾ cup brown sugar
  • ½ cup molasses
  • 1 egg
  • 1 cup powdered sugar
  • 1 tablespoon softened butter
  • 1 tablespoon milk

Instructions

  • Combine flour, salt, cloves, ginger, nutmeg and cinnamon in large bowl and set aside.
  • Add butter and brown sugar to a stand mixer fitted with the paddle attachment and beat until light and fluffy. Add in the molasses, and mix well, scraping down the sides of the bowl. Add in the egg, and mix well again.
  • Gradually add in the dry ingredients, to the wet mixture and combine at medium speed until the dough comes together.
  • Divide dough in half, and wrap half with plastic wrap. On a lightly floured surface roll dough with a rolling pin to even thickness of ¼ inch thick, and cut out with shapes using cookie cutters or a small knife. Then roll out the second piece of dough. Lastly combine the scraps of leftover dough and roll those out.
  • Place the cookies on an ungreased cookie sheet and bake the cookies at 350 F for 10-15 minutes. Bake them less time for smaller cookies, and longer for larger cookies, and less for chewy cookies, longer for crunchy cookies depending on your preference. Allow to cool on a wire rack.
  • To make the icing, combine powdered sugar, milk, and 1 tablespoon butter in a medium bowl and stir to fully combine. Place in a pastry bag fitted with a fine tip, and decorate the cookies. Let the icing set before hanging as Christmas ornaments with twine or ribbon.

Nutrition

Serving: 1Servings | Calories: 100kcal | Carbohydrates: 18g | Protein: 1g | Fat: 2g | Saturated Fat: 1g | Polyunsaturated Fat: 1g | Cholesterol: 11mg | Sodium: 55mg | Sugar: 10g
Tried this Recipe? Tag me Today!Mention @LifeisaParty or tag #lifeisaparty!
Gingerbread House Cookies

With homemade gingerbread house cookies, life really is a party!

More Christmas Cookie Recipes

You might also like our Sugar Cookies here.

Sugar Cookies: Grandma's tested and true recipe will become your go-to recipe for soft and tender cut out sugar cookies you can decorate with icing.

Also check out our Raspberry Almond Thumbprint Cookies here.

You might also enjoy our Toblerone Shortbread with Browned Flour Cookies here.

Toblerone Shortbread with Browned Flour -The "Famous Phipps Shortbread" with roasted flour, and Toblerone chocolate bar chunks.
  • « Go to Previous Page
  • Page 1
  • Interim pages omitted …
  • Page 6
  • Page 7
  • Page 8
  • Page 9
  • Page 10
  • Interim pages omitted …
  • Page 21
  • Go to Next Page »

Primary Sidebar

Welcome!

Life is a Party is all about helping you celebrate everyday with great food, entertaining and party inspiration, and seasonal crafts and home decor inspired by the holidays.

More About Dannyelle

Trending Recipes

  • Mac and cheese with panko breadcrumb topping.
    Best Homemade Mac and Cheese with Panko Breadcrumb Topping
  • Homemade iced capps in glasses on a wood table.
    Tim Hortons Copycat Iced Capp Recipe
  • Dirt Pudding no cream cheese in glasses with candy rocks, and fresh mint that looks like a little plant.
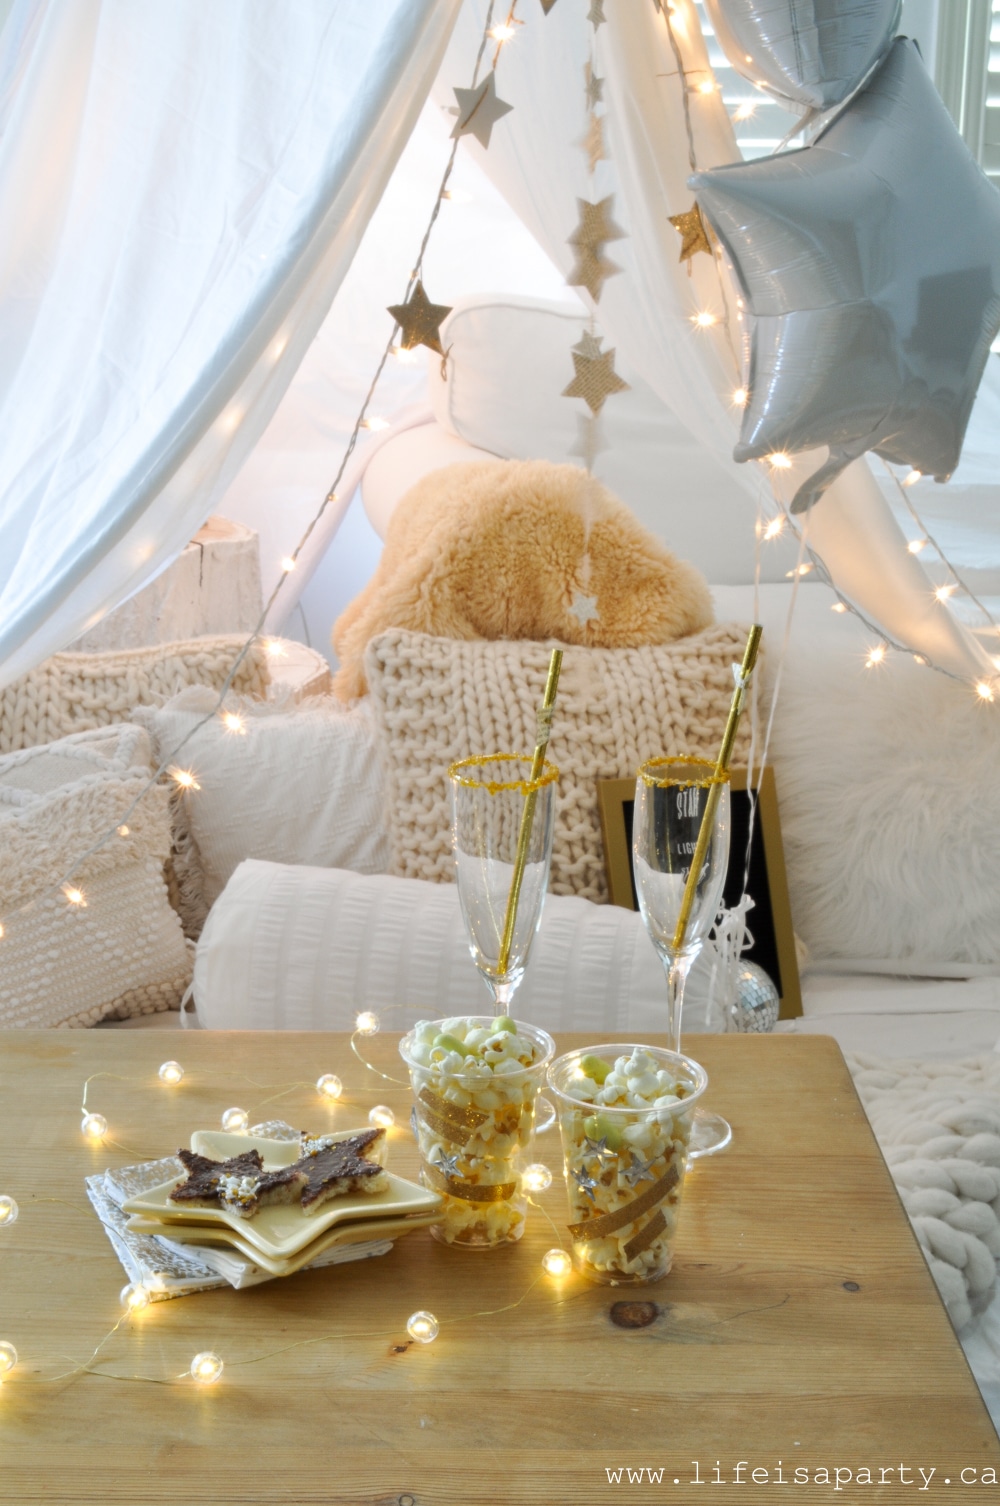
    Easy Dirt Pudding Recipe without Cream Cheese
  • Easy 3 ingredient coconut milkshake recipe.
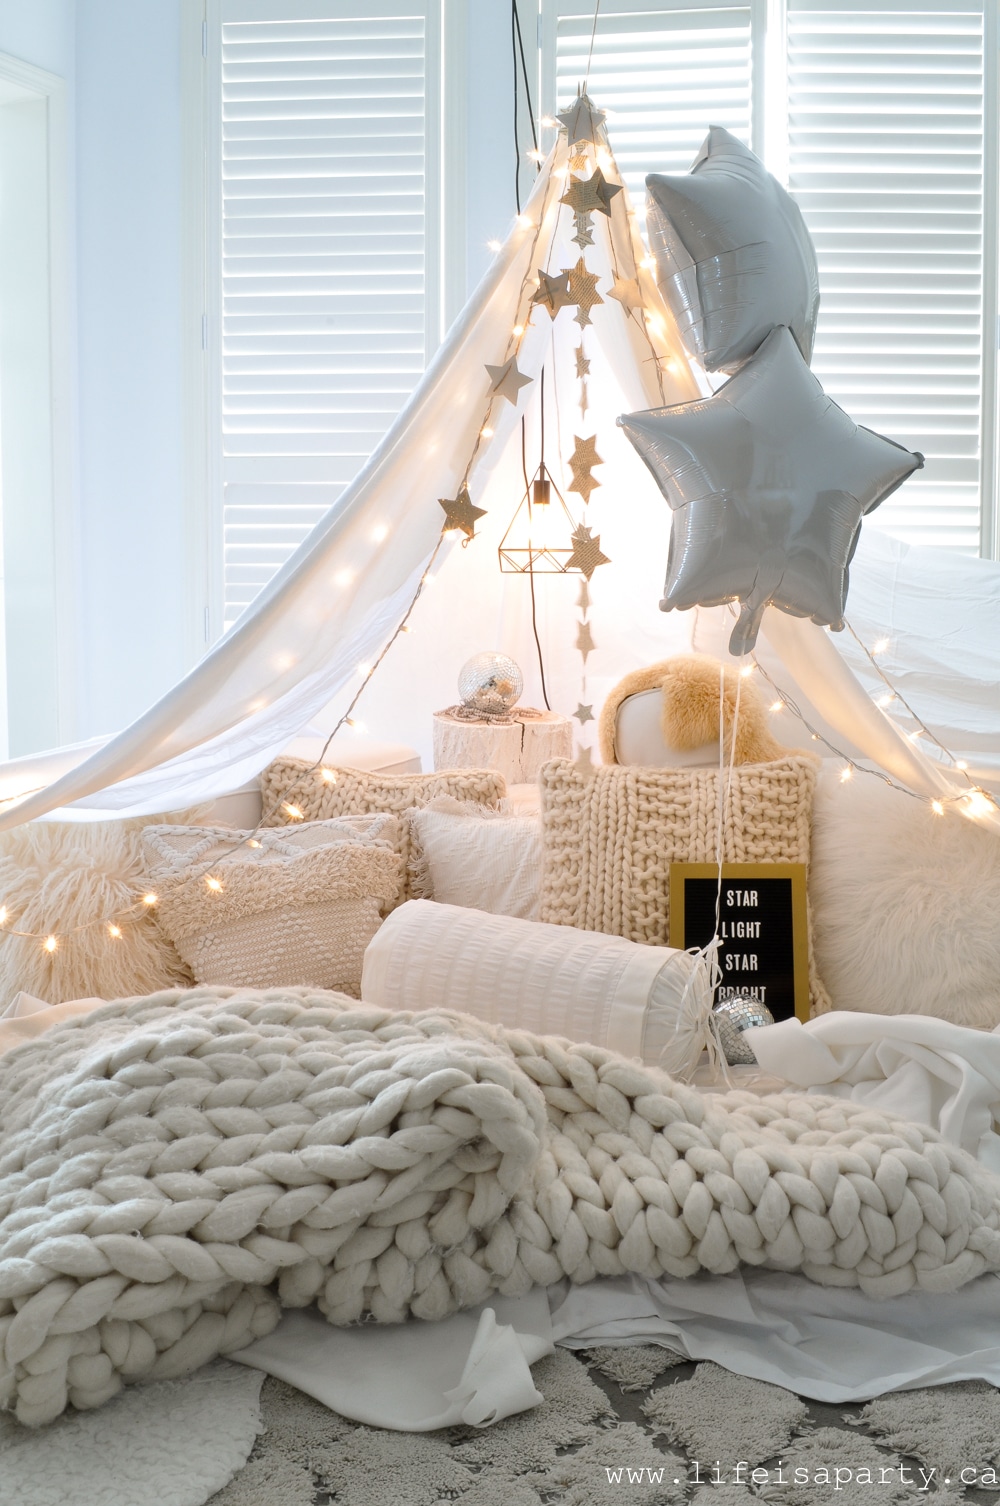
    Easy Coconut Milkshake Recipe
  • Easy food processor scones on a plate with jam.
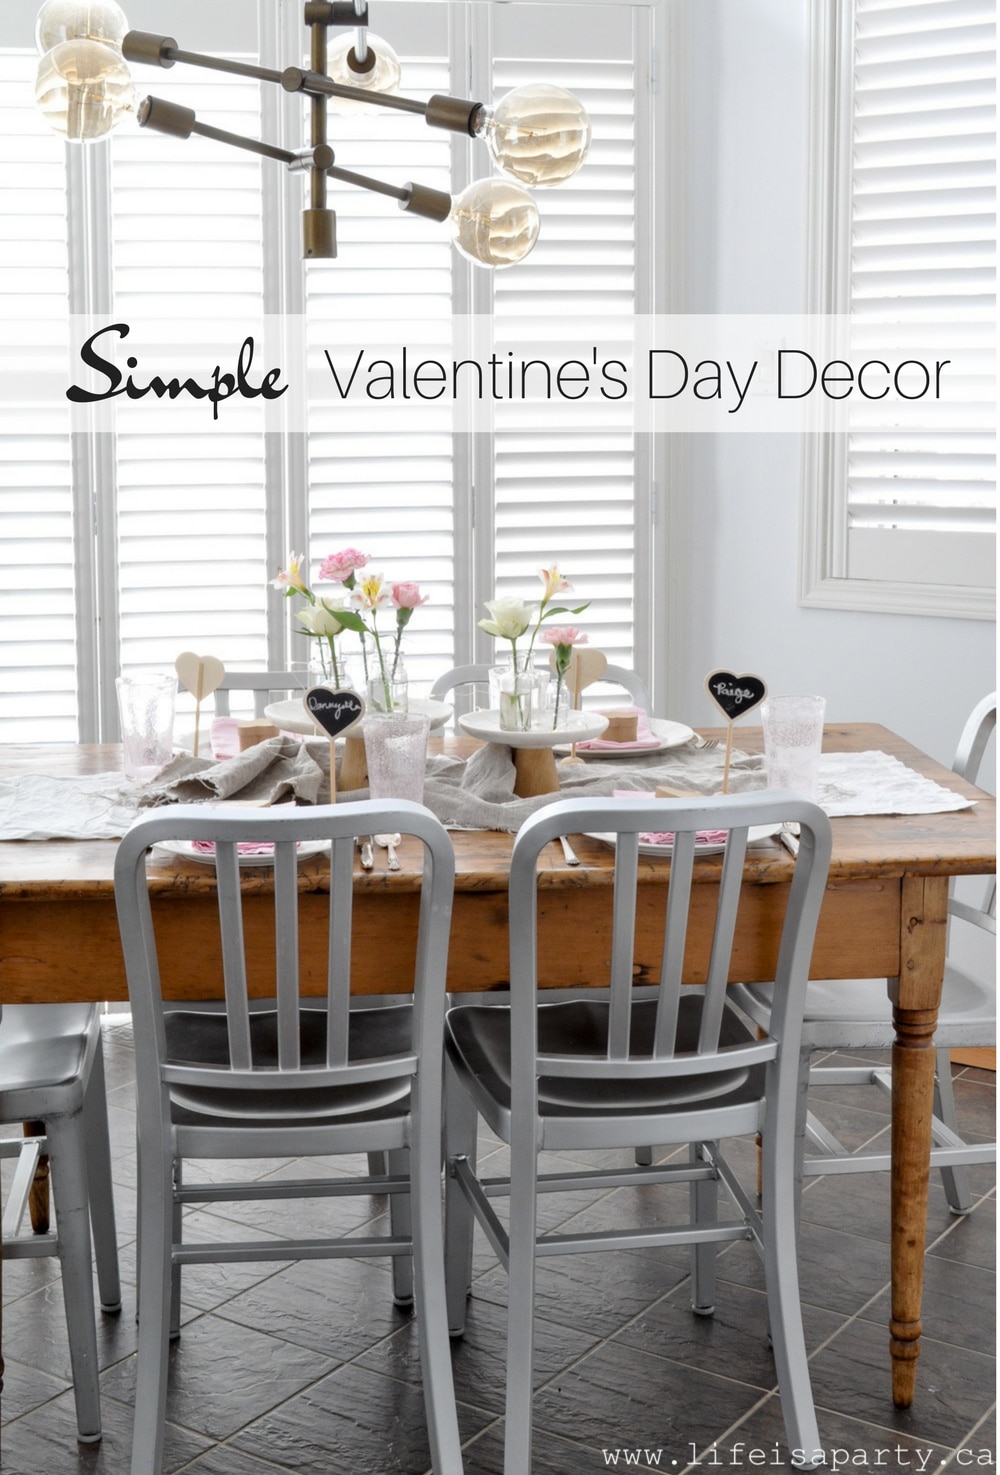
    Easy Food Processor Scones
  • Fluffy small batch pancakes for two ready to serve on a plate with syrup.
    Easy Small Batch Pancakes For Two Recipe

Fall Ideas

  • Pumpkin shaped dinner roll recipe, with a herb stem.
    Pumpkin Shaped Dinner Rolls
  • Fall breakfast board
    Fall Breakfast Charcuterie Board
  • Halloween witch decorations
    Witch Halloween Decor
  • fall home decor
    Fall Decorating Ideas -Home Tour
  • Modern Boho fall mantel ideas.
    Modern Boho Fall Mantel Ideas
  • Homemade pink candy apples on a cutting board.
    How To Make Pink Candy Apples

Entertaining Ideas

  • Adult mermaid party table set on the beach with cake and shells.
    Adult Mermaid Party Ideas: A Beach Picnic Goodbye to Summer
  • Overhead view of tomato party table with pizza and appetizers.
    The Ultimate Tomato Party: A Tomato Girl Summer Garden Gathering
  • Camp themed party table with green gingham tablecloth, wildflowers, and Welcome to Camp banner.
    The Ultimate Camp Themed Party for Adults
  • Garden party table set under white pergola with vintage floral tablecloth, pink peony centerpiece in wooden tool caddy, white wicker chairs, and climbing white roses in background.
    Garden Themed Party
  • Complete mimosa bar setup on white console table with vintage silver ice bucket, labeled colorful juice bottles, small glass garnish bowls, and ribbon-tied champagne flutes on white lace tablecloth with flower wall backdrop.
    How to Set Up a Beautiful Mimosa Bar
  • Breakfast for dinner party table styled like a bed with star quilt tablecloth, gingham pillows, and cloud installation above.
    Breakfast for Dinner Party: Brinner Under the Stars
  • Recipe Index
  • Parties & Entertaining
  • Fall
  • Subscribe
  • Free Resource Library

Footer

back to top

as seen in:

Better Homes and Garden Logo
American Farmhouse Style logo.
Apartment Therapy logo.

About

  • Privacy Policy
  • About

Subscribe

  • Sign Up! for emails and updates

Contact

  • Contact

As an Amazon Associate I earn from qualifying purchases.

Copyright © 2025 Life is a Party

Share
Pin
Post
Share
Pin
Post

Rate This Recipe

Your vote:


A rating is required
A name is required
An email is required