• Skip to primary navigation
  • Skip to main content
  • Skip to primary sidebar
Life is a Party
  • Recipe Index
  • Parties & Entertaining
  • Fall
  • Subscribe
  • Free Resource Library
menu icon
go to homepage
  • Recipe Index
  • Parties & Entertaining
  • Fall
  • Subscribe
  • Free Resource Library
subscribe
search icon
Homepage link
  • Recipe Index
  • Parties & Entertaining
  • Fall
  • Subscribe
  • Free Resource Library
×
Home

DIY Boho Driftwood Sticks

DIY Boho Driftwood Sticks

Aug 17, 2017 · Leave a Comment

Painted driftwood sticks.

DIY Boho Painted Driftwood Sticks: Easy tutorial using found driftwood sticks and paint to add a little boho to any room.

Boho painted driftwood sticks.
[feast_advanced_jump_to]

These beautiful DIY Boho Painted Driftwood Sticks are so easy to make and add a little fun to any room.
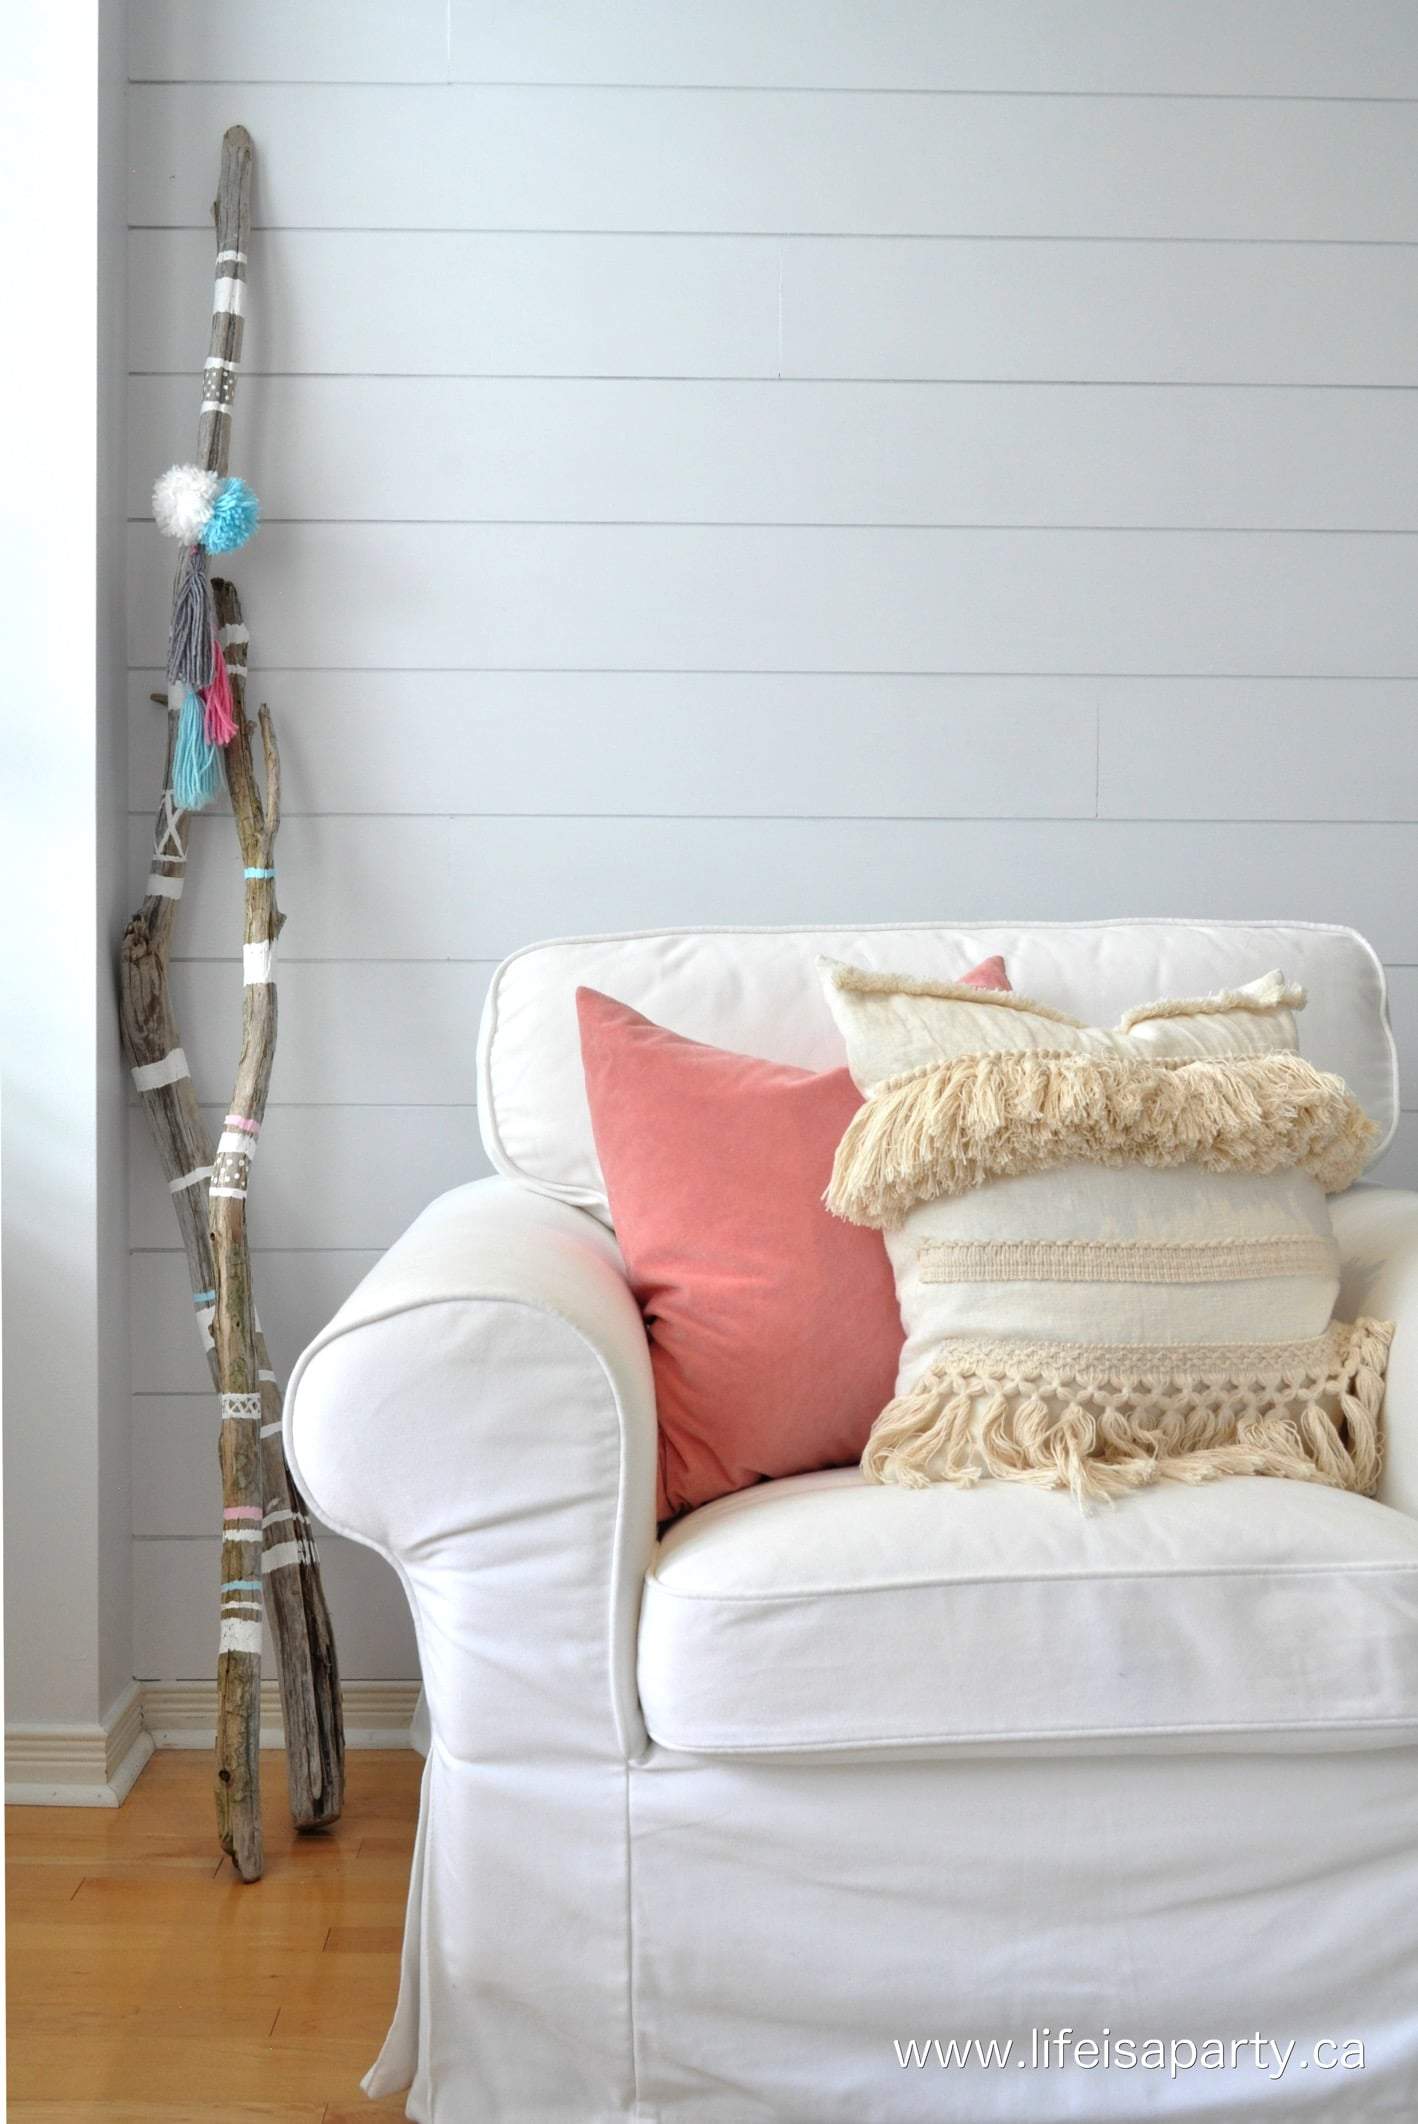
DIY Boho Painted Driftwood Sticks

I found the sticks while out for a walk one night with my husband.  We were walking along Lake Ontario, and took turns carrying them till we made it back to the car.  I knew they'd be perfect to add a little boho vibe to this little corner.

how to paint driftwood

Materials:

For this project you will need:

  • Driftwood Sticks
  • Craft Paint -white, pink, aqua
  • Optional -tassels and pom noms
painted driftwood boho sticks

How To Make Painted Driftwood Sticks

I laid out my sticks and had fun adding some stripes, polka dots, and X's.  The pattern is added randomly, and mostly in white.  I also mixed some of the pink and aqua paint with a little white to make them a little lighter.  You could add a few stripes in any colour to co-ordinate with your decor.

After they were all dry, I added on a couple of pom poms and tassels that I made from some yarn, some feathers would be a cute addition too.

diy boho decor

I love how the sticks add a little texture, height, and fun to this little corner.
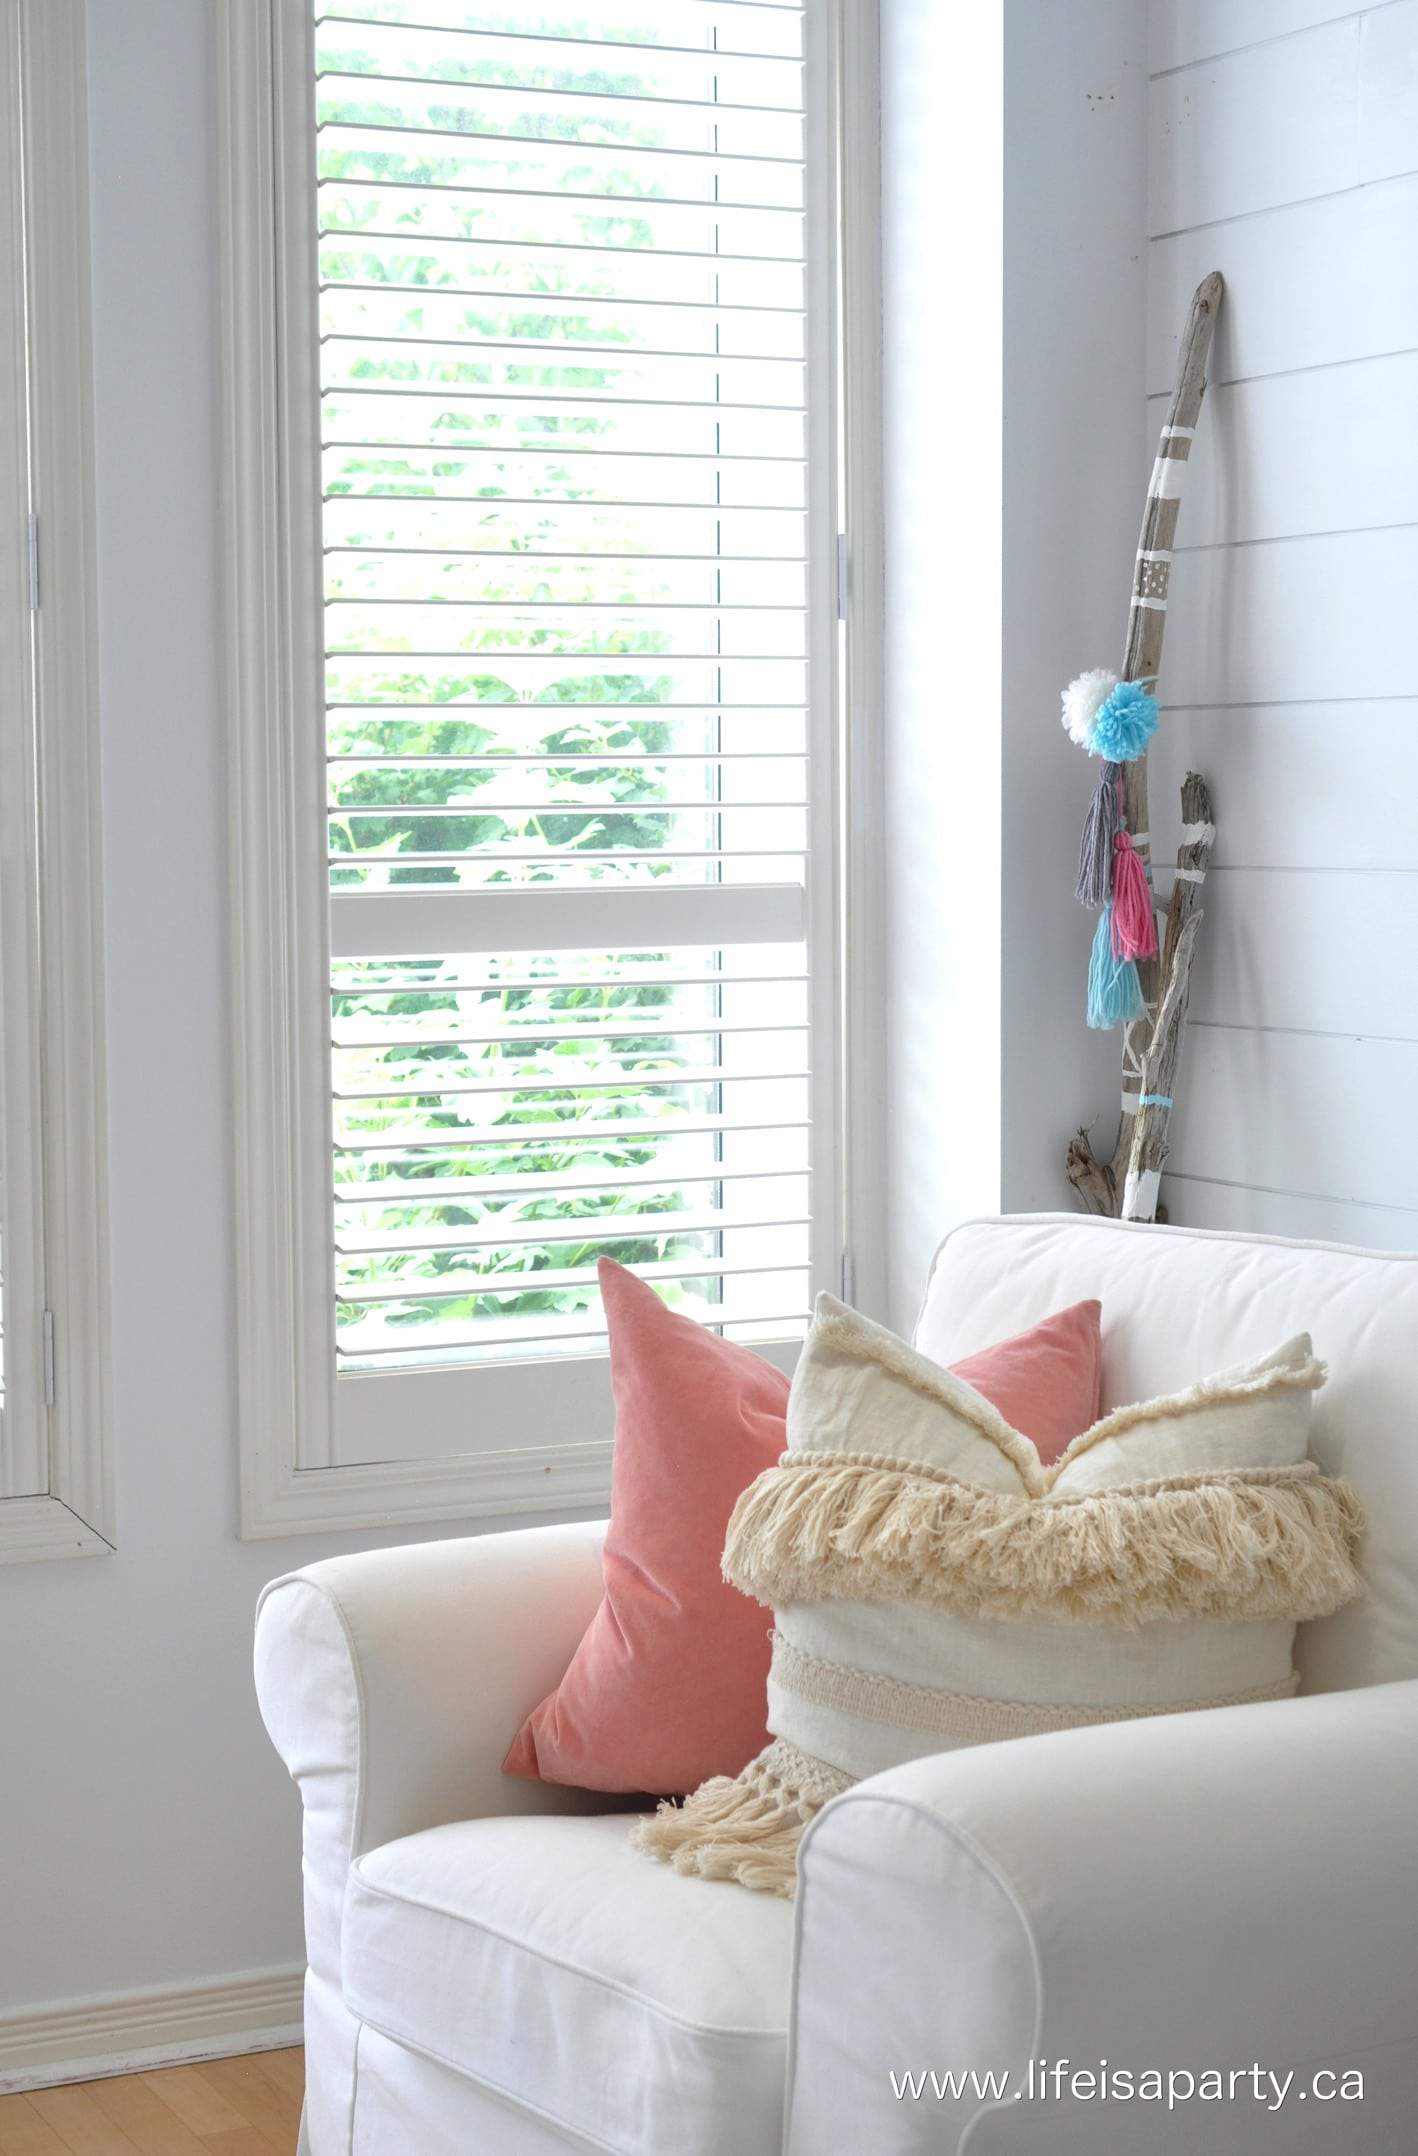
painted driftwood sticks

These would also look amazing in a kid's room, or a boho inspired nursery.

DIY Boho Driftwood Sticks

With easy DIY Boho Painted Driftwood Sticks, life really is a party!

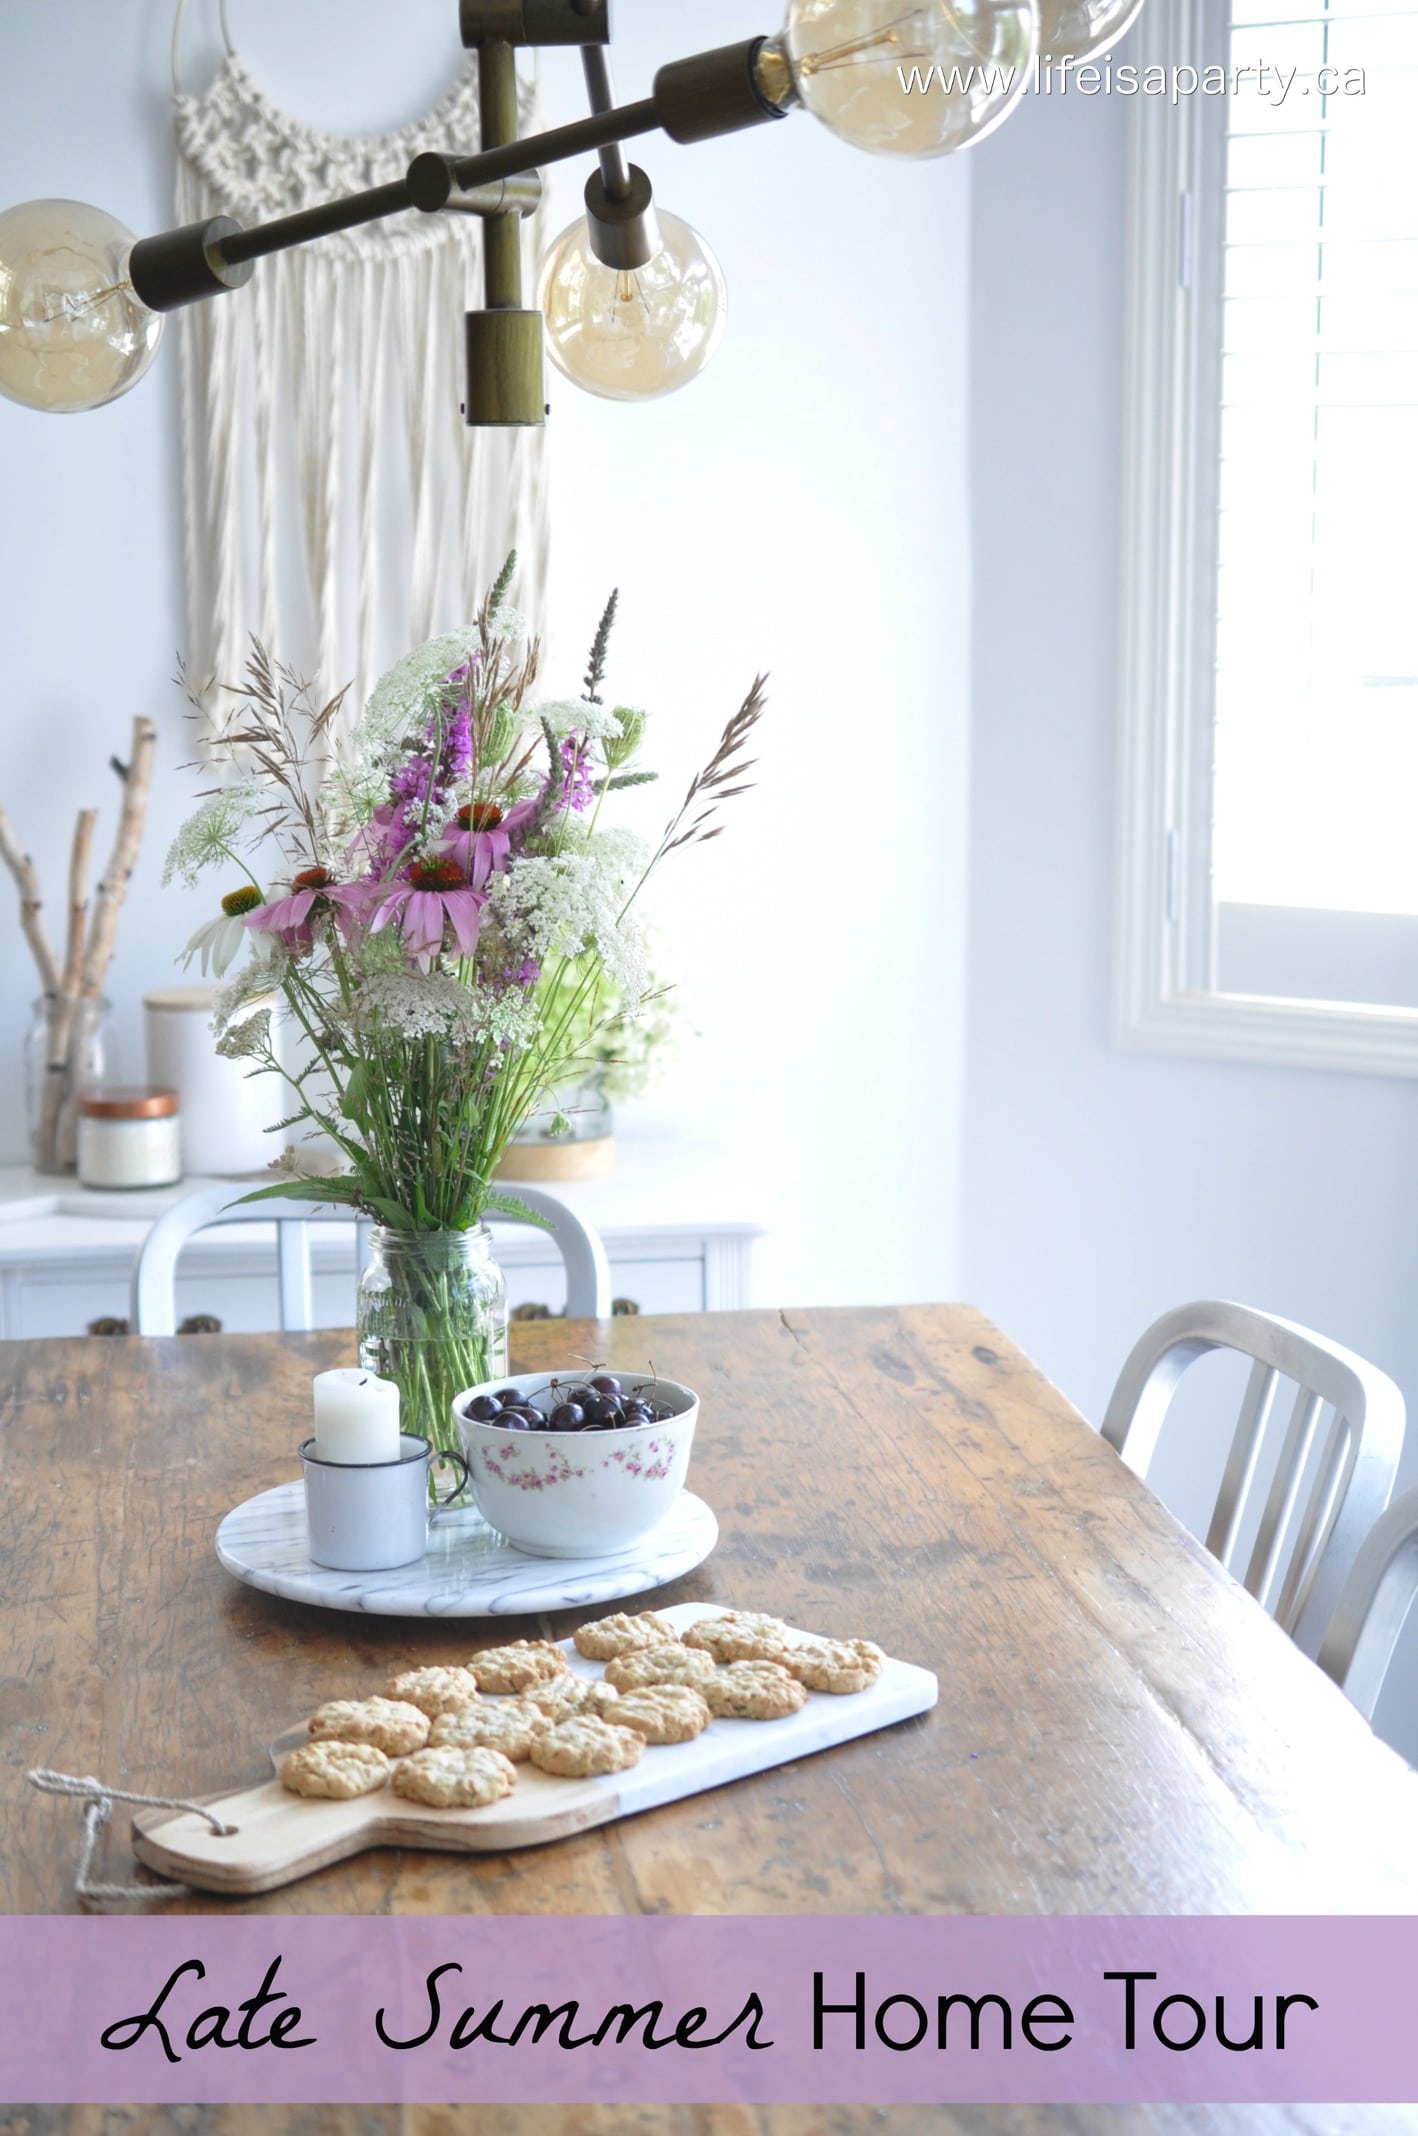
You might also like our Late Summer Home Tour here -where I used them along with lots more boho touches.
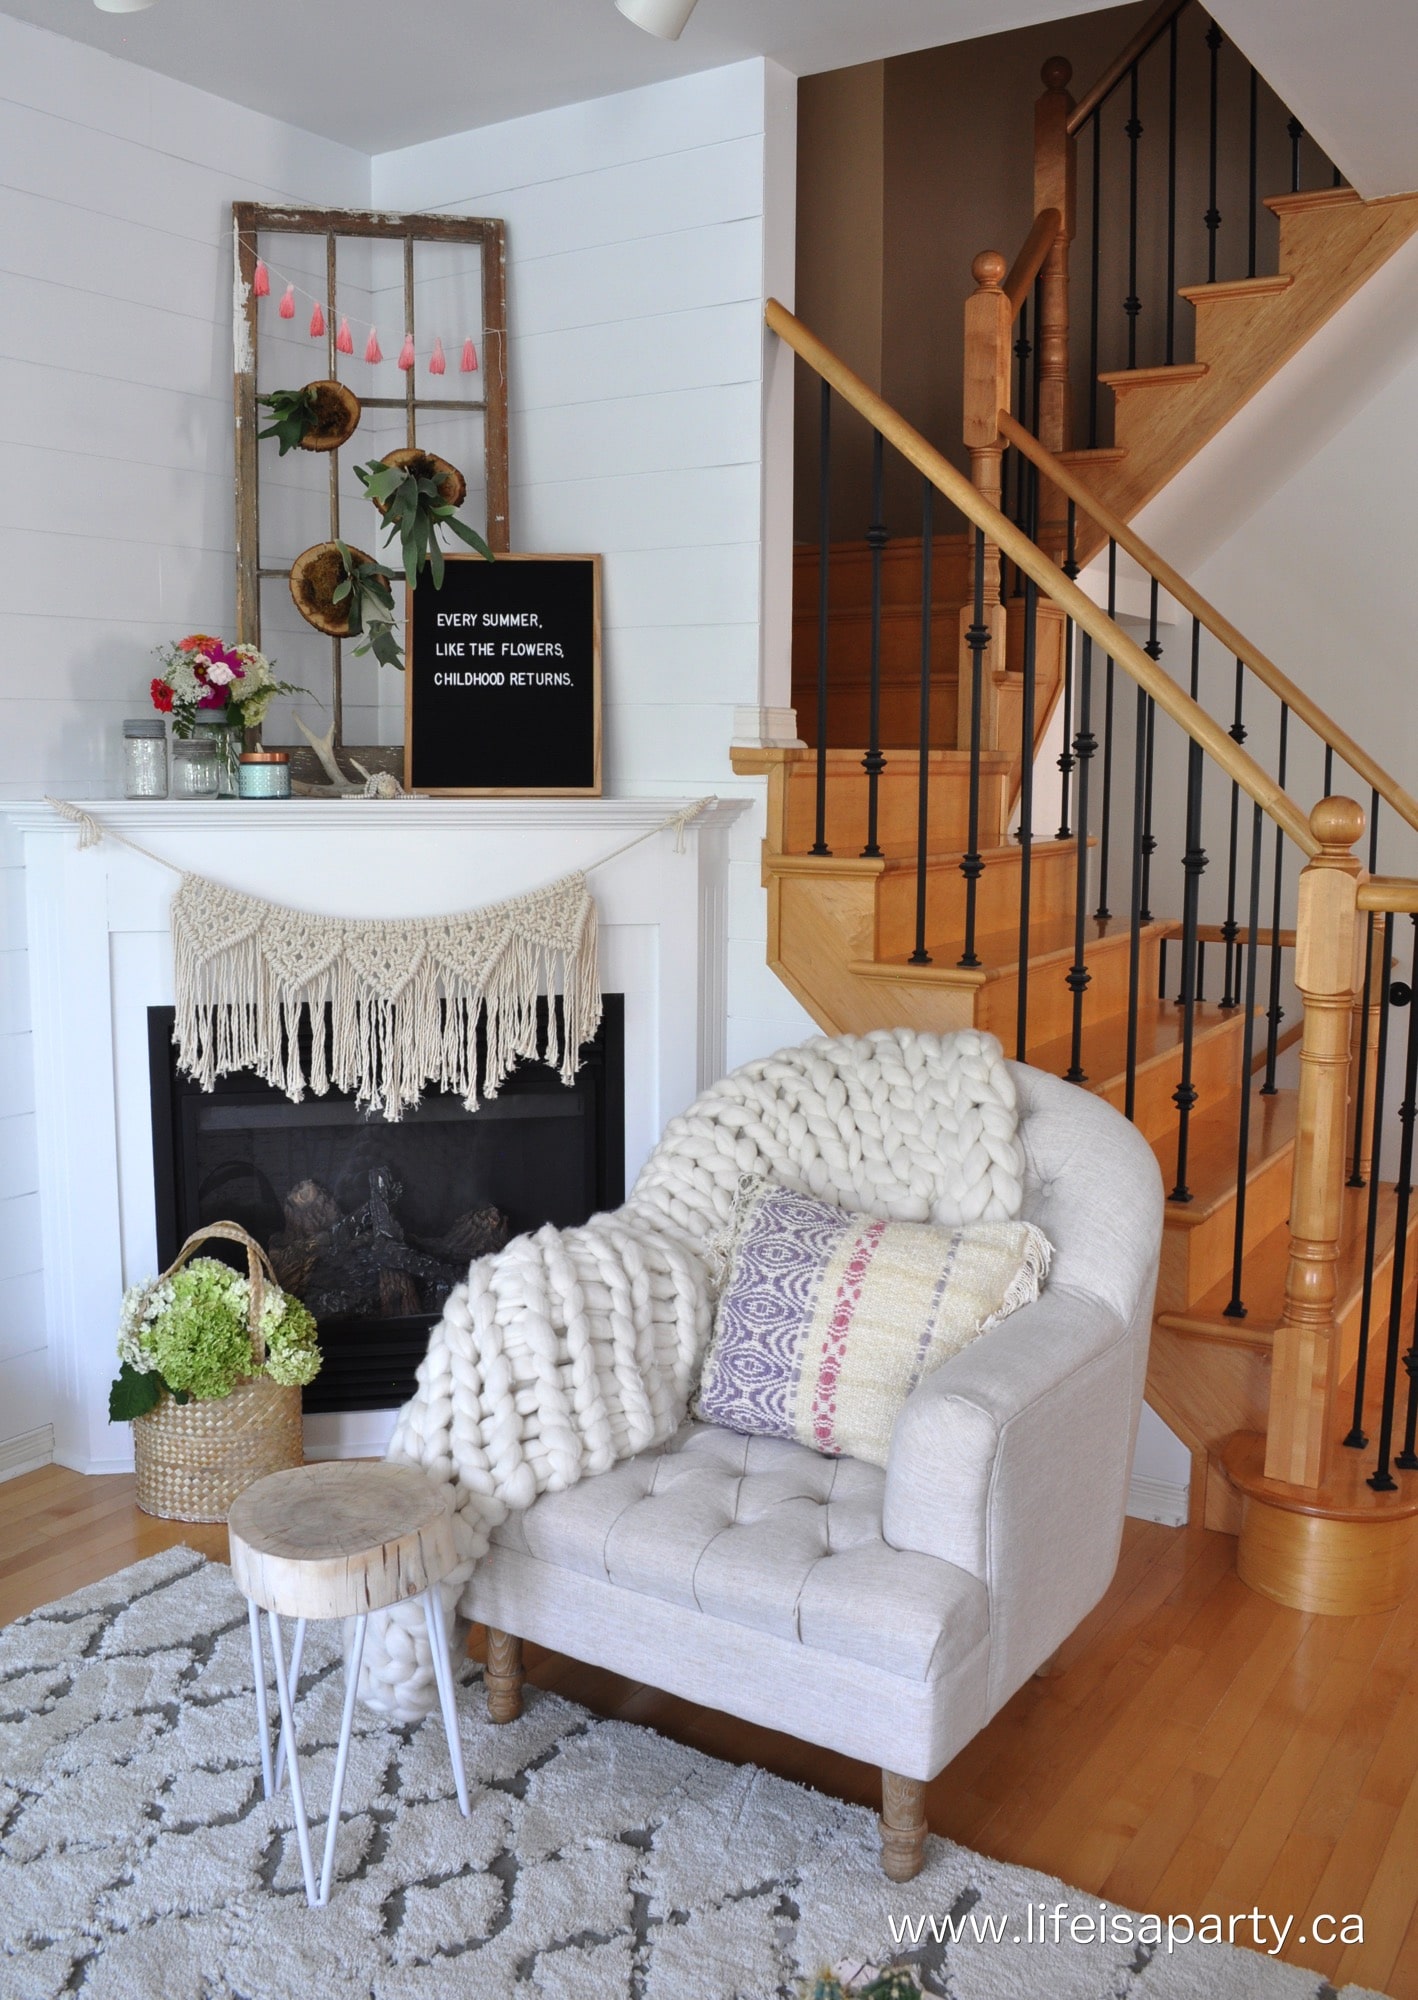
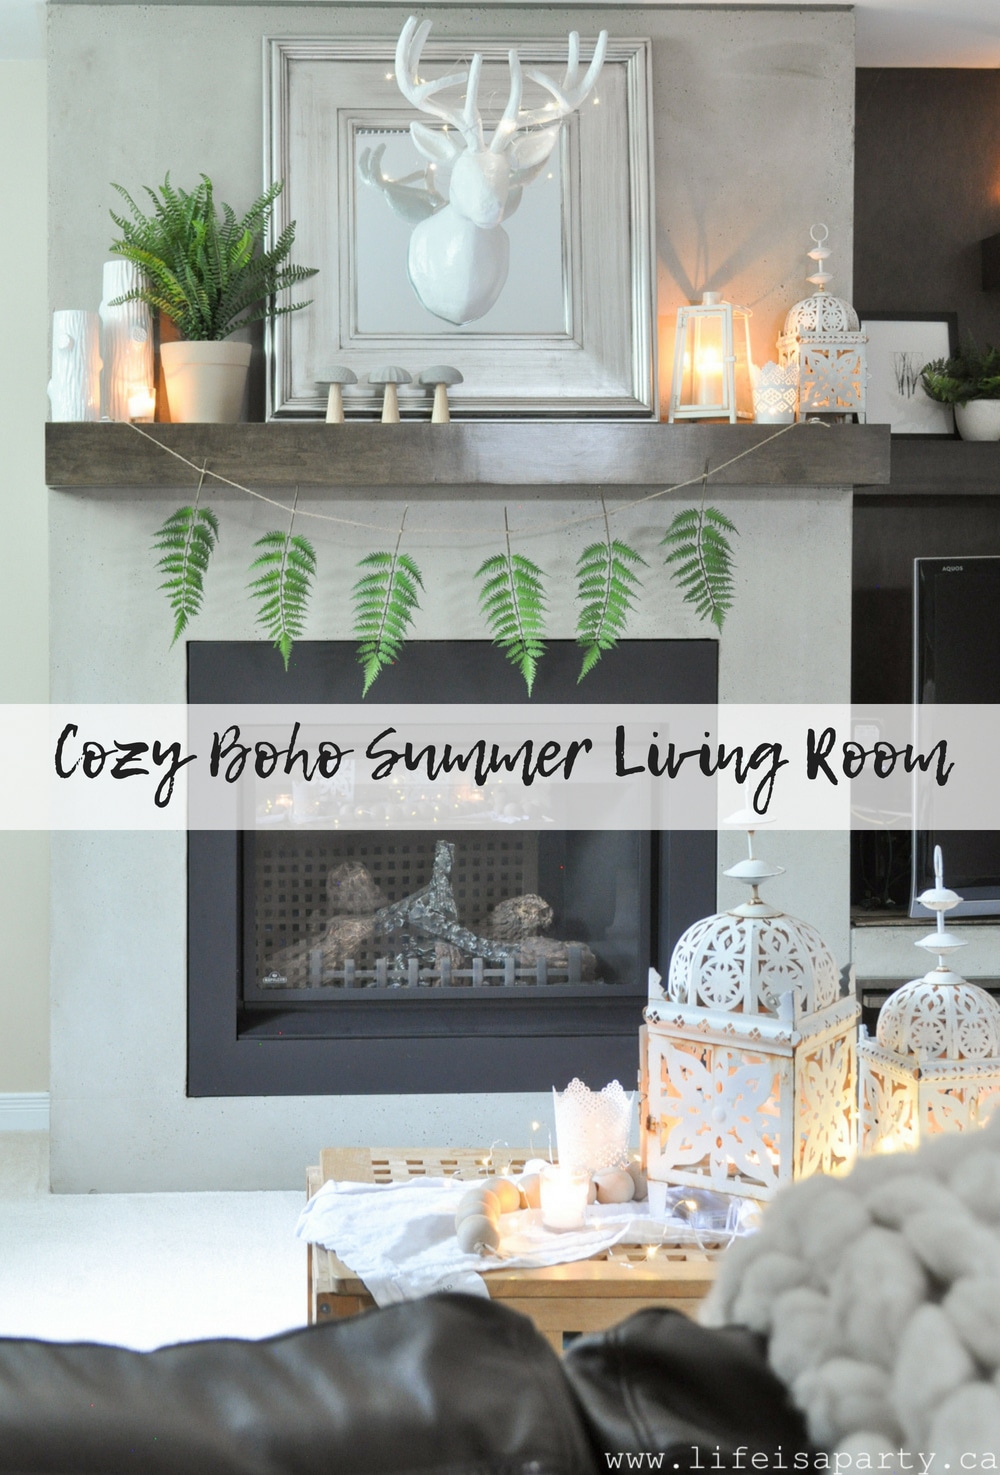
Also check out our Cozy Boho Summer Living Room here.
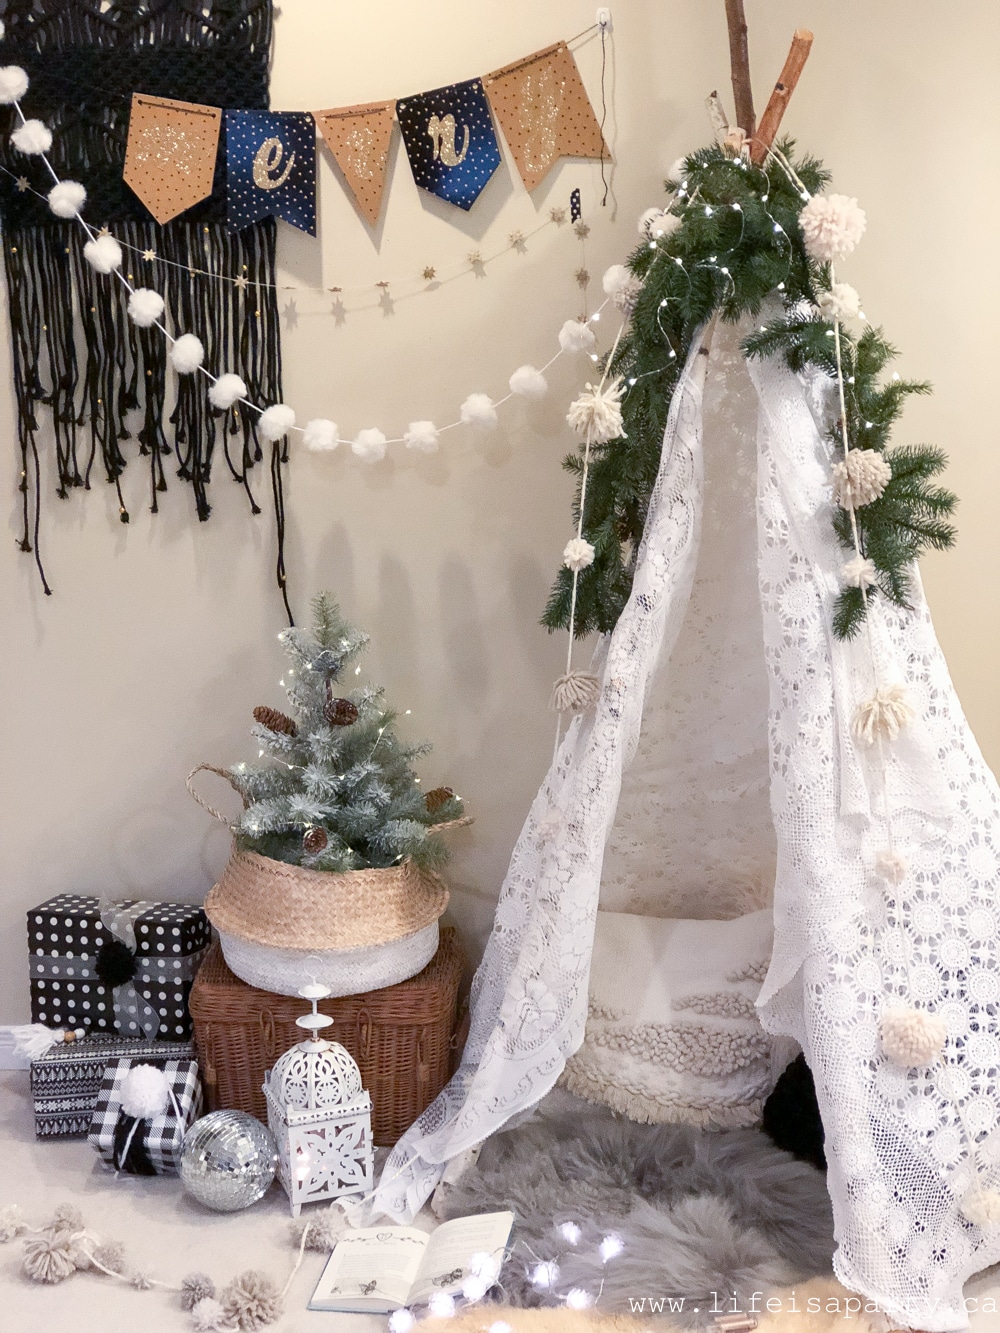
You might also enjoy our Boho Reading Tent here.
Late Summer Home Tour

Aug 2, 2017 · 5 Comments

Late summer home decor ideas.

Late Summer Home Tour -pretty pastels in pink and purple and fresh flowers with a little Boho and Rustic Scandinavian design.

Late summer home decor ideas.
[feast_advanced_jump_to]

I've taken my time through July gathering and making a few pieces for this late summer home tour I'm sharing today.  I've enjoyed gathering up some perfect summer pieces that combine my rustic Scandinavian style, with more boho influence.

It's the first of August, and officially the beginning of the second half of our Canadian summers.  Our kids go back to school the day after Labour Day, so we have one more full month to enjoy.  I'm already fighting off thoughts of back to school, especially as I see lots of my US friends prepping for their earlier start.  I'm trying to stay in summer mode as long as I can and squeeze out all it's goodness before I turn to thoughts of packing lunches, back to routine and all things pumpkin -haha.

Late Summer Dining Room

summer dining room

It has taken me a little while to finish up my summer decor.  Usually in blogland we're at least trying to work way ahead…but of course the funny thing about blogging about your life is it's always a funny balance of doing things in advance to inspire others, and the sharing in real time to keep it authentic.  This tour is erring on the authentic side…and perhaps a little late in terms of blogging.

I love my home more and more since completing the living room and eating area makeover for the last One Room Challenge (and I can't wait to hopefully tackle the kitchen for this fall's next One Room Challenge -update: it's done, check out the kitchen reveal here.).  So this was my first time since the big reveal in the spring to enjoy decorating the space in the living room and eating area for a new season.  I wanted to add in some pastels for summer.  I used a bit of pink, a little aqua, and a touch of lilac and that spilled over to the rest of the main floor too.

Summer Home Tour

This pretty runner is sure to be a new favourite -made from some vintage curtains found on a fun thrift store hunt while on vacation.  I love the colours and the pretty fringe edging.

Summer entrance table

I spruced up the entrance way with some pretty vintage bottles holding some ferns.

ferns in vintage bottles

And a call for summer adventures!

entrance table

I had fun adding lots of flowers for our little tour.  Some were wild flowers found on a walk and others were from my garden.  One of the things I love about summer is picking fresh flowers all the time.

dining room tour

Living Room

Now into the living room where I had the most fun.

Summer Home Tour

We brought our garden bench from outside to use as a coffee table and shifted the ottoman over to in front of the chairs.  I really like it.  It's super practical with lots of space for coffee cups and the rustic pink bench looks great.

living room tour

I styled it with a pretty little grouping of cactus in a rose gold container, and sweet little brass watering can -one of my yard sale scores this summer.

cactus

It was fun adding lots of pretty pillows to the couch and bringing in some colour with pink and a little aqua too.  I'm a little obsessed with vintage wool blankets lately.  They're always the first thing I check at the thrift store lately.  This one had the perfect bit of pink!

white couch

It's amazing how just a little colour can add lots of life to a space.

Summer living room

From the same set of thrifted curtains as I made the runner from, I also made a cushion.  I love it too, and I think I might have to make at least one more.  I love the fringe and the boho vibe it adds.

living room tour

Mantel

The mantel got a little refresh too, I think my favourite part is the pretty tassel bunting.

Summer mantel

We crafted it ourselves with some cotton yarn and dip dyed it in Koolaid!  I'll be sure to share the simple tutorial soon.

Late Summer Home Tour

My little market bag full of hydrangea area - another favourite.

hydrangea in a basket

Flowers, flowers, and more flowers.

Late Summer Home Tour -pretty pastels and fresh flowers with a little Boho and Rustic Scandinavian design.

Over on the other side of the room there are a few more simple summer touches.

summer living room
rustic boho home tour

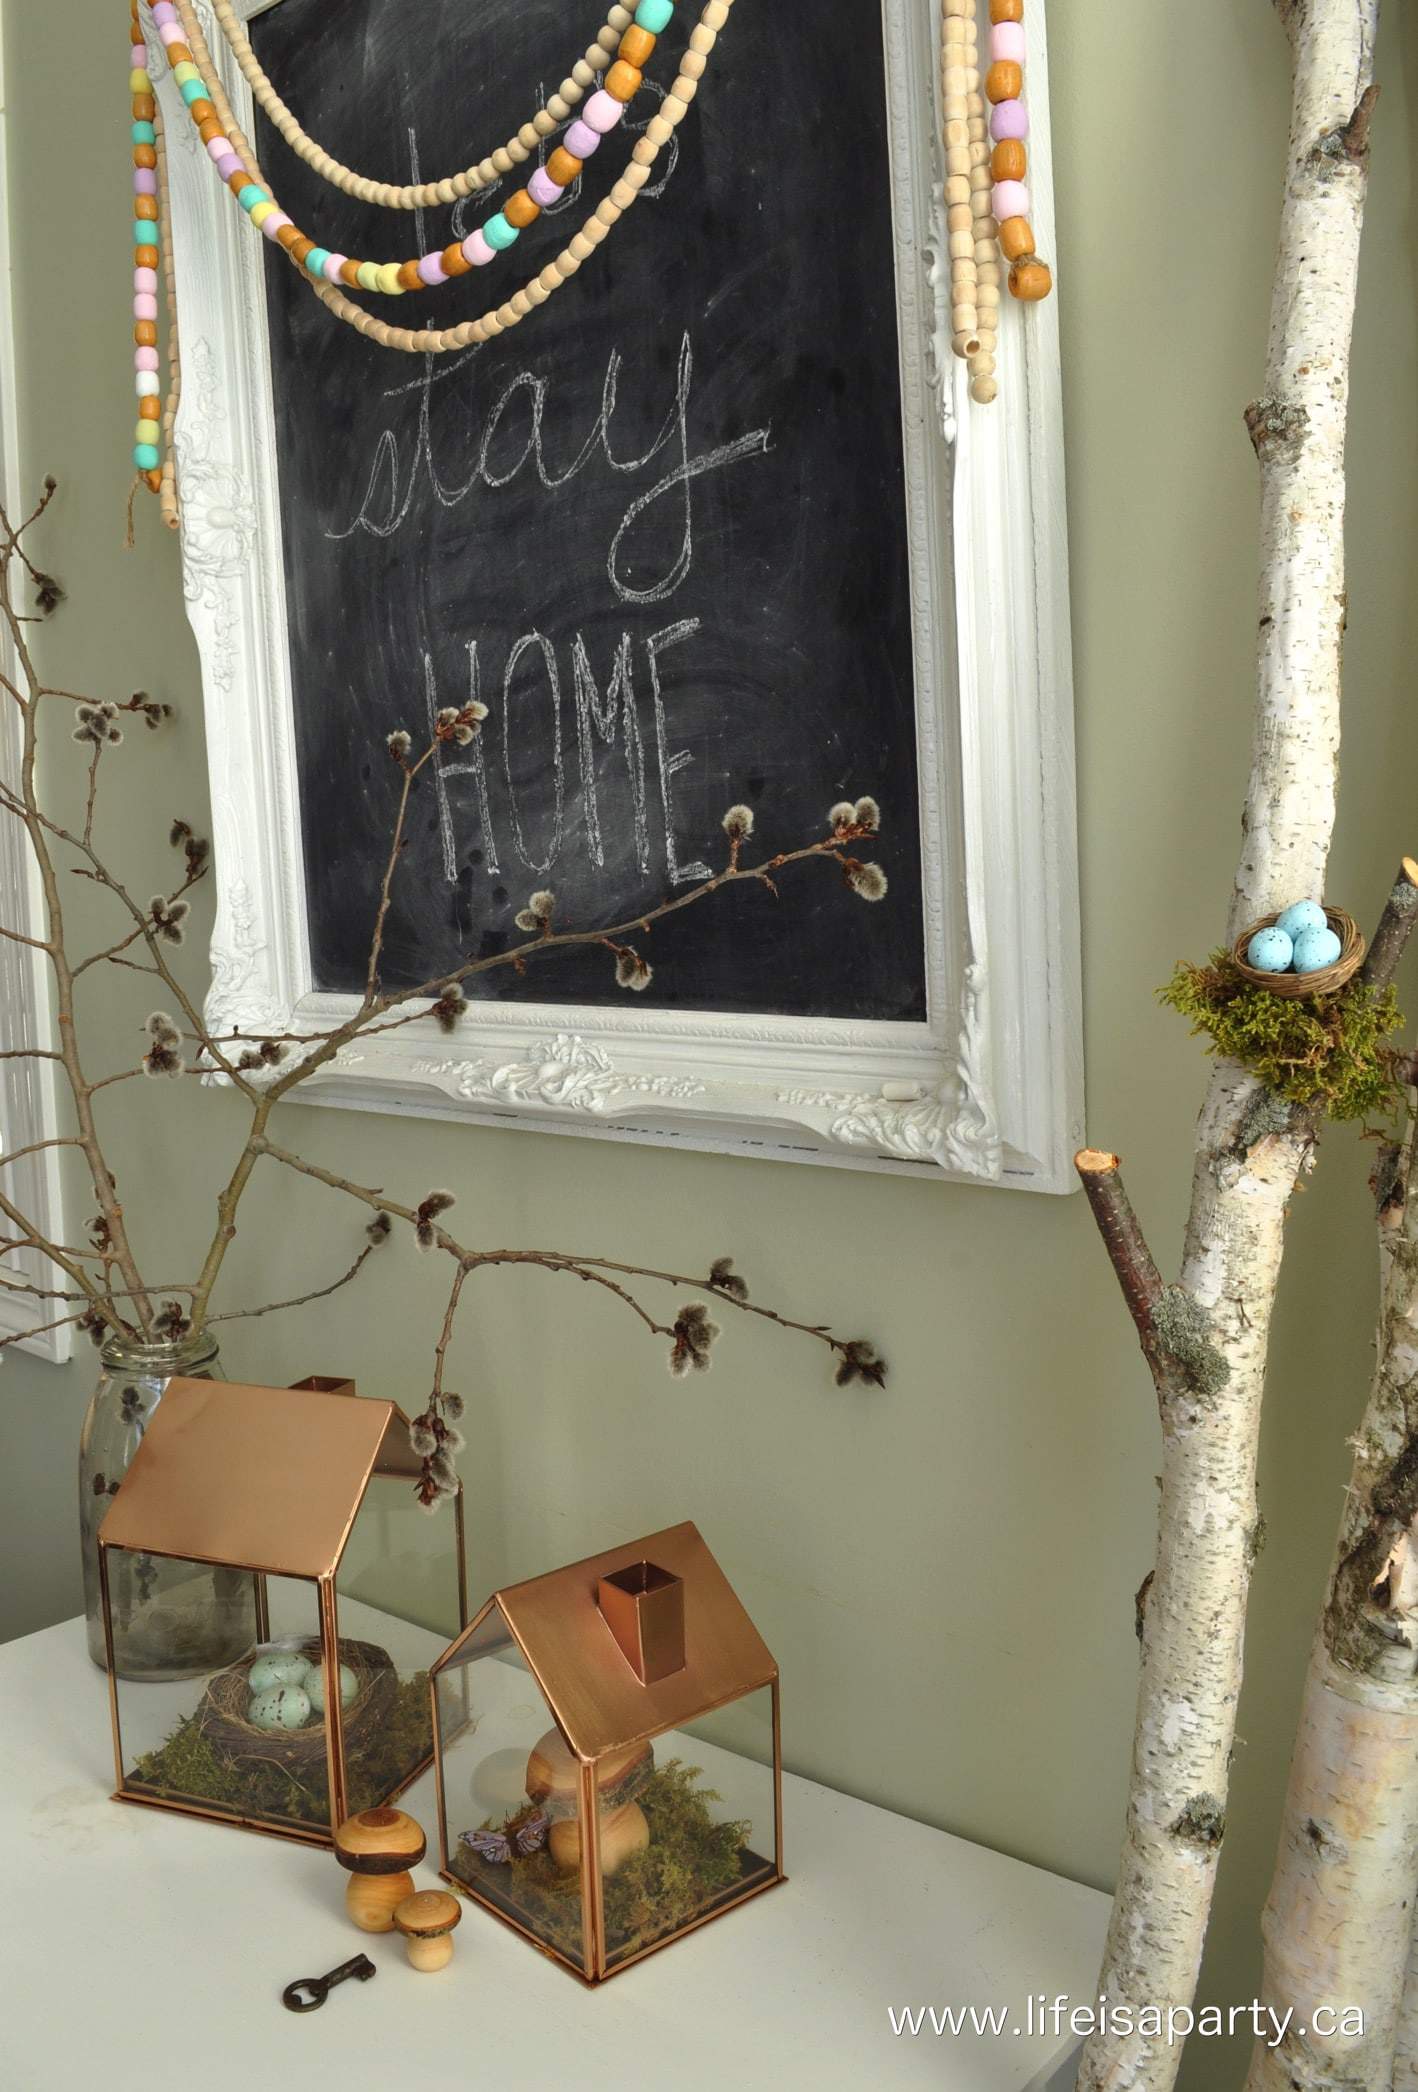
I had some pretty birch poles in the corner of this room for the spring, but wanted to add a summer vibe with some pretty driftwood.

Boho driftwood sticks painted and with yarn pom poms and tassels.

These were so simple to make -found the driftwood at the lake and painted with a little craft paint.  See the tutorial for the painted driftwood sticks here.

Eating Area

flowers and cookies on a table

Over in the kitchen, a few treats.  We're loving being home and having time to do things like make a pillow fort, run through the sprinkler, or bake.  This morning my youngest daughter made a batch of oatmeal cookies and they're sooo good!  We'll see how long they last. 😉

purple and white cone flowers and grasses bouquet

Thanks for joining me, and I hope it's inspired you to maybe add a few pretty colours for summer, or pick a bouquet of flowers for your table.

With a Late Summer Home Tour, life really is a party!

More Inspiration

You might also like our Cozy Summer Living Room tour here.

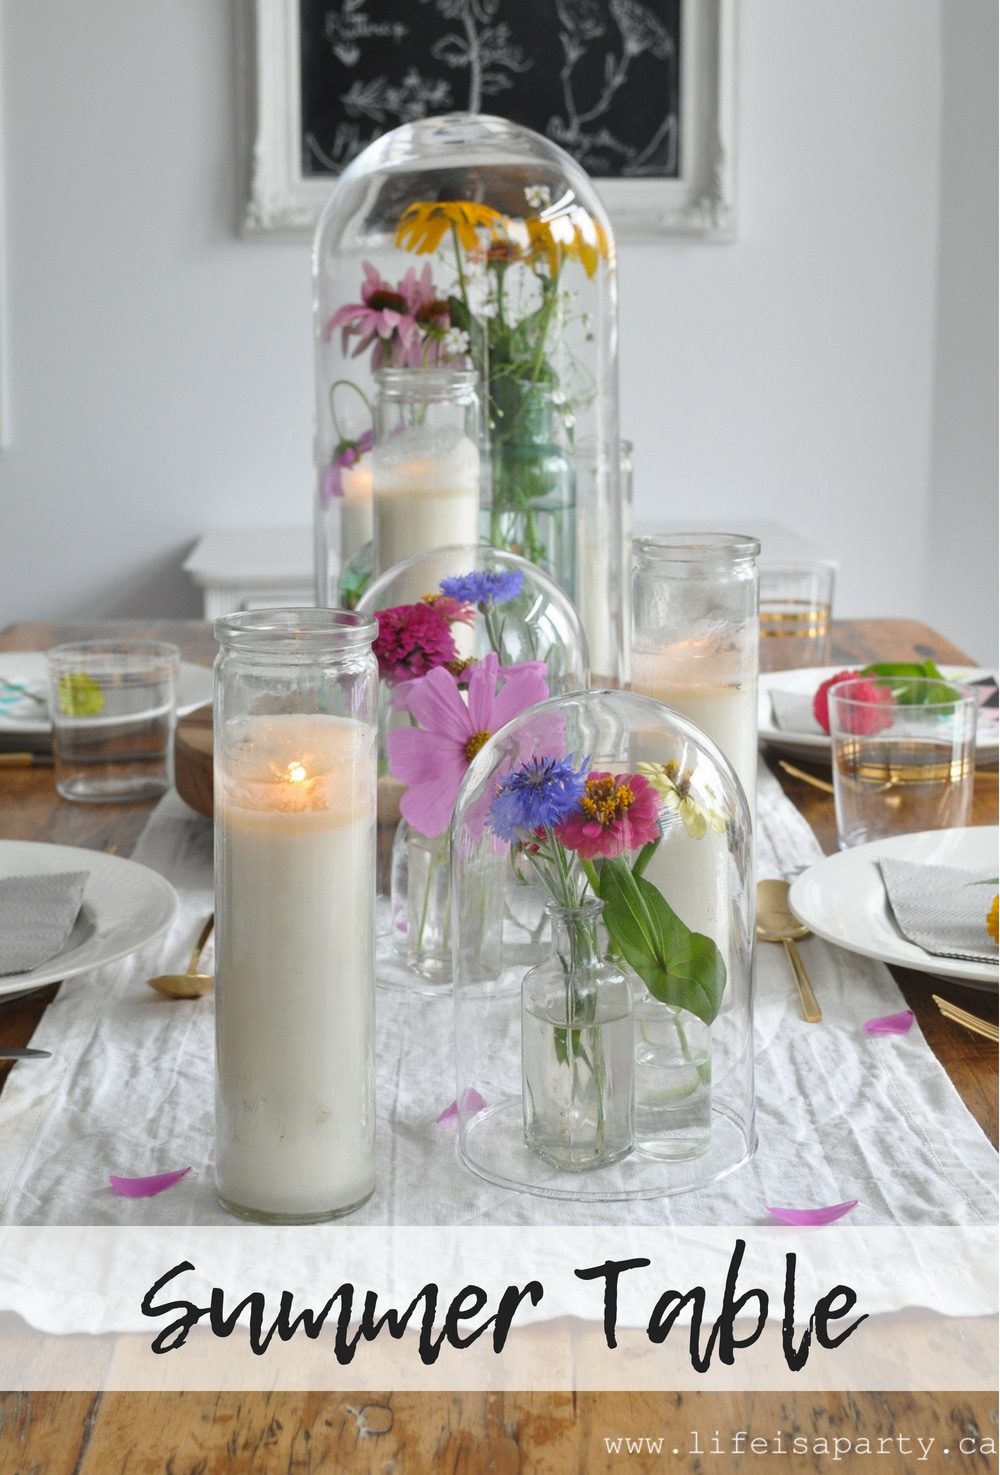
Also check out our Summer Table here.

Summer Tablescape -garden flowers in vintage bottles under glass cloches create a simple, easy summer time table for entertaining.

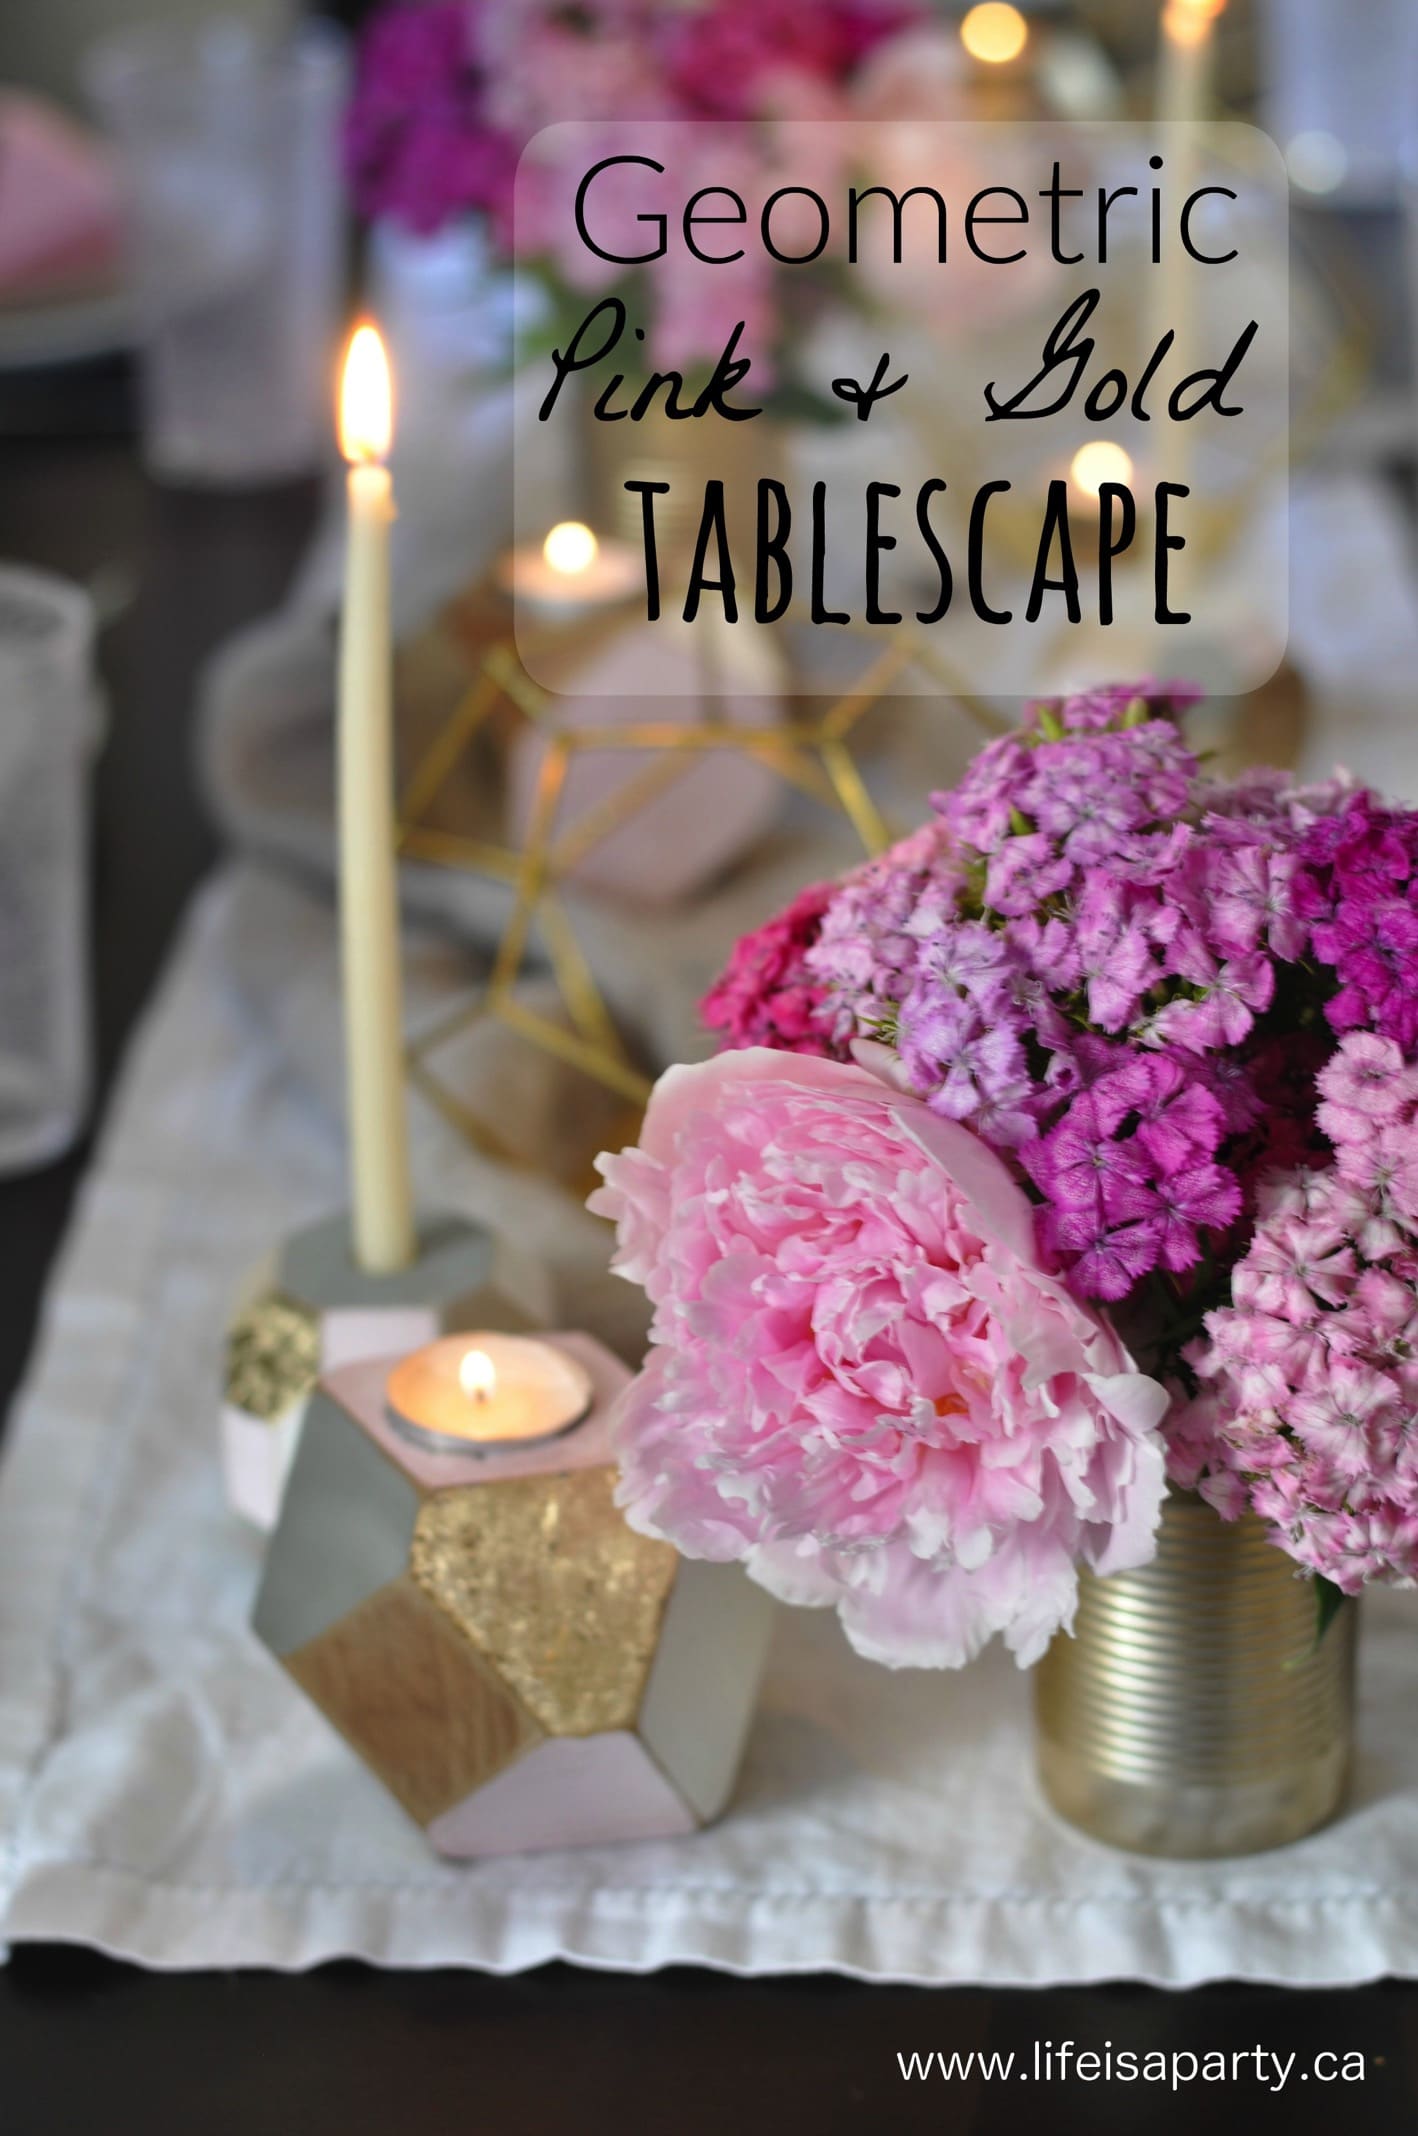
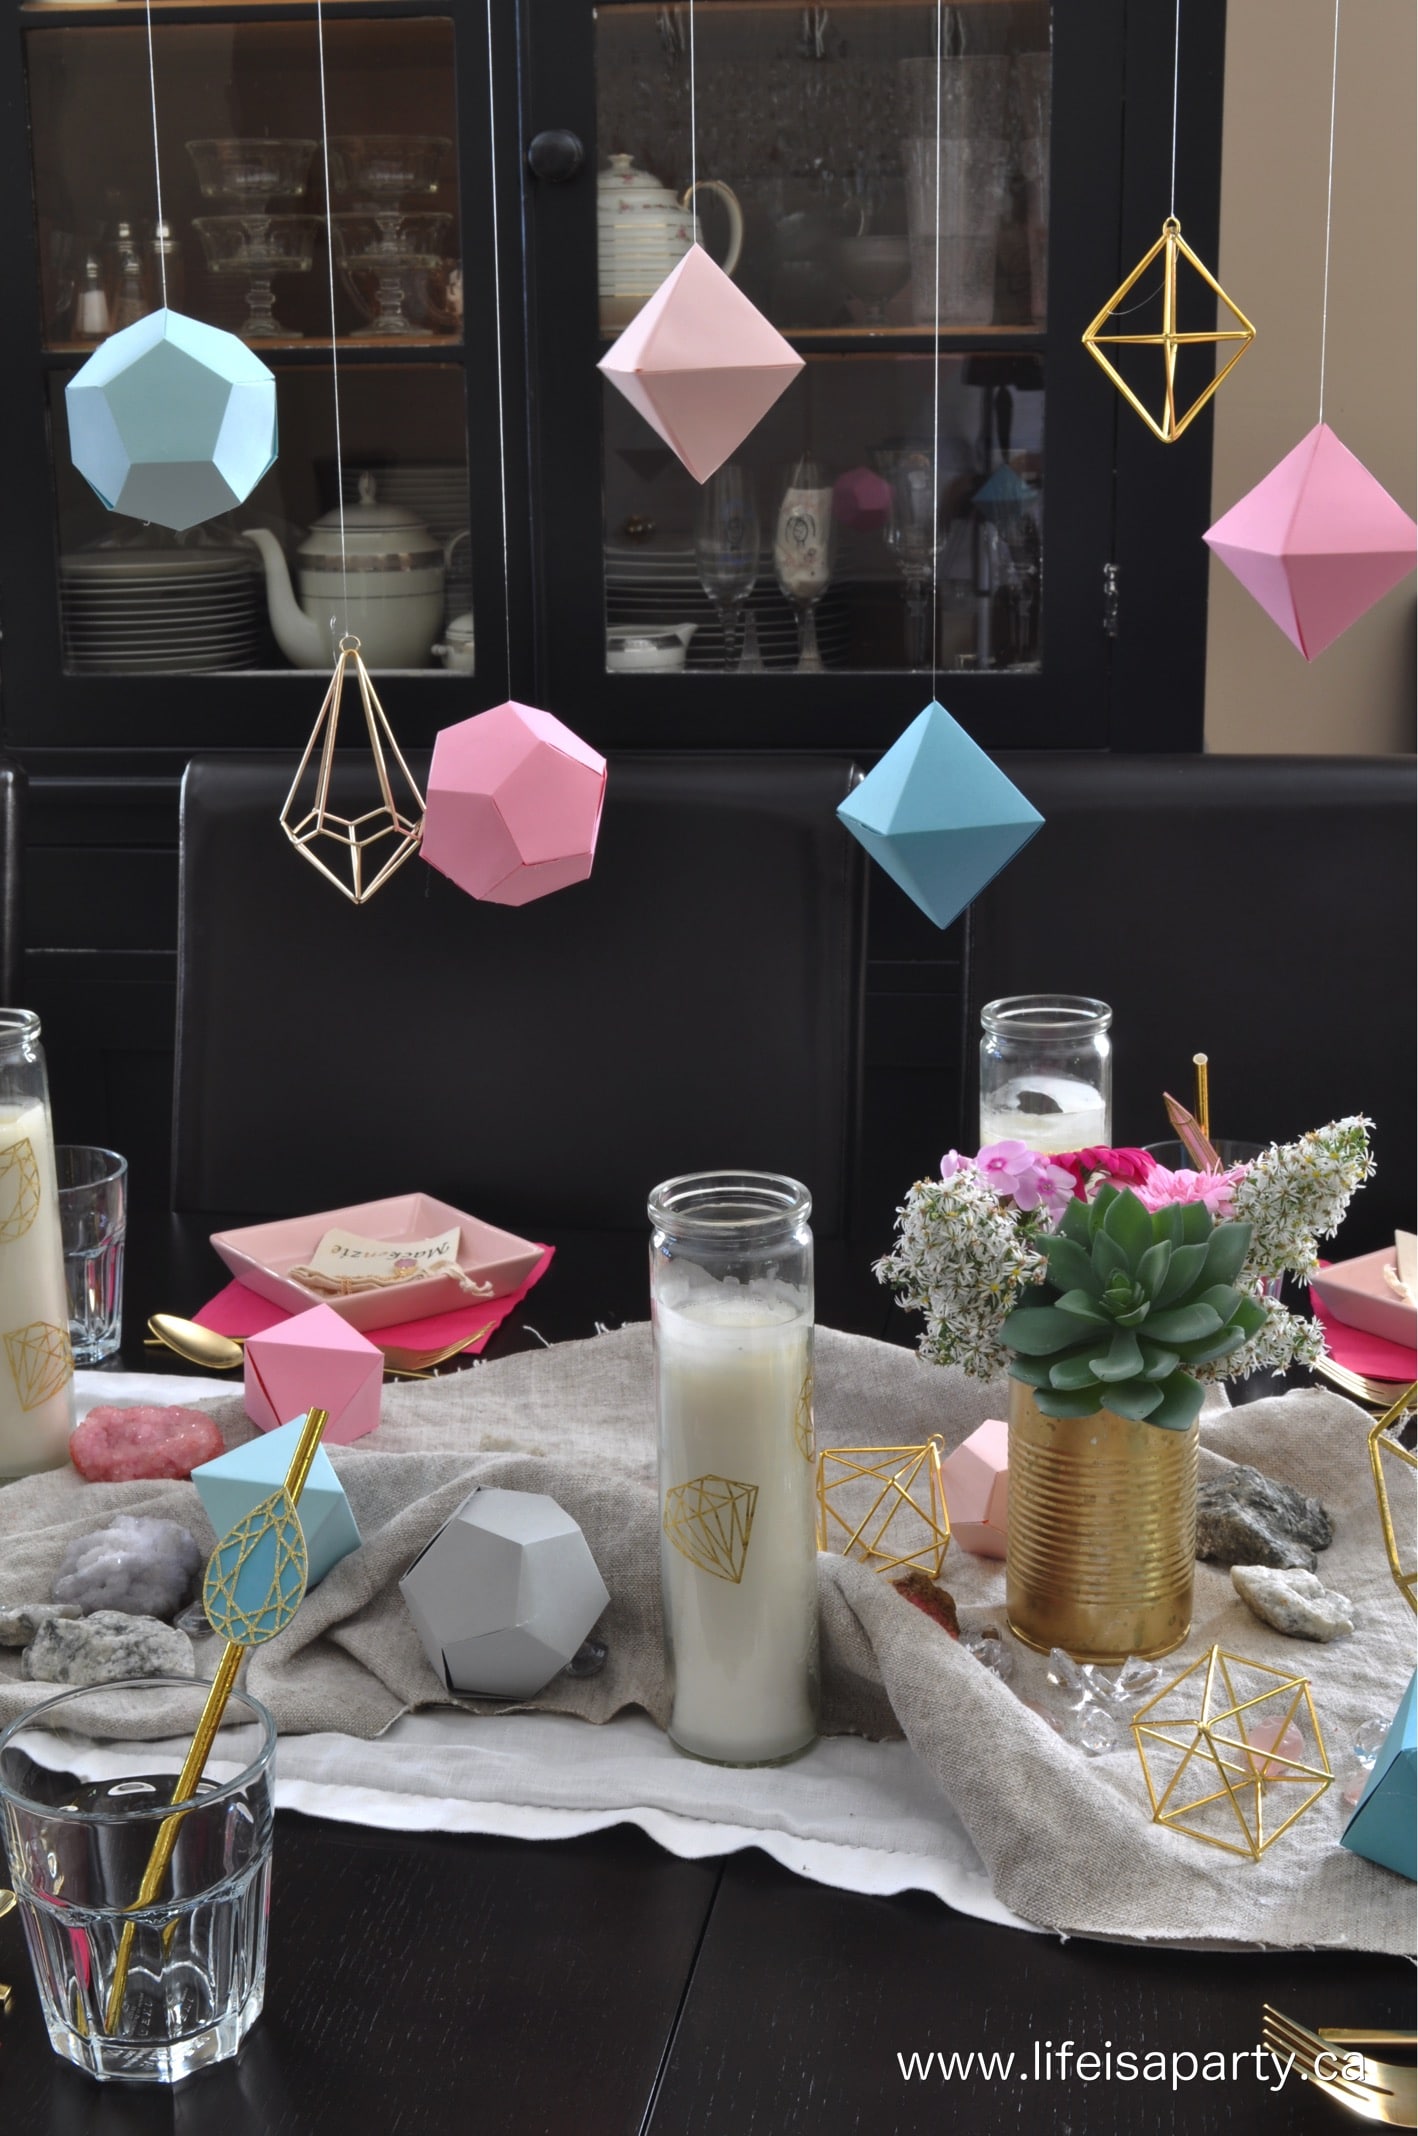
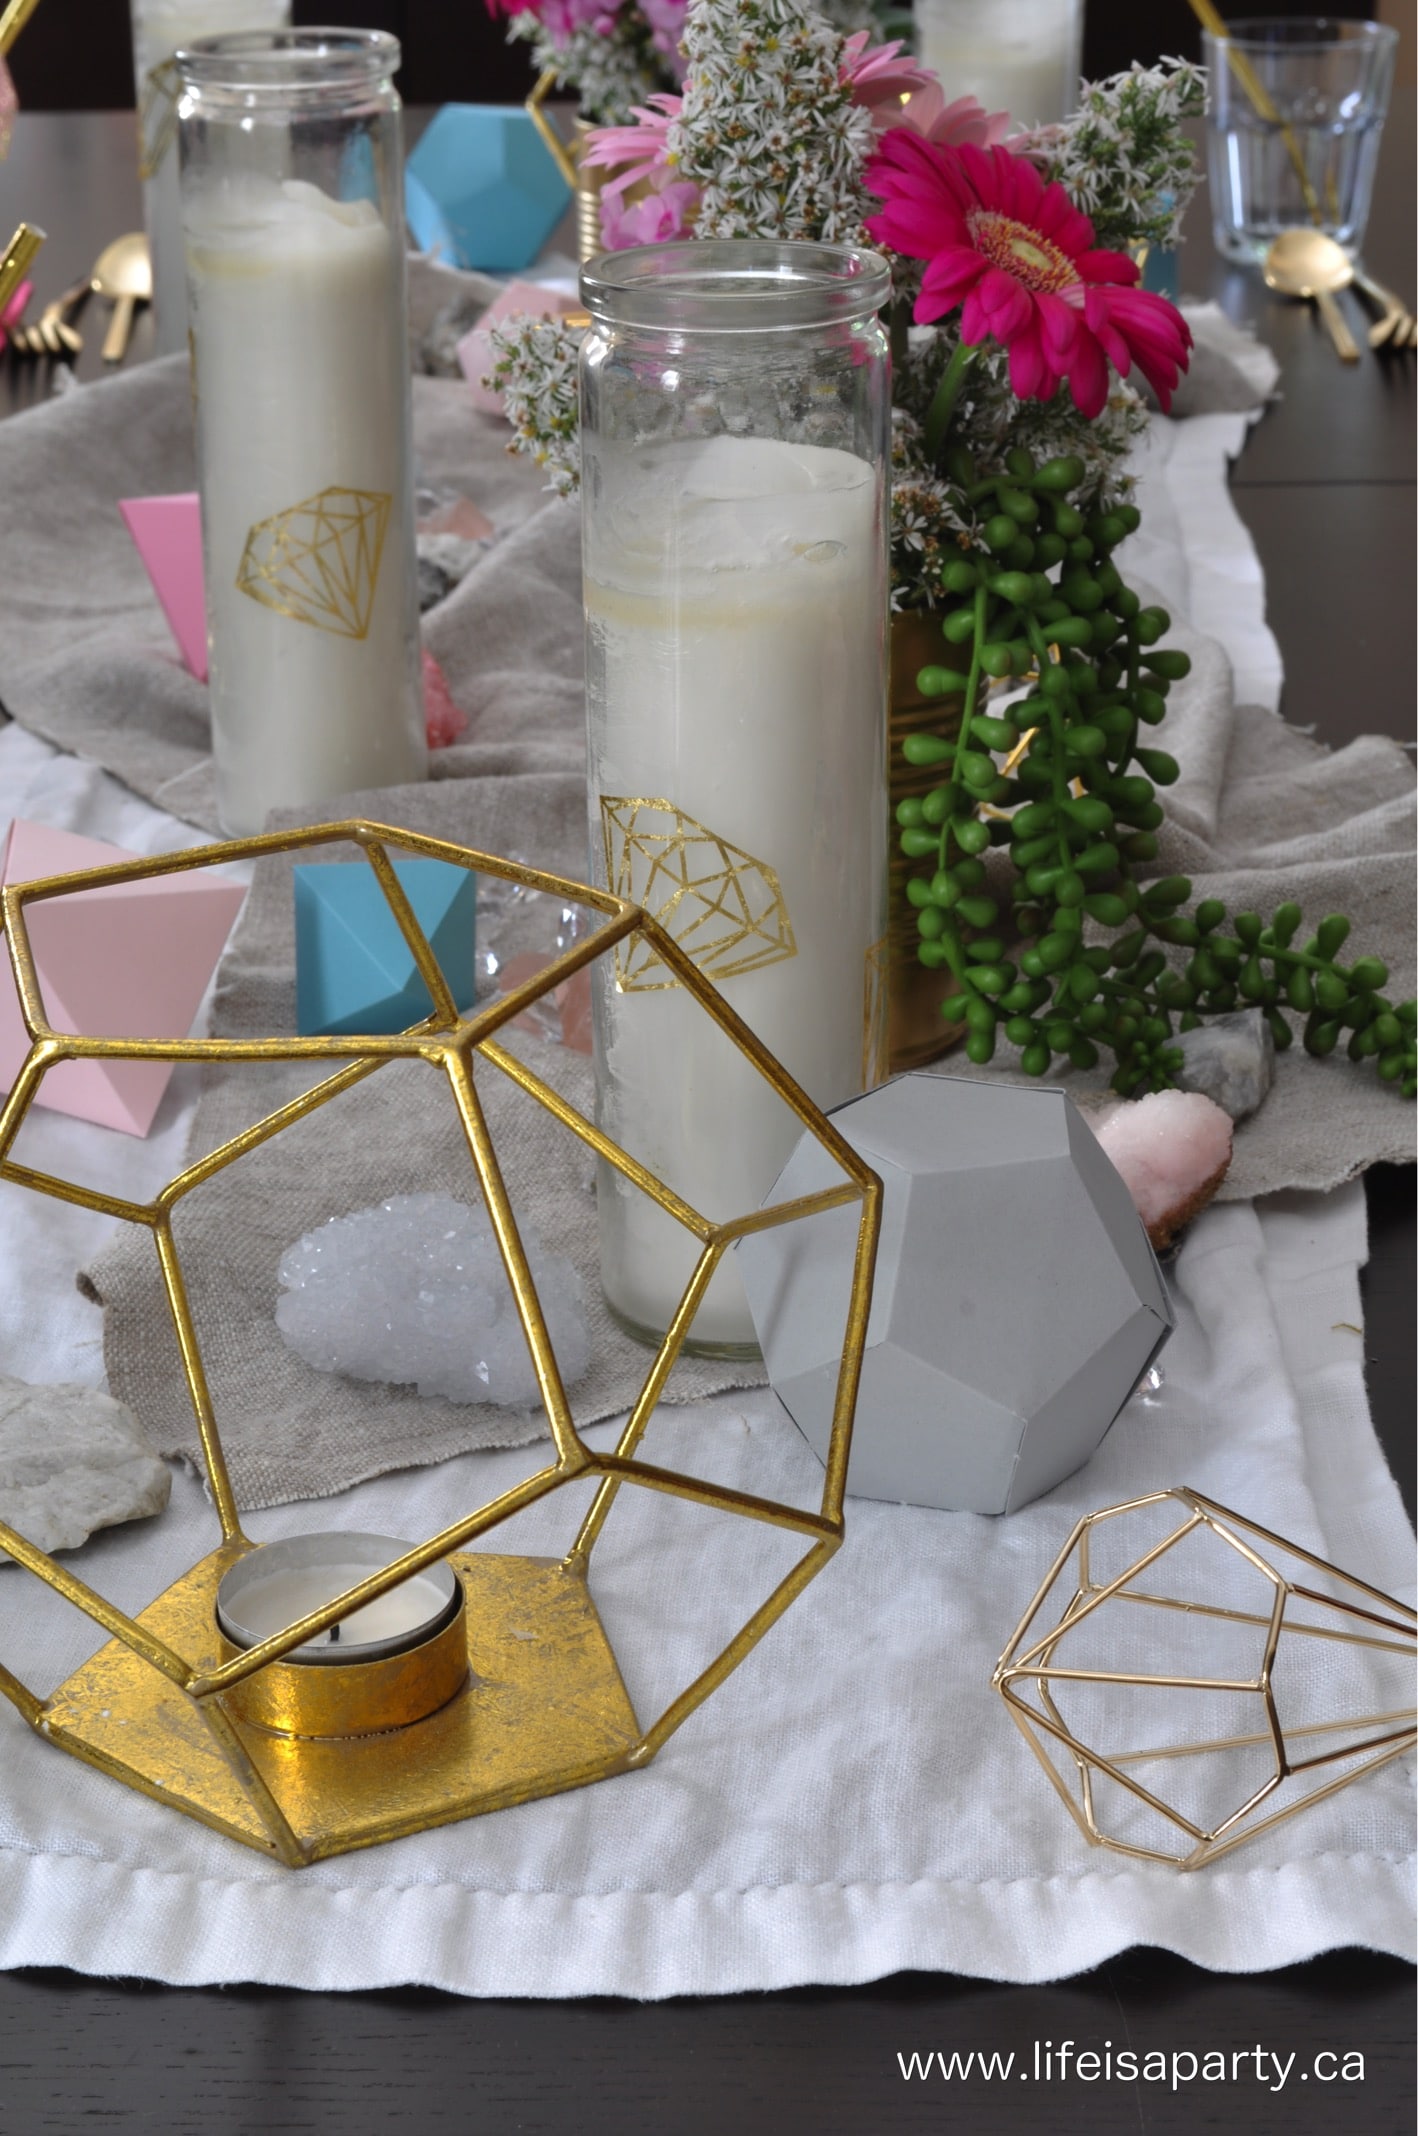
You might also enjoy our Geometric Pink and Gold Tablescape here.

Breakfast Picnic Ideas

Jul 28, 2017 · 4 Comments

Beach breakfast picnic with yougurt parfaits and baked goods.

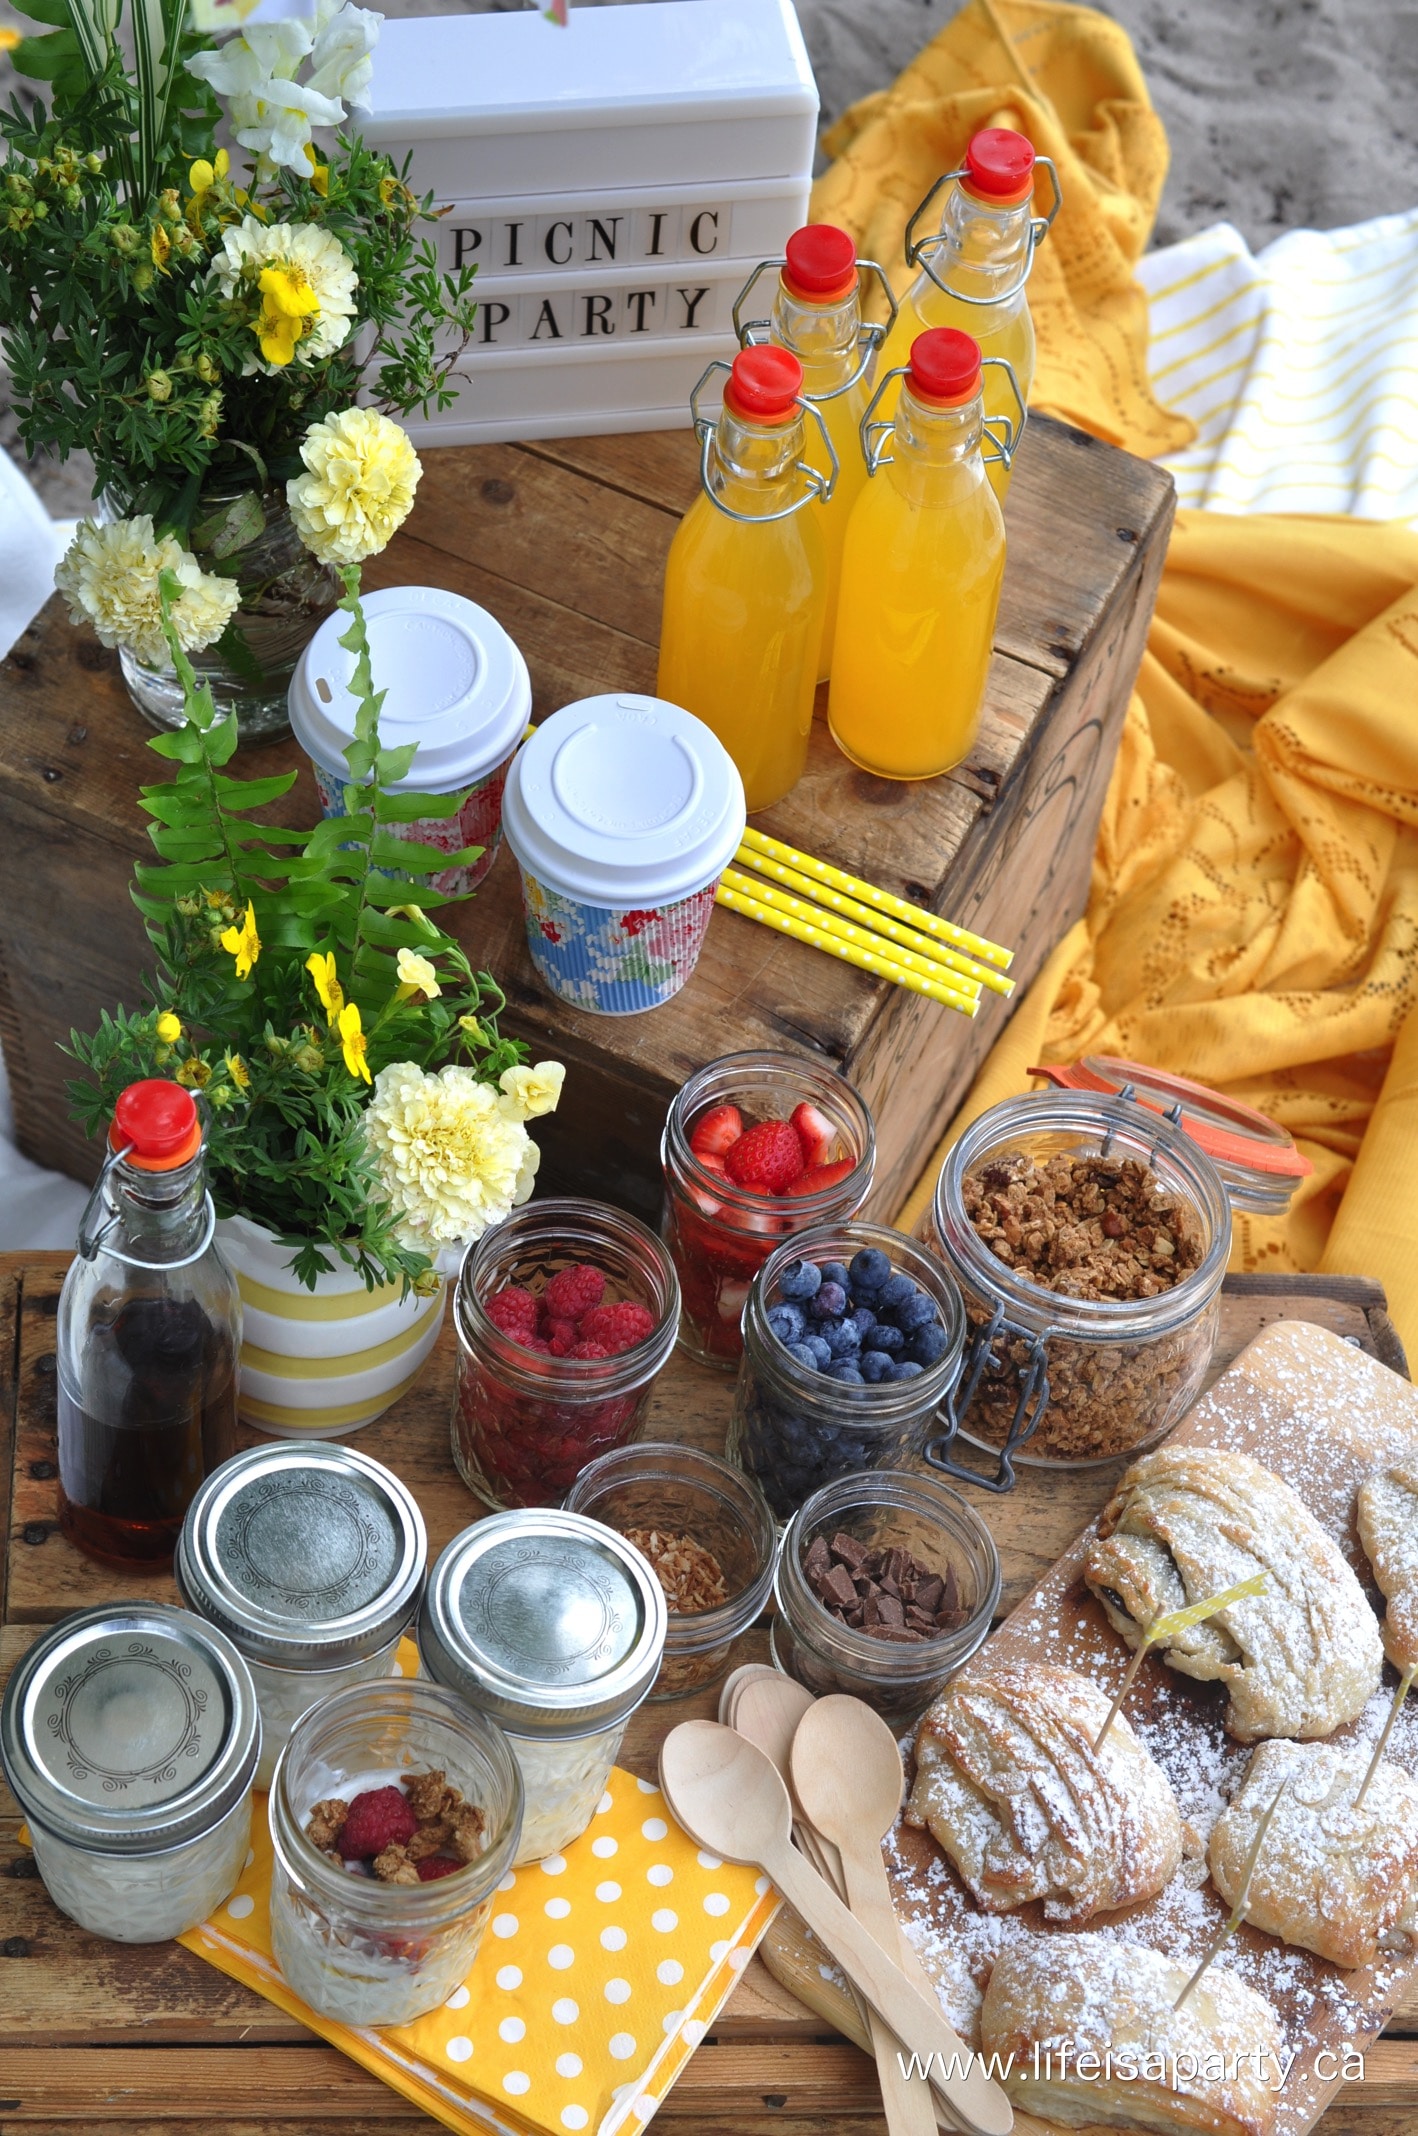
This breakfast picnic is full of ideas for pretty yellow decorations and an amazing menu with homemade croissants and a yogurt parfait bar!

Beach breakfast picnic with yougurt parfaits and baked goods.
[feast_advanced_jump_to]

Why We Love This Party

  • It's the perfect way to start the day -great food, outside, and beautiful scenery.
  • We love entertaining for breakfast, people are generally free, and it doesn't take up the whole day.
  • Picnics are such a great way to entertain. No need to clean the house, let's meet at the beach!
  • Breakfast foods are easy to make portable, and so delicious!

Today I want to share one of my favorite picnic ideas, which is a breakfast picnic.  We've been having a lovely summer so far…and I wish I could slow it down, and squeeze every bit of goodness out of it! Last week we were at the lake for vacation and one morning we treated ourselves to the most perfect little breakfast picnic. What a way to enjoy the most important meal of the day!  I think the best way to have breakfast is with a picnic.

We love picnics. If you do too, check out our French inspired picnic, or our Mushroom themed picnic. And find out what to bring on a picnic here.

Breafast picnic of a yougurt granola parfaits and fresh pastries.

Yellow Colour Scheme

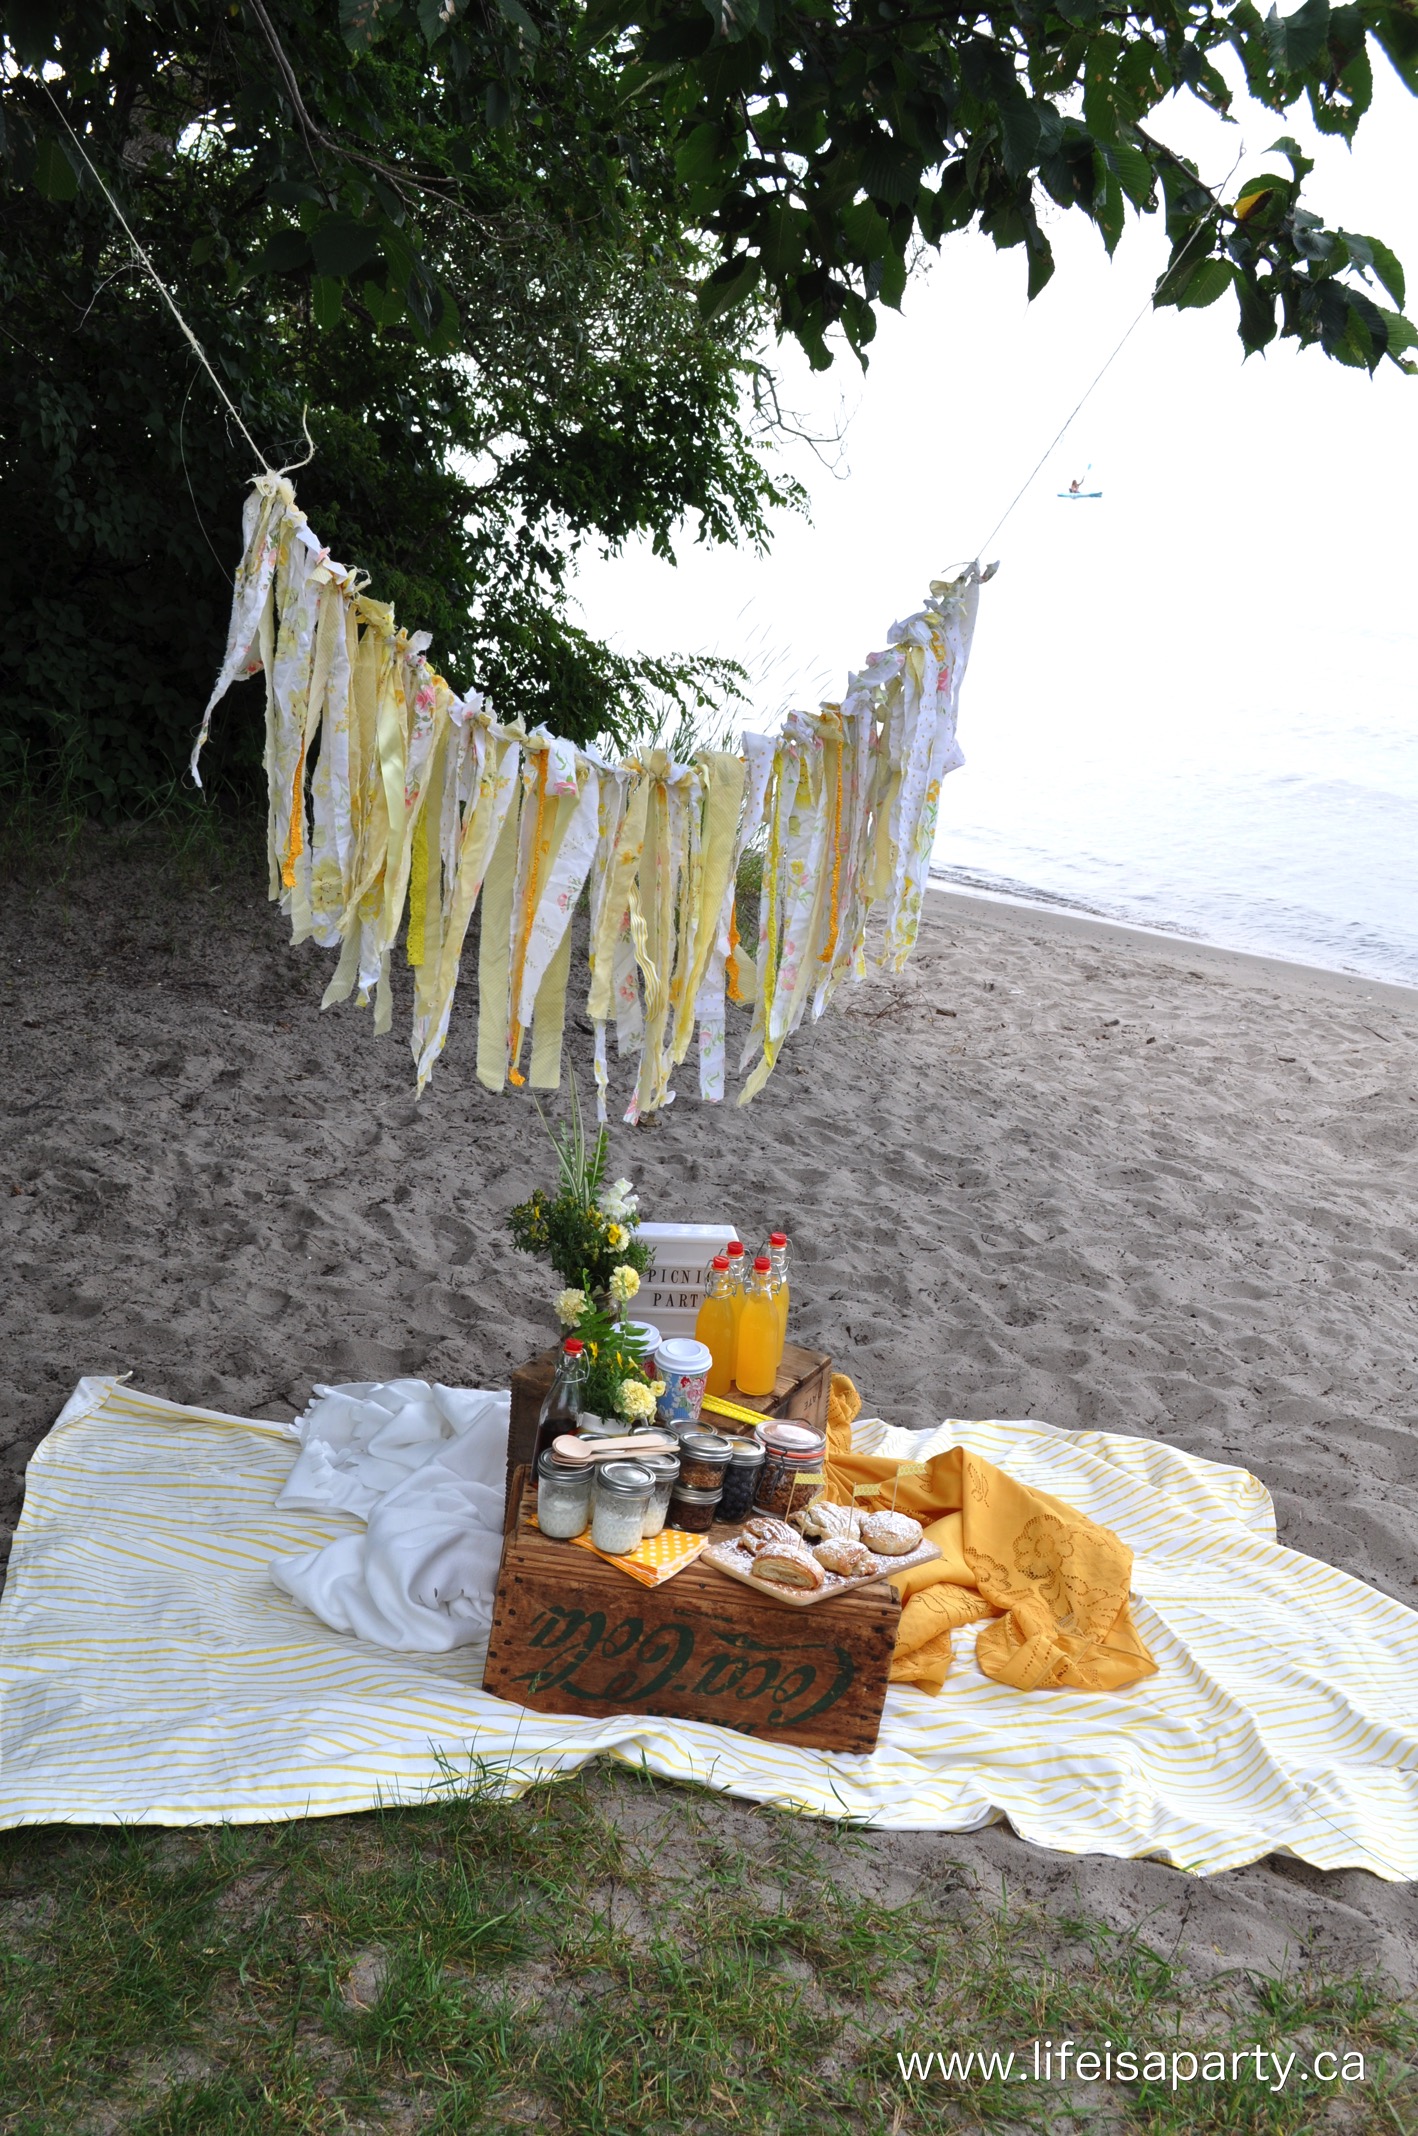
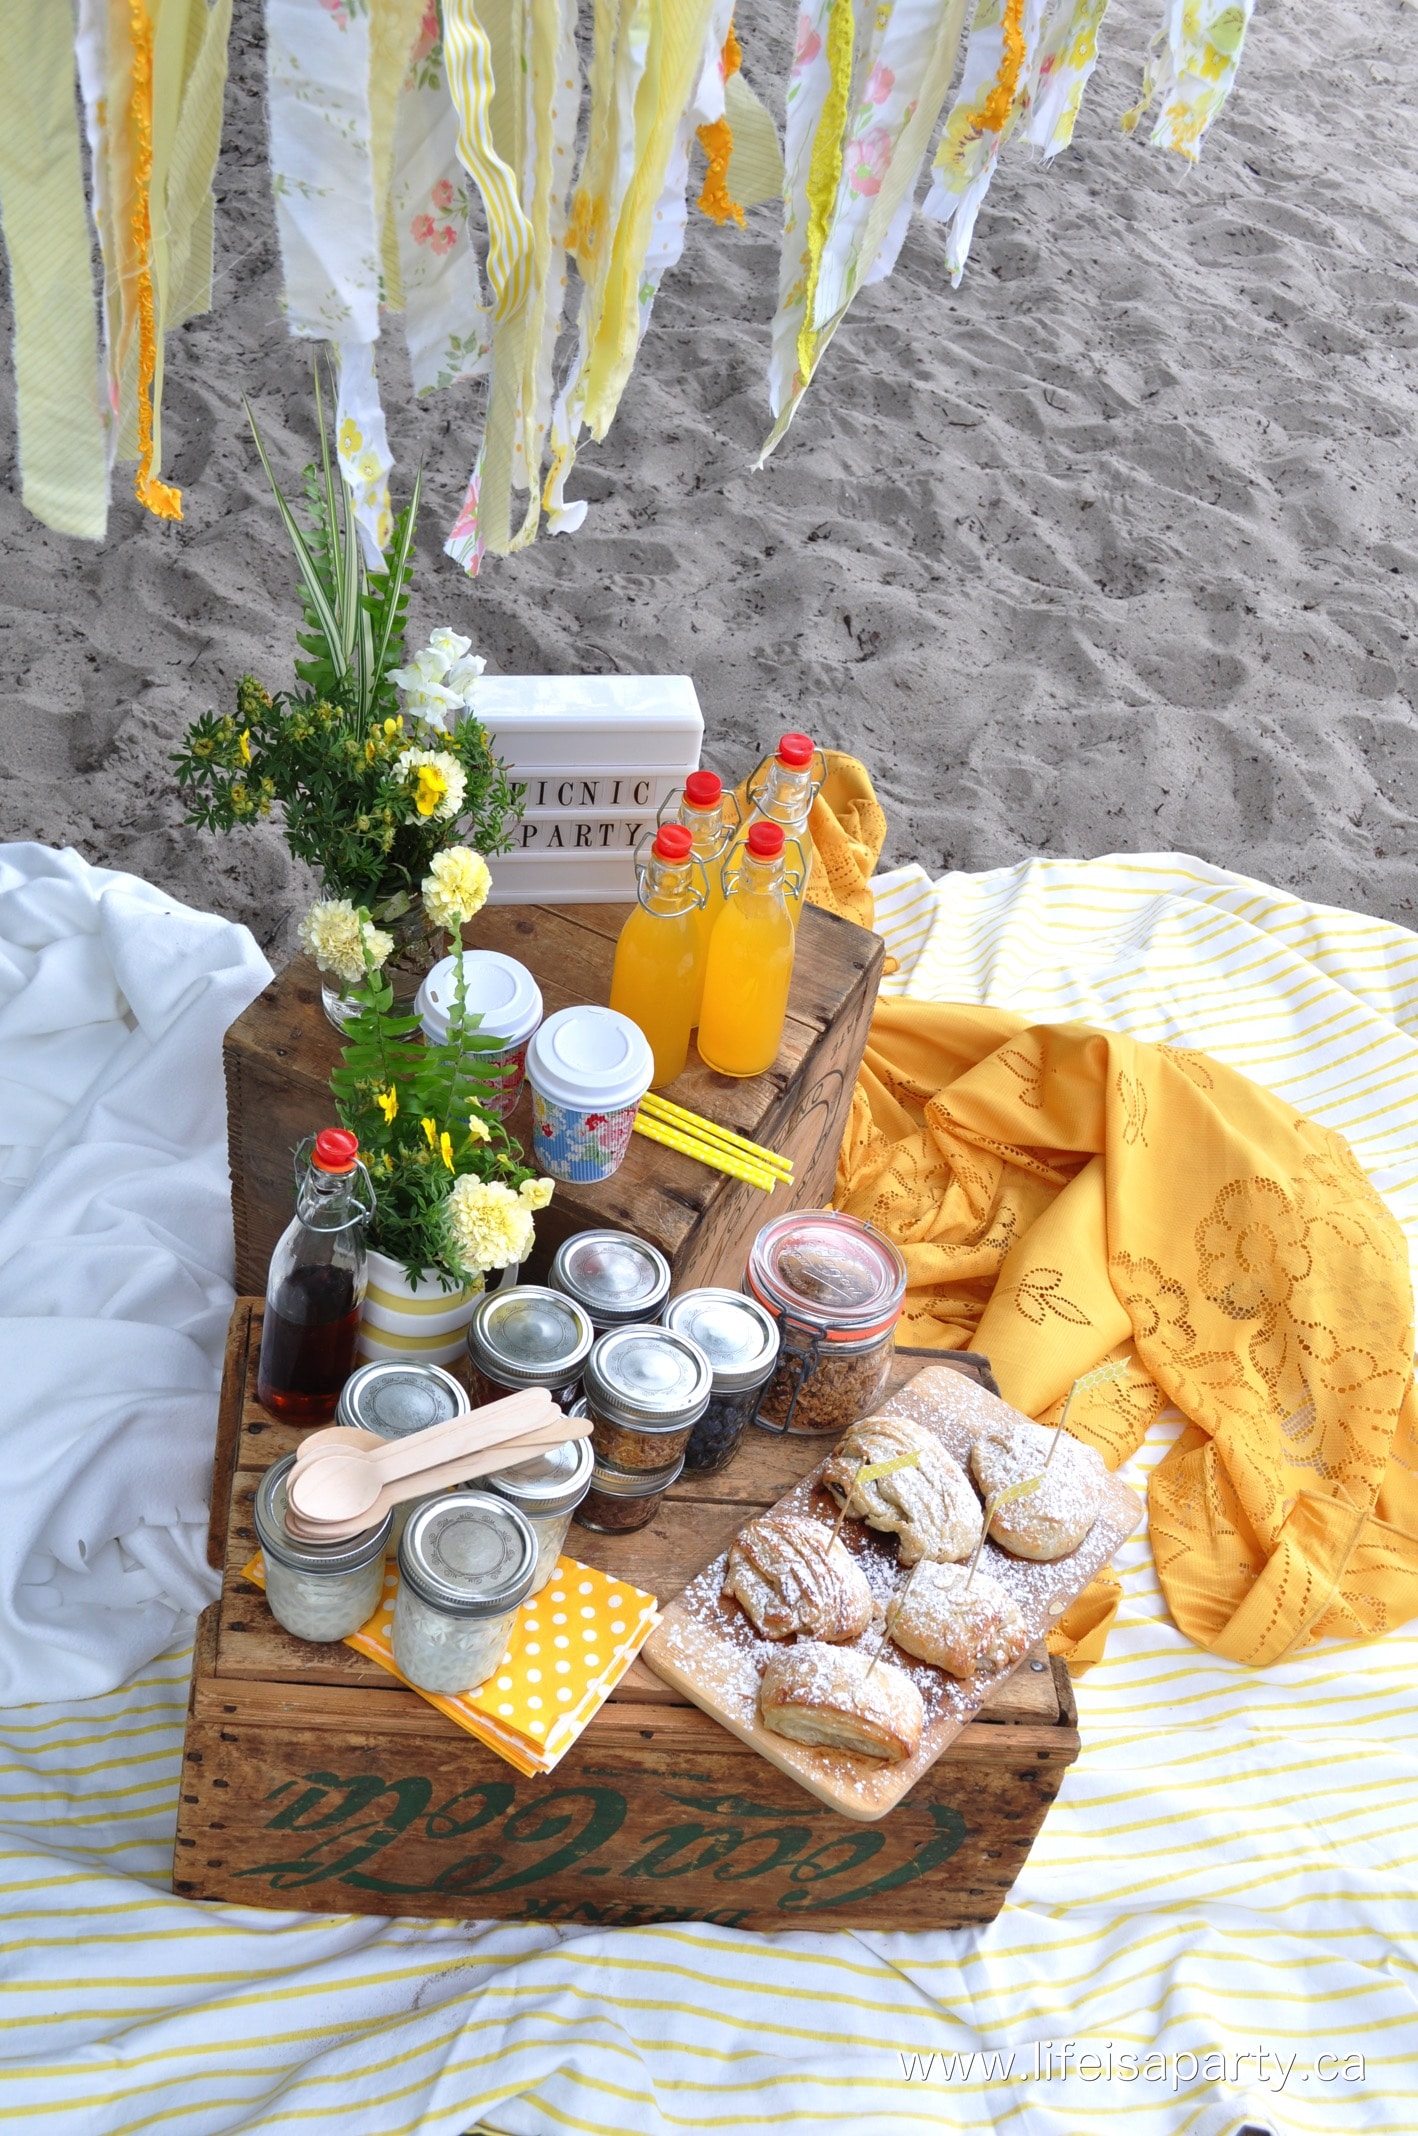
When I thought about a breakfast picnic, sunny yellow just seemed like the perfect colour scheme for the summertime. I shopped my house and found a couple of pretty yellow table cloths and the beautiful yellow vintage sheet bunting. The bunting was made last summer for a friend of a friend's wedding. 

A beautiful breakfast picnic with yellow decor and links to all the recipes including homemade croissants and a yogurt parfait bar!

To make the bunting, I shopped second-hand stores and found some vintage sheets with lots of yellow. I ripped the sheets into strips and combined them with some lace and ribbons tied to some twine for a pretty yellow bunting.

It was perfect for our picnic tied between some tree branches beside the lake.  It's such an easy idea to add a little fun decor to your picnic spot, and make things feel extra special.

yellow bunting made from vintage sheets

The mini lightbox that says "Picnic Party" was a fun detail to add to our picnic area. A small letterboard woud be great too.

breakfast picnic party

Wood Crates That Double As Tables

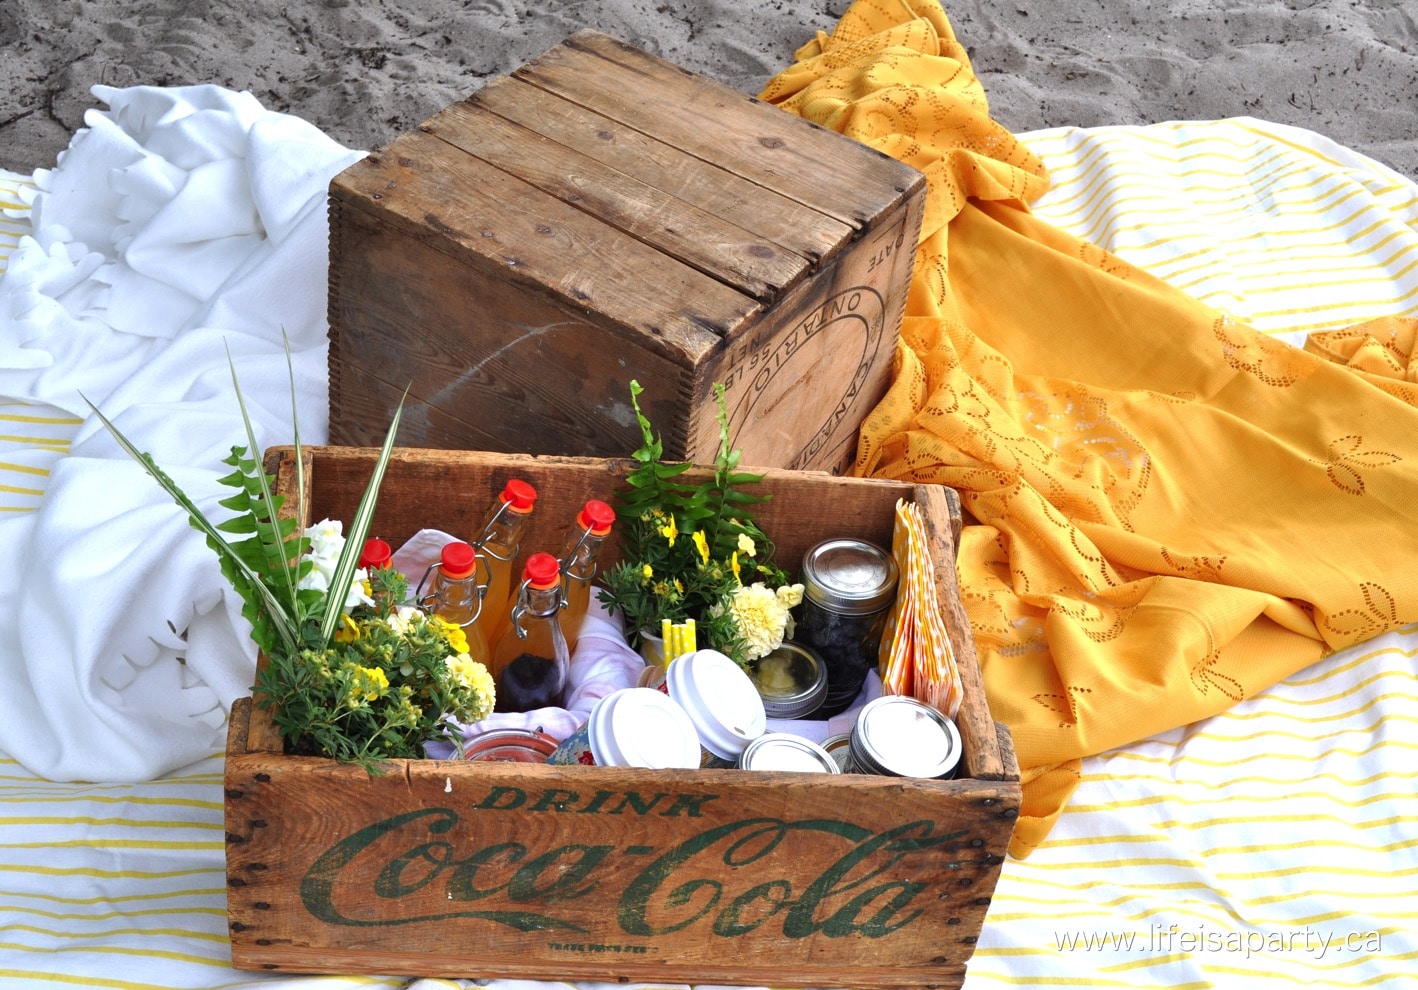
A traditional wicker picnic basket is fun, but for our picnic we used some vintage crates to carry everything, and they doubled as the perfect little picnic tables. Look out for them at antique shops, they're so handy.

We didn't have any distance to walk with these, so the weight wasn't an issue. For a location like a nearby beach or local park where you can park the car nearby, these kinds of pretty decor pieces and extras really elevate the experience and help create a fabulous picnic.

yellow breakfast picnic on the beach

Breakfast Menu

Our menu for breakfast was sooooo good. What could be better than a morning on the beach with good food? There are so many great easy picnic food ideas for breakfast. We kept things pretty simple but very delicious with some of our favorites.

  • coffee
  • orange juice
  • make-your-own yogurt granola parfaits
  • breakfast pastries

Breakfast Picnic Drinks

We had some mango orange juice in little reusable glass bottles, and some coffee because -breakfast. The coffee was in the prettiest to-go cups, perfect for a picnic. Bring a thermos of coffee, and refill as needed on the beach.

I wanted there to be options for the whole family, so juice and coffee were great choices.

orange mango juice in glass bottles

Make Your Own Yogurt Parfaits

  • Greek Yogurt
  • Granola
  • Strawberries
  • Blueberries
  • Raspberries
  • Toasted Coconut
  • Chocolate Chips
  • Maple Syrup or Honey

Then we had some great yogurt parfaits. I set up a little make-your-own yogurt parfait bar with lots of fresh, simple ingredients like our homemade granola -find our easy recipe here, along with some fresh fruit, including strawberries, blueberries, raspberries, toasted coconut, and chocolate, all in little individual mason jars for guests to help themselves to.

You might also like our yogurt and granola breakfast board here.

Make your own yogurt parfaits and pastries at a breakfast picnic.

I put the Greek yogurt into individual mason jars that were about ½ full so everyone could take one and add their own toppings.

Instead of honey, which we usually have on top of Greek yogurt, I brought some maple syrup. OMGoodness. I didn't know how great it was with yogurt and now I can never go back, haha.

yogurt parfait buffet

Pastries

And the star attraction of the picnic was, by far, the homemade croissants.

breakfast picnic pastries

If you follow me on Instagram you might have seen that my youngest daughter loves to bake and had it on her summer bucket list to make chocolate croissants from scratch. Let's face it, as parents we do a lot of investing in and supporting our kids, and we really don't expect much in return except their happiness and a little gratitude, right?

Well boy did we hit the jackpot here -on the first attempt the croissants were AMAZING! She made half chocolate and half almond -with almond paste inside and sprinkled with slivered almonds. 

If you aren't blessed with a 10-year-old baker at your house, or have less time, you could also pick some up at your favourite bakery or grocery store on picnic day. Any puff pastry danishes or croissants would be delicious and satisfy your sweet tooth.

Yellow Breakfast Picnic: breakfast picnic with yellow decor and links to all the recipes including homemade croissants and a yogurt parfait bar!

This picnic was so delicious and so much fun, and such a great way to start off the day.

Yellow Breakfast Picnic: breakfast picnic with yellow decor and links to all the recipes including homemade croissants and a yogurt parfait bar!

I hope these fun picnic ideas have inspired you.  With an early morning picnic for breakfast to start the day, life really is a party!

Frequently Asked Questions

How do you keep the yogurt cold?

Be sure to pack up the yogurt, fresh fruit, and fruit juice in a cooler bag with ice to keep them nice and cool.

How did you keep the coffee hot?

We brought our coffee in a large thermos. You could also bring the coffee in individual thermal coffee cups if that's easier.

How did you bring fresh flowers for a picnic?

We made our little arrangements in a mason jar and ceramic jug and packed them up in our divided wooden crate. The crate kept them from tipping over, and after we unpacked the wooden crate, we used it as a picnic table.

More Picnic Inspiration

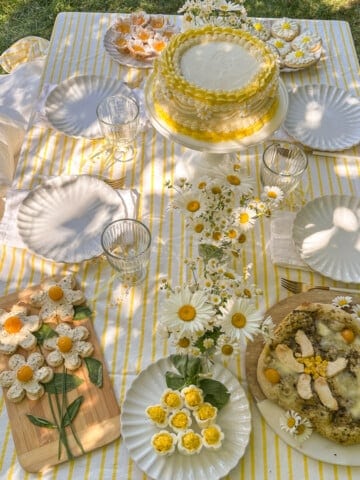
  • Daisy themed summer picnic party table with yellow and white striped tablecloth, daisy cake, daisy deviled eggs, floral pizza, and fresh daisy flower arrangements.
    Daisy Themed Party Ideas
  • Mushroom themed party picnic in backyard.
    Mushroom Themed Picnic Party
  • Cherry themed party table with food and cherry themed decor.
    Cherry Themed Party Ideas
  • Butterfly themed party ideas party table, food, and decorations.
    Butterfly Themed Party Ideas

If you try any of our  Breakfast Picnic Ideas or any other ideas on my blog please let me know how it goes in the comments below. Thanks for visiting today!

Jelly Donut Pancakes with Jam Inside

Jul 11, 2017 · 1 Comment

How to make jelly donut jam filled pancakes.

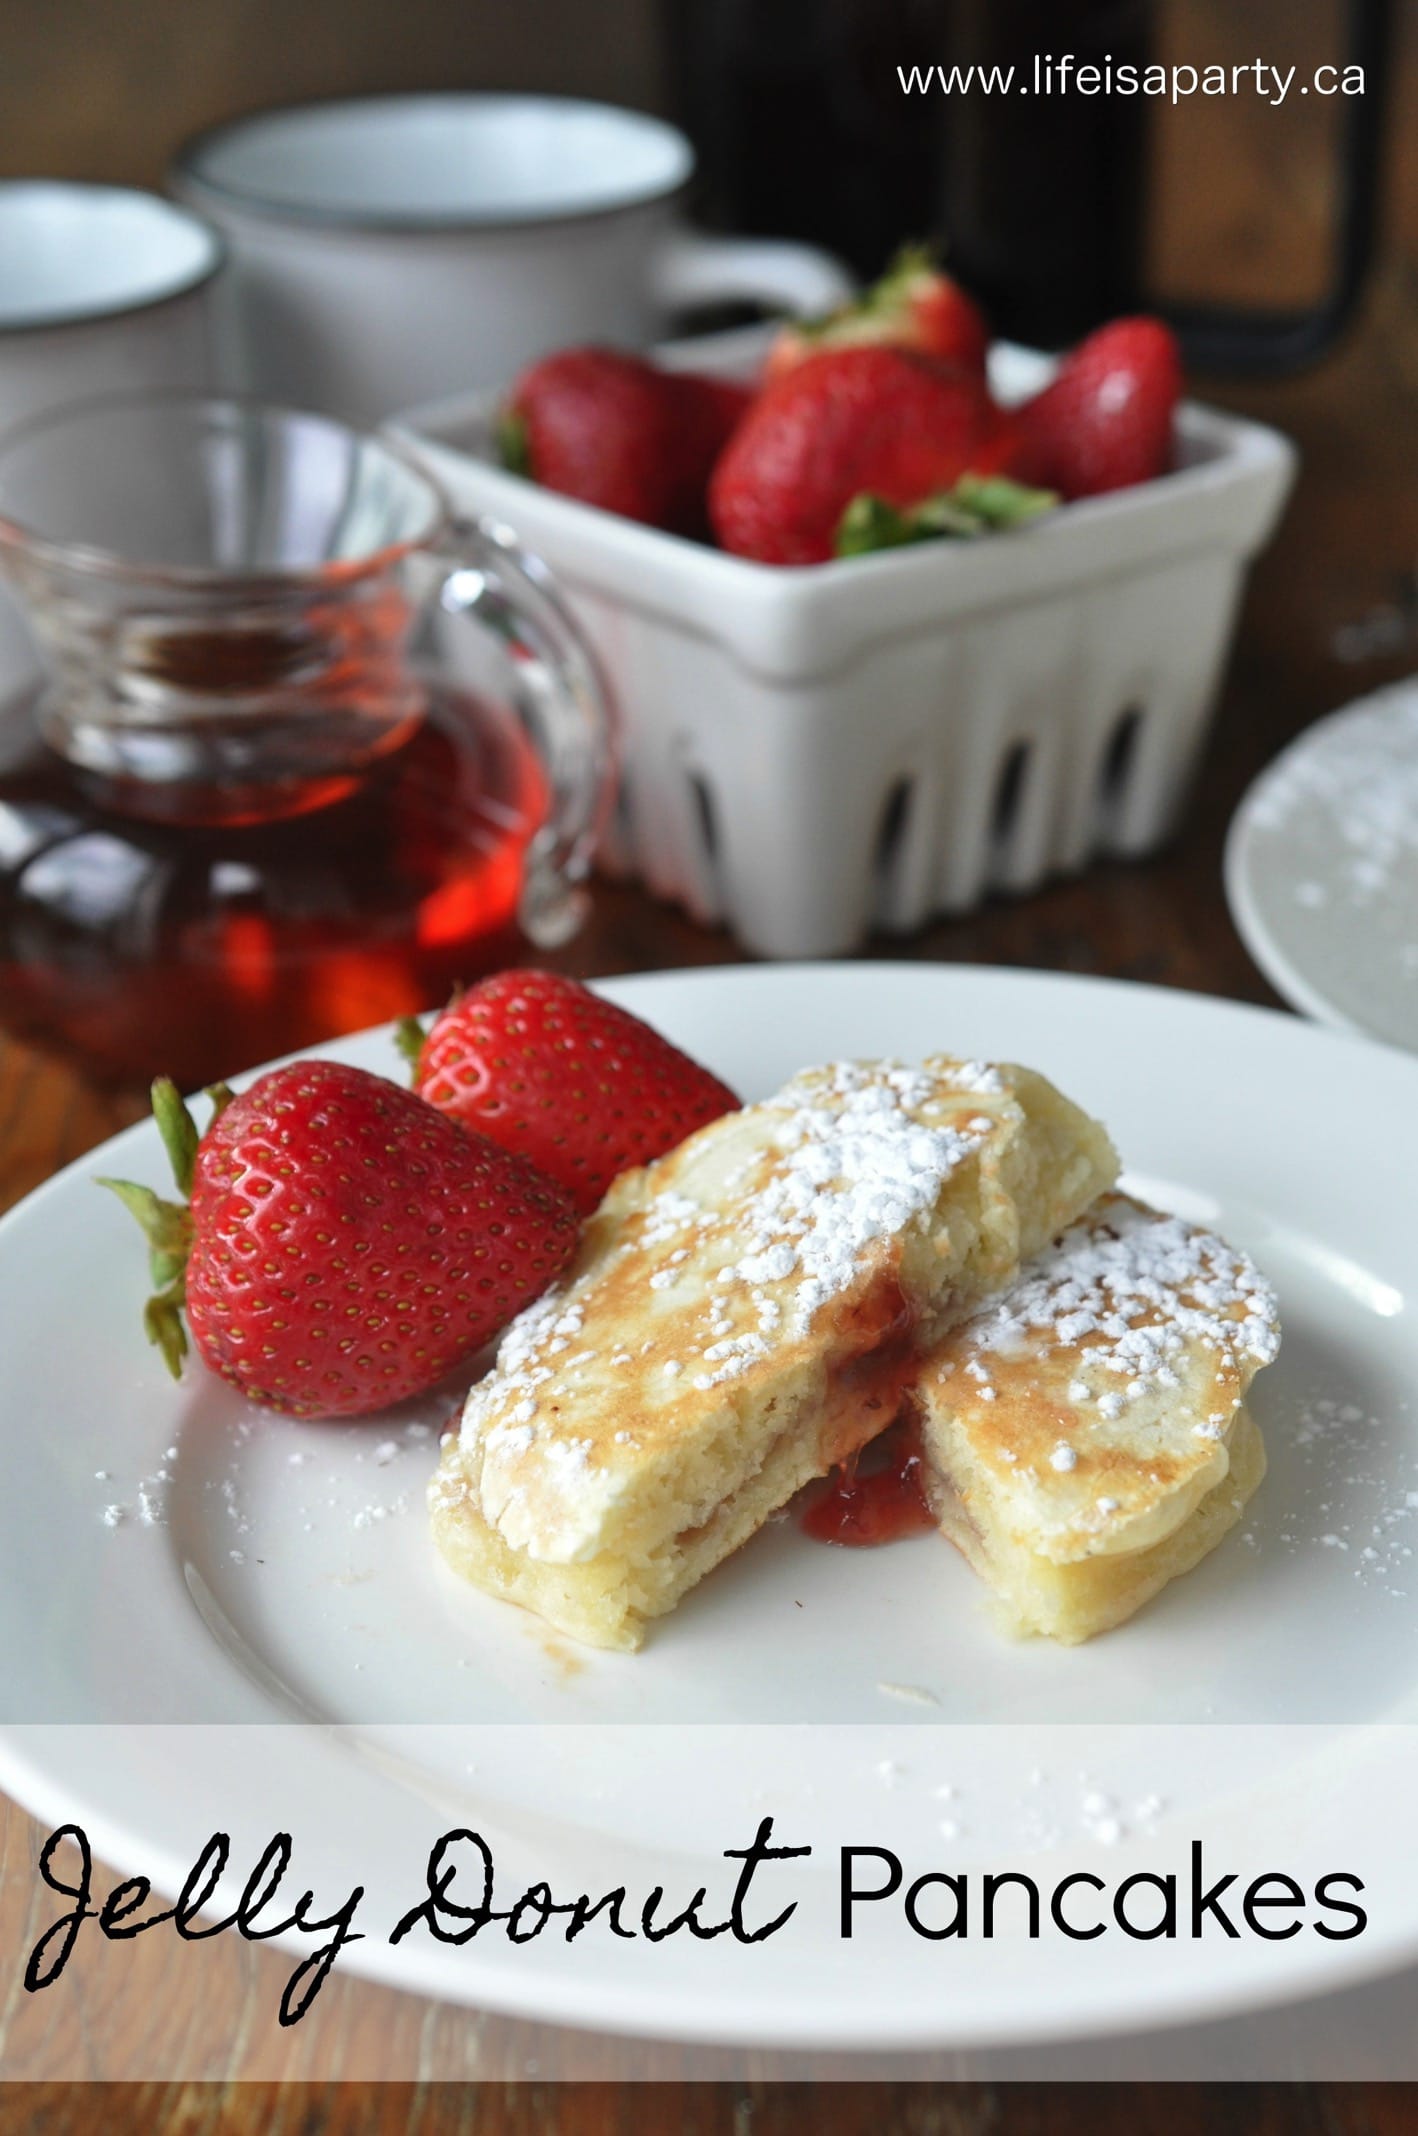
Jelly Donut Pancakes with Jam Inside: Your two favourite treats combined! Cut into a delicious pancake with a surprise inside -your favourite jam or jelly!

How to make jelly donut jam filled pancakes.
[feast_advanced_jump_to]

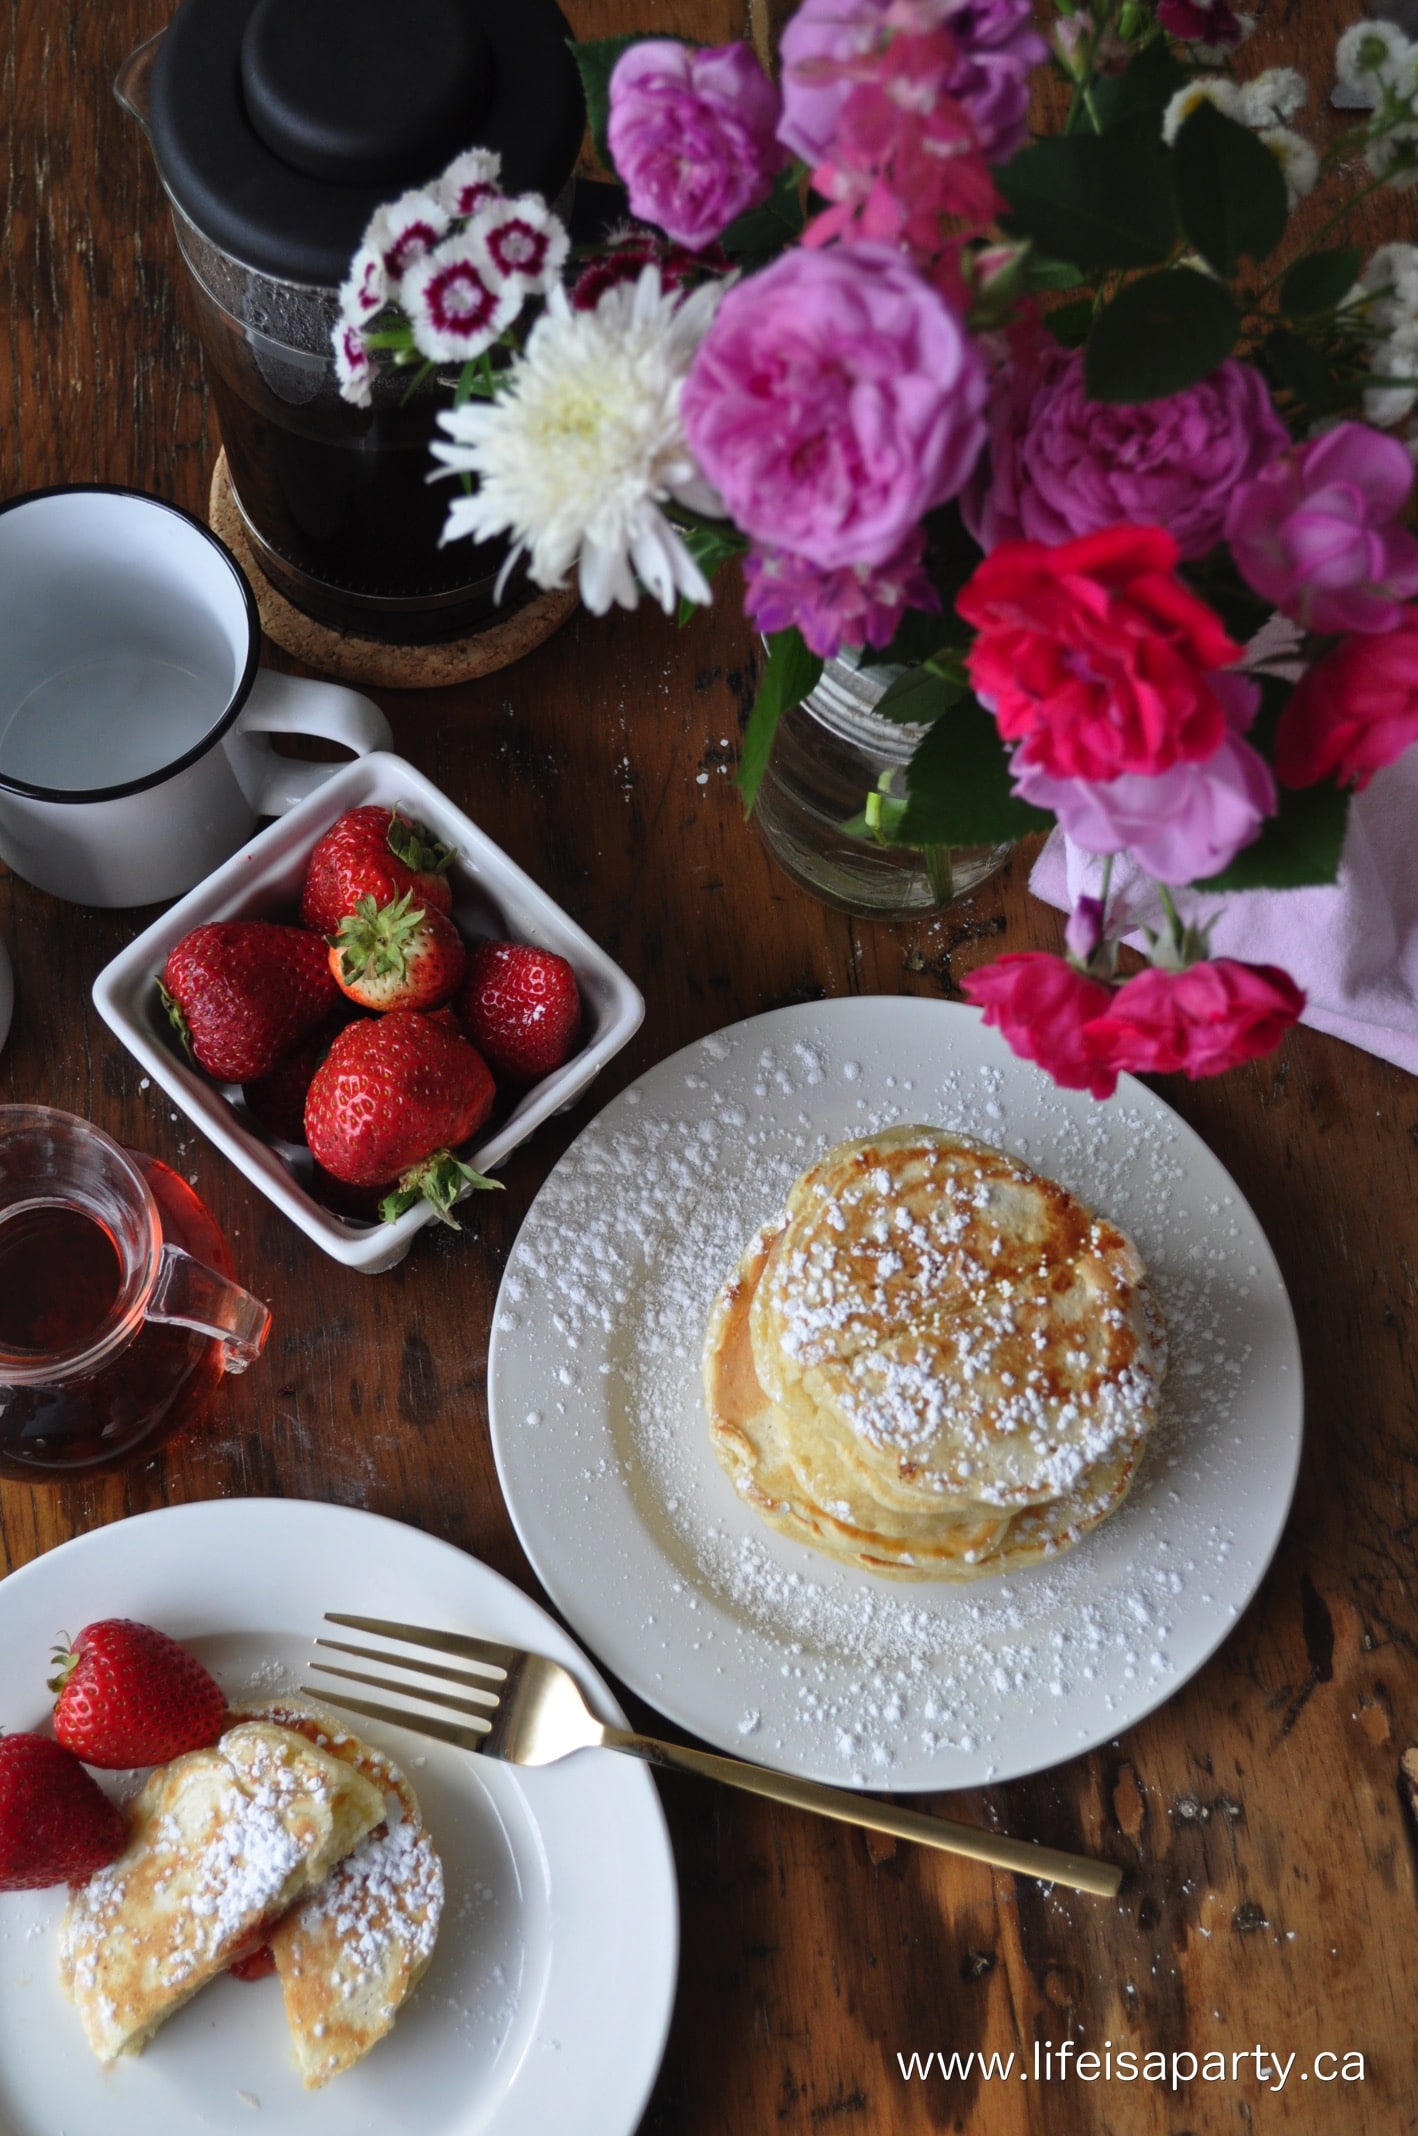
Hi, Maddie here -I'm the youngest member of the "Life is a Party" family and I love to bake.  Today I'm taking over the blog for my mom, and I'm going to be sharing an amazing recipe for Jelly Donut Pancakes.  These pancakes are filled with jam inside and then sprinkled with powdered sugar on top.  They're like a regular pancake and a jelly donut got together and had a baby and I know you'll love them!

Jelly Donut Pancakes

I make these pancakes quite often on school mornings. I'll get up earlier than the rest of my family and make them.  I  love to bake in a quiet house and they love to wake up to warm, fluffy pancakes for the perfect breakfast.  These are such a fun alternative to regular pancakes.  Next time you're craving homemade pancakes, you should try them.

You might also like our Small Batch Pancakes For Two Recipe.

how to make Jelly Donut Pancakes

How Do You Stuff A Pancake?

These pancakes are stuffed with strawberry jelly and when you cut into them it comes oozing out. You might be asking yourself "how do they get stuffed?" It's a very simple technique much easier than you think.

When you're cooking the pancakes you start with a regular spoonful of pancake batter.

jam filled pancakes

Then add a teaspoon of jam to the centre. You then cover it up with more batter on top of the jelly and when it is cooked flip it over just like a regular pancake.

how to make Jelly Donut Pancakes

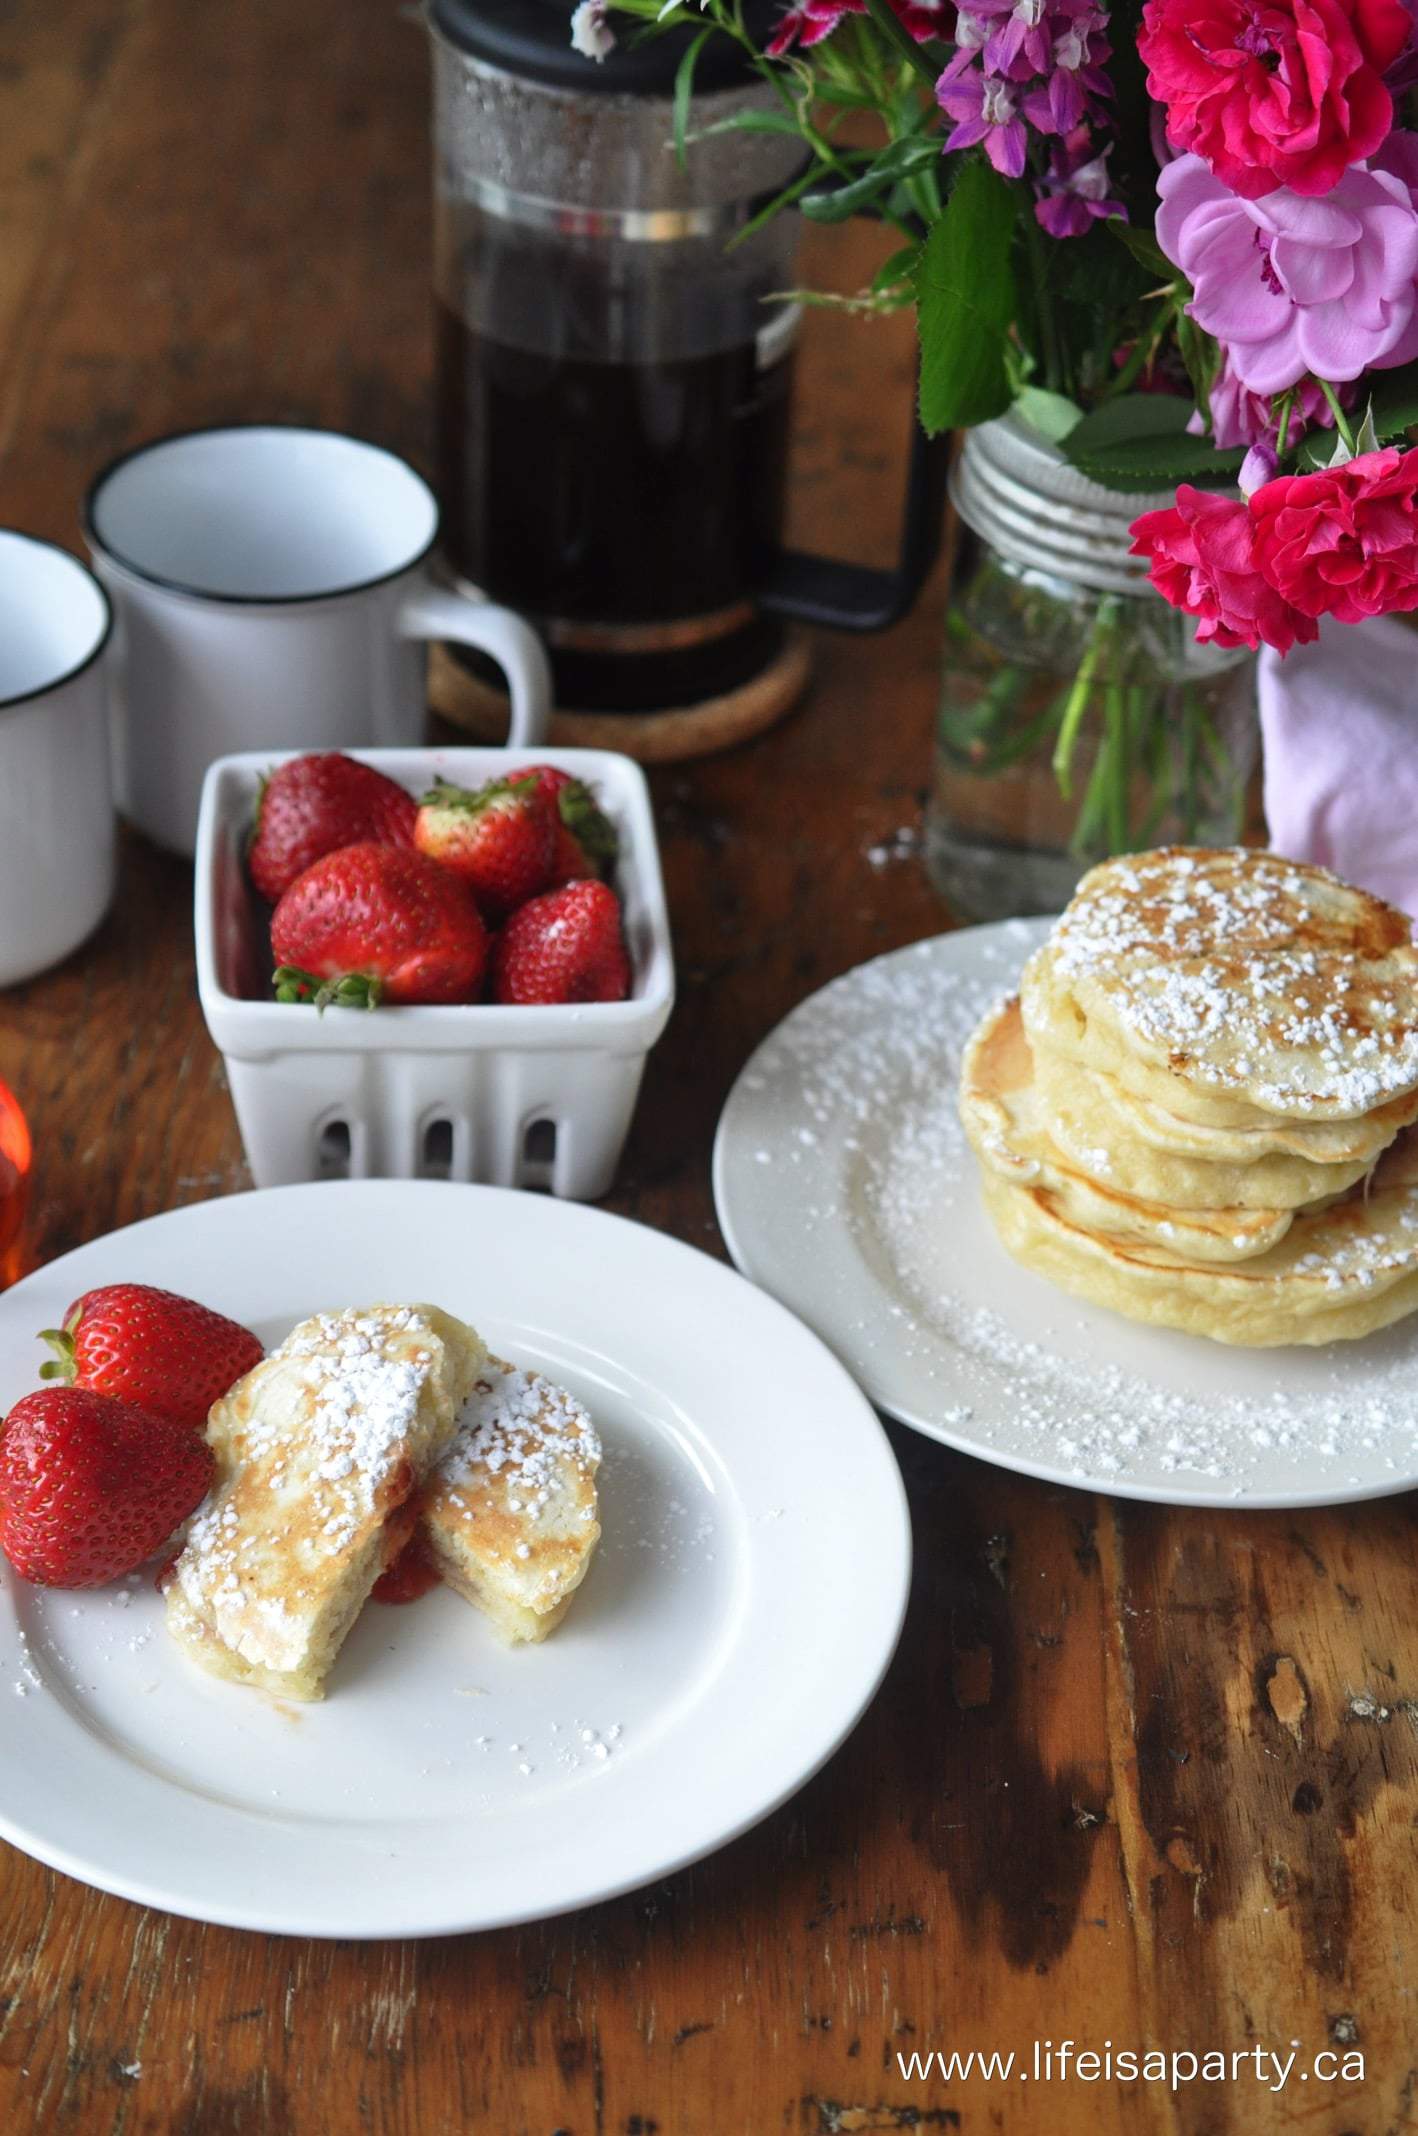
When eating the pancakes I would suggest cutting them like a pizza so that you get a bit of jam in every bite.  These jelly pancakes are sure to become a new favorite.  You might also like a maple syrup on top too.

Can I Use Pancake Mix?

We made our pancake batter from scratch for these pancakes and they're so delicious.  You might be wondering if you can use your favorite pancake mix to make these jelly donut pancakes.  If you're looking for a shortcut you can totally use pancake mix to make these.  Just make your pancake mix following the package directions, and use our method to add the jam or jelly inside.

 Pancakes with jam in the middle
stack of Jelly Donut Pancakes

Video

Check out the video below to see exactly how we made them.

Youtube video

Jam or Jelly

We've used strawberry jam for these pancakes today, but you can use whatever your favorite jam or jelly is.  We also love them with raspberry jam.  Blueberry jam is also a delicious option.  These are amazing with homemade jam, but whatever your favourite jam or jelly is will work great.

More Options

These jam stuffed pancakes are so good that it got us thinking about other things that would be delicious inside a pancake.  Instead of jam you might also like a peanut butter pancake.  Just use the same technique we outlined above, but substitute peanut butter instead of jam, or try a little of each for a pb and j version.  And for the chocolate lover try using nutella inside for another great option.  These are few of our favorite fillings to try.

These really are the perfect way to start your day and a great weekend treat.  Your family will love them!

Recipe

How to make jelly donut jam filled pancakes.

Jelly Donut Pancakes

Light and fluffy pancakes with jelly filling inside and powdered sugar on the outside.
5 from 1 vote
Print Pin Rate
Course: Breakfast
Cuisine: American
Prep Time: 15 minutes minutes
Cook Time: 20 minutes minutes
Total Time: 35 minutes minutes
Servings: 12
Calories: 188kcal
Author: Dannyelle Nicolle-Ramjist

Ingredients

  • 2 ½ cups all purpose flour
  • 3 tablespoon sugar
  • 2 ½ teaspoon baking powder
  • ½ teaspoon salt
  • 1 ½ cups milk
  • 3 tablespoon butter melted
  • 2 large eggs
  • ½ teaspoon vanilla extract
  • ¼ cup strawberry jam
  • ¼ cup powdered sugar

Instructions

  • Mix the flour, sugar, baking powder and salt in a large bowl.
  • In another bowl, mix the wet ingredients; the milk, melted butter, eggs, and vanilla.
  • Combine the dry and wet ingredients and mix, but don't over mix. A few lumps are fine.
  • Spoon batter onto a hot griddle coated with a little butter, or frying pan at medium-high heat to cook. Add a spoonful of jam into the middle, and then top with some remaining batter to cover.
  • Cook on one side until the small bubbles that appear at the edge of the batter pop, then flip over and cook on the other side until golden brown.
  • Sprinkle finished pancakes with powdered sugar and serve warm. Enjoy.

Nutrition

Serving: 1g | Calories: 188kcal | Carbohydrates: 32g | Protein: 5g | Fat: 5g | Saturated Fat: 3g | Polyunsaturated Fat: 2g | Cholesterol: 41mg | Sodium: 250mg | Fiber: 1g | Sugar: 10g
Tried this Recipe? Tag me Today!Mention @LifeisaParty or tag #lifeisaparty!
 Pancakes with jam in the middle

With a stack of Jelly Donut Pancakes, life really is a party!

More Breakfast Inspiration

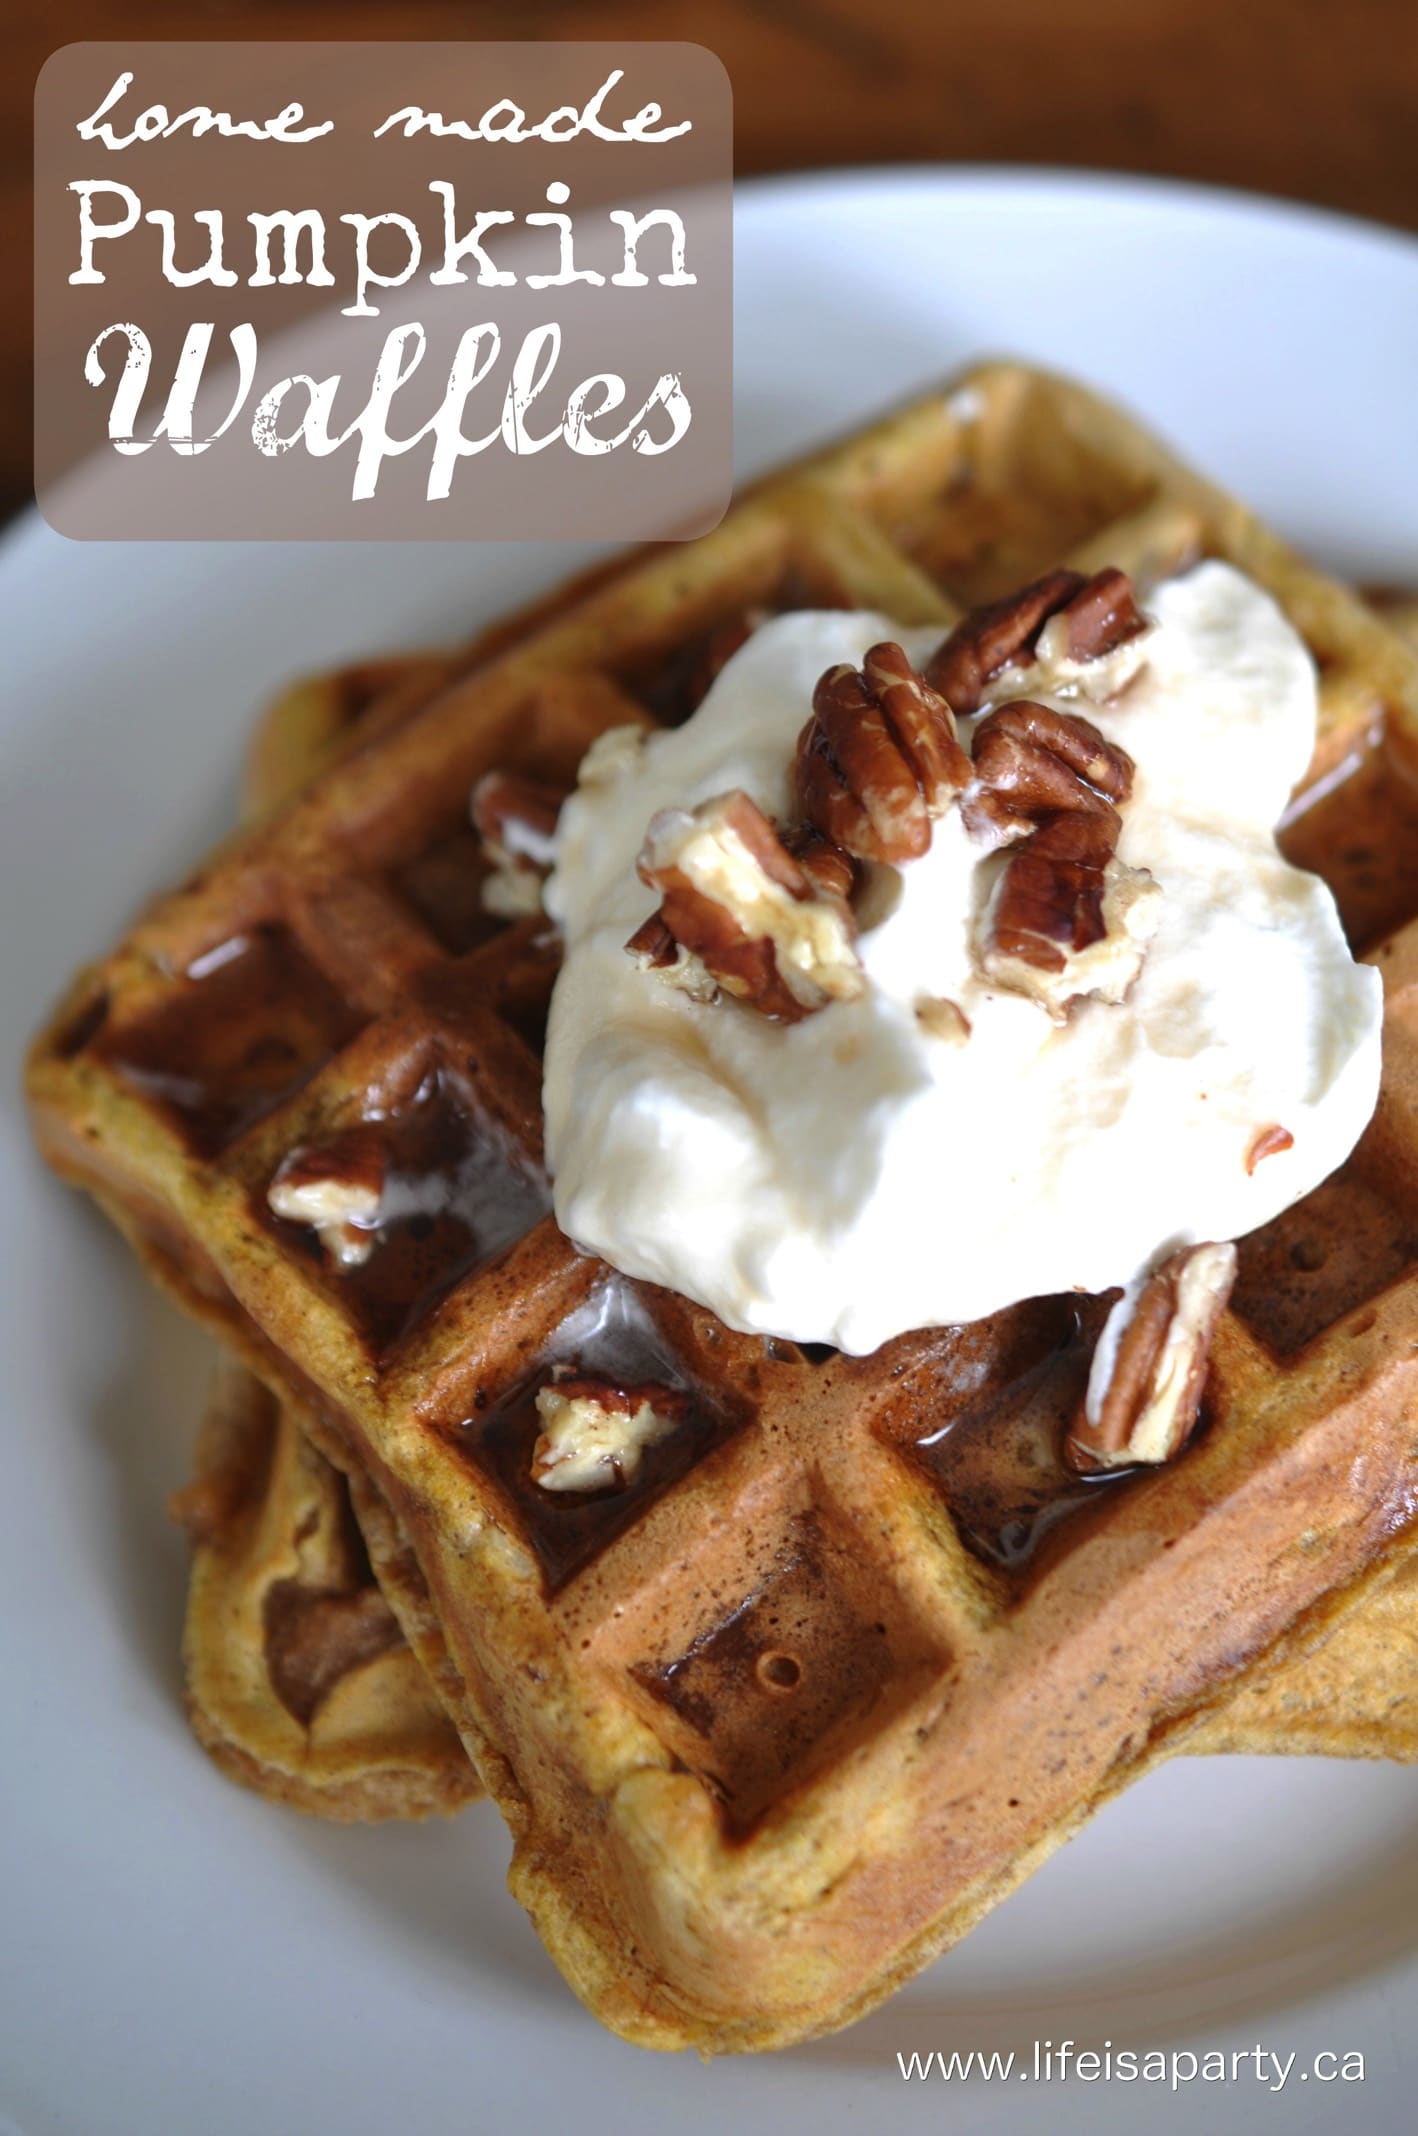
You might also like our Pumpkin Waffles recipe here.

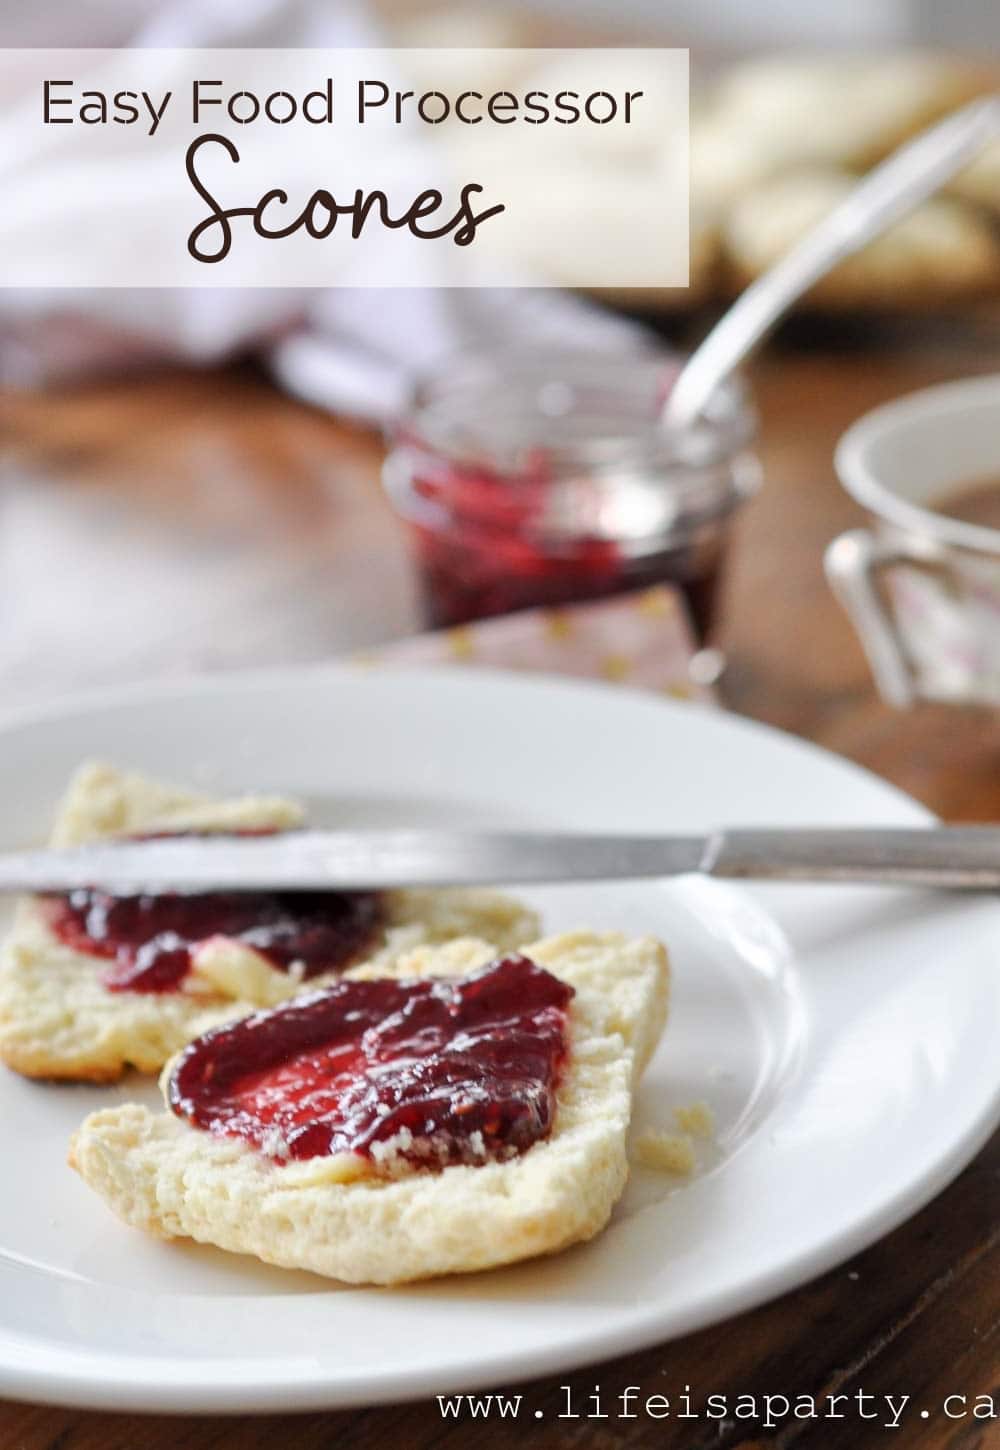
Also check our our Easy Food Processor Scones recipe here.

Easy Food Processor Scones: easy and quick to make in your food processor, these flakey scones are perfect for a tea party, breakfast, or snack.

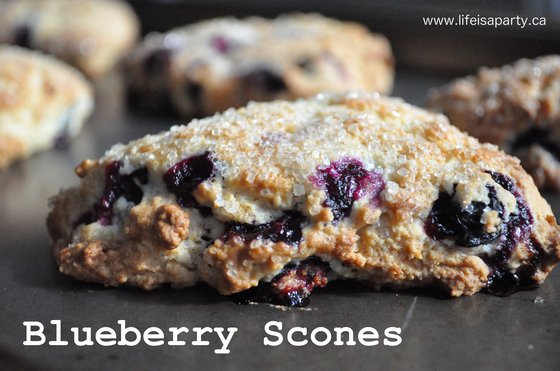
You might also enjoy our Blueberry Scones here.

Summer Picnic

Jul 7, 2017 · Leave a Comment

Ideas for a summer picnic.

Easy Summer Picnic: with an easy summer picinc menu, and some cute individual serving ideas this picnic is summery and fun!

Ideas for a summer picnic.
[feast_advanced_jump_to]

Today I'm sharing an easy and pretty summer picnic.

Location

I recently asked my blog readers "what keeps you from entertaining more"?  One of the answers I heard from quite a few people was that their house was the main reason they don't entertain more.  Some felt their decor wasn't what they wanted, or they were doing renos that weren't finished. Others said their houses were too small for company, and a few mentioned how hard it was to clean up for entertaining, especially with small children.  

This inspired a series of Summer Picnics.  If entertaining at home is a problem, let's meet up with friends outside -at a park, at the beach, on a trail.  I hope this series of blog posts on summer picnics will inspire some of you and help with the problem by getting you entertaining outside of your house.

summer picnic menu ideas

Today we're kicking if off with an easy picnic we enjoyed at the beach.

Easy Summer Picnic Menu

  • peach punch
  • sandwiches
  • chips
  • strawberry shortcake in a mason jar
  • thermos of tea

We had an easy menu -one that's perfect for the kids.  It was easy, but it was certainly delicious.  And we're always looking for easy and delicious, right?

what to serve at a picnic

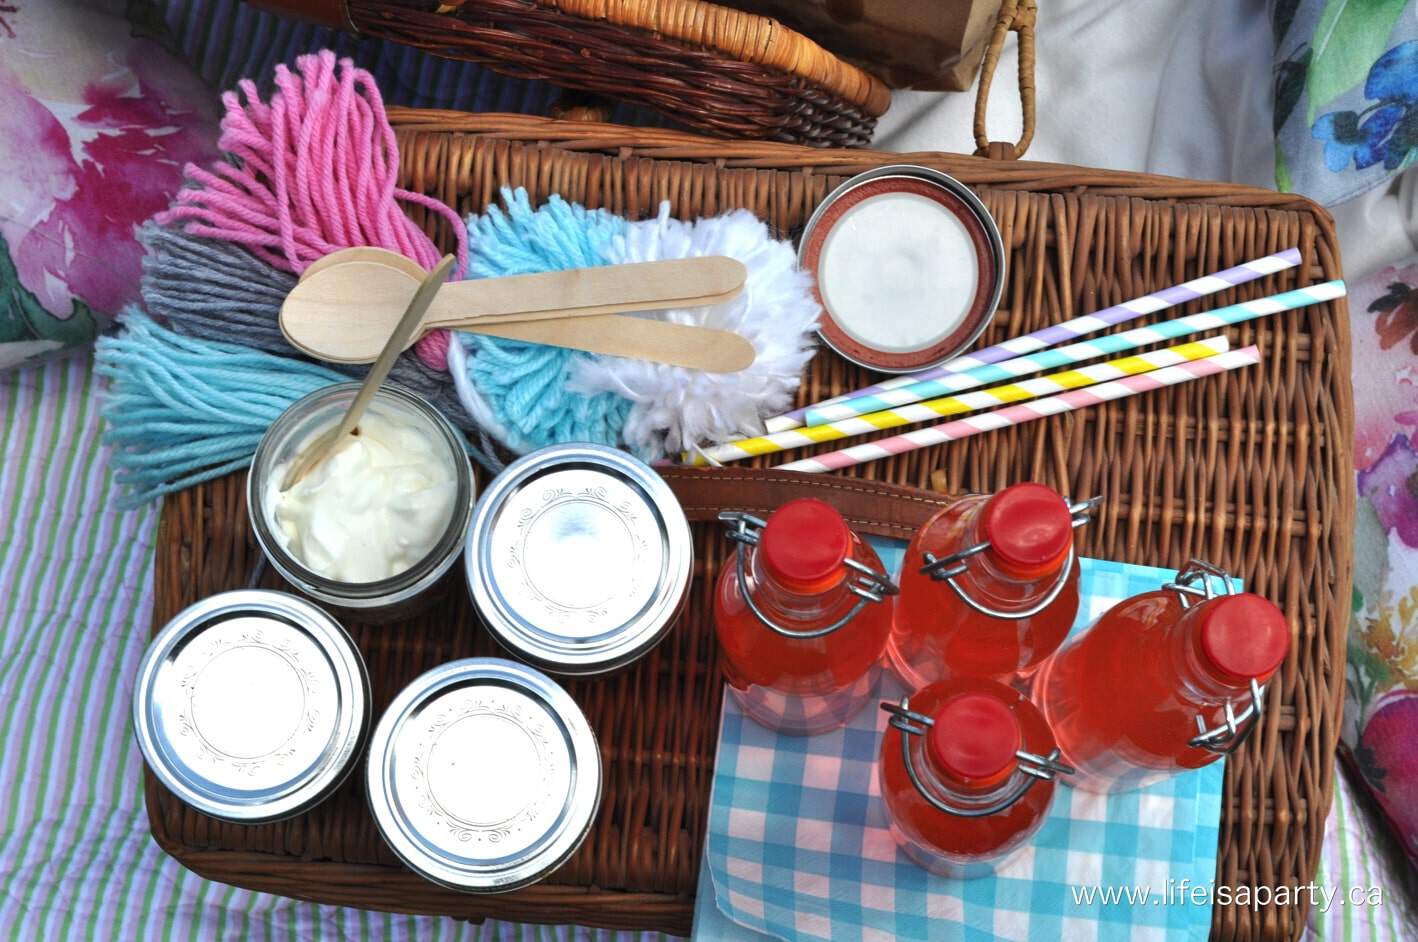
We started out with some peach punch in these pretty glass bottles.  I bought these reusable bottles years ago, and I've used them over and over for parties and picnics.  The flip tops are fun and they're always a hit with guests.  After your done, be sure to bring them home and wash them for next time.

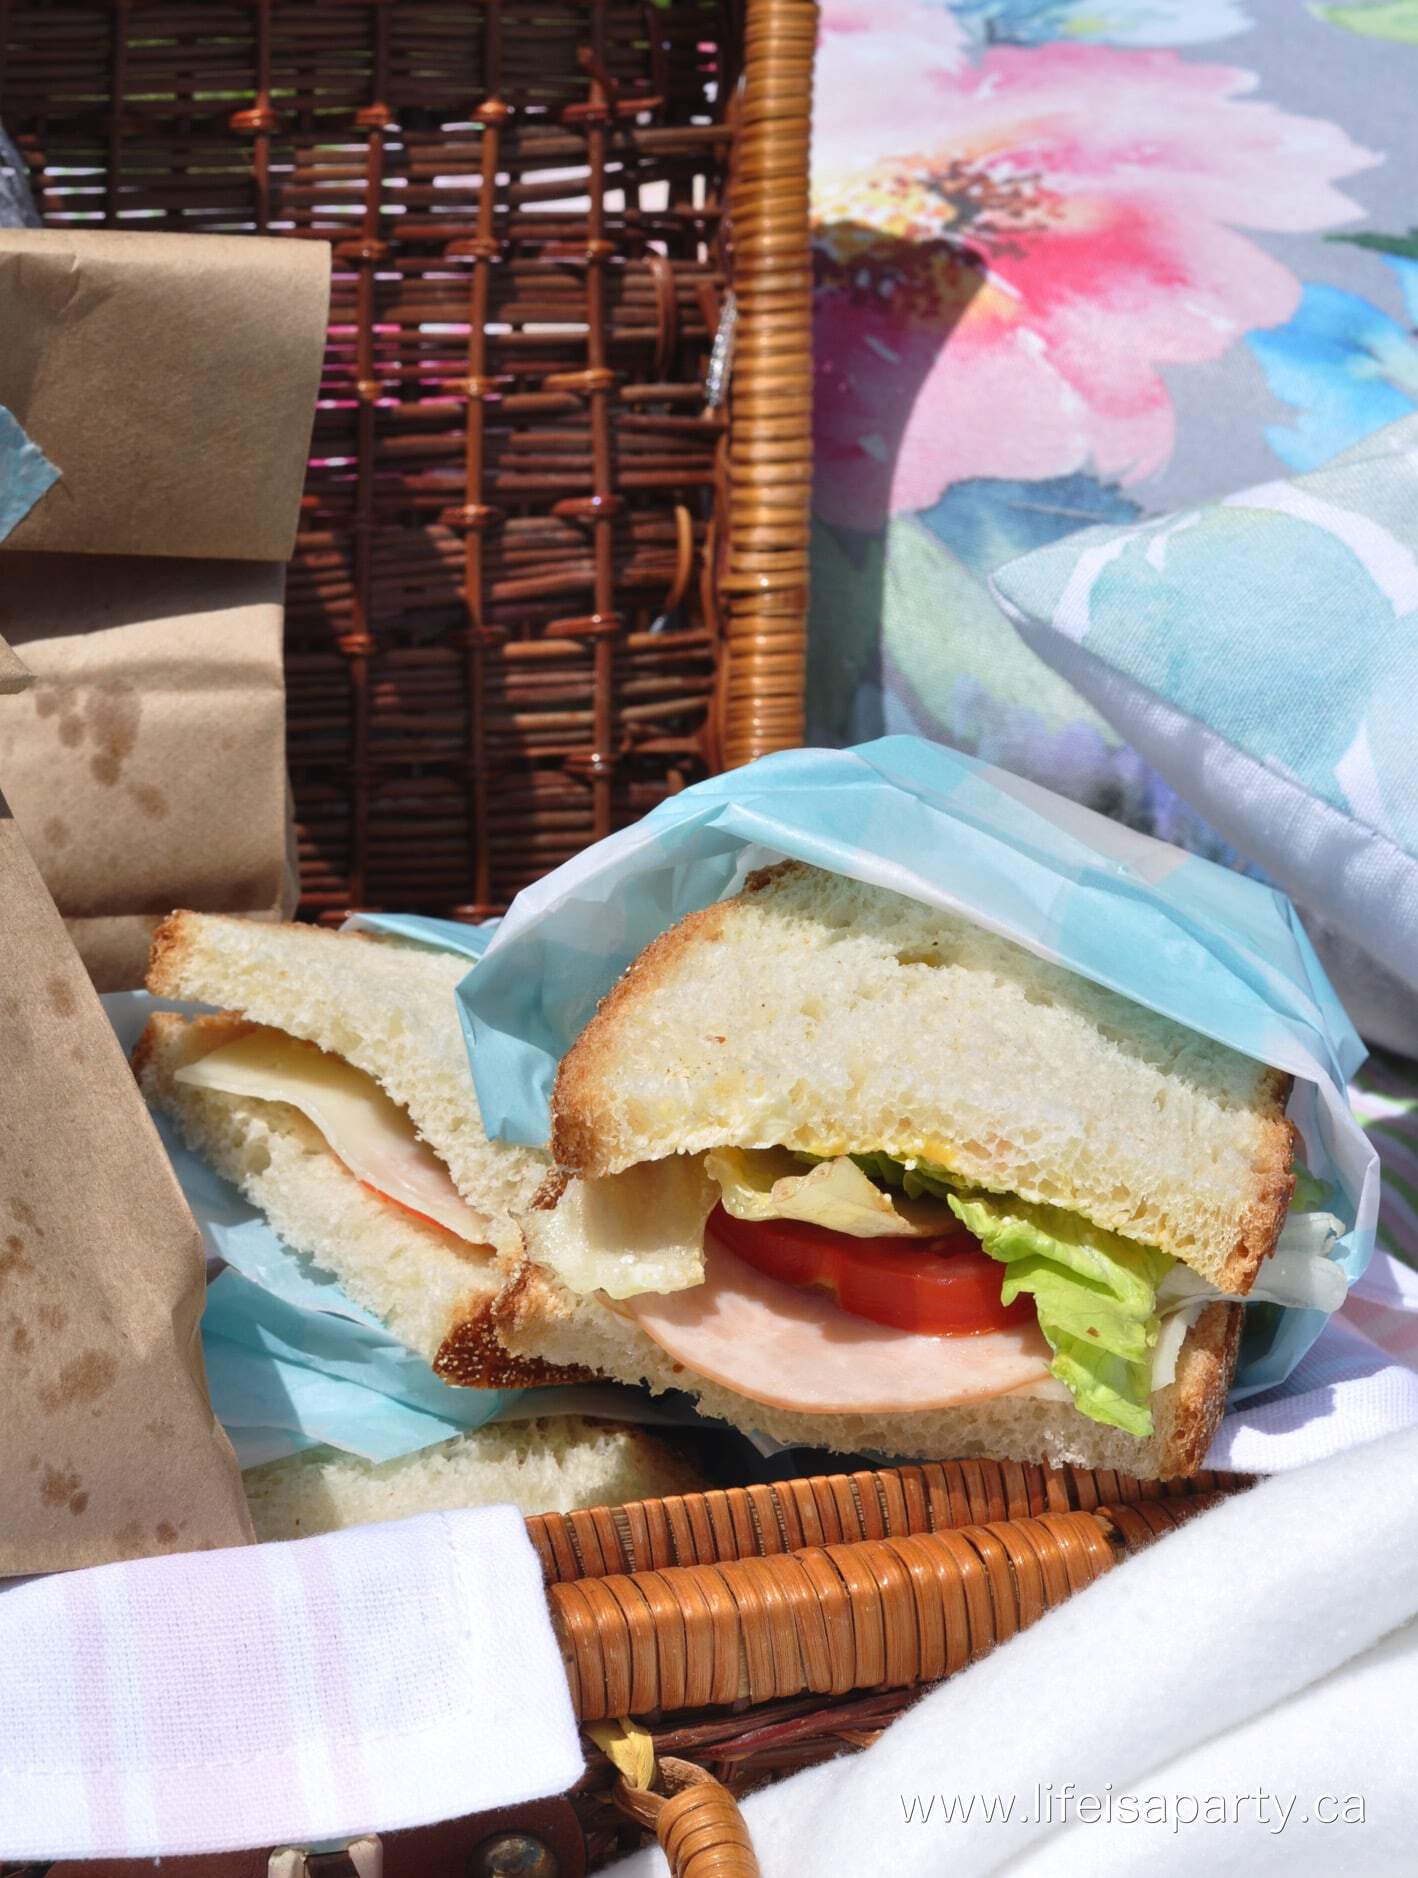
sandwiches for a picnic

Sandwiches

We had a real picnic classic for this one -sandwiches.  Sandwiches are always great for a picnic because they travel so well, and can be made to suit any taste.  We mostly had ham and swiss cheese, with some lettuce and tomatoes, and some sweet honey mustard.  I say mostly because sandwiches are easy to customize to everyone's taste.  One might want no mustard, one no cheese. Sandwiches are a great veggie option too.  And, who doesn't love a really great sandwich?

easy summer picnic ideas

Chips In A Paper Bag

Along with our sandwiches we had some chips, we served them in individual paper bags, with the little pretty washi tape to hold them closed.  I love this option, everyone gets their own which is always a plus with kids.

picnic dessert ideas

Strawberry Shortcake In A Mason Jar

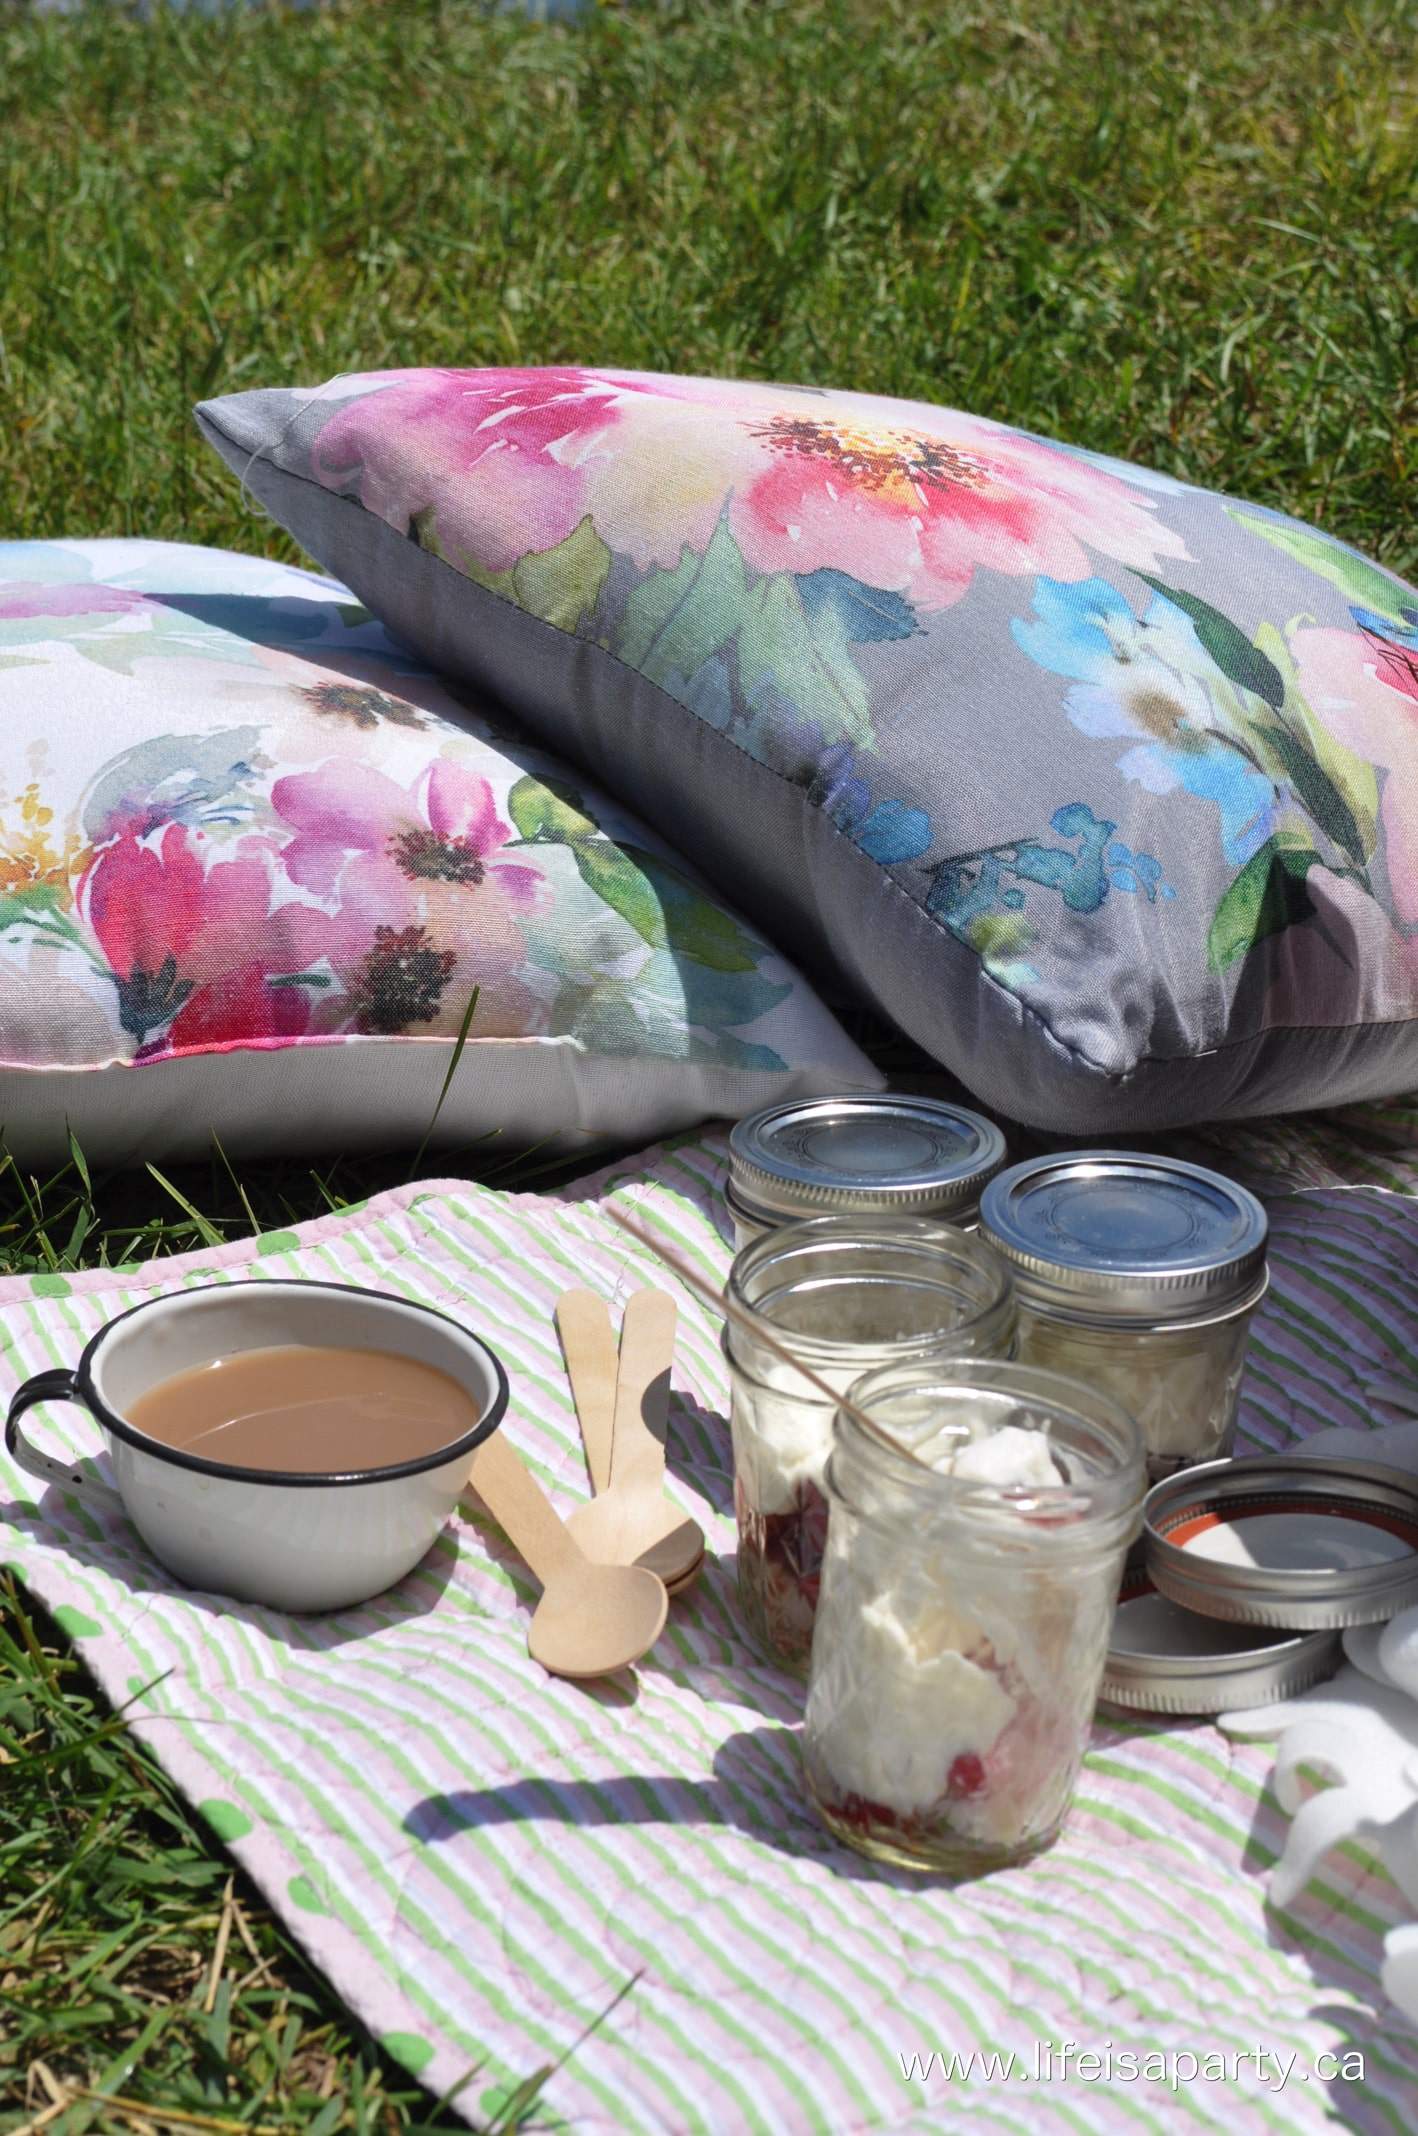
For a fun little dessert we had individual strawberry shortcakes in a mason jar.  I just cut up some angel food cake for the bottom, added some strawberries as the next layer, and finished it off with some sweetened whipped cream.  Simple and delicious.

individual servings for a picnic

I used some old vintage feeling wicker and brought along some pretty pillows for lounging too.  We piled everything up in our little wagon and headed for a pretty spot at the beach.  We had such a lovely afternoon by the water, eating and visiting with friends.

Easy Summer Picnic

And for the grown-ups, I even brought along a thermos of tea to enjoy with our desserts.  When I was a little girl, I can remember my mom packing up a thermos of tea for her and my dad on any long road trips.  I have to say it sure is nice after a dip in the cool lake to have a nice hot cup of tea in the sun.

Easy Summer Picnic dessert

I hope you're feeling inspired, especially if you feel like your house keeps you from entertaining as much as you'd like.  How about calling up some friends this weekend and inviting them to meet you and your family for a picnic at your local beach?

Easy Summer Picnic

With an easy summer picnic, life really is a party!

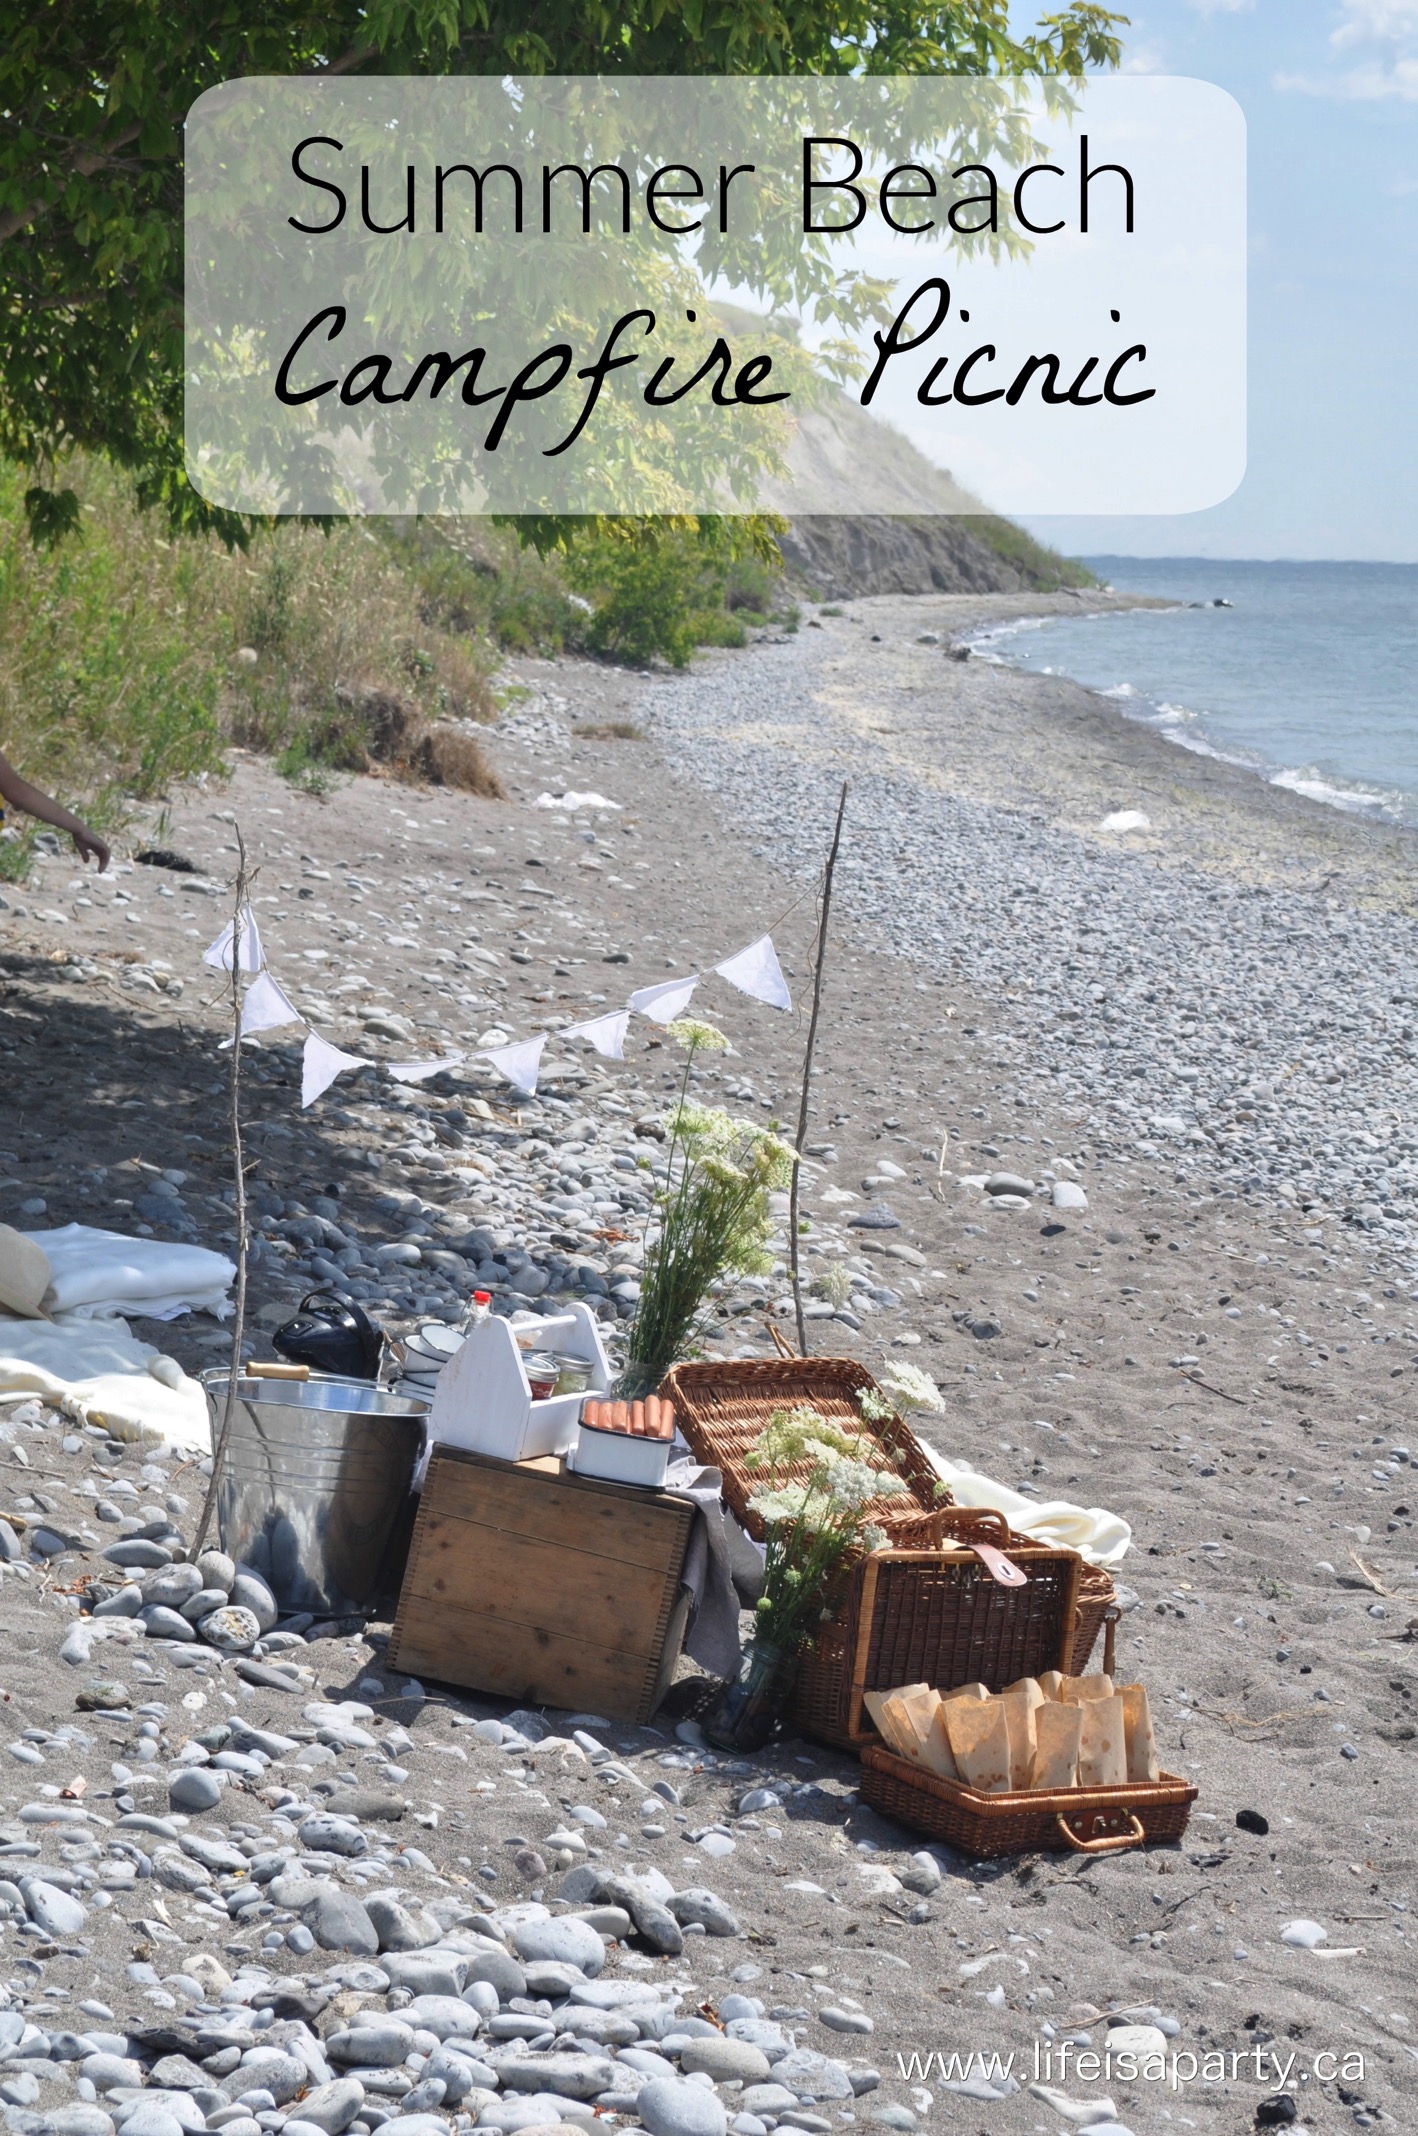
You might also like our Beach Campfire Picnic here.

Summer Beach Campfire Picnic: A fun menu of hotdogs, smores, and campfire baked apples, along with some simple decor make the perfect beach campfire picnic.

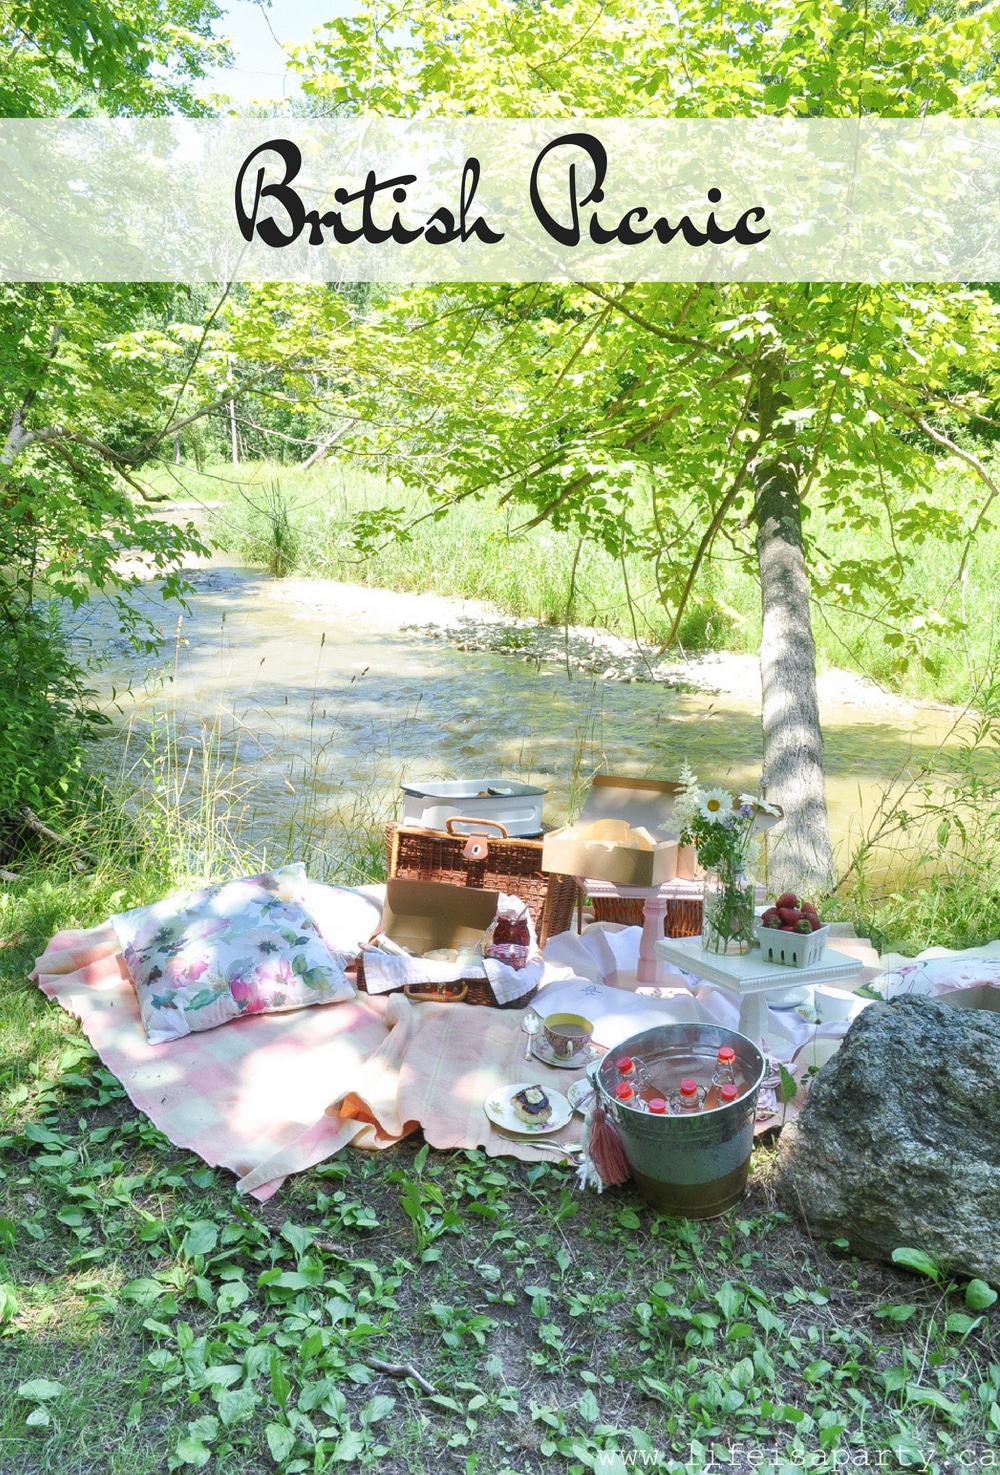
Also check out our British Inspired Picnic here.

British Picnic: our romantic English inspired British picnic food menu includes tea sandwiches, home-made scotch eggs, scones and cream, shortbread, empire cookies, custard creams, vintage decor and lots and lots of tea.

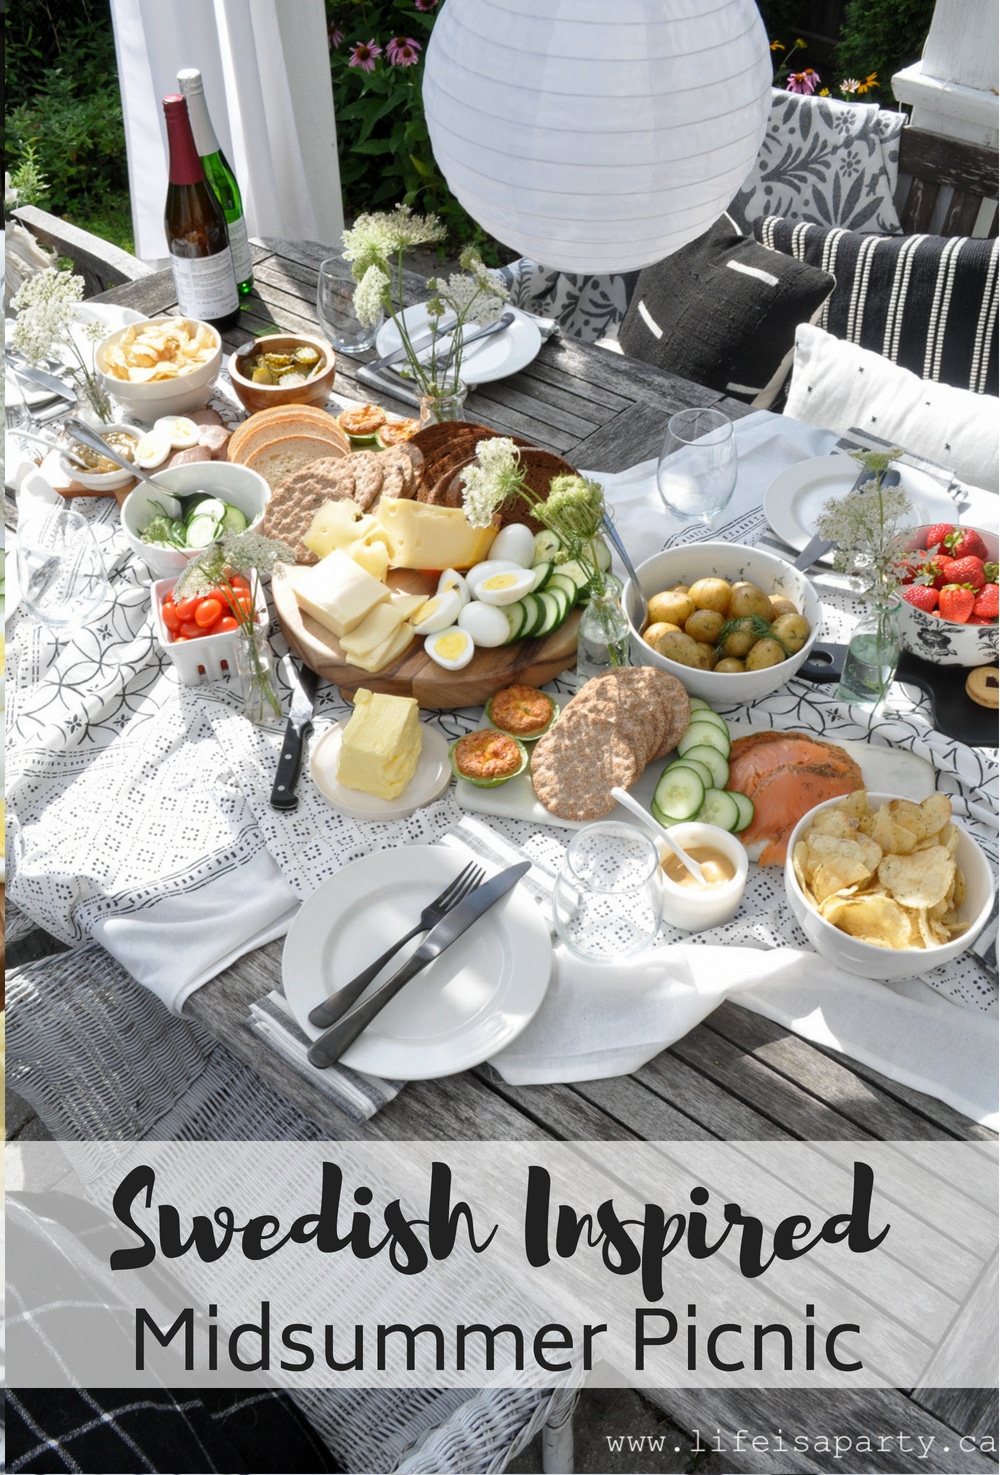
You might also enjoy our Swedish Inspired Midsummer Picnic here.

Swedish Inspired Midsummer Picnic:  Enjoy drinks, smorgasbord, and dessert all inspired by a traditional Swedish Midsummer menu.  Easy to create at home, and so delicious!

Easy 3 Ingredient Coconut Ice Cream

Jul 5, 2017 · Leave a Comment

Easy 3 ingredient coconut ice cream recipe.

Three Ingredient Coconut Ice Cream Recipe: this easy, no cook home made coconut ice cream is so quick to make an everyone loves it!

Easy 3 ingredient coconut ice cream recipe.
[feast_advanced_jump_to]

This Three Ingredient Coconut Ice Cream Recipe is sooo yummy, and soooo easy.  The perfect combination!  It's a no cook also.  It's really checking all my boxes.  If you're a fan of coconut you will love this homemade ice cream.

Love coconut? You might also like our easy coconut milkshake recipe, or this cashew coconut brittle recipe. You might also like Ice Cream Party Ideas.

No Cook

This recipe is so easy to make, because you don't have to cook it first.  There are no egg yolks and heavy cream in this recipe to make into a custard.  This coconut ice cream is more of a sherbert.  We love it because this makes it so quick and easy to put together.  You could make this recipe in just a few minutes, and then let the ice cream maker do all of the work for you.  

easy Coconut ice cream recipe

Three Ingredients

This easy ice cream recipe has only 3 simple ingredients, which makes it such an easy recipe to put together without much hard work.  

  • coconut milk
  • sugar
  • milk

Coconut Milk

We used canned coconut milk.  You can make it with high-fat coconut milk.  You can also make it with lower fat content by using a light coconut milk.  Either one works well in this recipe. We usually use full fat coconut milk because the coconut cream gives makes a creamier ice cream.   The coconut milk is what gives this ice cream it's pure coconut flavor.

This is a perfect recipe to make with kids this summer -even toddlers could do this one, because this no-cook recipe is so easy.

Milk

The only other ingredients in the ice cream base recipe are white sugar and regular milk.  We used 2% milk, but you can substitute whichever milk you normally use, including homo milk, 1% or skim milk.  

Sugar

The final ingredient in our easy coconut ice cream is sugar.  We used regular white sugar.  It of course adds sweetness to the finished ice cream, and makes this one of our favourite desserts.  We found ⅓ sugar to be the perfect amount but you can add more or less sugar depending on your tastes.

This recipe is made with basic ingredients that are easy to keep on hand to make this kind of ice cream anytime you want.  

Can I Make This Recipe Vegan Without The Milk?

You might be wondering if you can leave the milk out.  Vegan ice cream recipes are often made with just coconut milk and sugar.  Good news, you can turn this into one of the dairy-free ice cream recipes by replacing the cow's milk with more coconut milk.  If you want this recipe to be vegan, skip the cow's milk and use 2 cups of coconut milk instead.  It will have a slightly less creamy texture, but it's still really delicious.

Three ingredient coconut ice cream recipe

Ice Cream Maker

You will need to break out your ice cream maker for this recipe.  It's not a good no churn ice cream recipe to make in a loaf pan because it needs the constant movement of the ice cream maker to avoid ice crystals forming and create the best texture.  The ice cream maker creates the perfect creamy texture.  For best results make sure to churn your ice cream in an ice cream maker.  We used the cuisinart ice cream maker and makes great soft serve ice cream with the creamiest texture.  You can also put the ice cream in an airtight container after you remove it from the ice cream churn and store it in your freezer.

Three ingredient coconut ice cream recipe
how to make no-cook coconut ice cream

Video: 

See exactly how this ice cream comes together in our short youtube video linked below.

Youtube video

Coconut Ice Cream Toppings

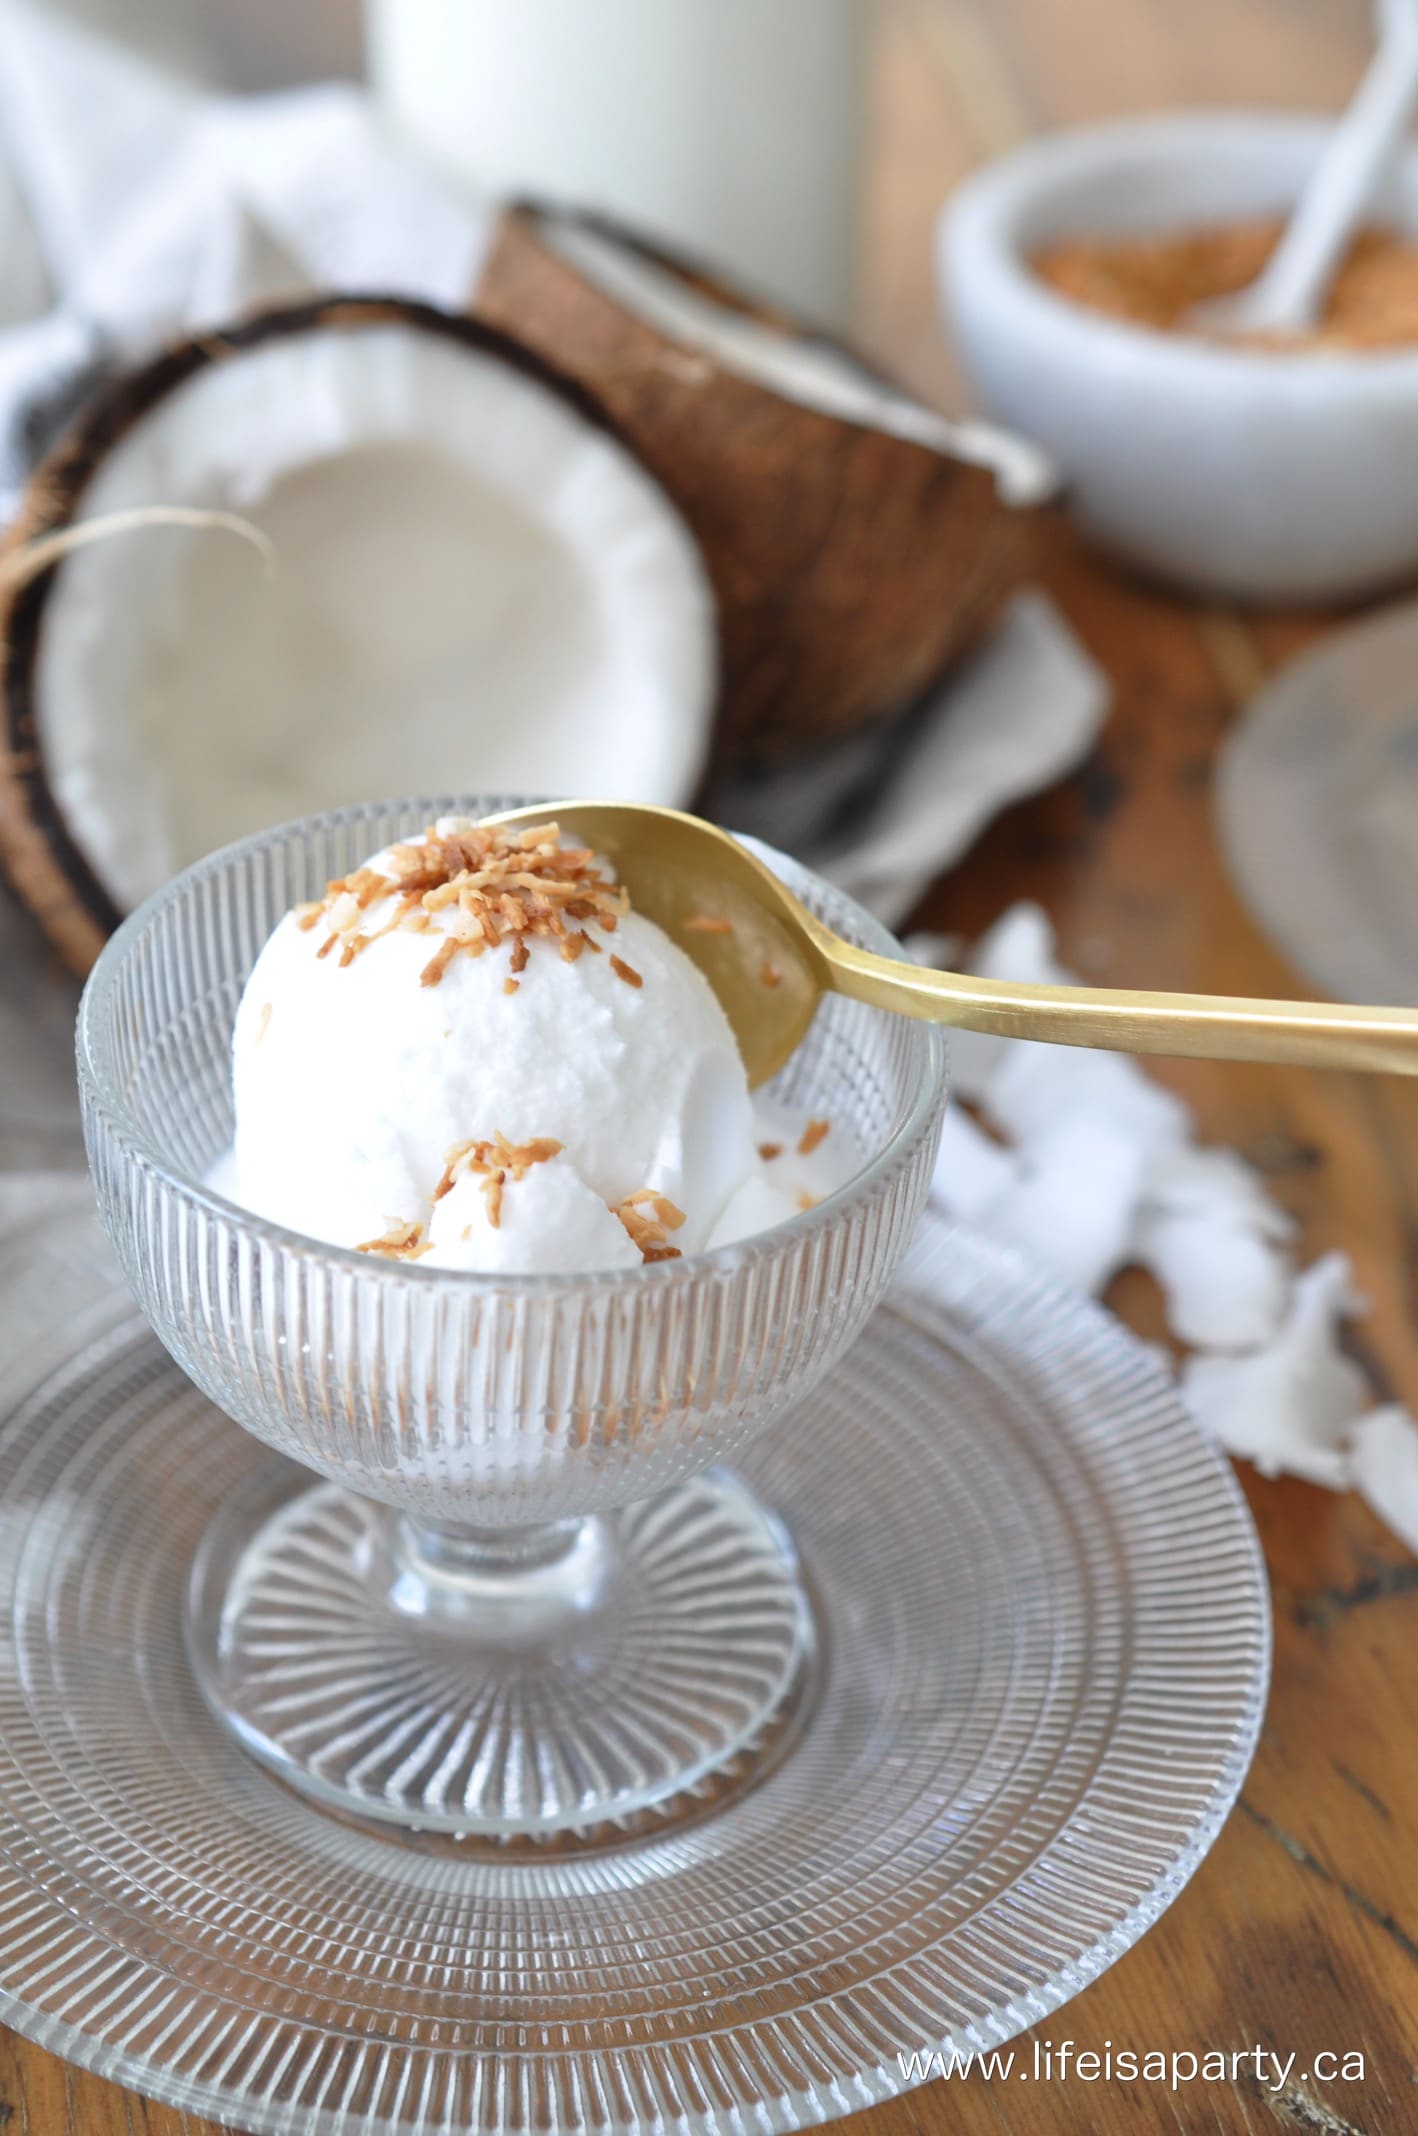
We toasted a little shredded coconut to add as a topping, it's nice for a little crunch.  Use a dry frying pan, and heat your coconut flakes until they're toasted.  Keep an eye on your coconut mixture, because it can burn quickly.  Be sure to let it cool before sprinkling it on your coconut ice cream.  This is the perfect topping for coconut lovers.

Another create option as a topping is to add some chocolate syrup to create a chocolate coconut milk ice cream.  A drizzle of caramel sauce on top of your coconut ice cream is a great topping option too.

Fresh fruit pairs really well with this ice cream also.  Try serving it with chopped fresh mango pieces for a tropical taste you'll love.

Grown Up Treat

If you're serving this coconut ice cream just to adults you can turn it into a grown up treat by adding 2 tablespoon of rum to the ice cream mixture before churning it.  It adds great flavor to the ice cream.

More Options

If you love vanilla coconut ice cream, you can add some vanilla extract, or vanilla beans to your ice cream mixture.  Try adding 1 teaspoon of vanilla extract, or scrape the seeds of one vanilla bean and add to the ice cream ingredients before churning.

Serving

We served our ice cream in cute dessert bowls.  This ice cream is also great served in an ice cream cone.  But for a really special serving idea, serve the coconut ice cream in a coconut shell.  Use an ice cream scoop to add the ice cream to the coconut shells and top with grated coconut, or any of your favorite toppings.

Coconut ice cream recipe easy no-cook

My girls enjoyed this ice cream and how easy it was to make so much that we picked up another few cans of coconut milk the next time we shopped -we figured we should probably have some on hand all summer. 😉

Recipe

Easy 3 ingredient coconut ice cream recipe.

Coconut Ice Cream Recipe

Easy and delicious coconut ice cream.
No ratings yet
Print Pin Rate
Course: Desserts
Cuisine: American
Prep Time: 5 minutes minutes
Additional Time: 20 minutes minutes
Total Time: 25 minutes minutes
Servings: 2
Calories: 265kcal
Author: Dannyelle Nicolle-Ramjist

Ingredients

  • 400 mL can coconut milk
  • ⅓ cup sugar
  • ⅓ cup milk

Instructions

  • Add coconut milk to a large glass measuring cup, and then add milk to make the total mixture 2 cups (about ½ cup of milk).
  • Add in sugar and stir to completely dissolve.
  • Pour into the frozen ice cream machine and churn until frozen, according to manufacture's instructions. Enjoy!

Nutrition

Serving: 1g | Calories: 265kcal | Carbohydrates: 20g | Protein: 3g | Fat: 21g | Saturated Fat: 19g | Polyunsaturated Fat: 1g | Cholesterol: 2mg | Sodium: 22mg | Sugar: 17g
Tried this Recipe? Tag me Today!Mention @LifeisaParty or tag #lifeisaparty!
no-cook coconut ice cream

With an easy, no cook, 3 Ingredient Coconut Ice Cream Recipe, life really is a party!

More Ice Cream Recipe Inspiration

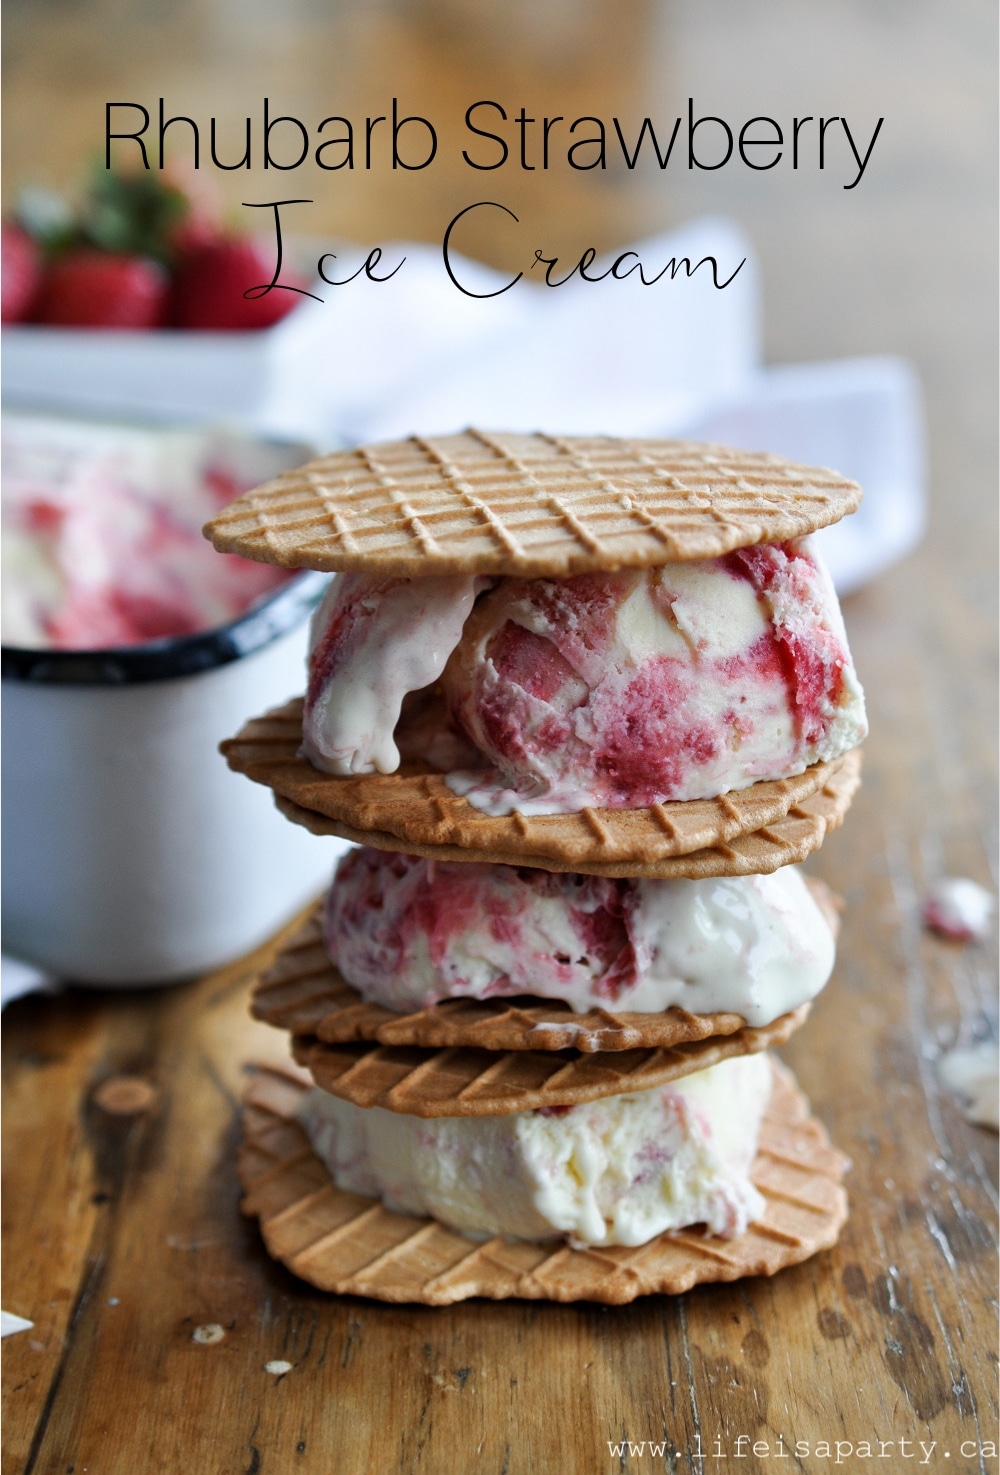
You might also like our Strawberry Rhubarb Ice Cream recipe here.

Homemade Rhubarb and Strawberry Ice Cream Recipe: creamy vanilla base, with tangy rhubarb compote and sweet strawberry compote ribbons throughout.

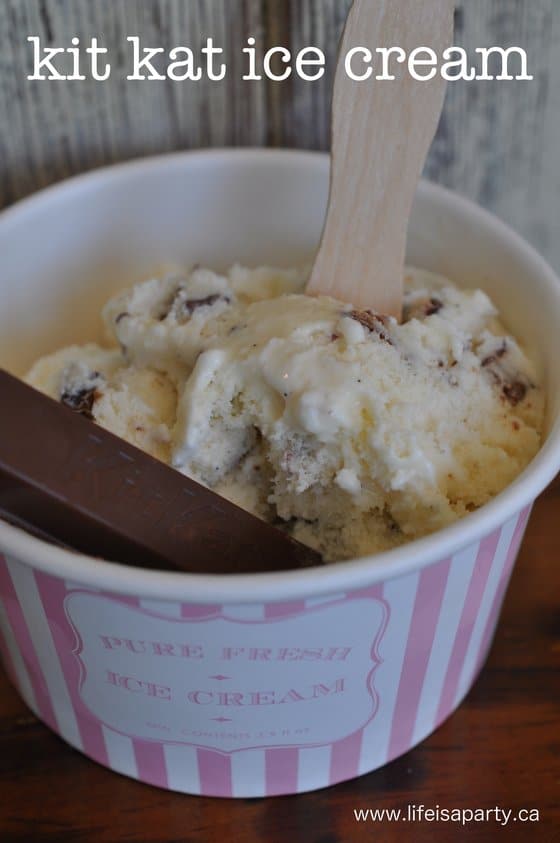
Also check our Homemade Kit Kat Ice Cream recipe here.

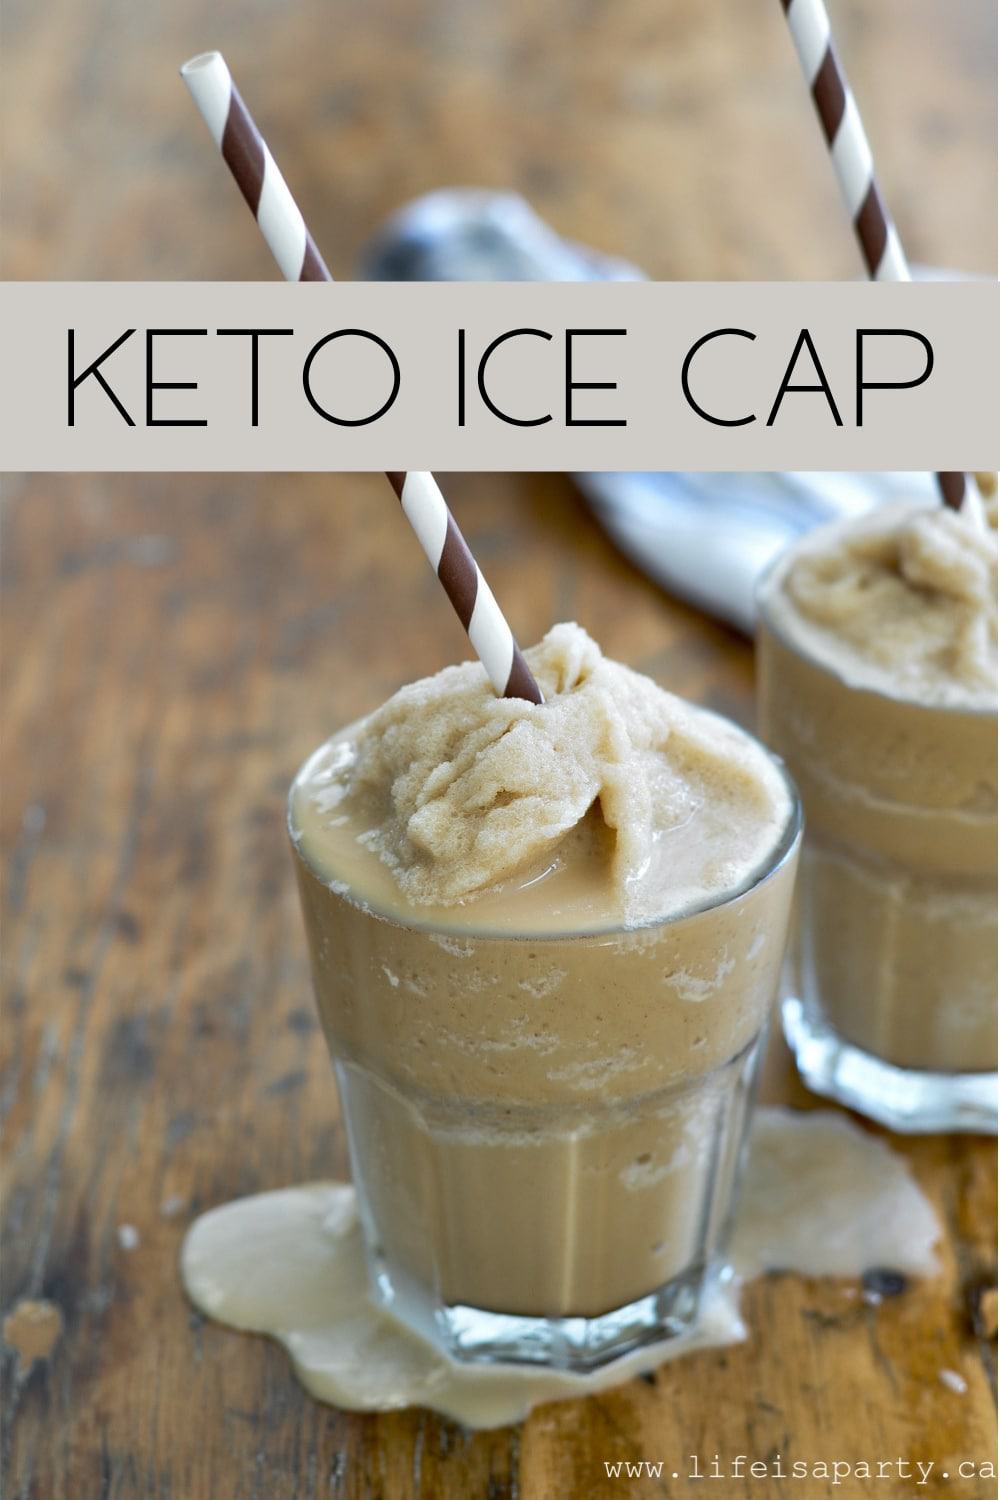
You might also enjoy our Keto Ice Cap recipe here.

Keto Ice Cappacino Recipe -you don't have to miss out on your favourite summer coffee treat, this keto friendly recipe is easy and delicious.

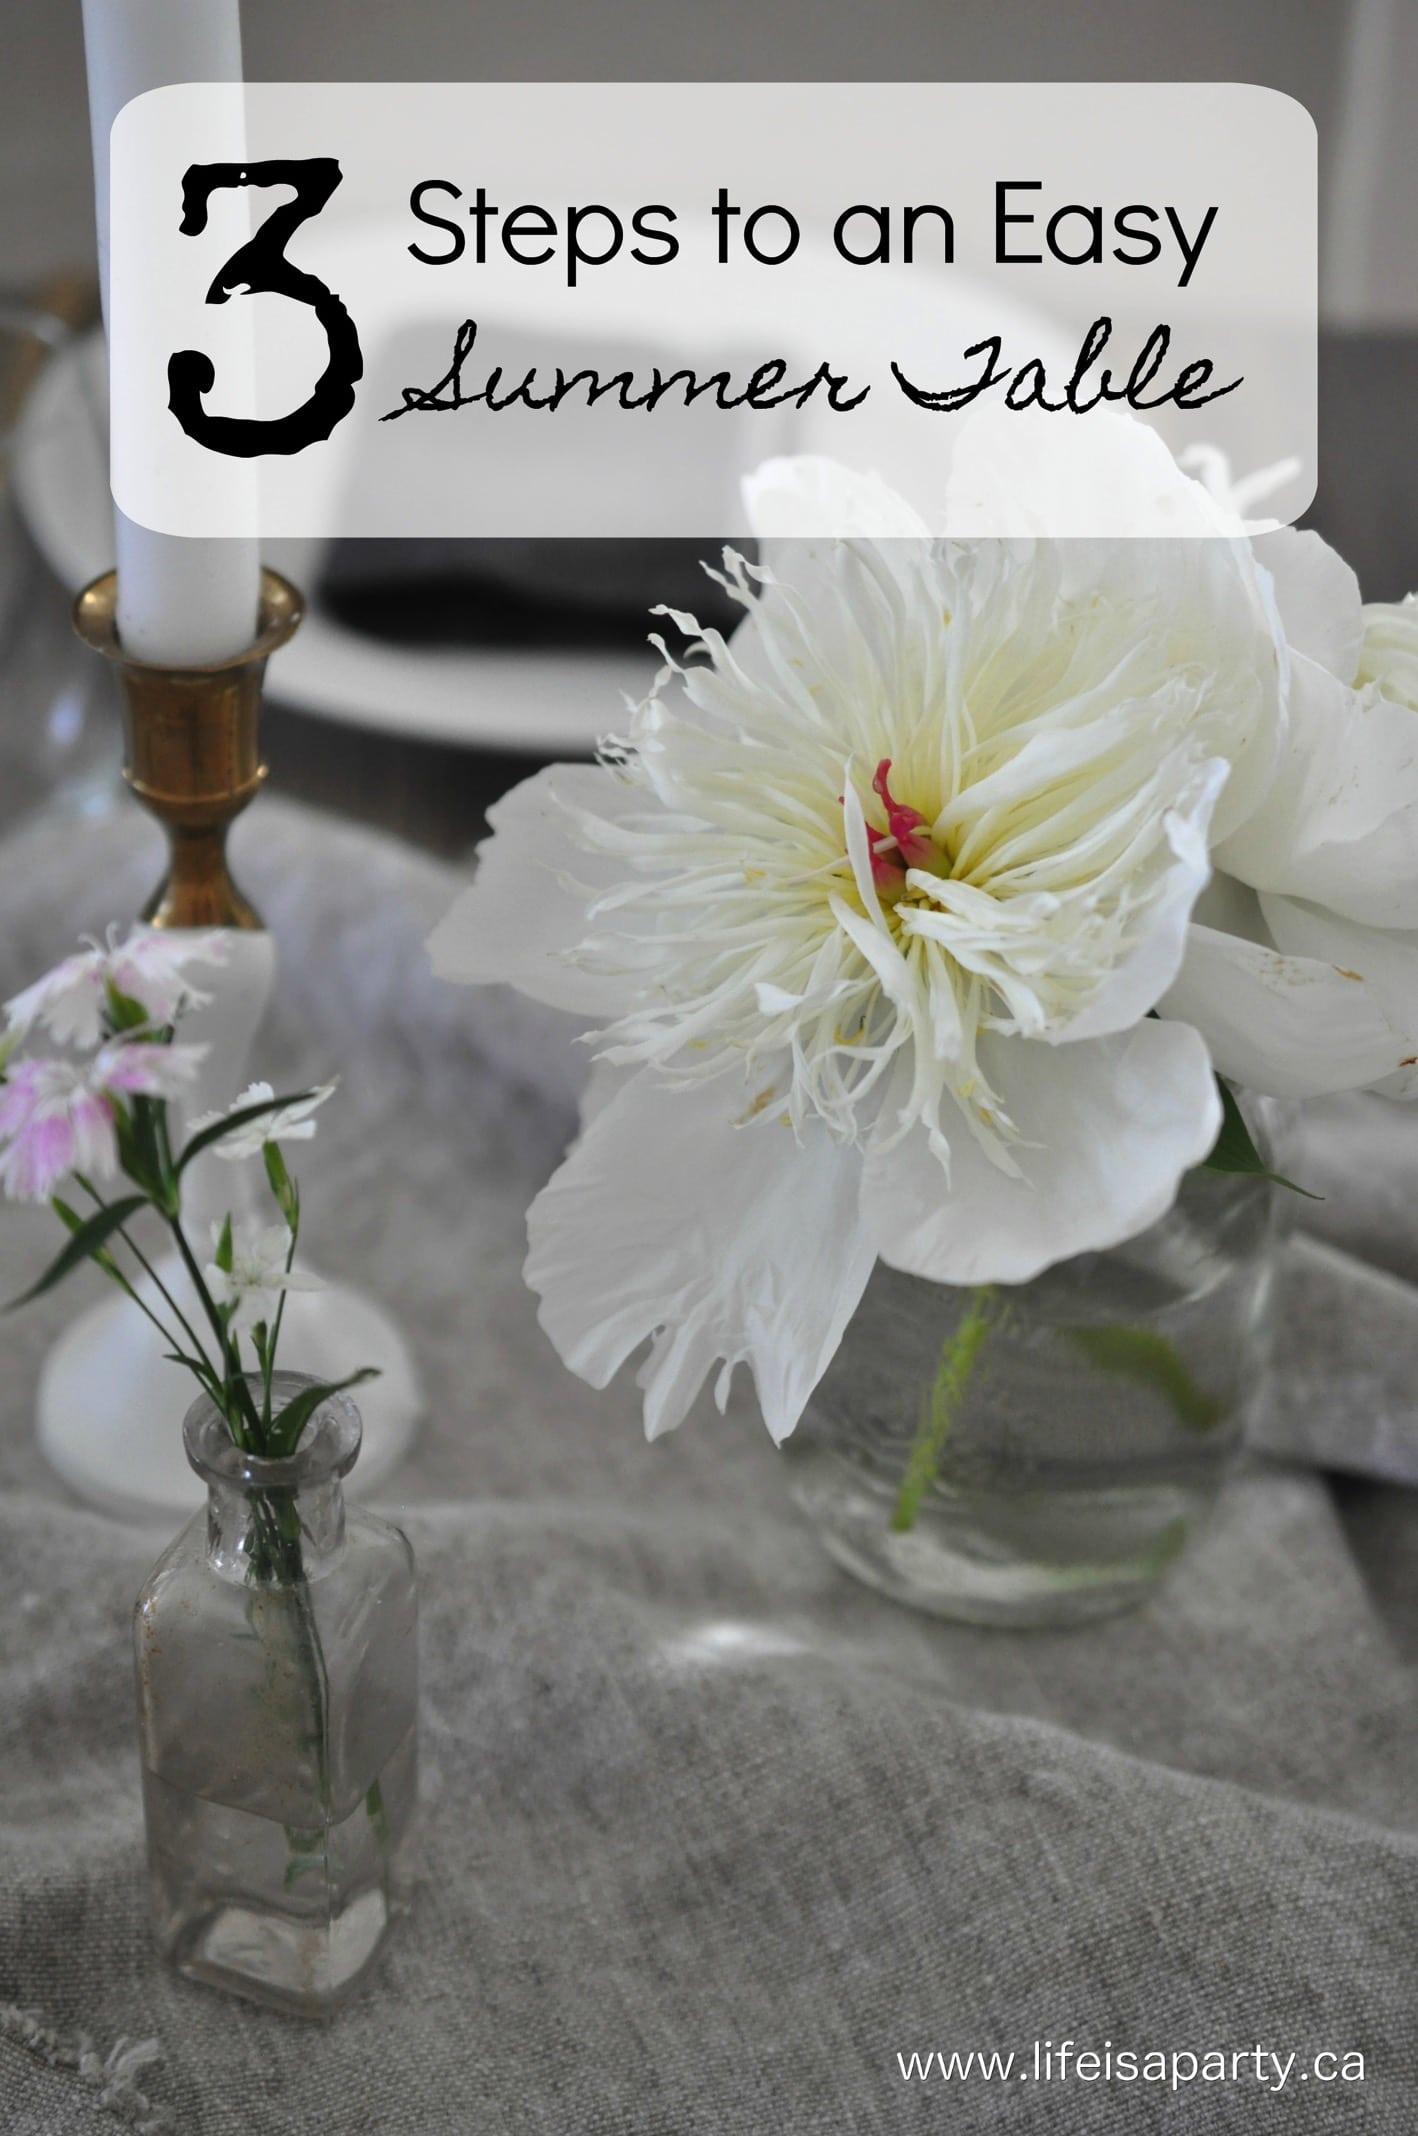
Three Steps to an Easy Summer Table

Jun 28, 2017 · Leave a Comment

Three Steps to an Easy Summer Table: learn how to start with the basics, add items for interest, and look in unexpected places to set the perfect table.

Three Steps to an Easy Summer Table: learn how to start with the basics, add items for interest, and look in unexpected places to set the perfect table.

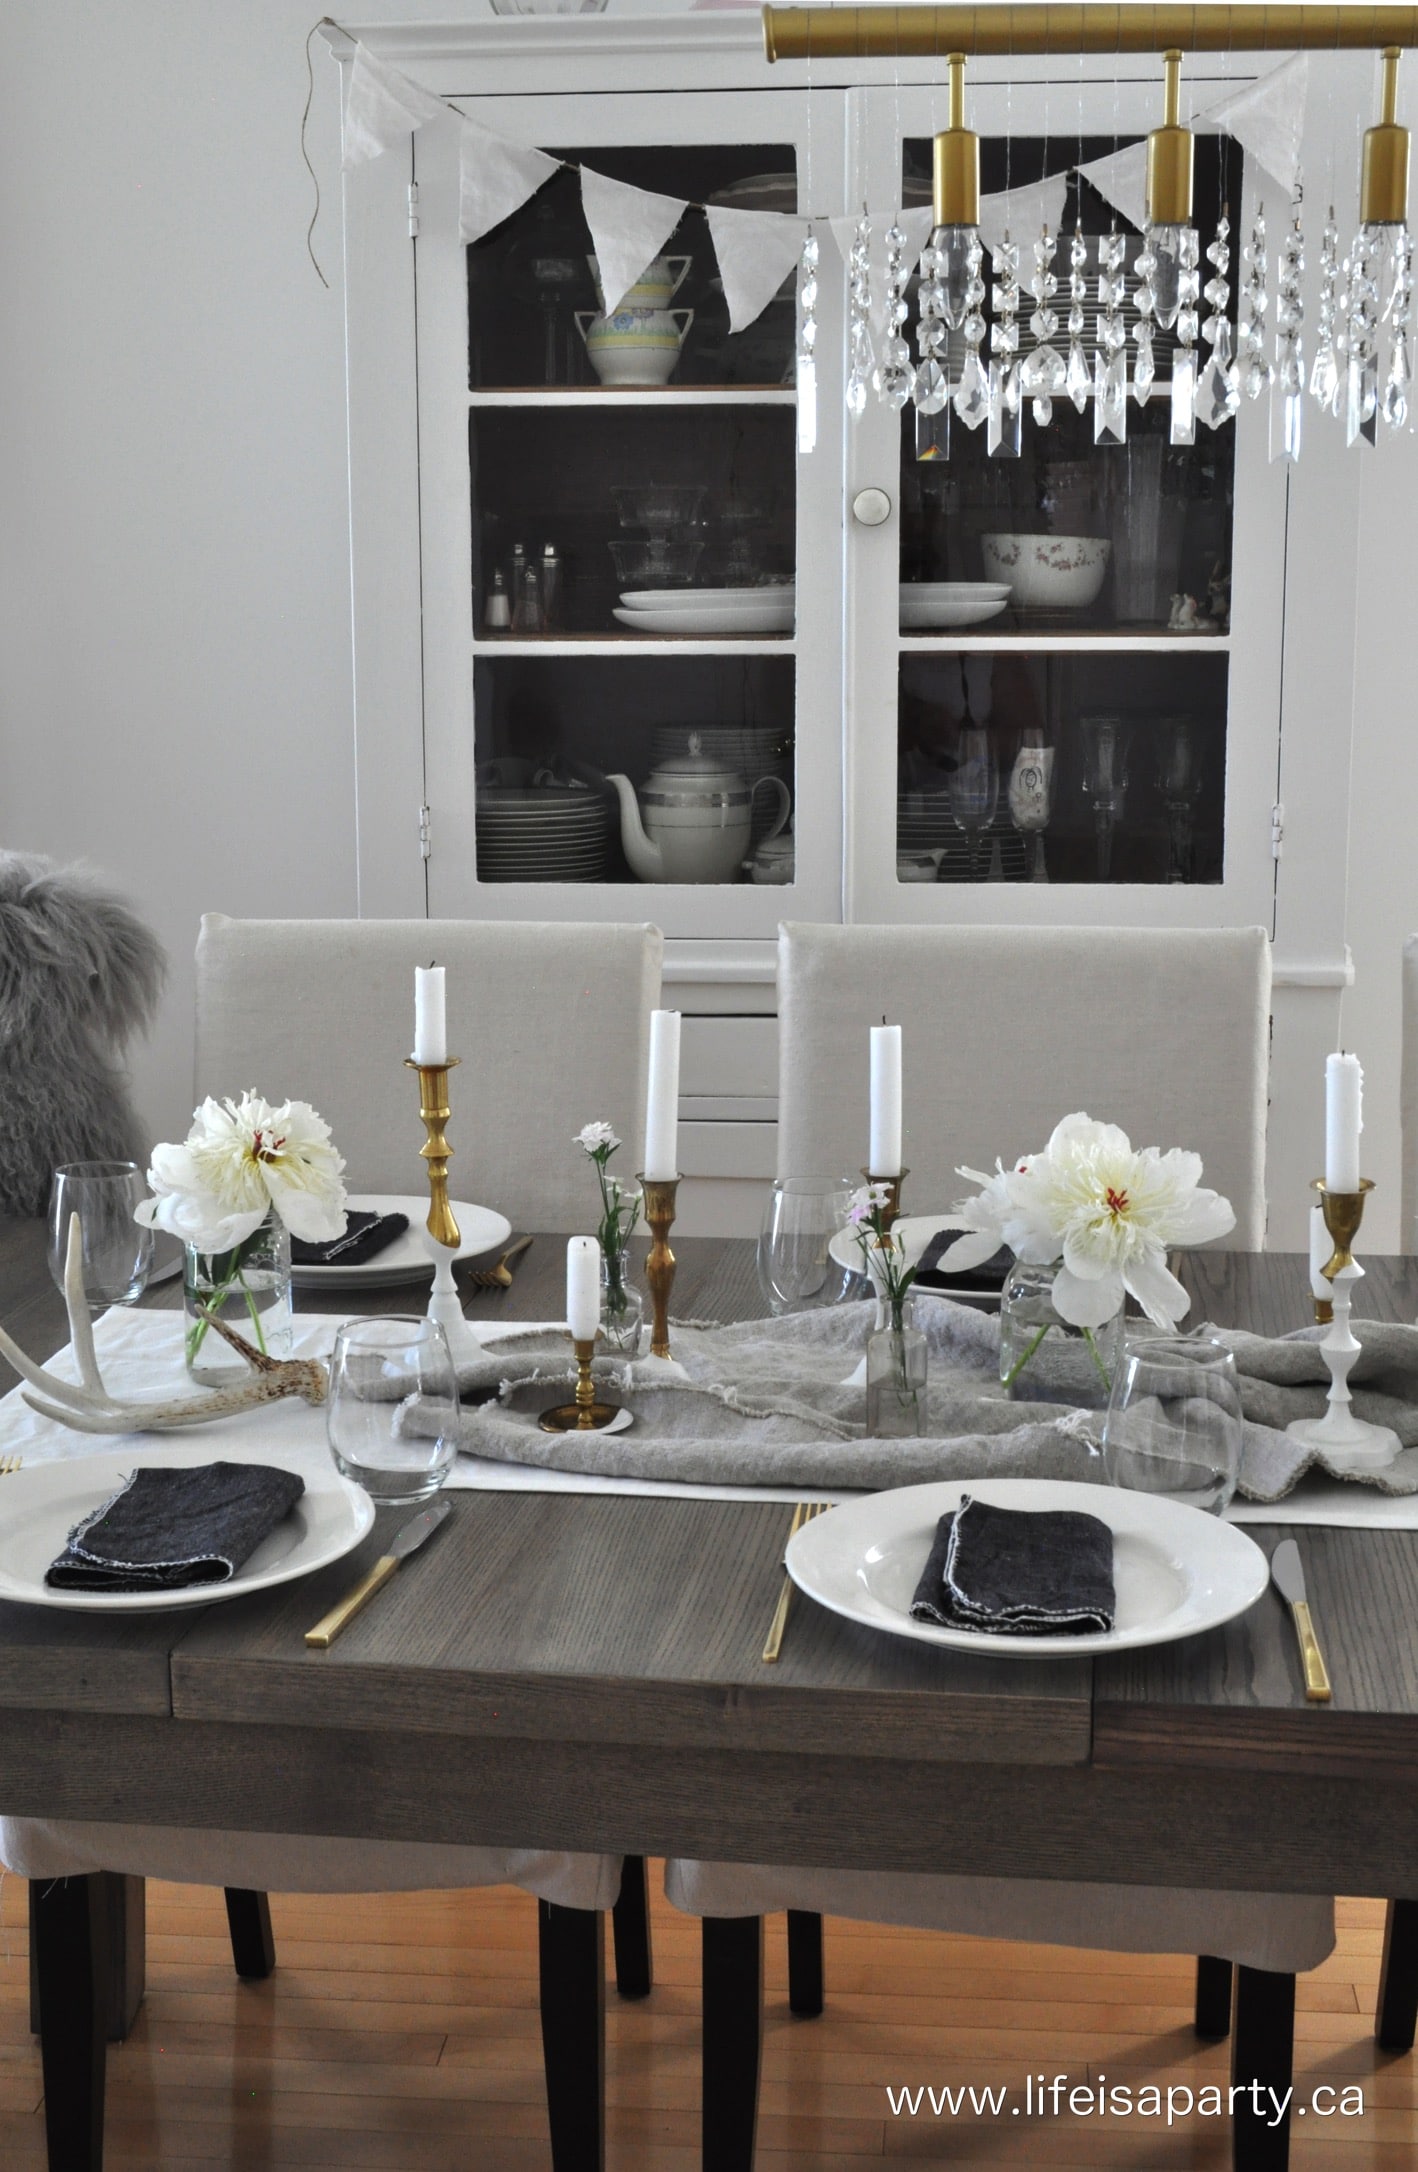
Last week I shared a post on my Entertaining Essentials - I shared all the basics you need for entertaining like white plates, stemless wine glasses, and white linens.  In today's post I'm sharing Three Steps to an Easy Summer Table set with those basics so you can see how to use them for entertaining.

Easy Summer Table

1. Start with the Basics

I set the table with  my everyday white dishes -find something similar here.  And then I used stemless wineglasses, I like these because they work for kids and adults, they're great for water, soft drinks or wine -and they look great too.

Easy Summer Table

On the table I used a basic linen runner, and I layered it with a rough piece of unfinished linen.  The napkins are some I picked up at the dollar store -basic denim with a roughly sewed edge -but basic white would look great too.

Summer Table with white peonies

2.  Add Interest

Summer Tablescape

Metals:

The cutlery is pretty gold, a real statement piece, the "jewellery" of the table.  the candlesticks repeat the gold -which is a great trick to setting a table.  We don't want everything to be too matchy, matchy, but repeating an element like the gold, or the glass, or the colour can help make the table feel tied together.

white peonies

Height:

For a centrepiece on our summer table, I used some the pretty brass paint dipped candlesticks -see how I made them here.  The candles help add height to the table.  This can always be done with flowers or branches too.

Three Steps to an Easy Summer Table

Texture:

I've added texture to your summer table through the linen table runners, especially the one with the rough edge.  The napkins also add texture.  The most texture though is the flowers.

flowers in a vintage bottle

These are from my garden and in simple mason jars, and vintage bottles.  When thinking about texture in terms of flowers you might think about picky, smooth, rough, sleek, fluffy, etc.  Texture doesn't just come from the flowers.  Smooth and sleek are to be considered too, and often come through the glass, and the cutlery.

summer tablescape

3.  Look for Elements in Unexpected Places

I always start with shopping the house first.  You probably have an old vase in another room, or an old mason jar in the cupboard, or a piece of fabric that could be a table runner.

neutral summer tablescape

Think of your colour scheme, and look around your house.  Don't be afraid to try things, and think outside of the box.  My napkins were really dishcloths I found at the dollar store.  My candle holders were old thrift store finds that had a little makeover.  These touches all add character and personality to those simple basics we started from.

neutral summer tablescape

With a 3 Steps to an Easy Summer Table like this one, life really is a party!

You might also like our Summer Dinner Party post here.

Also check out our Summer Table here.

Summer Tablescape -garden flowers in vintage bottles under glass cloches create a simple, easy summer time table for entertaining.

You might also enjoy our Geometric Pink and Gold Tablescape here.

Canadian Themed Party Ideas

Jun 19, 2017 · 8 Comments

Canada Day party ideas and dessert table.

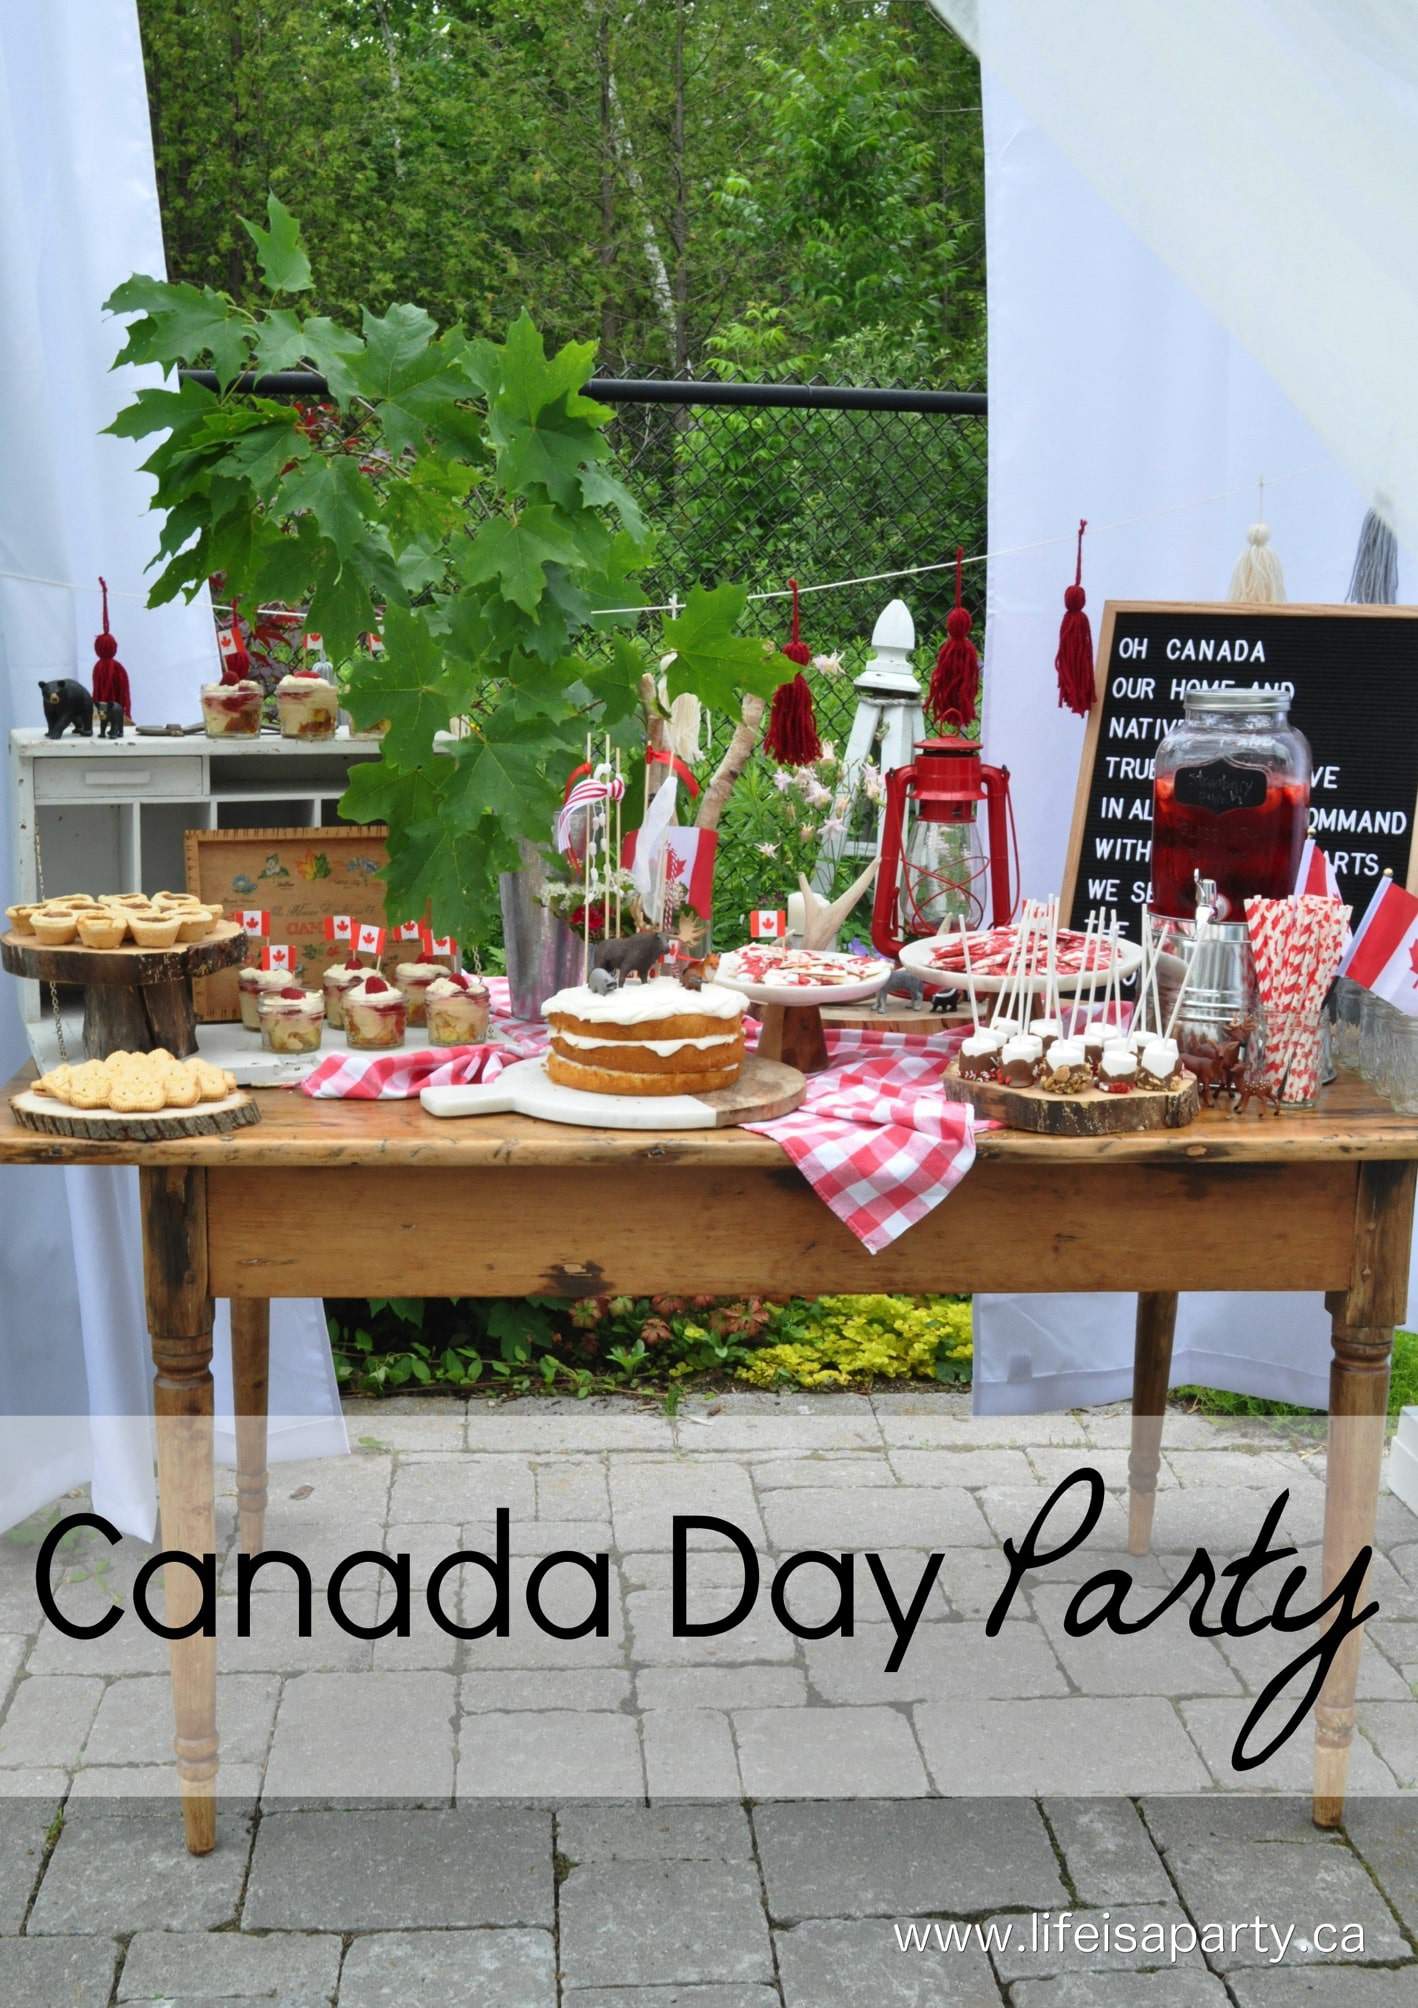
You will love these Canadian Themed Party Ideas for celebrating on Canada Day or anytime of year. We went with classic Canadiana party decor, and themed red and white party desserts for celebrating.

Canada Day party ideas and dessert table.
[feast_advanced_jump_to]

Why You'll Love This Party

  • Celebrate our home and native land.
  • Our desserts are Canadian classics, and red and white, not to mention delicous.
  • The decor is giving classic Canadiana vibes -think cozy cottage and vintage.

Canada Day is a fun reason for a party.  And we can't wait to celebrate with a Canada themed party!  I hope you enjoy all these Canada themed party ideas to inspire your own celebrations.

You might also like our Canada Day BBQ, Canada Day Chocolate Bark, or Butter Tarts with Raisins.

Canada Day Party ideas

Backyard Set Up

For my Canada Day party I decided to go with a classic Canadiana theme with lots of red and white.  We took our colour scheme from the Canadian flag.

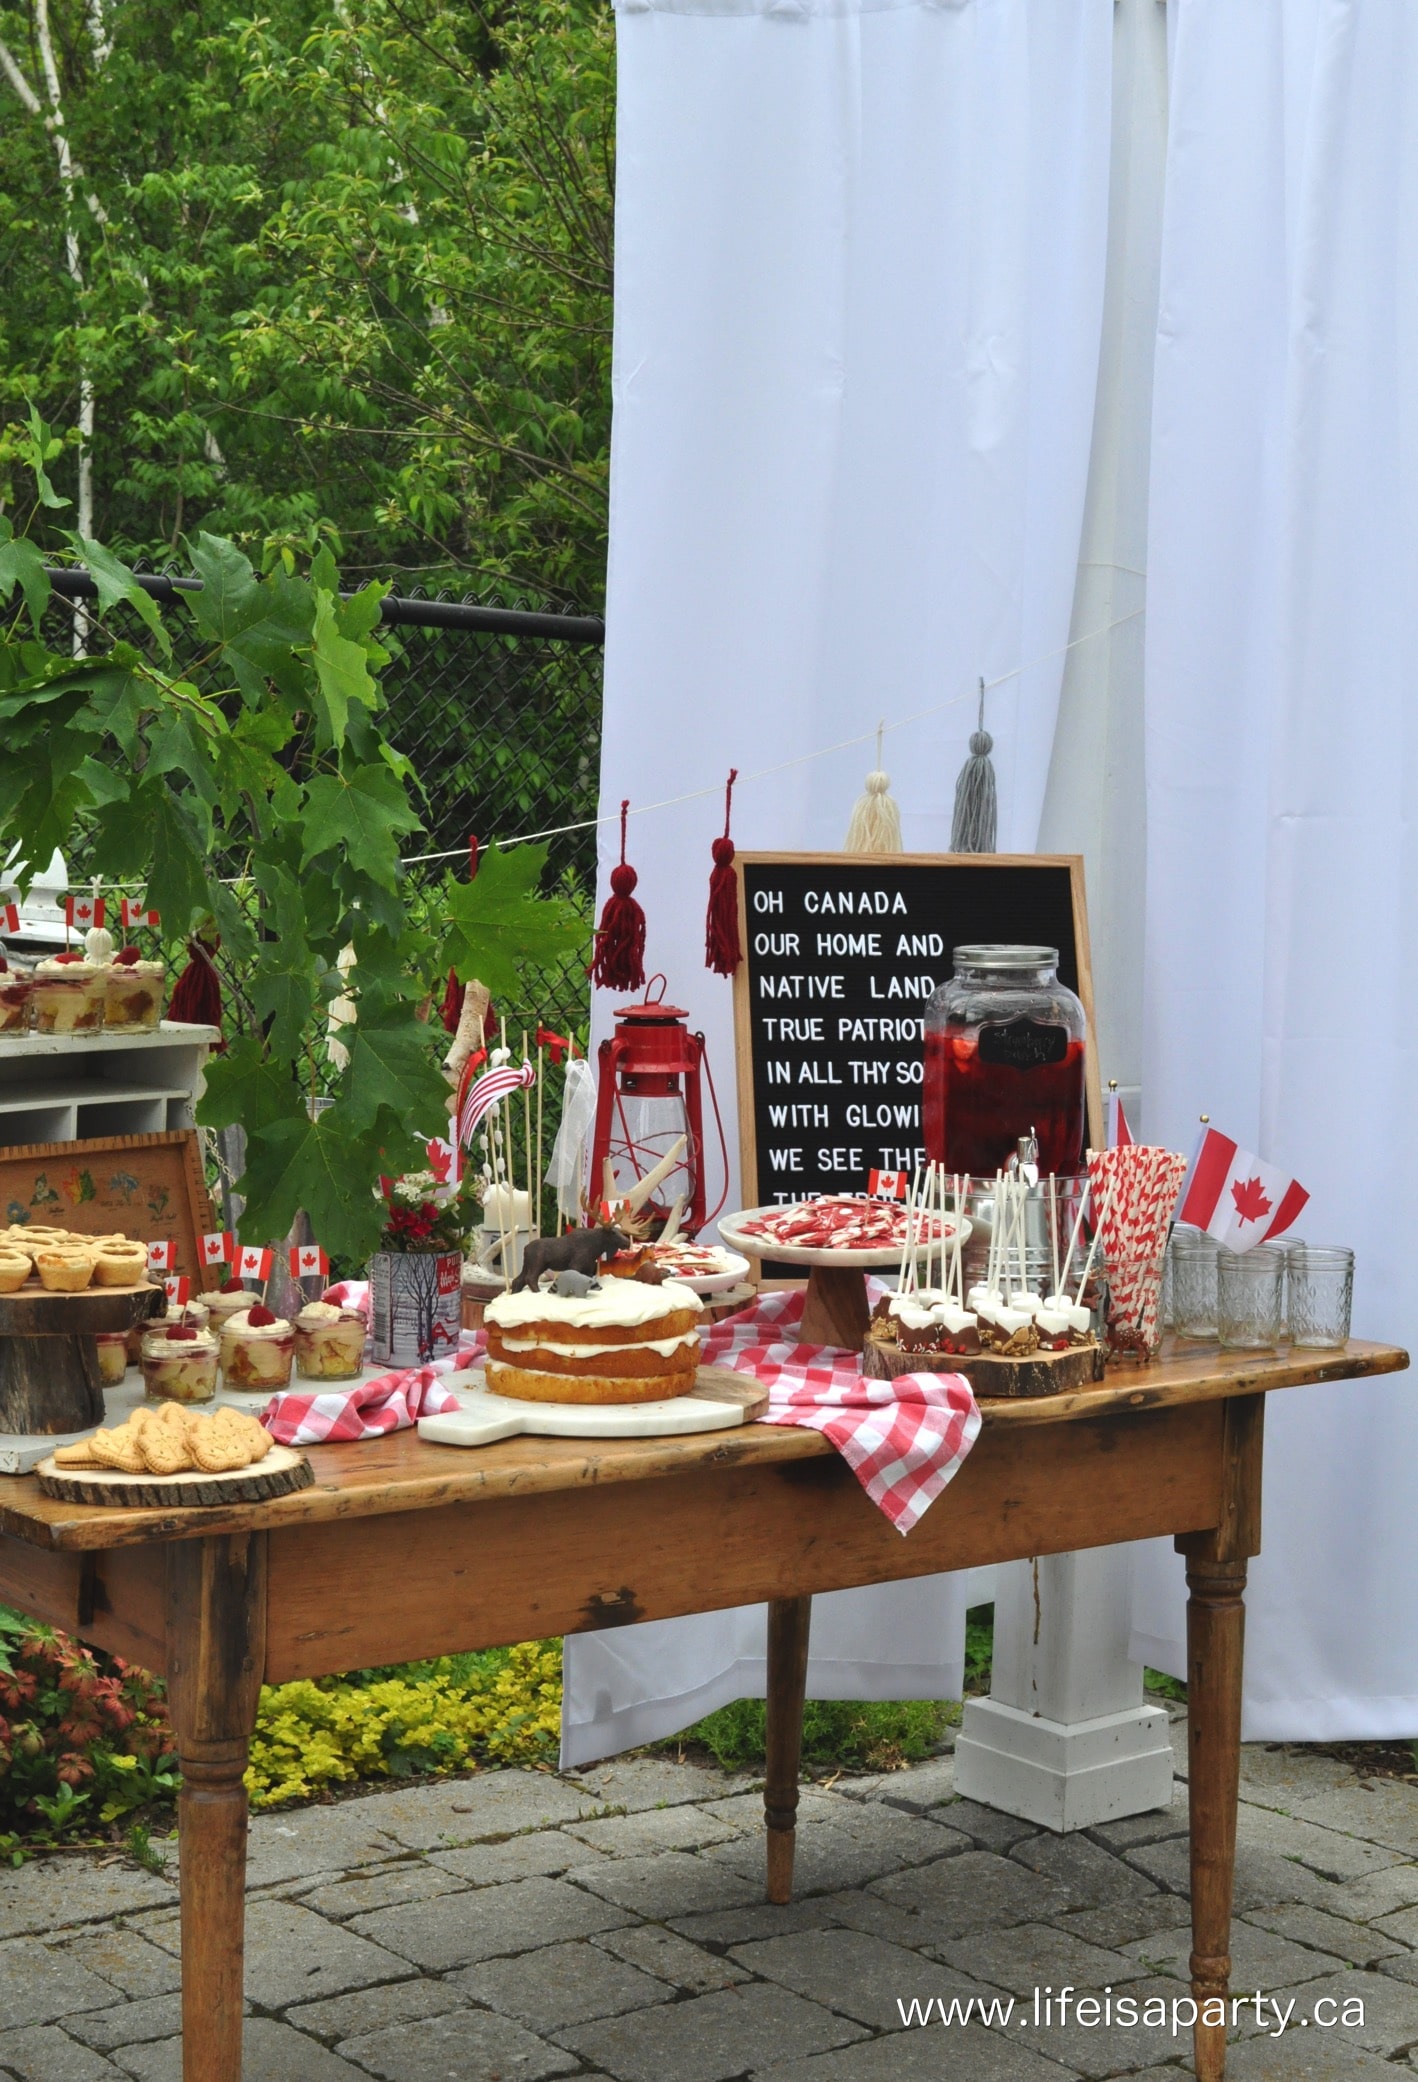
I set up a great dessert table under our pergola for a backyard get together.  I love summer entertaining in the backyard.

Canada themed party
Canada Day Party ideas

I set up the dessert table at one end of the pergola, and at the other end a little seating area with our Muskoka chairs.  It's that buggy time of year here, so the mosquito netting was pretty and functional.  It's a great conversation spot for two.

how to host a Canada themed party

It was so fun to put together a great dessert table with lots of fun Canada themed desserts.  And my party guests loved all the fun Canada desserts to choose from.

Canada Day Centrepieces and Table Decorations

I started out with some pretty centrepieces and flowers for the table.

Canada Day Party decorations

For the flowers, I cut a pretty maple tree branch, used some birch branches in a mason jar, and made a little flower arrangement in a maple syrup can.  What's more Canadian than a maple leaf?

Canada themed party decorations

I just used some flowers from my yard and an old maple syrup tin.

Canada Day Party Canada themed party decor

I wanted the party to feel rustic and kind of campy so I used a few wood log slices, along with some cute Canadian animal toys.  The old lantern was my Grandma's, one she used to use for trips the barn at night -the red was perfect for Canada Day!

Canada Day Party -Classic Canadiana party decor, and Canada themed party desserts that are easy to put together make this the perfect way to celebrate!

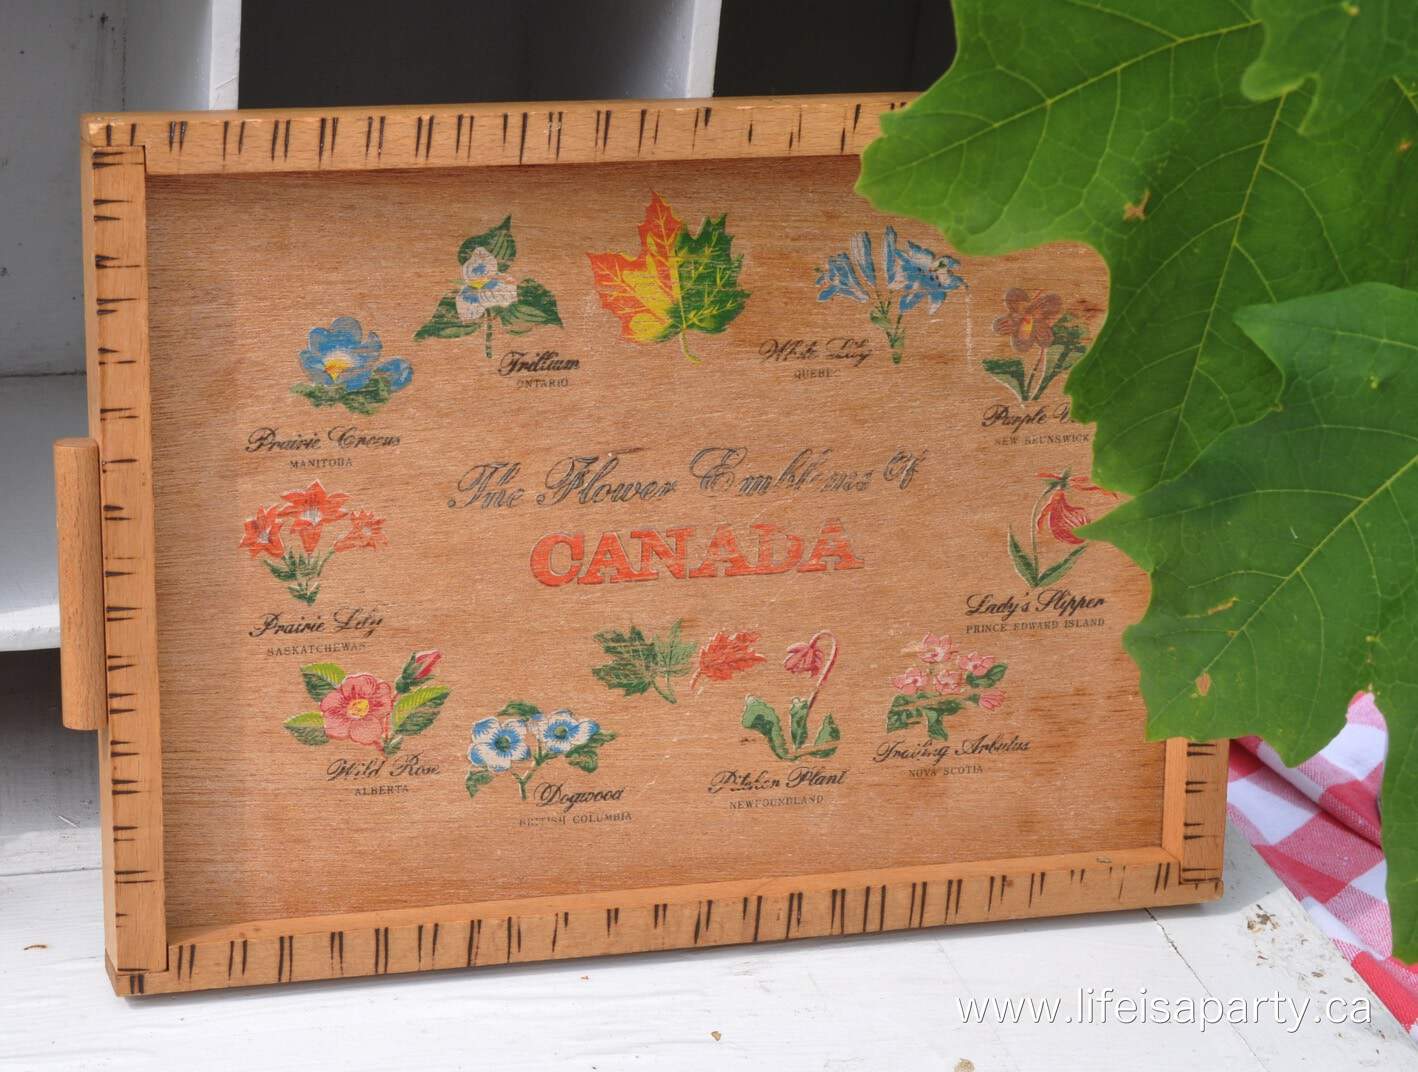
Another fun vintage piece I used was this old provincial flower tray.  I found it at a thrift store and knew it would be perfect for our Canada party.  I love that it has all the pretty flower from each province.  It's so fun seeing them from New Brunswick and Nova Scotia, all the way to out west!  It was the perfect vintage piece to share a little Canadian pride.

red DIY yarn tassels

I also made a really simple tassel bunting in red, white and grey from some yarn.  I love a simple craft like this as party decorations that you can reuse.

Canada Themed Dessert Table

This party included lots of easy food ideas -in fact you can see me making some of the recipes here if you want to see just how easy it was!

Canada Day Party dessert ideas

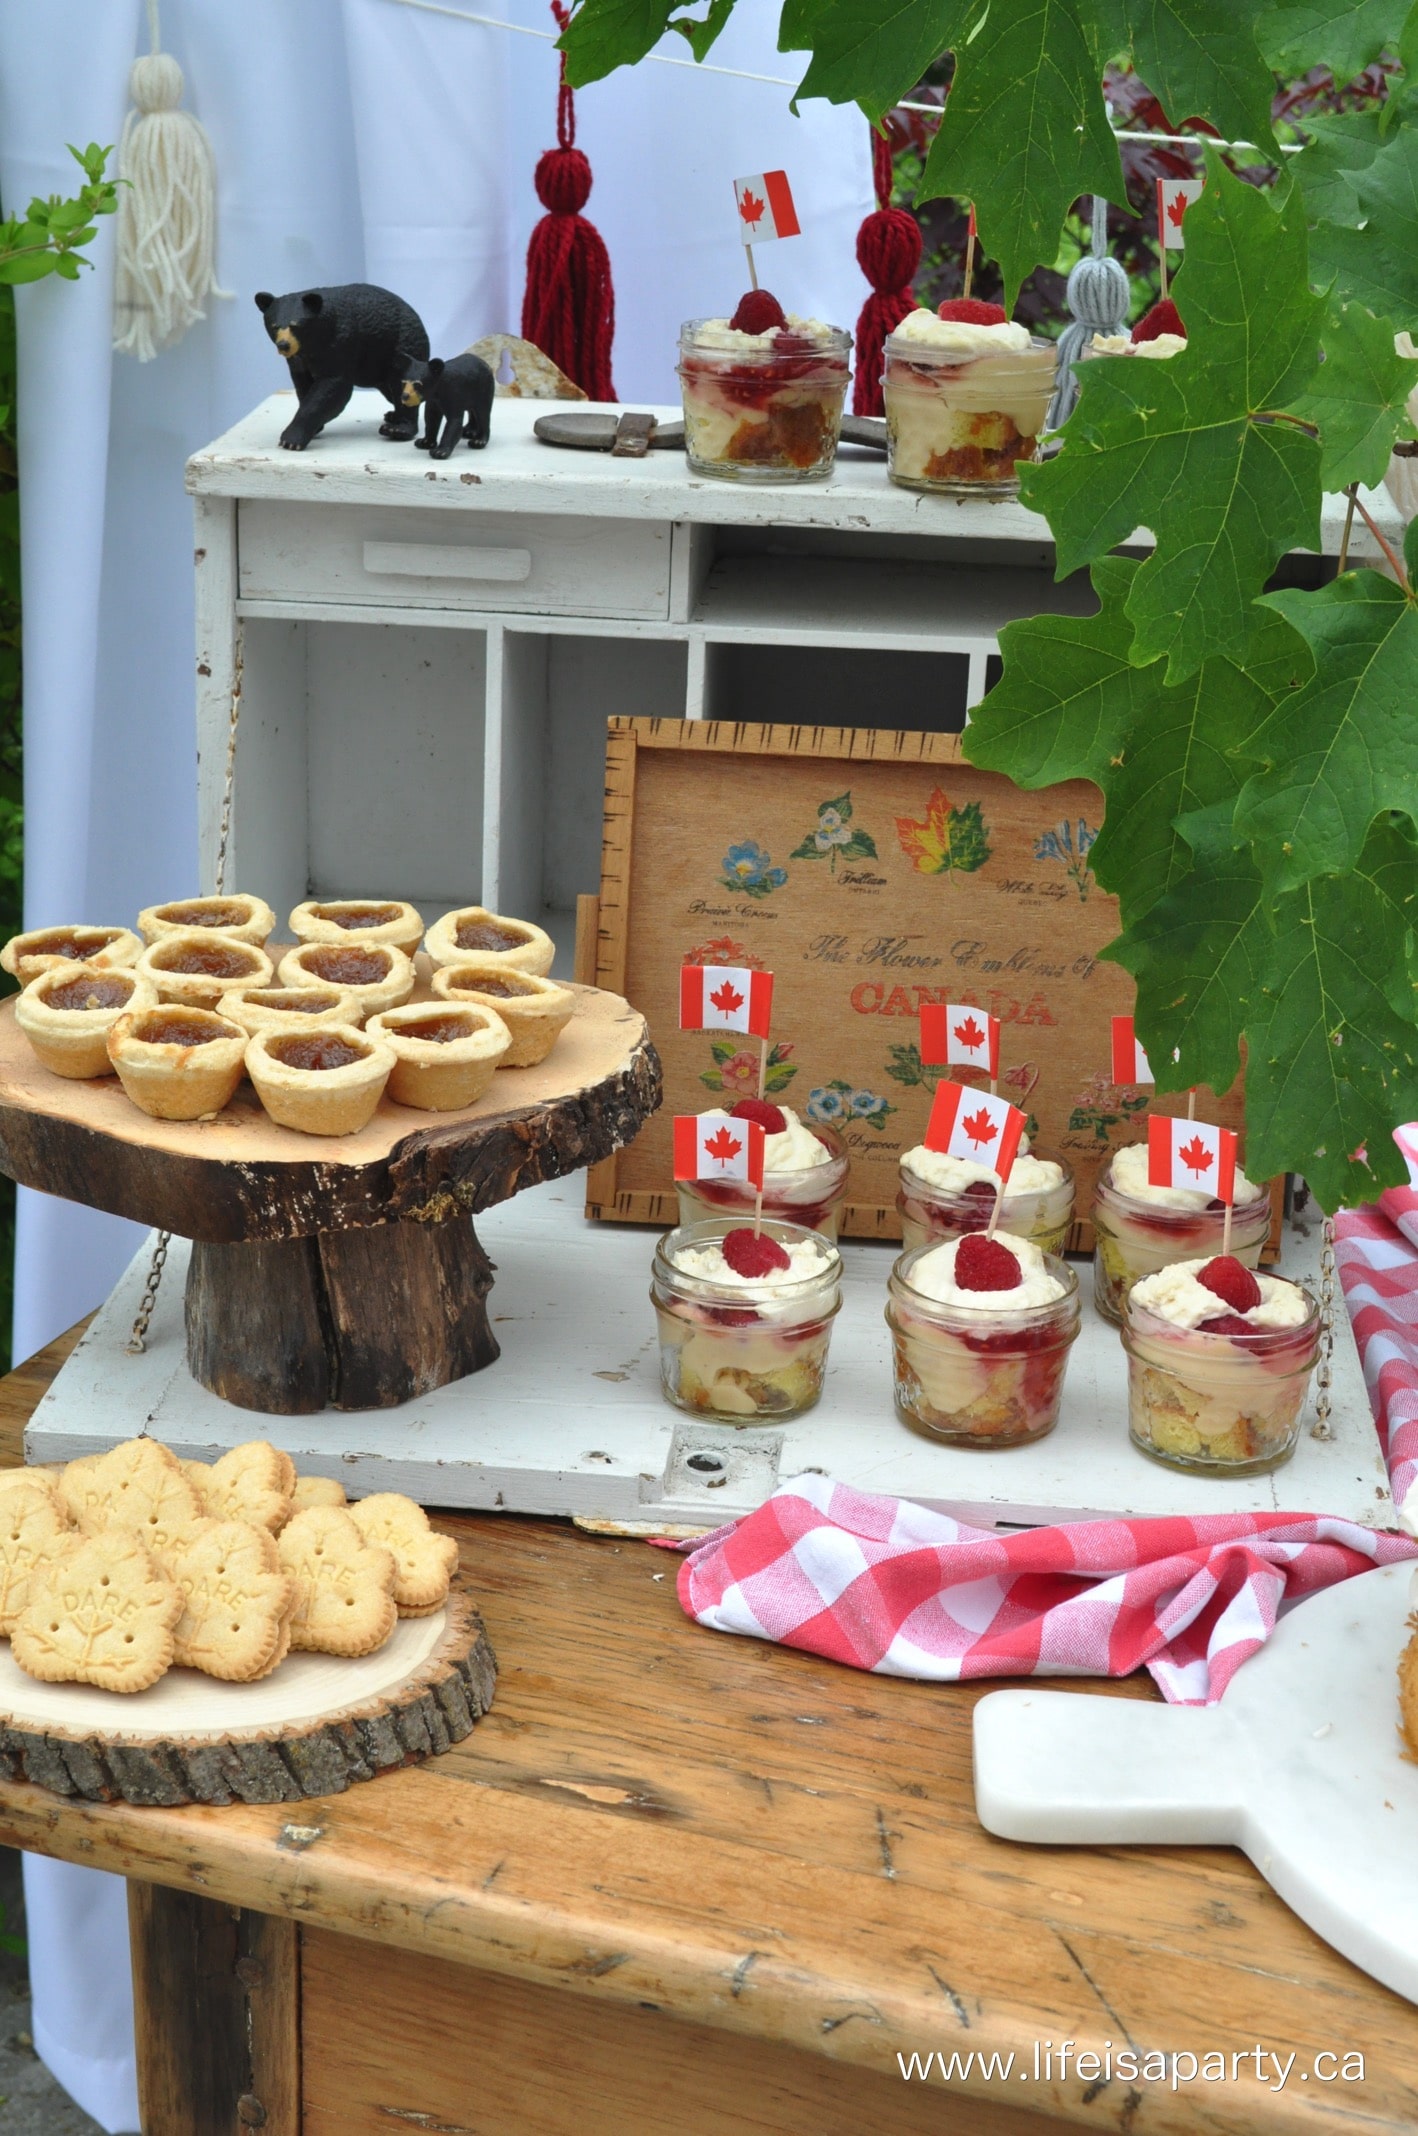
For the dessert table we went with classic Canadian themed foods and red and white.

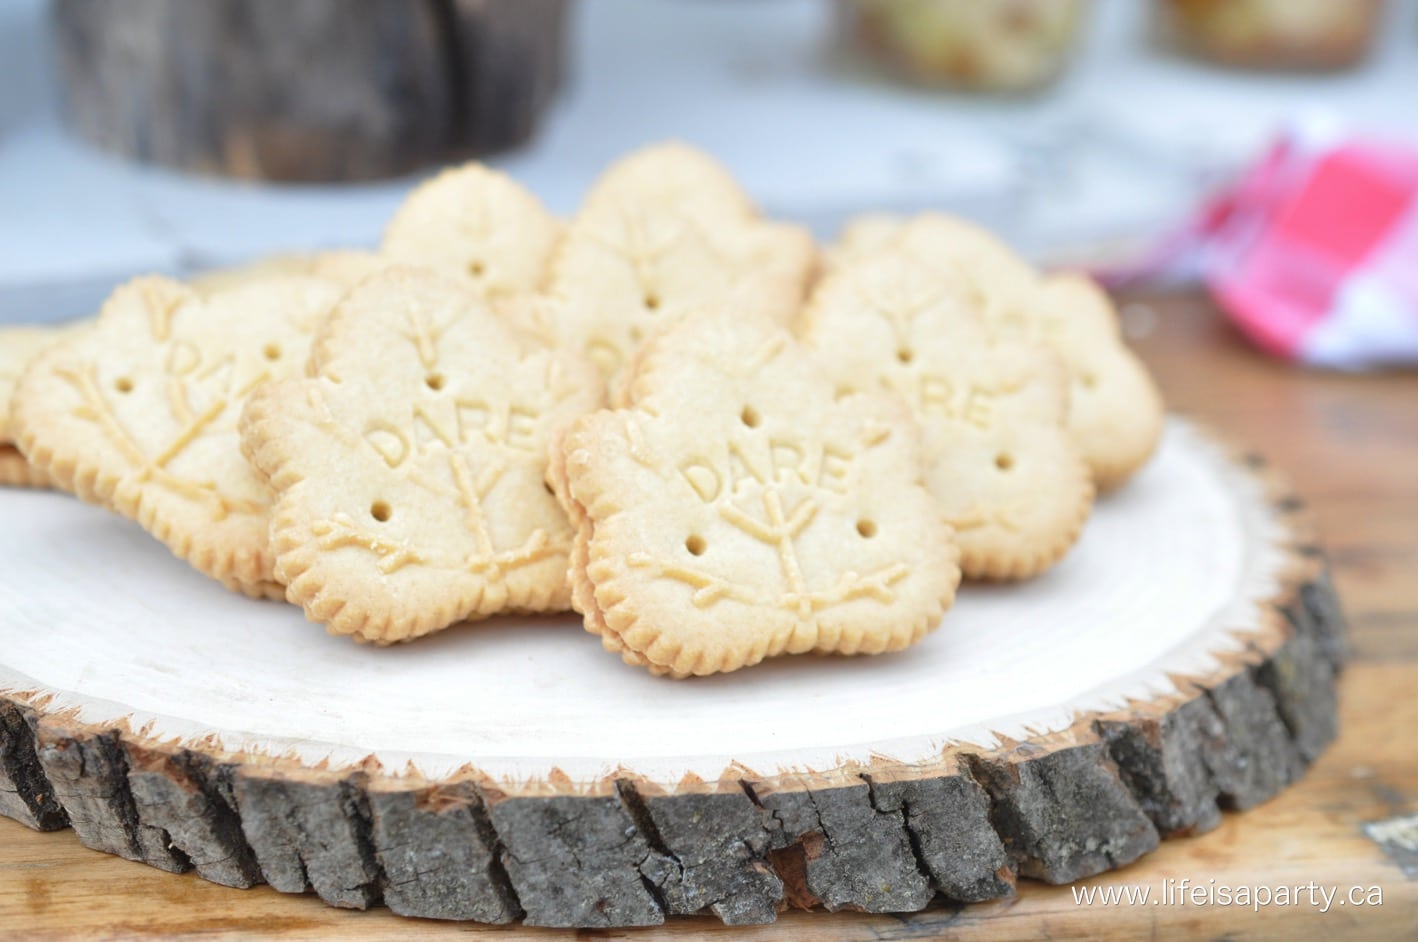
  • Maple Leaf Cookies: I picked up some maple leaf cookies.  They're a classic Canadian treat that taste like maple syrup.
Maple cookies
  • Butter Tarts: We also had some butter tarts.  You can't get more Canadian than a butter tart.  Use a classic recipe, or pick some up like we did.
Canada Day Party themed dessert table
  • Mini Red and White Raspberry Trifle: also made some individual raspberry trifles in mini mason jars. They're very easy to make.  I used some store bought pound cake, and canned custard.  Begin by cutting the pound cake into small squares and putting a layer in a mini mason jar.  Then spoon in some custard.  Top that with some raspberry jam and a few fresh raspberries, and then top with whipped cream.  That's it, easy peasy.  Be sure to store in the fridge.  I finished them off with a cute little Canada flags. I love the classic red and white theme for Canada Day, they'd also be great in strawberry.
Canada Day dessert
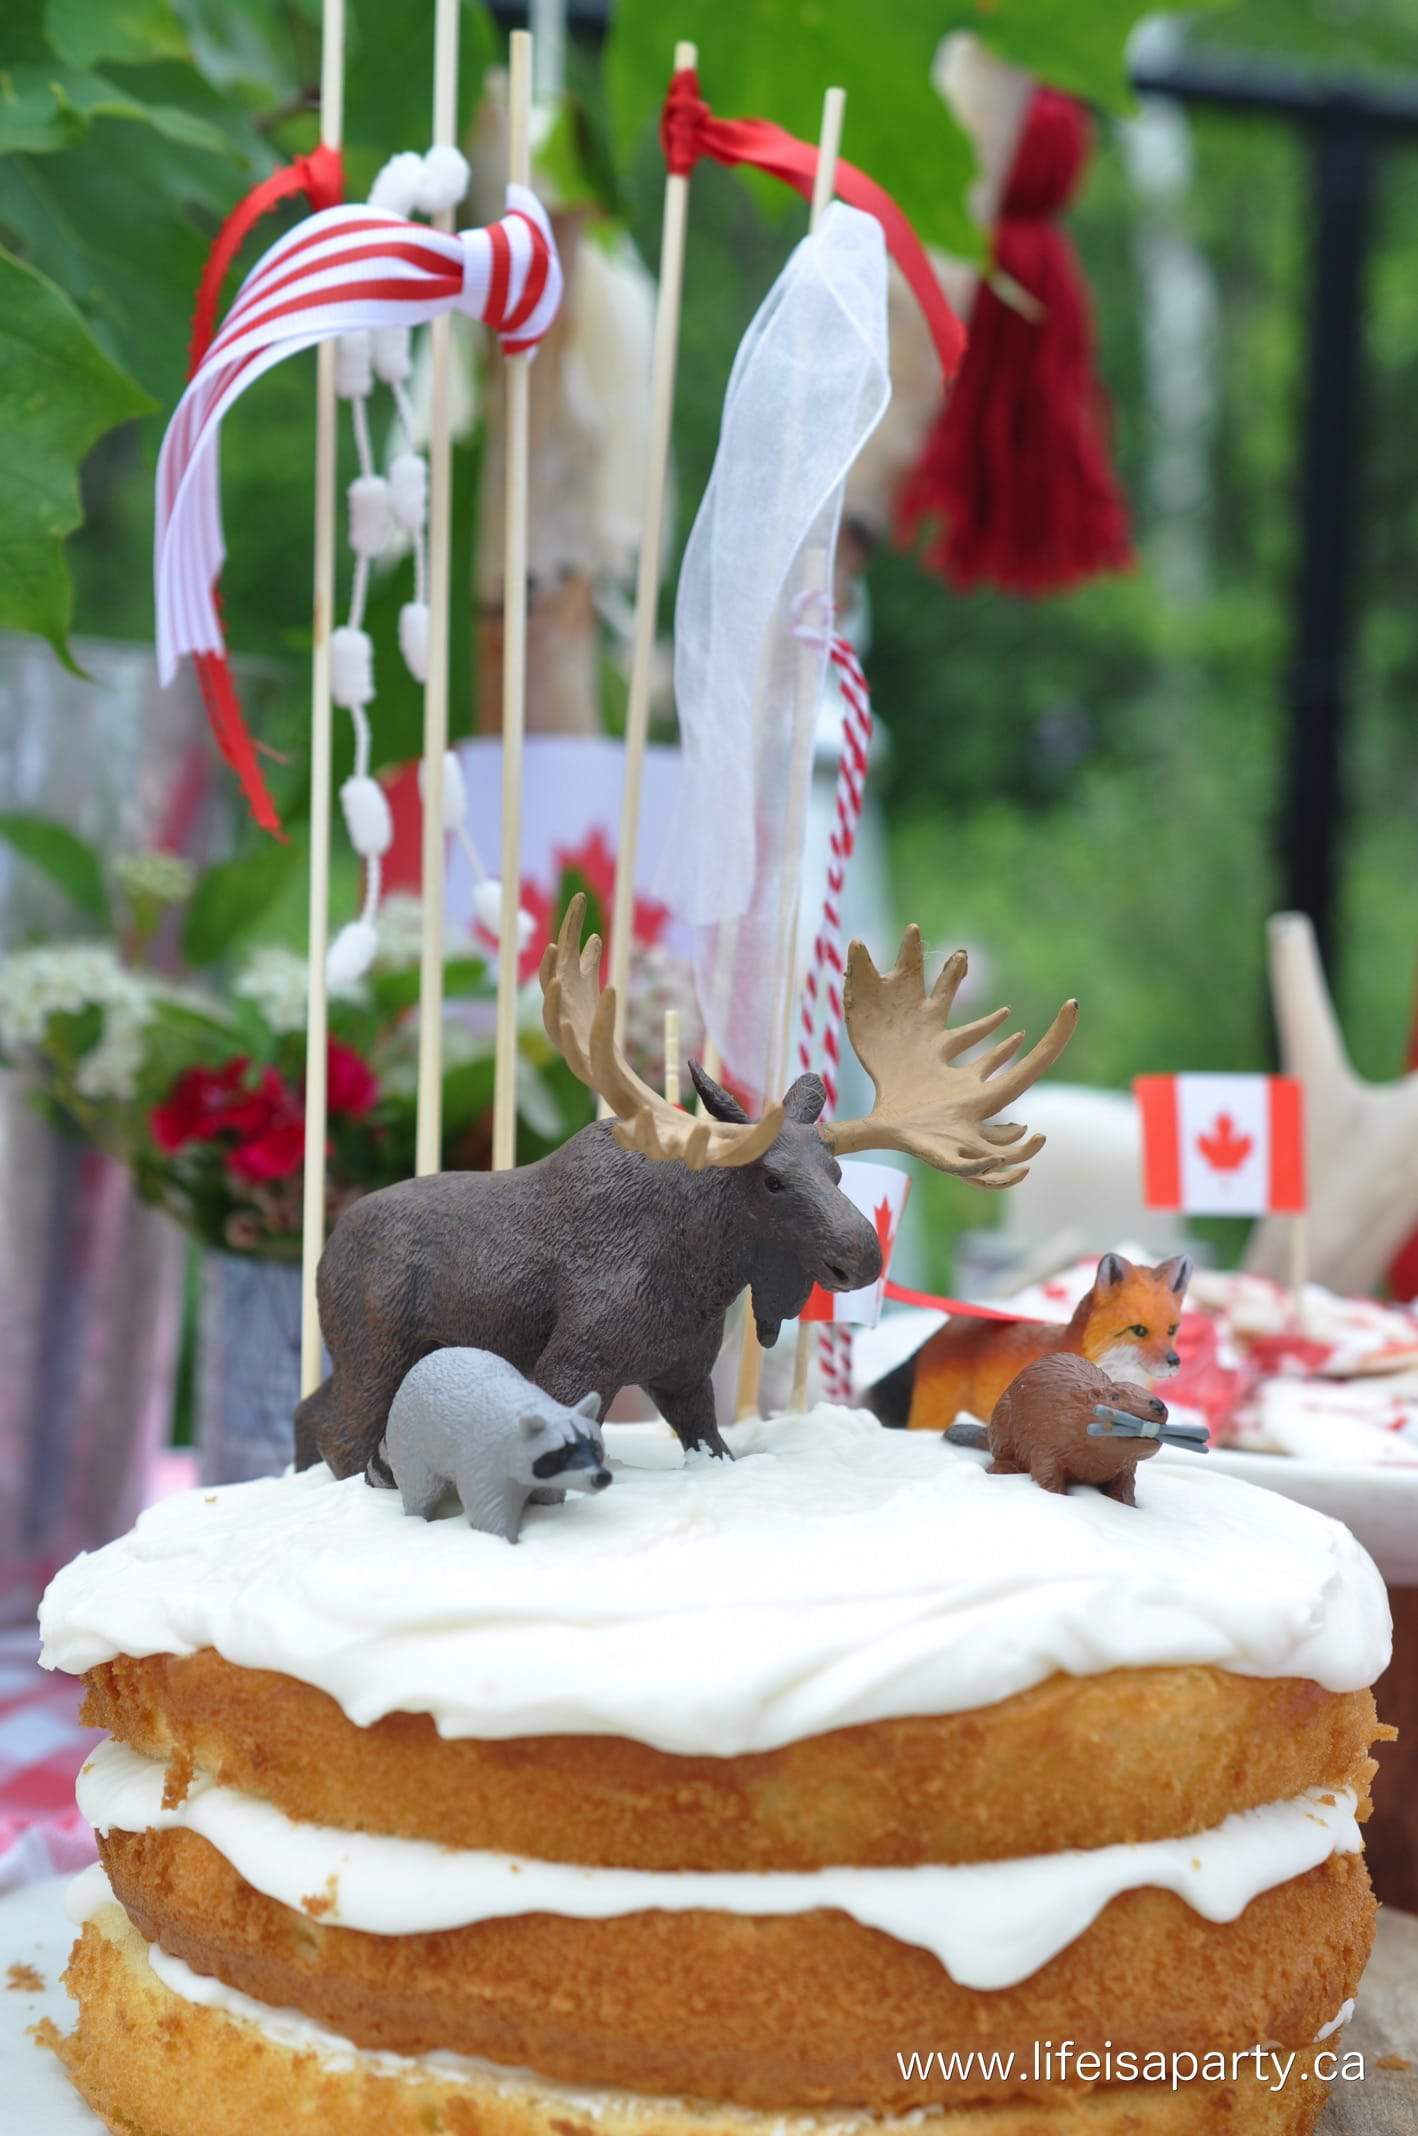
  • Canada Day Cake: One of my favourite desserts of the day was the easy Canada Day cake. I used a simple and inexpensive cake mix to create this cute three layer cake. I used some plastic toy animals to decorate the top along with some simple red and white ribbon flags.  So easy and so cute. You could serve this with a scoop of ice cream for a classic combination.  How about maple walnut to go with our theme?
Canada Day Party
Canada themed cake
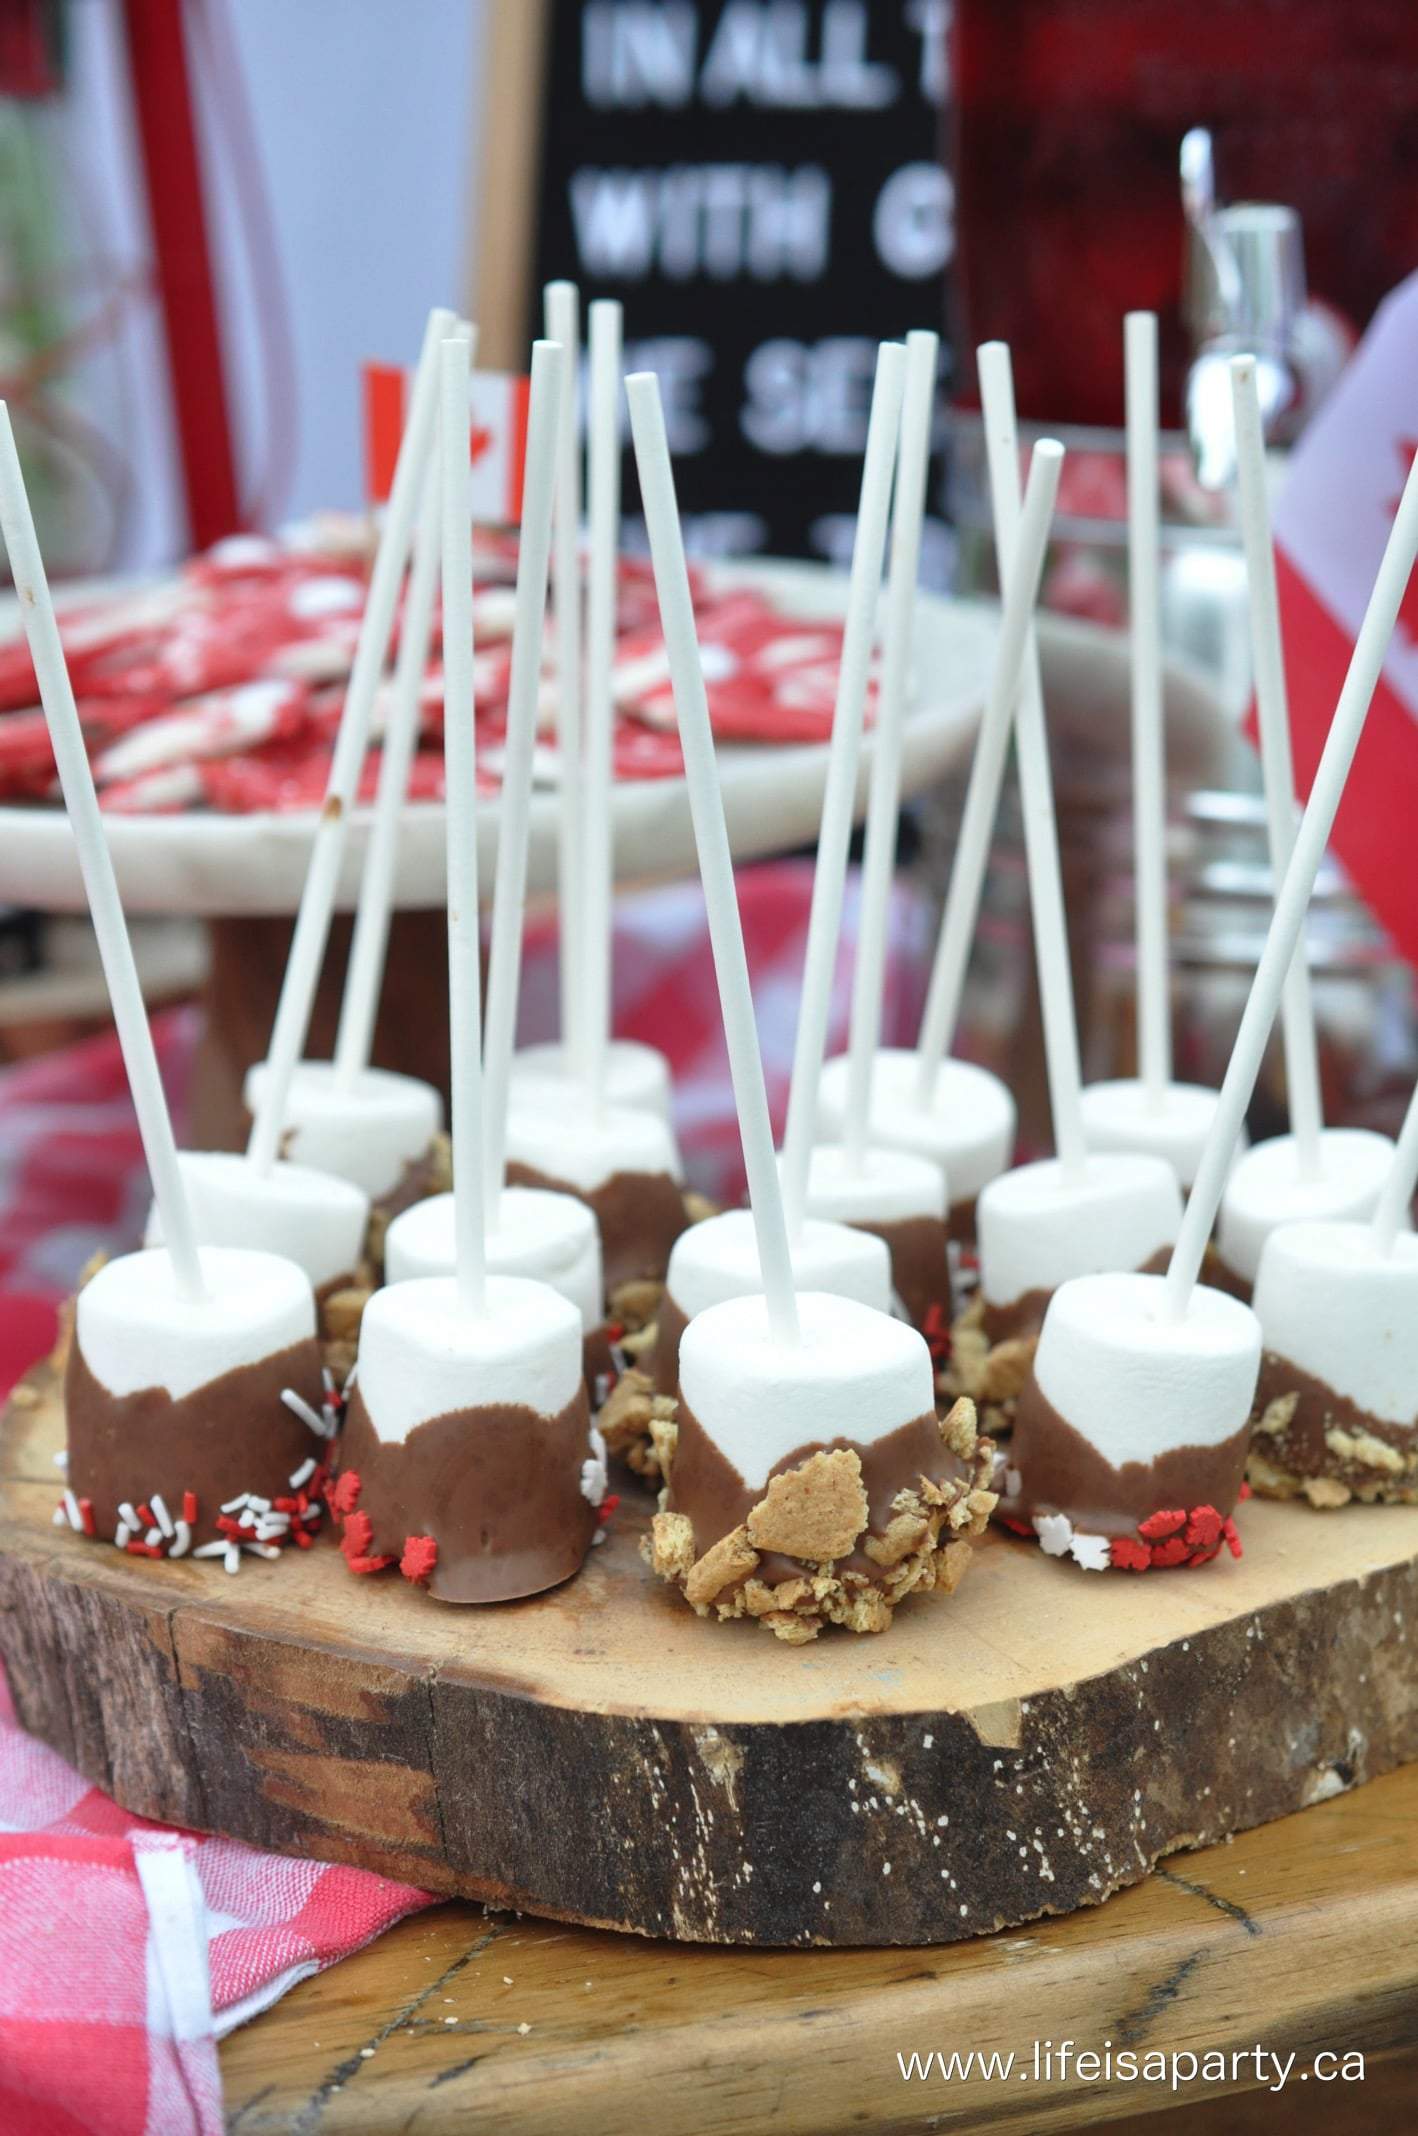
  • Marshmallow and S'more Pops: I also made some easy marshmallow pops.  Just dip marshmallows into melted chocolate and then coat with Canada Day sprinkles.  Another fun idea was to make some into s'more pops.  To make them we dipped the marshmallow into the chocolate and then into some crushed graham crackers.  Boy were these a hit with the kids, and one of the easiest ways to make s'mores ever.
Canada themed s'more pops
  • Canada Day Chocolate Bark: I also included my Canada Day Chocolate Bark -you can see how made it here, including a video.
Canada Day chocolate bark

Drink Station

Lastly we had a fun drink station on the end.  I used my letter board to display the lyrics of O Canada,  and share a little Canadian spirit..

Canada Day Party decorations

The strawberry punch is made with strawberry juice, ginger ale, and some fresh sliced strawberries.  We also a cooler near by filled with water bottles, and party coolers.

Canada Day Party decorations

I love my little deer family along with some fun Canada Day straws.

how to host a Canada themed party

We had such a good time at our Canada Day celebration.  It was a really fun way to celebrate our amazing country, and I can't think of a better reason to get together with family and friends on July 1st!

I hope I've inspired you to get together with friends and family this year and celebrate Canada!  Happy Canada Day.

Canada themed dessert table

With these fun Canada Day party ideas, life really is a party!

More Recipes You Might Like

  • Easy donut strawberry shortcake.
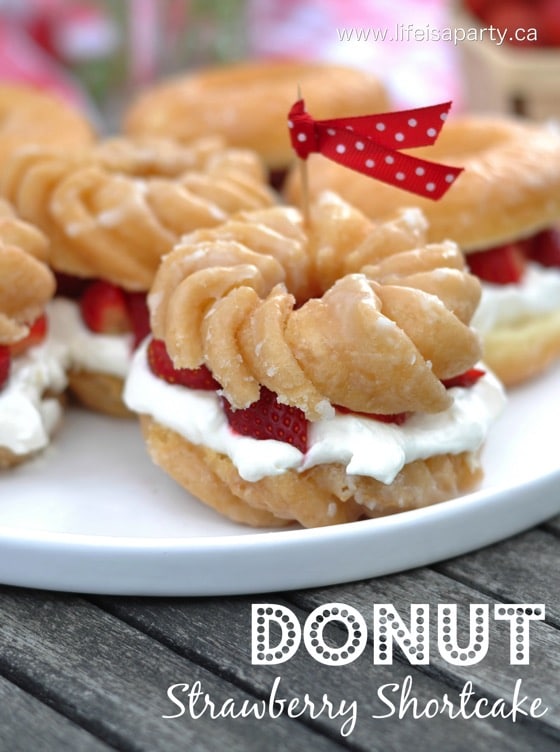
    Easy Donut Strawberry Shortcake
  • homemade strawberry rhubarb ice cream
    Strawberry Rhubarb Ice Cream Recipe
  • Strawberry cobbler in a mason jar.
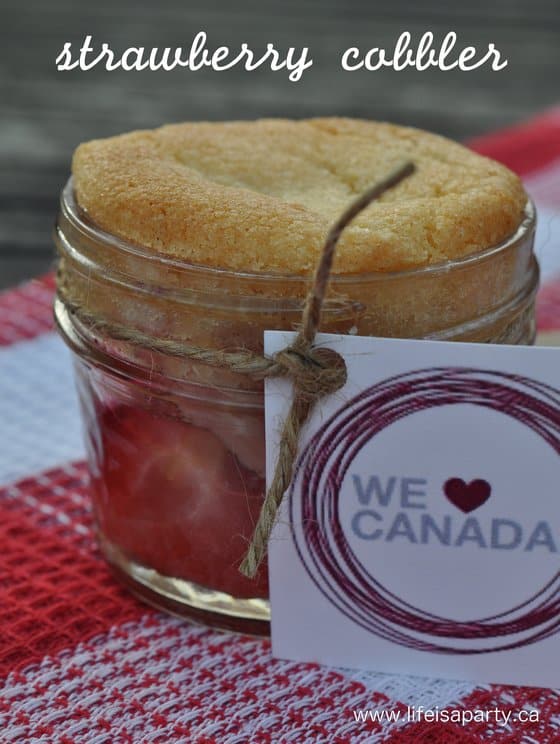
    Easy Homemade Strawberry Cobbler
  • Canada Day chocolate bark.
    Quick and Easy Canada Day Chocolate Bark Recipe

Frequently Asked Questions

What do you serve at a Canada Day party for dessert?

Think classic Canadian flavors like maple cookies and butter tarts. And also include some red and white options, like a simple Canadian-inspired red and white chocolate bark, or strawberry desserts.

What are the colors for a Canada themed party?

Classic red and white, taken from the Canadian flag.

If you try anything from these Canada Day Party Ideas or any other ideas on the blog please let me know how it went in the comments below. Thanks for visiting today!


Quick and Easy Canada Day Chocolate Bark Recipe

Jun 12, 2017 · 6 Comments

Canada Day chocolate bark.

Canada Day Chocolate Bark: a very easy, and delicious Canada Day dessert treat, perfect for any Canadian themed celebration.

How to make Canada Day red and white chocolate bark.
[feast_advanced_jump_to]

If you're looking for an easy dessert for celebrating Canada Day this Canada Day chocolate bark is perfect.  It's quick to make and looks amazing as part of your Canada Day .  And any chocolate lover will love it!  This Canada Day Chocolate Bark is the perfect, delicious dessert treat to make and bring to any celebration in honor of Canada Day no matter what your Canada Day plans are.  What better way to celebrate than a sweet treat all decked out in red and white.  It's the perfect Canada Day dessert for celebrating July 1st, especially if your looking for easy no bake desserts.

Canada Day Chocolate Bark

It's great for any Canadian themed party or dessert table, or a snack at a party.  I loved including it as one of many Canada Day desserts at this party.  Check out the whole Canada Day dessert table full of classic Canadian desserts for lots more Canada Day dessert ideas that you'll love.

Party Favor or Hostess Gift

I've also packaged some up in clear cello bags tied with some red ribbon for the perfect little hostess gift or party favour for your Canada themed party or Canada day celebration.  I love using fun desserts like this for wishing anyone a happy Canada Day!

Chocolate Bark

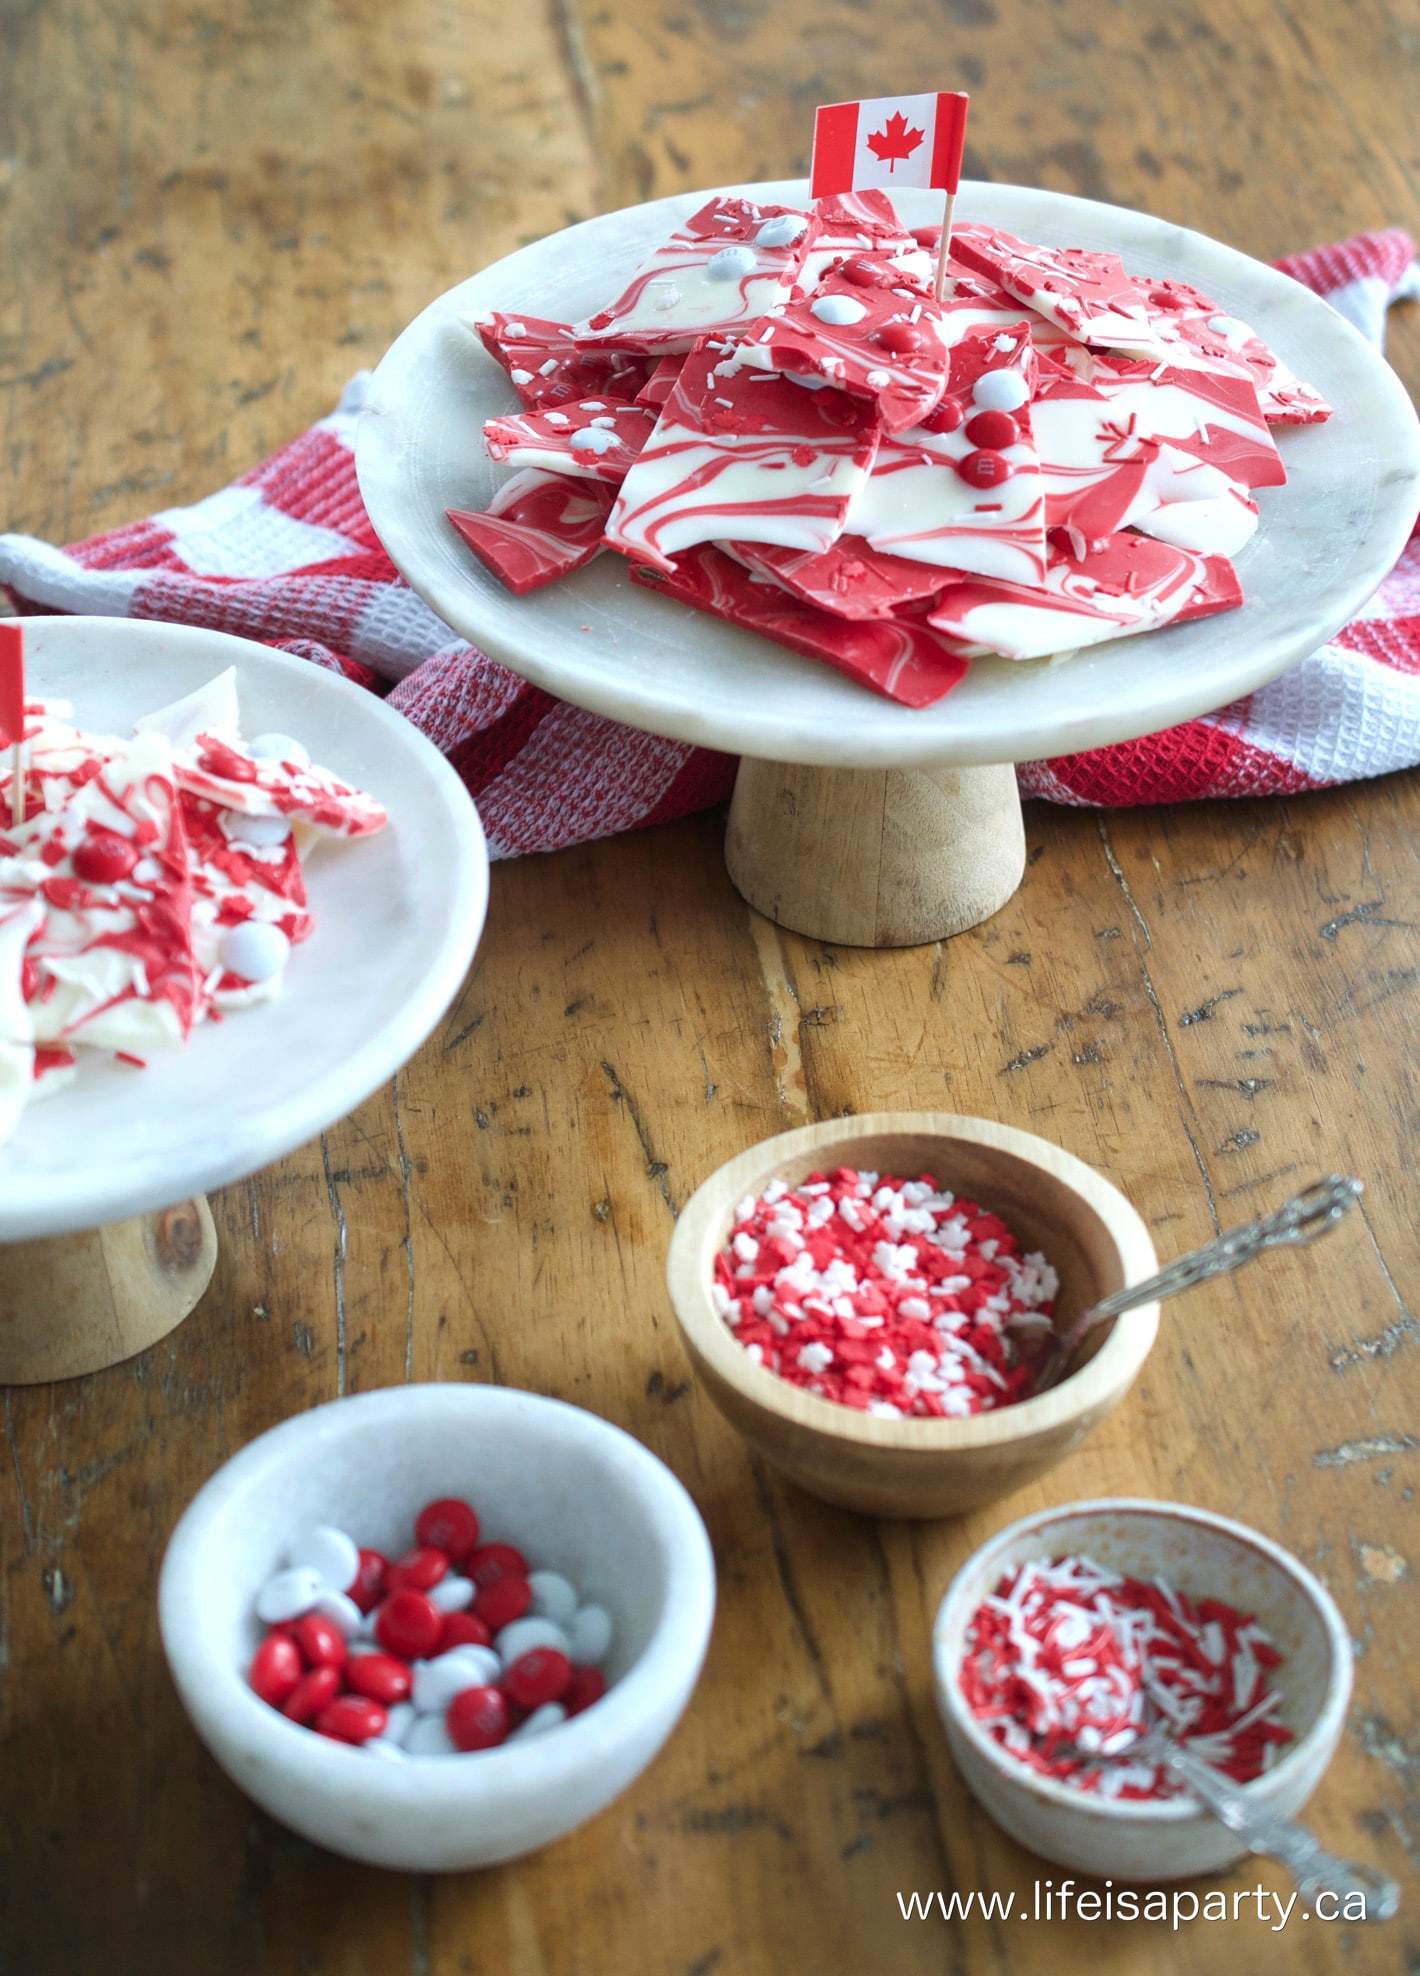
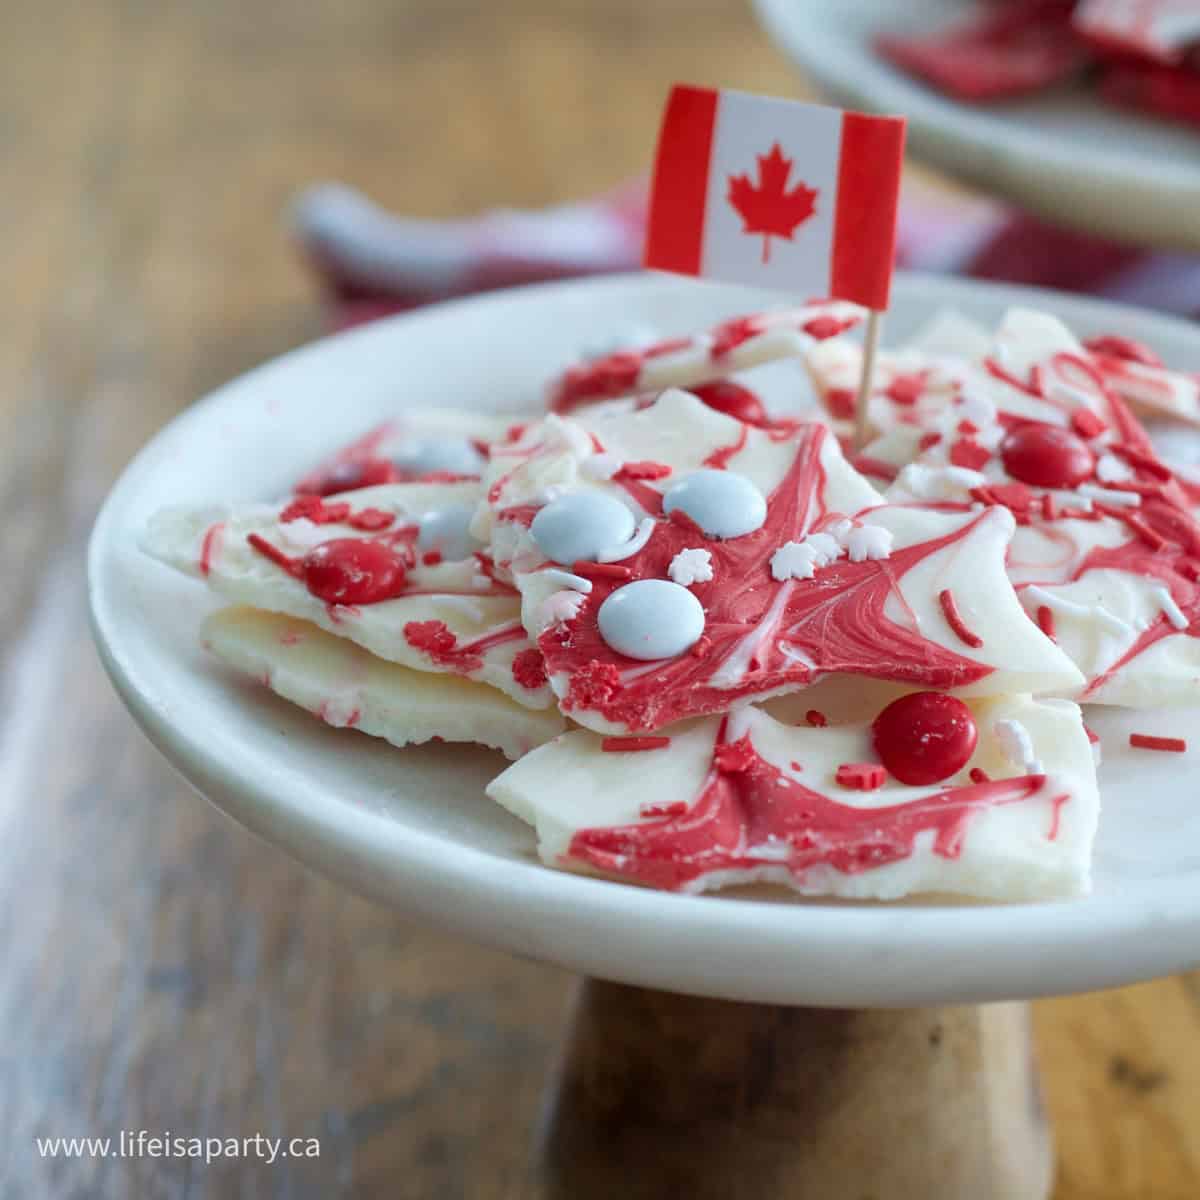
Chocolate bark is a classic dessert that's easy to make and so delicious.  It's traditionally made with regular milk chocolate and filled with things like candy, dried fruits and nuts.  For Canada day we wanted to make in one of our red and white desserts, so we used red and white chocolate melting wafers.  Look for these in the baking section of the craft store, or at the bulk food store.  Chocolate bark is one of my favorite tasty recipes that you can make for any occasion and guests always love it.

Red and White Add-ins

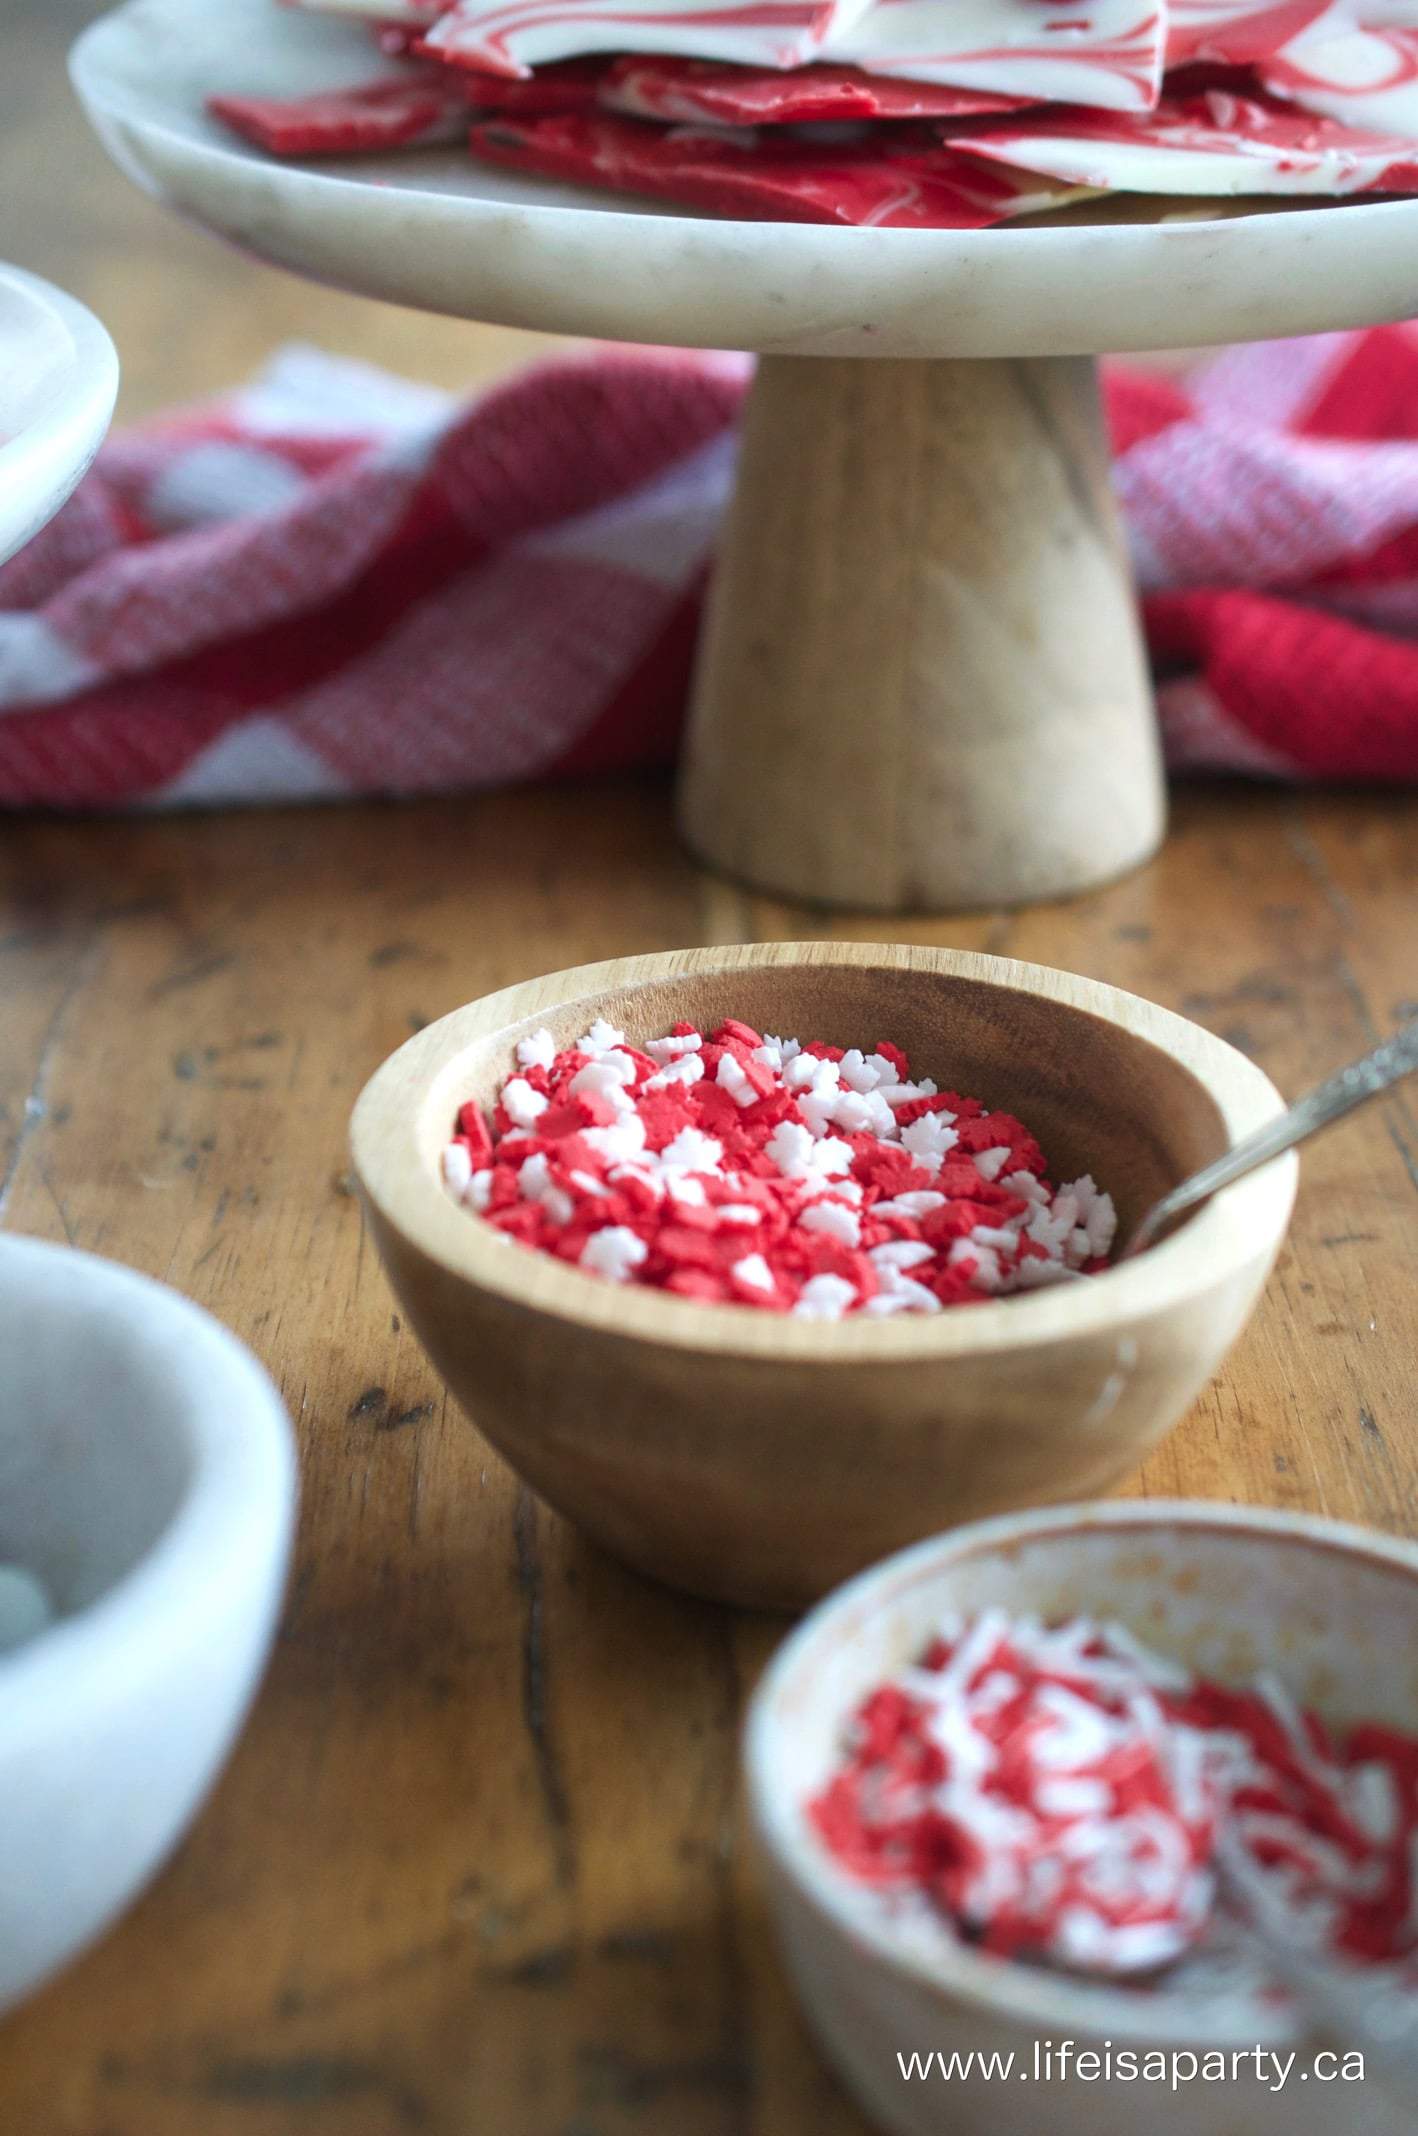
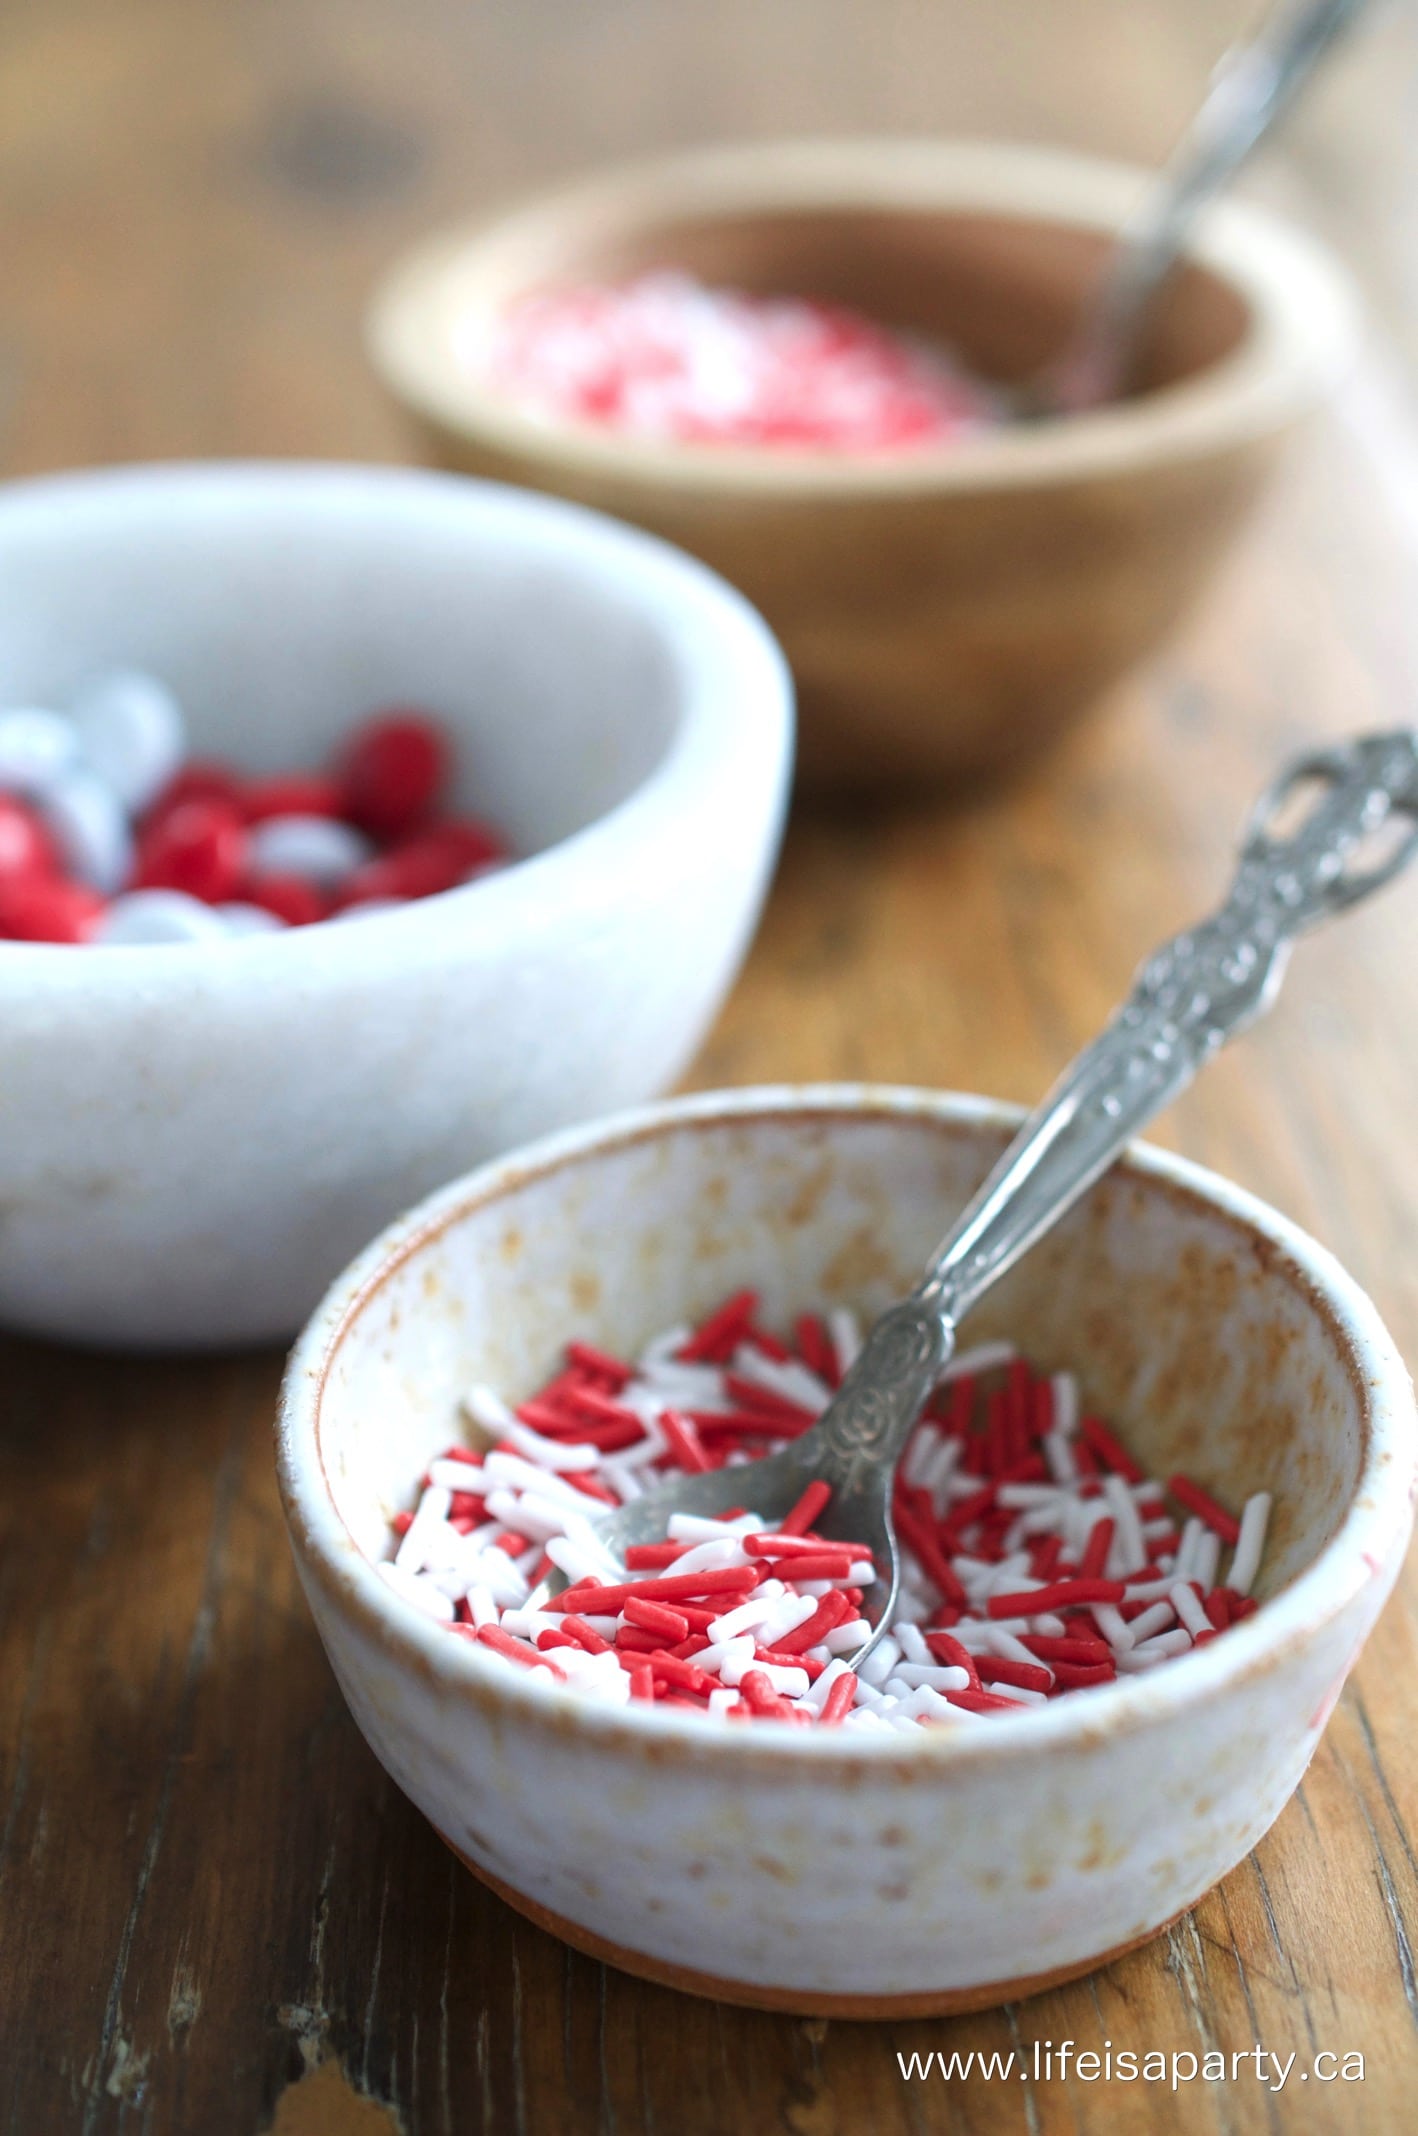
Chocolate bark usually has lots of fun add-ins added to the chocolate and for Canada day we wanted to stick to red and white .  While we were at the bulk store we also looked for any red and white sprinkles or Canada day themed sprinkles.  We also found special red and white M&Ms for Canada day and they were the perfect addition.  Adding candy and sprinkles was such a fun way to add a patriotic touch.  If you wanted to you could also use red and white dried fruit and nuts like dried cranberries, cherries, or strawberries and almonds for your festive treats.

Melting The Chocolate

Take care when you're melting the chocolate to make your chocolate bark.  White chocolate especially has a tendency to burn easily if you try and melt it too high of a heat.  If you are using the microwave to melt your chocolate be sure to use only half power, and check your chocolate every 30 seconds, giving it a stir, and then adding more time if needed.

You can also melt the chocolate in a double boiler,  It gives a more even, lower heat and is perfect for melting white chocolate without burning it on the bottom.  

If you do overcook the chocolate it will seize up, and remain lumpy no matter how much you microwave it.  It will sometimes turn brown and look burnt also.  If this happens you will have to throw it away and begin again.

If you find your chocolate is too think and not runny enough to work with easily, you can add a small amount, of vegetable shortening to the melting chocolate to make it more runny.  Start with a ½ teaspoon of vegetable shortening at a time until it is runny and smooth.  Never ever try to add water to the chocolate.  It will not combine with the chocolate and will cause the chocolate to seize.

.Canada themed dessert

Canada Day dessert idea

Video

Here's a little video of how easy it was to put together.

Youtube video

Store your Canada chocolate bark in an airtight container at room temperature.  Be sure to keep it out of the sun so that it doesn't melt at your party this long weekend.

I hope you're planning something special for Canada Day this year.  This easy treat is such a delicious recipe and sure to impress your guests.  It's the perfect dessert for first time bakers or children to help with because it's so simple to make and great addition to your Canada Day festivities.

Canada Day Chocolate Bark recipe

American Version

For all my American readers, this chocolate bark would be just perfect to celebrate the 4th of July too.  Just add in a bit of blue chocolate and blue sprinkles.  Swap out the maple leafs for some star sprinkles and you have the perfect treat to celebrate independence day.

Recipe

Canada Day chocolate bark.

Canada Day Chocolate Bark

Delicious red and white chocolate combined with red and white candy for a sweet treat.
5 from 1 vote
Print Pin Rate
Course: Candy
Cuisine: Canadian
Prep Time: 10 minutes minutes
Total Time: 10 minutes minutes
Servings: 16
Calories: 726kcal
Author: Dannyelle Nicolle-Ramjist

Ingredients

  • 2 cups white chocolate
  • 2 cups red chocolate
  • ½ cup red and white M&Ms
  • ¼ cup red and white sprinkles
  • ¼ cup Canada Day sprinkles

Instructions

  • Melt the two different chocolates in separate bowls in the microwave at 50% power in 30 sec. intervals until completely melted and smooth.
  • Cover a cookie sheet with parchment paper and add chocolate in about 1 inch wide stripes.
  • Use the back of a spoon to marble the chocolate by dragging it through the chocolate at 45 degrees and then then 45 degrees in opposite direction. (See the video for an example.)
  • Sprinkle the chocolate with M&Ms, and sprinkles.
  • When harden, snap into bite size pieces and enjoy.

Nutrition

Serving: 1g | Calories: 726kcal | Carbohydrates: 88g | Protein: 7g | Fat: 39g | Saturated Fat: 20g | Polyunsaturated Fat: 16g | Cholesterol: 22mg | Sodium: 88mg | Fiber: 2g | Sugar: 77g
Tried this Recipe? Tag me Today!Mention @LifeisaParty or tag #lifeisaparty!
Canada Day sprinkles

With Canada Day Chocolate Bark to help you celebrate, life really is a party!

what to serve for a Canada Day party

More Canada Day Inspiration

You might also like our Canada Day Party here.

Canada Day Party -Classic Canadiana party decor, and Canada themed party desserts that are easy to put together make this the perfect way to celebrate!Also check our our Strawberry Cobbler for Canada Day here.
You might also enjoy our Donut Strawberry Shortcakes here.
Father's Day Donut Party Ideas

Jun 9, 2017 · Leave a Comment

Father's Day donut party ideas.
Father's Day Donut Party Ideas -Easy DIY Donut Wall how-to, Donut banner, rice krispie donuts, and sprinkle candle holders.

Father's Day donut party ideas.
[feast_advanced_jump_to]

Getting ready for Father's Day?  You'll love our Father's Day Donut Party Ideas.

Father's Day Donut Party Ideas

What Dad doesn't love donuts?  Create an amazing donut wall and surprise him with a fun party centred around his favourite treat.

Father's Day Party Ideas

DIY Donut Wall

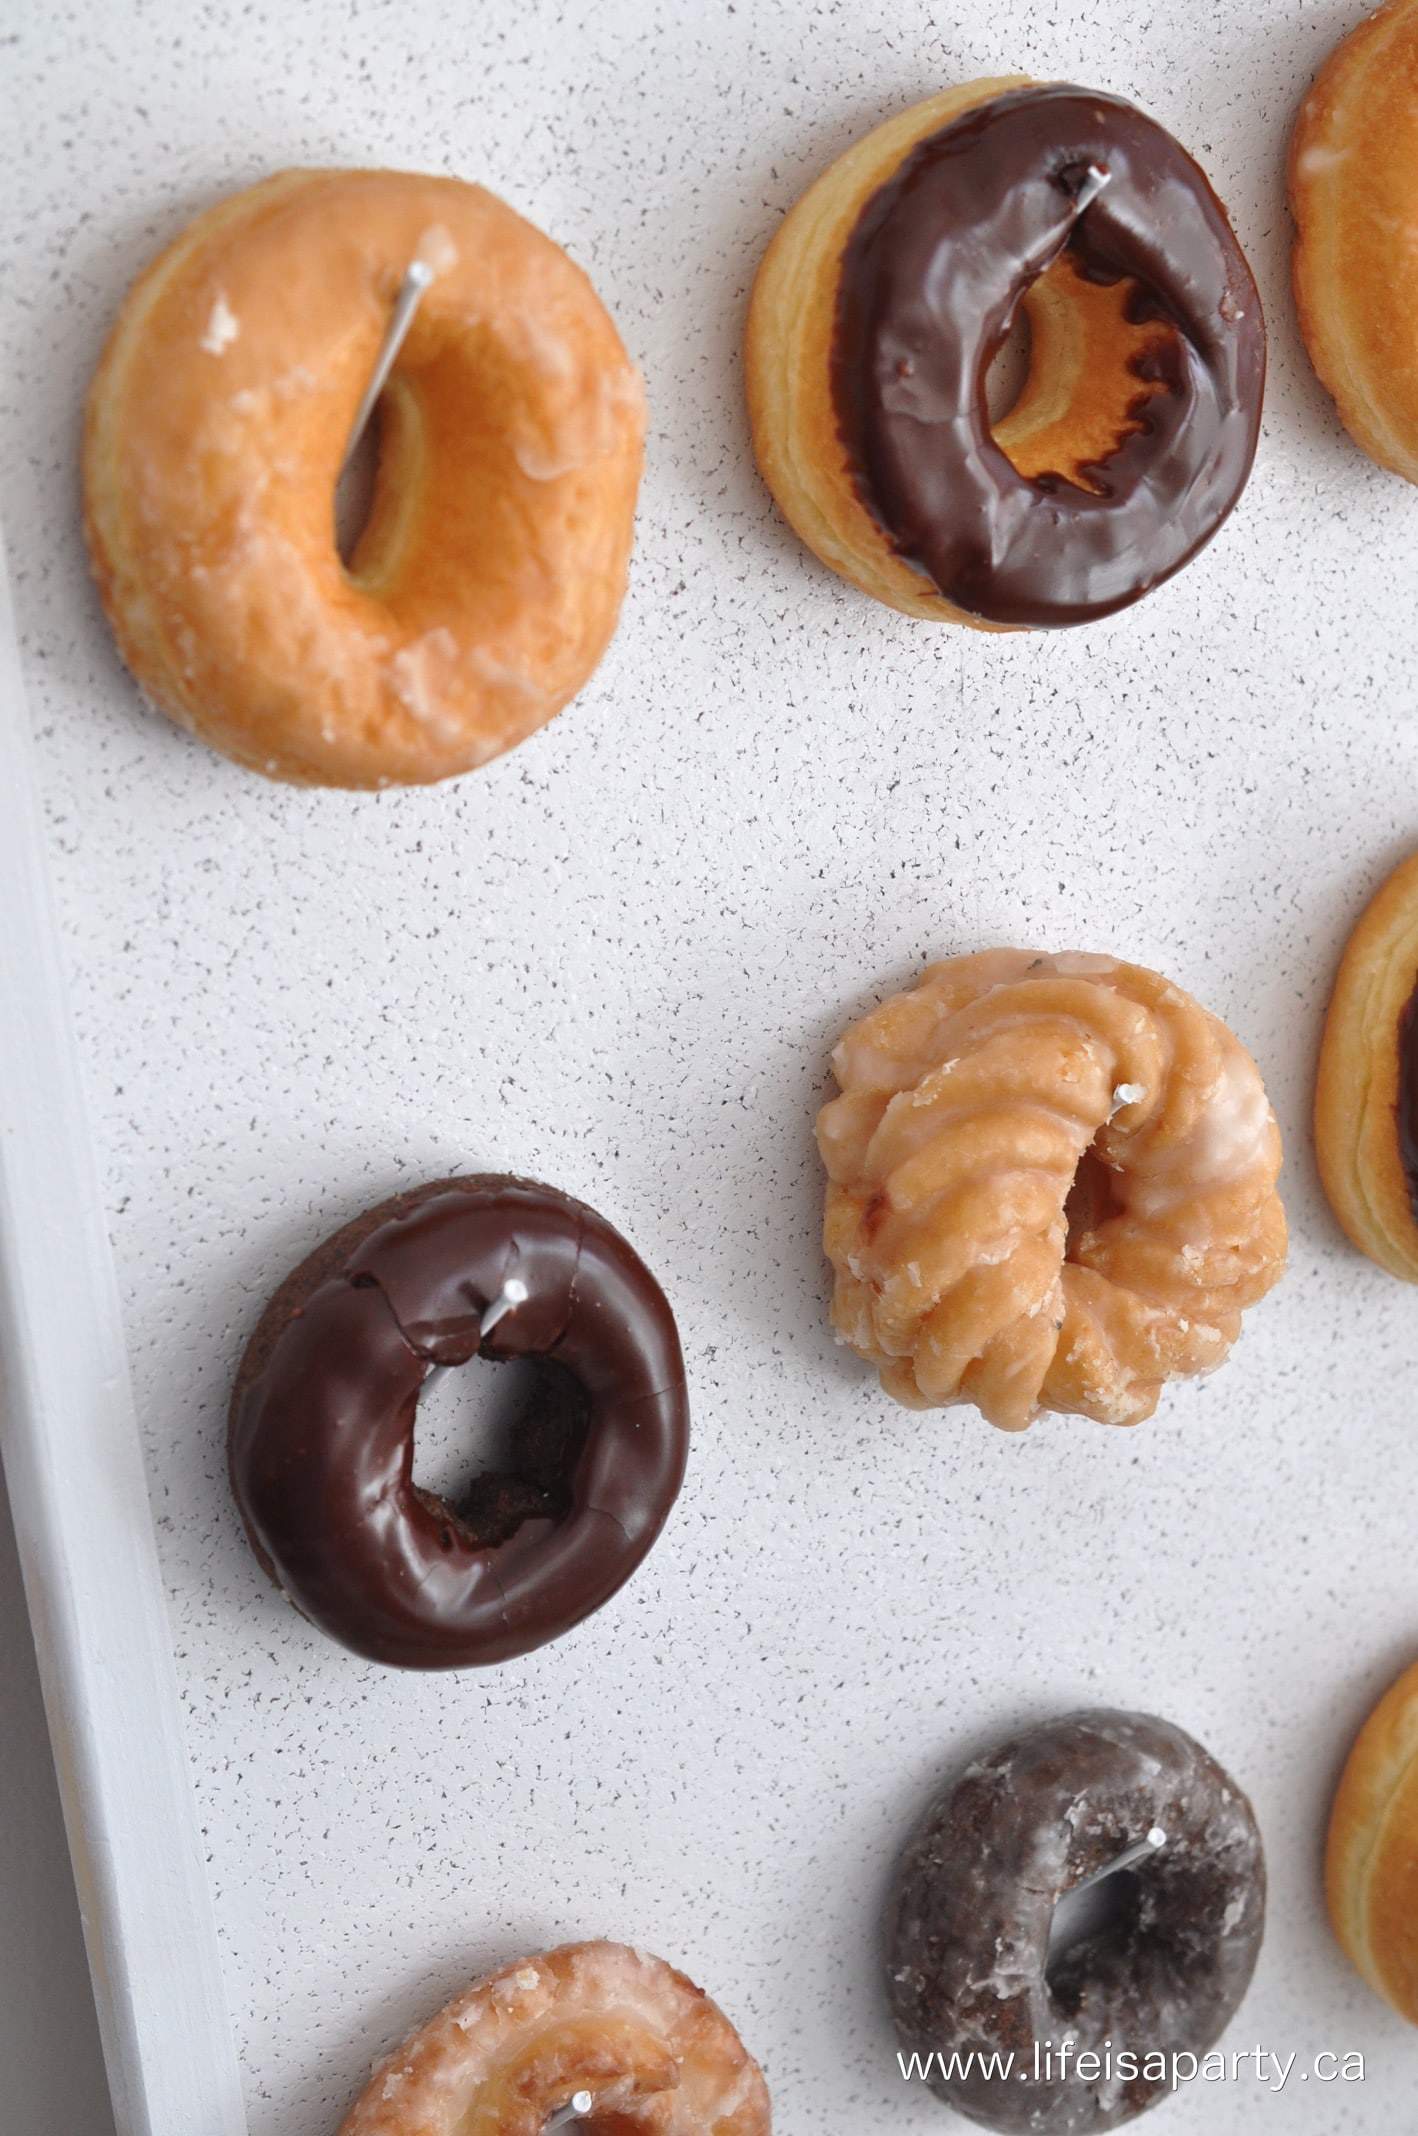
The fun centrepiece of this party was our DIY Donut Wall.  You'll be surprised by how easy and inexpensive it was to put together.  And wow, was it yummy!

Father's Day Party Ideas

I started out with a small cork board from the second hand store.

DIY Donut wall

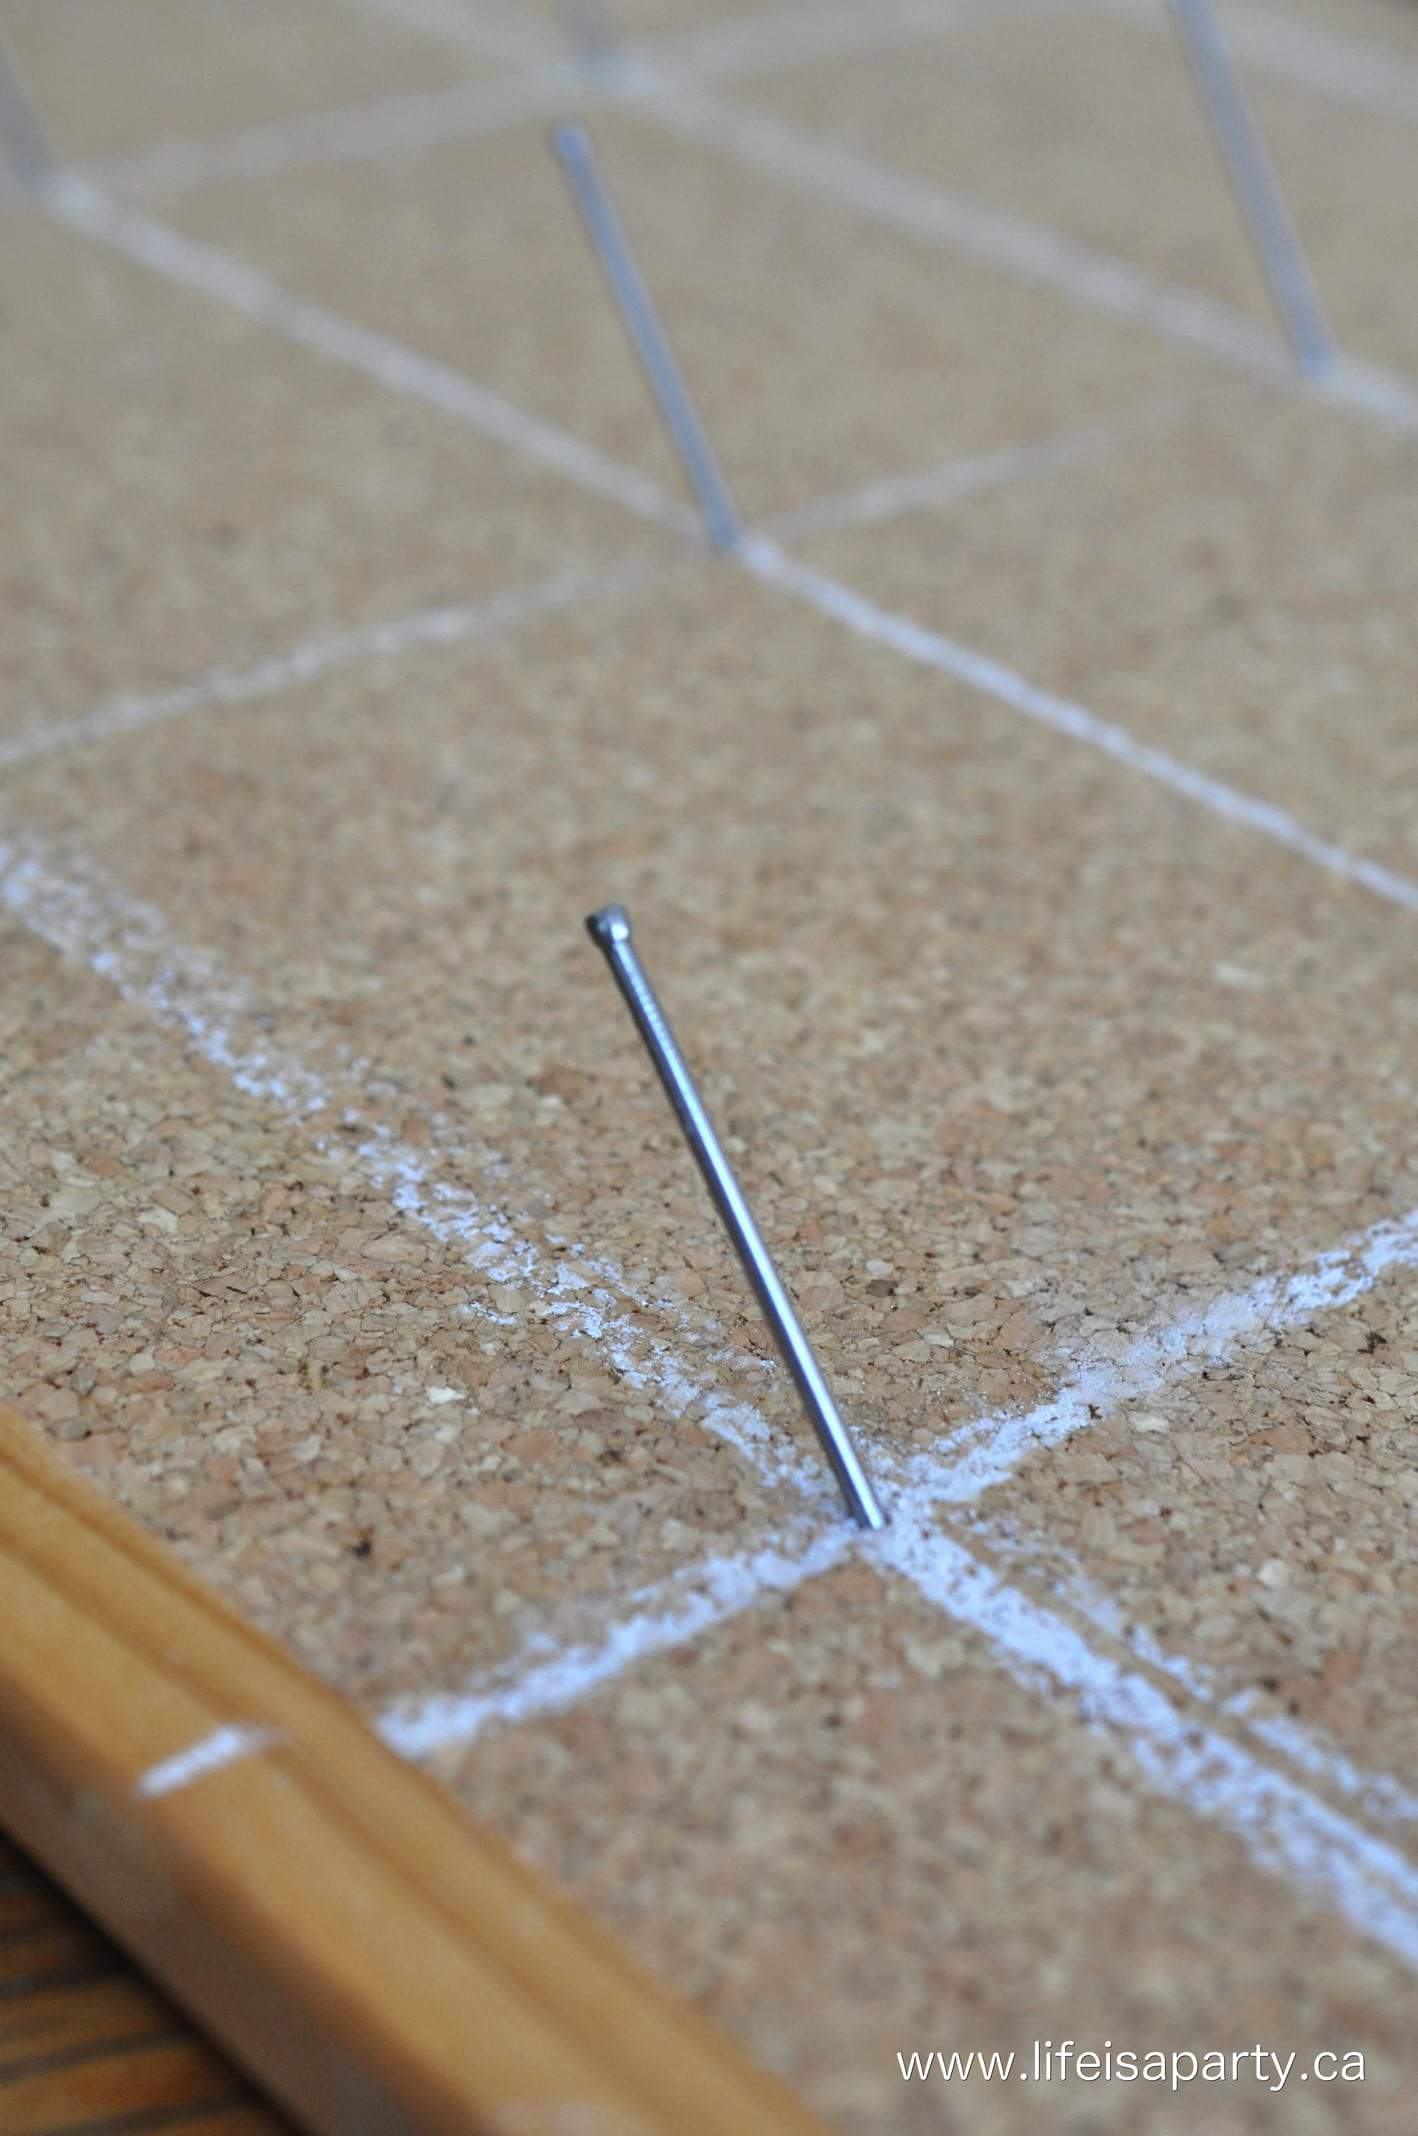
Next I laid out some parchment paper to cover it and arranged my donuts to give me an idea of how I wanted them spaced out.  I used a tape measure and some chalk to measure out all the spots for my nails to go that I would use to hang the donuts.  I used 2 ½ inch finishing nails.

how to make a donut wall

Then I used a hammer to tap the nails into the cork board at a bit an angle, being careful not to go through the board.

Depending on the thickness of your cork board, you could reinforce the nails at the back with a little hot glue.  I found that if I added them at an angle they were stable enough.

DIY donut wall for a party

Another tip, the cake donuts are heavier that the yeast donuts.  We didn't have any trouble with the weight of the donuts causing them to fall, but it's something to consider, especially if the wall will be on display for a really long time.

Once my nails were all in, I gave the board a few coats of white semi-gloss spray paint.  Be sure to allow it to fully dry before using.

easy DIY Donut wall

Rice Krispie Donuts

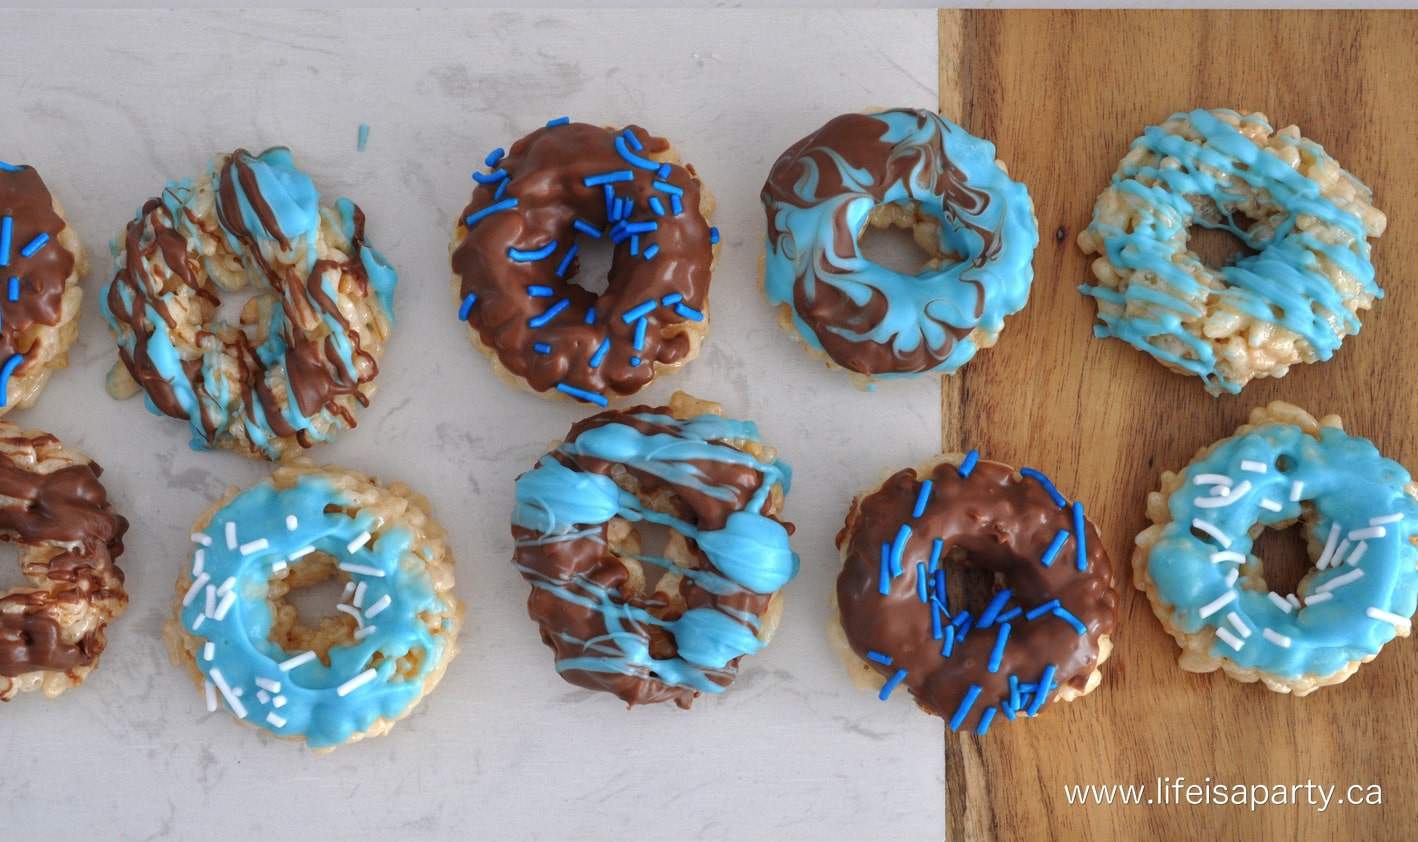
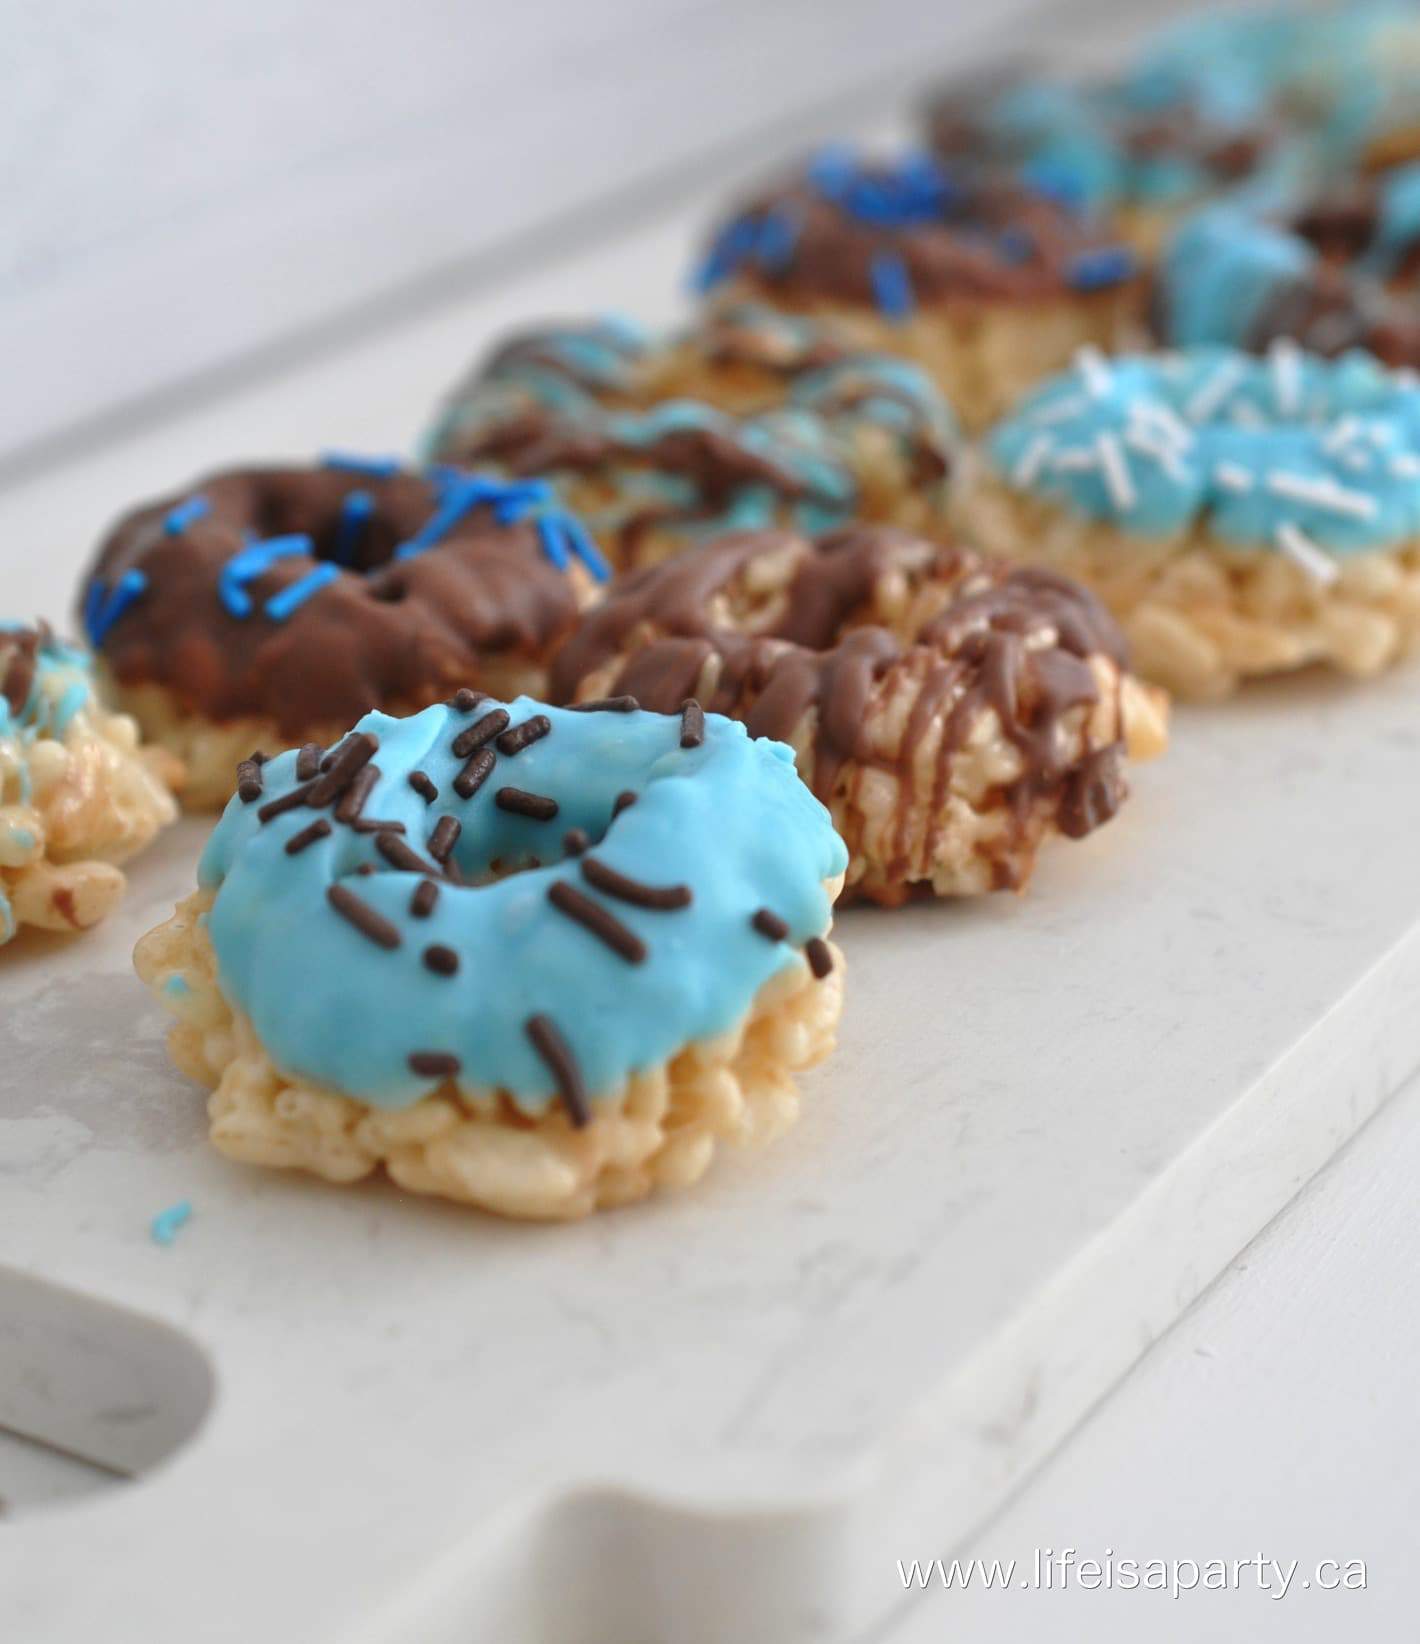
Along with our donut wall, we also made some rice krispie donuts.

Rice krispy treat donuts

We used our mini donut pan to form them into donut shapes.  After they were set we dipped them into melted chocolate and added some sprinkles.

Father's Day Donut Party ideas

I love how cute they turned out.

Father's Day Party Ideas

We found a fun donut inflatable and thought it was the perfect decoration for a donut party, and we'll have lots of fun with it the pool later.

Free Donut Party Printables

We also made some cute printables for the party.  You donut know how much I love you Dad!

You can download them for printing here.  We used the large one for framing and the small ones as napkin rings with a little baker's twine.

Father's Day Party Ideas

Paint Chip Donut Banner

I also made a quick and easy donut banner out of paint chips from the hardware store.  We picked up a few paint chips in our party colours, and then found some circles to trace in the right sizes and made the cute banner.  I added a few sprinkles too.  You could use any colours to coordinate with your party decor.  I thought blue and chocolate were perfect for Father's Day.

DIY donut banner

The donut banner was really easy to make, and a great one to get the kids helping with.

Father's Day Party Ideas

Donut Straws

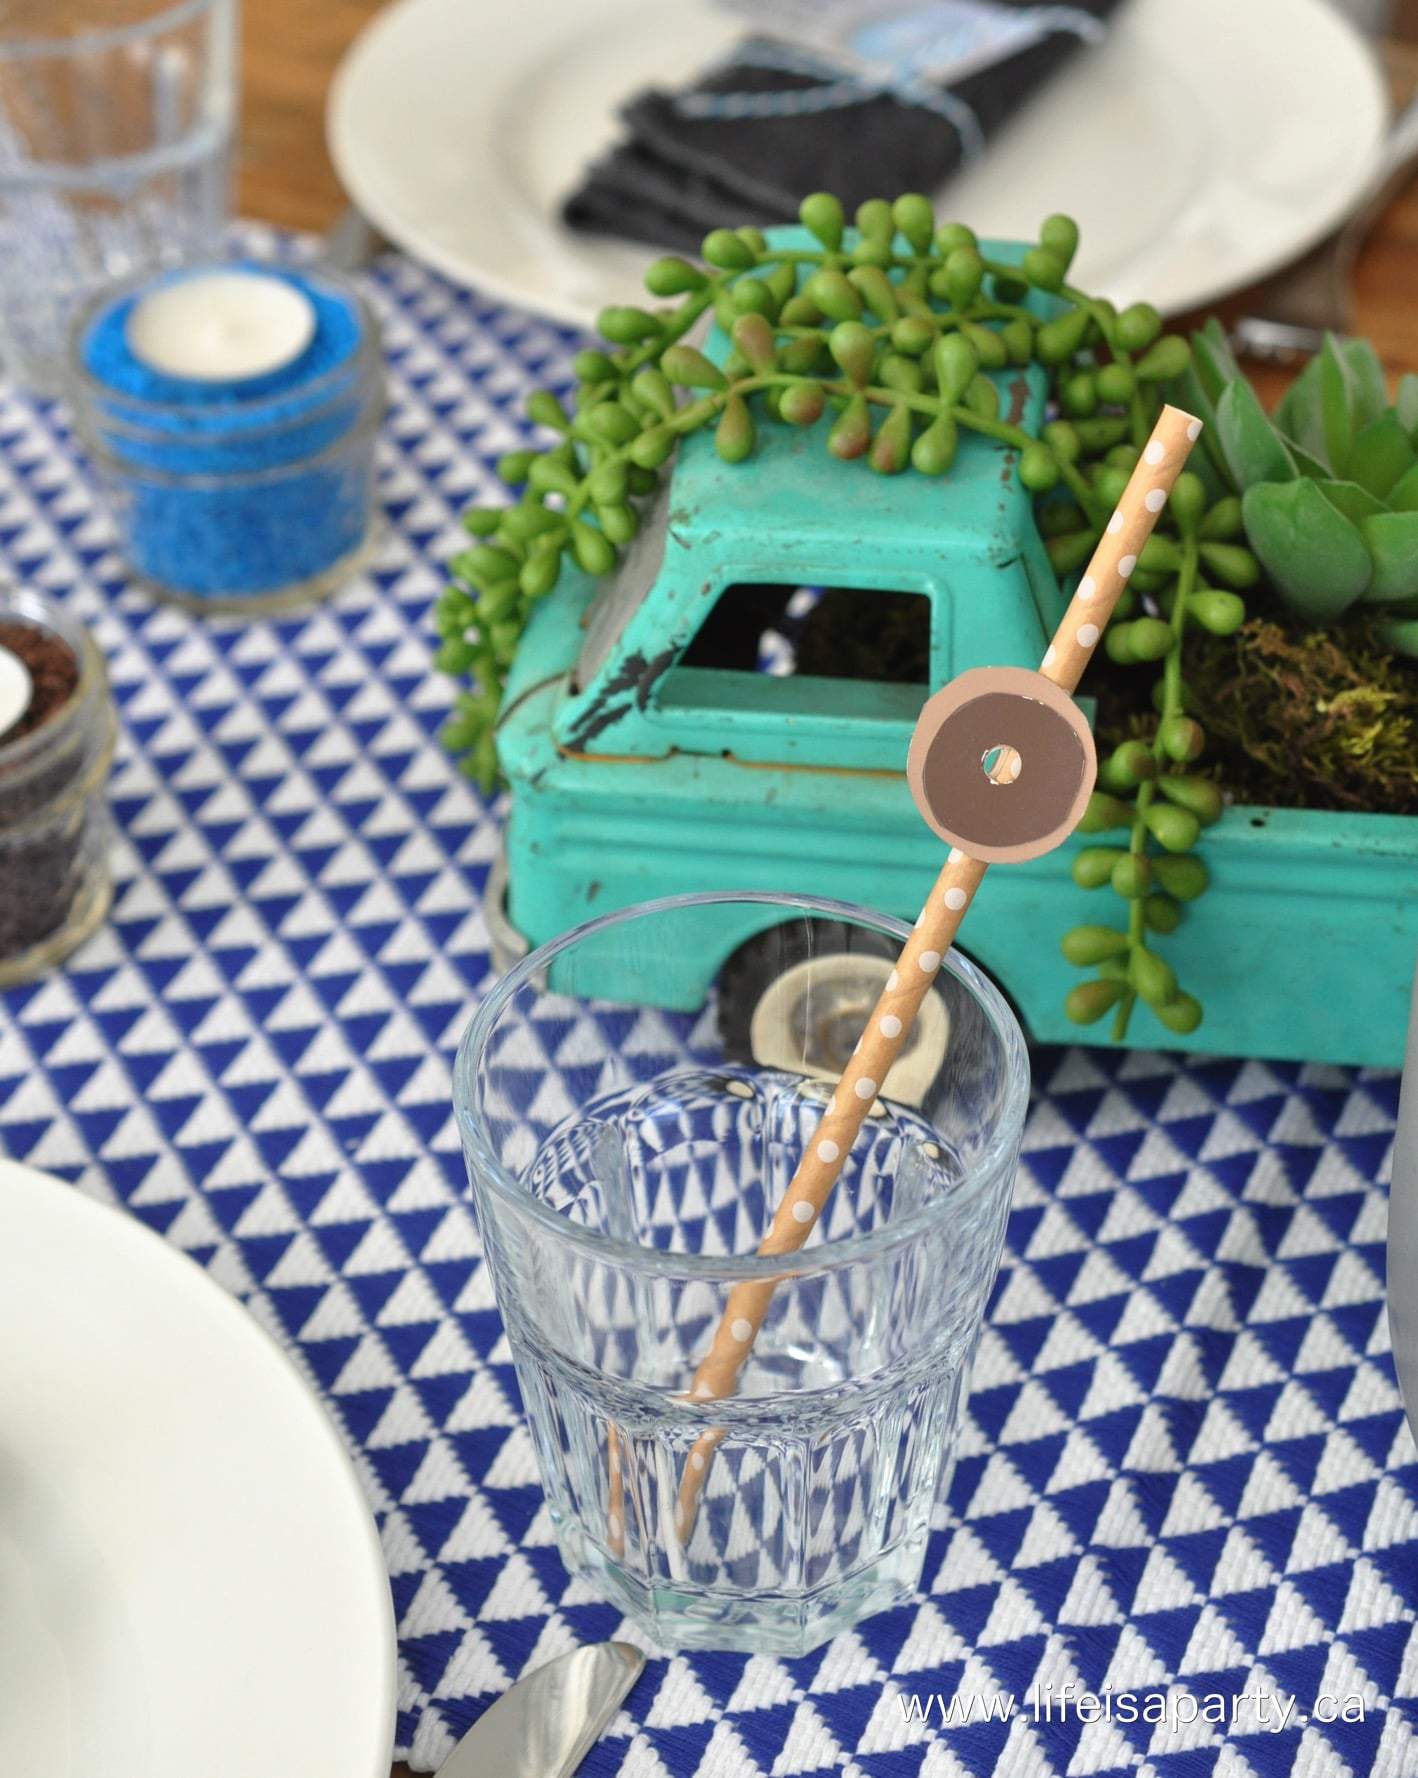
And the donut banner inspired me to make a few cute donut straws too.  I used the leftover paint chips and made some mini donuts.  I used a hole punch to make the tiny centre hole for these ones, and then just hot glued them to paper straws.  They were really quick and easy to make and so cute.

Father's Day Party Ideas

Father's Day Party Table Ideas

We used lots of blues for our tabelscape.  My favourite piece is the sweet vintage truck filled with succulents.  It seemed perfect for Father's Day.

succulents in a vintage toy truck

I also used some letters to spell out DAD.  The D's are actually old bookends, and the A is from some wall decor.

Father's Day Party Ideas

Sprinkle Candles

To fit in with our donut theme, I also made some really easy sprinkle candles.

Father's Day Donut Party ideas

I picked up some sprinkles at the bulk food store in our party colours and filled mini mason jars with them, and added a tea light.

Donut Party sprinkle candles

This was a really fun party, and my husband and kids LOVED it.  We ate too many donuts and had a really fun time.

Father's Day Party Ideas

I hope you're feeling inspired to celebrate a Father in your life with all our Father's Day donut party ideas.

Father's Day Donut Party

With a Father's Day donut party ideas like these, life really is a party!

More Father's Day Party Ideas

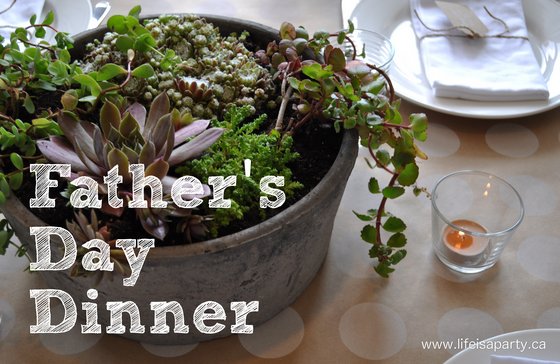
You might also like our Father's Day Dinner here.

Father's Day Party Ideas

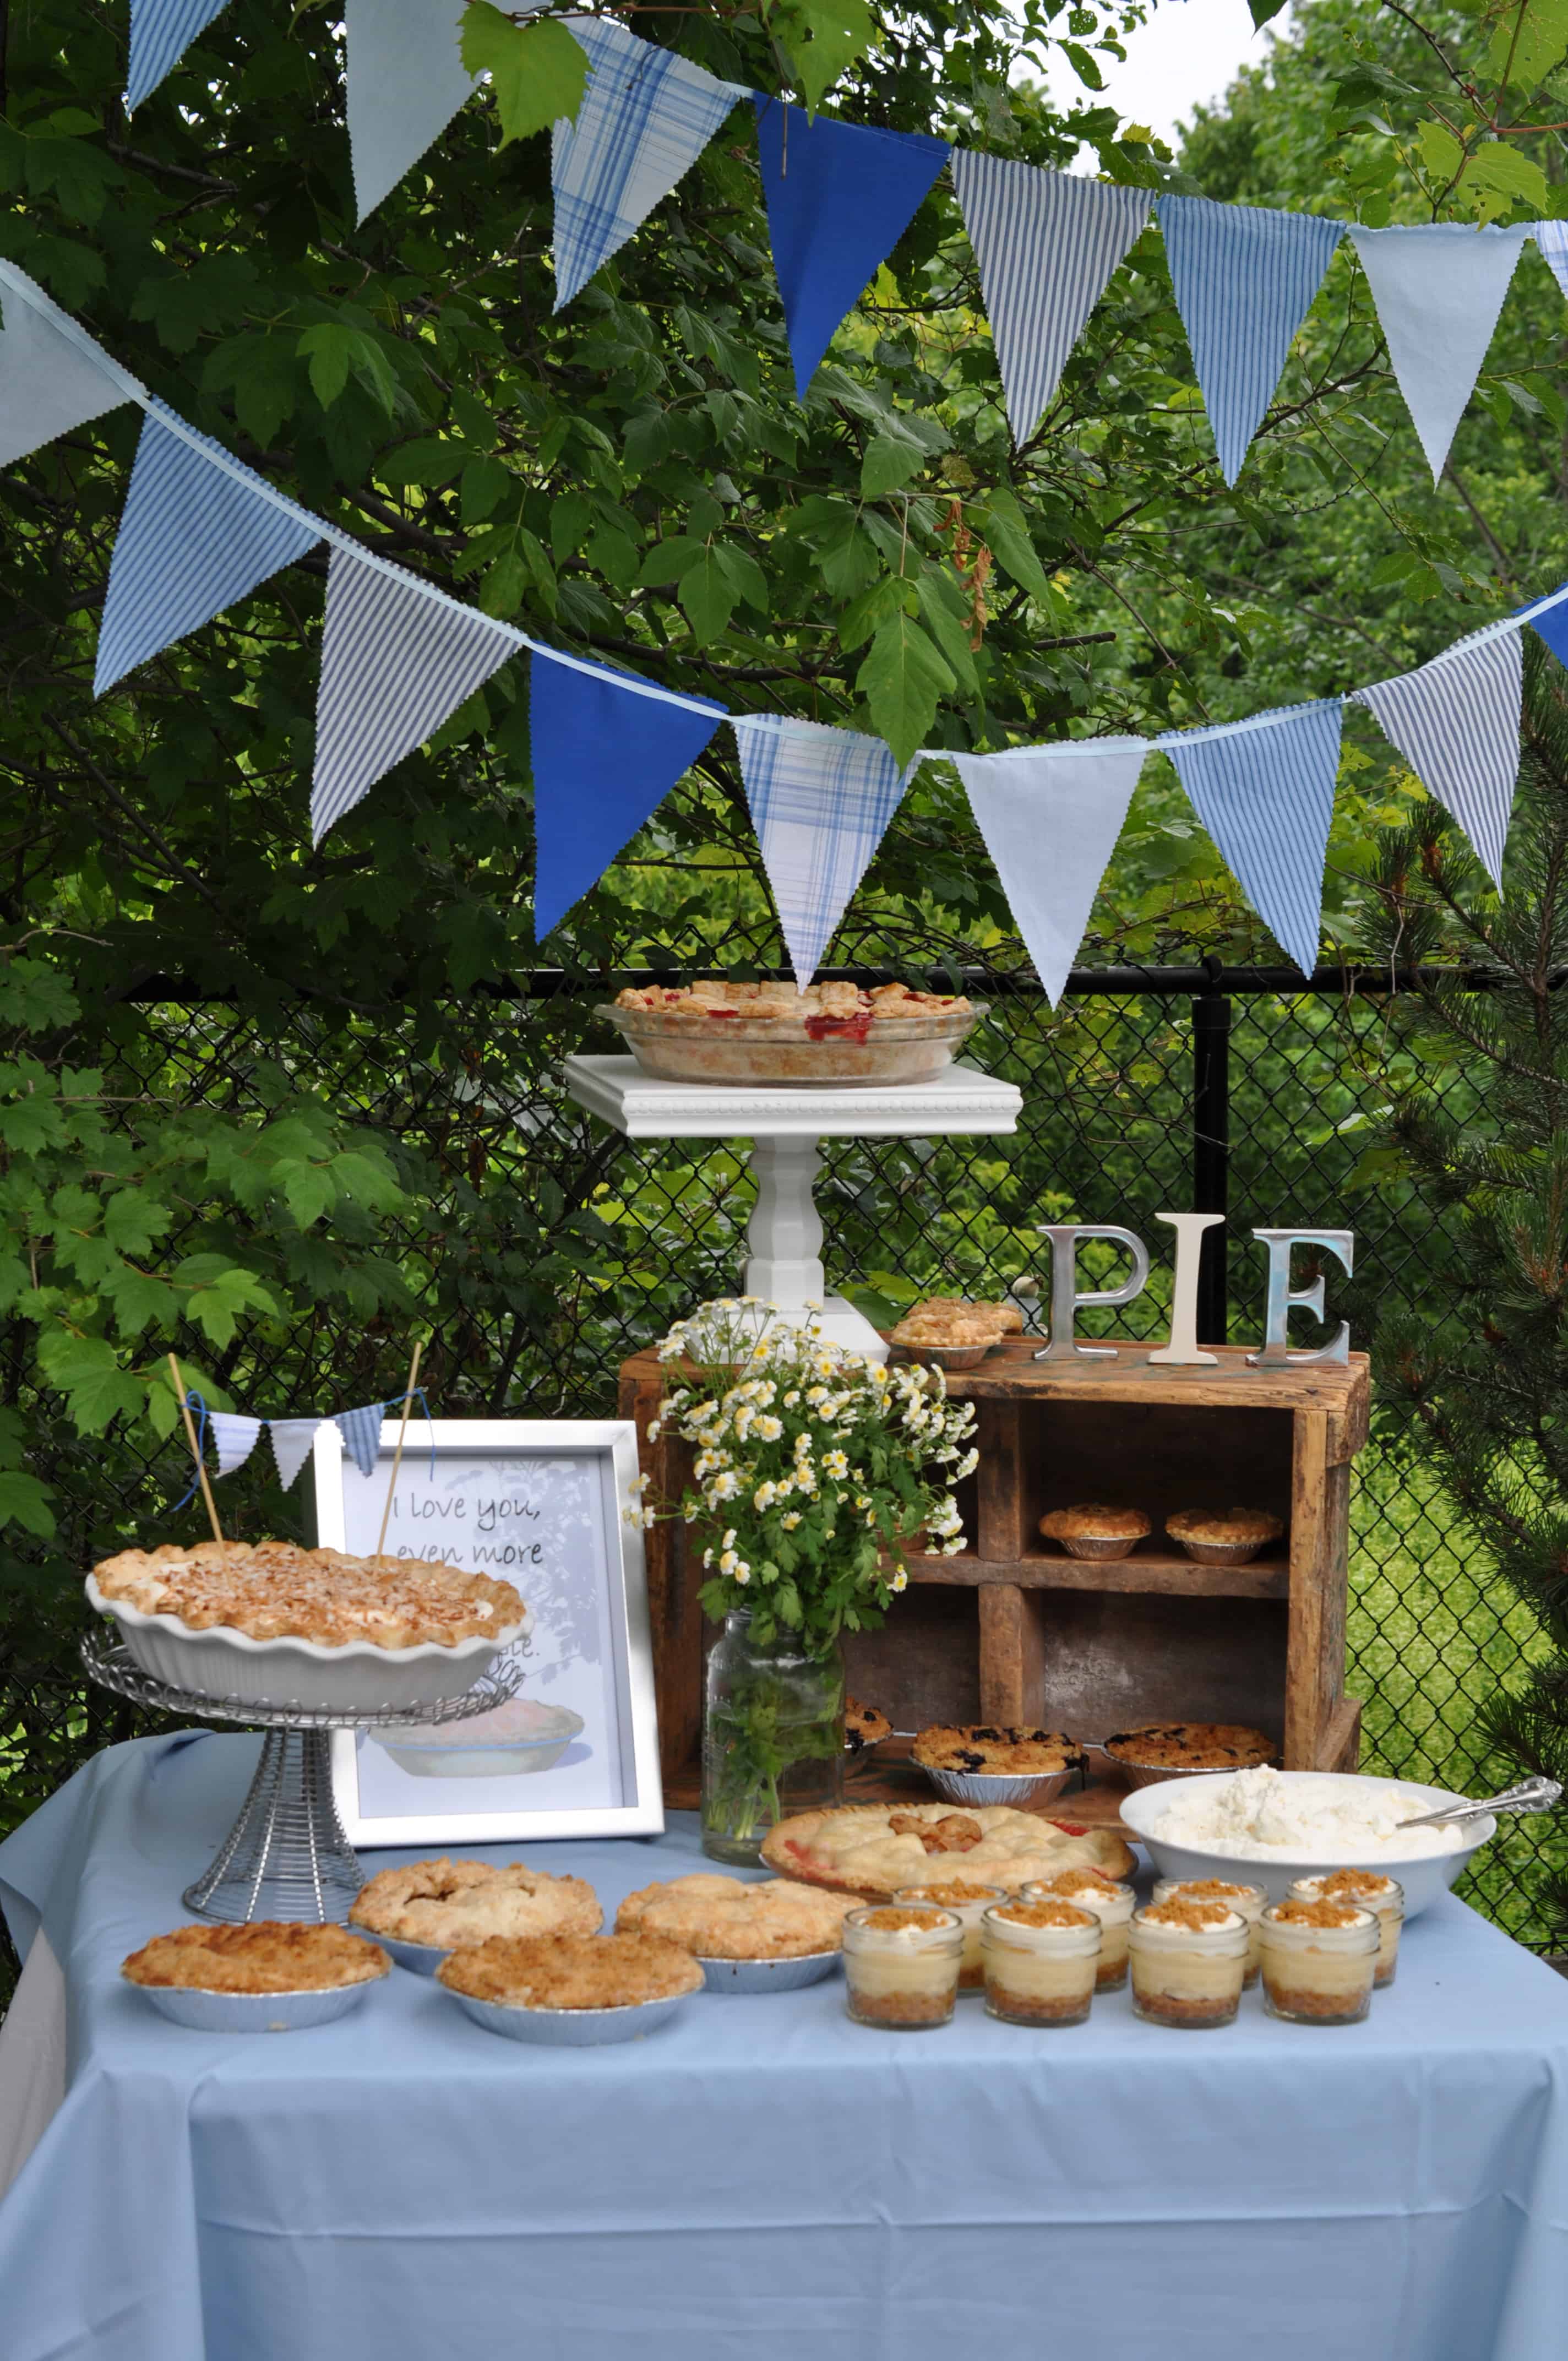
Also check out Father's Day Pie Stand here.

Father's Day Party Ideas

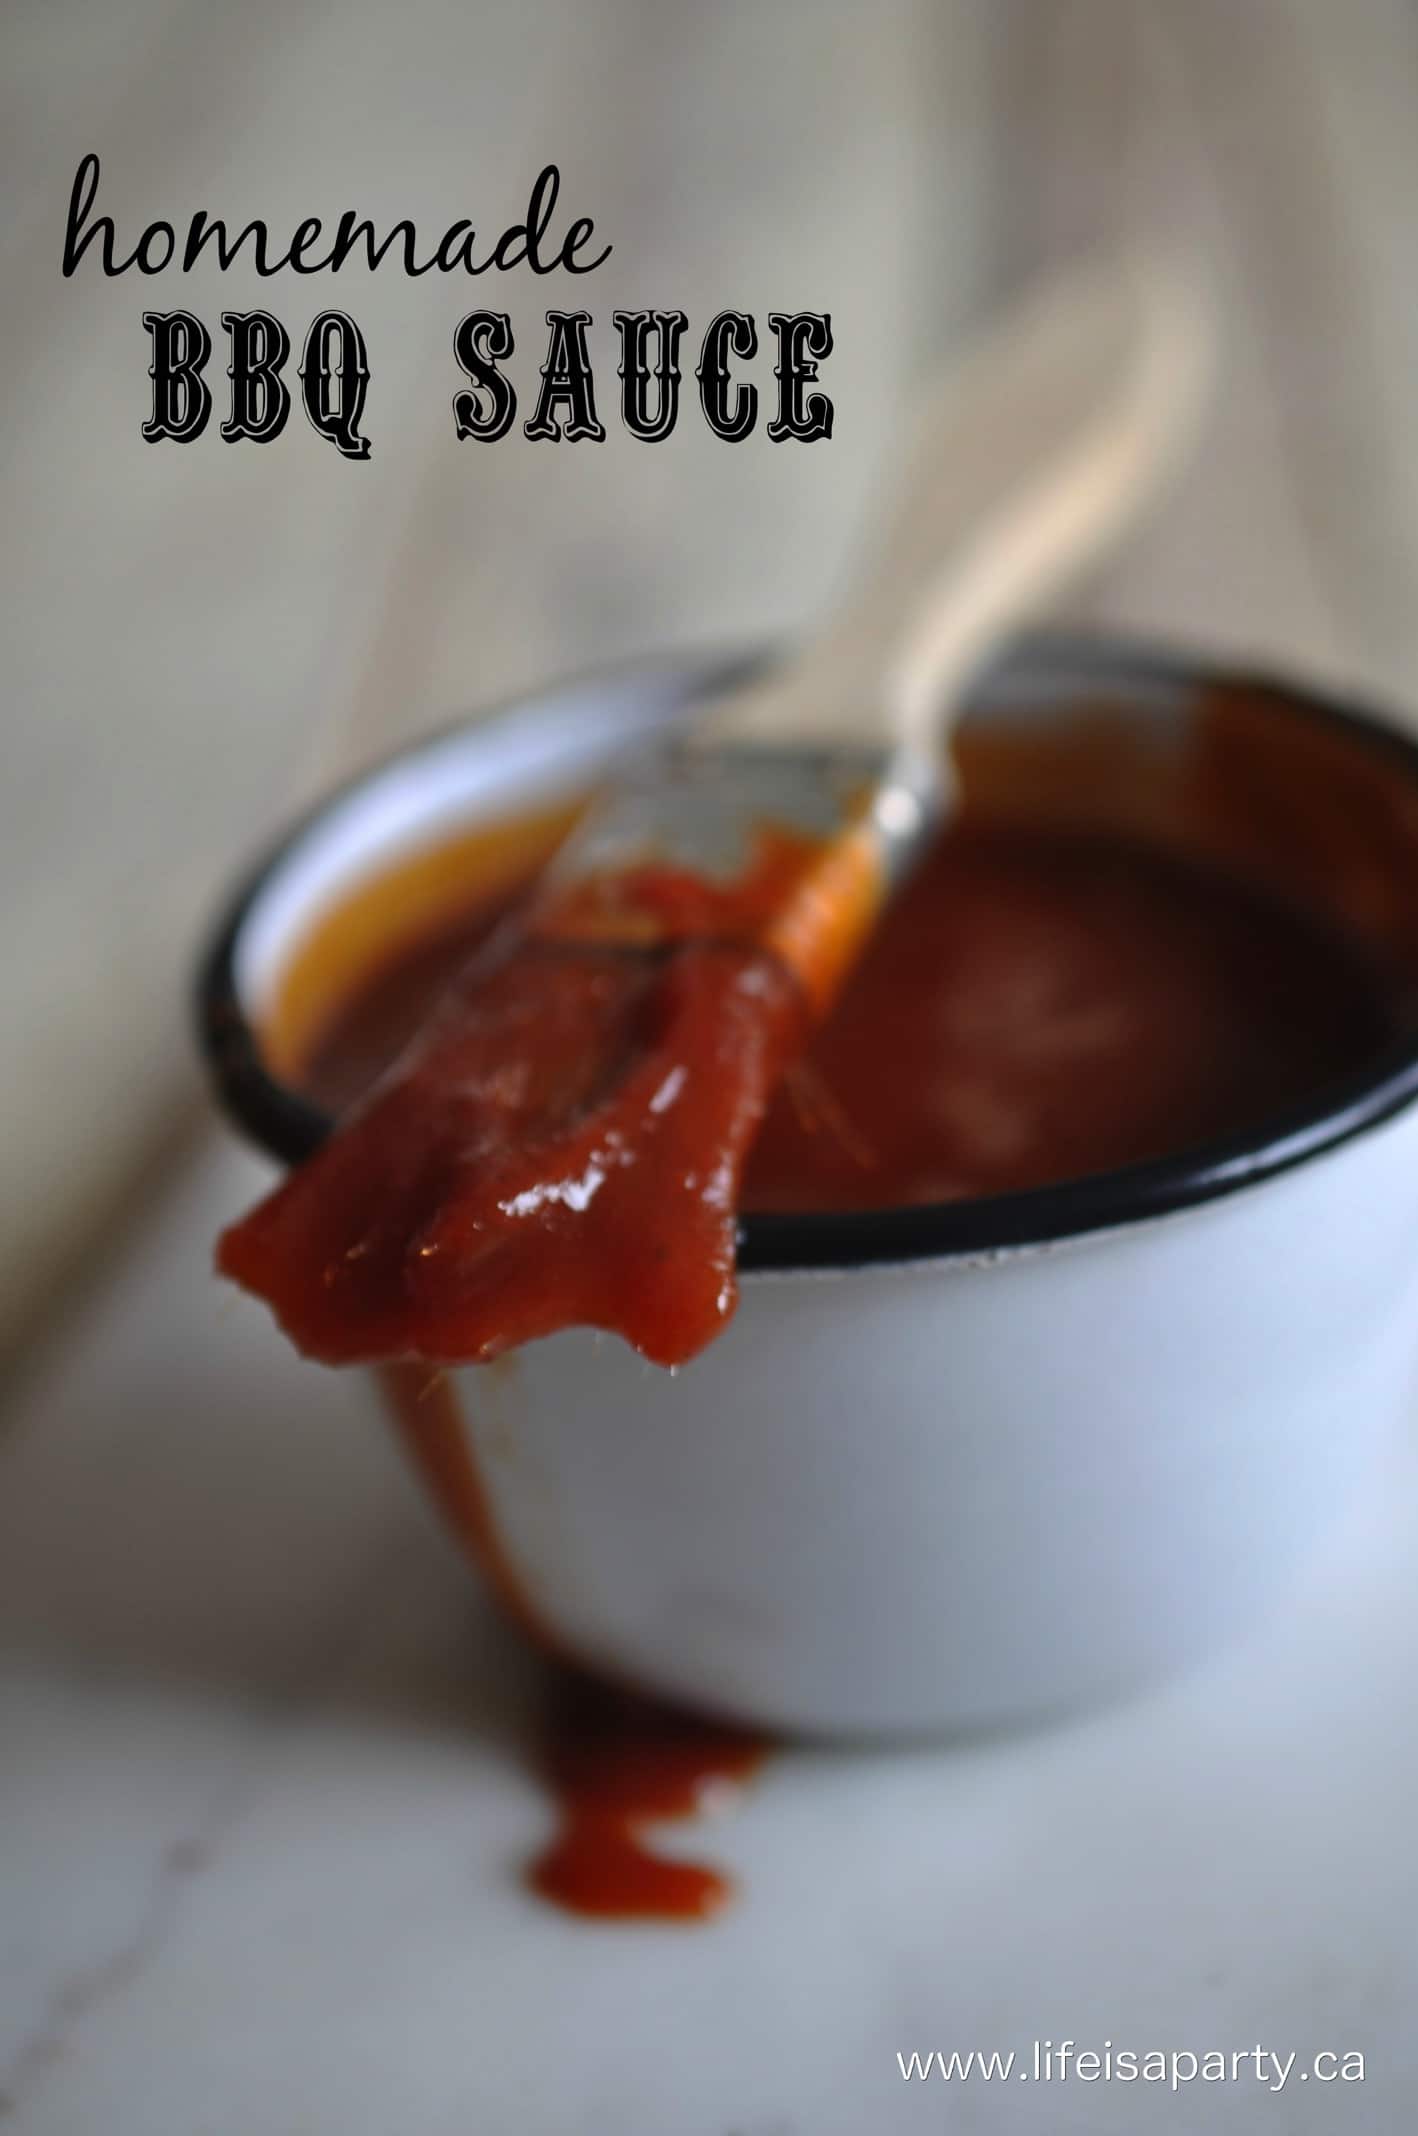
You might also enjoy Father's Day Homemade BBQ Sauce Recipe and Printable Tags here.

Father's Day Party Ideas

No-Cook Homemade Hot Sauce Recipe

Jun 6, 2017 · 1 Comment

No cook hot sauce recipe in small jars with homemade labels.

Easy No Cook Homemade Hot Sauce that you can make in minutes in your blender. This hot tangy homemade hot sauce is perfect for anyone who loves it spicy!

No cook hot sauce recipe in small jars with homemade labels.
[feast_advanced_jump_to]

This No-Cook Homemade Hot Sauce is perfect for Father's Day. Let's face it, he doesn't want another tie, but he'll love the homemade version of one of his favourite things -hot sauce.

Why We Love This Recipe

  • It's very quick to make, since there's no cooking.
  • This sauce is very easy to make. You just but everything into the blender.
  • You can control the heat level.
  • It tastes great, full of pepper flavor.

No-Cook Makes it Easy

This no-cook version is super simple to make. Our raw hot sauce only takes a few minutes to whip together and is sure to impress when people find out you made your own hot sauce from scratch. It really is the perfect homemade gift for the hot sauce lover.

Saftey First -Word of Warning

This isn't a "do it with the kids" kind of a recipe. The peppers are hot, and you should take some precautions yourself, like wearing gloves and being careful not to touch your face…or anywhere else while you're working.

No Cook Homemade Hot Sauce recipe

Guyanese Recipe

My Mother-in-law is from Guyana, and when I asked her if she had a hot sauce recipe she volunteered to teach me how to make it. Probably every West-Indian household has its own version of this sauce. Some people don't include onion or garlic cloves, some people like to let it ferment for a fermented hot sauce, others like to cook it down a little. Our version is probably the most simple recipe, and it's very yummy. If you like spicy food, you're going to love it. This was a go-to condiment in my husbands household growing up. And rather than store-bought bottles, this was everyone's favorite. It has a nice depth of flavor to it.

Ingredients

how to make No Cook Homemade Hot Sauce

See the recipe card below for all the exact measurements.

  • Wiri Wiri peppers, Scotch Bonnet Peppers and Bell Peppers: We found all the fresh peppers, at the local grocery store. If you have any trouble finding scotch bonnet peppers, or wiri wiri peppers, you might want to try an ethnic grocery store with a larger selection of different varieties. The bell peppers -sometimes called sweet peppers, should be easy to find anywhere.
  • Fresh Garlic: We also recommend using fresh garlic, not jared, for a fresher taste.

How Hot Can You Handle?

You can control the level of heat of your sauce based on your pepper selection.  Our first time making it was on the hot side -especially for me who prefers low heat, so I adjusted it and the recipe. Make a sauce with less intense heat with the addition of some bell pepper. 

You really can adjust the heat level to suit your taste, and a make a good hot sauce with a little less heat. The scotch bonnet peppers are the very hottest, especially with the seeds and core included. For a less fire-y version with a lower spice level, just add more bell pepper, and less scotch bonnets, or try some other milder hot peppers for a more mild hot sauce. 

If your hot sauce is too hot you tend to lose some of the flavor of the peppers, because there's just too much heat to notice pepper flavor. My MIL likes to add some little wiri wiri peppers whole to hers, and add them to her food whole, almost like a pickle -too hot for me, but you might like to try it -or blend some into the sauce.

Instructions

1. Wash your ingredients, and remove the stem and seeds of the bell peppers, and remove just the stem of the scotch bonnet peppers, leaving the core and seeds -unless you want the sauce to be less hot, in which case you can remove the scotch bonnet core and seeds as well.

No Cook Homemade Hot Sauce recipe

2. Place add the ingredients into a blender or food processor. Blend until everything is fully combined into a sauce, with no seeds intact or chunks left.

guyanese pepper sauce recipe

2. Store in a glass mason jar or small bottles in the fridge. Makes about 3-4 small bottles.

wiri wiri pepper sauce

Storage

Store this hot sauce in the fridge and it will last for 2 months -especially since a little goes a long way. Some people like to make a fermented sauce version that goes through a whole fermentation process, but this is a simple fresh version, so you need to store it in the fridge.

Look for small glass hot sauce bottles, or spice jars to store this delicious sauce. You only need small amounts of the sauce, so you don't need a large jar. This is a great way to use up a bounty of hot peppers if you're growing your own.

No Cook Homemade pepper Sauce

Frequently Asked Questions

Can I make it more mild?

Yes, just add less Scotch bonnet peppers, and remove their core and seeds to make the sauce more mild.

Can I make it more hot?

Yes, include the Scotch bonnet peppers iwth core and seeds included, and add more of them.

Can I use jarred garlic in this recipe?

We recommend you do not. This recipe is best with fresh garlic for the best flavor.

More Recipe Ideas

  • Homemade sweet beer bbq sauce.
    Homemade Sweet Beer Bbq Sauce Recipe
  • Montreal steak seasoning recipe.
    Homemade Montreal Steak Seasoning
  • Homemade Guyanese cheese straws in a wihte tin.
    How To Make Cheese Straws -Guyanese Recipe

If you try this No-Cook Homemade Hot Sauce Recipe or any other recipe on my blog please leave a star rating and let me know how it went in the comments below. Thanks for visiting today!

Recipe

No cook hot sauce recipe in small jars with homemade labels.

No-Cook Homemade Hot Sauce Recipe

Hot and spicy easy no cook hot sauce condiment.
5 from 1 vote
Print Pin Rate
Course: Condiment
Cuisine: Guyanese
Prep Time: 15 minutes minutes
Total Time: 15 minutes minutes
Servings: 20
Calories: 6kcal
Author: Dannyelle Nicolle-Ramjist

Ingredients

  • 1 red bell pepper -stem and seeds removed
  • 1-4 scotch bonnet peppers -stem removed but seeds and core included
  • 3 large cloves of garlic
  • 1 small onion or ½ a large one
  • ¼ cup white vinegar
  • 2 teaspoon salt
  • 2 teaspoon sugar
  • wiri wiri peppers optional

Instructions

  • Wash the peppers and remove the stem and seeds from the bell peppers, but just remove the stem from the scotch bonnet peppers -unless you want the sauce to be less spicy, then you can remove the core and seeds as well.
  • Add all the ingredients into a blender or food processor and blend until fully combined into a sauce, with no seeds intact or chunks left.
  • Store in a glass mason jar or small bottles in the fridge. Makes about 3-4 small bottles.

Notes

Take caution when working with hot peppers and protect your hands with gloves.  Be careful not to touch your skin, especially your eyes.
To make the sauce less hot remove the core and seeds of the scotch bonnet peppers.  You can also increase the number of bell peppers and decrease the number of scotch bonnet peppers for a more mild sauce.
Store the sauce in the refrigerator for up to 2 months.

Nutrition

Calories: 6kcal | Carbohydrates: 1g | Protein: 0.1g | Fat: 0.03g | Saturated Fat: 0.01g | Polyunsaturated Fat: 0.01g | Monounsaturated Fat: 0.001g | Sodium: 233mg | Potassium: 21mg | Fiber: 0.2g | Sugar: 1g | Vitamin A: 191IU | Vitamin C: 9mg | Calcium: 2mg | Iron: 0.05mg
Tried this Recipe? Tag me Today!Mention @LifeisaParty or tag #lifeisaparty!

Summer Backyard Picnic

Jun 2, 2017 · 2 Comments

Summer backyard bbq ideas.

Summer Backyard Picnic -beautiful table setting ideas with lily of the valley place cards, and mason jar flower arrangements and an easy, no fuss menu.

Summer backyard bbq ideas.
[feast_advanced_jump_to]

I love the warms days of summer that we're starting to enjoy, and after a long winter one of the things I love most is getting outside more.  A sure sign of beautiful weather is eating outside again and enjoying a Summer Backyard Picnic.

Easy Backyard Picnic

After a weekend of gardening, this easy, and yummy dinner was the perfect way to enjoy the sun and relax in our garden.  We spent the day planting our veggie patch, working on planting flower containers for the deck, and weeding our perennial beds.  It was so nice to sit down together outside and enjoy the beauty of our garden along with our yummy dinner.

Backyard Picnic salads

After all our hard work outside, I was happy for a an easy, no-cook summer meal, and a pretty table setting.

Backyard Picnic table

Summer Picnic Table

I kept the table very simple with a pretty white linen table runner, white plates, and simple cotton napkins.  The pretty summer flowers are the star of the show.

Columbine and snowball flowers

I gathered up some pretty blooms from our garden, like columbine and snowballs and added in some lilacs and flowering tree branches from a walk along a nearby country road.

We used some vintage mason jars and enamelware jugs for the flowers.

Summer Backyard Picnic easy menu

My favourite little detail for the table were the sweet lily of the valley placecard holders.

Lilly of the valley place cards

I used some small vintage bottles that were an antique fair find last year.  We tied on some place card tags with a little twine.  Lilly of the Valley were the perfect little flower to use in the vases, and they smelt divine.

Lilly of the valley in vintage bottles

No-Cook Backyard Picnic Menu

  • fresh bread
  • butter
  • olives
  • cheese
  • mild salami
  • spicy salami
  • salads
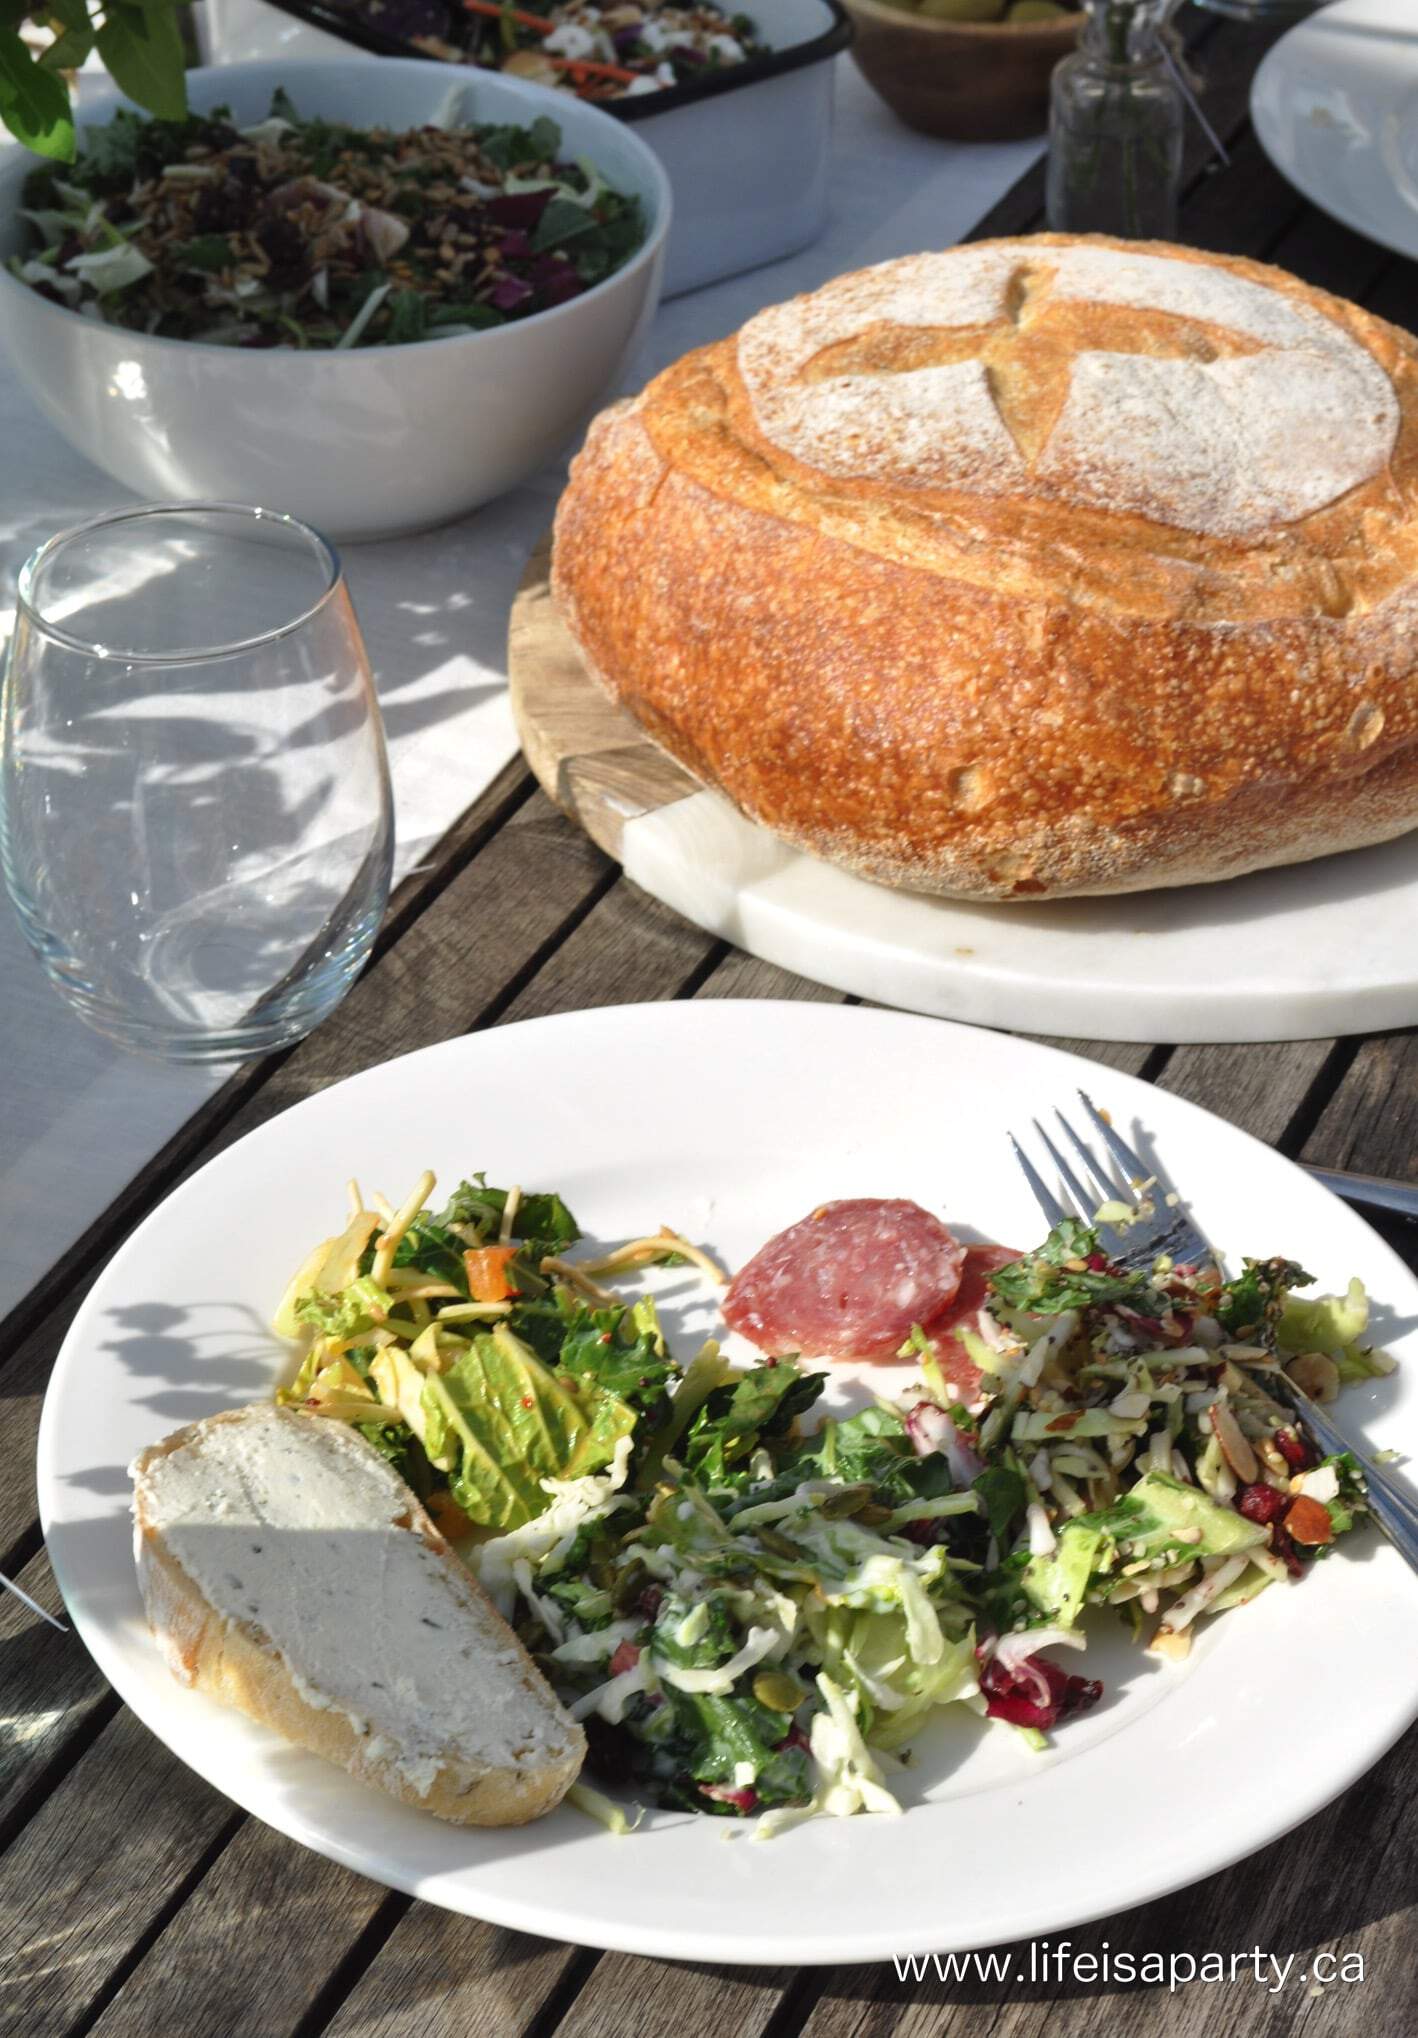
Backyard Picnic with salad
Summer salads for a Backyard Picnic
 Backyard Picnic table
easy Summer Backyard Picnic menu

We paired our salads with some beautiful fresh bread, cured meats and cheeses for the perfect summer picnic.

fresh bread loaf with Lilly of the valley flowers

This is my favourite kind of summer entertaining -easy enough for the host to enjoy the party too!

Summer Backyard Picnic

I'm so glad it's warm enough to enjoy eating outside again.

easy Summer Backyard Picnic

With a beautiful, healthy, and easy Summer Backyard Picnic, life really is a party!

More Picnic Inspiration

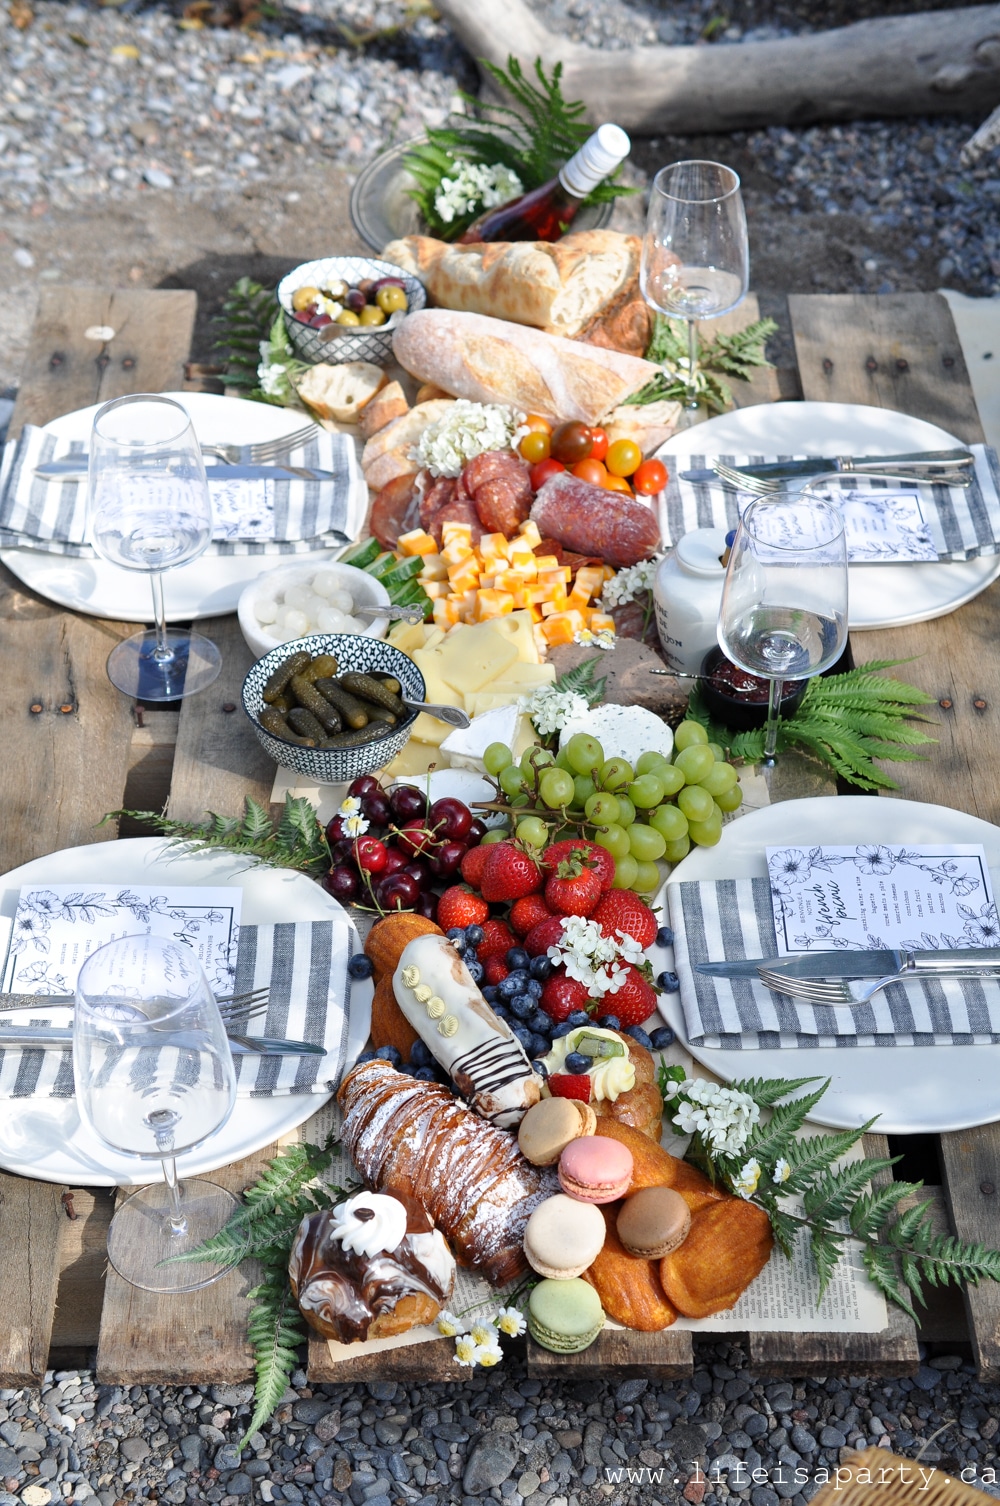
You might also enjoy our French Inspired Picnic here.

Also be sure to check out our Swedish Inspired Picnic here.

Swedish Inspired Midsummer Picnic:  Enjoy drinks, smorgasbord, and dessert all inspired by a traditional Swedish Midsummer menu.  Easy to create at home, and so delicious!

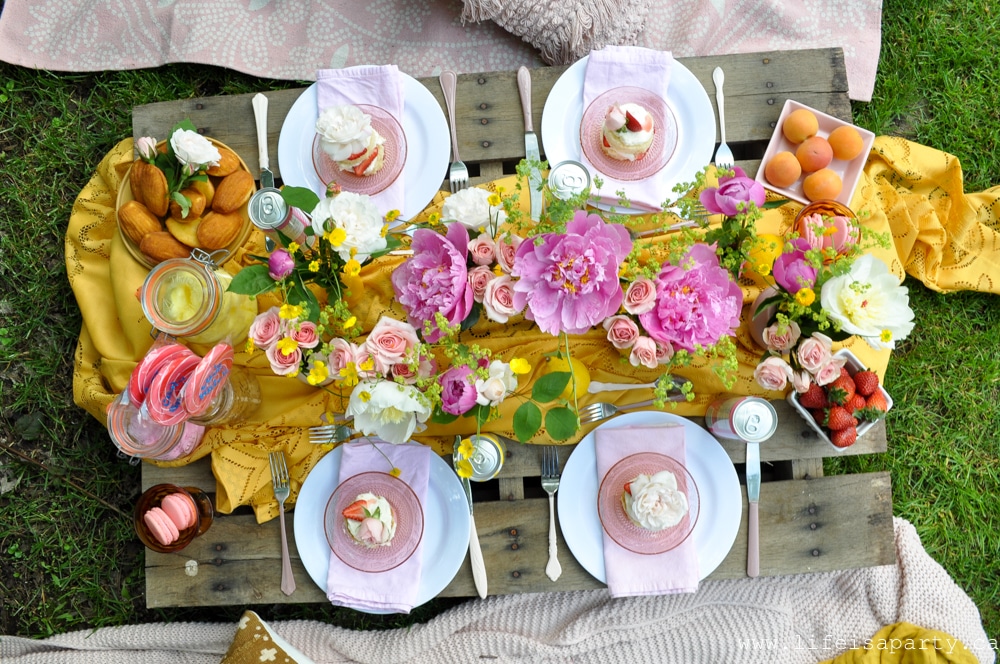
You might also enjoy our Pink and Yellow Backyard Picnic here.

Classic New York Style Creamy Cheesecake Recipe

May 30, 2017 · Leave a Comment

Cheesecake Recipe.

Classic New York Style Cheesecake -baked cheesecake is made with sour cream for extra richness, denseness, and creaminess.

Cheesecake Recipe.
[feast_advanced_jump_to]

If you don't have a classic cheesecake recipe that's a regular go-to for you, then this recipe is perfect.  It's great for company, birthdays, or to bring with you when you're invited over to someone's house and offer to bring dessert.  It's baked in the oven, and comes out rich and dense and wonderful. Add your favourite toppings and you'll love it.  It's a classic New York style cheesecake, with sour cream for extra creaminess, and richness.  If you love a rich, dense baked cheesecake that's not difficult to make, this is the best cheesecake recipe.

My husband and I have been making this Classic Cheesecake Recipe for years and years.  It's pretty much no-fail, and everyone always loves it.  And everyone always asks for the recipe after they've had it.  I love it best topped with traditional cherry pie filling and homemade sweetened whipped cream.  If you're a fan of cheese cake, you will love this recipe.

New York Style Cheesecake

New York style cheesecake is typically a little more dense and more creamy than regular cheesecake.  It gets its extra creaminess from including sour cream.  The sour cream adds to the creaminess and the tang pairs beautifully with the flavor of the cream cheese.  Some New York cheesecake recipes get their creamy and dense texture from also adding heavy cream.  We prefer to use just sour cream in our recipe.  Sour cream has a tangy taste that complements the cream cheese.  Using cream can change the taste of the cheesecake, and lessen the rich and distinctive cream cheese flavor.

New York style cheesecake also includes more cream cheese, and eggs than regular cheesecake.  This adds a delicious richness to the cake and helps create that signature creamy and silky texture that's dense and smooth.  New York style cheesecake is baked in a springform pan that allows for a nice golden brown crust to form on the outside of the cake.  It also traditionally includes a graham cracker crust on the bottom.

Classic New. York Cheese Cake recipe

Ideas for Toppings

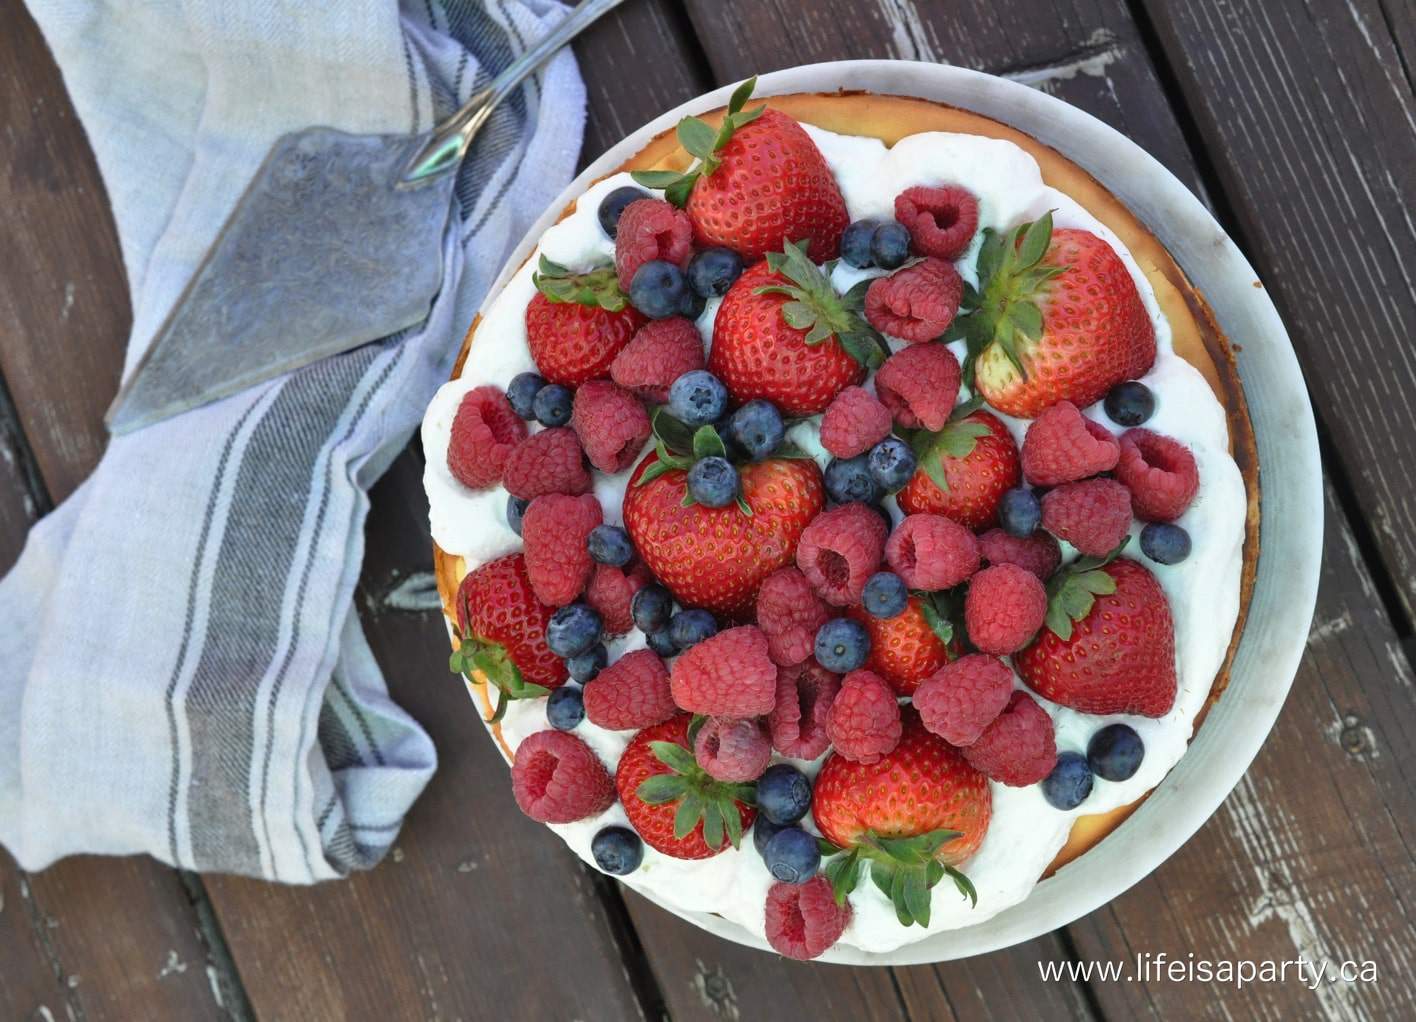
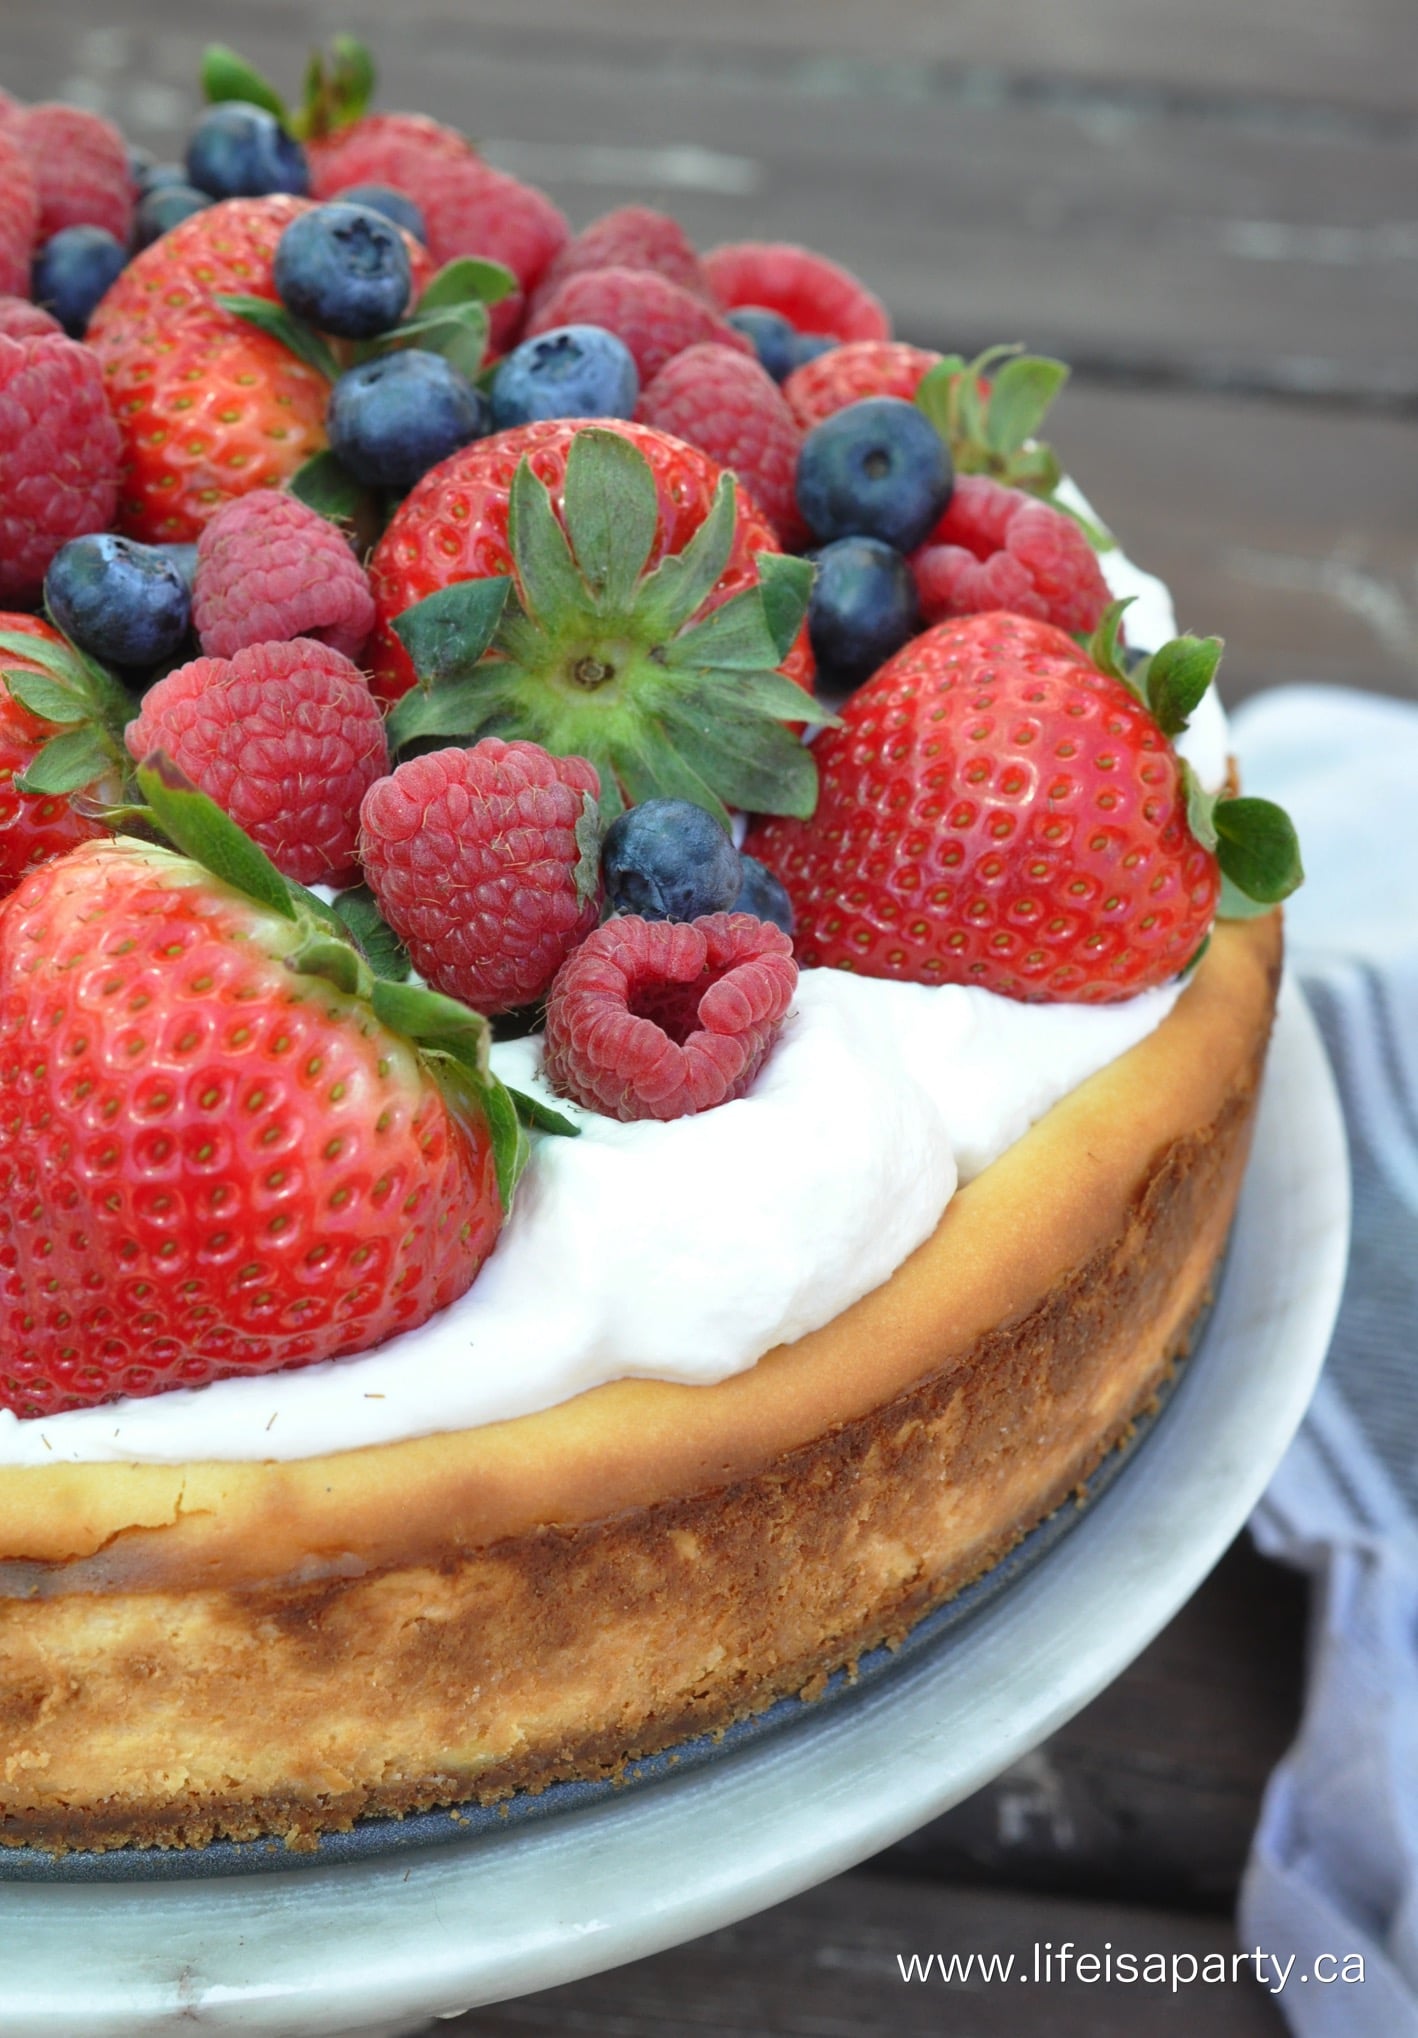
This cheesecake is delicious on it's on, or served with a little sweetened whipped cream.  It's also great with a topping.  I topped this classic new york-style cheesecake with beautiful fresh fruit.  This topping is perfect for summer.  It's a really great plain cheesecake base that you could really add any topping to. You could also serve it plain, or with the old favourite cherry pie filling on top. Any kind of fresh fruit that you love, or fruit pie filling is great on top.  You could try raspberry, strawberry, or blueberry.  In the fall even apple pie filling is.a great topping.

I love to include a bit of whipped cream, and for the chocolate lovers, you could also add a little chocolate syrup, or chopped up chocolate bars or nuts.  How about a combination of all those things and some brownies?  And if you're a caramel lover, you can also try your favorite caramel sauce or even dulce de leche.

Whether you have this cheesecake plain or with any combination of toppings it's so delicious.

Graham Cracker Crust

Every classic New York style cheesecake recipe has a buttery graham cracker crust.  You can use graham cracker crumbs or make your own by putting graham crackers in a food processor and pulsing the to a fine crumb.  The make the crust, the graham cracker crumbs have some sugar added for sweetness, and some melted butter to hold them all together.  After mixing it all together and pressing it into the bottom of the pan in an even layer.  Next the crumbs are baked to create a firm crust on the bottom of the pan, before the cheesecake batter is added on top.

Some people prefer to use digestive biscuits instead of graham crackers.  You can substitute them if you prefer.

Cream Cheese

The main ingredient in any classic New York cheesecake recipe is cream cheese.  New York style cheesecake has more cream cheese than regular cheese cake, which creates the dense texture and distinct taste.  Use your favorite brand of cream cheese.  The best choice for making baked cheesecake is to use full fat cream cheese. 

Can I use low fat cream cheese in my cheesecake?

Full fat cream cheese will give the best result for this recipe.  Low fat cream cheese has less fat in it, and more moisture.  Using it in baked cheesecake can result in a cheesecake that won't firm up as much when it's baked.  The main difference in using low fat cream cheese instead of full fat cream cheese in your cheesecake is the texture of the finished cheesecake.  The texture of a cheesecake made with lowfat cheesecake is softer and less dense.  

You can bake this cheesecake with low fat cream cheese.  I would not use no-fat cream cheese.  The texture is better with full fat cream cheese.  Since there are 3 packages of cream cheese in this recipe, if you are tempted to replace the full fat cream cheese with low fat cream cheese instead, I would still use at least one package of full fat cream cheese for the best results.  The only real reason to use low fat cream cheese in this recipe is to save some calories, but given the rest of the ingredients, and the toppings, it may be better to make it with full fat cream cheese and just eat a little less to save calories that way.

baked cheese cake recipe

Sour Cream

One of the distinctive ingredients in New York style cheesecake is sour cream.  It helps create the creamy, and silky texture of the cake, adds tanginess that goes well with the cream cheese, and 

Flavoring

The cheesecake gets most of its flavor from the cream cheese.  The sour cream is tangy and goes with the cream cheese flavor very well, along with adding creaminess, smoothness, and denseness to the cake.  The cheesecake is flavored with vanilla.  Use best quality vanilla extract, or vanilla paste as the flavoring.

Baked Cheesecake recipe with fresh berries

Store your cooled cheesecake covered in plastic wrap and in the refrigerator.

how to make a baked cheesecake

Troubleshooting -How To Keep Your Cheesecake From Cracking

Cheesecakes often crack while they're cooling.  But, don't be too worried if it cracks.  A cracked cheesecake tastes just as yummy as an uncracked cheesecake.  If your cheesecake does develop a crack and you don't want it to show when you're serving it, you can hide the crack with toppings.  Topping your delicious cheesecake with whipped cream and fresh fruit will hide a multitude of sins.  

Cheesecake Tips

To avoid the cheesecake cracking there a few tips that can help.

  • Make sure all your ingredients are at room temperature before you make it.  Cold ingredients are hard to mix together, and can make the batter go lumpy.  Room temperature ingredients are easier to mix together, without over mixing.  Over mixing adds too much air to the cheesecake batter, and can lead to cracking as the cake cools down.
  • Don't overbeat your eggs.  The eggs in particular add air to the batter, that can later lead to cracks forming as the cheesecake cools.
  • Use the low setting on your mixer to avoid over mixing the batter.
  • Stop beating as soon as the mixture is smooth.
  • Once you've added the mixture to the springform pan, tap it gently on the counter a few times to eliminate any air bubbles which can lead to cracking after the cheesecake is baked.
  • While you're baking the cheesecake keep the oven door closed.  Opening it can cause drafts.  Any major changes in temperature can result in cracks forming.
  • Don't overcook your cheesecake.  The center of the cake should be just barely set, like jello.  The cheesecake may crack if it's too dry from overbaking.  Remember it will continue to bake a little more as it cools.
  • Let the cheesecake cool in the oven with it turned off and the oven door slightly open.  Sudden changes in temperature often lead to cracking.  Cooling in the oven is more gradual, and helps to keep the cake from cracking as it cools.
  • Run a knife around the inside of the edges of the pan to loosen the cake from the pan after it's baked.  Cracks can develop as the cake cools if it's stuck to the edge of the pan, and can't pull away as cools.
Classic Cheese Cake recipe

Perfect For The Cheesecake Lover

This homemade cheesecake is sure to be a hit with any cheesecake lovers.  It is a great recipe that you will come back to again and again. With the buttery graham cracker crust and rich and creamy cheesecake filling this is the perfect cheesecake.  I love how versatile this plain New York style cheesecake is.  Add any toppings you like or serve it plain.  It's lovely served with fresh in-season fruit.  It is also delicious with classic cherry pie filling on top, or any pie filling flavor.  It's also great dressed with chocolate or caramel sauce and whipped cream.  Whatever way you choose to enjoy it, it is sure to become a favourite.

This cheesecake is perfect for a birthday cake, any special occasion, or a dinner party.  Everyone always loves it.  It's a favorite at our house for Christmas day.  It's also one that we love to make for a week of summer vacation at the lake.  It makes the perfect rich dessert with a cup of tea or coffee.

Recipe

Cheesecake Recipe.

Classic New York Style Cheesecake

Classic rich and creamy cheesecake perfect on it's own or with your favourite toppings.
No ratings yet
Print Pin Rate
Course: Desserts
Cuisine: American
Prep Time: 15 minutes minutes
Cook Time: 50 minutes minutes
Total Time: 1 hour hour 5 minutes minutes
Servings: 12
Calories: 370kcal
Author: Dannyelle Nicolle-Ramjist

Ingredients

  • 1 cup graham cracker crumbs
  • 3 tablespoon sugar
  • 3 tablespoon butter melted
  • 24 oz cream cheese 3 x 8 oz packages
  • ¾ cup sugar
  • 2 ½ tablespoon all purpose flour
  • 3 eggs
  • ¾ cup sour cream
  • 1 tablespoon vanilla extract

Instructions

  • To make the crust for the cheesecake, combine the graham cracker crumbs, 3 tablespoon sugar, and melted butter in a small bowl. Press the mixture into the bottom of a 9-inch spring form pan. Bake at 325 degrees for 10 minutes.
  • To make the cheesecake, combine the cream cheese, ¾ cup sugar, and flour in the bowl of a stand mixer fitted with the paddle attachment and mix until blended.
  • Add the eggs one at a time, mixing after each one, and scraping down the sides of the bowl with a rubber spatula. Add in the sour cream, and vanilla and combine. Do not overmix your ingredients, which can add air and leading to cracking in your cheesecake as it cools.
  • Pour the cake filling over the crust. Bake at 450 degrees for 10 minutes. Reduce oven temperature to 250 degrees, and continue baking 45-50 minutes until the centre is just set, like jello. Loosen cake from the sides of the springform pan by running a knife around the inside, and let cool before removing the rim of the pan.
  • Let chill before serving. Top with whipped cream, and fresh fruit, or cherry pie filling, or chocolate sauce to serve.

Nutrition

Serving: 1g | Calories: 370kcal | Carbohydrates: 26g | Protein: 6g | Fat: 27g | Saturated Fat: 15g | Polyunsaturated Fat: 9g | Cholesterol: 120mg | Sodium: 256mg | Sugar: 20g
Tried this Recipe? Tag me Today!Mention @LifeisaParty or tag #lifeisaparty!
Classic Cheese Cake topped with fresh fruit

With a delicious New York style cheesecake, life really is a party!

More Dessert Recipe Inspiration

You might also enjoy our Black Forest Cake In A Mason Jar recipe here.  Make these little desserts in mason jars so that they're perfectly portable and easy to serve.  Perfect for a picnic or when entertaining.

Also check out our Donut Strawberry Shortcakes.  The easiest and best shortcake you ever made.  They're especially delicious during strawberry season when local berries are fresh.  Try them with different donut bases for different flavors, including chocolate for anyone who loves the combination of strawberries and chocolate.

You might also like our Strawberry Pie recipe here.  For my cheesecake lovers.  This pie made with an easy crust, and a delicious tangy layer of no bake cheesecake filling is topped with fresh strawberries.  It's a crowd pleaser and easy to put together.  Save this recipe for strawberry season.

Magical Animal Adoption Agency Party

May 26, 2017 · 8 Comments

Magical animal adoption agency party.

Magical Animal Adoption Agency Birthday Party: create your own agency with stuffed animals and activities for the perfect birthday party.

Magical animal adoption agency party.
[feast_advanced_jump_to]

Magical Animal Adoption Agency Book

My daughter Maddie turned 10 last month and to celebrate we had a Magical Animal Adoption Agency Party.  If you've never read the books before you'll love the story of how a little girl named Clover discovers the Magical Animal Adoption Agency in the woods one day and spends the summer volunteering there.  The Agency is filled with magical animals like unicorns, magical kittens, invisible puppies, and fairy horses.

magical animal adoption agency party

For the party we thought it would be fun to recreate the Magical Animal Adoption Agency so that Maddie and her friends could adopt their own magical animals.

Party Invitations

We made sure to invite the girls in plenty of time and let them know that if they had a chance to read the book before coming it would make the party even more fun.

Magical Animal Adoption Agency Birthday Party invitations

Welcome To Our Magical Animal Adoption Agency

As guests arrived we had a few little details from the book, like a garden gnome by the door who guards the agency at night.

Magical Animal Adoption Agency Birthday Party

Inside guest made their way past the amazing Unicorn and Rainbow dessert table in the dinning room and into the living room where we had our agency all set up.

rainbow unicorn dessert table

Mr. Jam's Desk

We added some details from the book to the living room for the party, like Mr. Jam's desk, and the wishing book.

Magical Animal Adoption Agency mr. jam's desk

In book one, Mr. Jams who runs the agency is called away on business and leaves Clover a note asking her to look after the agency while he's gone, so we made a version of the note from the book and left it on his desk, along with some tea and cinnamon toast, which he's always eating.

Magical Animal Adoption Agency

The Wishing Book

We also made a version of The Wishing Book, where people can come and leave their name and a request for a certain animal if it's not at the agency. The next time the agency gets that particular magical animal, they'll call anyone who's requested it first.

the wishing book

And over the fireplace, more rainbows and unicorn sayings.

unicorn mantel

The Animals

We turned a shelf in the living room into our pets cages where our friends could see them all and read about their magical qualities.  The Magical Animal Adoption Agency website is amazing and has some great descriptions of the animals that we printed out and added to their cages.

Magical Animal Adoption Agency

For the party, everyone got to choose their own magical animal stuffie and then do different activities with them at different stations.  The stuffies doubled as the party activity and take home favour.

Based on the books, here's what we came up with for our magical animals.

Fire Salamanders

We had some fire salamanders -in the book these little guys are fire-hot, heat loving salamanders. I found some at the dollar store and decorated their cage with some faux greens and rocks.

fire salamanders

Toad

There was also had Esmeralda the toad.

Magical Animal Adoption Agency

Next was one of my favourites, the fairy horses -these are fairy sized horses.  We used play mobile horses for ours.

fairy horses
Magical Animal Adoption Agency fairy horses

Next was the jeweled tortoise.

Magical Animal Adoption Agency

Magical Kittens

On the next row we had the magical kittens.  Each had a different magical power -the first one could shoot lightning.

Magical Animal Adoption Agency

The second magical kitten could throw frost and freeze things.

Magical Animal Adoption Agency

The third magical kitten could do acrobatics.

Magical Animal Adoption Agency kitten

We also had the unknown egg, the subject of the second book in the series.  No one knows exactly what it contains, but it's to be bedded with soft feathers.

unknown egg

Dragons

Next came the dragons.  There cages were quite stark because of the obvious dangers of fire.  A bucket of water was near by.

Magical Animal Adoption Agency dragons

Lastly there was an invisible unknown creature.

Magical Animal Adoption Agency

I picked up all the stuffies at different toy stores.

Adopting Their Own Magical Animal

The party guests and the birthday girl all choose an animal to adopt.  Everyone got a chance to fill out their adoption certificate for their new pet -you can find one here.

magical animal adoption agency certificate

I set up various stations for the girls to visit with their pets around the kitchen and living room.

Magical Animal Adoption Agency Birthday Party

Food Station

In the book, there is mention of all the special and different foods that the various animals eat, so I had fun making a centre piece of them in the kitchen.

Magical Animal Adoption Agency

The oats and the sugar beet biscuits are for the unicorns -we didn't see any of those at our party, since they're kept out in the stables.

Magical Animal Adoption Agency Birthday Party: create your own agency with stiffed animals and activities for the perfect birthday party.
jar of full moon beams

The sugar cubes are for the fairy horses too, and the full moon beams are for polishing the unicorn horns.

Magical Animal Adoption Agency

The squashed flies (rolled up pieces of black tissue paper) are for the toad of course.

Magical Animal Adoption Agency

And the chilis are for the fire salamanders.  The star dust and moon dust are also for polishing unicorn horns.

Design A Pet Box and Name Your New Pet

After the girls had their adoption certificates filled out it was time to take their pets to each station.  The first one was to design a pet box.

animal adoption party
Magical Animal Adoption Agency Birthday Party ideas

This was a great first activity because the girls could use them as they visited all the other stations and put their goodies inside.

Make Your Pet a Collar

After the boxes were made the girls took their new pets to the make a collar station.

Magical Animal Adoption Agency Birthday Party
jars of wood beads

Washing Room and Grooming Station

The next station was the washing room and grooming station.  We picked up little nail brushes for them to brush their pets.  And just like in the book, there were toothbrushes to groom the little fairy horses.

toy grooming station

Vet Station

toy vet station

Next was the Vet Station, where the girls could give their pets a check up before taking them home.

Magical Animal Adoption Agency Birthday Party
kids potion station

Make Your Own Pet Food

The final station was a spot to make your animals food.  We set this one up outside near the sandbox, and put out some fun "ingredients".

make your own potion

Everyone used a flower pot to make their own concoction.

Magical Animal Adoption Agency Birthday Party

I think there were more magic potions made than anything else.glitter

The glitter was a huge hit -of course.

The girls played outside and had a few fun adventures with their magical pets until it was dinner time.  We had easy takeout pizza and veggies and dip.

Skyping Author Kallie George

And then after dinner, the best activity ever -we got to Skype with Kallie George the Magical Animal Adoption Agency Books author!

Kallie George

Talking with Kallie was certainly the highlight of the party and such a special, special treat for Maddie.  Kallie is the sweetest and we all loved hearing all about how she'd been writing since she was a little girl and what inspired the series.  It was especially exciting and inspirational since she's a fellow Canadian.

Magical Animal Adoption Agency Dessert Table

rainbow dessert table
rainbow desserts.

We had so much fun creating a dessert table in a world of magical unicorns and rainbows!  Every little girls dream.  We started out with the beautiful rainbow flower backdrop.

create your own agency with stuffed animals and activities for the perfect birthday party

Paper Flower Backdrop

We've made paper flowers a few times, you can see exactly how to make them here at our Paper Flower Making Video.  For this party we wanted a rainbow theme, so we made our flowers in a pastel rainbow colours.  A lot of the flowers we already had from other parties, and to make them fit this theme we added colour with paint.

To hang our backdrop, we hot glued the flowers to some large pieces of sketching paper that comes on a roll.  I reinforced a few spots by hot gluing heavy cardboard to the back.  I then used a darning needle to stitch a few pieces of string through the cardboard to hang the paper from.  It worked really well.

We created a pastel rainbow of flowers and hung a beautiful unicorn head in the middle.

rainbow desserts.

Since the Magical Animal Adoption Agency books take place in the woods, we wanted a forest feel to the room, so we used two small trees on either side of the dessert table.  The trees are real trees that I cut and placed in cement in a galvanized bucket so they wouldn't tip over.  These are actually two of the ones I made for our Christmas dining room forest, and saved for Maddie's party.   For this party I used fairy lights and some pretty butterfly garland in the trees.  I covered the cement base with some moss.

rainbow desserts.

Forest Tablescape

To carry on the forest feel, we decorated the table with a moss runner, some fun mushrooms made from air dry clay and more fairy lights.

rainbow desserts.

We were trying to create the magical woods feeling.

Magical animal adoption agency party.
magical animal. adoption agency party.

On the dessert table we made a few special treats for the day.

rainbow desserts.

Light As Air Cupcakes

In the second Magical Animal Adoption Agency book in the series -The Enchanted Egg, there is a beautiful impromtu picnic where everyone has light as air cupcakes.  The cupcakes are so light that they sometimes float away.

light as air cupcakes

So we had a few cupcakes floating up and one in a tree branch.  These cupcakes were delicious.  They were made with a vanilla cake mix, but for something special some have raspberry jam in the middle, and some have nutella in the middle.  Yum.

light as air cupcakes.

Mr. Jam's Jam Cookies

Another treat inspired by the book where Mr. Jam's Jam Cookies.  Mr. Jam's runs the Magical Animal Adoption Agency.  And in the books he's always eating jam sandwiches, so we thought some jam sandwich cookies were the perfect addition.  You can find our recipe for Jam Cookies here.

jam jam cookies

Unicorn Bark

We also made some Unicorn Bark.

unicorn bark.

The Unicorn Bark was really easy to make and all the girls loved it!  We started out with some white chocolate melted and spread on some parchment paper on a cookie sheet.  Next we added different blobs of pink, turquoise, and purple melted chocolate.  Then we ran a toothpick through it while it was still melted to create the beautiful marble effect.  Then we added some special sprinkles,  and edible glitter.  I especially love the little stars.  When the chocolate was hardened we broke it into pieces.  I love how pretty it is!

unicorn bark.

Rainbow Jello

Since the whole party was inspired by the idea of rainbows and unicorns, we wanted to include some rainbow food.  We made rainbow jello.

unicorn dessert table.

Since we wanted pastel rainbows we tried a recipe where you mix some of the jello while it's still liquid with cool whip to create the pastel layers.  We topped the jello with more cool whip and star sprinkles.

rainbow desserts.

It was time consuming, but easy, and looked fantastic.

More Treats

I also made some of my homemade caramel corn -get the recipe here.  It's such a yummy treat.

unicorn farts.
unicorn rainbow birthday cake.

We picked up the birthday girls favourite almond cake at Ikea, and made it fit our theme with some rainbow ribbons and playmobile unicorns on top.

magical animal adoption agency party

Unicorn Farts

Lastly we made some unicorn farts.  Maddie made some cute labels and we added them to some cotton candy.  It certainly made the little girls giggle.

unicorn dessert table.

When our little guests arrived I heard a few wow's and saw the look of delight on the birthday girl's face and it was worth all the effort.

magical animal adoption agency party.

Because really, what's better than a Rainbow Unicorn Dessert Table for your birthday?

More Inspiration

You might also like our Ice Cream Themed Birthday Party here.

Ice cream themed party with ice cream buffet.

Also check out our Easy Woodland Forest Party here.

Woodland Forest Party Food Ideas: Easy to put together woodland forested themed party food ideas with store bought ingredients that are cute and delicious.

You might also enjoy our Mermaid Party here.

How To Mount A Staghorn Fern

May 17, 2017 · Leave a Comment

How to mount a stag horn fern on wood.

How To Mount A Stag Horn Fern: great tutorial to take a potted stag horn fern and mount it onto wood so it can hang. Beautiful addition to any home.

How to mount a stag horn fern on wood.
[feast_advanced_jump_to]

These mounted Staghorn Ferns add a little green to any room, look great in a grouping, and are easy to make.  I made these for my Rustic Scandinavian Living Room Makeover Reveal last week -see it here if you missed it,  and I wanted to share How To Mount a Staghorn Fern.  I think this unique fern adds a rustic feel, and are a great way to create the feel of a deer head, in a more updated way.

How To Mount A Stag Horn Fern

Materials:

  • Staghorn Fern
  • wooden tree slice
  • picture hanger
  • green wire
  • four screws
  • screwdriver
  • moss
How To Mount A Stag Horn Fern

How To Mount A Staghorn Fern:

1.  Add A Hanger To A Wood Slice

These Stag Horn Ferns are called this because their beautiful fonds remind people of deer horns.  They look great mounted on a wall growing from wood plaques or any mounting board, or even a piece of driftwood.  It's easy to take them from a potted fern to a mounted fern.  The first step is adding a hanger to the back of the mount or wooden plaque so that you can easily hang it somewhere when you're finished.  I used a couple of picture hangers that screwed into the back.

Mounting A Stag Horn Fern

2.  Add Screws To The Front

Next, you want to add the screws to the front of the wood base.  These will hold the base of the fern in place so you want them to be placed in the piece of wood to create an area a little larger than the base of the plant.  Screw them into the wood, but make sure about a ½ inch is exposed, so you can wrap the wire around it easily.

How To Hang A Stag Horn Fern

3. Remove Excess Dirt

The first thing to do to the plant is to remove the loose soil from the roots of the stag head fern.  Use your fingers to gently pull away any extra dirt, without damaging the root ball.  You want to leave just a small amount of dirt around the roots.  The roots will be wrapped up in moss to keep them from drying out.

Looking after A Stag Horn Fern

4.  Position The Staghorn Fern

You must determine the top of the fern.  Each plant will have a small rounded leaf at the top -this are the basal fronds and they resemble a small flat shield.  The fern will survive best if these leaves is are at the top when it's hanging.  This most closely resembles its natural habitat.  These tropical plants grow in tree trunks of the oak tree in South America.

They prefer a warm growing season, since they're from a tropical climate, but do well indoors as a houseplant just about anywhere.  The stag horn fern naturally grow in partial shade on the sides of trees and don't like direct sunlight.

The mature larger plant has three different types of leaves in total, the basal rounded shield fronds, these are sterile leaves.  Then the stag horn type antler fronds that grow upward, and then the less jagged flat leaves  that grow facing down.

How To Mount A Stag Horn Fern

5.  Attach To The Wood

Wrap the surface area of the roots of the plant in sheet moss, including the back of the plant that will be right against the wooden tree slice.  Then set the plant in place against the wooden base and use wire to tightly attach the plant to the backing, wrapping it around the screws to secure it.  You could also use a strong fishing line for this step instead.

How To Hang A Stag Horn Fern

6.  Hide Screws With Moss

Use a little extra moss as the best way to cover the screws with a mound of moss.

7.  How To Water

To water the mounted staghorn fern, it's recommended that you take the fern down and submerge the top of the moss and entire plant in a kitchen sink, bucket of water, or tub of luke warm water for about half and hour and then let it drip dry awhile before hanging it back up.  They'd be even happier with rain water, if you have any available.  These plants are naturally grown in high humidity and indirect light,  They don't like to dry out.  You may find that the best place for a staghorn fern is in a room like a bathroom with a shower where there are more humid conditions.

Hanging A Stag Horn Fern

Recipe

How to mount a stag horn fern on wood.

How To Mount A Staghorn Fern

No ratings yet
Print Pin Rate
Cook Time: 15 minutes minutes
Total Time: 15 minutes minutes
Author: Dannyelle Nicolle-Ramjist

Equipment

  • screwdriver

Materials

  • Staghorn Fern
  • wooden tree slice
  • picture hanger
  • green wire
  • four screws
  • moss

Instructions

  • Prepare your wood piece by adding a hanger to the back of it, so that you can easily hang it when you're finished. Use a two picture hangers and screw them into the back of the wood.
  • Next, you want to add screws to the front. These will hold the base of the fern in place so you want them to be placed in the piece of wood to create an area a little larger than the base of the plant. Screw them into the wood, making sure that about a ½ inch is exposed, so you can wrap the wire around it easily.
  • Next remove the loose soil from the roots of the stag head fern. Use your fingers to gently pull away any extra dirt, without damaging the root ball.
  • Determine the top of the fern, which has small rounded leaves called the basal fronds. The fern will survive best if these leaves is are at the top when it's hanging.
  • Wrap the roots of the plant in sheet moss, including the back of the plant that will be right against the wooden tree slice. Then set the plant in place against the wooden base and use wire to tightly attach the plant to the backing, wrapping it around the screws to secure it.
  • Use a little extra moss as the best way to cover the screws with a mound of moss.
  • To water the mounted staghorn fern, it's recommended that you take the fern down and submerge the entire plant in lukewarm water for about half and hour. Then let it drip dry before hanging it back up

The staghorn fern are quite slow growers and should last a long time if they're properly cared for.  The care is similar to air plants.  The biggest challenge to keeping a healthy staghorn fern is to keep it moist since they prefer a humid climate.  Some people like to mist their ferns with water in a spray bottle between watering.  This helps keep the plant from drying out.

I'm really pleased my staghorn fern mount.  This is the first time I've tried to grow them, and I'm not sure how easy they are to keep alive.  Mine here inexpensive -around $7 each at my local nursery, so they weren't a huge investment. Look for them at a big box store too, where they should also be quite inexpensive.  I thought they were comparable to cut flowers, so if they last longer than cut flowers, we've got our money's worth.  I'll try my best to the keep the little guys alive. 😉  I love the way they look, especially all grouped together.  They're like wall art.  I love their natural and rustic look.

With easy Mounted Staghorn Ferns, life really is a party.

More DIY Craft Project Inspiration

You might also like How To Make Wood Garland with Yarn Tassels here.

You might also enjoy our Twig Houses here.  They're made with simple materials and are a great addition to your home decor.

Twig Houses

You might also enjoy our Mason Jar Oil Lamps here.  Made with simple materials, these are a great addition to your home decor.  Use them anywhere you  would use candles.

Mason Jar Oil Lamps

Rustic Scandinavian Living Room and Eating Area Reveal

May 10, 2017 · 53 Comments

Rustic Scandinavian living room decor.

Rustic Scandinavian Living Room and Eating Area: Make over using neutrals, texture, mixing modern and rustic, natural and cozy elements -Hygge.

Rustic Scandinavian living room decor.
[feast_advanced_jump_to]

I'm so, so excited to share my Rustic Scandinavian Living Room and Eating Area Reveal with you today!  It's been six weeks of projects and I'm so happy with the results.  I've been a guest participant in the One Room Challenge where bloggers take six weeks to make over one room in their homes and share weekly updates.  This is the sixth and final week when everyone shares their finished rooms.

I've had the chance to work with some amazing sponsors and I couldn't be happier with the results.  What a change! [All the sources are linked at the bottom of the post for your convenience.]

Before:

As a reminder, here's what the room looked like before I began.

Rustic Scandinavian Living Room and Eating Area: Make over using neutrals, texture, mixing modern and rustic, natural and cozy elements -Hygge

The rooms were beige and green, with a cream shag rug and green couch.  Both the eating area and the living room had been decorated about ten years ago when we first moved into the house.  We were due for a new couch, and I was ready for a change.

The Dining Room Makeover

I had re-done the dining room in the last One Room Challenge and turned it from a dated contemporary look to a light, bright Rustic Scandinavian feel.

Rustic Scandinavian Living Room and Eating Area: Make over using neutrals, texture, mixing modern and rustic, natural and cozy elements -Hygge

I really wanted to continue the Rustic Scandinavian look throughout the rest of the main floor.

The Inspiration

Here's the mood board I started with six weeks ago.

Rustic Scandinavian Living Room Mood Board

I wanted to create a "Hygge" feeling, the Danish word that means "a calm comfortable time with people you love, the art of building your own cozy sanctuary, to keep oneself snug, celebrating everyday simple pleasures, coziness of soul".  I was inspired by Scandinavian design to mix rustic and modern, keep things neutral with whites, greys, and real wood, add in cozy texture and elements of nature, and keep things somewhat minimal.

Progress:

In case you missed any updates you can find them all here:

DIY Shiplap Expert Tips from a Contractor

Fireplace Makeover

DIY Macrame and Fringe Pillows

The Reveal

I stuck pretty close to the mood board, and when I doubted myself in the middle, as sometimes happens with a major new look before everything quite comes together, I used the board and inspiration shots for guidance.

Rustic scandinavian living room 20

The Living Room

We started out with new paint -Para's JoJo Whitewash and what a difference it made!  The room has lots of windows but with the new white walls it feel so bright, and I love it!

Rustic Scandinavian Living Room and Eating Area: Make over using neutrals, texture, mixing modern and rustic, natural and cozy elements -Hygge

We added shiplap to give this neutral room some texture and interest, and really like it.  It feels rustic and modern at the same time -adding texture, but with great linear straight lines too.

Rustic Scandinavian Living Room and Eating Area: Make over using neutrals, texture, mixing modern and rustic, natural and cozy elements -Hygge

Fireplace

I made over the fireplace -spraying out the brass, removing the wood decal on the front and painting it all white.  What a difference, all I can say is I wish I'd done it sooner!

Rustic Scandinavian Living Room and Eating Area: Make over using neutrals, texture, mixing modern and rustic, natural and cozy elements -Hygge

I made the pretty DIY macrame bunting garland for the front -it was surprisingly easy to make.  Some of the hallmarks of Scandinavian style are simple, minimal, neutrals, and bringing nature in.  On the fireplace I added three pretty stag horn ferns -tutorial on how to mount them coming soon.  They're meant to be reminiscent of deer head with their horn like fronds.

Rustic Scandinavian Living Room and Eating Area: Make over using neutrals, texture, mixing modern and rustic, natural and cozy elements -Hygge

The boards they're mounted on are from Afloral, along with the pretty glass cloches.  I have a pretty collection of decorative mushrooms underneath them.

Rustic Scandinavian Living Room and Eating Area: Make over using neutrals, texture, mixing modern and rustic, natural and cozy elements -Hygge

I was thankful for sunny days to photograph, but it made capturing the mushrooms a little tricky.

Rustic Scandinavian Living Room and Eating Area: Make over using neutrals, texture, mixing modern and rustic, natural and cozy elements -Hygge

Also on the fireplace this amazing letter board from Letter Board Company.  I love it.  I've added a little Scandi message, but love that I can change it up all the time.

Rustic Scandinavian Living Room and Eating Area: Make over using neutrals, texture, mixing modern and rustic, natural and cozy elements -Hygge

Rug

I also needed a new rug.  Our old rug was from the Home Depot and lasted so, so well that it was the first place I looked for a replacement.  I found this gorgeous Carlsbad Area Rug.  I love that it adds a little pattern to the room, and its faded design makes it work perfectly as a rustic addition.  And it's so, so soft underfoot.

Rustic Scandinavian Living Room and Eating Area: Make over using neutrals, texture, mixing modern and rustic, natural and cozy elements -Hygge

This is the pretty view when I come downstairs in the morning.  I love it.

Rustic Scandinavian Living Room and Eating Area: Make over using neutrals, texture, mixing modern and rustic, natural and cozy elements -Hygge

Furniture

We also needed a new couch, chair and ottoman for the room.  After 16 years with our previous one, it was time for a replacement.  We settled on this slip covered one, so that I could have white without the worry.

Rustic Scandinavian Living Room and Eating Area: Make over using neutrals, texture, mixing modern and rustic, natural and cozy elements -Hygge

Accessories

The chunky knit wool throw on the couch is from Artizen Home -and it's amazing!  It's so pretty, so warm, and so cozy.  Everything you ever dreamed of in a throw blanket.  I absolutely adore it, and the pretty texture it adds to the room.

Rustic Scandinavian Living Room and Eating Area: Make over using neutrals, texture, mixing modern and rustic, natural and cozy elements -Hygge

On the ottoman are some pretty terrariums and succulents.  I love the brass detail, and these gorgeous succulents are faux -so I can keep them looking this good.

Rustic Scandinavian Living Room and Eating Area: Make over using neutrals, texture, mixing modern and rustic, natural and cozy elements -Hygge


I find it tricky to keep real ones looking great, so these are the perfect solution.  These are so life like they're sure to fool everyone.

Rustic Scandinavian Living Room and Eating Area: Make over using neutrals, texture, mixing modern and rustic, natural and cozy elements -Hygge

Behind our couch, there is a pass through to the kitchen.  I've added a few branches into the space, and hanging on the branches are some air plants.

Rustic Scandinavian Living Room and Eating Area: Make over using neutrals, texture, mixing modern and rustic, natural and cozy elements -Hygge

They make for a pretty view when I'm doing dishes.  I've read they -along with the stag head ferns - need to come down and be soaked in water once a week.  We'll see how I fair with them, I think I'm holding out more hope for the faux ones.

Rustic Scandinavian Living Room and Eating Area: Make over using neutrals, texture, mixing modern and rustic, natural and cozy elements -Hygge

We got a chair to match the couch, and I used my wood stump tables with them -see how I made the stump tables here.

Rustic Scandinavian Living Room and Eating Area: Make over using neutrals, texture, mixing modern and rustic, natural and cozy elements -Hygge

I have to say I just love this pretty view -the shiplap and birch poles, the stumps, the light.

Rustic Scandinavian Living Room and Eating Area: Make over using neutrals, texture, mixing modern and rustic, natural and cozy elements -Hygge

Another succulent to join the club.

Rustic Scandinavian Living Room and Eating Area: Make over using neutrals, texture, mixing modern and rustic, natural and cozy elements -Hygge

And back on the other side of the room, the other little chair.

Rustic Scandinavian Living Room and Eating Area: Make over using neutrals, texture, mixing modern and rustic, natural and cozy elements -Hygge

At the bottom of the stairs there's the perfect spot for a little table.  The pretty Scandinavian prints are from Northern Edge Prints.

Rustic Scandinavian Living Room and Eating Area: Make over using neutrals, texture, mixing modern and rustic, natural and cozy elements -Hygge


I added the house shelves -they're a classic Scandi touch.

Rustic Scandinavian Living Room and Eating Area: Make over using neutrals, texture, mixing modern and rustic, natural and cozy elements -Hygge

One of the things I love about Scandinavian design is how simple it is.  It leaves some room to breathe.

Rustic Scandinavian Living Room and Eating Area: Make over using neutrals, texture, mixing modern and rustic, natural and cozy elements -Hygge

From the living room it's into the eating area.

The Eating Area

Rustic Scandinavian Living Room and Eating Area: Make over using neutrals, texture, mixing modern and rustic, natural and cozy elements -Hygge

What a difference changing the paint from green to white made!

Rustic Scandinavian Living Room and Eating Area: Make over using neutrals, texture, mixing modern and rustic, natural and cozy elements -Hygge

I also refinished the kitchen table.  It's an antique family piece, and I love it.  It sees a lot of action from family dinners to craft sessions.  Its finish was wearing off and it had serval colours of glitter embedded in it.

Rustic Scandinavian Living Room and Eating Area: Make over using neutrals, texture, mixing modern and rustic, natural and cozy elements -Hygge

I stripped it and resealed it.  It already has a scratch on the new finish…we'll call it rustic.

The star of the show in here has to be my new light from Wayfair.

Rustic Scandinavian Living Room and Eating Area: Make over using neutrals, texture, mixing modern and rustic, natural and cozy elements -Hygge

I love the juxtaposition of the modern light and the rustic antique table.  Scandinavian design is great at adding a little modern.

Rustic Scandinavian Living Room and Eating Area: Make over using neutrals, texture, mixing modern and rustic, natural and cozy elements -Hygge

The finish is an oil rubbed bronze and it has slightly bronze Edison style bulbs.  It's so beautiful at night.

Rustic Scandinavian Living Room and Eating Area: Make over using neutrals, texture, mixing modern and rustic, natural and cozy elements -Hygge

And on the back wall, I took down my antique chalkboard, and added another pretty DIY macrame piece.  I like that it echoes the brass and adds a bit of a more modern vibe.

Rustic Scandinavian Living Room and Eating Area: Make over using neutrals, texture, mixing modern and rustic, natural and cozy elements -Hygge


The little cupboard that houses all the dog's supplies stayed, and I like that it repeats the brass again with its handles.

Rustic Scandinavian Living Room and Eating Area: Make over using neutrals, texture, mixing modern and rustic, natural and cozy elements -Hygge

I just love how the kitchen turned out.  It's simple and pretty and the perfect backdrop for entertaining and photographing parties for the blog.

Rustic Scandinavian Living Room and Eating Area: Make over using neutrals, texture, mixing modern and rustic, natural and cozy elements -Hygge

And the living room is great too.  I'm the type of person who takes a while to warm up to new things, but I have to say that each day I love it even more than the day before.  I'm so glad I did it, and so glad to have partnered with some amazing brands to make it possible.

Sponsors:

A HUGE thank you to my sponsors.  It was amazing to work with each one of them and showcase their beautiful products!

Disclosure:  Some of the products in this post were sponsored.  I received product from Home Depot, Afloral, Wayfair, Artizan Home, Fringe Market, Para Paint, Letter Board Company, Fusion Paint, and Northern Edge Prints.   All opinions, as always are my own.  Thanks for supporting the brands that make Life is a Party possible.

Rustic Scandinavian Living Room and Eating Area: Make over using neutrals, texture, mixing modern and rustic, natural and cozy elements -Hygge

Source List:

Rug: Home Depot  -Carlsbad Area Rug in grey, 8 x 10 (available in-store)

Light:  Wayfair  -Wunsch 6-Light Cascade Pendant

Paint:  Para -Colour JoJo Whitewash

Chunky Wool Throw Blanket: Artizen Home -Large Throw, colour "On The Lam"

Accessories:  Afloral -Large Cloche, Small Cloches, Faux Succulents, Grey Mongolian Lamb Fur Pillow, Grey Mongolian Lamb Fur Throw, Wood Slabs, White Wood Tray, Terirrums -Cubes, Pentagon

Macrame Cord and Fringe for DIY Pillows:  Fringe Market -Cord  -Fringe

Shiplap Installation: Benjamin Wood Works

Letter Board:  Letter Board Company -16 x 20 Chatterbox

Paint for T.V. Unit Makeover: Fusion Mineral Paint -Casement

Art Prints: Northern Edge Prints, Forest Print and Log Rings Print

Be sure to check out all the other One Room Challenge Reveals and get inspired for your next make over project.

With a finished Rustic Scandinavian Living Room and Eating Area, life really is a party!

Rustic Scandinavian Living Room and Eating Area: Make over using neutrals, texture, mixing modern and rustic, natural and cozy elements -Hygge

DIY Macrame and Fringe Pillows

May 3, 2017 · 24 Comments

DIY macrame and fringe pillows.

DIY Macrame and Fringe Pillows: DIY Macrame Bunting, DIY Macrame Hoop Wall Hanging and DIY Fringe Pillows with instructions to make your own.

DIY macrame and fringe pillows.
[feast_advanced_jump_to]

One of the keys to decorating a neutral room is to add lots of texture to keep things from feeling cold, and to add interest so it isn't boring.  When I decided on an all white and neutral colour scheme for my One Room Challenge living room and eating area Rustic Scandinavian Makeover, I thought it would be fun to add texture with some DIY Macrame and Fringe Pillows.

One Room Challenge Progress

The One Room Challenge is a six week challenge, where guest bloggers decorate a room and share their progress each week.  This is week five, and we're almost there and on to some of these finishing touches.  If you missed it, you can catch up here:

  • One Room Challenge Living Room and Eating Area Plans and Inspiration
  • Expert Tips On DIY Shiplap -Week Three
  • Fireplace Makeover -Week Four
  • Rustic Scandinavian Living Room and Eating Area Reveal -Week Six


how to make a fringe pillow

Attempting macrame brought back memories of my childhood.  I remember my mom and her friends making owl wall hangings and plant hangers, even a hanging end table.  In fact, when I mentioned to my mom that I was going to be trying some macrame, she told be all about the class she took when I was a baby, and the next time I saw her she gave me her old instructions booklets from the 70's.  I'm not so amazed that she still had them, I'm more amazed that she was able to find them, haha.

DIY Macrame Wall Hanging

DIY macrame wall hanging on brass hoops

I worked from some YouTube videos, and found seeing how to make the macrame really helpful.  For the DIY Macrame Bunting on the fireplace I used this video from The Crafty Ginger, and for the DIY Macrame Hoop Wall Hanging I used this one, also from The Crafty Ginger.  She's really clear in her instructions, and makes it all pretty easy, even for a beginner life me.

DIY Macrame Bunting

DIY Macrame Bunting

I was surprised how quickly these projects went.  One evening even for a first timer like me, should be enough to complete them.  I used Natural Cotton Small Cord from The Fringe Market.  They have the most beautiful fringe and cording.

how to make macrame bunting

The fringe at The Fringe Market inspired another project -beautiful DIY Fringe pillows.

DIY Fringe Pillows

I ordered several different cotton fringes from the Fringe Market -it's hard to choose because they have so many gorgeous ones!

DIY fringe pillows

Materials:

  • Diamond Double Knot Fringe 6.5 in -Natural Cotton
  • Scalloped Lace Fringe 3 inch -Natural Cotton
  • 1 inch Natural Cotton Loop Fringe
  • 4.5 inch Extra Thick Textured Brush Fringe -Natural Cotton
  • Micro Skirt Fringe
  • Cushion Cover

How To:

To make the pillows, I used some linen cushion covers in an off white colour to match the fringe.  I just cut the fringe to the width of the pillow, with a little bit of extra so I could fold it under for a nice clean edge.  The fringe is pinned in place before sewing to keep every thing lined up evenly.  I stitched it to the pillow cover with my sewing machine, make sure to back stitch the ends carefully to ensure that the fringe doesn't unravel.

how to make your own fringe pillows

It's a really quick and easy sewing project -and you could even use fabric glue for a no-sew option.  So quick and they have so much impact.

DIY Fringe Pillows

I love how they turned out, and add so much texture and interest to the room.

how to make a macrame wall hanging

I'm wrapping up a few final projects in the living room and kitchen eating area, but we're definitely in the home stretch of the this One Room Challenge. I'm just about to start adding in the finishing touches like art, plants and flowers.  I can't believe how different it looks, and I can't wait to share the big reveal with you next week.  Be sure to check out everyone else's progress this final week too.

how to make macrame bunting

With DIY Macrame and Fringe Pillows, life really is a party.

The Fringe Market provided the cording and fringe for this project.  As always, all opinions are my own.  Thanks so much for supporting the brands that make Life is a Party possible.

How To Make A Pussy Willow Spring Wreath

Apr 29, 2017 · Leave a Comment

DIY pussy willow wreath.

How To Make a Pussy Willow Spring Wreath: easy tutorial on how to use a grapevine wreath base and create a beautiful pussy willow wreath for spring.

DIY pussy willow wreath.
[feast_advanced_jump_to]

A few weeks ago I made this pretty spring pussy willow wreath out of some pussy willows I found growing near my house, and I wanted to share with you how easy it is to make beautiful spring wreaths from pussy willows. The warmer weather brings out the pussy willows in the spring season. They tend to grow in wet areas. Depending on where you live the pussy willows may still be out, or you can purchase them for this project. It does take quite a few to make it, but it's really easy to put together, and looks so amazing. It's the perfect front door wreath to welcome spring and chase away any lingering winter gloom. I love seeing this cheerful welcome home on my door in springtime.

How To Make a Pussy Willow Spring Wreath

Pussy Willow Wreath Materials:

To make this DIY pussy willow gorgeous wreath you'll need,

  • pussy willows -I cut a whole garbage bag full of branches
  • garden clippers
  • wire
  • wire cutters
  • a grapevine wreath to use as a base

How To Make a Pussy Willow Wreath:

1. To make this wreath, you begin by cutting your pussy willows into short lengths, about a foot or less in length. You want them all to be around the same size.

2. Once you have them all cut down, divide your pile of pussy willow pieces into four groups, this will help you divide them evenly around the wreath, and not run out or have a lopsided wreath. Each pile should be enough to do a quarter section of your lovely wreath.

DIY Pussy Willow Wreath

3. We choose a grapevine wreath to use as the base for this wreath. It works well because the twigs of pussy willows blend in well with the grapevine. This works better than an embroidery hoop, or foam wreath form, since they would show more and not blend in as well. You might even have an old wreath with a grapevine base that you can upcycle for this project. To begin adding the pussy willows to the base grapevine wreath form, gather a small pile of pussy willows and lay them on your wreath, and wrap floral wire around them to secure them to the wreath (it's best to use a dark wire for this project like black, brown, or green so it blends into the background). Then, apply another small pile overlapping the first pile and continue to wrap with the wire. Work your way all the way around the grapevine wreath base. On the final few piles, make sure to tuck them under the branches of the first ones you added. Wire is the easiest way to secure the pussy willows, for a tight, even look with your final beautiful wreath.

Pussy Willow Wreath

4. If you like, you can embellish the finished wreath with a small nest, mini eggs, and some moss. It's a lovely spring detail and perfect addition. I used wire to attach mine, but a hot glue gun would also be a great way to add it to your own spring wreath. You might even like to add some pretty flowers.

How To Make a Pussy Willow Wreath

Also, be sure to create a little hanging hoop with the wire at the back of your new wreath before you tie it off, so you can easily hook your gorgeous spring wreath on a wreath hanger.

How to make a pussy willow wreath

This wreath was really an easy project make, and turned out even nicer than I thought it would -love it when that happens. I'd say the skill level to create this low. It's not difficult, just a little bit fiddly. This easy DIY spring wreath is a great addition to your own front door to great spring guests with the warmest welcome. This wreath will last a long time too, so you can bring it out year after year in the springtime.

Pussy Willow Wreath tutorial

I hung mine on my front door and added a few other fun details.

White spring planter

I planted my urn with some favorite spring flowers like spring bulbs and pansies, and used more pussy willows in the middle as a wonderful way to tie back to the new spring wreath. Colorful flowers are always a great way to add some bright colors for spring.

spring front porch decor

At the side I switched out the faux snow in the lanterns for the warm weather season with some moss and pinecones. Easter eggs would be a fun addition too.

spring planter with pussy willows

And I added more pretty pansies because I love fresh flowers. The bunny is the perfect spring accessory and great idea too.

bunny garden ornament

Bird Visitor

Along with my birdie that is.

If you follow me on Instagram, you'll know that a morning dove built a nest so quickly in my grapevine garland one afternoon that I didn't have the heart to try to remove it once she started sitting on it. I think there must be some eggs in there since she sits there most of the day and night.

bird nesting

I've named her Gertrude, Gertie for short. She's very quiet, keeps to herself, and doesn't make a mess. All good qualities in a new neighbour.

Her nest is directly above the front door, but at least it goes with the spring decor! I think she must have been attracted to the new beautiful spring door wreath.

How To Make a Pussy Willow Wreath

With a pretty new Spring Pussy Willow Wreath, life really is a party!

More Wreath Inspiration

You might also like our Mushroom Wreath here.

Mushroom Spring Wreath

Also check out our Pampas Grass Wreath here.

Budget Fireplace Makeover Before and After

Apr 26, 2017 · 17 Comments

Easy and inexpensive fireplace makeover.

Easy Fireplace Makeover -how to remove a dated wooden decal, paint out your brass and modernize your builder basic fireplace.

Easy and inexpensive fireplace makeover.
[feast_advanced_jump_to]

Today I'm sharing with you my Fireplace Makeover, and all I can say as I enjoy it now is why didn't I do this sooner?  We had a basic builder corner fireplace that we didn't love for years and years.  With a few relatively easy changes it's now so much better!

It's Week 4 of the One Room Challenge, hosted by Calling It Home where bloggers make over one room of their homes in six weeks.  We're nearing the end.  If you need to catch up you can check out my previous weeks here:

  • One Room Challenge Living Room and Eating Area Plans and Inspiration
  • Expert Tips On DIY Shiplap
  • DIY Macrame and Fringe Pillows
  • Rustic Scandinavian Living Room and Eating Area Reveal
fireplace makeover before

The Fireplace Makeover Before

You may remember how the fireplace looked before our fireplace facelift.  It matched the hardwood colour in the rest of the house and the stairway beside it, so the maple wood color worked, but it all sort of blended together.  The thing I always hated about it most was that wooden decal on the front of the fireplace.  It bugged me from the beginning and I always intended to remove it.  I felt like it looked kind of cheap, and really didn't add much character to the old fireplace.  If anything it made the whole thing look like an outdated fireplace, even though it wasn't that old.  

I even asked someone to help me years ago to remove it.  Although it was maybe 5 years ago, so we'd lived in the house 5 years already and the woodworking friend said that the wood around it had faded from the sun, so there would always be a spot showing where it had been.  I knew then we should go ahead and remove it but he convinced me it would look worse.

how to makeover your wood fireplace

Removing the Wood Decal

With making over our living room,  I knew I had to finally get it off.  This was the first step to our fireplace makeover.  I took advantage of my woodworker brother-in-law Shaun working on the shiplap -read his tips from a contractor on how to install shiplap here. all about that here if you missed it, and asked him to remove it for me.  I had visions of trying myself and making it worse by marking up the wood around it.  He popped it off in a matter of seconds.  The easiest way to remove it was to use a small putty knife to get underneath it, and pry it off.

how to remove a wood decal from a fireplace

It came off all in one piece.  He then carefully pulled out the four finishing nails that had held it in place.  What a big difference it made.

how to remove a wood decal from a fireplace

There was a little wood glue residue left, that I sanded down with some sandpaper.  I debated whether to refinish the one panel of the fireplace where it had been removed, or paint the whole fireplace white.  I never minded the wood, and it did match the rest of the wood floors and stairs.  But, all the inspiration pics of Scandinavian living rooms seemed to have white fireplaces, and in the end I decided to go for it.  I wanted to achieve that Scandinavian classic look, and paint is always the easiest way to make a big change.

how to makeover your dated fireplace

Painting The Wood

I painted the entire room  with JoJo Whitewash by Para in an eggshell finish to create beautiful Scandinavian inspired white walls, including our feature wall covered in shiplap.  For the trim in the room we used the same color but used a semi-gloss finish.  So we wanted to use the semi-gloss on the fireplace surround as well.  I gave the wood a very light sand to prep it, but didn't need to do much to the wood.  After sanding the next step was to wiped it down with a clean cloth to remove any sanding dust.  

?I painted the fireplace with a brush.  You could use a paint sprayer if you liked for a really smooth finish, but for a small project like this, I thought a brush worked fine.

Problems With Taping

I thought I was being a good, responsible, non-lazy diy-er by taping out the walls around the mantel and sides of the fireplace before I painted it.  I wished I'd never taped it along the walls, because although I thought I'd done it really carefully, it was a little too close, and left a thin strip of wood showing between the white of the shiplap and the new white of the fireplace.  And, as I peeled off the tape, the paint was peeling off my fireplace mantel too!

easy fireplace makeover

What can I say, I'm a learner.  So, I give myself permission to make silly mistakes, and learn from them.  Hopefully you can benefit from my errors if you're about to do yours, haha.  I used a utility knife to carefully cut the edge of the tape and paint so that it won't peel off the paint as I removed the tape.  The next morning I used a little artist brush and fixed up my edges.  No big deal -all's well that ends well.

Painting The Brass

how to paint your brass fireplace

The other big change is that I painted out the brass that came with our builder grade fireplace.  I swear from the time we moved in I meant to get around to this job of painting the brass out on our old surround and it took ten years.  Do you have any little projects like that at your house?  The brass always looked very dated.  The fireplace looks sooo much better after getting rid of the brass.  It was the focal point of a room that we never wanted.  My first thought when I put the painted grill back on was why didn't I do this years ago?  Oh well, it's done now and I love it.

easy fireplace makeover

Heat Resistant Spray Paint

It was super simple to do.  I picked up some matte bbq spray paint -it's specifically for surfaces that get hot, so perfect for this job.   You definitely want to use a heat resistant paint because our gas fireplace insert does get hot when it's burning.   

The first step was to remove brass grill pieces.  They just pop right off, no tools required.   Once they were off, there isn't much prep needed.  I did a very quick sand with a fine grit sandpaper, just to rough it up a tiny bit and help the paint adhere well.  After the sanding I wiped it down to remove and sanding dust before painting.  I spray painted them in the garage on a drop cloth.  You want to spray paint in a well ventilated area, but also in a protected area, out of the wind.  I gave the front and back several light coats, making sure not to go too heavy and cause the paint to run.  Let them dry overnight to really let the paint set.  When they were all dry I popped them back on -easy peasy.  

Instant Change

Changing out the brass gave an instant updated look.  This is such an inexpensive way to give the entire thing a new look.  It's a great example of how a small change can have a really big impact.  It really wasn't much work.  We removed it in minutes.  The thing that took the longest was waiting for the paint to dry between coats.  Quick updates like this one make a huge difference to the whole room look and are the best way to have a big impact on a budget.  I can't believe the power of a little paint and the amazing end result we achieved with this fire surround makeover.  We love our new beautiful fireplace.

Recipe

Easy and inexpensive fireplace makeover.

Wood Fireplace Makeover

5 from 2 votes
Print Pin Rate
Cook Time: 2 hours hours
Additional Time: 1 day day
Total Time: 1 day day 2 hours hours
Author: Dannyelle Nicolle-Ramjist

Equipment

  • paint brush

Materials

  • white semi gloss paint
  • sand paper
  • paint brush
  • drop cloth
  • heat resistant black spray paint

Instructions

  • Use a putty knife to gently pry the wood decal off of the fireplace.
  • Lightly sand the wood fireplace mantel and surround, and then wipe down to remove any sanding dust.
  • Paint the fireplace with two to three coats of paint until fully covered.
  • To make over the brass pieces start by removing them from the fireplace. They should just pop off easily.
  • Lightly sand the brass to create a rough surface for the paint to adhere better, and then wipe down to remove any sanding dust.
  • Spray paint in a well ventilated but protected area. Spray several light coats to prevent andy drips. Let dry overnight and then place back on the fireplace
Fireplace Makeover

Should Have Done It Sooner

Just a few inexpensive and quick changes and what a difference it makes! Paint is always such a great way to make a big change on a small budget.  Our fireplace has come a long way from where it was.  It looks like we have a whole new fireplace.  If you have a builders fireplace and hate the wood decal and brass now you see how quick and easy it is to update it to something a bit more modern and clean lined.  

Paint is such a great option.  Quick and easy diy projects are always my favorite.  All you need is a little white paint and some black heat proof spray paint to makeover your existing fireplace.  I'm so glad I finally did mine.  It makes the whole living space feel better with a whole new look.  The is one of the quickest and easiest diy fireplace makeover ever and the best part is it did not cost a lot of money.  I waited a long time to finally do it.  I'm so glad I finally did this fireplace renovation.

Fireplace Makeover

Thanks so much for following along on this redecorating adventure with me, you can see lots more behind the scenes and sneak peeks over on Instagram.  Also, be sure to check out all the other One Room Challenge guest participants progress this week.

easy fireplace makeover

With an easy fireplace makeover, life really is a party!

More Inspiration

You might also like our Laundry Room / Mudroom Makeover Reveal here.

Laundry Room / Mudroom Makeover Reveal: From a chaotic and messy space to an organized and beautiful one with built-in lockers and storage solutions.

Also check out our Kitchen Makeover Reveal here.

You might also enjoy our Scandinavian Living Room Makeover Reveal here.

Expert Tutorial on DIY Shiplap from a Contractor

Apr 20, 2017 · 18 Comments

Expert tips on installing DIY Shiplap.

DIY Shiplap: how to install DIY shiplap with our expert tips from a contractor and what tools to use to make awkward cuts.

Expert tips on installing DIY Shiplap.
[feast_advanced_jump_to]

We love the shiplap trend.  It's such a great way to add texture and a rustic feel to any space.  We decided to add an accent wall of shiplap to our living room while we make it over.  In the end, we went with a DIY version of shiplap made from inexpensive plywood strips and turned out amazing.  We have all the great tips and professional ways to do this project in your own home with a real professional finish.

Add Texture With DIY Shiplap

This week we installed DIY Shiplap on a feature wall in the living room.  When I was designing the room, I was a little worried that all the white might be a little boring, so I knew I had to add in layers of texture to add interest and warmth to the space.  Shiplap has the perfect Rustic Scandinavian feel -although we're used to seeing it used in the Modern Farmhouse look, it's definitely at home in Scandi decor too.  

I was a little nervous about DIYing it myself, but my friend Kim of Kim Power Style has installed it herself in her beautiful Modern Coastal Cottage home and she talked me through the whole process.  

I decided to give it a try -although I was a little worried about all the crazy cuts and angles around the fireplace and stairs.  We wanted the shiplap on the feature wall, but since the fireplace is in the corner, I had to wrap it around that small wall too.

how to DIY shiplap

I chatted about it with my brother-in-law Shaun, who has his own company Benjamin Woodworks, and got a few pointers and suggestions from him.  By the end of the conversation though, he was volunteering to come and put it up for me.  He's truly the best.  

So we made a date for Easter Sunday for the install and my family all hung out and cooked a turkey together while he worked on the wall, and I chipped in where I could.  Here's a before shot of the space.

DIY Shiplap: how to install DIY shiplap with our expert tips from a contractor and what tools to use to make awkward cuts.

Shaun did an amazing job, and as he worked I gathered a few tips from the expert in case I ever want to try it on my own, or in case you've been thinking about doing DIY shiplap wall project in your home.

DIY Shiplap: how to install DIY shiplap with our expert tips from a contractor and what tools to use to make awkward cuts.

Materials

  • RevolutionPly Plywood -cut into planks
  • 1 ¼ " brad nails
  • 18 gauge brad nail gun
  • level
  • 1" utility knife
  • caulk
  • wood filler for nail holes
  • fine sandpaper
  • paint and primer

How To Install DIY Shiplap

Pre-cut at the Hardware Store

1.  I looked at a few tutorials and took the advice of my friend Kim and decided to use 5.2 mm RevolutionPly Plywood to create the planks.

what plywood to use for Diy shiplap

It was the cheapest option and looked great everywhere I saw it used.   I had the wood pre-cut before so it was all ready for Shaun to install.

why plywood to use for diy shiplap

We had the plywood cut into planks at the Home Depot store.  This is the easy way to have perfectly straight cuts.  They have a big machine that insures straight cuts, and is quite quick.  We had them cut  into 5 ⅞ inch strips, so that with the gap in-between they'd be 6 inches.  The home improvement store usually charges one dollar per cut, and it's definitely a good idea to have them do it for you and save yourself the time and stress of making sure they're all cut perfectly straight. If your cut boards are not straight it will ruin the finished wall with uneven gaps.  If you're doing DIY faux shiplap this first step is important to get right.  

One little tip -make sure to keep your off cuts separate, you don't want to mix them in by mistake and mess up your whole faux shiplap wall pattern when you're installing them.

what to use for DIY Shiplap

Start At The Bottom

2.  When you begin to install the diy shiplap wall start at the bottom of the wall with a level board.  Our baseboard was surprisingly level so we didn't have to adjust ours at all.  But if yours is out a bit, make sure you get the top of that first board level.  This is the building block for the next row, and the entire plank wall afterward all the way to the top of the wall, so it's important to make sure this first piece is level, and the next board should be also.  First thing make sure to start as you want to go.

how to install DIY Shiplap

We used the width of the board as a spacer, giving us 3/16" gaps.  Be sure to keep checking occasionally that your boards are still level as you go up the entire wall.

how to install your own DIY Shiplap

Installing

3.  We went with a staggered board pattern, and nailed them in with 1 ¼" brad nails using an 18 gauge brad nail gun.  This made the project go fairly quickly for our small space.  Try and nail into the wall studs.  You can find them with a stud finder and mark the wall if you need too.  An expert tip, the electrical outlets will be attached to studs, so start your search there.  The studs will be equally spaced.

Some people like to also use construction adhesive or liquid nails on their boards.  It's sometimes used on it's own, or to reinforce the nails.  Because we used very light plywood to make our own shiplap planks, we thought that the brad nailer was enough on it's own.  This will also make it so much easier to remove in the future if we want to.  All that we'll need to do if we want to ever take it down is ply the boards off and fill the small nail holes in the drywall.  

Since the look of shiplap is so trendy at the moment, it's more than likely going to go out of fashion at some point as well, and it's a good idea to think about how to remove it when it's time for a change while installing it.  Your future self will thank you.

DIY Shiplap: how to install DIY shiplap with our expert tips from a contractor and what tools to use to make awkward cuts.

Easy To Cut With A Utility Knife

4.  We cut the boards to length with a simple utility knife, there's no need to use a circular saw, or table saw for this project.  Shaun said that the thin boards might be damaged with the up and down motion of a big  saw, so he cut them using a set square for a straight edge, and a 1 inch utility knife -scoring a few times, and sanding off any rough edges.  If you were worried about having to use a big saw for this project, the best and easiest way is to use a simple utility knife to trim pieces to size.

how to cut diy shiplap with a utility knife

Adjust Outlet Boxes

5.  I didn't know this, but with the outlet covers removed you can adjust the depth of you outlet boxes, with two simple screws.  Shan adjusted them slightly so that they'd be flush with the new wall treatment.  Use this trick for all the light switches and electrical outlets.

Use A Compass To Scribe

6.  If you have some tricky cuts around something like a fireplace, like we did, here's how the experts do it.  Use an everyday geometry compass to scribe your difficult cut on to the wood.  Set the compass, and then run the metal piece along the profile of the trim and use the pencil to transfer it to your wood.

how to install shiplap around your fireplace

Shaun used a jigsaw to cut out these more difficult cuts, and then smoothed the edges of the boards with a file.  Another expert tip, draw it out and cut it first on a scrap piece of wood.  When you're happy with the fit, use it as a pattern and trace it on to the good board.  If you're working around a fireplace like we were, both sides should be the same, so you should be able to re-use your pattern piece.

how use a compass to scribe around trim when you install shiplap

How To Use A Carpenters Sliding Bevel

7.  We had some funky angles along the trim on the stairs.  There's a simple tool you can use to get your angles perfect.

using a carpenters sliding bevel to cut shiplap on an angle

Just line up a carpenters sliding bevel to the trim edge and then move it over to your board and trace the exact angle on to your board.  I love little tools like this one that make life so much easier!  The right tools for the right job makes a huge difference.  You can pick one up an inexpensive on for around $10.

using a carpenters sliding bevel to cut angles when installing shiplap

Caulk For A Perfect Finish

8.  Final expert tip, finish up with a little paintable caulking.  Even the experts have a few gaps here and there, for a professional finish caulk the edges around fireplaces, and trim where needed, the corners, and along the ceiling and baseboard.

how to install your own diy shiplap

Filling and Sanding

To finish, I filled the nail holes with a little wood filler and putty knife, and then once they were dry I sanded it smooth with a fine grit sandpaper.  I choose to leave the vertical lines as they were.  I like the more rustic look of leaving the seams, some people like to use wood putty to fill those lines for the finished look of one continual board.  If you are doing the vertical lines as well, you might want to use an electric sander as filling all the small gaps isia bigger job than just nail holes.  You can do it either way depending on your preference.   

After the filling and sanding, I vacuumed off the wall afterwards to remove the sanding dust, then it was time to paint.  The Scandinavian look is all about white, so I used JoJo Whitewash by Para to match the rest of the room.  Some people like to use a paint sprayer for painted shiplap, it does a great job of getting into all the little groves.  If you're painting by hand, a small brush is the best option for getting into all the groves.  We did two coats of paint on our wall.

I just love how our DIY shiplap accent wall turned out.  It feels rustic and warm and cozy, and the horizontal lines help add some texture to the room.  It was fairly inexpensive to do, and it really adds so much to the room.  Making faux shiplap out of inexpensive plywood was a fraction of the cost of using real shiplap boards.  

Beginner Level Project

We had a few tricky cuts around the fireplace and around the stairwell, but if you were doing a regular wall with straight lines, this would definitely be a beginner level project.  You can don't need any specialized tools for the regular cuts.  Have the hardware store cut the boards into shiplap, and then use a simple utility knife for the rest of the cuts.

DIY Shiplap: how to install DIY shiplap with our expert tips from a contractor and what tools to use to make ackward cuts.

If you're local to the GTA Shaun does AMAZING work and I highly recommend him for any tile or woodwork or renovating jobs you might need done.  Check out his website -Benjamin Tileworks for more details about his work.  It was so much fun to partner with him on this project.

One Room Challenge Progress

It's already Week Three in the One Room Challenge and I still have a few projects to do.  I've already painted the living room and kitchen, and now installed and painted the shiplap.  The last big painting project is to re-do the fireplace. I also need to refinish the kitchen table still.  The new kitchen light needs to be installed too.  Finally I want to leave myself a little time at the end for some DIY artwork.  So, there's still lots to do, but it is starting to feel like we're making progress.

This week we bought new furniture for the living room that I can't wait to show you.  The rug also arrived and some of the beautiful accessories, along with the stunning new light for the kitchen.  I hope to paint the fireplace over the next day or so, and finally put the painting stuff away!  The kitchen table can get refinished in the garage now that the weather is nicer, hopefully that project will get started this week too.  We're getting there -slow but sure wins the race! 

And here's all our progress on this makeover:

  • Expert Tips On DIY Shiplap
  • Fireplace Makeover
  • DIY Macrame and Fringe Pillows
  • Rustic Scandinavian Living Room and Eating Area Reveal

In the meantime, I'll just be staring at my beautiful new shiplap wall

DIY Shiplap: how to install DIY shiplap with our expert tips from a contractor and what tools to use to make ackward cuts.

With DIY Shiplap, life really is a party!

More Inspiration

You might also like our DIY Concrete Side Tables.

Check out our Fireplace Makeover here.

You also might like How To Refinish A Dark Wood Veneer Dining Room Table.

One Room Challenge Week One -Living Room and Eating Area

Apr 5, 2017 · 25 Comments

One Room Challenge Living Room Makeover -six weeks to completely makeover our living room with new furniture, paint, ship lap, and fireplace makeover.

One Room Challenge Living Room Makeover -six weeks to completely makeover our living room with new furniture, paint, ship lap, and fireplace makeover.

I had so much fun participating in the One Room Challenge (ORC) last fall, that i knew i wanted to participate again in the spring version.  This time around I'm making over the living room and the eating area of our kitchen.  I want to continue the Rustic Scandinavian design I used in the Dining Room make over.  You can read all about the Dining Room Makeover from last time here.

Before and After of dining room makeover

The Living Room Before

Here's what the room looks like now.  It was decorated by us when we moved into this house about 11 years ago now.  It's pretty neutral and has served us well, but it's time for an update.

one room challenge living room makeover before pictures

The room really has great bones -9ft ceilings, hardwood floors, and great light.

how to make over your living room

The Plan

It's time for some new furniture.  We've had this couch and chair set since we got married, and we're coming up on our 16 year anniversary next week. They've lasted pretty well.

living room makeover before pictures
one room challenge living room makeover

Over on the other side of the room, is the fireplace.

one room challenge before pictures

I always intended to give it a little makeover, but never got around to it, so now is the time.

And attached to the living room is the kitchen eating area.  With replacing the green furniture in the living room, it's time to say goodbye to the matching green walls in the kitchen too.  This area will get an update with a new light, and new accessories too.  

I'm thinking about refinishing the kitchen table too.  It's a family antique I found in my Grandma's barn long, long ago.  I love it.  But it does sometimes look a little orange-ish, especially in photos on the blog.  I do a lot of photo's here because the light is great, so I'm thinking about refinishing it.  I had quite the time refinishing my veneer dining room table for the last one room challenge.  It was a steep learning curve, but I think I've got the hang of it now.  Hopefully I'll have enough time during the six weeks to tackle this table.

one room challenge makeover

Inspiration

Here's some of the inspiration for the rooms.

rustic scandinavian inspiration

Mood Board

And here's the mood board for the living room.  This should give you a sense of where I'm headed.

Rustic Scandinavian Living Room Mood Board

To-Do List

  • new couch and chair
  • furniture edit
  • new living room rug
  • paint the walls
  • shiplap accent wall
  • fireplace makeover
  • tv unit makeover

I've got big plans to replace the couch, chair and ottoman, and maybe the rug too. The living room and kitchen will be painted JoJo White Wash by Para, to match the dining room, and tie the whole main floor together.   I'm thinking about planking one wall in the living room to add a little texture for this very white colour scheme -but I haven't totally decided yet.  Lots of natural elements will be added like sheep's skin rugs, wood, antlers, and plants.  I'm also planing to add in lots of cozy texture with chunky knits, wood planks, a shag rug, and some macrame.  

I'll be stream lining things a little by getting rid of the shelf unit.  The fireplace is getting a little makeover -by removing the wood decal from the front and painting out the brass.  I'm thinking about painting it white, but we'll see how it looks when the walls are painted.  I might be painting the tv unit too.  Looking so forward to this space to become lighter and brighter.

I love the Rustic Scandinavian look for it's neutral bright white and mix of modern with rustic pieces.  I think the design will be very easy to live with.  Having said that, I'm a little tiny bit nervous about white everything with two kids and a dog, but I'm thinking that just like the dining room, slip covers are the key to living with an all white scheme -I guess we'll find out. 😉

And so the adventure begins.  In six weeks I'll be revealing the final living room and eating area, along with all the other One Room Challenge guest participants.  And each week along the way, I'll be checking in with an update on my progress, and joining in with all the participants -so be sure to check out all their rooms here.

With a Rustic Scandinavian Living Room and Eating Area make over, life really is a party!

One Room Challenge Progress

  • Expert Tips On DIY Shiplap -Week Three
  • Fireplace Makeover -Week Four
  • DIY Macrame and Fringe Pillows -Week Five
  • Rustic Scandinavian Living Room and Eating Area Reveal -Week Six

Dog Birthday Party

Apr 4, 2017 · 6 Comments

Dog birthday party.

Puppy Dog Birthday Party: easy ideas for a dog cake for humans, and a real dog, along with inexpensive dog themed decorations, and dessert table.

Dog birthday party.
[feast_advanced_jump_to]

This past weekend my little pet doggie Oscar turned one, and we celebrated with a Puppy Dog Birthday Party.

Easy Puppy Dog Birthday cake

Let me just say right off the top that I know some people might think this is a little crazy.  And it is.  I know my doggie didn't actually need a birthday party. In fact, he probably didn't even realize that it was his birthday party, lol.  But if we're in the business of making life a party, then why not take all the  reasons we can find to celebrate?

I want to create crazy memories for my kids, and god children that they'll remember when they grow up.  I want them to have stories like "remember when Oscar turned one and we had a little birthday party for him?  And it was so silly and so much fun."  Those are the kind of things I want to hear them remembering when they're all grown up.  Any excuse to celebrate, any reason to bake a cake and sing, any time we can gather with people we love and share a meal, and any day we can truly make life into a party -I say let's do it!
simple Puppy Dog Birthday Party ideas


The Puppy Dog Party

I had some fun setting up a pretty dessert table and a few decorations -but I promise it was all pretty easy.  We love decorating for birhdays, check our all our best ideas for decorating for at home birthday parties. And I think you could honestly show up at home with a store bought birthday cake, a new dog bone and a balloon and declare it a party at your house and everyone would be just as delighted.  

It doesn't have to be too fancy, it's really just about seizing the opportunely to celebrate, to play, to party with the people you love.  Because let's face it, life is hard sometimes, and it's good to sprinkle life with parties between the hard bits.

Dog Party lunch ideas


We invited our friends and the grandparents over for a long walk in the forest, which we knew the birthday boy would love.  After the walk we had some hot dogs -because dog party = hot dogs.

hot dogs for a dog party

Lunch

I kept the menu really easy with hotdogs and sausage, veggies and dip, hummus, and chips.

veggies and dip
chips in takeout boxes

For drinks we had easy lemonade in pretty re-usable bottles.

individual lemonade in reusable glass bottles

My colour scheme was blue, for my boy.  I kept things simple with a few honeycomb party decorations and a pretty succulent planter on the table.

easy succulent centre piece
succulent planter

I found some dog paw ribbon and used it to dress up the napkins.

Puppy Dog Party paw print ribbon napkins

Puppy Dog Party Dessert Table

My favourite was our little dessert table.  I made an easy backdrop with some scrapbook paper.  We hand drew some doggie words -Bow Wow, woof, and ruff and added in some bones too.  I used my sewing machine to stitch them into garland.  We hung them up with some "woof" washi tape.  This was so simple and inexpensive to make.

Puppy Dog Birthday Party dessert table background decorations

There were two birthday cakes -one for the doggie and one for his two-legged friends.

birthday cupcake for a dog to eat

We used this recipe for Peanut Butter and Apple Doggie Cake, and Oscar loved it.  It was full of all his favourite foods -apple, peanut butter and egg.

Puppy Dog eating a dog friendly birthday cupcake

And for the humans, I made a simple cake from a cake mix and decorated with some ribbon flags and toy dogs.

Puppy Dog cake with dogs on top

I just love how the cake turned out and it was so simple to make.

easy Puppy Dog themed Birthday Party

I also made some rice krispie cookie "bones" for the humans, with a bone cookie cutter.

Puppy Dog Birthday cake with blue ribbons
dog bone shaped Rice Krispie treats


My husband and kids LOVE rice krispies so this was a fun and easy addition.

Puppy Dog Birthday Party food desserts

Puppy Love

If you had told me even a year and half ago that I'd have a pet dog now, I really probably won't have believed you.  We always said we weren't pet people.  But somehow last spring on a family walk I started feeling like the picture would be more complete with a puppy in it.  When I fist mentioned it I was almost joking.  But the funny thing was I couldn't shake the idea, and the more I thought about it the more I thought it just might be a good idea.  My husband was the hardest to crack.  The kids were on board from the get go, in fact they'd always wanted a dog but had literally given up dreaming about it because we'd said so many times "we're not pet people".  But something in us changed.

I kind of think God wanted to teach us some more about unconditional love.  There's nothing like a dog's greeting when you get home.  He's just so darn happy to see you.  He makes you feel very loved.  And he doesn't care how your day was, if you were particularly successful or not, if you made a lot of money or not, his opinion of you never seems to change.  He just loves you.  He doesn't want anything from you, just you.  And there's really nothing quite like that feeling.  I'd still say we're not really pet people.  But we've become Oscar people.  I don't particularly like dogs…maybe a little more than before.  But I like my dog and he likes me, and that's pretty nice.

Here's to many more doggie birthday parties in the future.

Puppy Dog Birthday Party ideas

With a puppy dog birthday party, life really is a party!

More Inspiration

You might also enjoy our Puppy Dog Adoption Party here.

Easter Finger Foods Brunch

Mar 30, 2017 · 9 Comments

Easter finger foods brunch with decor and menu.

Easter Finger Foods Brunch: the perfect, no fuss Easter brunch menu with breakfast finger foods and Easter table decor ideas.

Easter finger foods brunch with decor and menu.
[feast_advanced_jump_to]

Breakfast Finger Foods make the perfect Easter Brunch.  It's such a good idea for excited kids who just want to eat chocolate but this way can have a little of what they like,  and grown-ups who have an excuse to try everything and come back for more of what they love.  It's perfect for your family gatherings.  Today I'm excited to share this Easter Finger Foods Brunch full of bite-sized snack food that are perfect for breakfast or brunch.

Easter breakfast finger foods brunch ideas

For this party, I chose a Friday morning and invited over some of my blogging friends for a girl friends brunch.  We had the best time!  It was a morning of making some really great connections, and so much encouragement and celebrating each others success.  This menu is also a great way to celebrate with the whole family.  There's nothing like a special occasion breakfast.  A finger food beautiful brunch is a great idea for your next party.  It would be great for celebrating Mother's Day, for a baby shower or bridal shower as well.

Easter brunch tablescape ideas

Easter Brunch Table

Let me share the details of the pretty and easy tablescape with you.  I wanted to keep things a little more casual so I set everything up in the kitchen, rather than the dining room.  It made the get together feel more laid back and put my guests at ease as soon as they arrived.

Easter brunch table centrepiece

The table is a pretty combination of spring pastels.  I started out with the pretty watercolor floral pillows.

Easter brunch table ideas

The pillows set the tone for the rest of the tablescape. I thought it would be fun to use Easter candy as decor in pretty mason jars on the table -and for my guests to nibble on throughout the party.

Easter Finger Foods Brunch table ideas

We used a simple runner on the table and layered on a piece of linen.  I didn't want the table to be too sweet, so I felt like the more rustic linens, and un-ironed napkins kept it a bit more rustic.

Easter spring table

The primroses are a nice spring touch.  I thought they looked pretty wrapped in some moss and in placed in these lanterns.

Easter table ideas

I also used these pretty vintage little bowls, perfect for our Granola Cereal Buffet.  It's always fun incorporating some vintage treasures.

Easter pastel spring table

To make things causal and easy I set up the food in a little buffet, so guests could help themselves.

how to host an Easter brunch

Finger Food Brunch Buffet Menu

  • mini quiche
  • sausage rolls
  • hot cross buns
  • butter
  • cheese
  • jam
  • mini cinnamon rolls
  • turnover breakfast pastries
  • chocolate mousse Easter eggs
  • yogurt and granola bar with toppings

I wanted to do breakfast foods, but all finger food size for ease.  These little bites are perfect for enjoying the most important meal of the day.

Easter Finger Foods Brunch with breakfast finger foods

Mini Quiche and Sausage Rolls

Since it was breakfast, sausage and eggs seemed essential.  So, I picked up some frozen mini quiche.  These were perfect for brunch, they're like little mini breakfast casseroles in a pastry.  They're perfect for a finger food buffet.  I also and ordered some mini sausage rolls from my local bakery.  They were so good.  I warmed these up to serve them, but they're also delicious room temperature.

breakfast Finger Foods Brunch

Hot Cross Buns

Since it's Easter, I also ordered some hot cross buns.  I offered guests butter, jam, and cheese to go with them.  These were delicious and festive with minimal effort.  Another time of year you could serve something like bagels or mini bagels with different toppings instead.  Regular cream cheese, salmon, capers, and cucumbers or sweet cream cheese would be a great thing to offer.

Easter Finger Foods breakfast Brunch
Easter Finger Foods Brunch hot cross buns

Breakfast Sweets and Pastries

For some more sweet treats, I also picked up a some mini cinnamon rolls and made some easy bake at home turnovers.  When I was making the turnovers I cut them in half so they'd be mini size too.  Cutting things down is a great idea to keep everything finger food size and fun way to allow your guests to try lots of different breakfast classics without getting too full.  Buying some things, and getting some ready to bake are an easy way to offer lots of variety without having to cook all day.  Other fun breakfast sweet ideas are mini pancakes or french toast sticks, or mini waffles, or something like muffins, donuts, or danishes.

how to host an Easter Finger Foods Brunch

Chocolate Mousse Easter Eggs

And then, just for fun, I made some of my little Chocolate Mousse Easter Eggs -find the recipe here.  Another time of year, you could put together a small dessert board as another option.

chocolate mousse Easter eggs brunch dessert

They're really the perfect sweet little treat for Easter, and they looked so festive too.

easter brunch finger foods breakfast

It was great having all these breakfast finger foods off to the side so that guests could help themselves as we chatted away.

make your own granola yogurt parfait buffet breakfast finger foods

Yogurt and Granola Bar

I also set up a fun little granola bar using my bar cart to hold lots of yummy toppings and options to make your own yogurt and granola parfait.

Easter Finger Foods Brunch: the perfect, no fuss Easter brunch menu with breakfast finger foods and Easter table decor ideas.

I made some of my famous homemade granola -find the recipe here.

homemade granola

Along with the granola, there was some different things to add to it to create a parfait.  We had different fruits, greek yogurt, maple syrup, honey, and some special toppings.  The fresh fruit we had was cantaloupe, strawberries, and black berries.  Other berries, bananas, and pineapple would be great to include too, or even a fruit salad.

granola parfait buffet easter brunch

I used some little mason jars to serve some dried fruits like coconut, raisins, dried cranberries, and also chocolate chips.  More great additions I might include include next time would be peanut butter, almond butter, different flavors of yogurt, and dark chocolate chips. 

Parfait Serving Pieces

On the table my guests had some beautiful vintage footed dessert bowls that were perfect for making their own parfait in.  Remember you want quite a small bowl for this, so choose something smaller than a cereal bowl.  Stemless wine glasses would be a great option for this as well.

easter brunch yogurt granola make your own parfait buffet

I think my guests loved the granola bar the most.  It was everyone's favourite breakfast food option.  Everyone could choose exactly what simple ingredients they wanted and suit their own taste buds.  This idea is perfect for small or large groups, since everyone can help themselves.  Infact, this is the one thing that my guests kept returning to make another parfait with their favorite ingredients, and try new combinations.

Easter tablescape

It truly was so much fun having a blogger meet up, and I think my guests had a good time too since my brunch lasted most of the day.  A sure sign of a good party is lingering guests.  This menu was really easy to put together, since a lot of it was store bought, or make ahead.  Everyone really enjoyed the food and I would recommend this easy menu for your next brunch or breakfast get together.  Finger food size was so easy to put together, and for everyone to enjoy.

With an Easter Finger Food Brunch for a Spring Feast, life really is a party!

More Inspiration

You might also enjoy our Bunny Breakfast post here.
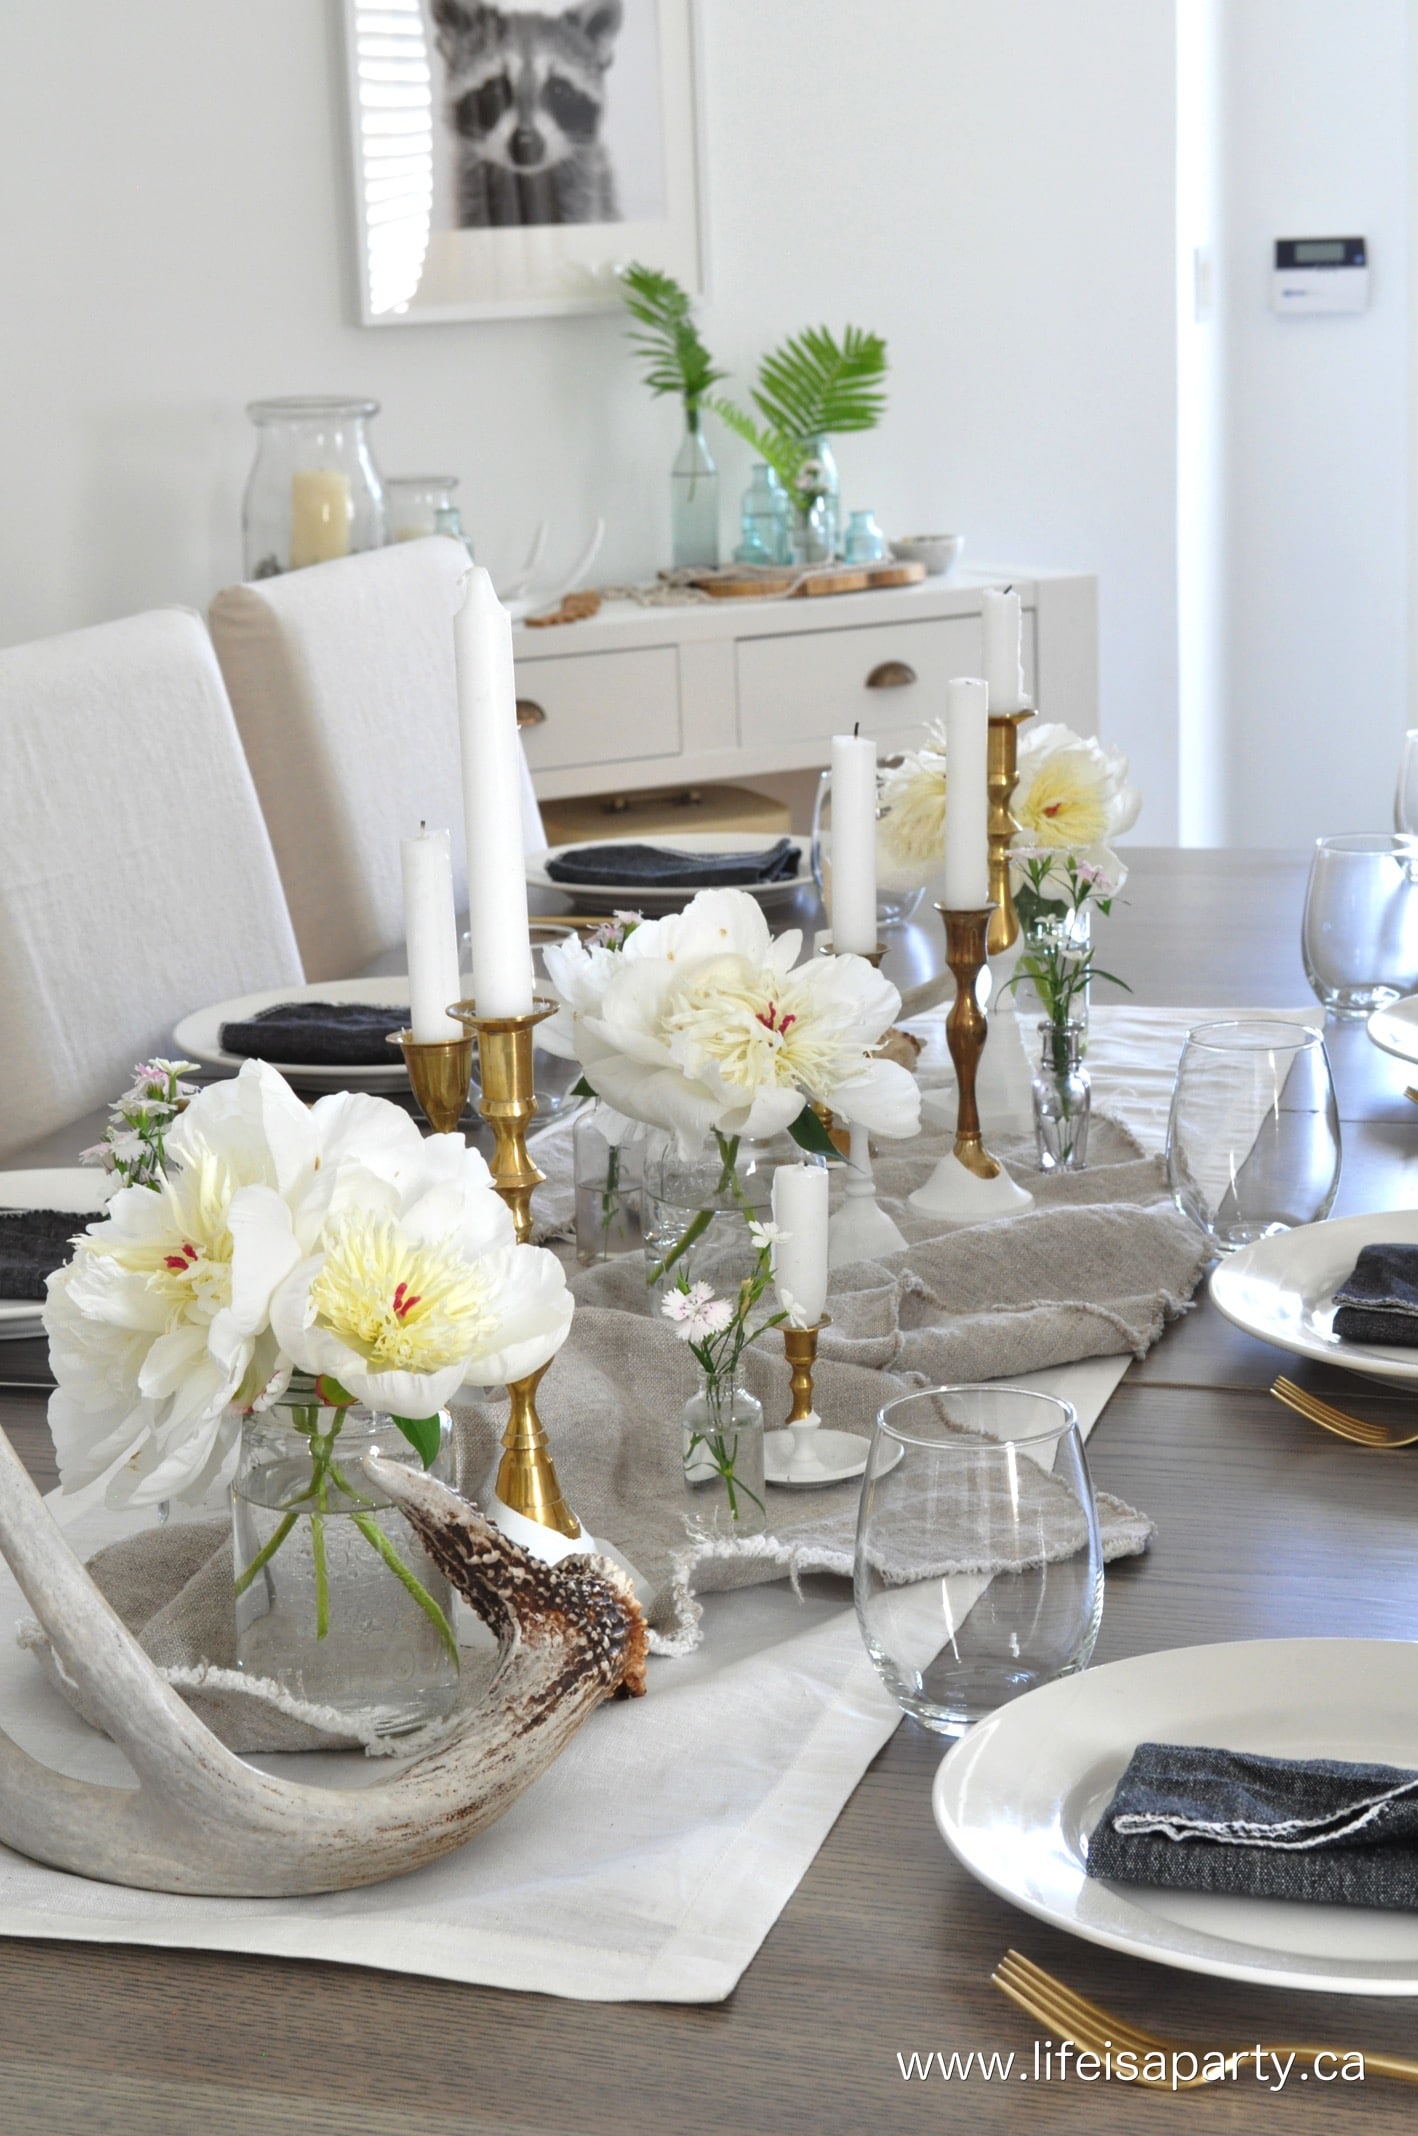
Also check out our Easter Tea Party post here.

You might also enjoy our Spring Woodland Easter Brunch here.
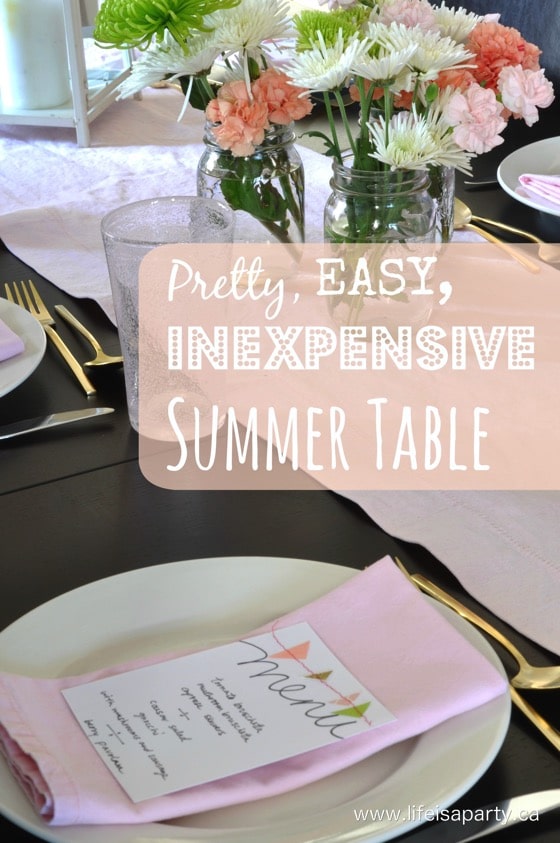
Best Southern Fried Chicken and Waffles Recipe

Mar 25, 2017 · Leave a Comment

Fried chicken and waffles.

Southern Fried Chicken and Waffles: Recipe for crispy fried chicken and fluffy waffles, with warmed maple syrup.

Fried chicken and waffles.
[feast_advanced_jump_to]

Today I'm sharing this amazing recipe for Fried Chicken and Waffles.  This recipe has it all, sweet and salty, and crunchy and soft.  It's perfect weekend food, and has become a family favorite.  

Perfect Combination

I had never tried this combination before.  I'm not from the South, in fact I live way up in Canada where chicken and waffles hasn't really been a thing.  I first tried at a restaurant, and I thought it was so good.  I mean I already loved fried chicken and I already loved waffles, but it was hard for me to imagine how they went together.  

When I was a kid I had some pretty strict food rules.  One of which was no mixing sweet and savour.  I'm glad I out grew that one…except for Hawaiian pizza, cause it's just not right, are you with me?

When I as older and tried chicken and waffles I thought they were a match made in heaven.  The waffle is soft and sweet, and the fried chicken has that crispy crust and is a little bit salty, and topped with maple syrup is just the perfect combination.

Chicken and Waffles

Fried Chicken

Southern fried chicken has to be one of the best foods there is.  There's nothing better than a crispy fried chicken piece that's nice and moist and tender on the inside.  This fried chicken recipe is first marinated in a buttermilk brine to help tenderize it and keep it moist.  The acidity in the buttermilk helps break down the protein structures in the meat and creates a more tender and soft piece of chicken.

To contrast that moist and tender chicken the breading creates the crispiest chicken skin.  The contrast between the crunchy outside breading and the soft tender chicken inside is perfect. You can make chicken strips if you prefer, but we like to use the bone-in chicken pieces because they make the best chicken that's juicy and not dried out.  The breading is a mixture of flour and spices and makes the best southern chicken.

We like to shallow fry our chicken and then finish it in the oven.  You can use a deep fryer to cook the chicken, but we prefer this method because the chicken doesn't get too dark on the outside, and then can finish cooking all the way through in the oven without fear of it burning on the outside in the fryer.  Because the chicken wings are smaller, they may be cooked through after being fried, so be sure to check them before putting them in the oven.

Waffles

The waffles are an important part of this dish.  Our waffle recipe makes the most delicious and fluffy waffles.  Beating the egg whites and folding them into the waffle batter makes them light and fluffy on the inside, with a crisp outside.  A waffle mix might be quicker, but it just doesn't create the perfect texture that making these from scratch produces.  As soon as you take these waffle iron they will be nice crispy waffles, but if they sit for too long they're start to lose some of their outside crispness, so it's best to serve them right away.

Maple Syrup

Chicken and waffles isn't always served with sweet maple syrup.  It's often served with honey.  But being I'm from Ontario, real maple syrup is a favorite and I think works so well.  If you want to add some heat to the dish you can even add a little hot sauce to your maple syrup and make it into a spicy maple syrup.  It's best to serve warm maple syrup.  Just heat it up in the microwave for a few seconds.  You don't want to add fridge cold syrup to your nice warm waffles.  

Some people find the syrup to be too sweet of an addition, but really it isn't more sweet than honey, and you can add just a little if you don't want too much sweetness.  Do make sure it's real maple syrup and not just table syrup.  The two really can not compare.    

Oil

We like to fry our chicken in peanut oil.  It has a high smoke point, so you can fry at a higher temperature.  The hot oil helps to create a more crispy coating on the outside.  If you prefer you can use vegetable oil or canola oil for frying your chicken.  Or if you or someone you're cooking for has a peanut allergy you can substitute vegetable oil or canola oil for the peanut oil.

how to make Chicken and Waffles at home

Chicken and Waffles are the perfect mix of salty, crispy chicken, and sweet, soft and fluffy waffles.

Chicken and Waffles recipe
homemade fried Chicken and Waffles

This dish is best served hot when it's first made.  If you do have leftovers, store them in an airtight container in the refrigerator, and re-heat in the oven to restore some of the crispiness.

This great recipe is such a winner and makes the best Sunday brunch food.  I like to serve it with a big kale salad with dried cranberries as a side dish.  Any salad that's sweet and tart is a great pairing.  A spinach salad with berries and poppy seed dressing, or a sweet and creamy coleslaw would be an excellent choice also.  I've served chicken and waffles to guests many times and it's always a hit.  They're sometimes not too sure at first if they've never had this combination because it's still not that common where I live.  But they always love it.  This has become a real family favourite.  It's perfect for a special occasion.  I love to serve chicken and waffles for a fun dinner party too.

Time Saving Shortcut

If we are ever short on time when making this we sometimes pick up the chicken at our favorite fast food place.  It's a great little hack if you're short of time.  Send you're partner to pick up the chicken while you make the fresh waffles, and by the time they're back your waffles should be ready and it's a quick and easy meal.  Of course the homemade fried chicken is better, but if you're in a time crunch and don't want to deep fry, but still want to enjoy this amazing a dish, this little hack might be helpful.

Recipe

Fried chicken and waffles.

Fried Chicken and Waffles

The perfect crispy fried chicken paired with soft and fluffy waffles and maple syrup.
No ratings yet
Print Pin Rate
Course: Main
Cuisine: American
Prep Time: 30 minutes minutes
Cook Time: 1 hour hour
Additional Time: 1 day day
Total Time: 1 day day 1 hour hour 30 minutes minutes
Servings: 8 servings
Calories: 505kcal
Author: Dannyelle Nicolle-Ramjist

Ingredients

For the Fried Chicken

  • 1 chicken cut up into 8 pieces
  • 2 cups buttermilk
  • 2 ½ cups flour
  • 1 ½ tablespoon Lawyer's seasoning salt
  • 1 teaspoon paprika
  • 1 teaspoon black pepper
  • 1 teaspoon dried thyme
  • ½ teaspoon cayenne pepper
  • 1 teaspoon garlic powder
  • oil for frying

For the Waffles

  • 2 cups all purpose flour
  • 1 teaspoon baking soda
  • ¼ teaspoon salt
  • 2 tablespoon sugar
  • 2 eggs
  • 2 cups milk
  • ⅓ cup butter -melted
  • ½ cup maple syrup

Instructions

To Make the Fried Chicken

  • Marinade the chicken in the buttermilk from 12-24 hours.
  • To make the breading, combine the flour, seasoning salt, paprika, black pepper, dried thyme, cayenne pepper, and garlic powder.
  • Remove the pieces of chicken from the buttermilk mixture and dip each piece of chicken into the flour mixture to coat.
  • Fry breaded chicken in a pan with a few inches of oil heated to 350 degrees, until golden brown, about 5-7 min on each side. Work in small batches of about 3 pieces, taking care not to over crowd the pan.
  • Place fried chicken on a baking sheet and finish cooking in a preheated 360 degree F oven, until cooked through. (Wings may not require the oven cooking, they may be cooked through after they're fried.). Chicken is cooked when it reaches an internal temperature of 165 degrees F.

To Make the Waffles

  • Sift together in a large bowl the flour, baking soda, salt and sugar.
  • Separate the eggs and beat the 2 egg whites until stiff peaks but not dry.
  • In a separate bowl combine the egg yolks, milk, and melted butter. Stir these wet ingredients into the dry ingredients with a few swift strokes. The batter will be slightly lumpy.
  • Fold the egg whites into the waffle batter until just combined.
  • Cook in a waffle maker.
  • Serve the waffles hot with fried chicken on top, and warmed maple syrup drizzled over top.

Nutrition

Serving: 1g | Calories: 505kcal | Carbohydrates: 77g | Protein: 16g | Fat: 14g | Saturated Fat: 7g | Polyunsaturated Fat: 6g | Cholesterol: 84mg | Sodium: 1320mg | Fiber: 2g | Sugar: 22g
Tried this Recipe? Tag me Today!Mention @LifeisaParty or tag #lifeisaparty!
Fried Chicken and Waffles

With homemade Chicken and Waffles, life really is a party!

More Recipe Inspiration

You might also like our Homemade Onion Rings recipe here.

Also check our our Homemade Potato Chips recipe here.

You might also enjoy our Marinated Flattened Chicken recipe here.
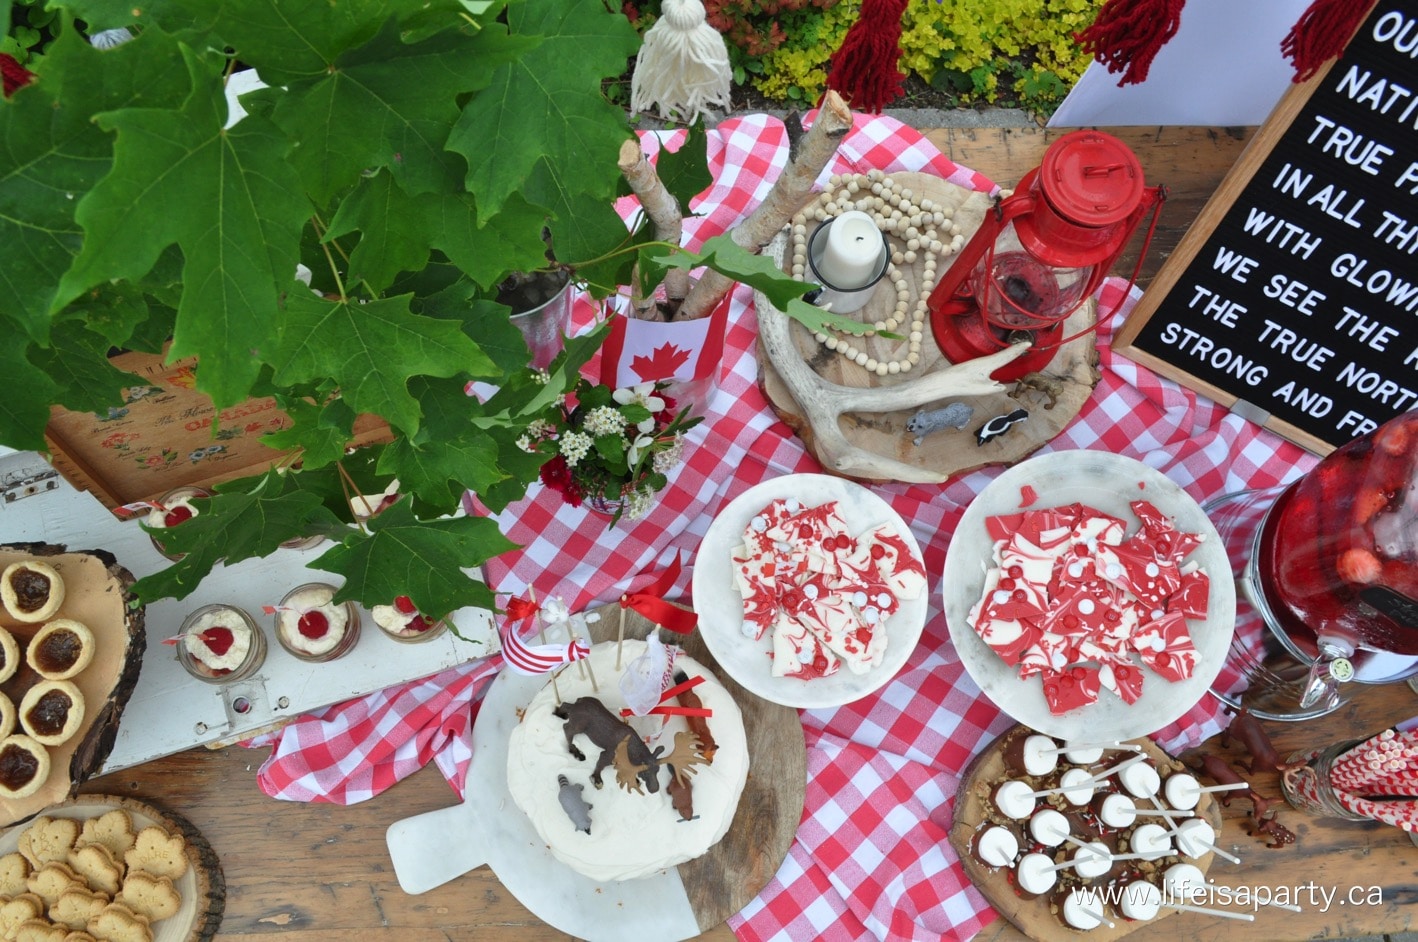
Spring Home Decor Ideas

Mar 20, 2017 · 17 Comments

Spring home decor ideas.

Spring Home Decor: A forest inspired spring home tour with lots of woodsy and nature inspired details to inspire.

Spring home decor ideas.
[feast_advanced_jump_to]

I'm so excited to be sharing my Spring decor ideas with you today.

When I started working on the Spring Home Tour, I realized I've never shared one on the blog before, although I decorate for Spring and Easter each year, so I'm extra excited to share it with you today.  I've taken tons of pictures, so I hope you'll grab yourself a coffee and enjoy.

spring home decor

Spring Home Decor in the Entrance Way

Let's get started in the entrance way.  I've added a few Spring touches to my console table.

gold leaf Easter eggs

You can see how I made the Gold Leaf Easter Eggs here, and I've hung them on some pretty pussy willows I found on a walk one day.

spring home decor

I painted a few wooden beads for a pretty pastel Spring look.  These wooden beads were a fun recycling project.  I found an old wooden bead seat cover at a garage sale and thought up-cycling the beads would be a great inexpensive way to make some pretty garland.  You can see how I made the Mason Jar Oil Lamps here.

Easter egg tree

One of my favourite little touches in my Spring decor this year are the pretty faux mushrooms.  I made these ones from some air dry clay, and they turned out so cute.  You'll also see lots more throughout the tour.

DIY clay mushrooms

Bar Cart

At the entrance of the dining room, my little bar cart is all ready for some Spring entertaining.

spring home decor

I picked up this little vintage toy truck ages ago at an antique shop.  It was  used for Christmas a few years ago, and it hasn't been out since.  I thought the pretty aqua was perfect for spring.

vintage toy truck with succulents


And, I've found the secret to beautiful succulents…faux. 😉

vintage toy truck with succulents

Dining Room

On the dining room table, I've created a little spring forest.

spring dining room table

I began with a beautiful moss runner down the centre of the table.

moss table runner


The moss was picked in the forest, and I let it dry before using it as a runner.  I wanted a woodland spring look, so I added some ferns, and birch, butterflies and mushrooms, and a few spring bulbs.

spring home decor

On the buffet, I added some pretty eggs to my wooden bowl.

Spring Home decor


Easter eggs in wood dough bowl

What could be more spring like than a beautiful bowl of eggs?

antique wood bowl with Easter eggs

I love the mix of the wood, and white and soft pastels -along with more of the moss and few pretty feathers.

antique wood bowl with Easter eggs

It's amazing how some green and fresh flowers makes everything feel alive again.

spring dining room table

Spring Home Deco in the Living Room

From the dining room, we head into the living room next.

spring home decor ideas

I've carried the spring forest feel all through the main floor, with little touches.

Spring Home Tour

Spring Mantel

This Spring Mantel is one of my favourite spots this year too.

spring home decor ideas'

I found a few free printables for the pretty antique specimen art and used some mini wooden clothes pins to attach them to a branch.

spring mantel ideas

I wanted to create the feel of a walk in the forest, and all the treasures I'd found and brought home with me.

spring mantel


More mushrooms here, some that I made out of paper mache last year.  And there's also a beautiful antler that I really did find on a forest walk this Spring.

spring mantel

There are a few little wire fairy lights too, so everything can sparkle at night.

spring mantel

Over on the over side of the room, tea and some Spring recipe ideas.

spring home decor

I'm just loving the simplicity of the wooden beads in all different sizes right now.

Spring Home Tour

I've added some pretty floral cushions for Spring too.

Spring Home decor

On the book case I've kept things pretty simple and neutral.

Spring Home Tour

I had to bring out my Spring Dioramas -see how I made them here, that are from last year.

spring dioramas

Kitchen

Next over in the kitchen, I love the Spring sunshine, now that it's back.

spring kitchen home decor

On the table, a really simple wooden trough -I think it might have been the top tray of an old tool box, and I found it at an antique market.  I've filled it with more moss, and pretty eggs, including these simple Cement Easter Eggs I made last year.

farmhouse Easter eggs

Over on my little cupboard, I've strung more of the wooden beads, for just a tiny bit of Spring colour.

spring home decor ideas


The copper houses have turned into pretty terrariums for Spring.

spring home decor

And this little nest is the perfect Spring detail.

spring home decor ideas

I seem to be completely in love with tiny mushrooms, and these little wooden ones I bought at the Christmas market this year just had to stay out to welcome Spring.

Spring Home Tour

I think because I have a new puppy, I've been out walking and exploring the green spaces and forest around my house more than ever this past year.  It's inspired me to bring the outdoors and the sense of wonder and tiny treasures inside.  I hope maybe I've inspired you a little too -get out for a walk and see what you can find.

With a pretty Spring home decor, life really is a party.

Gnocchi with Mushrooms and Italian Sausage Recipe

Mar 16, 2017 · Leave a Comment

Gnocchi with mushrooms and Italian sausage.

Gnocchi with Mushrooms and Italian Sausage: easy, semi-homemade pasta dish perfect for a family weeknight, and delicious enough for company.

Gnocchi with mushrooms and Italian sausage.
[feast_advanced_jump_to]

This Gnocchi with Mushrooms and Italian Sausage is a real family favourite.  It's easy to put together, since it uses store-bought gnocchi from the pantry, and it's so, so good.

store bought Gnocchi with Mushrooms and Italian Sausage

Gnocchi

I discovered gnocchi one day after a discussion at a playdate.  A friend of mine who comes from an Italian background was talking about what she was having for dinner.  I had only tried gnocchi once or twice before at an Italian restaurant.  

I was certainly intimidated by the idea of trying to make my own little potato pasta pillows, of homemade gnocchi.  I was surprised to hear that she bought hers in the dry pasta section of the grocery store.  And I thought that if she used pre-made gnocchi and liked it, I should give it a try too.

how to make Gnocchi with Mushrooms and Italian Sausage

My friend mentioned that she sometimes made gnocchi with a little wine, garlic, mushrooms, parmesan cheese, and sometimes a bit of cream.  I thought that sounded delicious, so that very night I picked up the ingredients, added Italian sausage, and we've been enjoying this easy meal ever since!  It was a huge hit with the whole family.  The store bought version made tender gnocchi that was so delicious with the creamy mushroom and Italian sausage sauce.  This is a delicious dinner with simple ingredients that's very quick and easy to prepare.  It's sure to become one of your favorite recipes.

pantry Gnocchi

Here's my version of the recipe, easy enough for busy weeknights, but delicious enough for company.  It's great with a green salad, nice crusty bread, and a bottle of wine.  With minimal effort, you'll have a delicious meal the whole family will love.  You will want to add this recipe to your regular rotation after you see how easy it is to make, and how delicious it tastes.

Sausage

We used mild Italian sausage in our recipe.  This makes this meal very family friendly and great for kids or anyone who doesn't like spicy food.  If want to add a little spice to your portion, you can sprinkle it with some red pepper flakes to add a little heat.  If everyone you're cooking for likes spicy food, you can use hot Italian sausages instead of mild ones.  The spicy Italian sausage are a great way to turn up the spice in this recipe.

You could also substitute turkey sausage in this recipe if you prefer it.  Or you could try a Italian chicken sausage.

Mushrooms

We did a mixture of white button mushrooms and portobello mushrooms for this recipe because they're our favorite kinds.  You can use both kinds like we did, or do all one kind, or substitute them with your favorite kind if you prefer.

one pot Gnocchi with Mushrooms and Italian Sausage
Gnocchi with Mushrooms and Italian Sausage Recipe

If you have any leftovers, store them in a sealed airtight container in the refrigerator, and reheat in the microwave.  If you do have any leftovers, it sure is a lunch to look forward to the next day.

We served our creamy gnocchi dish with a sprinkling of parmesan cheese.  It would also be delicious garnished with some fresh basil leaves.  And if you want to add some heat you can also add a sprinkle of red chili flakes.

This is a one skillet and one pot dinner too, so easy clean up.  Just another reason to love this great recipe.  The pillowy gnocchi is so delicious with the creamy sauce, tender mushrooms and flavorful Italian sausage pieces.  It's the perfect recipe for any pasta lover the next time they are craving comfort food.  This creamy sausage gnocchi is such a yummy quick dinner with a salad and garlic bread.

One Pot Gnocchi

Recipe

Gnocchi with mushrooms and Italian sausage.

Gnocchi with Mushrooms and Italian Sausage

Rich gnocchi with mushrooms and Italian sausage in a creamy wine sauce.
No ratings yet
Print Pin Rate
Course: Main
Cuisine: Italian
Prep Time: 15 minutes minutes
Cook Time: 20 minutes minutes
Total Time: 35 minutes minutes
Servings: 6 servings
Calories: 600kcal
Author: Dannyelle Nicolle-Ramjist

Ingredients

  • 16 oz. package of potato gnocchi
  • 1 lbs Italian sausage
  • 1 teaspoon olive oil
  • 10 oz white mushrooms sliced
  • 2 large Portobello mushrooms sliced
  • 1 onion diced
  • 2 garlic cloves minced
  • 1 teaspoon salt
  • ½ teaspoon black pepper
  • 1 teaspoon Italian seasoning
  • ½ cup dry white wine
  • 1 cup heavy cream
  • parmesan cheese to taste

Instructions

  • Begin by removing the sausage from the casing and frying it in a large skillet over a medium high heat until it is cooked through, crumbled, and golden brown. Remove from the pan and set aside.
  • In the same pan, add the olive oil and sauté the onions, mushrooms, and garlic until they are cooked about 5 min.
  • Add the cooked sausage back to the pan, and add the wine. Scrap up any brown bits from the bottom of the pan, bring the wine to a boil and let reduce slightly.
  • Meanwhile bring a large pot of water to the boil, and cook the gnocchi according to the package directions.
  • Add the cream and parmesan cheese to the sausage and mushroom mixture, and then add in the hot drained gnocchi. Stir to combine, and enjoy.

Nutrition

Serving: 1g | Calories: 600kcal | Carbohydrates: 41g | Protein: 22g | Fat: 37g | Saturated Fat: 17g | Polyunsaturated Fat: 21g | Trans Fat: 1g | Cholesterol: 111mg | Sodium: 990mg | Fiber: 3g | Sugar: 5g
Tried this Recipe? Tag me Today!Mention @LifeisaParty or tag #lifeisaparty!
How To Make One Pot Gnocchi with Mushrooms and Italian Sausage

With Gnocchi with Mushrooms and Italian Sausage, life really is a party!

More Recipe Inspiration

You might also like our Easy Lasagna Recipe here.

Easy Lasagna with cottage cheese: this is a great make-ahead, and it freezes well. Easy to put together, and sure to be a family favourite.

Also check out our Tortellini and Italian Sausage Soup Recipe here.

You might also enjoy our Unstuffed Zucchini Recipe here.

Unstuffed Zucchini: the perfect quick and easy, one pot weeknight meal. We made cooking time quicker using zucchini zoodles.

Bath Bomb Recipe for Kids with a Toy Inside

Mar 14, 2017 · Leave a Comment

DIY bath bombs with a toy inside.

Bath Bomb Recipe For Kids with a Surprise Toy Inside: the perfect DIY fizzy, scented bath bomb with a toy inside! Kids will love.

DIY bath bombs with a toy inside.
[feast_advanced_jump_to]

My little girls love taking baths, and playing in the bath.  If your kids do too, then this is the kids bath bomb recipe with a toy inside is the perfect little treat for them.  We made ours for Easter with an Easter egg mold, but you can make them for any time of year with a regular round mold.  Not only will your little love having a hot bath with a bath bombs fizz, but they'll get so excited when they discover that there's a small toy hidden inside!  Bath time just got better.

how to make your own bath bomb

This treat offers a beautiful scented and fizzy bath, with the fun of a surprise little toy inside.  What could be better?  And they're simple enough to make either for them for a surprise or with them.  Your kids will love doing this fun project and helping to choose different colors and scents for their own bath bombs.  

Kid Friendly Ingredients

The best part of making your own DiY bath bombs is that you can make thiem with kid friendly, safe, simple ingredients.  Commercial bath bombs sometimes contain harsh chemicals, and can even lead to allergic reactions for sensitive skin.  Our DIY bath bombs recipe is full of natural ingredients.  If your child has particularly sensitive skin you can even choose to leave out any scent.

How Bath Bombs Work

Bath bombs get the name bomb because of the fizz that happens when they hit the warm water.  When the sodium bicarbonate and the citric acid hit the water they have a chemical reaction that creates carbon dioxide and makes the wonderful fizz effect.  That's why these are the main ingredients in our bath bomb.  The bicarbonate of soda and citric acid ingredients and the chemical reaction are totally safe for your skin. The color is added for interest, the essential oil adds a soothing scent, and the olive oil is good for your skin.  The witch hazel is an important ingredient in your bath bomb too.  The witch hazel helps bind the ingredients together, and create the sand like texture so that you can form it into the bath bomb mold.  Over time the witch hazel evaporates, living the dry hardened bath bomb.

Did you know that bath bombs have a shelf life?  Citric acid and baking soda oxidize over time and will react less with water.  Be sure to use up your bath bombs within six months for the best results.

diy bath bomb with a toy inside

Handmade Gifts

Homemade bath bombs also make the most perfect gifts.  Choose little toys that your recipient will love.  Small plastic toys work really well.  We used bunnies for Easter, but look for dinosaurs for the dinosaur lover, fairies, unicorns, even small cars would all work really well for this and make a great gift.

Toys

I used some sweet little Easter bunny plastic toys I found at the dollar store, but you could certainly personalize it for someone special.  How about mini dinosaurs for the dino lover you know, or shopkins, or little plastic unicorns?  Little cars would be a fun choice too.  So many fun possibilities.  When you're choosing your toys be sure to look for something small enough to fit inside your mold with some room to spare around it.  You need a good amount of the bath bomb around the toy to make sure that it holds together well and doesn't fall apart when you unmold it.  

You also need a toy that is waterproof.  The toy will be revealed as the bath bomb dissolves in a warm bath.  So make sure your toy is something that can get wet.  Plastic items work really well.

Easter Egg Bath Bomb with a Surprise Toy inside

Recipe

DIY bath bombs with a toy inside.

Kids Bath Bomb Recipe with a Surprise Toy Inside

No ratings yet
Print Pin Rate
Cook Time: 15 minutes minutes
Additional Time: 1 day day
Total Time: 1 day day 15 minutes minutes
Servings: 1 Bath Bomb
Author: Dannyelle Nicolle-Ramjist

Materials

  • ½ cup citric acid we found ours at the health food store in bulk
  • ¼ cup baking soda
  • 1 tablespoon olive oil
  • witch hazel -a few sprays from a spray bottle
  • food colouring -few drops
  • scented oil -few drops
  • plastic Easter egg to use as a mold or a round bath bomb mold
  • small toy for the surprise

Instructions

  • Combine the dry ingredients of citric acid and baking soda in a mixing bowl.
  • In a separate wet ingredients small bowl, combine the olive oil, food colouring, and scented oil.
  • Slowly add oil mixture to dry mixture until it reaches the consistency of wet sand.
  • To bring it all together, spray lightly with a small amount of witch hazel.
  • Pack the bath bomb mixture tightly into the bottom of the mold or plastic Easter egg and add the toy surprise to the middle. Fill the other half of the mold completely and click it together with the toy inside. Let it set for 24 hours.
  • After 24 hours, open the bath bomb molds or Easter egg and carefully remove the bath bomb. Store these in an dry place, in an airtight container.
kids bath bomb recipe

The Bath Bomb Mold

We made our bath bombs for Easter and thought it was so fun to reuse some plastic Easter eggs as the molds.

diy bath bomb with toy inside

Variations

When it comes to adding variations to your easy bath bomb recipe feel free to try lots of different  colors and scents.  We made some light pink, some light blue. You can even make different layers of color in your bath bath to create a striped effect.  To create the different colors just add a few drops of food coloring to the liquid mixture. 

The sky is really the limit when it comes to combining different colors and scents. We made our bath bombs with either vanilla and lavender essential oil.  It only takes a few drops of essential oils to add a beautiful scent.  This creates a wonderful sensory experience for kids.  Sweet almond oil is another great choice.

Another fun idea is to add some dried flower petals to your homemade bath bomb recipe.  Real dried lavender or rose petals make a fun addition and add a little magic and so much fun.

how to make a bath bombThese are a little fiddly, and we did break some un-moulding them.  If you're worried an making the Easter egg version, you could just give them inside the plastic Easter egg.  We did get the hang of it though, and had lots of successes too. 

kids bath bomb recipe

We wrapped some of ours up in cellophane bags and tied them with ribbon.  This makes them perfect for gift giving with a cute bow and gift tag.

diy easy bath bomb recipe

We made ours in the shape of an Easter egg to make the perfect addition to any Easter basket.  Another idea is to use a heart shaped mold for Valentine's Day with a special Valentine's Day toy inside.  This DIY bath bomb recipe is so fun and easy to make that they'd be a great craft idea for kids to make at summer camp, or at a club.  You could also make them at school for a Mother's Day gift, just leave the toy out, and let the children pick food colors and a scent they think their mother will enjoy.  Who won't love homemade beauty products as lovely thoughtful gift?  If you're making these in larger quantities be sure to look for the citric acid at the health food store, were we able to buy just the amount we needed in the bulk section.

Easter Egg Bath Bomb with a Surprise Toy inside

With homemade bath bombs with a surprise toy inside, life really is a party!

More Easter Inspiration

Also check our Bunny Bait Easter Trail Mix here.

Bunny Bait Easter Trail Mix -trail mix, with some fun Easter additions like graham cracker bunnies, and Easter eggs, also a free printable Bunny Bait label.

You might also like our Little Baker's Easter Basket here.

Also check out our Bunny Treat Box here.

DIY Leather Feather Necklace or Earrings

Mar 9, 2017 · Leave a Comment

How to make a leather feather necklace or earrings.

DIY Leather Feather Necklace: Use leather, gold leaf and some gold chain to create a simple and stunning leather feather necklace.

How to make a leather feather necklace or earrings.
[feast_advanced_jump_to]

This Leather Feather Necklace with Gold Leaf is the perfect spring accessory.  It was really fun to make and perfect for wearing, or gifting.  It's a great way to use up leather scraps.  You can make it in lots of different colors for a really fun look.

DIY Leather Feather Necklace

It's really easy to make, with just a few simple supplies.  The main item you'll need is a small piece of leather.  This is great way to use any leather scraps.  Look for bundles of scrap leather pieces at craft stores or online.  Another source of leather can me upcycling old leather goods, like handbags, or wallets.  You only need small pieces, so one bag can give you a lot of material.  Use your own or look for them second hand at garage sales or thrift stores.

Matching Earrings

We made a long necklace with our leather feather, but you could also make earrings.  To make earrings you will need an earring hook, and two leather feathers.  Try to make your two leather earrings as similar as possible so that the two earrings match.  Instead of attaching a gold chain to the top to create the necklace, attach the earring hook to the top.  You may need an extra small jump ring to ensure that the feather hangs facing outward.

Stitching Detail

We've added a stitching detail to our feather.  This stitching adds a lot of dimension to the leather feather.  If you don't have a sewing machine, you can leave this step out for a more plain look.  We used a regular sewing machine and regular thread to stitch the leather.  Do practise on a small scrap of leather to ensure your settings are correct before stitching your feather.  The sewing machine will make holes in the leather, and unlike fabric, even if you remove the stitching if you make a mistake, the holes will still show.  You have just one shot at getting the stitching perfect, so be sure to work carefully.  I liked the look of the stitching in a slight "V" pattern, going doing down, and then back up at a very slight angle.  You can do the same, or just do one line that is straight down the center of the feather.  Tie your thread ends off in neat knots at the back of the feather and snip off the loose ends for a clean finish.

We used black thread on black leather, but you can choose to use a contrasting thread color, if you want it to stand out more.  You could even use a metallic thread for a different look.

how to make a leather feather

Gold Leaf

We added a fun gold leaf detail to our leather feather.  This step is optional.  You could use silver leaf, or rose gold leaf as a variation.  We wanted a spoty, not quite covered look, so to accomplish this look be sure to apply the adhesive with just a few dabs here and there and don't completely cover it.  The gold leaf adhered very well to the leather and added a fun detail, and a little glam to the jewelry piece.

Chain Tassel

We also added a gold tassel made with a few lengths of gold chain to our feather.  To make it we cut three extra pieces of gold chain using wire cutters.  We varied their lengths for interest, but made them around the length of the feather.  The chains are attached to the feather using a jump ring.  Open your jump ring with small jewelry pliers and then after adding the chain, carefully close it to secure your tassel.  This detail is optional.  We used matching gold chain for the tassel detail and the necklace.  You could also use silver, or rose gold for a different look.

Leather Feather Necklace

Recipe

How to make a leather feather necklace or earrings.

Leather Feather Necklace or Earrings

No ratings yet
Print Pin Rate
Cook Time: 30 minutes minutes
Total Time: 30 minutes minutes
Author: Dannyelle Nicolle-Ramjist

Equipment

  • scissors
  • leather hole punch
  • Sewing Machine

Materials

  • Leather
  • Gold Leaf
  • Adhesive for Gold Leaf
  • Gold Chain
  • Jump Rings
  • Thread

Instructions

  • To begin with, create a feather template you're happy with and use it to cut out your leather. Look for feather patterns online, or draw your own. We liked using sharp scissors for cutting, but you can also use a x-acto knife if you prefer.
  • The next step is to punch a hole in the top of the feather. We used a leather punch for this and it worked really well.
  • Apply gold leaf adhesive to the bottom of the leather feather with a small paint brush, creating a spotty coat so that some of the leather will still show through. Dap off any excess with a paper towel. Wait for it to set, according to the manufactures directions, and then apply gold leaf. This step is optional. You can also use silver leaf, or rose gold leaf for a different look. Or leave the leaf off all together.
  • Using a sewing machine and coordinating thread (or contrasting for a different look), stitch a line down and back up the middle of the feather. Pull threads through from the front to the back and tie off the ends on the back to finish.
  • Cut fringe along the side of the feather with sharp scissors, stopping short of your stitch line, on each side. Try to angle the slits downward to look like a real feather.
  • Using an open jump ring, add some pieces of gold chain in varying lengths to create a tassel at the top of your feather. Next add a long chain to the top jump ring as a necklace and then carefully close the necklace with small jewelry pliers.

How To Make A Leather Feather Necklace:

Leather Feather Necklace
How to make leather feather

I can't wait to wear this pretty feather necklace with some spring outfits.  It would also be great to make two and turn them into earrings.  These are perfect for wearing yourself or making for your best friend or girl friends as handmade gifts.  These one of a kind custom feathers would even be a great item to make to sell at craft fairs or a place like Etsy.

how to make a feather out of leather

With a Leather Feather Necklace or Earrings like this, life really is a party!

More Inspiration

You might also like How To Make A Leather Cuff Bracelet here.

Also check out our Macrame Feathers here.

You might also enjoy our Wood Feathers here.

Bread Machine Mini Nutella Filled Donut Recipe

Mar 7, 2017 · Leave a Comment

Bread machine donut holes with Nutella.

Nutella Filled Donuts: This easy donut dough is made in the brad machine, mini sized, covered in powdered sugar and filled with Nutella.

Bread machine donut holes with Nutella.
[feast_advanced_jump_to]

If you're a donut lover, and a Nutella lover, these Nutella Filled Mini Donuts are a match made in heaven!  They are sweet little bites of sugary, chocolatey, hazelnutty goodness.  What could be better than fresh homemade nutella donuts?

Nutella Mini Donuts

Bread Machine Donut Dough

These mini donuts are made with an easy bread machine dough.  It's very versatile.  I've used the same donut dough that I used for my mini jelly donuts -see them here.  This time they're rolled in powdered sugar, and filled with Nutella.

I like making the dough in a bread machine because it's so easy.  The bread machine does all the hard work for you.  Just add your ingredients and let the machine make the dough for you.  Set your bread maker to the dough setting and layer in the ingredients.  It's important when you're using a bread maker to layer in the ingredients exactly how the recipe says to.  You want your yeast on the very top so that it activates properly.

We aren't using the bread machine to bake the donuts.  We're just making the dough in the bread maker, and then shaping and frying the donuts separately.  

bread machine donut dough

Without A Bread Maker

Even if you don't have a bread machine you can also make this dough my hand.  Start by adding your warm water, warm milk, sugar, and yeast into the bowl of a stand mixer or in a mixing bowl.  Let it set until it begins to get foamy.  Add the remaining dough ingredients eggs, butter, flour, and salt and mix together on low, scape down the sides of the bowl, and mix again.  Or in a mixing bowl use a wooden spoon to mix all the ingredients together.  

Next knead the dough by hand, or with the dough hook attachment in your stand mixer for 5-7 minutes.  Next let your dough rest in a greased bowl that's covered in a warm spot to let the dough rise until it has doubled in size, about 1.5 hours.  After that the dough is ready and you can follow the recipe below for shaping, second rise, frying, and filling the donuts.

Nutella filled donuts from the bread machine

Frying Your Donuts

These donuts are best deep fried in oil.  This recipe is not meant to be baked or cooked in a air fryer.  It is easiest to fry these in an at home deep fryer.  These are not too expensive and you buy them anywhere that sells kitchen appliances.  They make it much easier to fry donuts because they have a built in thermometer that regulates the temperature of the oil and keeps it even.

You can use a pot of oil on a stove to fry these donuts.  Be sure not to over fill the pan with oil.  Also do use a candy thermometer on the side of the pan to monitor the temperature of the oil.  Adjust your heat accordingly to try and keep the temperature as even as possible.  If you find that the donuts are browning quickly on the outside but still raw in the middle, your oil is too hot.

We like to fry in peanut oil.  It has a high smoke point and also doesn't transfer the tastes of other food, so you can reuse the oil for frying other things without affecting the taste.  You can also use vegetable oil, if you prefer it for deep frying.

Nutella filled mini bread machine donuts

Sugar Coating

We rolled our donut holes in powdered sugar.  We think the powdered sugar and the nutella filling go perfectly together.  You can also roll your hot donuts in regular granulated sugar if you prefer, or even cinnamon sugar.

Filling Your Donuts

These donuts are filled with Nutella inside.  Look for a special donut filling tip (Tip #230)  to add to your icing bag.  This tip is extra long and makes filling these little donuts so much easier.   You can also use this tip for other fillings like jam and custard.  

You want to completely fill, but not over fill or under fill your donuts.  Fill your first one and then break it open to make sure it's filled enough and adjust the feel and pressure accordingly until you hang of it.

how to make Nutella filled donuts

Storage

These donuts are best eaten the day they are made.  If you have leftovers you can store them in an airtight container at room temperature.  

You can also store the unbaked dough in the fridge for a day ot two.  This is a great way to keep them if you don't want to eat them all at once, because fried donuts really taste best when they're fresh.  We fried up half a batch of the dough and made these donuts, and used the other half of the dough for jelly donuts the next day -see how to make the jelly donuts here.

Nutella filled donuts

These are best eaten the same day they're made….in my experience, it's not a problem. 😉

easy nutella donut recipe

These would be a really sweet addition to any special occasion, and they make a brunch extra special, they're also amazing on Christmas morning, Easter morning, Father's day breakfast -really anytime is a great time for amazing nutella donuts.  These homemade donuts are stuffed with hazelnut spread and rolled in powdered sugar are really the most delicious treat.  

If you've never made homemade donuts this nutella donuts recipe is worth a try.  Using the bread machine takes most of the hard work out of this recipe.  Just add your ingredients, let the bread maker do its thing, and then you just have to roll out, fry, and fill the donuts.  They are definitely worth the effort.

Recipe

Bread machine donut holes with Nutella.

Bread Machine Mini Nutella Filled Donut Recipe

Light and fluffy mini donuts filled with creamy and rich chocolate hazelnut Nutella filling.
No ratings yet
Print Pin Rate
Course: Desserts
Cuisine: American
Prep Time: 20 minutes minutes
Cook Time: 20 minutes minutes
Additional Time: 2 hours hours 30 minutes minutes
Total Time: 3 hours hours 10 minutes minutes
Servings: 60
Calories: 70kcal
Author: Dannyelle Nicolle-Ramjist

Ingredients

  • ¾ cup lukewarm milk
  • 2 tablespoons warm water
  • 1 egg beaten
  • 3 tablespoons butter
  • ¼ cup white sugar
  • ½ teaspoon salt
  • 2 ½ cups all-purpose flour
  • 2 ¼ teaspoons 1 pkg. active dry yeast
  • oil for frying
  • 1 cup powdered sugar
  • 1 ½ cups Nutella

Instructions

  • When making dough in a bread maker, the order the ingredients are added in is important. Add ingredients layer by layer, and do not mix. For the first layer in the bread maker, add milk, water, and beaten egg. Next add the butter, sugar and salt. Finally add the flour, and the yeast as the last ingredient. Set bread maker to dough setting and start the machine.
  • When the dough is finished, roll dough out using a rolling pin on a lightly floured surface to about a ½ inch thick. Use small circle cookie cutters to cut out the donuts. Reroll your scapes and cut out the donuts once more. Lay the donuts on a greased cookie sheet, cover with plastic wrap and allow to rise around 30 min. in a warm place.
  • Fry donuts in oil. The oil temperature should be 350 degrees, using a deep fryer or a pot of oil on the stove with a candy thermometer in it to check the temperature. Fry the donuts on one side until they are golden brown, then flip over and cook over side. (If the outside is too brown and the middle isn't cooked, the temperature of your oil is too hot -you will have to watch the temp as you go, and adjust as needed, or use a deep fryer.) Fry the donuts in batches so you do not overcrowd the pan and cool off the hot oil too much. Use a slotted spoon to remove them and let the excess oil drain off.
  • Roll the hot donuts in powdered sugar to coat them, when they're cool. To fill the donuts with Nutella, wait until they are cool, then use a piping bag with a #230 tip to pipe the Nutella into the middle. These donuts are best eaten the same day they're made.

Nutrition

Serving: 1g | Calories: 70kcal | Carbohydrates: 10g | Protein: 1g | Fat: 3g | Saturated Fat: 2g | Cholesterol: 5mg | Sodium: 27mg | Sugar: 6g
Tried this Recipe? Tag me Today!Mention @LifeisaParty or tag #lifeisaparty!
how to make donuts with the bread machine

With homemade nutella stuffed donuts, life really is a party!

More Donut Recipes

You might also like our Honey Cruller Donuts recipe here.

Also check out our Jelly Donuts recipe here.

Bread Machine Jelly Donuts: mini heart shaped jelly donuts, with an easy to make bread machine dough. Perfect for Valentine's Day dessert, or anytime.

You might also like our Mini Brownie Donuts recipe here.

How To Make A Ploughman's Lunch with an Irish Twist for St. Patrick's Day

Mar 3, 2017 · 1 Comment

Irish ploughman's lunch with cheese, ham eggs, bread and apple.

Irish Ploughman's Lunch: The perfect easy and delicious way to celebrate St. Patrick's Day, with a really simple Brown Irish Soda Bread recipe included.

Irish ploughman's lunch with cheese, ham eggs, bread and apple.
[feast_advanced_jump_to]

Yesterday I shared by St. Patrick's Day table and bar cart, and today I'm sharing the food.  We had a delicious Ploughman's Lunch with an Irish twist.  It's perfect for celebrating St. Patrick's Day -easy, and so, so delicious. You might also like our Irish Beef, Guinness, and Mushroom Pie Recipe for celebrating St. Patrick's Day. You might also like our St. Patrick's Day Tablescape here.

Irish Ploughman's Lunch

What's A Ploughman's Lunch?

A traditional ploughman's lunch is served all over the UK.  It's real pub grub.  Some say it was made popular in the 1950's in Britain when the cheese bureau at the time popularized it to help with cheese sales.  Other's say it was the milk marketing board in the 1960 in a campaign to promote cheese.

A ploughman's lunch usually consists of some classic cheese, good bread, and cold meat, sometimes hard-boiled eggs, and condiments like pickled onions, english mustard, or pickle.  It also sometimes includes a bit of fresh fruit like an apple or salad or vegetables like peppery radishes, cherry tomatoes,.  A ploughman's lunch was commonly served in local pubs as a lunch time meal accompanied by a glass of ale.  It is a British classic served all other the English countryside, and at every traditional pub.  It's quite a simple meal, but it really is the perfect combination of robust flavors.

The name ploughman's lunch is because it's associated with the substantial mid day meal served to agriculture workers, and it dates back hundreds of years in England, much earlier than the 1950's or 60's.  People had been eating a traditional combination of a thick wedge of crusty bread, English cheese, and beer in English pubs or at home for as long as anyone can remember.  Unfortunately the ploughman's lunch had fallen out of favour during rationing times during WW1 and WWII, when they didn't have the resources to make it.  The advertising campaigns were to bring it back into popular use.  They worked very well.

Irish Twist

We've put a fun Irish twist on ours with some special Irish ingredients, making it the perfect meal for celebrating St. Patrick's Day with friends.

Ploughman's Lunch with an Irish twist

Ingredients

  • Bread

We started out first with some homemade Brown Irish Soda Bread.  This recipe is easy and delicious.  I originally had this recipe at my sister's house.  She got the recipe from a friend of hers after having it many, many times at her house.  Those are always the best kind of recipes.

This bread uses soda as the raising agent, not yeast, so it's quick and easy to make.

homemade Irish soda bread recipe

Recipe

Brown Irish soda bread recipe.

Brown Irish Soda Bread

Rich and slightly sweet brown bread.
5 from 1 vote
Print Pin Rate
Course: Main
Cuisine: Irish
Prep Time: 10 minutes minutes
Cook Time: 1 hour hour
Total Time: 1 hour hour 10 minutes minutes
Servings: 16
Calories: 208kcal
Author: Dannyelle Nicolle-Ramjist

Ingredients

  • 4 cups whole wheat flour
  • 1 ⅓ cups all-purpose flour
  • 1 cup brown sugar
  • 1 teaspoon salt
  • 4 teaspoon baking soda
  • 4 cups buttermilk

Instructions

  • In a large bowl combine all the dry ingredients: both flours, brown sugar, salt, and baking soda.
  • Add in the buttermilk and gently mix to combine. Do not knead or over mix.
  • Grease two 9x5 loaf pans, and divide the batter evenly between them. Bake at 350 degrees for one hour. (I made mine round in two cake pans, and reduced the cooking time slightly because they were more shallow. Bake until the tip of a knife comes out clean.)

Nutrition

Serving: 1g | Calories: 208kcal | Carbohydrates: 44g | Protein: 7g | Fat: 1g | Polyunsaturated Fat: 1g | Cholesterol: 2mg | Sodium: 580mg | Fiber: 3g | Sugar: 14g
Tried this Recipe? Tag me Today!Mention @LifeisaParty or tag #lifeisaparty!
Brown Irish soda bread recipe
  • Irish Cheese

Next along with our amazing Irish Soda Bread, we knew we needed some Irish cheese.  A traditional ploughman's lunch uses English cheddar so as part of our Irish twist we looked for some Irish semi-hard cheese.  I found some good varieties at the local grocery store

  • Kerrygold Dubliner Irish Cheddar Cheese
  • Blarney Castle Gouda
  • Bradbury's Mature Irish cheddar.
Irish Ploughman's Lunch idea

I feel like I have a special connection to Ireland, although I'm not Irish and I've never been there.  My best friend, Heather, is from Dublin.  She's passed onto me a certain appreciation for all things Irish.

how to make an Irish Ploughman's Lunch
  • Irish Butter

We were discussing Irish butter in preparation for the ploughman's lunch.  Unfortunately you can't buy Irish butter in Canada, something to do with the milk pasteurization laws here (but for my American readers, you should be able to find Kerrygold).

As we discussed Irish butter and what made it better we came up with the milk fat content being higher, and the cow's being grazed on grass -which is a certain problem here in Canada where the grass is under the snow for half the year.

I was able to find a few substitutes though.  We had one grass fed cows butter, and one with a European style butter with a higher milk fat content.  They were a splurge, but so, so yummy, and really fun to hunt down for a special occasion like this.

Irish Butter
  • The Rest Of The Ploughman's Lunch

We also served:

  • a generous slice of carved ham
  • crisp slices of apple,
  • hard-cooked eggs.

Lastly we also needed some condiments,

  • a good mustard
  • pickled onions
  • and traditional Branston pickle, or any good chutney would be great.

We served our Irish inspired ploughman's lunch on individual cheese boards, which worked really well.  You can either serve the condiments and butter on each individual board, or have them available in the middle of the table for everyone.

Irish Ploughman's Lunch condiments

Irish Beer

The traditional accompaniment to the ploughman's lunch is a pint of beer, which is why it's so popular on a pub menu.  So we decided to go with

  • Irish Guinness, which is a very dark beer,
  • and Irish hard apple cider, both are favourites around here.

Any Irish beer would be a great addition to this lunch.

St. Patrick's Day Irish Ploughman's Lunch

In short, this is the perfect easy no cook meal for a party.  The ingredients are best served at room temperature.  Bake your bread and cook your ham ahead of time and assemble this lunch in a matter of minutes.  You can sit a long time, savour good simple food, and then have another pint and another story in the Irish way.

St. Patrick's Day party ideas

Frequently Asked Questions

What's the difference between an Irish ploughman's lunch and a traditional one?

We used Irish ingredients, including Irish cheddar, Irish soda bread, Irish butter, and served it with Irish beer.

How is a ploughman's lunch different from a charcuterie board.

A ploughman's lunch is more simple. It uses fresh bread instead of crackers, and usually a cold roast meat, or pork pie. Where as a charcuterie board is usually an assortment of cured meats.

More St. Patrick's Day Inspiration

  • St. Patrick's Day Burgers with an Irish Twist
  • Steak Guinness and mushroom pie with golden puff pastry and rich gravy on white plate.
    Beef Steak, Guinness, and Mushroom Pie Recipe
  • Scotch eggs sliced in half showing the hard boiled egg center on a white plate.
    Homemade Scotch Eggs Recipe
  • Banoffee Pie Recipe: with toffee made from condensed milk, bananas, and whipped cream combined into a pie this dessert is rich and delicious.
    Best Banoffee Pie Recipe

With an Irish Ploughman's Lunch to celebrate St. Patrick's Day, life really is a party!

If you tried this Irish Ploughman's Lunch or any other ideas on my blog please let me know how it went in the comments below. Thanks for visiting today!

St. Patrick's Day Party

Feb 28, 2017 · 2 Comments

St. Patrick's Day party decor, menu, and drinks.

St Patrick's Day Party -modern and simple ideas for decor and a festive St Patrick's Day Bar Cart for entertaining.

St. Patrick's Day party decor, menu, and drinks.
[feast_advanced_jump_to]

It's almost St Patrick's Day, and today I'm bringing you some inspiration for celebrating with our St Patrick's Day Party.  This beautiful tablescape is the perfect modern, and simple party decor.

St Patrick's Day Party decor

Moss Table Runner

I started out with this amazing moss table runner.  I went hunting for moss in the forest and found some great pieces.

They were really wet, since it's spring, so I dried them out to create this beautiful runner for the table.

You could also pick some up at the craft store.

St Patrick's Day Party table ideas

I wanted to make sure that my dining table didn't get damaged at all, so I started out with a strip of clear cello wrap to protect the table, and then laid out the moss pieces on top.

modern St Patrick's Day party decor

I picked up some simple white candles at the dollar store and cut a few holes in the moss where I placed them to make sure they weren't too tippy.

St Patrick's Day Party

Along with the candles, I sprinkled some leprechaun gold -aka chocolate coins left over from Christmas stockings.  Yum.

St Patrick's Day Party Table

More St Patrick's Day Party Decor

On the buffet, I added some simple honeycomb balls and paper lanterns for a modern festive feel, along with a little light box message.

St Patrick's Day Decor

St Patrick's Day Party Bar Cart

I also thought it would be fun to set up a St. Patrick's Day bar cart.

St Patrick's Day drinks

I love setting up little drink stations like this for a party so guests can help themselves.

St Patrick's Day Party Bar cart

On the bar cart, we served some of our Irish favourites -Guinness and Magners Irish Cider.

St Patrick's Day Party Bar Cart

It's fun to add a few St Patrick's Day details, like shamrocks, my "I feel lucky" DIY St. Patrick's Day artwork, and some fun paper straws.

St. Patrick's Day Party

And for some after dinner coffee, we were sure to include some Baileys Irish Cream.

St. Patrick's Day Party

I had so much fun setting up our festive table, and preparing for friends to visit.  

St. Patrick's Day Party

It looked so pretty with all the candles lit!

With a modern festive St Patrick's Day Party table and decor, life really is a party!

More St. Patrick's Day Inspiration

Check out all the food from our party - Irish Ploughman's Lunch.

You might also like our St Patrick's Day Table here.

St. Patrick's Day Table: a mix of vintage and modern touches with lots of green for the perfect St. Patrick's Day table decorations.

Also check out our St. Patrick's Night In -Dinner and Movie Ideas for St. Patrick's Day here.

St. Patrick's Night In -Dinner and a Movie Ideas for St. Patrick's Day: recipes, Irish drink ideas, and favourite top Irish films.

Pancake Sugar Cookies with Maple Syrup Icing

Feb 23, 2017 · 2 Comments

Pancake sugar cookies.

Pancake Sugar Cookies: these are pancake sugar cookies are perfect for a Pancake Tuesday celebration, or a Pancakes and Pyjamas party.

Pancake sugar cookies.
[feast_advanced_jump_to]

These Pancake Sugar Cookies are the perfect way to celebrate Pancake Tuesday!  They would also be really great as an addition to a pancakes and pajamas party.  Made from simple ingredients these cookies are so tasty and they really look like a little stack of pancakes.

sugar cookie pancakes

Time Saving Idea

This is a great easy cookie recipe, the sugar cookie recipe my Grandma always used, for every occasion.  It was truly one of her favorite cookie recipes. But if you don't have time to make sugar cookies from scratch you could also substitute in a sugar cookie mix, or ready bake sugar cookie dough to make your pancake cookies.  These shortcuts should give you enough time to work on the best party -decorating these adorable cookies.  We love simple ways of speeding recipes like this up when we're in a time crunch.

Pancake Sugar Cookies for Pancake Tuesday

Pancake Sugar Cookies

To make the pancakes cookie base, I cut out simple round circles from the sugar cookie dough.

yellow icing

Icing Our Pancake Cookies

After the cookies were baked to a golden brown and cooled, it was time to make them really look like pancakes.  I started out with the "butter".  To make it, I made a mixture of icing sugar and milk and mixed it to a paste consistency.  Then I added in yellow food colouring so it looked a little like butter.

yellow icing for sugar cookies pancakes

To make the pats of butter for the top of the pancake stack, I rolled out the frosting between two pieces of plastic wrap, and then cut it into little squares with a knife.  I set the whole piece in the fridge for a little while to firm up, and went on to the icing that we would use for the syrup.

Pancake Sugar Cookies for Pancake Tuesday

For the syrup frosting, I made a really runny icing, thinned out with milk, and maple syrup. To make it darker I added a few teaspoons of cocoa powder, and a little bit of yellow food colouring.   I wanted it to be runny enough to pour off of a spoon easily.

sugar cookie pancakes

To assemble the pancake sugar cookies, I stacked two cookies together, spooned on some of the syrup icing so that it drizzled off the edge like a real pancake stack, and added a pat of butter to each one.

sugar cookies that look like pancakes

Recipe

Pancake sugar cookies.

Pancake Sugar Cookies

Delicious soft sugar cookies decorate with maple syrup to look like little pancakes.
No ratings yet
Print Pin Rate
Course: Desserts
Cuisine: American
Prep Time: 15 minutes minutes
Cook Time: 20 minutes minutes
Additional Time: 20 minutes minutes
Total Time: 55 minutes minutes
Servings: 48
Calories: 214kcal
Author: Dannyelle Nicolle-Ramjist

Ingredients

Sugar Cookies

  • 1 cup butter softened
  • 1 cup powdered sugar
  • 1 cup white sugar
  • 2 eggs
  • 1 ½ teaspoon vanilla extract
  • 3 cups all purpose flour
  • 3 teaspoon baking powder
  • ½ teaspoon salt

For The Butter Icing

  • ½ cup powdered sugar
  • 1 teaspoon milk
  • 2-4 drops of yellow food coloring

Maple Icing

  • 1 cup powdered sugar
  • 2 tablespoon milk
  • 2 tablespoon maple syrup
  • 2 teaspoon cocoa powder
  • 2 drops yellow food coloring

Instructions

  • To make the cookies begin by creaming the butter and sugars together in the bowl of a stand mixer fitted with the paddle attachment, or in a large mixing bowl with your electric mixer.
  • Add the eggs, and vanilla and mix until well combined, scraping down the sides of the bowl.
  • In another large bowl combine the dry ingredients of flour, baking powder, and salt and whisk together or sift.
  • Gradually add the flour mixture to the wet ingredients and stir until well blended. Be careful not to overwork your dough.
  • Wrap the dough in plastic wrap and let in the refrigerator for some chill time.
  • Once chilled, roll out the dough on a floured surface to about ¼ inch thick and cut into circles.
  • Bake the cookie shapes on a baking sheet in 350 degree oven for 8 - 10 mins.
  • Let cool completely on a wire rack before icing.
  • To make the icing "butter" in a separate bowl combine ½ cup powdered sugar with 1 teaspoon of milk to make a paste consistency, and then stir in the food coloring until it looks yellow like butter.
  • Place the mixture onto a sheet of plastic wrap and place another on top and use a rolling pin to roll it out to about ¼ inch thick. Next use a sharp knife to cut it into small squares, that are about ¾ inch big. Place these in the fridge to set while you make the maple icing.
  • To make the maple icing, combine 1 cup of powdered sugar with 2 tablespoon milk, and 2 tablespoon maple syrup, cocoa and yellow food coloring. Mix until it's a smooth consistency.
  • To assemble the cookies, place the cooled cookies onto parchment paper and put a small amount of maple icing on one cooking to act as glue and stack another cookie on top. Drizzle the stack with the maple icing so that it runs down the side, but some of the cookie is still visible. Place one piece of the butter icing on top.

Nutrition

Serving: 1g | Calories: 214kcal | Carbohydrates: 33g | Protein: 2g | Fat: 8g | Saturated Fat: 5g | Polyunsaturated Fat: 3g | Cholesterol: 36mg | Sodium: 178mg | Sugar: 21g
Tried this Recipe? Tag me Today!Mention @LifeisaParty or tag #lifeisaparty!
sugar cookie pancakes

They turned out really authentic looking, and they were so delicious.  These were the perfect addition to our Pancake Tuesday Party -which you can read all about here.

how to make sugar cookie pancakes

With Pancake Sugar Cookies for Pancake Tuesday, life really is a party!

More Pancake Inspiration

You might also like our Pancake Tuesday party with free printables here.

Also check out our Jelly Donut Pancake Recipe here.

Also be sure to look at our Pancake Bean Bags.

Pancake Tuesday Party

Feb 21, 2017 · 4 Comments

Pancake Tuesday party ideas.

Pancake Tuesday Party: Free pancake printable decorations, invite, and pancake jokes, and a pancake buffet with topping ideas.

Pancake Tuesday party ideas.
[feast_advanced_jump_to]

It's almost Pancake Tuesday, and time to start thinking about a special pancake party.  No matter how old you are, who doesn't love the idea of pancakes for dinner once a year?  This is such a fun tradition, and one that my family loves!

We've set up our party for celebrating pancake Tuesday, but these ideas for the menu and decorations, along with the free printables would also be also be so great for any pancake themed party.  If you're hosting a pancakes and pajama party, or a pancake themed birthday party for a little girl or boy, you'll find lots of fun inspiration here too.

Pancake Tuesday Party

Entertaining on a weeknight for pancake Tuesday can be a bit tricky, but this easy party is perfect for family and friends.  I've made it a little easier with some beautiful free printables you can print, cut out and hang up for a festive atmosphere.  Do all your set up the day ahead, if you can, and then all you'll have to do the night of is cook your pancakes.

Pancake party ideas

Free Printable Pancake Party Banner

For the backdrop to the pancake buffet, I used inexpensive tissue paper and twine to create some pretty tissue paper tassels. These are really simple to make, and have a big impact.

shrove Tuesday pancake party decorations

The cute little watercolor pancakes were made by my youngest daughter Maddie.  I love them.  You can download them for free in our Free Resource Library.  Just subscribe below for instant access.

pancake party ideas and free printables

What's cuter than a pancake?  A smiling pancake.

Free Printable Pancake Party Invitation

We also created a Pancake Party invite.  You can print it out and send it to friends for your own little get together.  Download it from our Free Resource Library.  Subscribe below for instant access.

Syrup Can Flower Vases

For the table, we used maple syrup cans for vases.

Pancake Tuesday party

I love that they have painted on labels, and such pretty pictures of little maple sugar shacks, and lots of forest trees.  The blue in the cans inspired the color scheme of light blue for the party.  Look for these at the grocery store, and just pour the syrup into a bottle or pitcher, was the can and use for your flowers.  I've saved mine to use year after year for Pancake Tuesday.  It's such a fun party detail.  We kept the rest neutral with natural brown kraft paper and lots of white.

pancake party decor

Baby's breath makes the perfect centerpiece of simple flower arrangements.

what to do on Pancake Tuesday

Pancake Party Table

For the place settings, I used some cute denim napkins and the sweetest printable pancake jokes.

Pancake Tuesday dinner ideas

Free Printable Pancake Jokes

The printables help take this get together from a simple dinner to a party.  Even if you're just making pancakes for your kids, I guarantee they'll love the pancake joke printables we came up with.  You can find them in our Free Resource Library.  Subscribe below for instant access.  Then just download, and print on card stock on your home printer or at an office supply store.

Along with the jokes, I made some mini tissue paper tassels with some tissue paper from the dollar store, to tie the whole look together.

pancake jokes

Pancake Sugar Cookies

I also made a batch of Pancake Sugar Cookies.  We used our favourite sugar recipe and round cookie cutter to make them.  They turned out so cute -find the recipe for the pancake sugar cookies here. They're easy to make, and such a fun detail.  I added one to each place setting, and one of the little girls who loves sugar cookies was asking us "where are the sugar cookies?"  she thought they were actual pancakes, so I guess that was a good sign, lol.  These would also be a really fun addition to a party favors if you were hosting a pancakes and pajamas party birthday party.

Pancakes and pajamas Party

Pancake Buffet

The highlight of the whole party was of course the pancakes!  We set up a whole pancake bar where guests could help themselves to their own pancakes and all the fixings.  The topping bar was a huge hit with party guests.  Everyone loved being about to add their favorite things and make the perfect pancake.

  • buttermilk pancakes
  • blueberry pancakes
  • chocolate chip pancakes
  • maple syrup
  • blackberries
  • blueberries
  • raspberries
  • strawberries
  • sliced bananas
  • sprinkles
  • whipped cream
  • bacon
  • sausage
  • pancake sugar cookies
  • strawberry pancake shortcakes

We set up the easy, help-yourself, pancake buffet for dinner, complete with lots of fun and delicious pancake toppings.  We love this set-up for a party, since guests can help themselves to their favorite toppings and you can enjoy yourself too, without having to serve all evening.  This is such a great way to serve food at a party.

Pancake buffet

The menu was simple -pancakes!

pancake party buffet

My husband makes fluffy pancakes from scratch buttermilk pancakes -find the best recipe here.  For this special occasion he made a double batch.

Pancake party ideas

We had a few different kinds of pancakes.  He made some plain original pancakes, and some made with blueberries, and some made with chocolate chips- YUM!

how to throw a pancake party

We also made some sweet strawberry shortcake stacks of mini pancakes.  I love how these look, and they were delicious too.

Pancake  Party

Pancake Toppings

We offered lots of fun toppings for the pancakes, and they were really easy to put together.

pancake party buffet

We used simple mason jars for the toppings.  I love this party idea because it look great, and was easy for guests to access.  We offered different fresh berries, along with some sprinkles, since it was a party.  I also made a little whipped cream.  And of course, we had to have lots of real maple syrup -we are Canadian after all.

pancake cookies

I also had some more of the cute pancake sugar cookies -see the recipe here, on the pancake buffet.

Pancake Party

Since it was dinner, we also fried up some bacon and sausages.  The perfect savoury accompaniment to lots and lots of pancakes on our breakfast bar.

Pancake Tuesday Party

Orange Juice and Mimosas

For drinks, I offered guests some orange juice, since it seems like the perfect accompaniment to pancakes.  And for the grown-ups, I picked up a bottle of sparkling wine, so we could turn our orange juice into mimosas.  Special Tuesday night treat, haha.

Pancake Party

This little party was so much fun and we had a great time.  Whether you set up something like this, or just print out our pancake jokes and make your kids pancakes for dinner, I hope you're feeling inspired!  We had so much fun celebrating pancake Tuesday, but these would also be great ideas for a pancakes and pajamas birthday party too.

Pancake Tuesday Party

With a special Pancake Tuesday Party, life really is a party!

More Pancake Ideas

You might also like our Pancake Sugar Cookies recipe here.

pancake party

Also check out our Jelly Donut Pancake recipe here.

Jelly Donut Pancakes: Your two favourite treats combined! Cut into a delicious pancake with a surprise inside -your favourite jam!


Crispy Panko Onion Rings Recipe

Feb 18, 2017 · Leave a Comment

Homemade onion rings.

Homemade Panko Breaded Fried Onion Rings: great recipe to make breaded onion rings, guaranteed to wow!

Homemade onion rings.
[feast_advanced_jump_to]

Last night, Friday night, Homemade Breaded Onion Rings seemed like the perfect treat to kick off the weekend.  These onion rings were amazing.  Made with simple ingredients, they're the perfect balance of crunchy seasoned goodness on the outside, and sweet tender onion on the inside.  If you're an onion ring fan, you will love these ones coated in panko breadcrumbs and deep-fried to perfection. Speaking of panko, have you tried our Mac and cheese with panko breadcrumb topping?

homemade onion rings and salt

I heard it said once that if you only ate french fries when you made them yourself, from scratch, it would probably be about right -from a calorie and health perspective.  Since they're a lot of effort, it's good that they're a sometimes, not all the time treat.  The same could be said of these amazing onion rings.

container of breaded onion rings

Not an everyday kind of food, a little fiddly to make, but so, so worth it.  These homemade onion rings are definitely worth the trouble.  After the first crunchy bite, I'm sure you'll agree with me.  They're the perfect side dish accompaniment to your favorite burger, or hot dogs.  Also a great appetizer or snack.  Make them as a game day snack.

Onions

Onion rings are made of slices of raw onion.  The onion is sliced so that it forms rings, and then the rings are coated in breading and fried.  You can use any white onions or yellow onions for this recipe.  The very best onions for this recipe are sweet onions.  I like to use Spanish onions.   Vidalia onions or Walla walla onions are a great option too. 

You want the onion slices to be about ¼ inch thick.  Discard the very smallest and center rings from the onion.

Bread Crumbs

We love to use panko bread crumbs for the best onion rings.  The panko bread crumbs make the most crispy onion rings.  Look for panko crumbs in the grocery store with the regular bread crumbs.  Panko bread crumbs are a Japanese bread crumb.  These crumbs are made from crustless white bread and are flaked and dried to produce a lighter and crispier bread crumb.  When used in fried food, it creates a crunchier effect than regular bread crumbs do.  In this recipe we combine both the crunchy Panko bread crumbs and seasoned Italian regular breadcrumbs for the perfect blend of both.

Breading Station

Preparing your delicious onion rings can get a little messy.  The easiest way to make them is to prepare a breading station.  Set up a station with one bowl filled with flour, another bowl with the batter, and a shallow third bowl with the breadcrumb mixture.  Begin by dipping the rings first into the flour, and tapping off any excess flour.  The second step is to dip the floured onion rings into the batter.  Be sure to let any excess batter drip of the rings before the third step of placing them into the bread crumbs.  Use your fingers to flip over the onion rings and press in the panko mixture so they're fully coated.  Next the coated onion rings are ready to fry.

Frying

The best way to make delicious crispy onion rings is to fry them in a deep fryer.  A deep fryer gives the best results.  It's much easier to get a great result with at home deep fryer than with a large pot of oil because there is a thermometer on the deep fryer that regulates the temperature and keeps it even, so it doesn't become too hot or cool down too much.  Deep fry onion rings in small batches so that the deep fryer isn't over crowded.

After the frying the onion rings in hot oil, remove them when they're gold brown and place them onto a few paper towels to absorb any excess oil and sprinkle them with a little salt while they're still hot.

sliced onions for onion rings
breading onion rings

Onion rings are best eaten as soon as they're ready.

Serve these crispy fried onion rings with your favourite dipping sauce like ketchup, barbecue sauce, fry sauce, or some mayo with a little hot sauce.

fresh homemade onion rings

These are guaranteed to take your regular burger night -or any other meal, to a whole new level.

Homemade Onion Rings: great recipe to make homemade breaded onion rings, guaranteed to wow!

These are guaranteed to woo any guests you serve them to.  They're definitely a crowd favorite.  The combination of sweet onion flavor, and crispy batter and breadcrumb coating, with a little sprinkling of salt is truly the perfect onion ring.  If you are an onion ring lover, you're guaranteed to love this panko onion ring recipe.

Recipe

Homemade onion rings.

Onion Rings

Crispy onion rings with breading on the outside, and tender onion on the inside.
5 from 1 vote
Print Pin Rate
Course: Side Dish
Cuisine: American
Prep Time: 10 minutes minutes
Cook Time: 20 minutes minutes
Total Time: 30 minutes minutes
Servings: 32 Onion Rings
Calories: 44kcal
Author: Dannyelle Nicolle-Ramjist

Ingredients

  • 1 large sweet Spanish onion
  • 1 ¼ cup flour -divided
  • 1 teaspoon baking powder
  • 1 egg -beaten
  • 1 cup milk
  • ½ cup panko bread crumbs
  • ½ cup Italian seasoned bread crumbs
  • 1 teaspoon salt
  • 1 teaspoon pepper
  • 1 teaspoon garlic powder
  • ½ teaspoon cayenne pepper optional
  • oil for frying

Instructions

  • Slice onion and dip rings into ¼ cup flour to coat them, shaking off any excess.
  • To make the batter, combine 1 cup of flour, and the baking powder in a large bowl. Whisk in the milk and egg to make a smooth batter. One by one, dip in the onion rings that have been coated with flour already. Let them drip to remove any excess.
  • In a shallow bowl, combine the two kinds of bread crumbs, salt, pepper, garlic powder, and cayenne. Stir to mix well.
  • Dip the battered onion rings into the bread crumb mixture to coat evenly.
  • Fry the onion rings in a deep fryer with oil at 375 degrees, until golden brown. Drain on paper towel, and sprinkle with additional salt, to taste.

Nutrition

Serving: 1g | Calories: 44kcal | Carbohydrates: 7g | Protein: 2g | Fat: 1g | Polyunsaturated Fat: 1g | Cholesterol: 6mg | Sodium: 131mg | Sugar: 1g
Tried this Recipe? Tag me Today!Mention @LifeisaParty or tag #lifeisaparty!
onion rings

With Homemade Crispy Panko Onion Rings, life really is a party!

More Recipe Inspiration

These onion rings would be so good with our Irish Burgers.

You might also like these Homemade Potato Chips here.


Also you might enjoy our Stuffed Mushroom Recipe.

Mini Hearts in a Bottle Miniature Terrarium

Feb 10, 2017 · 2 Comments

Mini hearts in a bottle craft.

Mini Hearts in a Bottle Miniature Terrarium: Tiny felt heart flowers inside a glass jar create a magical terrarium garden.

Mini hearts in a bottle craft.
[feast_advanced_jump_to]

Our little mini hearts in a bottle miniature terrarium is so sweet, and really easy to make for someone special this Valentine's Day. We love decorating for Valentine's Day with cute DIY touches, like our Yarn Hearts.

Mini Hearts in a Bottle

I was inspired by the mini glass bottles with the sweet little cork tops.  I thought it would be cute to make a miniature heart flower that was like it was growing inside.

miniature terrarium craft

These little bottle gardens remind me of teeny, tiny terrariums.  You can get a sense of the scale and how small they really are by the thimble.  The thimble was too big to fit inside the glass bottles, so I made a cute little stand alone one with the thimble as a tiny flower pot.

how to make a miniature terrarium

Here's how to make your own:

Miniature Terrarium Materials:

  • mini glass bottles
  • moss
  • air dry clay
  • white glue
  • felt
  • stuffing
  • thread
  • glue
  • wire
  • green embroidery thread

mini terrarium craft

Instructions:

1.  To make the heart flower, start by cutting out two matching hearts (a front and a back) , small enough to fit through the mouth of the glass bottle.  Sew them together with coordinating thread, using a blanket stitch.  Before sewing all the way around the heart, add in a little stuffing.  Finishing sewing it all the way around.

2.  To make the stem, cut a small piece of wire.  Using green felt, cut out a very tiny leaf or two, with a narrow stem piece.  Tie on some green embroidery thread to the top of the wire, and wrap it around the wire tightly.   Part way down, wrap in the stem of the felt leaf.  At the end of the stem, finish by tying the thread off, and using a little white glue to secure it.

3.  To assemble the heart flower, use a tiny piece of air dry clay as a base, and insert the stem into it, so it's able to stand up on its own.  Glue the heart onto the top of the stem to create the flower, pushing the wire up into the felt heart.  Allow the clay and glue to dry.

4.  To assemble the jar, put a tiny amount of glue in the bottom of the jar with a toothpick.  Glue the flower in place in the jar, using tweezers to position it.  Cut the moss into tiny little pieces and add to the bottle.  Use a toothpick and tweezers to push it down and compact it at the bottle of the flower.  Optional:  Add a little handmade tag that says "love grows here".

5.  To create the thimble flower, make the flower in the same way, with the clay pushed into the thimble and topped with moss.

Mini Hearts in a Bottle

Mini Hearts in a Bottle Grouping

Make a few for a pretty little grouping, with different shades of pink felt hearts.  Use little birch tree rounds to create different heights in your display, and different sized bottles.

felt heart craft


I love how these turned out and they were really simple to put together.

They remind of fairies.  Any little fairy fans on your Valentine's Day list?  These would be perfect.  I know my little girls love them.

Mini Hearts in a Bottle terrarium

With A Mini Heart in a  Bottle Miniature Terrarium, life really is a party!

More Heart Inspiration

  • How to make yarn hearts.
    How To Make Yarn Wrapped Hearts
  • Book page heart garland.
    Book Page DIY Heart Garland
  • Wooden bowl full of homemade 3D origami hearts.
    3D Origami Hearts
  • Birch bark heart craft.
    Birch Bark and Gold Leaf Hearts

Valentine's Day Breakfast

Feb 2, 2017 · 17 Comments

Valentine breakfast buffet with mini pancakes, heart shaped sausage, yogurt parfaits, and fresh strawberries.

Celebrate Valentine's Day with a special Valentine breakfast party that brings family and friends together for a festive morning full of heart shaped treats, pretty decorations, and delicious food. This Valentine's Day breakfast is perfect for making sweet memories in your pajamas!

Valentine's Day breakfast ideas menu and decor.

Quick Look

  • 💕 Occasion: Family Valentine's Day celebration
    🍴 Menu: Sweet and savory breakfast buffet
    🎨 Decor: DIY paper flowers and budget friendly finds
    💭 Top Tip: Set up your paper flower backdrop and table the night before so you can enjoy a relaxed morning with your family!

Why You'll Love This Party

  • Family friendly celebration. Perfect for couples and kids to enjoy together.
  • Budget friendly decor. Use dollar store finds and DIY paper flowers.
  • Simple menu. Mix homemade favorites with store bought shortcuts.
  • Pajama party vibe. No need to get dressed up for this cozy celebration.
[feast_advanced_jump_to]

I love Valentine's Day, and as much as I love celebrating with my sweetie, I also love celebrating as a family. This Valentine's Day Breakfast is the perfect way to celebrate together and share a little love with a special morning party. We set up a beautiful breakfast buffet with all our favorite foods, added some festive decorations like giant paper flowers, and enjoyed a relaxed morning in our pajamas. It was such a fun way to start the day!

If you love this party you might also like our Valentine Breakfast Board, Valentine's Day Tea Party, Valentine's Day Movie Night, 20 At Home Valentine's Day Ideas, or Fondue Date Night.

Valentine's Day Breakfast: the perfect inspiration with decor and menu for celebrating Valentine's Day with family and friends.

Valentine Breakfast Menu:

I started with a beautiful buffet filled with sweet and savory options so everyone could find something they loved. Here's what we served:

Valentine's Day Breakfast: the perfect inspiration with decor and menu for celebrating Valentine's Day with family and friends.

Sweet Options:

  • Mini Pancake Stacks -We love this pancake recipe, double it, or triple it for a crowd. We made mini pancakes and served them in stacks with the cutest Valentine's Day picks.
  • Heart Shaped Jelly Donuts -Homemade donuts are such a treat! We made the dough in the bread maker the night before and then cut them into small hearts, fried, and filled with them in the morning. Get our easy bread machine jelly donut recipe here. Or pick up donuts at your favorite bakery.
  • Yogurt and Granola Parfaits -These are simple to assemble. We made our homade granola a few days ahead of time, or use your favorite store bought granola. On the morning of the party layer yougurt (plain, vanilla, or your favourite flavor) in the bottom of a small bowl and then layer granola on top. Garnish with a heart shaped strawberry, cut with a small knife or cookie cutter.
  • Fresh Strawberries
  • Whipped Cream -This is one of those things that is so much better homemade, just whip with some sugar and vanilla. But if you need to you can substitute store-bought, or whipped topping instead.
  • Maple Syrup -Real maple syrup is what every pancake breakfast truly deserves.
  • Valentine's Day Sprinkles -The kids especially will love this easy addition that makes breakfast feel so much more special.
Valentine's Day Breakfast: the perfect inspiration with decor and menu for celebrating Valentine's Day with family and friends.

Savory Options:

  • Scrambled Eggs -To make our scrambled eggs fit our Valentine theme we served them up a pretty heart shaped bowl.
  • Heart Shaped Breakfast Sausage -look for sausage patties at the grocery store, and after they're cooked use a heart shaped cookie cutter to make them into hearts.

Other great addtions would be bacon, or hash browns. Buy the hashbrown patties, and use a heart shaped cookie cutter to make them into hearts also.

Valentine's Day Breakfast: the perfect inspiration with decor and menu for celebrating Valentine's Day with family and friends.

Drinks:

Valentine's Day Breakfast: the perfect inspiration with decor and menu for celebrating Valentine's Day with family and friends.
  • Pink Hot Chocolate -To make things extra special I made pink hot chocolate. Look for white hot chocolate mix and add a little pink food coloring, or make your own with melted white chocolate, hot milk, and pink food coloring. We served it in a tea pot into heart shaped cups. We found the perfect heart shaped marshmallows and had whipped cream as a garnish too.
  • Coffee for the Adults
Valentine's Day Breakfast: the perfect inspiration with decor and menu for celebrating Valentine's Day with family and friends.

Paper Flower Backdrop

Valentine's Day Breakfast: the perfect inspiration with decor and menu for celebrating Valentine's Day with family and friends.

My very favorite element of the Valentine's Day Breakfast Buffet has to be the amazing paper flower backdrop.

I actually made the flowers last year and had them stored in a plastic bag in the basement. They're so pretty I couldn't bear to throw them out! Find my How To Make Giant Paper Flowers tutorial here, including a video. They're quite easy to make. I used pinks, white, some off white, and some book page papers. Some have a little pink paint added here and there too.

To hang them over the buffet, I hot glued them all to some paper in a kind of swag, and then used command hooks to secure the paper to the wall. Prepare this all the day before, and the next morning it will be all ready and waiting for you.

The giant paper flowers are so pretty, I don't think I want to take them down!

Valentine's Day Breakfast: the perfect inspiration with decor and menu for celebrating Valentine's Day with family and friends.

Valentine's Day Table

Valentine's Day Breakfast: the perfect inspiration with decor and menu for celebrating Valentine's Day with family and friends.

For the Valentine's Day dining table, I kept it pretty simple.

Table Setting Details:

  • Layered Table Runners -I used a pink and white table runner and layere them for texture.
  • Milkglass Glass Vases and Flowers -The milkglass was all from thrift stores, and I love how they all match, but are a little diferent. I filled them with some simple pink and white roses and tulips from the grocery store.
  • Heart Pates -I used our everyday white plates, but layered some adorable heart plates on top that were a great garage sale find a few years, that I birng out every Valentine's day.
  • Wooden Heart Chalkboard Placecards -I picked these up at the dollar store and thought they'd make great placecards for our table.

I wanted to keep things pretty neutral, in keeping with the feel of the room, with just enough festive pink to make it feel like Valentine's Day, but with lots of neutrals too.

Valentine's Day Breakfast: the perfect inspiration with decor and menu for celebrating Valentine's Day with family and friends.

Make Ahead Tips

In the Week Before:

  • Make the flowers for the backdrop
  • Shop for ingredients and flowers
  • Make the granola

The Night Before:

  • Hang the paper flower backdrop
  • Arrange the flowers and set the table
  • Make jelly donut dough and store in the fridge overnight
  • Make whipped cream and store in the fridge
  • Wash strawberries
  • Set out serving dishes and utensils
Valentine's Day Breakfast: the perfect inspiration with decor and menu for celebrating Valentine's Day with family and friends.

Valentine's Morning:

  • Fry the donuts and fill with jelly, or pick up at the bakery
  • Cook pancakes and keep warm in 200°F oven
  • Cook sausage and cut into heart shapes
  • Make scrambled eggs
  • Make yougurt parfaits
  • Make pink hot chocolate
  • Setup the buffet and enjoy

This was such a fun and sweet little family party on Valentine's morning. I hope you're feeling inspired to do something special with your family to celebrate love day together. Whether big or small, make sure to show your loved ones how much they mean to you.

With a special Valentine's Day Breakfast, life really is a party!

Valentine's Day Breakfast: the perfect inspiration with decor and menu for celebrating Valentine's Day with family and friends.

Frequently Asked Questions

How far in advance can I prep for a Valentine breakfast party?

You can make the paper flower backdrop weeks ahead and store it carefully. The night before, set your table, and prep some food. The morning of, just finishing preparing the food and assembling the buffet.

What if I don't have time to make homemade donuts?

Store bought donuts work perfectly! Serve regular donuts, or look for special Valentine ones near the holiday at your favorite bakery.

Can I make this work for just two people?

Absolutely! Scale down the menu to your favorite items. A simple spread of heart shaped pancakes, sausage, eggs, and coffee with a few pretty flowers is perfect for a romantic morning.

What other foods can I cut into heart shapes?

Try waffles, toast, eggs, hash browns, or fruit slices (watermelon, pineapple). Any food that's thick enough to hold its shape works, use mini heart cookie cutters for smaller items.

How do I keep pancakes warm while cooking a big batch?

Place cooked pancakes on a baking sheet in a 200°F oven. They'll stay warm and fresh while you finish cooking.

Do I need special equipment for this party?

Not at all! A heart shaped cookie cutter is helpful but optional. If you don't have one just use a knife. Everything else uses regular kitchen equipment and serving dishes you probably already have.

Can I do this party for a classroom or large group?

Yes! Focus on easy items like store bought donuts, and simple finger foods. The heart cookie cutter technique works great for making regular foods feel festive without a lot of extra work.

What drinks should I serve besides pink hot chocolate?

Coffee for adults, regular milk or chocolate milk for kids, orange juice, and water are all great options. You could also do a strawberry smoothie for a pink drink option.

More Valentine's Day Ideas

  • Close up of pink heart-shaped strawberry marshmallows dusted with coating.
    Homemade Strawberry Marshmallows with Freeze Dried Strawberries
  • Valentine breakfast board with heart-shaped waffles, heart-shaped eggs, bacon, sausage, fresh berries, and toppings on marble platter.
    Valentine Breakfast Board
  • Peanut butter and jam thumbprint cookies on a cooling rack with a jar of jam.
    Peanut Butter Thumbprint Cookies
  • Valentine's Day movie night free printables including tickets, banners, snack labels, and decorations.
    Valentine's Day Movie Night With Free Printables

If you try anything from this Valentine's Day Breakfast party or any other ideas on my blog, please let me know how it went in the comments below. Thanks for visiting today!

Birch Bark and Gold Leaf Hearts

Jan 24, 2017 · Leave a Comment

Birch bark heart craft.

Birch Bark Gold Leaf Hearts: easy birch bark craft is perfect for Valentine's Day, or a rustic wedding, cute birch bark ornament with gold leaf.

DIY birch bark heart craft.
[feast_advanced_jump_to]

This year for Valentine's Day, I wanted to add a few Rustic Scandinavian touches around the house, and made these simple and beautiful Birch Bark and Gold Leaf Hearts for a little Valentine's Day Tree.  It's the perfect rustic birch bark craft. In the past I've also used these DIY yarn hearts for a similar look.

Birch Bark Gold Leaf Hearts

If you follow me on Instagram, you might have seen me collecting birch bark.  I had some, and found some from a dead tree in the forest that is perfect for my birch bark craft.  If you're not lucky enough to have a forest near by, you can order some on-line.  Here's how I made them.

Birch Bark craft

Birch Bark Craft Materials:

  • Birch Bark
  • Gold Leaf
  • Gold Leaf Adhesive
  • Twine
  • Darning Needle

How To Make Birch Bark Hearts

1. Start by cutting out some small hearts from your birch bark.  You can make a pattern and draw it onto your birch bark, or free hand it.  Birch bark is easy to cut, but also quite fragile, and easy to rip, so take some care with this step.

Birch Bark craft

2.  Next, use a small paint brush to apply the gold leaf adhesive to the edges of the birch bark hearts.  I liked the look of doing the edges of both sides, so they could be reversible.

Birch Bark heart ornaments

3.  Following the manufactures directions with your adhesive, and wait until the glue is slightly set before applying the gold leaf.  Wrap small pieces around the edge, and rub off the excess with your fingers, or use the left over gold scraps and rub the edges into it.

Birch Bark Hearts

4. Lastly, cut a small piece of twine to hang your heart.  Mine was three-ply and too thick for the delicate hearts, so I unraveled it into three strands, and used one for each heart.  Thread a darning needle with the twine and carefully poke a hole through the heart.  Take care to not make the hole too close to the edge, since the bark rips easily.

Birch Bark Hearts craft

I hung my finished birch bark craft on to some branches to make a Valentine's Day Tree.  It's so beautiful with the light hits the gold, and adds a little sparkle.

how to make a Birch Bark craft

This pretty little tree is perfect for Valentine's Day, but would also be really pretty for someone doing a nature inspired wedding.  It would also be beautiful as a garland.  There are lot's of possibilities, I'm loving mine on the entrance way console table.

Birch Bark craft ideas

With Birch Bark and Gold Leaf Hearts, life really is a party!

More Inspiration

You might also like our Yarn Hearts here.

Also check out our 3D Origami Hearts here.

You might also enjoy our Book Page Heart Garland here.

Book Page Heart Garland: How to make a DIY watercolour book page heart garland with an old book and a sewing machine, easy and inexpensive.

Rock Climbing Gem Party

Jan 19, 2017 · 6 Comments

Rock climbing themed party decor and menu ideas.

Rock Climbing Gem/Jewel/Geometric Birthday Party -rock climbing party with DIY gem decor, rock themed dessert table, and party favor ideas.

Rock climbing themed party decor and menu ideas.
[feast_advanced_jump_to]

When my daughter Paige turned 12, she decided she'd like a rock climbing gem birthday party to celebrate.  We had an amazing time rock climbing with her friends, and then invited them all back to our house for a "Paige Rocks" celebration.  We used the idea of rocks to inspire a rock/gem/jewel/geometric party theme.

Rock Climbing Gem/Jewel/Geometric Party dessert table

The party was amazing.  It's so much fun to create, and to host birthday parties, and this theme was great.  I hope it inspires you.

Rocking Climbing birthday party

Rock Climbing

We started out at our local rock climbing gym and the girls got to climb for a few hours together.  The staff members were great at teaching everyone how to suit up with the ropes and get climbing, even the first timers.  It was great that each rock climber at any skill levels could join in and have fun.  Paige loves rock climbing and had a great time getting to the top of the wall with all her friends.

Rock Climbing birthday party

After the rock climbing wall was done, we headed back to our house with some tired, hungry and excited girls.Rock Climbing Gem birthday party table

The Rock/Gem/Jewel/Geometric Birthday Party Decorations

We love making things feel extra special by decorating for birthdays. Check our our best ideas for decorating for at home birthday parties. We set up the dining room for our birthday party guests to enjoy some "rock" inspired treats.

Rock Climbing Gem birthday party

The Table

For our Rock Climbing Gem Birthday Party our color palette was pink, aqua, and gold.  I made a lot of the decorations with my Cricut machine.  Including the paper 3-D shapes that we used throughout the party area as decorations.

paper 3d gems jewels

I adjusted the size a few times to make some bigger and smaller ones.

Rock Climbing Gem birthday party decorations

The Rock Climbing Party Favors

Each girl, had a special place setting waiting for them.

Rock Climbing Gem party favour

I used inexpensive muslin bags to make a goodie bag for everyone, and customized them with each girl's name, so they doubled as placards.  To make the party bag for everyone, I used iron-on gold vinyl and cut it out with the Cricut machine.  They were really easy to make and the girls were very impressed.

Rock Climbing Gem birthday party favour

Each bag was to hold a little gem necklace -which was the perfect little rock climbing party favor.

Other fun additions to party favor bags for a rock climbing party could be carabiner clips, water bottles, a small goody bag of rocks and crystals.

Rock Climbing party favour

Gem Straws and Candles

I also used my Cricut to make the straw gems.  After we cut out the gem shape on the Cricut, we used hot glue to attach them to the gold paper straws.  We found a gem cut file that had two layers, in my Cricut Design Space.  I cut the top layer out of glitter cardstock, and layered it over another piece of cardstock in the party colours.  These little gems turned out so well, I loved them and so did the girls.  I was so impressed with what my Cricut was able to do.

gem decal for candles

We used the same cut file to create some vinyl adhesives for my candles.  The candles are from the  dollar store, and then we added the gems cut out in gold vinyl.  They looked amazing, and were very easy and inexpensive to make.

gem jewel decal for candles

DIY Borax Crystal Decorations

On the table we also used lots of scattered rocks, gems and crystals.  We collected some rocks on our walks, and found some fun faux gems at the dollar store.  We also made some pretty crystals out of borax.  This tutorial was our favourite.  It took about a week for us to make them all.  We added some gold paint to some of them too.  These were such a fun addition to our rock themed party decorations and a great DIY for your own party.

diy borax crystals for a gem rock climbing themed birthday party

We also added some pretty pink flowers, and some geometric gold candle holders.

gem themed table

More Gem Rock Decorations

Over in the entryway, I used a few more of the vinyl gems I cut out on the Cricut machine.  They looked great on the mirror, and easily peeled off after the party.

gem jewel decals and party decorations

I also sewed some geometric bunting.  Again I used the Cricut and cut out some simple geometric shapes out of different colours of cardstock and in different sizes.  I used my sewing machine to sew them into a pretty garland -see my tutorial here on how to sew paper or card stock into a banner with a sewing machine .  I made a few and used some over the console table too.

Rock Climbing Gem/Jewel/Geometric Birthday Party -rock climbing party with DIY gem decor, rock themed dessert table, and favour ideas.

To make the geometric shaped honeycomb decorations, I cut the round ones before they were unfolded -I love how these turned out and they're so simple to make.

Rock Climbing Gem/Jewel/Geometric Birthday Party Desert Table

Rock and Gem Themed Dessert Table

The main attraction of the party was the beautiful rock themed food dessert table.  We had so much fun putting it together and the party goers just loved it.

Rock themed dessert table

The backdrop was made with a simple branch attached to the wall that we hung more of the geometric garland and shapes off of it.  The vinyl wall decals were cut with the Cricut machine too.  I used the same gems and layered the vinyl with white on top and, pink and aqua the party colors underneath.  We also made "Paige Rocks" out of the vinyl.  These all looked amazing for the party, and were easy to remove afterward.

Rock Gem/Jewel/Geometric Party decorations

The metal geometric shapes were some I used as Christmas decorations, but worked perfectly here with our theme.

All the party desserts were rock and gem themed, which was such a great idea.

Rock Climbing Gem birthday party dessert table

The Birthday Cake

The cake was made the week before -you can see how easy this succulent cake was here, and I just put it in the freezer and took it out the morning of the party.

Rocking Climbing birthday cake

Paige, the birthday kid, loved the succulents, so we incorporated them into the party flowers, and just added some pretty rock candy to the cake to tie it into the rock gem theme.  It turned out so, so pretty.

Rock Climbing Gem/Jewel/Geometric Birthday Party -rock climbing party with DIY gem decor, rock themed dessert table, and favour ideas.

I served some fruit in cute little paper cups.

Rock Climbing Gem/Jewel/Geometric Party dessert table

Rock Themed Candy

The rock themed candy was pretty fun to find.  We had classic rock candy.

Rock themed candy

I also found this fun rock popping candy, that the kids thought was amazing.  This brand was Shock Rocks, but look for Pop Rocks too.

Rock themed desserts and candy

And to go with the gems, some candy rings.

Rock themed dessert and candy

One of the prettiest treats of the day, a beautiful plate of donuts.  They sure looked great with their little gem pics!  For your own food table, use gem cake topper/ cupcake toppers to bring your theme to any food item.

Rock Gem/Jewel/Geometric Party dessert

Over on the other side of the table, more treats.

Rock themed dessert table

We made regular rice crispy squares, and cut them into cubes and dipped half on a diagonal into coloured chocolate.  They were simple, looked great, and were so yummy.

geometric Rice Krispie squares

We also made some dirt pudding (chocolate pudding with crushed oreos) and topped them with candy rocks, and served them in little mason jars.   These were a fun way to use the candy rocks. They look so real, and taste great.  They're chocolate inside.  They'd be fun to use for your own rock themed birthday cake too.

gem jewel decals

I wanted to offer some chips so I picked up a party mix and served them in these sweet little takeout boxes.  I wanted them to match the party, so I used some more of the vinyl decals and added them to the boxes.

diy agate slice rock lollipops

Homemade Agate Slice Rock Lollipops

We also made these agate slice rock lollipops.  We used this tutorial to make them out of crushed up candy.  They weren't too hard to make, and looked amazing.  The tricky part was trying to find colors that we wanted and flavours that went together well.  These are also great to include as rock climbing party favors.  Package these in cellophane bags and tie with ribbon.

Gem dessert table

Tips and Tricks

This party was a huge success.  If you're considering something similar, I have one little bit of advice.  The rock climbing place also had a party room and dedicated area, and we considered renting it to keep things all in one place, but I'm so glad we didn't use it, and set everything up at home.  

Hosting part of the party at home meant that we could make it really, really special.  I could set up everything ahead of time, and the 15 min. drive back to our house was no problem at all.  The girls faces when they walked in and saw it all, made it all completely worth while, that's for sure, and I never would have had time to make it quite so magical if it wasn't at home.  There was even something about the birthday child coming into the party space and seeing it with all her friends that made it really wonderful.

jewel themed dessert table

This is one of those times where the smile on the birthday girl's face says it all.  This was the best rock climbing party ever!

Rock Climbing themed birthday party

With a Rock Climbing Gem Birthday Party, life really is a party!

More Party Inspiration

  • Chocolate themed birthday party with chocolate dessert table.
    Chocolate Themed Party
  • Mermaid themed food ideas for a party.
    Mermaid Themed Party Food Ideas
  • Rainbow art party ideas.
    The Rainbow Art Party
  • Ice cream party sundae bar with colorful toppings in mason jars and DIY cone backdrop.
    Ice Cream Party Ideas: Sundae Bar, Activities & Decor

Harry Potter Family Movie Night

Jan 17, 2017 · Leave a Comment

Harry Potter family movie night ideas.

This Harry Potter Family Movie Night with the kids has ideas for homemade wands, decorations, butter beer recipe, golden snitch chocolates, and every flavour jelly beans.

Harry Potter family movie night ideas.
[feast_advanced_jump_to]

Why We Love This Movie Night

  • Harry Potter!!!! We're big fans!
  • The DIY Harry Potter wands were easy to make with things from around the house, and came out so great.
  • We made butterbeer, and goldsnitch chocolates and they were delicous.
  • The DIY Harry Potter decor from things was a fun detail to add.

Over the last few months, my daughter Paige has been reading the Harry Potter books.  So we've started watching the movies together as she finishes each book.  Over the Christmas break we enjoyed the first three together, and last Saturday we made a Family Movie Night out of the fourth Harry Potter Movie.  It was so much fun, that I wanted to share it with you and possibly inspire a Harry Potter Family Movie Night of your own.

We did this party quite awhile ago, and it inspired even more DIY Harry Potter decor, including a whole set of Harry Potter Free Printables you might like. And we created a whole snack tray of Harry Potter snacks that are perfect for a Harry Potter movie night. And our Harry Potter Christmas Tree post, includes a whole Honeydukes candy cart and free printables! You might also like our Harry Potter Christmas Party ideas. Be sure to check them out for more ideas.

Harry Potter Family Movie Night homemade decorations

We didn't have anything planned Saturday, and those are sometimes the very best kind of Saturdays.  I knew we were planning to watch the next Harry Potter movie, since Paige had finished the book and when I was out shopping that week I noticed a package of Bean Boozled  Jellybeans -they're just like Bertie Botts Every Flavour Beans, so I picked them up on an impulse, thinking they might be fun for movie night.

You know how much we love a theme around here, so I mentioned to the girls I'd picked up the jelly beans, and asked if they'd like to turn it into a family party.  The apple doesn't fall too far from the tree, of course they loved the idea of making it into a family party.  And so, our Saturday was filled with creating our little Harry Potter party.

Harry Potter homemade party decorations

Harry Potter Decorations

They decorated the living room with a few Harry Potter inspired things.  They added Harry's luggage pile and owl Hedwig, along with a broom for flying -not exactly the Nimbus 2000, haha, but close enough.

how to decorate for a Harry Potter party

We were inspired by the scene in the first book where all the school letters come flying out of the fireplace, and added some letters on fishing line to our fireplace.  

On the side chair, is Harry's cloak of invisibility.  

And up on the mantel, a favourite quote "Mischief Managed".

Harry Potter Family Movie Night decor ideas

Harry Potter Movie Night Menu

We often make homemade pizza for family movie night, so we enjoyed that with a salad for dinner, and ate in the living room watching the movie.  To go with our pizza we made our own Butter Beer, and it was soooo good.

Harry Potter Family Movie Night dessert table

Butter Beer

To make the Butter Beer, we combined a little bit of vanilla cream soda in the bottom of the cup with some butterscotch sauce, and stirred well to combine.  Then we topped it with more cream soda.  We added whipped cream to the top, and another drizzle of butterscotch sauce.  It was kind of like a soda float, so good.

homemade butter beer
Harry Potter Family Movie Night golden snitch desserts

Harry Potter Dessert

For our dessert, we made some golden snitches out of Ferrero Rocher chocolates.  We used free printable Golden Snitch wings, and hot glued them to the wrappers.

golden snitches made from chocolates

We also ate the jellybeans.  This was so funny.  

We put them all into a little bowl.  You know that sweet smell you usually get when you open a bag of candy?  Well it was certainly missing here, since the vomit, grass, and dog food jelly beans were mixed in there too.  

We took turns choosing one and seeing what we got.  It was so funny to see some of the reactions to a first taste.  And also funny to see who refused to play anymore after one round, haha.

homemade Harry Potter style wands

DIY Harry Potter Wands

My girls spent most of the day before the movie working on their wands.  

They used inexpensive plastic chopsticks as the base for each one, and then added dimension with hot glue.  For some of them we also added beads, and polymer clay details, or beautiful marbles.  

Once they were done, we painted them with regular craft paint.  

They turned out so, so well.  I think they were their favourite part of the day.

how to make your own harry potter wand

Harry Potter Costumes

My an girls also made some costumes for us.  They made the sweetest little doggie Hogwarts uniform for our dog Oscar, out of felt and hot glue.
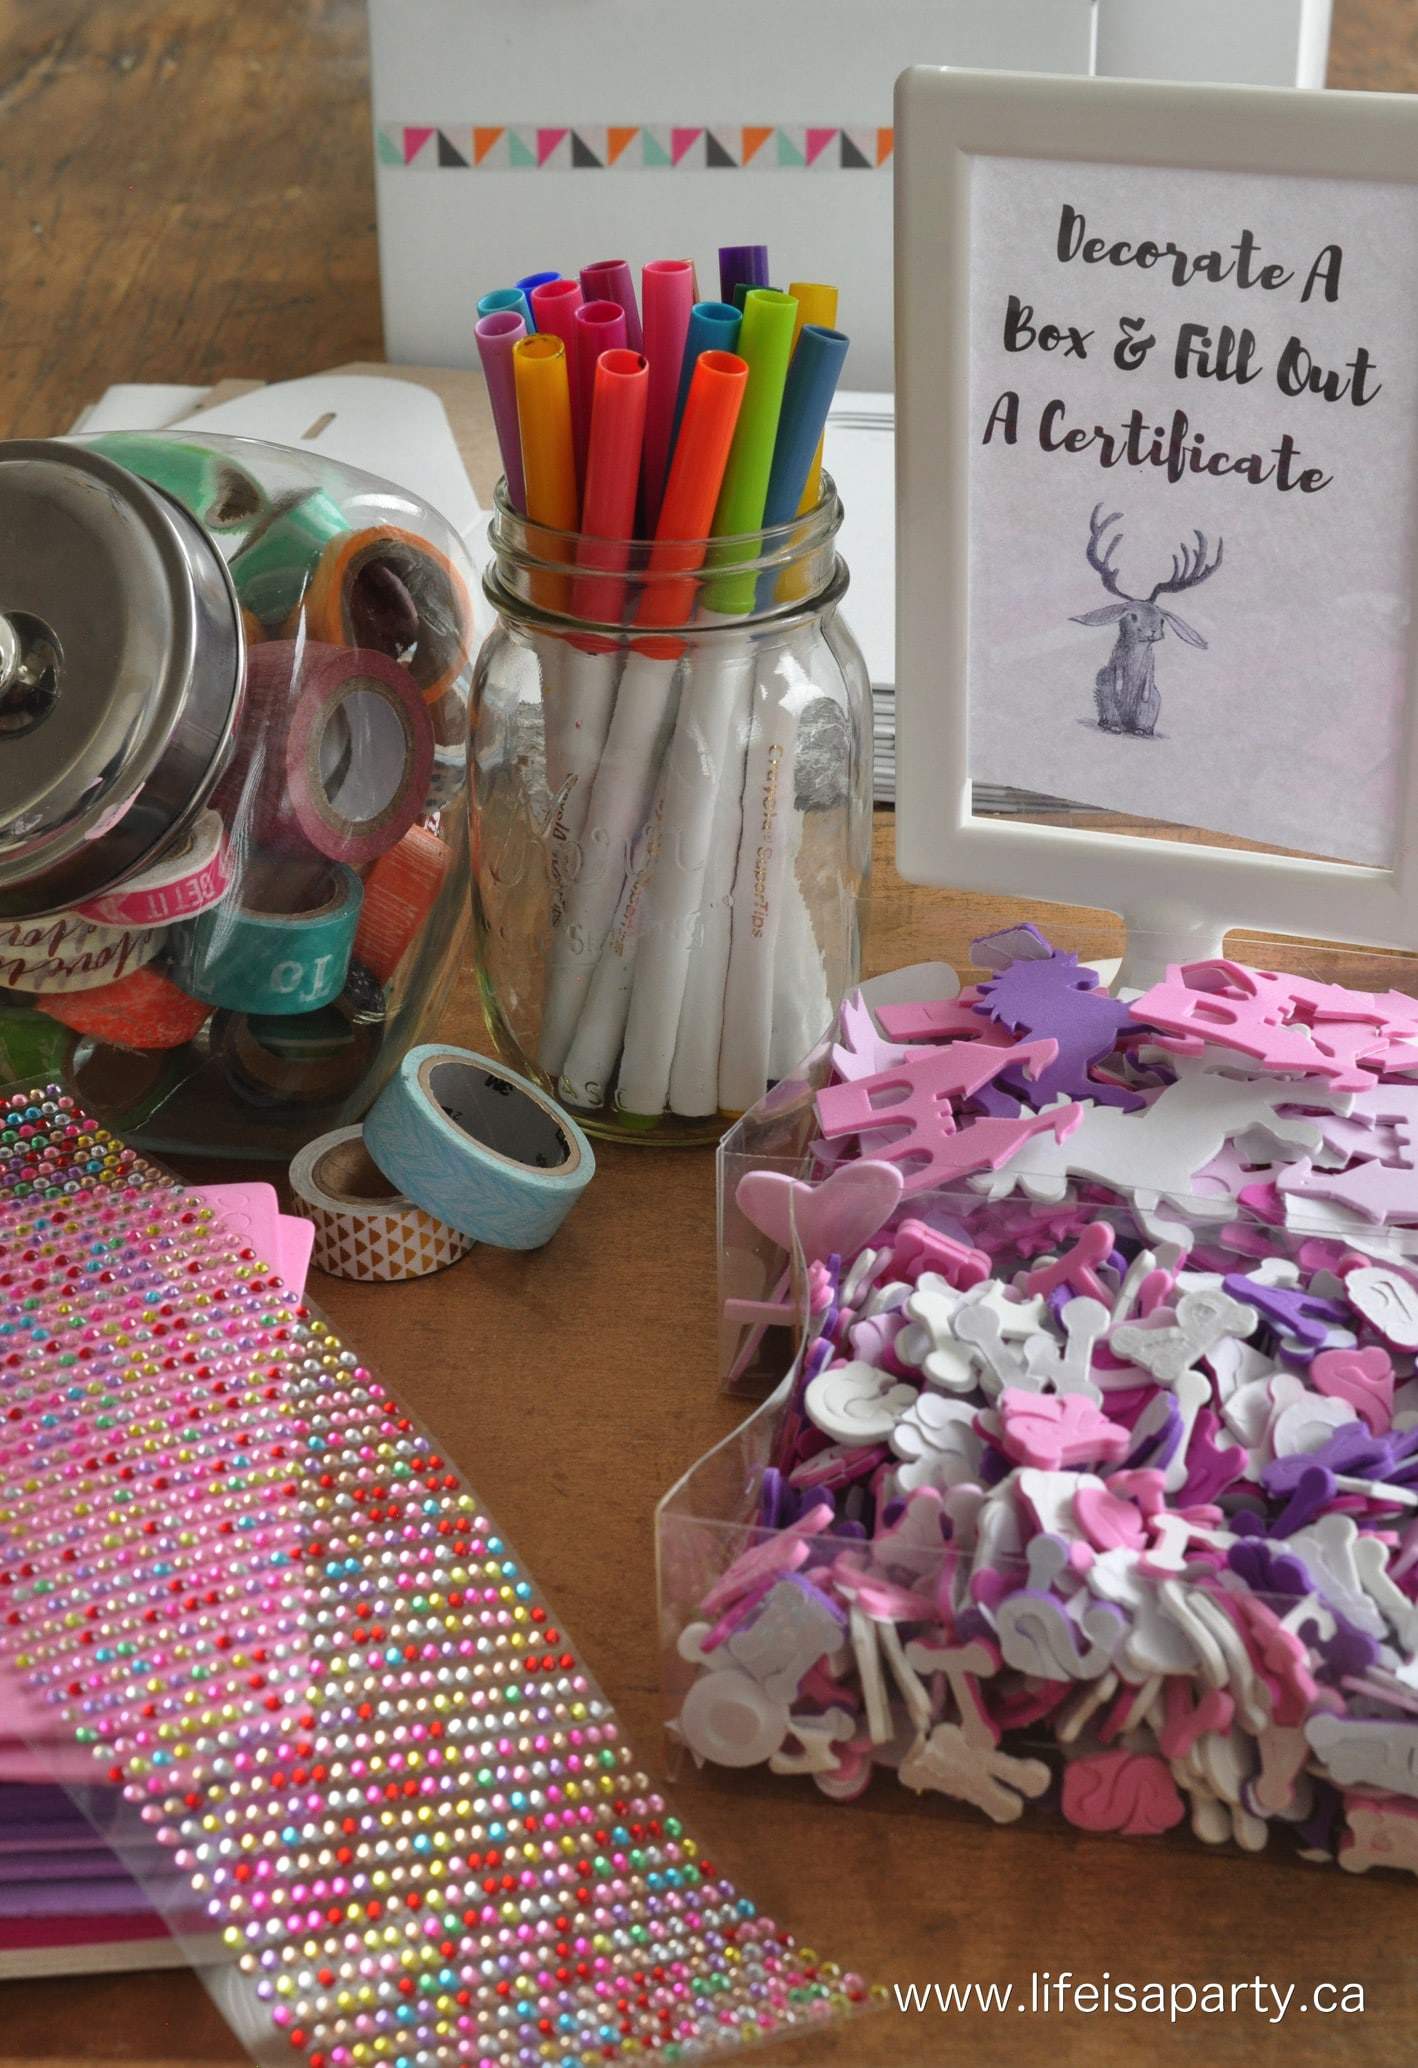
Harry Potter dog costume

And for the rest of us, school ties to match our houses.  We had all taken an on-line quiz before to see what house we belonged to.

Harry Potter Family Movie Night house ties

This was such a fun night, and I know we were making special memories too.

Harry Potter Family Movie Night -homemade wands, decorations, butter beer recipe, golden snitch chocolates, and every flavour jelly beans.

It was almost all stuff we had around the house.  I think the only thing I had to buy was the package of jelly beans.  

It's a reminder to me that sometimes all we need is time enough to create something fun.  Often our weekends are busy, or full of errands and jobs to do, but there is something special about a Saturday with no real plans,and all the possibilities it holds.

Harry Potter Movie Night dessert table

As we say around here a lot, life is what we make it, so we may as well make it a party, and this is the perfect example of that.  May your life be marked with great celebrations, some as simple as an amazing family movie night.

Harry Potter dessert ideas

With a Harry Potter Family Movie Night, life really is a party!

More Movie Night Inspiration

  • Harry Potter snacks and treats board.
    Harry Potter Inspired Snacks and Treat Ideas
  • Harry Potter DIY Decor & Free Printables used to create this Potions Classroom.
    Harry Potter DIY Decor and Free Printables
  • Free movie night printables including a free ticket, popcorn banner, food labels, and signs.
    Free Movie Night Printables
  • Halloween movie night free printables
    Halloween Movie Night Ideas and Free Printables

If you try any of our Harry Potter Movie Night Ideas or any other ideas on my blog please let me know how it went in the comments below. Thanks for visiting today!

Frequently Asked Questions

Where did you find the every flavor beans?

I spotted them at the party store. You could also look for them at speciality candy shops or on-line.

How long did it take to make the Harry Potter wands?

We worked on the in stages, since we need to let the hot glue dry, bake the polymer clay, let it cool, attach it with hot glue, and then finally paint the wands. It was probably an hour or two project, broken up over the afternoon.

Where did you get the suitcases and bird cage?

These are some vintage ones I actually use as decor. I found the suitcases at an antique show years ago, and the bird cage was a thrift store find that we spray painted gold to use as decor. They came in handy for this project.


The Best Homemade Gingerbread Milkshake Recipe

Dec 23, 2016 · Leave a Comment

Gingerbread milkshake with homemade gingerbread syrup.

Gingerbread Extreme Milkshake Freakshake: Recipe for gingerbread syrup and gingerbread extreme milkshakes. 

How to make a gingerbread milkshake.
[feast_advanced_jump_to]

These Gingerbread Extreme Milkshakes are just in time for a special holiday season treat, I'm sure Santa would love one too.  If you love gingerbread cookies and holiday treats, then this is the recipe for you.

If you haven't heard of Extreme Milkshakes or Freakshakes you're missing out.  They're milkshakes kicked up a few notches, with the addition of lots of extra treats on top!  But you can also make these has regular milkshakes, just leave out all the fun toppings piled on top.  Either way, these this gingerbread milkshake recipe is sure to become a new holiday favorite, and a great way to spread a little holiday cheer.

Gingerbread Extreme Milkshake recipe

I thought it would be fun to make Gingerbread Milkshakes for the holidays.  They're the perfect treat for Christmas.  I made these for my kids and they LOVED these delicious treats.

Gingerbread Extreme Milkshake with gingerbread donuts, whip cream, sprinkles, gingerbread man, and candy cane

Homemade Gingerbread Syrup

To make these sweet treats, start by making yourself a batch of Gingerbread Syrup.  It's easy to make, and uses simple ingredients, and keeps in the fridge for weeks.  It also tastes amazing with your coffee too for a little gingerbread latte.  If you love all things gingerbread flavor, you will love it.

Some recipes for gingerbread milkshakes suggest using gingerbread ice cream, but it can be expensive and hard to find.  With our easy to make gingerbread syrup, you can use regular vanilla ice cream to make your gingerbread cookie milkshake, and then use any leftover gingerbread syrup in your coffees all season long.

Gingerbread syrup
gingerbread men and Gingerbread Milkshake

Extreme Shakes

The extreme part of the milkshake is all the fun toppings piled high.  We started with dipping the rim of the glass in melted milk chocolate and then sprinkles.  Next, we topped off the milkshake with a gingerbread donut, lots of whipped cream, more sprinkles, a gingerbread man cookie and a candy cane for a classic Christmas addition. Don't forget a festive colorful straws.   A cinnamon stick would be a great garnish too.  You could also use cookie crumbs in addition to the sprinkles.  Or even add mini gingerbread houses to the top.

These would be very fun to serve at a gingerbread house decorating party.  They're perfect for anyone who loves seasonal flavor drinks this time of year, but prefers a cold treat.  Kids really love these gingerbread milk shakes.

Recipe

Gingerbread milkshake with homemade gingerbread syrup.

Gingerbread Extreme Milkshakes

Gingerbread flavoured milkshakes with toppings on top.
No ratings yet
Print Pin Rate
Course: Drinks
Cuisine: American
Prep Time: 15 minutes minutes
Cook Time: 5 minutes minutes
Total Time: 20 minutes minutes
Servings: 2 Milkshakes
Calories: 1129kcal
Author: Dannyelle Nicolle-Ramjist

Ingredients

Gingerbread Syrup

  • 1 cup water
  • 1 cup white sugar
  • 1 tablespoon molasses
  • ½ teaspoon cinnamon
  • ½ teaspoon nutmeg
  • 3 cloves
  • 1 ½ tablespoon chopped fresh ginger

Gingerbread Milkshake

  • 2 cups vanilla ice cream
  • ¾ cup milk
  • 2 tablespoon gingerbread syrup
  • optional toppings like whipped cream donuts, gingerbread men, sprinkles, and candy canes

Instructions

  • To make the Gingerbread Syrup, combine the water, sugar, cinnamon, nutmeg, cloves and fresh ginger in a saucepan. Bring to a boil, and cook stirring all the sugar is completely dissolved, about 5 mins. Allow to cool, and strain, then store in a jar.
  • To make the Gingerbread Milkshake, combine the ice cream, milk and gingerbread syrup in a blender and blend until smooth.
  • Serve in a mason jar that has been rimmed with chocolate and sprinkles, top the milkshake with a donut, whipped cream, sprinkles, gingerbread man, and a candy cane. Enjoy!

Nutrition

Serving: 1g | Calories: 1129kcal | Carbohydrates: 212g | Protein: 11g | Fat: 29g | Saturated Fat: 15g | Polyunsaturated Fat: 12g | Cholesterol: 86mg | Sodium: 407mg | Fiber: 4g | Sugar: 174g
Tried this Recipe? Tag me Today!Mention @LifeisaParty or tag #lifeisaparty!
Gingerbread Extreme Milkshake Freakshake: Recipe for gingerbread syrup and gingerbread milkshake for the holidays.

With homemade Gingerbread Extreme Shakes, life really is a party!

More Holiday Treat Inspiration

You might also like our Gingerbread Cookie Recipe here.

Gingerbread House Cookies: a classic gingerbread cookie recipe perfect for Christmas cookie ornaments or mini houses.

Also you might enjoy our Cashew Coconut Brittle here.

cashew-coconut-brittle-1.2.jpg

Check our Homemade Caramel Corn recipe here.


  • « Go to Previous Page
  • Page 1
  • Interim pages omitted …
  • Page 9
  • Page 10
  • Page 11
  • Page 12
  • Page 13
  • Interim pages omitted …
  • Page 21
  • Go to Next Page »

Primary Sidebar

Welcome!

Life is a Party is all about helping you celebrate everyday with great food, entertaining and party inspiration, and seasonal crafts and home decor inspired by the holidays.

More About Dannyelle

Trending Recipes

  • Mac and cheese with panko breadcrumb topping.
    Best Homemade Mac and Cheese with Panko Breadcrumb Topping
  • Homemade iced capps in glasses on a wood table.
    Tim Hortons Copycat Iced Capp Recipe
  • Dirt Pudding no cream cheese in glasses with candy rocks, and fresh mint that looks like a little plant.
    Easy Dirt Pudding Recipe without Cream Cheese
  • Easy 3 ingredient coconut milkshake recipe.
    Easy Coconut Milkshake Recipe
  • Easy food processor scones on a plate with jam.
    Easy Food Processor Scones
  • Fluffy small batch pancakes for two ready to serve on a plate with syrup.
    Easy Small Batch Pancakes For Two Recipe

Fall Ideas

  • Pumpkin shaped dinner roll recipe, with a herb stem.
    Pumpkin Shaped Dinner Rolls
  • Fall breakfast board
    Fall Breakfast Charcuterie Board
  • Halloween witch decorations
    Witch Halloween Decor
  • fall home decor
    Fall Decorating Ideas -Home Tour
  • Modern Boho fall mantel ideas.
    Modern Boho Fall Mantel Ideas
  • Homemade pink candy apples on a cutting board.
    How To Make Pink Candy Apples

Entertaining Ideas

  • Adult mermaid party table set on the beach with cake and shells.
    Adult Mermaid Party Ideas: A Beach Picnic Goodbye to Summer
  • Overhead view of tomato party table with pizza and appetizers.
    The Ultimate Tomato Party: A Tomato Girl Summer Garden Gathering
  • Camp themed party table with green gingham tablecloth, wildflowers, and Welcome to Camp banner.
    The Ultimate Camp Themed Party for Adults
  • Garden party table set under white pergola with vintage floral tablecloth, pink peony centerpiece in wooden tool caddy, white wicker chairs, and climbing white roses in background.
    Garden Themed Party
  • Complete mimosa bar setup on white console table with vintage silver ice bucket, labeled colorful juice bottles, small glass garnish bowls, and ribbon-tied champagne flutes on white lace tablecloth with flower wall backdrop.
    How to Set Up a Beautiful Mimosa Bar
  • Breakfast for dinner party table styled like a bed with star quilt tablecloth, gingham pillows, and cloud installation above.
    Breakfast for Dinner Party: Brinner Under the Stars
  • Recipe Index
  • Parties & Entertaining
  • Fall
  • Subscribe
  • Free Resource Library

Footer

back to top

as seen in:

Better Homes and Garden Logo
American Farmhouse Style logo.
Apartment Therapy logo.
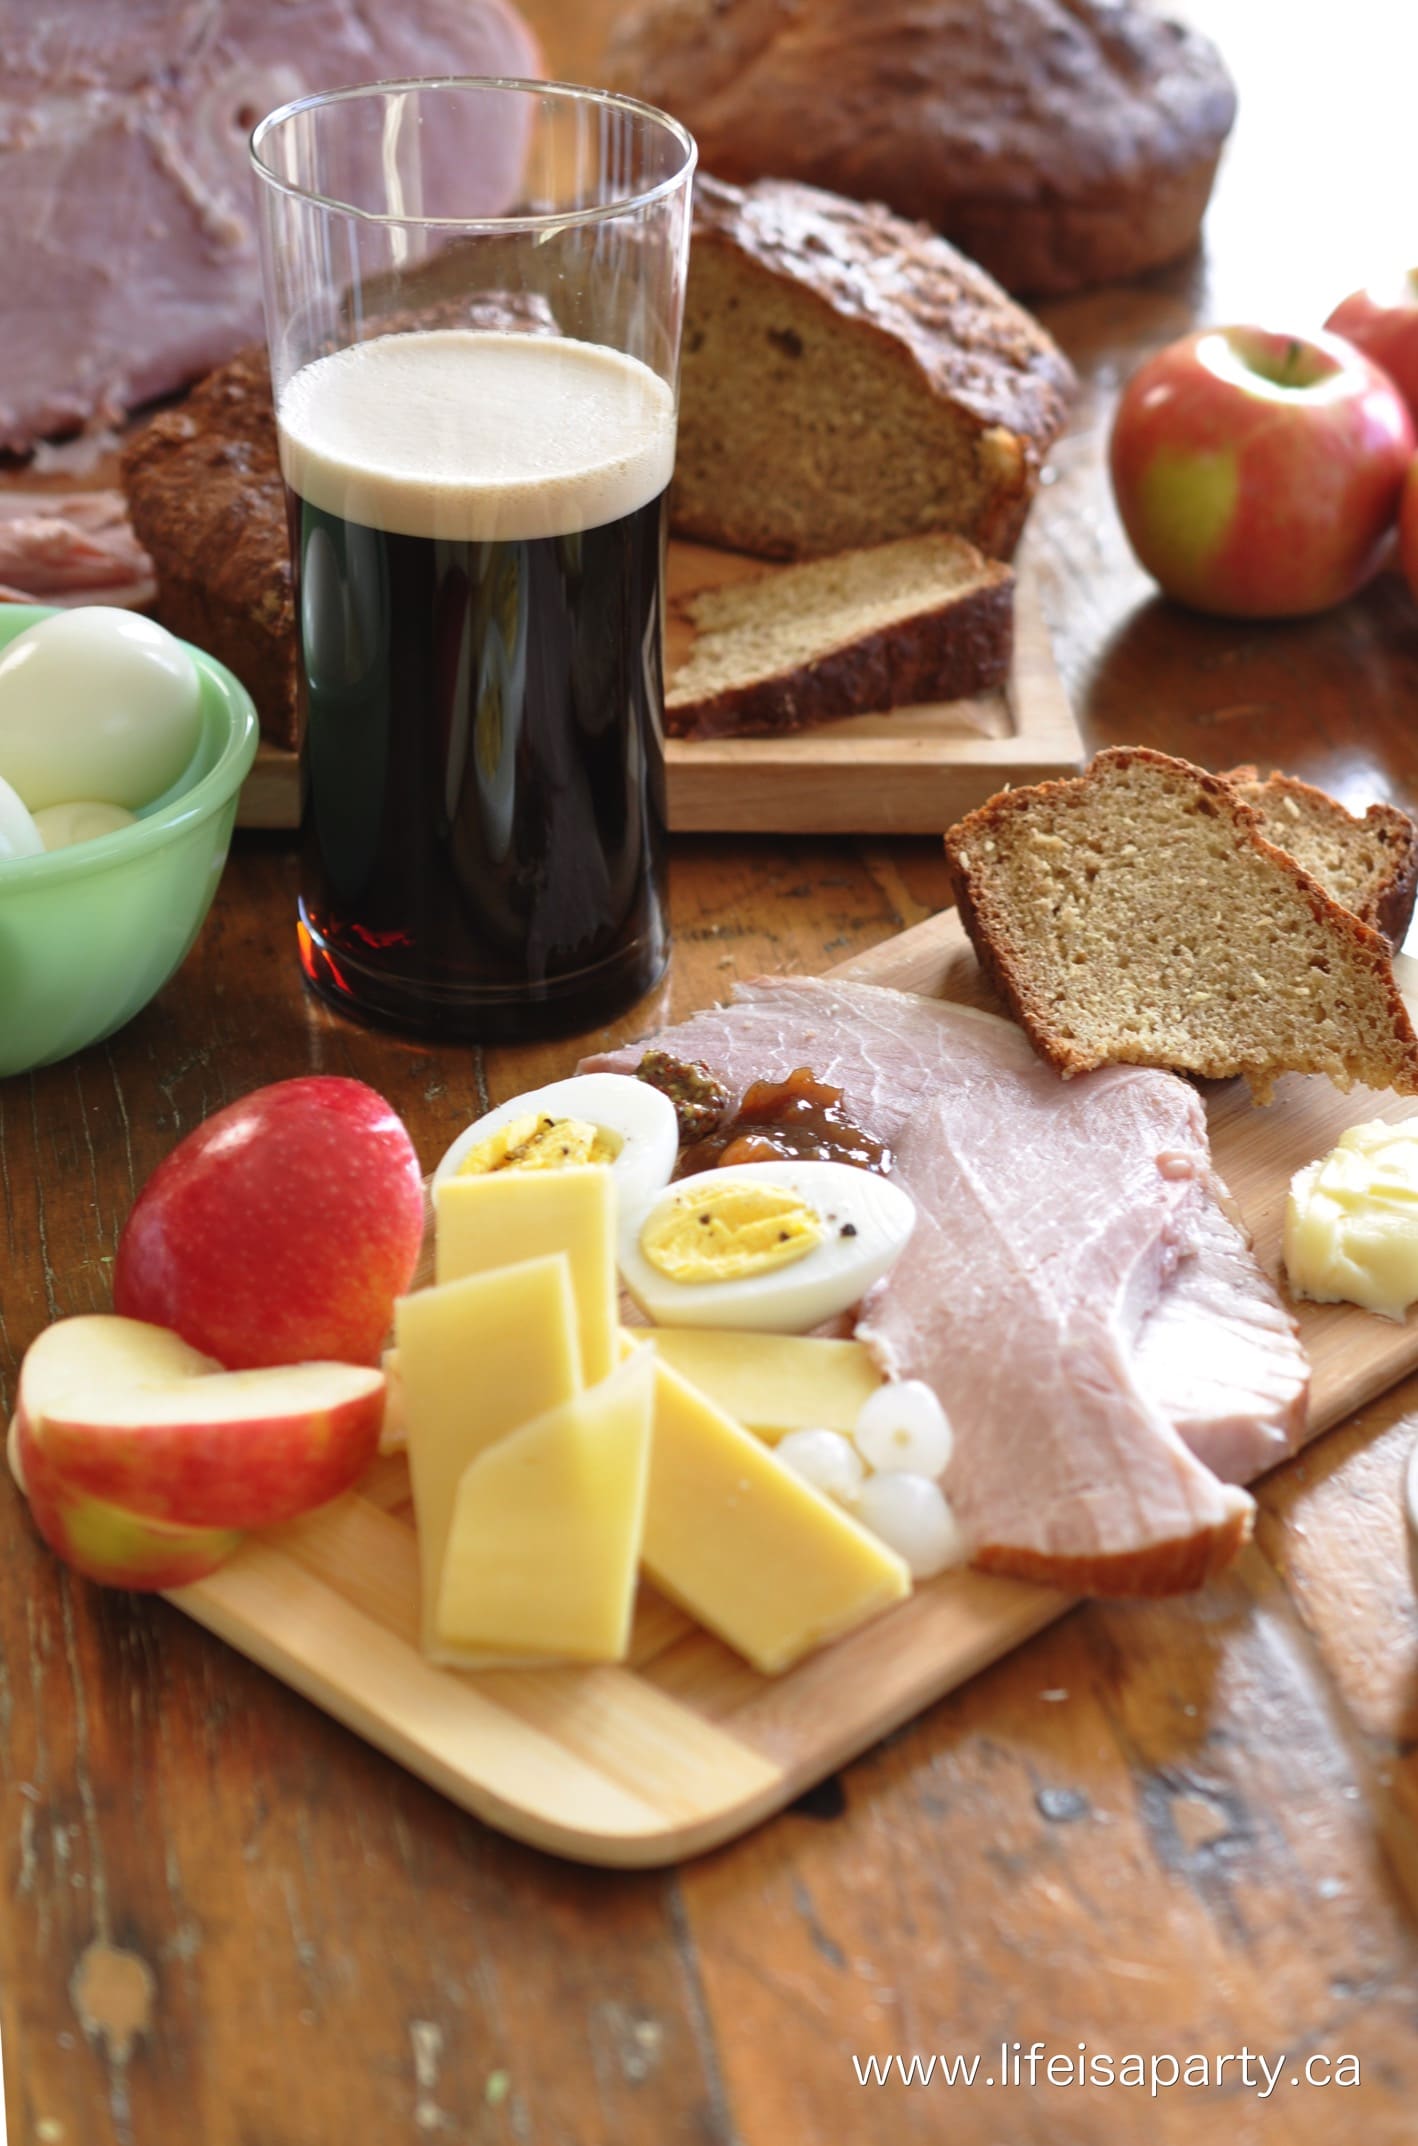
About

  • Privacy Policy
  • About

Subscribe

  • Sign Up! for emails and updates

Contact

  • Contact

As an Amazon Associate I earn from qualifying purchases.

Copyright © 2025 Life is a Party

Share
Pin
Post
Share
Pin
Post

Rate This Recipe

Your vote:


A rating is required
A name is required
An email is required