
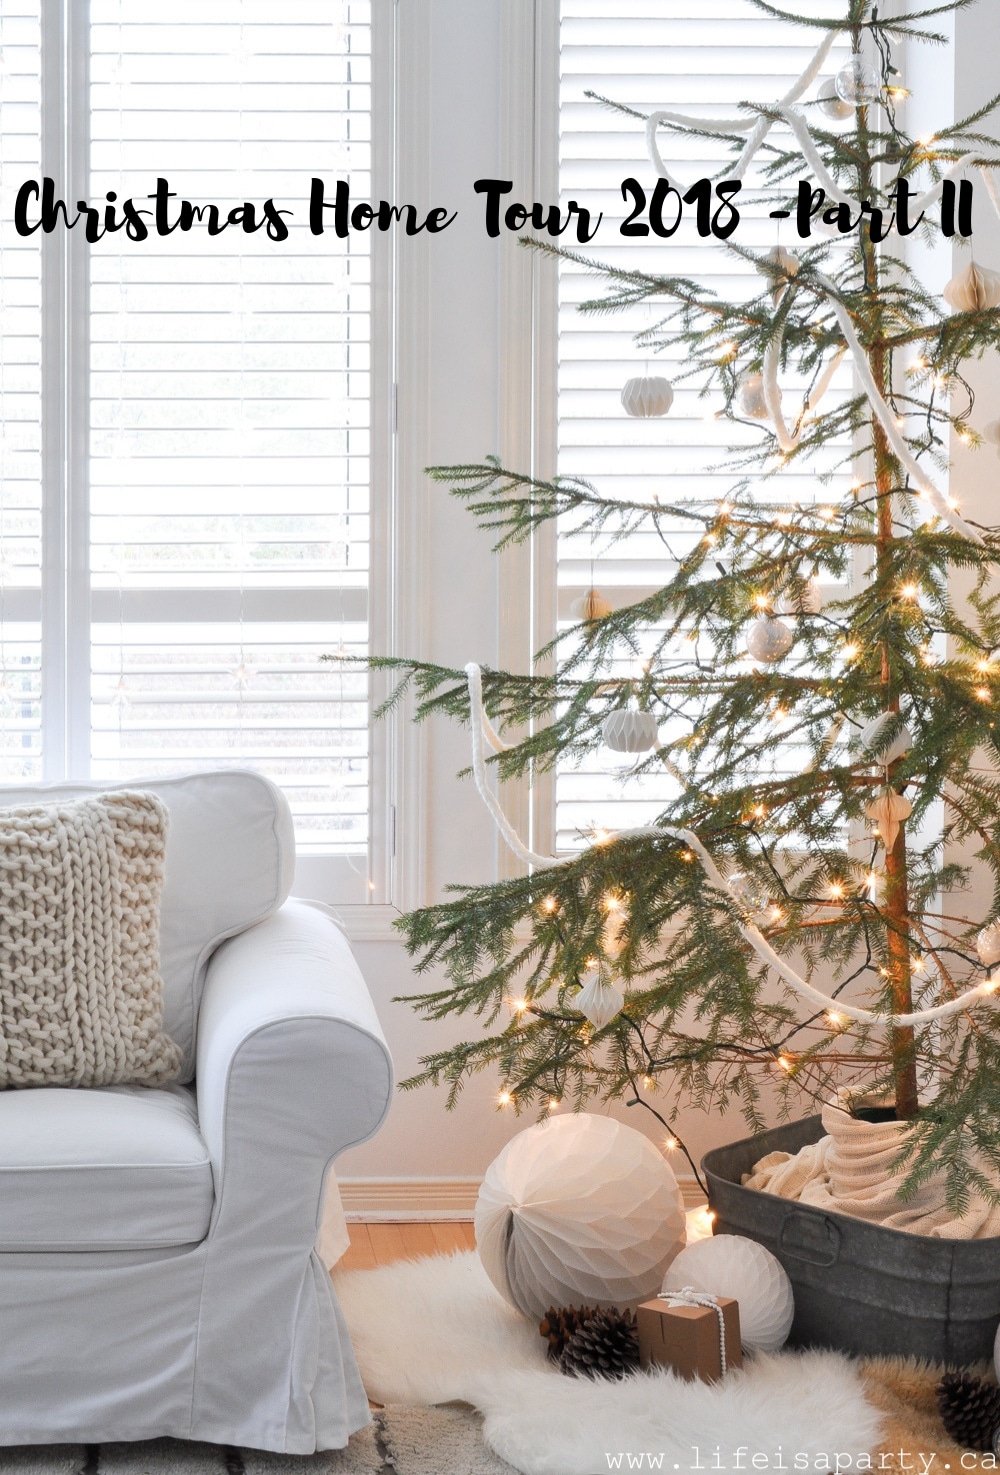
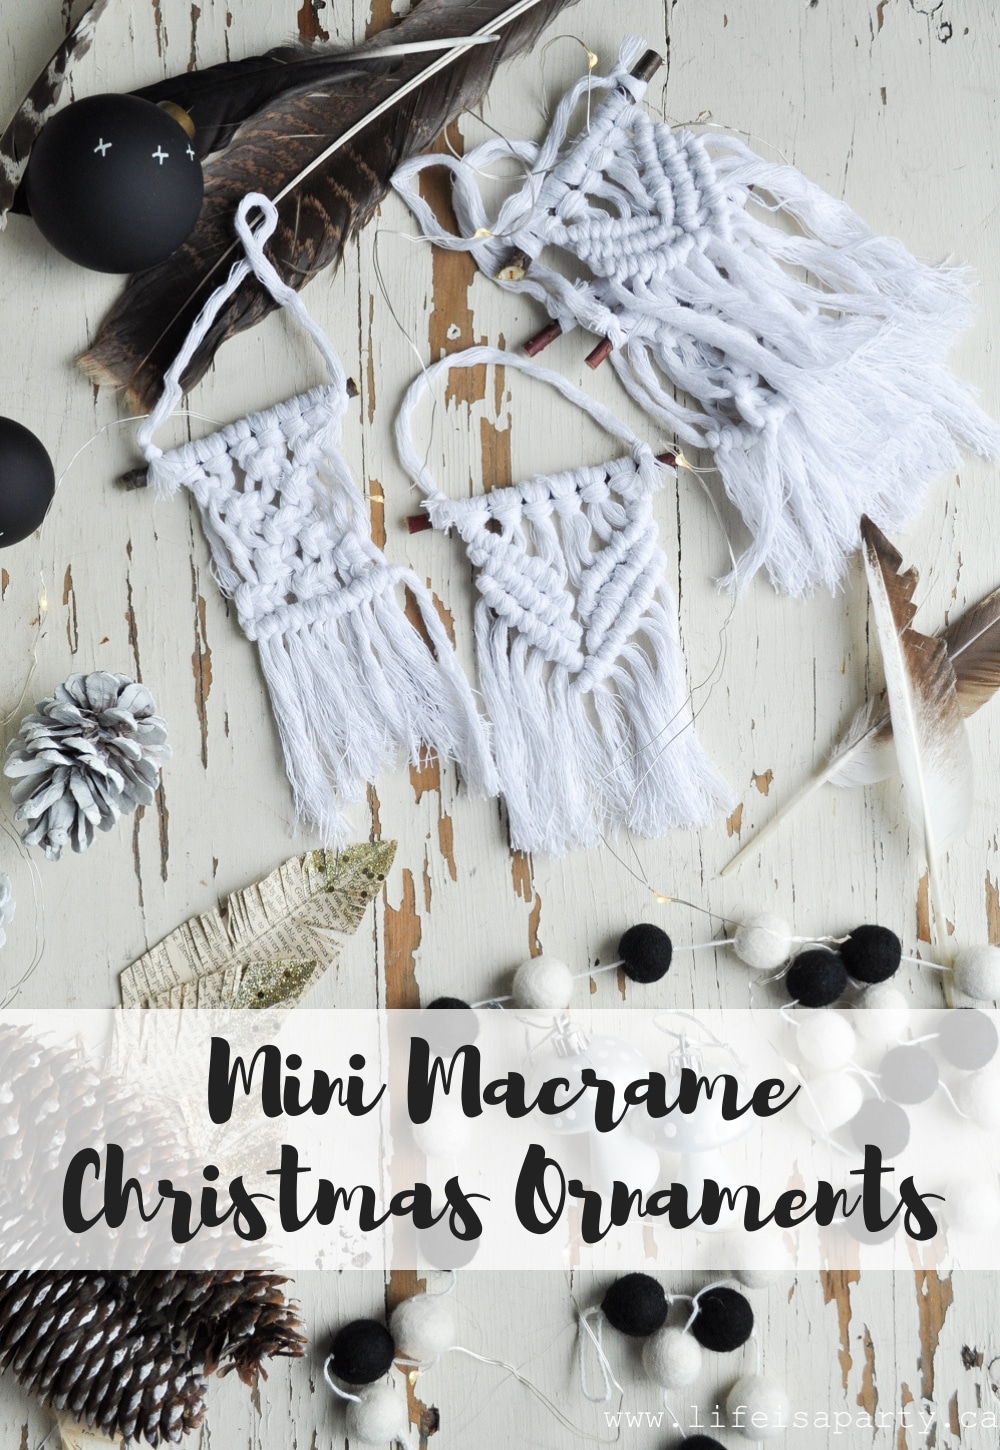
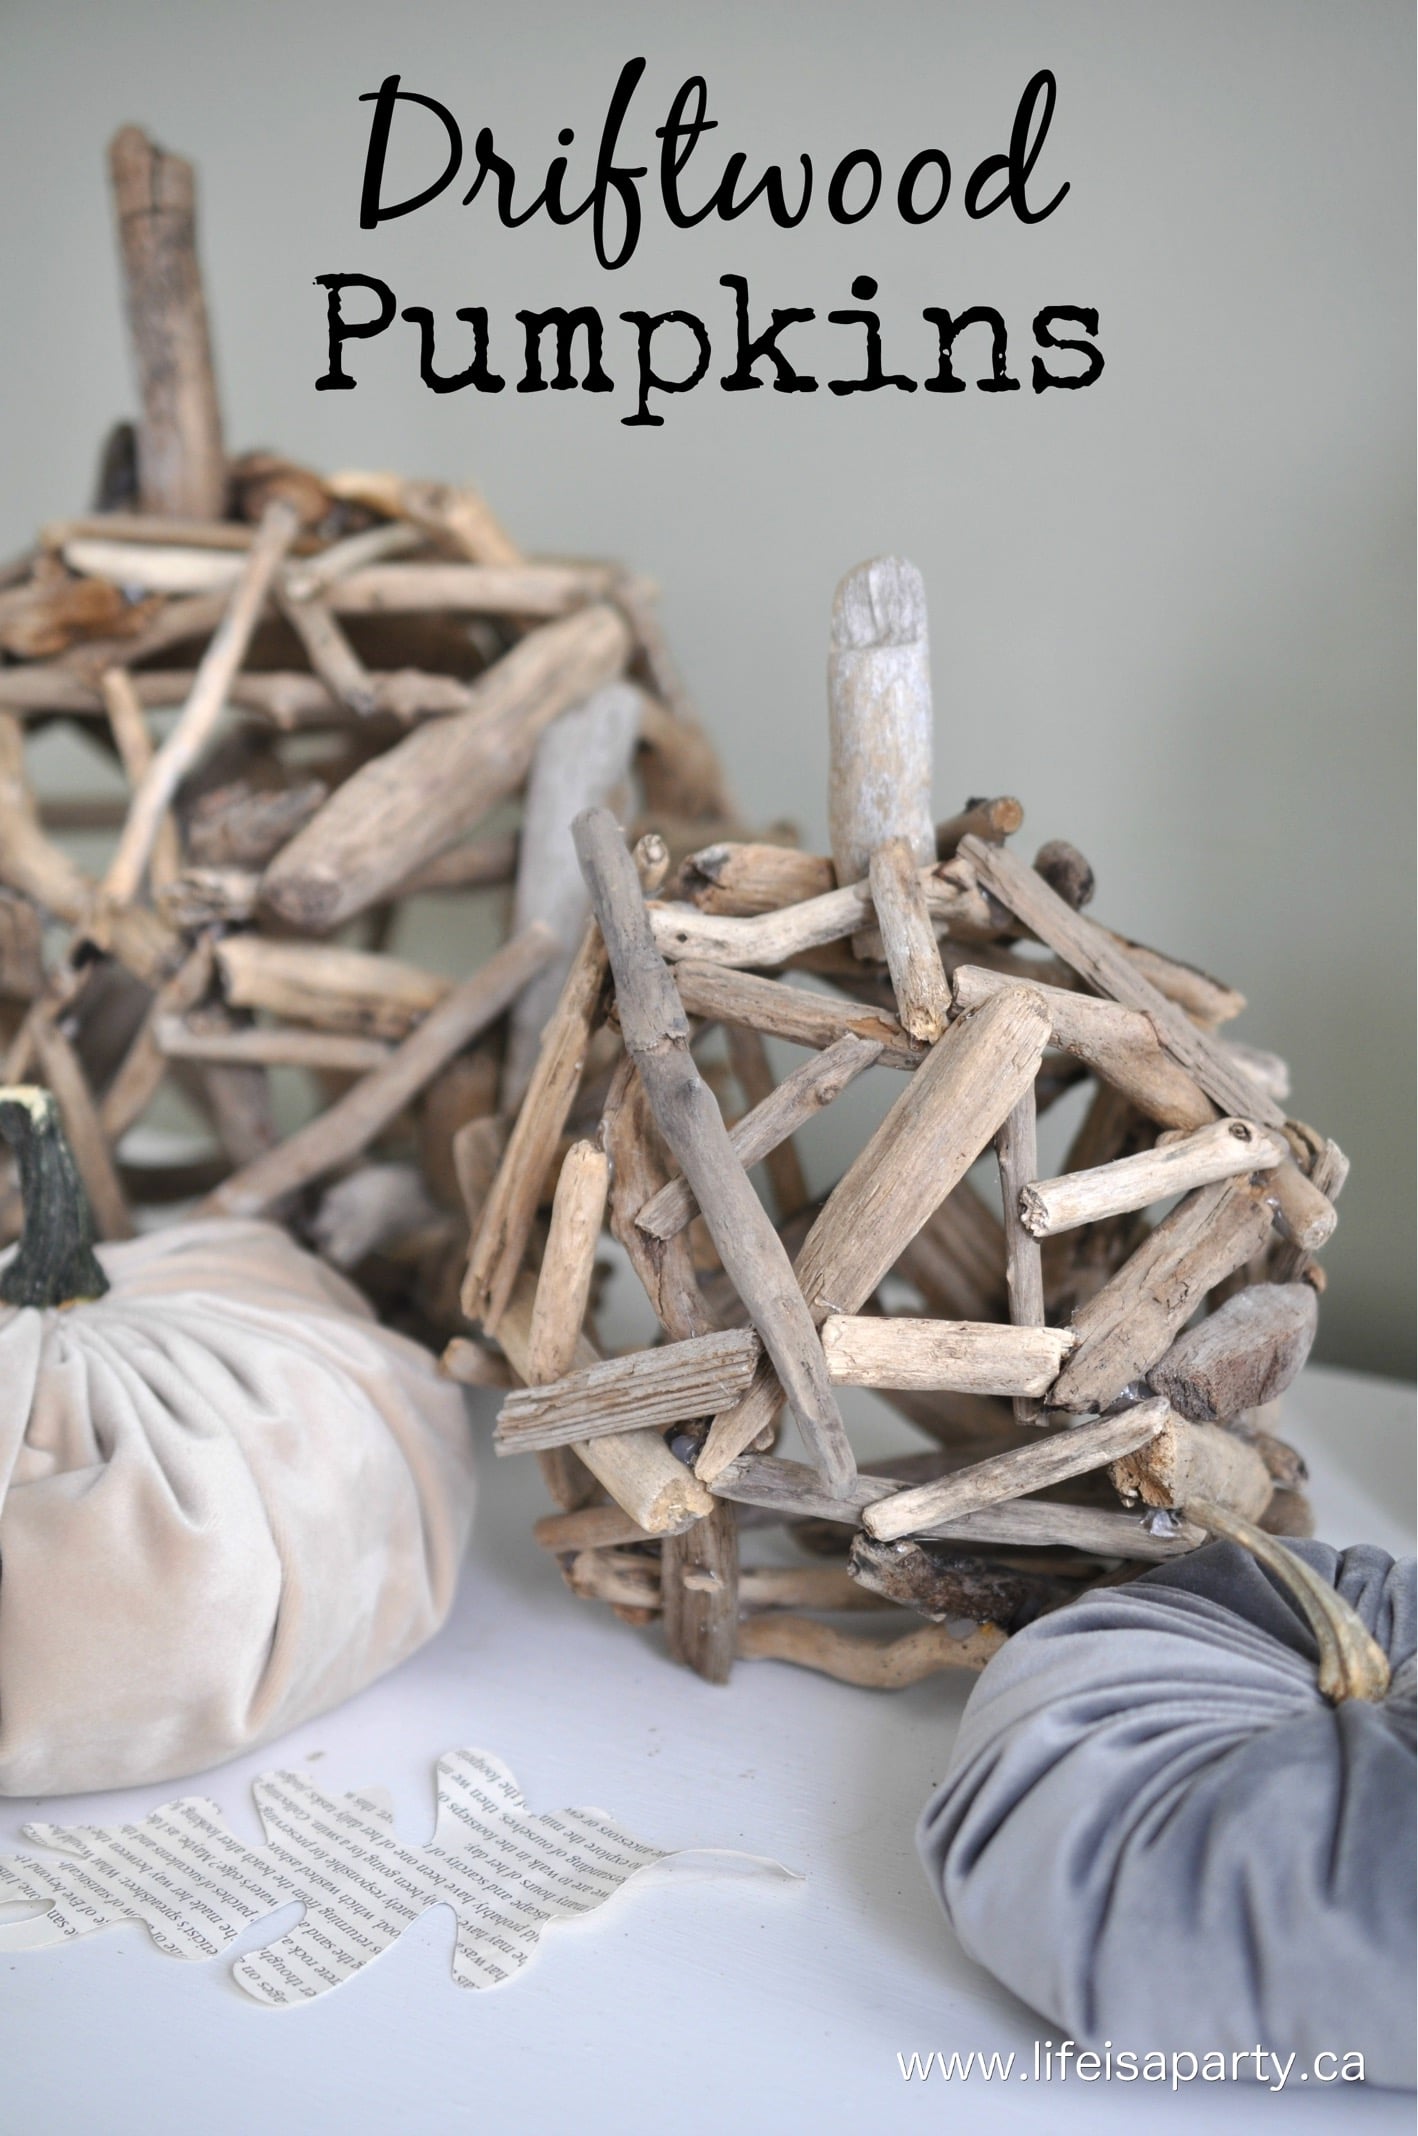
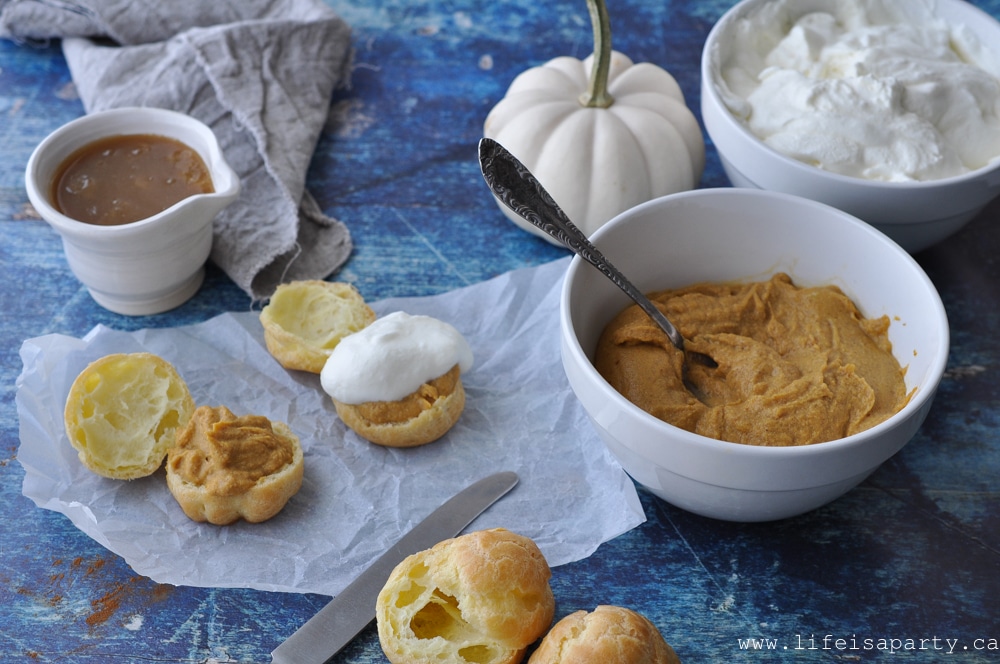
Menu Ideas for Hosting Guests with Dietary Restrictions: ideas on how to accommodate guests who are vegan, keto, dairy-free, and gluten-free.

Navigating hosting guests with dietary restrictions can be tricky for a hostess. It sounds like the beginning of a joke -a vegan, keto, dairy-free, and gluten-free person walk into a bar... At my recent Valentine's Day party I had guests that fit all four of these categories plus a few that had no dietary restrictions which made menu planning very difficult.
Since vegan and keto are almost opposites, I knew I was going to have to get a little creative. As a joke we asked Siri what to serve, and she responded nuts -pretty much the only thing everyone at the table would be able to eat, lol.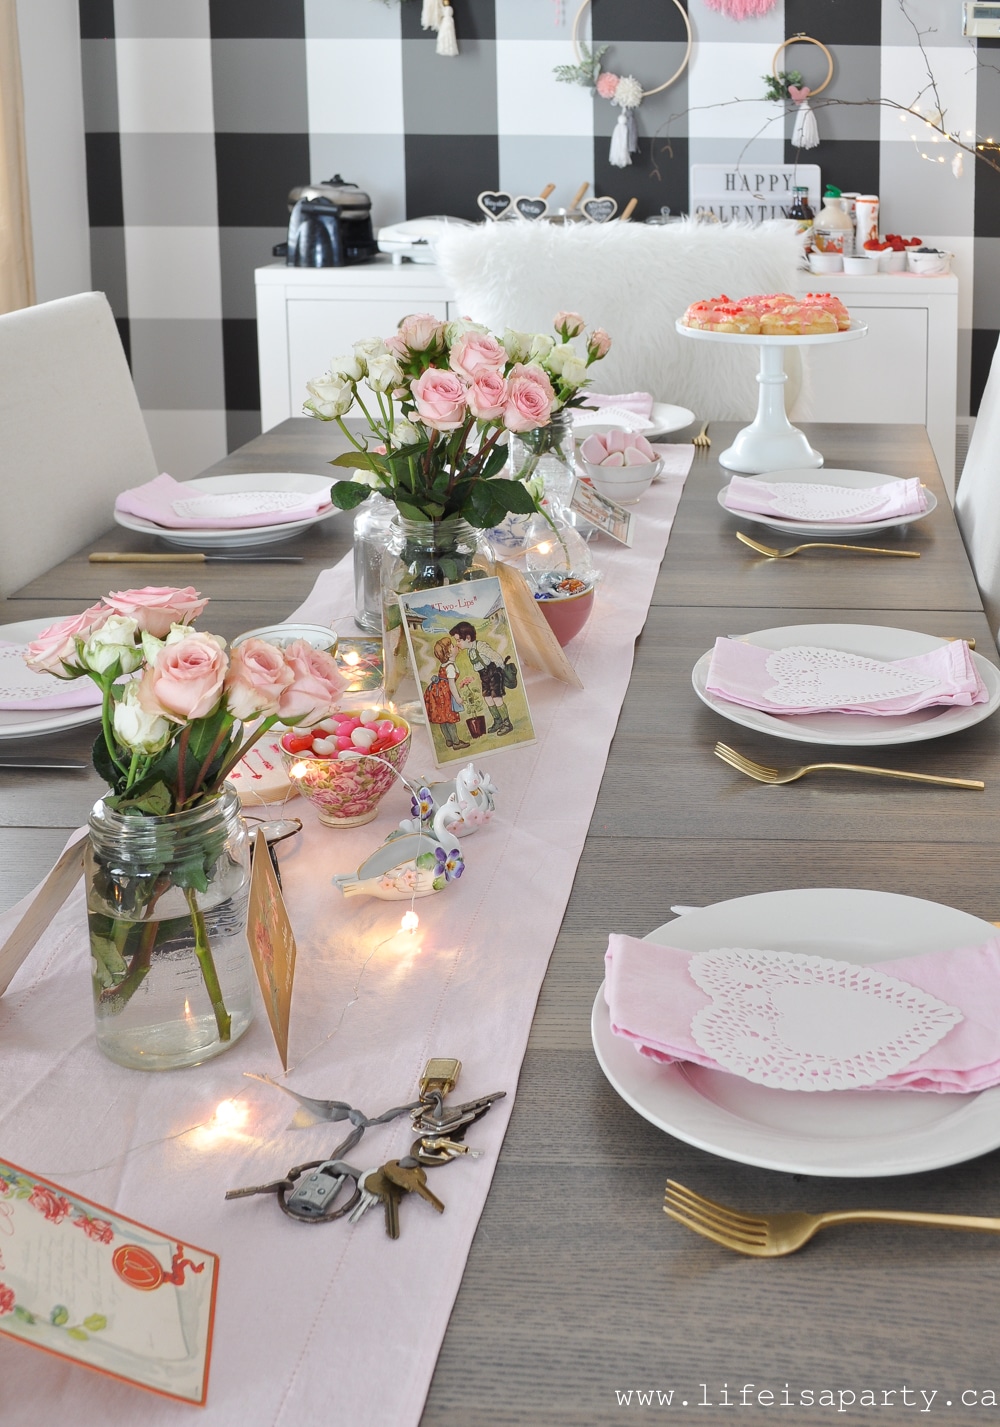
Waffle Bar Brunch
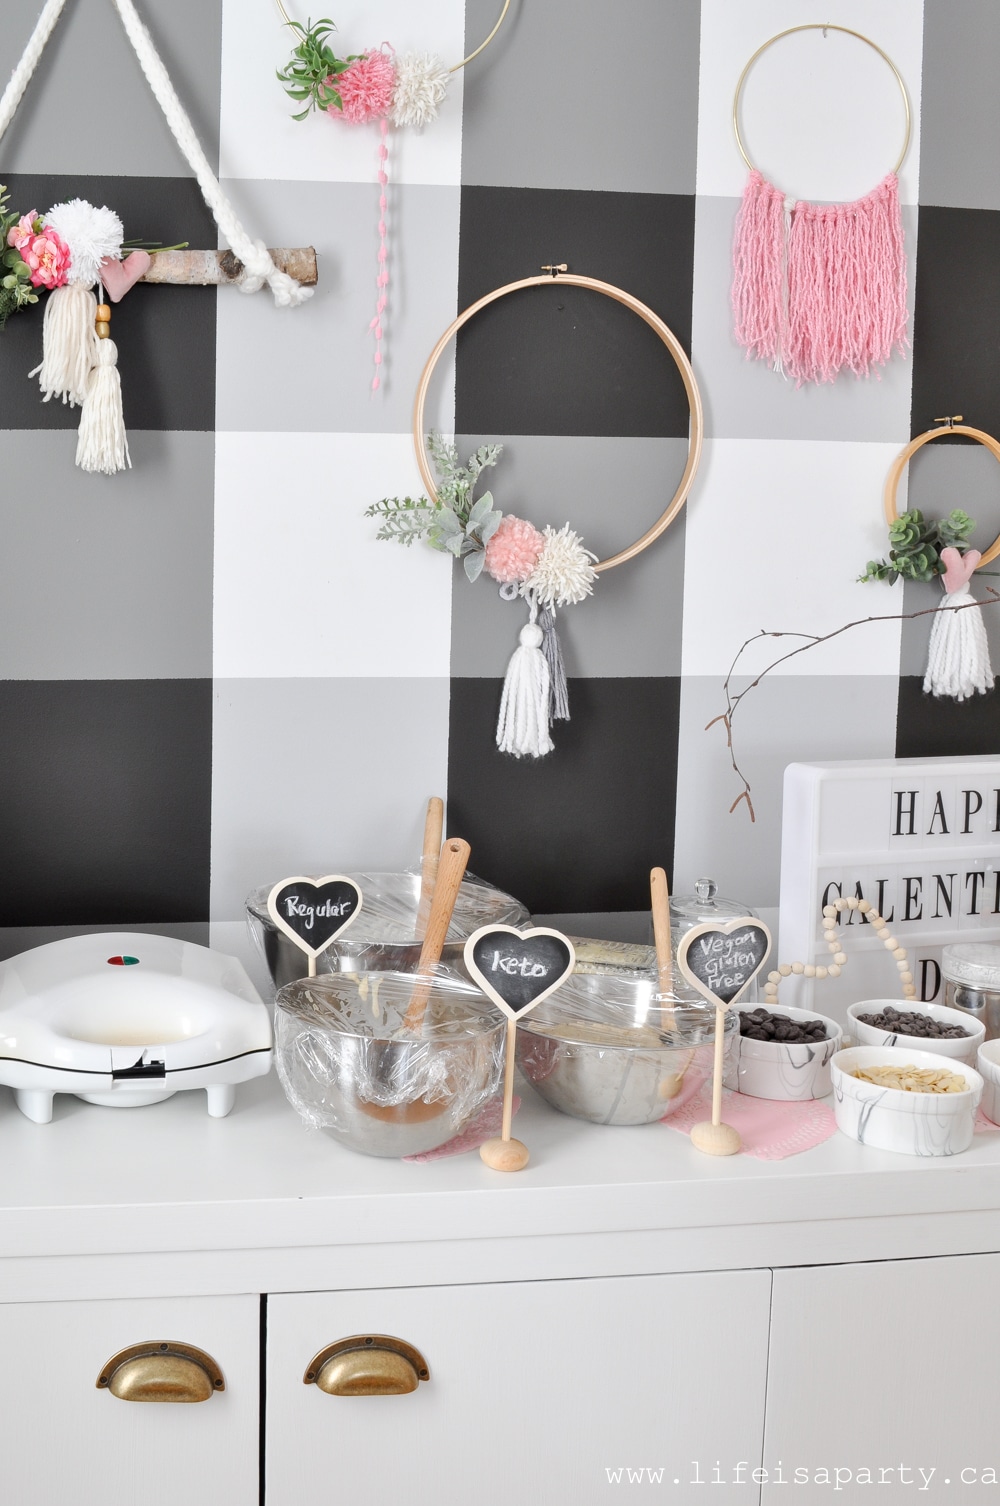
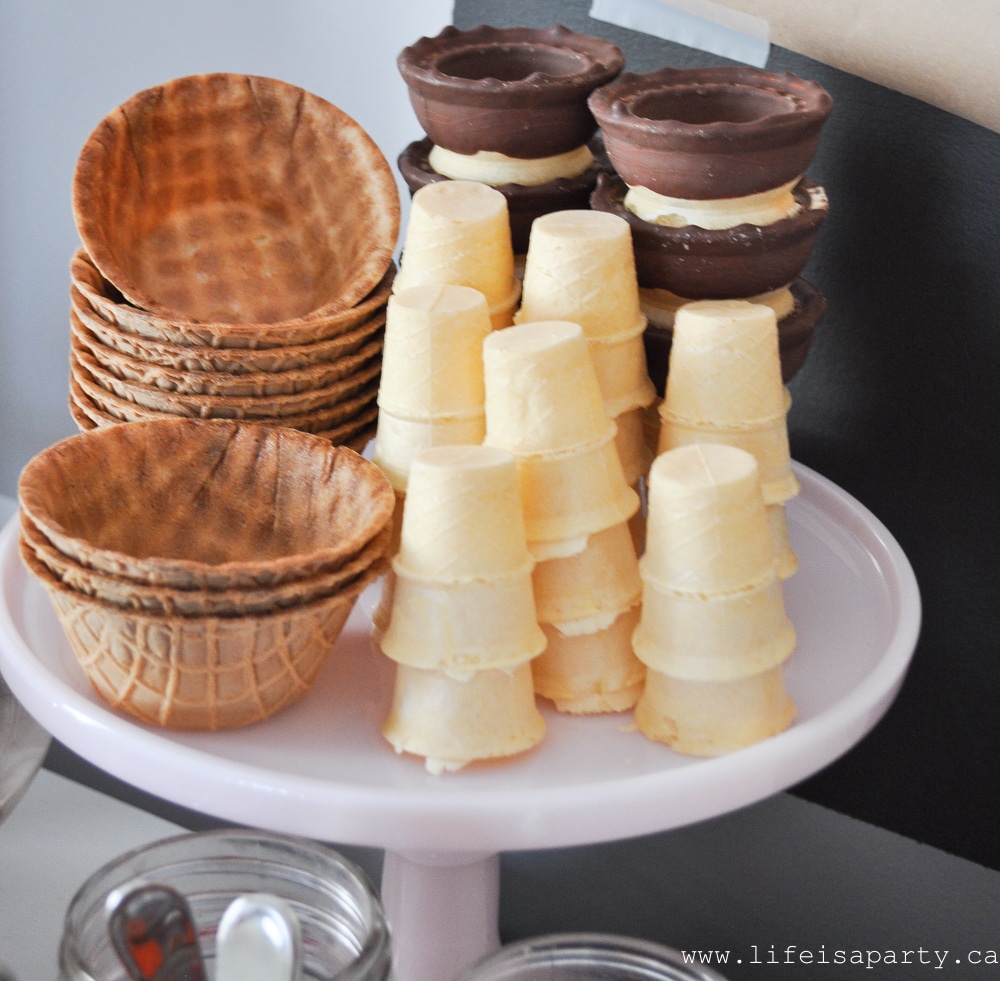
My party was for brunch, so I wanted to include breakfast foods. So here's what I came up with -A Make Your Own Waffle Bar. There was nothing that would meet everyone's needs so I realized I'd have to create different dishes for everyone. I liked the idea of waffles because then at least we'd all be eating the same thing, just different variations.
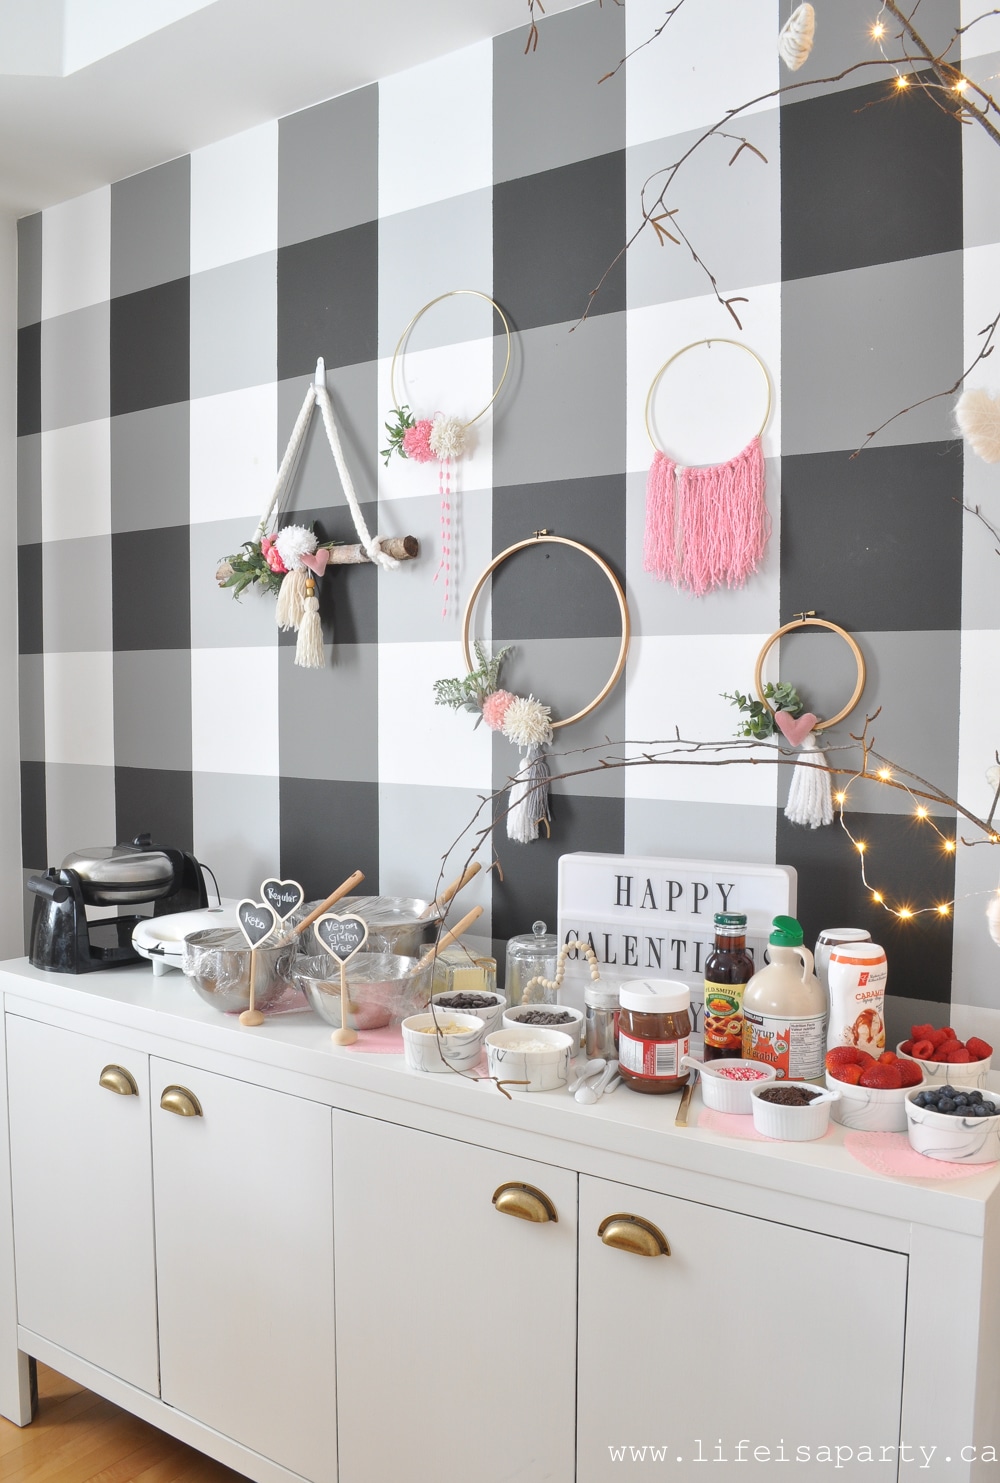
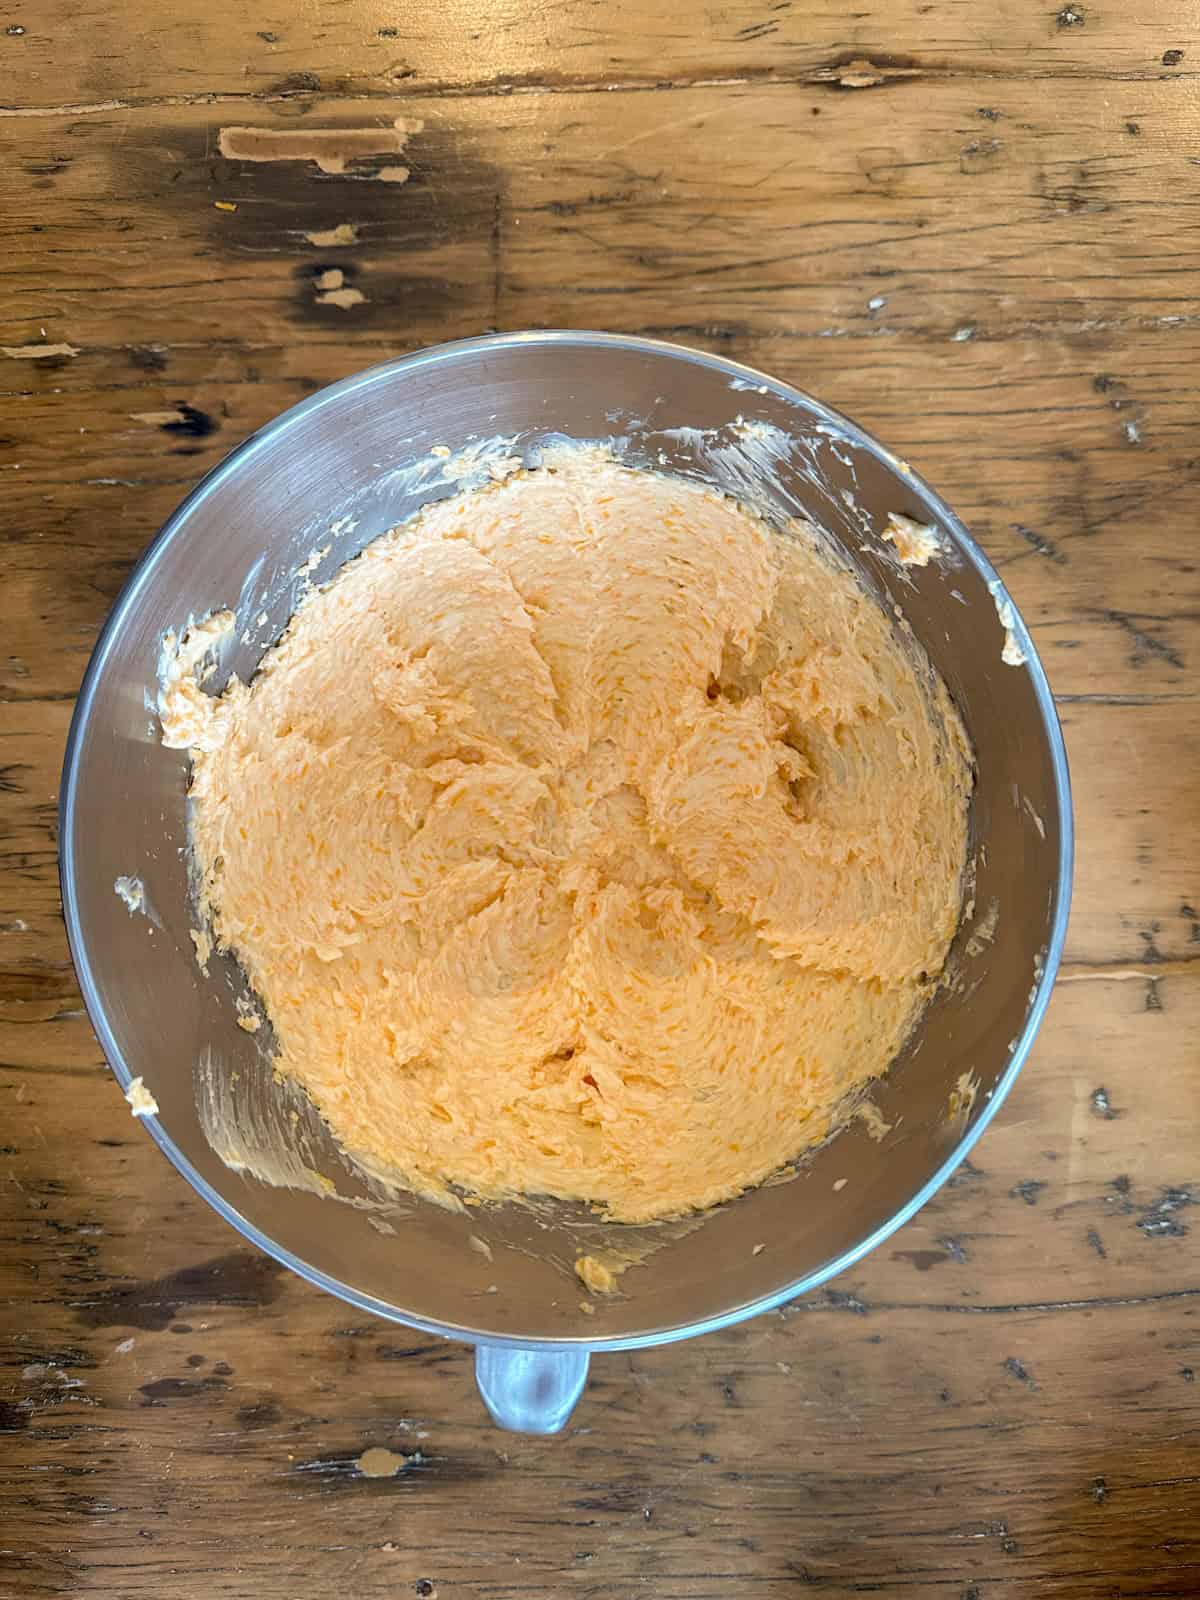
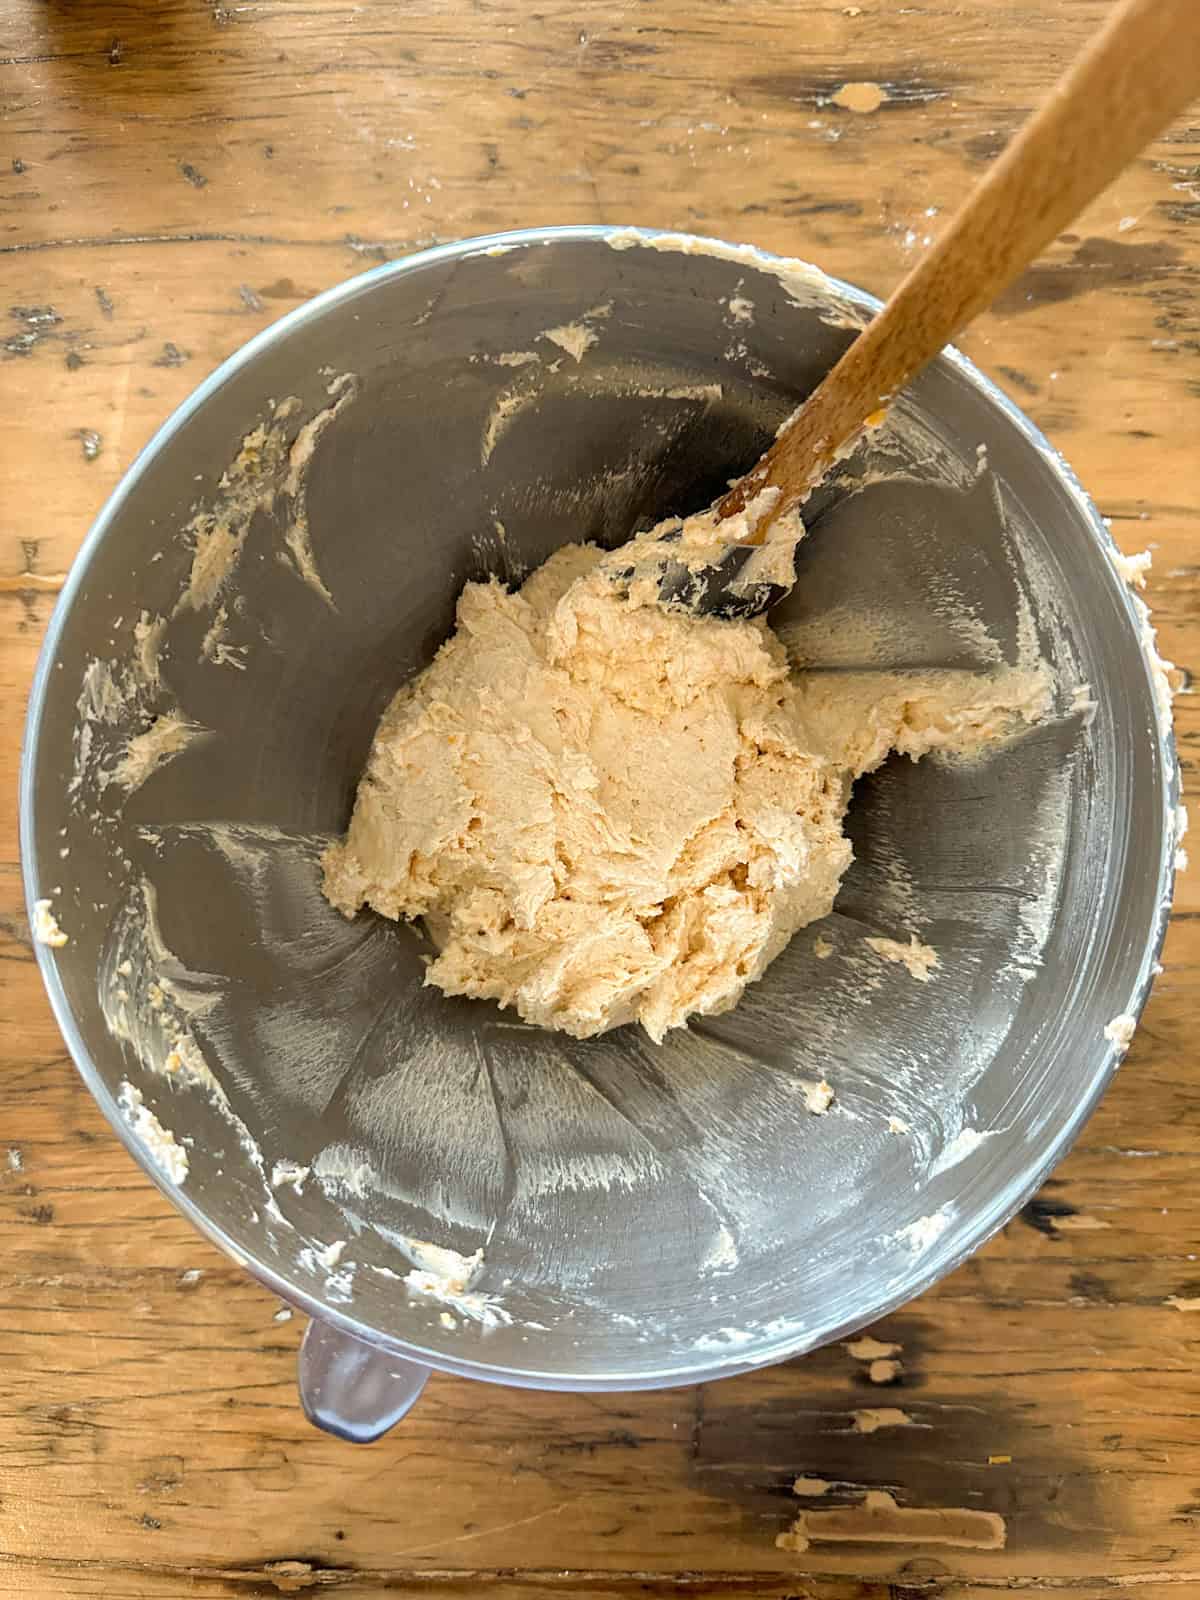
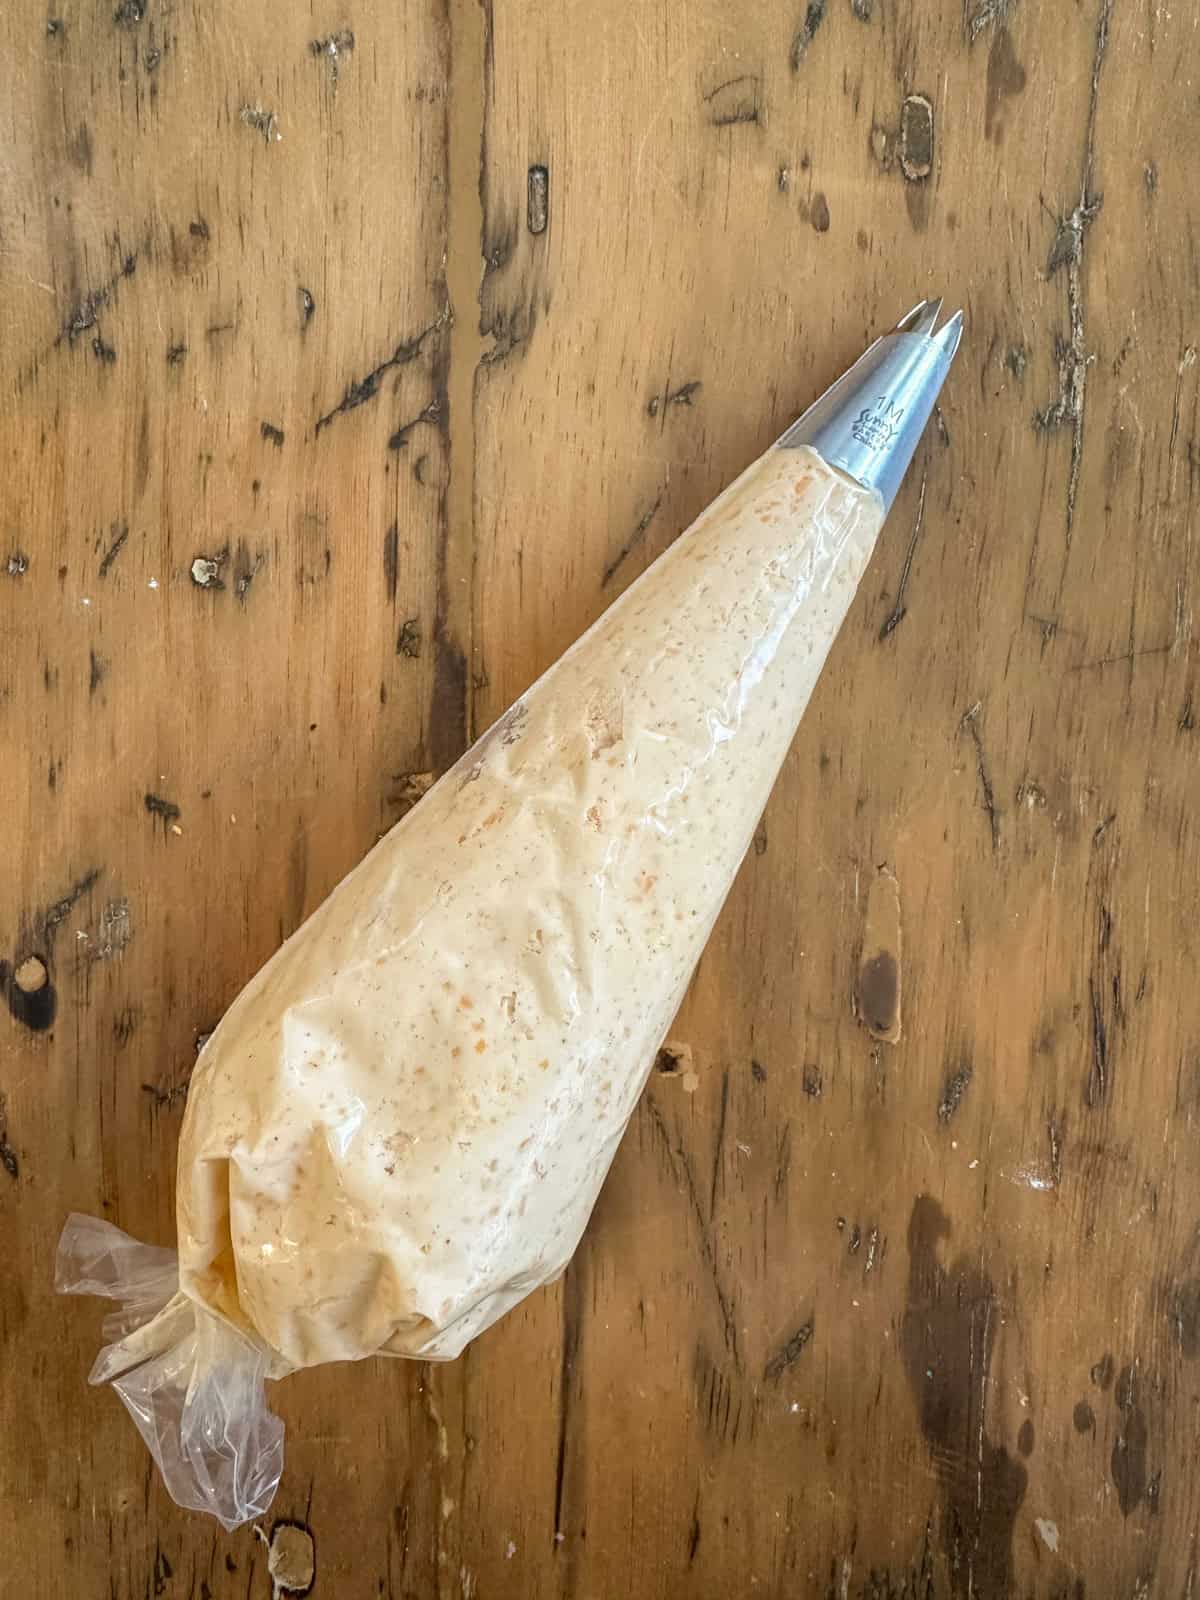
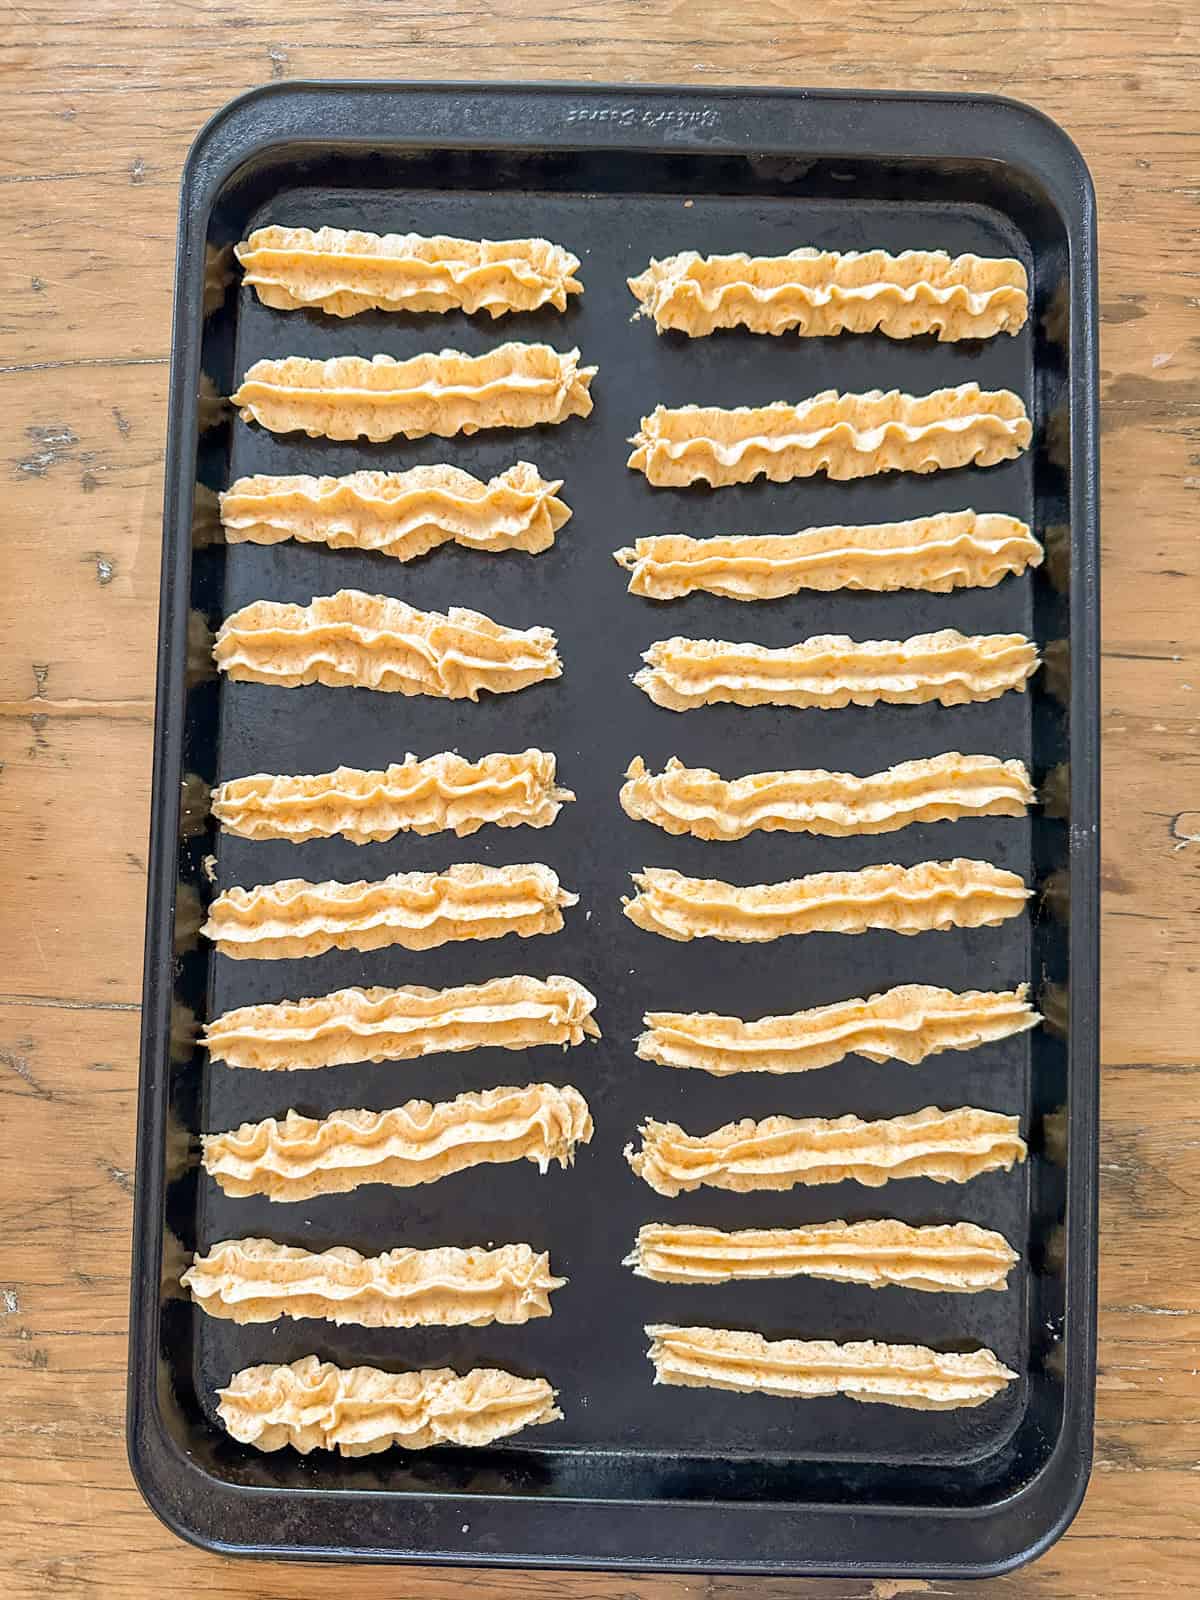
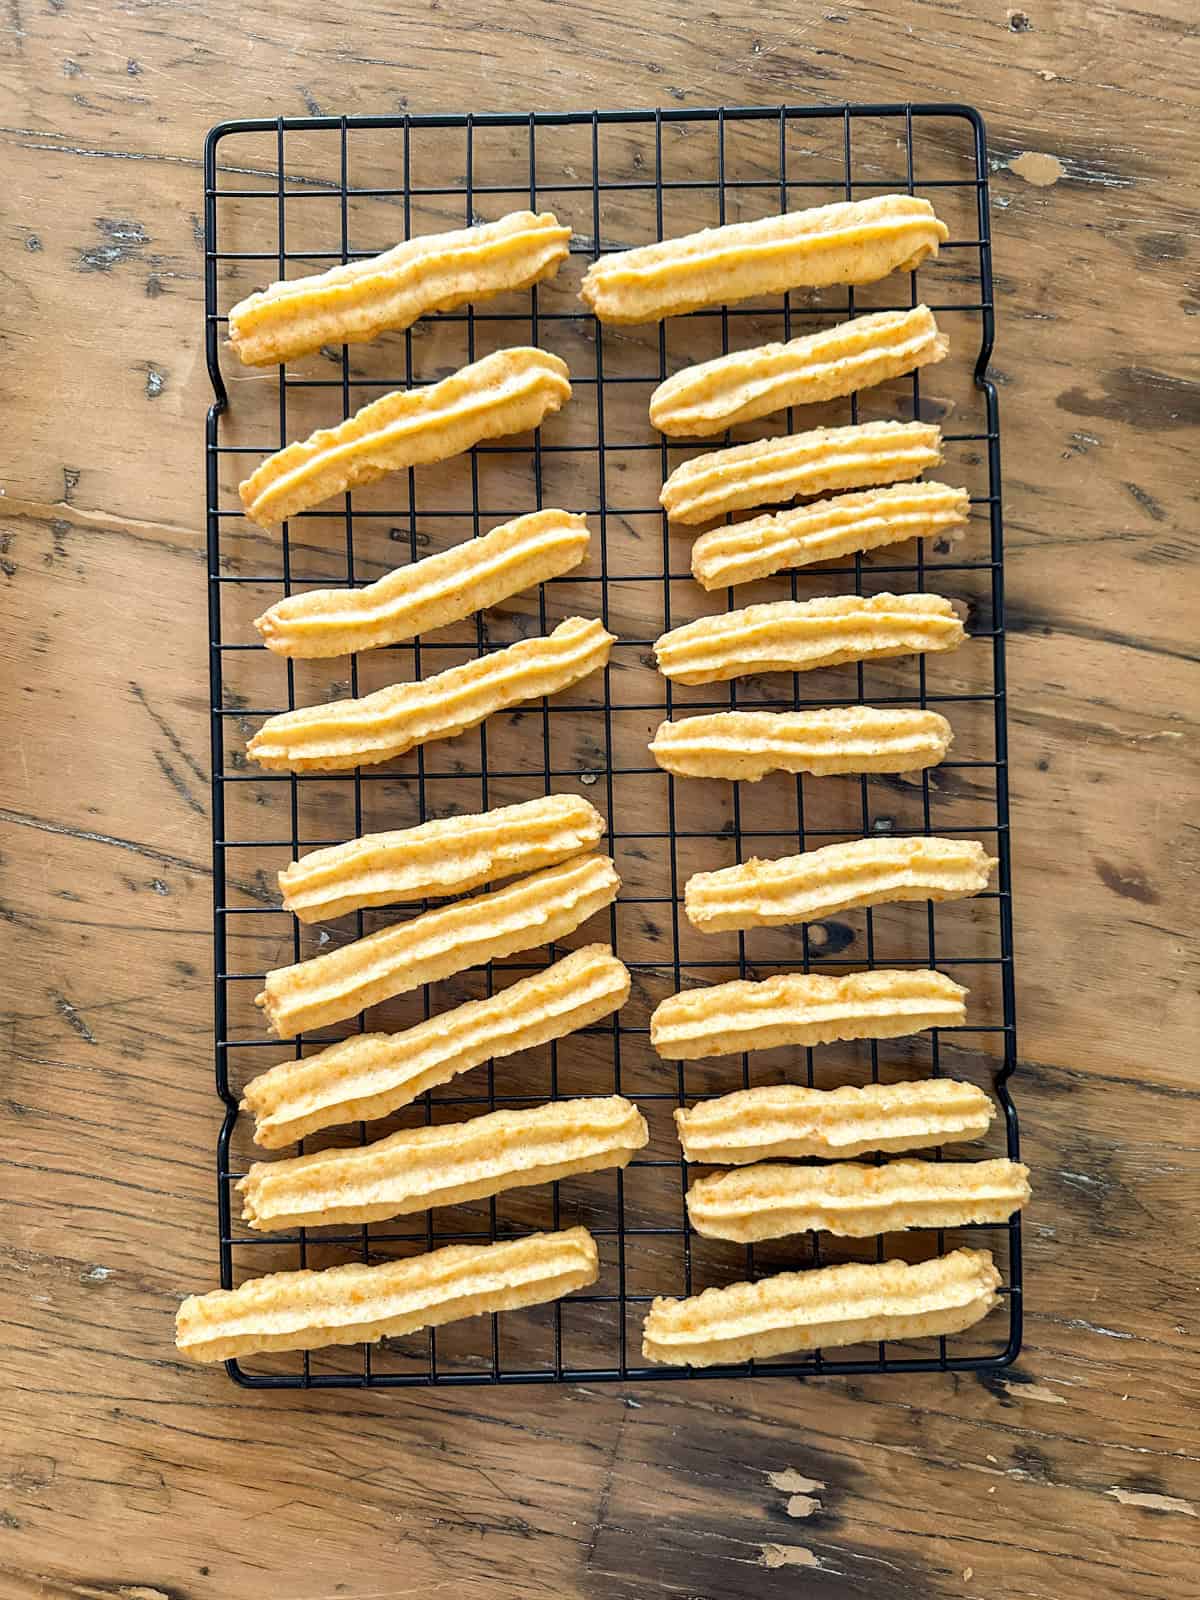
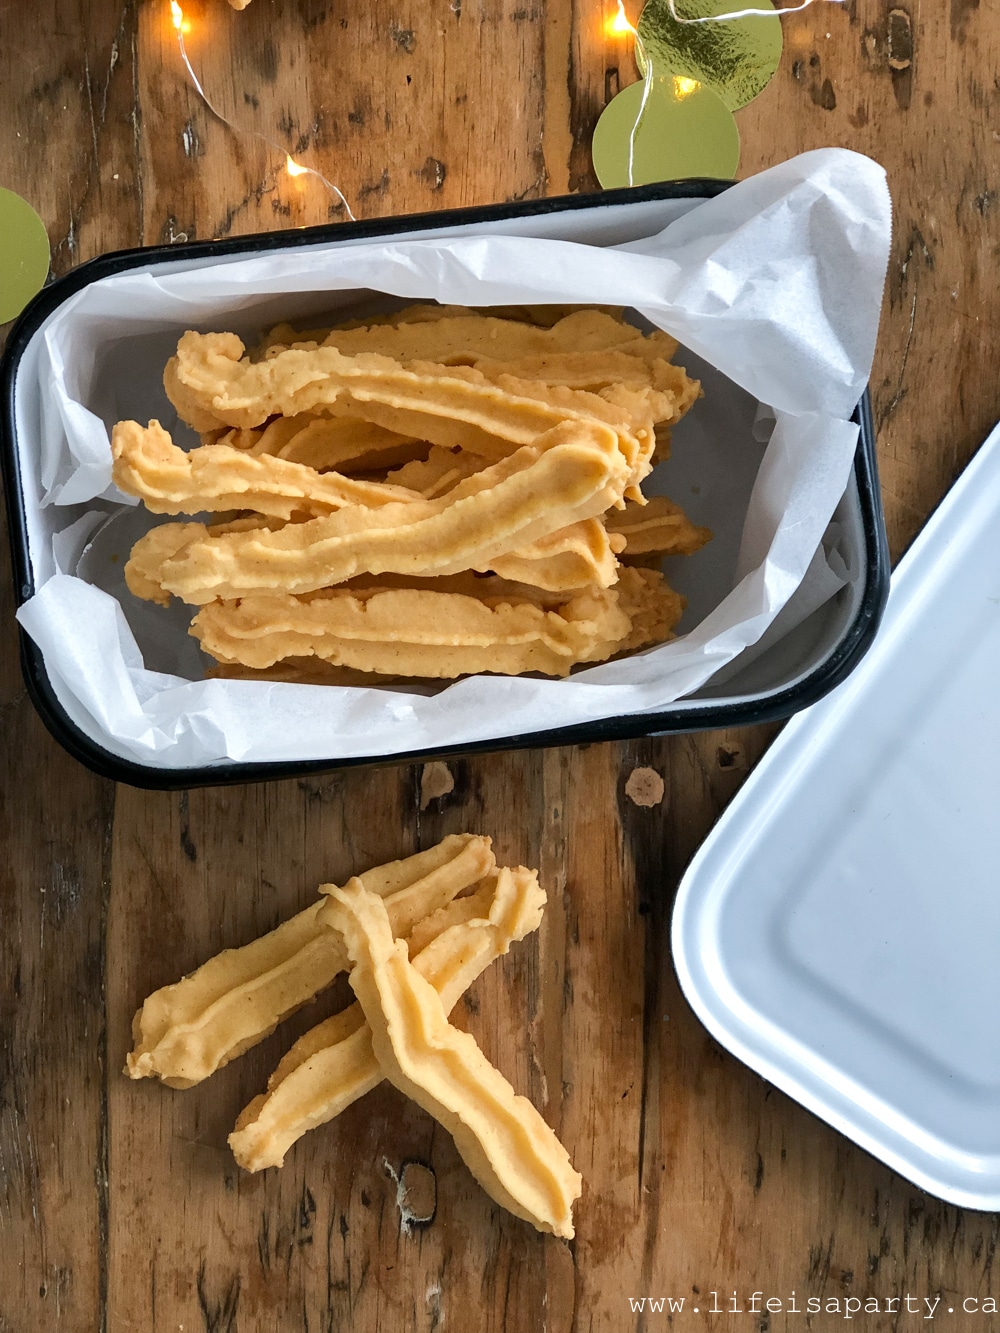
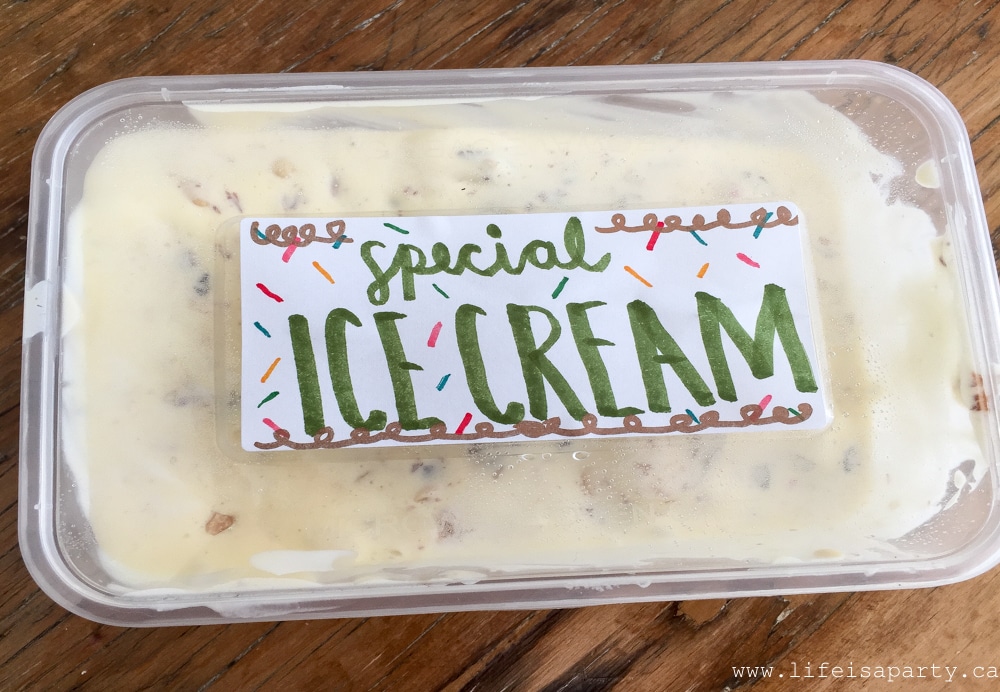
We made batter for regular waffles, keto waffles, and then one more that were vegan, dairy free, and gluten free all wrapped into one.
My go-to brunch dishes are usually casserole dishes, things like french toast casserole, hash brown casserole, and quiche. I love serving these because I can make them ahead, and they stay nice and warm, and don't need to be served immediately. Since these dishes weren't going to work, but I didn't want to be cooking waffles at the last second and trying to keep them warm, I set up a "Make Your Own Bar".
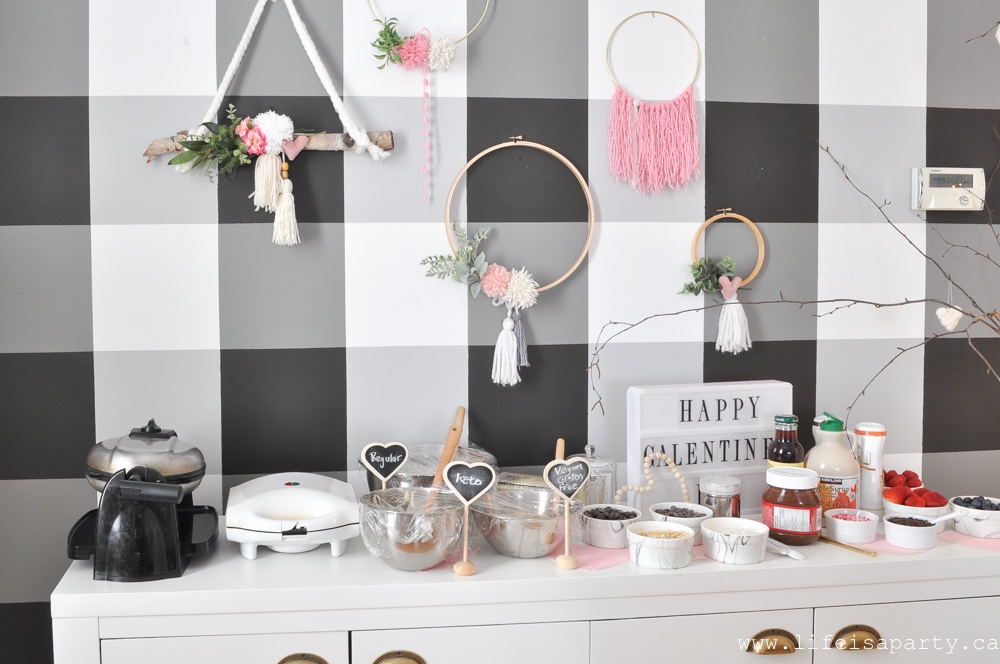
I set up my own waffle iron, and a borrowed one for the party -making sure to run one to an outlet in another part of the house with an extension cord so I won't blow a fuse. The three different batters were made in the morning before guests arrived, and had them labeled for guests to help themselves too. I turned on the waffle irons a little before we sat down so they could warm up. For the first round of waffles I made some for everyone, and then after that guests helped themselves, which worked out great.
Topping Ideas
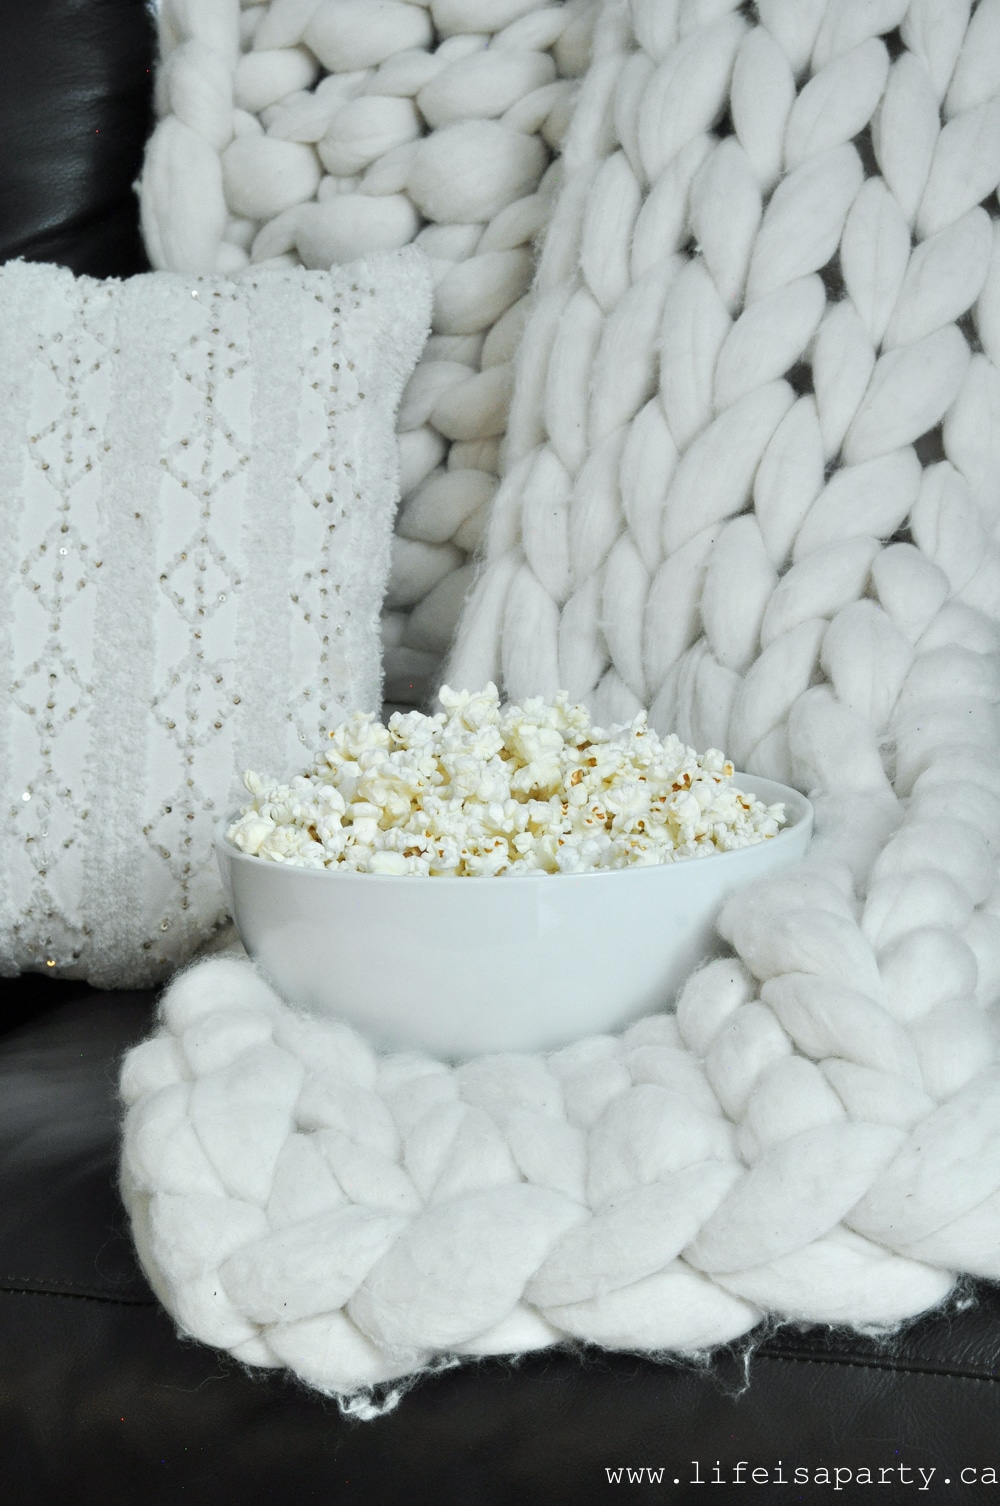
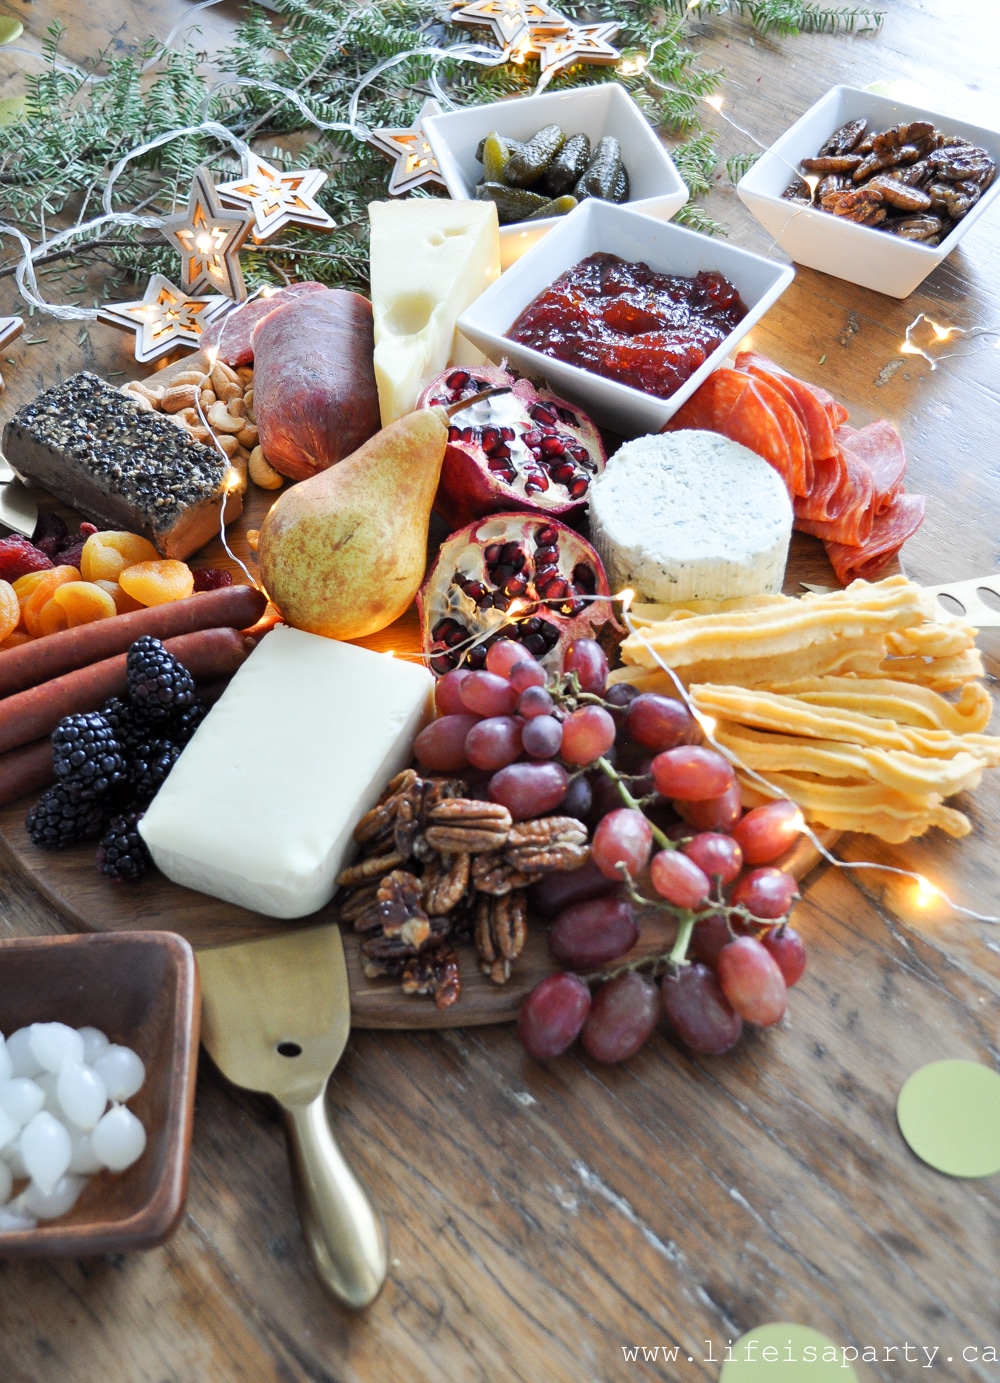
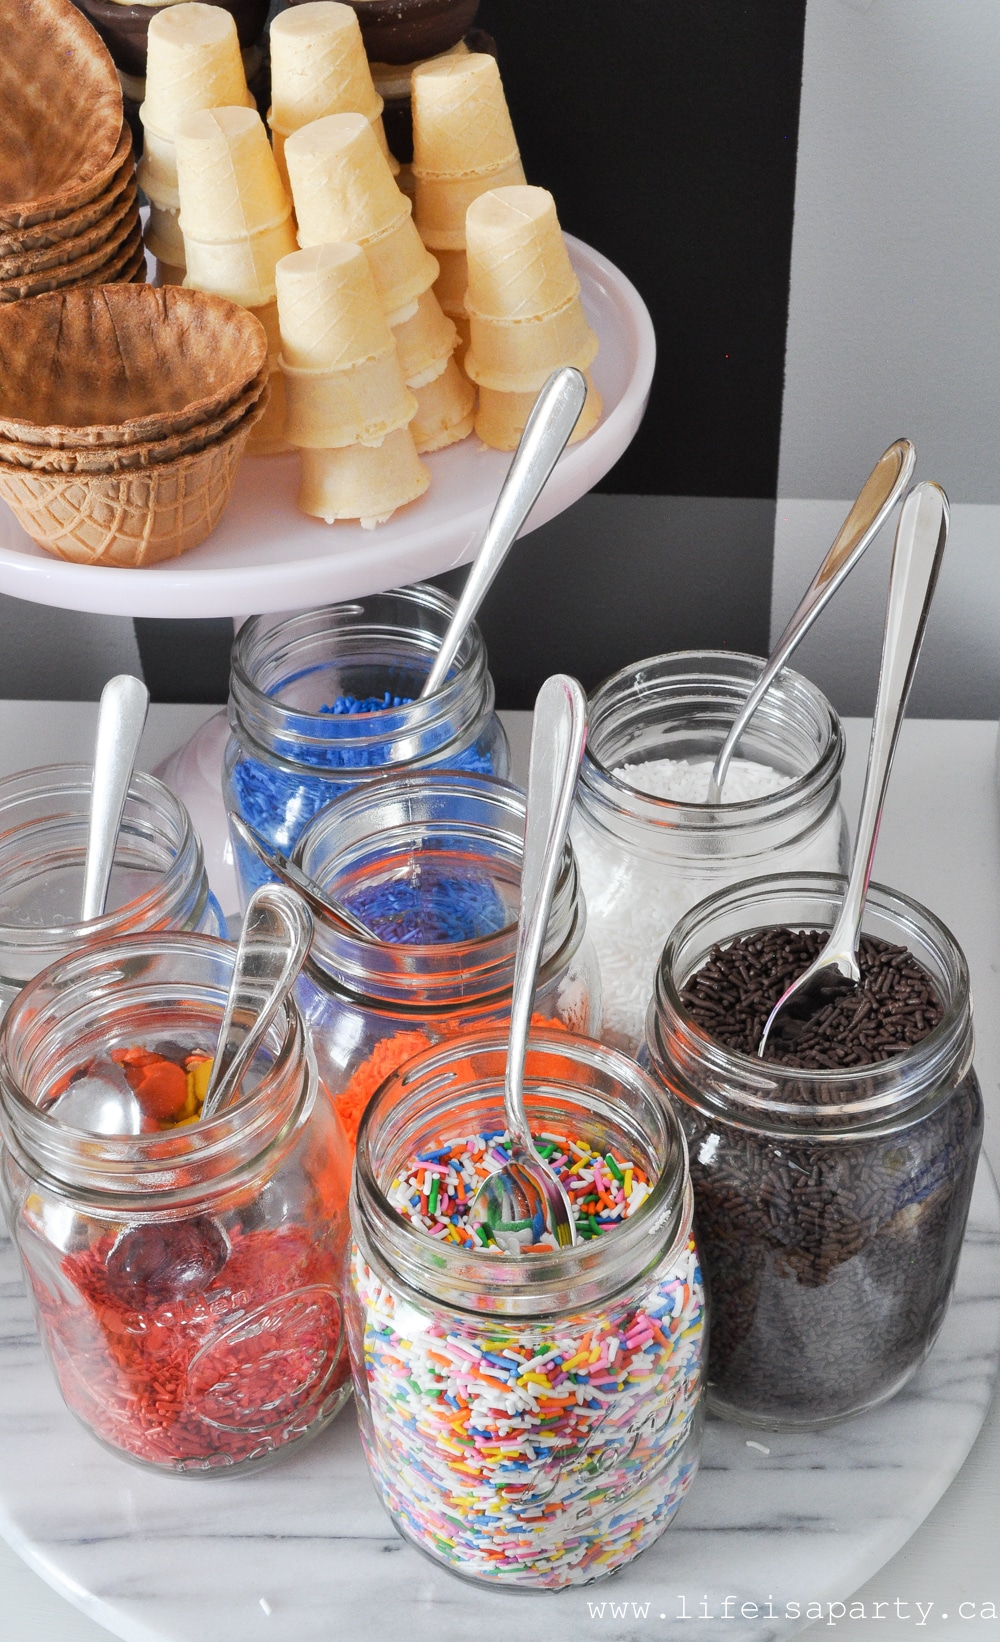
Along with the waffles, there were lots of toppings that worked for everyone's different dietary needs. Everyone enjoyed the berries. Then there were also nuts, and coconut that everyone could have. I also had some sprinkles and chocolate chips for those who wanted. I had some maple syrup, some chocolate and strawberry sauce, and also some sugar free syrup. There were sausages and bacon for those who wanted as well. There was unsweetened whip cream and butter as well.
Potluck
I also asked each guest to bring along to the party something that they could eat, that way I knew everyone had at least two options.
Drinks
For drinks we had coffee and tea. I was sure to include almond milk, heavy cream, and sweetener along with the regular milk, and sugar.
I set up a juice bar with different juices as well, but was sure to include some sparkling water too.
Research Before Hand
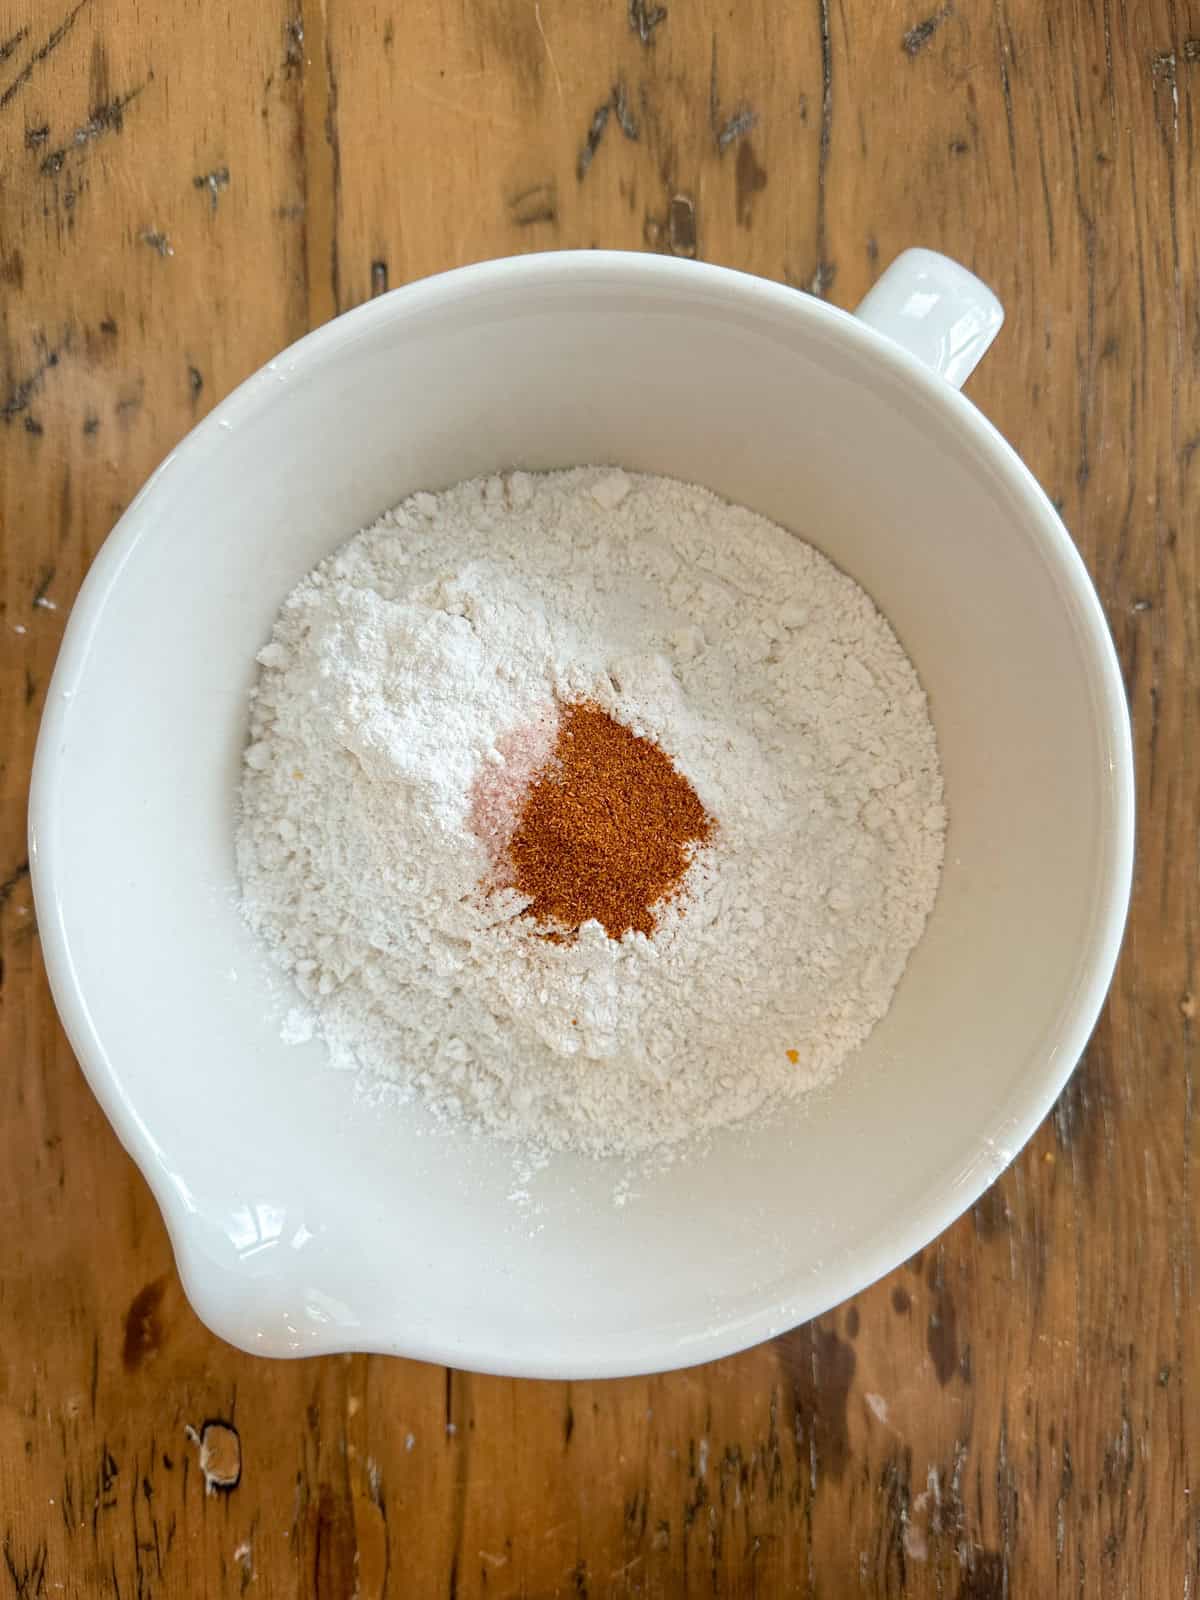
It did take a little research on my part, to figure out a menu for hosting guests with dietary restrictions, but I know my guests really appreciated being accommodated. I didn't have a keto or a vegan, dairy-free, gluten-free waffle recipe. I looked on-line and found one of each, and everyone seemed to really enjoy them. My advice would be don't be afraid to try something new.
Shop The Bulk Store for Unusual Items
Also, I didn't have all the ingredients for the recipes. It can sometimes be really expensive to invest in special ingredients, especially if you feel like you'll never use them afterward. Here's my tips -go to the bulk store and buy just want you need for the recipe, and for something like the almond milk that was only available in a large container that I won't use out, send it home with the guest you bought it for.
More Ideas
My party was for brunch, but I did have a few other ideas for menus when entertaining guests with lots of different dietary restrictions.
- Salad Bar-lots of greens, fresh veggies and nuts, along with cheeses, hard boiled eggs, and meats, including some vegan cheese and tofu. You could also include some breads or crackers on the side, including a vegan and gluten free option.
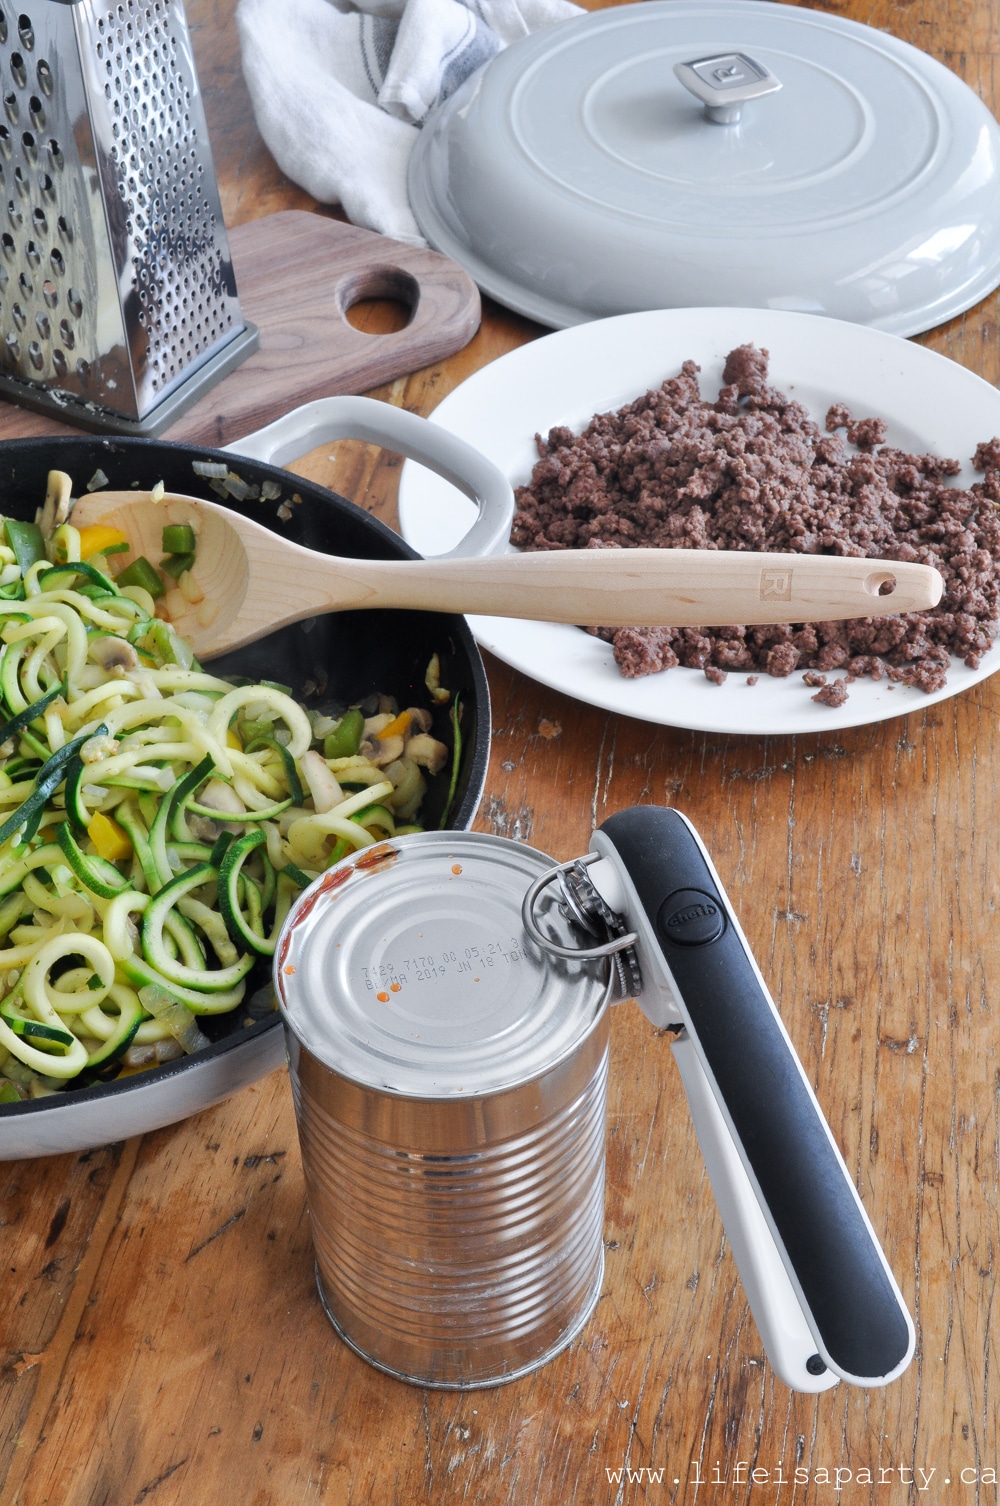
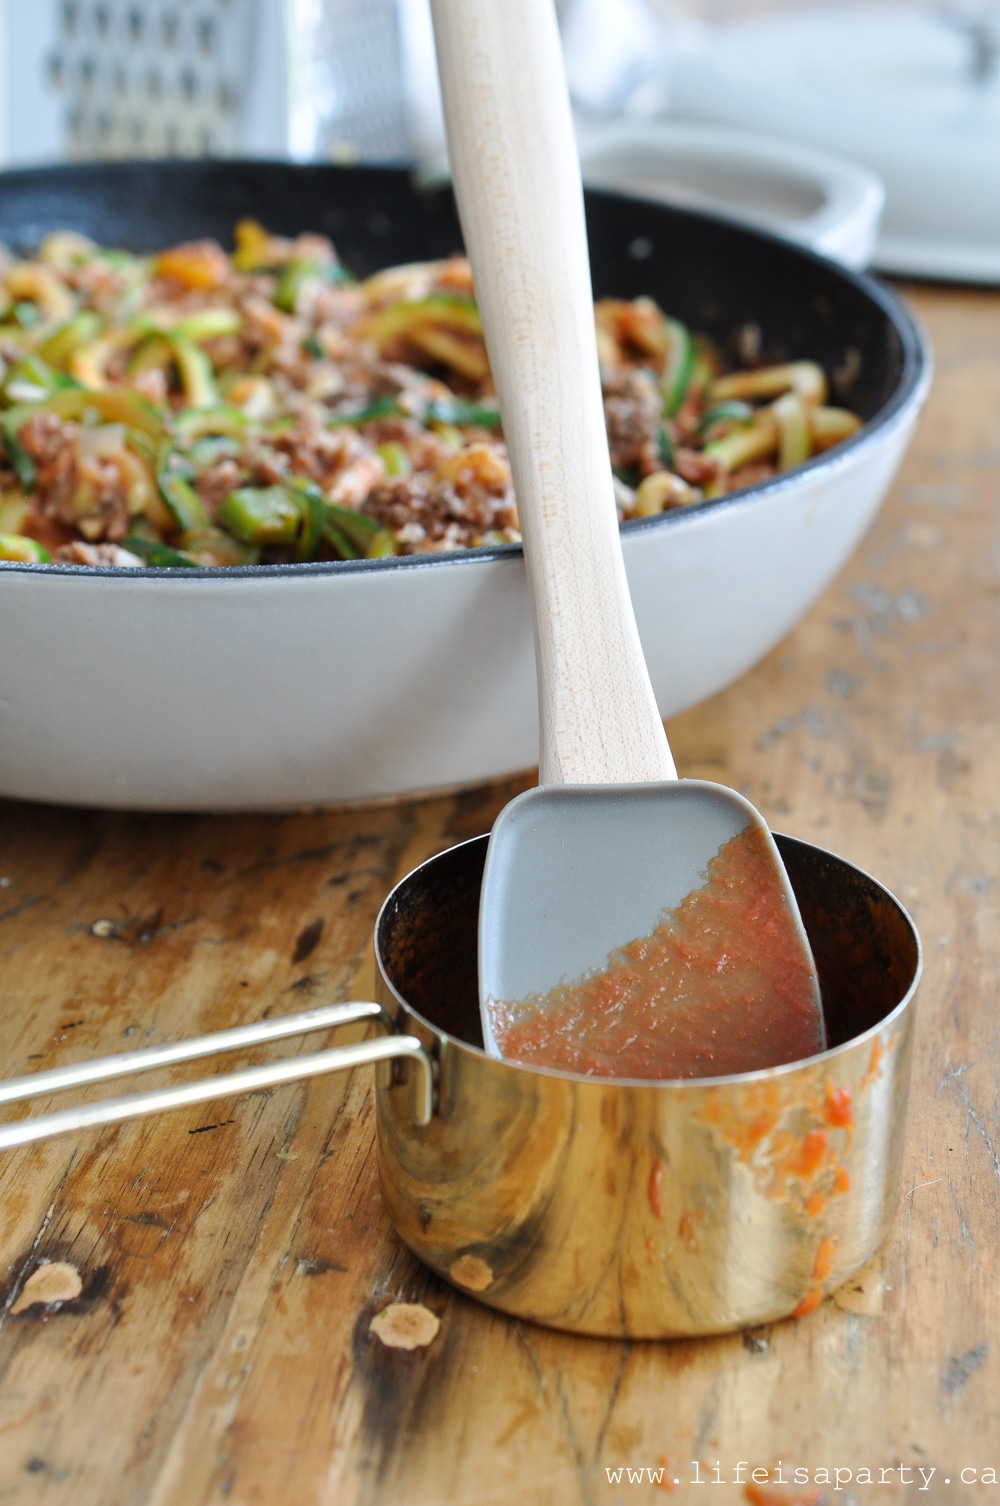
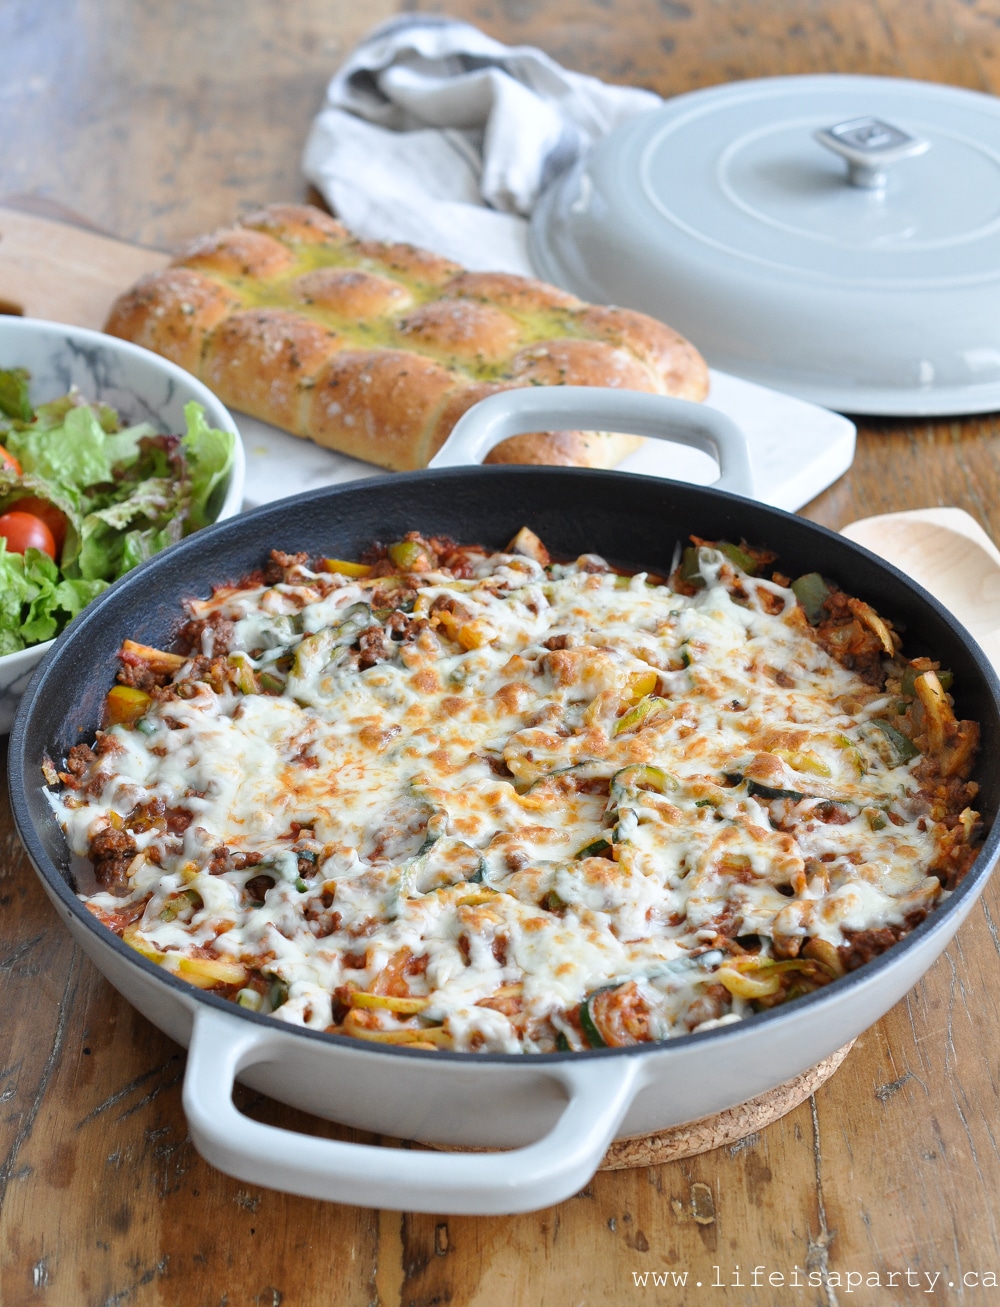
- Pasta Bar-you could have different sauces like tomato, and alfredo and different pastas. You could include regular pasta, but also a gluten free option, and zoodles -spiralized zucchini for a vegan and keto option. Along with the pasta and sauce options I'd include some different meats -like meatballs, grilled chicken, and sausage. For a vegan option you could have some vegan "meat" available too. I'd also have some different sautéed veggies available like onions, peppers and mushrooms. A large salad on the table, and some bread, including a gluten free bread option too would be a great addition. Click here to see a pasta bar I but together in the past, that could easily be updated with some other options.
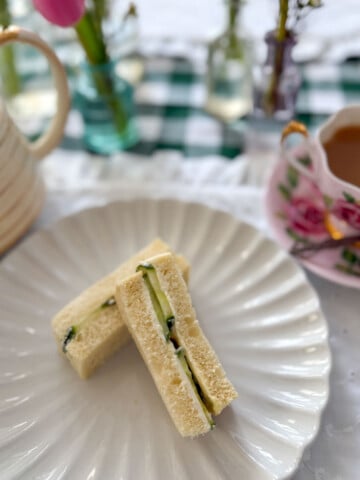
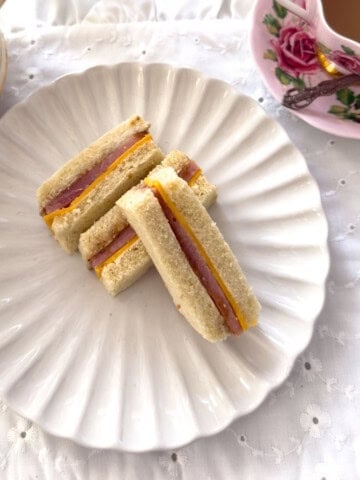
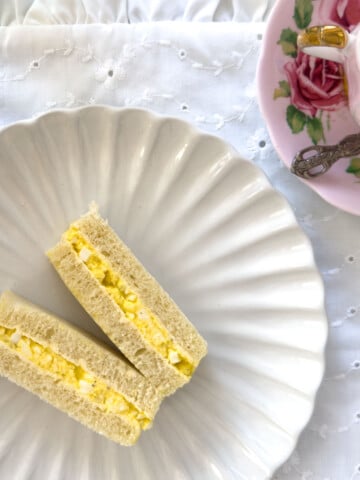
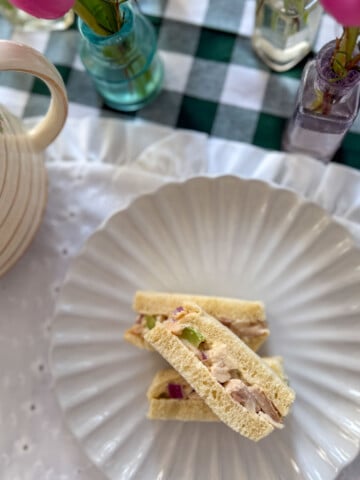
- Sandwich Bar-I'd include deli meats and cheeses, along with a vegan "meat" and cheese option too. Keto eaters would love to see some bacon as well. I'd also include lots of veggie options like lettuce, tomatoes, peppers, sliced onions, alfalfa sprouts, pickles, and olives. For breads be sure to offer one gluten free option. And for keto guests, a low carb wrap, or large lettuce leaves to use as a wrap. Then be sure to have lots of condiment options including mustards, and mayo. A mayo made with olive oil is a great option for those eating keto.
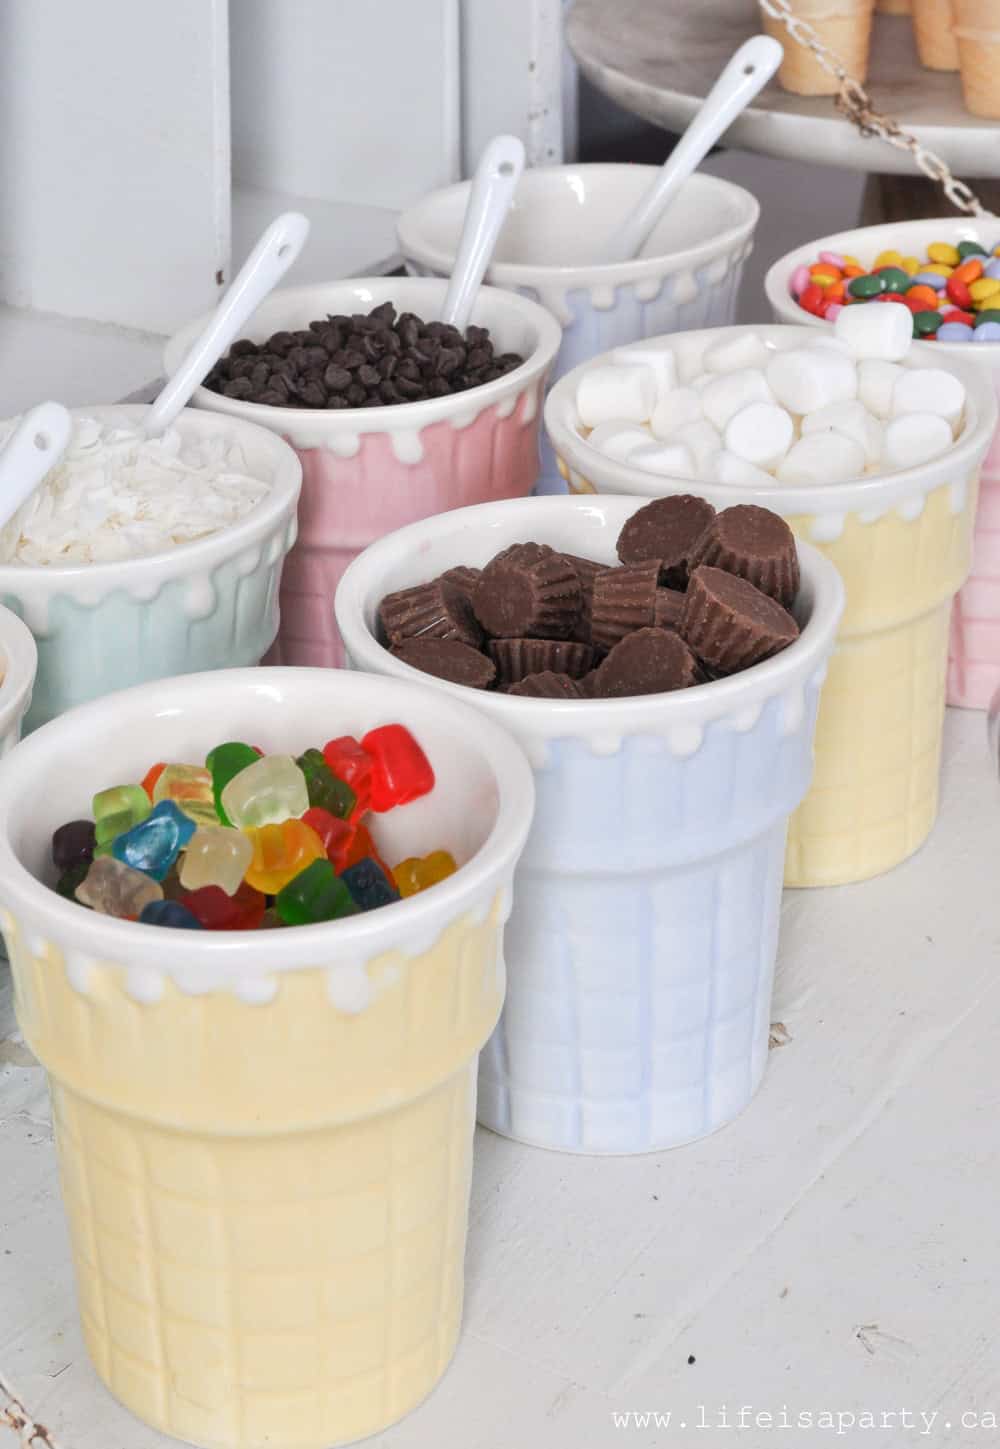
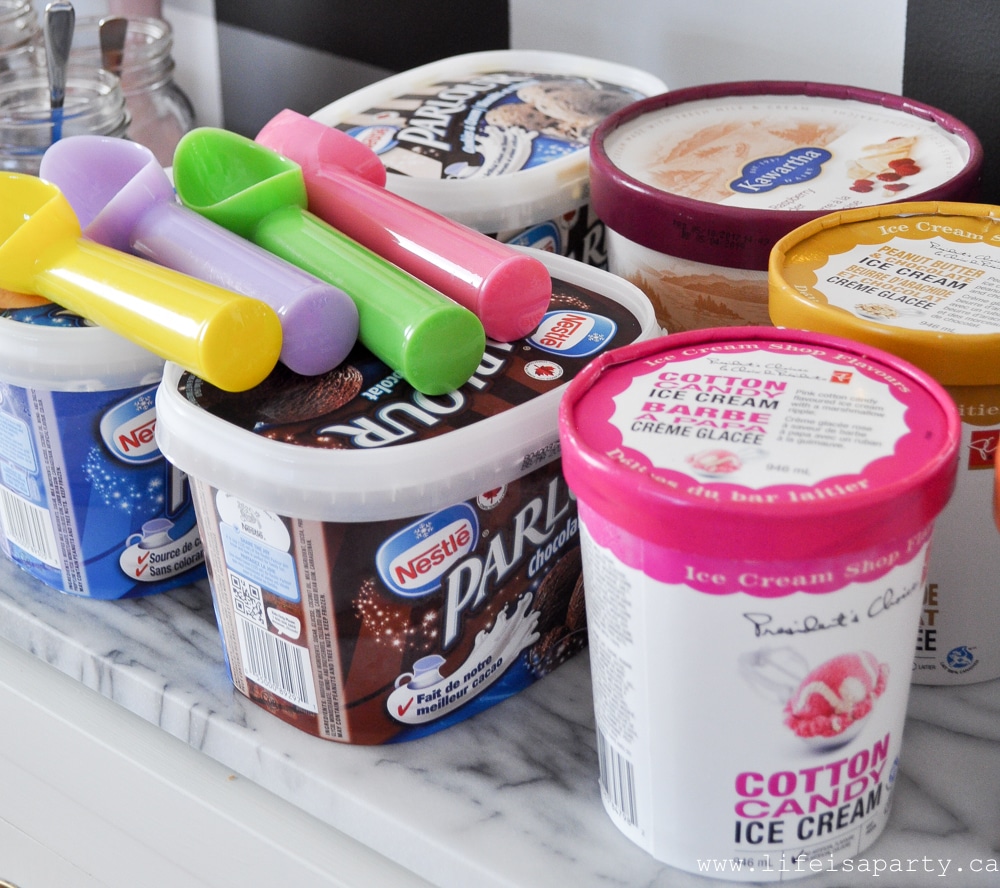
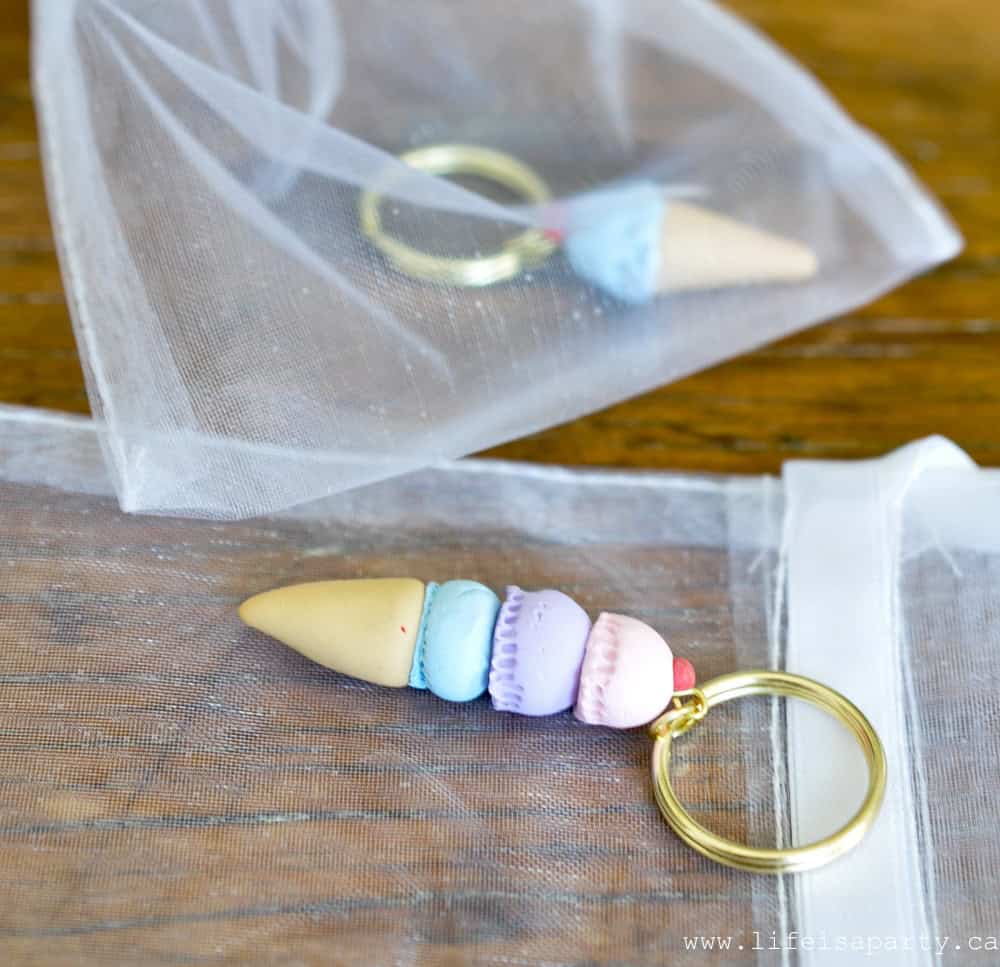
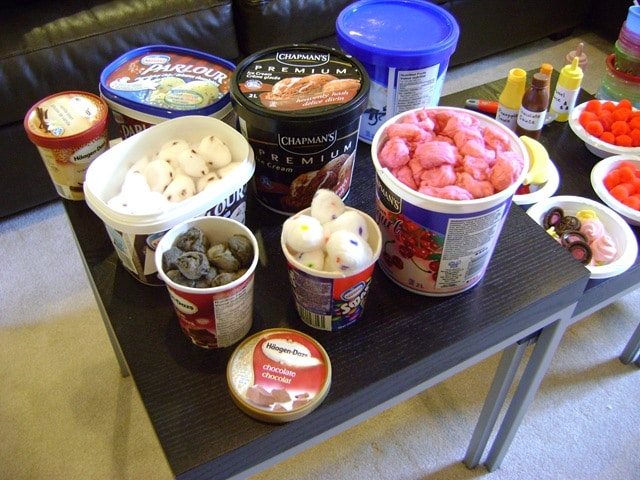
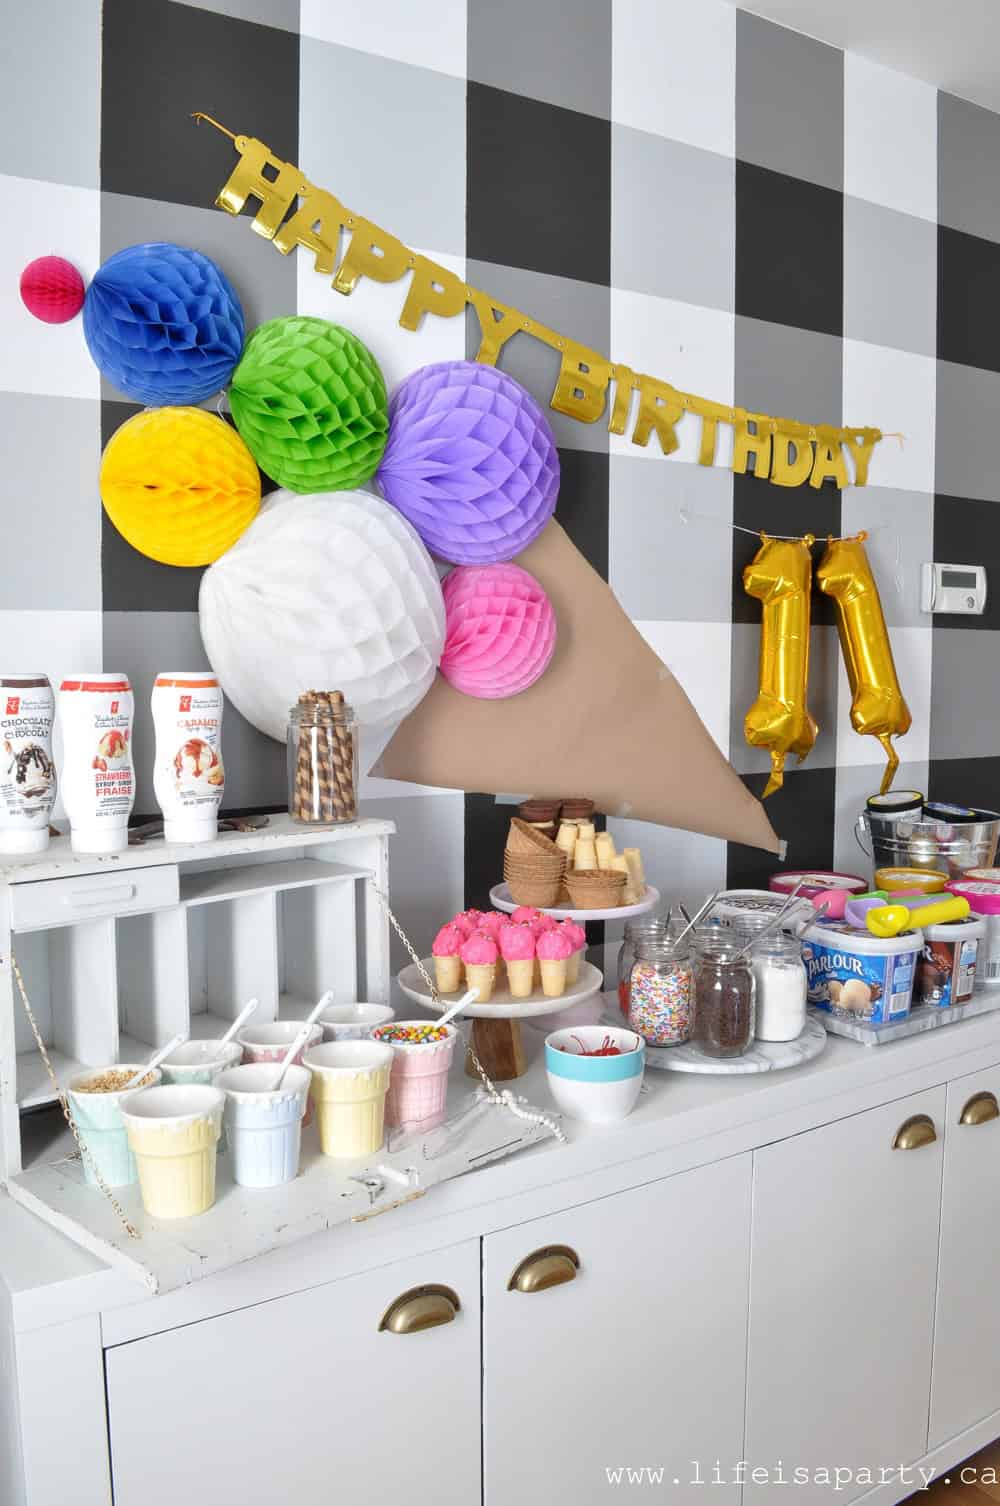
- Ice Cream Bar-dessert can be really challenging too with this many different restrictions. You can find ice cream that is vegan, dairy-free (think rice cream), and keto friendly (look for low carb). Once you have an ice cream for everyone, add in lots of fun toppings. Chocolate syrup, a strawberry syrup, or a sugar free option would be fun. Include lots of nuts, coconut, and berries since everyone can eat those options. Candy toppings are fun too. Whip cream is great too, made with sweetener or non-sweetened for the keto people. And you could have coconut whip cream as a vegan option.
These are just a few fun ideas. Bars and Make-Your-Own are definitely the way to go for a group with needs this varied. Also don't be afraid to ask guests to bring something they can eat as well. And if you're really stumped there's always take-out. Having curry and don't know how to make a vegan one, ask at your favourite Indian restaurant and pick up a vegan one as example -sub in any dietary restriction here.

A Place For Everyone At Your Table
It is definitely challenging to hosting guests with dietary restrictions and meet everyones different needs, and because of that I'm sure that sometimes those with lots of dietary restrictions don't get invited over for dinner all that often. Because we want to always try our best to include everyone, and give everyone a place at the table, I hope these ideas help. I have to say that although I have found it a little challenging and even intimating to accommodate everyone, when I've gone to the effort to do so the recipients are always so grateful.
Also, when I'm unsure or have a question about where to buy something that's unusual to me, asking the person is always really well received. They're never annoyed that I don't know how to accommodate them, and always the opposite actually -completely grateful, blessed, and happy that I'm going out of my way to find something that will work for them.
In fact, one of my best stories about this kind of thing was when one of my girl friends was actually moved to tears by the effort that I'd made to make something really similar to what everyone else was having and still fulfilled her dietary needs. She was so used to either not being invited, or having to bring her own food to get-togethers that she wept. Hospitality is very powerful, and going the extra mile to accommodate everyone can have some amazing results. Sometimes we're held back from including everyone because we sincerely don't know how, so I hope my brunch and other menu ideas inspires and empowers you to invite everyone to your table.
With Menu Ideas for Hosting Guests With Dietary Restrictions, life really is a party.
More Ideas
Also check out 5 Tips To Create Pinterest Worthy Parties on a Budget here.


 I also set up a speaker so we could play some music in the background for them.
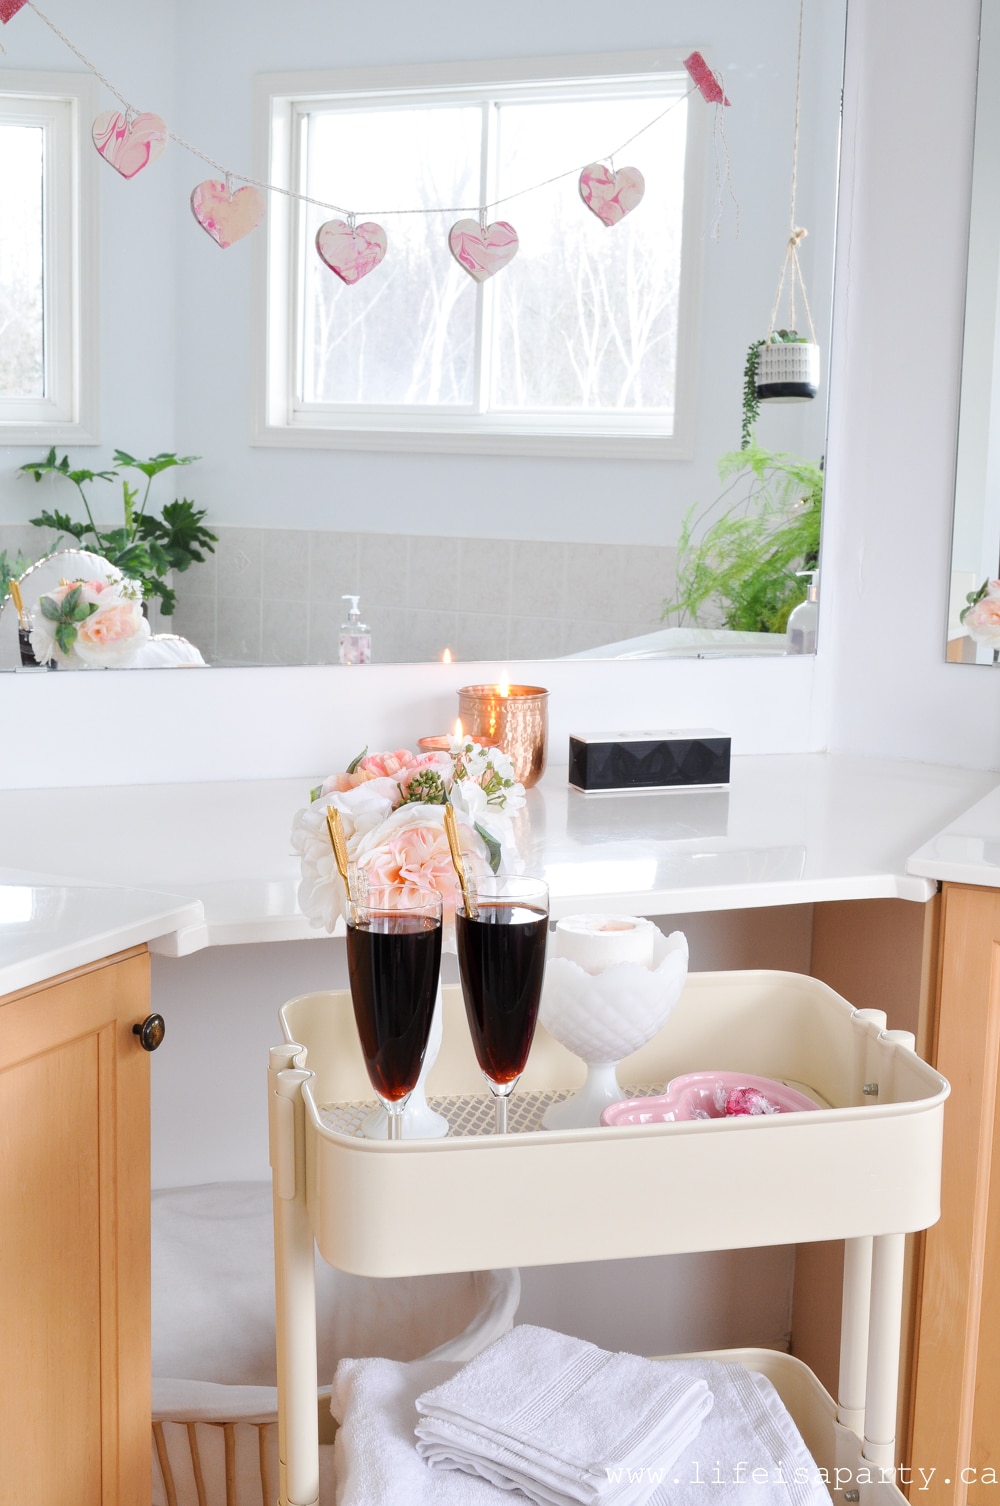
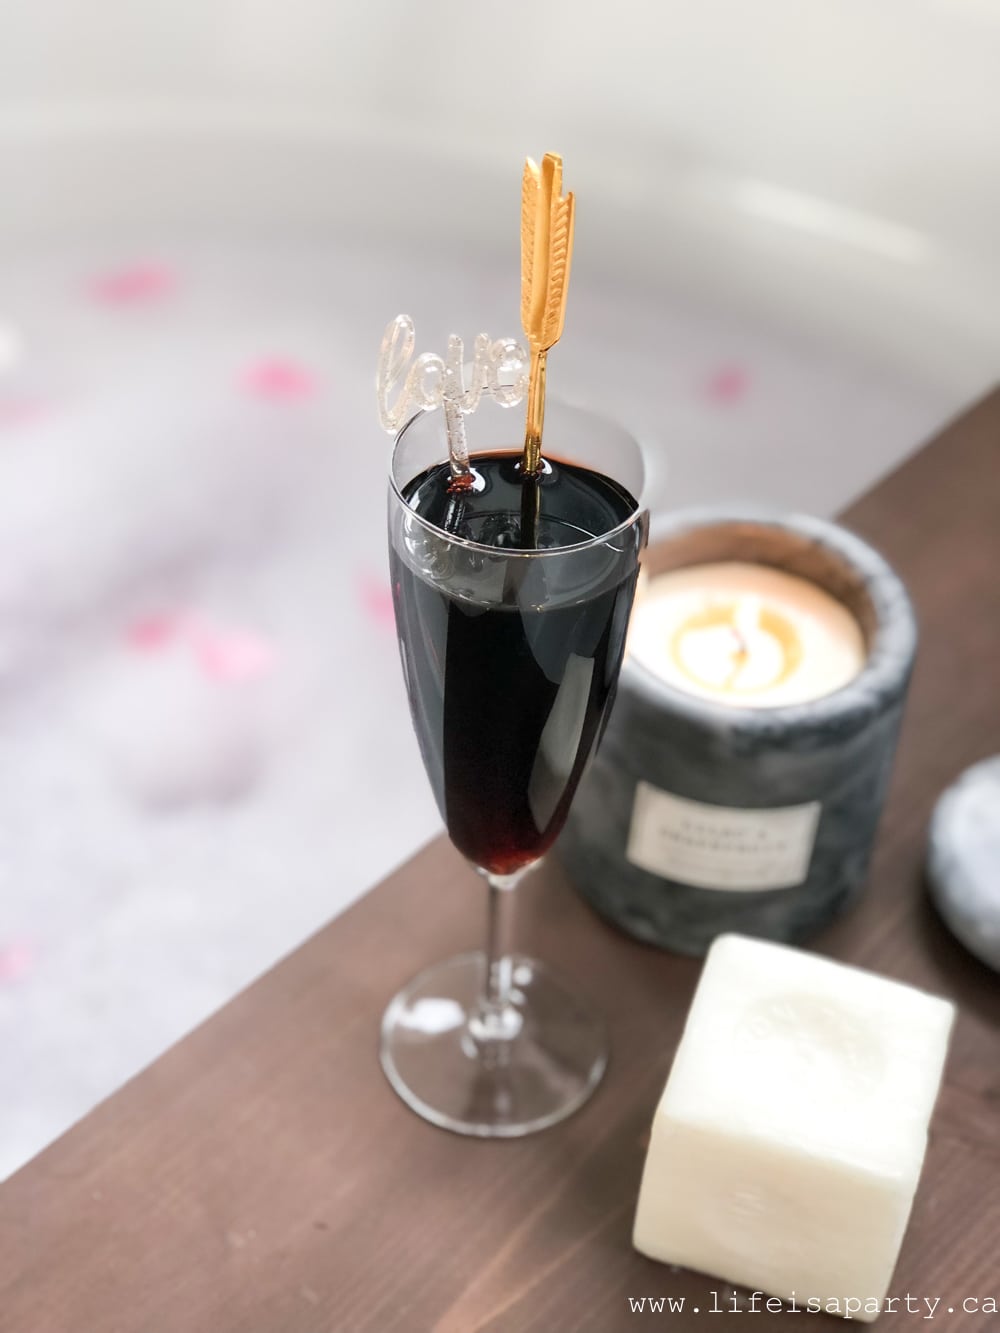
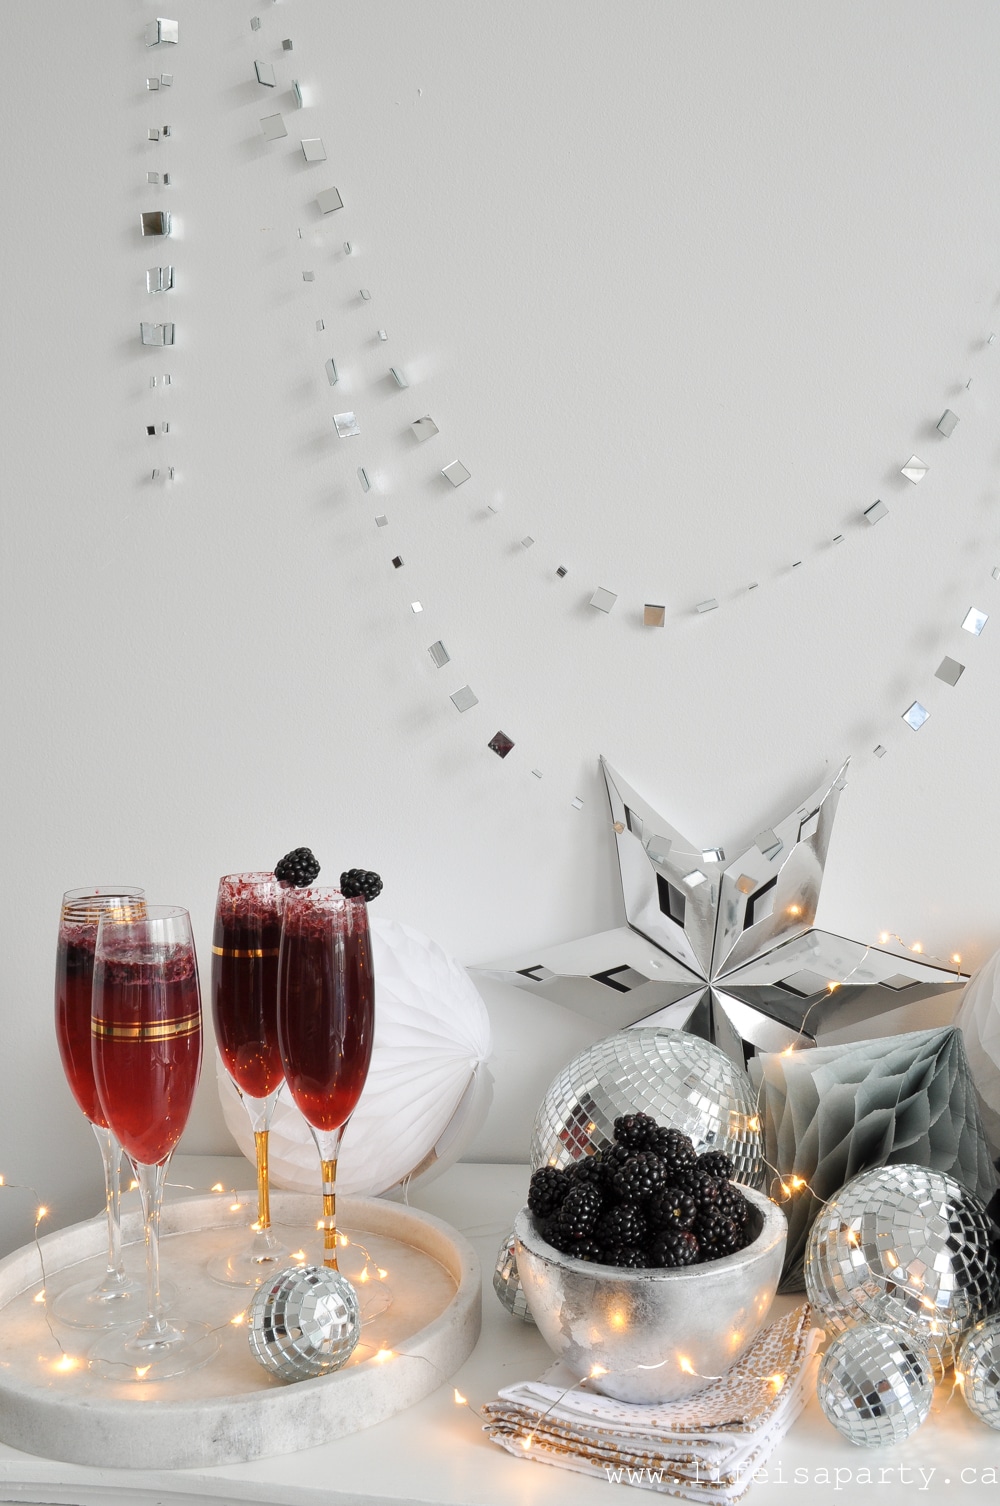
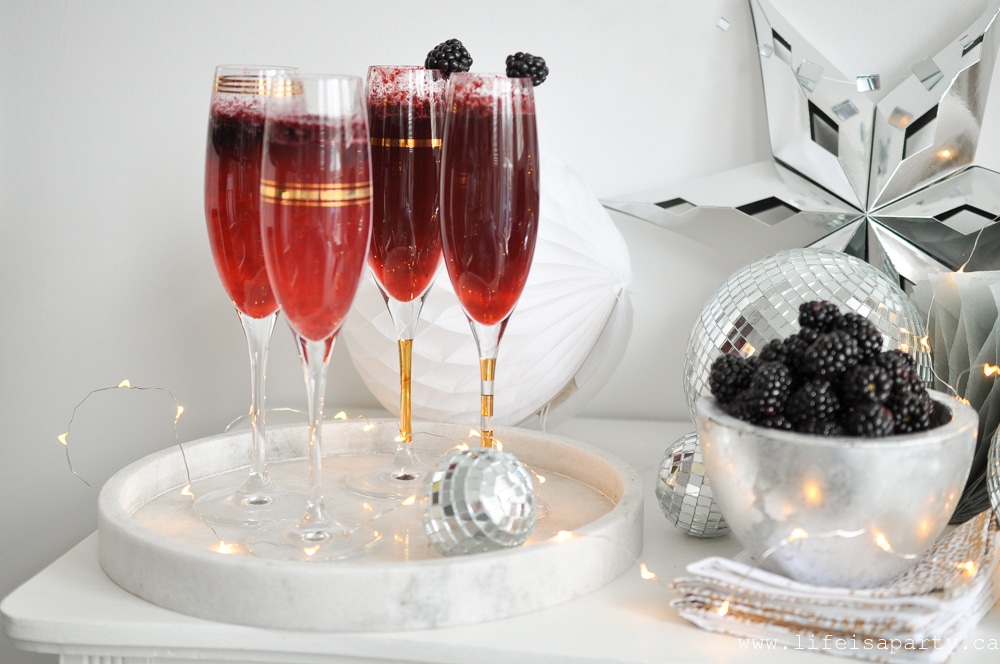
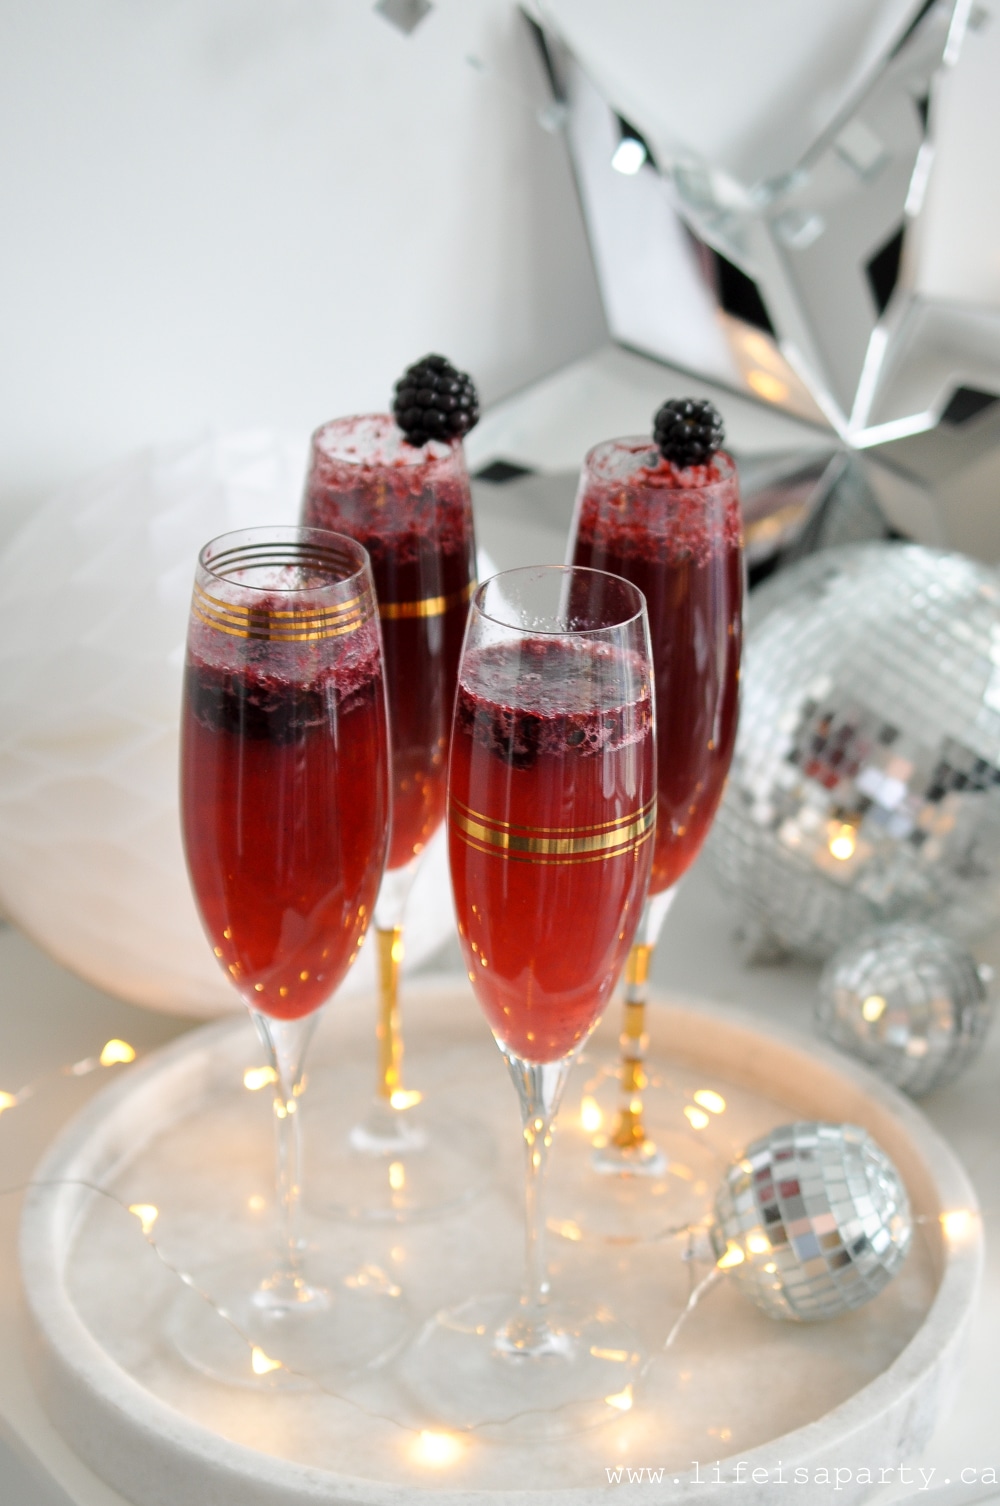
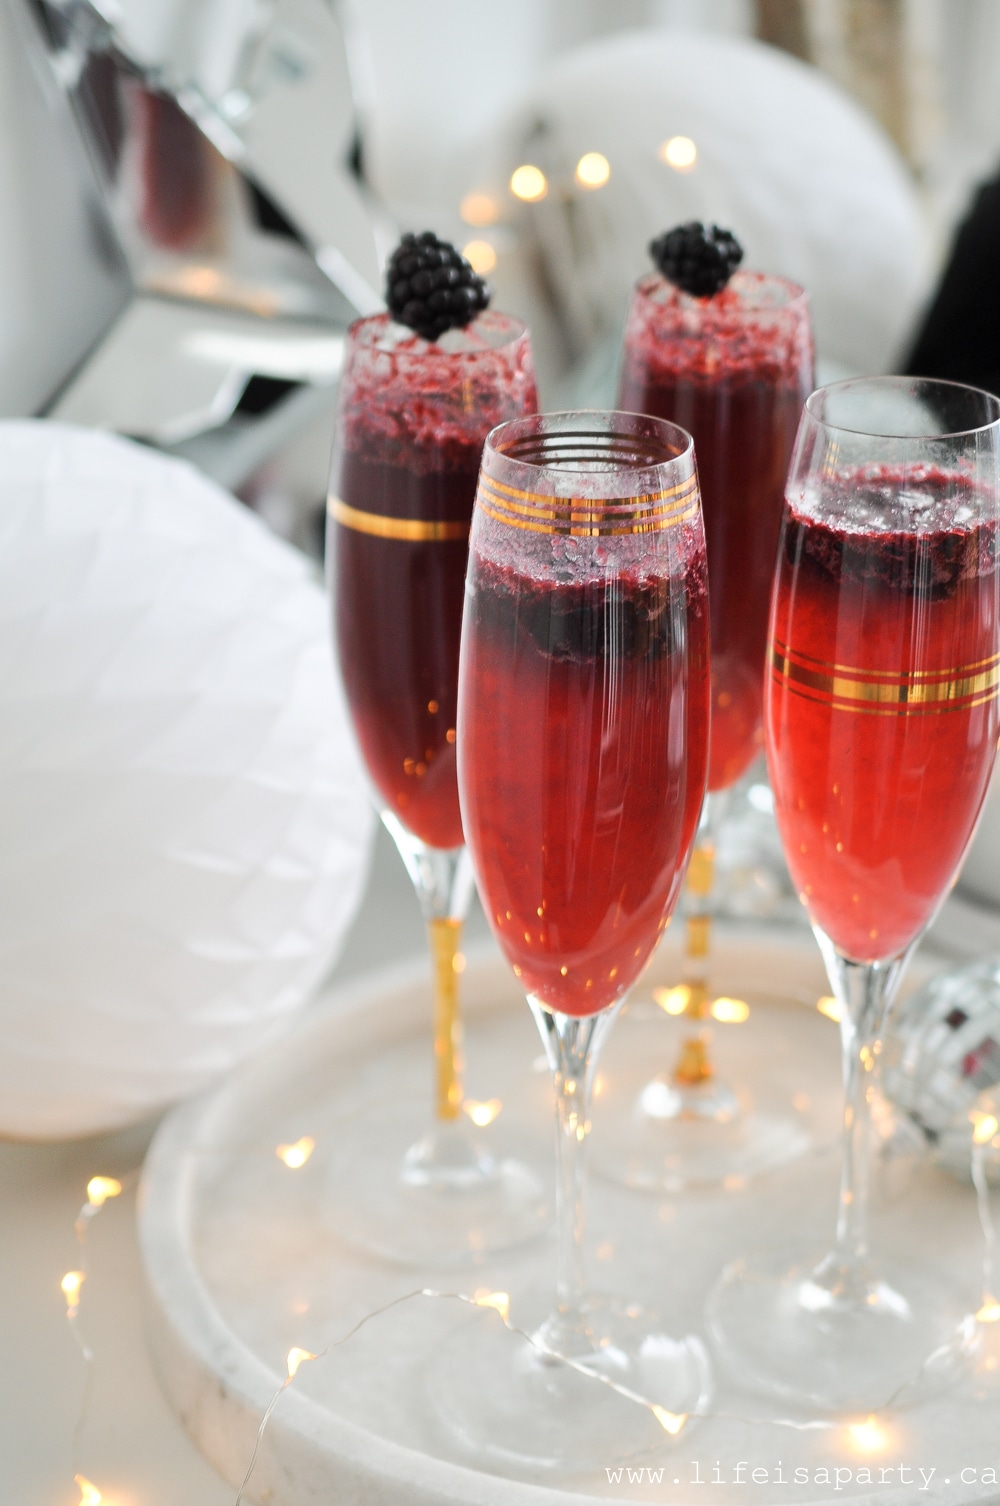
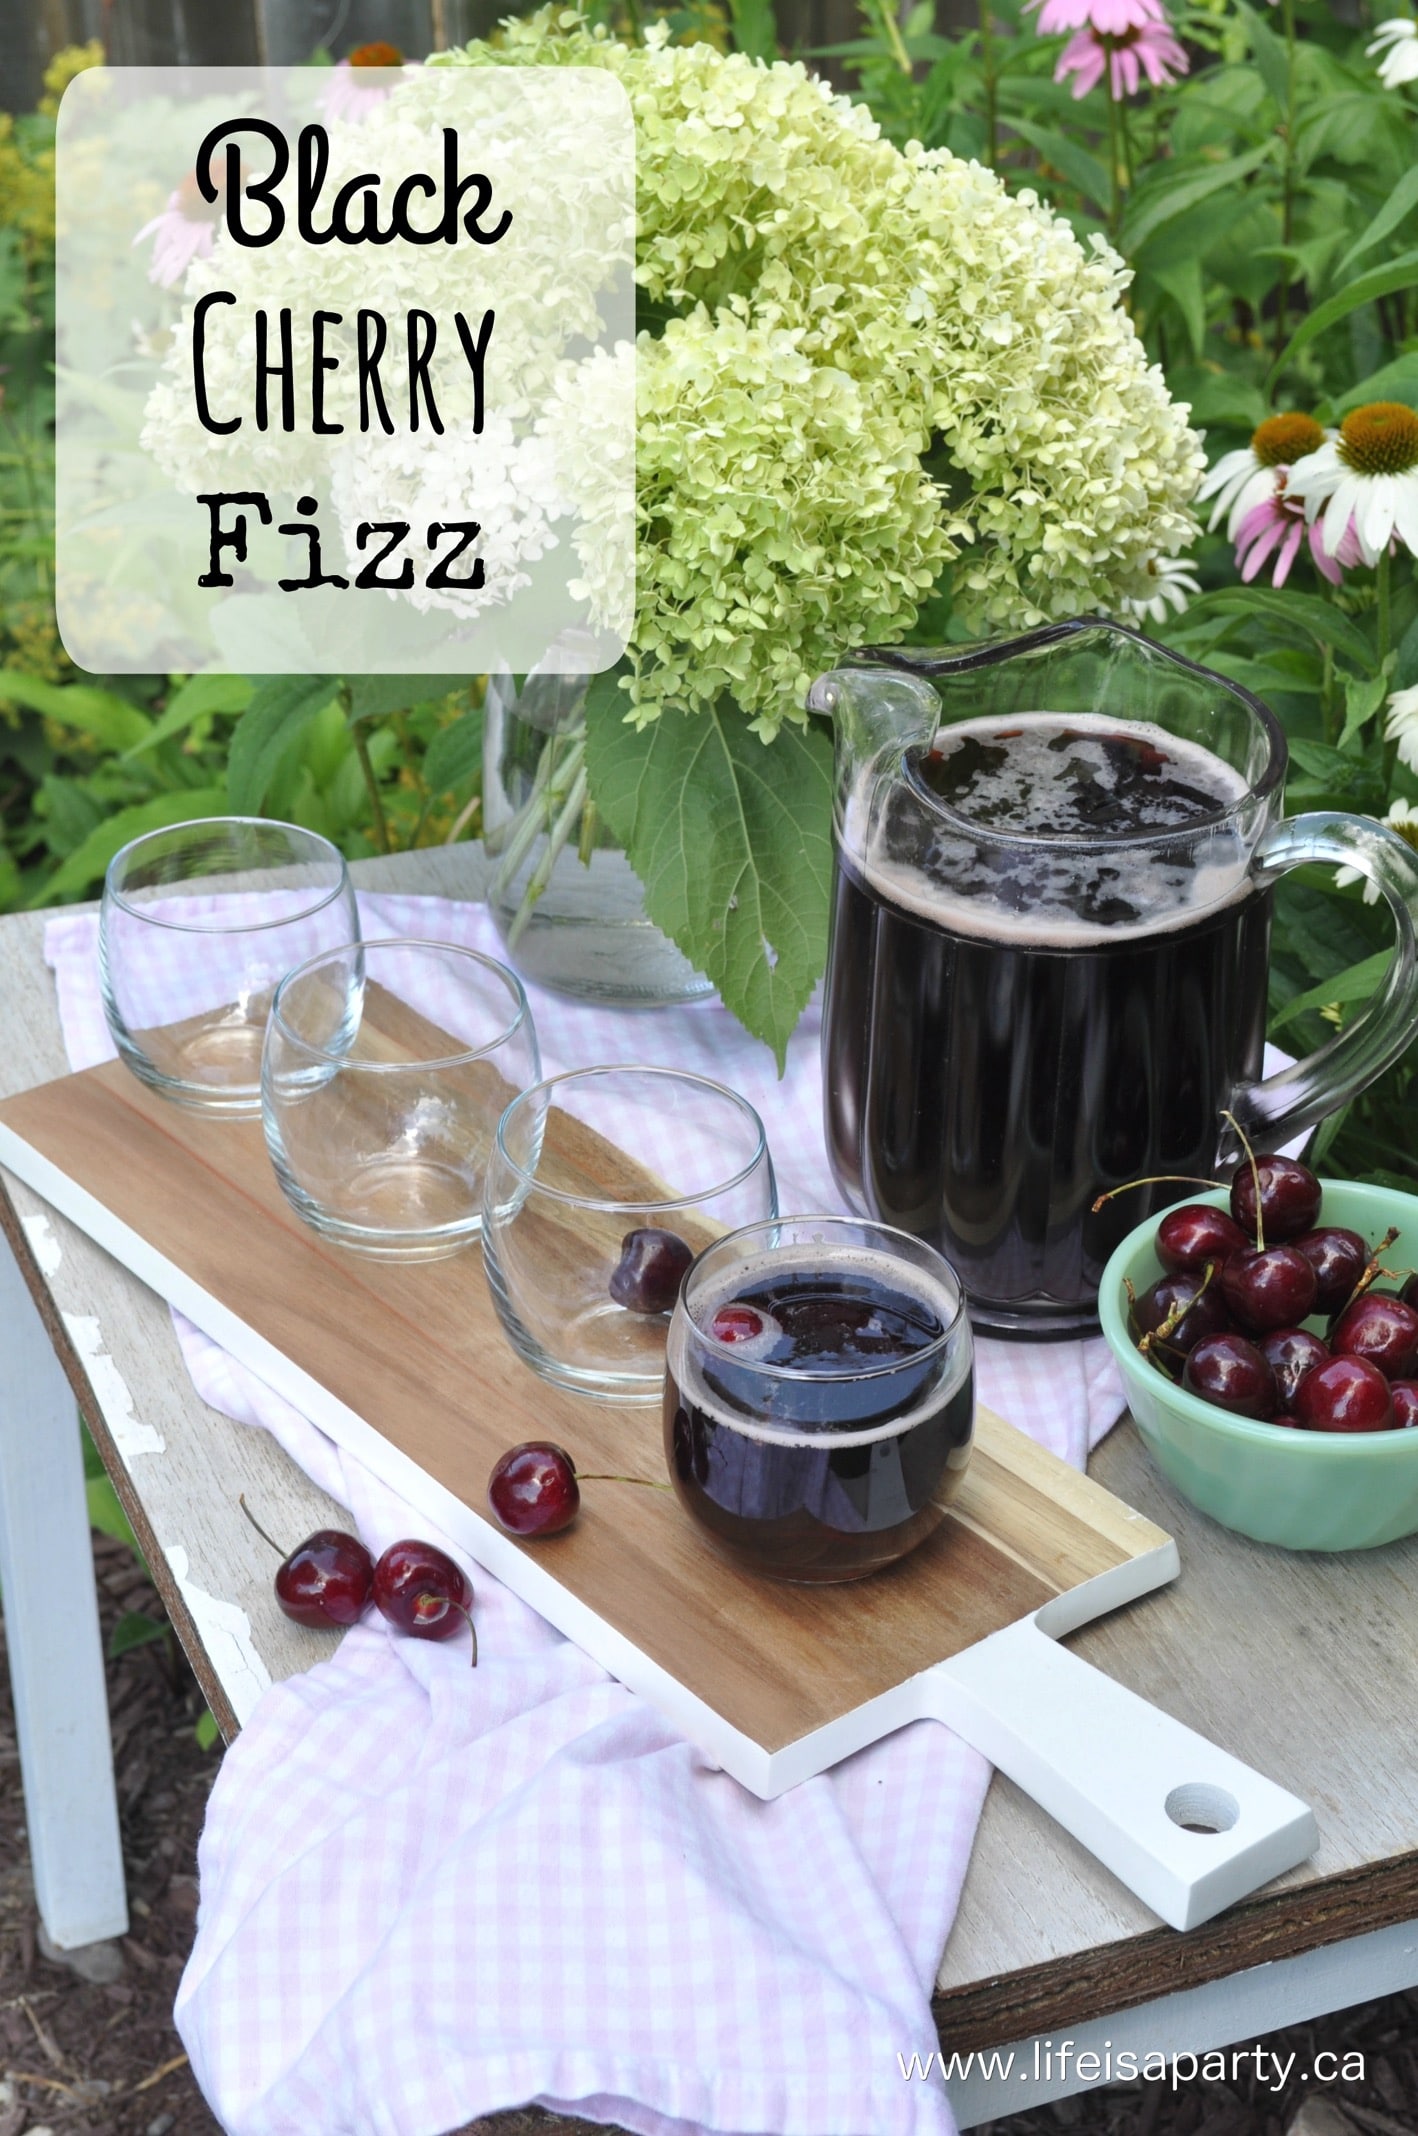
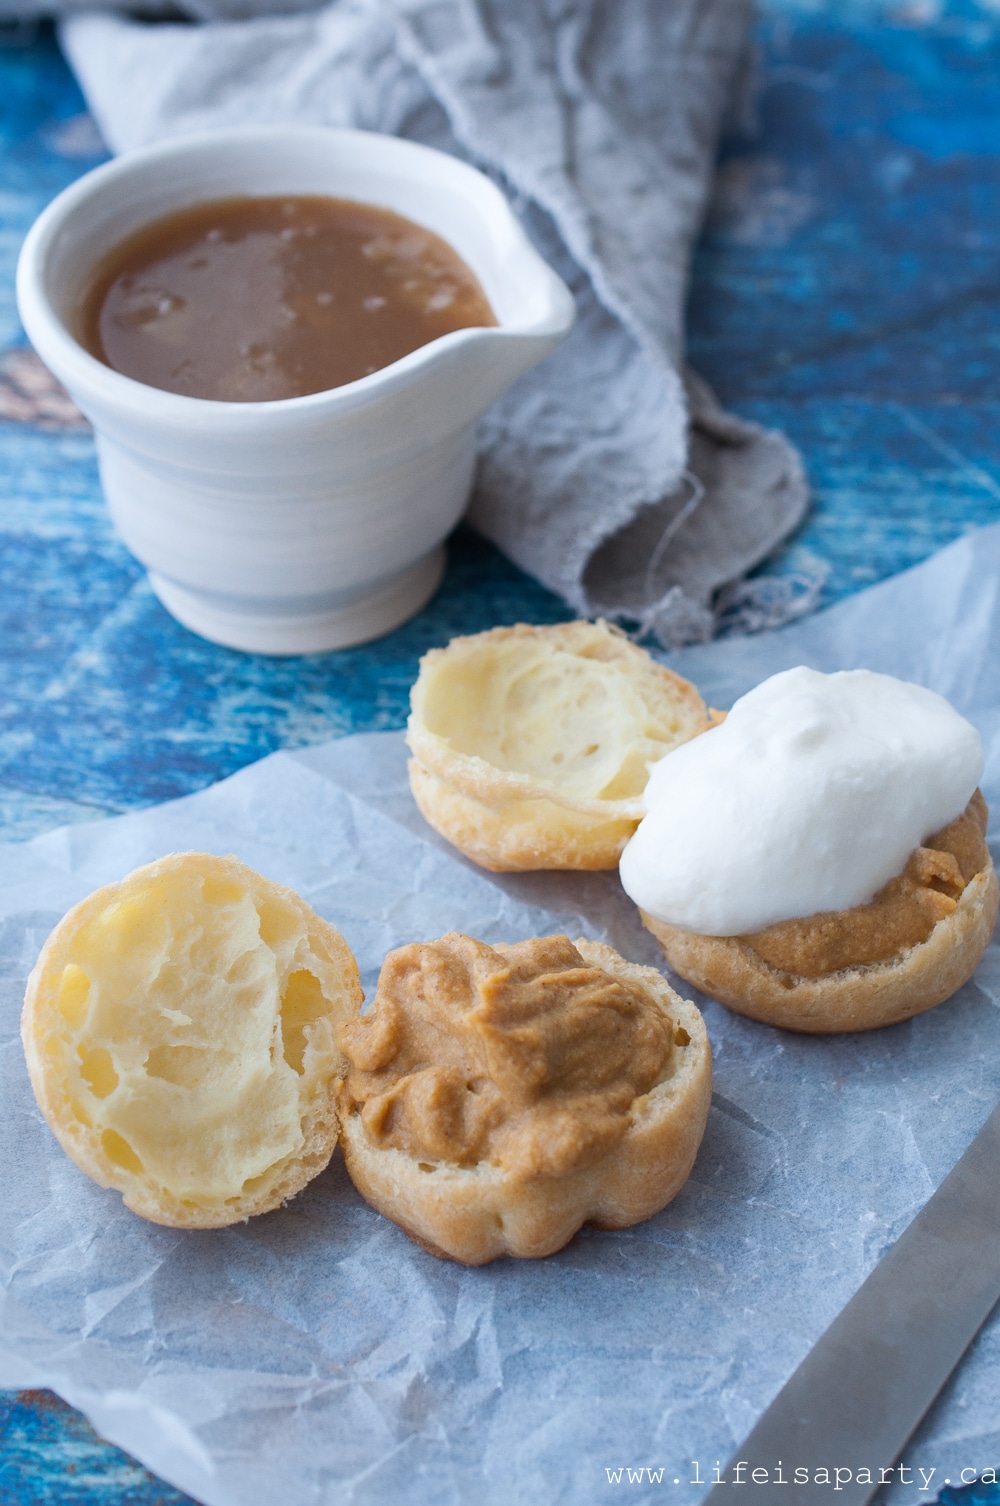
 I wanted to have a couple of fancy refreshments for them, so we had some black cherry pop (one of our favourites) in pretty champagne glasses.
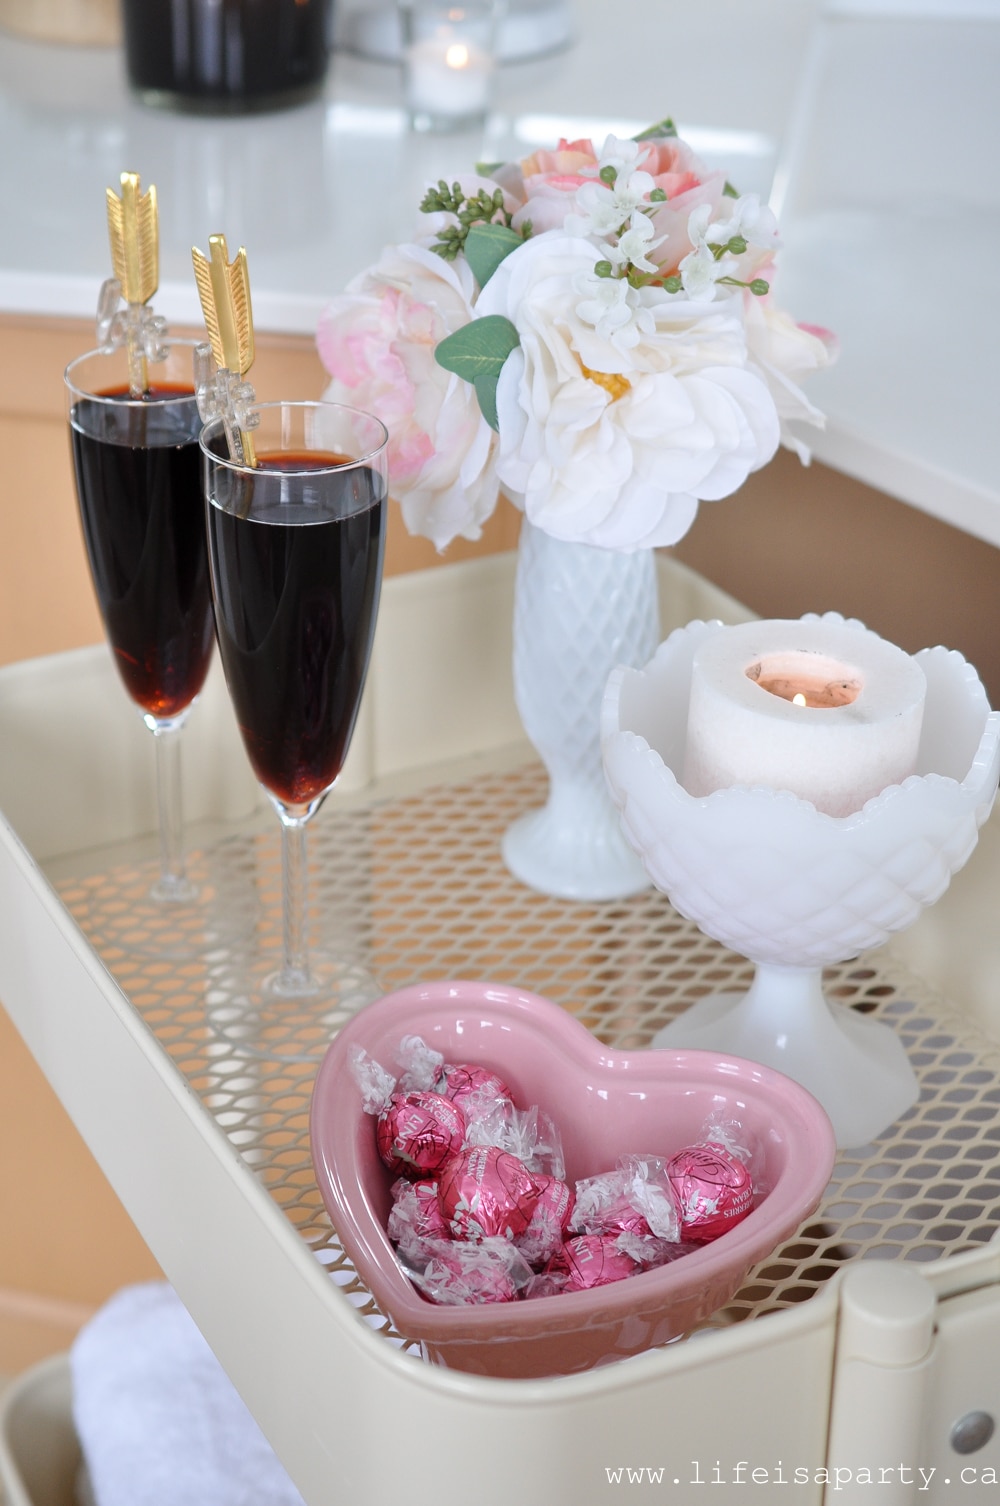 And since it's Valentine's Day we also had to have some chocolates.
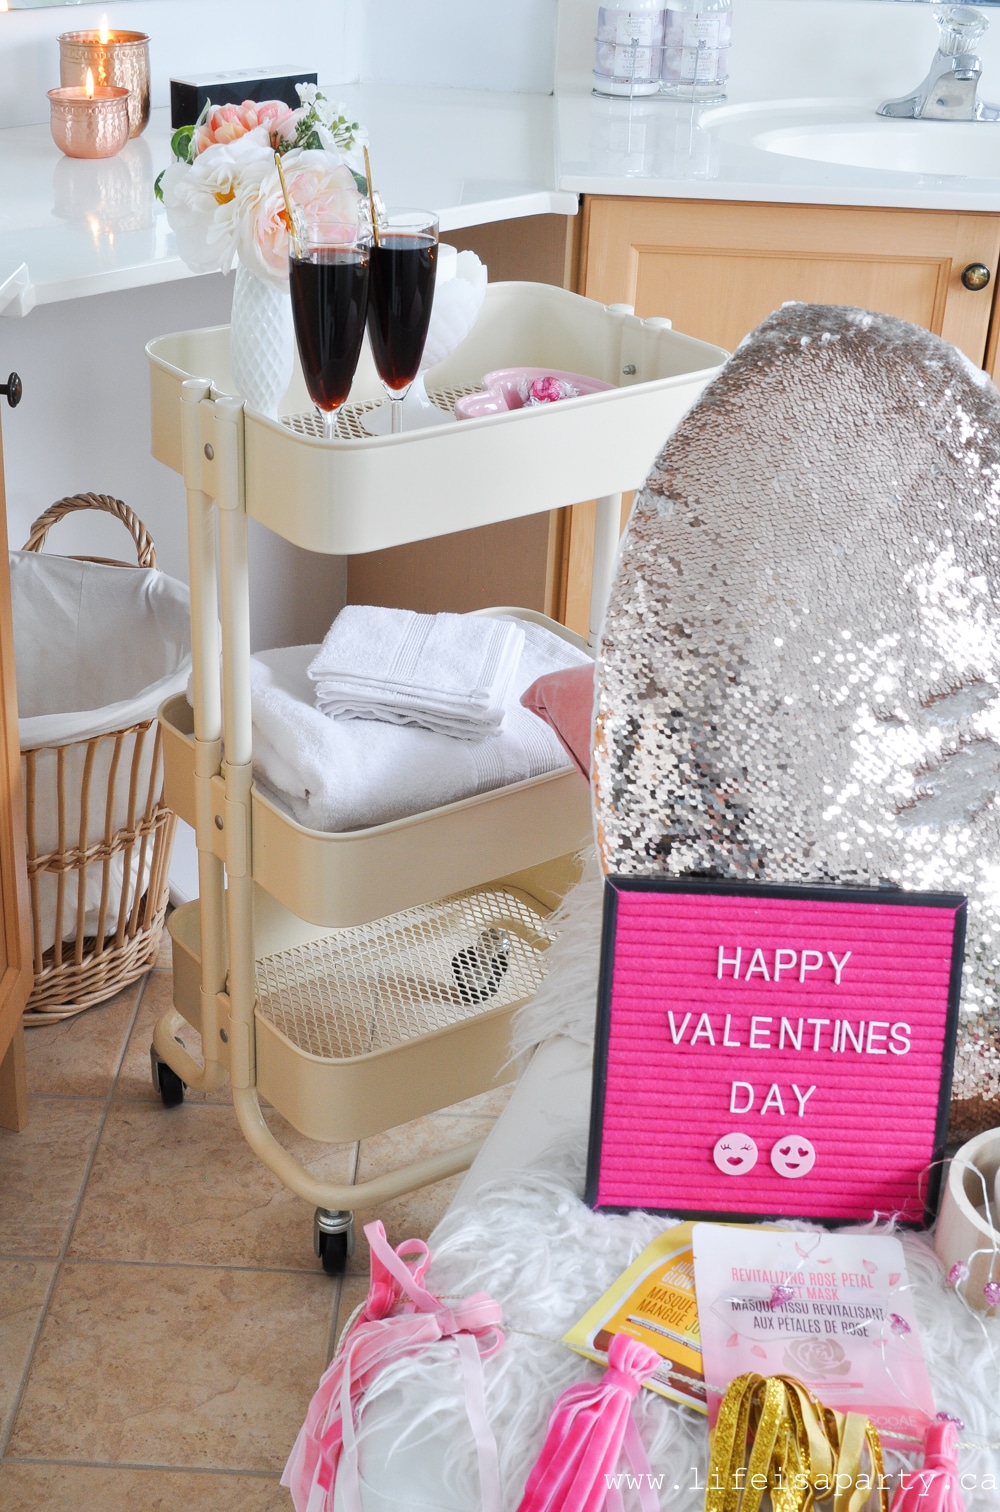
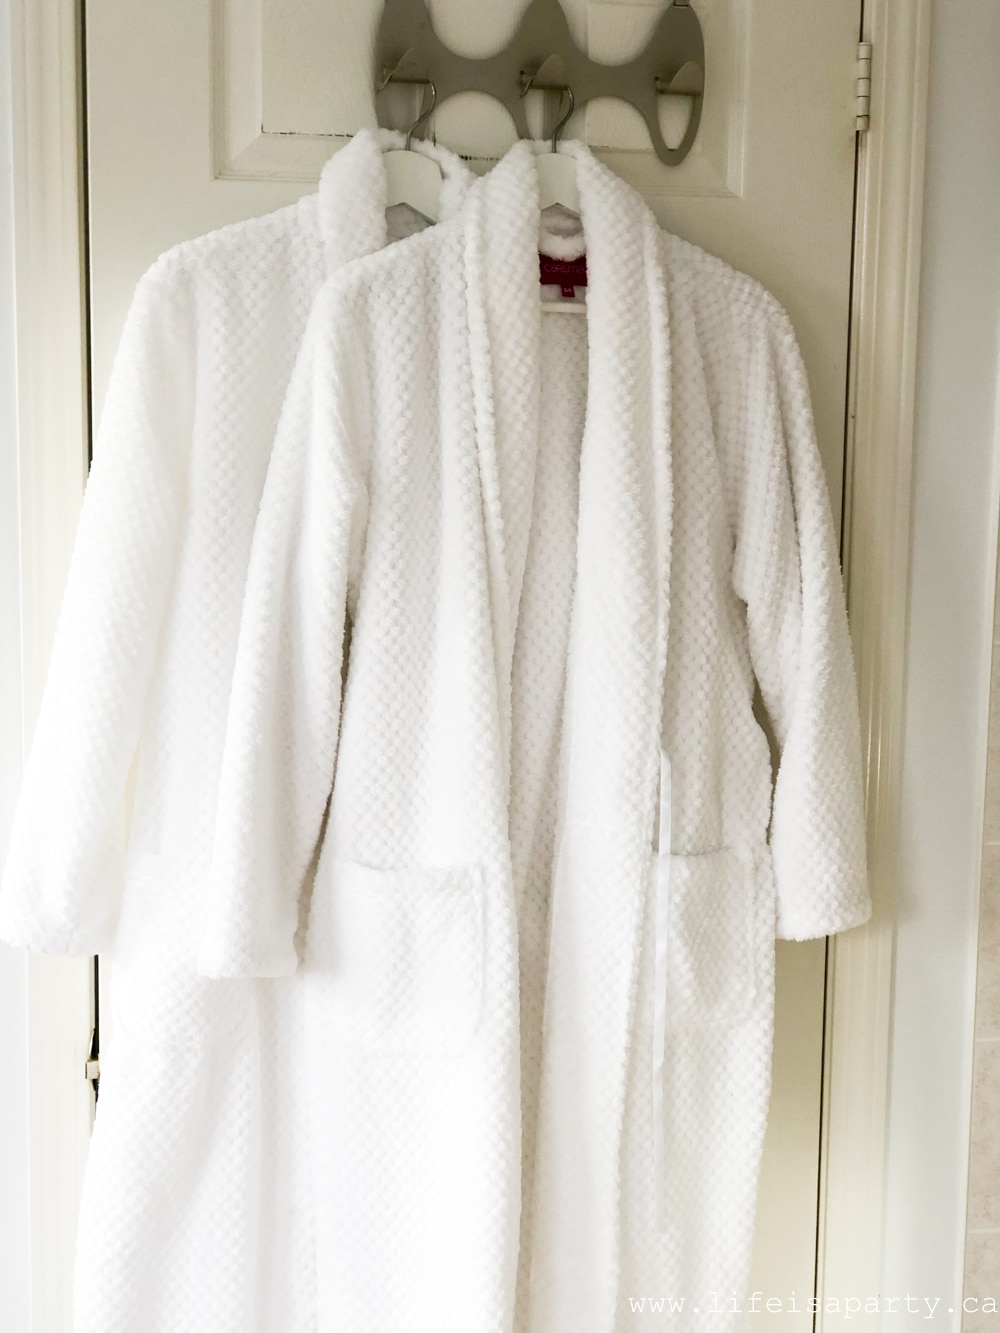 Spa Robes
 Spa Treatments
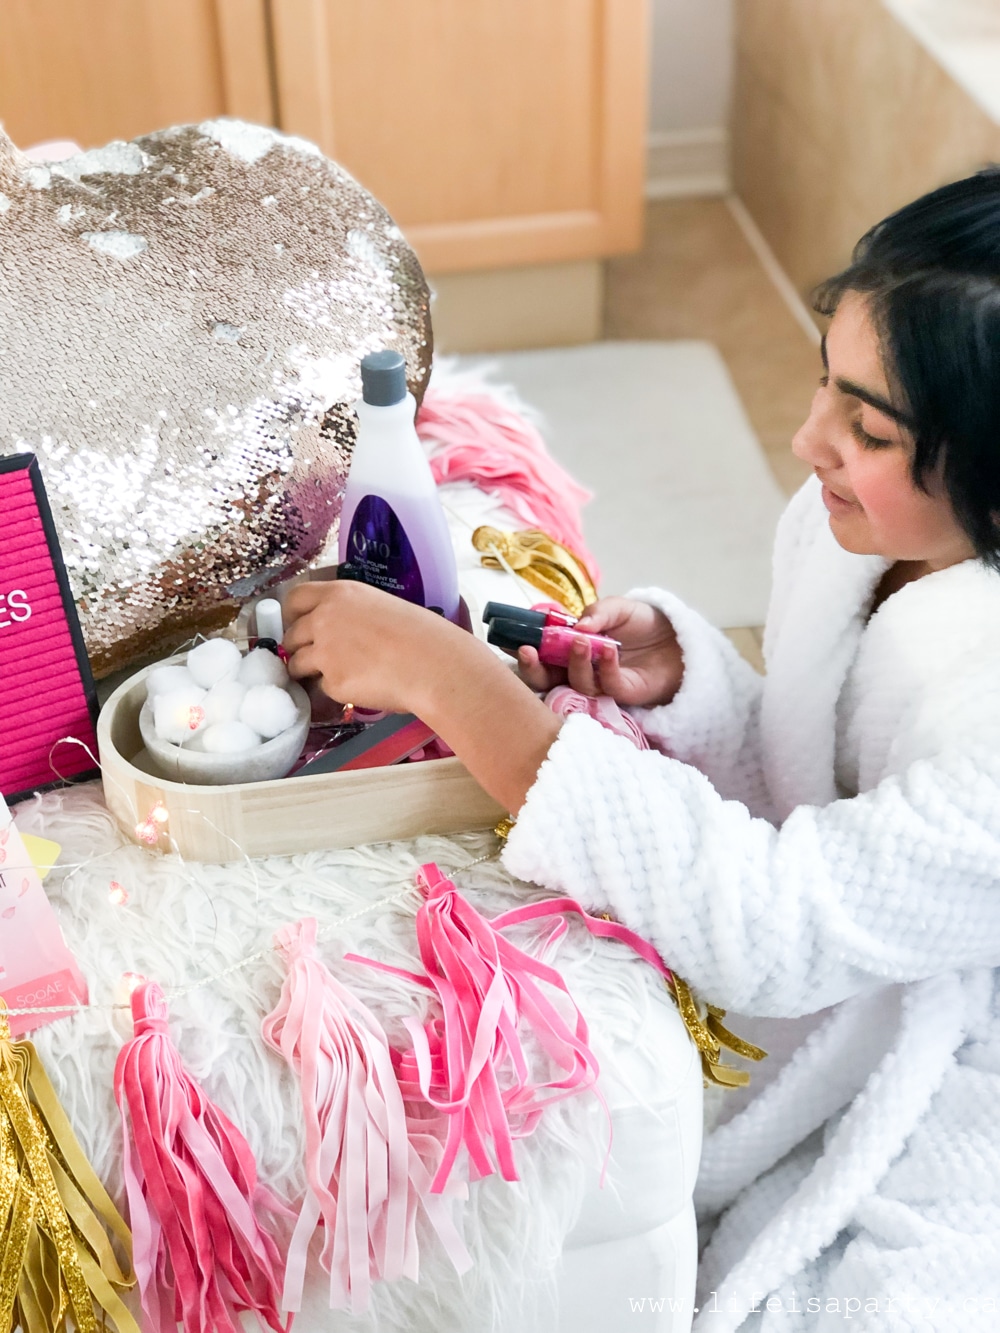

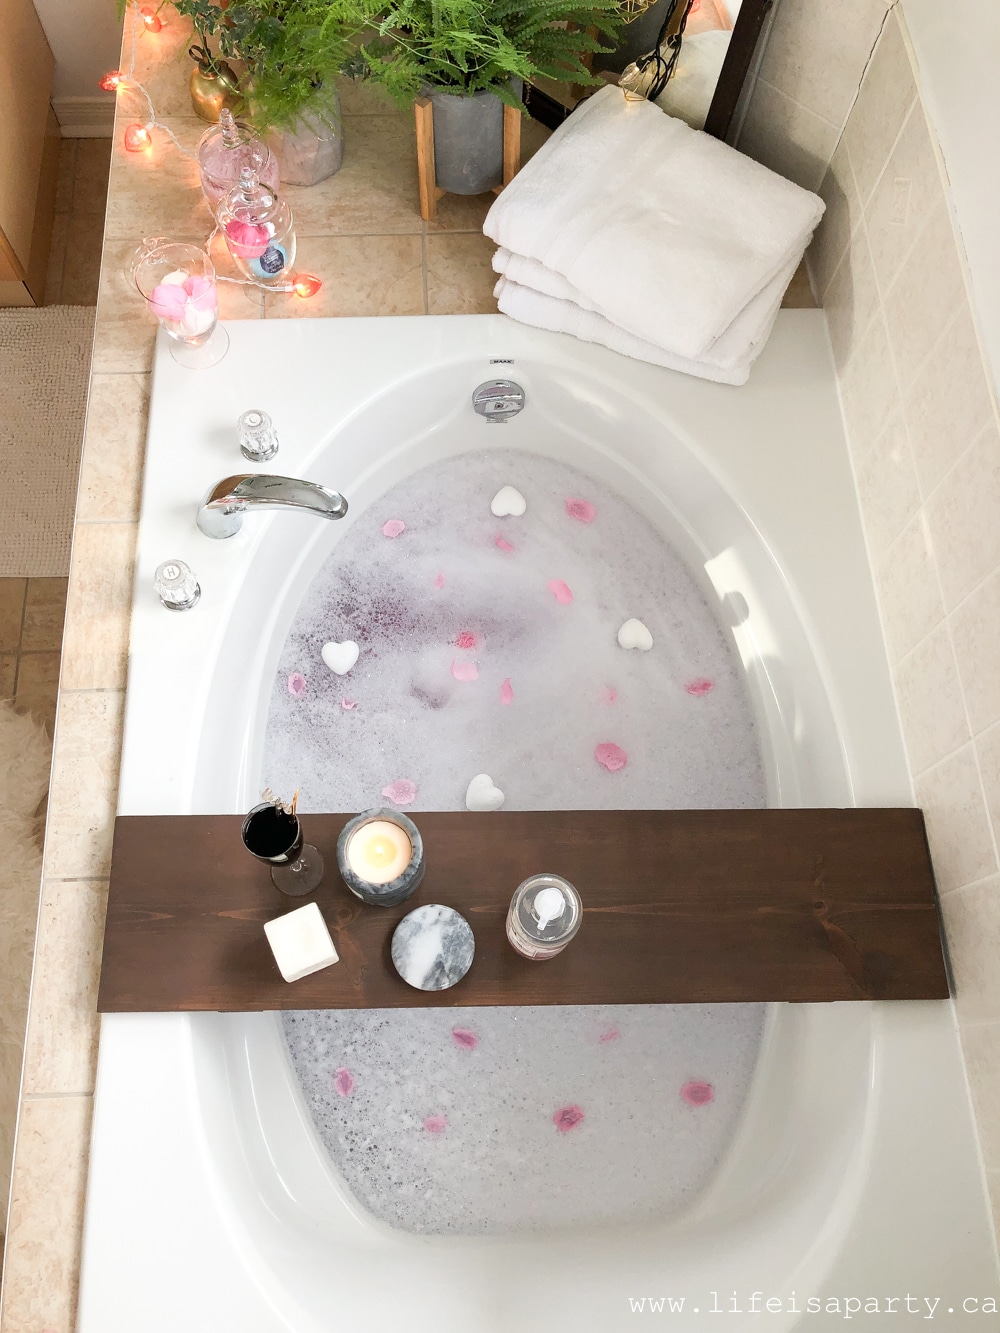
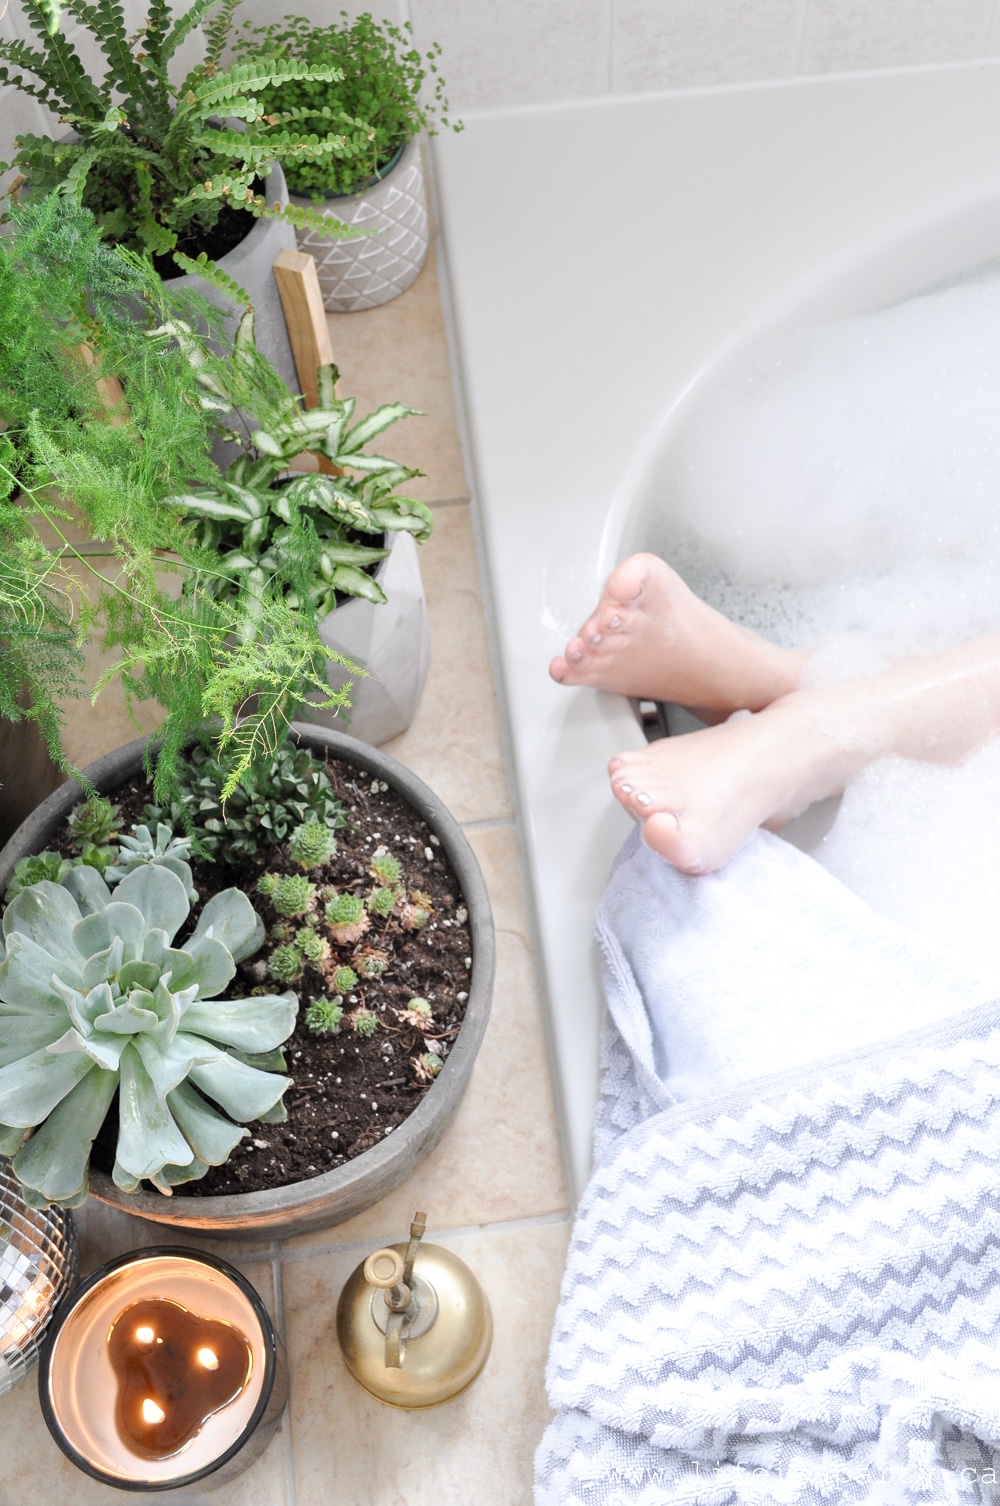
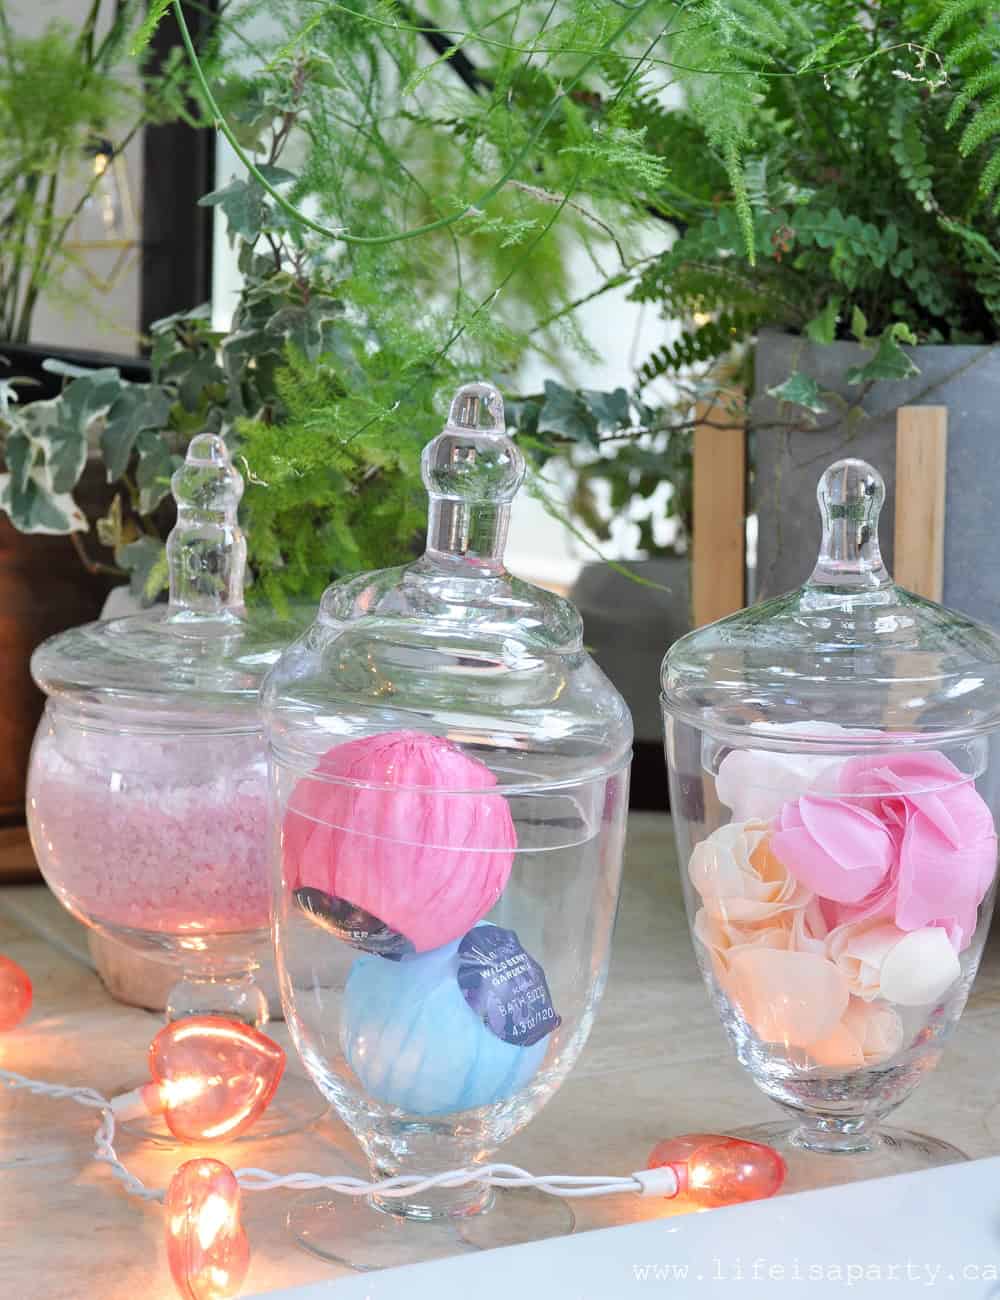 I love these pretty glass jars holding bath salts, bath bombs, and rose petal soaps.
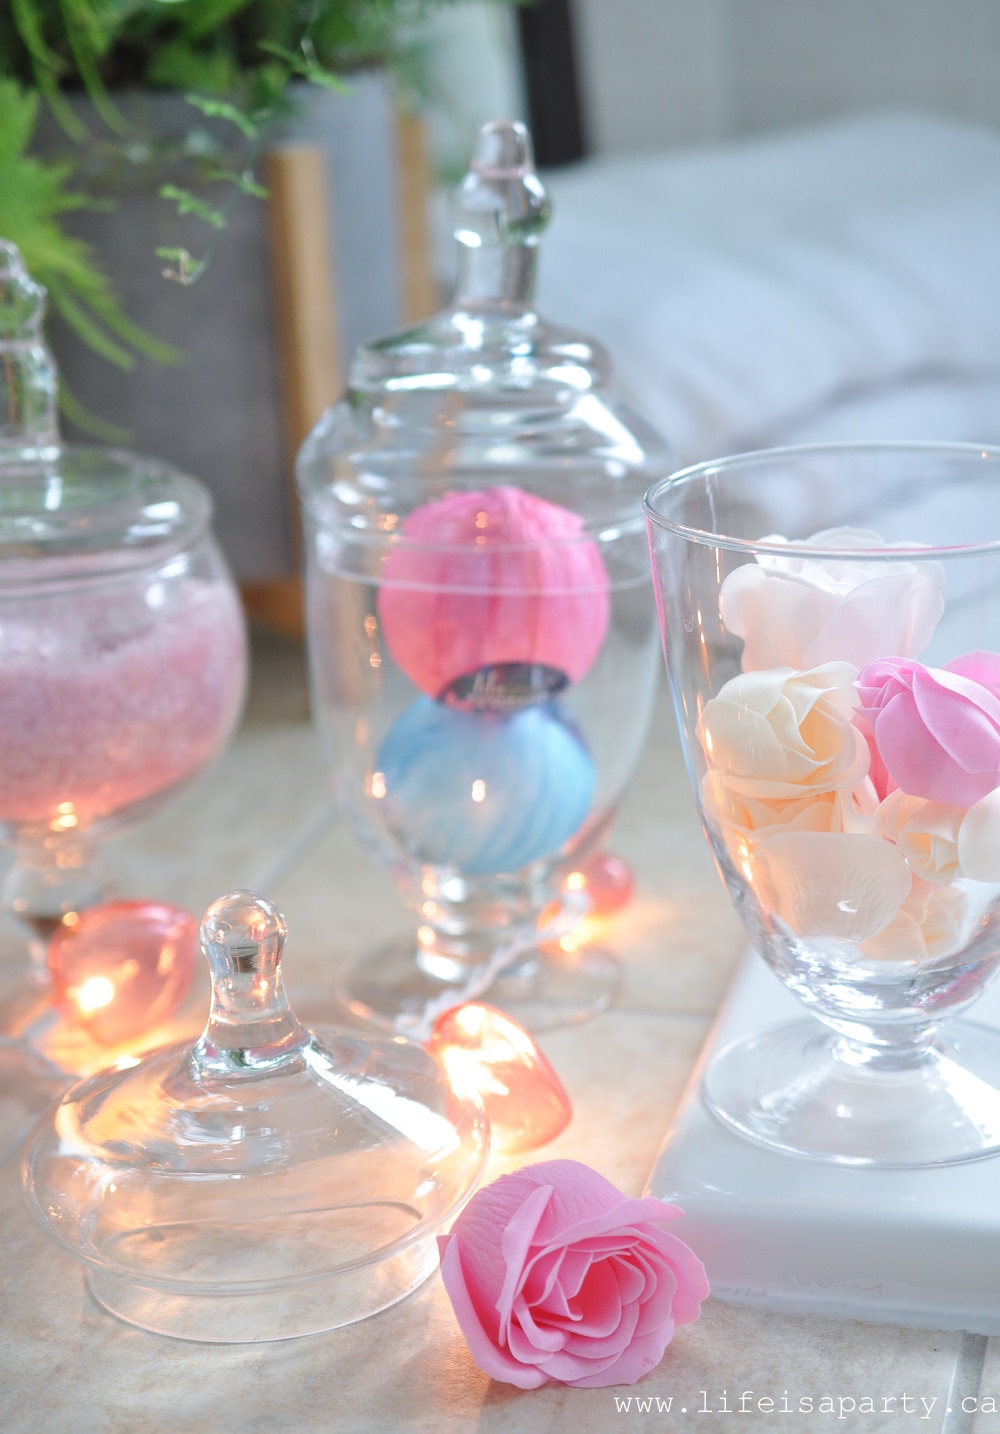 We added a pink bath bomb, some bubble bath, and some of the rose soap petals to the bath.
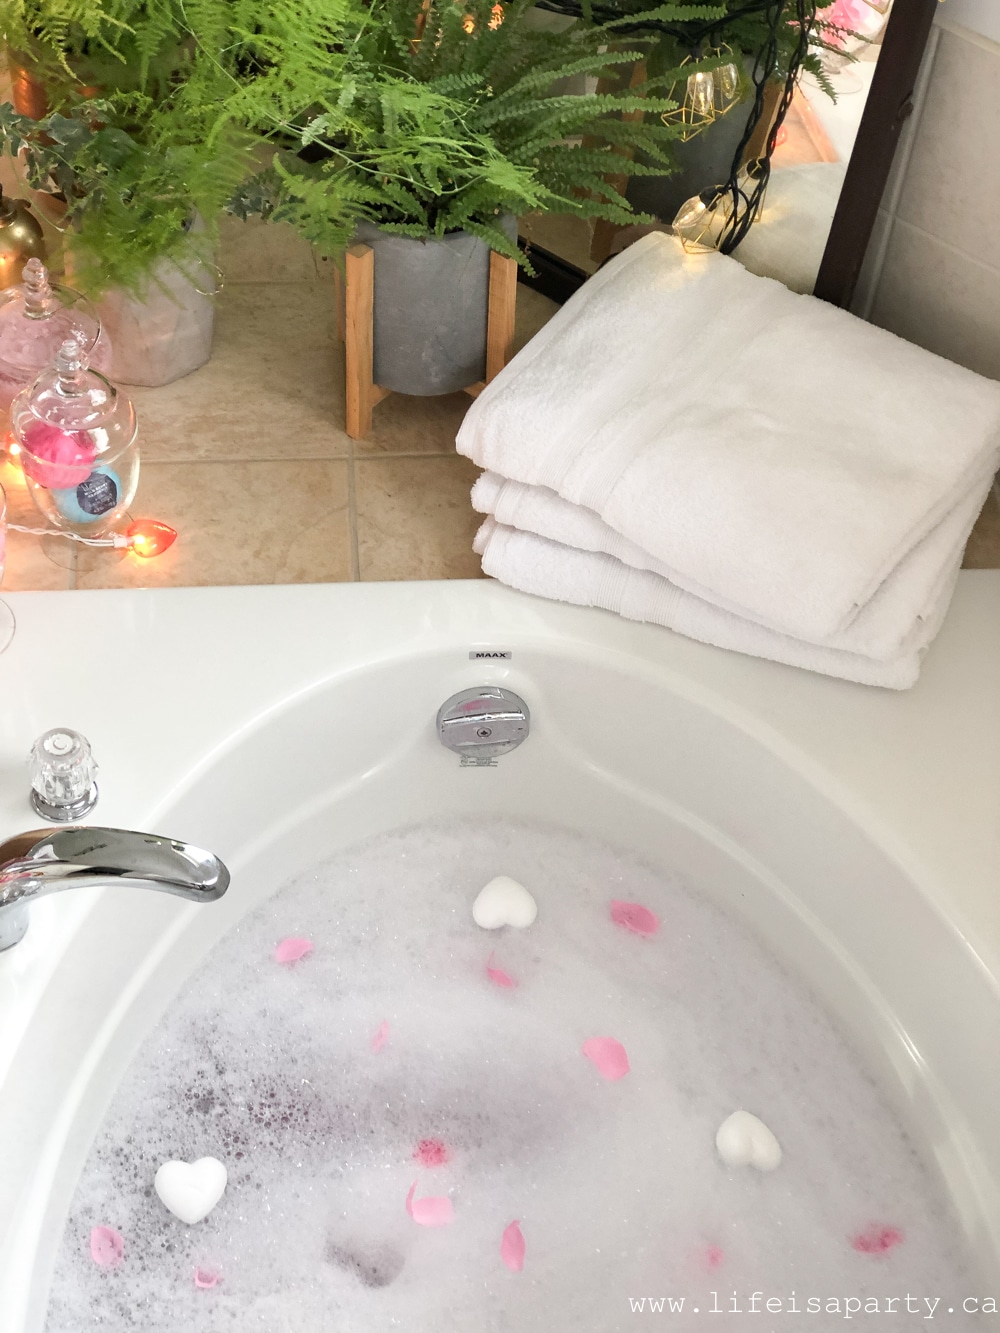 I love how it turned the water pretty pink. There's also a few styrofoam hearts floating on top (picked up a the dollar store and such a fun addition).
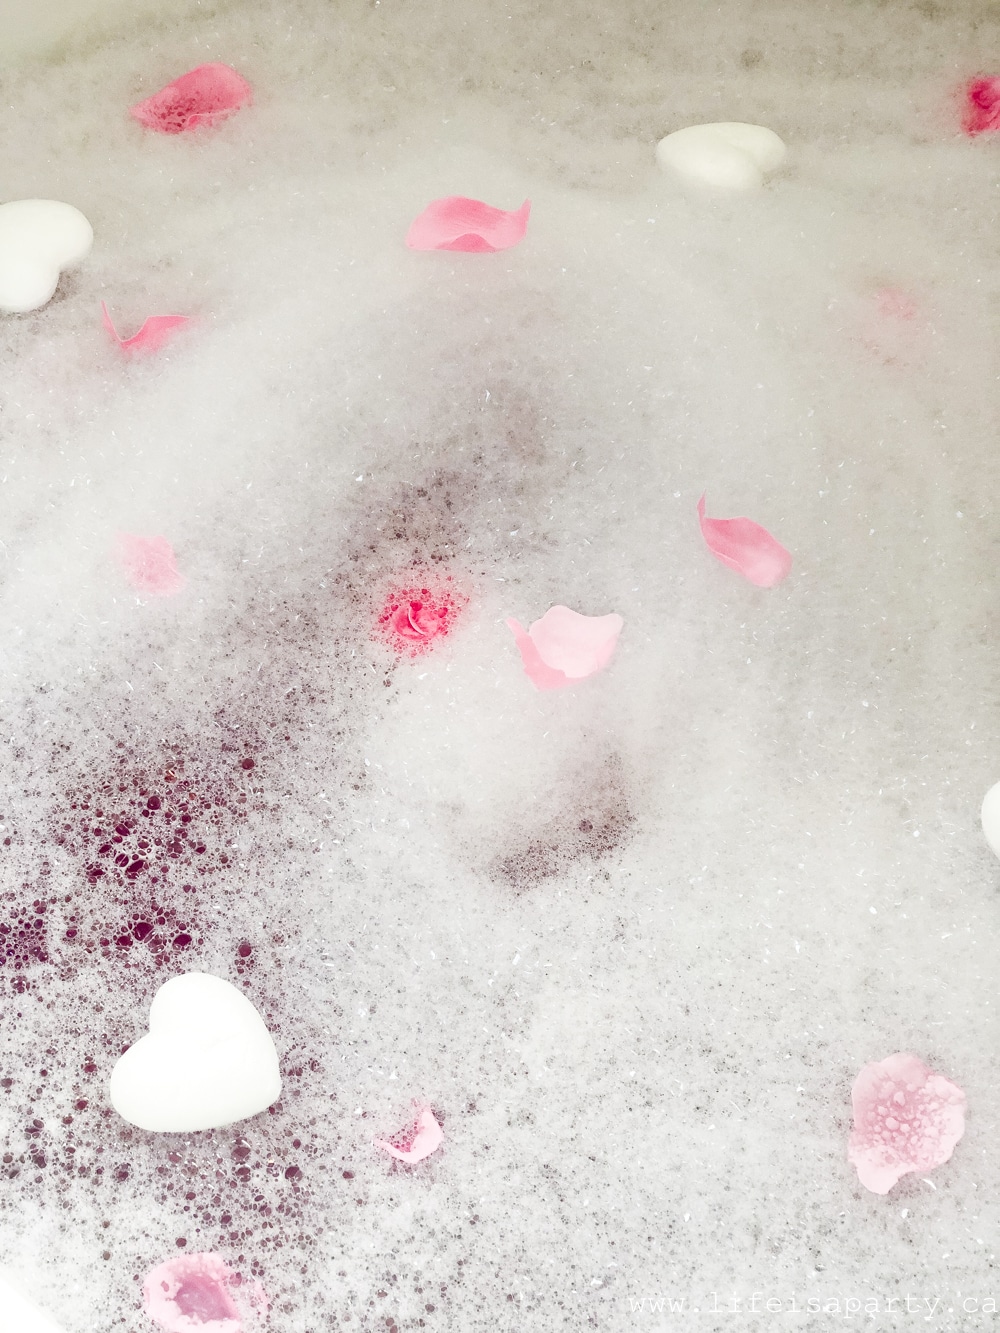
 The girls had a lot of fun enjoying their special Valentine's Day Spa, which might have also included doing each other's hair and makeup -one of their favourite pastimes lately. 😉
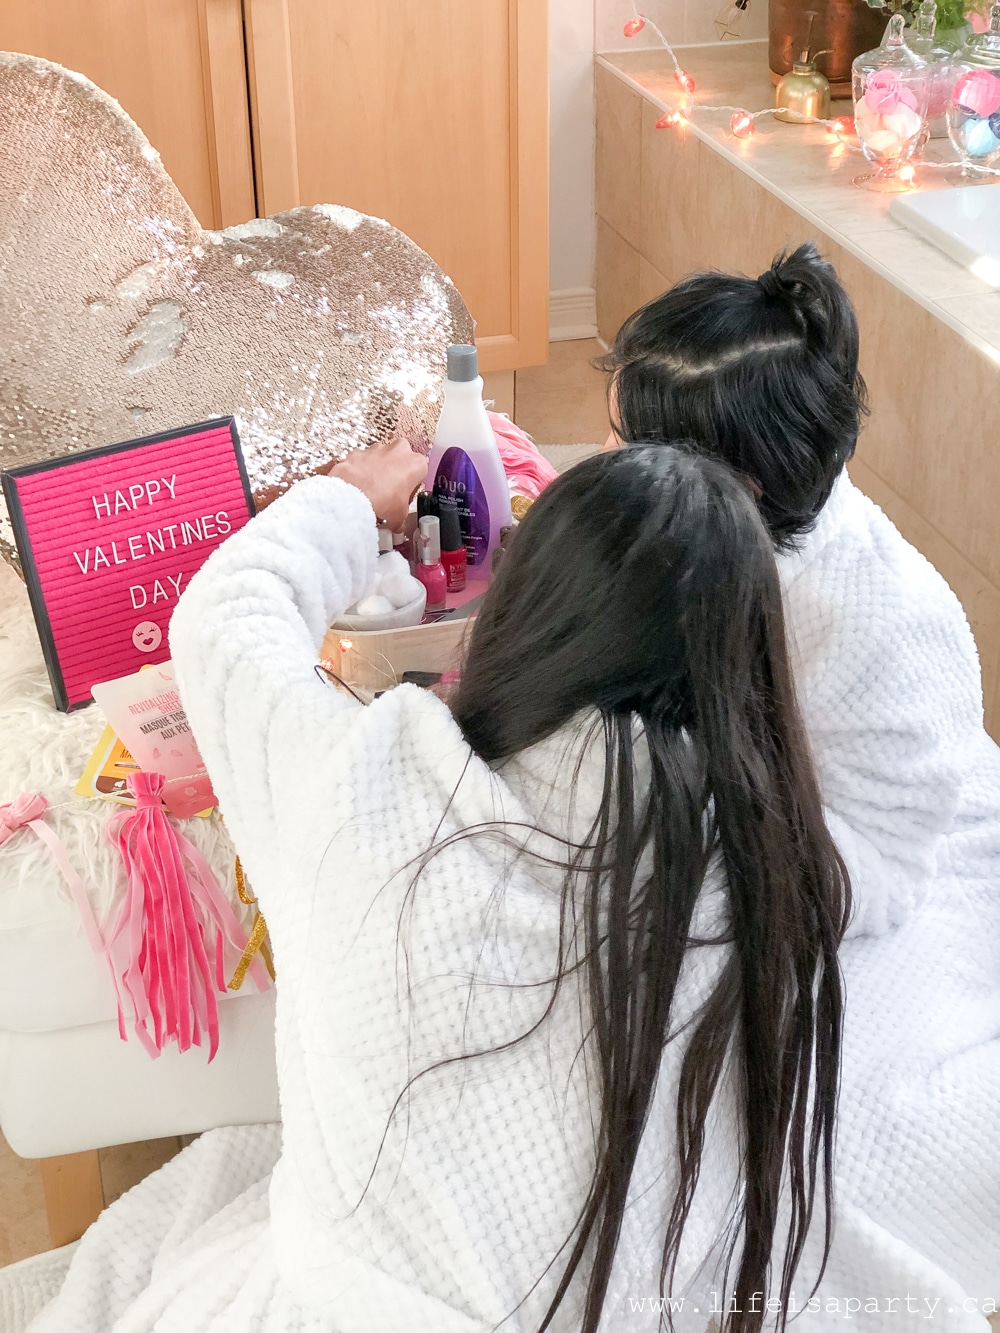


 5. Book Dinner with a Friend


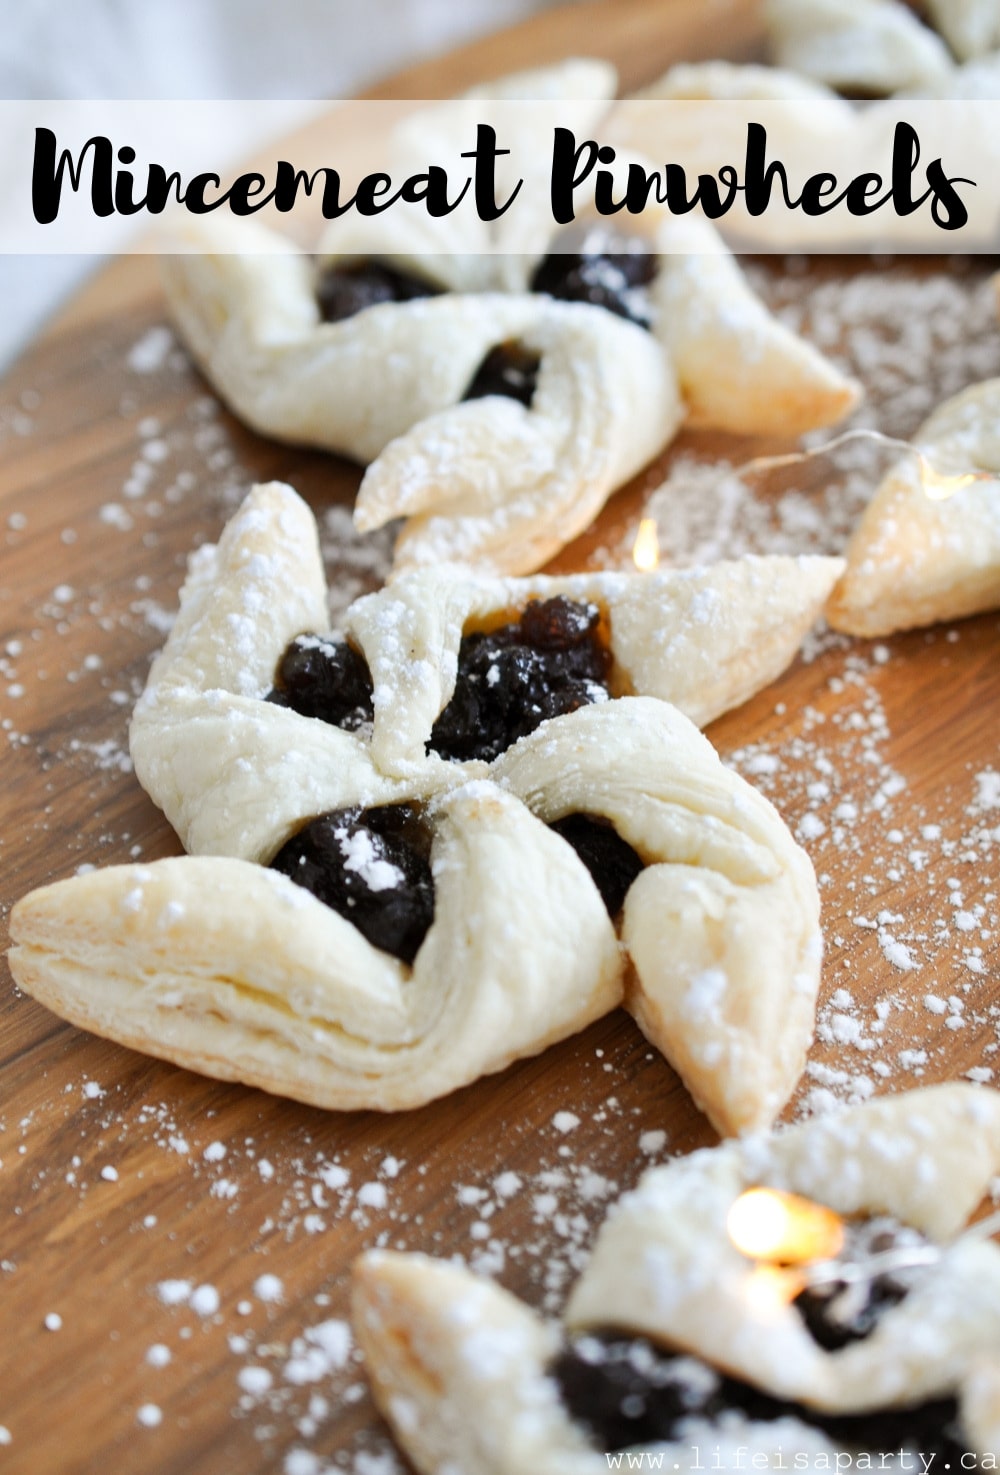


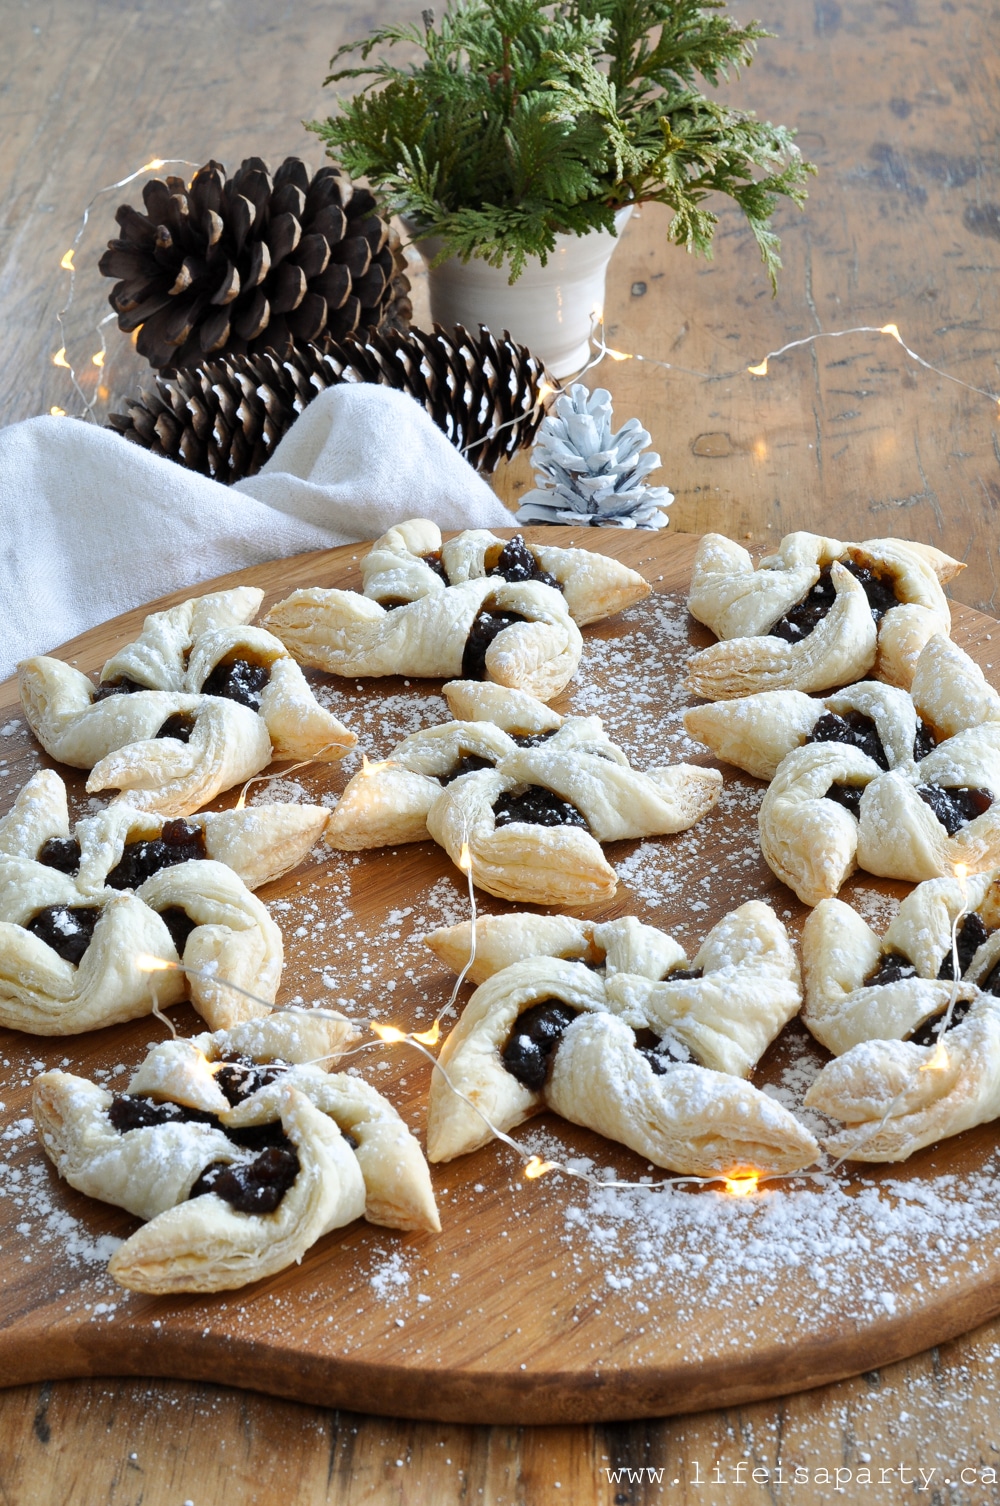


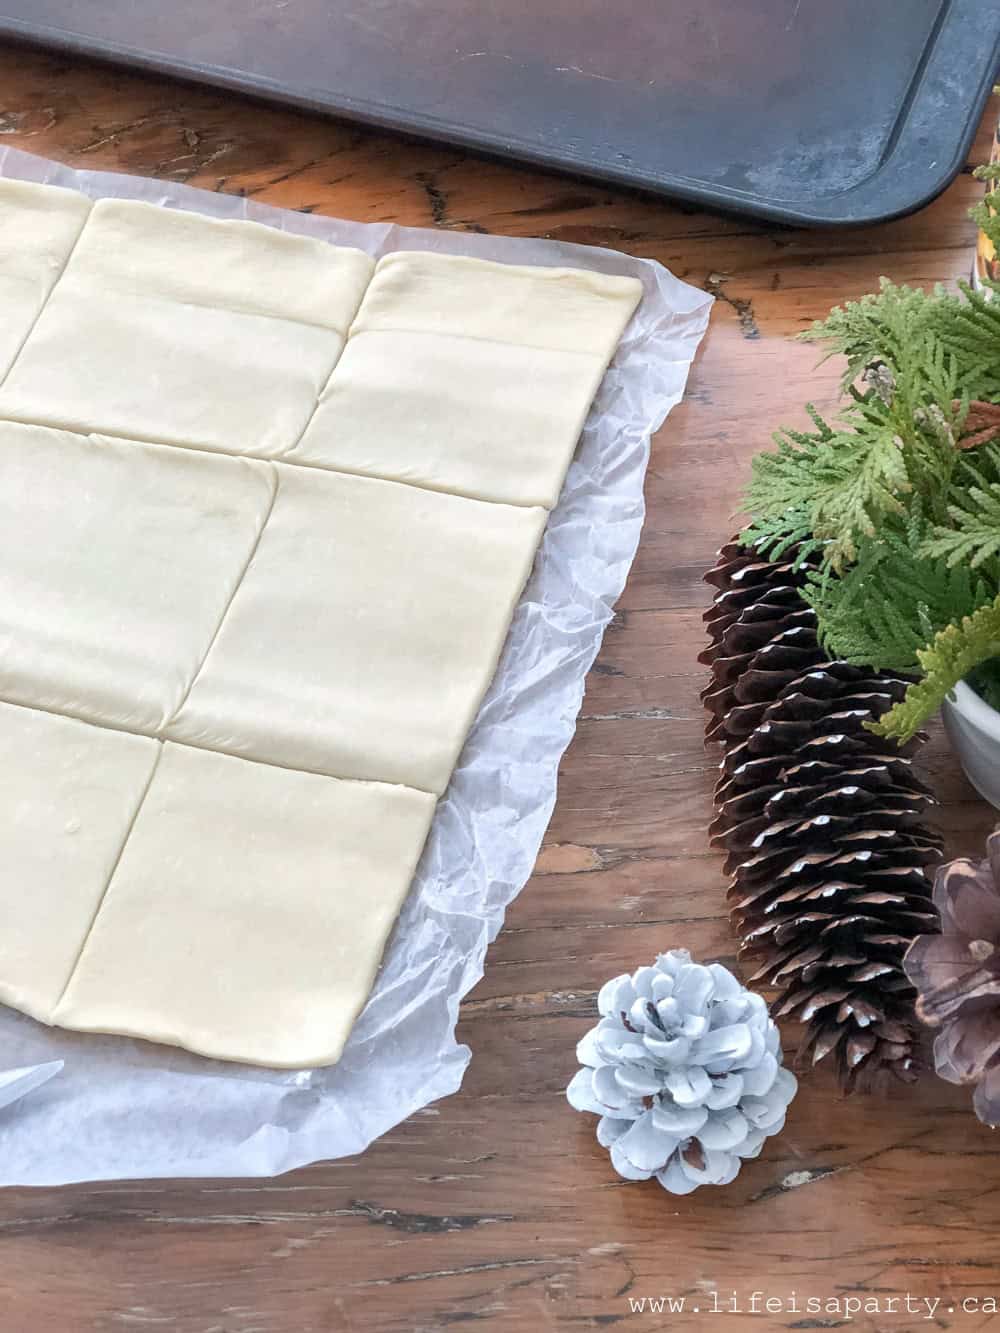
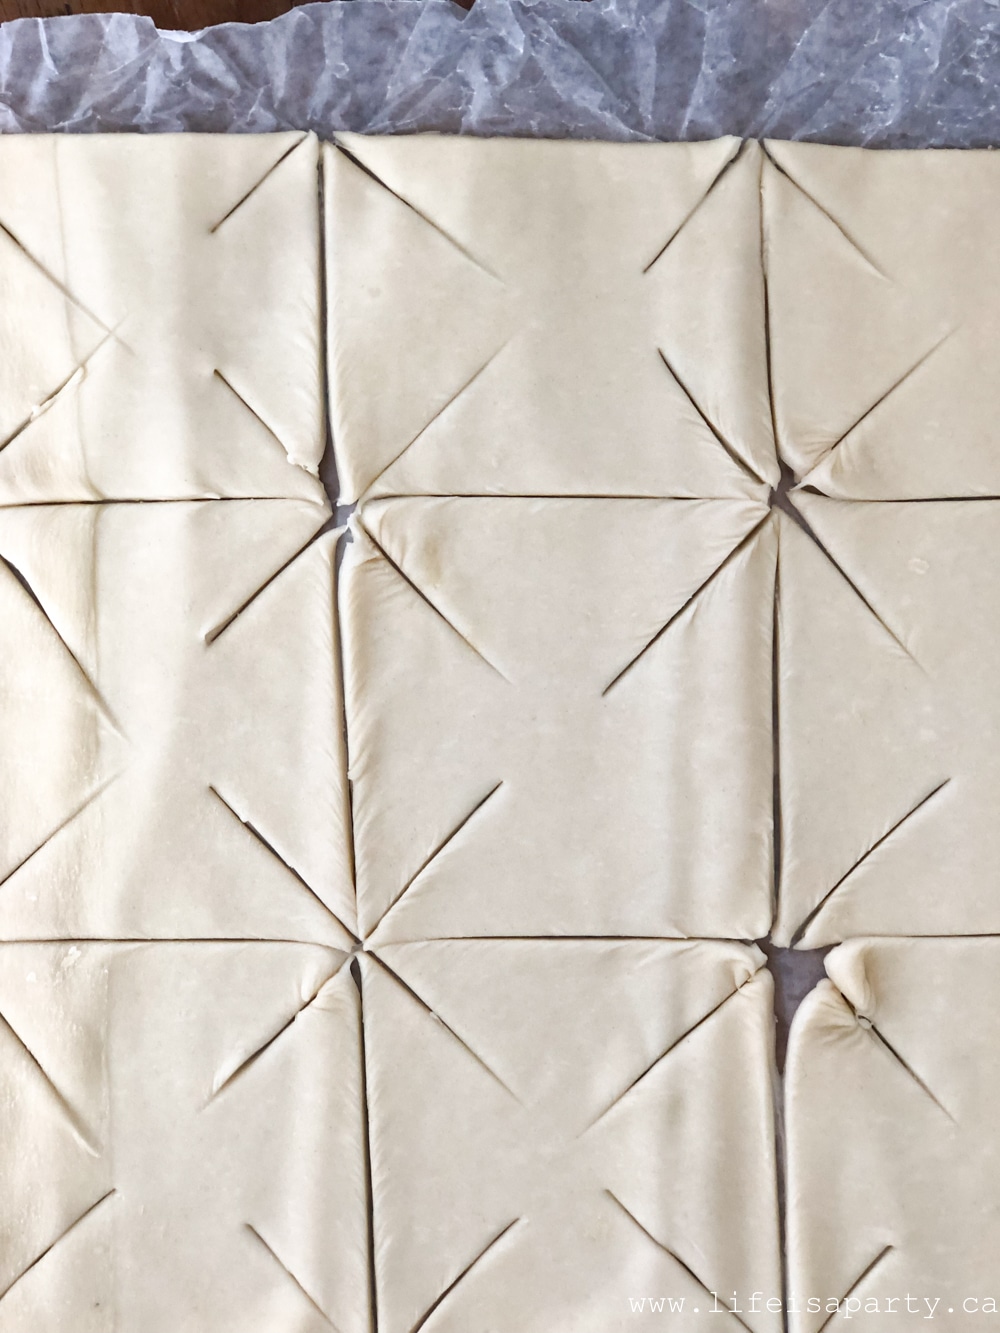
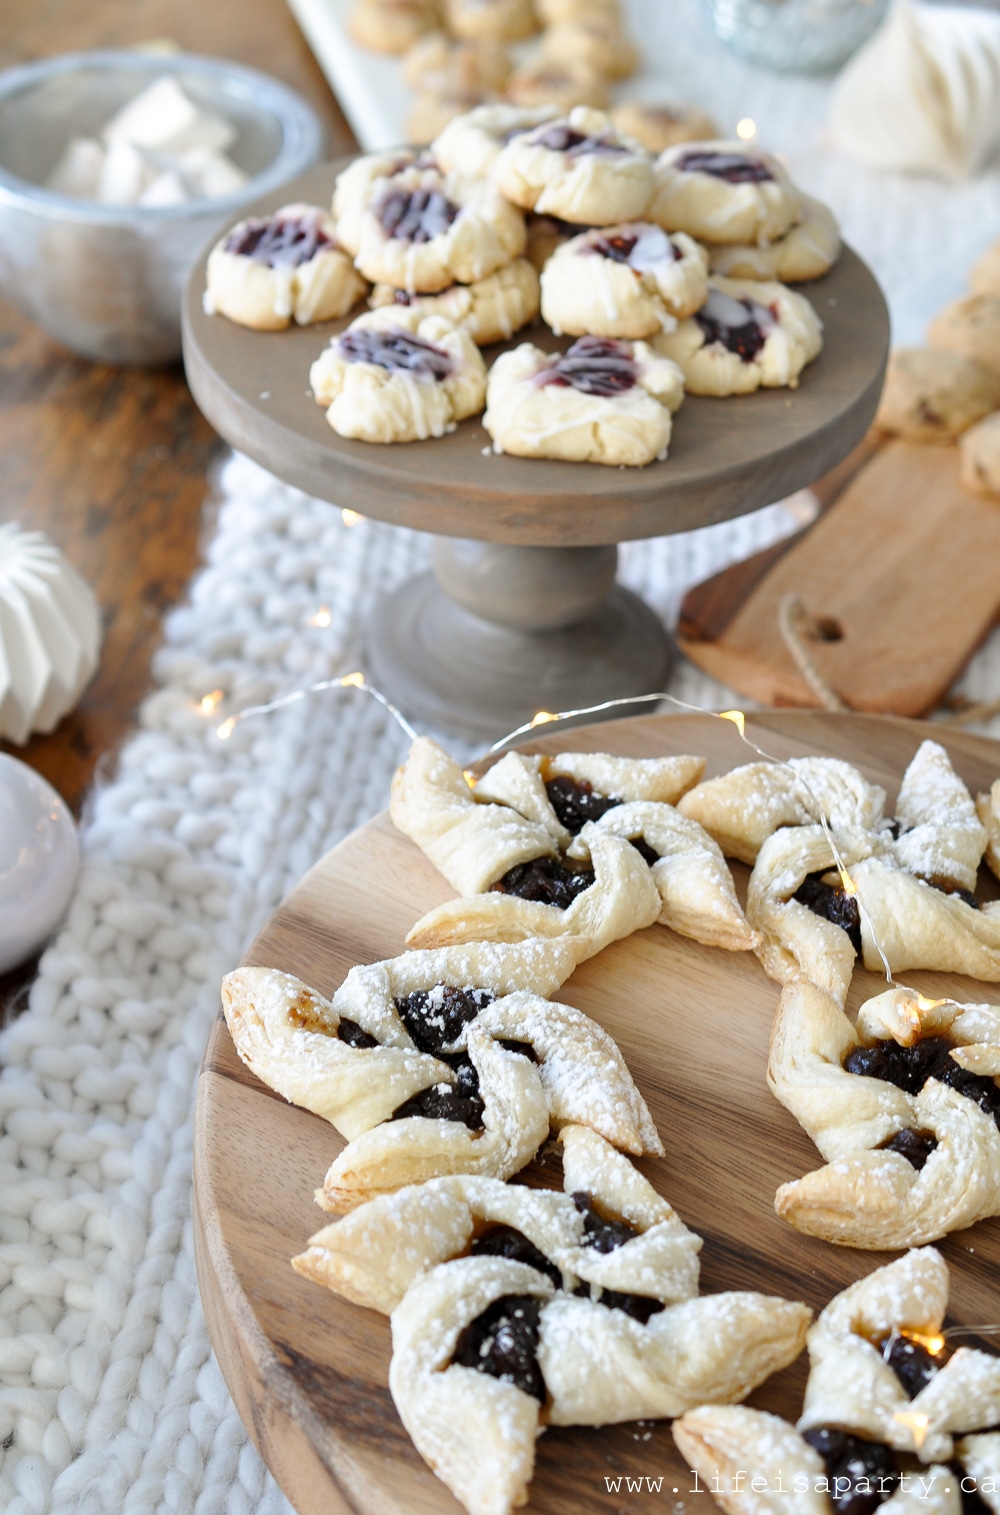
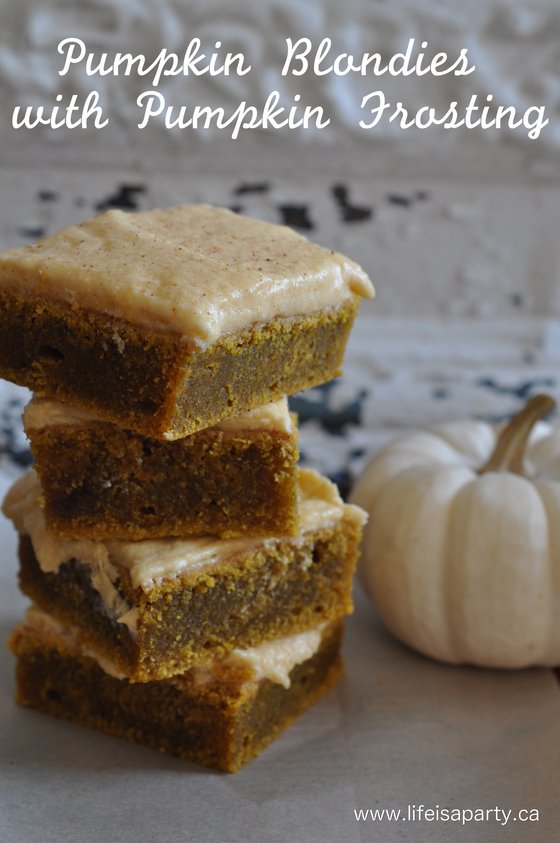
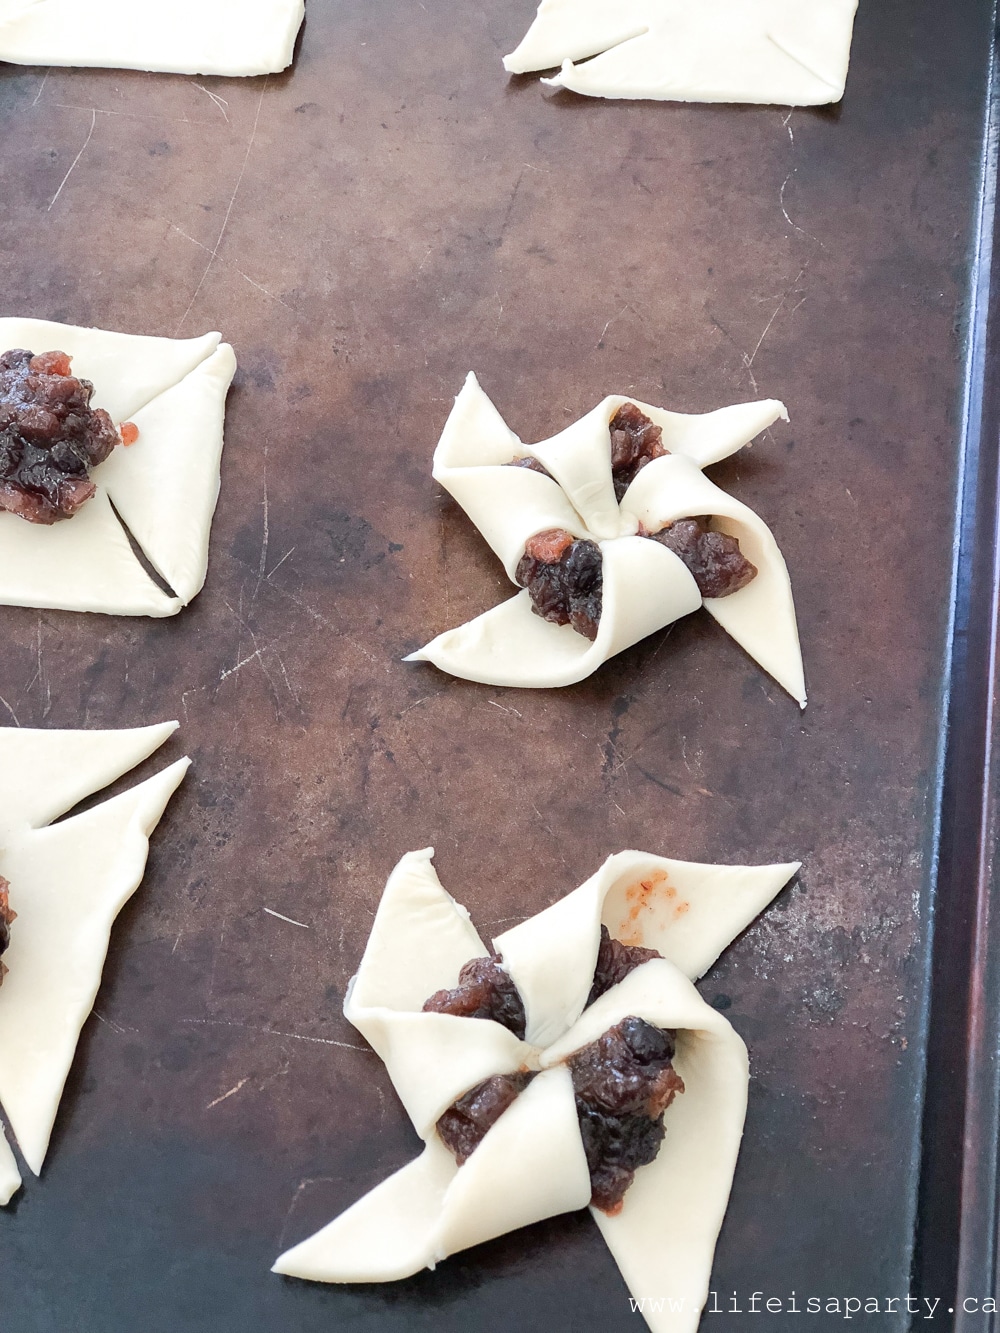 I saw these puff pastry mincemeat pinwheels on a British cooking show many years ago, and it's so easy and so tasty, it's become a favourite Christmas recipe of ours. It's a great way to make a quick version, with all the same great taste of normal nice pies, but none of the hard work. And it's a great leftover mincemeat recipe to remember.


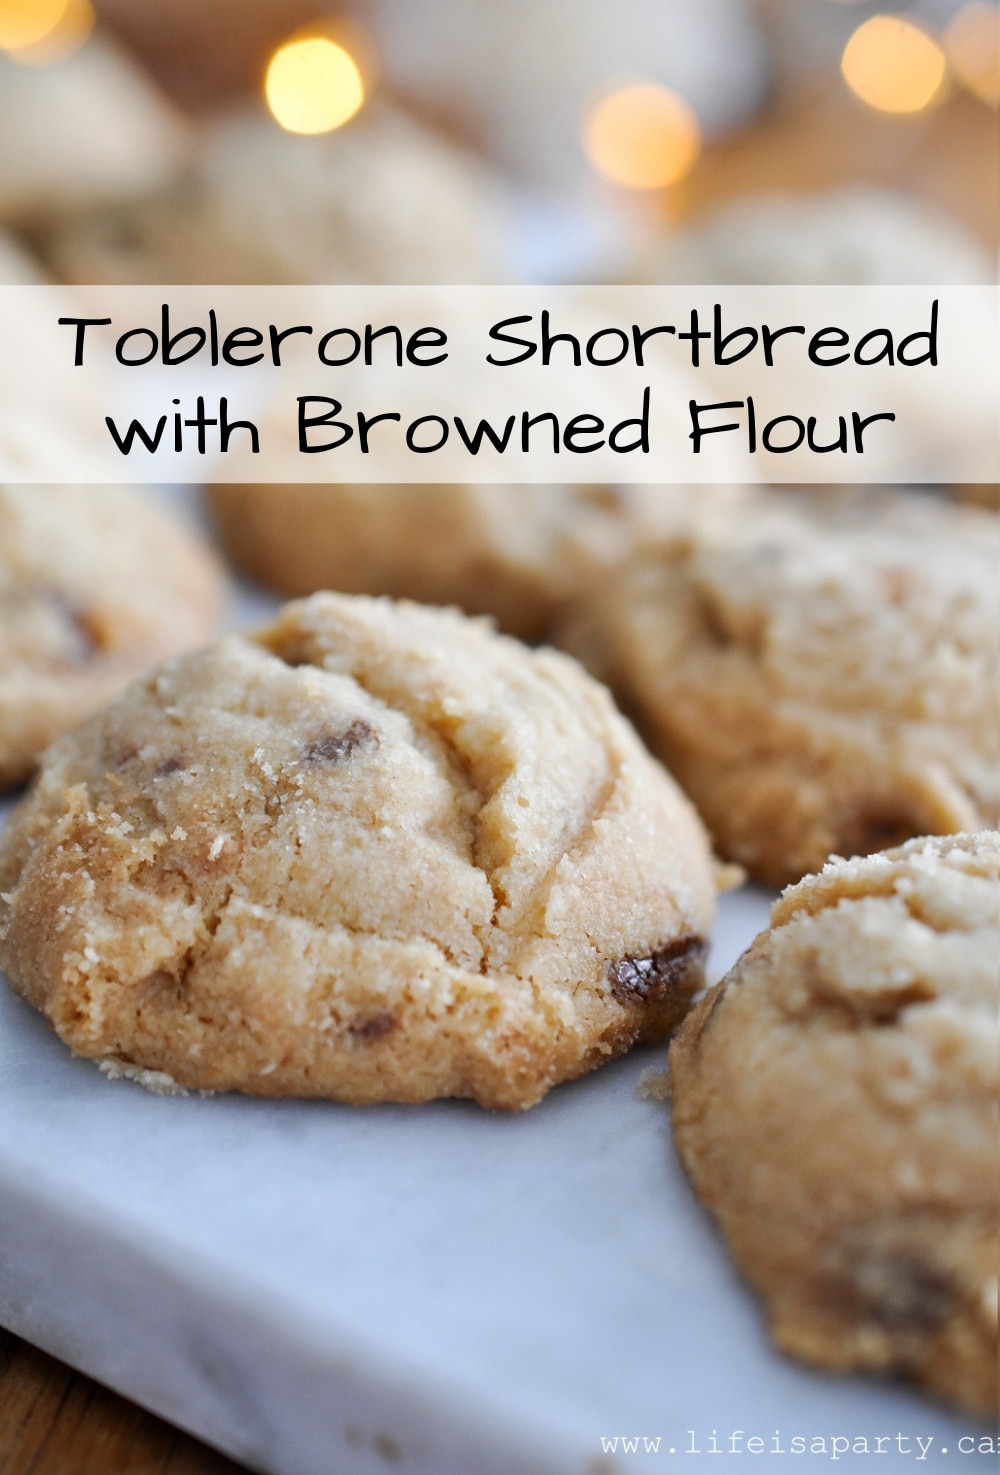
 With Toblerone Shortbread Cookies with Browned Flour, life really is a party!


 I shared the front porch, the mudroom, the dining room and our basement family room the other day, you can catch up with my
 I picked up some amazing yarn that comes already knit into a chain. It would be great for a chunky knit blanket, but it also makes a gorgeous garland. I love how simple and warm and fuzzy it is.
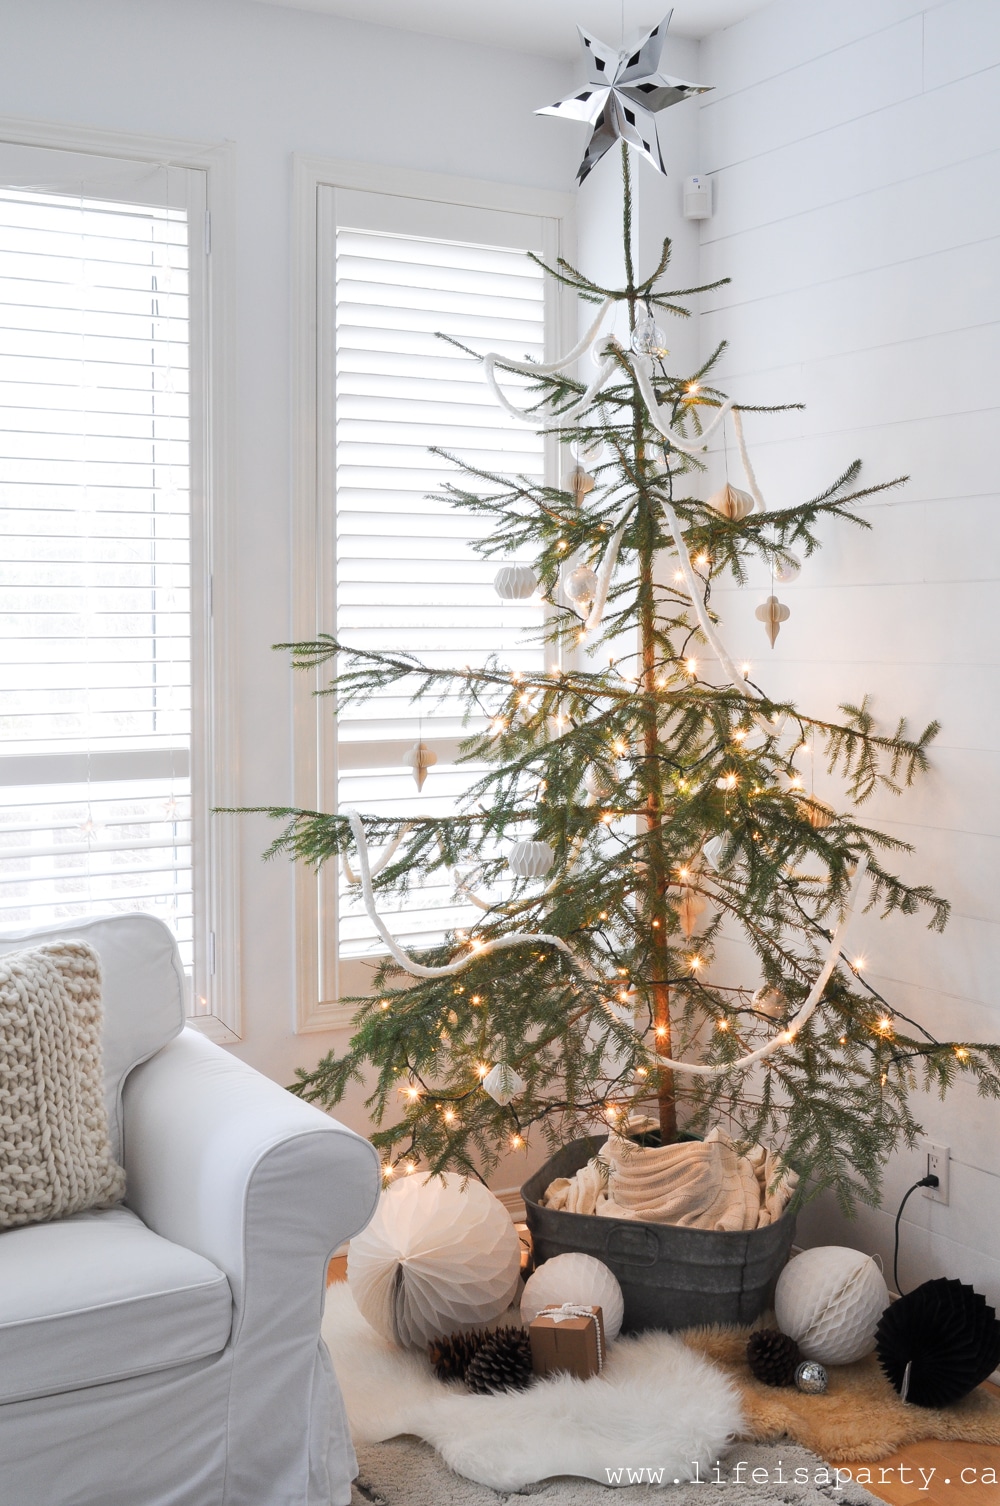
 On the top of the tree we've hung a paper star, and attached it to the ceiling which worked perfectly.
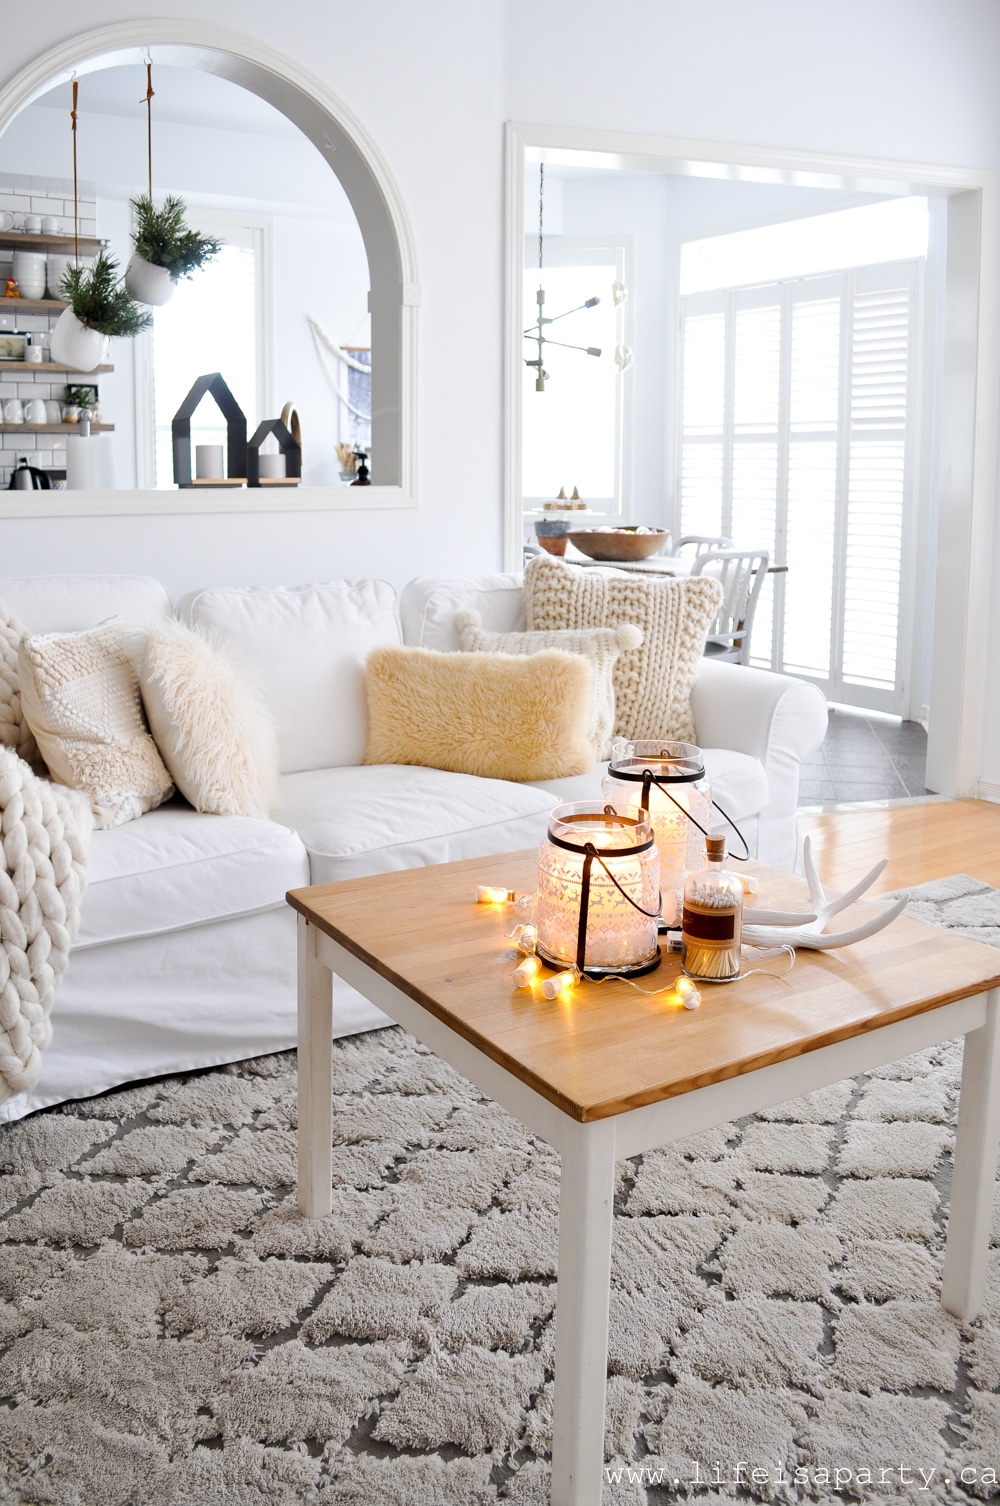 The yarn garland inspired the warm white cozy theme for the rest of the room. The couch is already for a Hallmark movie marathon. 😉
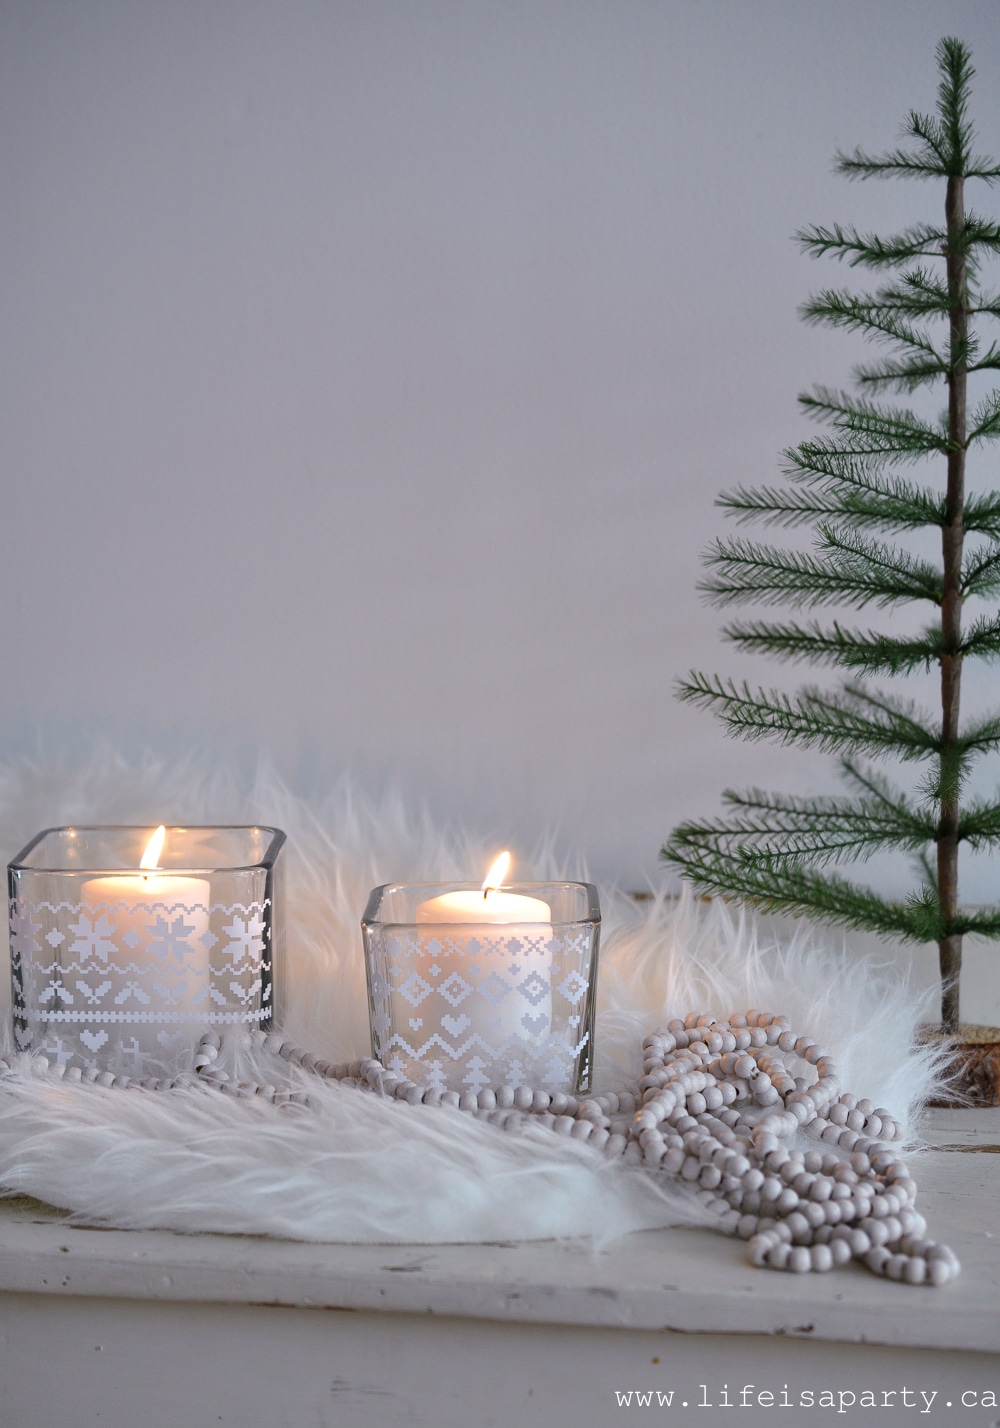
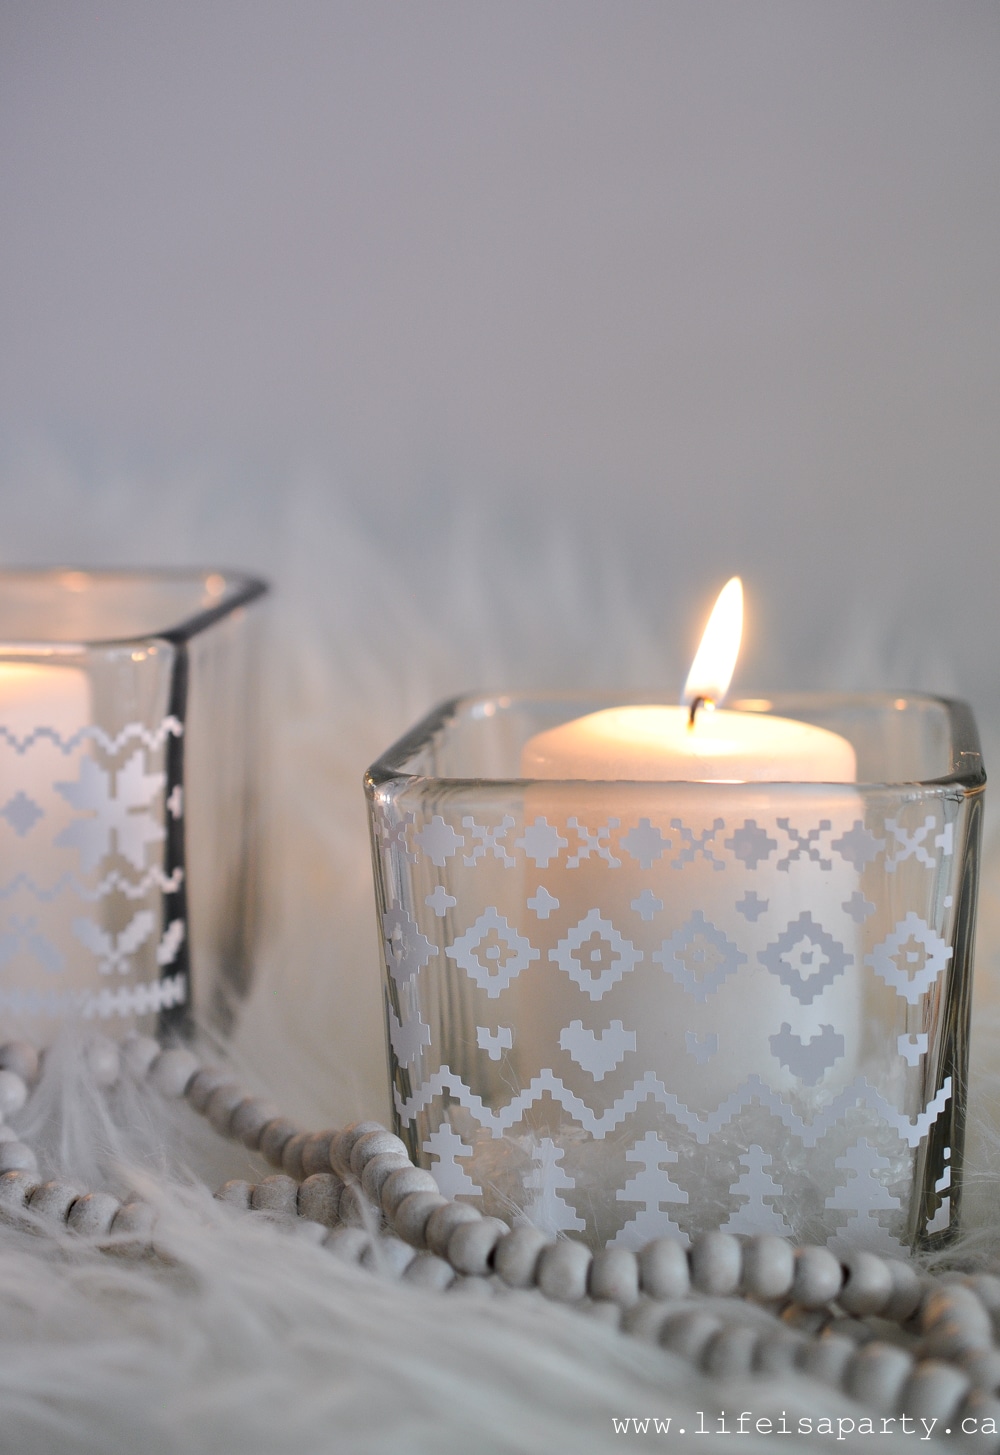
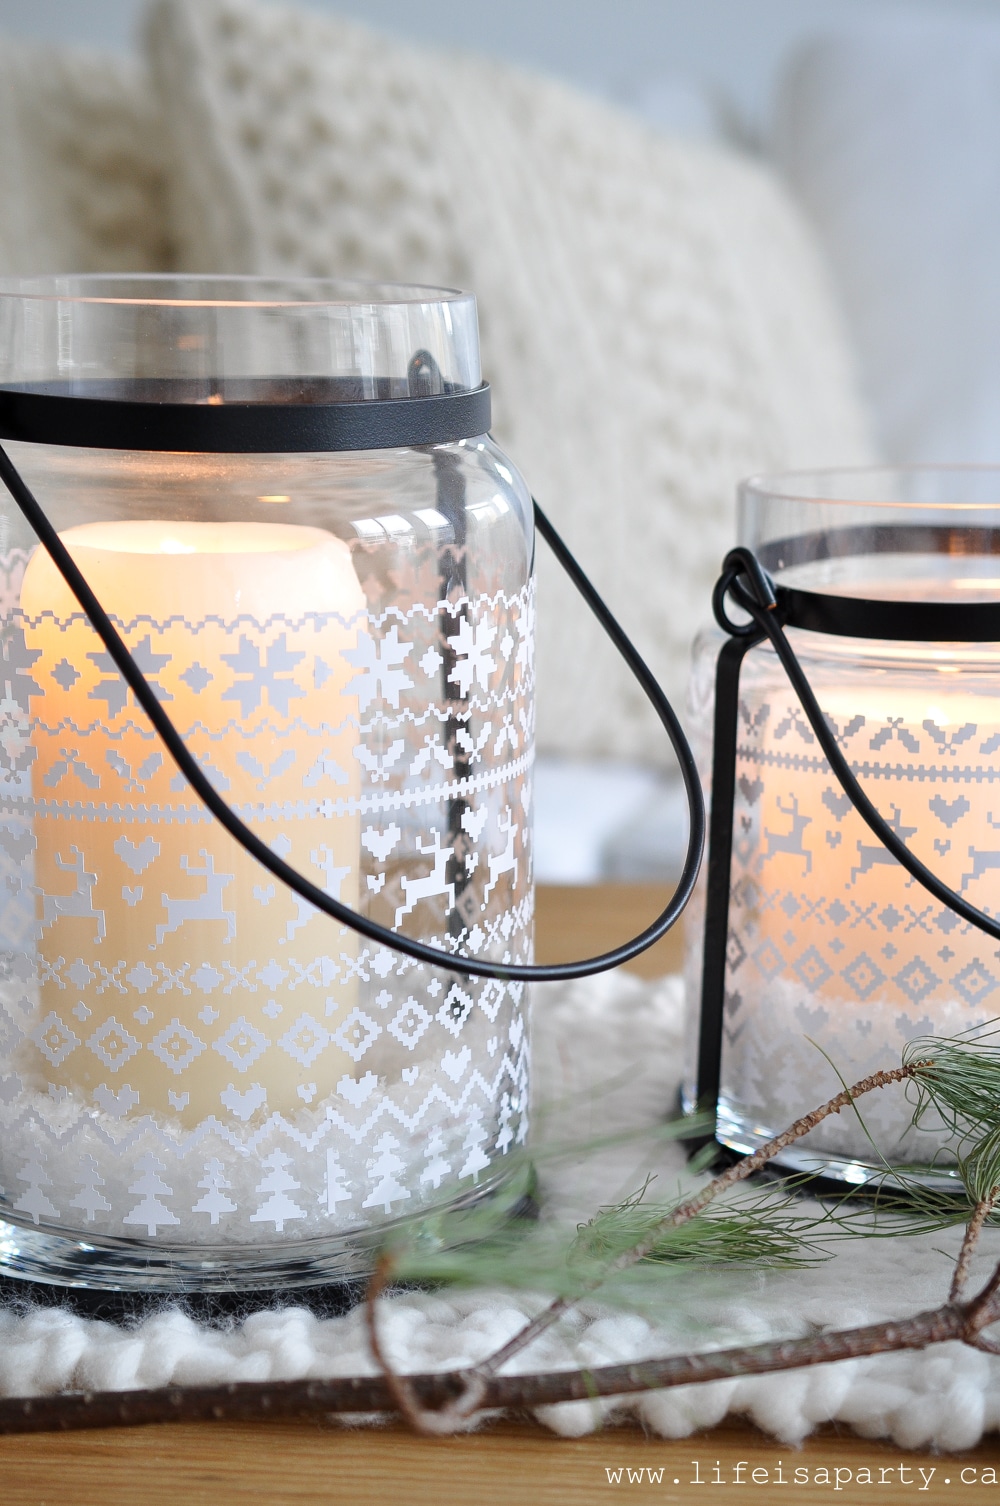
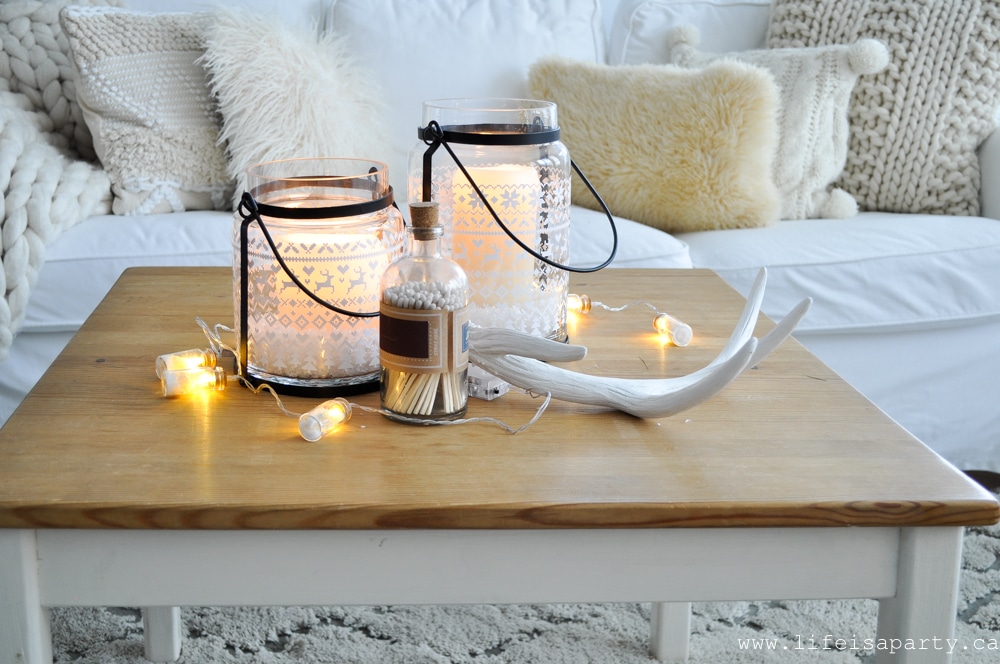 On the table are the candle holders I made with the fair isle pattern, inspired by cozy sweaters. The little lights are like mini snow globes with little white bottle brush trees in them.
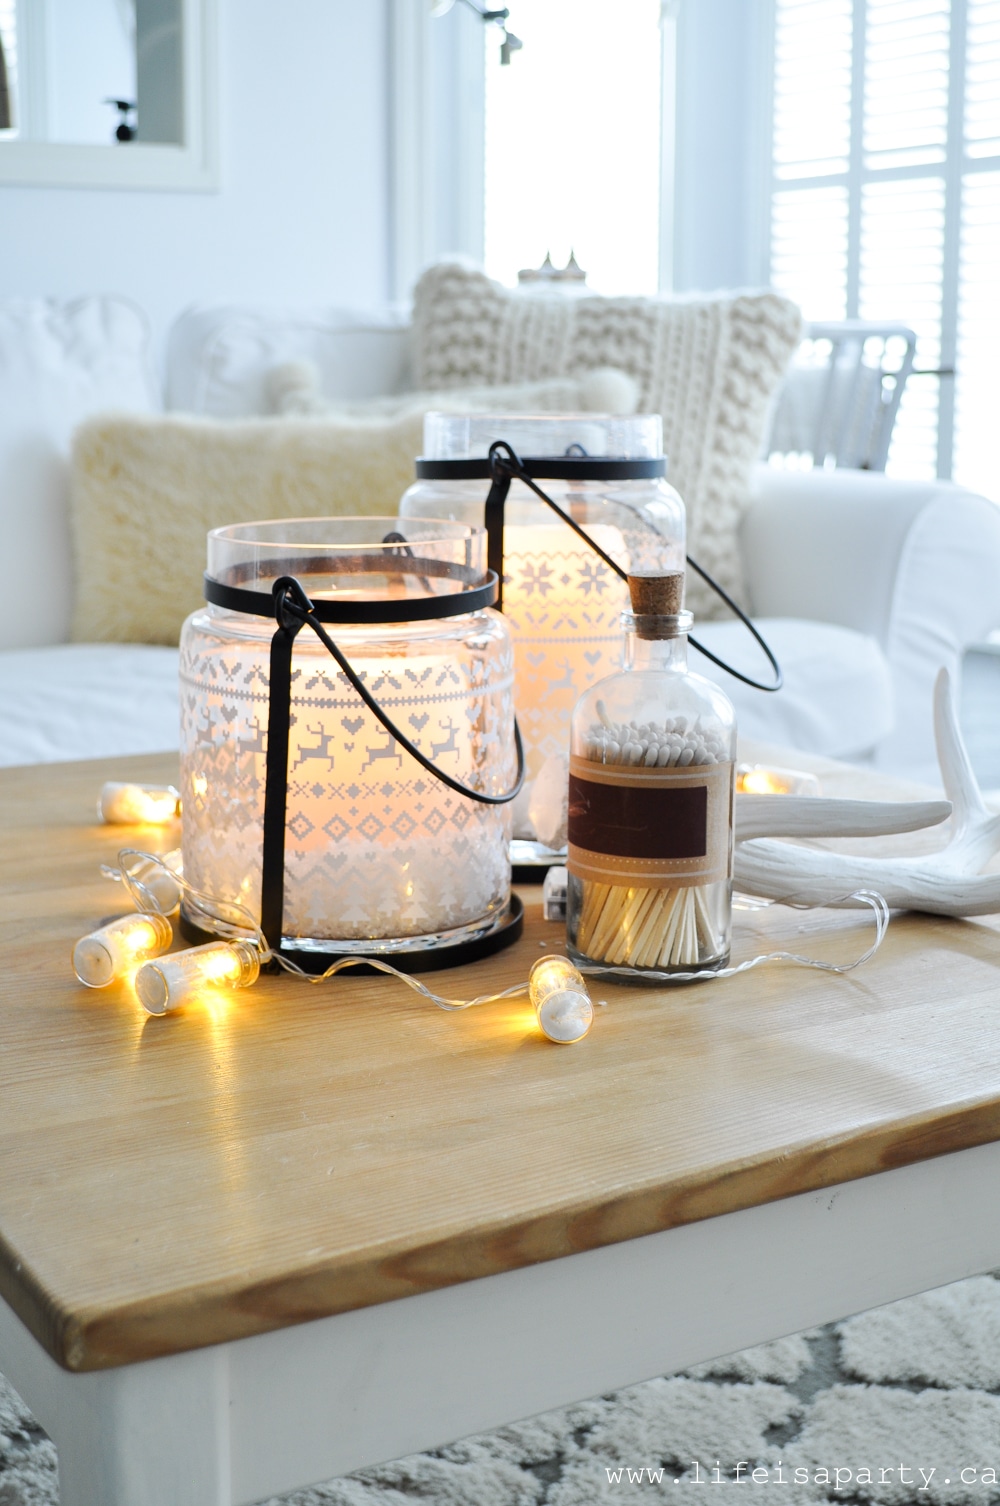 Fireplace
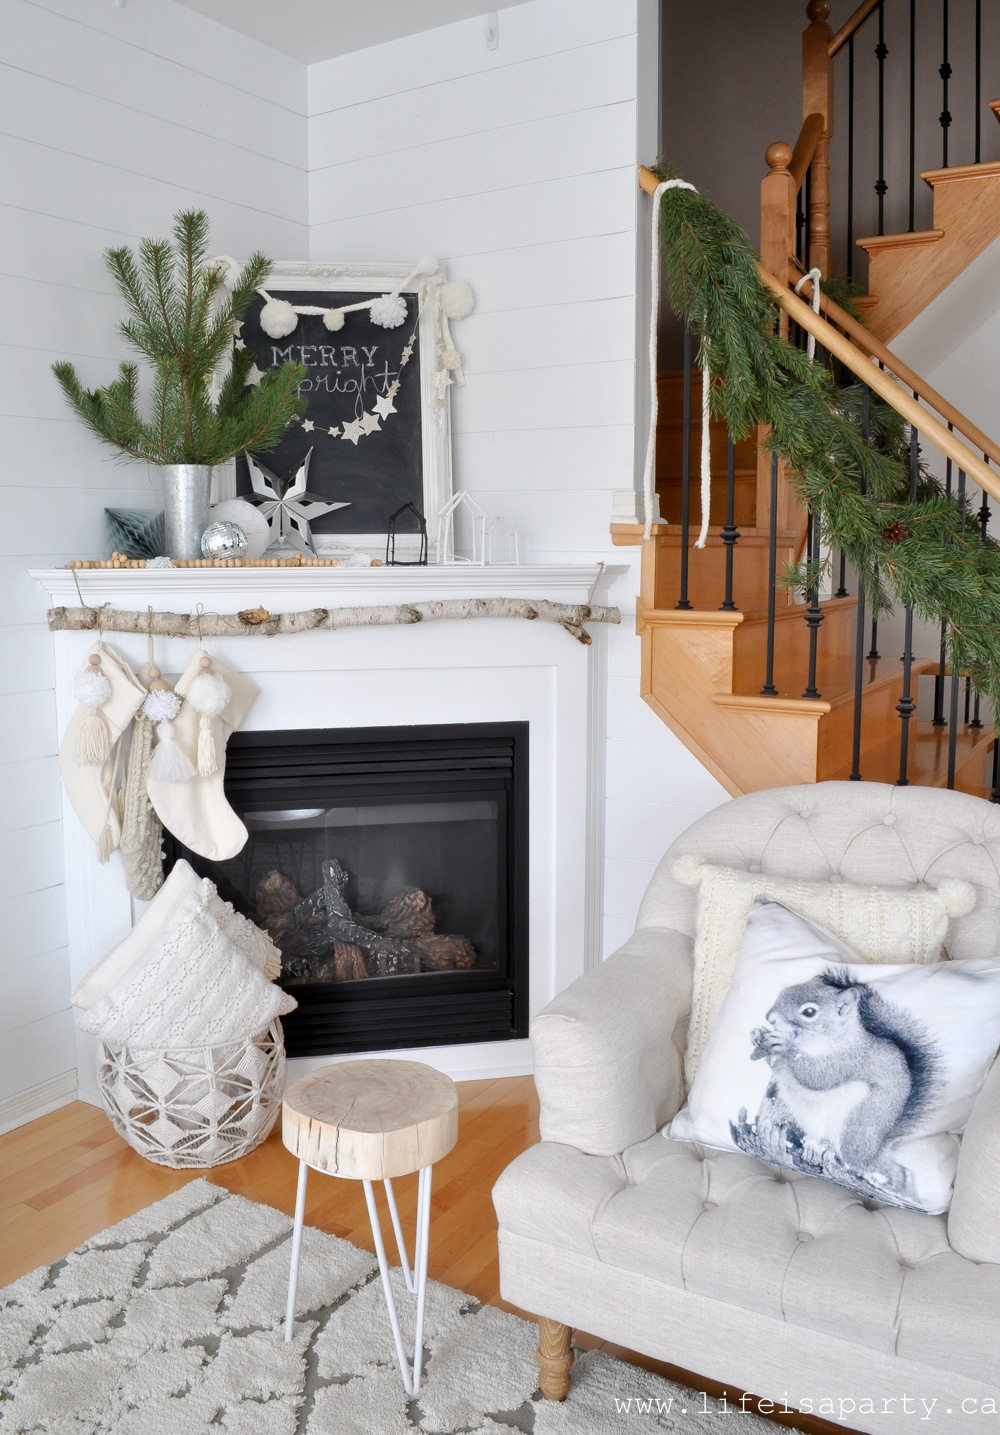 The fireplace is really simple, and cozy too.
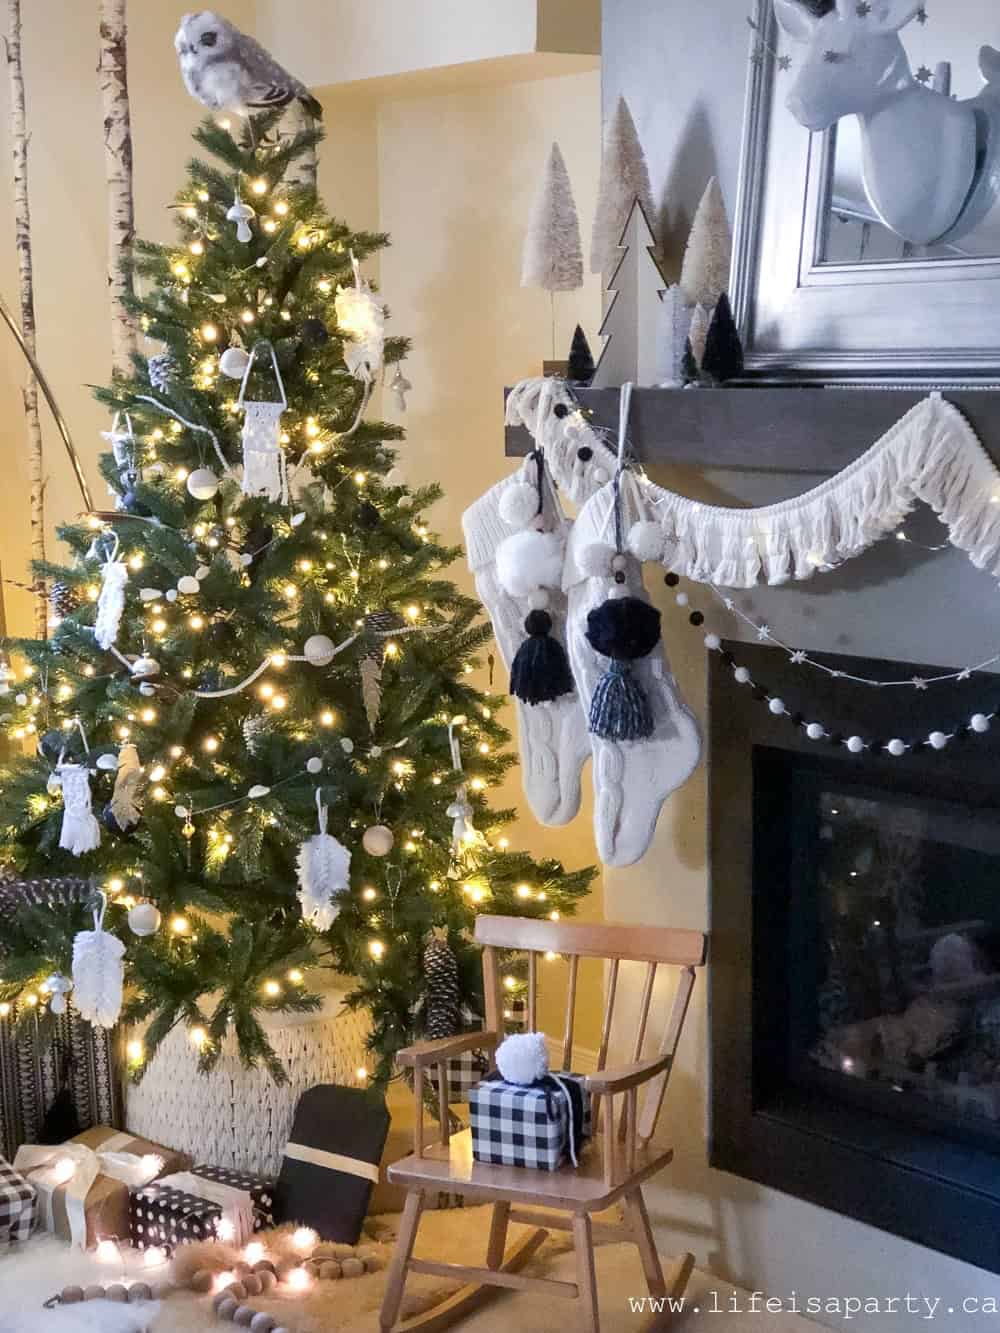
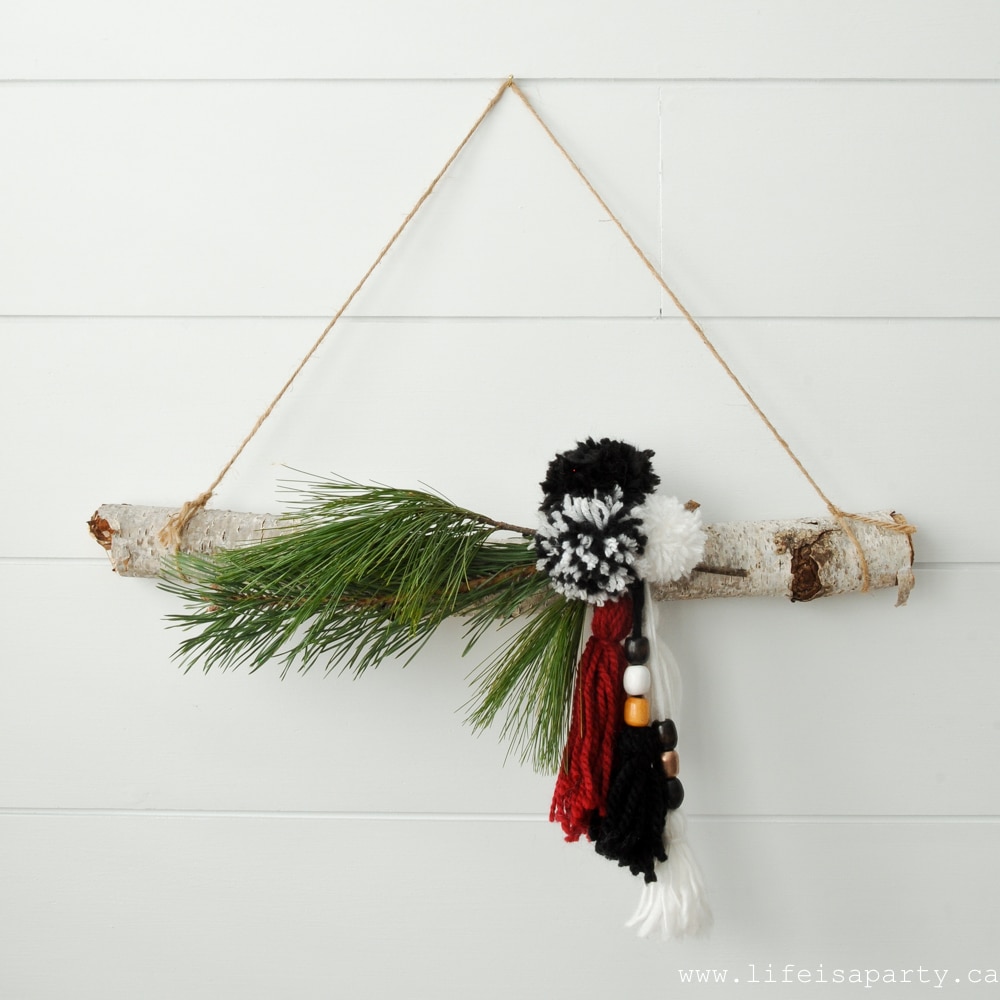
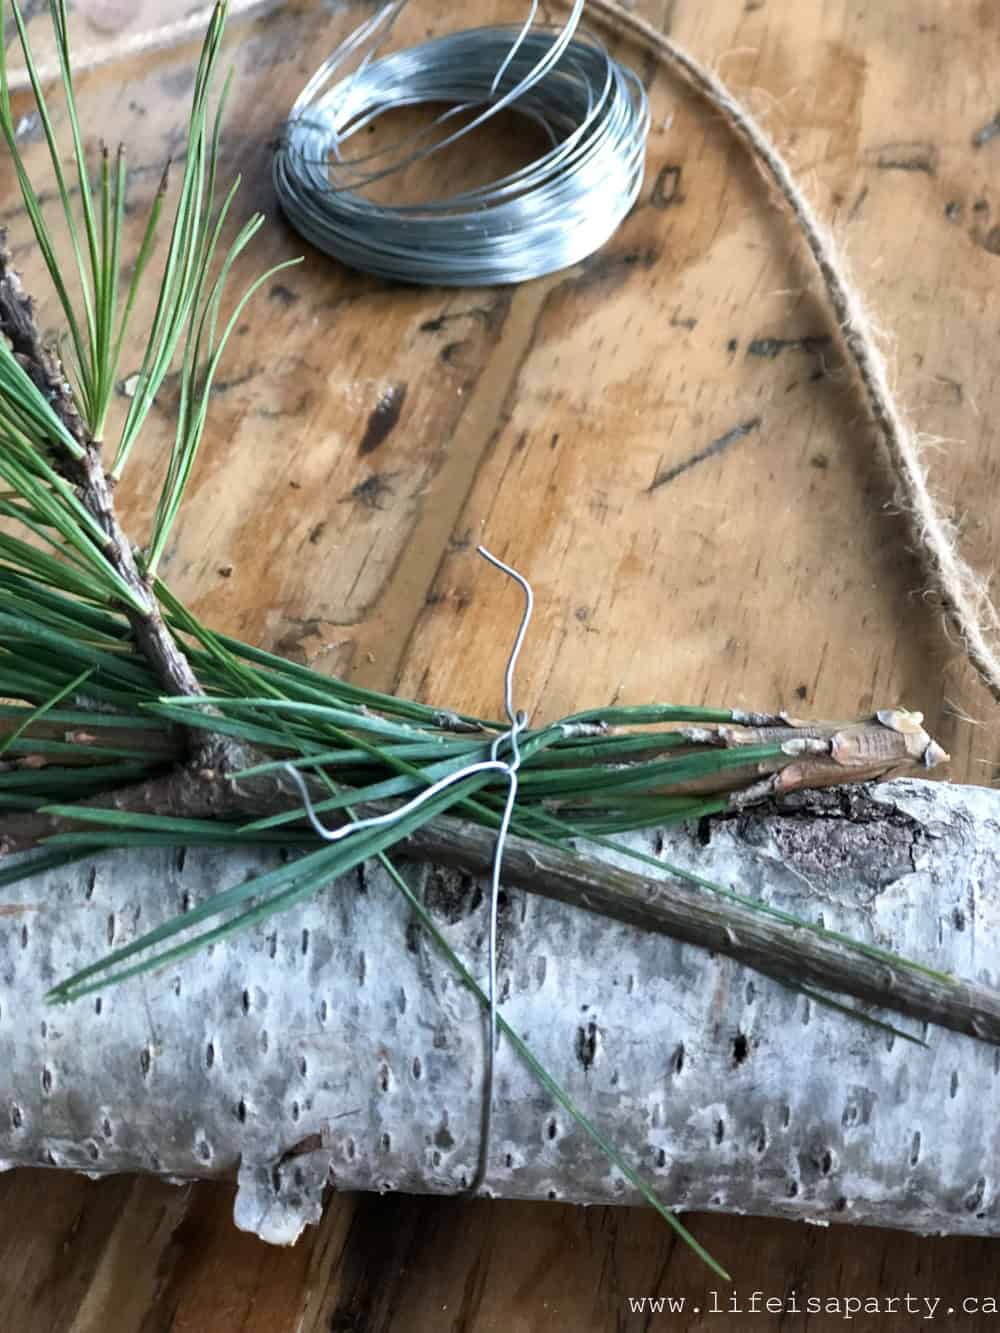
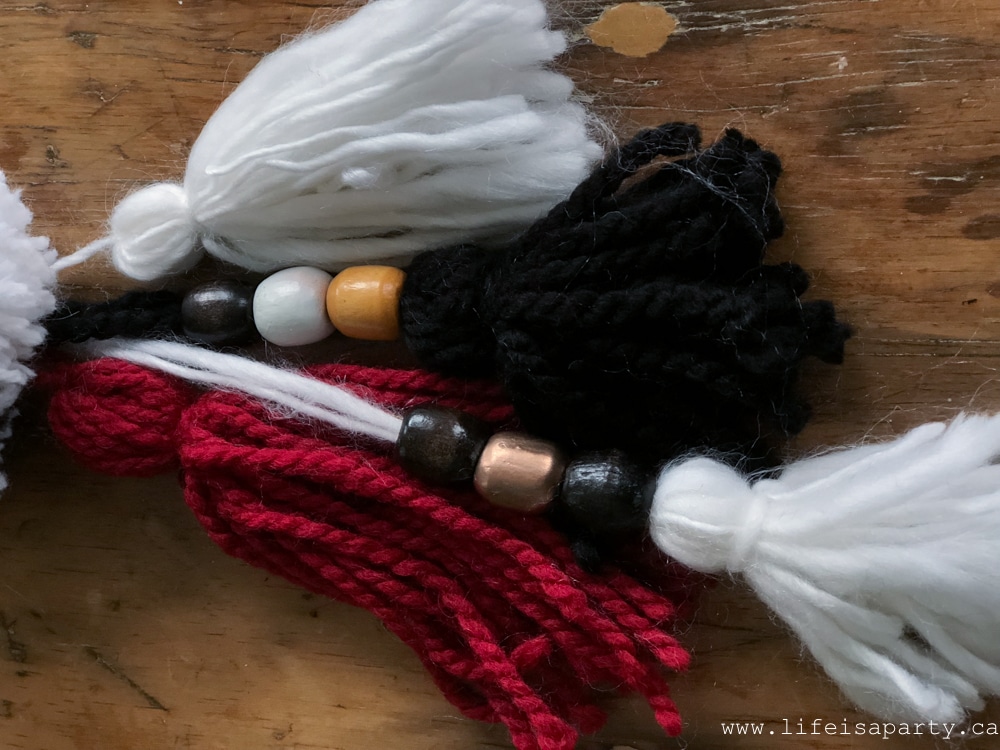
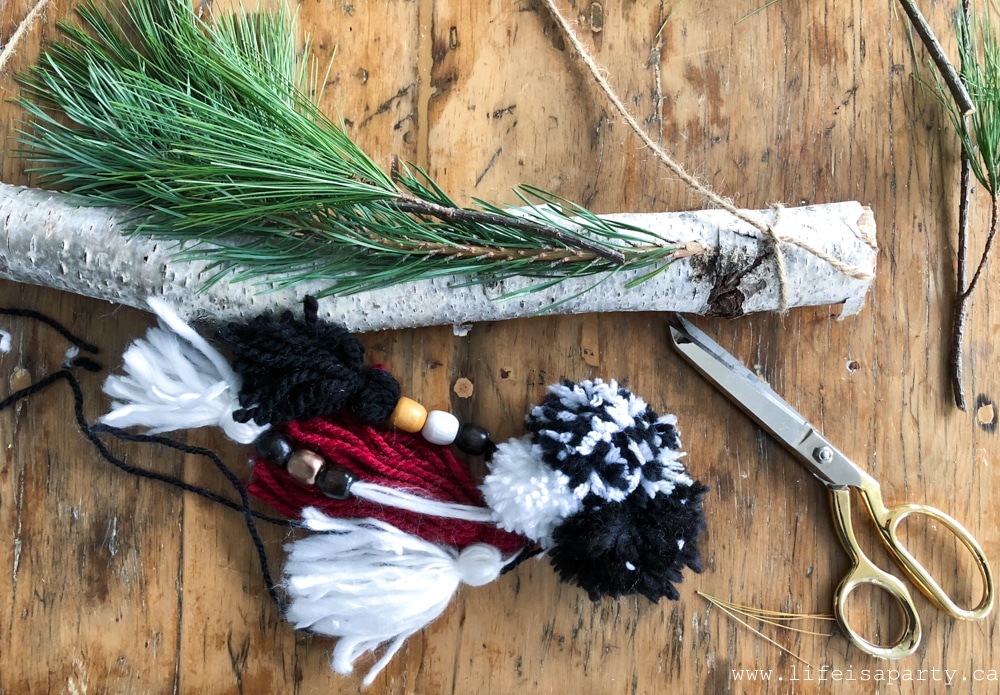
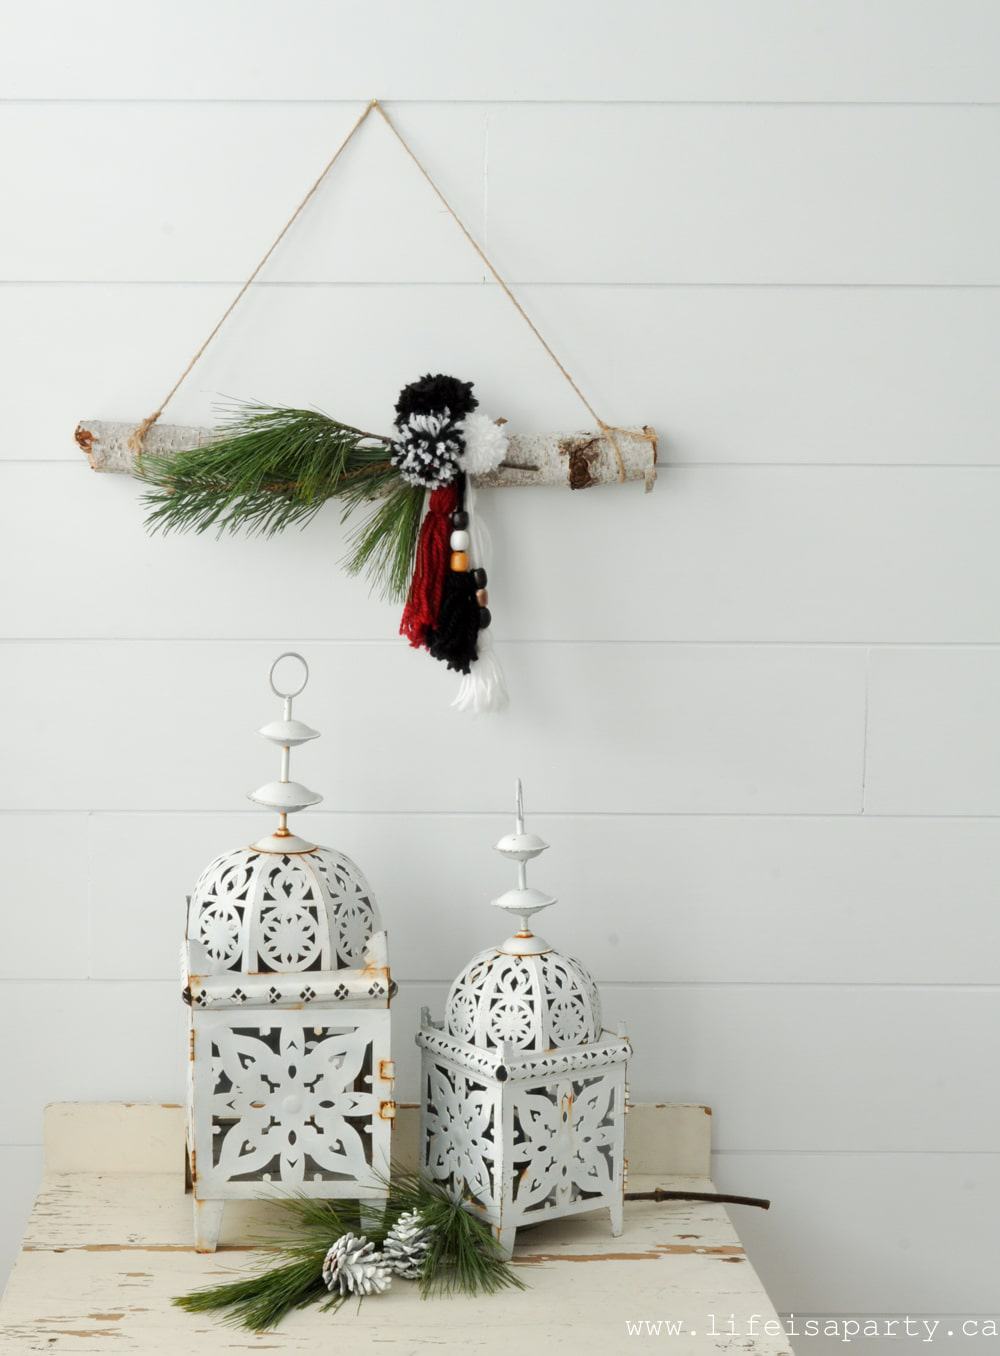
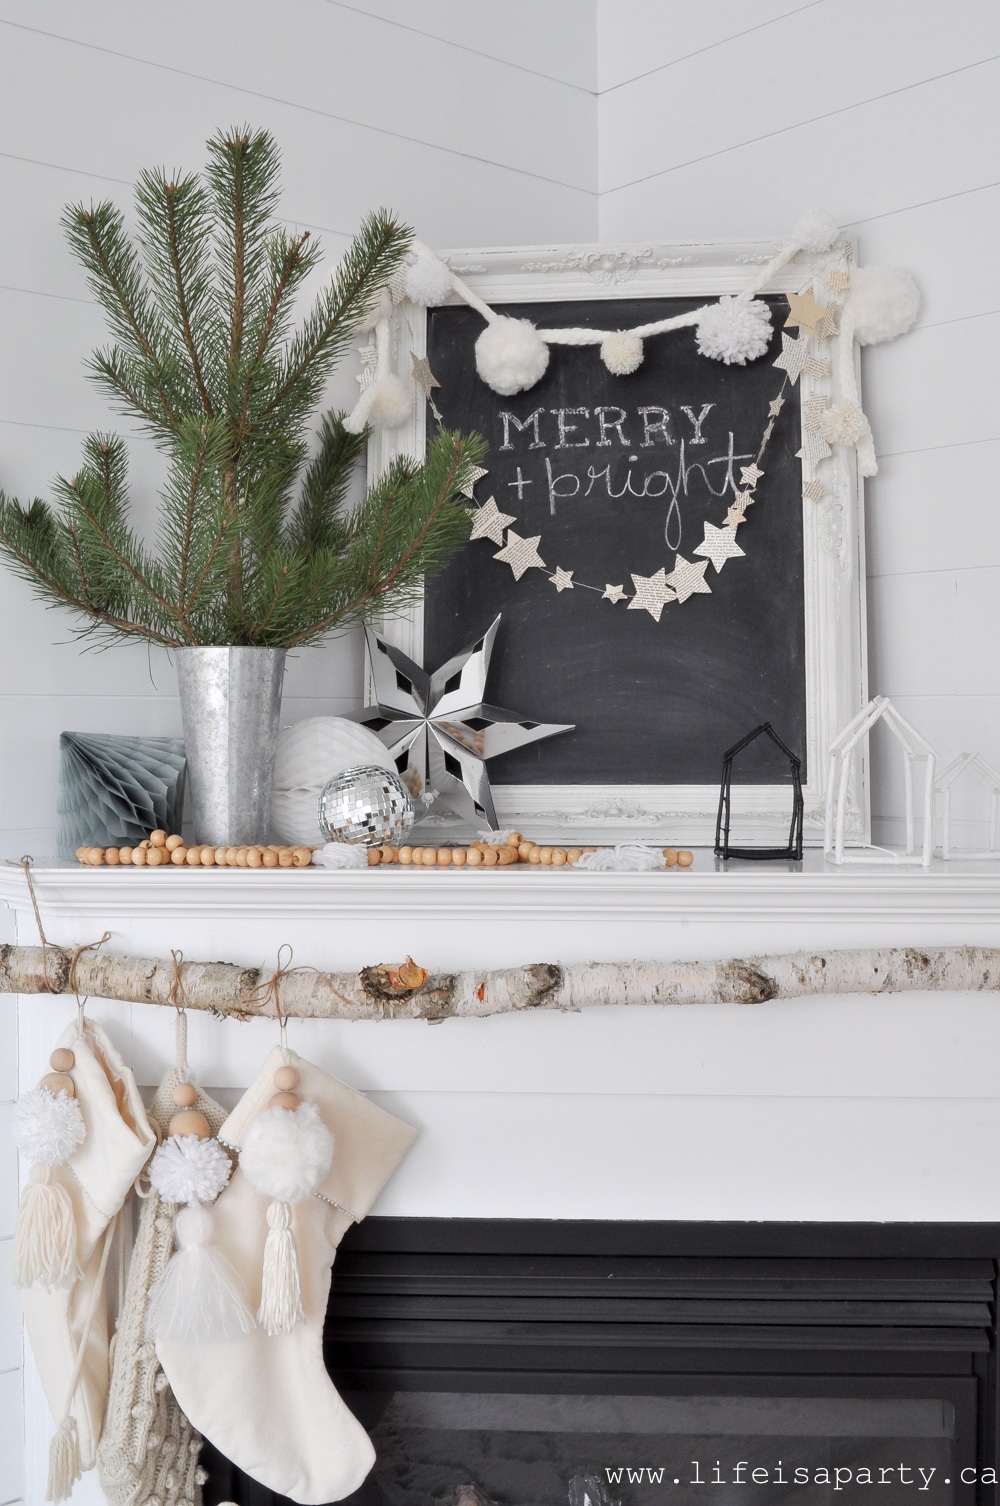 I hung the stockings on a birch pole. And added some fun stocking tassels for a little more texture.
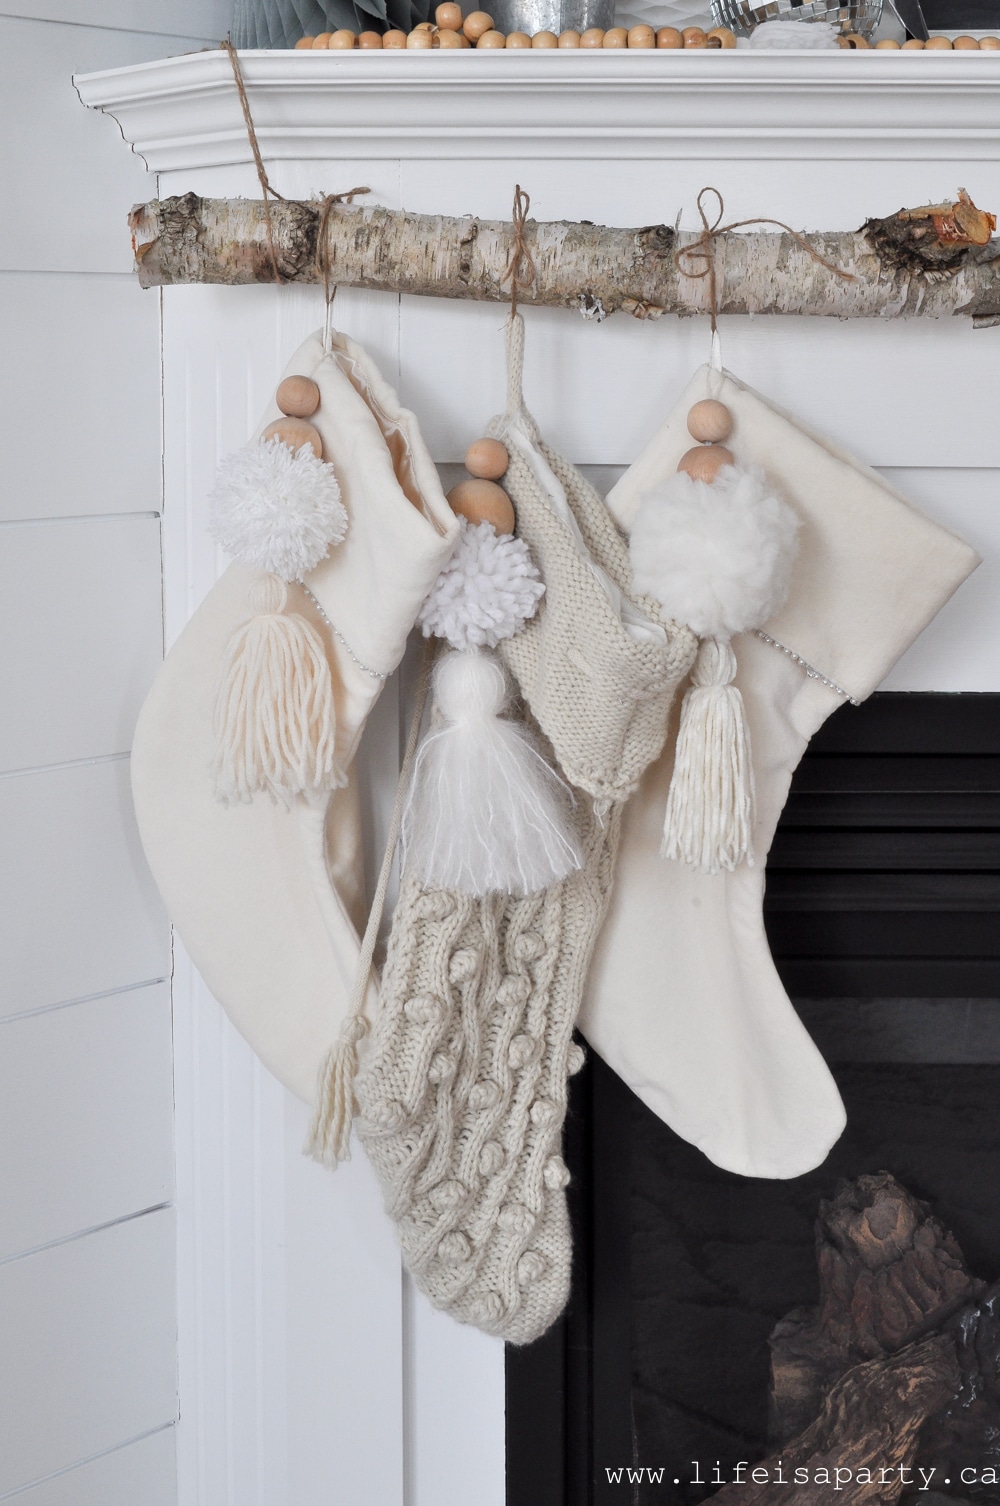 And at the bottom of the stairs a few more cute decorations.
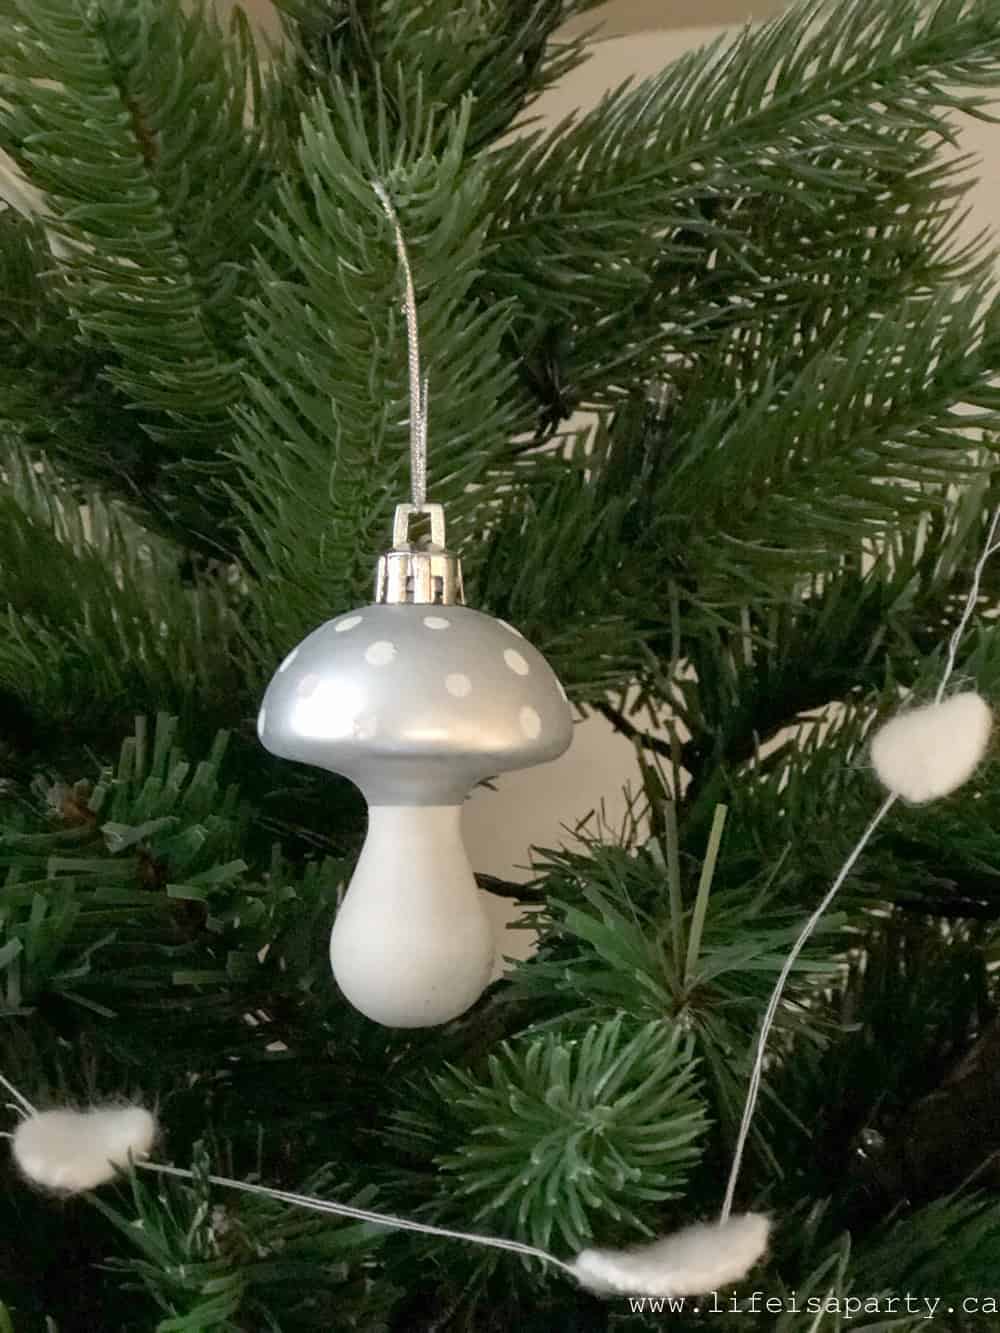
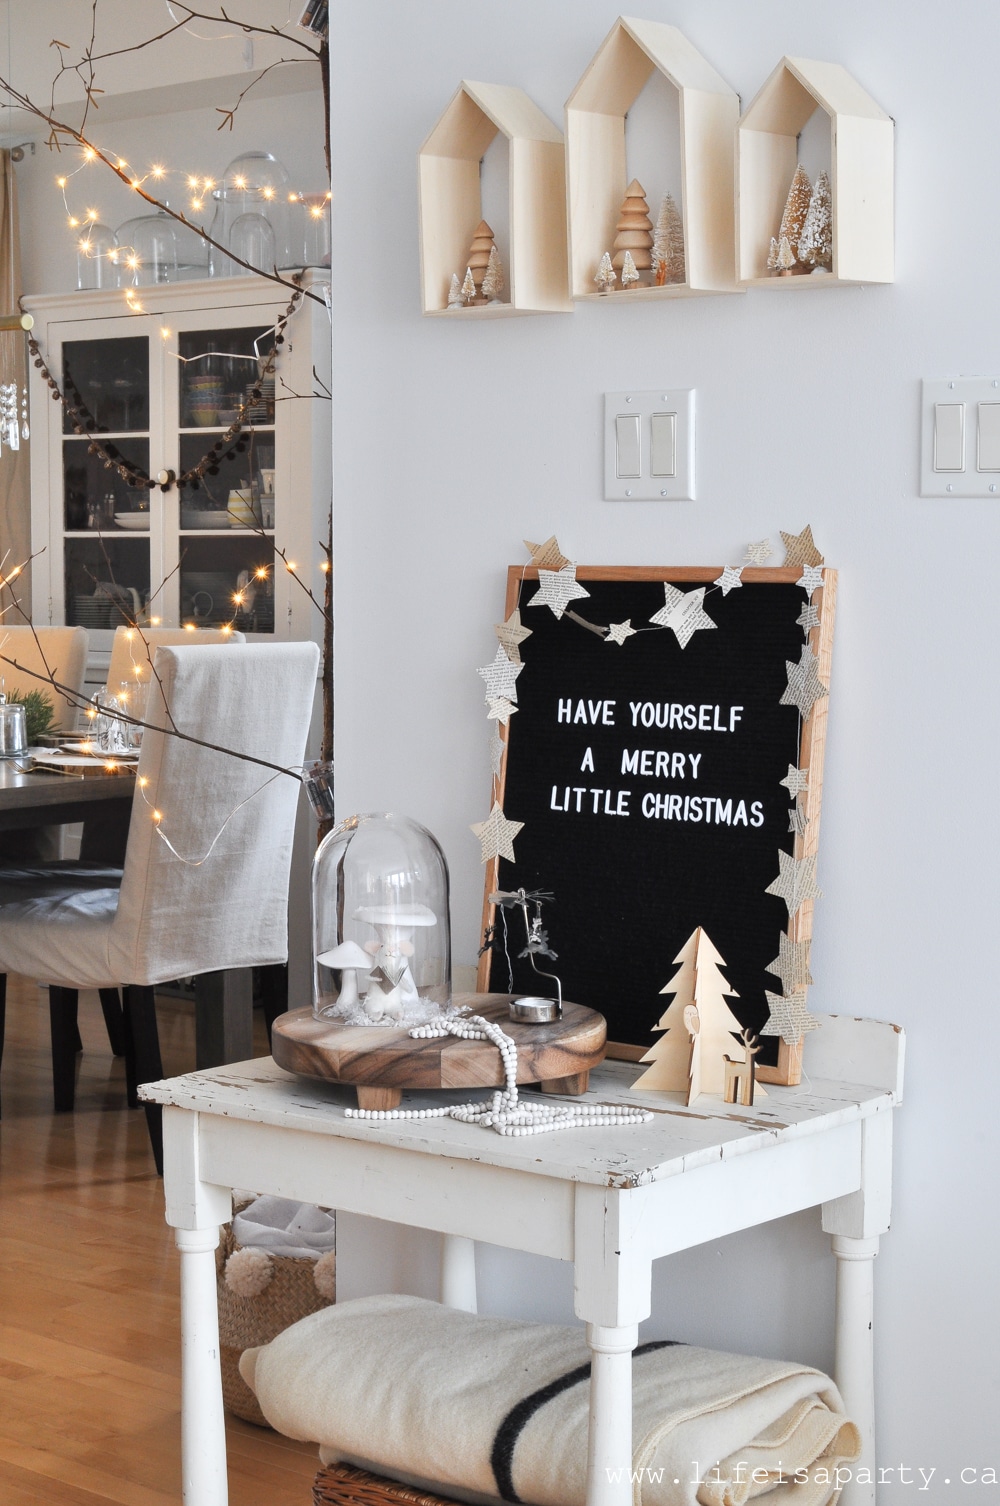 I was inspired by a little light at Ikea with a hedgehog reading a book under a mushroom. I created my own version and it couldn't be cuter.
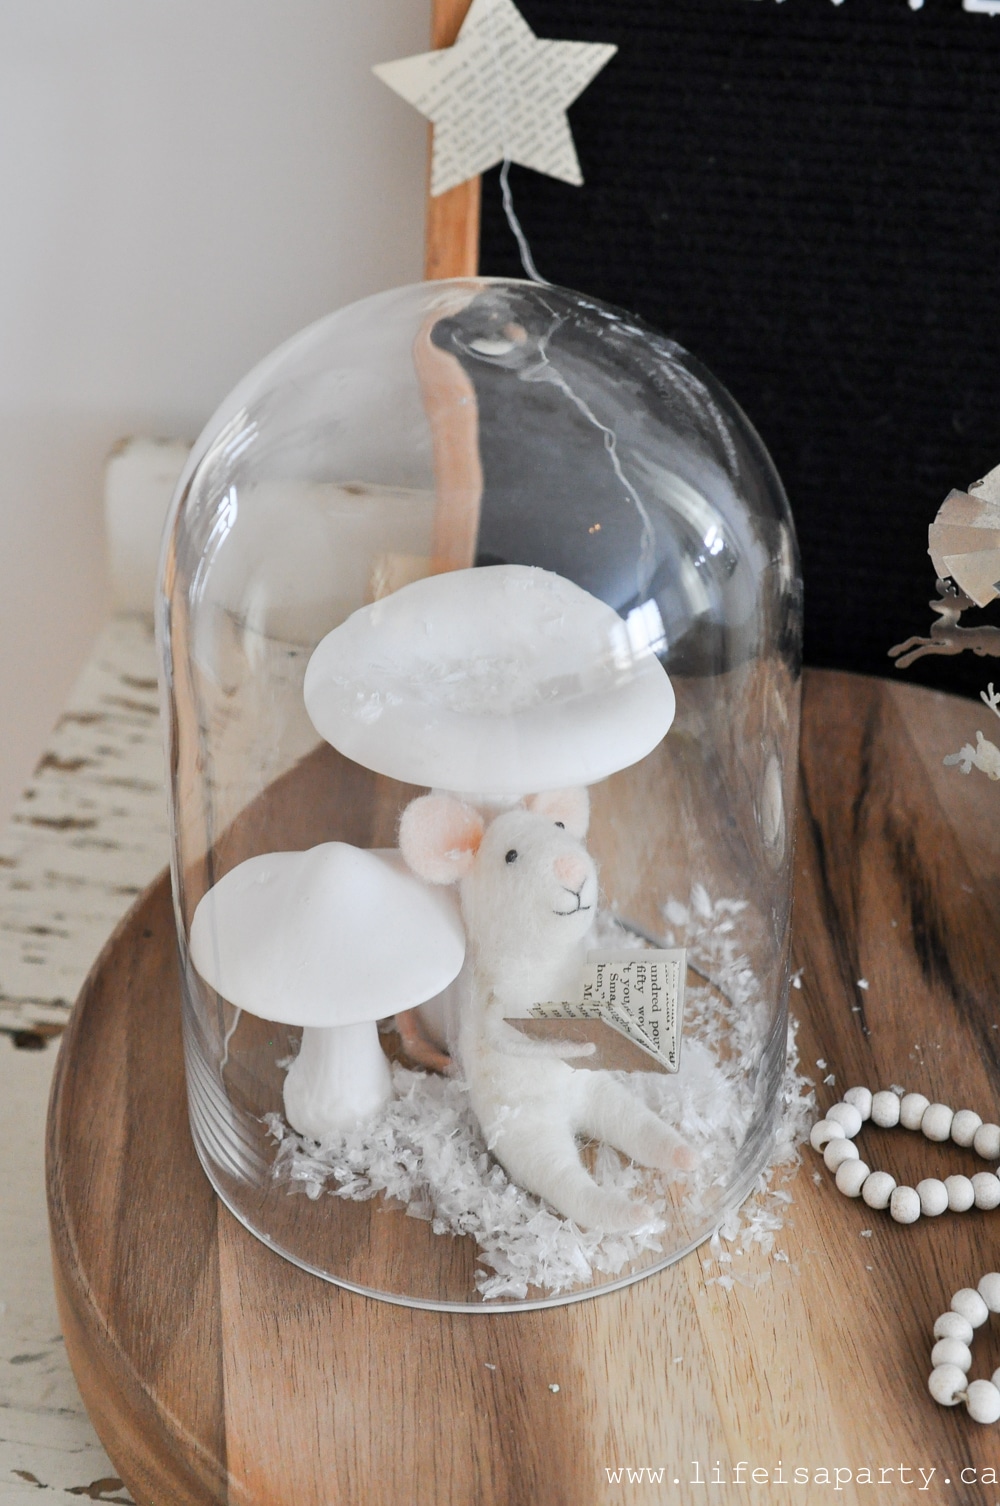 On the wall above the table some little house shelves, dressed up with some simple bottle brush trees for Christmas.
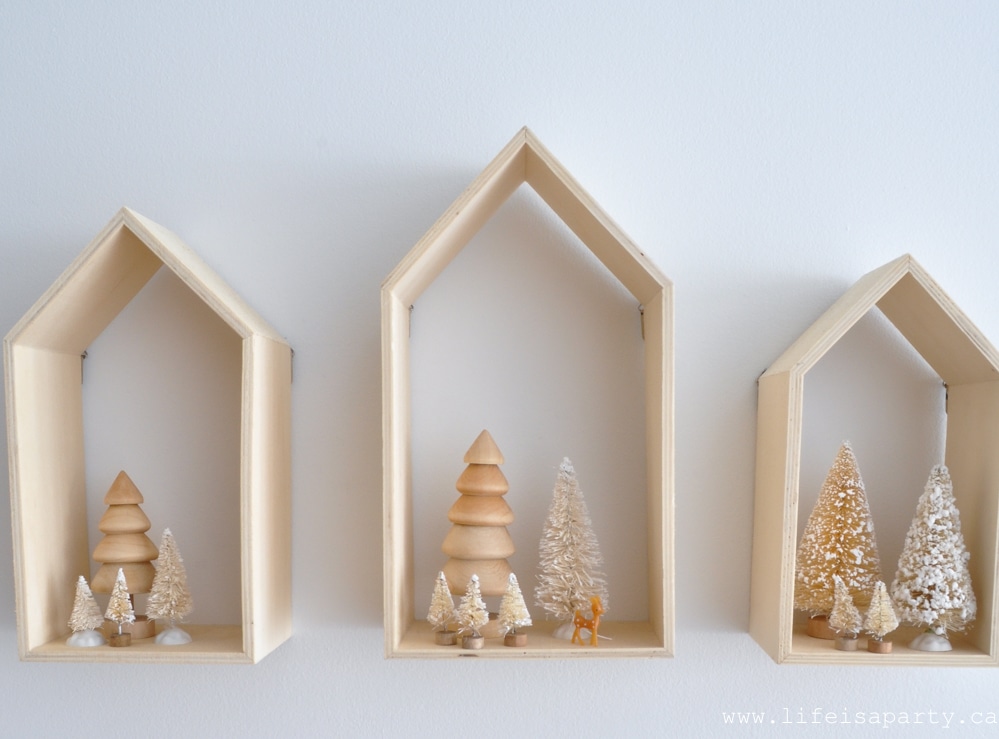 And here my favourite seat in the house.
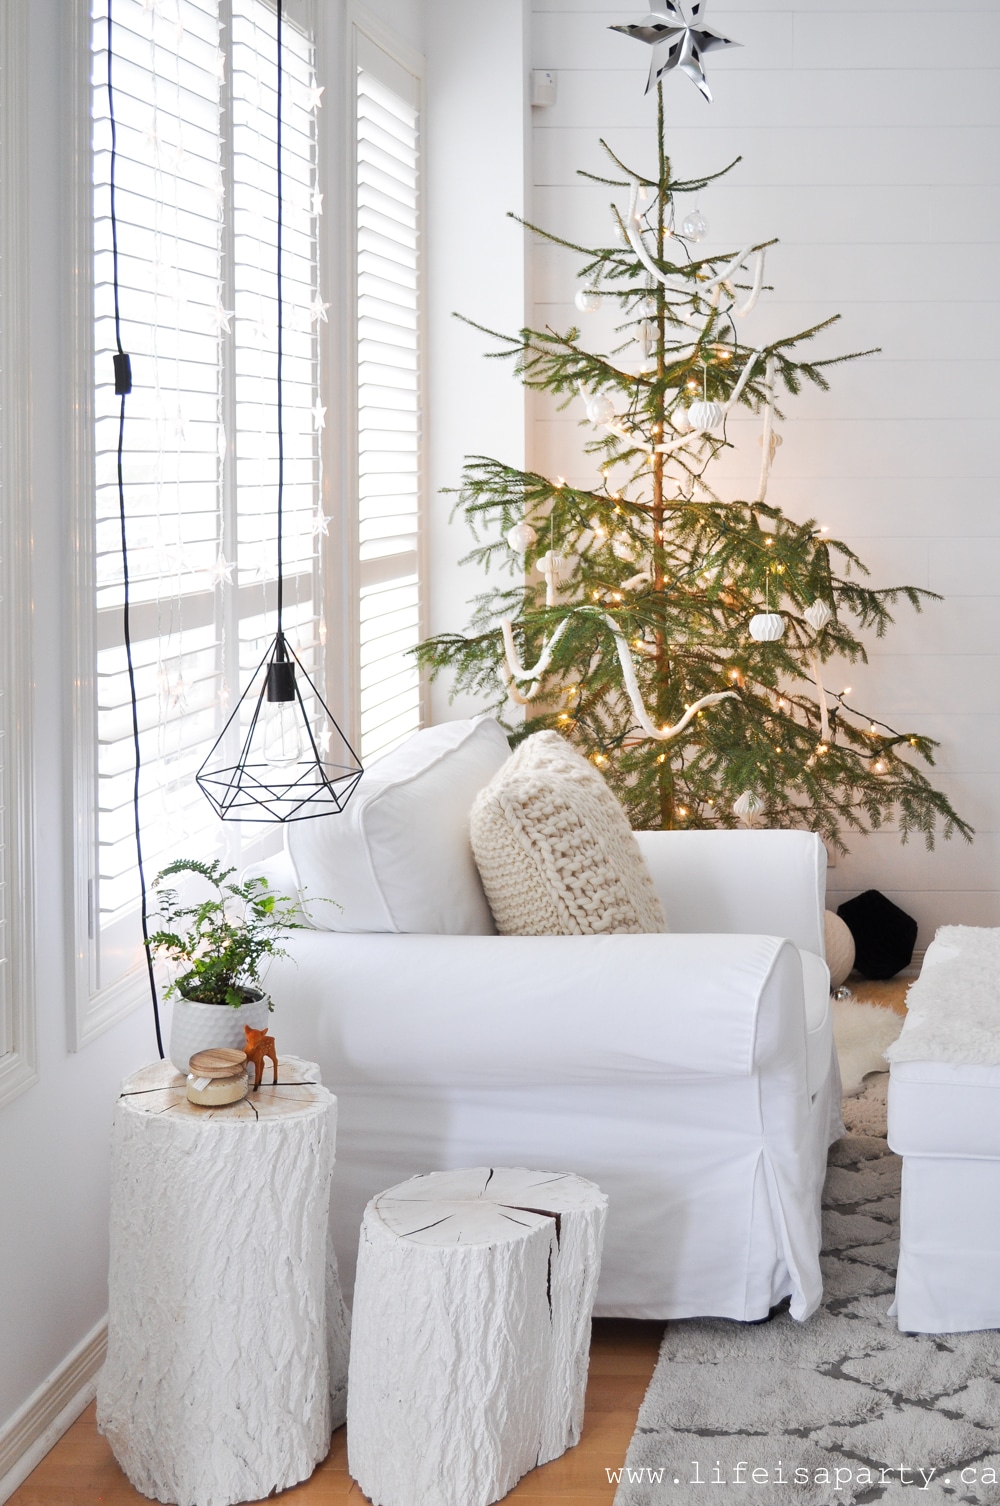

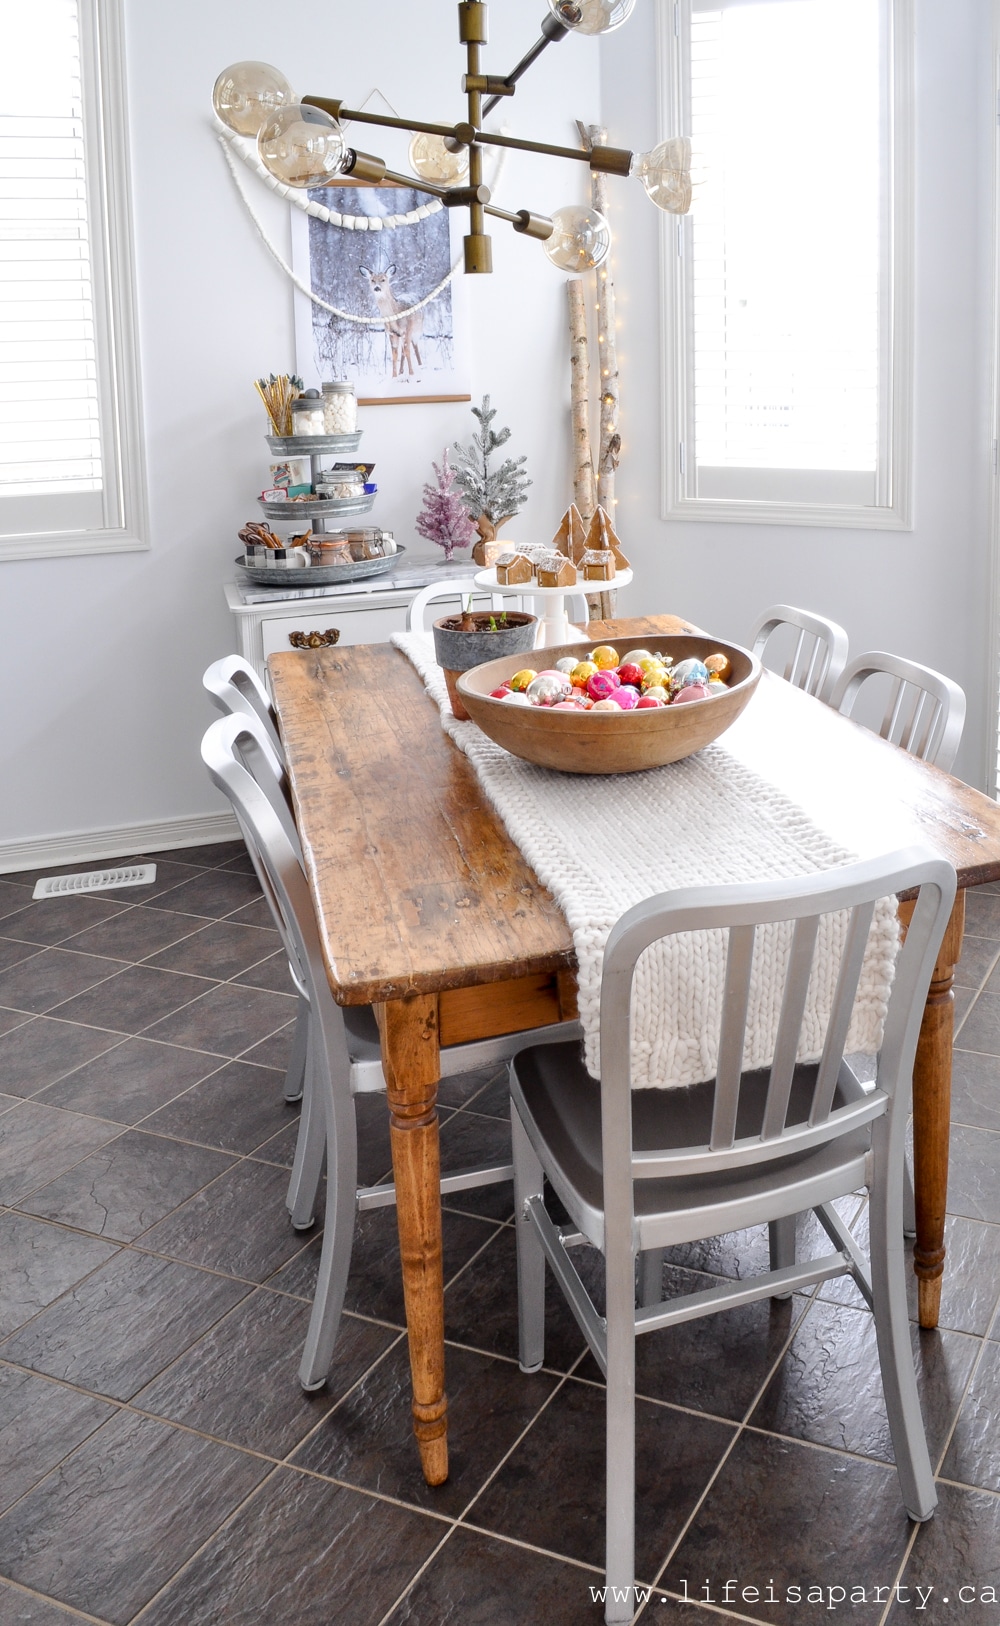 On the table a favourite of mine, an old wooden dough bowl full of vintage ornaments.
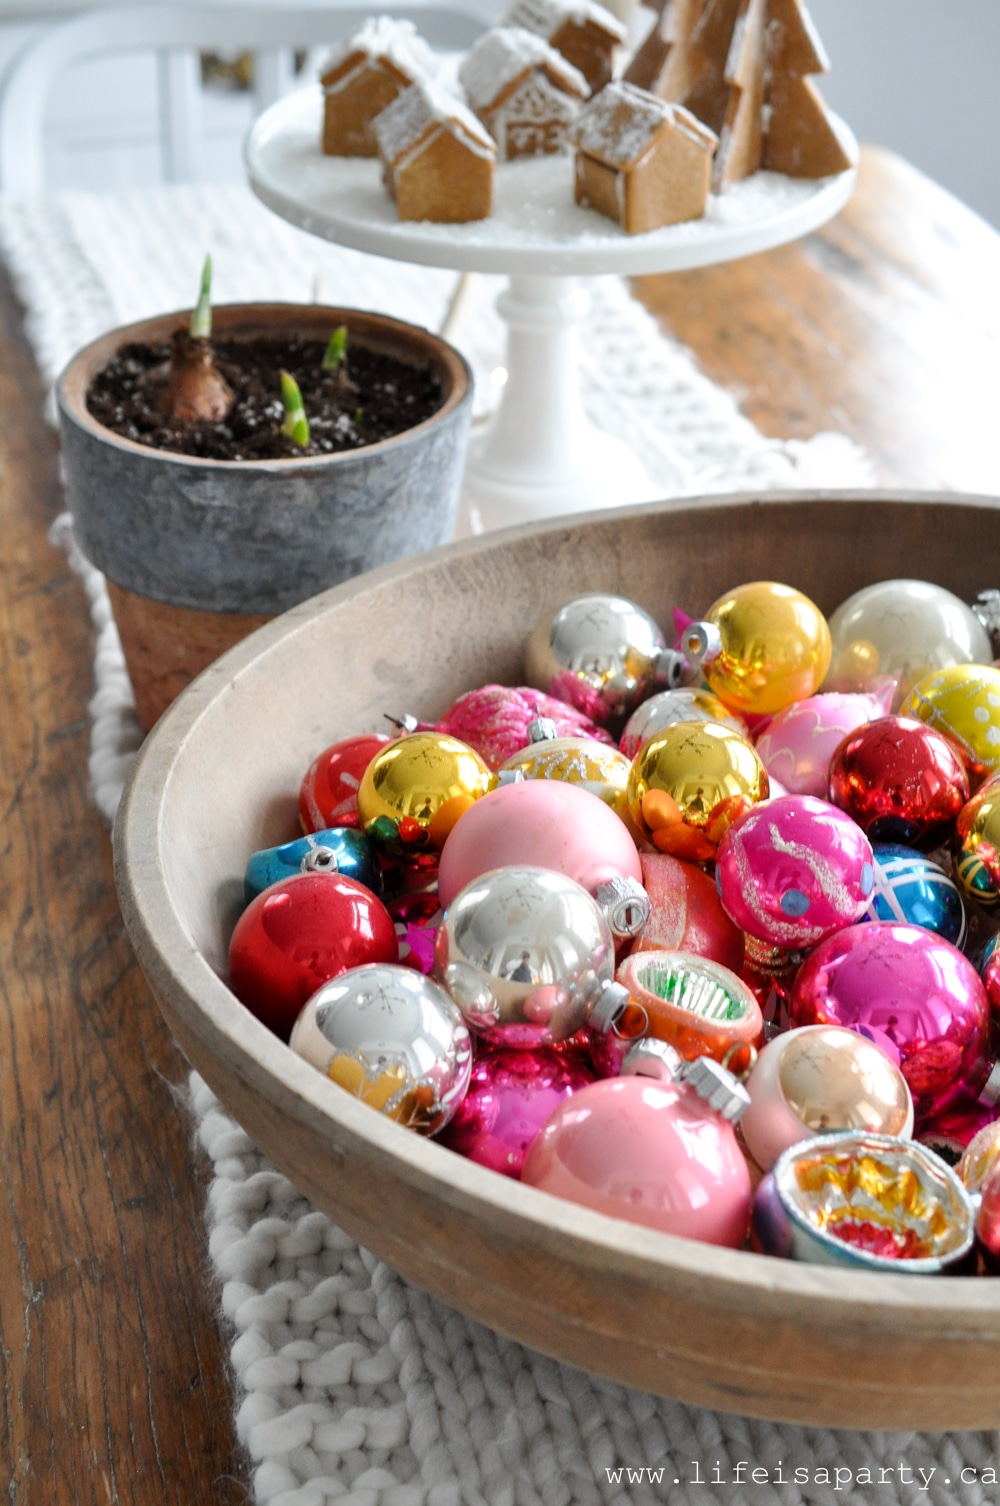 And the sweetest little gingerbread village that my girls made -you find the gingerbread recipe here.
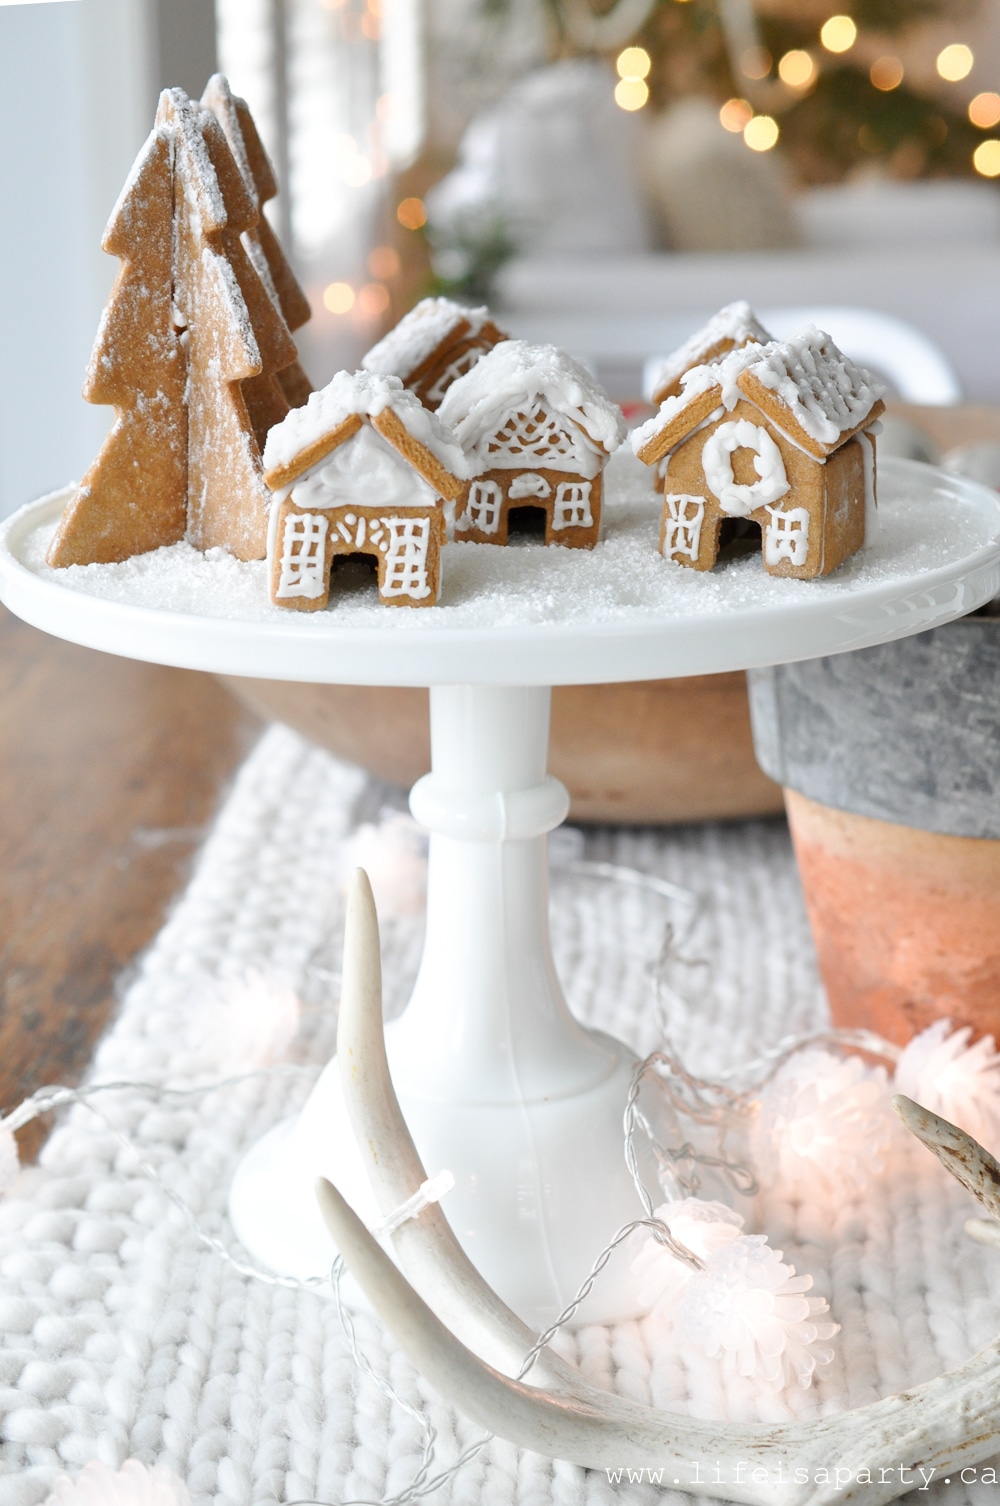 And also on the table are the sweetest little pine cone lights I picked up at Dollarama -love them.
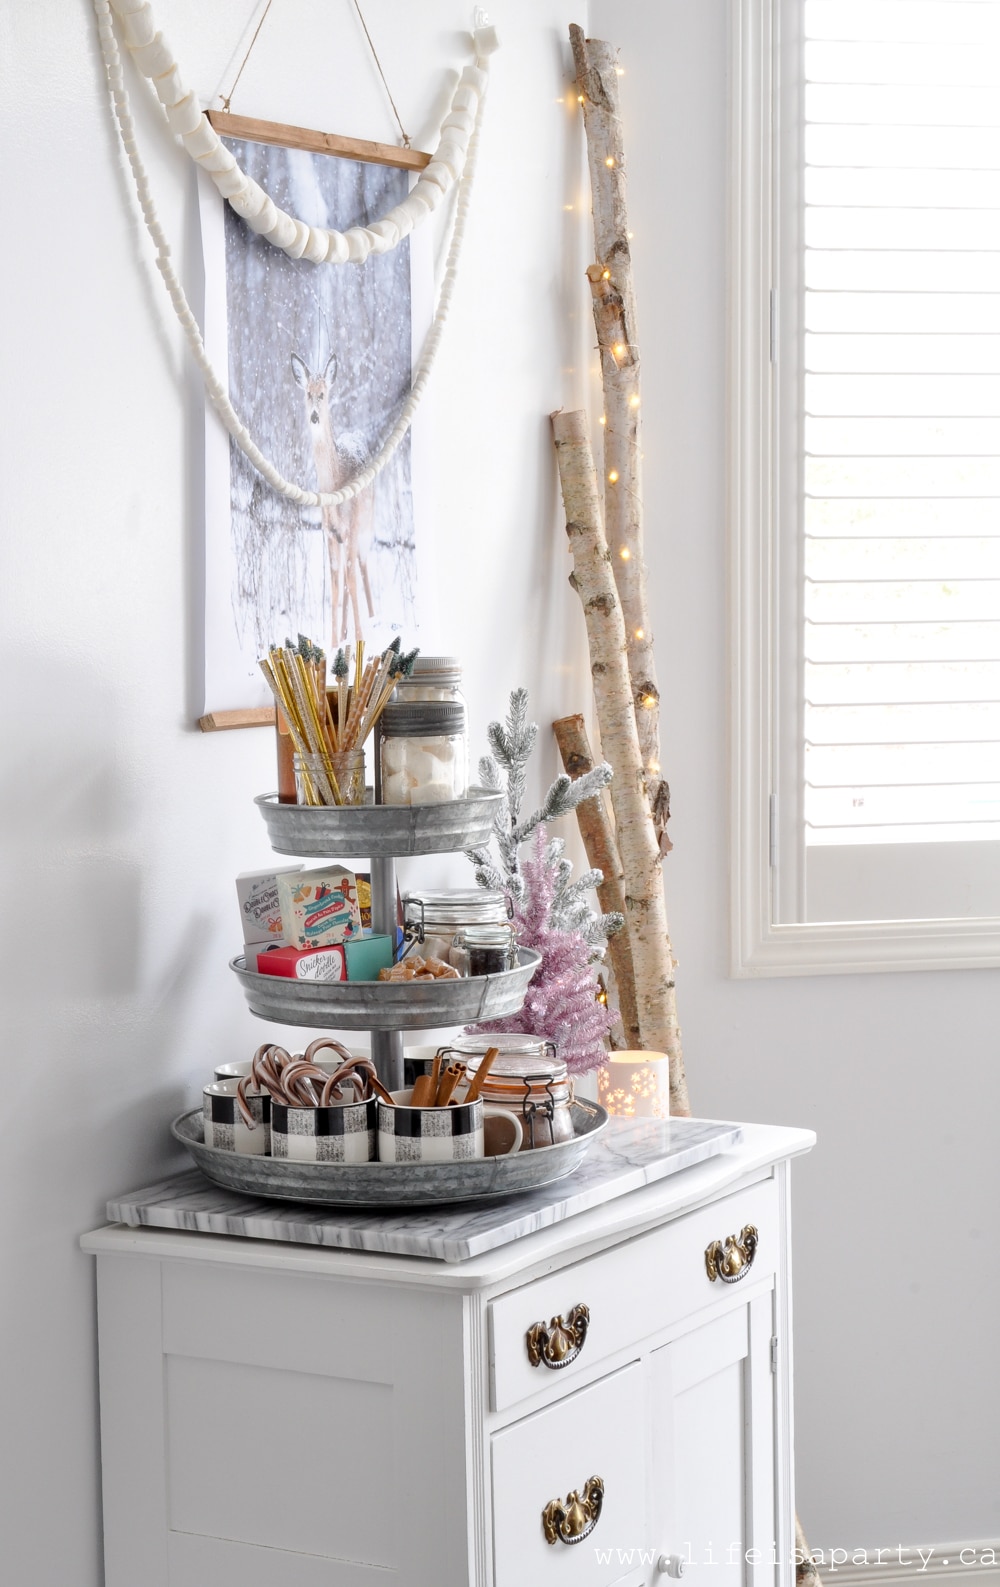
 I set up a little hot chocolate station here for cold days.
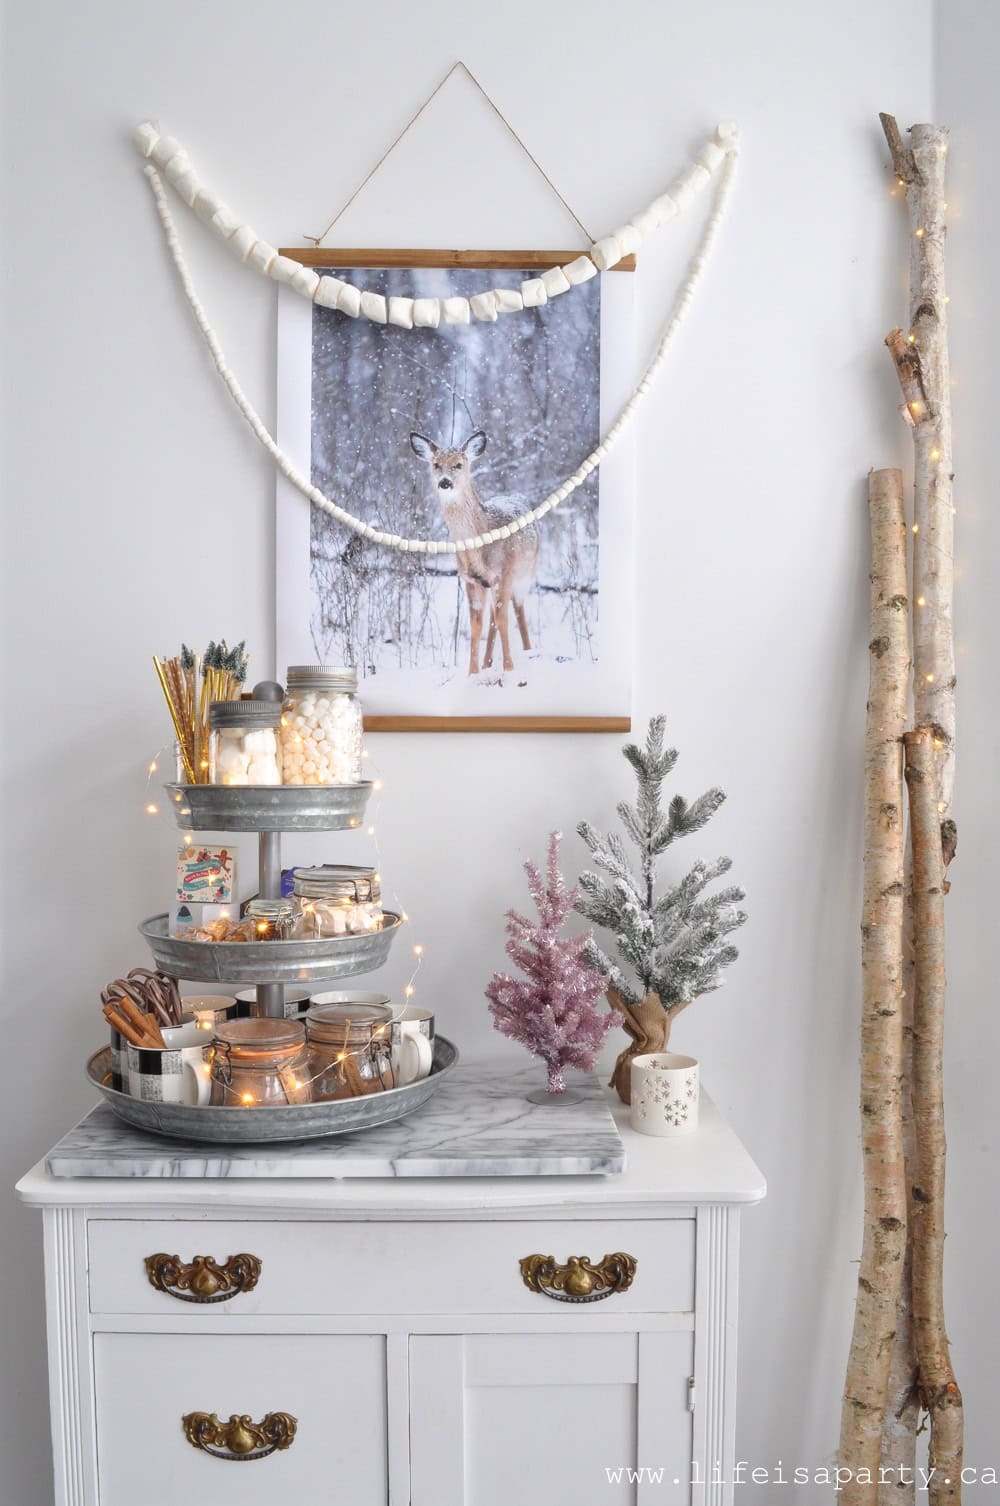 This is a favourite spot of mine this year. The beautiful print is an engineering print, the most inexpensive way to make a large poster, and I mounted it on some wood I had cut at the hardware store.
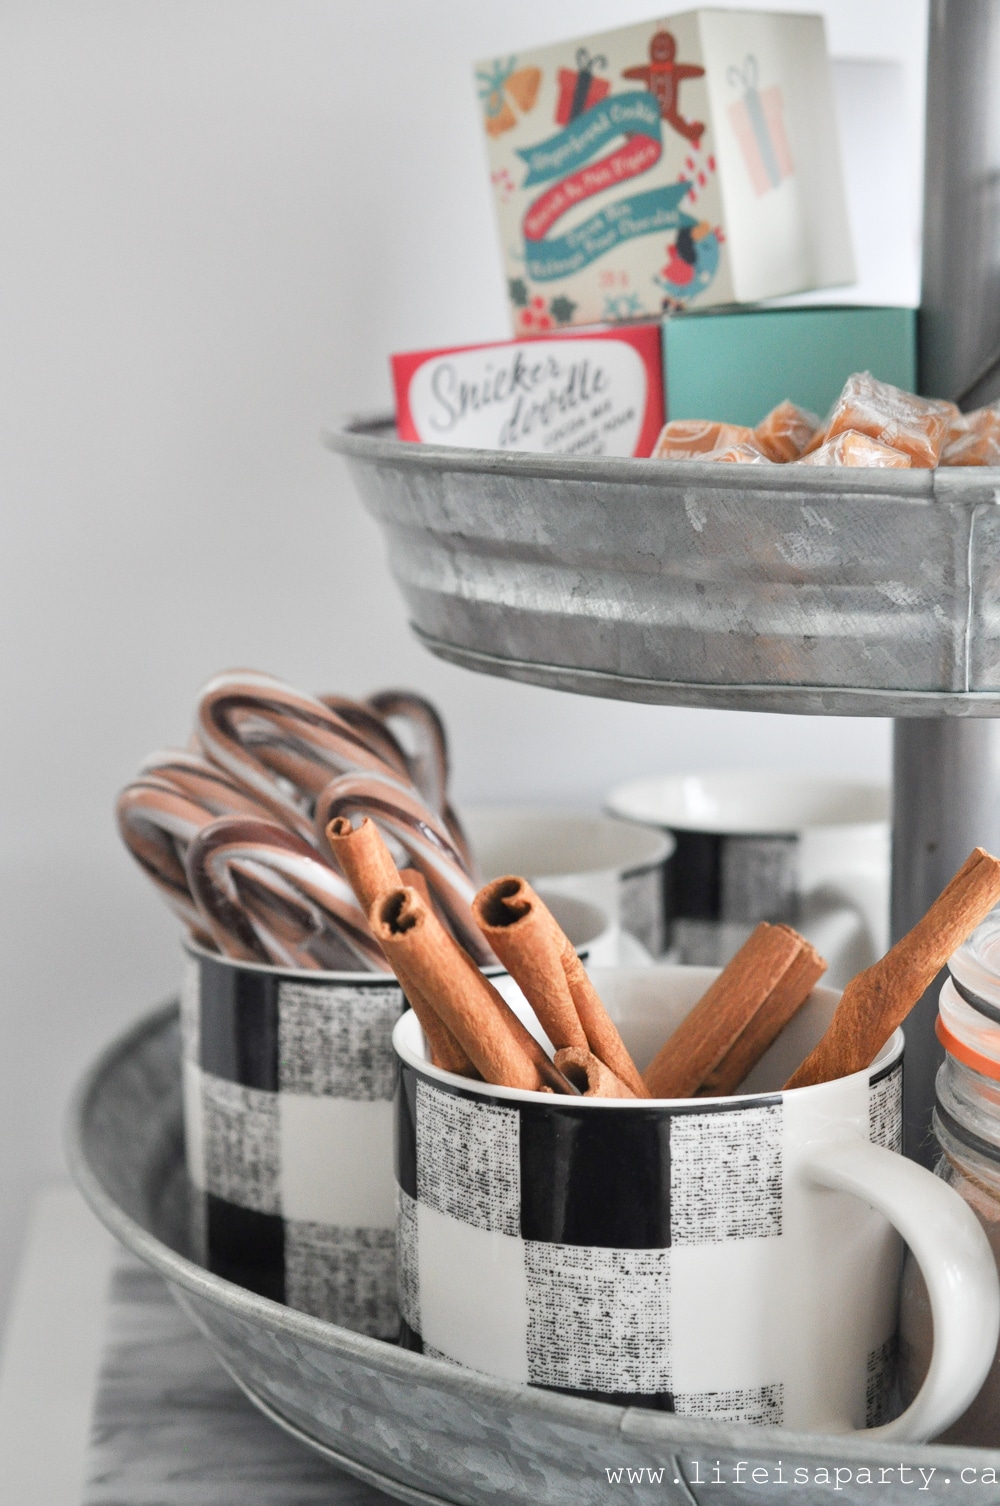
 And over on the other side the shelves got a few special vintage pieces.
 We love making Christmas cookies. In fact next week we have a whole week of Christmas cookies to share with you, with a new recipe everyday, so be sure to come back and check it out starting Monday.
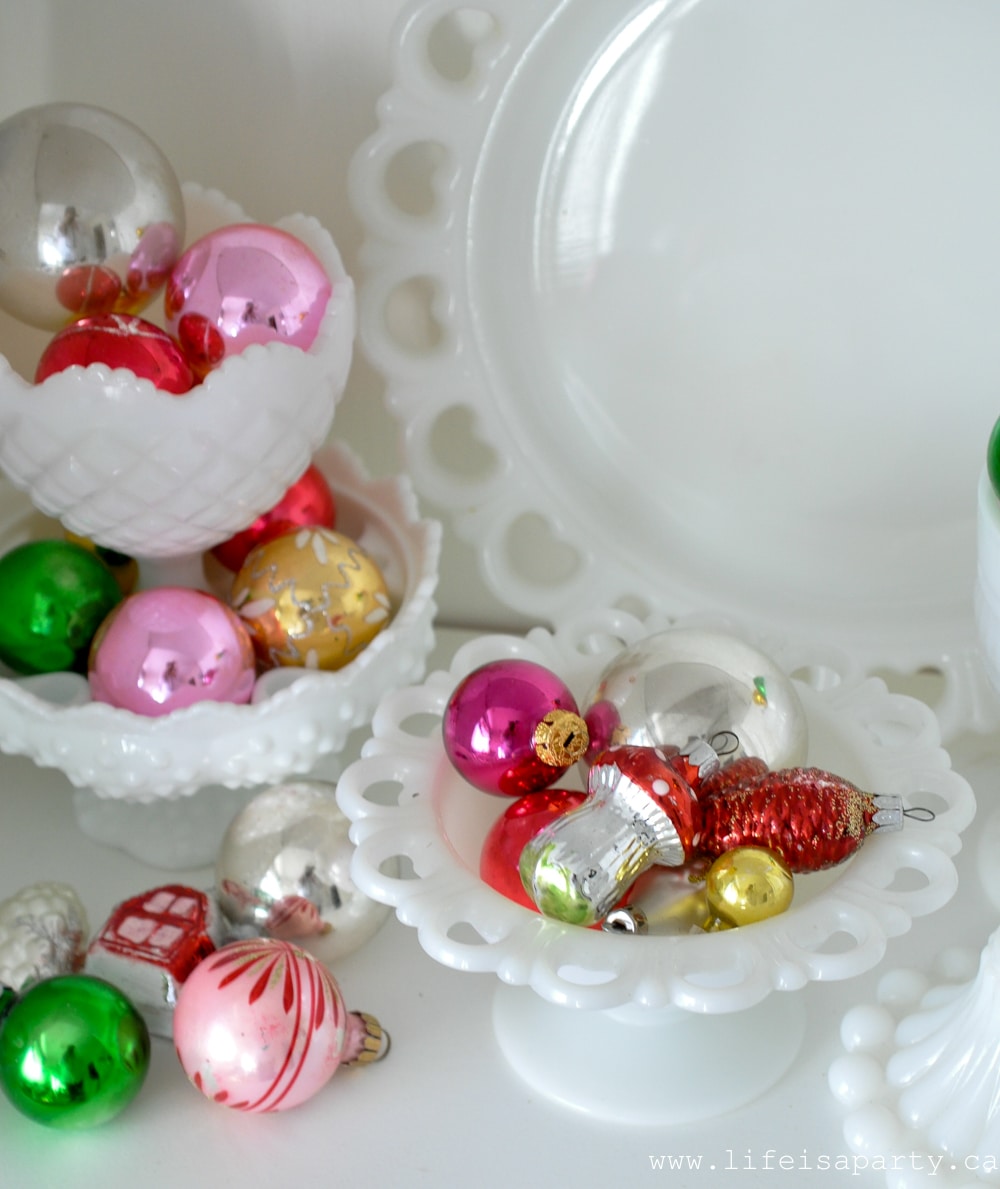
 These open shelves are a so fun to decorate for each season. And I love my growing collection of vintage Christmas pieces.
 And now let's go upstairs for a look.
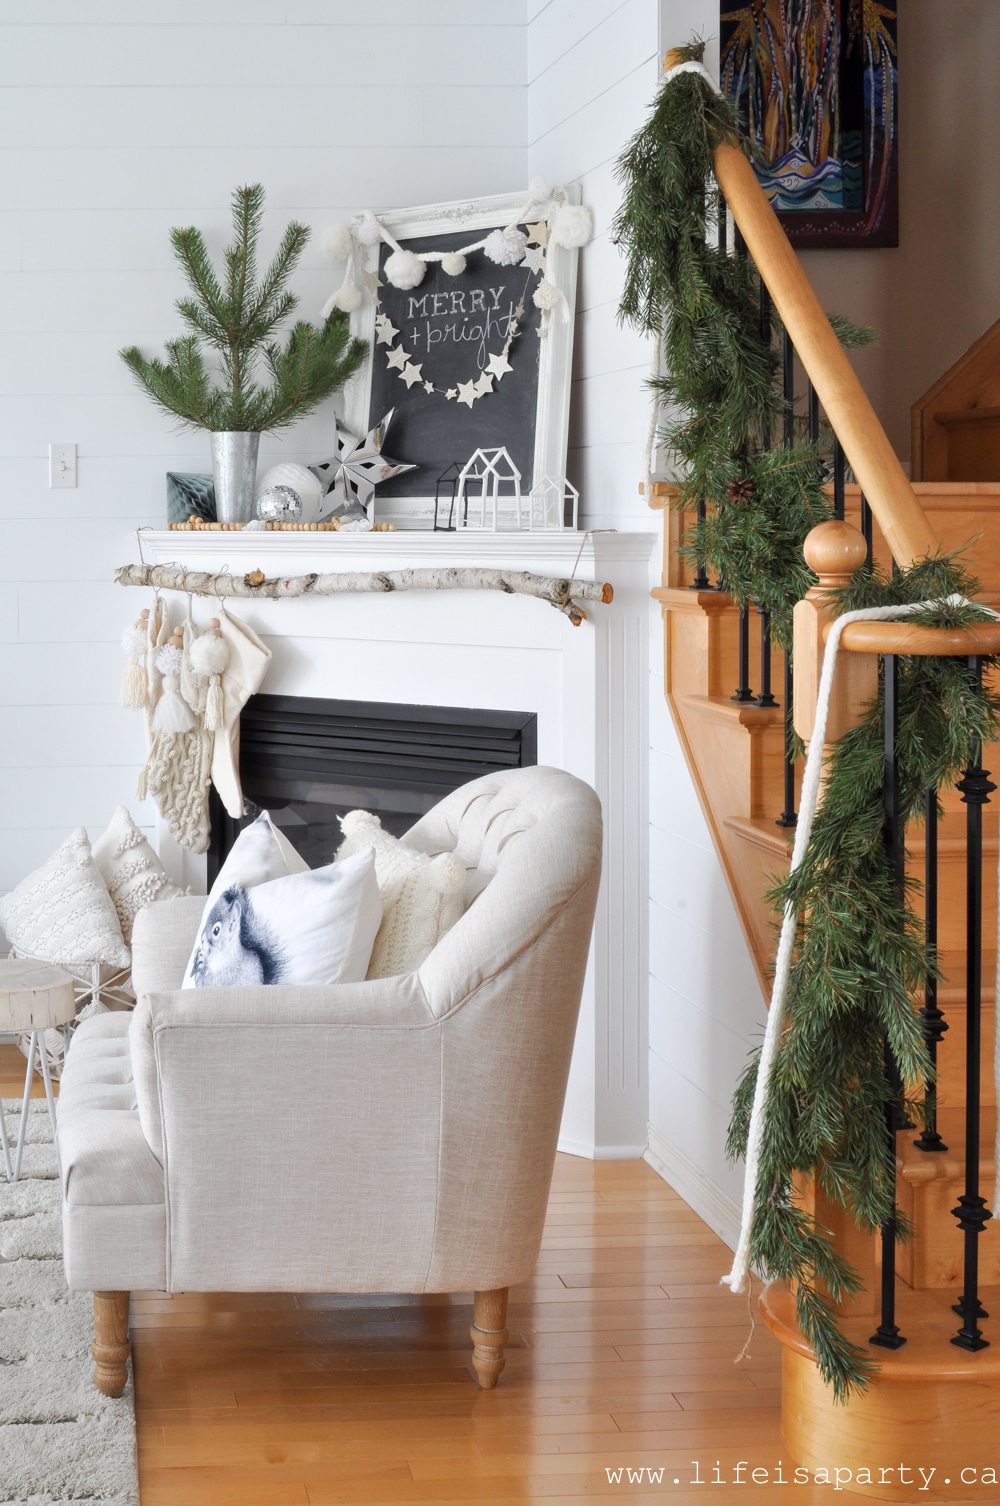 The Study
 I made this fun advent calendar for the whole family. We were at the Lindt store one day, enjoying a free sample. 😉 We noticed how many different varieties there were and that you could buy them individually so we had the brilliant idea of making an advent calendar out of them and trying them all. Everyday we all try a different one together and it's been such a yummy treat for us all.
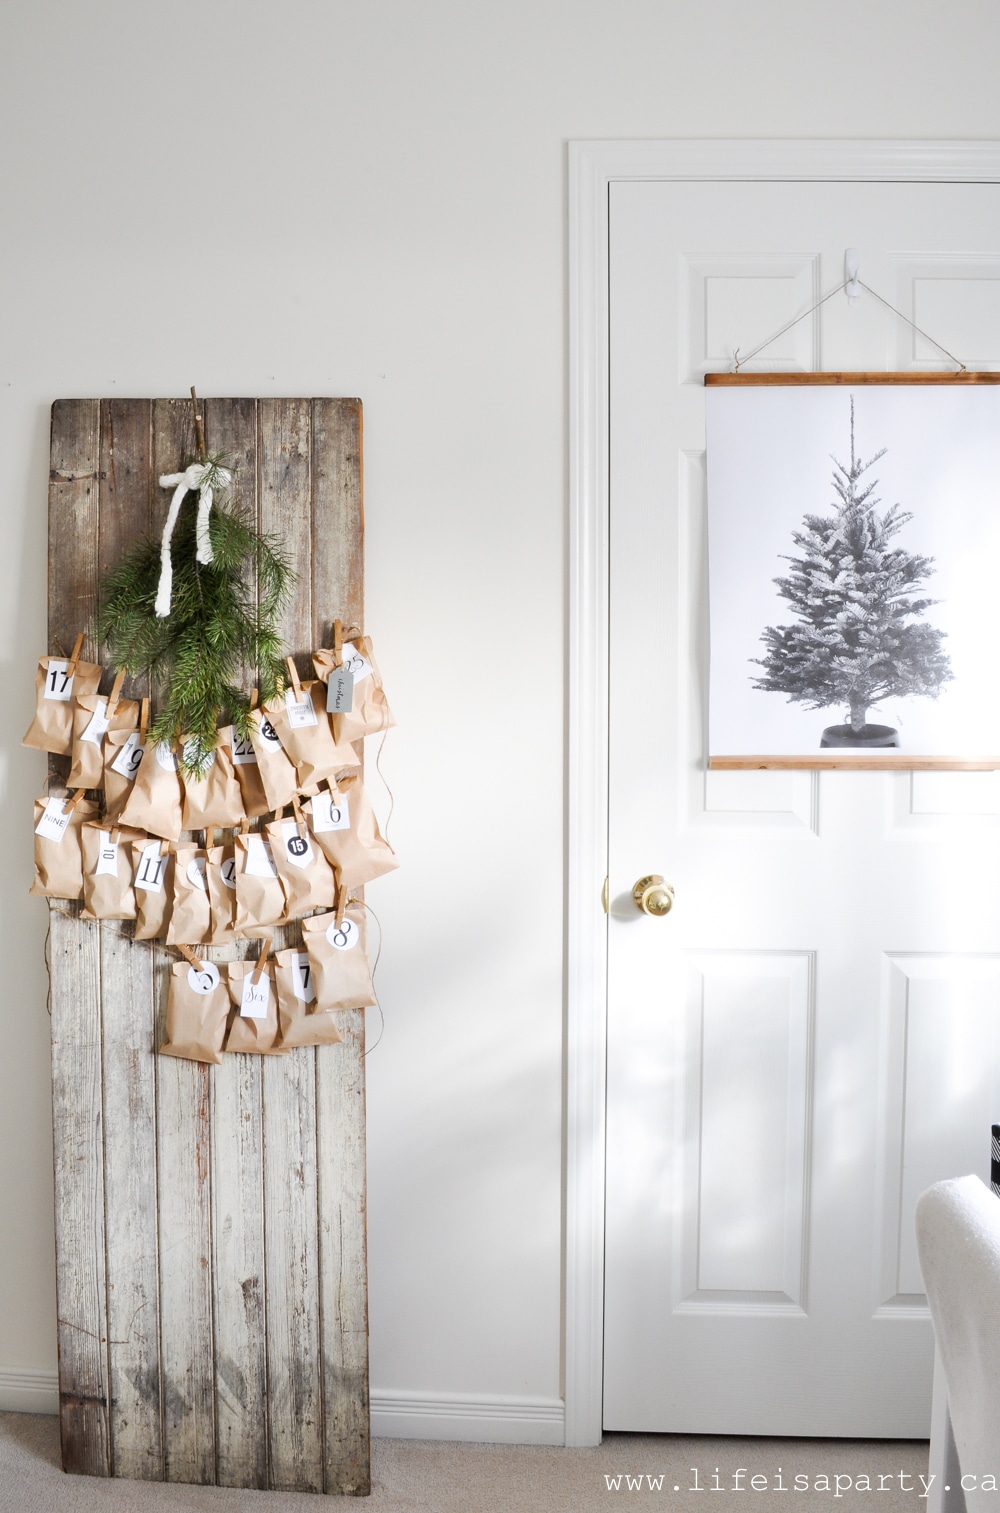 The chair is a great spot to curl up with a laptop.
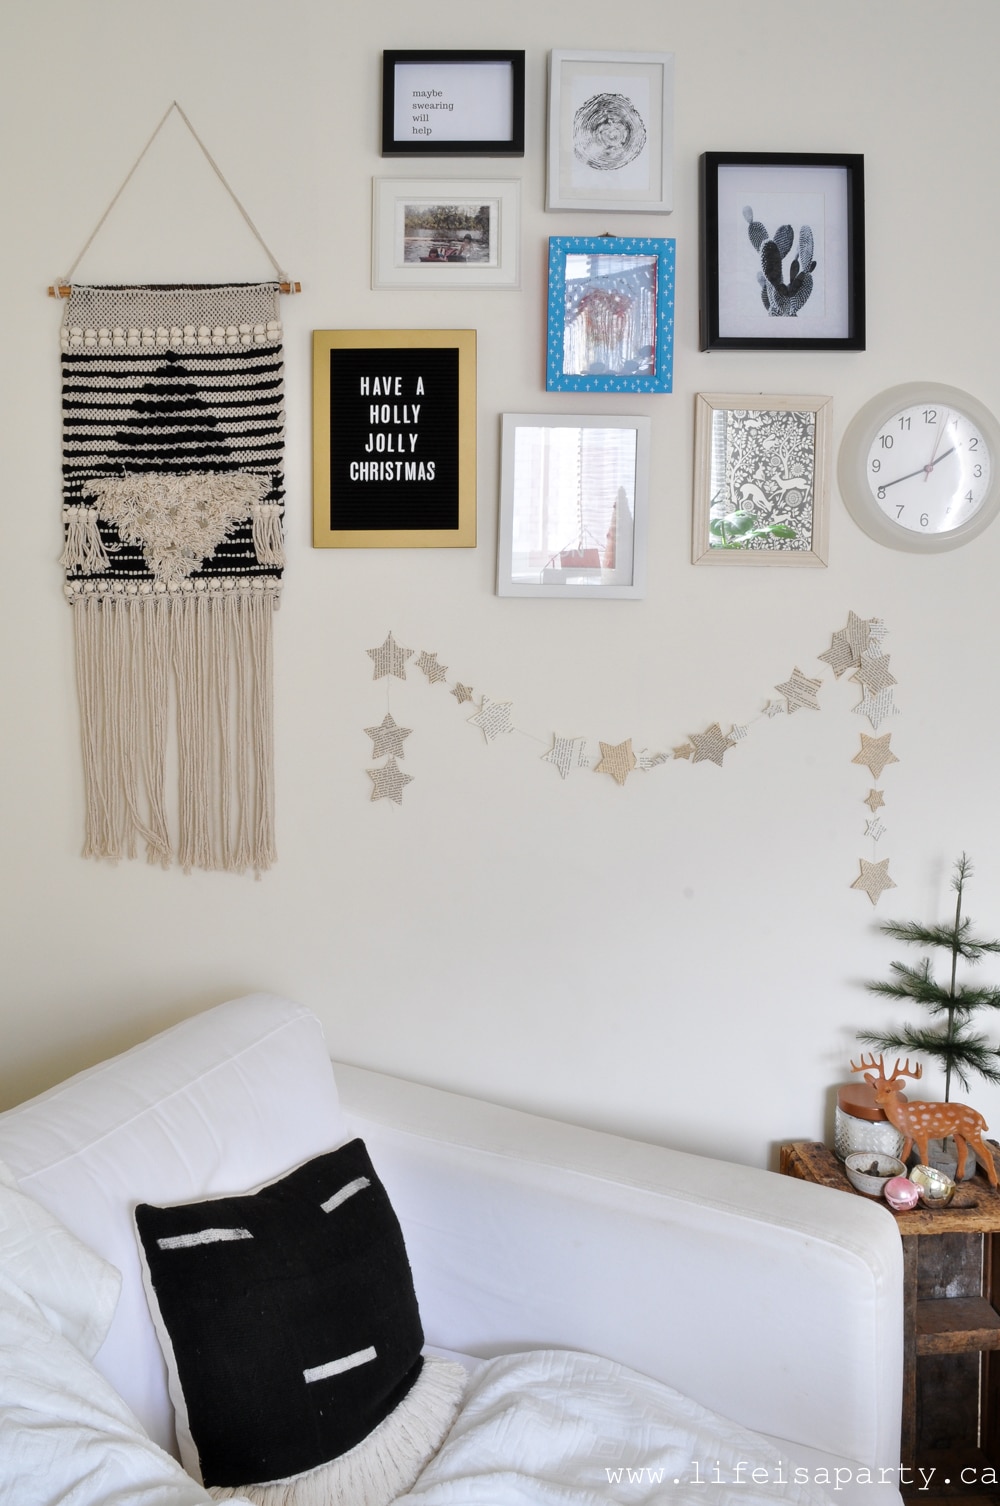
 The shelves got a little Christmas decorating too.
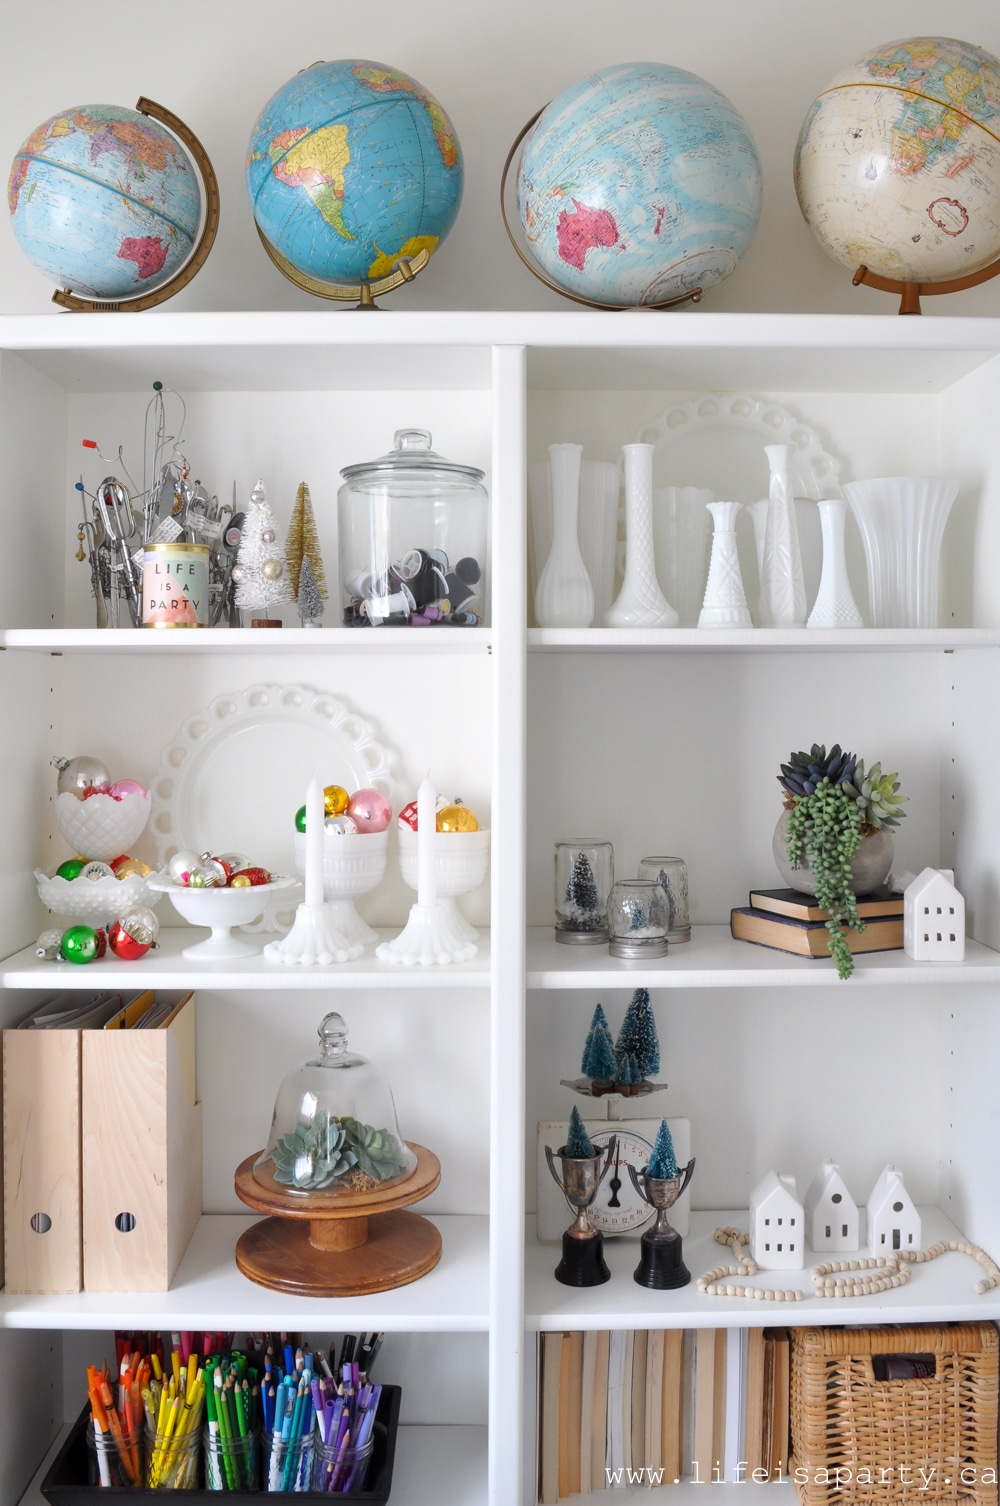
 Always fun to add in a few more vintage pieces.
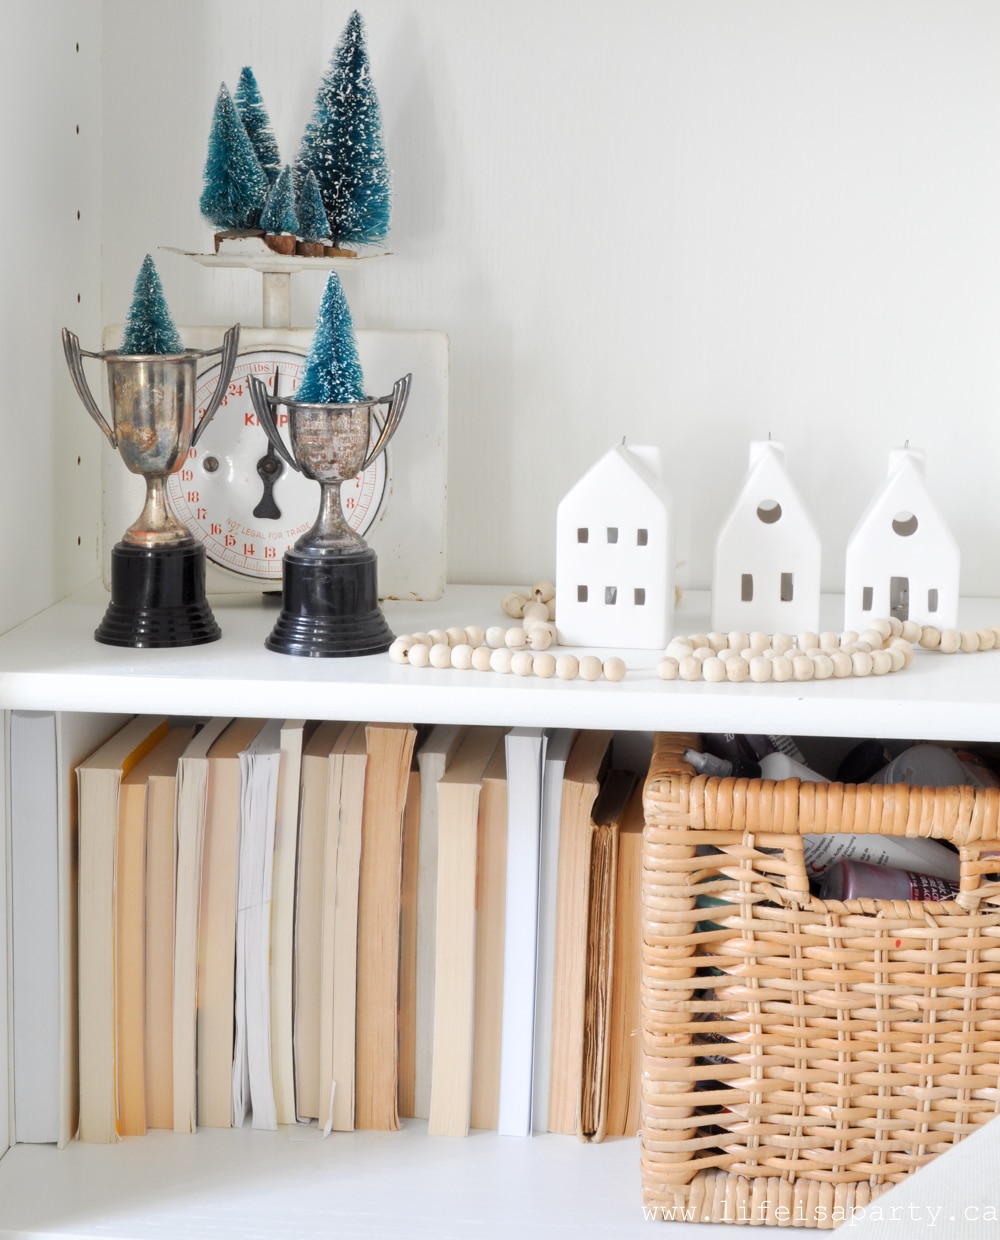 This is a great spot for Christmas crafting and gift wrapping.
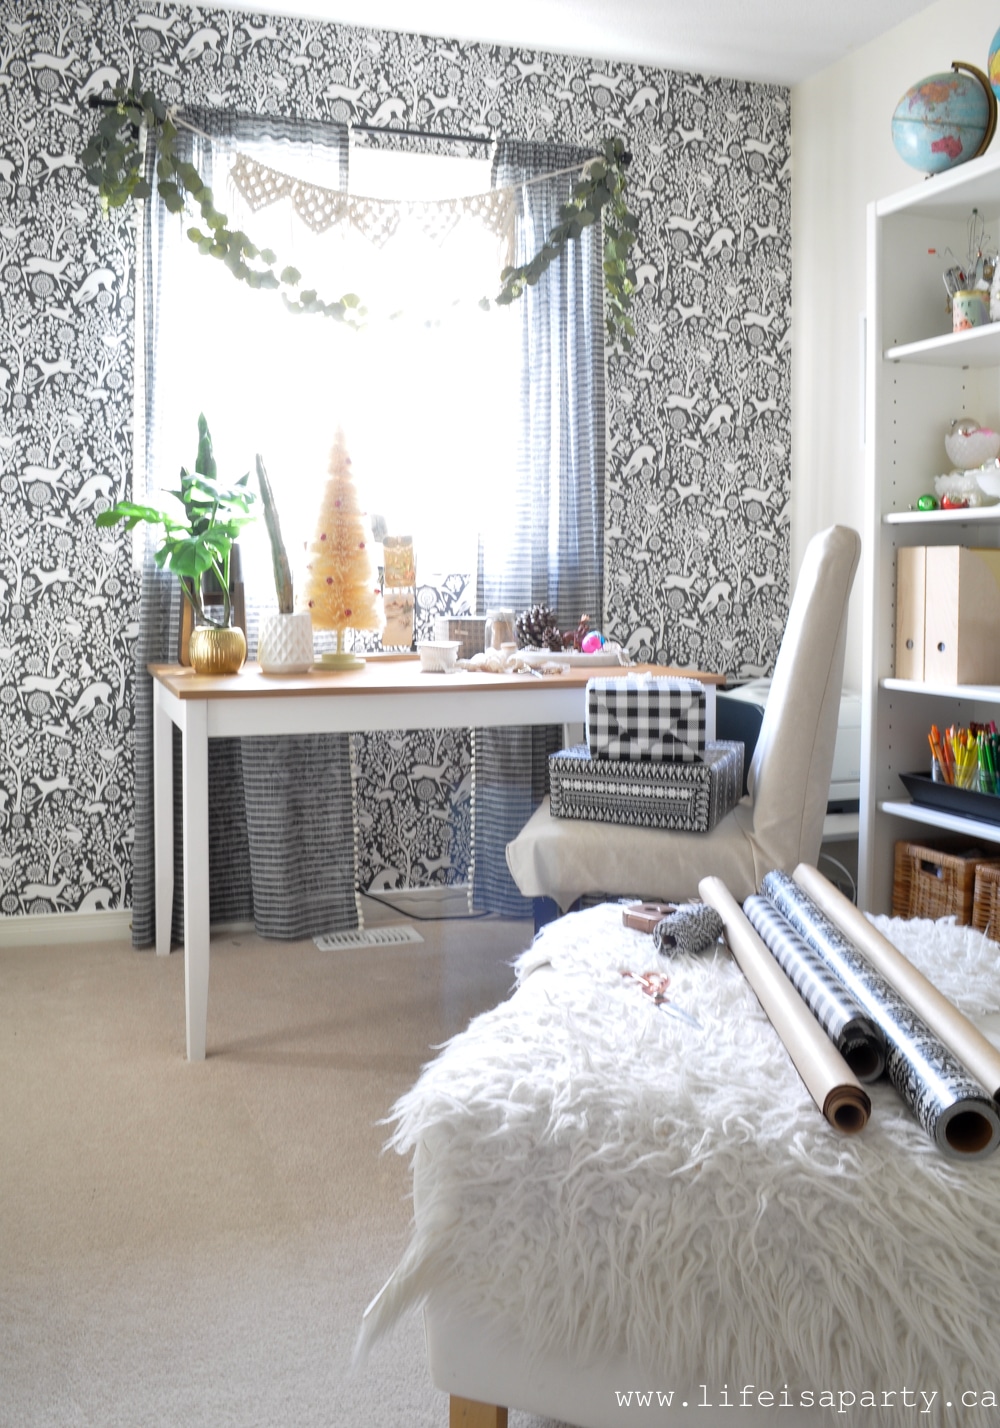
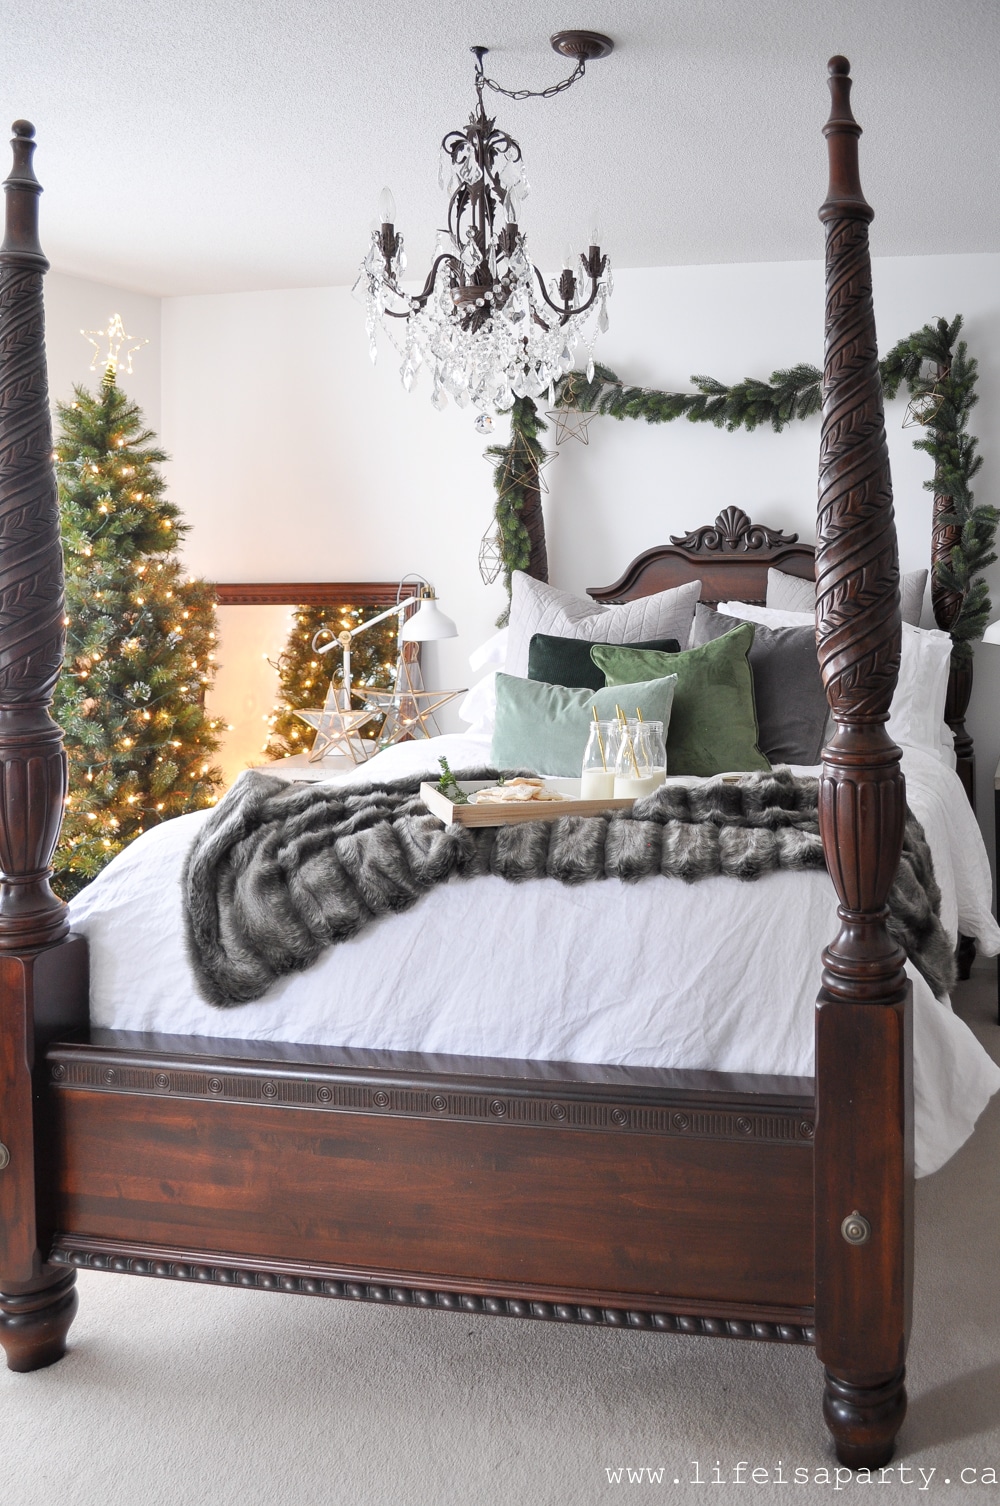
 I worked with
 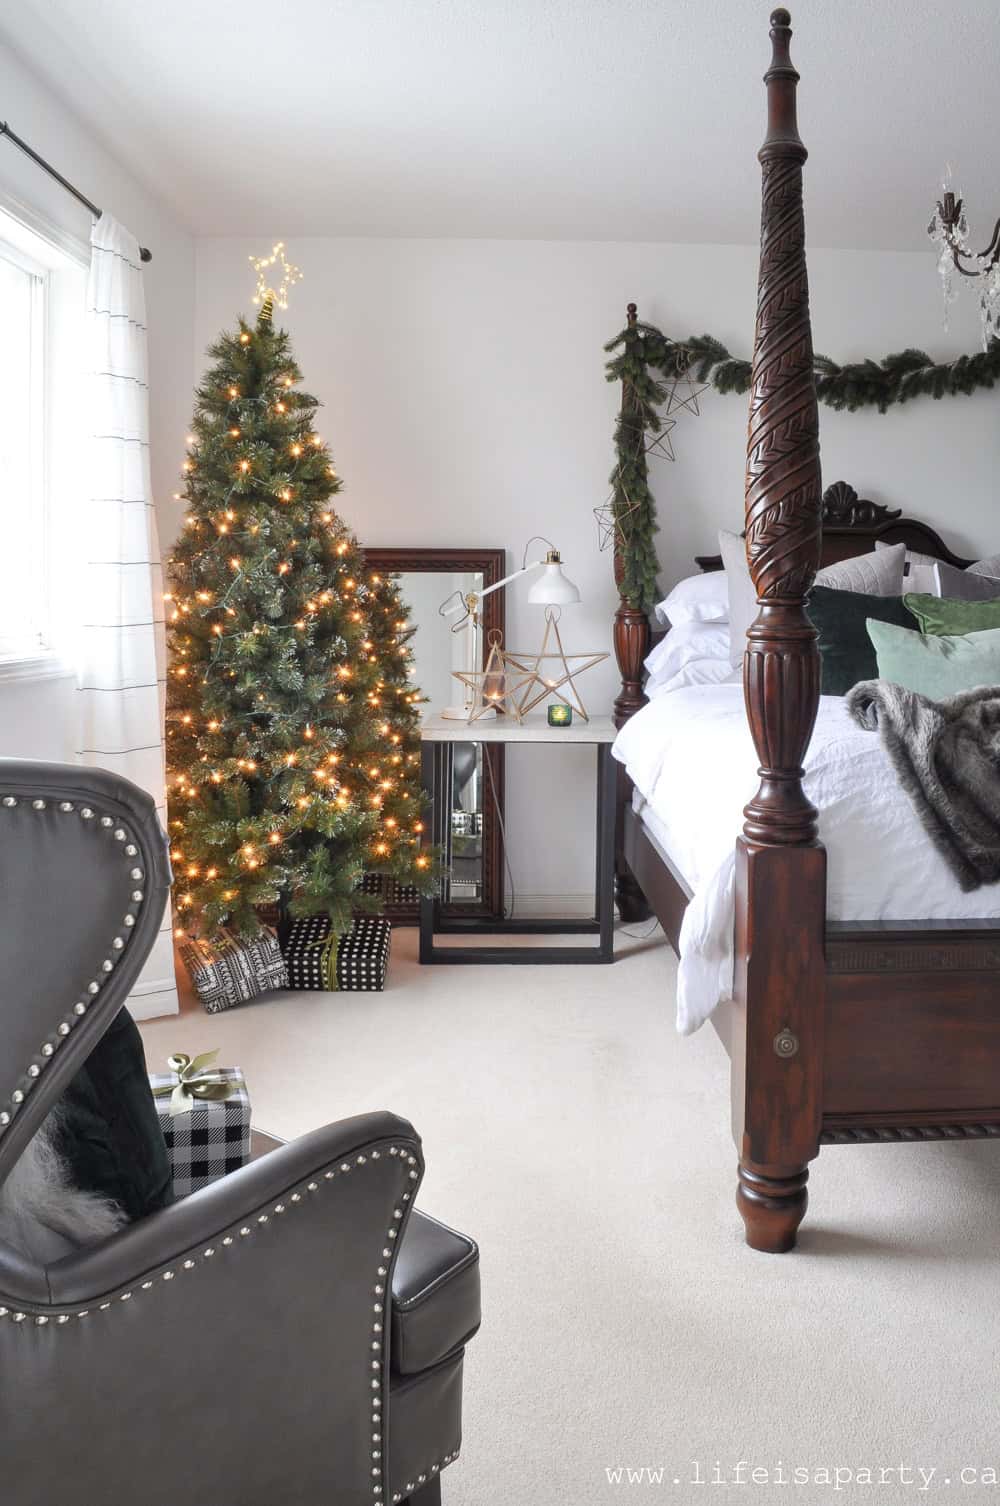 We've never had a tree in here before and I have to say it's so beautiful and romantic at night all lit up.
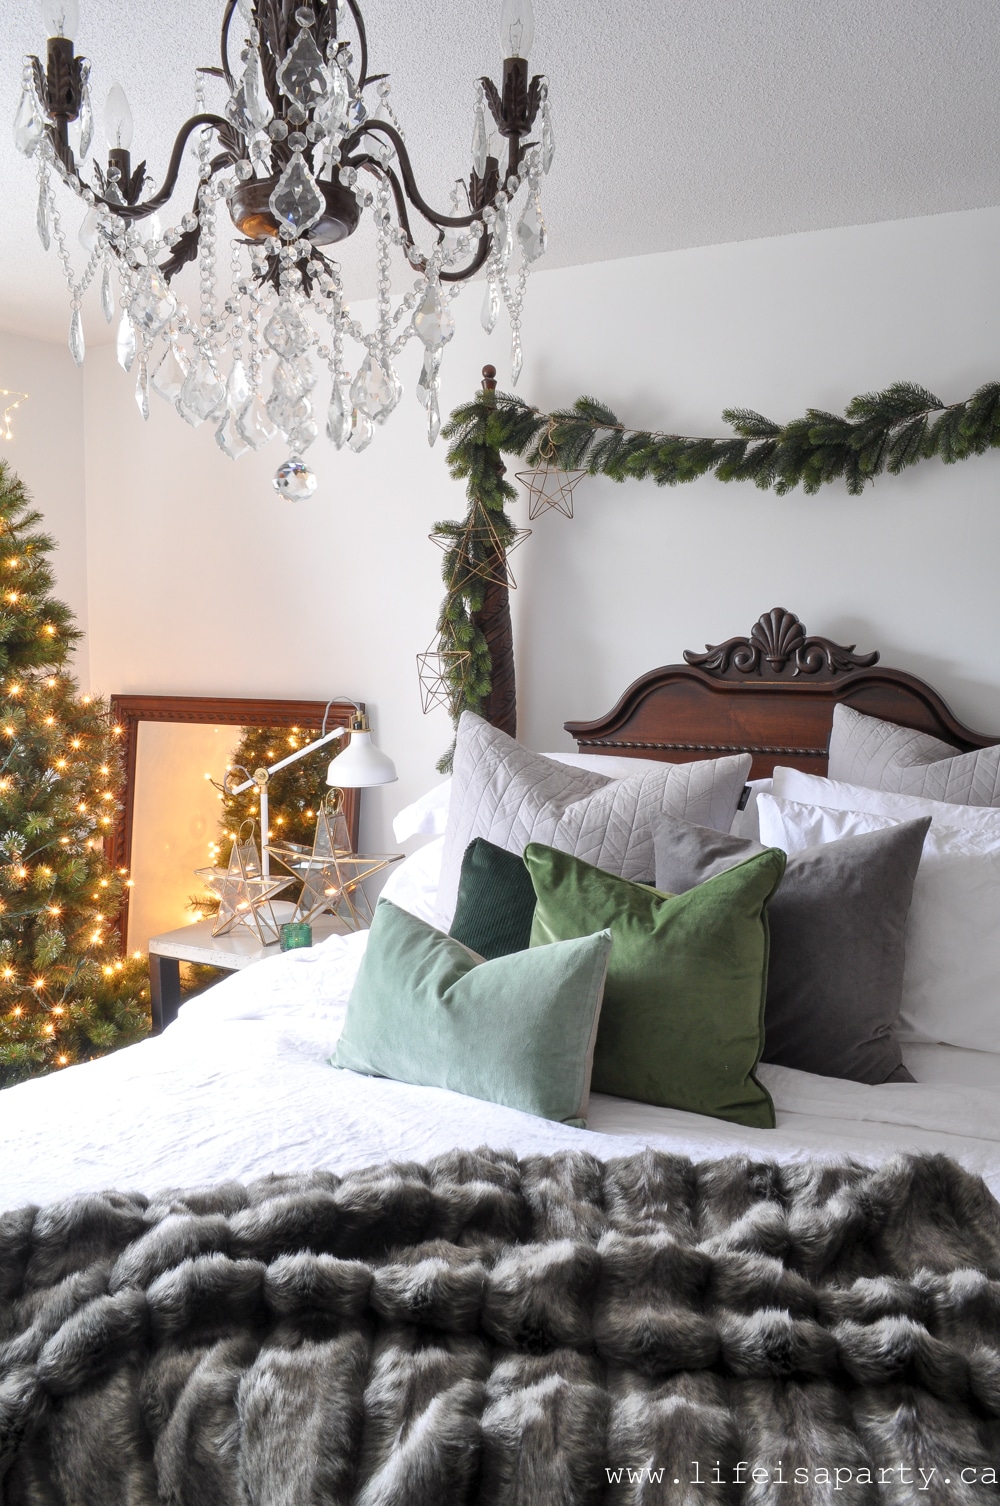
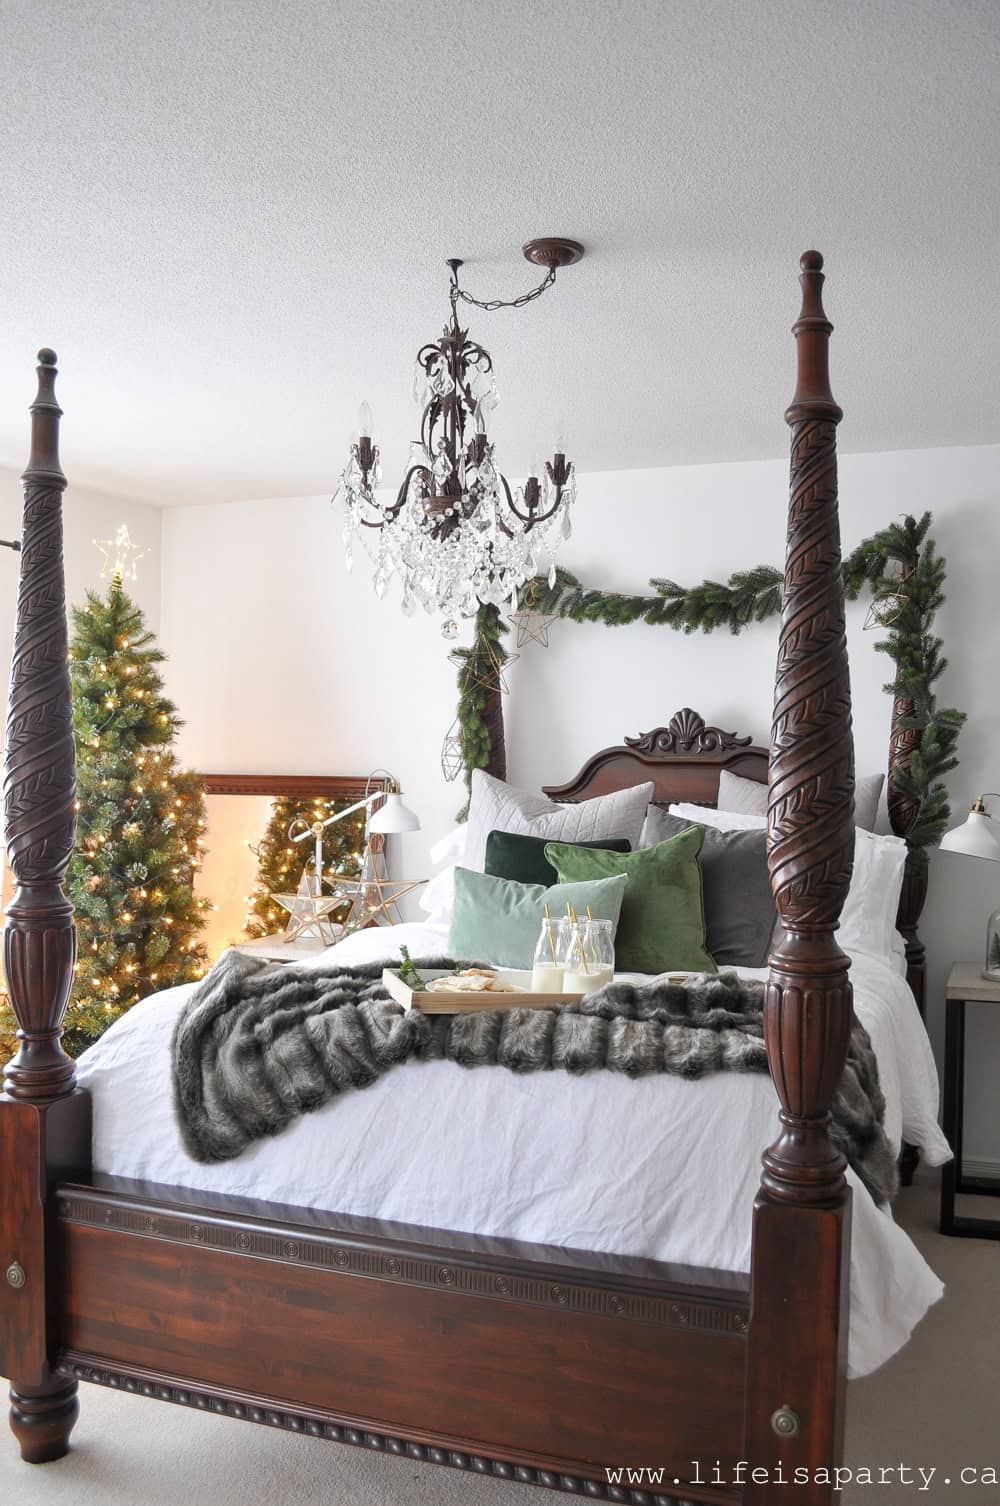
 I've added some green cushions for Christmas -one dark corduroy, one velvet moss green square one, and the rectangular jade velvet one in front.
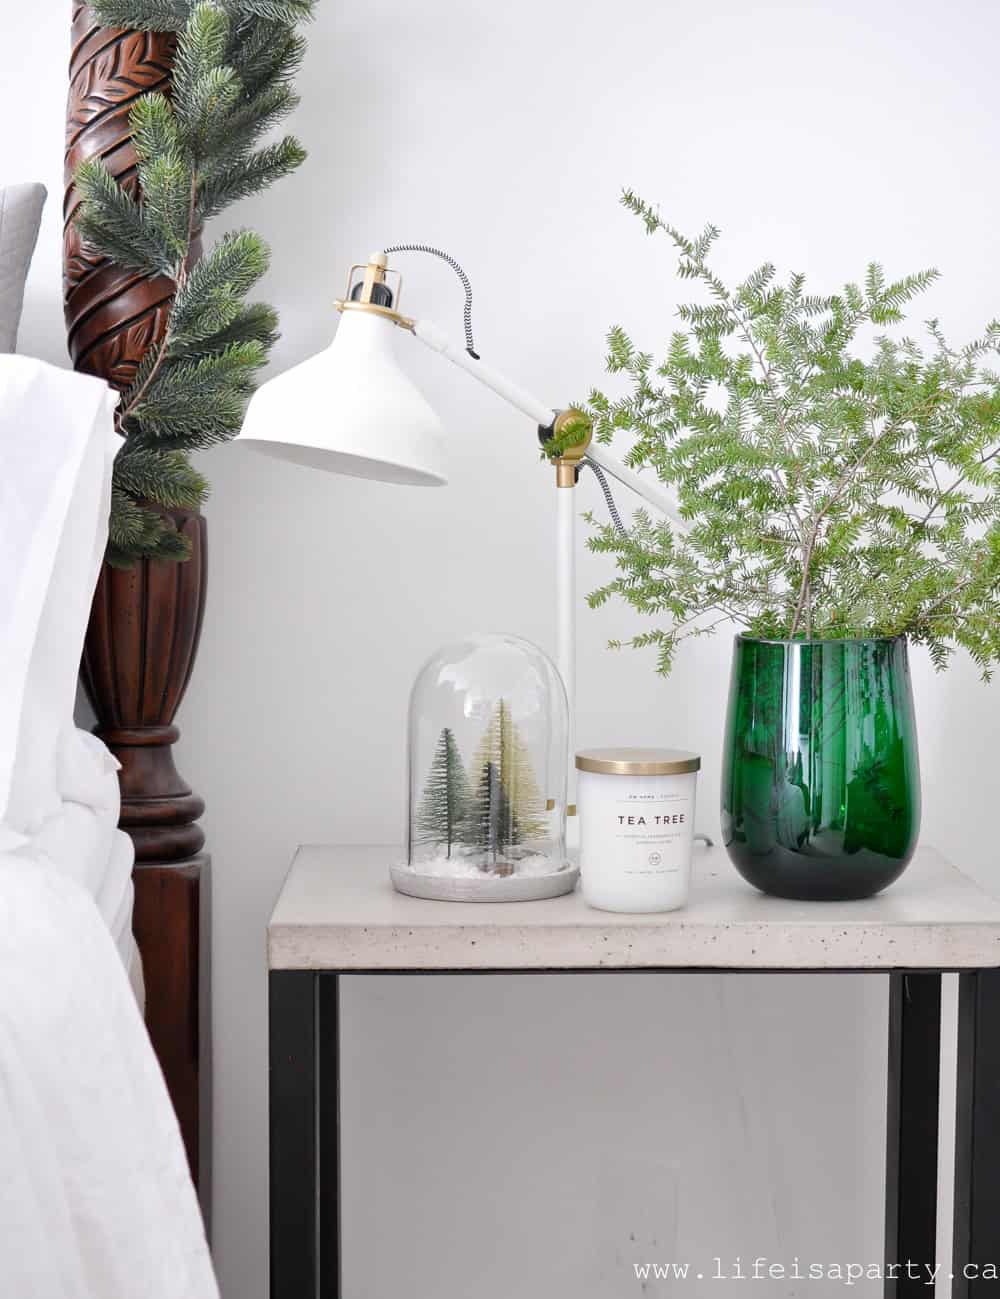 And over on the other side of the bed, the gorgeous vase that set the whole colour scheme filled with some fresh hemlock one of my favourite Christmas greens since it's so delicate. The pretty little bottle brush trees are from Ikea and look great in a little cloche.
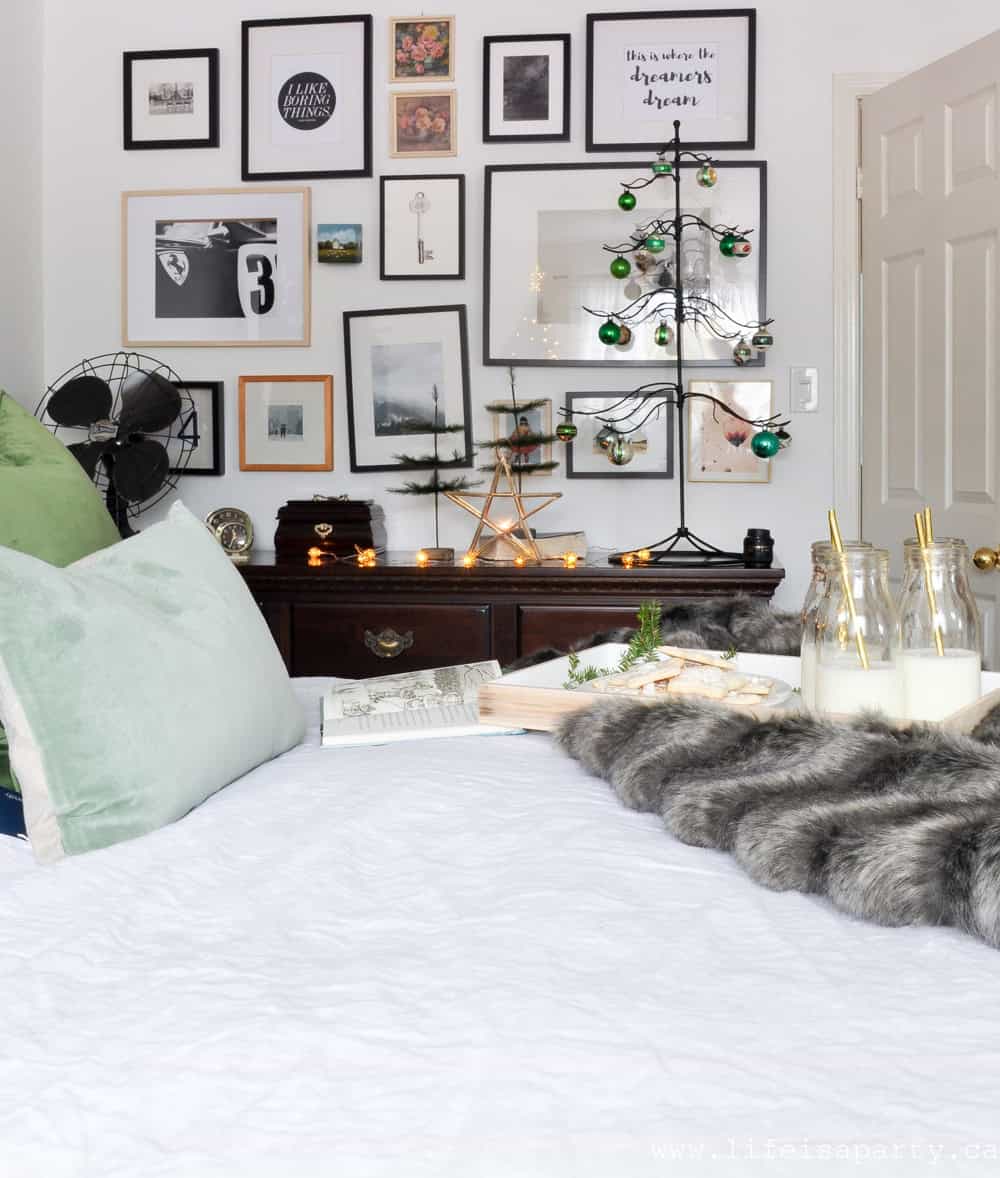
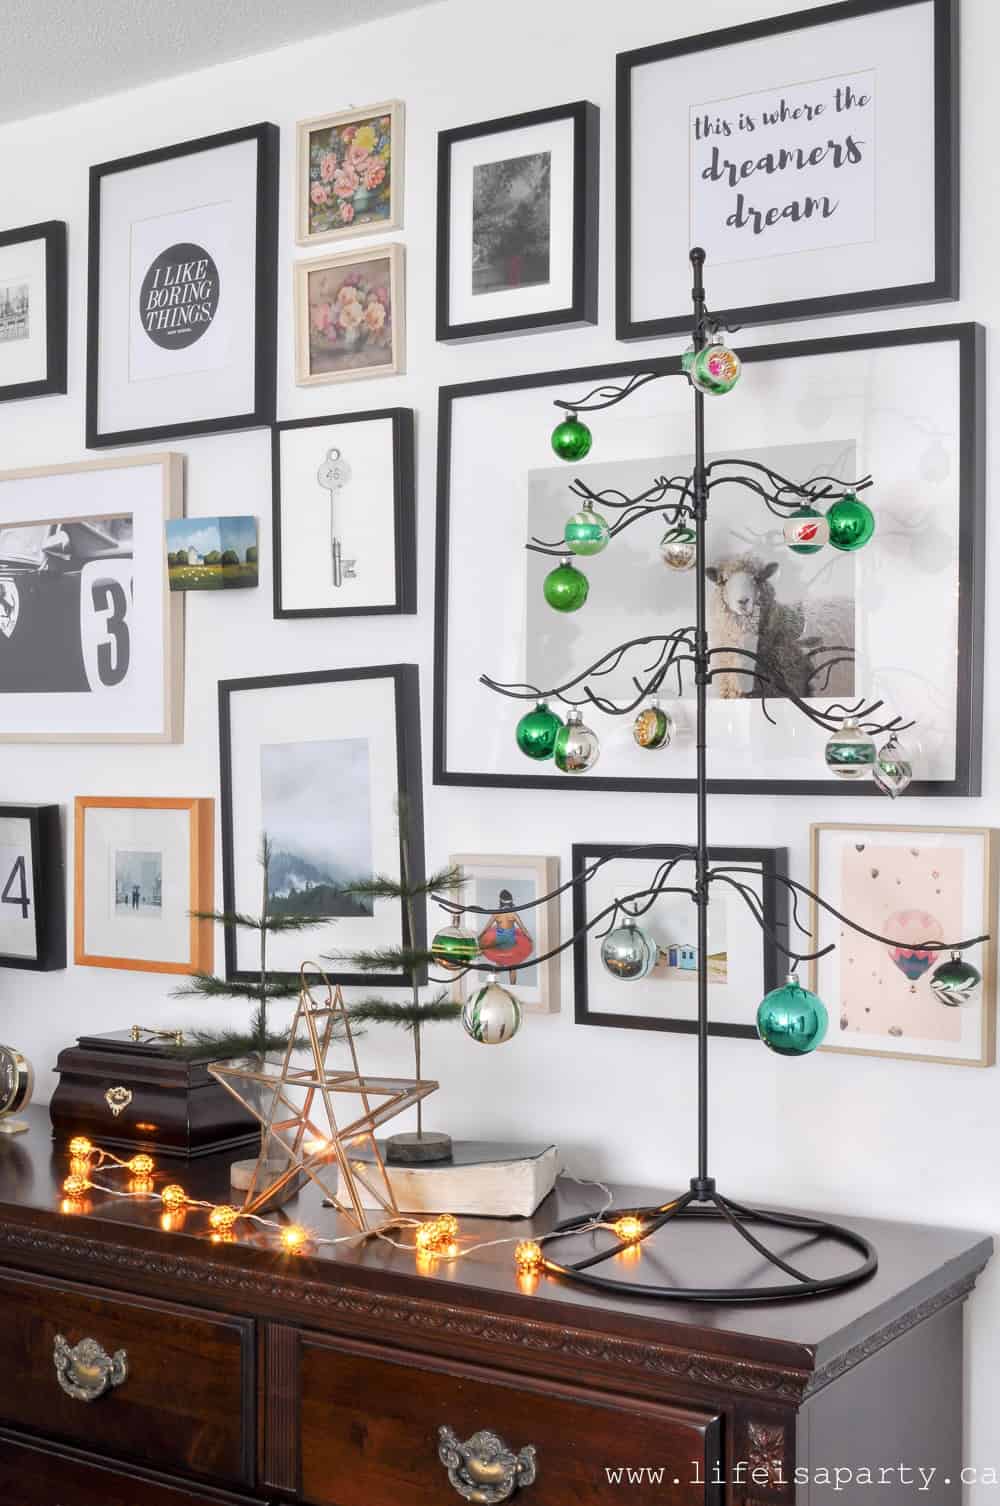 I added an assortment of green vintage ornaments to this little black tree.
 This room feels like the perfect little Christmas retreat, or spot for a bedtime story.
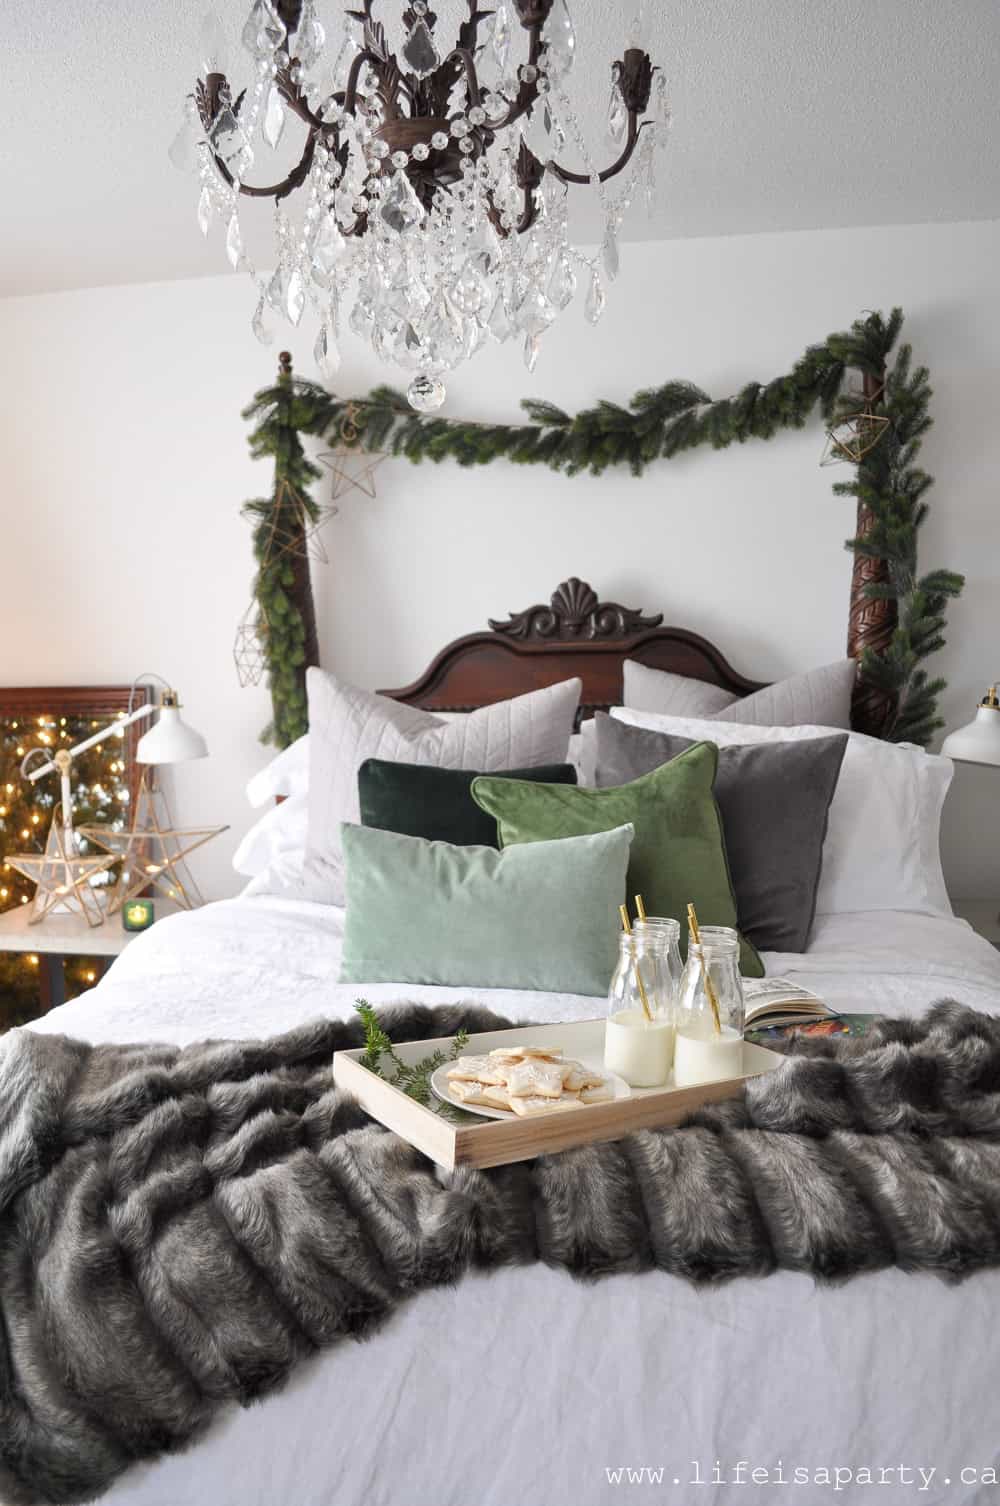


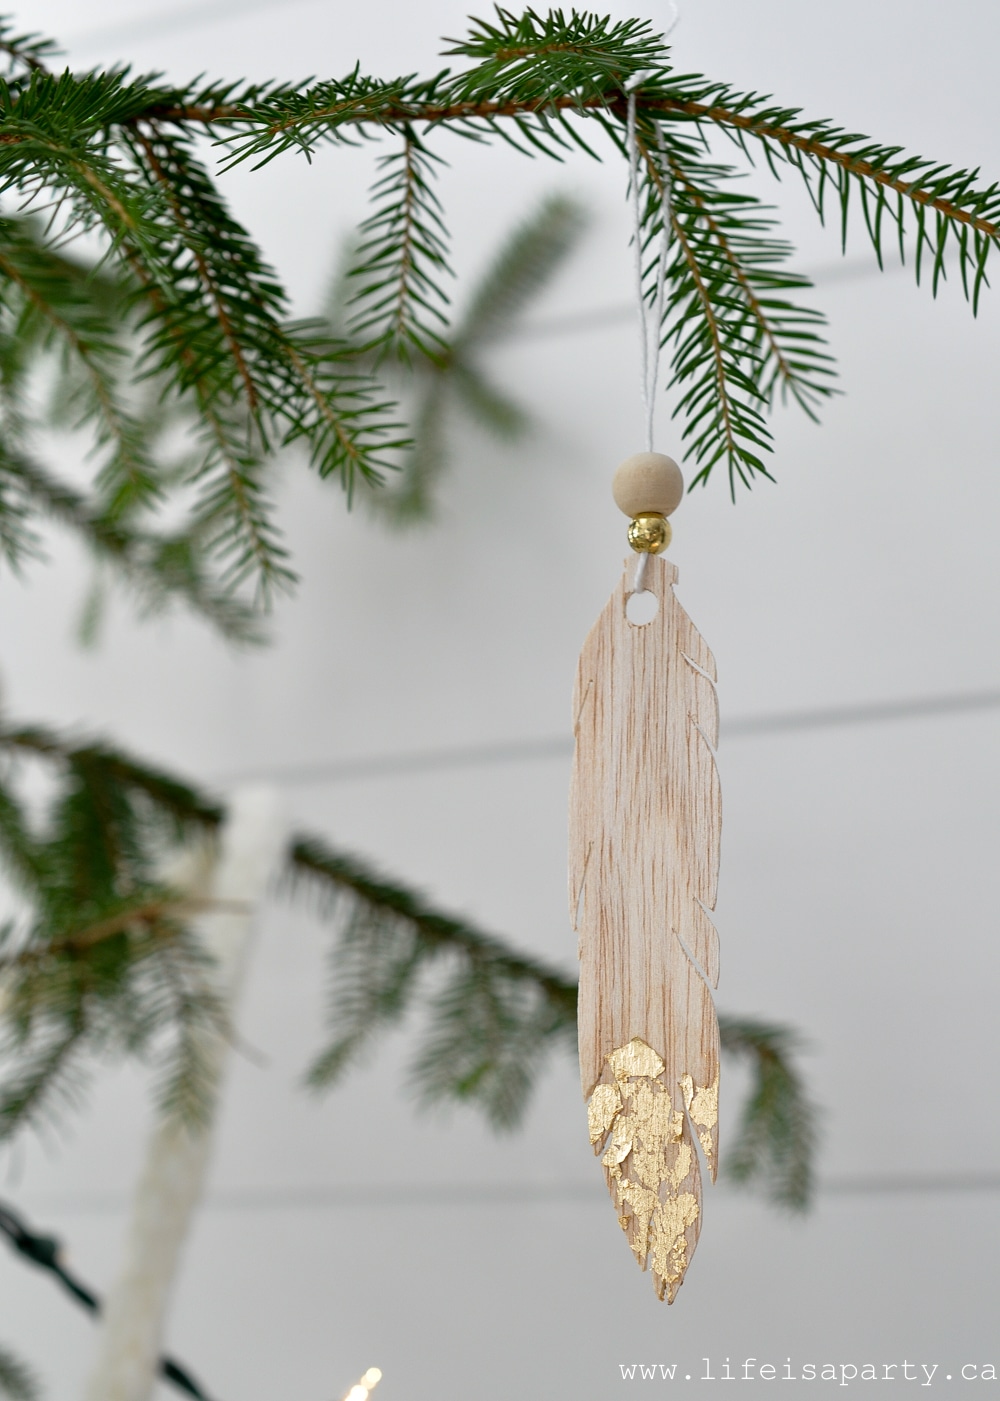
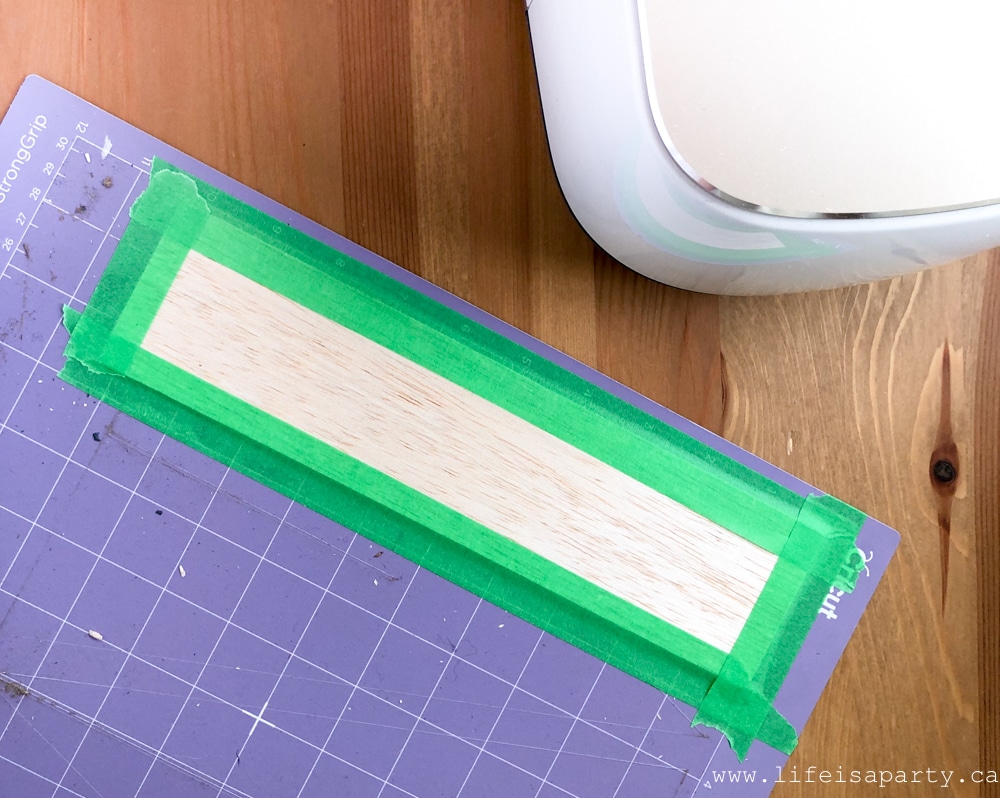
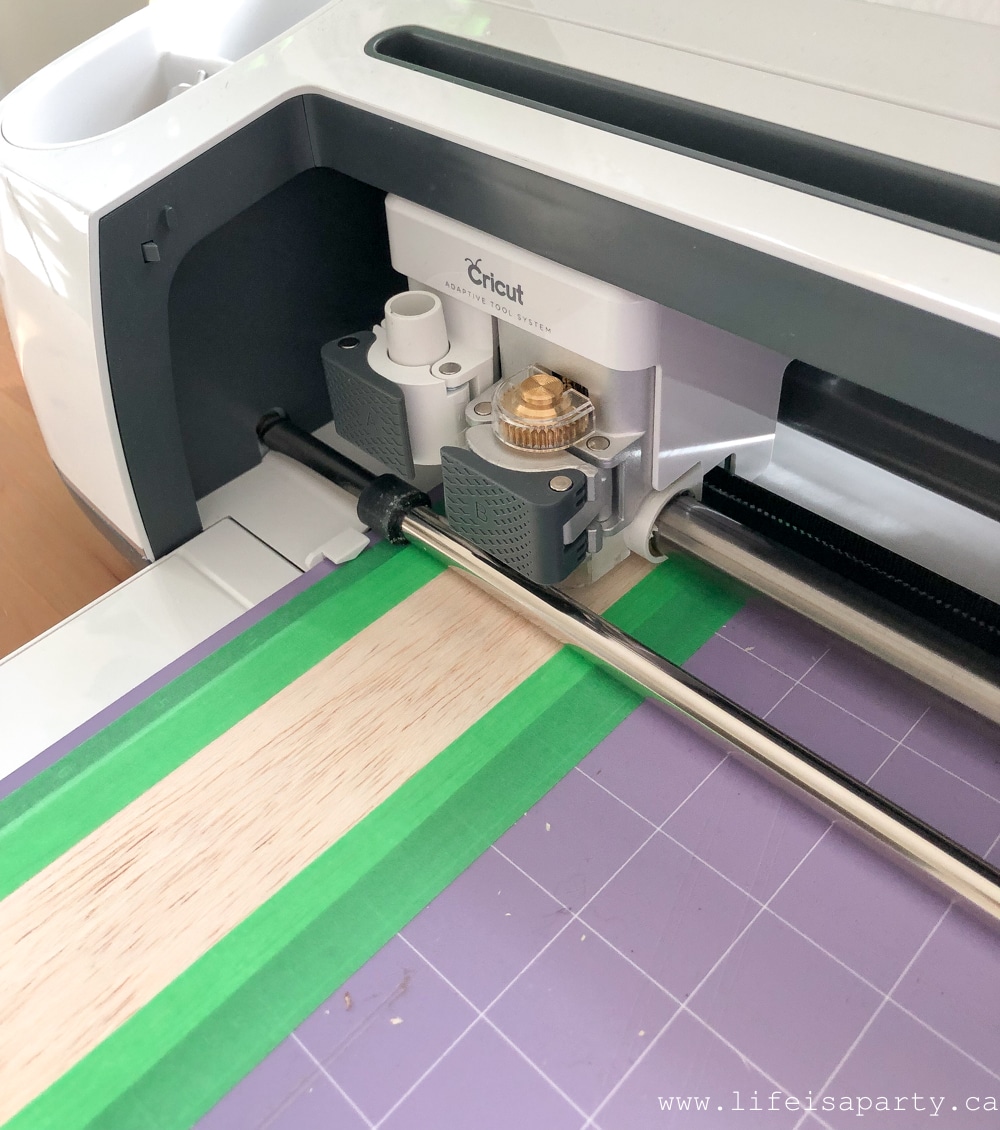
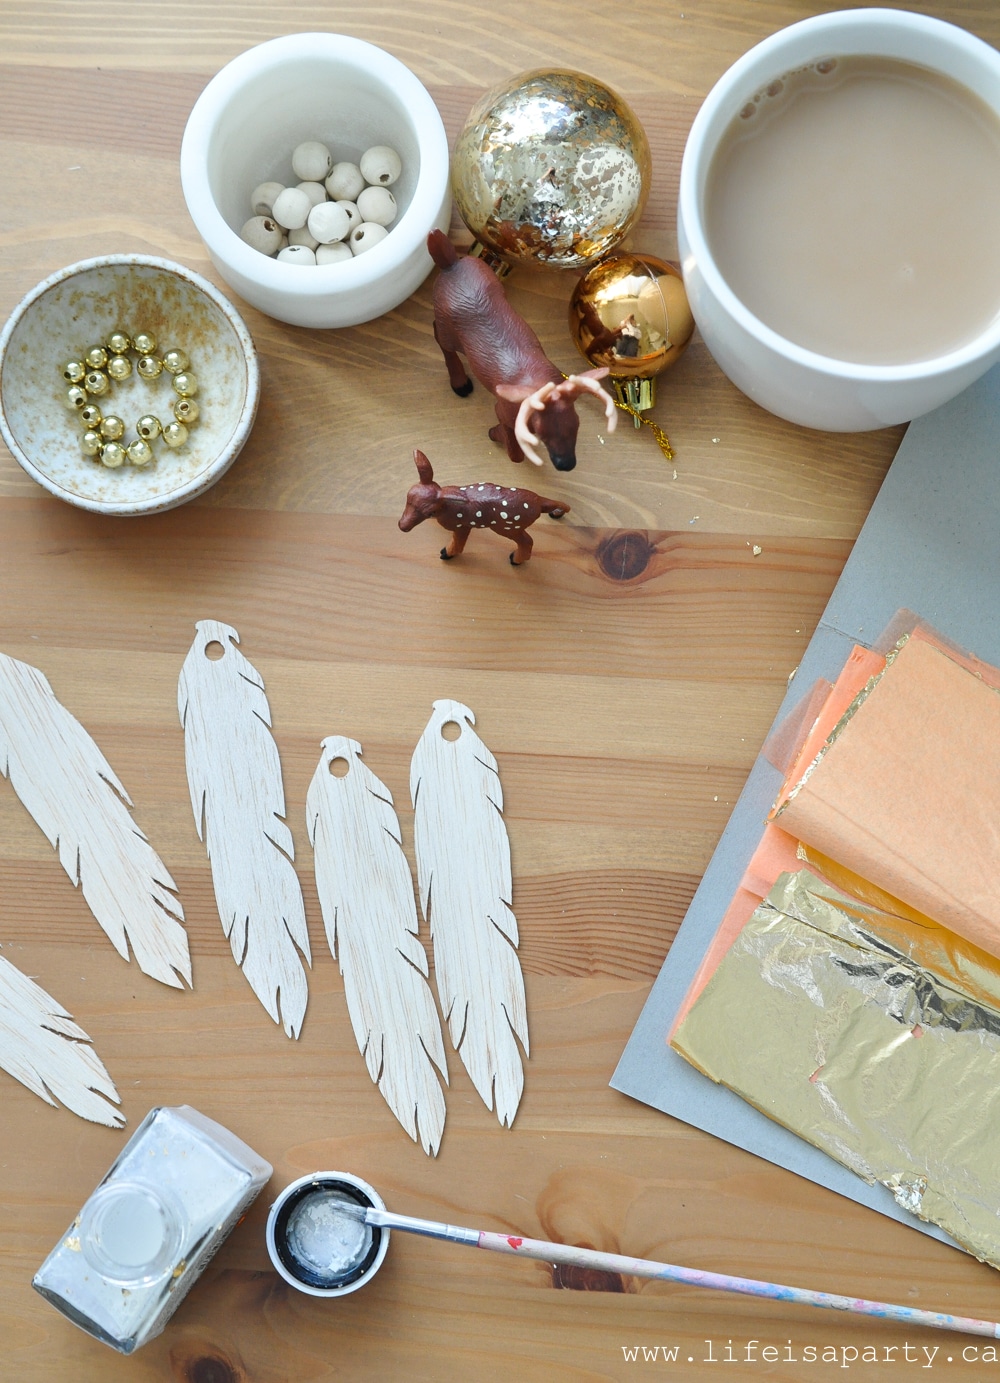
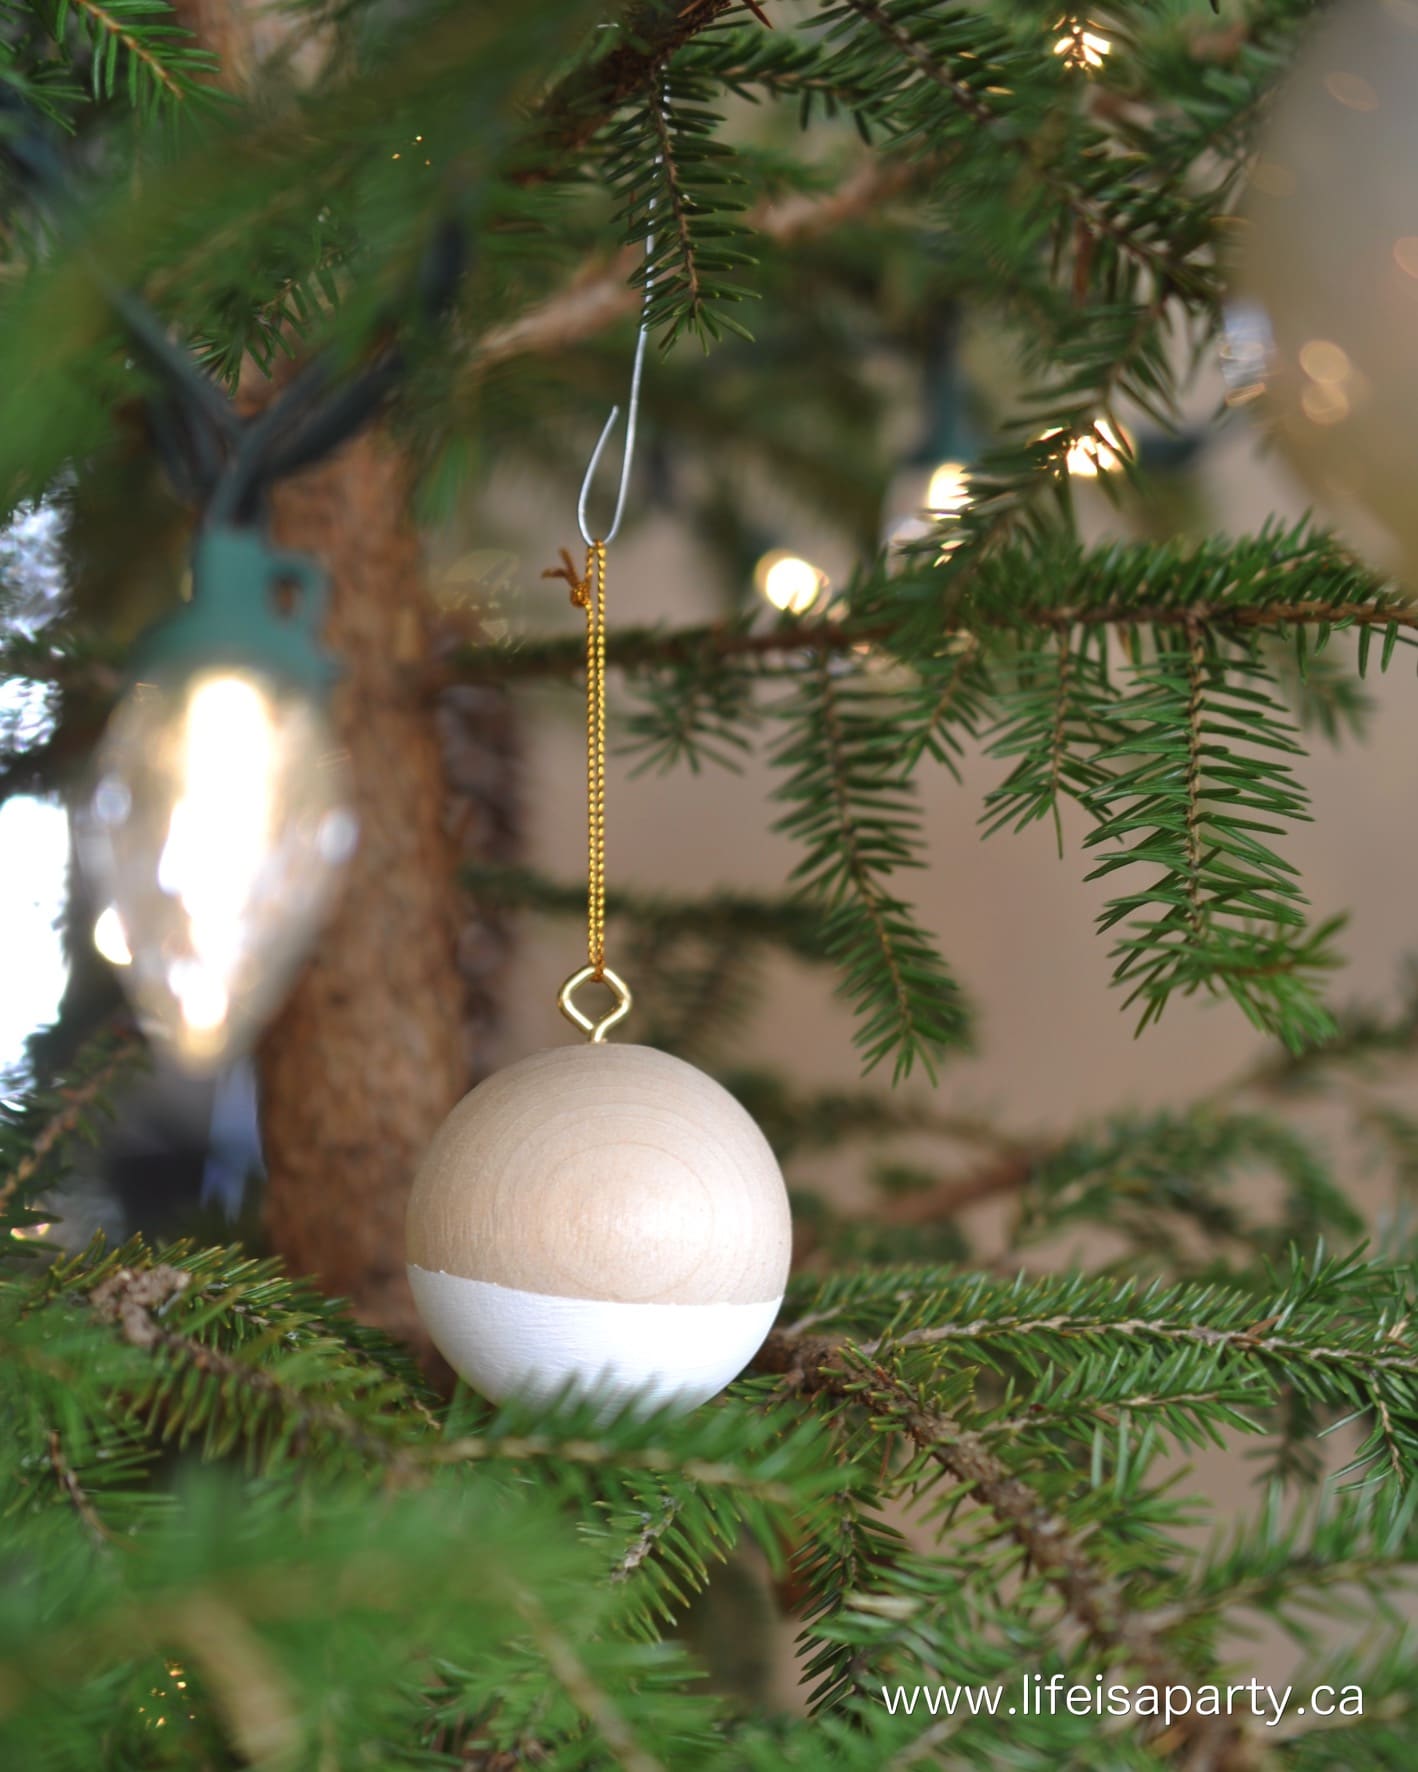
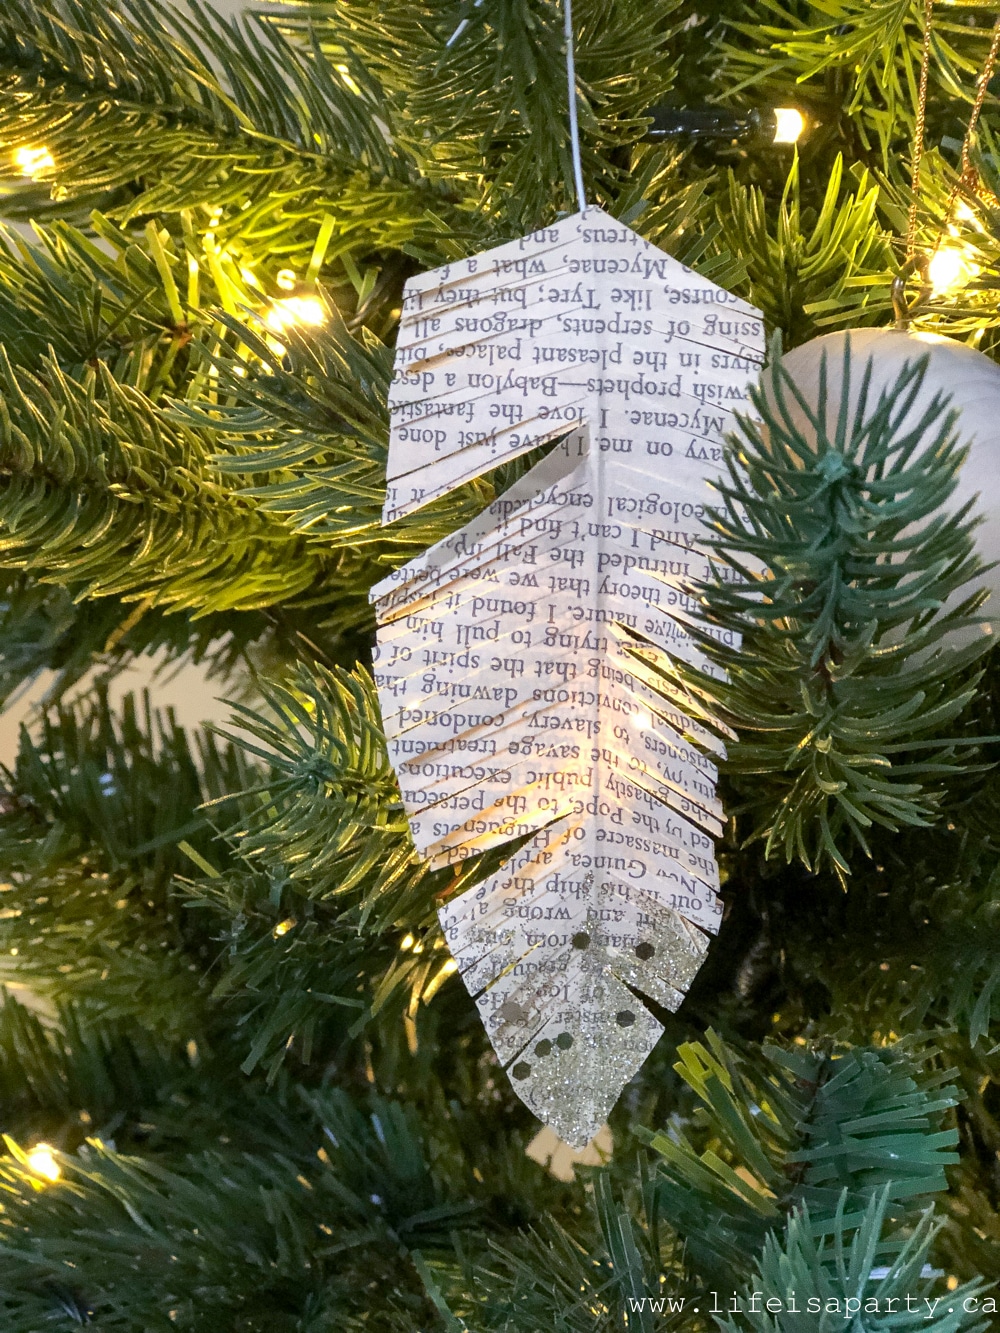
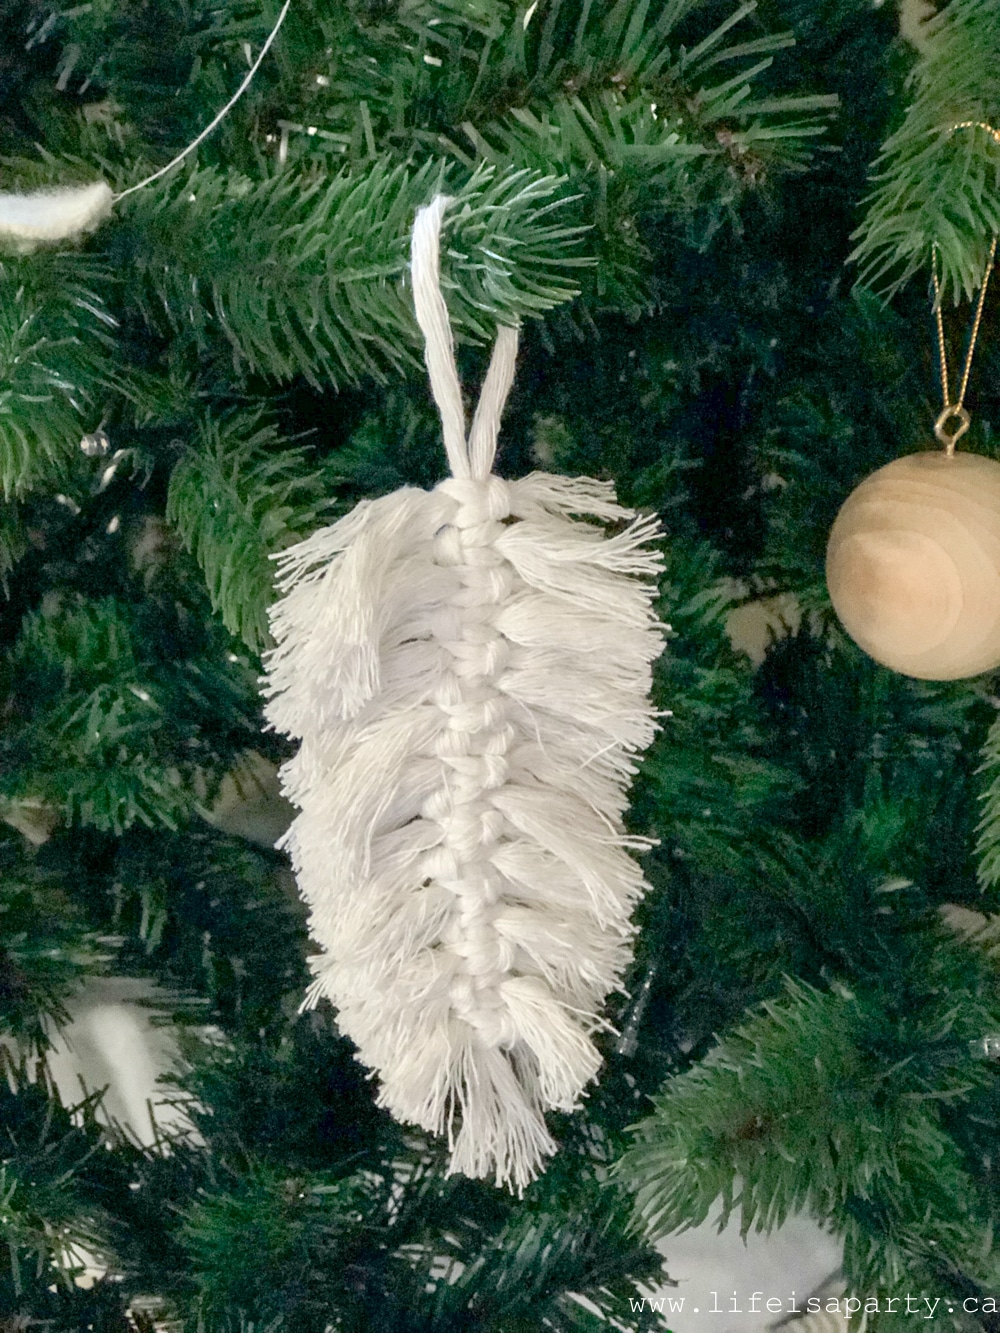
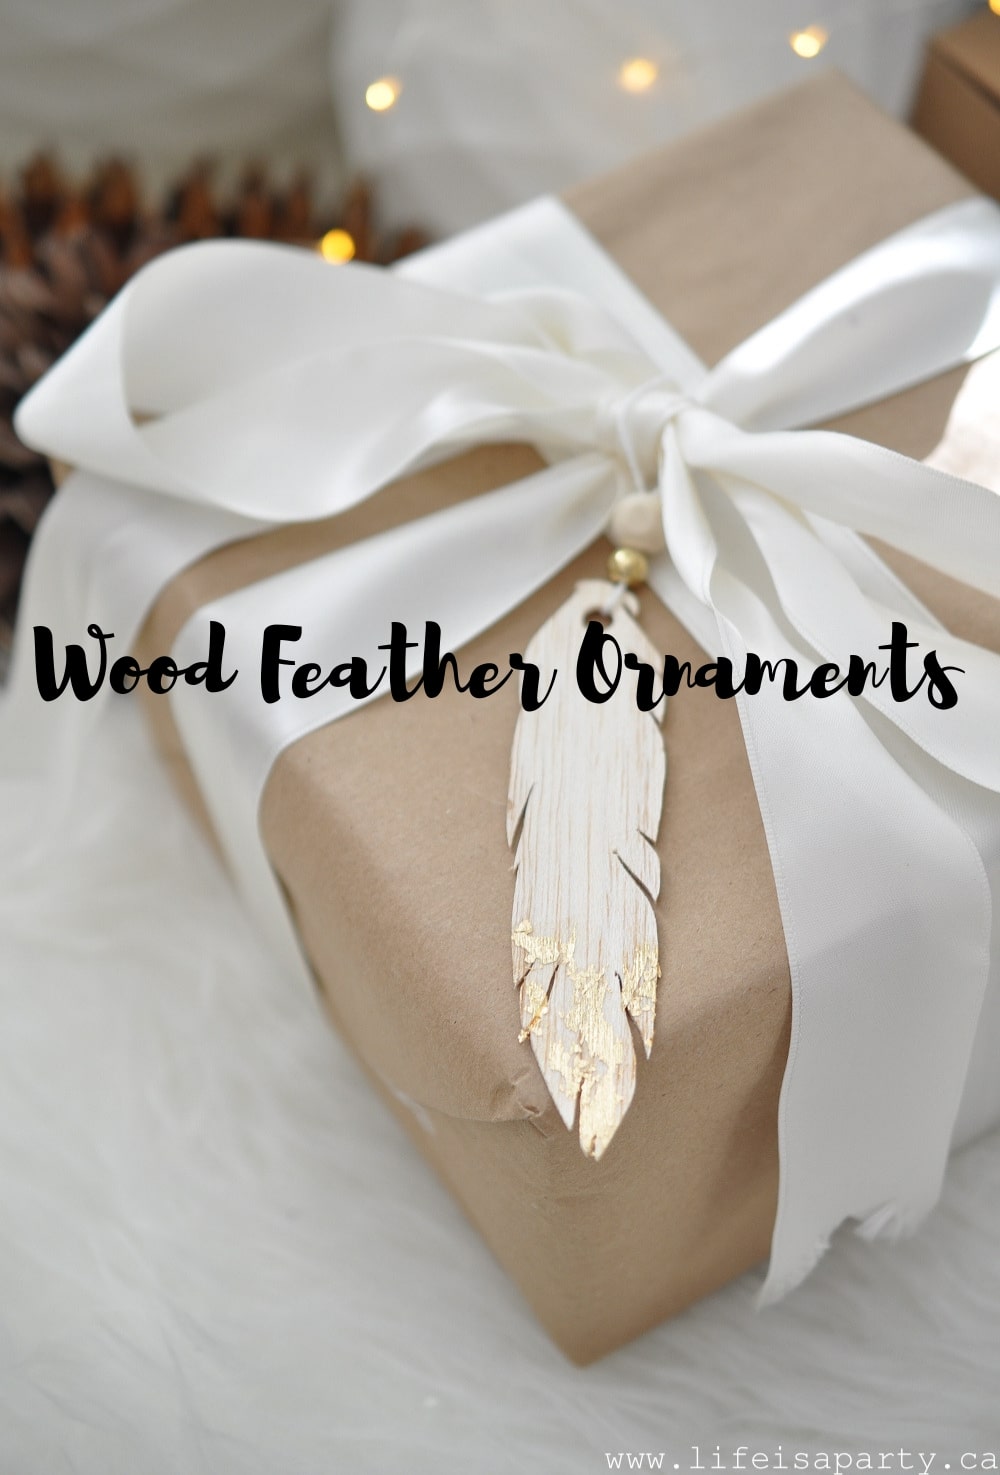
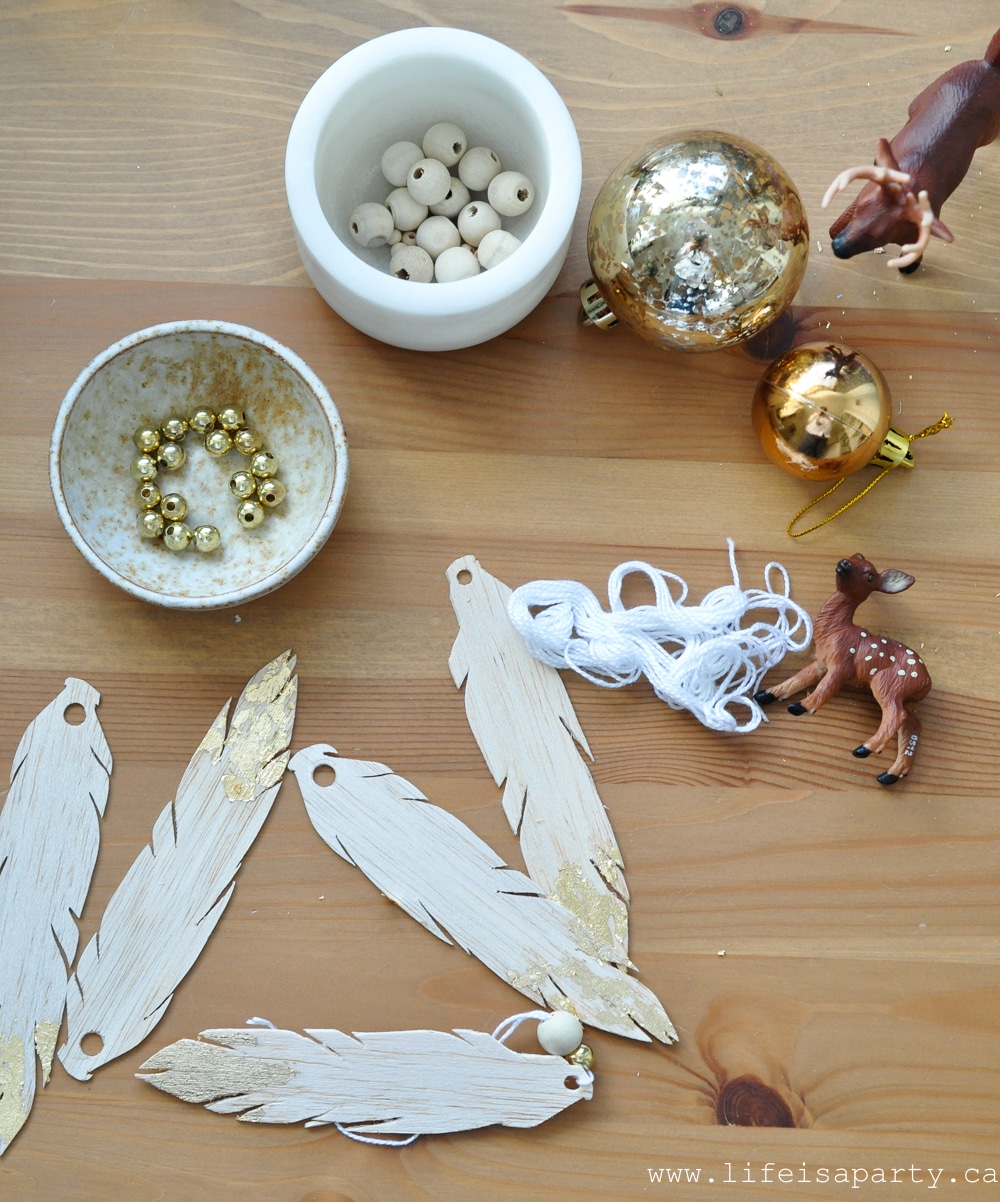 Add a string to hang it from, with a gold and a wood bead.
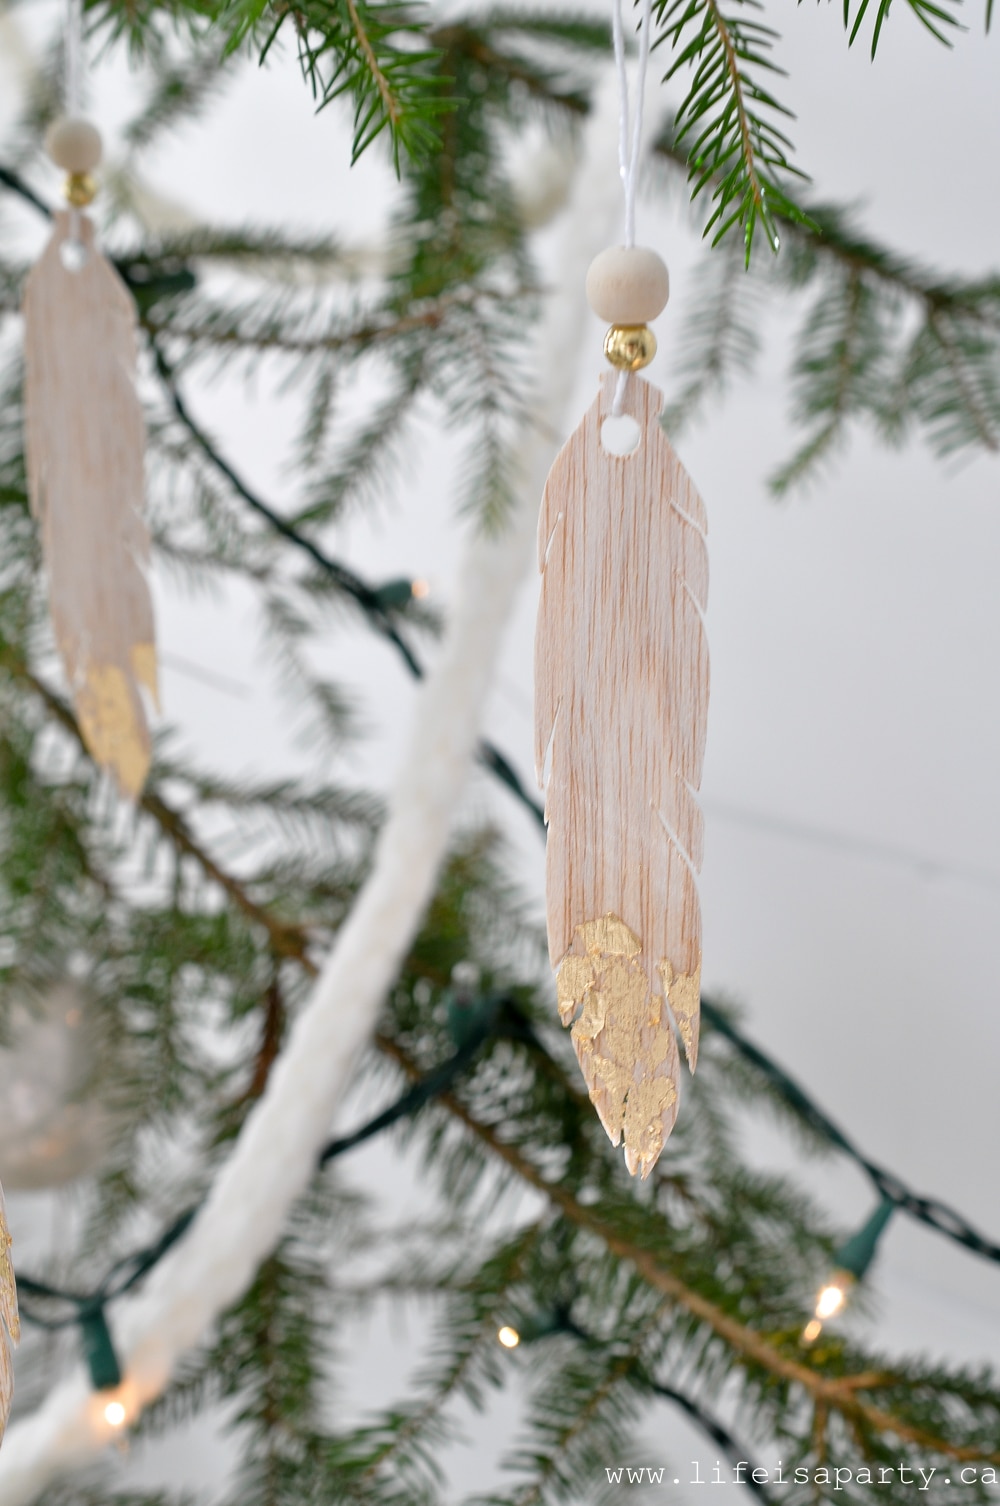
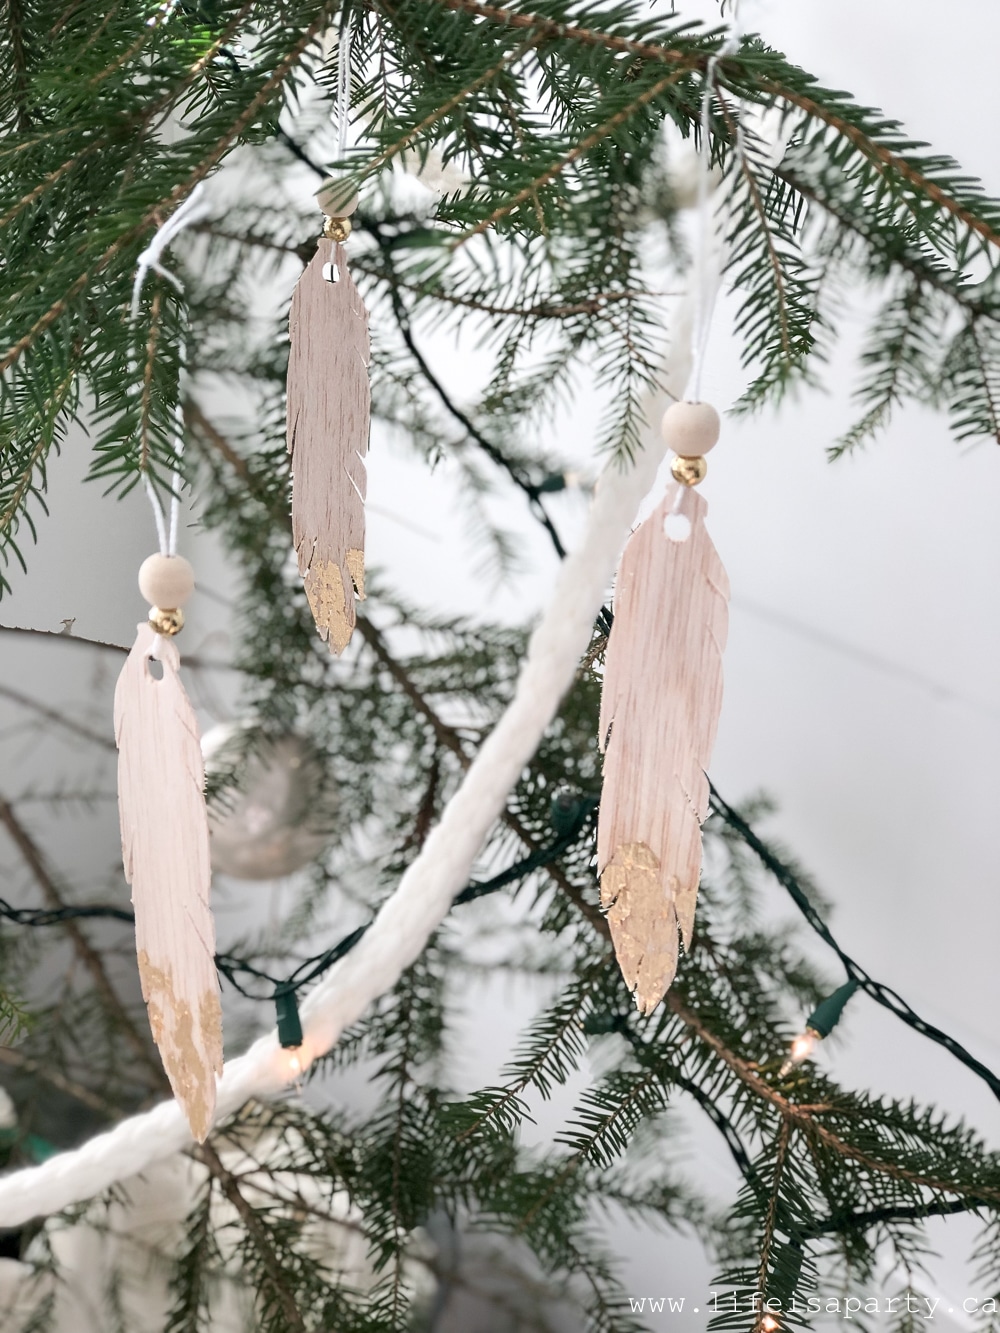 They also look beautiful to decorate a Christmas gift. You could write the recipient's name on with a sharpie marker if you wanted to.
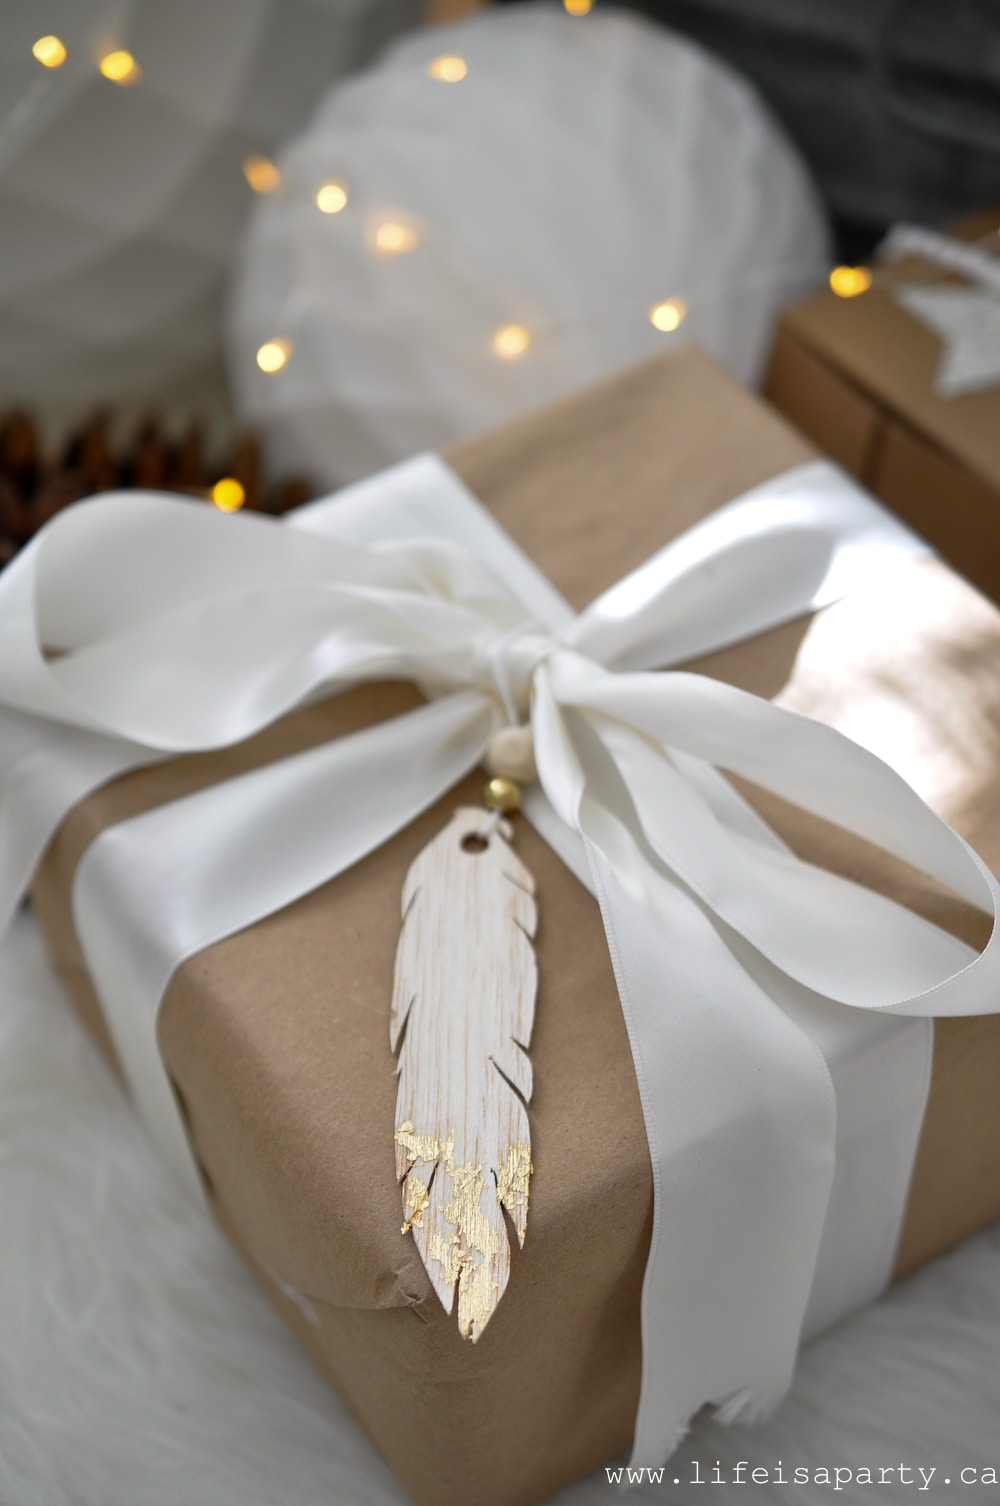
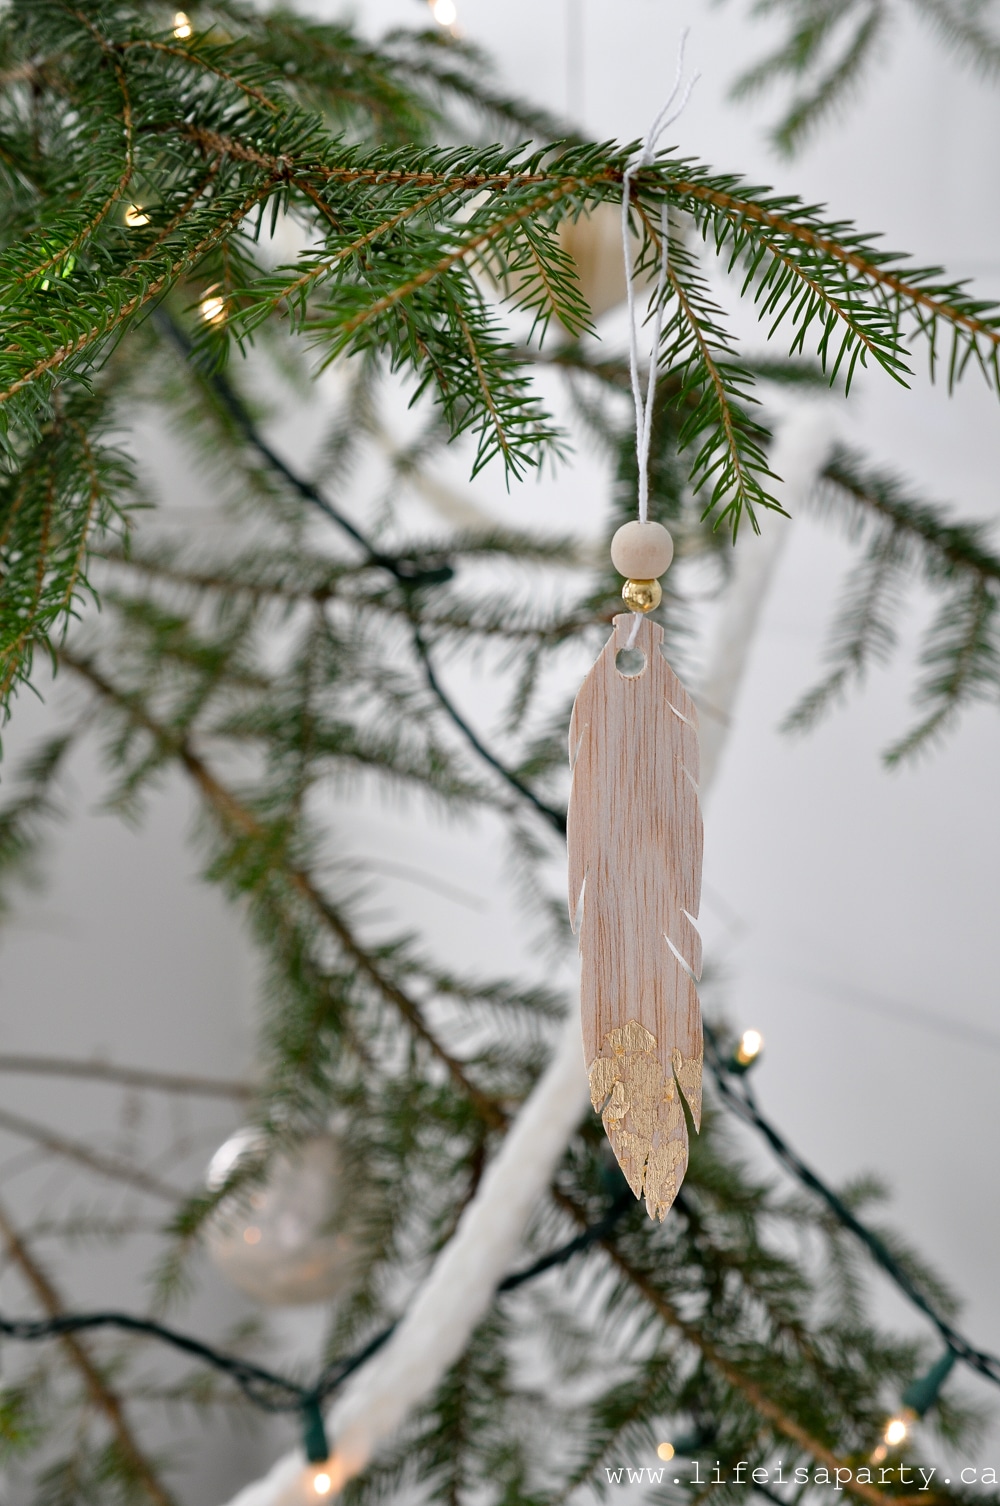 With these pretty wood feather ornaments, life really a party.


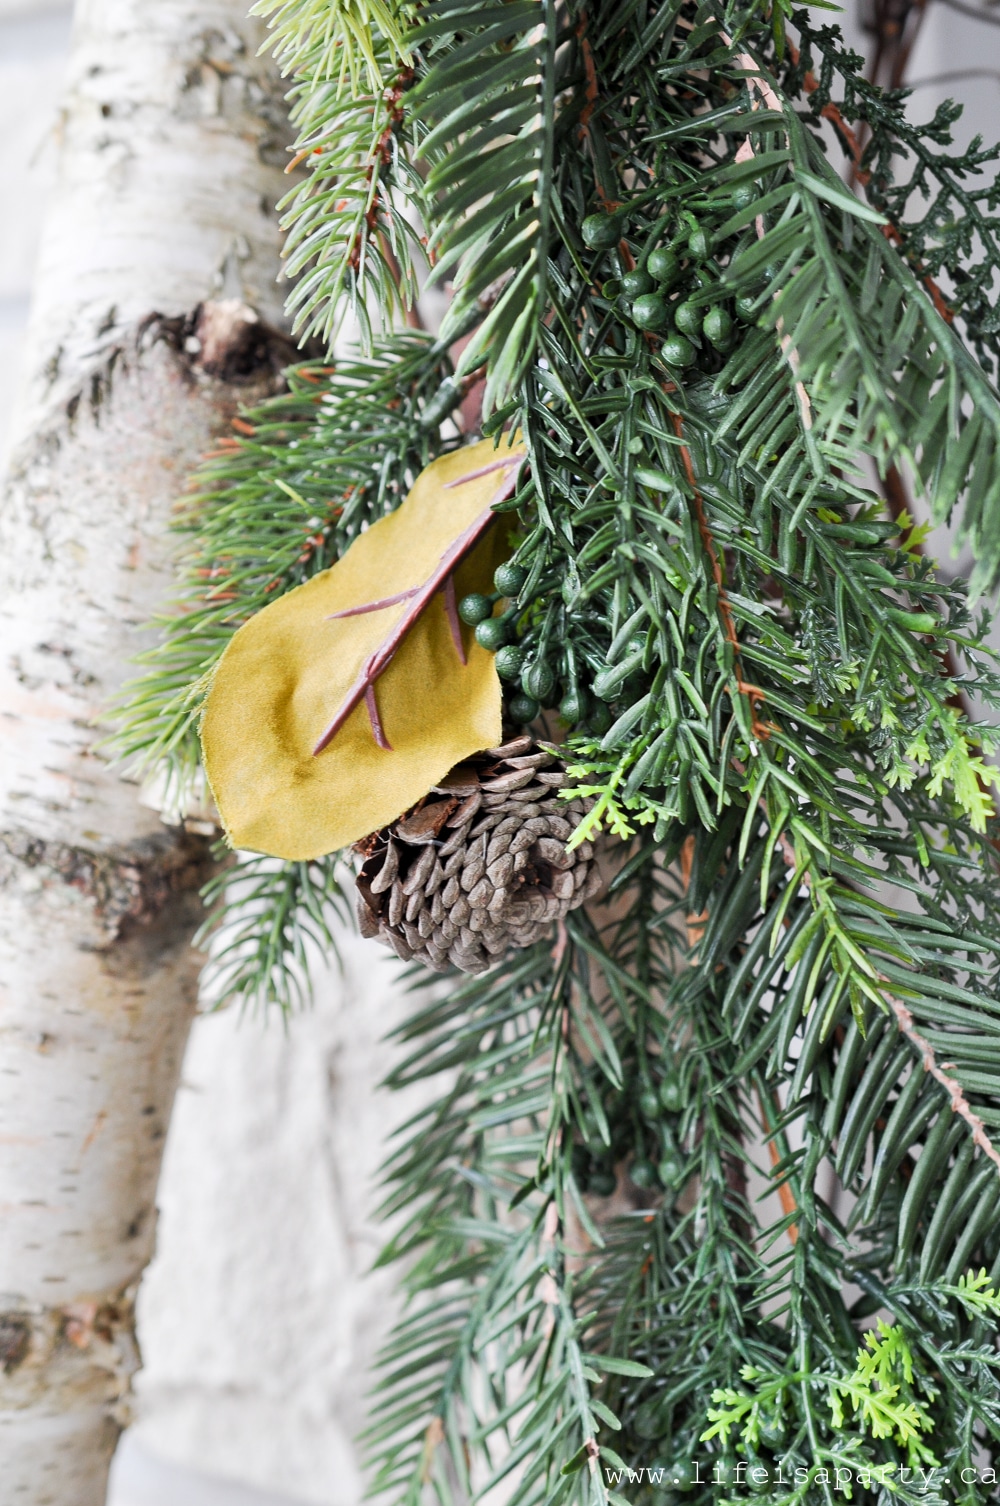
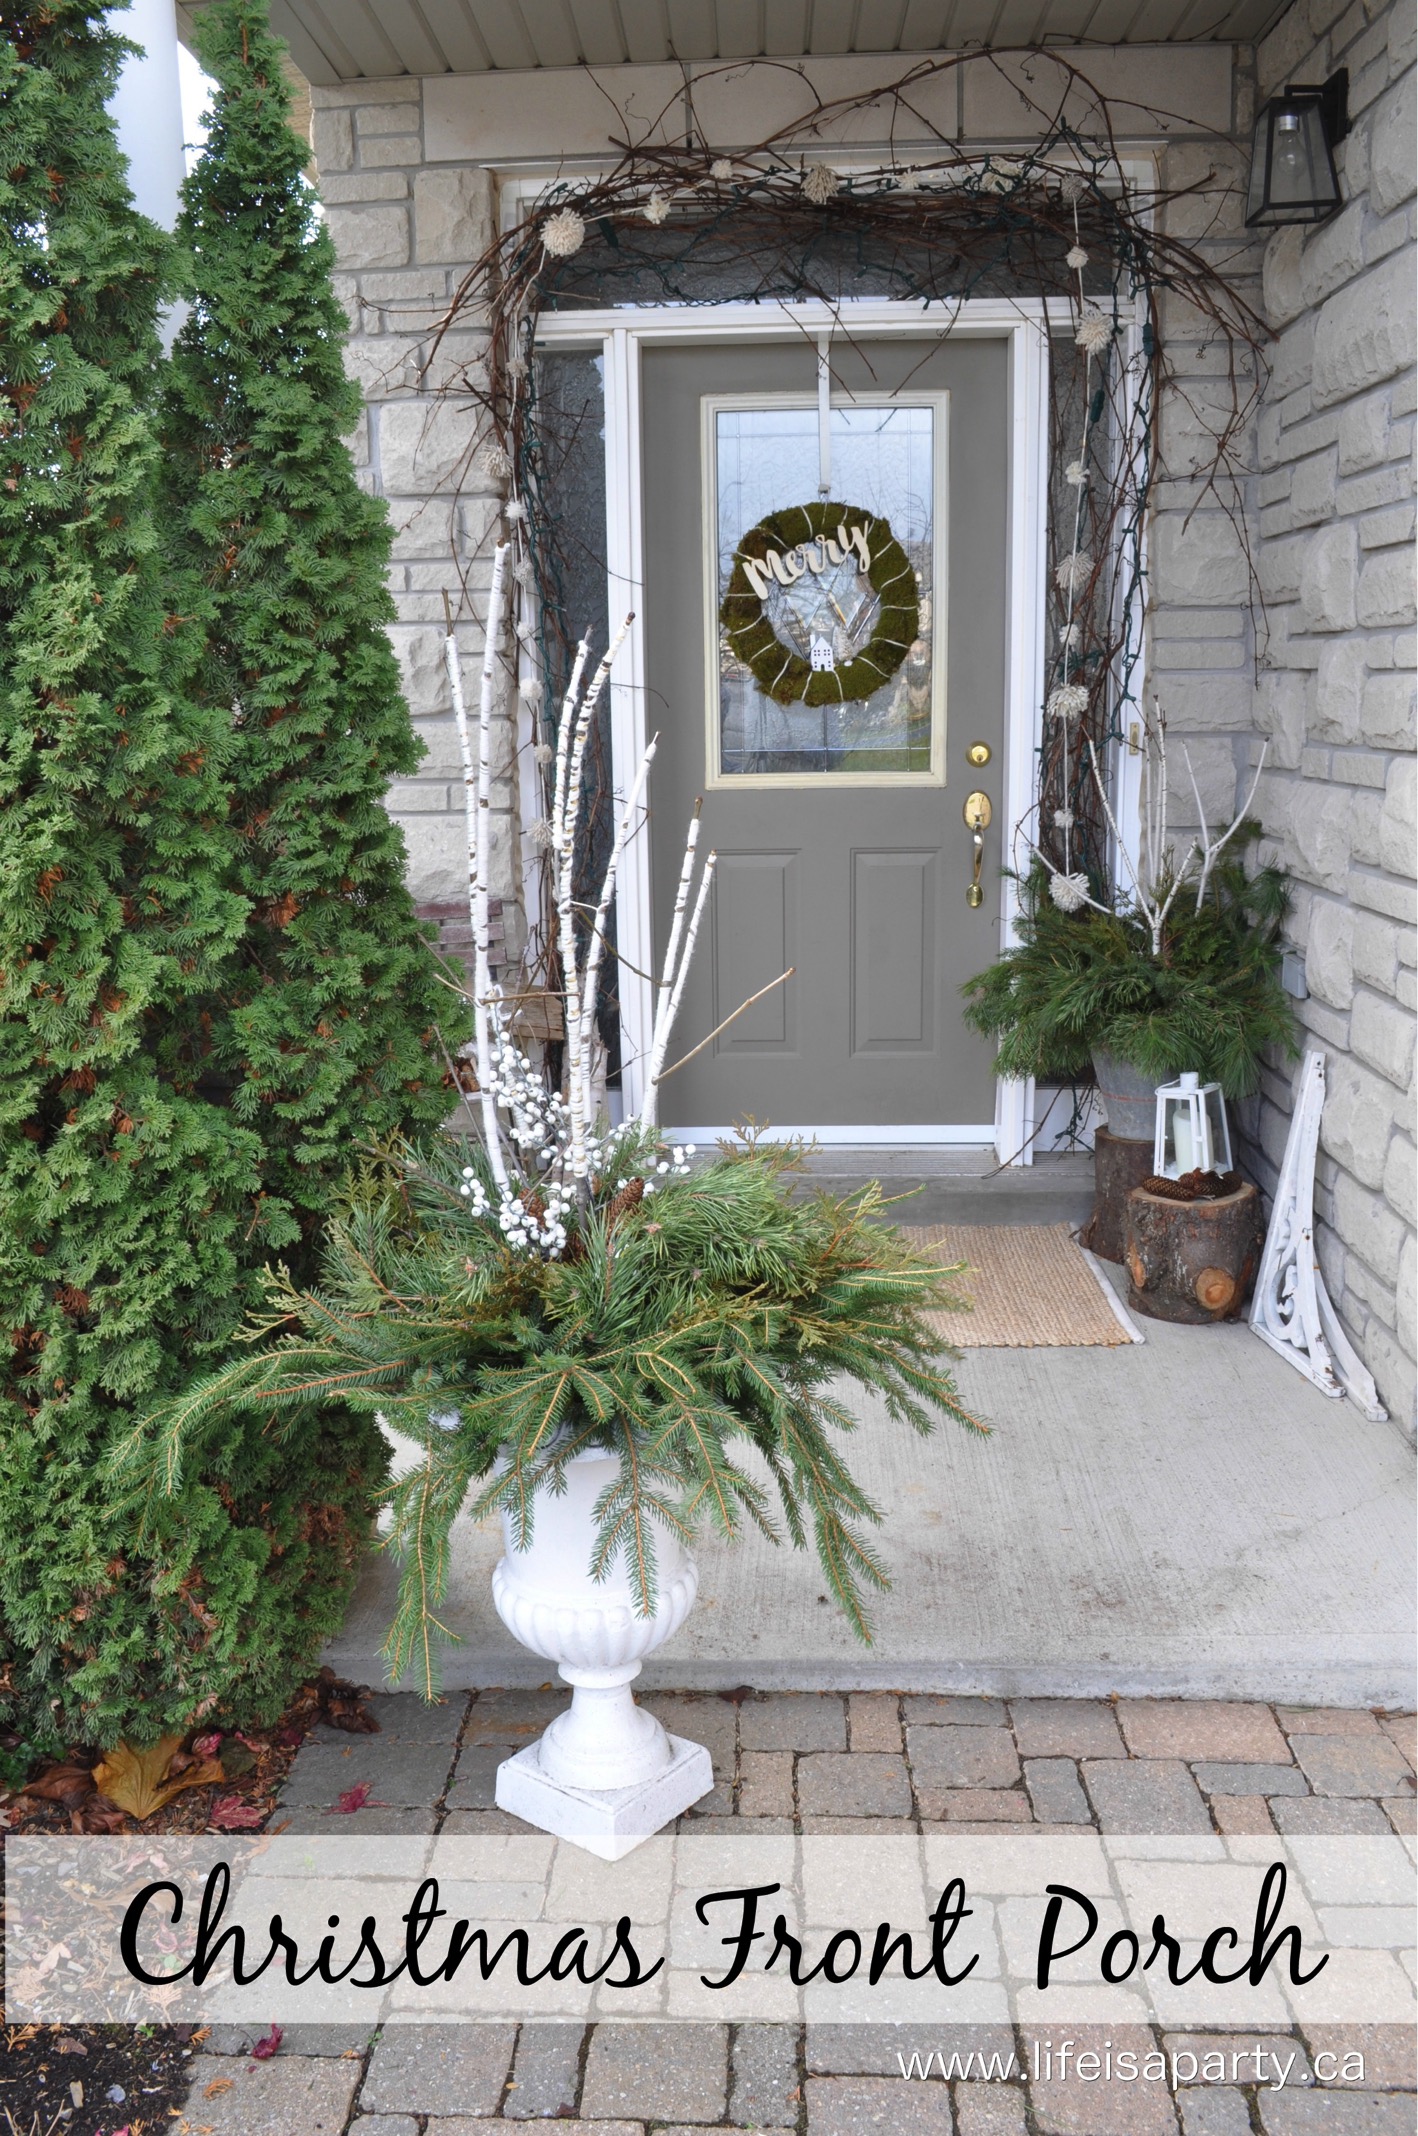
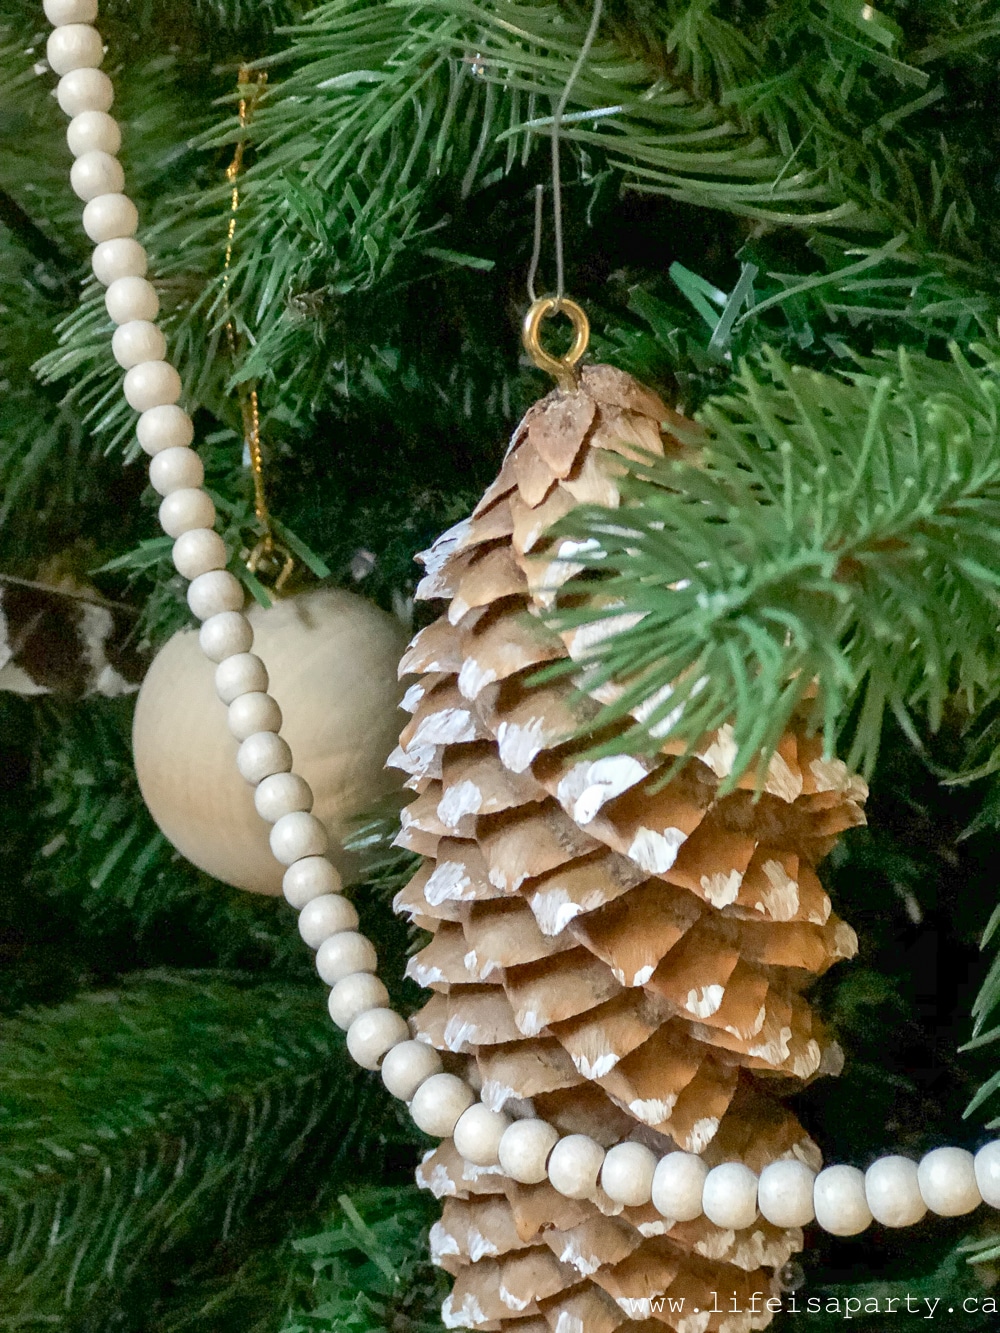
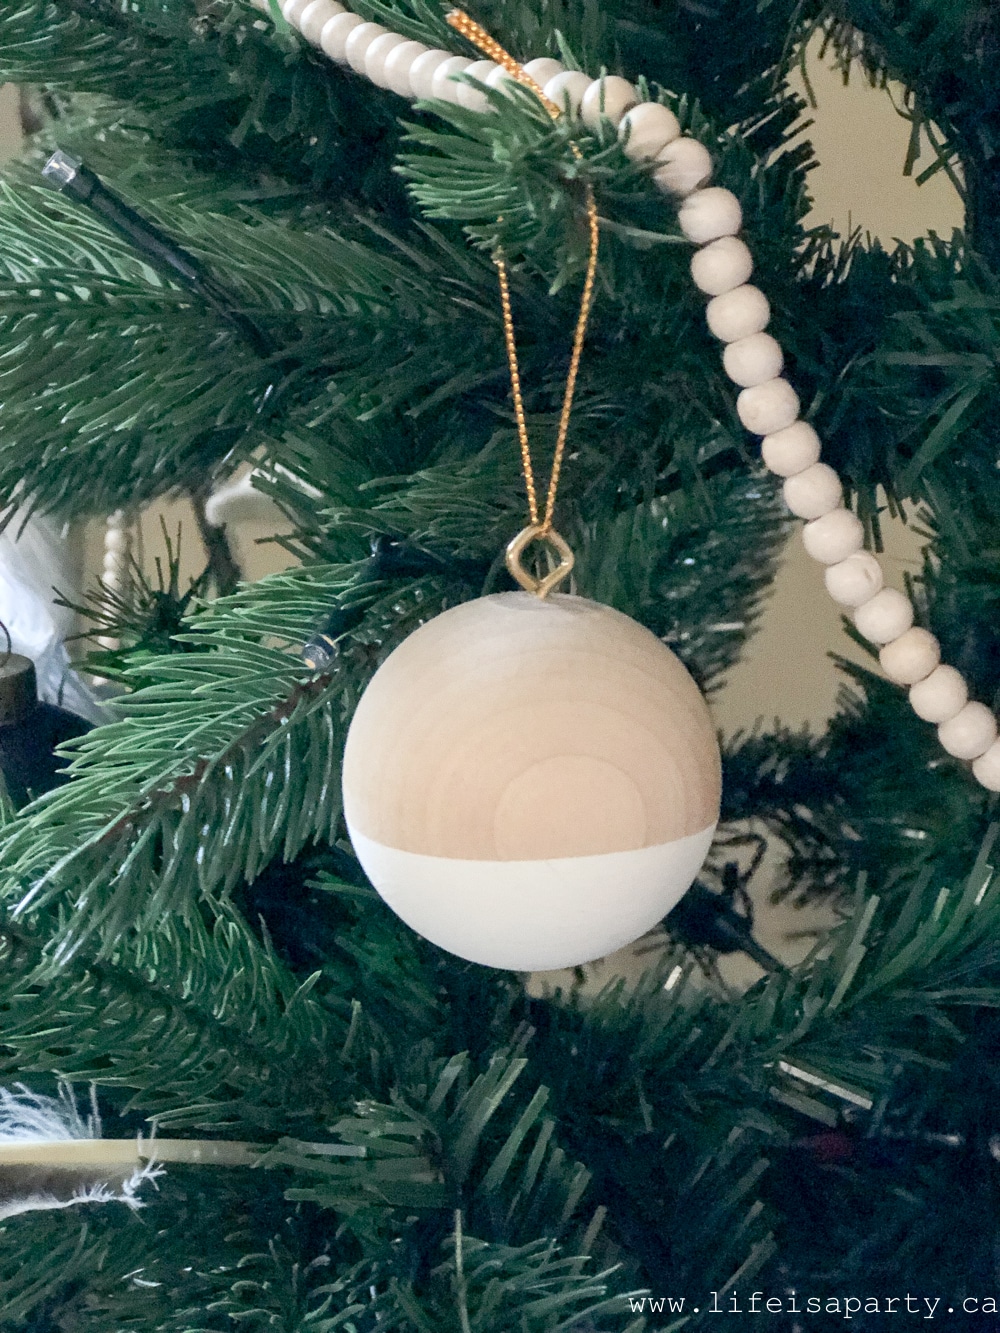
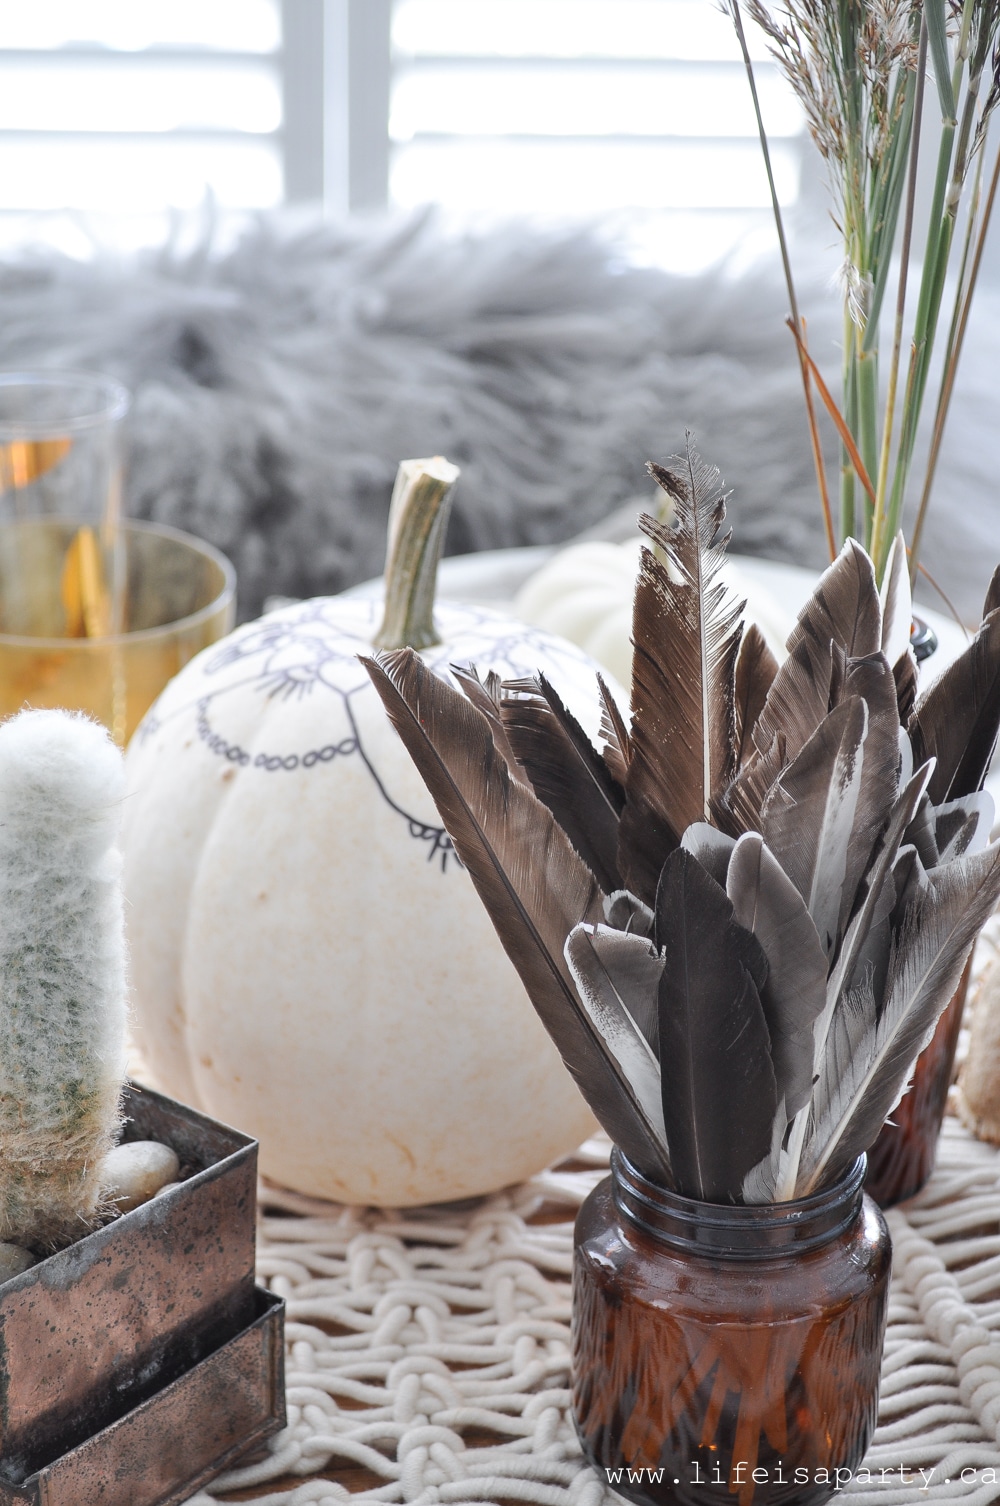
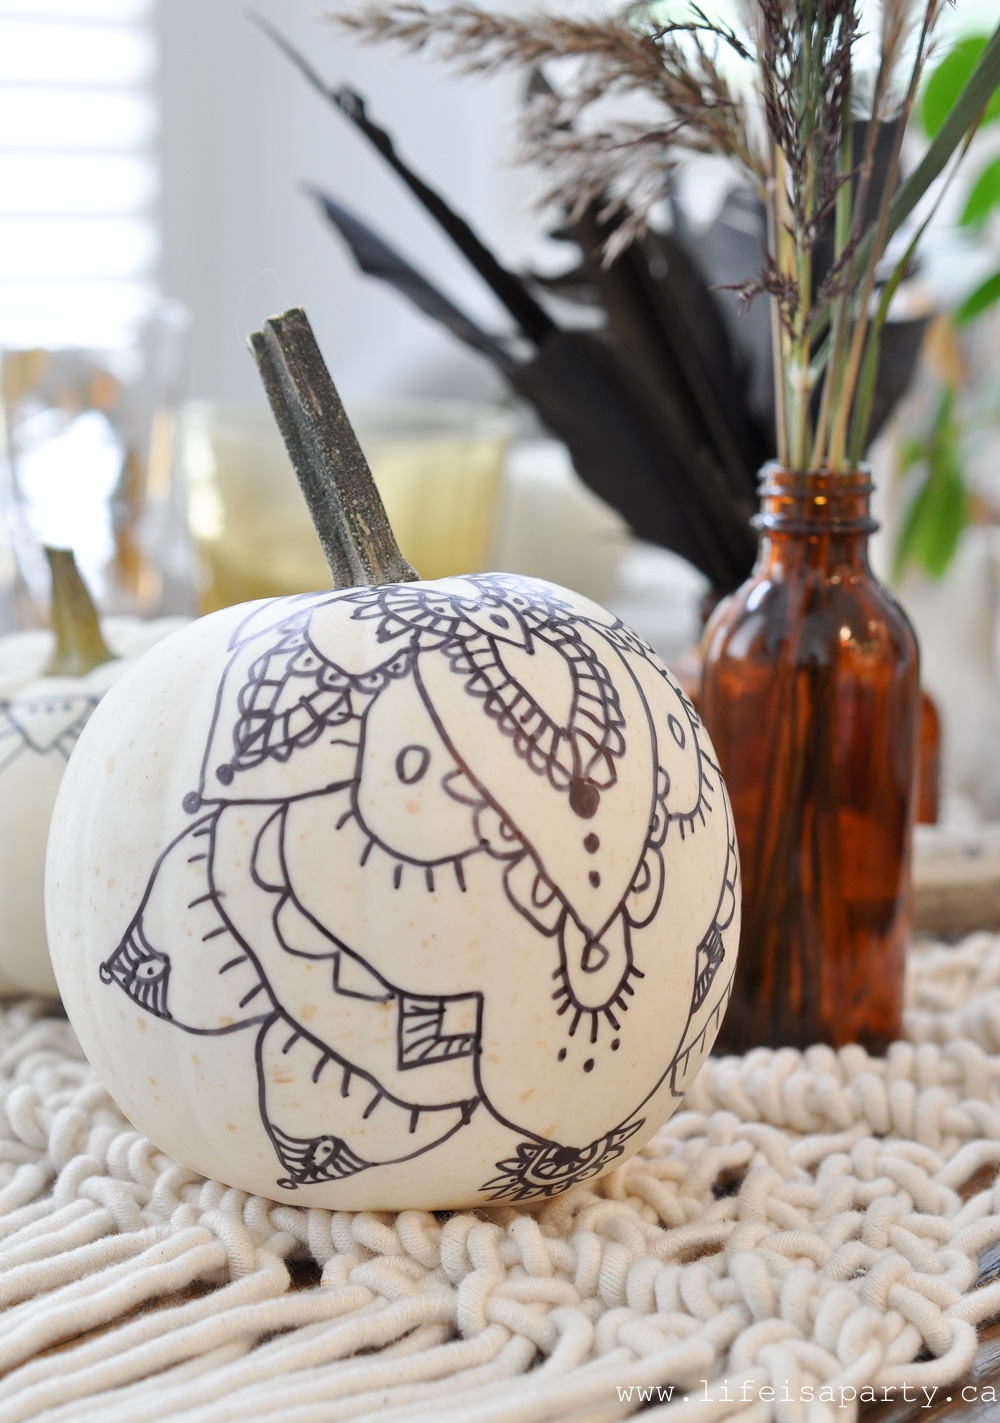
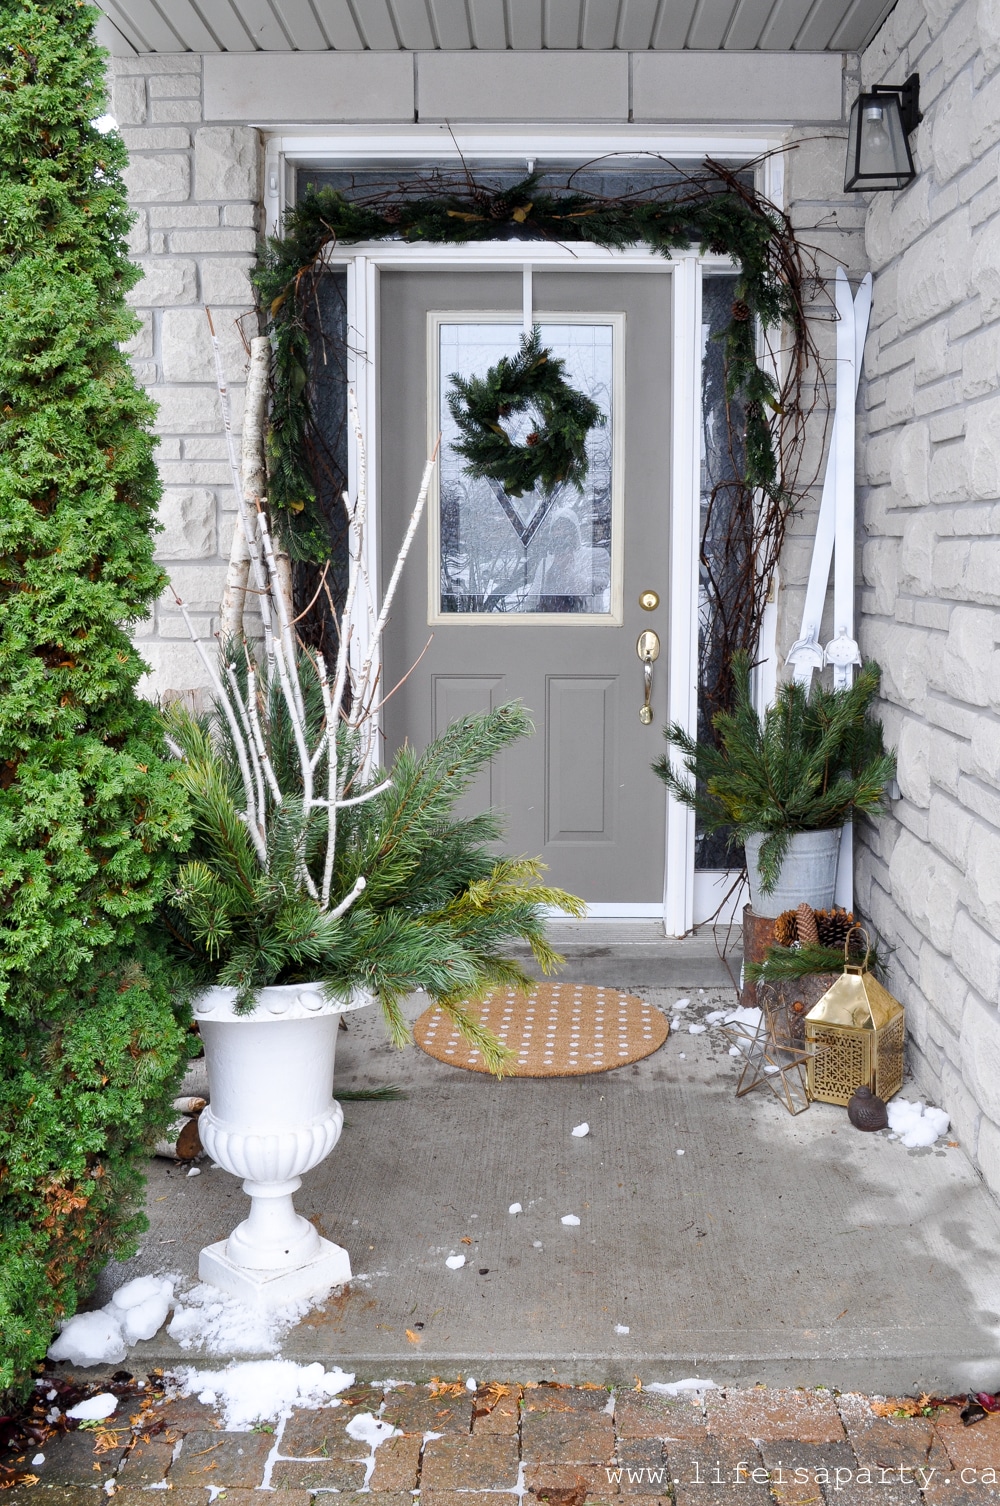 I always feel like the front door is a little taste of what's to come inside. I love rustic Scandinavian style, especially at Christmas. Scandinavian style is all about bringing the outdoors in and decorating with whatever is seasonal. At Christmas that means lots of things like birch, pinecones, and fresh greens.
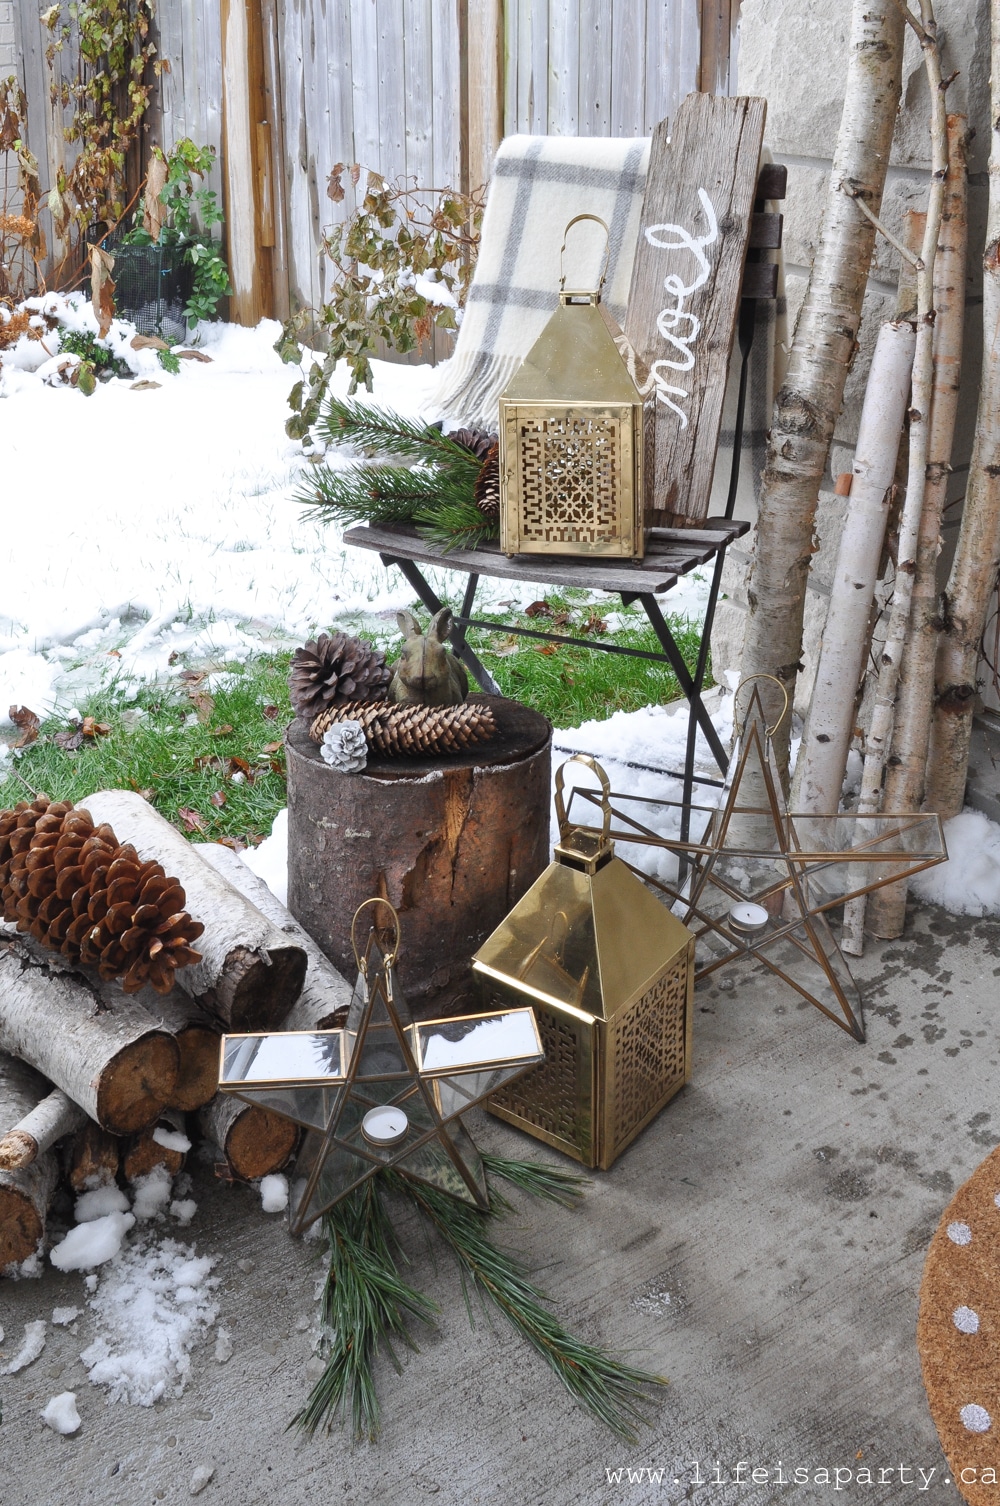 I've added some pretty brass lanterns this year too. I especially love the stars for Christmas.
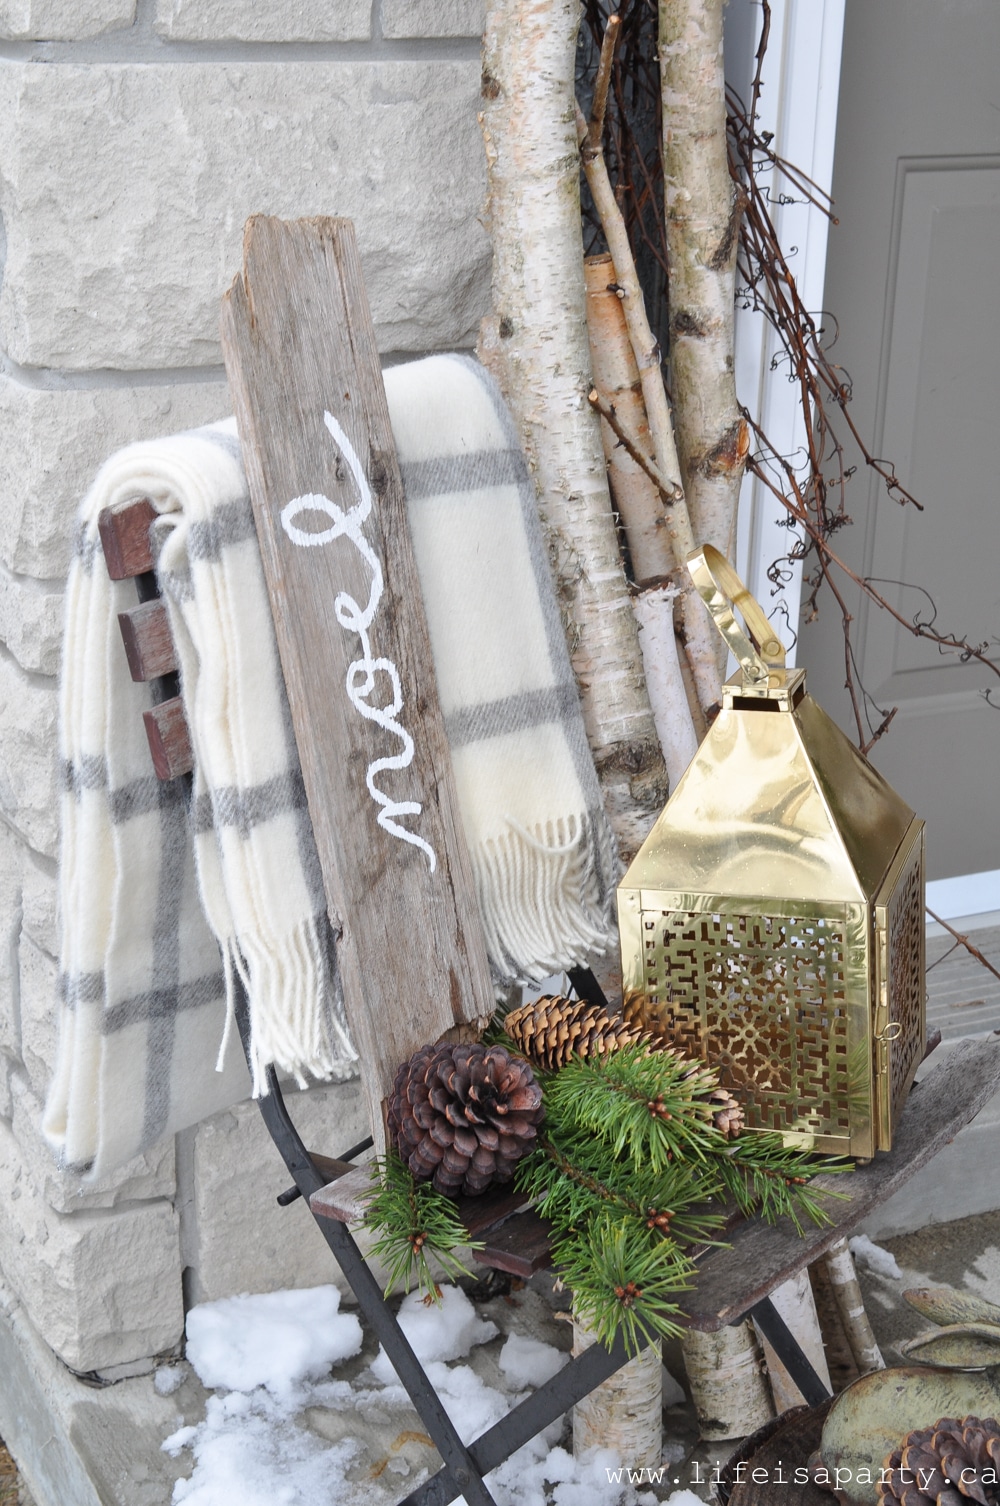 Over on the other side a fun little DIY. I couldn't find any beautiful antique skis at a decent price so, I took some old ones from a thrift store and spray painted them white for a nice neutral look to fit in with my decor.
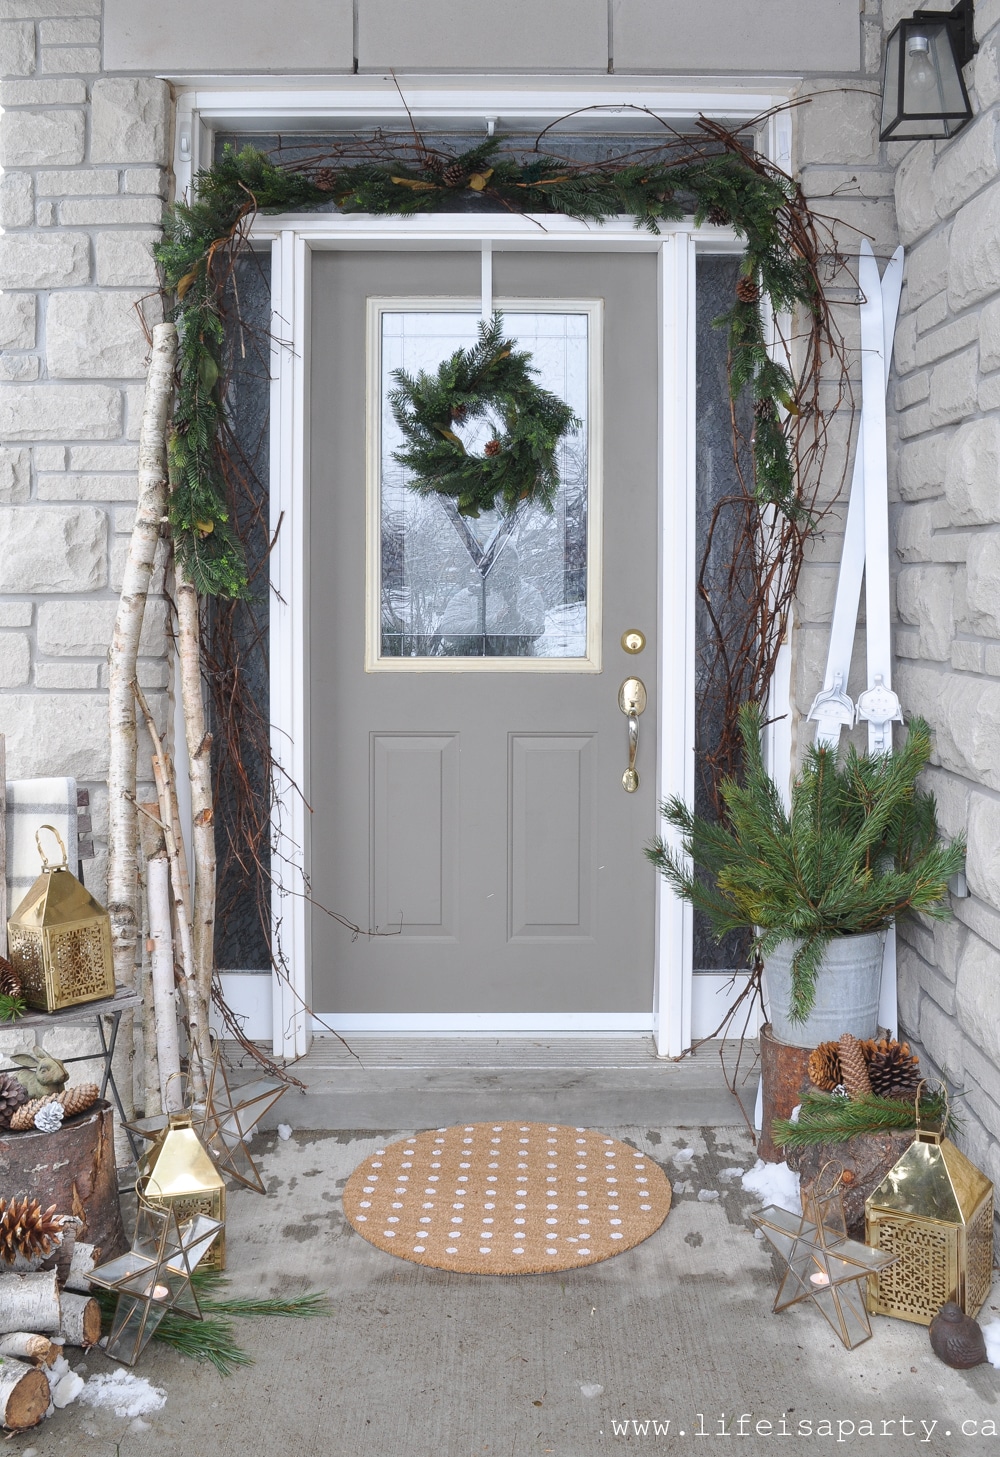 You can
  We just finished re-doing our
 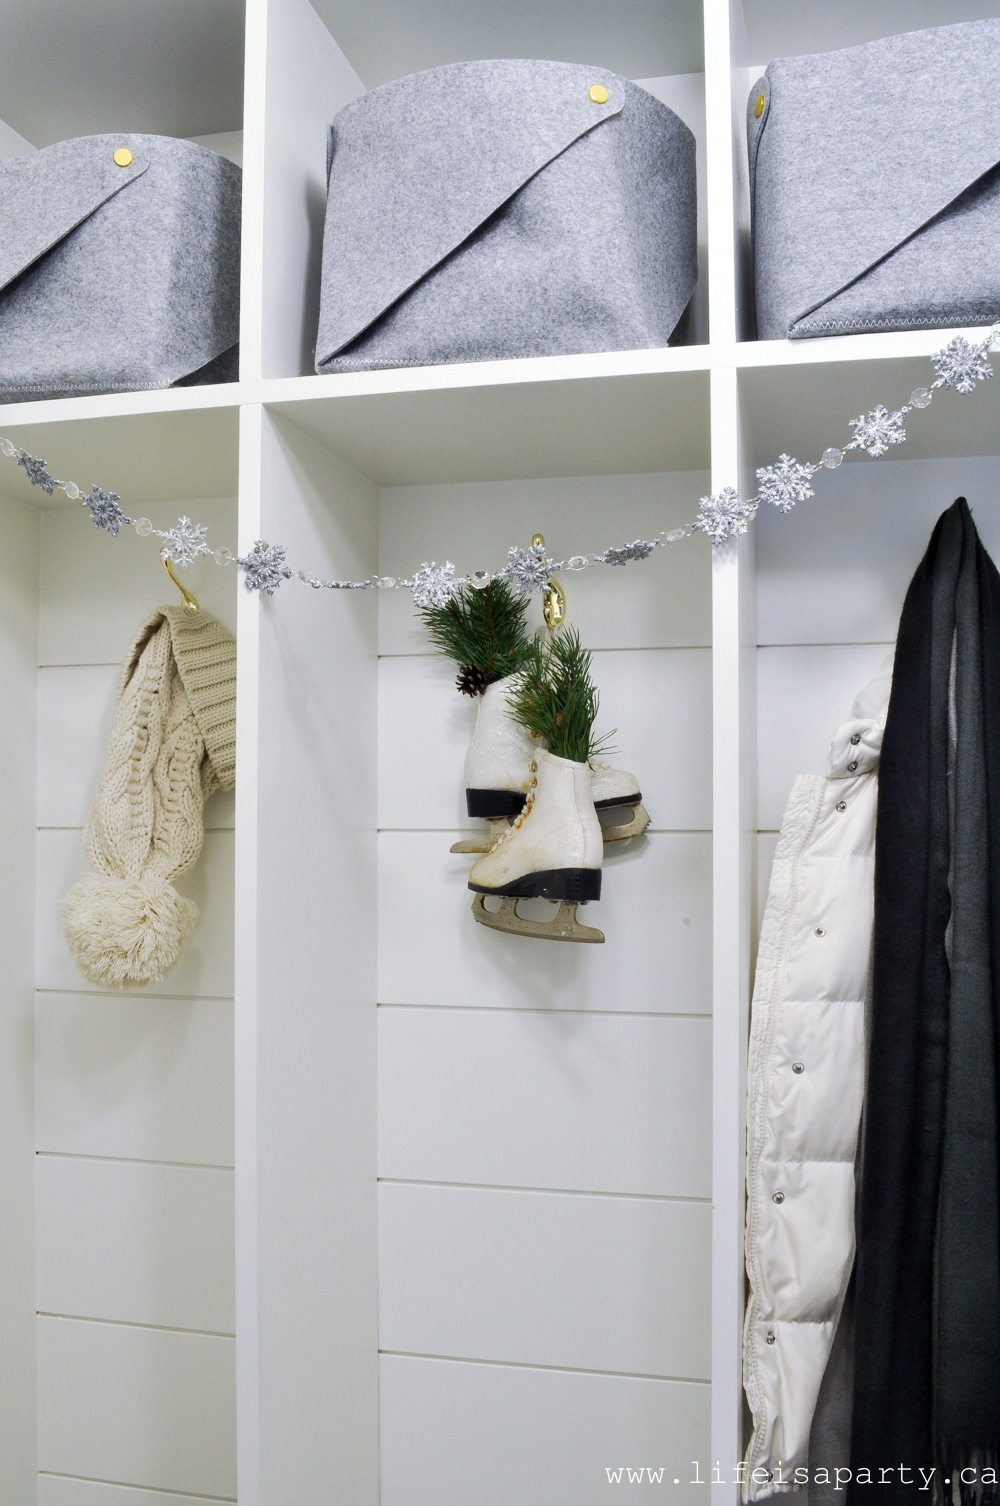 And over on the other wall a little festive art that can stay up all winter, hung with a vintage clothes hanger.
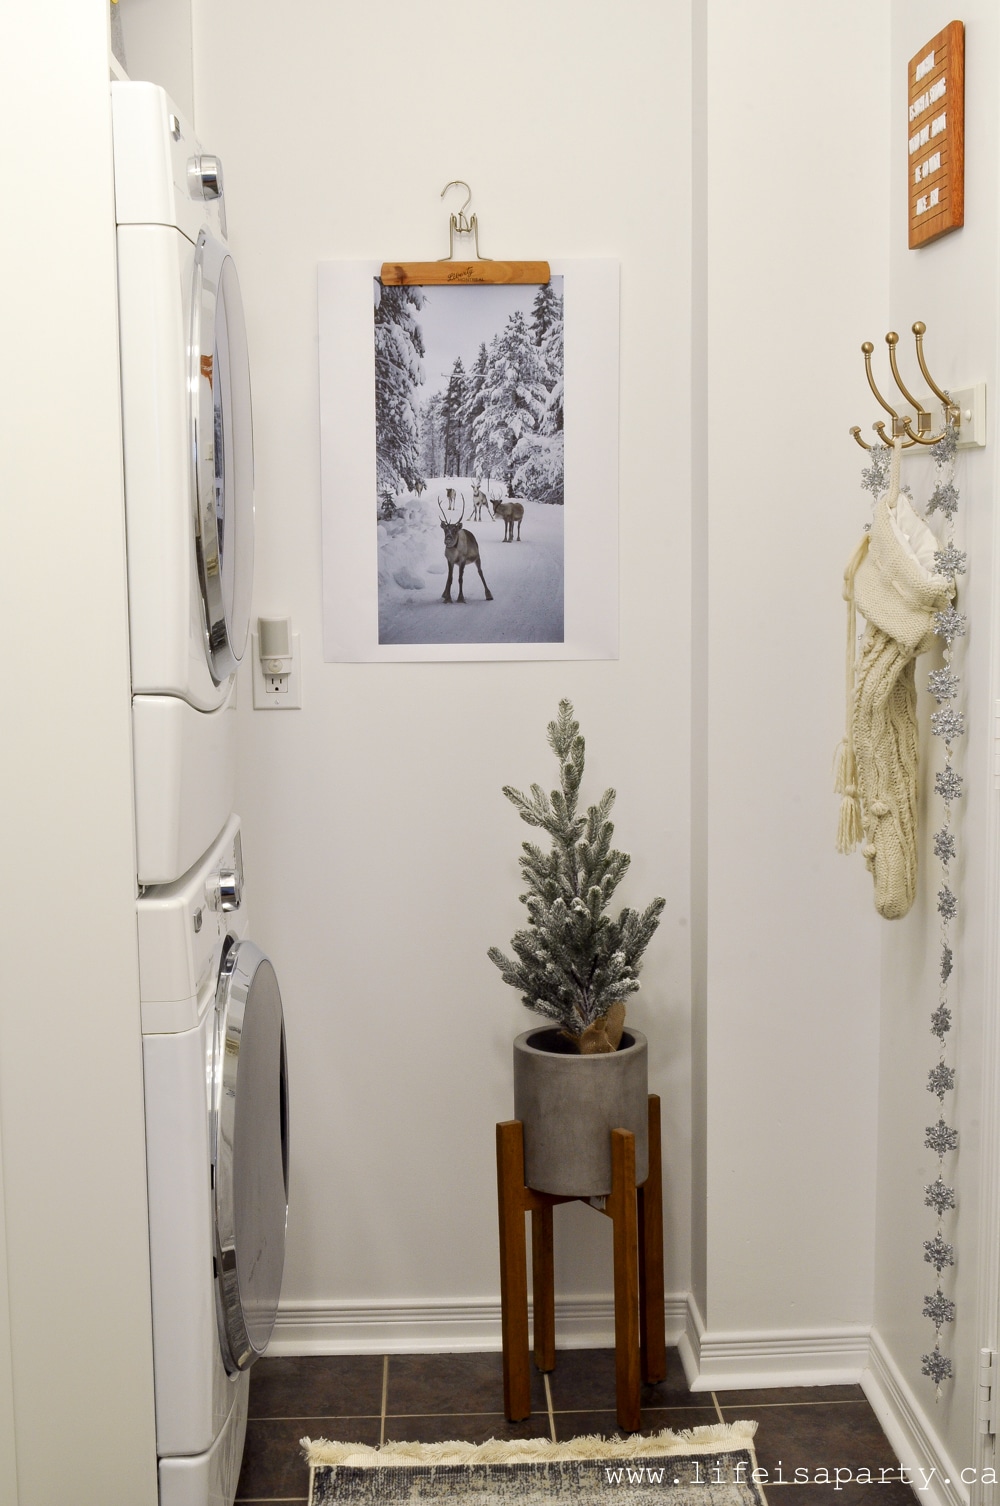
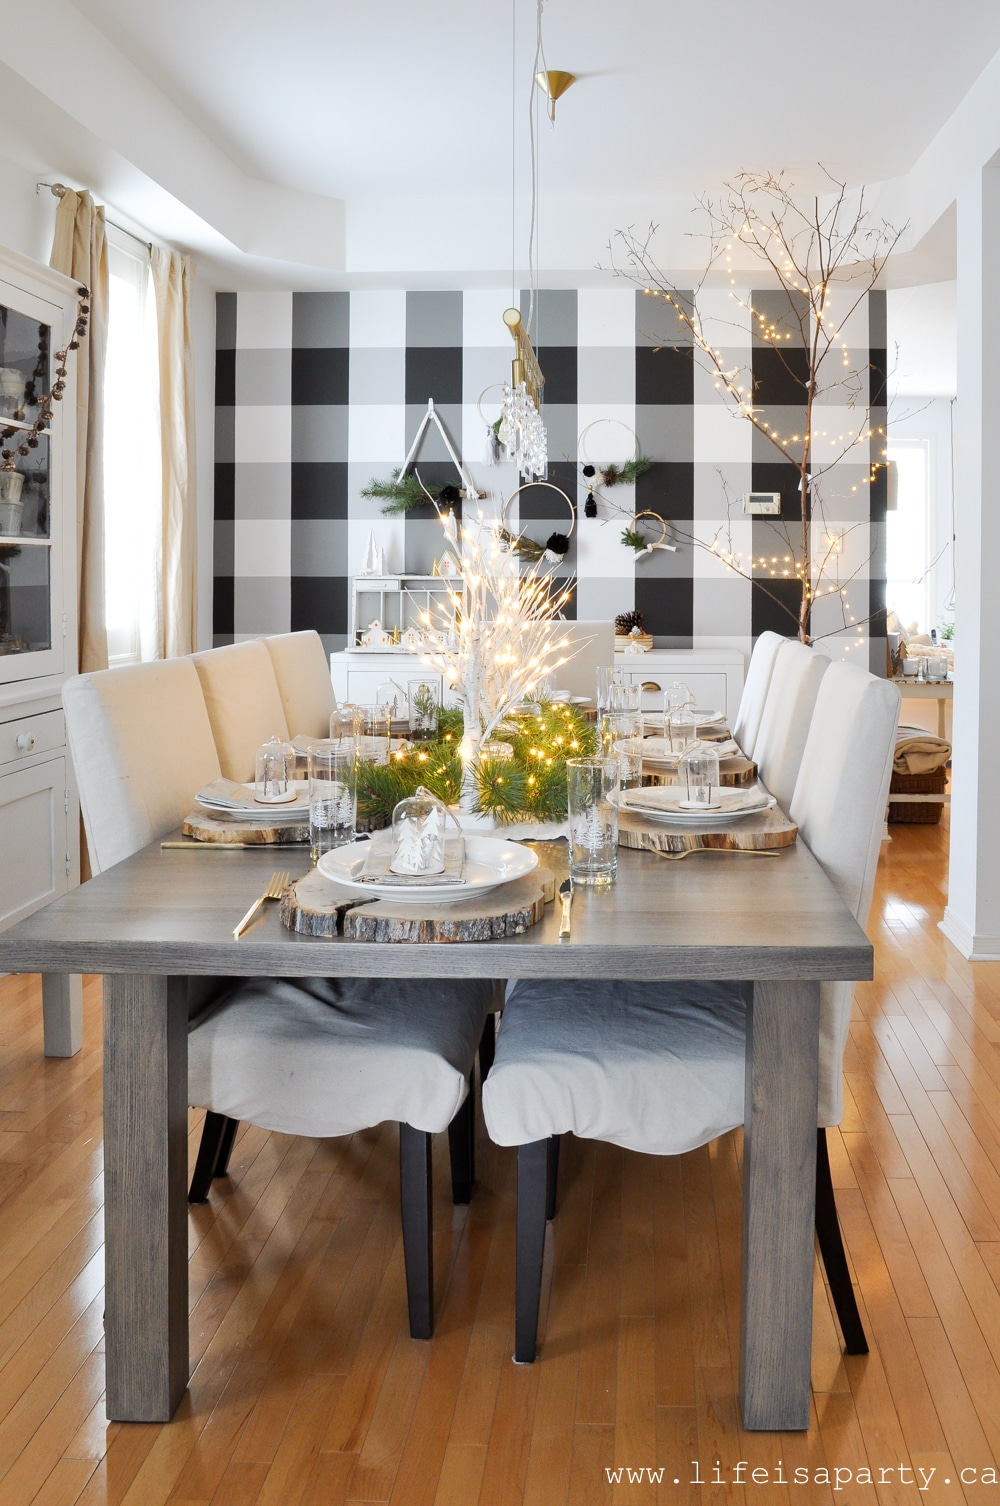
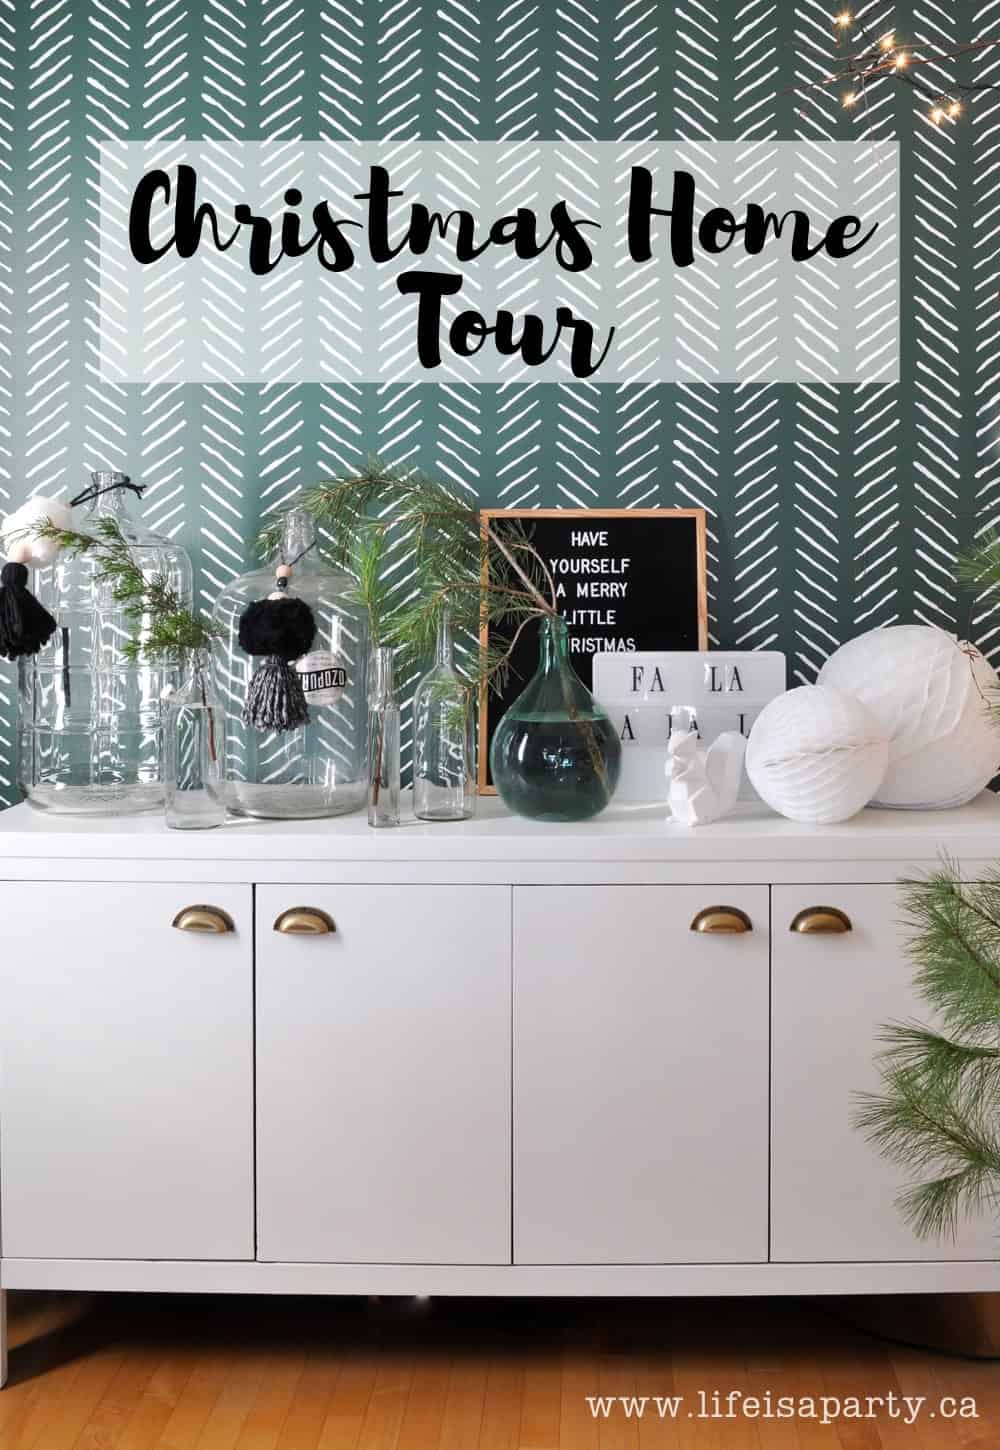
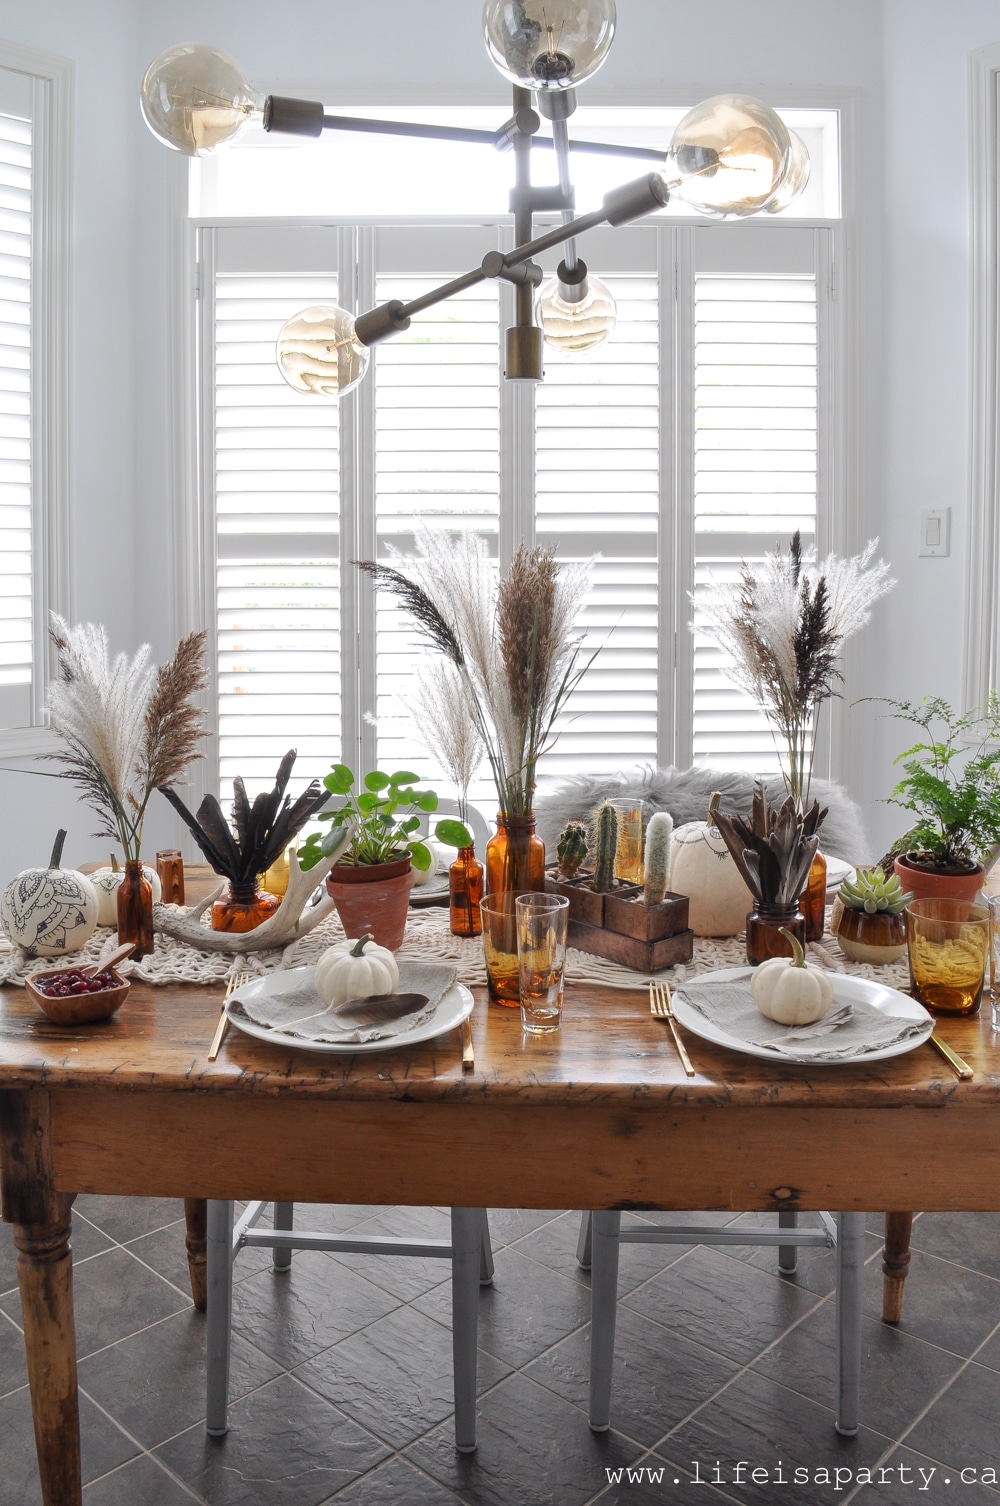
 The mudroom opens into our dining room.
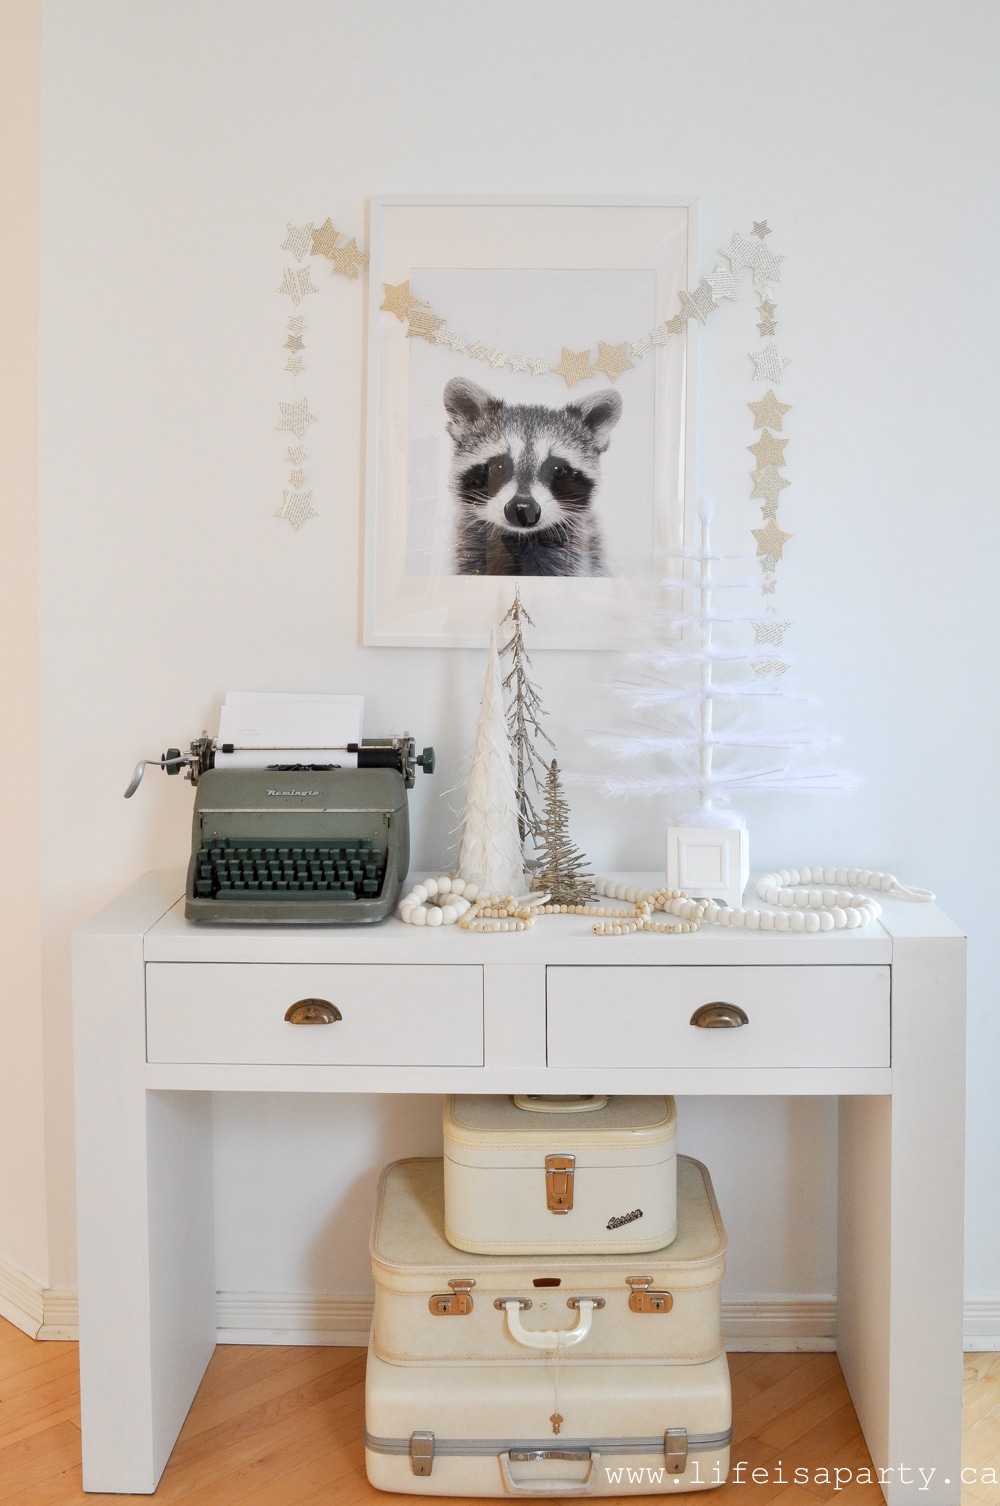 I kept the console table really simple with a little grouping of trees and some garlands. I wanted the main floor to feel really cozy this year, so I went with lots of whites, neutrals and texture.
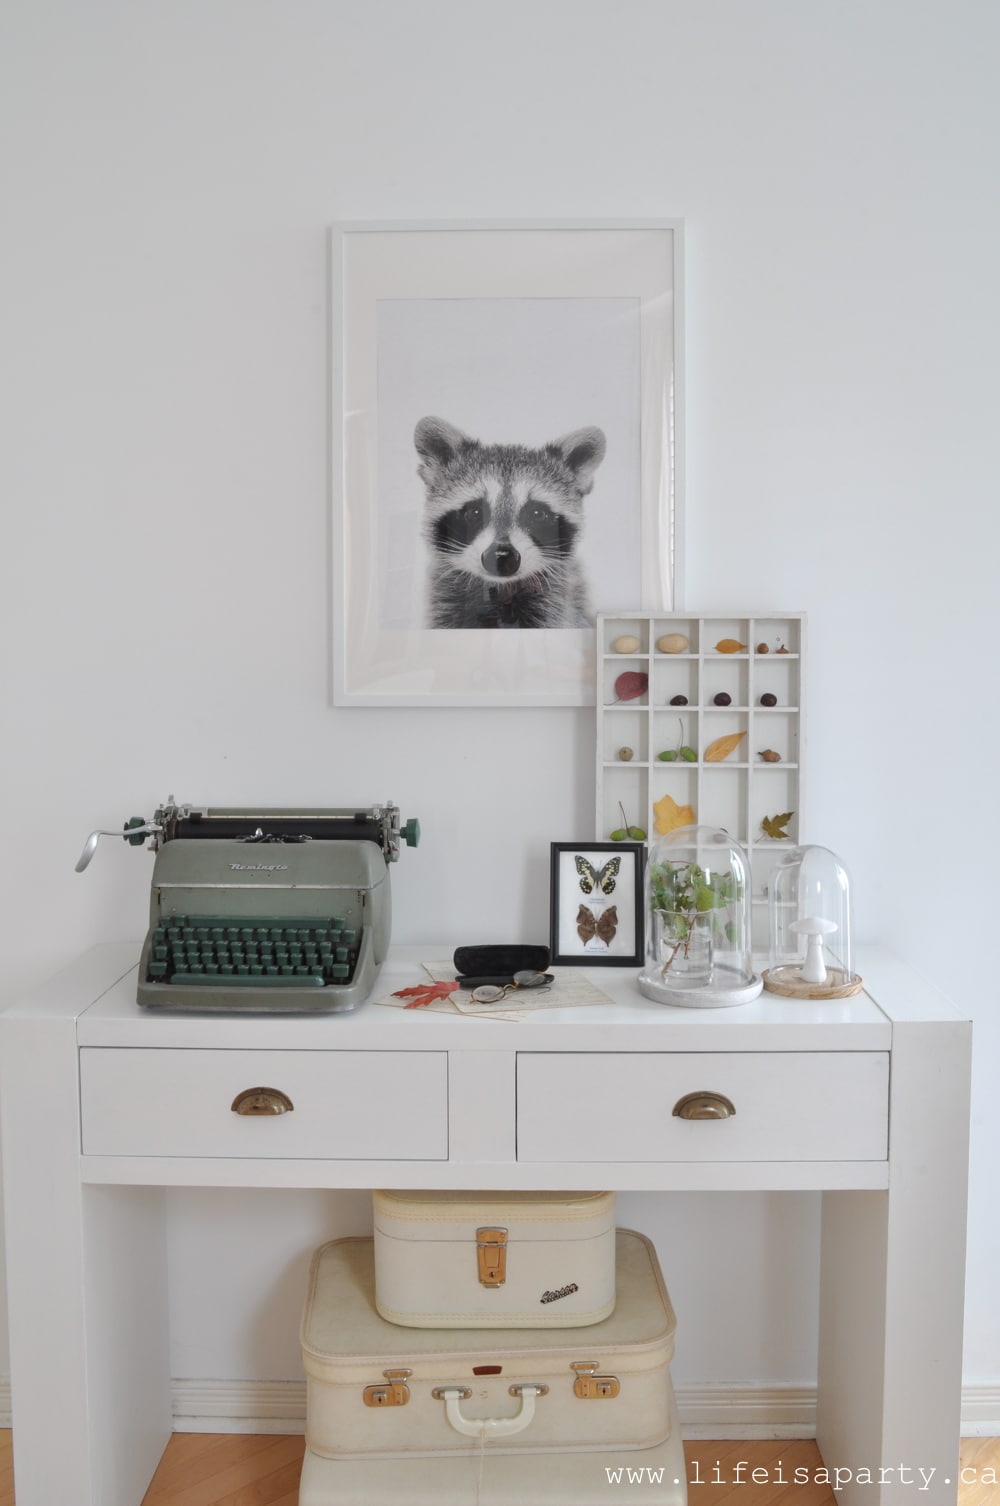
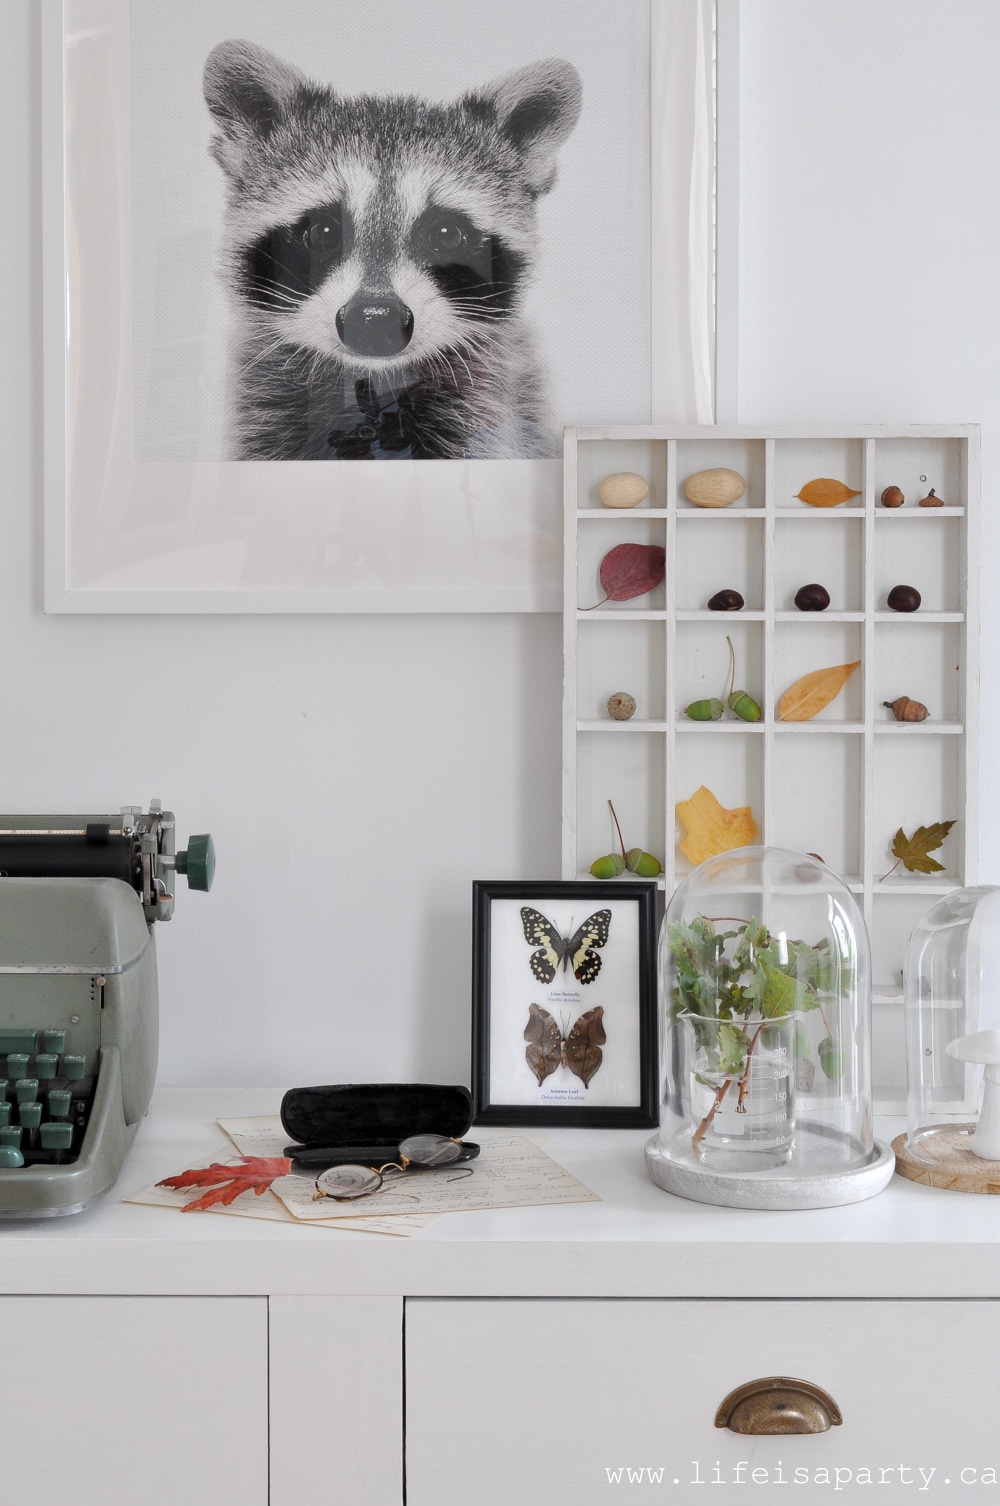
 The vintage typewriter is an old favourite.
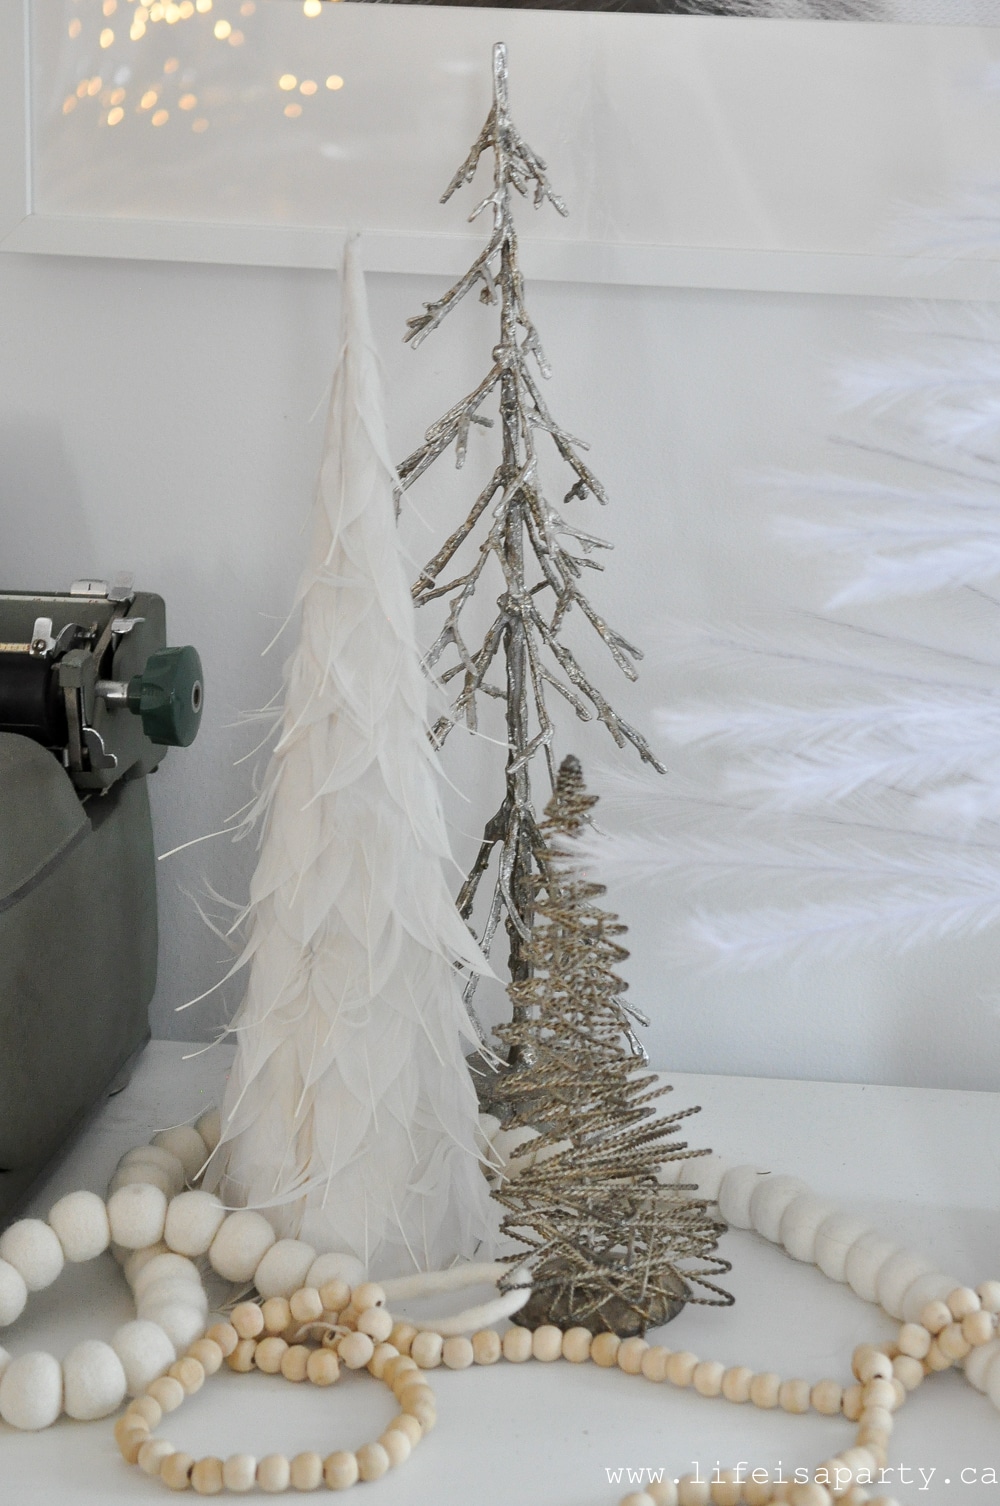 The rest of the room was inspired in part this year by these fun light up birch trees.
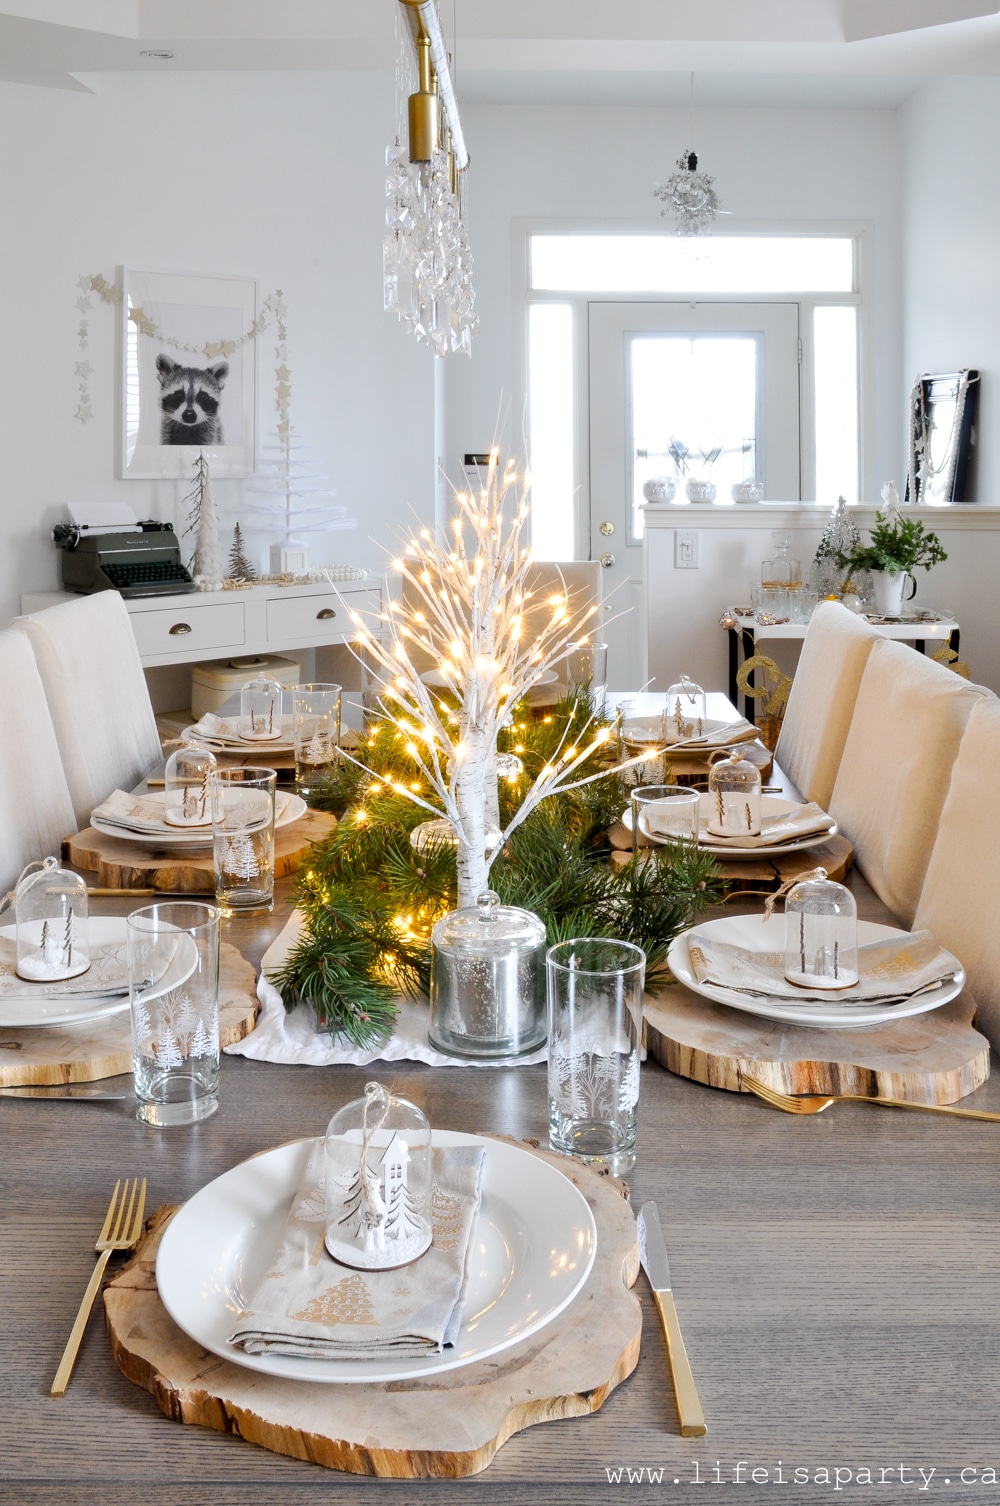 Scandinavian Christmas Table
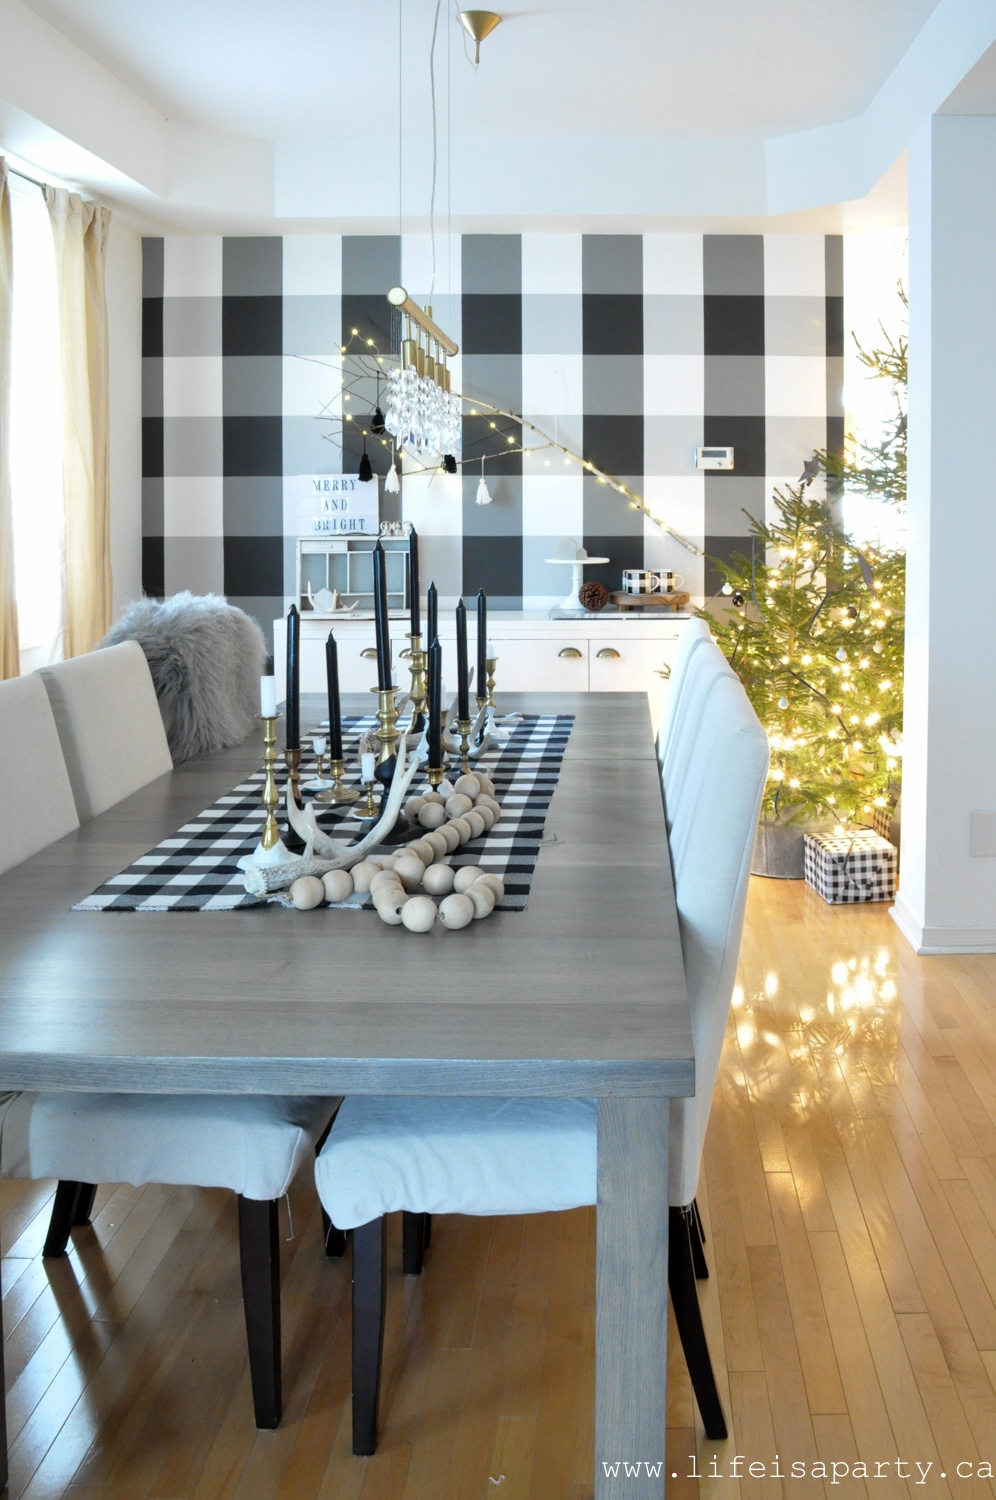
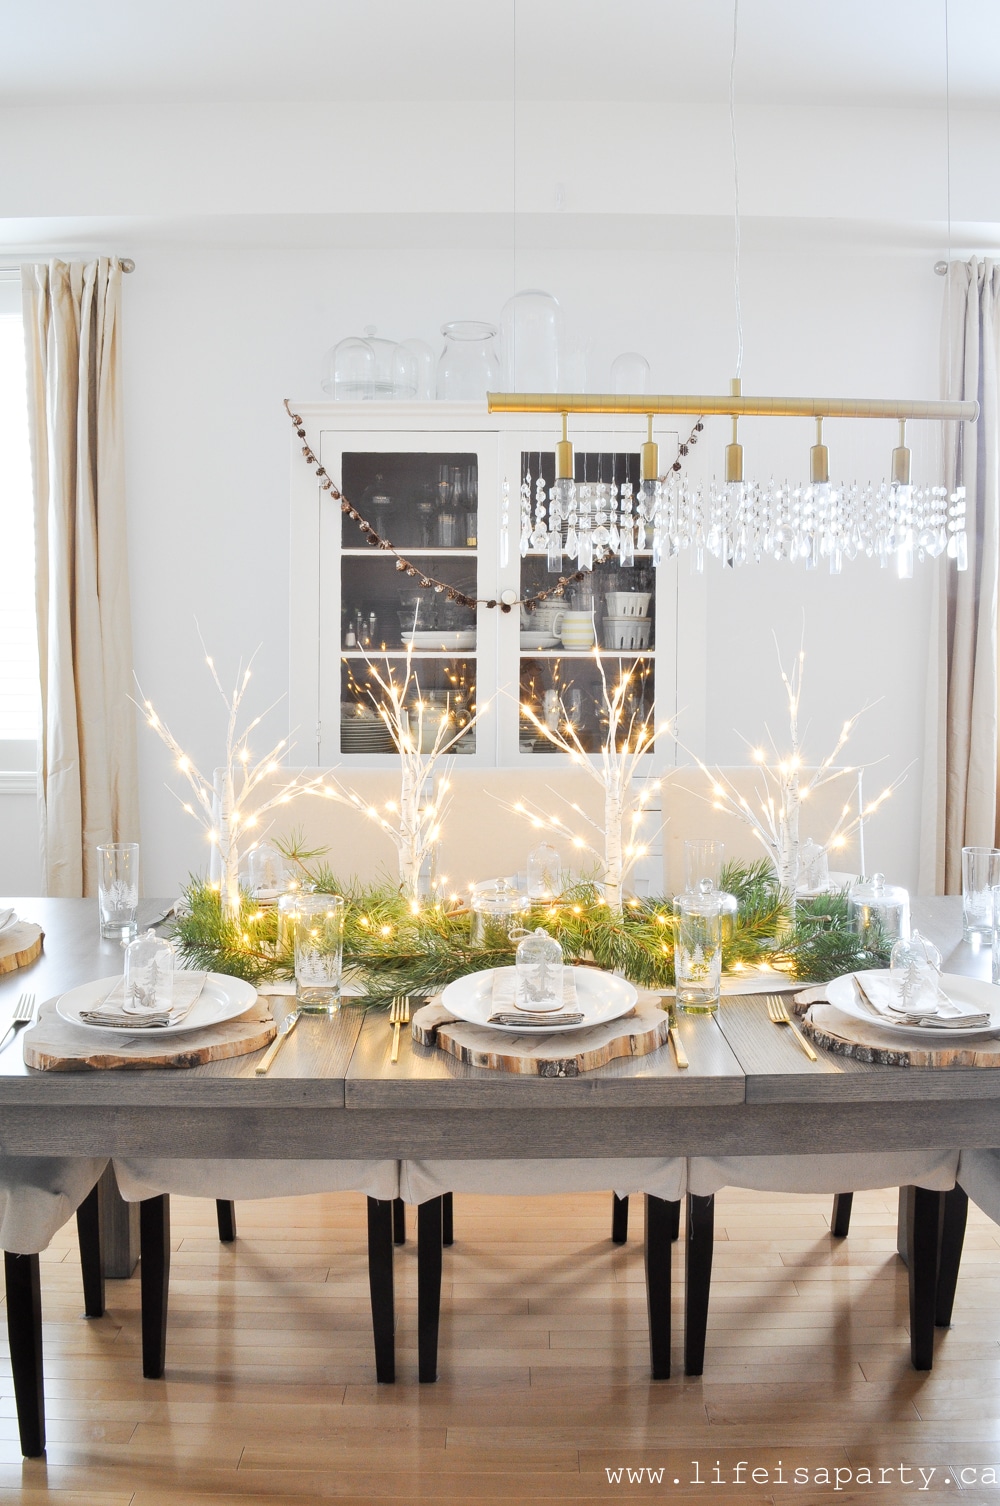
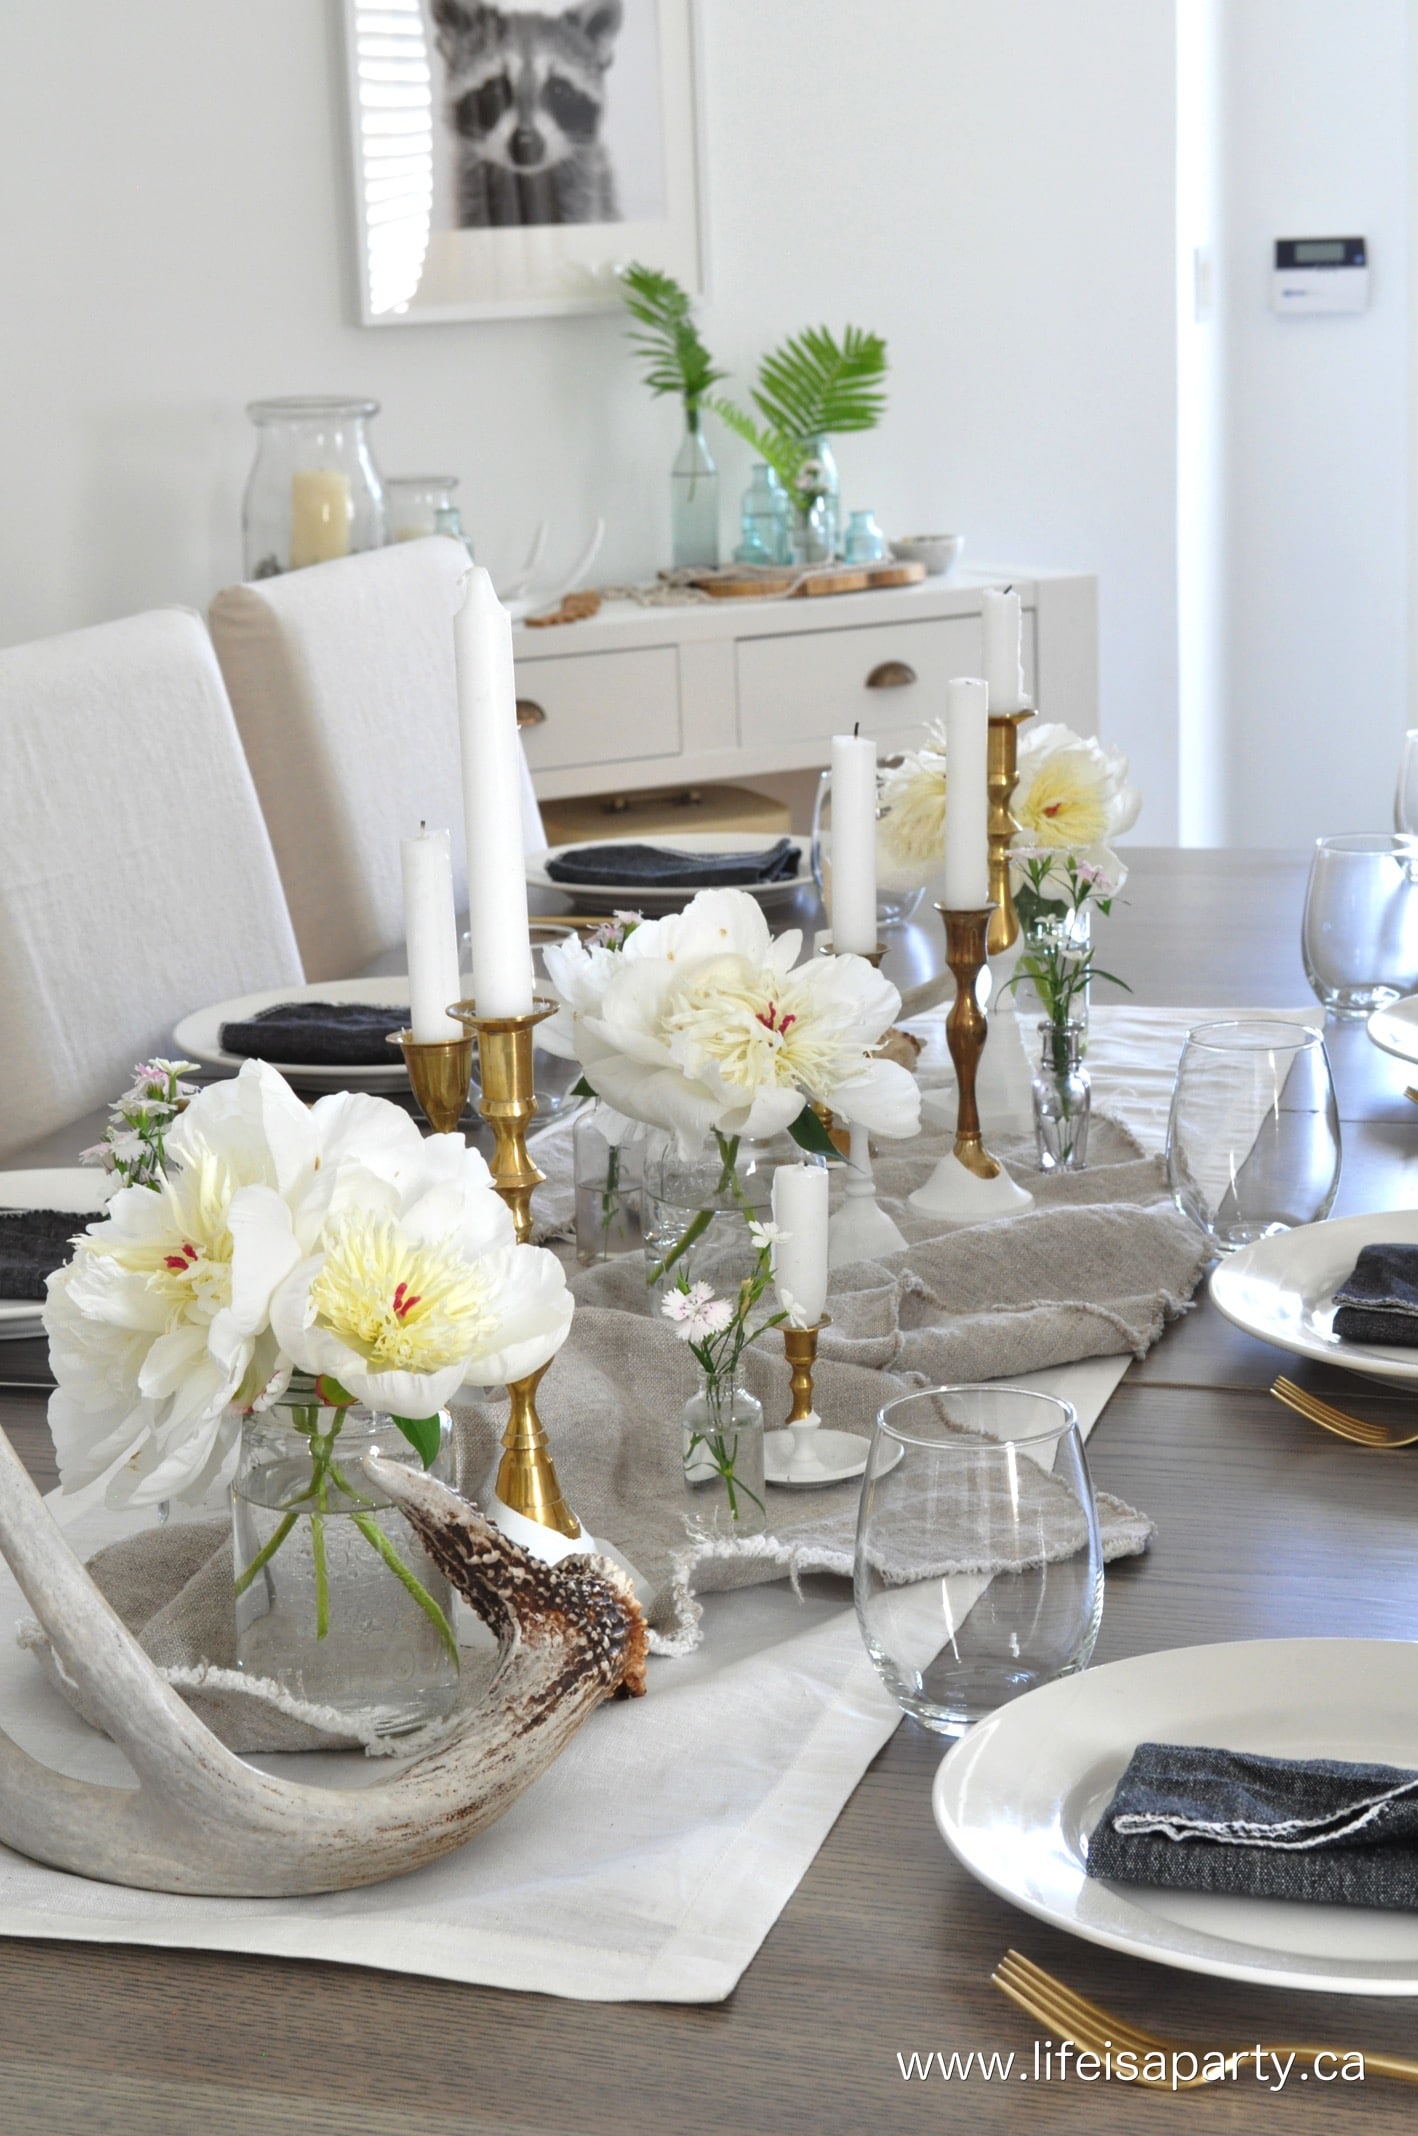
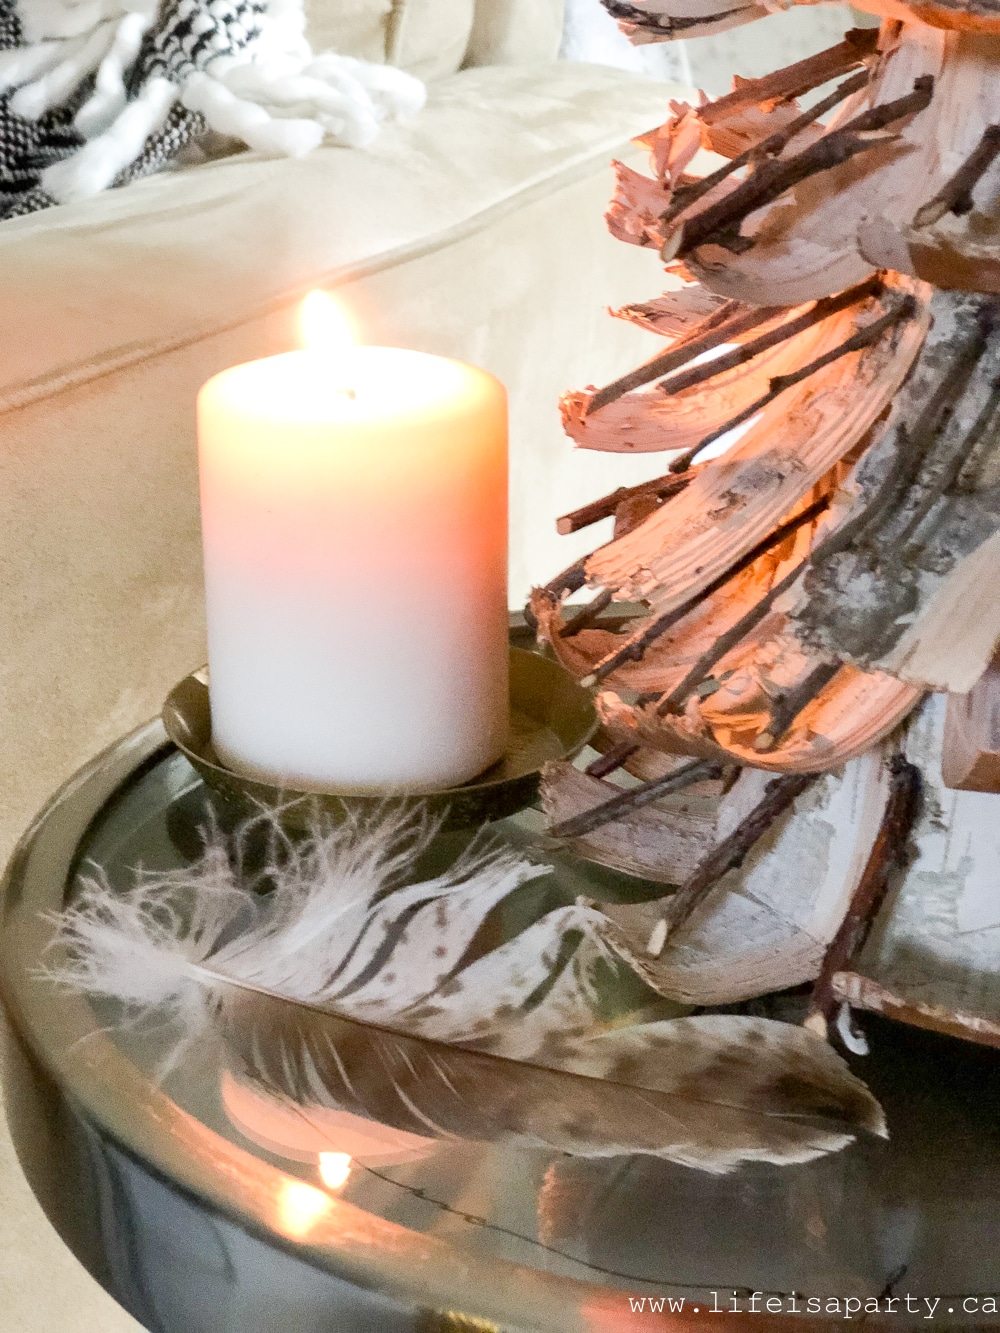
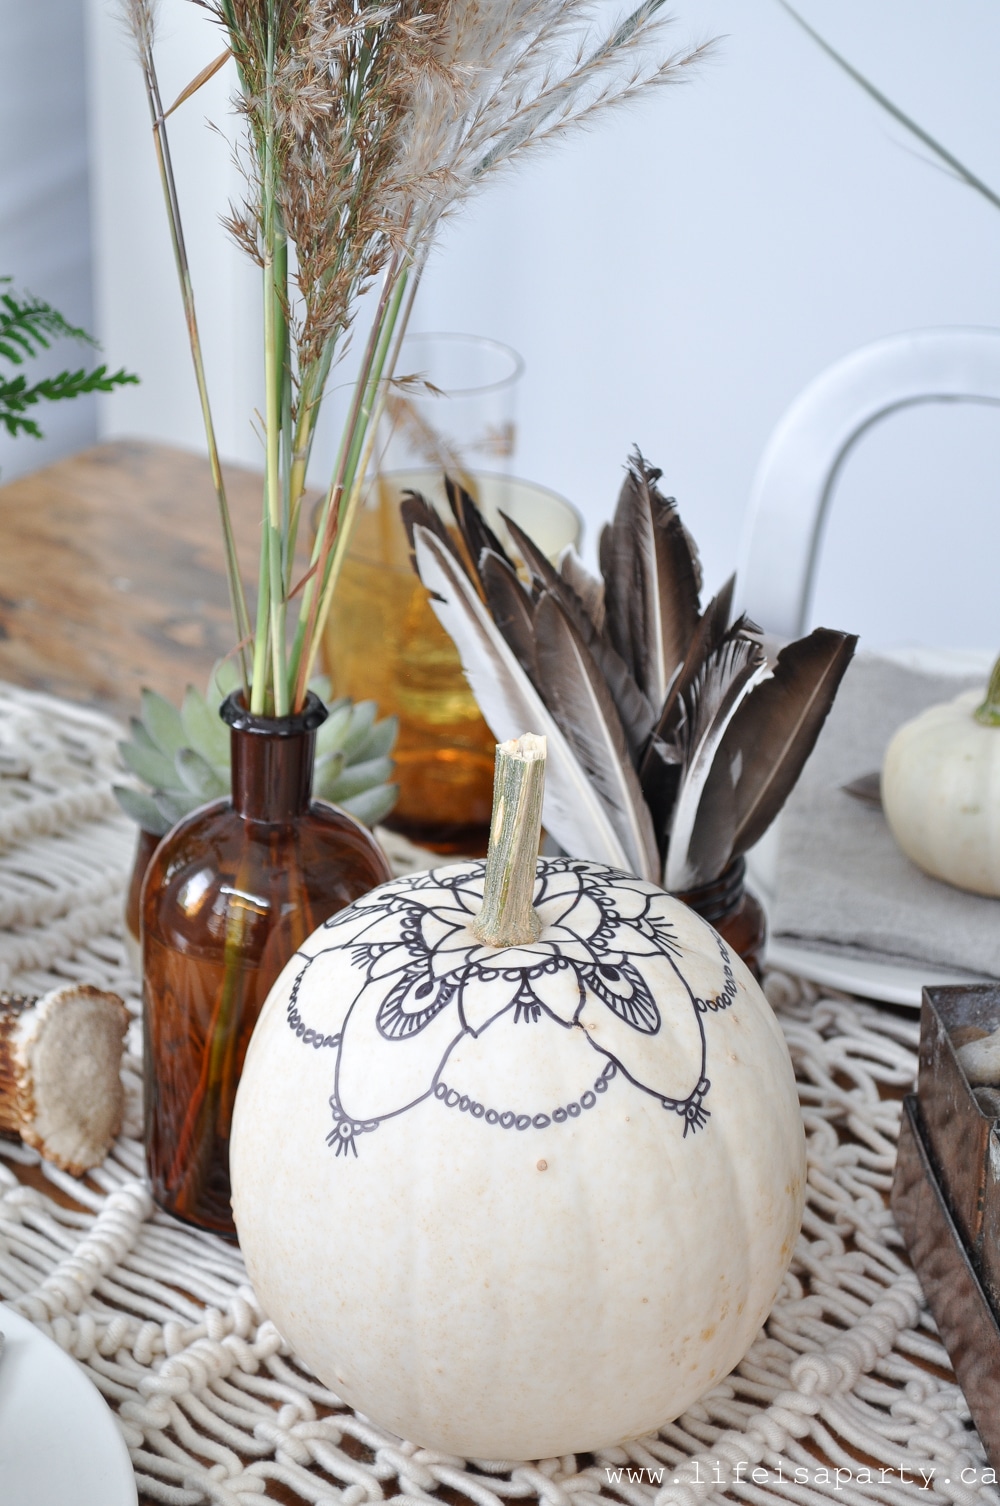
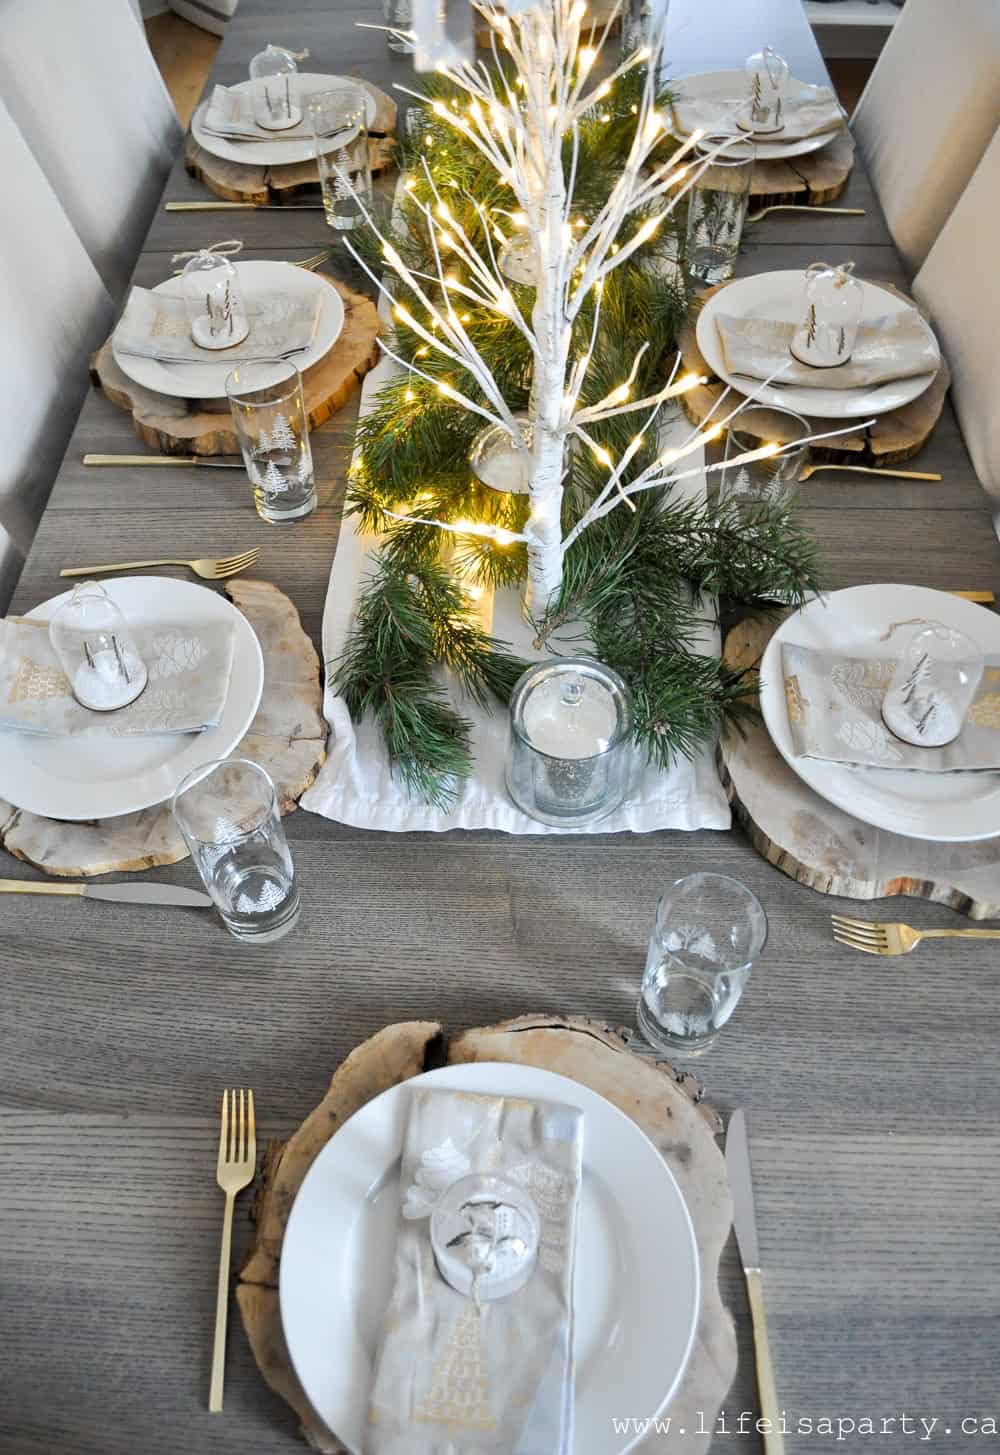 The table has a real rustic woodland Scandinavian vibe. The centre piece is the beautiful birch trees, surrounded by some fresh pines and candles.
 There are five different designs, and they're all adorable. I thought they'd be a really sweet take home gift for my dinner guests on Christmas day.
 I also love the glasses. When I was a little girl, my parents had some that were very similar. They were kept on some open shelves in the kitchen and I remember my parents only really using them for mixed drinks when they had friends over for card games. These have little pine trees on them and deer and they're perfect for Christmas.
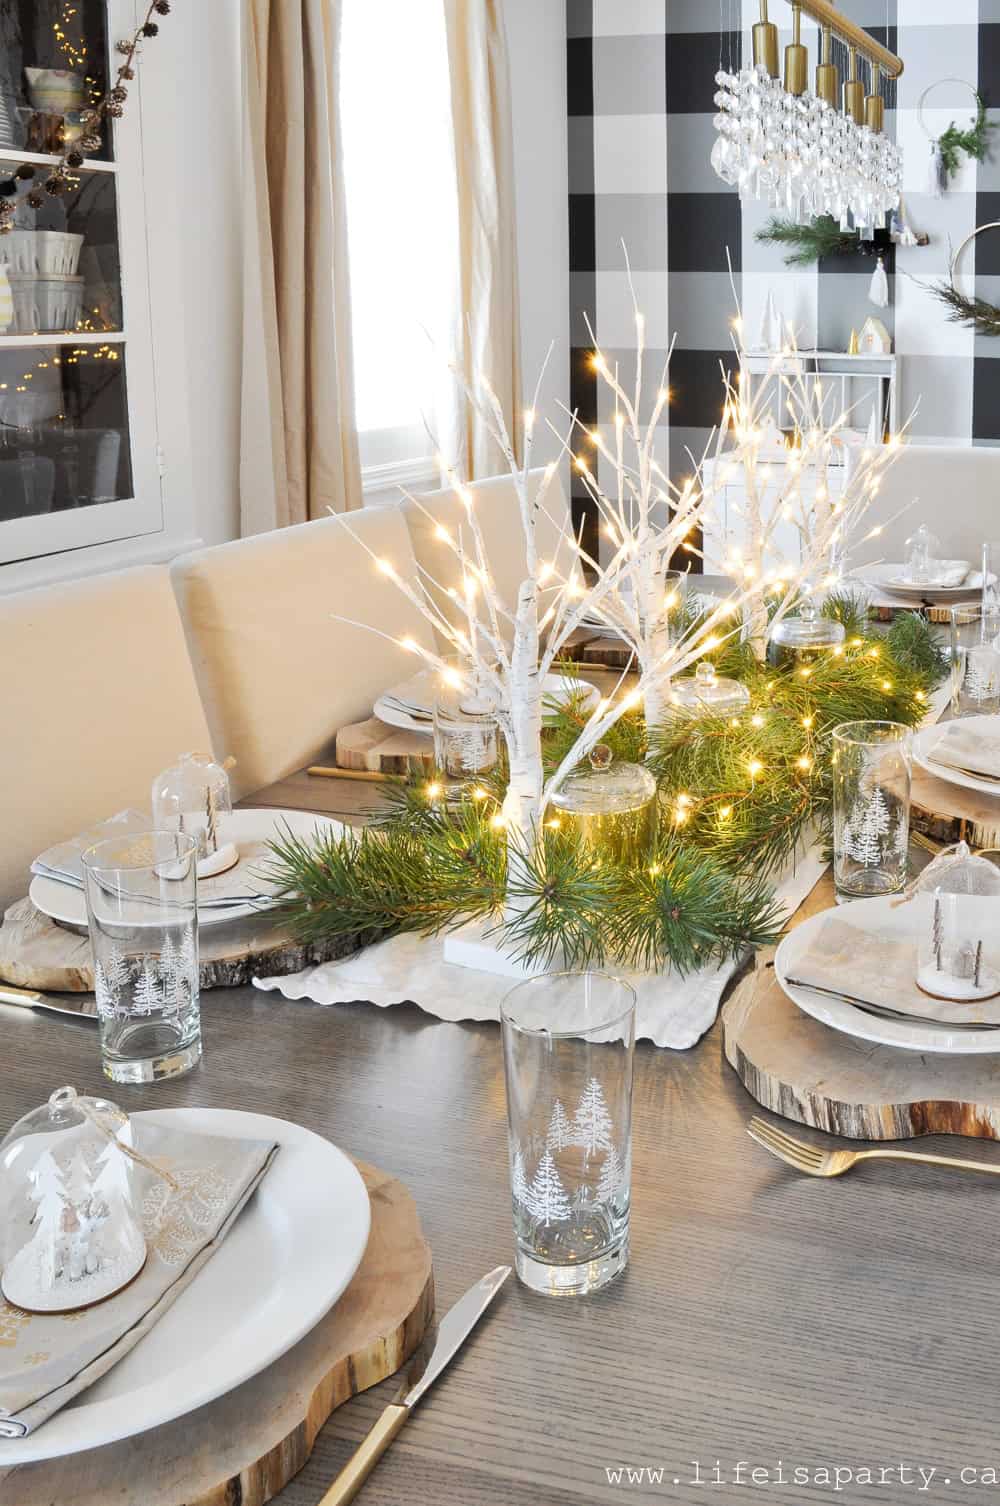
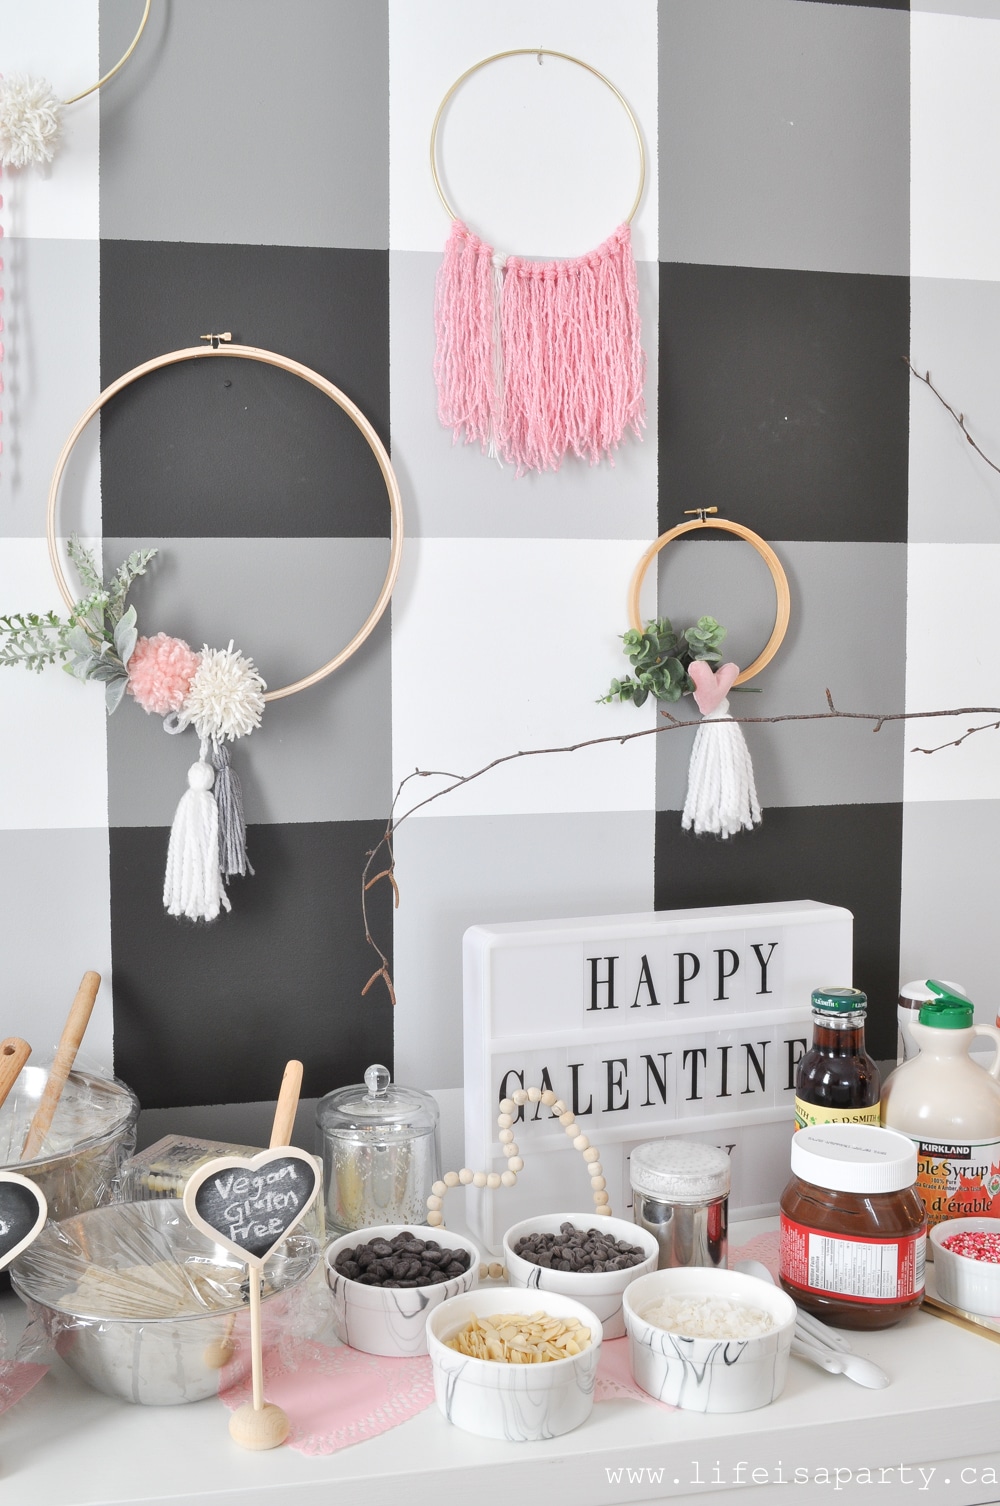
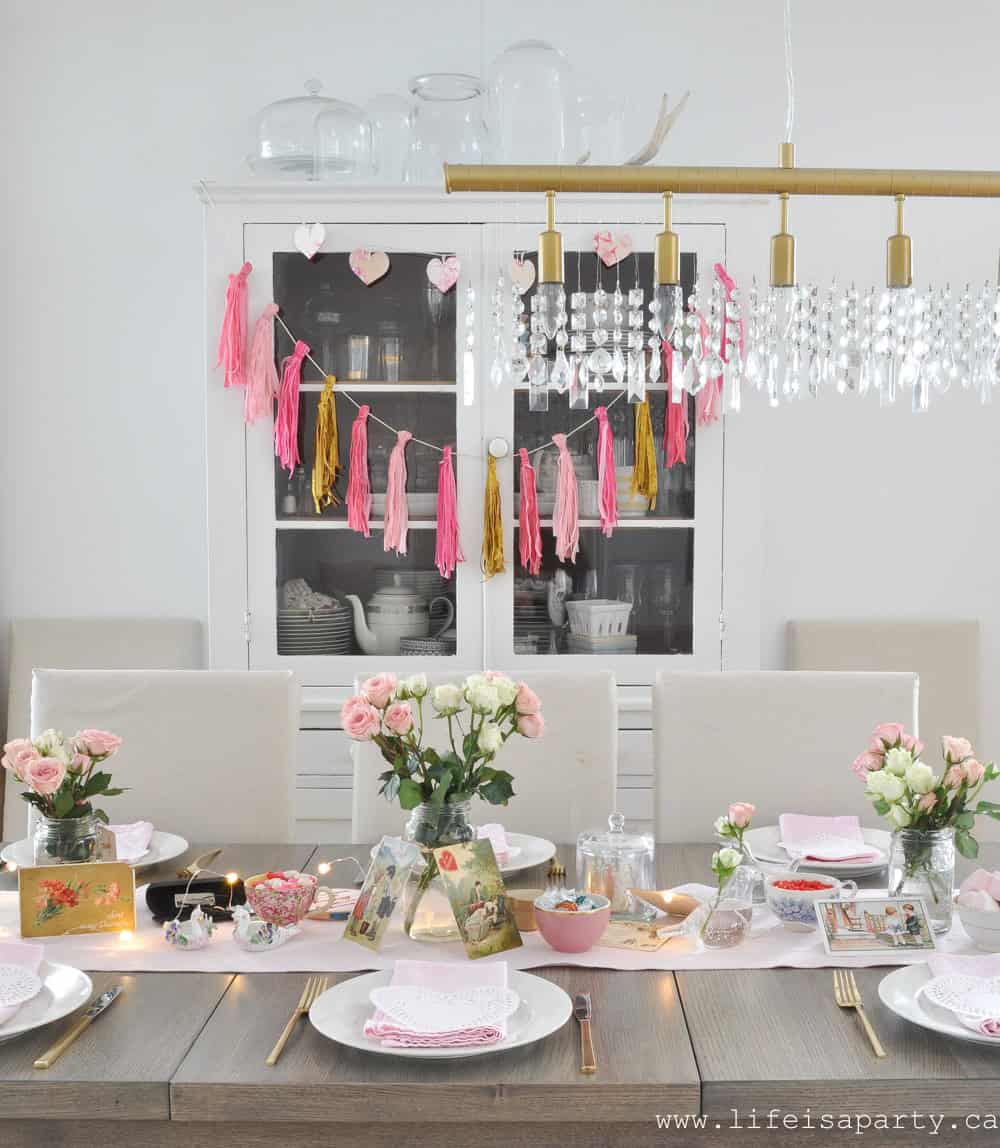
 Buffalo Check Wall
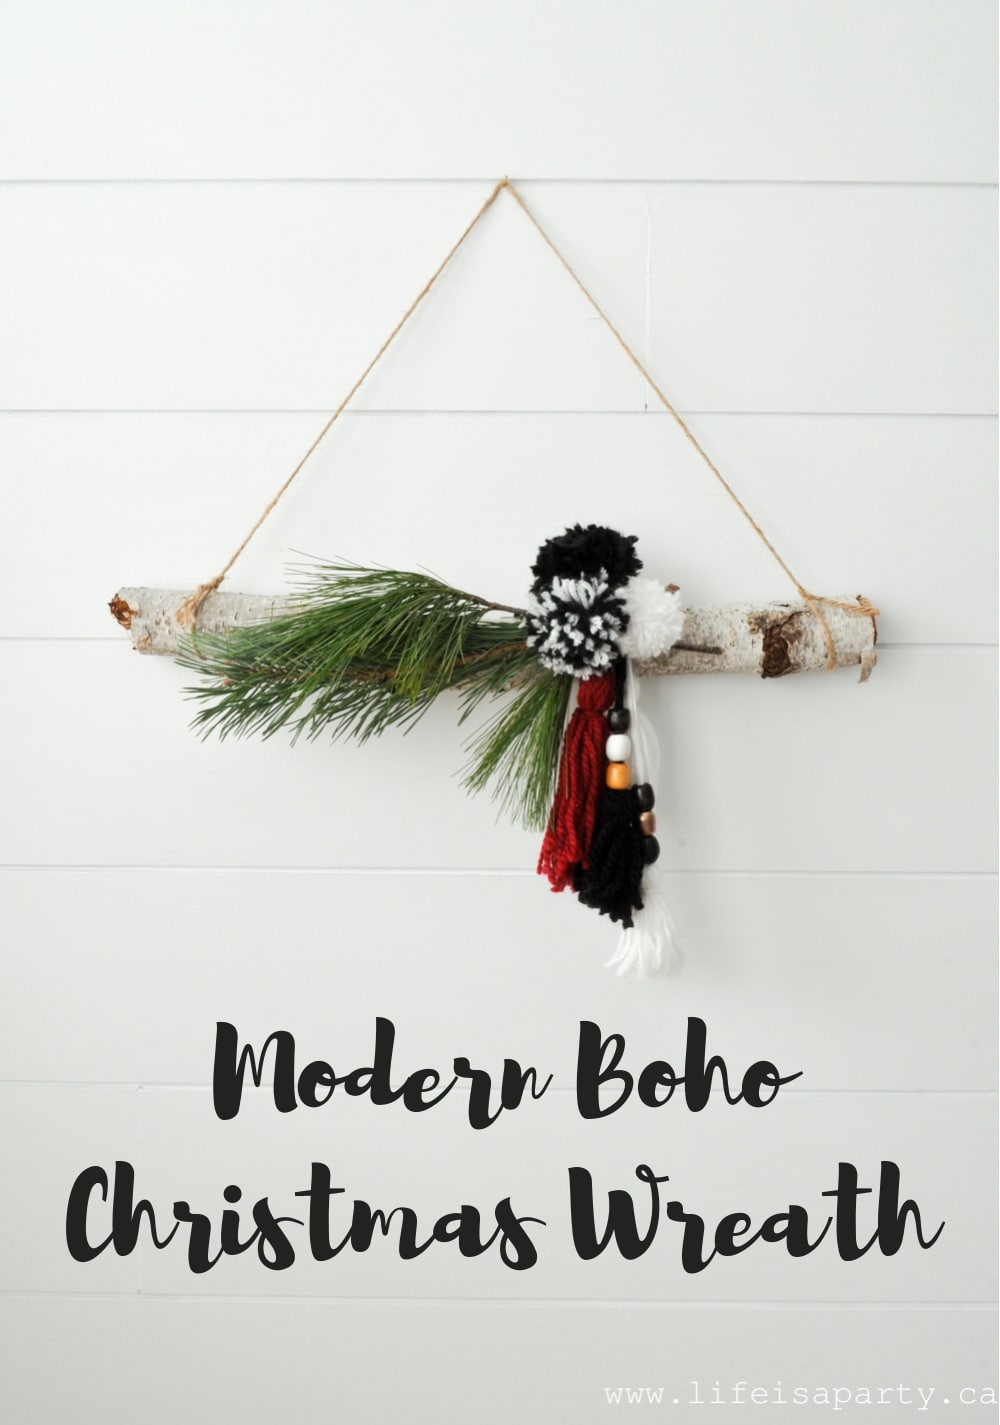
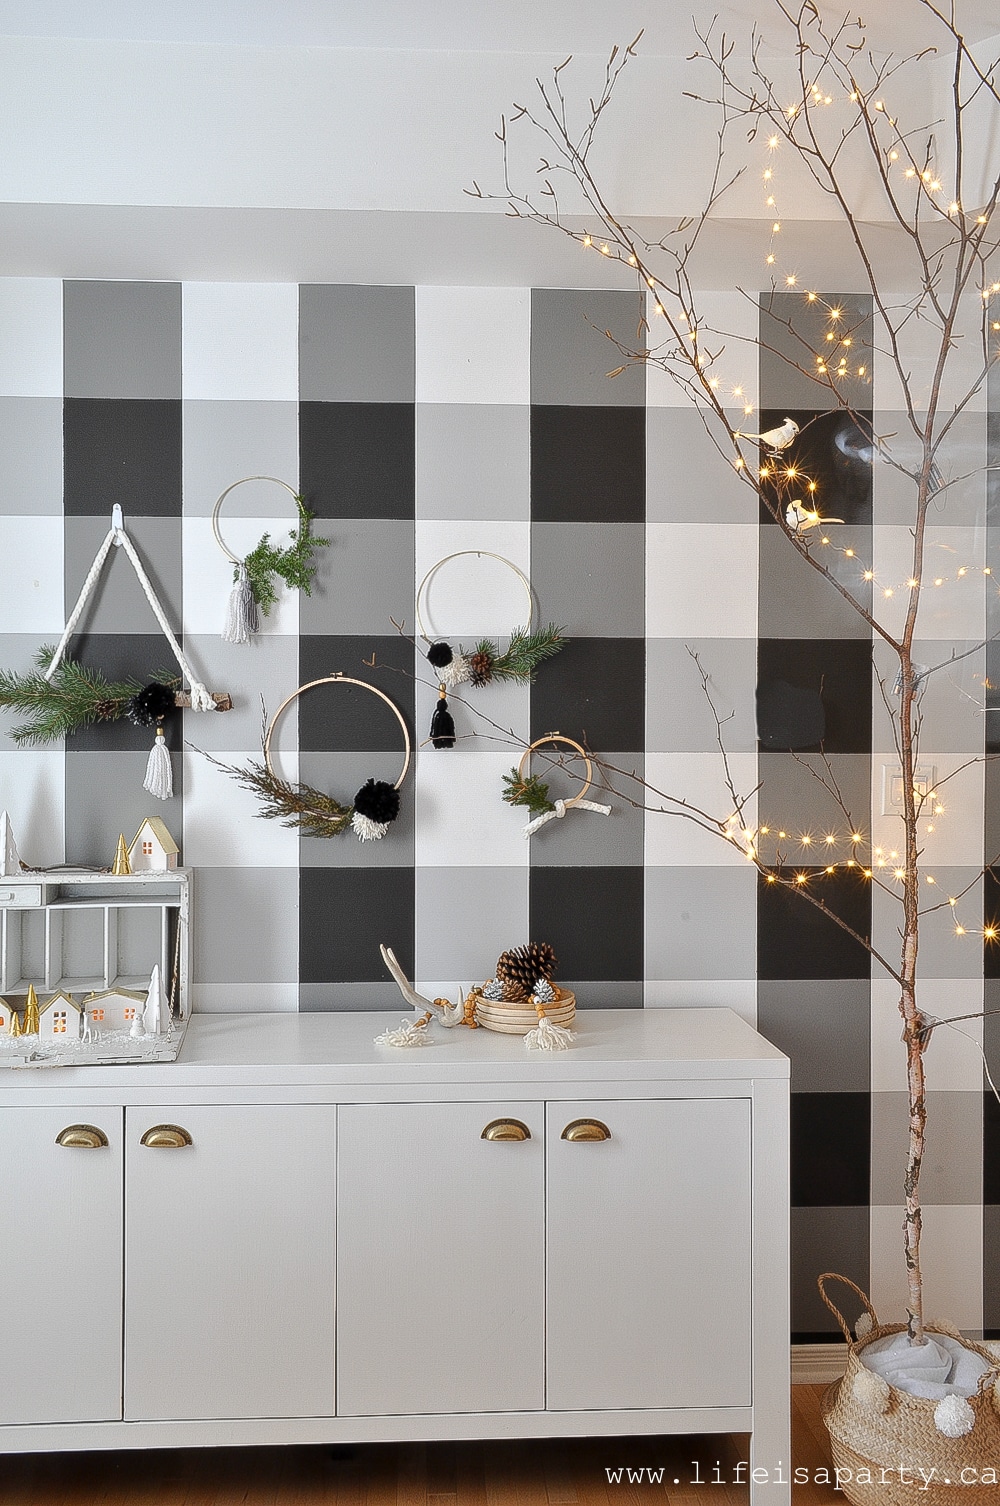 I made a series of wreaths for Christmas. The birch one is the same as this
 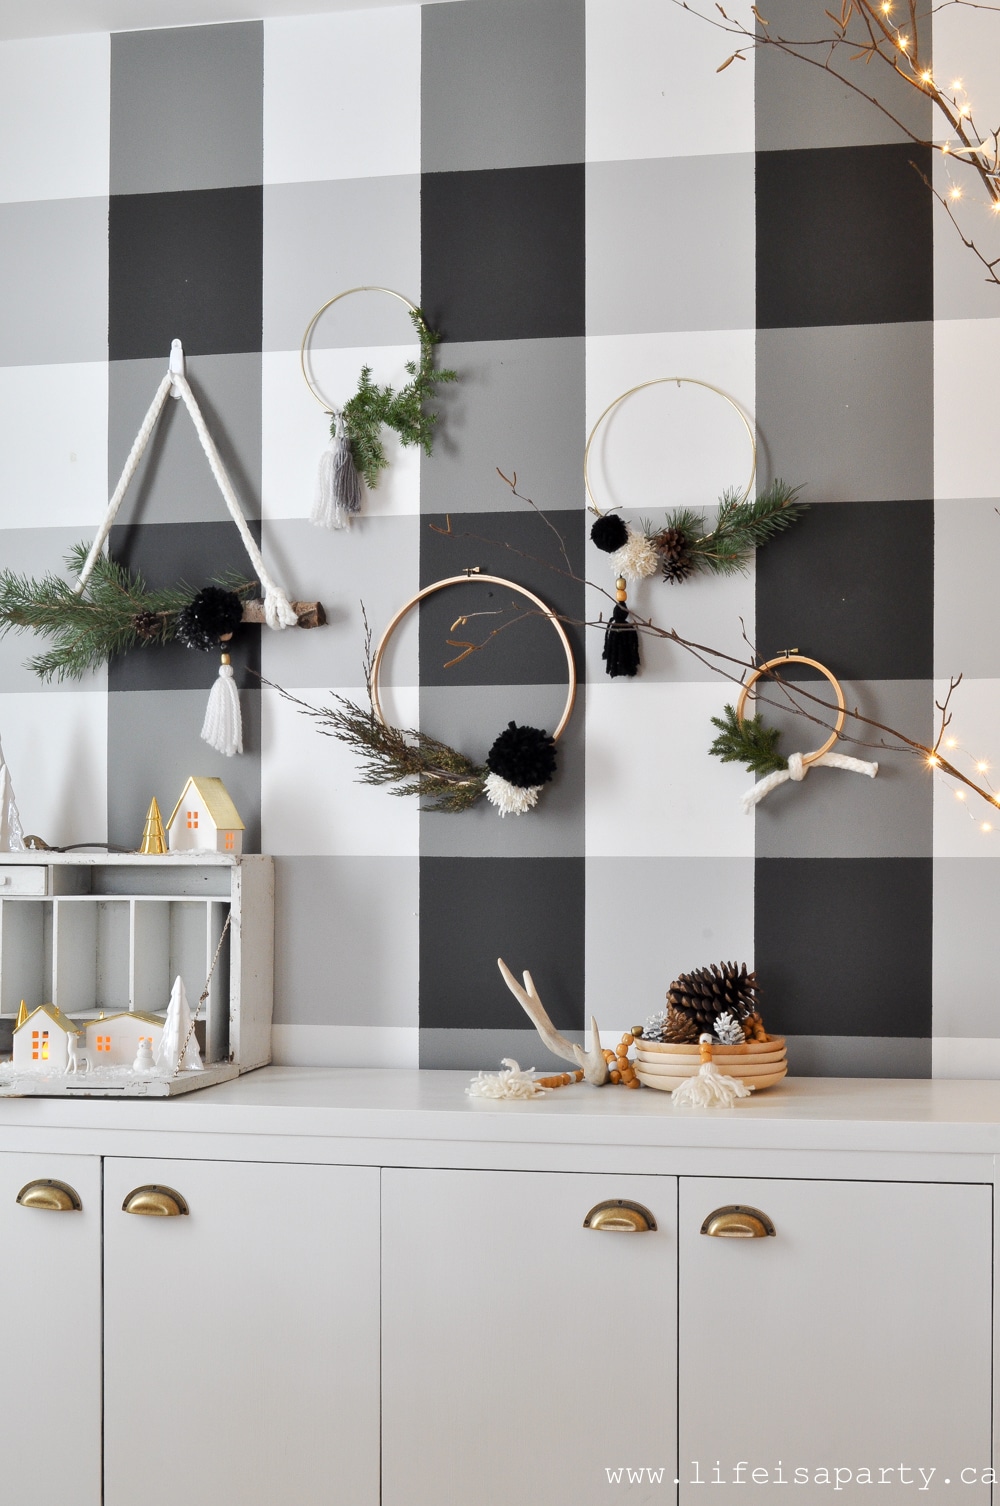 Two were made with gold rings, and two with embroidery hoops. They're updated from last year with their asymmetrical design, and some pom poms and tassels. I love how they turned out and they were so simple to make.
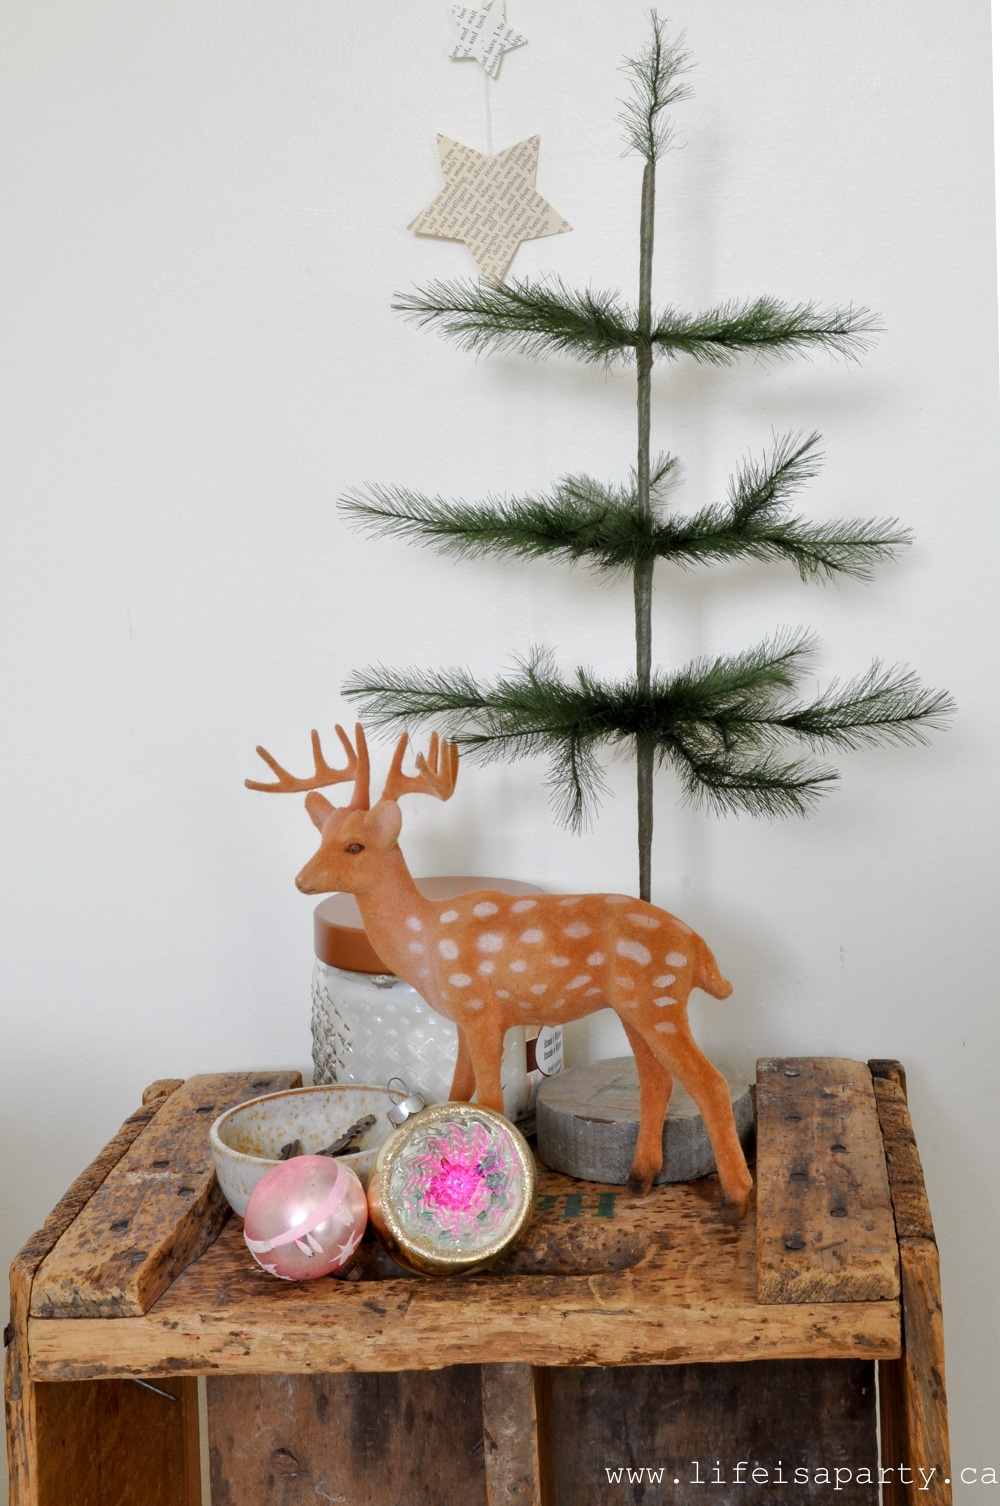
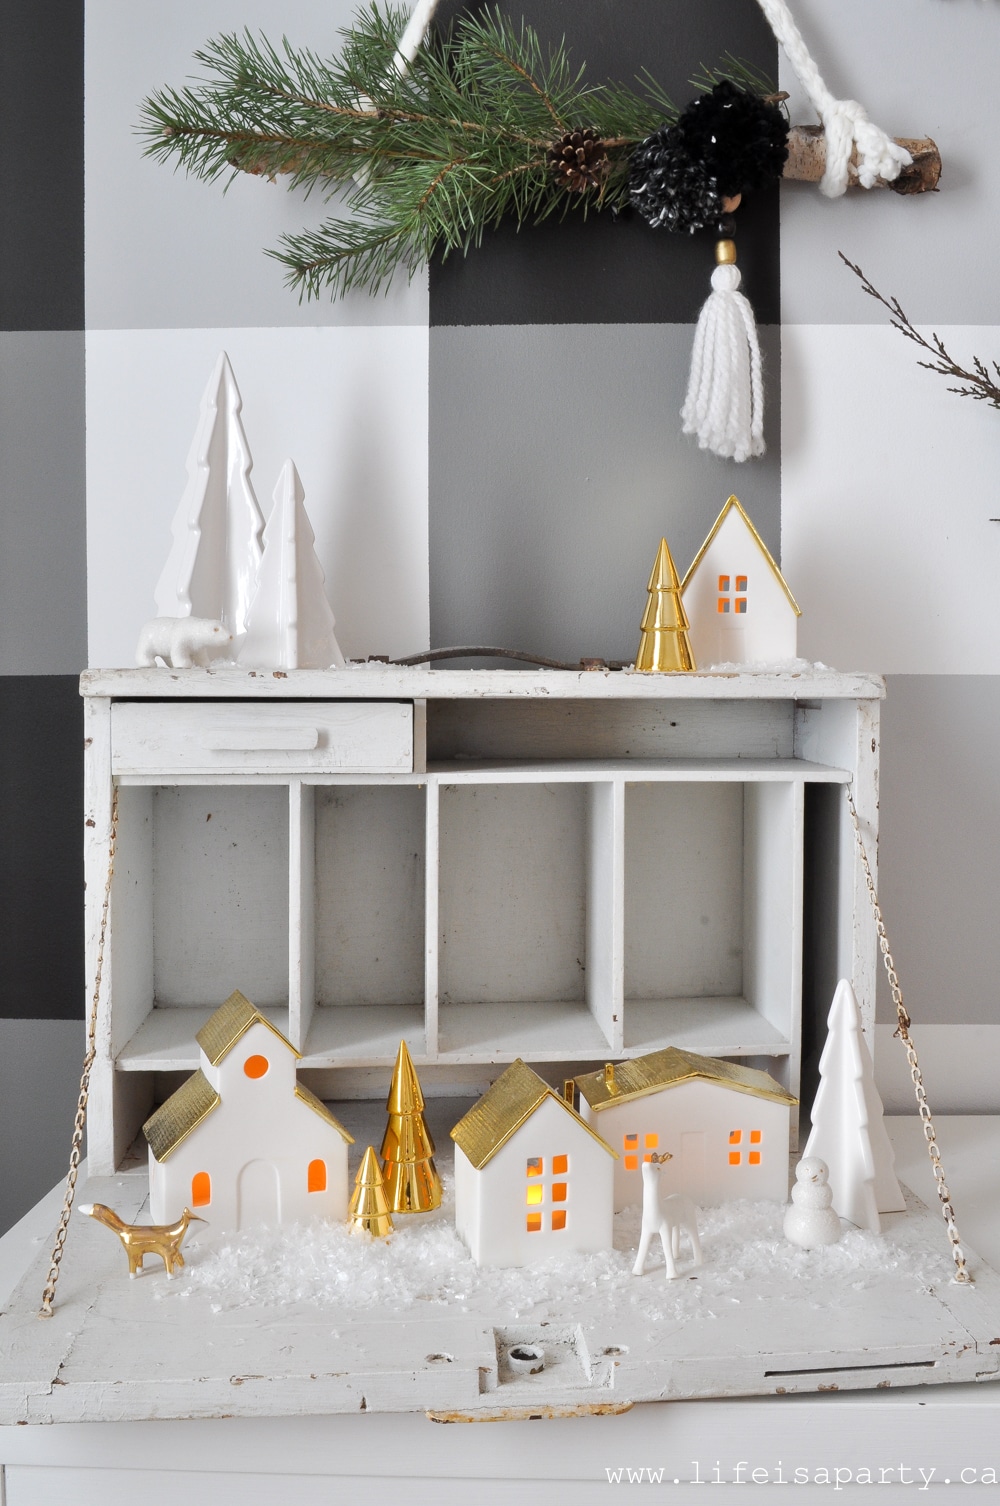 I set up my little Christmas village here too. It's one of my very favourite Christmas decorations, and I love how they light up, and the little animals with them.
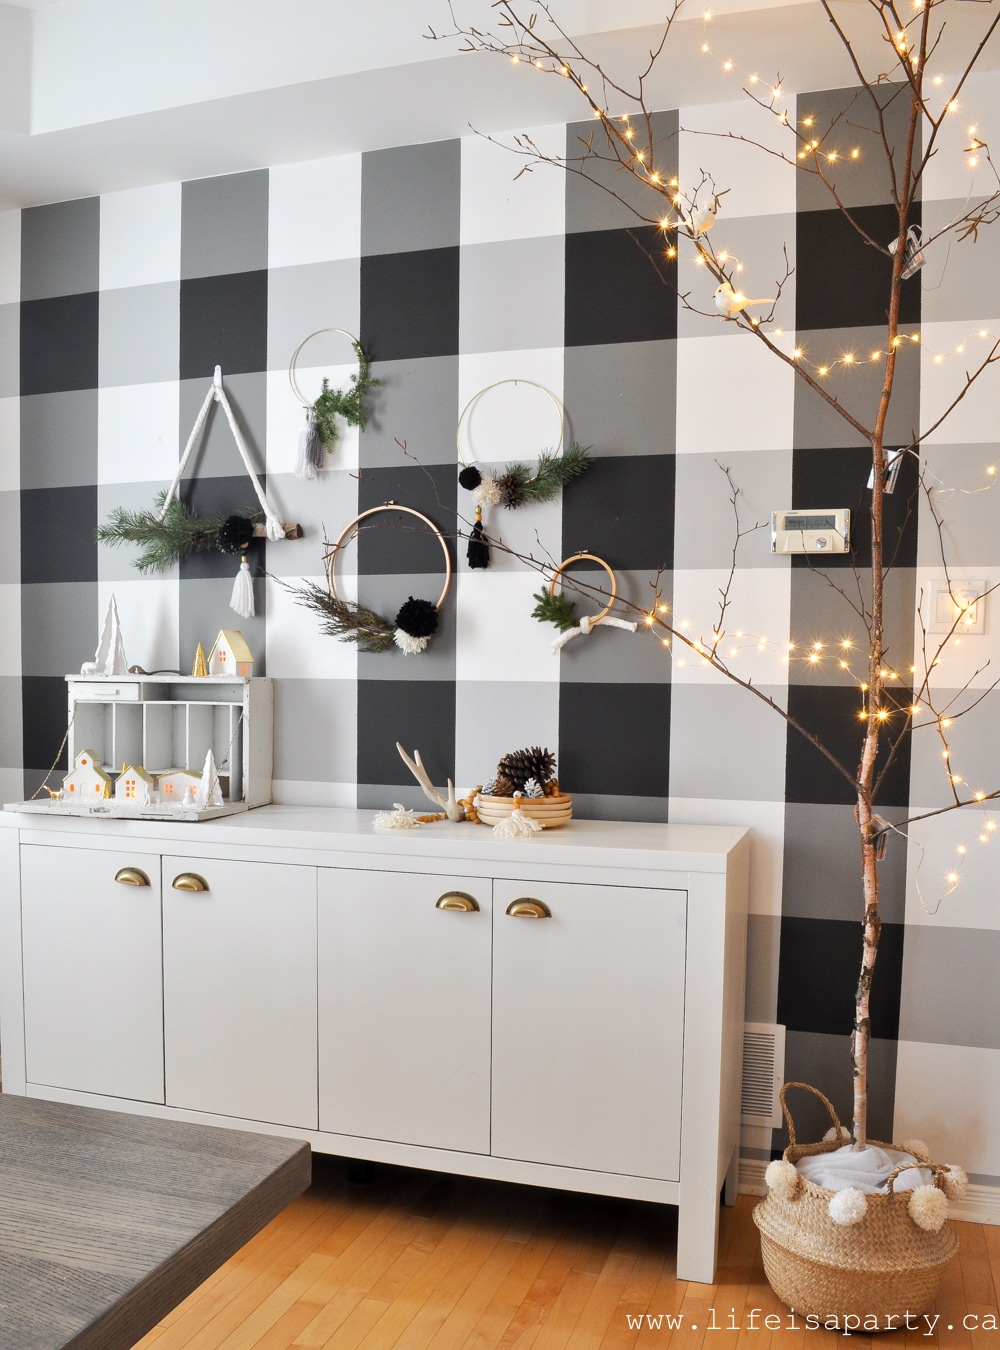 Inspired by the birch on the table, I added a real one too. This one was found in the woods. I stood it up in the garage in a pail with some concrete for a few days, before I brought it in. It's so simple and pretty with the twinkle lights on it.
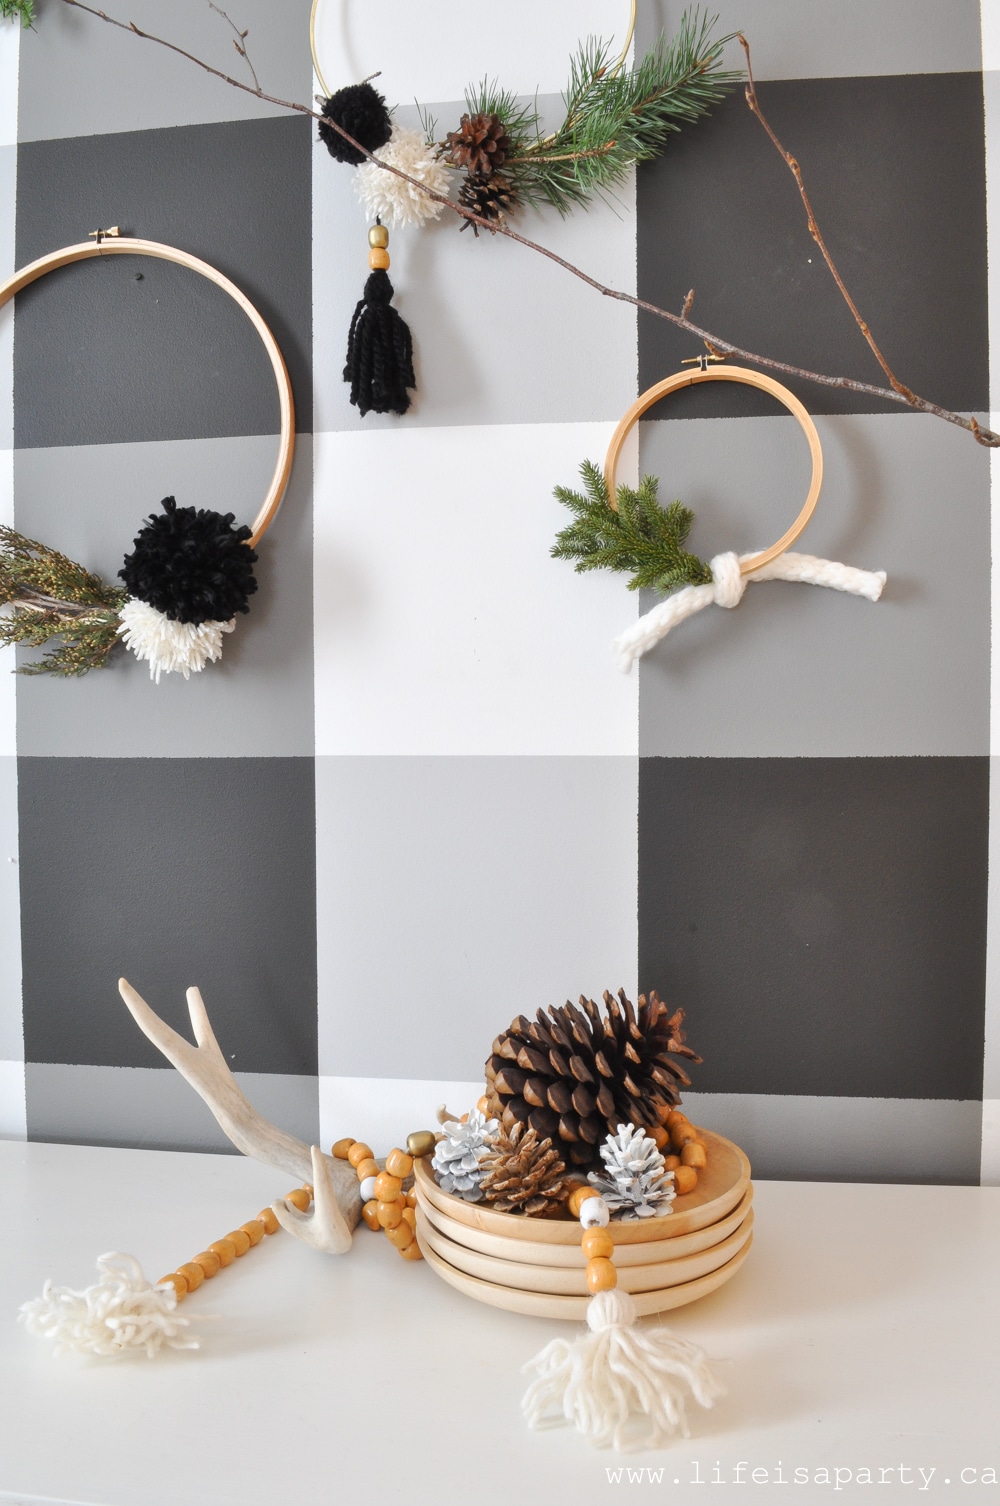
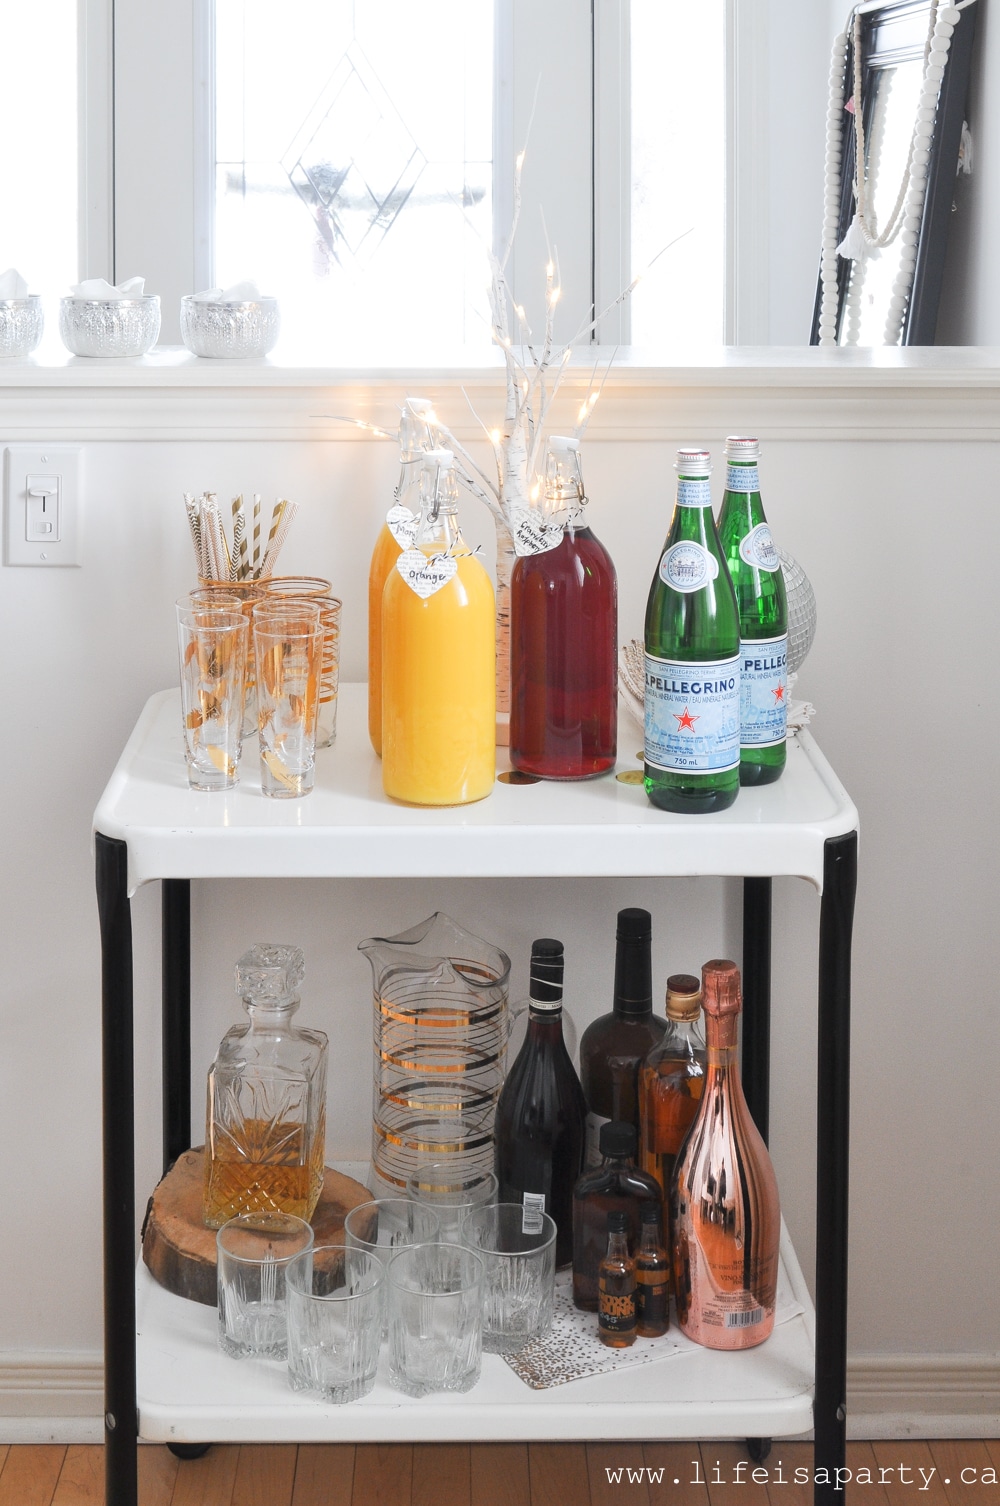
 Bar Cart
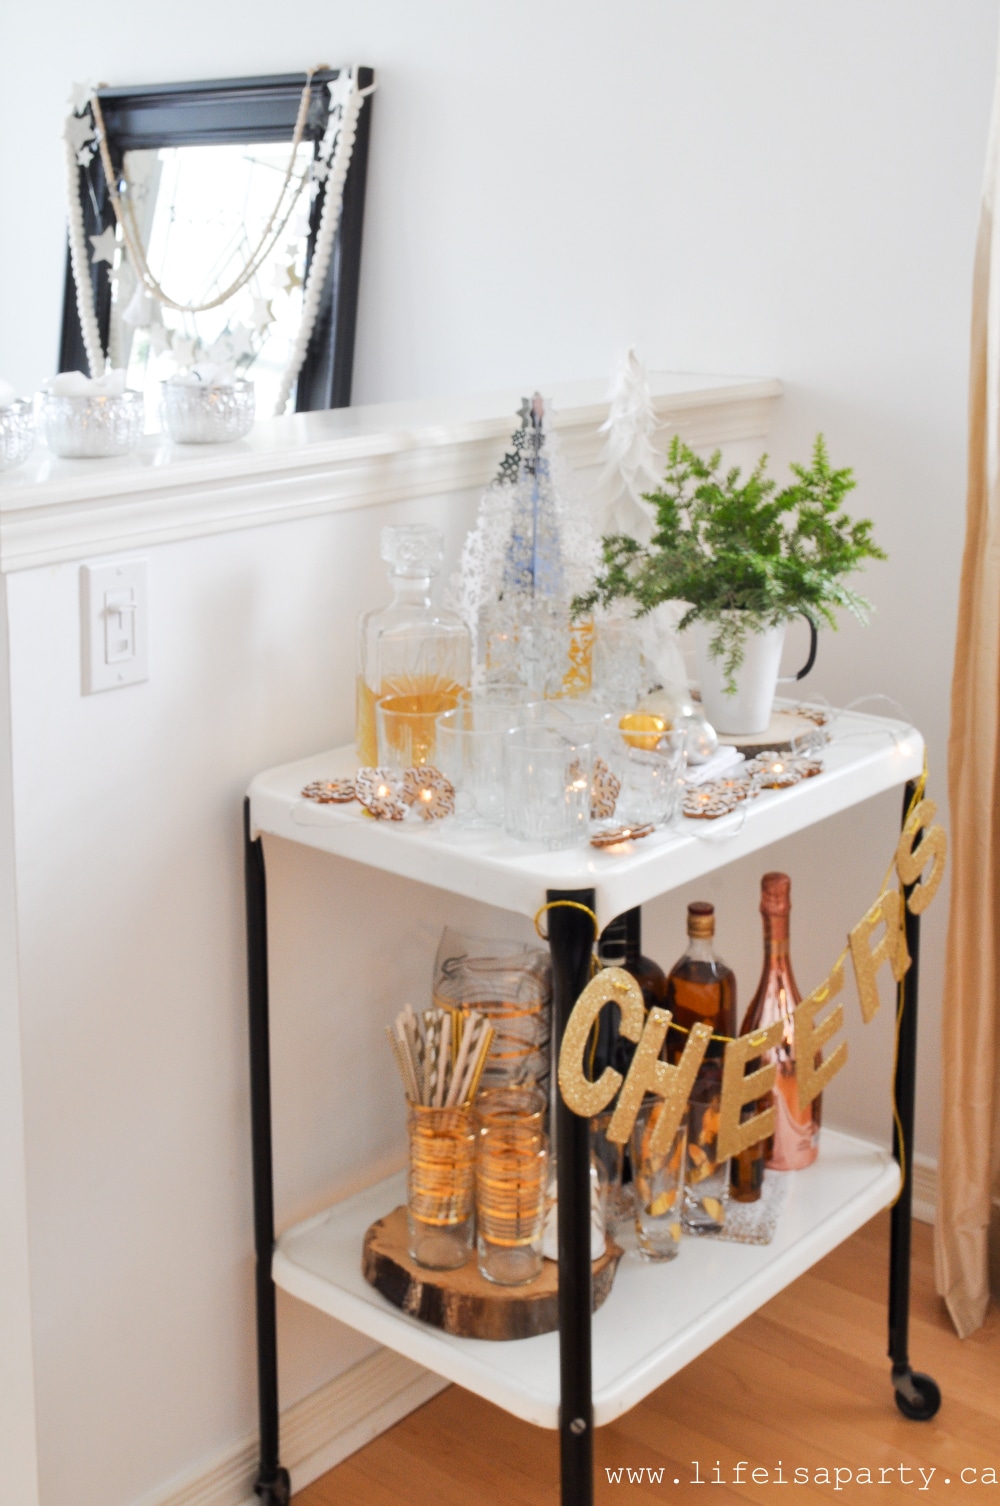
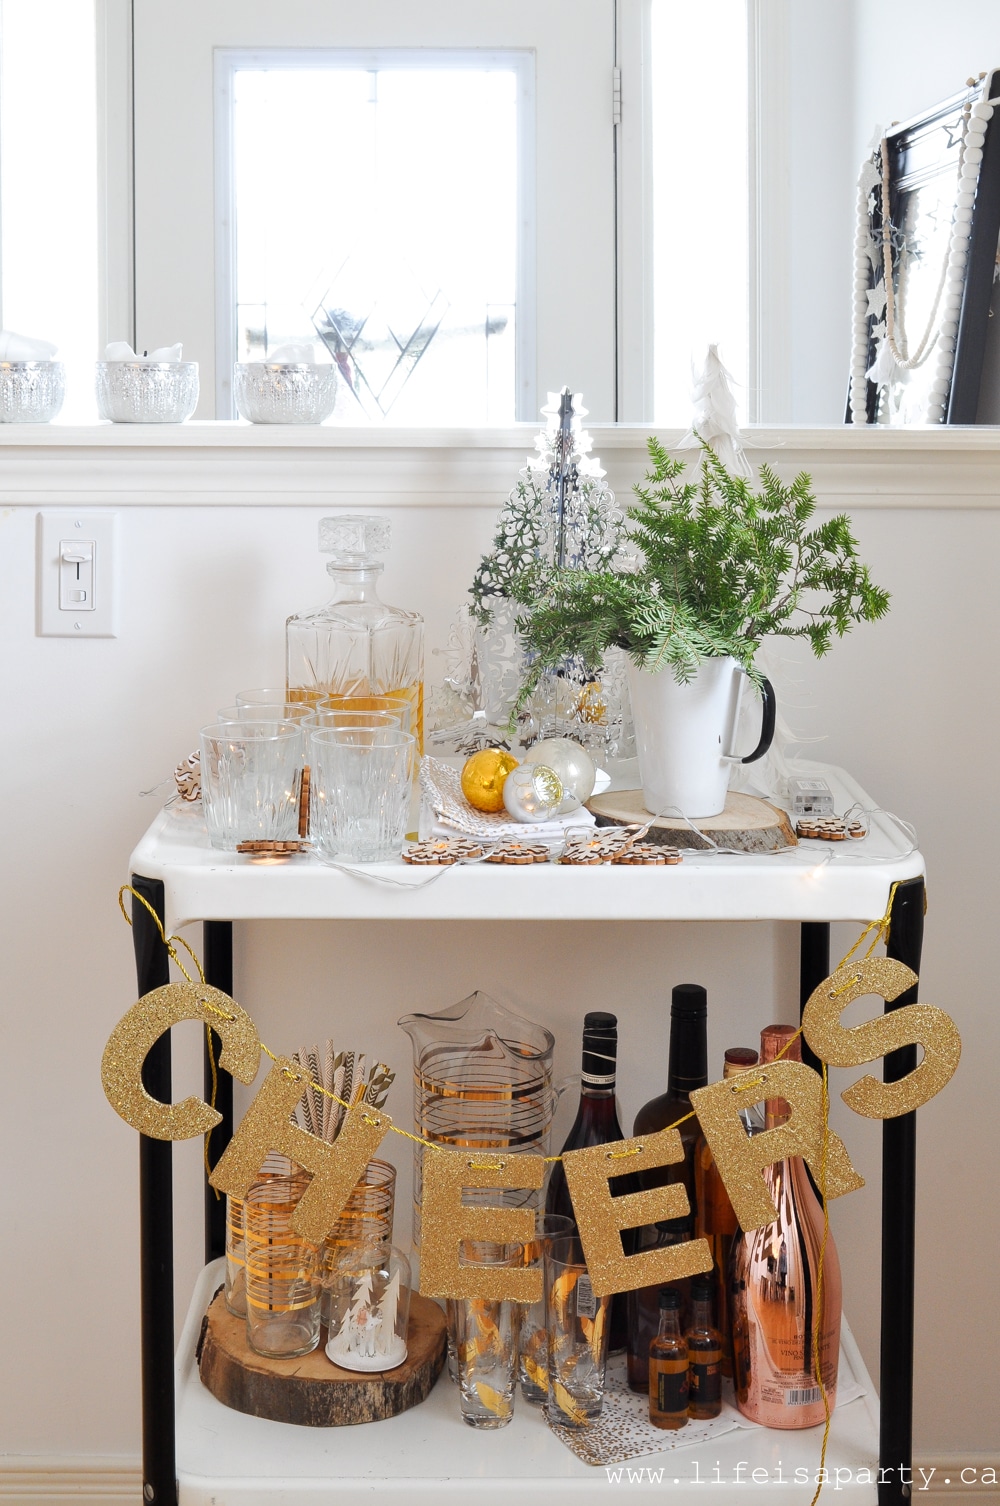 I've got a new decanter, and whiskey is on offer to warm up cold guests over the holidays.
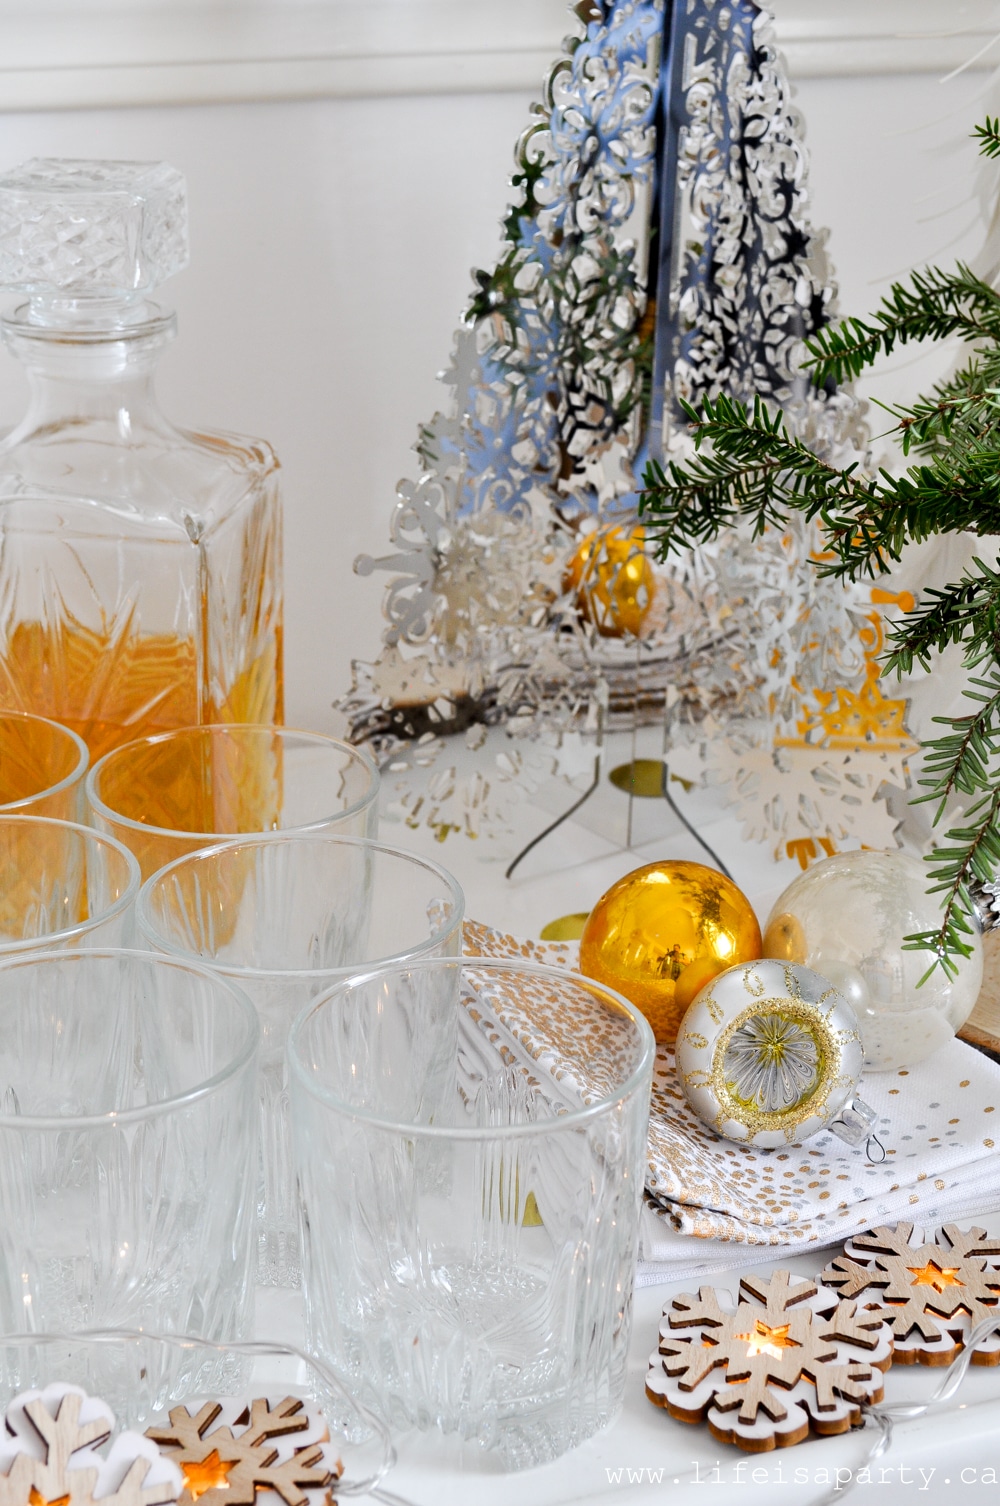
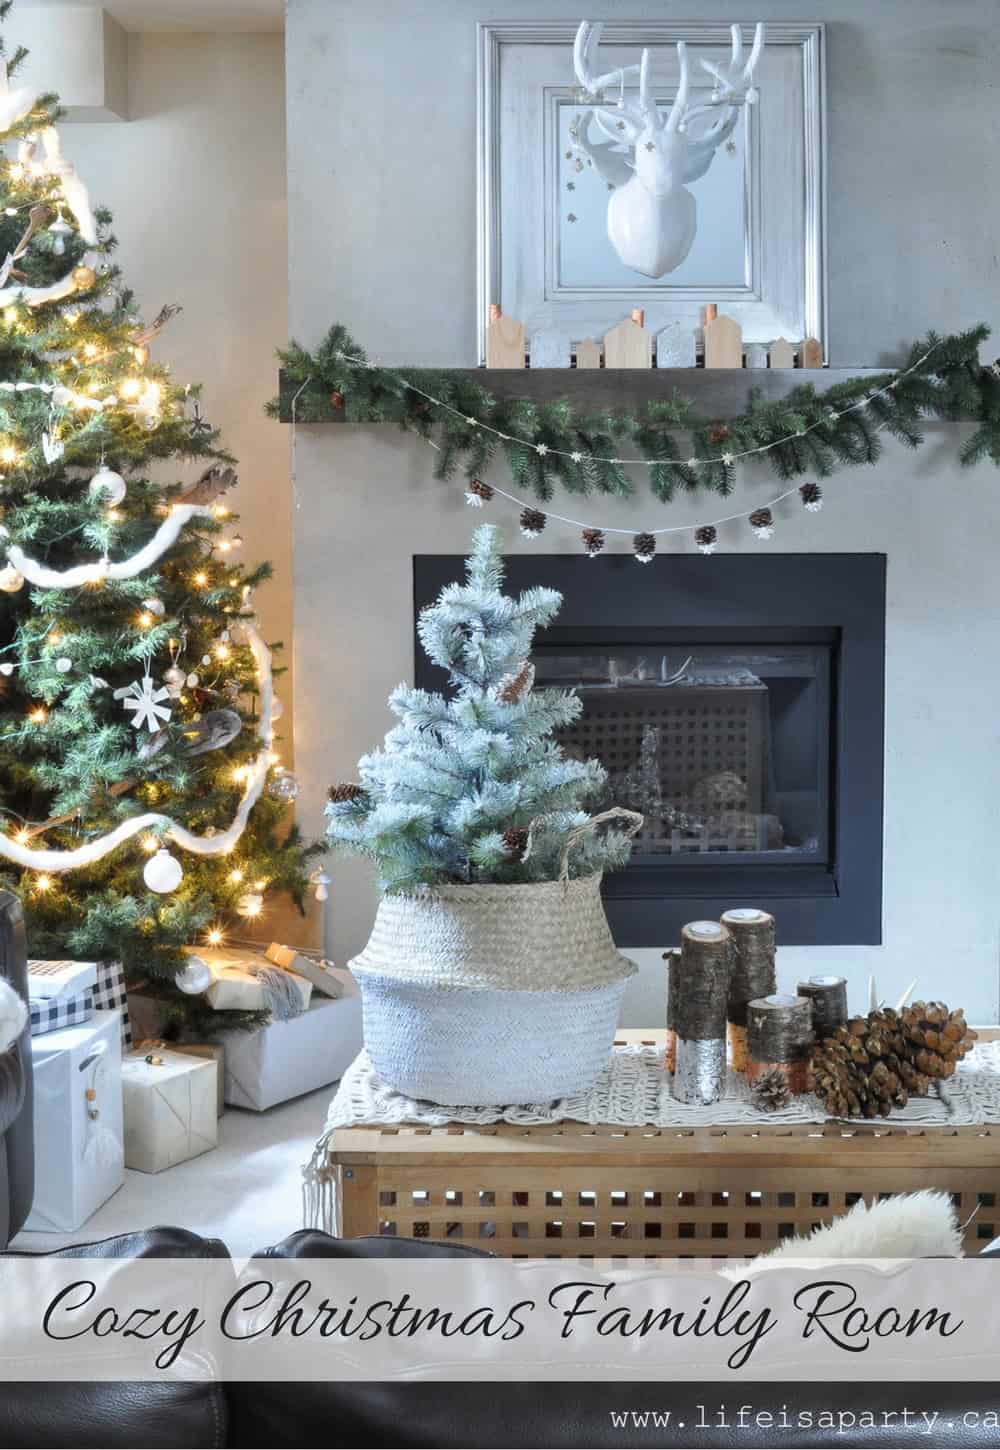
 This is a favourite spot of ours over the holidays for family movie nights, and curling up with new books and toys over the Christmas holidays.
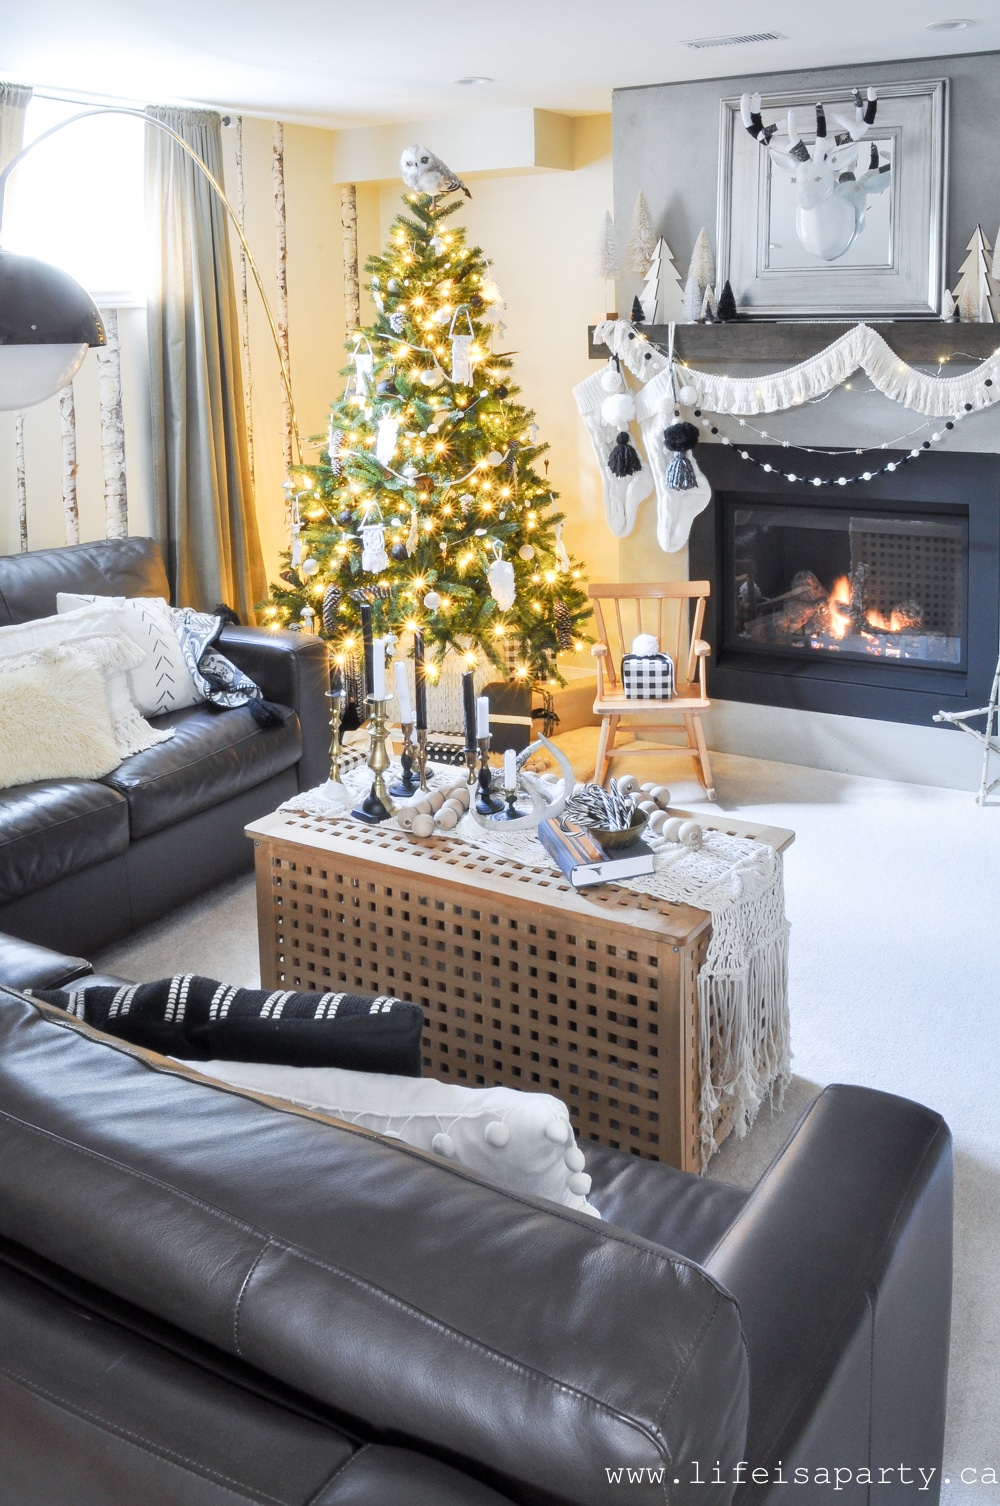
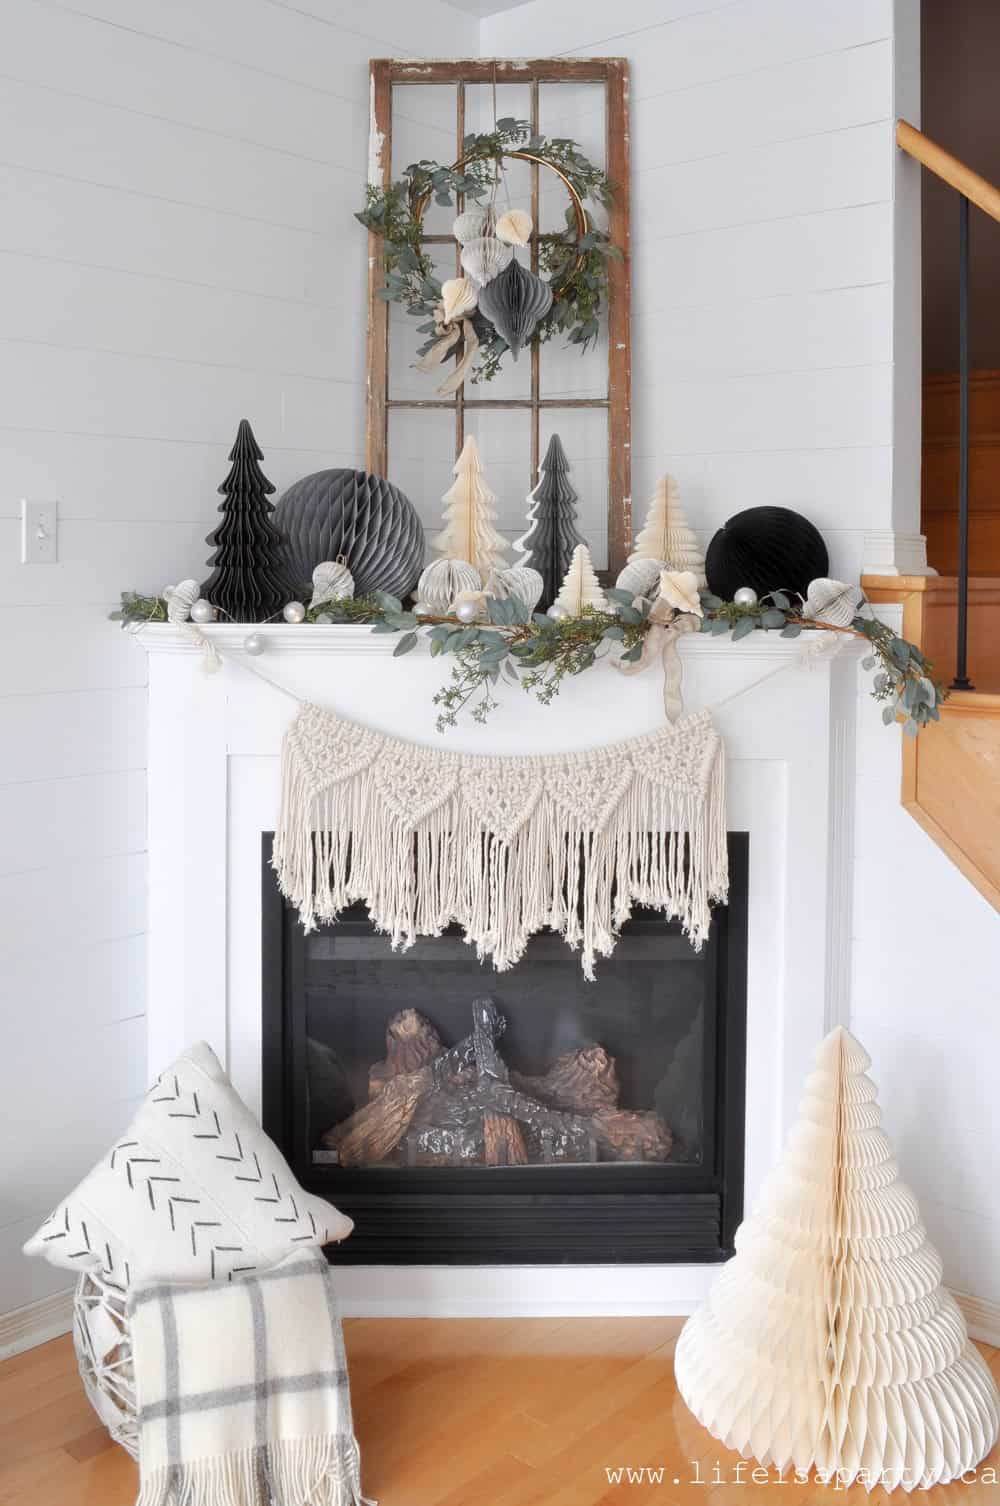
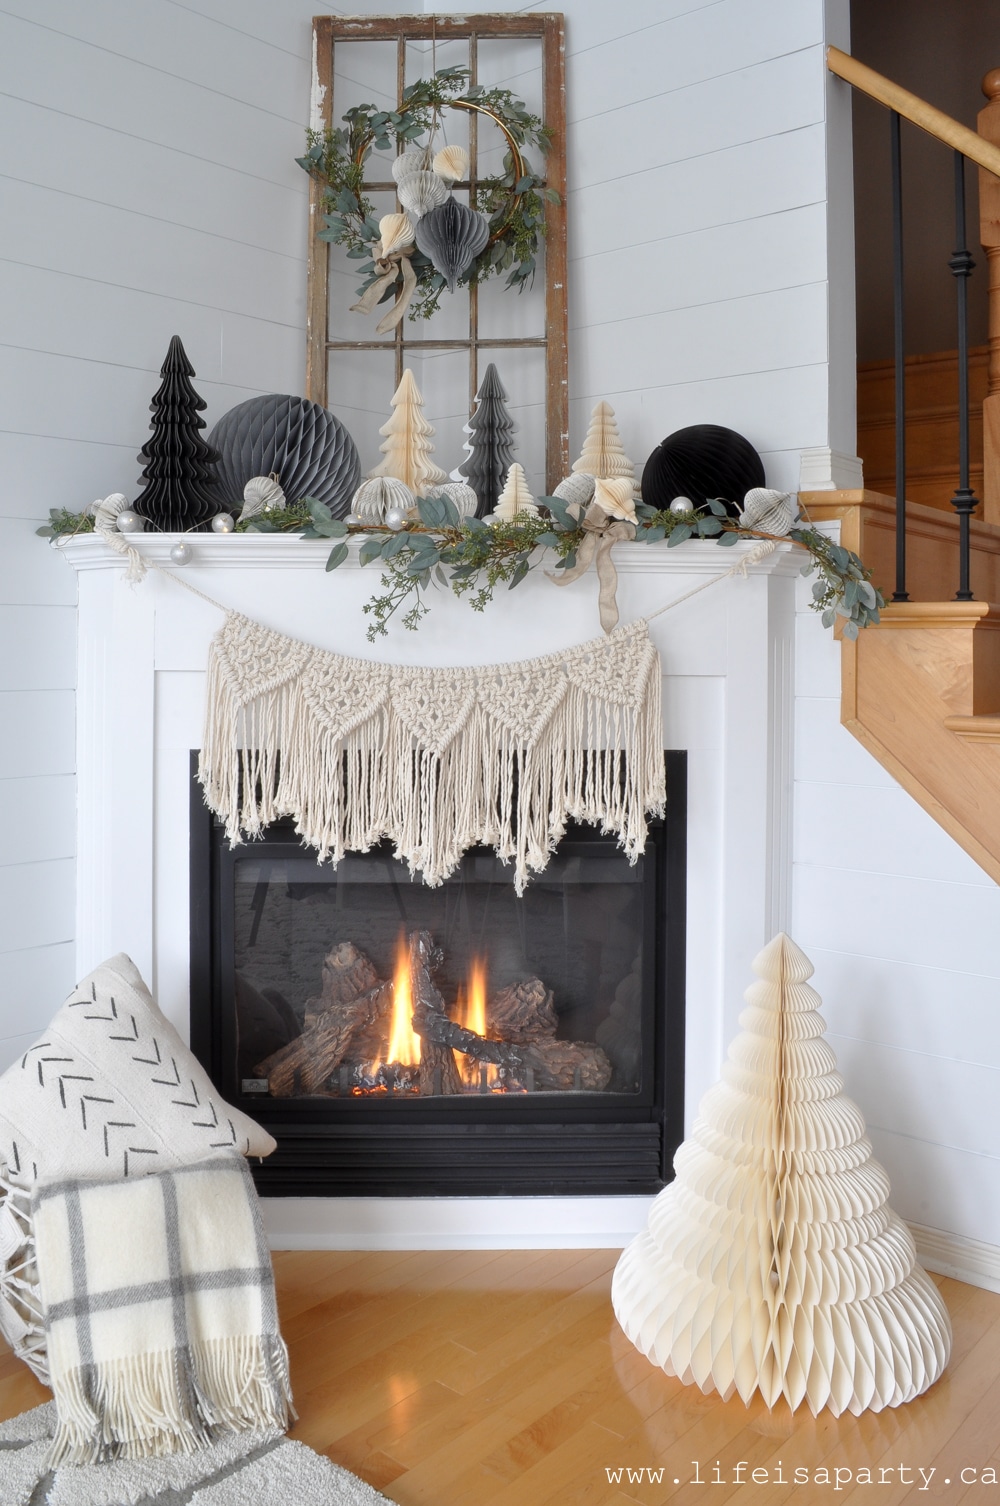
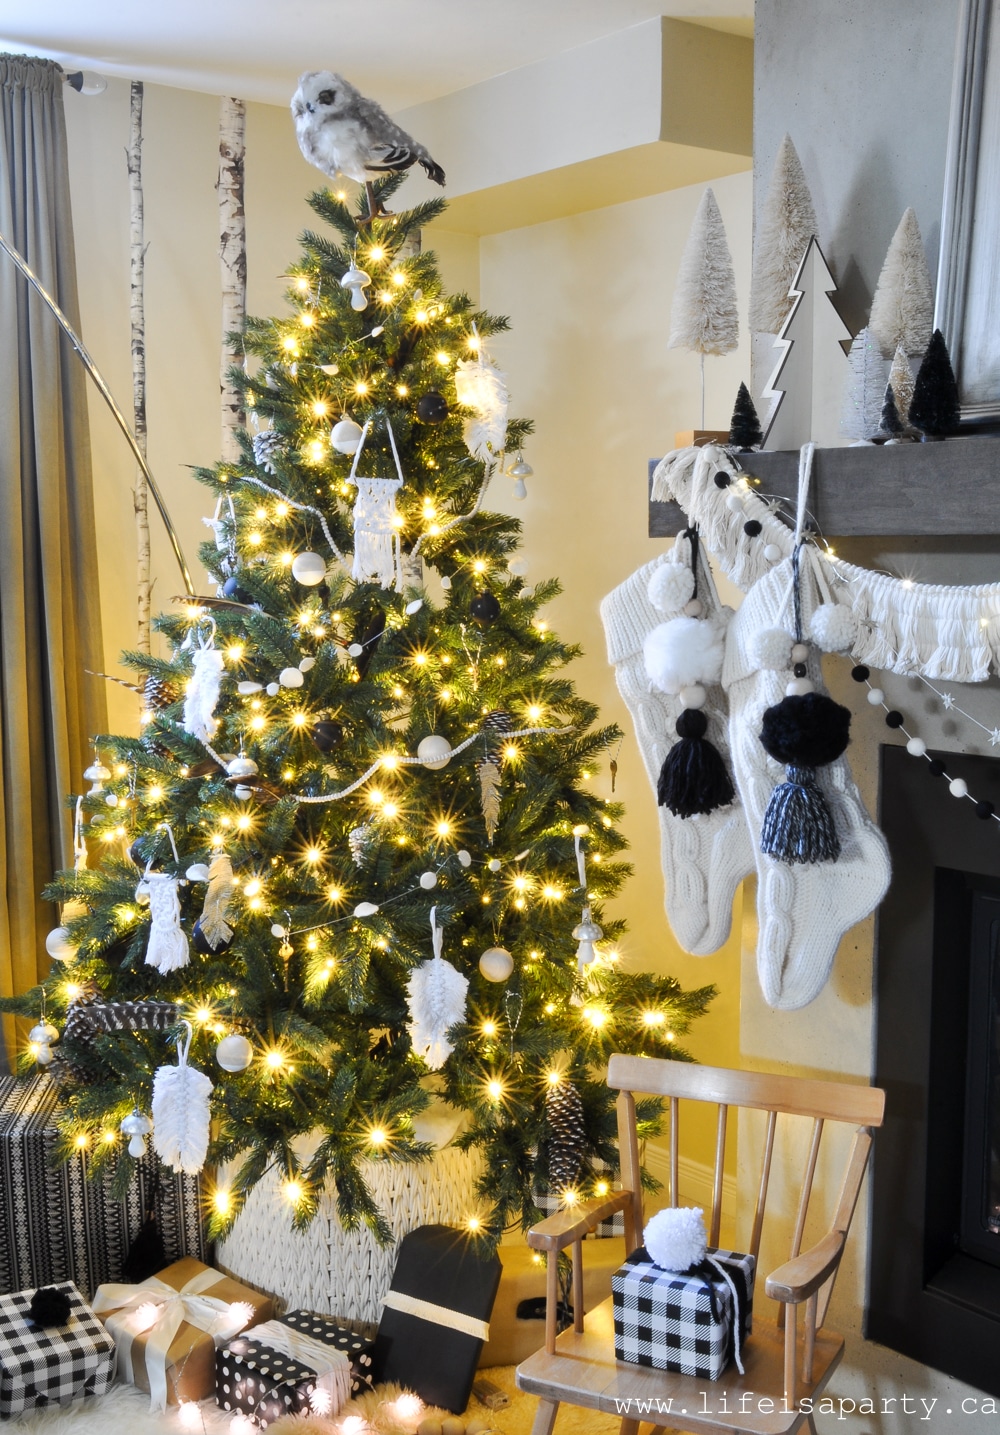
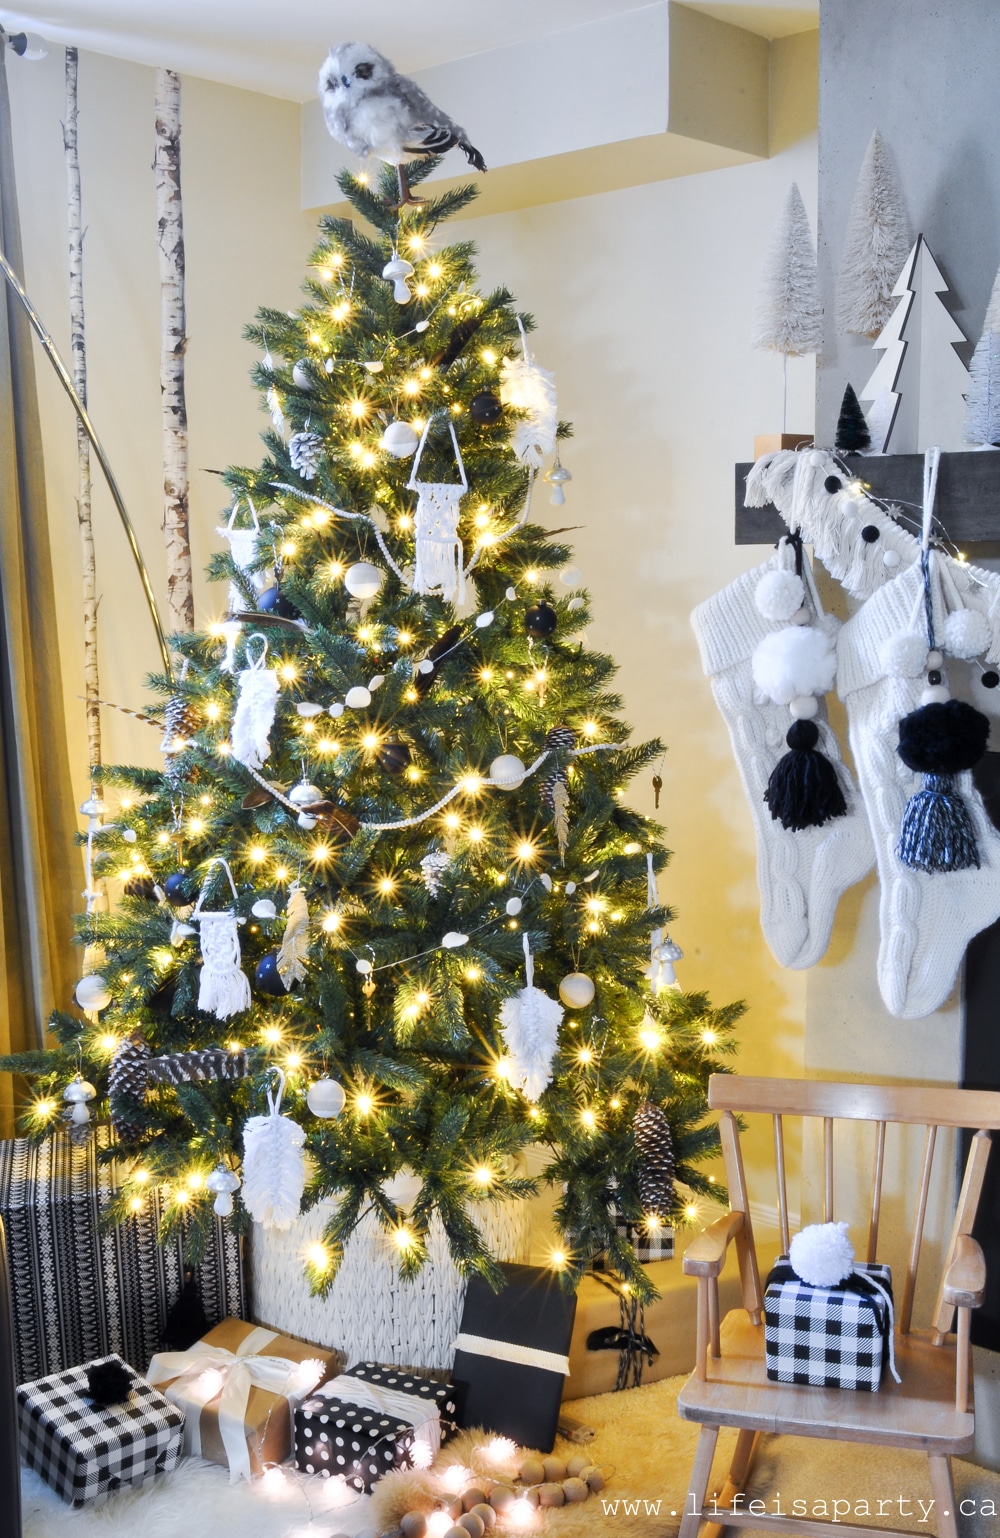
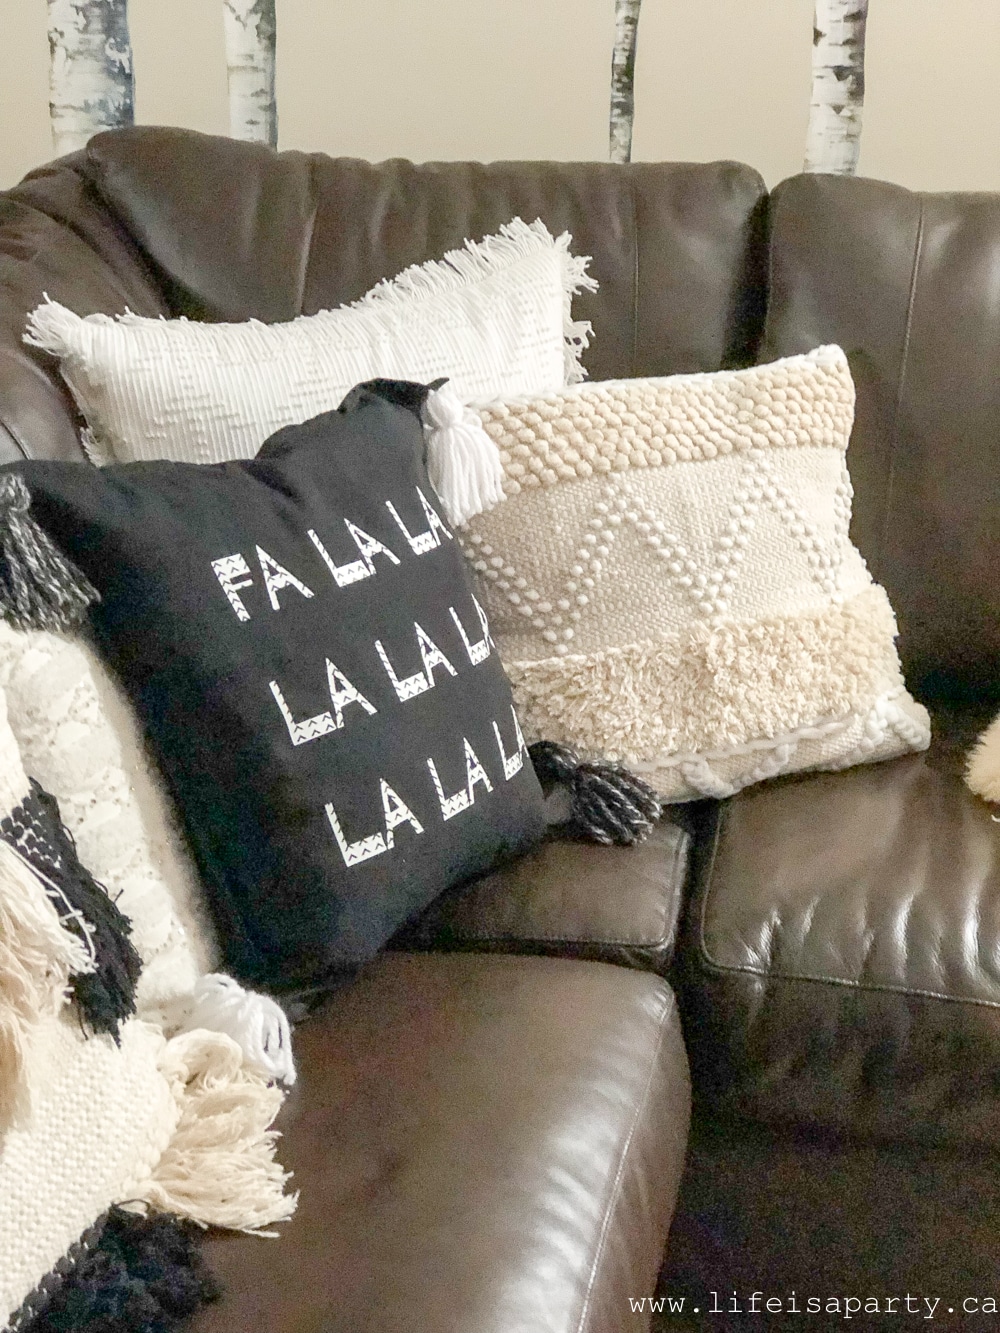
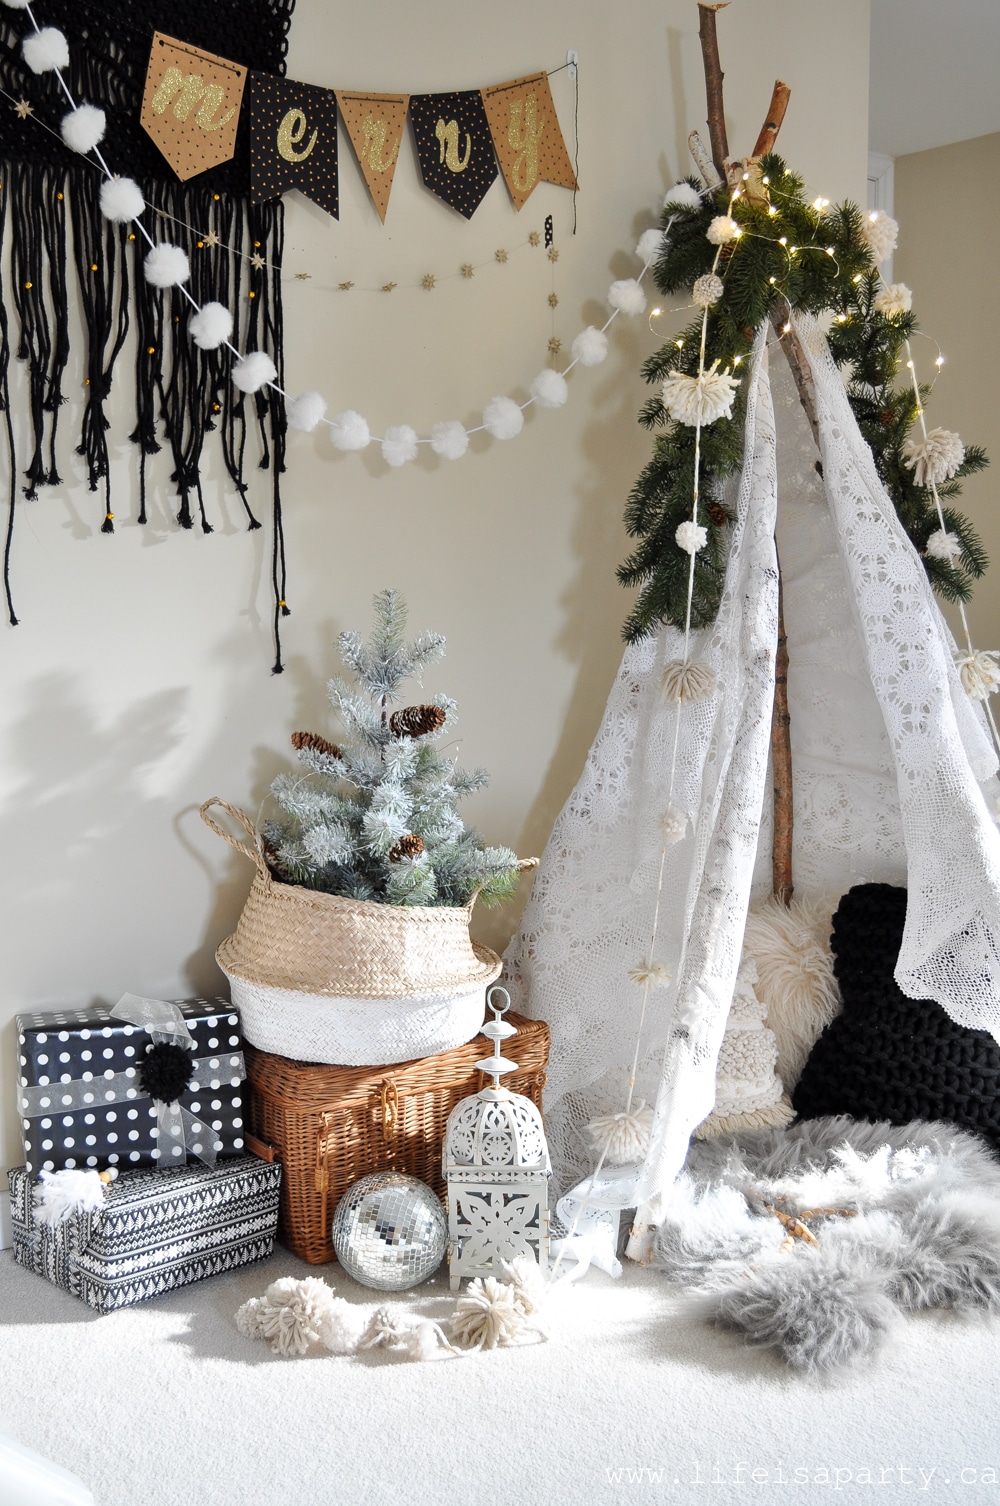
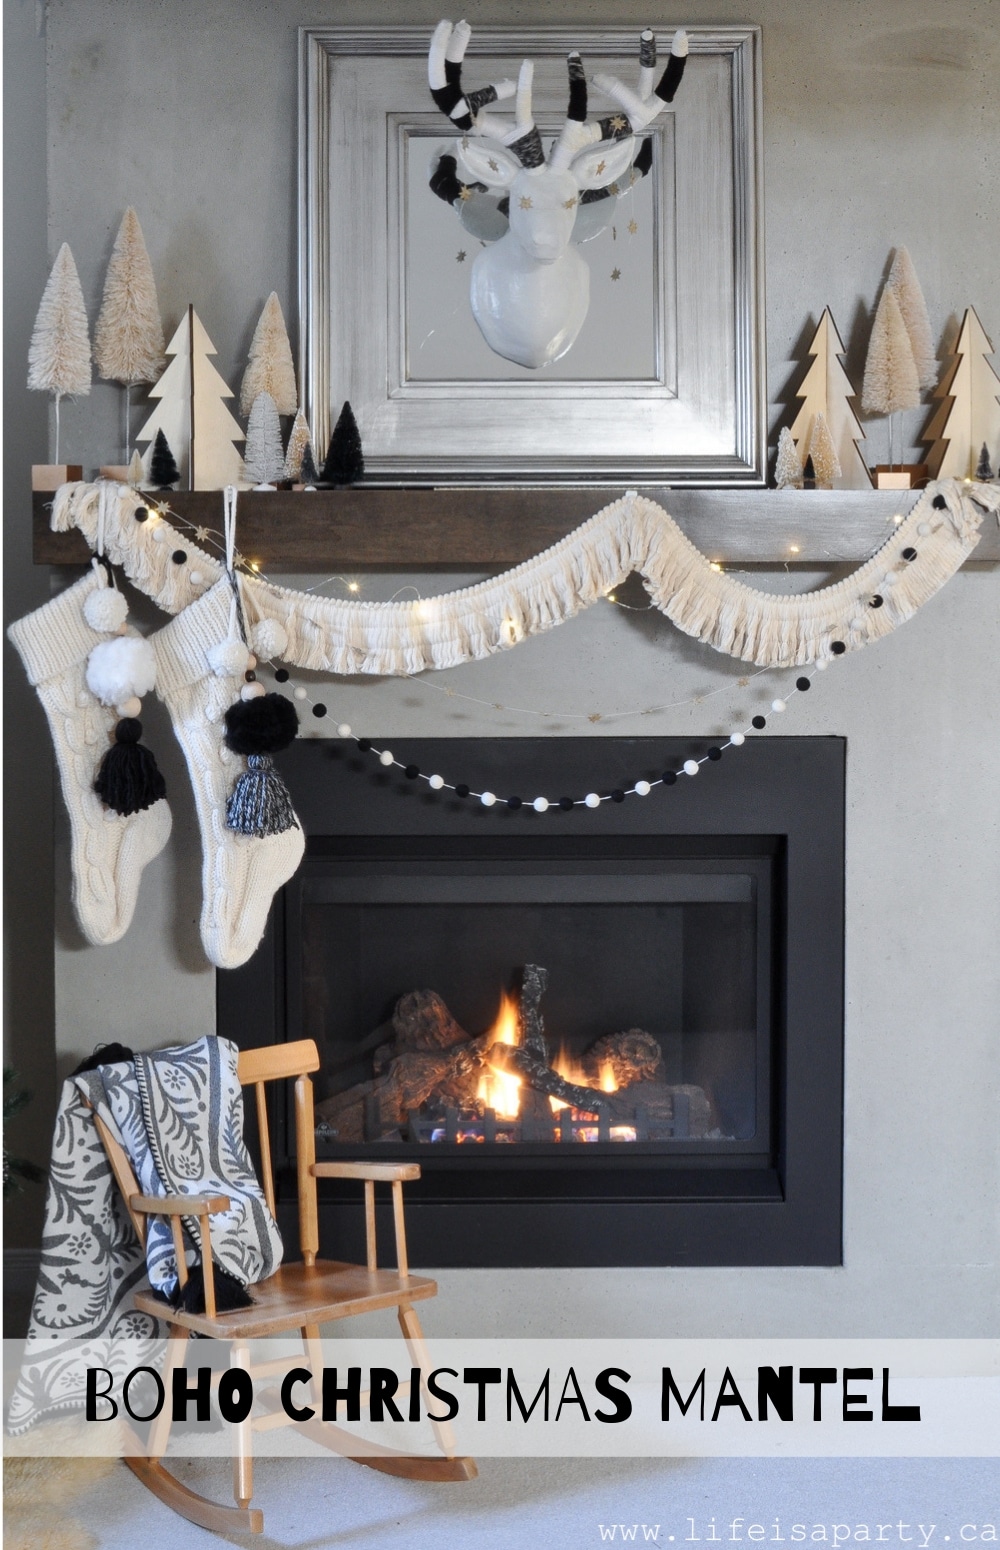
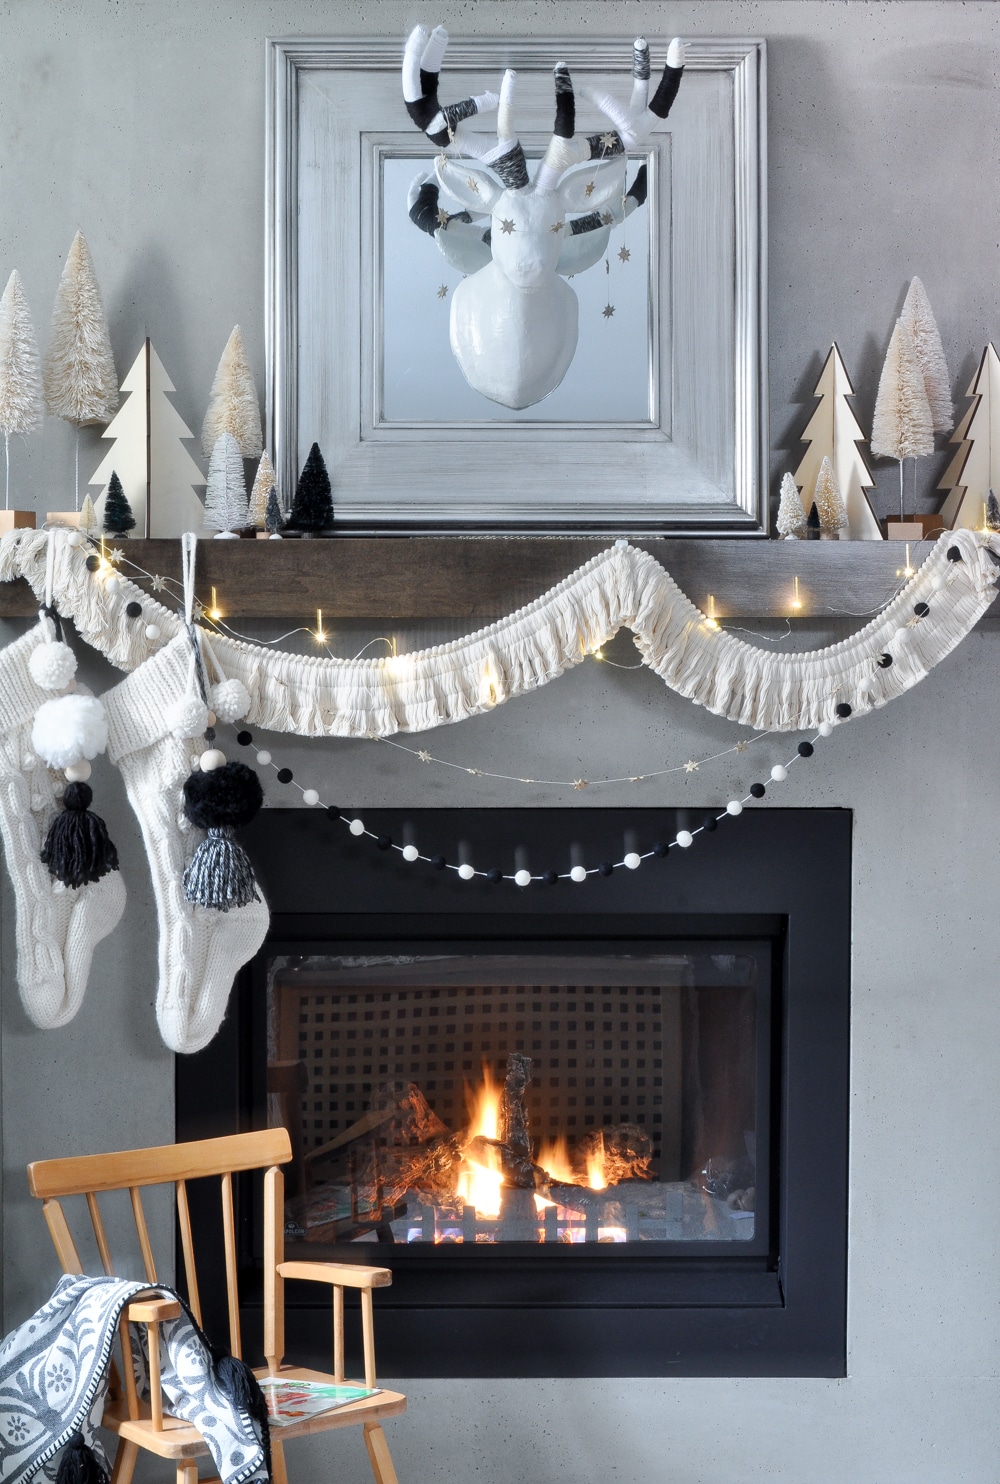
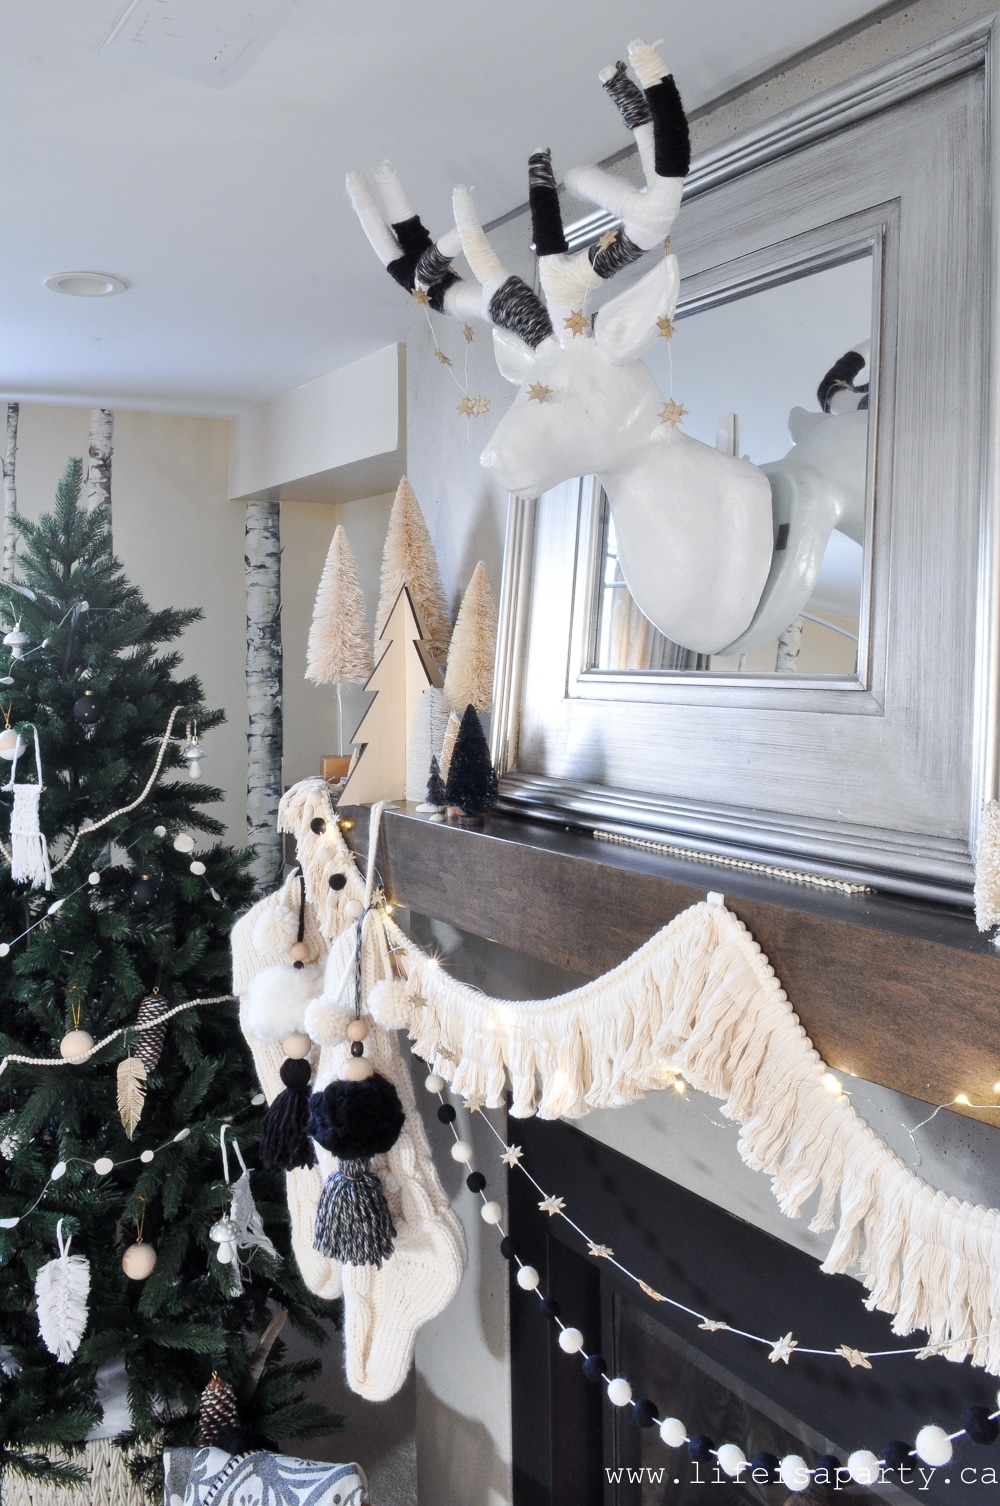
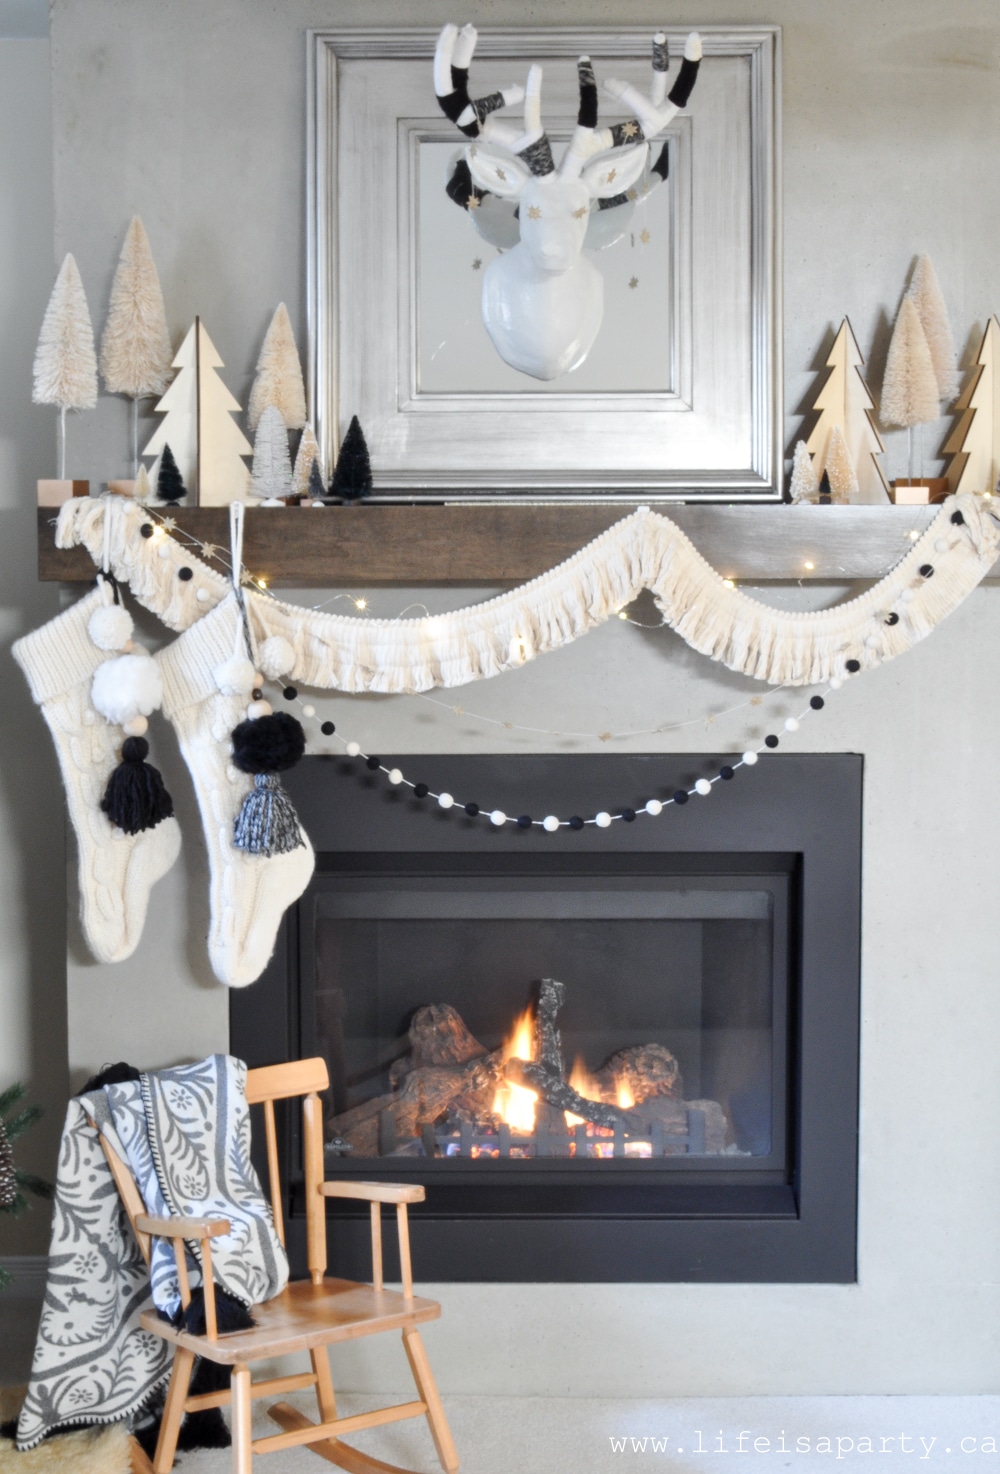
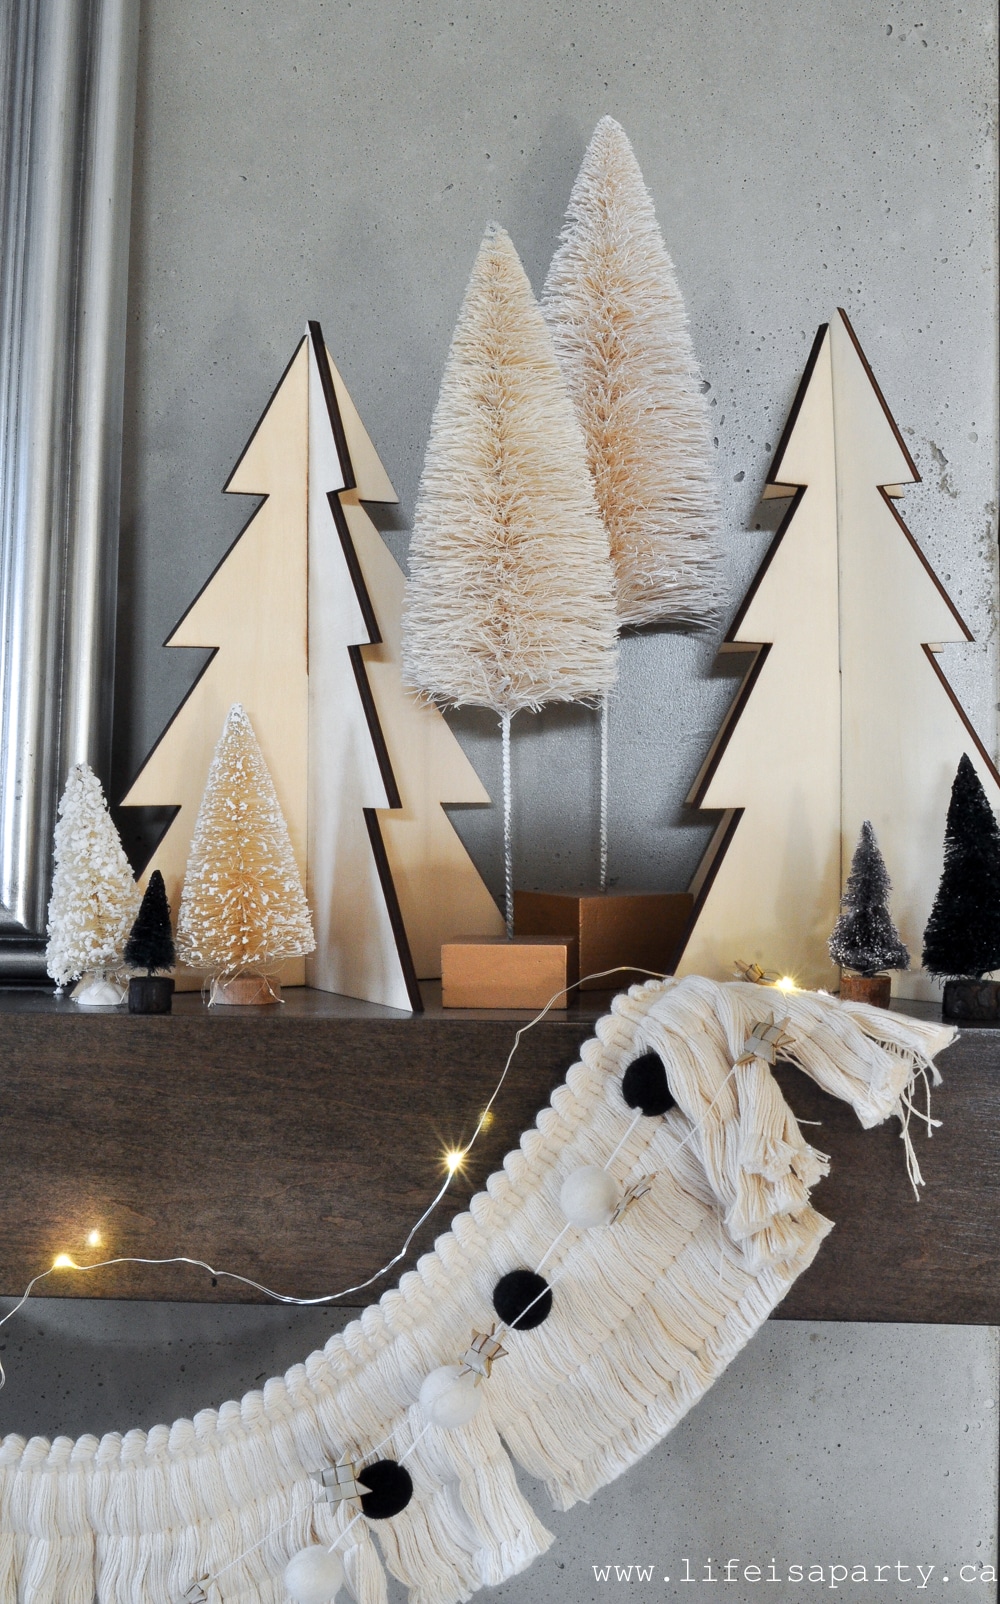
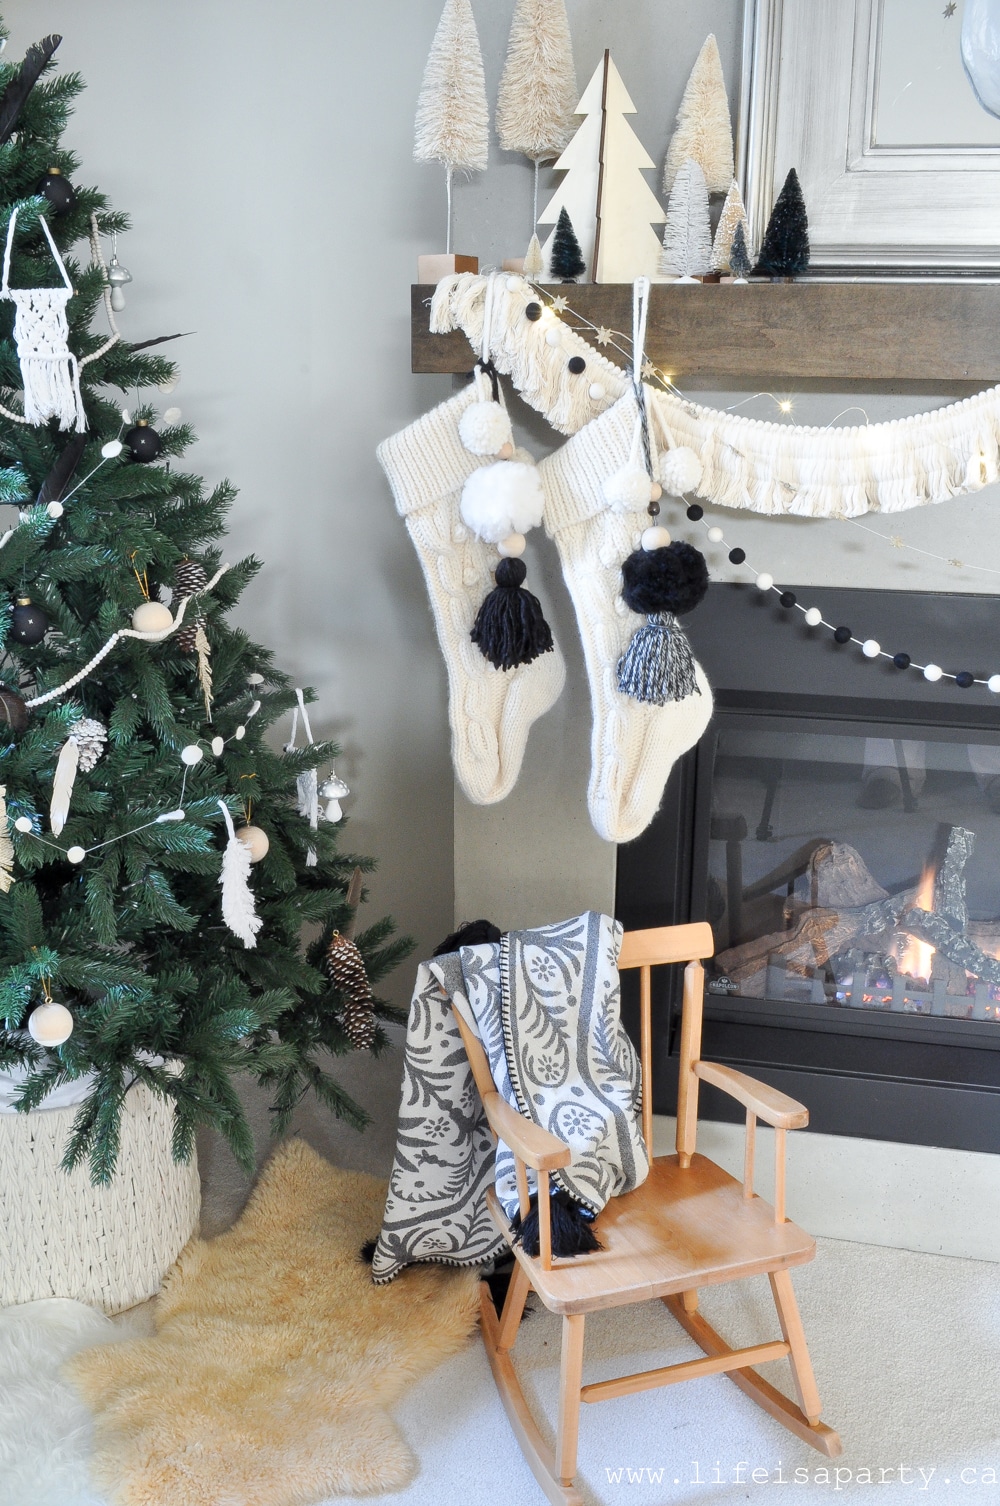
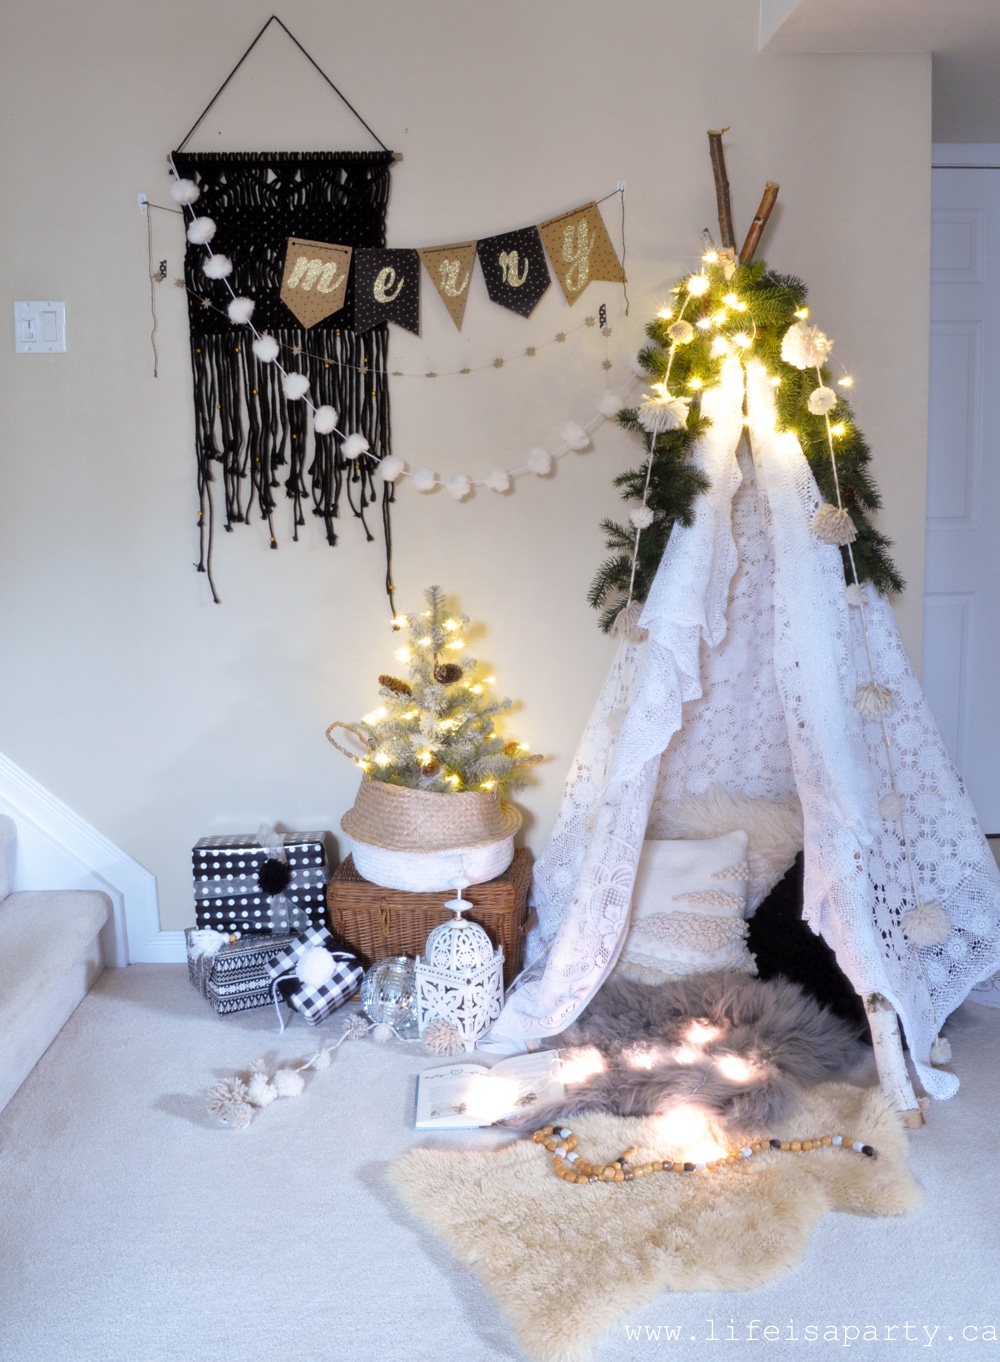
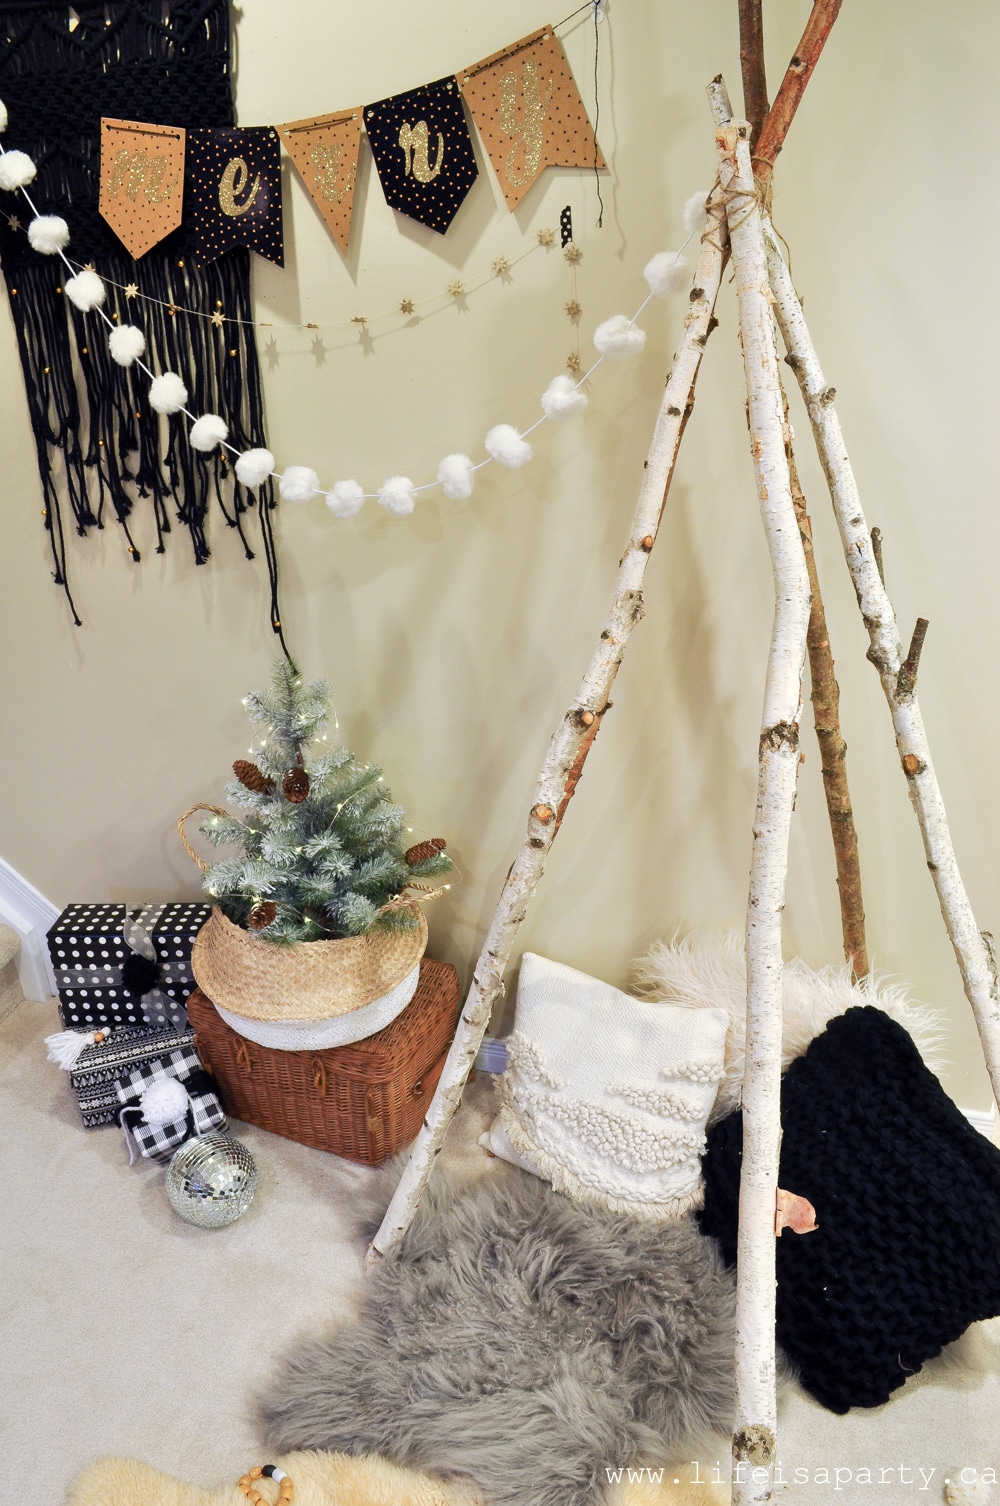
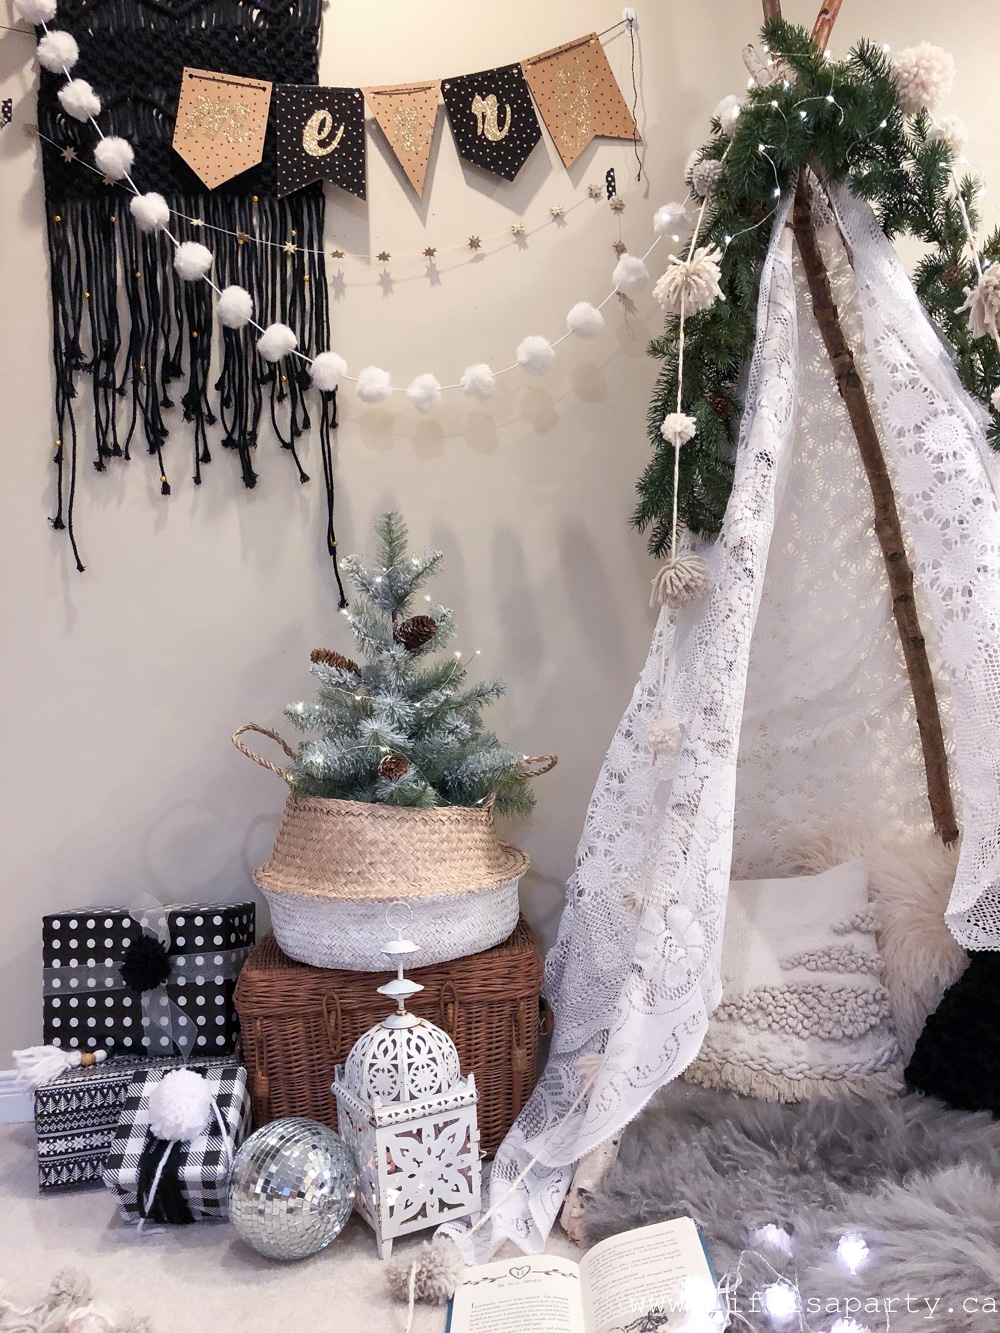
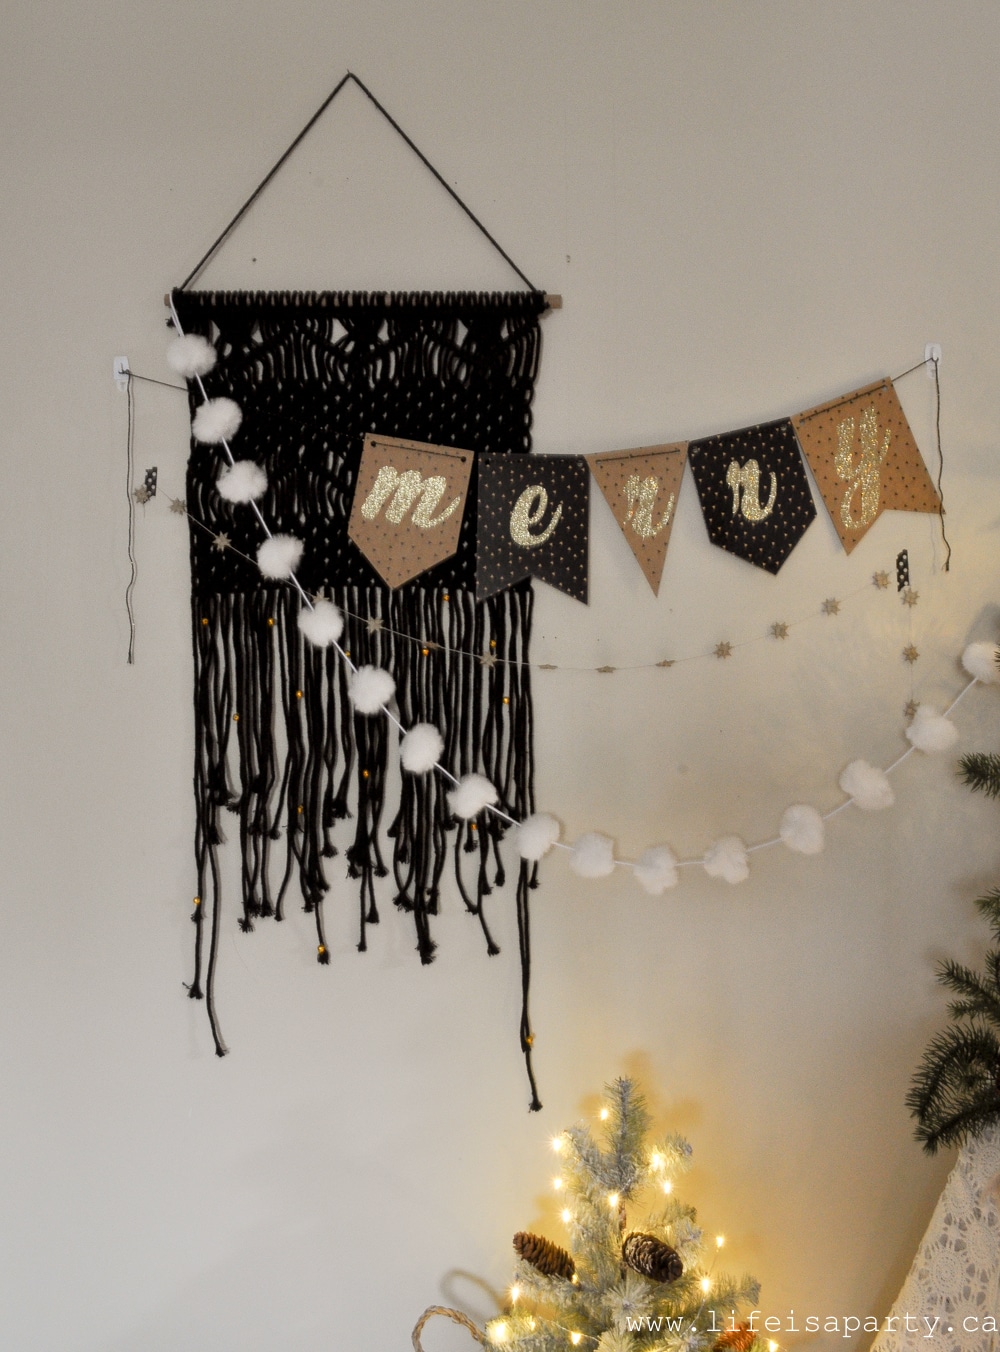
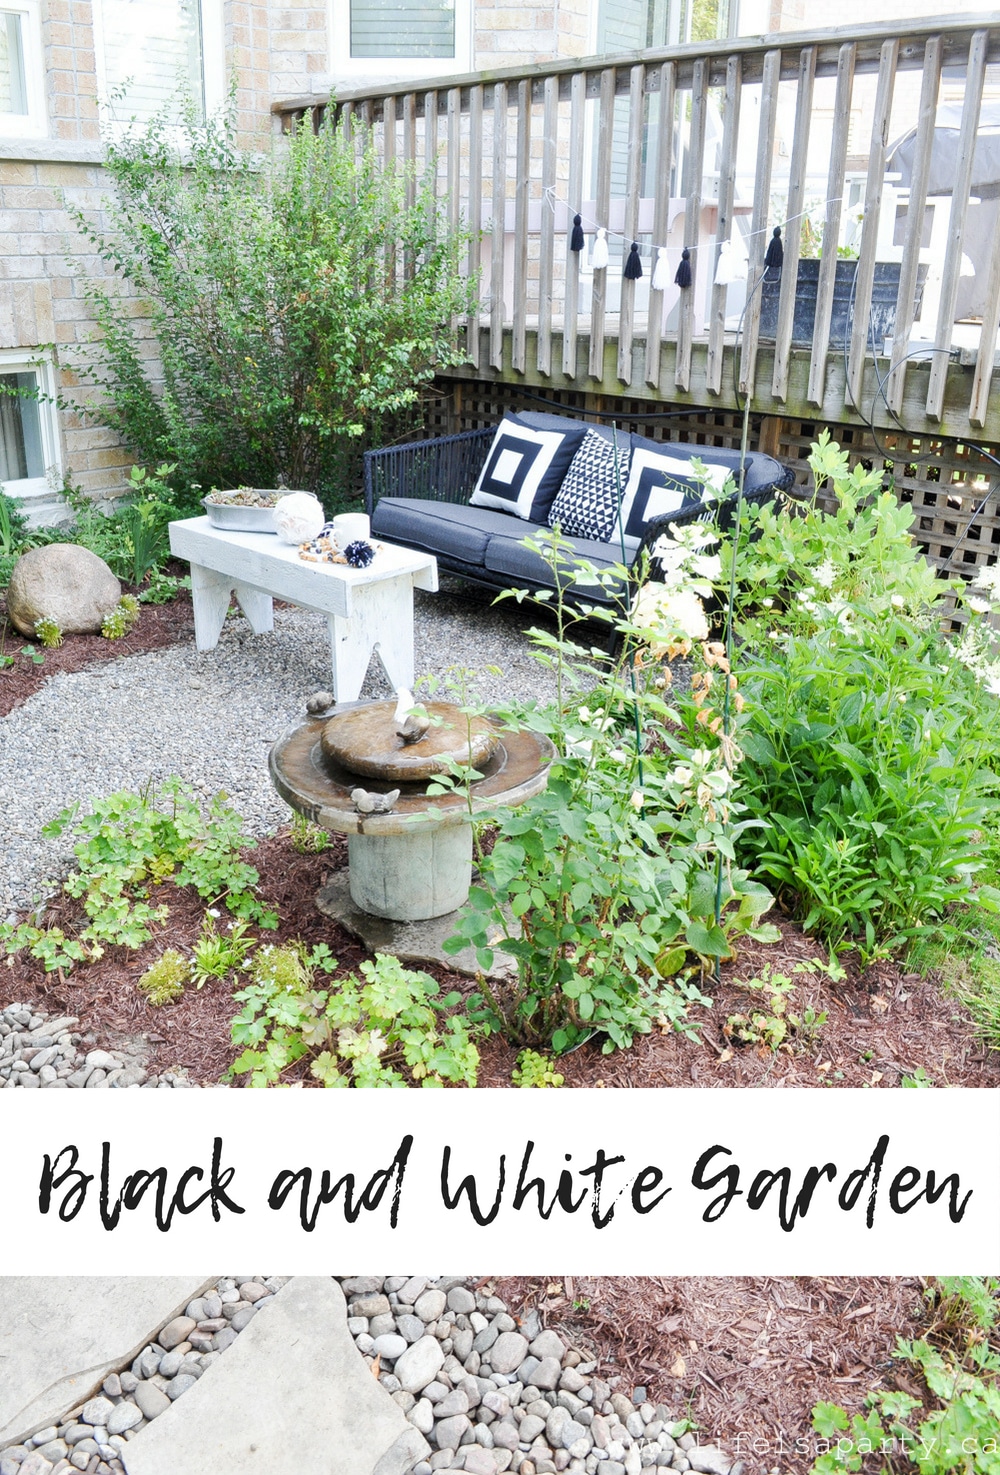
 I've decorated with a black and white boho theme for Christmas, and I love how it turned out.
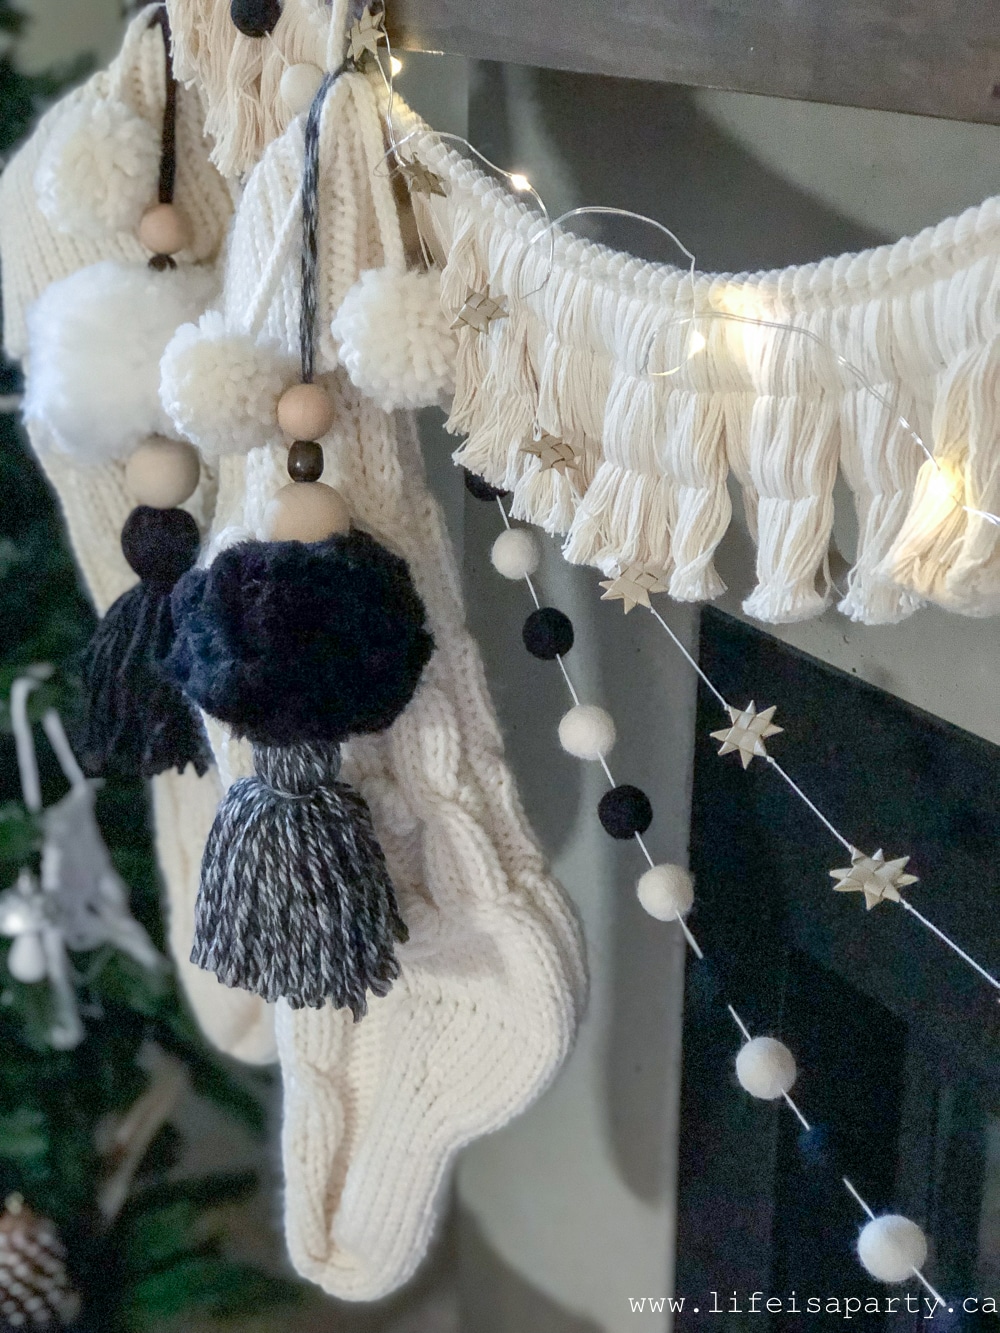
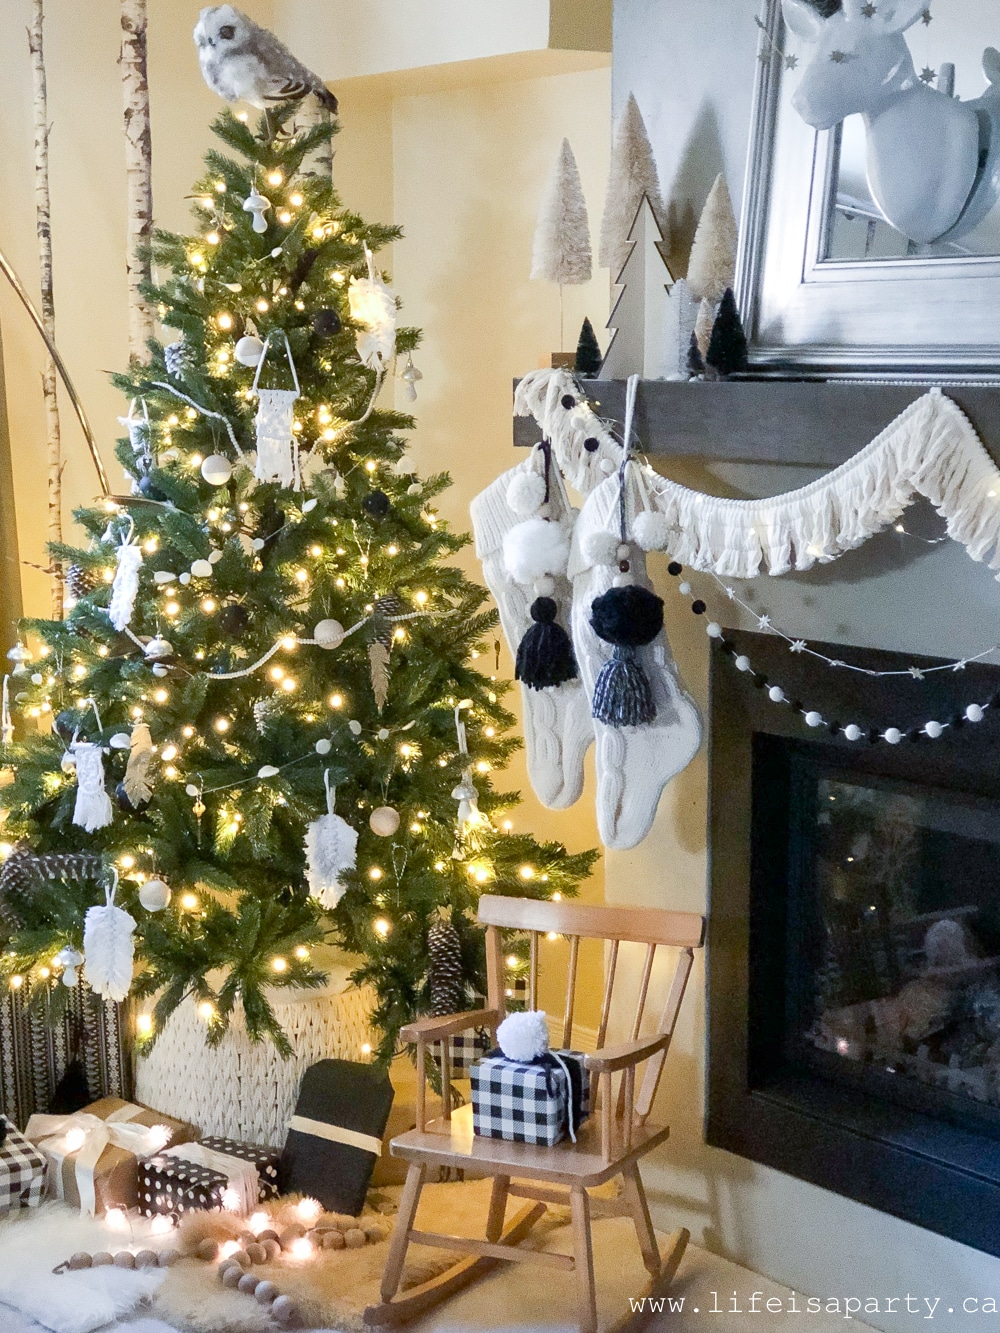
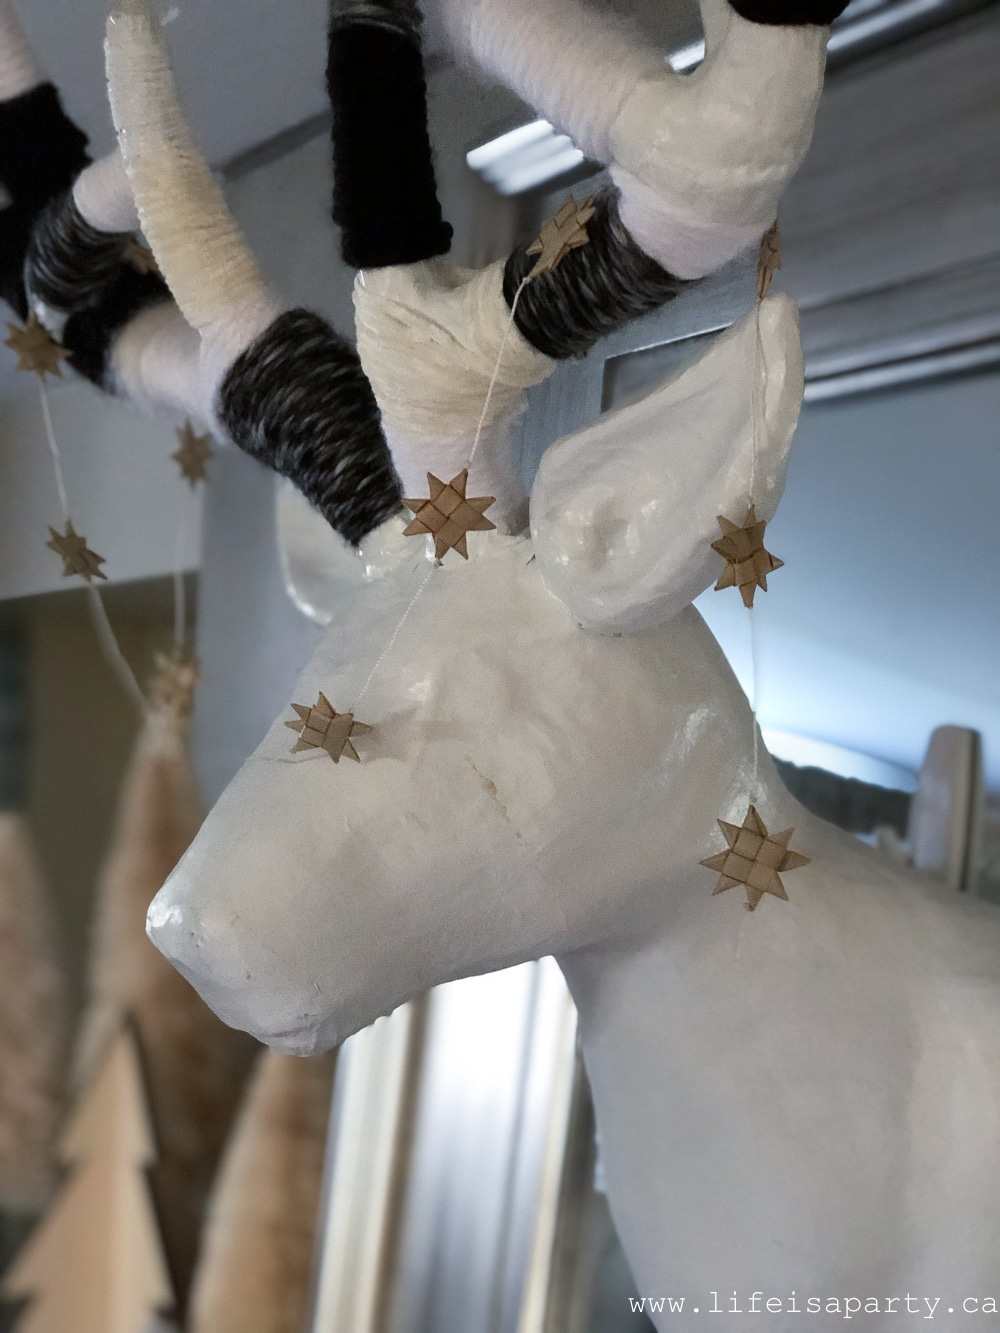
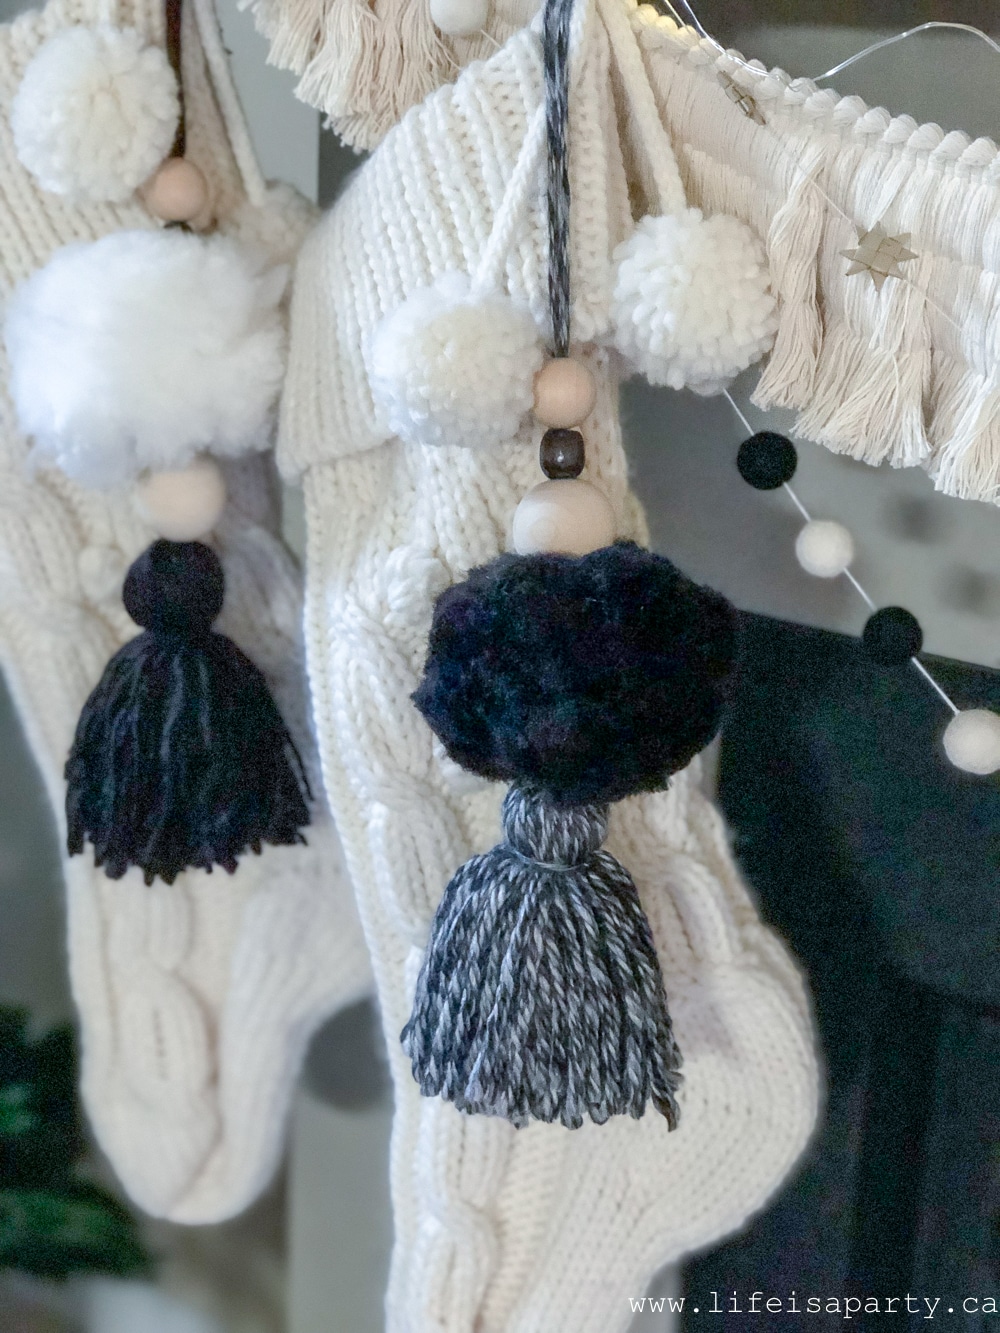
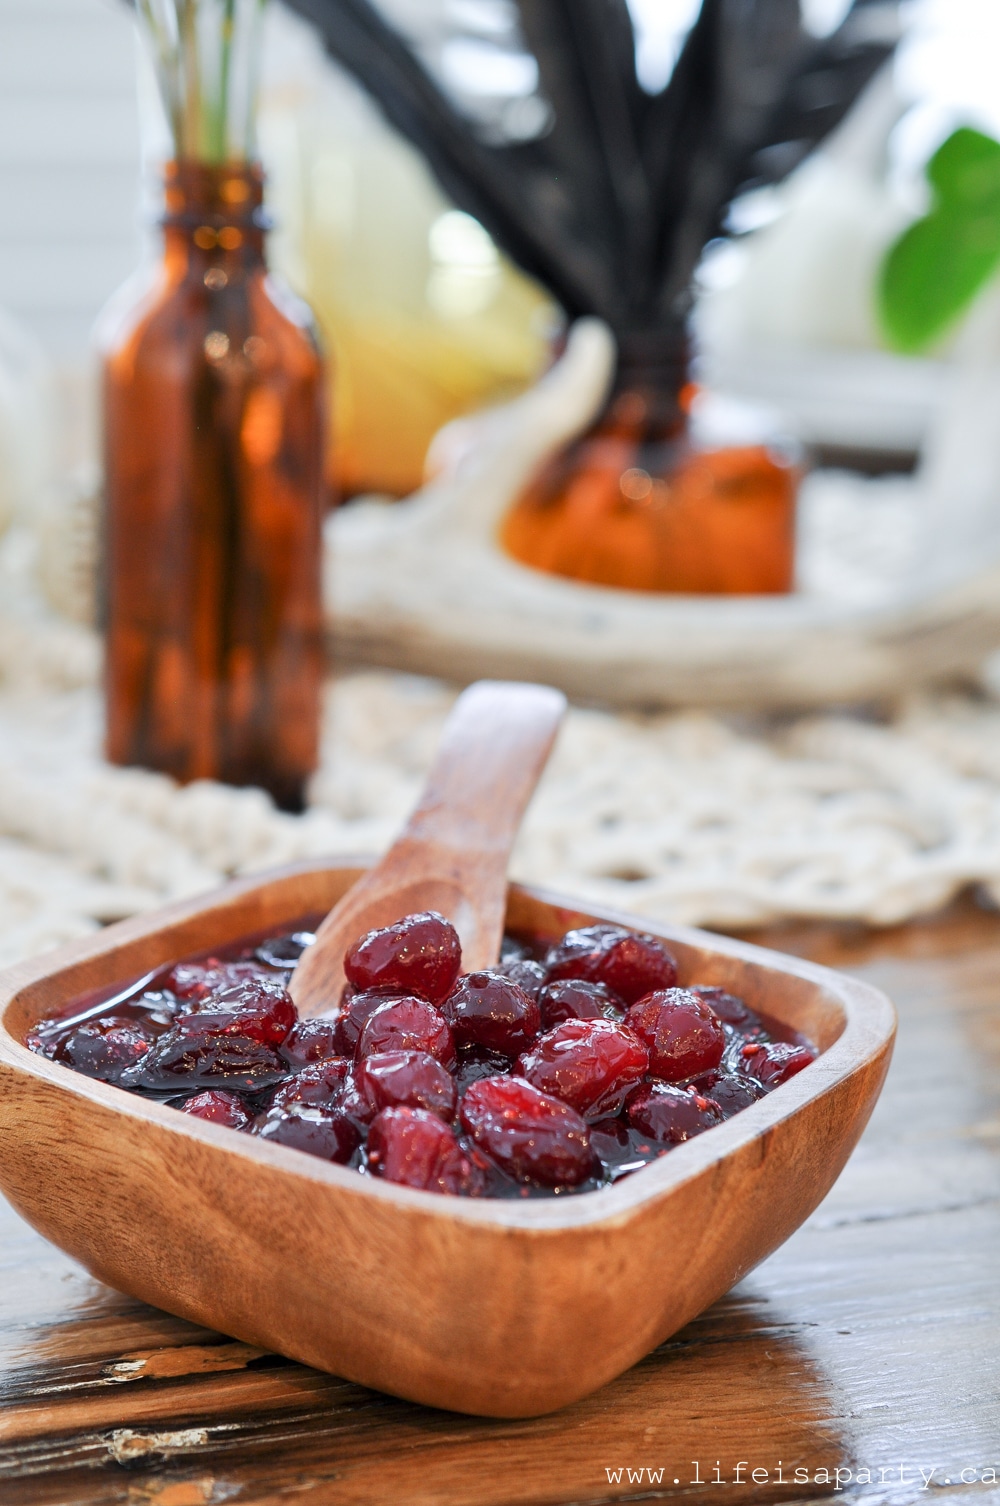
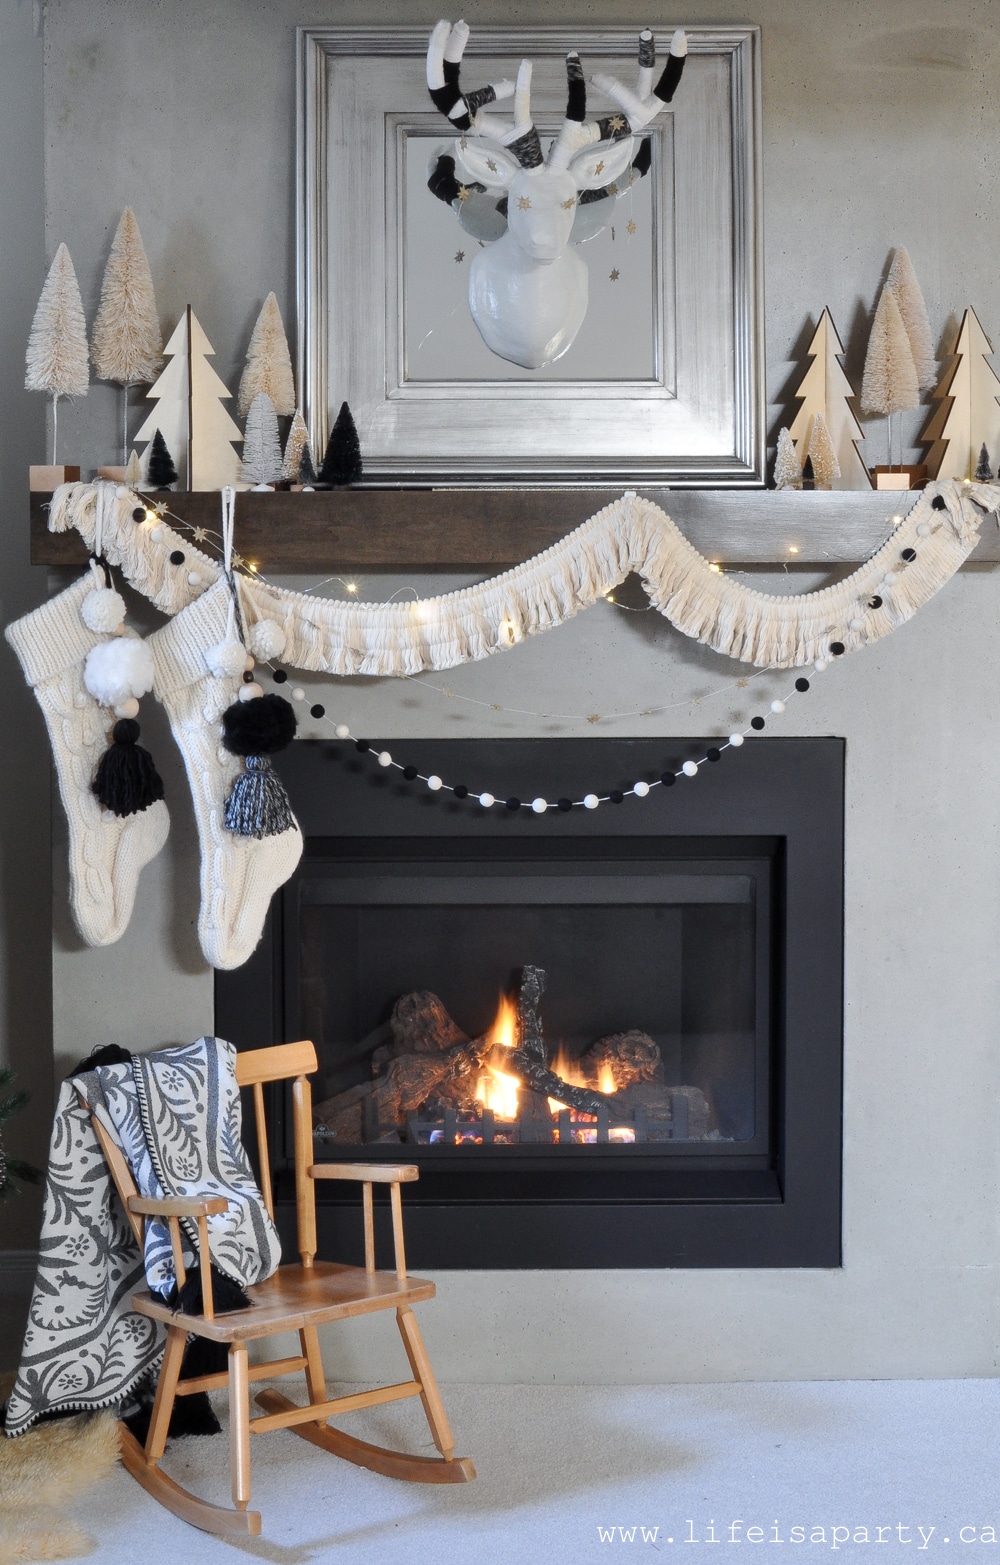 The mantel is decorated with bottle brush trees -the few black ones got a little spray paint added to them. The deer head is paper mache, and I wrapped the antlers in some yarn to add texture. The fringe makes a fun garland, and the stockings are dressed up with some fun stocking tassels. You can read more about our
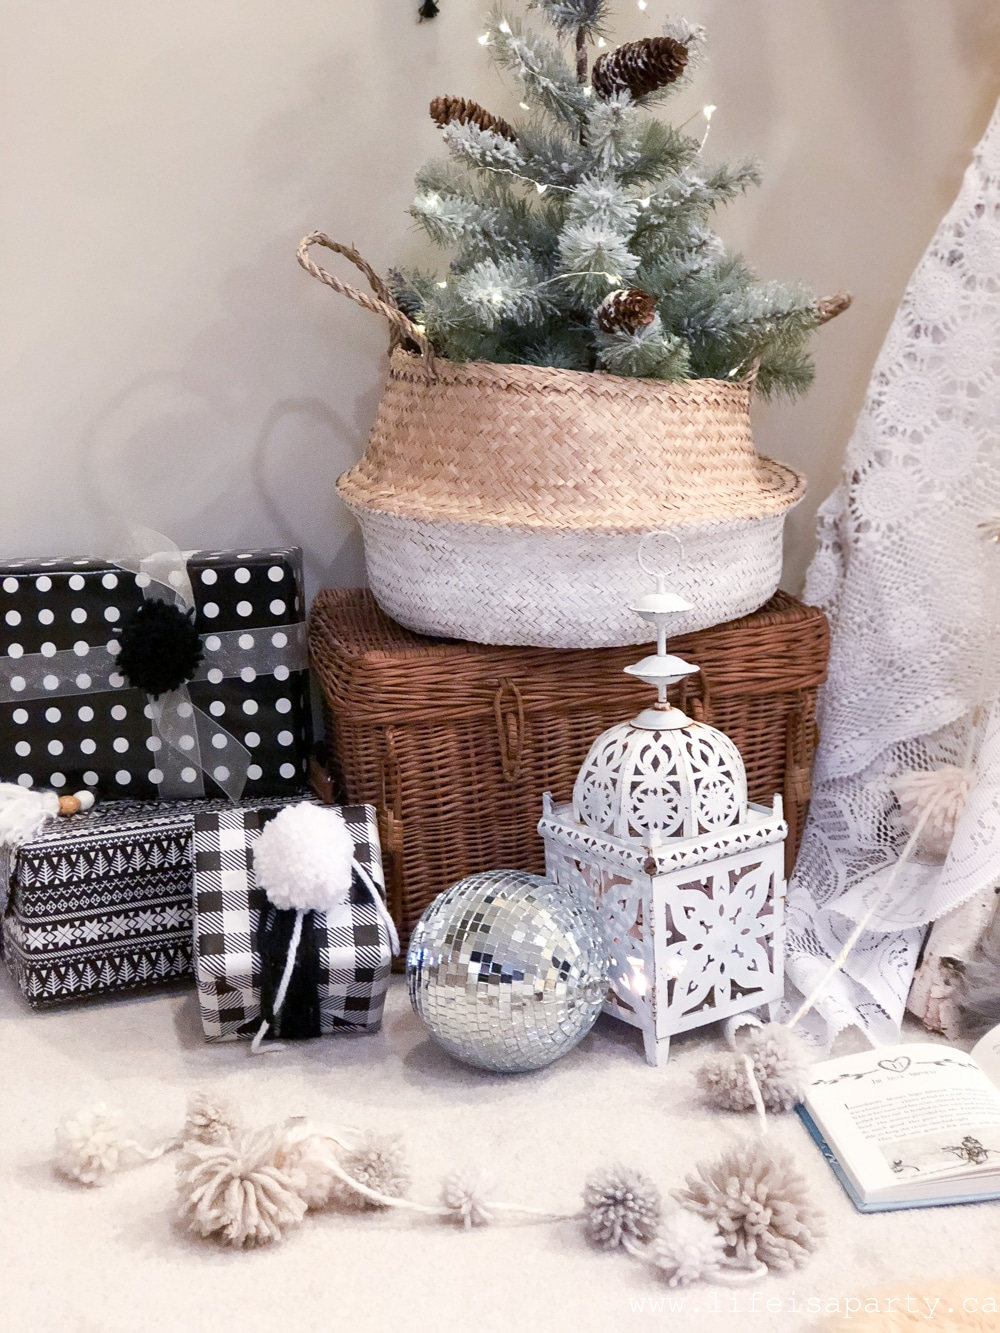
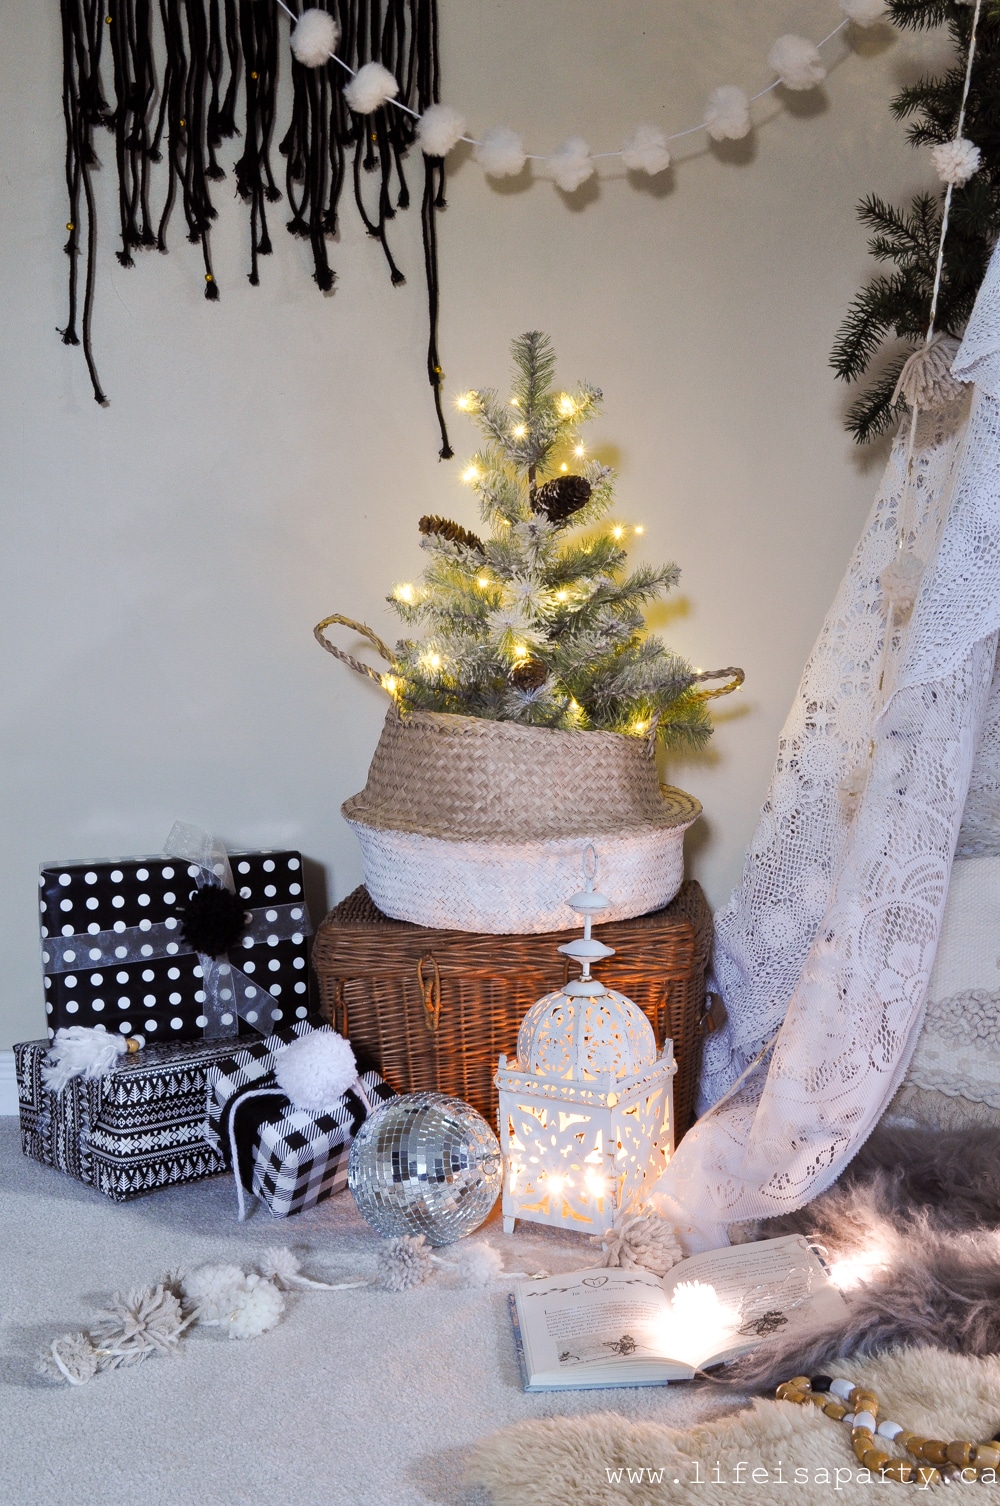
 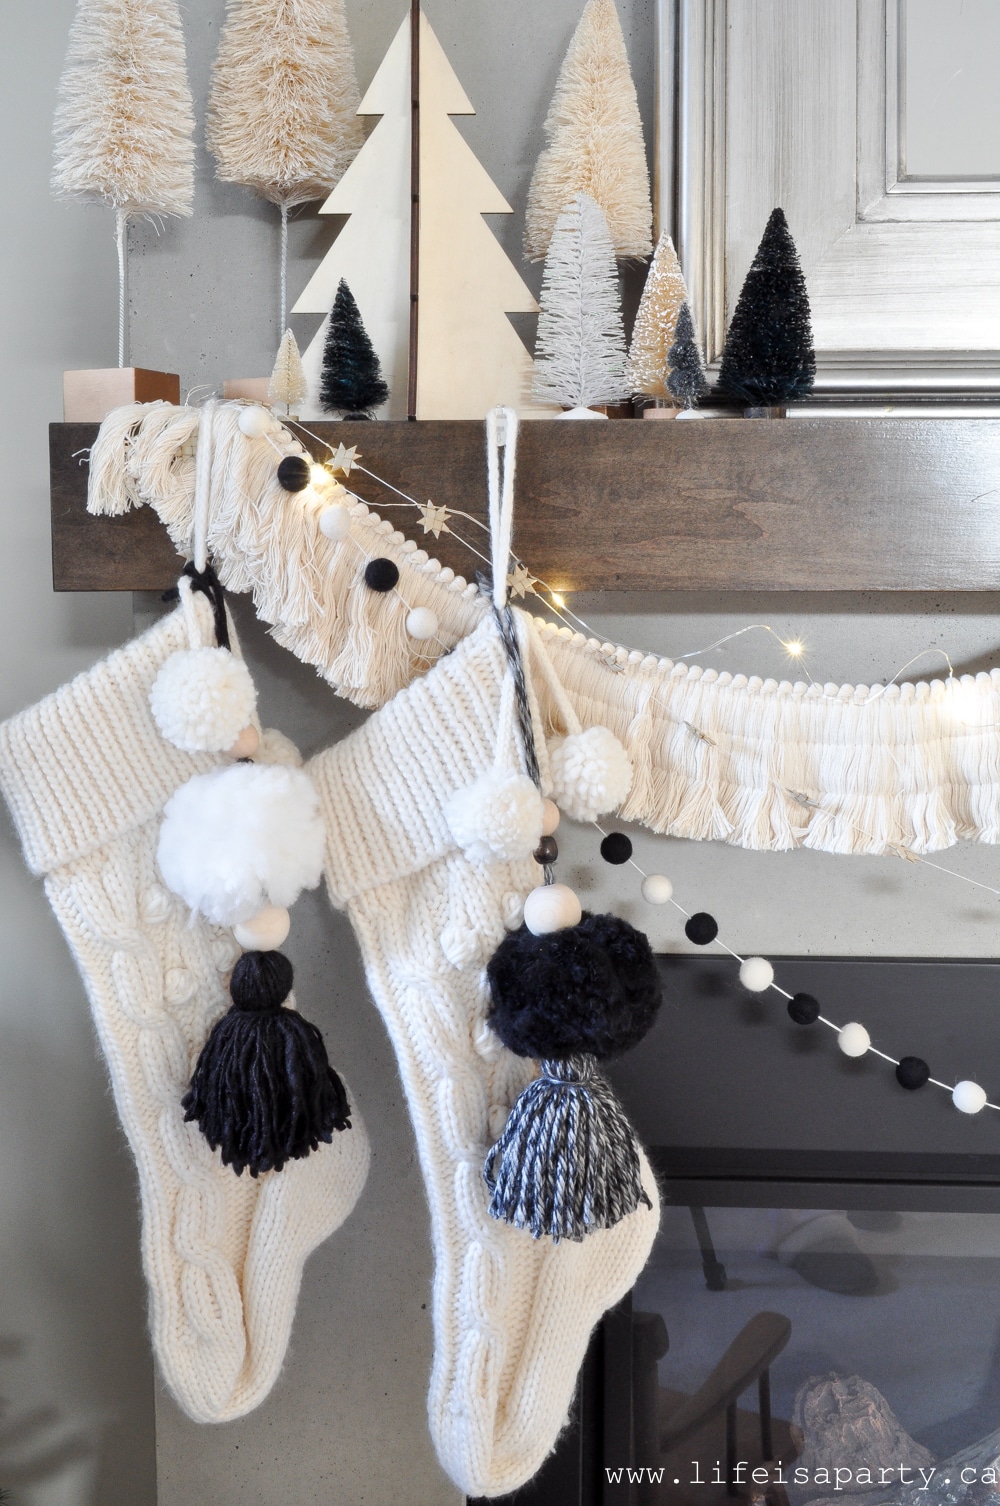 The tree looks great in its macrame basket, and with an owl as the topper.
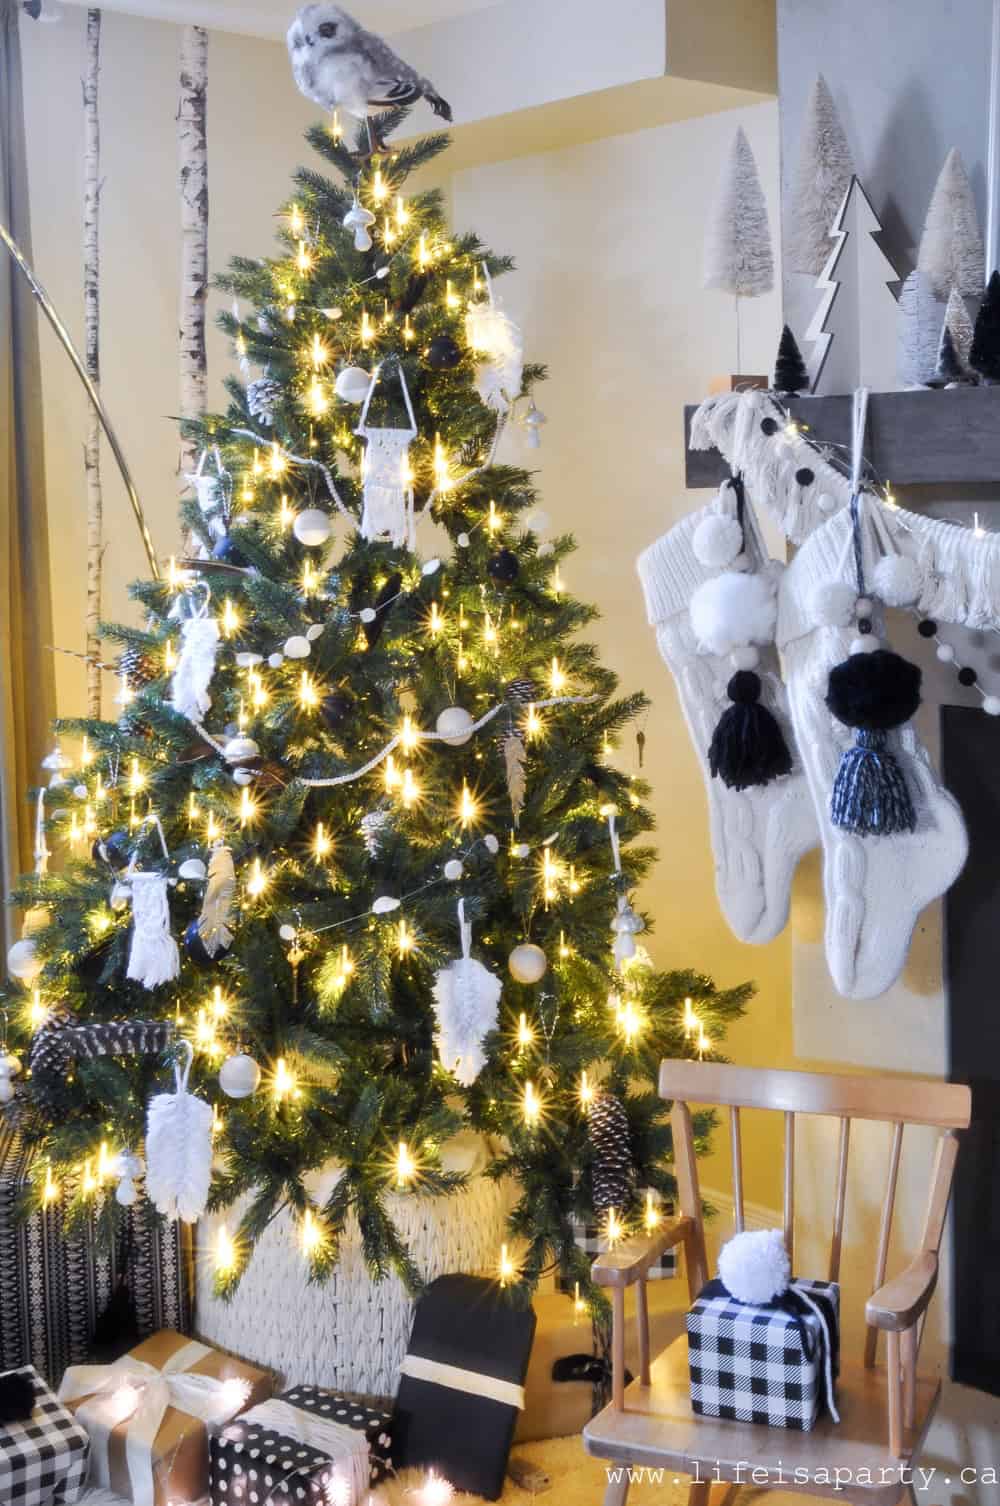 It's decorated with lots of DIY ornaments, like this
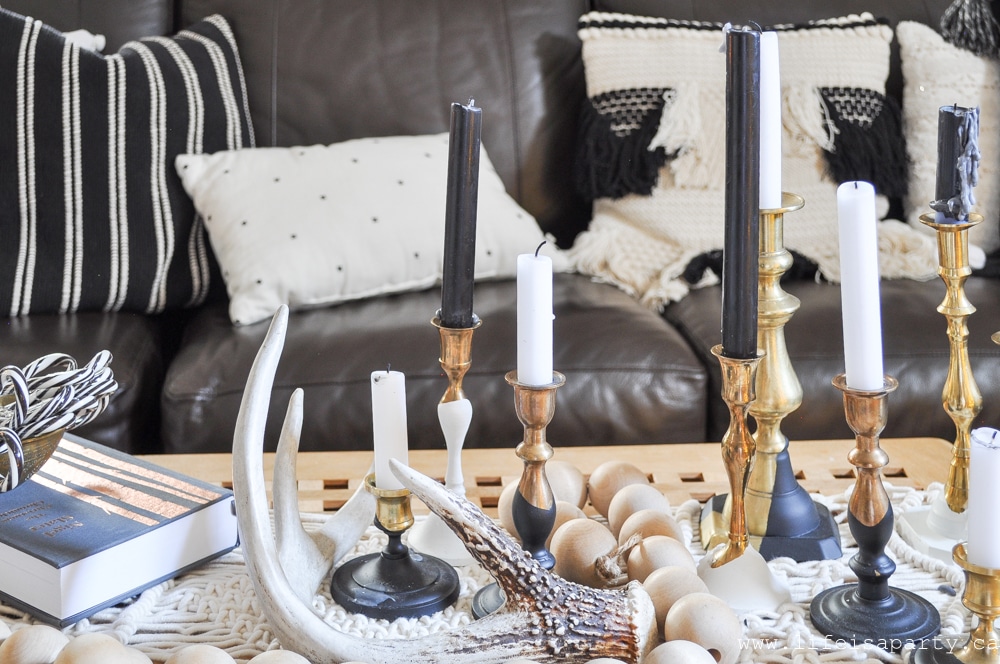
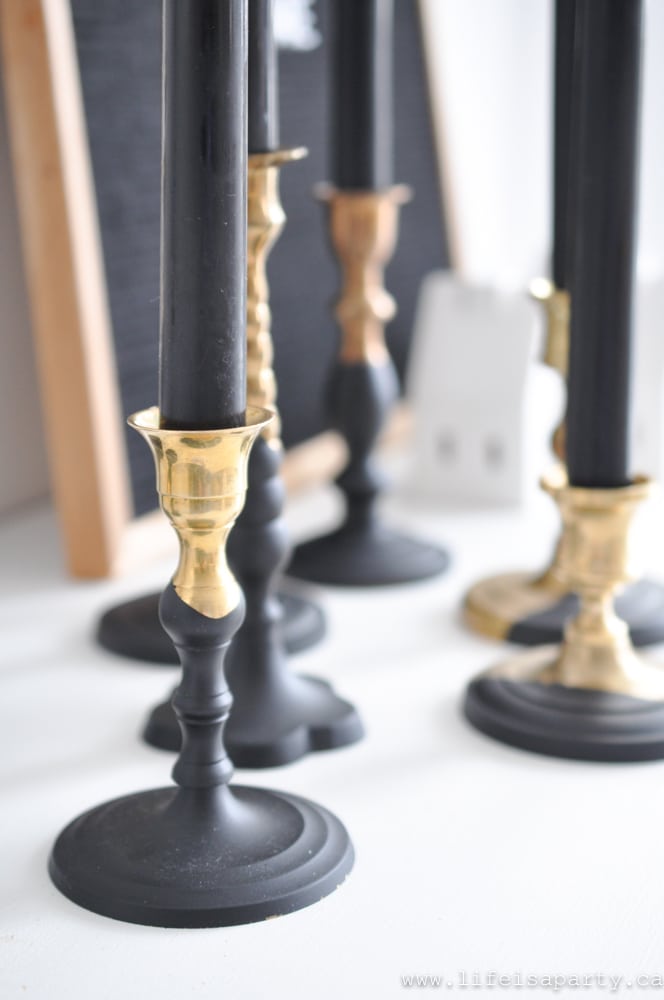
 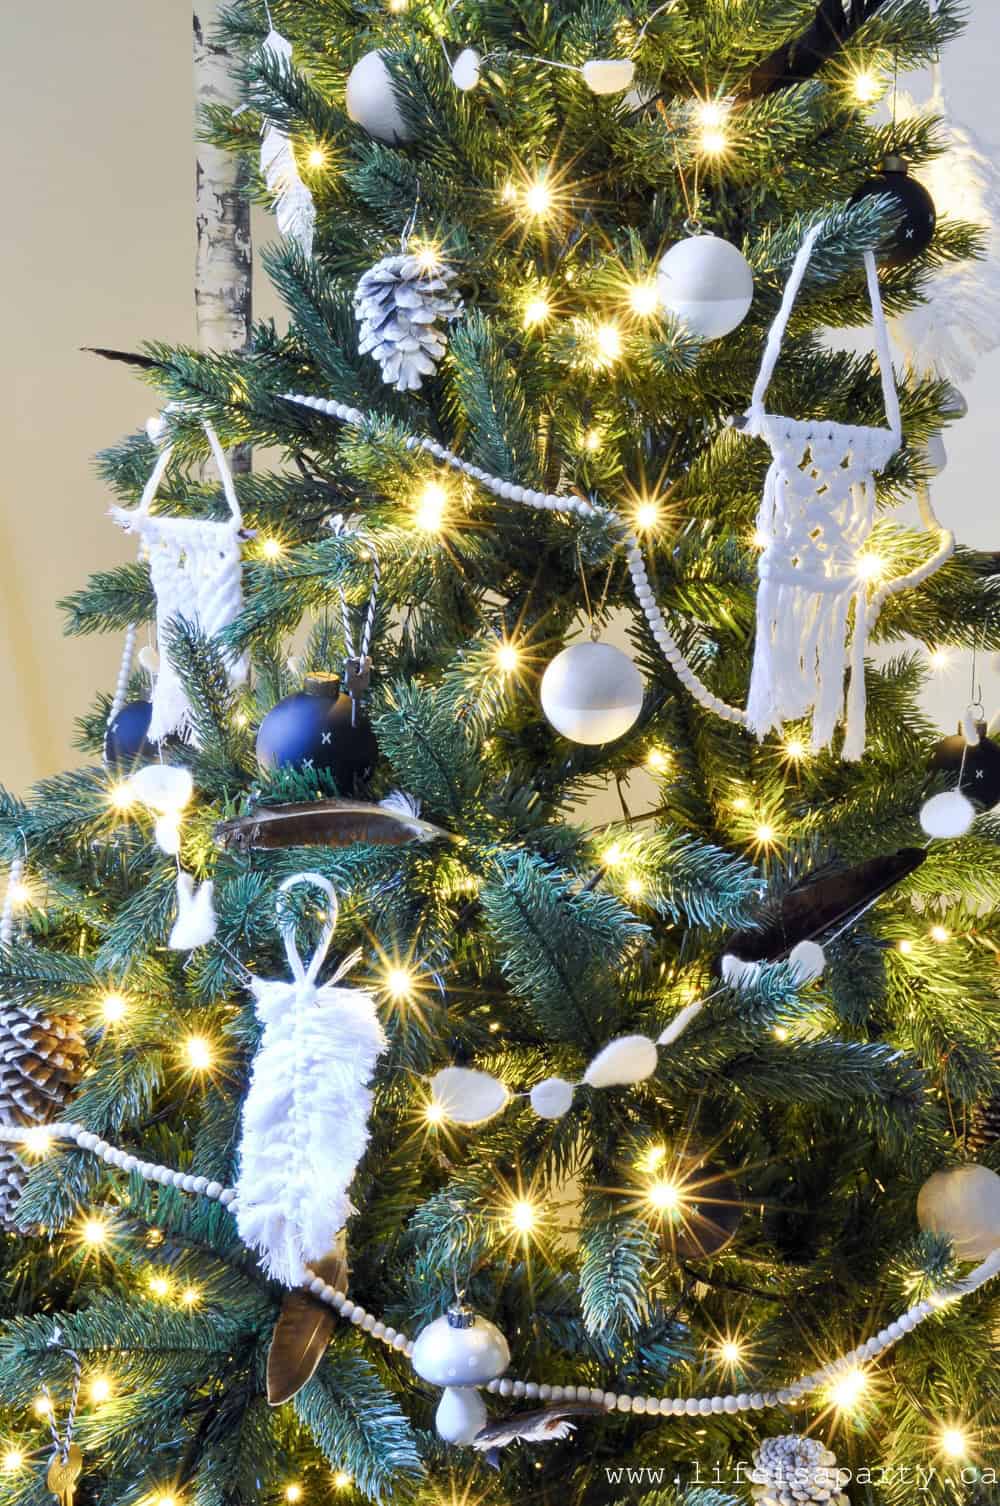 The coffee table is full of brass candle holders.
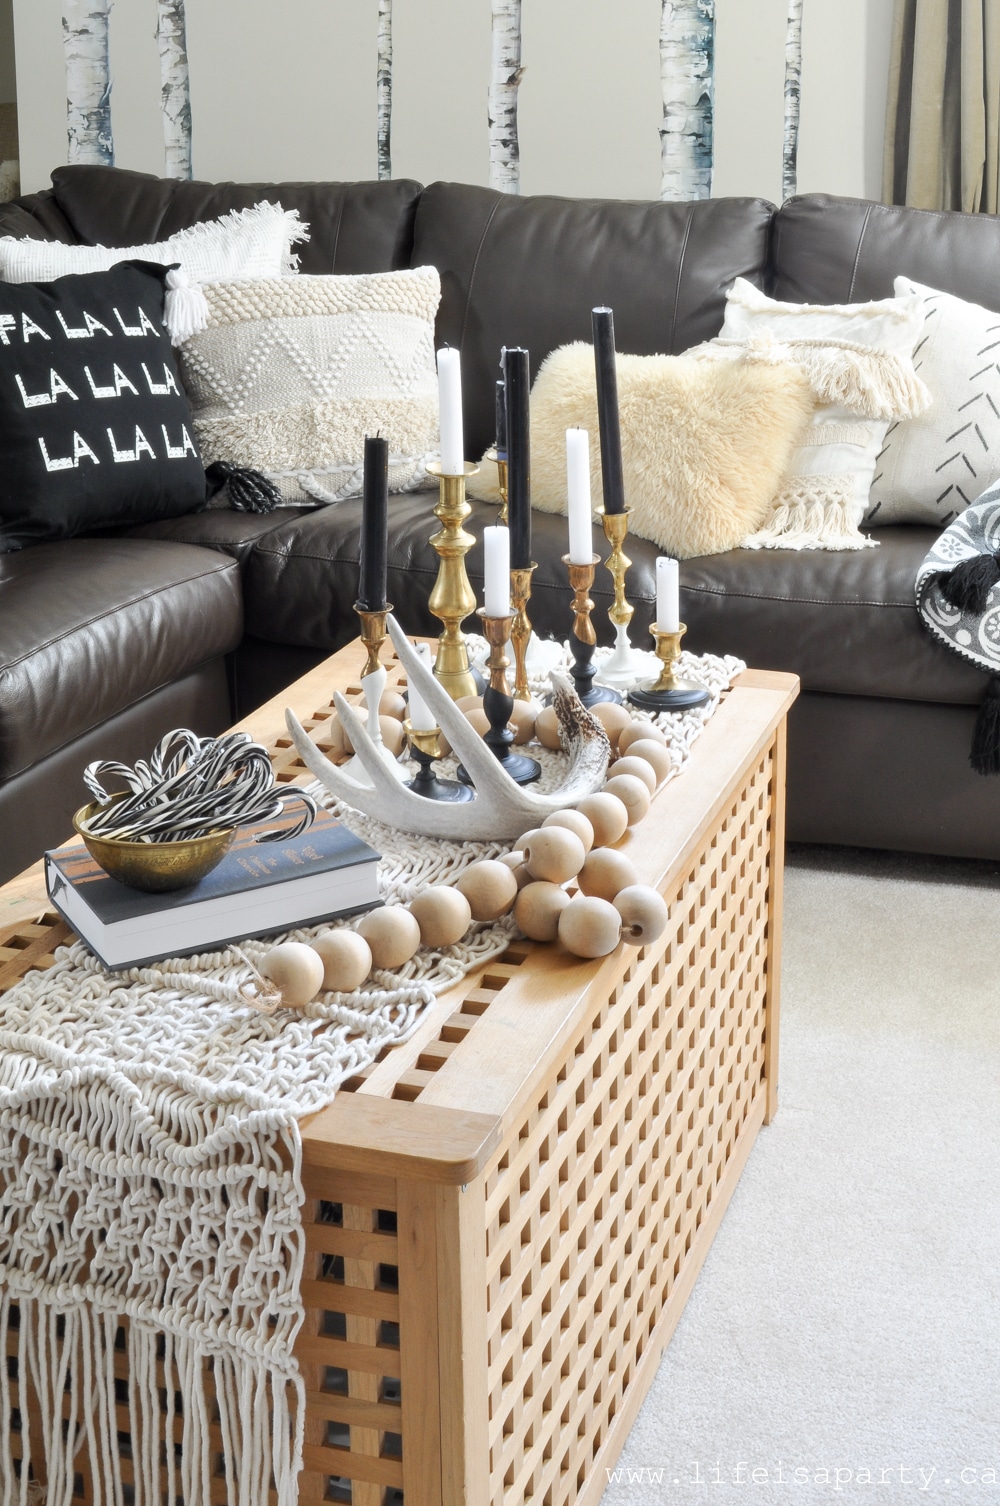 I'm so looking forward to a little down time with a good book here over the Christmas break.
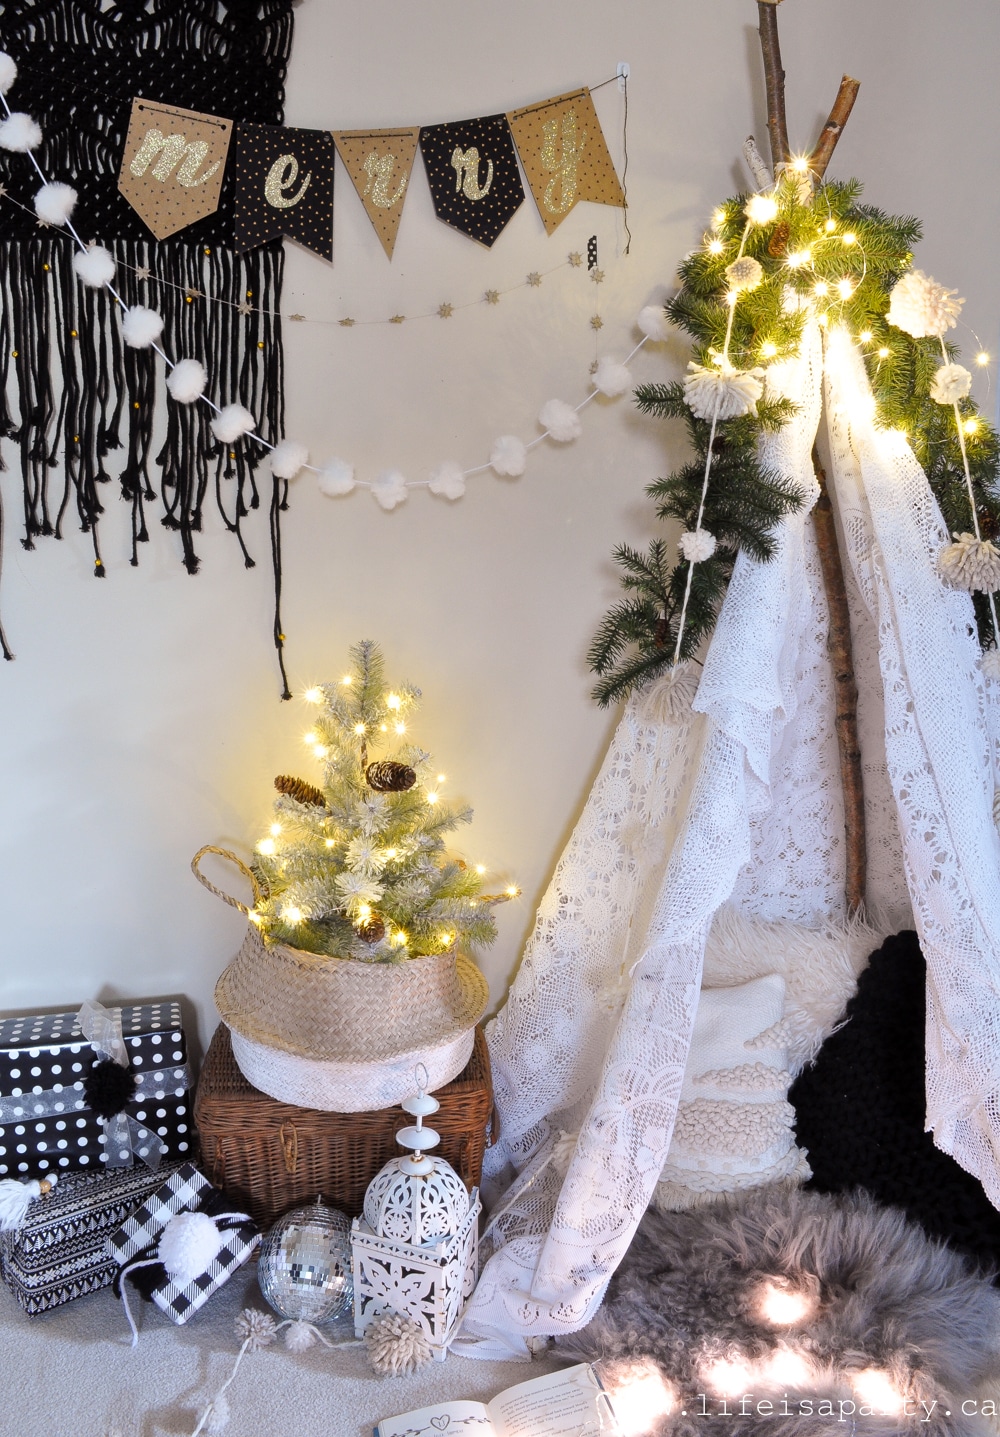
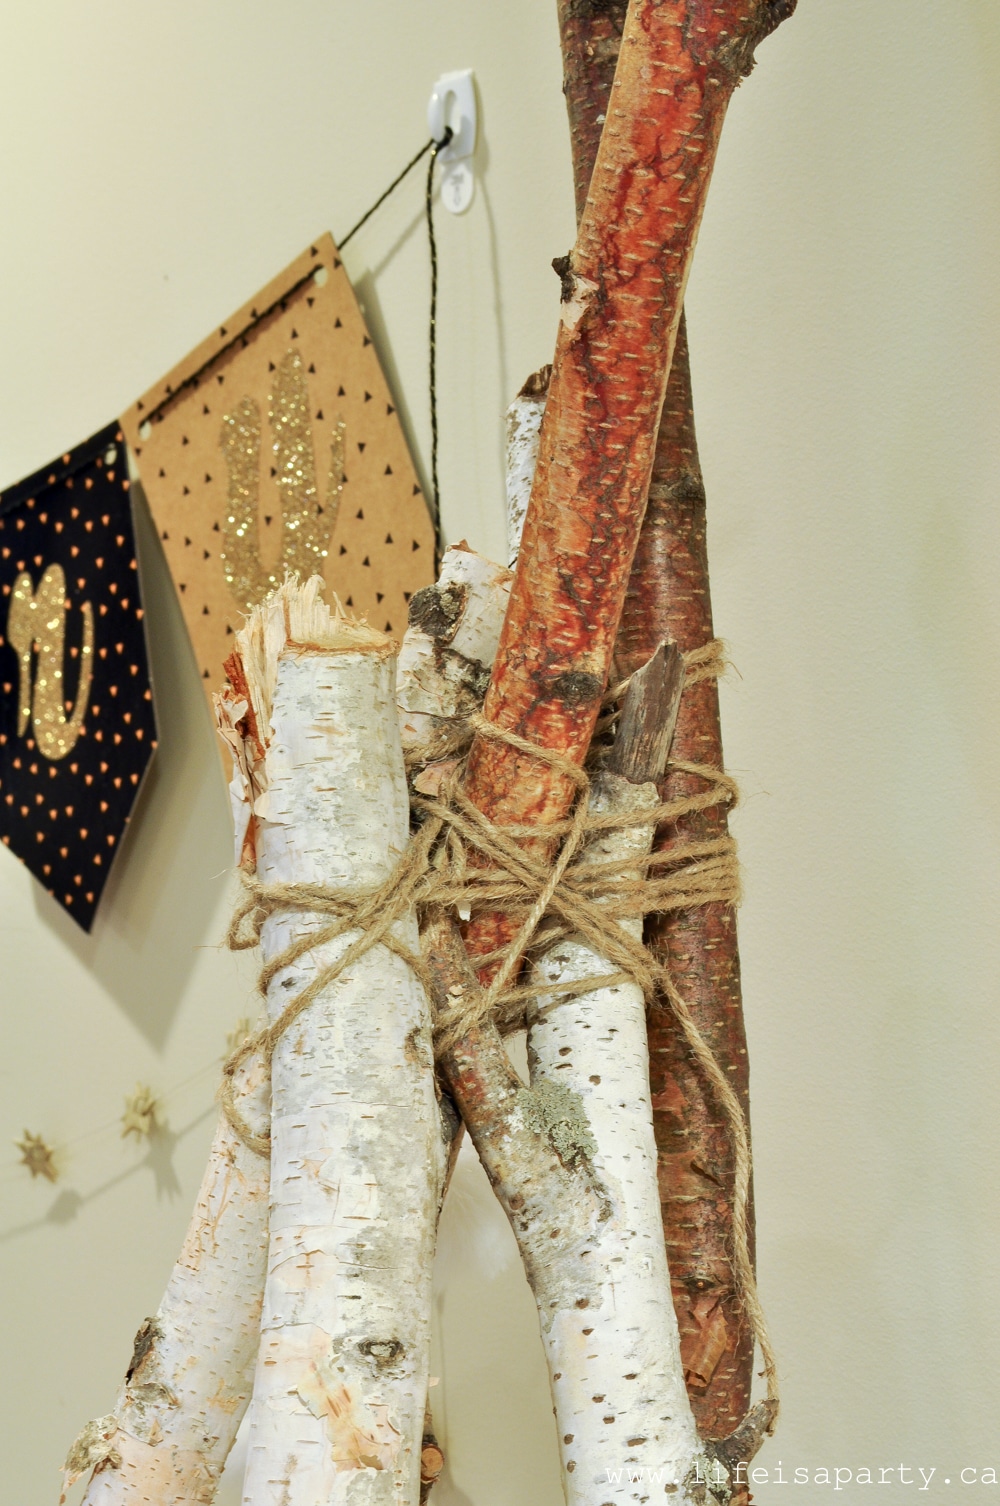
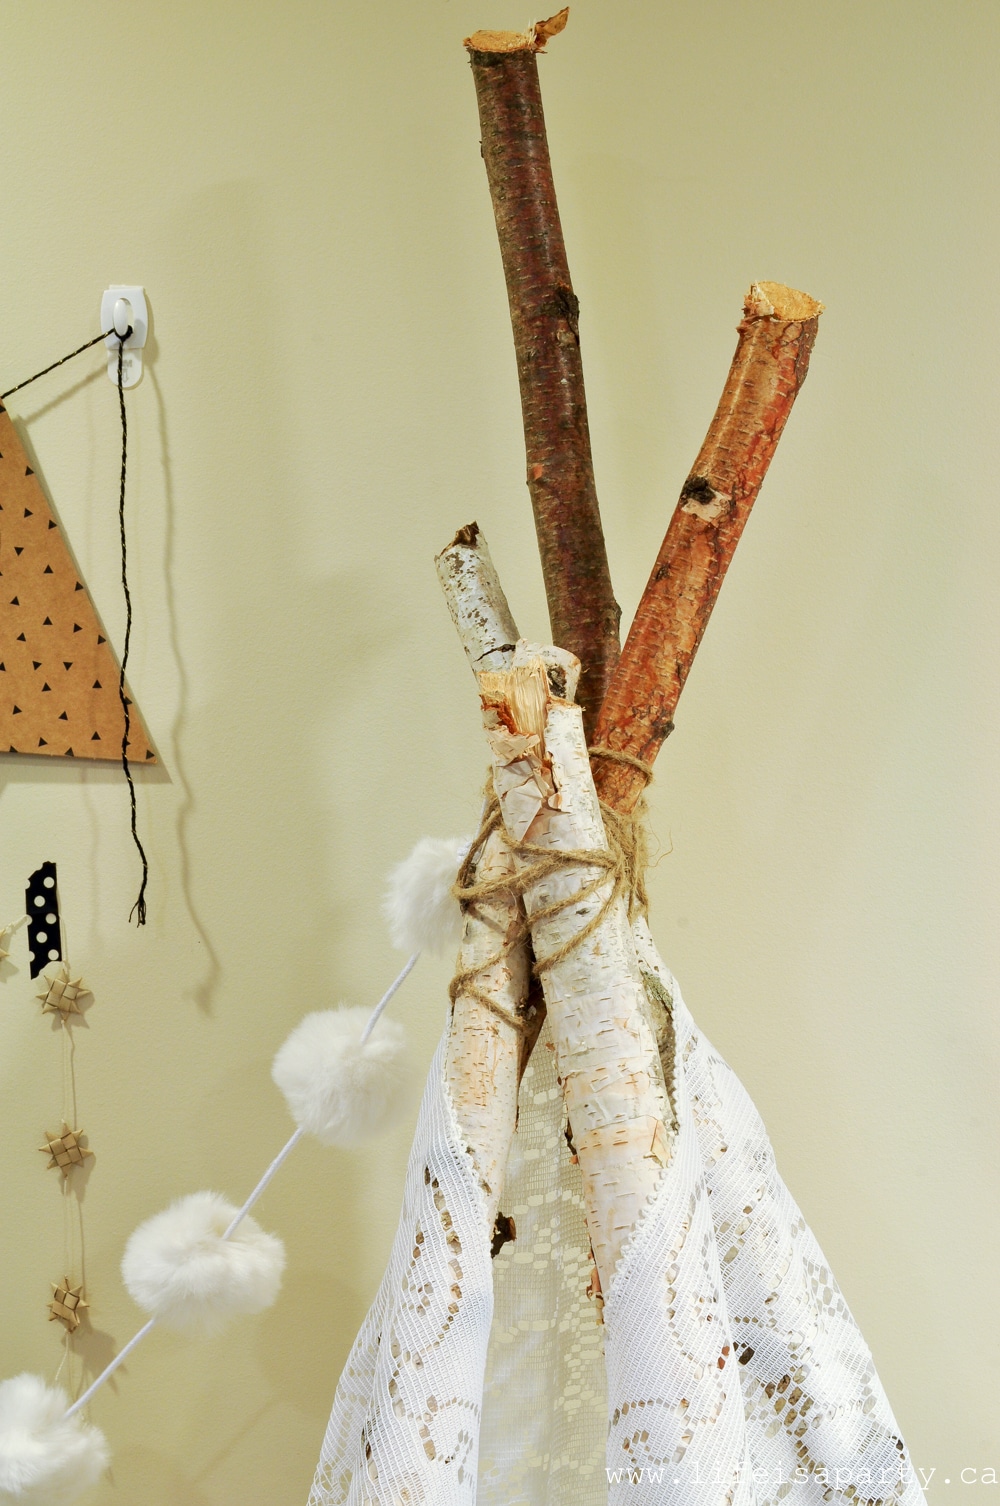
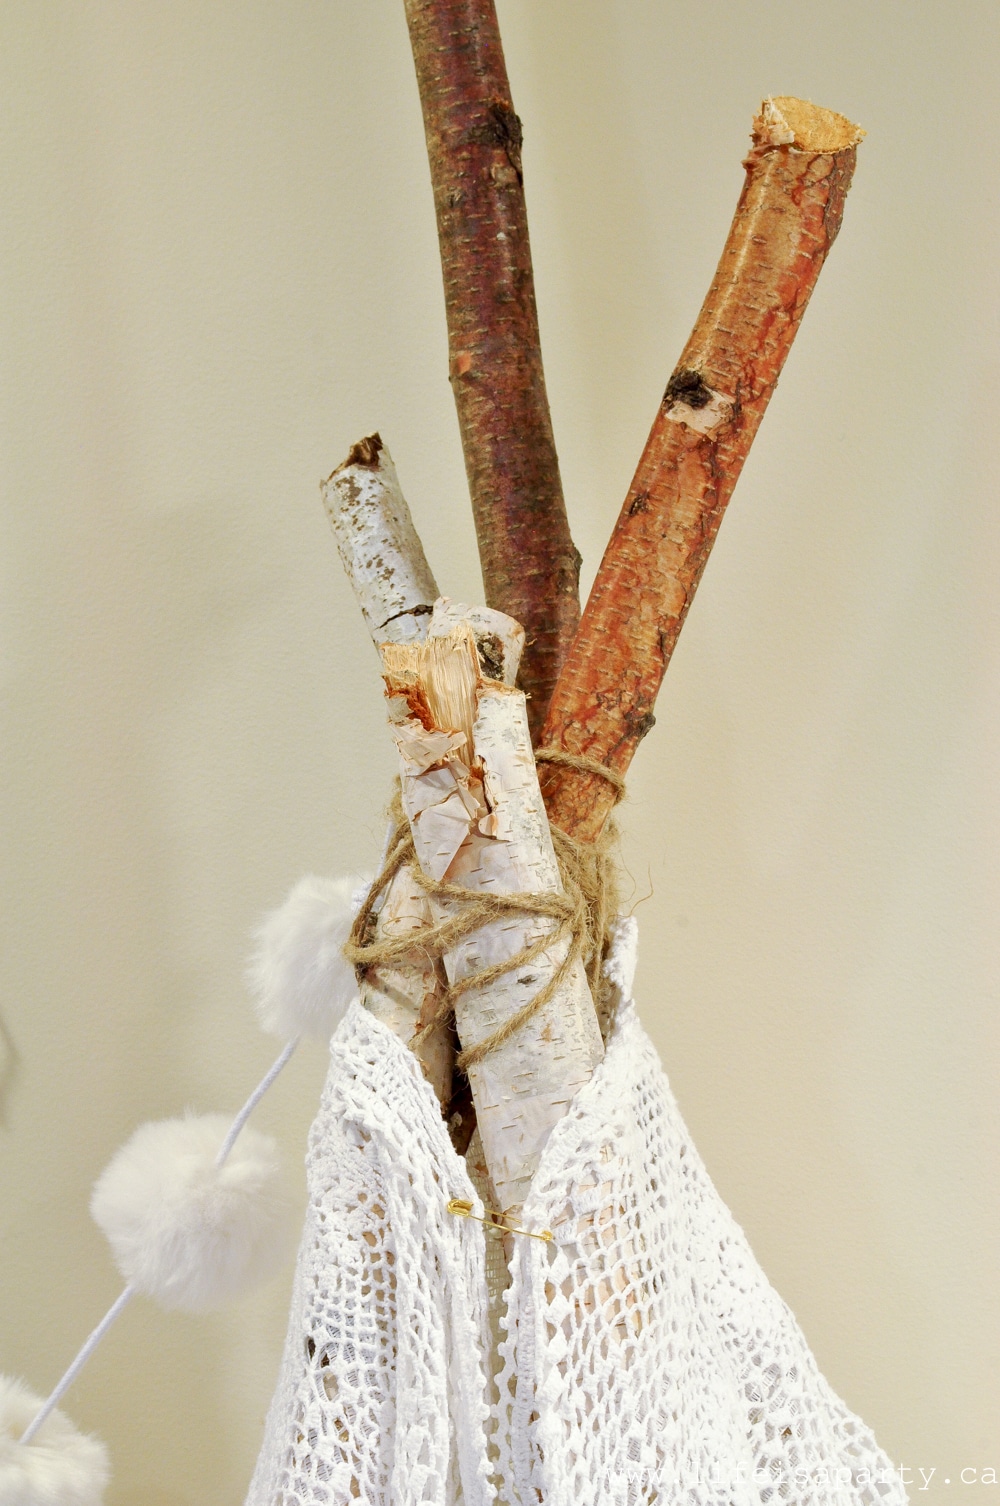
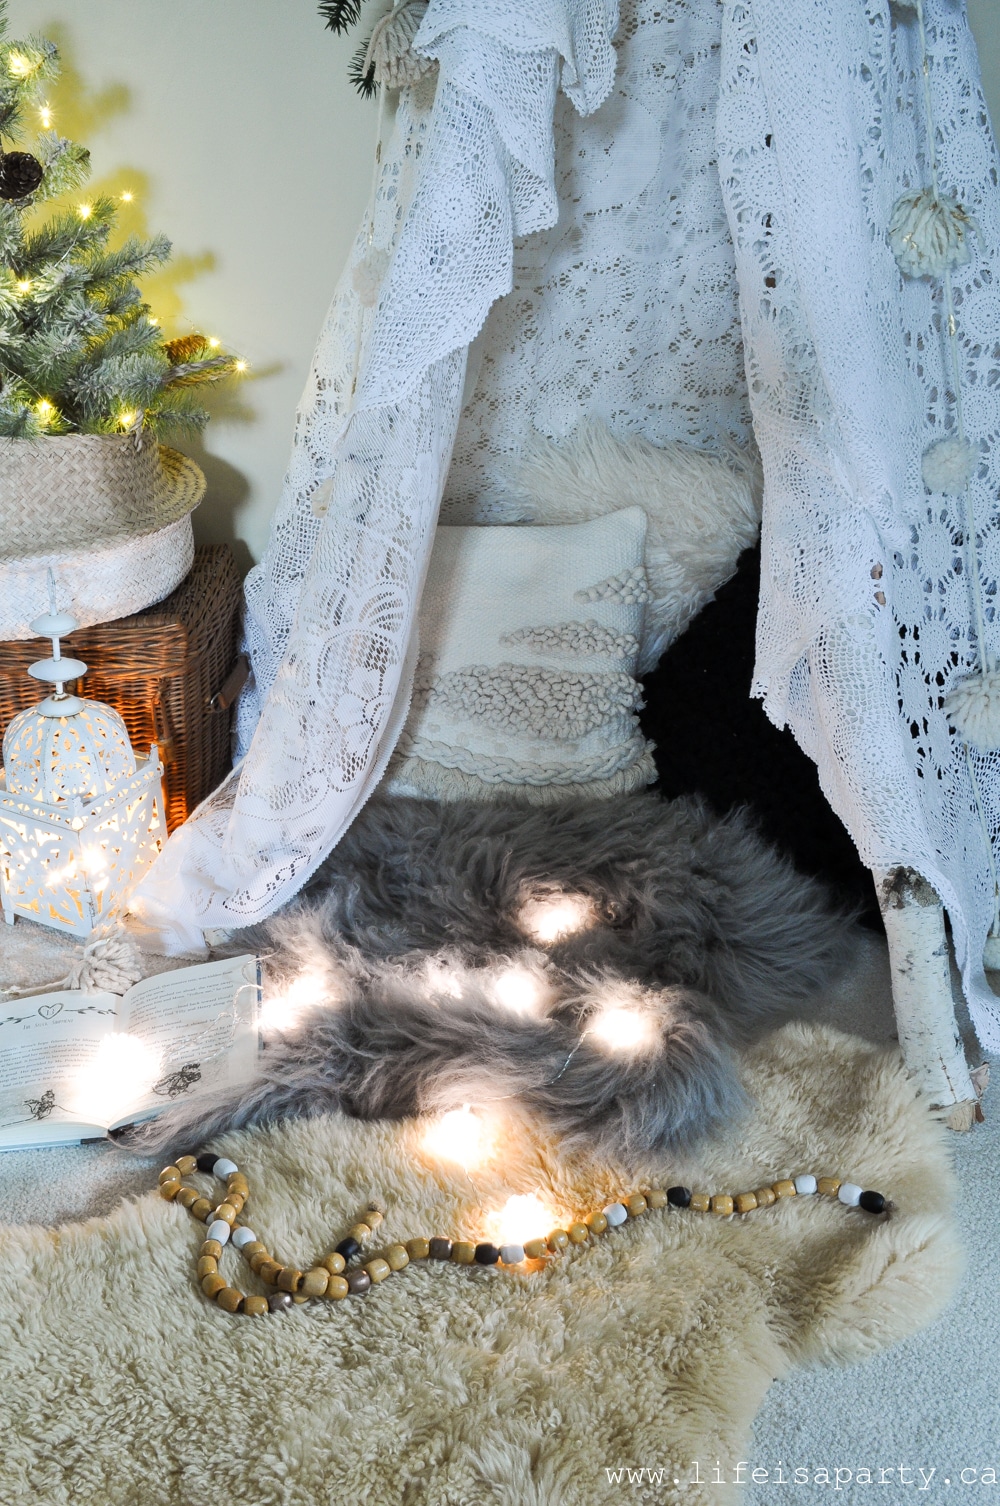
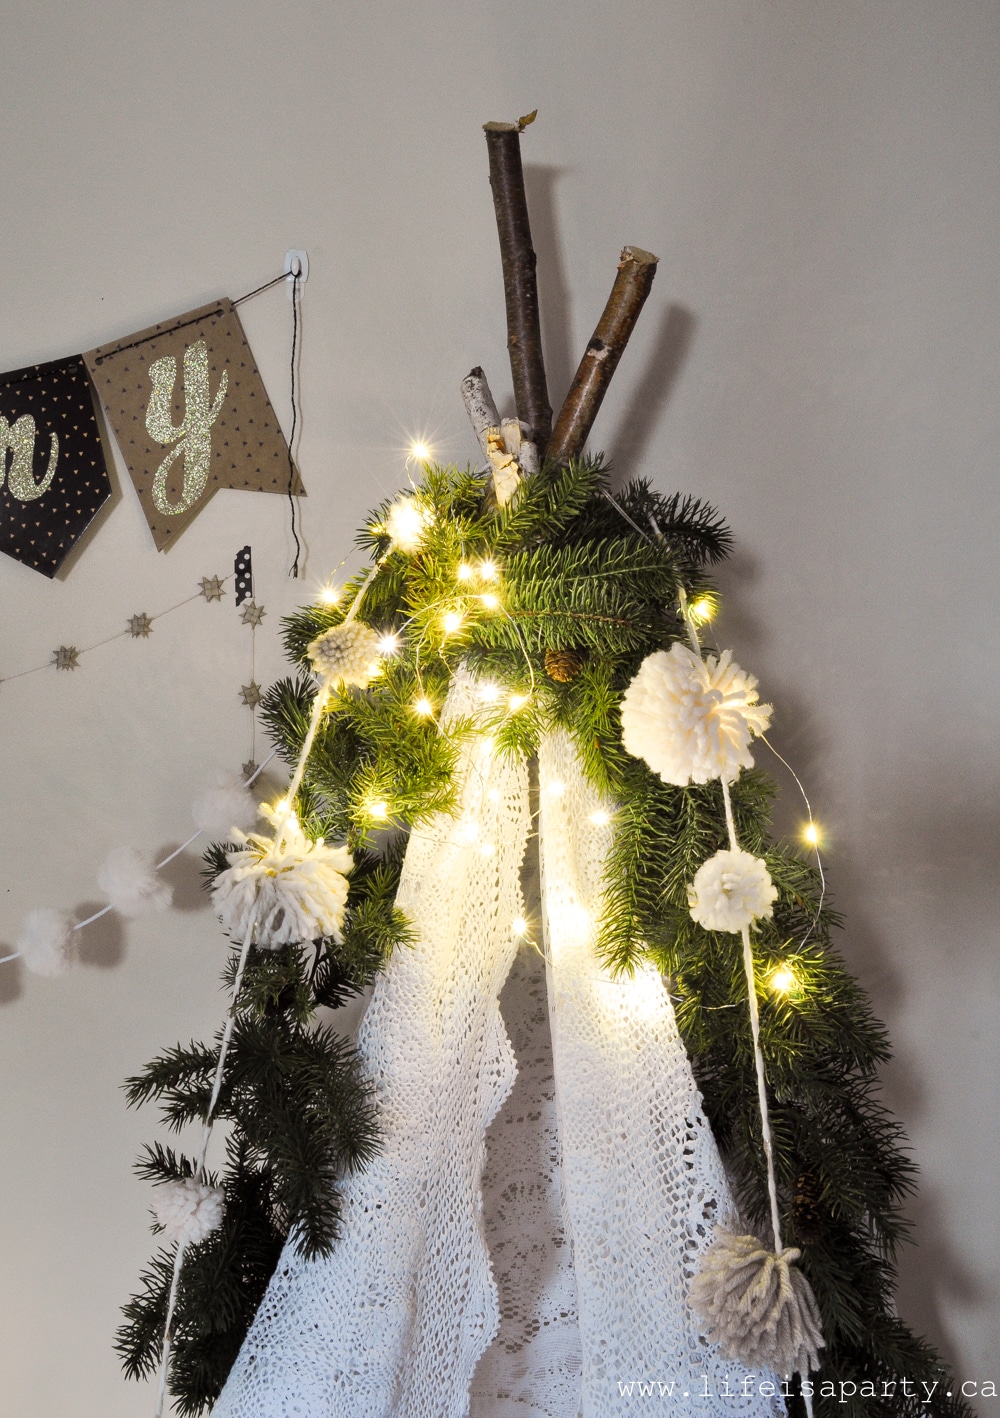
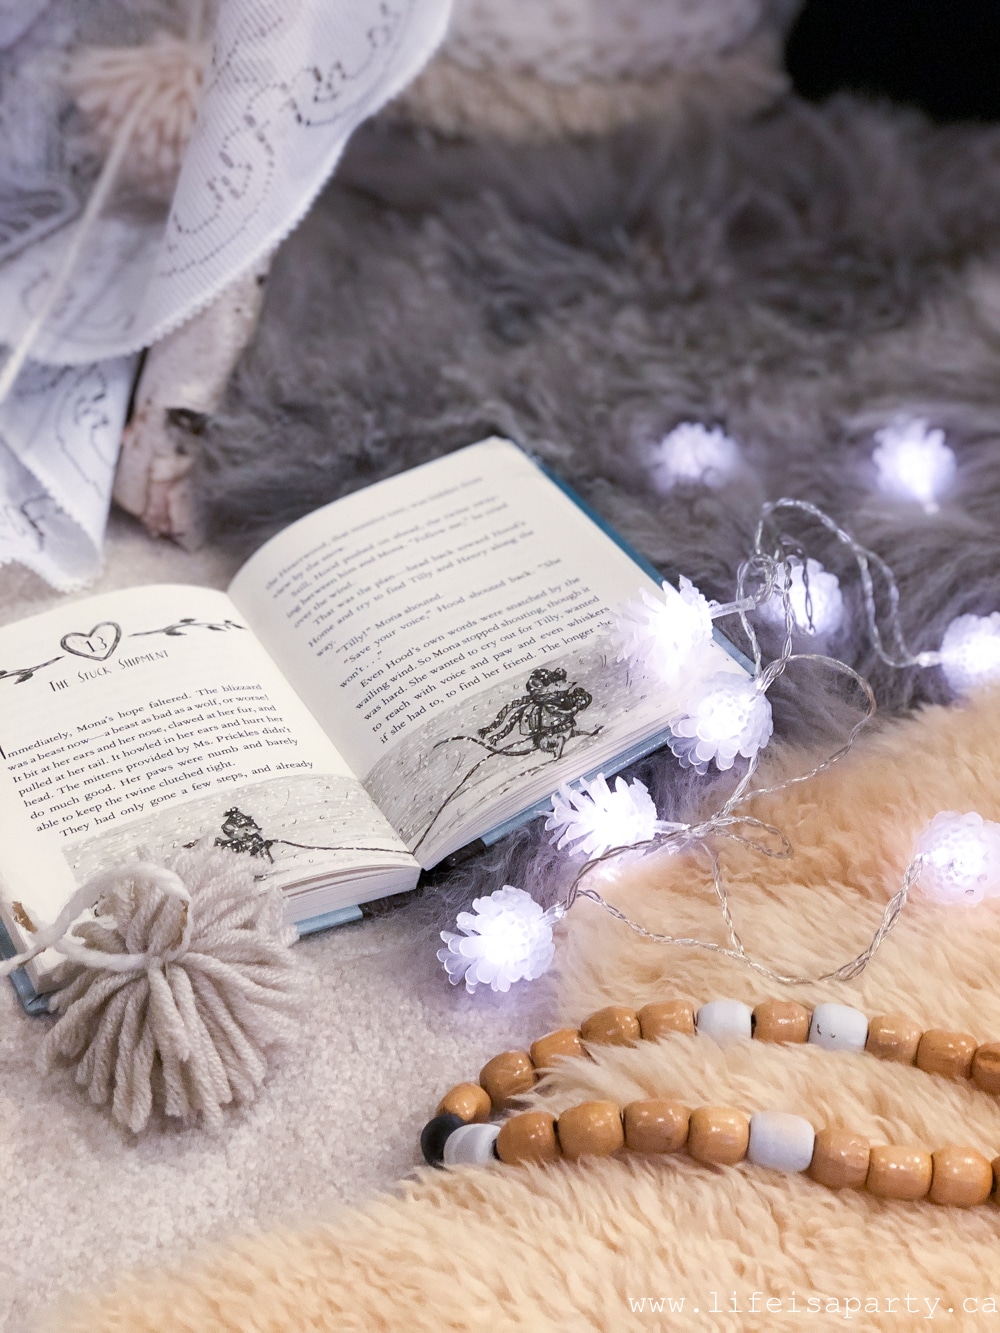
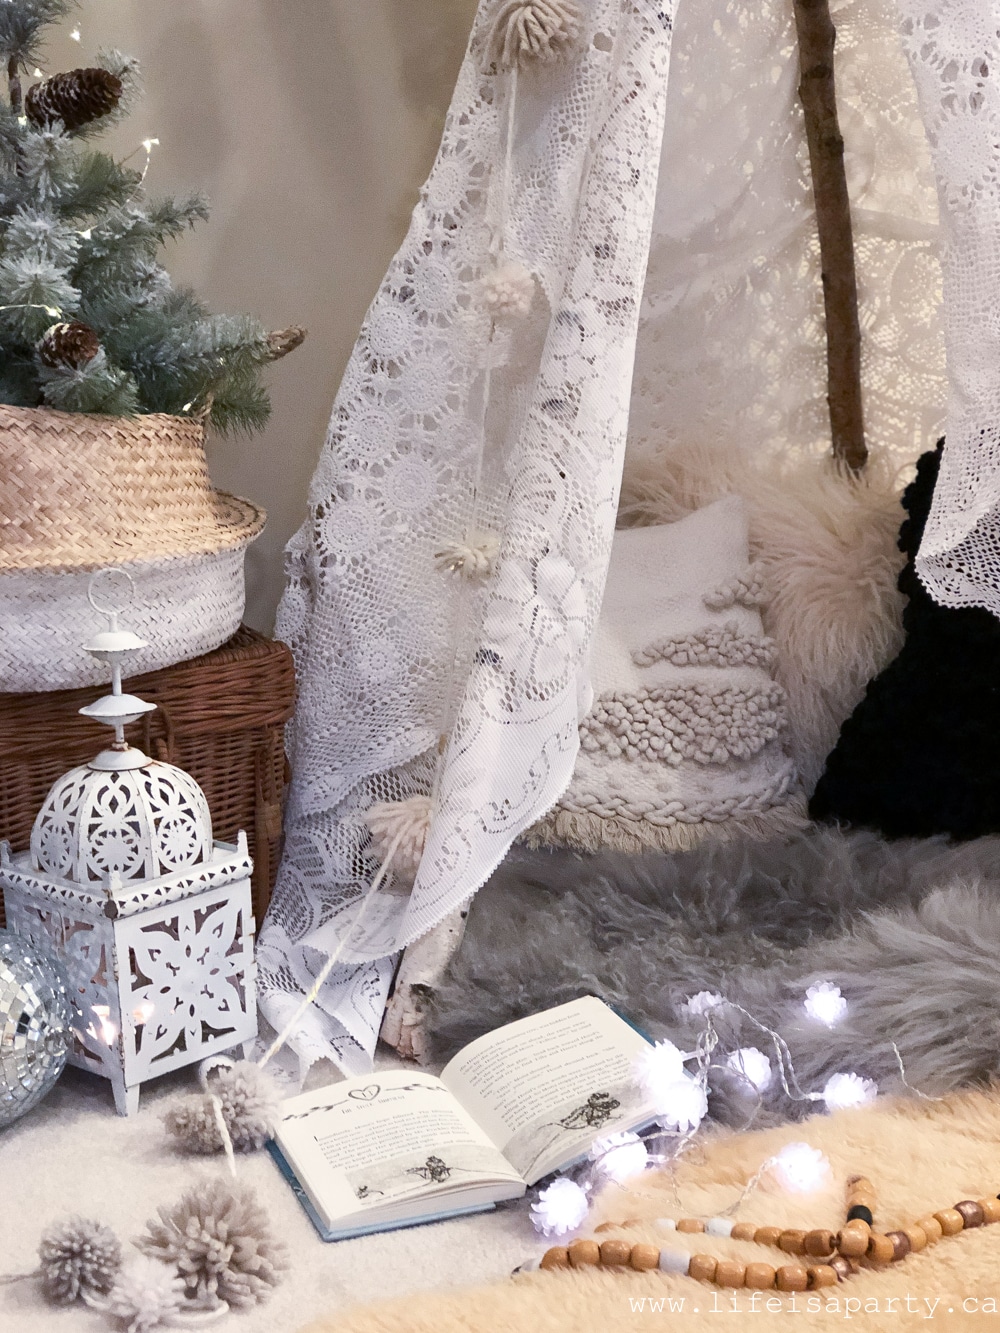
 Over on the other side I've set up the sweetest little boho Christmas reading tent. I won't fit in, but my girls will. 😉
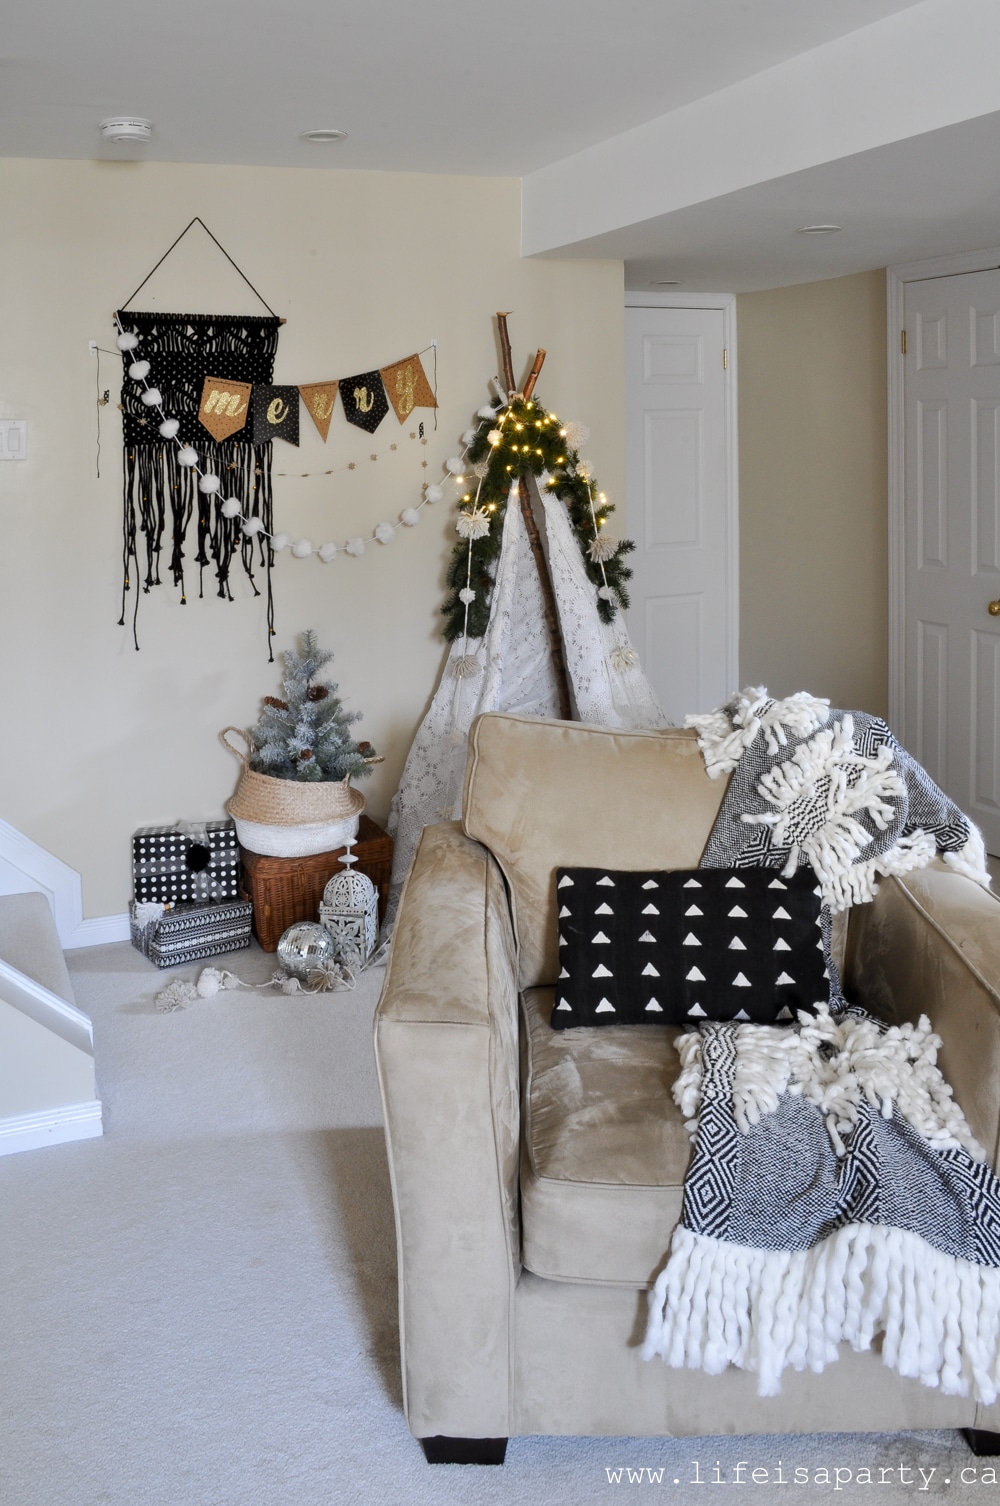 This spot is just so cozy and sweet. You can see how I made this
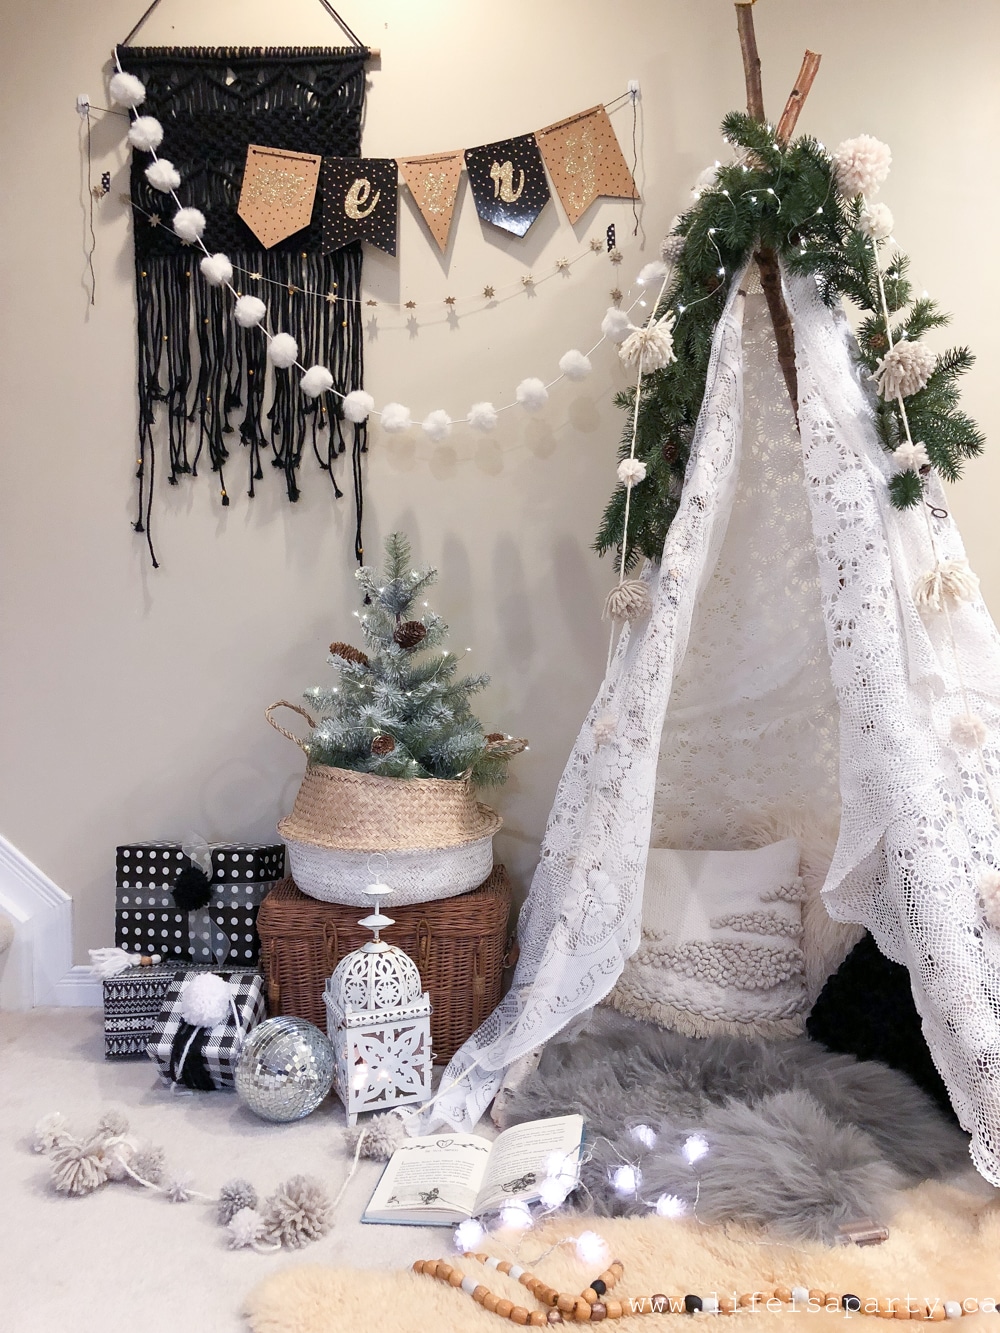


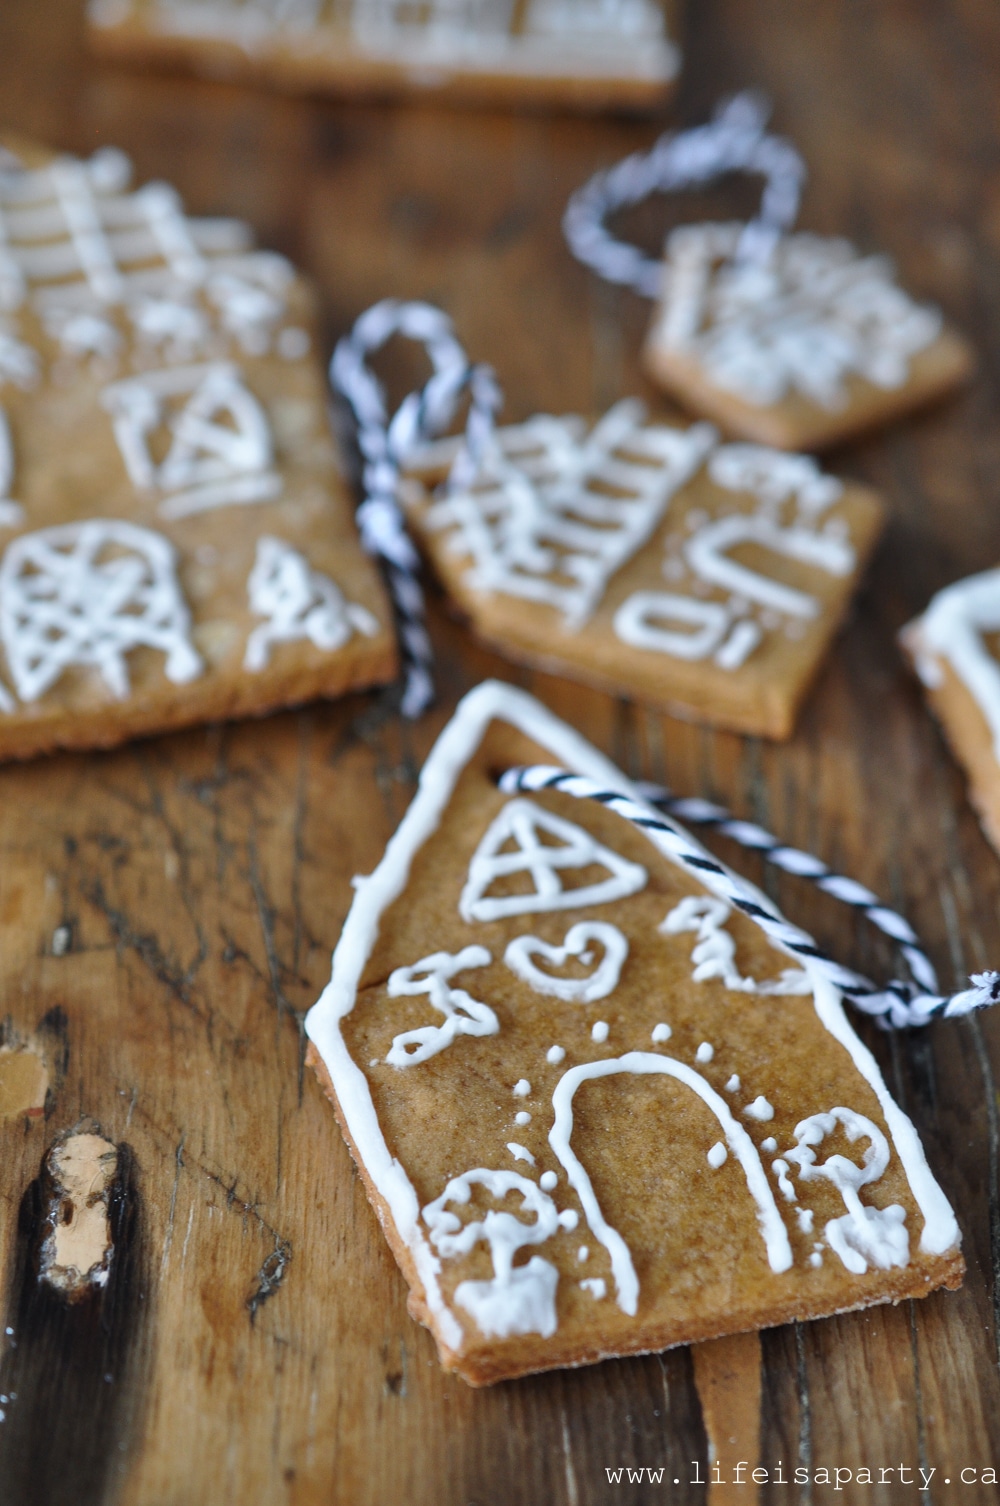 Once the cookies are iced and the icing has had a chance to dry and fully set, it's time to add a string for hanging the gingerbread ornaments. We used a little bakers twine to hang them. Thin ribbon would also be lovely for hanging them. Adding the hanging string to the cookies turns them into the prettiest Christmas ornaments. They look so pretty as decorations for the holiday season on a traditional tree, or even on a branch.
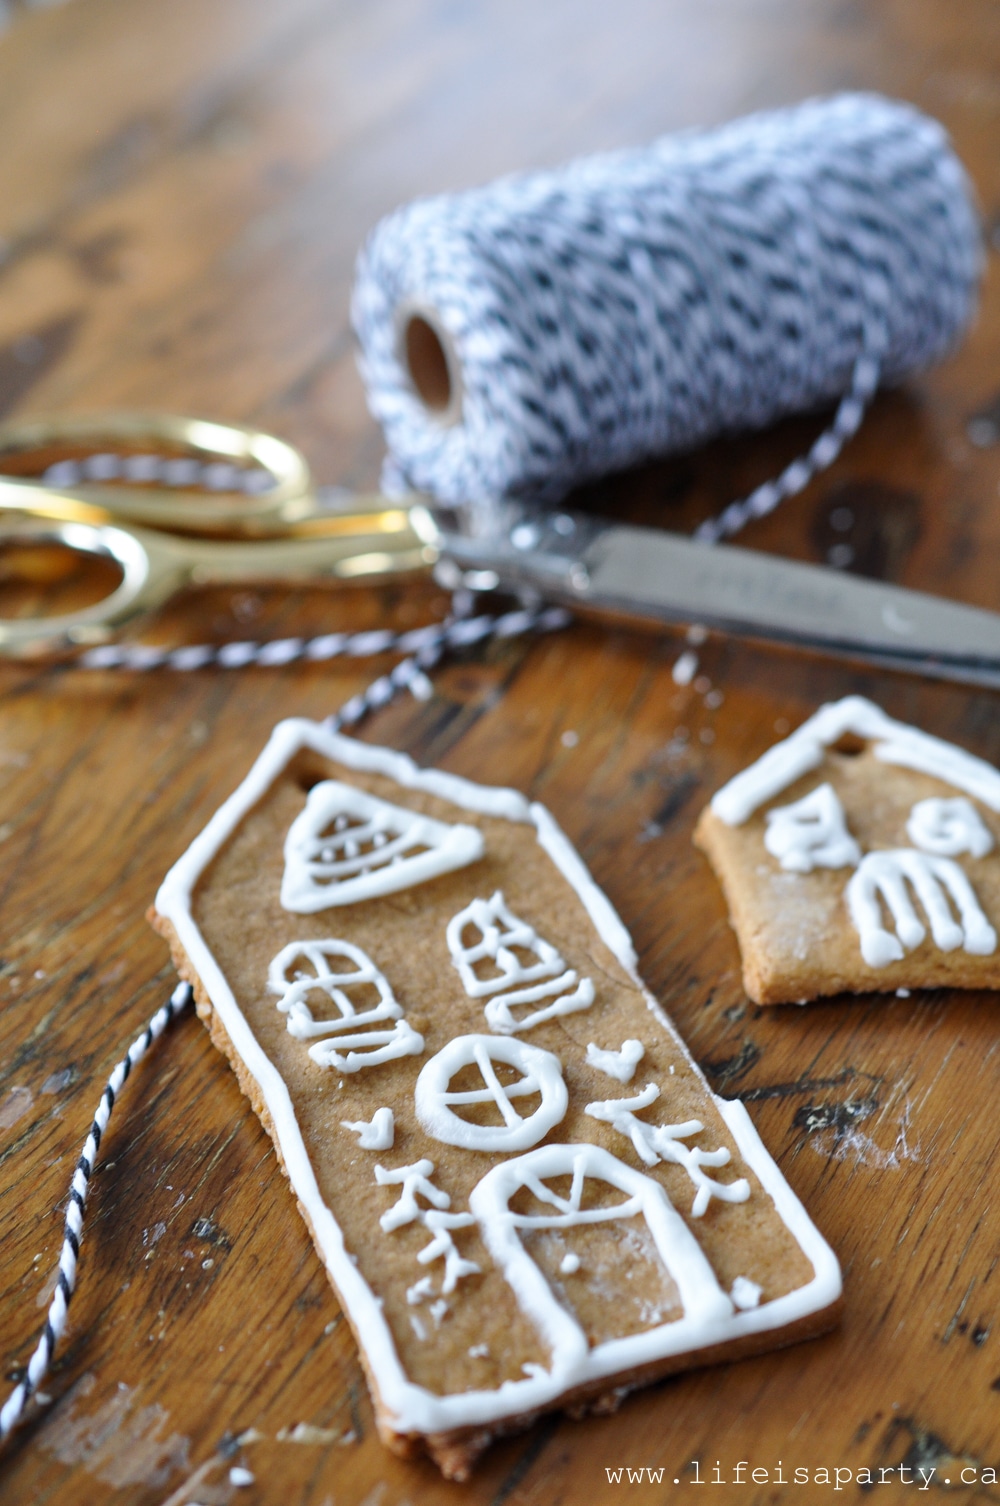
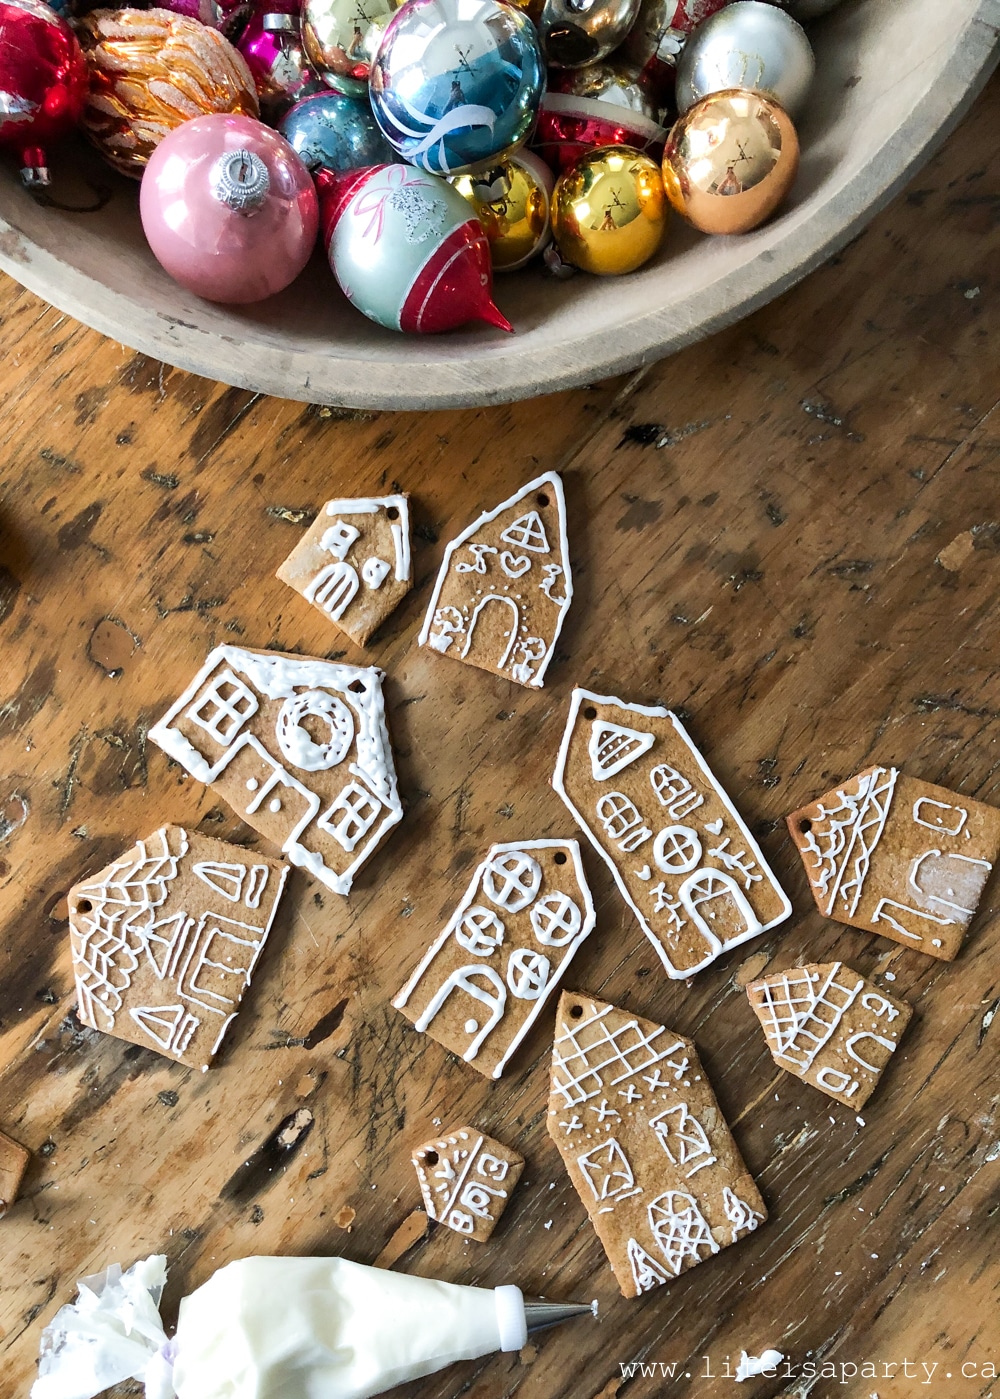
 My girls actually decorated them all. I think the students have exceeded the teacher now. I was working on some last year, and then they came home from school and made some far more beautiful ones than I had. This year I left it too them.
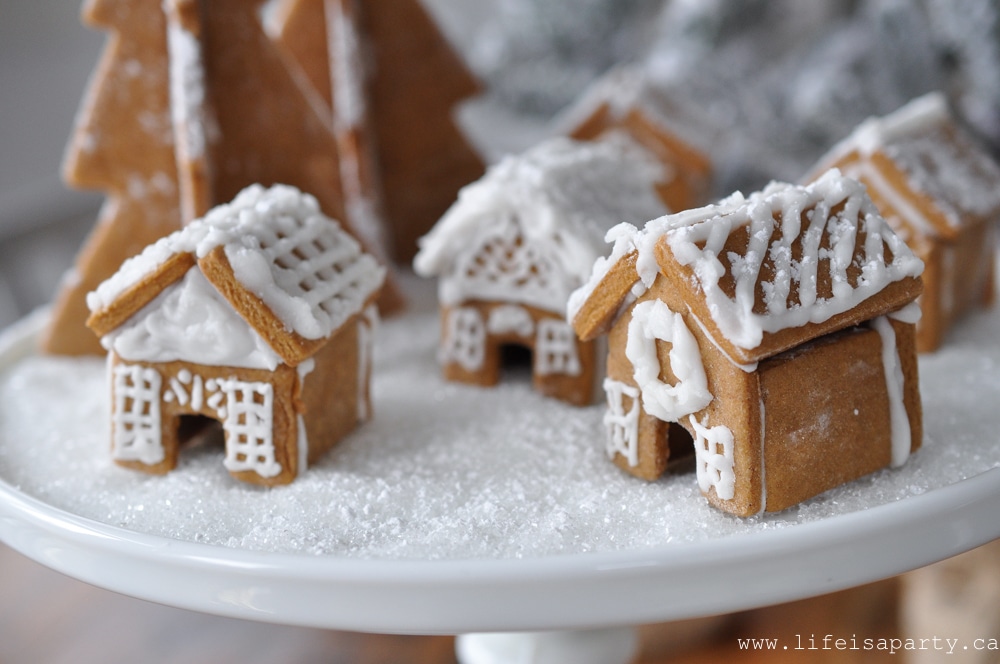
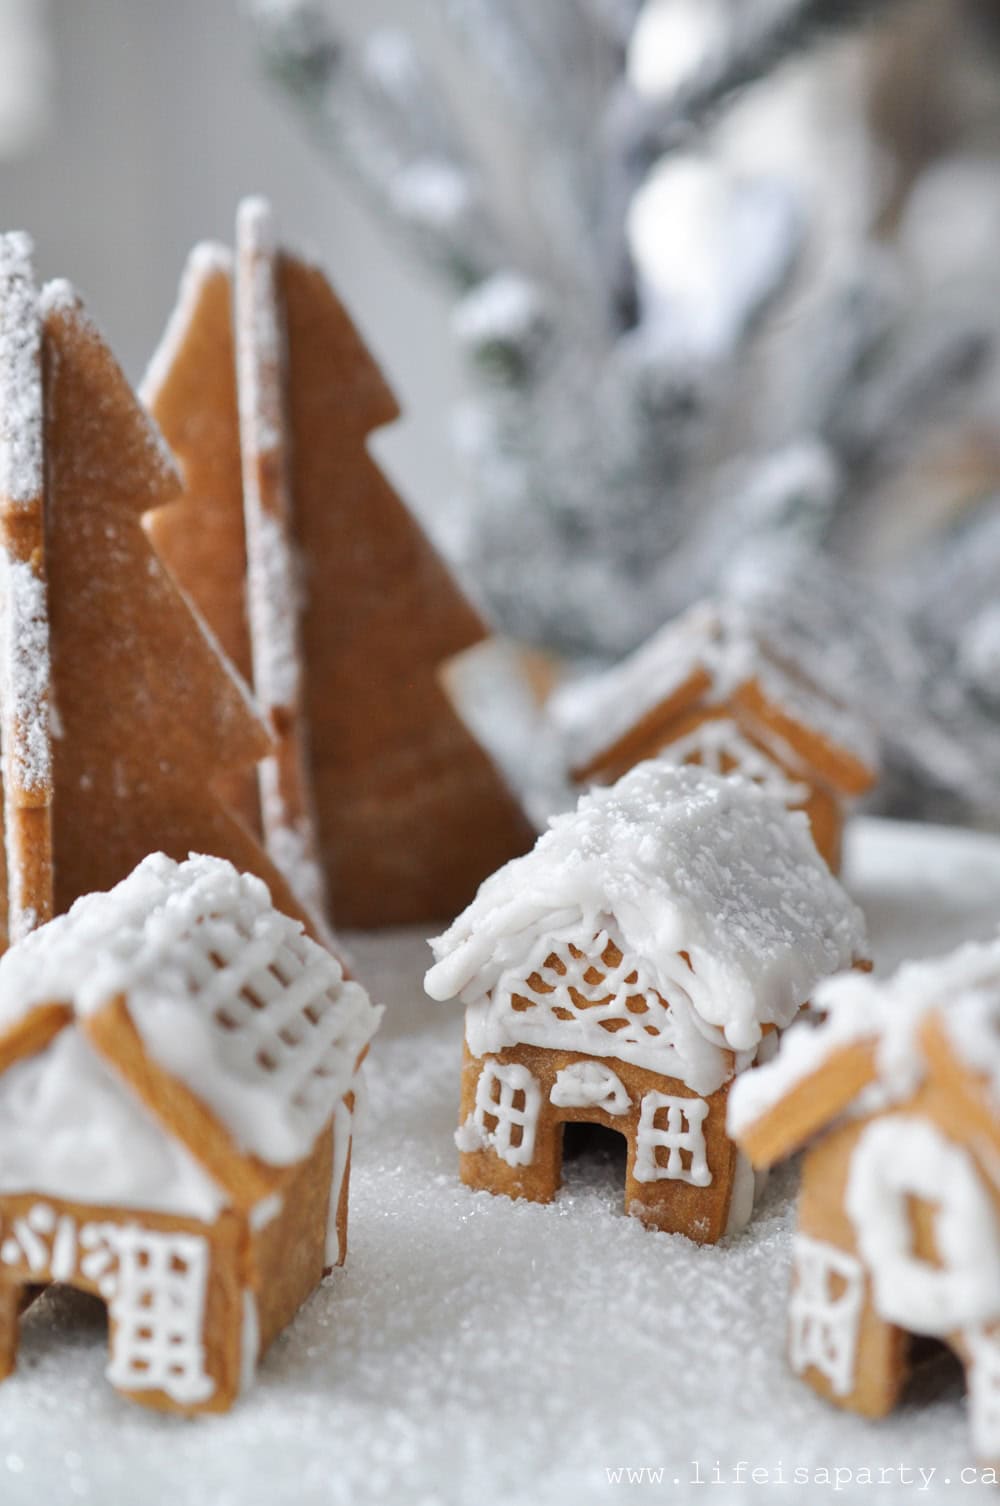
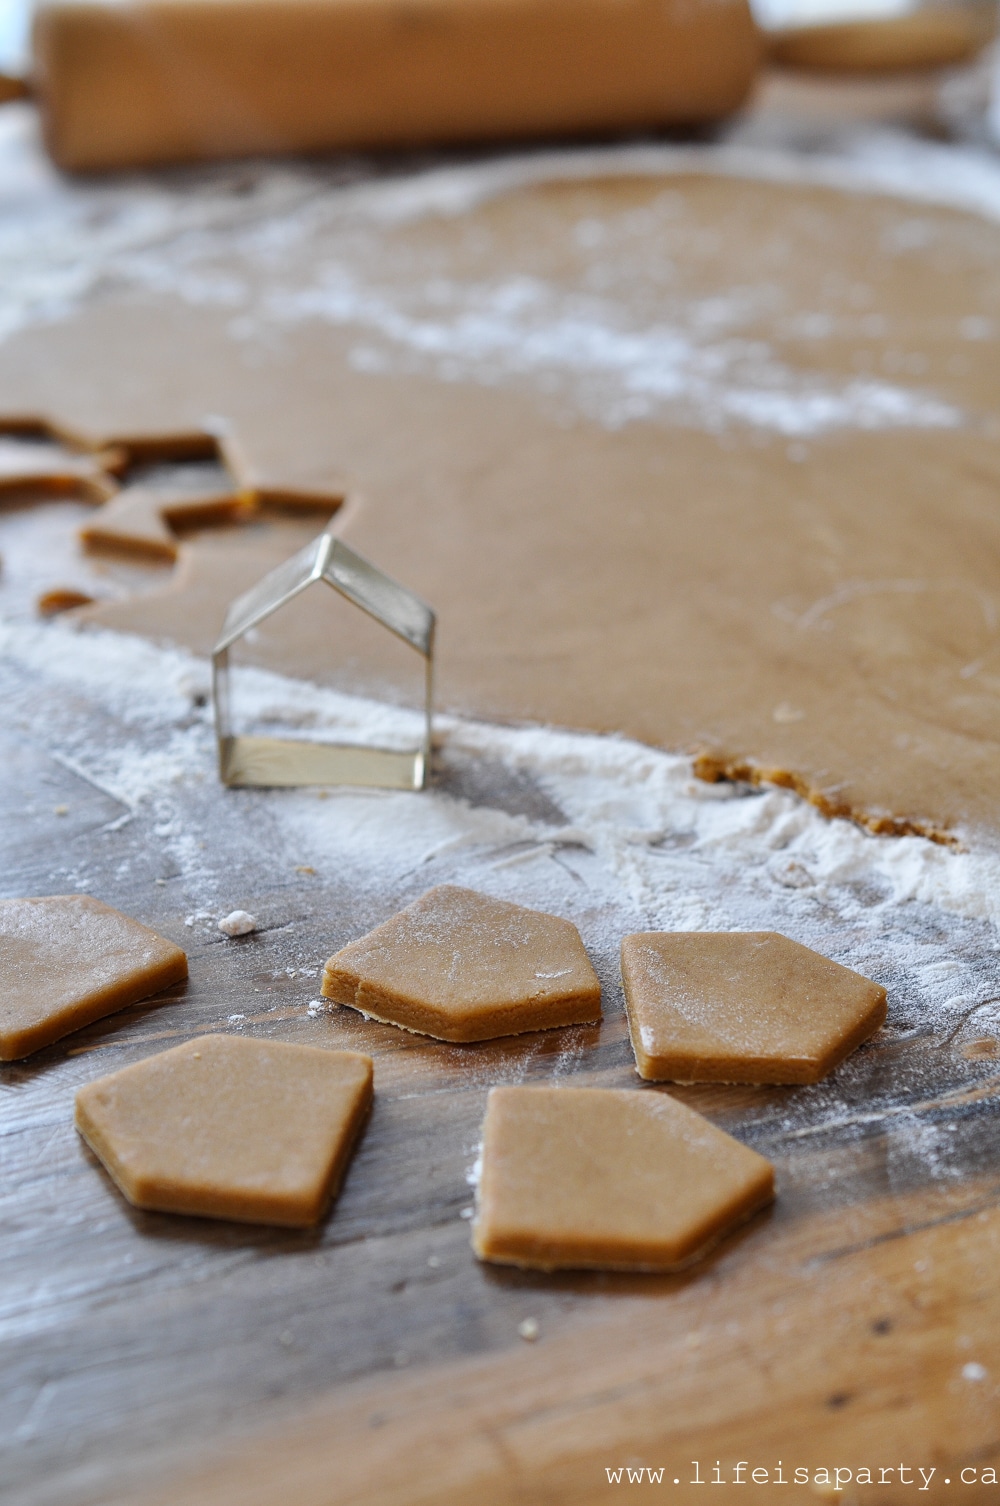
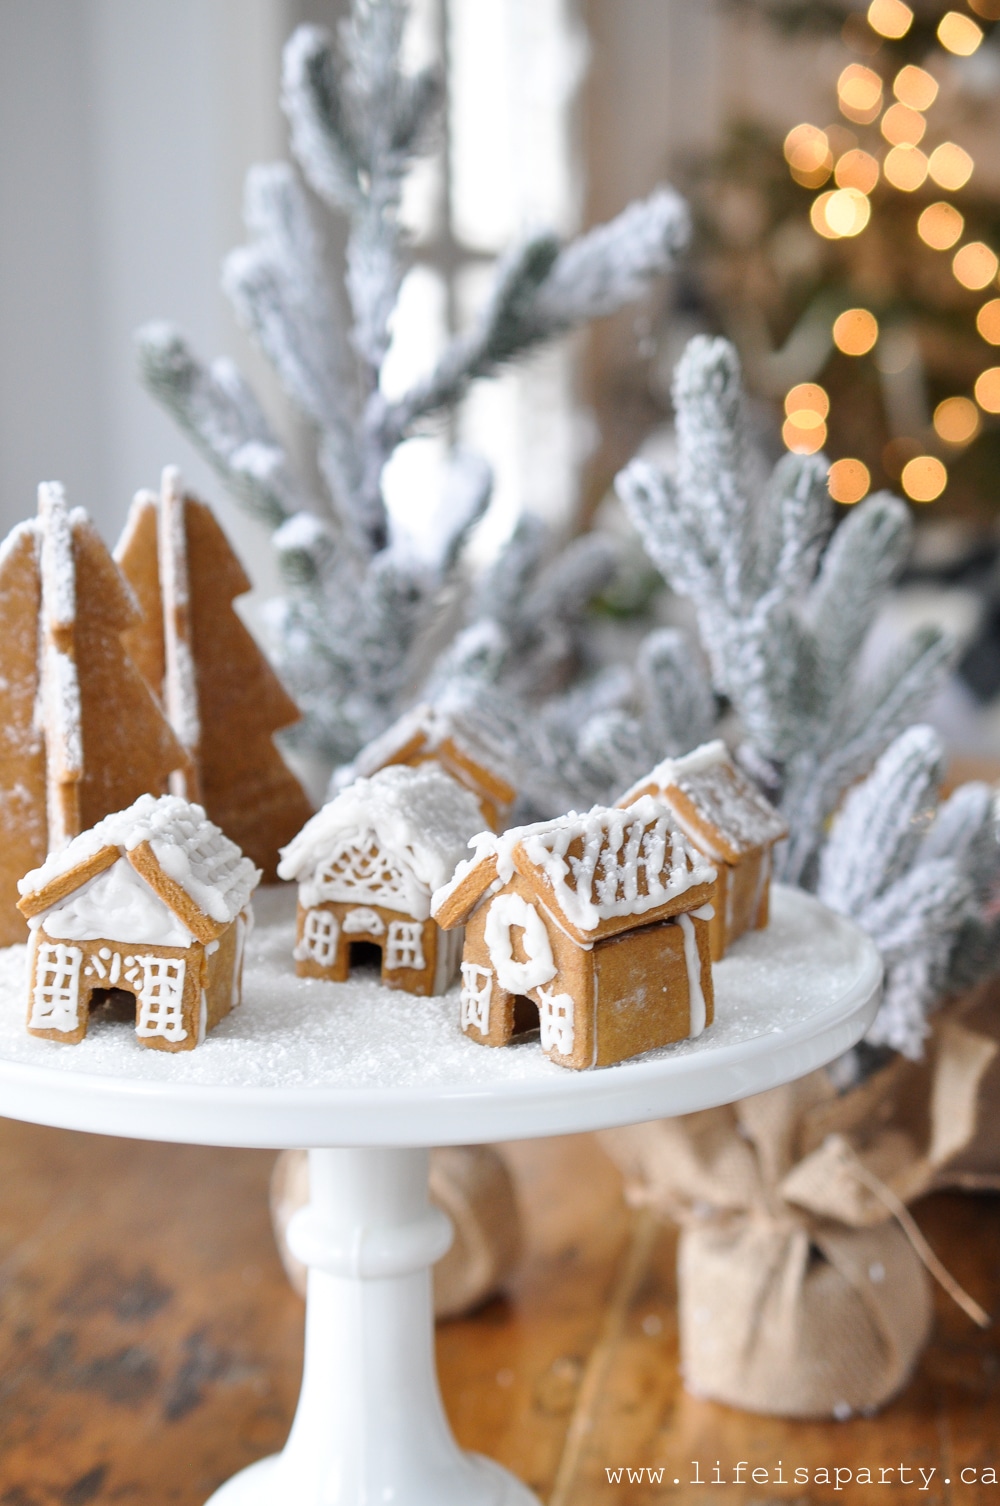
 We arranged them on a cake plate and added in a few cookie trees to create a tiny miniature gingerbread village.
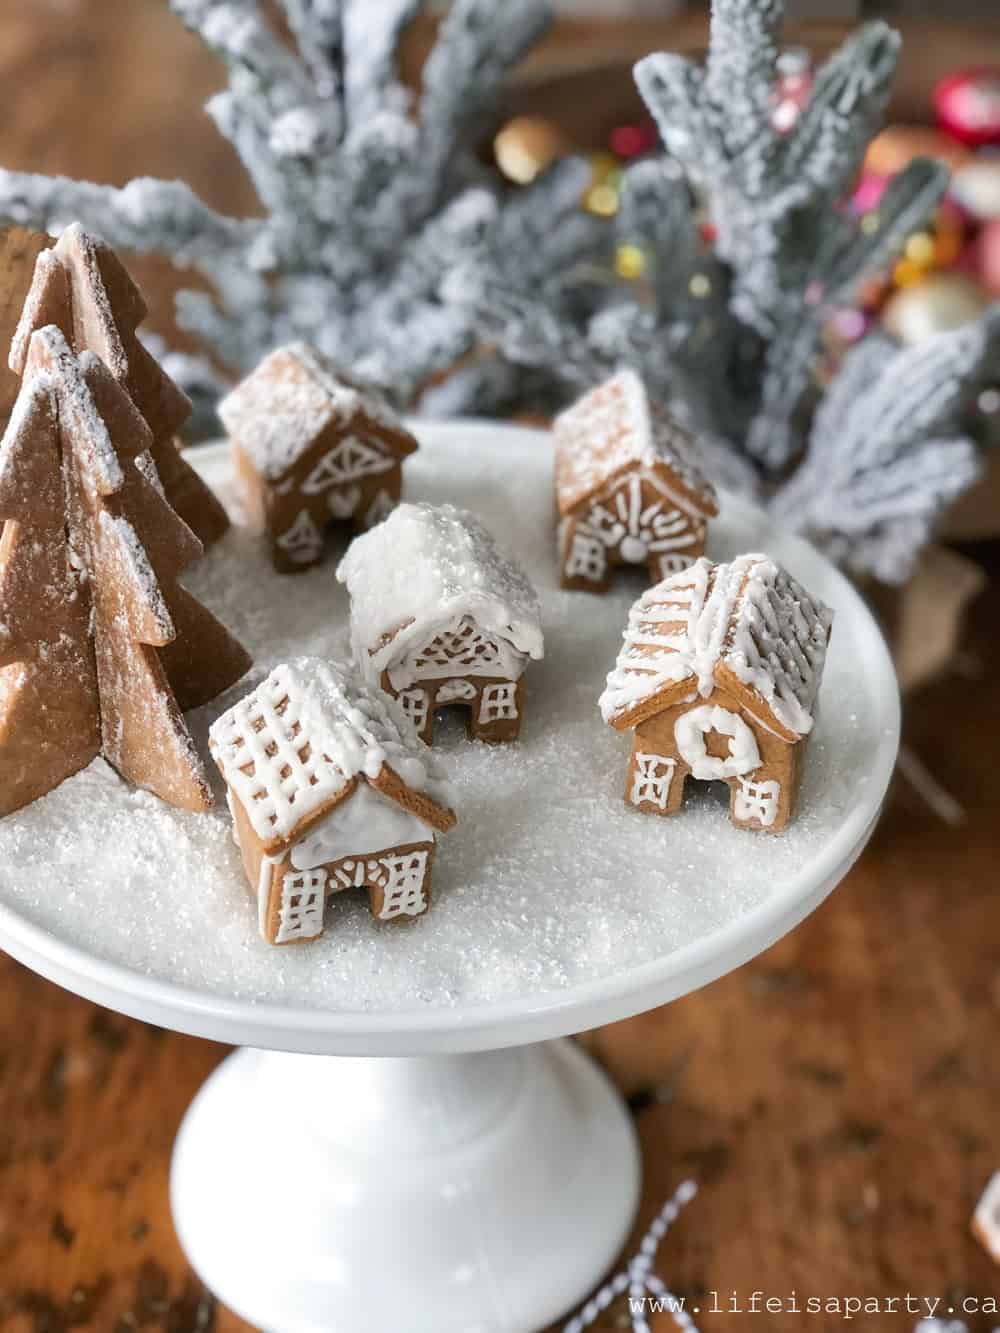 I love how these gingerbread house cookies turned out, and they're so delicious too. The perfect Christmas cookie. The hanging ornament gingerbread house ornaments look so beautiful on a Christmas tree.
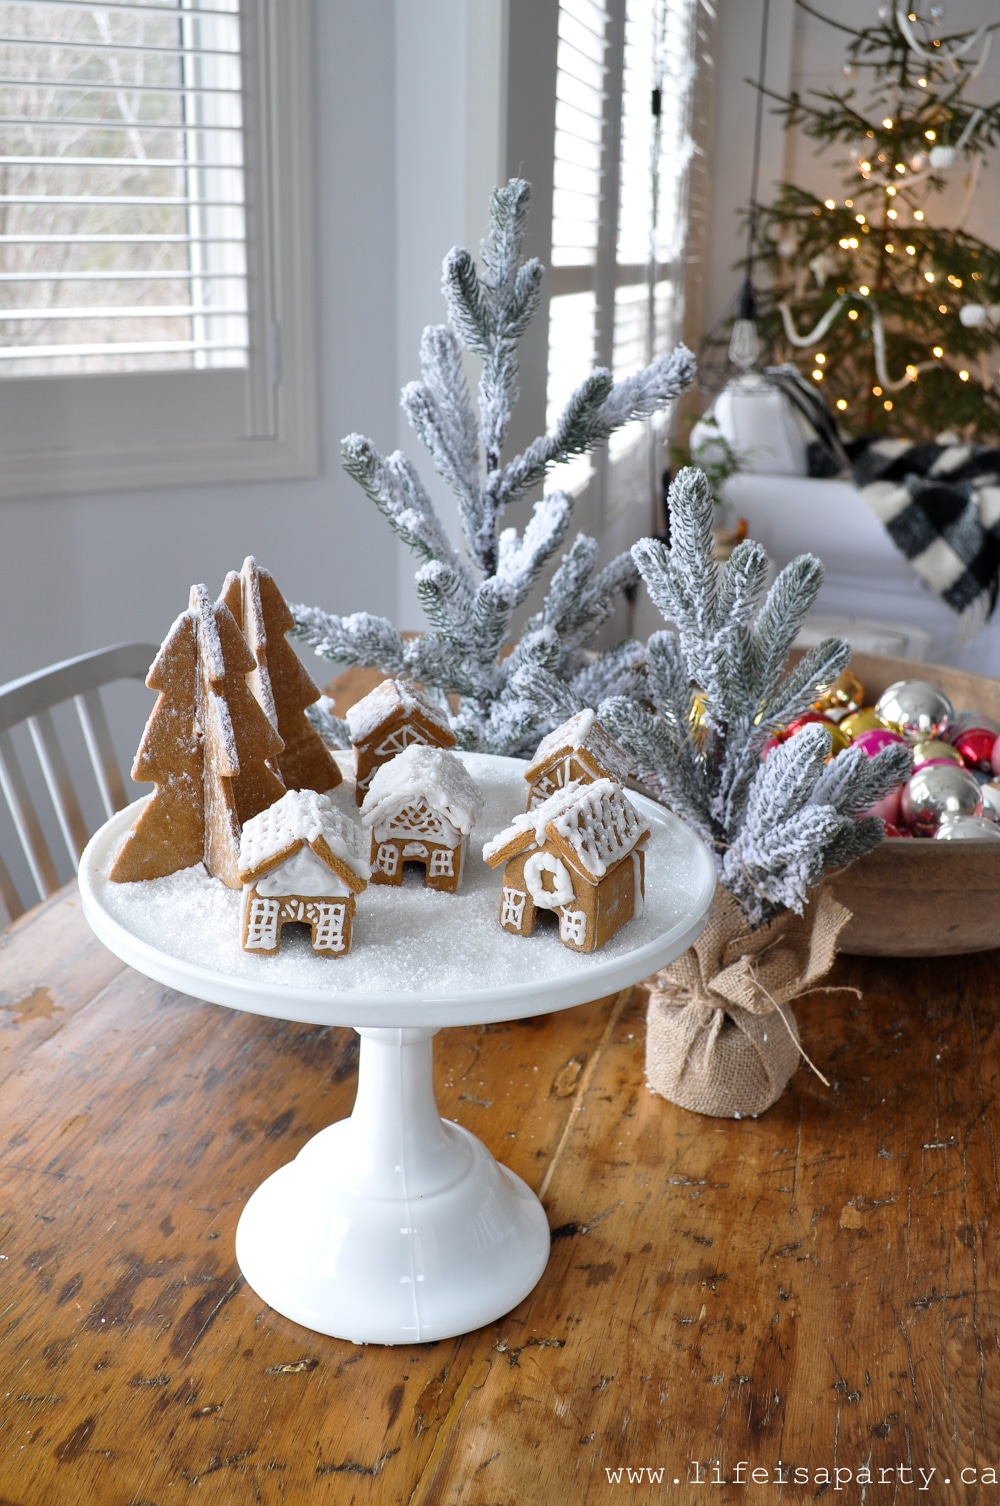


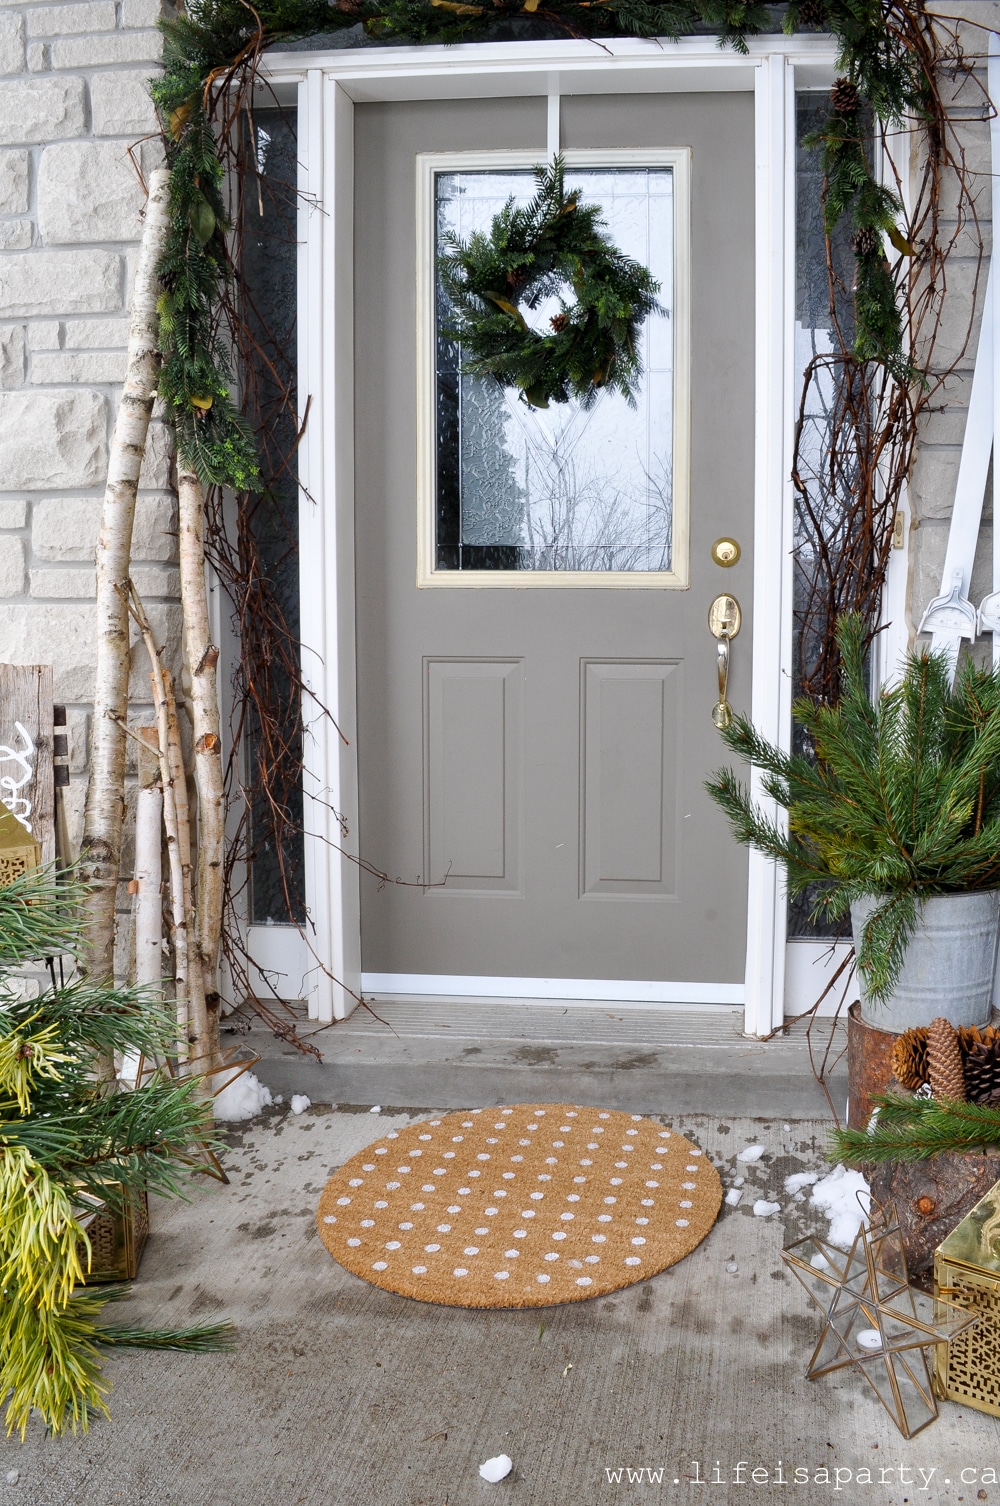 Doormat
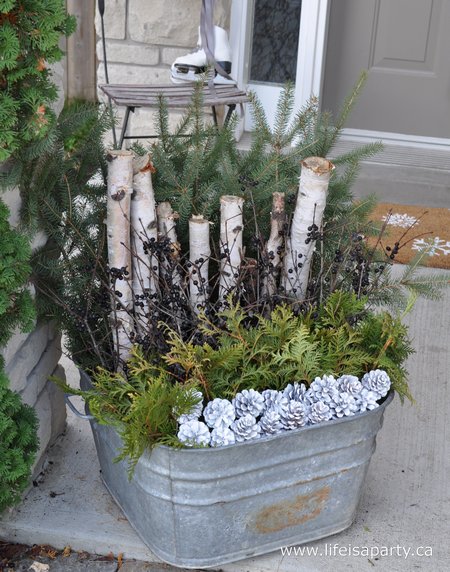
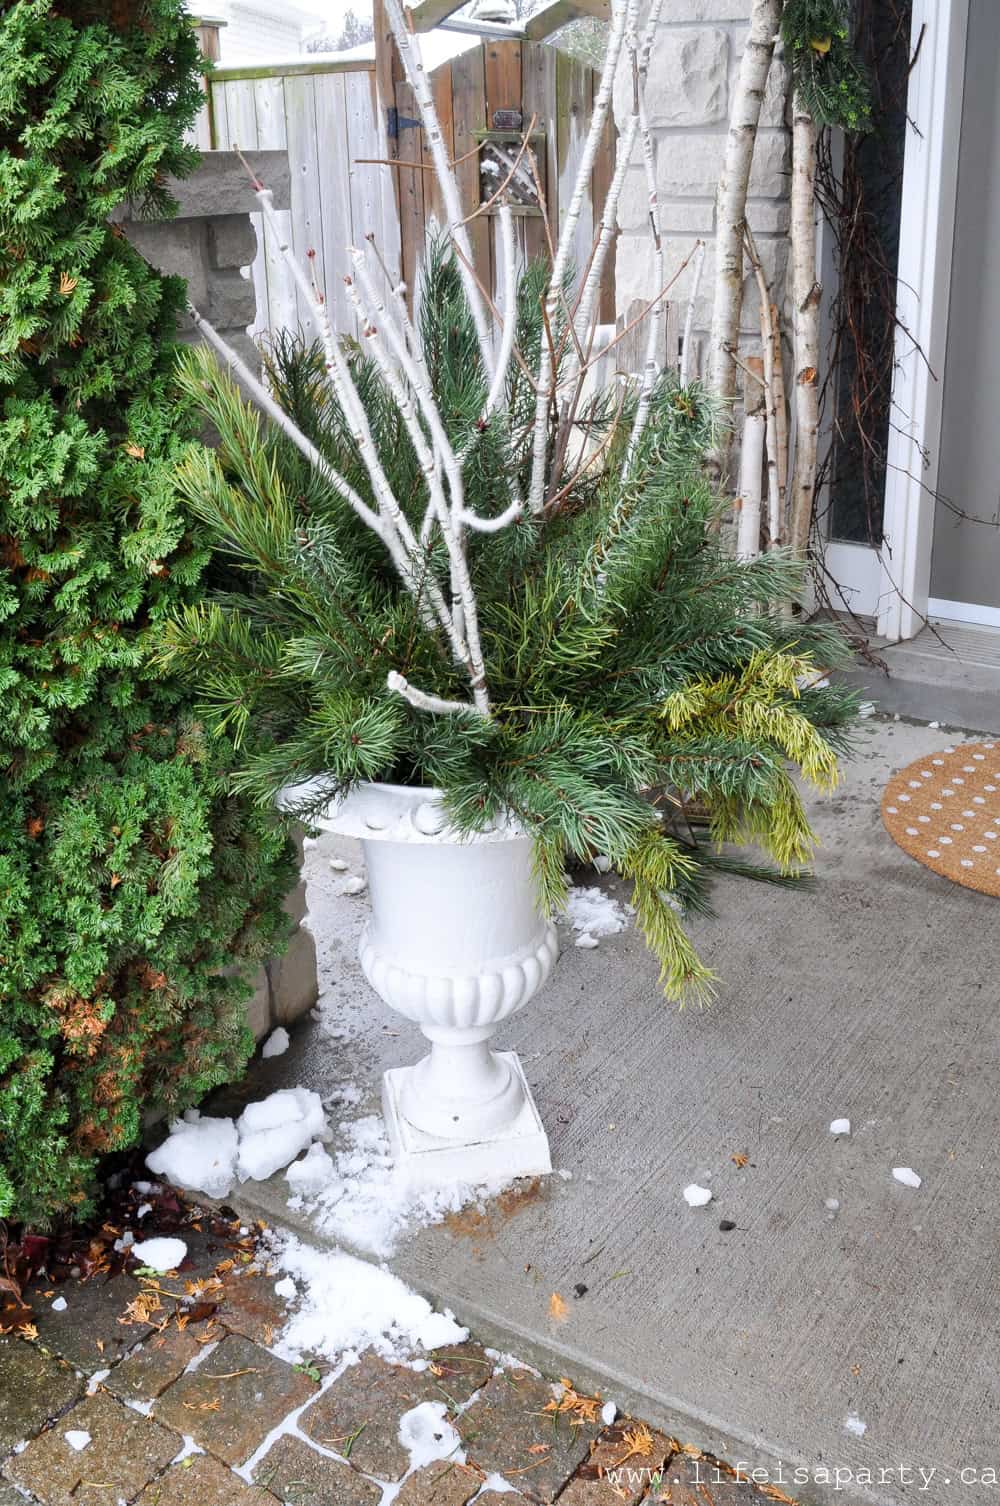 I kept the urn very simple this year too. It's more foraged pine and some yarn wrapped branches in the middle.
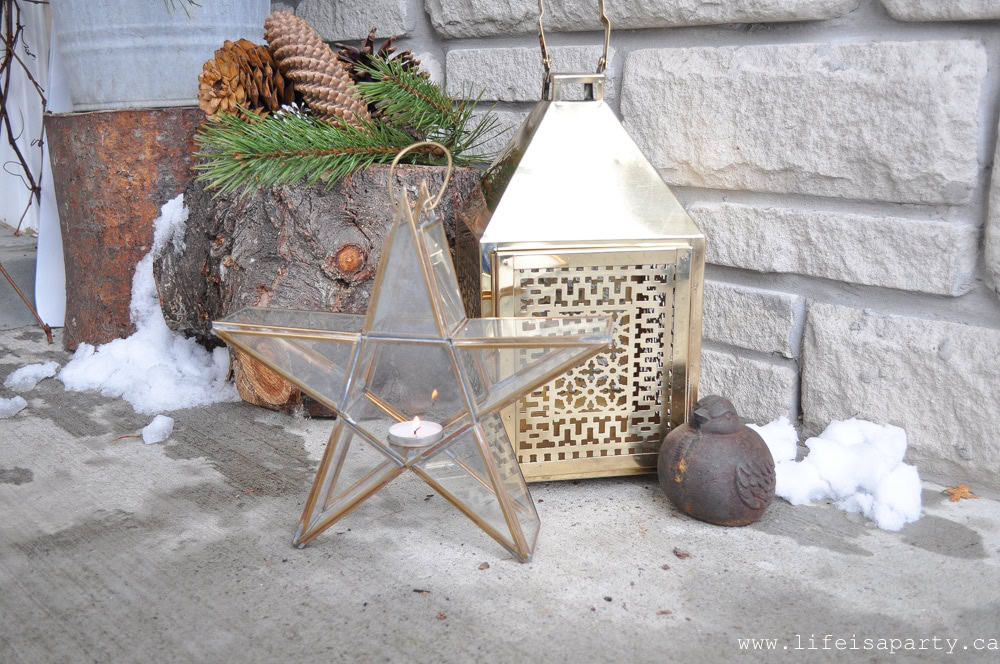 The brass cutout lanterns are gorgeous, and a real favourite of mine. I paired them with these beautiful glass and brass star lanterns which are perfect for Christmas.
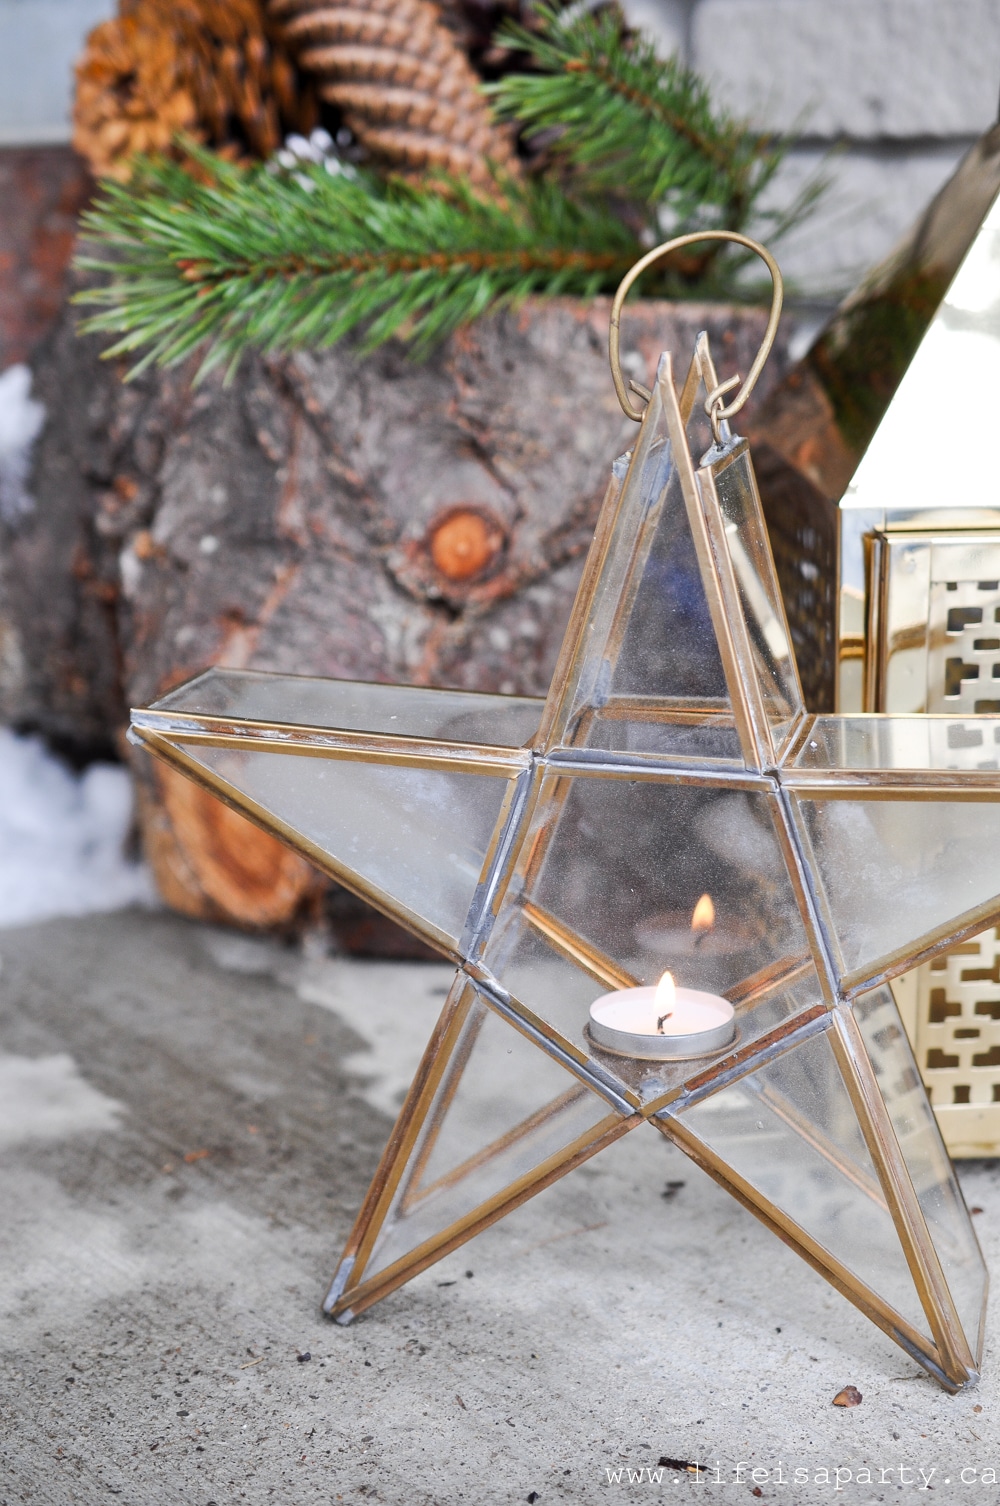 And over on the other side of the door, a slightly larger grouping.
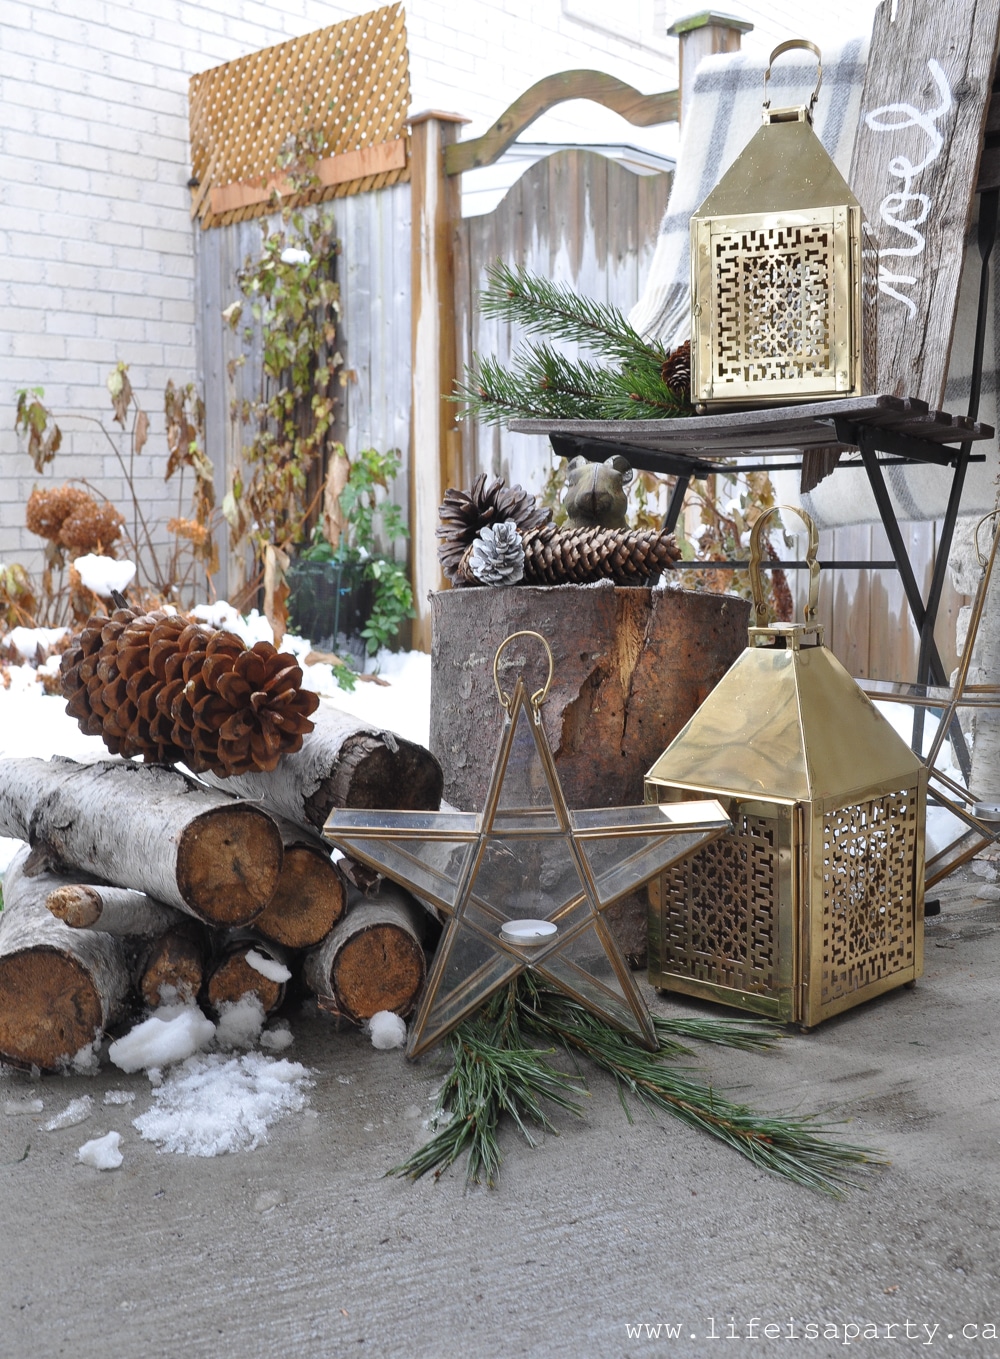 I've styled the front porch with lots of logs, greens, and pinecones and I love how rustic it feels.
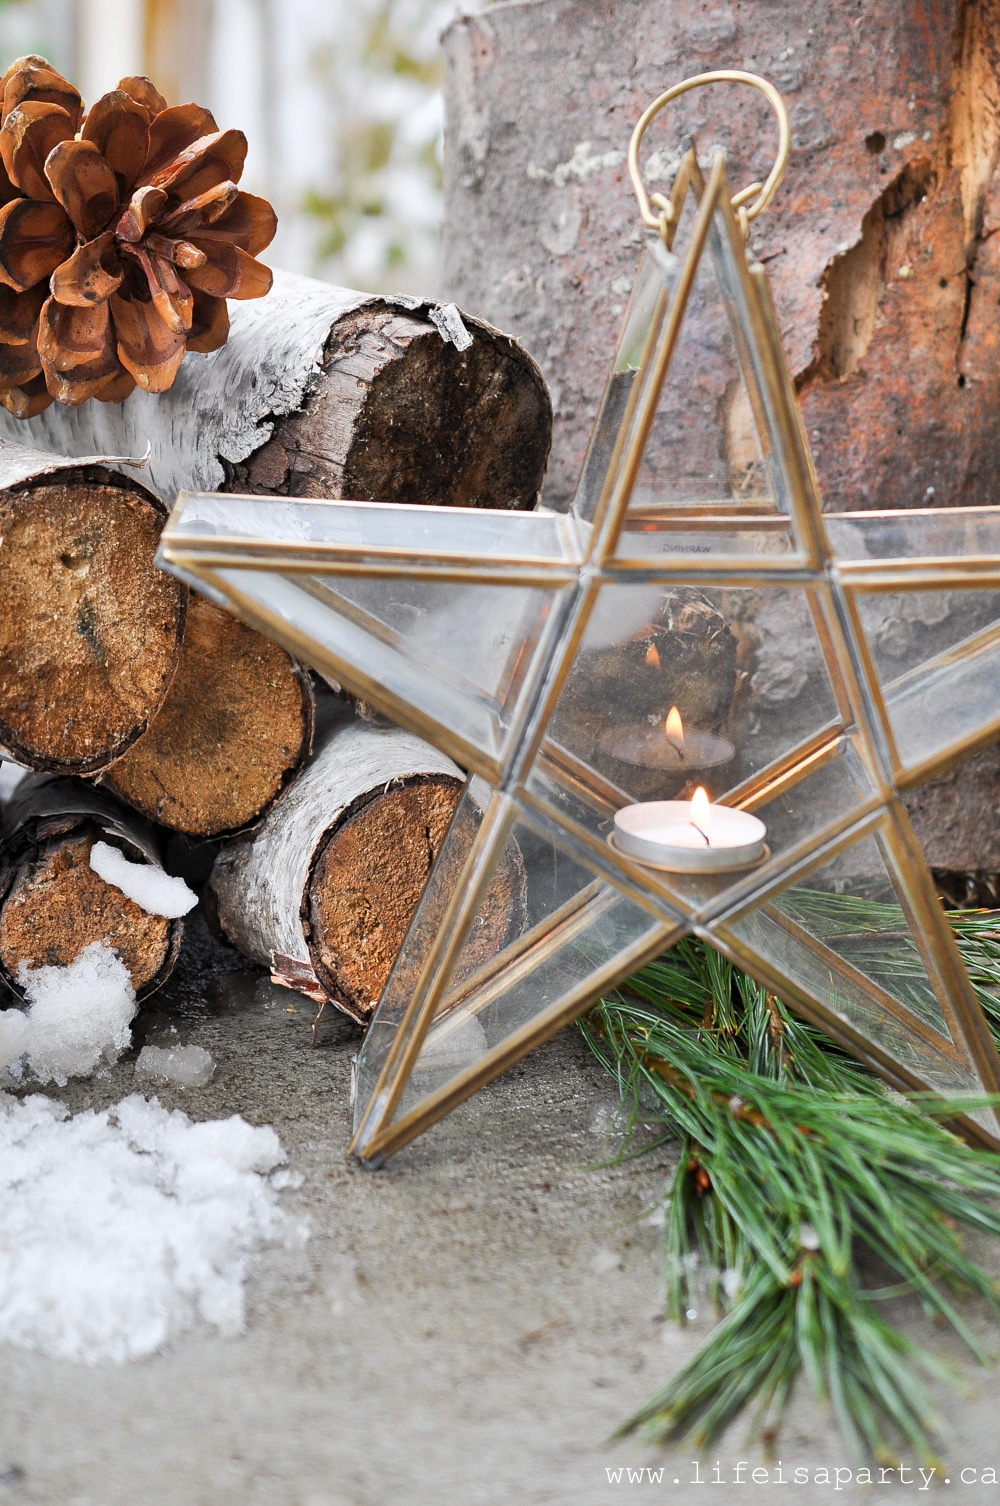 DIY Additions
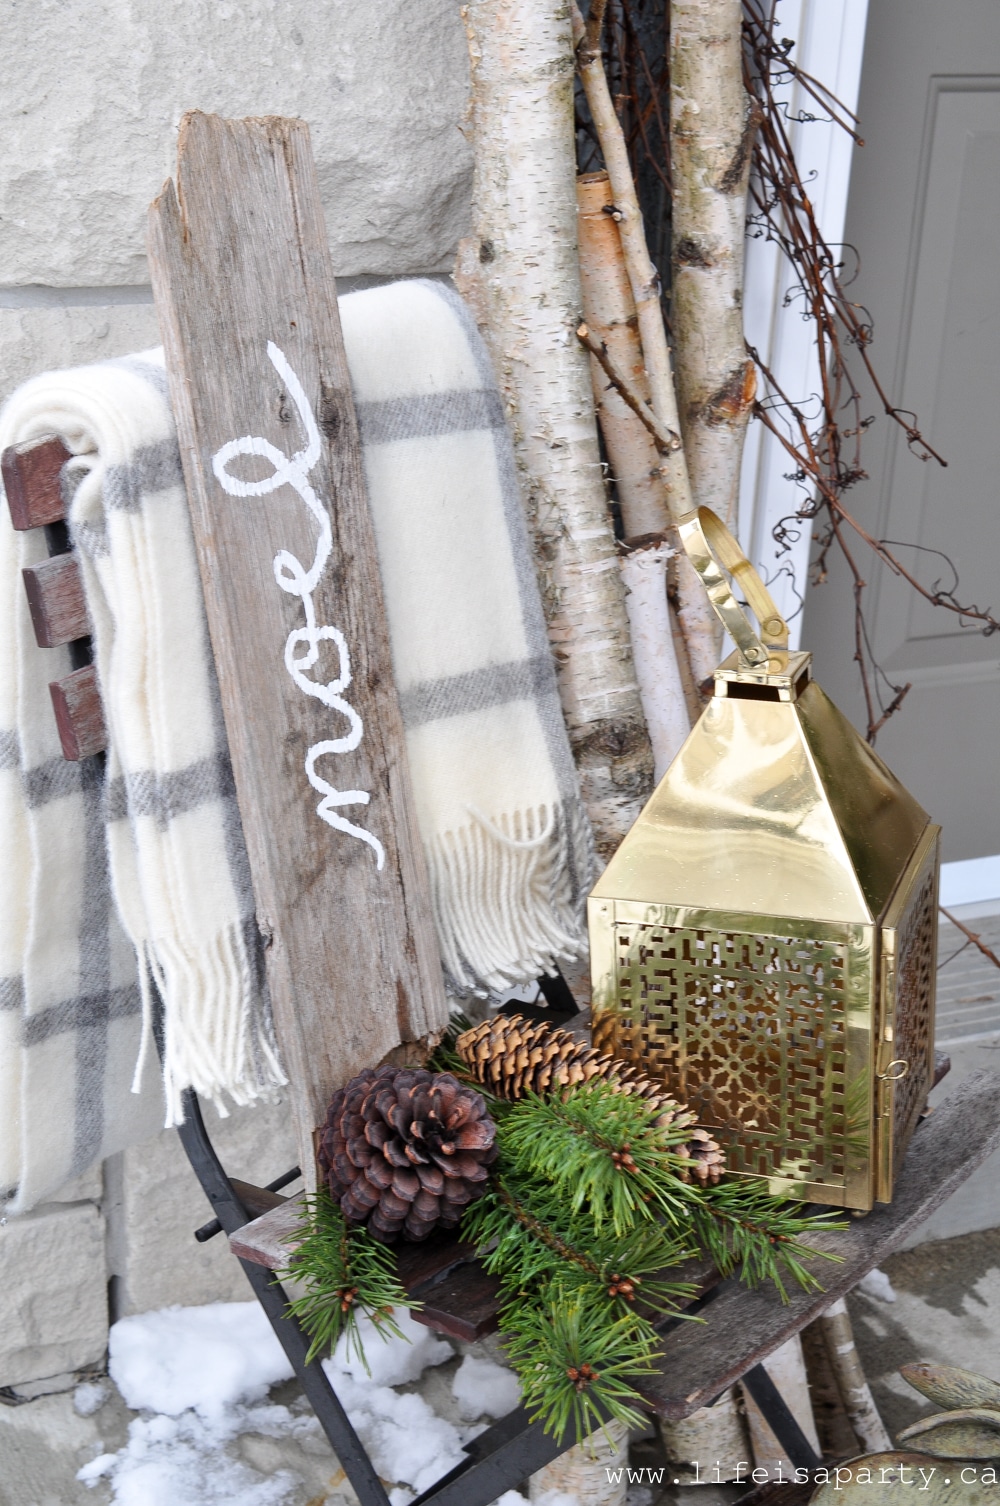 Over on the other side, one more quick DIY with the skis.
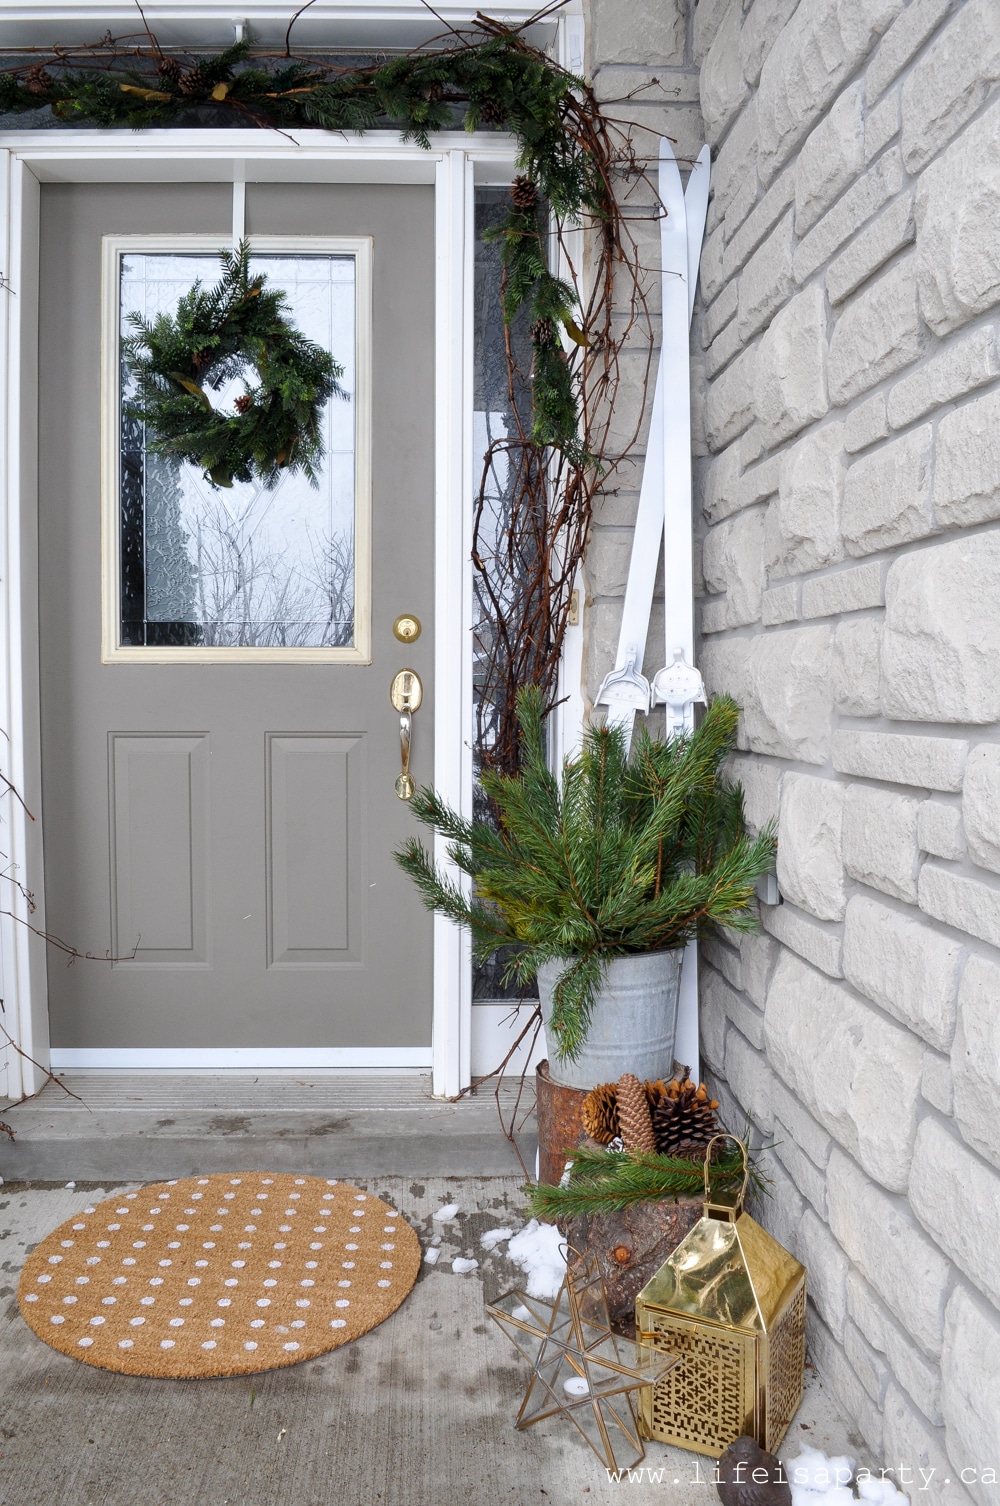 I've been on the lookout for some affordable vintage skis for the last year or two, but with no luck. I decided to DIY the look. I found some really inexpensive skis at the thrift store and spray painted them white. I'd still love some vintage wood ones, but these will do the job until then. 😉
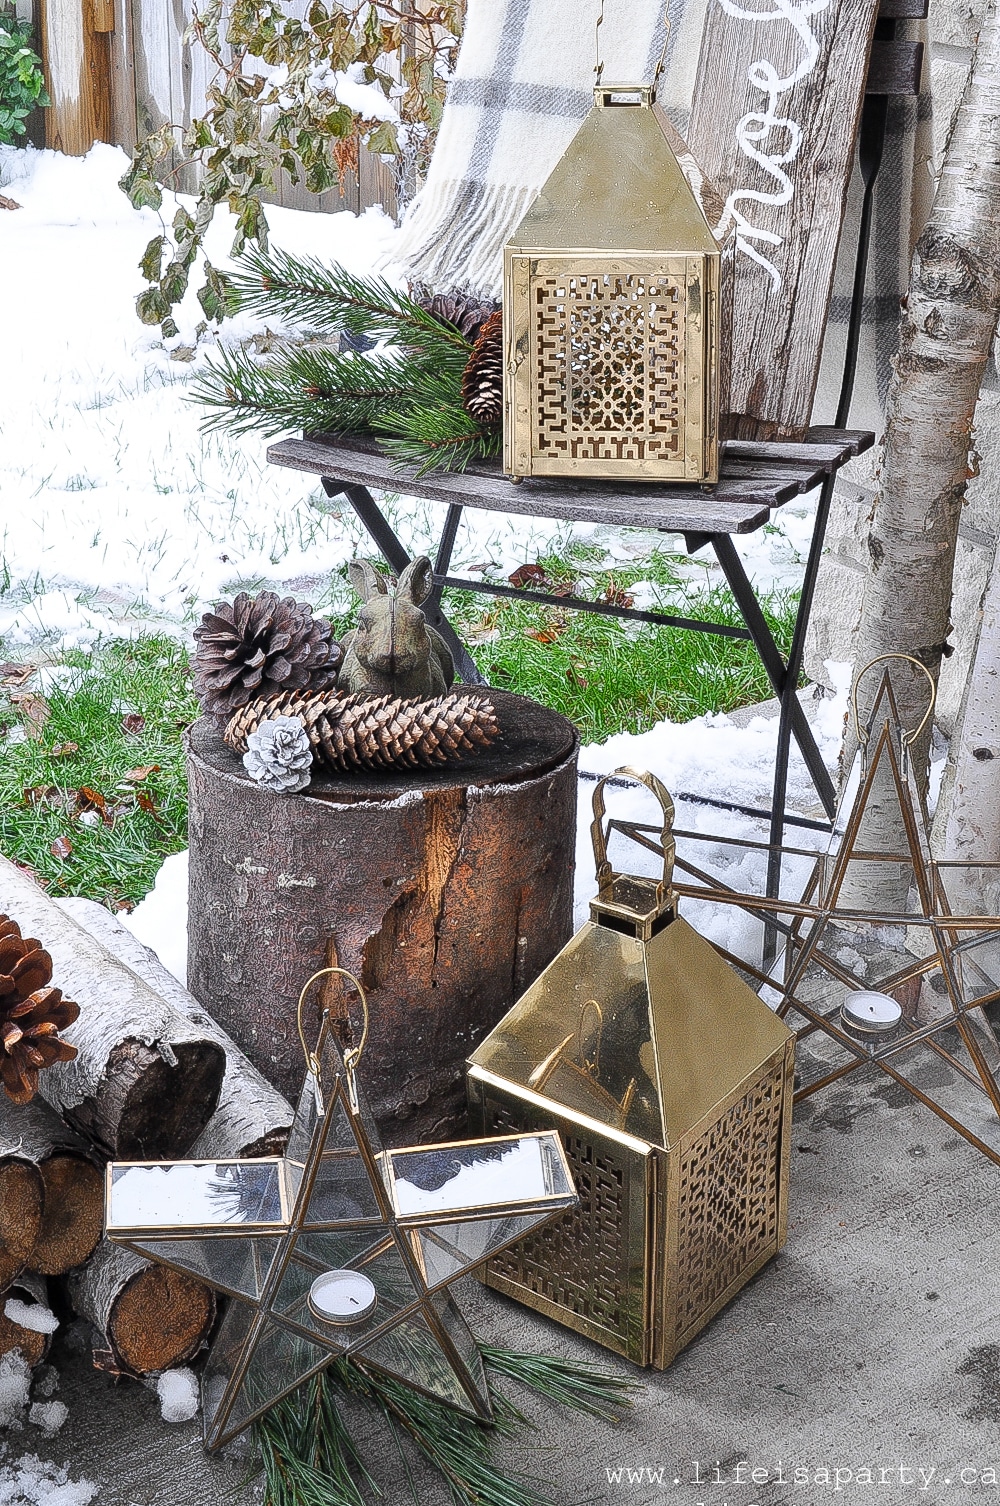 With a front porch all dressed up for Christmas, life really is a party!
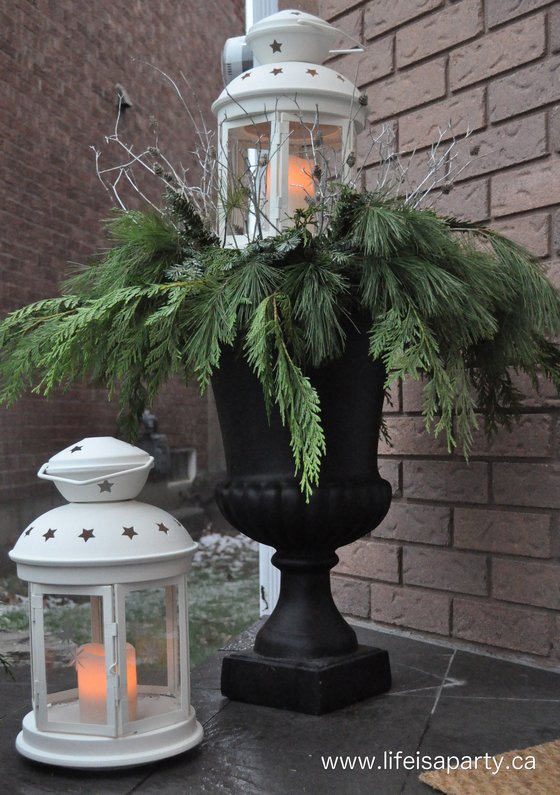


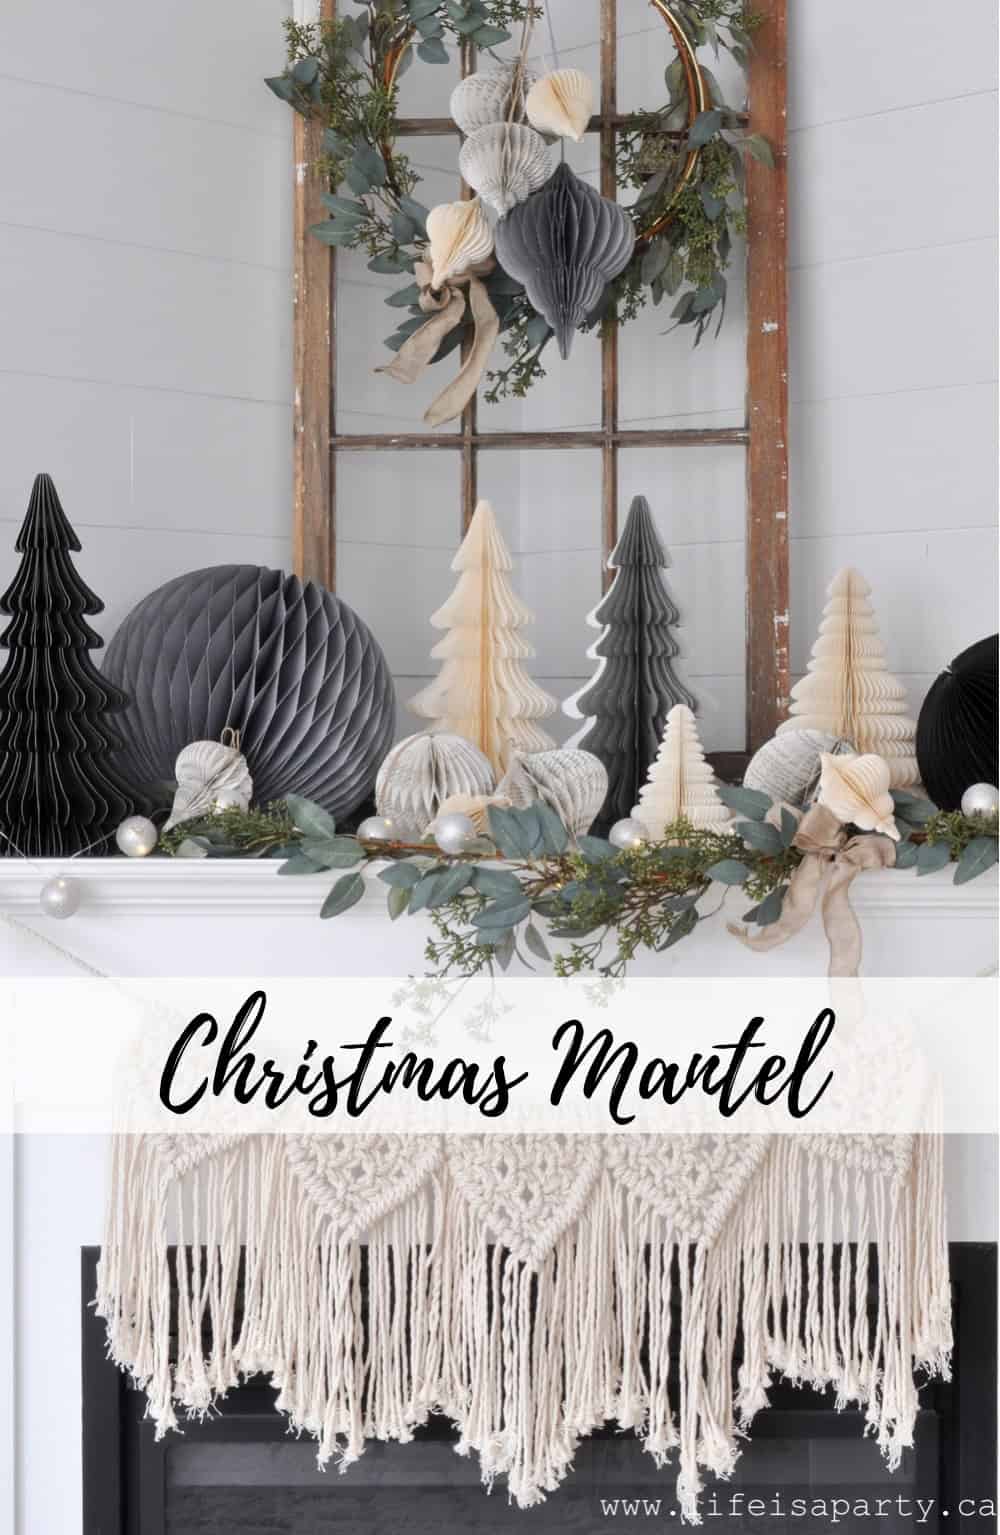
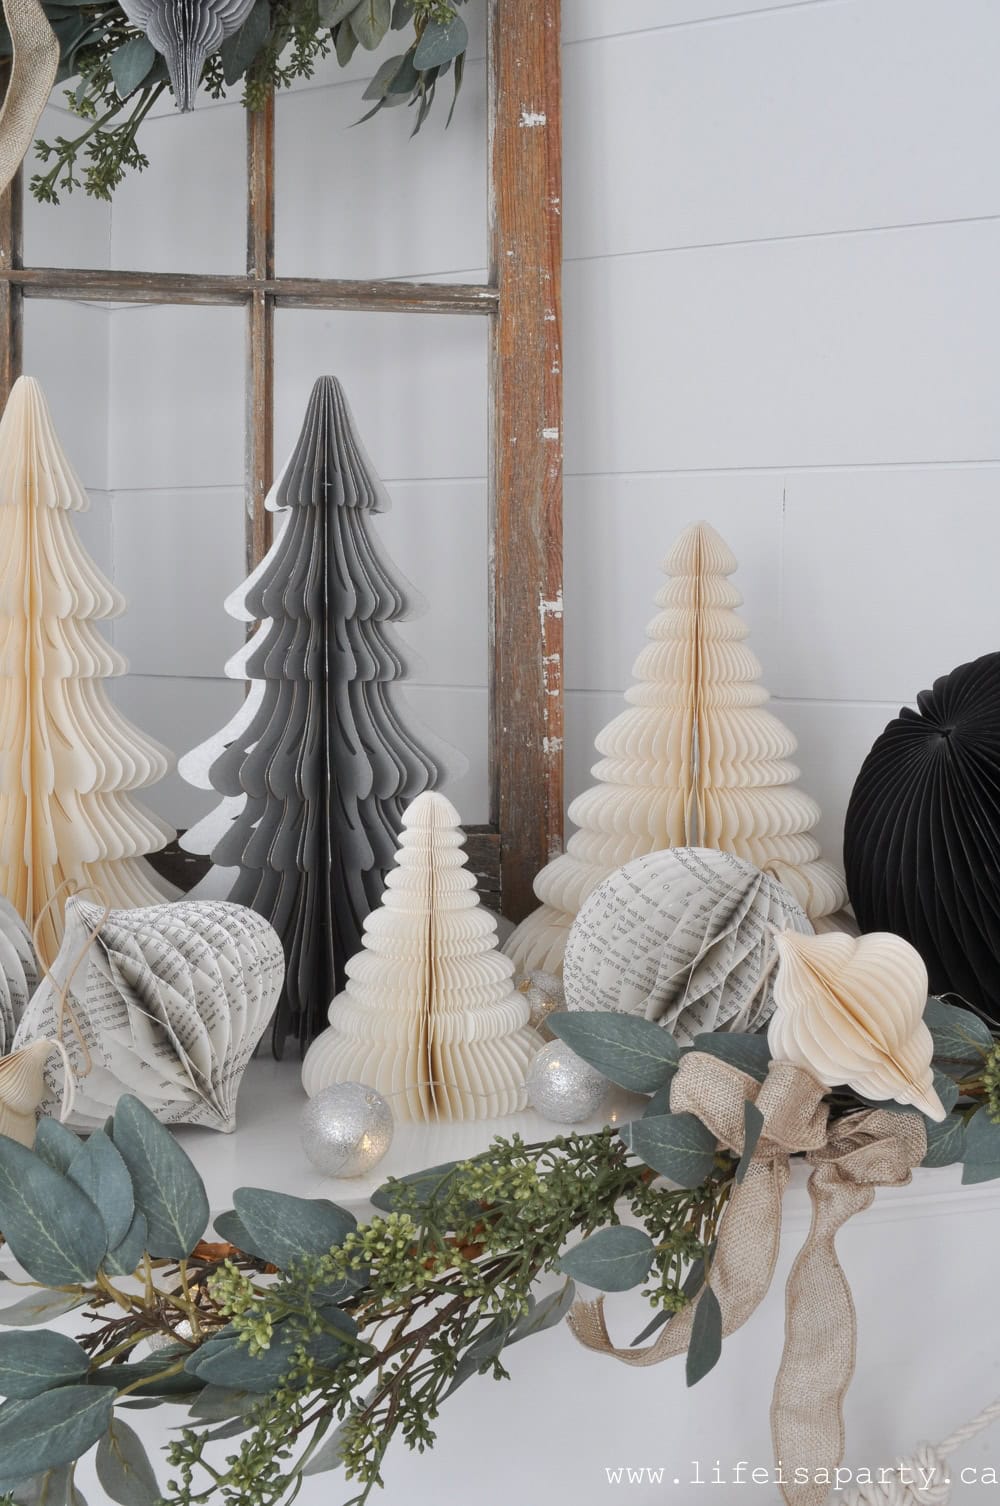
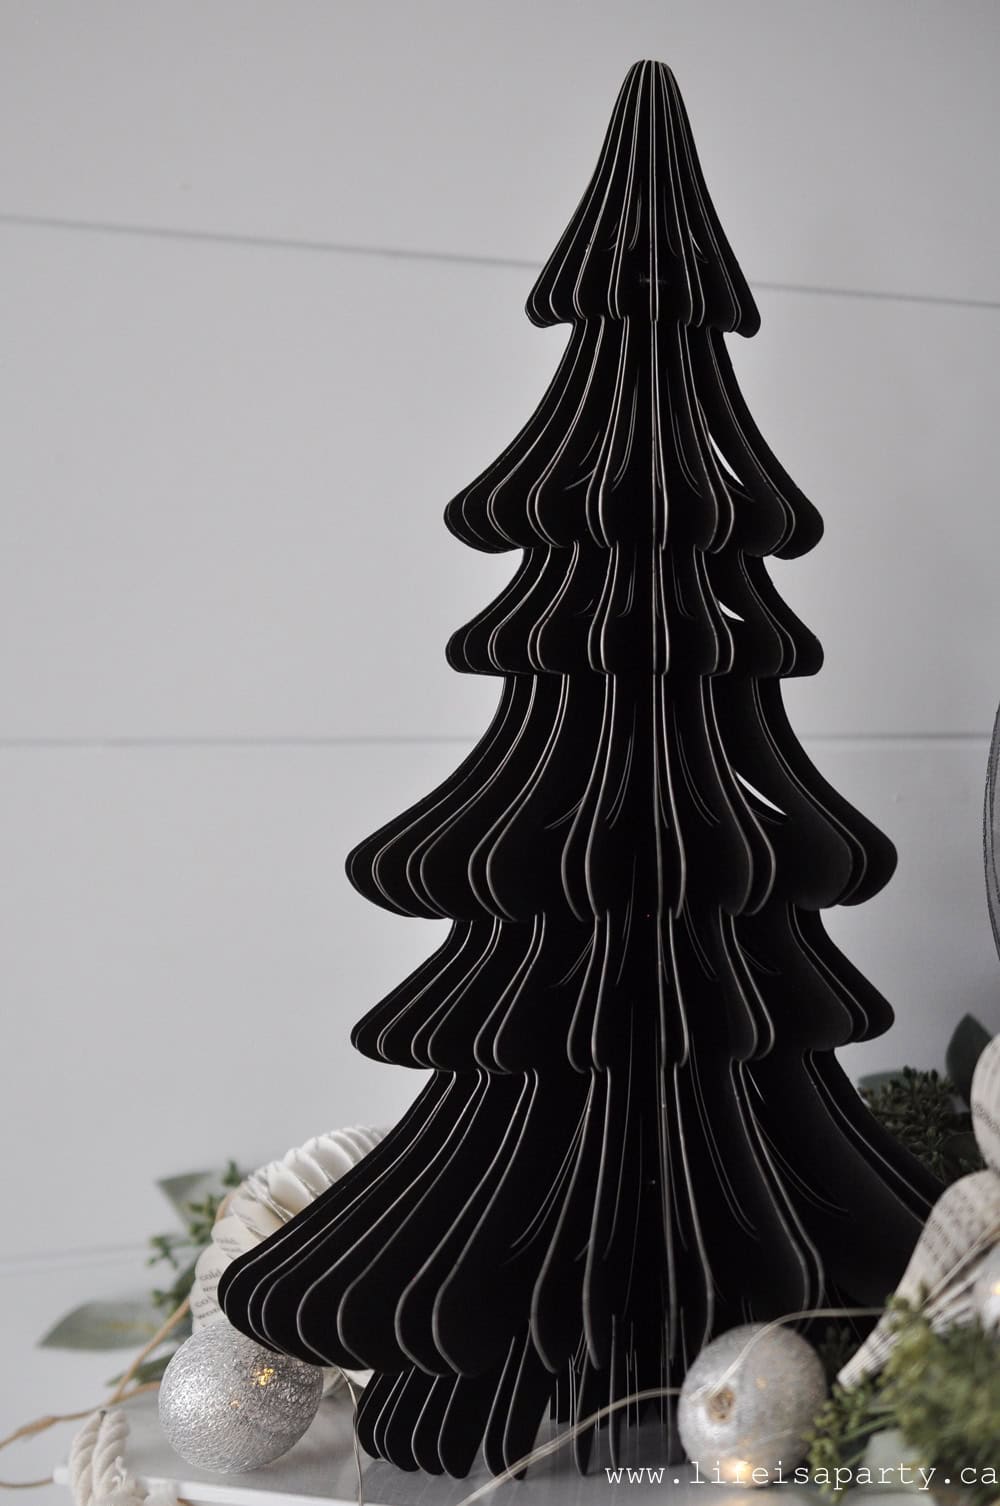
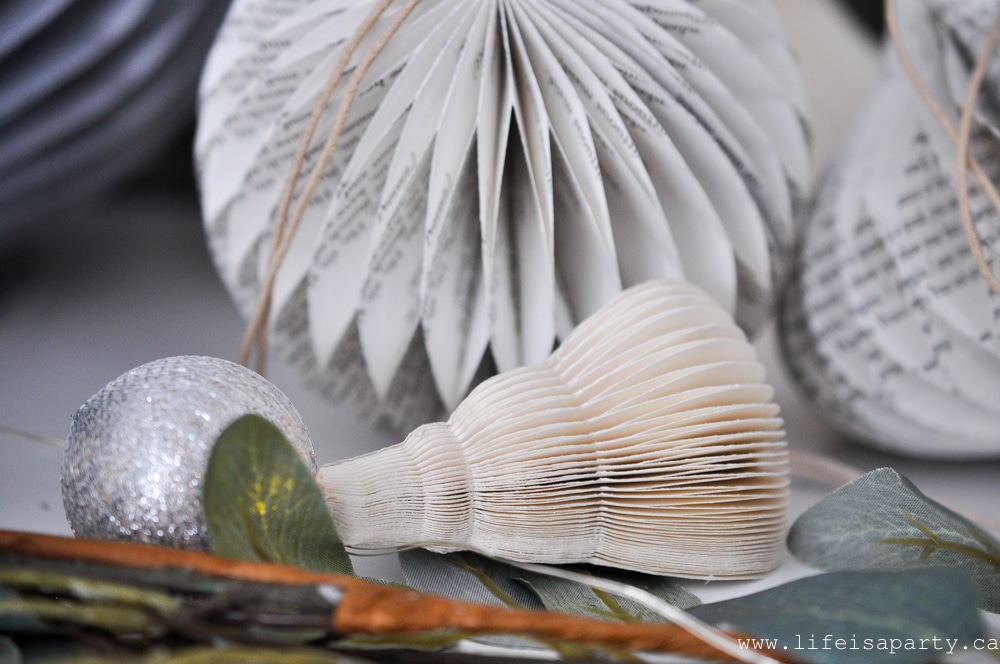 There are different shapes, sizes, and colours including this ivory set.
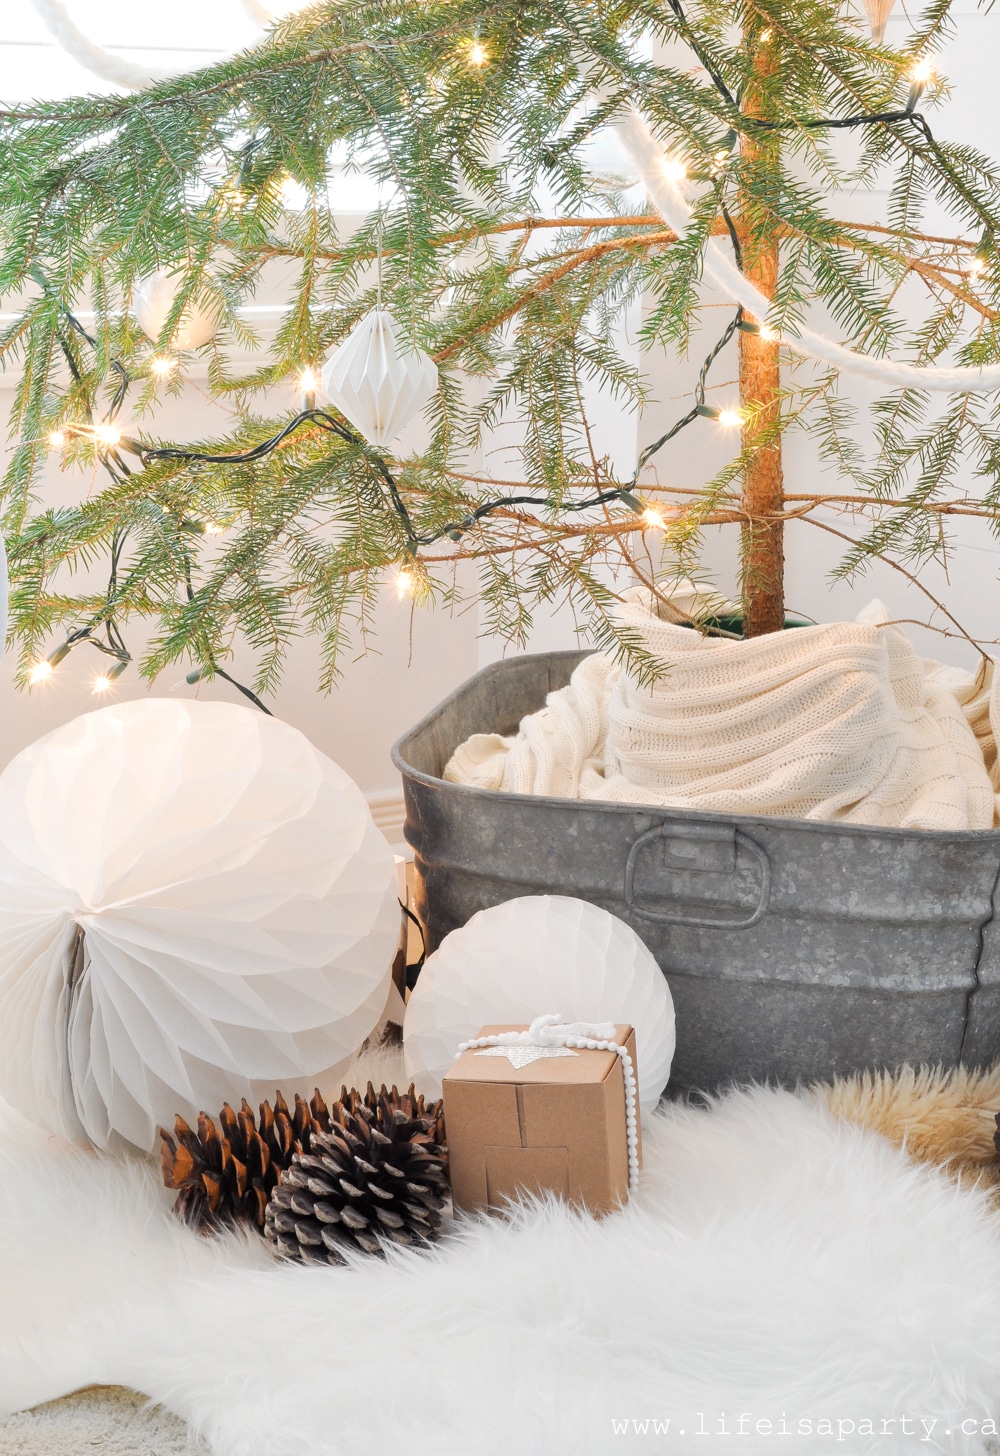
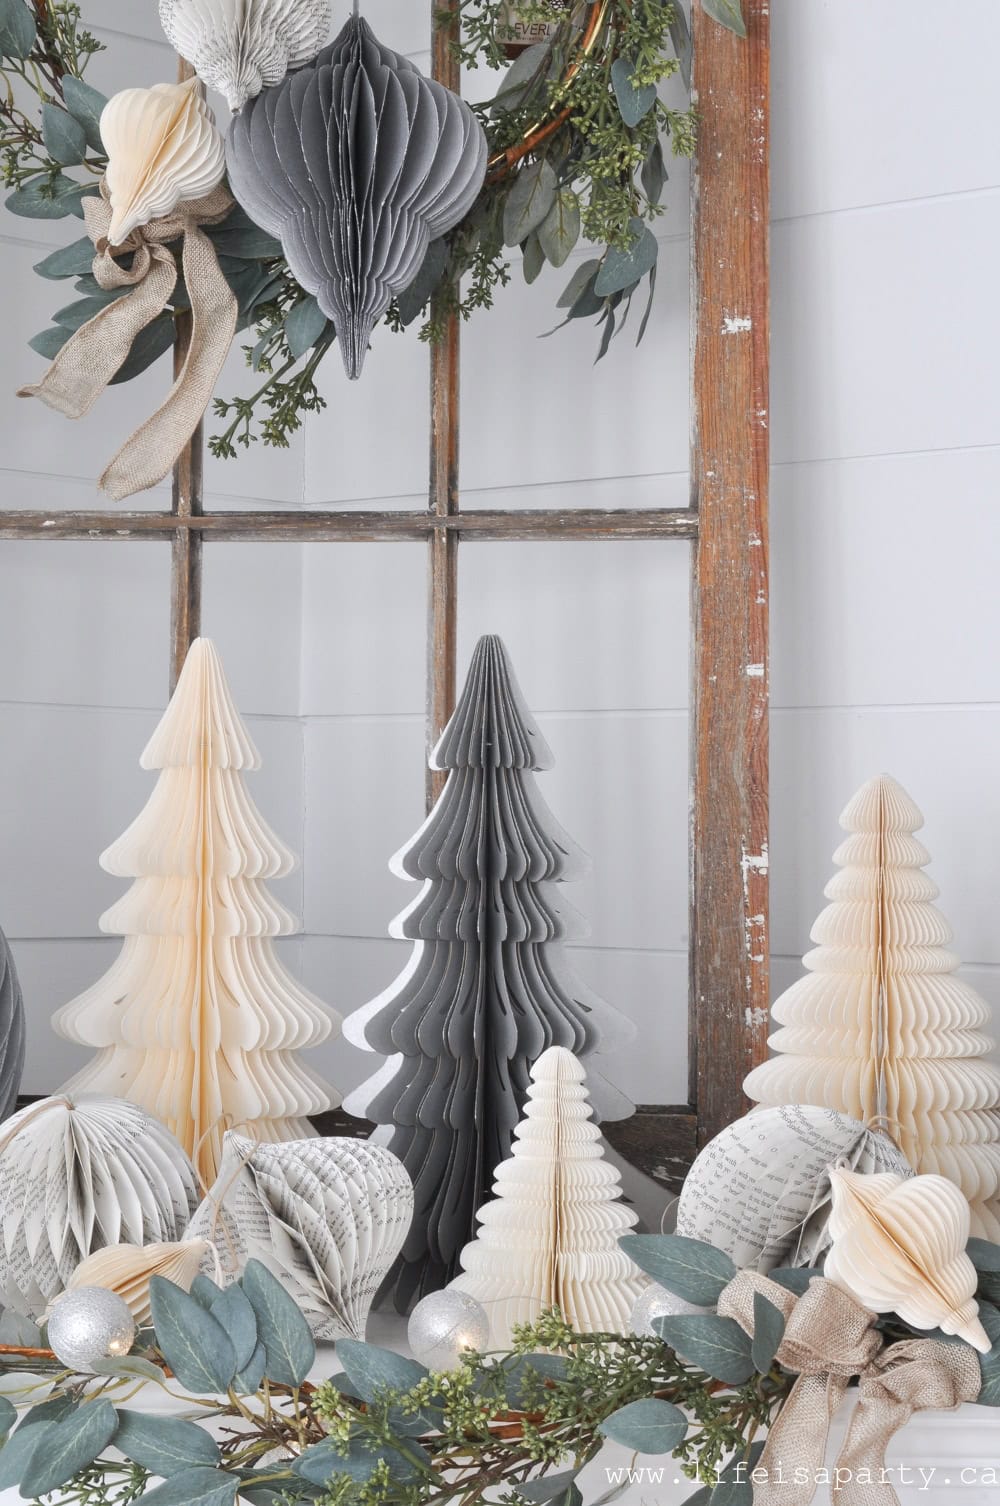 I also added in some of the honeycomb balls for interest. These are not your average tissue paper honeycomb balls. These are made of cardstock and will last for years and years. I especially love the silver honeycomb balls with glitter on the edges.
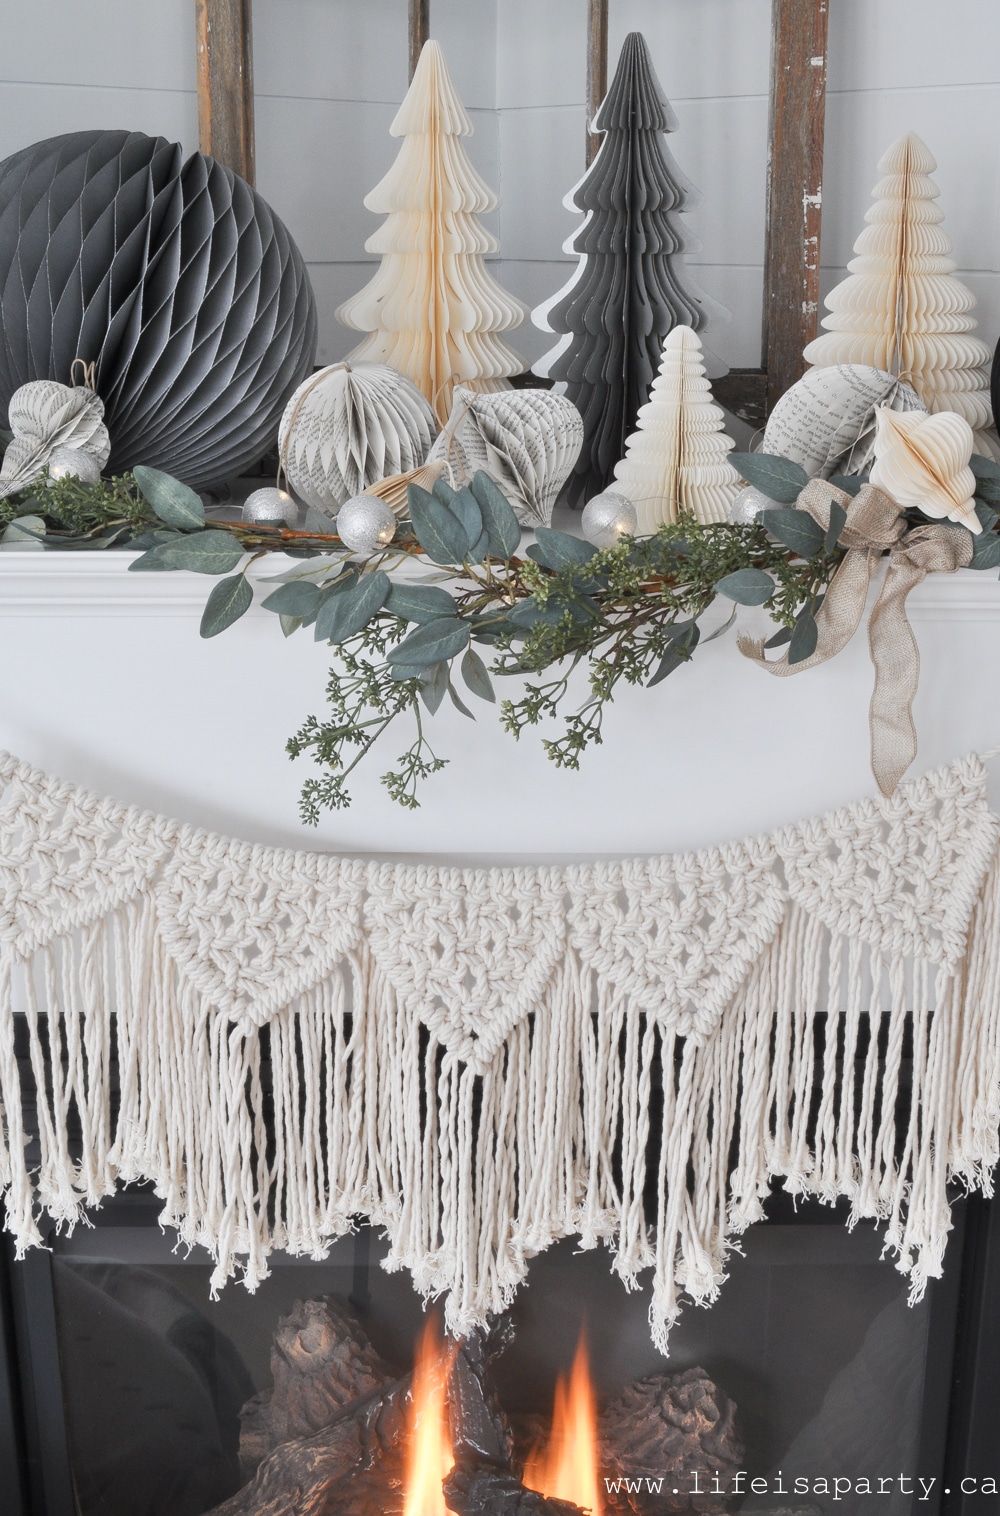 Garland and Wreath
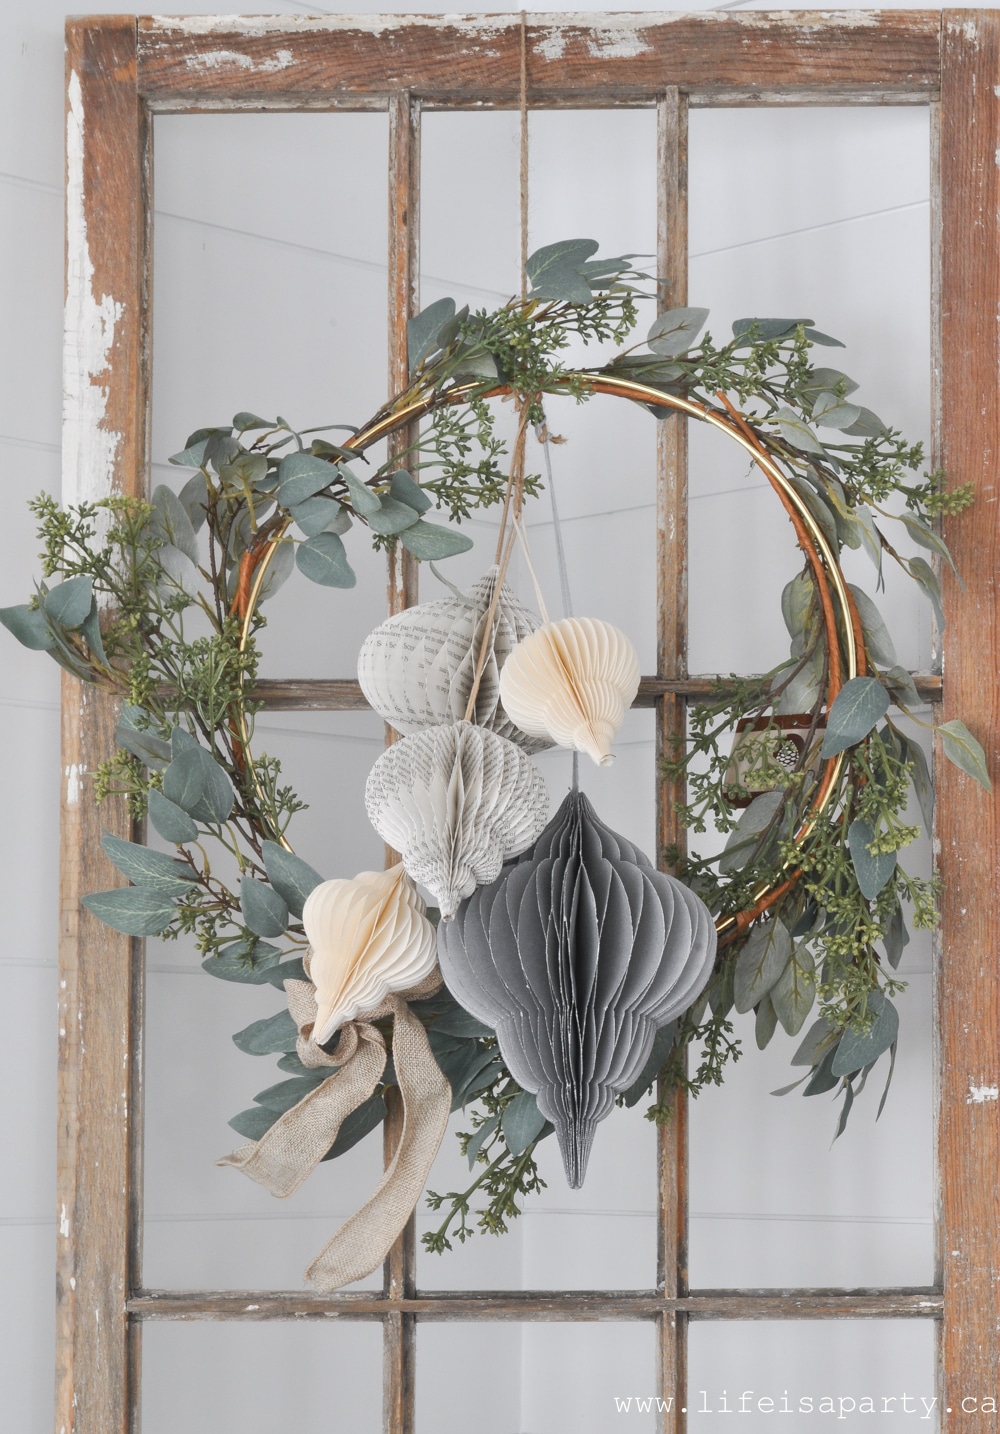 I used a second garland to make a simple wreath. I started with a gold hoop and wired the garland around. In the middle I added another cluster of ornaments. And they're all hung up on a rustic vintage window pane. It helps add height to the mantel.
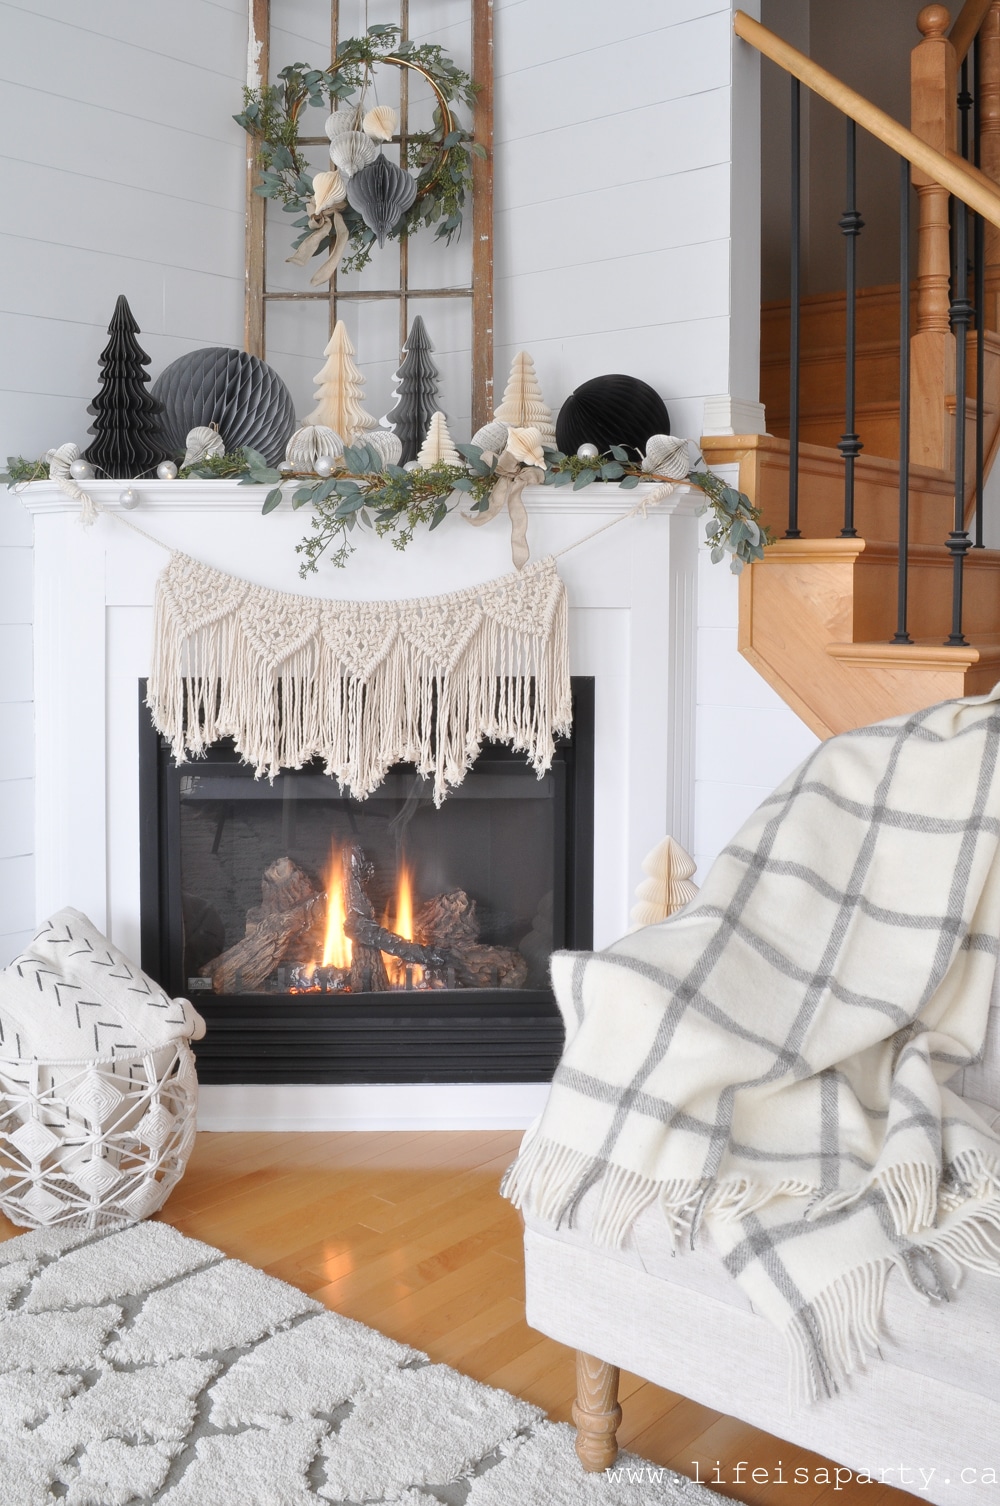
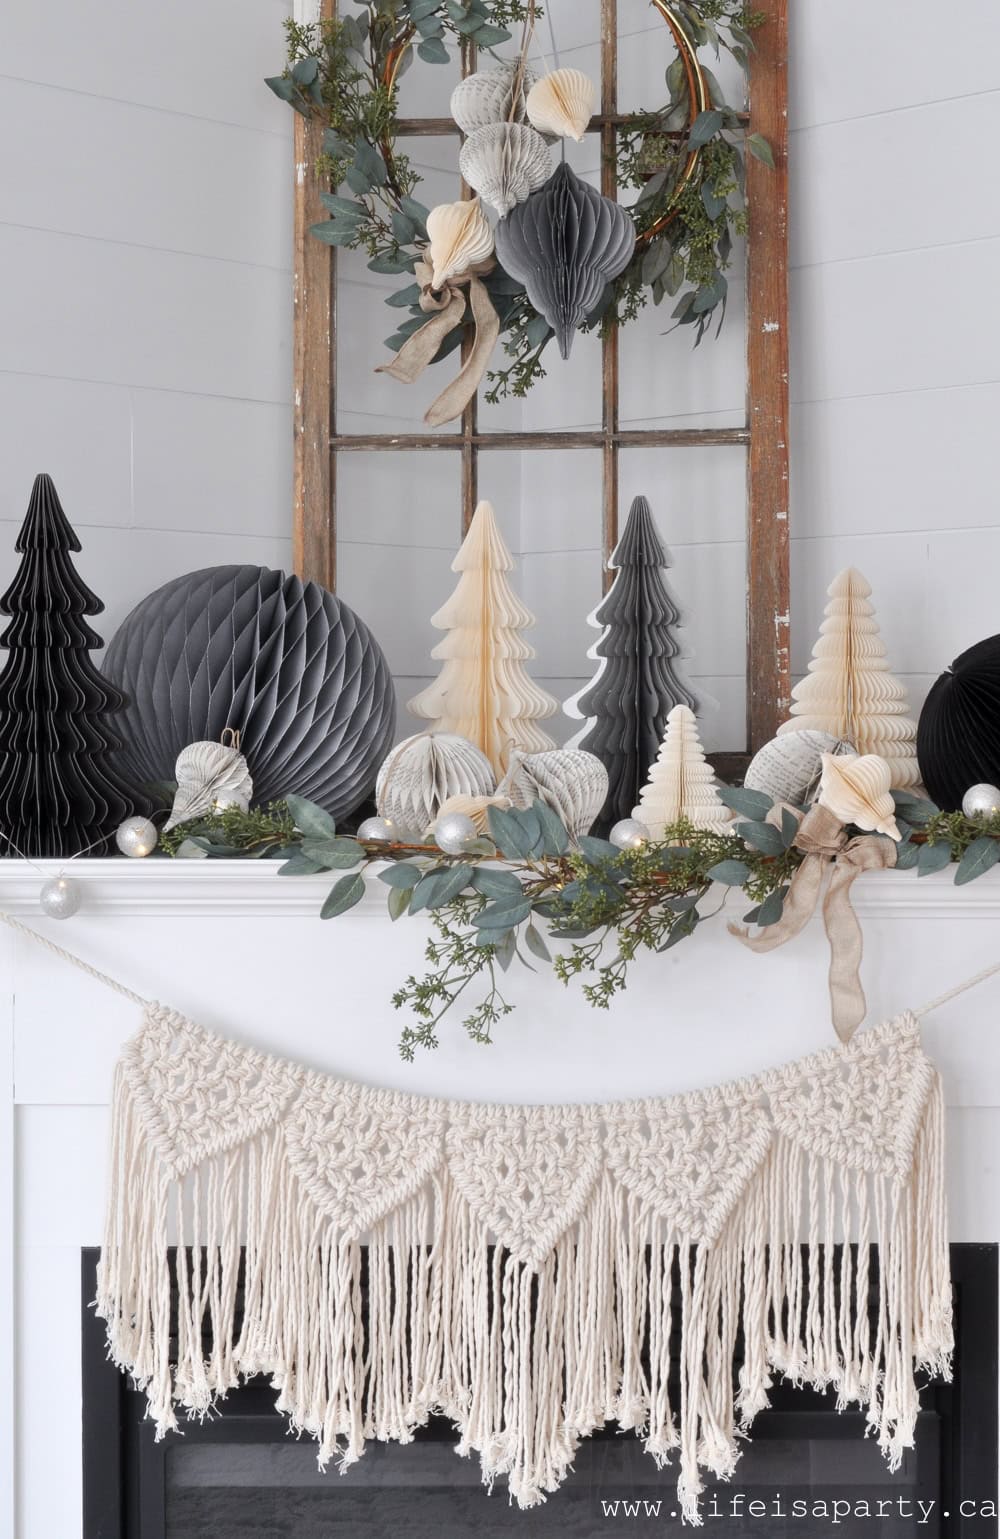
 I love how just a few simple paper ornaments make for such a beautiful Christmas mantel.


 4. Tree Topper
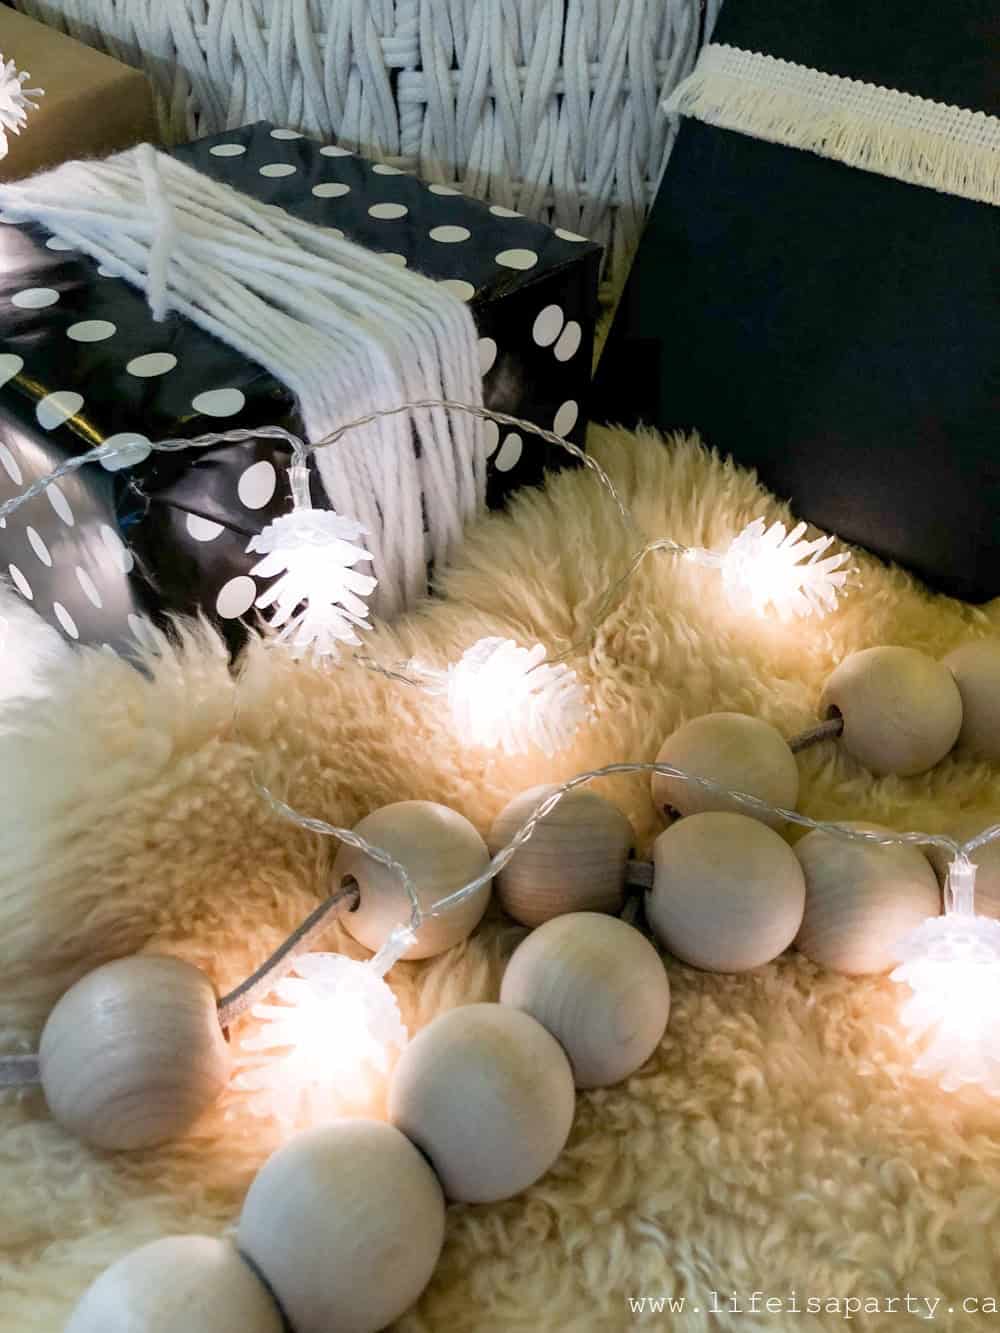


 I made these
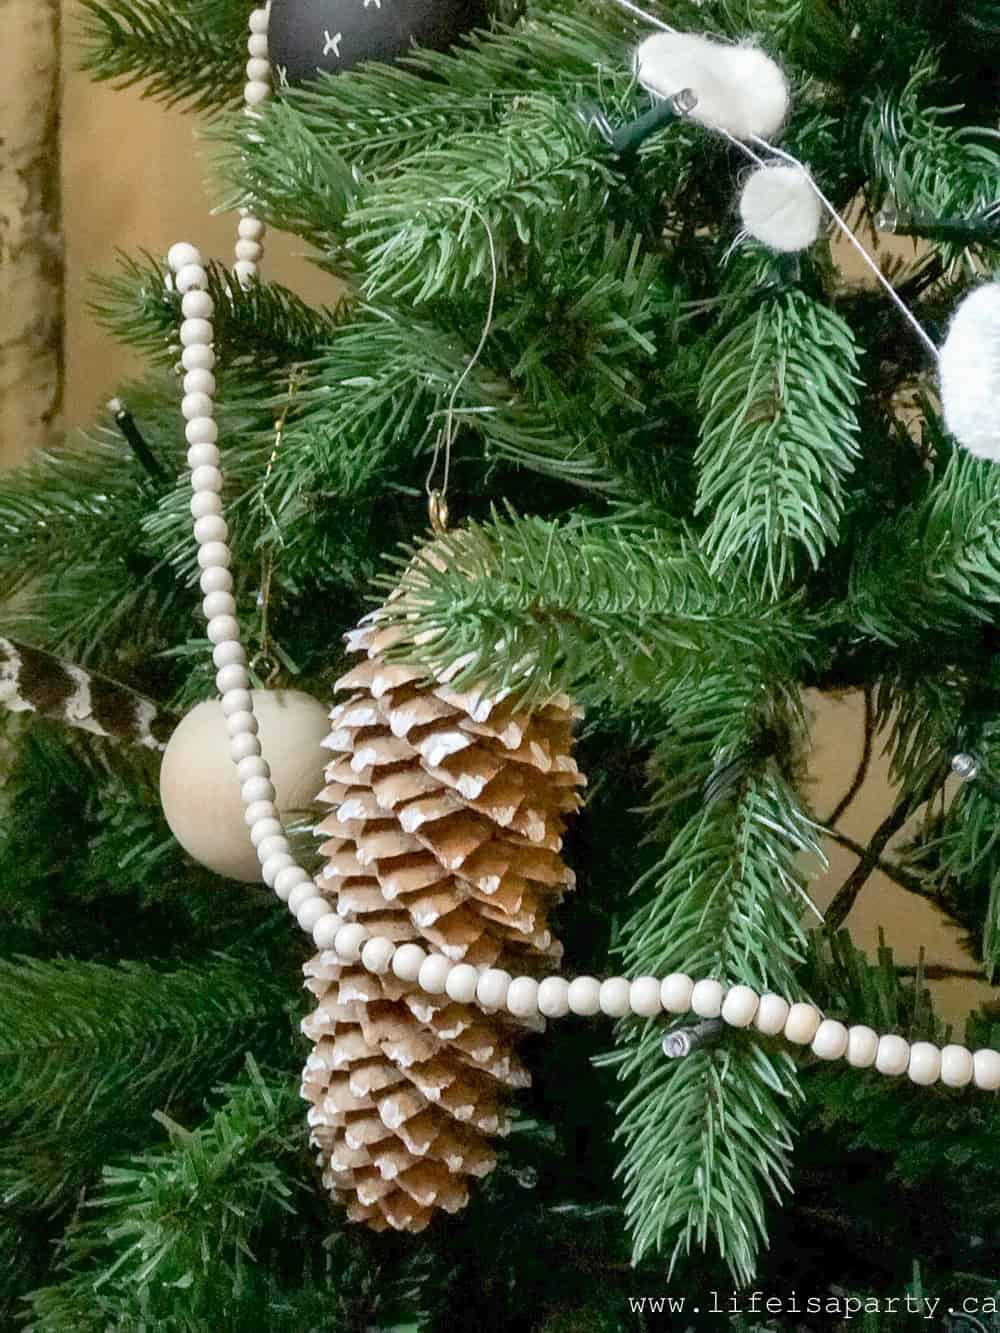


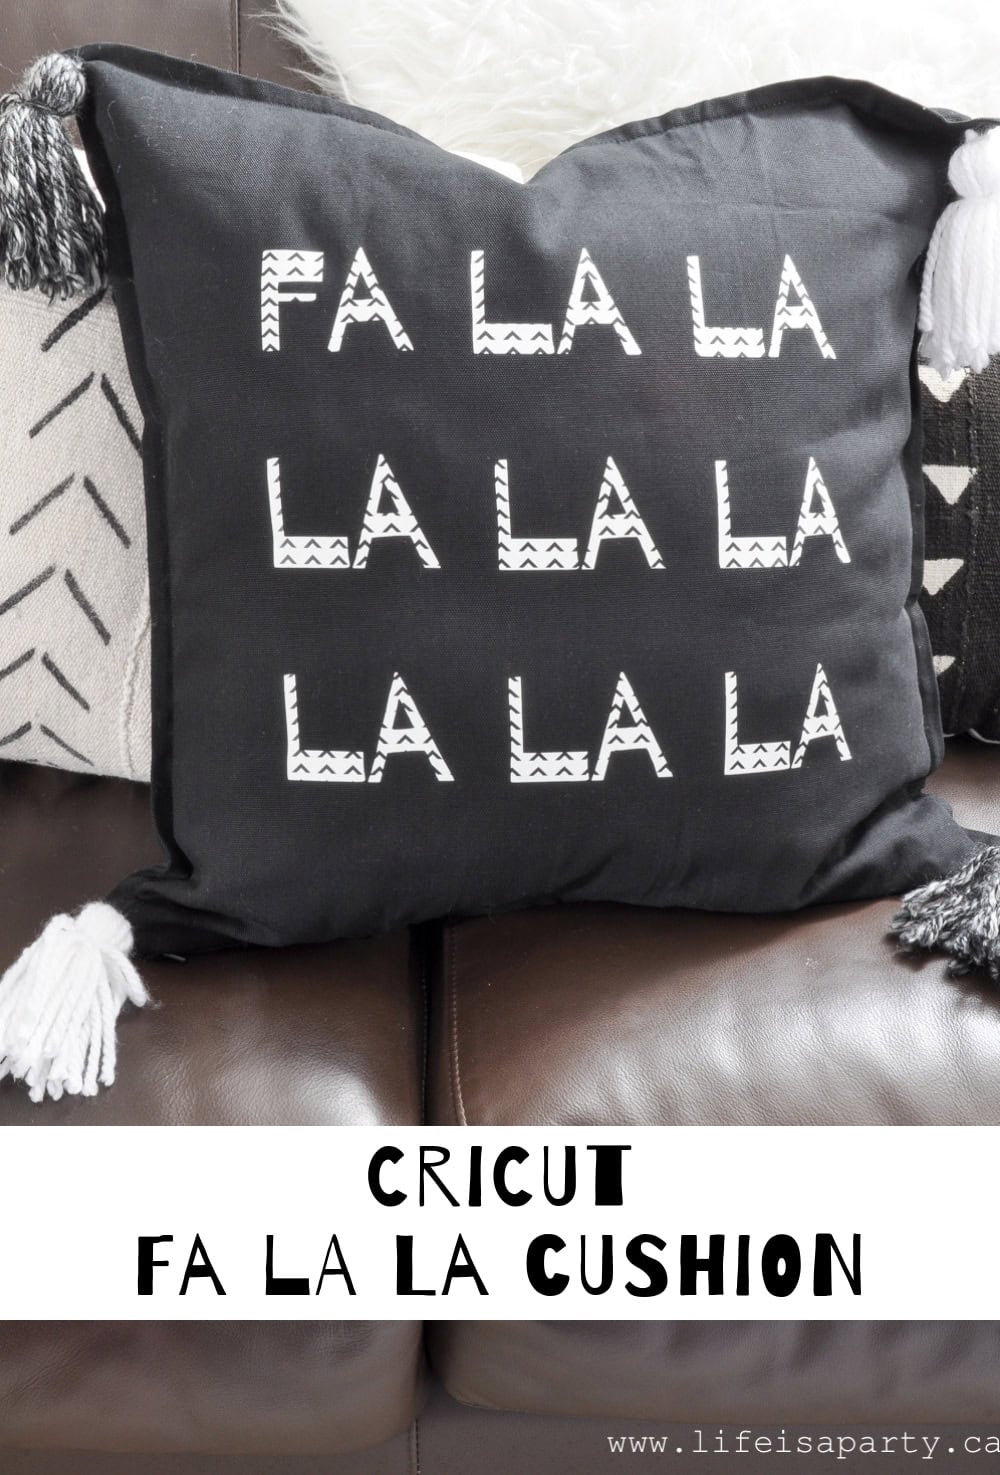


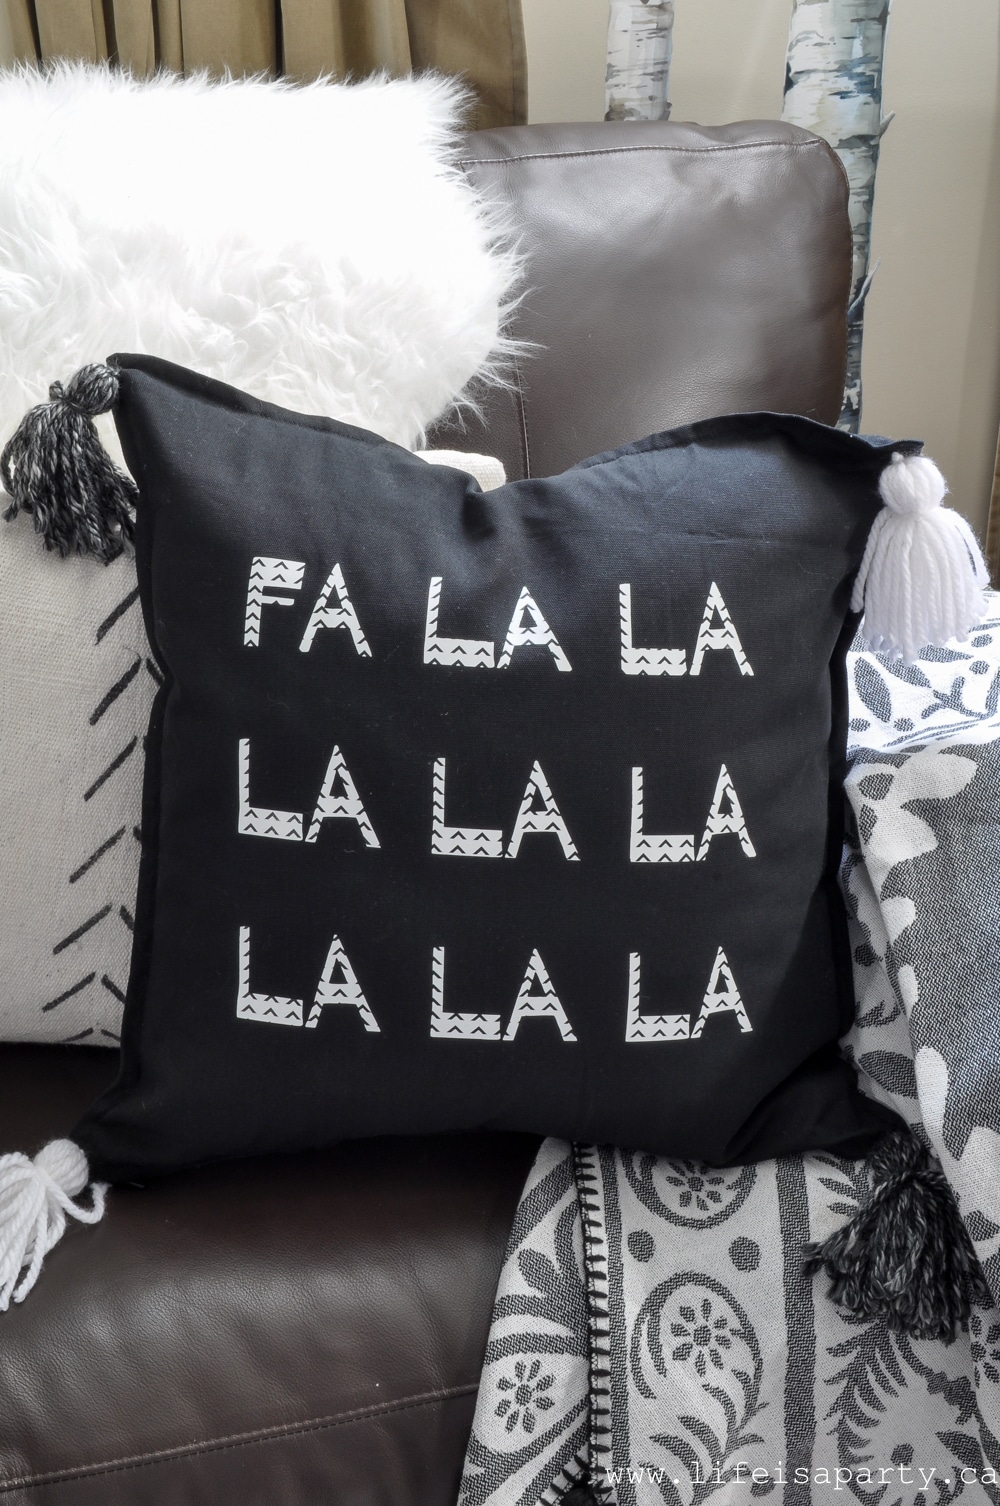
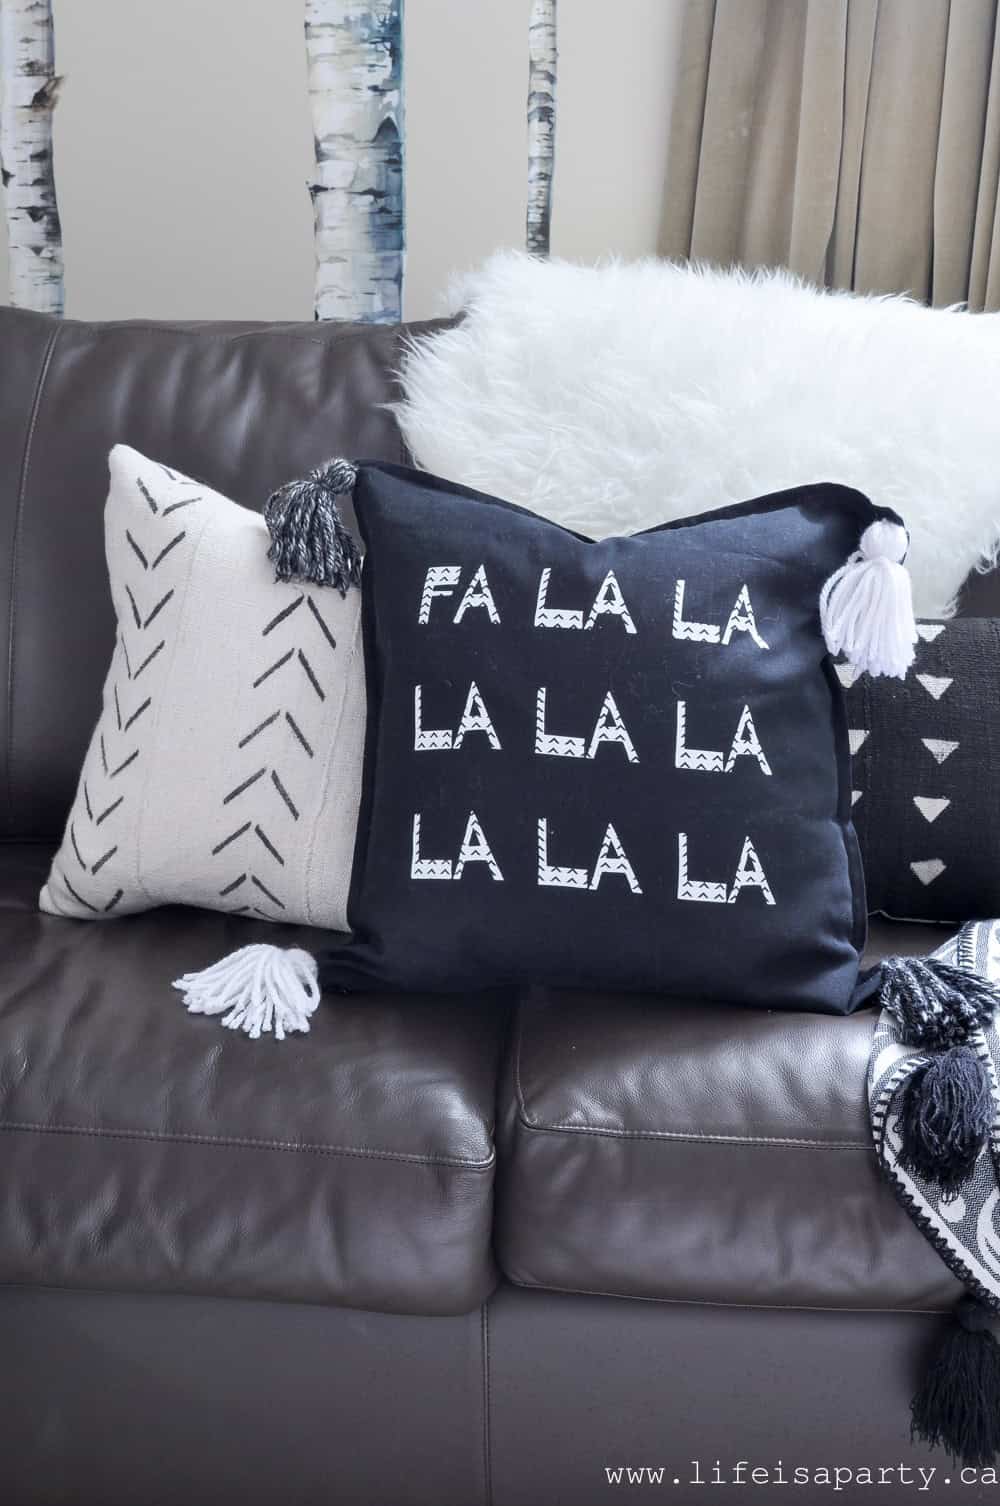
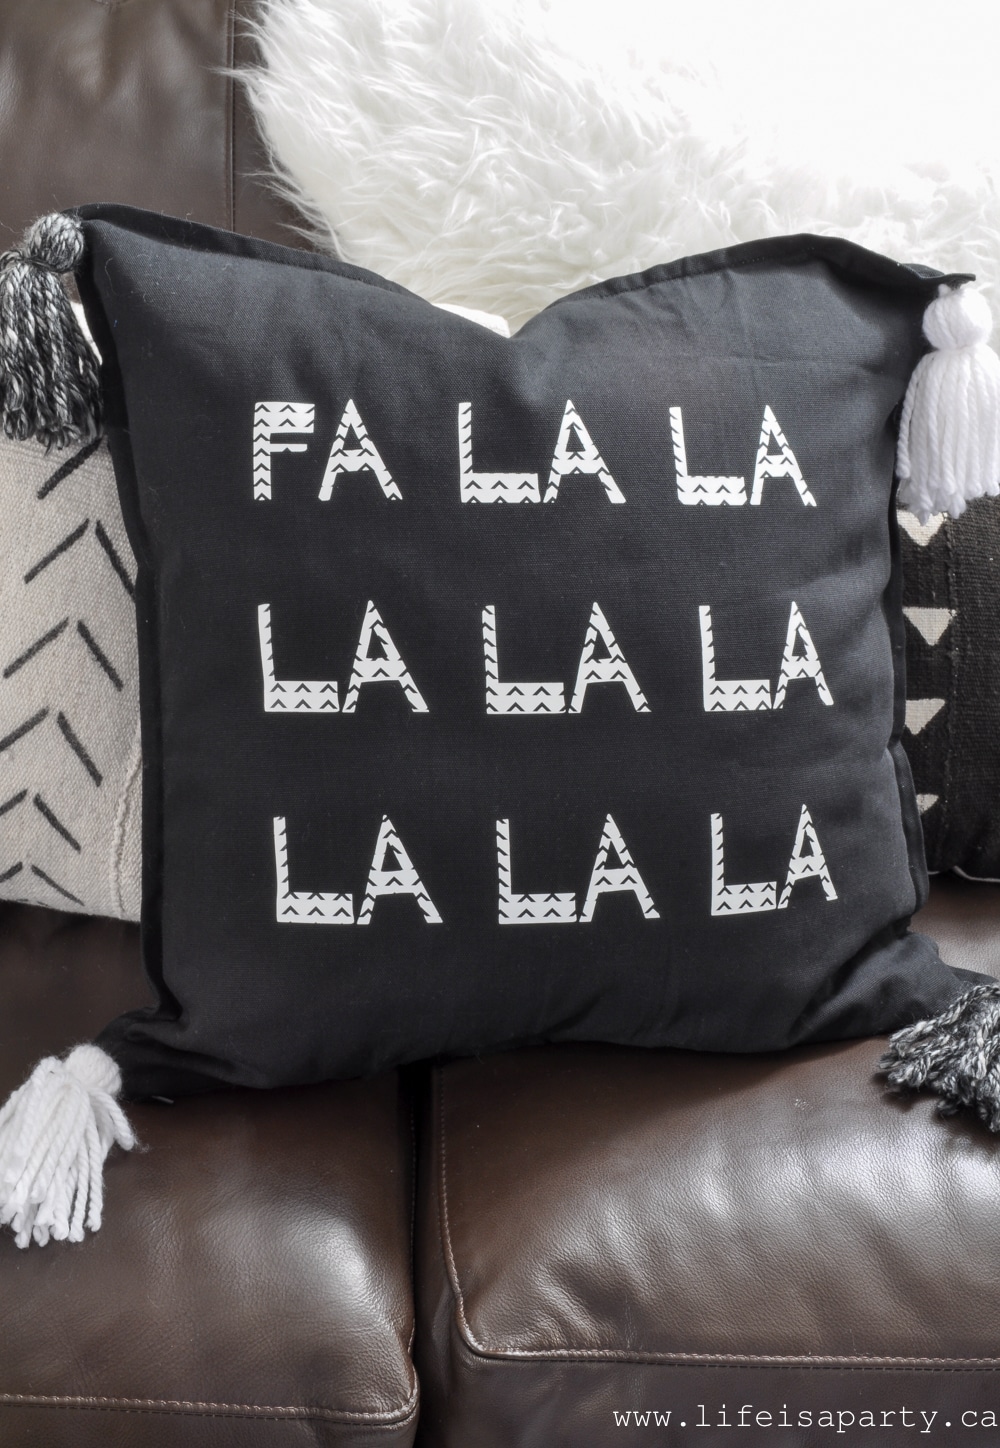 With a beautiful Fa La La Pillow, life really is a party.
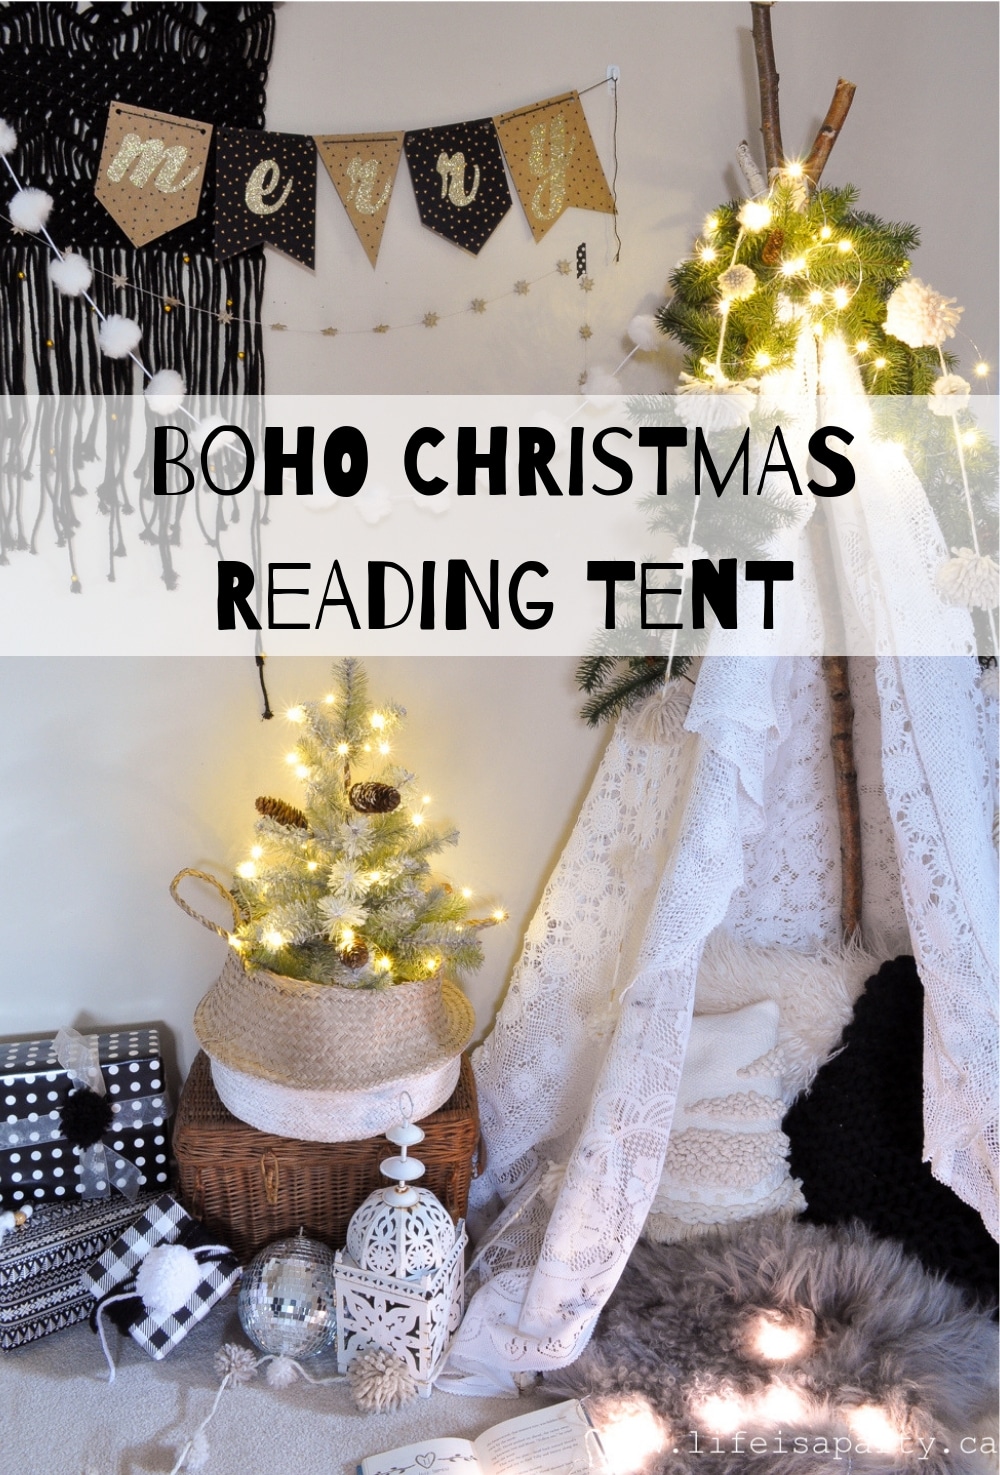


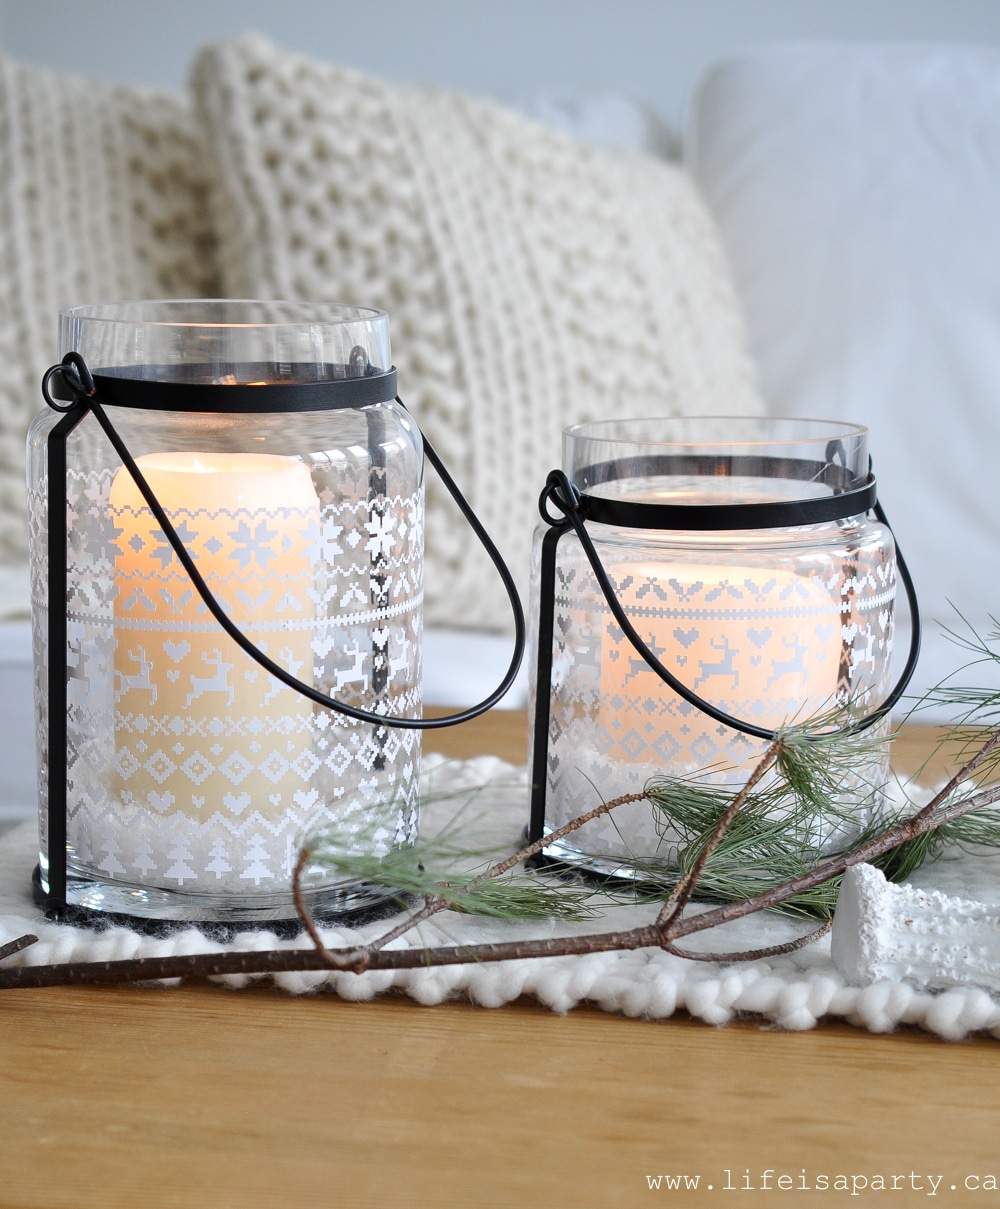
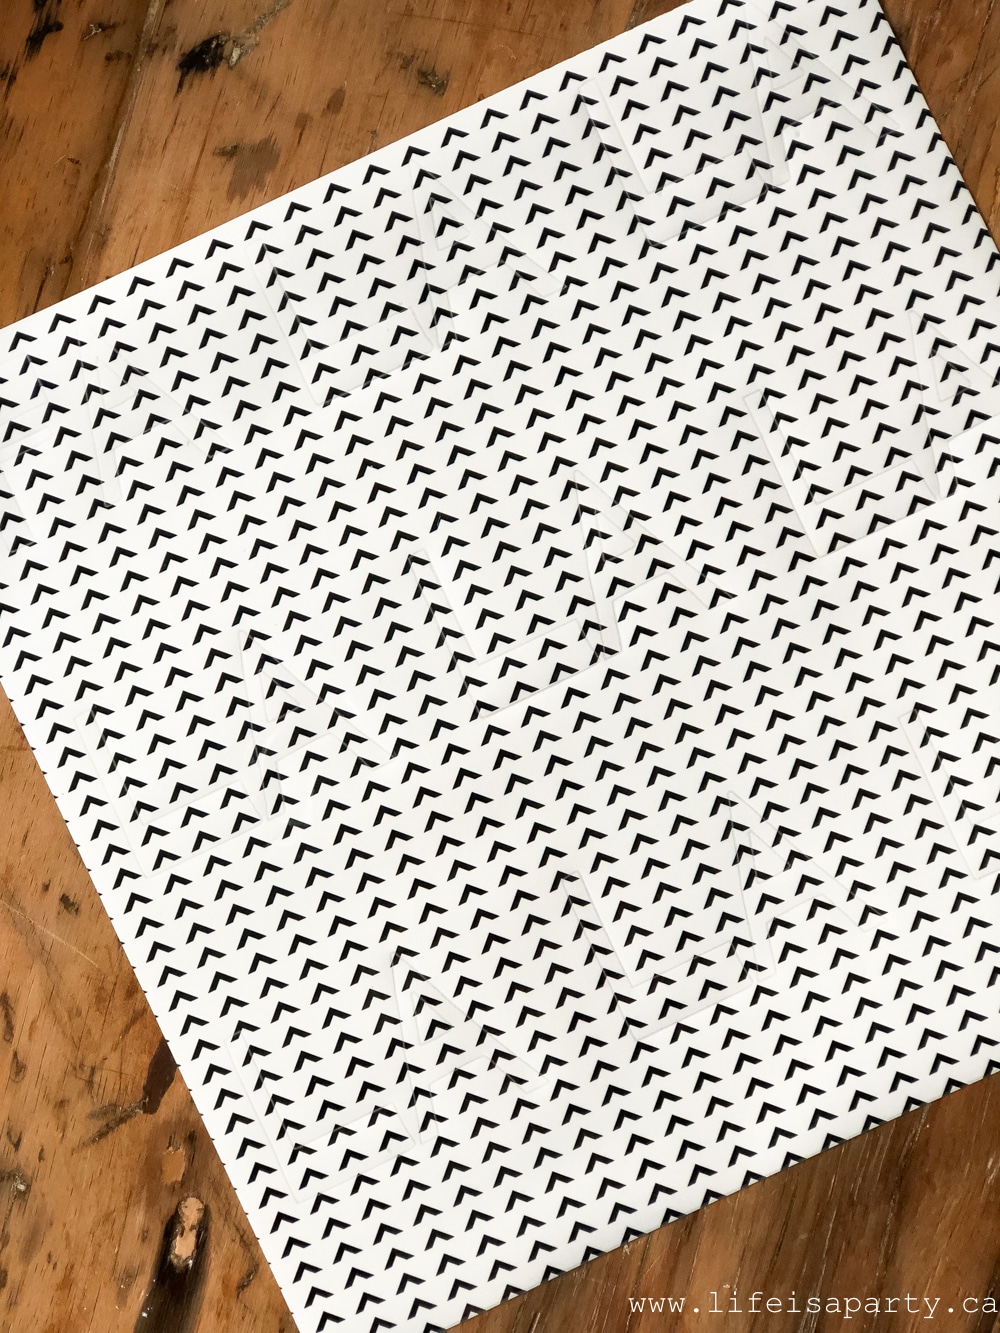
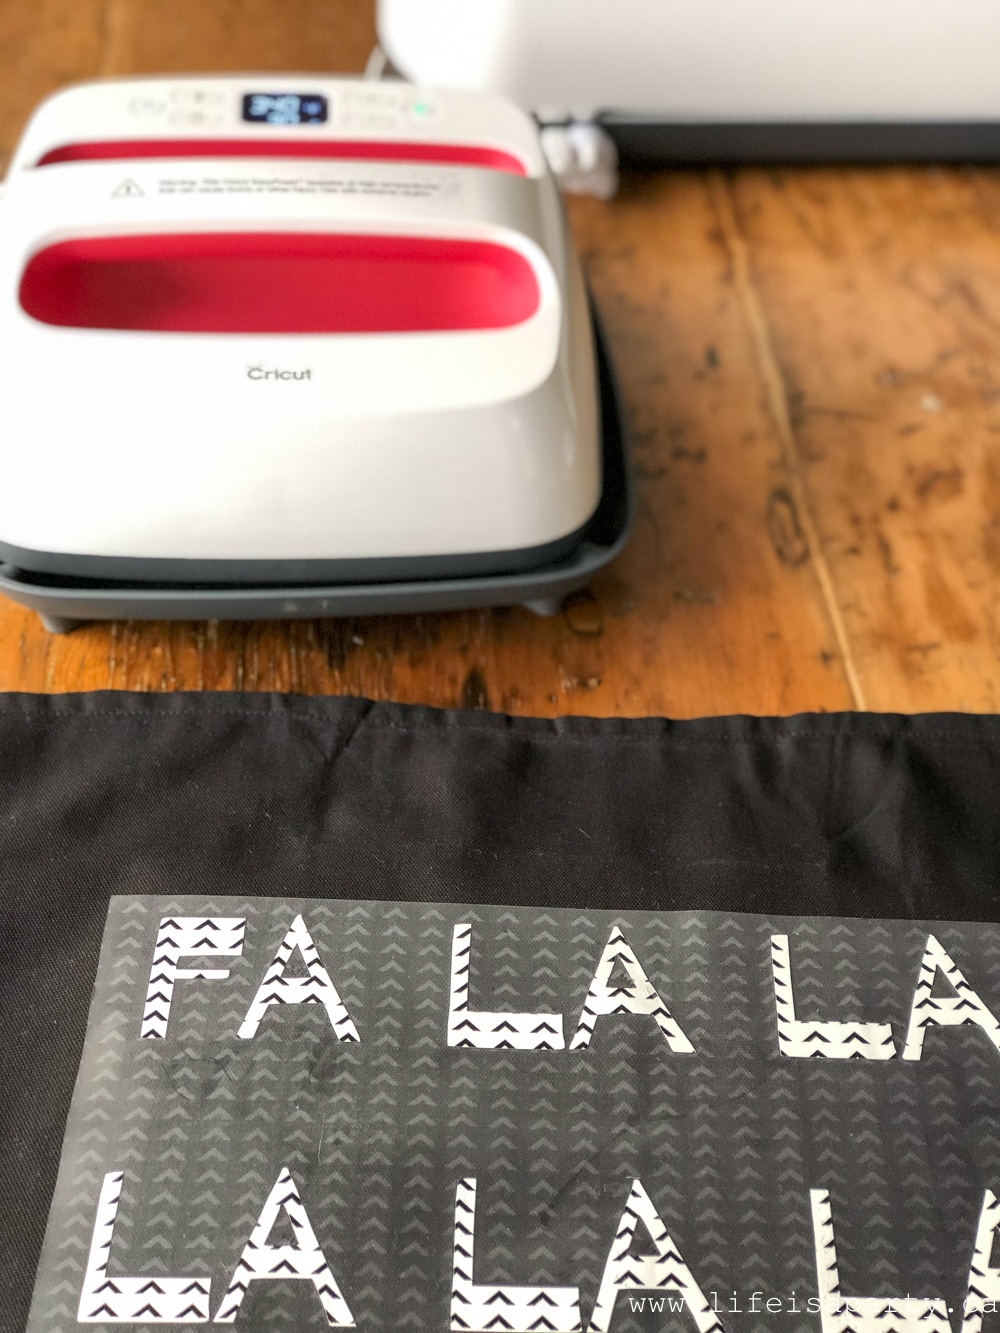
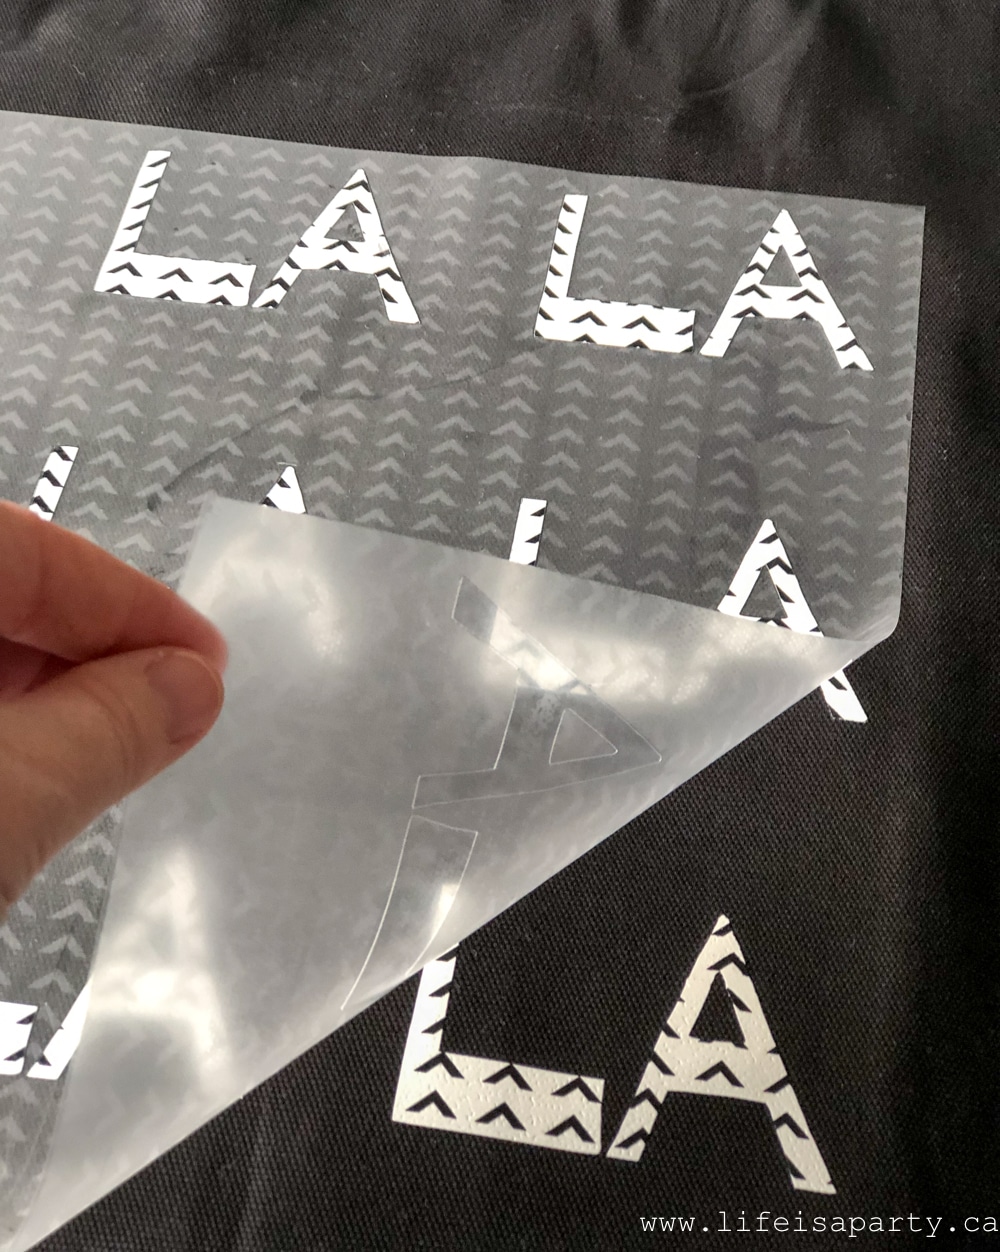
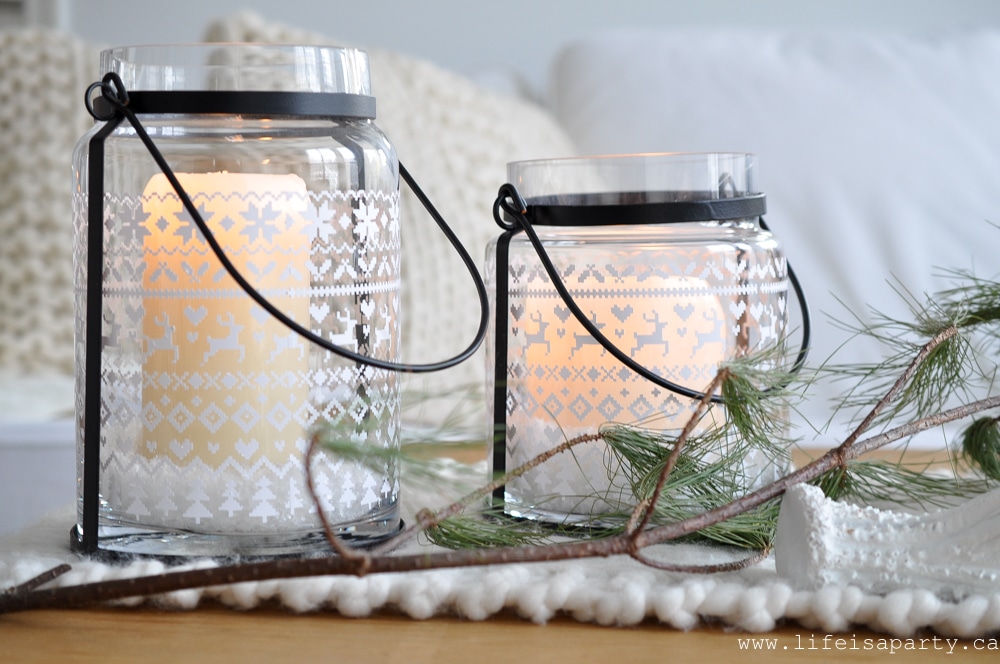
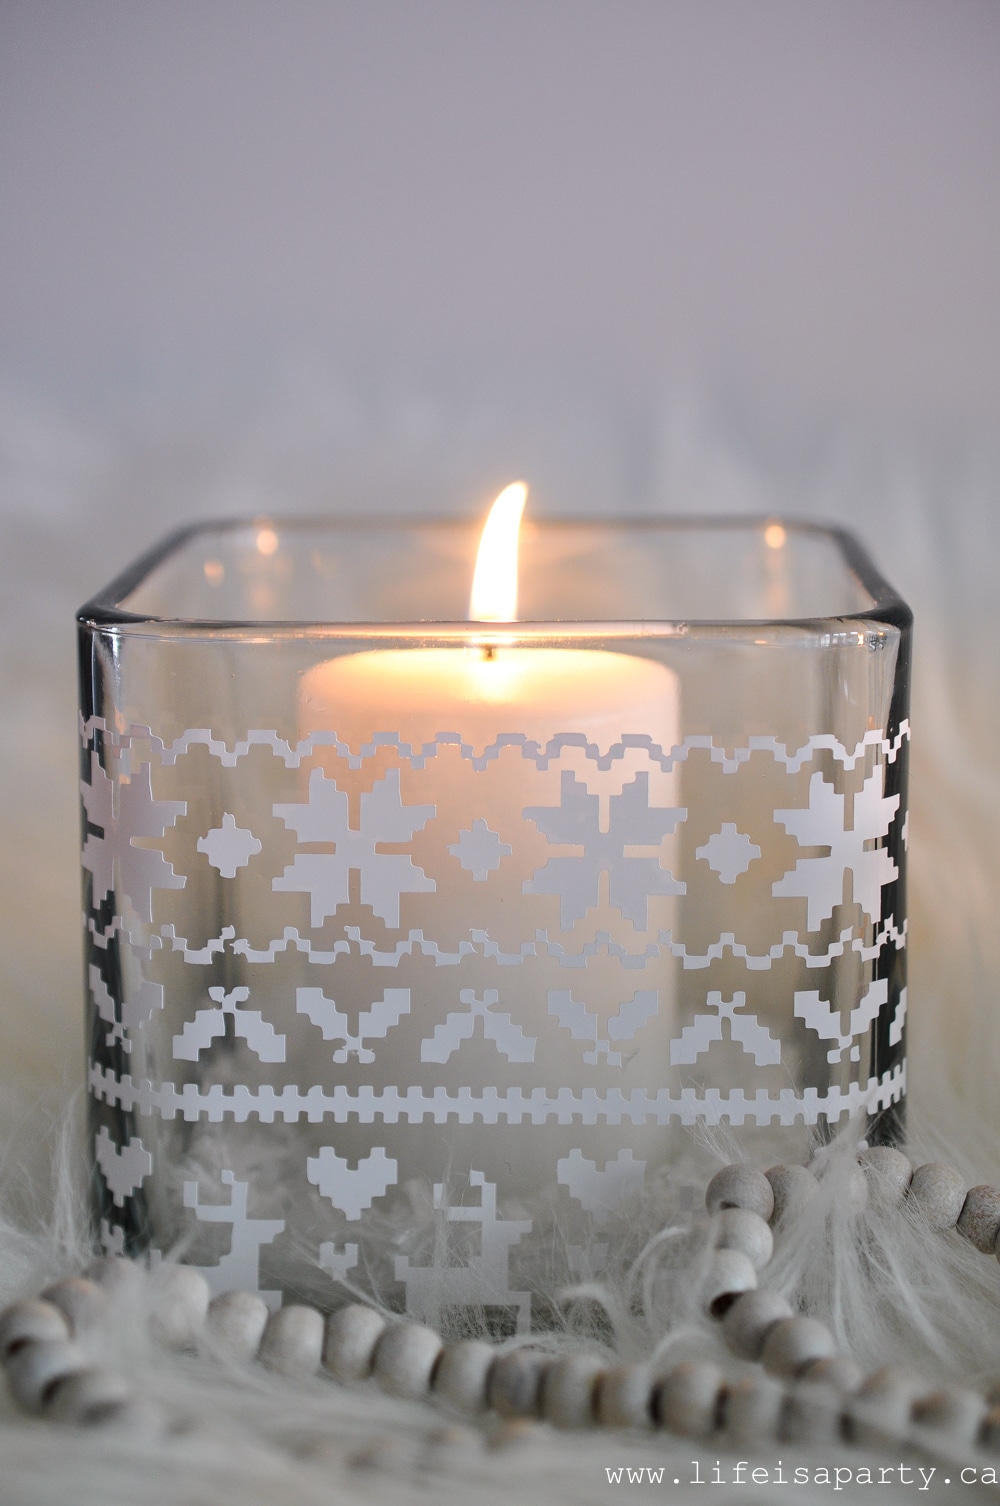
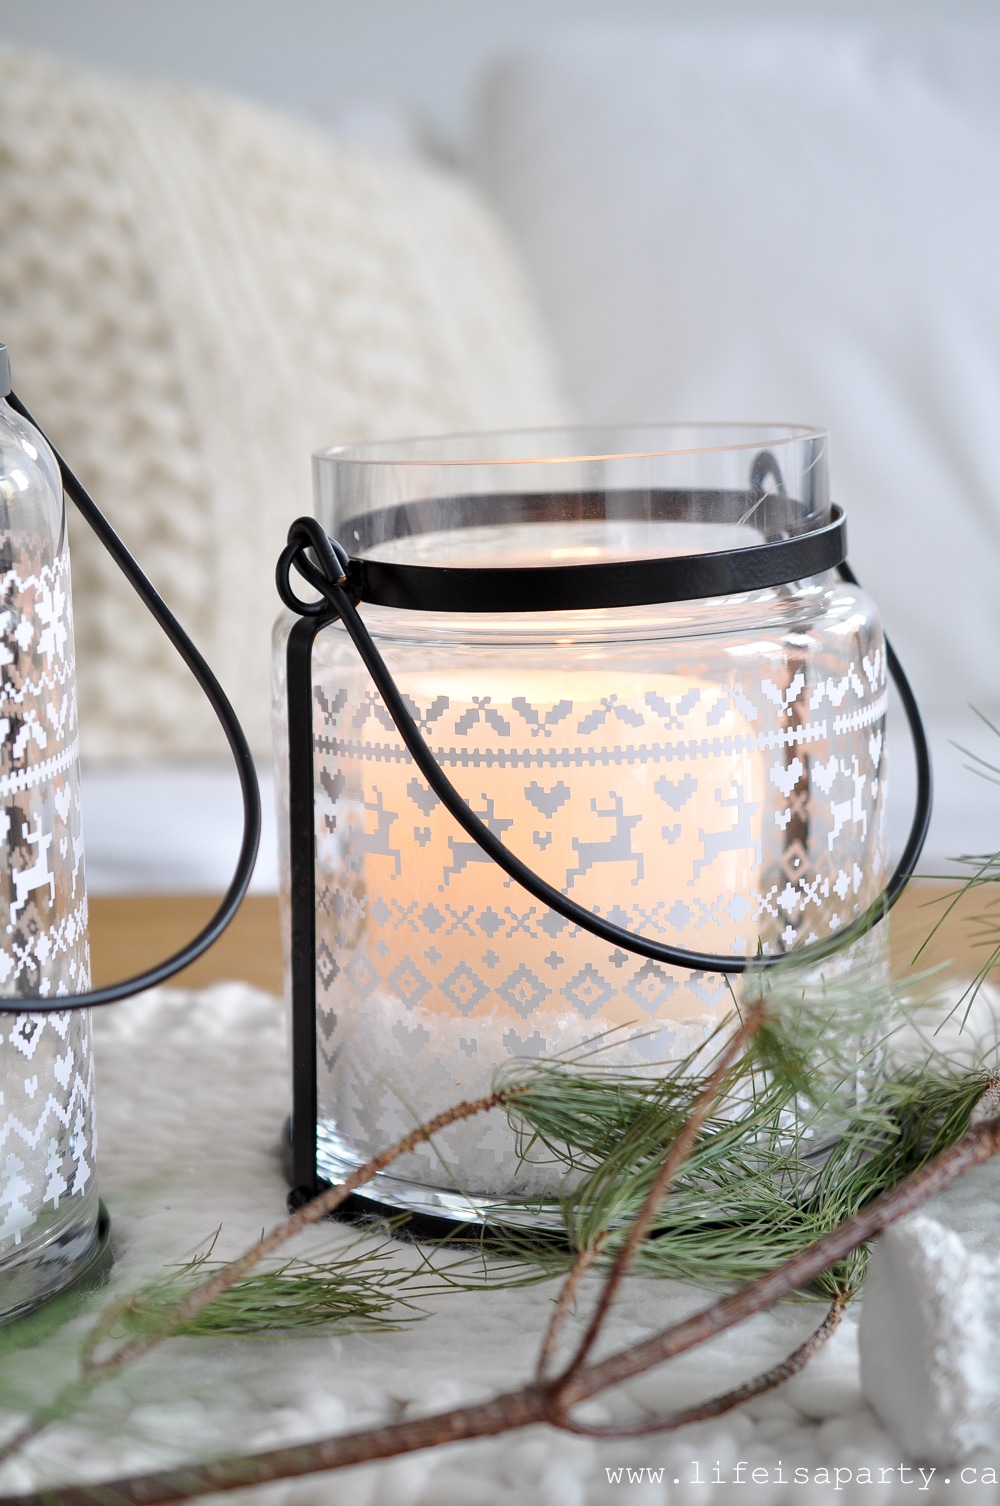
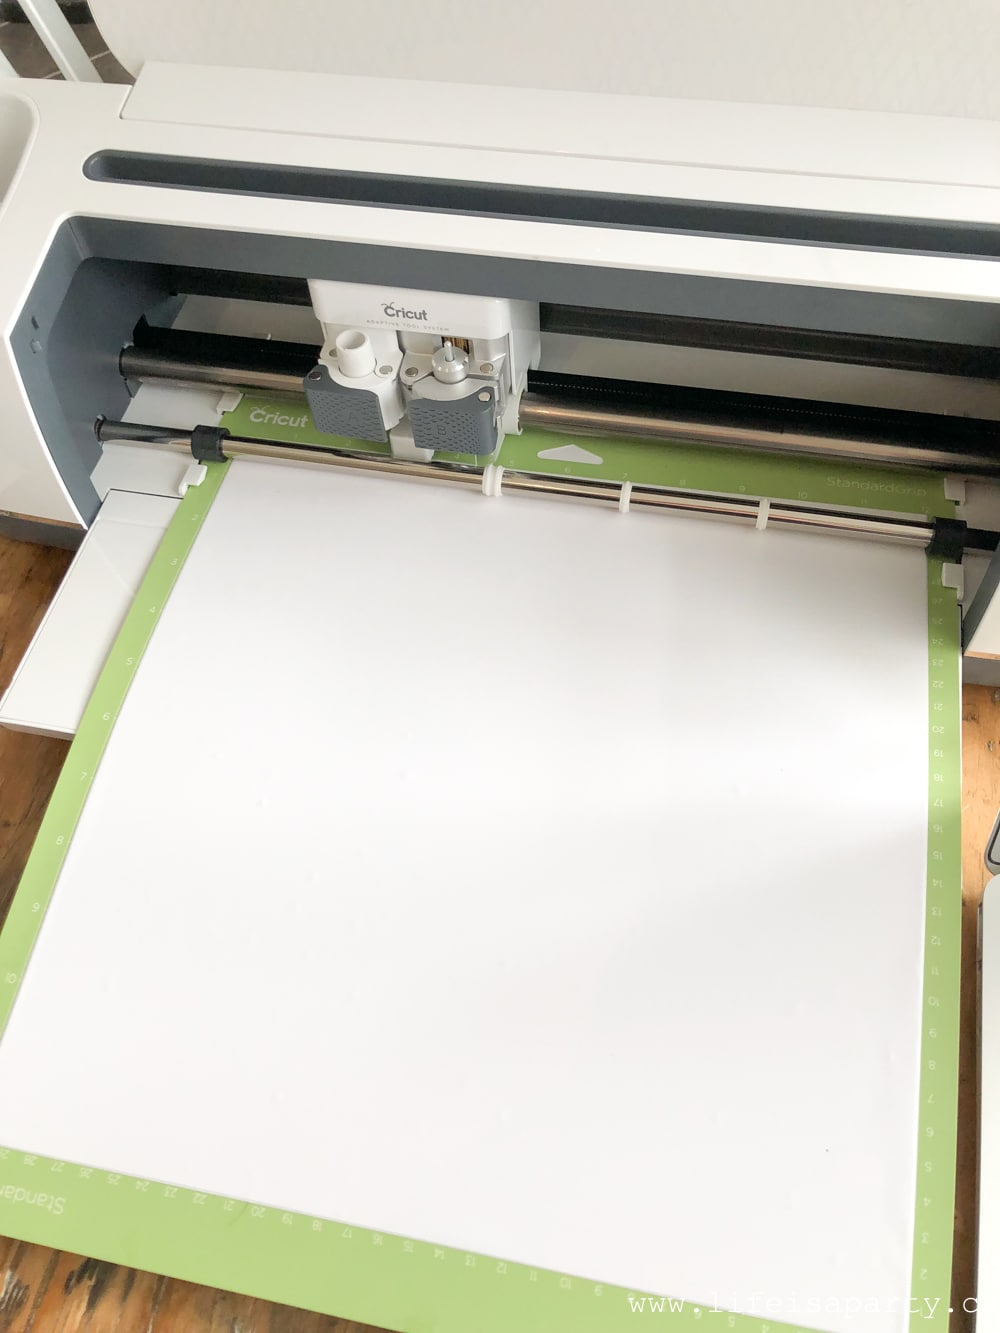
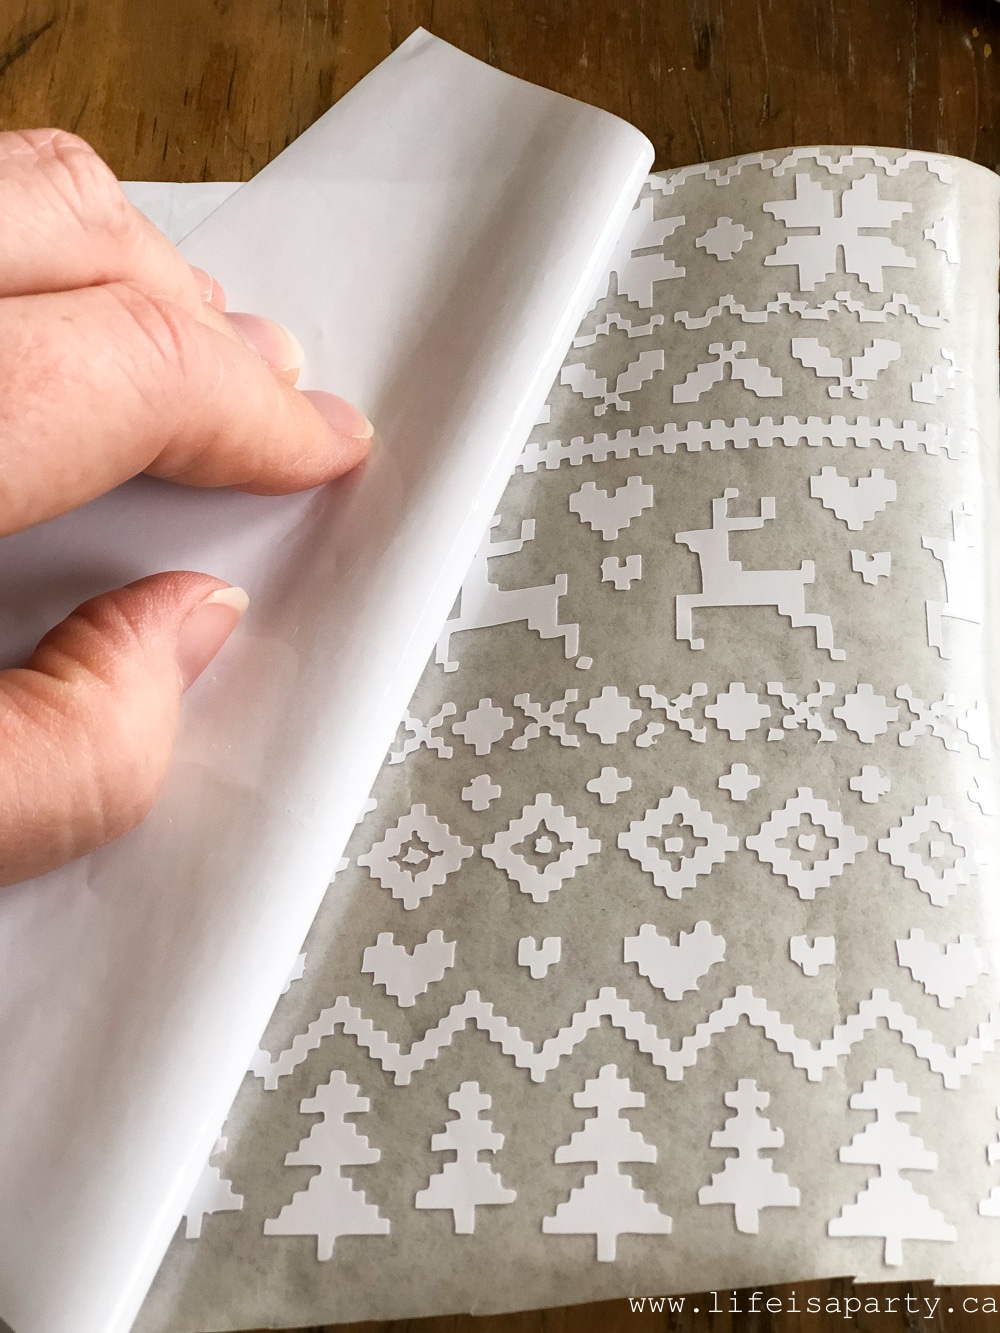
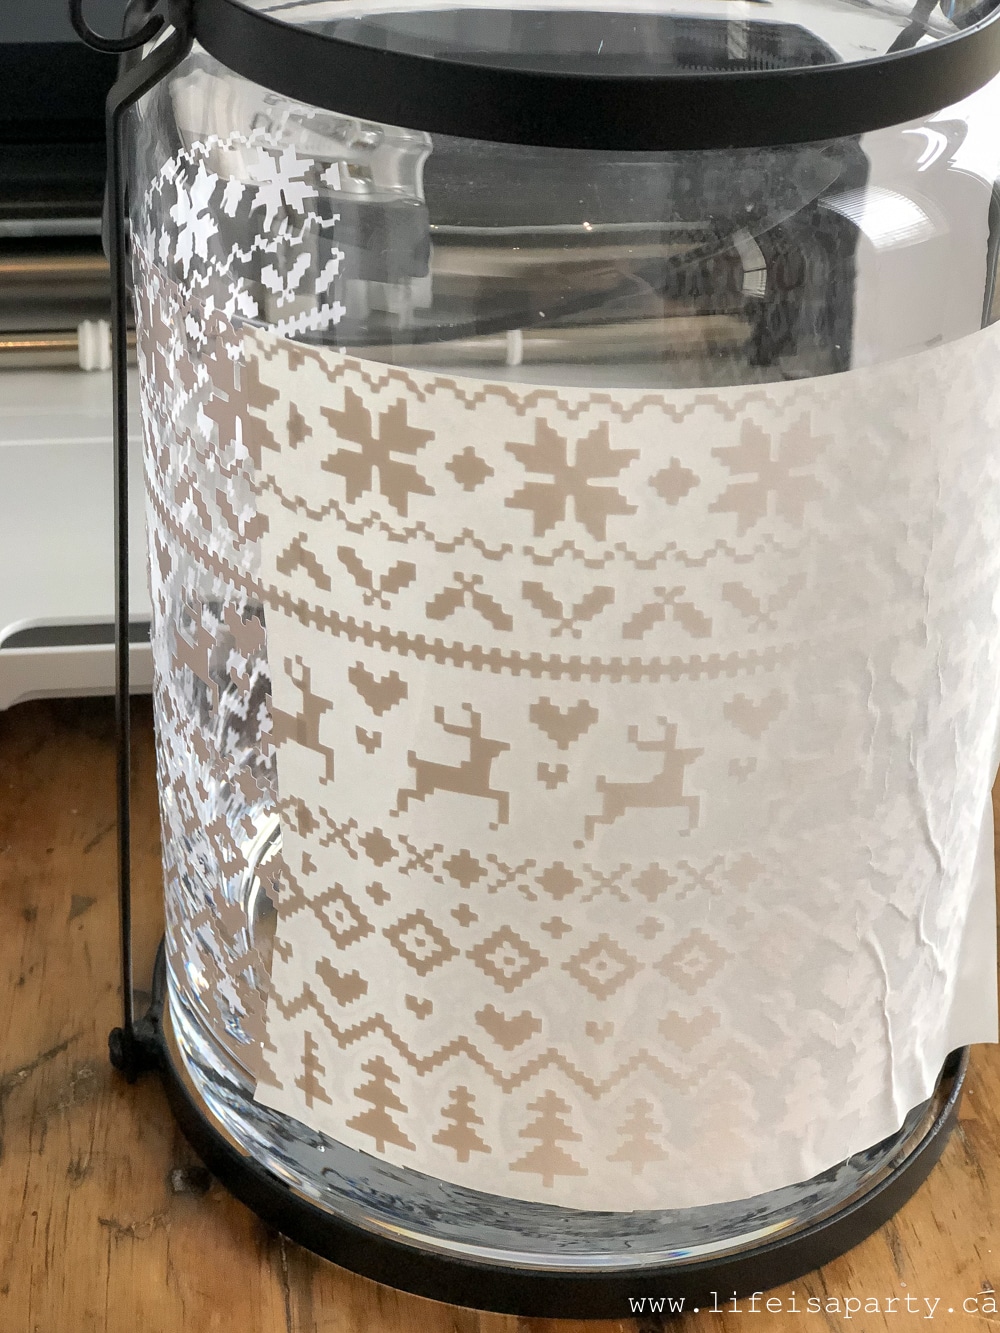
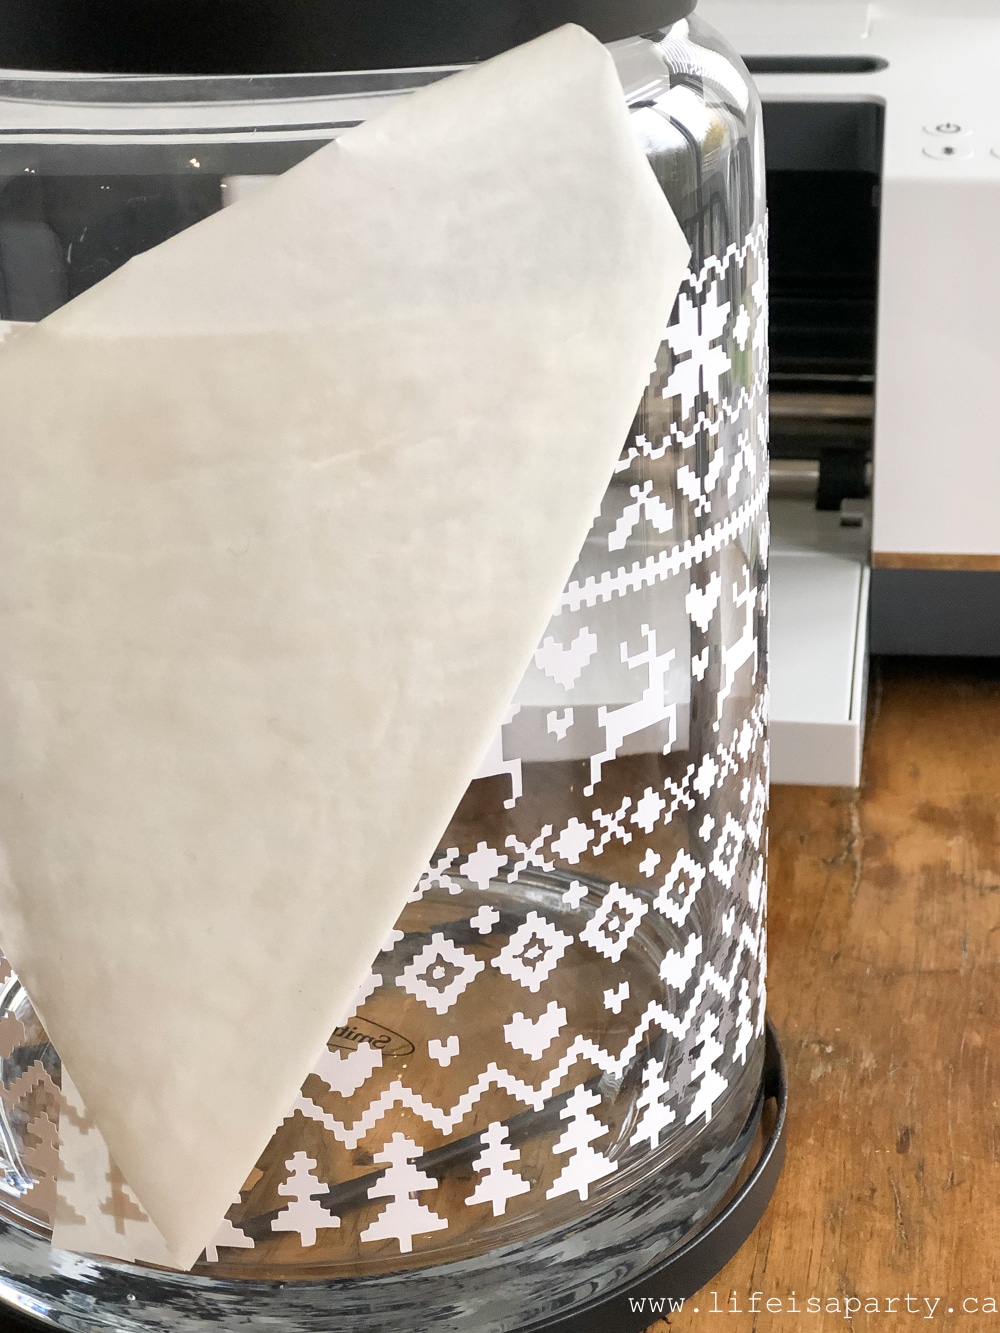
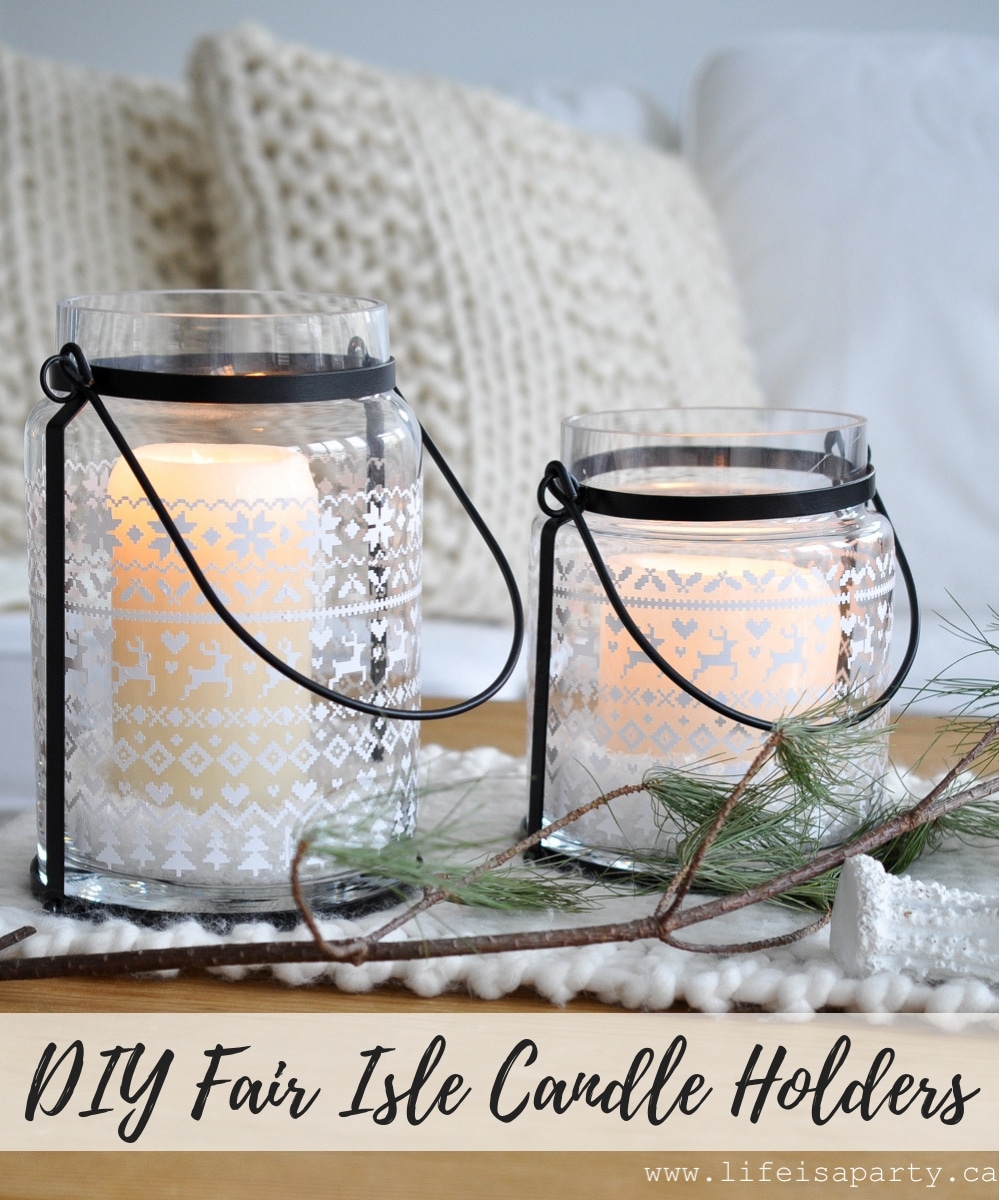 The clocks went back last week because the days are getting shorter, and darker. They're also getting colder. I thought these fair isle patterned lanterns were perfect to add a little warm and cozy feel. Fair Isle is a traditional sweater pattern, and I thought it would be great as part of my Christmas decor. I've chosen a pattern that's got a little Christmas feel to it with some trees, reindeer, and holly. I love how these lanterns turned out, especially since I made them myself with my new Cricut Maker.
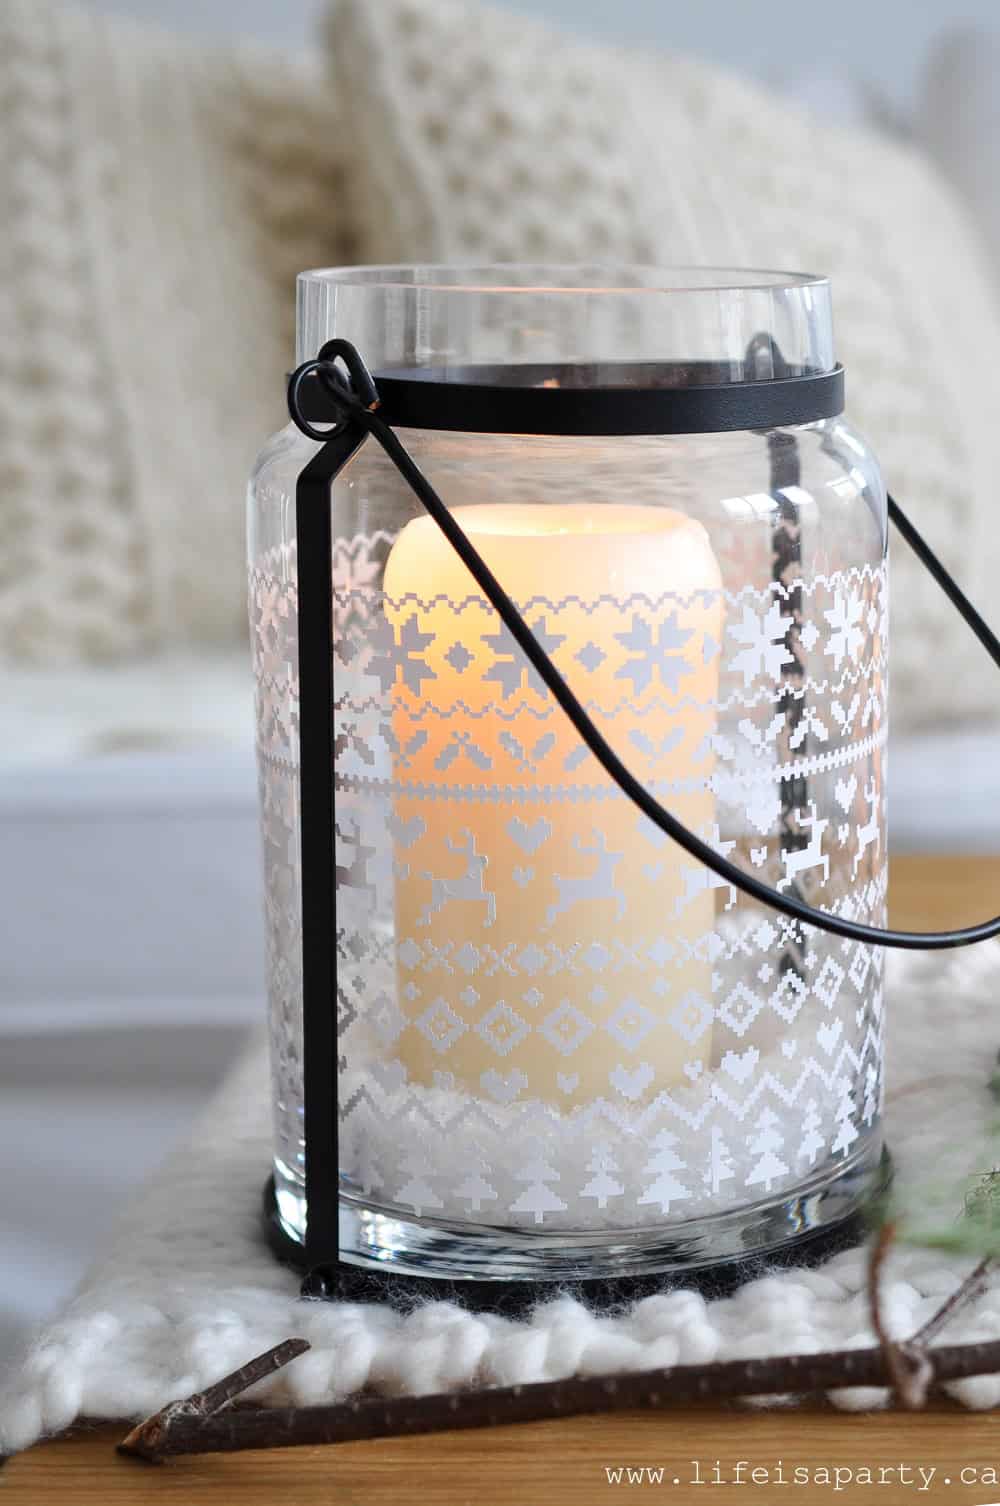


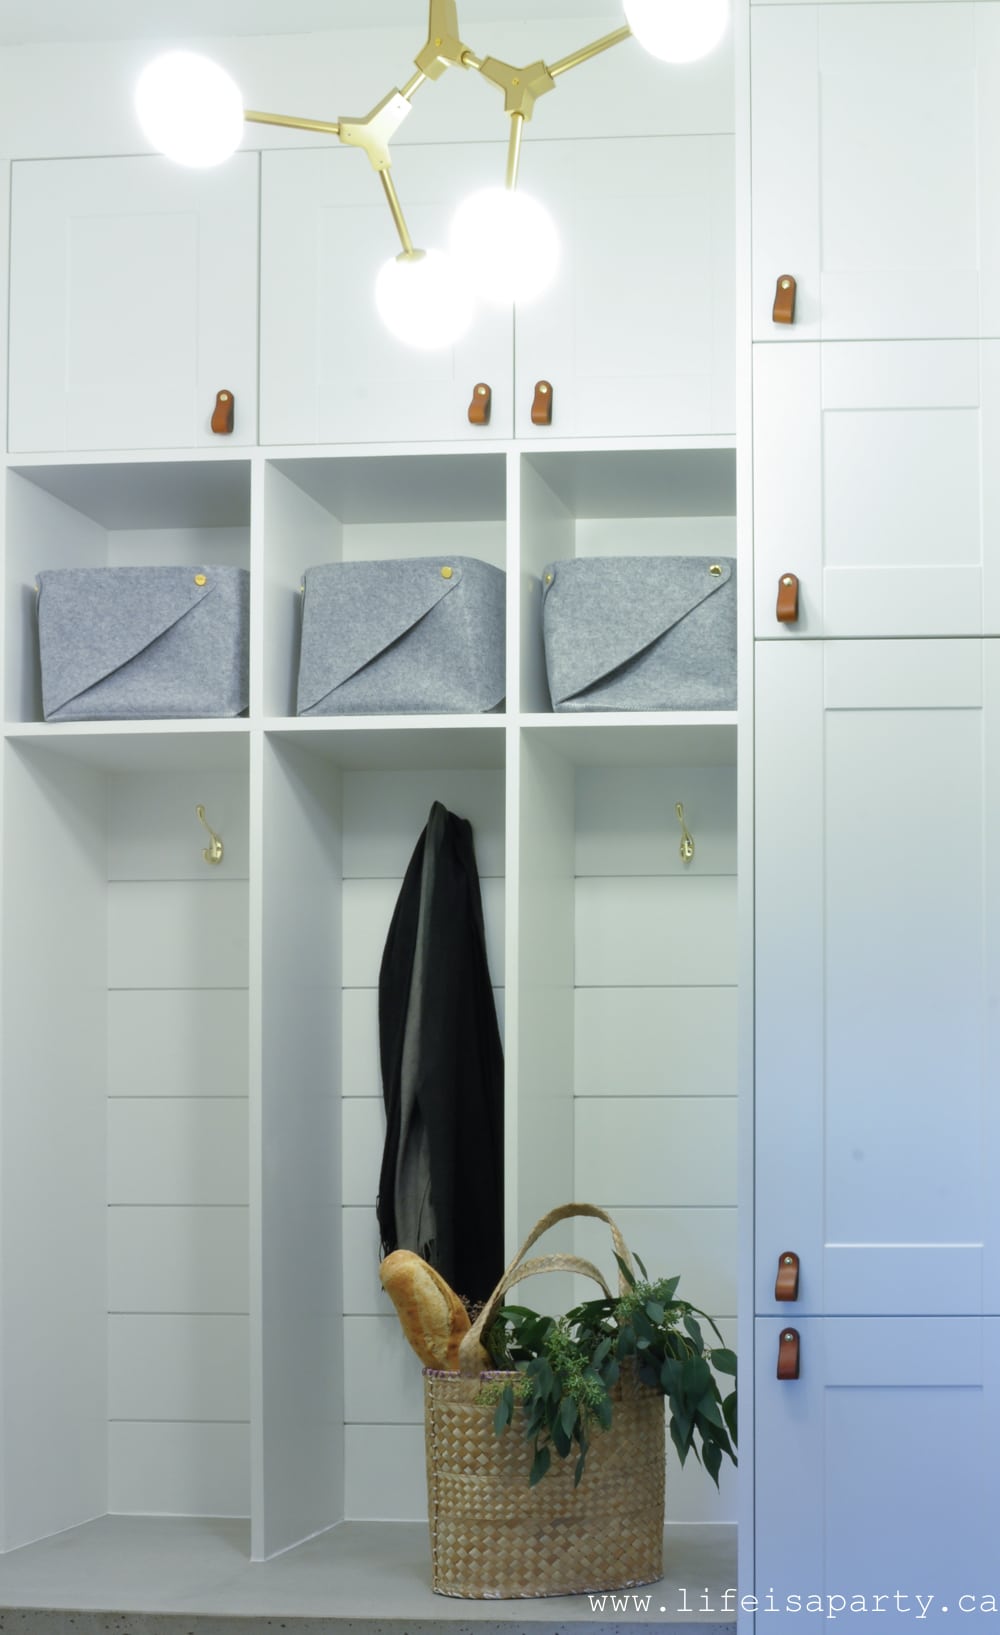
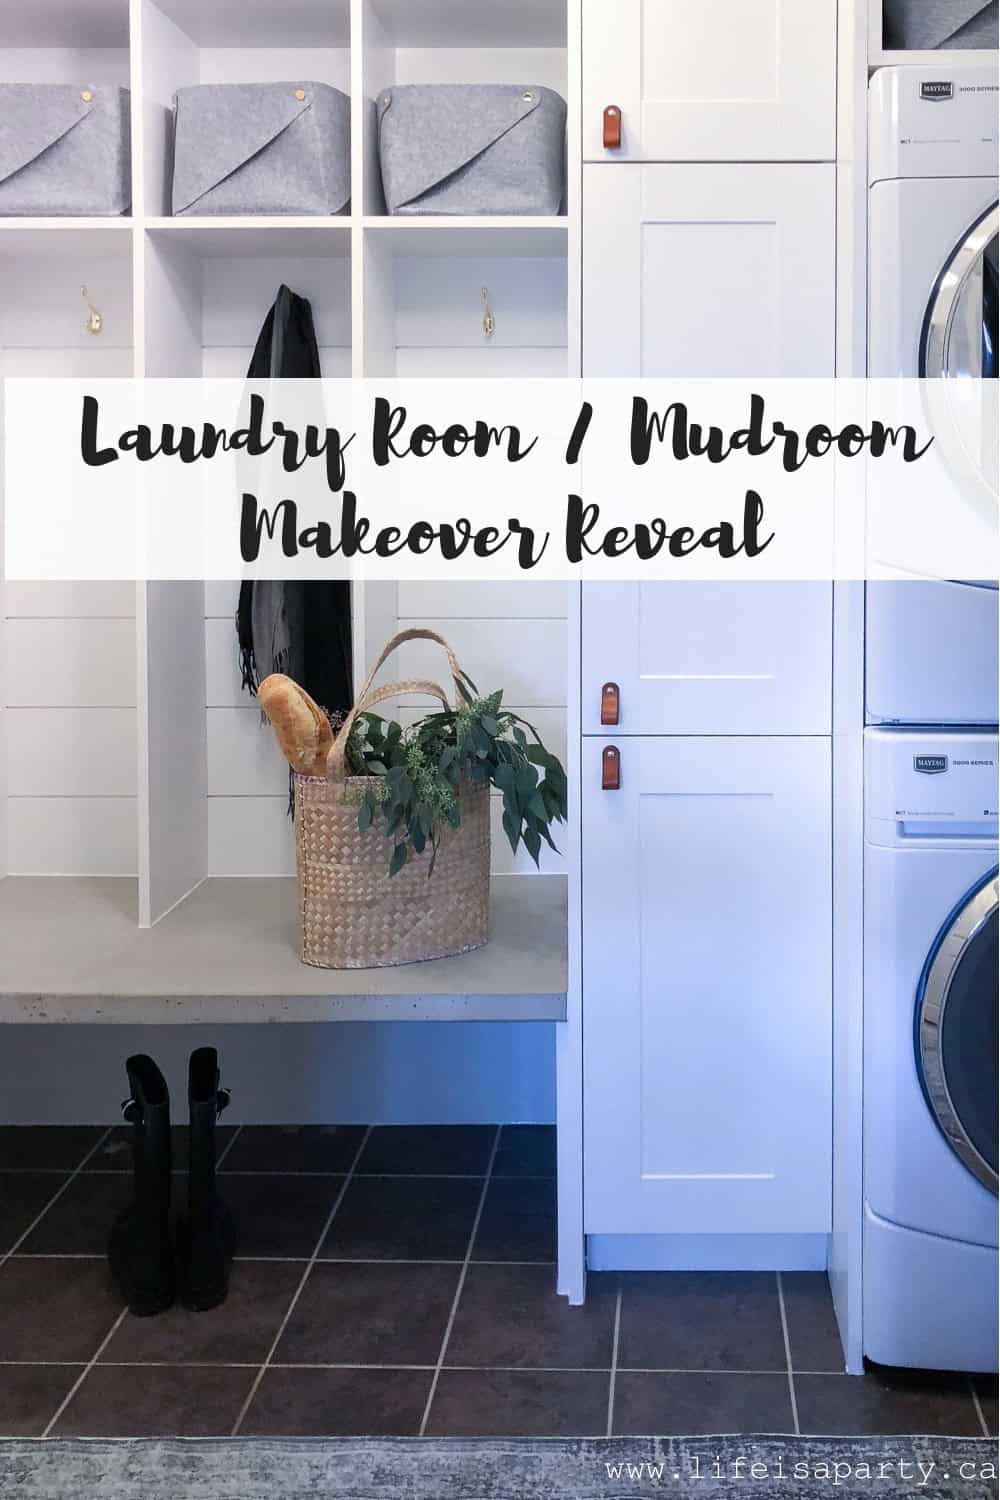
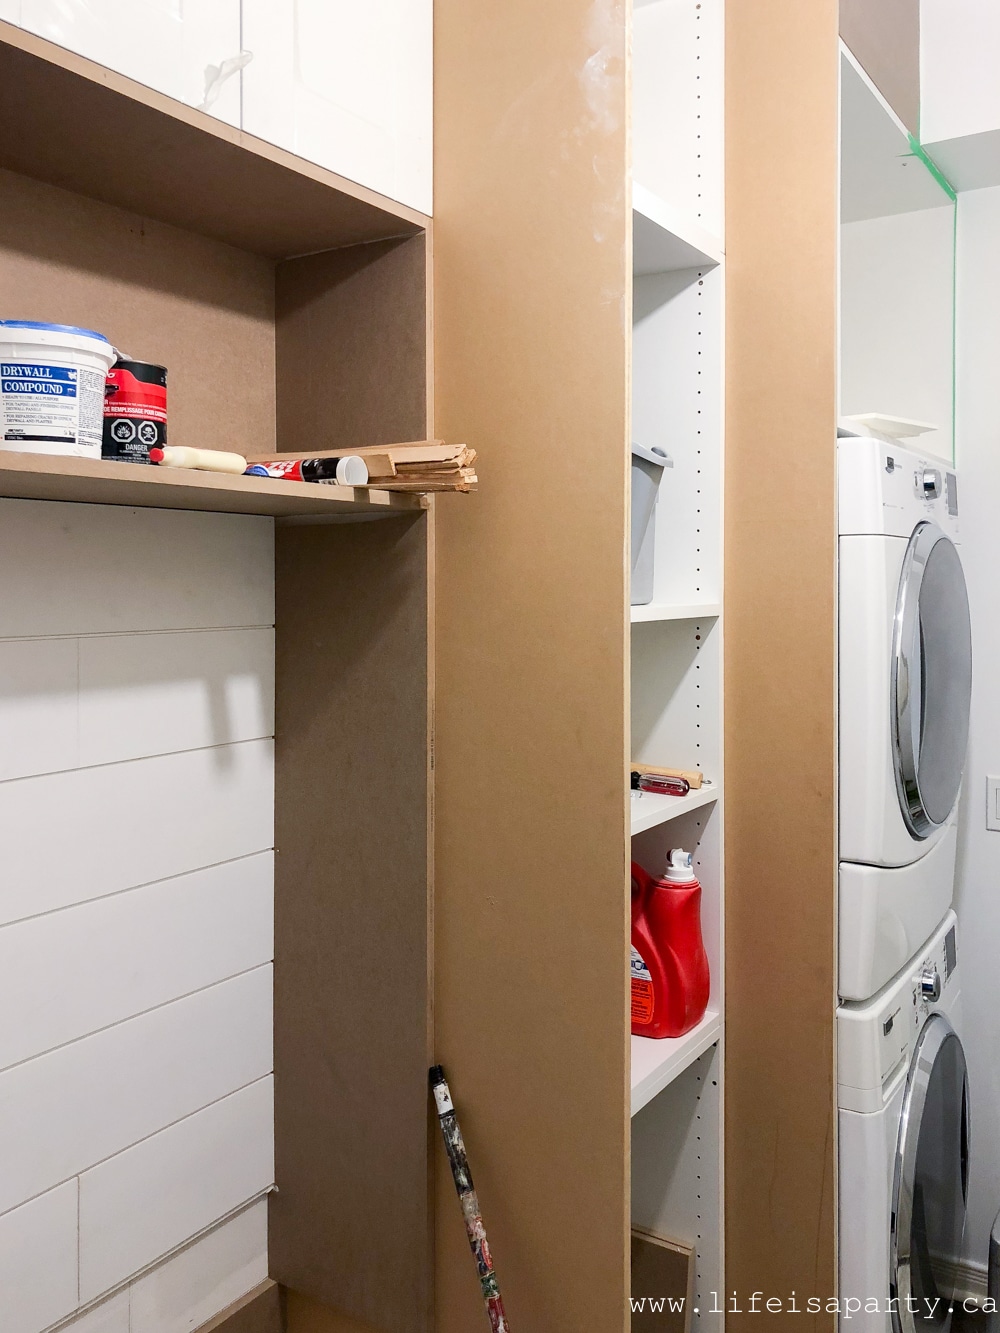
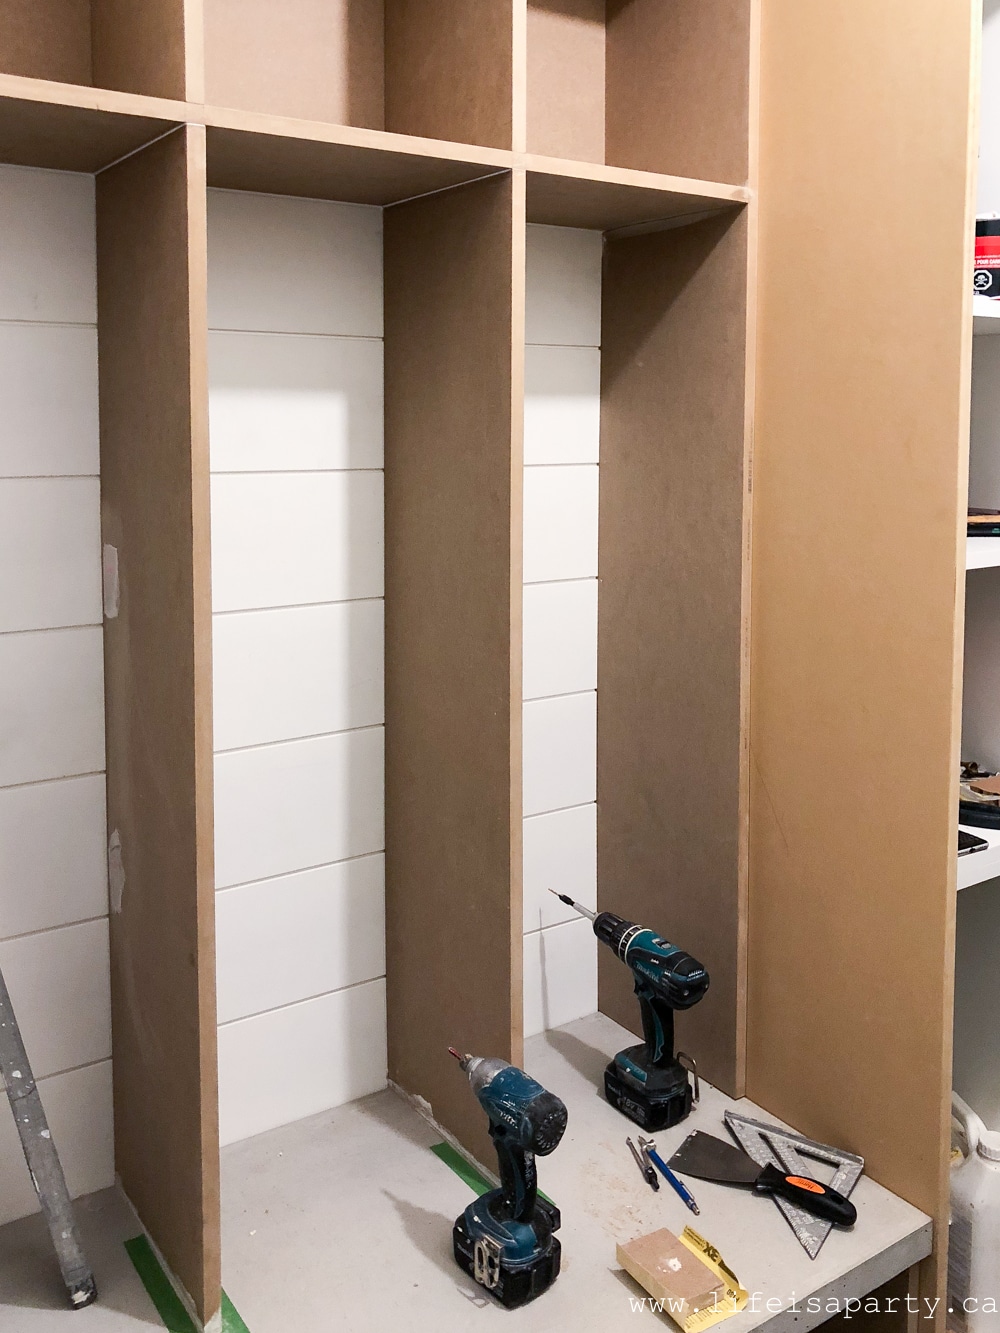
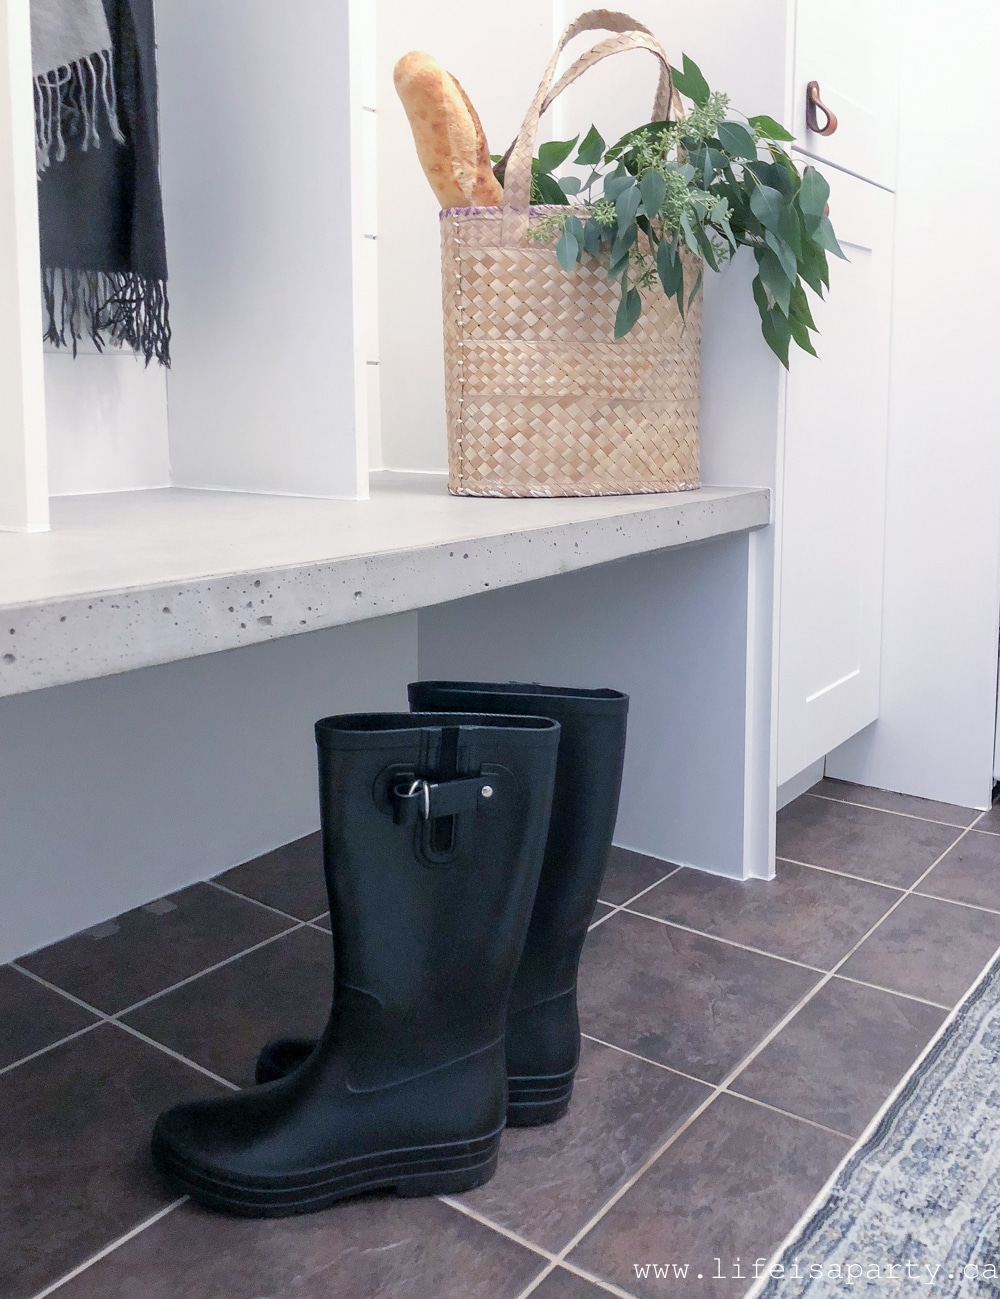 He measured up for it the first day, and built the custom forms to create it for the space. When it was dry and cured enough to install, it was a tiny bit nerve wracking. Working with concrete always is since it's so heavy, and very breakable as you try to manipulate it into place. But, his measurements were perfect and it went into place perfectly. It's reinforced underneath with steel rods so it's also perfectly stable and worry free now that it's in. We designed it so that it stuck out enough to be used as a seat to put your shoes on, but also so it can be stood on to reach the high cabinets above it. It adds so much personality to the entire room.


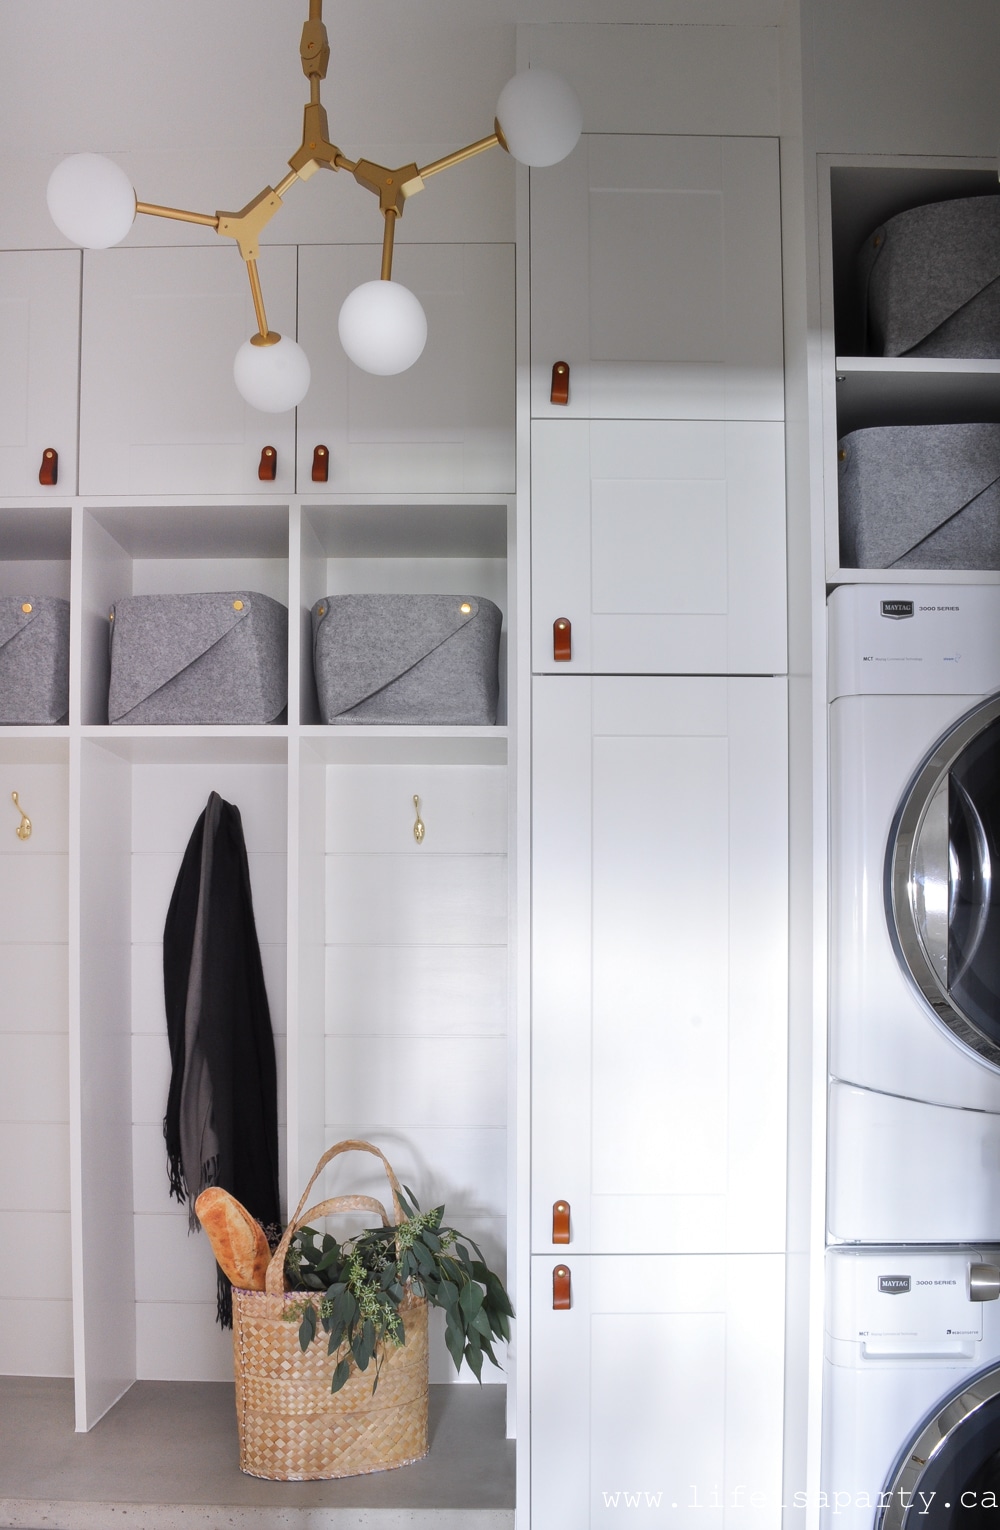

 Since we can't use our sink for a laundry bin anymore, I picked up this little cutie with its faux leather handles and wipeable plastic type coating on the inside it was perfect. I also love that it can squish down and be put in a cabinet when we're not using it.


 Sponsors


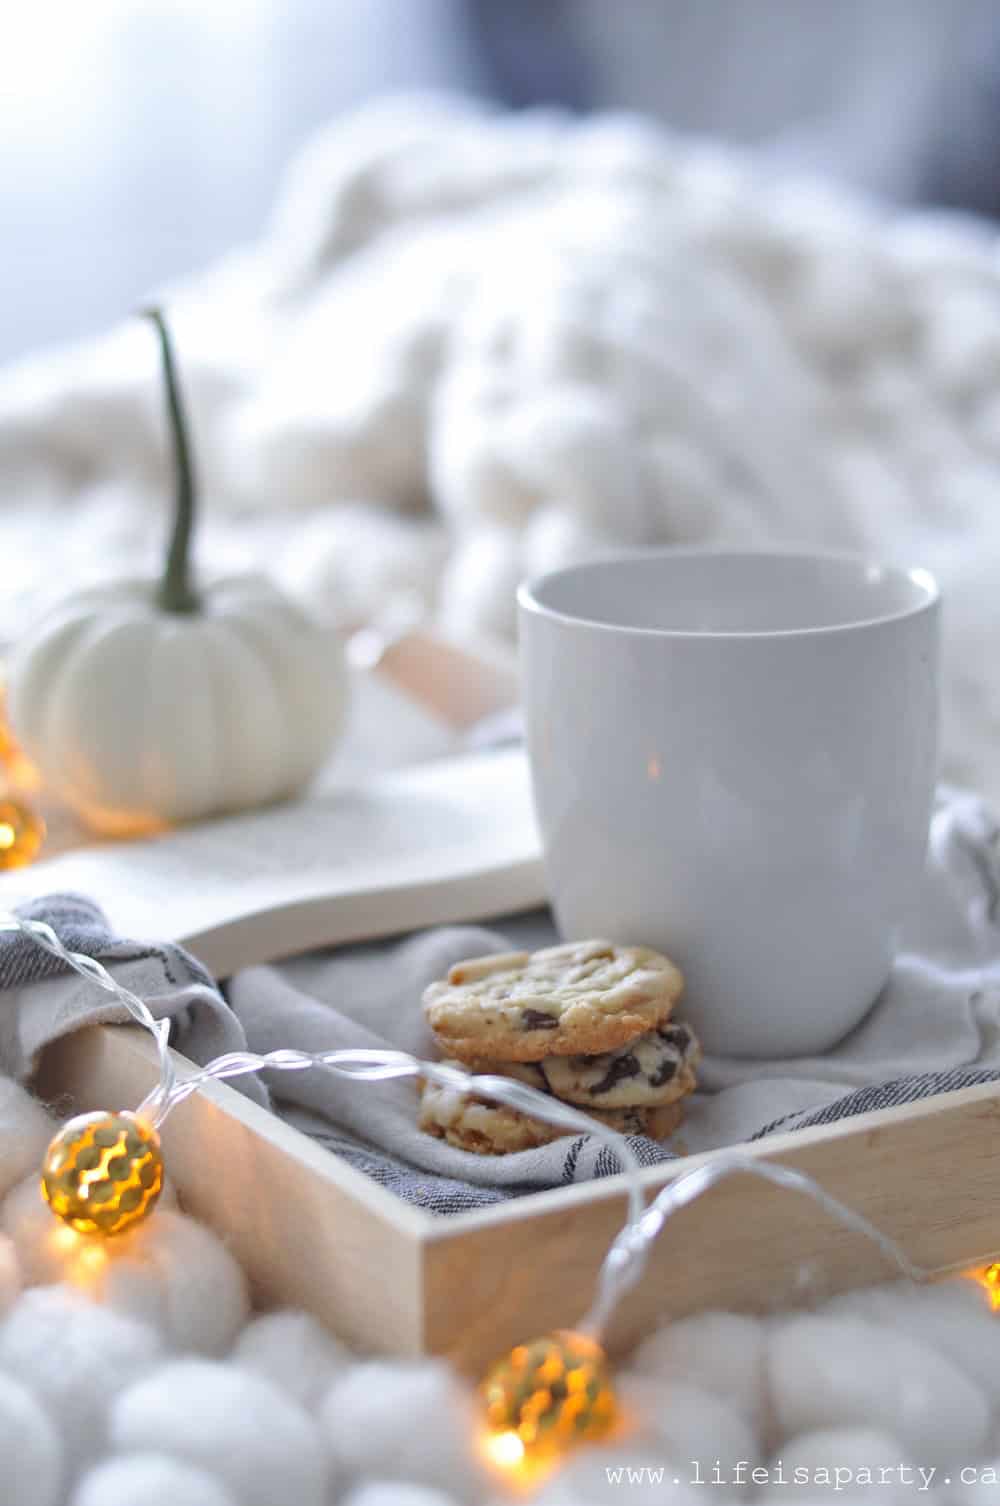
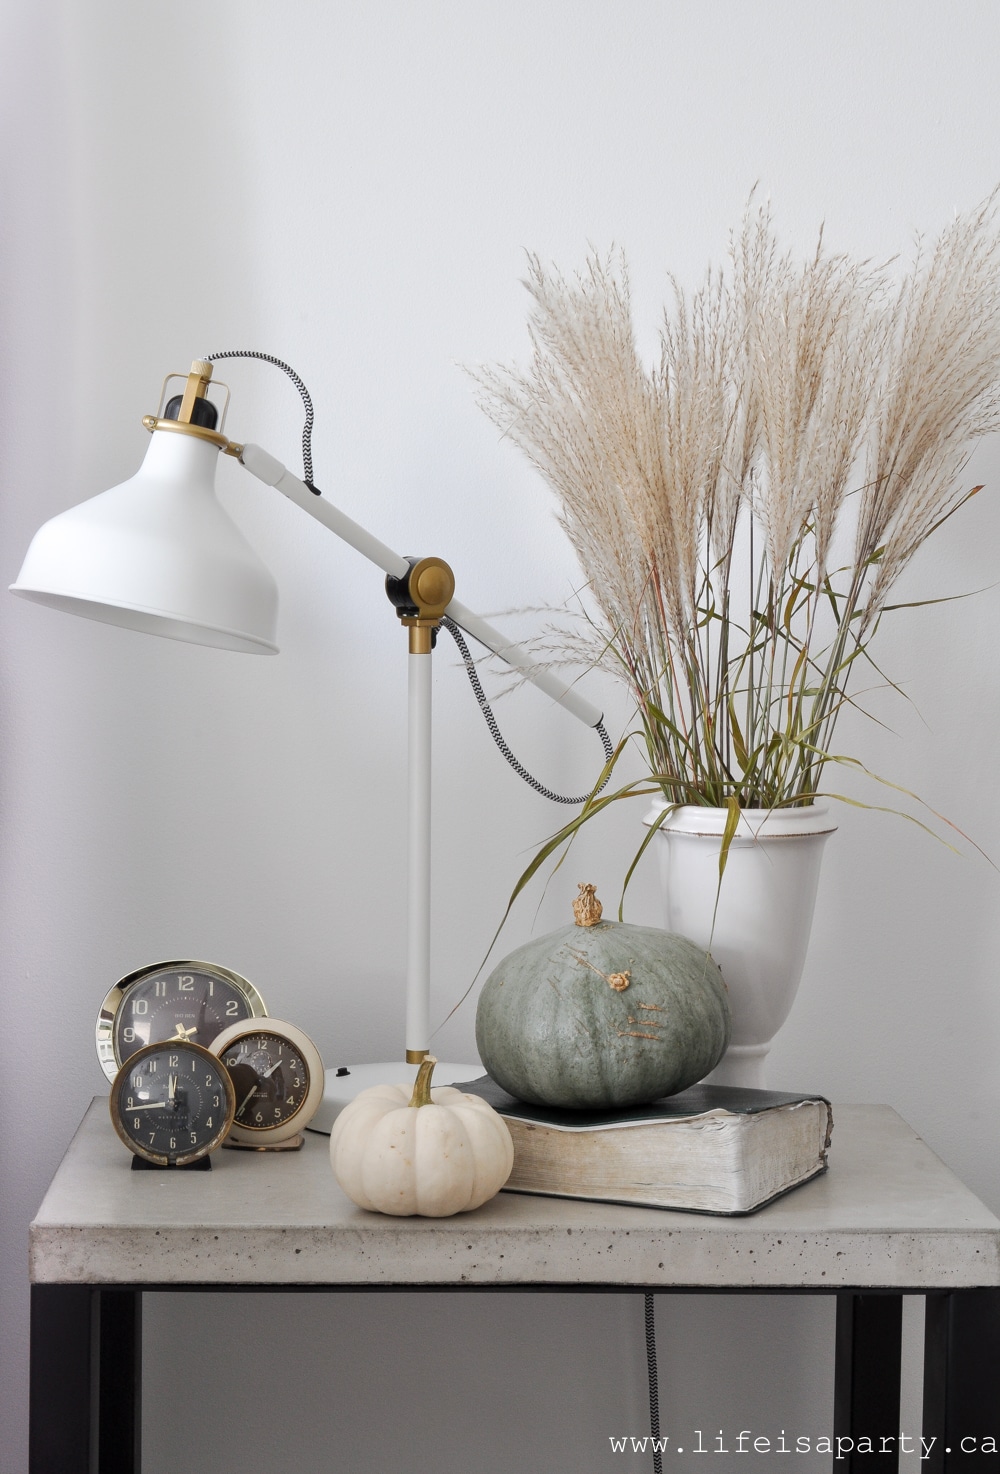
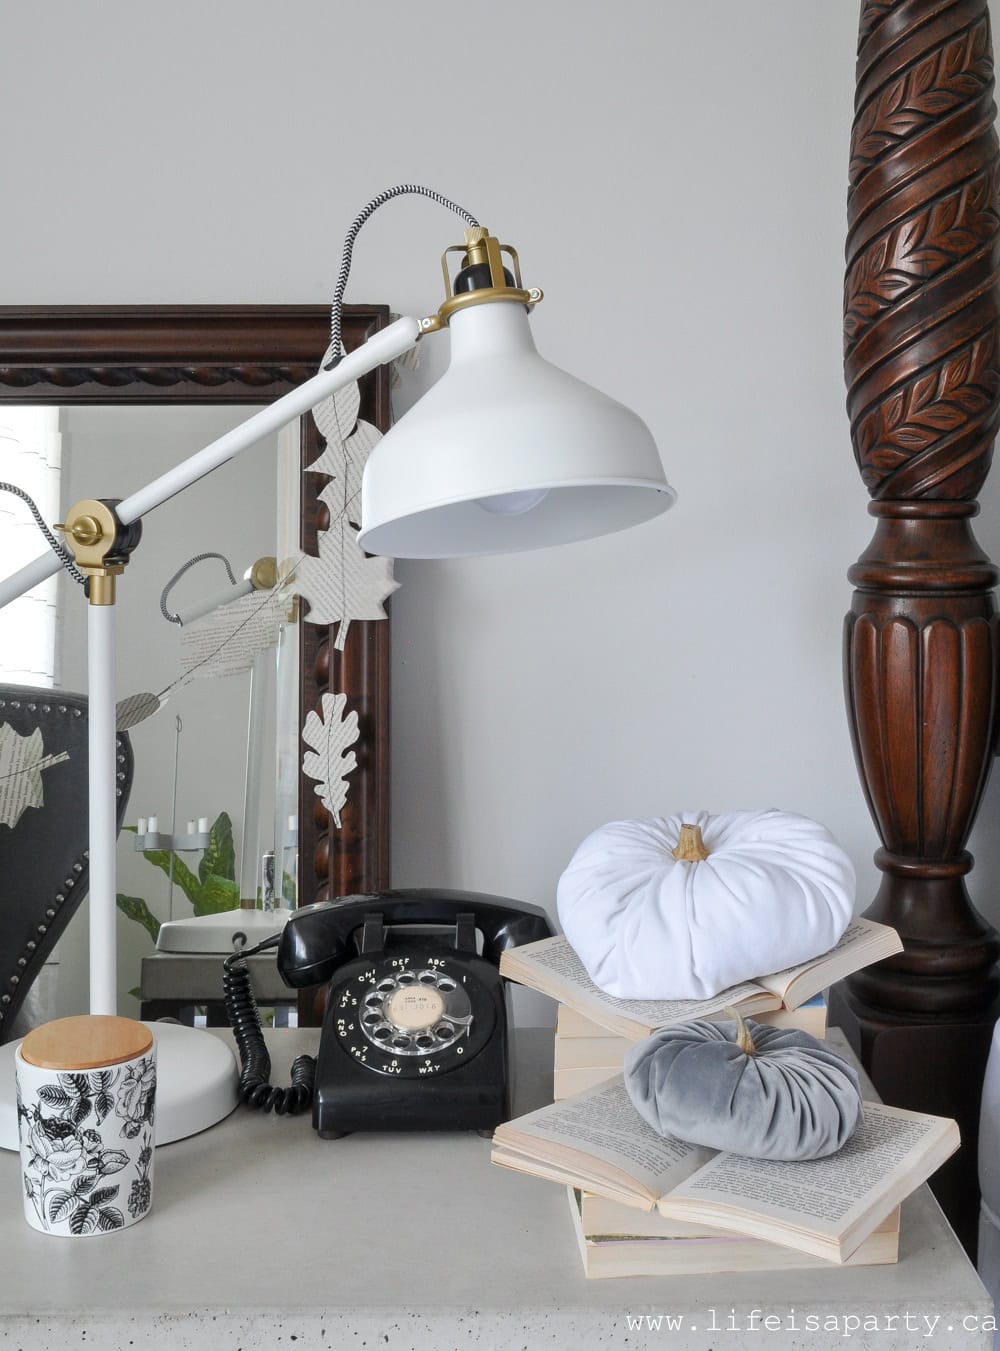
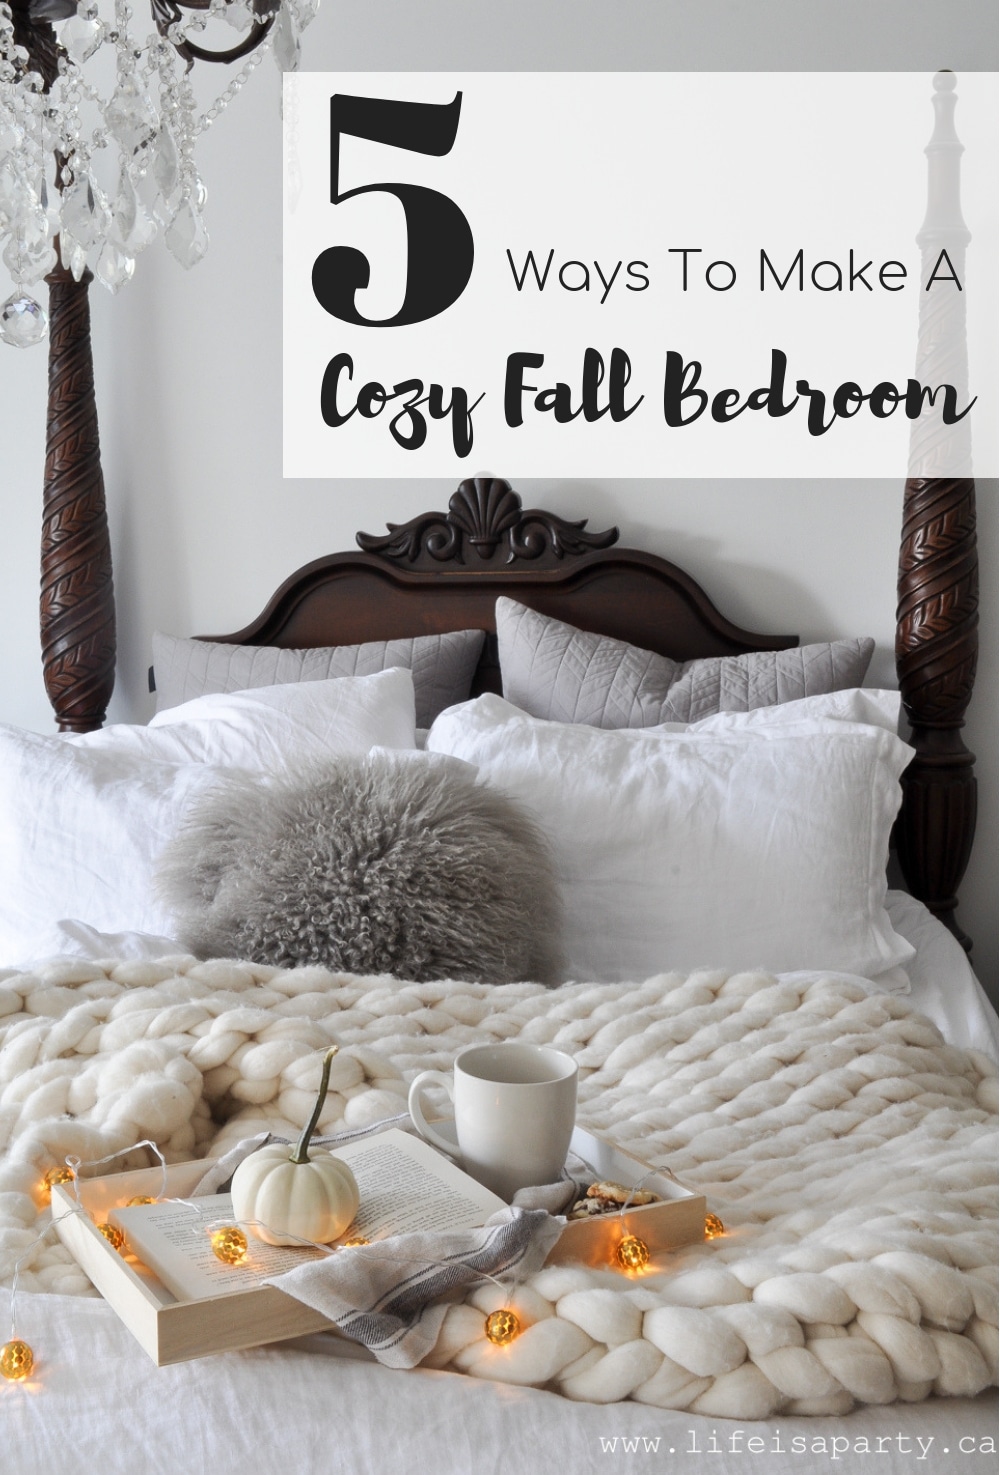 It's that time of year. The air is getting colder, the leaves are starting to turn colour, and the days are getting shorter. It's fall, and it's time to get cozy. I added a few simple touches to my bedroom for fall to add to the cozy feel.
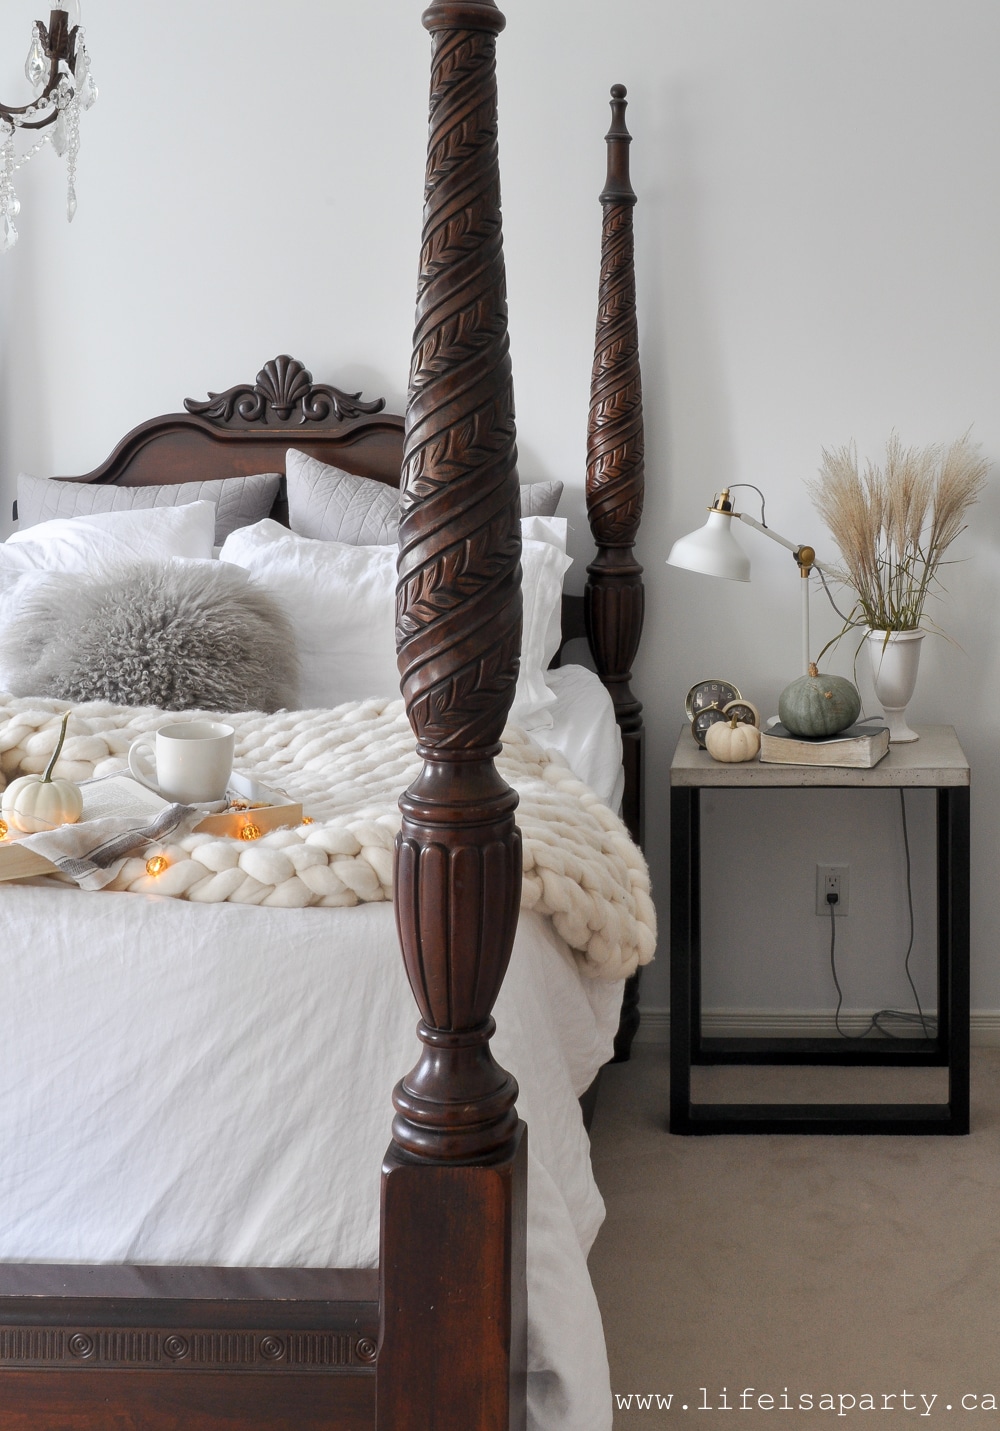 1. Add Cozy Layers
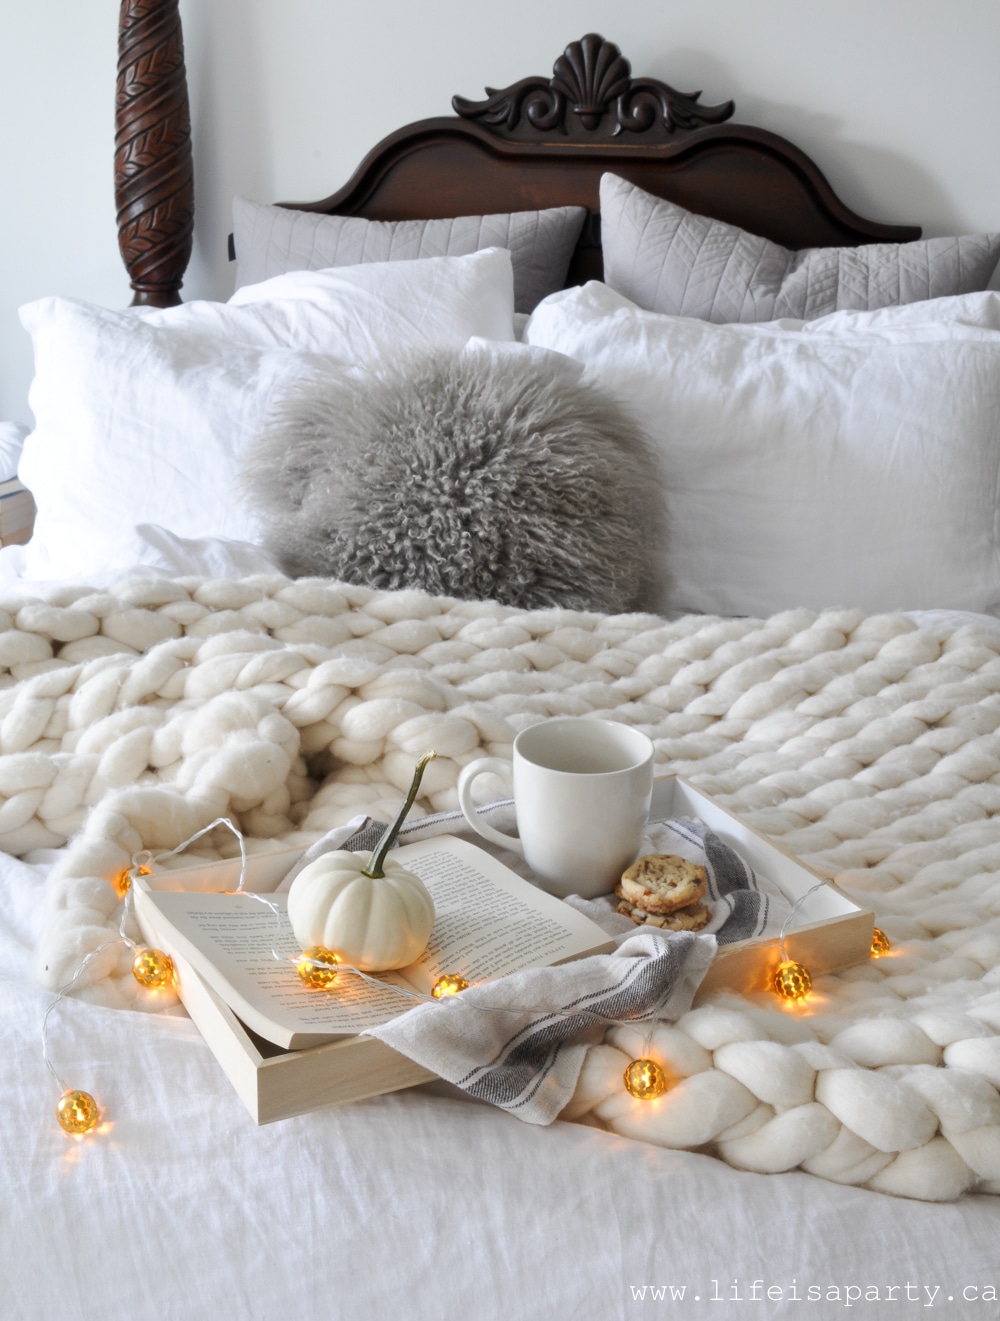

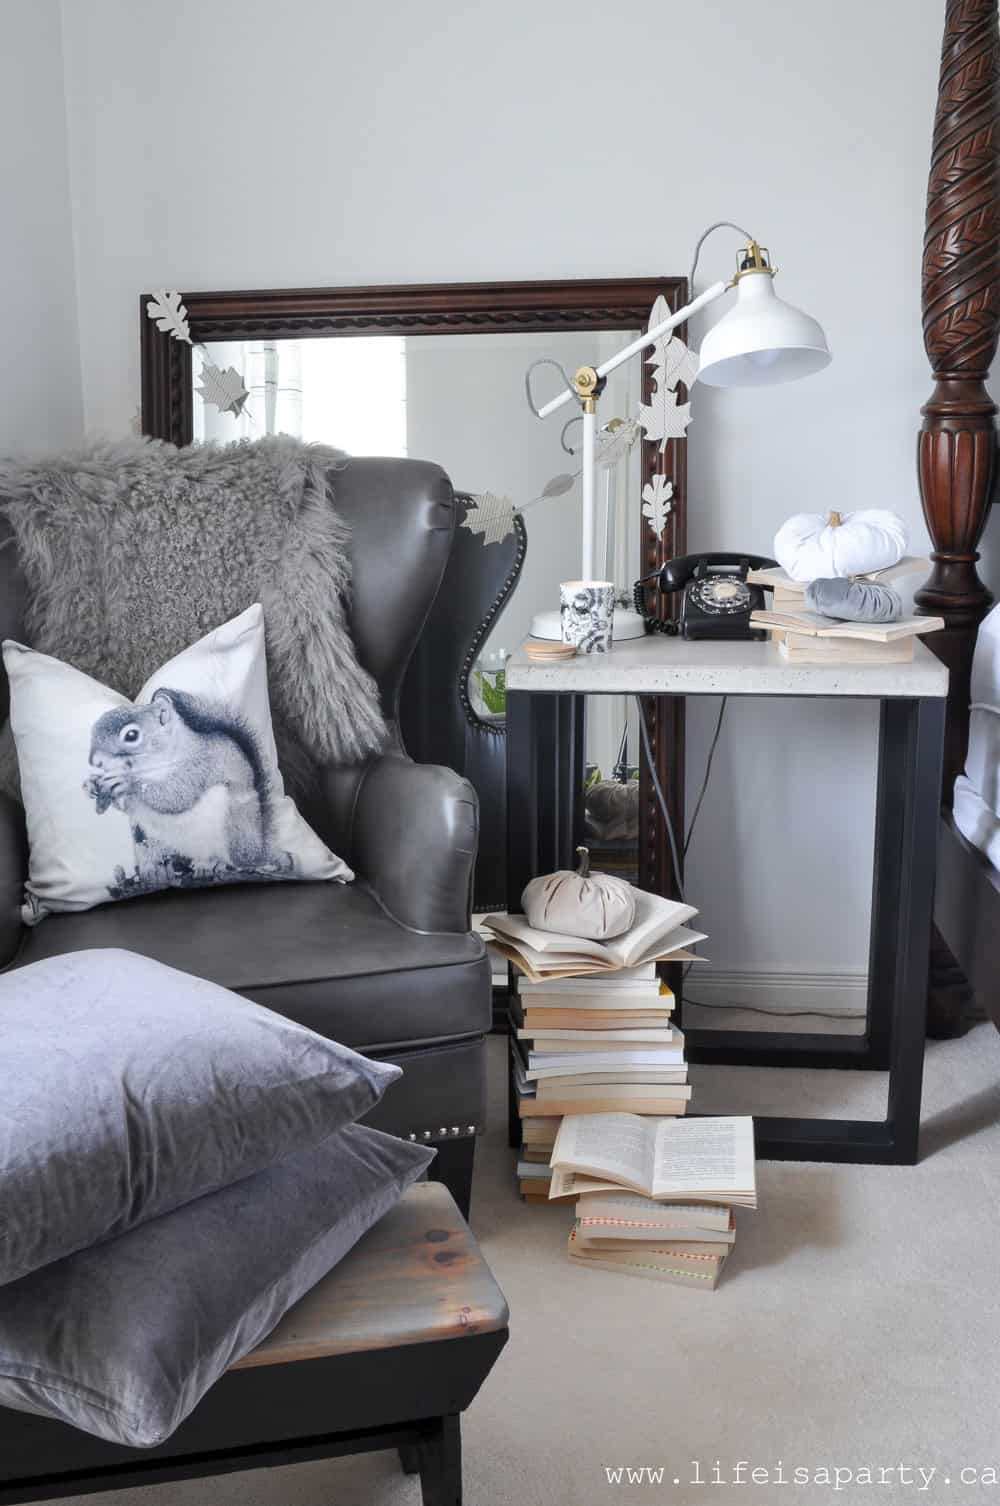

 4. Add Some Natural Elements
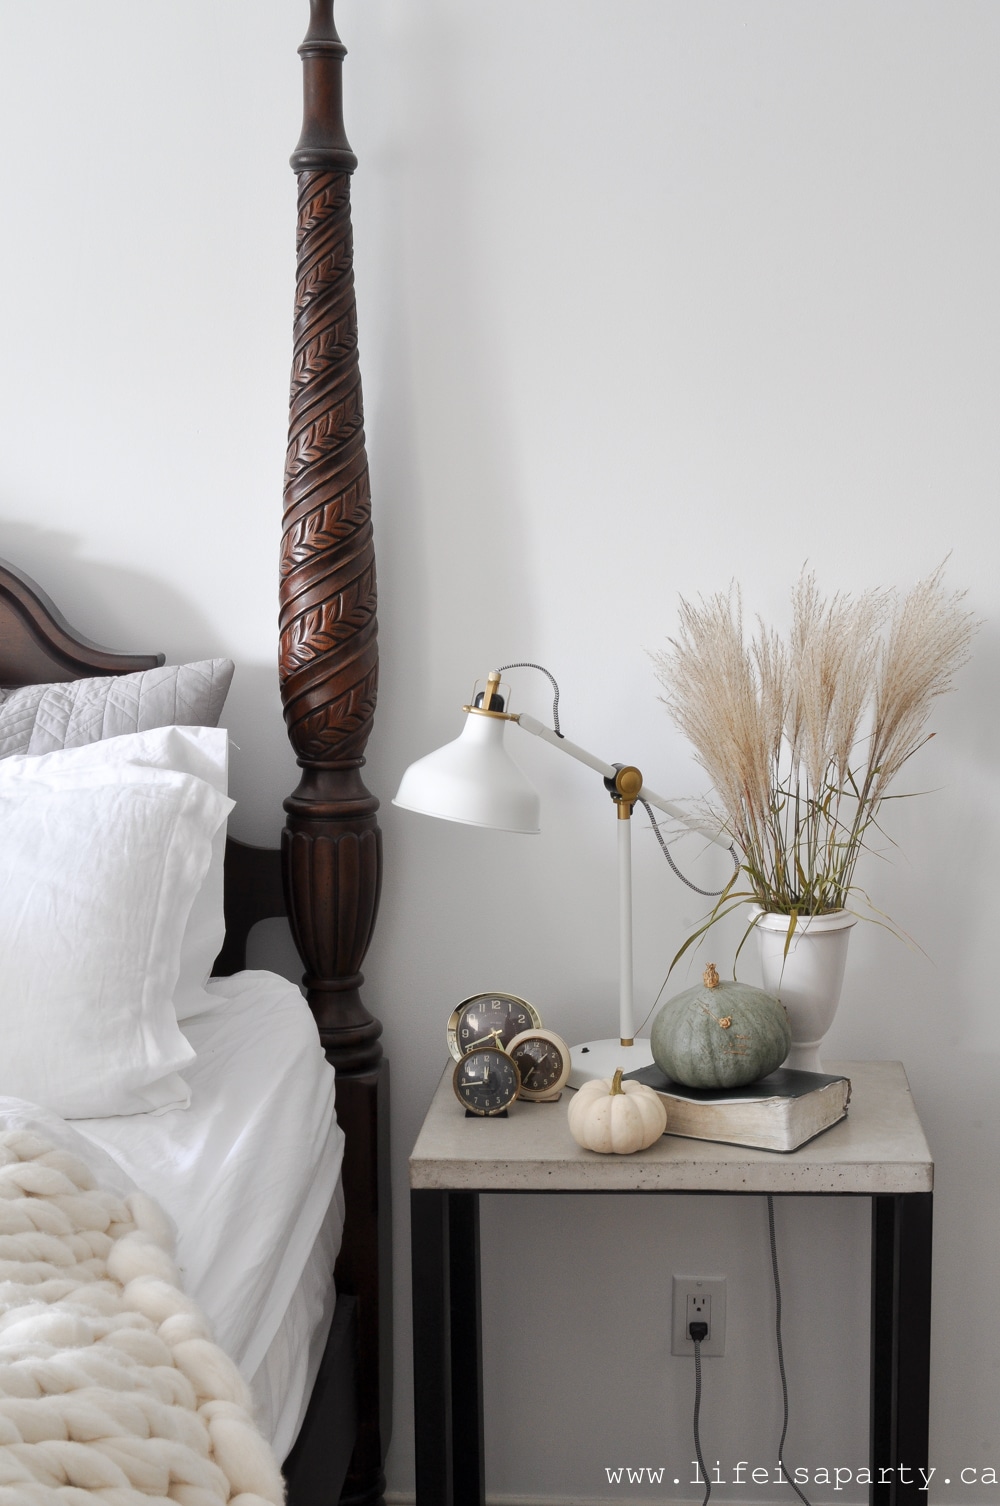
 This bedroom is all ready for fall with these simple touches.
 With these simple 5 Ways To Make A Cozy Fall Bedroom, life really is a party!

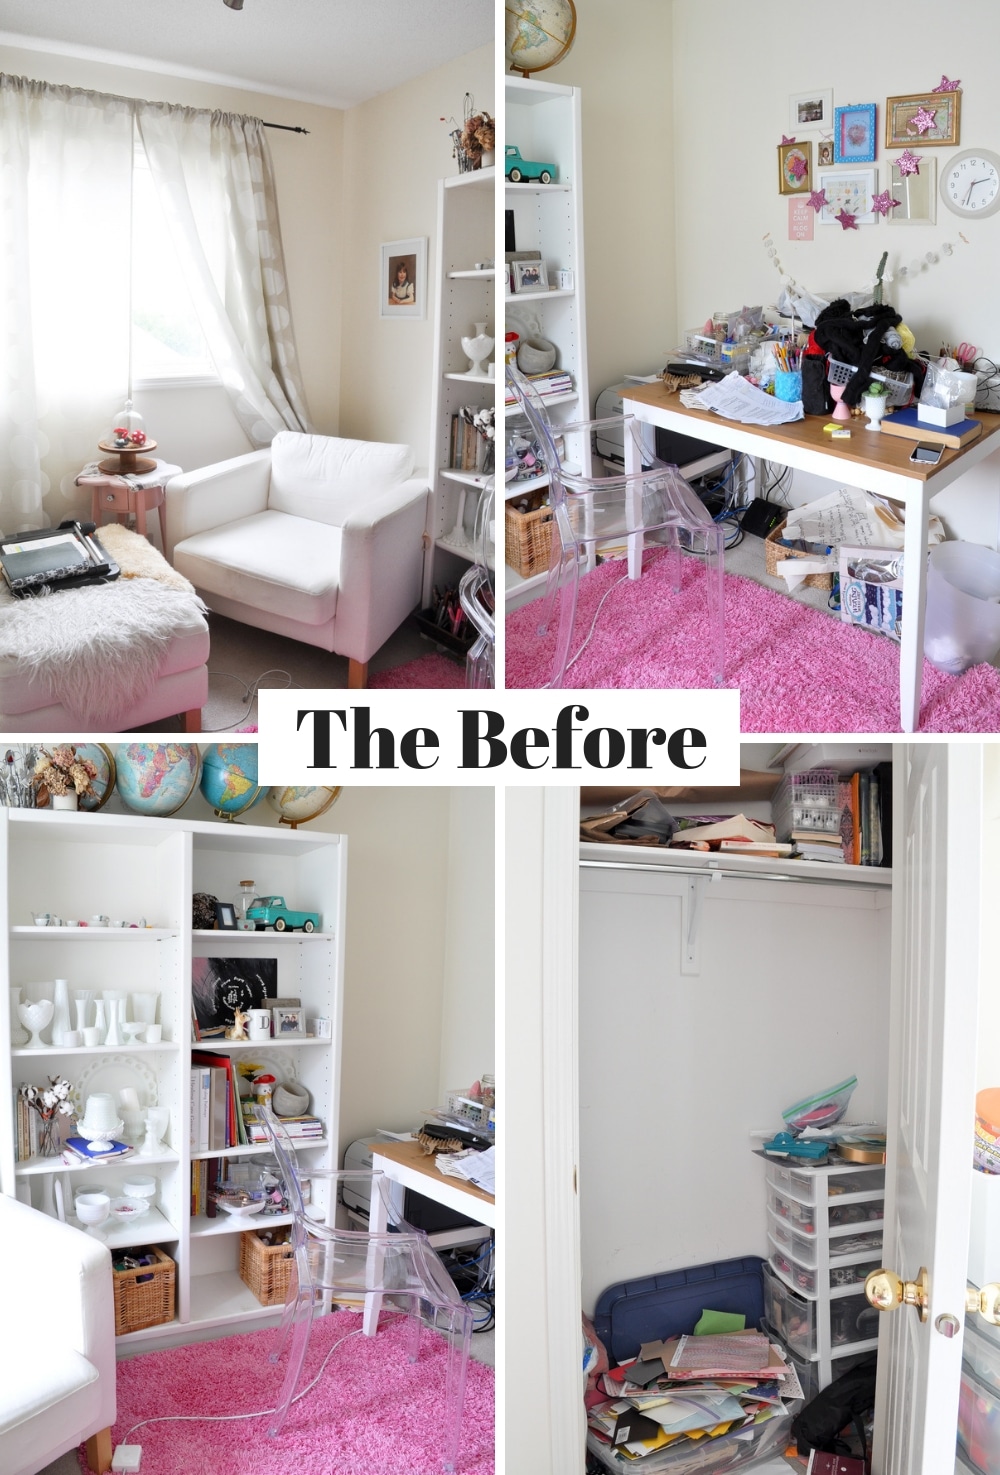 Problem Areas


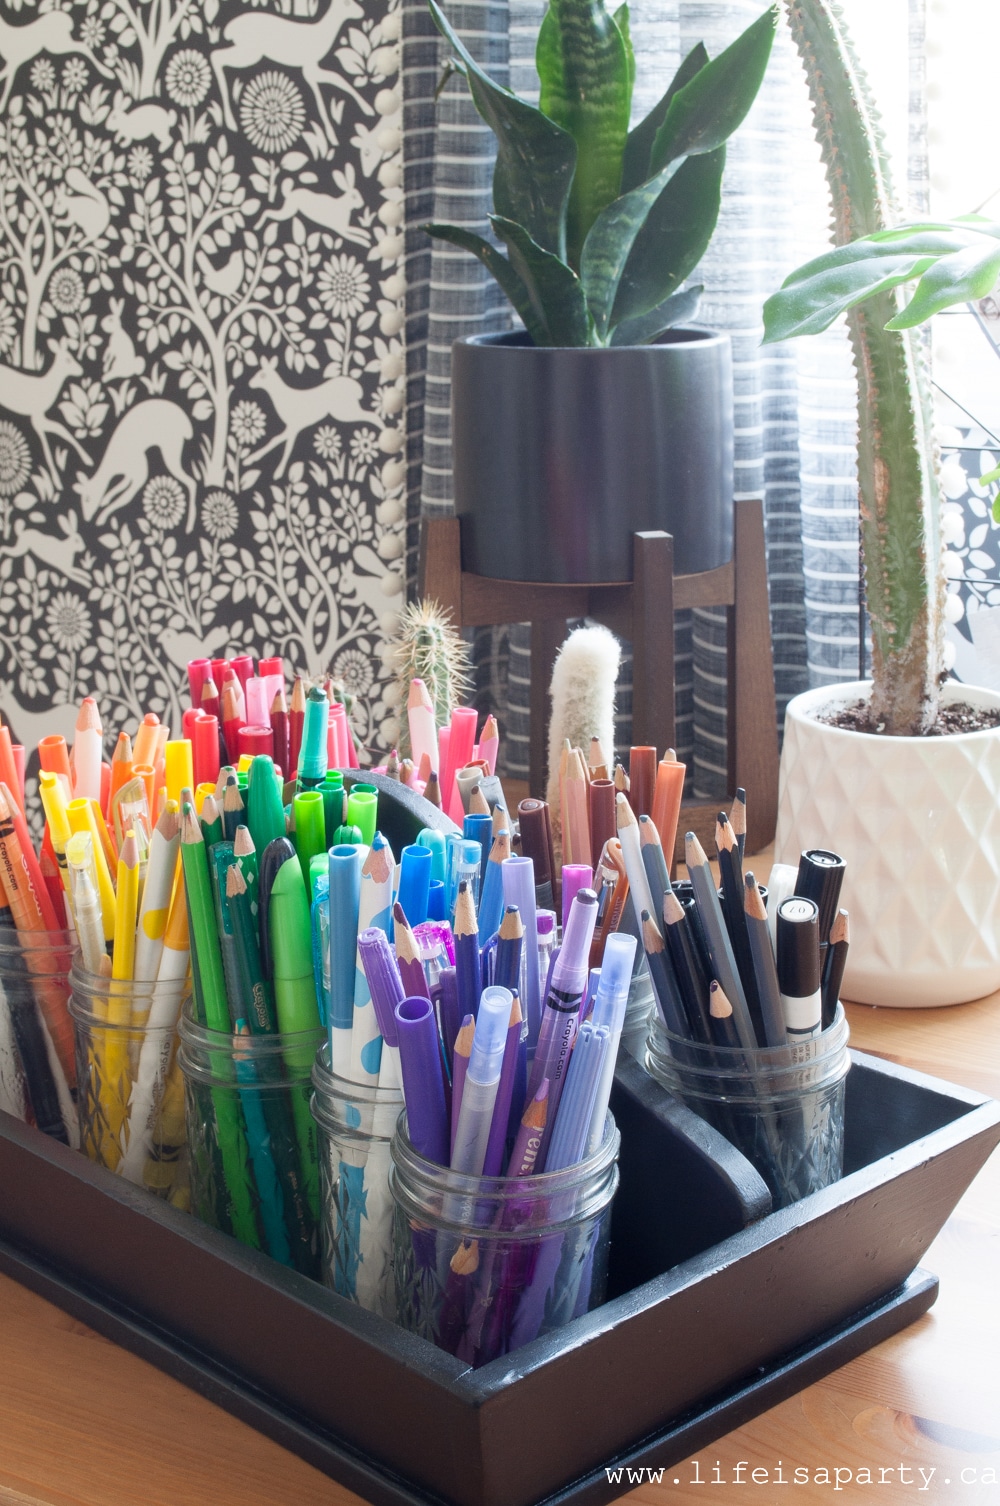
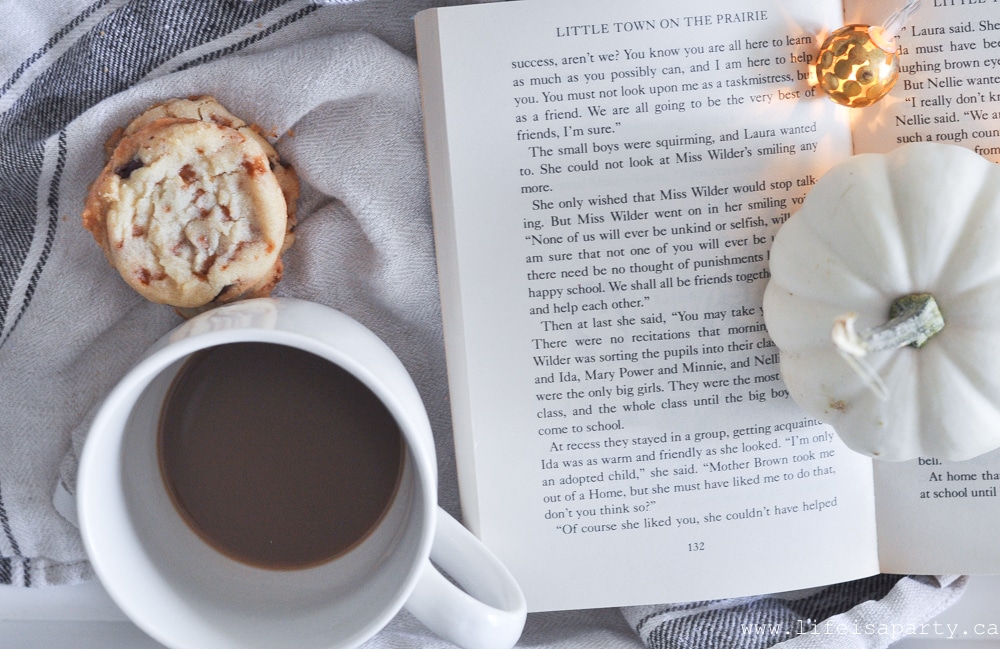
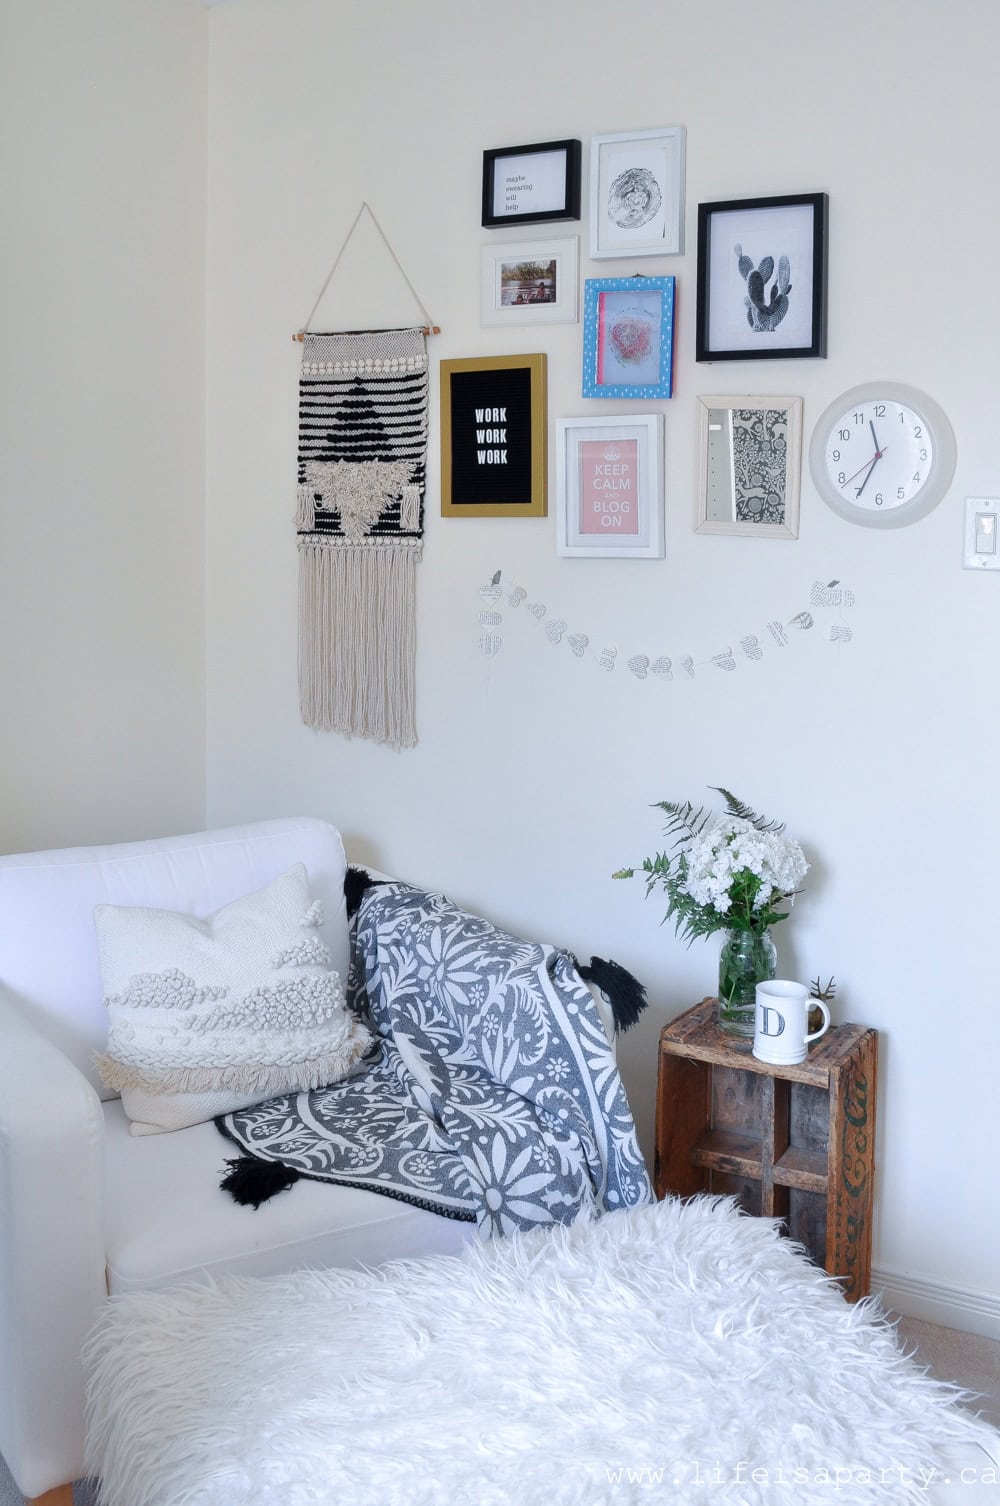 The little crate is the perfect spot to rest a cup of tea while you work.
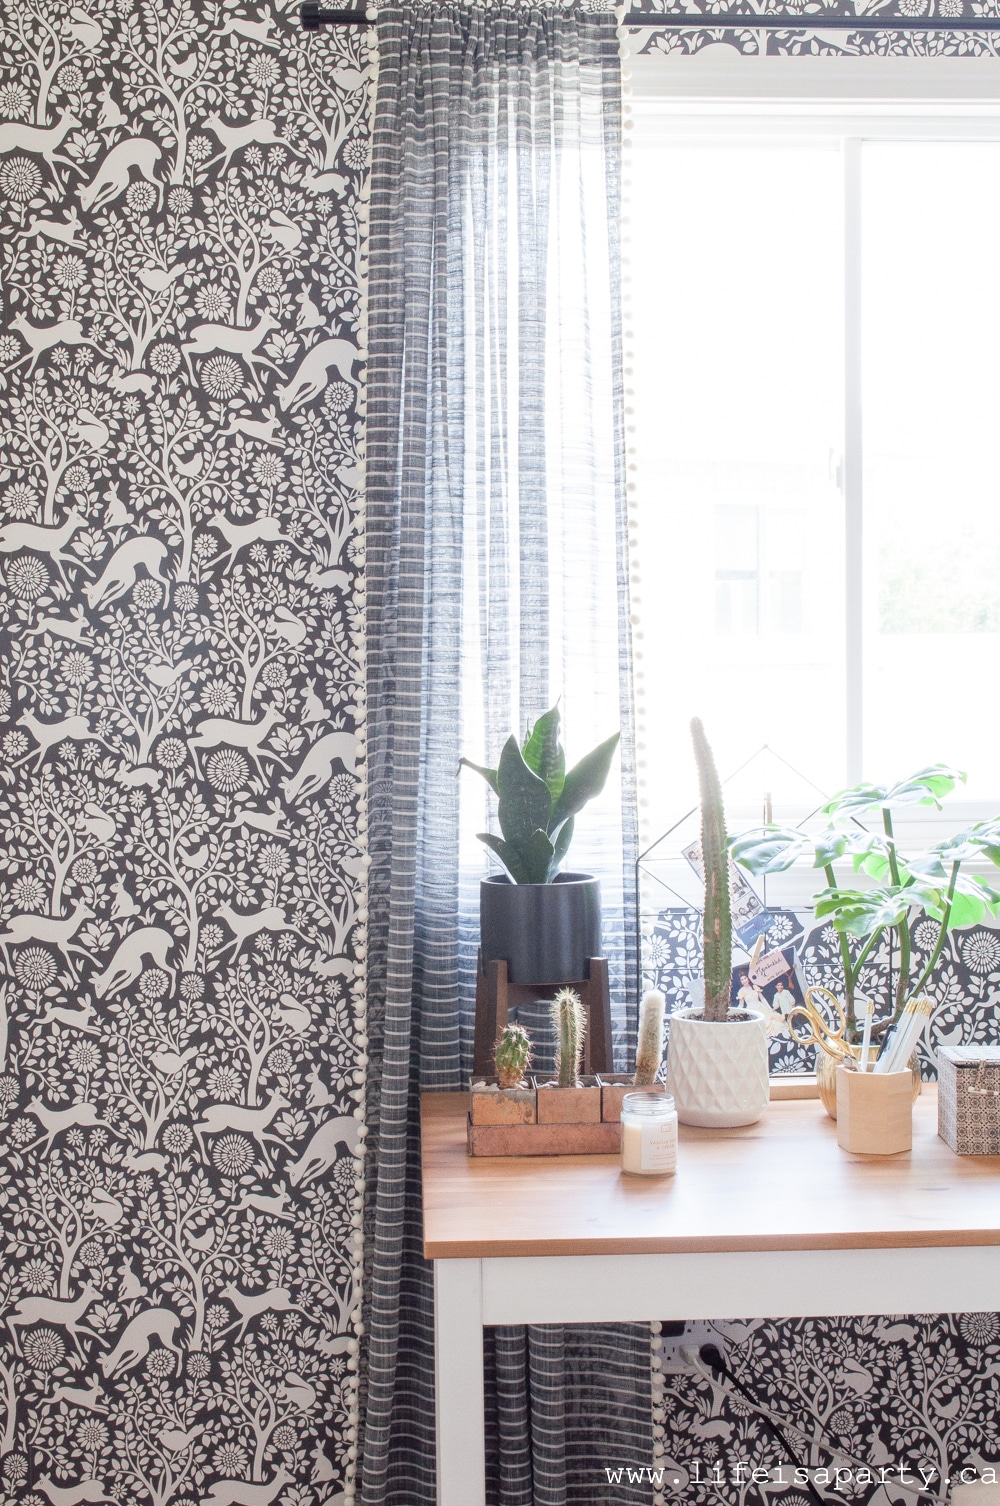
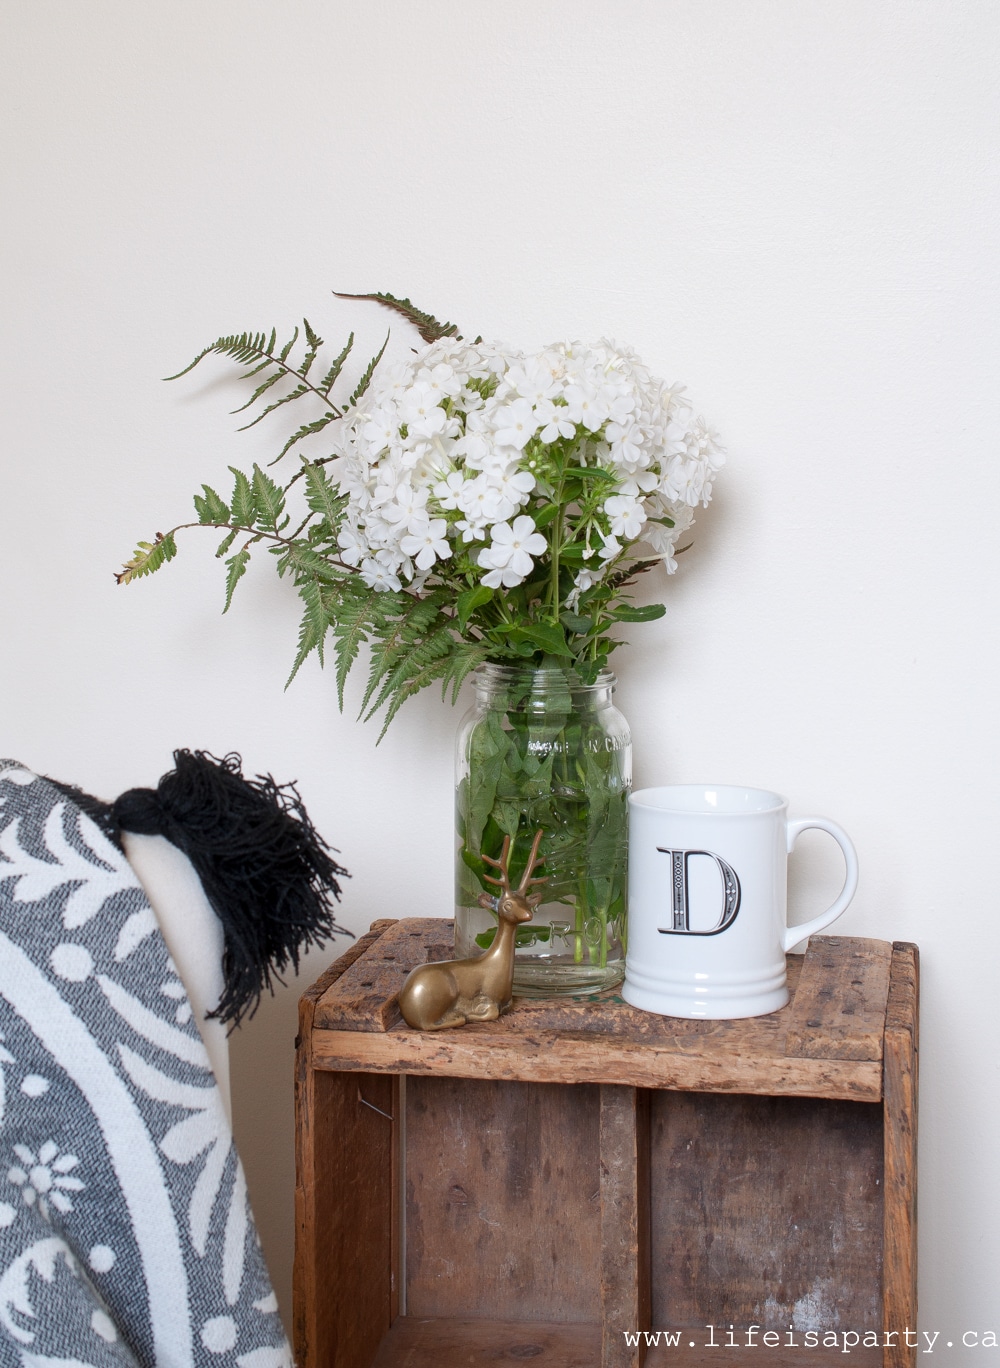 The gallery wall was a lot of fun to work on.
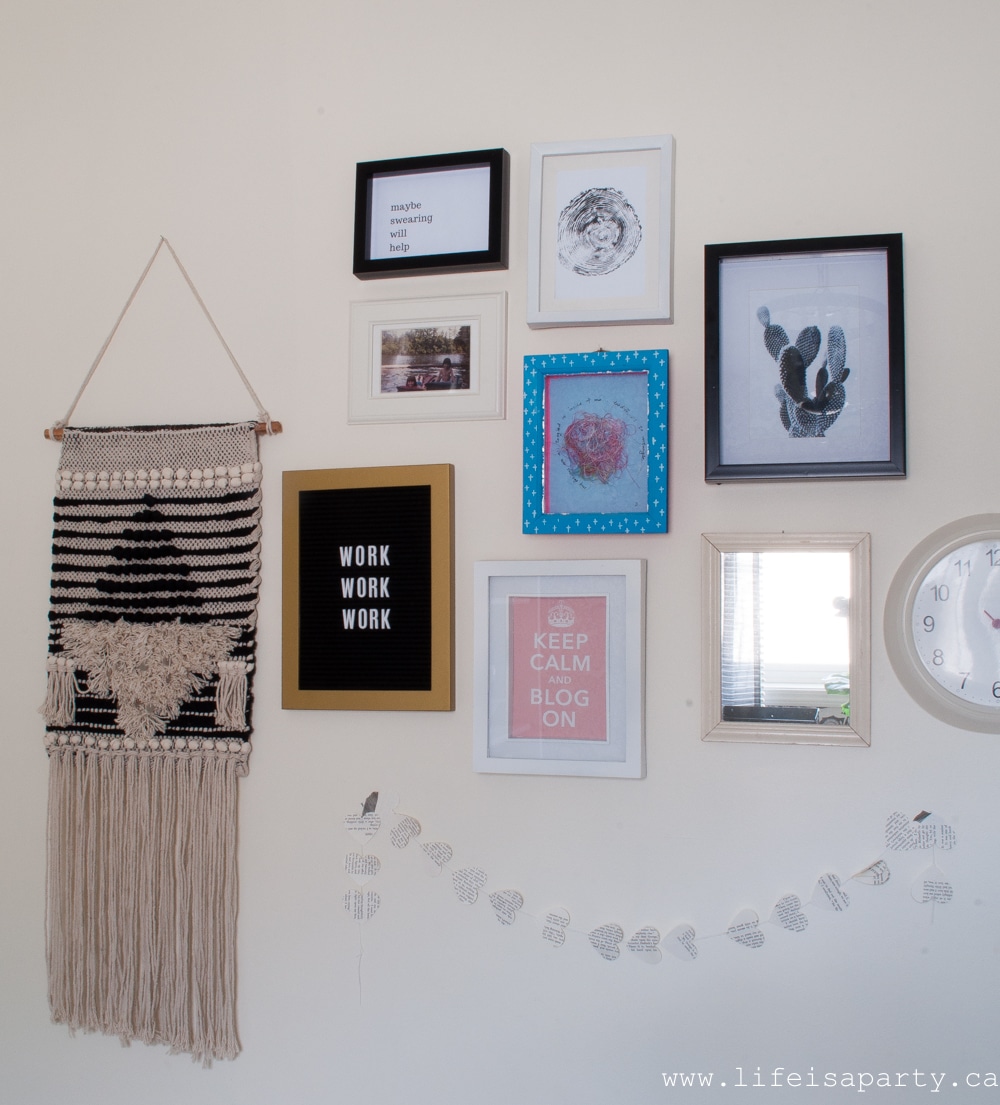 The gallery wall is a real mix -the new wall hanging for more of that boho feel was a clearance find. I have a snap shot of me and my sister as kids, and an old art piece. There's also a letterboard -work, work, work" indeed as we "keep calm and blog on". 😉
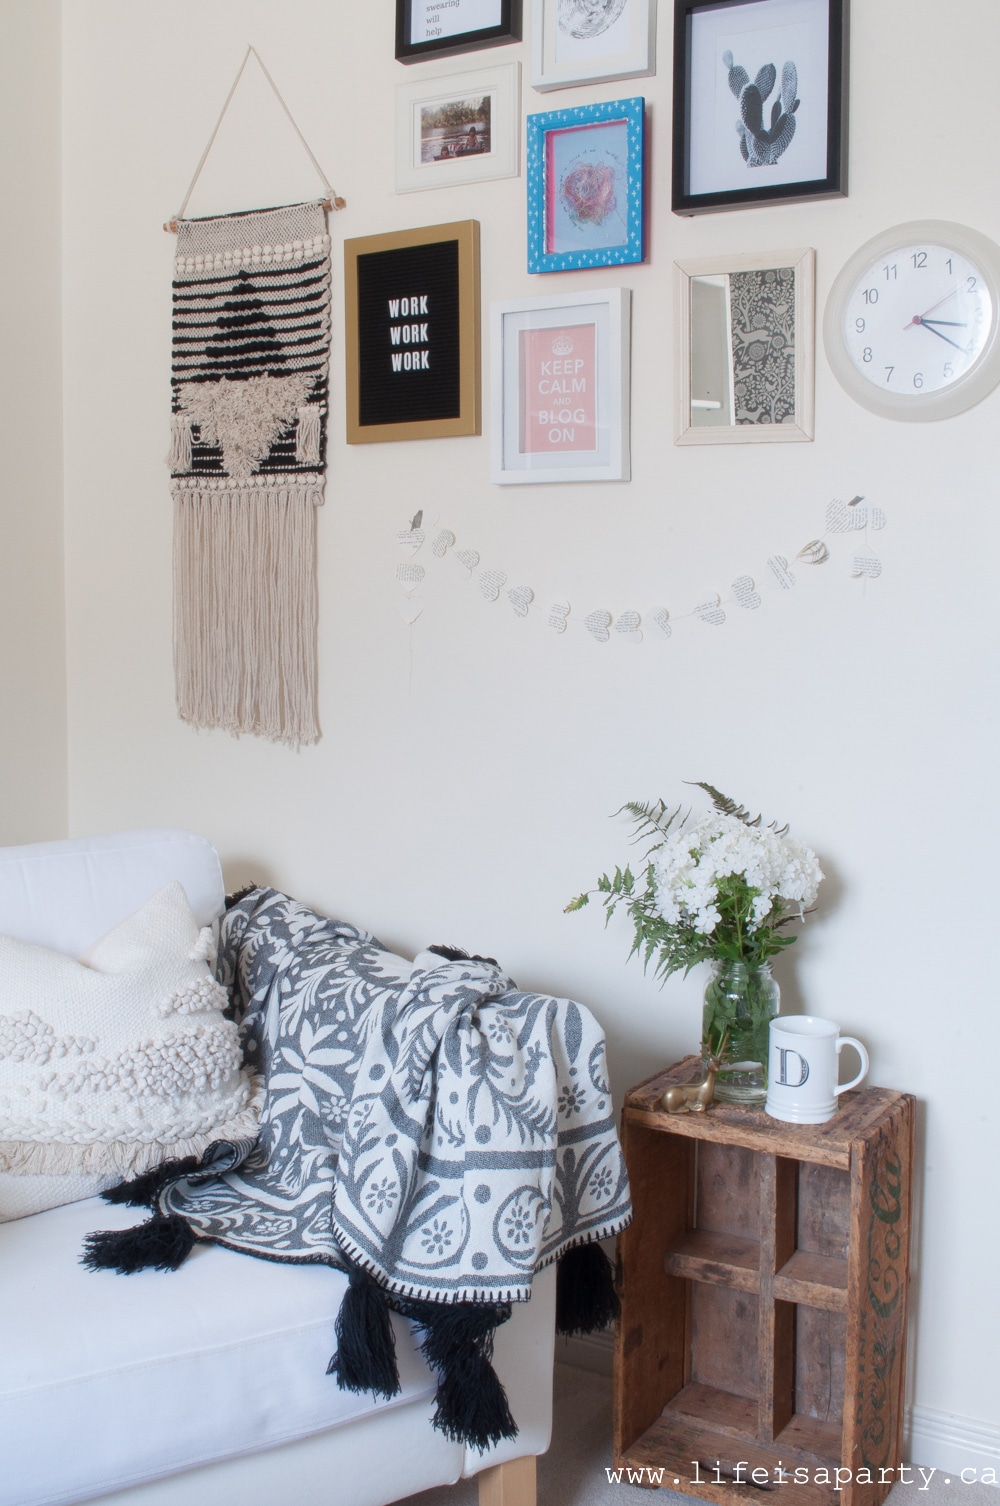 This gallery wall makes me smile, which is exactly what it's there for.
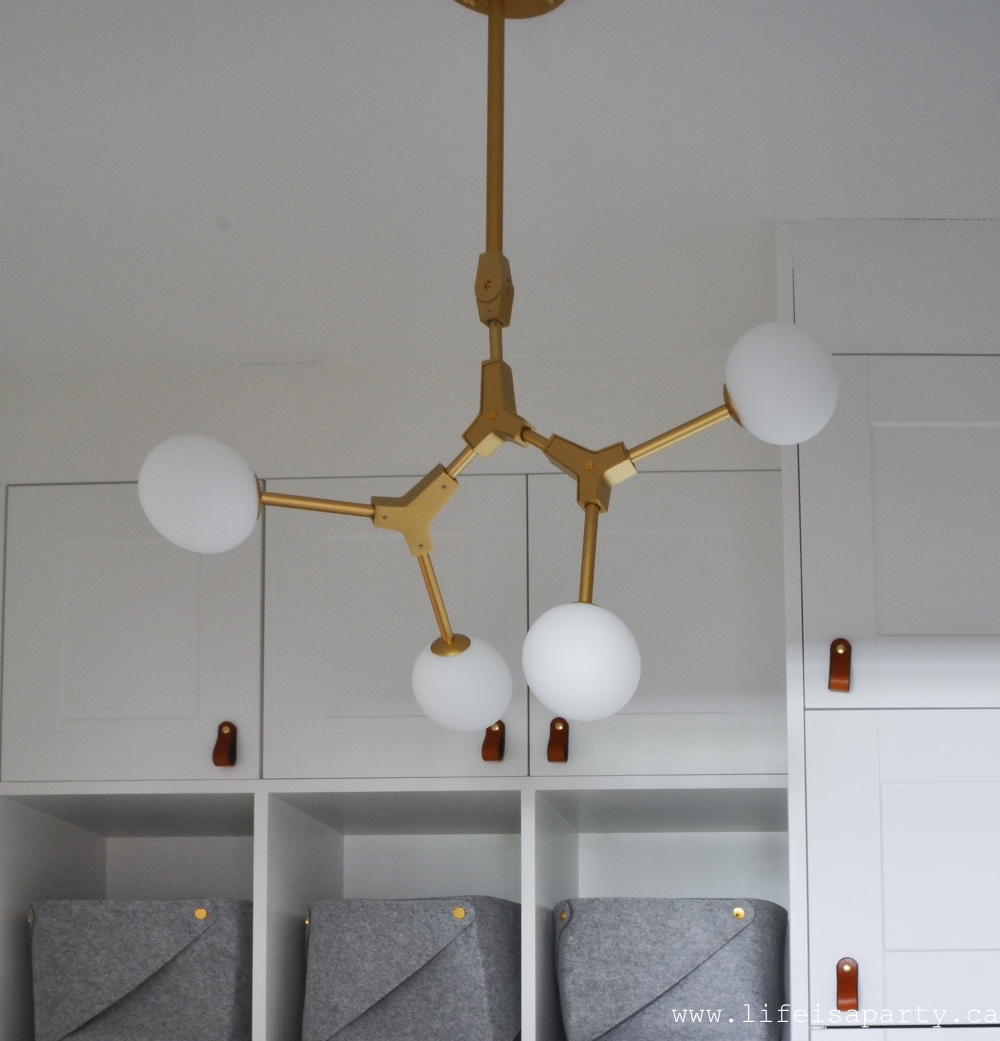
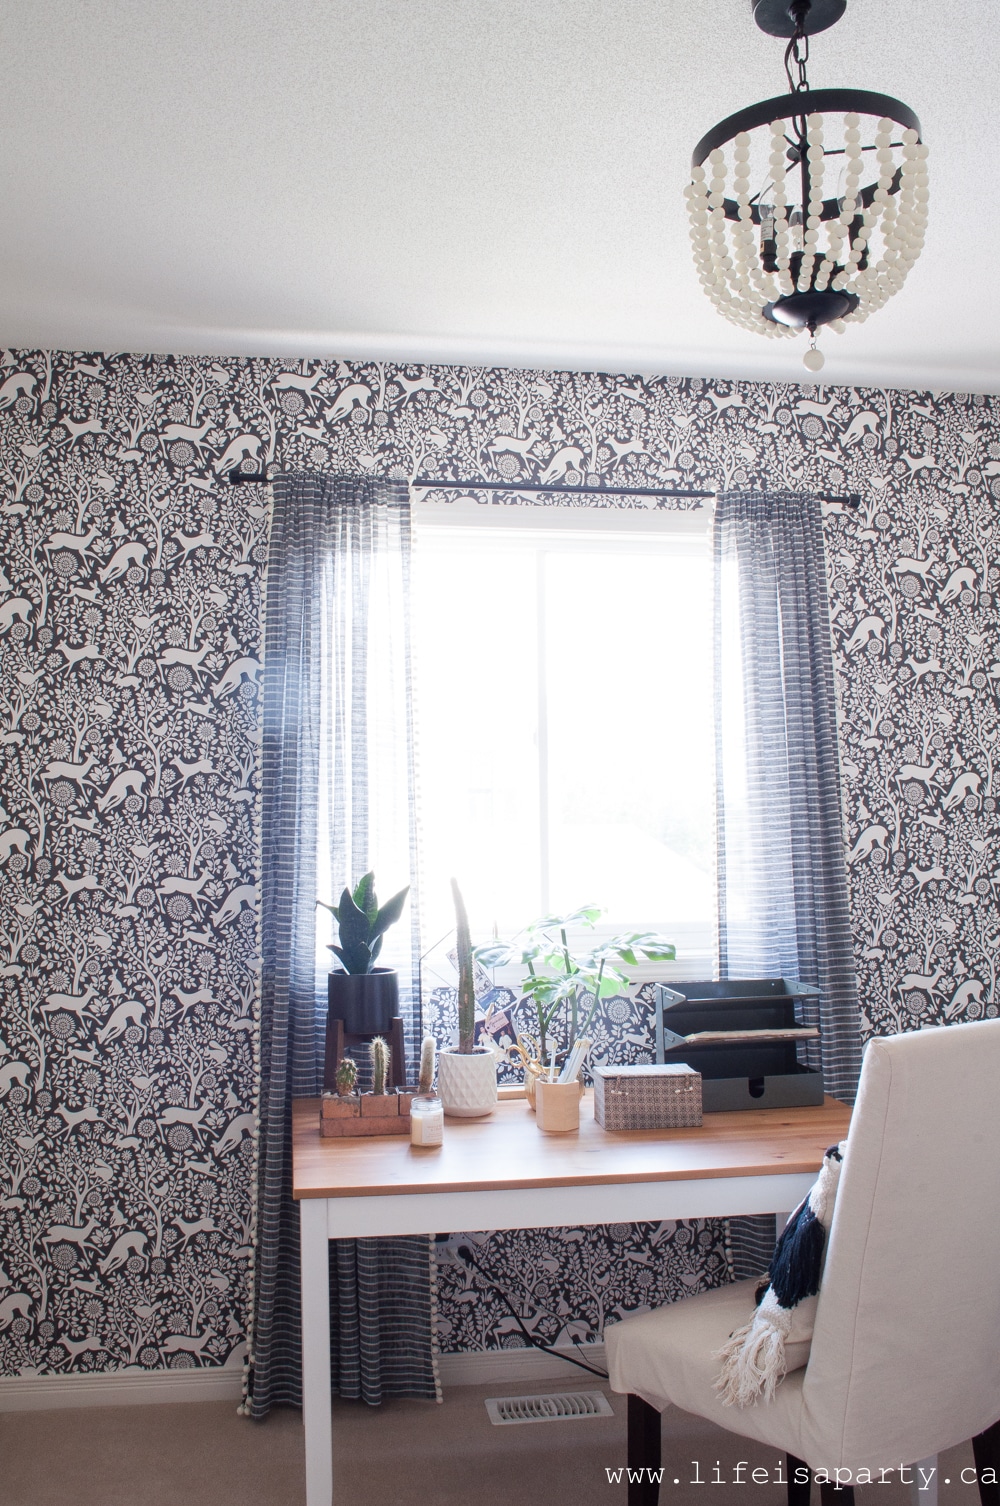 Once I finally got the room to this stage it was feeling pretty perfect, except for the light. There was nothing wrong with the track lighting that was there, but it didn't exactly feel right. And then I found the perfect light, at the perfect price. I wasn't too sure since I didn't really need it, but it was too pretty to return.
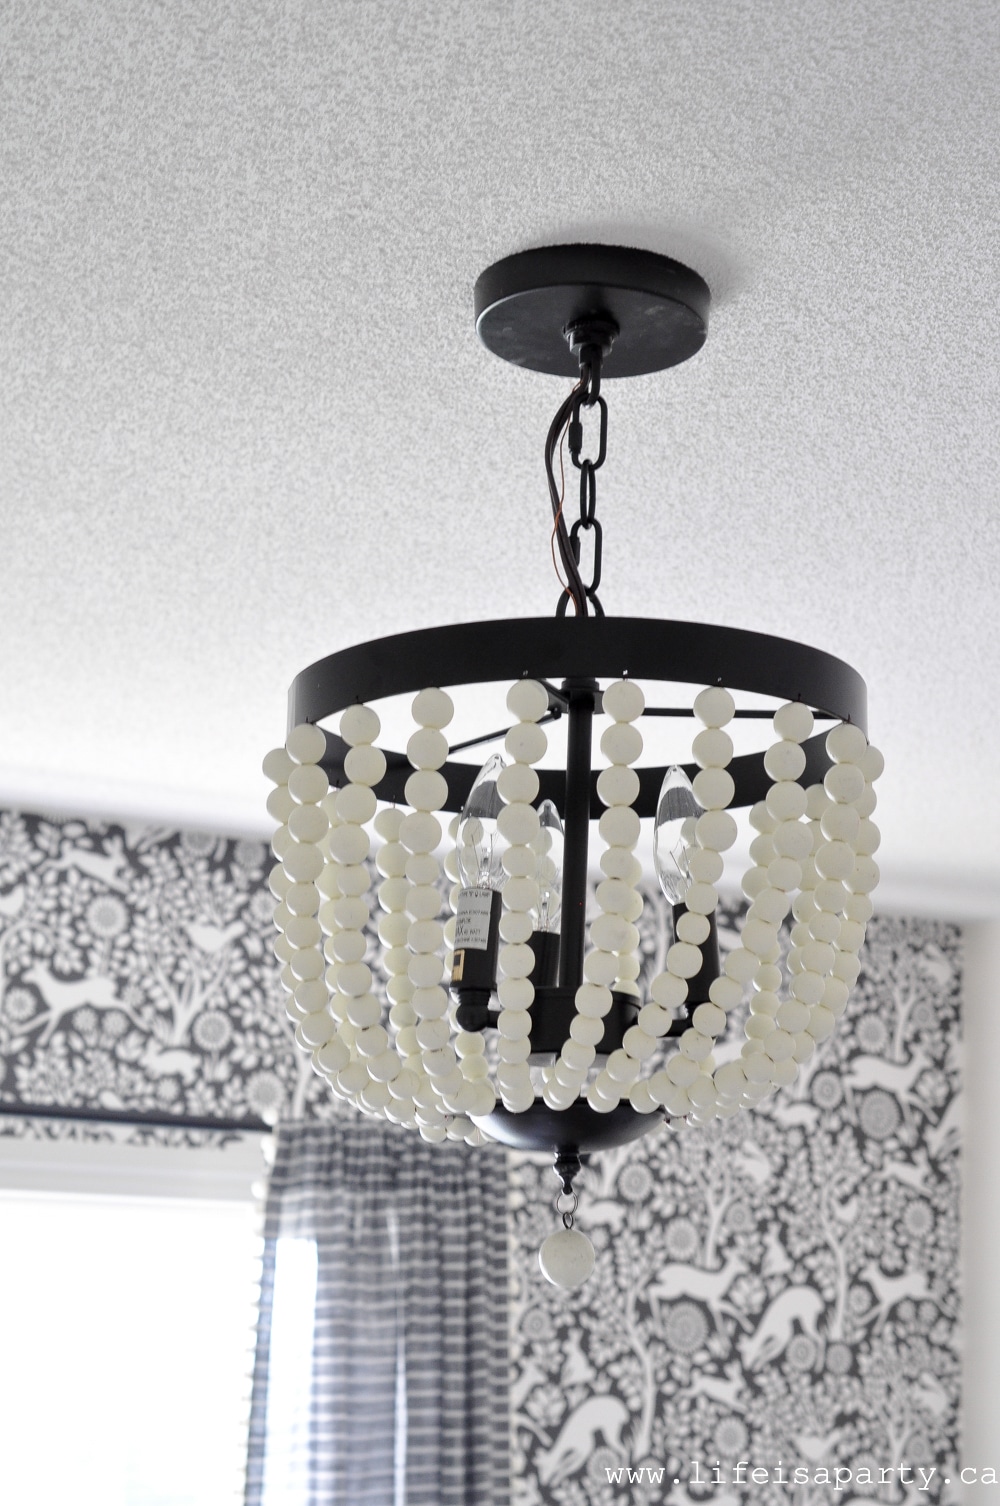
 Now let's see if having a beautiful and organized workspace helps me get some more work done.


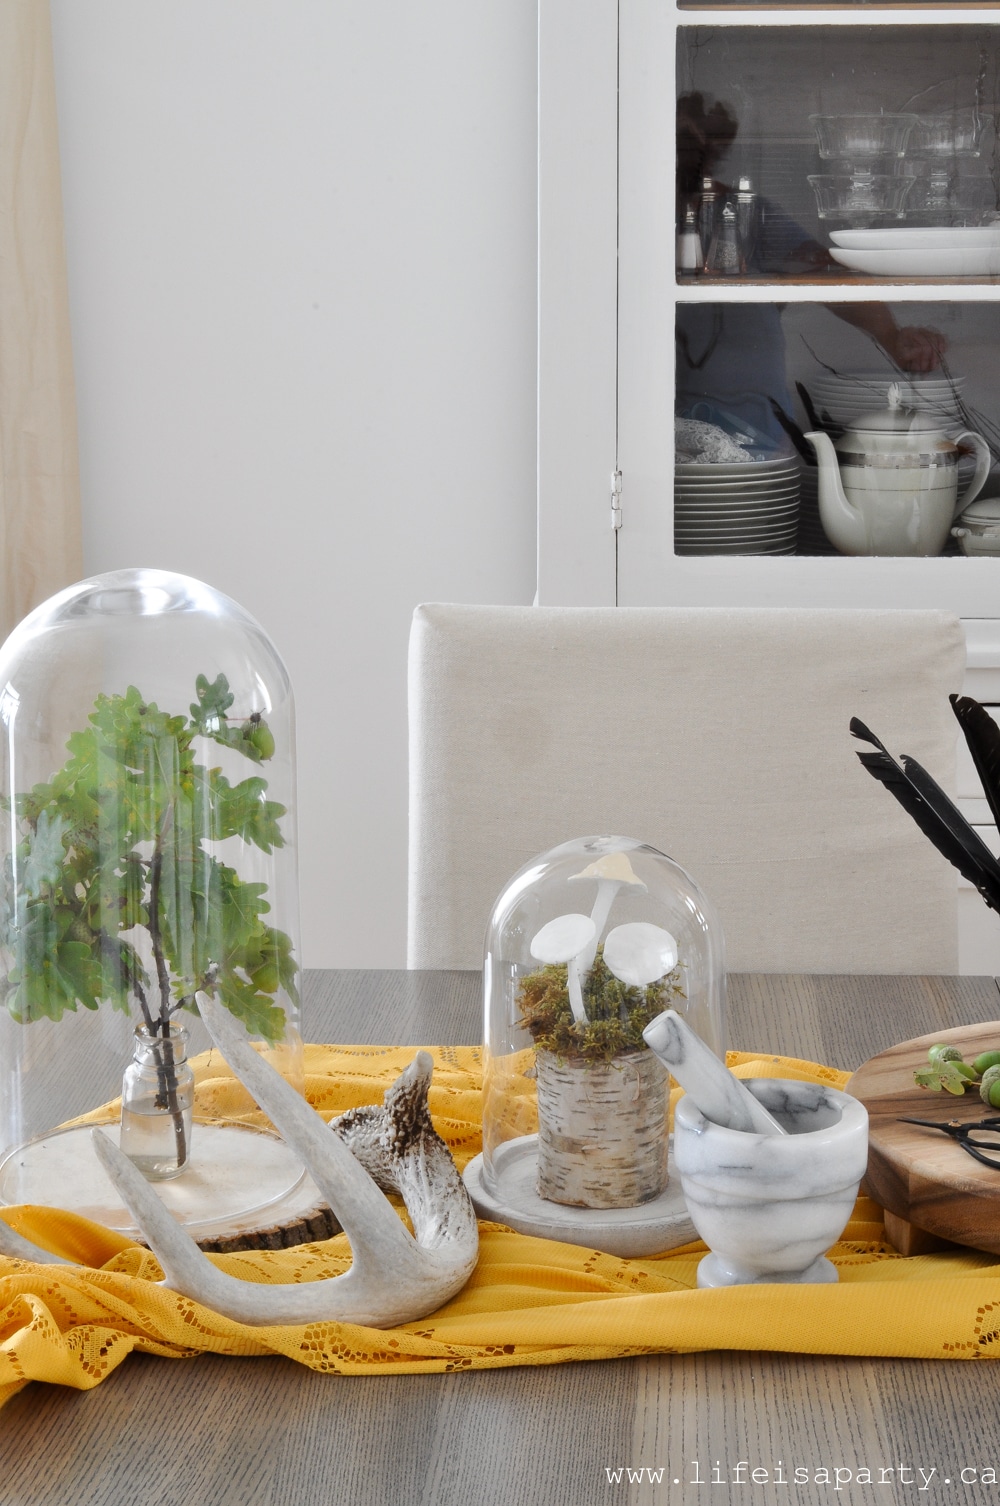
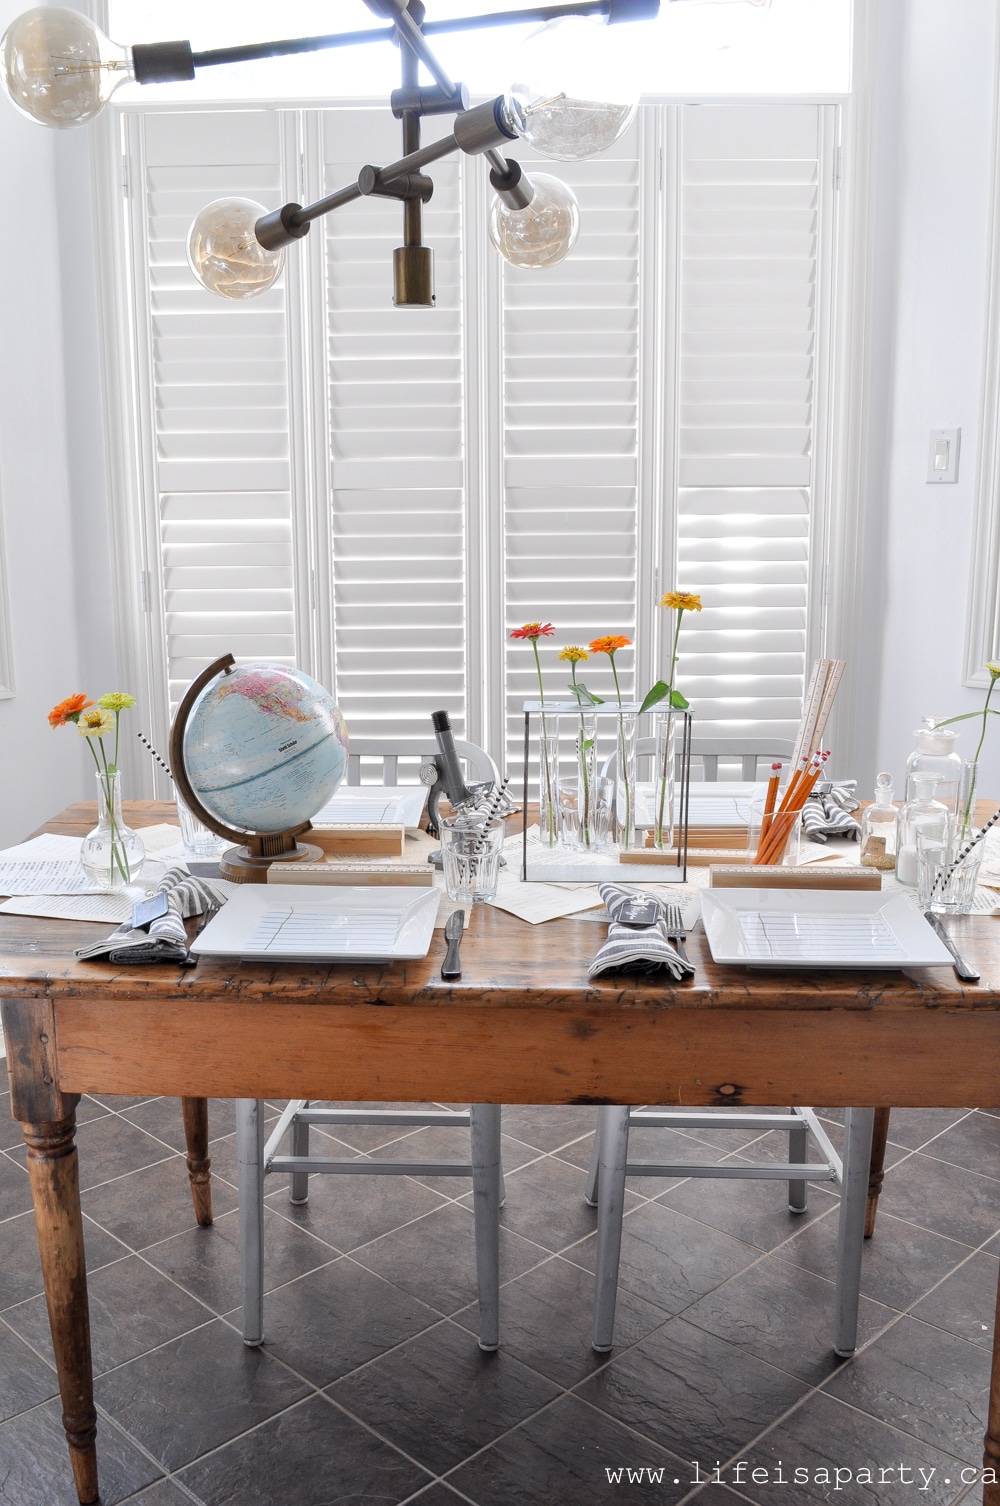
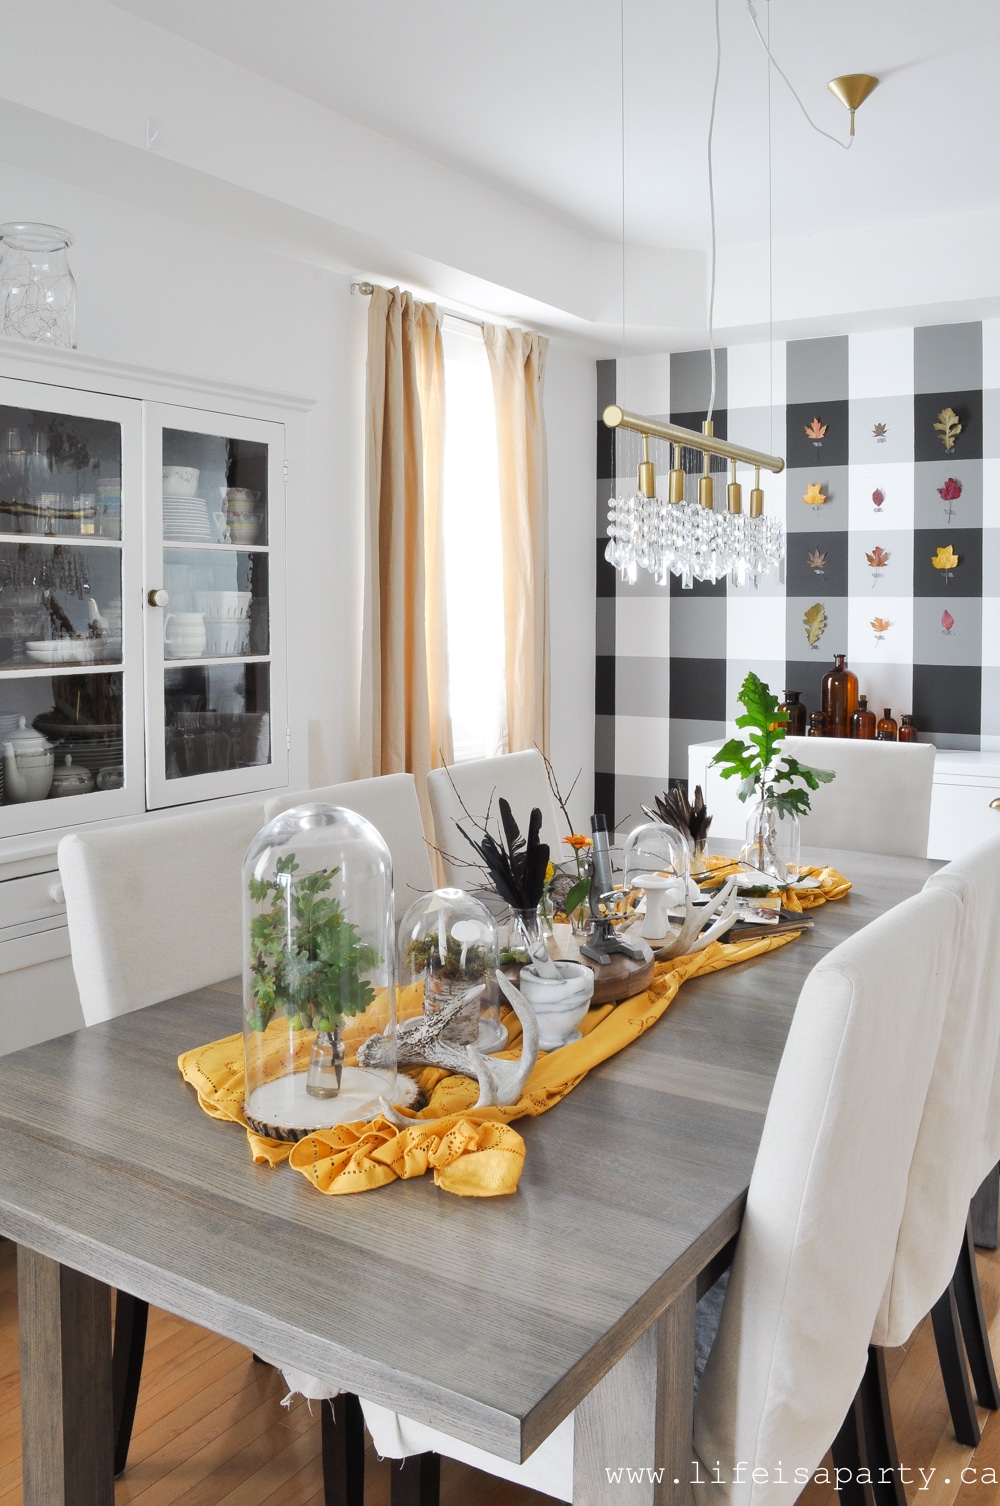 I used this pretty vintage lace tablecloth in mustard yellow as a runner. This neutral loving girl decided to add in a little of this fall's it colour -mustard yellow. I've sprinkled little bits of it all over the main floor. And I love it.
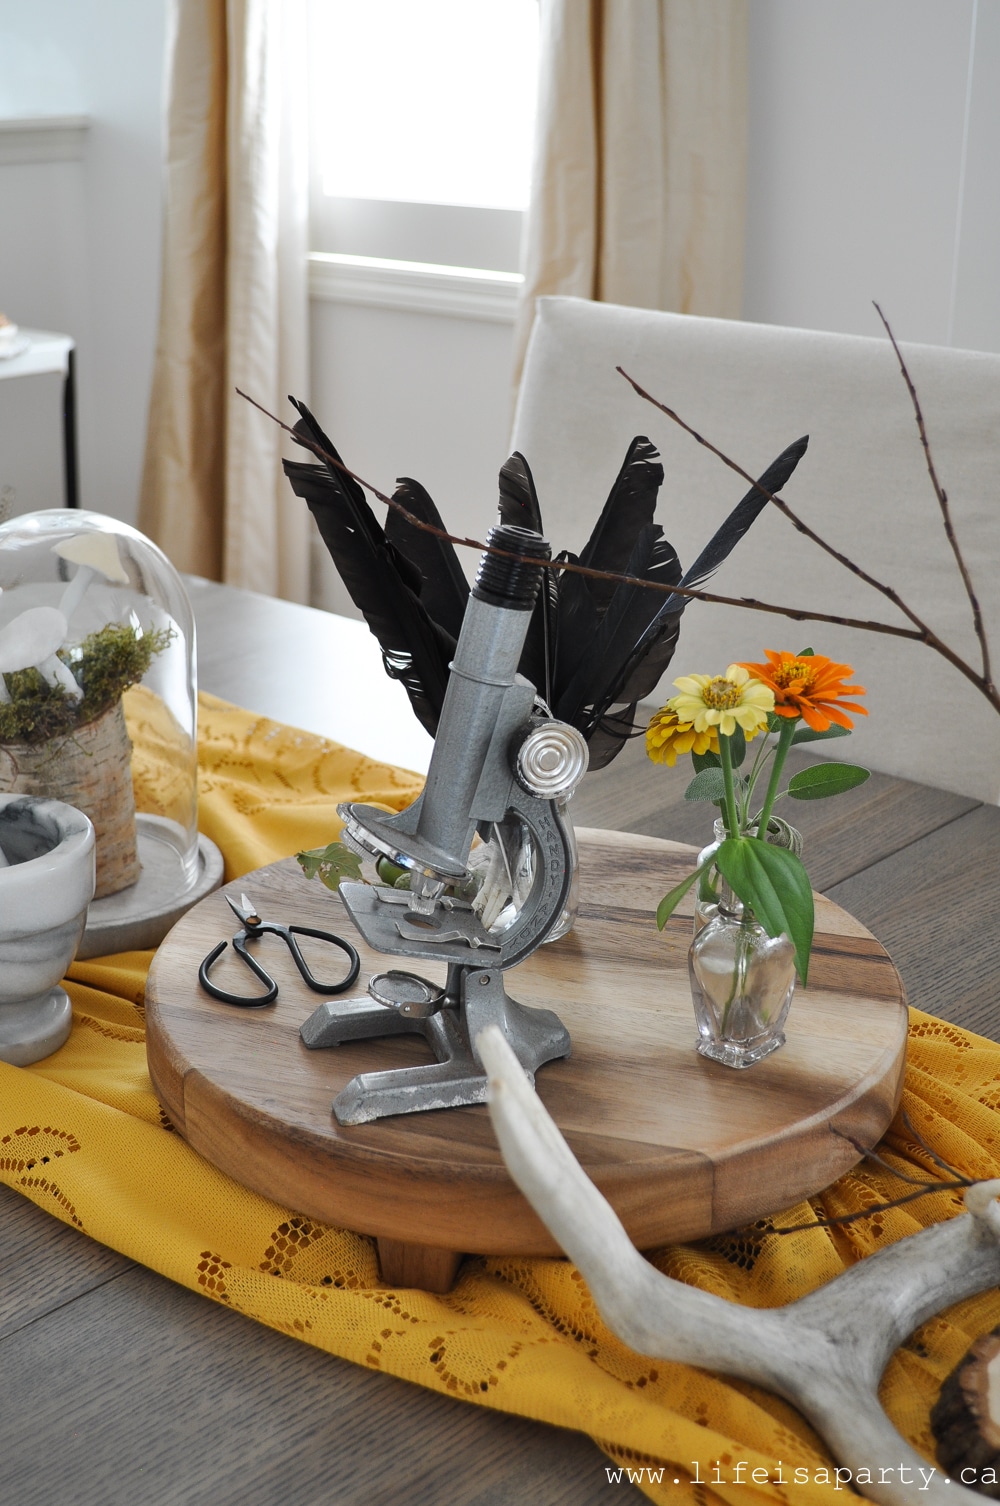
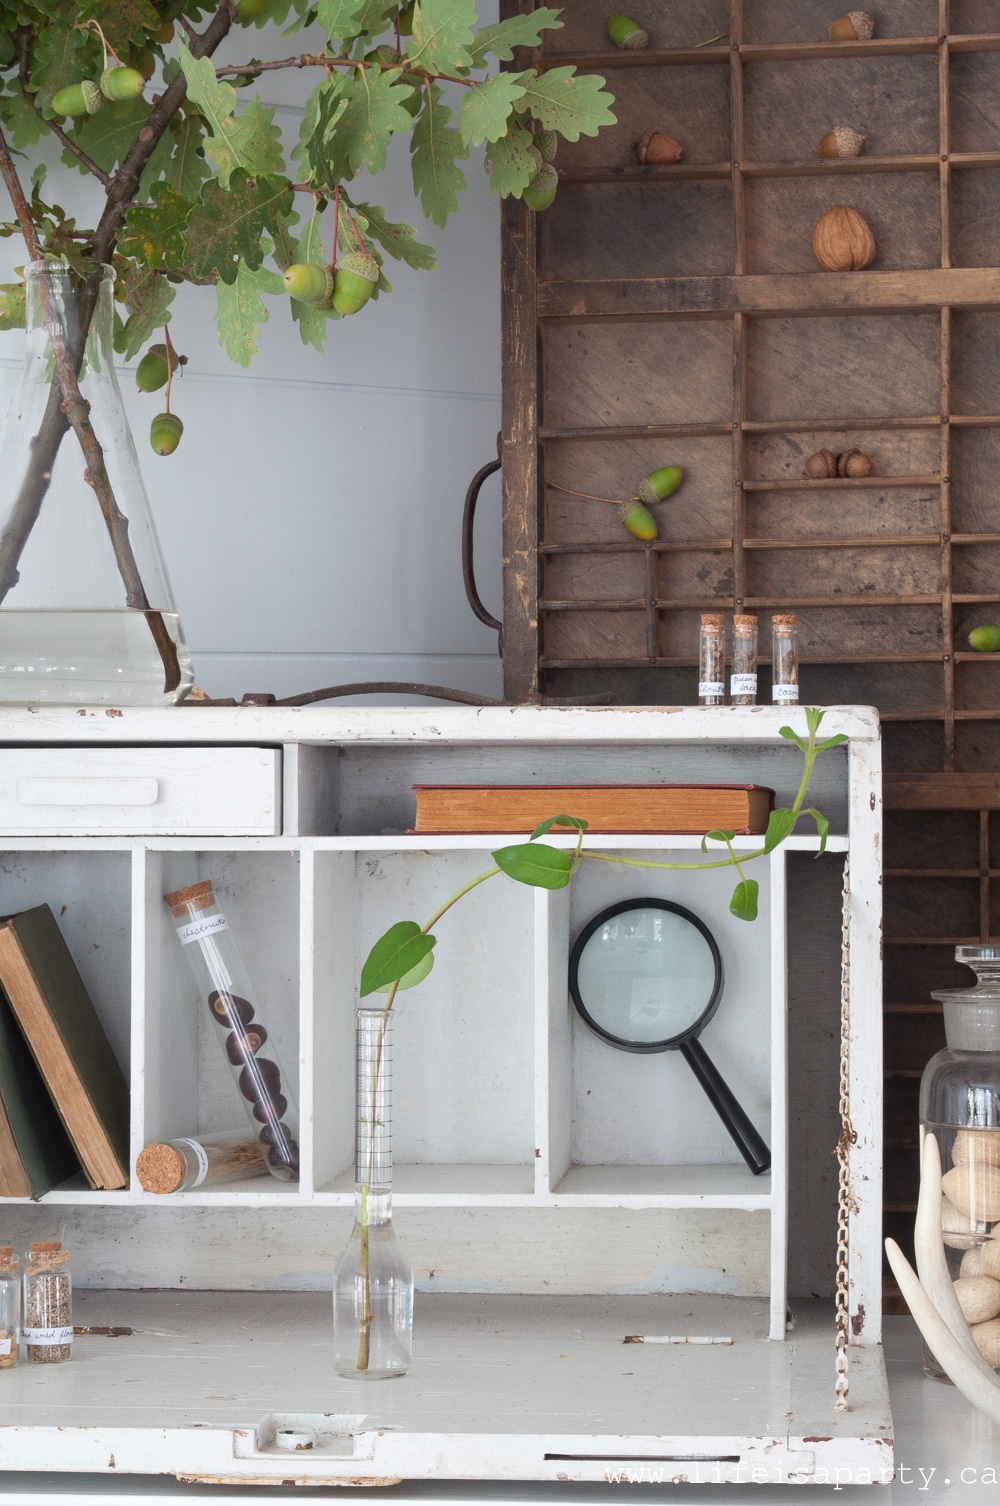
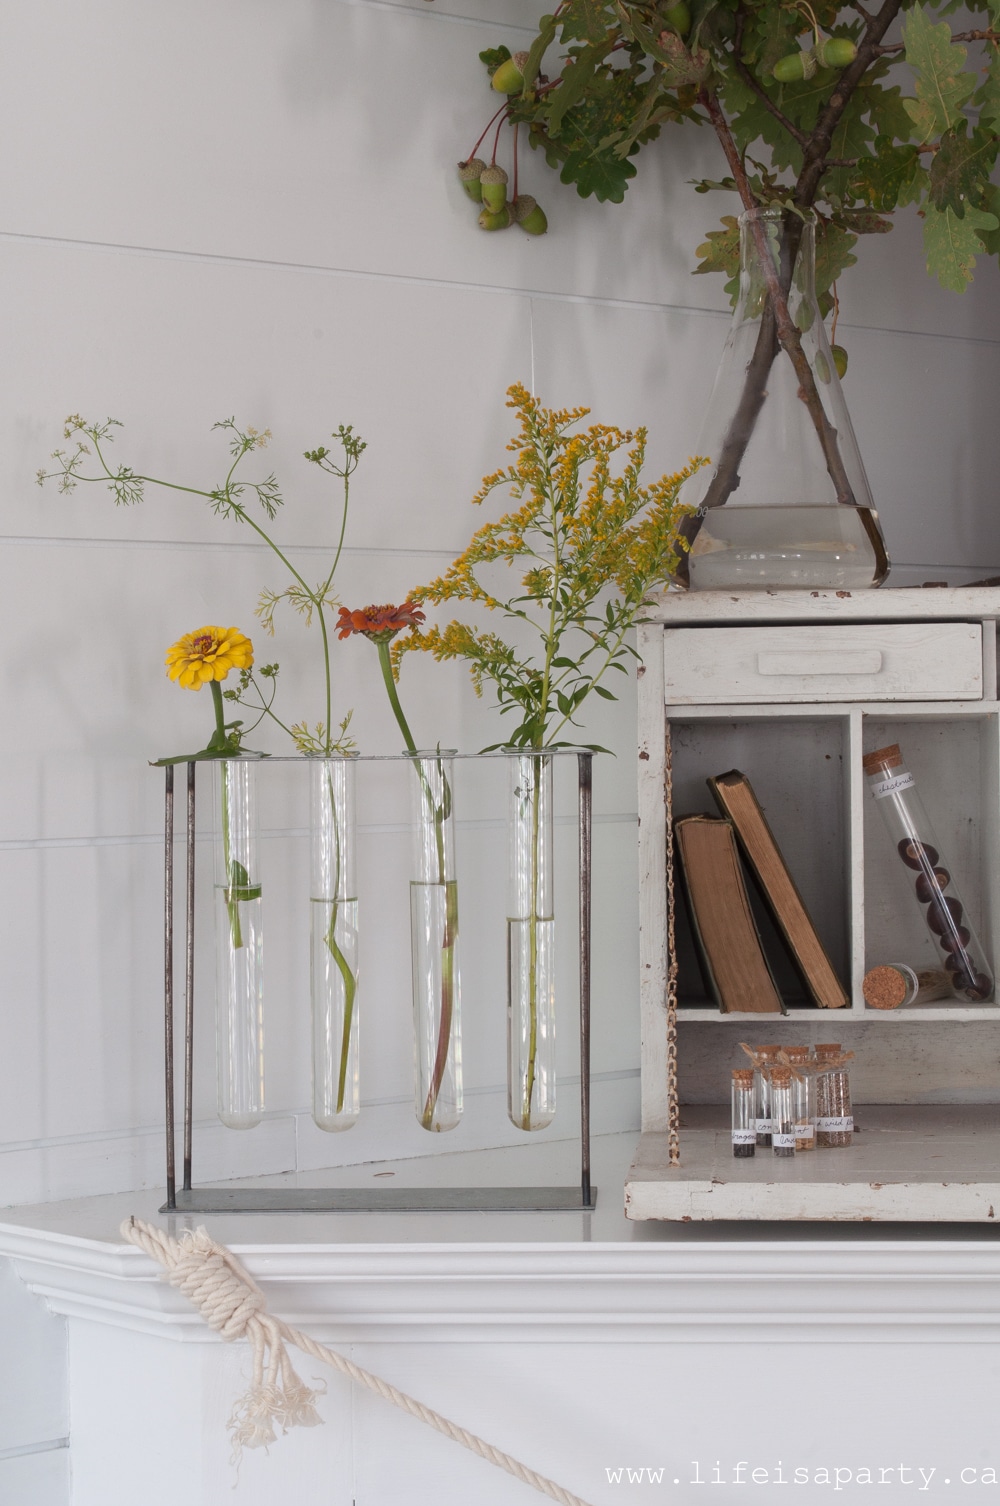
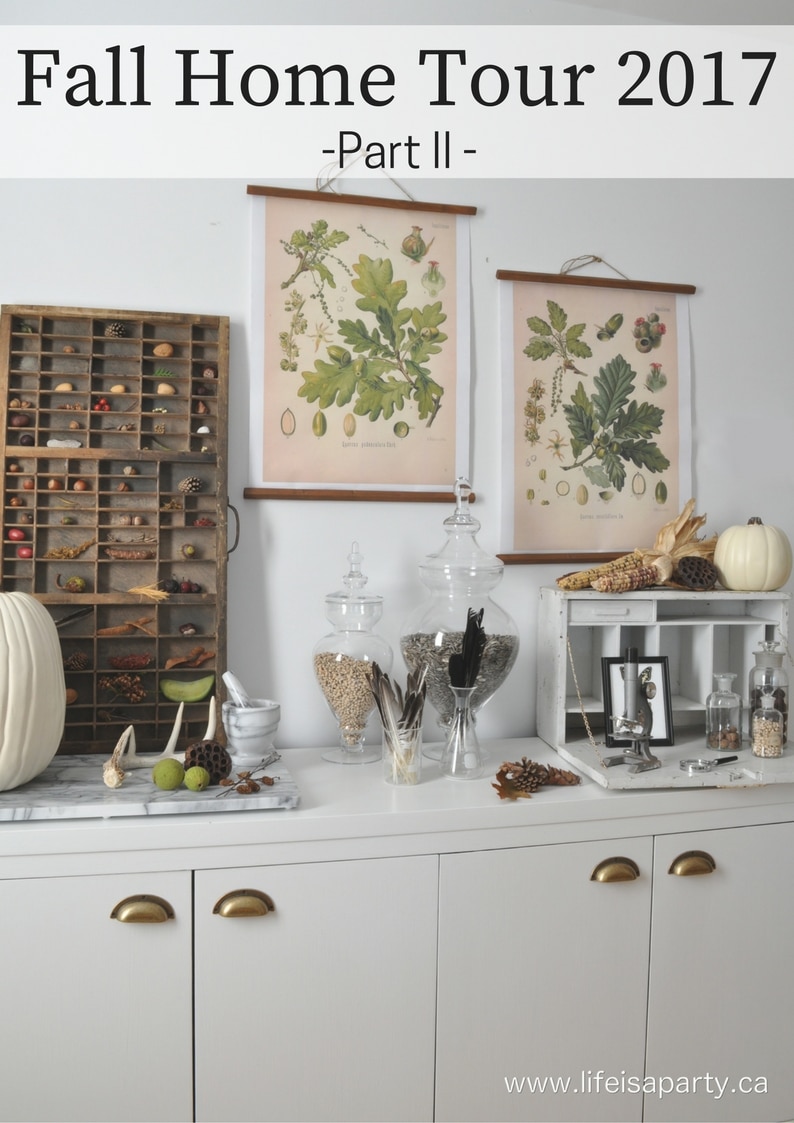
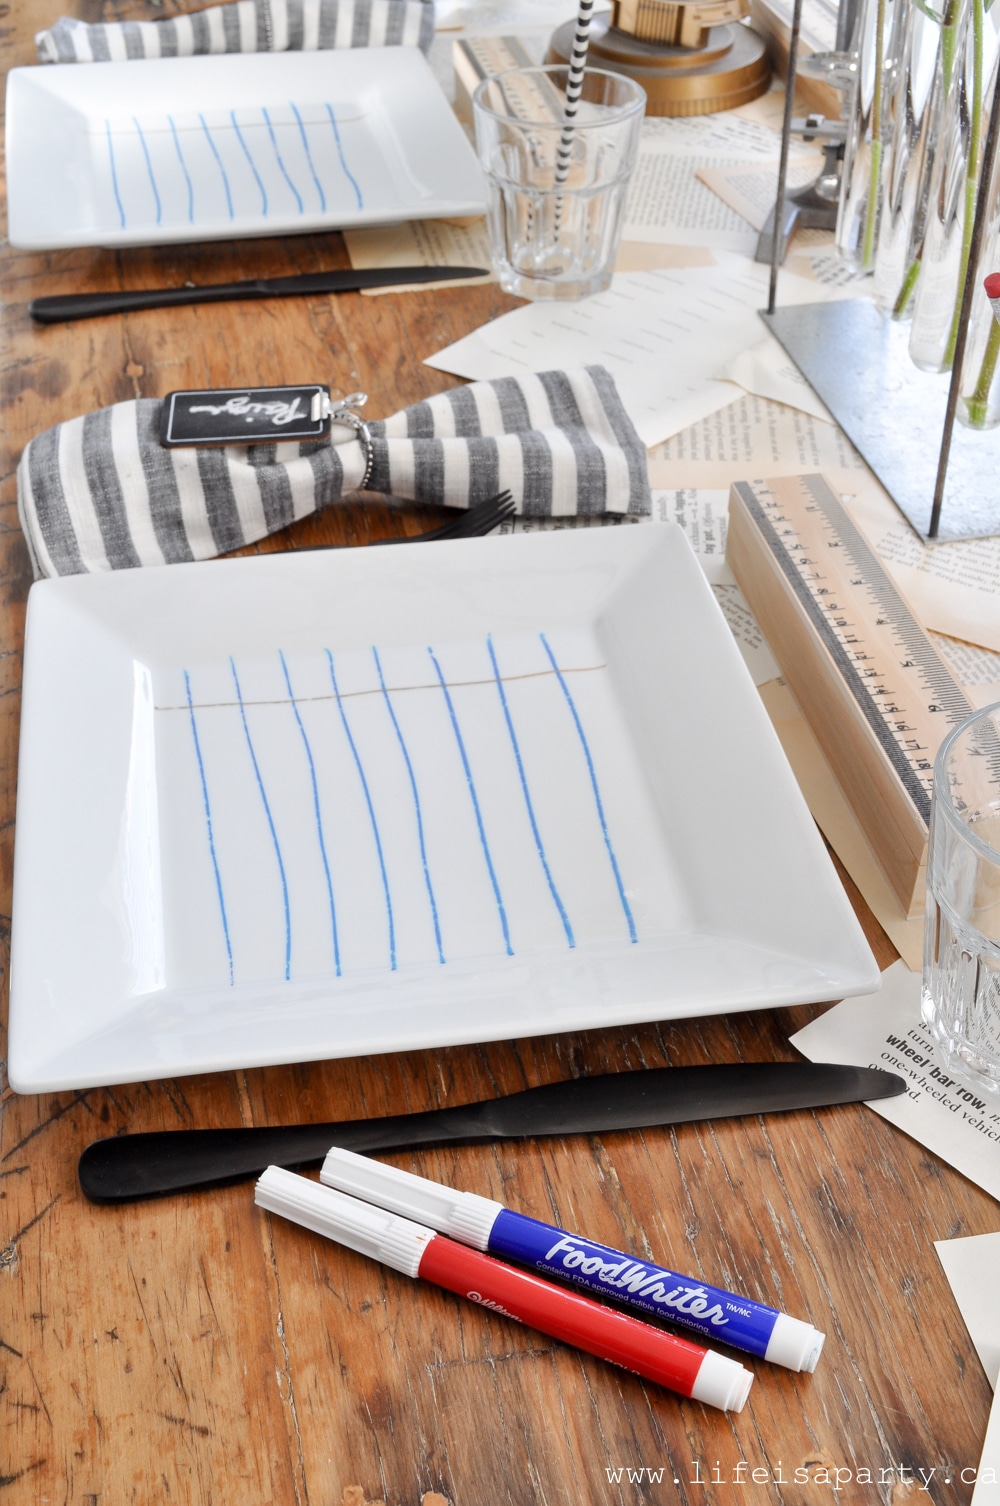
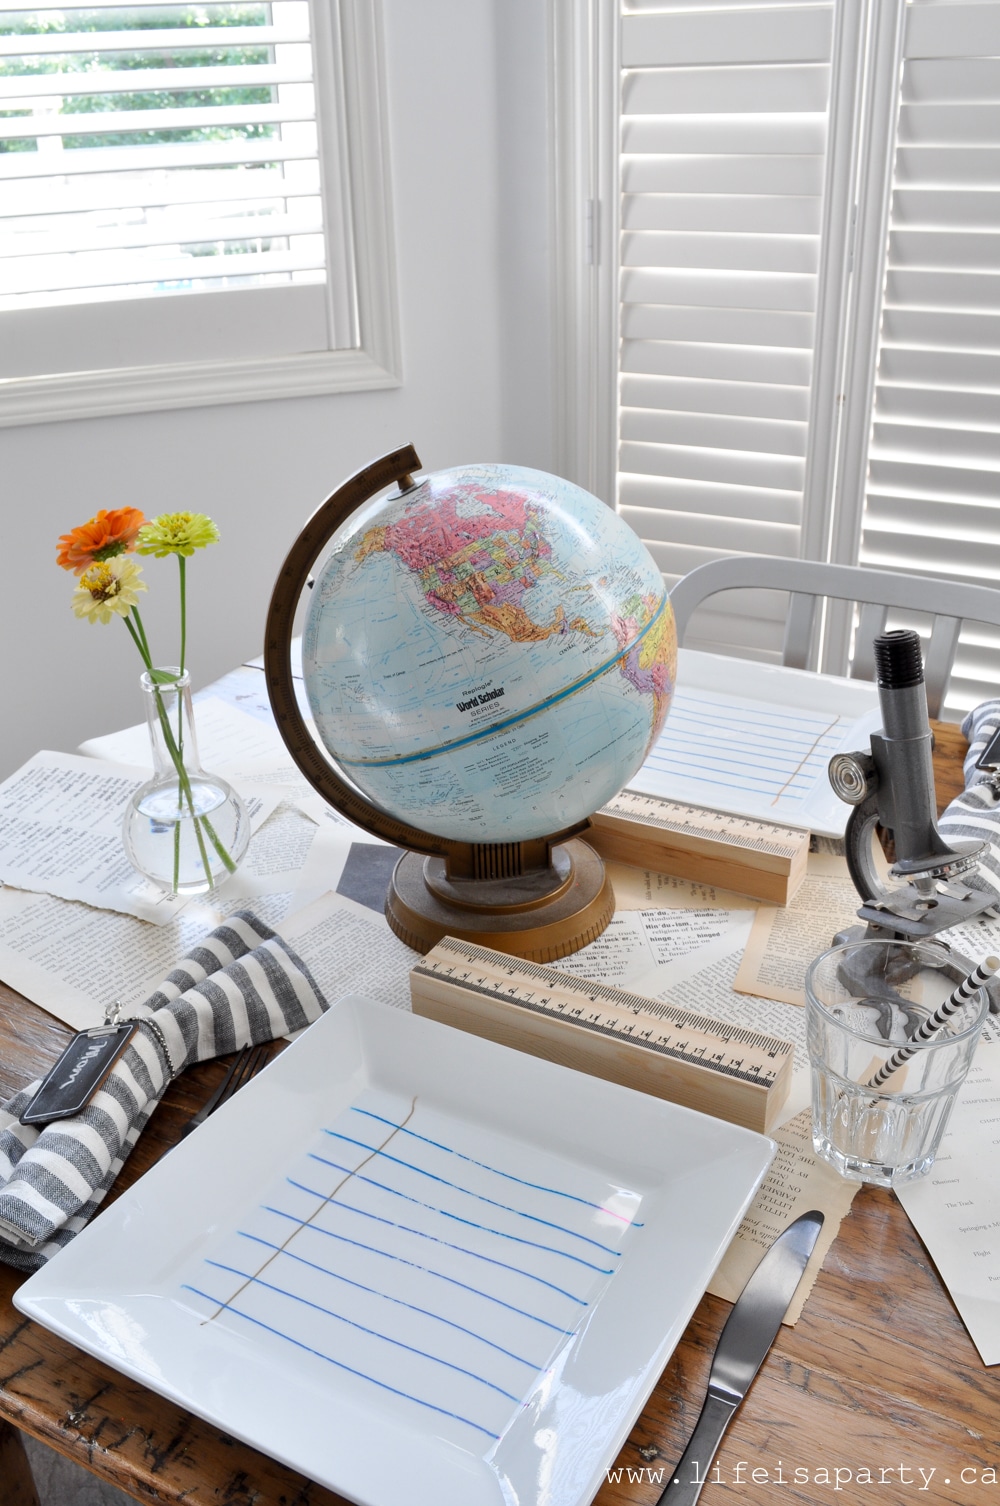
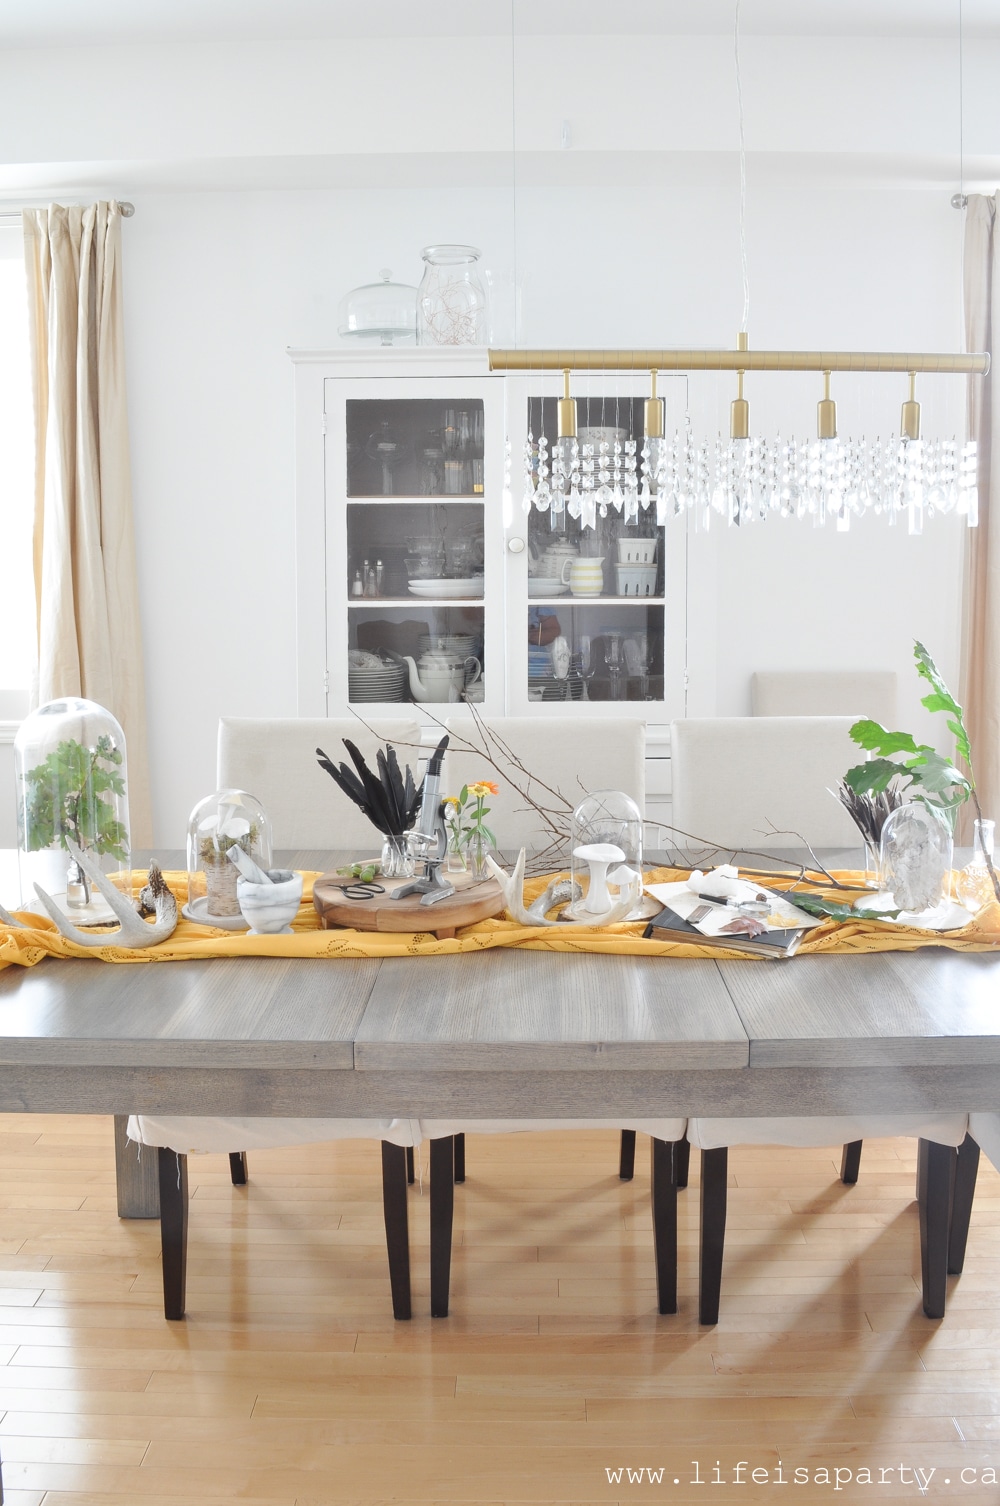 The table is almost a cabinet of curiosities. There are lots of treasures for studying. Oak leaves, and acorns which always make me think of fall right away, and a collection of mushrooms and fungi. There's also antlers, feathers, and pretty pressed fall leaves.
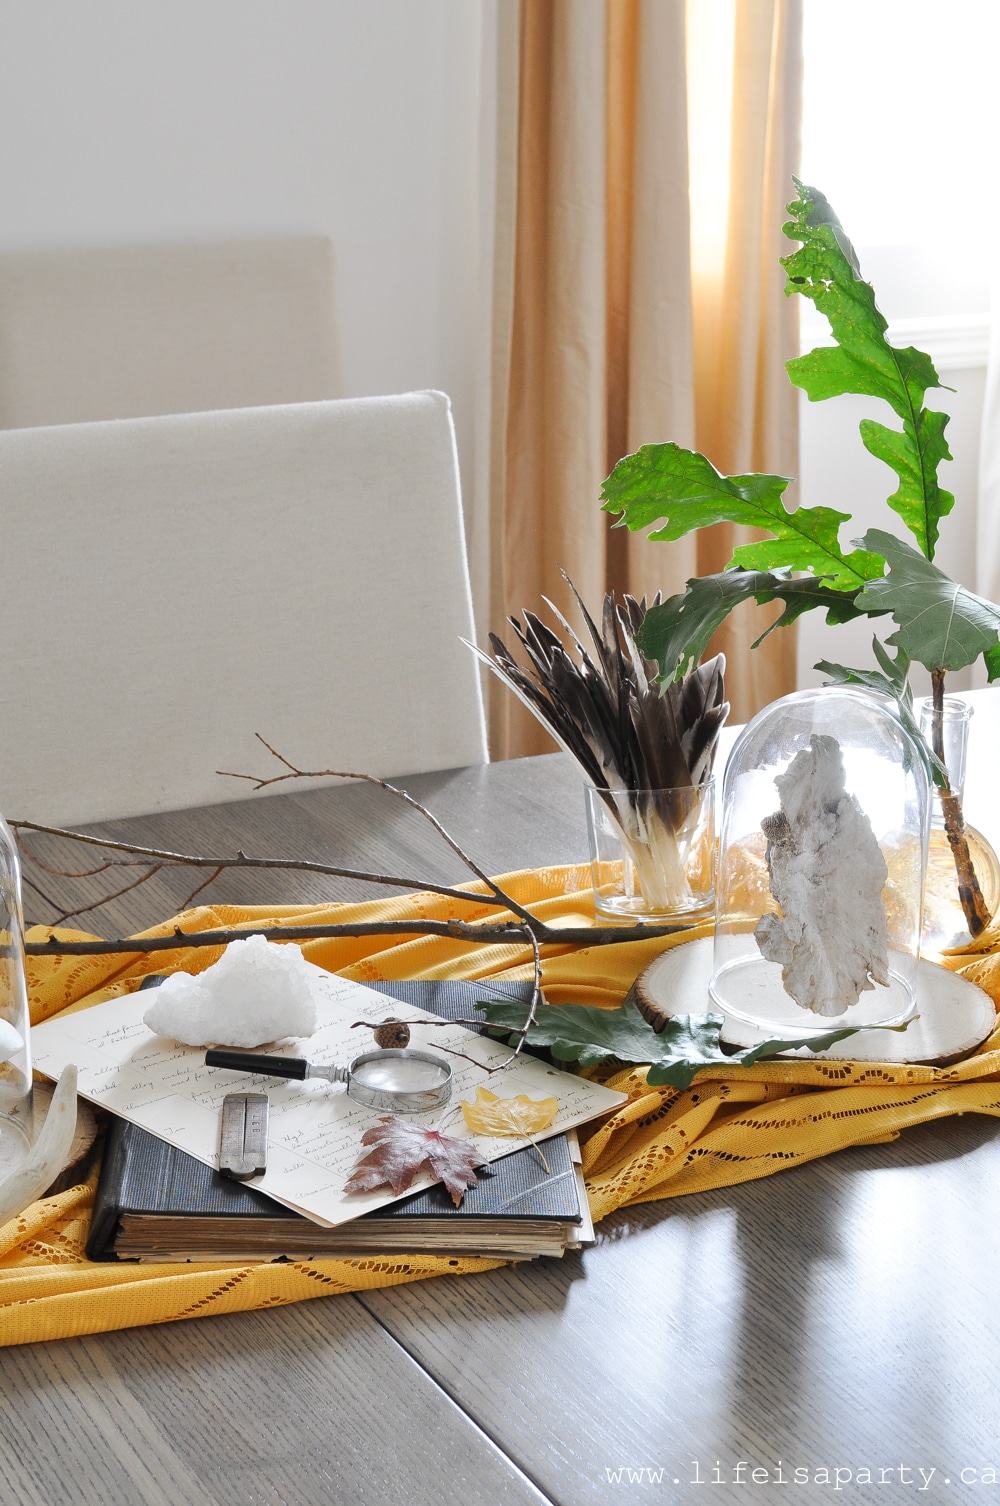
 One of my favourites on the table is this vintage microscope, found on kijiji by my sweet sister who knew I was looking for one to add to my science vibe last year.
 And a new addition to the collection -this old notebook. I found it in an old box at an antique fair this weekend -you might have seen it in my
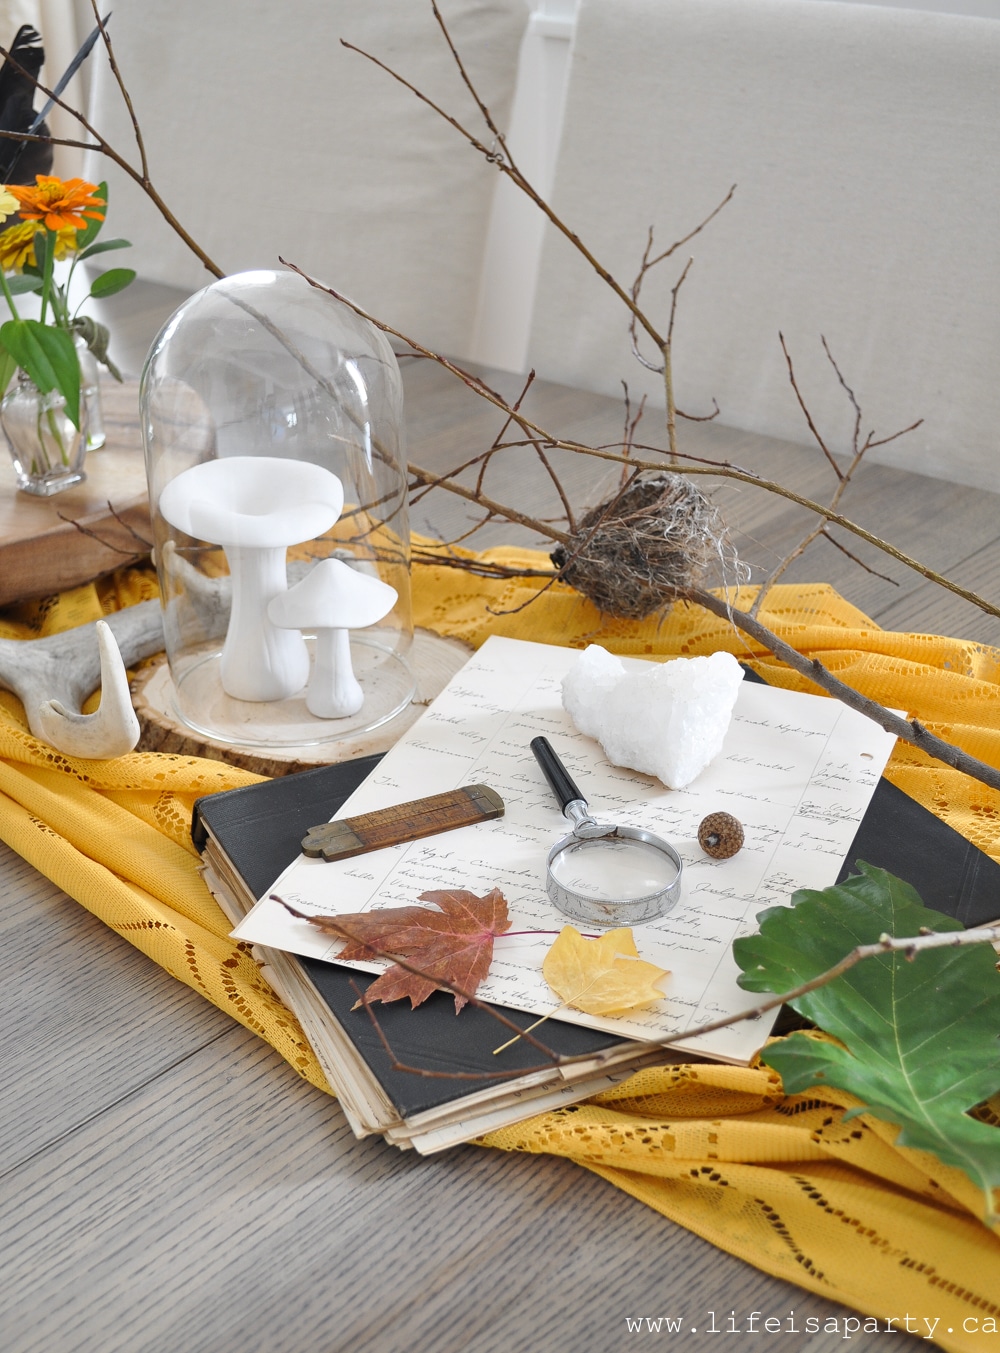
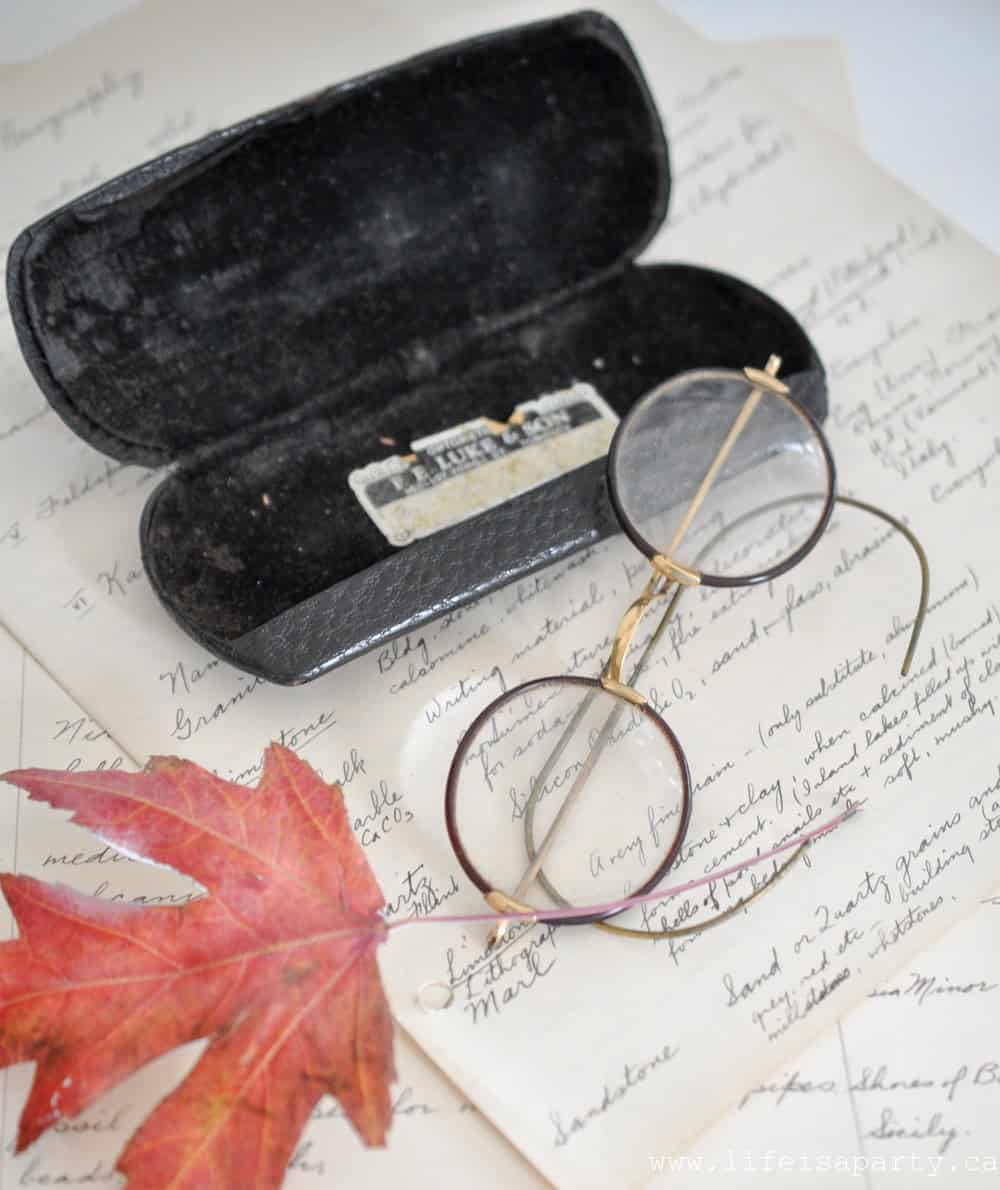
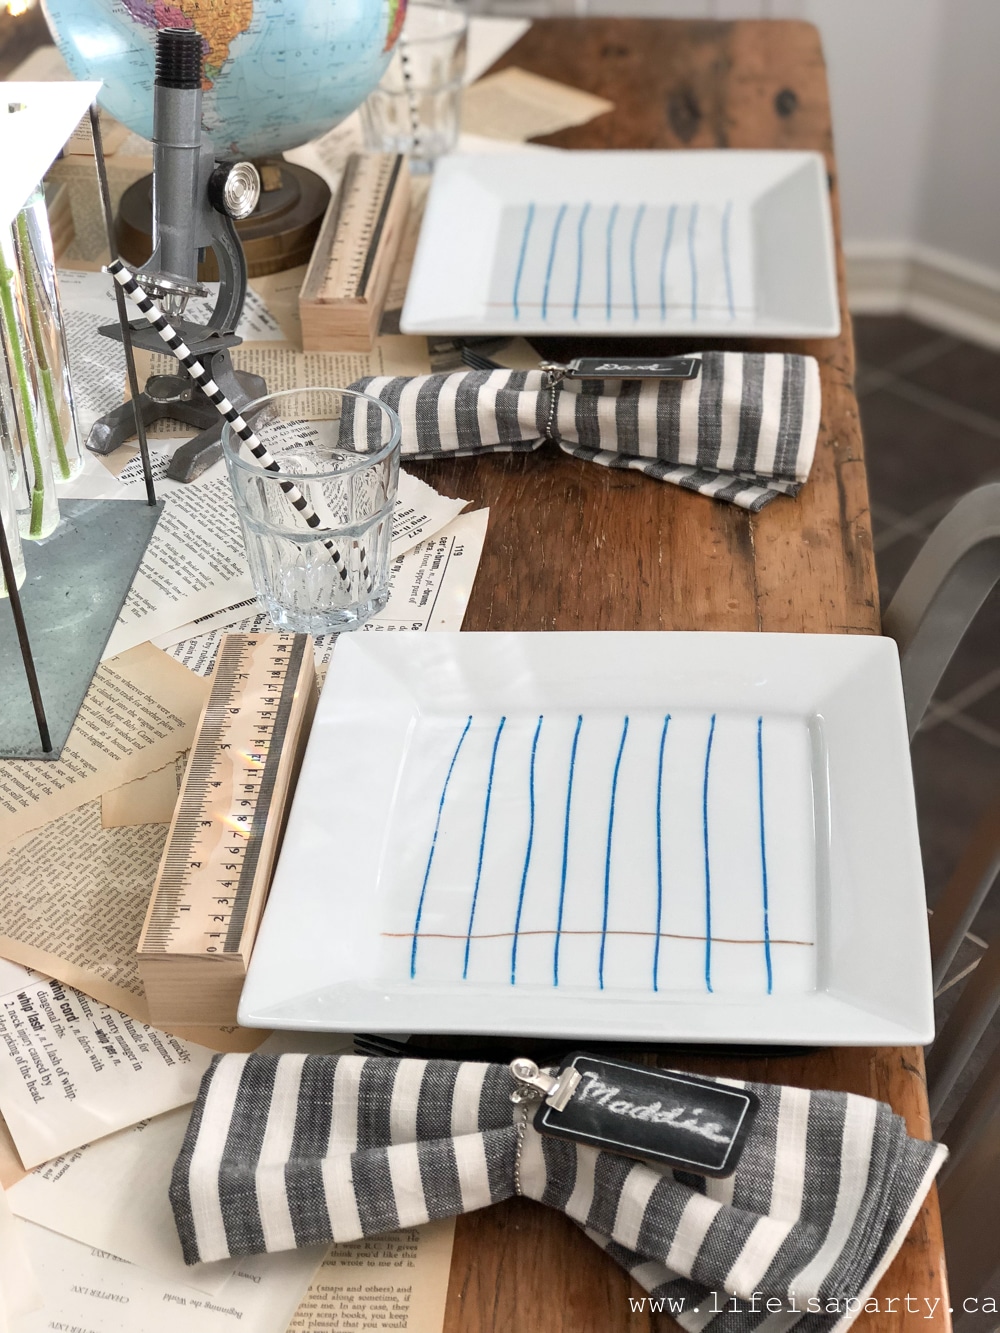
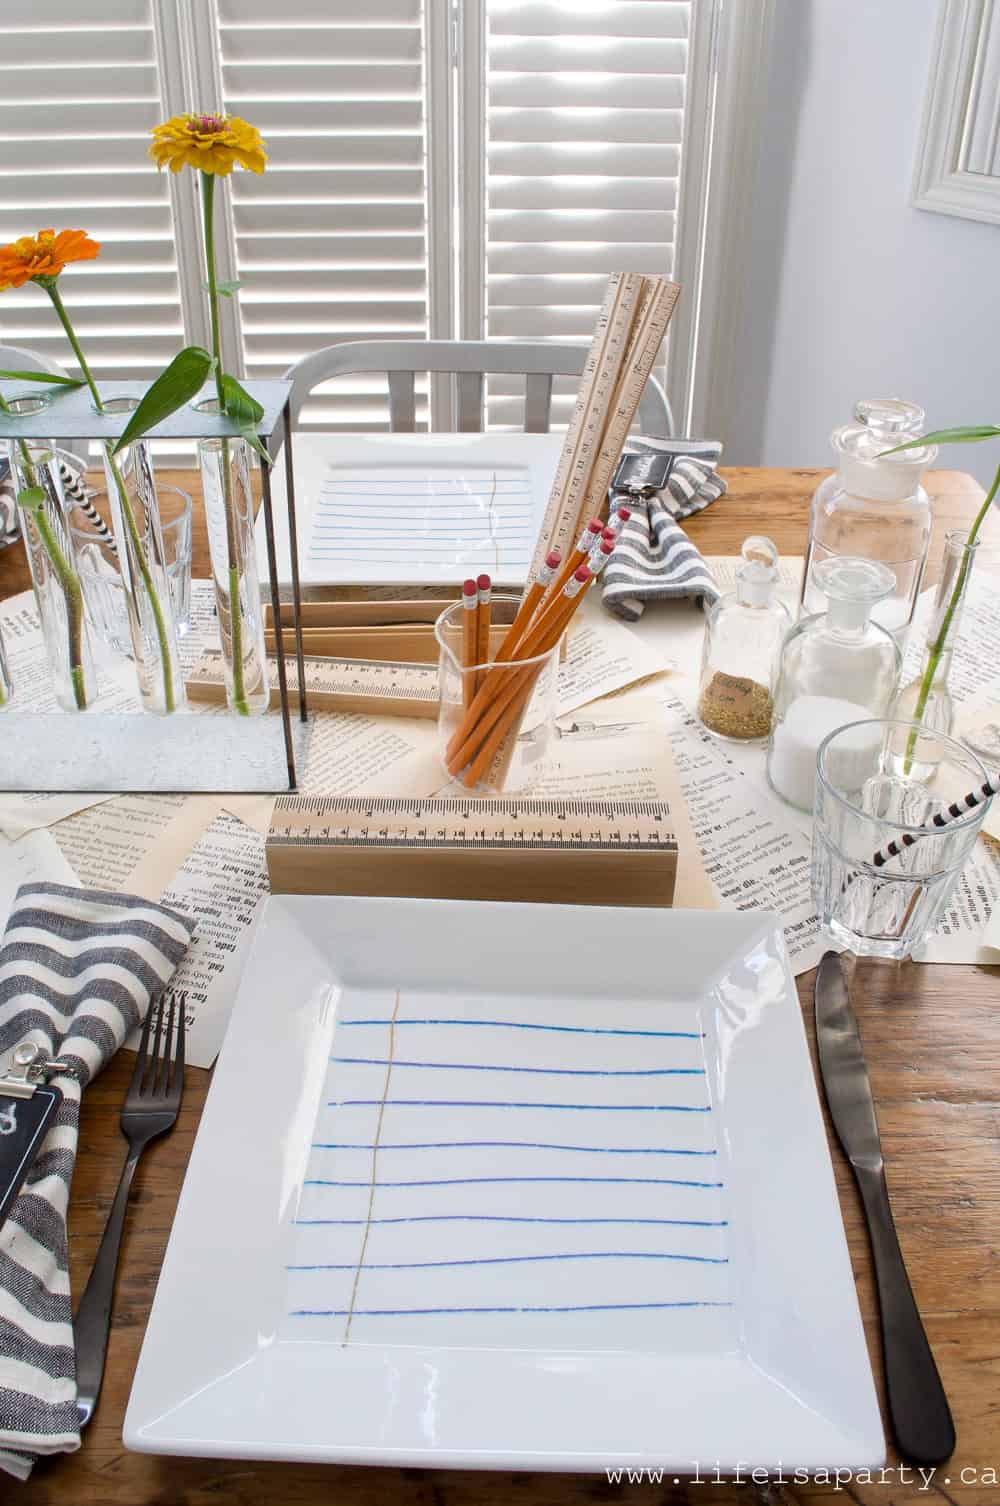
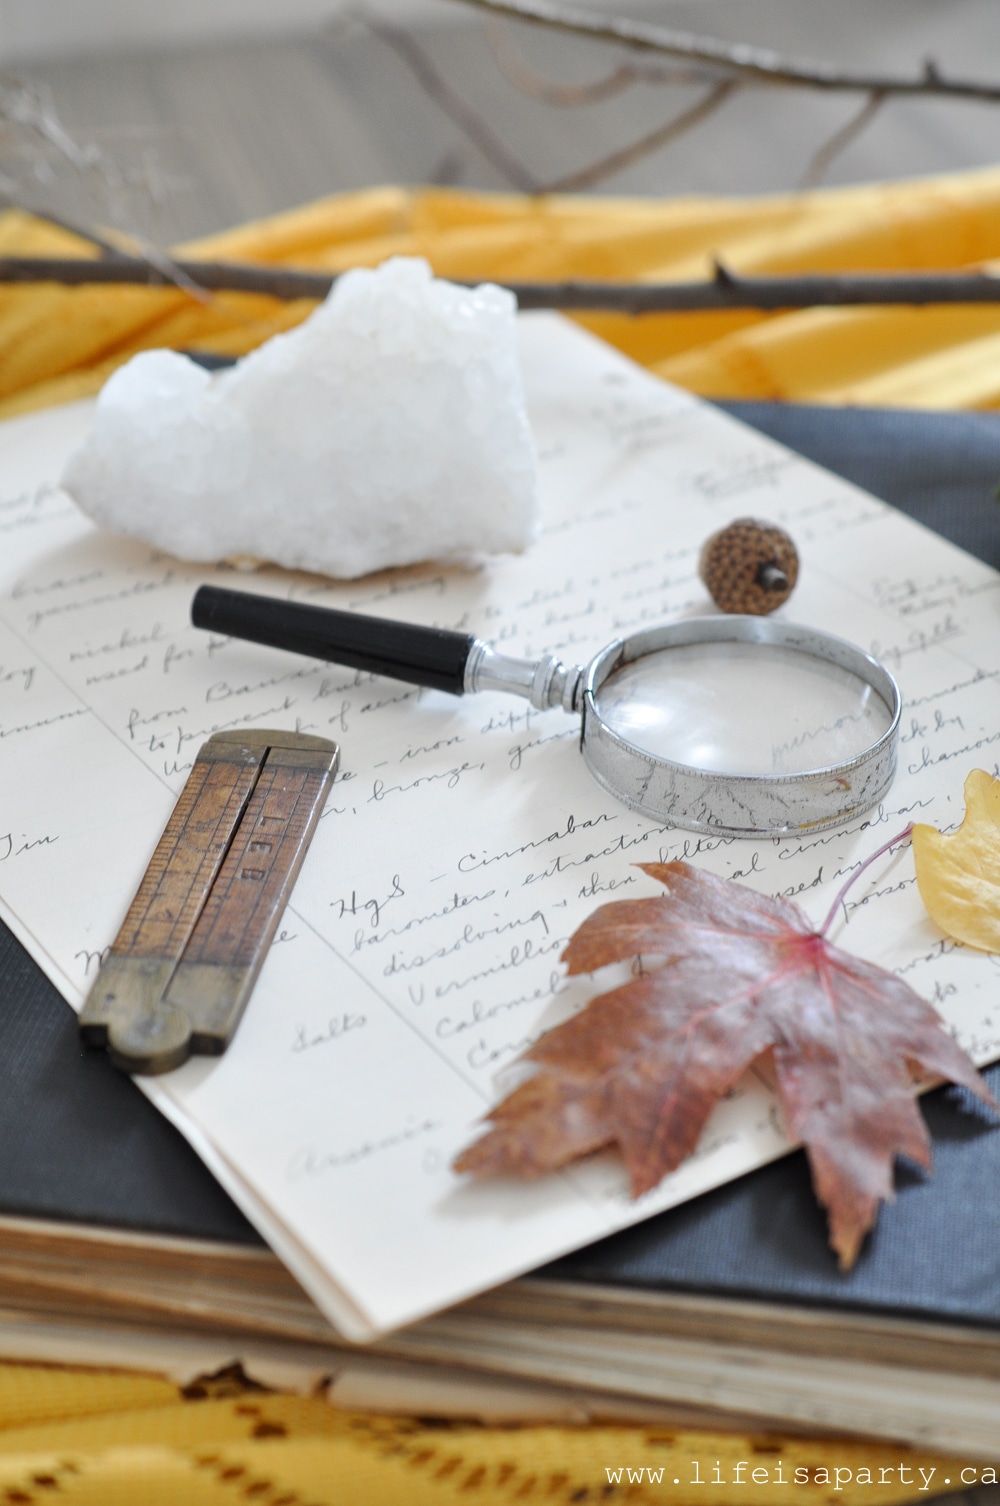 I think she's been examining leaves and seeds with her magnifying glass, and measuring them with her little fold away ruler. 😉
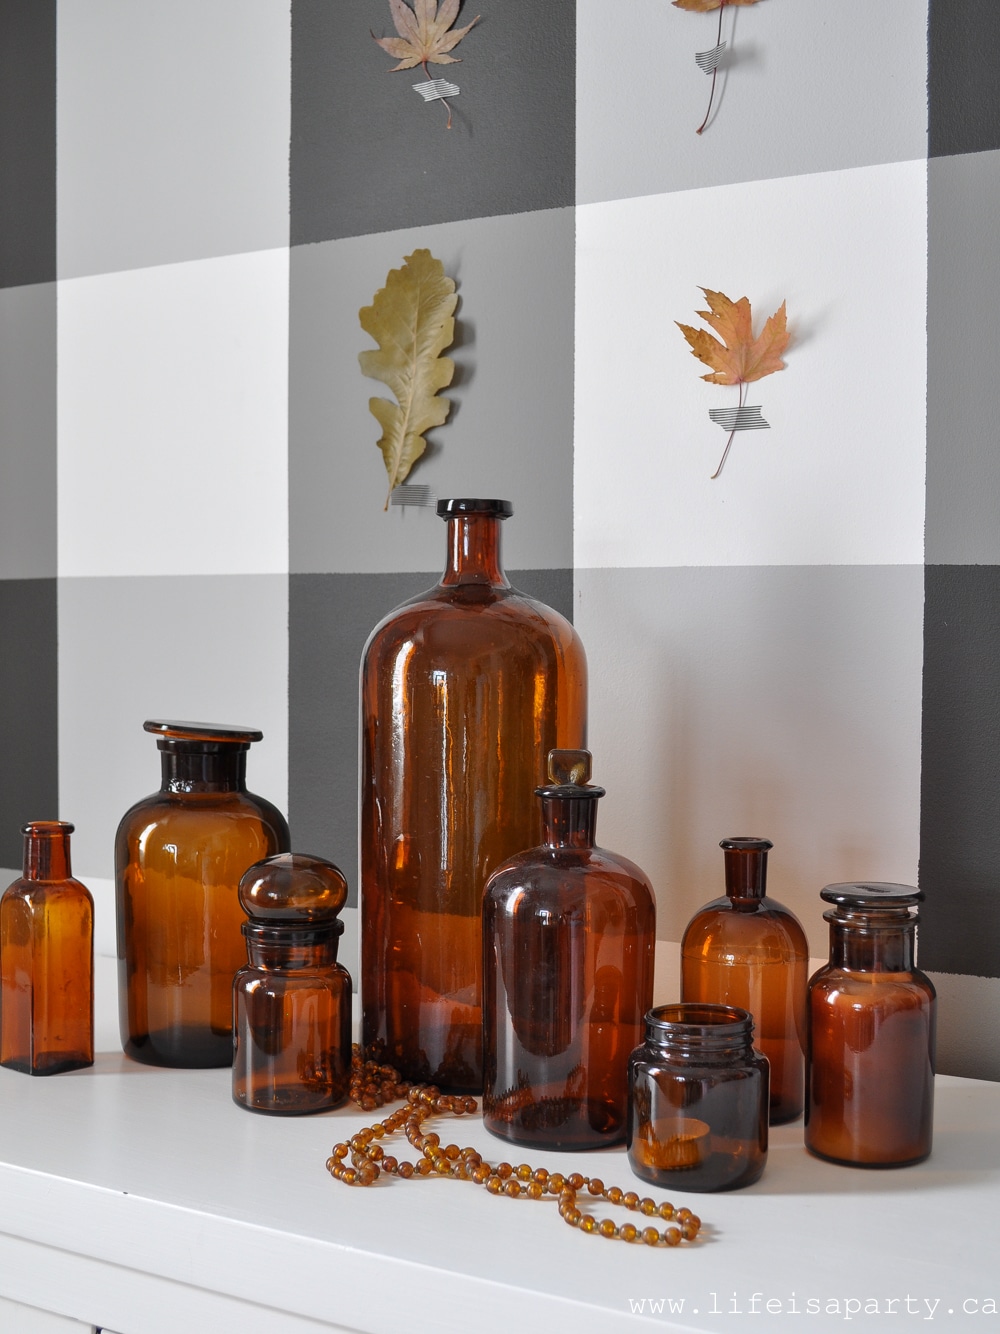
 Leaf Specimen Wall
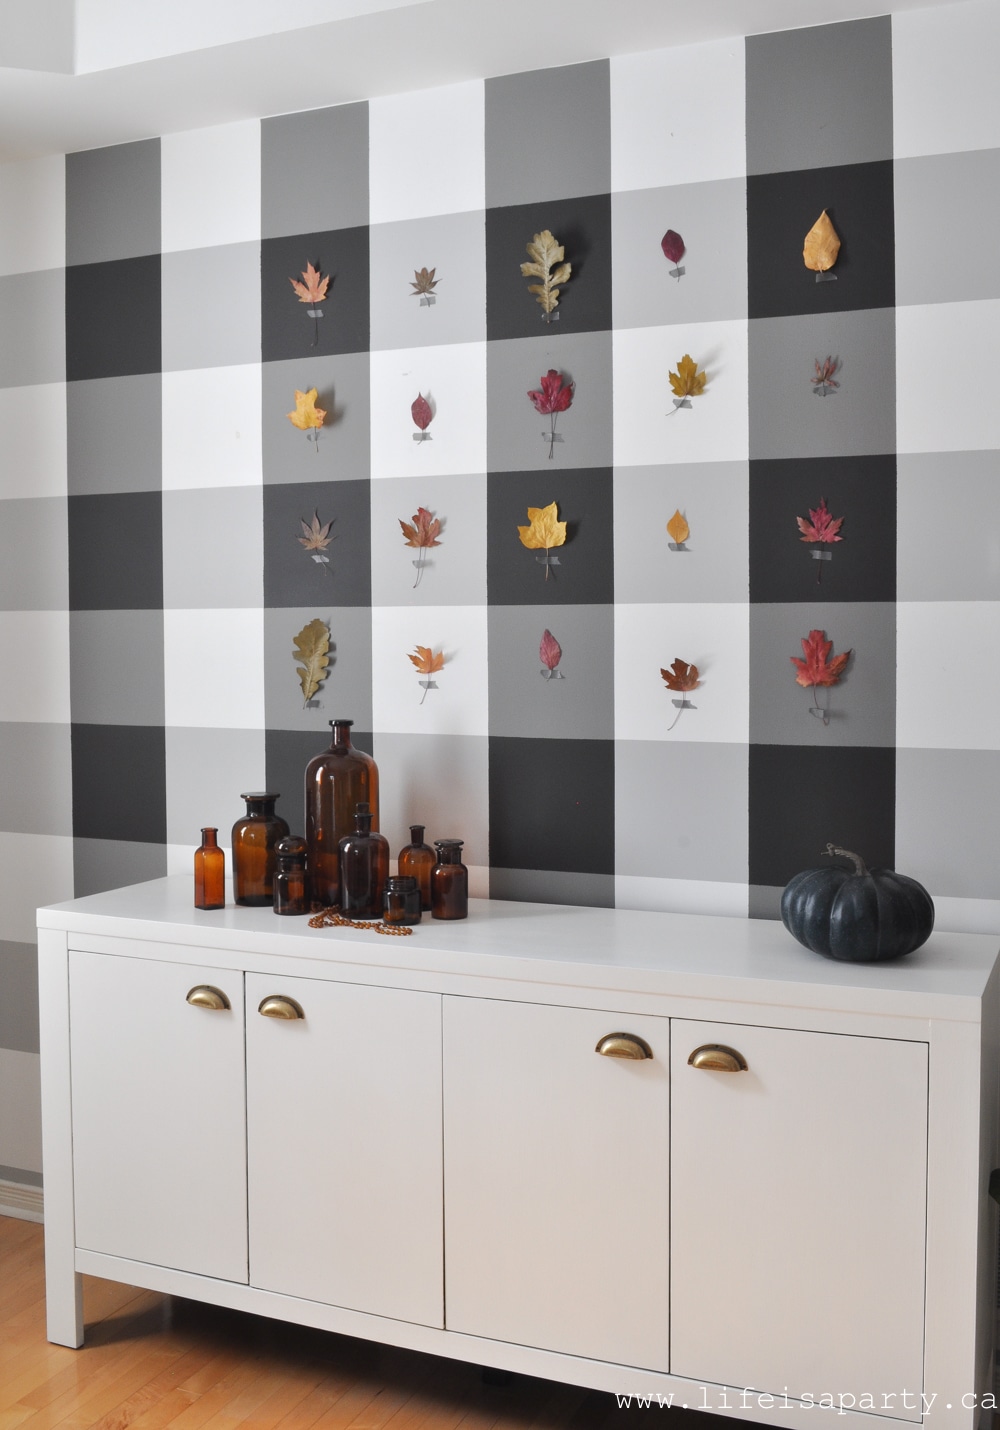 These pretty leaves are taped up with little washi tape and the heavier ones have a straight pin holding them up.
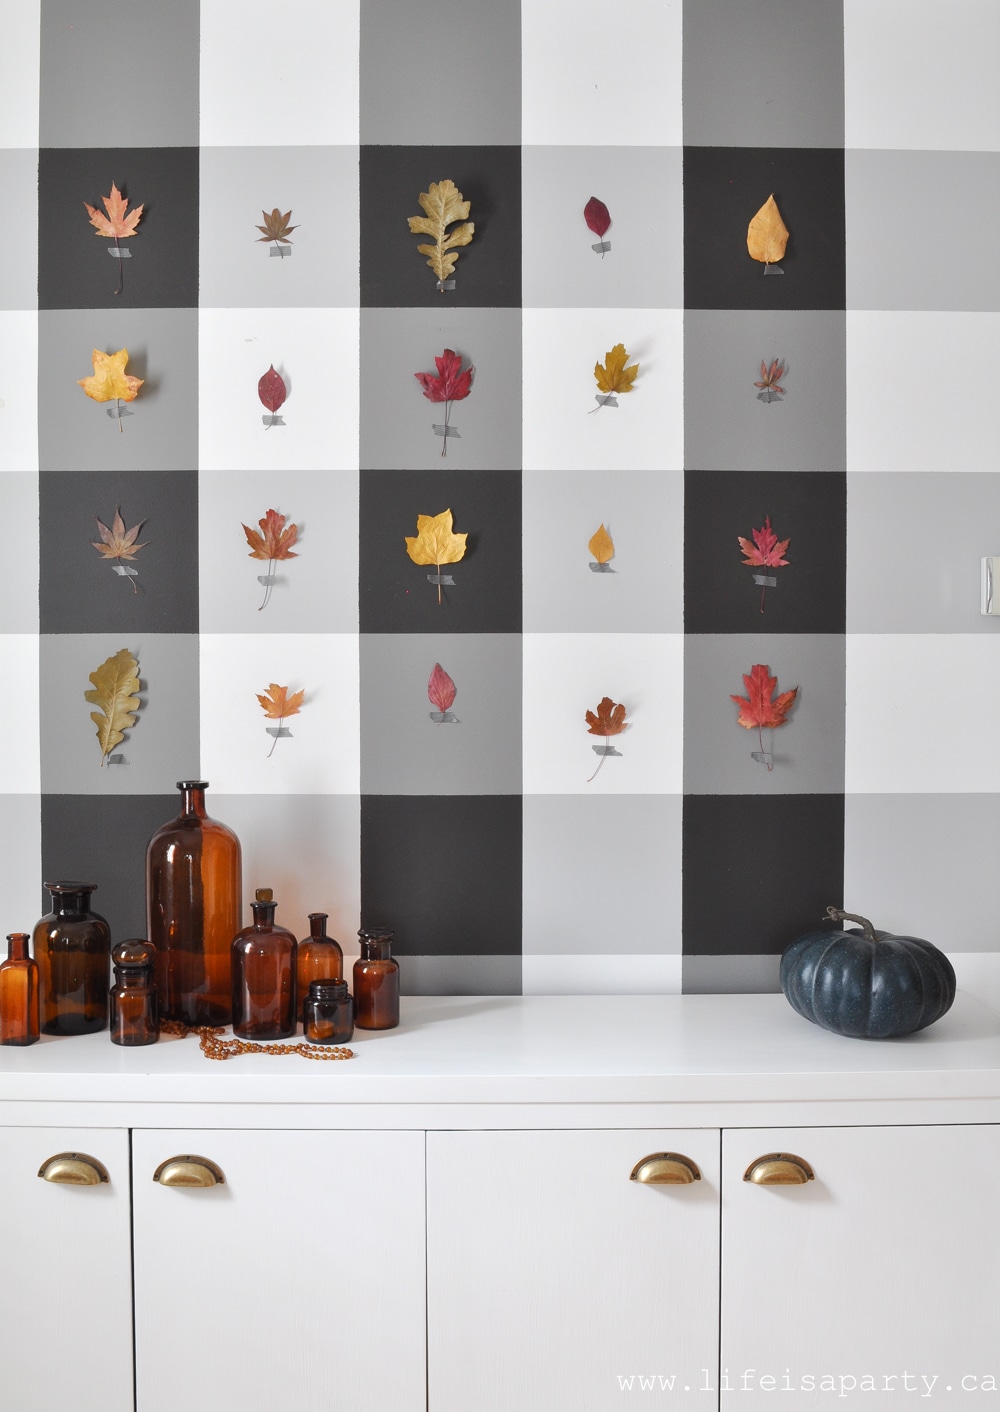 I love how it turned out.
 Amber Glass Collection
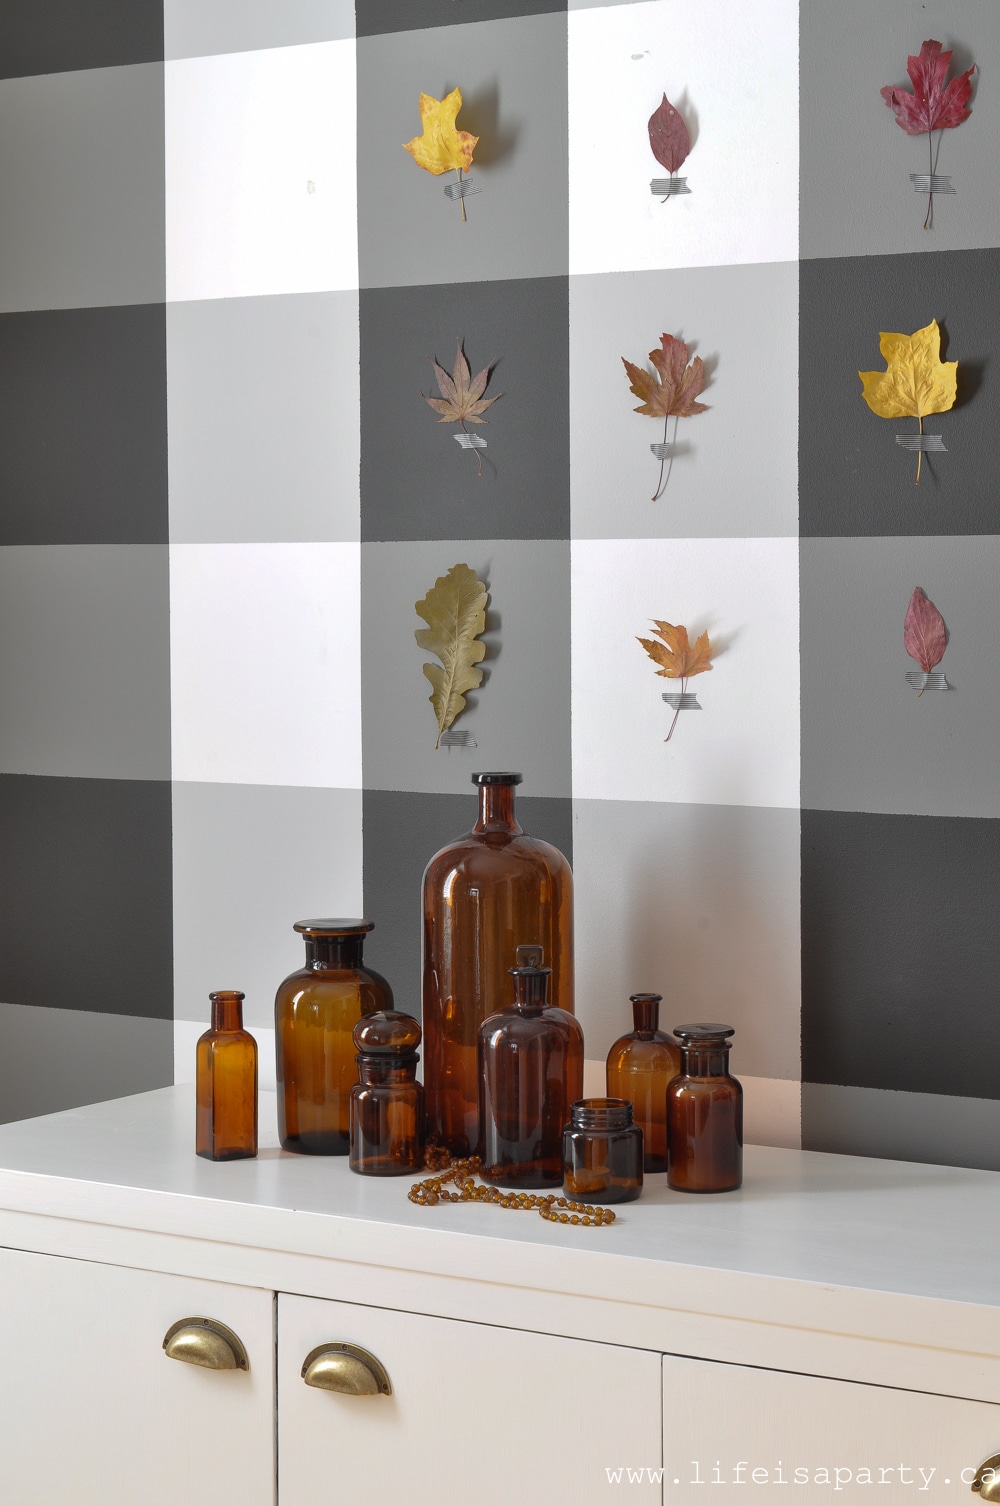
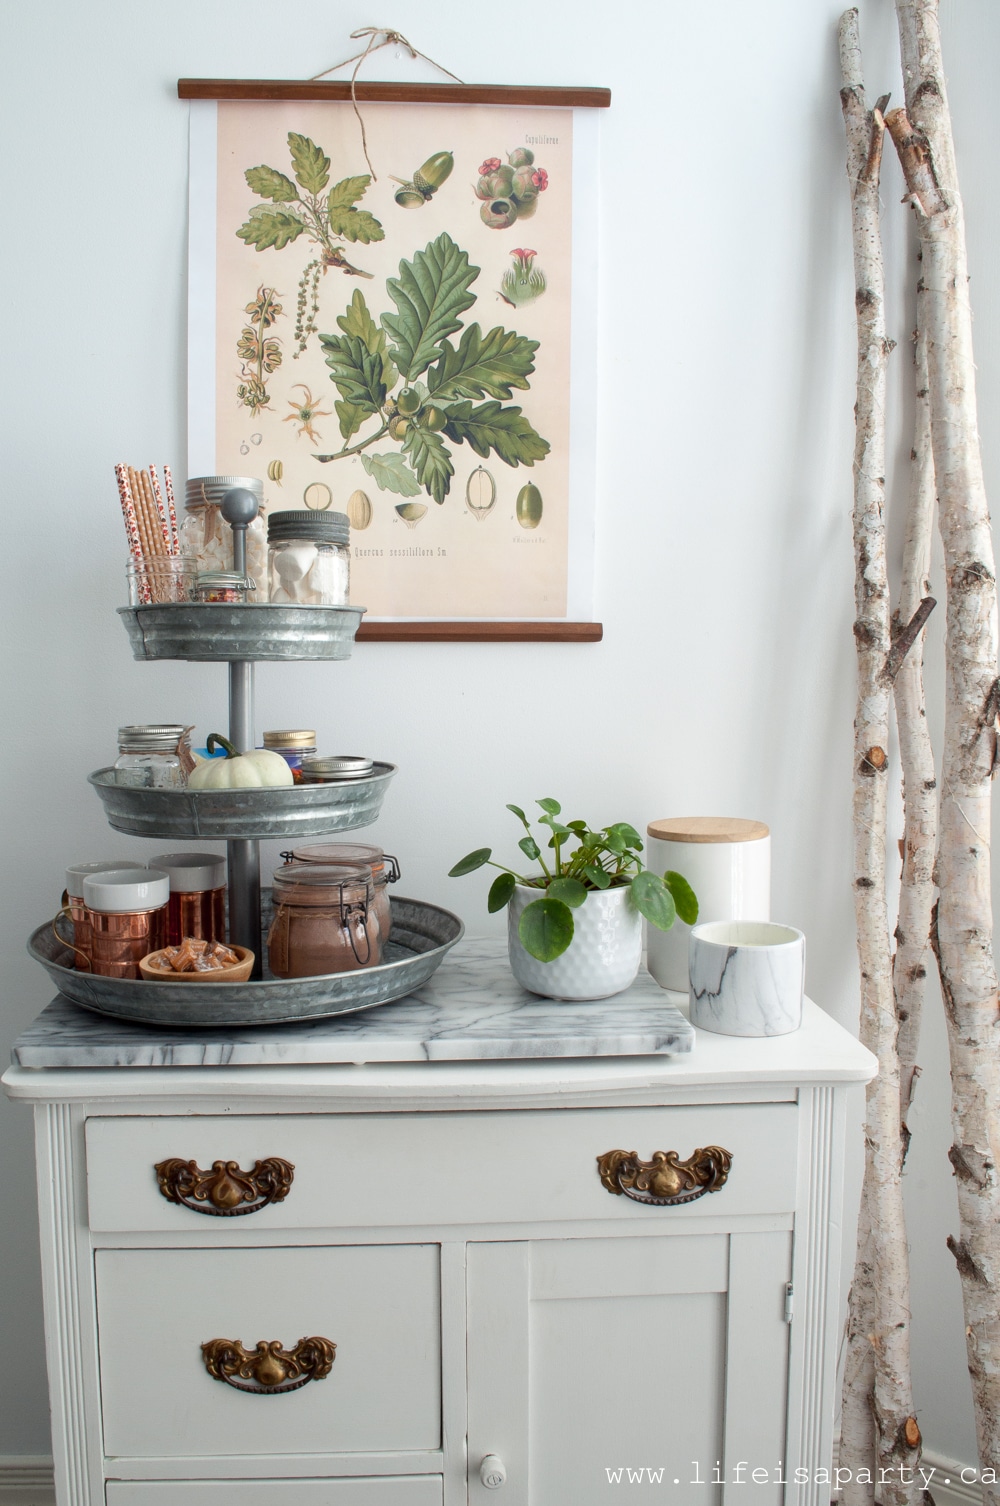
 Fall Bar Cart
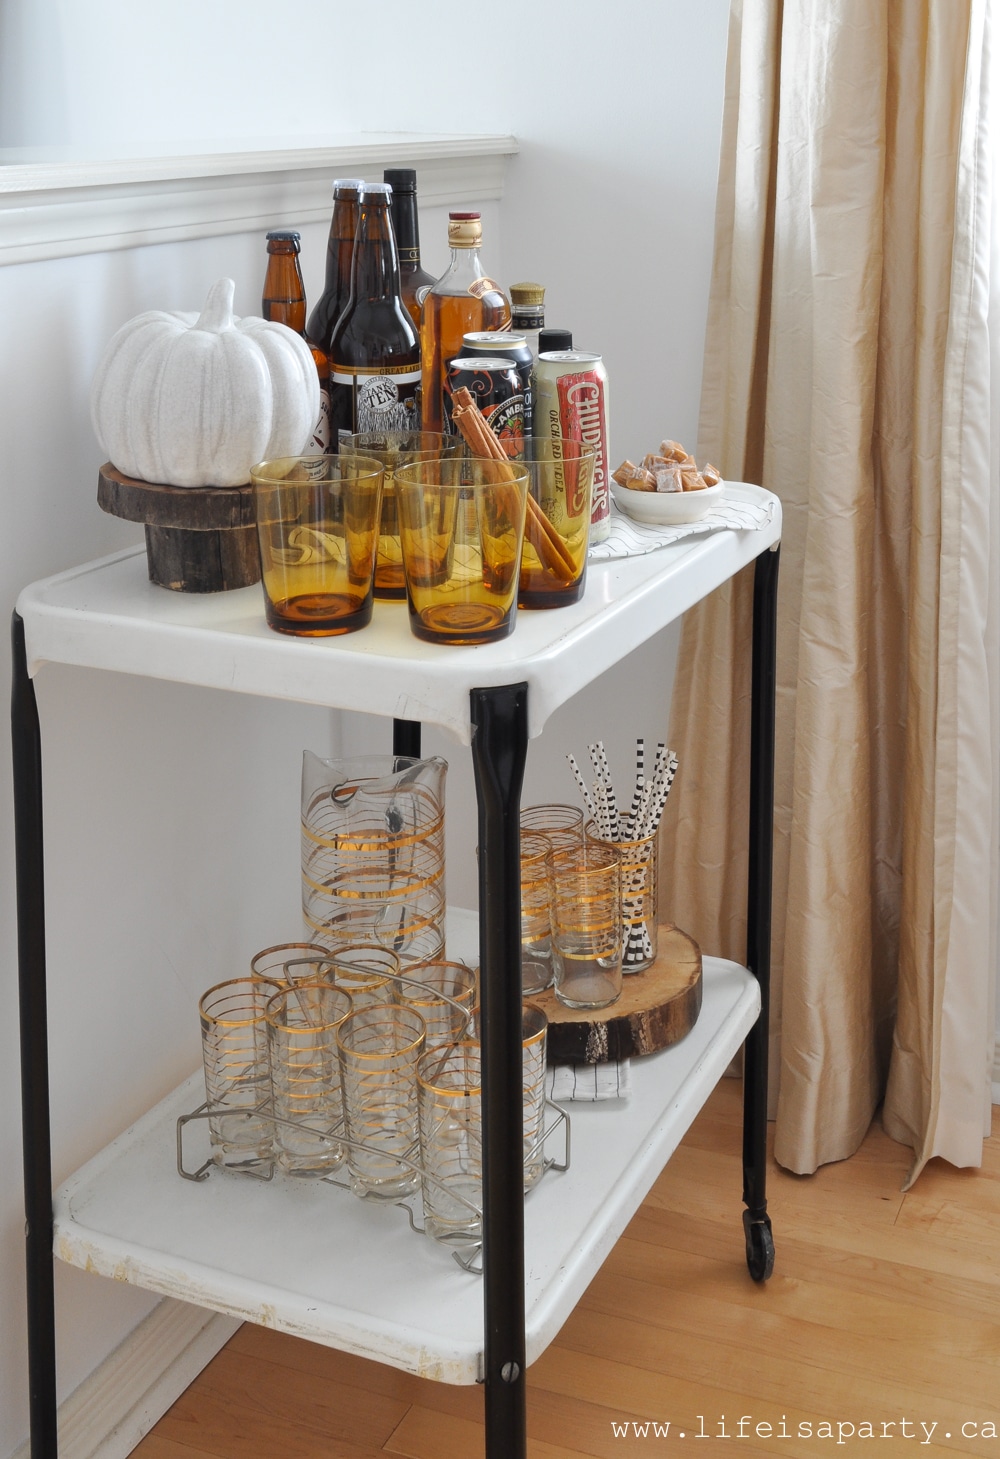 I added a little more mustard yellow with these pretty amber glasses. And on the lower shelf, there's a whole collection of vintage glasses.
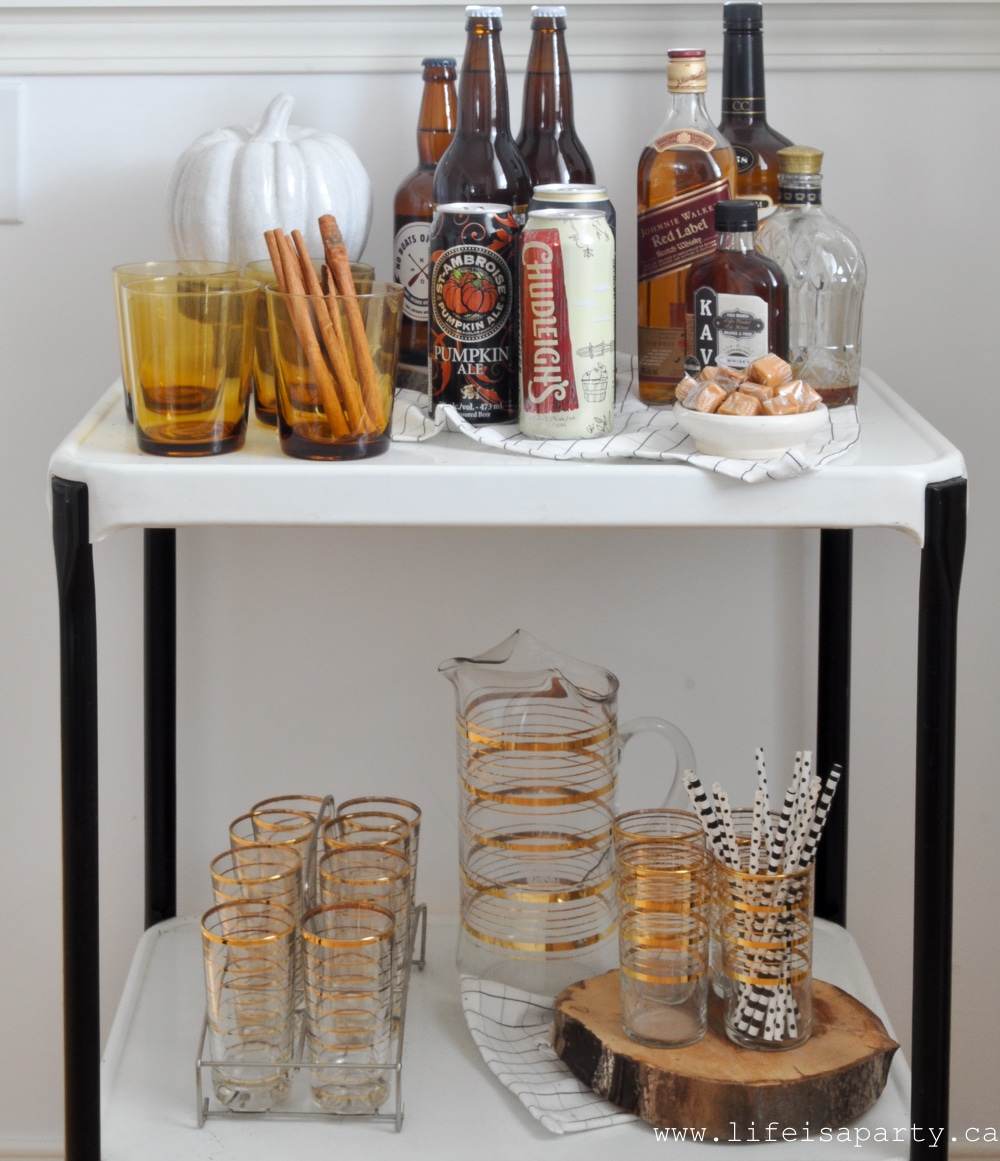 I thought it would be fun to add in some special drinks for fall.
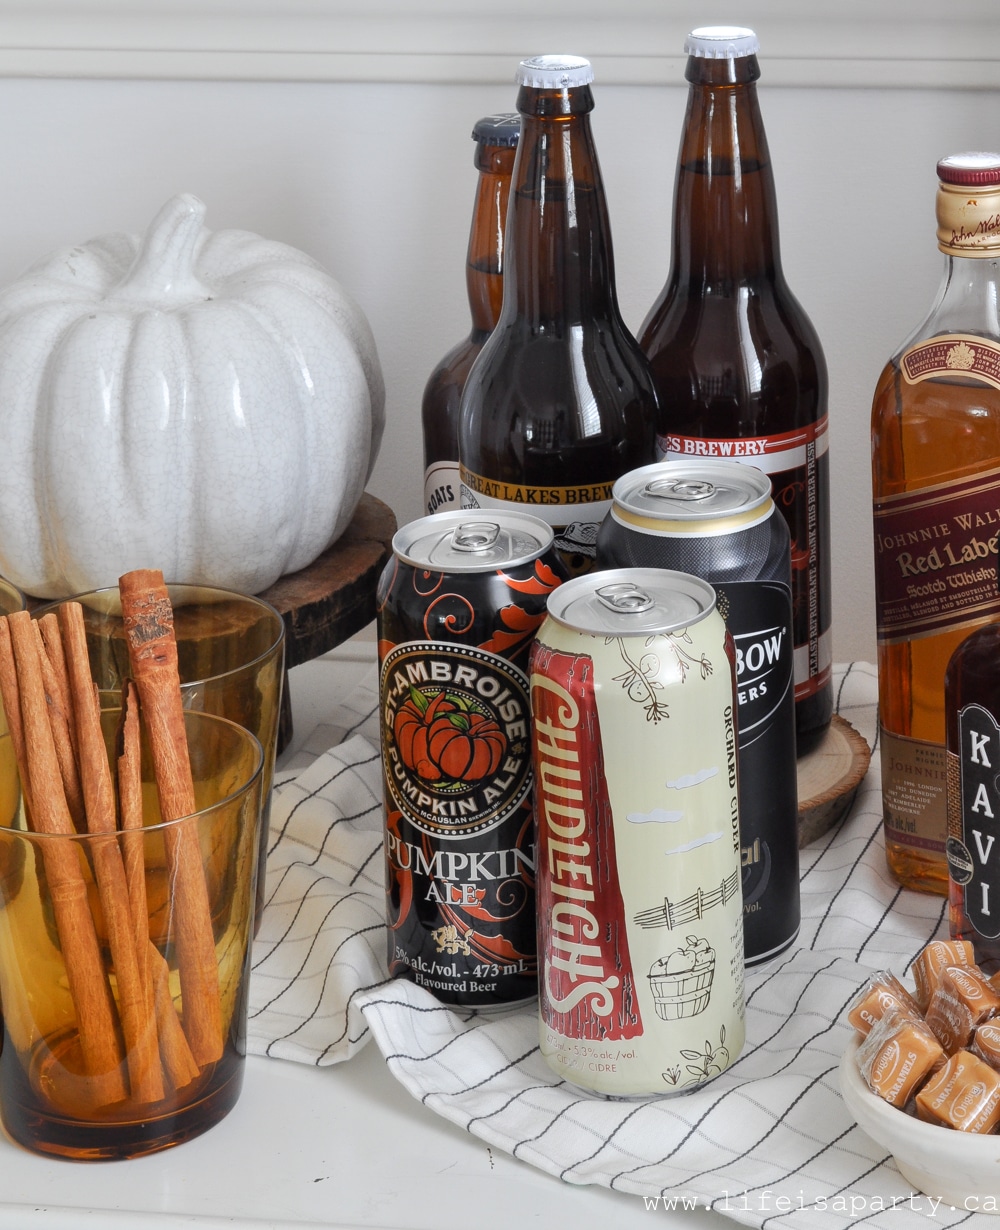
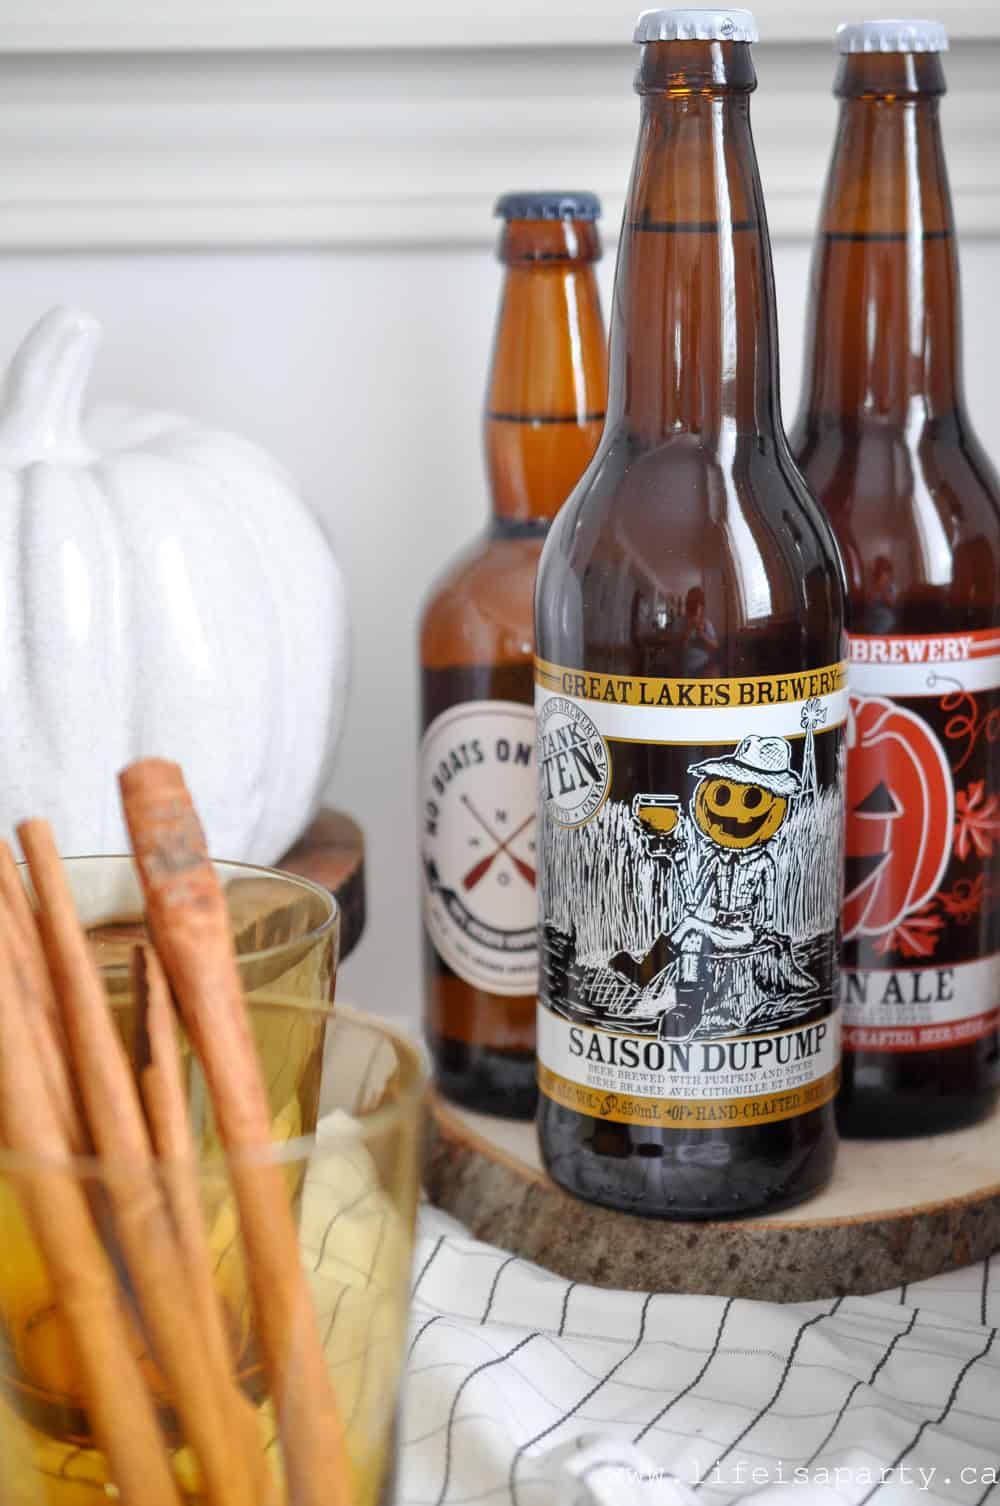
 And just because cool fall nights might need a little warming up, a selection of whiskey too.
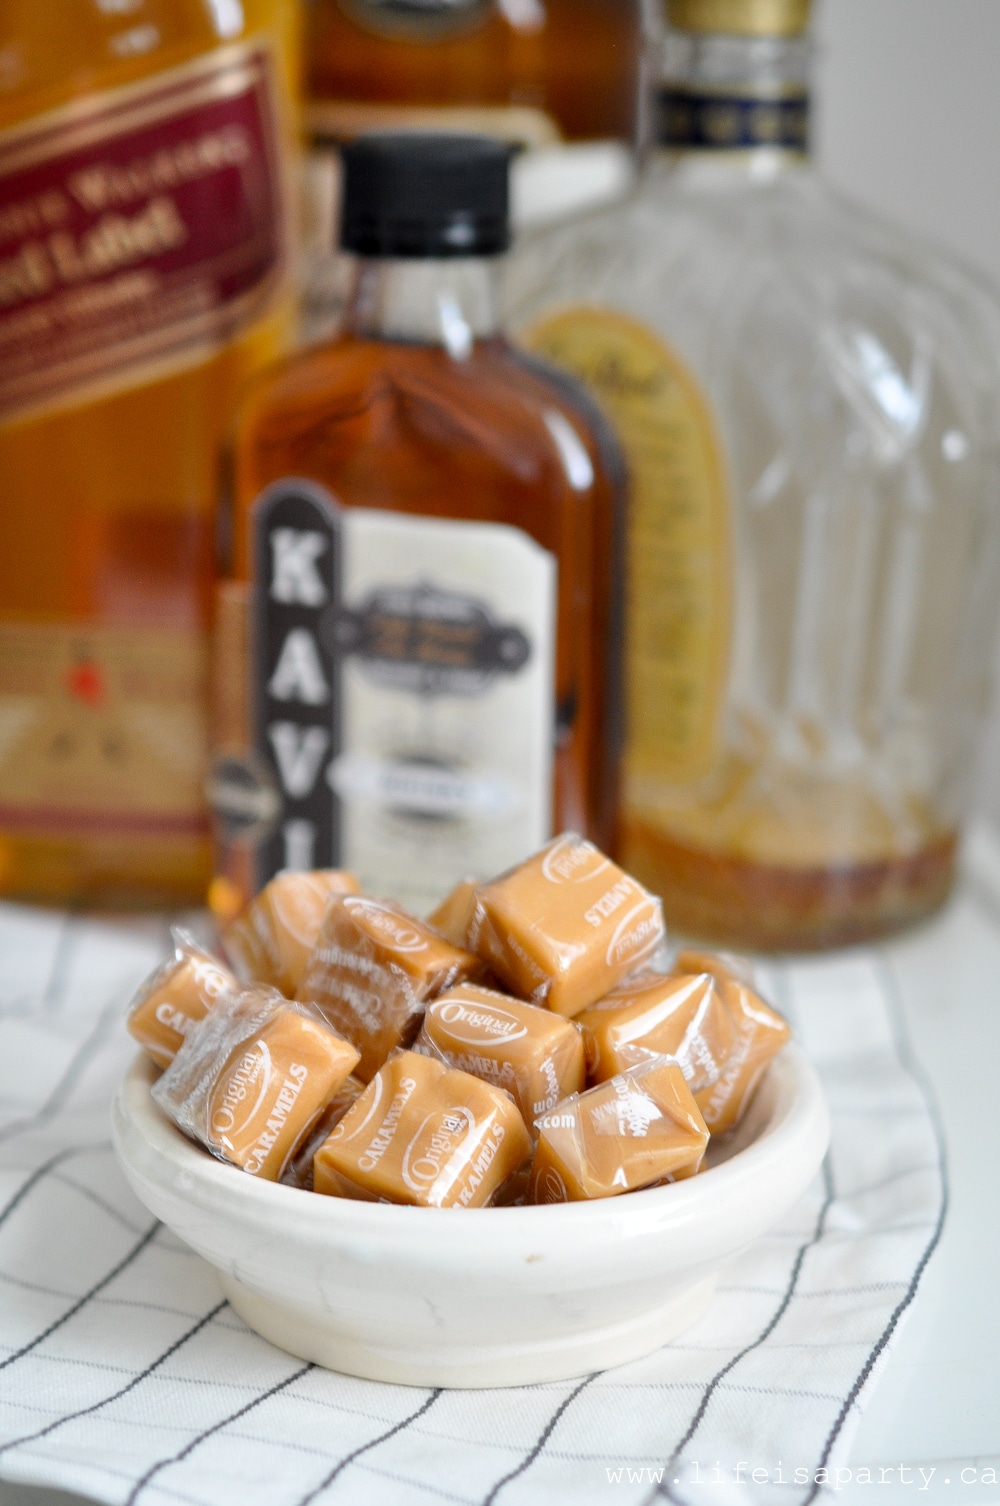 From the dining room we head into the living room.
 The Stairs
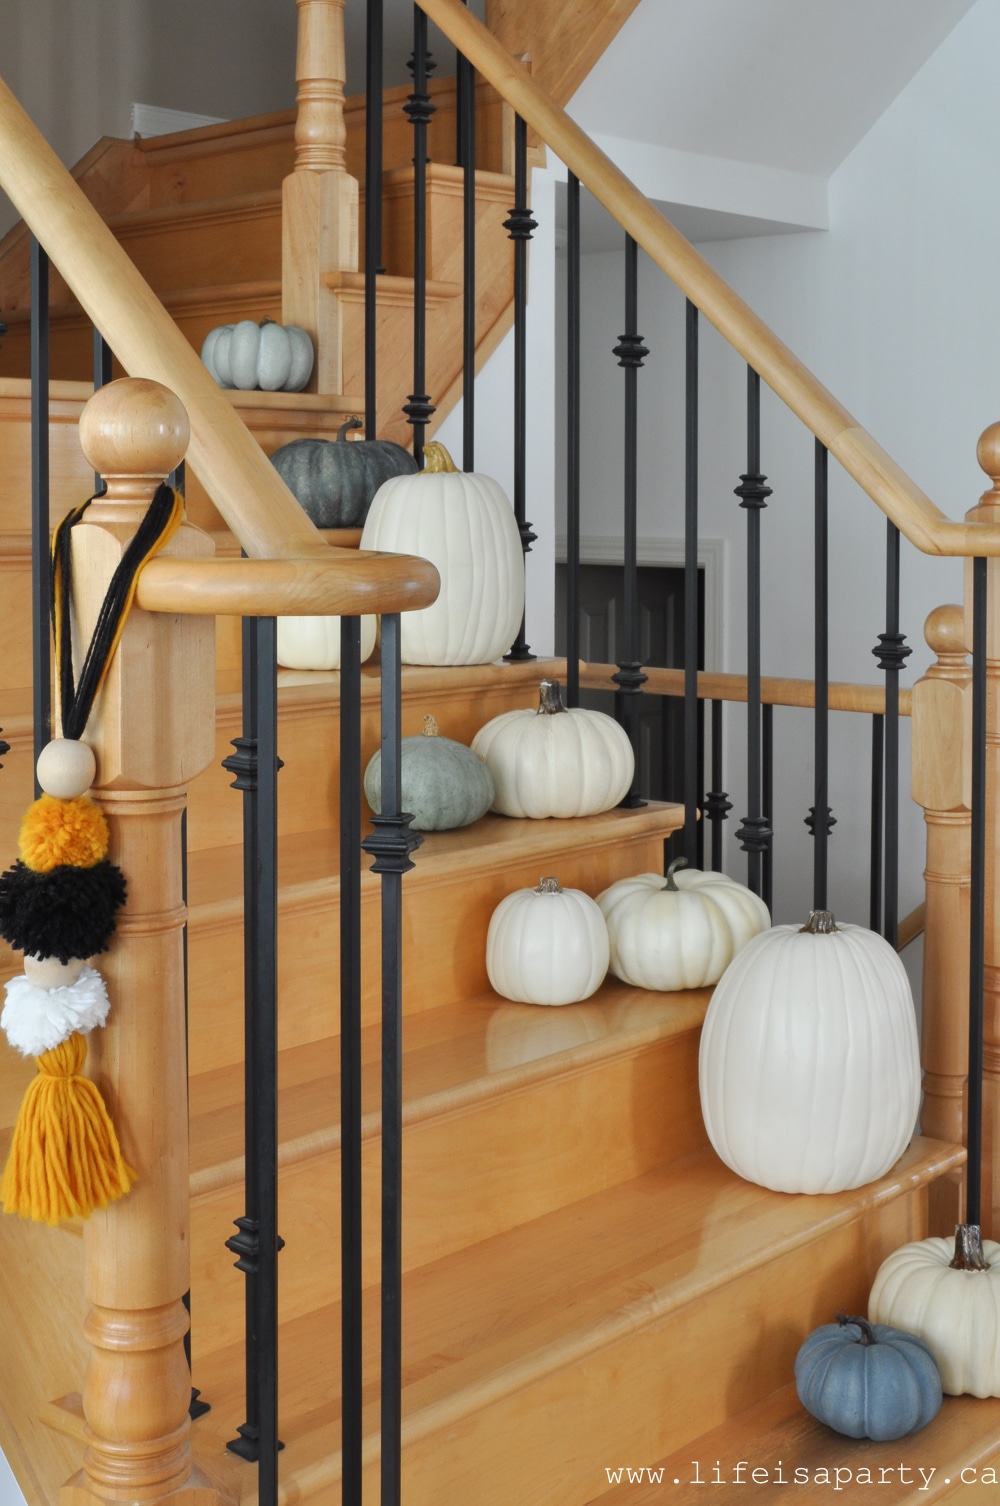 At the bottom of the stairs, a spot for a little table and a bowl of mini pumpkins and gourds. "Hello Gourd-geous" indeed.
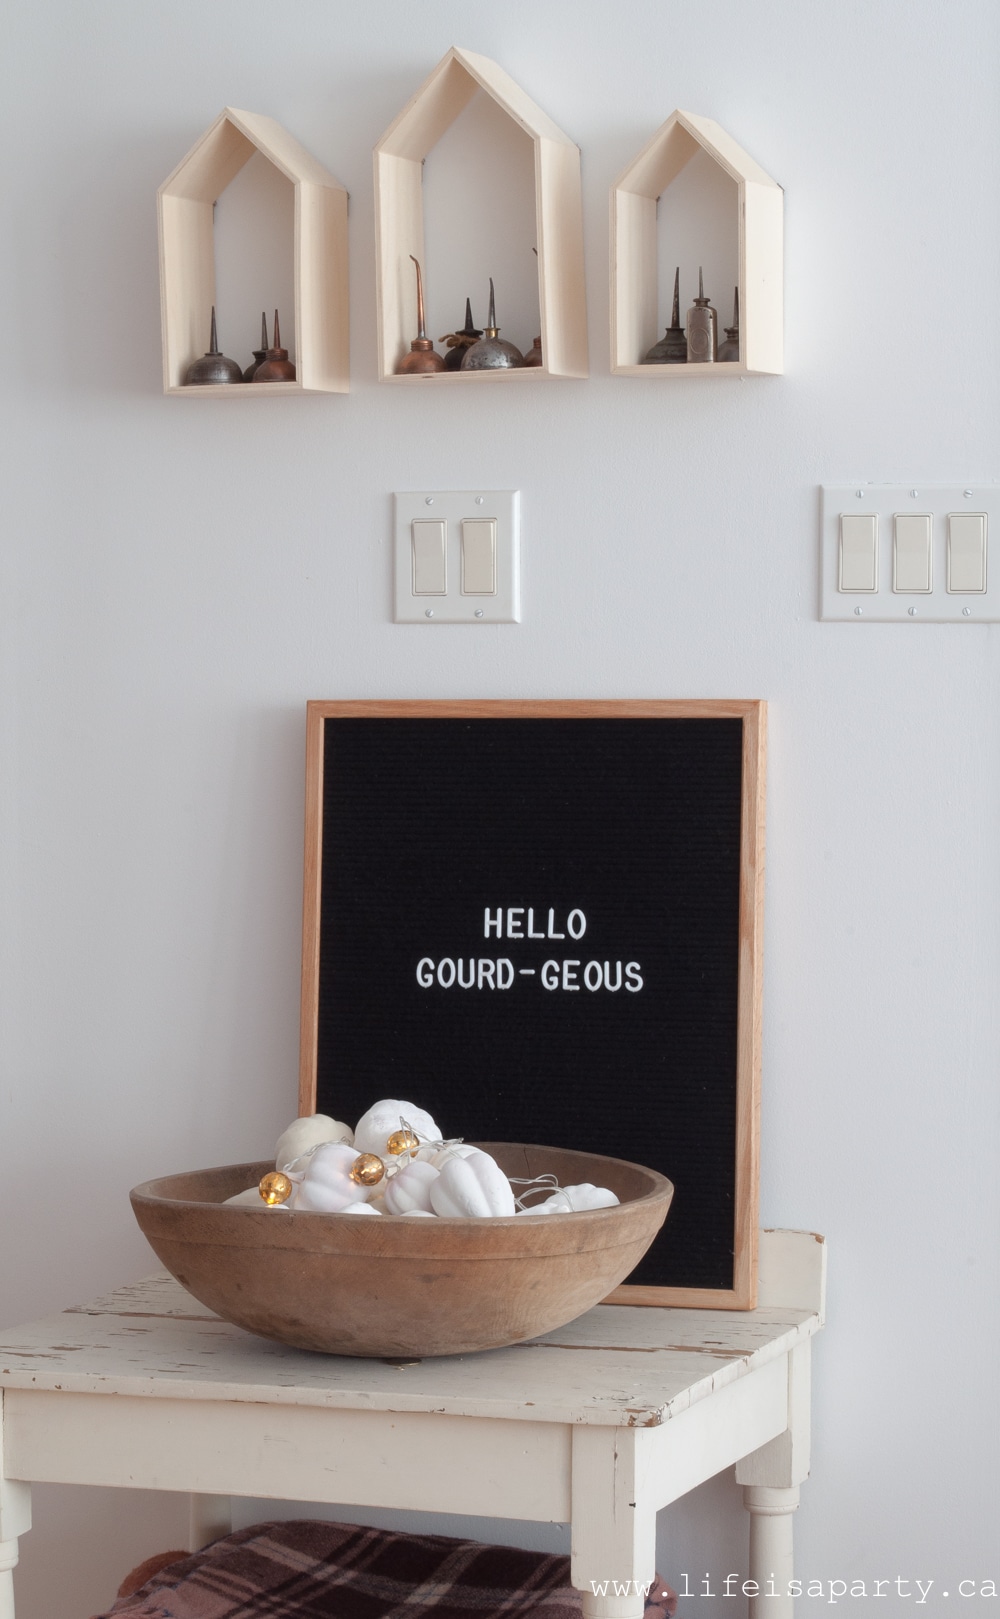
 It really doesn't take too much of an accent colour to make a big impact. I made the tassel swag that I hung over the banister with some wool and some large wooden beads, and I love the pop of yellow and the boho vibe.
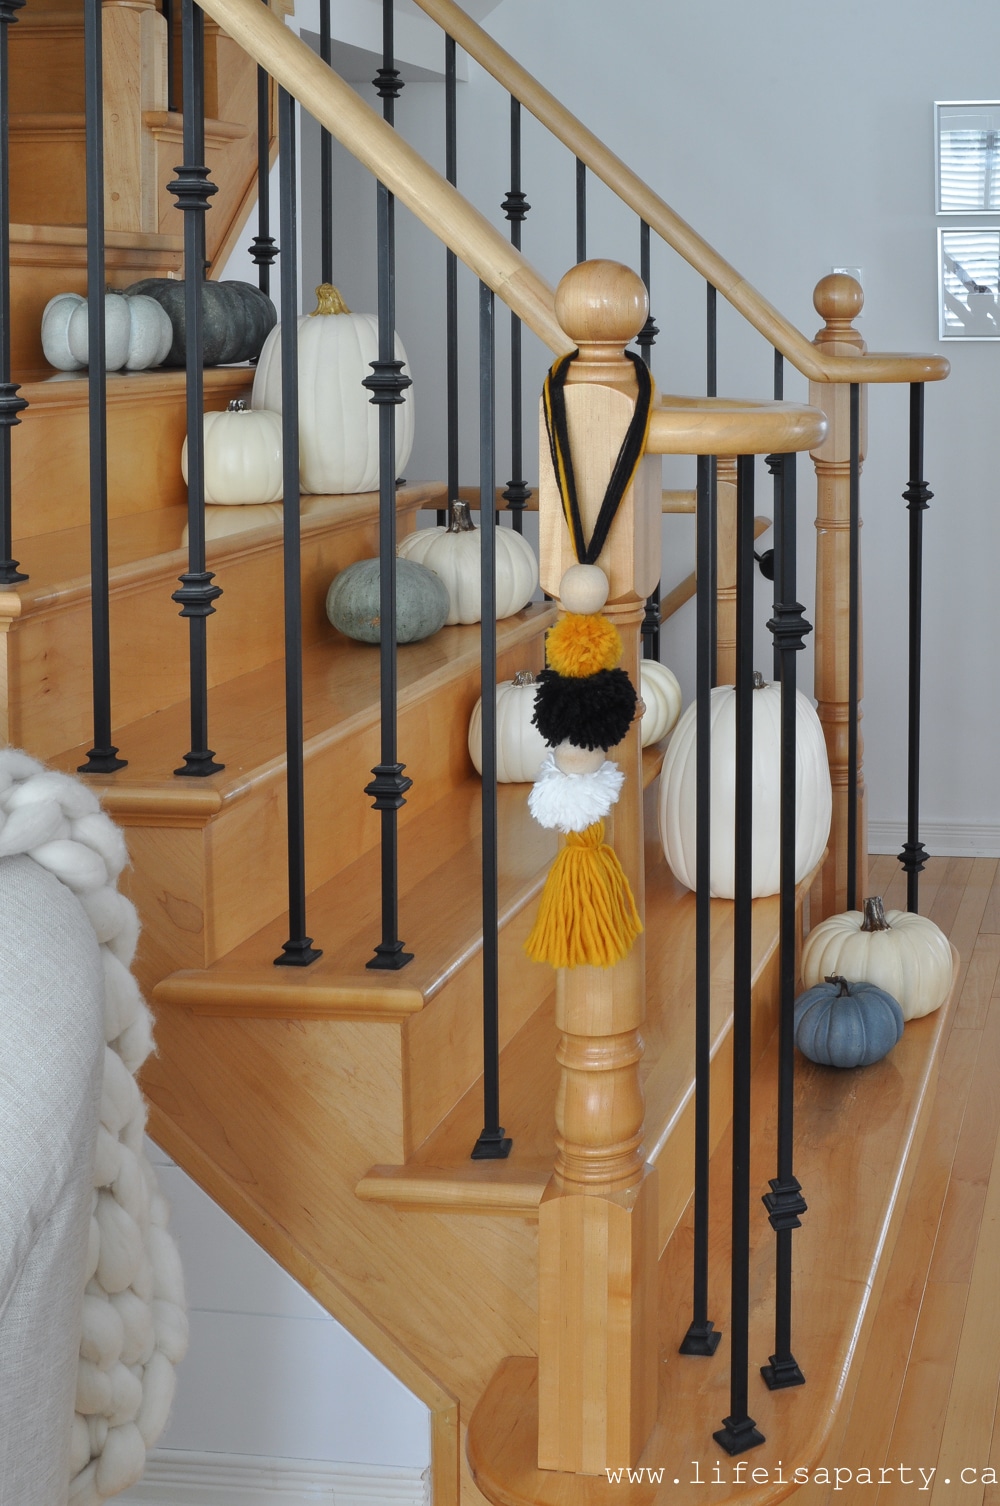 And another really easy, inexpensive way to add an accent colour for fall was painting the bottom of this pumpkin with some mustard yellow craft paint.
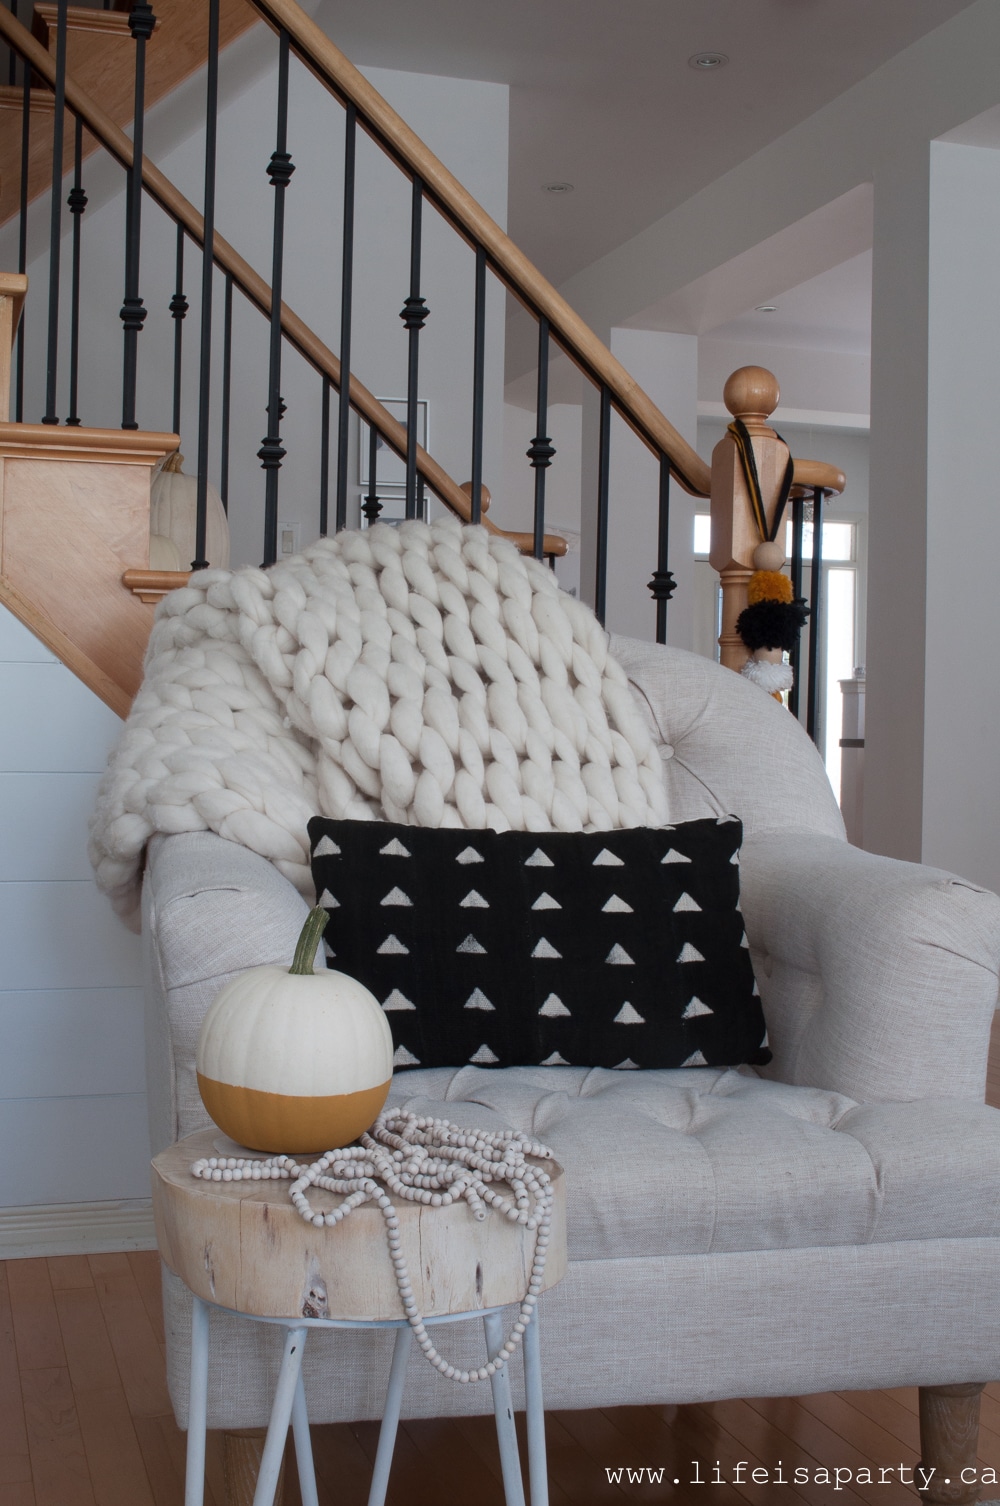 Fall Fireplace Mantel
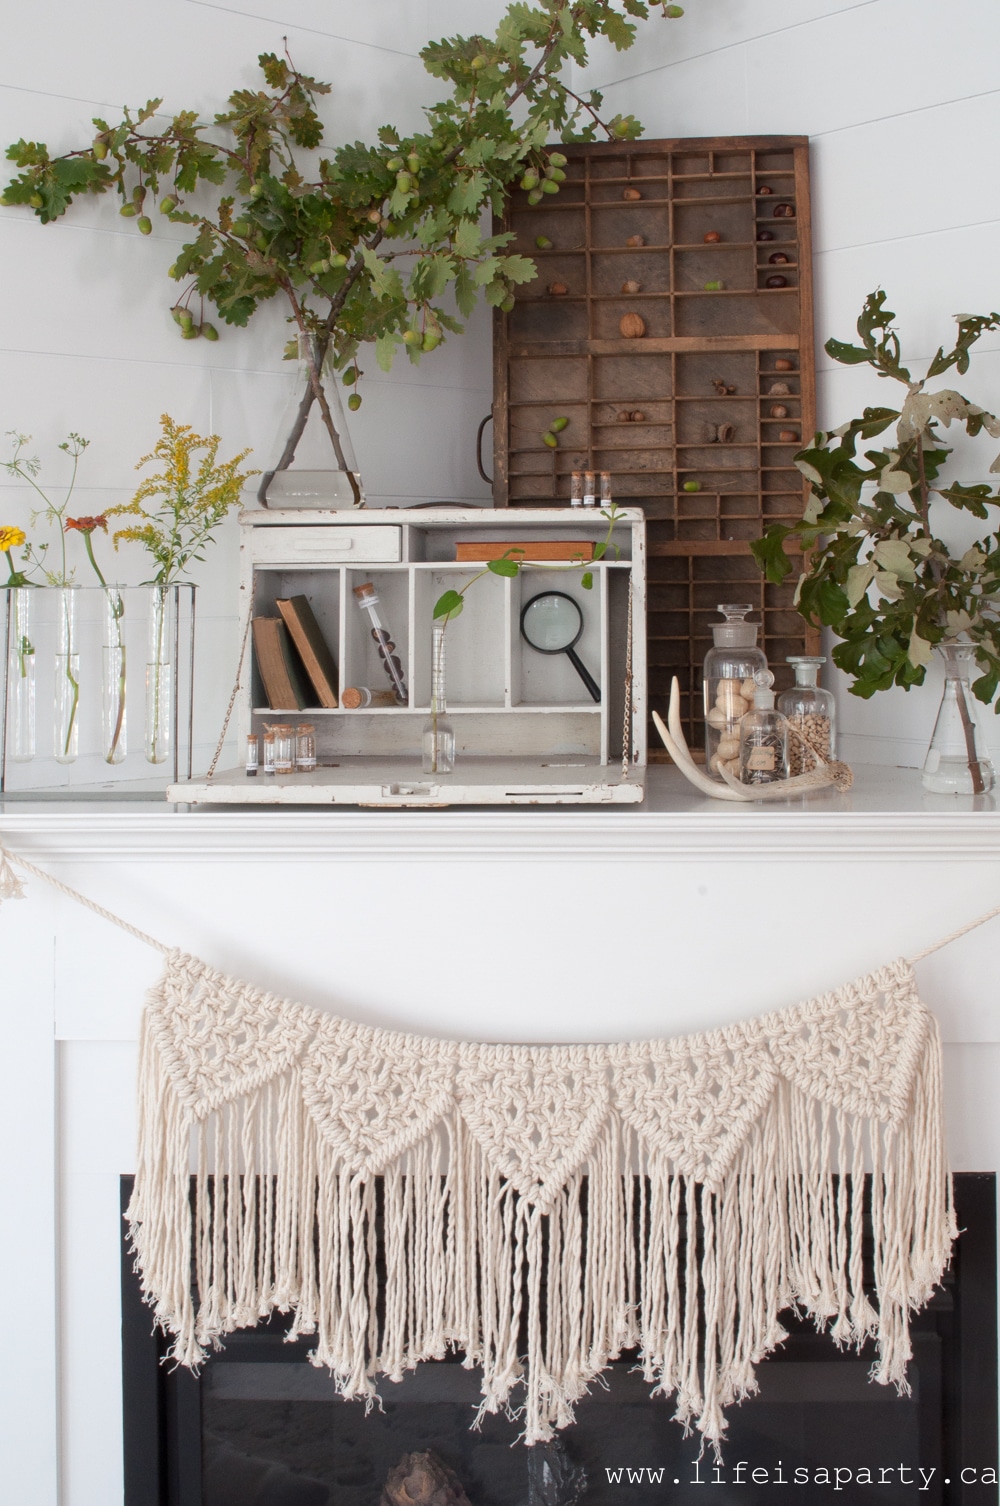
 The scientific glass is a mixture of new and vintage, and works perfectly as a vase.
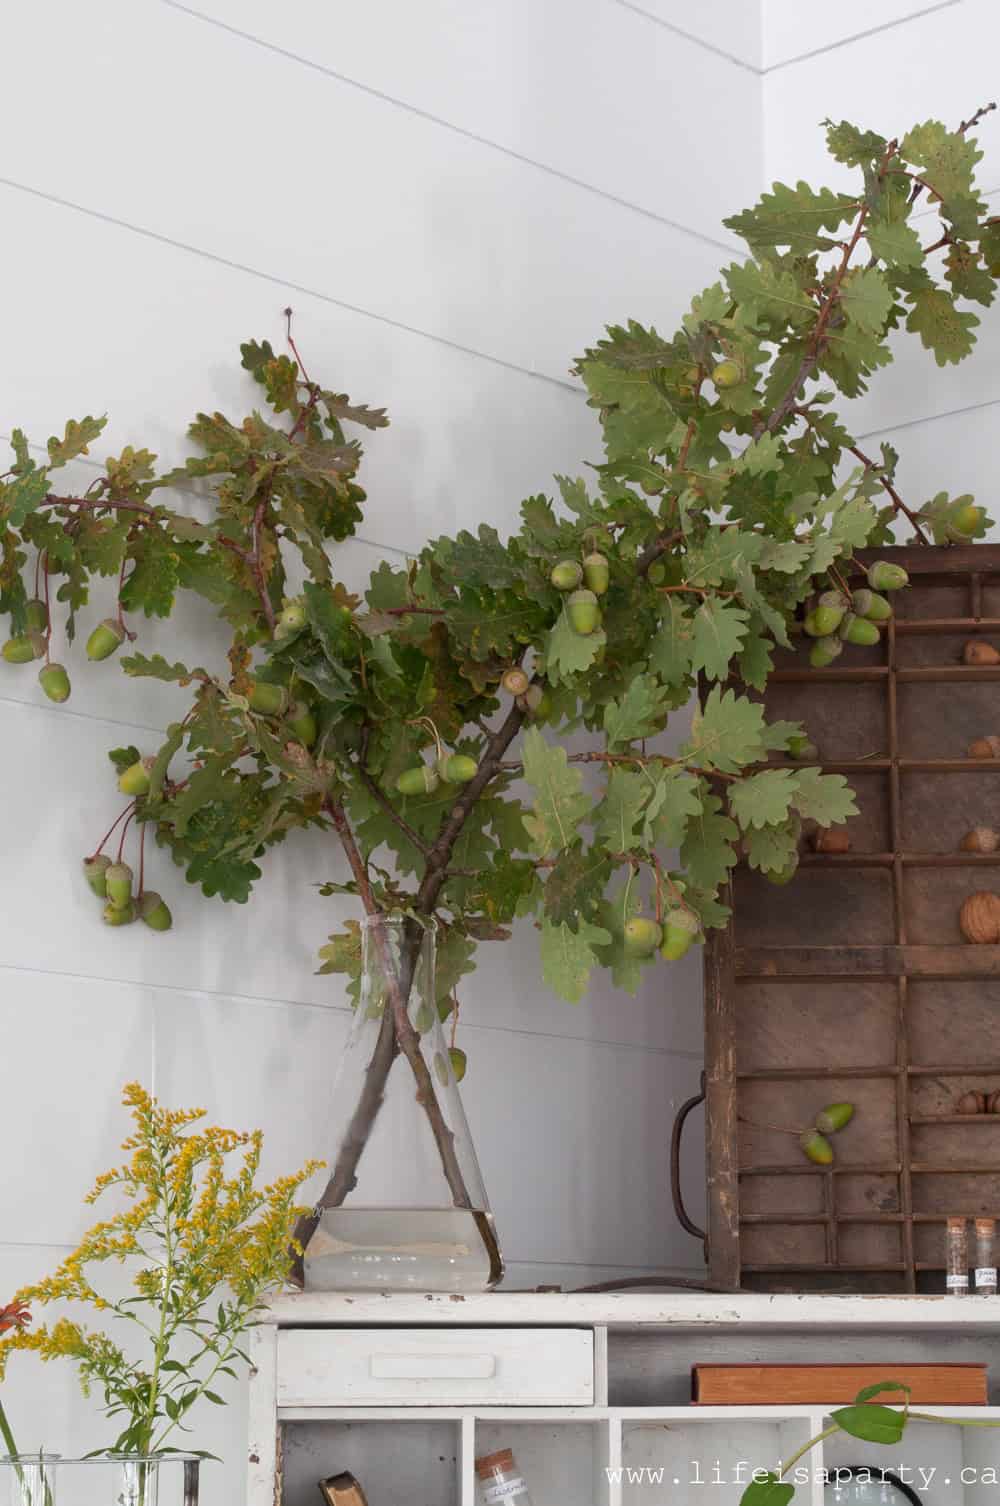
 I added lots of seeds and nuts to the display too.
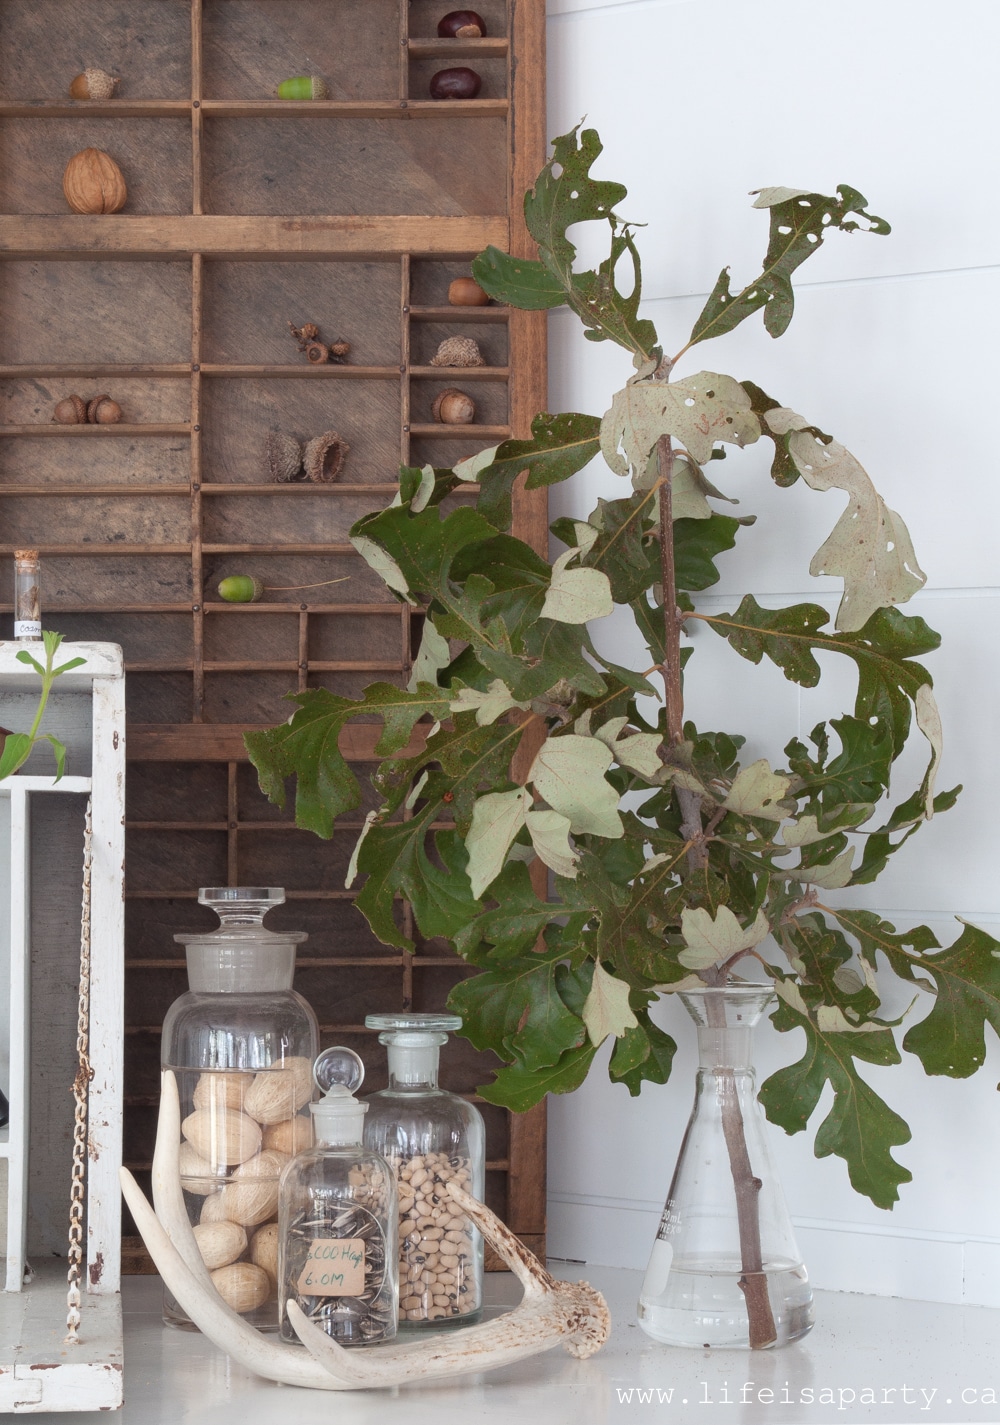 The macrame swag is a DIY project from a few years ago,
  Mustard Yellow Accent Colour
 My favourite is the
  The colour is amazing, the texture adds so much, and the pattern is perfect.
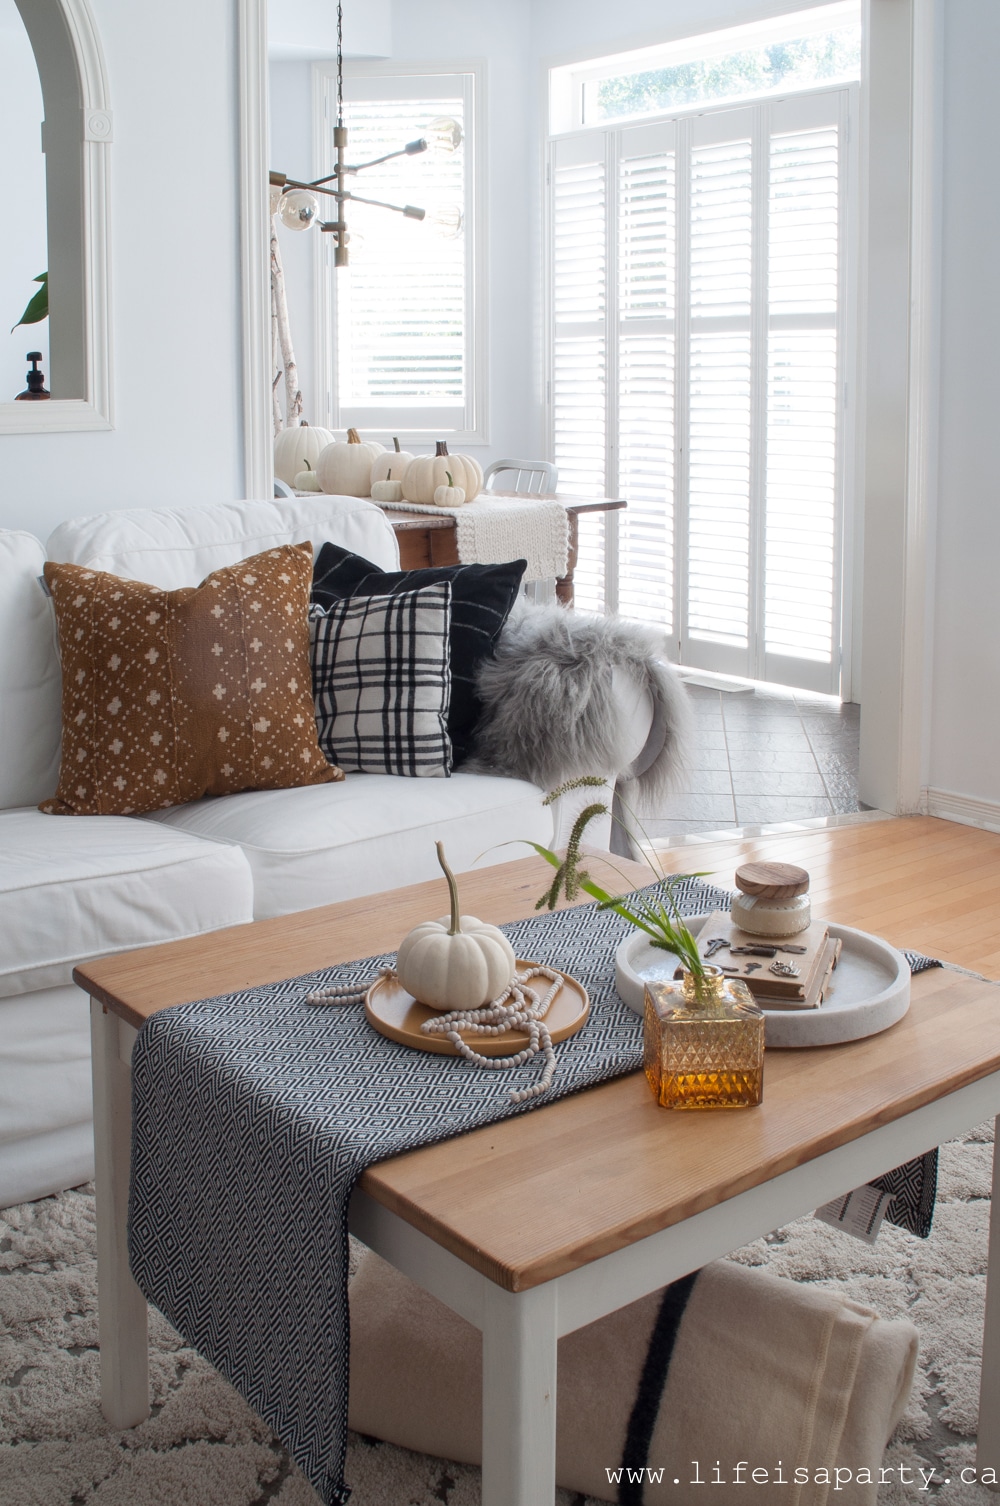 I kind of love it.
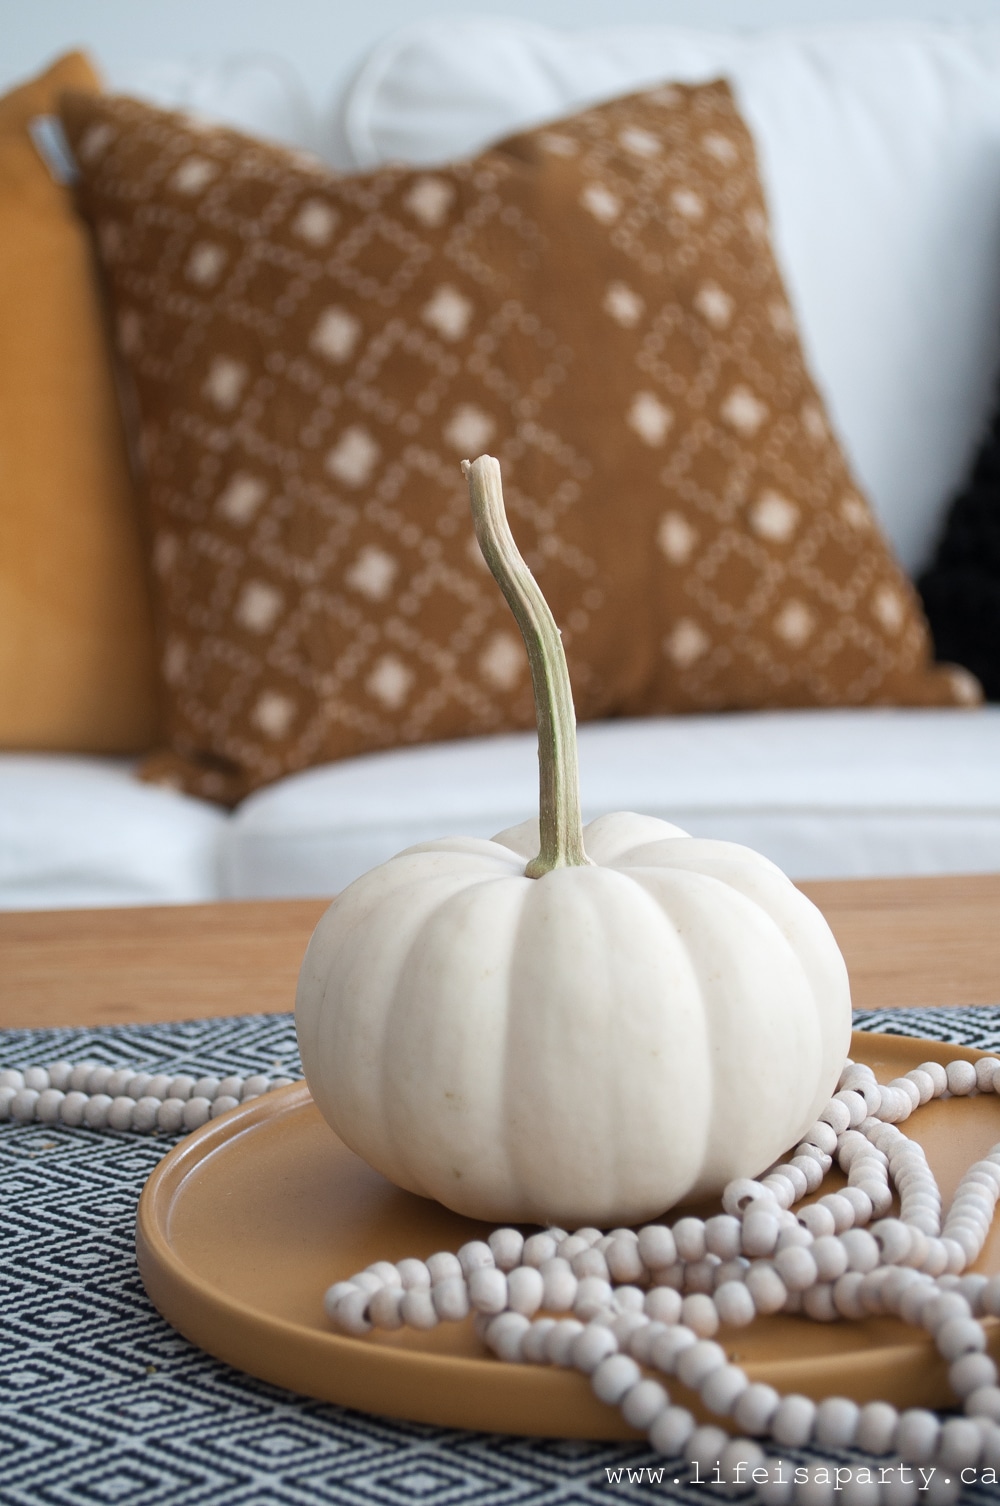 On the table are a few more vintage finds. I love how much character and interest they add to the space.
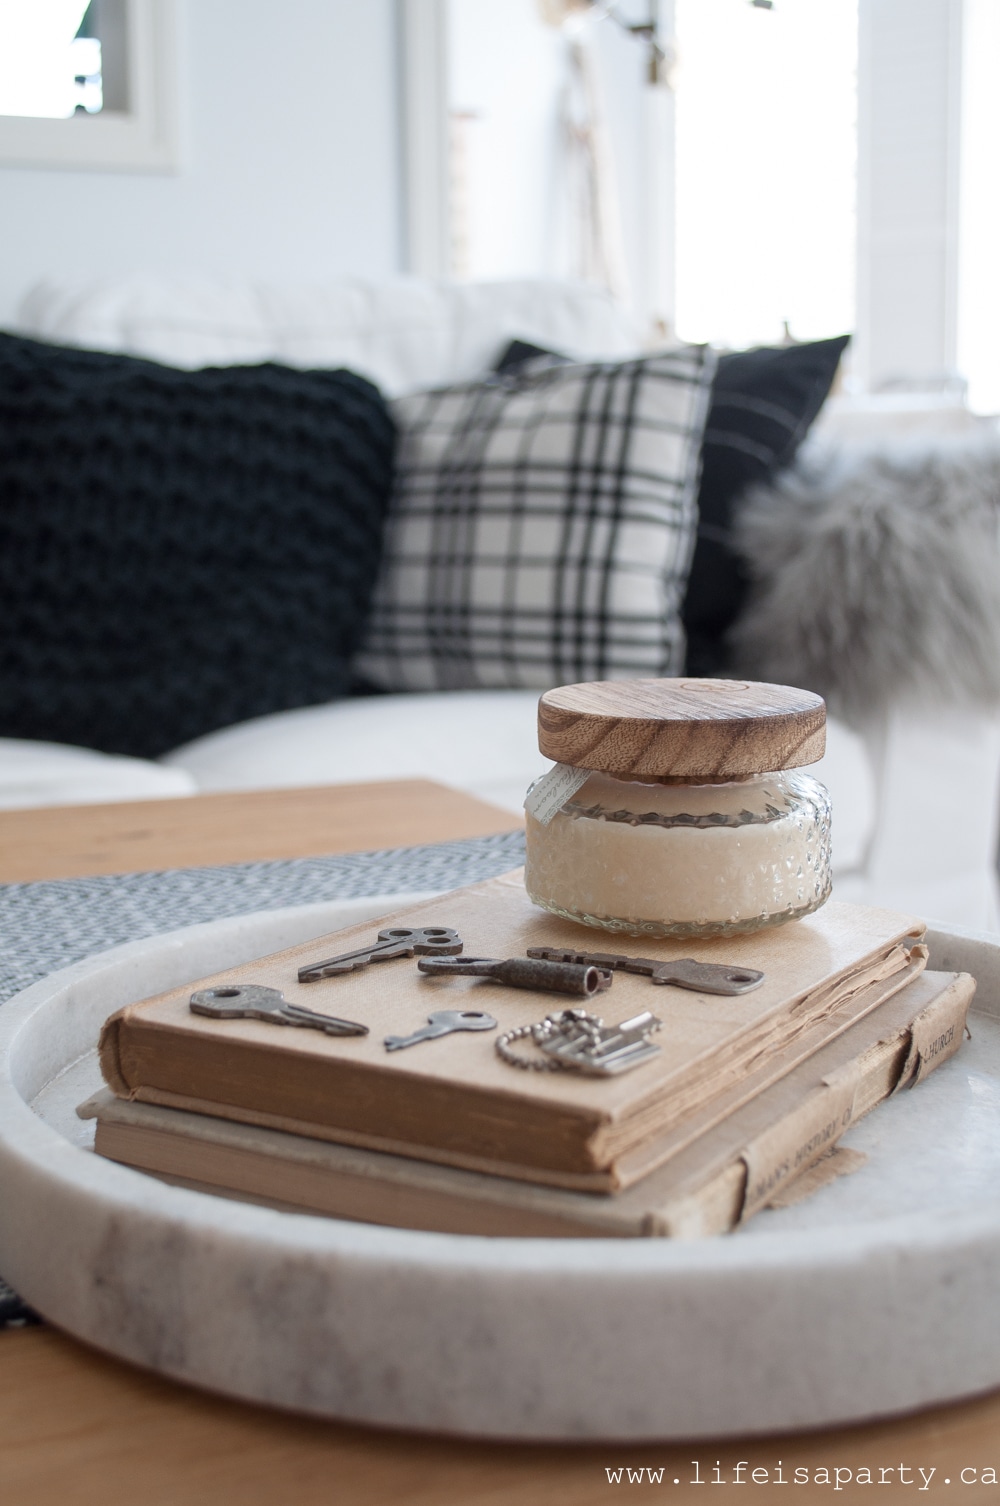
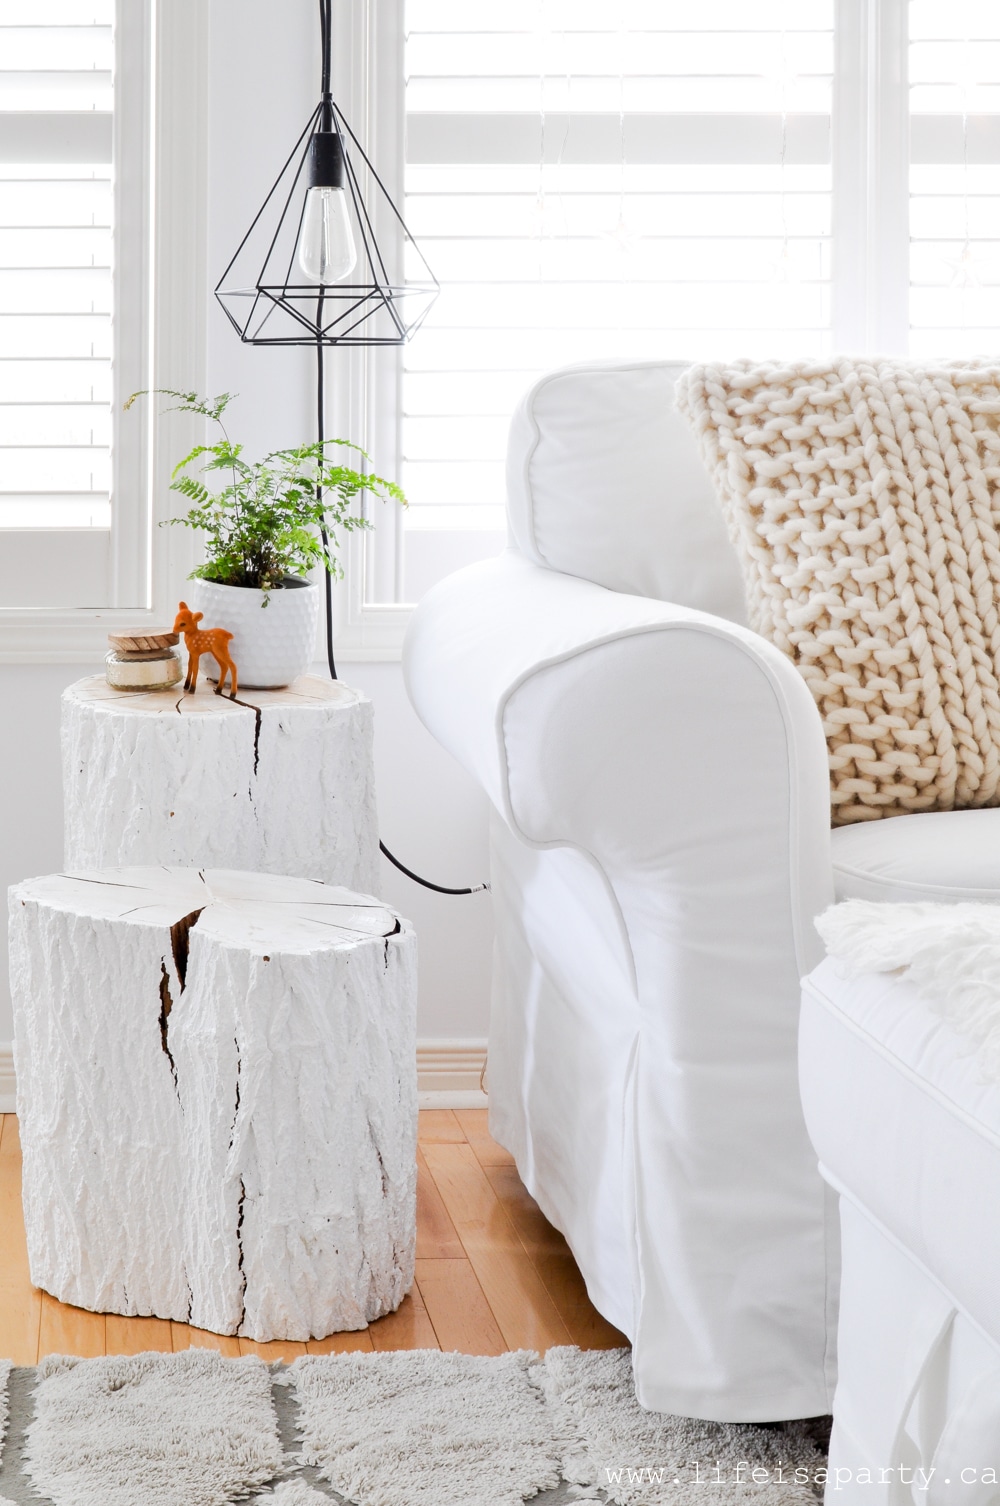
 My side table stump tables
 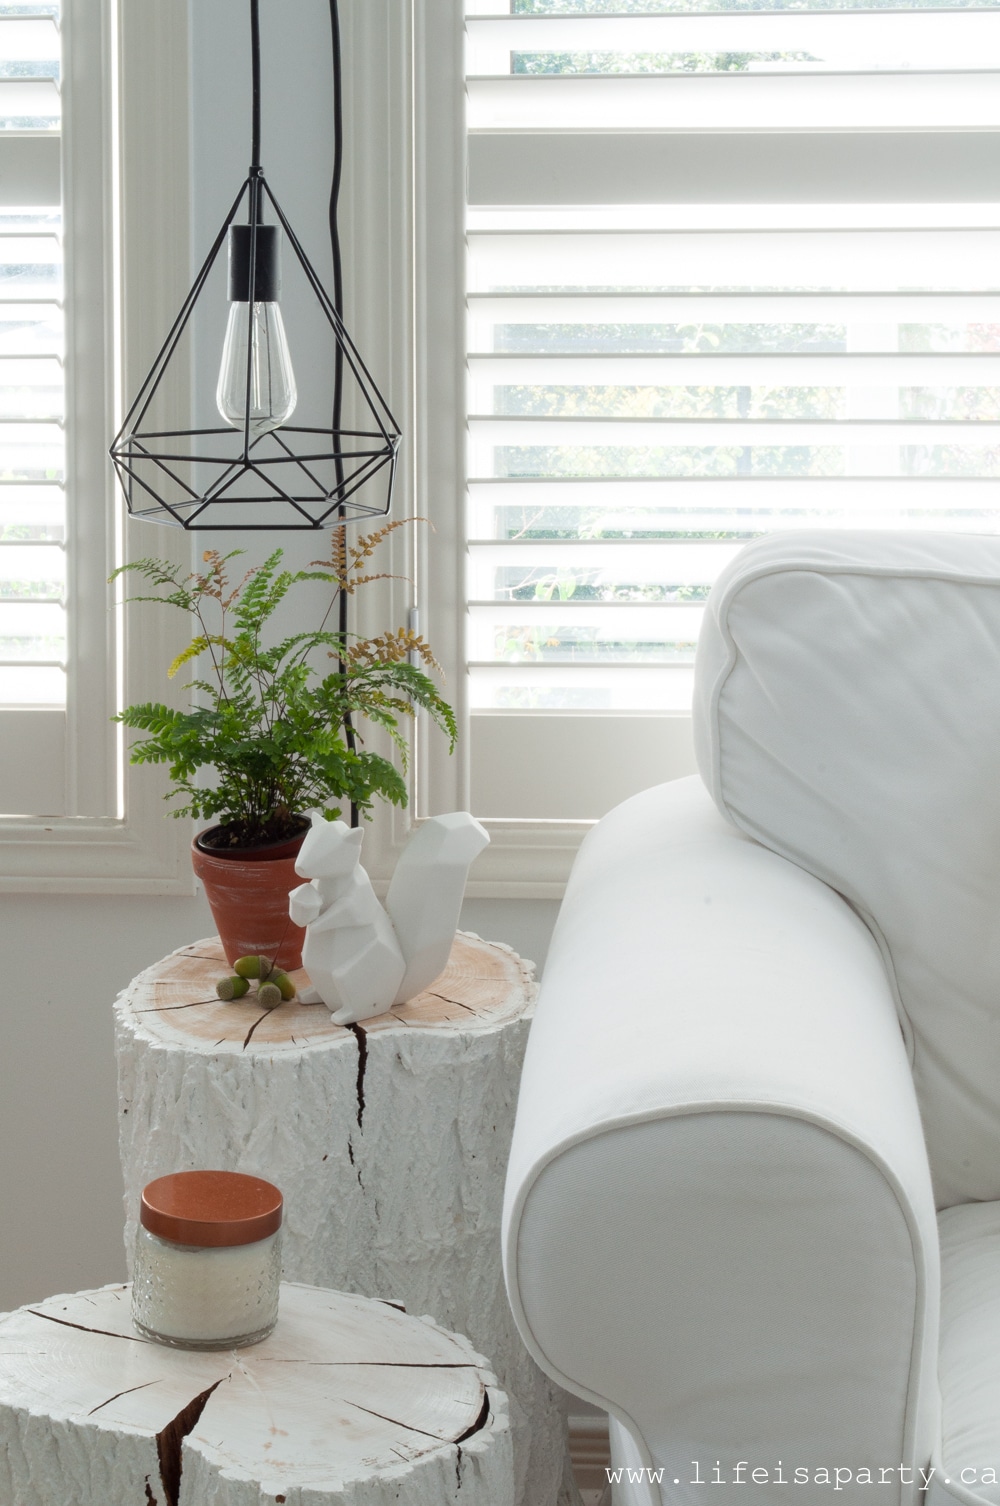 This chair is a real favourite spot for just about everyone, including our dog Oscar.
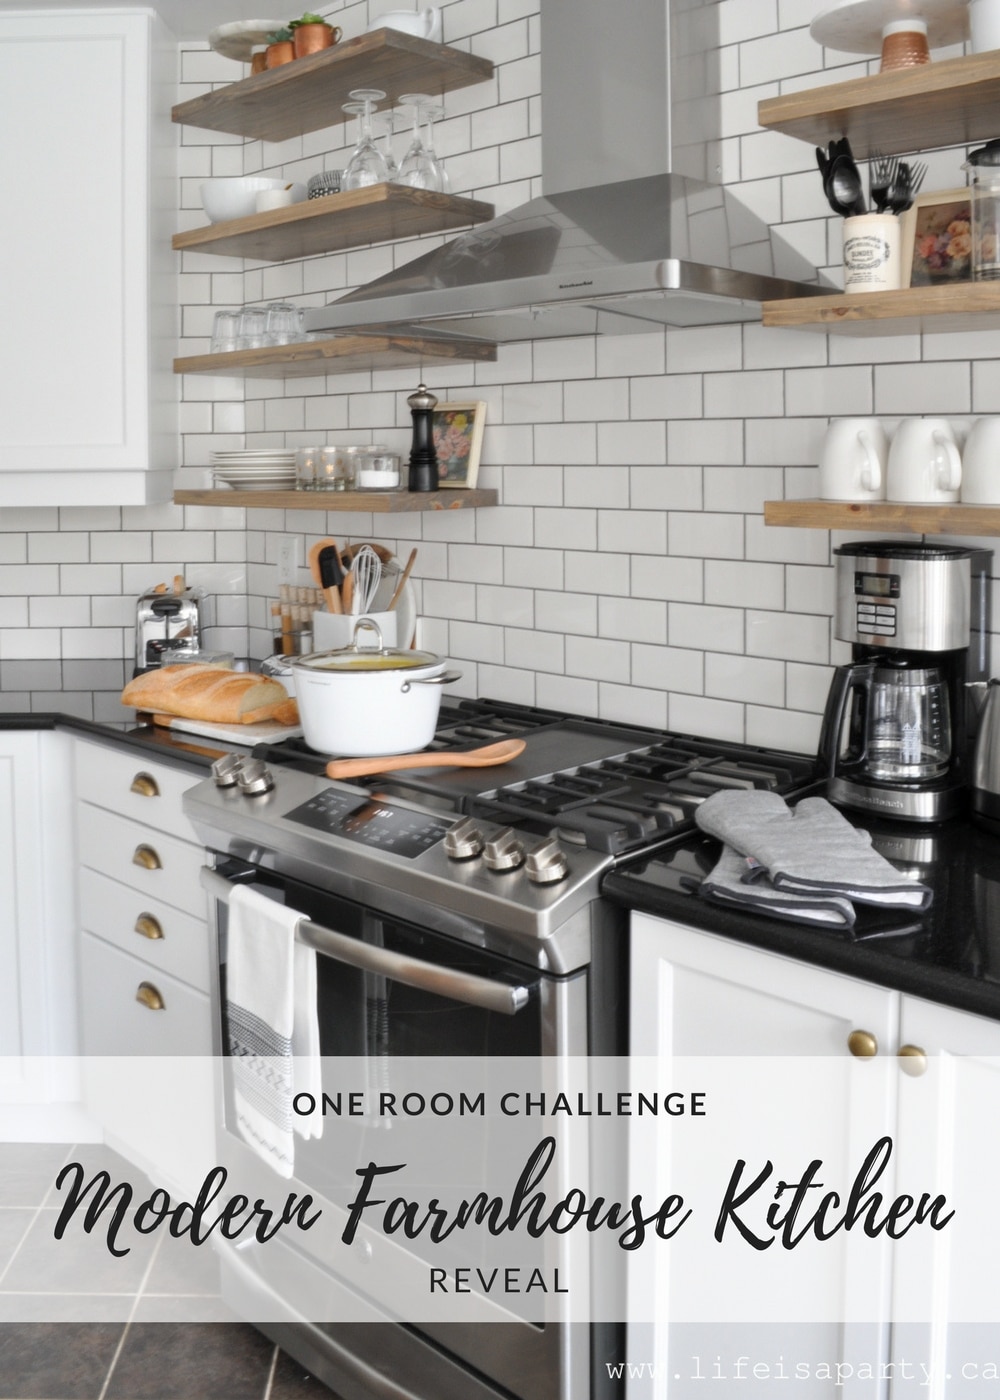
 The Kitchen
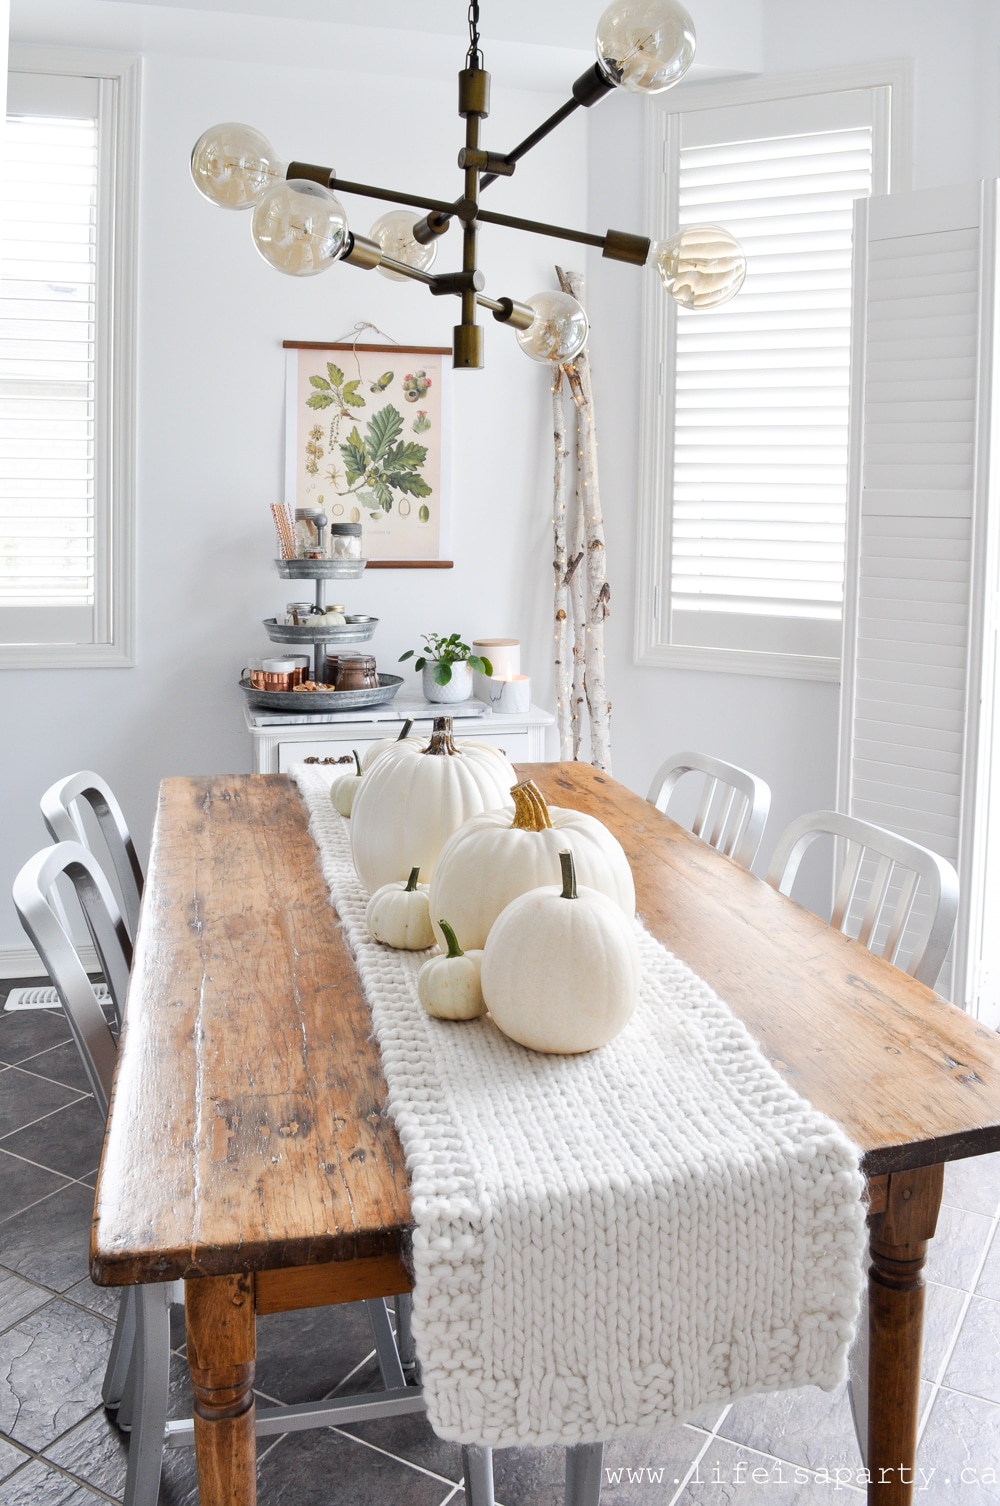 I found this pretty knit runner at Homesense the other day. It was still hot weather then, but I knew if I didn't grab it I'd regret it. I brought it home and as soon as it turned a little cooler this week, I knew it was perfect for my fall decor.
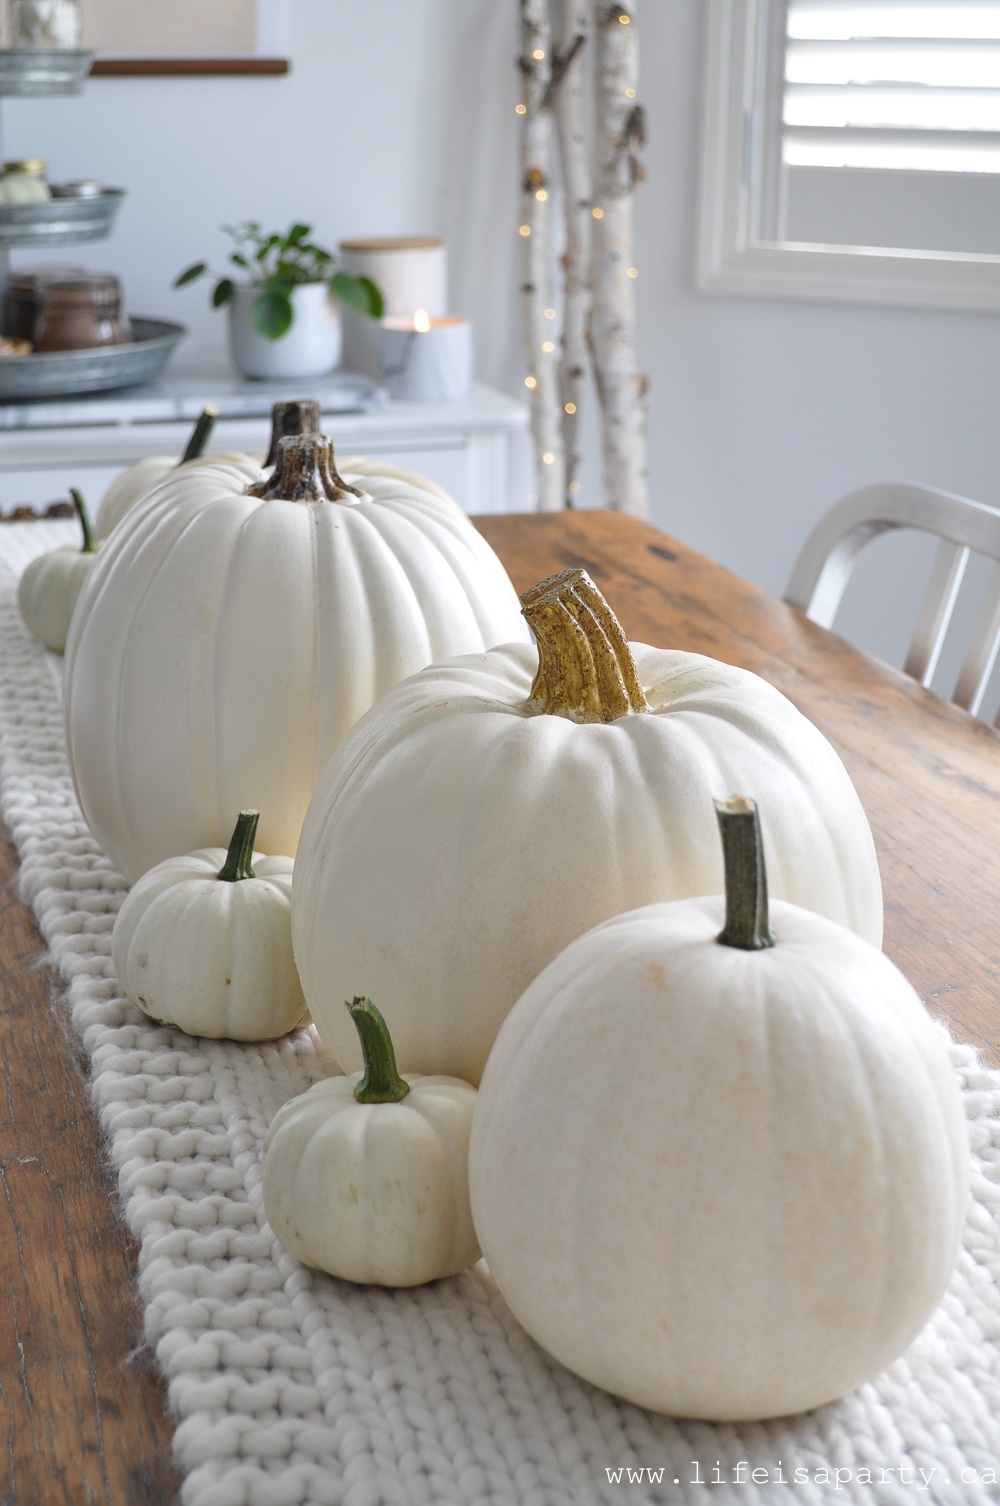 I love how fluffy and cozy it looks. It will be perfect for Christmas and winter too.
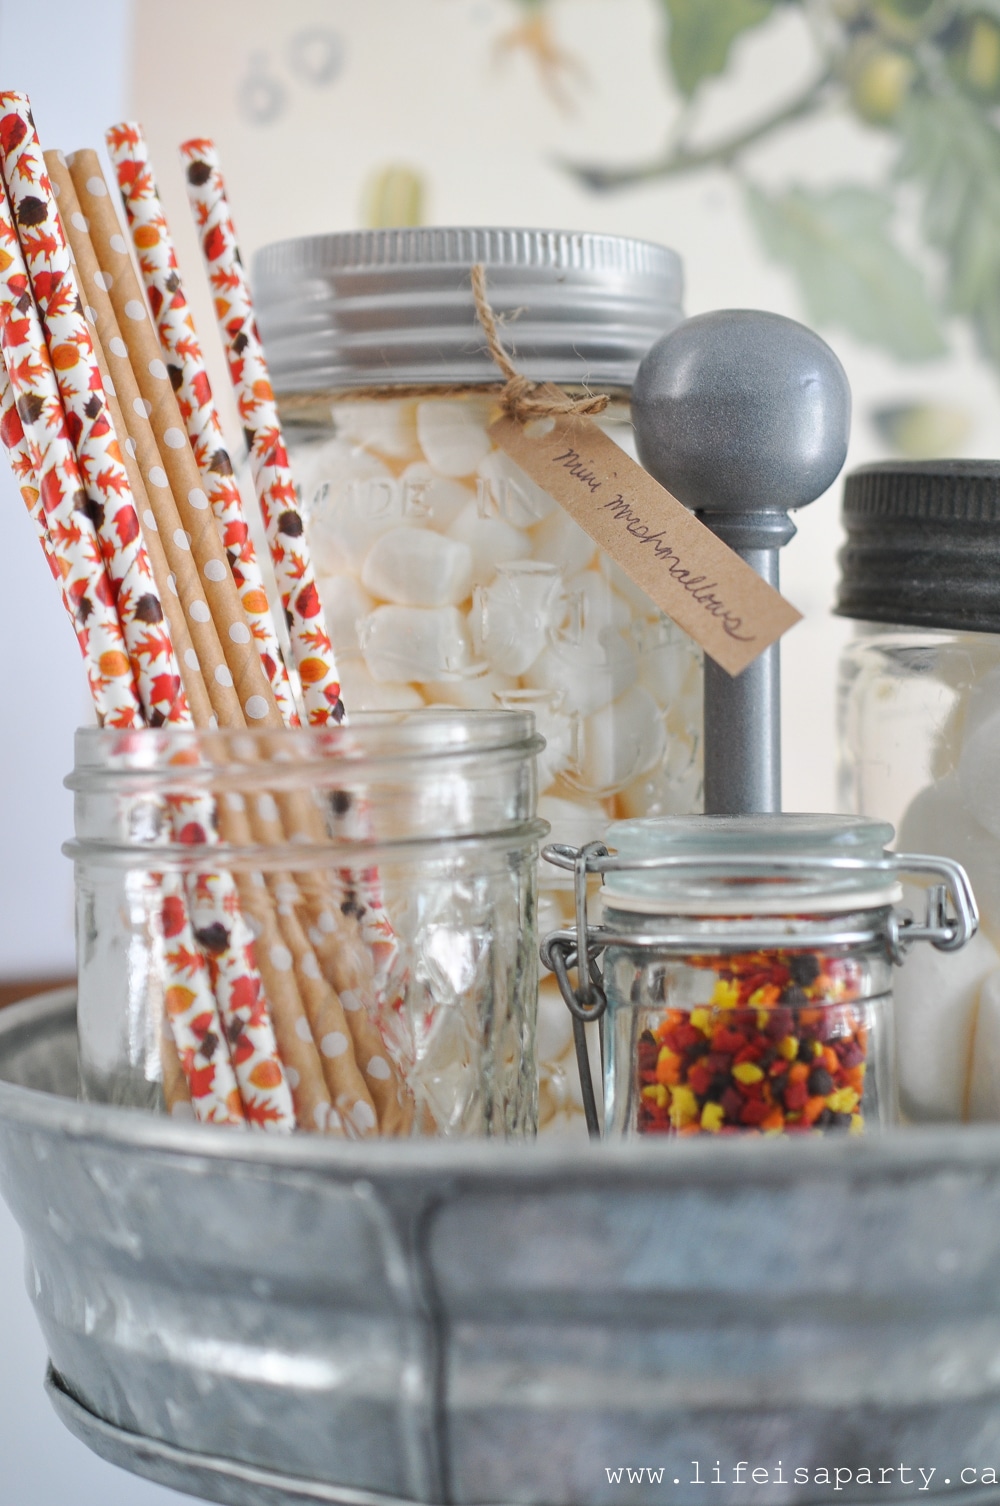
 My girls love having a hot chocolate on fall days after school, and this little hot chocolate bar complete with sprinkles and flavoured marshmallows makes it even more fun.
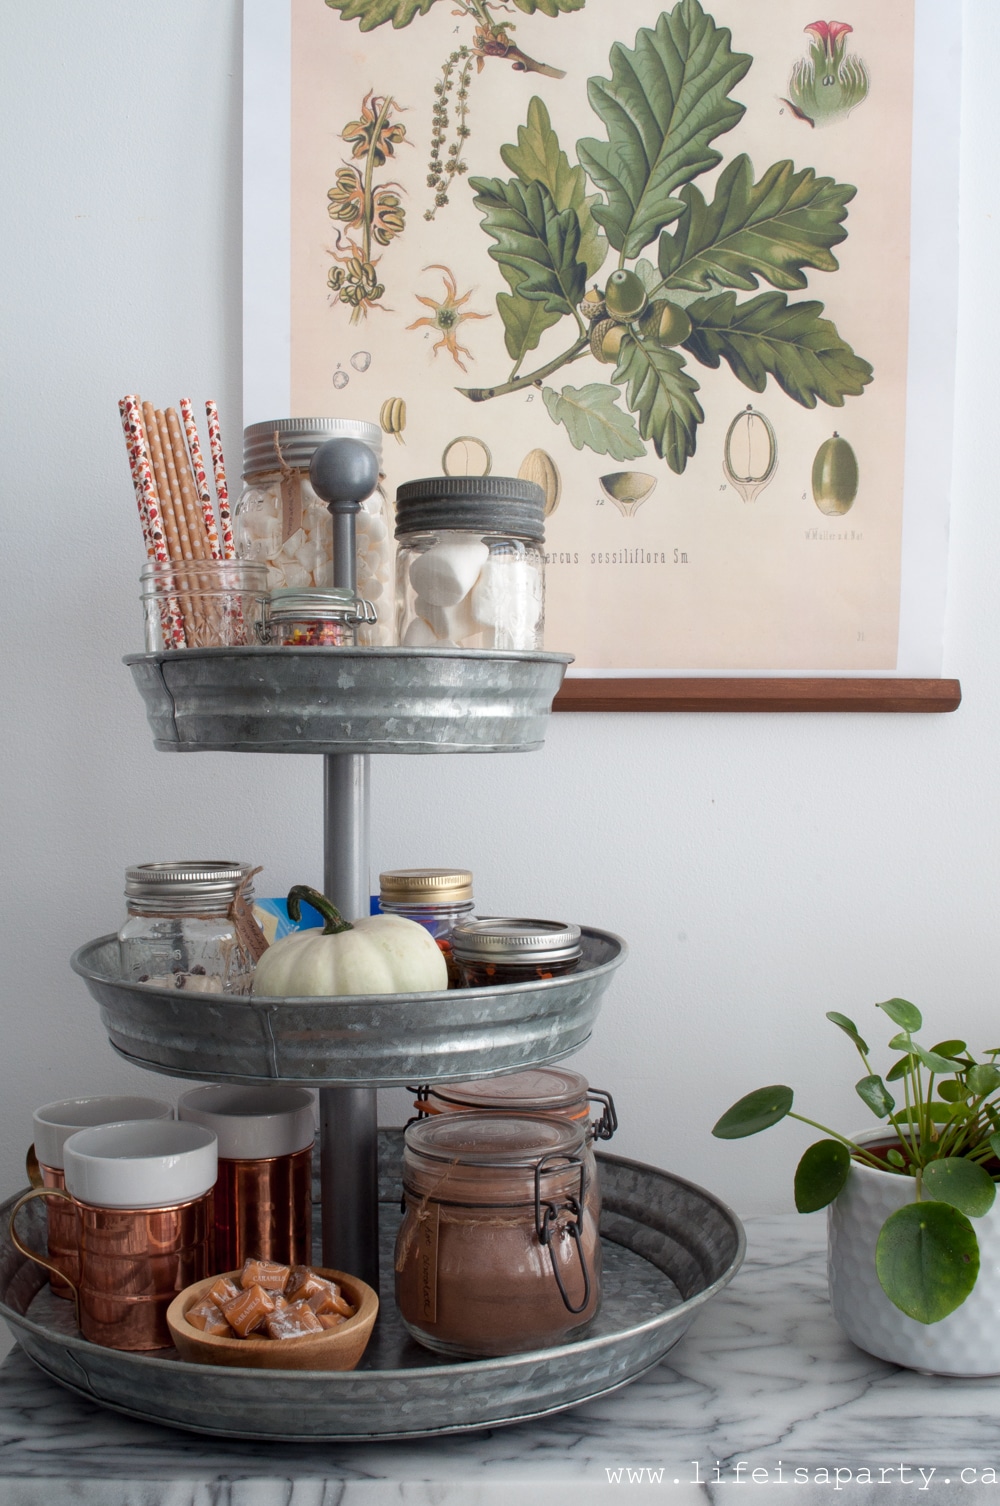
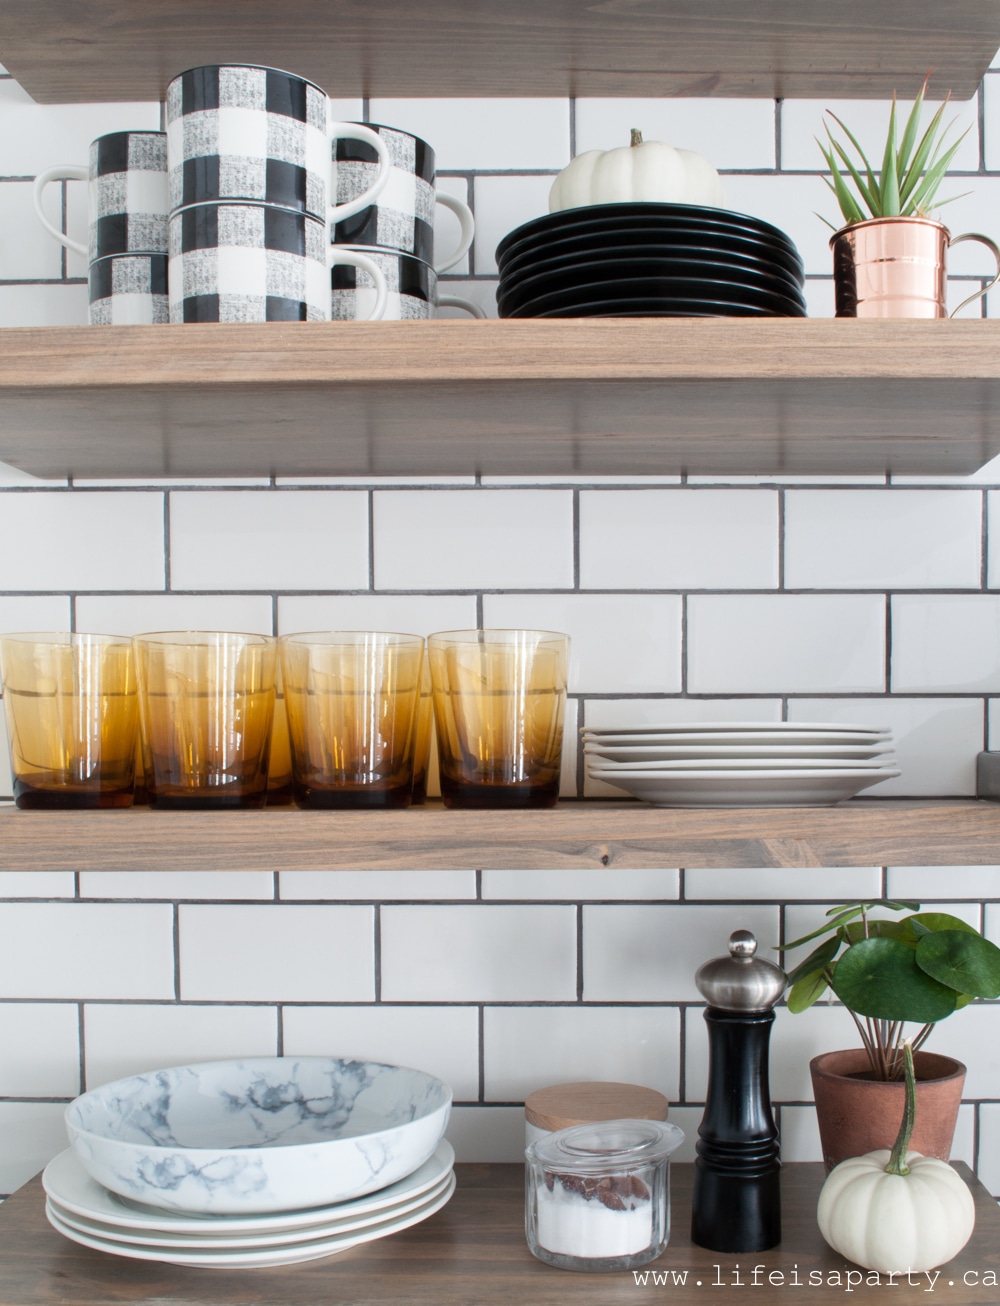
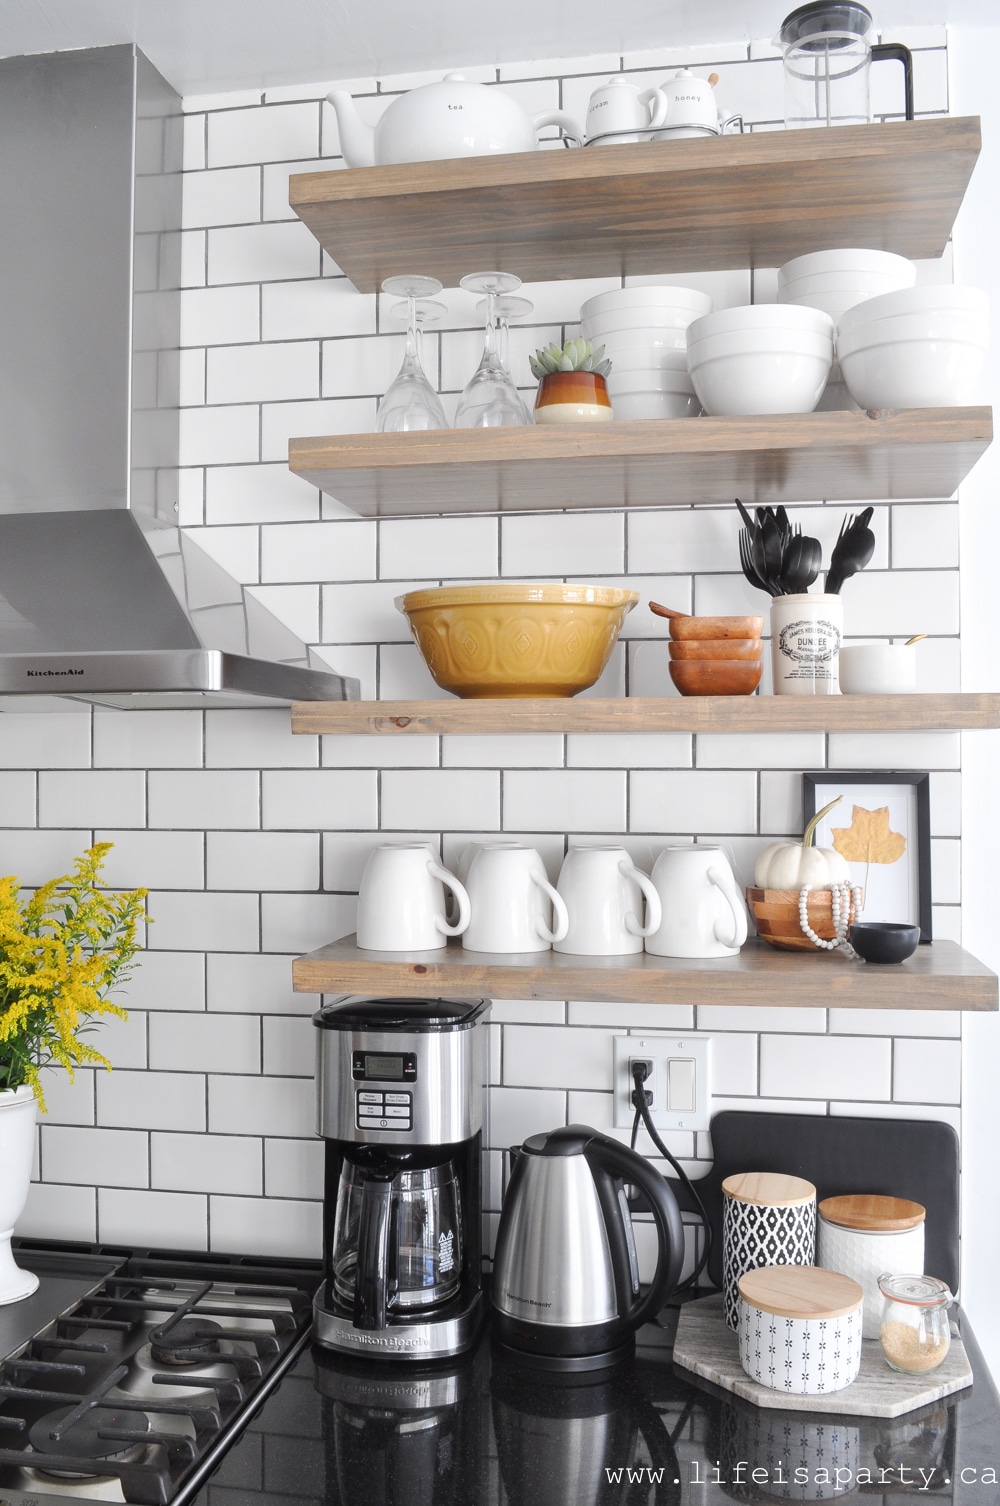
 Kitchen Shelves


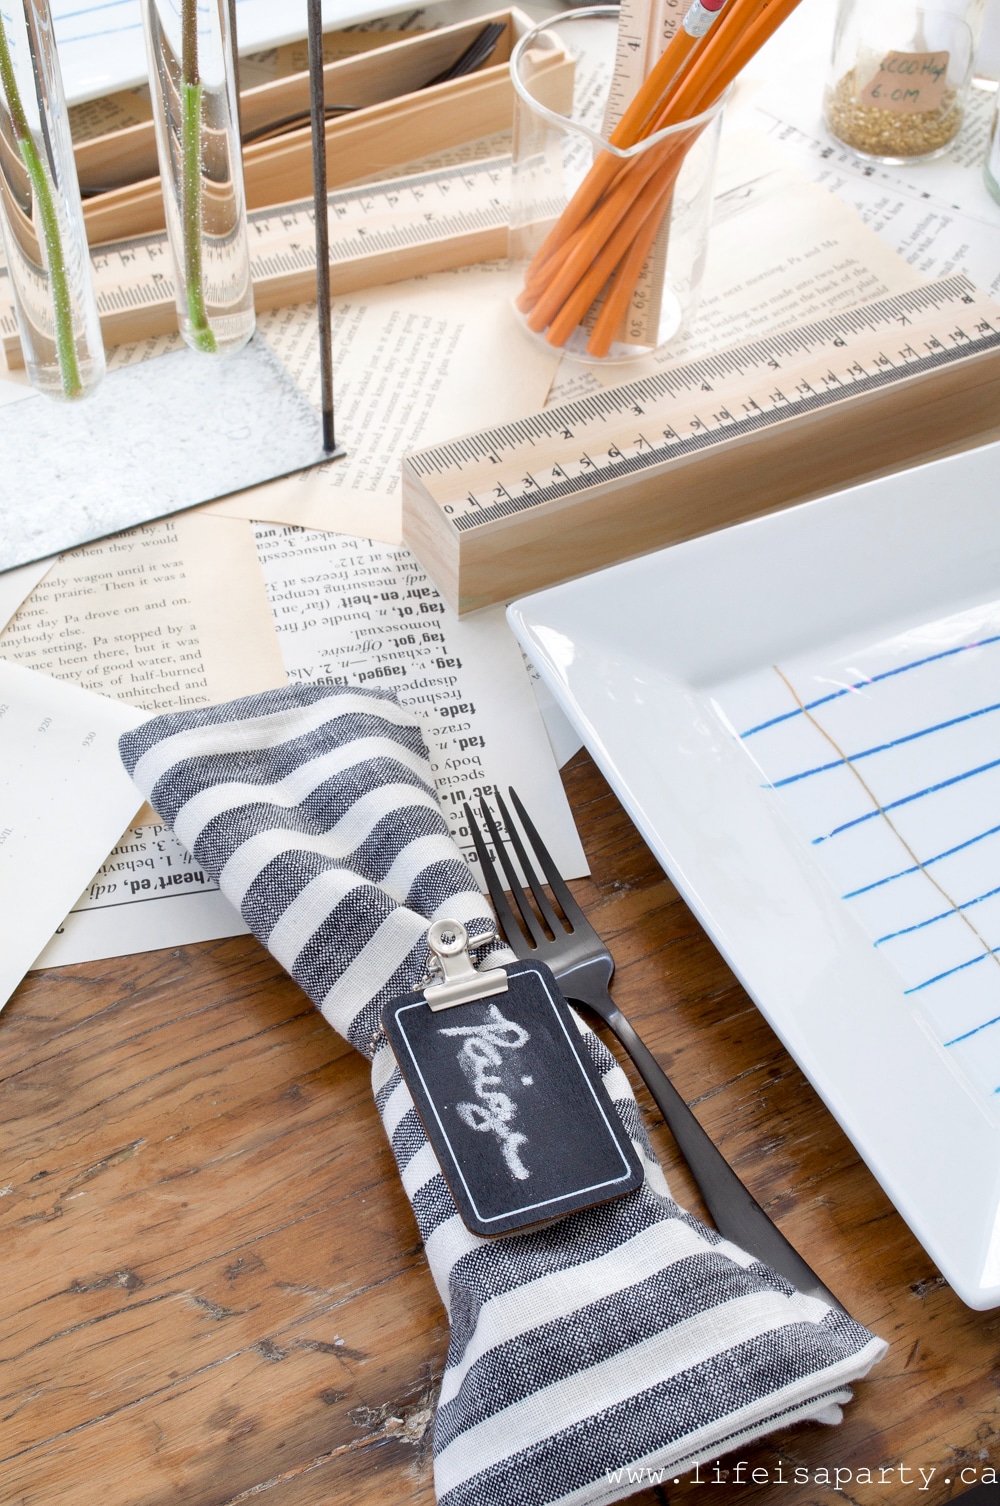 I used chalk to write our names.
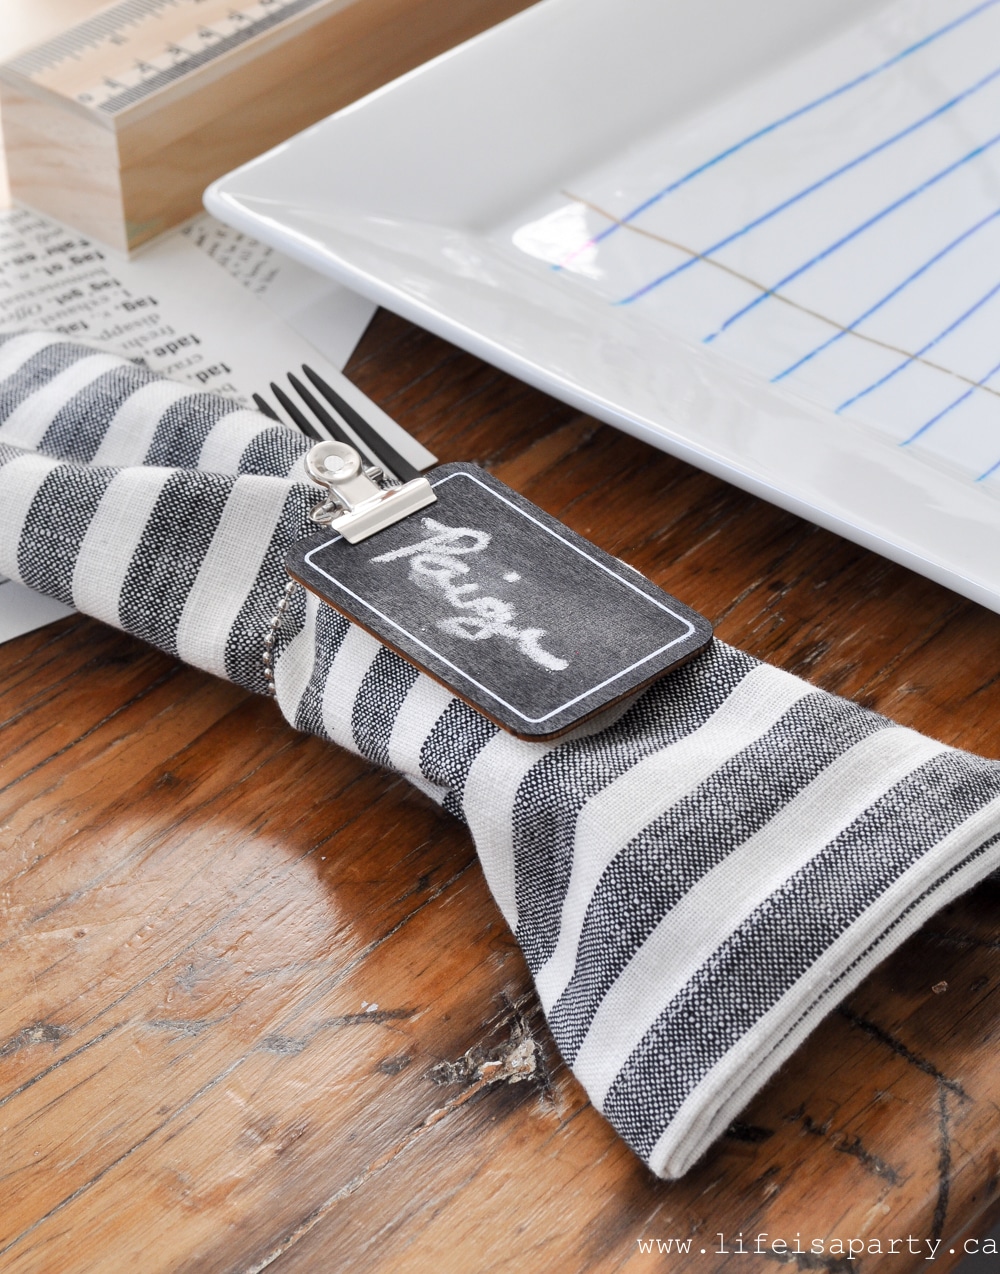
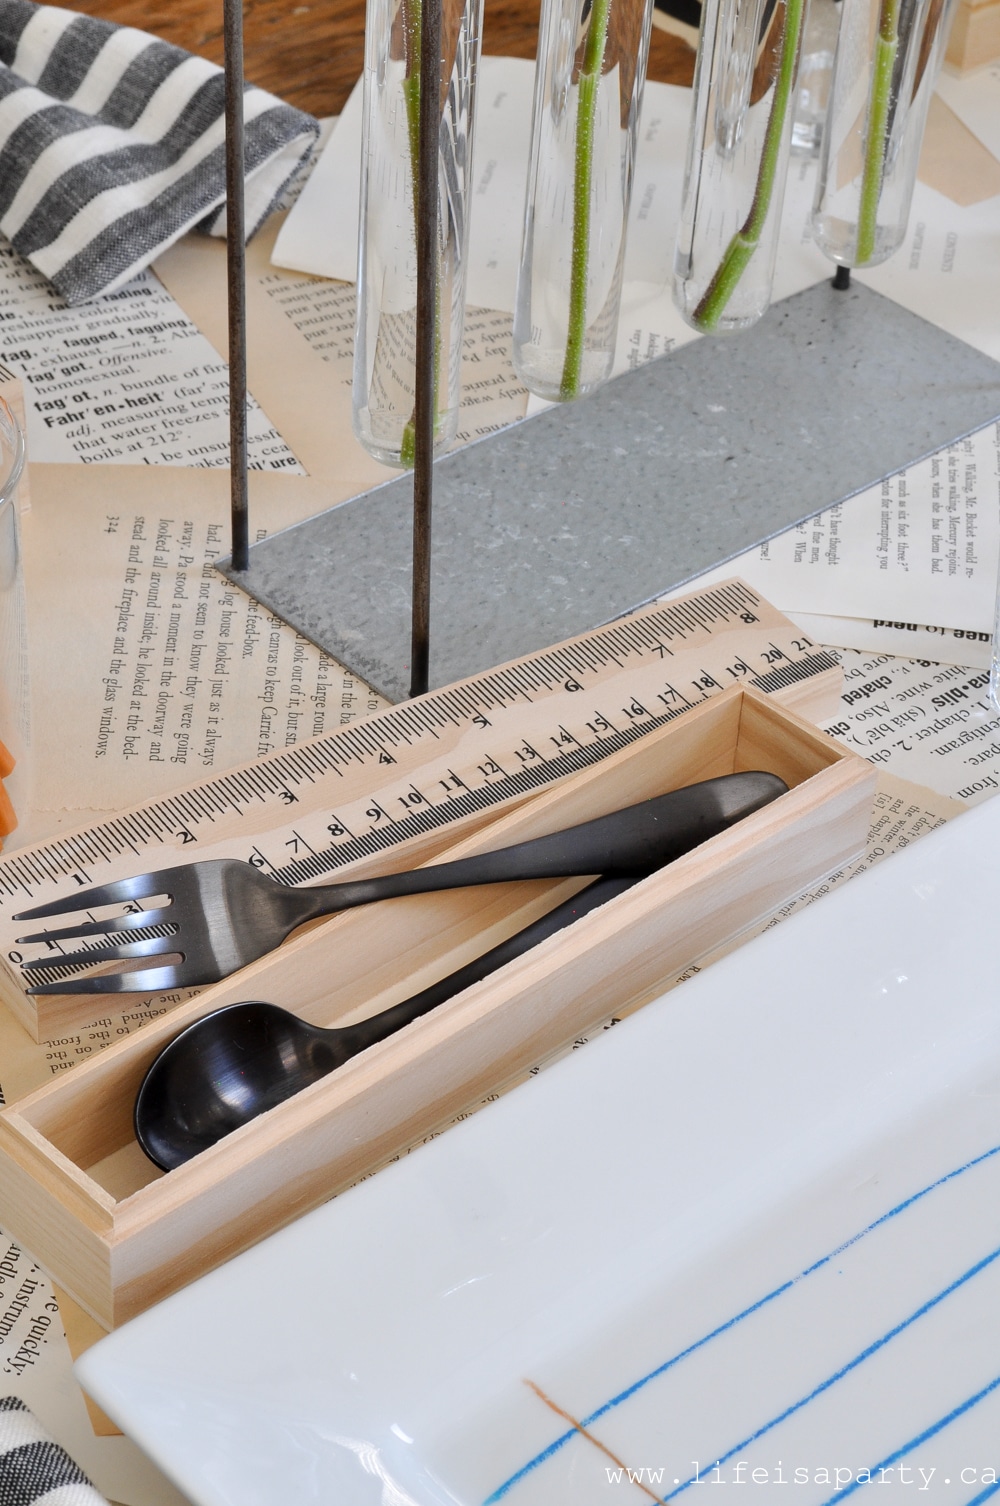
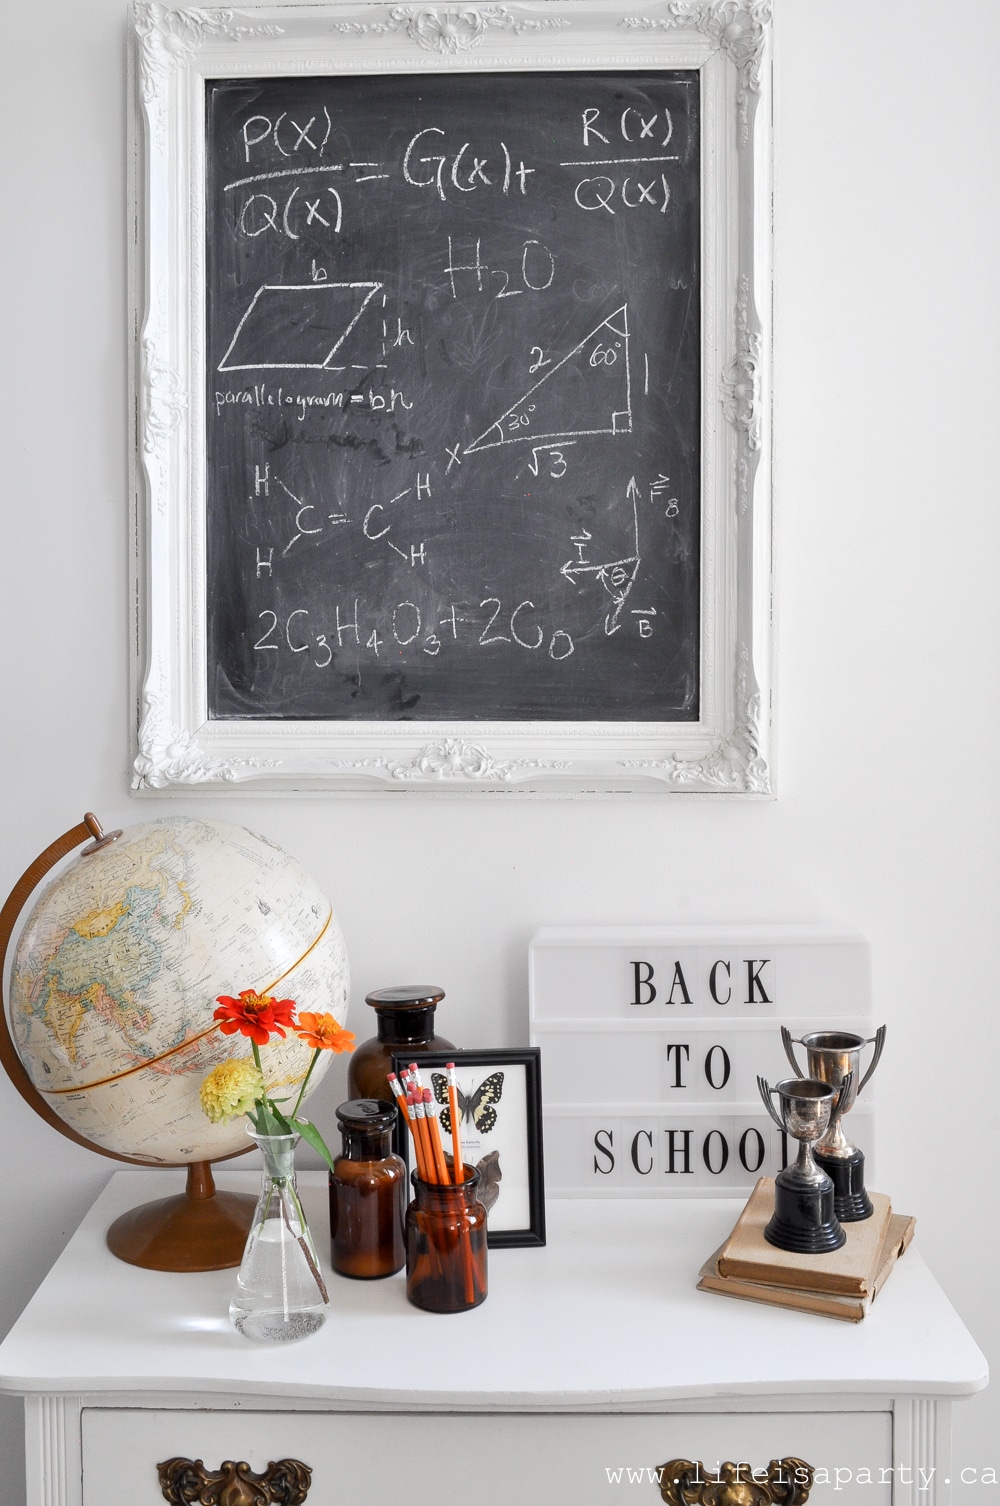
 Most of the lab glass I've picked up at antique sales, but there's some new pieces mixed in too.
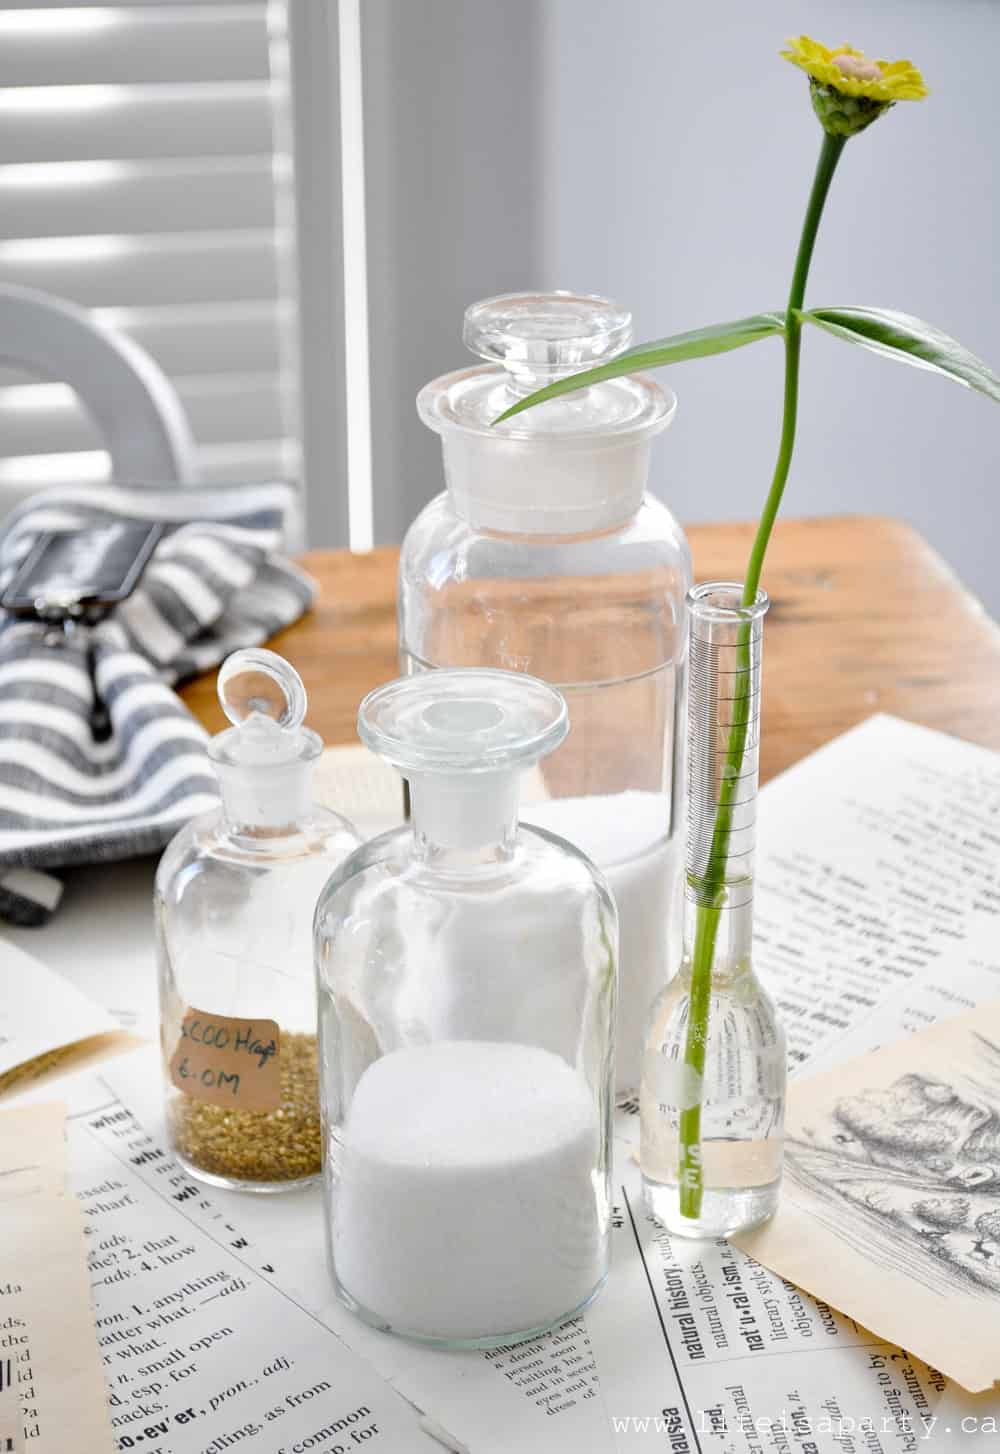
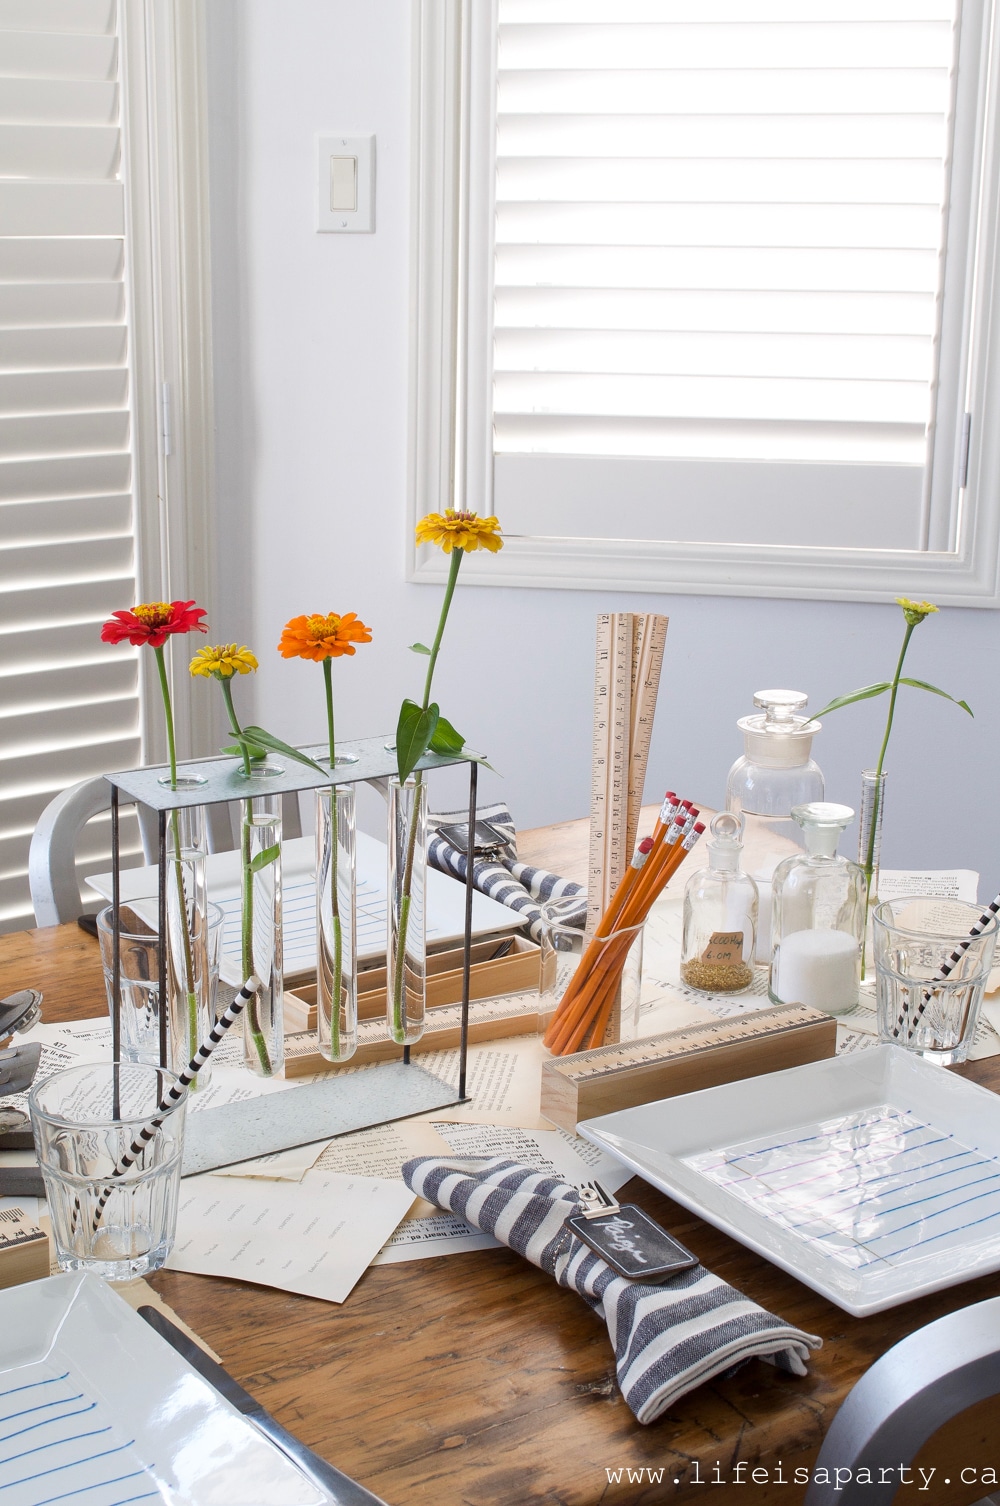
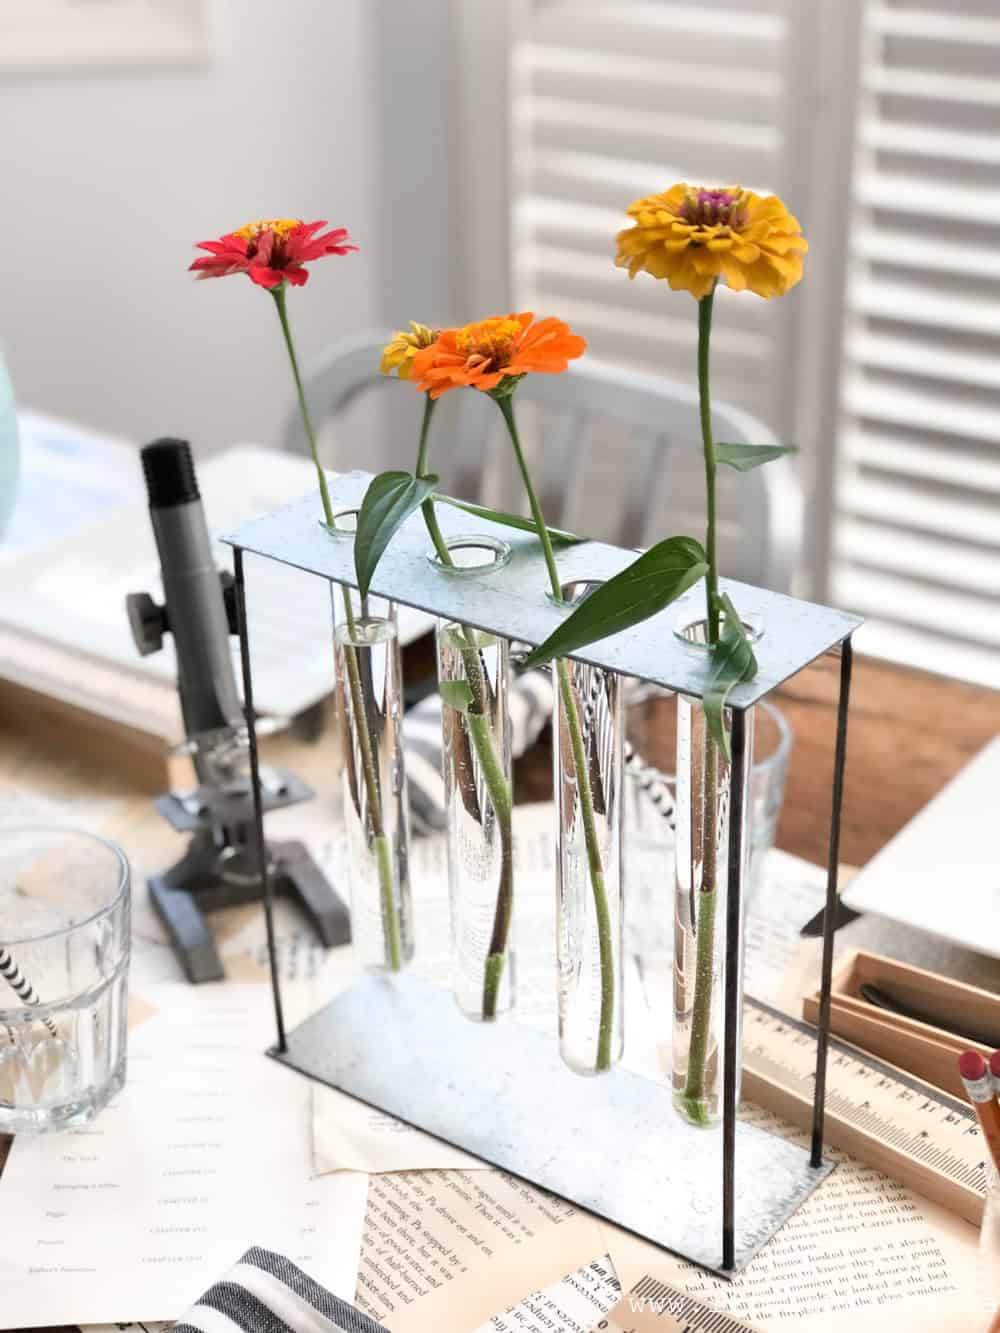
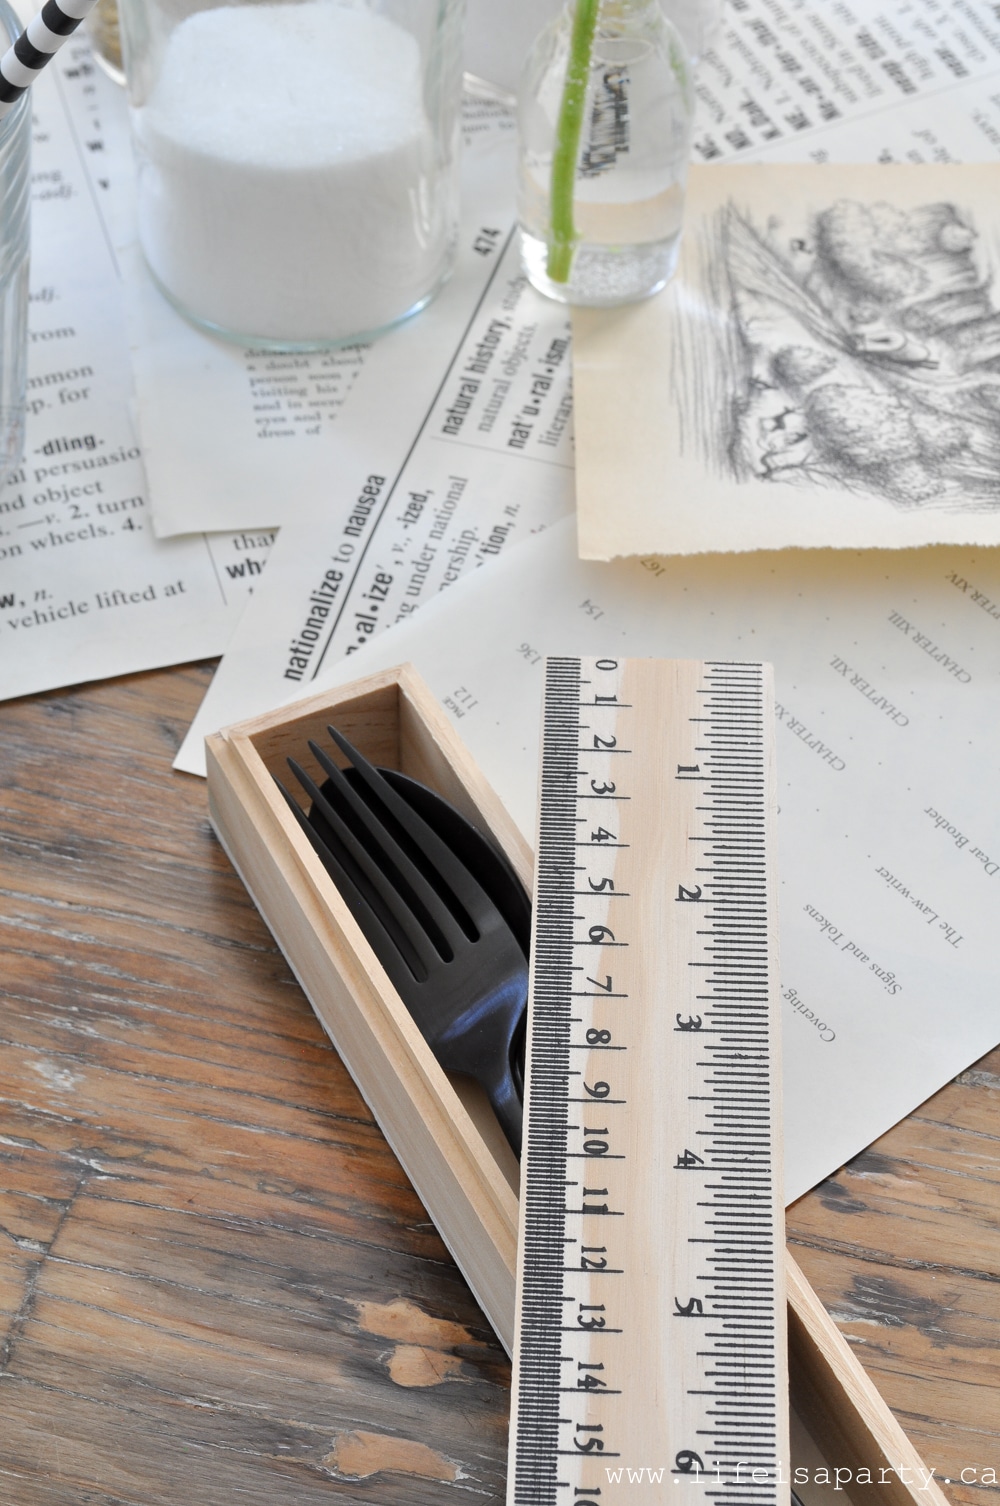
 I also had an old microscope. Look for them in the office section of your thrift store.
 These school supplies are new but have that vintage feel to them.

 We had such a lovely dinner, filled with every detail of my girls first days.
 I almost can't believe that one is high school -and there's only going to be three more dinners like this one after this!
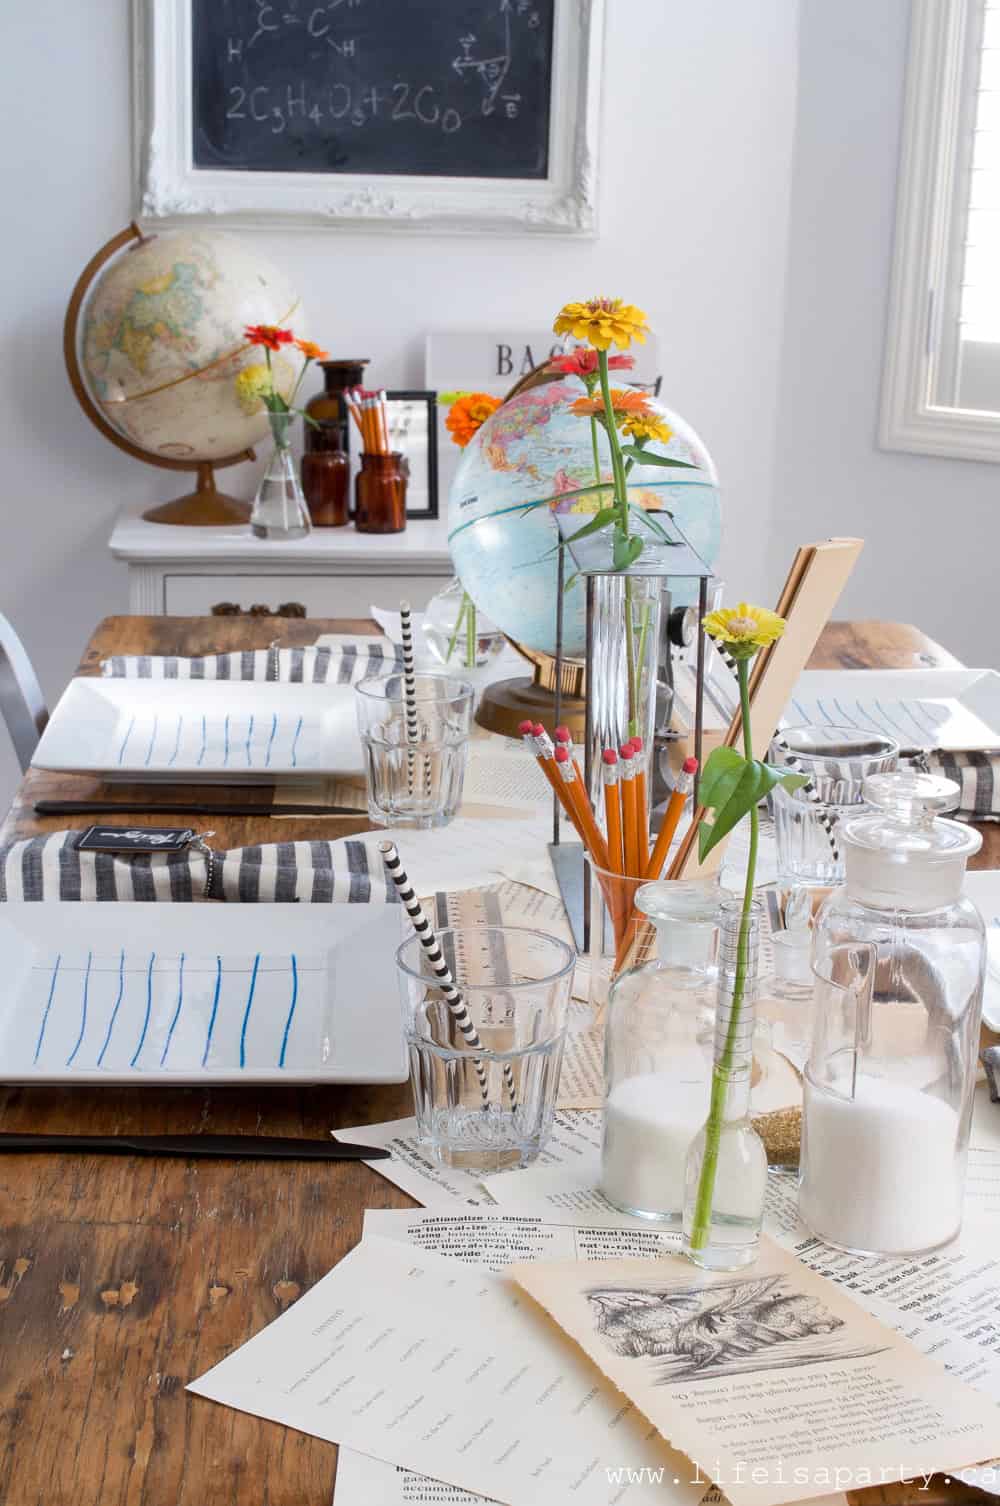 This years are speeding up! All the more reason to cherish them and make all the memories.
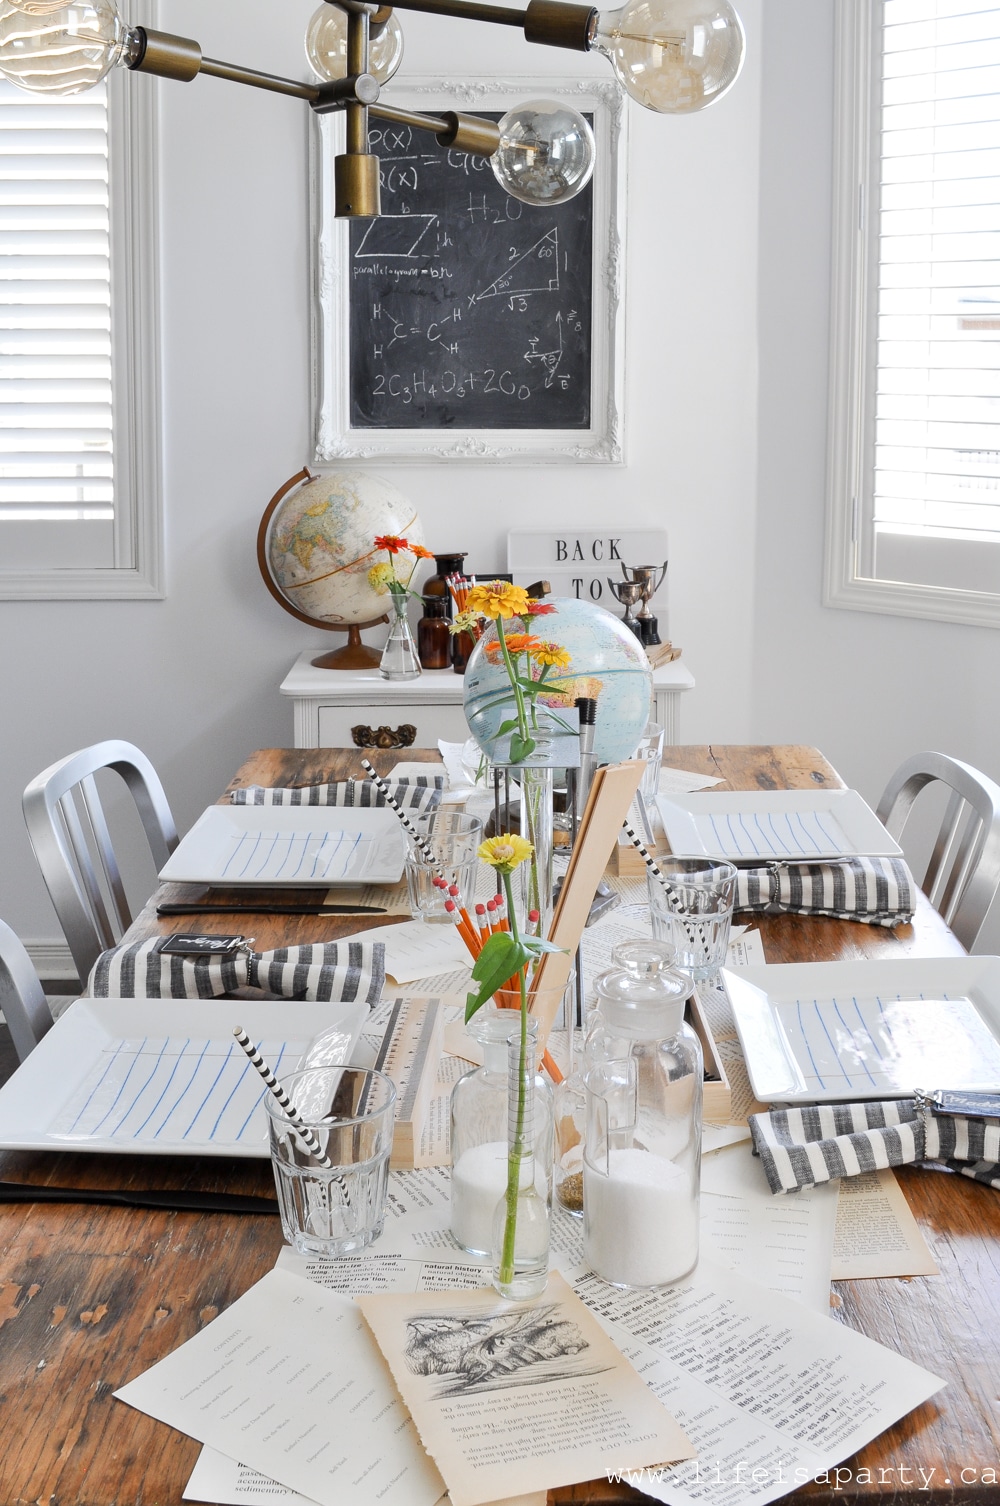 With a Back To School Dinner to celebrate the first day of school, life really is a party!
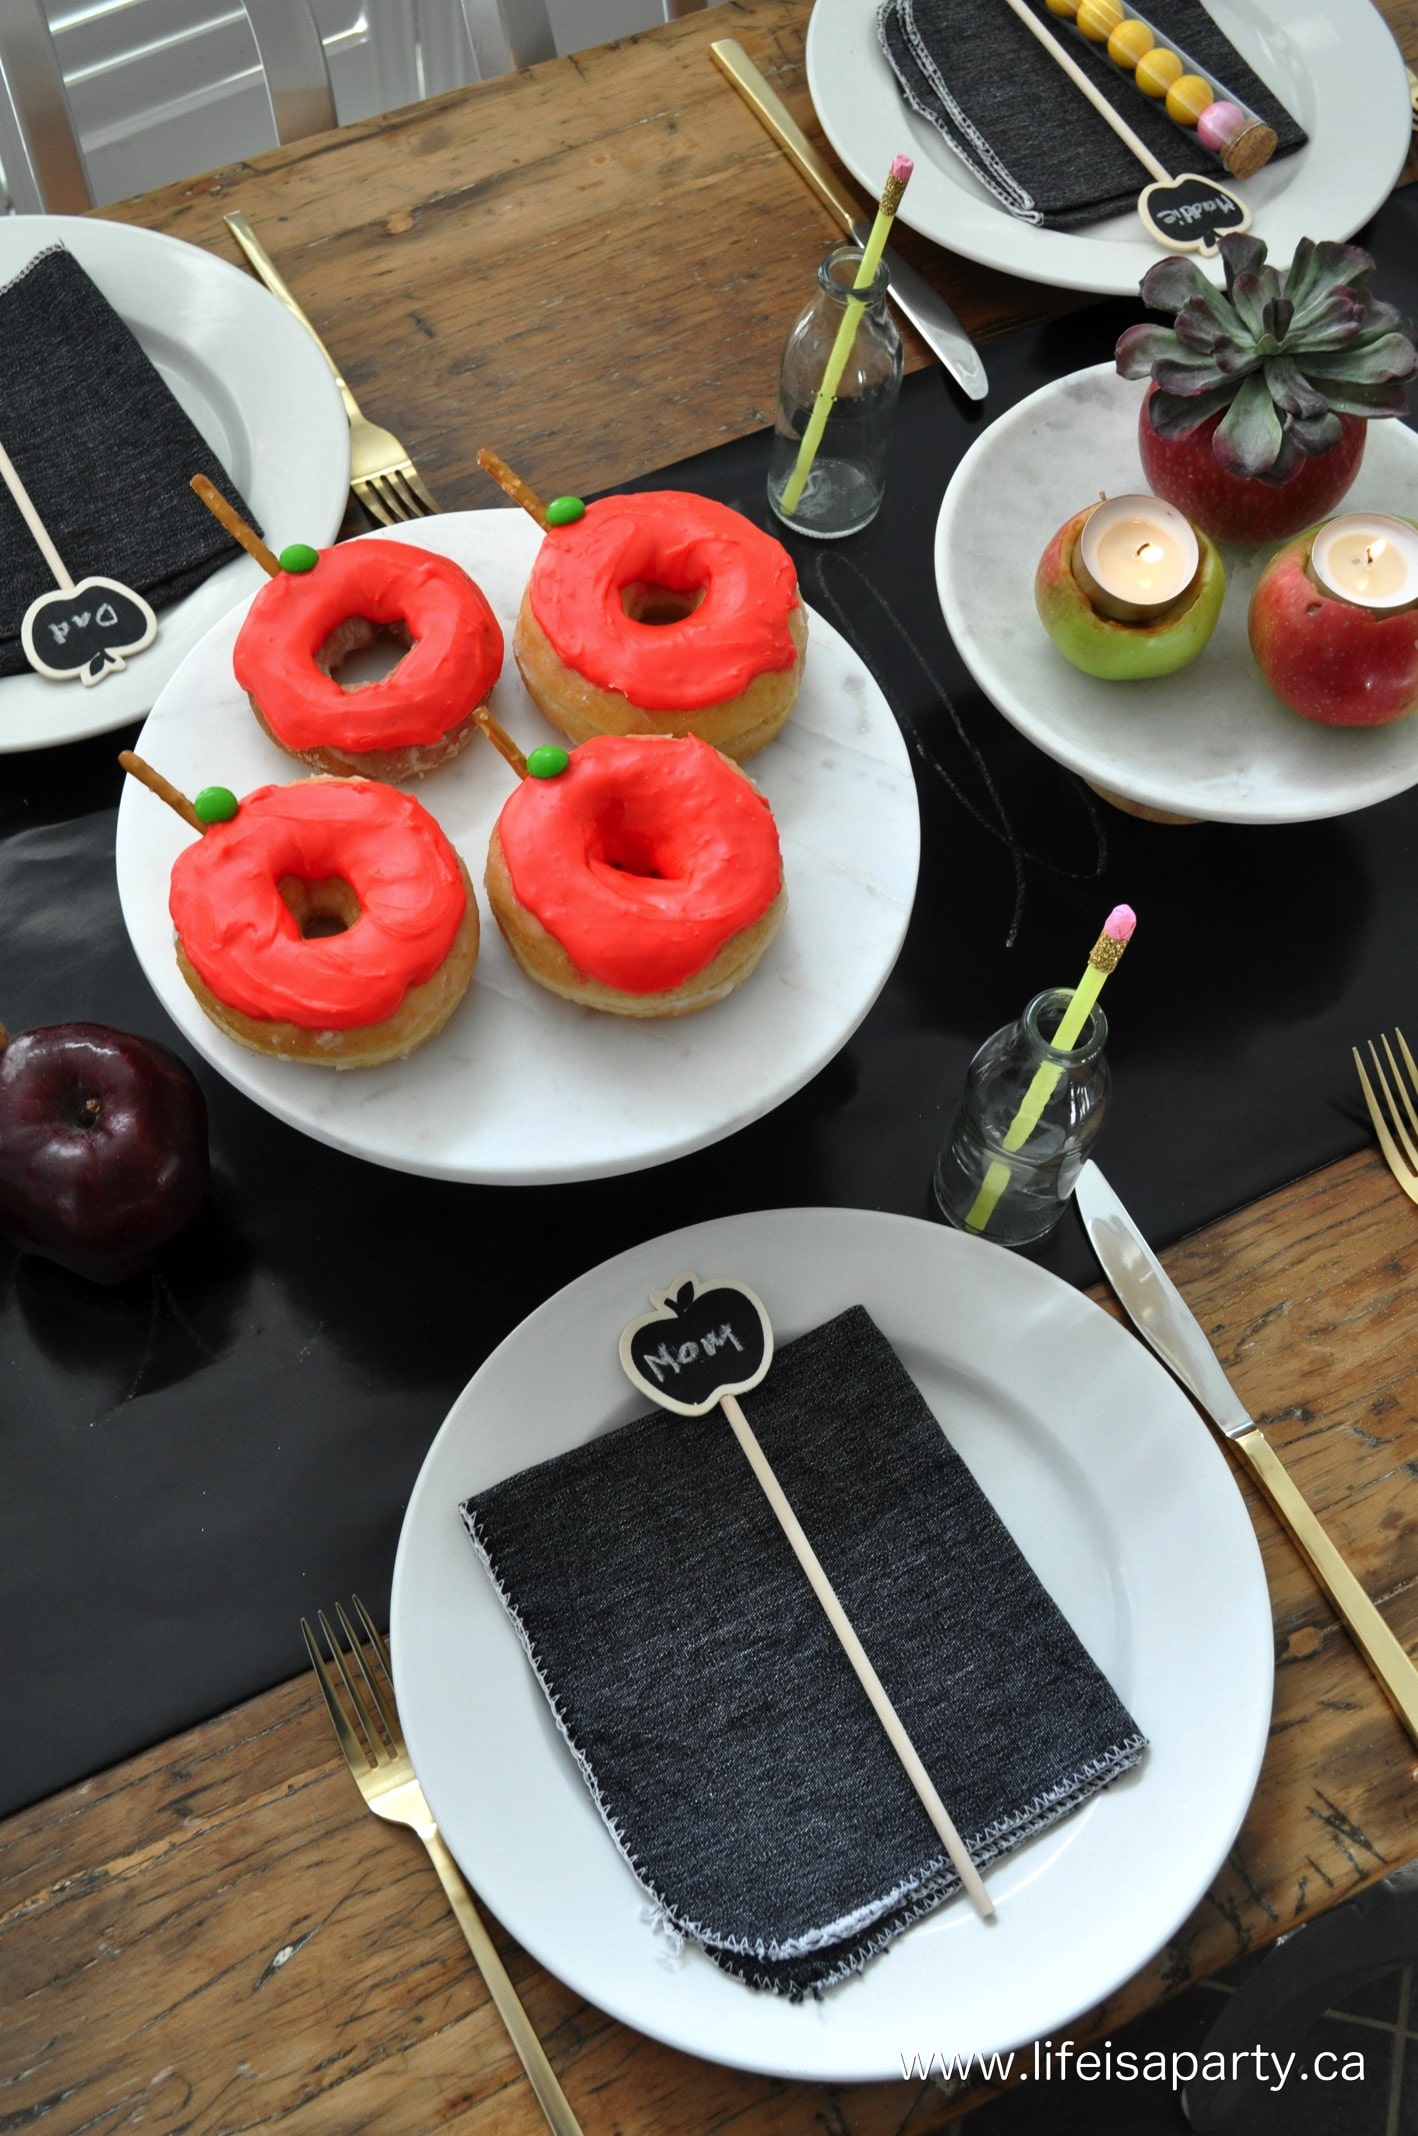


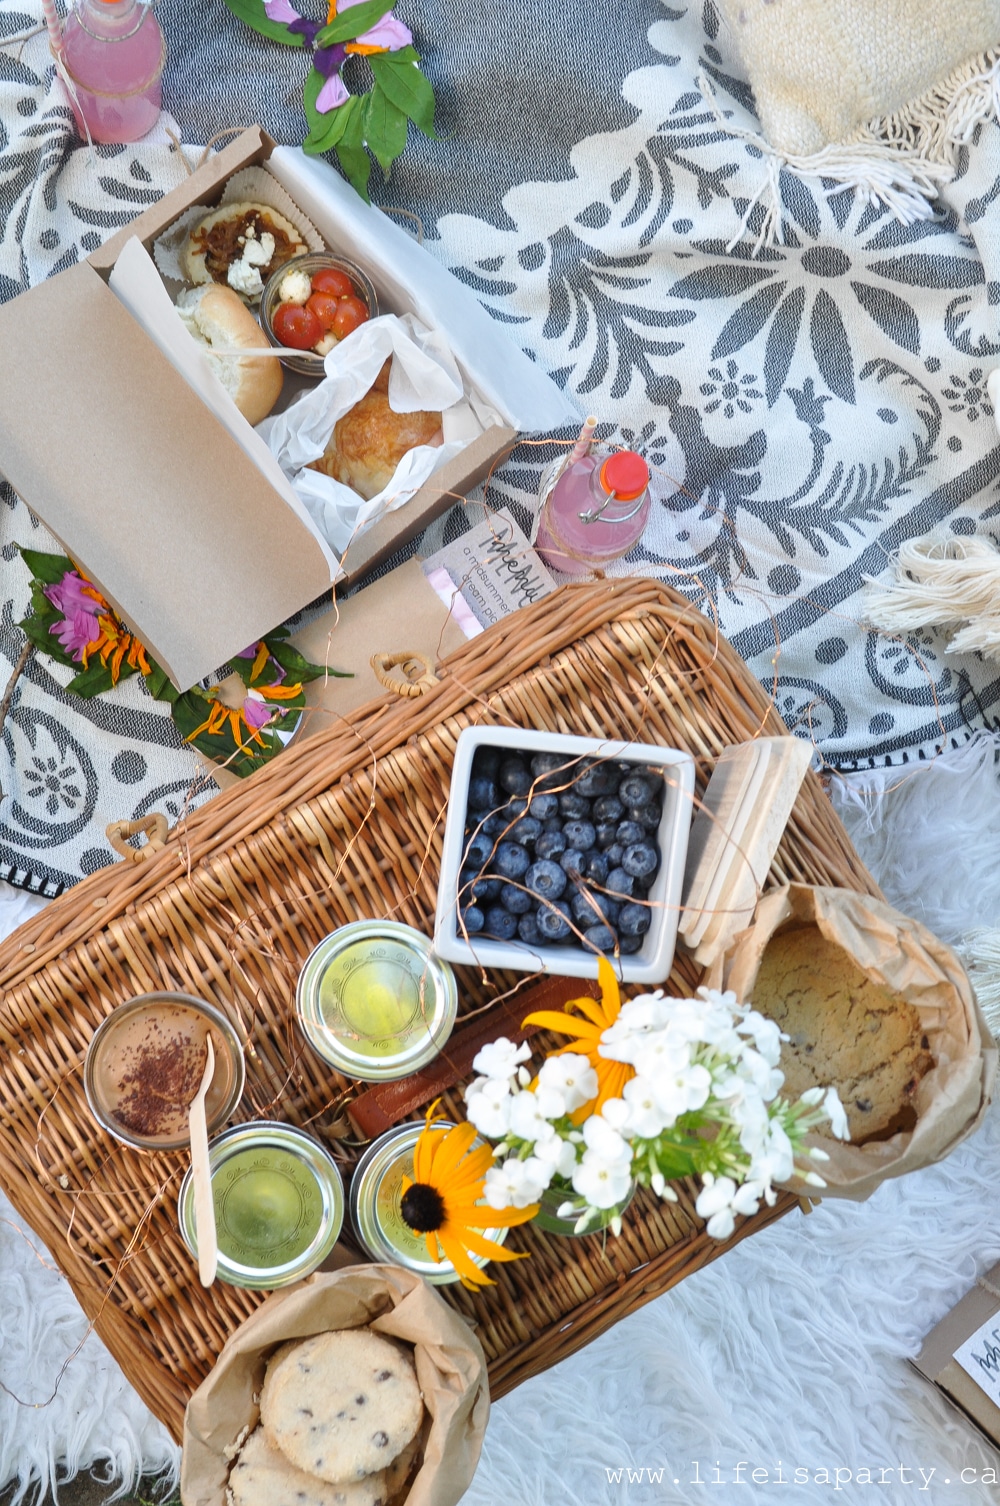
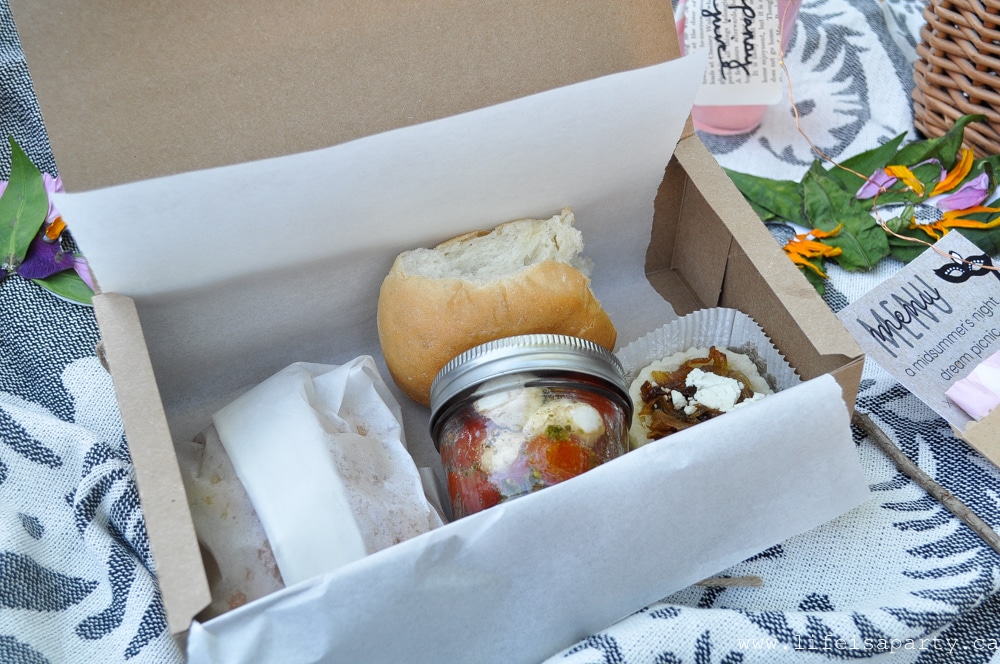
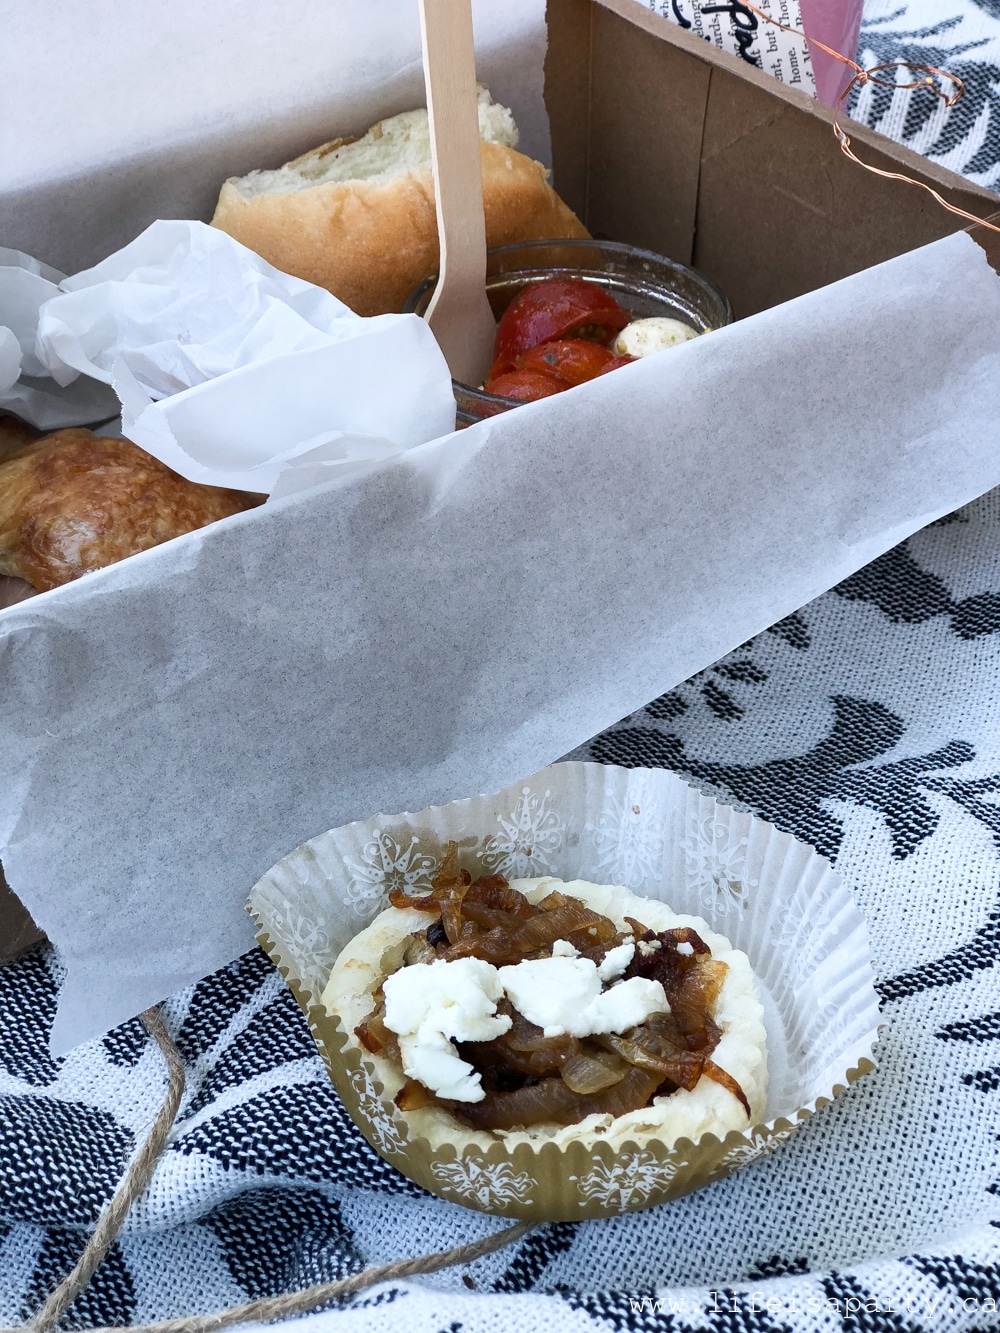
 The little salad was a made with tomatoes from our garden and bocconcini. In the bottom of a little mason jar I added a splash of olive oil and balsamic vinegar, and about a ¼ teaspoon of homemade pesto. The on top of it I added some cherry tomatoes and mini bocconcini and finished it of with some salt and pepper. Just before opening everyone gave their's a shake and they were perfect.
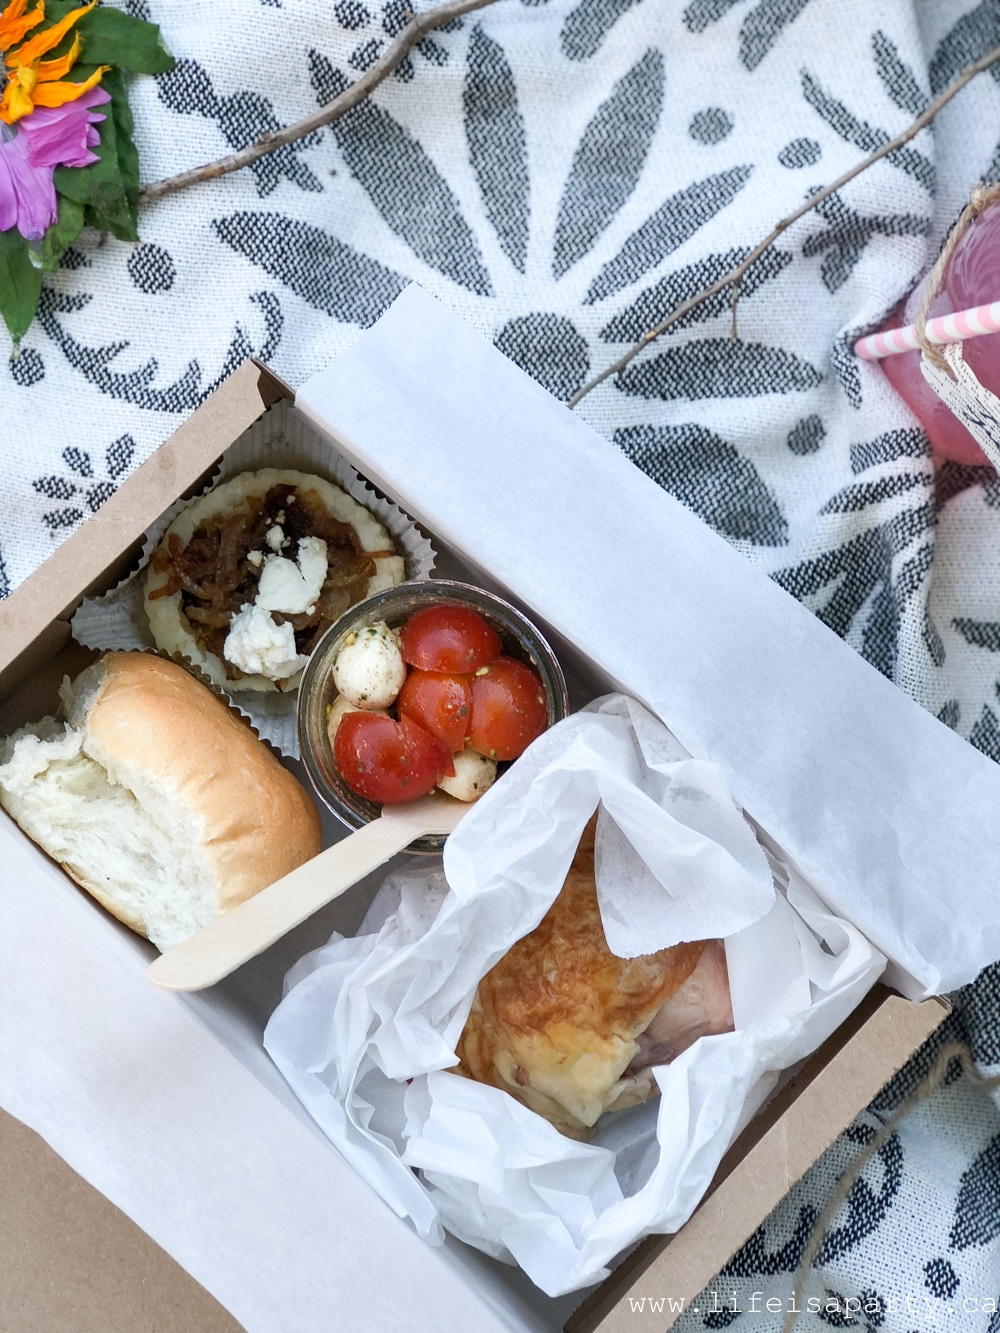
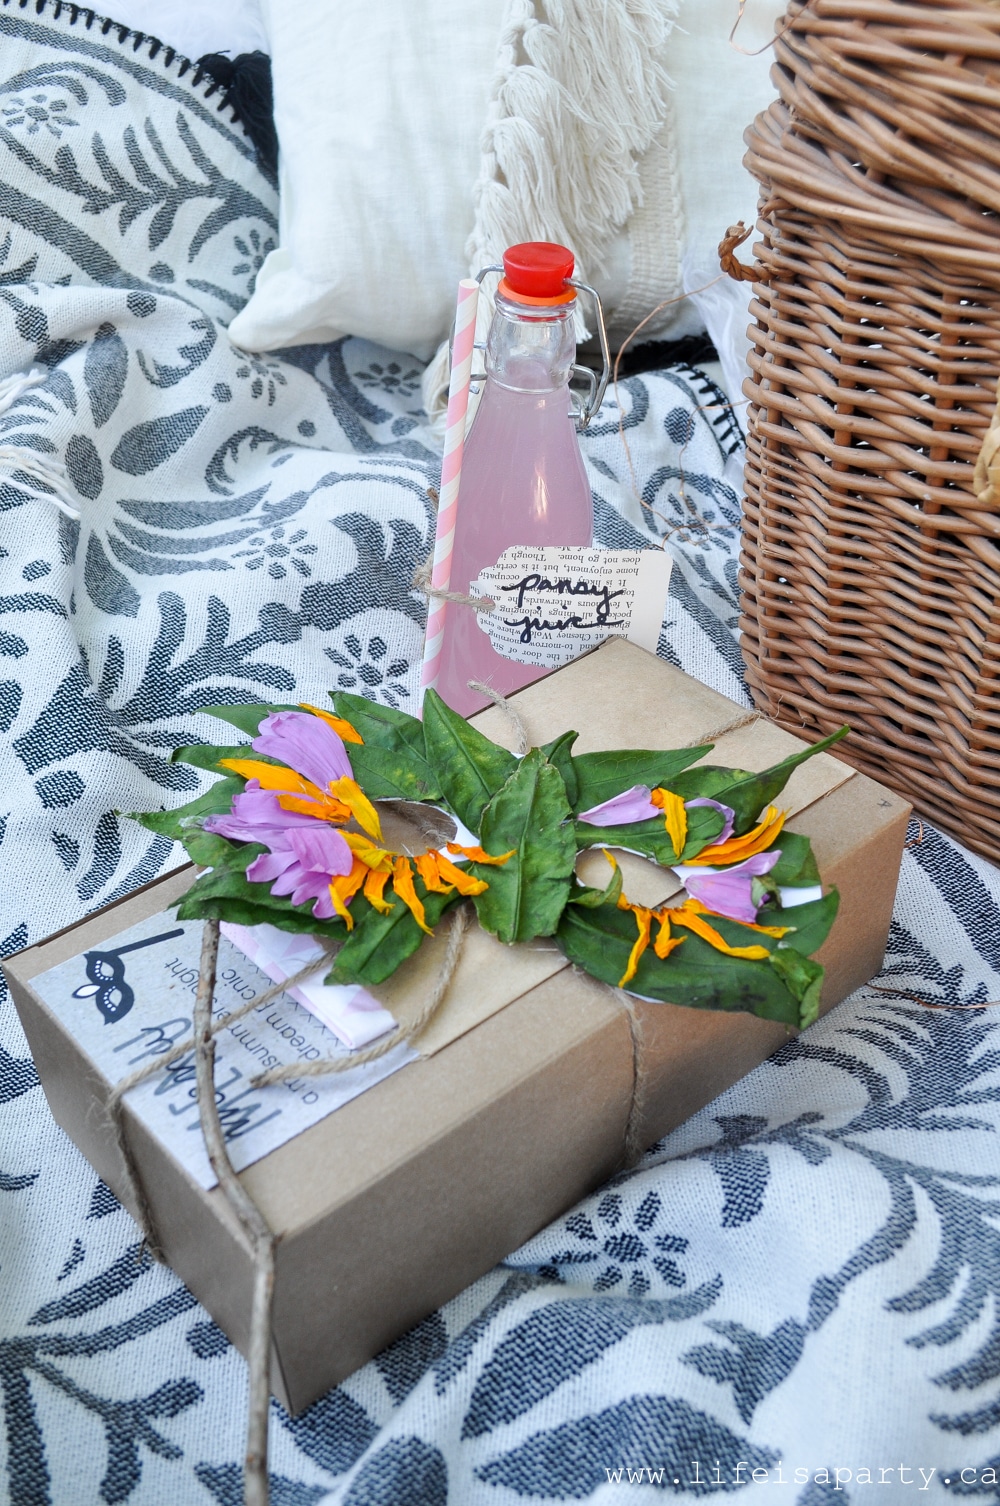
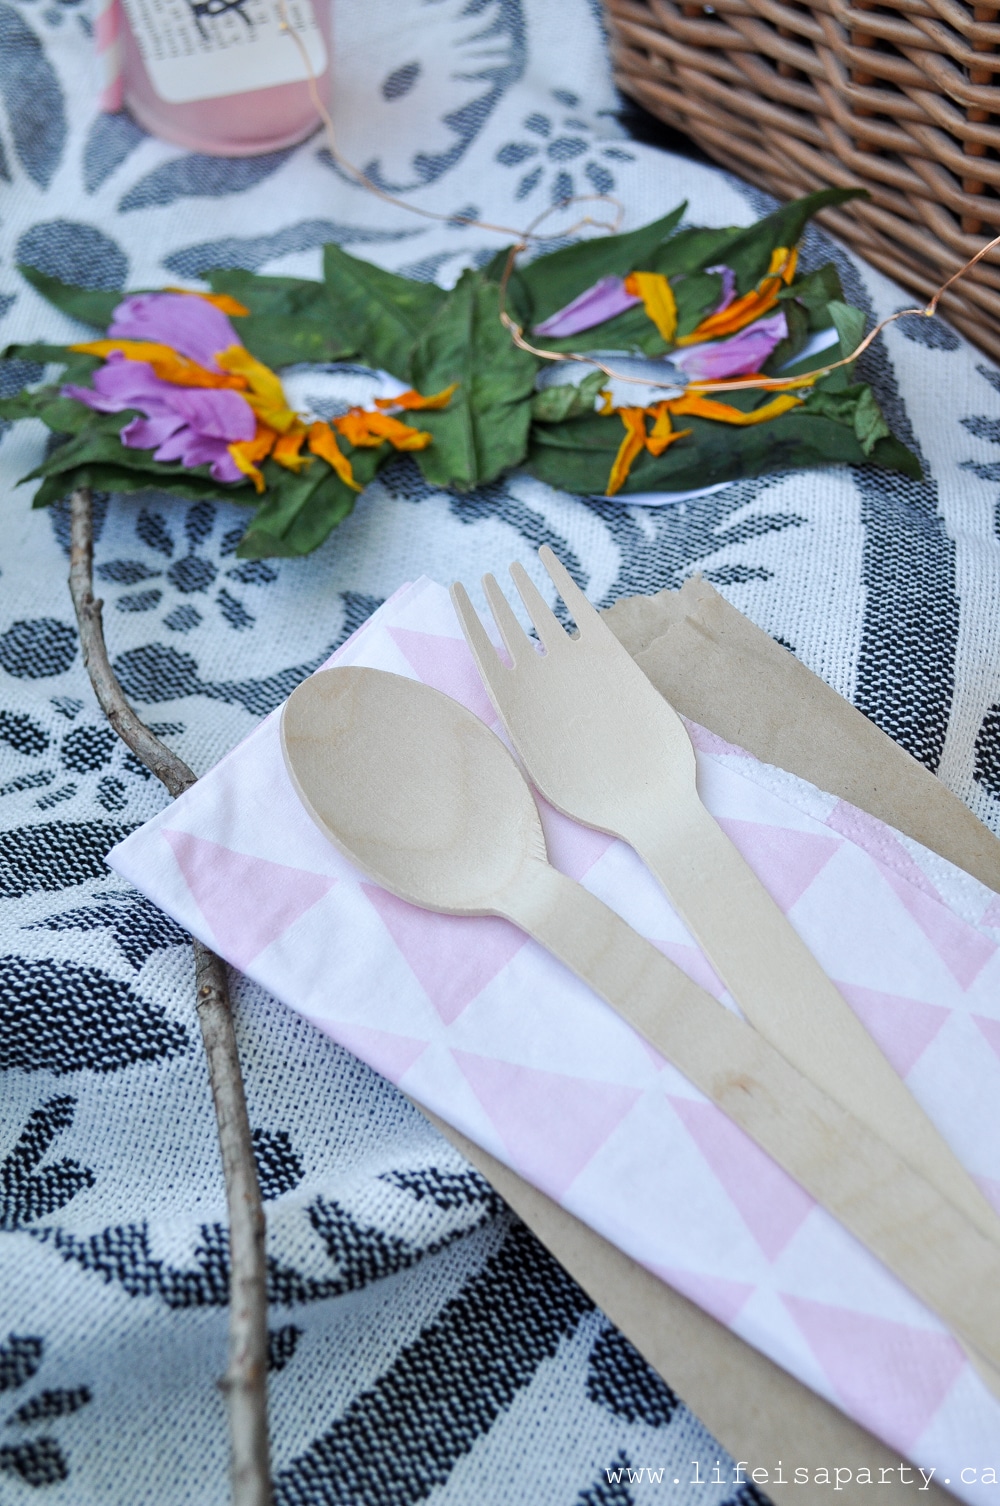
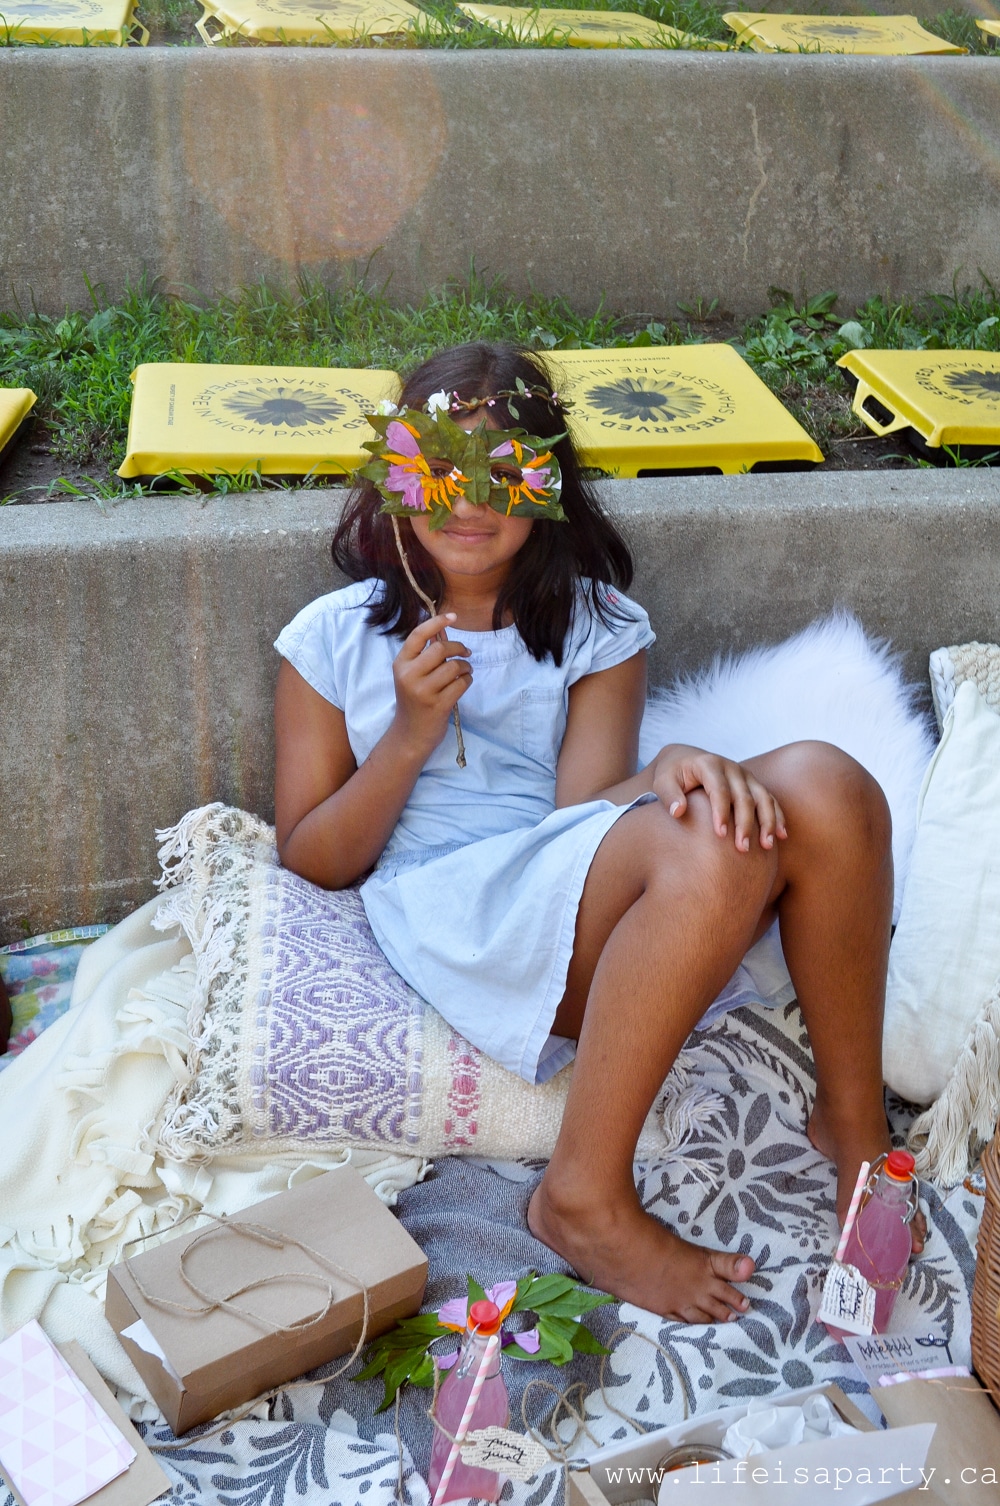
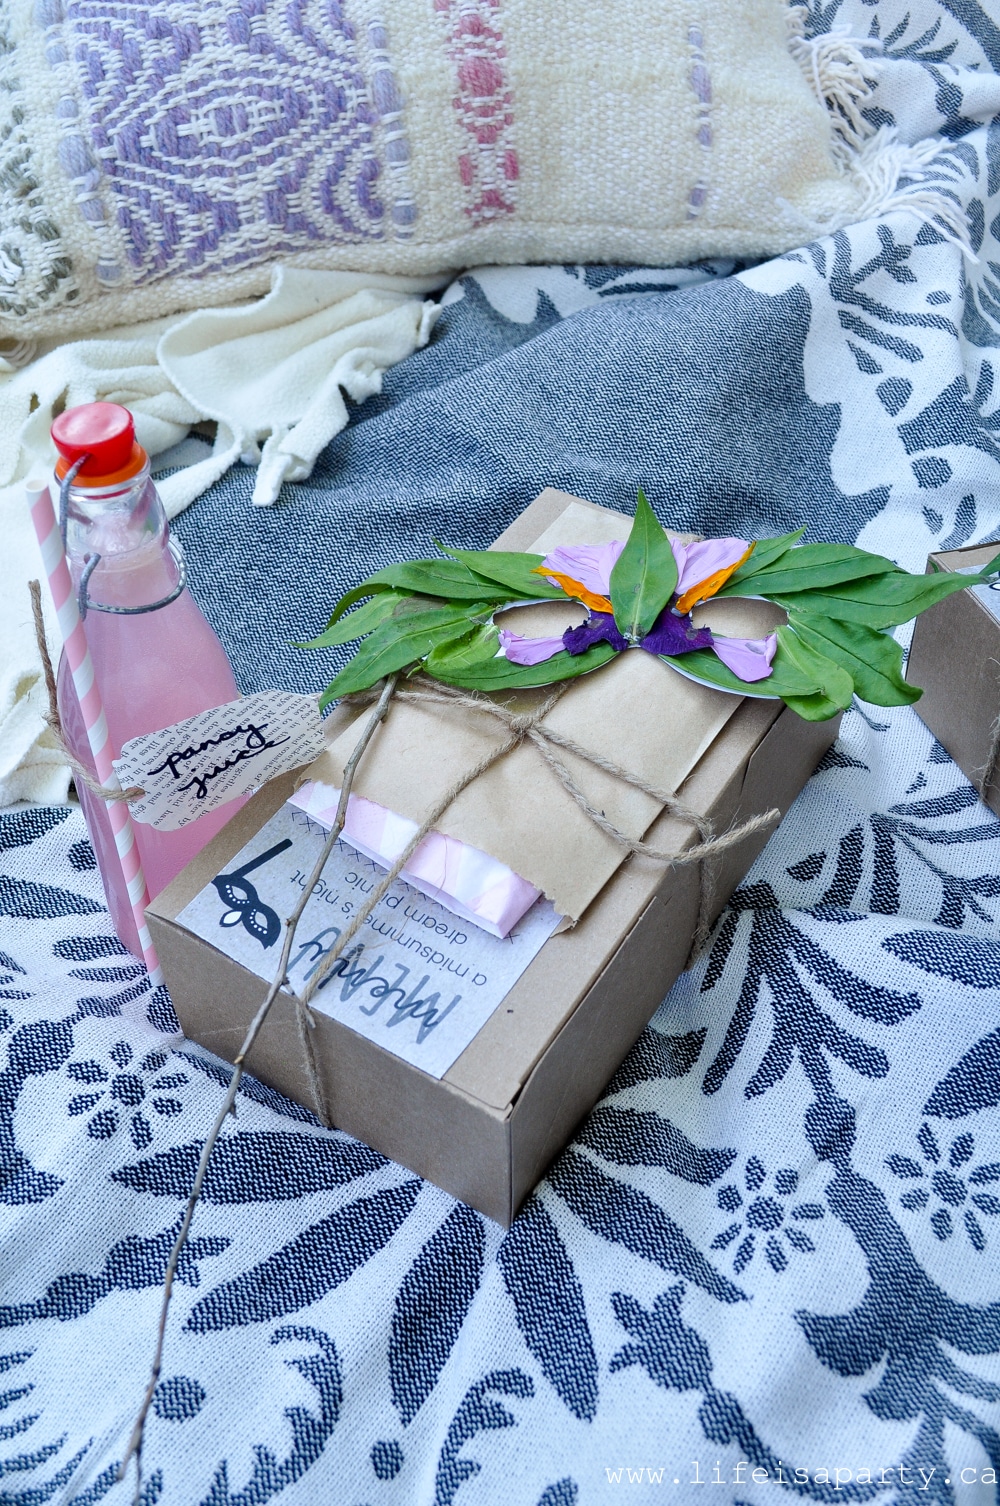
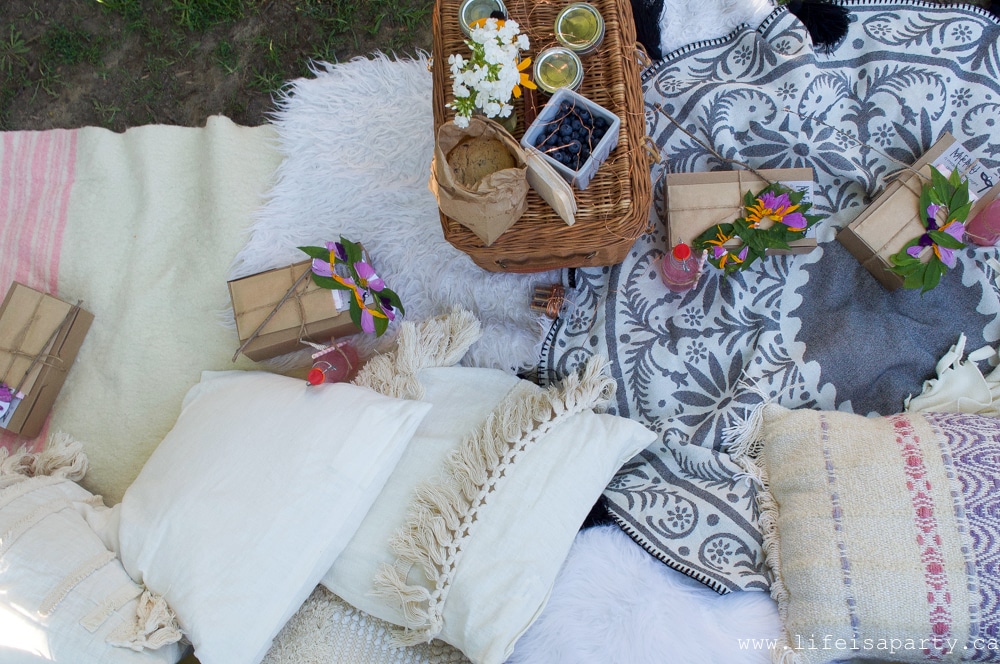
 For the floral masks, they found a template on-line and printed it on card stock to use as the base, and then added all the pretty fresh leaves and flower petals from our garden, and just hot glued them on. the perfect finishing touch was a twig handle. They turned out so pretty and whimsical and perfect for the evenings midsummer celebrations.
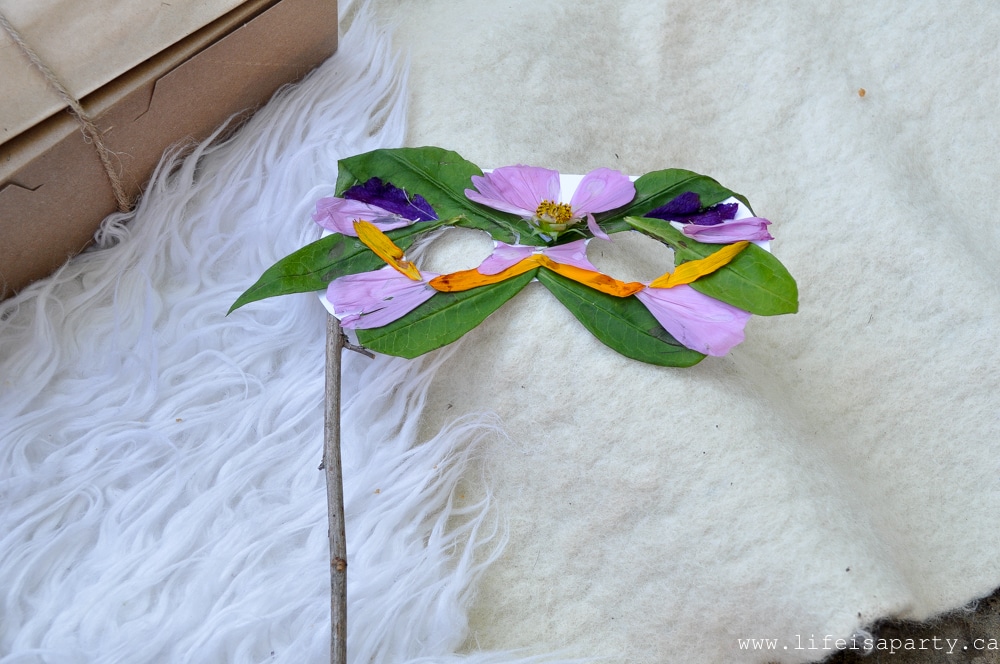
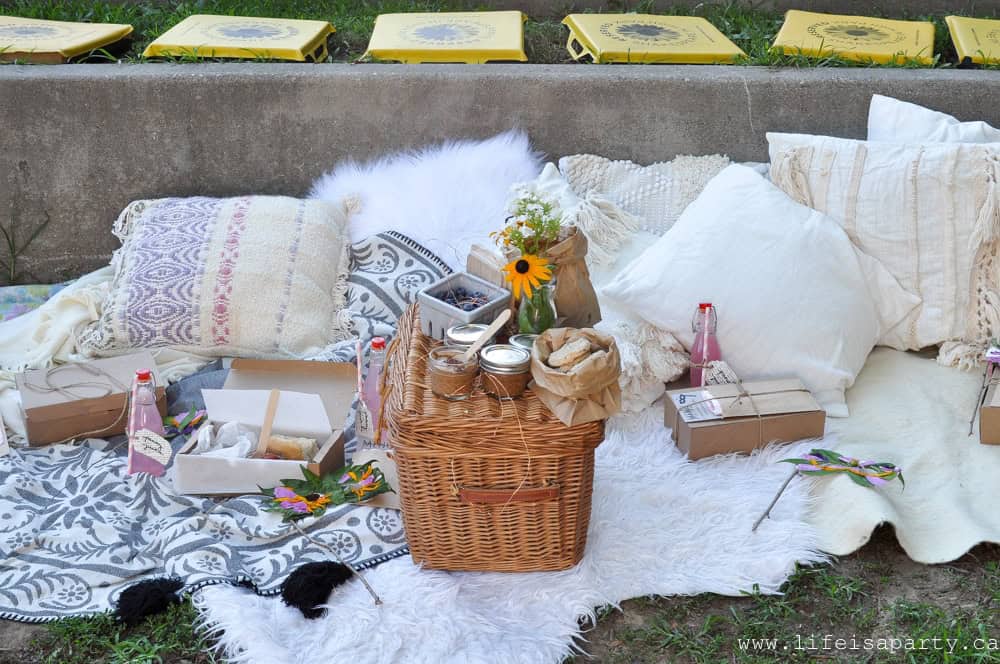
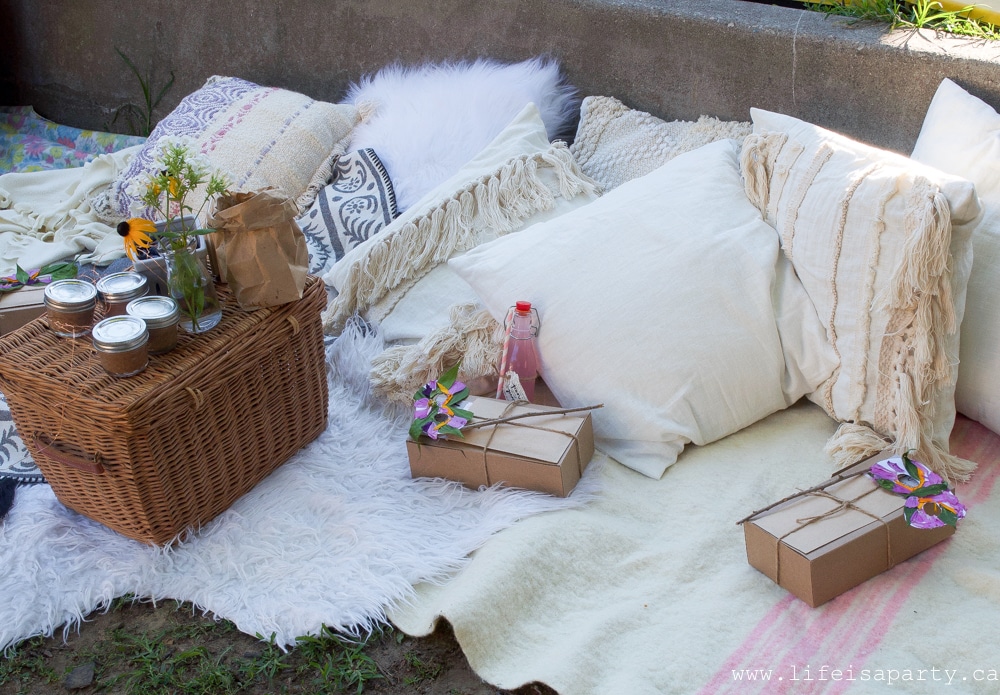
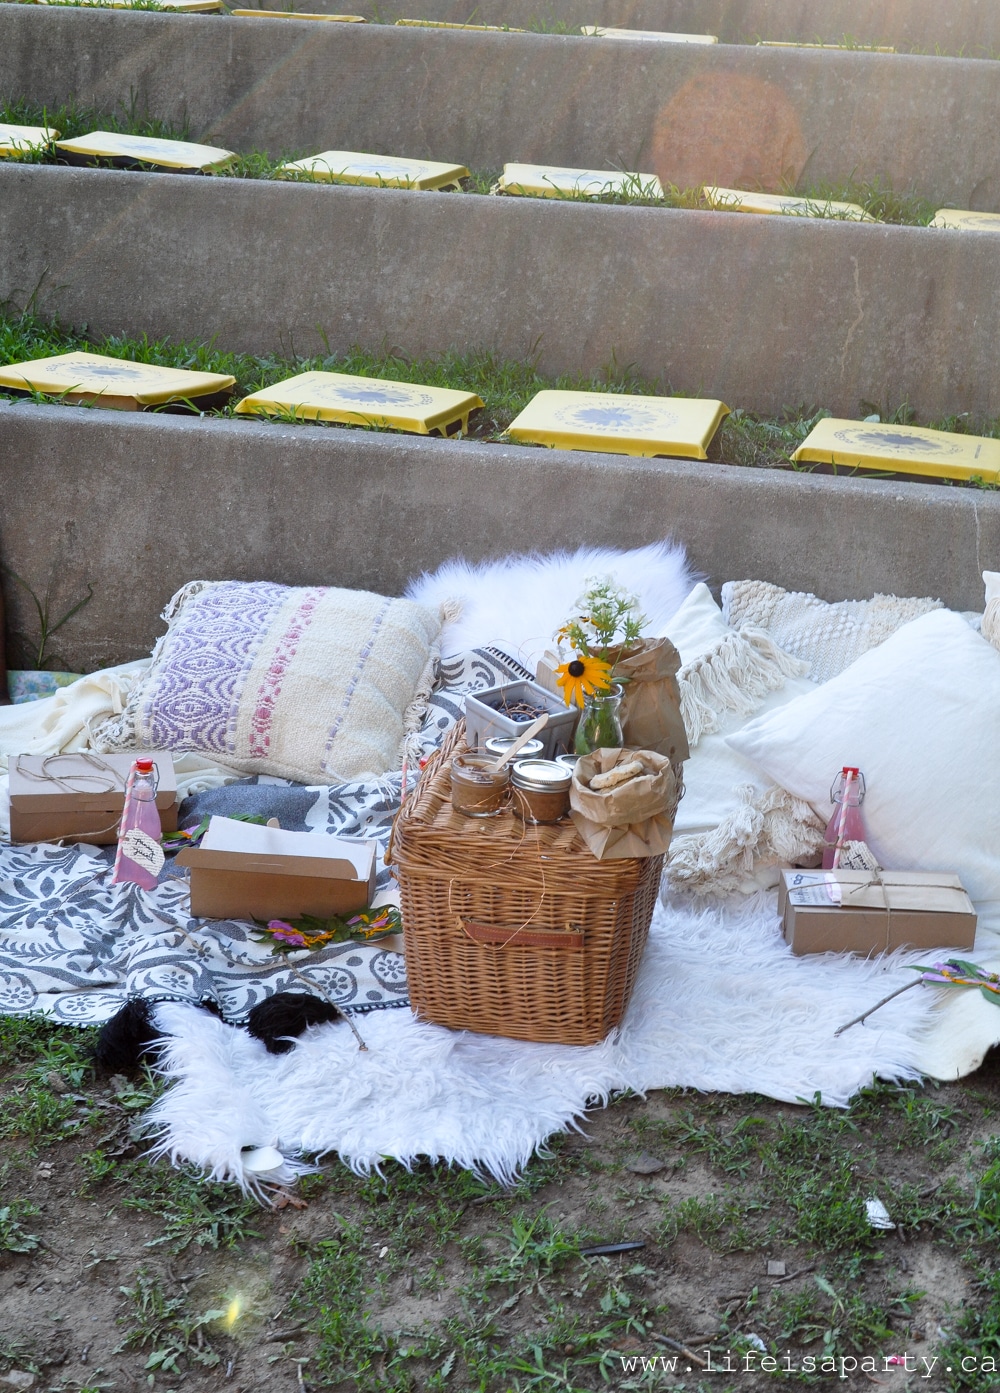 The course of true love never did run smoothly, as exhibited in the play, but the evening sure did! The girls all managed to stay awake and follow the plot of their first Shakespeare play. We thought starting out with one that included fairies, like fairy king Oberon, and a magical theme and was a good plan. 😉 The day was a raging success, and I think it just might need to become a tradition that we do again next year.
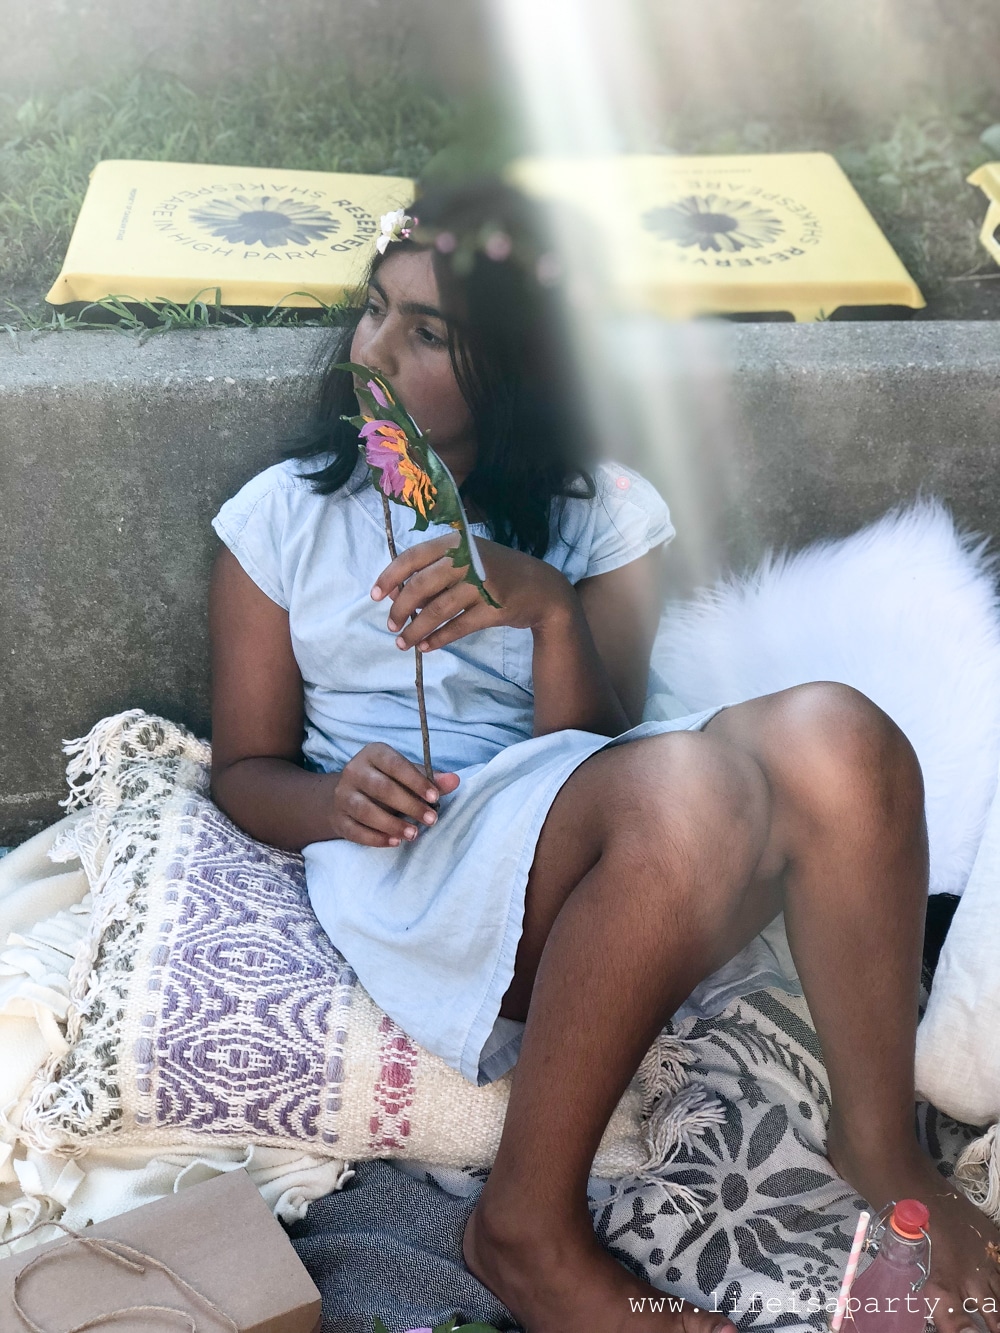


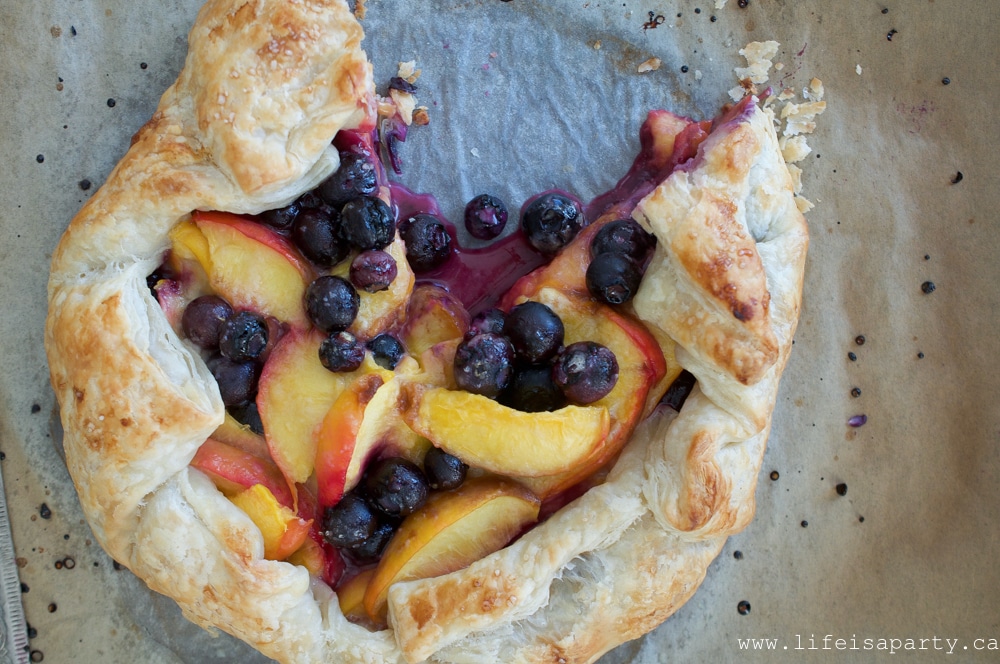
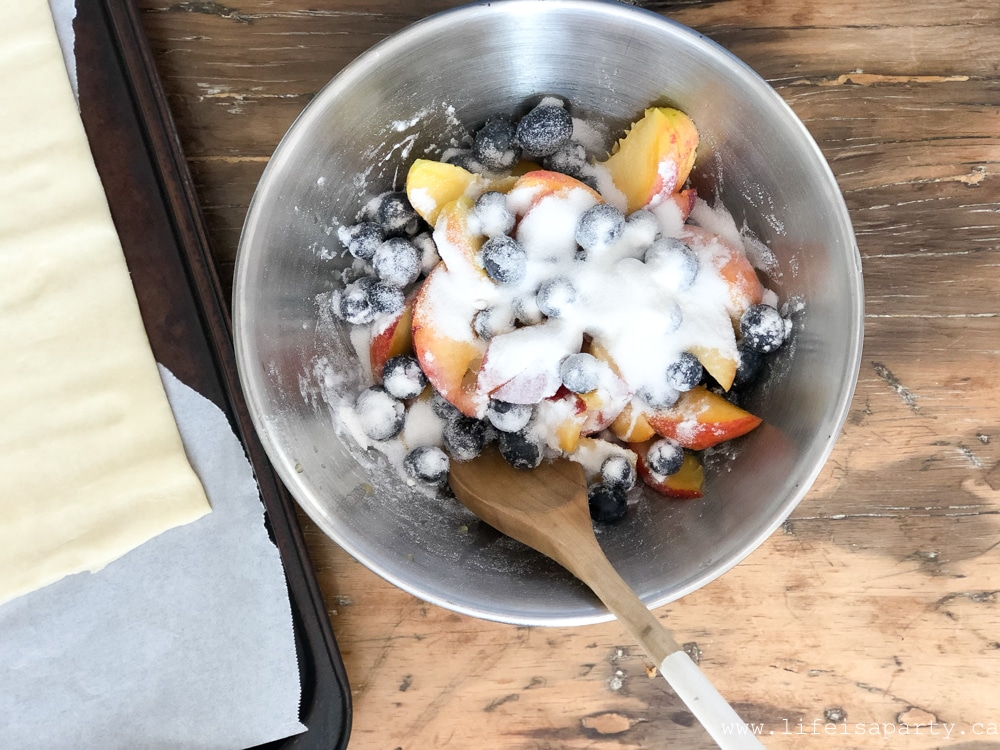
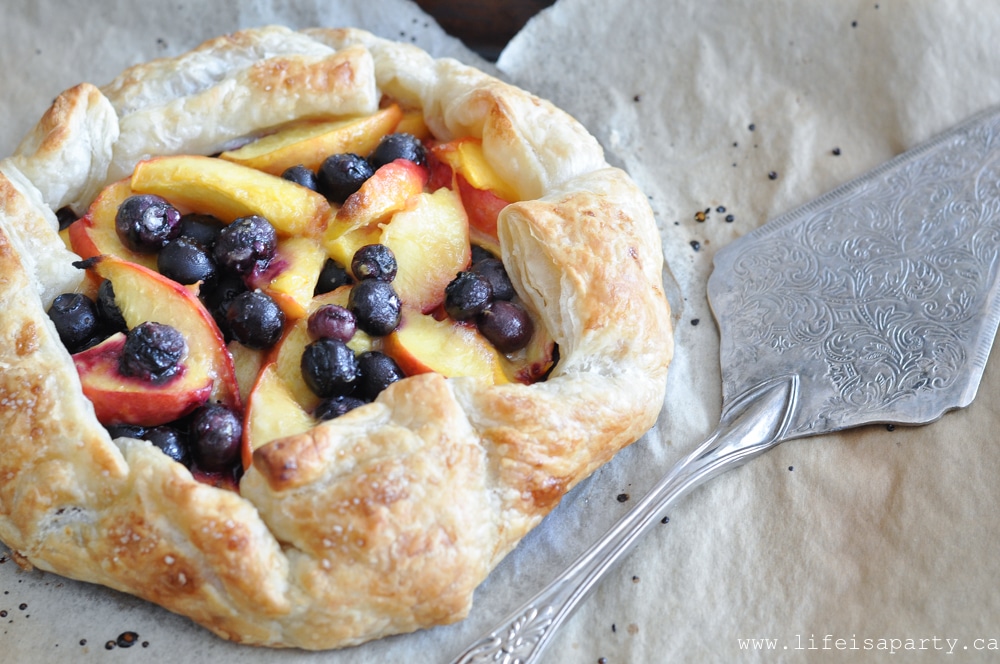
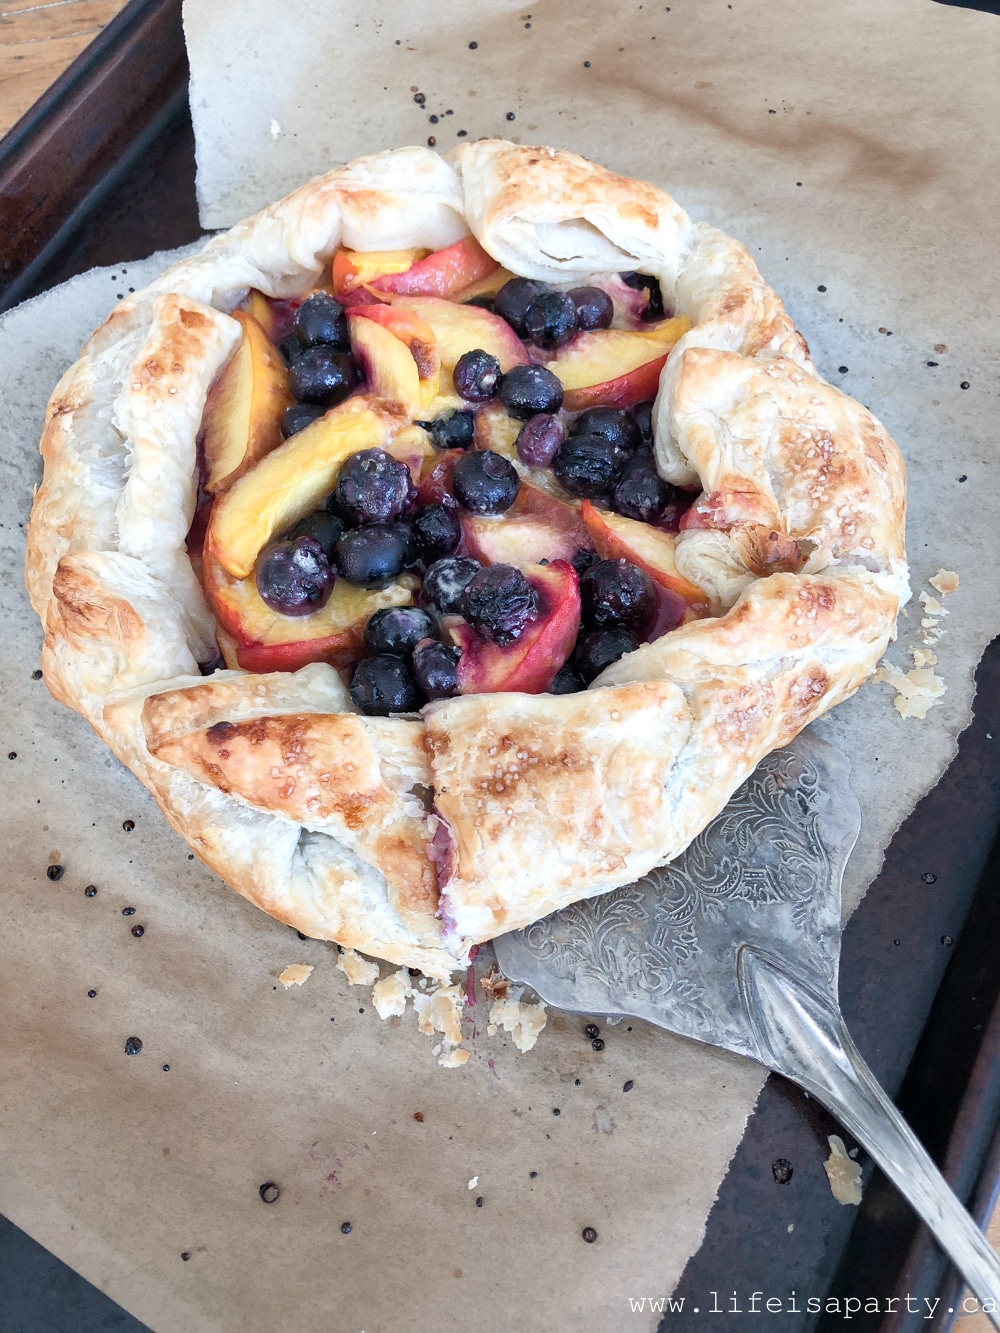
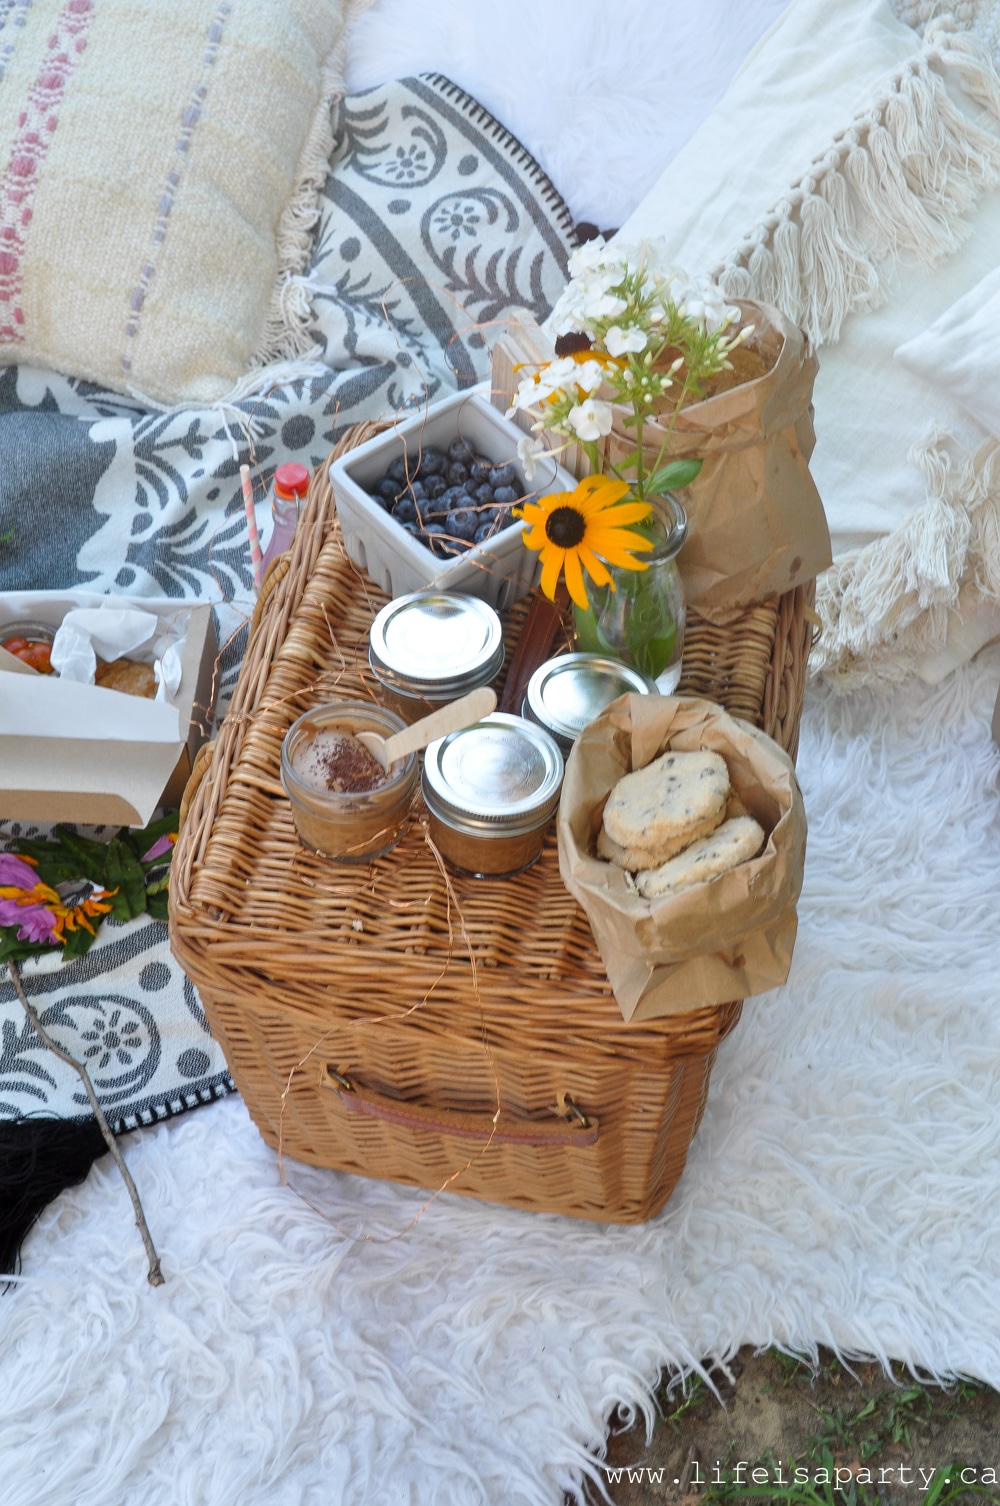
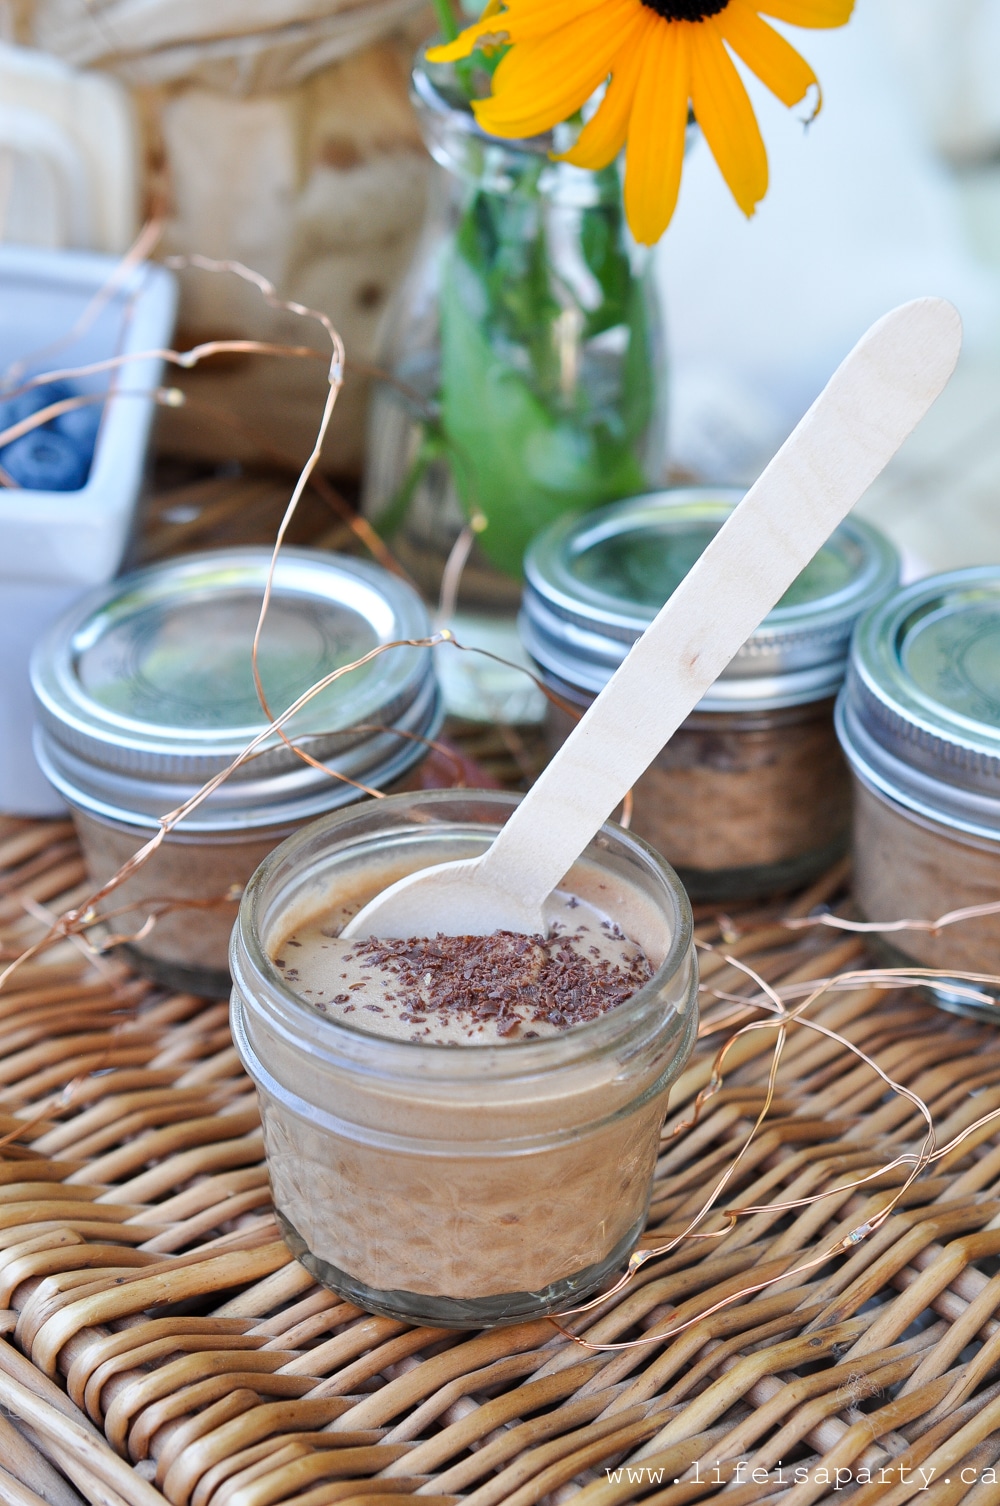
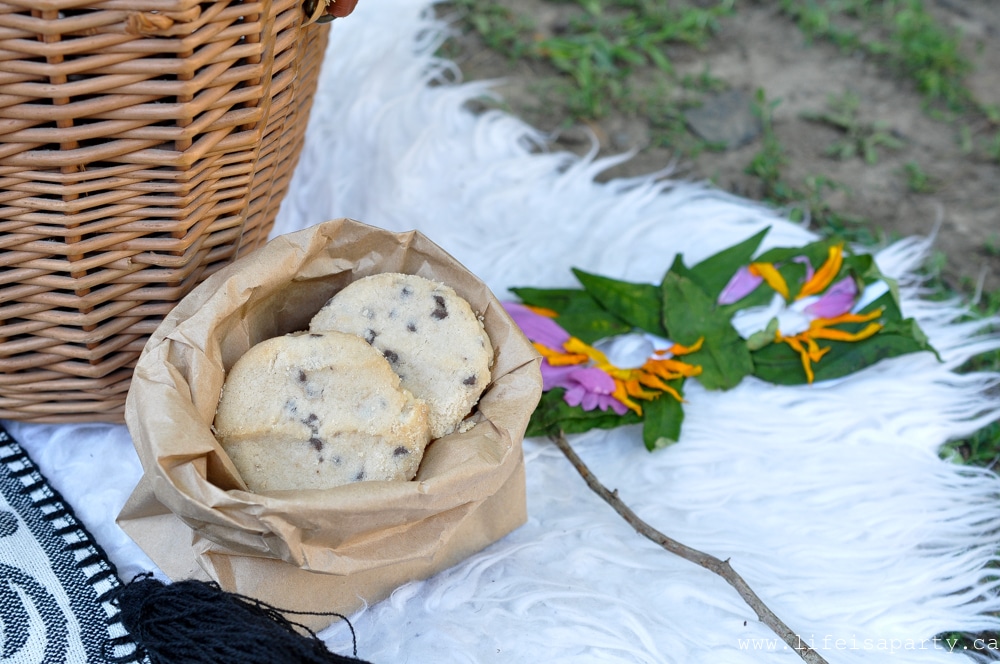
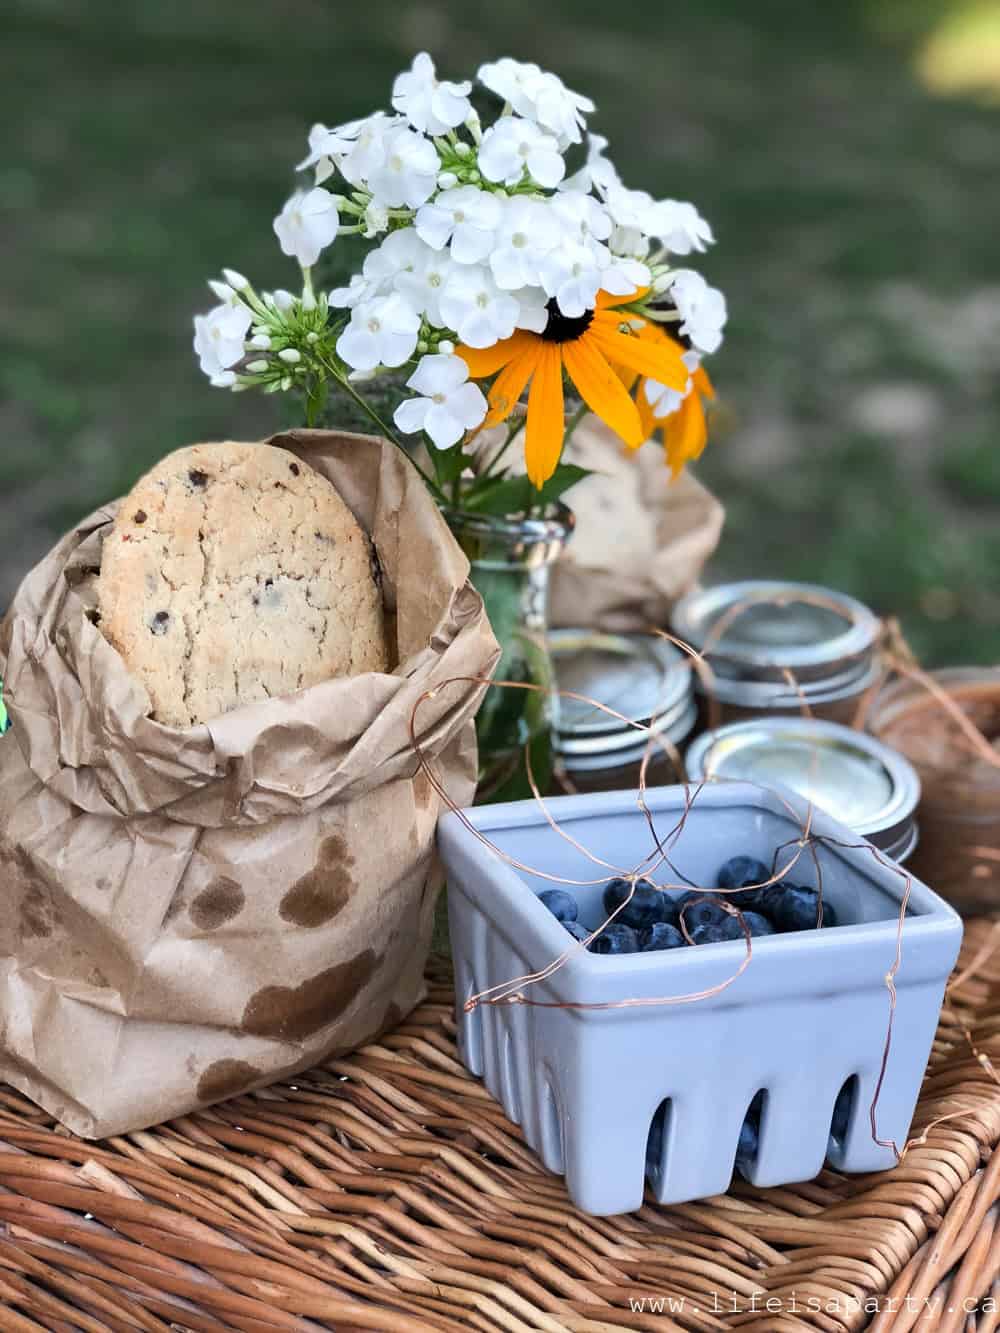
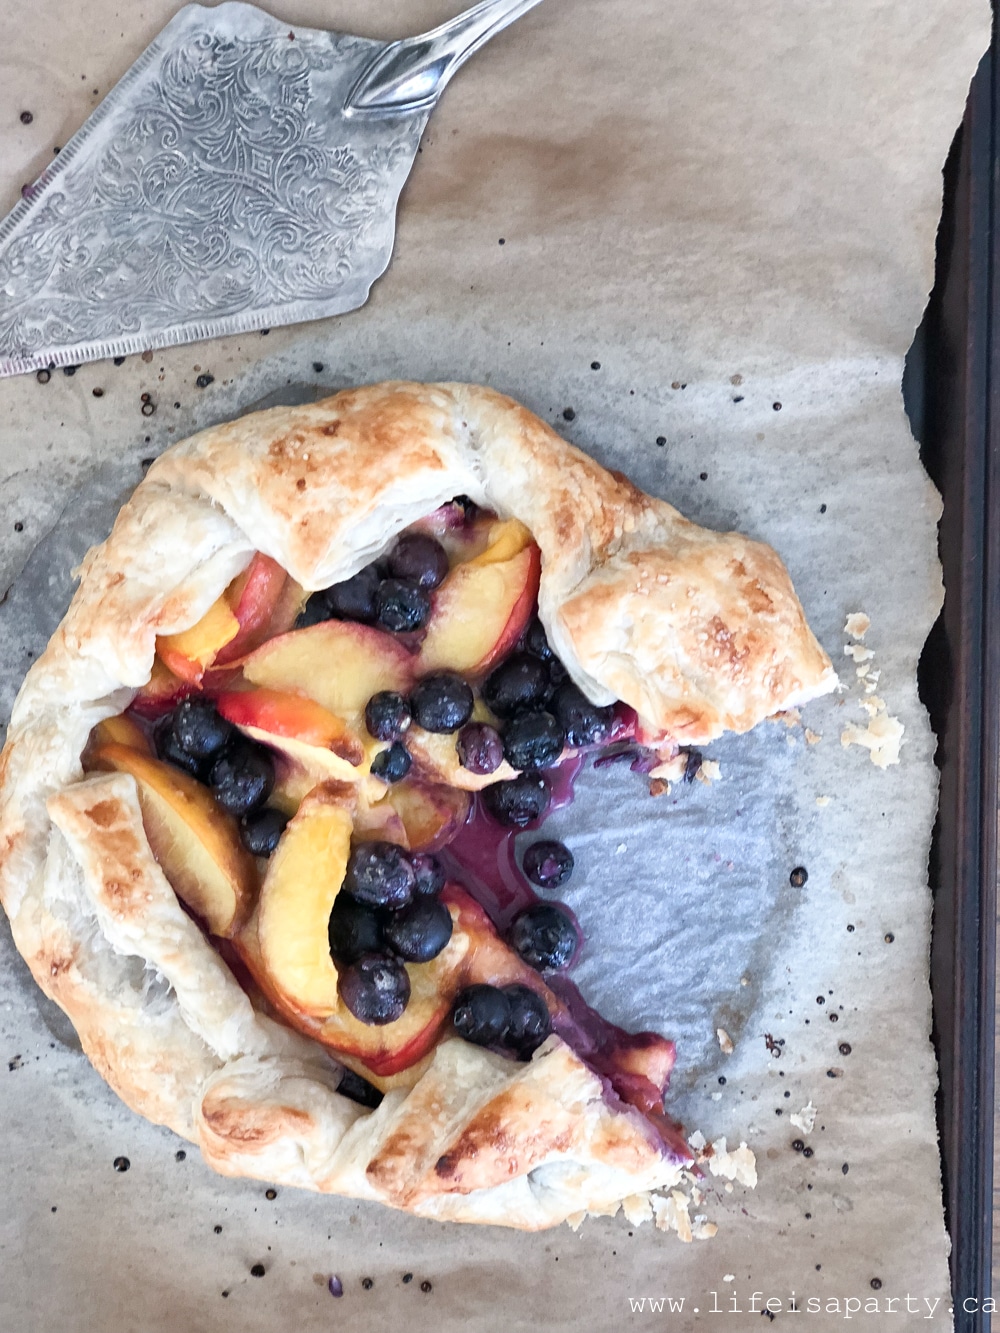
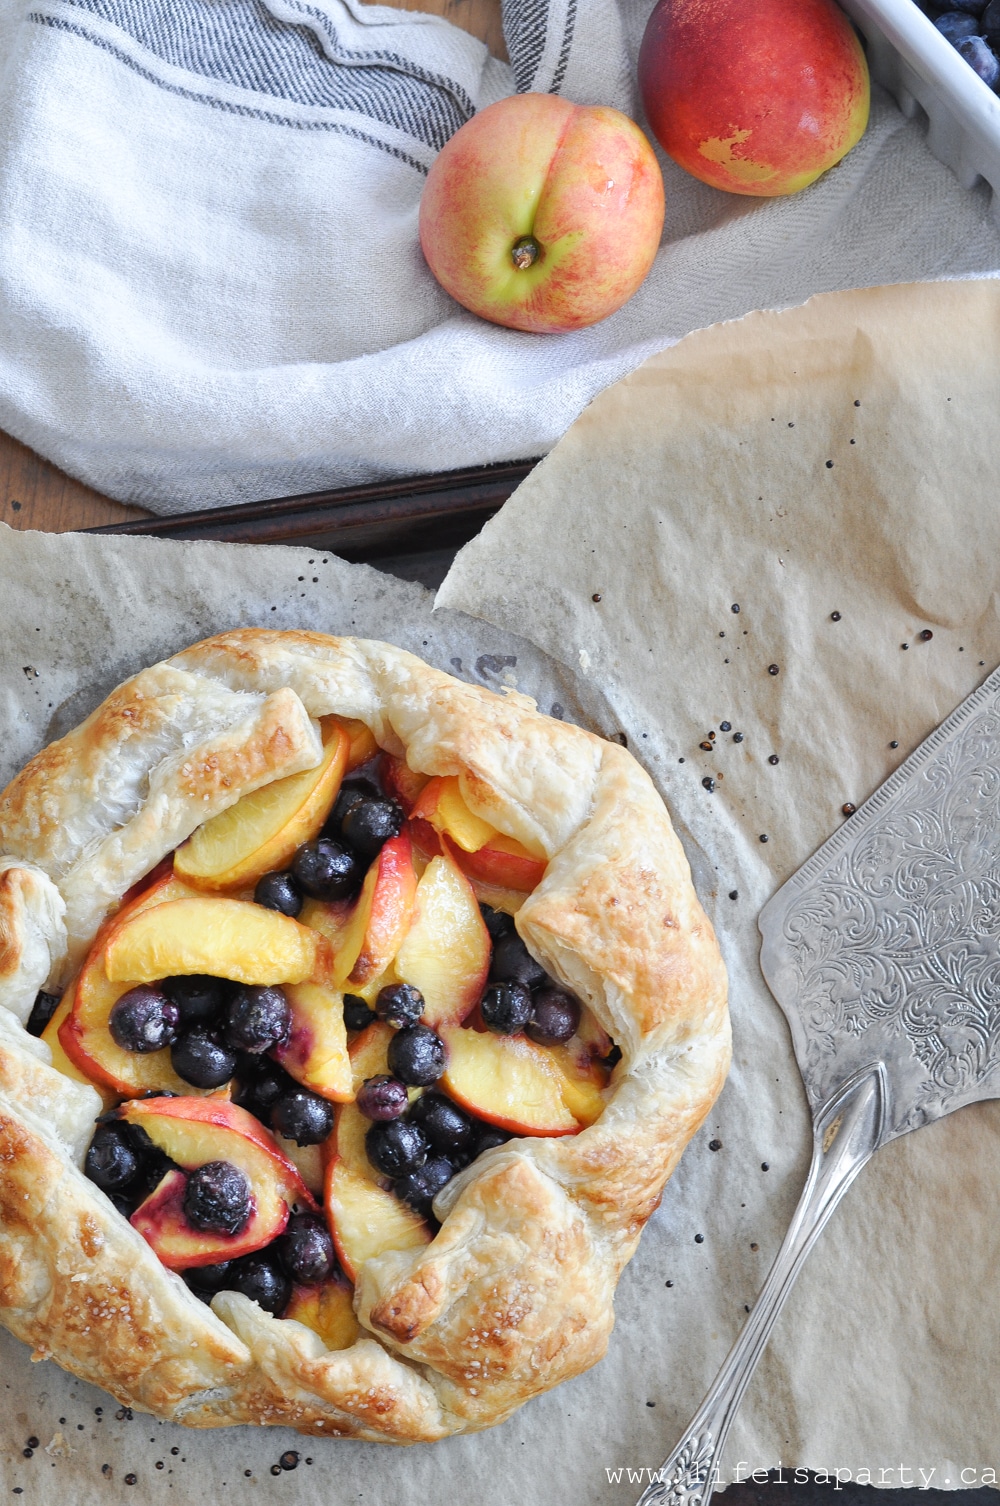 Perfect Summer Dessert
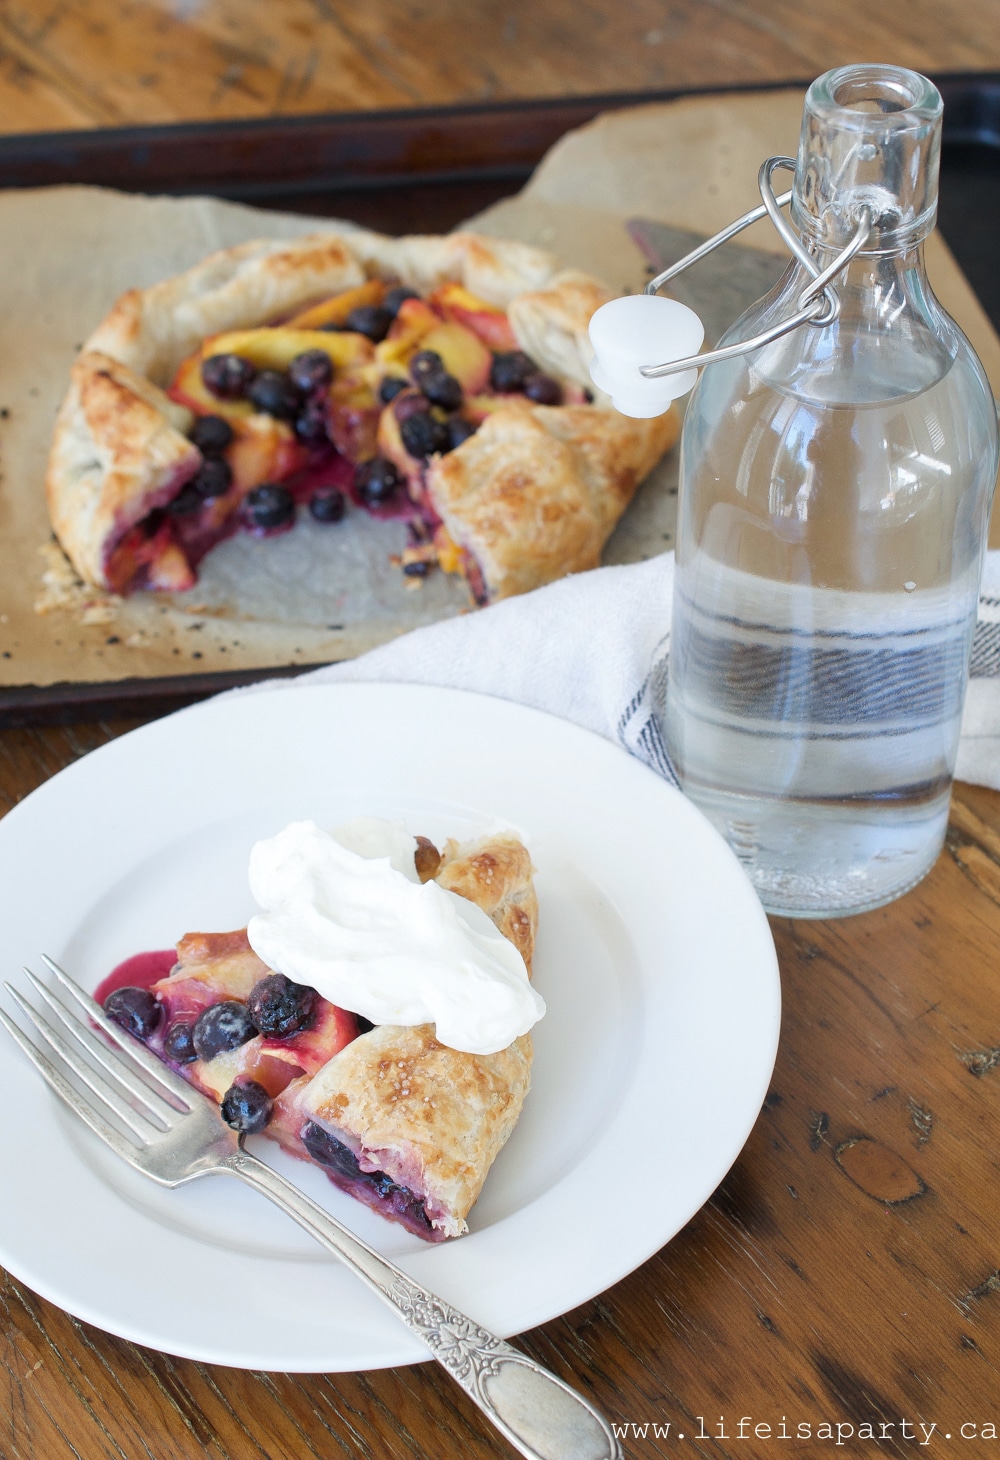


 Recipe Variations:


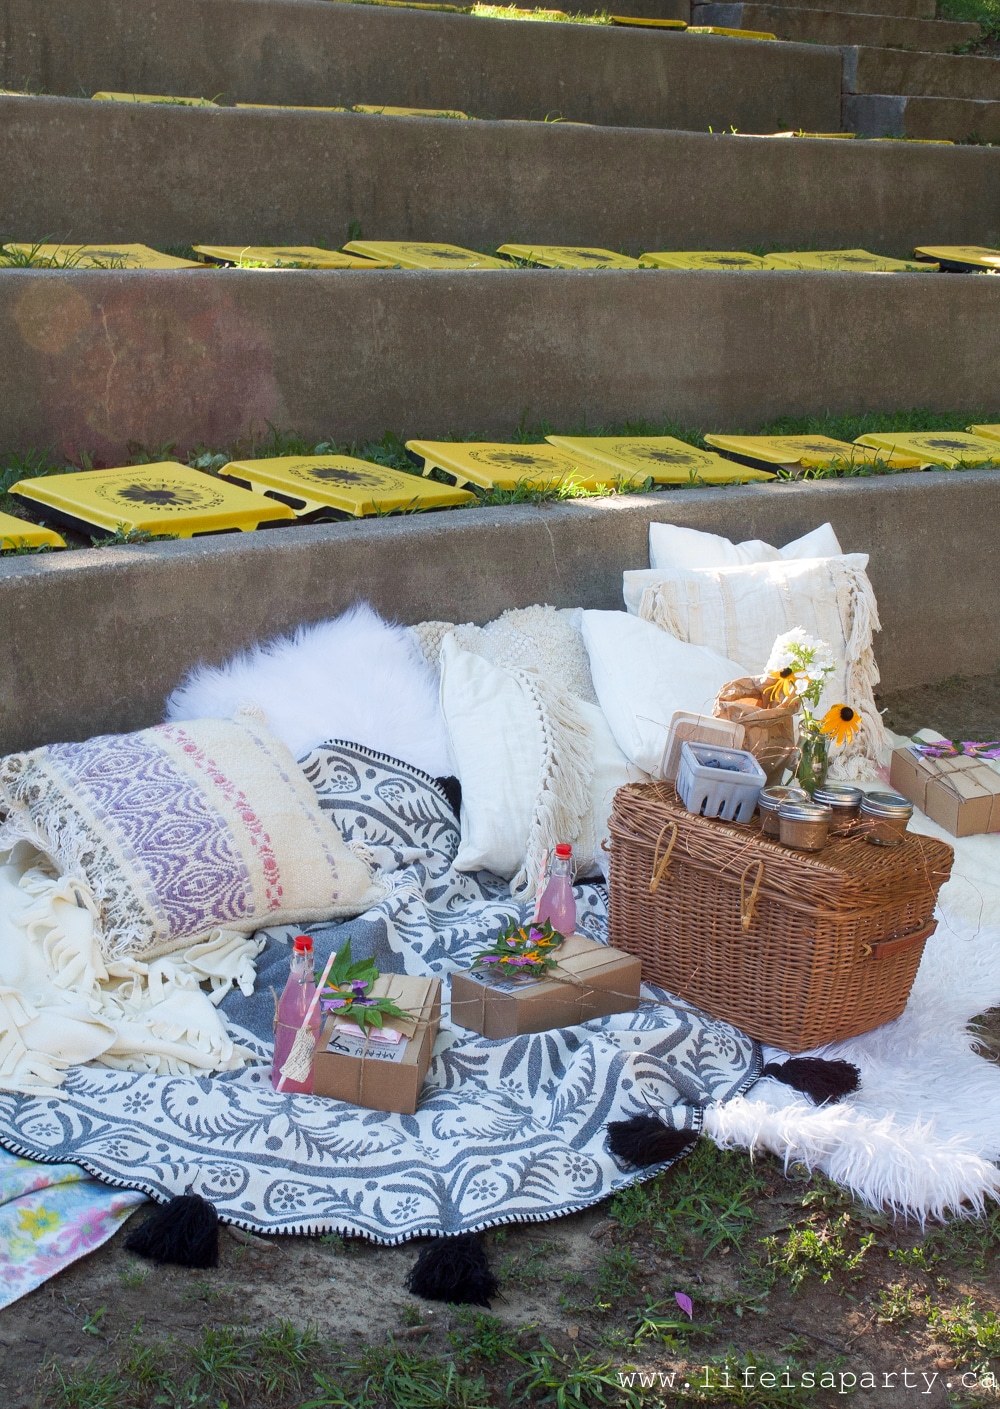
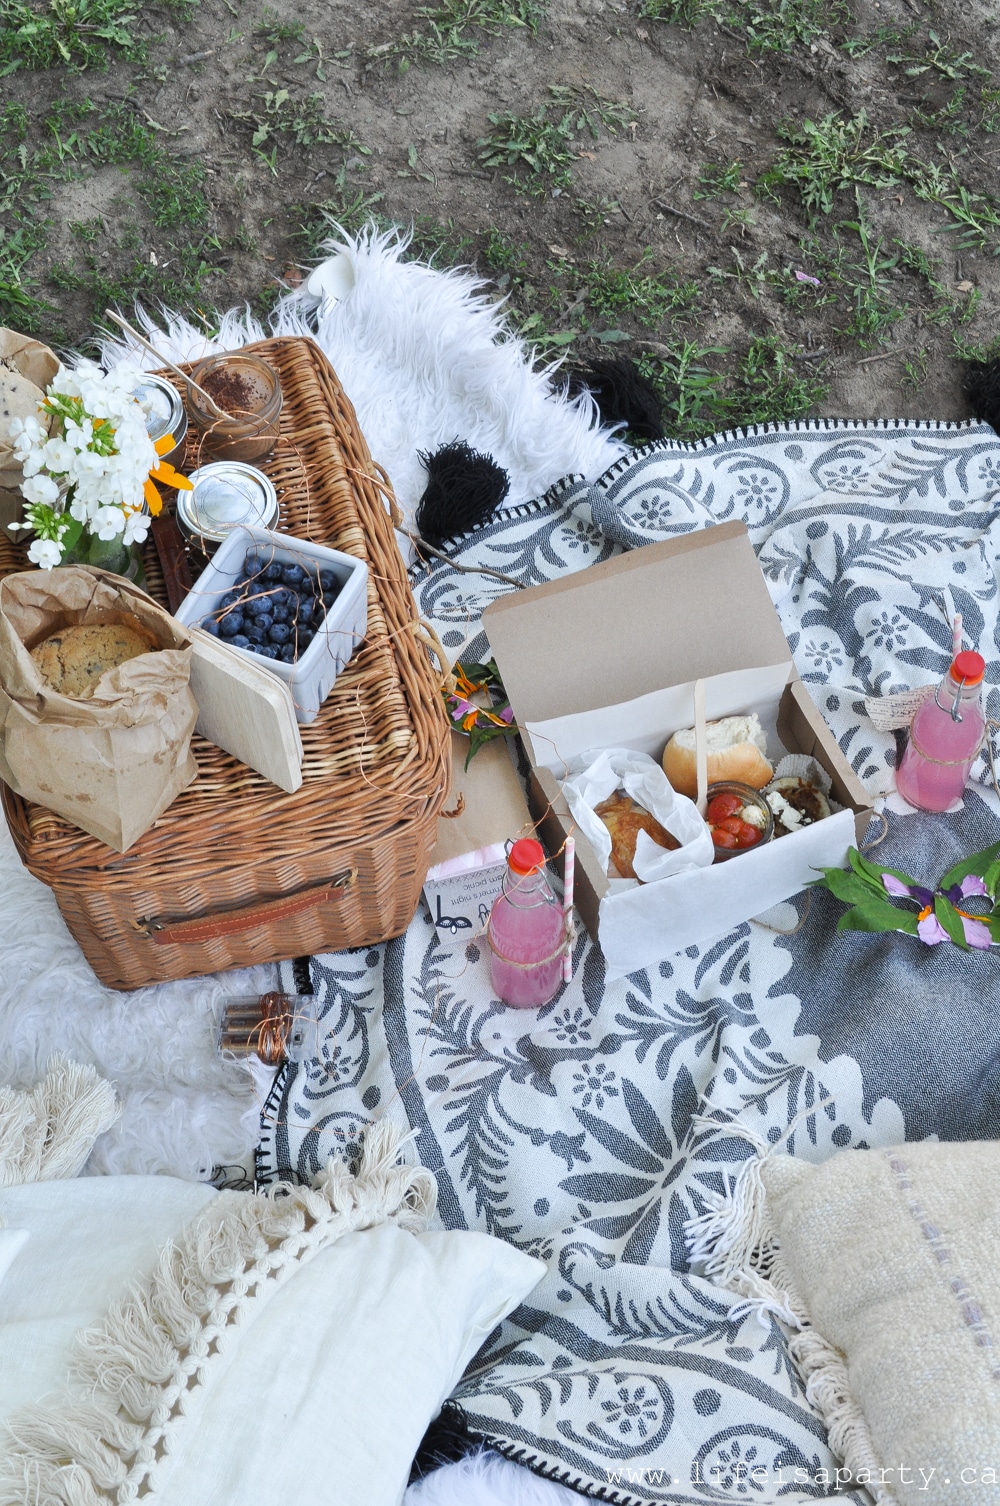
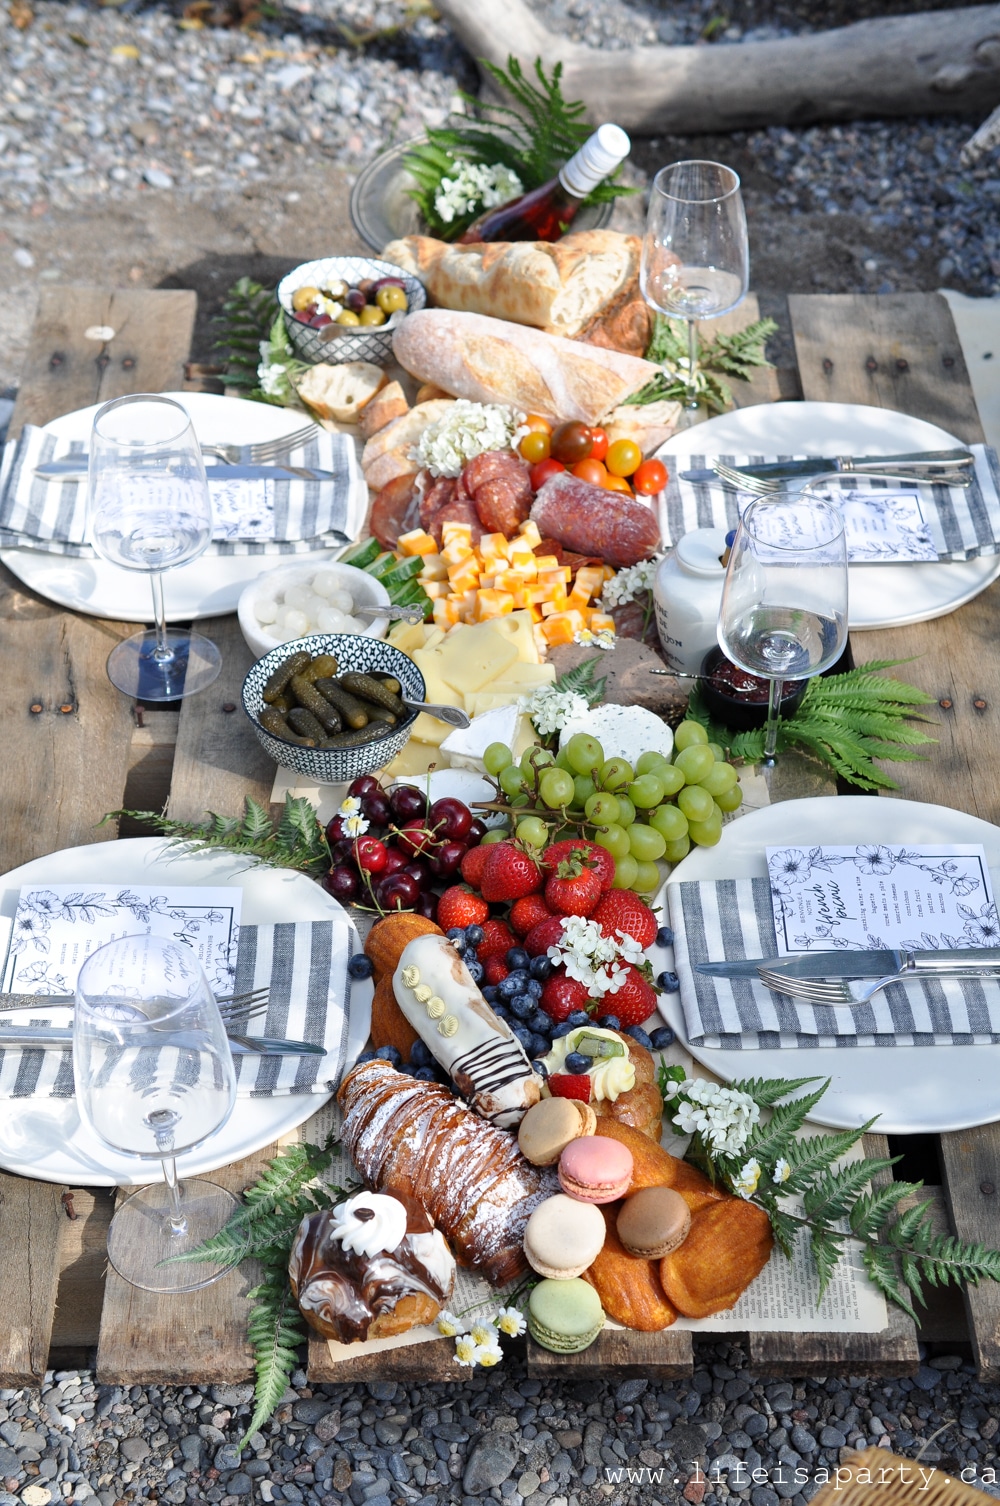
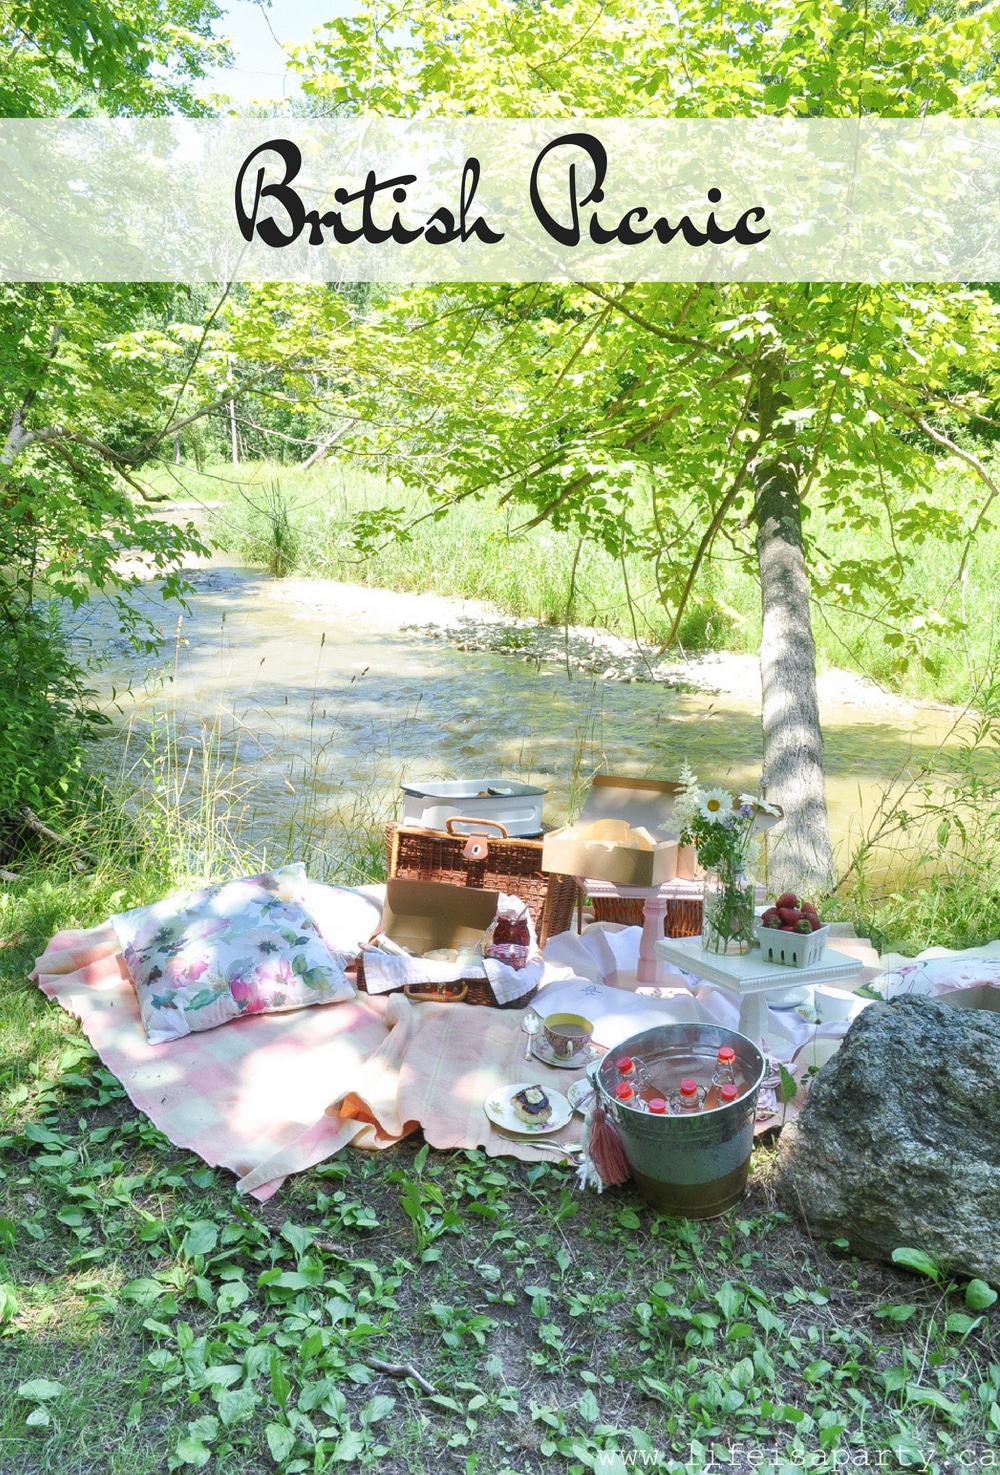
 International Inspired Picnics
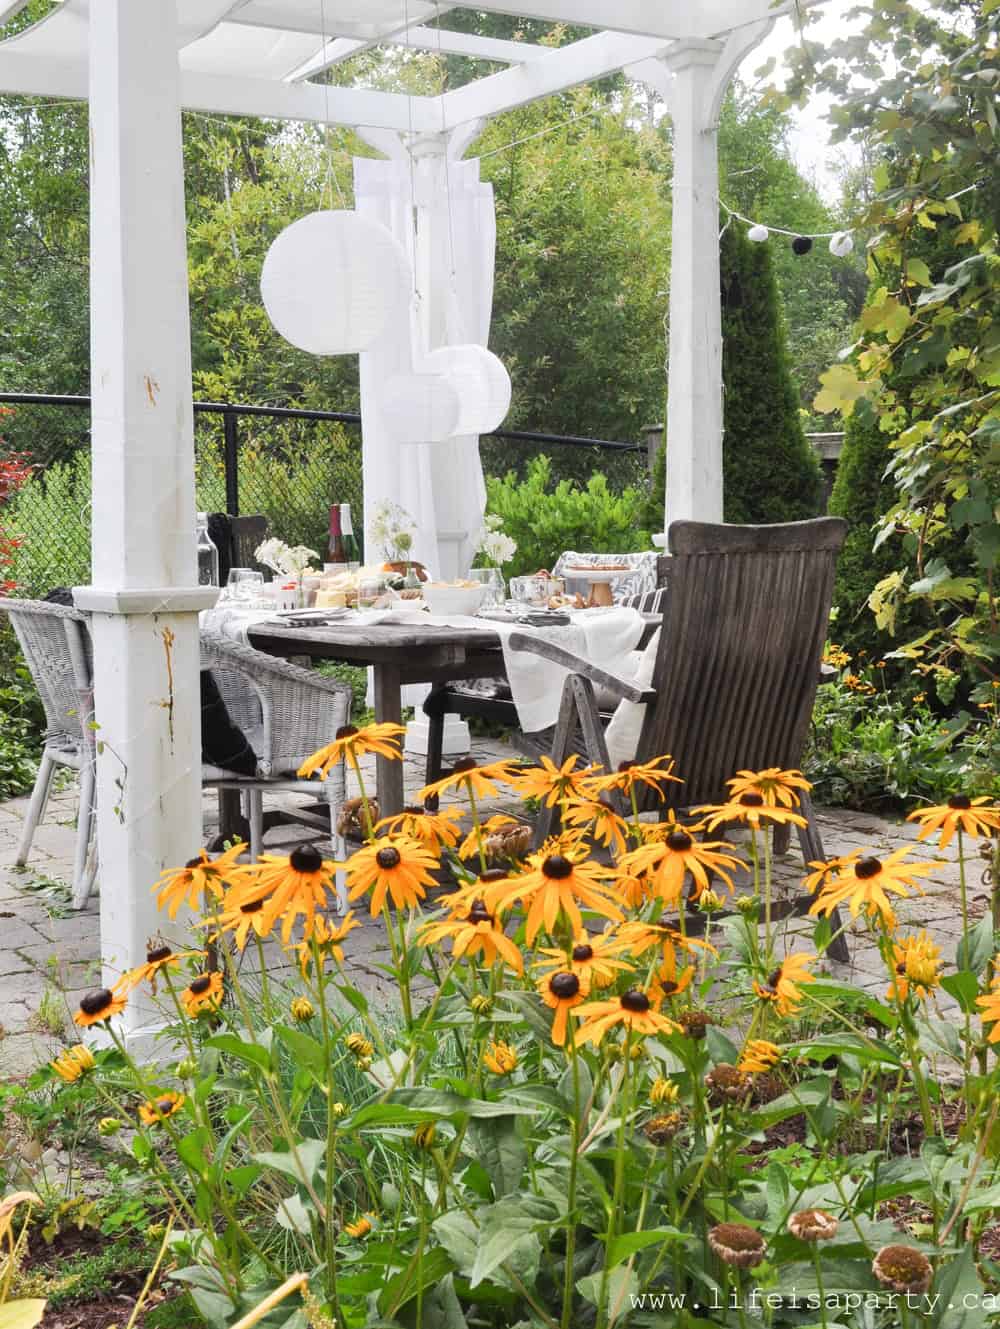
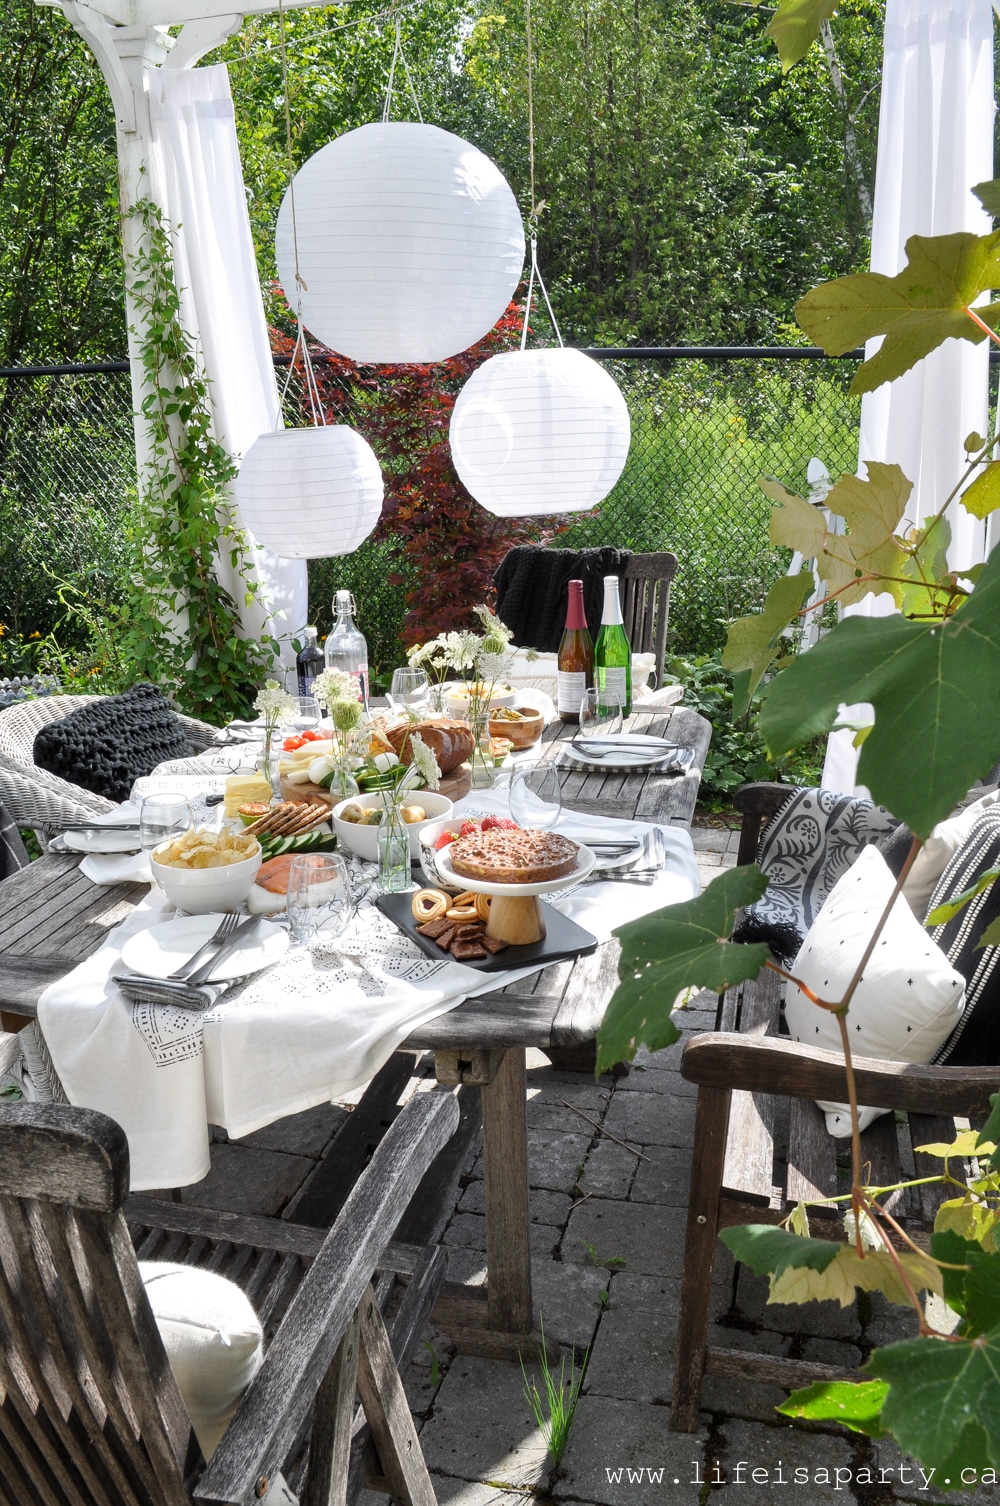 The Setting and Decor
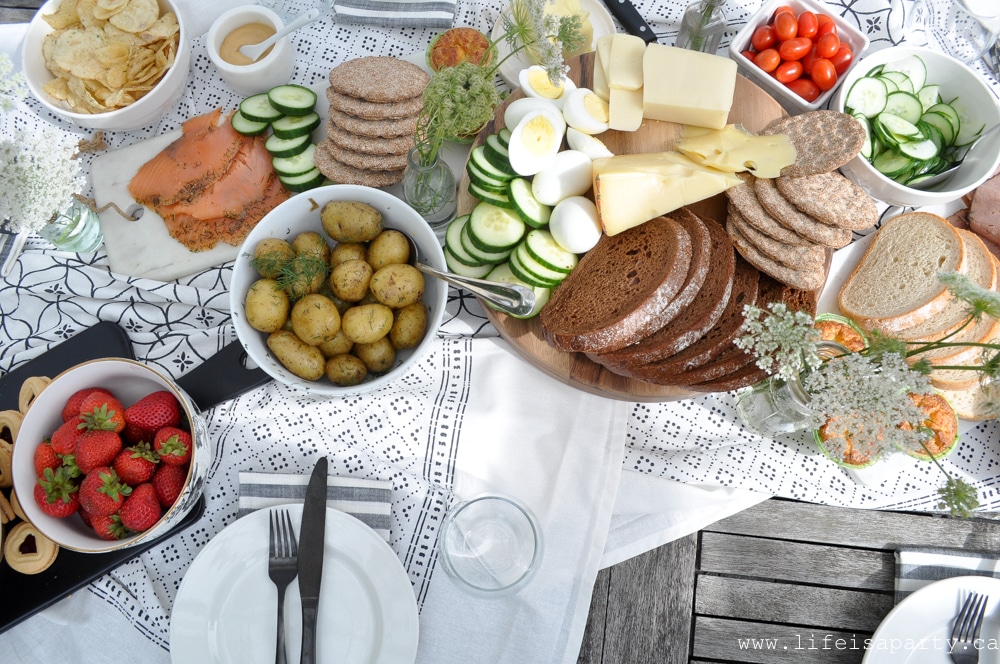
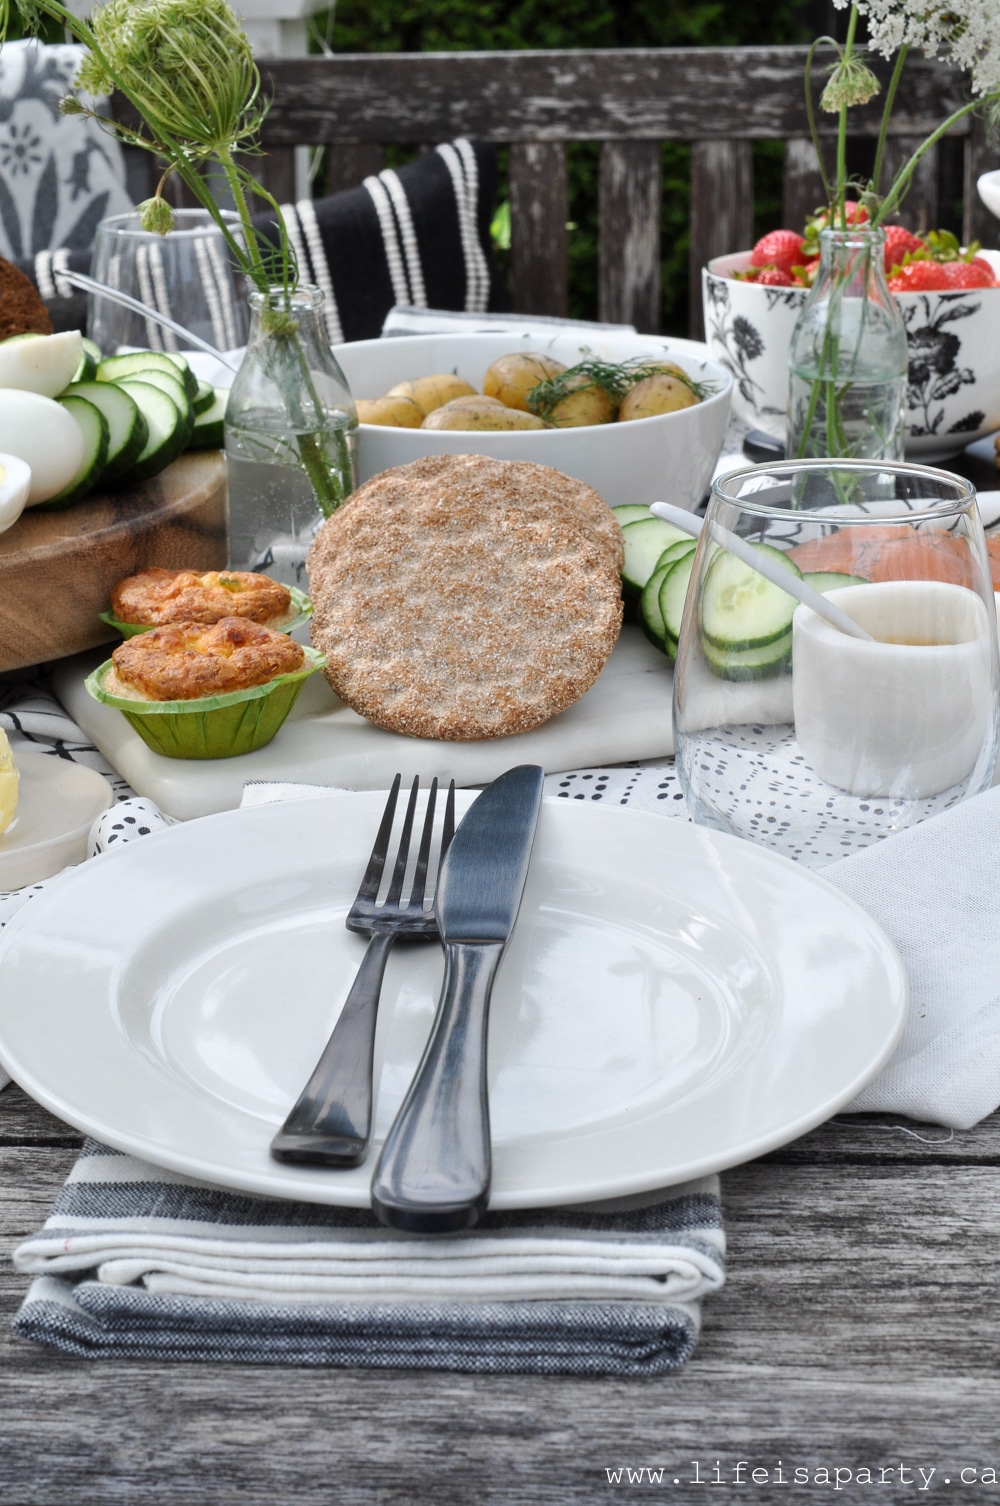

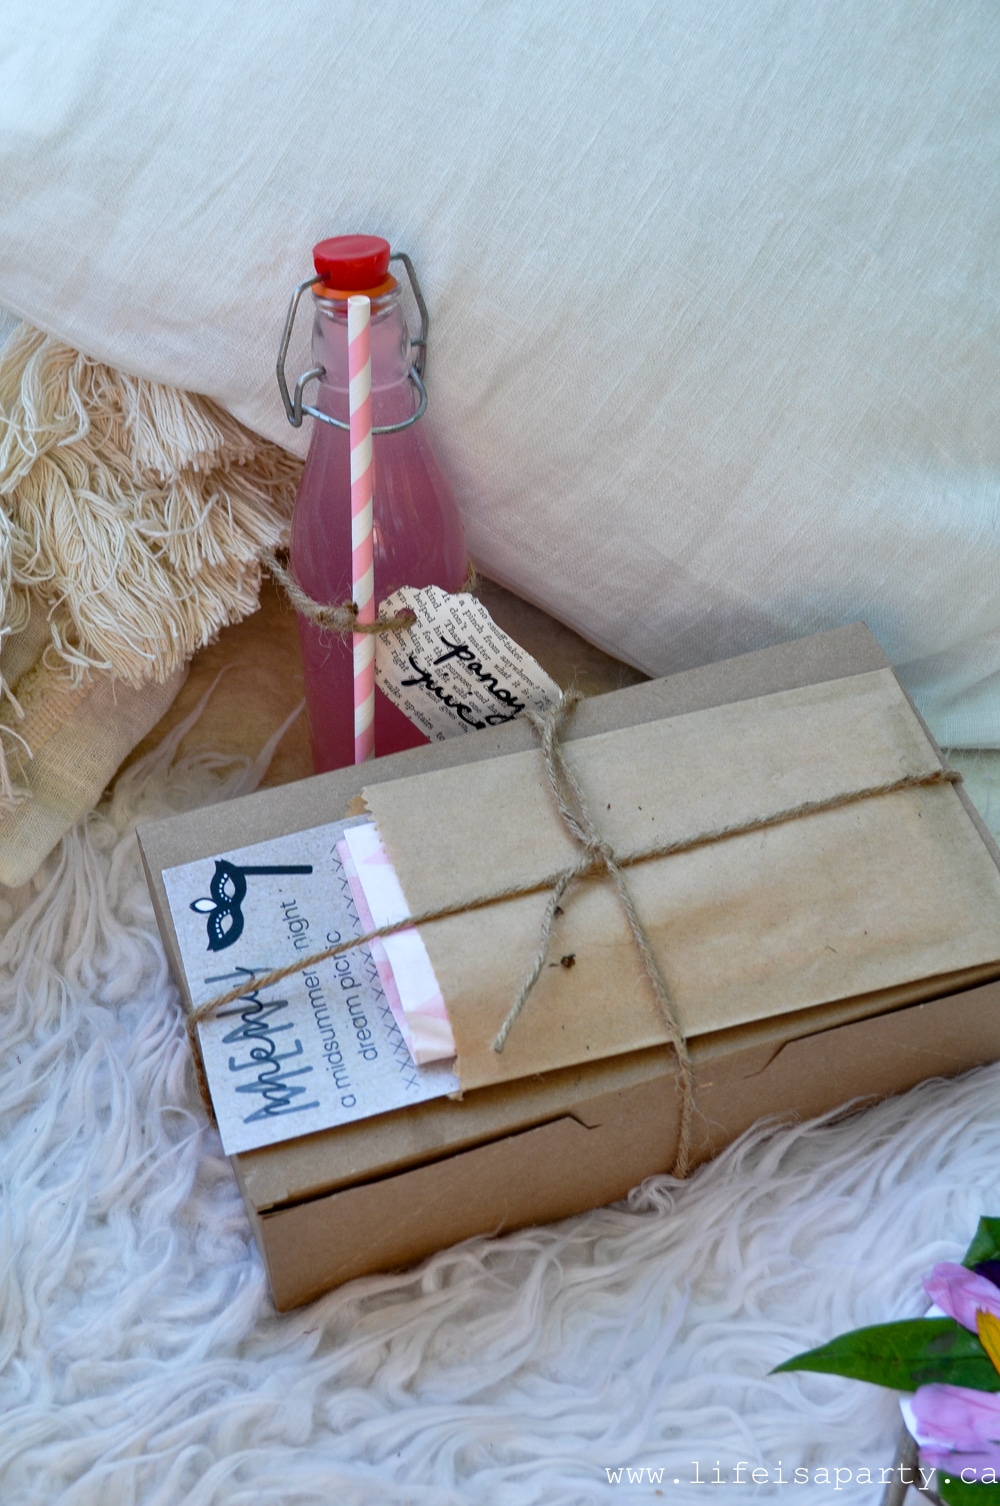
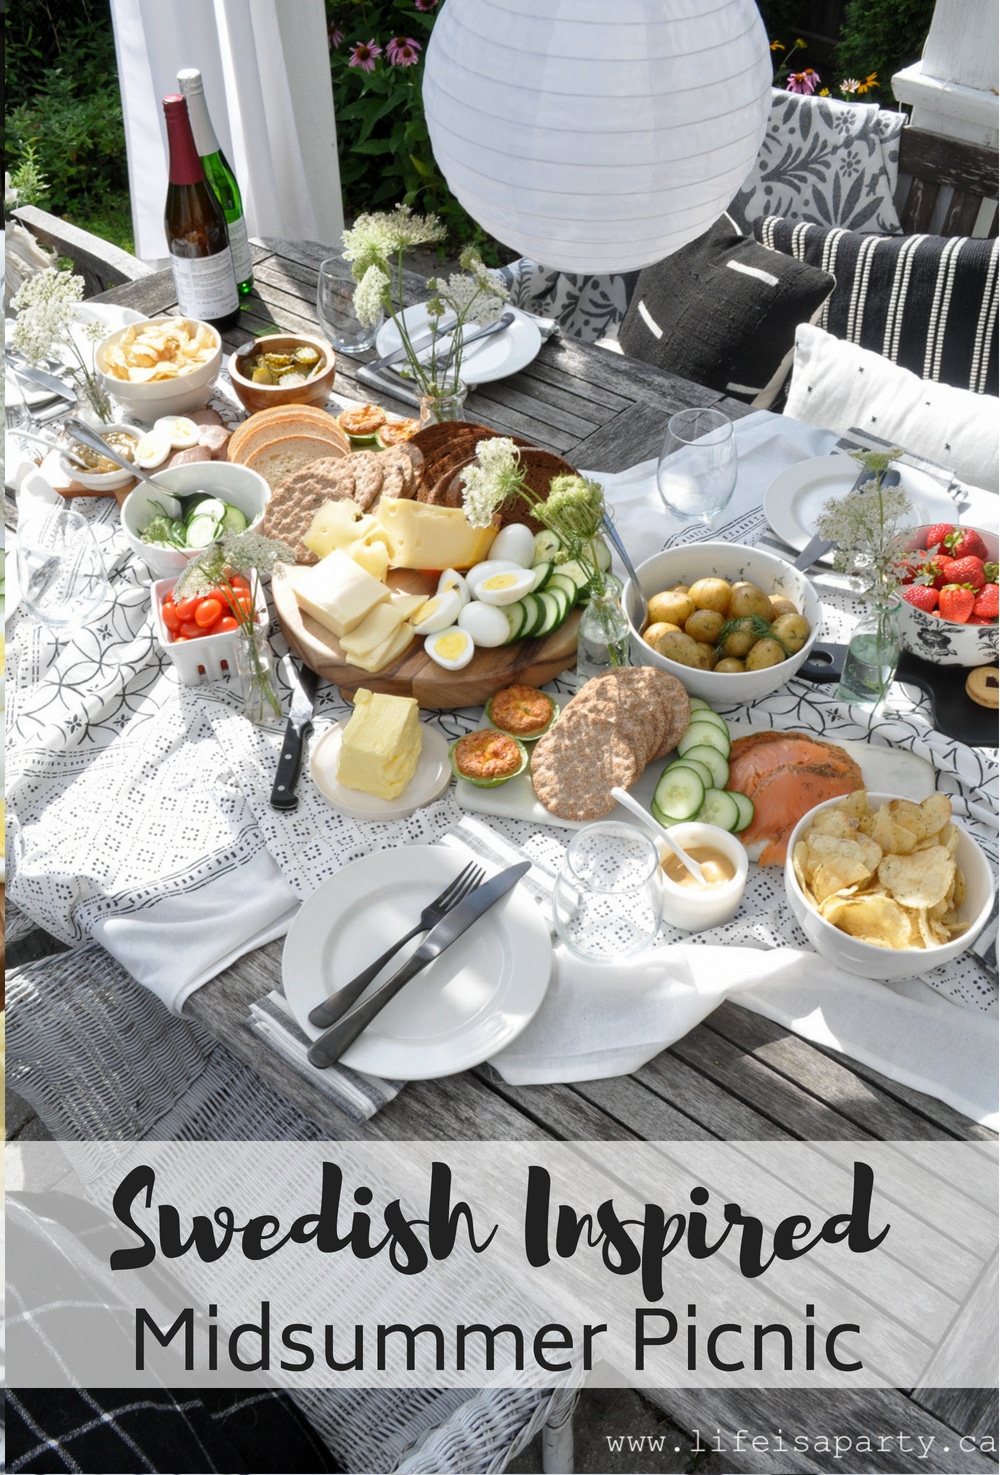
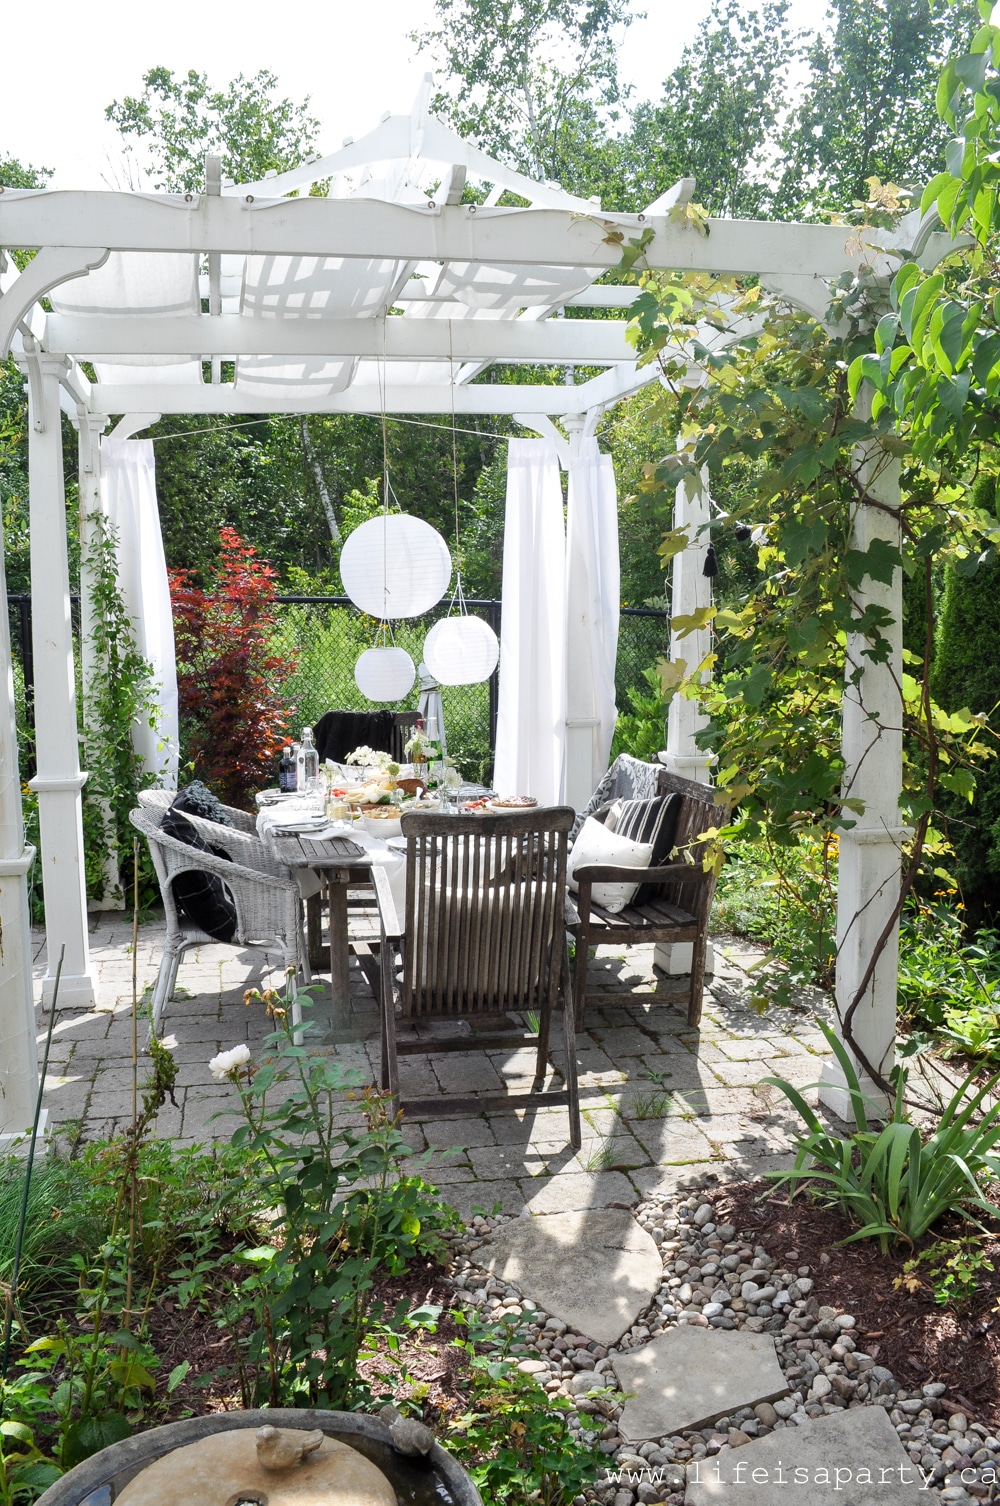
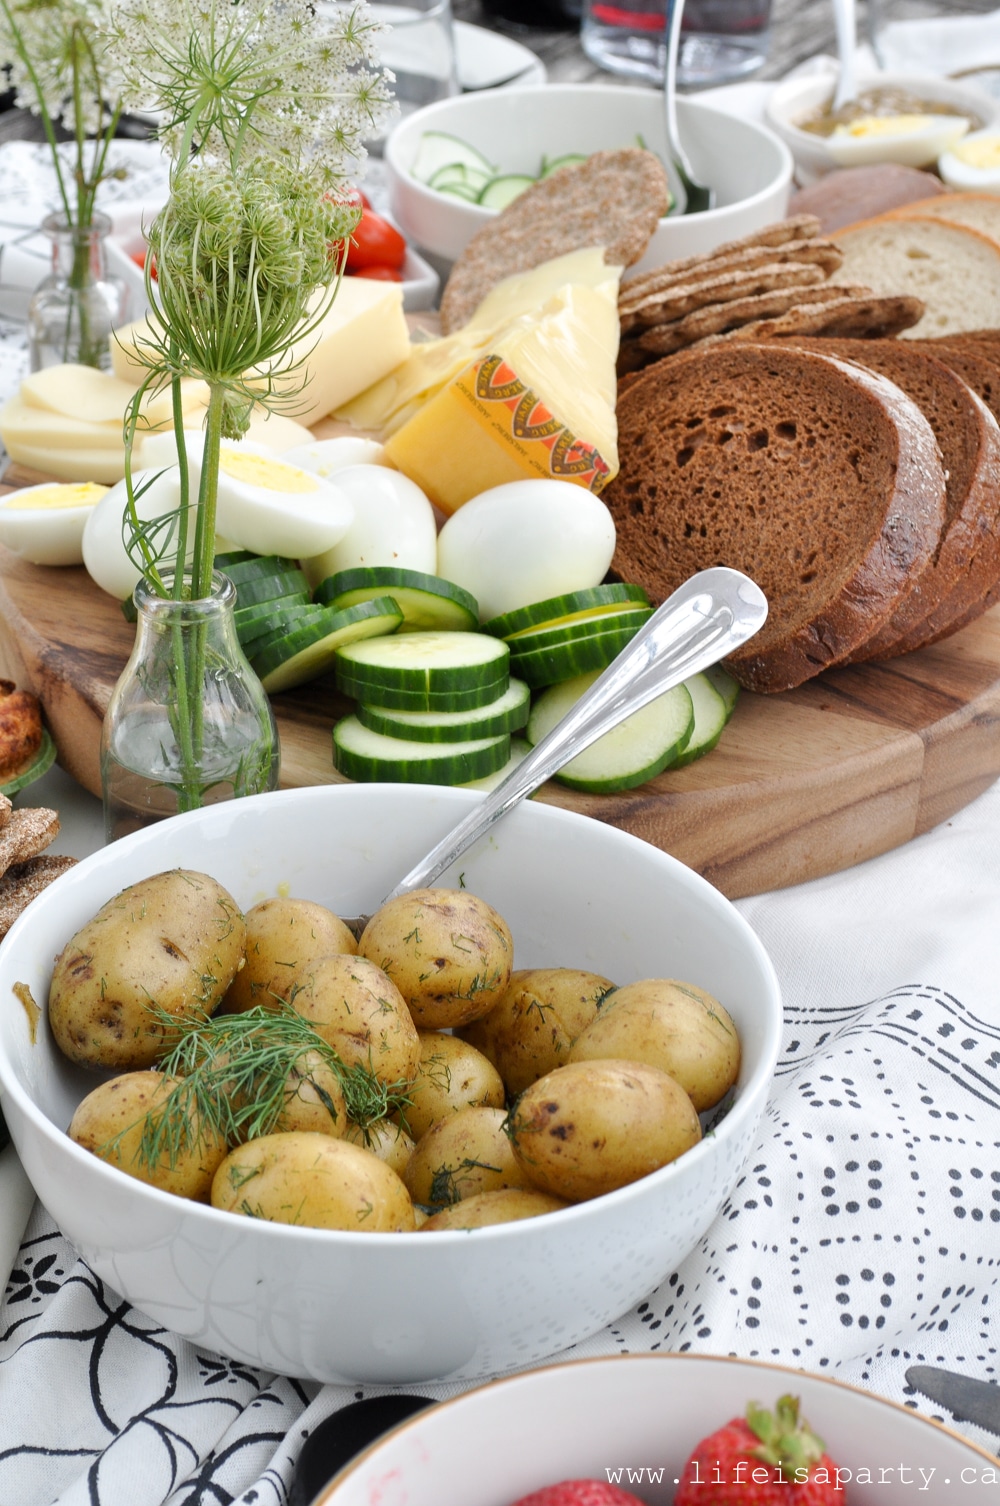
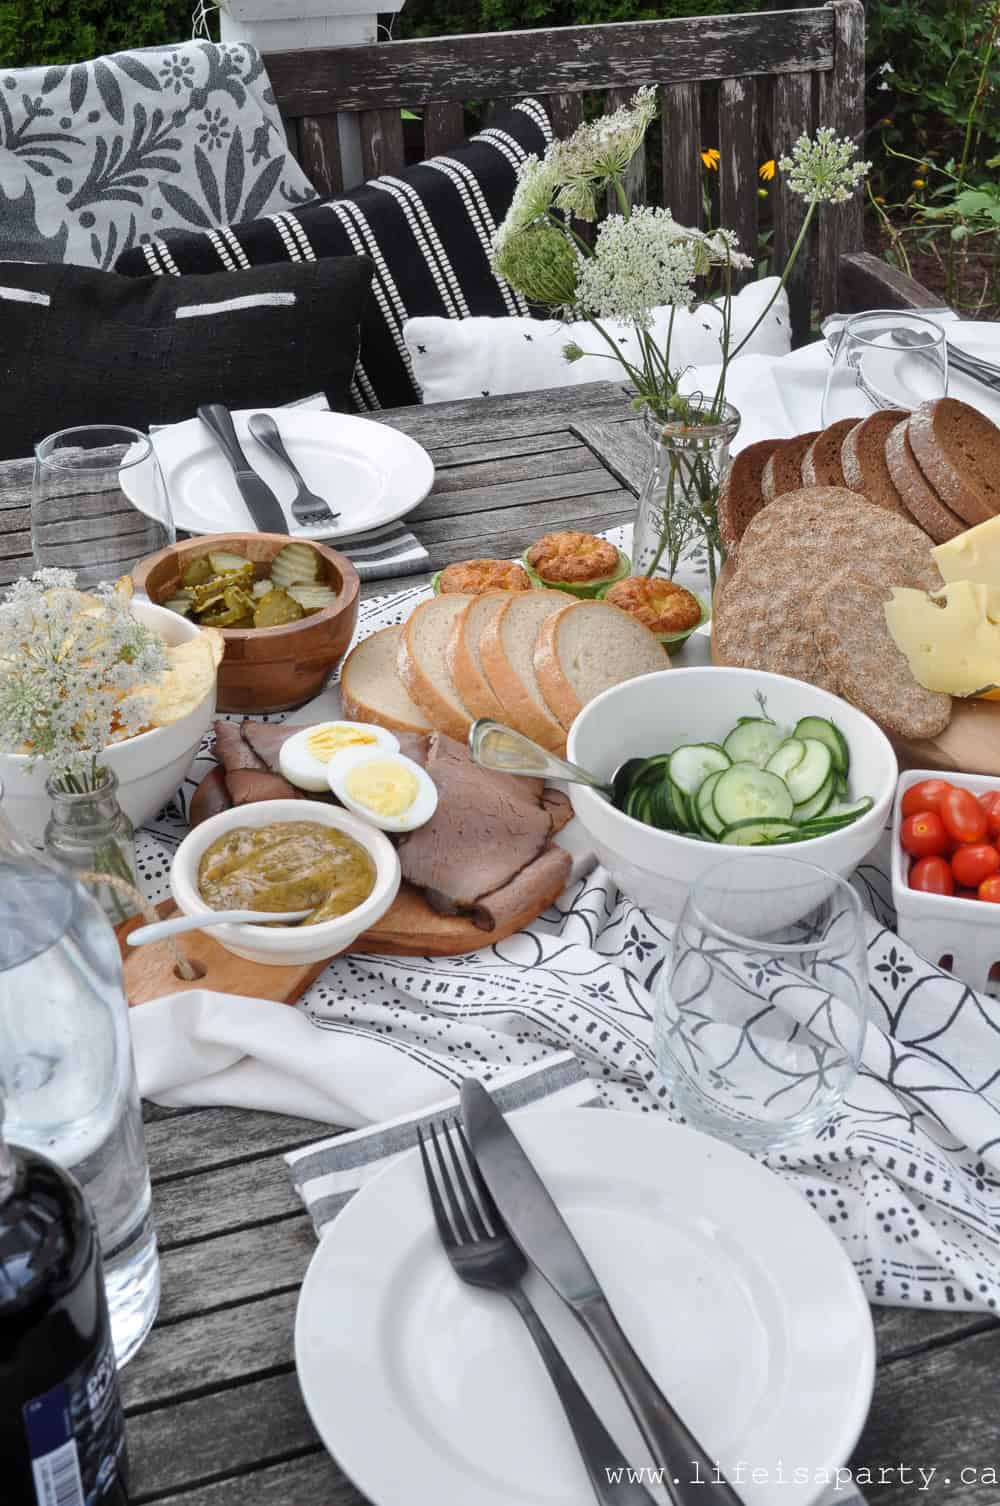
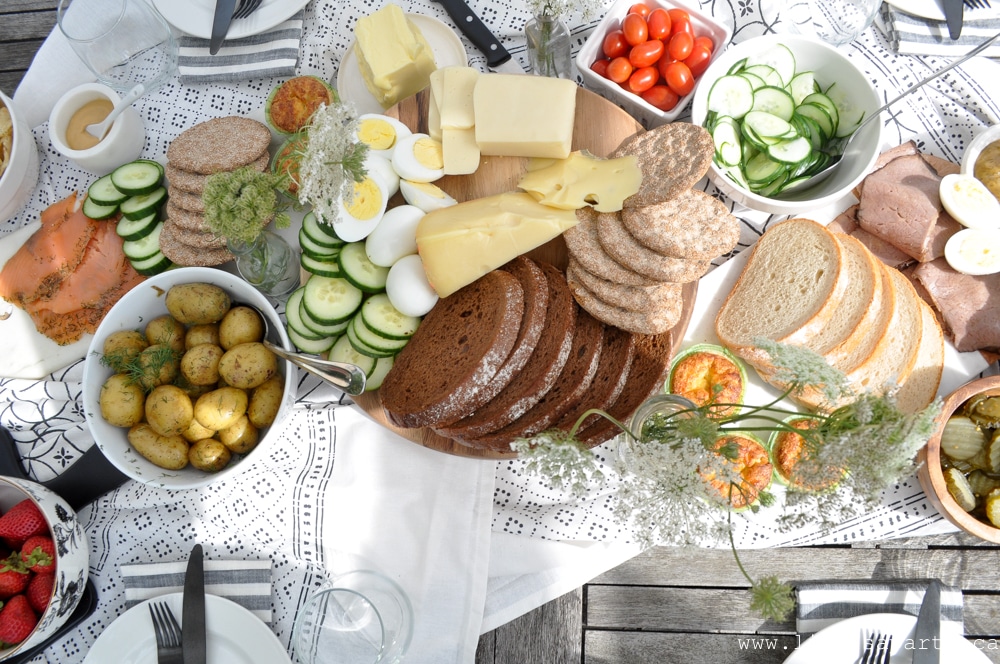
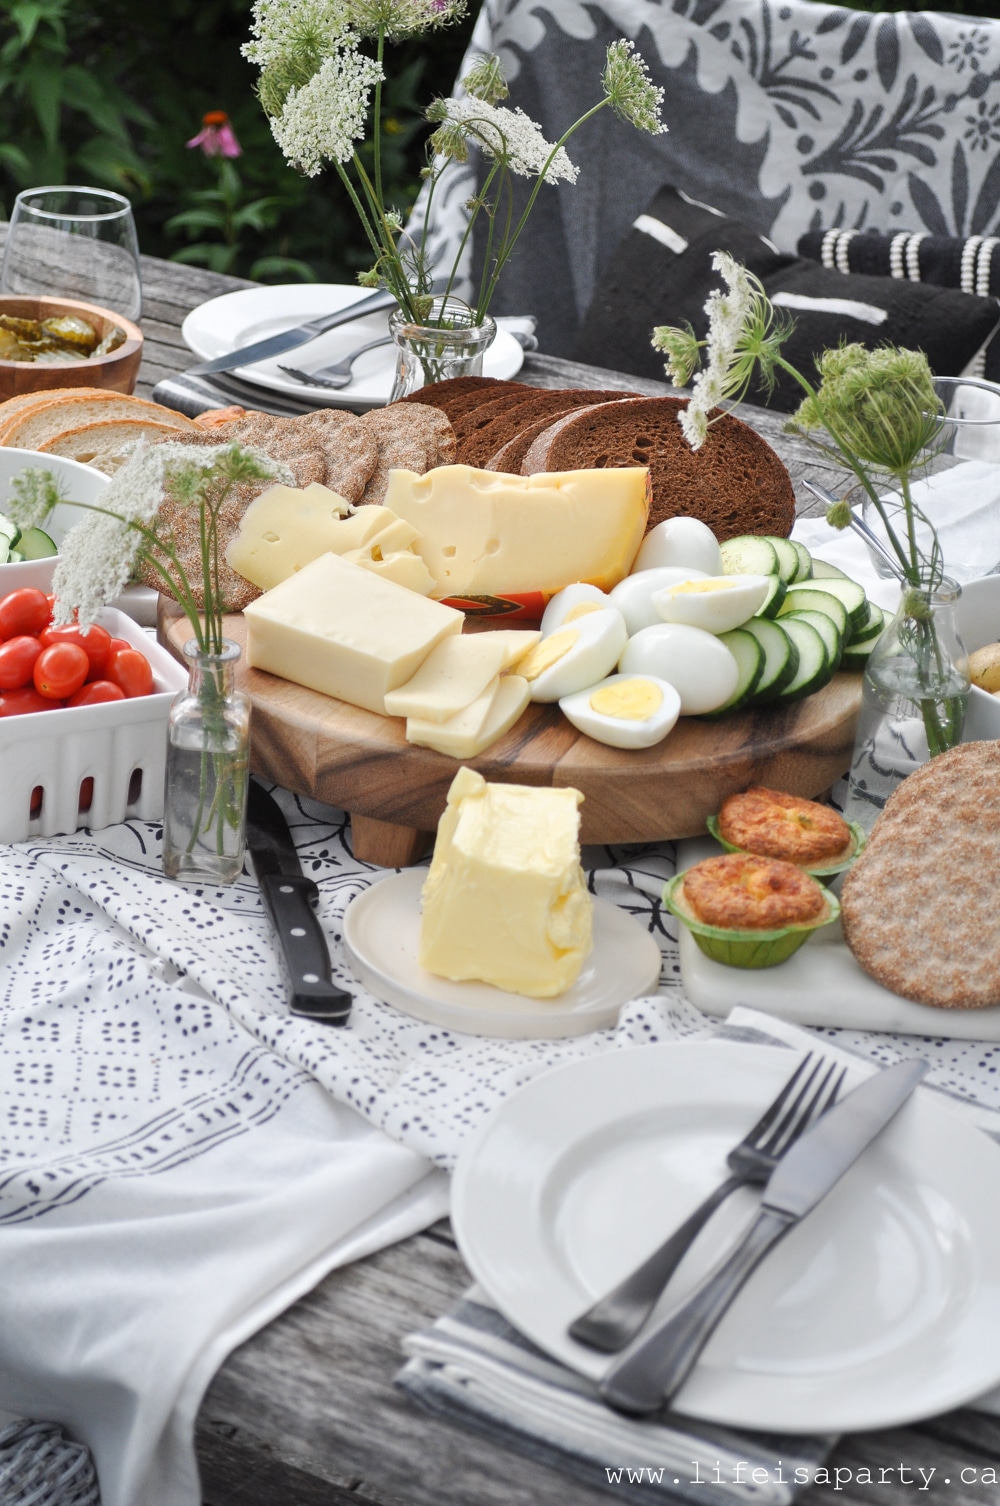
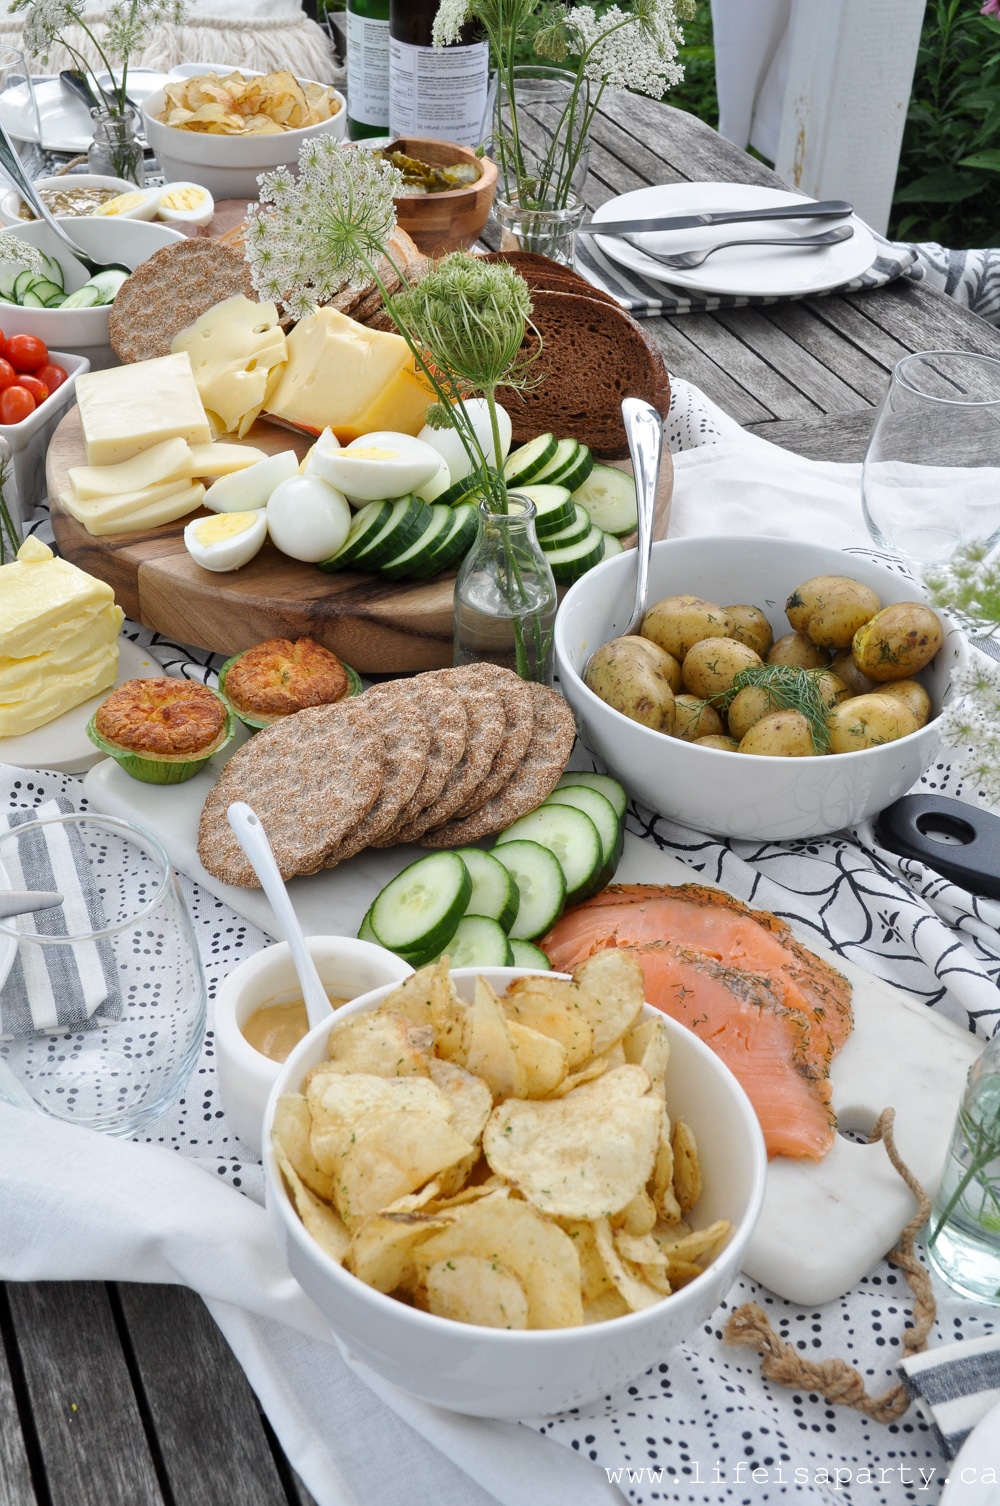
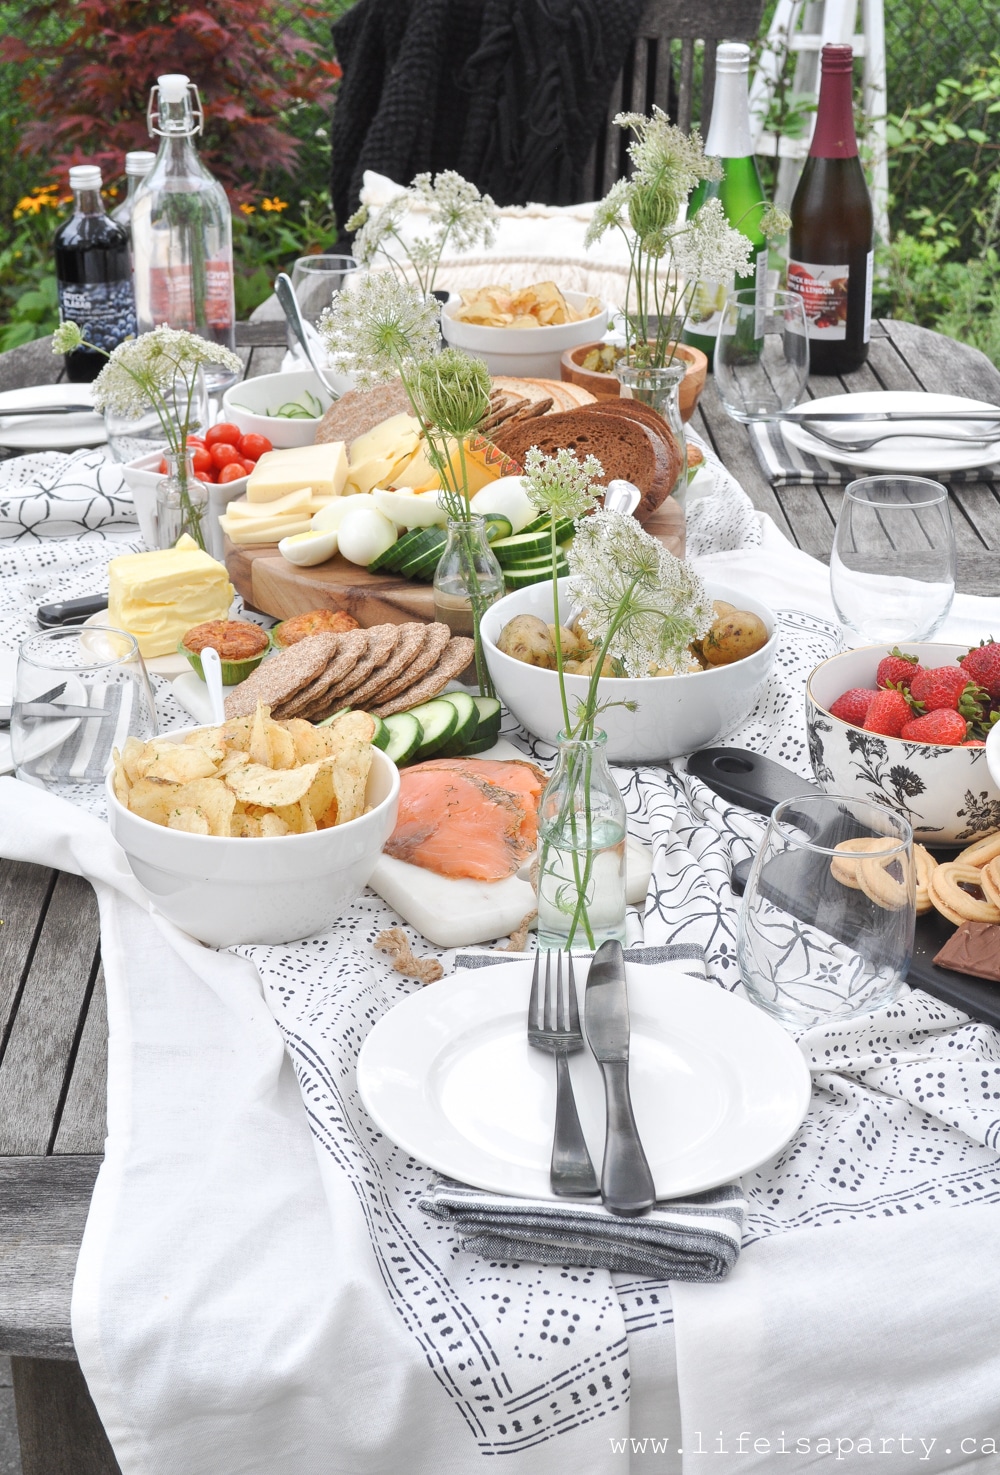
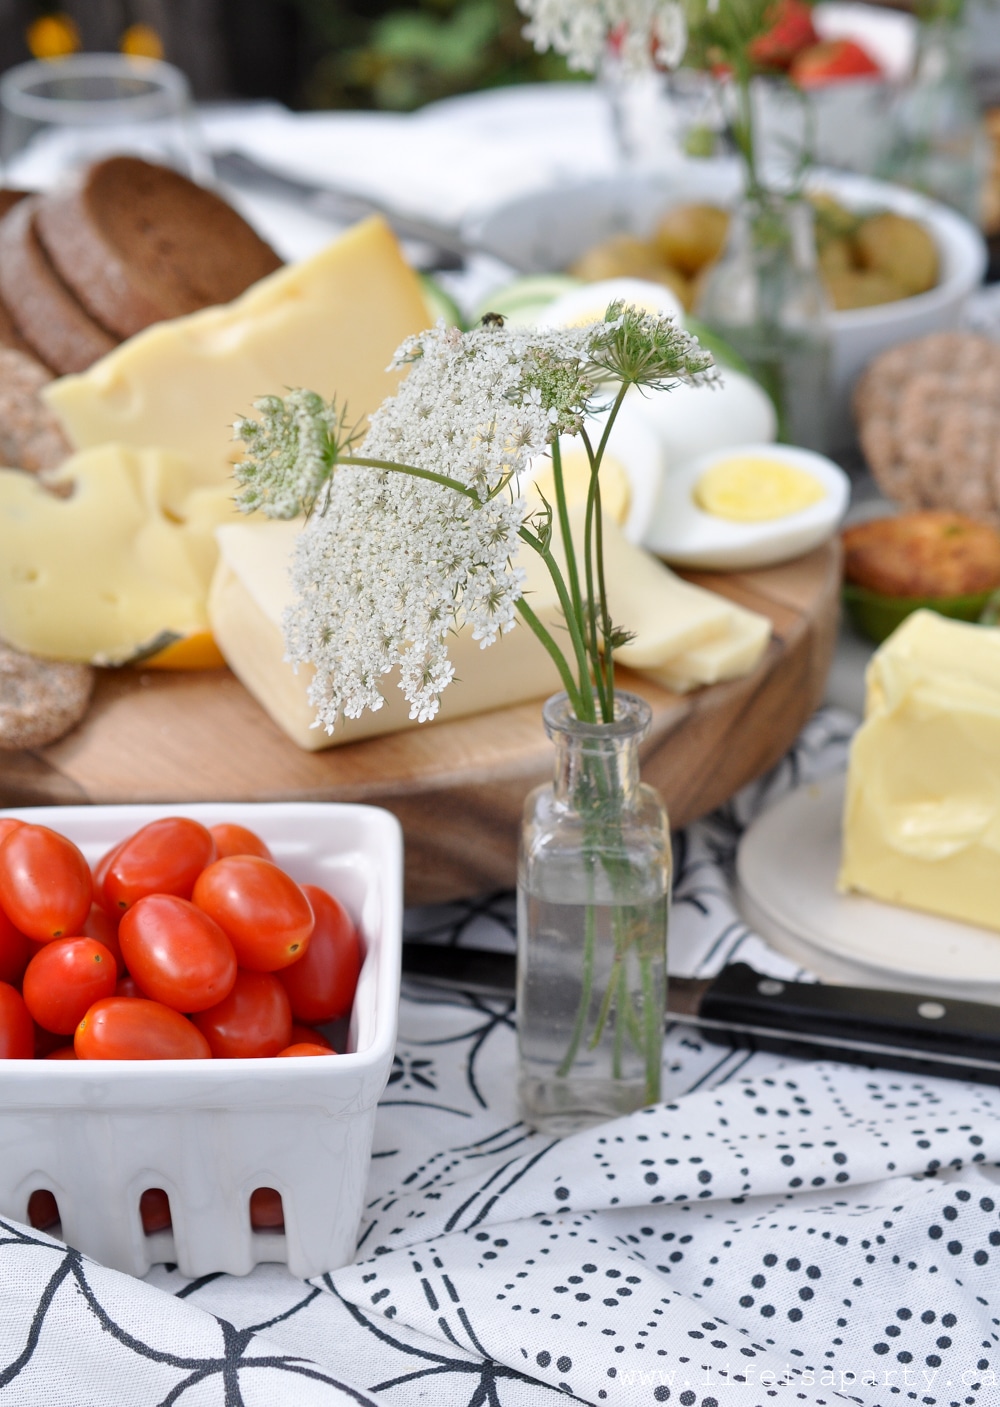 Swedish Inspired Midsummer Picnic Menu
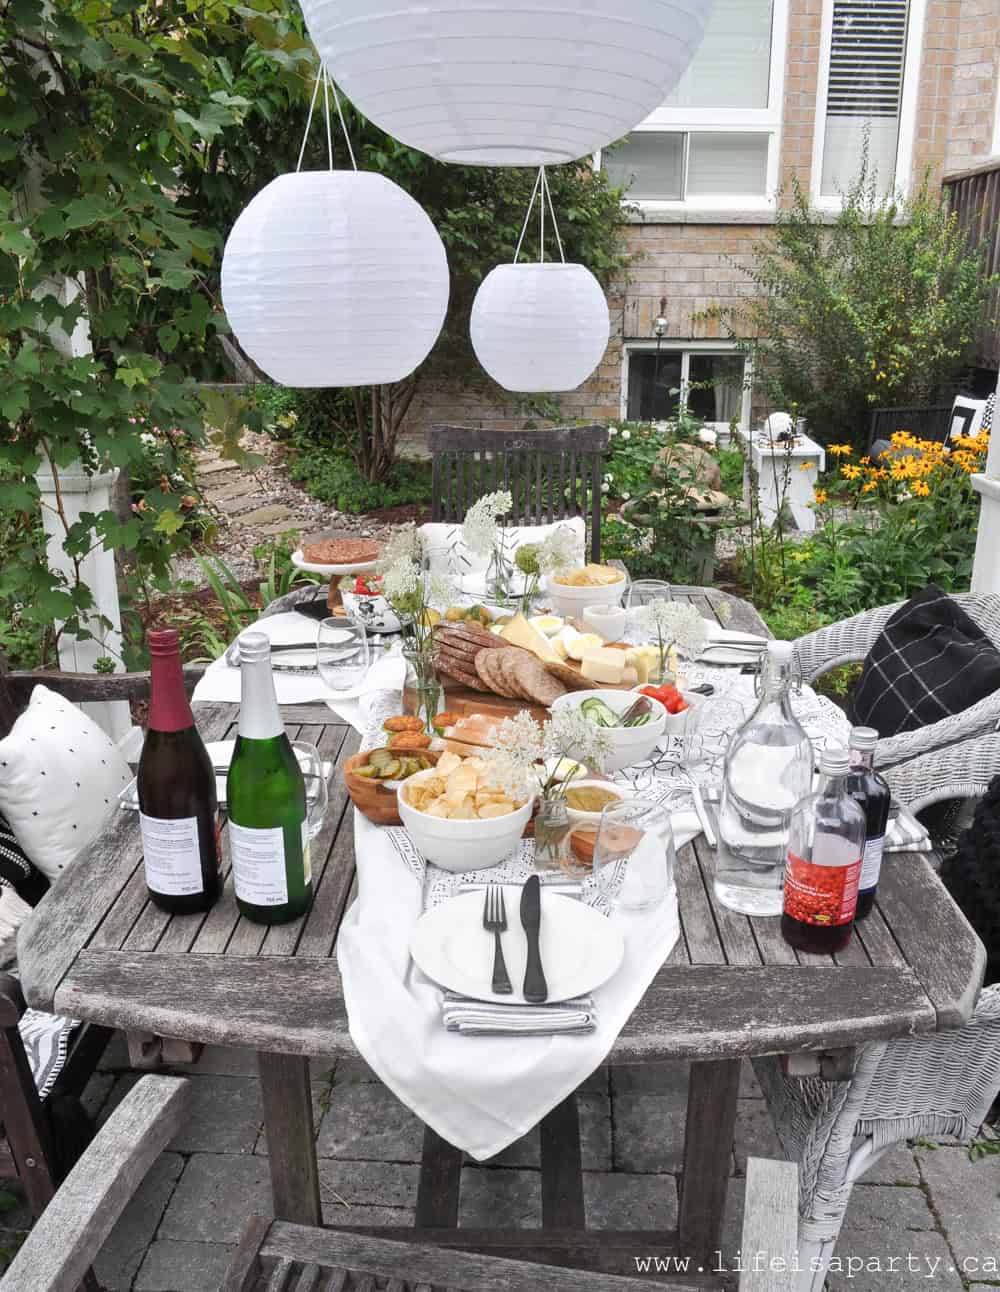
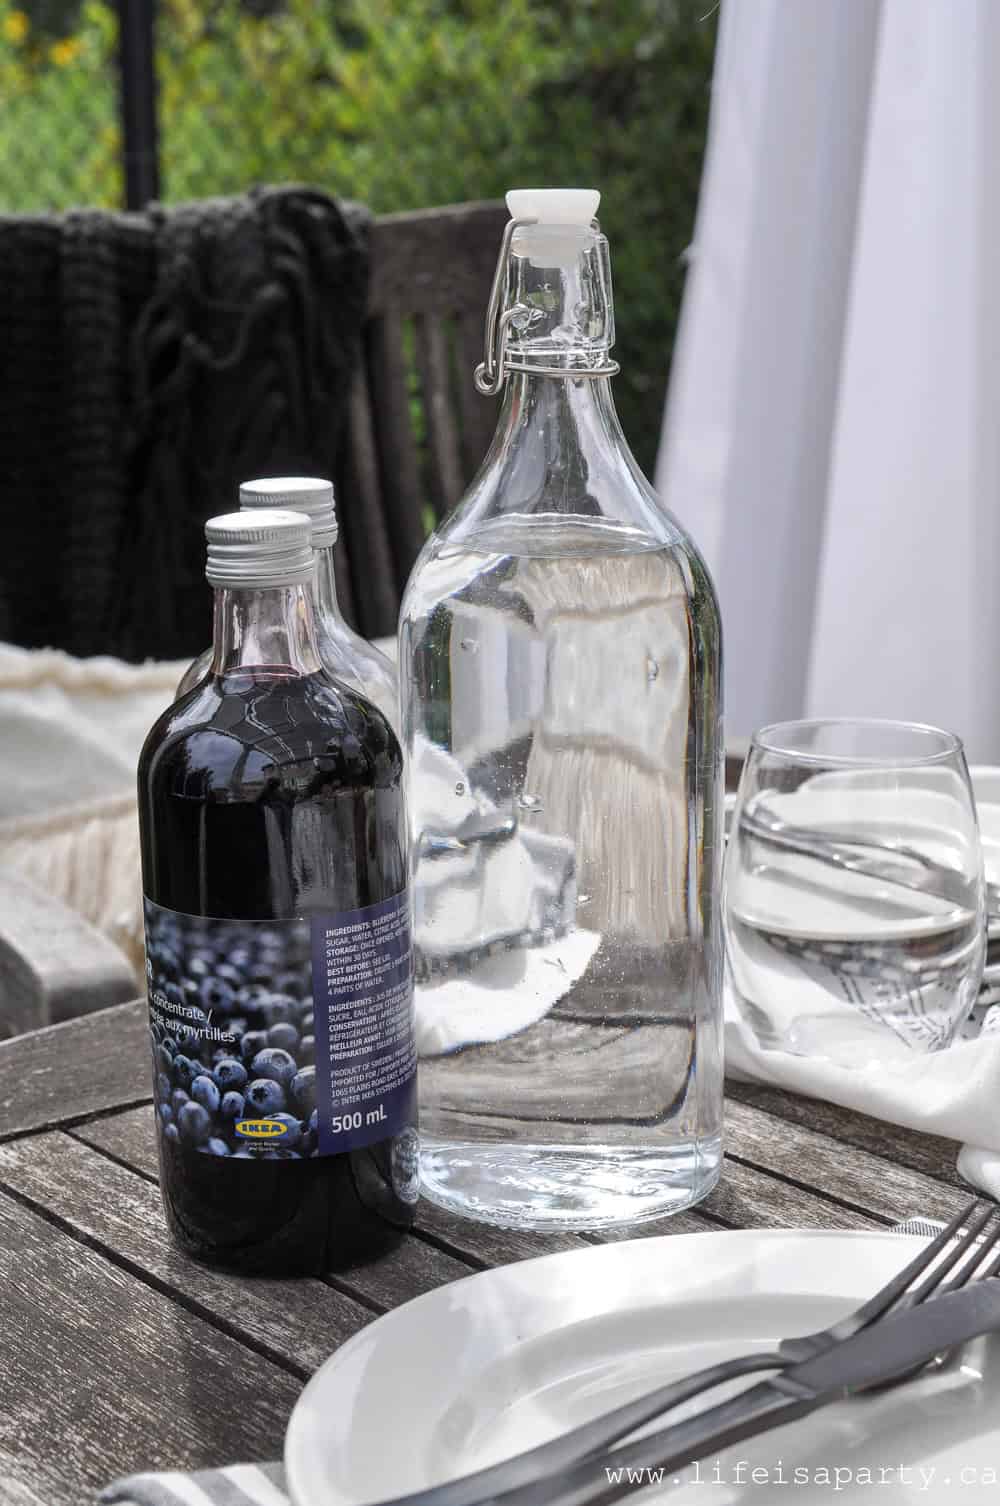
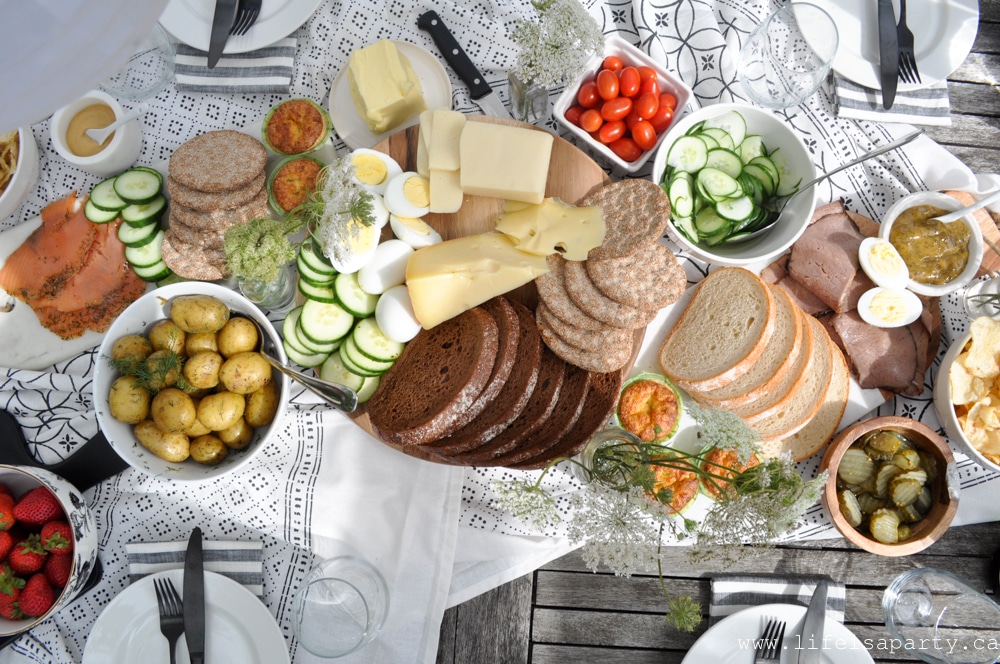 I was guided by the traditional smorgasbord for a Midsummer picnic, and also what was easily available here in Canada. I did find lots of great additions on my trip to Ikea. Here's what we picked up at Ikea, to make this picnic a little easier.
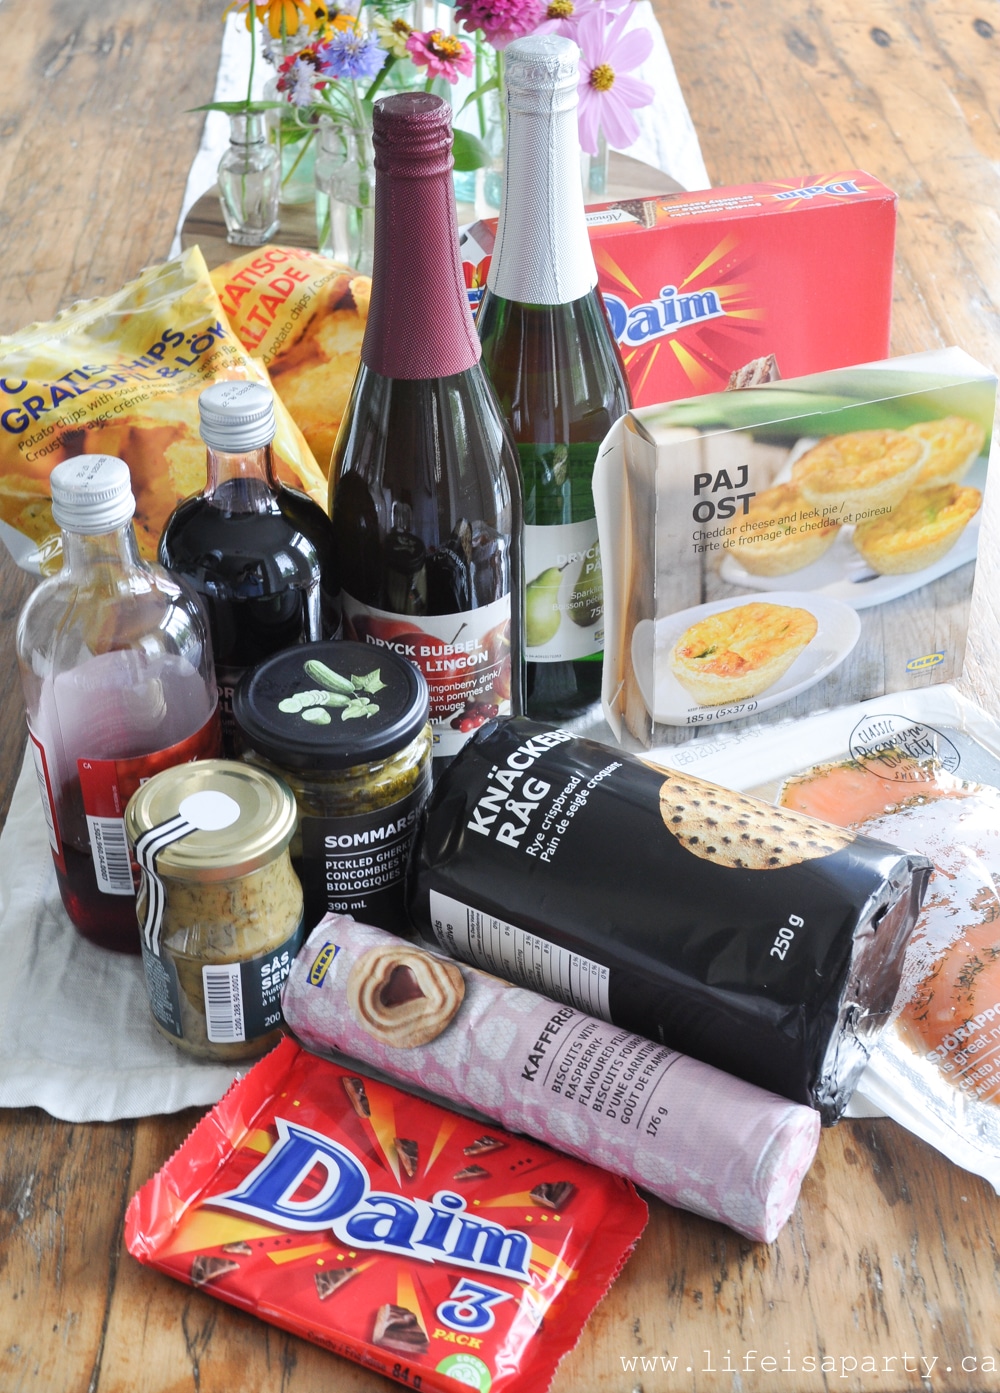
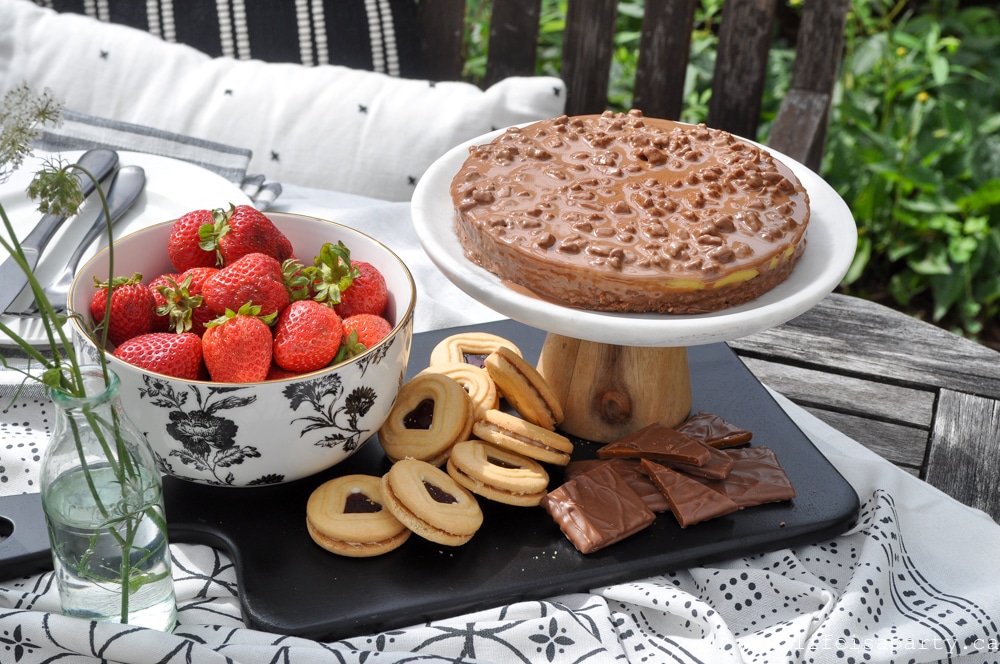
 Dessert
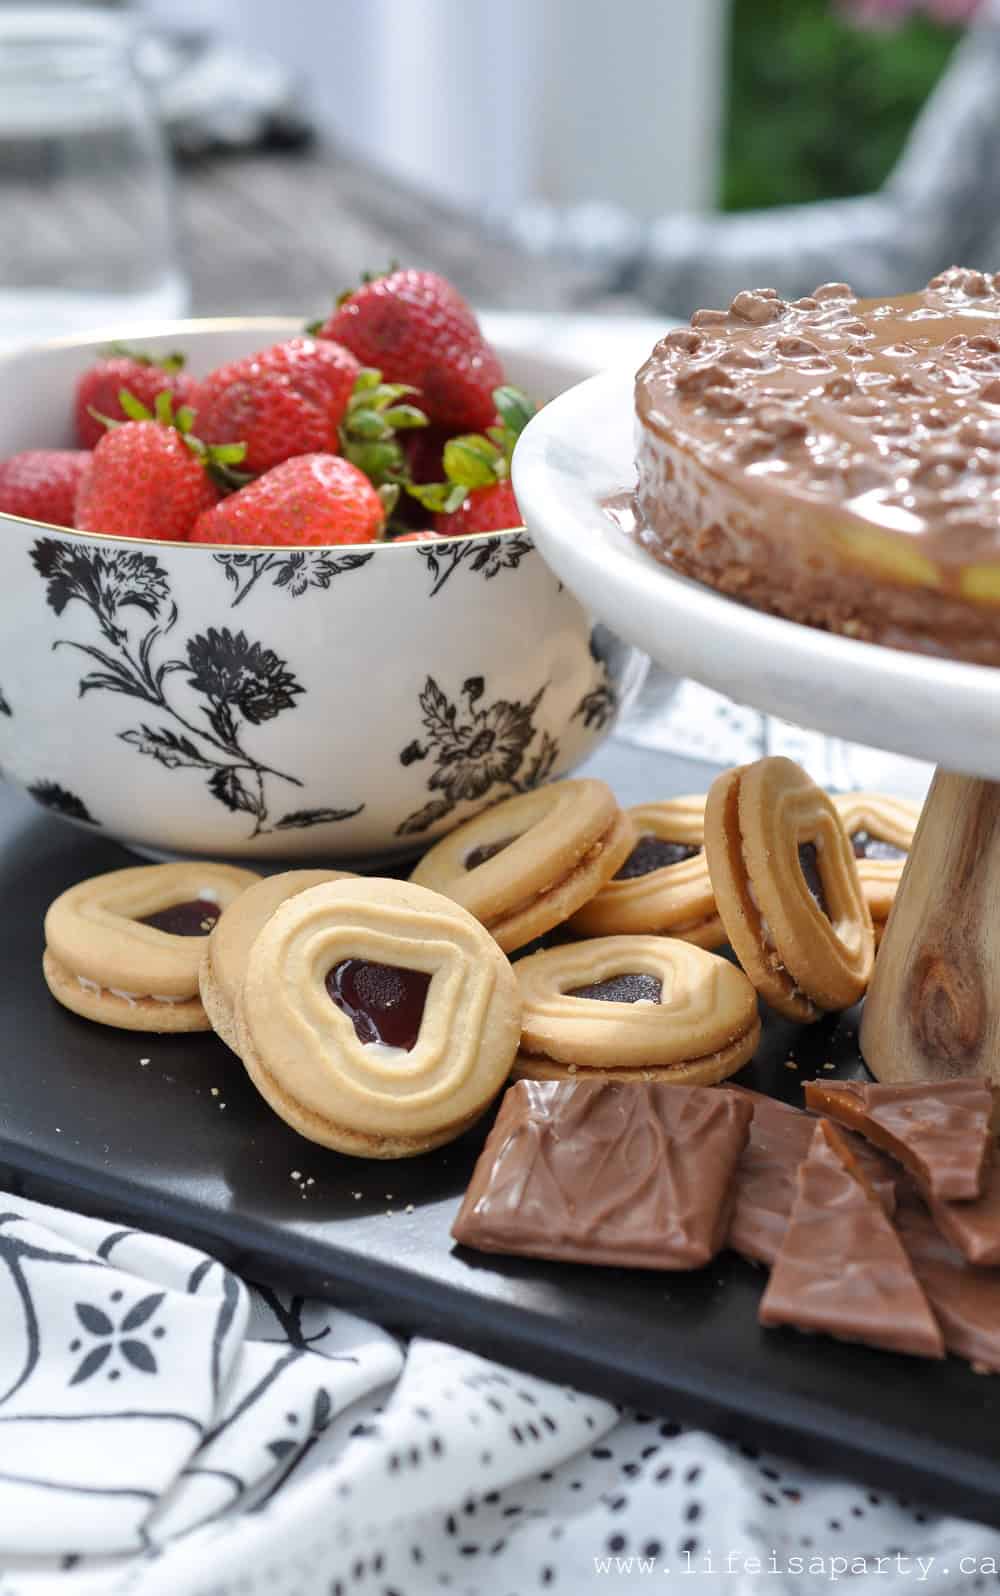 This theme was so fun to put together and it was fun trying to find some of the traditional food and celebrate the beginning of summer together. I loved that it was little bit different, but there was still something for everyone -even the kids, to really enjoy.
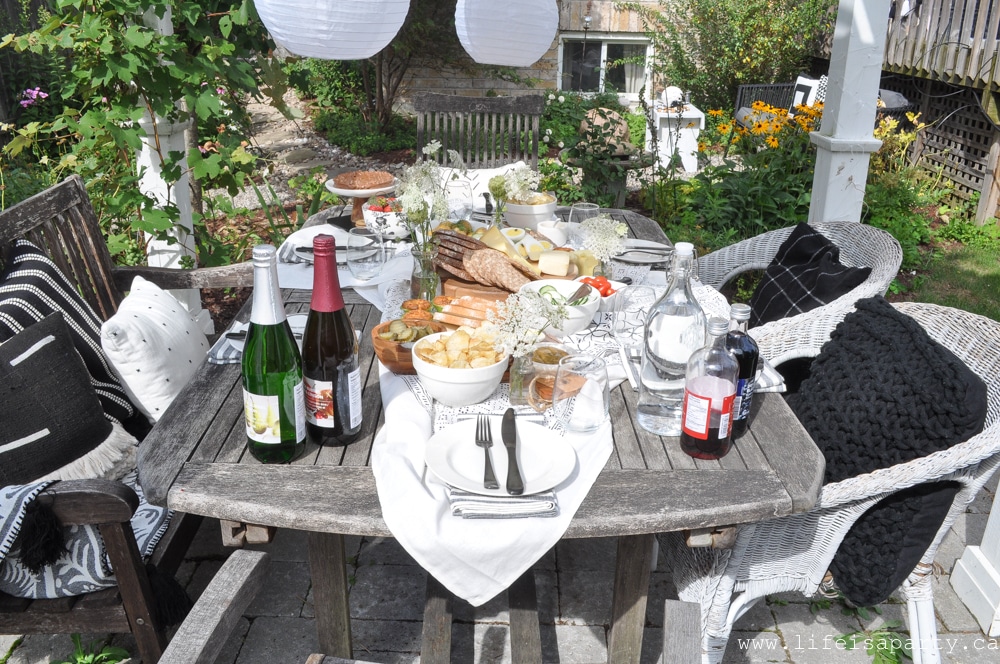
 With a Swedish Inspired Midsummer Picnic, life really is a party!
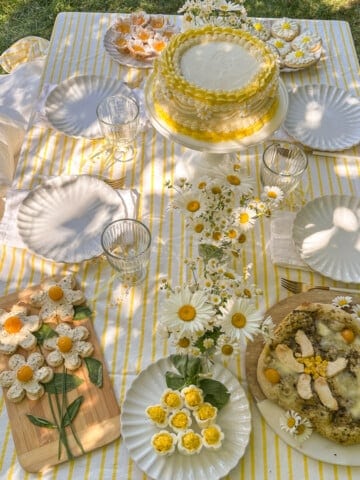


