• Skip to primary navigation
  • Skip to main content
  • Skip to primary sidebar
Life is a Party
  • Recipe Index
  • Parties & Entertaining
  • Fall
  • Subscribe
  • Free Resource Library
menu icon
go to homepage
  • Recipe Index
  • Parties & Entertaining
  • Fall
  • Subscribe
  • Free Resource Library
subscribe
search icon
Homepage link
  • Recipe Index
  • Parties & Entertaining
  • Fall
  • Subscribe
  • Free Resource Library
×
Home

Asymmetrical Christmas Mantel Ideas

Asymmetrical Christmas Mantel Ideas

Nov 24, 2021 · 1 Comment

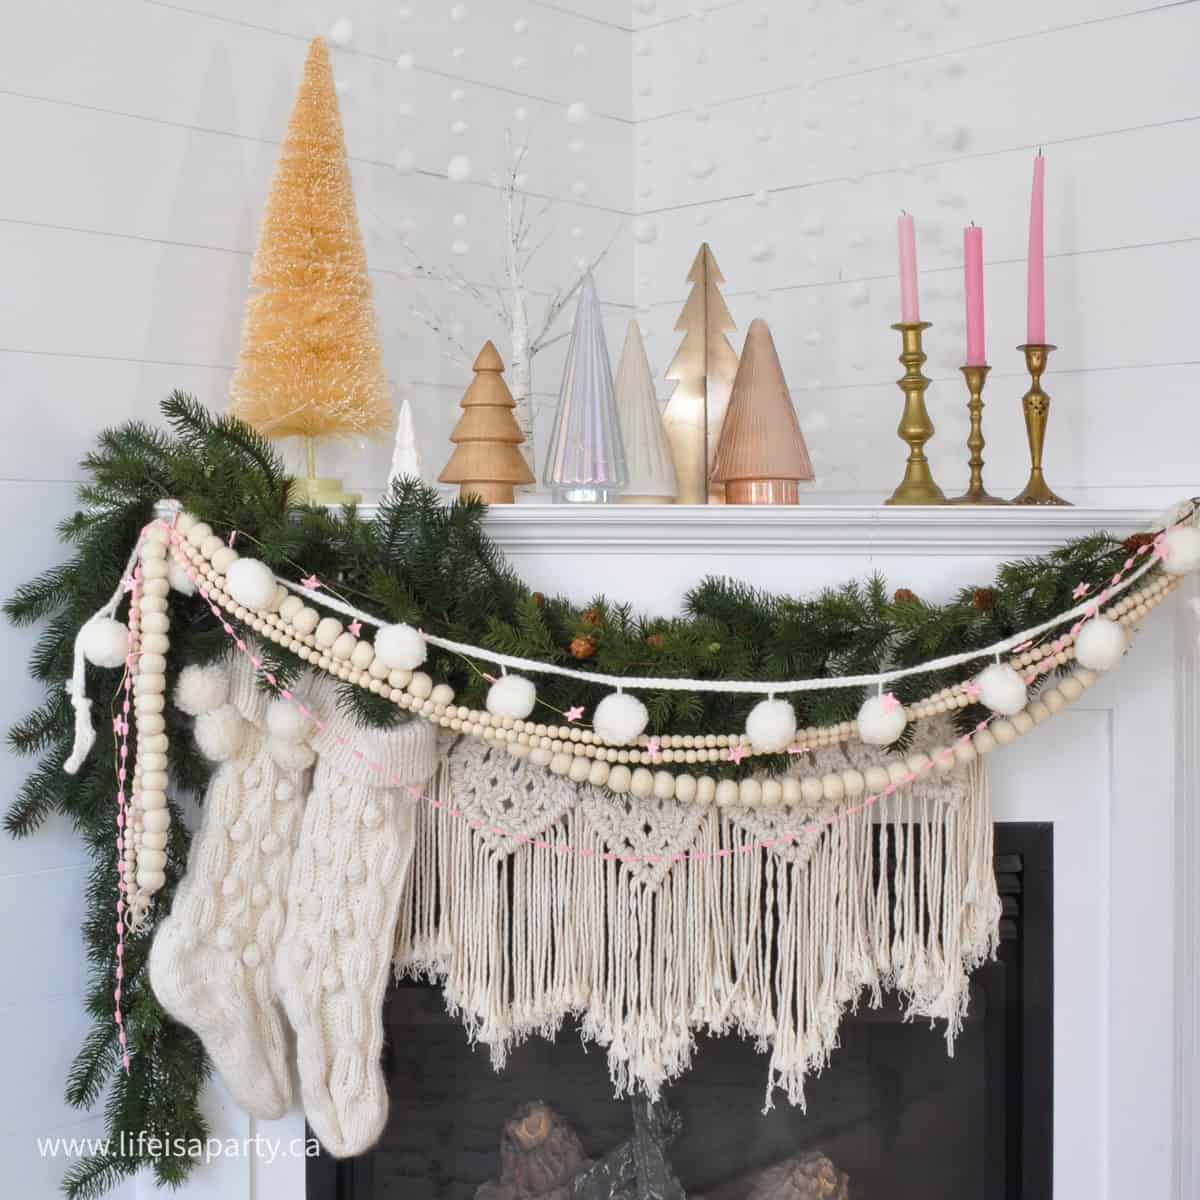
Asymmetrical Christmas mantel

Asymmetrical Christmas Mantel Ideas: use garland and a mini Christmas tree collection to create a cozy pretty Christmas mantel.
[feast_advanced_jump_to]

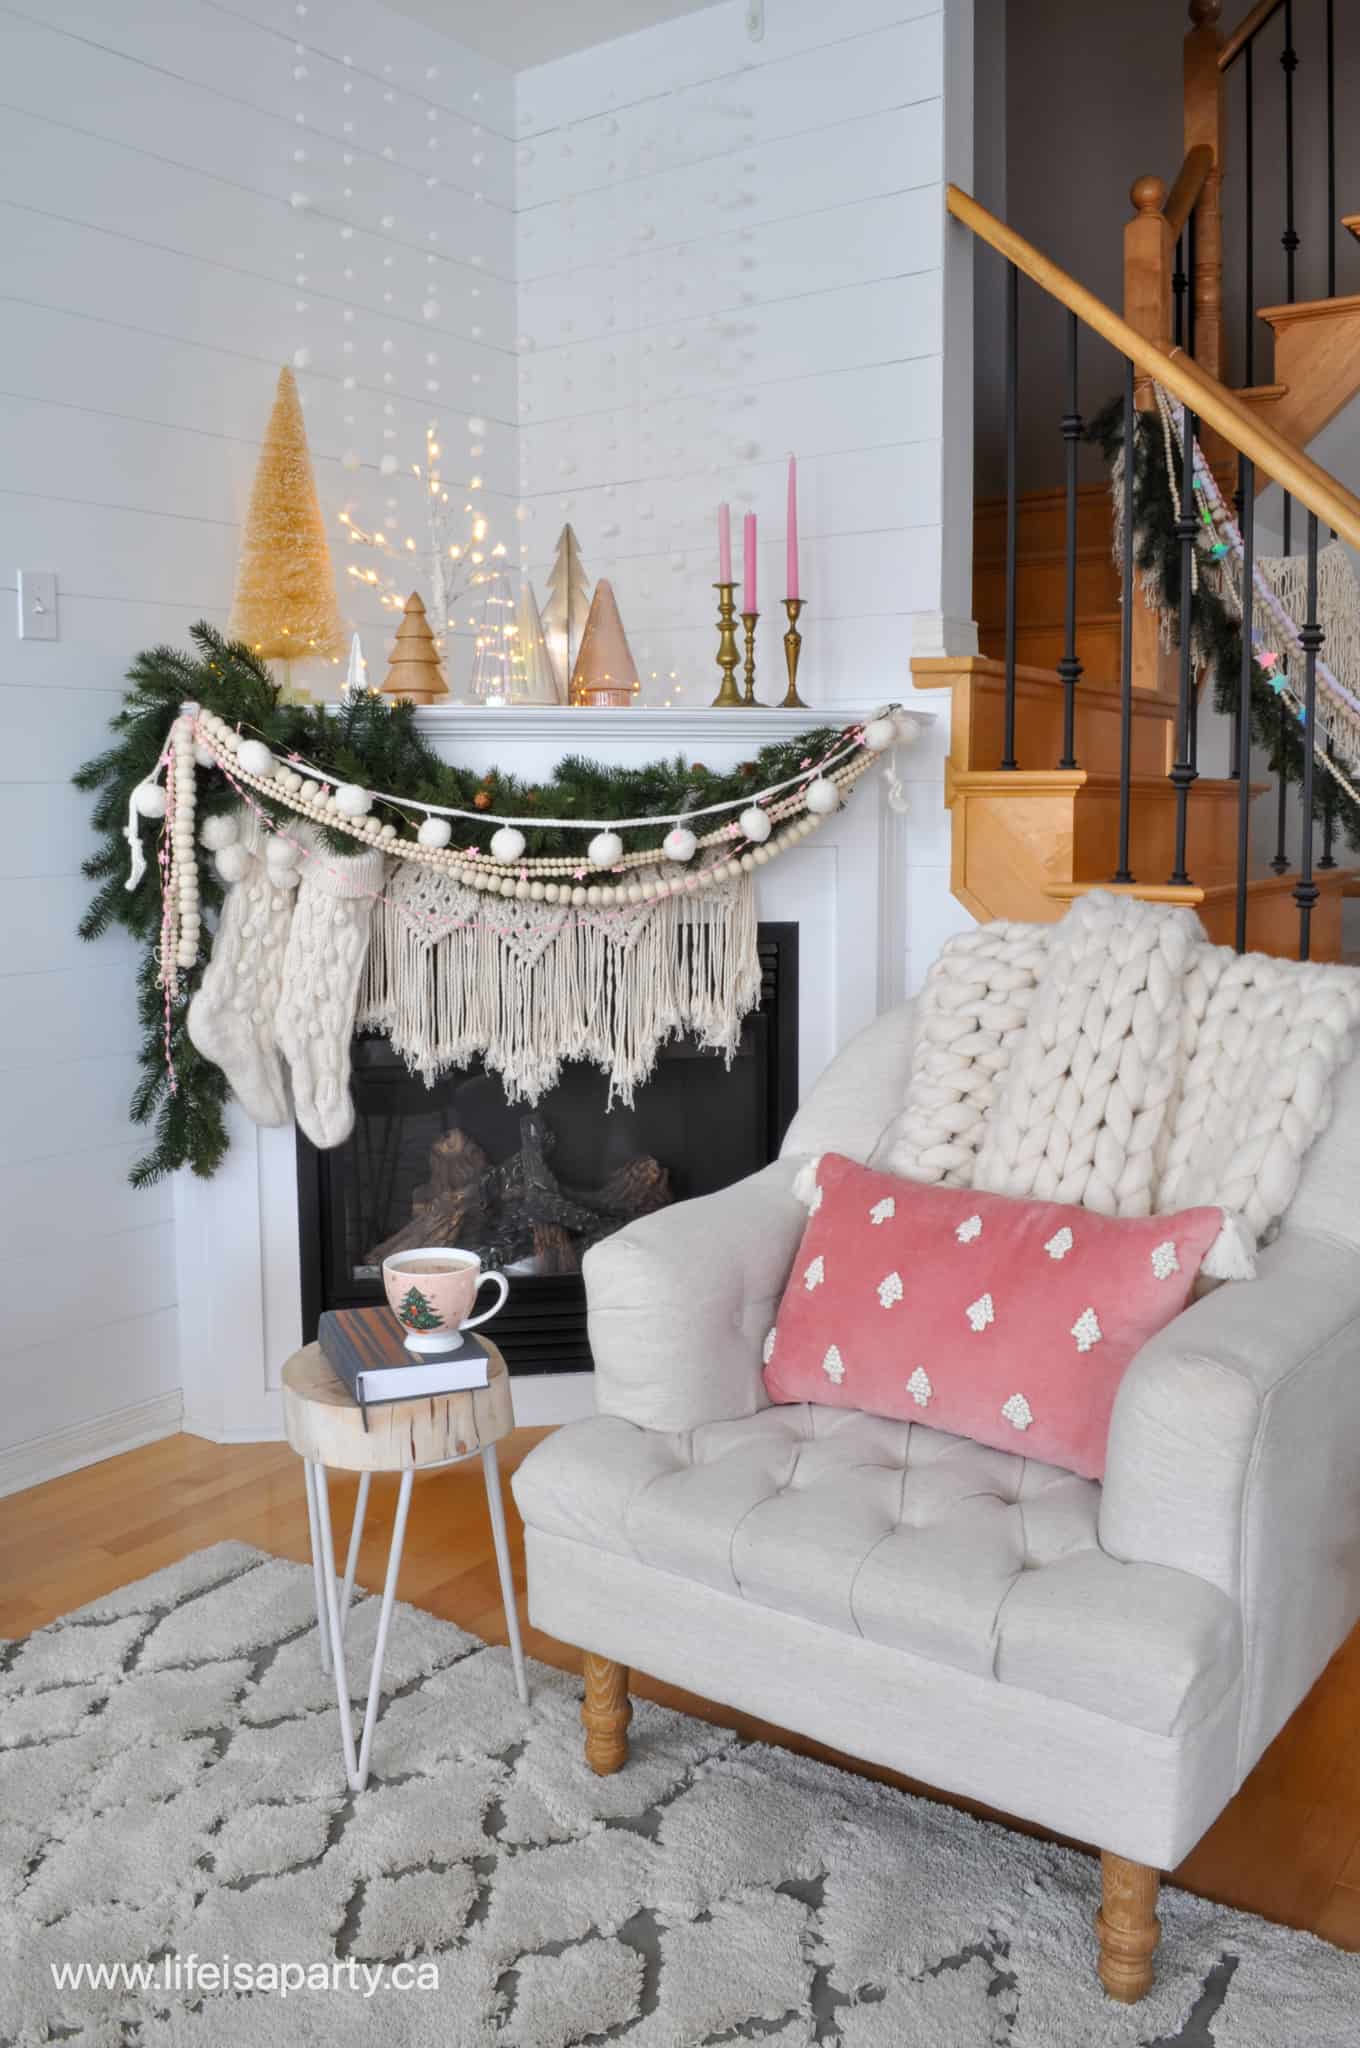
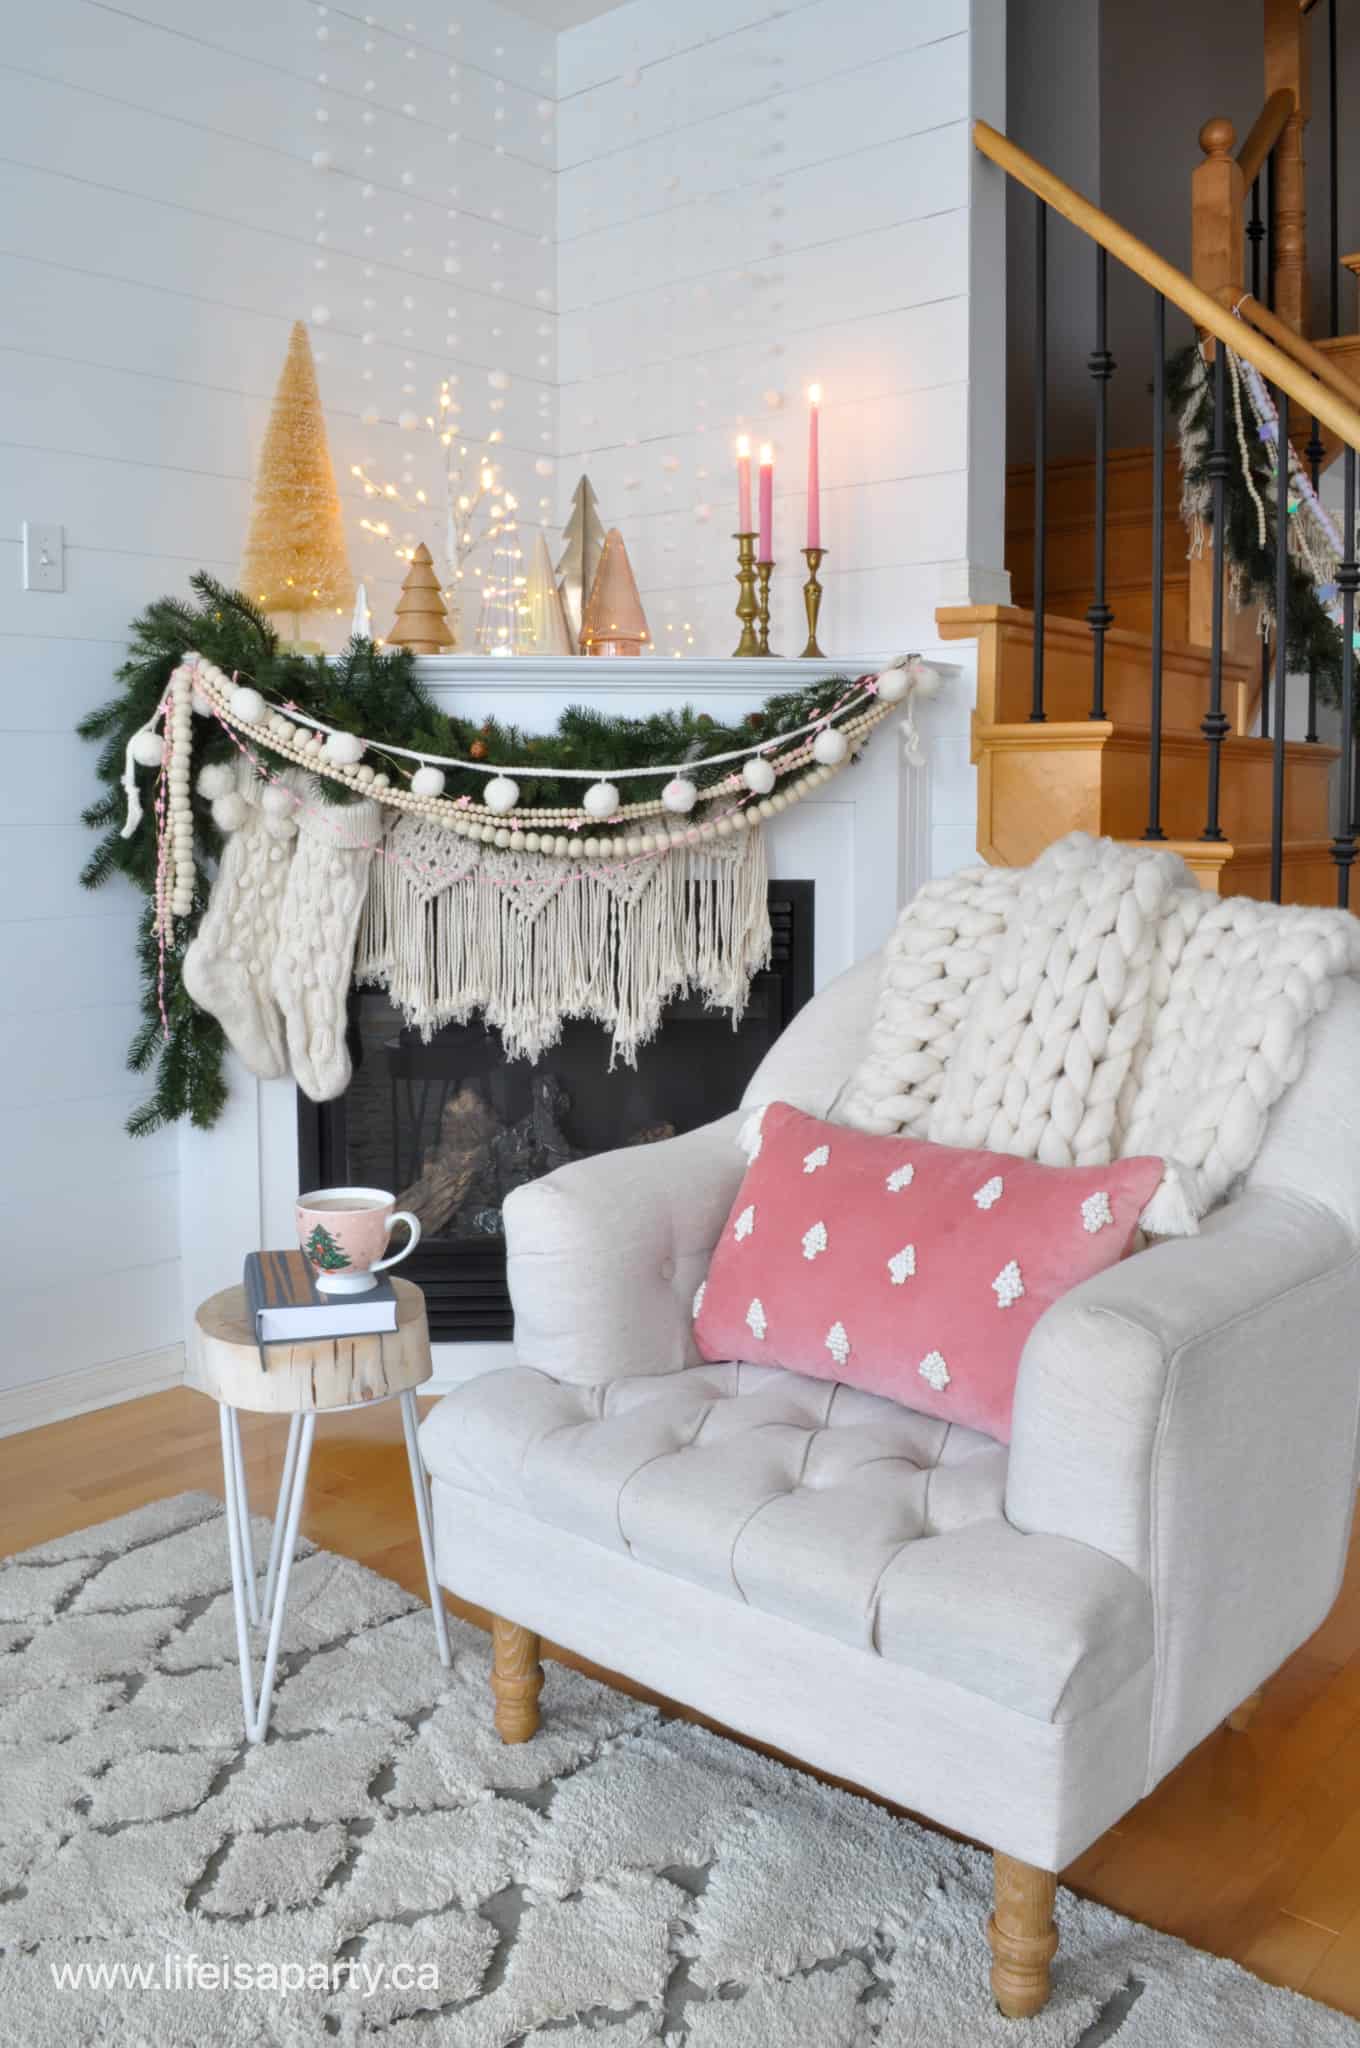
I love decorating my mantel for Christmas.  I've never loved things being perfectly symmetrical so today I'm sharing some asymmetrical Christmas mantel ideas.  I love this look and that it's a bit different, and it's really easy to pull together.
pink Christmas decor fireplace mantel

Snowy Backdrop

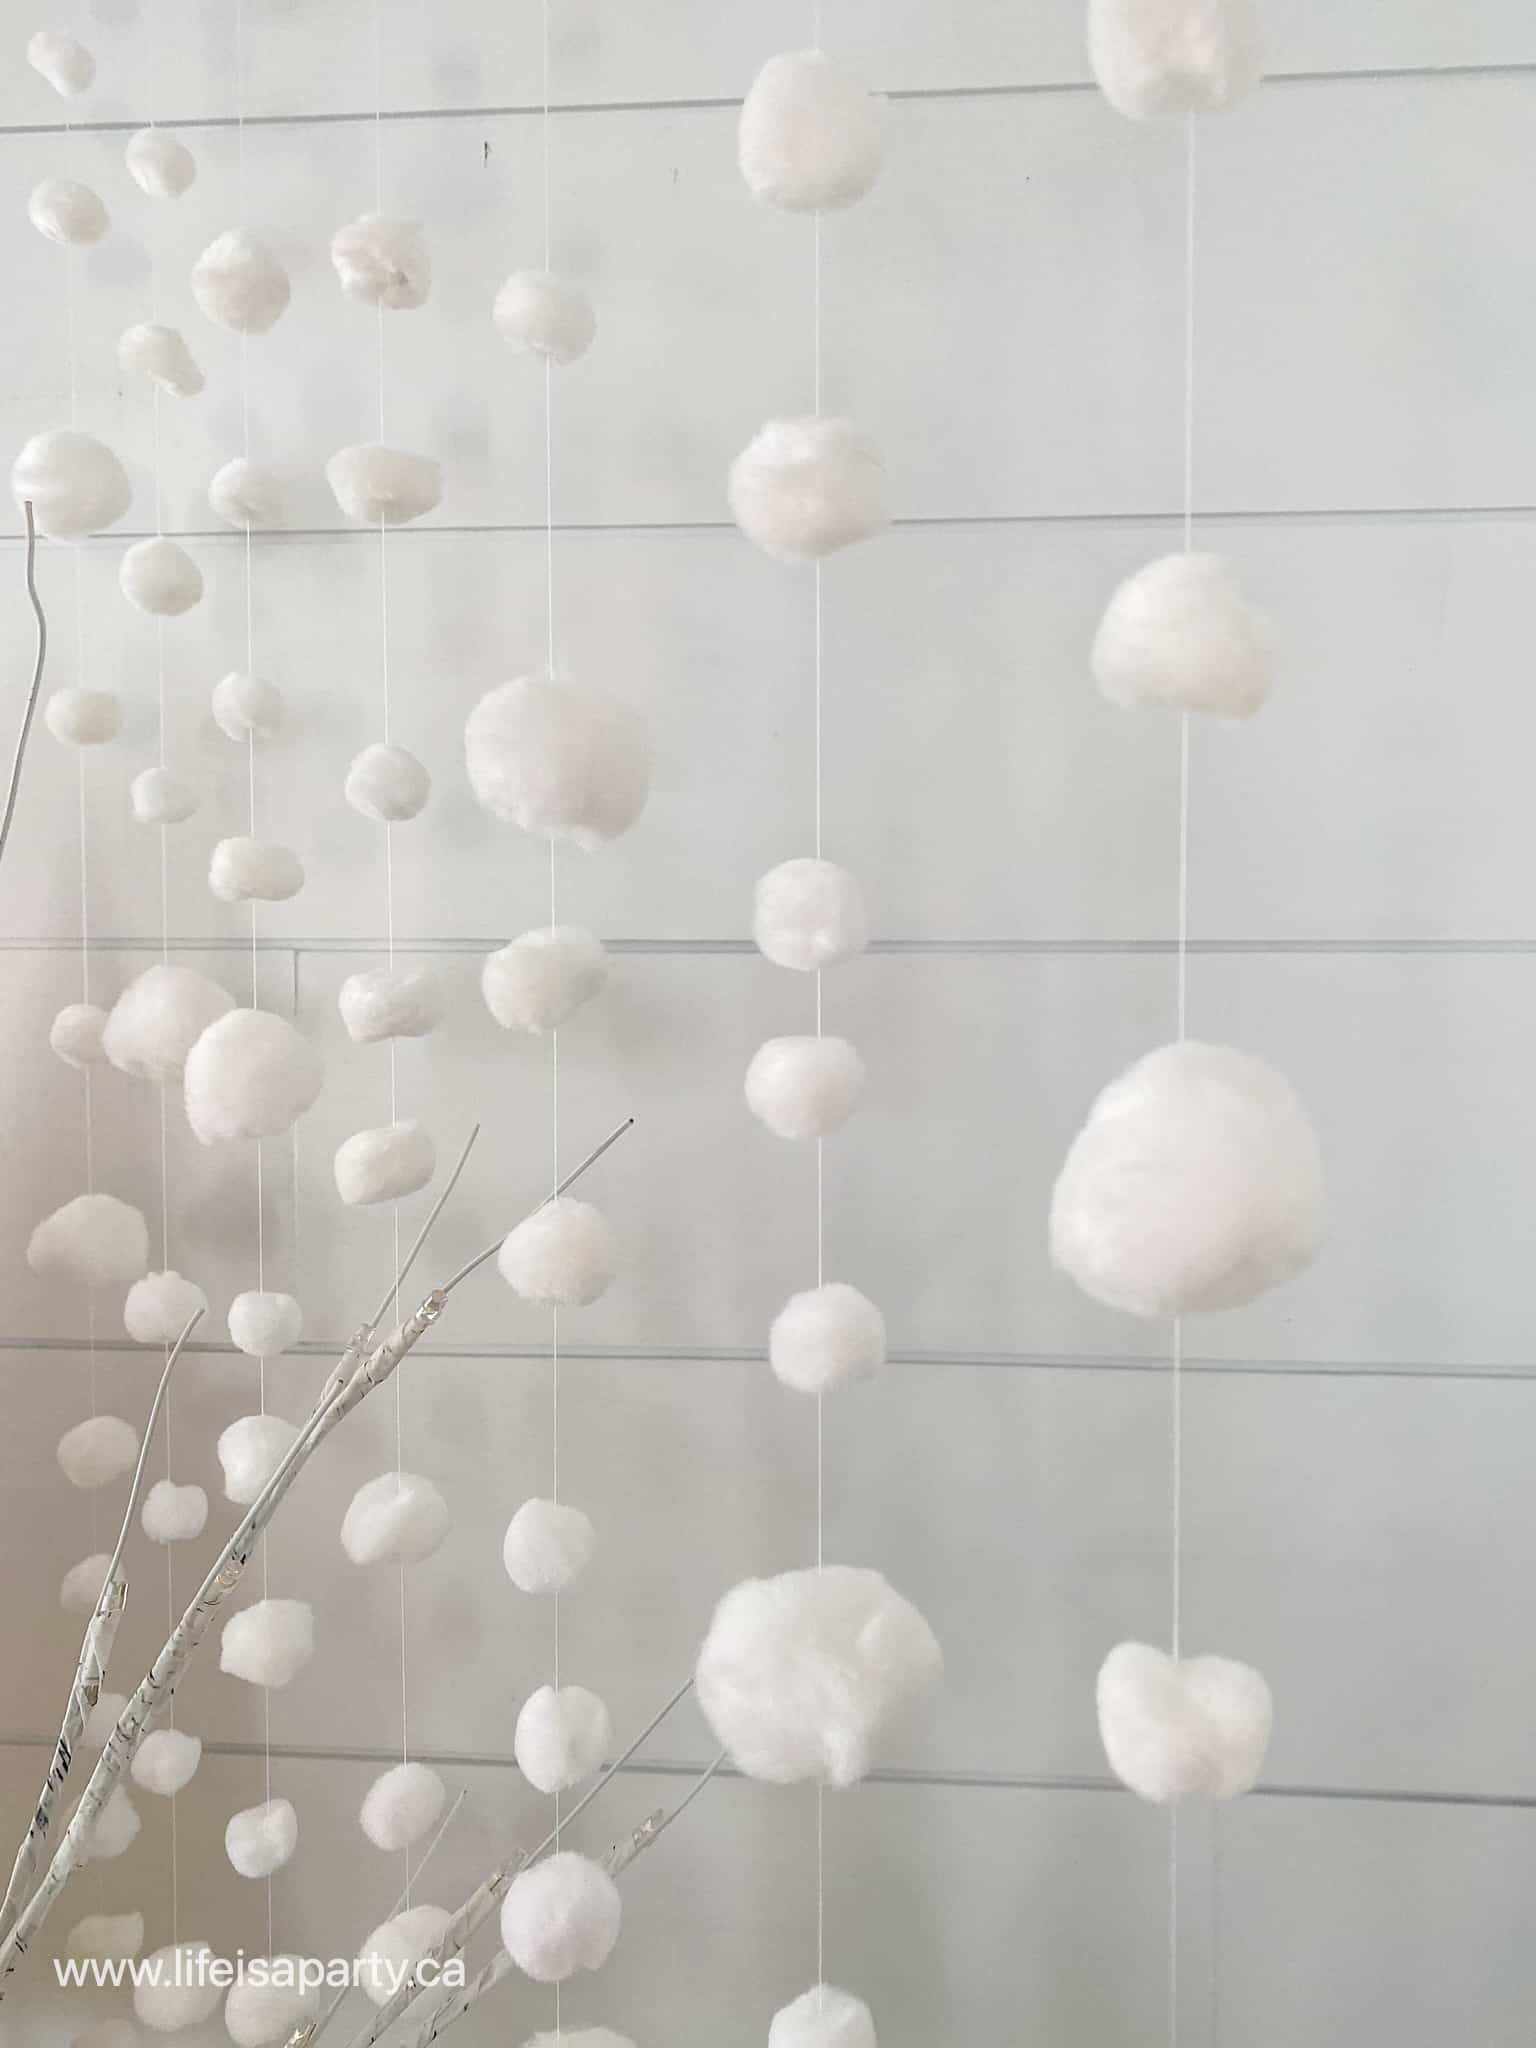
We have a corner fireplace and it can be a bit tricky to decorate, because it has such a large triangular space to fill.  I usually start out with some kind of back drop.  For Christmas I decided to make a curtain of snow.  To start, I picked up some white pom poms in three different sizes, and strung them randomly onto some white thread.  Next, I used some command hooks at the top, with a string tied between them, and hung the strands of pom poms from them.  I love how snowy and whimsical it looks for the holidays.
DIY snow curtain backdrop

Christmas Trees

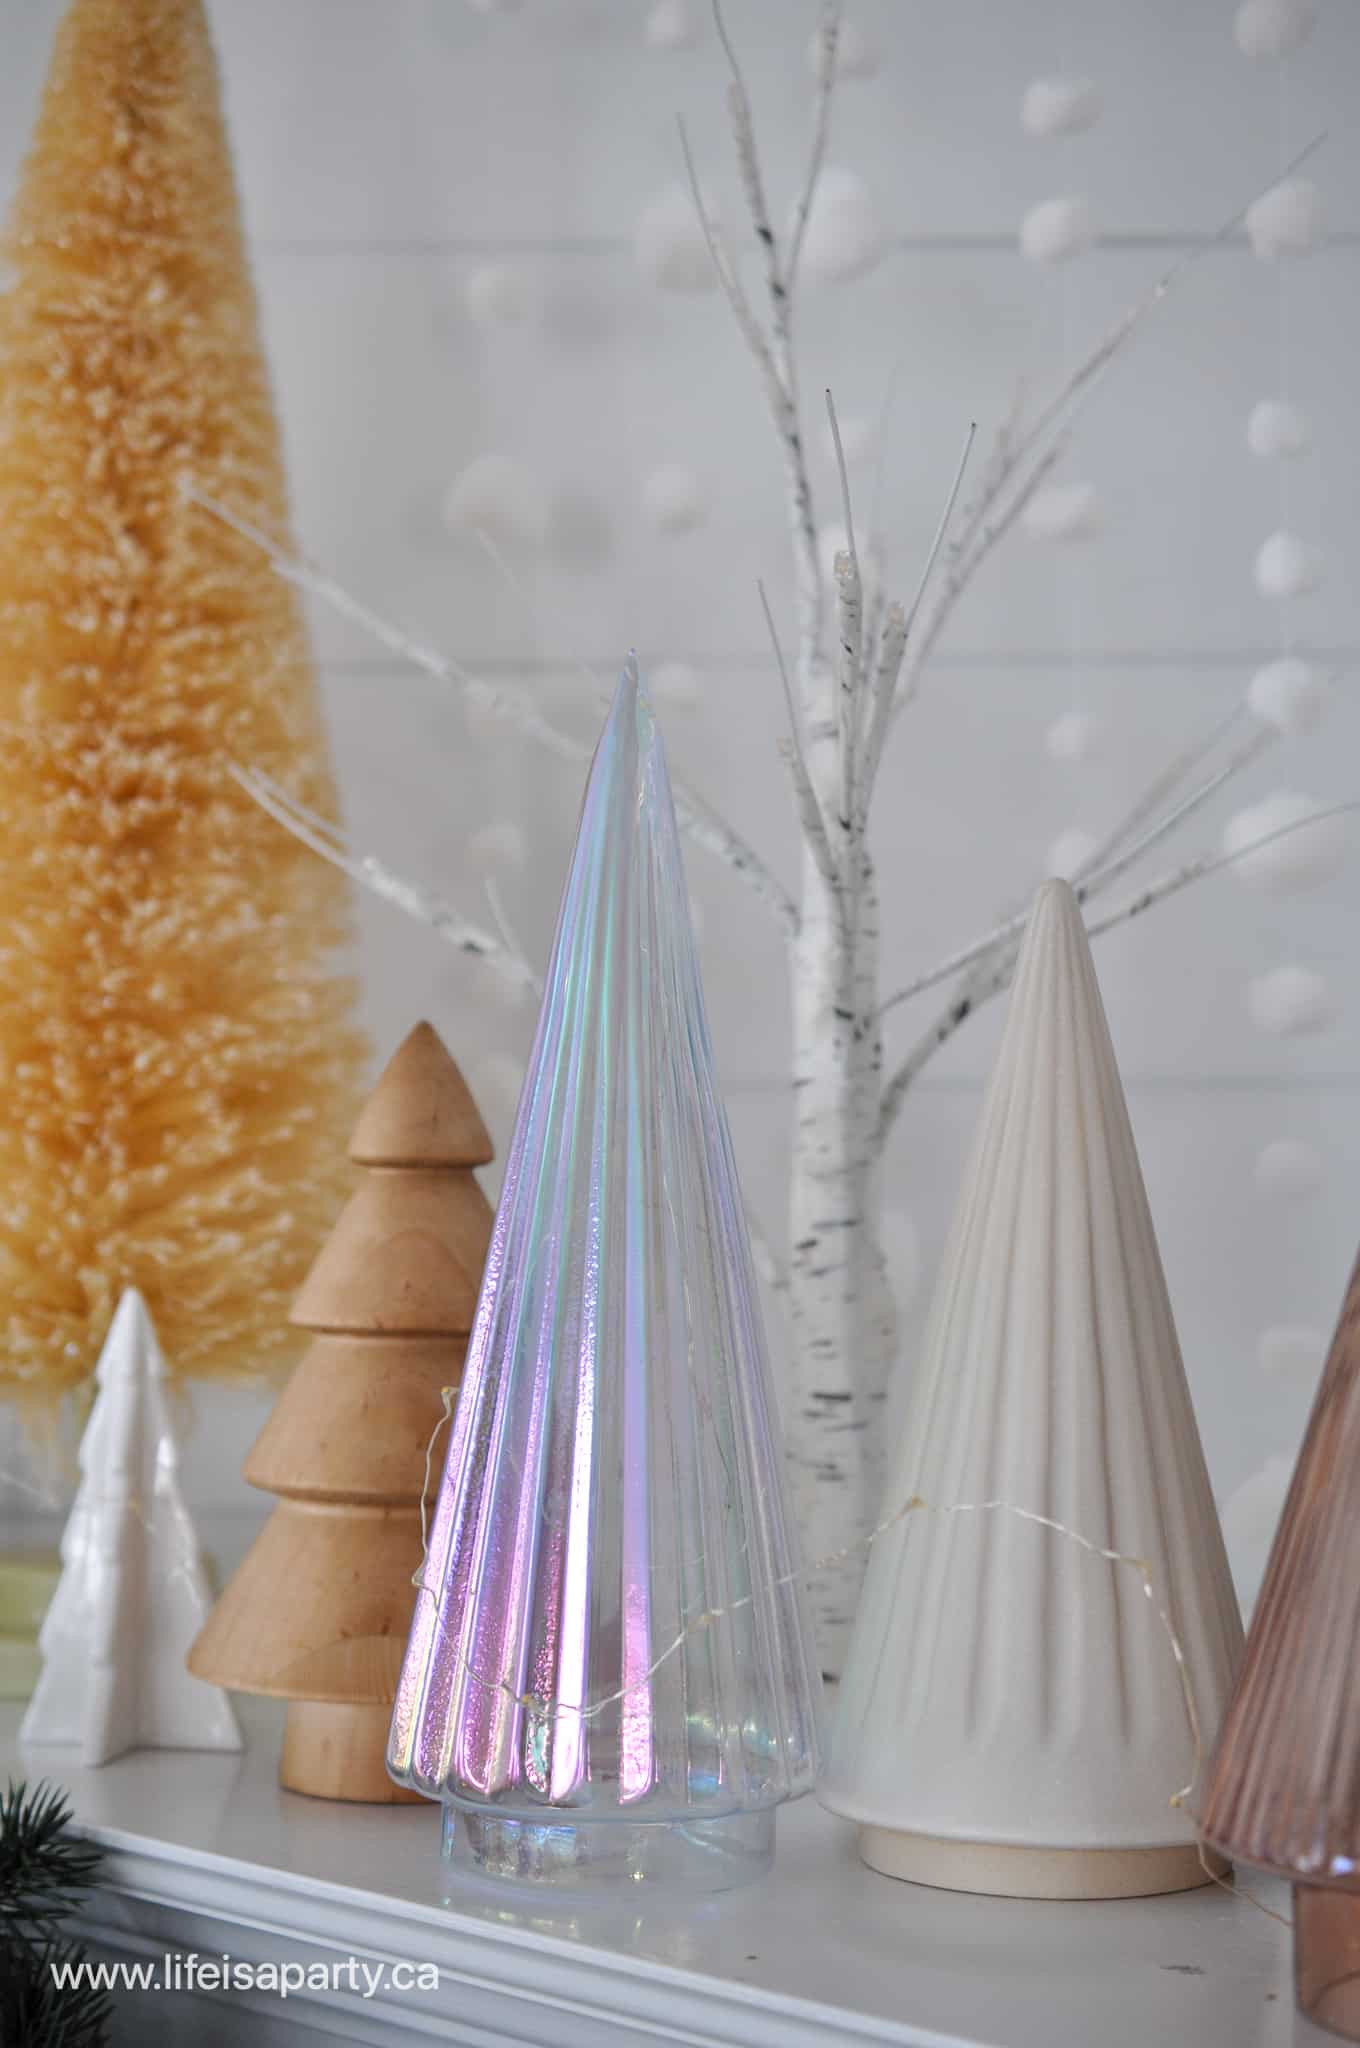
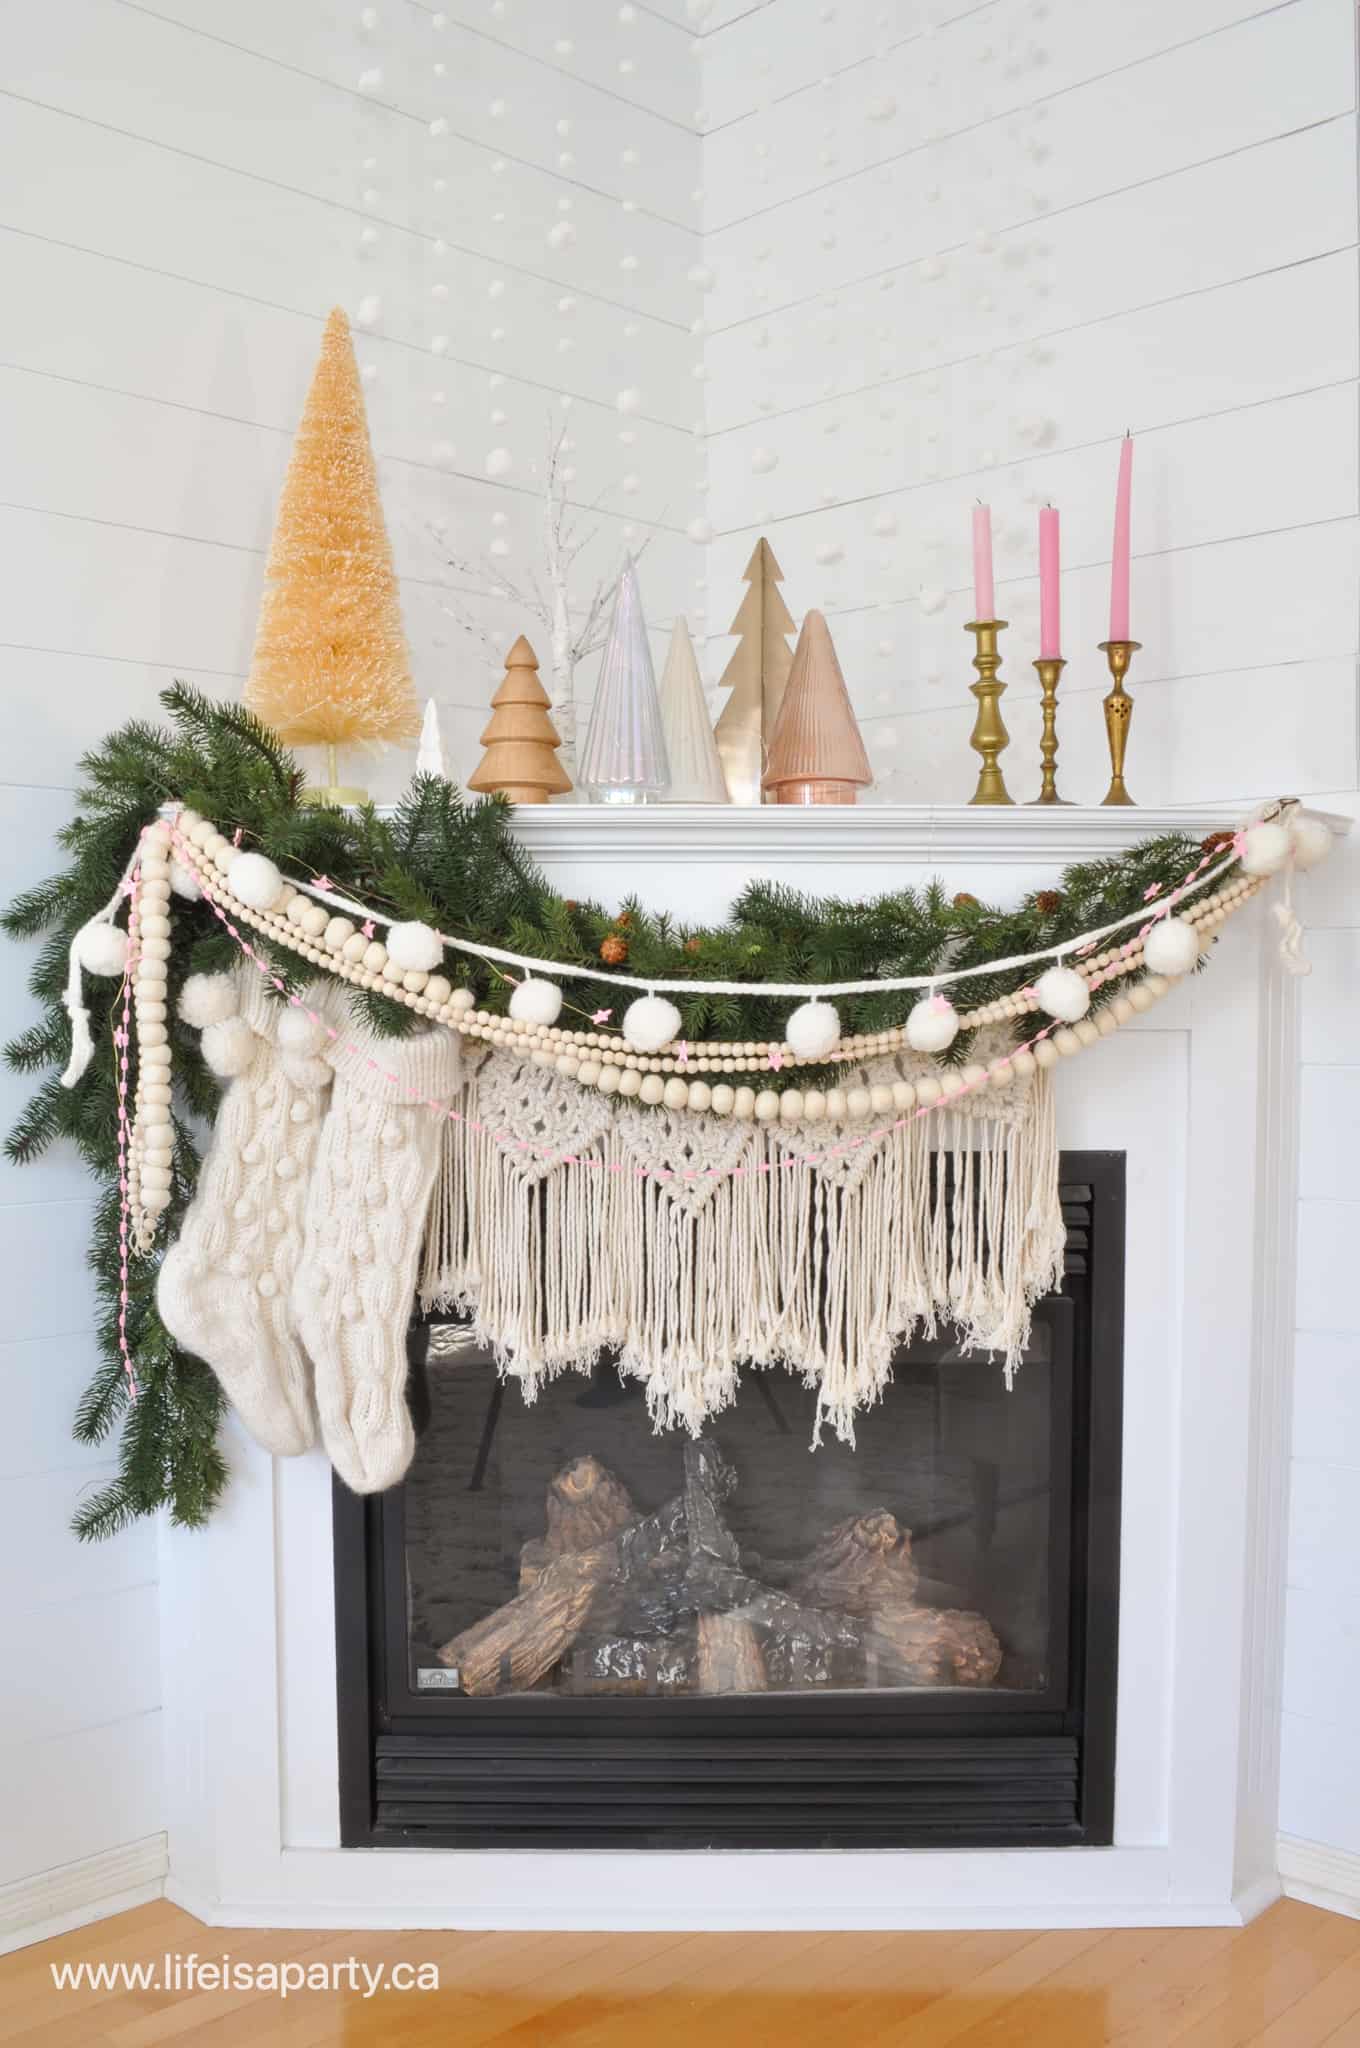
In front of my snowy backdrop I added a collection of mini Christmas trees.  I love mixing different colours and textures.  This year for my Christmas decor I'm using lots of whites and neutrals with touches of pink, and iridescent.  I used a tall bottle brush tree, two different white ceramic ones, a raw wood tree, one pretty iridescent tree, a pink glass tree, and a metal brass looking one.  I love the mix of different colours, textures, and heights to add interest to the display.  We've placed the largest one to the right, to create a bit of the swoop to the display, and coordinate with the asymmetrical garland beneath it.
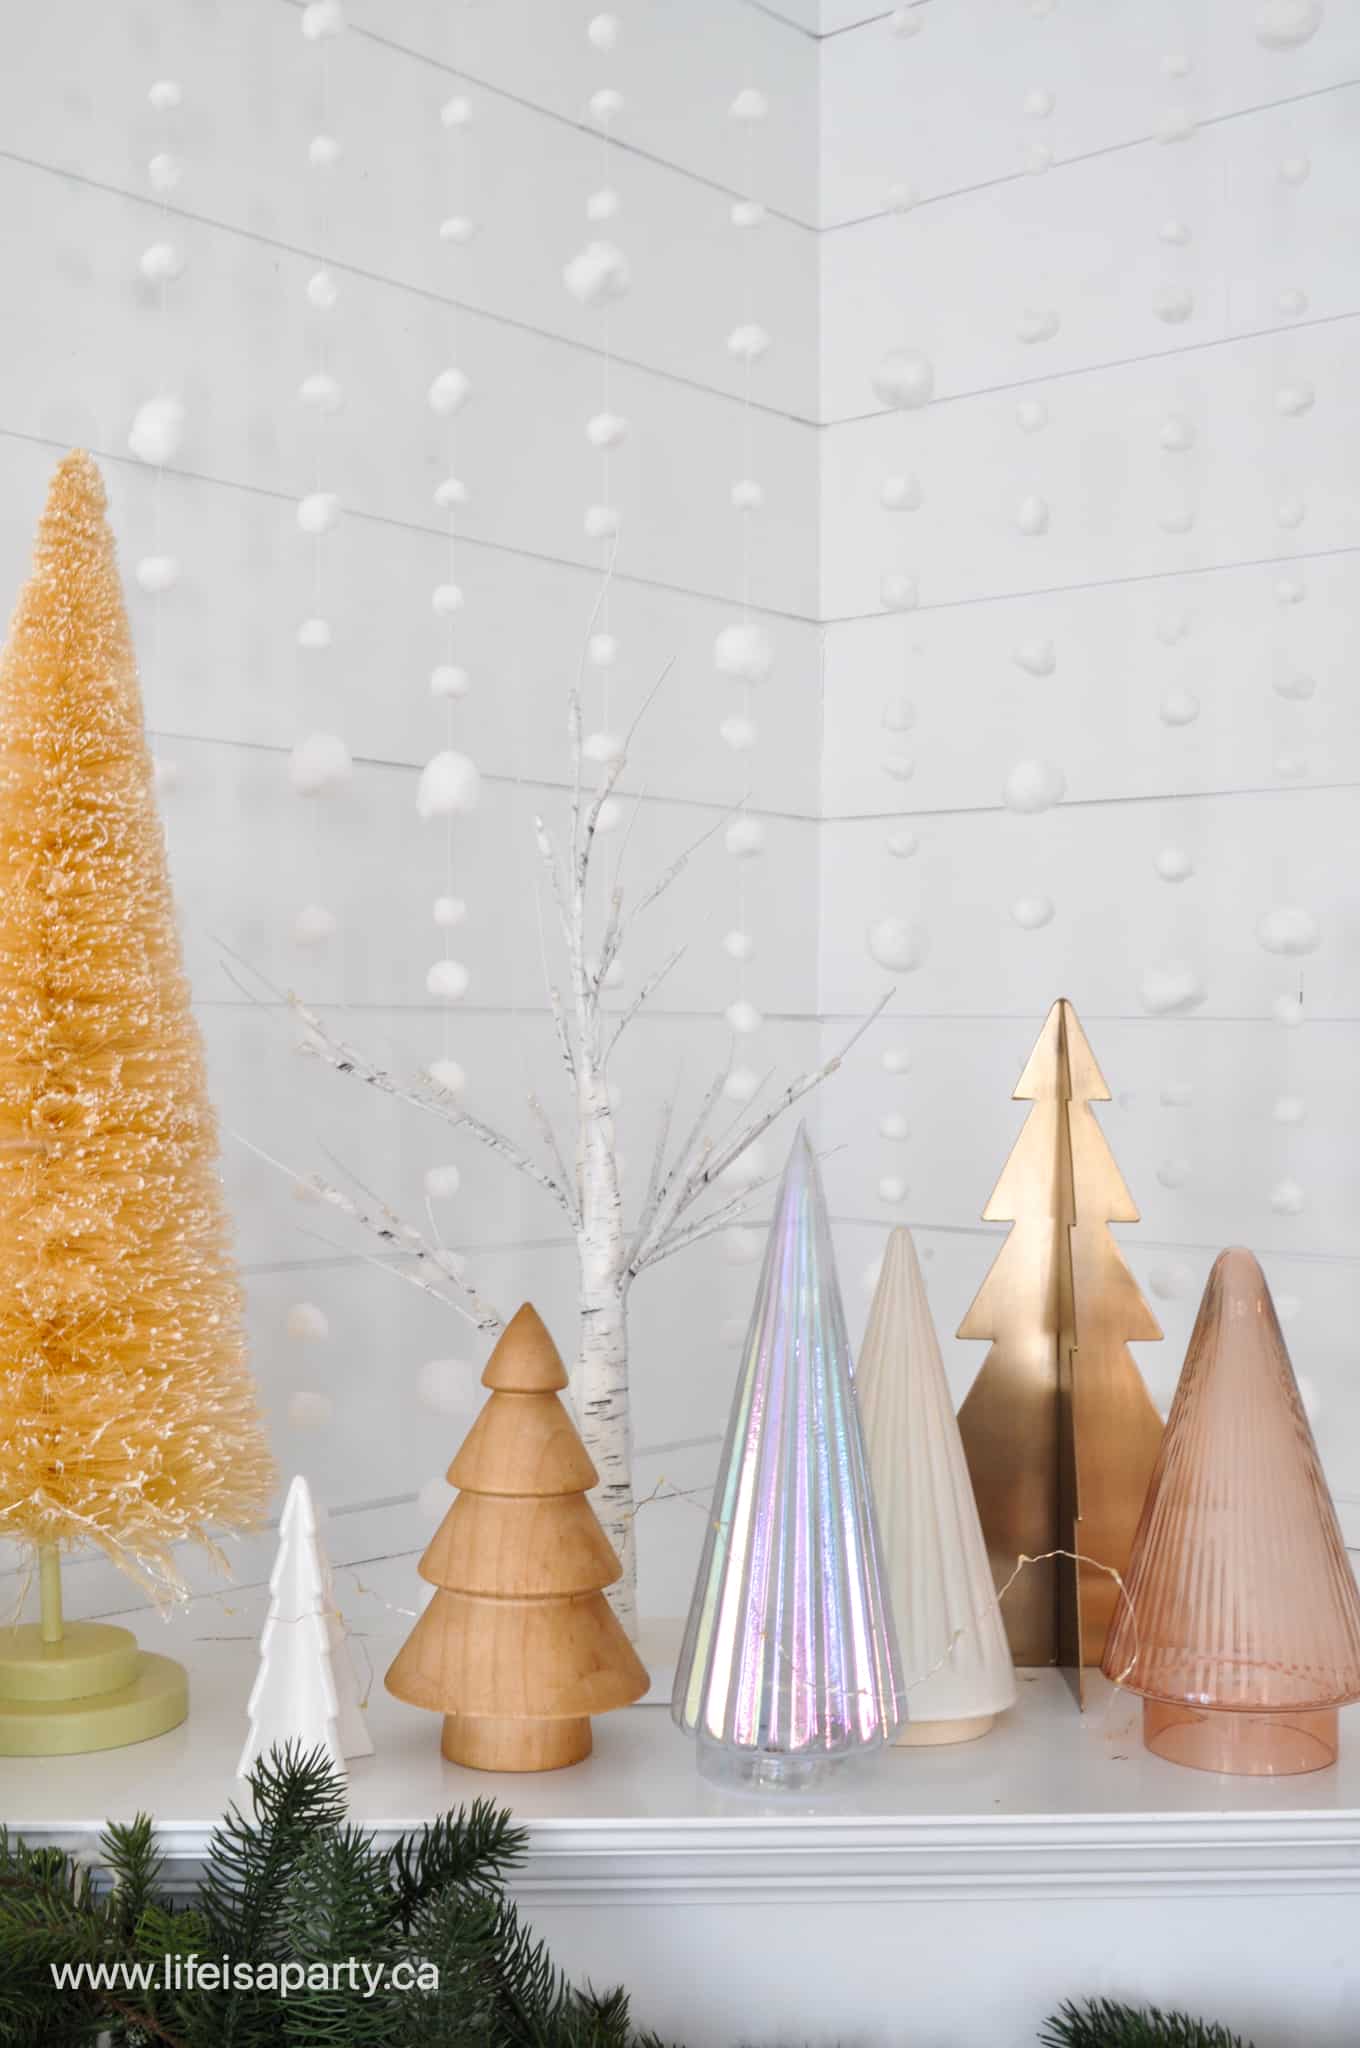
asymmetrical Christmas mantel
mini table top Christmas tree collection
iridescent Christmas tree

Candles

Next, since it's Christmas I thought it would be nice to include some candles.  I used vintage brass candle stick holders form the thrift store, and thrifted pink candles.
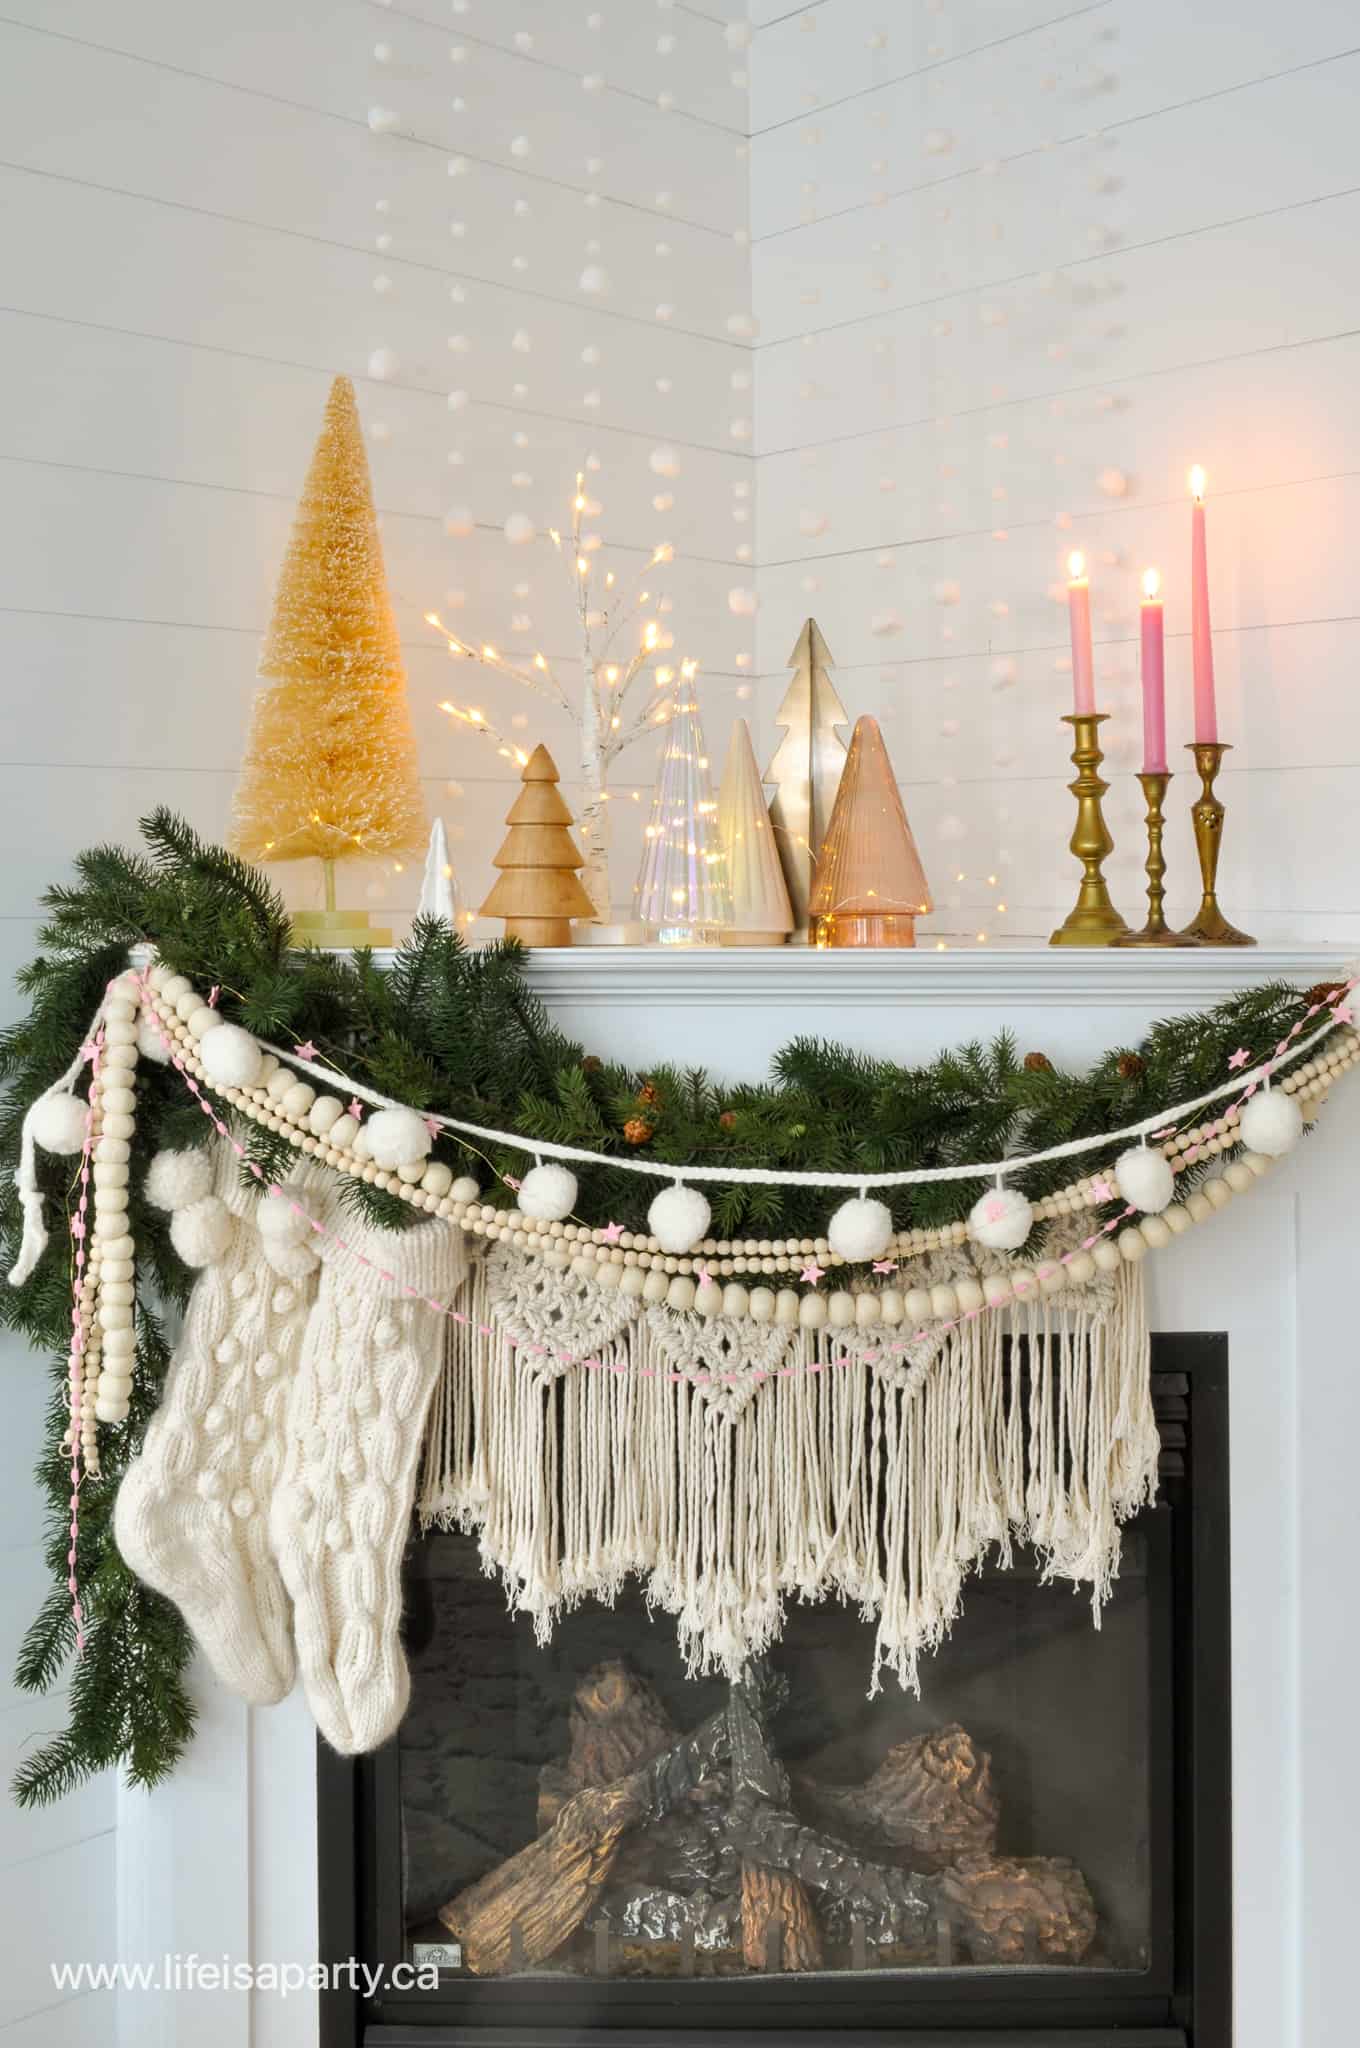
asymmetrical Christmas fireplace mantel

The Garlands

The base of this garland is two faux fir garlands, attached to the mantel with two small finishing nails on either side.  I wanted my Christmas decor to feel warm, cozy, and layered this year, with a Scandinavian feel, so I layered a lot of different garlands on top of the greenery.  Secondly, I always have my DIY macrame bunting hanging on the mantel, and I left it up for Christmas, since it feels so cozy and pretty.  See the tutorial for the macrame bunting here. On top of that, I combined a fun pom pom one, and a felt ball one.  I also included one long 12 ft. garland of raw wood beads, and doubled it.  Lastly to add in some of the pink I used some pink pom pom yarn, and the pink star garland that I made last year with polymer clay and gold wire -find the full tutorial for the star garland here.

And the last finishing touch to the garland area was to hang up some warm, wooly stockings.  I used more command hooks to hang them, and placed them on one side to add to our asymmetrical look.
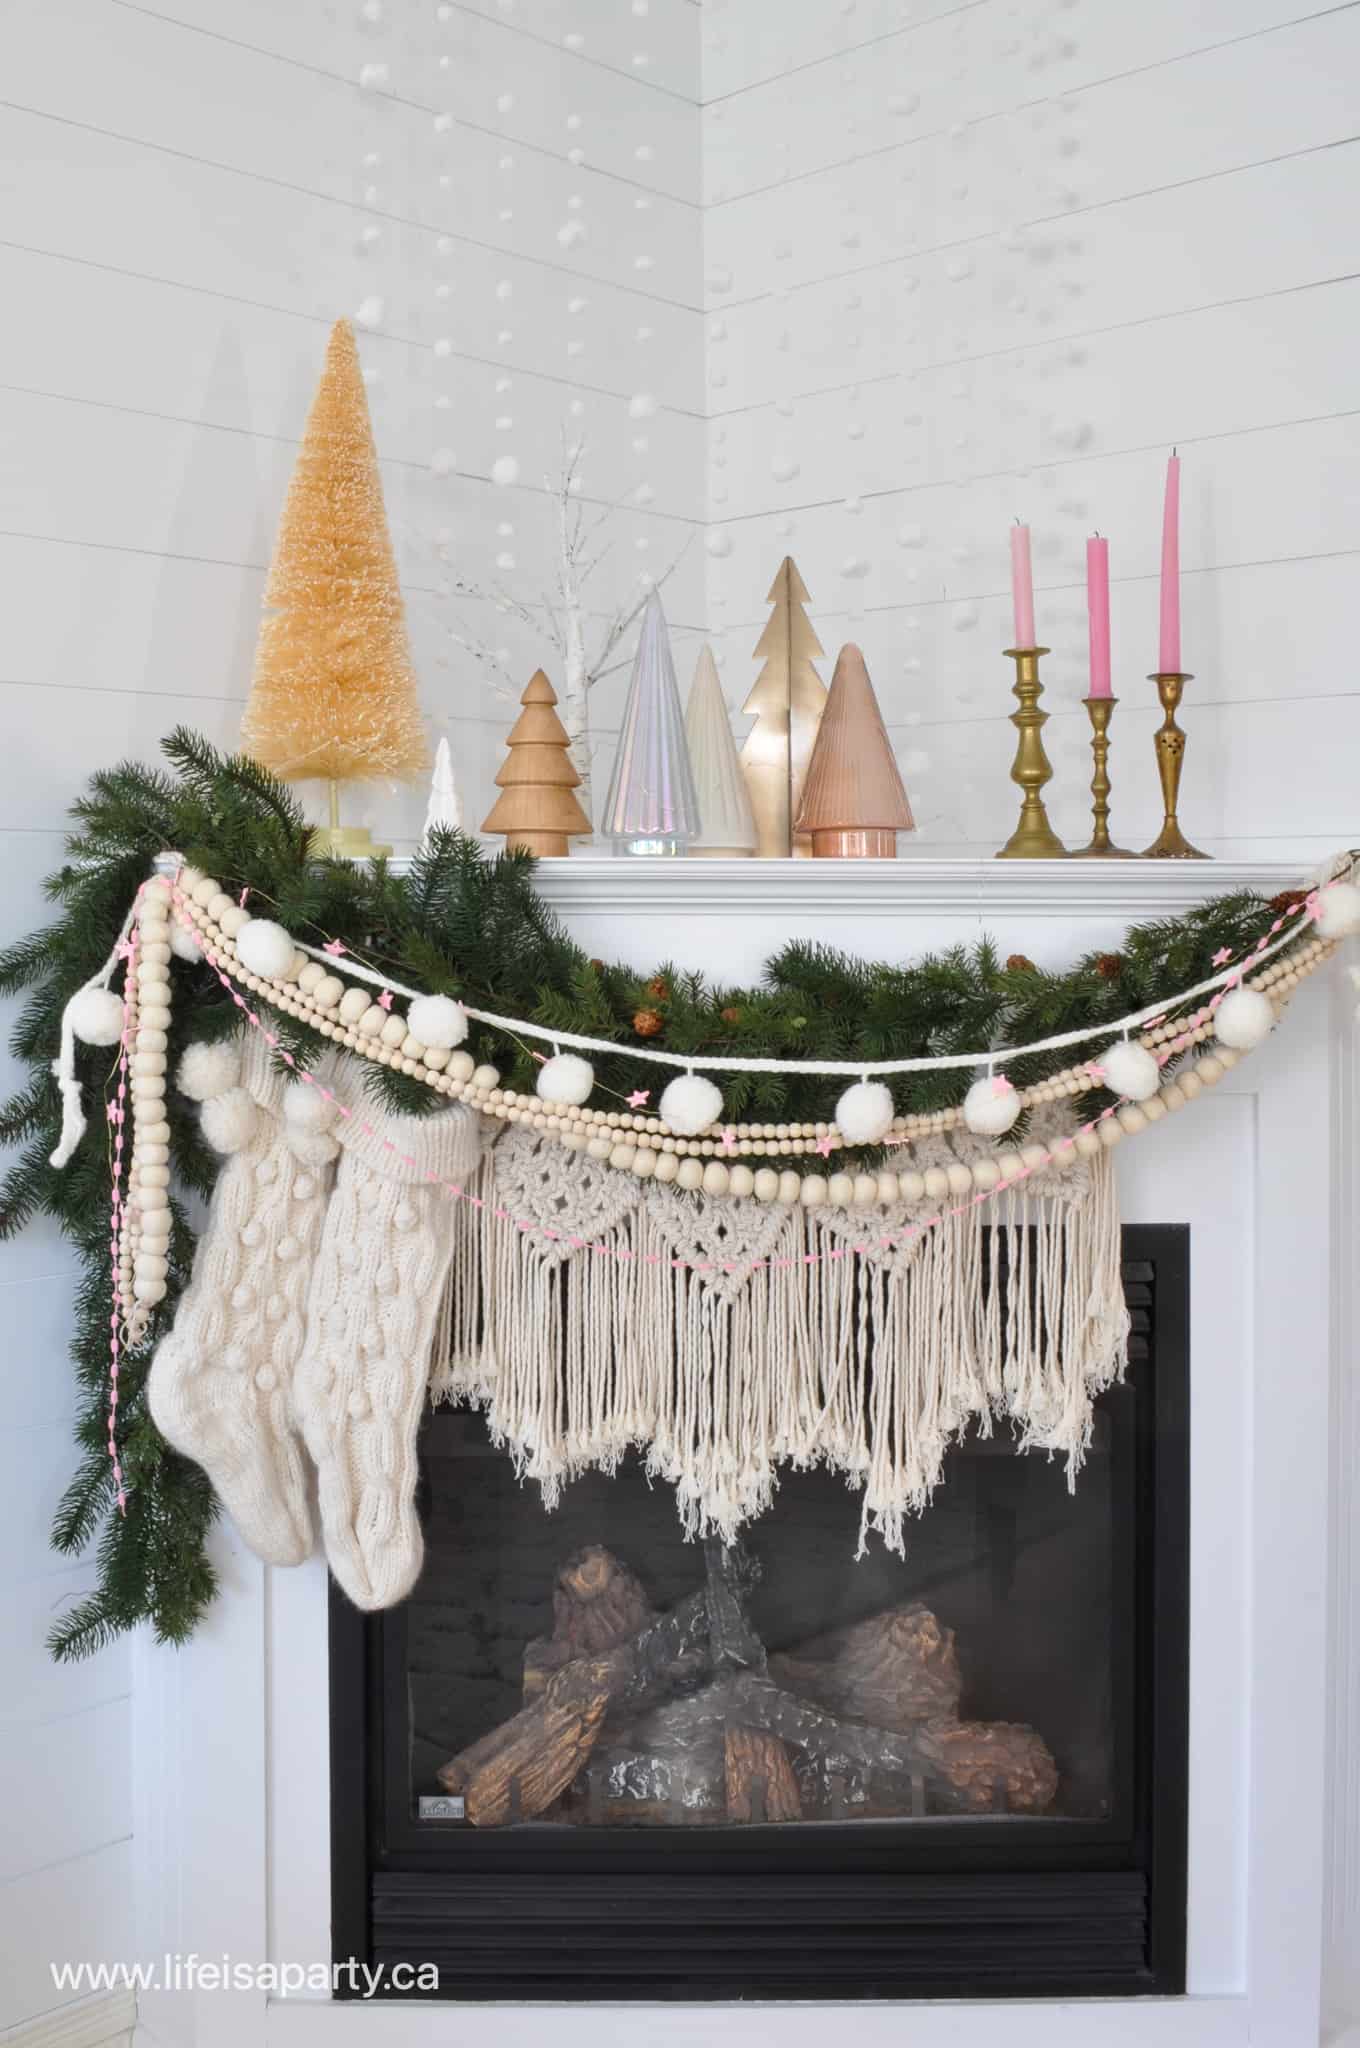
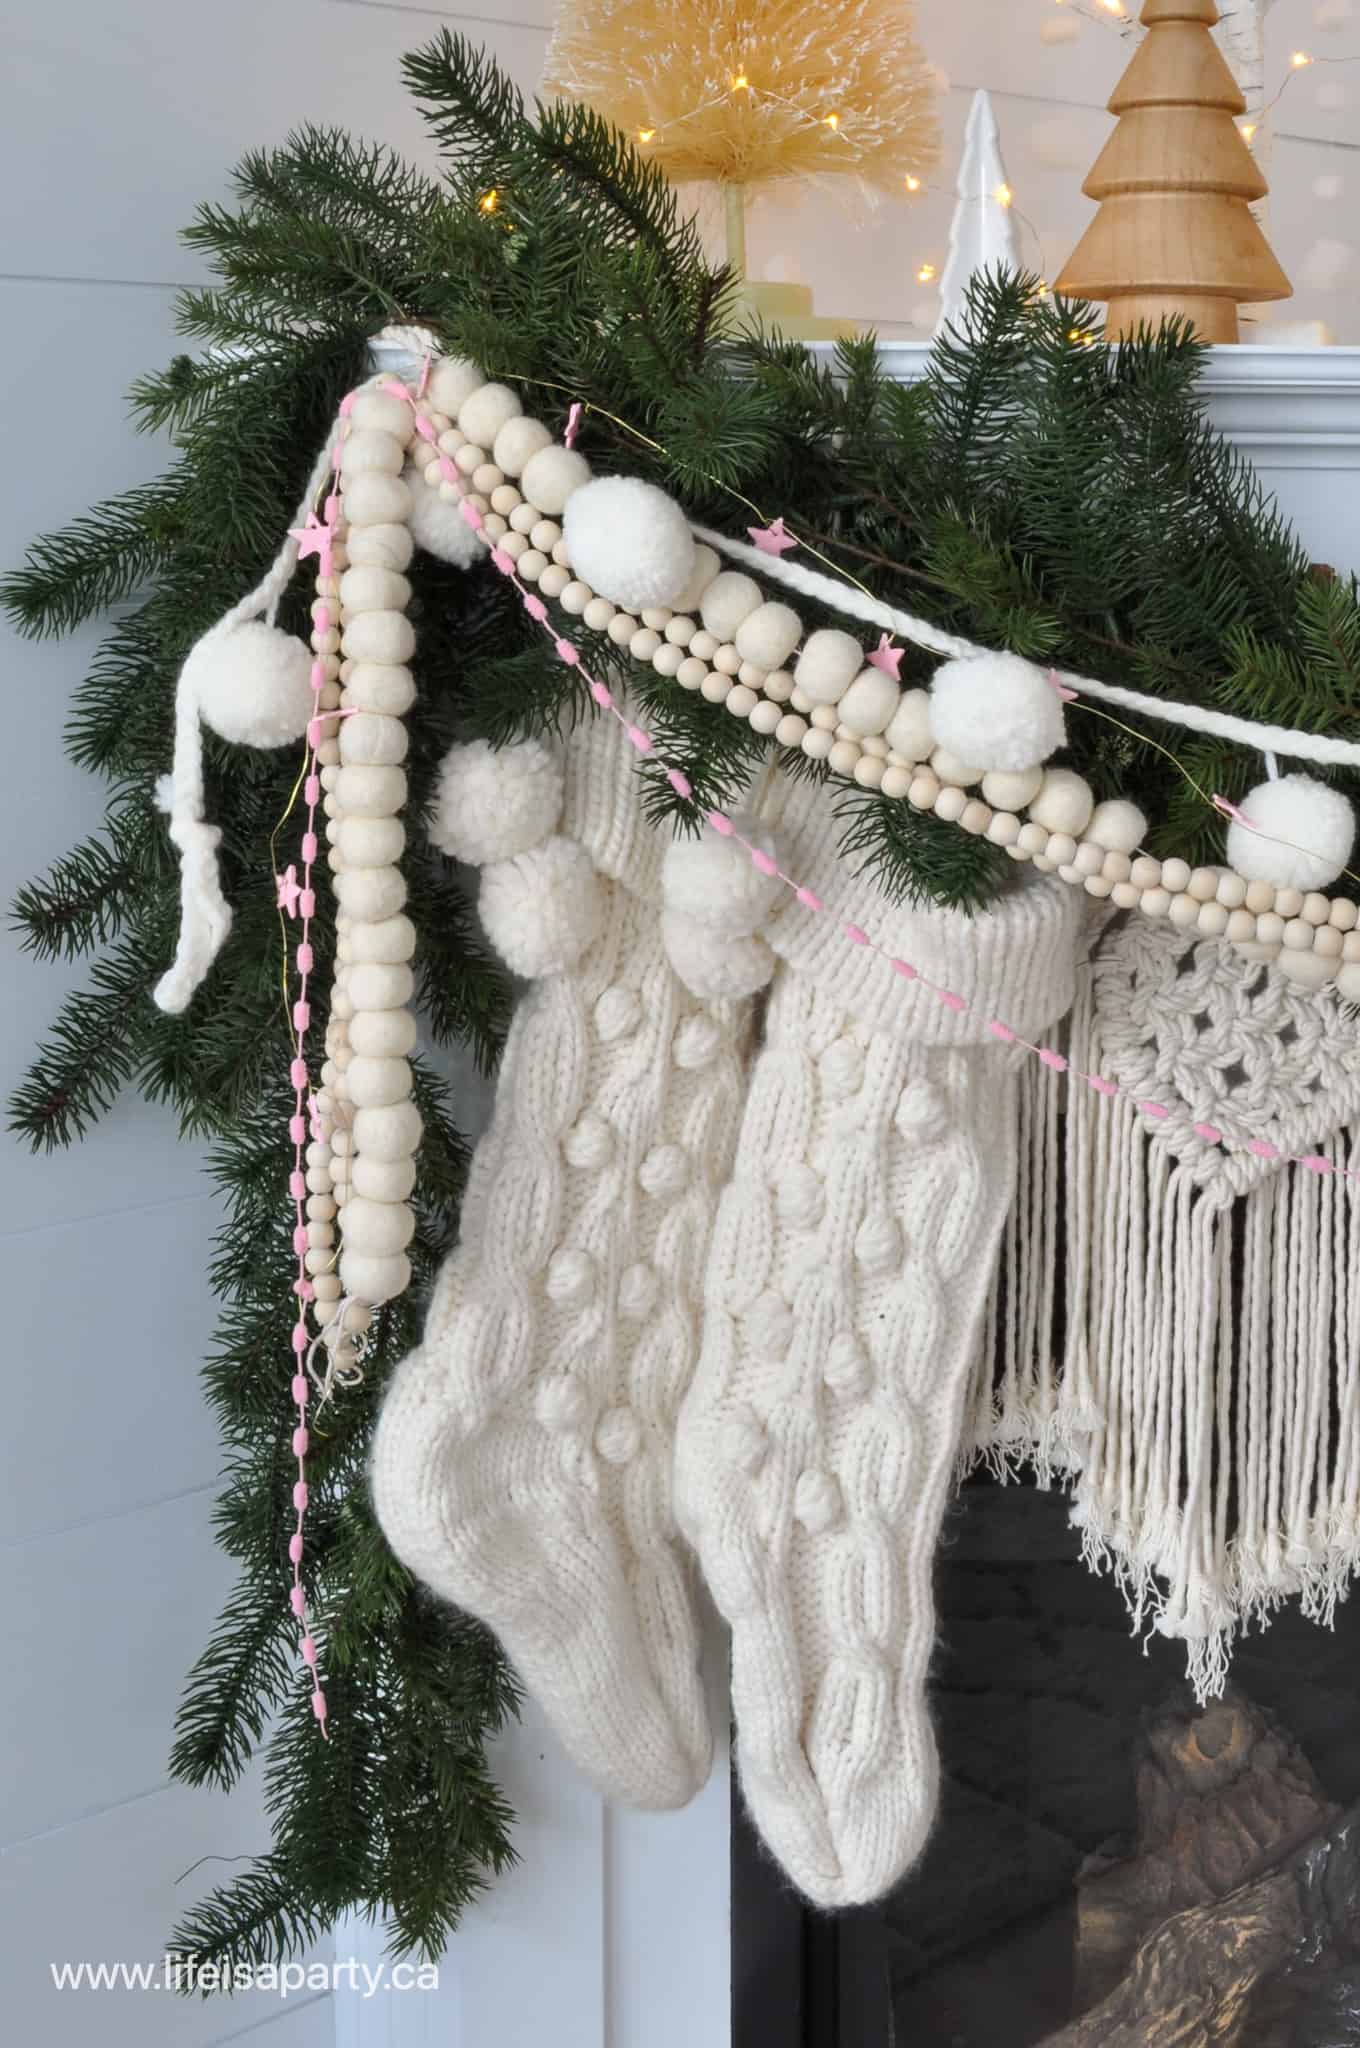
how to decorate an asymmetrical Christmas mantel
asymmetrical Christmas mantel

I love the asymetrical look achieved by off setting the garlands, and arranging the Christmas trees all to one side.  This Christmas mantel is full of interest, and all the cozy, Christmas feels I was looking for.  I hope it inspires you.
pink Christmas decor ideas fireplace mantel

With these Asymmetrical Christmas mantel ideas, life really is a party!

Free Printable Letter To Santa

Nov 17, 2021 · 4 Comments

letter to Santa free printable

Free Printable Letter To Santa: use our free printable template in pink or blue, to make writing a letter to Santa extra fun and easy.

letter to Santa free printable
[feast_advanced_jump_to]

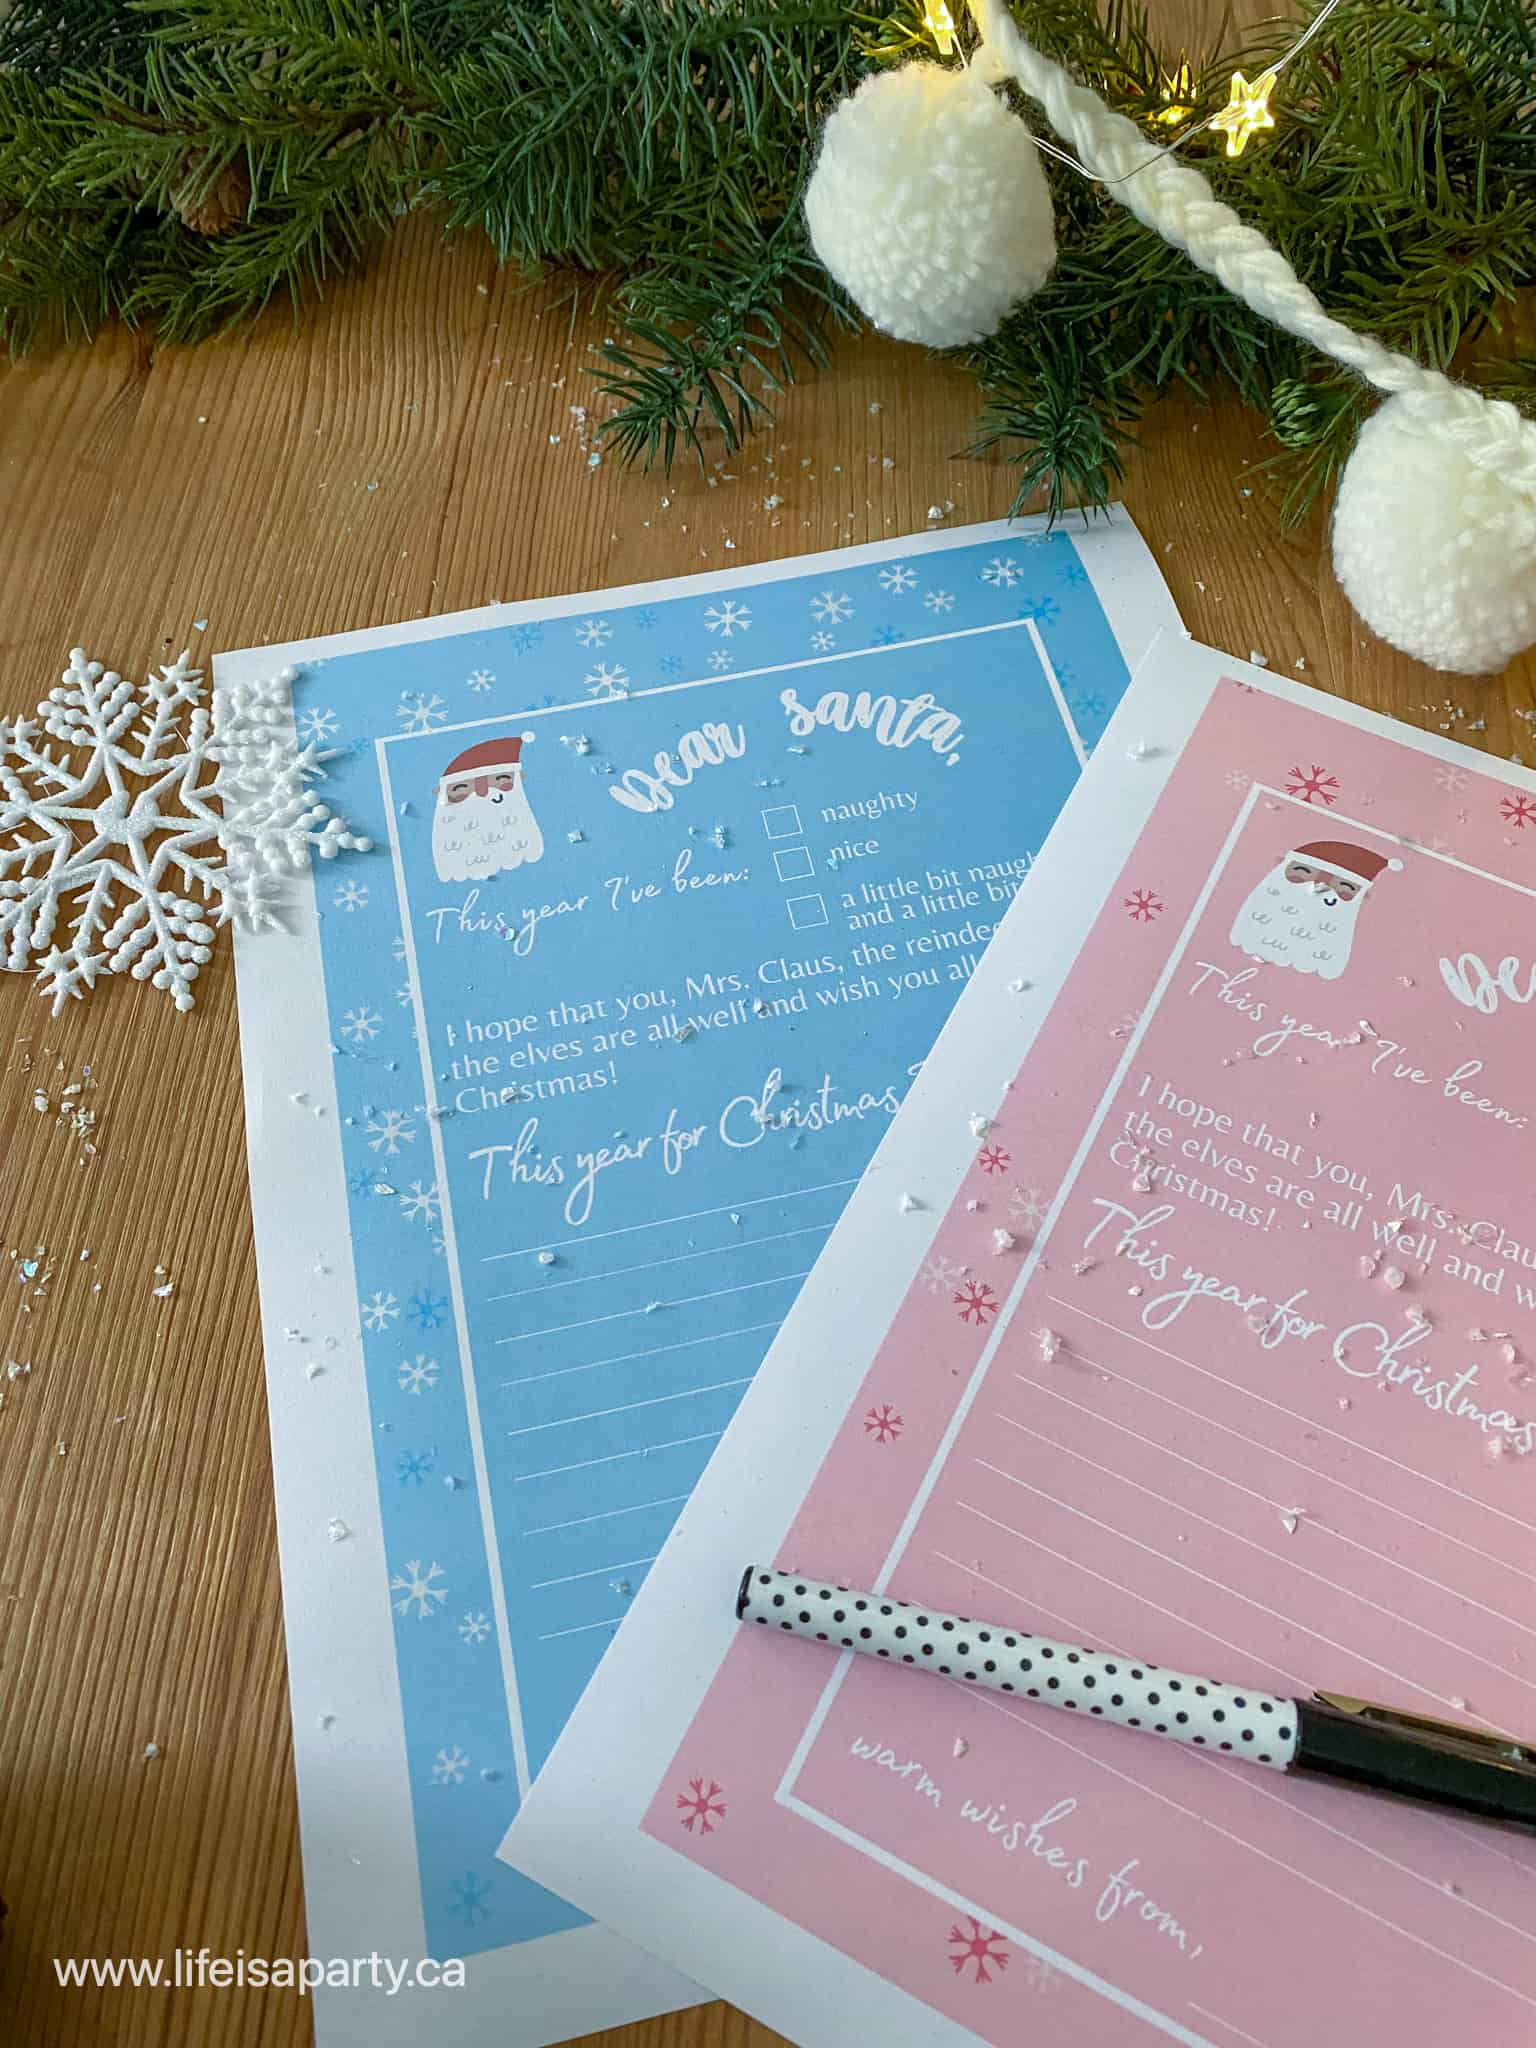
It's always fun for kids to write a letter to Santa at Christmas. Make this fun holiday activity easier -and cutier, than ever with our free printable letter to Santa template. 

Free Printable Letter To Santa In Pink or Blue

We've made our letter to Santa templates two different versions, available in both pink and blue, so choose whichever your child prefers. Just print and let them fill out all the details, making it easier than ever for anyone to write their own letter to Santa. 

Our free printable dear Santa letters are great area wonderful way to send magical messages to the big guy. The blank Santa letter templates can be printed at home on your home printer, or at any office supply store.

free letter to Santa printable

You'll love seeing which box they check, and if they think they've been naughty, nice, or a little of both this past year. There's a also a fun little greeting to Mr. Claus, and a spot for them to fill out what's on their Christmas wish list this year.

Start A Fun Tradition

We love traditions, especially during the Christmas season. So there's so many fun activities to do as a family like Elf on the Shelf -check out all our free printables and cute ideas here. We also love to bake Christmas cookies and turn it into a Christmas baking party too.

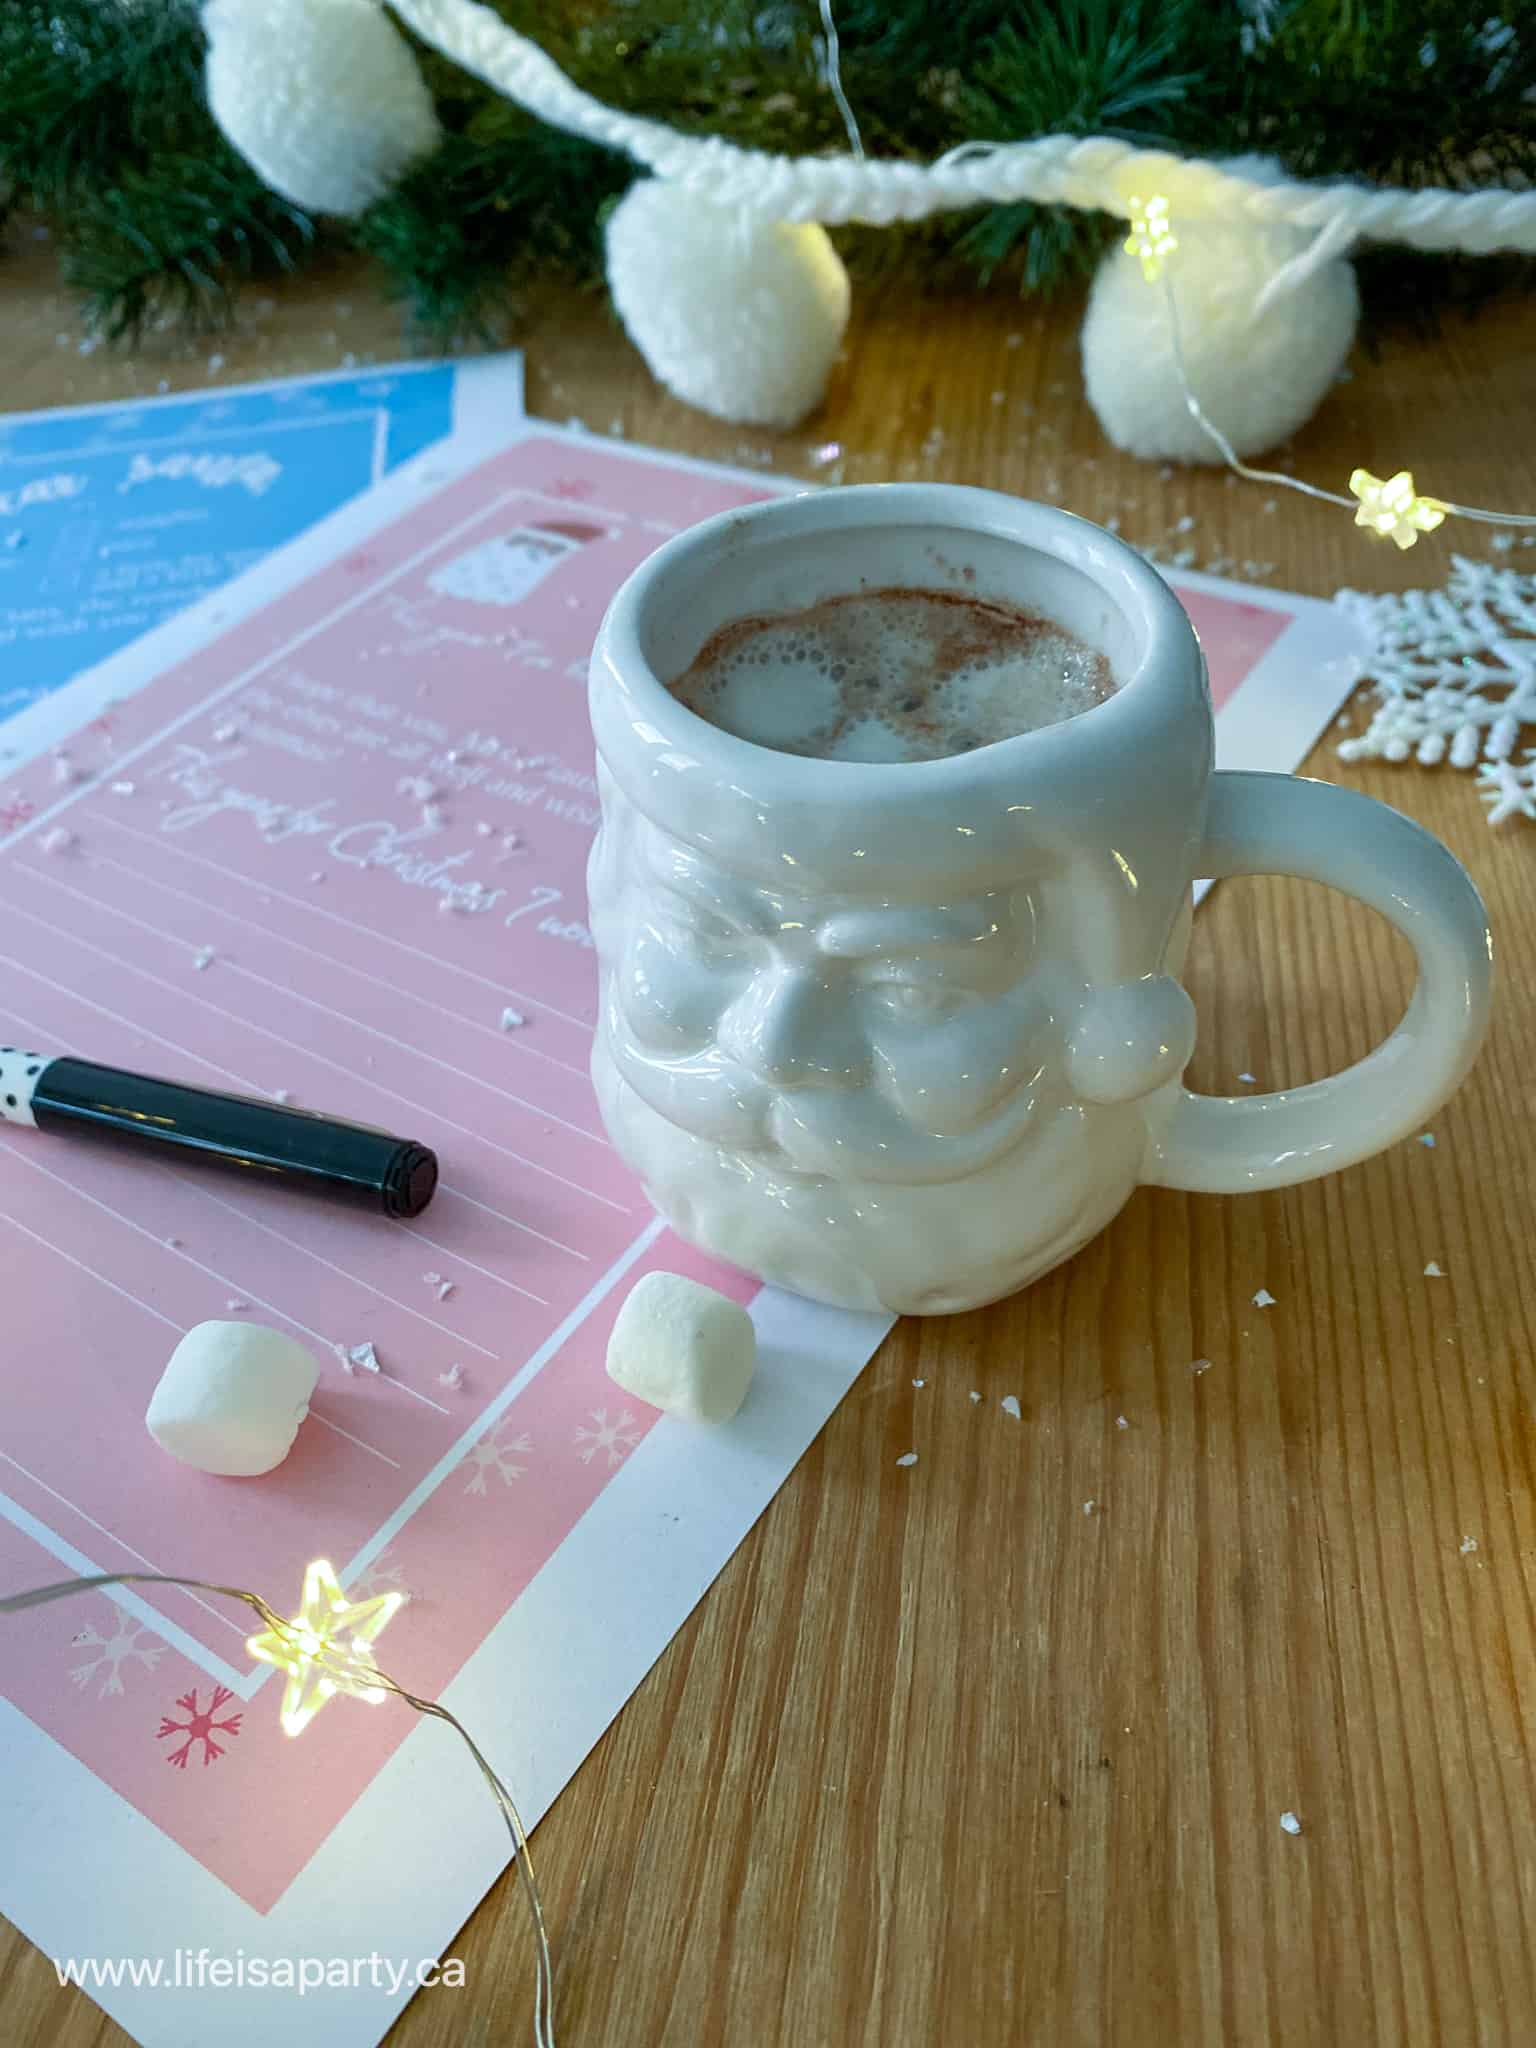
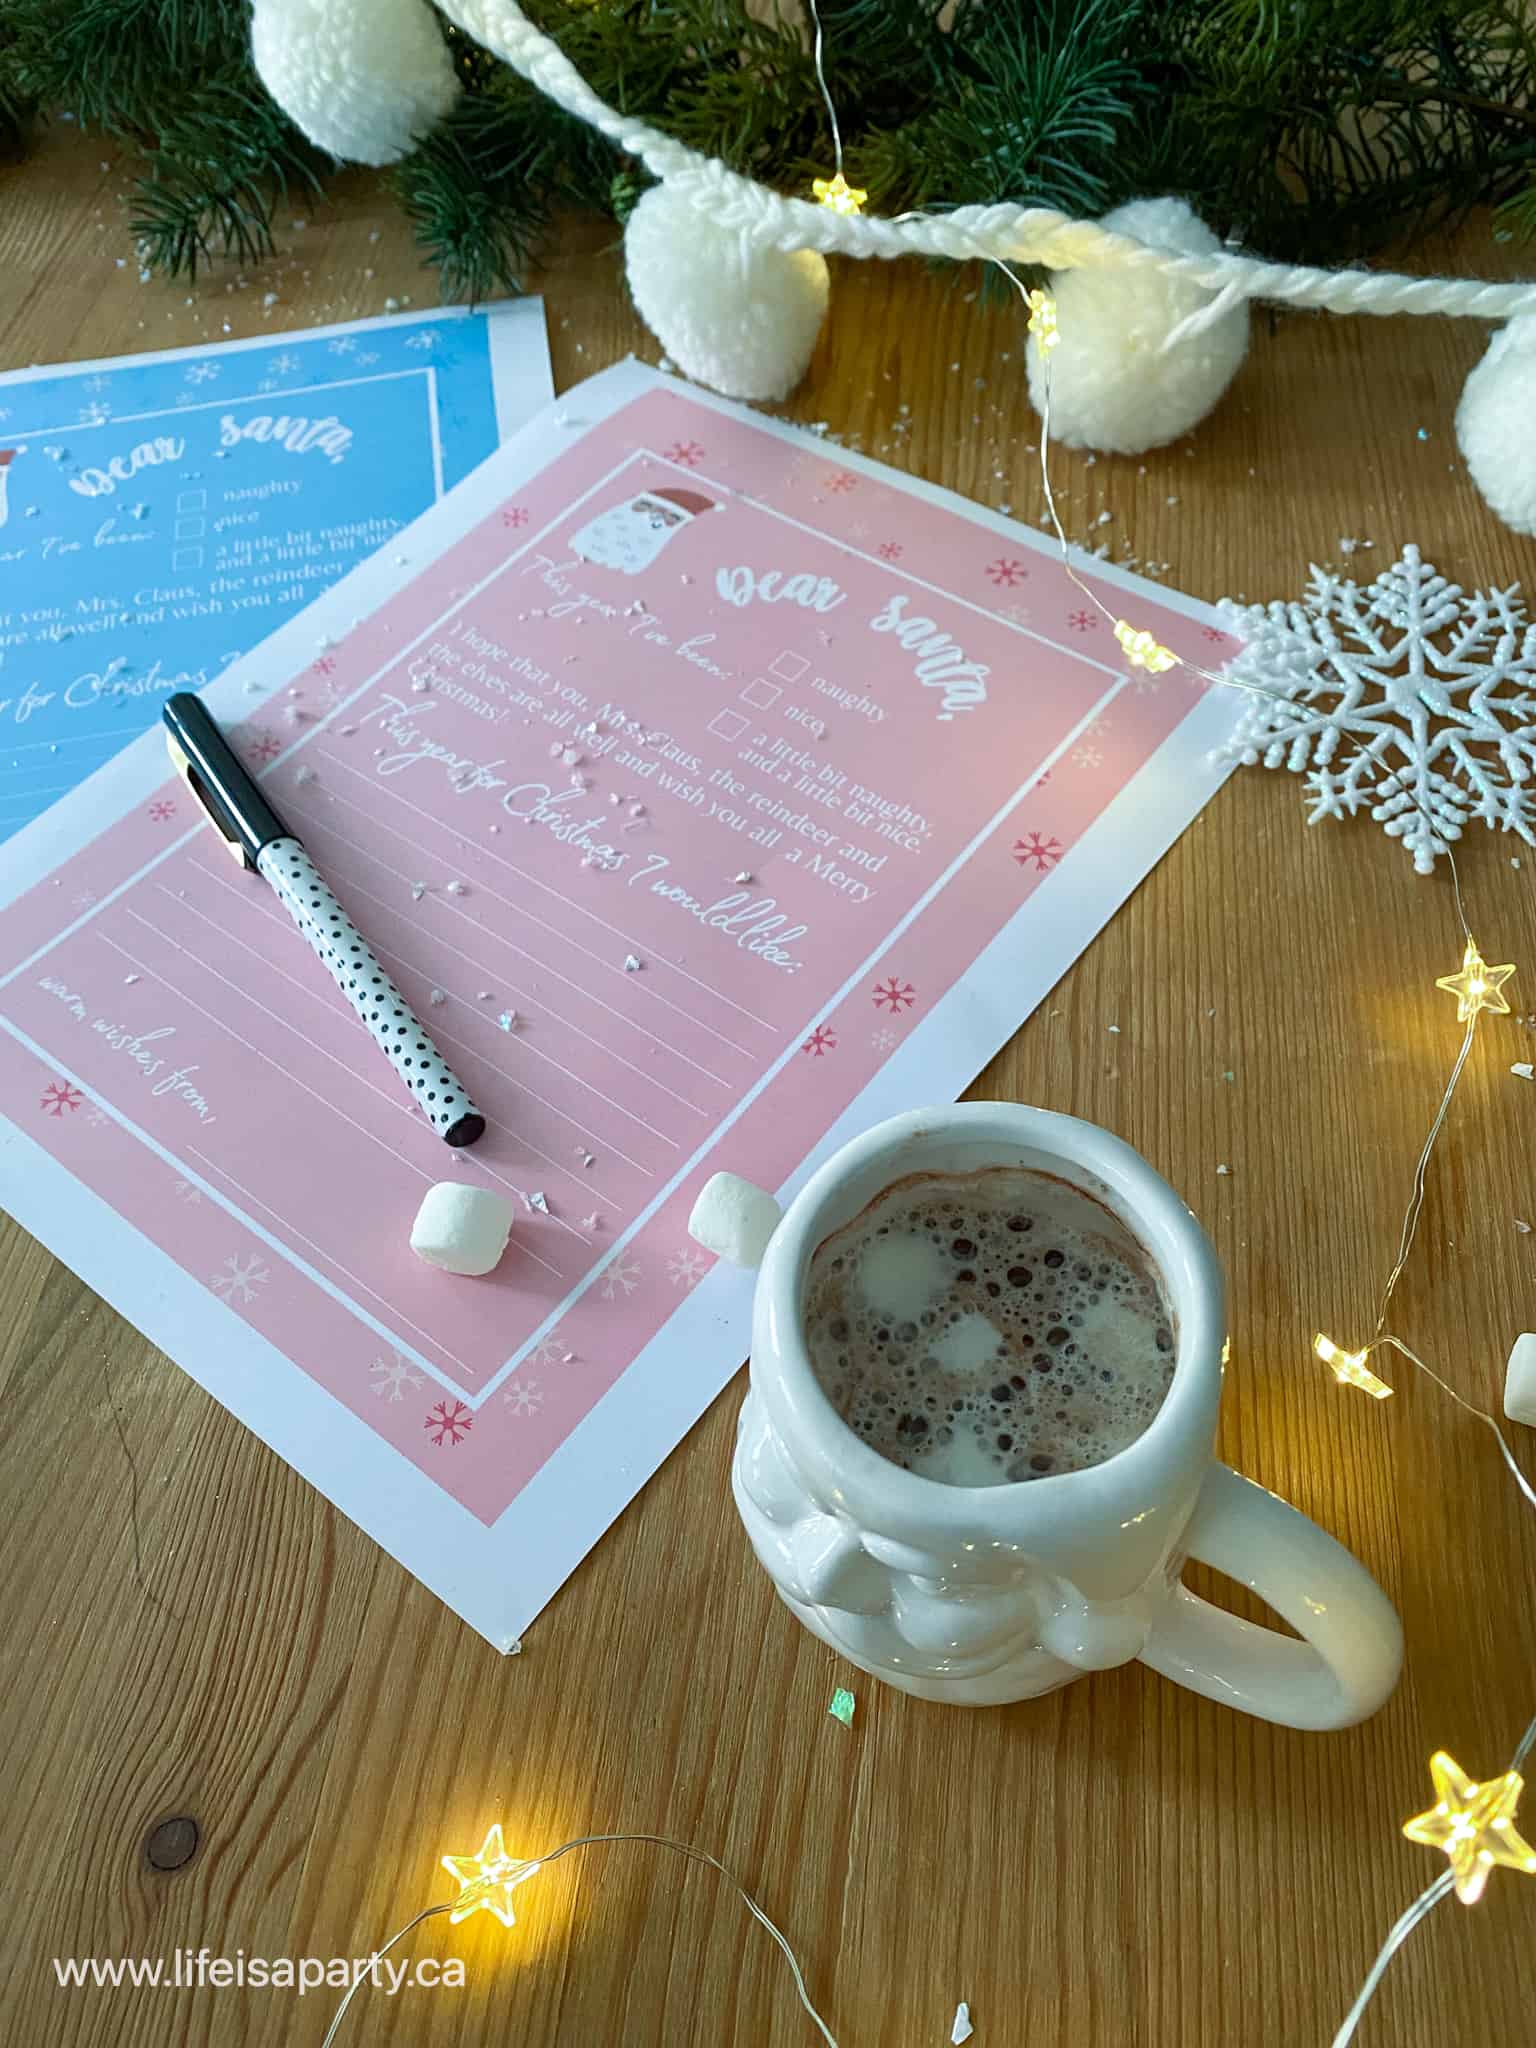
And writing a letter to Santa is a favourite tradition too. Make an afternoon of it with some hot chocolate, and toy flyers or catalogues. You might want to pick up a fun Santa pencil just for the occasion! This simple letter makes it easier for young children with a little help, or older kids who aren't sure what to say and easy, fun way to share their Christmas wishes.

It's also a fun activity at a festive get together or as part of a Christmas crafts station. Create a letter writing centre with our fun free printable letter, and some envelopes, and stamps. You could make your own post office, complete with a mini Christmas tree, Christmas lights, and post box. Make sure kids add their return address to their Christmas letter on the envelope, and address their letters to Santa Claus North Pole, before leaving them with your DIY postal service -and be sure to actually mail them.

Another great idea for this magical time of year is add the blank printable Santa letter template to a Christmas Eve box. Kids will love sharing their Christmas lists, and the nice things they've been doing along with the traditional milk and cookies for Santa and carrots for the reindeer. Make a little box or basket with special Christmas pajamas, the letter, and package of hot cocoa to enjoy while writing letters.

pink letter to Santa printable

Subscribe For Free Printables

This letter to Santa is available free to Life is a Party subscribers, in our free printable library. Subscribe below for instant access to the PDF files and tons more beautiful free printables. Our free printable Santa letter template is available for personal use only.

With a beautiful Letter To Santa template to enjoy this holiday season, life really is a party!

pink and blue free letter to Santa printables

Christmas Breakfast Board

Nov 15, 2021 · 2 Comments

Christmas breakfast board

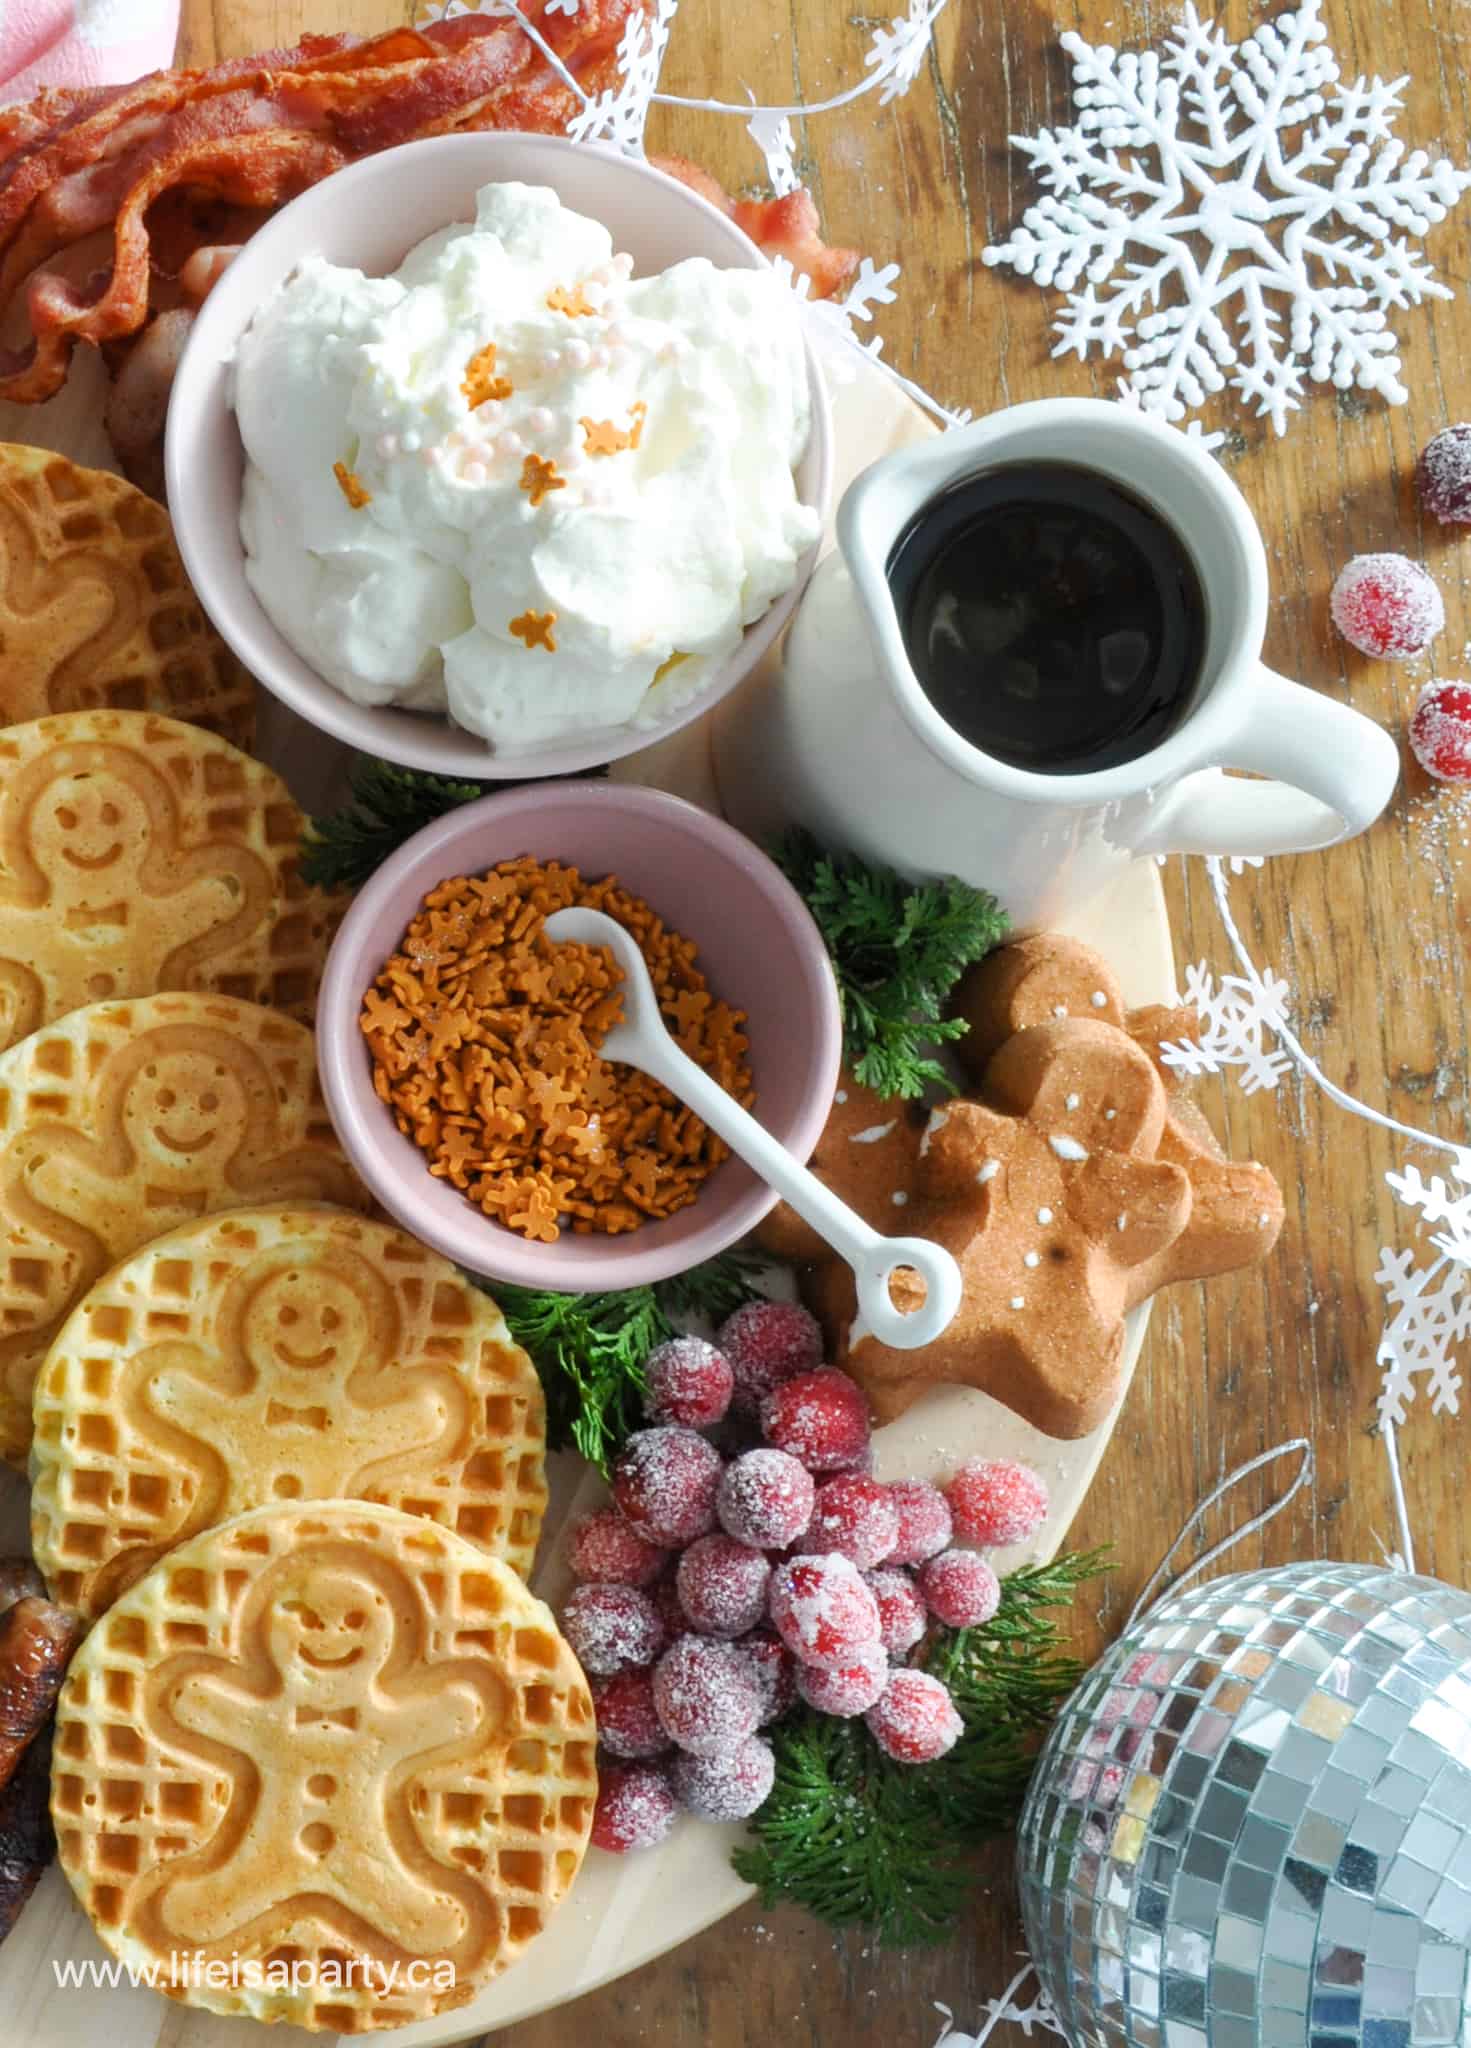
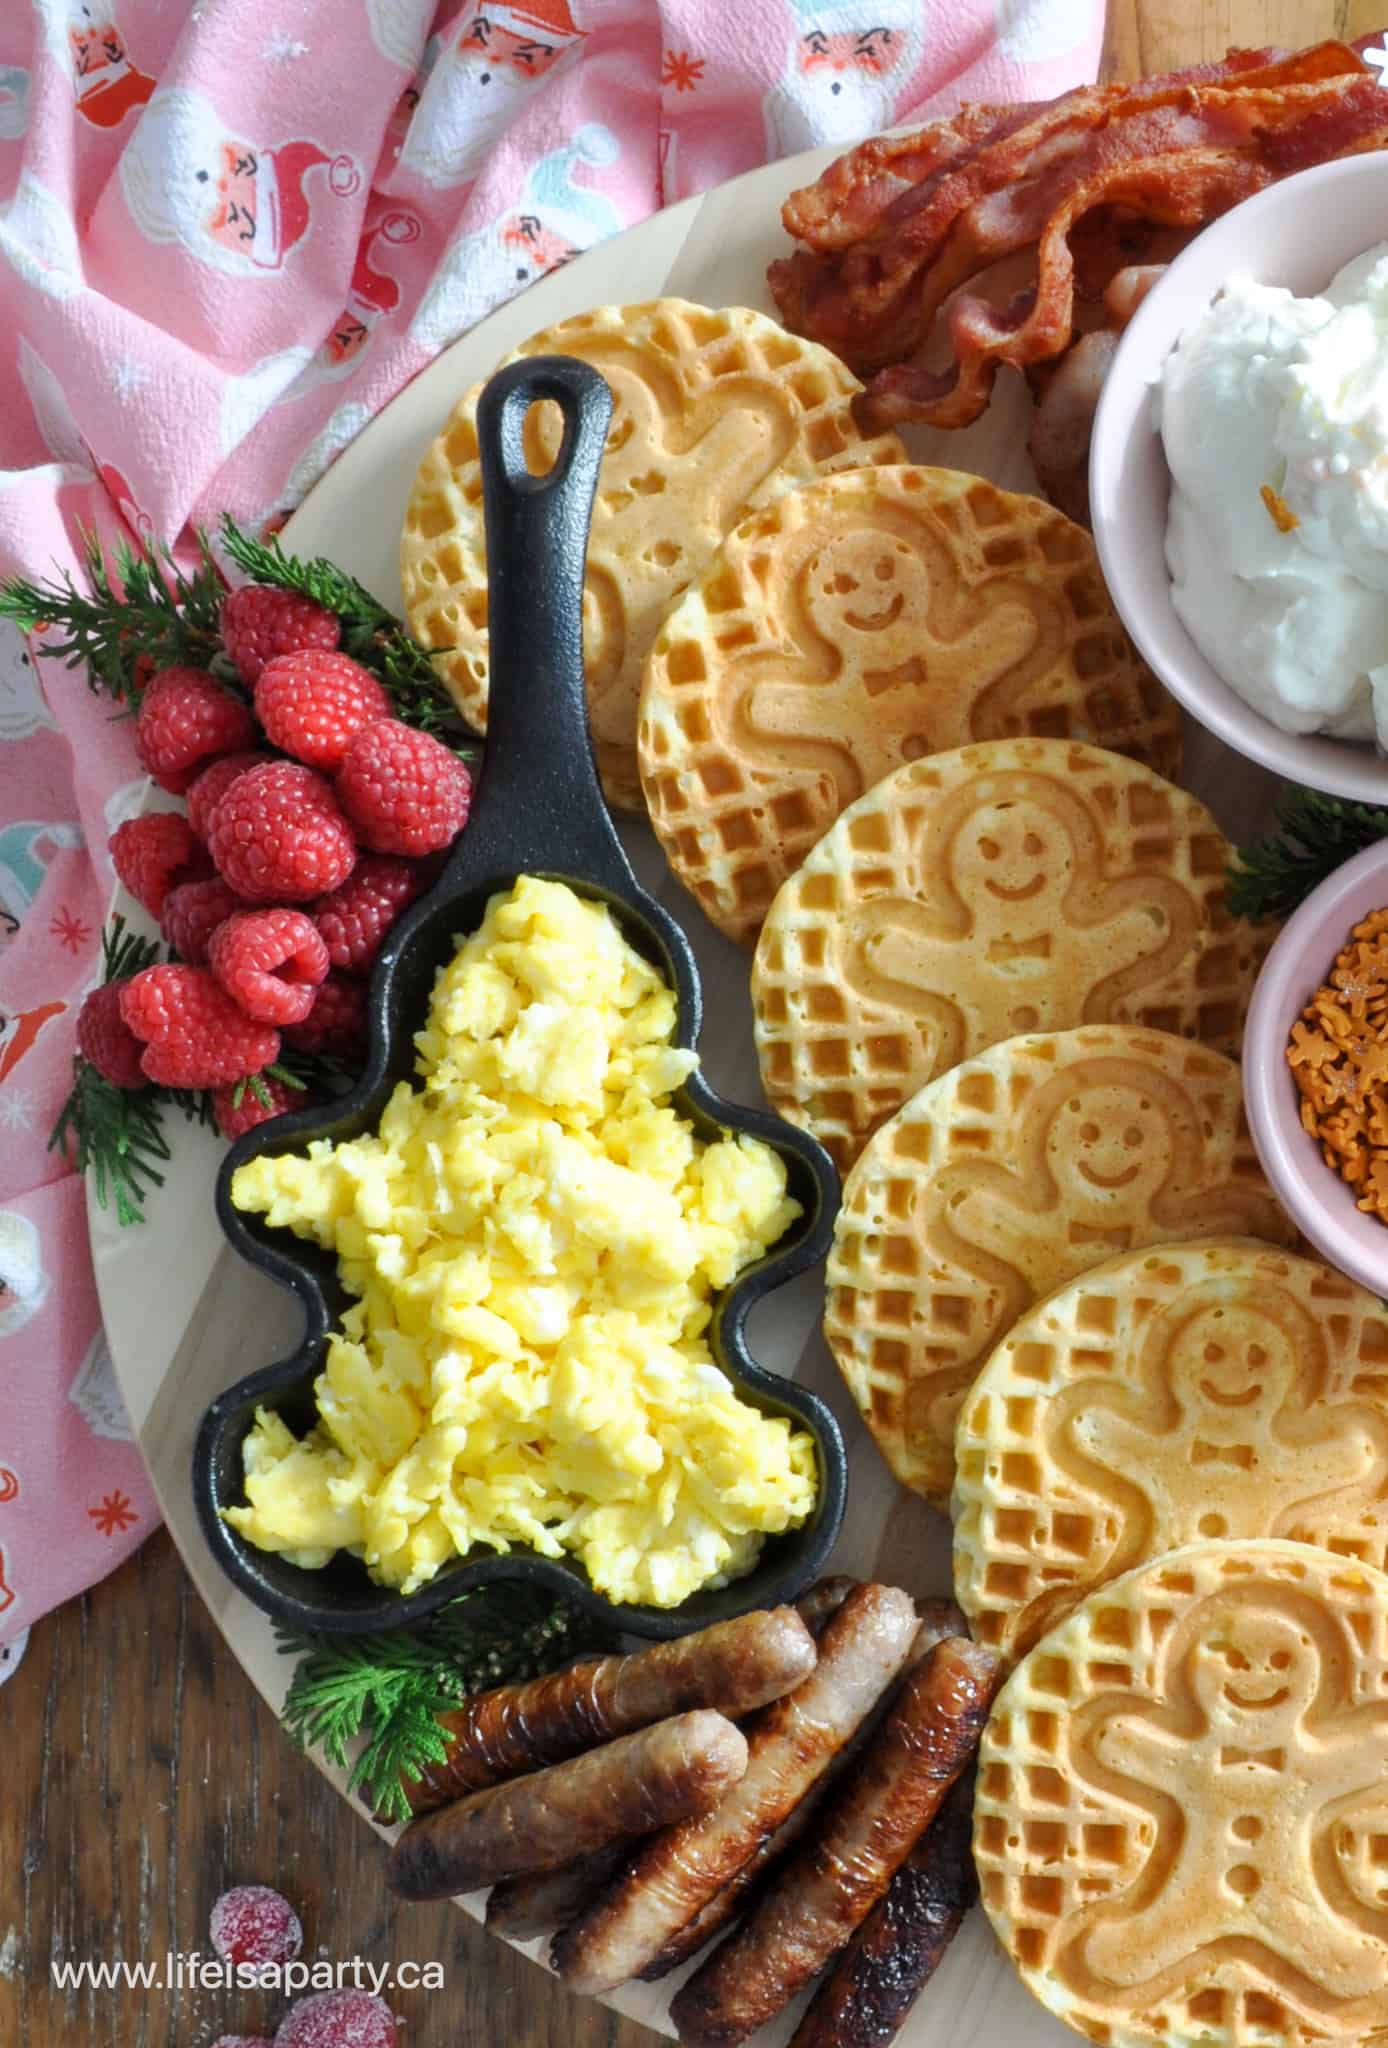
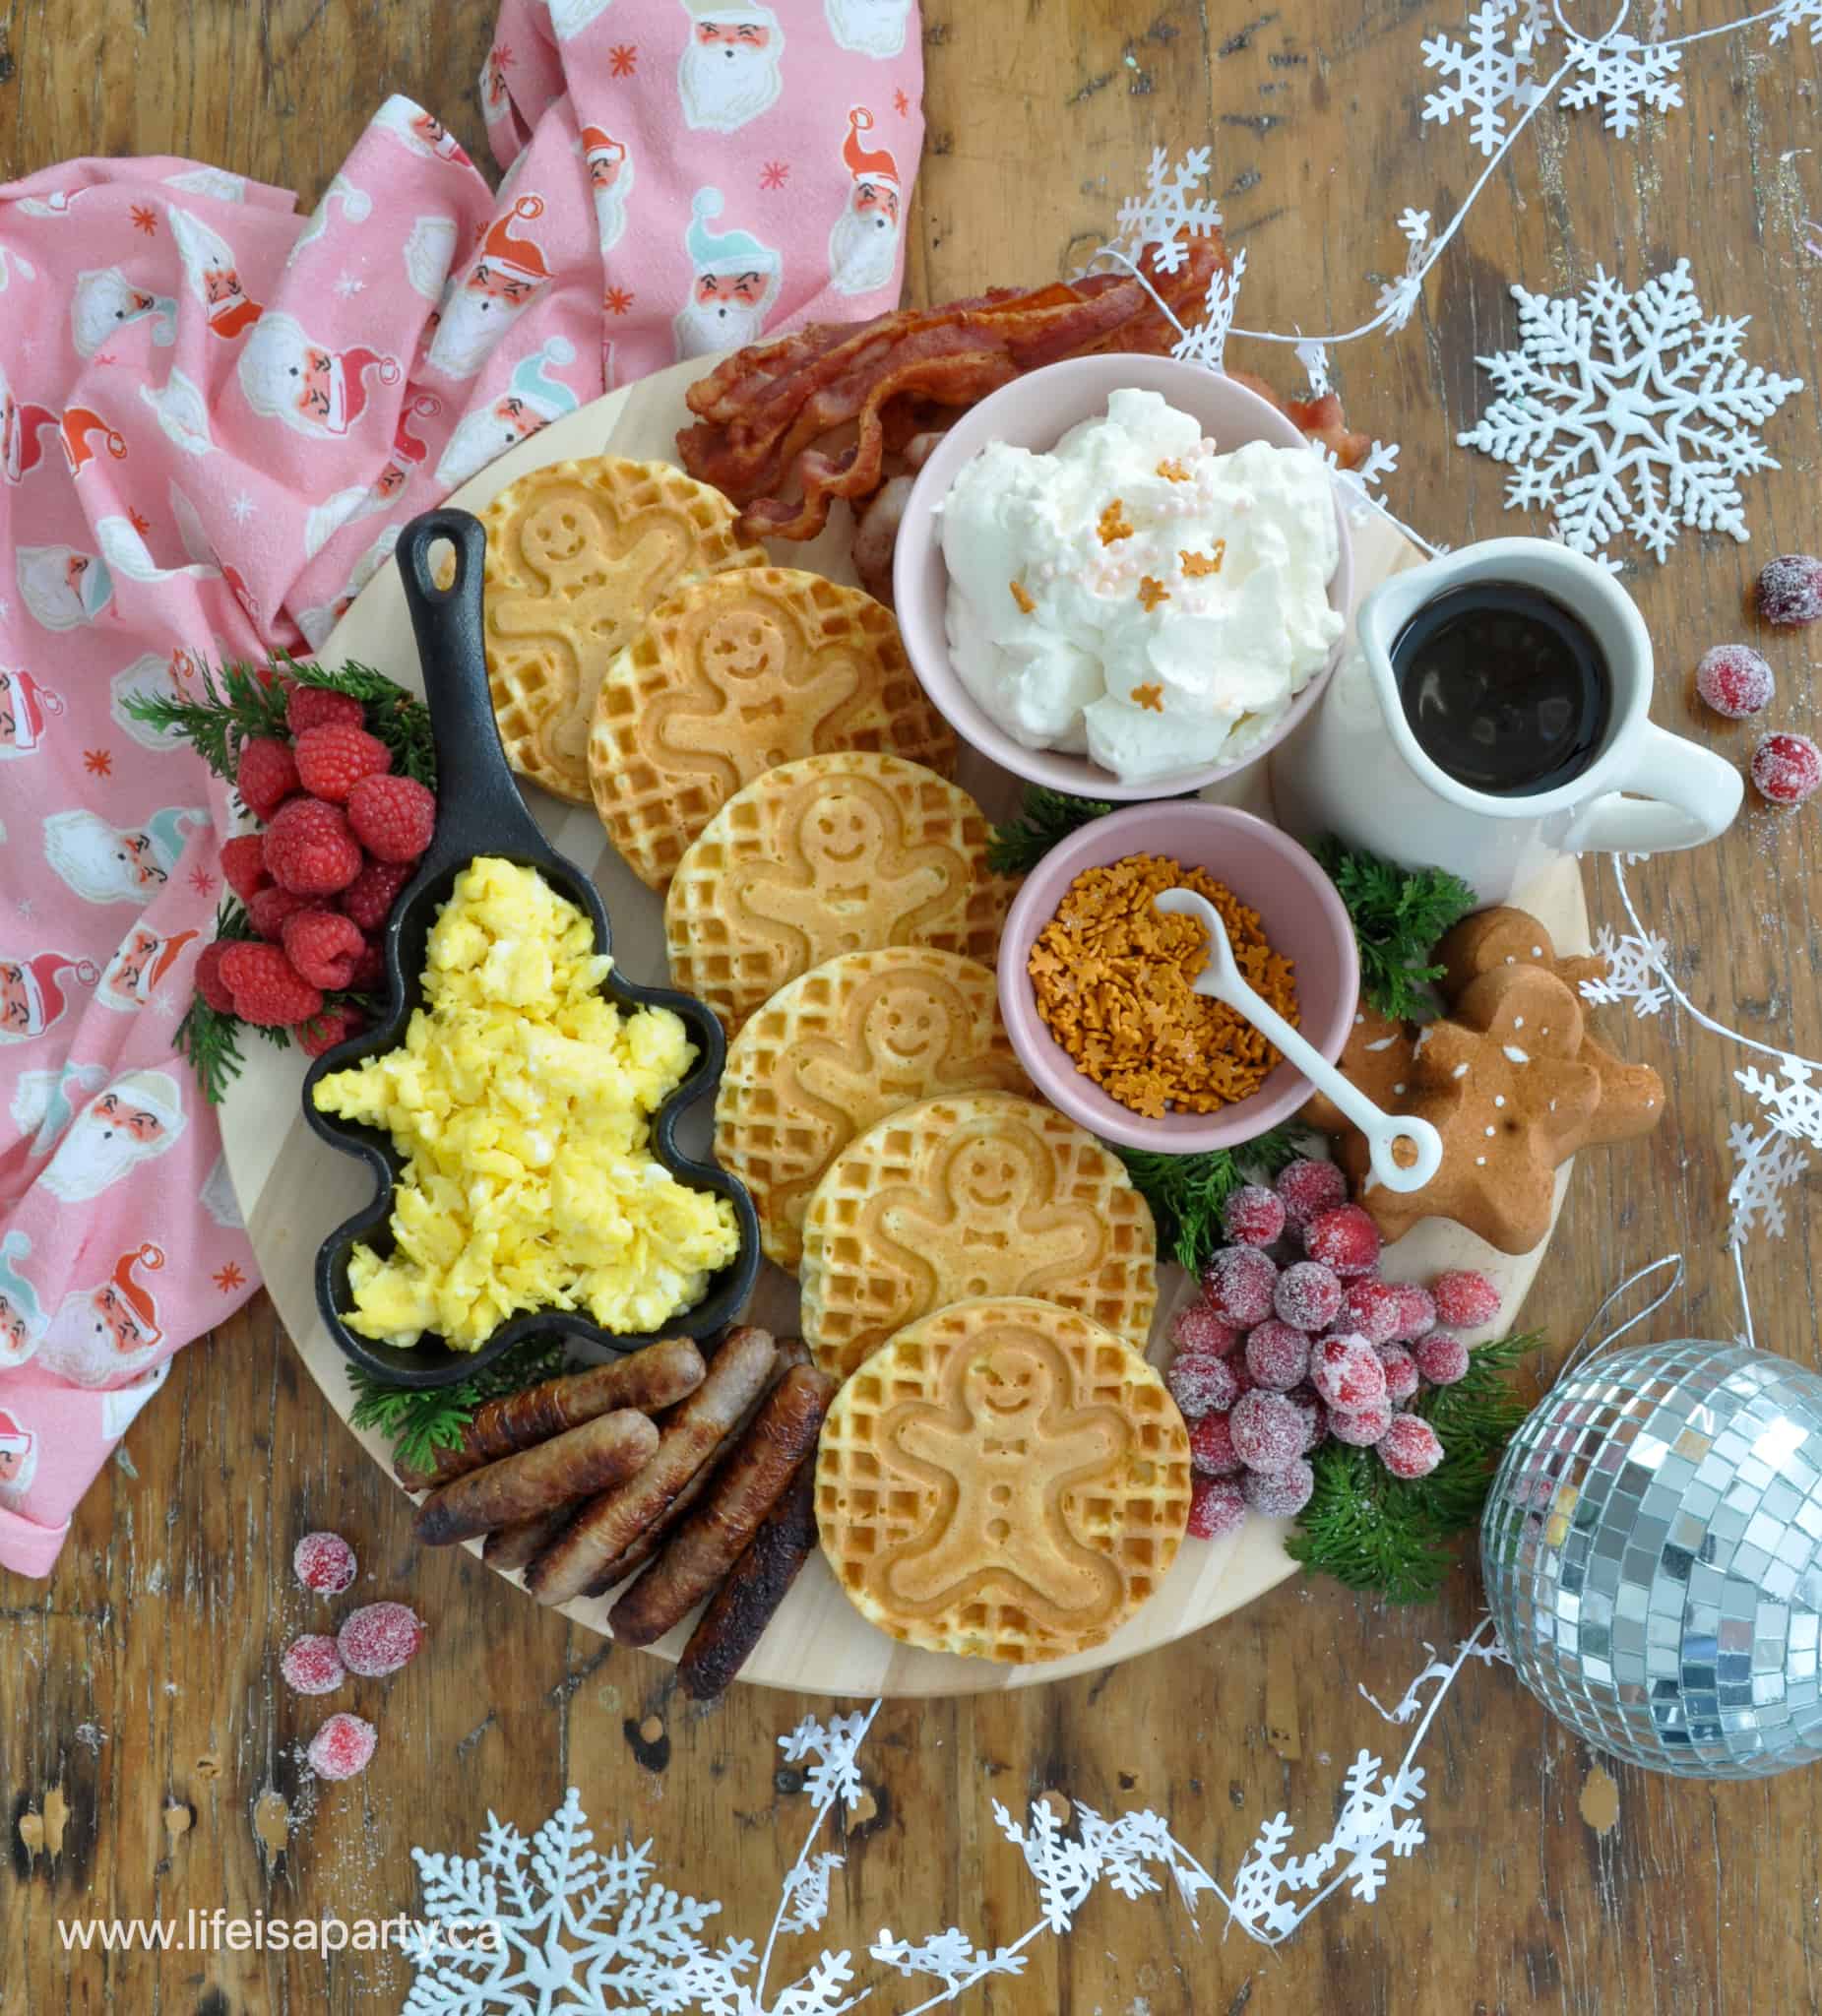
A Christmas breakfast charcuterie board is the perfect solution for busy Christmas morning with festive gingerbread waffles, sugared cranberries, bacon, eggs, and all your favorite holiday treats. This beautiful breakfast spread lets everyone graze while opening presents, and most items can be prepared the night before for a stress-free holiday morning.

Christmas breakfast board
[feast_advanced_jump_to]

A Quick Look At This Recipe

  • 📋 Type: Christmas Breakfast Board
  • ⏲️ Ready In: 35 minutes (20 minutes prep, 15 minutes assembly)
  • 👪 Servings: 6-8 people
  • 🔪 Difficulty: Easy
  • 💭 Top Tip: Make the sugared cranberries and cook proteins the night before so you only need to warm and assemble Christmas morning!

Why You'll Love This Christmas Breakfast Board

  • Festive gingerbread theme: Gingerbread waffles, marshmallows, and sprinkles create a cohesive holiday look.
  • Make ahead friendly: Cook bacon, sausage, and sugared cranberries the night before for easy morning assembly.
  • Perfect for Christmas morning chaos: Everyone can graze while opening presents without sitting down for a formal meal.
  • Sweet and savory balance: Offers waffles and treats alongside eggs and breakfast meats to please all preferences.
  • Beautiful presentation: Cedar sprigs, sugared cranberries, and festive colors make this board Instagram worthy.

I've been creating Christmas breakfast charcuterie boards for my family every Christmas morning for the past several years, and it has become our favorite holiday tradition. The key is preparing everything the night before so Christmas morning is about family time, not kitchen stress. My kids love grazing from the board while opening presents, and adults appreciate having substantial breakfast options without the pressure of a sit down meal.

The gingerbread theme makes this board feel extra festive and cohesive. Between the gingerbread shaped waffles, gingerbread marshmallows, and warm holiday spices, your kitchen will smell like Christmas morning should. The homemade sugared cranberries add an elegant touch that looks impressive but takes only 30 minutes to prepare.

This Christmas breakfast board works beautifully whether you're hosting extended family for Christmas brunch or keeping it simple with your immediate household. The variety means picky eaters find something they love while adventurous eaters can try everything.

If you love easy breakfast ideas for the holidays, you might also enjoy these pumpkin waffles, easy overnight French toast casserole, or small batch pancakes for Christmas morning entertaining.

Christmas breakfast ideas

What's On a Christmas Breakfast Board

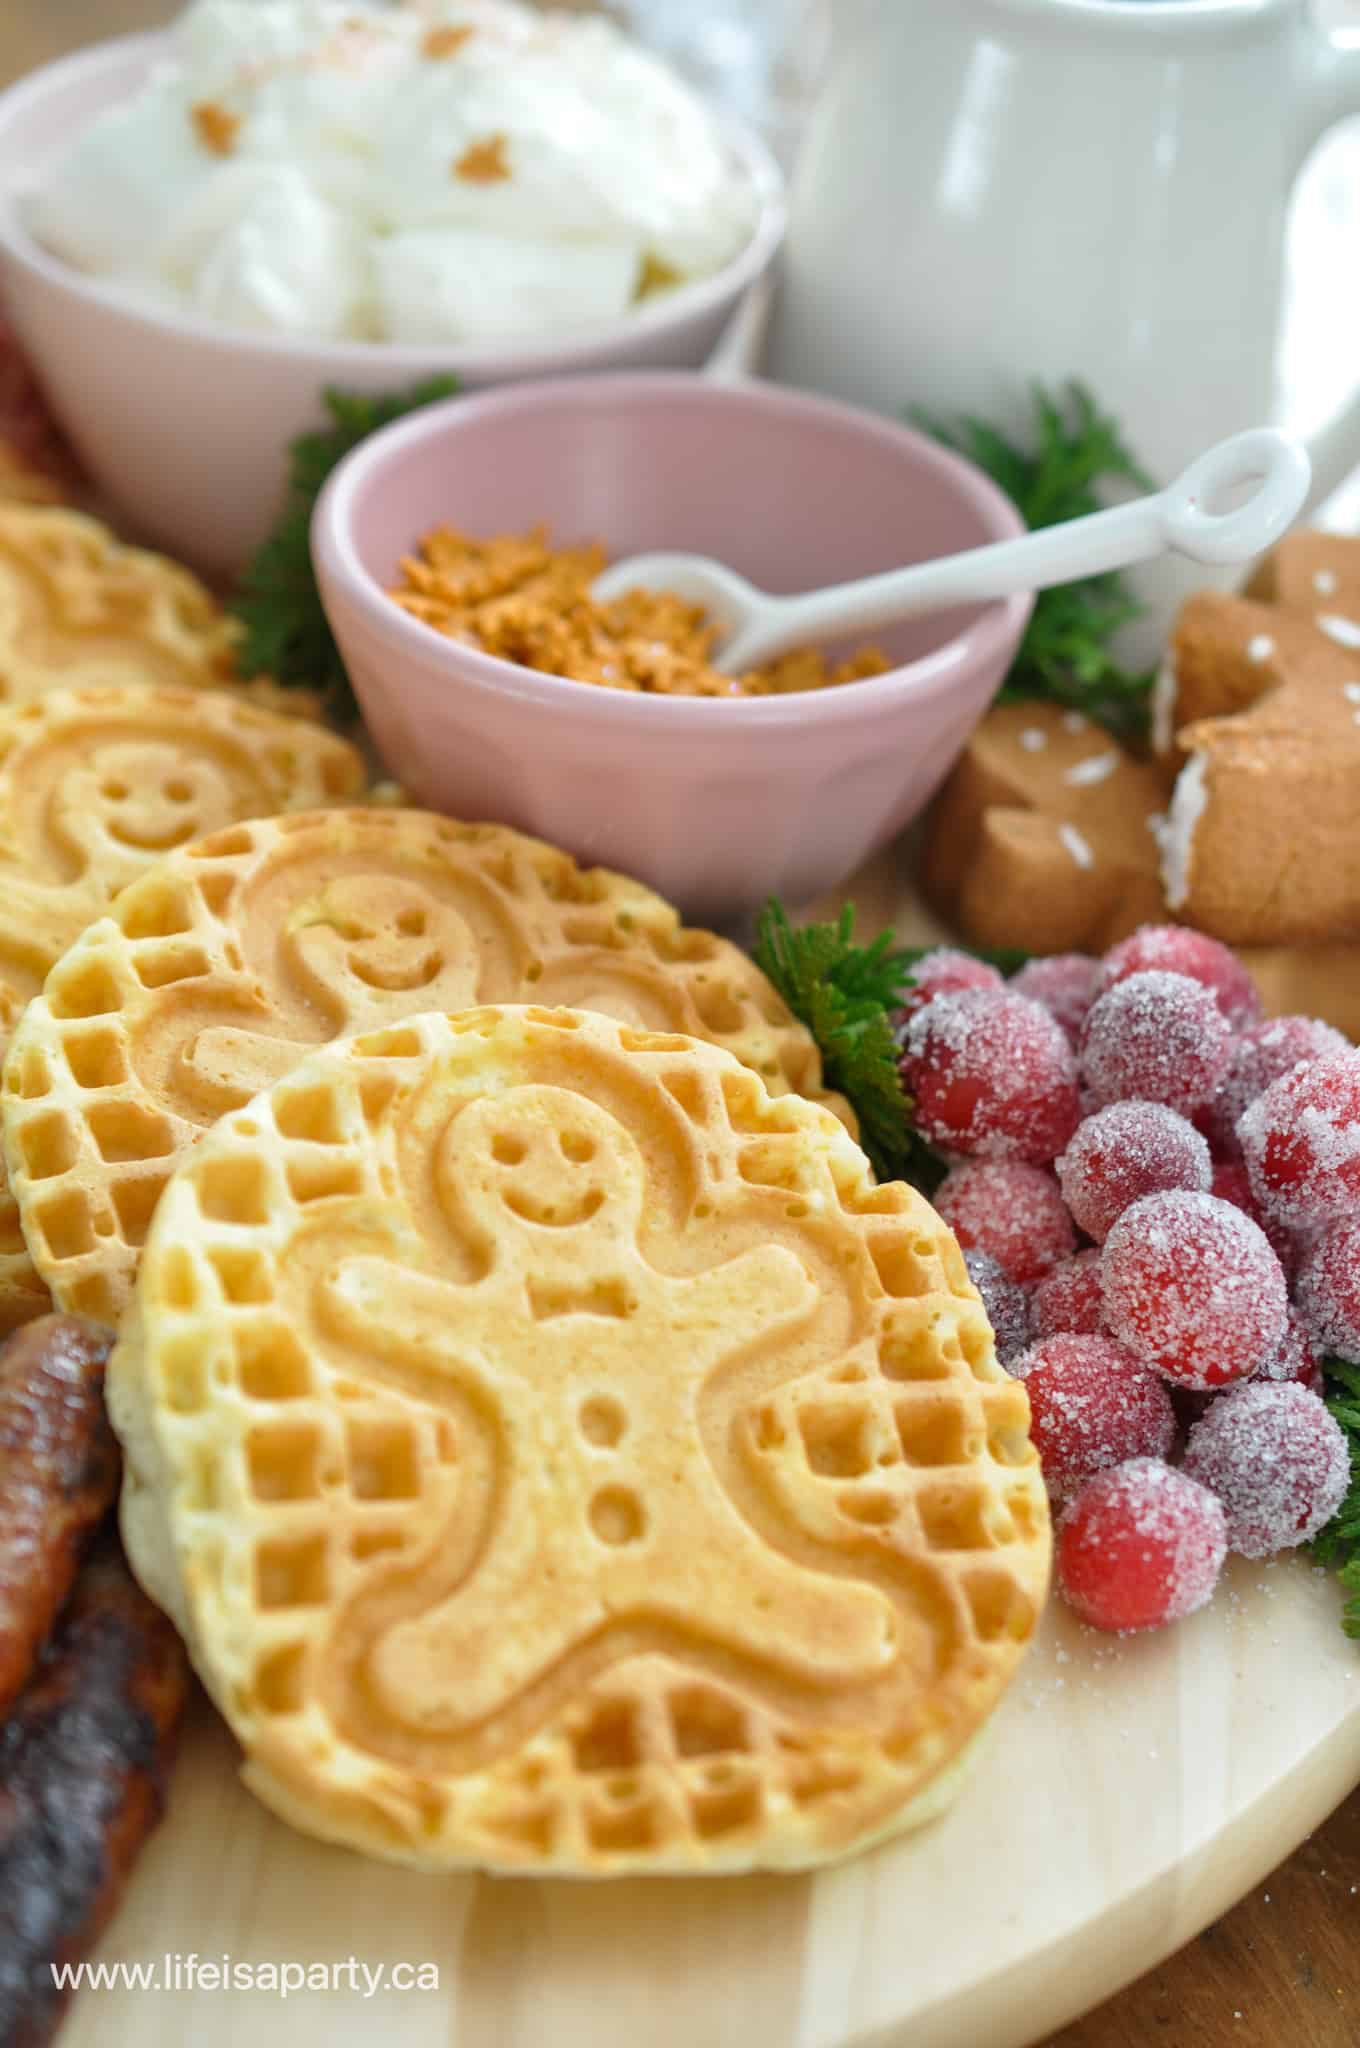
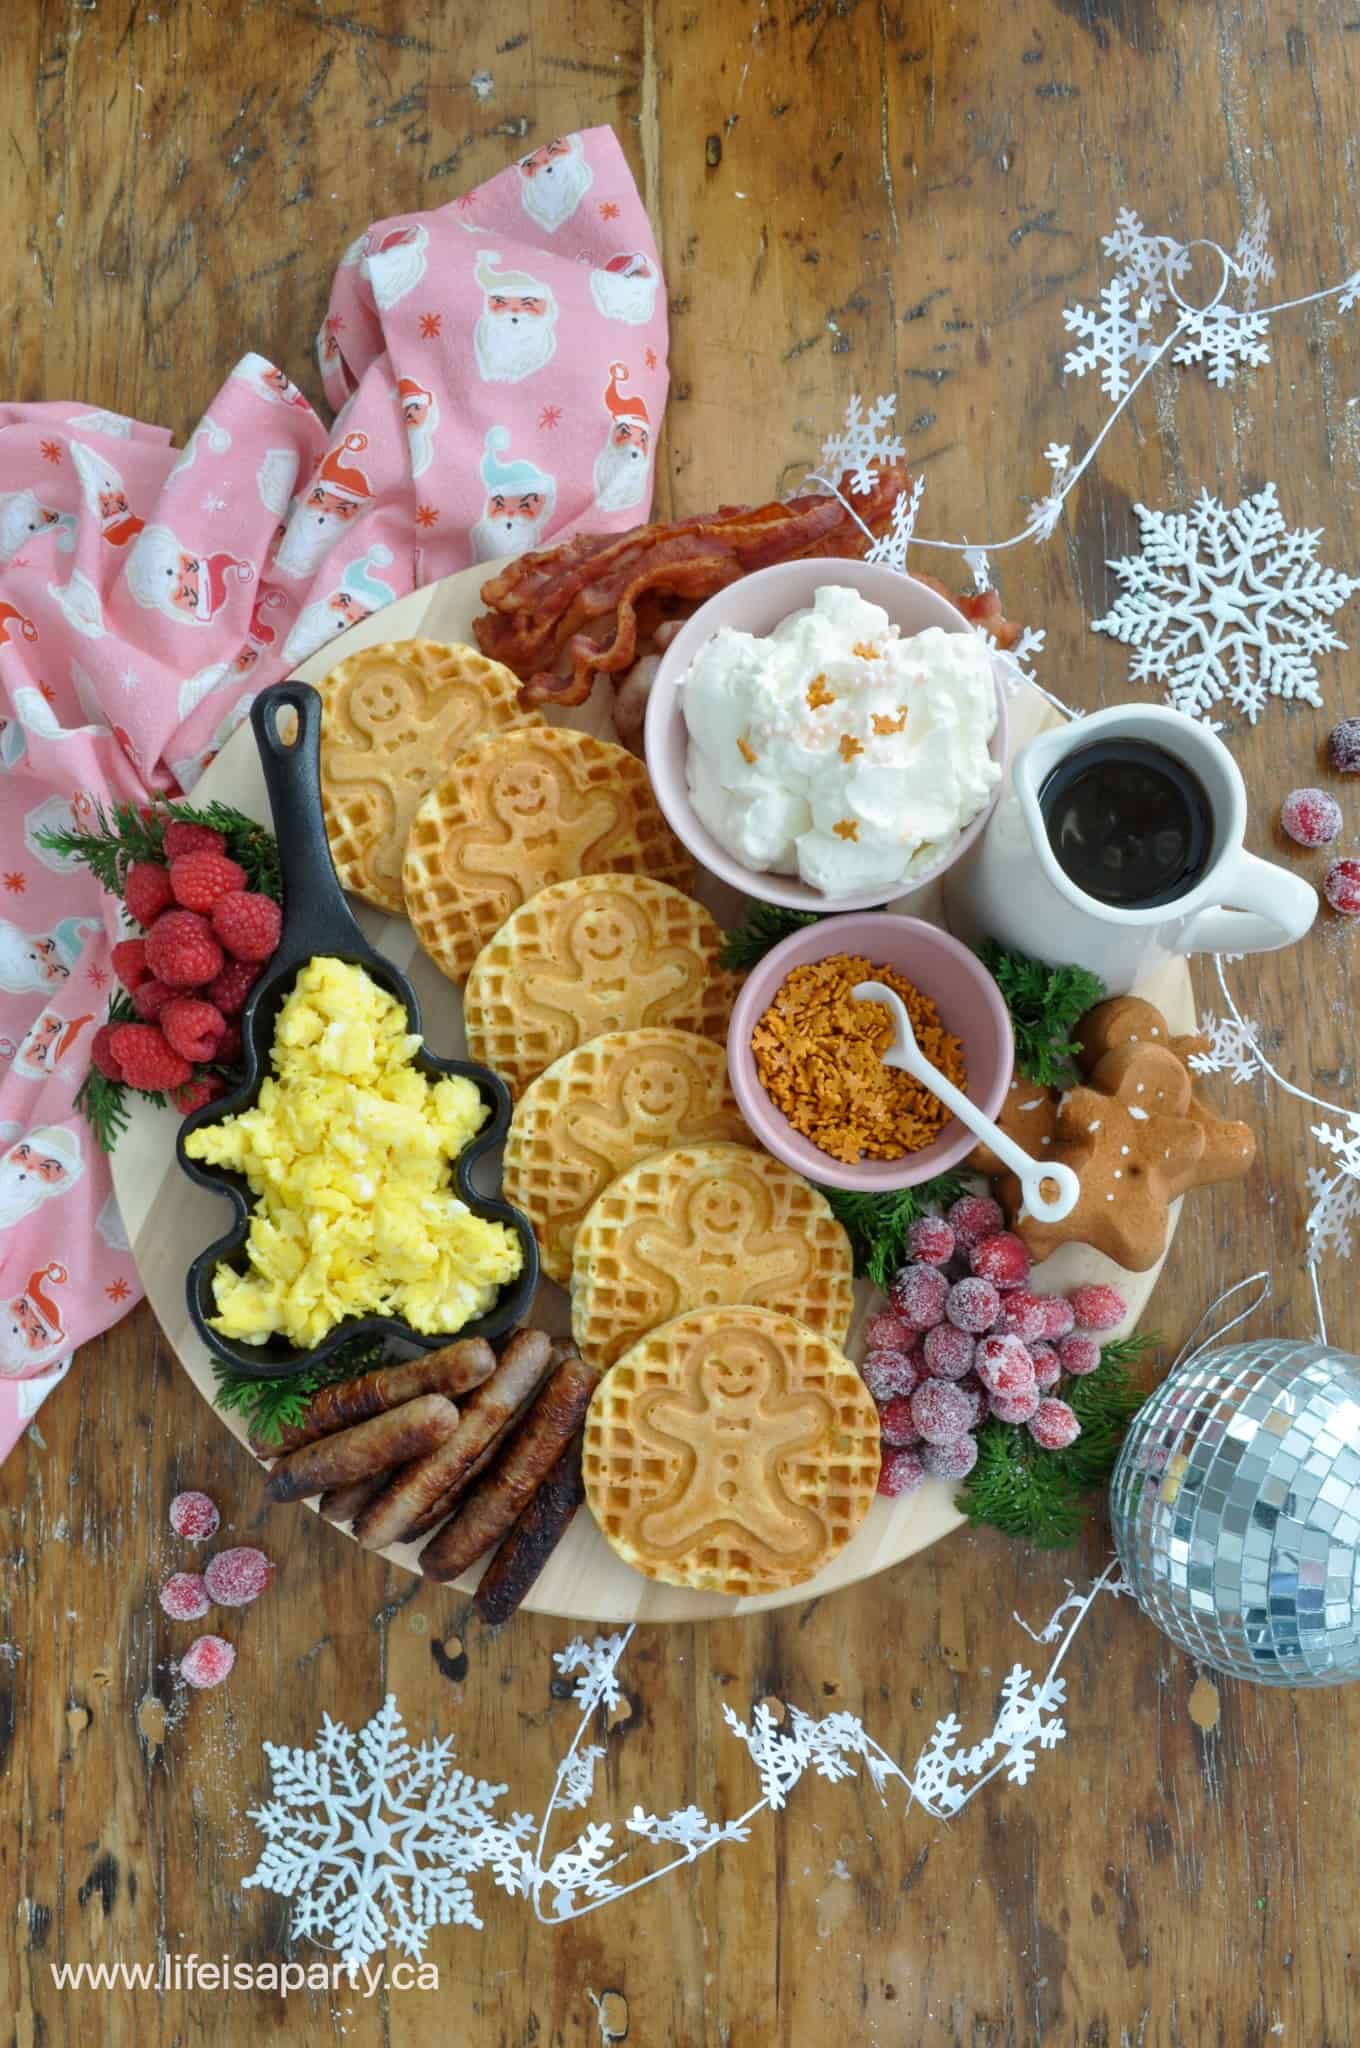
Gingerbread Waffles: Use a gingerbread shaped waffle maker if you have one, or make regular waffles and cut them into festive shapes with cookie cutters. You can use your favorite waffle recipe or mix, and gingerbread flavored batter takes the theme even further.

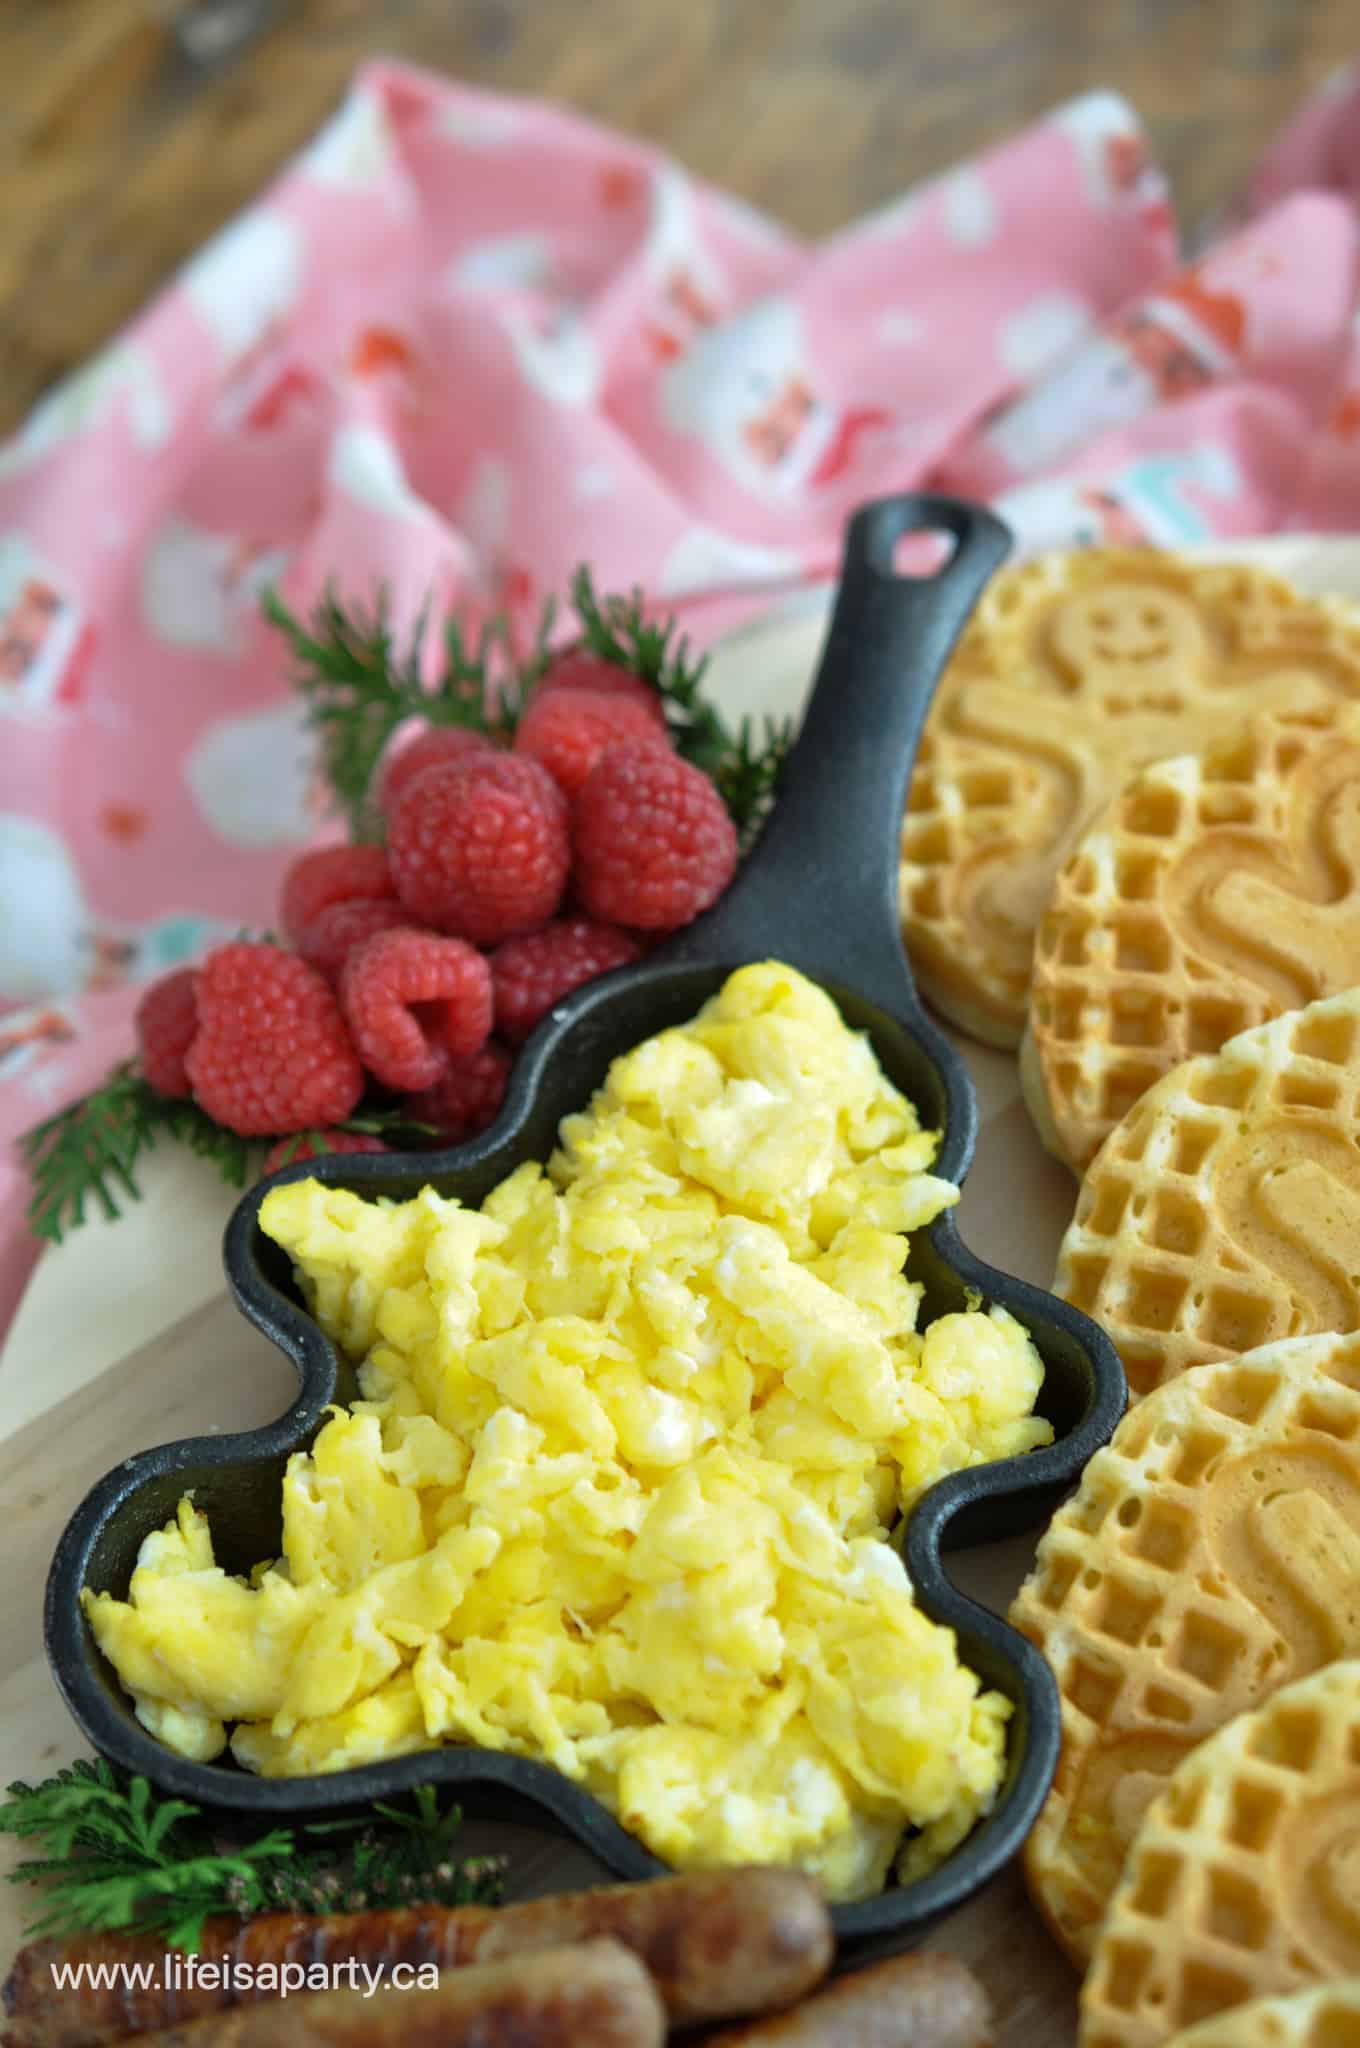
Scrambled Eggs: Fluffy scrambled eggs add protein and balance the sweeter items. Cook them just before assembling since they only take a few minutes.

Breakfast Meats: Crispy bacon and breakfast sausage links provide savory elements. I always bake my bacon in the oven at 400°F for 15-20 minutes for perfectly crispy results with minimal cleanup.

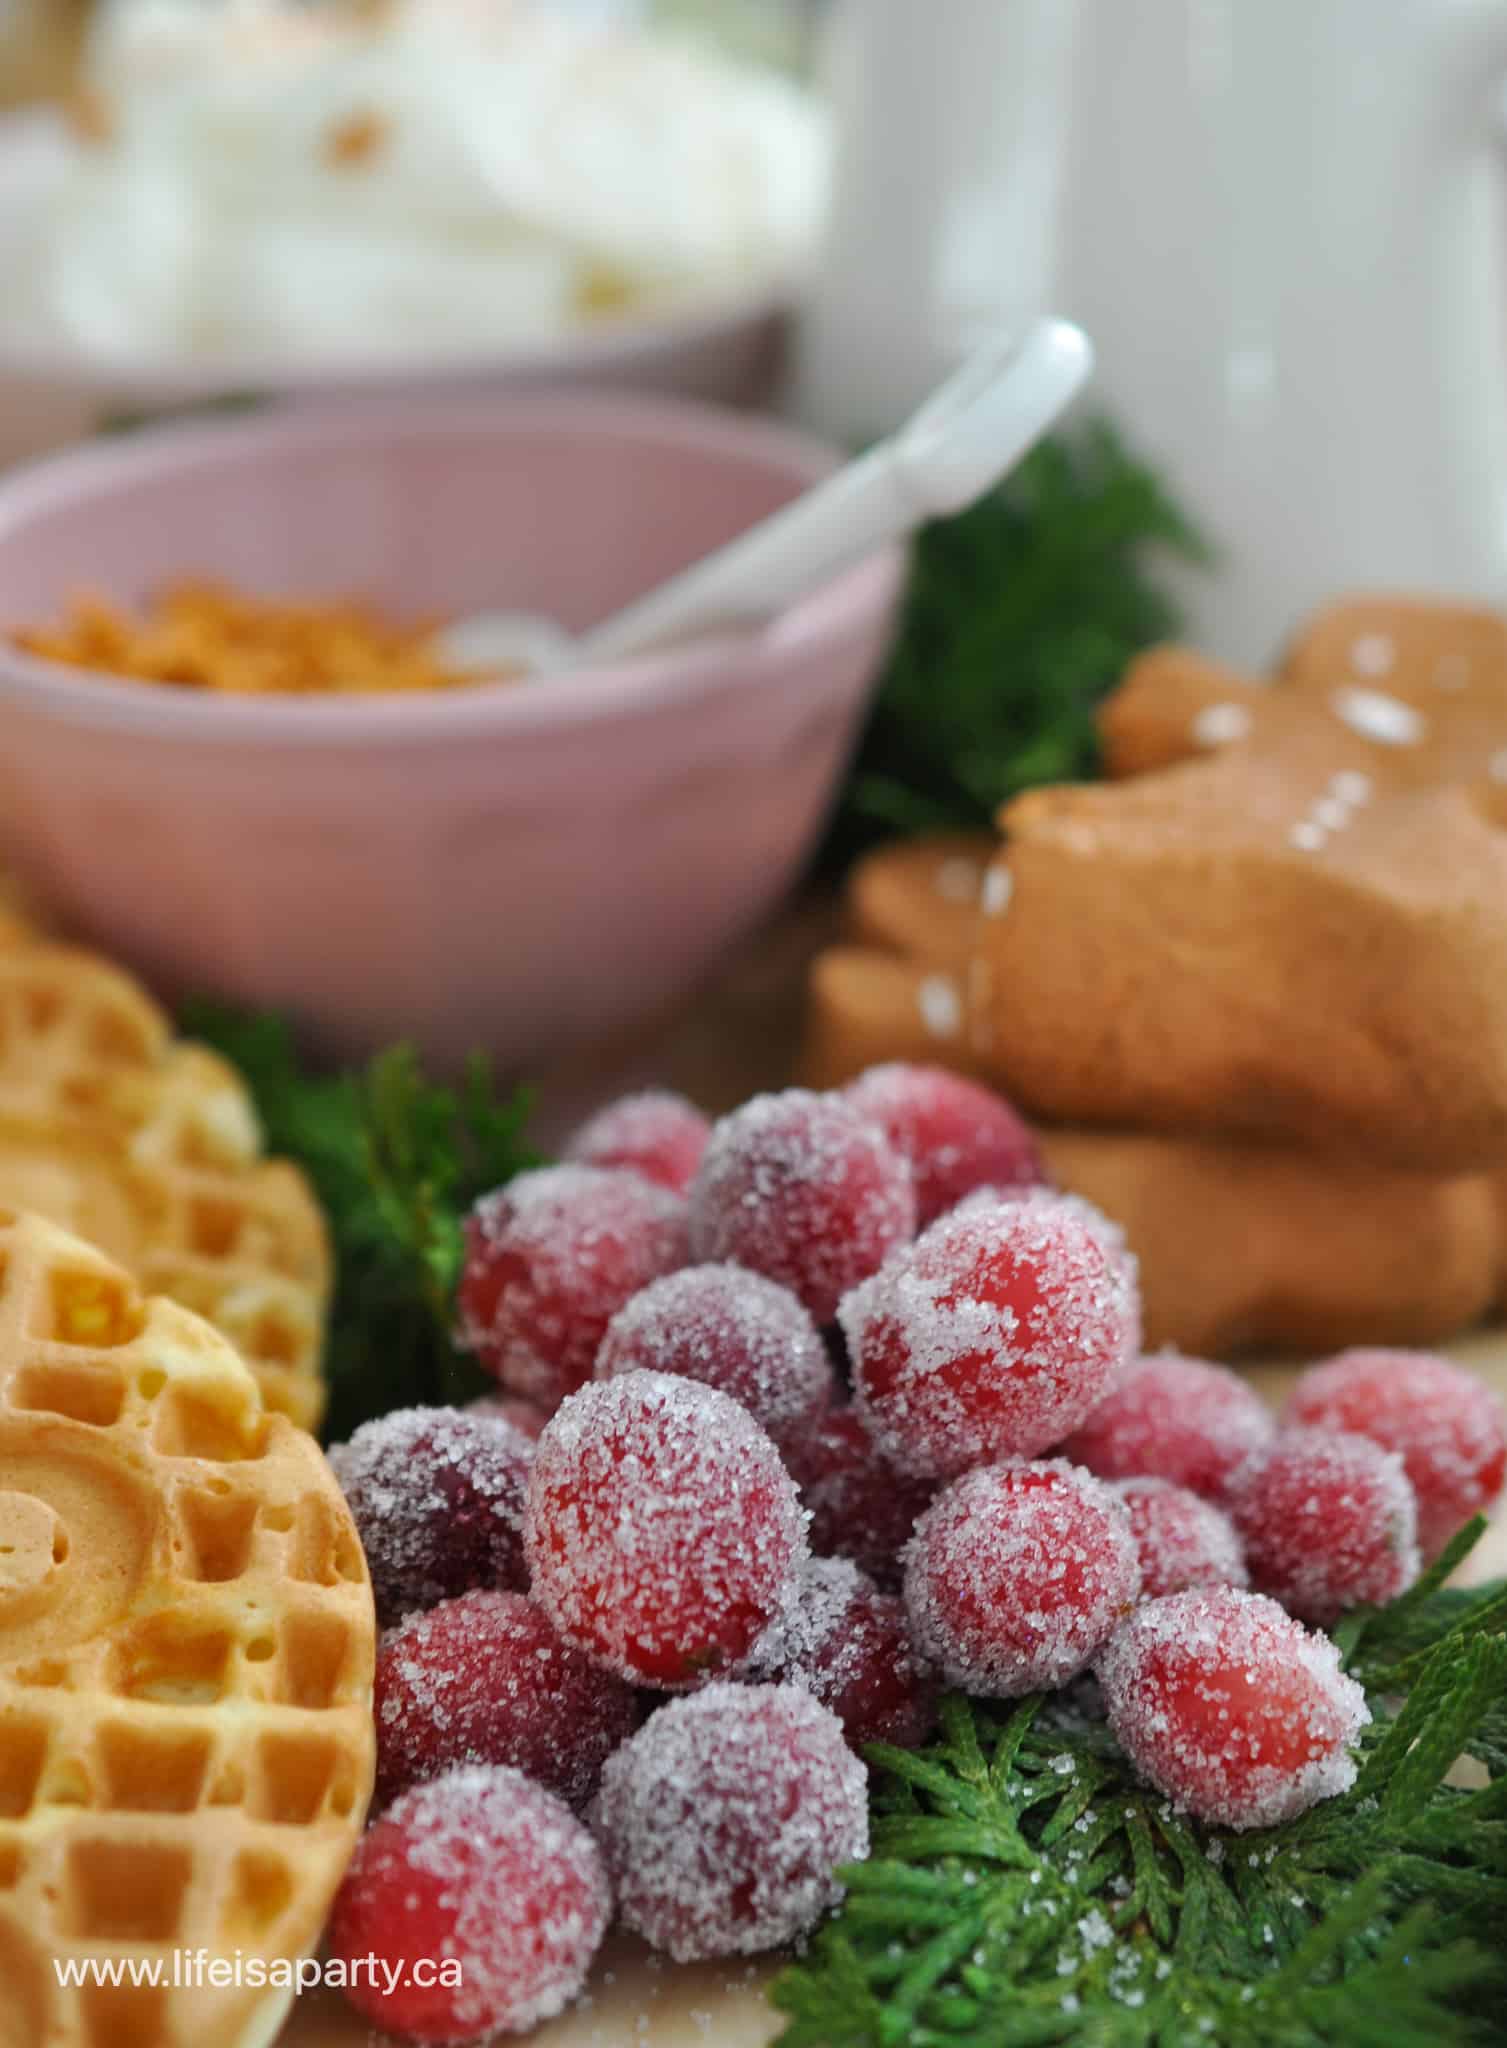
Sugared Cranberries: These jewel-like cranberries are easier to make than they look and add gorgeous color and festive sparkle. See the recipe below.

Fresh Berries: Raspberries, strawberries, or any seasonal berries add fresh color and natural sweetness.

Whipped Cream: Serve in a small bowl with a spoon for topping waffles. Make it the night before and keep refrigerated.

Maple Syrup: Pour into a small pitcher or bowl so everyone can drizzle their waffles.

Festive Additions: Gingerbread marshmallows, holiday sprinkles, and fresh cedar or rosemary sprigs from the garden create Christmas magic.

Christmas breakfast board ideas

The Gingerbread Theme

Creating a gingerbread themed Christmas breakfast board brings everything together visually and makes your breakfast feel extra special. Here's how to build the theme:

Gingerbread Waffles: The star of the show. If you can't find a gingerbread waffle maker, regular mini waffles work perfectly. You can add 1 tablespoon molasses, ½ teaspoon ground ginger, ½ teaspoon cinnamon, ¼ teaspoon nutmeg, and ¼ teaspoon cloves to your favorite waffle batter for authentic gingerbread flavor.

Gingerbread Marshmallows: Look for these seasonally at specialty stores or online. They're adorable scattered across the board and kids love them.

Gingerbread Sprinkles: Add a jar of gingerbread shaped sprinkles for topping waffles and whipped cream.

Mini Cast Iron Skillet: I use a gingerbread shaped mini cast iron skillet for the scrambled eggs. It keeps them warm and adds to the theme, but any small oven-safe dish works.

If you can't source gingerbread specific items, you can create any Christmas theme using shaped waffles (Christmas trees, snowflakes), red and green sprinkles, and peppermint flavored additions instead.

Christmas morning breakfast ideas

How to Make Sugared Cranberries

These sparkling cranberries look like Christmas jewelry on your breakfast board and taste delicious. They're surprisingly easy to make and can be prepared 1-2 days ahead.

how to make sugared cranberries

Ingredients:

  • ¼ cup sugar
  • ¼ cup water
  • 1 cup fresh cranberries
  • ¼ cup sugar (for coating)

Instructions:

Step 1: Combine ¼ cup sugar and water in a medium saucepan. Cook over high heat, stirring constantly, until the sugar completely dissolves and the mixture reaches a gentle boil.

Step 2: Add the cranberries and stir gently to coat them in the sugar syrup. Remove the pan from heat immediately. You're not cooking the cranberries, just coating them.

Step 3: Use a slotted spoon to remove the cranberries from the syrup and spread them in a single layer on a wire rack set over a plate or baking sheet. Let them sit for 20-40 minutes until they become tacky and sticky to the touch.

Step 4: Place the remaining ¼ cup sugar in a shallow bowl. Working in batches, roll the sticky cranberries in the sugar until completely coated. They should look frosted and sparkly.

Step 5: Store sugared cranberries in a single layer in an airtight container at room temperature for up to 2 days. Don't stack them or they'll stick together.

Christmas breakfast ideas

Assembly Instructions for Your Christmas Breakfast Board

Step 1: Start the Night Before

Cook your bacon and sausage the night before. Let them cool completely, then store in airtight containers in the refrigerator. Make the sugared cranberries up to 2 days ahead. Whip your cream and refrigerate. This prep work means Christmas morning assembly takes only 15-20 minutes.

Step 2: Christmas Morning Prep

Warm your pre-cooked bacon and sausage in a 300°F oven for 8-10 minutes. Make fresh waffles using your waffle maker or waffle iron. If you're making regular waffles instead of shaped ones, you can use Christmas cookie cutters to cut them into festive shapes while they're still warm. Scramble your eggs last so they're hot when you assemble the board.

Step 3: Choose Your Board

Select a large wooden board, cutting board, or serving platter. I use a board that's at least 18 inches long to give plenty of space for all the components. Make sure it's food safe and can handle warm items.h berries on the board and make them extra special holiday treats for Christmas

Step 4: Arrange the Waffles

Start by laying the waffles down the center of the board in a gentle wave pattern, overlapping them slightly. This creates your focal point and establishes the visual flow.

Step 5: Add Bowls and Skillets

Place your mini cast iron skillet with scrambled eggs on one side of the waffles. Add small bowls for whipped cream, maple syrup, and sprinkles. Space them evenly for visual balance.

Step 6: Add Proteins

Arrange the bacon and sausage links around the bowls and waffles. You can stack bacon in small piles or fan it out. Sausage links can be arranged in a row or scattered.

Step 7: Fill with Fruit

Add piles of fresh raspberries, sugared cranberries, and any other fresh fruit around the board. Use the bright colors to fill empty spaces and create pops of color.

Step 8: Final Touches

Tuck small sprigs of fresh cedar or rosemary from your garden around the fruit for a natural festive decoration. Scatter gingerbread marshmallows across the board. Sprinkle some holiday sprinkles over the whipped cream bowl for extra sparkle.

Christmas breakfast board

Make-Ahead Strategy

The secret to a stress-free Christmas morning breakfast board is strategic prep work:

Two Days Before:

  • Make sugared cranberries
  • Shop for any missing ingredients

The Night Before:

  • Prep waffle batter (if making from scratch)
  • Cook all bacon and sausage
  • Whip cream and refrigerate
  • Set out serving board and bowls

Christmas Morning:

  • Reheat proteins (10 minutes)
  • Make waffles (15 minutes)
  • Scramble eggs (5 minutes)
  • Assemble board (10 minutes)

Total Christmas morning work: 40 minutes, most of which is hands-off reheating time.

Serving on Christmas Morning

This breakfast board shines on Christmas morning because it lets everyone eat while opening presents. Set it up in the living room on a coffee table or keep it in the kitchen where people can wander over between gifts. The variety means kids can grab waffles with sprinkles while adults load up on eggs and bacon.

I love using this approach because Christmas morning is chaotic and wonderful, and sitting down for a formal breakfast feels impossible when there are stockings to explore and presents to unwrap. The board stays out for 1-2 hours as everyone grazes, and there's always something left for those who want seconds.

For drinks, set out a large carafe of coffee, hot chocolate for the kids, and orange juice. Festive Christmas mugs make everything feel more special.

If you're hosting overnight guests for Christmas, this board feeds 6-8 people easily. For larger gatherings, make two boards or use a very large serving platter.

You might also enjoy serving this alongside our Christmas granola for a complete Christmas brunch spread, or check out our yogurt and granola breakfast board for another entertaining style breakfast.

Christmas breakfast ideas

This delicious brunch board, with a gingerbread theme is one of my favourite fun Christmas breakfast ideas.   This is so much fun for anytime around the holidays, Christmas eve, or Christmas day and your family and friends will love it. Instead of a regular breakfast or brunch, arrange it like this to take it to the next level.

Christmas breakfast charcuterie board

More Christmas Breakfast Inspiration

  • Easy overnight French toast casserole recipe.
    Easy Overnight French Toast Casserole
  • Granola recipes.
    Crunchy Granola Recipe
  • Yogurt parfait board with fresh berries, granola, honey, peanut butter, dried fruit, and edible flowers on a wooden lazy Susan board.
    Yogurt Parfait Board
  • Old fashioned bear claw pastries with almonds on a cake plate.
    Old Fashioned Almond Bear Claw Pastries Recipe

Frequently Asked Questions

Can I make this Christmas breakfast board the night before?

You can prep almost everything the night before. Cook bacon, sausage, and sugared cranberries ahead of time. On Christmas morning, warm the proteins, make fresh waffles, and scramble eggs just before assembling. Fresh waffles are worth the 15 minutes because they taste so much better than reheated ones.

What's the best board size for a Christmas breakfast charcuterie?

Use a board at least 18 inches long for 6-8 people. Larger boards (24+ inches) work better for 10 or more people. The key is having enough surface area so items aren't piled on top of each other. You want everything visible and accessible.

How do you keep hot items warm on a breakfast board?

Cook eggs last and use a mini cast iron skillet or small oven-safe dish to help them retain heat. Warm bacon and sausage just before assembling. The board won't stay piping hot for hours, but it should stay warm enough for the first 30-45 minutes while everyone is most hungry.

Can I make a Christmas breakfast board without cooking?

Yes! Use store-bought mini waffles (frozen, then toasted), pre-cooked bacon, pre-cooked sausage links that just need warming, and skip the eggs entirely. Add yogurt, granola, fresh fruit, mini muffins, and mini cinnamon rolls for a completely no-cook assembly.

What are good store-bought items for a Christmas breakfast board?

Frozen mini waffles or pancakes, pre-cooked bacon, pre-cooked sausage links, mini cinnamon rolls (just bake), mini muffins, store-bought whipped cream, fresh berries, and any festive holiday treats. There's no shame in using shortcuts on busy Christmas morning.

How far in advance can I make sugared cranberries?

Make them 1-2 days ahead and store in a single layer in an airtight container at room temperature. Don't make them more than 2 days ahead because they'll start to get sticky and lose their sparkly coating.

What can I use instead of gingerbread waffles on my Christmas brunch board?

Regular waffles, mini pancakes, or French toast sticks all work beautifully. You can cut regular waffles into Christmas tree shapes or gingerbread men using cookie cutters, or make chocolate chip waffles, pumpkin waffles, or classic buttermilk waffles. The theme is flexible based on what your family loves.

If you try this Christmas breakfast charcuterie board or any other ideas on my blog, leave a rating and let me know how it went in the comments below. Thanks for visiting today!

Recipe

Christmas breakfast board

Christmas Breakfast Board

Video

The perfect breakfast for Christmas morning with gingerbread waffles, sugared cranberries, eggs, bacon, and festive treats everyone will love.
5 from 2 votes
Print Pin Rate
Course: Breakfast
Cuisine: American
Prep Time: 20 minutes minutes
Cook Time: 15 minutes minutes
Total Time: 35 minutes minutes
Servings: 4
Calories: 1098kcal
Author: Dannyelle Nicolle-Ramjist

Ingredients

  • 4 scrambled eggs
  • 6-8 waffles gingerbread shaped or regular
  • 12 breakfast sausage
  • 8-10 slices bacon
  • 1 cup raspberries
  • 1 cup whipped cream
  • ¼ cup sprinkles
  • 1 cup maple syrup
  • 3 gingerbread marshmallows
  • ¼ sugar + ¼ cup sugar -divided
  • ¼ water
  • 1 cup cranberries

For the Sugared Cranberries

  • ¼ cup sugar
  • ¼ cup water
  • 1 cup fresh cranberries
  • ¼ cup sugar for coating

Instructions

  • Make the Sugared Cranberries:
    Combine ¼ cup sugar and water in a medium saucepan. Cook over high heat, stirring, until sugar dissolves completely.Add cranberries and stir to coat. Remove from heat immediately.Remove cranberries with a slotted spoon and spread on a wire rack. Let sit 20-40 minutes until tacky.Roll sticky cranberries in remaining ¼ cup sugar until coated. Store in airtight container up to 2 days.
    ¼ sugar + ¼ cup sugar -divided, ¼ water, 1 cup fresh cranberries
  • Prepare the Proteins:
    Bake bacon at 400°F for 15-20 minutes until crispy. Can be done night before.Cook sausage links according to package directions. Can be done night before.On Christmas morning, warm pre-cooked proteins in 300°F oven for 8-10 minutes.
    12 breakfast sausage, 8-10 slices bacon
  • Make Fresh Waffles:
    Prepare waffles using your favorite recipe or mix in a gingerbread waffle maker or regular waffle iron.If using regular waffles, cut into festive shapes with Christmas cookie cutters while warm.
    6-8 waffles
  • Scramble Eggs:
    Scramble eggs just before assembling so they're hot and fresh.
    4 scrambled eggs
  • Assemble the Board:
    Lay waffles down the center of a large wooden board in a wave pattern, overlapping slightly.Place mini cast iron skillet with scrambled eggs on the board. Add small bowls for whipped cream, maple syrup, and sprinkles.Arrange bacon and sausage links around the board.Fill empty spaces with fresh raspberries and sugared cranberries.Tuck fresh cedar or rosemary sprigs around the fruit for decoration.Scatter gingerbread marshmallows across the board and sprinkle holiday sprinkles over whipped cream.Serve immediately while proteins are warm.
    4 scrambled eggs, 6-8 waffles, 12 breakfast sausage, 8-10 slices bacon, 1 cup raspberries, 1 cup whipped cream, ¼ cup sprinkles, 3 gingerbread marshmallows, 1 cup maple syrup

Notes

Make-Ahead Tip: Cook bacon, sausage, and sugared cranberries the night before. Store in refrigerator and warm just before assembling.
Board Size: Use a board at least 18 inches long for 6-8 people.
Theme Variations: Can't find gingerbread items? Use Christmas tree shaped waffles, red and green sprinkles, and peppermint additions instead.
Store-Bought Shortcuts: Use frozen mini waffles, pre-cooked bacon, and pre-cooked sausage to make this even easier.
Gingerbread Waffle Flavor: Add 1 tablespoon molasses, ½ teaspoon ginger, ½ teaspoon cinnamon, ¼ teaspoon nutmeg, and ¼ teaspoon cloves to your waffle batter.

Nutrition

Calories: 1098kcal | Carbohydrates: 126g | Protein: 28g | Fat: 54g | Saturated Fat: 19g | Polyunsaturated Fat: 9g | Monounsaturated Fat: 22g | Trans Fat: 0.4g | Cholesterol: 278mg | Sodium: 1211mg | Potassium: 691mg | Fiber: 4g | Sugar: 92g | Vitamin A: 1258IU | Vitamin C: 15mg | Calcium: 271mg | Iron: 6mg
Tried this Recipe? Tag me Today!Mention @LifeisaParty or tag #lifeisaparty!

About the Recipe Developer

I'm Dannyelle, a trained celebrant and former teacher who's been creating memorable celebrations for 15+ years. This Christmas breakfast charcuterie board has become our family's favorite holiday morning tradition over the past several years. My work has been featured in Better Homes & Gardens and Country Living for party styling and seasonal entertaining. More about Life is a Party →

How To Make DIY Paper Christmas Star Decorations

Nov 10, 2021 · 4 Comments

DIY paper stars Christmas

DIY Paper Christmas Star Decoration: this easy craft is perfect for Christmas. Make any size or colour, add mini holes, paint and glitter.

DIY paper stars Christmas
[feast_advanced_jump_to]

It's always fun to make some homemade Christmas decorations. These paper Christmas stars are fun to make, and use materials that you probably have on hand already. These stars are perfect for the holiday season. I'll be using these as part of my own Christmas decorations this year. They'd also be really fun for New Year's Eve.

DIY paper star decorations

Simple Origami

Origami stars can be a little bit tricky to put together at first, but the results are so stunning. These step by step instructions should make it easy to create these. Once you make a few and get the hang of it they're very easy. You can make them in any size you like, or a mix like we've done here. Make larger ones for a more dramatic look, especially when lit up with fairy lights. Imagine one at the top of the tree, with holes and some lights inside. And the smaller stars are really cute.

how to make paper star decorations

This simple craft is a great one for the whole family to make together, and simple enough for kids, once you get used to making them. Try making them in different colors, or using festive papers from the craft store.

Materials

To make these Christmas stars you will need:

  • paper or card stock
  • scissors
  • glue stick or school glue
  • glitter
  • mini hole punch hole punch

How To Make 3D Stars

how to make a paper star decoration

Square Paper

1.Start out with a square piece of paper. You can use any colour you like, regular paper, or card stock or scrapbook papers with pretty patterns or glitter all work well. Heavier cardstock is harder to fold, but holds its shape the best after it's finished. Our smallest squares of craft paper were 6 cm by 6 cm, and they went up from there.

Folding Paper

To create our star shape, begin by folding the paper in half. Keeping the fold edge at the top, next, fold the top left corner down to the bottom edge to make a crease, then unfold , and fold the bottom left corner to top and make a crease.

2. Where the two creases meet is the mark where you next fold the top right corner to.

simple paper star decoration
how to make a paper star

3. Now take that same right corner and fold that flap back on itself to line up with the edge.

4. Next, fold the whole piece in half along the middle folds.

DIY paper star

Cutting The Point

5. Finally, use a pair of scissors to cut a straight line, as shown in the image. The greater the angle of the scissors, the pointier the star will be, Experiment after making your first star, to see what angle is your favourite.

6. Unfold the star and reverse the fold lines where necessary to form the points of your star.

easy paper star decoration

Decorate With Holes, Paint, and Glitter

7. You can also use a hole punch to add some pattern to your star. I used a mini hole punch to create a lacy look to some of my stars by folding each point of the star, and punching through two layers at once to create a pattern. Iridescent paint added a little sparkle to some.  Glitter paint would be pretty too.  I added some glitter to some with some glue and glitter sprinkled on top.

paper star decoration

Hanging Stars

8. To make the stars into hanging Christmas decorations, I added a mini hole to one point at the top of the star and used a darning needle to thread some cotton string through it. You could also choose to make double sided ornaments by making two stars the exact same size, and a hot glue gun to attach two together. To make a tree topper, use the same method but with larger stars.

paper star Christmas decoration

How To Display The Paper Star Decorations

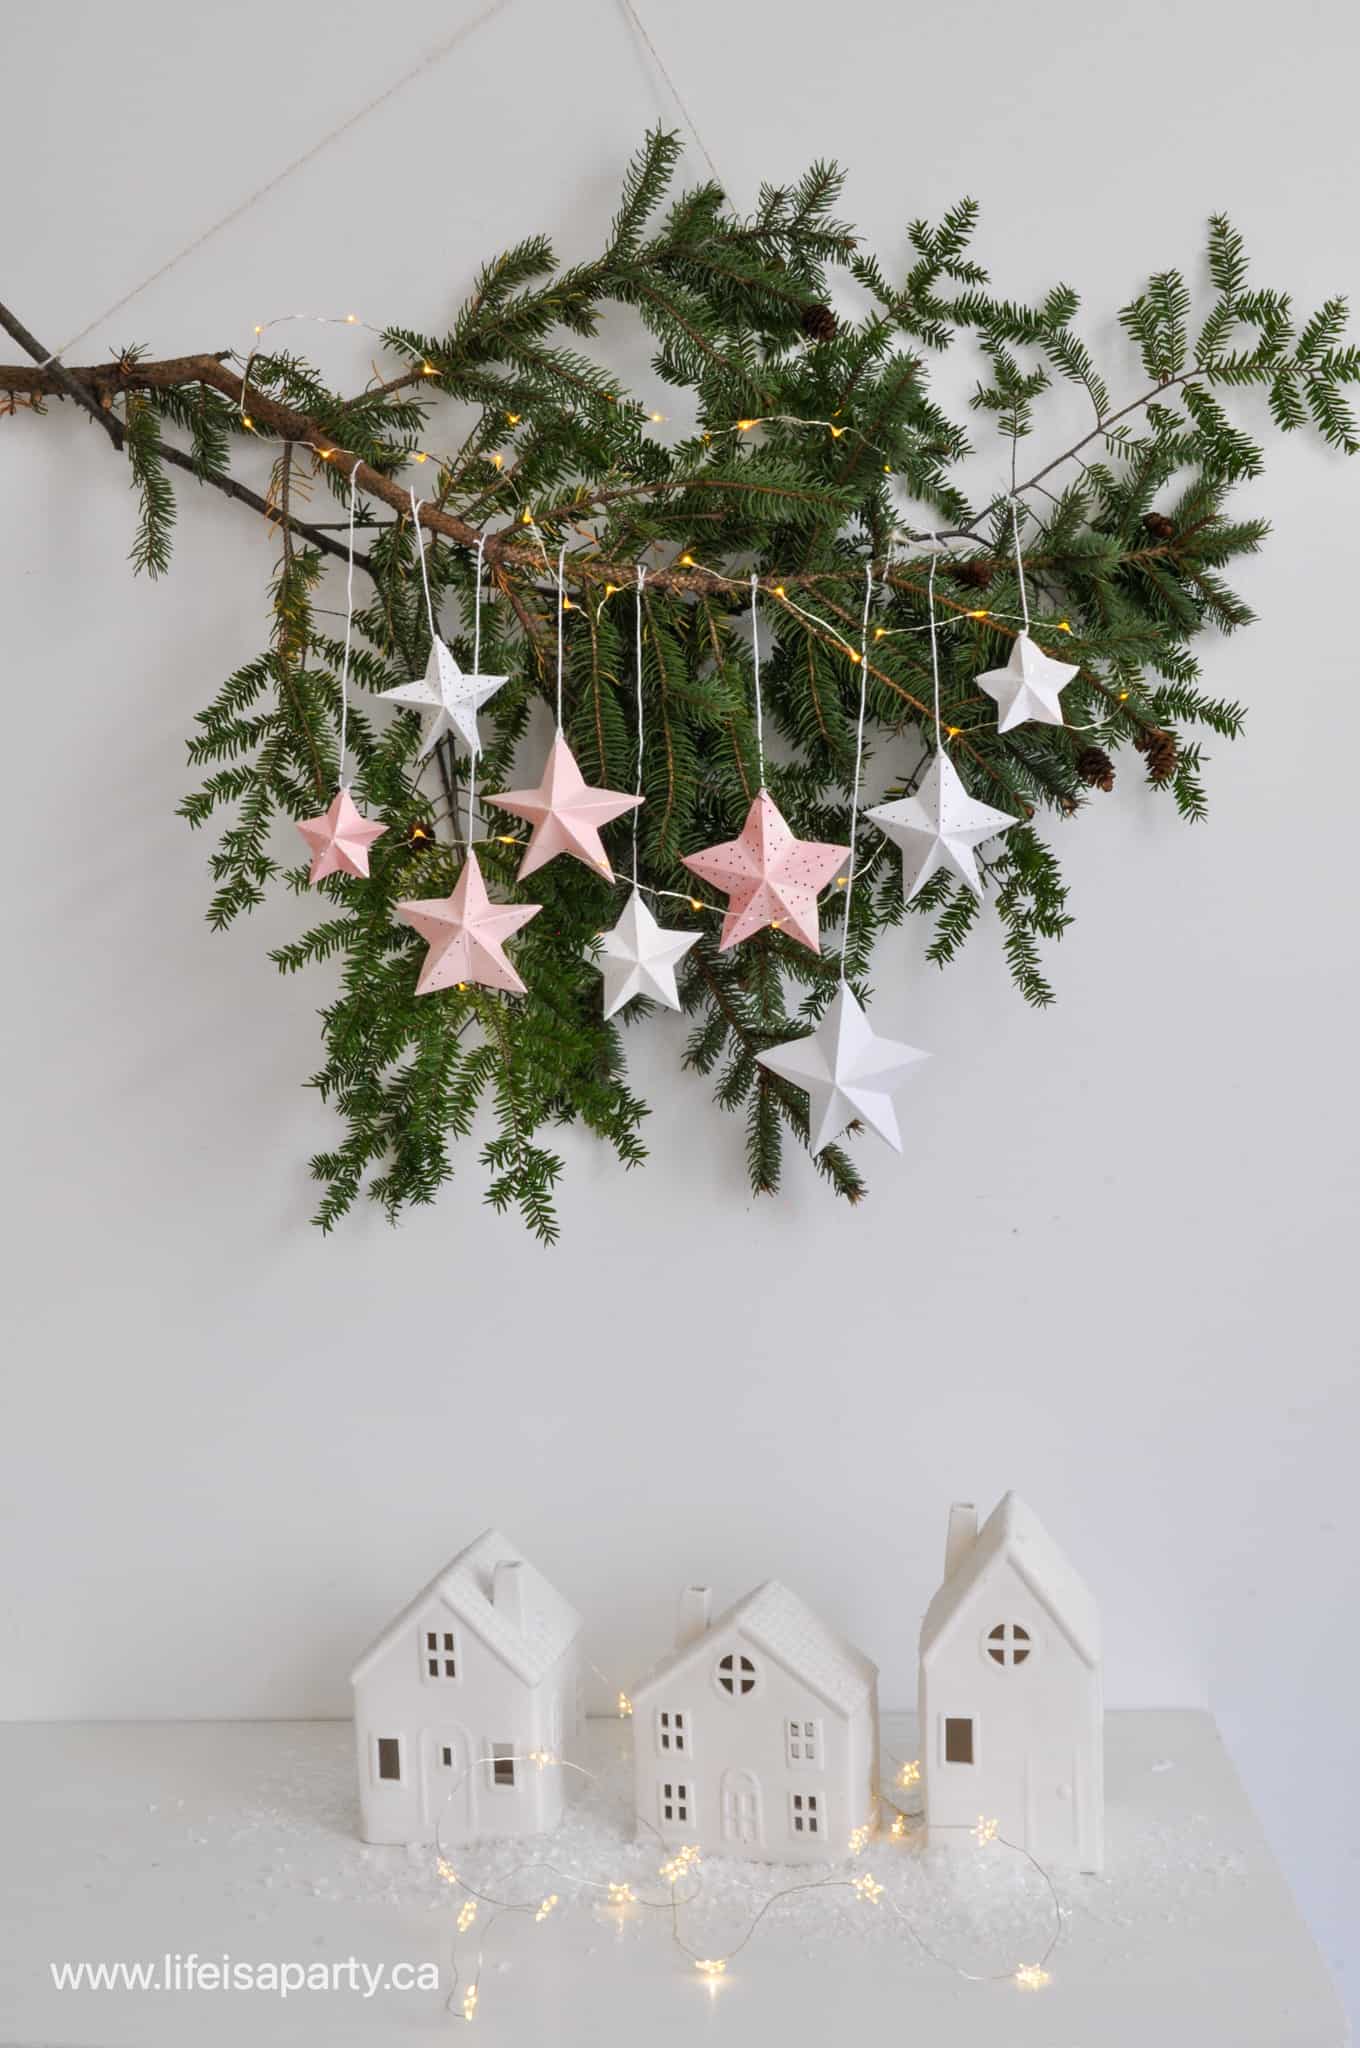
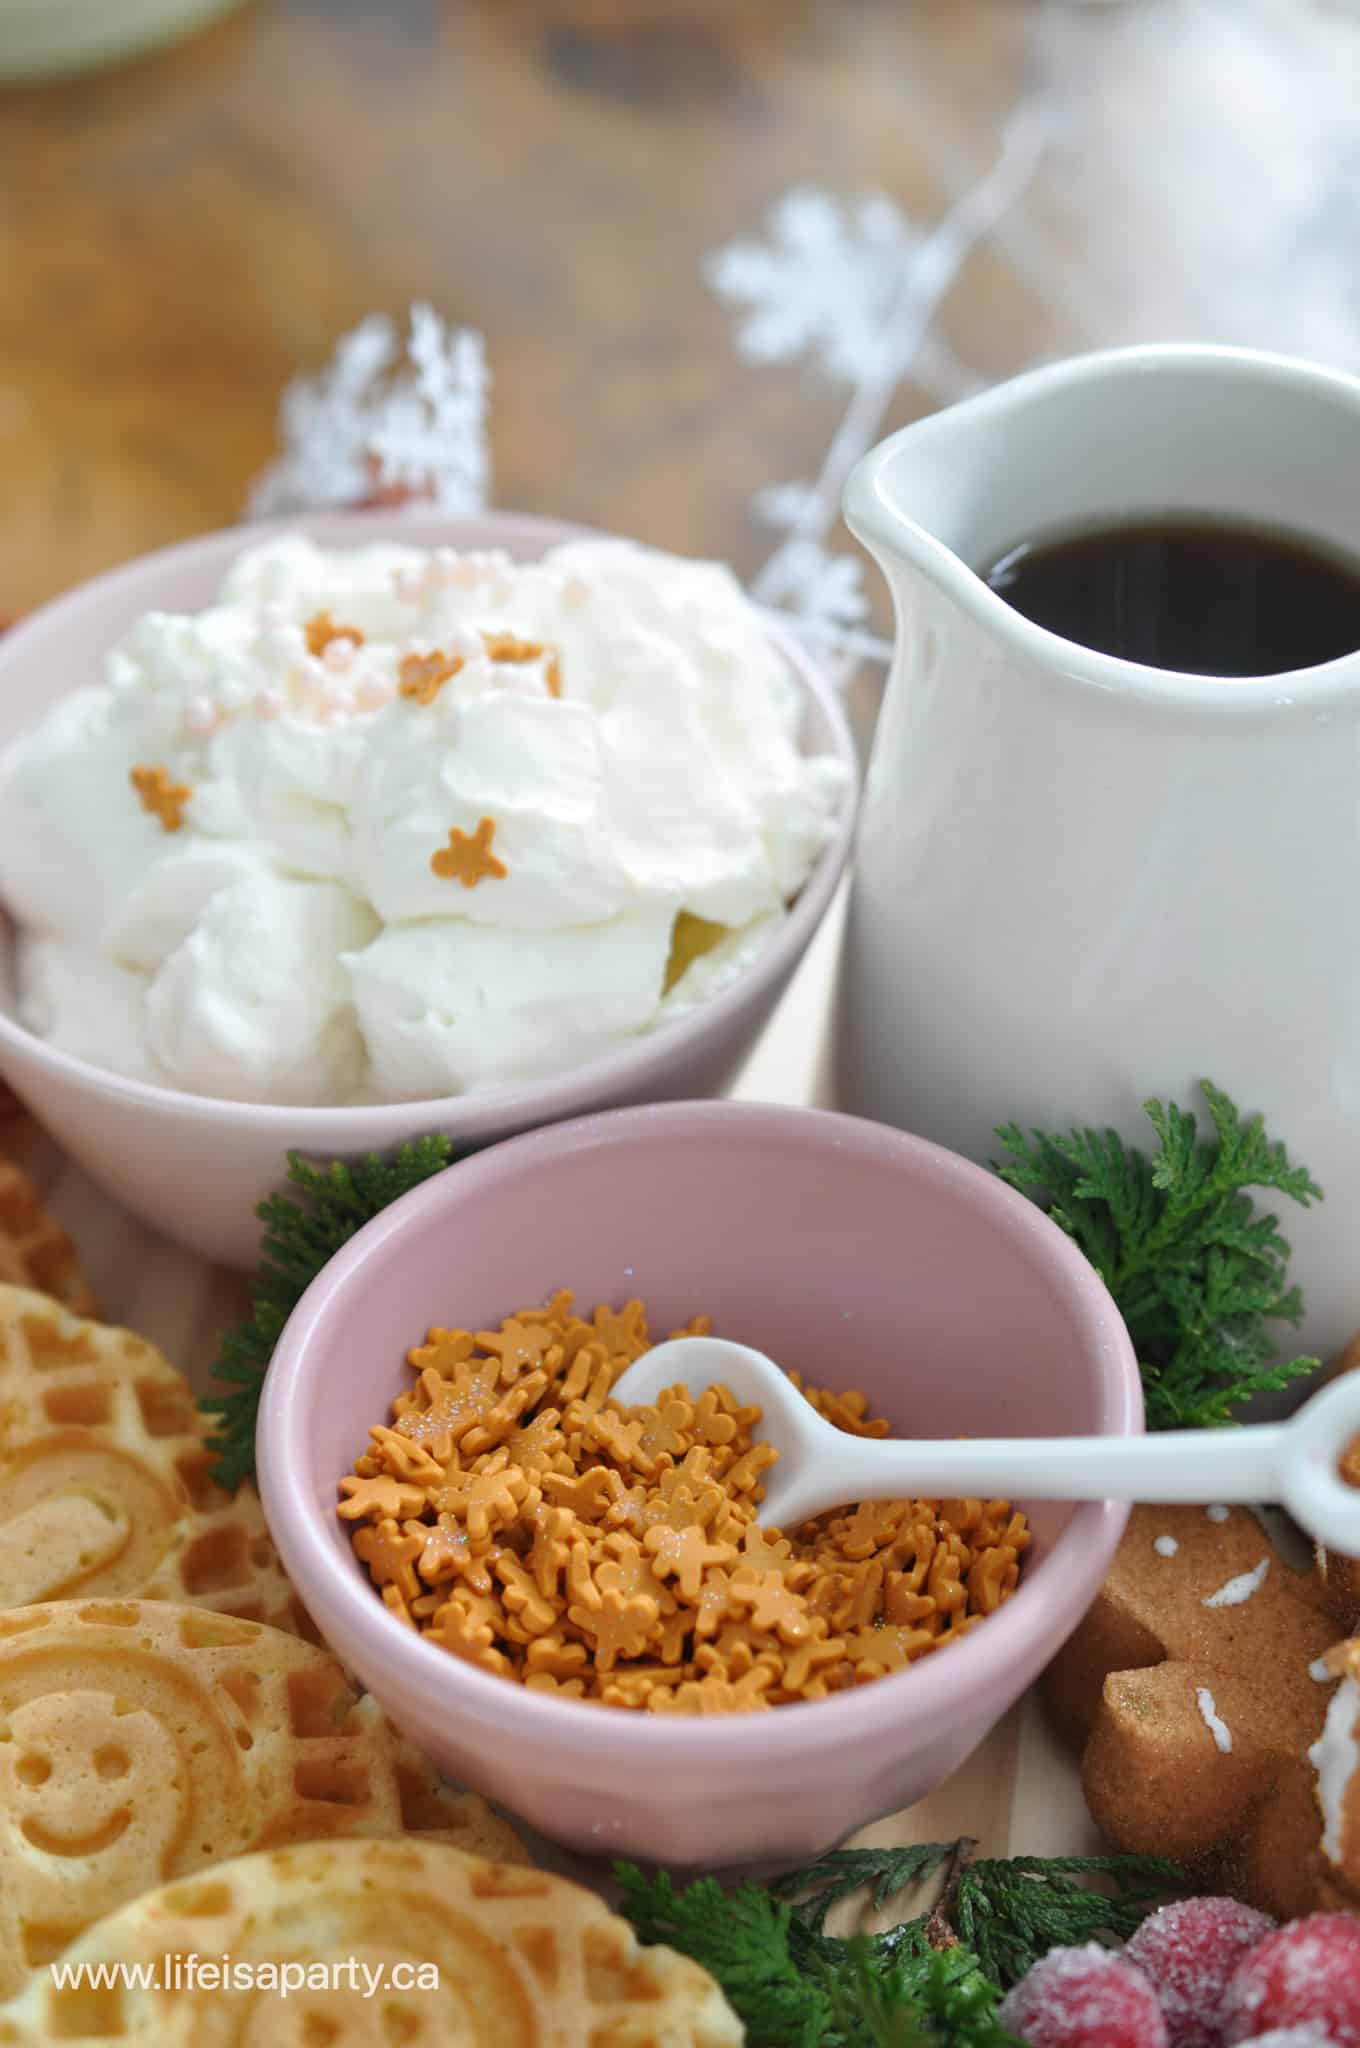
There's so many ways you could display these paper stars decorations at this wonderful time of year. The large ones would make really pretty Christmas tree toppers. They're also gorgeous hanging from a tree branch at different heights to make a wall hanging for the Christmas season, like I've done here. Small ones would look great on a Christmas tree, wreath, or tucked into a garland over your living room mantel. I made a few stars from paper bags and a Froebel star last year, and these would look amazing mixed together with them too. They'd also be cute as gift toppers. There's so many ways to use them this time of year.

paper Christmas star

Wall Hanging

To make my wall hanging, I found a few evergreen branches, and tied them with some twine to hang them on the wall.  Next, I tied string to my stars, and hung them at various heights.  Lastly I added some fairy lights for a little sparkle.  These look so pretty at night.

Recipe

DIY paper stars Christmas

DIY Paper Christmas Star Decoration

No ratings yet
Print Pin Rate
Cook Time: 5 minutes minutes
Additional Time: 5 minutes minutes
Total Time: 10 minutes minutes
Author: Dannyelle Nicolle-Ramjist
Cost: $2

Equipment

  • paint brush
  • mini hole punch hole punch
  • scissors
  • darning needle

Materials

  • paper or card stock
  • glue stick or school glue
  • glitter
  • iridescent paint
  • cotton string

Instructions

  • Start out with a square piece of paper. You can use any colour you like, regular paper, or card stock or scrapbook papers with pretty patterns or glitter all work well. Heavier cardstock is harder to fold, but holds its shape the best after it's finished. Our smallest squares of craft paper were 6 cm by 6 cm, and they went up from there.
  • To create our star shape, begin by folding the paper in half. Keeping the fold edge at the top, next, fold the top left corner down to the bottom edge to make a crease, then unfold , and fold the bottom left corner to top and make a crease.
  • Where the two creases meet is the mark where you next fold the top right corner to.
  • Now take that same right corner and fold that flap back on itself to line up with the edge.
  • Next, fold the whole piece in half along the middle folds.
  • Finally, use a pair of scissors to cut a straight line, as shown in the image. The deeper greater the angle of the scissors, the pointer the star will be, Experiment after making your first star, to see what angle is your favourite.
  • Unfold the star and reverse the fold lines where necessary to form the points of your star.
  • You can also use a hole punch to add some pattern to your star. I used a mini hole punch to create a lacy look to some of my stars. I also painted some with irredicscnet paint, and added glue and glitter to some.
  • To make the stars in to hanging Christmas decorations, I added a mini hole to one point at the top of the star and used a darning needle to thread some cotton string through it. You could also choose to make double sided ornaments by making two stars the exact same size, and a hot glue gun to attach two together. To make a tree topper, use the same method but with larger stars.

These paper Christmas stars are so fun to put together, and there's so many different ways you could use them.  They're also very inexpensive to make, and a great craft for kids or a group.  

With pretty paper Christmas stars like this, life really is a party!
 
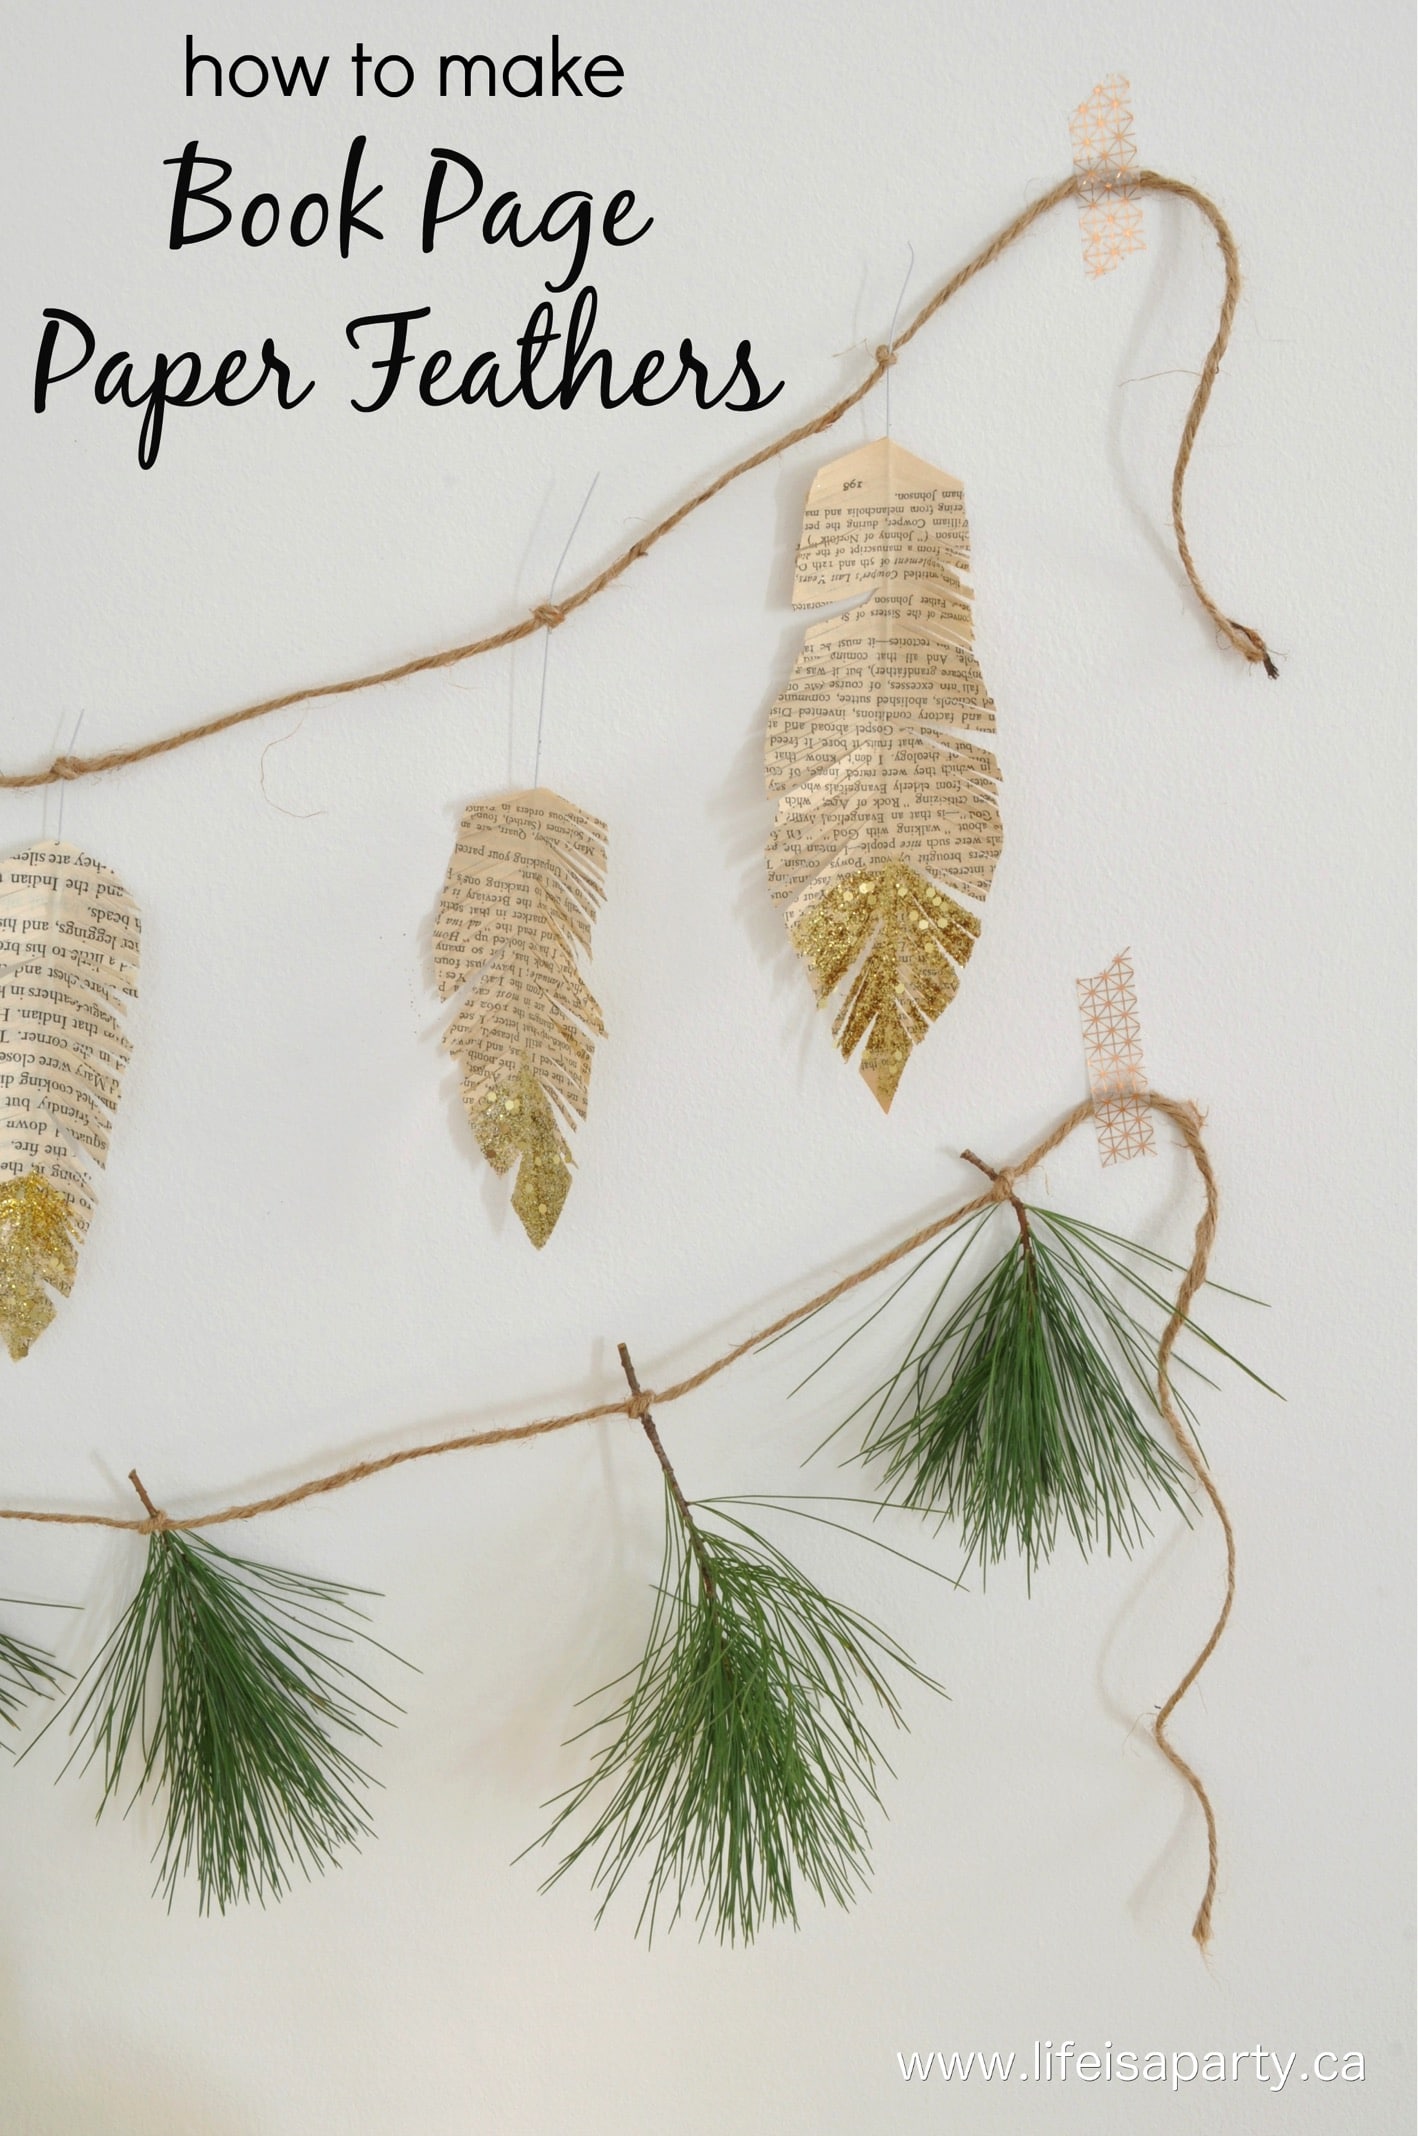
You might like our Book Page Paper Feathers Tutorial here.

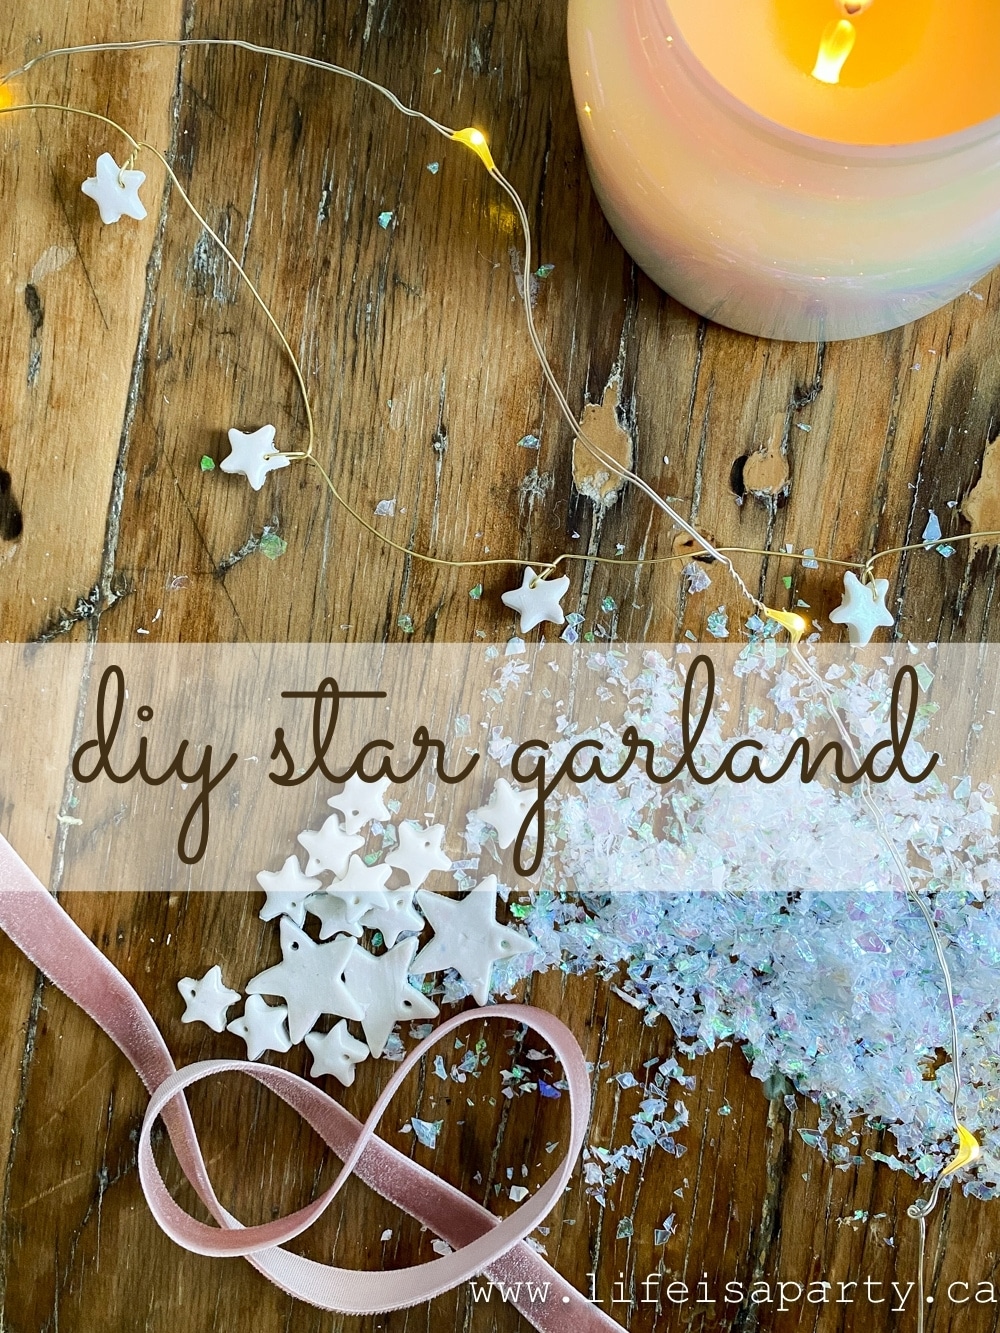
Also check out our DIY Star Garland here.

DIY Star Garland: easy craft using polymer clay and gold wire to create beautiful star garland for Christmas decorating.

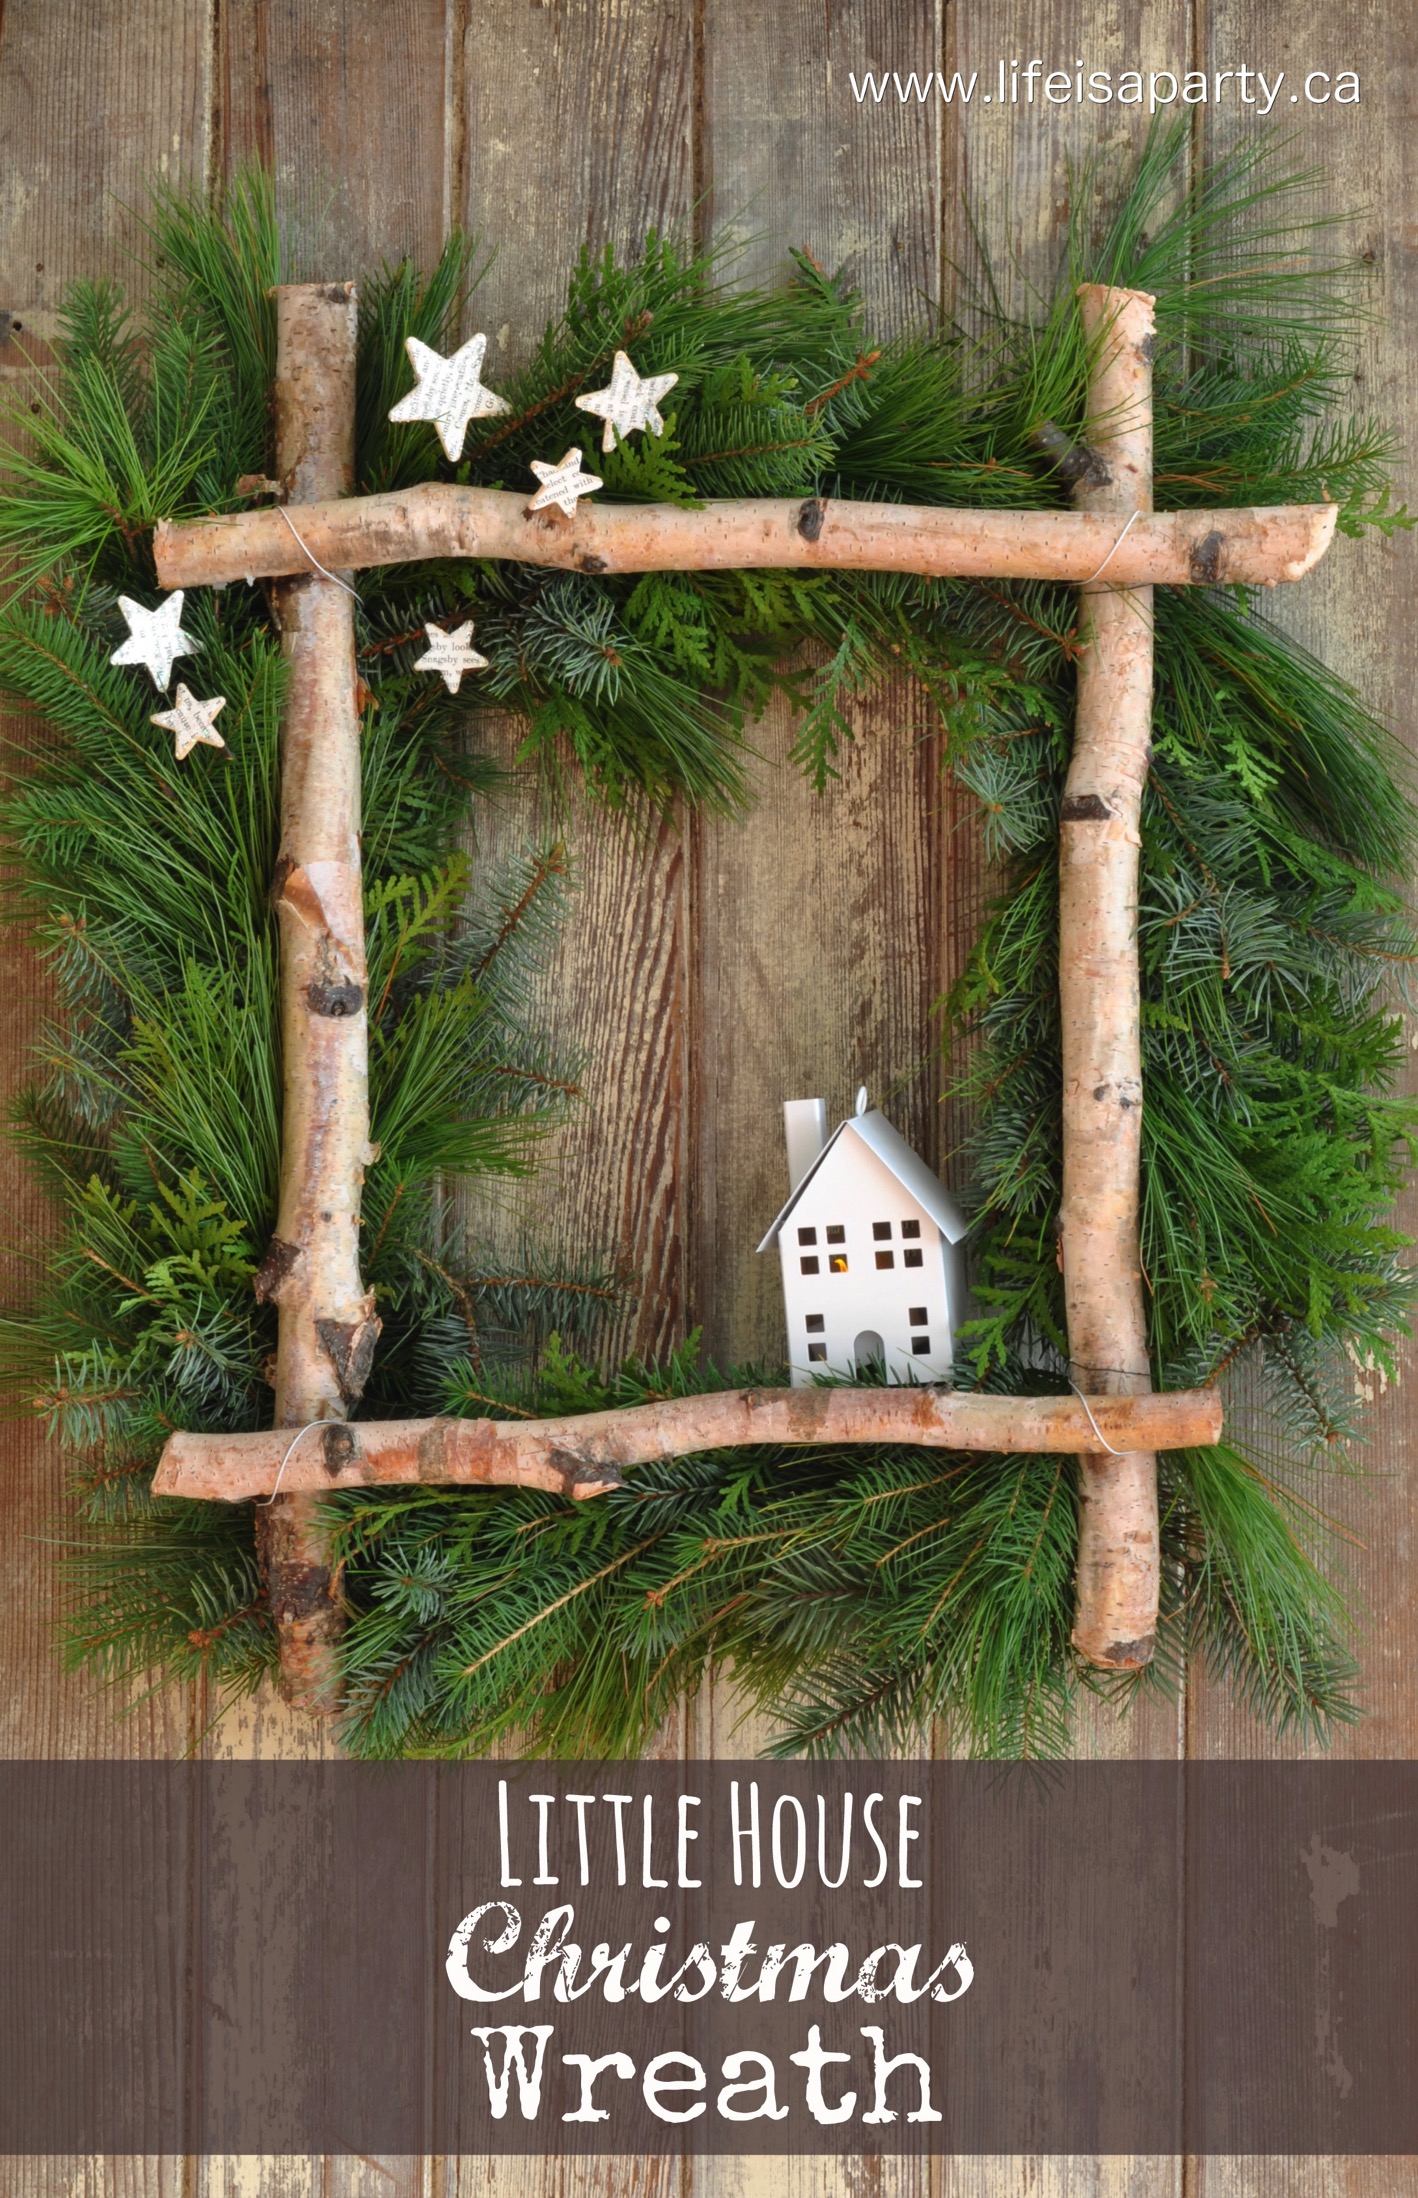
You might also like Little House Christmas Wreath here.

Birch Christmas Wreath:-full tutorial to make your own square wreath from some gathered greens, birch logs, and a coat hanger. Perfect for Christmas.

DIY Moon Shaped Christmas Wreath

Nov 3, 2021 · 6 Comments

Pink crescent moon shaped Christmas wreath.

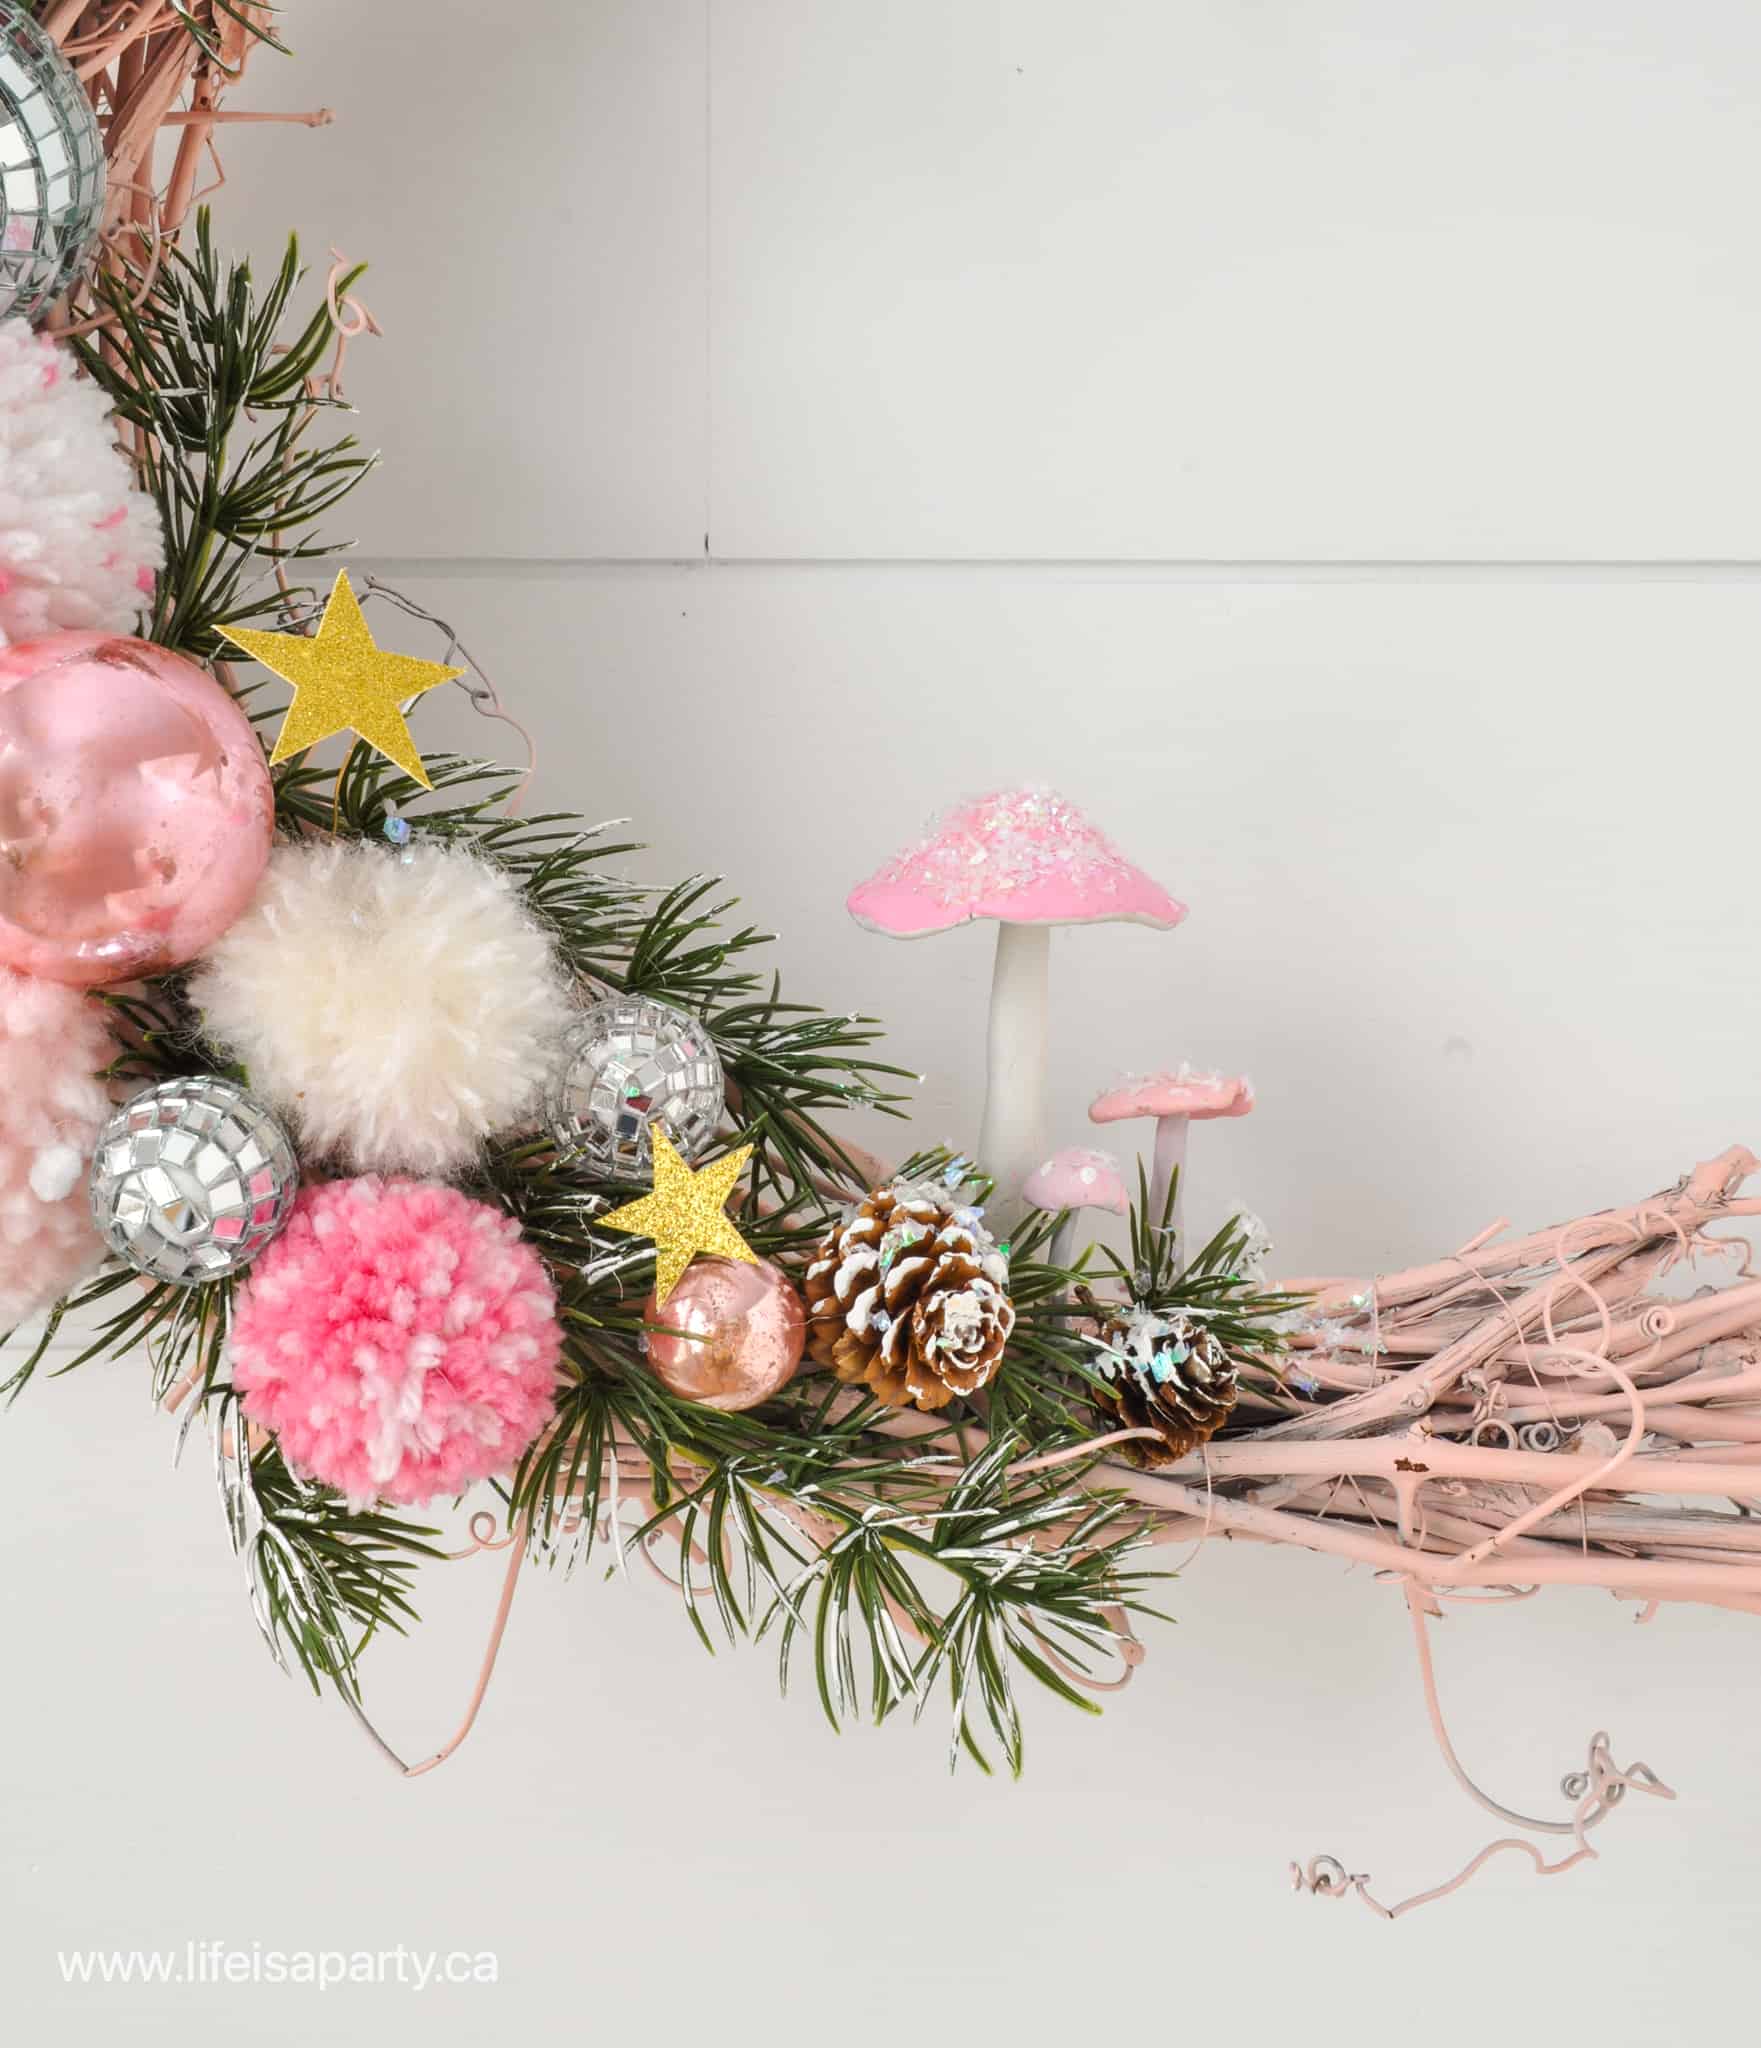
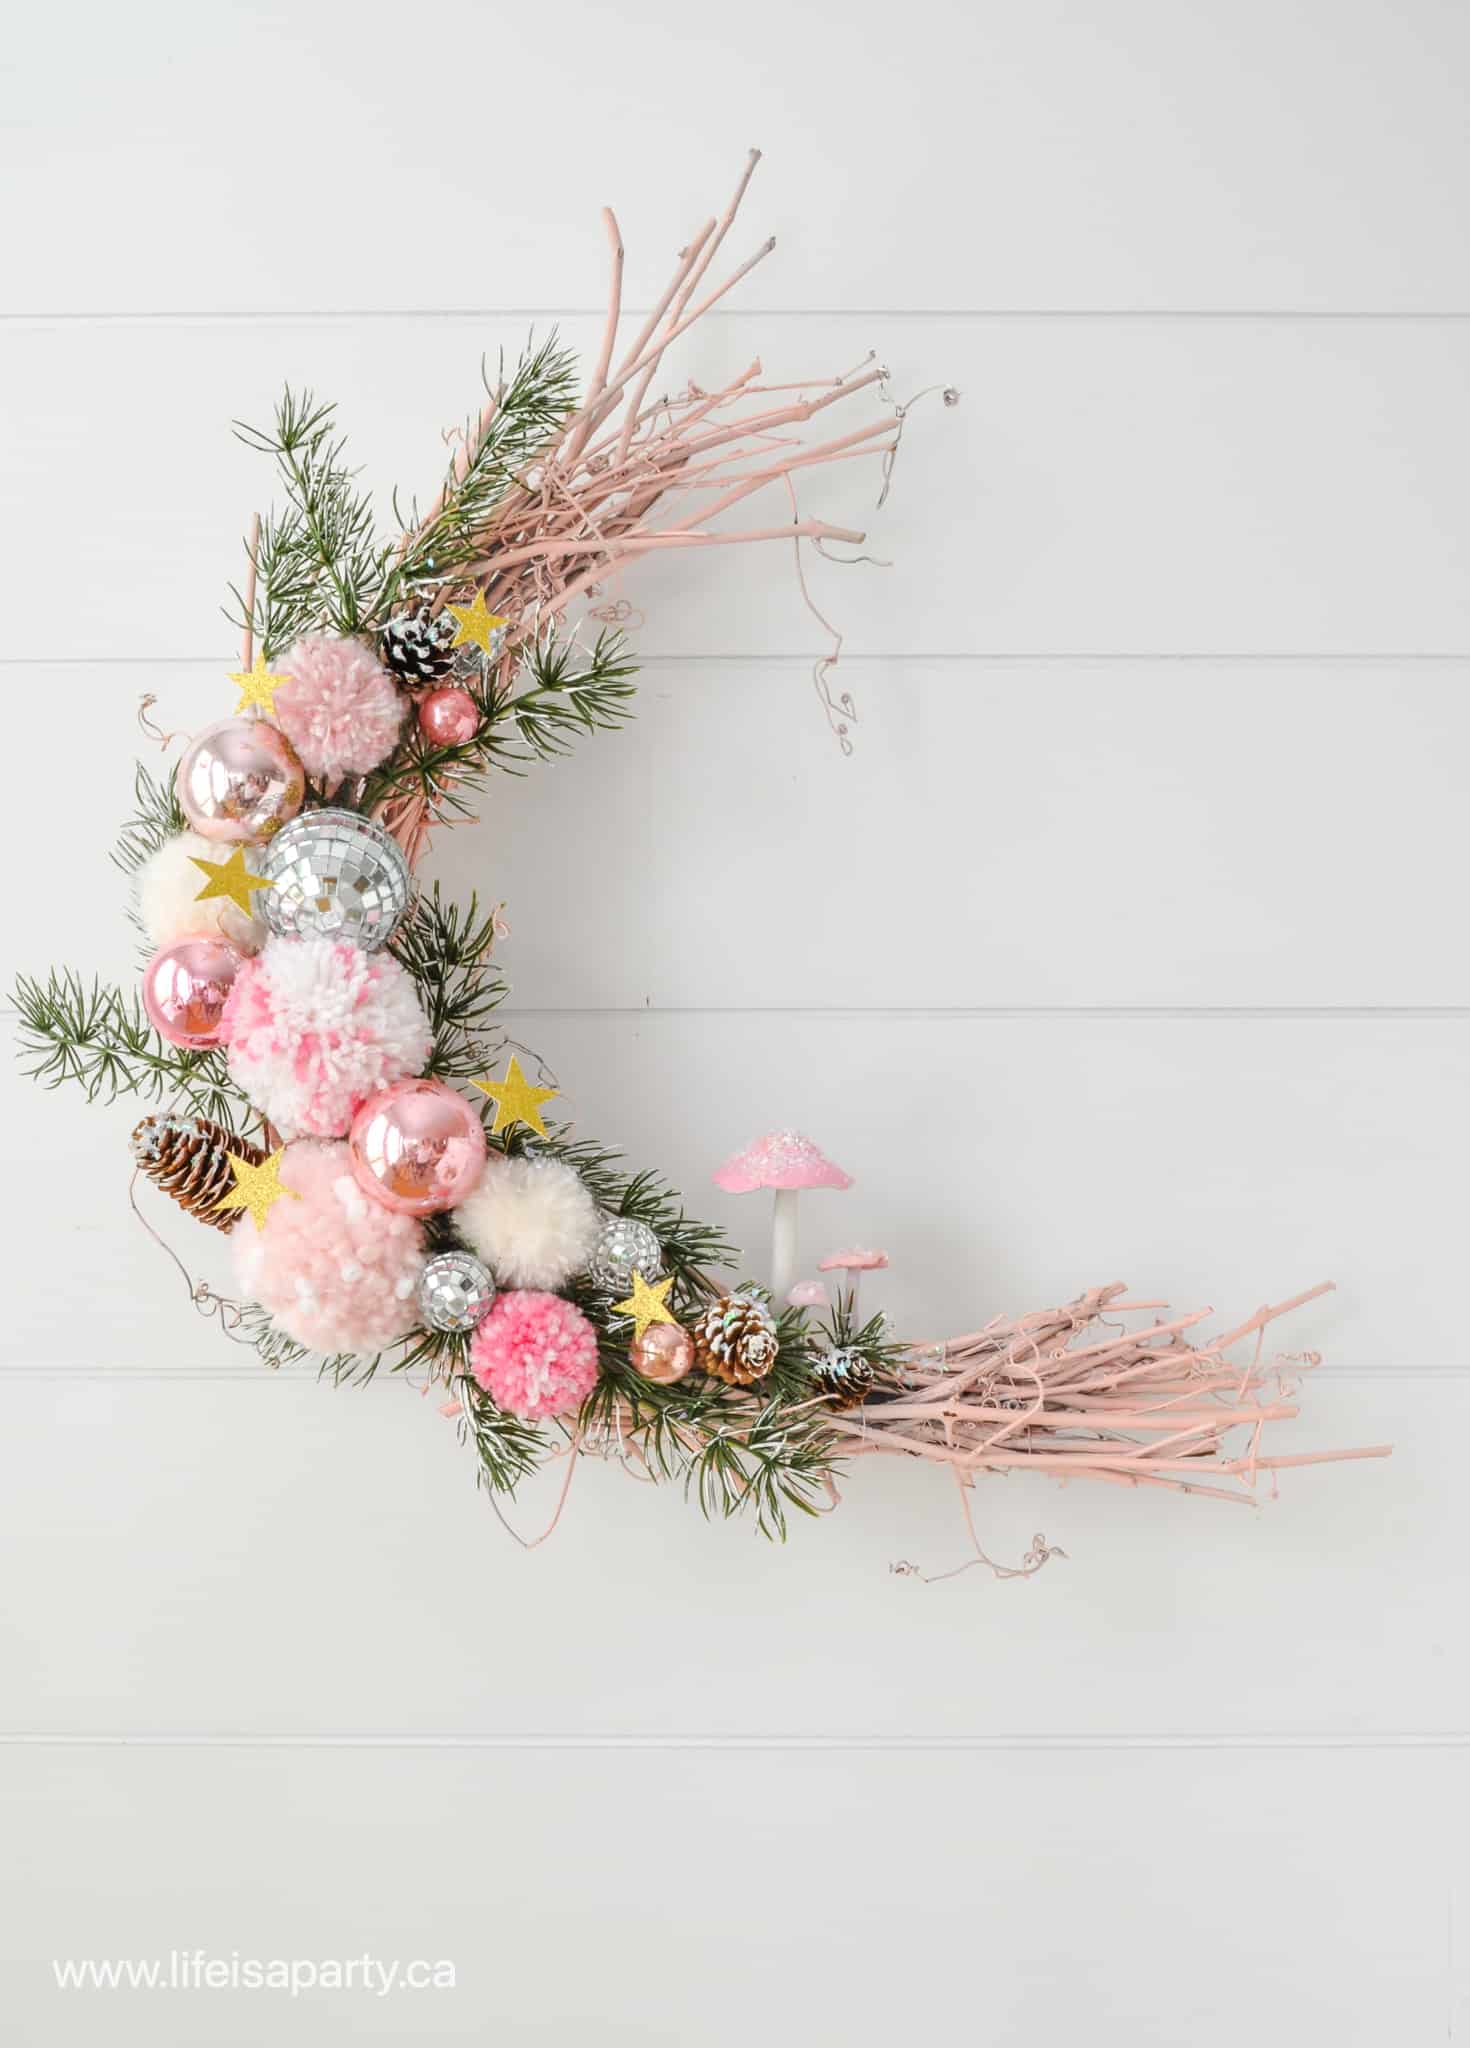
Moon Shaped Christmas Wreath: how to use a round wire form to make a DIY moon shaped grape vine wreath decorated with ornaments and mushrooms.

[feast_advanced_jump_to]

Moon shaped crescent wreaths have become so popular that I thought it would be fun to make one for Christmas.  This DIY wreath wasn't hard to put together, and I love that when you make it yourself you can customize it to go with your own personal decor and colour scheme.

I made a Halloween version of this wreath -you can find it here.  It was so popular, that I knew a Christmas version would be great too.  I love it.  I can't decide whether to use it on my holiday mantel, front door, or a vignette.  That's a pretty good problem to have. 😉

I'm still loving pink, so I went with a pink colour scheme for this wreath.  But if you're more traditional, you could switch it up for red.  It would look great in blue's or even neutrals depending on your holiday colour scheme.

moon christmas wreath

Moon Shaped Christmas Wreath Materials:

  • wire wreath base
  • grape vine
  • garden clippers
  • wire
  • wire cutters
  • pink spray paint
  • faux greens
  • pink ornaments
  • yarn pom poms
  • pine cones
  • mini disco balls
  • air dry clay
  • hot glue
  • craft paint -white, pink, grey
  • white glue
  • iridescent faux snow
  • gold glitter paper
  • Cricut star cut pattern

The Moon Shaped Grapevine Wreath Base

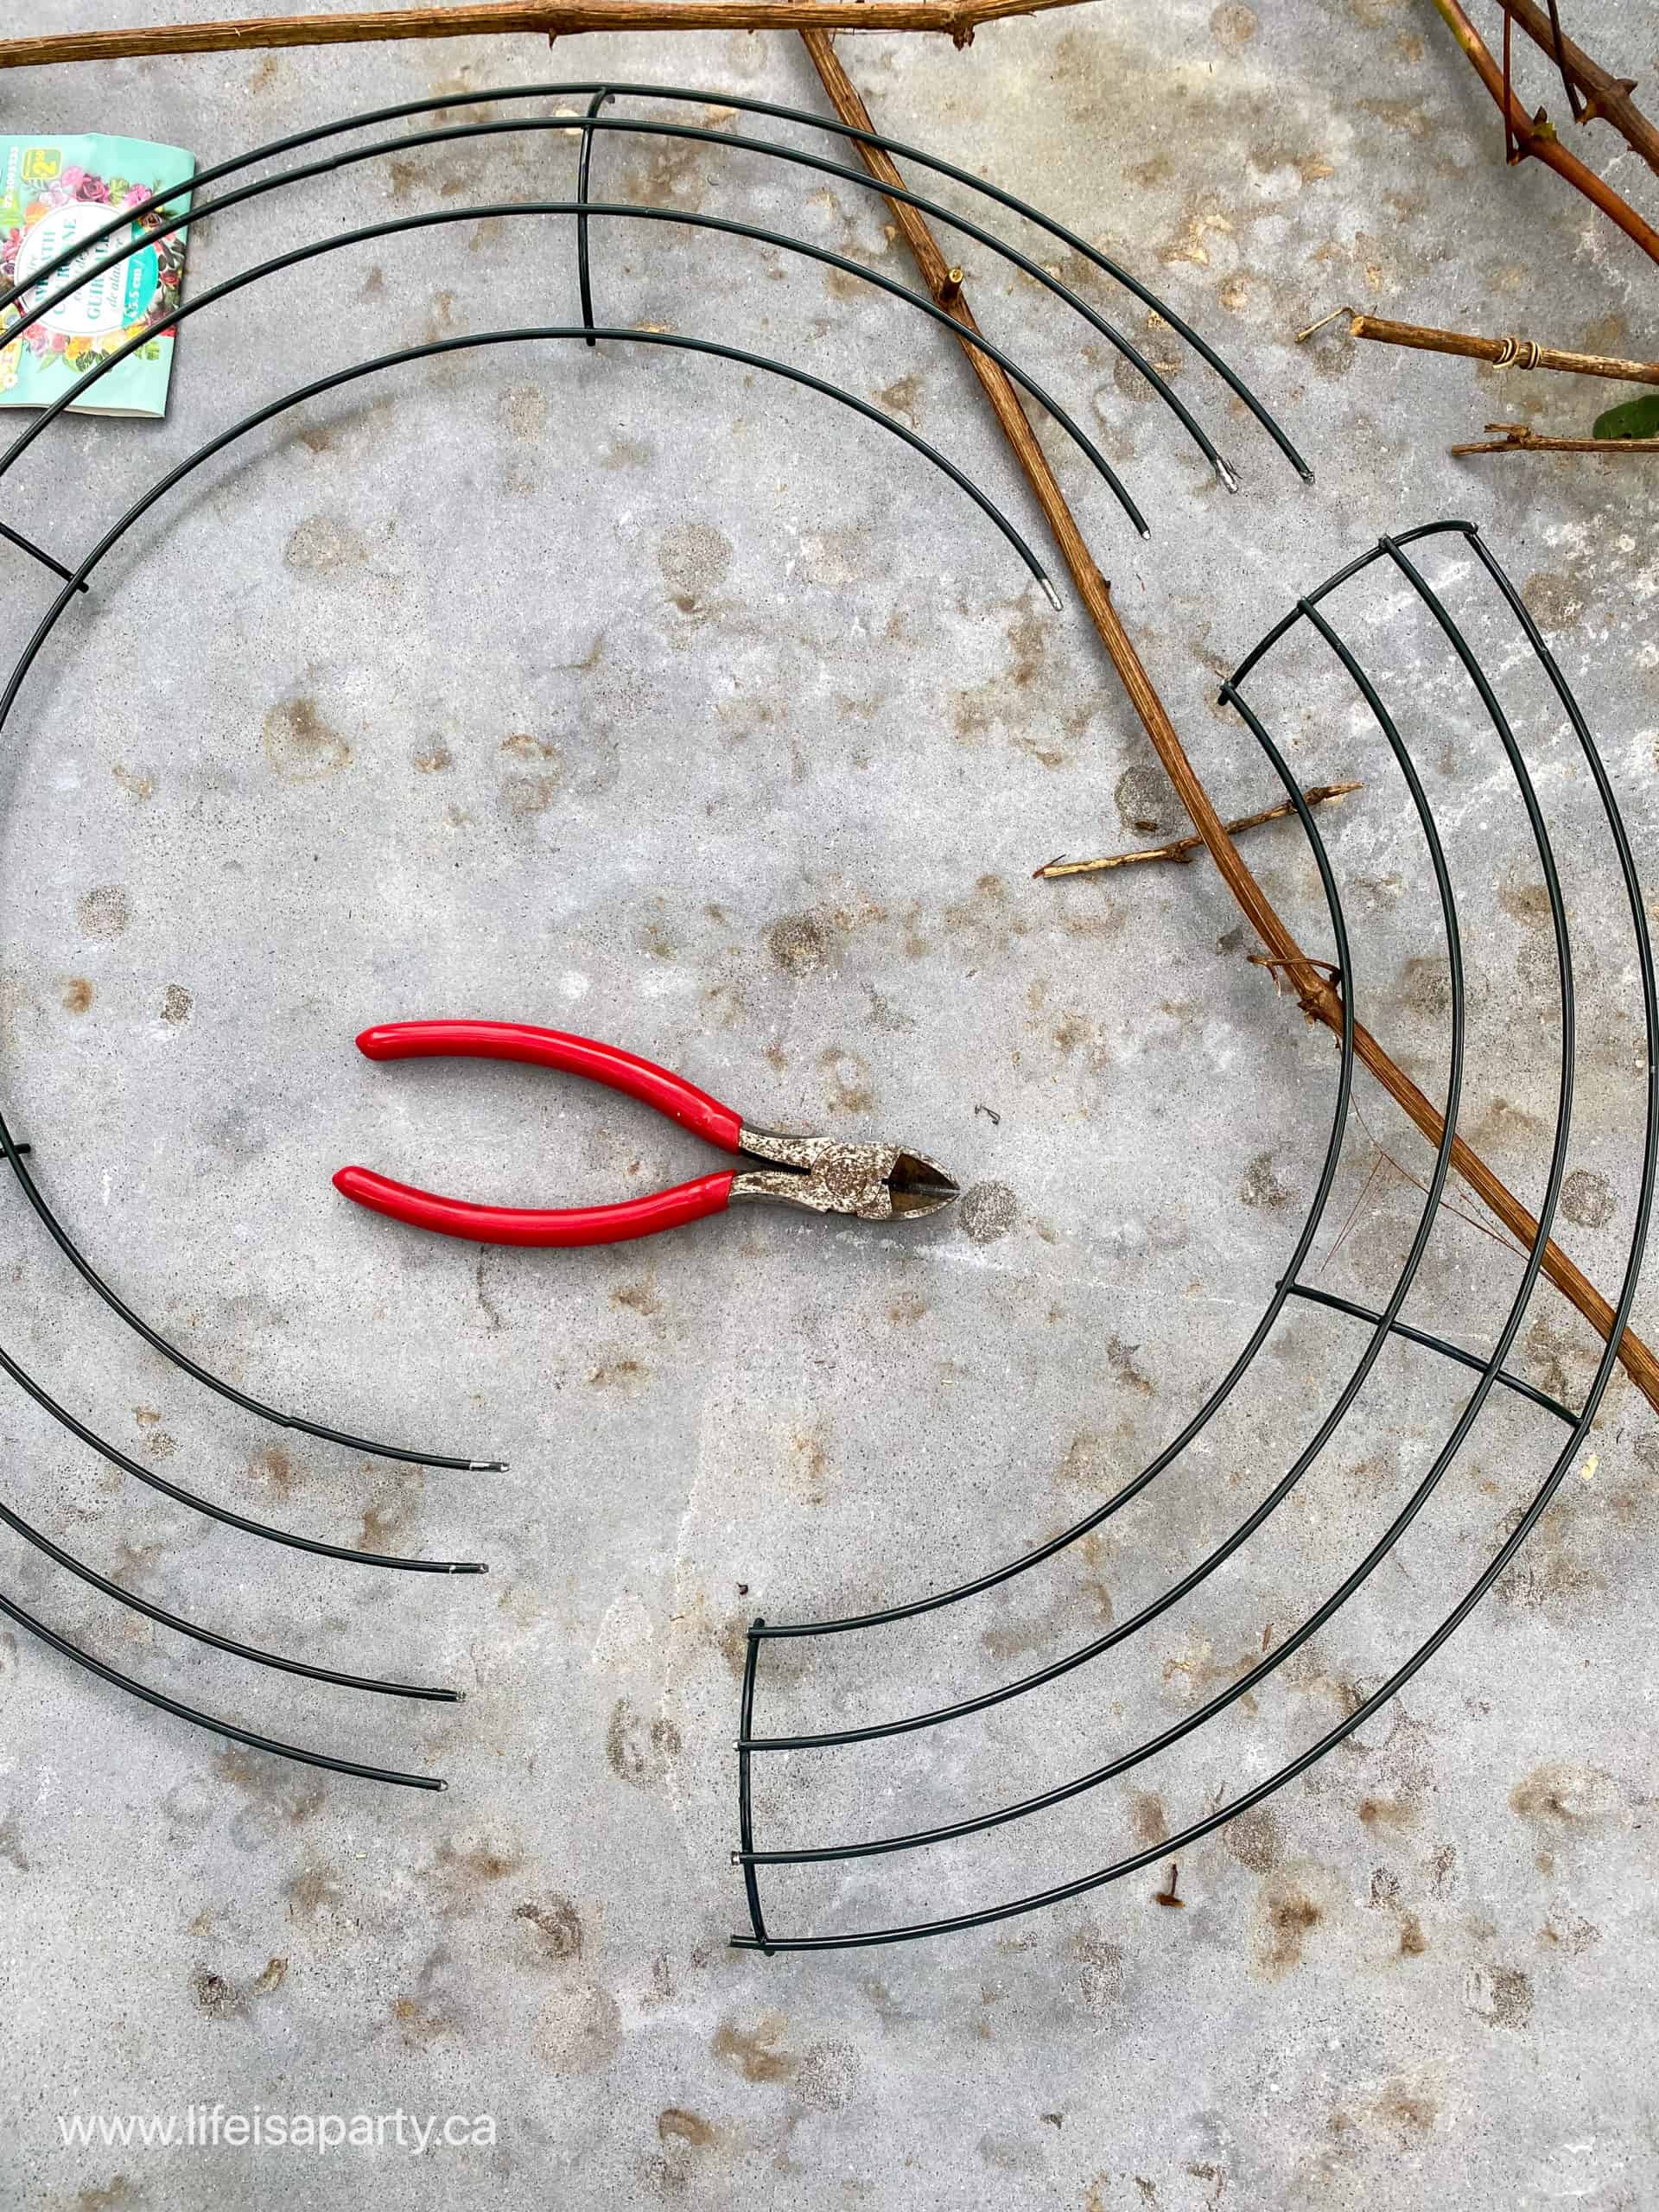
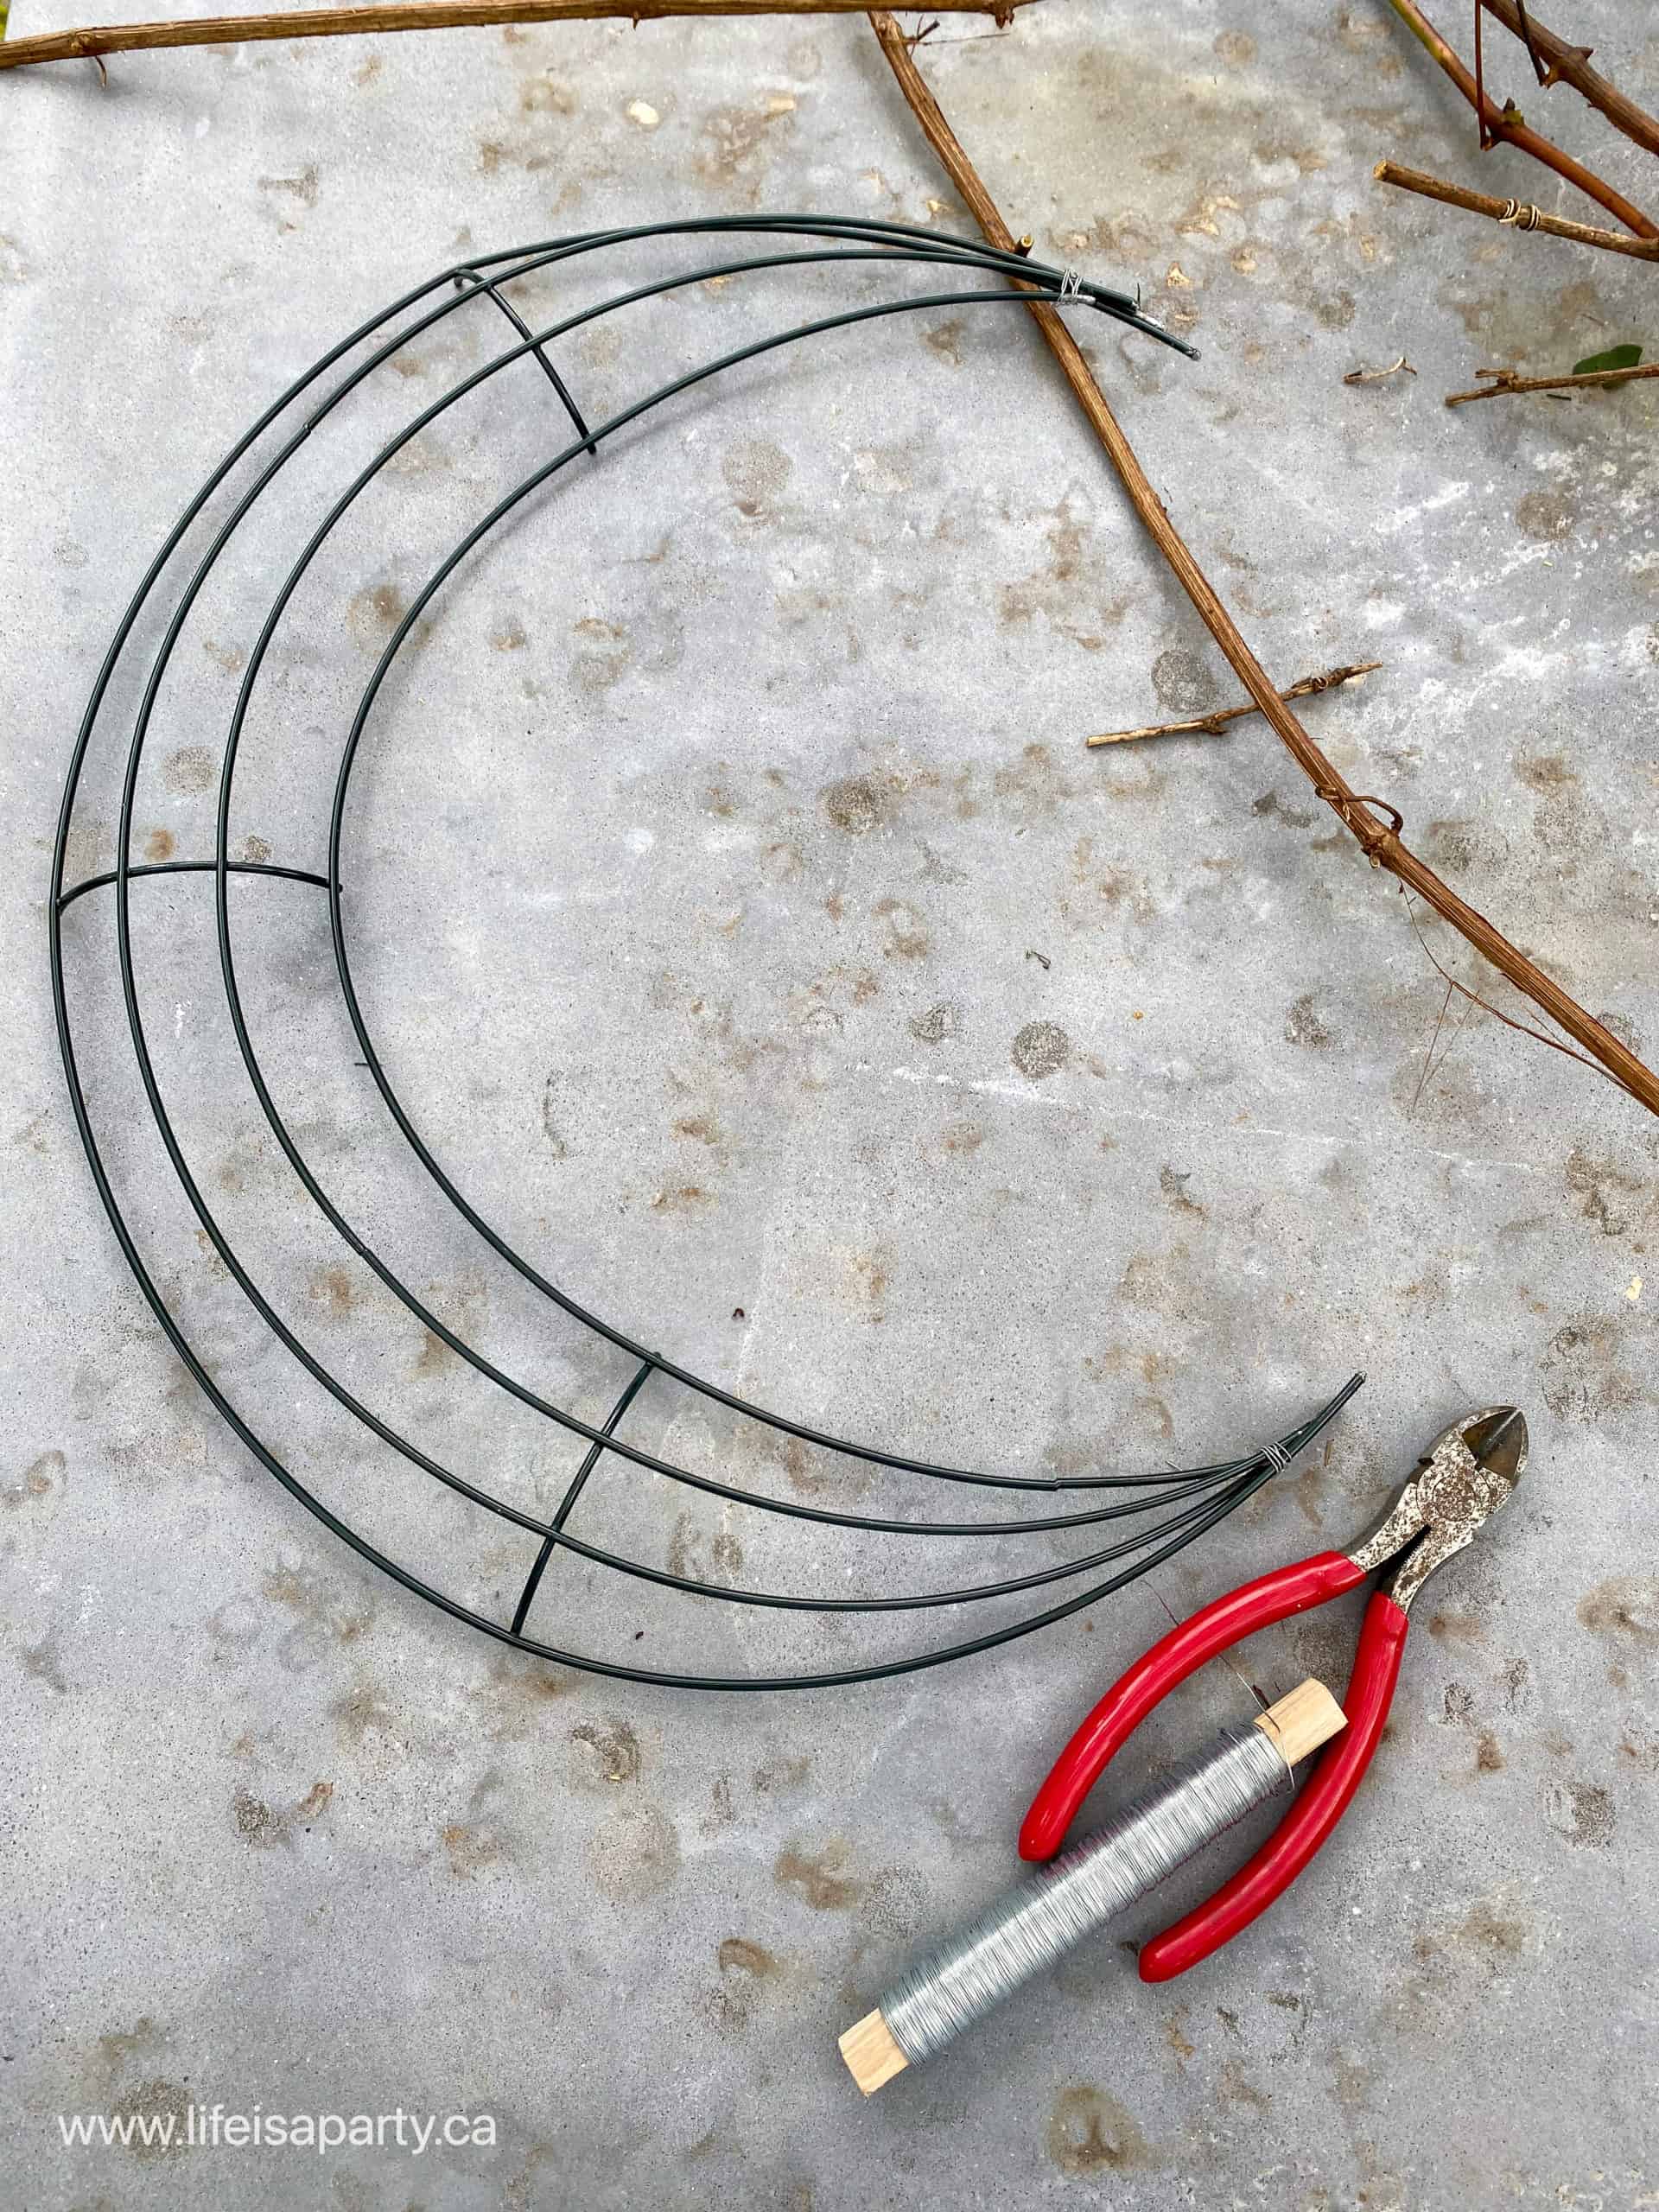
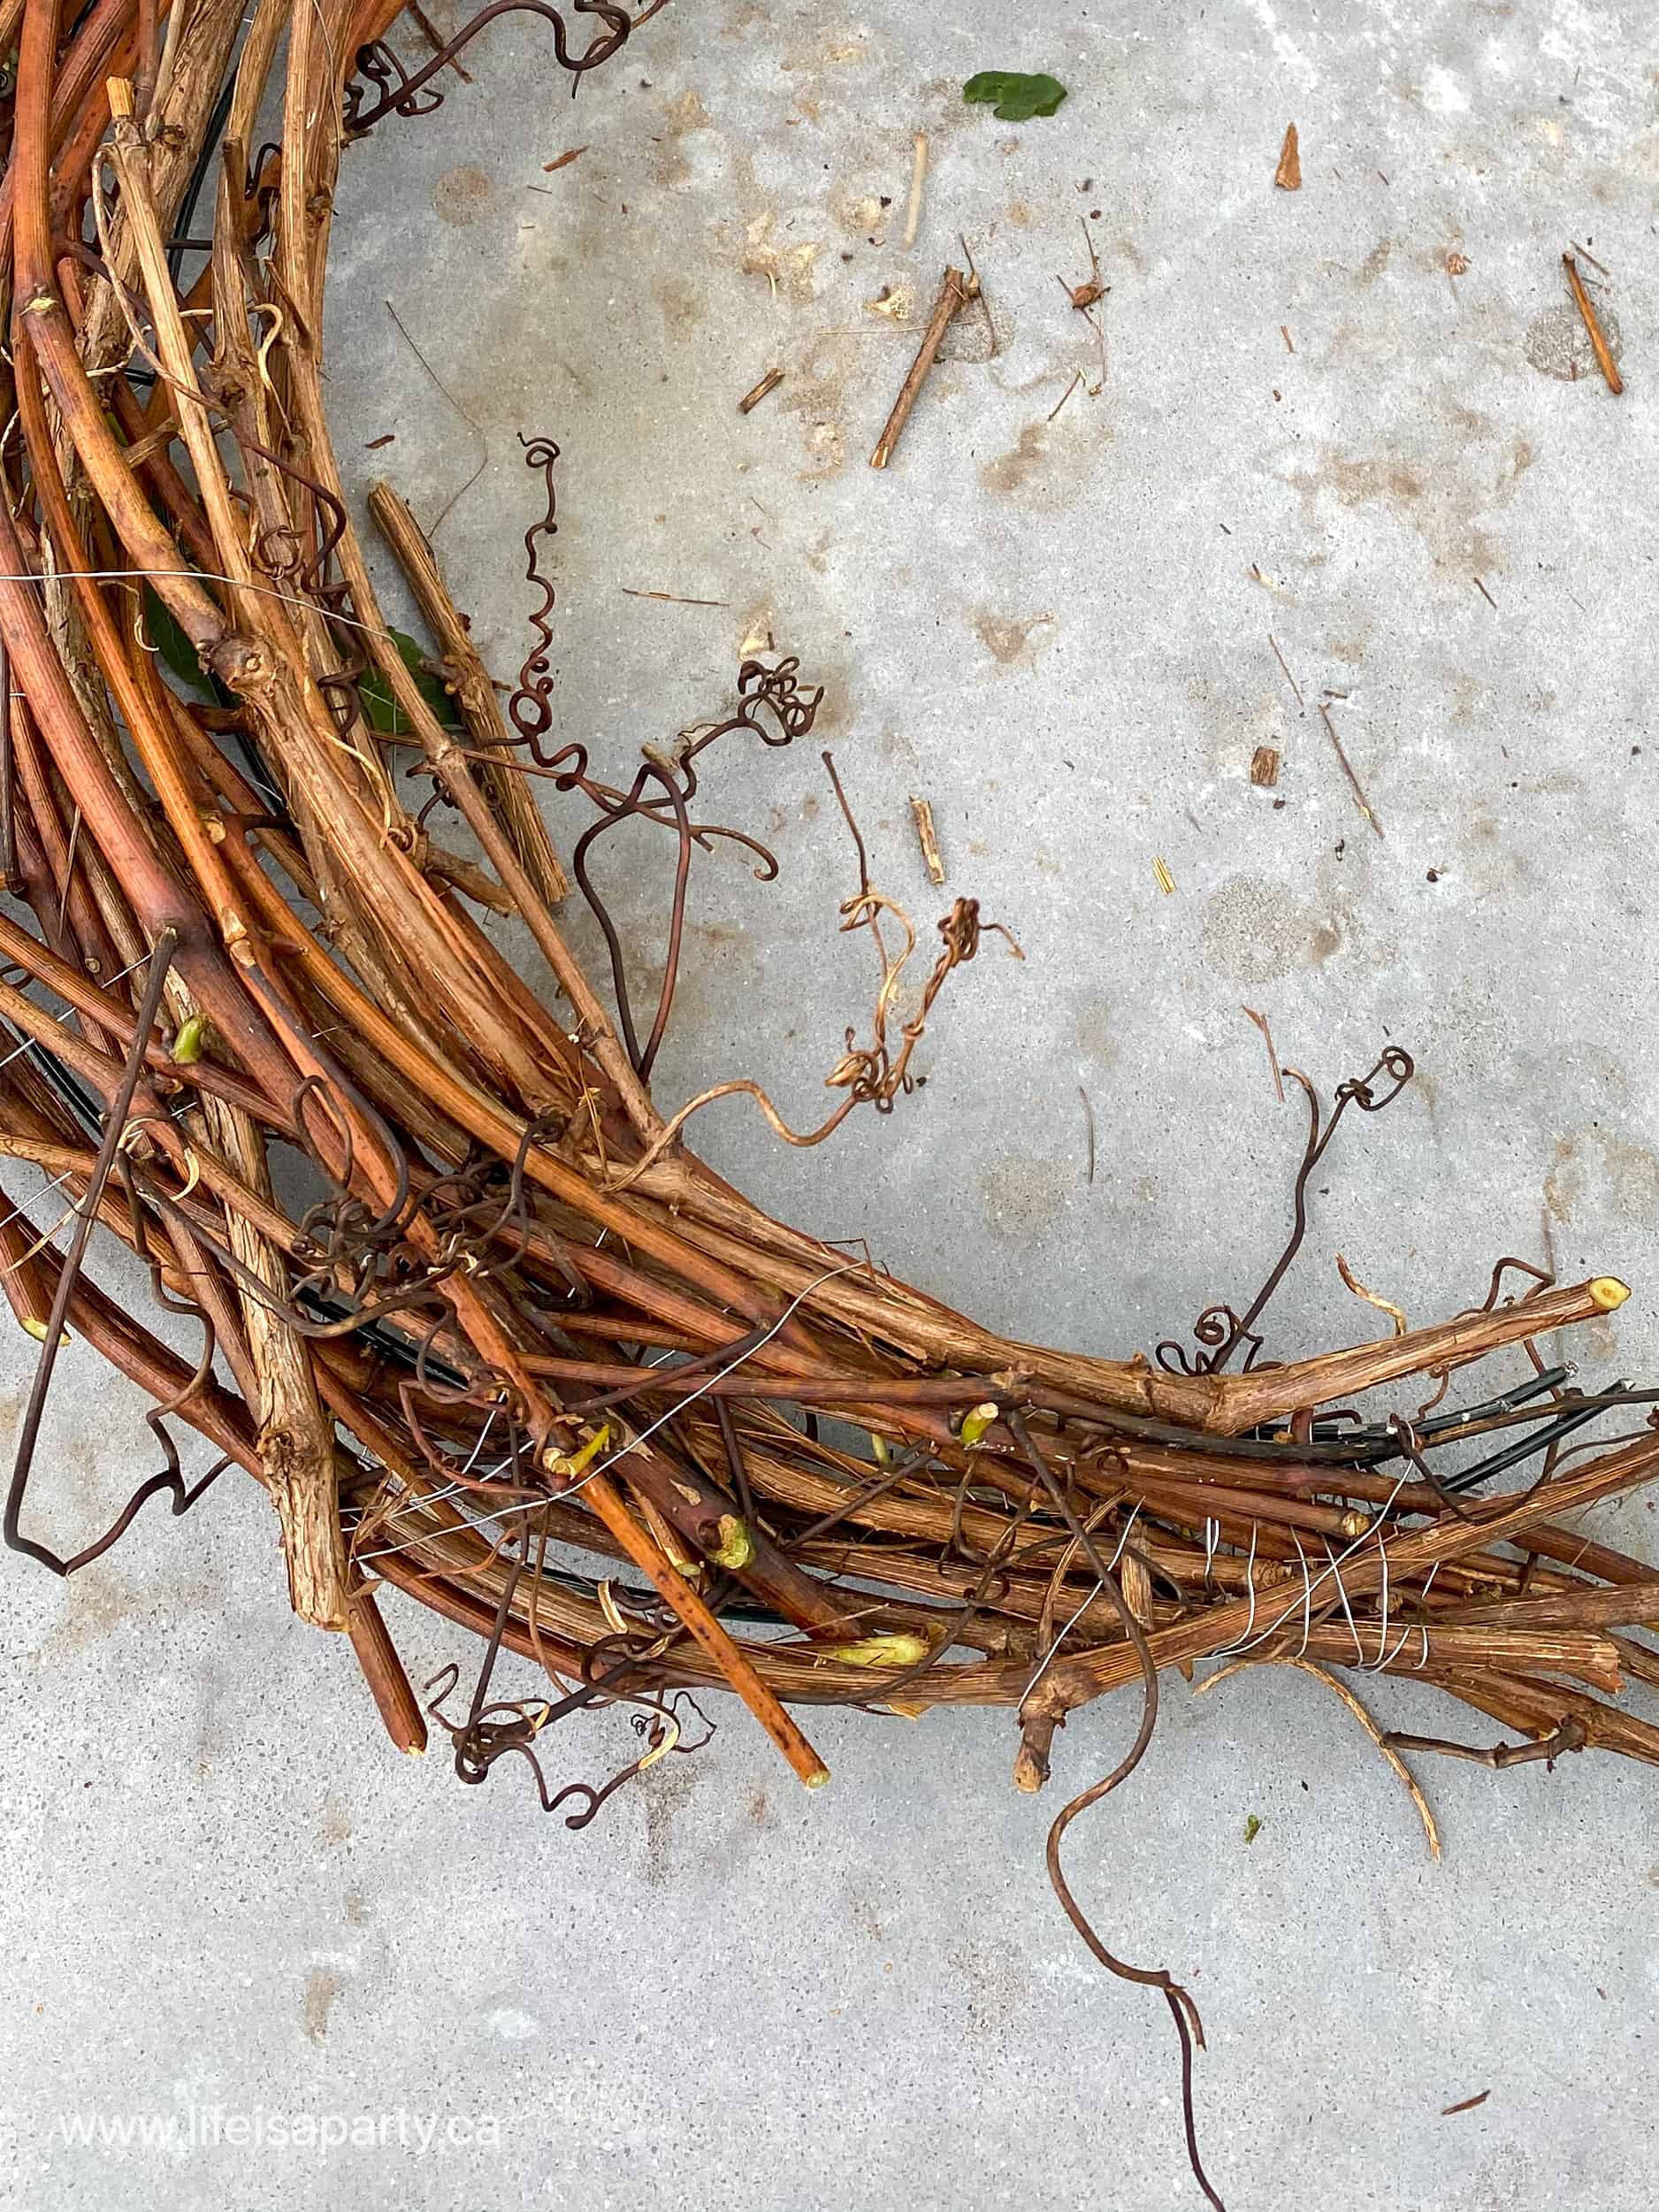
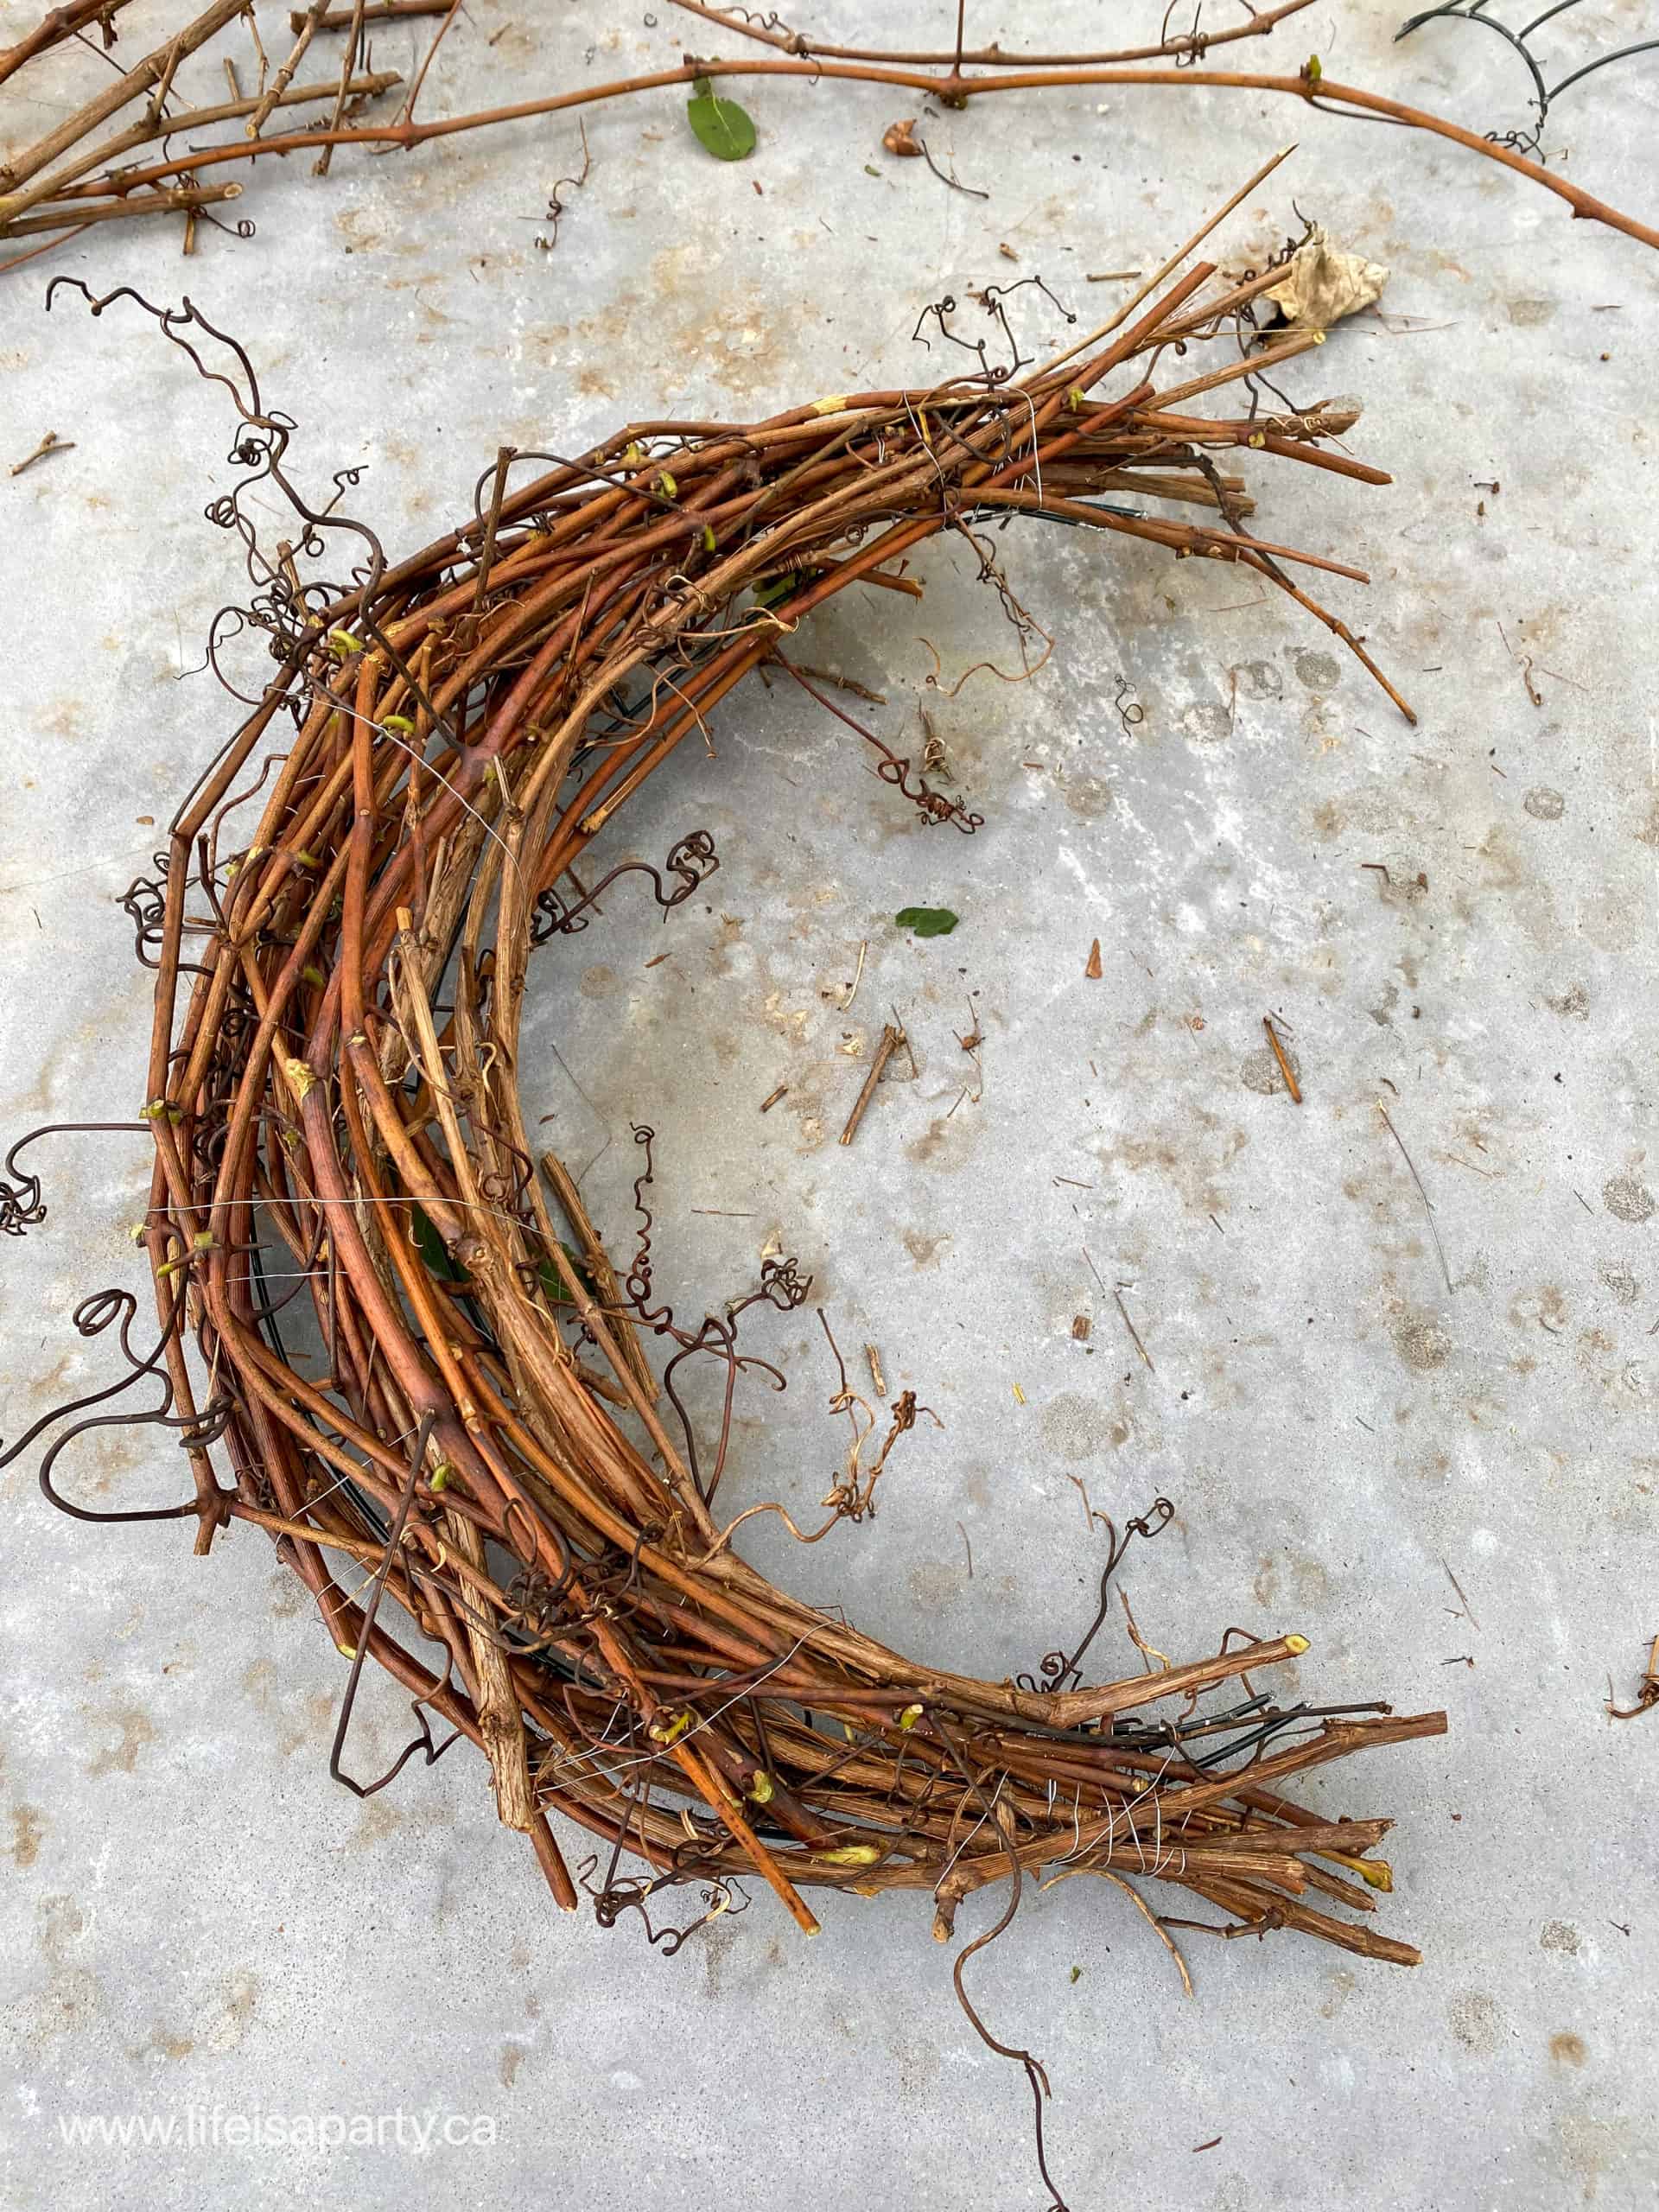
I started out making the grapevine wreath.  I used a dollar store metal wreath frame as the base.  Begin by using some wire cutters to remove a section of the wreath.  I cut out two sections of my wreath and drew the loose ends together on each side to create the crescent moon shape.  Grape vine grows wild near where I live, so I gathered some and used wire to attach it to the wreath base.

how to make a crescent moon wreath
moon shaped wreath diy
how to make a crescent moon shaped wreath
diy moon shaped wreath

I wanted by crescent moon wreath to be pink so I used some spray paint, pink ballet slipper, to paint it.  Be sure to give it a few coats, and flip it over to get into all the nooks and crannies.  Once it's dry, it's ready to decorate.

The Mushrooms

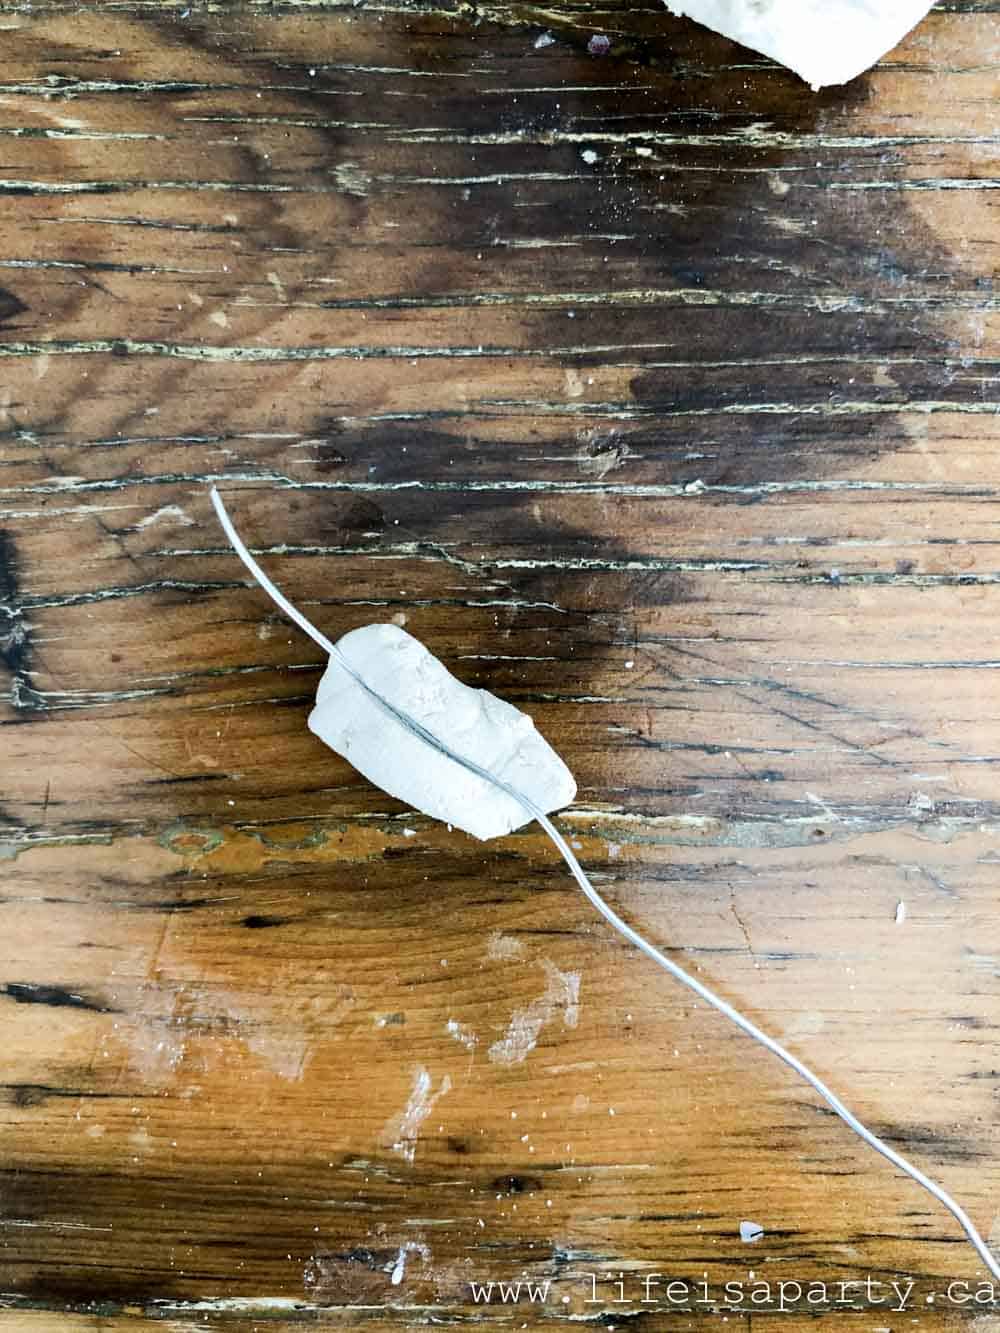
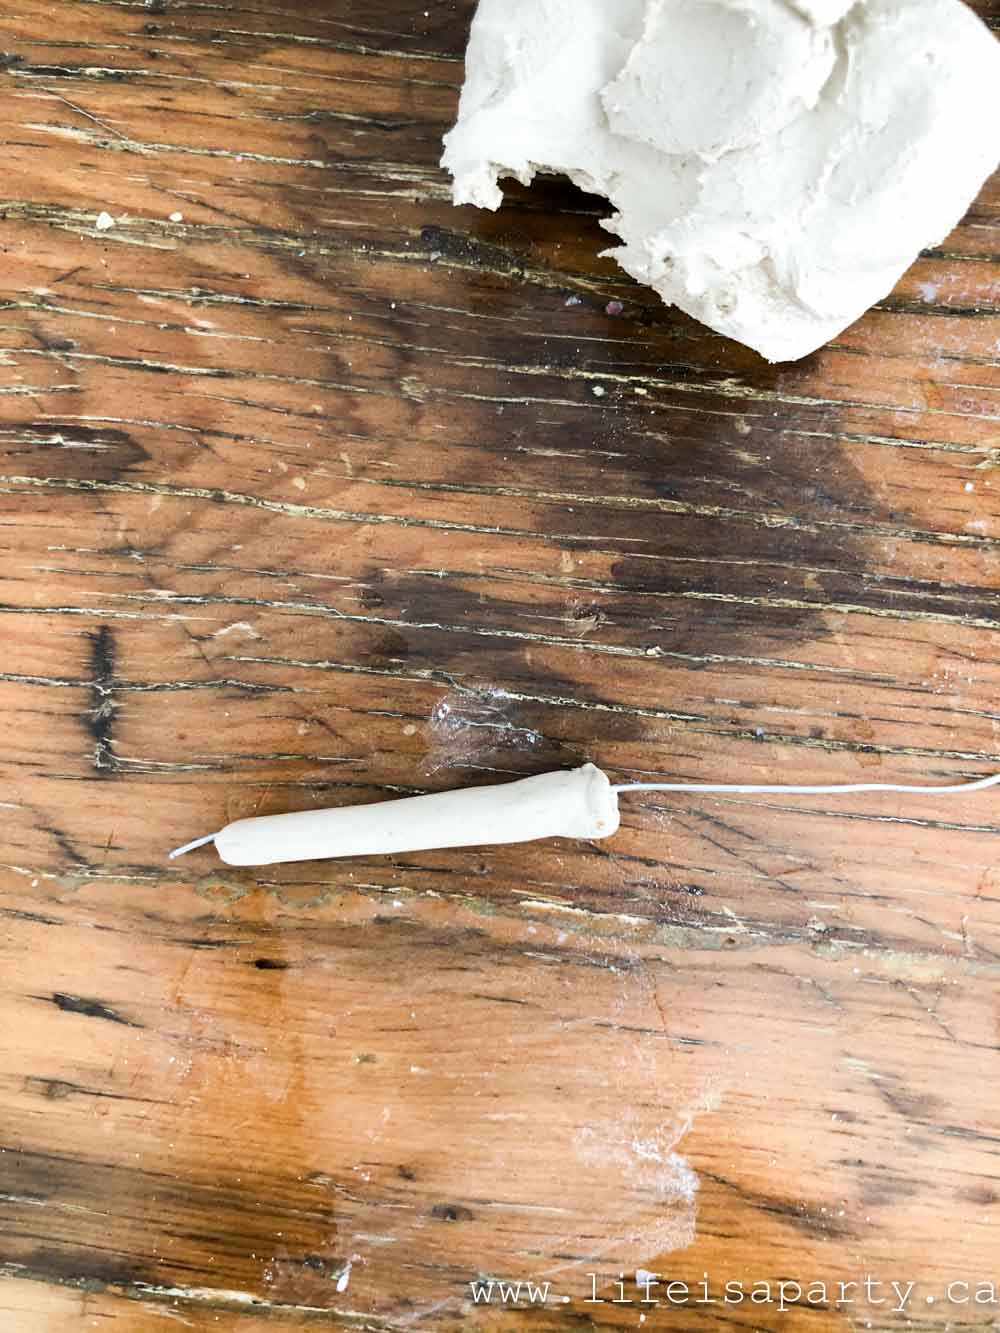
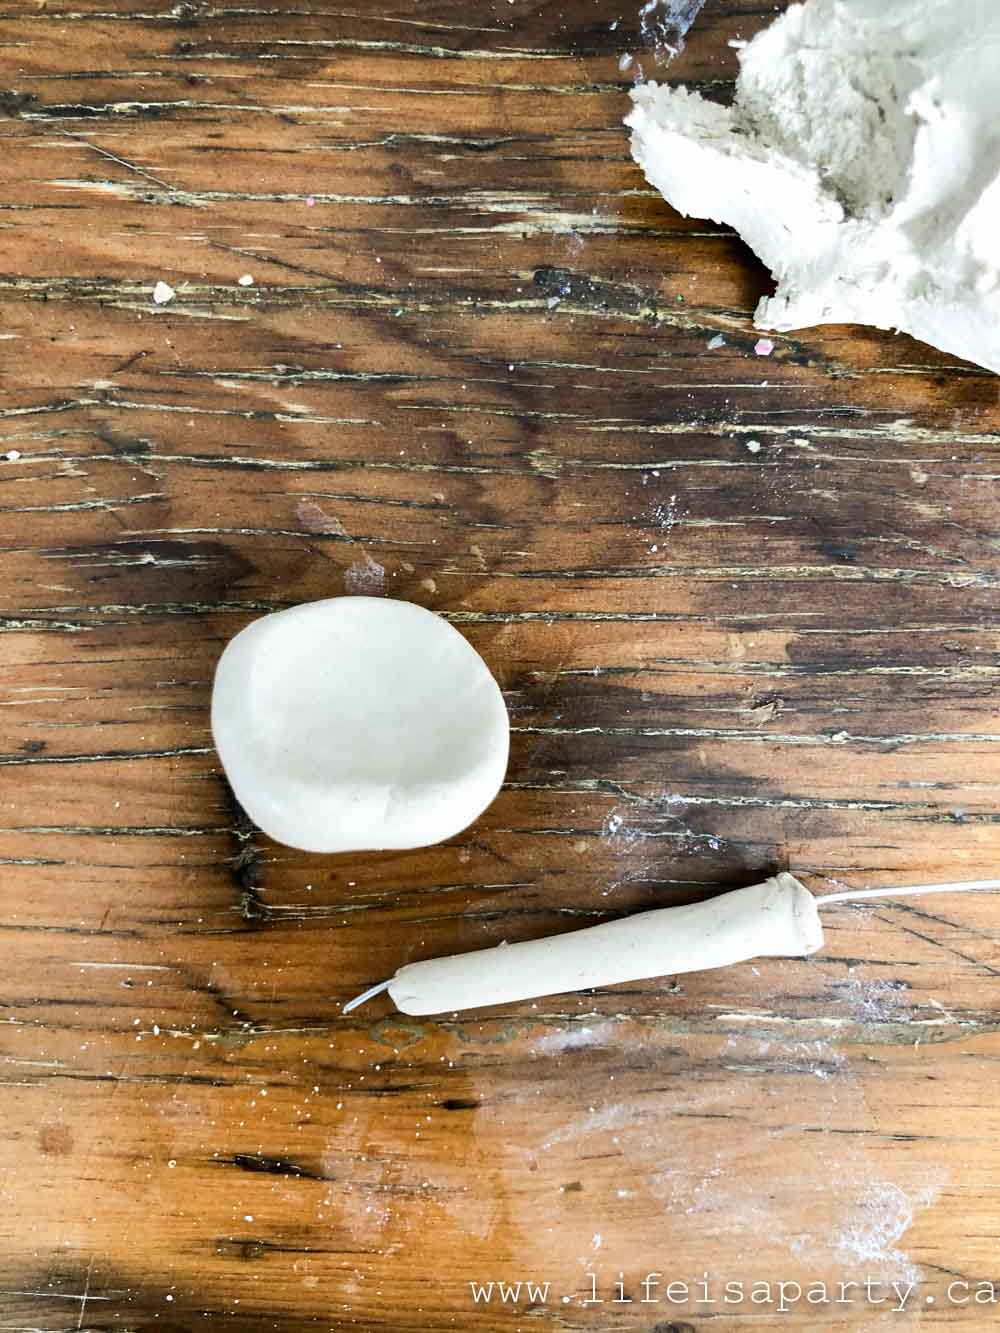
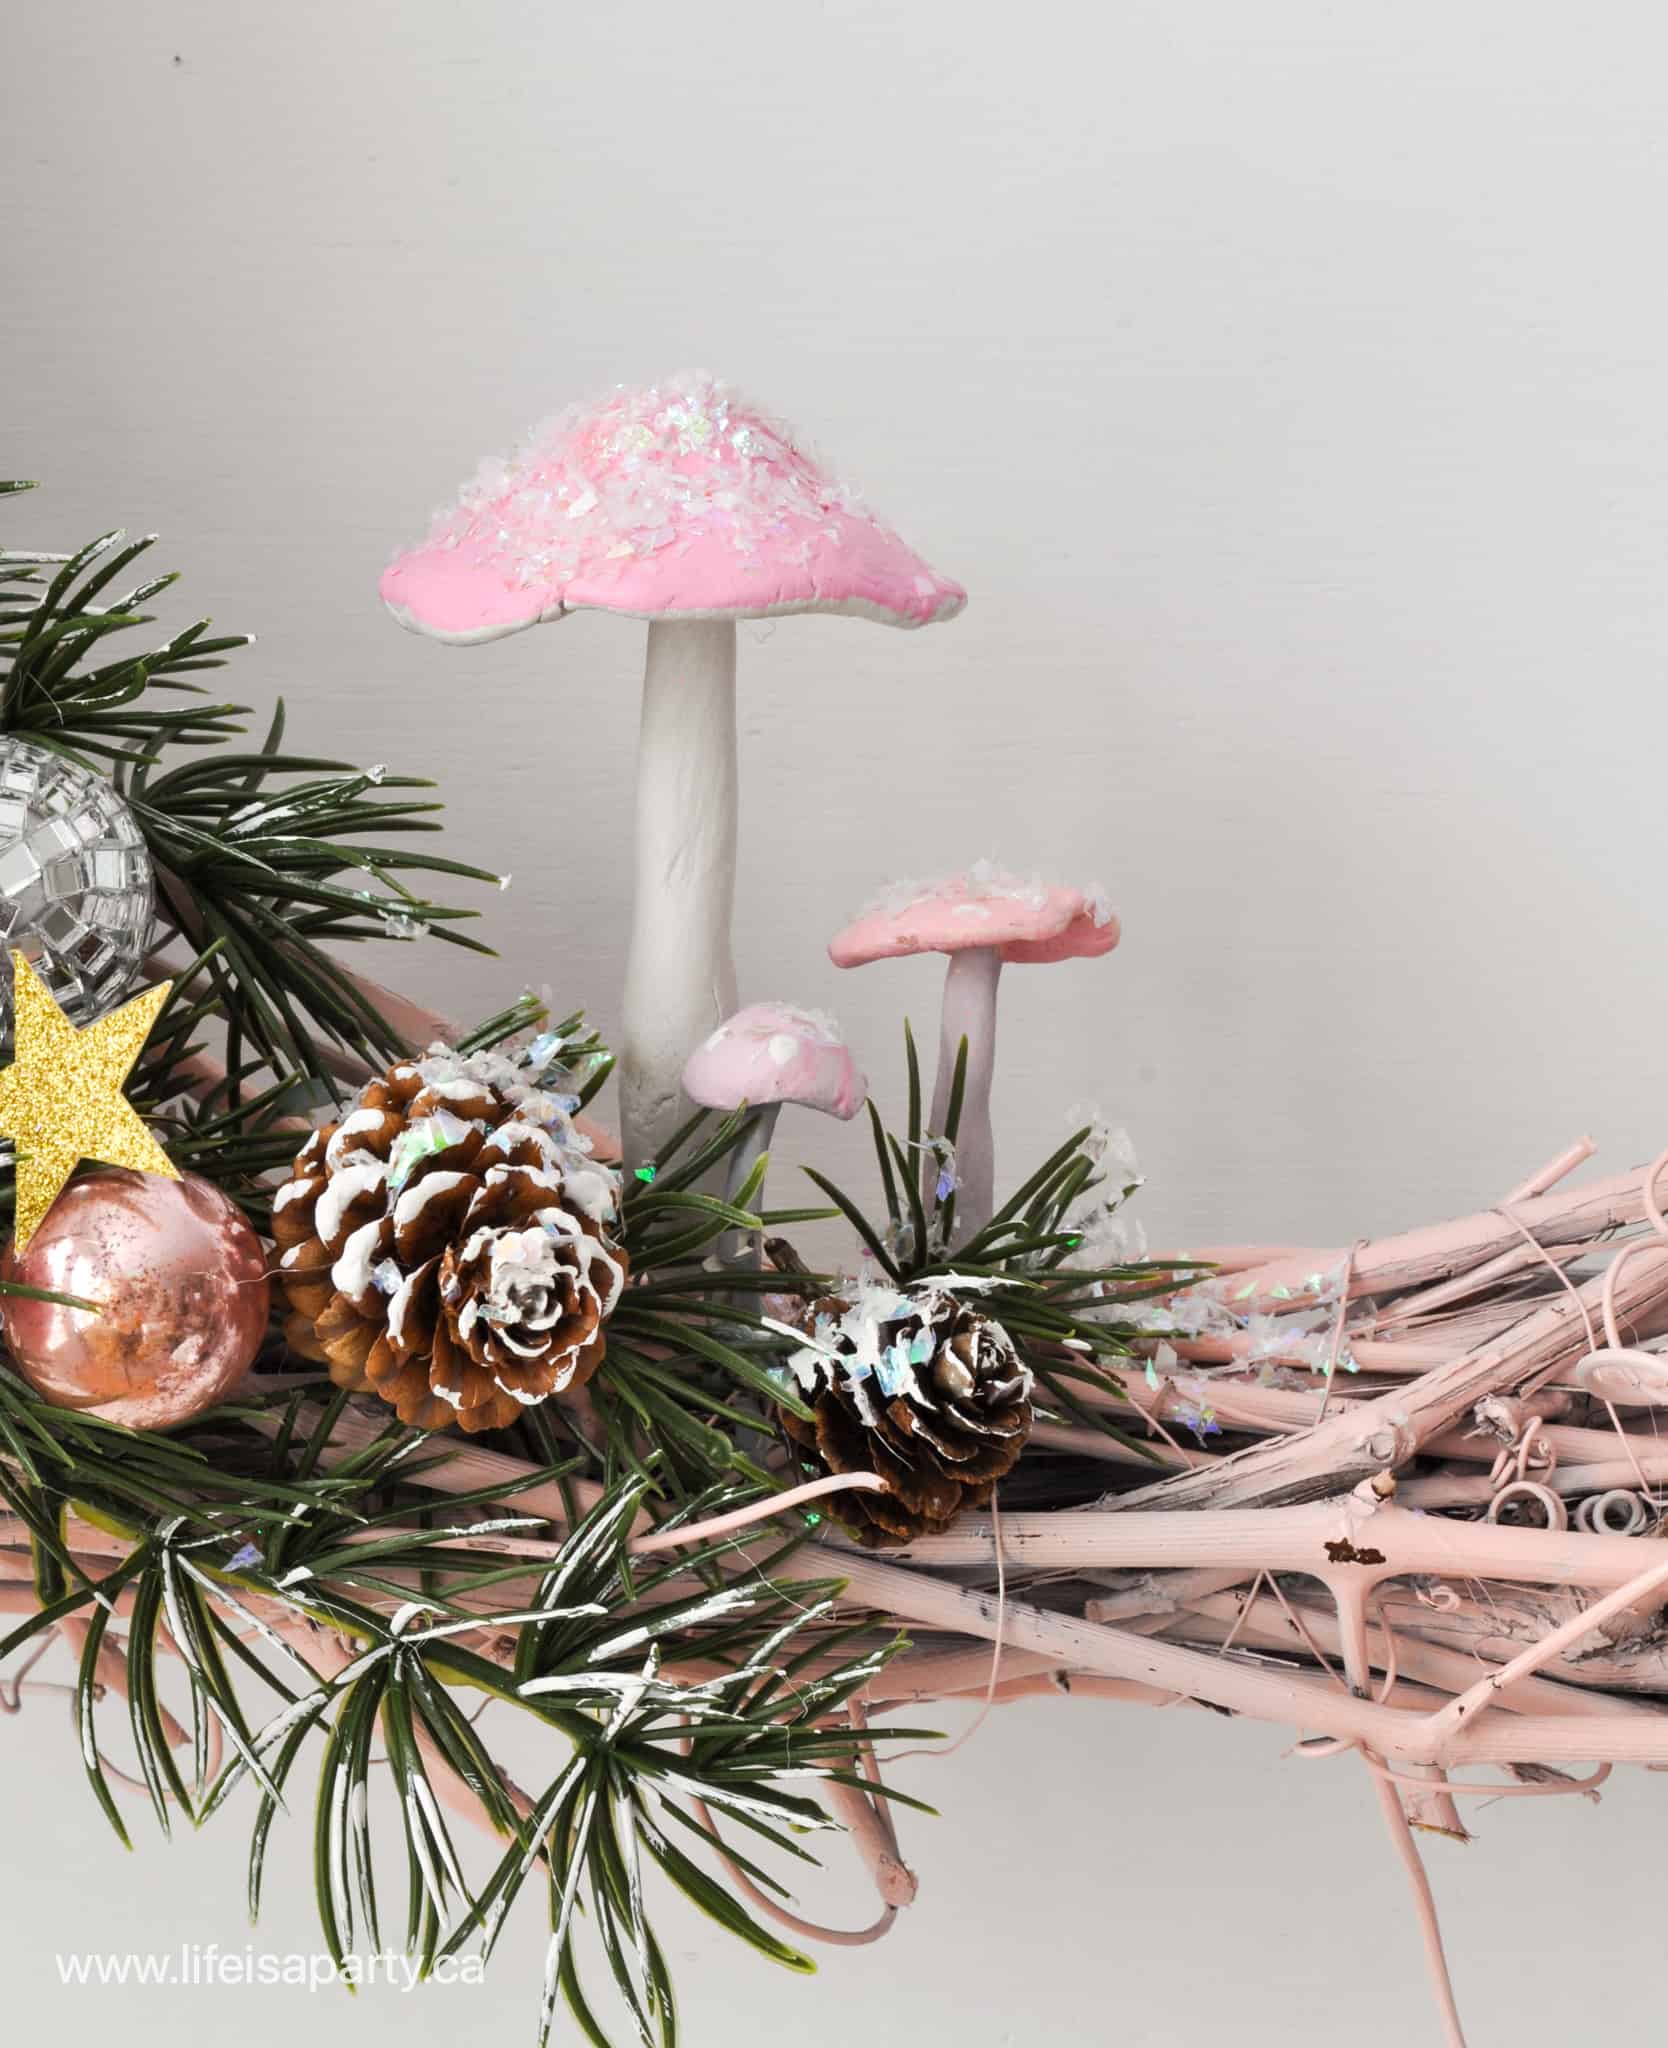
I made the mushrooms out of air dry clay.  Start with a piece of wire to be the mushroom stem, and roll the clay around it.  Form a mushroom cap separately, and then push it on the wet clay stem.  Use a piece of styrofoam, and push the wire ends into it so they can dry.  After the air dry clay has fully harden, which usually takes overnight, you can paint them.  I used some craft paints in white, pink, and grey.  Traditional red would be really cute for a red wreath too. 

diy clay mushroom
how to make a clay mushroom
easy clay mushrooms
diy air dry clay mushroom
diy clay mushrooms
DIY Christmas mushrooms

Decorating The Moon Shaped Christmas Wreath

Start by hot gluing some greens on the grapevine.  Next arrange your ornaments and pom poms on top.  I picked up various yarns to make my pom poms in two different sizes.  To make them multicoloured, like I did, just add some different colours as you make them.  Once you're happy with your arrangement it's time to attach them.  I used hot glue to attach the pom poms, and pinecones.  Some of the vintage pink Christmas ornaments I didn't want to permanently attach to the wreath, so I used some wire to attach them.  This will allow me to remove them without any damage, if I want to use them differently another year.  I wanted the mushrooms to look as though they were growing out of the wreath, so I attached them in a cluster near the bottom, with some hot glue on the wire ends.

DIY moon shaped Christmas wreath
pink Christmas wreath

Stars

Stars were the perfect addition to the wreath, since they're great for Christmas, and go so well with the moon.  I used my Cricut to cut out some gold glitter paper -get my free Cricut cut pattern here.  After they were cut out, I hot glued some gold wire to the back.  This enables you to position the stars standing out from the wreath, as though they're floating and creates a really pretty 3D effect.  To attach them, just poke the wire in and secure at the back of the wreath.

Pink Christmas moon wreath

Snow

As a final touch, I used some white craft paint on the greens and pine cones to look like snow.  Then I added glue to the mushrooms, and pinecones and sprinkled them with some faux iridescent glittery snow.  This touch added a little magic.  

Christmas DIY mushrooms

The wreath is hung with some wire attached to the wire wreath base at the back.

DIY crescent moon shaped Christmas wreath

I love how this moon shaped Christmas wreath turned out and think it will be a really fun addition to my holiday decor.

Halloween Mantel Decor

Oct 13, 2021 · 4 Comments

Halloween Mantel

Halloween Mantel Decor: a moon shaped wreath, and flying black butterflies with lots of pumpkins and lanterns are perfect for Halloween.

Halloween Mantel
[feast_advanced_jump_to]

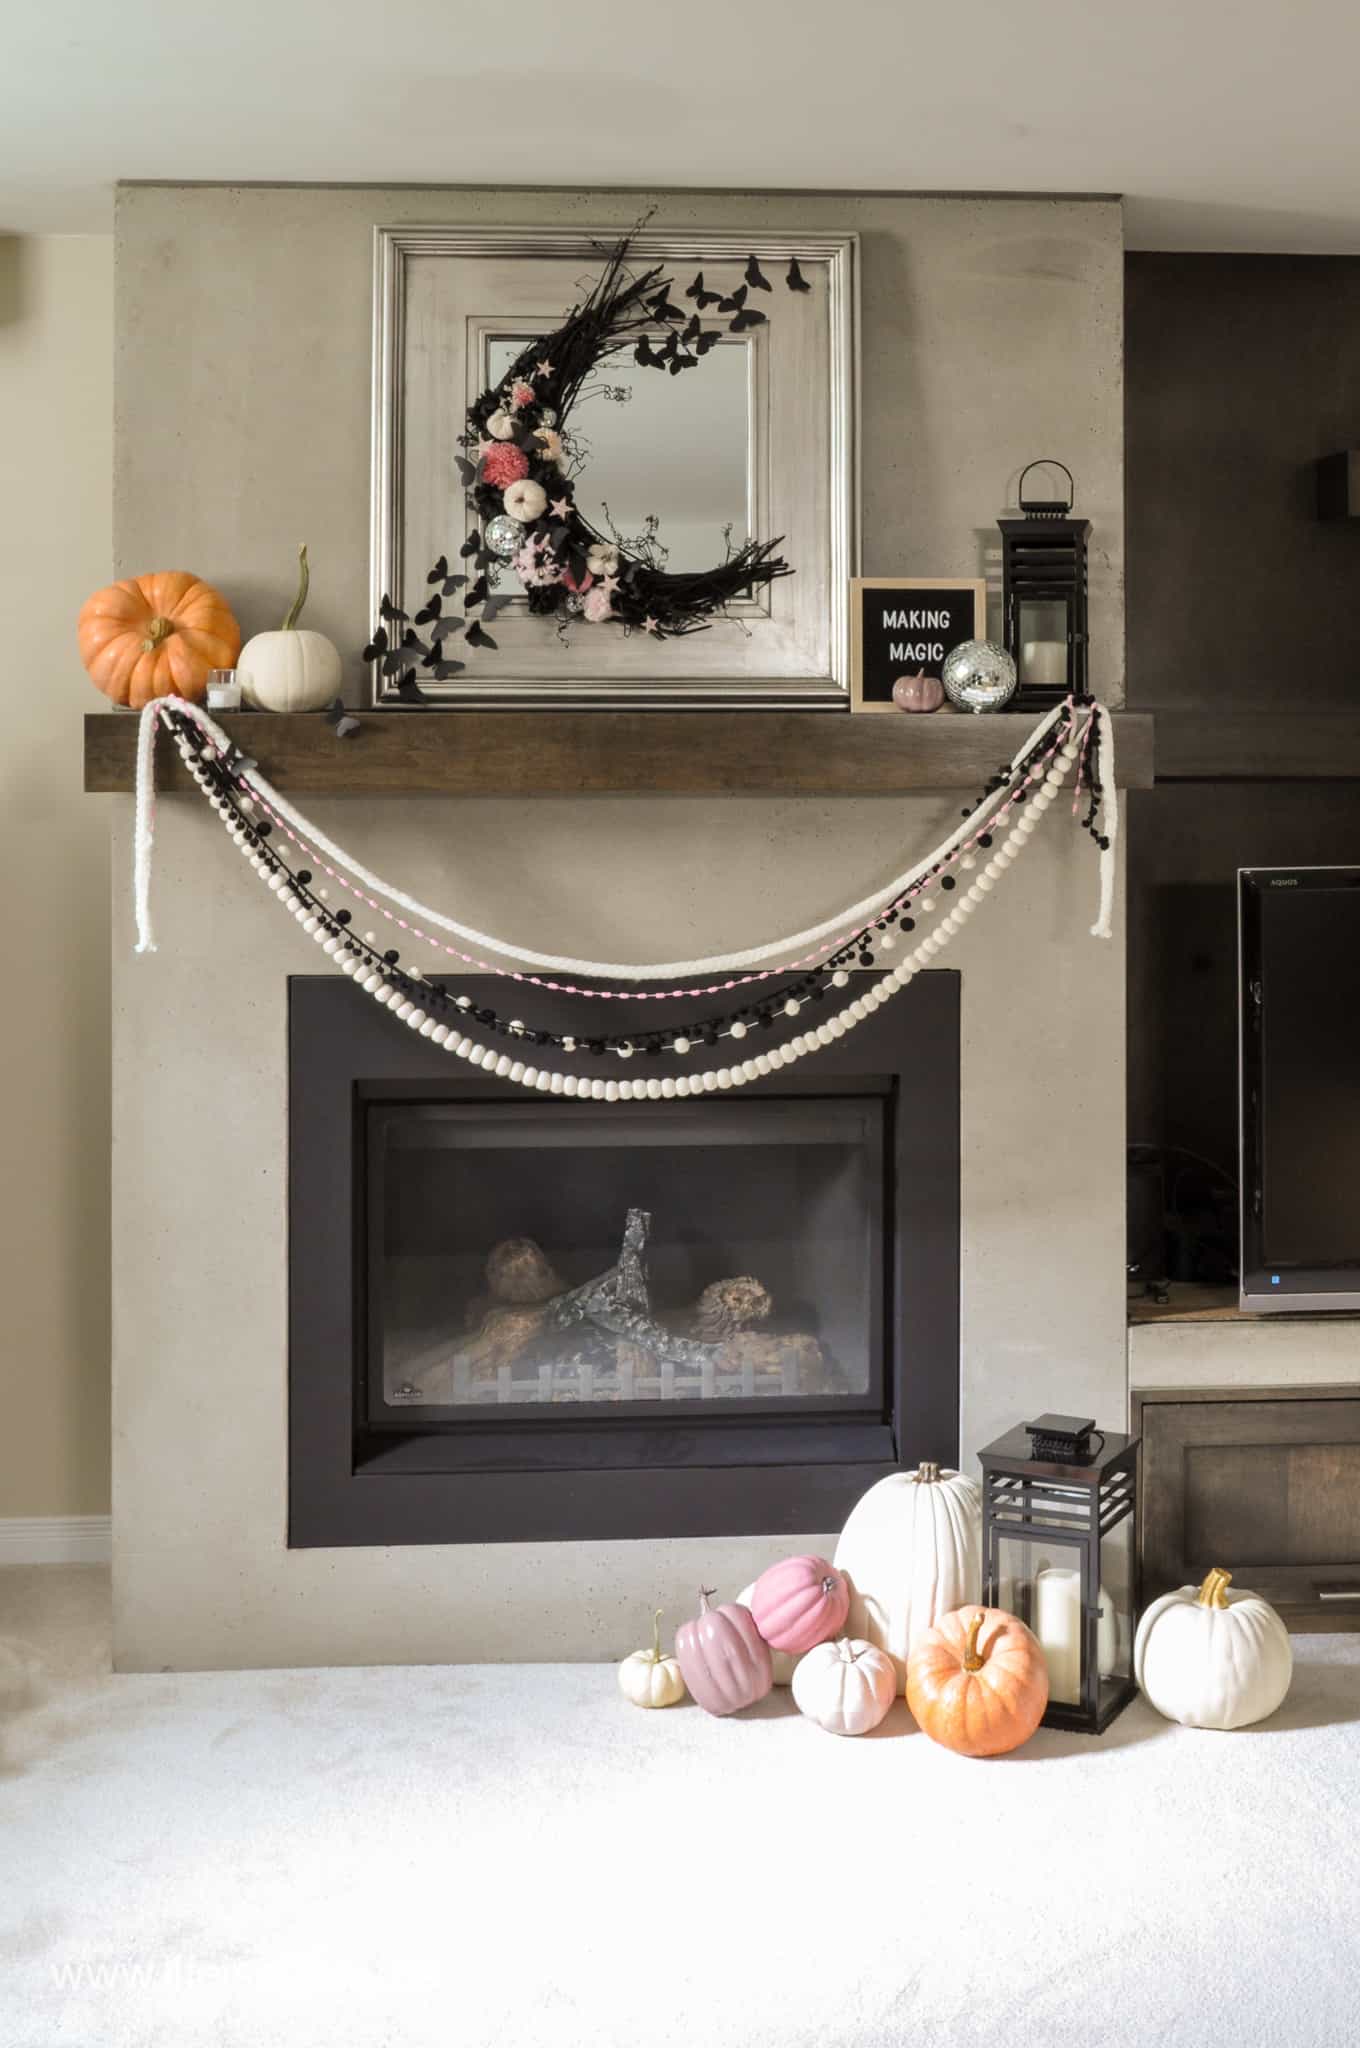
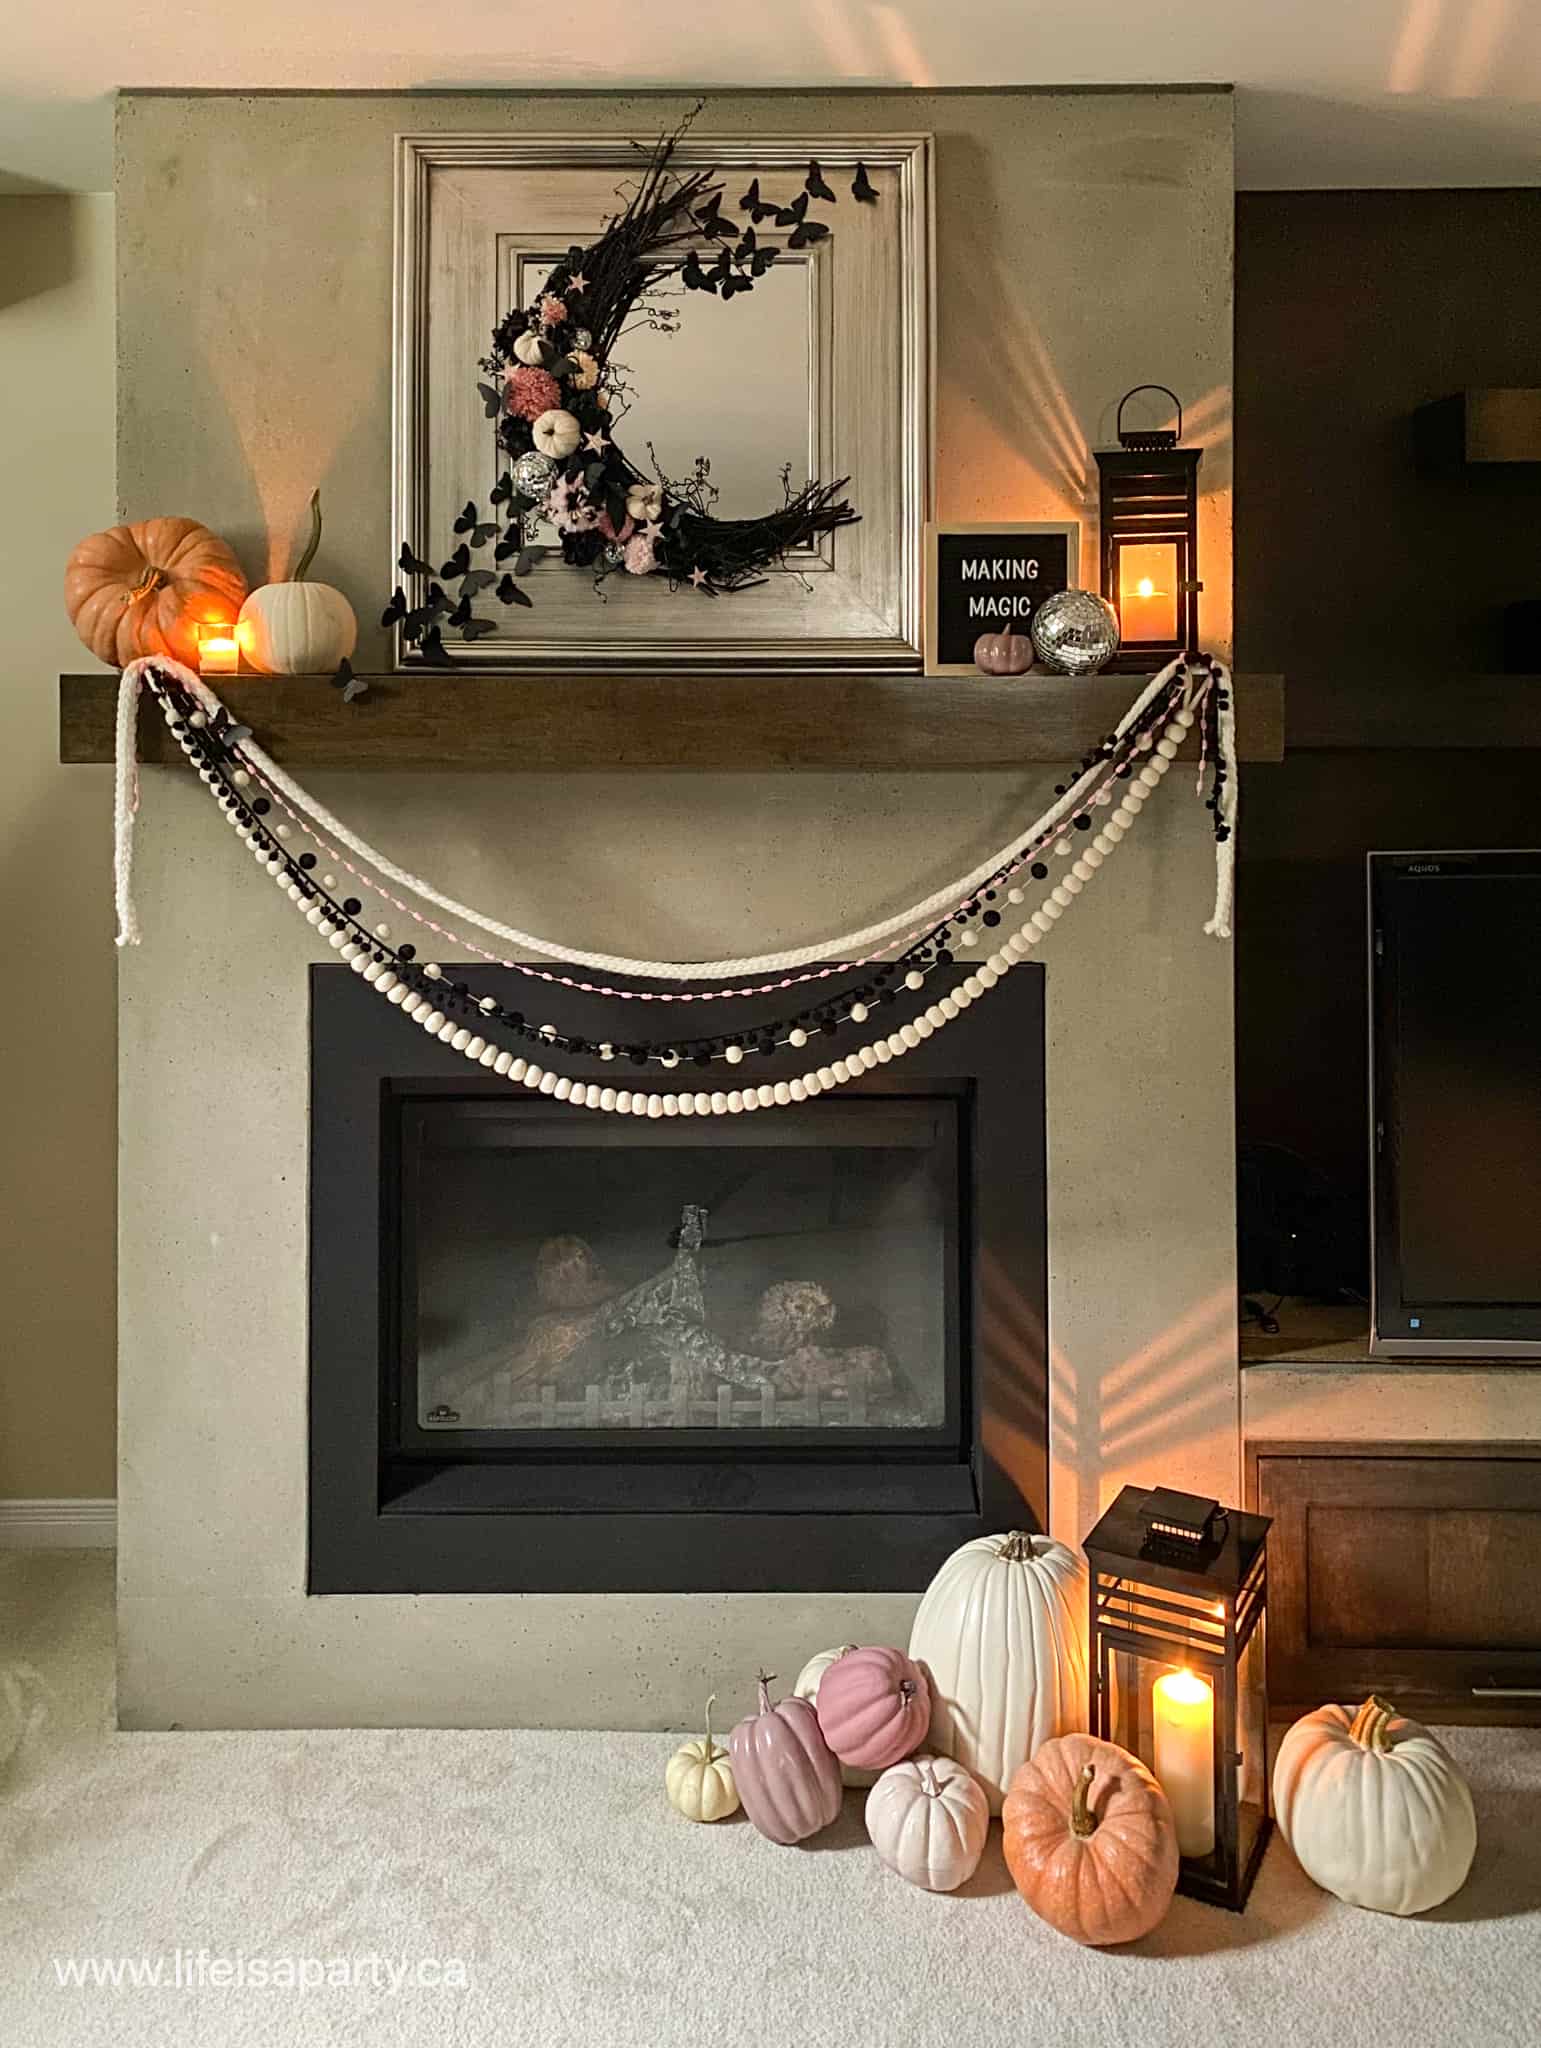
This Halloween I thought it would be fun to add some Halloween decor to the fireplace mantel. It's perfect for Halloween movie watching. And even though it's perfect for Halloween and a little spooky, it's also really beautiful too. If you're looking for that balance of spooky decorations but still really beautiful, here's some inspiration for you and some Halloween mantel ideas you'll love.

Your fireplace is the perfect spot to add some indoor Halloween decorations to your fall décor. Add a sprinkle of the holiday season living room style with your favorite Halloween mantel decorations. The first things we started with to decorate the top of the mantel was making and hanging this beautiful Halloween wreath.

Moon Wreath

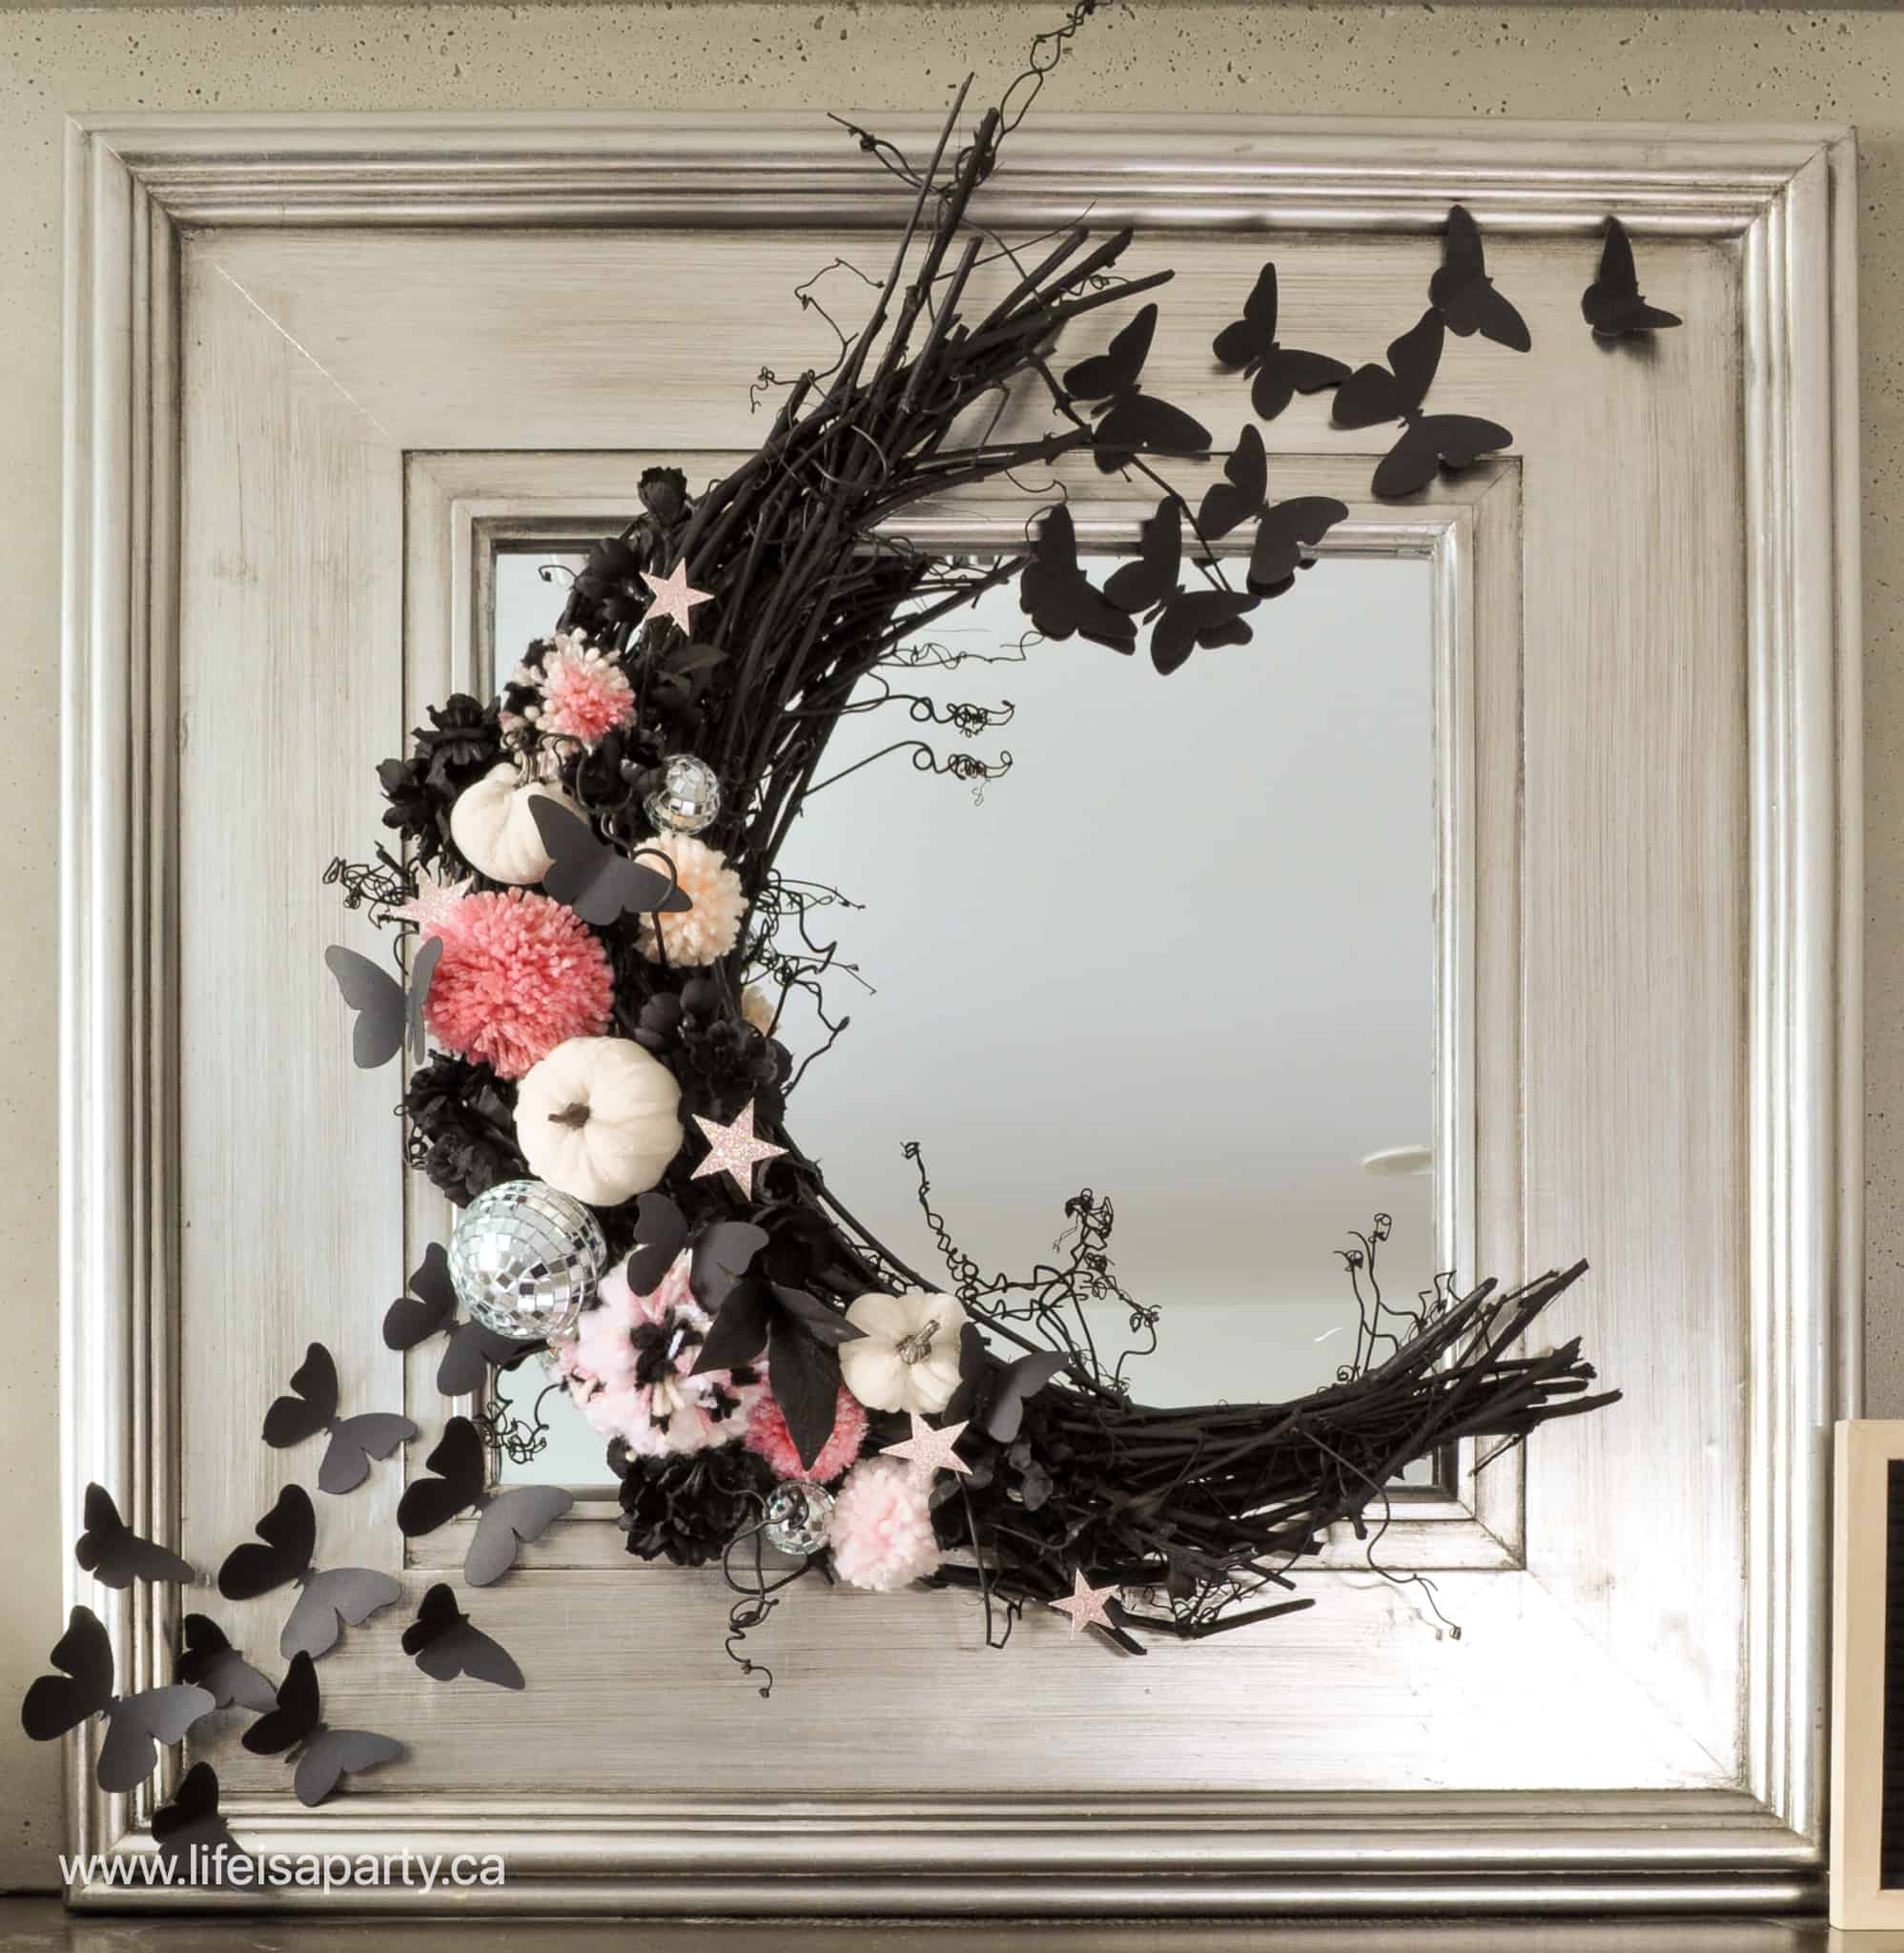
The wreath is a fun DIY. You can read all about how I made it from a dollar store round wreath form, and transformed it into this fun moon wreath for Halloween.  Check out the full tutorial to make the Halloween moon wreath here. This new wreath makes the perfect focal point. I had so much fun making it, it's truly one of my very favorite holiday DIYs ever.

Moon Shaped Halloween Wreath

The wreath set the colour scheme for all our Halloween mantel decor ideas. I used black, with some pink, peach, and white for a scary vibe.

To hang the wreath I used a simple 3M hook attached right to the mirror. Look for one that holds the appropriate about of weight for your project.

Black Butterflies

When I made the wreath, I added some black paper butterflies for a spooky look, and decided to cut out some extra ones with my Cricut, to decorate the mantel with as the perfect finishing touch to the wreath. You can find my free black butterfly cut file for cricut here. I attached the butterflies to the mirror using some scotch tape, and was sure to fold the wings outward to create a more 3D effect. Be sure to group the butterflies so that they're all flying at about the same angle in the same direction for the best look.

I really like the black butterflies, but if you prefer you could use some black spooky bats here instead. Pick up some dark bats, or cut them out with your Cricut machine, and attach the paper bats in same way I have attached the butterflies. Another fun option would be some cute creepy spiders and spider webs.

Halloween Mantel in Black and Pink

Garland

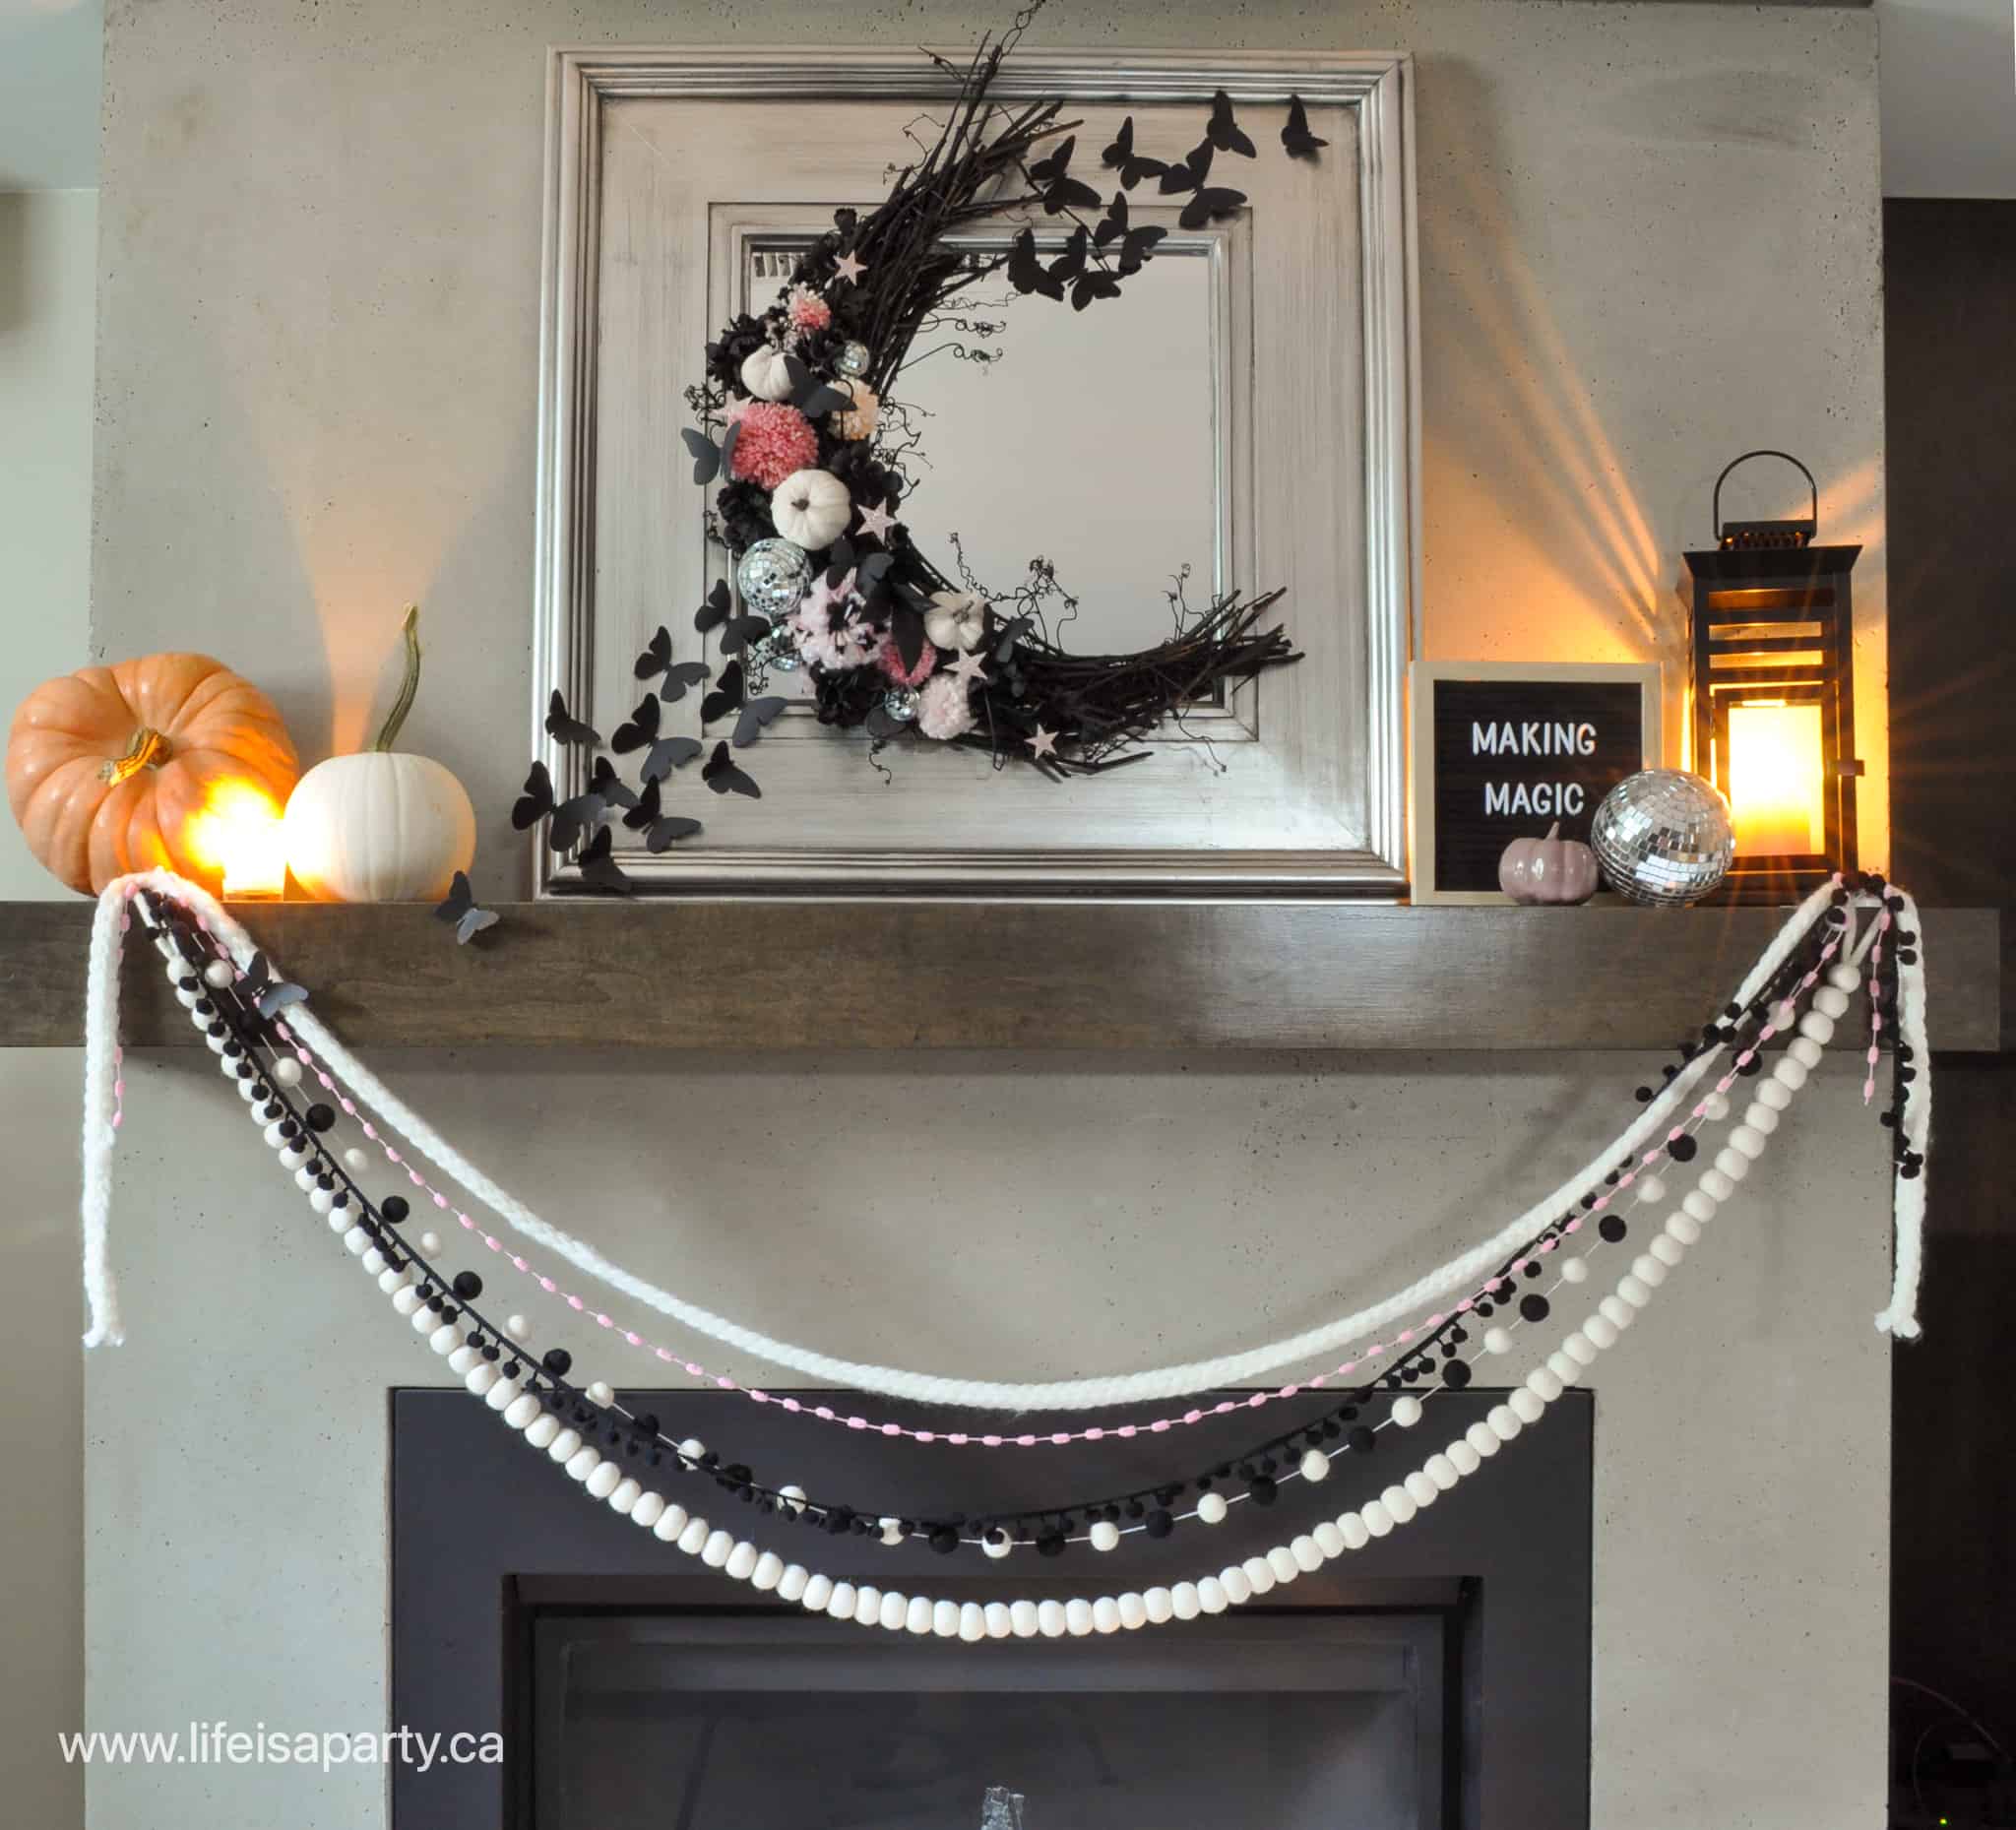
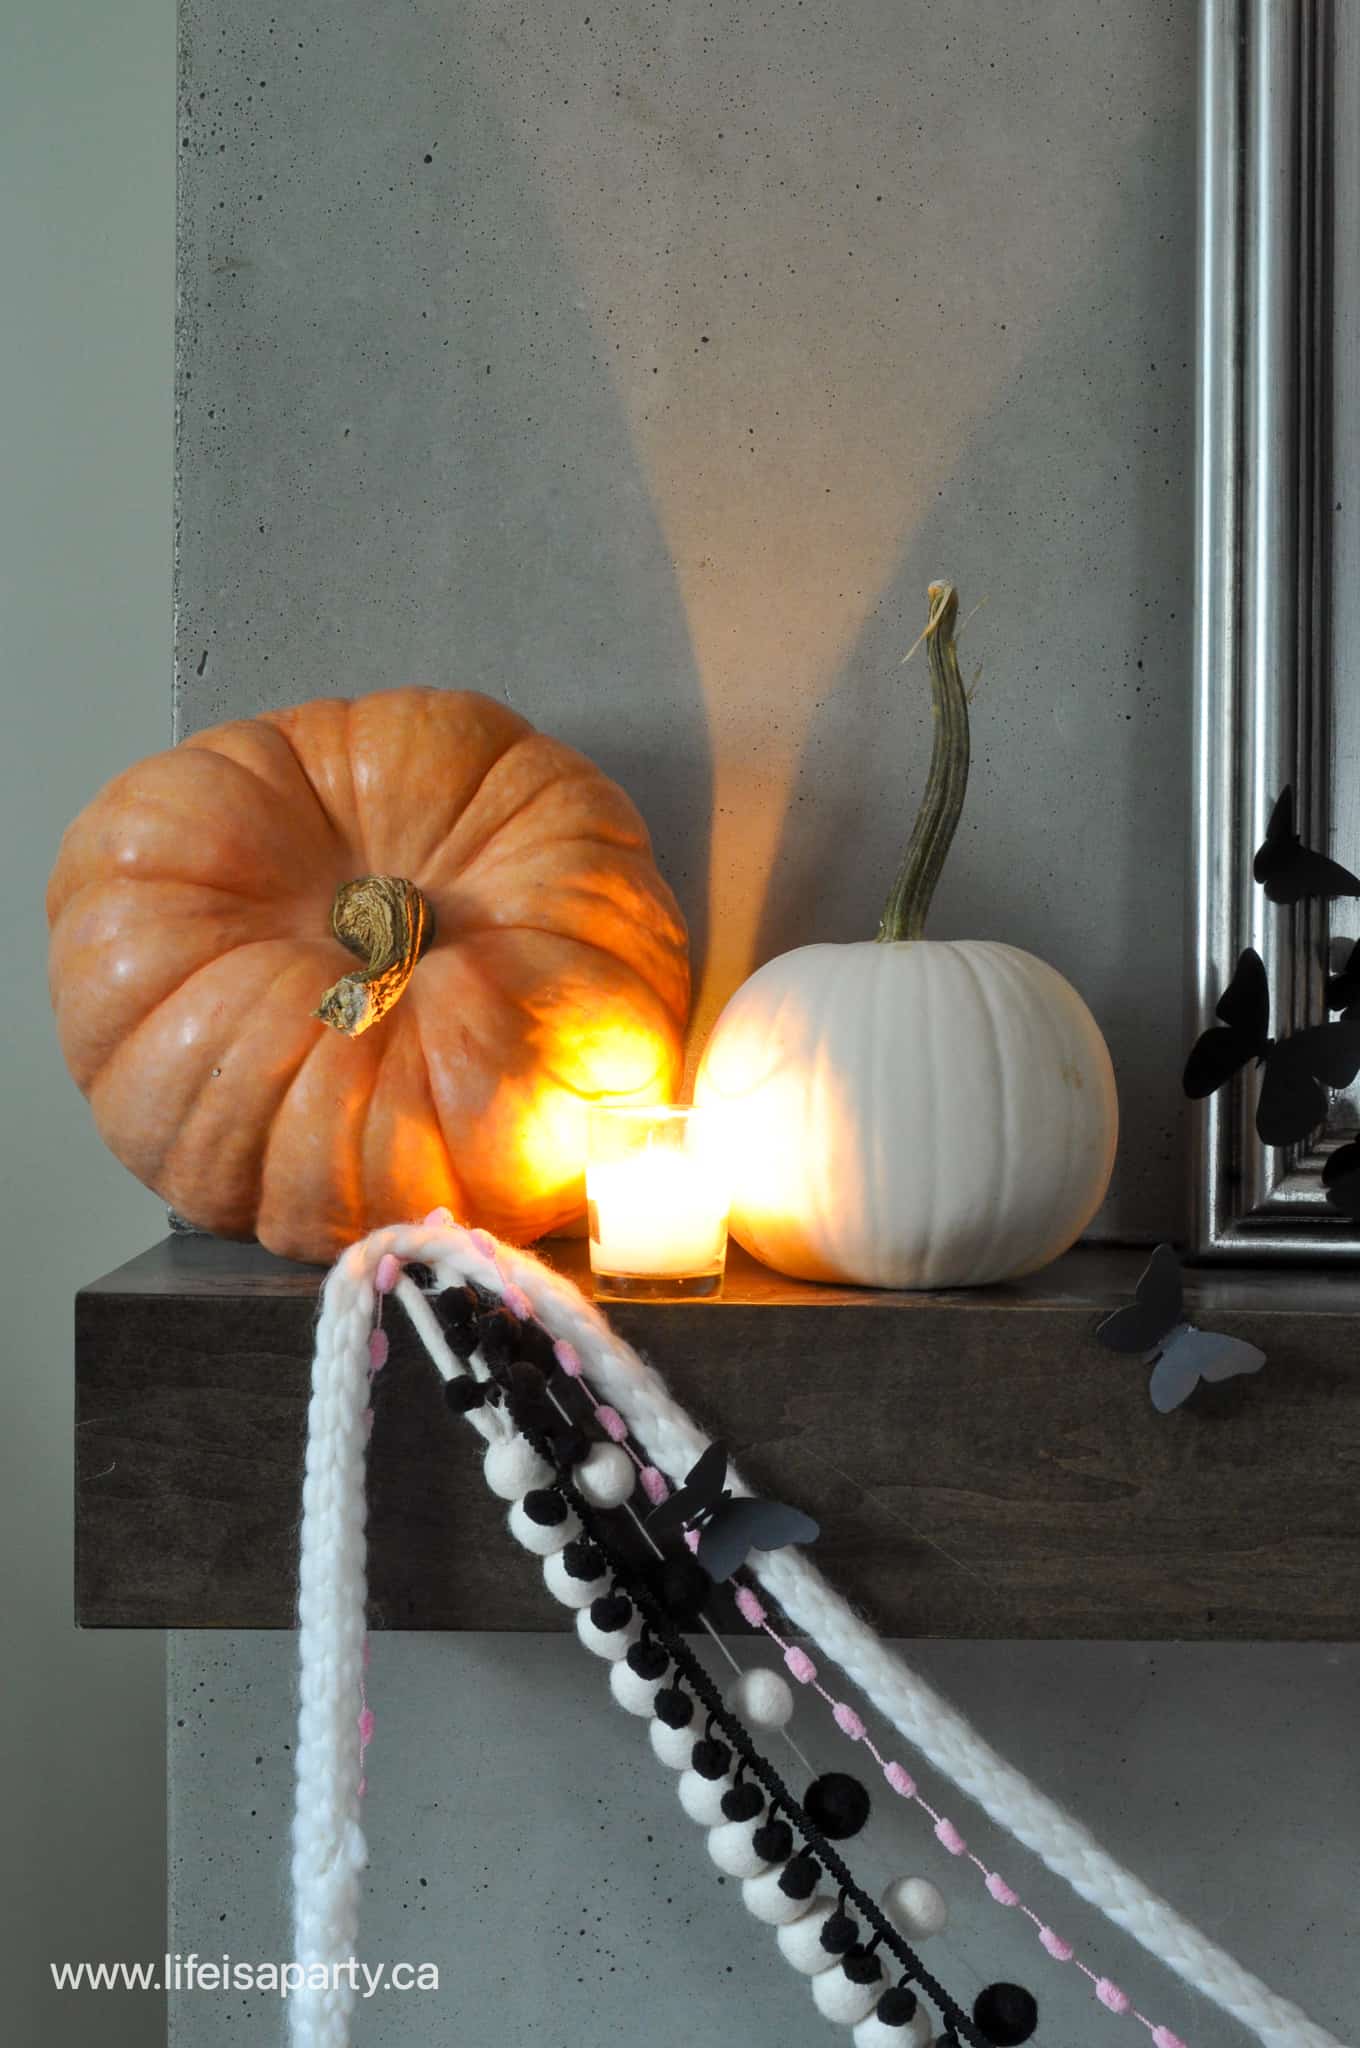
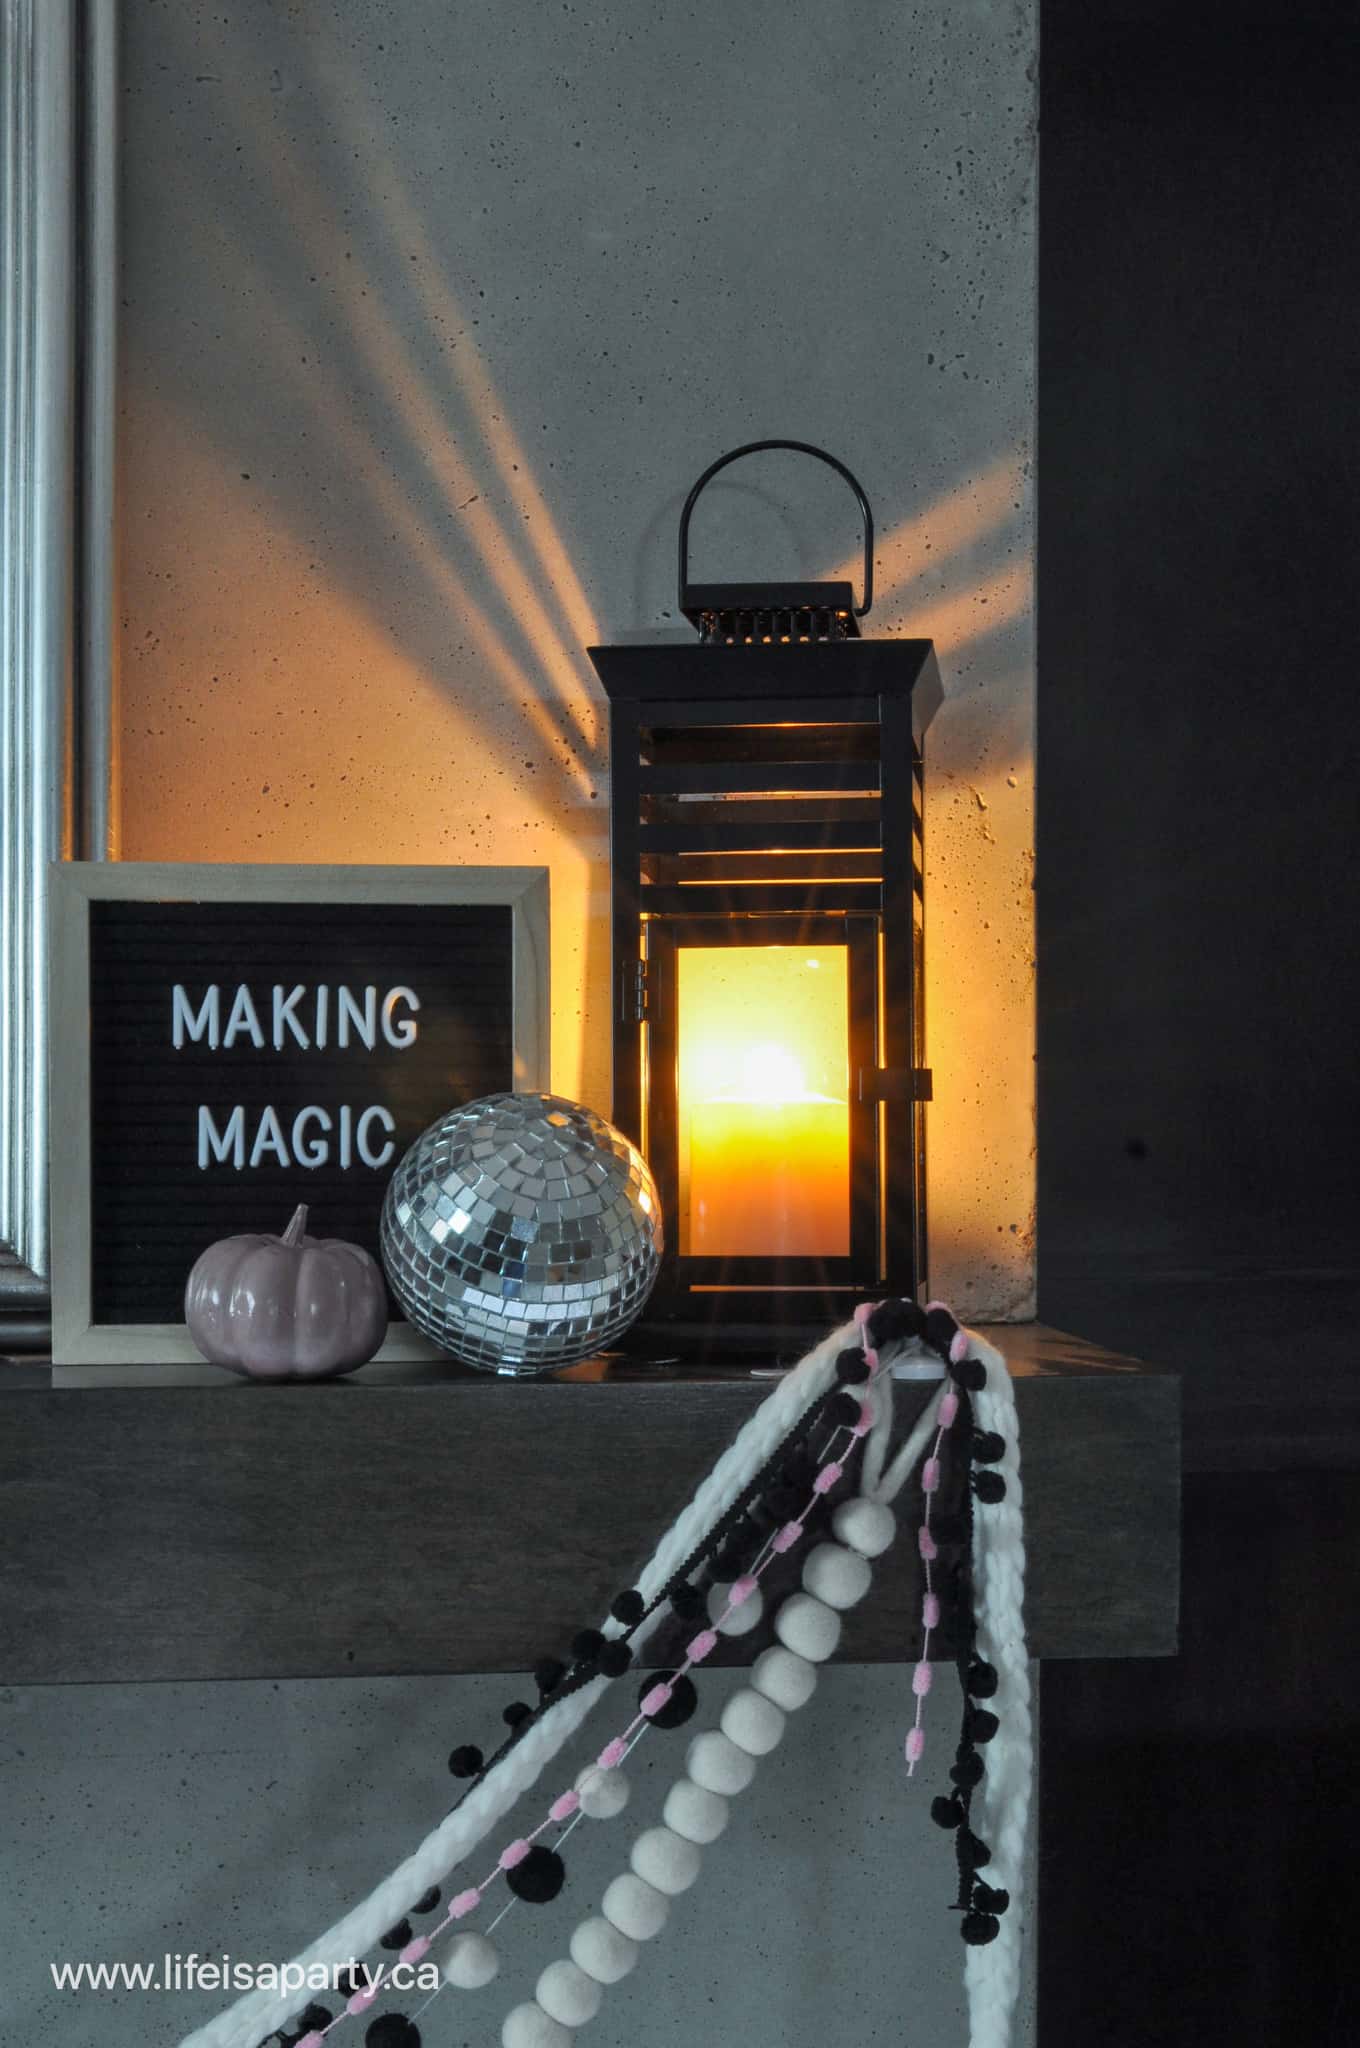
I love using a garland on a fireplace. To create these Halloween garlands, I hung a few different pieces of yarn, black lace, fringe, pom poms, and felt ball garland in black and white, with one strand of pink pom pom yarn. It was really simple to hang them with a couple command hooks. The best part about this garland is it's not specially Halloween. Use the neutral ones any time of year, or raid your ribbon or yarn basket. Layering different textures in the garland helps create a cozy home feel, even for our spooky mantel.

Pink Halloween Decor

Pumpkins, Pumpkins, and More Pumpkins

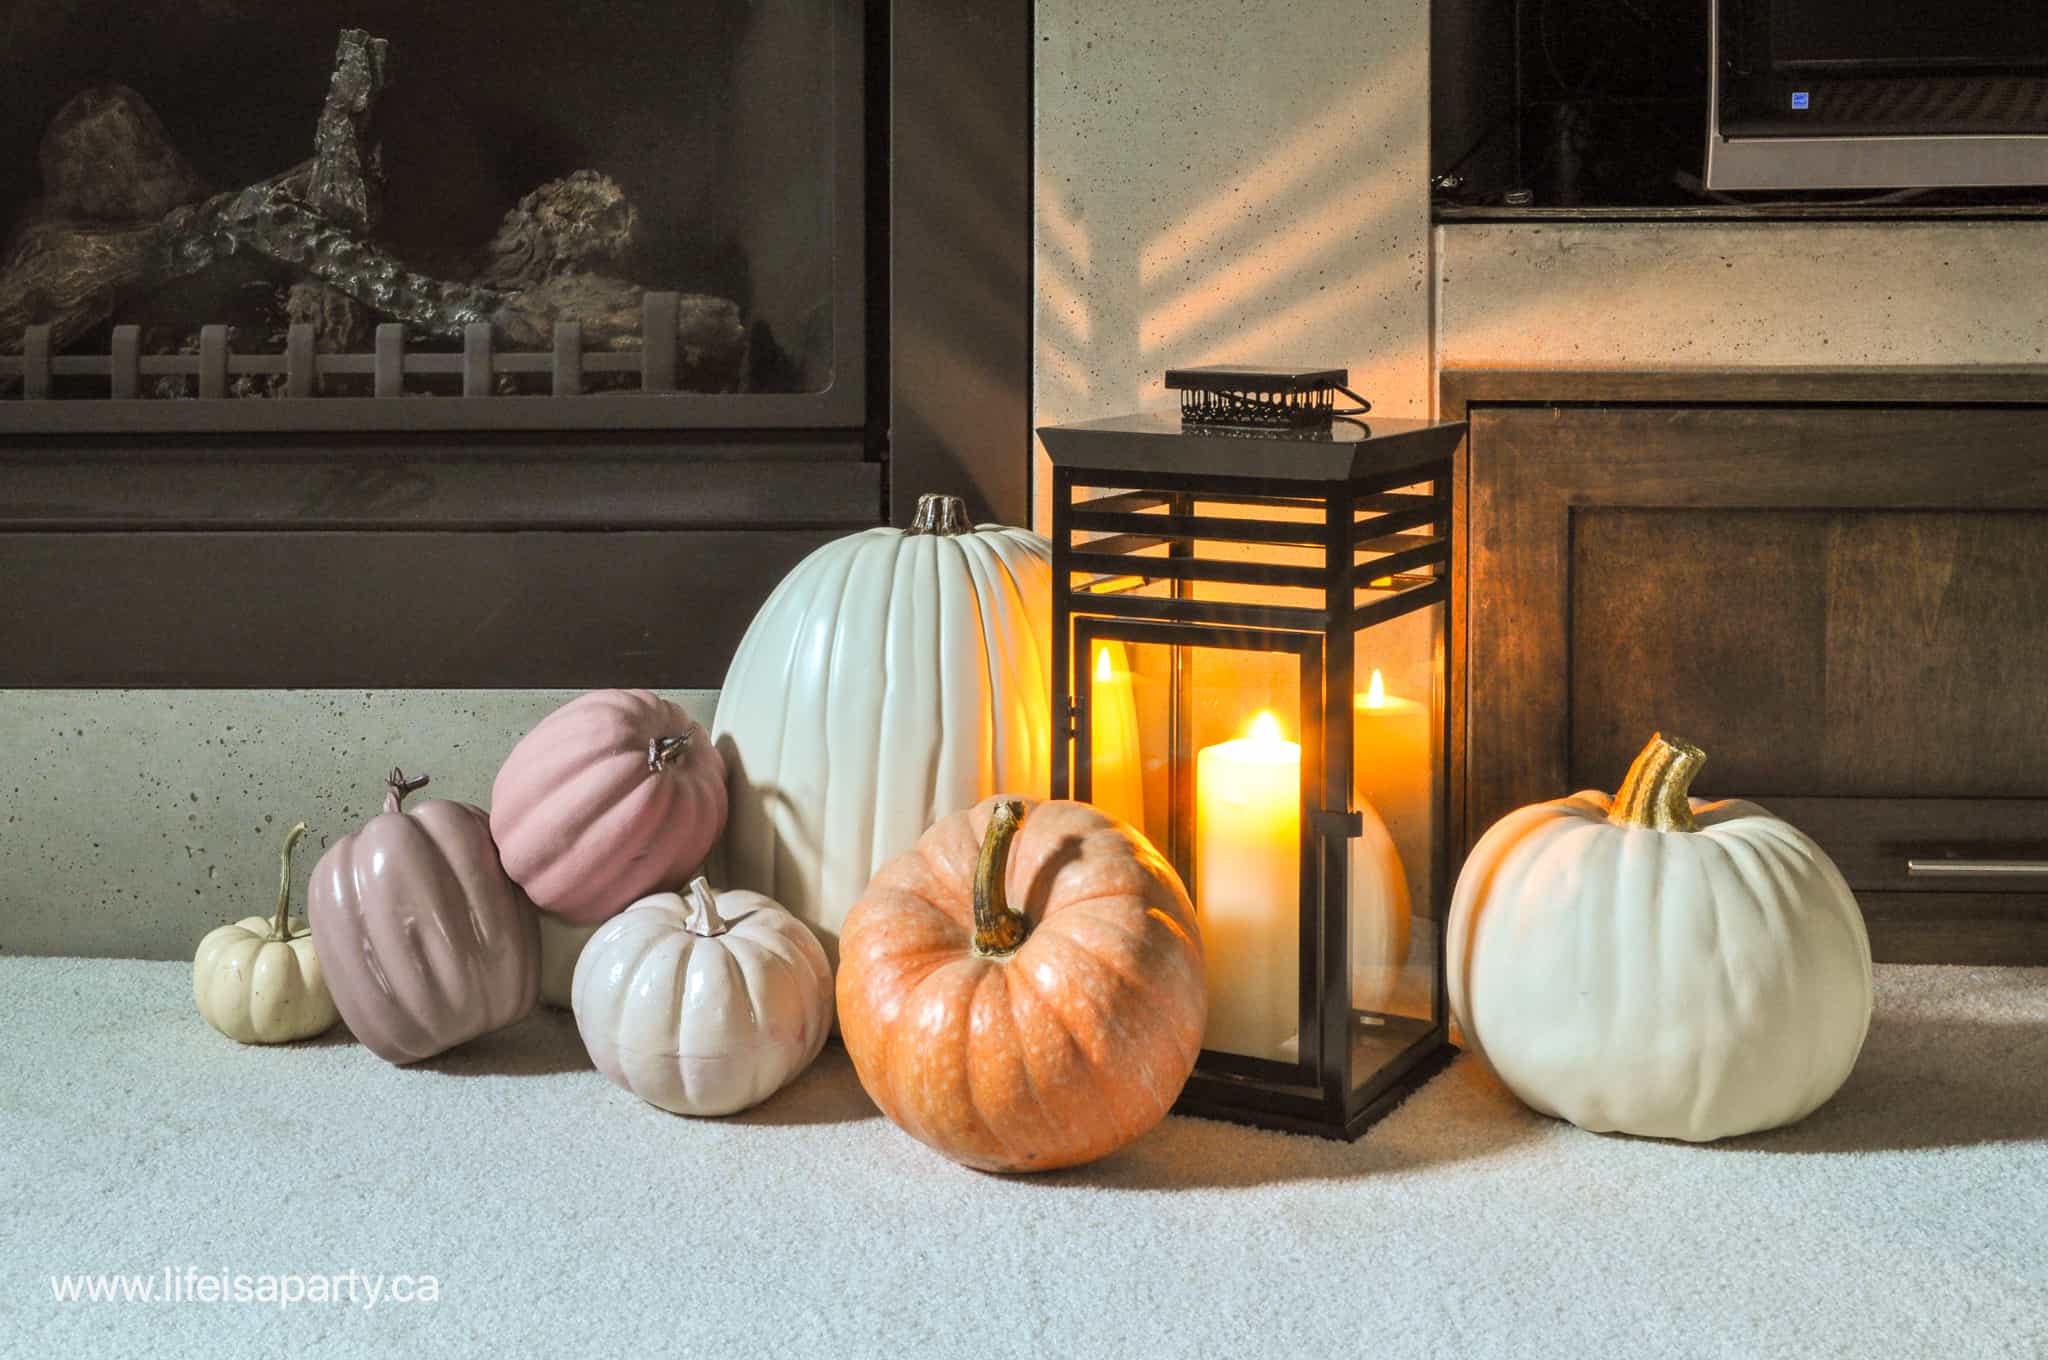
The rest of the mantel is decorated with pumpkins. There's a mixture of real and faux pumpkins here. I love using real pumpkins, but remember that indoors they can go bad fairly quickly. A tip is to cut a small piece of parchment paper and layer it under your real pumpkins. It won't show, but it will help protect your home from any damage. .And we used white pumpkins, pink pumpkins, and peachy orange pumpkins to go with our spooky Halloween mantel color scheme perfectly. We combined large, small, and mini pumpkins in our farmhouse Halloween mantel display. Some of the faux pumpkins weren't the right shade of pink to match the wreath so they got a spooky makeover with some spray paint.

I also added in a couple black lanterns -because they seemed perfect for Halloween. Any black candle holders would work well. I love using my regular home decor pieces in a seasonal look like this one. No need to always buy new holiday themed pieces, when you can shop your house and find things simple items like white candles, old books, book pages, lanterns, string lights, and black candlesticks that you already have. Once you get your creative juices flowing you realize you can use lots of existing decor in new ways for a fun way to decorate your Halloween mantel.

Halloween mantel decor
pink Halloween decor

Touch of Whimsy

I also added a simple letter board saying "making magic" and a disco ball to match the ones in the wreath. I always like to add a few fun things to create a bit of whimsy as a final Halloween touch. Another great option might be to add a witch hat, or magic wand.

Halloween letter board

It's really a pretty simple Halloween mantel, but I love how it turned out. And it looks so beautiful and spooky at night with the candles lit. It's a really fun addition to your haunted house this fall season. It's the perfect place for watching scary movies, eating Halloween candy, and snuggling in your favorite throw blanket.

Halloween mantel decor

With this Halloween mantel decor, life really is a party!
DIY Cresent Moon Wreath

Oct 6, 2021 · 3 Comments

DIY Crescent Moon Wreath with homemade grapevine base, and decorations.

This Moon Wreath is an fun DIY. Convert a round wire wreath base into crescent moon wreath adding your own grape vine and decorations.

DIY Crescent Moon Wreath with homemade grapevine base, and decorations.

Why You'll Love This Project

  • It's perfectly magical for Halloween or fall.
  • You can customize by spray painting the wreath black, leaving it natural, or painting a different color and adding your own decorations.
  • It's really inexpensive to make using dollar store supplies.

"Love it! Very inspired to make my own. Thank you for sharing!" -Mitchell via Pinterest

[feast_advanced_jump_to]

I've noticed lots of crescent moon shaped wreaths lately, and fell in love with them. I thought it would be fun to DIY my own. Using grapevine and a round wire wreath form, we made our own moon shaped wreath base.

You might also like our Christmas Moon Shaped Wreath, Pinecone Wreath, DIY Birch Wreath, or these DIY Acorns.

DIY Halloween moon wreath

I did see some grapevine crescent moon wreath bases at the craft store when I was shopping for a new wreath, but they weren't very crescent shaped, and they were quite expensive. You can make your own version that looks better and is cheaper.

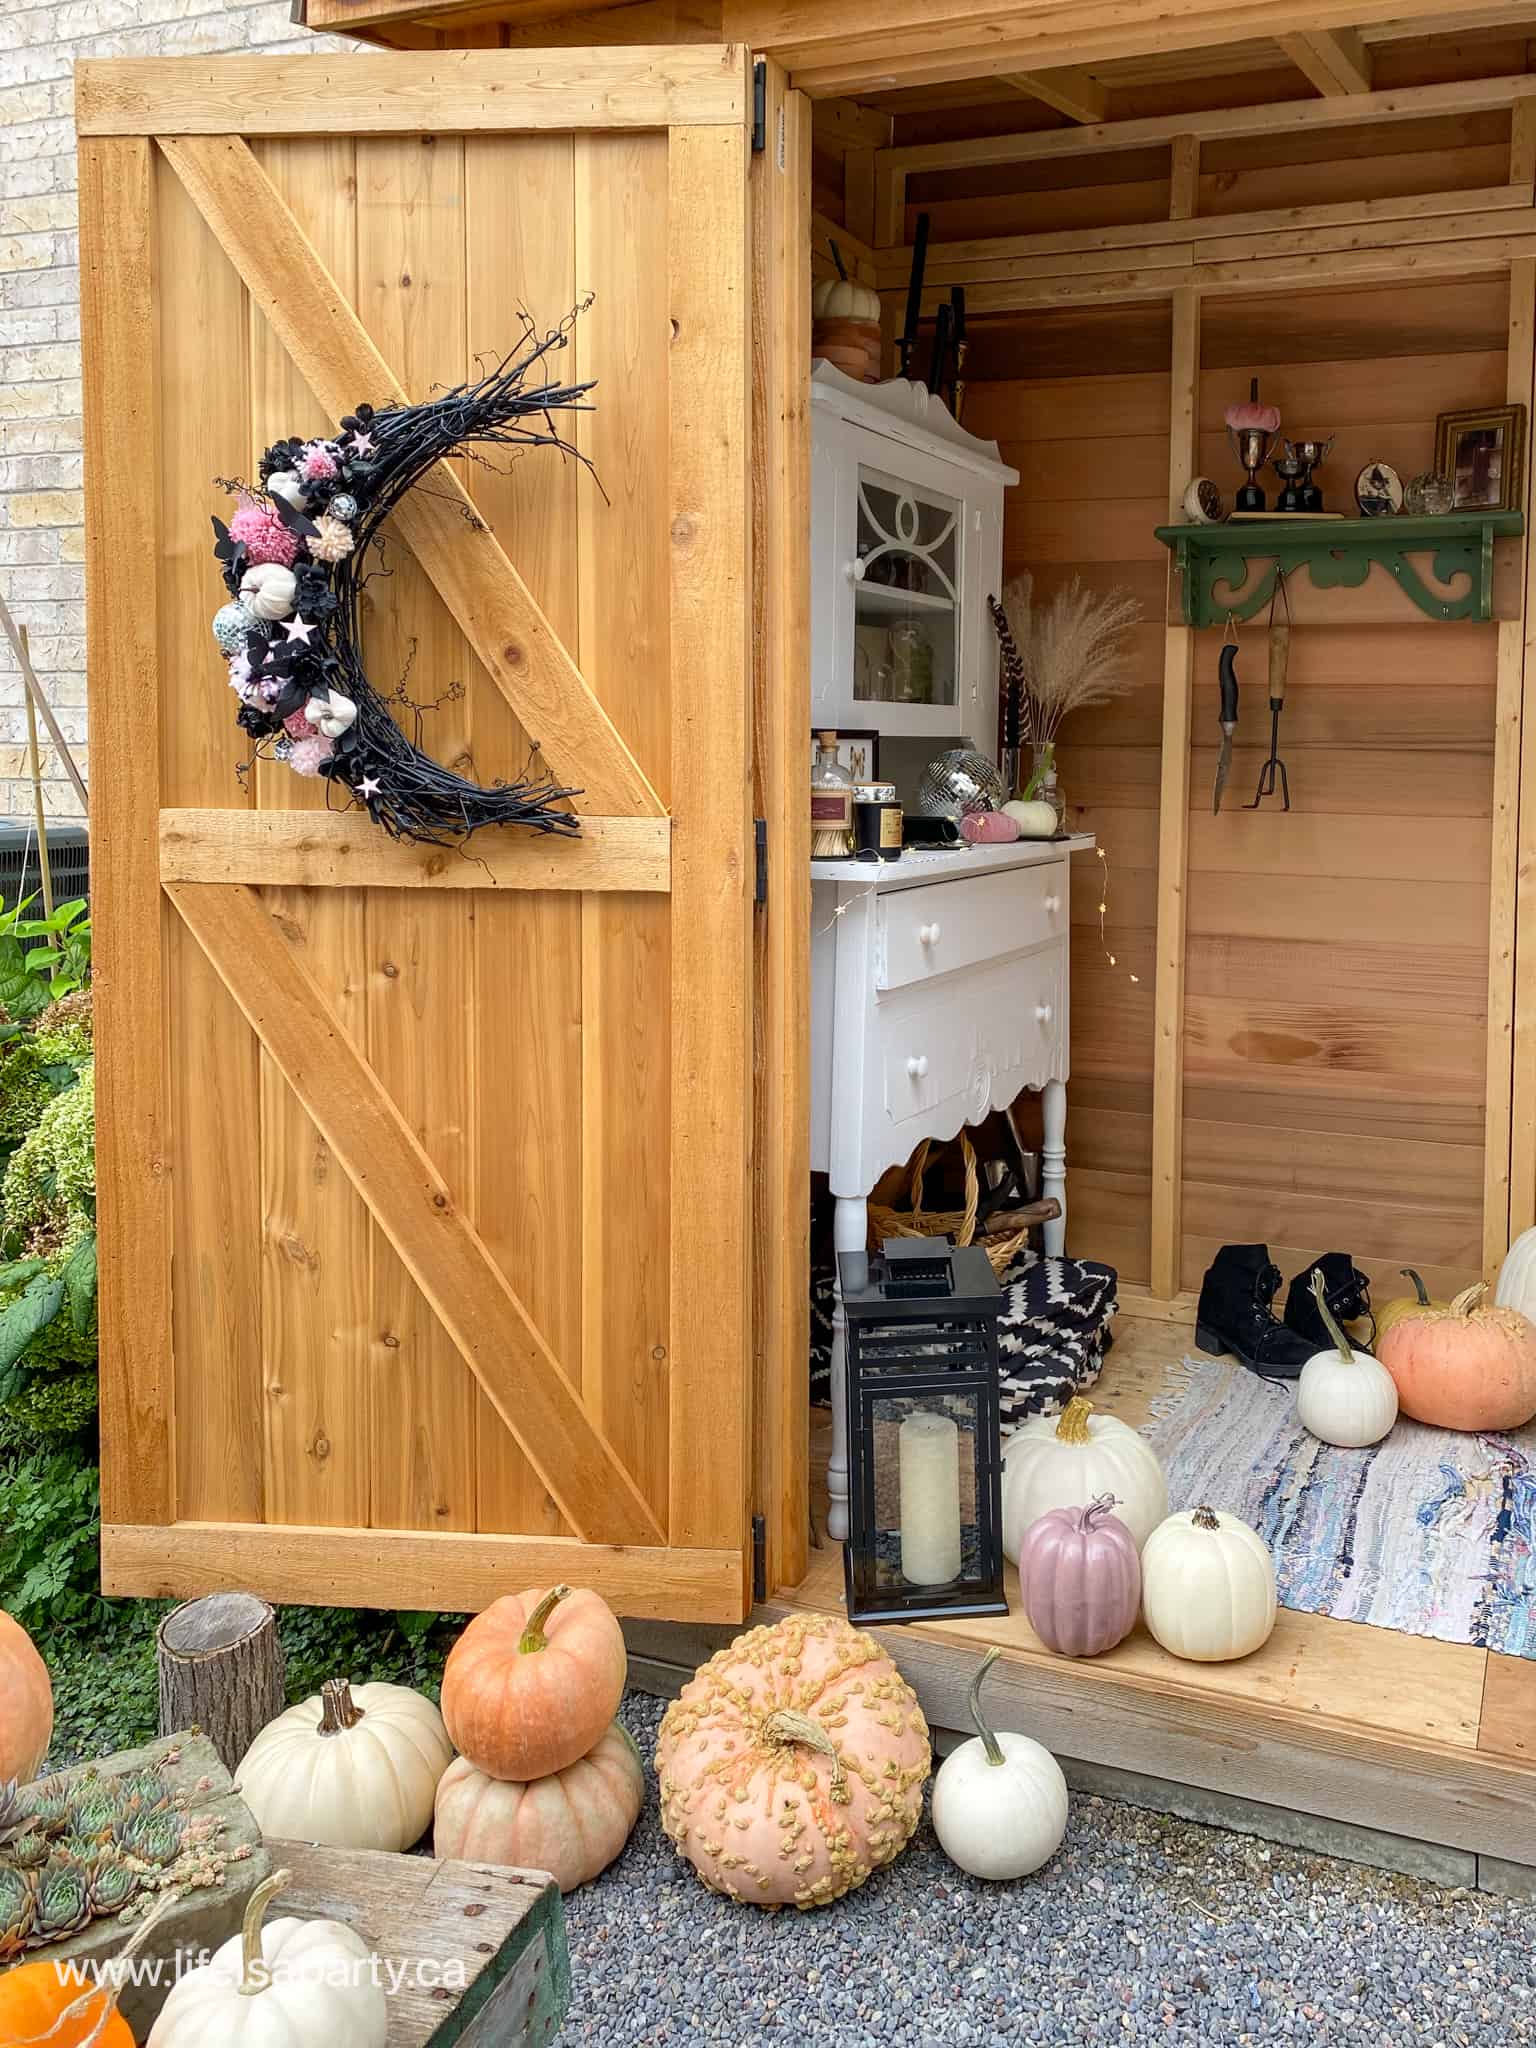
We used our moon wreath as part of our Halloween Witchy Garden Shed -you can check out more details about it here.

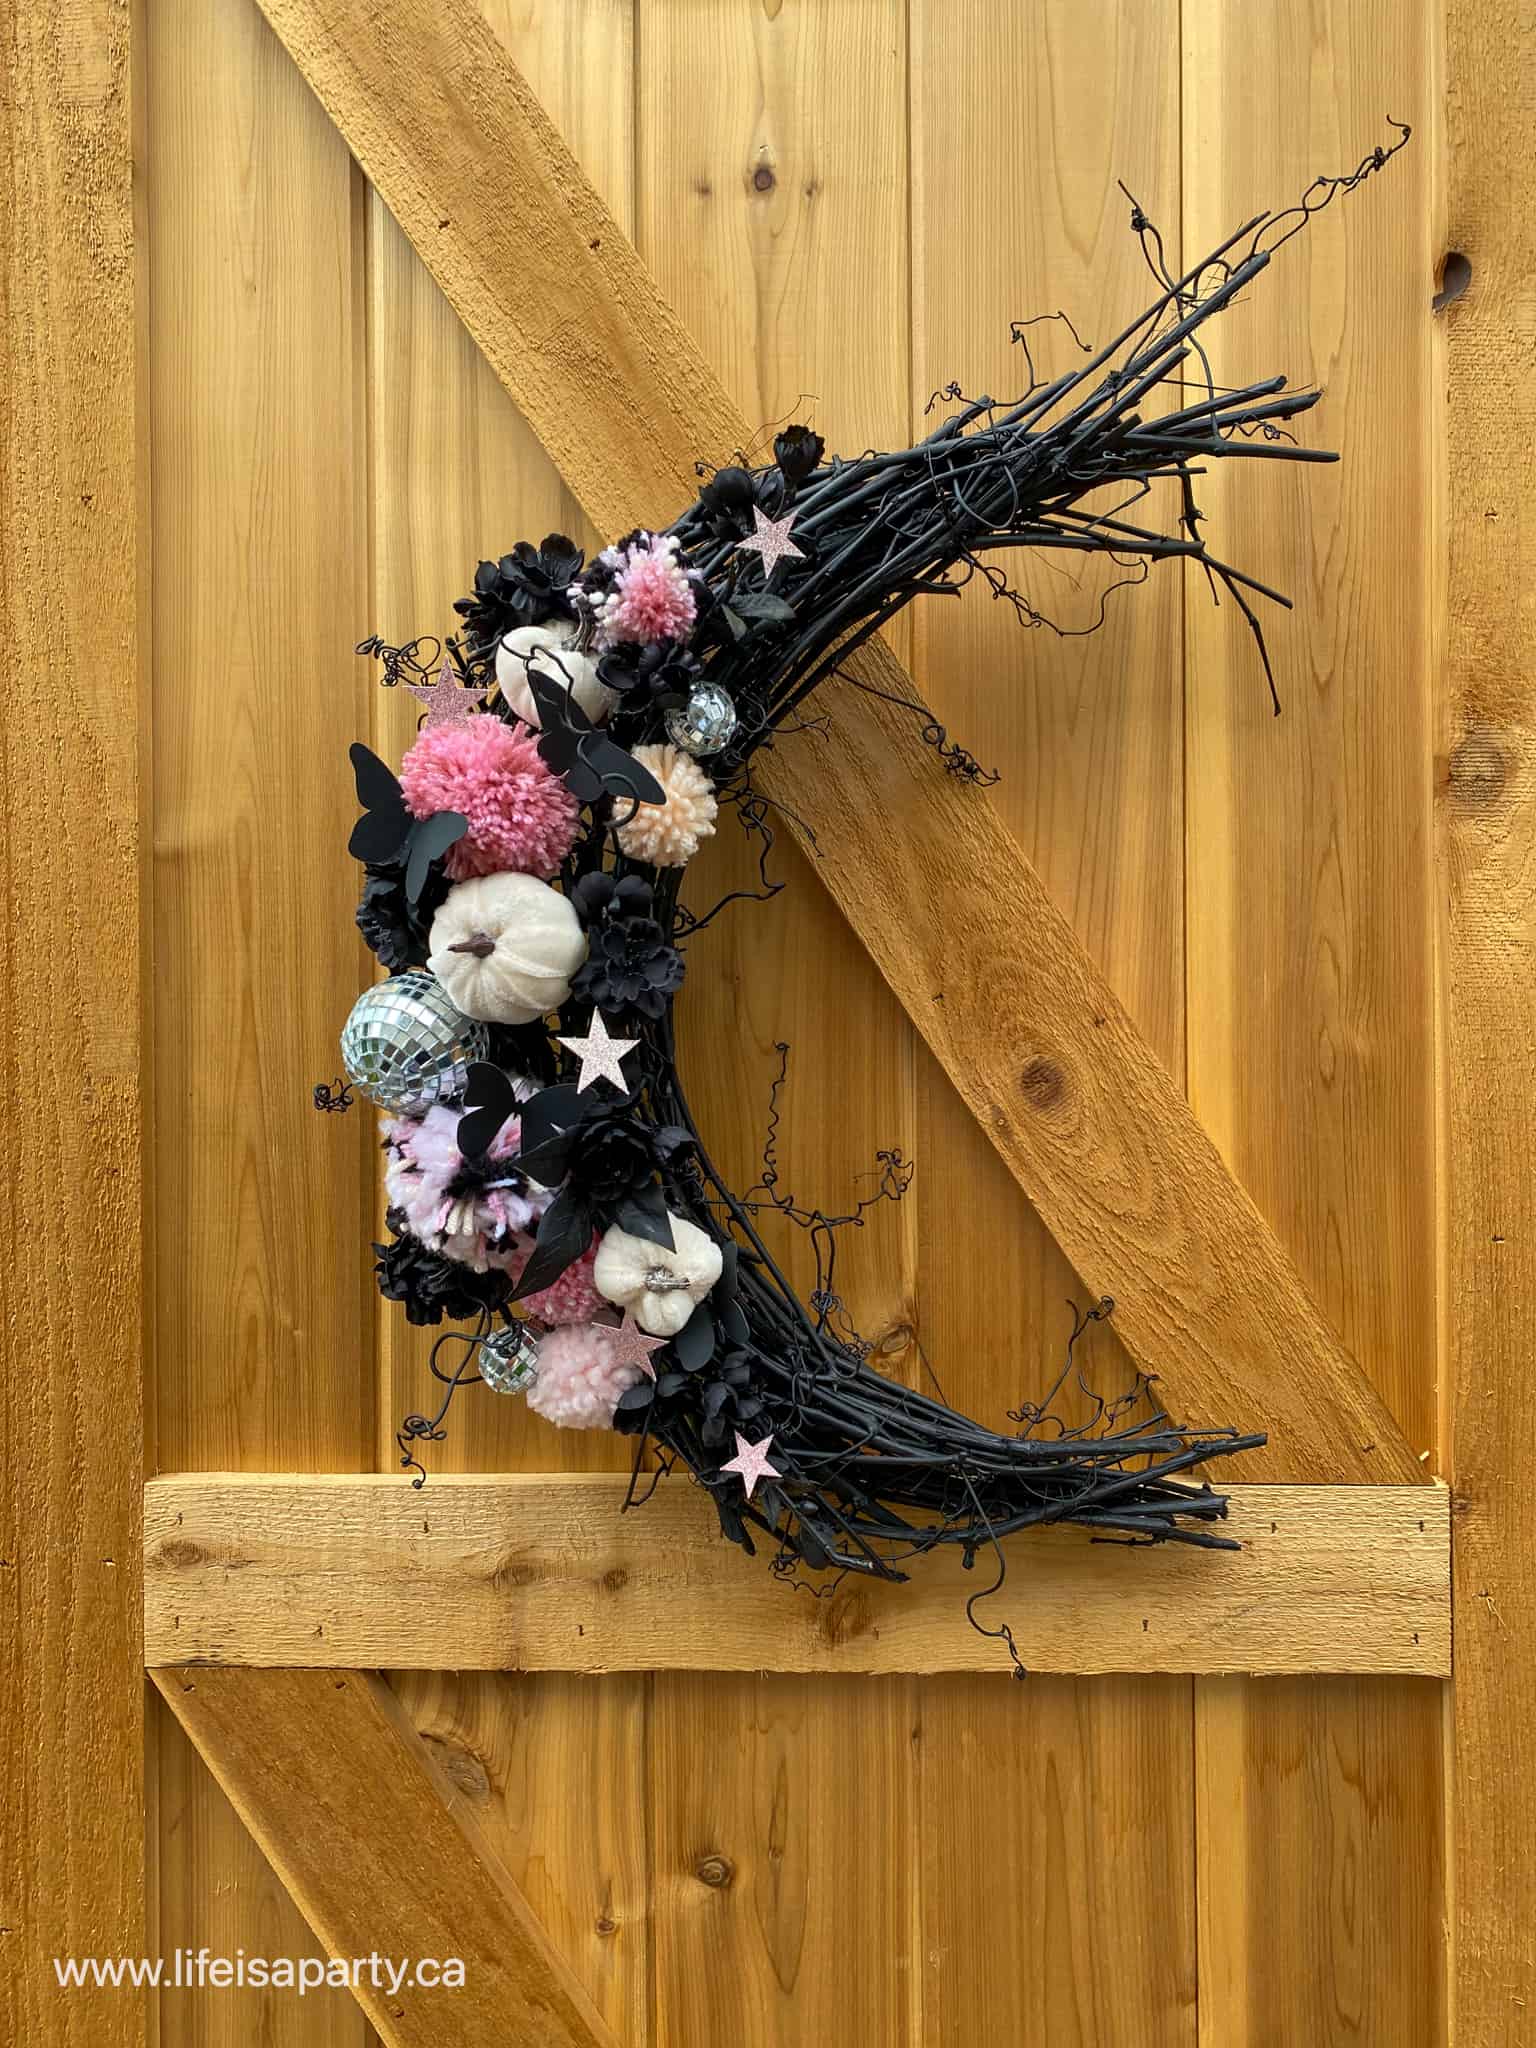
Garden shed door decorated with crescent moon shaped DIY wreath.

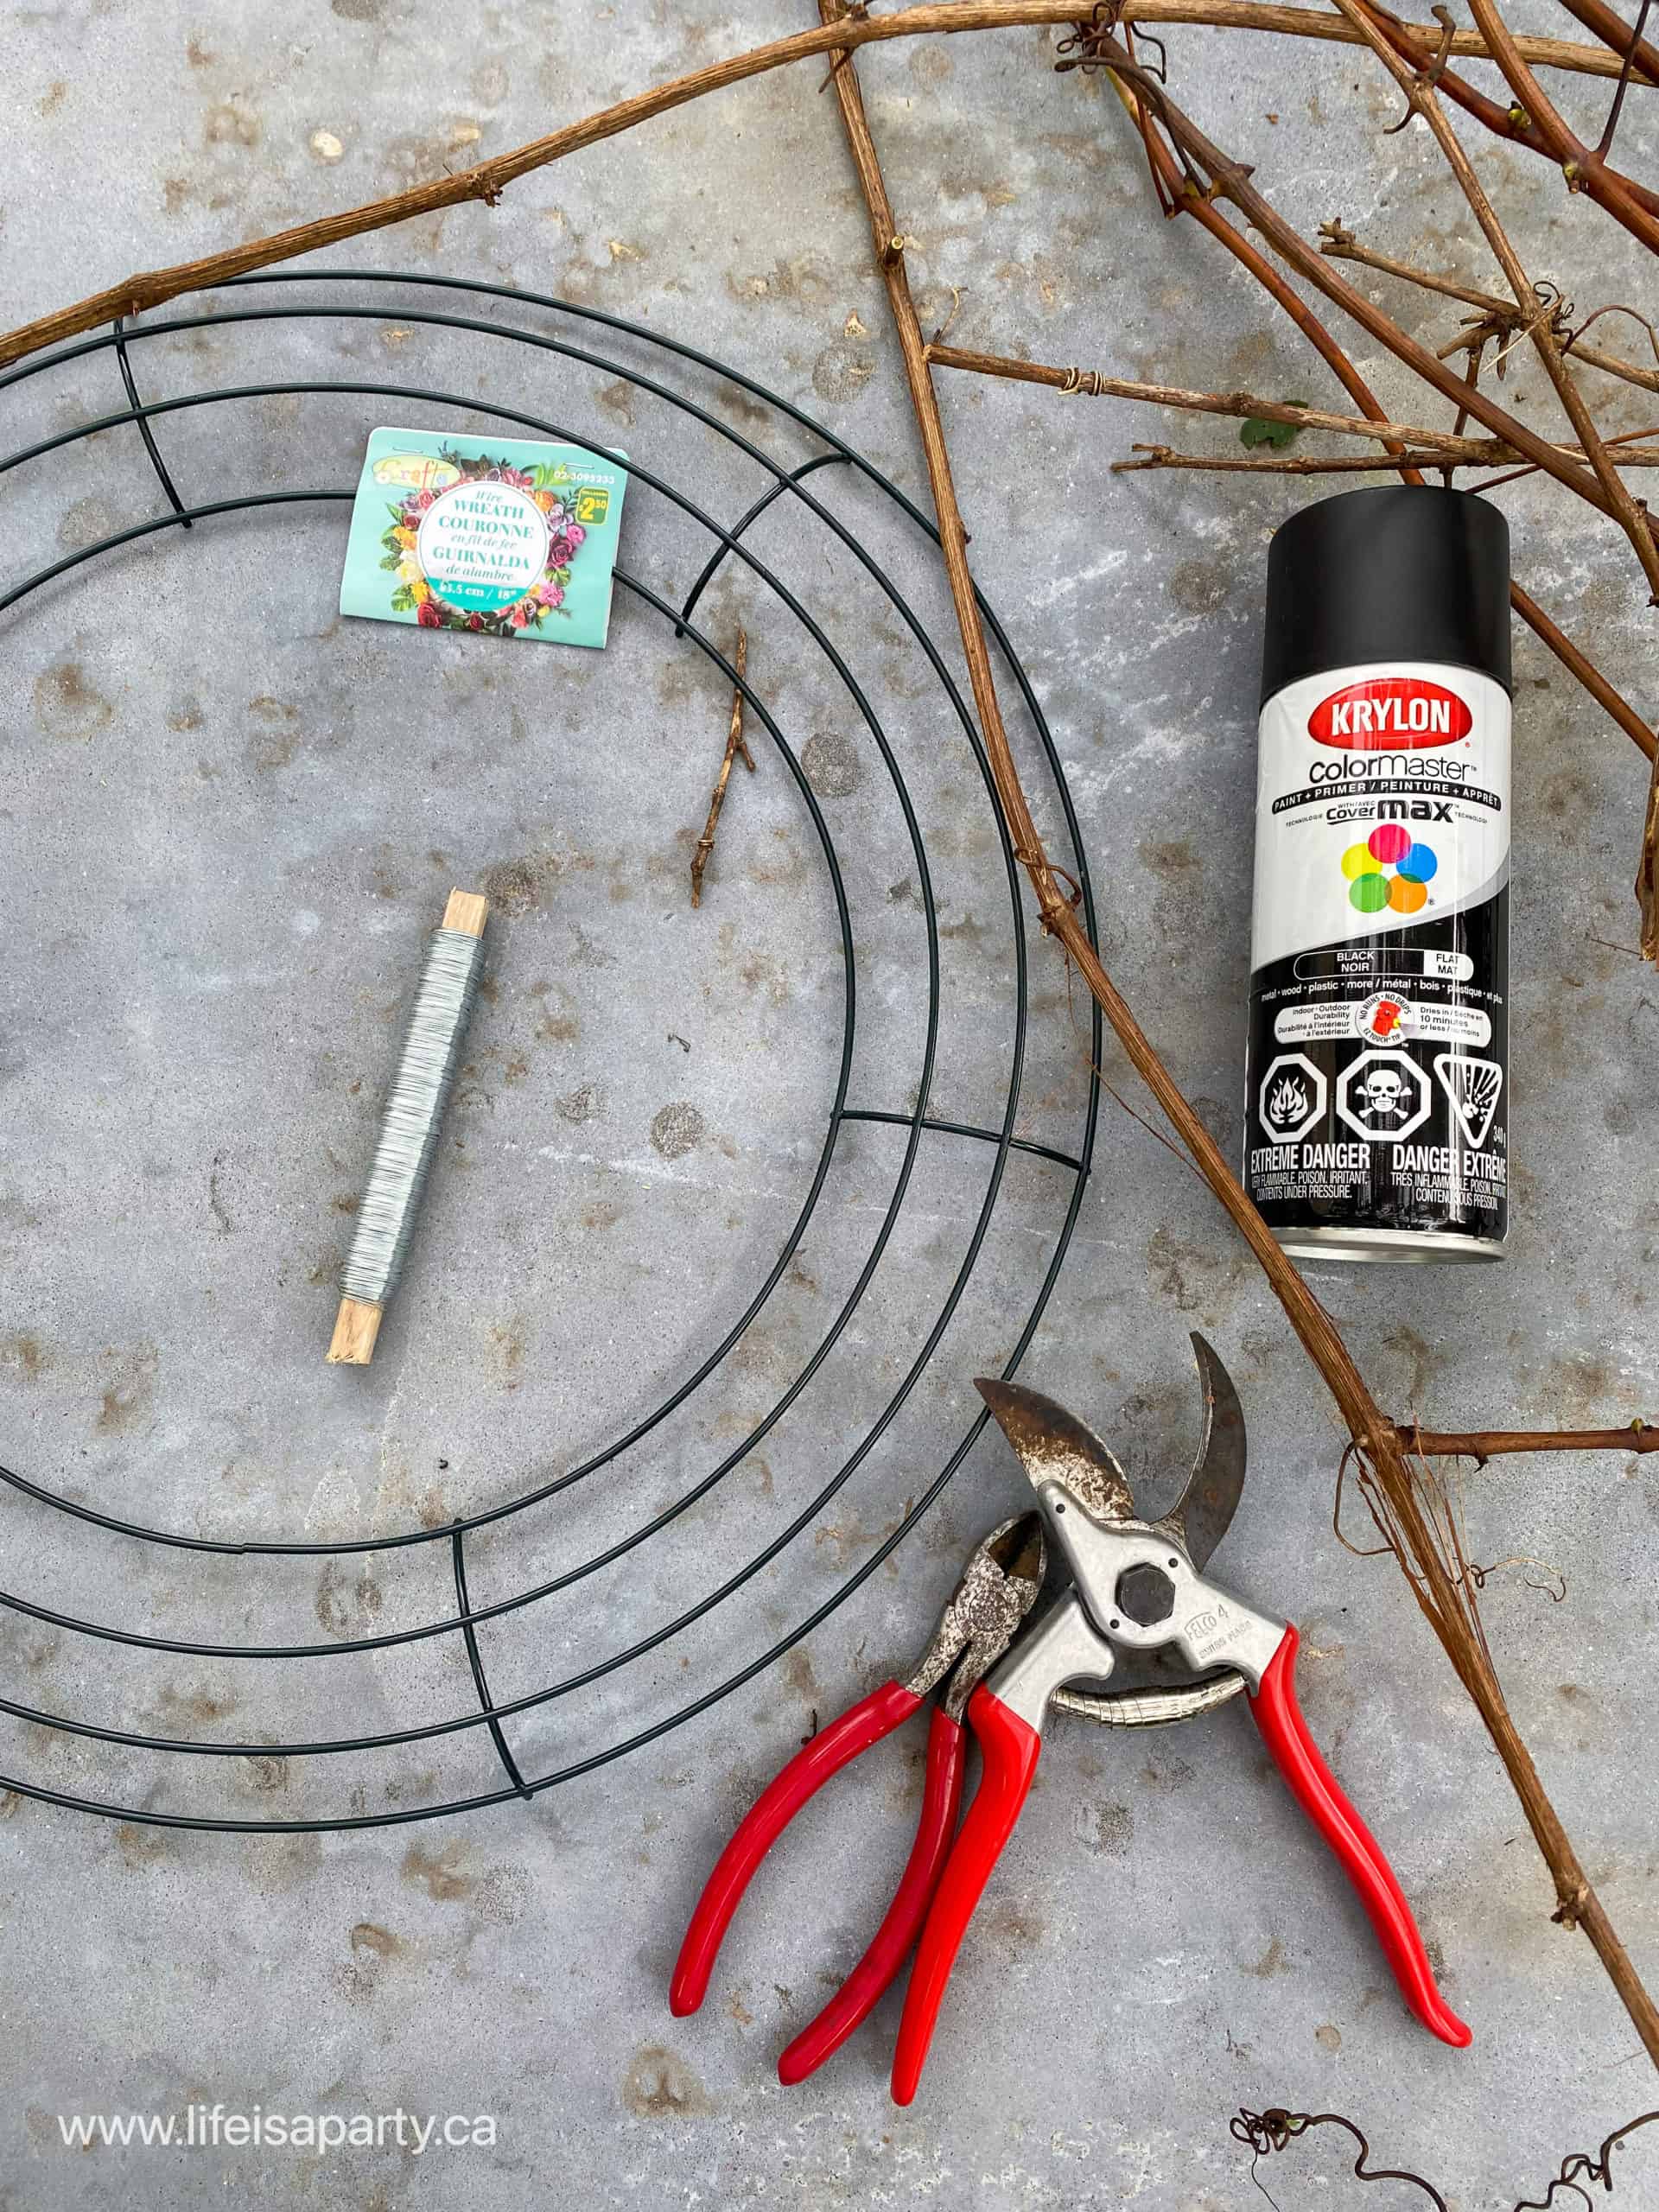
Materials:

how to make your own moon shaped wreath
  • Round Wreath Form: We're going to customize this form and turn it into a crescent shape.
  • Grapevines: Look for these growing on fence rows.
  • Fine Wire: You want something bendable and easy to work with. Since we spray painted our wreath the color of the wire didn't matter, but if you want to leave the grapevine natural, be sure ot use a brown colored wire that will blend in with it.
  • Wire Cutters
  • Garden Clippers: For cutting the grapevine.
  • Black Spray Paint: Or whatever color you'd like your crescent wreath to be, or you could leave it natural.
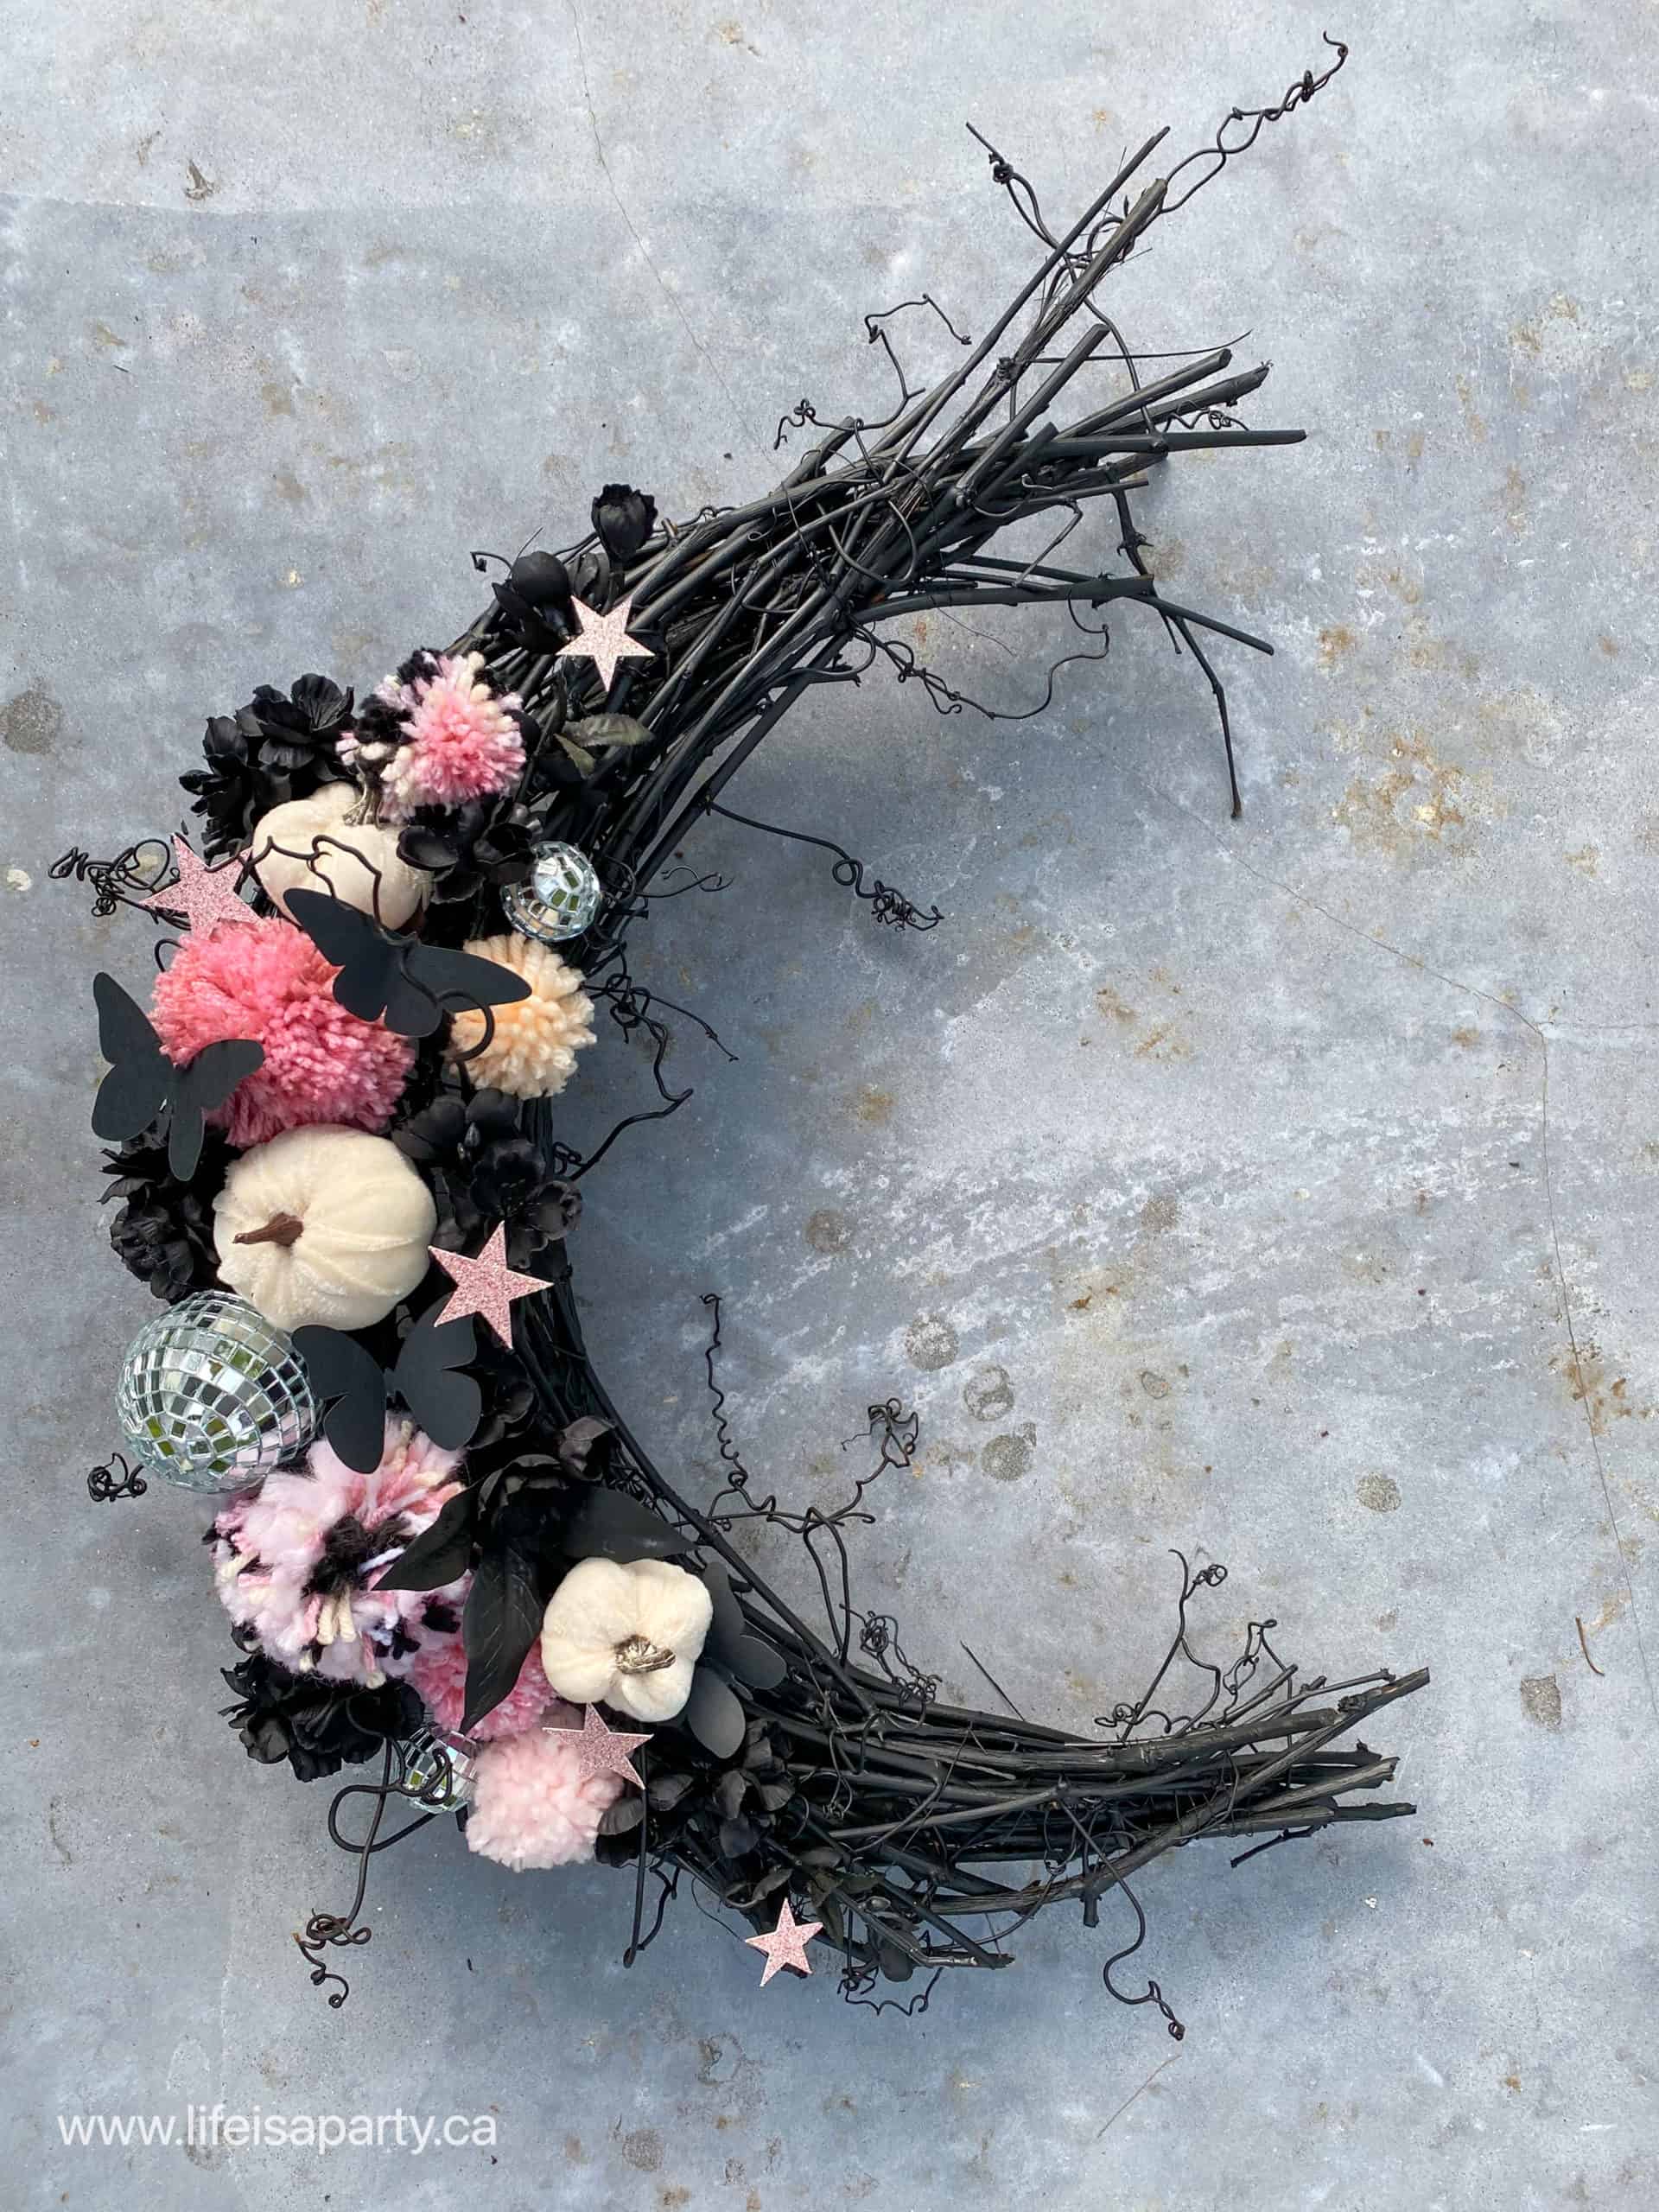
  • Decorations For The Wreath: We used black faux flowers, yarn pom poms, disco ball ornaments, mini velvet pumpkins, back paper butterflies, and pink glitter stars.
  • Hot Glue

Variations

If you don't have access to grapevine, you could use a different material like burlap strips, ribbon, mesh, or fabric to cover your wire wreath frame. Then add in faux florals, vines, and branches on top, securing them with hot glue to create your wreath base and add more embellishments on top.

How To Make The Crescent Moon Wreath Base

Step 1: Make the Crescent Wreath Form

I started with a regular round metal wreath form, and with a few simple steps I turned it into a moon wreath form. Pick up an inexpensive round wire wreath form from the dollar store. The first step is to cut out a section of the round wreath form. Use wire cutters to cut it. It does take a little muscle and perseverance, but you can cut through them.

DIY crescent moon wreath

Once you have a section of the round wreath form removed, you can create your crescent shape. Use some floral wire to gather the ends of the wreath form together, and secure it tightly to create each end of the moon. 

how to make a moon shaped wreath

I wanted to make a black grapevine wreath, so I used the green wreath form I found and some silver coloured wire because I knew I was spray painting it all black once it was formed. 

If you wanted to keep the natural brown grapevine colour, you could begin by spray painting your wreath form brown, and using brown wire to attach the grape vine.

Step 2: Adding the Grapevine

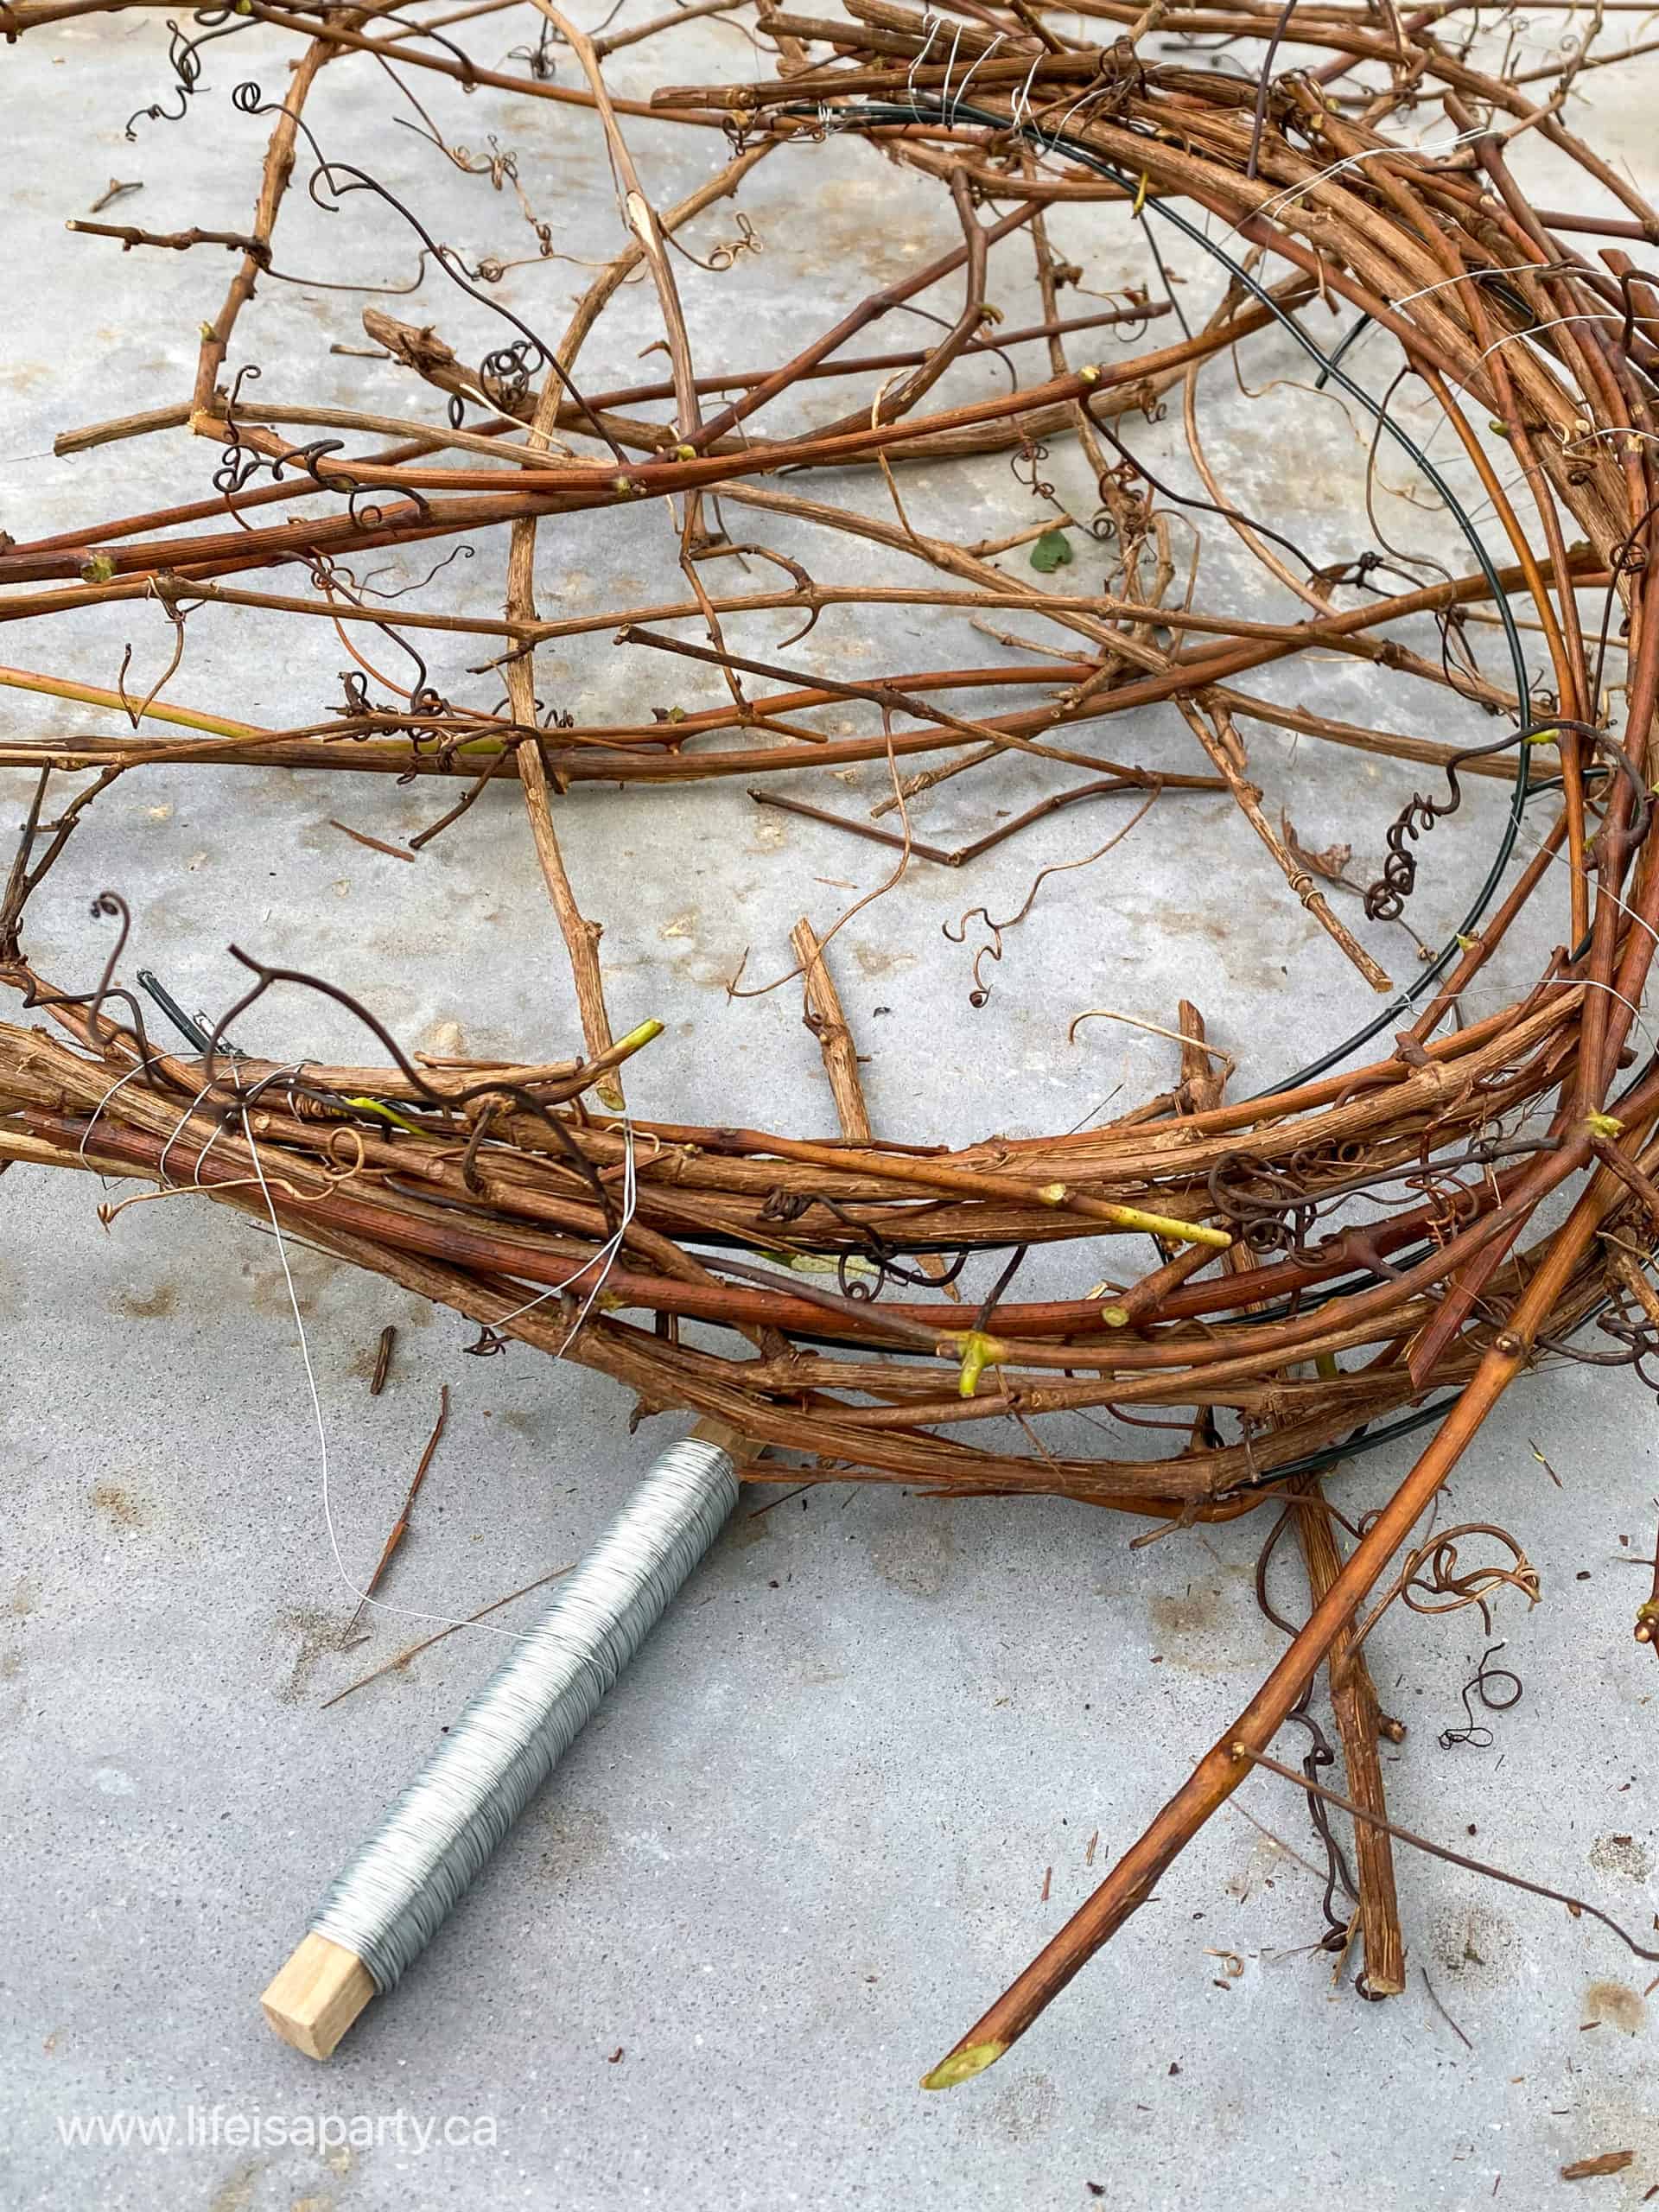
Next you begin to add your grapevine. I gathered my grapevine from a spot where it grows wild, and removed all of the leaves. There were lots of the twirly tendrils attached, which I think are my favourite part, so be careful not to break them off. 

It's best to make your wreath within a few days of cutting the grapevine, because when you first pick the grapevine it's still really flexible and easy to bend. 

If you were using older grape vine, you could soak it in water first to make it more flexible.

DIY grape vine moon wreath
DIY moon wreath

To add the grapevine to the wreath form, cut grapevine pieces to the right length and wire them onto the wreath from. As you go, you will want some pieces of grapevine that are shorter, to bulk up the middle section of the wreath. Try and tuck the ends into the wreath as you build it. Once it is how you like it wrap the wire around tightly and secure at the end.

You can also twist some wire to the back to create a wreath hanger.

DIY crescent moon grape vine wreath base

Next, spray paint your wreath black. Remember to do several light coats to avoid dripping, and spray from different angles, and from the back for full coverage.

Step 3: Decorate Your Moon Wreath For Halloween

Once your wreath is dry you can embellish it in your own style to suit any occasion. We made a Halloween wreath. 

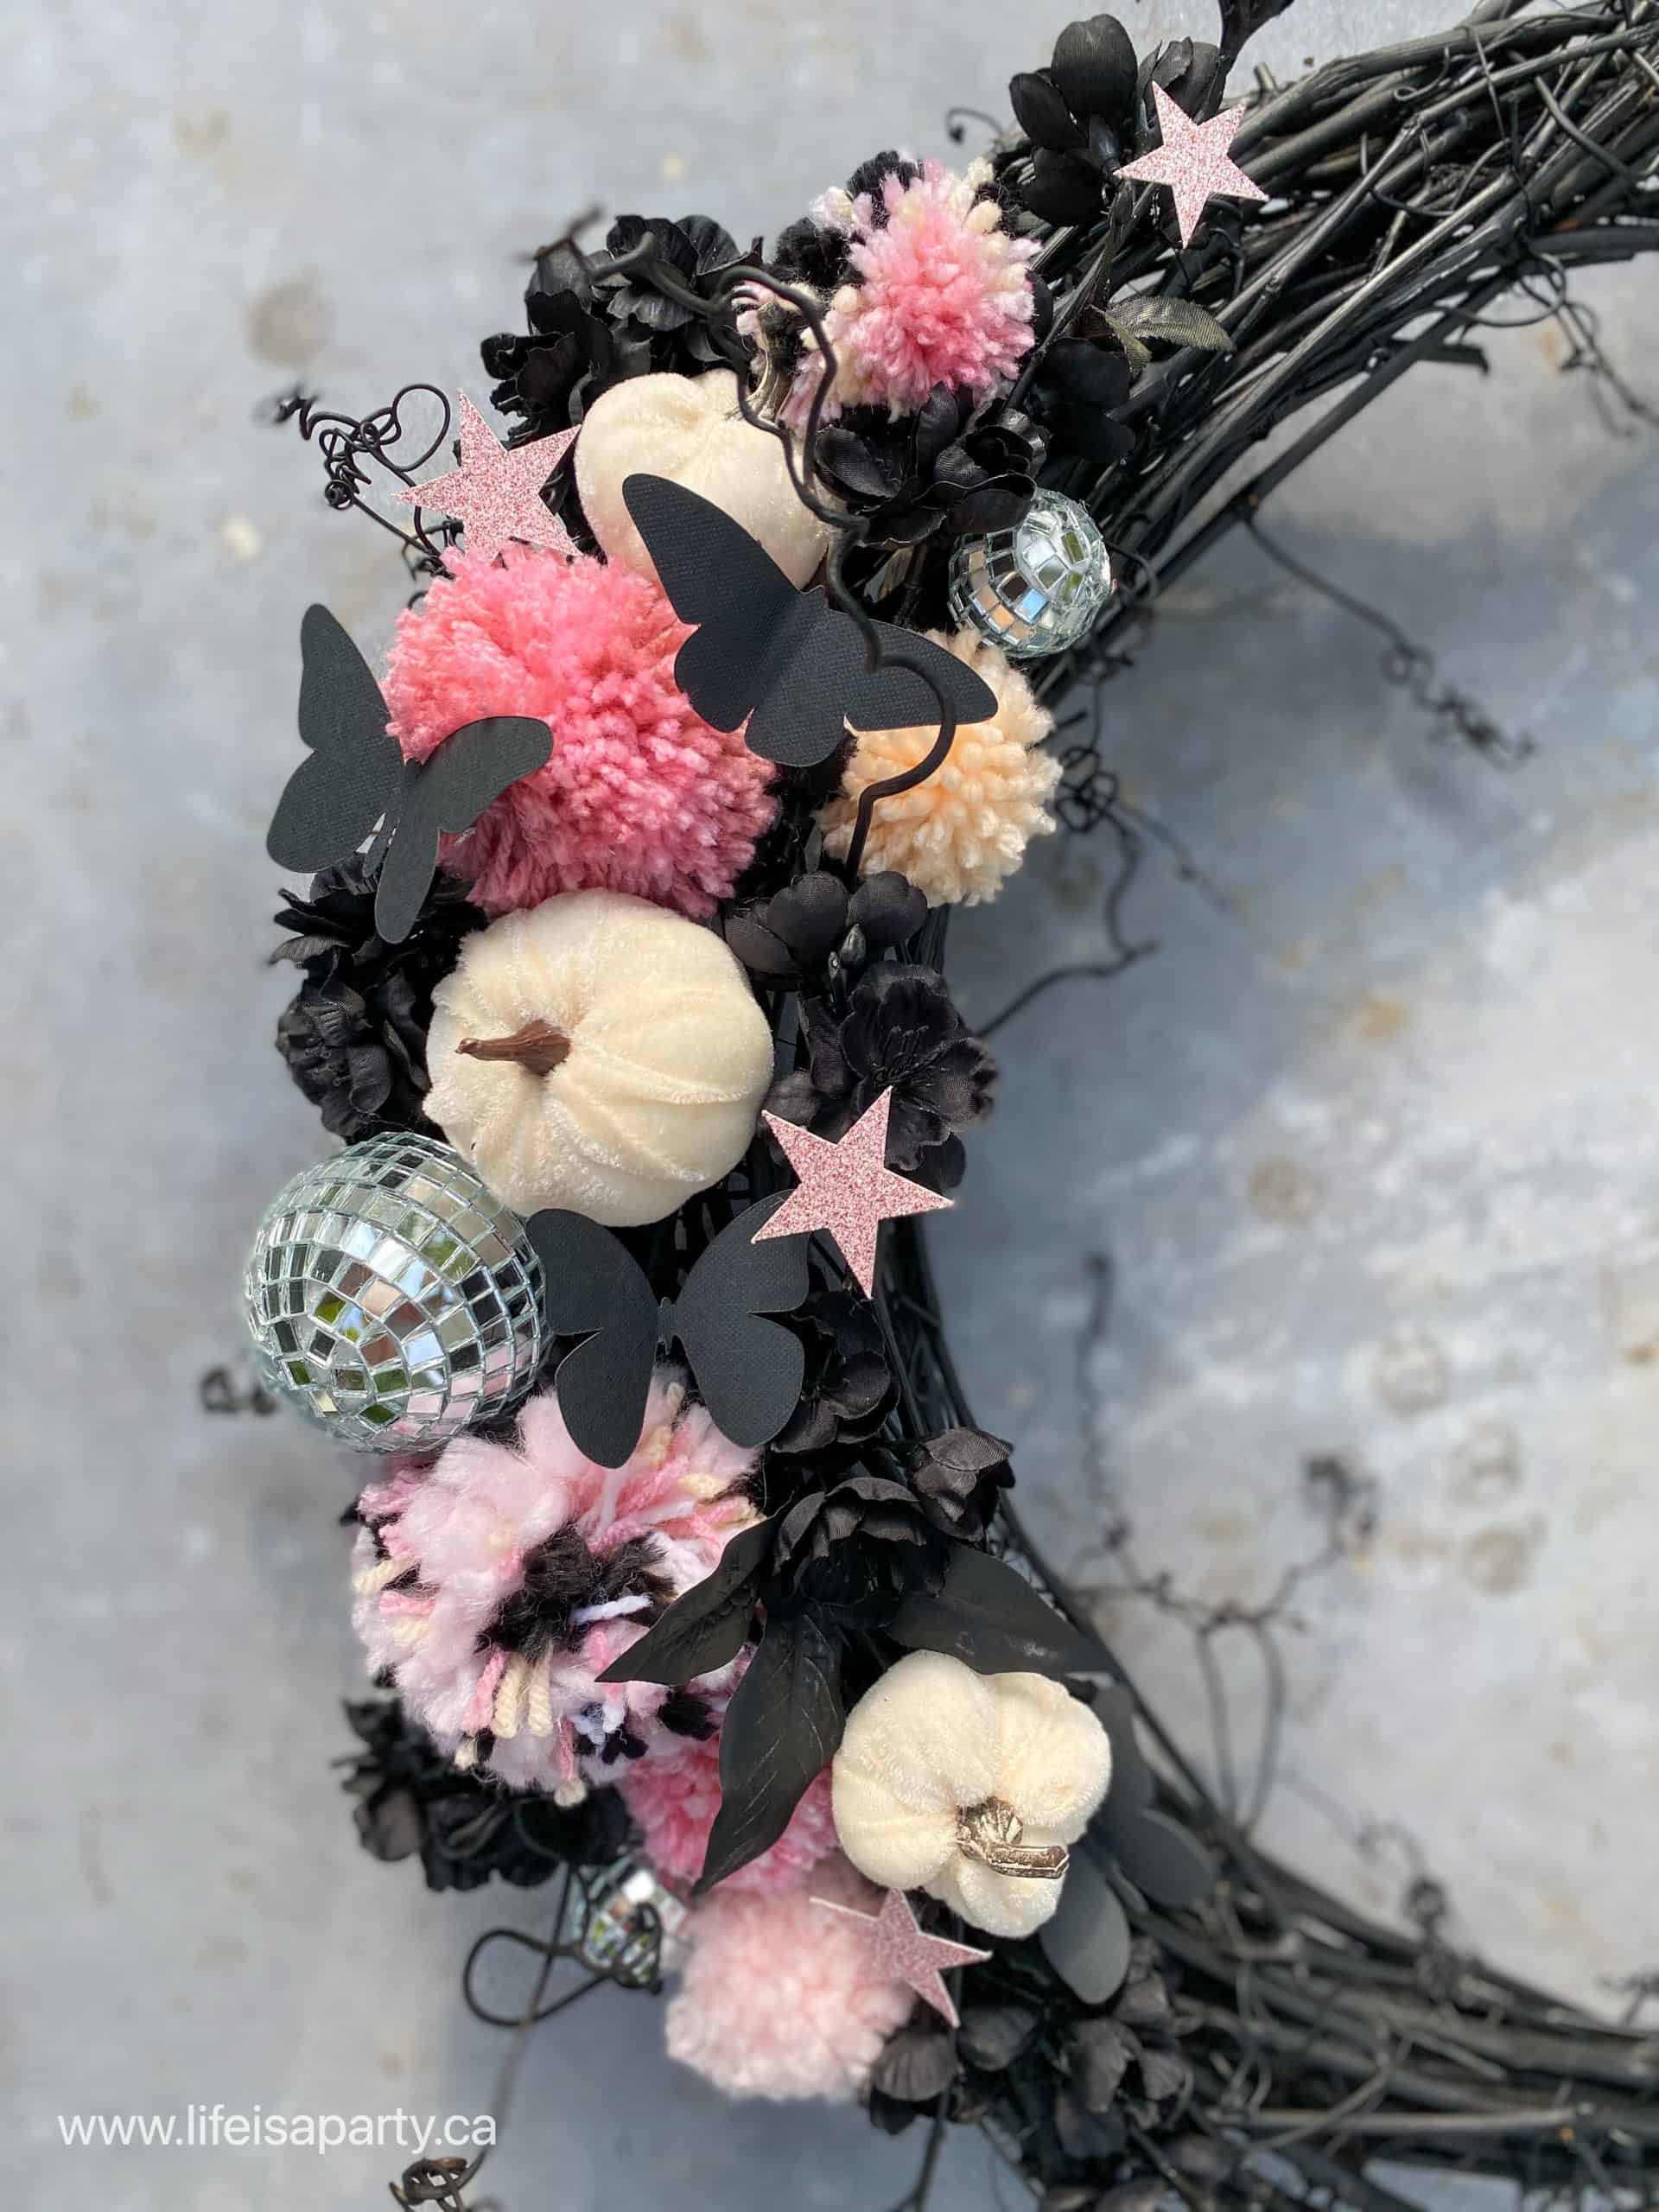
I was inspired by Lifesfrostings, and used pink, peach and black yarn to make two sizes of pom poms. I also added some mini velvet pumpkins, black faux florals, and some mini disco ball ornaments. The artificial flowers are form the craft store, and I used some wire cutters to cut them into smaller flowers to decorate the wreath.

Lastly I embellished the wreath with some black paper butterflies, and pink glitter paper stars. To make the paper stars and butterflies more dimensional, I hot glued them to some black wire and wired them to the wreath, so they could stand out more.

This wreath is the perfect addition to a front door or a mantel. It's a great idea to use for Halloween season.

black and pink moon Halloween wreath

With an amazing DIY moon shaped wreath, life really is a party!

More Wreath Ideas

  • Pink crescent moon shaped Christmas wreath.
    DIY Moon Shaped Christmas Wreath
  • DIY Crescent Moon Wreath with homemade grapevine base, and decorations.
    DIY Cresent Moon Wreath
  • DIY mushroom wreath
    Mushroom Spring Wreath
  • Pampas grass wreath DIY
    Easy DIY Pampas Grass Wreath

Freqeuntly Asked Questions

Where did you get the grapevine to make your own crescent wreath?

I picked the grapevine that grows wild in my area. Look for it along fence rows. And remove the leaves before making the wreath.

What if I don't have access to grapevine?

You can purchase a moon shaped grapevine wreath base online or at a craft store, and then paint it and embellish it yourself to make something similar. Or purchase grapevine garland and shape it into a wreath. Soak the grapevine in water to make it easier to work with.

How did you cut the wire wreath form?

I used wire cutters to cut the wreath form. It was a bit hard to cut, but I also found bending the wire back and forth helped it to snap off.

If you try this DIY Crescent Moon Wreath or any other idea on my blog please leave a star rating and let me know how it went in the comments below. Thanks for visiting today!

moon wreath

Recipe

DIY Crescent Moon Wreath with homemade grapevine base, and decorations.

DIY Crescent Moon Wreath

Make your own crescent moon shaped wreath using a regular round wire wreath form and grapevine.
5 from 1 vote
Print Pin Rate
Cook Time: 20 minutes minutes
Total Time: 20 minutes minutes
Servings: 1 wreath
Author: Dannyelle Nicolle-Ramjist
Cost: $15

Equipment

  • Wire Cutters
  • Glue Gun
  • scissors
  • garden clippers

Materials

  • round wire wreath form
  • fresh grape vine
  • wire
  • black spray paint
  • pom moms
  • mini pumpkins
  • mini disco balls
  • faux florals
  • paper black butterflies
  • glitter paper stars

Instructions

  • The first step is to cut out a small section of the round wreath form. Use wire cutters to cut it. Once you have a section of the round wreath form removed, you can create your crescent shape. Use some floral wire to gather the ends of the wreath form together, and secure it tightly to create each end of the crescent moon. 
  • Next you begin to add your grapevine.  Cut the grapevine pieces to the right length and wire them onto the wreath from. As you go, you will want some pieces of grapevine that are shorter, to bulk up the middle section of the wreath. Try and tuck the ends into the wreath as you build it. Once it is how you like it wrap the wire around tightly and secure at the end. Also, twist some wire to the back to create a wreath hanger.
  • Next, spray paint your wreath black. Remember to do several light coats to avoid dripping, and spray from different angles, and from the back for full coverage. Let if dry fully before the next step.
  • Start by adding two sizes of yarn pom poms, mini velvet pumpkins, black faux florals, and some mini disco ball ornaments.  Use the wire cutters to cut the flowers to the right size. Use hot glue and black wire to attach the embellishments to the wreath. Lastly, we hot-glued some wire onto the black paper butterflies, and pink glitter paper stars. The wire means the butterflies and stars can stand out from the wrath and add dimension.

Notes

If you are spray painting your wreath it doesn't matter what color of wire you use to attach the grapevine.  If you want to leave your grapevine natural, be sure to use a brown wire that will disappear.
Attach your hanging wire and test it before you add the embellishments.
Adding wire to the paper butterflies and stars means they can pop out form the wreath and add some dimension to the design.
Use any colors or combination of colors you like.  If you prefer traditional orange, black and purple for Halloween, use these colors.  
Decorate this wreath for other occasions with different embellishments, or for year round use with moss, flowers, and mushrooms.

Fall Breakfast Charcuterie Board

Sep 29, 2021 · Leave a Comment

Fall breakfast board

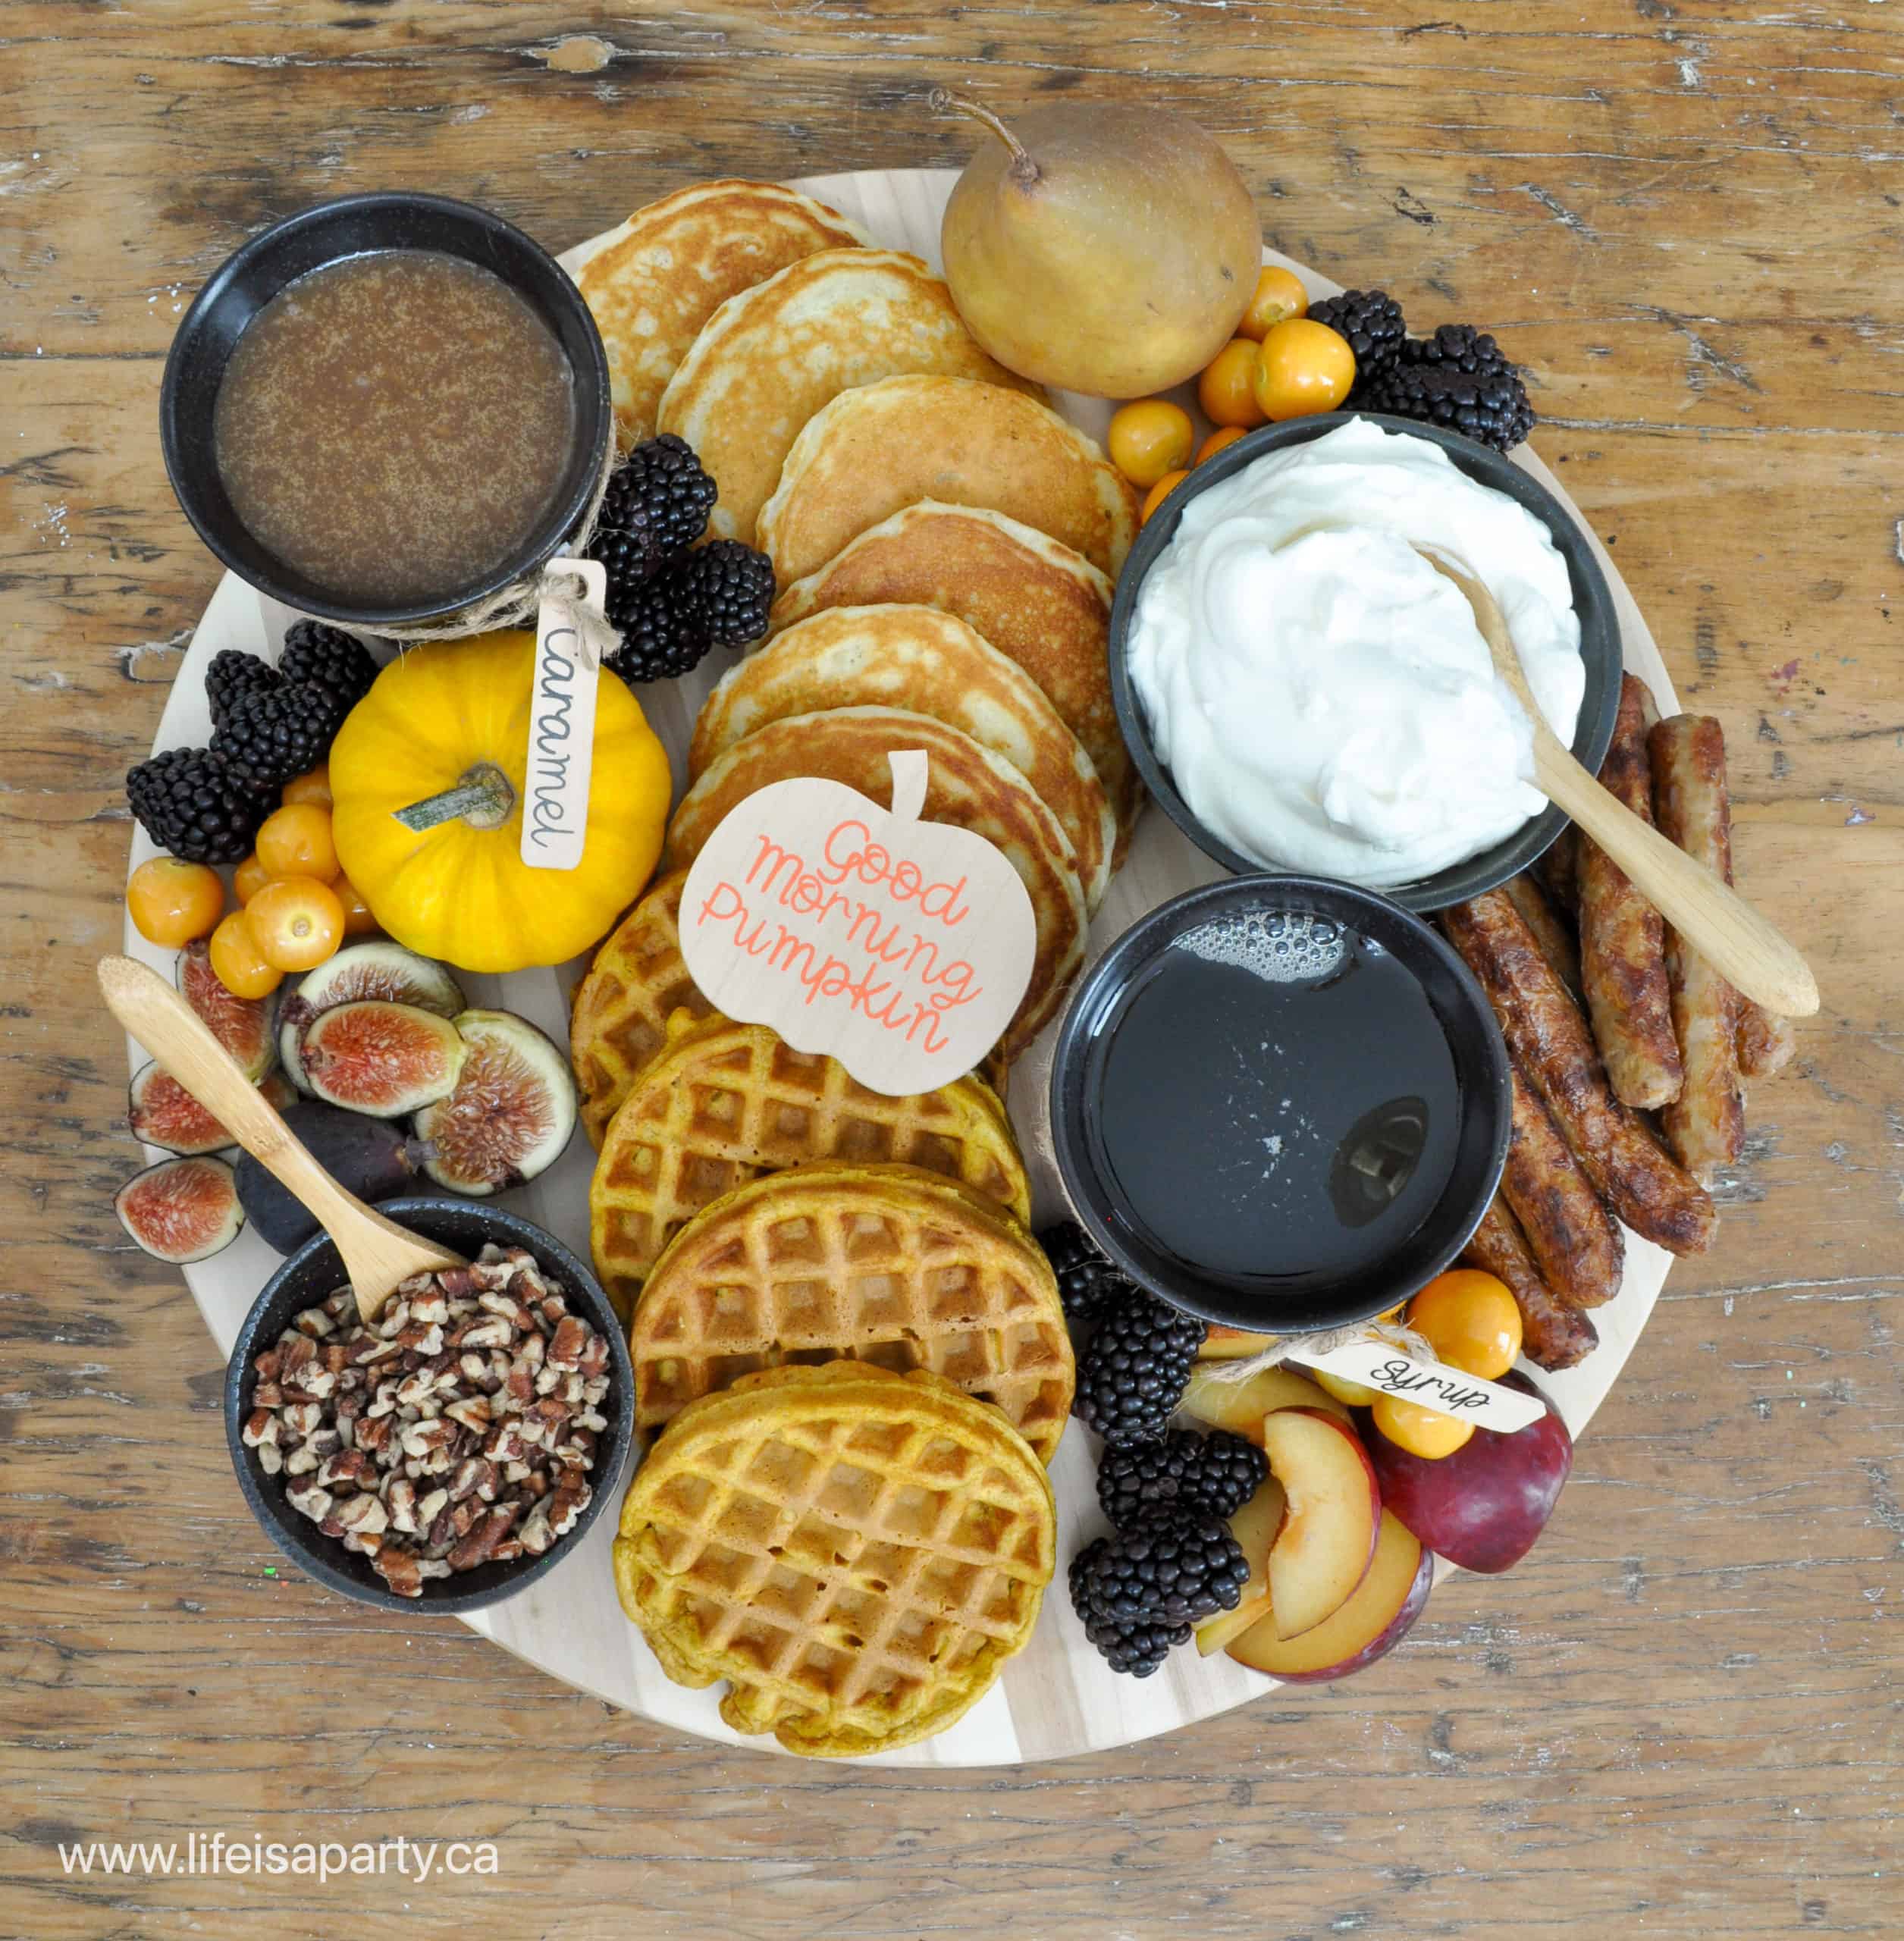
Fall Breakfast Charcuterie Board: pancakes, pumpkin waffles, sausage, syrups, whipped cream, nuts, and fresh autumn fruit.

Fall breakfast board
[feast_advanced_jump_to]

What could be better on a fall weekend than a breakfast charcuterie board to enjoy? We took advantage of the best flavours of the season, like pumpkin and toasted pecans to make it perfect for fall!  This is a great board for breakfast or brunch to enjoy the most important meal of the day.  We had so much fun incorporating all our favorite breakfast foods to make this cozy brunch.  You and your family and friends will love this delicious fall breakfast.

fall breakfast charcuterie board

Breakfast Foods

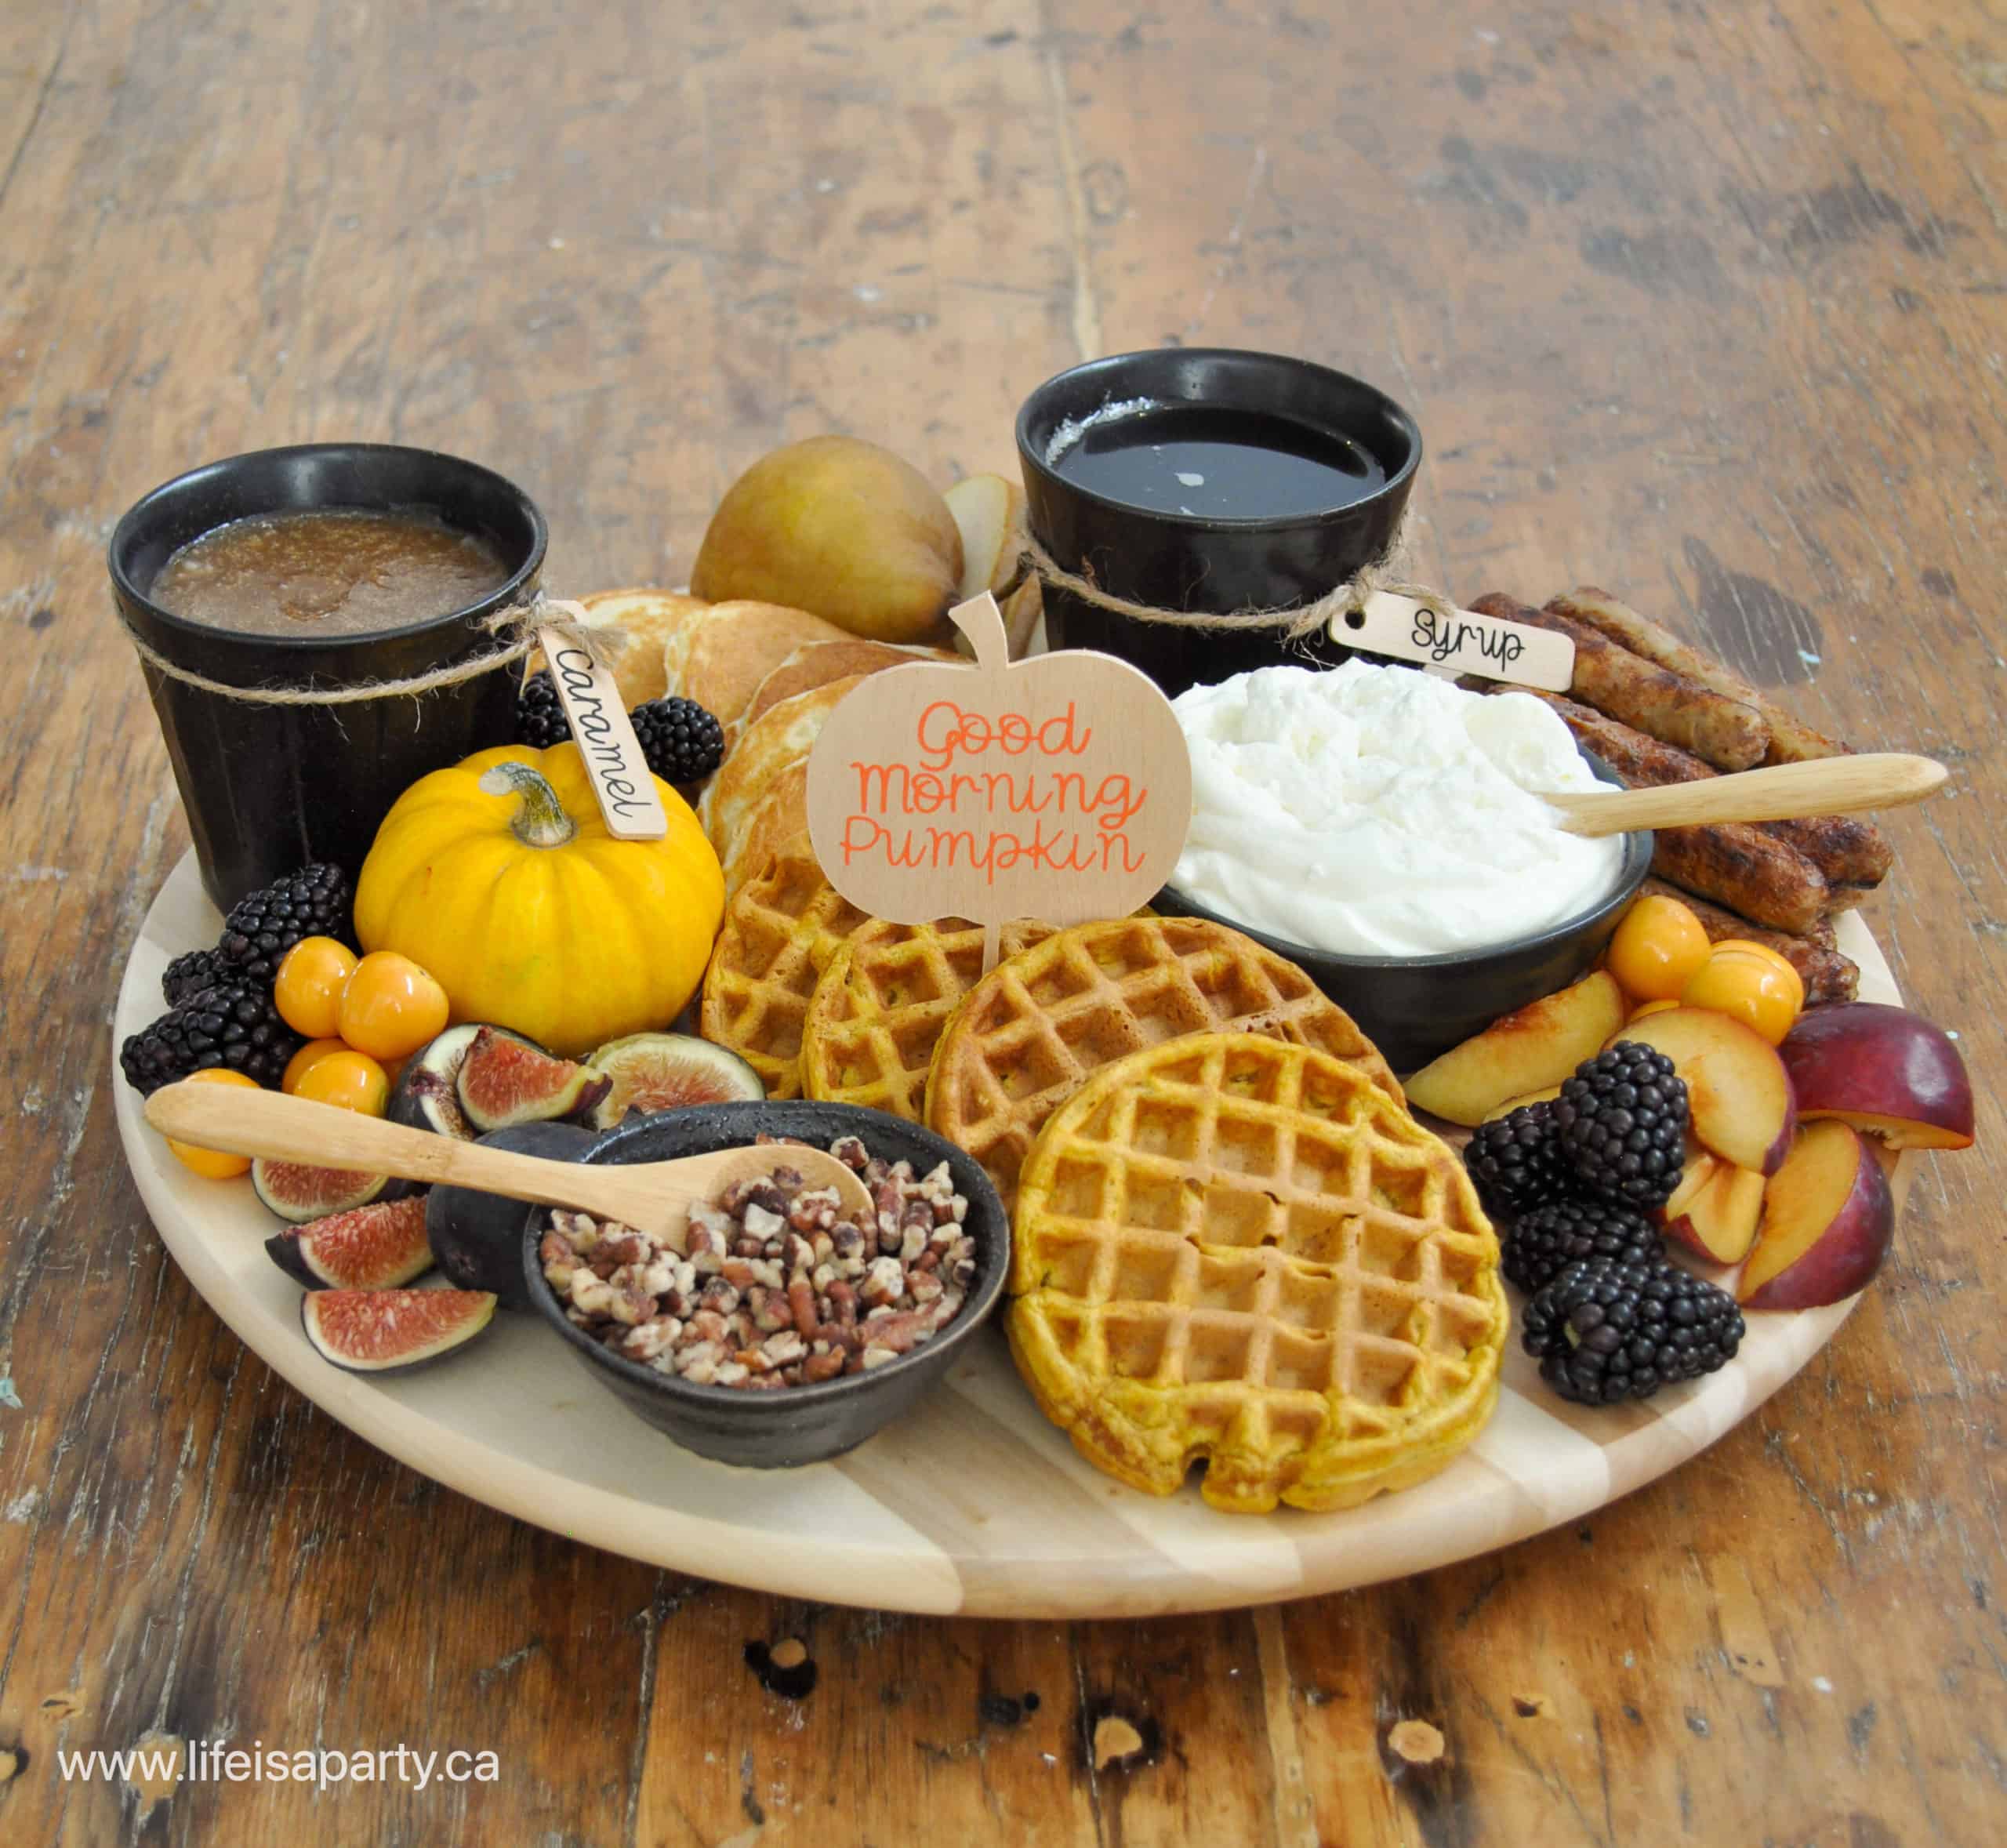
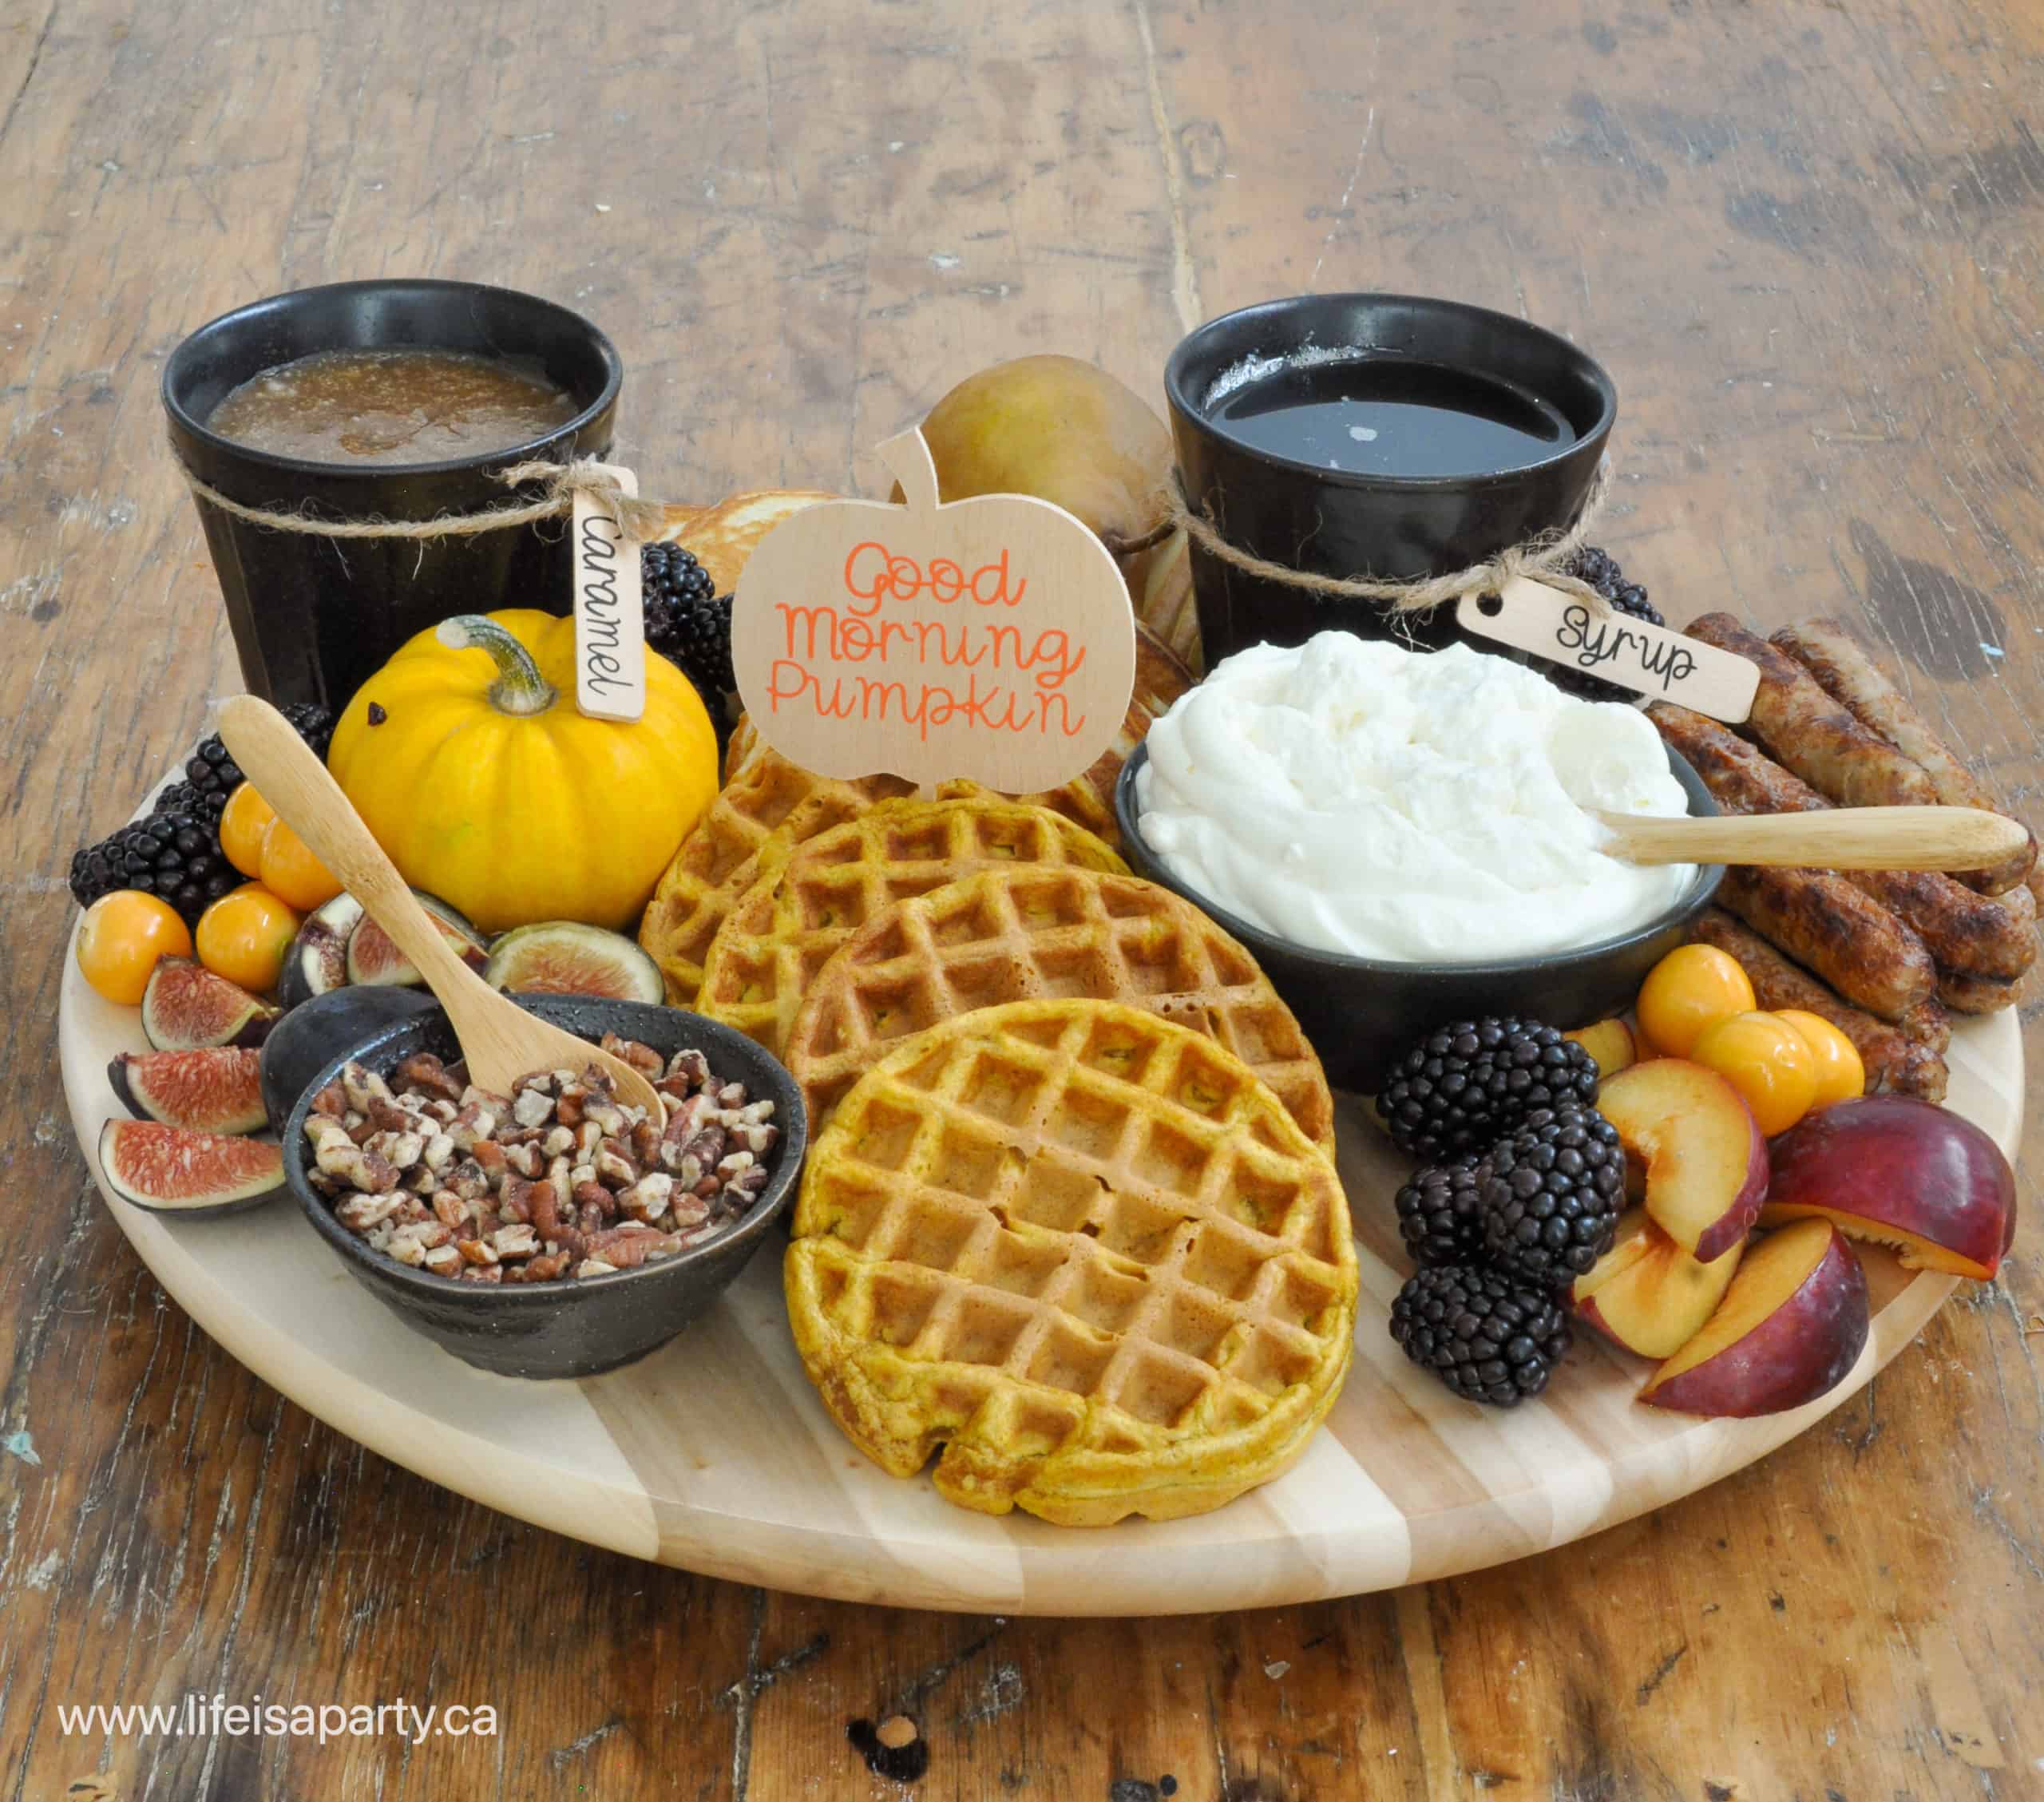
For my fall season breakfast charcuterie board, I chose to go with sweet -since it's everyone's favorite.  We made mini pancakes and pumpkin waffles, and added sausage, and all the delicious fall fruit and toppings.  It's perfect for fall hosting, and such a great way to serve up lots of different items.  Not only does it look beautiful, but guests can easily help themselves to whatever they want.  And there lots of great choices that the whole family will love.  Our fall brunch menu included:

  • Pumpkin Waffles -recipe here
  • Mini Pancakes
  • Breakfast Sausages
  • Maple Syrup
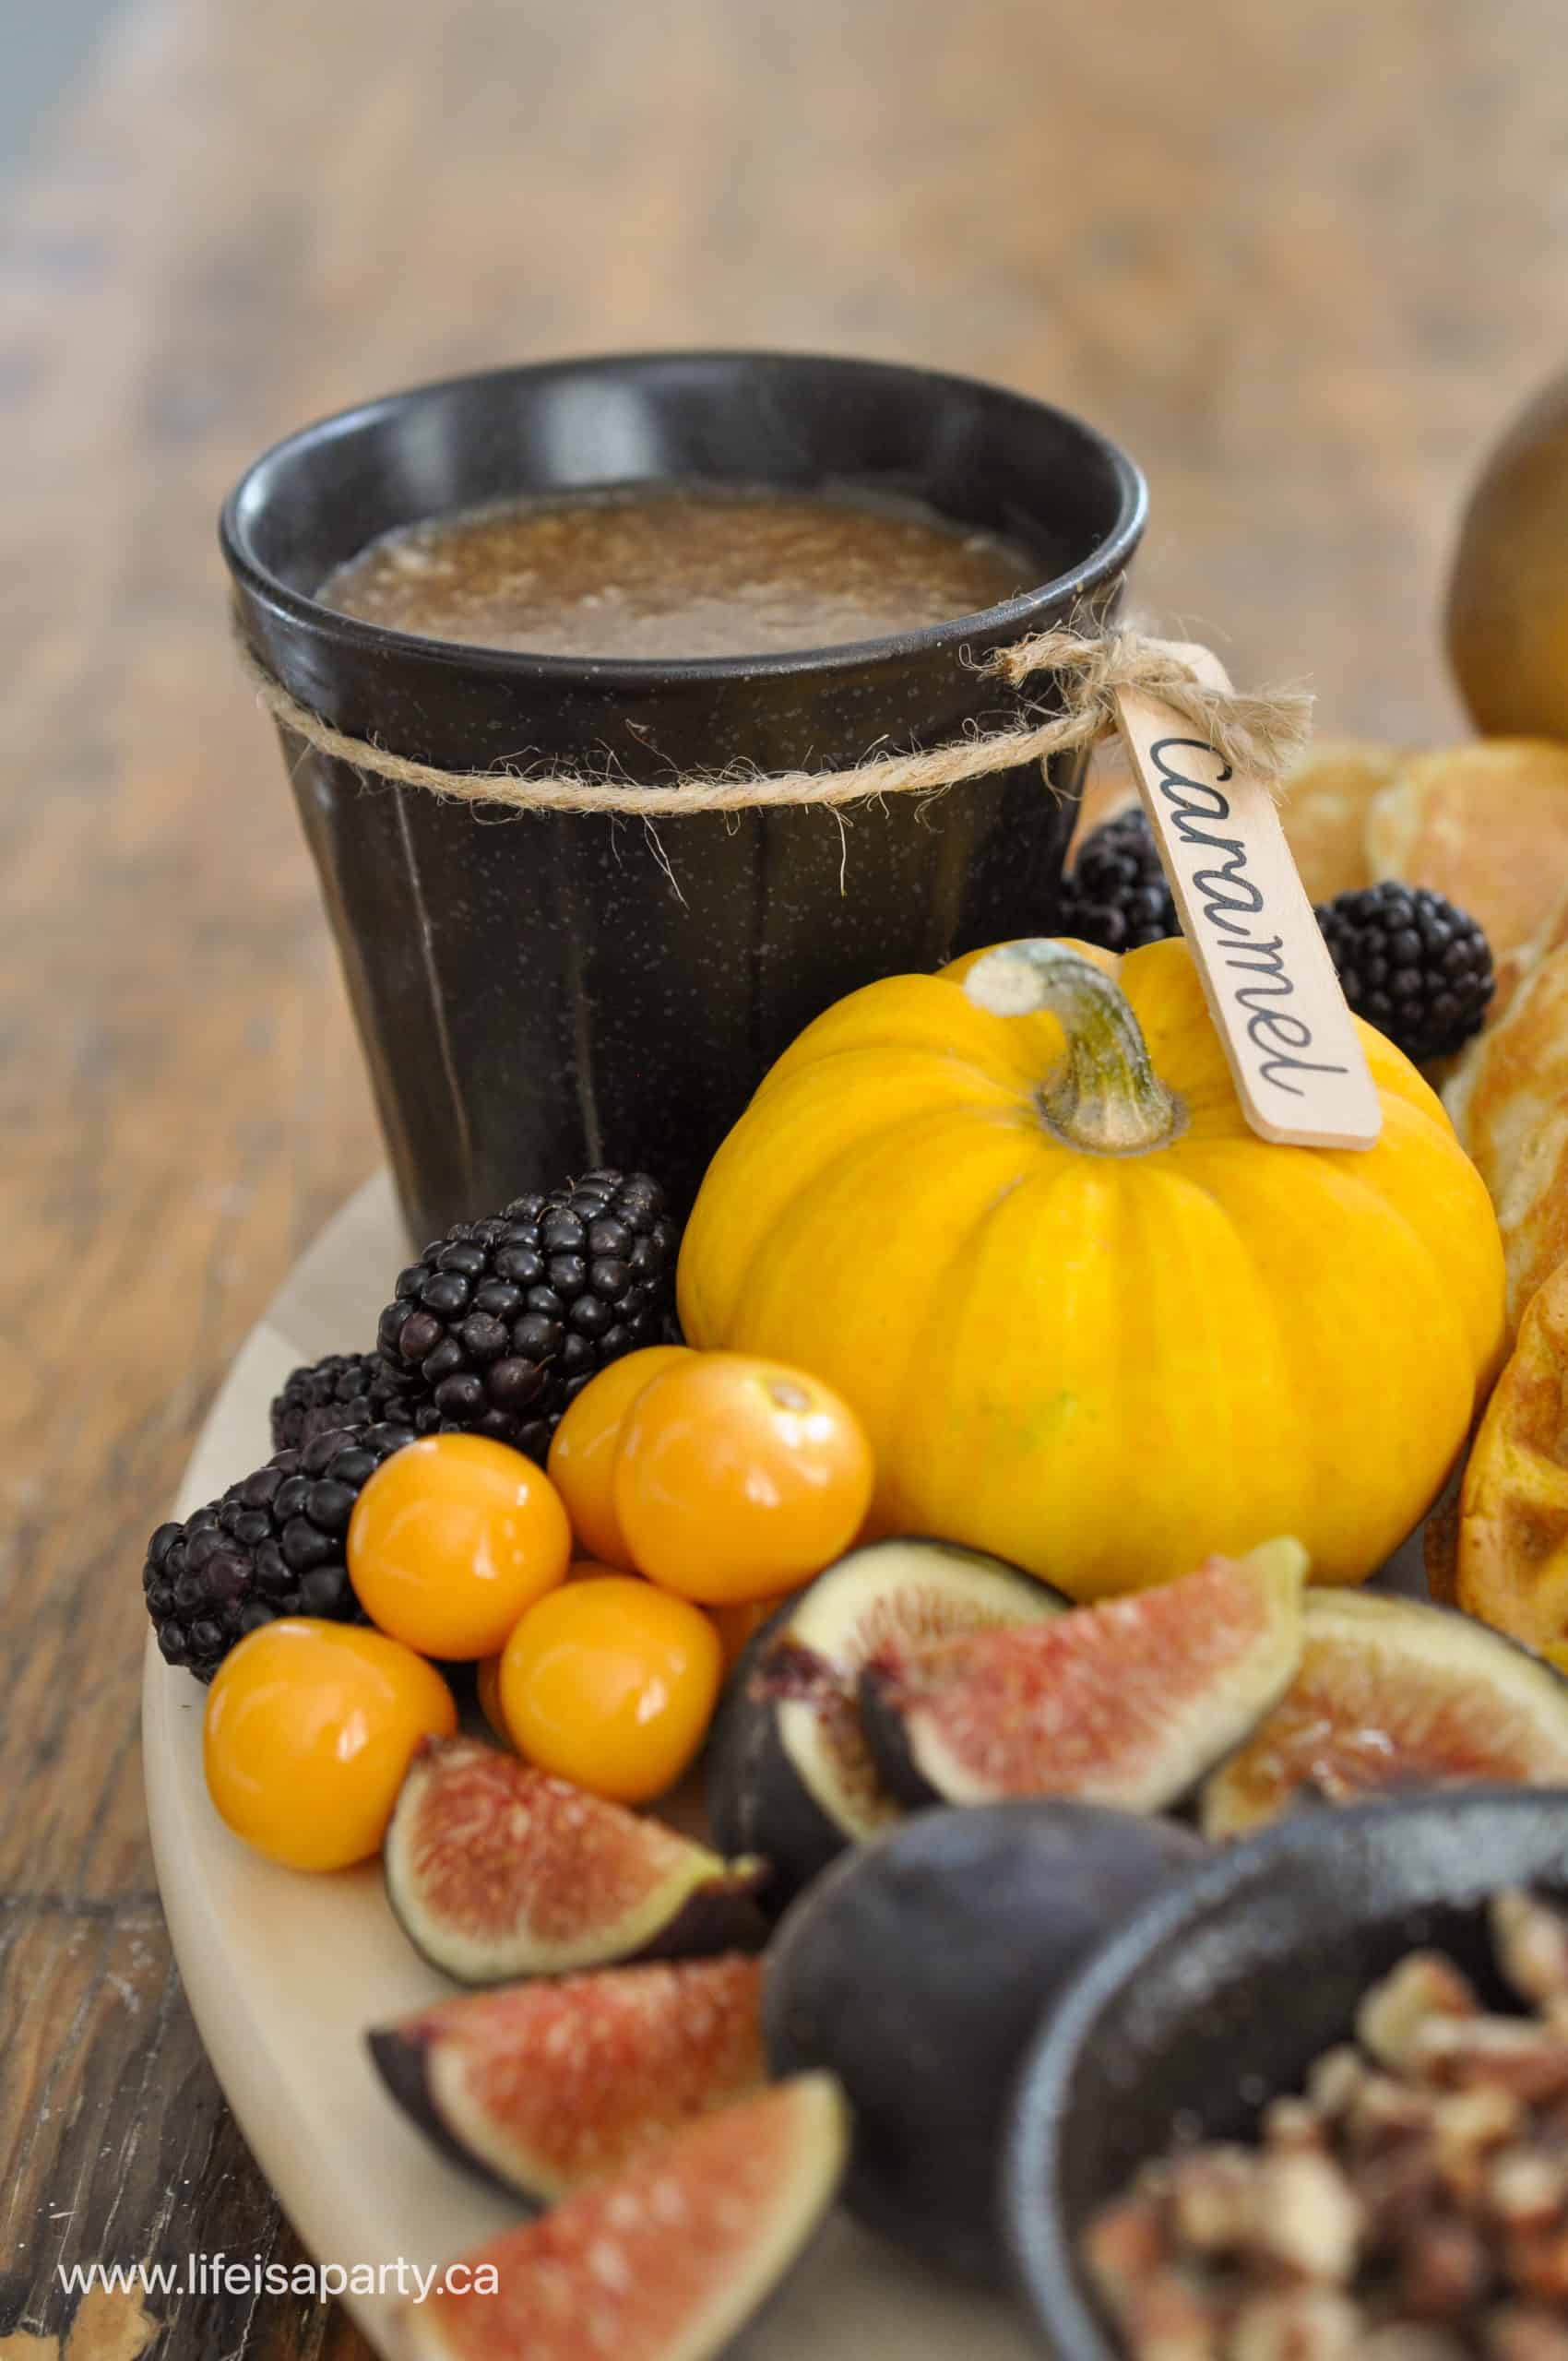
  • Caramel Sauce
  • Whipped Cream
  • Toasted Pecans
  • Pears
  • Plums
  • Blackberries
  • Golden Berries
  • Fresh Figs
good morning pumpkin cricut project
Cricut charcuterie board labels

Breakfast Foods

For my breakfast charcuterie board, I chose to go with sweet.  We made mini pancakes and pumpkin waffles, and added sausage, and all the delicious fall fruit and toppings.

breakfast charcuterie board
  • Easy Pumpkin Spice Waffles
  • Mini Pancakes
  • Sausage
  • Maple Syrup
  • Caramel Sauce
  • Whipped Cream
  • Toasted Pecans
  • Pears
  • Plums
  • Blackberries
  • Goldenberries
  • Fresh Figs
how to make a breakfast board

Waffles, Pancakes, and Sausage

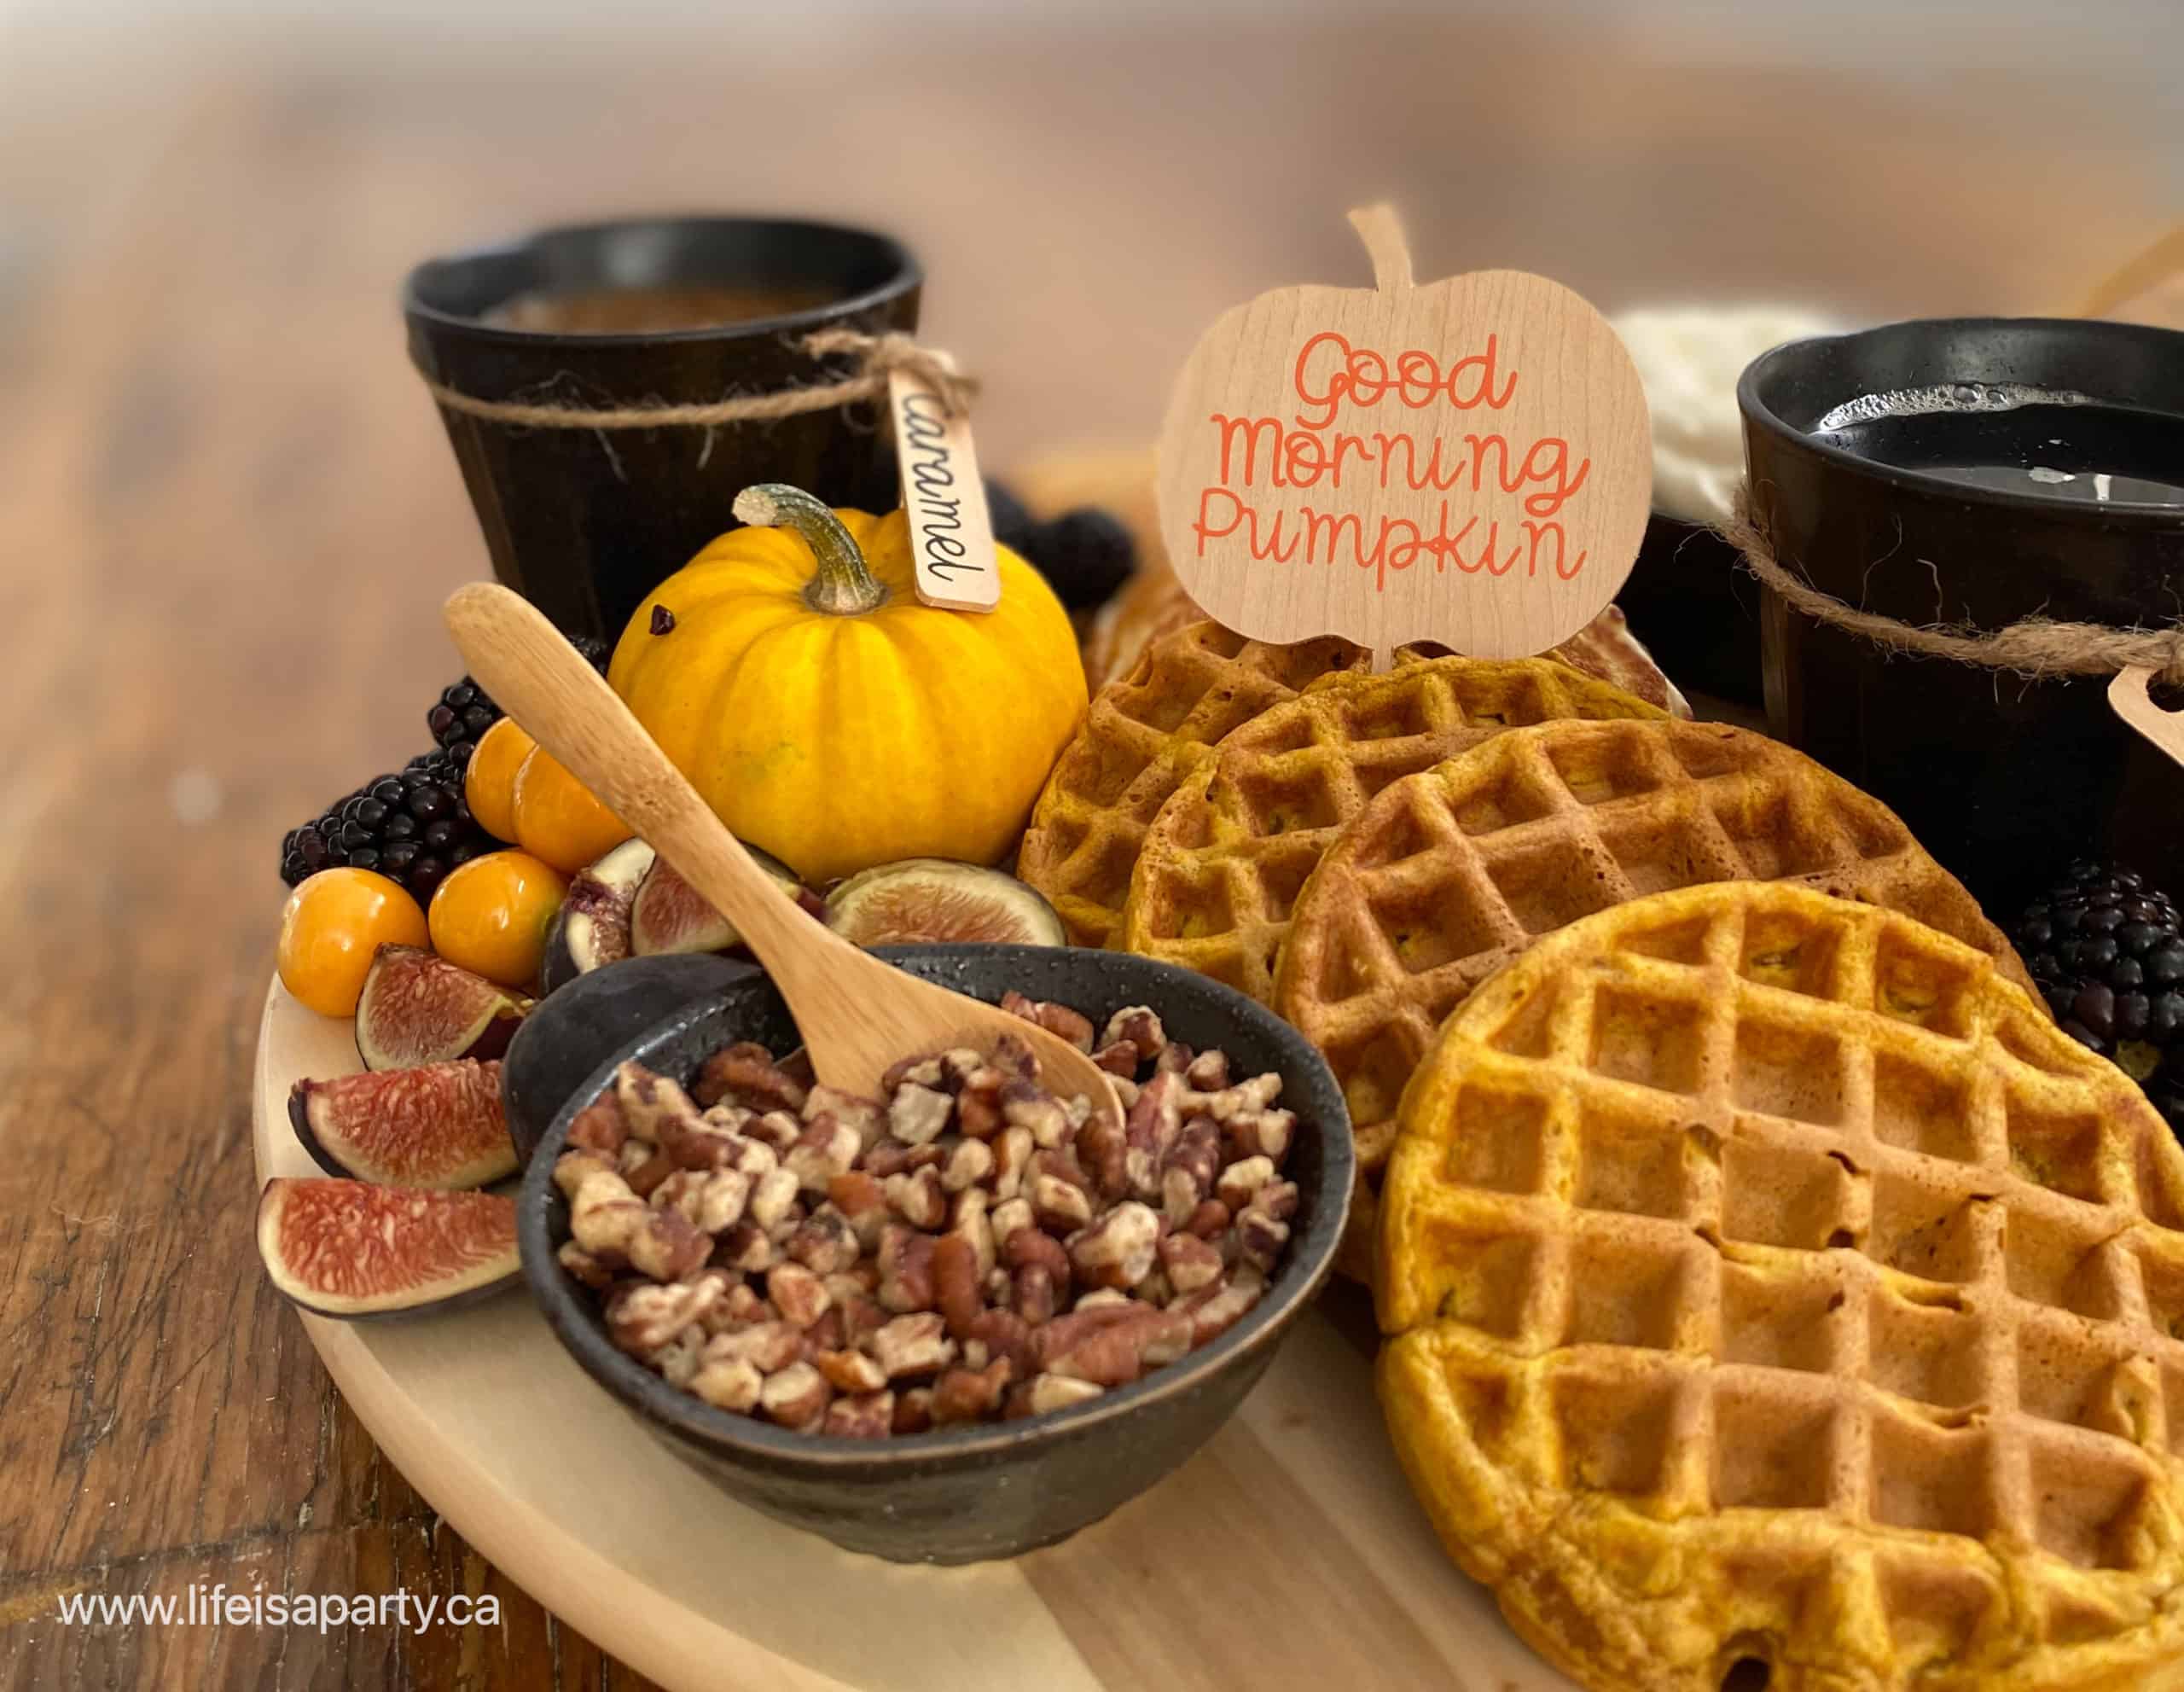
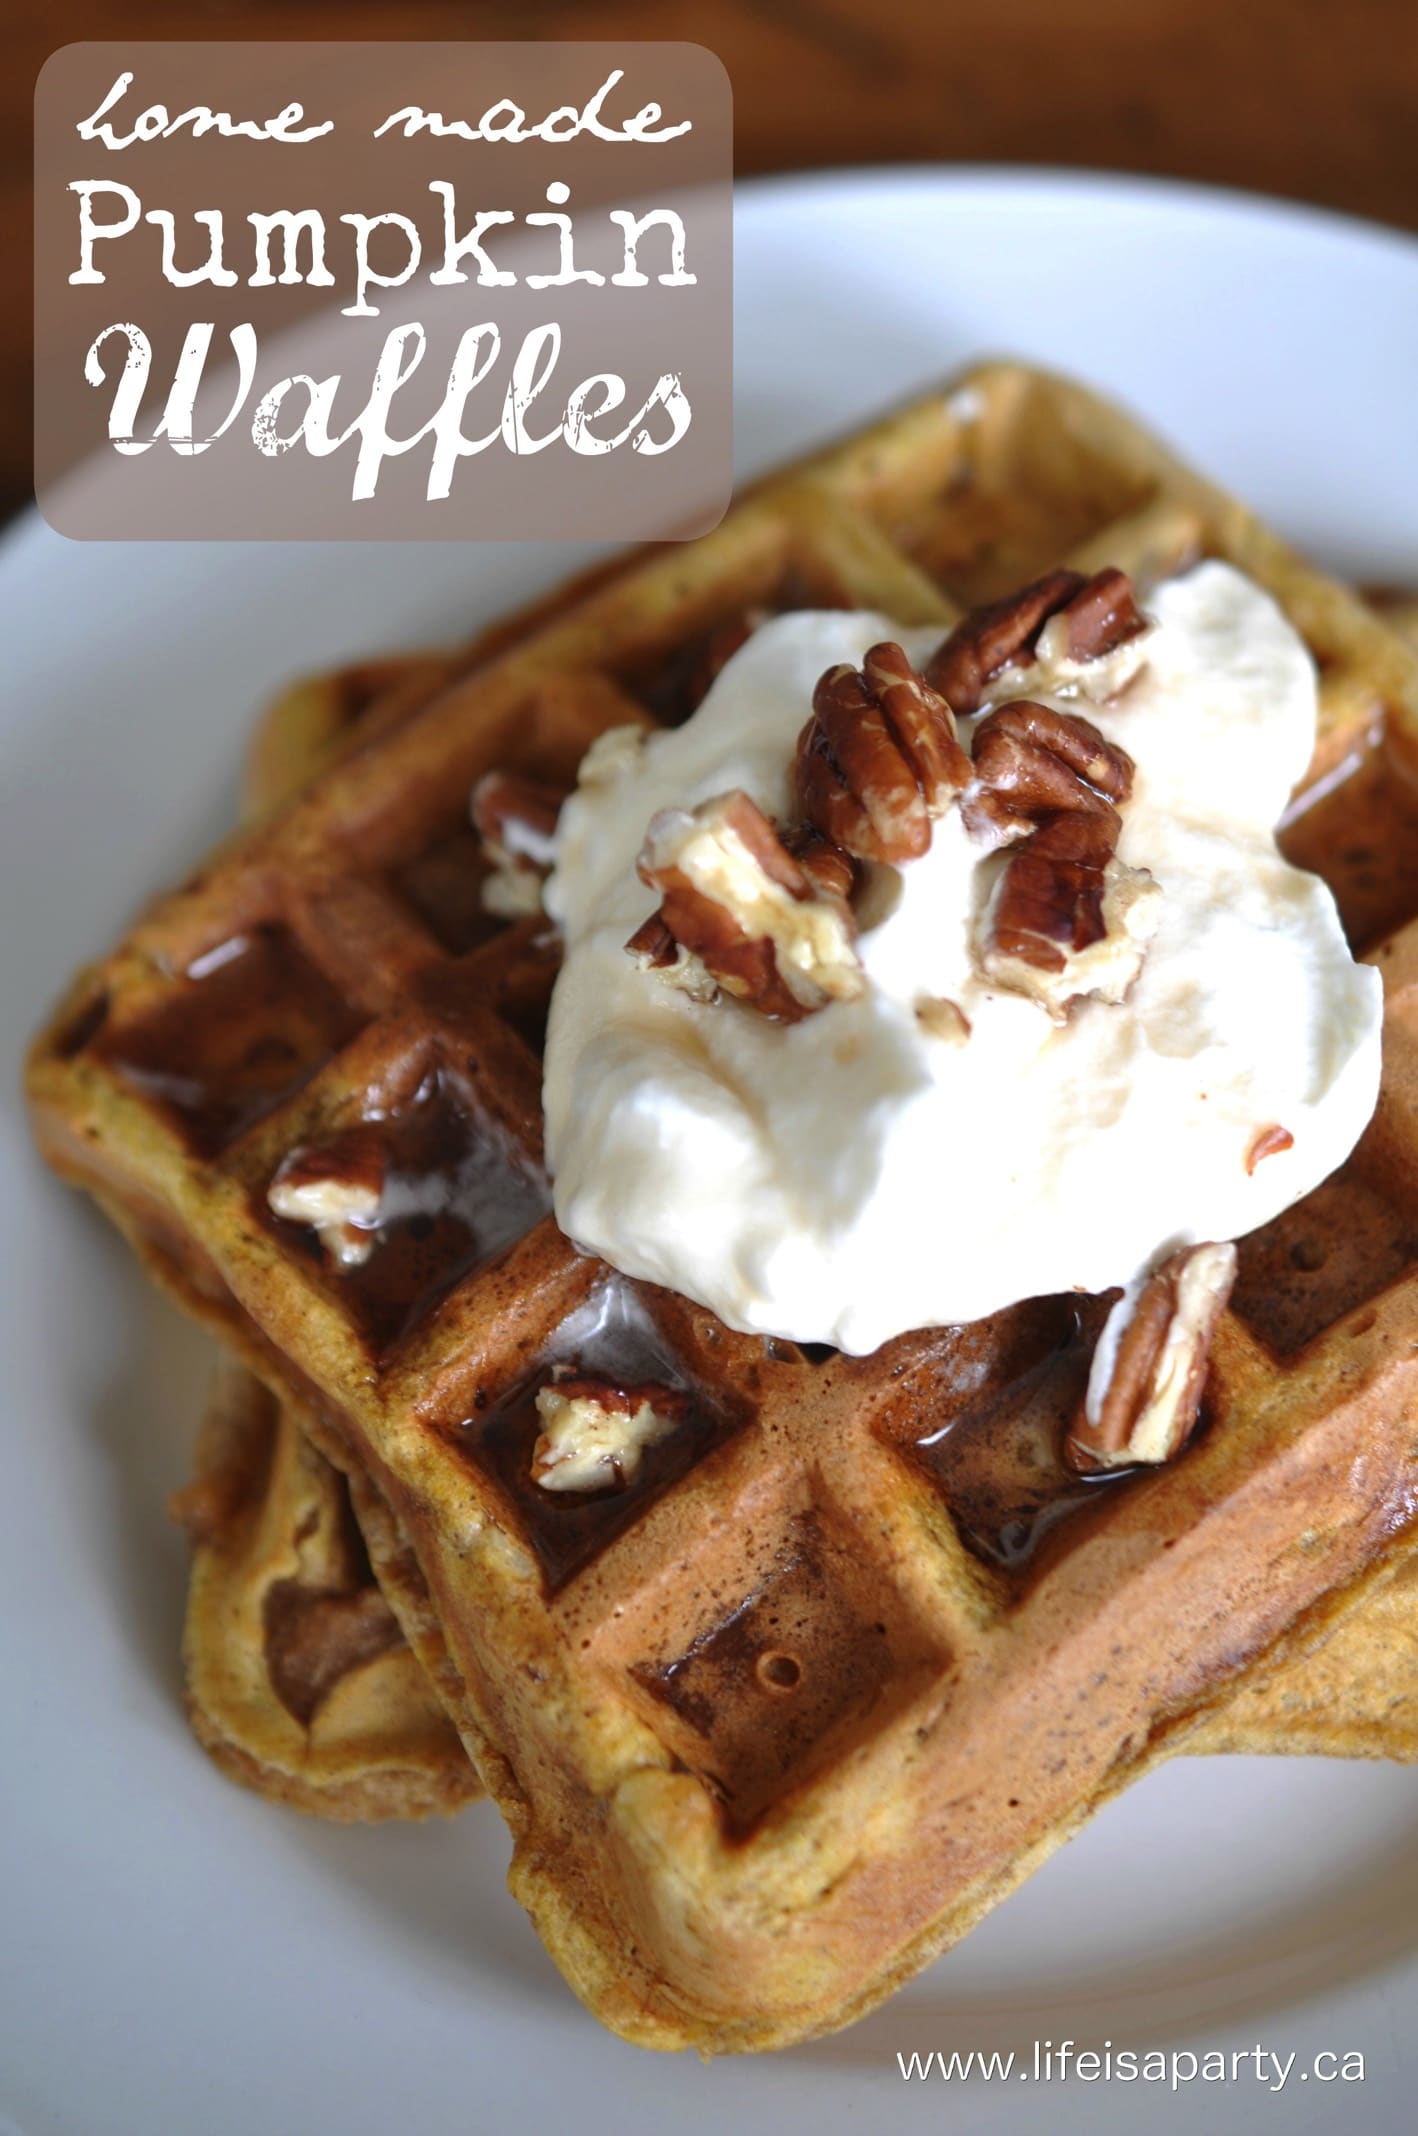
I used our easy pumpkin spice waffle recipe -find it here.  The pumpkin waffles were made in a mini waffle maker.  Pumpkin-shaped waffles would be great too.  They're perfect for a board like this, because you can sample a little bit of everything.  If you don't have a waffle maker you can use this same batter to make them into pumpkin pancakes.  It's such a wonderful way to incorporate some pumpkin spice and fall vibes.

fall breakfast charcuterie board

We also made some regular pancakes.  To make the pancakes uniform and about the same size as the mini waffles I used an ice cream scoop for the batter. It worked perfectly and I highly recommend trying it.  

We're big fans of sausage with our pancakes or waffles so I made a batch to go with them.  Bacon would be a great choice too, if you prefer, or some of each.

Toppings

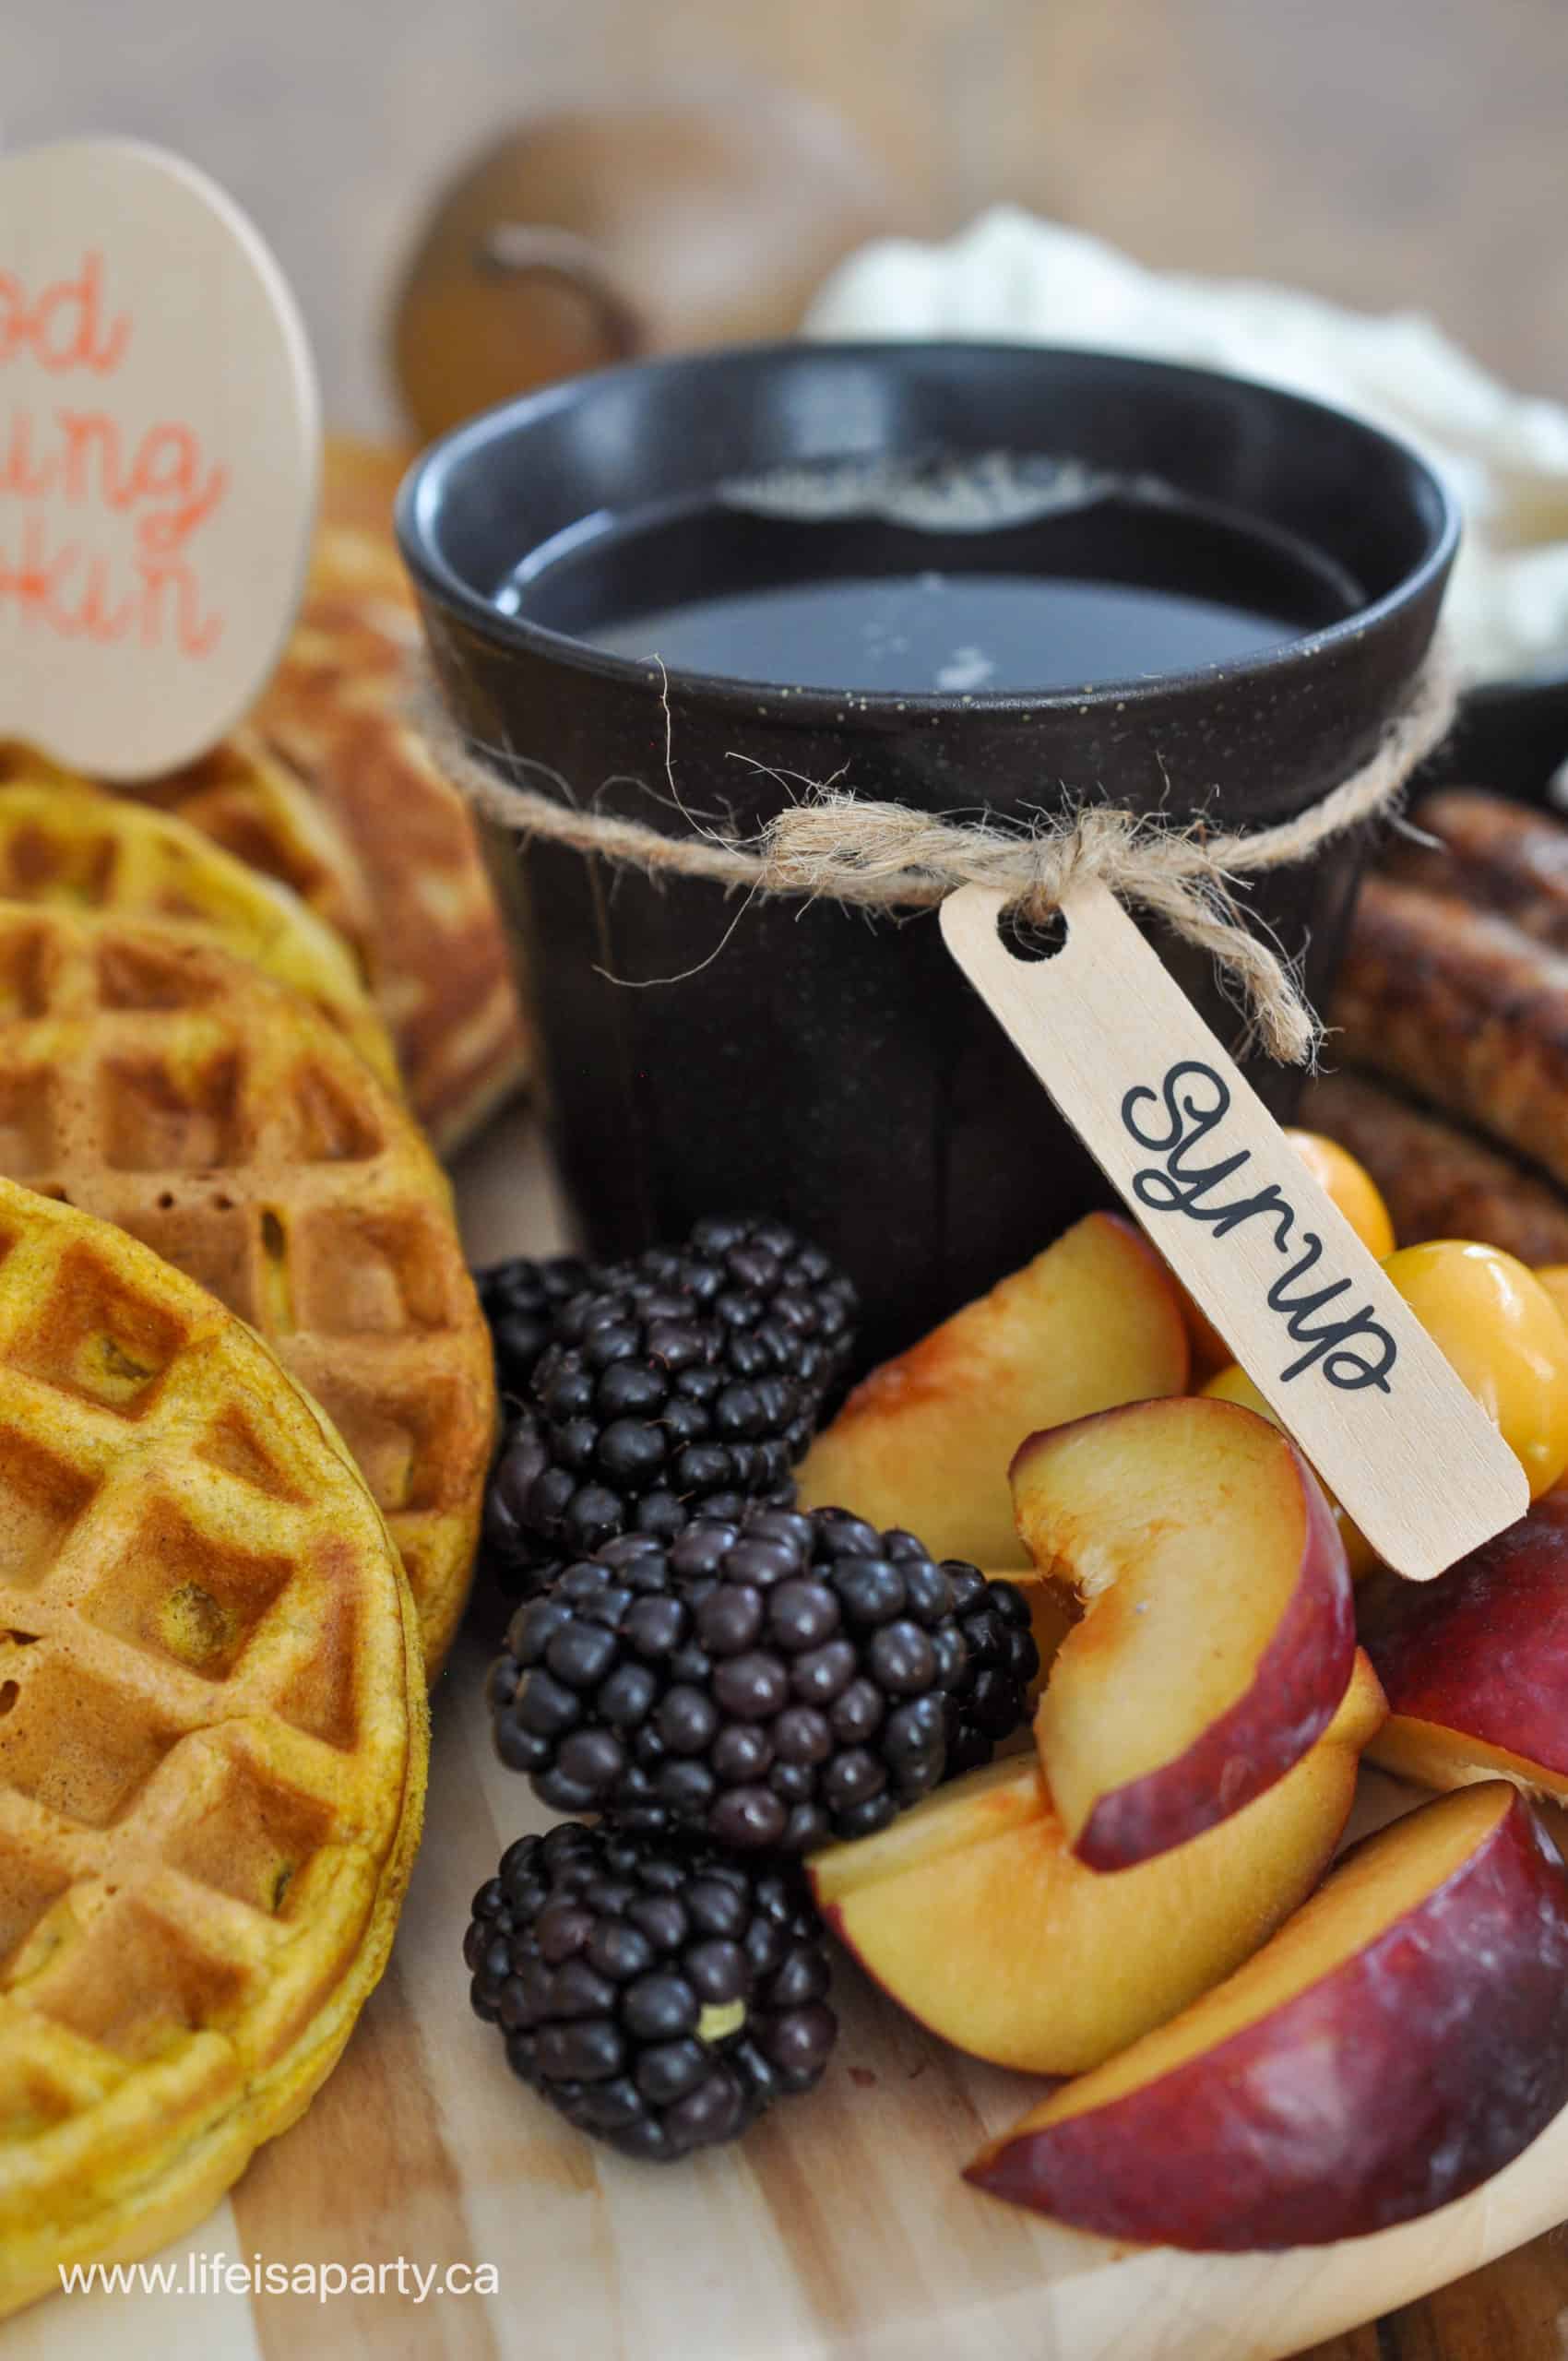
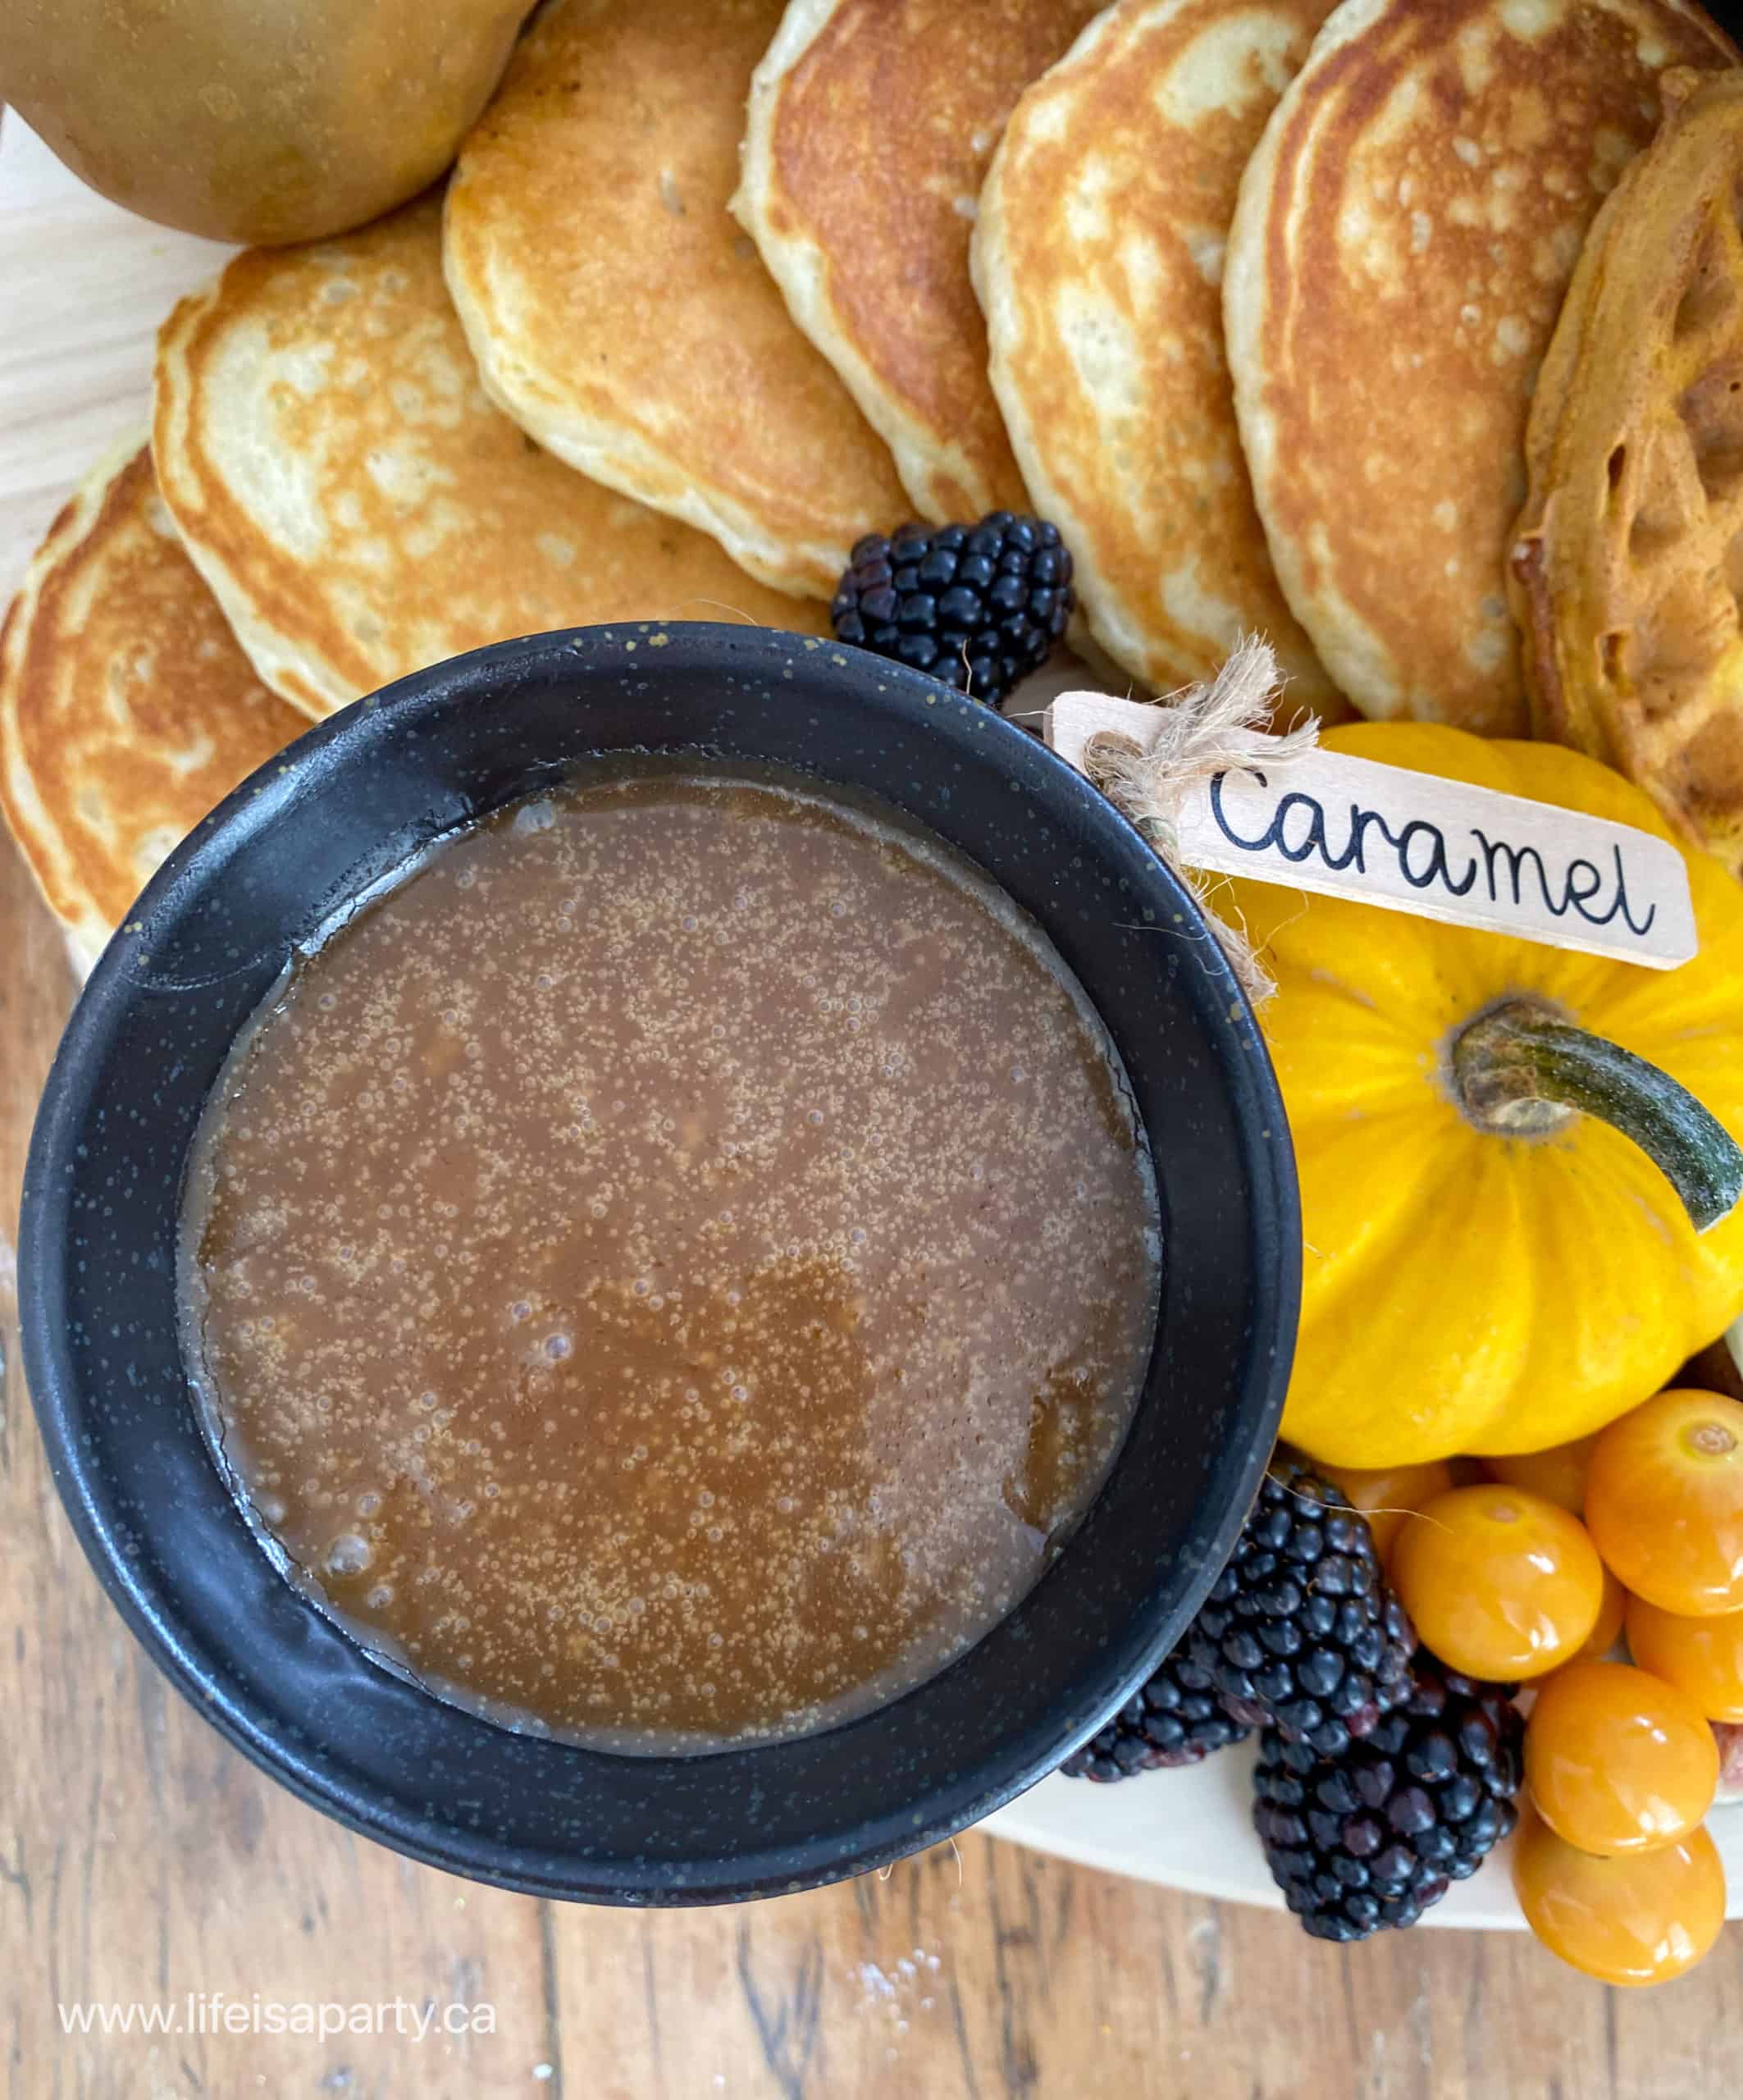
Part of the fun of pancakes and waffles is lots of fun toppings.  I started with maple syrup -in my Canadian opinion this is always a must when it comes to pancakes.  I also included a warm caramel sauce.  This was especially good on the pumpkin waffles.  We used our easy caramel sauce recipe here, or you can use some store bought caramel sauce.  Both the syrup and caramel sauce are best served warm.

caramel sauce
fall breakfast board

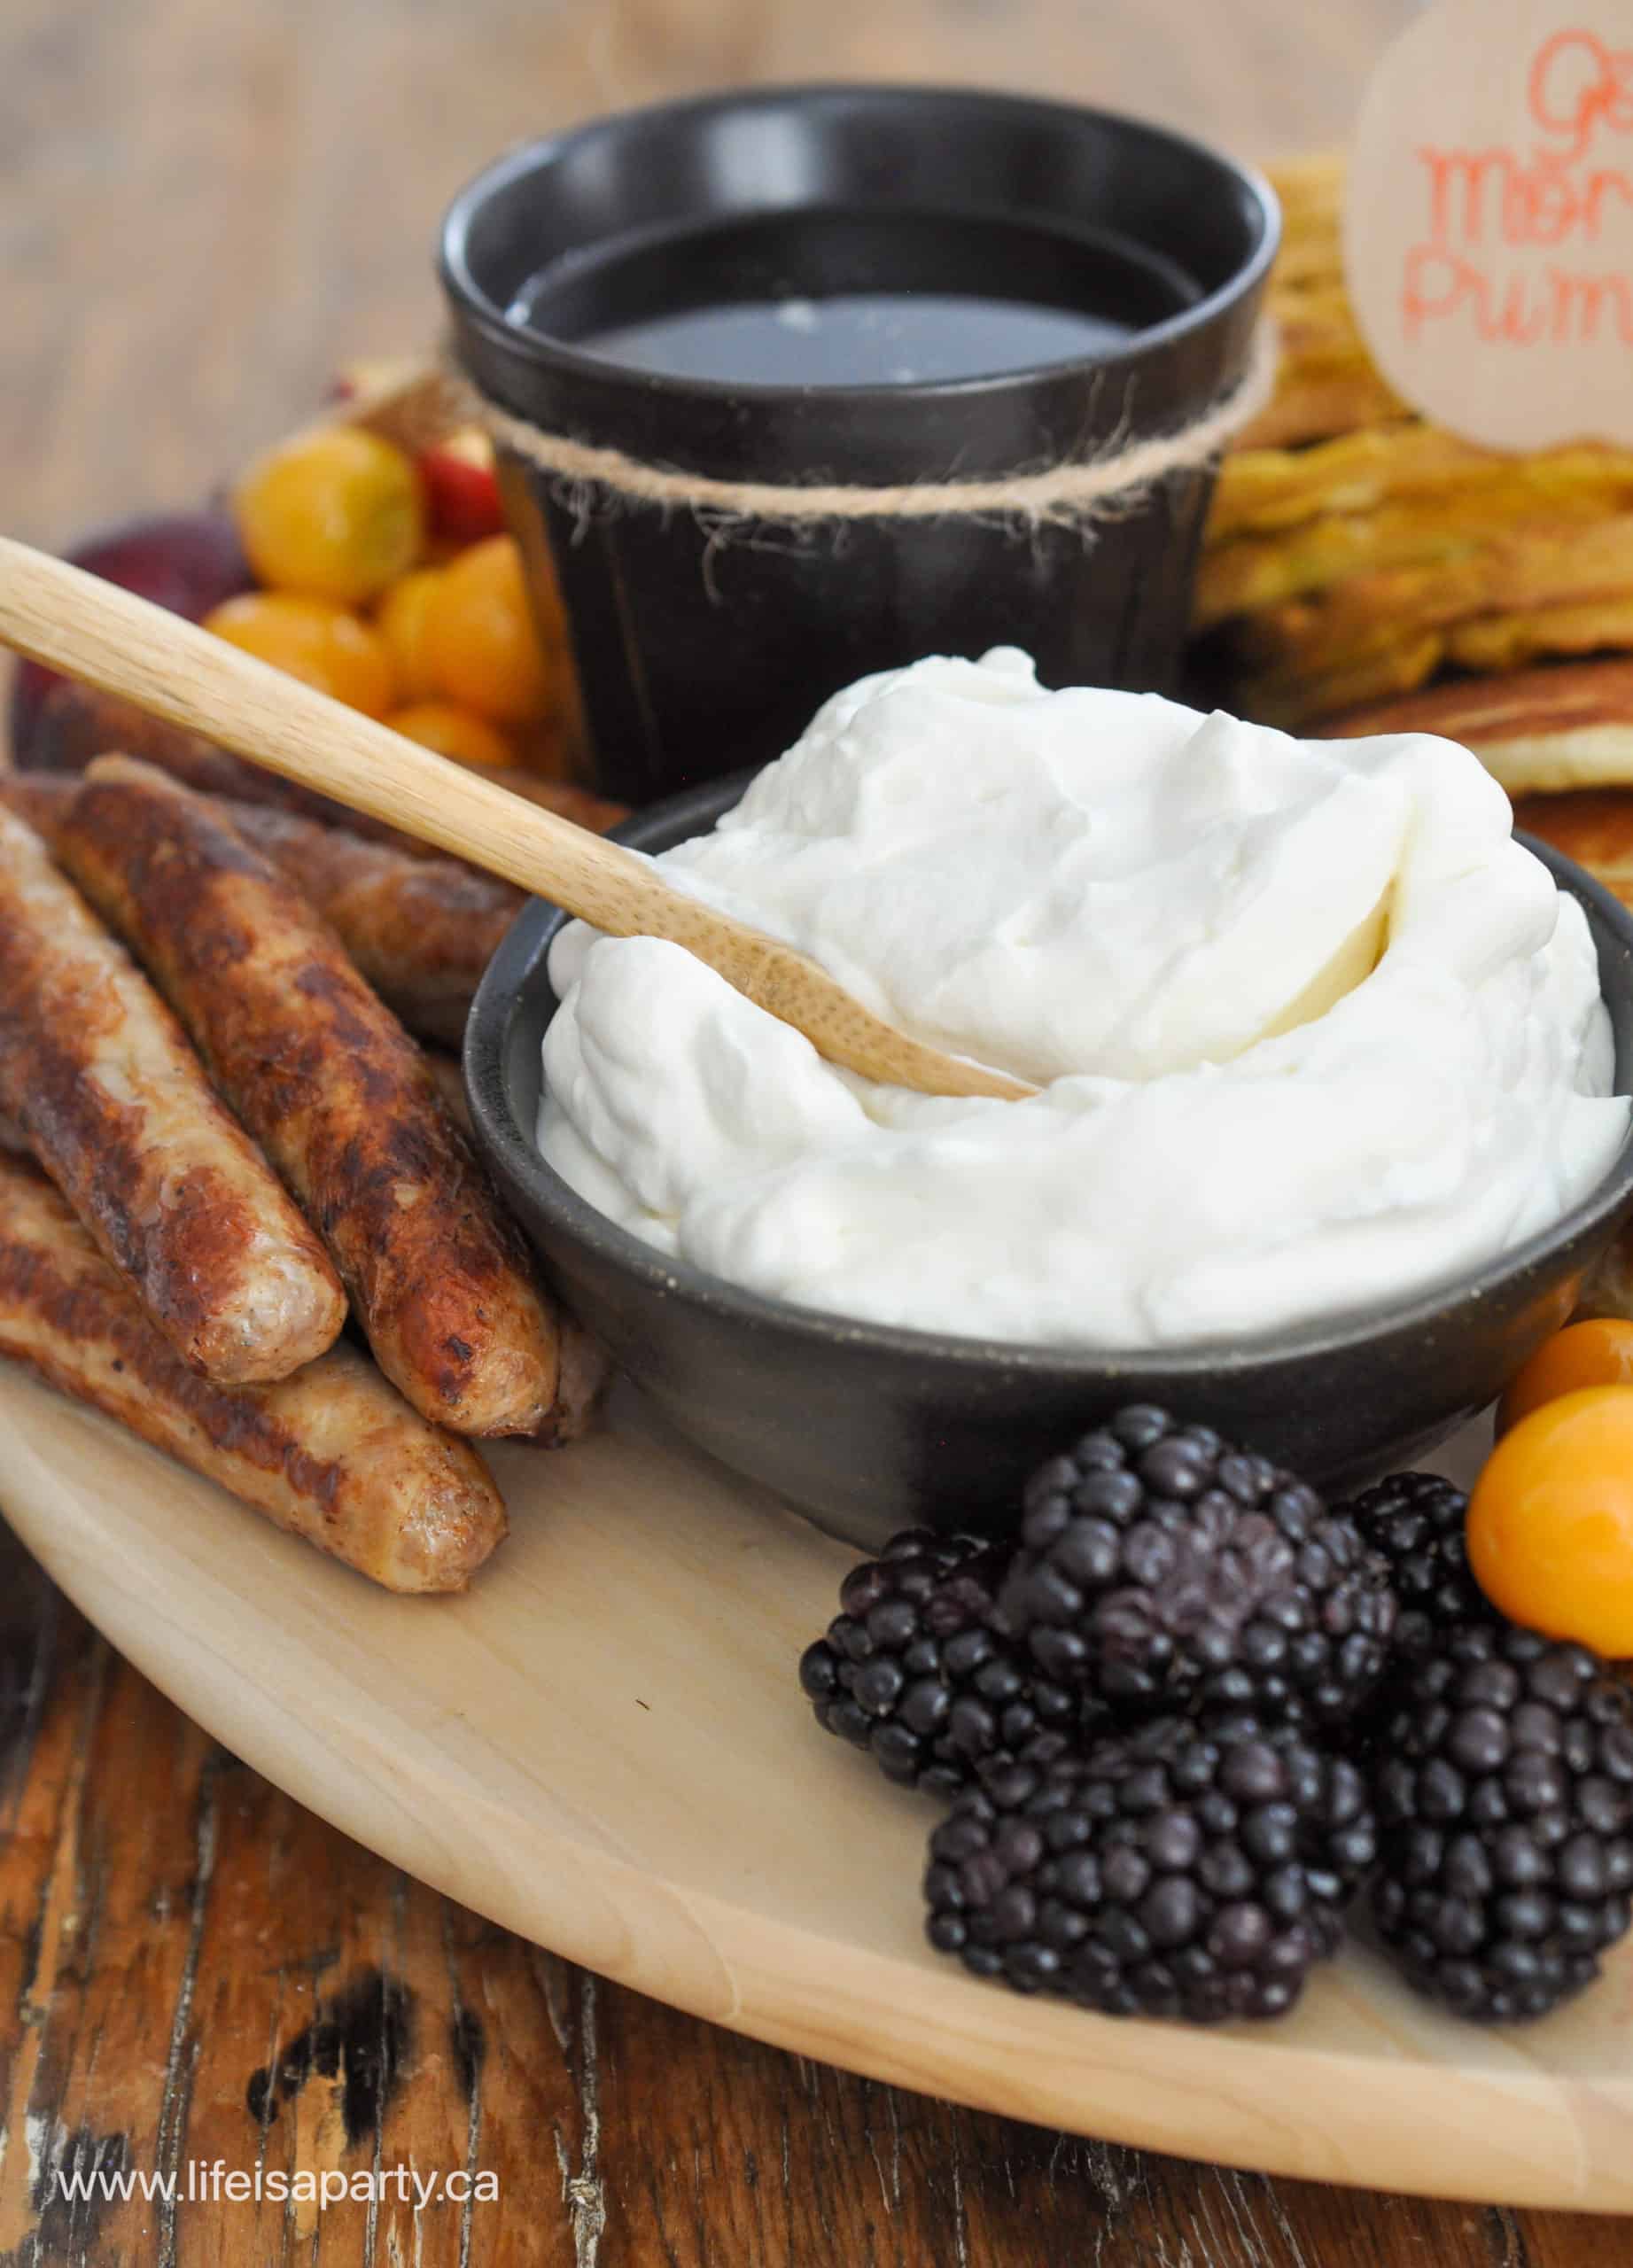
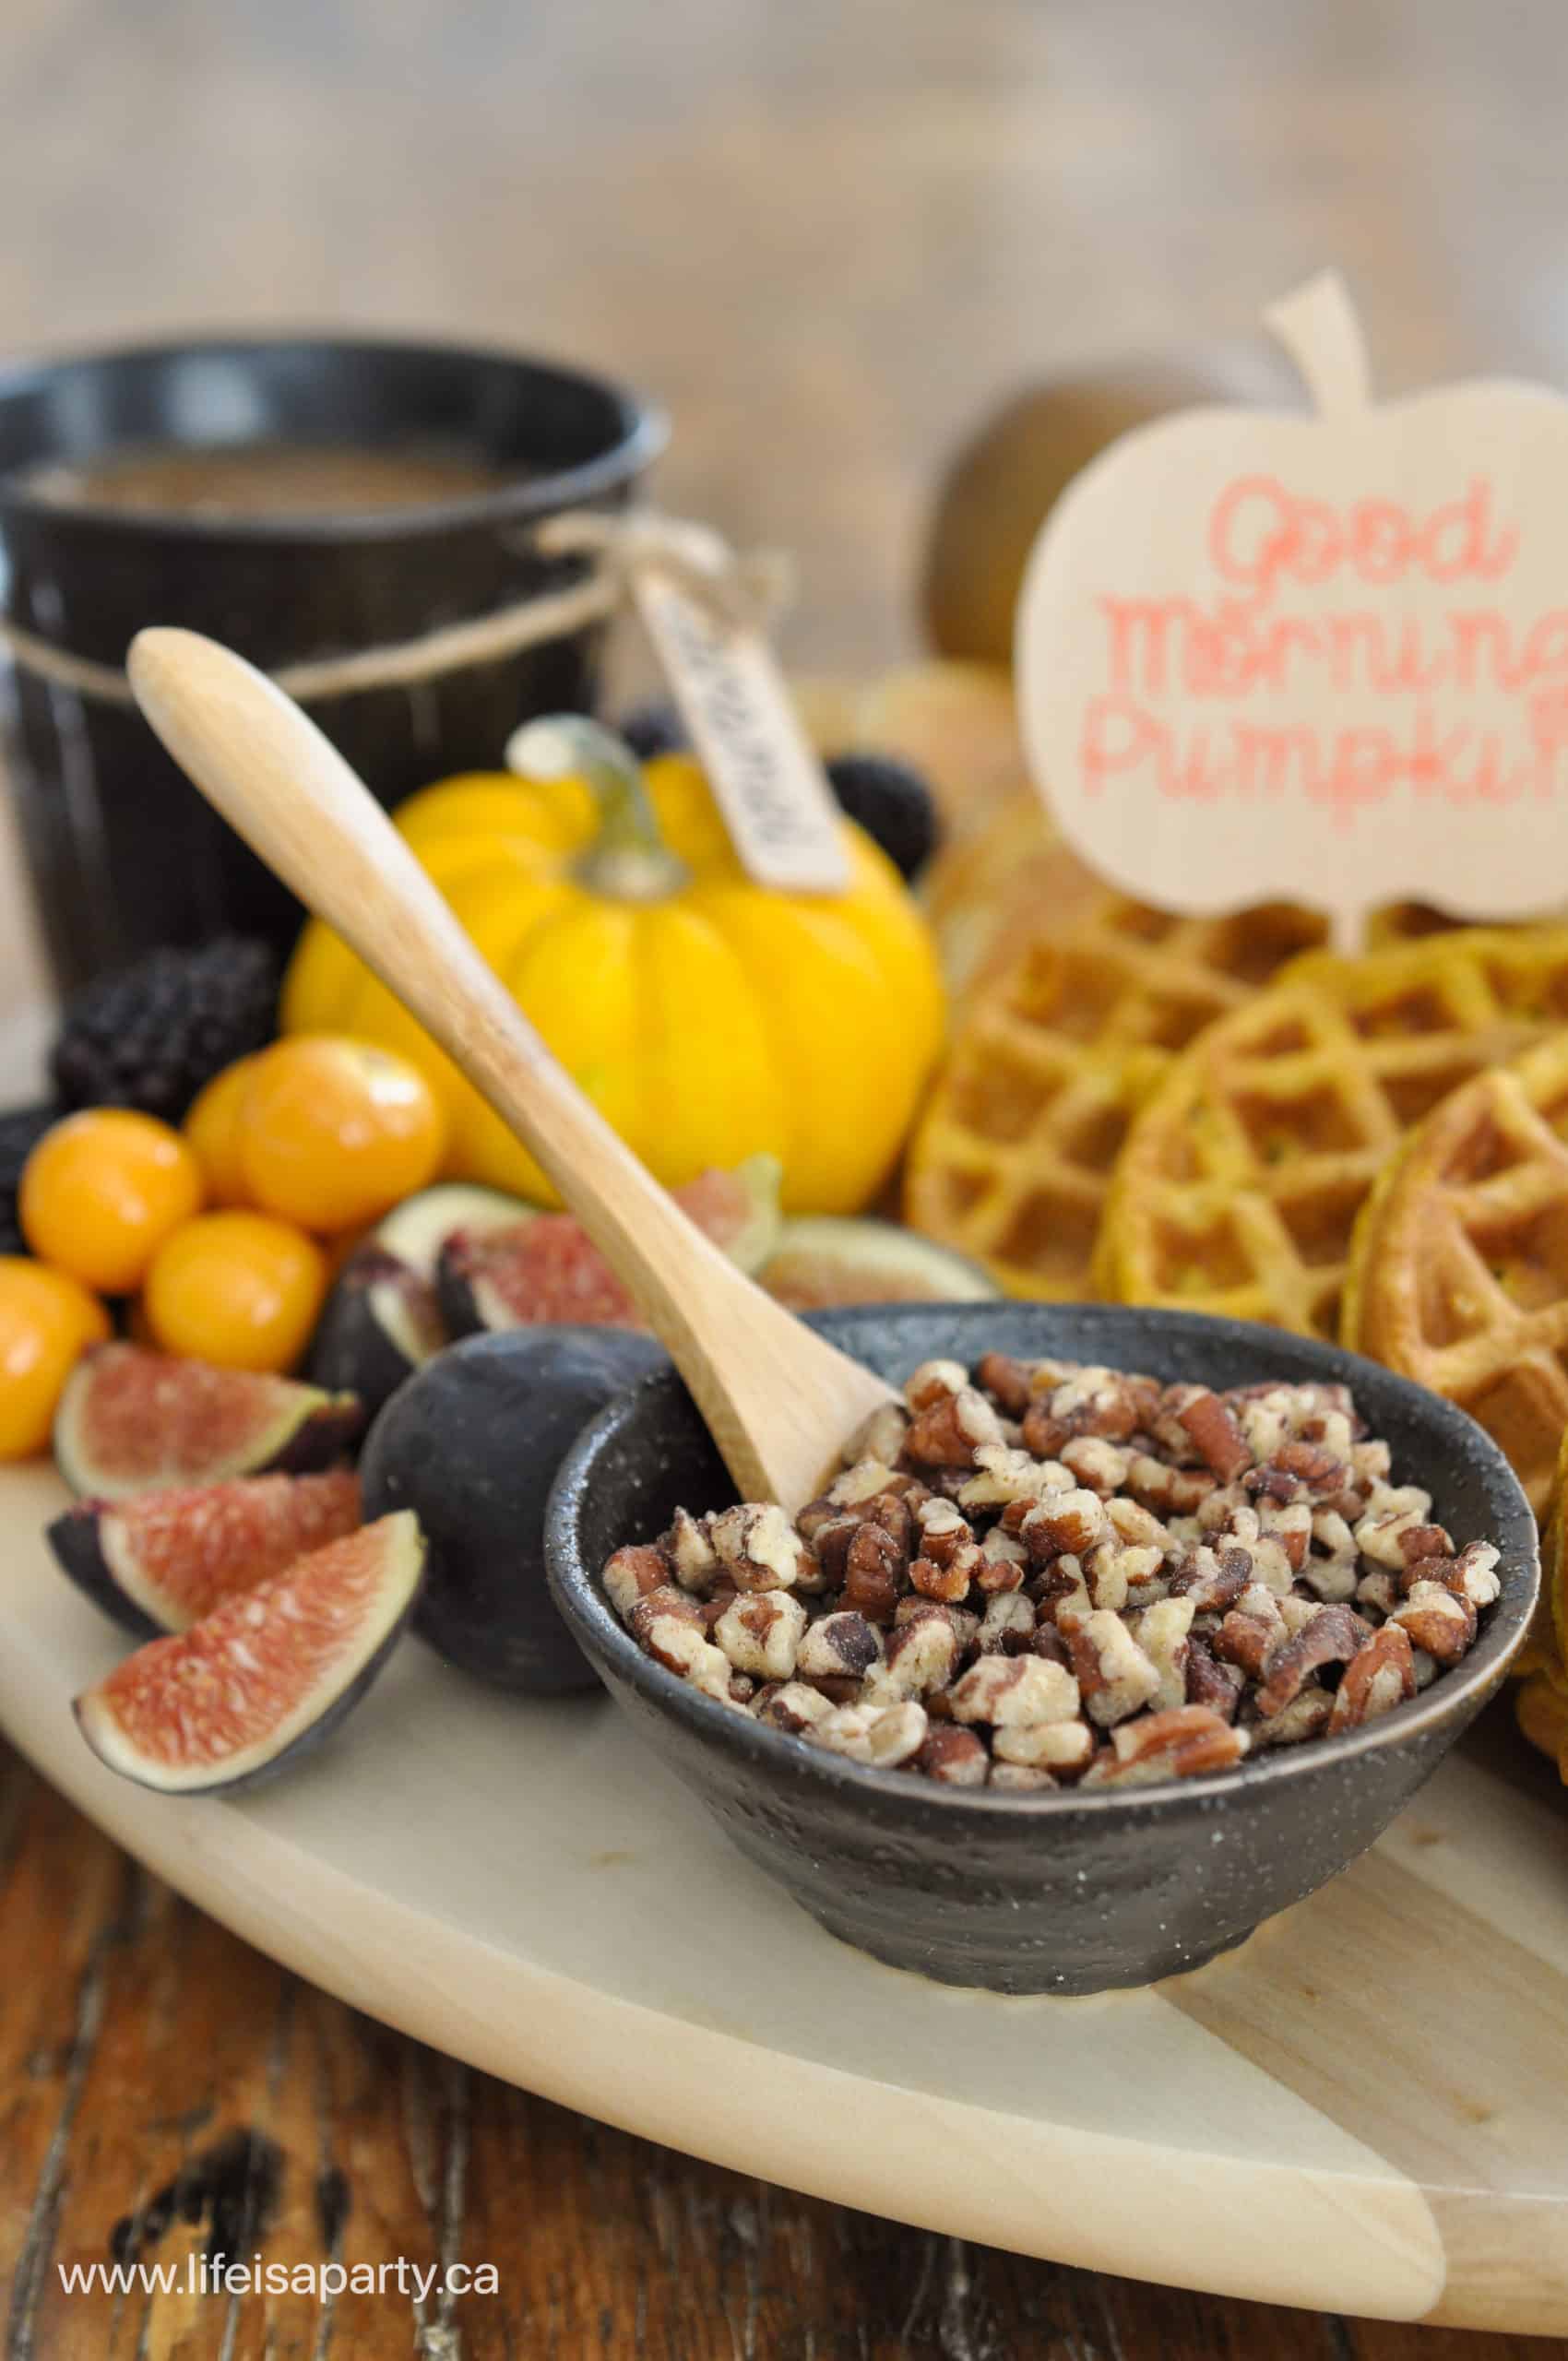
We also had some whipped cream, and toasted pecans.  To toast the pecans heat them in a dry skillet over medium heat, turning them as they toast, and taking care not to burn them.  Homemade whipped cream is easy to make and so delicious, but canned is a great addition too.

breakfast board ideas

Fresh Fruit

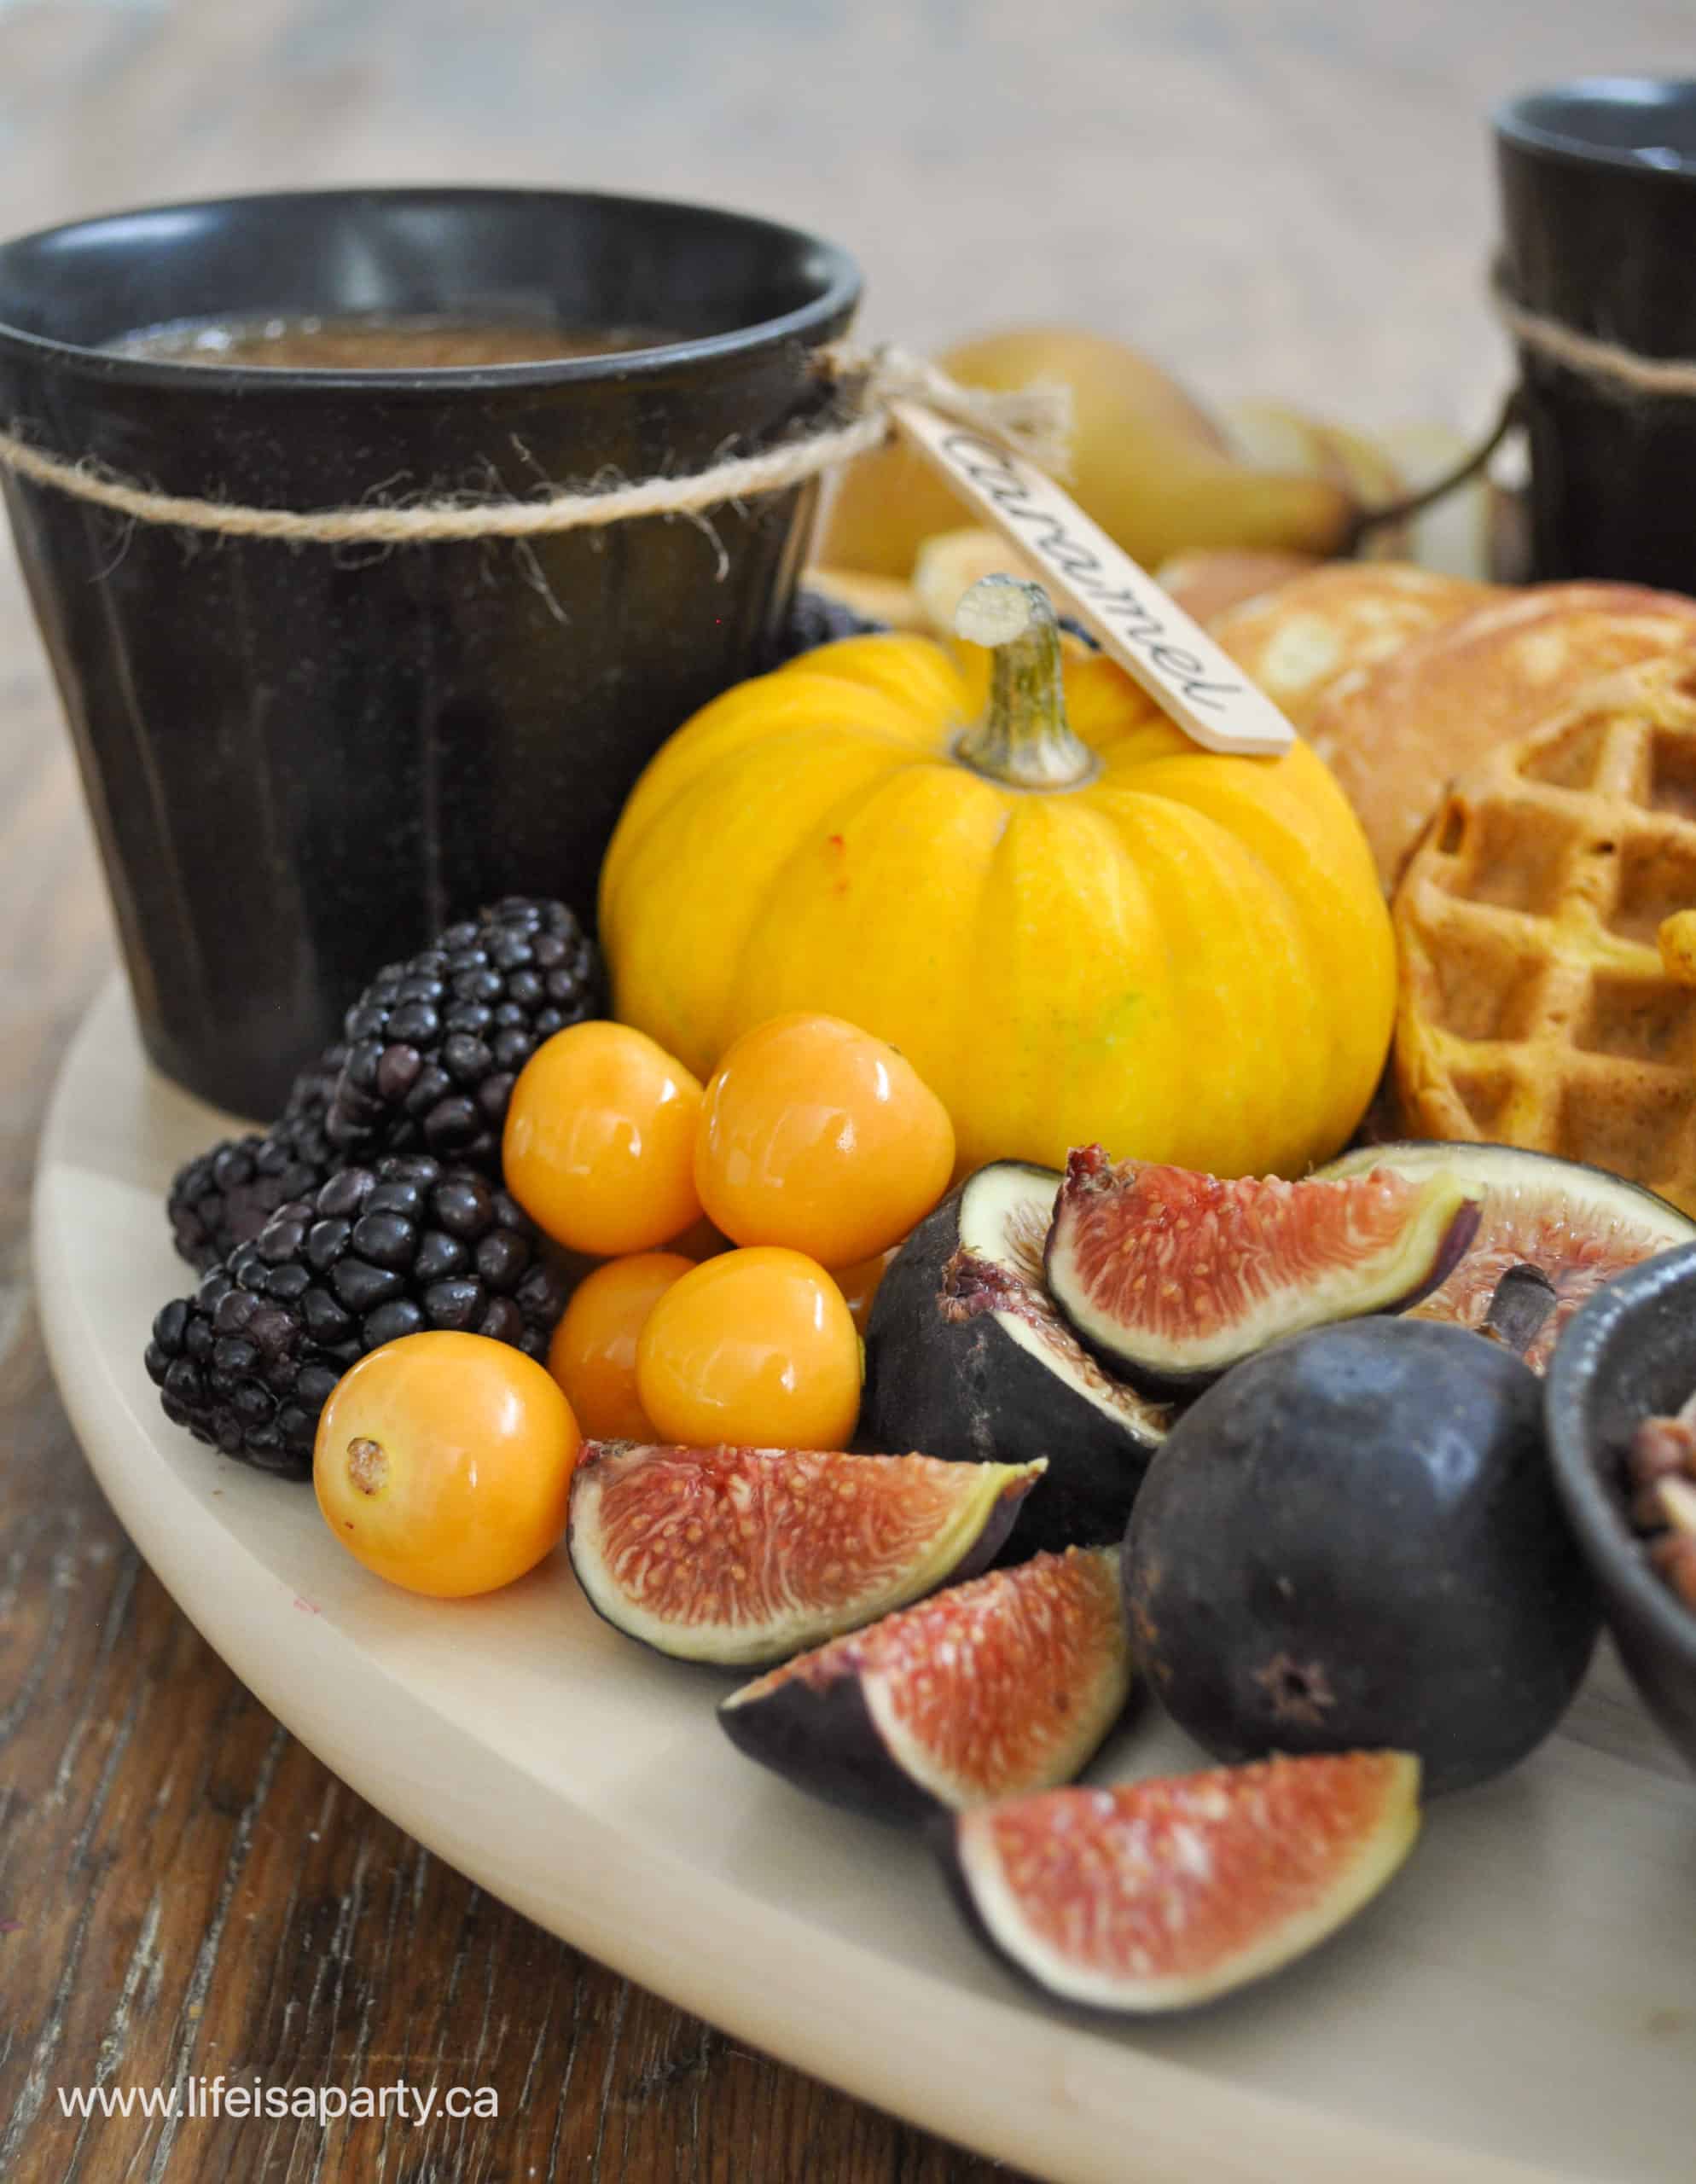
I also wanted to include lots of beautiful fall fruits.  We had pears, plums, blackberries, goldenberries, and fresh figs.  This was such a fun way to incorporate some fruit this time of year.  Apples would be a great fall choice too.  Some fried apples or warm apple pie filling would be a great topping for the waffles and pancakes too.

fall breakfast board

More Options

If you wanted to incorporate some more fall brunch ideas you could add in some eggs.  Some scrambled, or hard-boiled eggs would be great on this board.  Pumpkin loaf would be a great addition as well -check out our pumpkloaf with honey cinnamon butter here.  You really can never have too many pumpkin recipes this time of year.  If you want more sweet treats. mini cinnamon rolls would be a delicious addition as well.

breakfast charcuterie board ideas

Putting The Breakfast Charcuterie Board Together

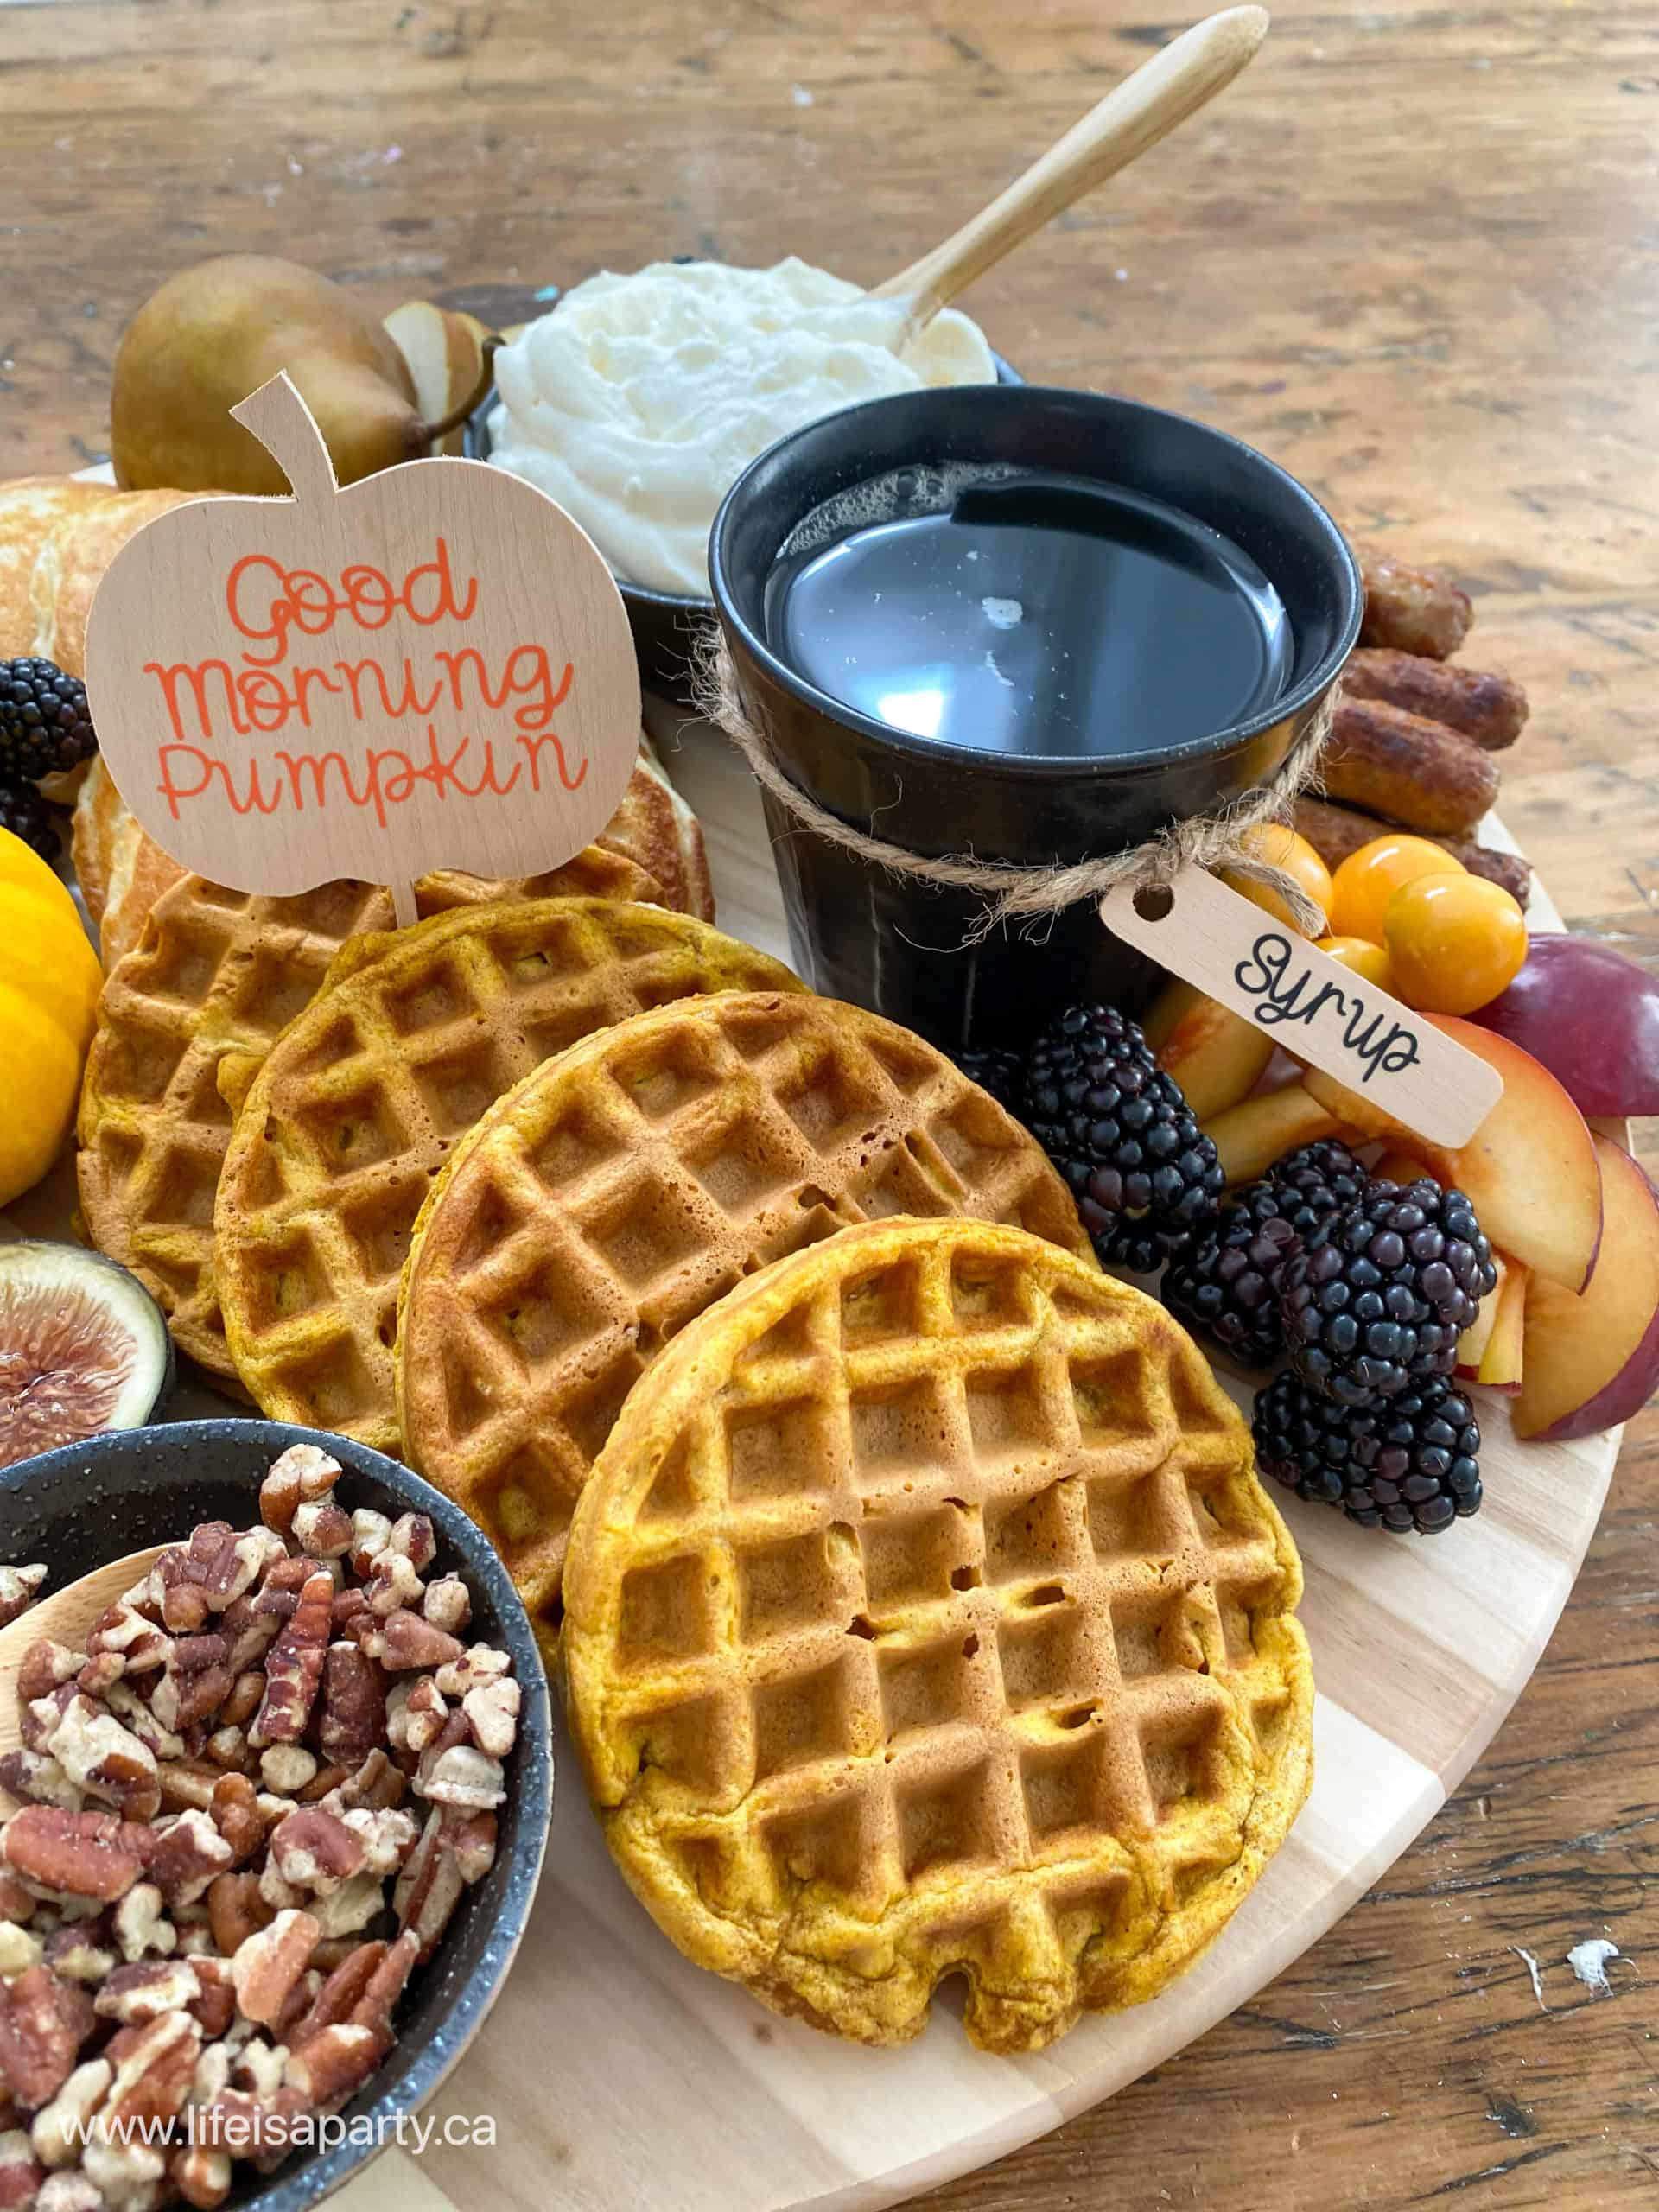
The breakfast board is built on a large wooden board that is a round lazy Susan.  This worked perfectly for our festive brunch board, because everyone could easily spin the board and reach what they wanted.  I started with the pancakes and waffles which were the star of the show, and placed them down the middle as our main focus.  

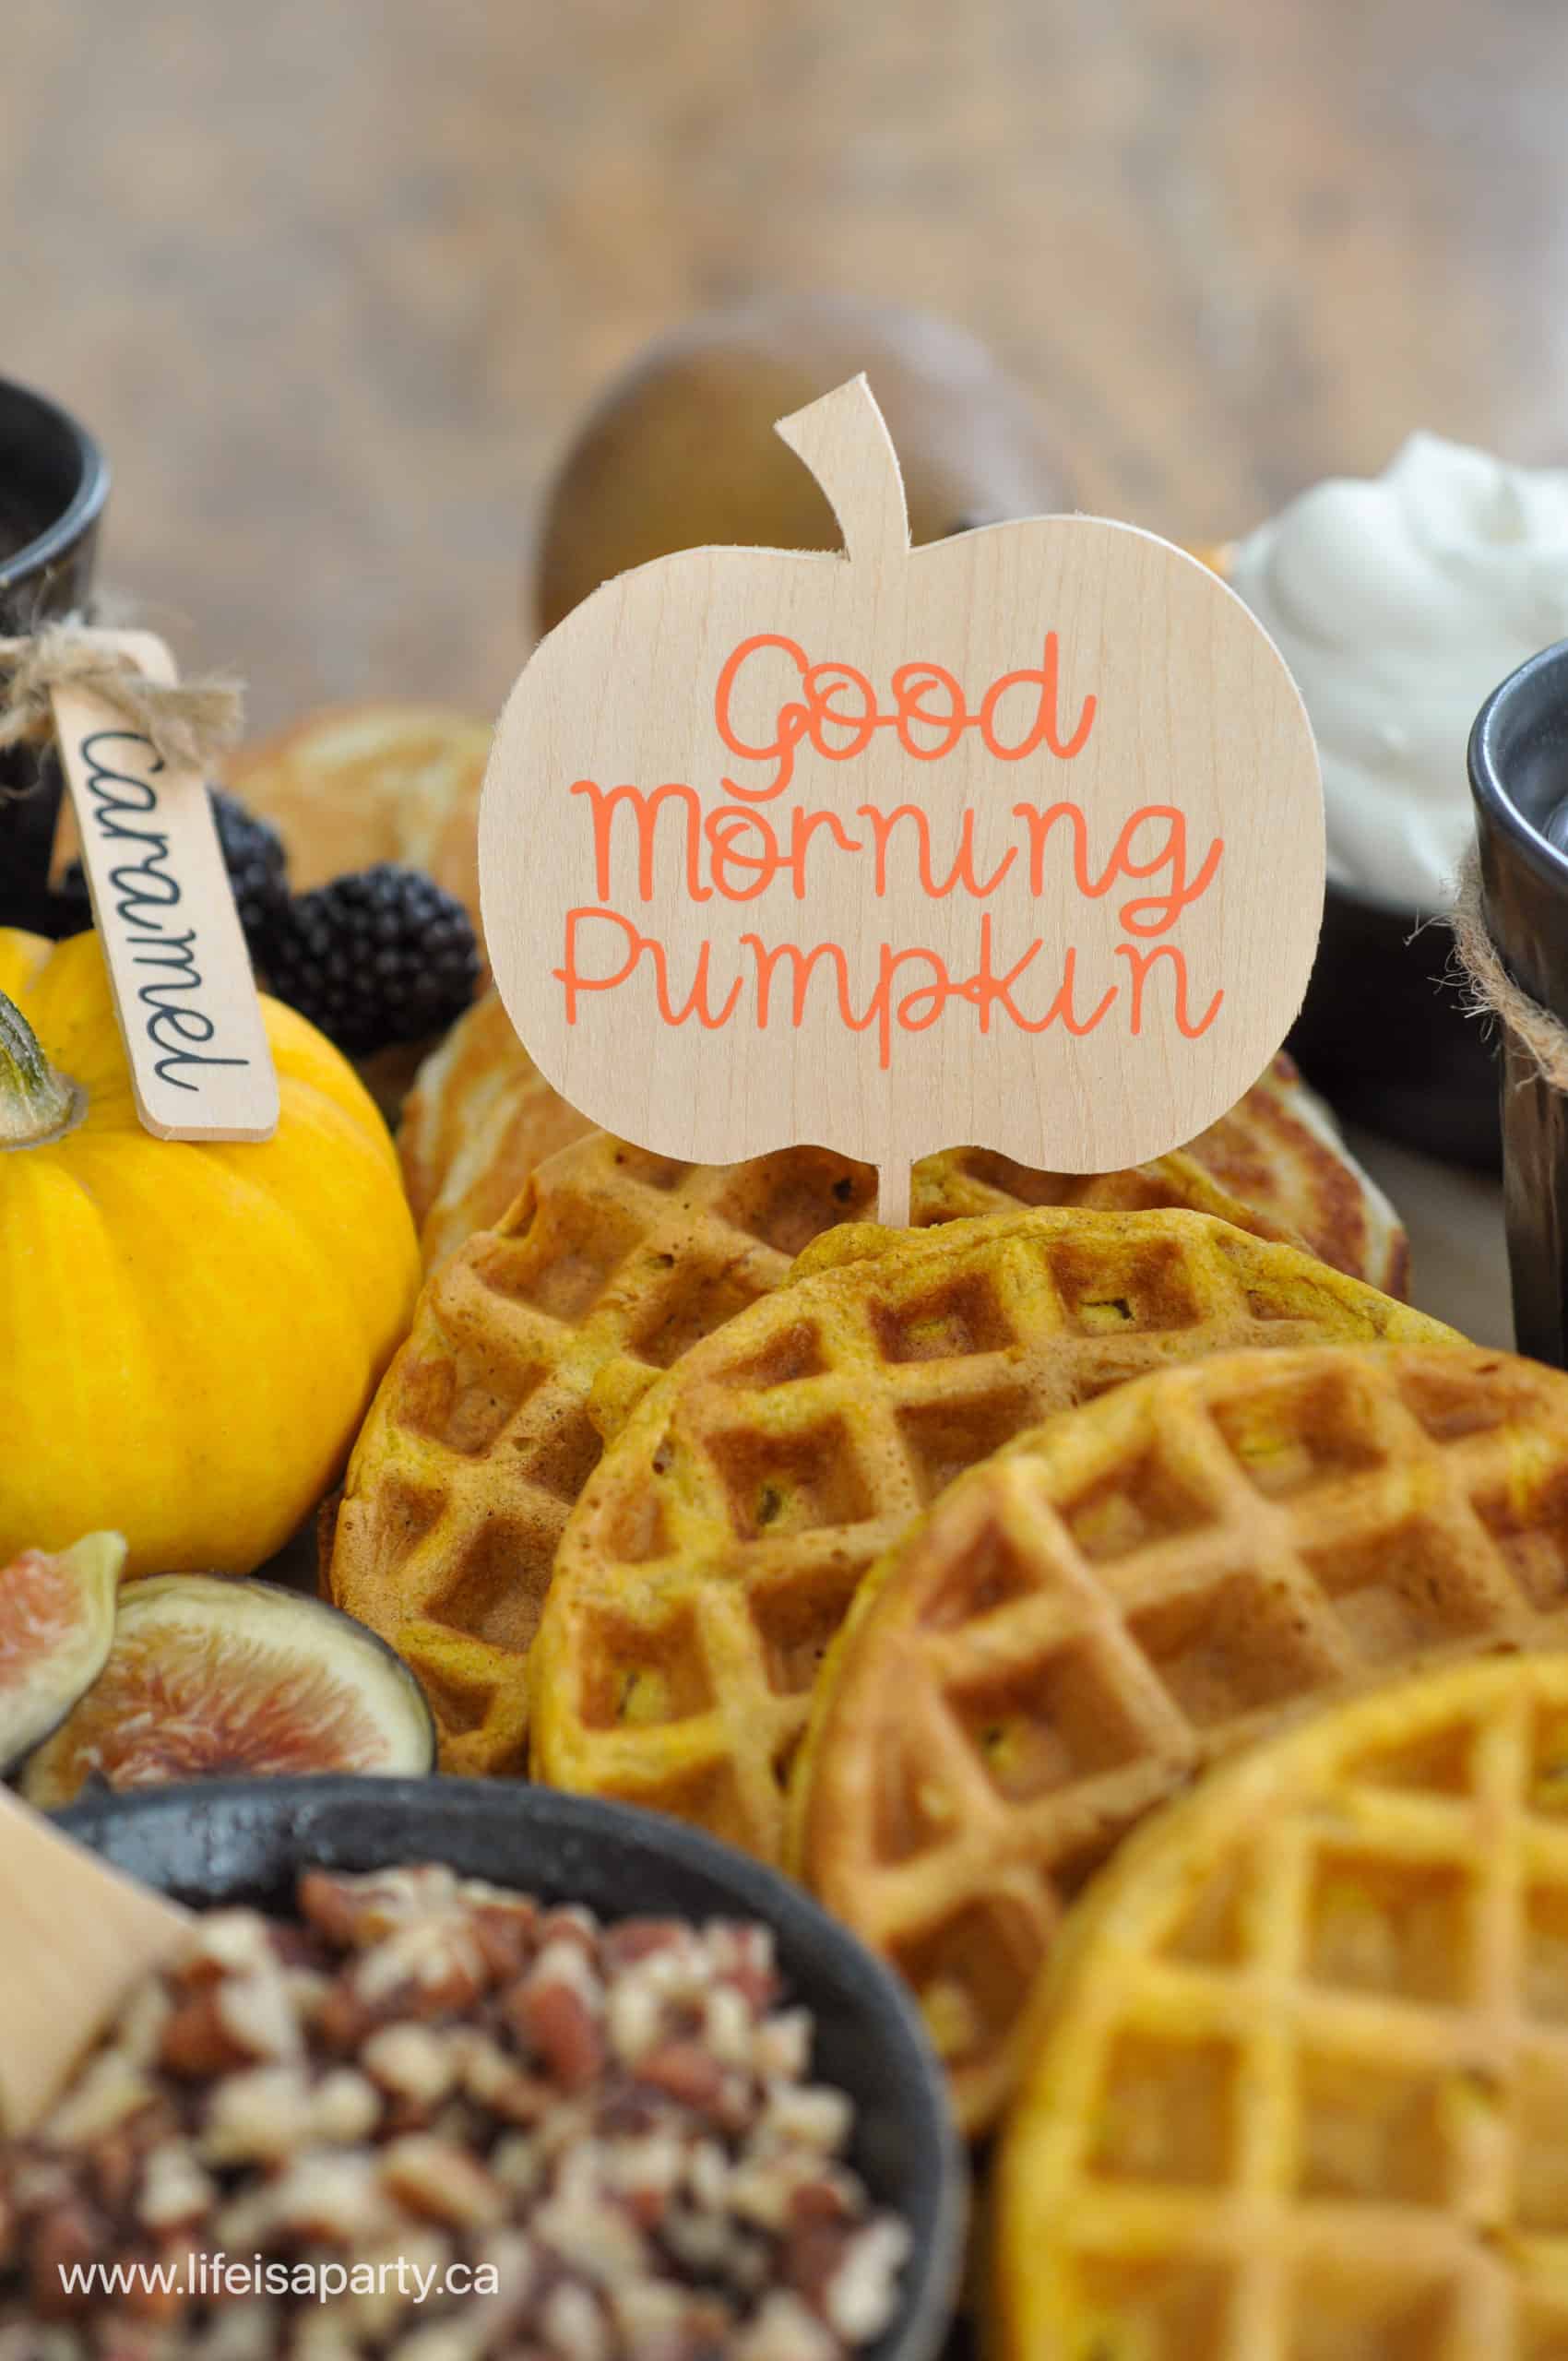
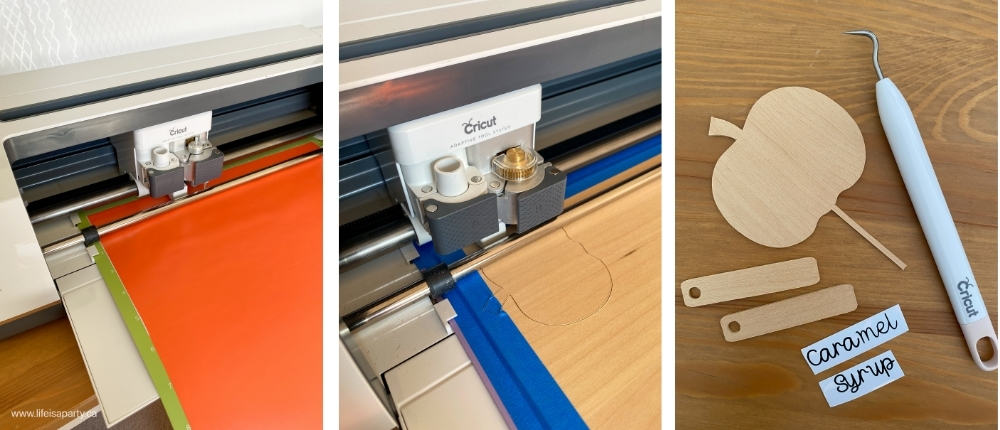
Next I added all the fun additions and toppings around the pancakes and waffles.  We served our syrup and caramel sauce in some black ceramic cups with the cutest little labels tied on.  I also added a "Good Morning Pumpkin" pick to the waffles.  I used my Cricut machine to cut out the wood labels, little pumpkin pick and the vinyl lettering.  Find my Cricut cutting file here to make your own.  These were such a fun addition, and helped bring the board to the next level.  The pumpkin pick was one of my favorite things.

fall breakfast board cricut labels

I used some black ceramic small dishes to hold the whipped cream, and the pecans.  I love the contrast of the black ceramic pieces with the light wood board.

The rest of the items were arranged on the board in the extra space that was left.  I included a mini pumpkin, since it fit so perfectly for fall, but it was just for decoration.  

This board was such a fun breakfast to put together, and everyone loved it.  It was also a really great combination of flavours, and only took a few simple steps to create.  This easy fall brunch board would be great for any fall get together.  It's the perfect way to start your day on special occasions or just to enjoy the flavors of the season..

fall breakfast board

With a beautiful fall breakfast board like this to enjoy, life really is a party!

More Fall Breakfast Inspiration

You might also like our Pumpkin Waffles recipe here.

Homemade Pumpkin Waffles -easy recipe for pumpkin waffles, perfect morning treat, and easy to freeze extras for a quick weekday breakfast later.

Also check out Pumpkin Bread with Honey Cinnamon Butter here.

Pumpkin bread with walnuts, spread with cinnamon honey butter and a cup of tea.

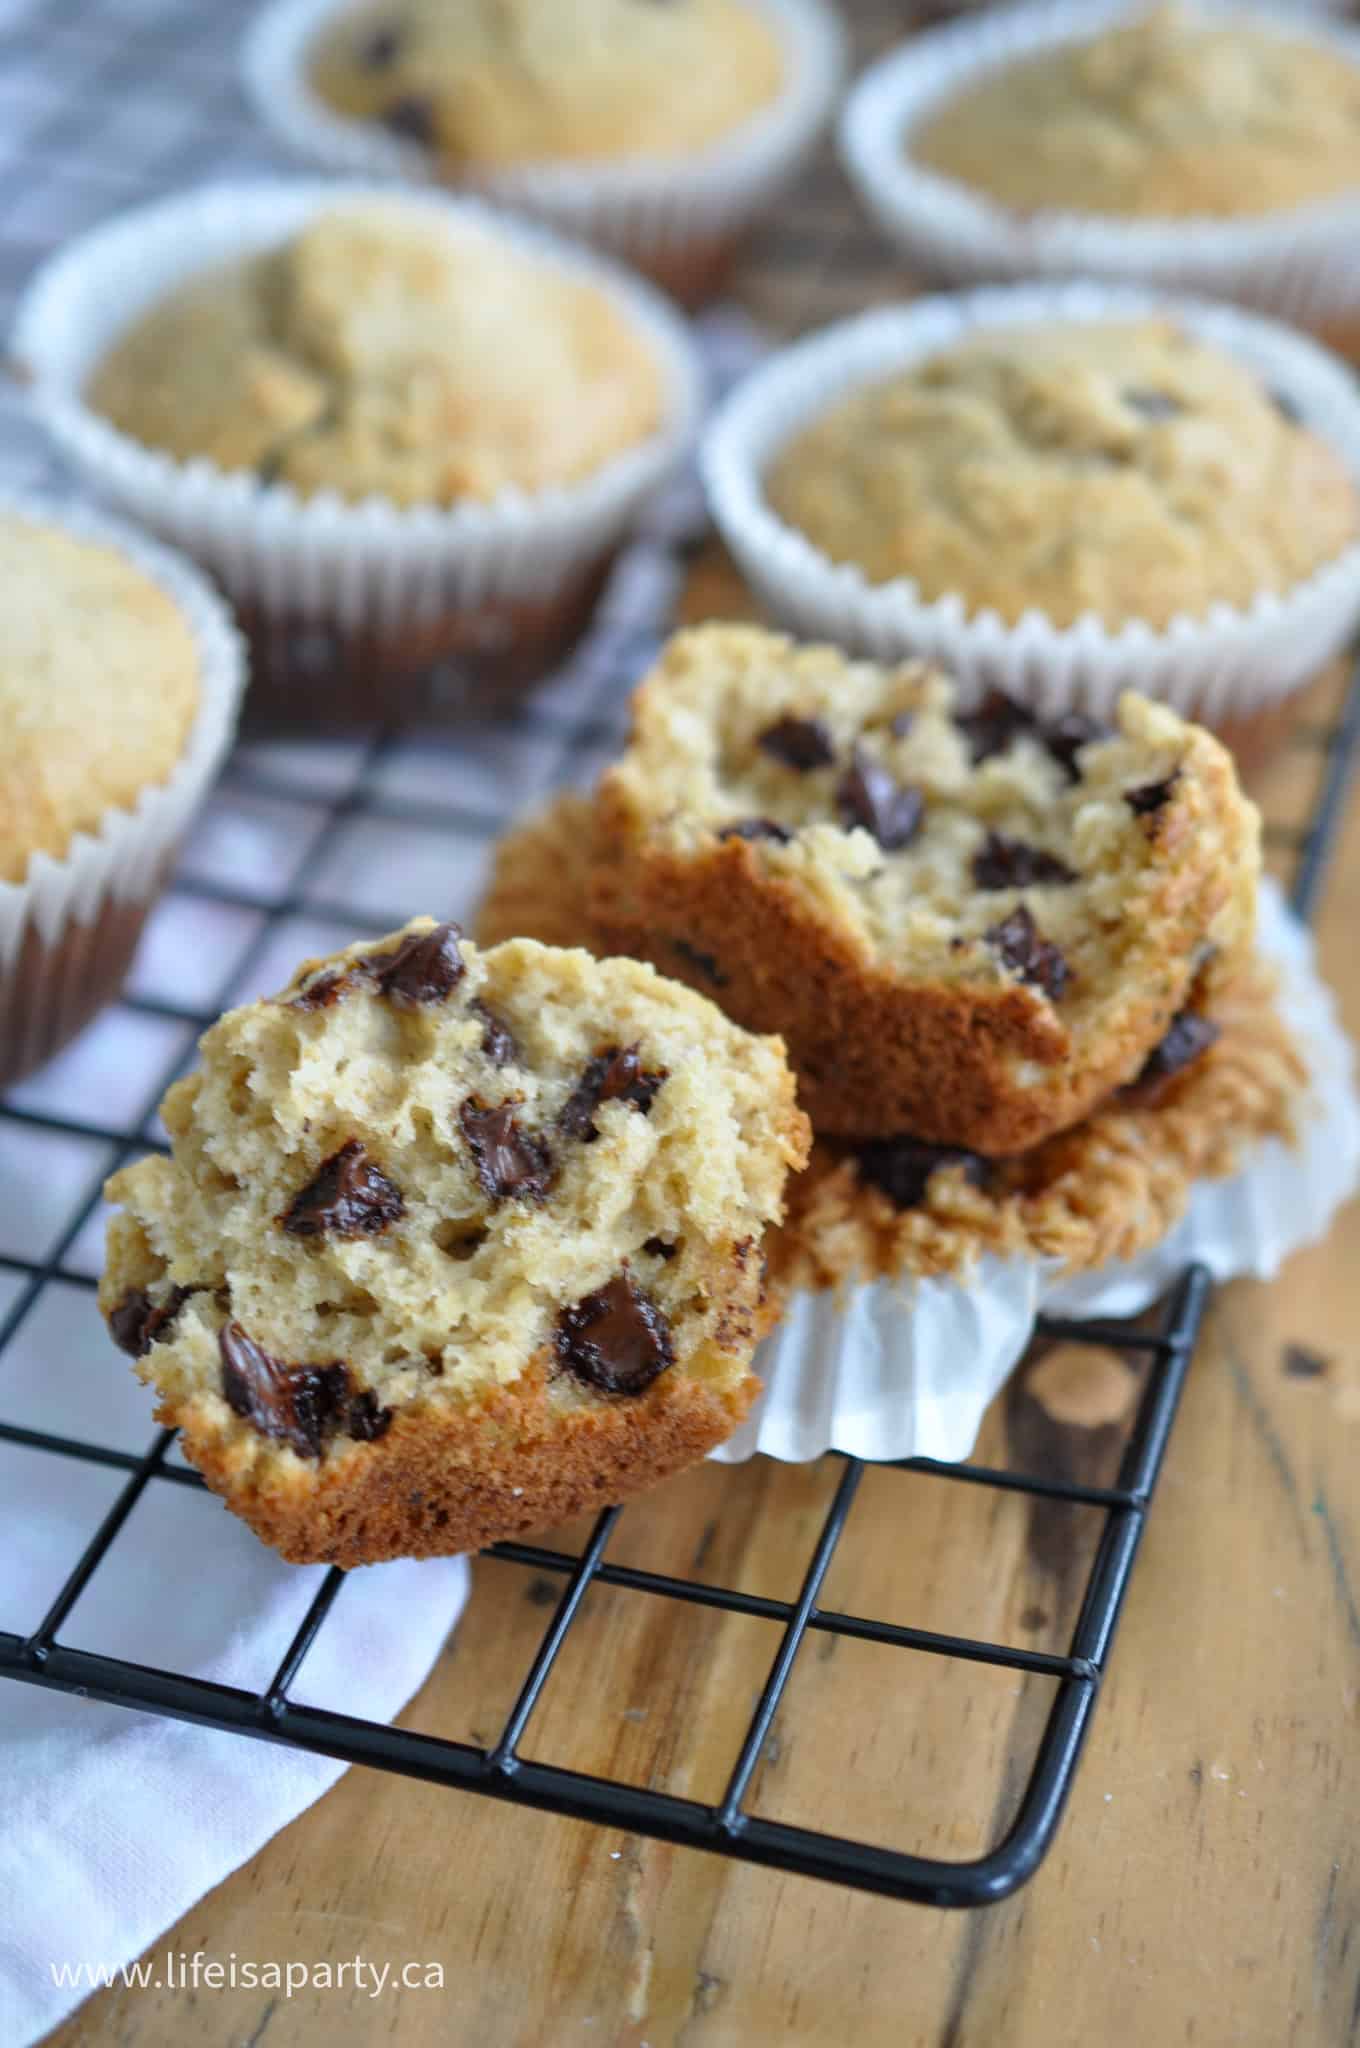
You might also like Easy Oatmeal Chocolate Chip Muffins here.

Witch Halloween Decor

Sep 29, 2021 · 2 Comments

Halloween witch decorations

Witch Halloween Decor: inspired by Harry Potter, our garden shed is full of vintage and elegant witch decorations perfect for Halloween.

Halloween witch decorations
[feast_advanced_jump_to]

It wouldn't be Halloween without a little witch Halloween decor. Inspired by all things Harry Potter, we used lots of vintage finds to create a witchy feel in our little garden shed. This would be a really fun addition to a Halloween party, or instead of giving out candy on my front porch this year, perhaps I'll invite trick or treaters with their parents into the witch shed, and put on a witch costume for the evening.

witch Halloween decor

I've been seeing lots of really fun outdoor play house decorating for Halloween on Instagram the last few weeks, and I thought why not create an adult version to enjoy this Halloween. So I got busy adding lots of fun witchy pieces to my garden shed. 

The Garden Shed

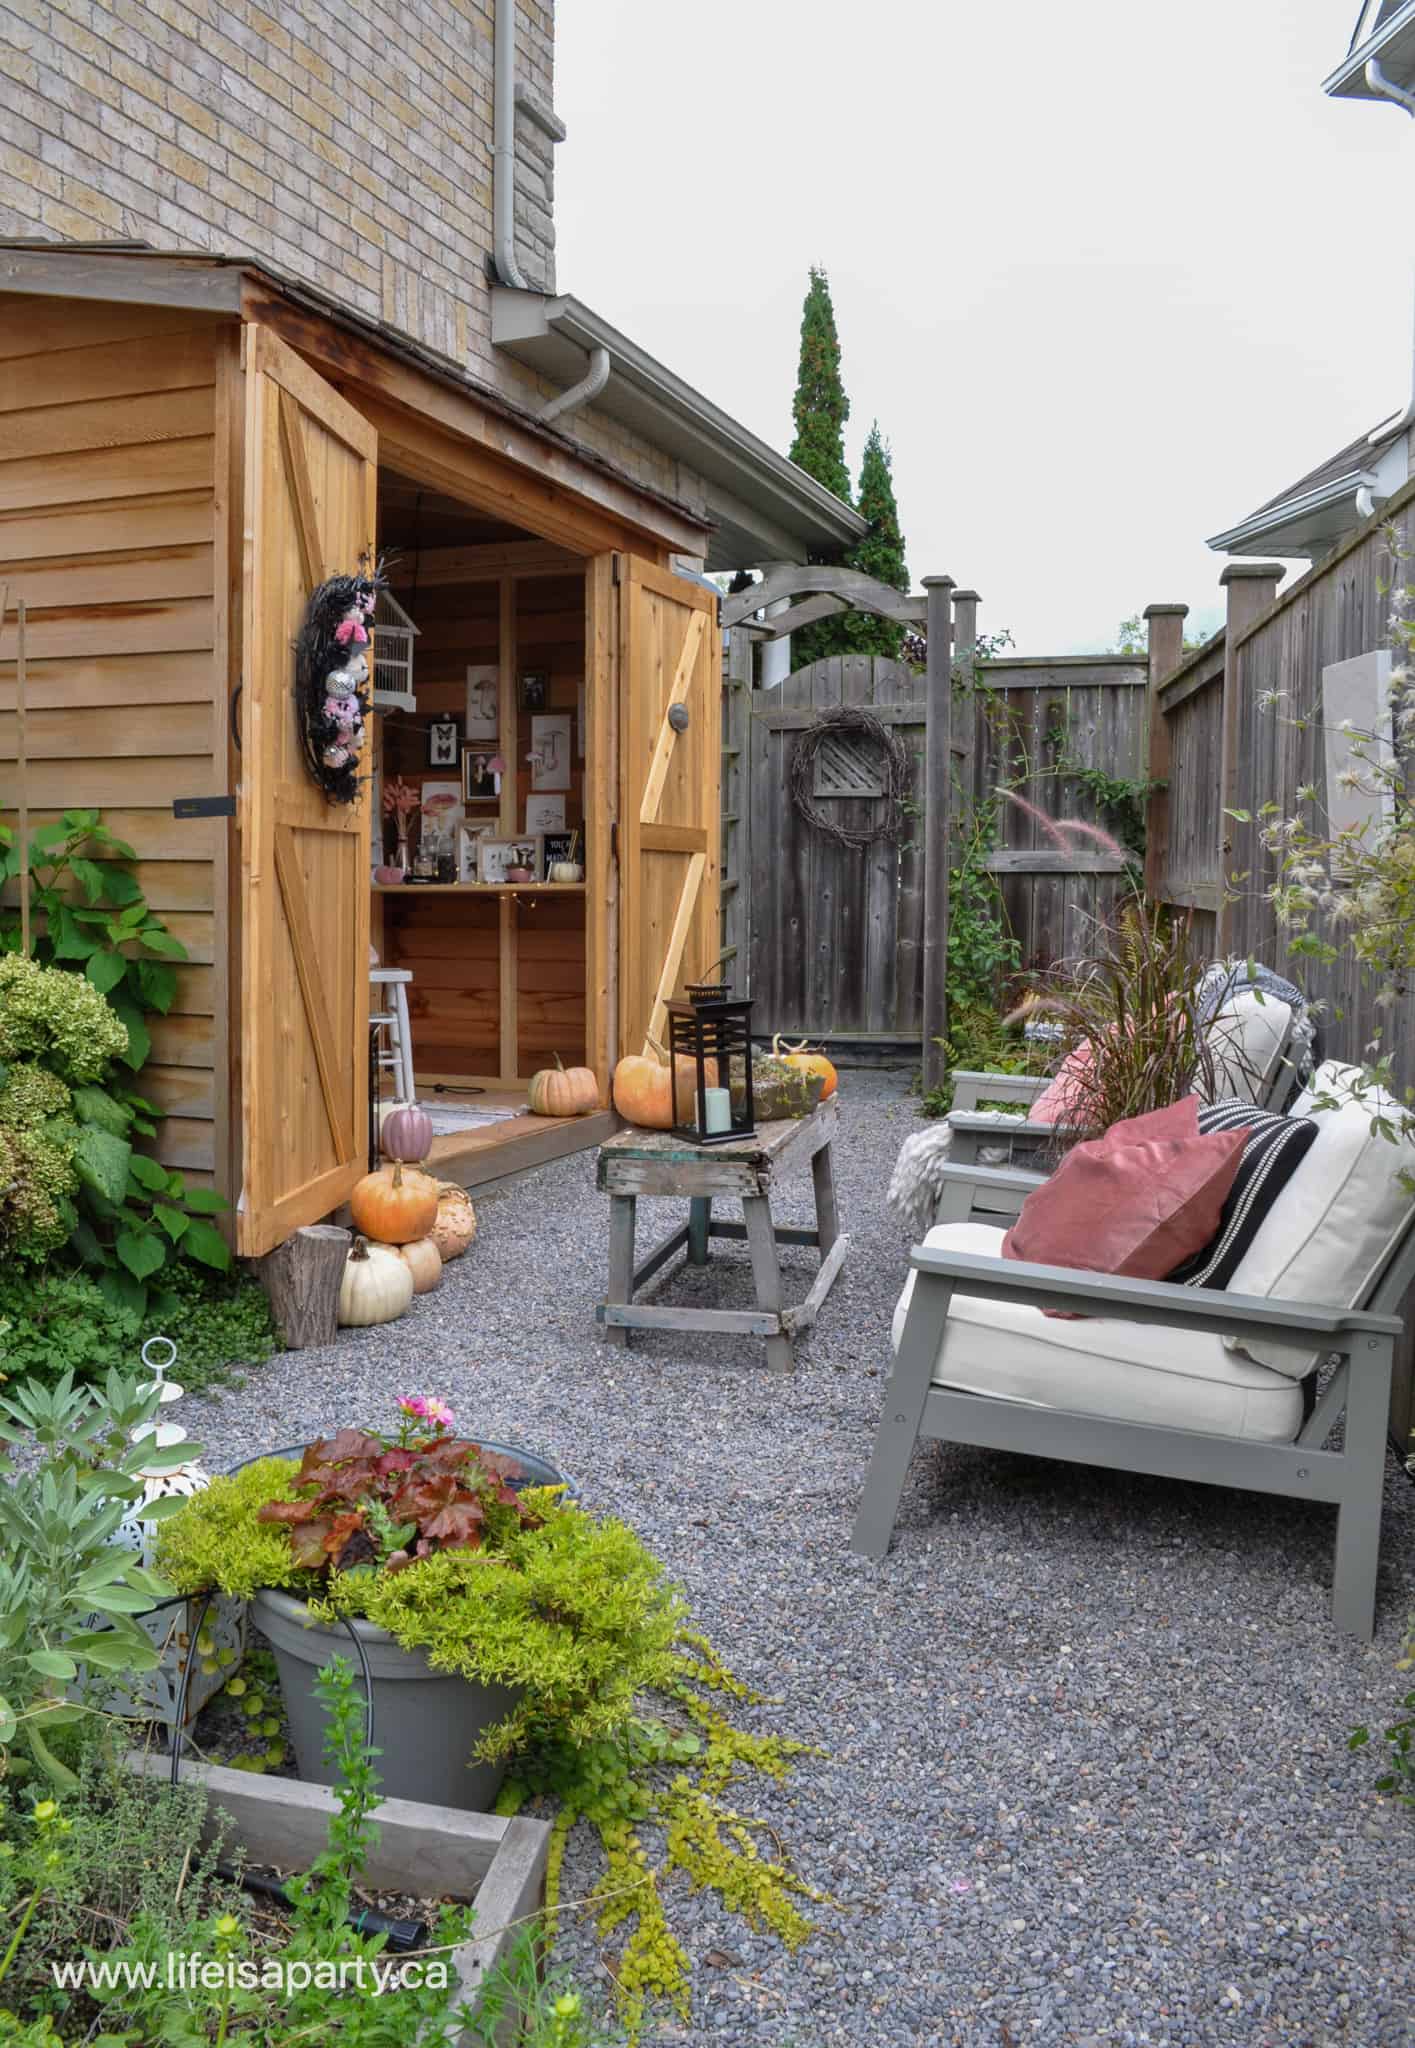
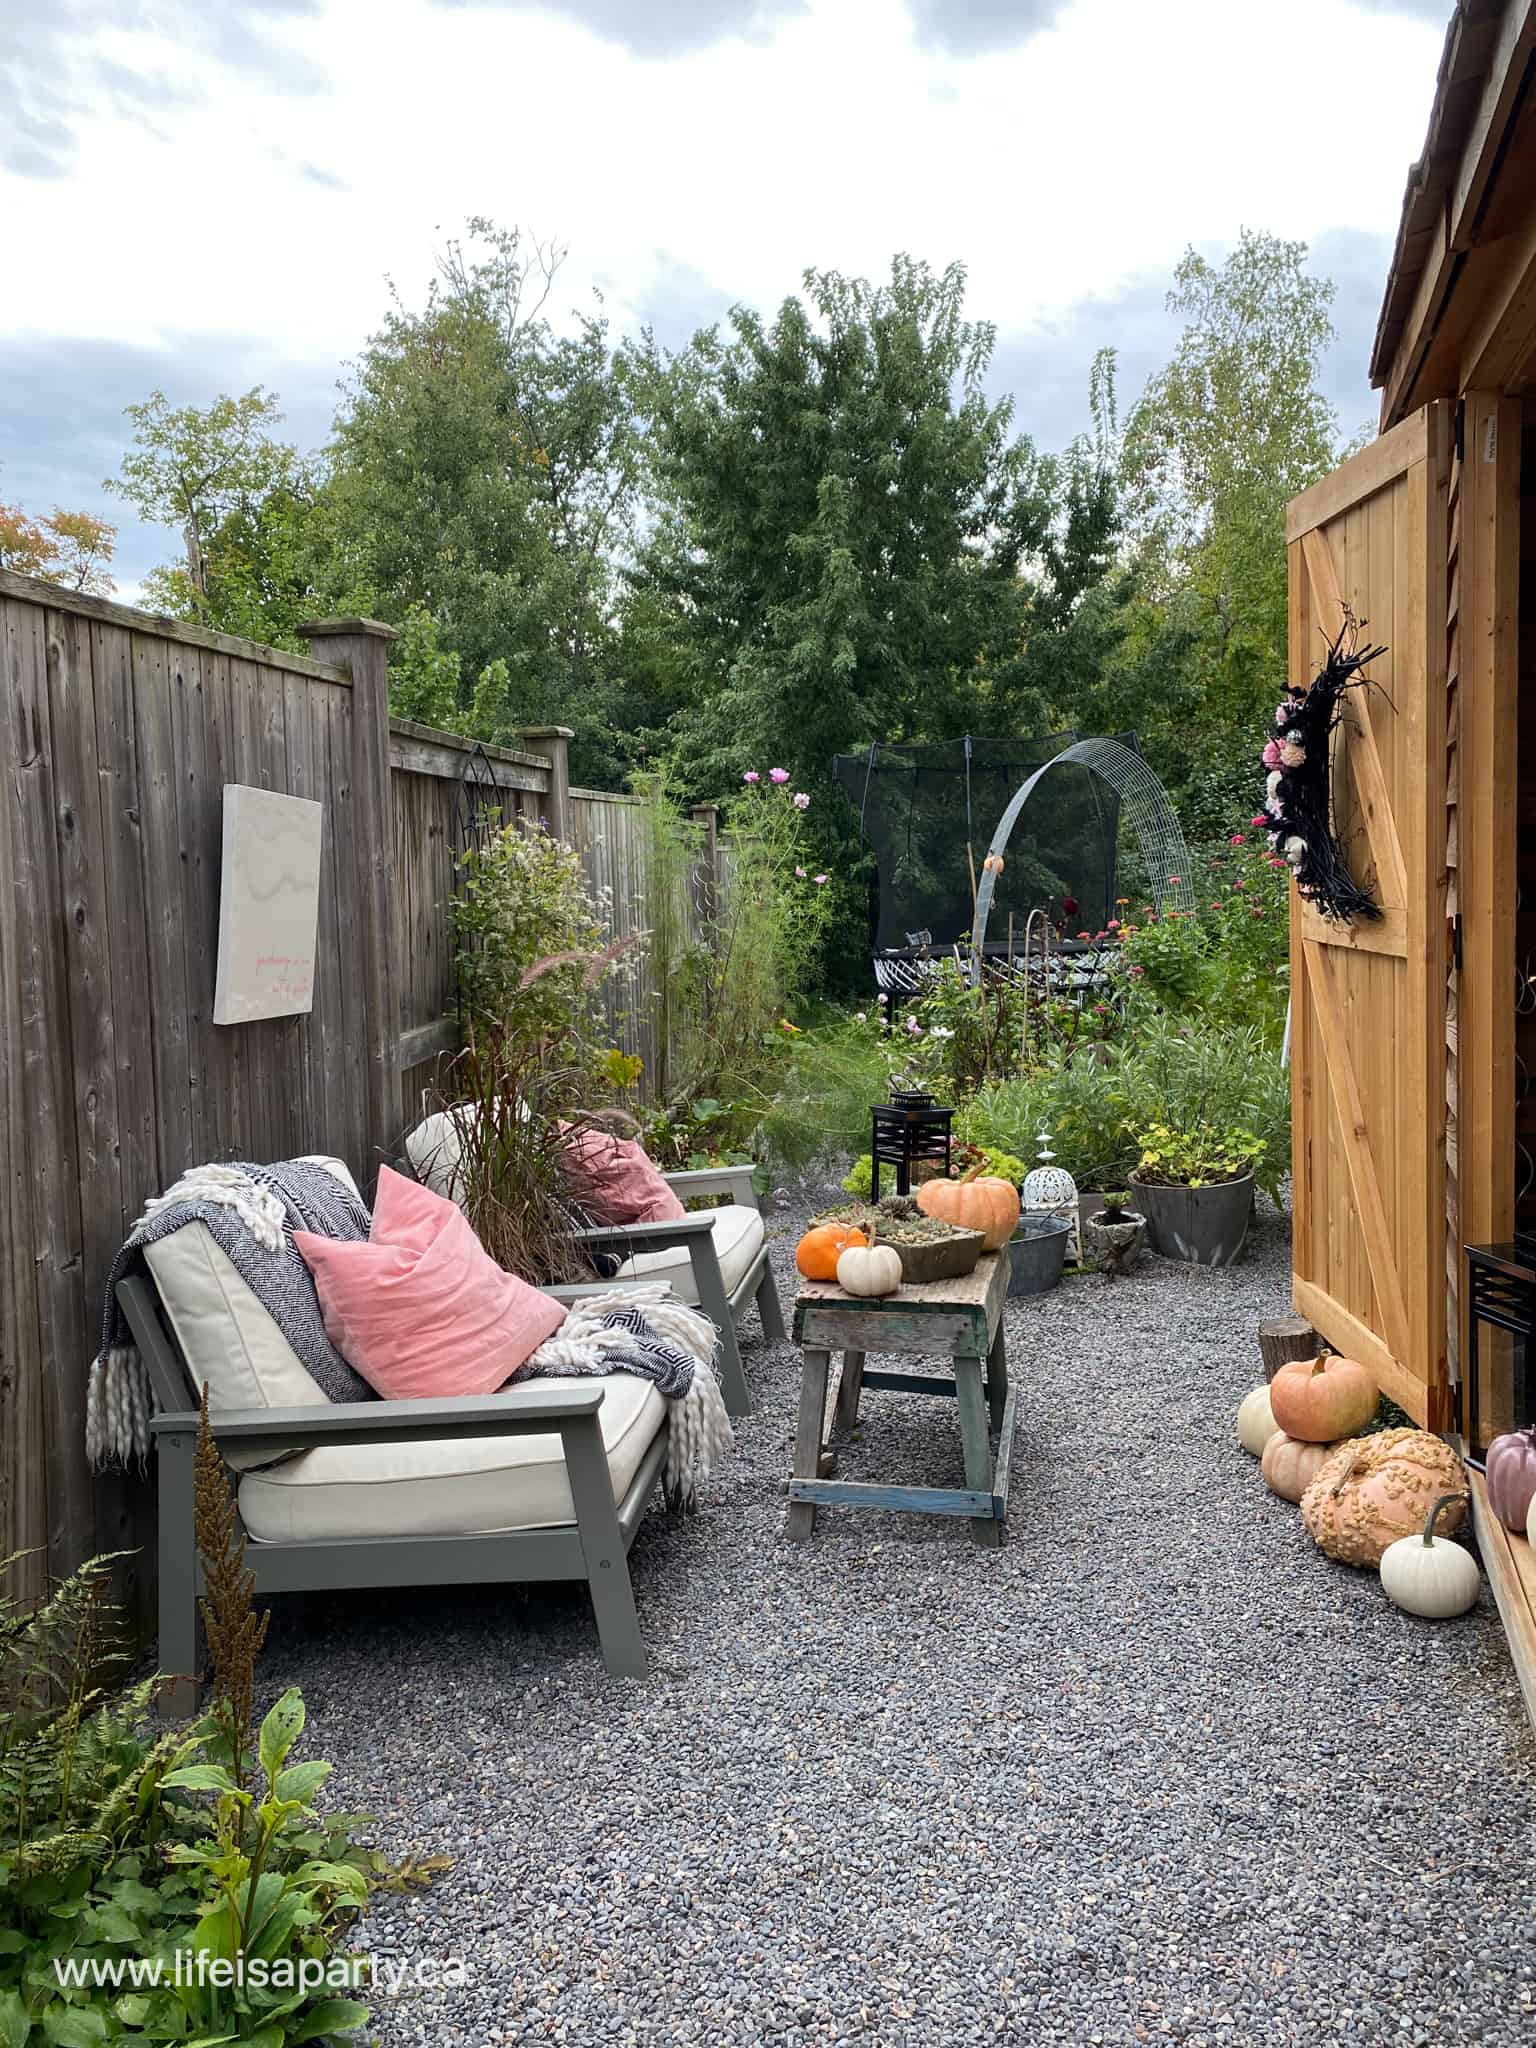
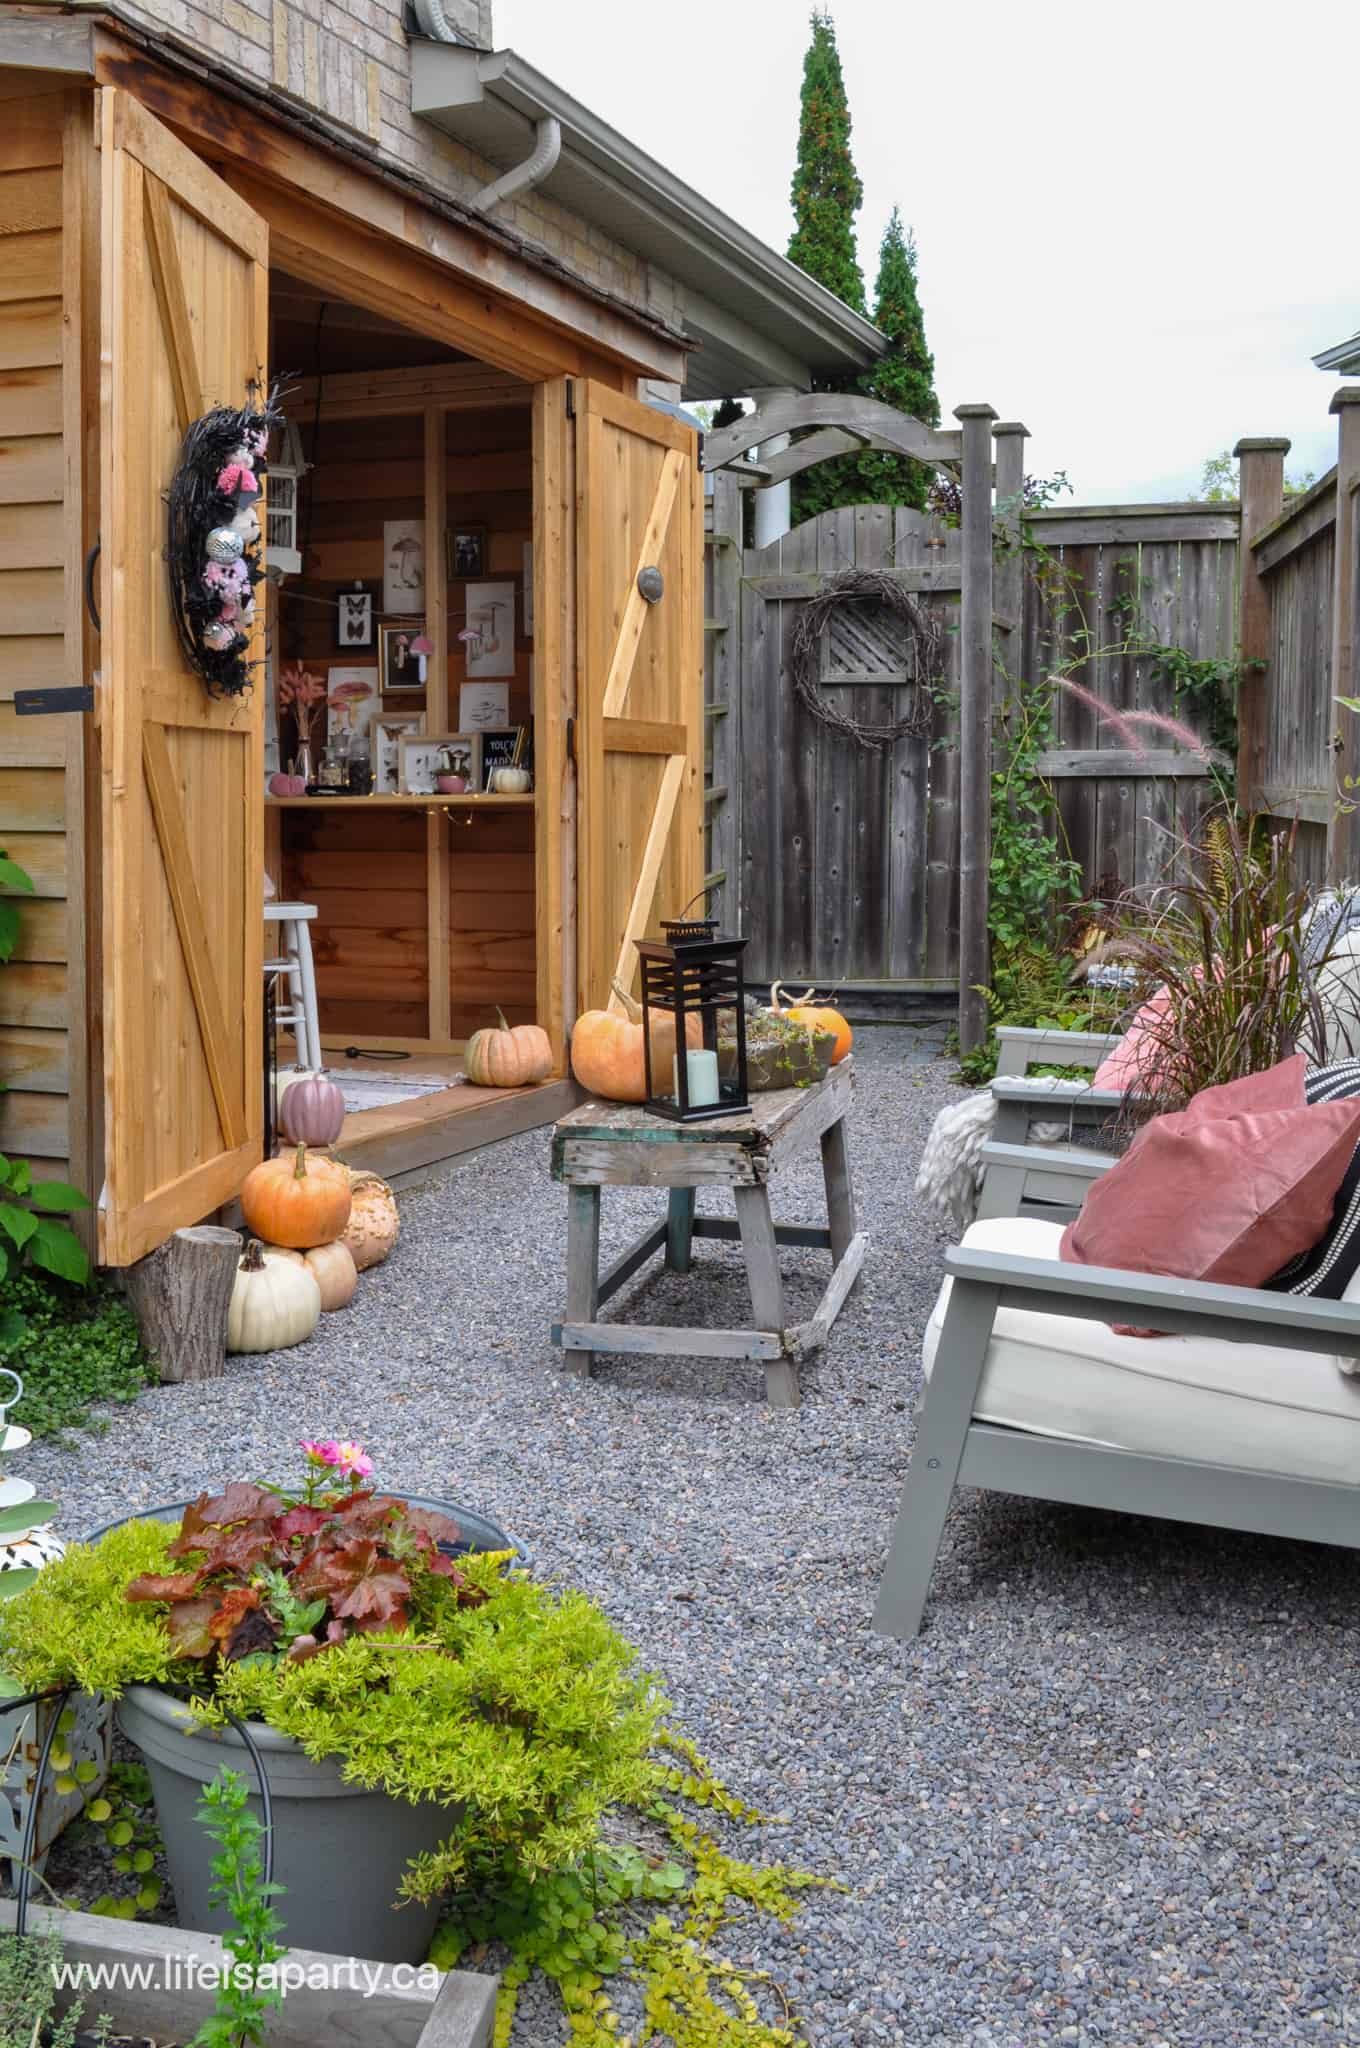
Way back when the pandemic started and we were all home more than usual, we decided to makeover our side yard -read all about the whole process of our DIY portager garden here.  We added raised beds, with pea gravel paths and this amazing cedar shed. It was intended to hold our garden tools in the summer, and some of our outdoor furniture during our cold and snowy Canadian winters. It has worked out really well, but beyond just being really functional, it's also turned out to be incredibly cute.

Witch halloween decorations

A Witch's Garden

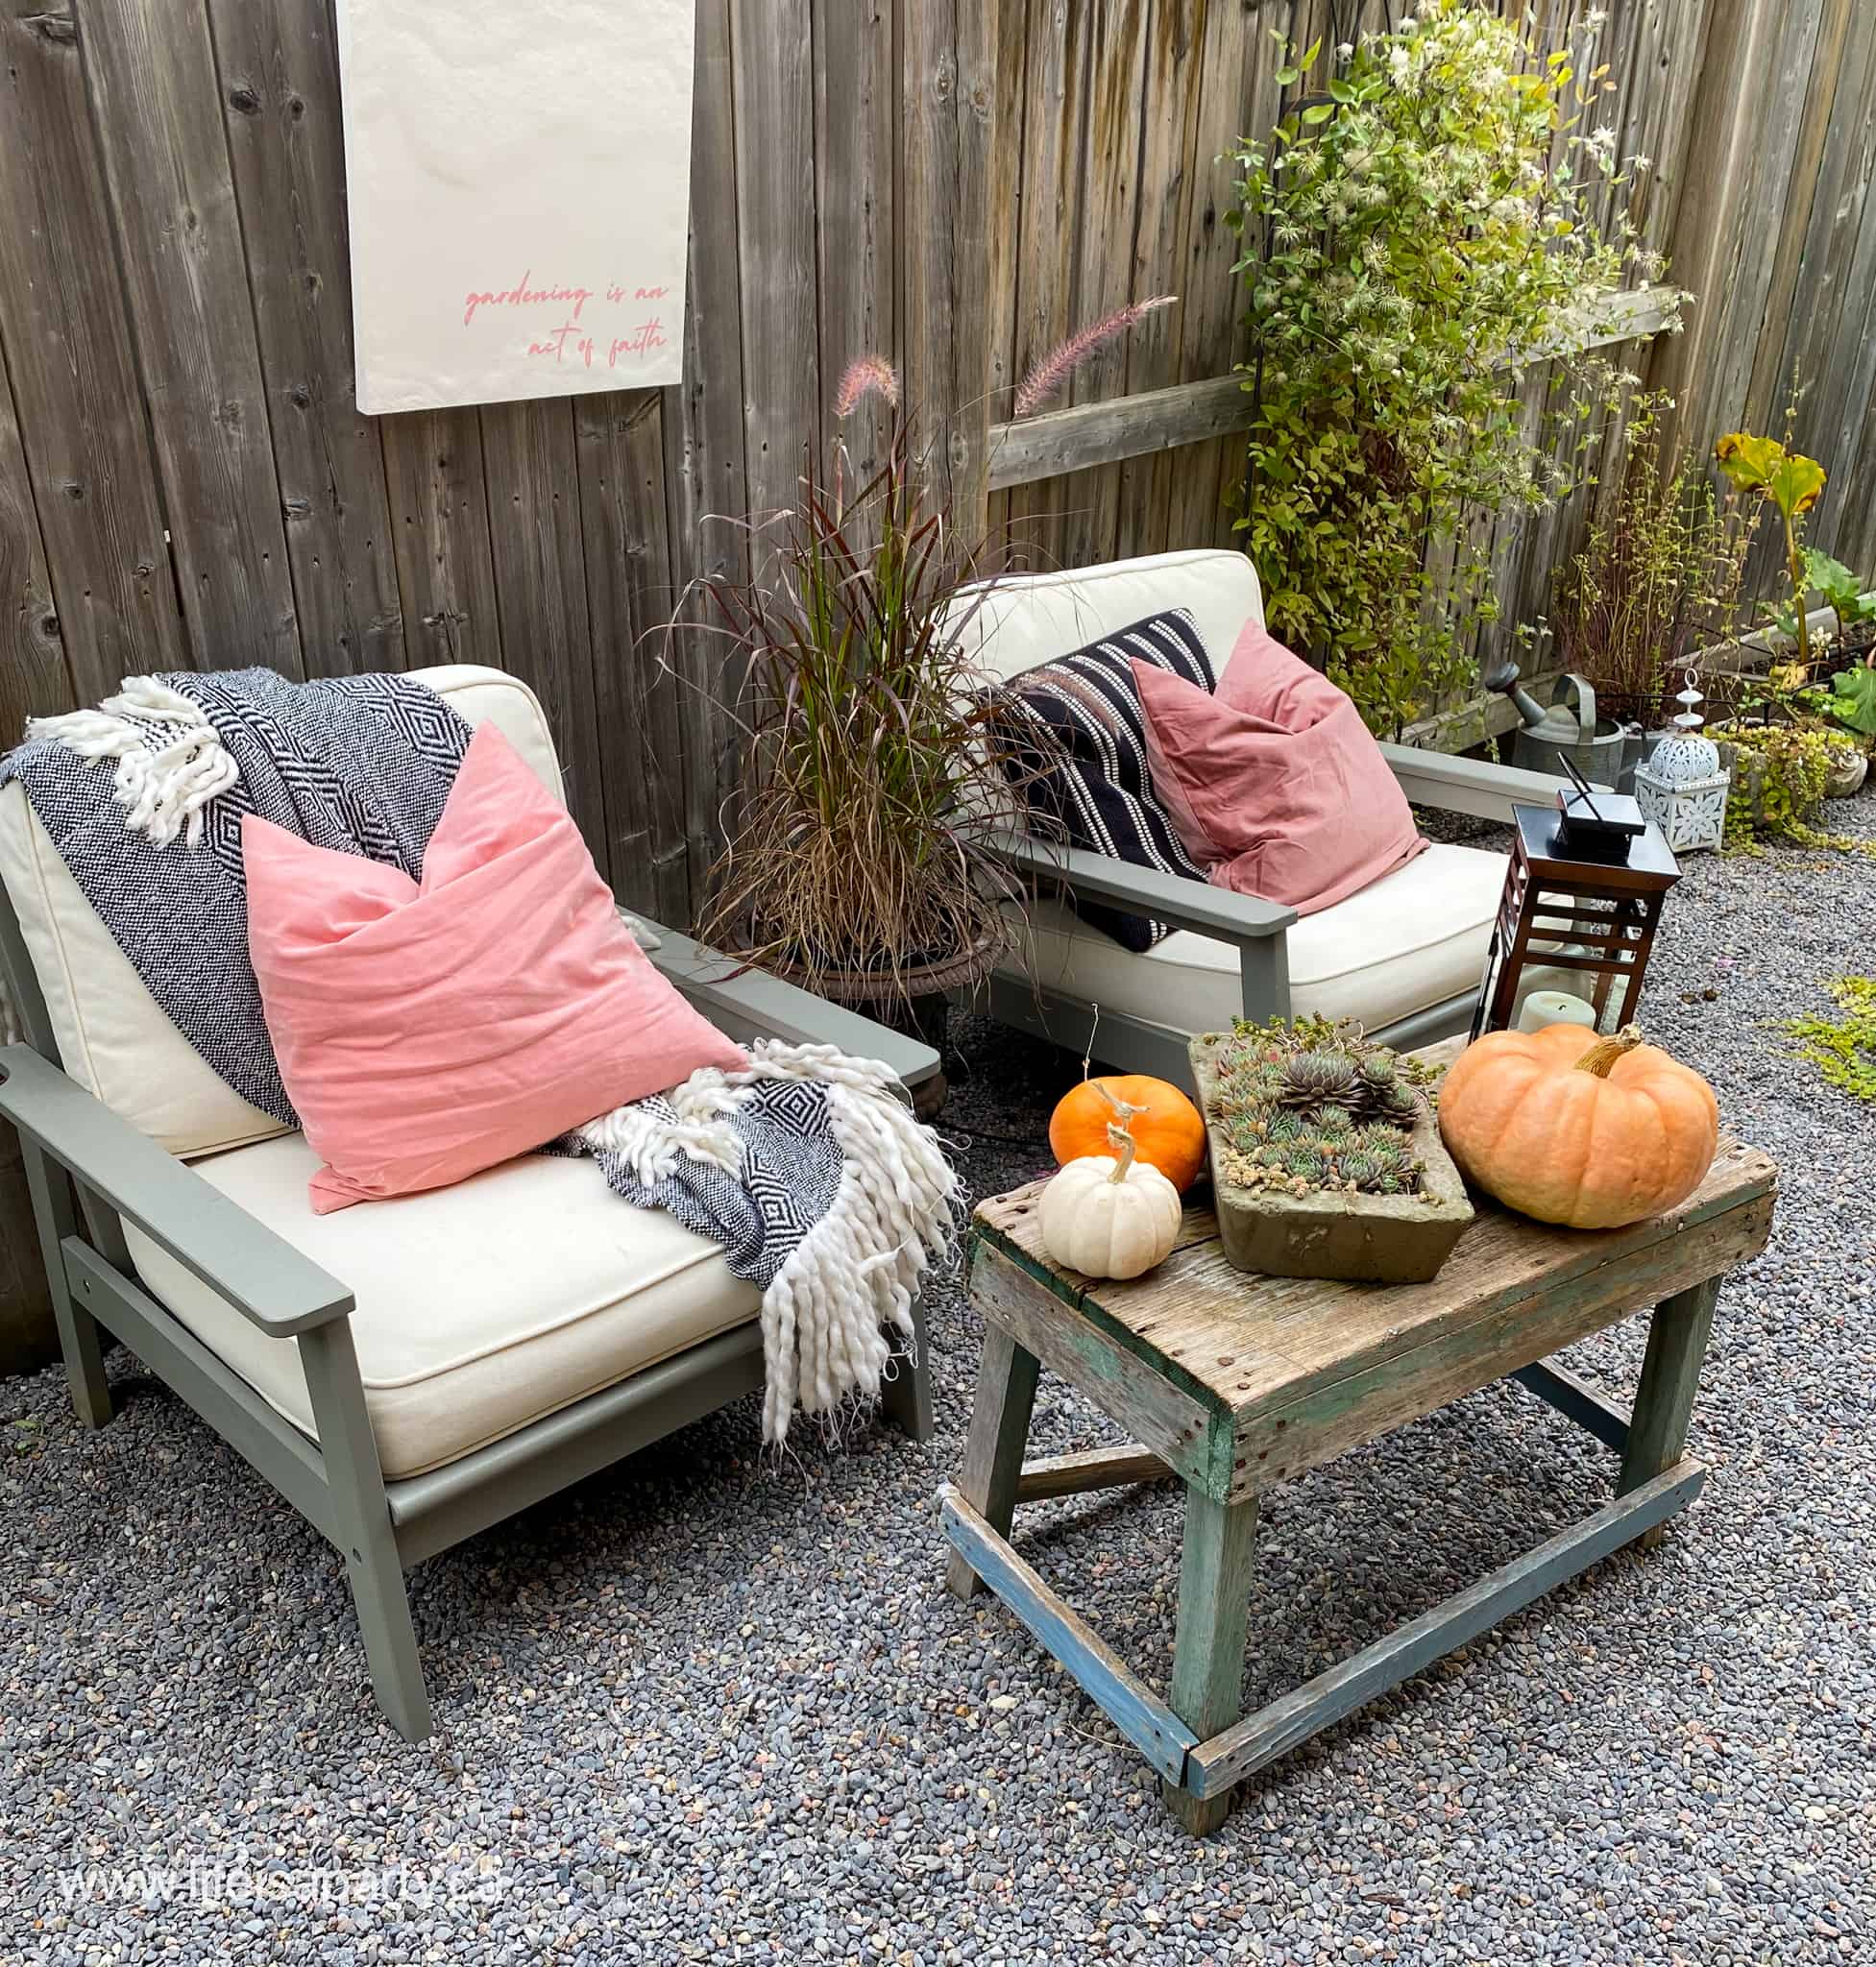
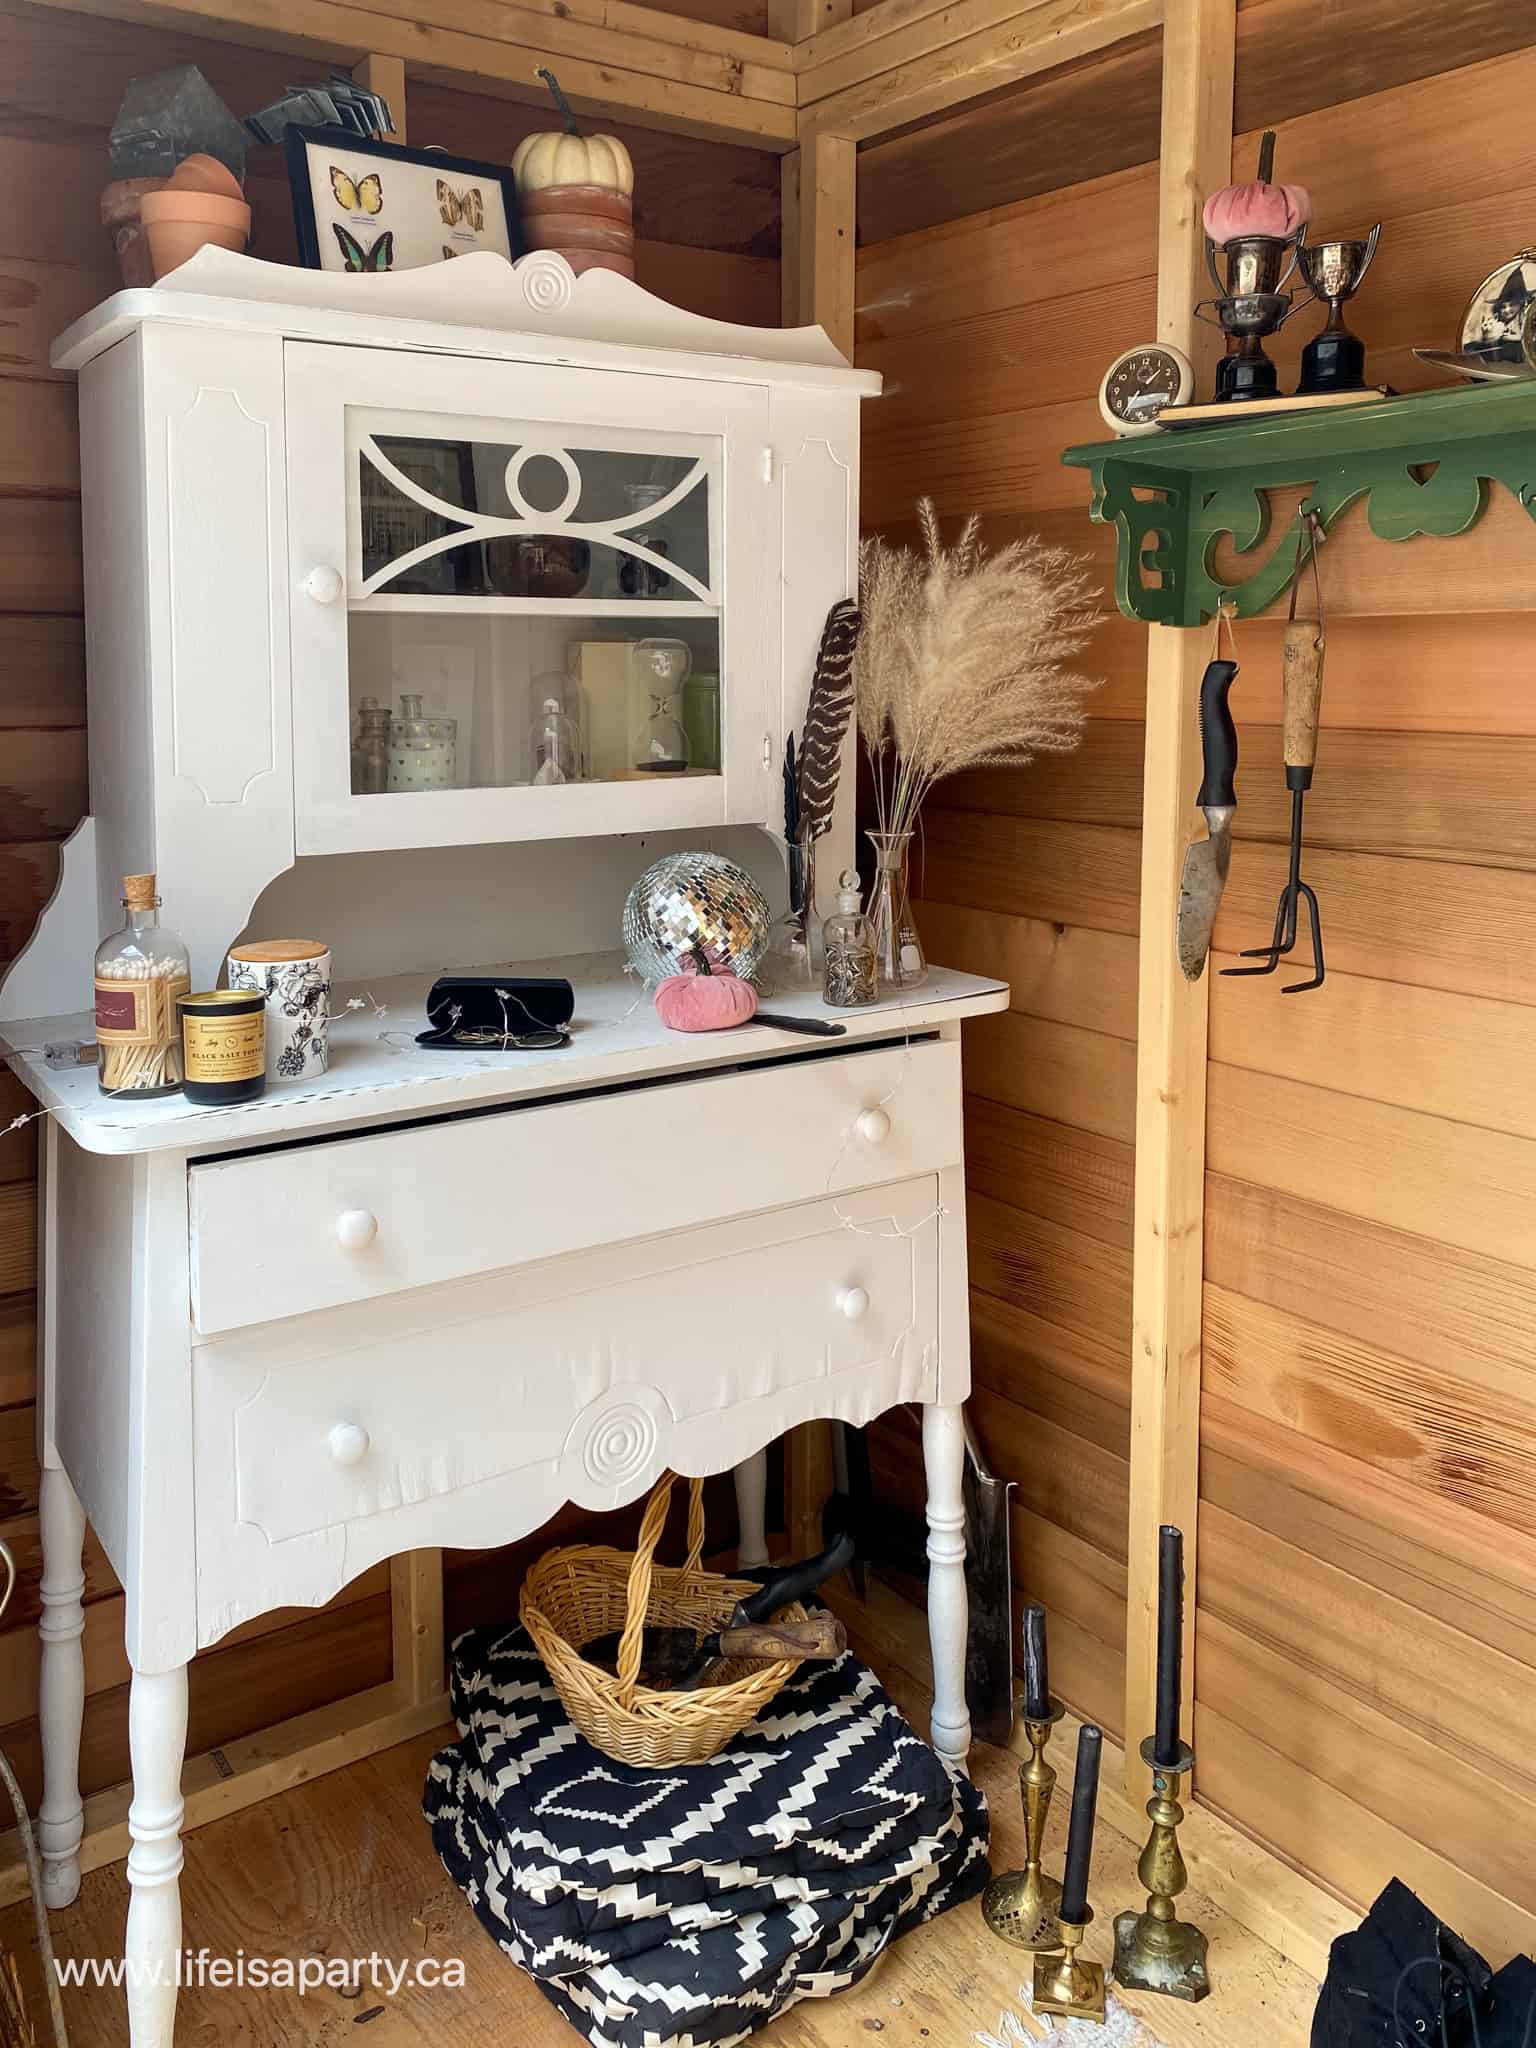
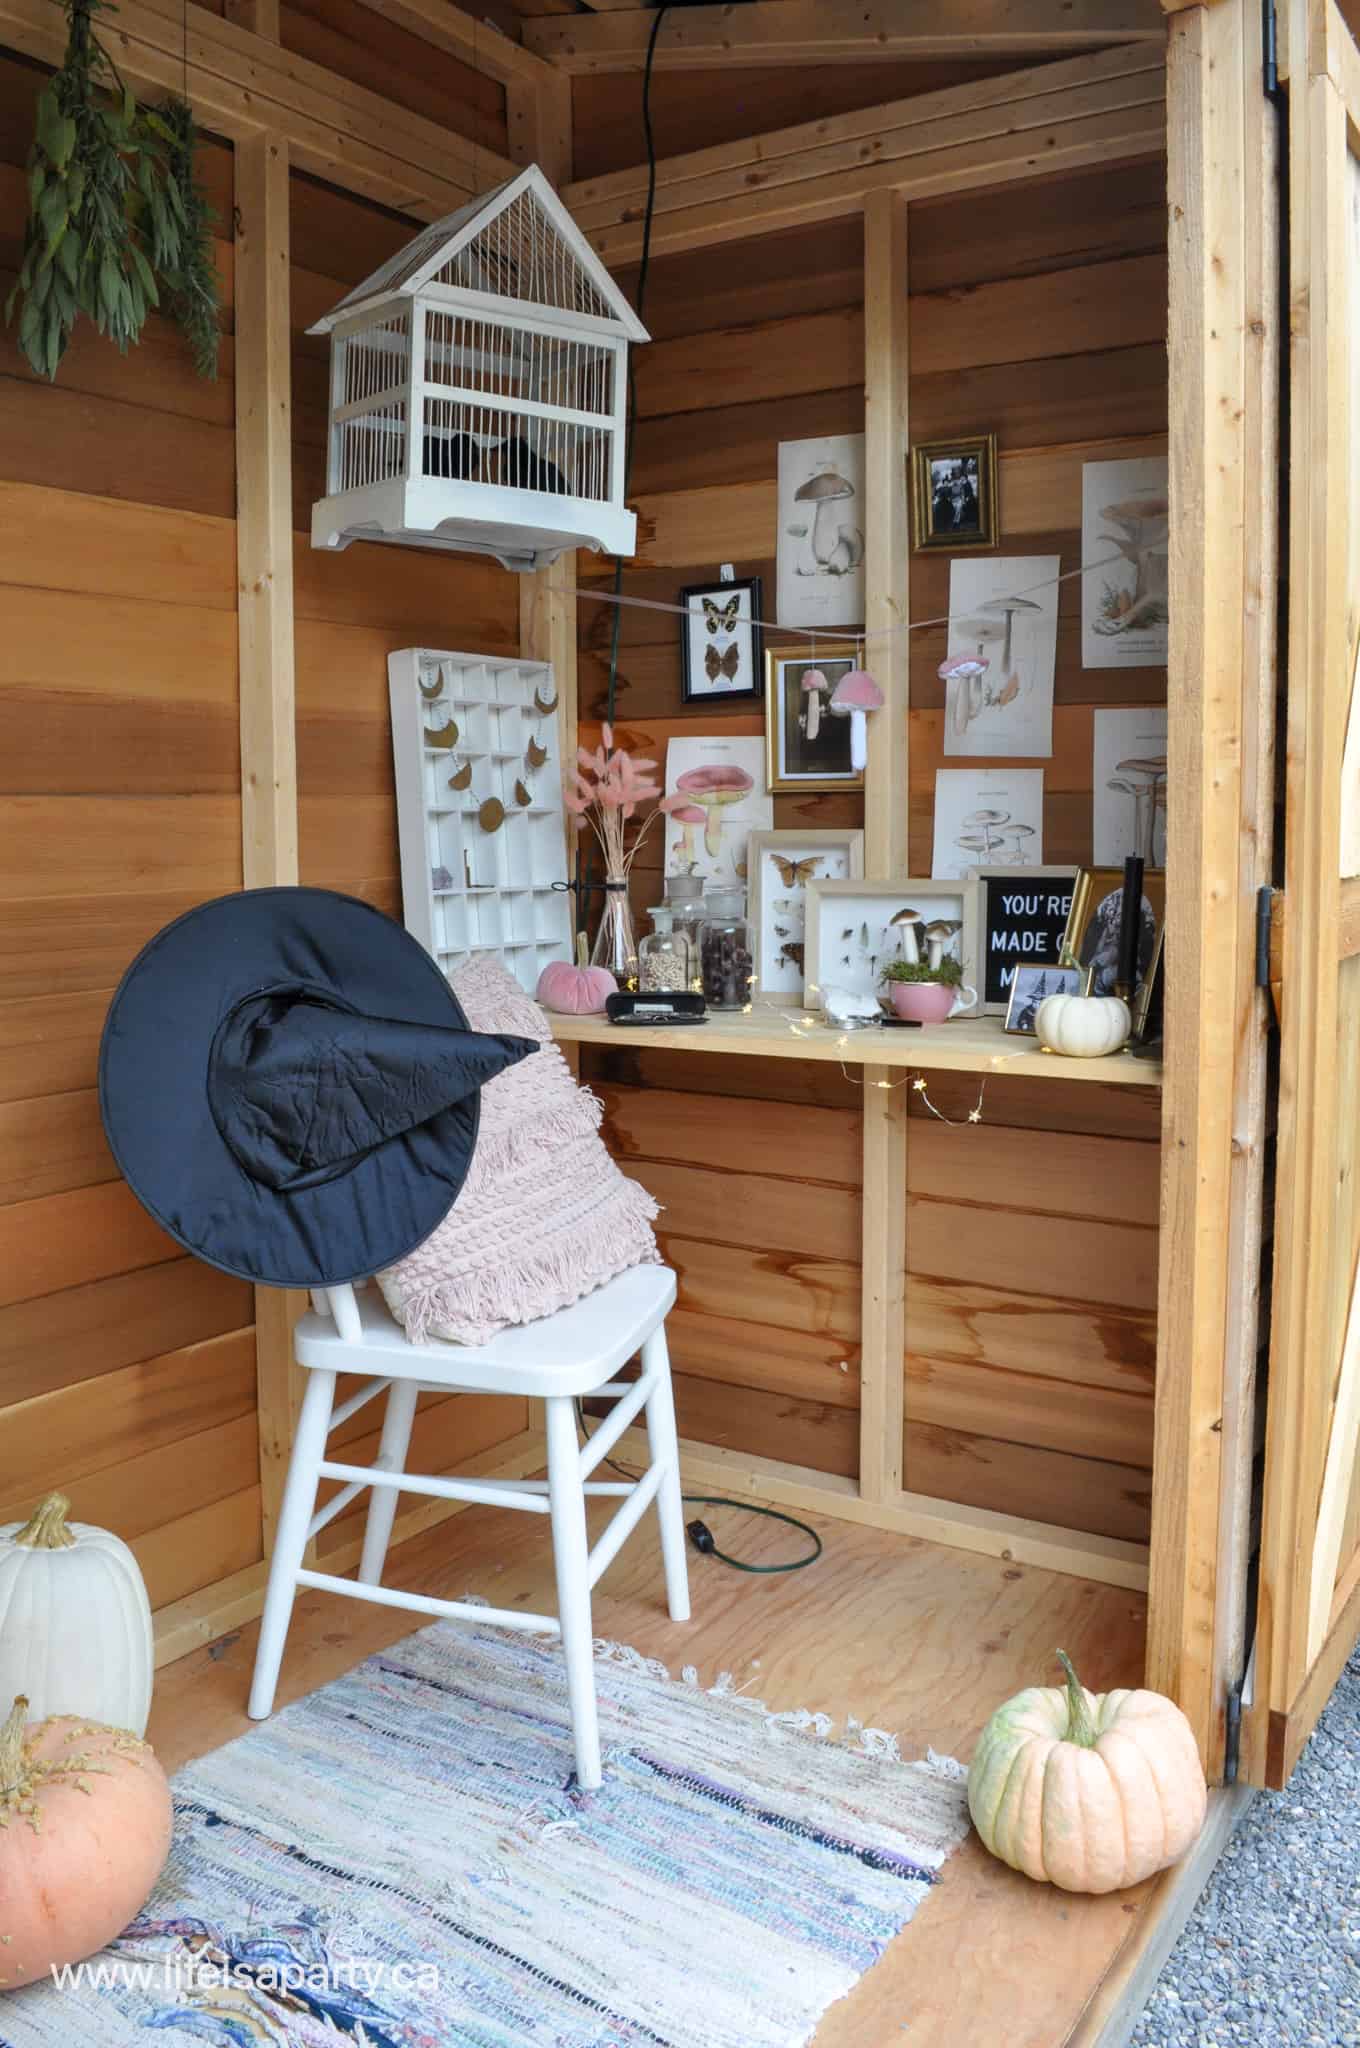
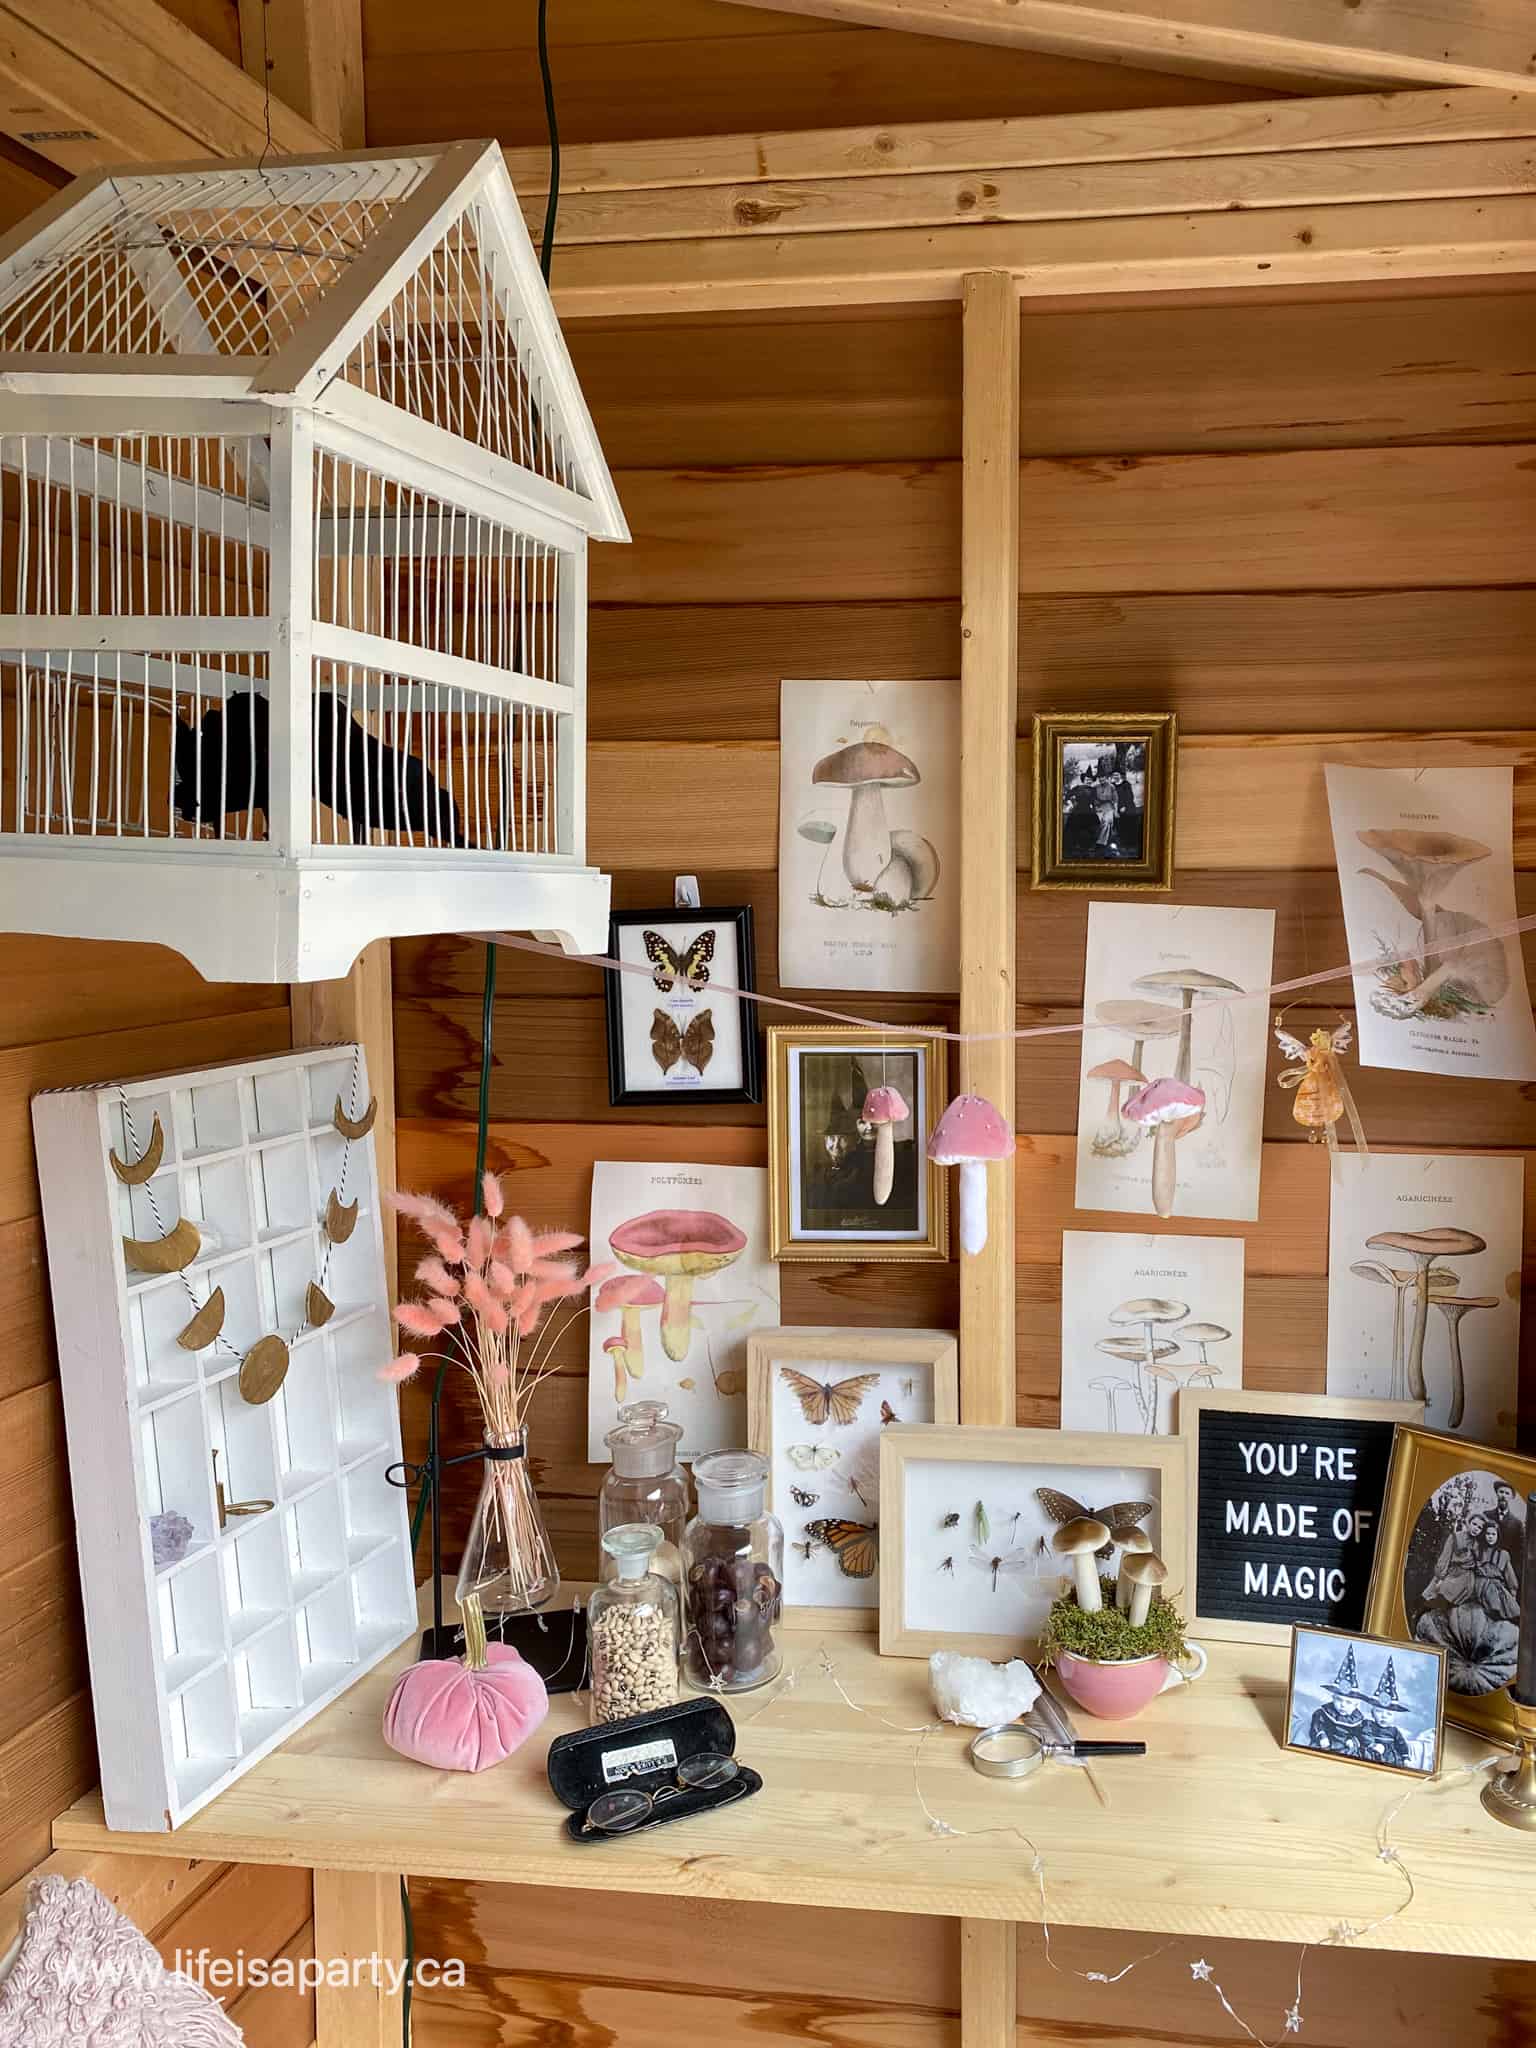
We added some chairs outside for a sitting area, and inside we put in an old antique hutch for storage and a removable little desk worktop spot. It's been used on and off as a sweet little extra office space in the spring and the fall. This halloween with the addition of some halloween decor items, it's turned into a witch's garden shed, the perfect spot for collecting things for potions, and growing and drying them. This would also be really fun in your living room for a party.

Halloween decorations

Harry Potter Inspiration

A few years ago we had the chance to go to Universal and I loved all the amazing Harry Potter rides, and gift shops, It really felt like you were entering a different world. I absolutely loved all the attention to detail and it definitely inspired me as I created this witchy Halloween shed with a real Harry Potter feel to it. If you love Harry Potter check out more of my Halloween Harry Potter decor here.

outdoor Halloween decor
Outdoor fall decor
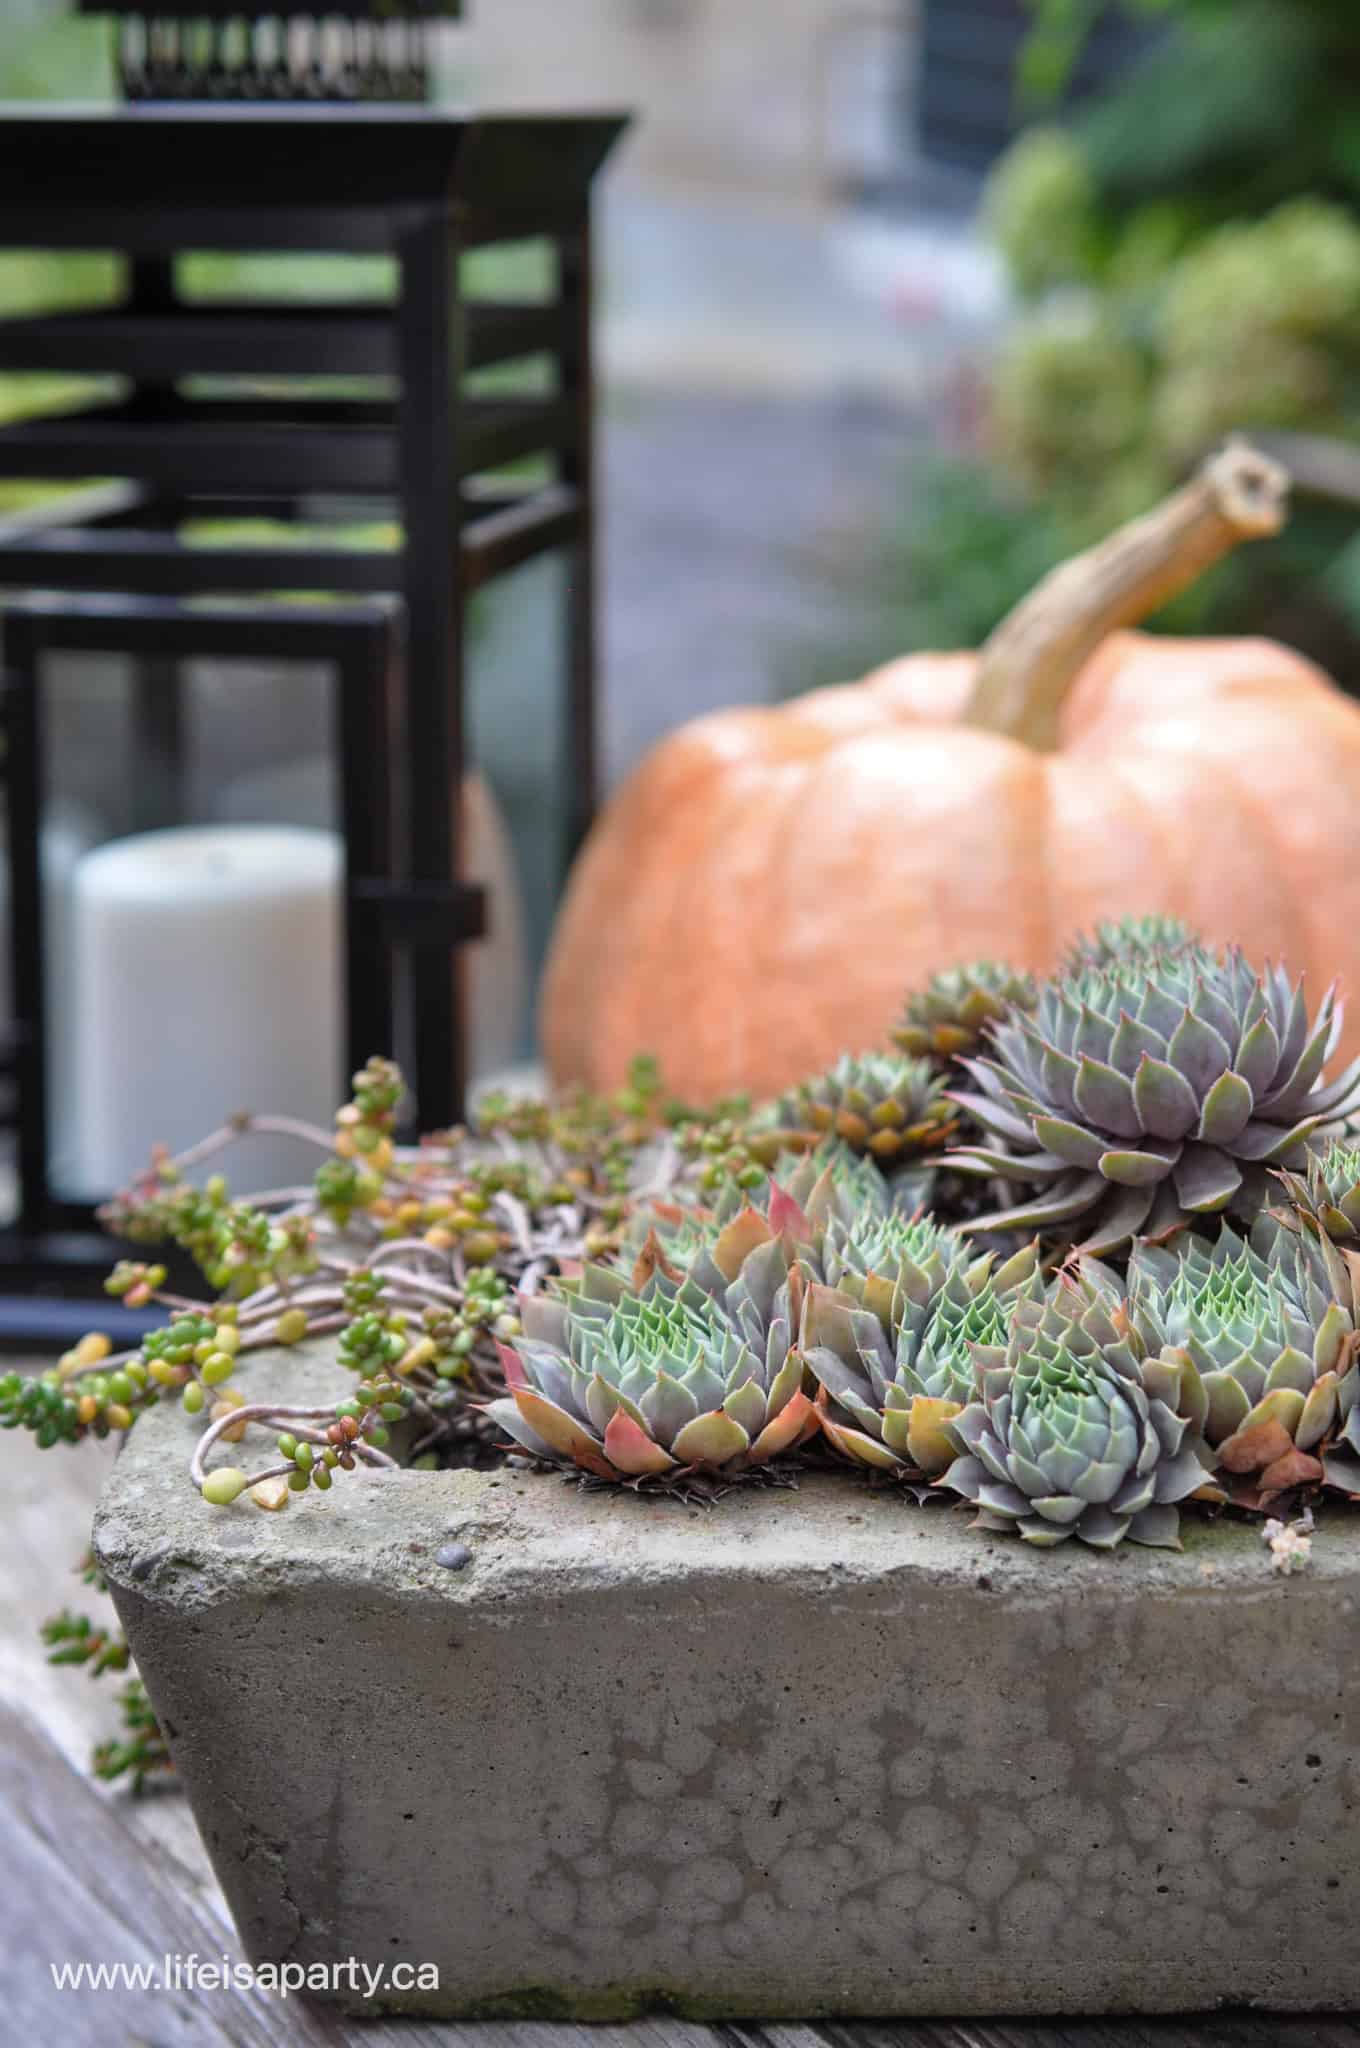
succulents and pumpkin

Inside The Witchy Shed

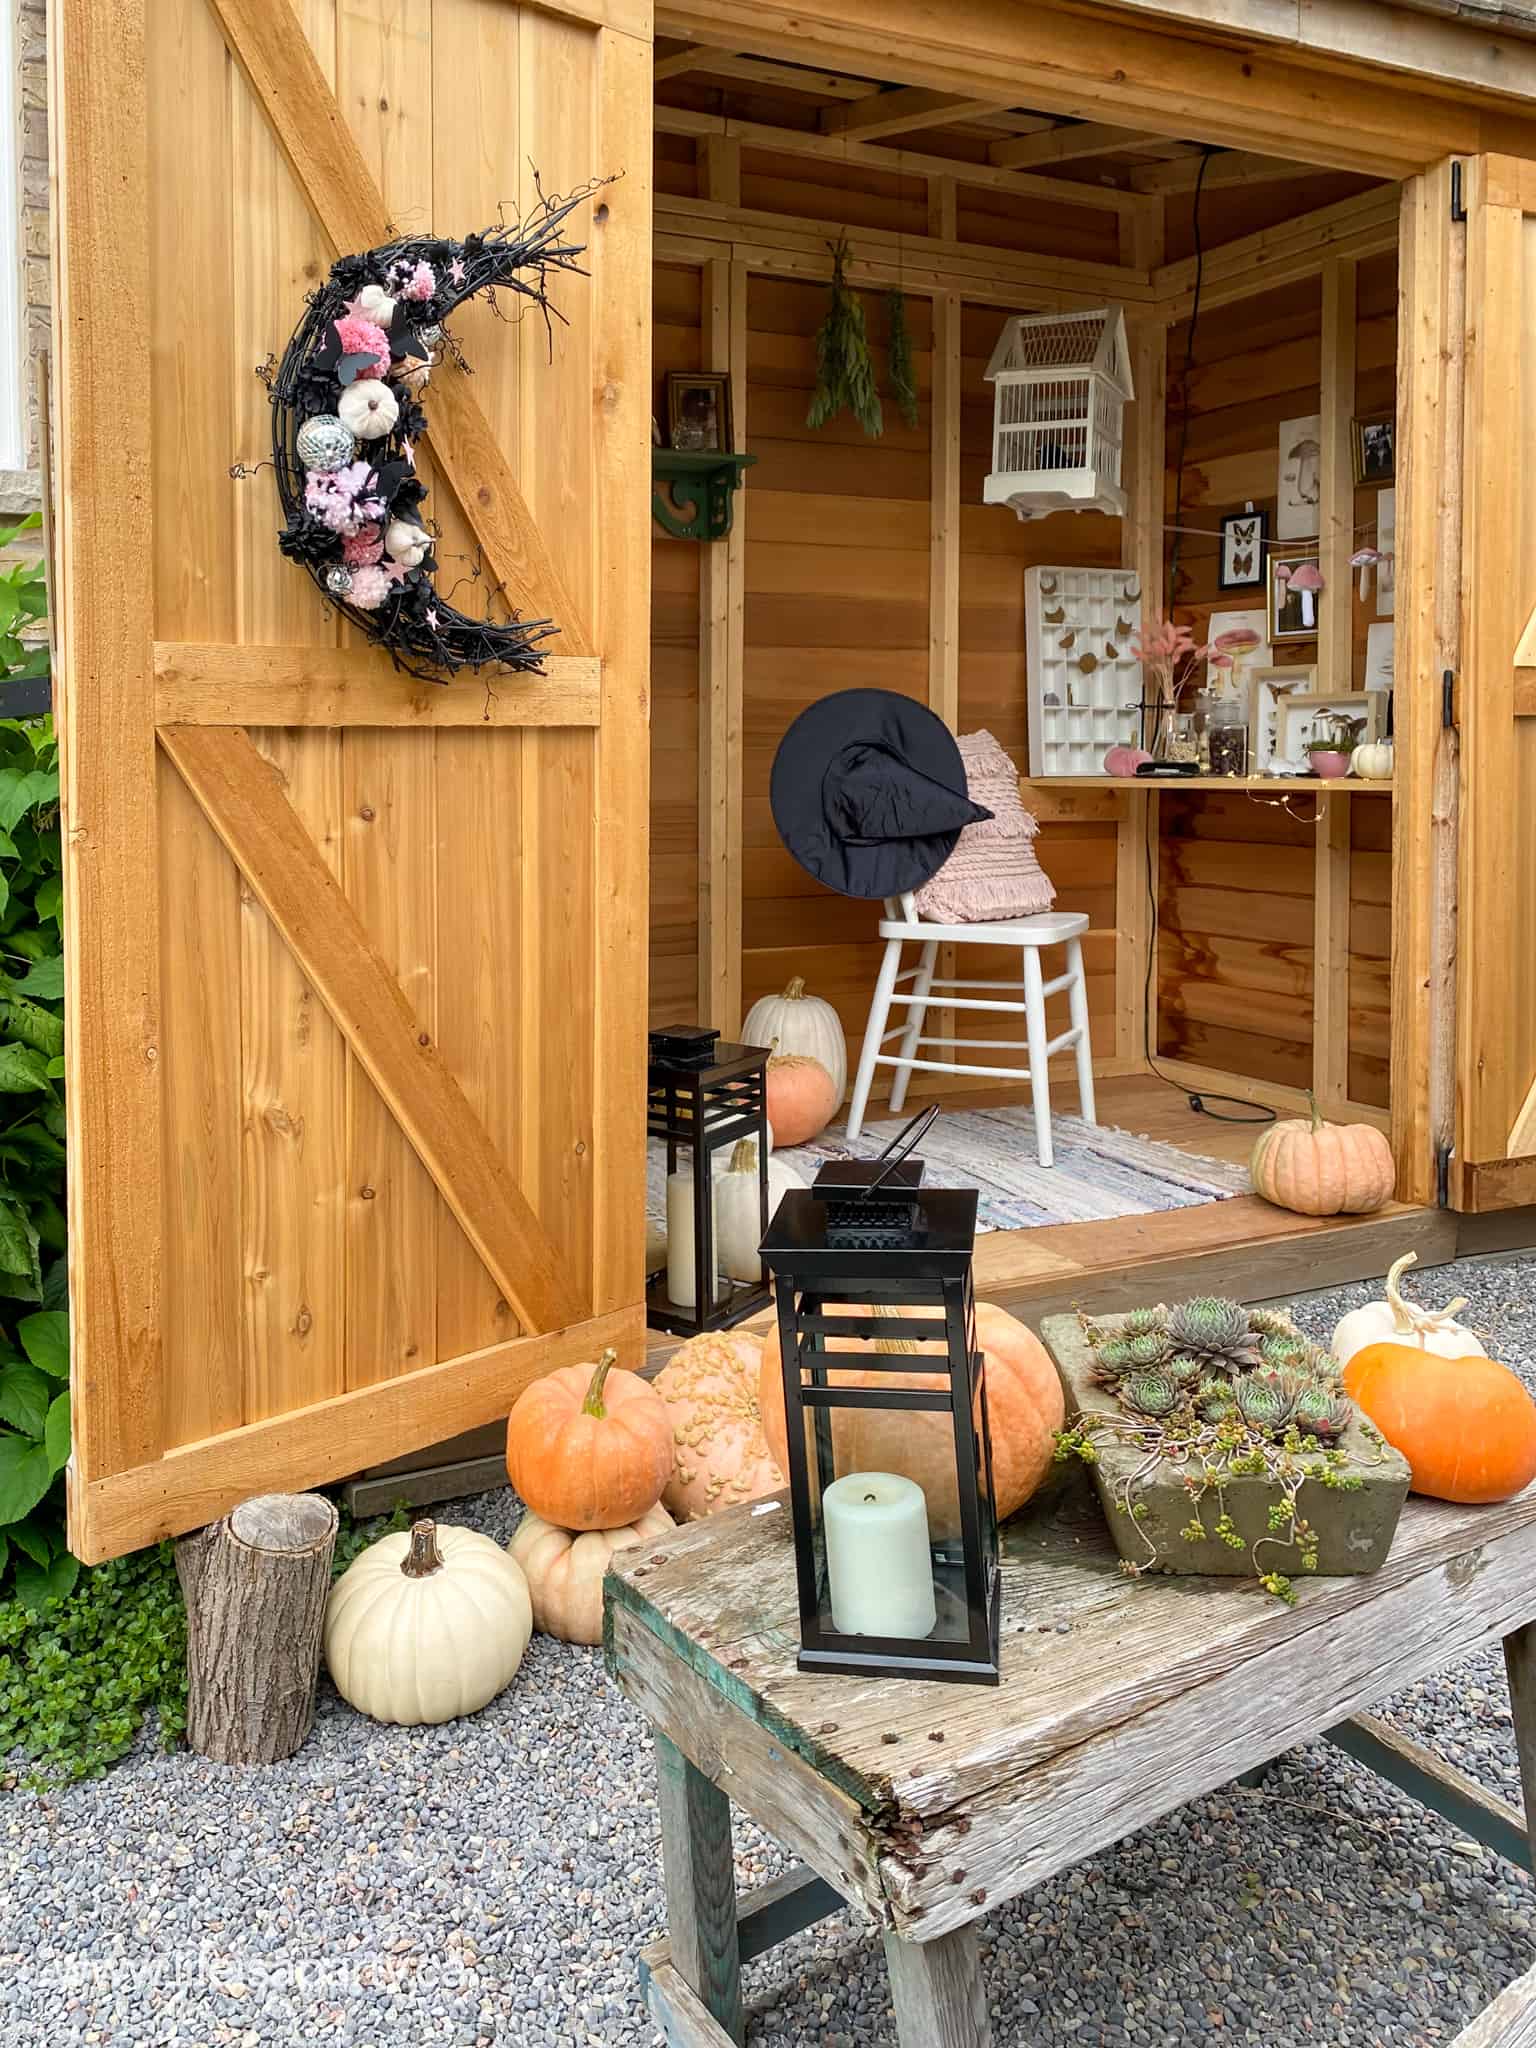
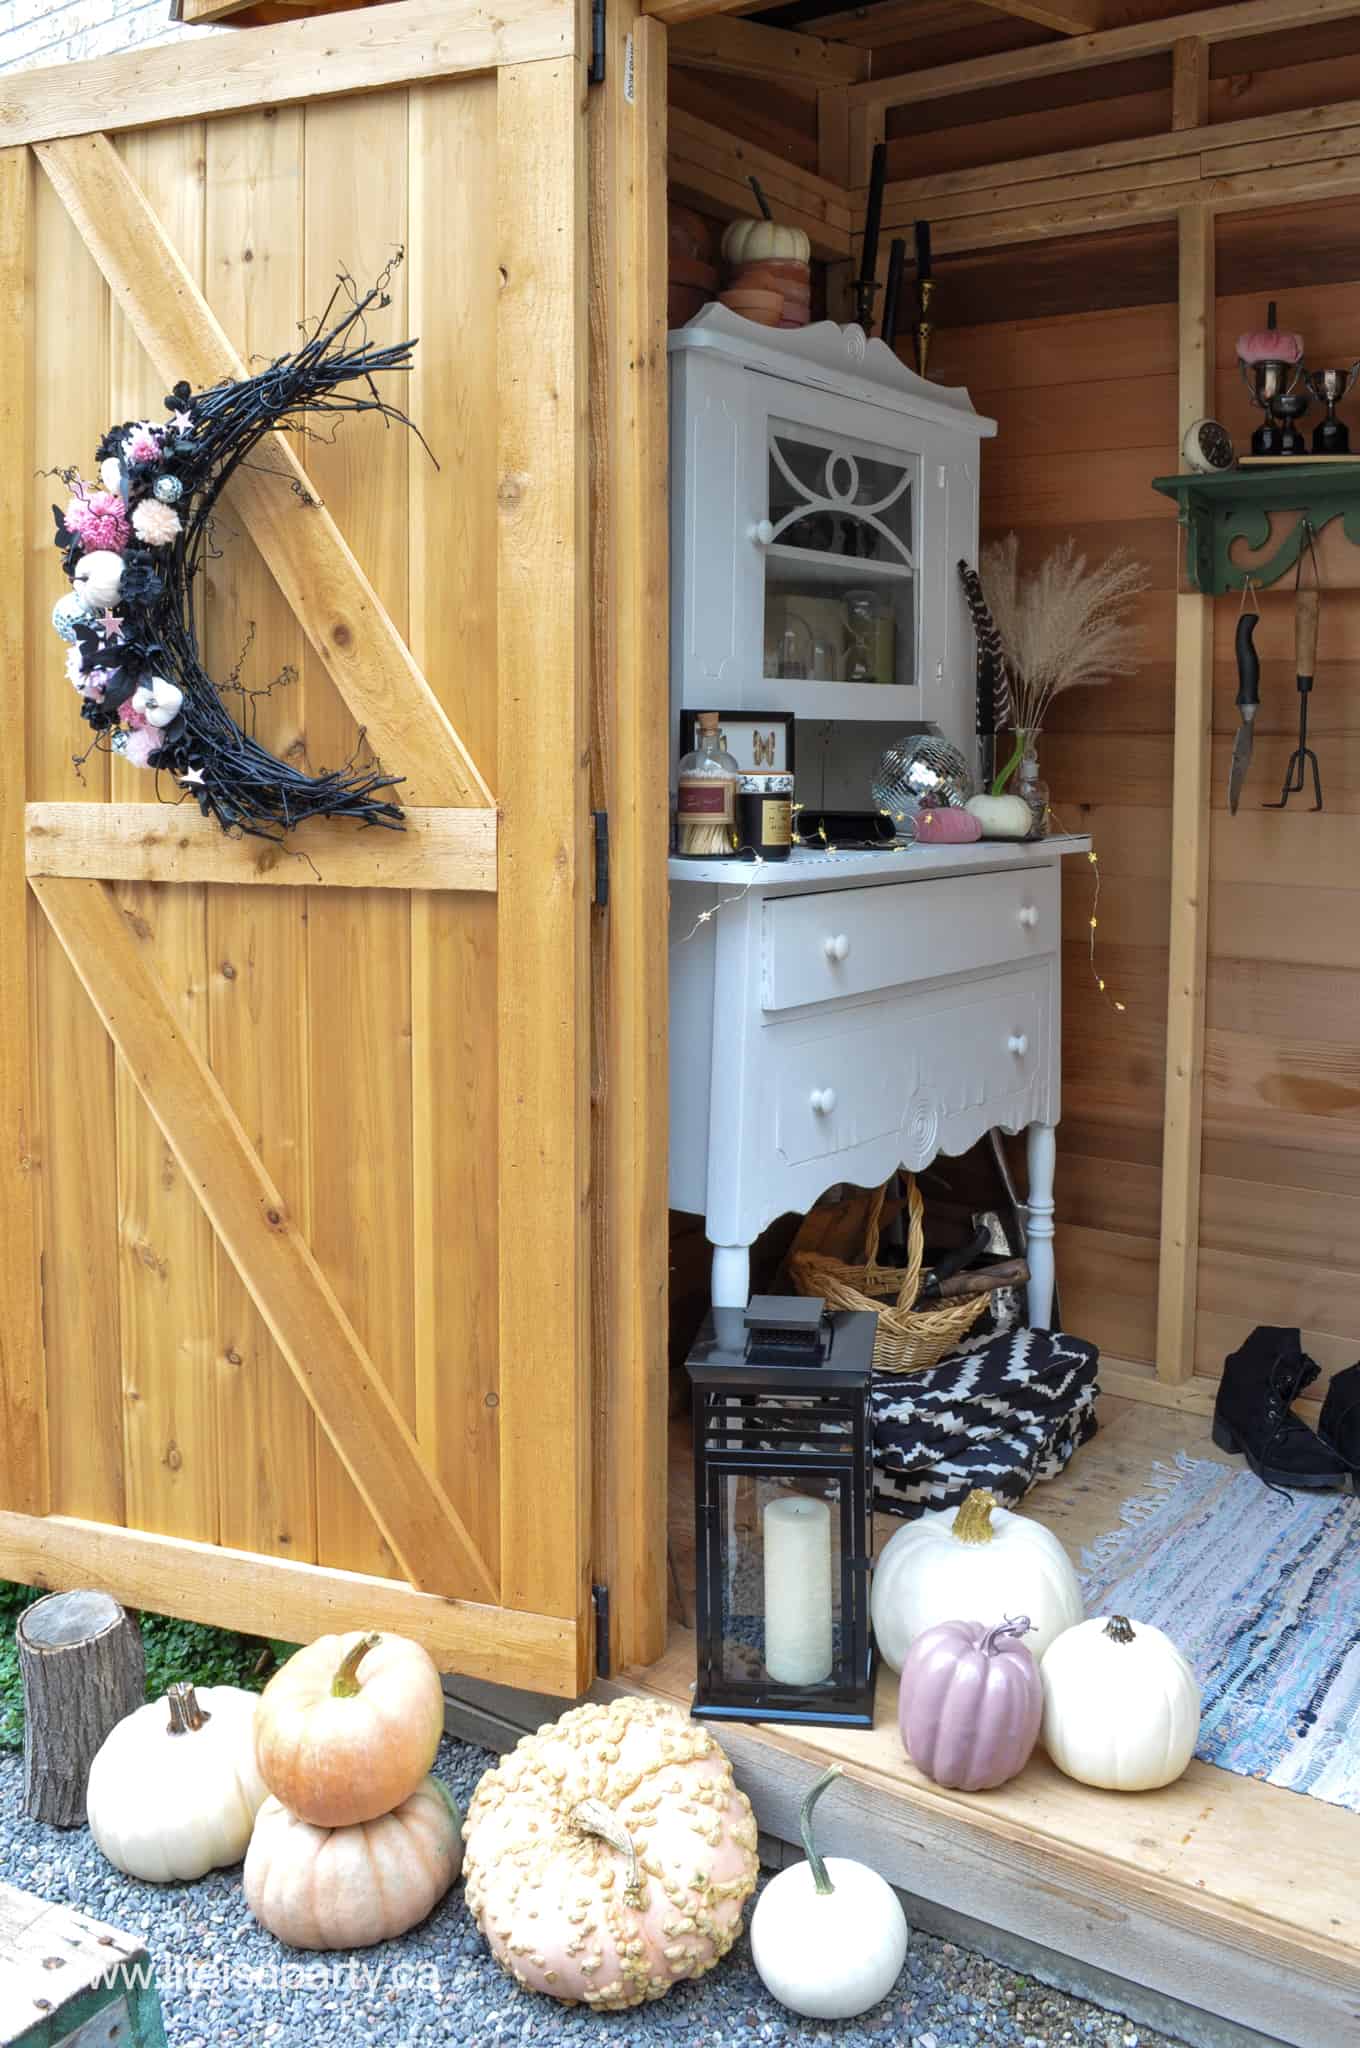
I made a fun moon shaped wreath, with butterflies, stars, pumpkins, and disco balls. I'm be sharing more details about how I made it next week.

witch halloween decor ideas
DIY moon wreath

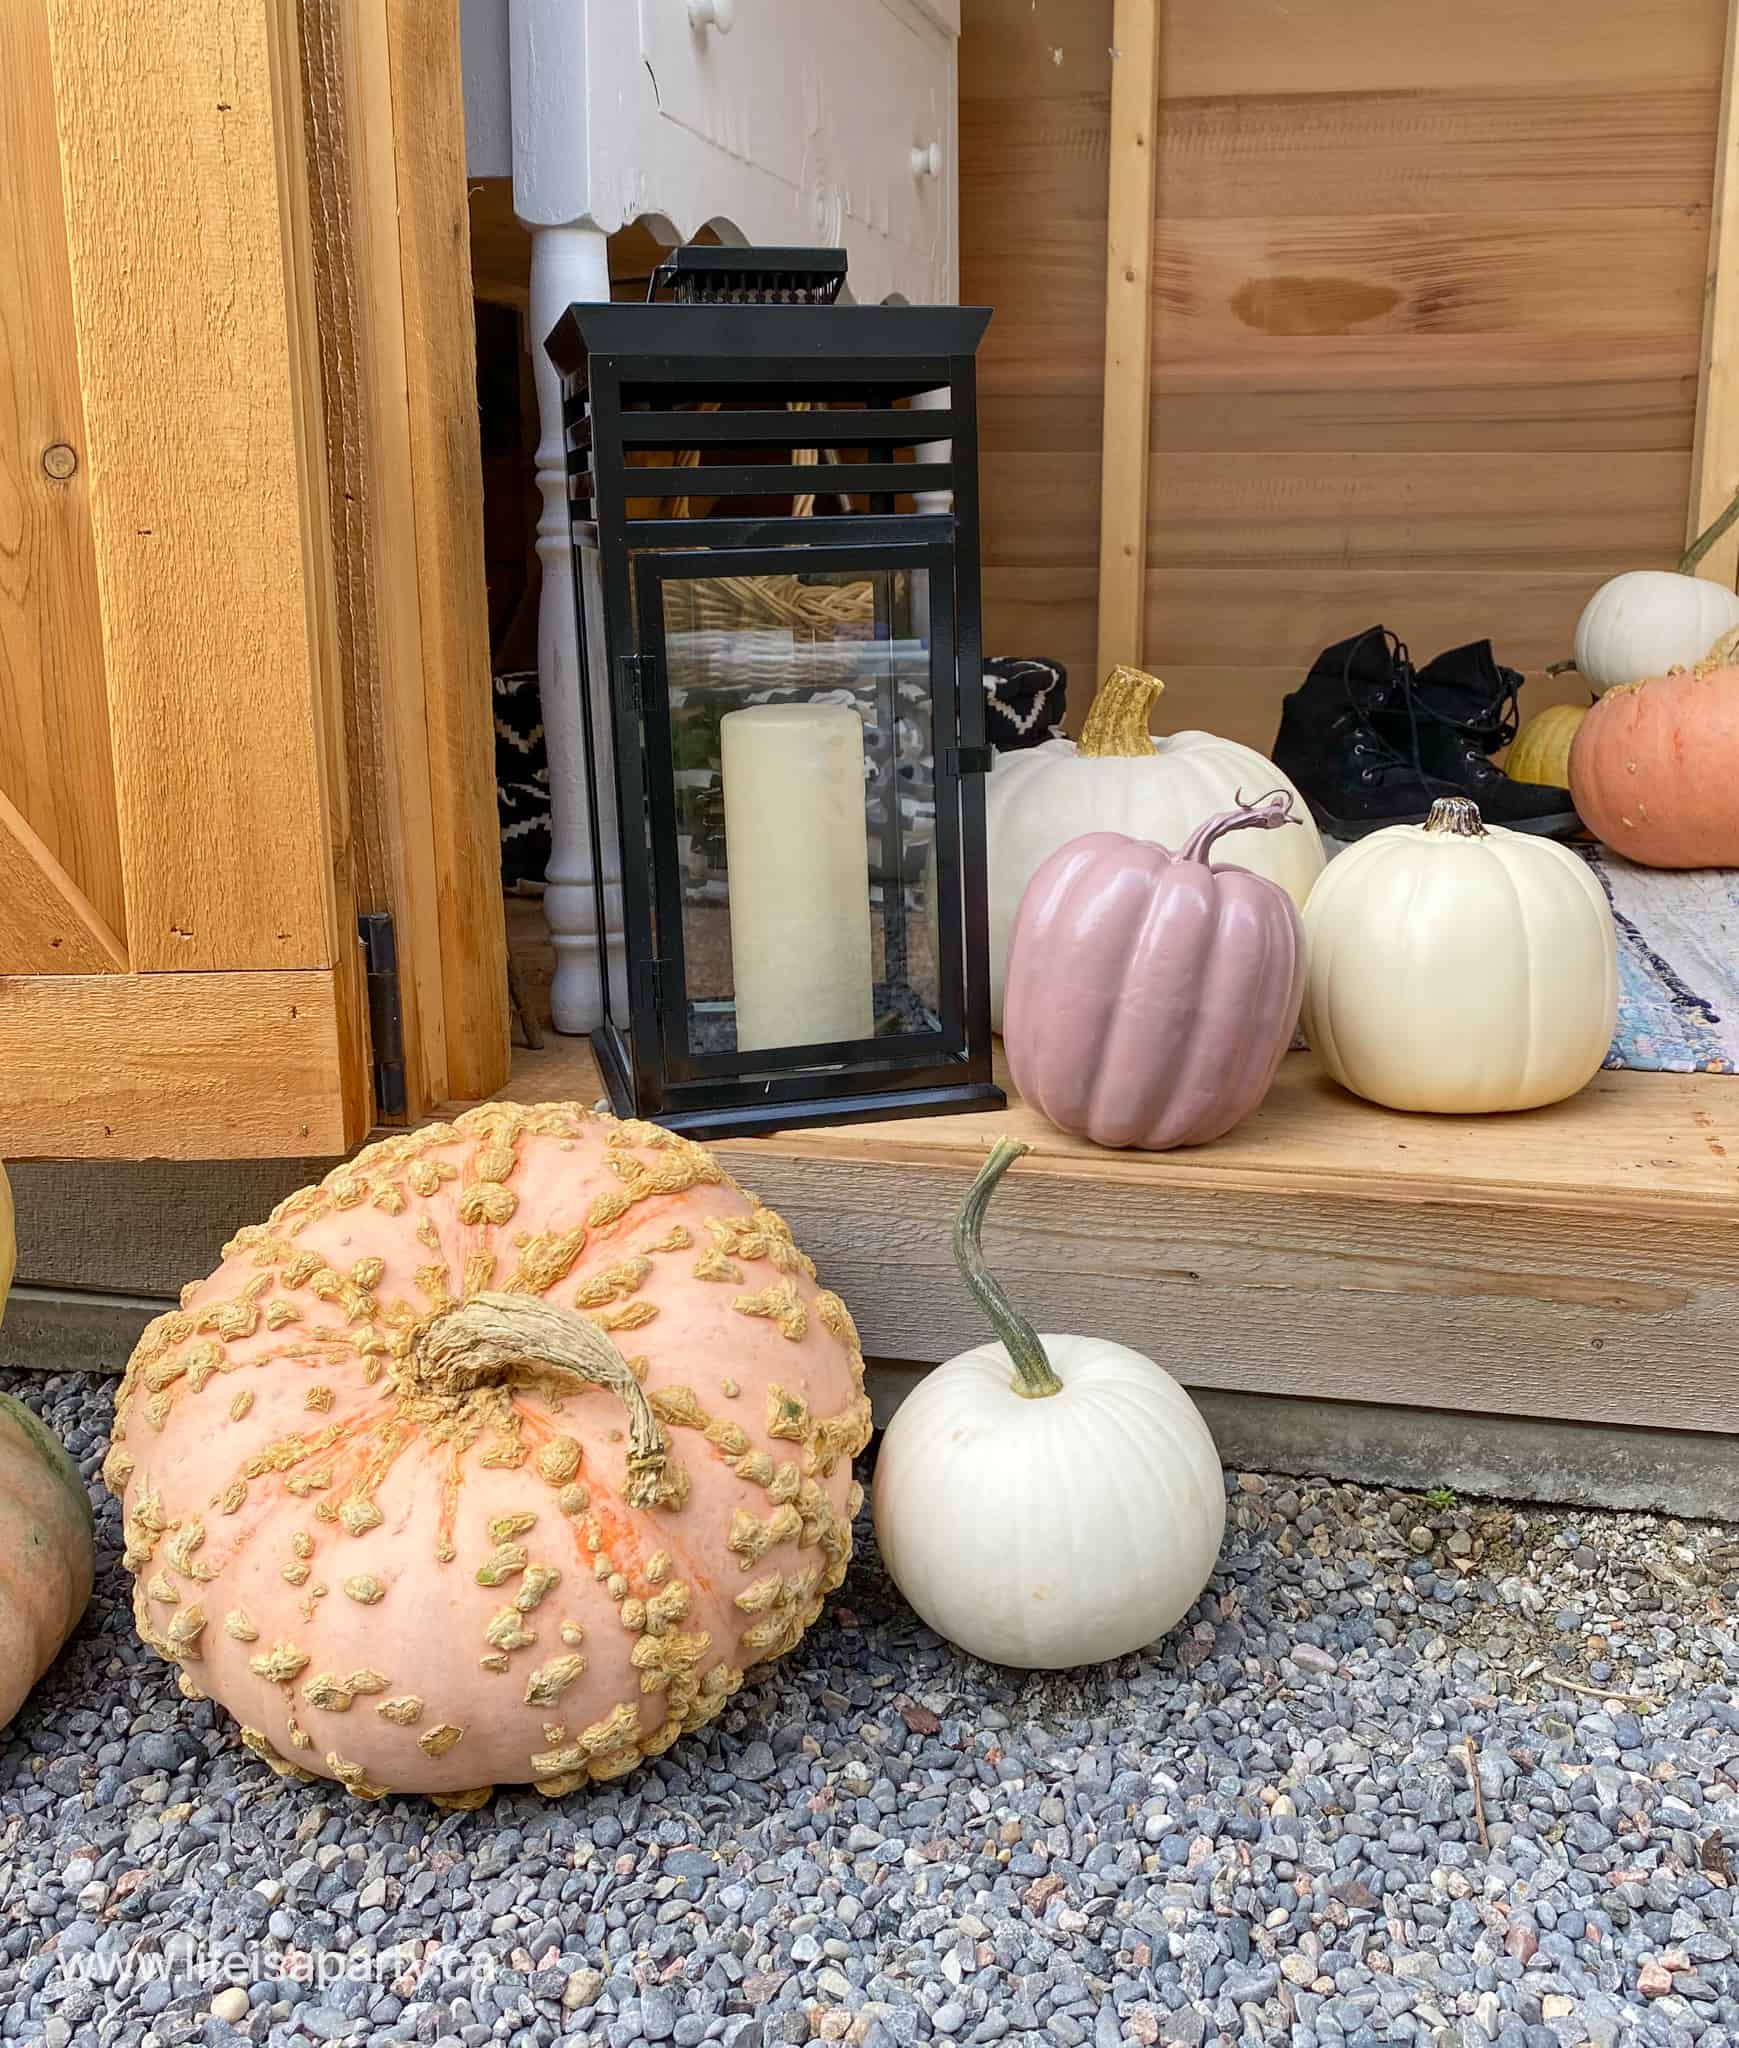
Along with the beautiful DIY halloween wreath, there are also lots and lots of pumpkins. They've got to be any good witches favourite thing to grow, don't you think? 

pumpkins and later

The Antique Hutch

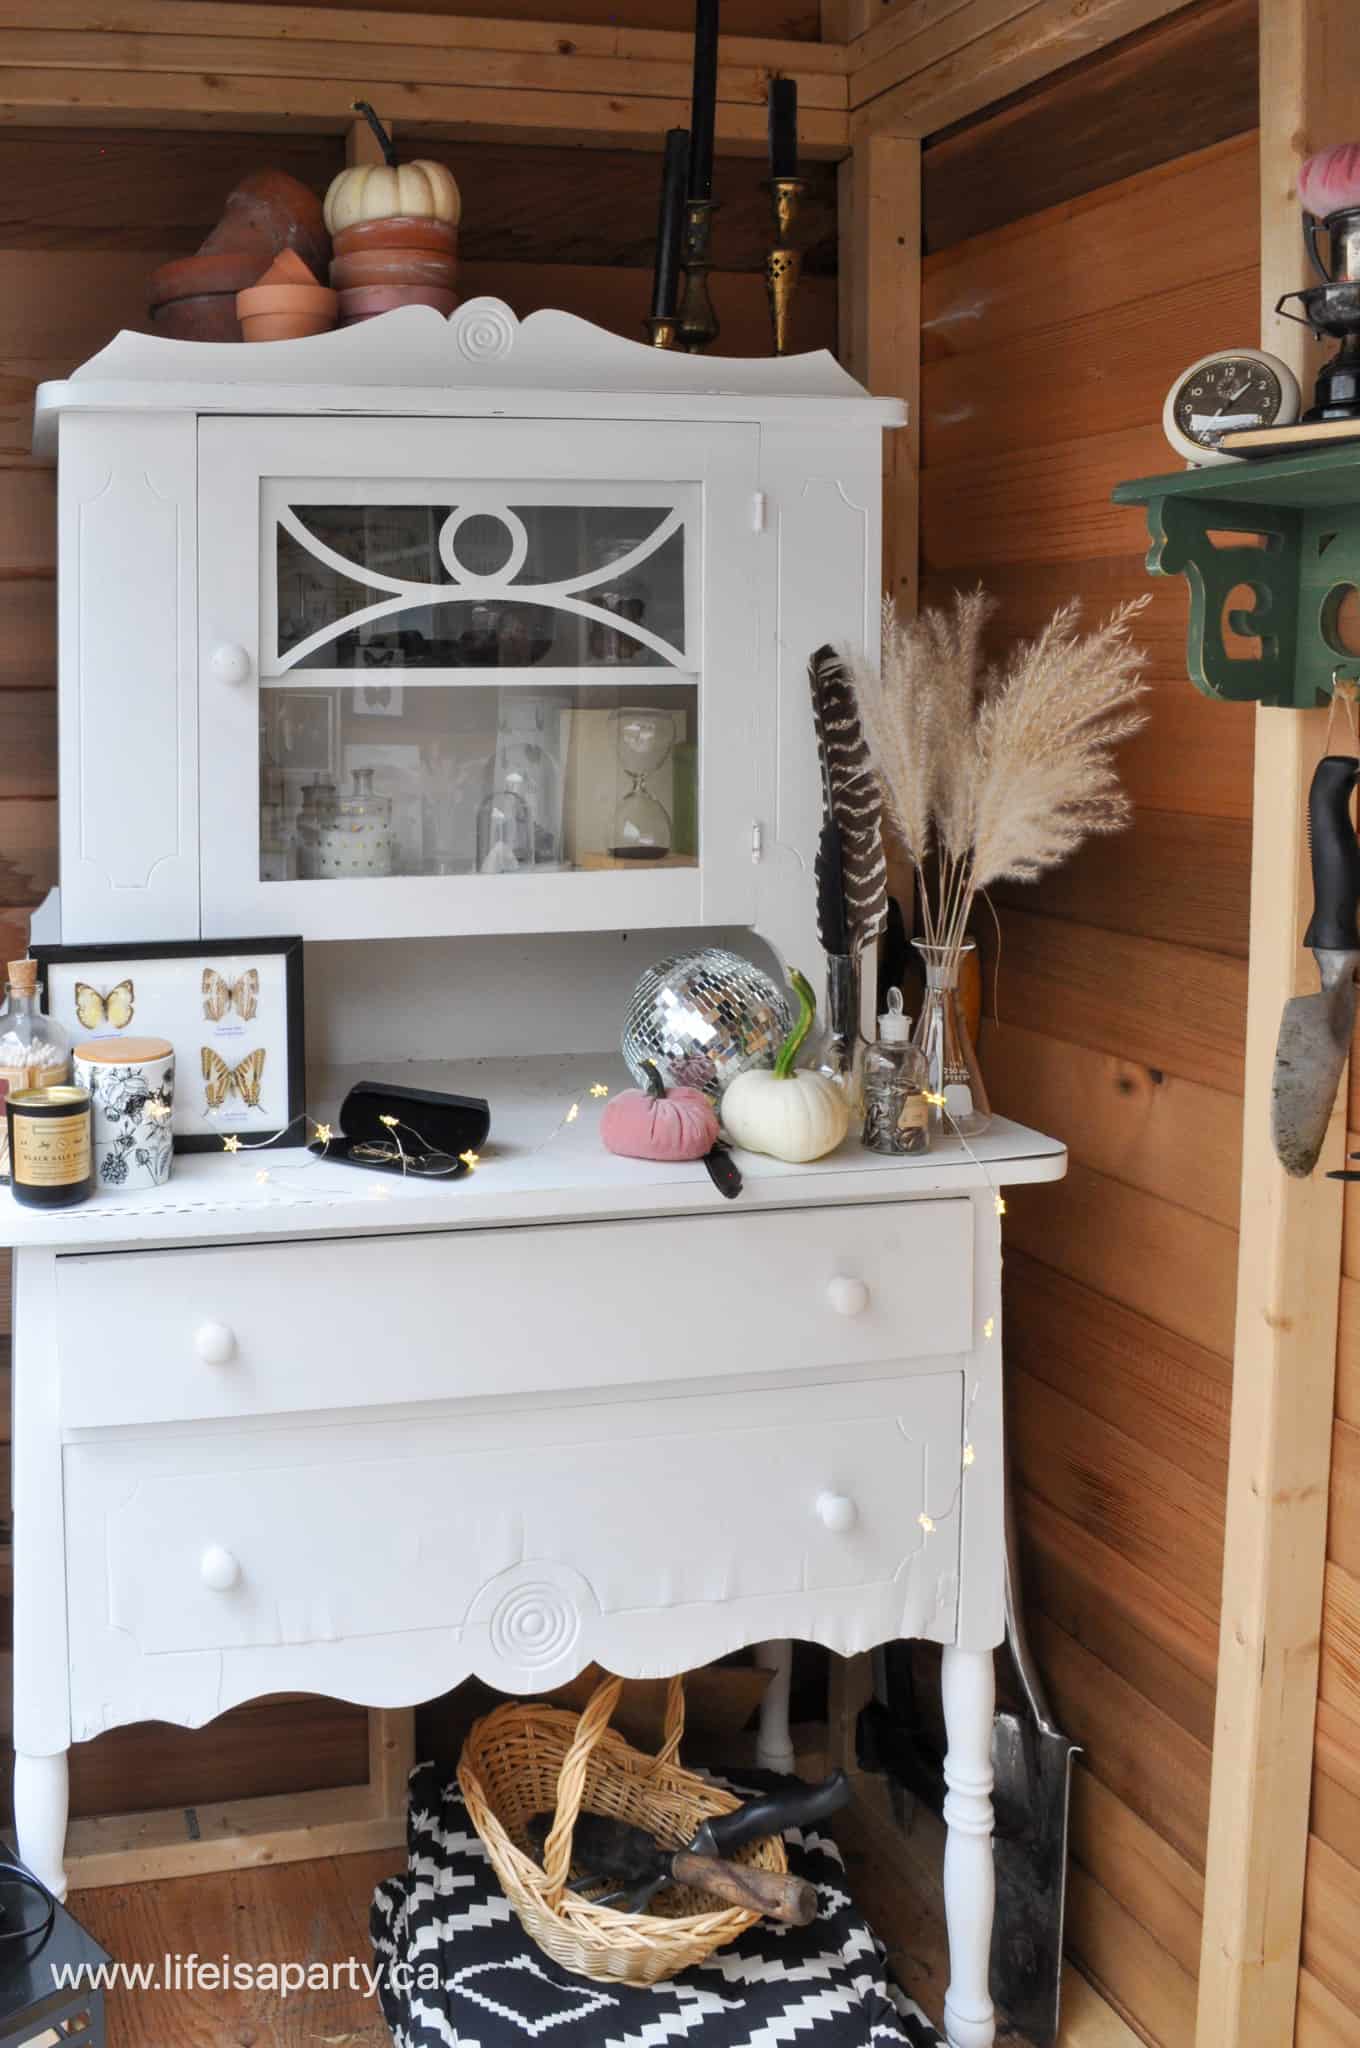
On one side of the witchy shed we have our little antique hutch, and it's filled with everything you need for creating potions.

witch halloween decorations
Harry Potter inspired halloween decor
halloween decor
witch halloween decor
Harry Potter halloween decor ideas

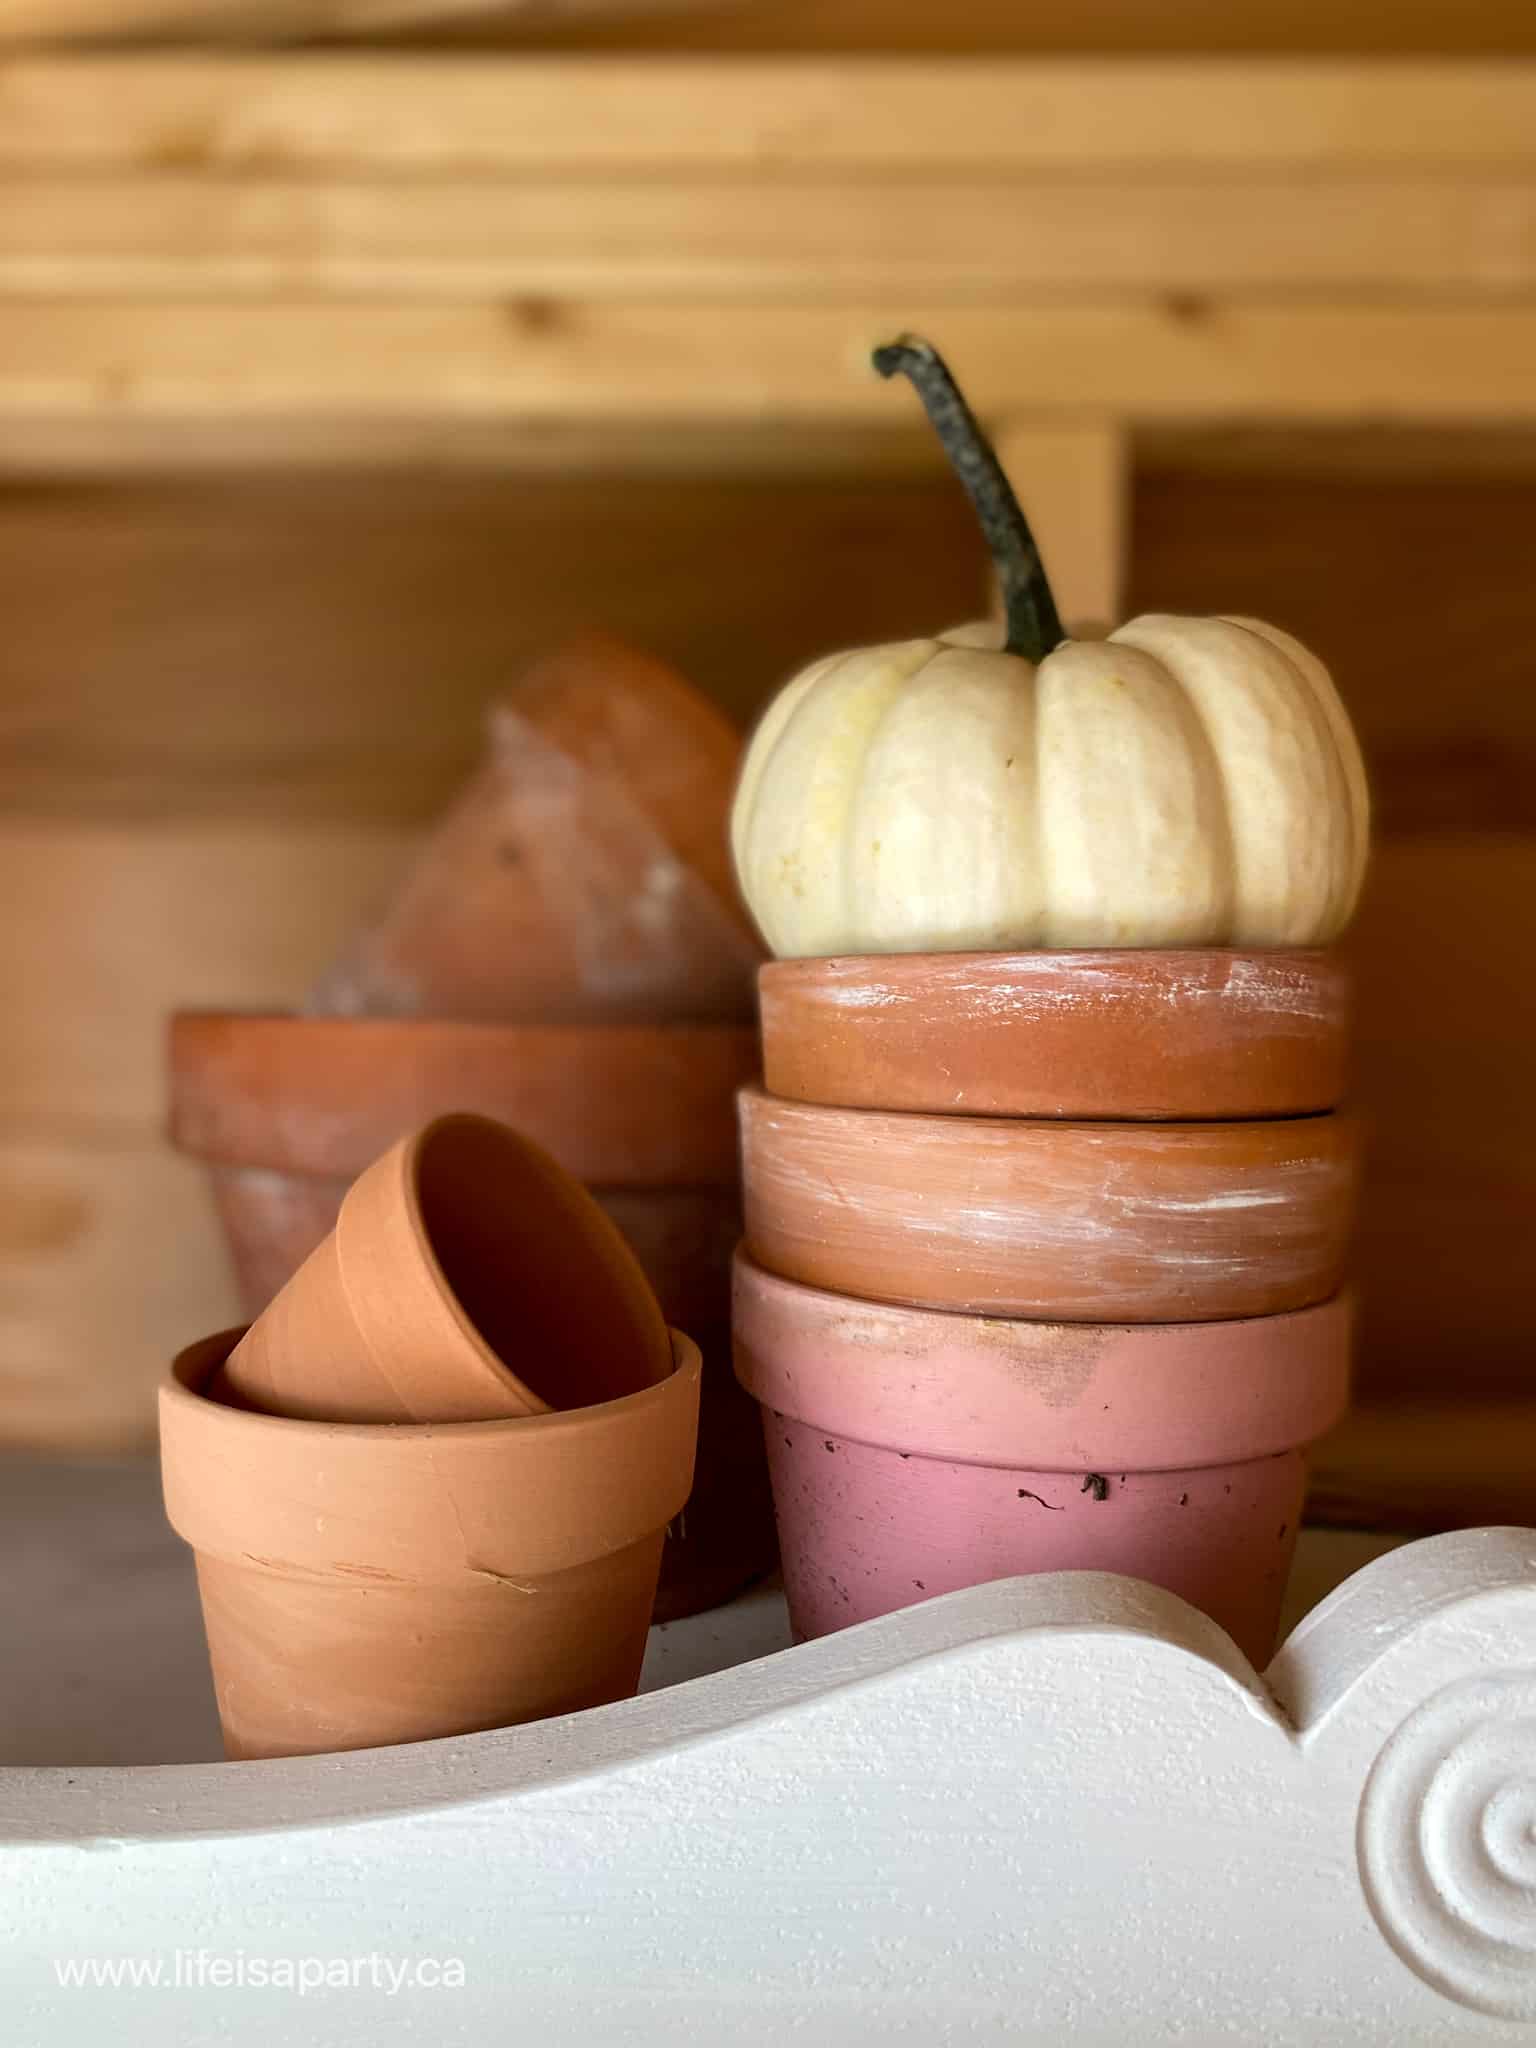
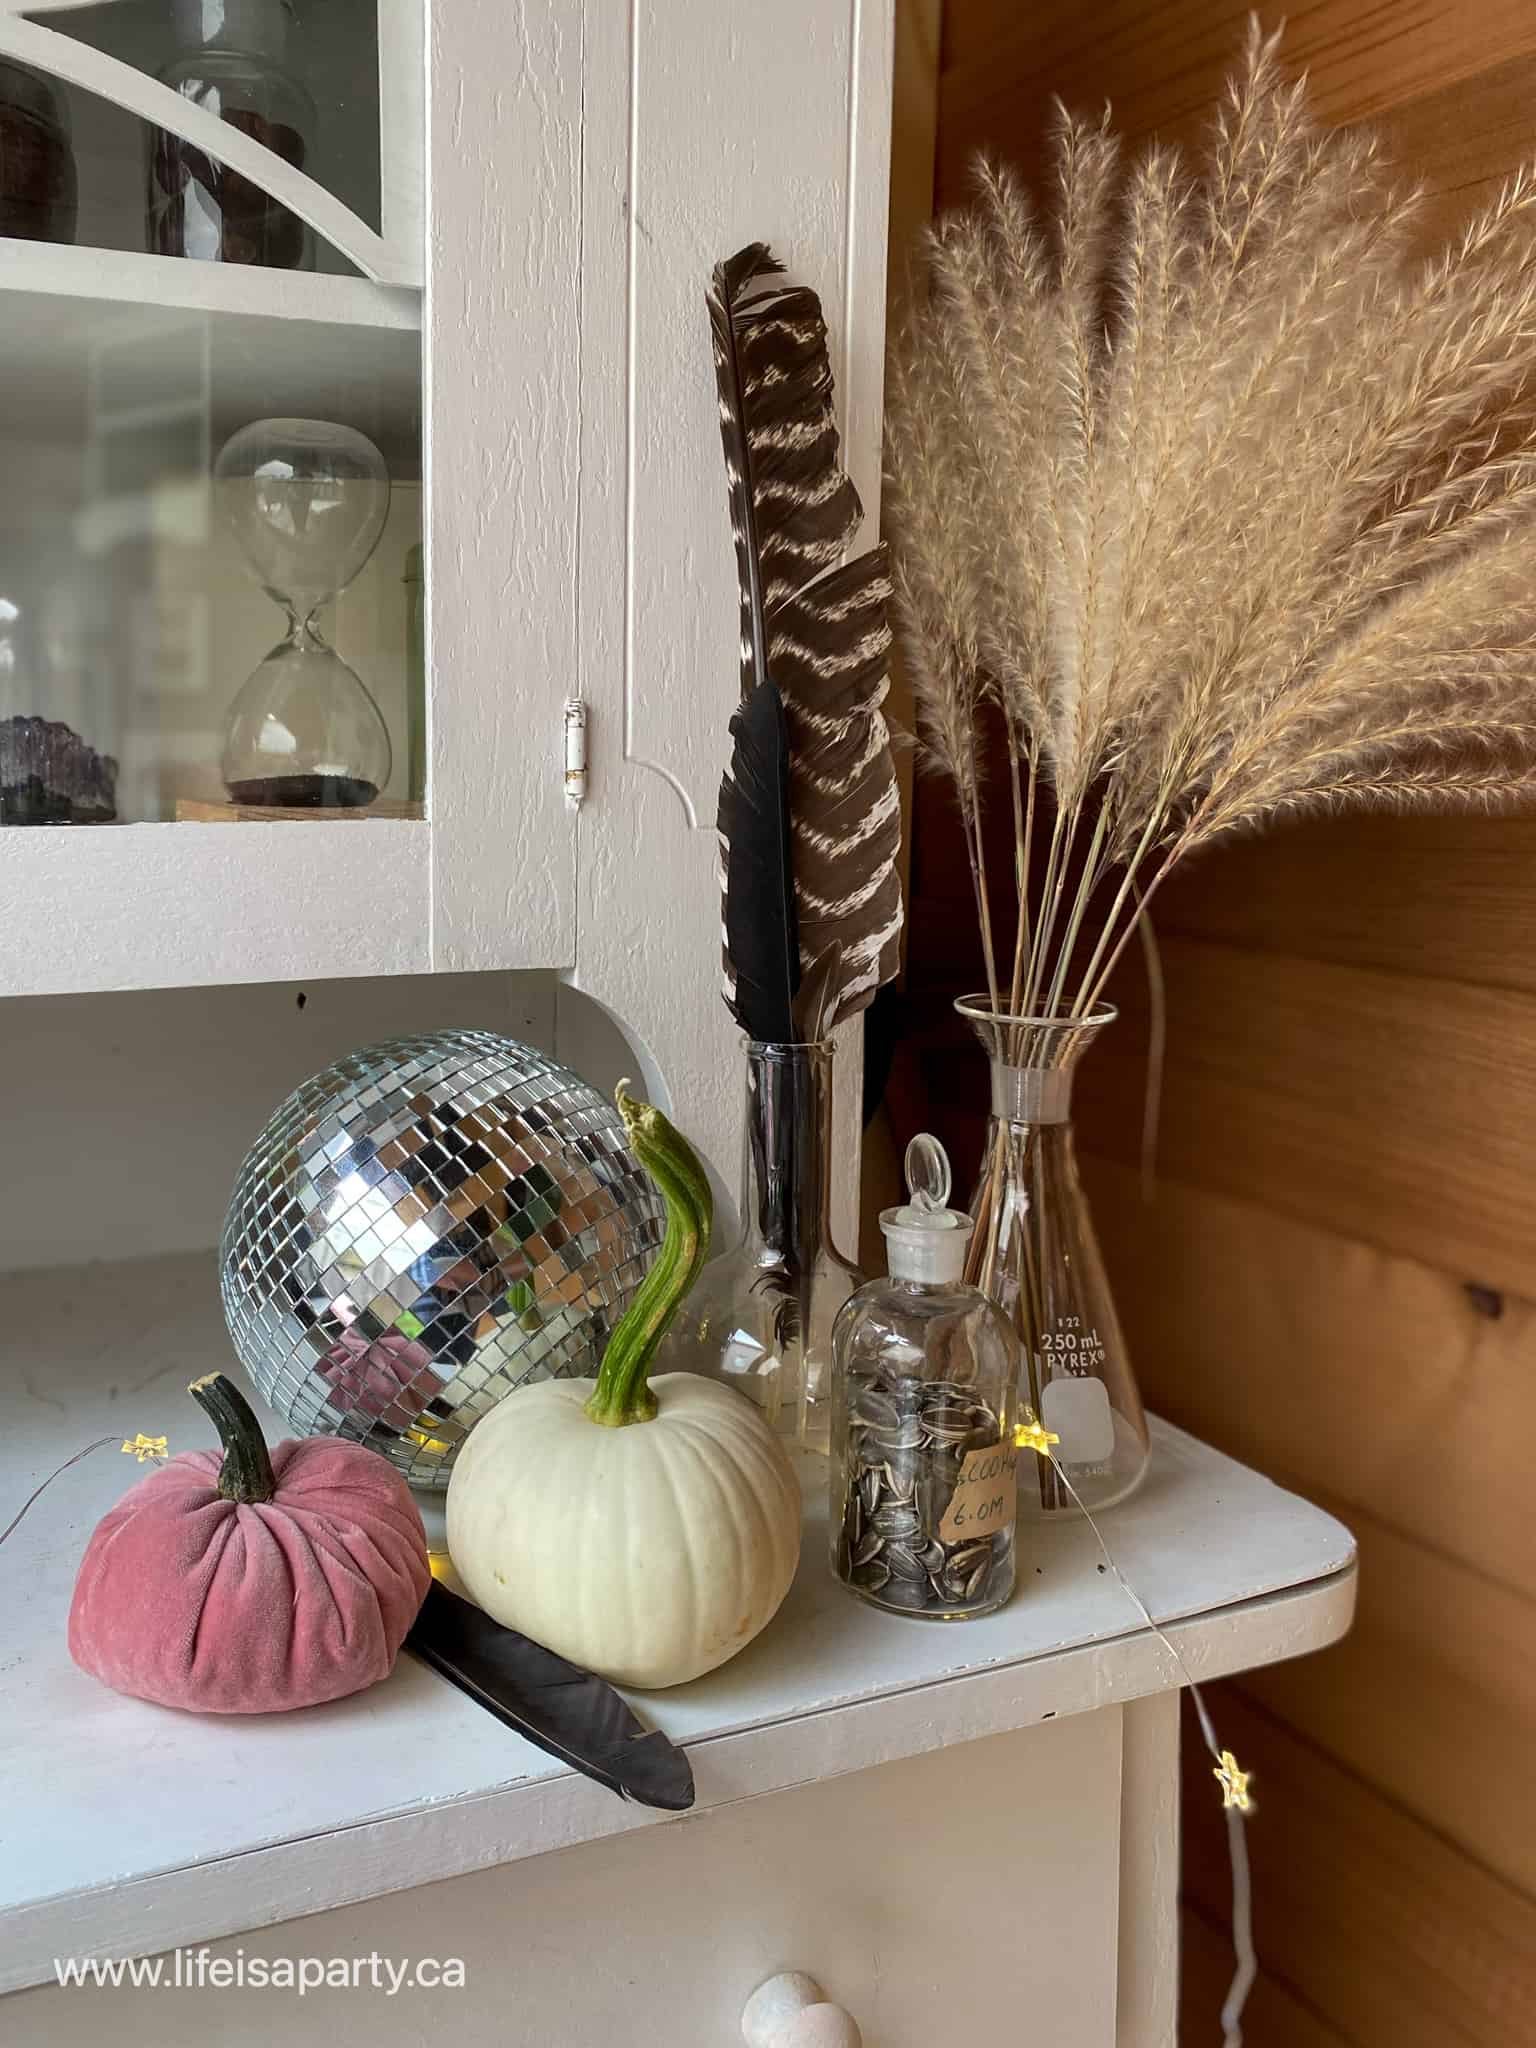
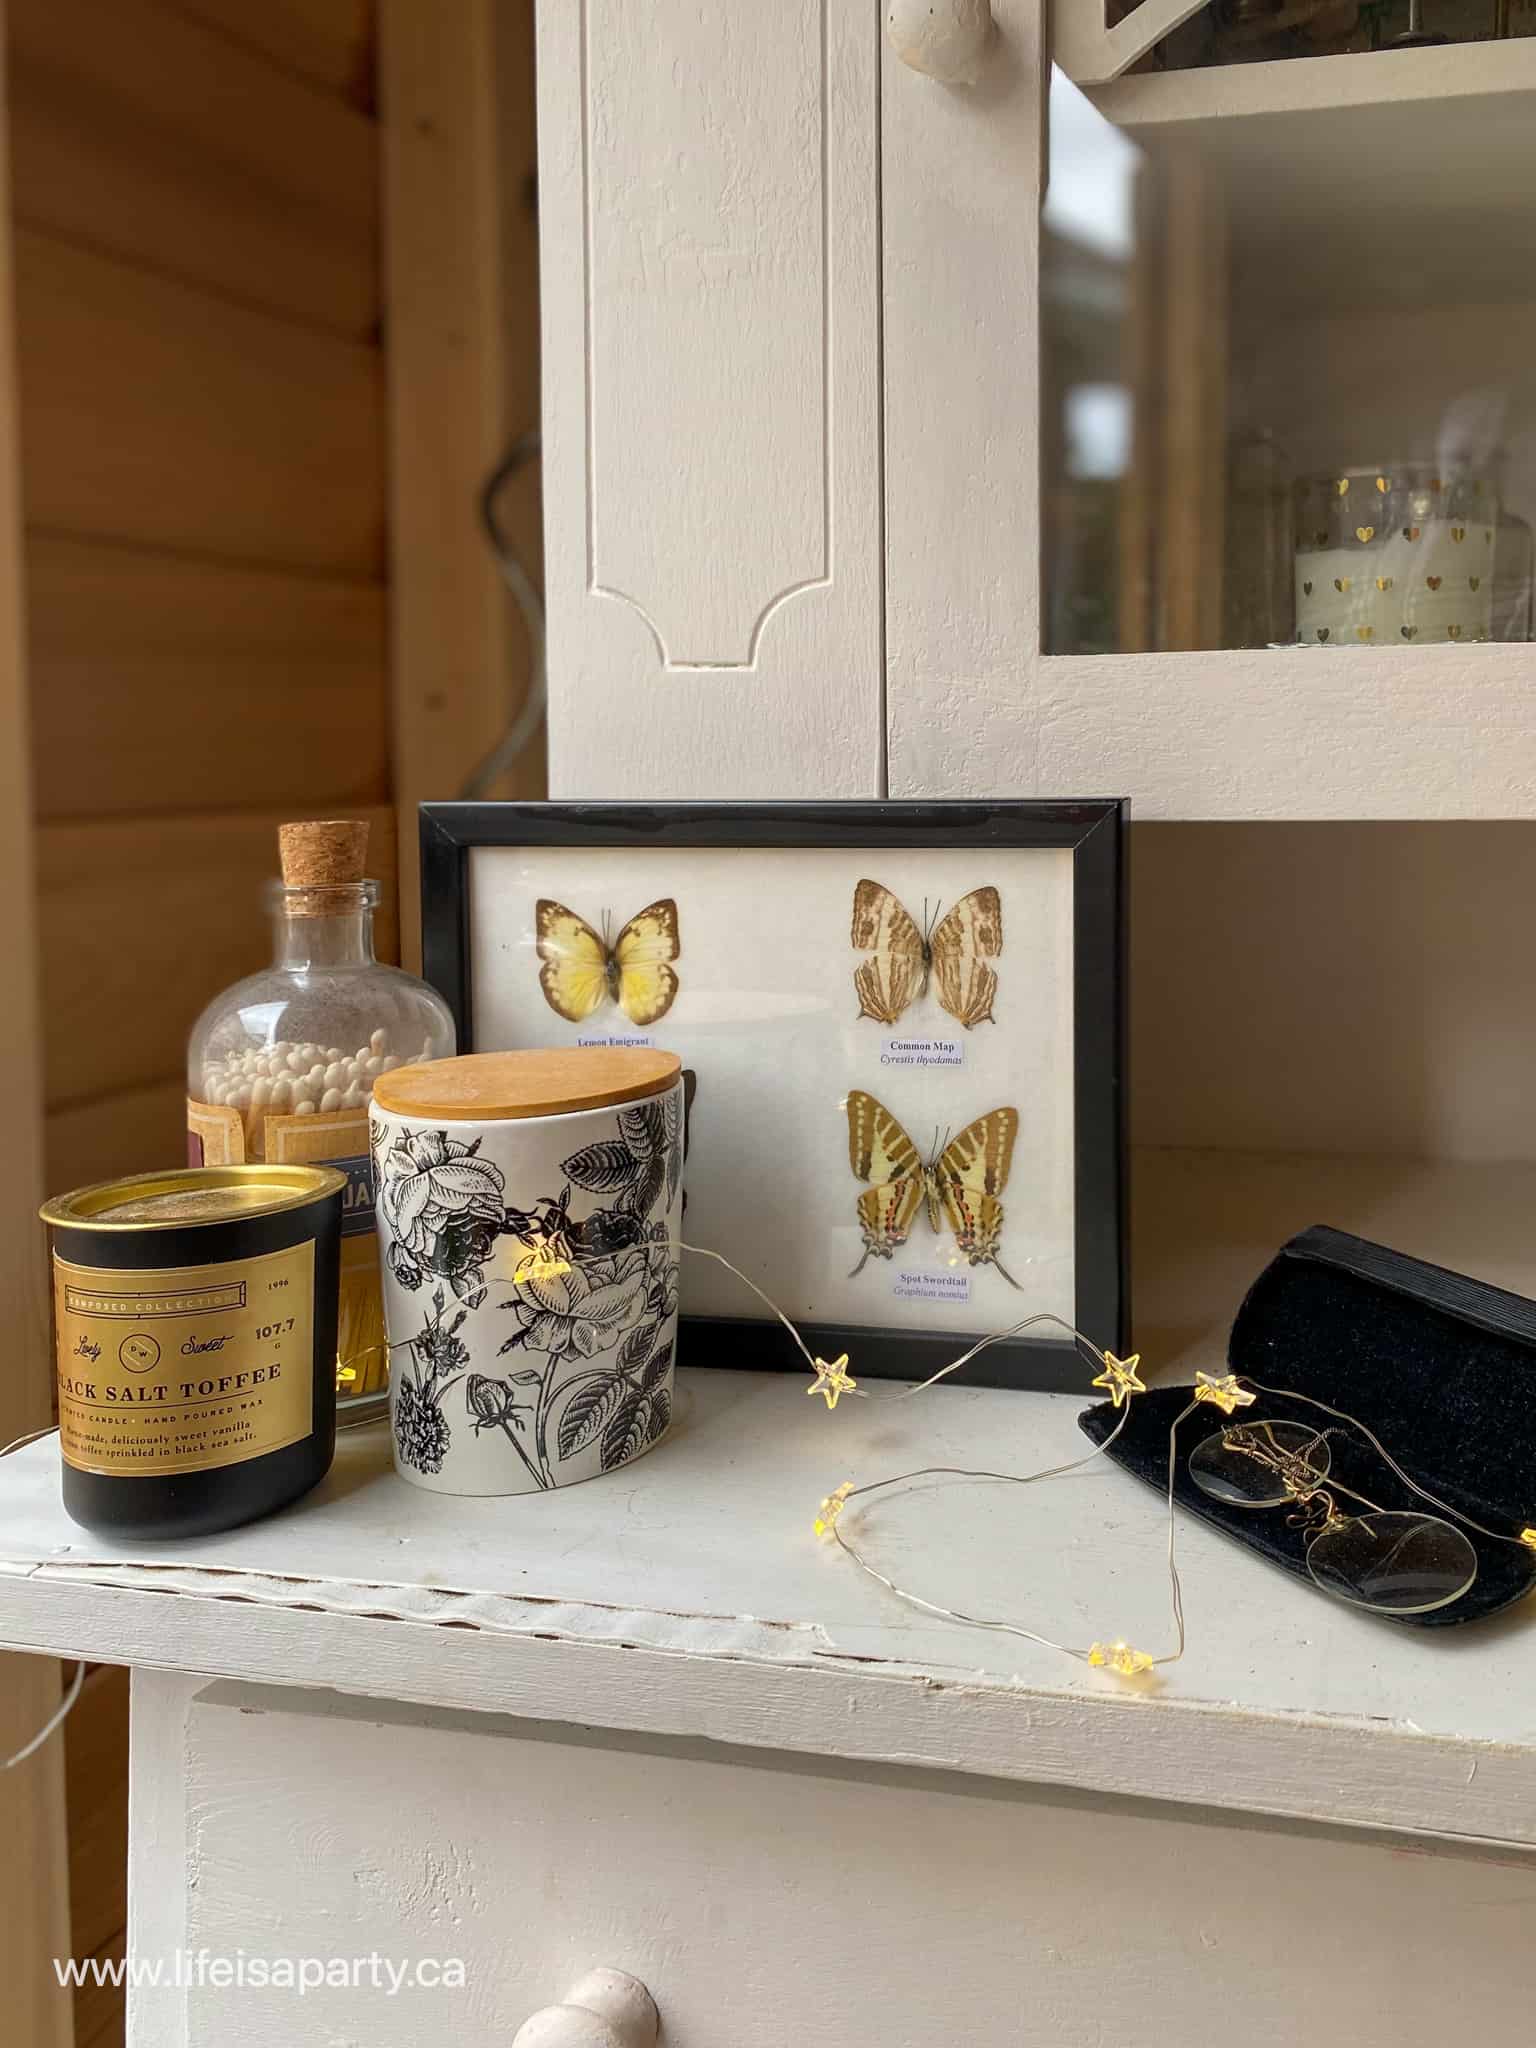
The setting here is a garden shed, so there's lots of garden tools and pots. Next, layered with that are lots of different preserved insects, candles, orange pumpkins, and white pumpkins. There is also some different vintage scientific glass containers, and beakers, ready for collecting seeds or making potions. 

halloween witch decor elegant
Harry Potter halloween decor ideas

The Shelf

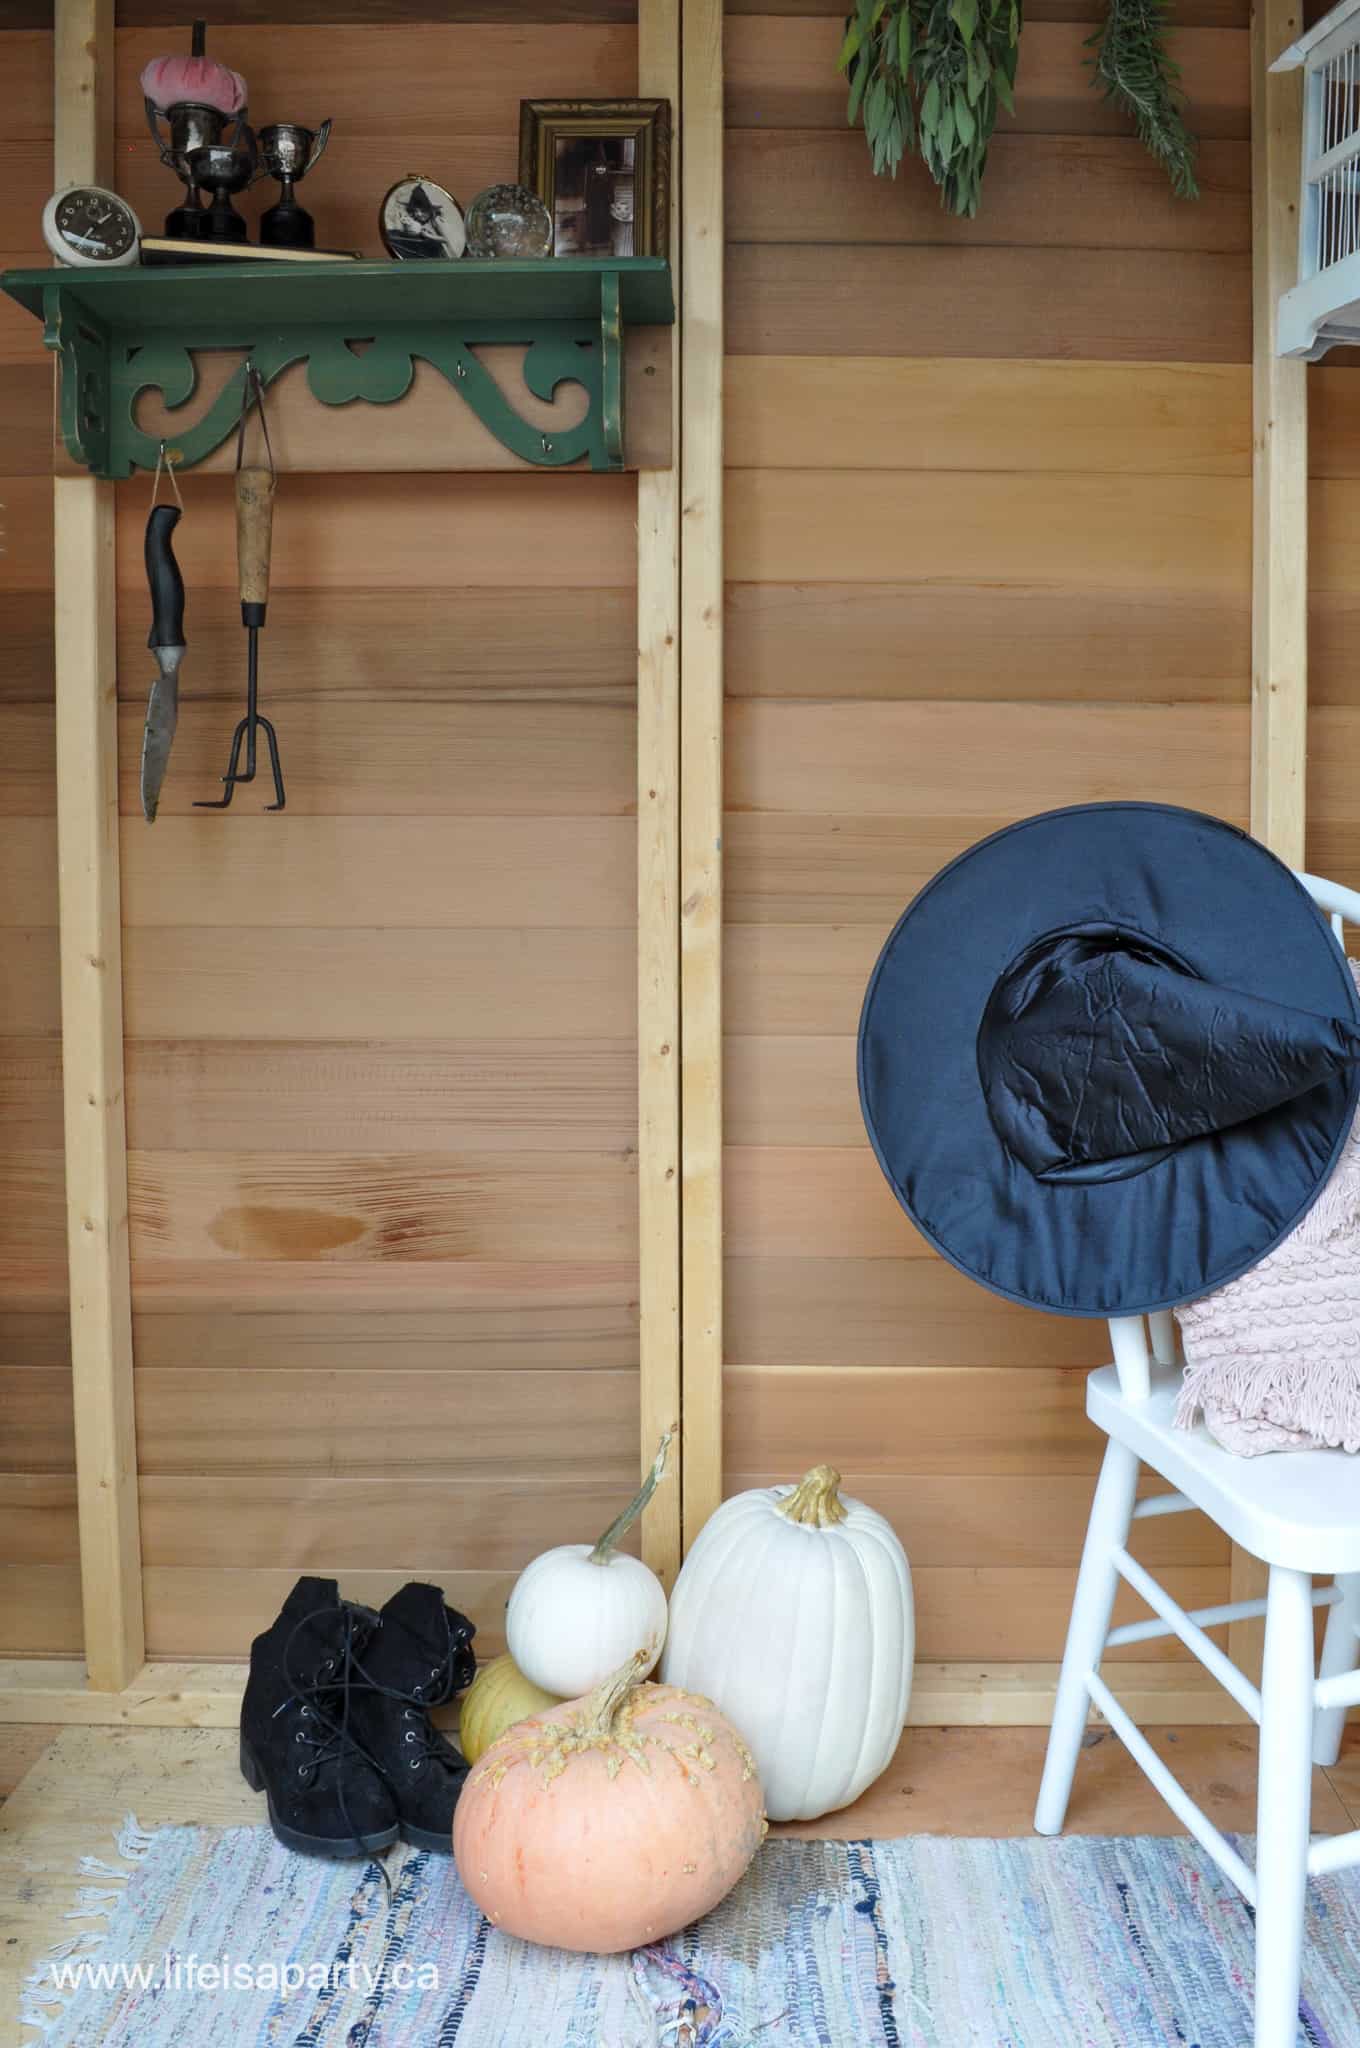
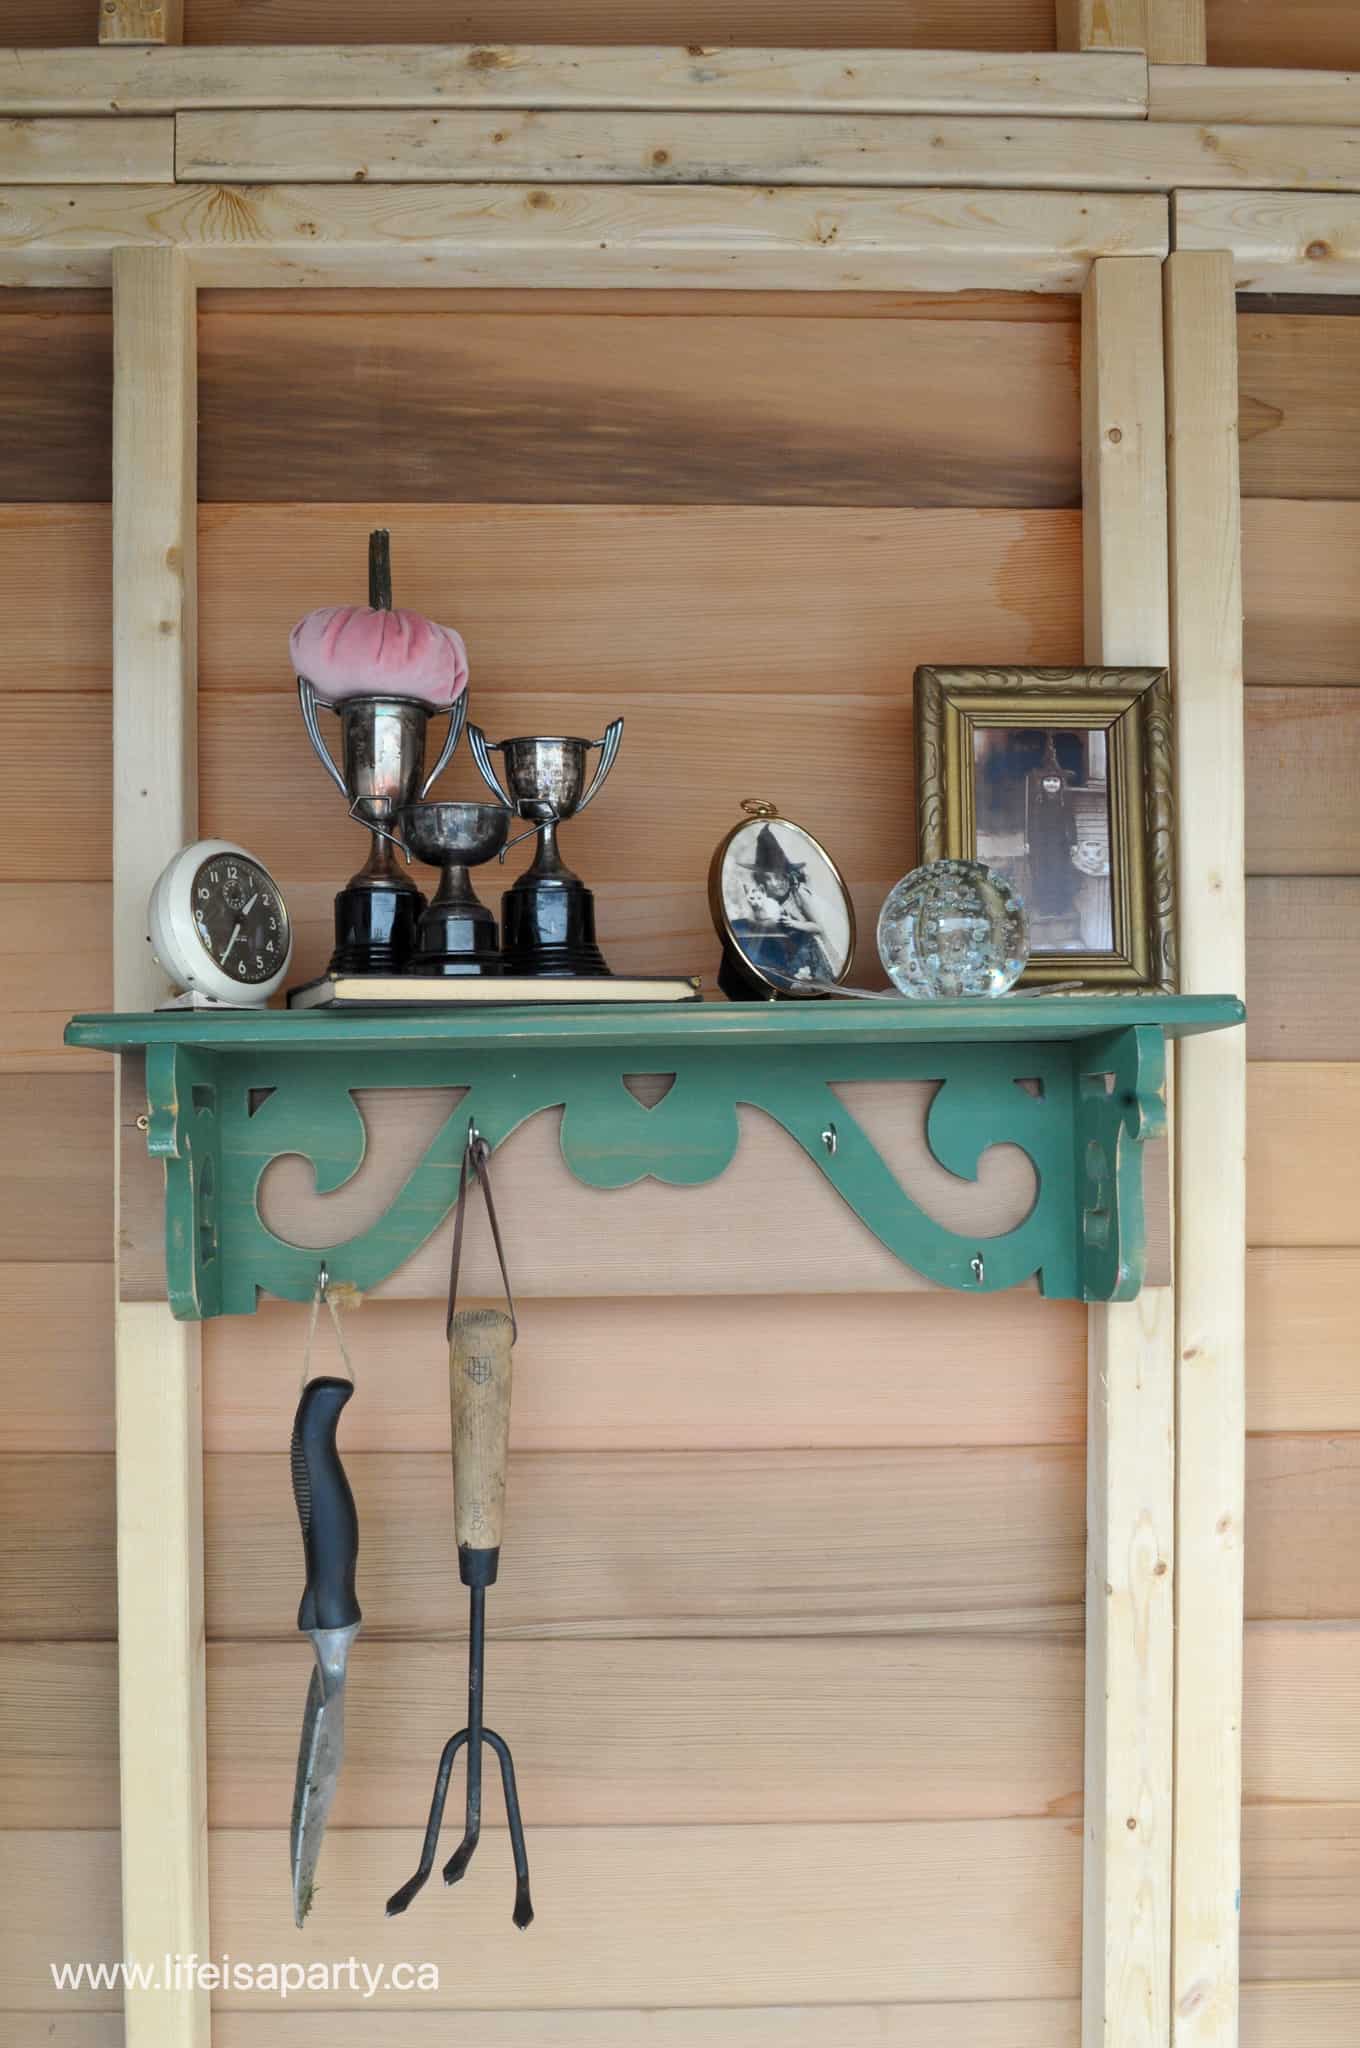
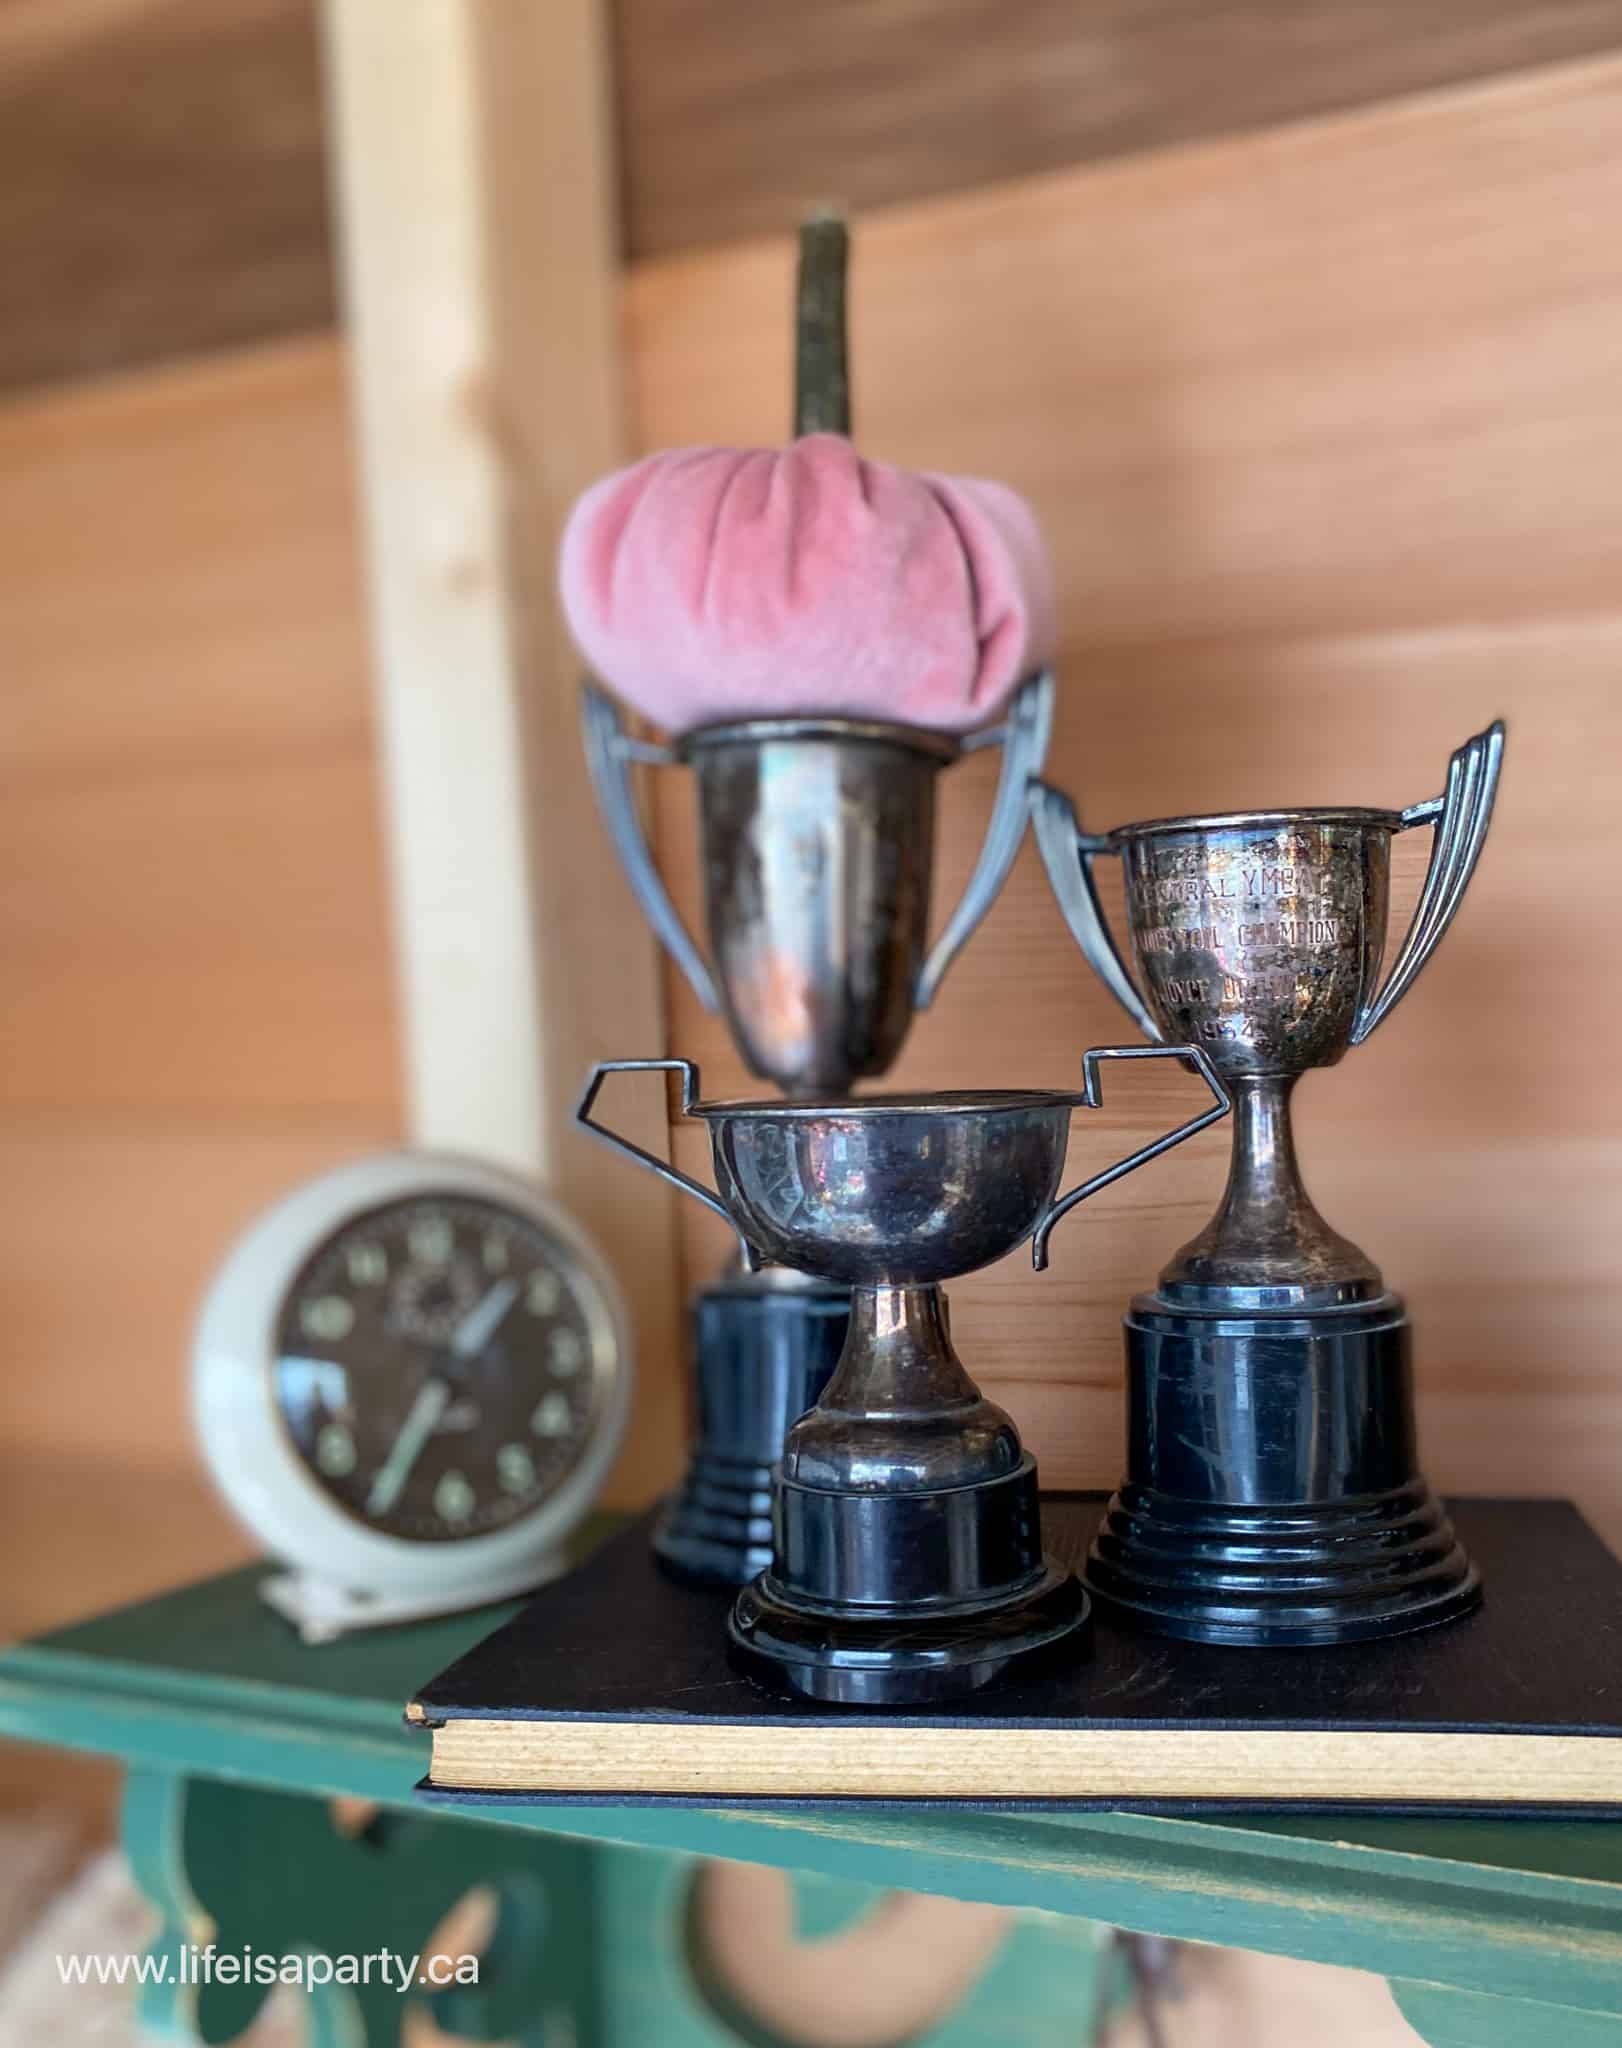
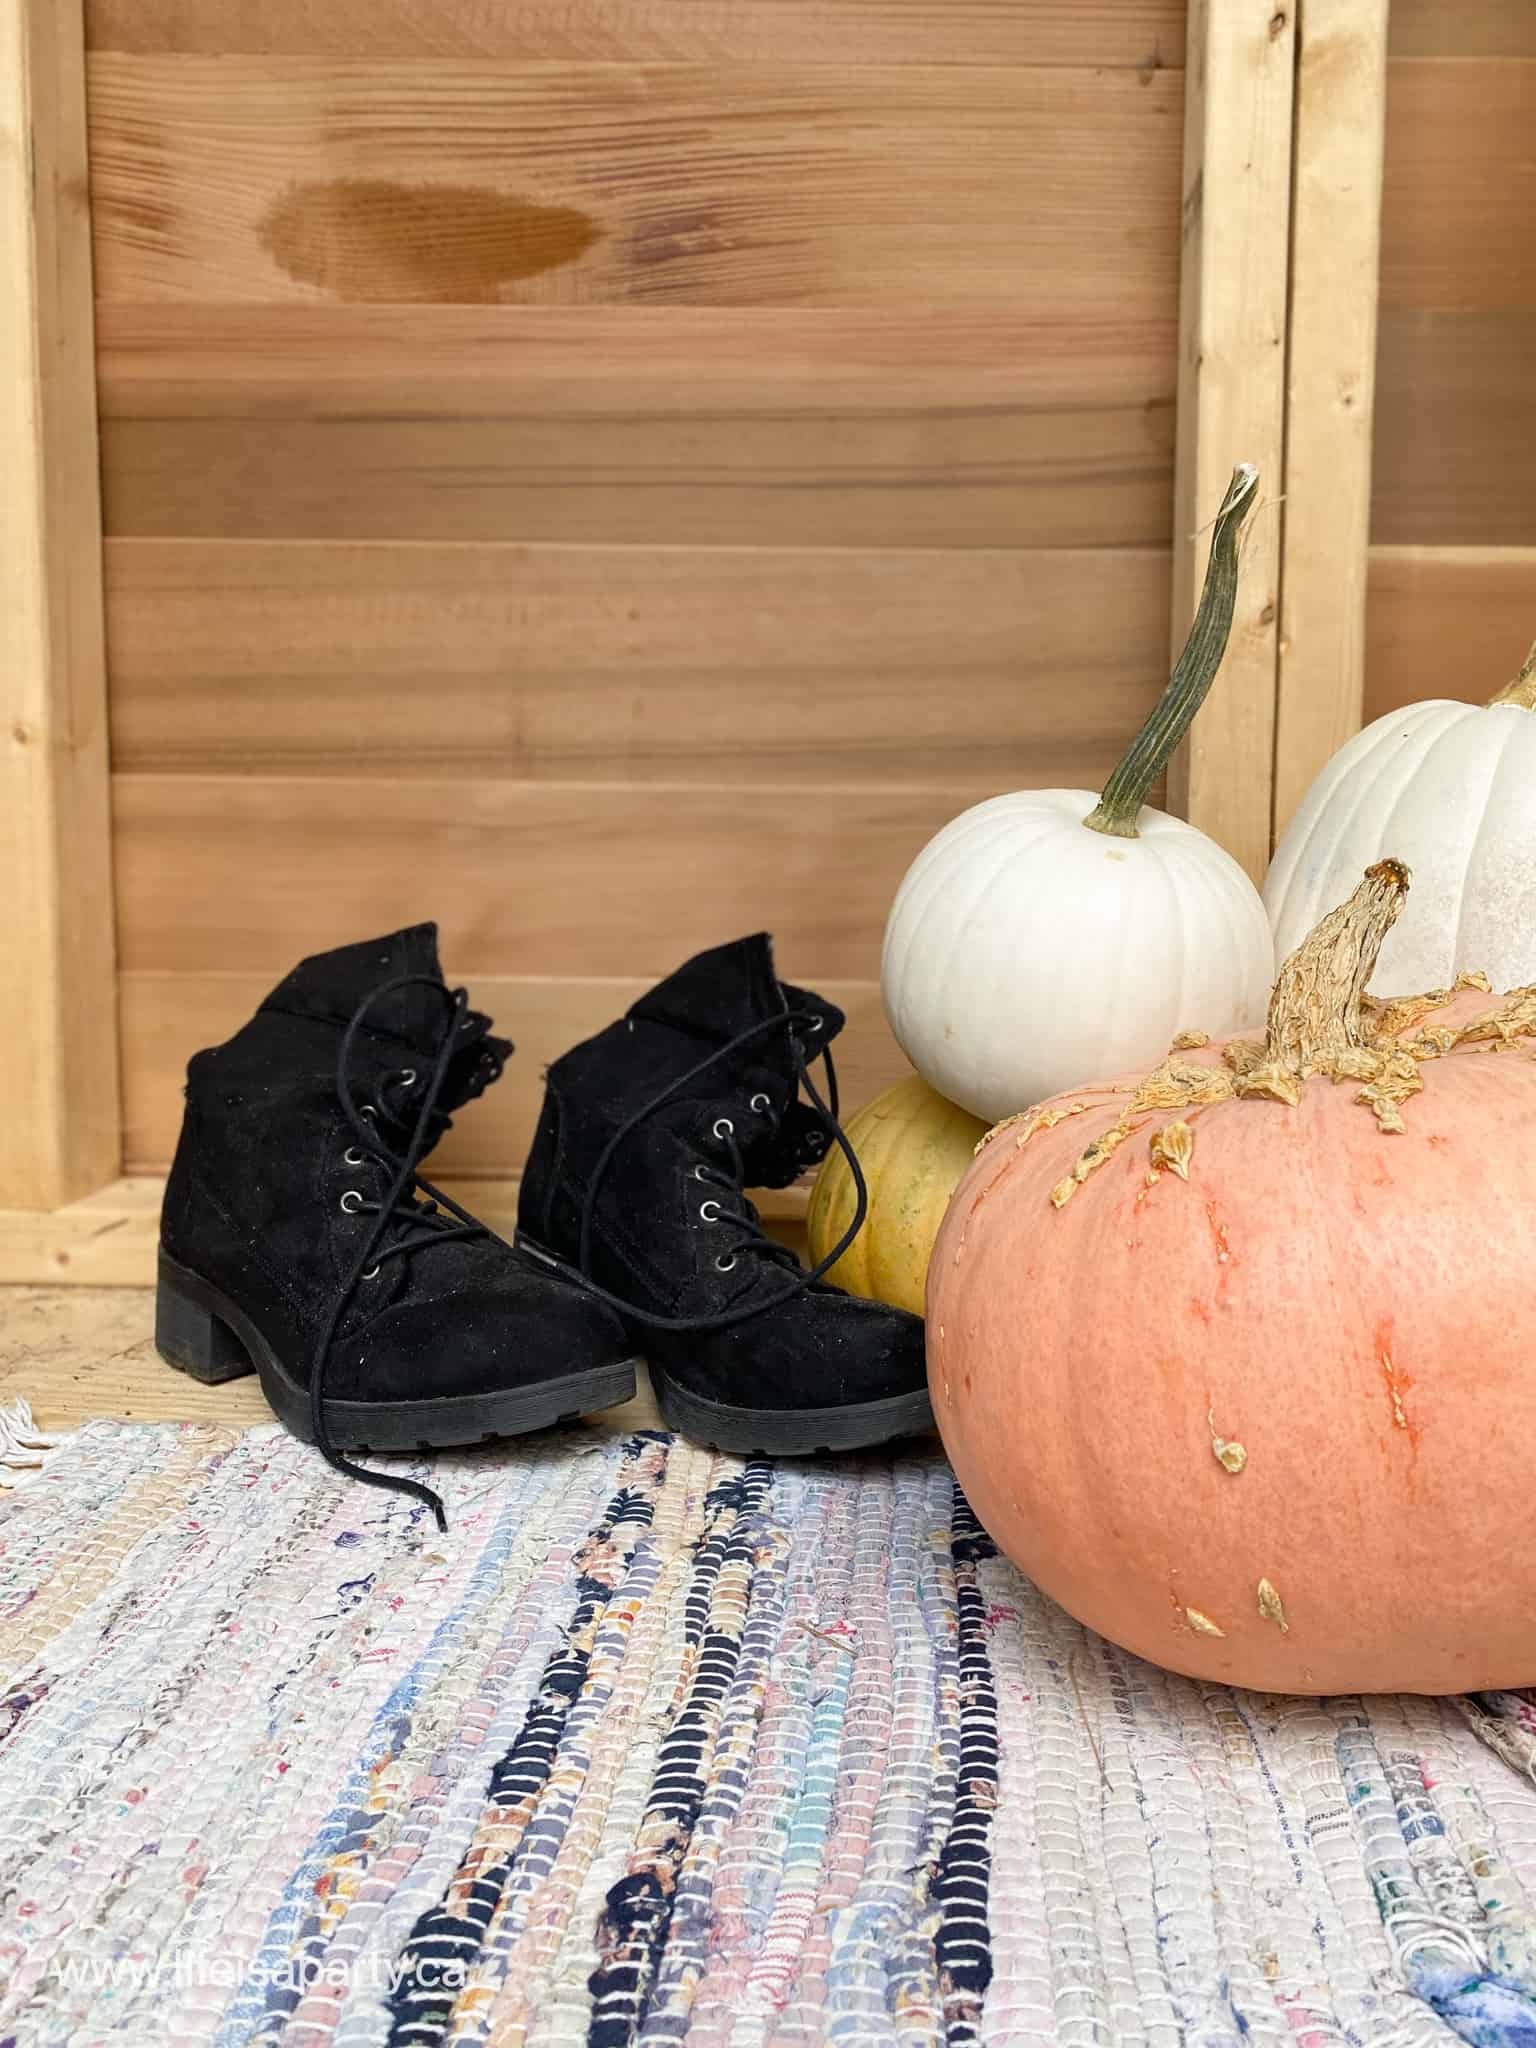
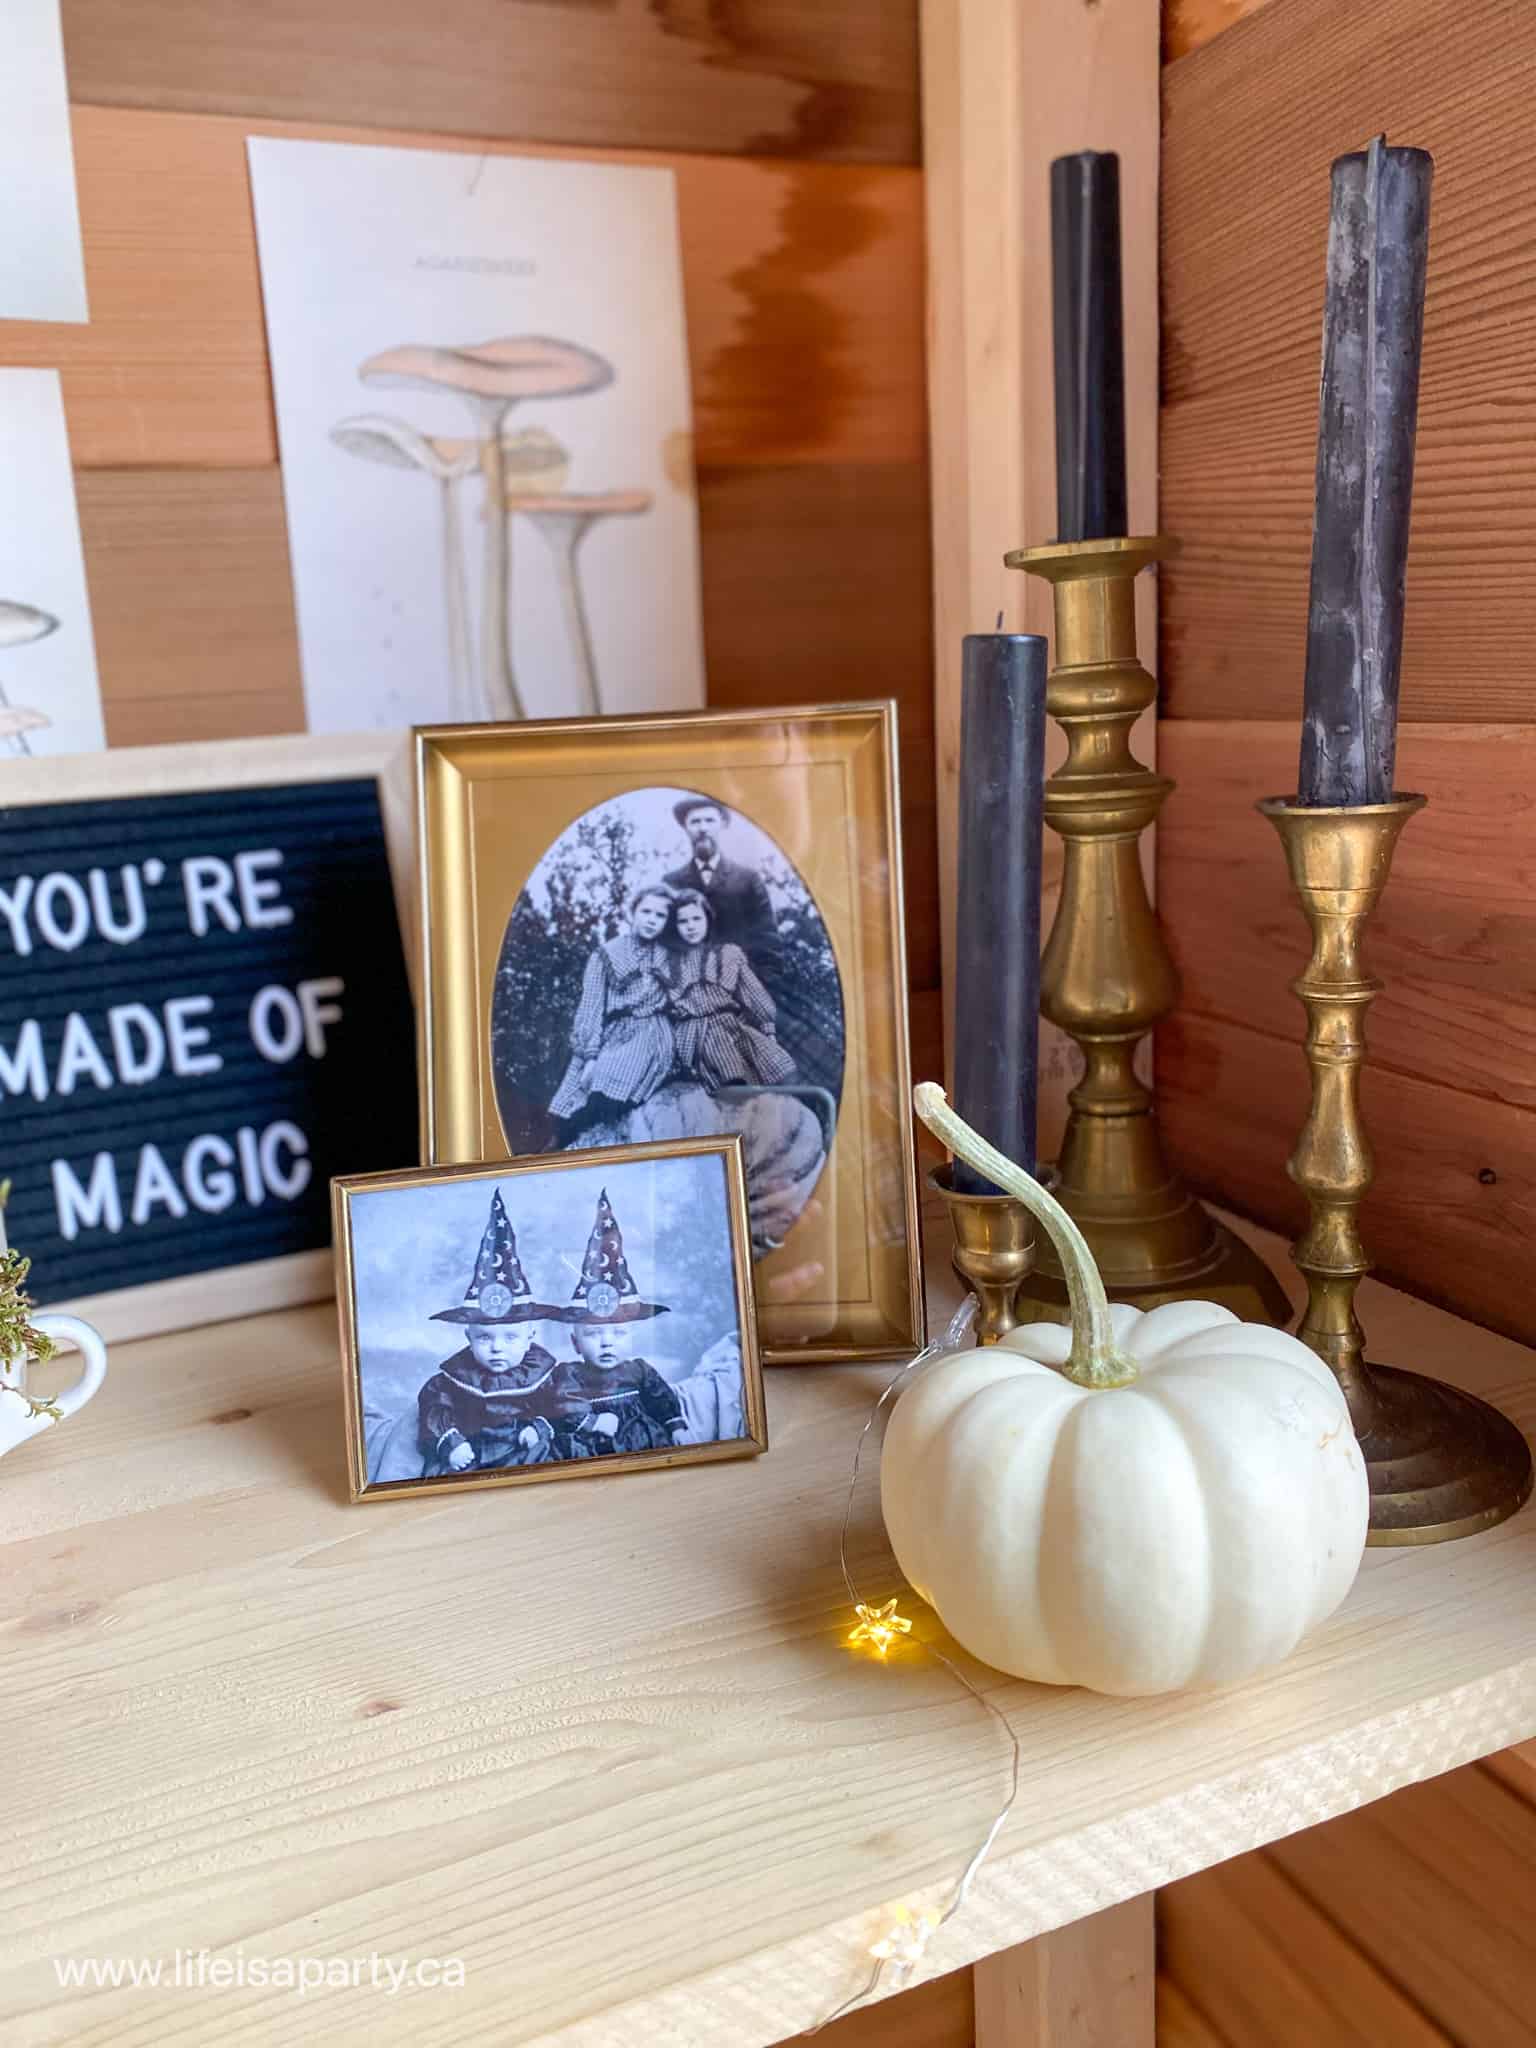
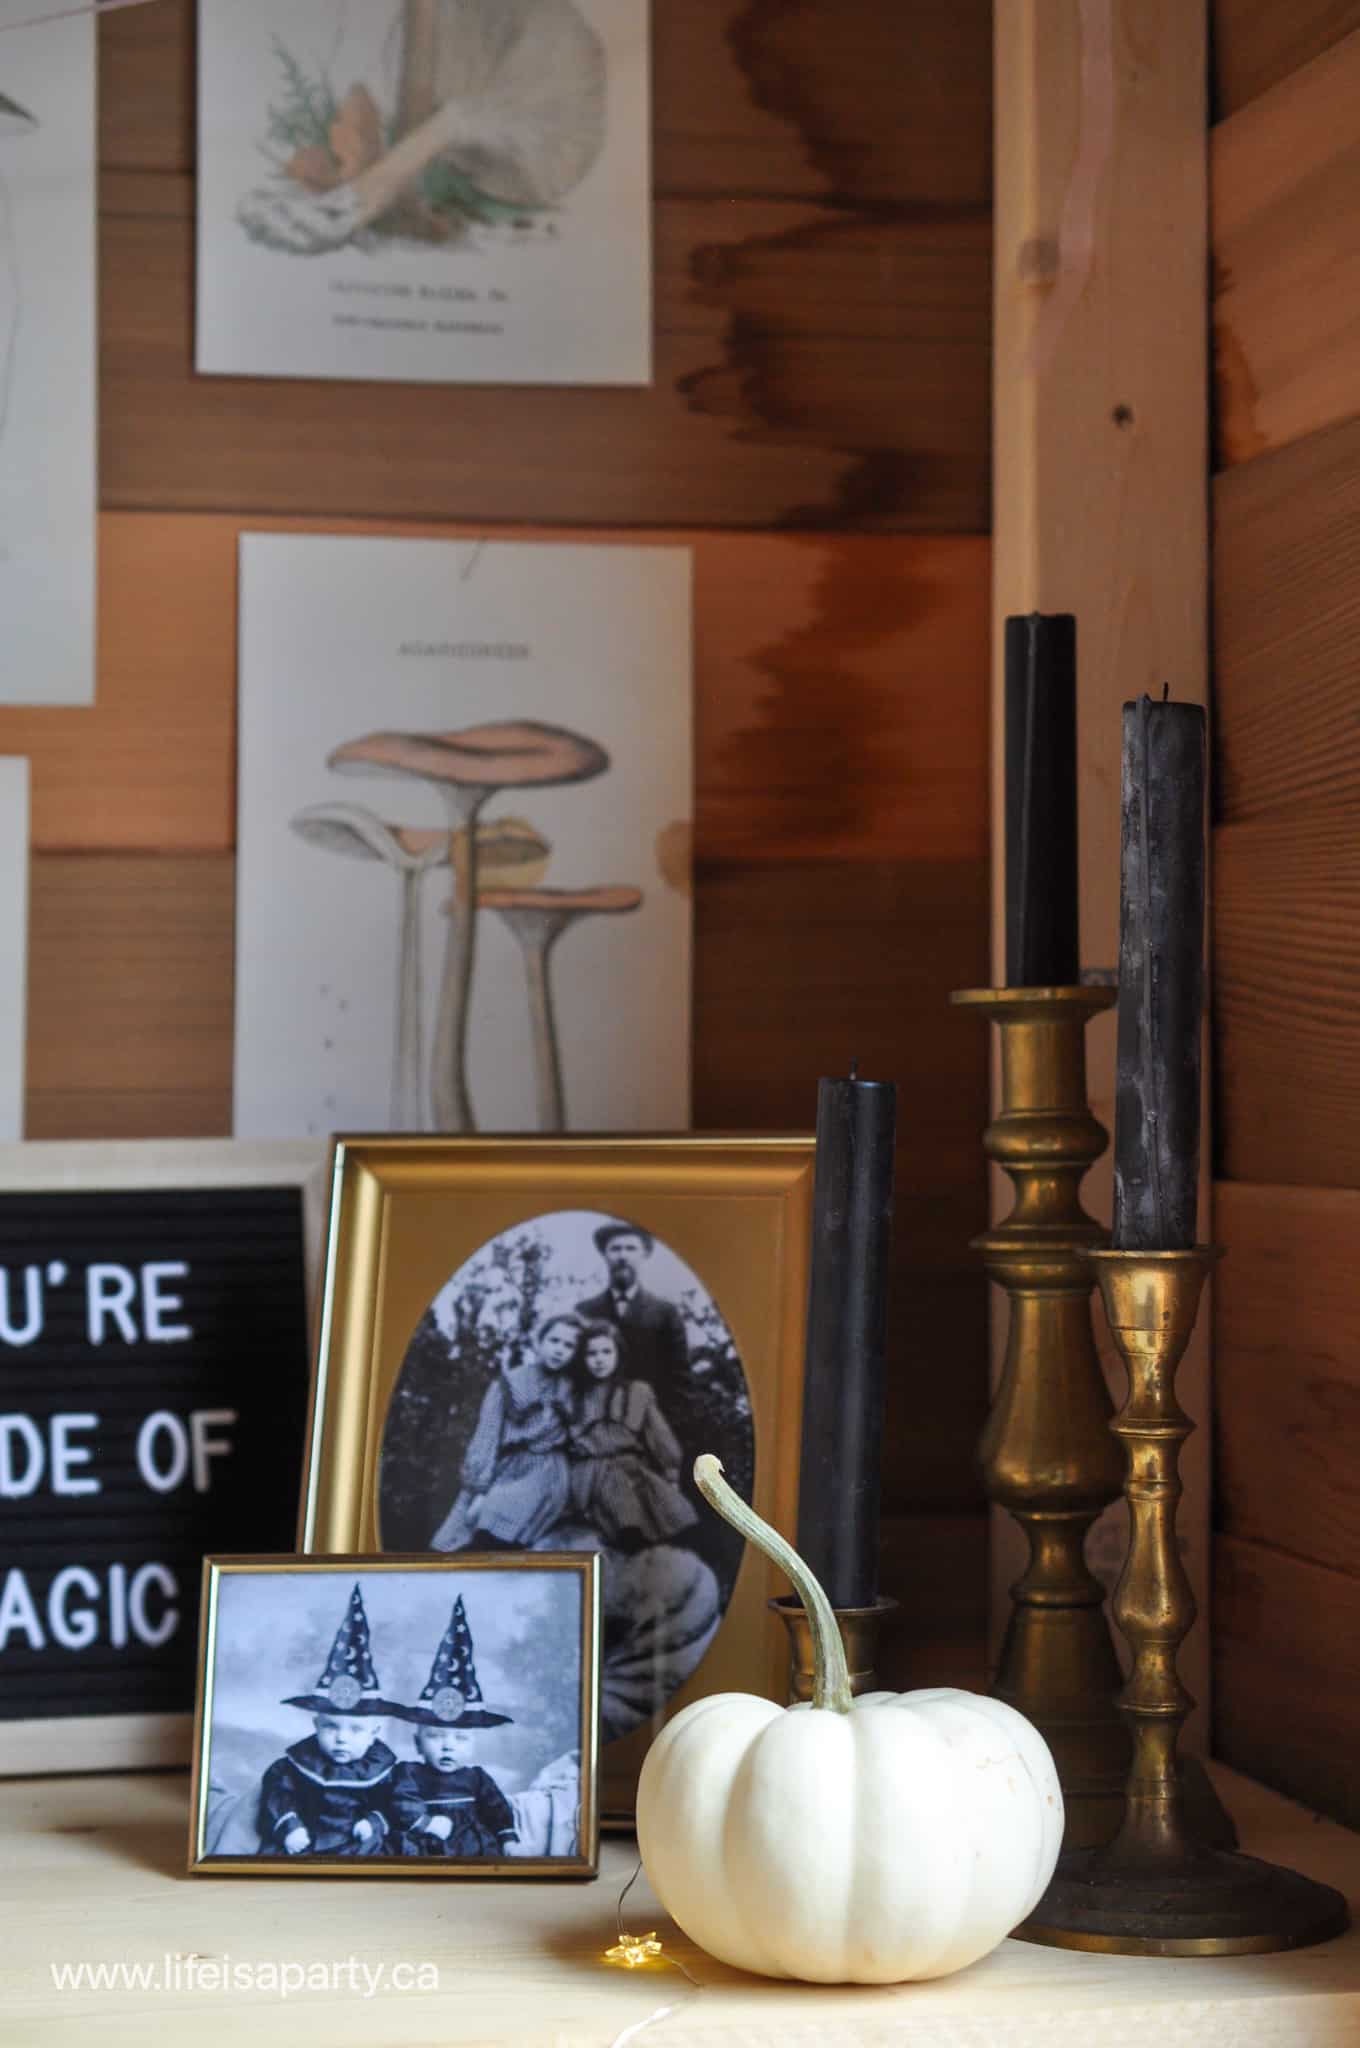
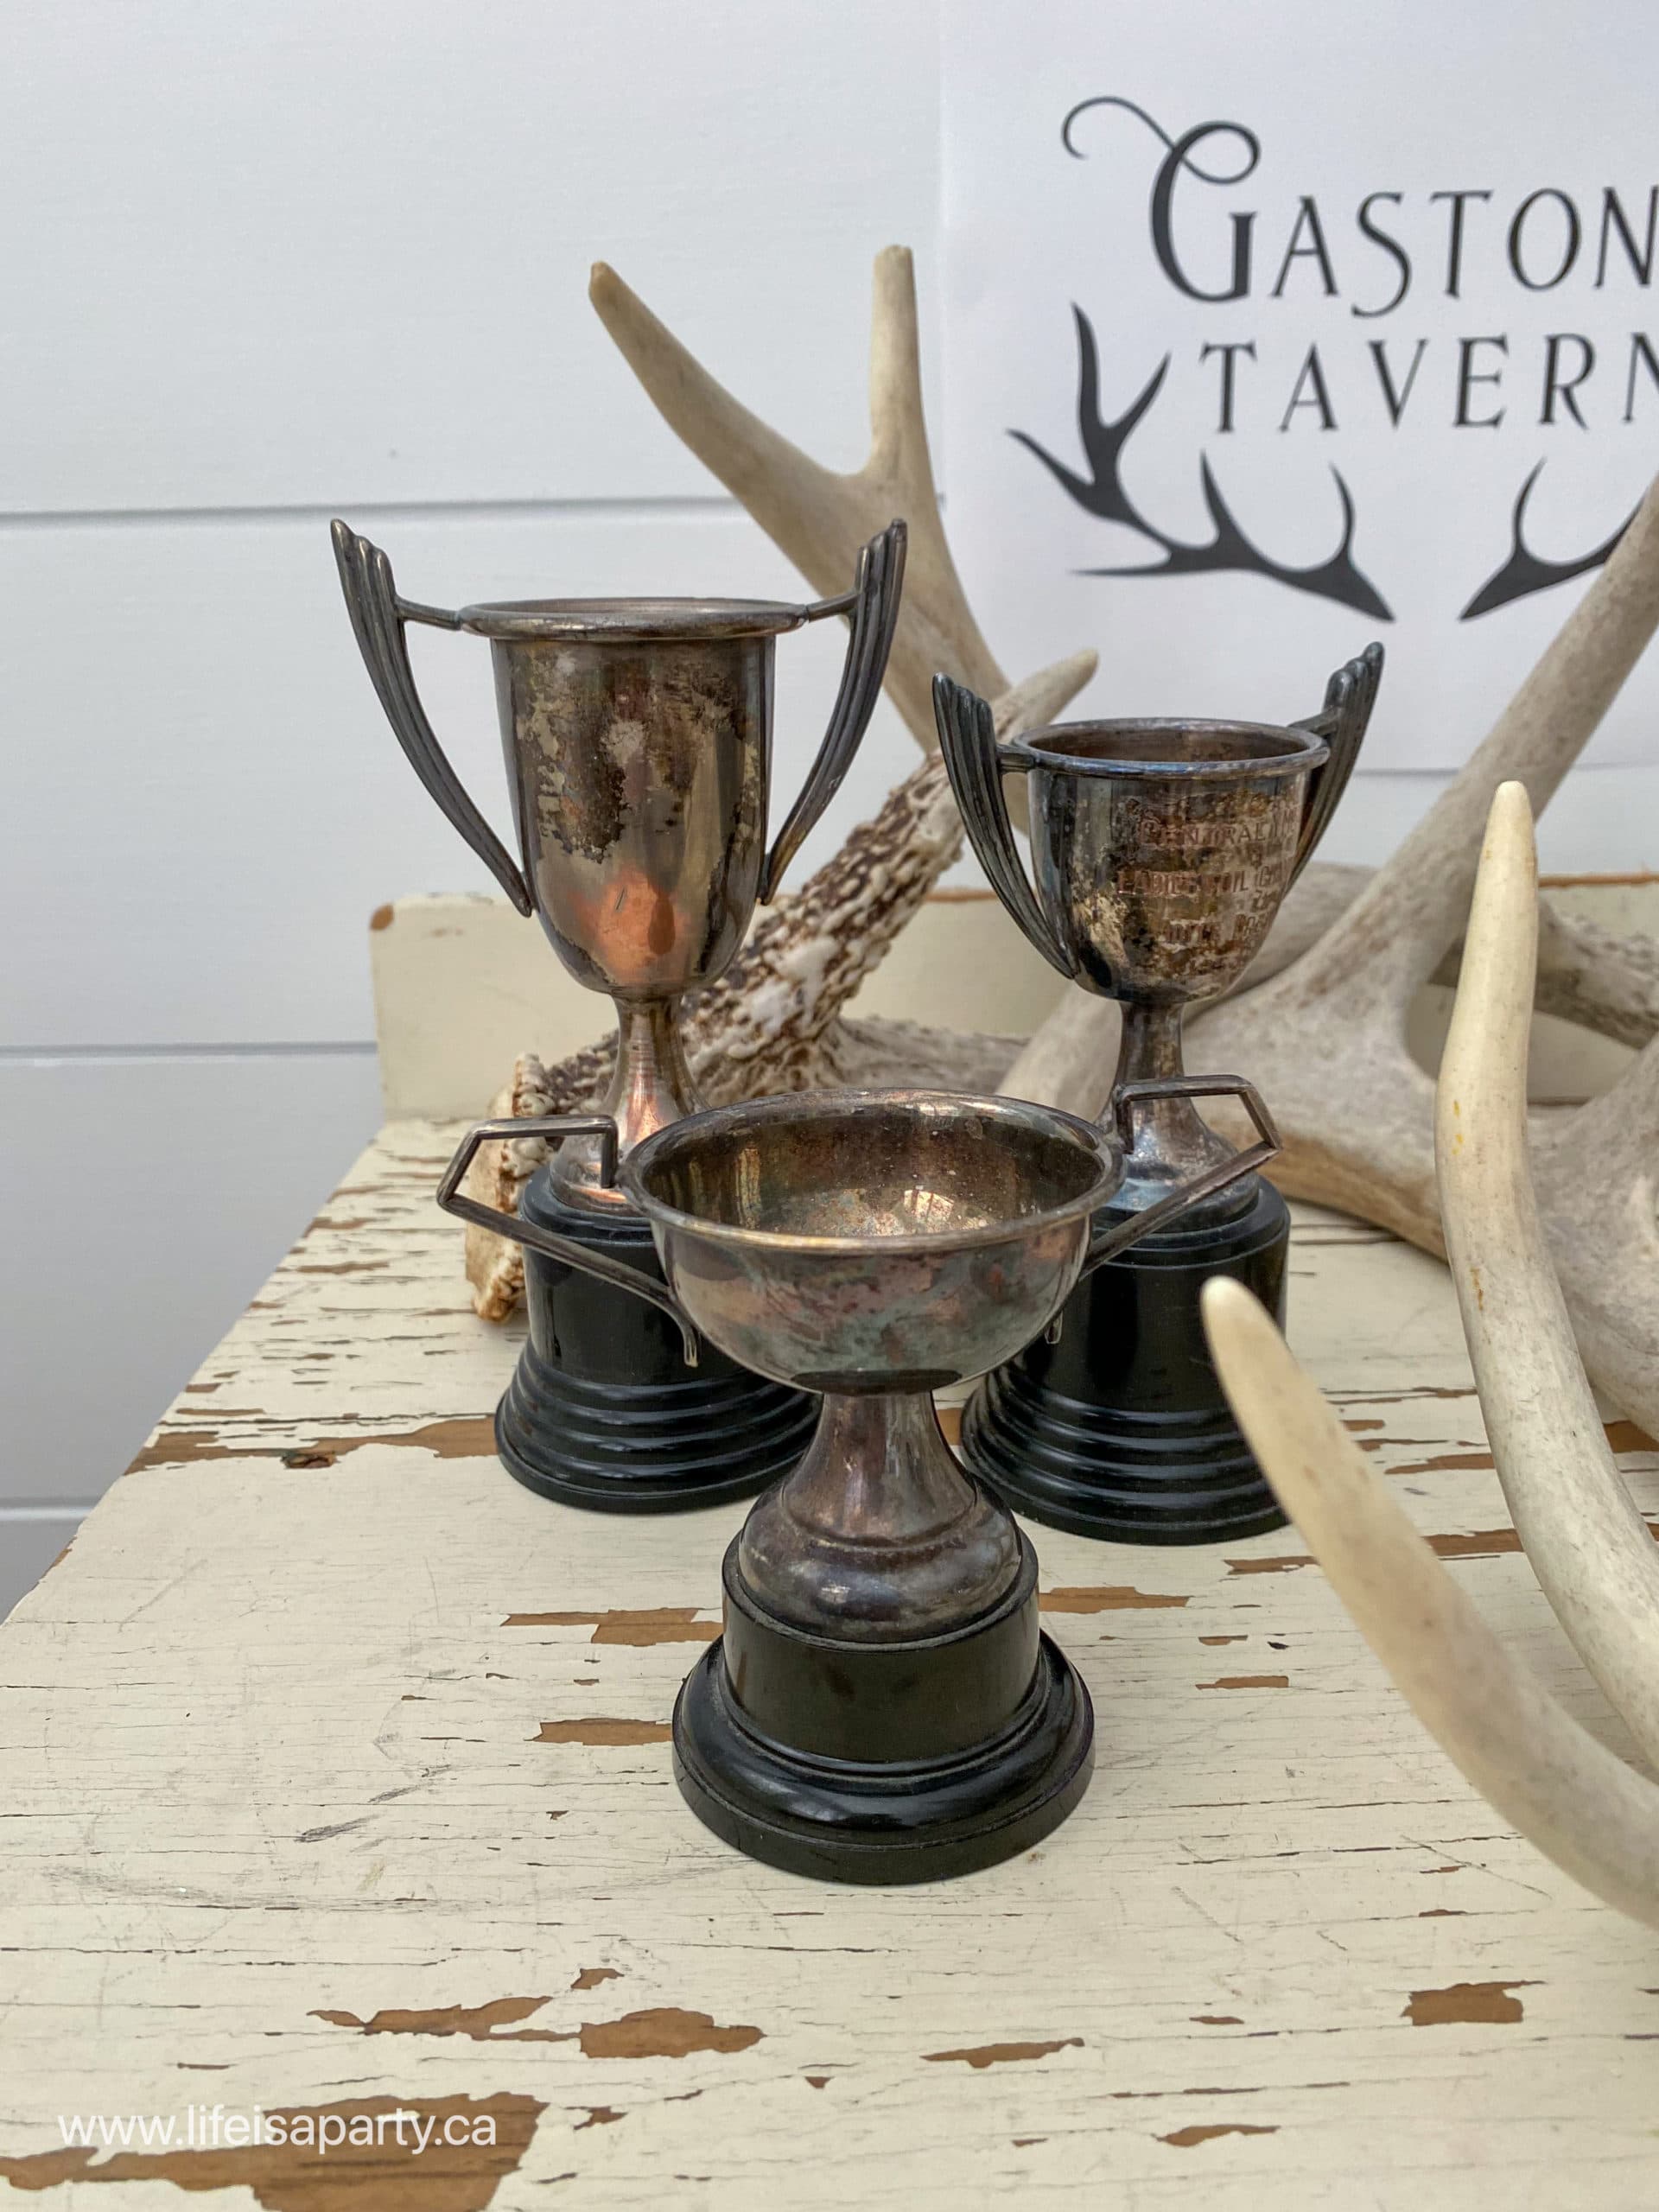
As you enter the shed, there's a little shelf that is used to hang garden tools, and on top a few witchy treasures. We have an old clock, and set of vintage trophies -best potion awards perhaps? best pumpkin? or fastest in the broom flying race? And on the other side a few witchy family portraits. These were so easy to put together. I found a few vintage photos on-line and printed them on my home printer. Then I added them to some vintage gold and brass frames from the thrift store. And also, down on the floor, there's a pair of boots ready for some work in the garden -or to be part of a Halloween costume. 😉

witch halloween decor
vintage witch halloween decor
elegant halloween decor
witch shoes and pumpkins

The Witch's Desk

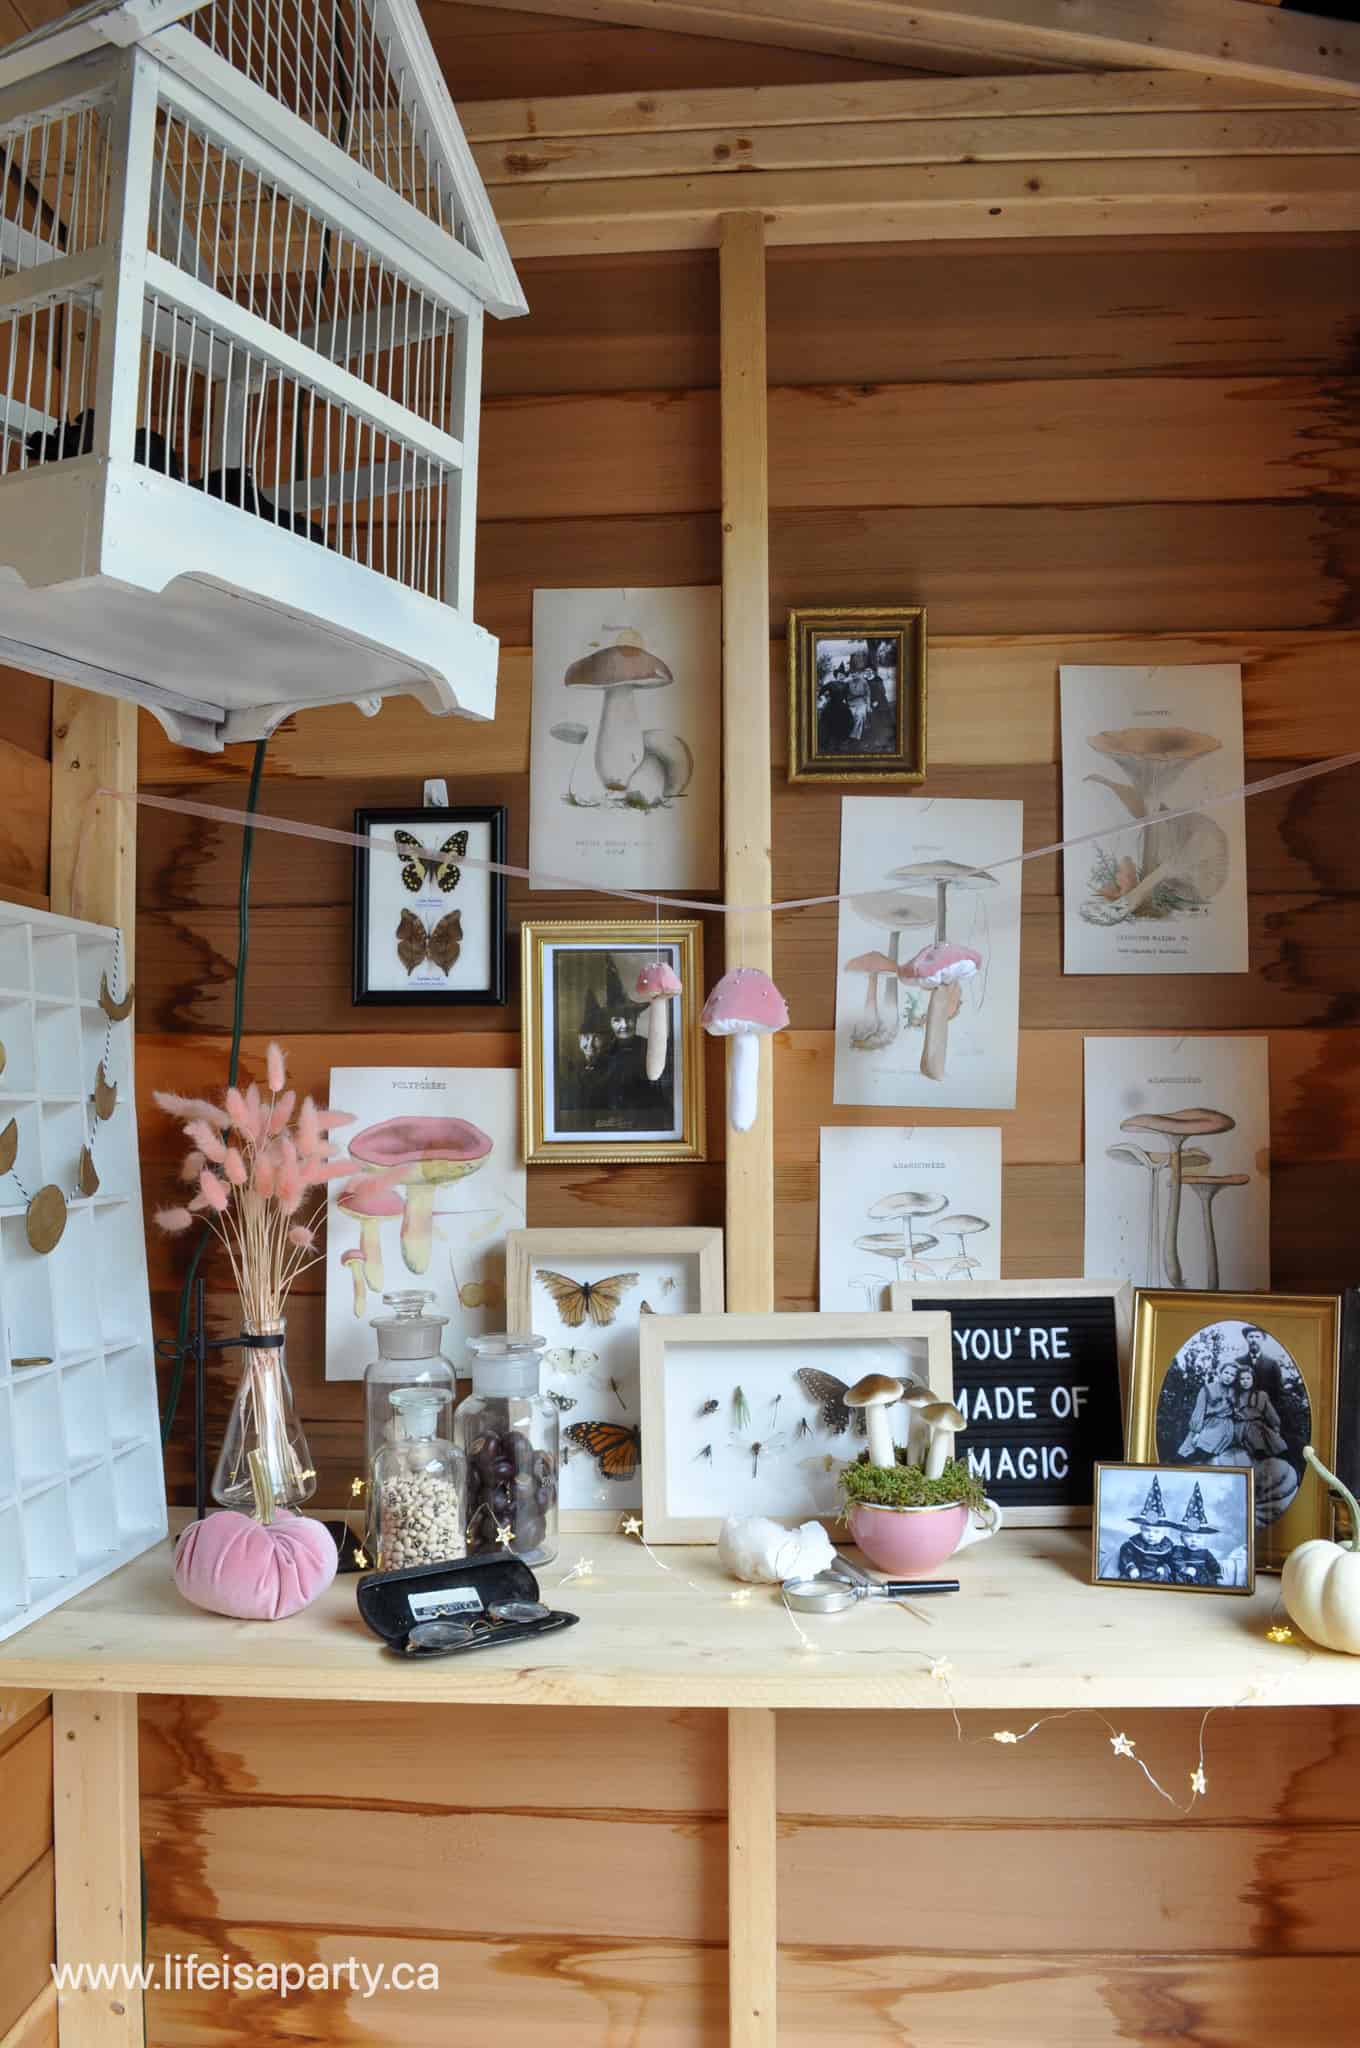
Over on the other side of the shed, our witchy friend looks like she's been very busy working. This area is my very favourite. It's a little cluttered, and full of magic.

witch decorations
witch desk decor
witch halloween decor

There's lots of fun details on the desk area. 

Pet Crows

There are some pet crows in the bird cage. I wonder if the with has black cats too? Or a few pet plastic spiders? The cage was a thrift store find spray painted white, and the birds are from the dollar store. 

Witch Family Photos

There's also more family photos -aren't they festive in their witches' hats?  To make them grab some old frames at the thrifts store, and look for vintage witch photos on-line.  Print out some with your home computer and add to the frames for your own witch family photos.

Mushrooms and Witch Hat

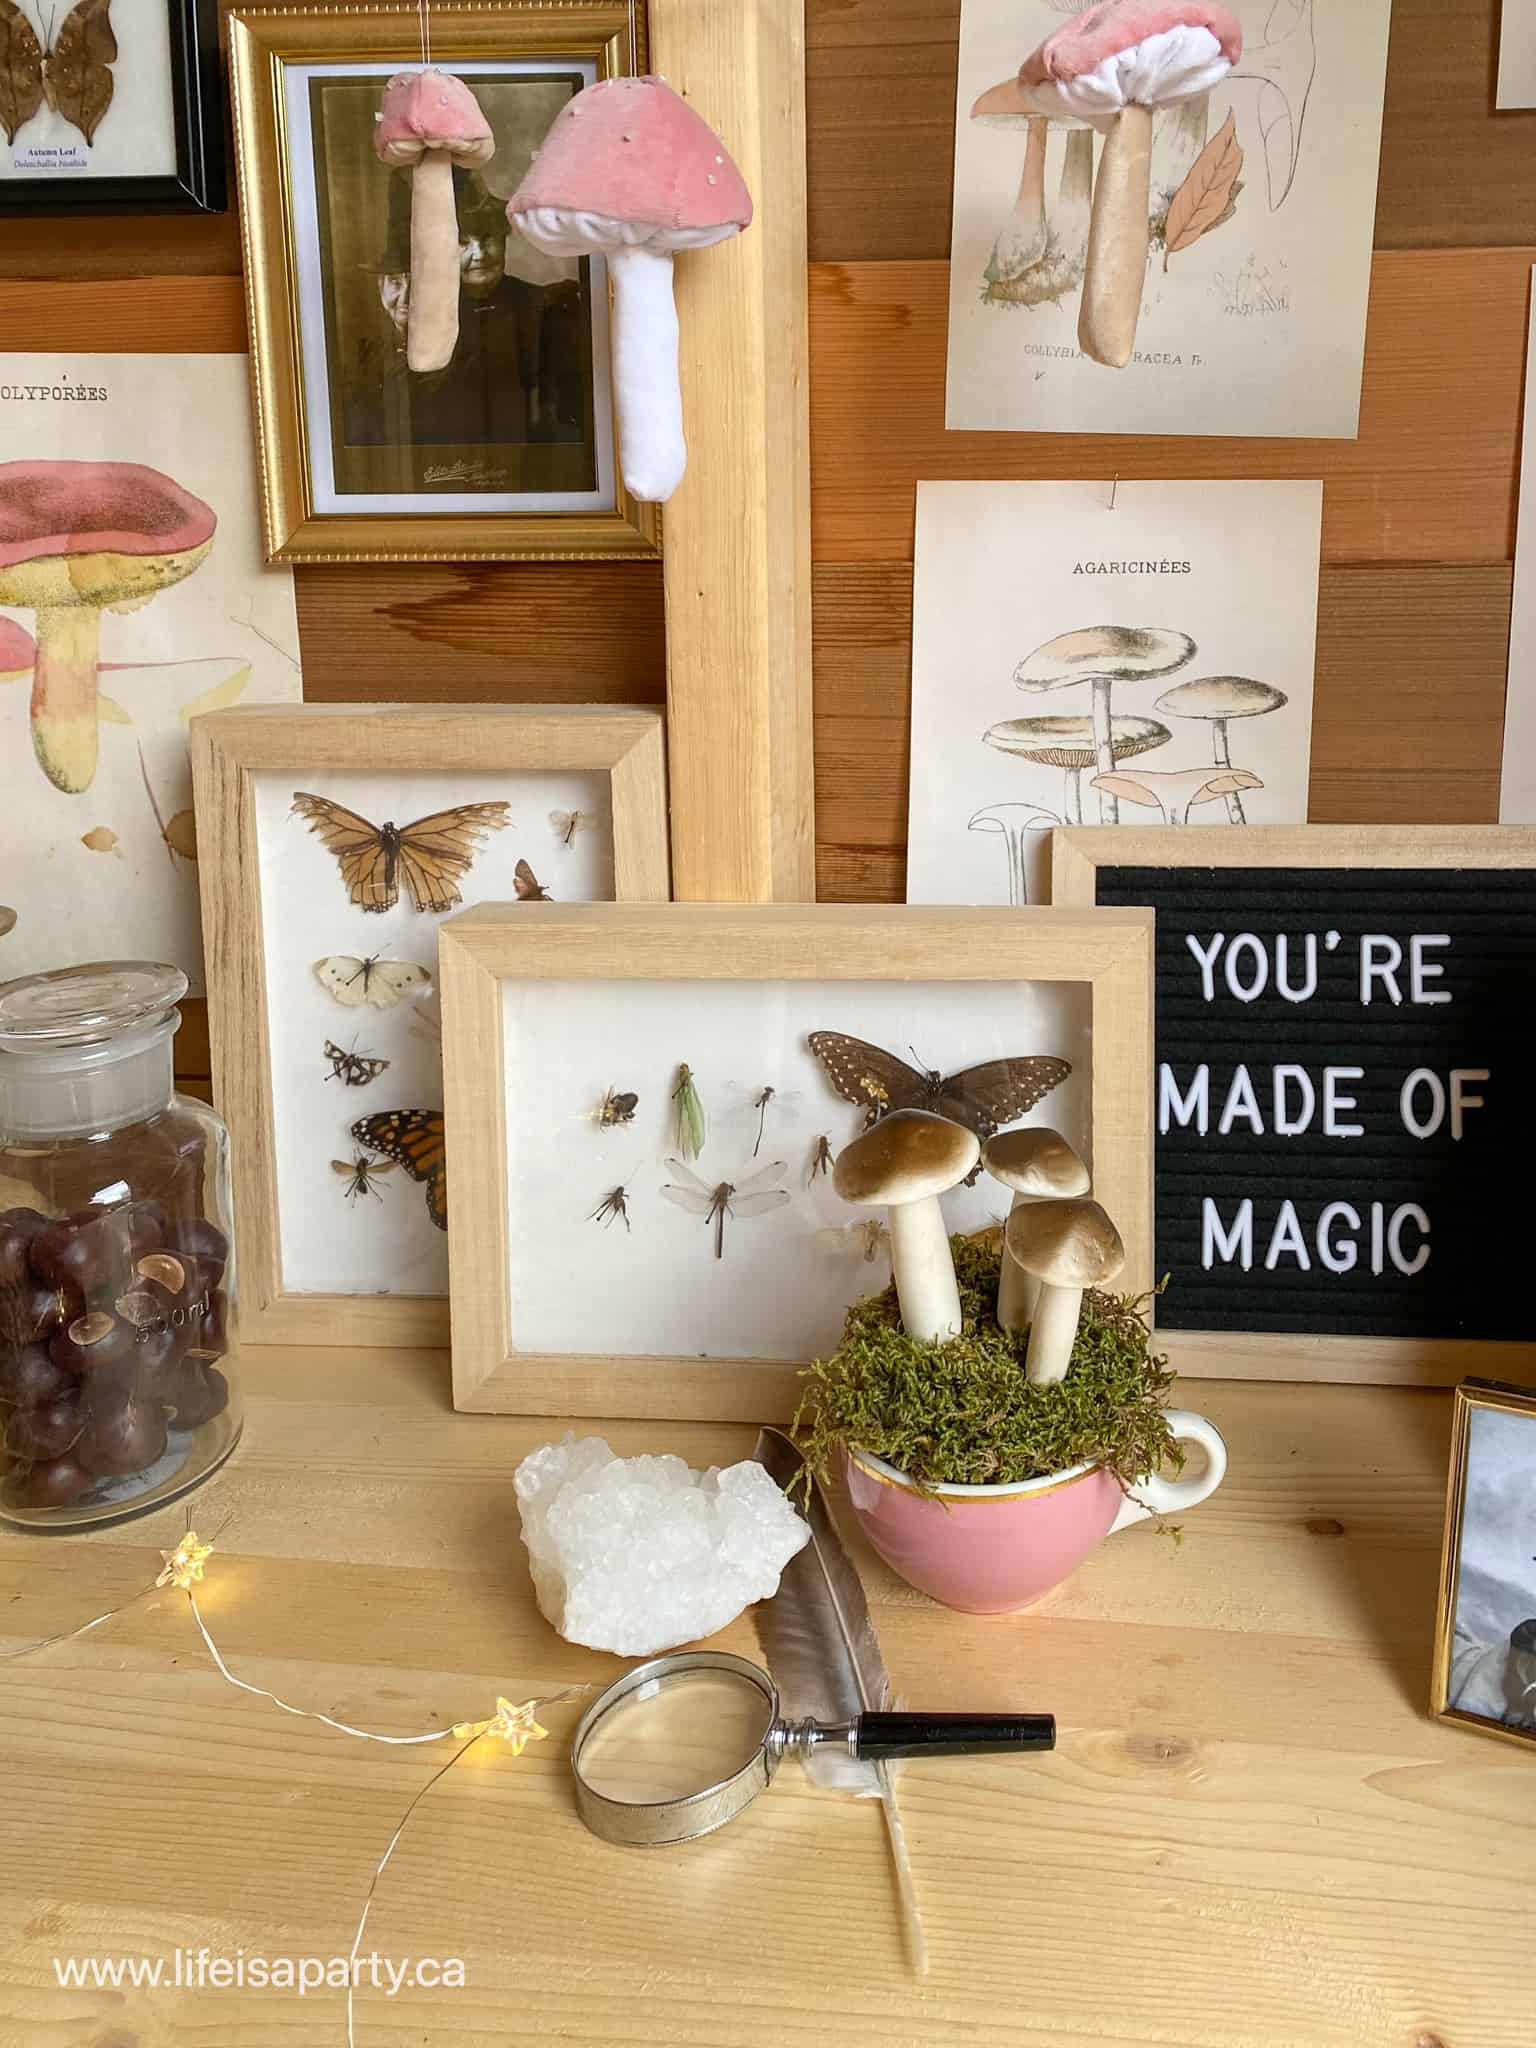
There's also some free prints of vintage botanical pink mushrooms pinned up -you can read more about the mushrooms here. And she's left her witch hat on the chair. I found this perfect black hat at the dollar store. It had some black tulle with stars on it, which I easily removed. I thought our garden witch would have an altogether more practical black hat.

Harry Potter halloween decor
witch halloween decor

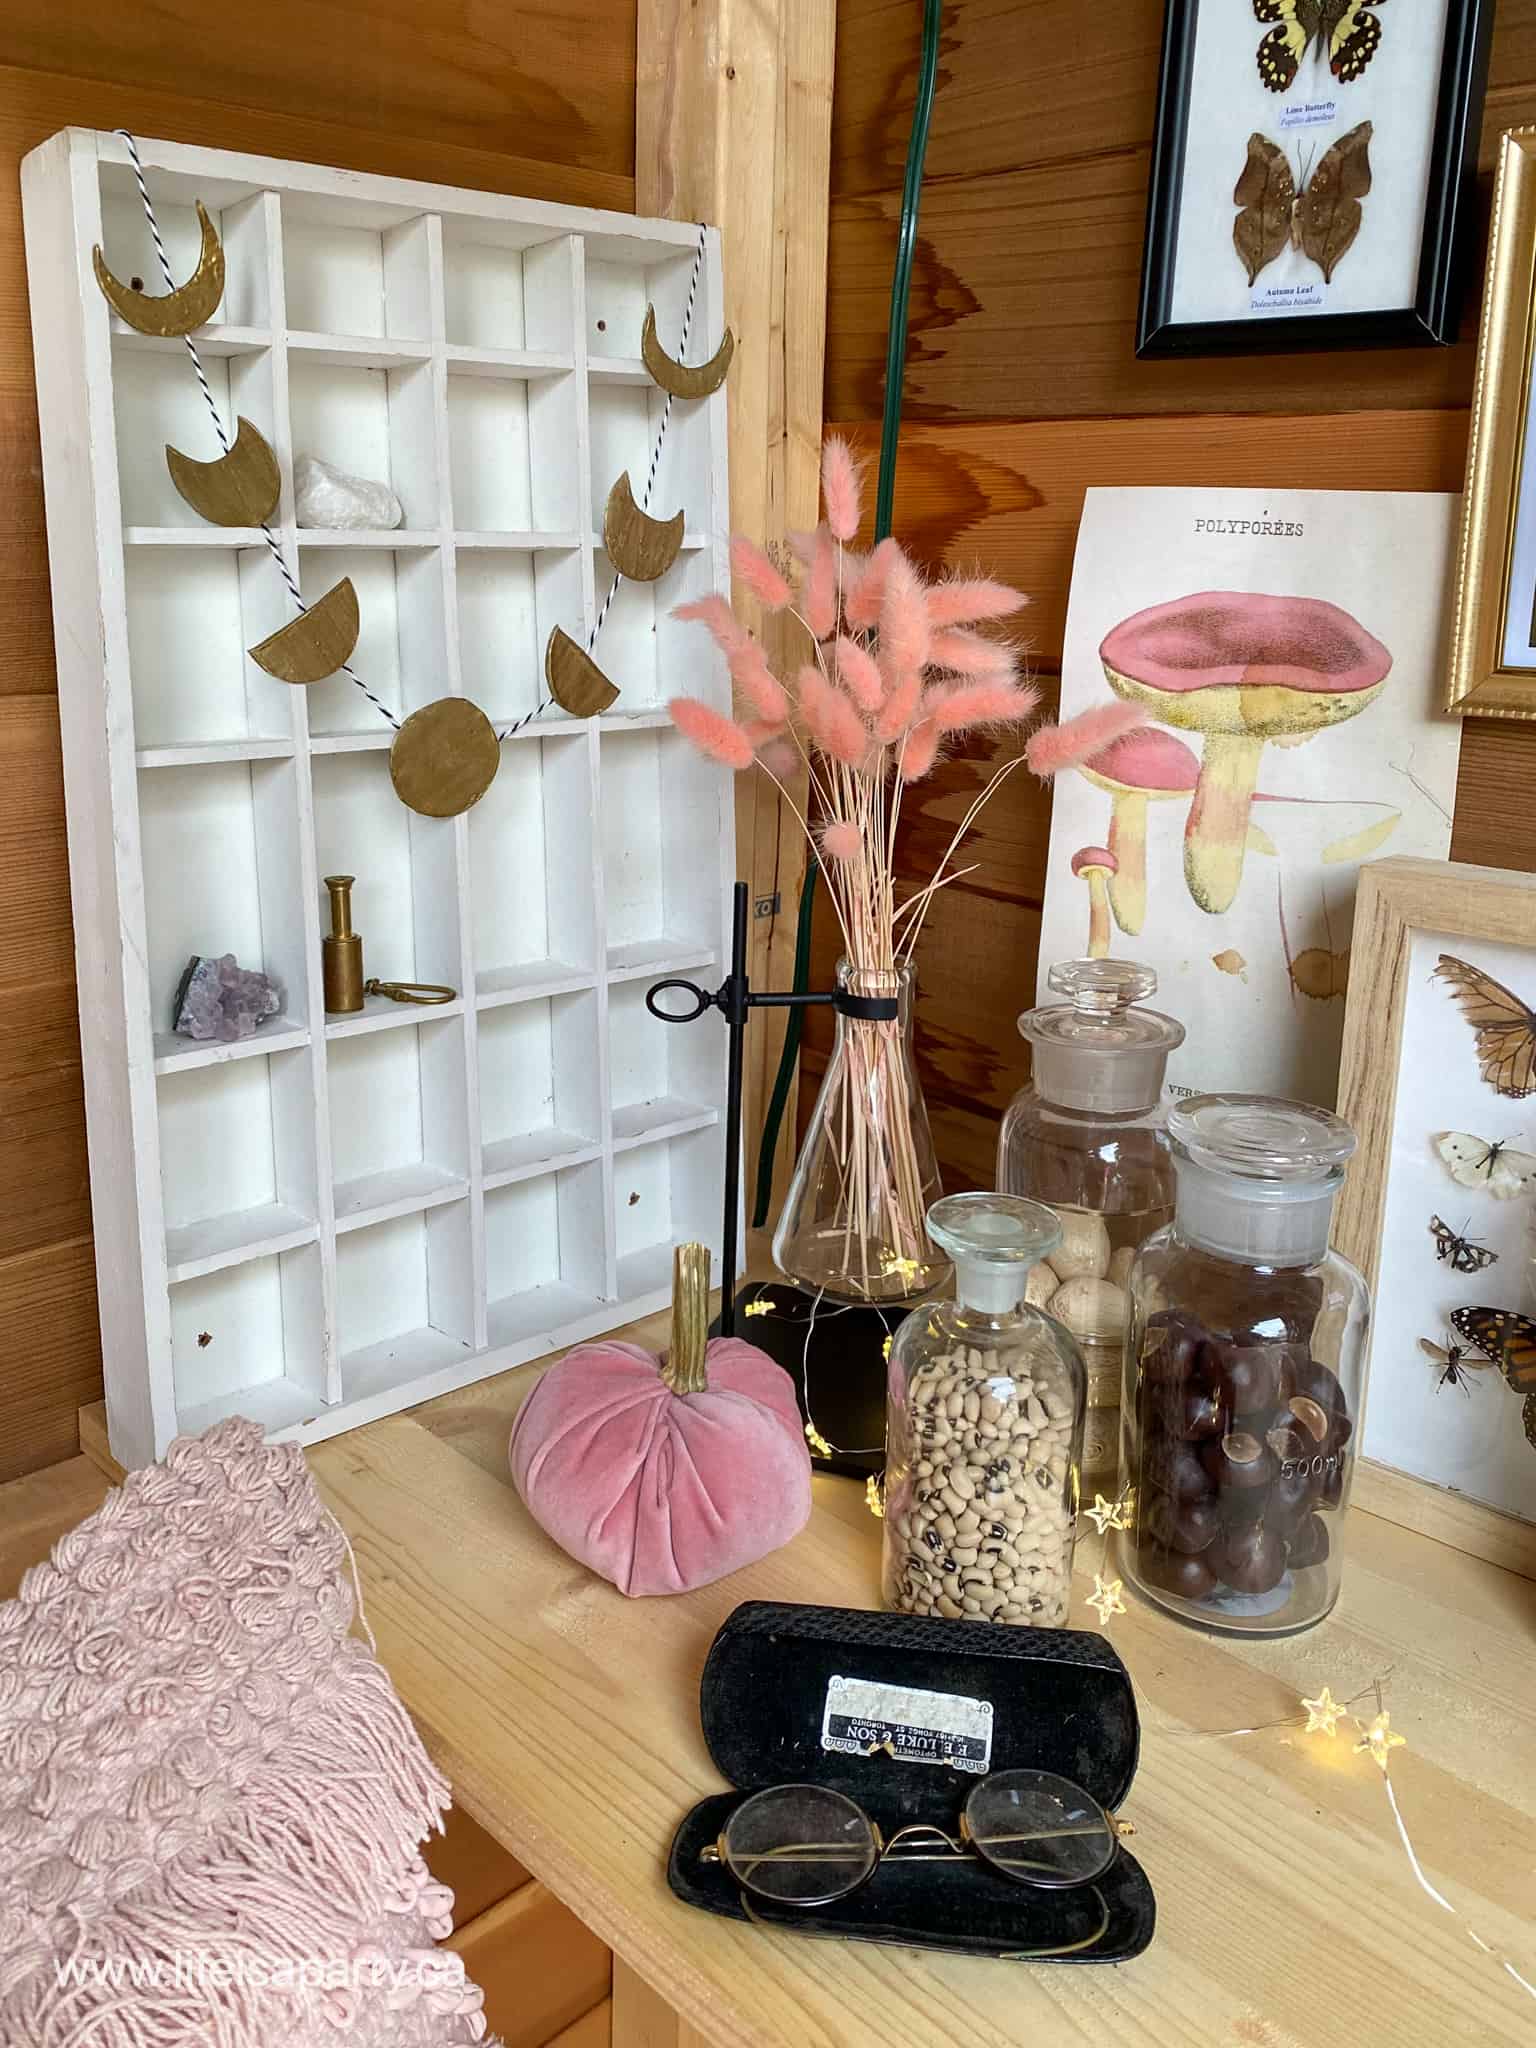
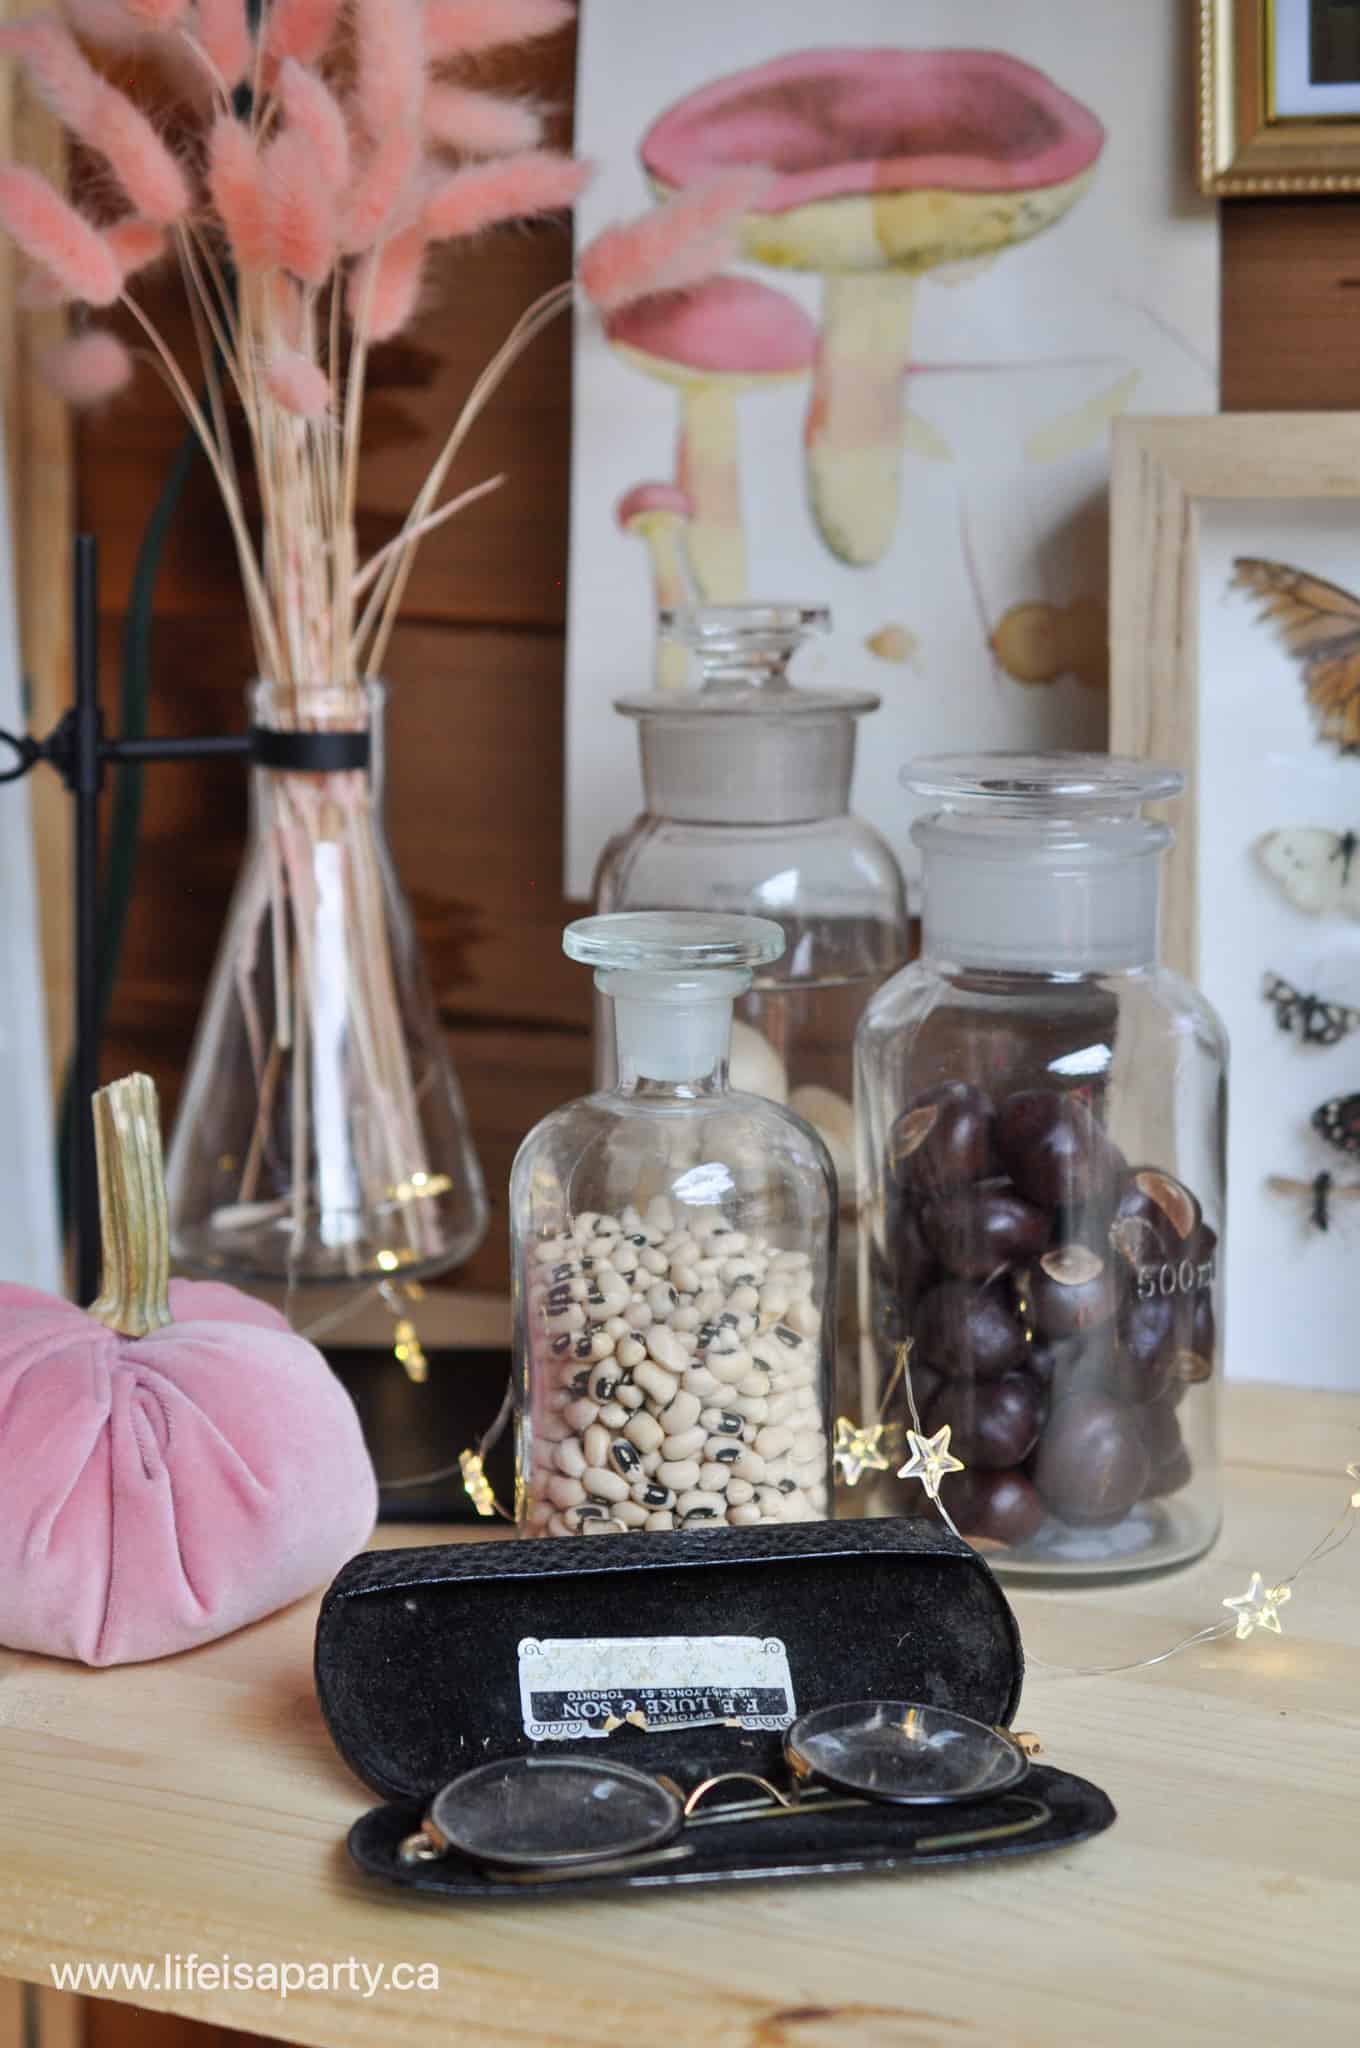
On the left side there's a cycle of the moons phases made of polymer clay, and painted gold. There's also more scientific glass with collections of seeds, chestnuts, and pods. This pair of vintage glasses looks ready to help her read a spell book.

witch decor
witch decorations

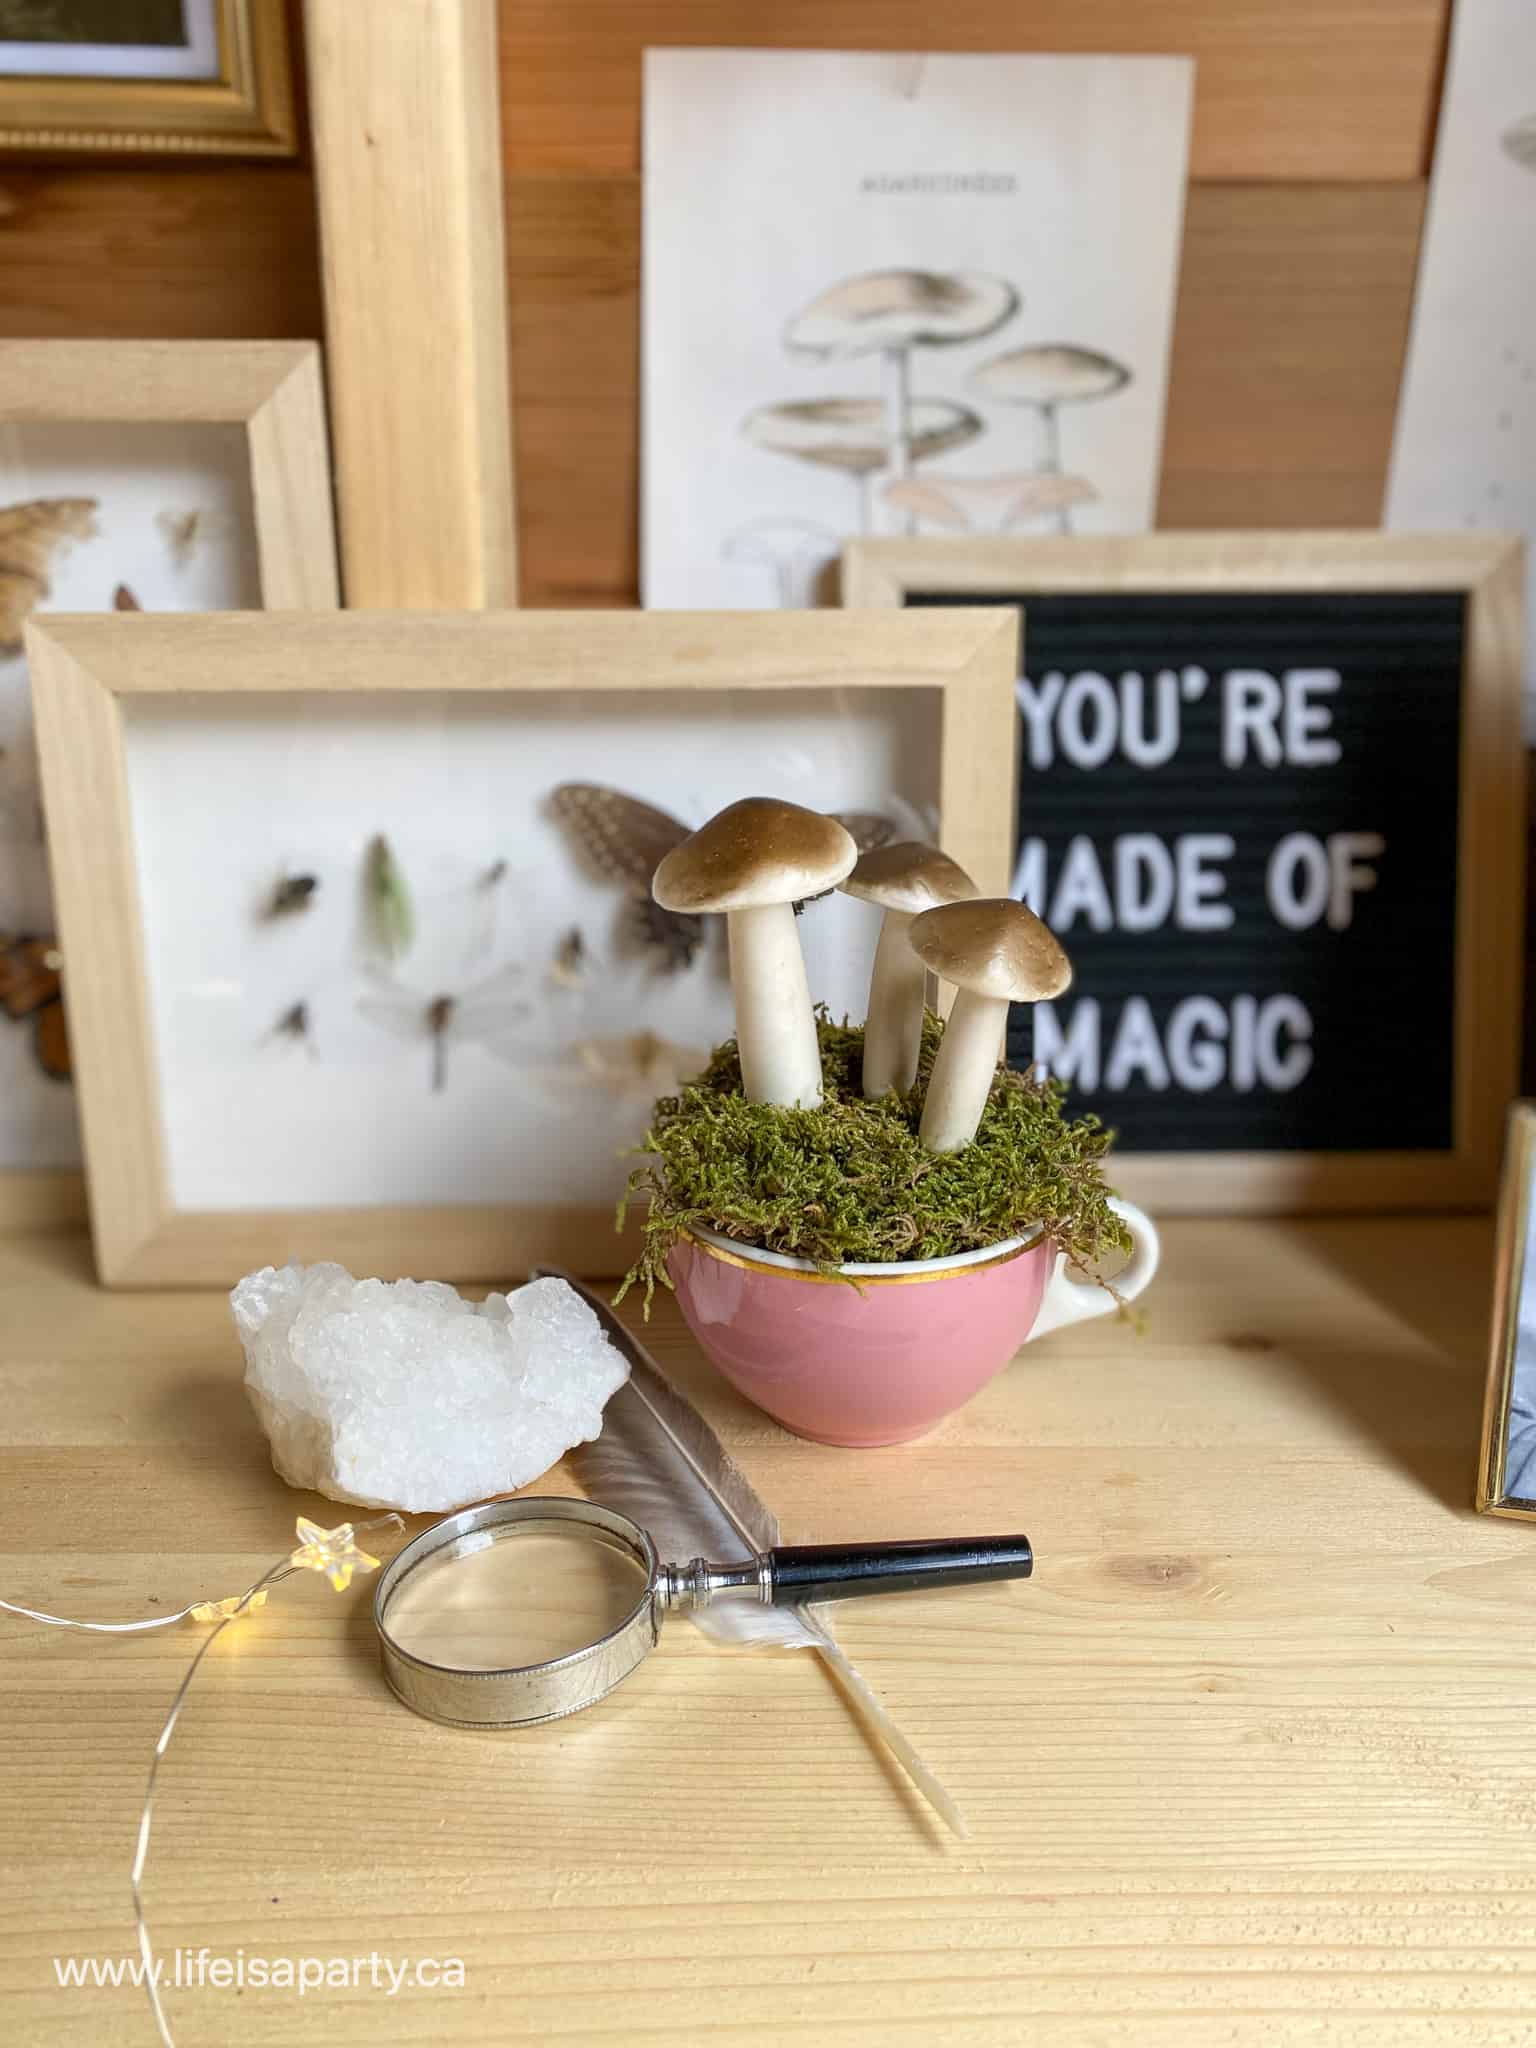
And one more adorable DIY, are these mushrooms in a teacup. They look so great with the DIY velvet mushrooms I made for here in the spring -see the tutorial on how to make DIY velvet mushrooms here.

witch halloween decor
Harry Potter halloween witch decorations

This little witchy shed was so much fun to put together. I used mostly vintage pieces I had from thrift stores, and antique shops. It's my own little Halloween-y version of a garden shed right out of the set of Harry Potter. Can't you just imagine Professor Minerva McGonagall, or Professor Pomoma Sprout in a black dress puttering about in here? 

witch halloween decorations

With your own little witchy Halloween shed in your backyard, life really is a party.

Fall Decorating Ideas -Home Tour

Sep 22, 2021 · 5 Comments

fall home decor

Fall Decorating Ideas -Home Tour: Boho fall decor with dried grasses, macrame, pumpkins and pink, peach, mustard yellow, and rust.

fall home decor
[feast_advanced_jump_to]

Fall is probably my favourite time of year.  It's also one of my favourite times to decorate.  I'm so excited to show you my fall home tour this year, and hopefully give you a few little fall decorating ideas that you can use too.

Fall Colour Scheme

This year for my fall decor I decided to go with a pallet of pink, peach, mustard, and rust.  I've been using pink and even a little mustard for the past little while, but I'm excited to add some peach and rust to the mix.  The colours of a sunset are pretty perfect for fall, I'd say.  And since I really love the boho vibe, these colours are working perfectly.  My house is pretty neutral, so there's still lots of white and cream, and black and grey mixed in, even a little green in the dining room.  It's feeling so cozy and ready for fall in here, so I'm excited to show you around.

Fall Decorating Ideas in the Dining Room

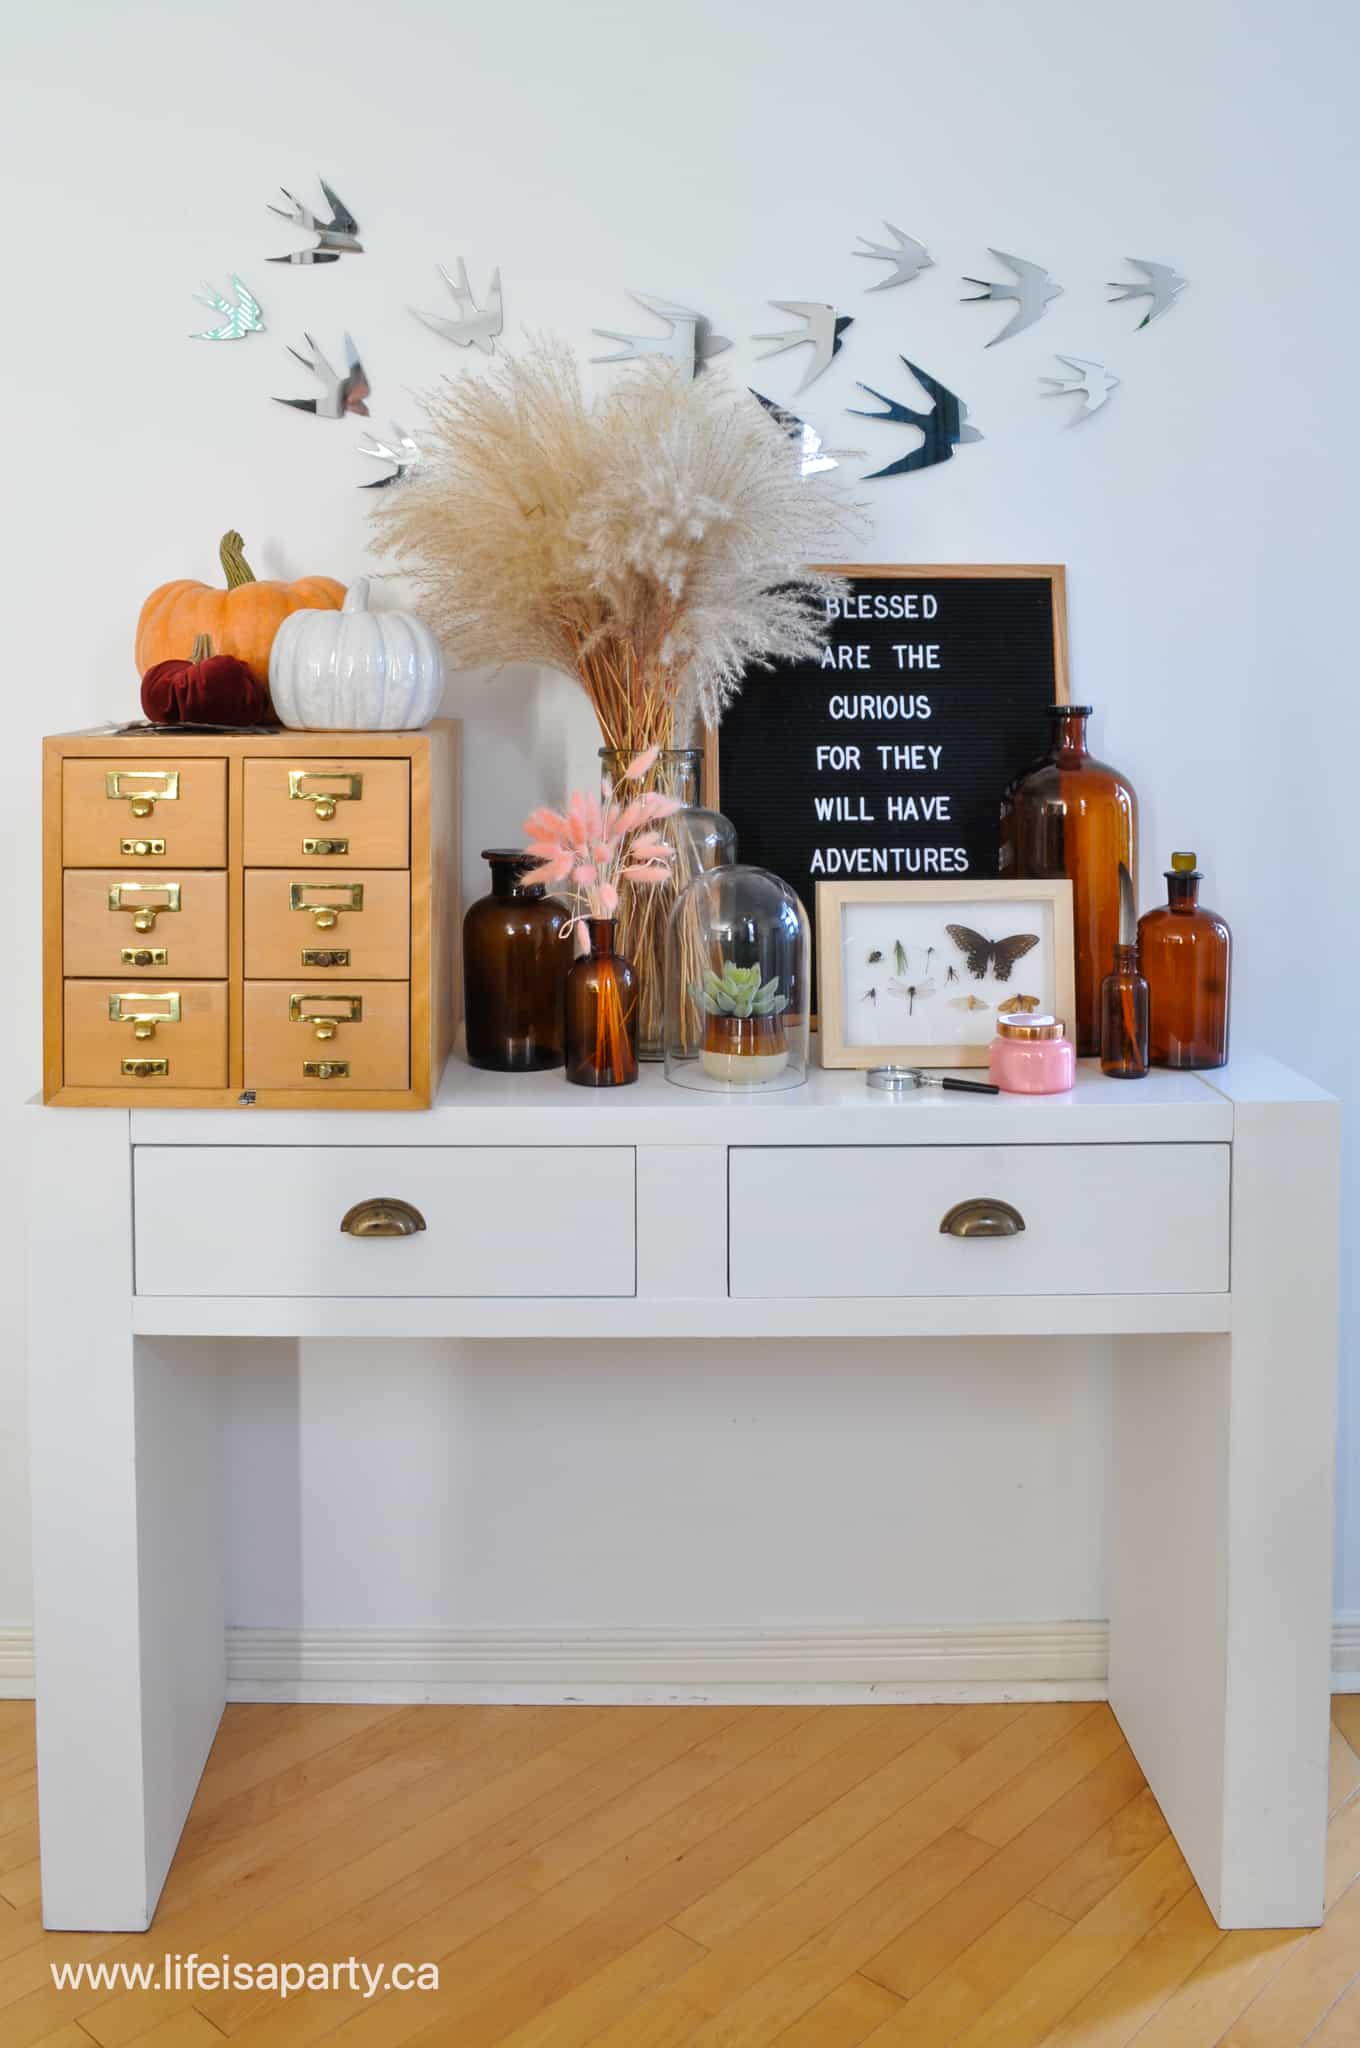
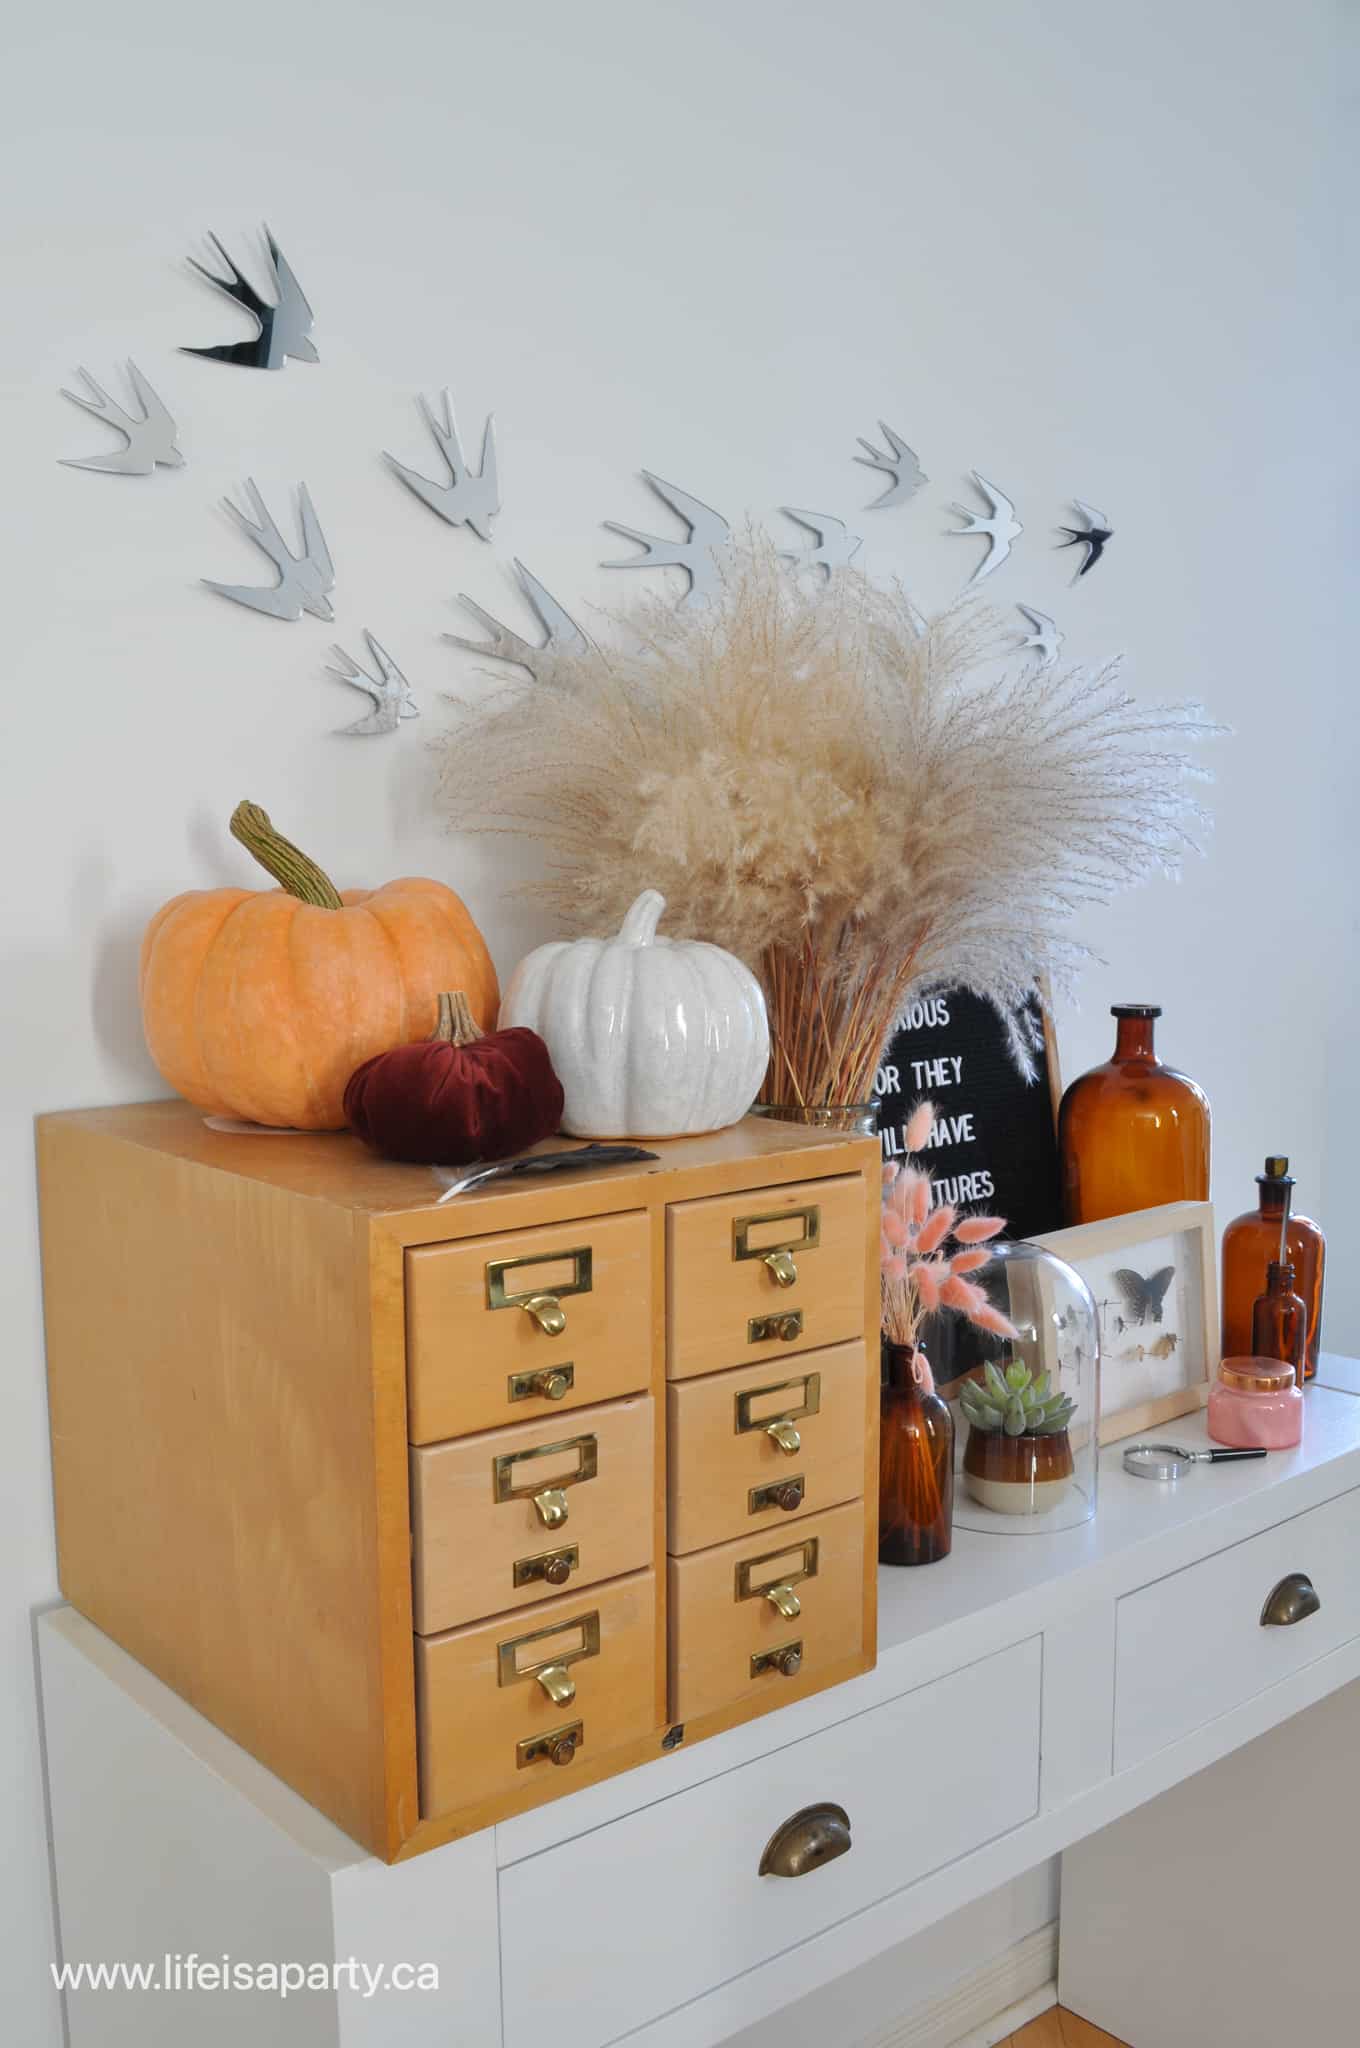
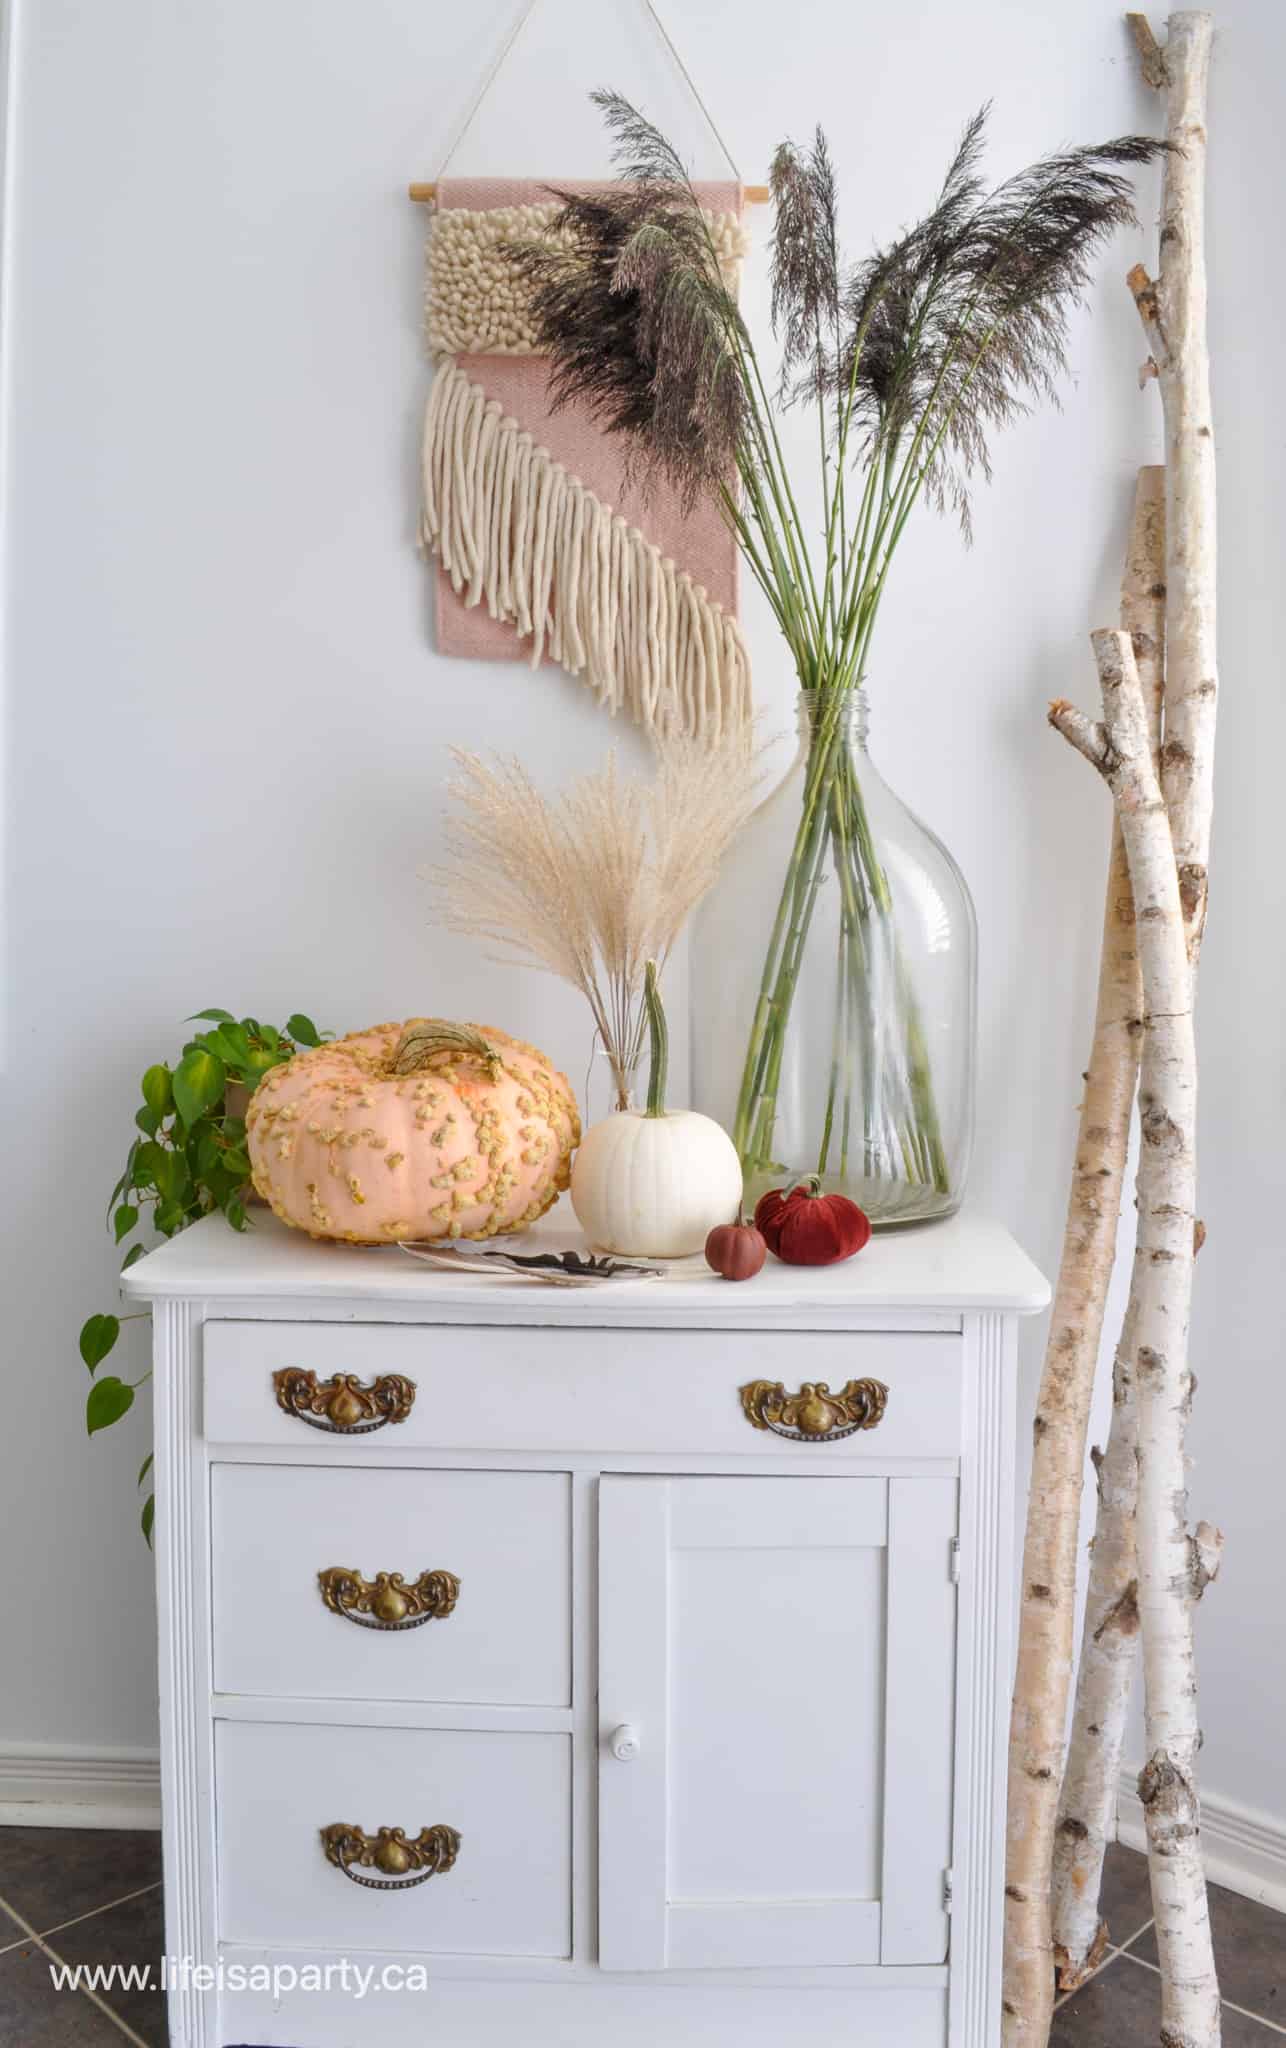
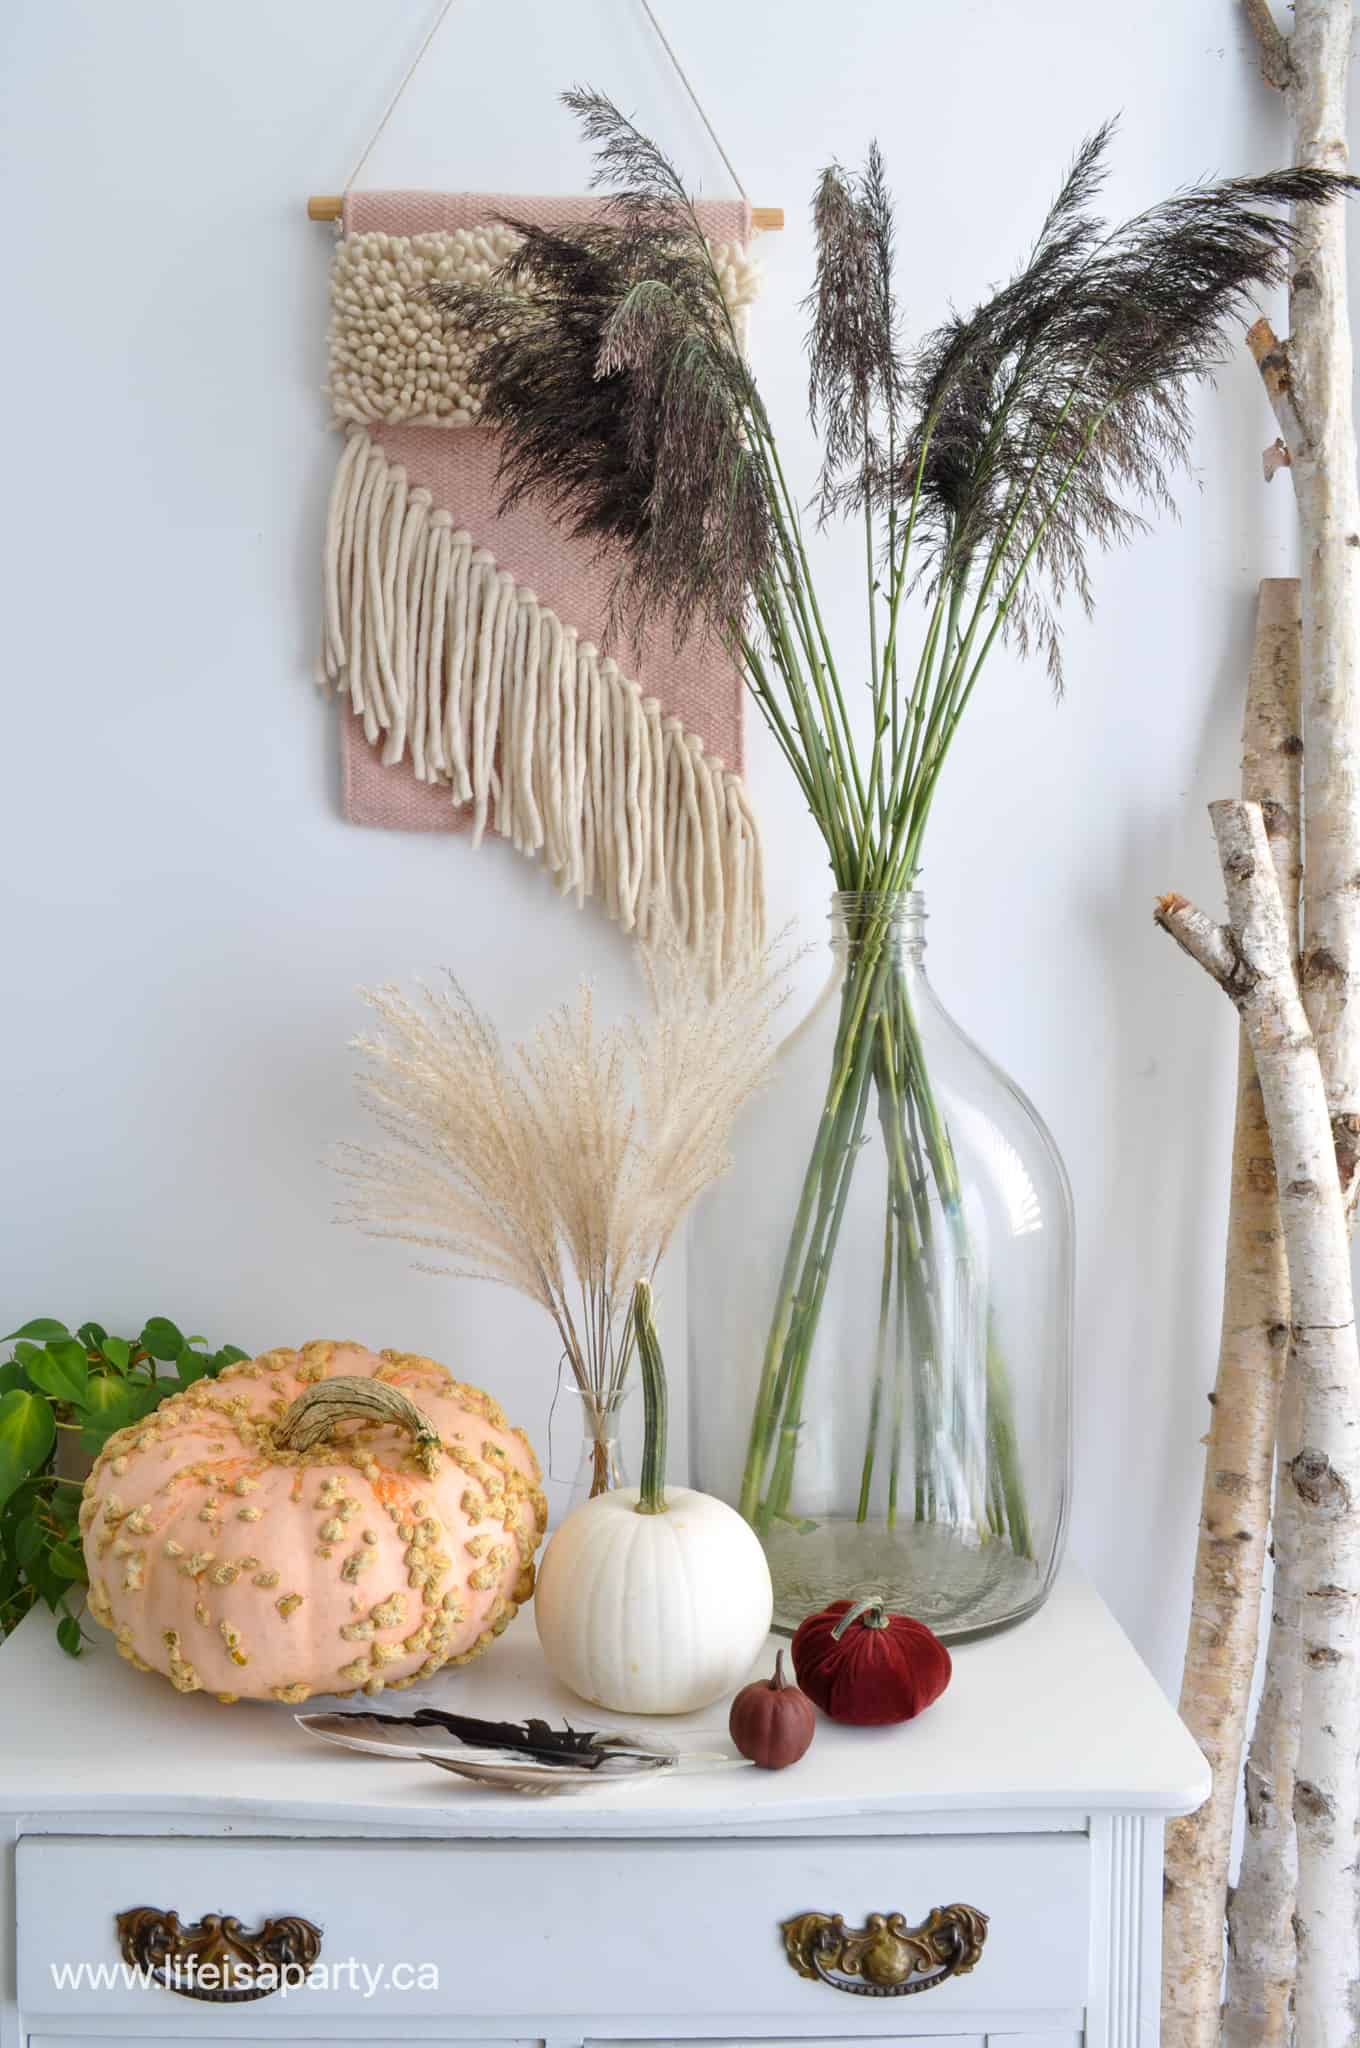
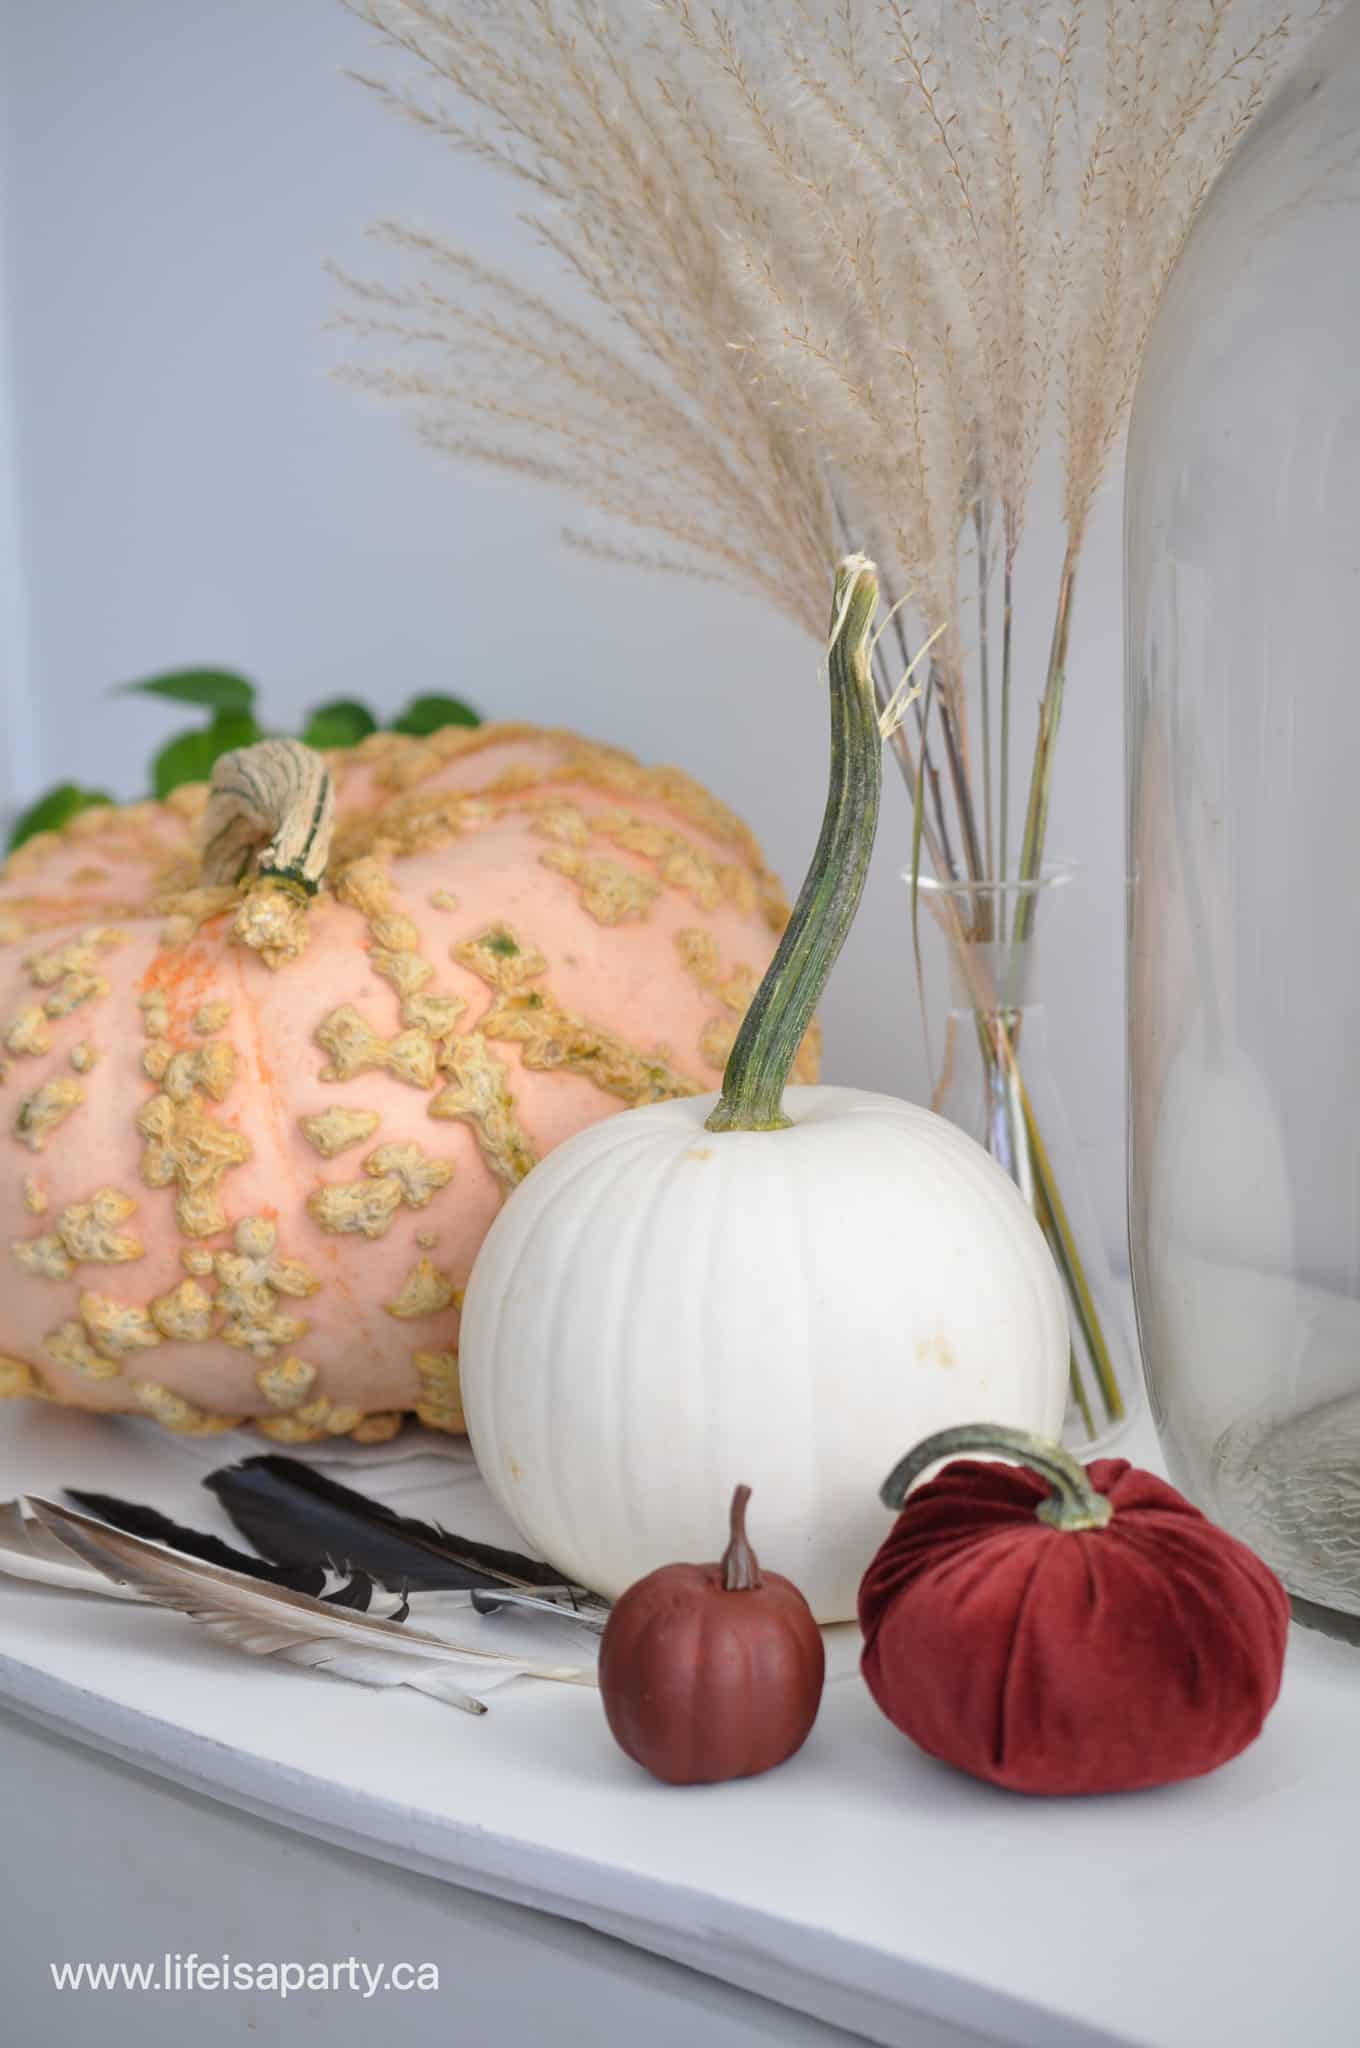
When you enter our house you're greeted by this little console table at the front door.  I've added lots of pumpkins and some of my amber glass collection along with lots of pretty dried grasses for fall.

fall decorating ideas for a console table

I kind of have a thing for science inspired decor.  Picture a Victorian lady going for walks in the fall, collecting plant samples, and insects and bringing them home to study and catalogue.  I haven't gone crazy with the theme this year -like I did with fall botanical decor here, but you'll see a few subtle touches here and there, like these insects, the card catalogue, and the magnifying glass.

fall home tour
fall decor amber glass bottles

Dining Room Table

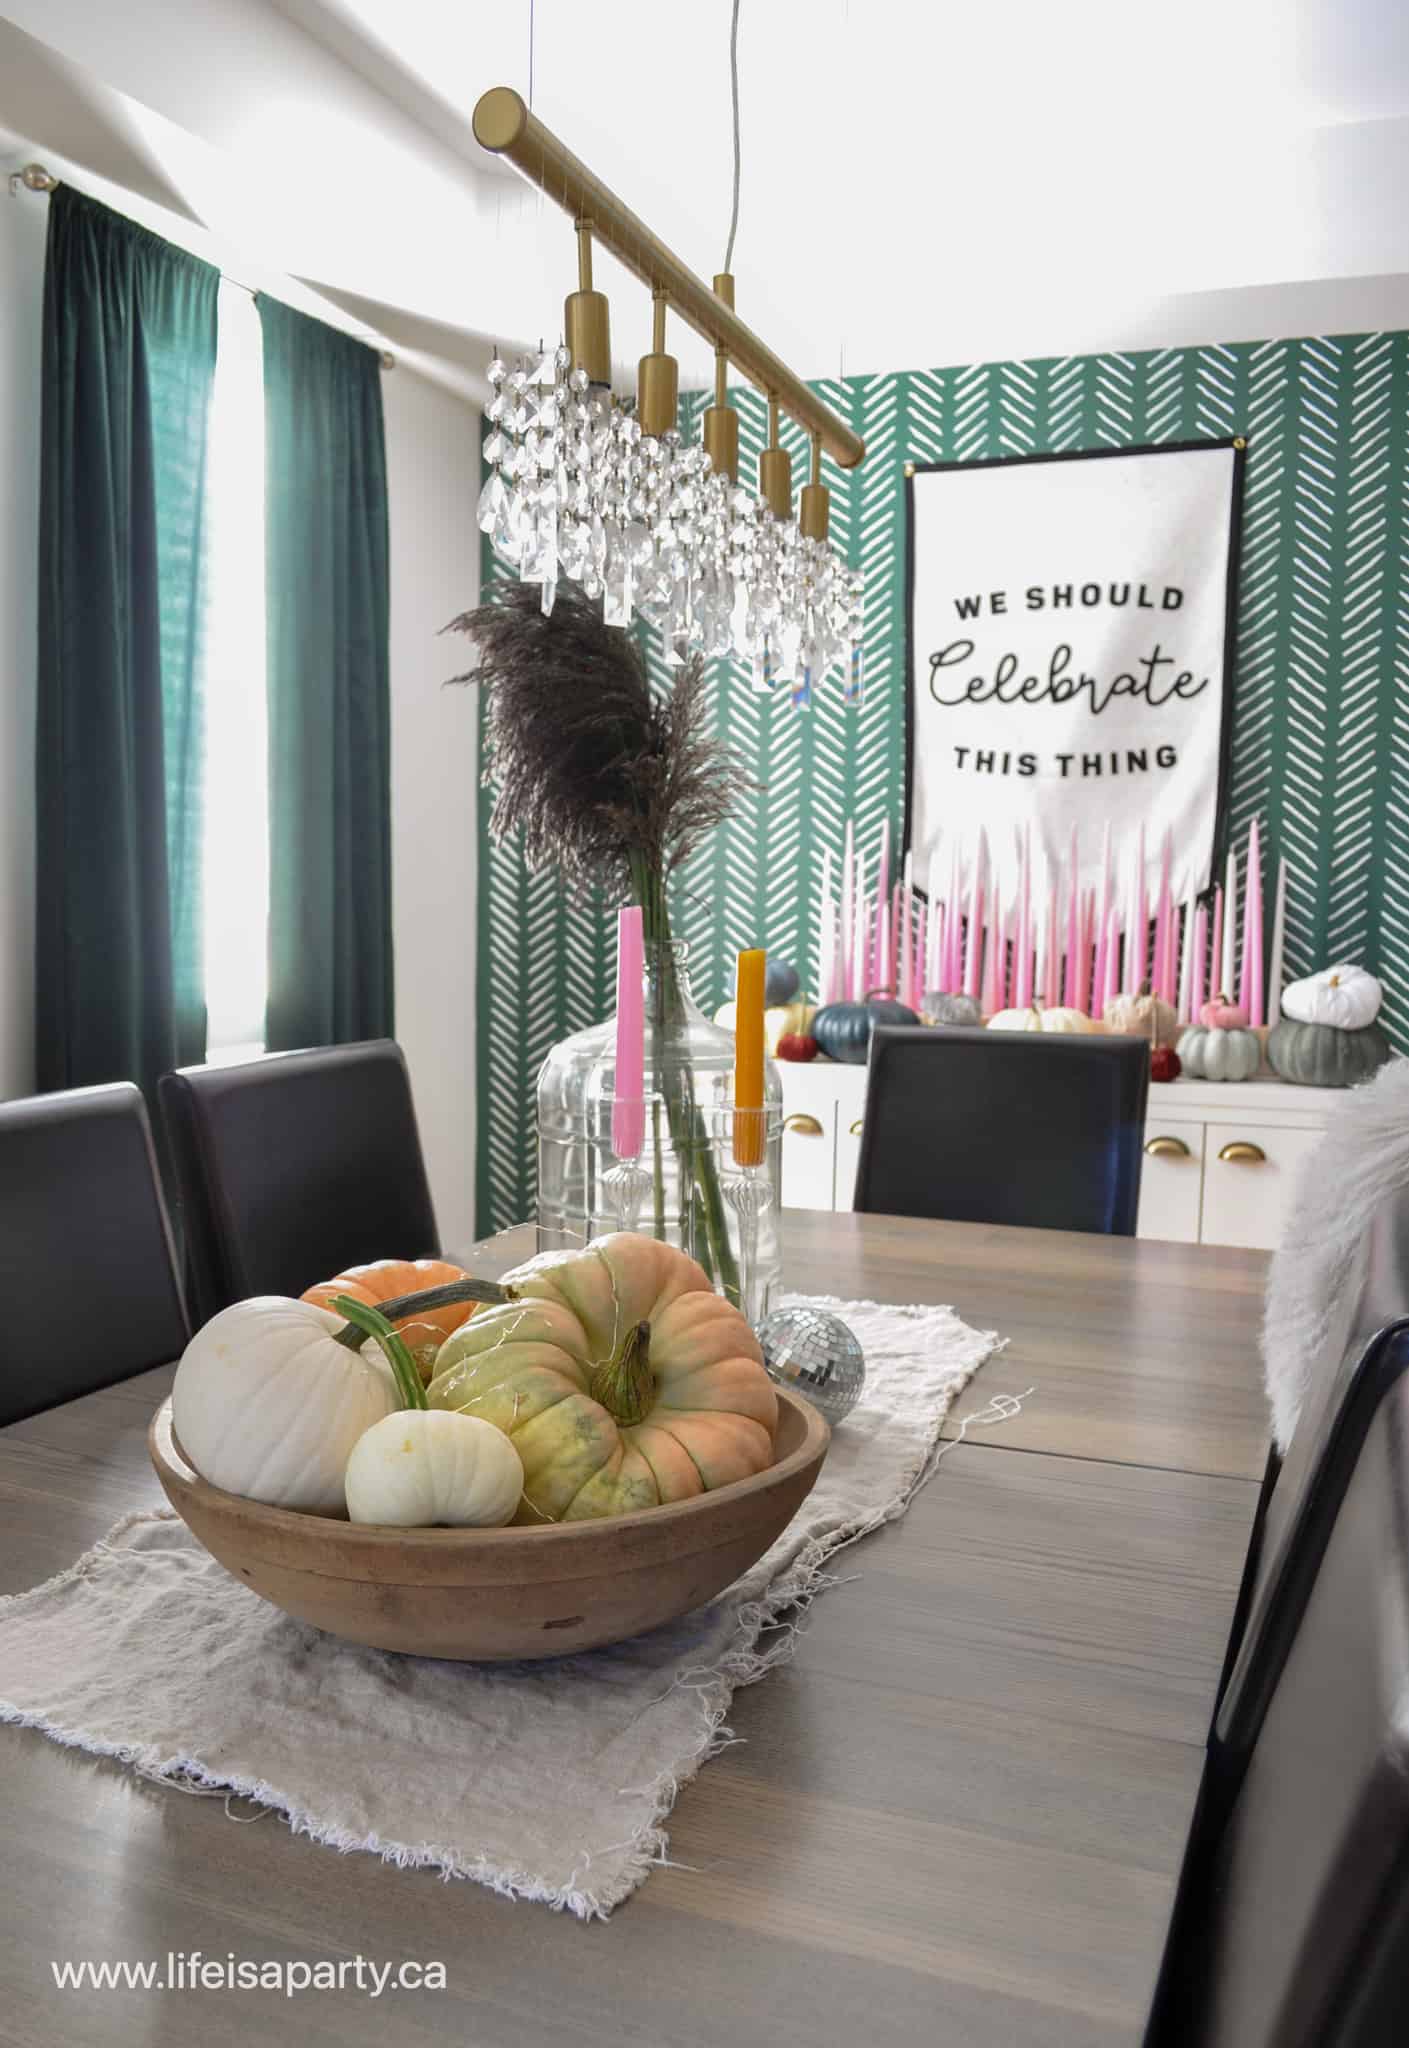
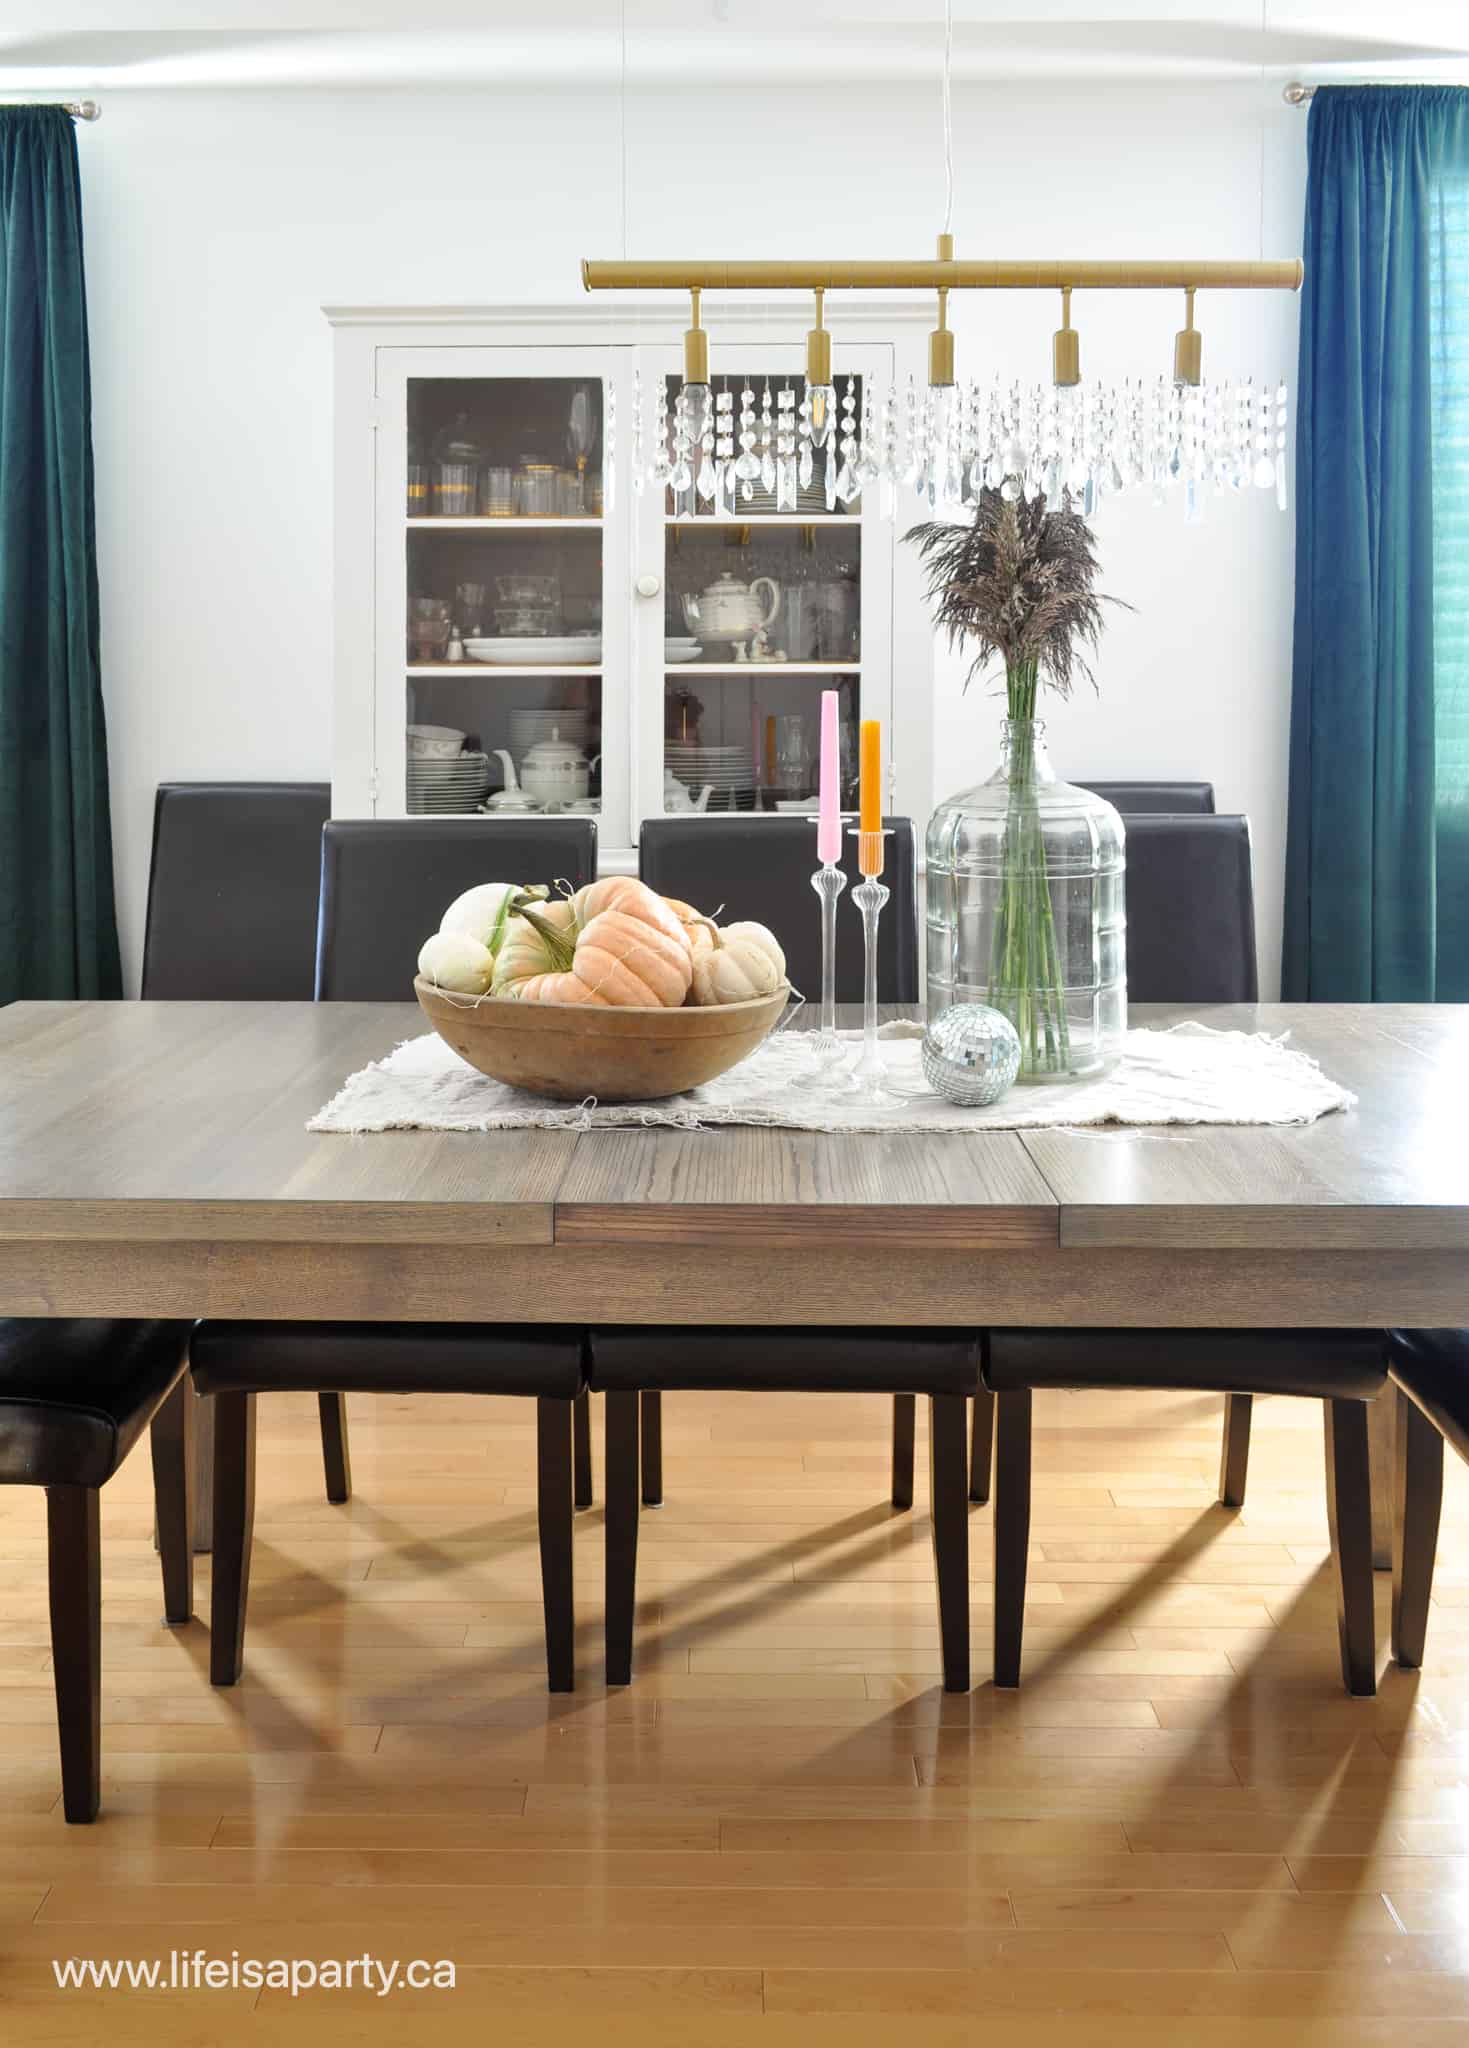
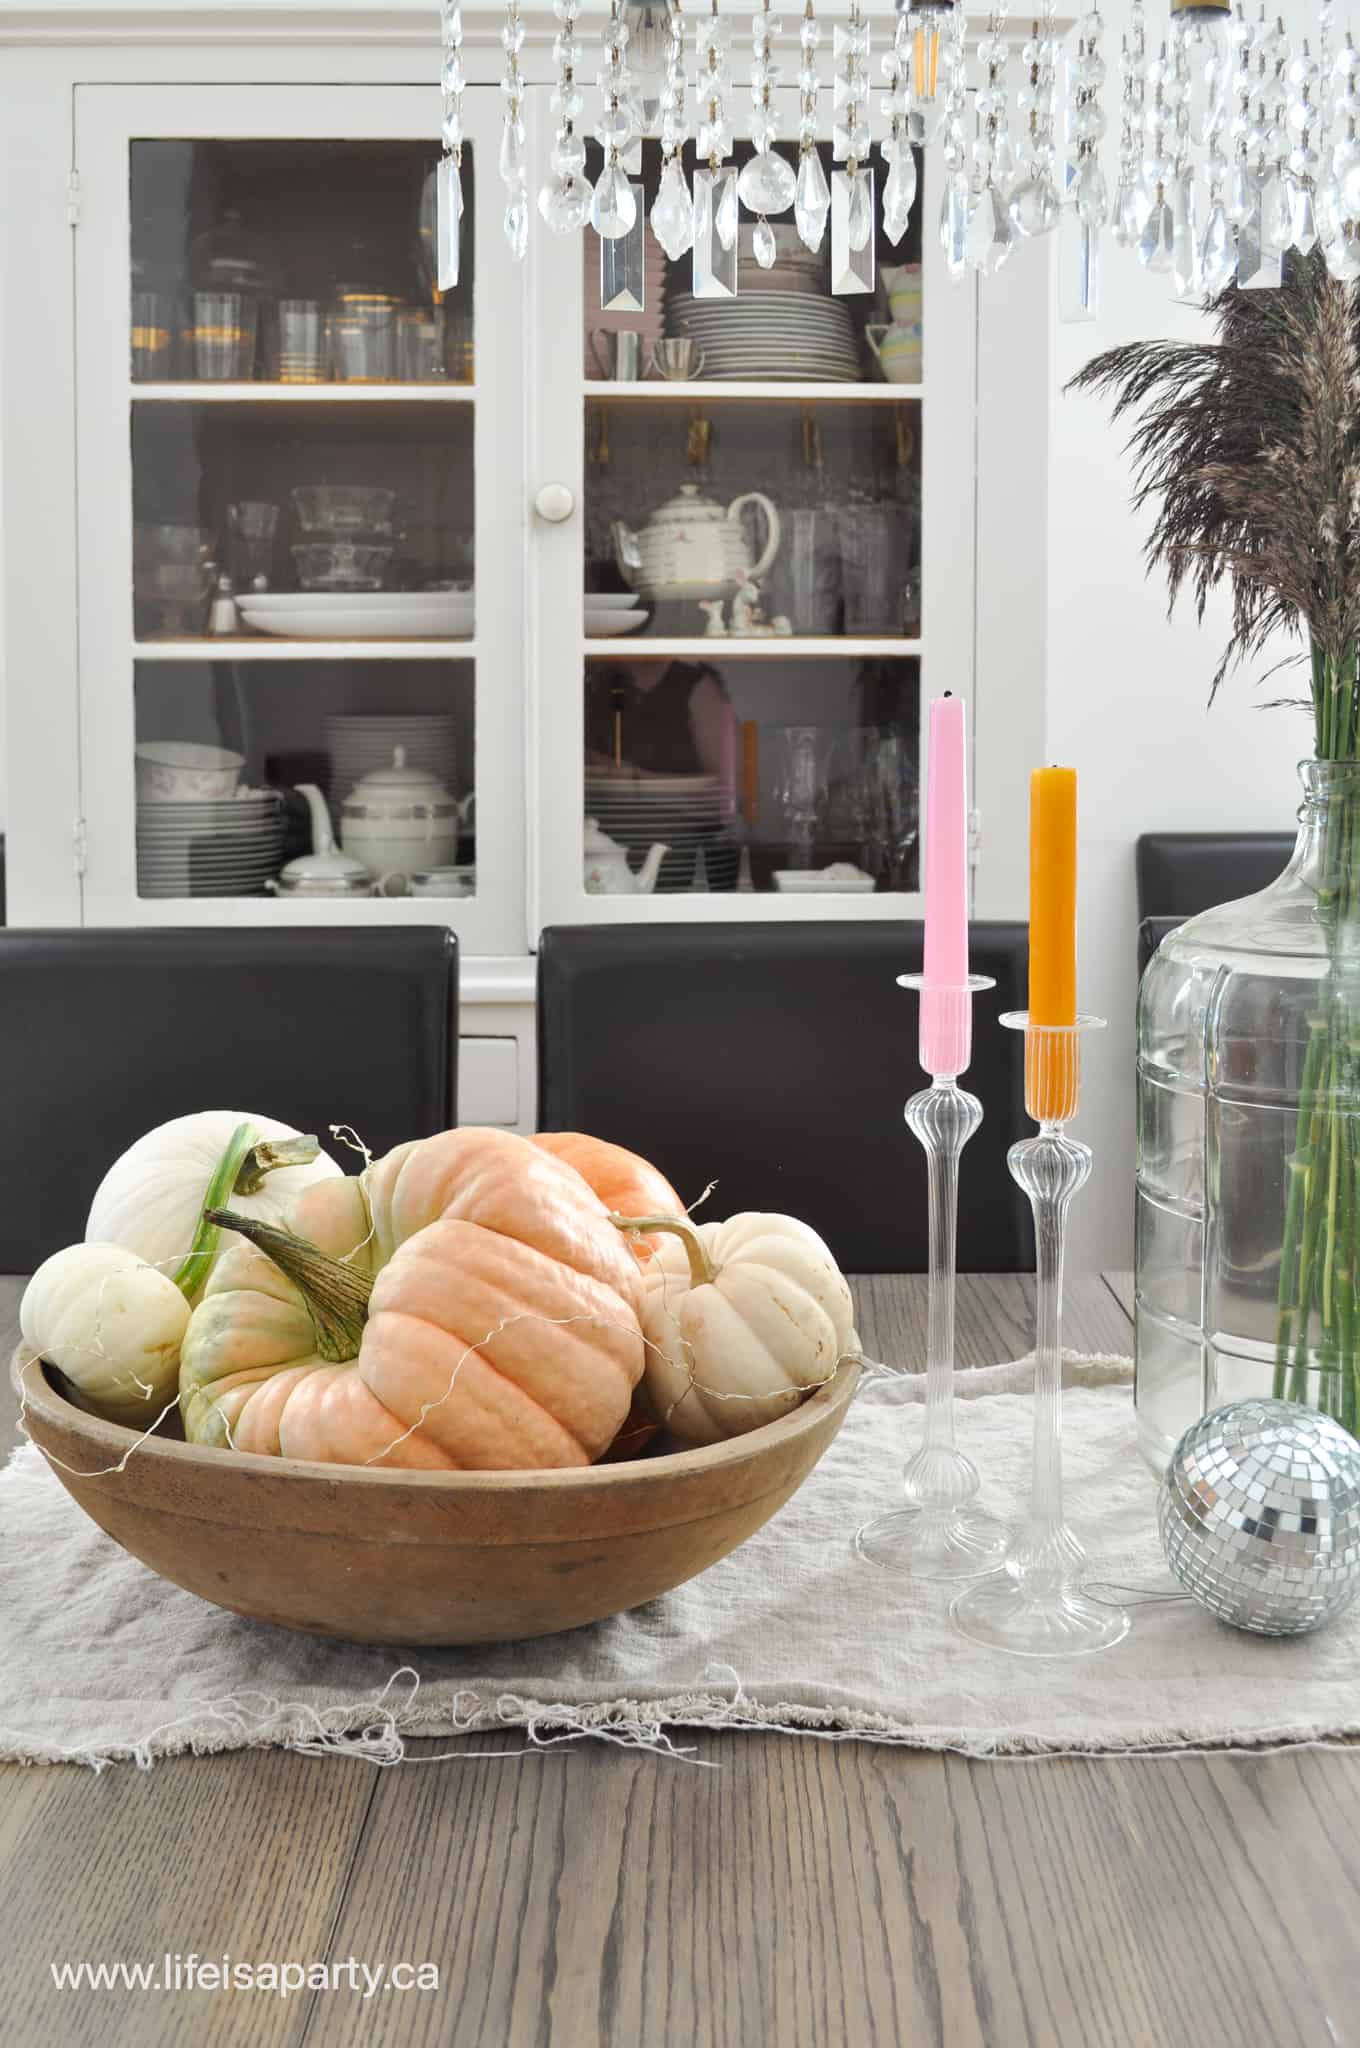
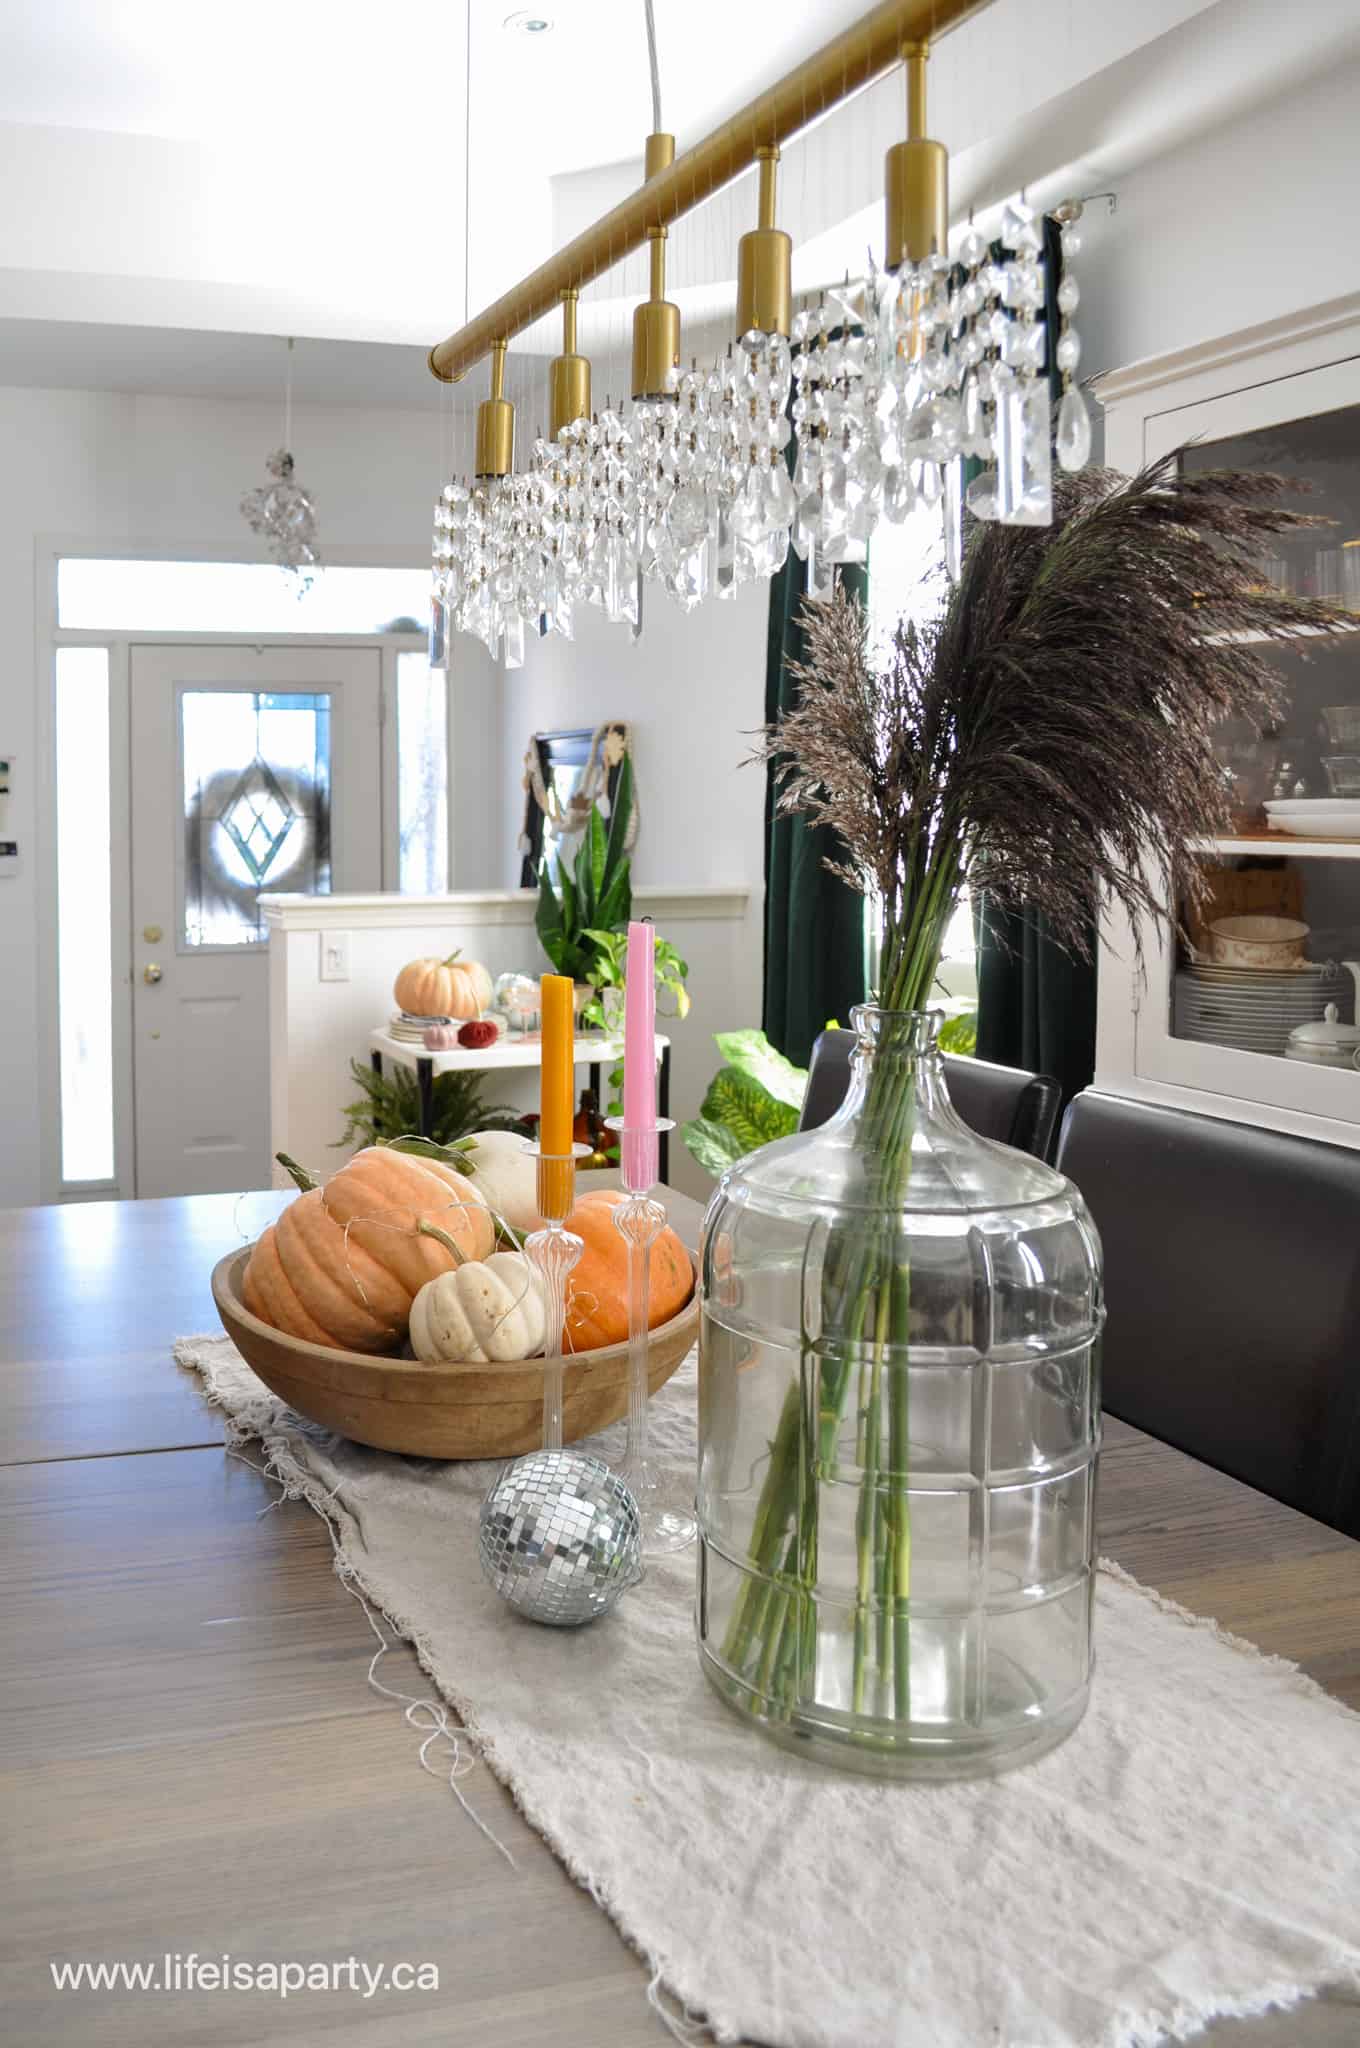
On the dining room table I kept things pretty simple this year, and I love it so much.  I found a new pumpkin farm not too far away -since my own in my garden this year were a bit of a flop and only a few small ones grew.  Maybe I over watered them, since we installed a new irrigation system this year?  Perhaps killed them with kindness? We'll try again next year. You can read about my little portager garden here.  This wood dough bowl full of real pumpkins is pretty much what fall dreams are made of.

fall decorating ideas in the dining room
fall dining room
how to decorate for fall
wood dough bowl full of pumpkins
fall decorating ideas

Bar Cart

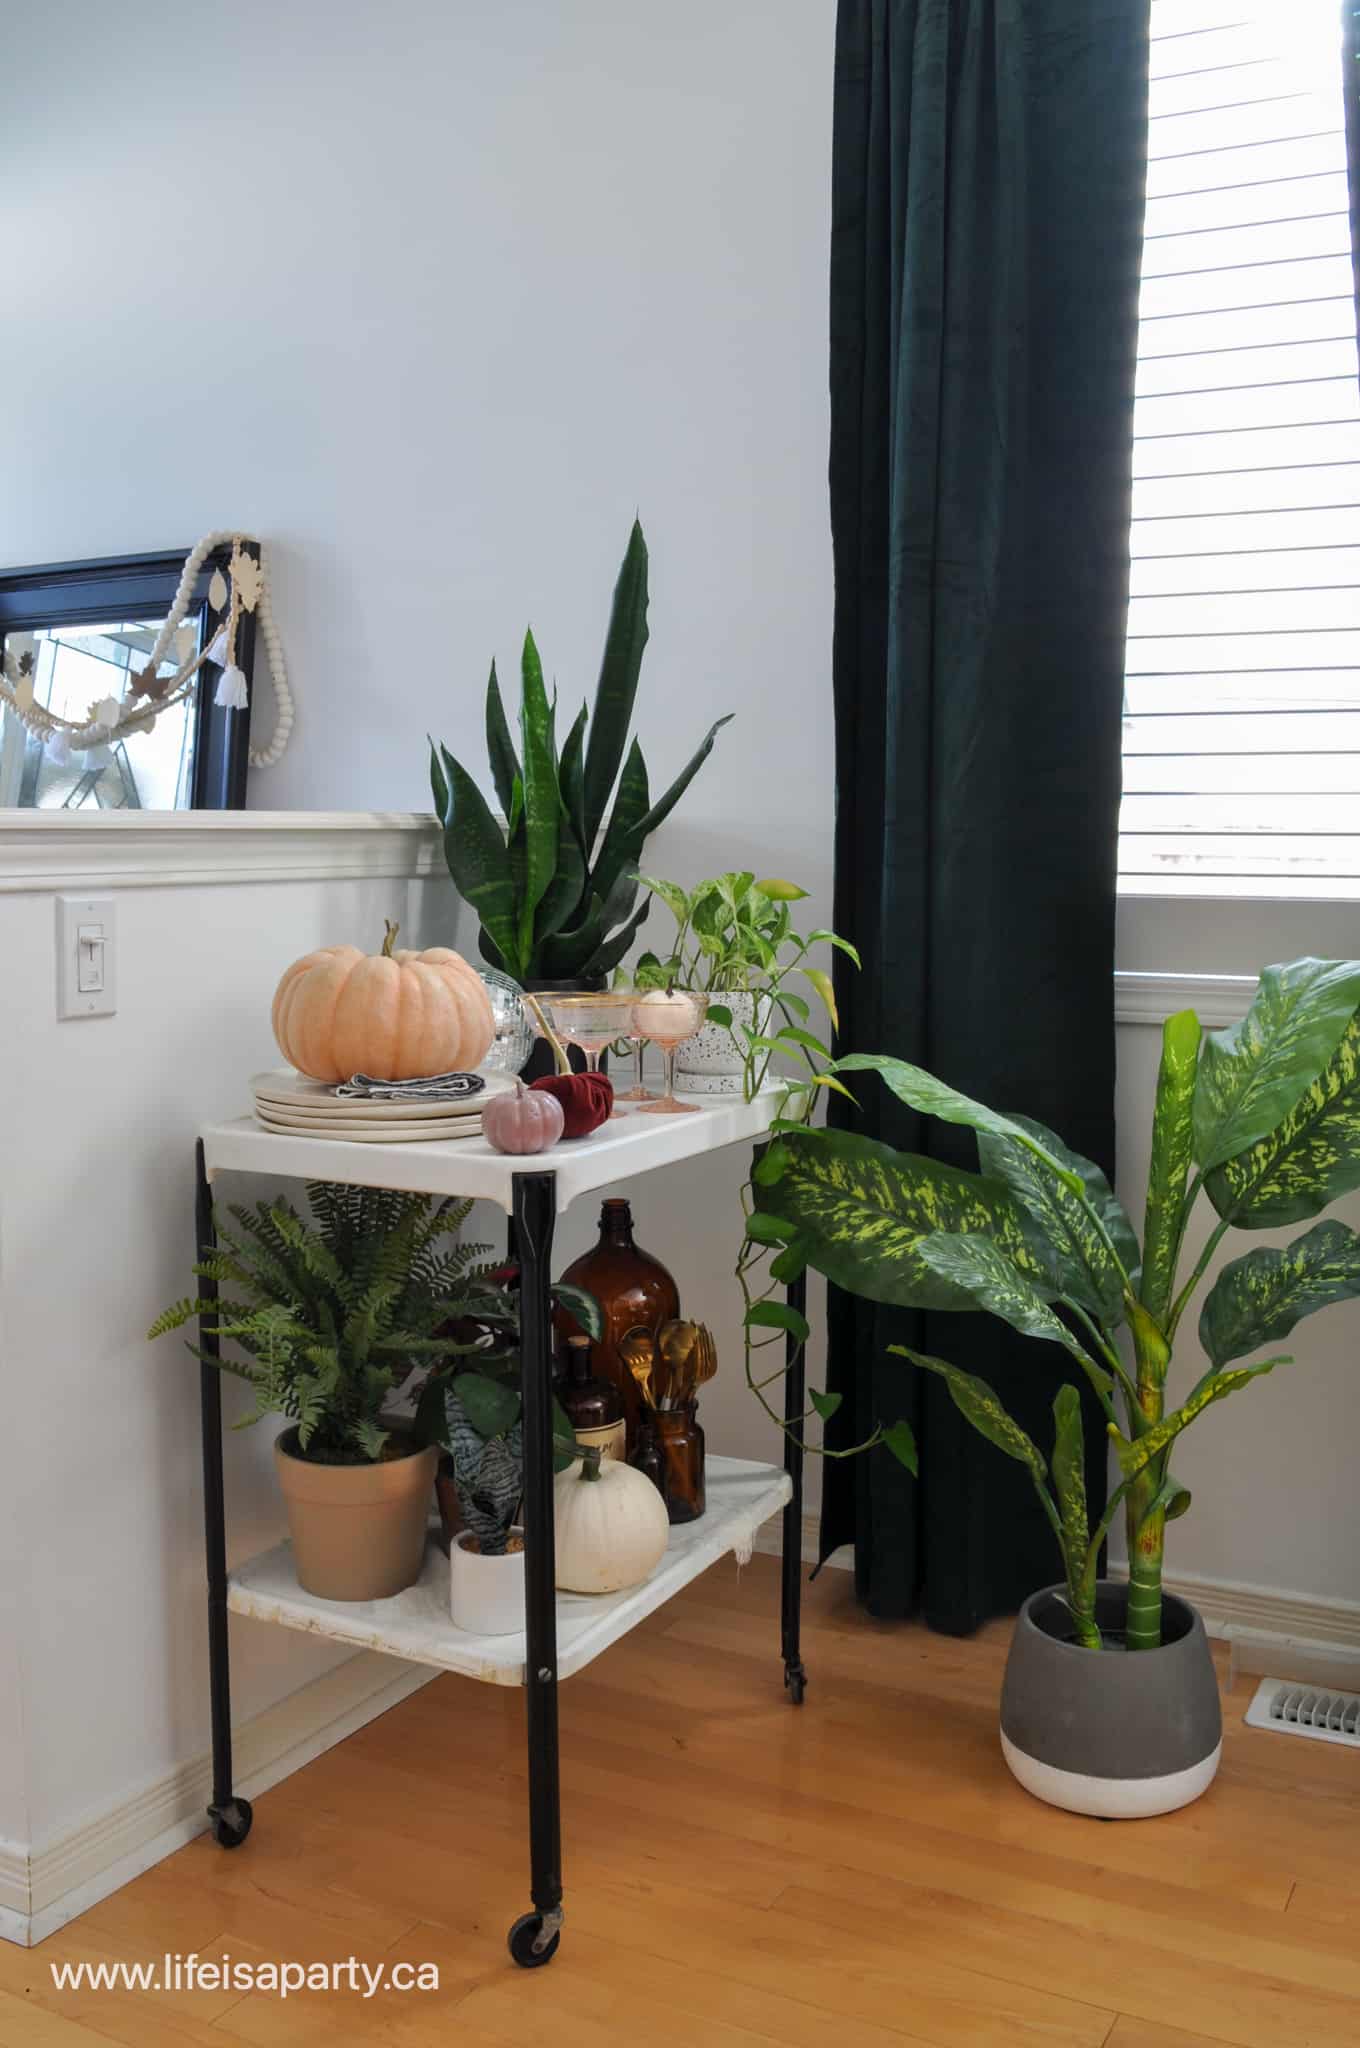
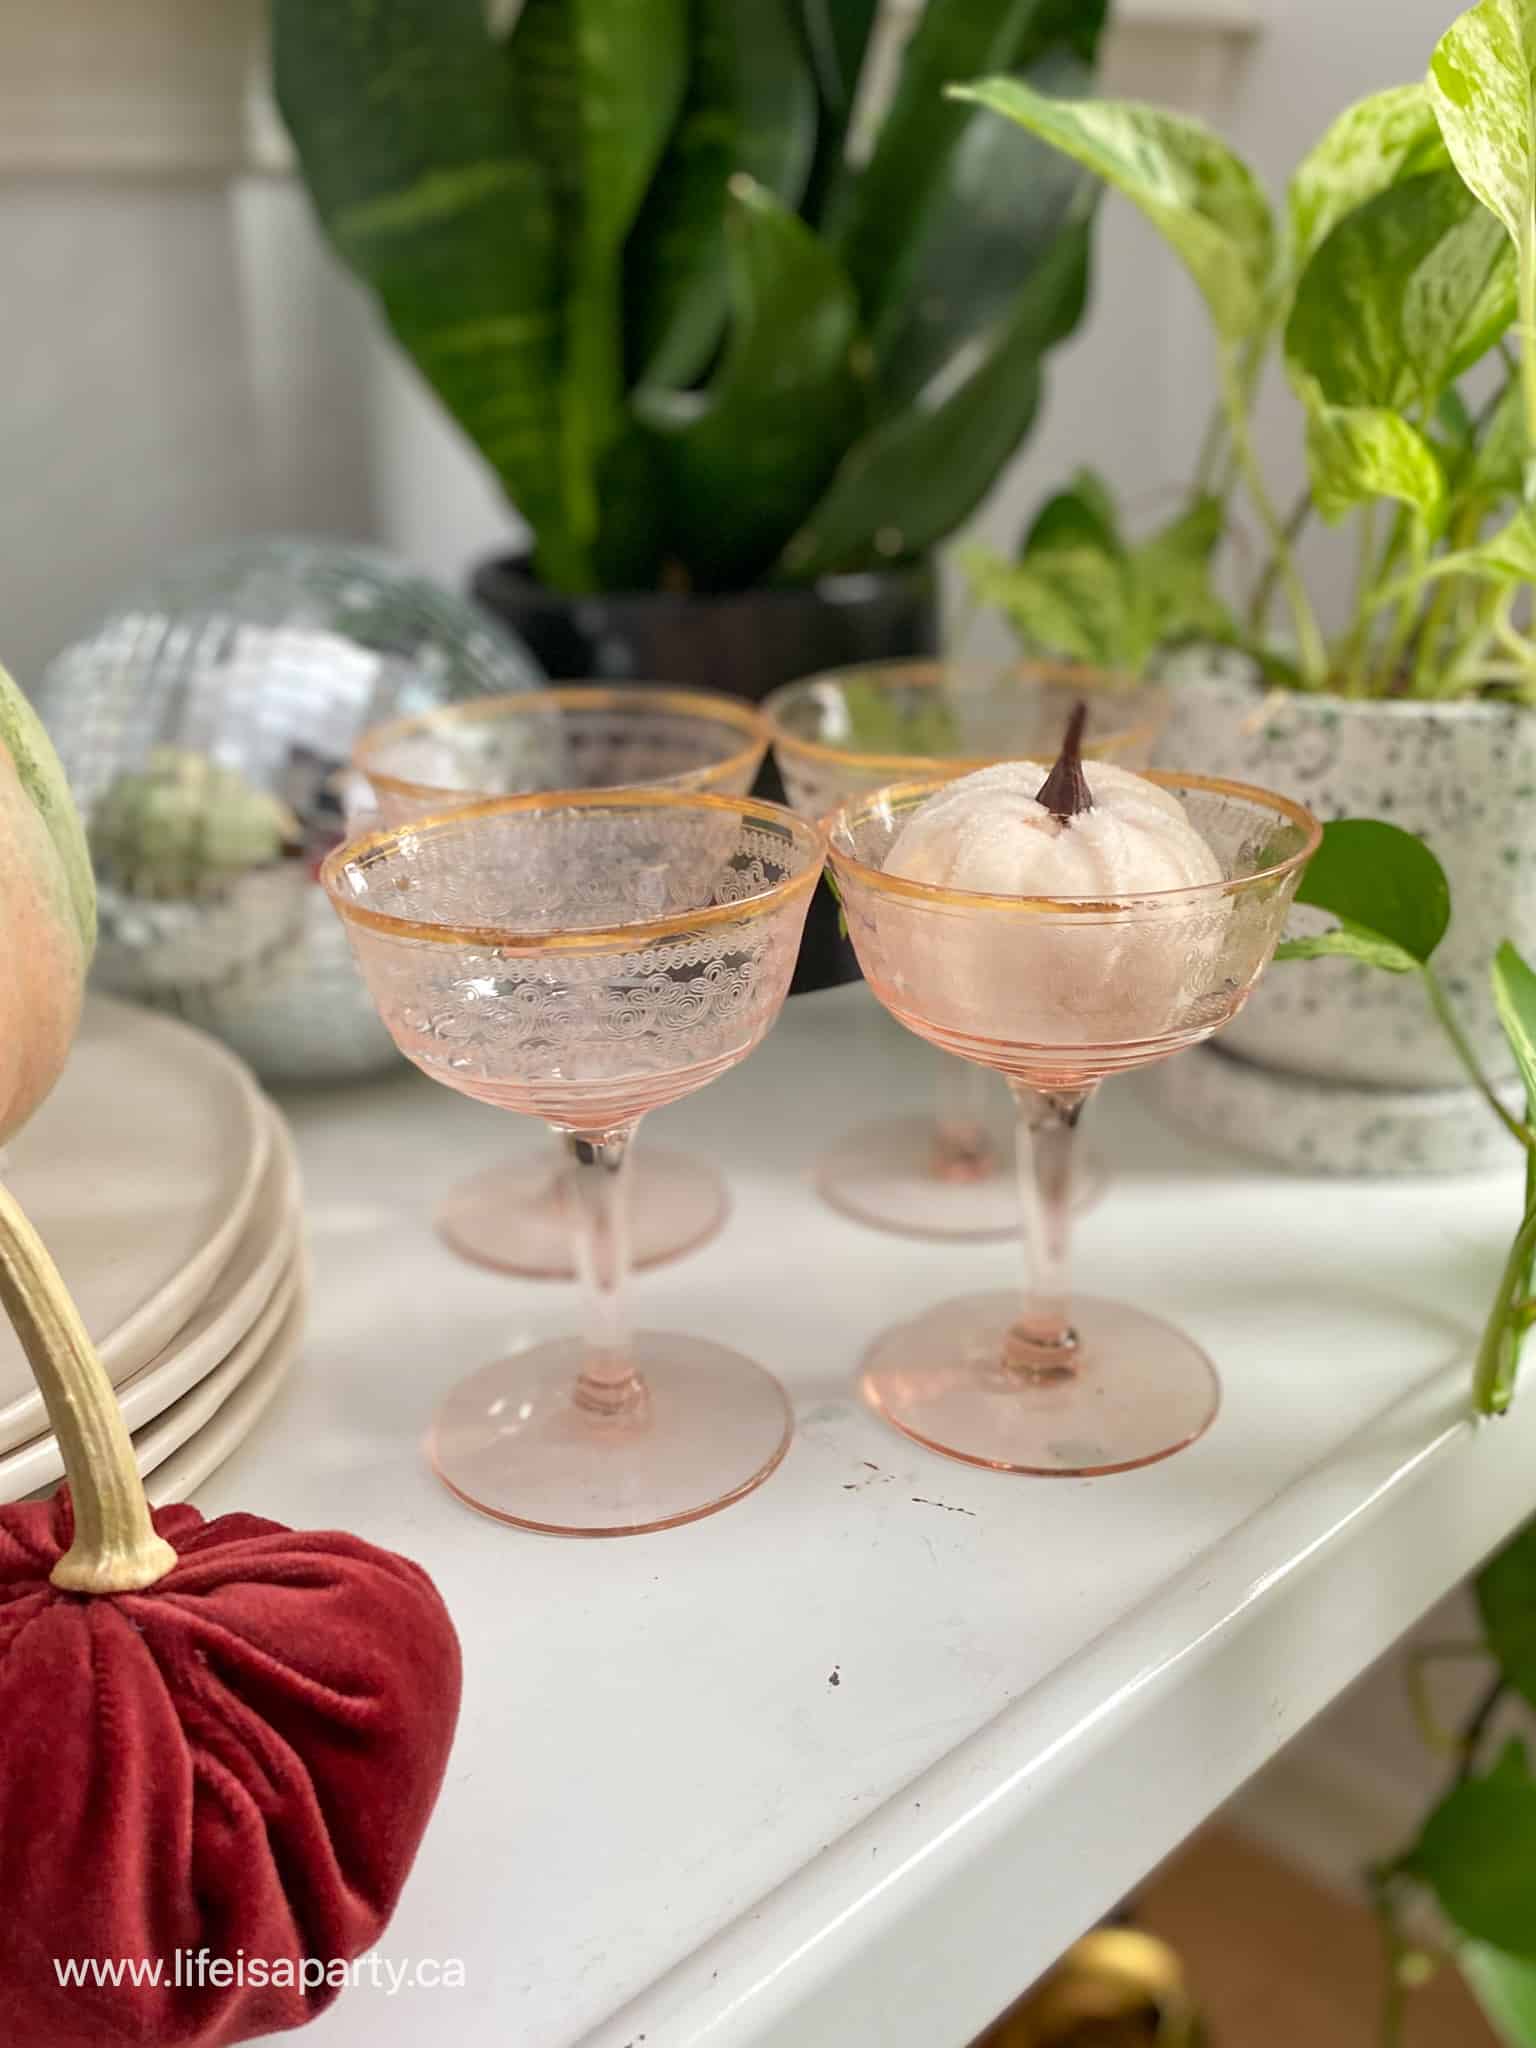
On the little bar cart, I've got lots of plants for the boho look -a mix of real and faux.  There's also my favourite recent antique store find.  These gorgeous pink champagne coupes were only $1 a piece and I love them. On the bottom more pretty amber glass and plants.

boho fall bar cart
boho fall decorating ideas
vintage pink champagne coupes

Feature Wall

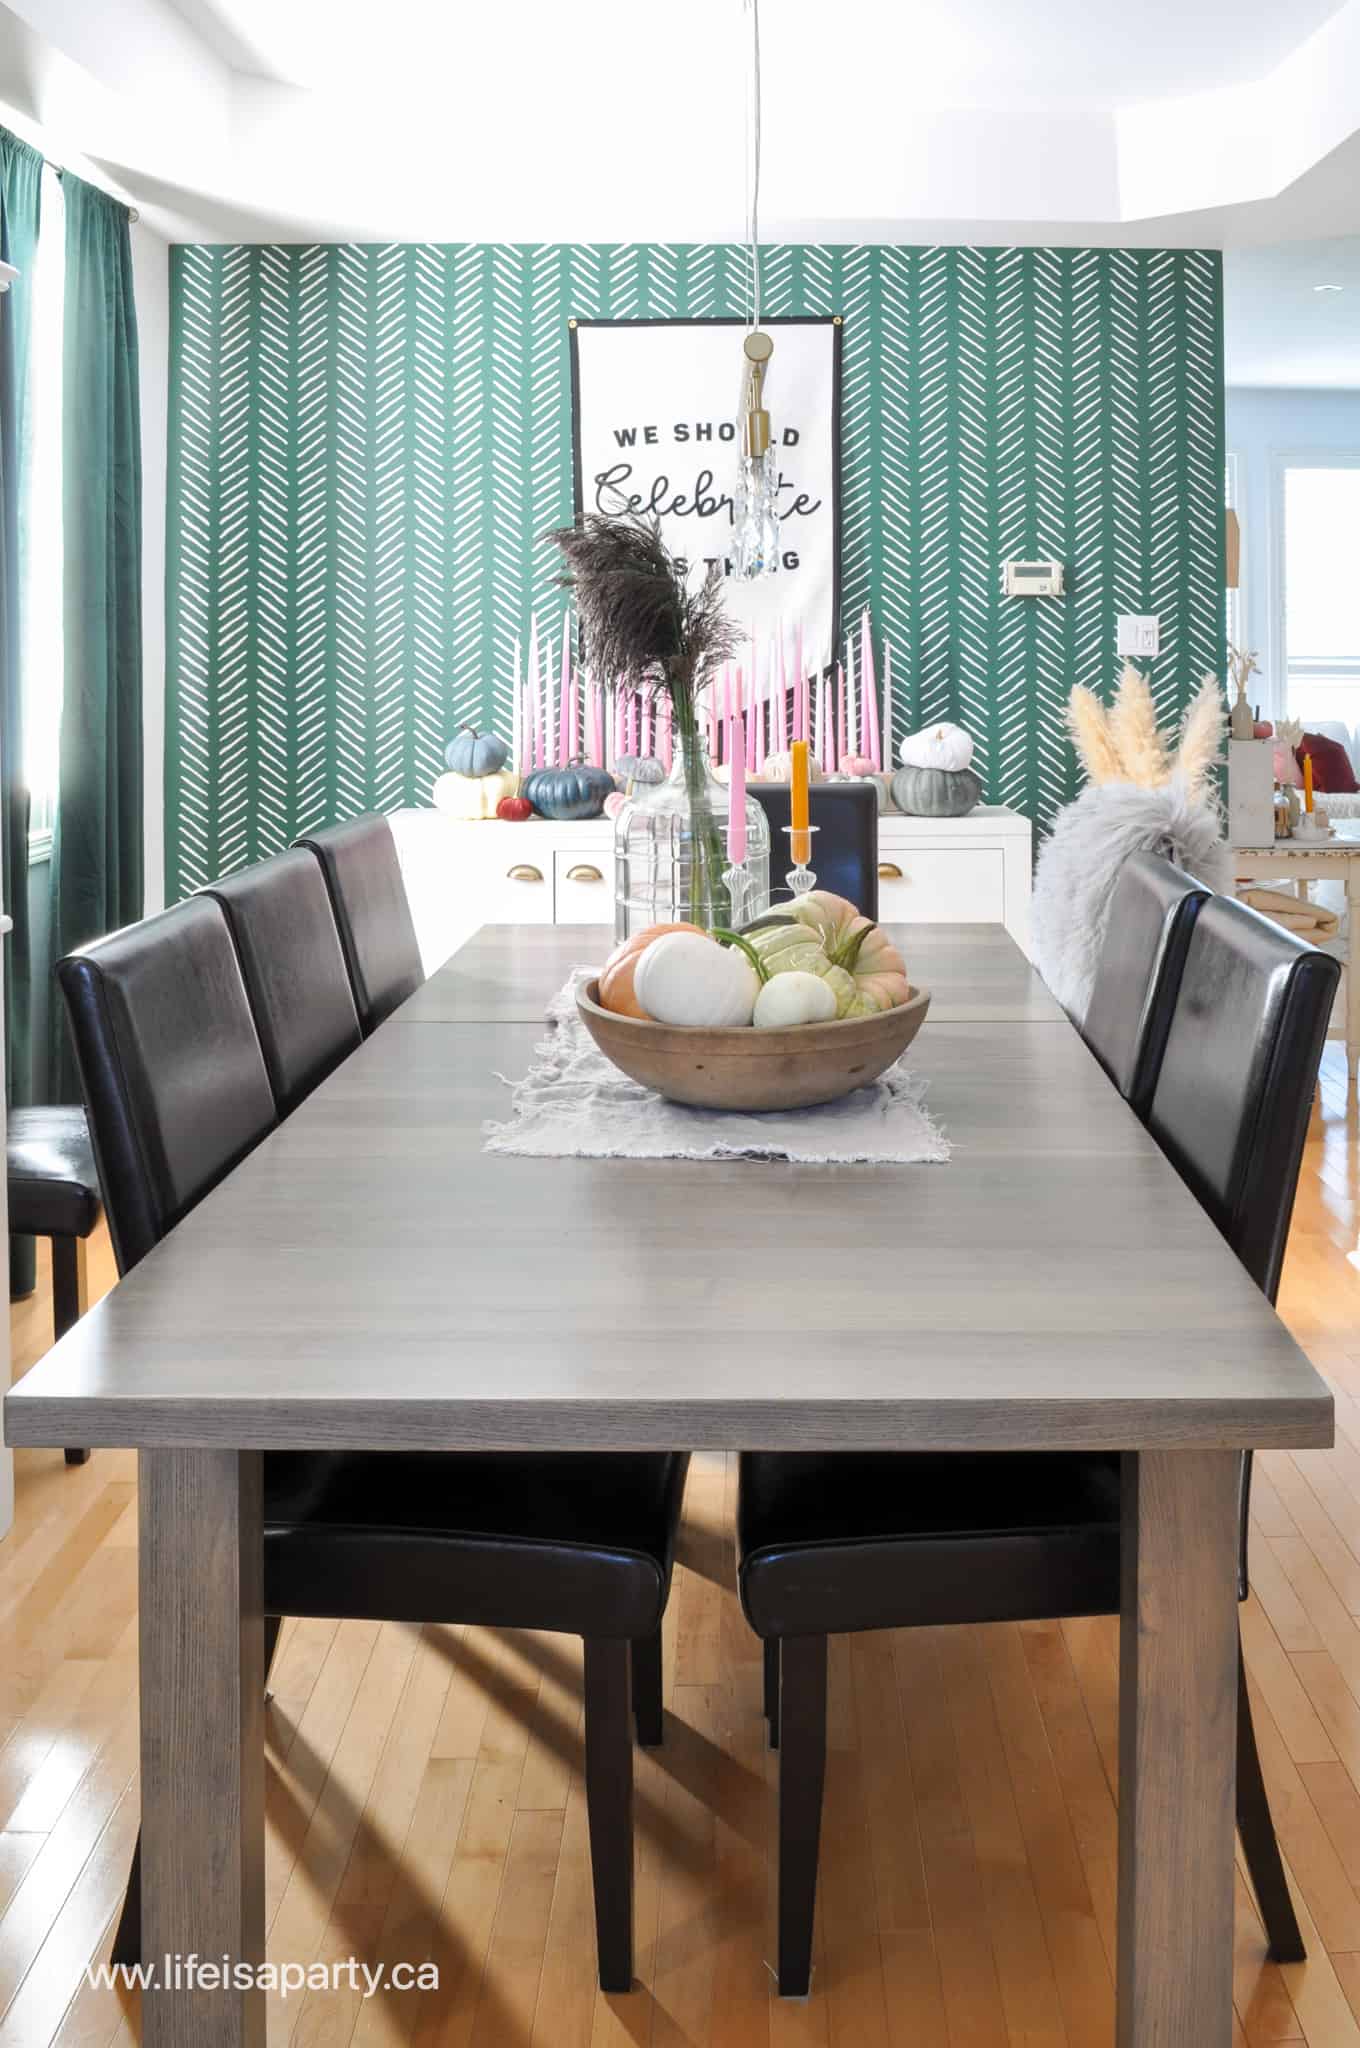
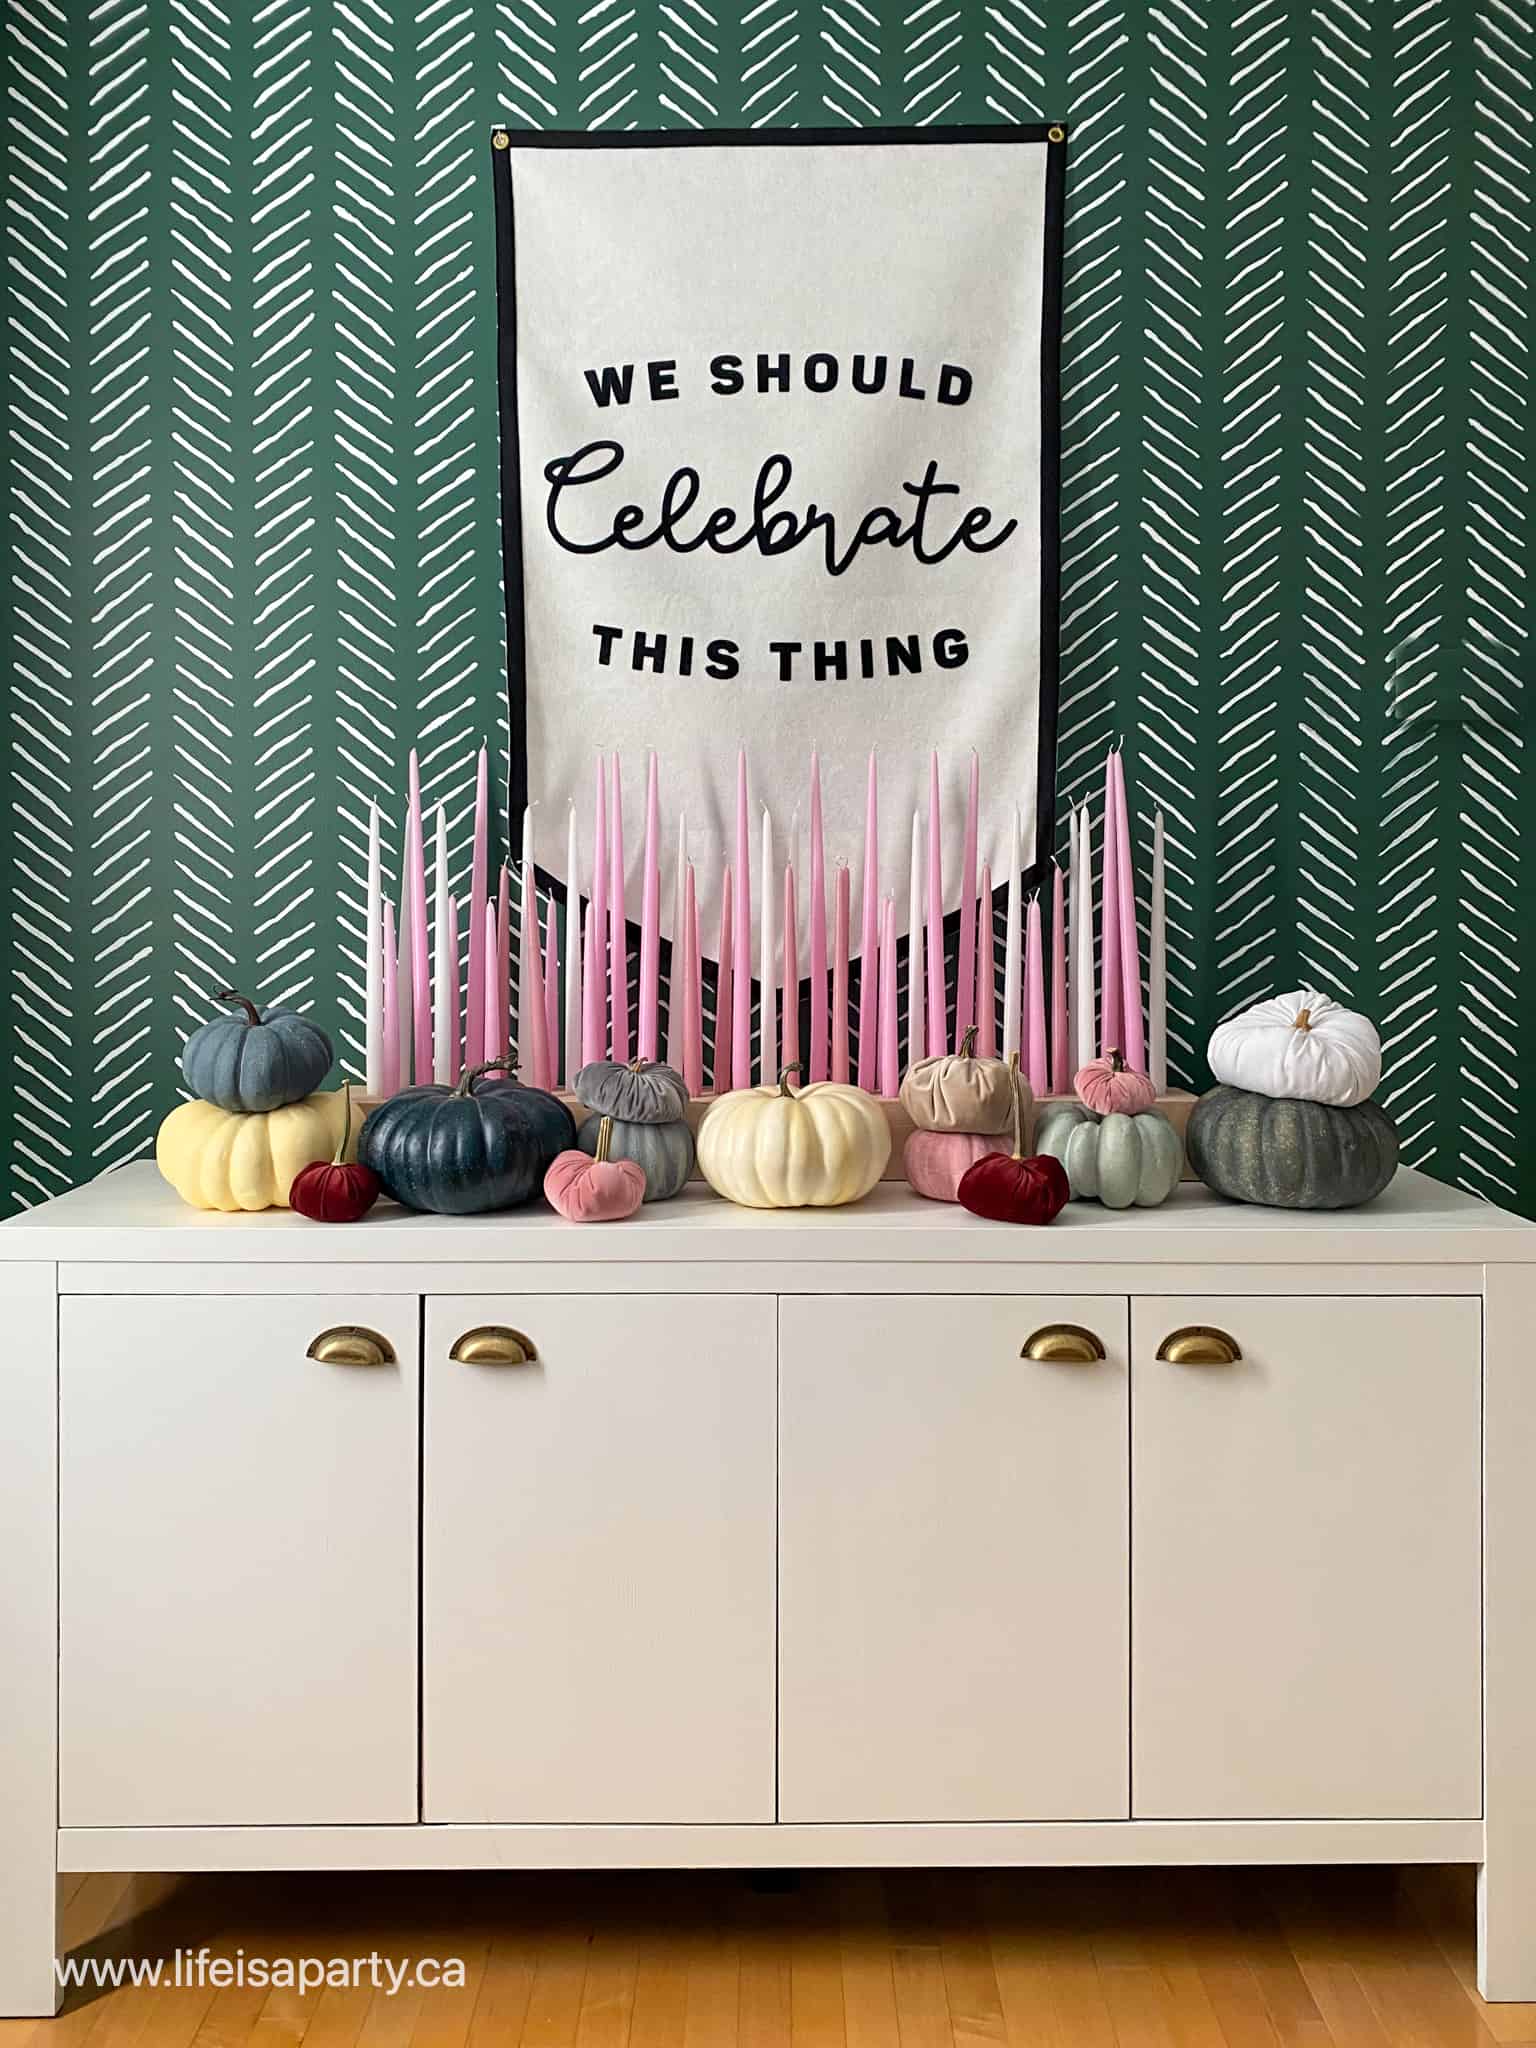
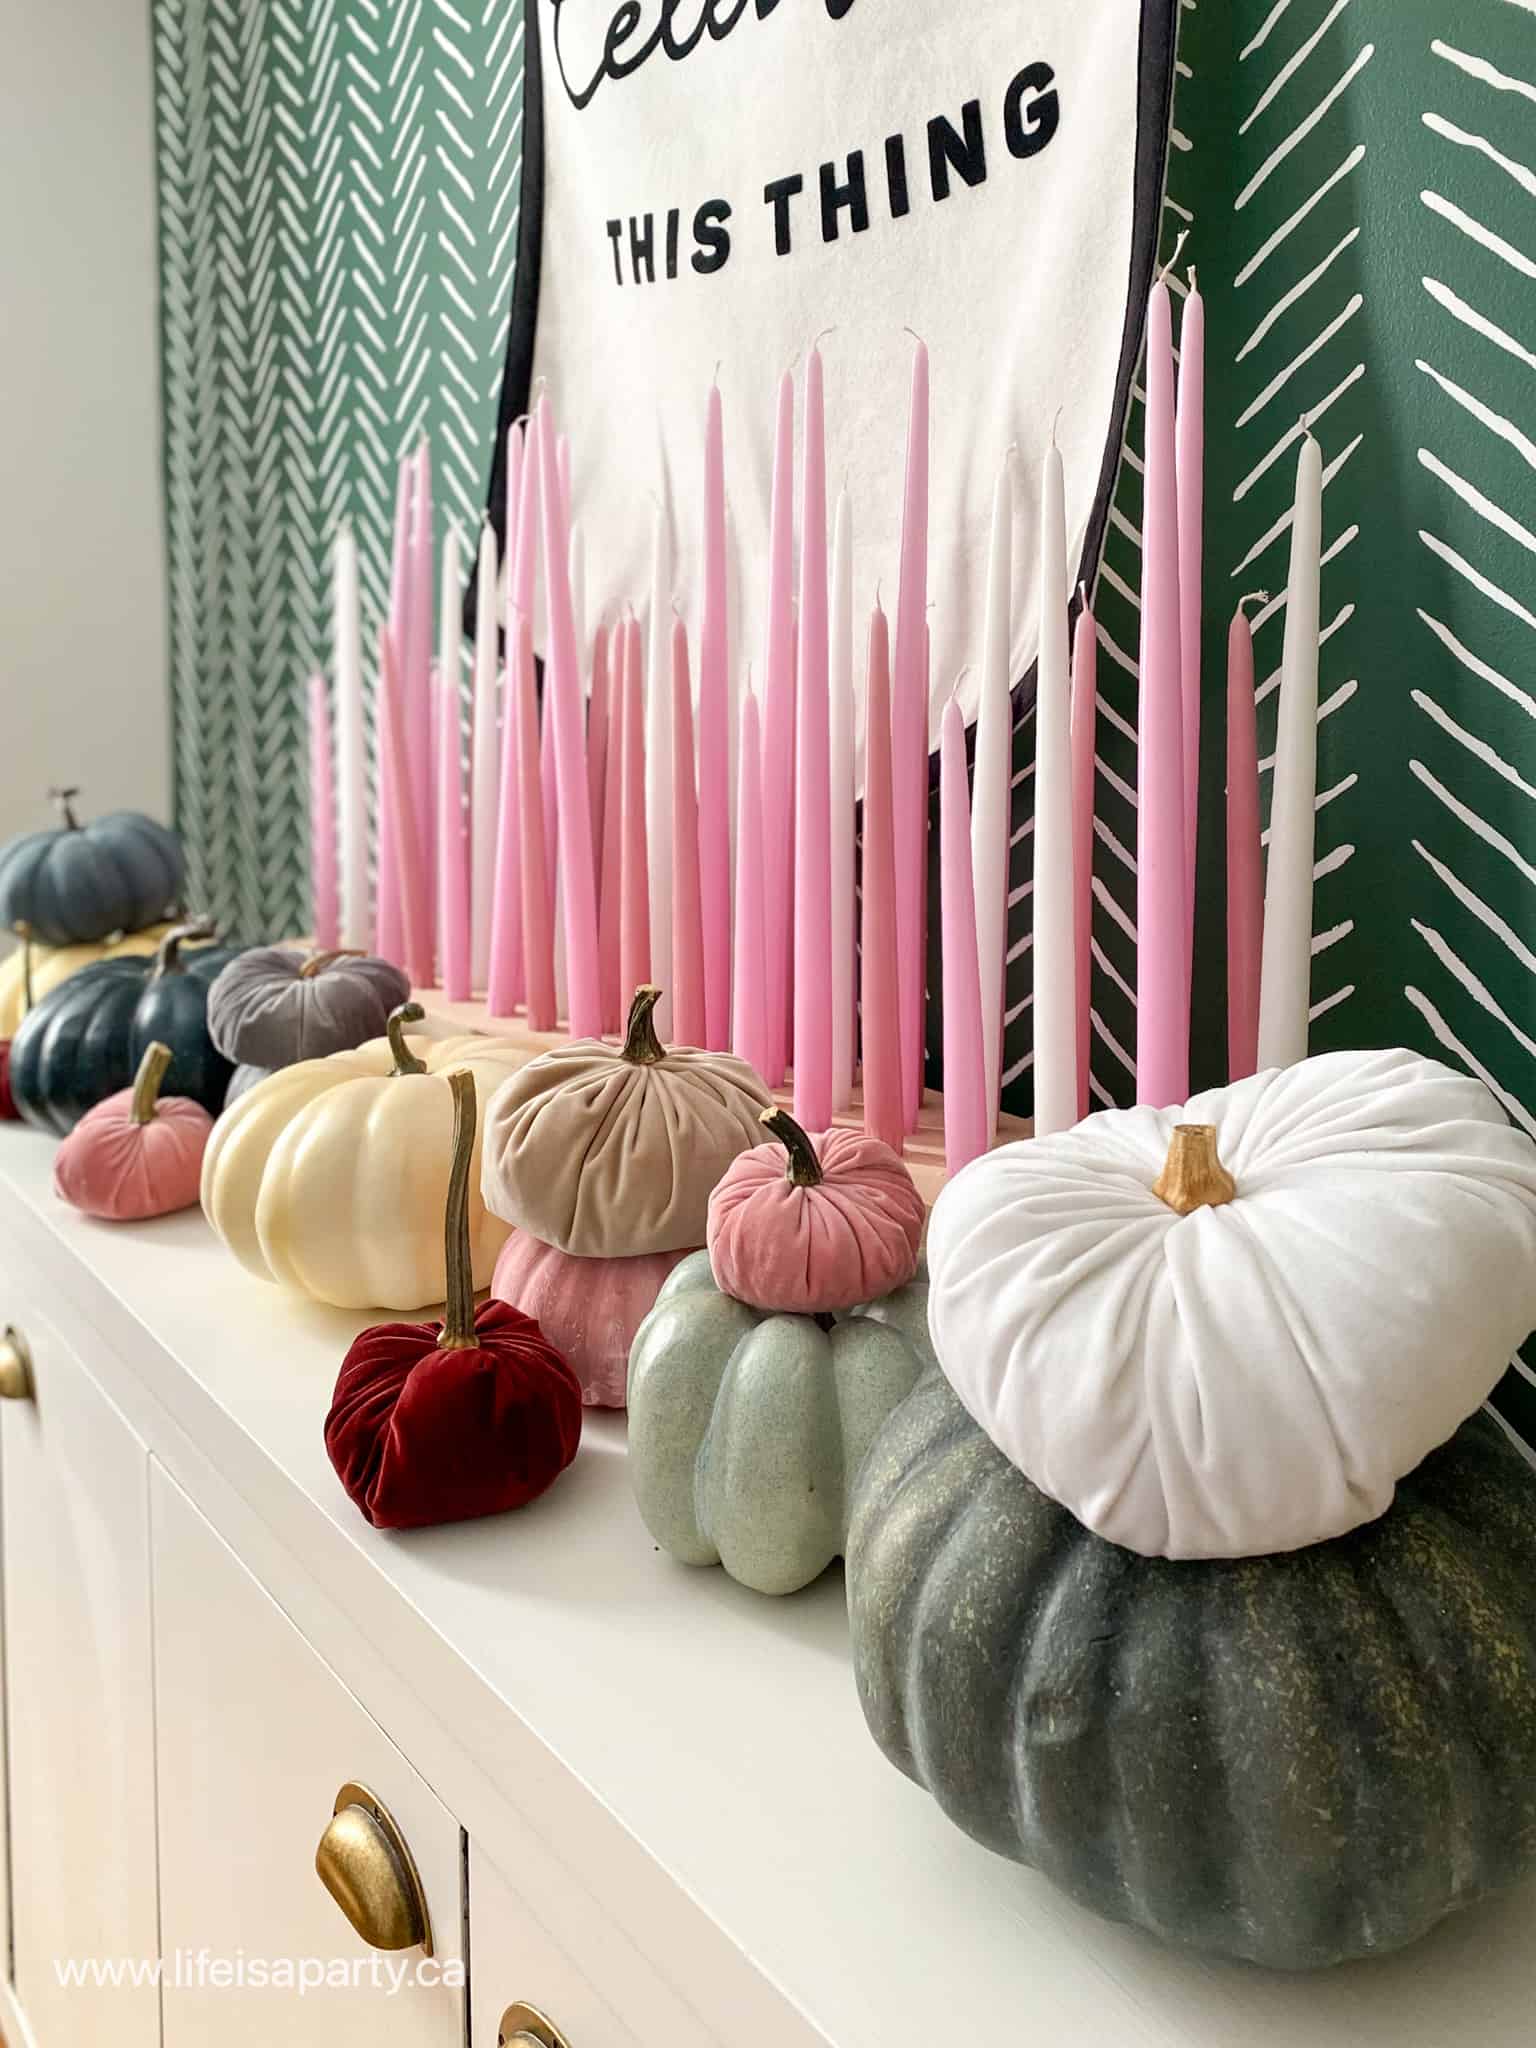
We have a fun feature wall in the dining room.  Our DIY hand stencilled green featured wall is still going strong.  I've got the most beautiful wall hanging on it, that pretty much sums up my philosophy of life "we should celebrate this thing".  What?  Everything!  Let's start with fall. ;). In front of it is my DIY candle holder that my brother-in-law and sister made for me last Christmas.  I'm still absolutely loving it and I feel like it goes with the sentiments of the banner so well.  So to add a little fall over here, I started adding pumpkins and didn't stop!  There is a mix of faux pumpkins and velvet pumpkins I made.  This year I added a few rust coloured ones in, and I love them.  

fall boho decor
DIY velvet pumpkins

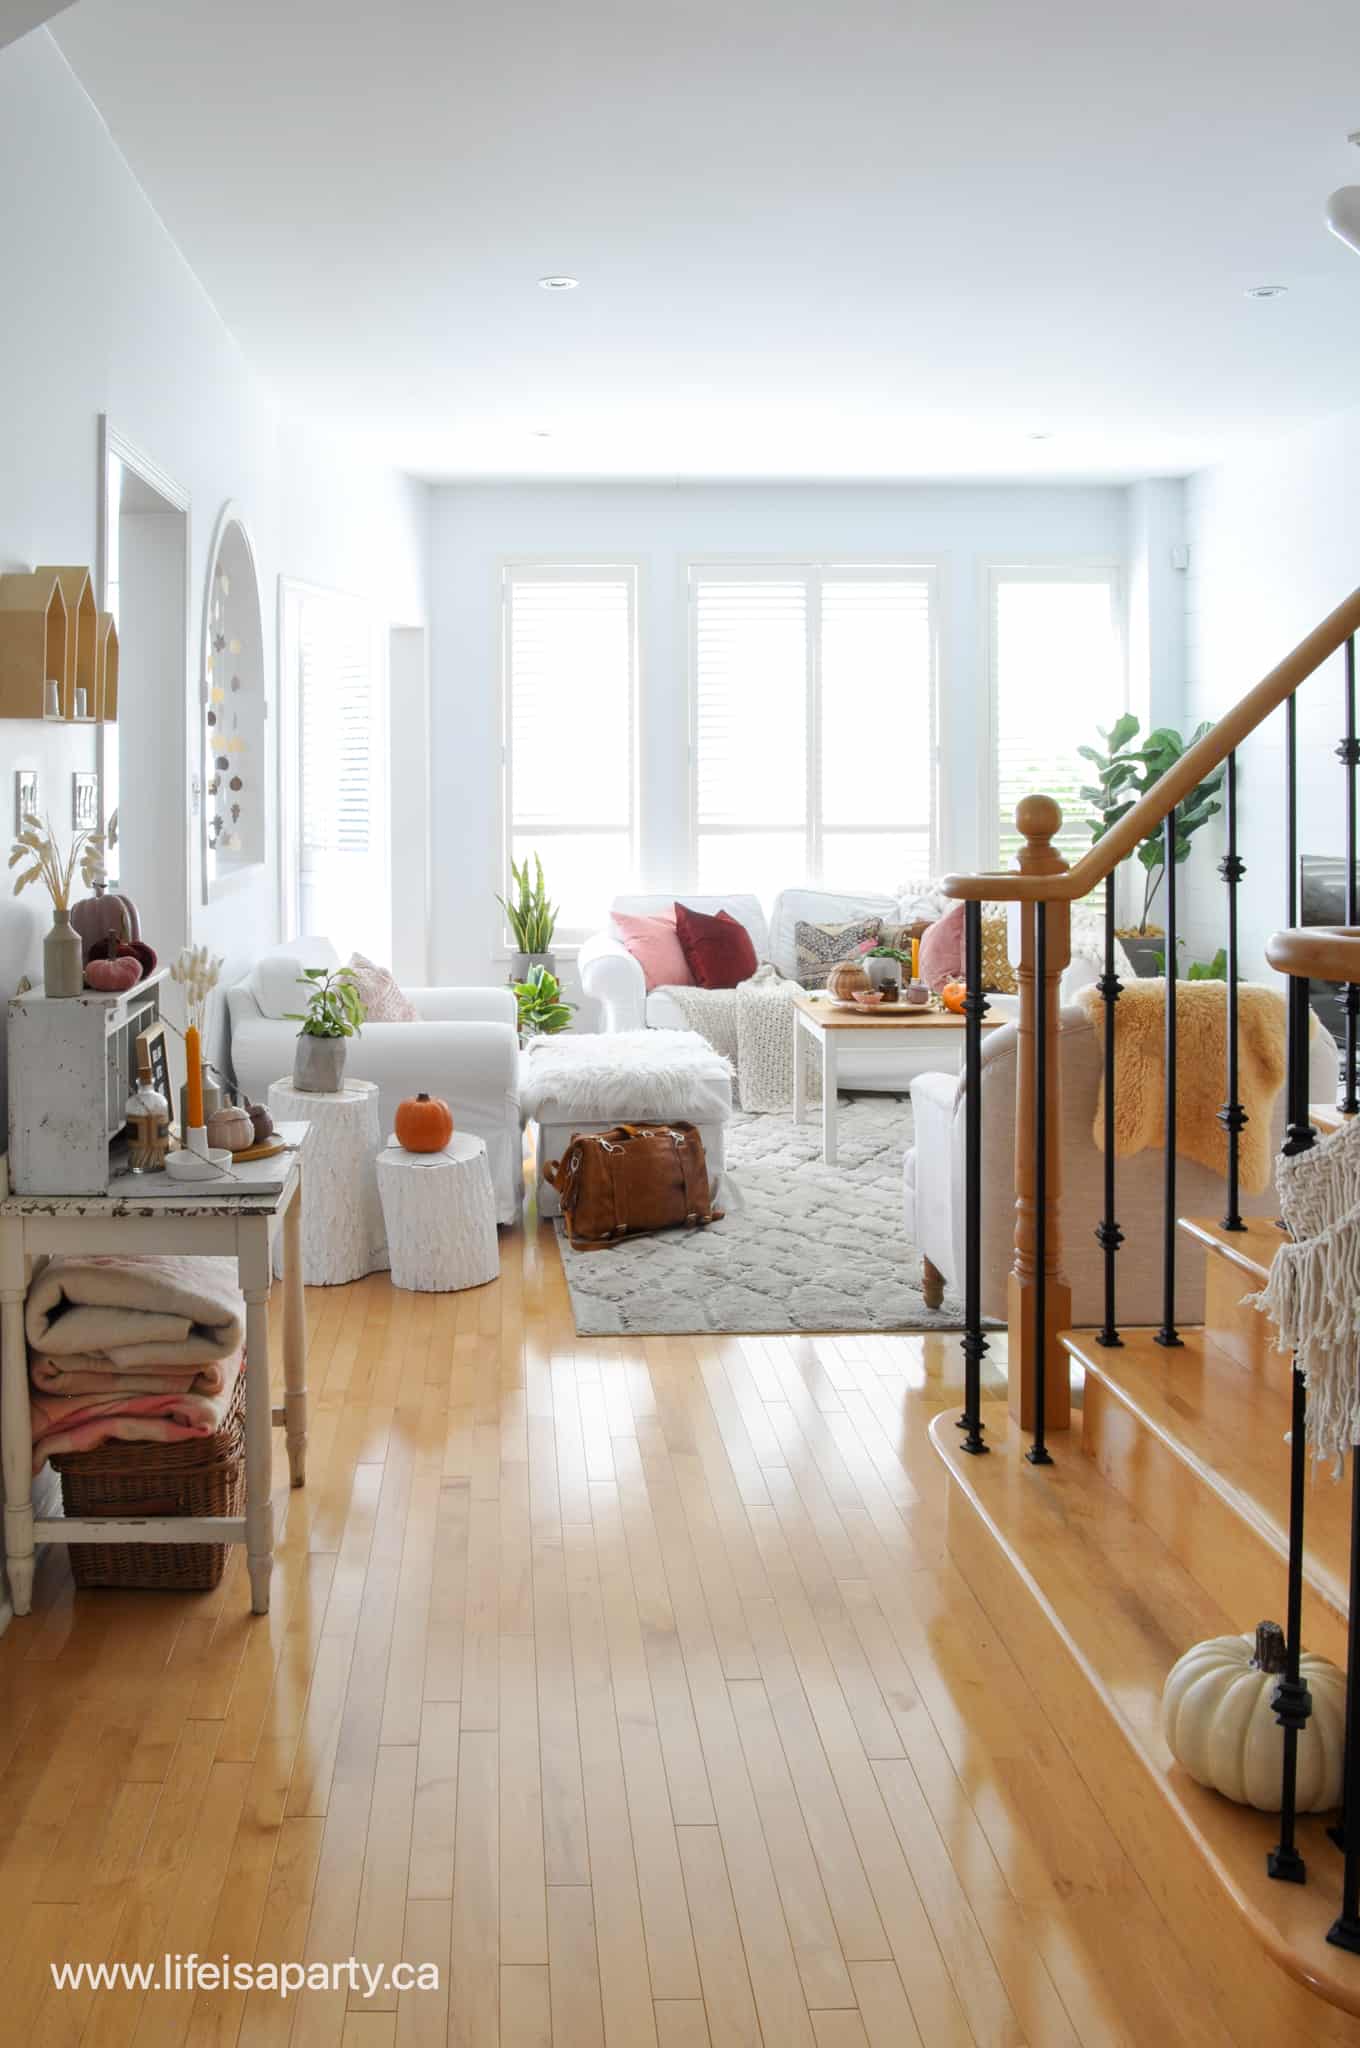
The Living Room

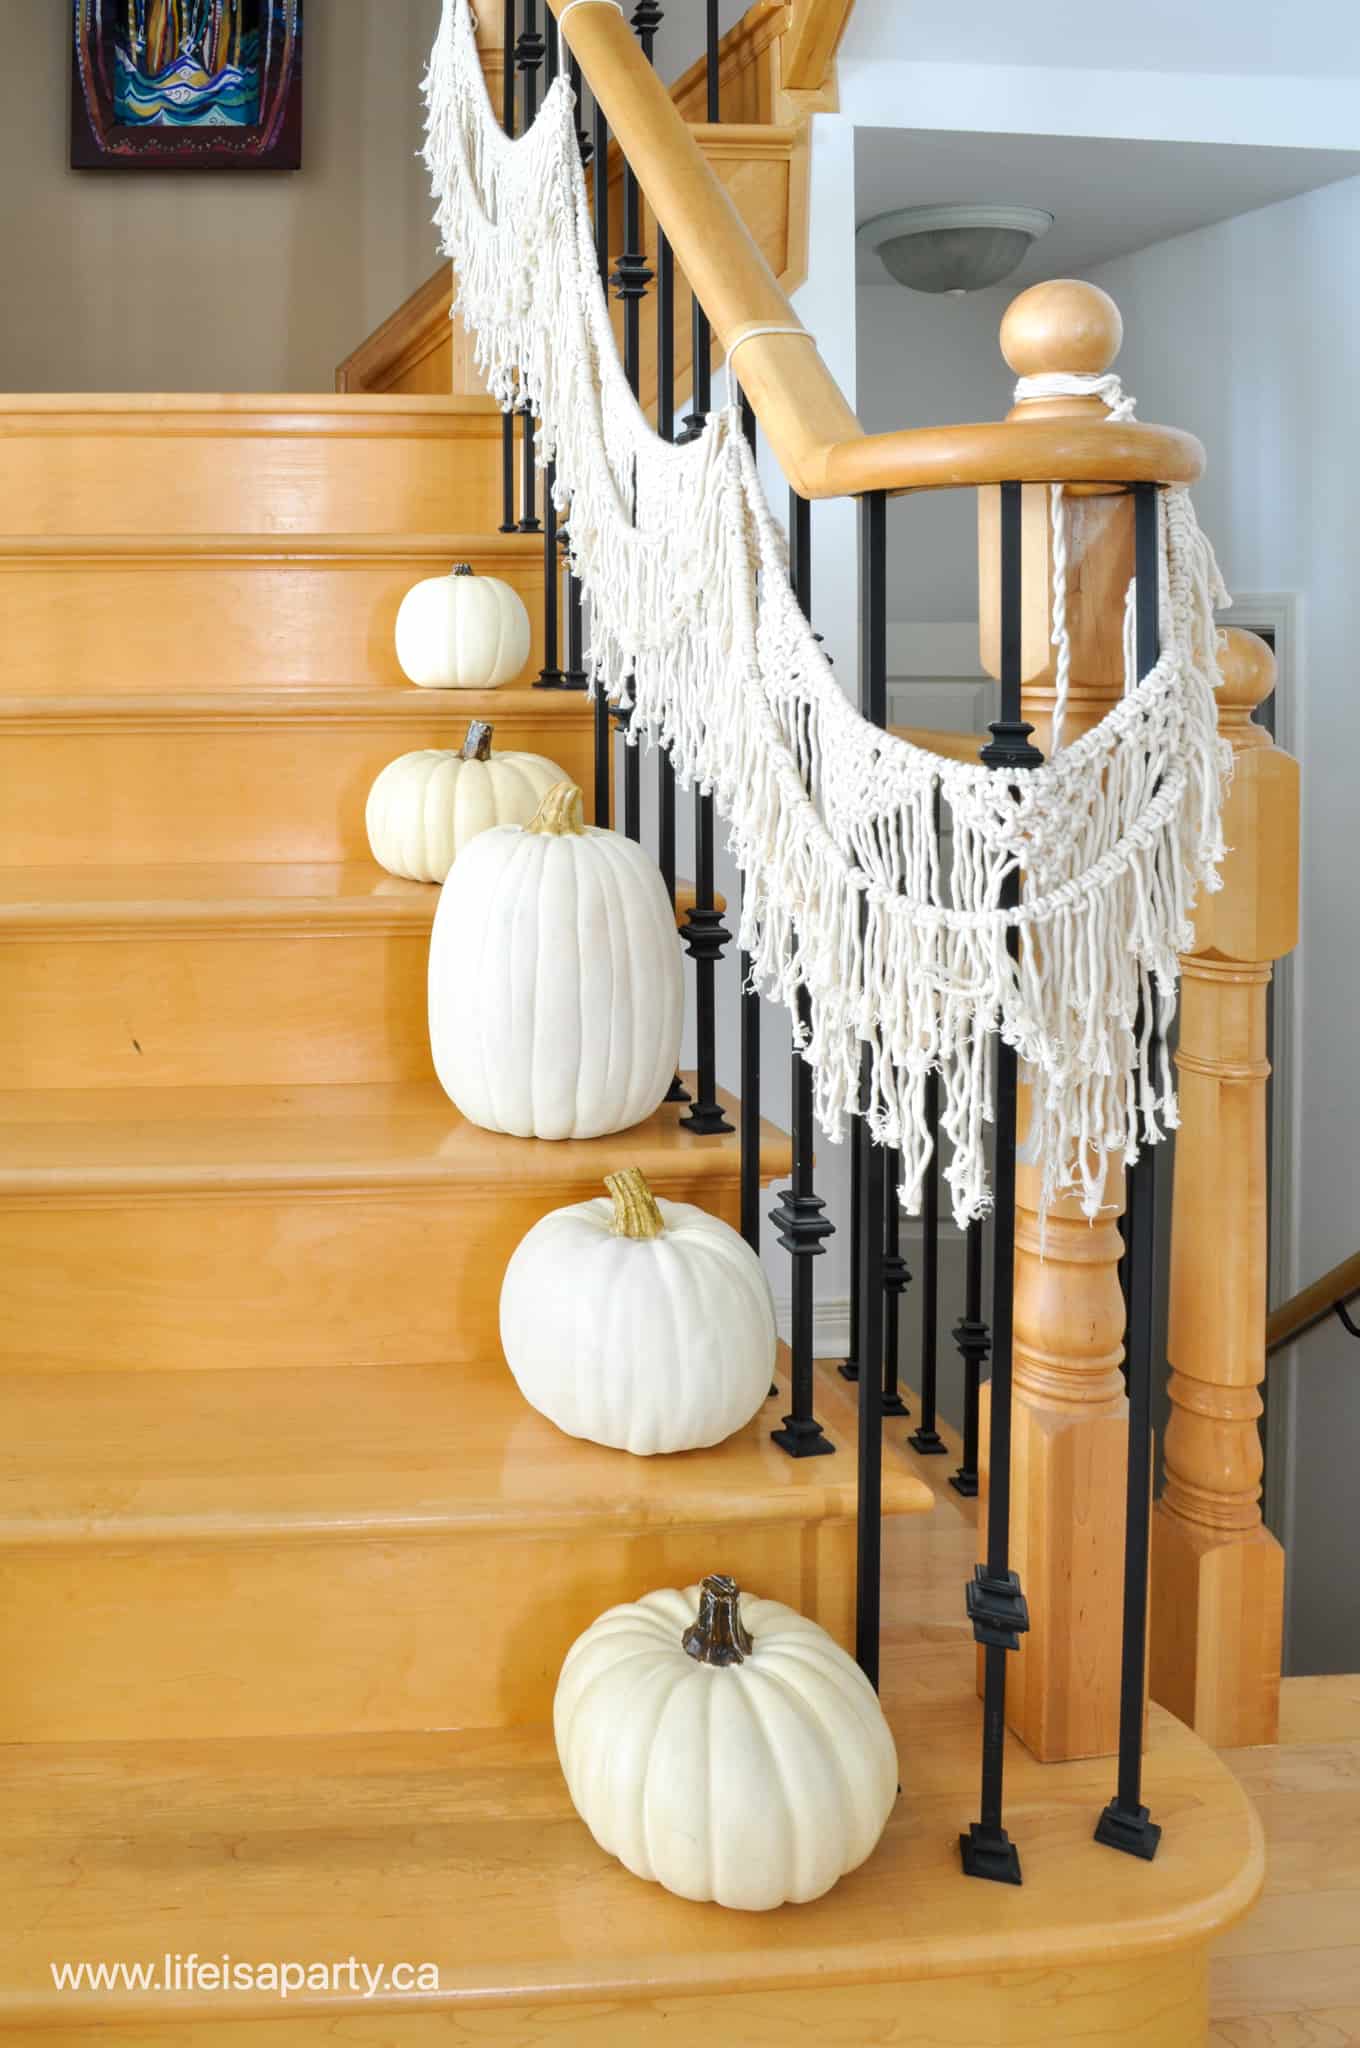
Heading into the living room, past our staircase looking very ready for fall with lots of pumpkins here too.  I've kept up the macrame garland because it's so pretty and boho.  You can see how I made the macrame garland here.  It looks great paired with these faux white pumpkins.

fall decorating ideas
fall staircase with pumpkins

We also have a little wall and side table on the way into the living room.  It's a fun spot to decorate seasonally.  It's got a pretty mix of pumpkins, including some of the velvet ones and these sweet little wicker ones.  I had some old orange wicker pumpkins in my fall decoration boxes last year, and pulled them out for a little makeover.  I used some spray paint and now I'm so in love with them.  Wicker is a great boho touch too, along with the pretty dried grasses.

boho fall decorating ideas

Pillows

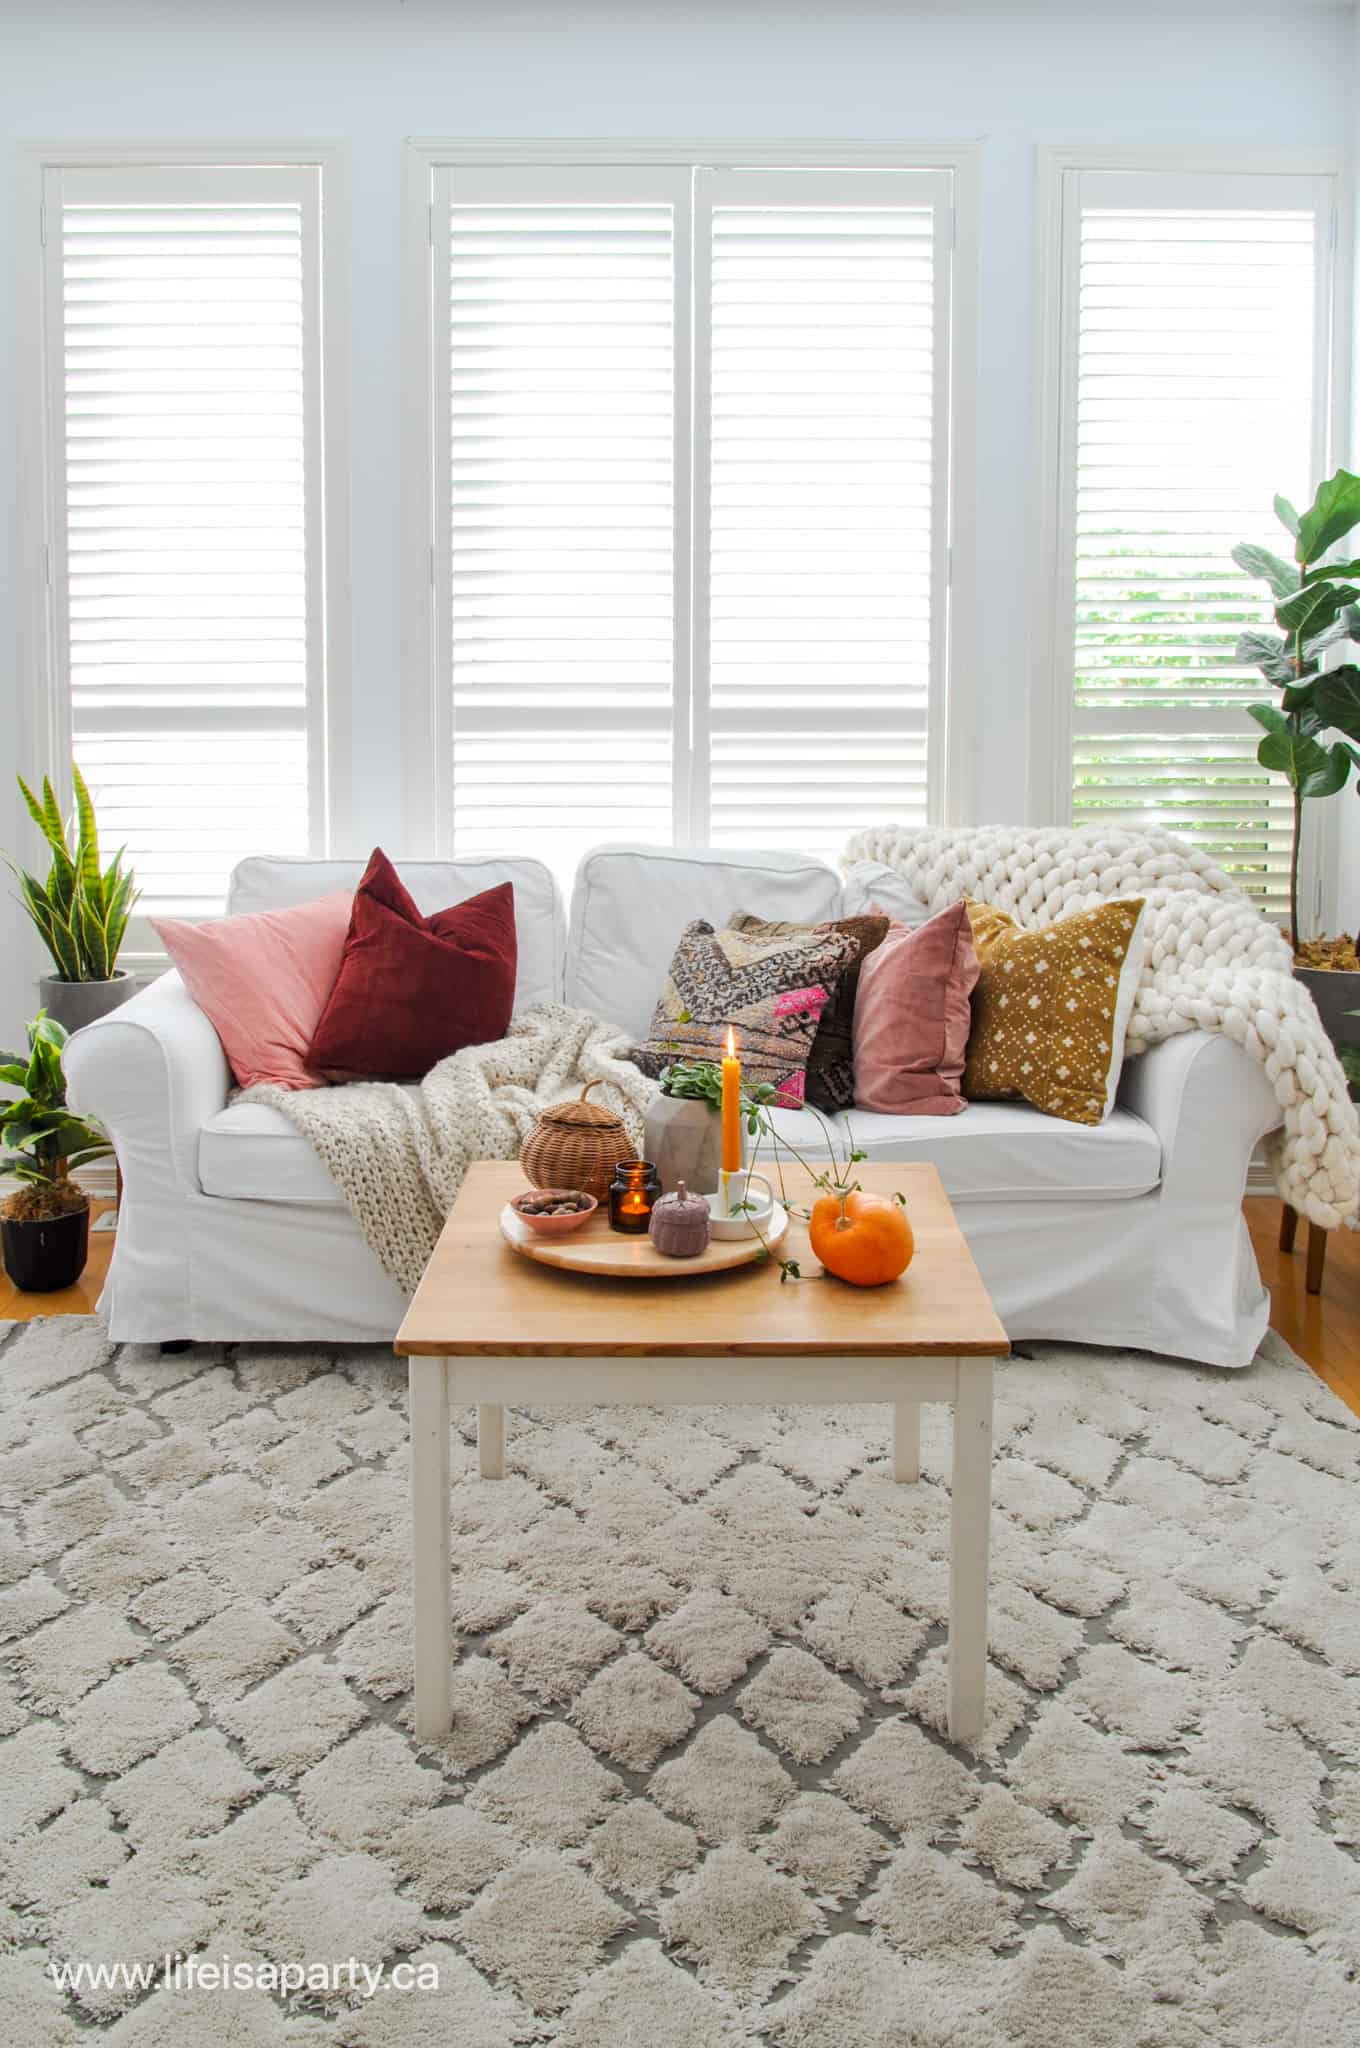
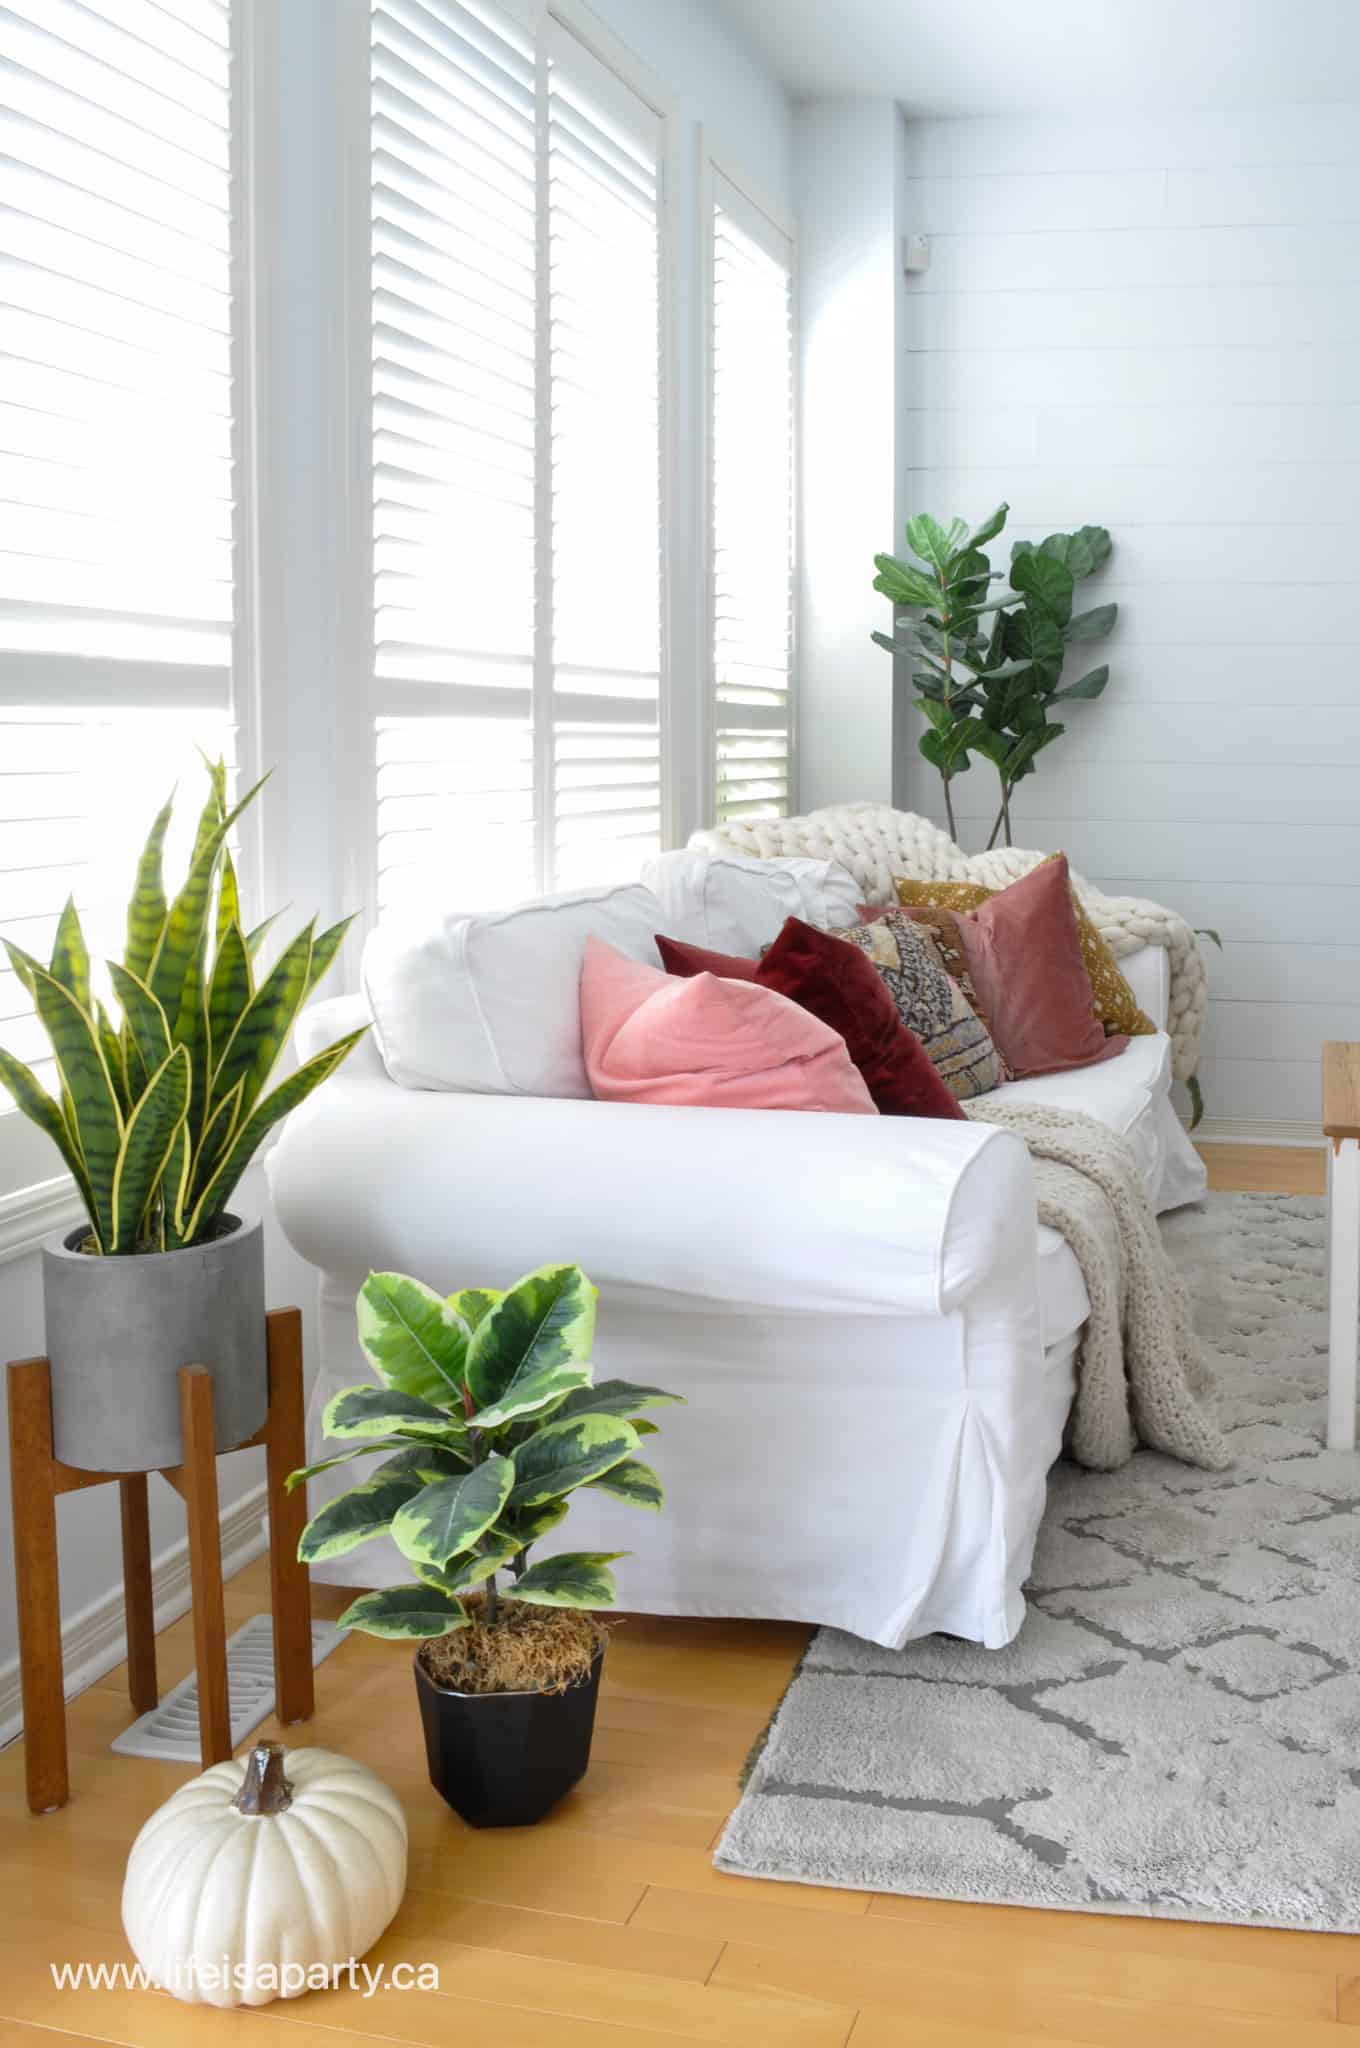
Into the living room and my favourite spot this season might just me our cozy couch.  It's an inexpensive slip covered couch from Ikea, but what I really love about it is how easy it is to change up with pillows.  This season my whole colour scheme was really created here.  I have a slight obsession with pillows.  Like I own far too many to count kind of obsession.  I often start the whole scheme of the room from a new pillow.  In fact a few years ago I was talking to my sister about my "pillowscape" and she stopped me to ask if that was really a word?  Well, if it's not, it really should be.  

pink peach mustard yellow rust fall decor

My pillowscape this year began with these fun vintage rug pillows from Turkey.  They add great texture.  Throw in a gorgeous mustard yellow mud cloth pillow, and pink fringe covered boho pillow and then all you need is some cozy velvet in pink, peach, and rust.  Oh and we can't forget the knit throws.  I love how it turned out this season.  And it's perfect for all the fall movie watching and snuggles.  

fall decorating ideas

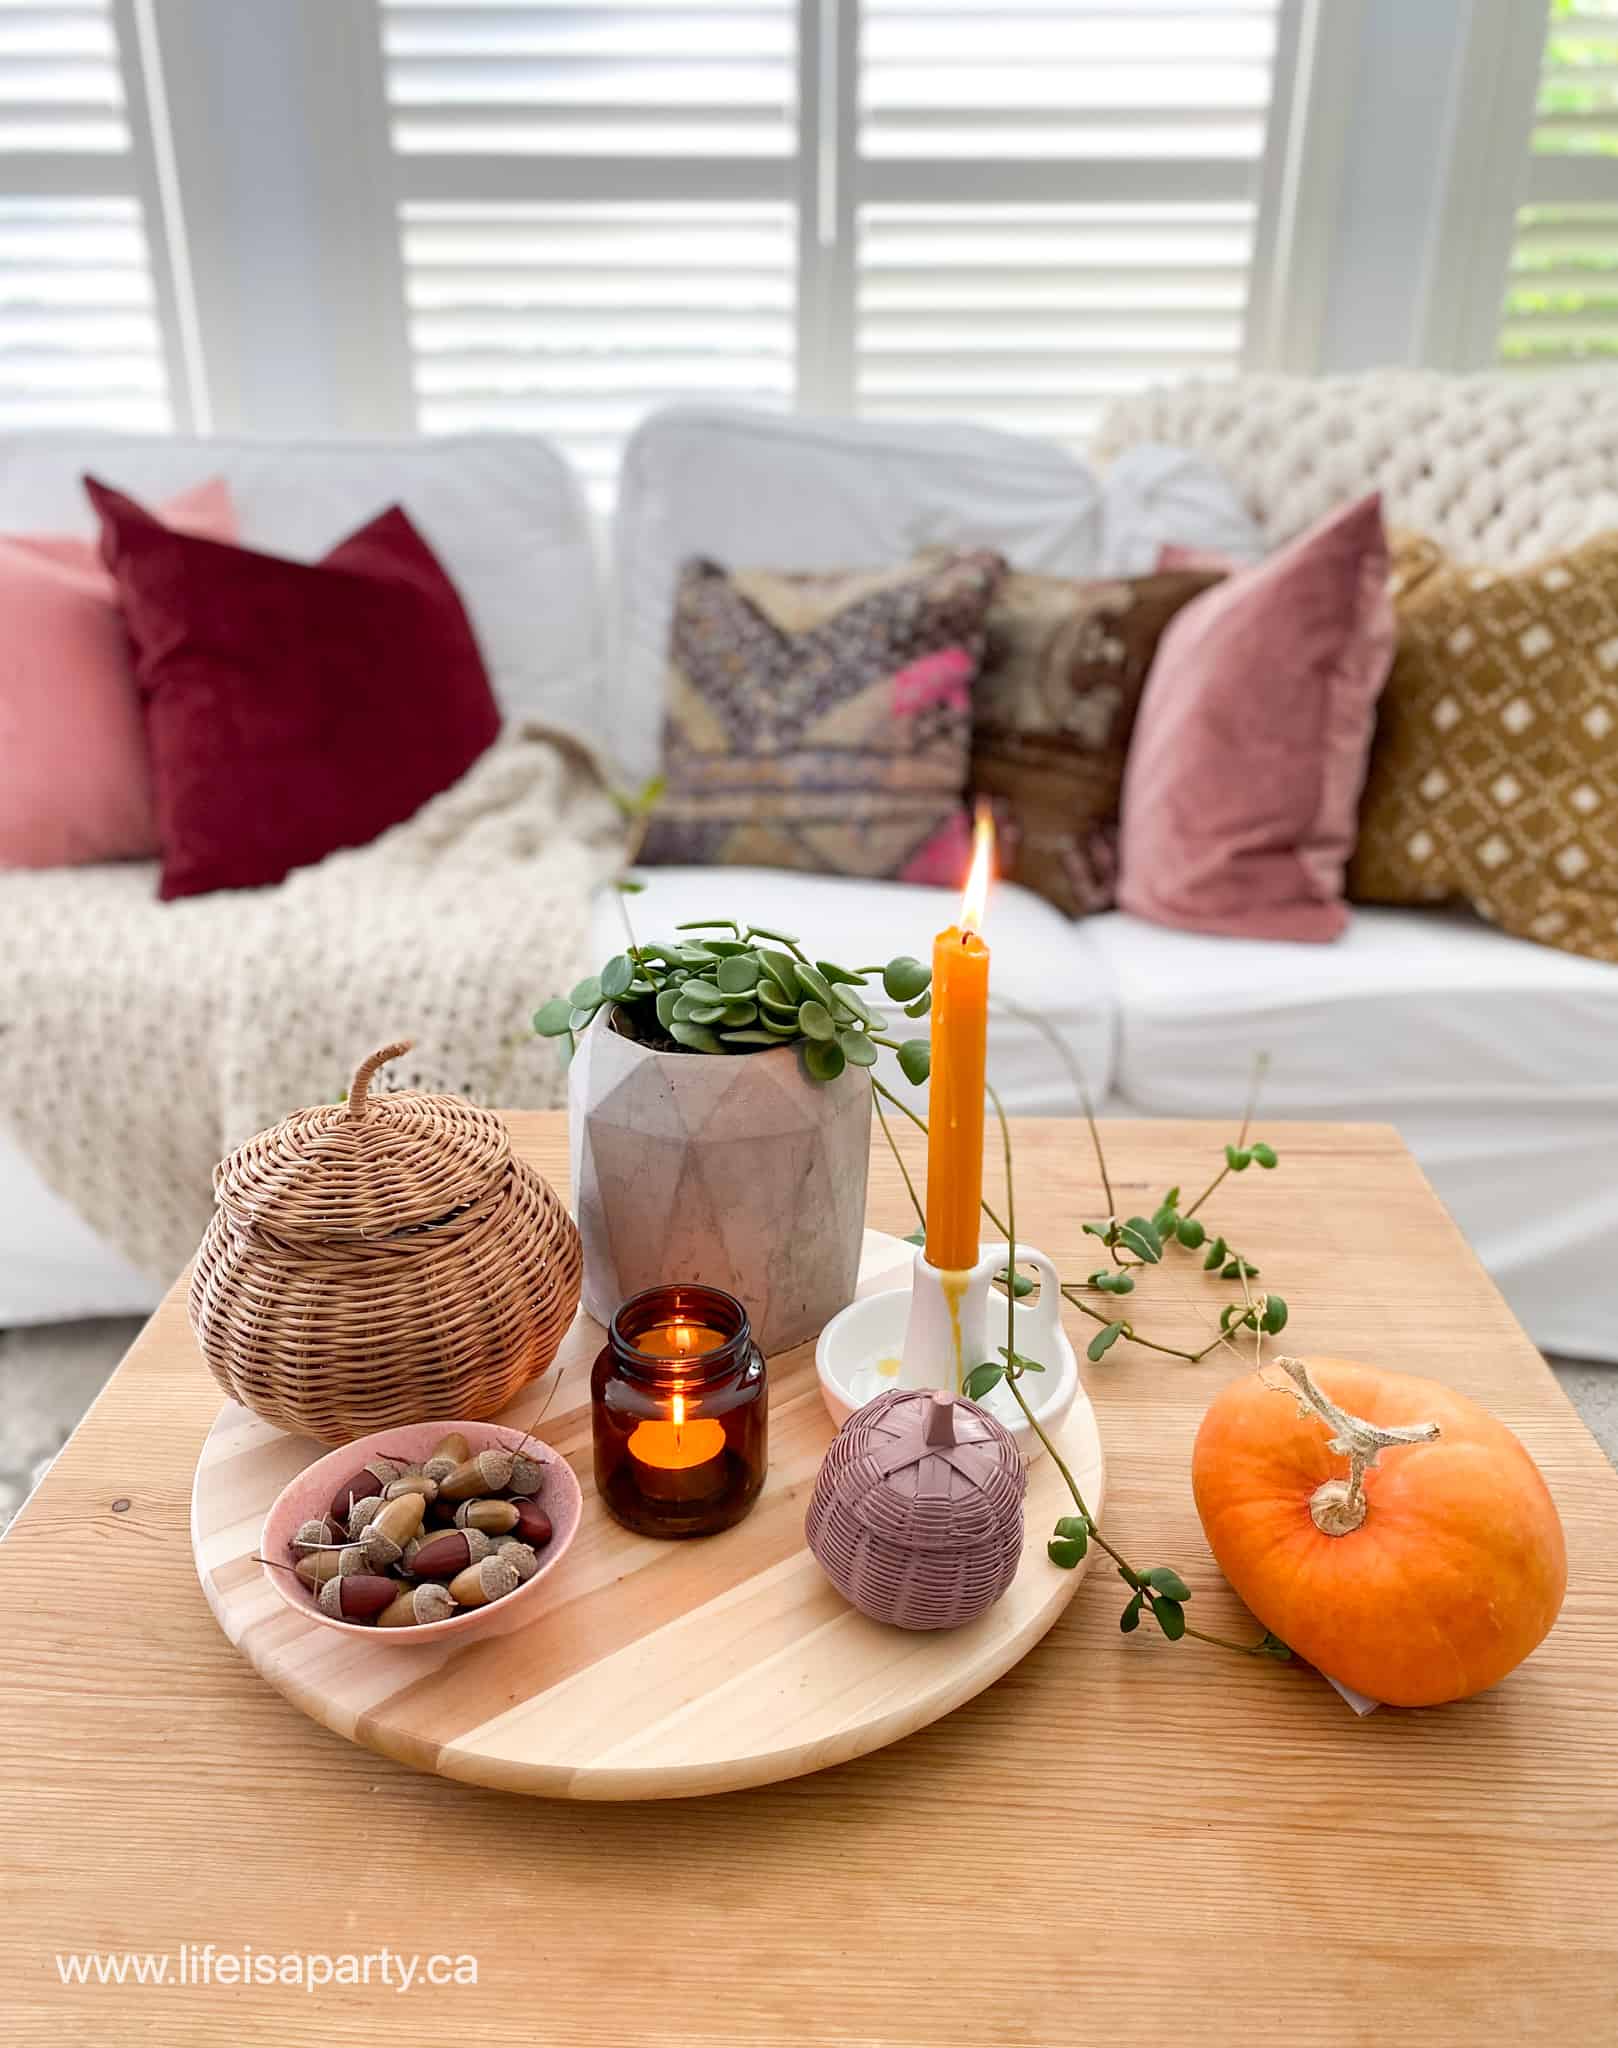
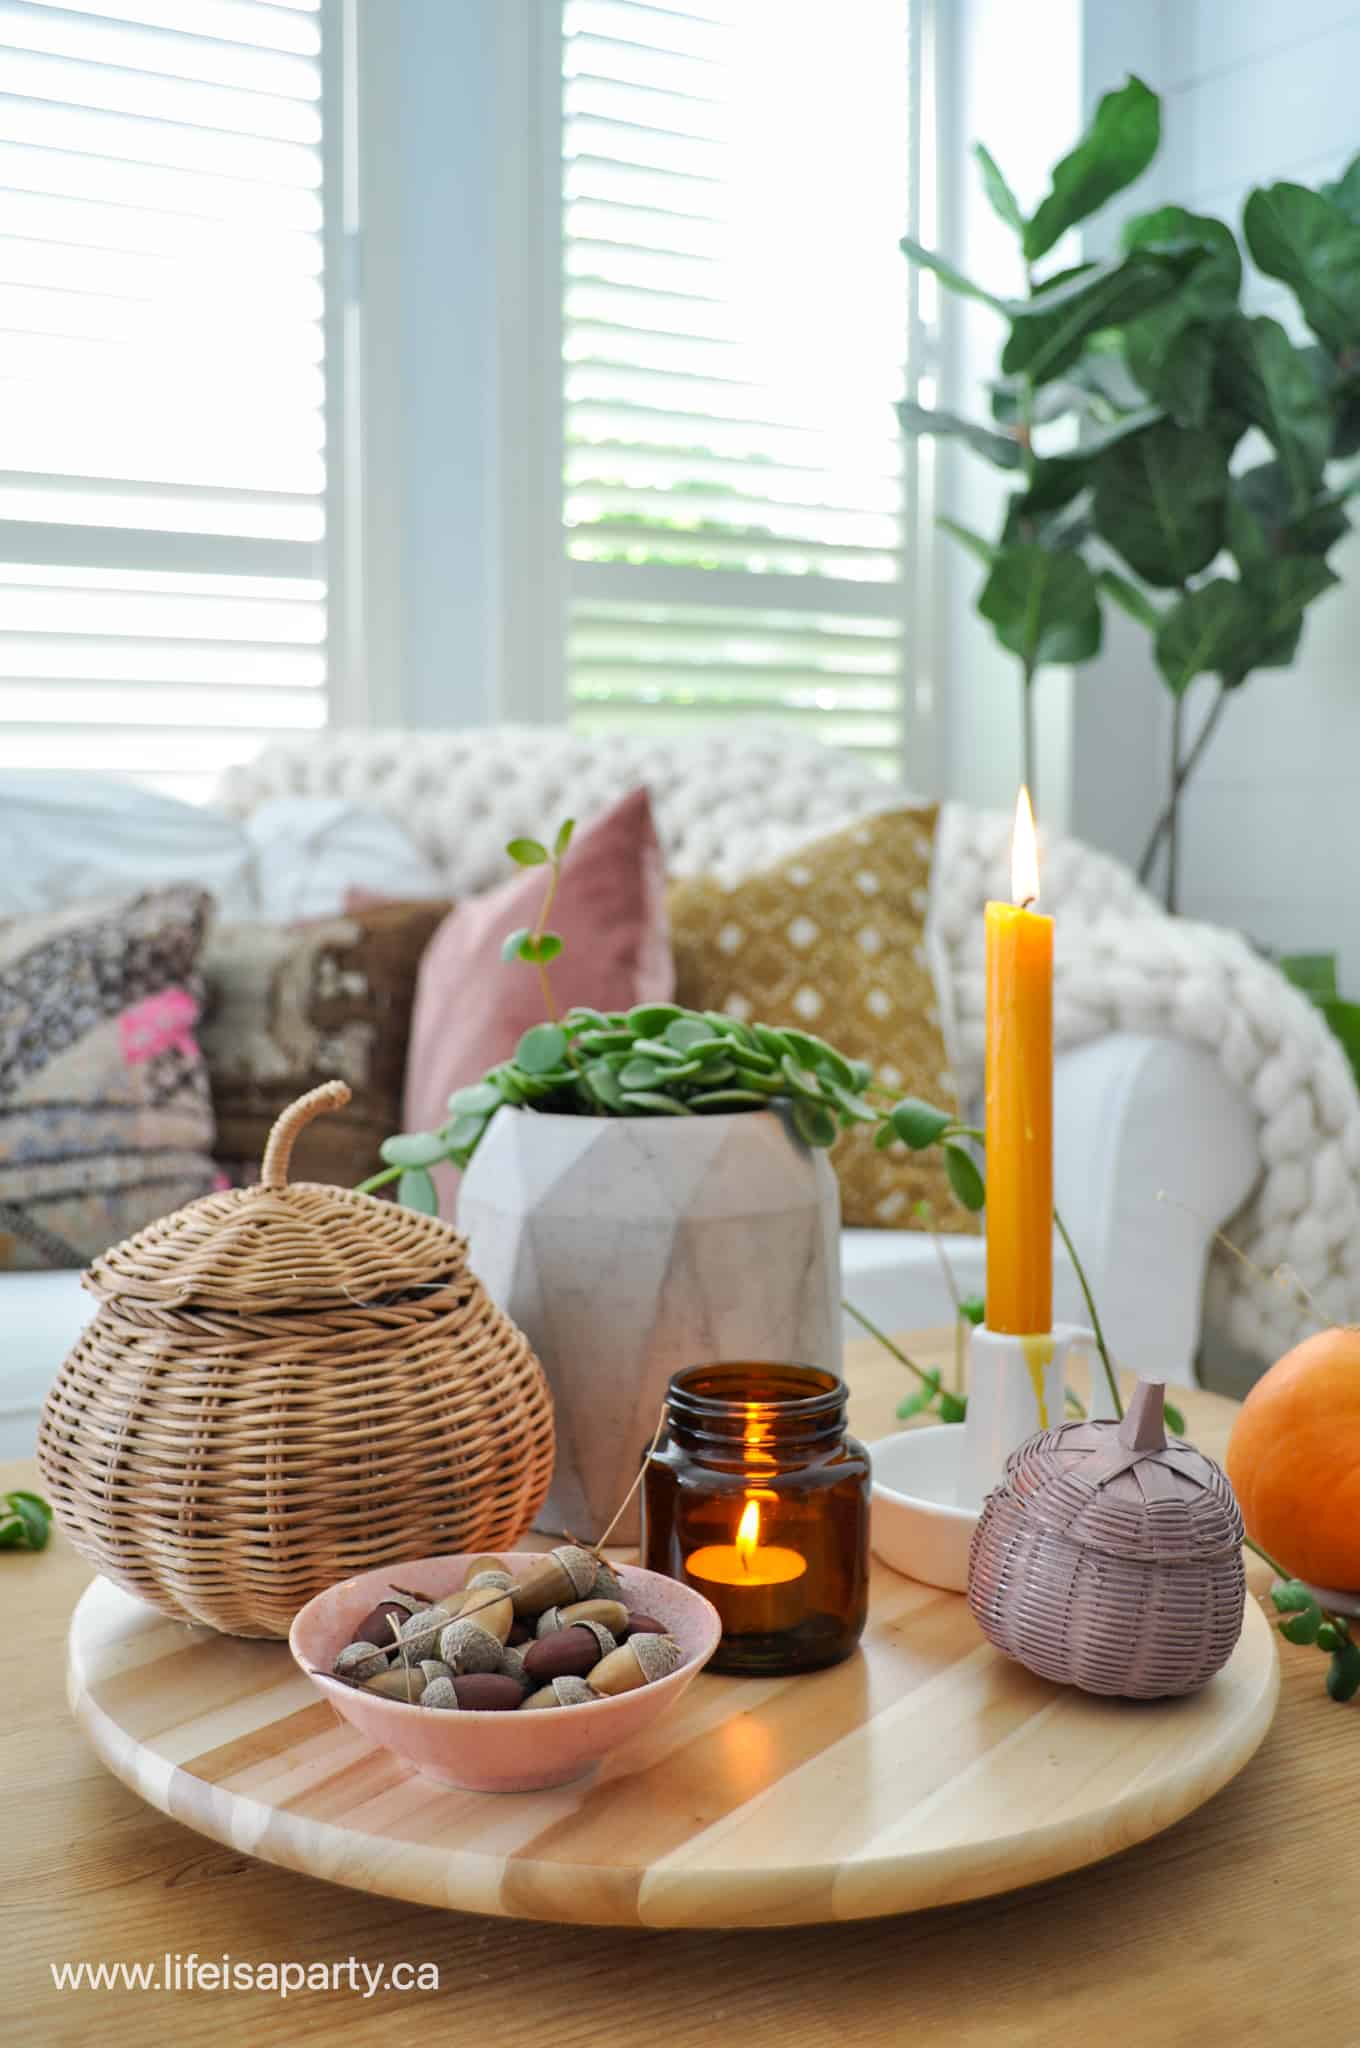
It's also the perfect backdrop for the coffee table.  This coffee table decor started with the wood lazy Susan from Ikea, which helps contain and elevate everything.  I picked up the large wicker pumpkin at the craft store and love it here. 

fall coffee table
how to decorate your coffee table for fall

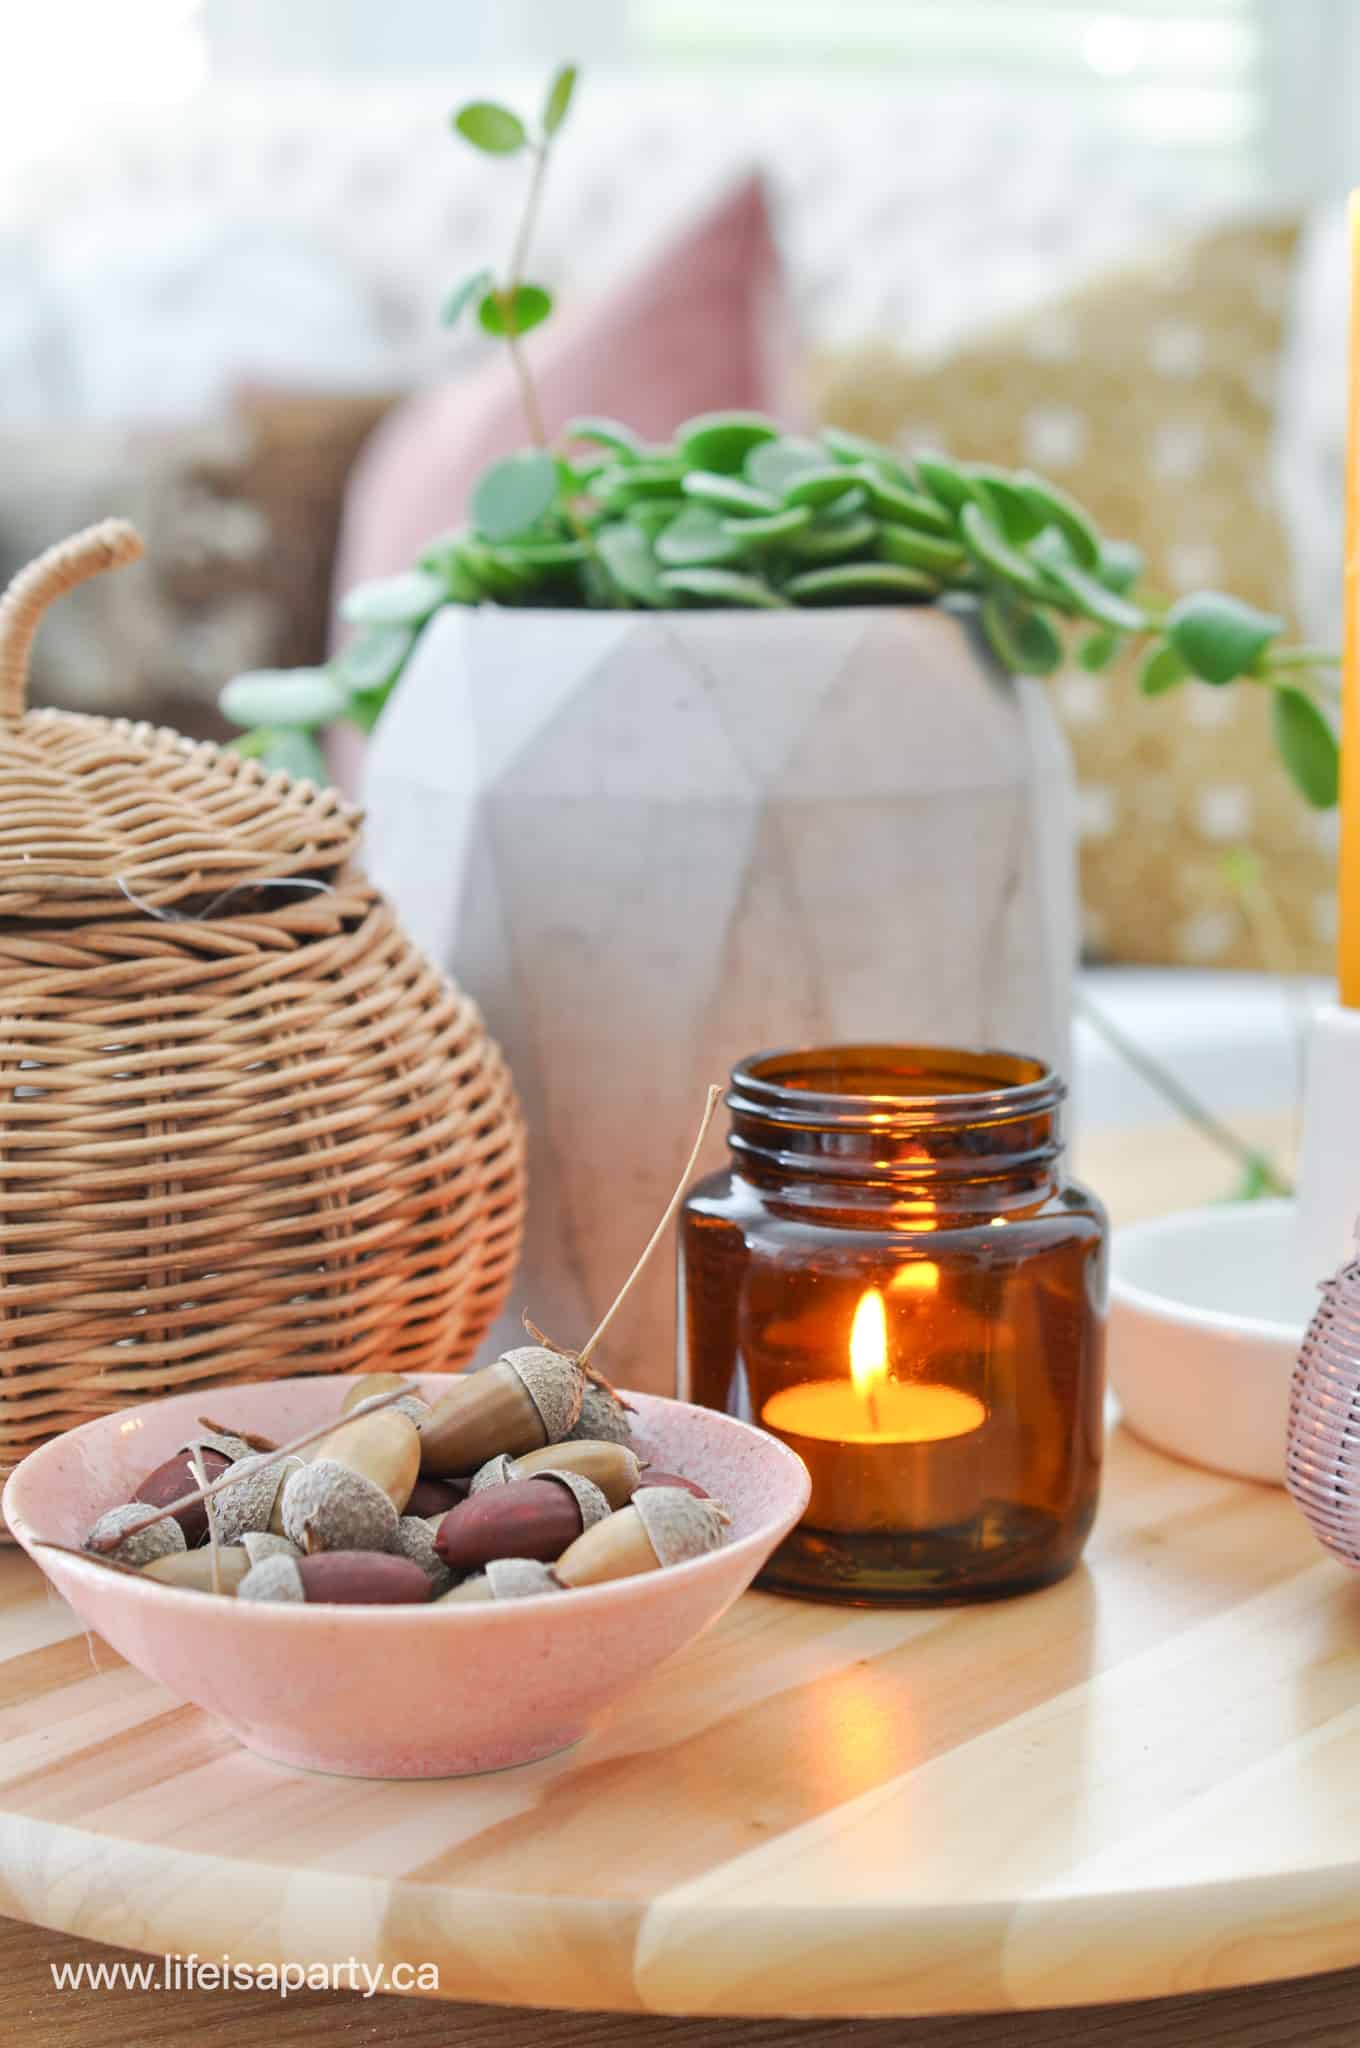
I found the pretty mustard yellow candle thrifting -which is a really great place to find coloured candles.  The amber glass jar is actually an upcycled yeast jar with a tea light in it.  The little pink bowl looks adorable with some acorns in it.  I painted a few of them in the rust just to bring more of that colour in.  And then there's one little peachy coloured pumpkin that I grew in the garden.  

painted acorns

Fireplace

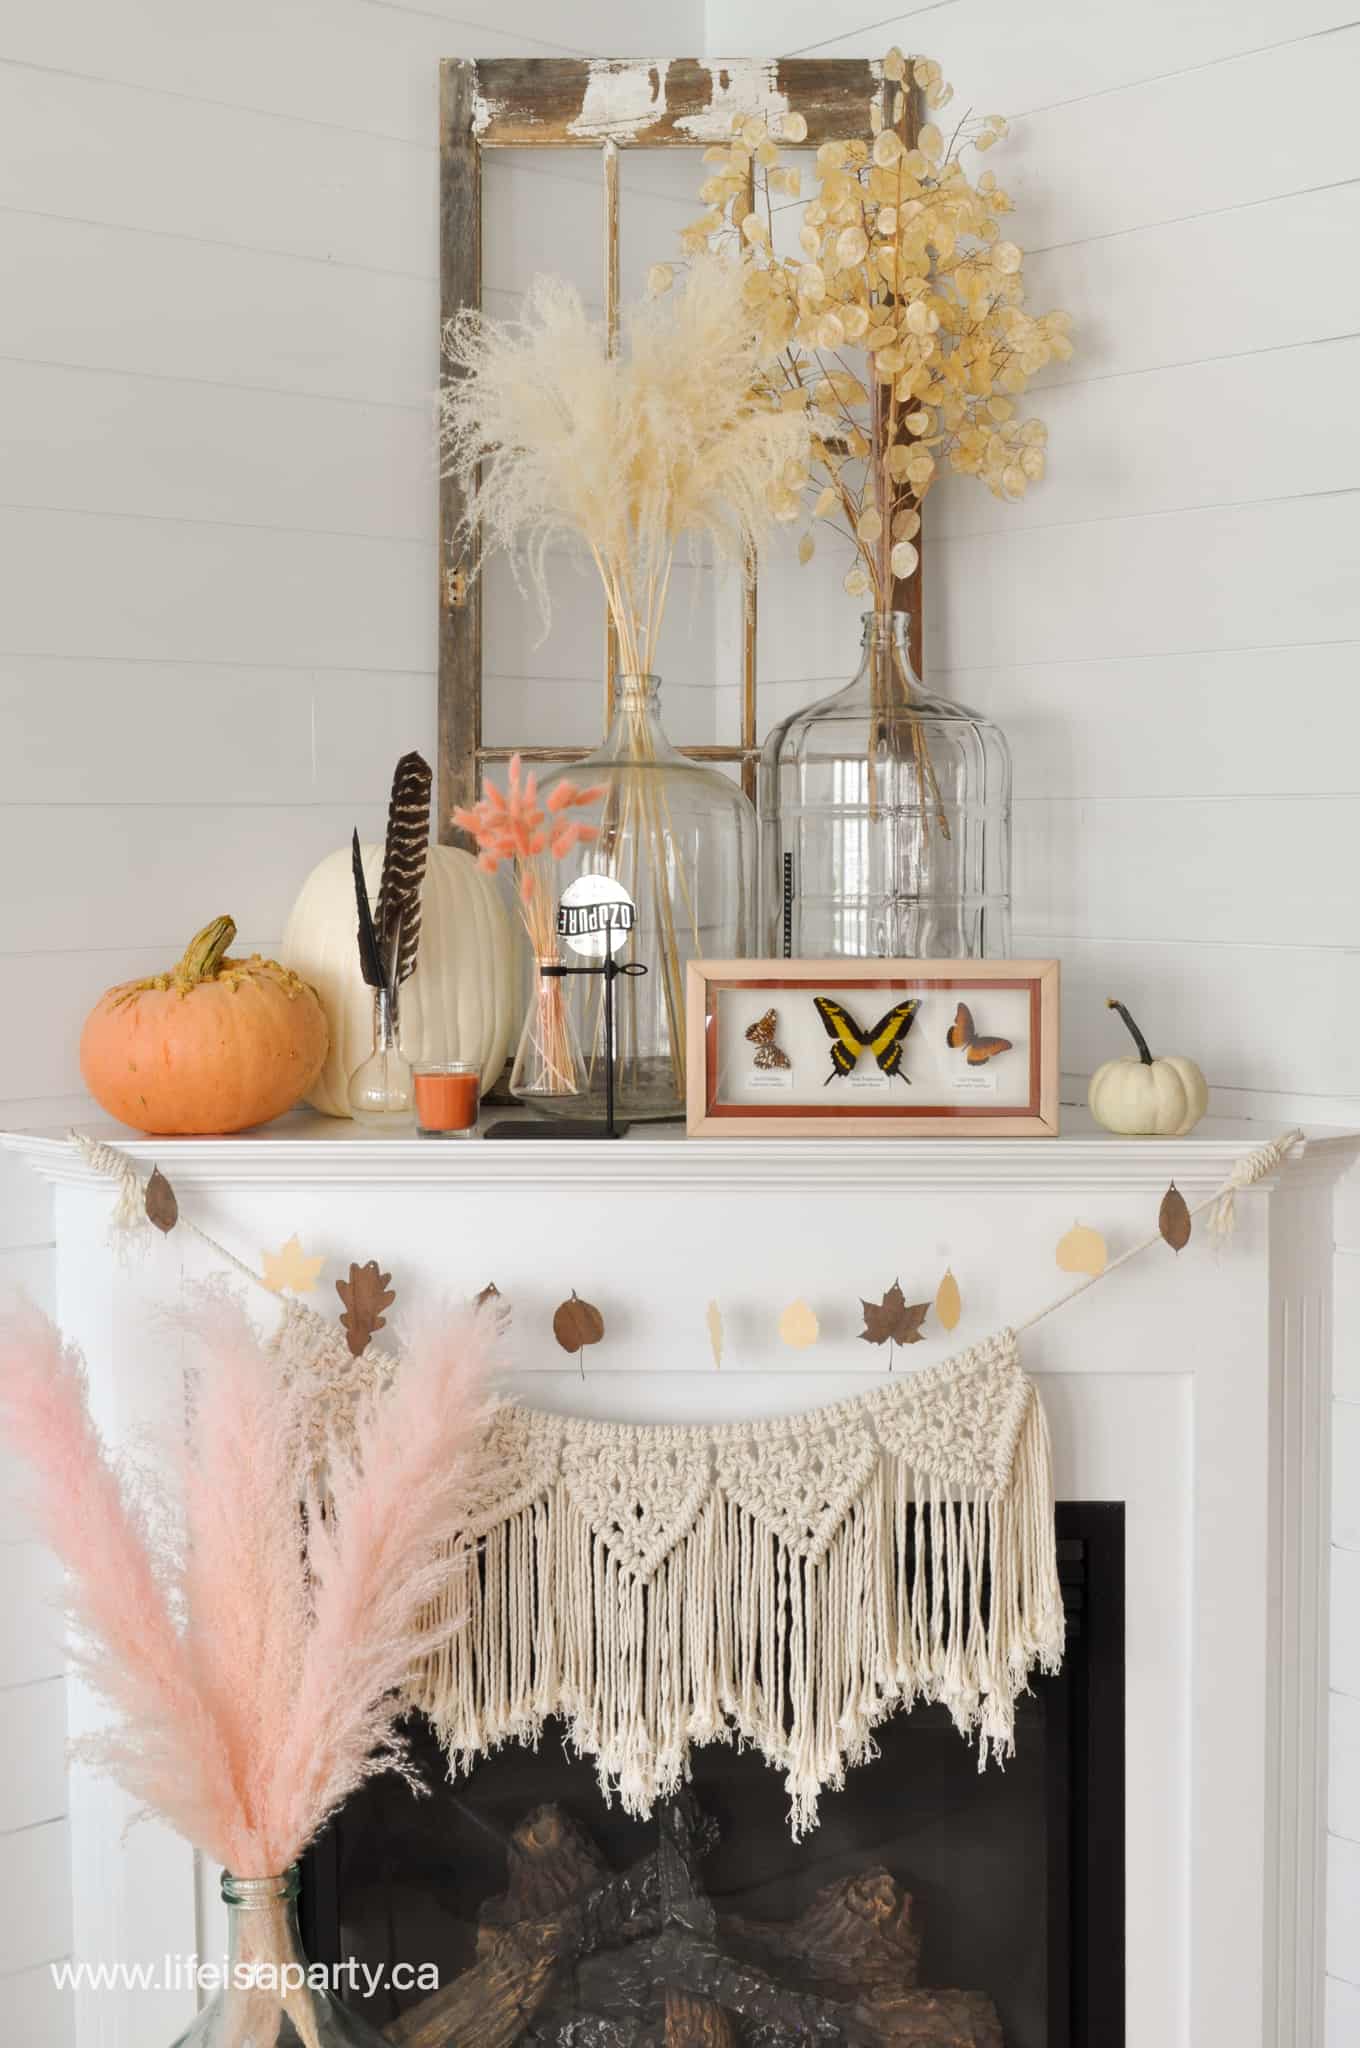
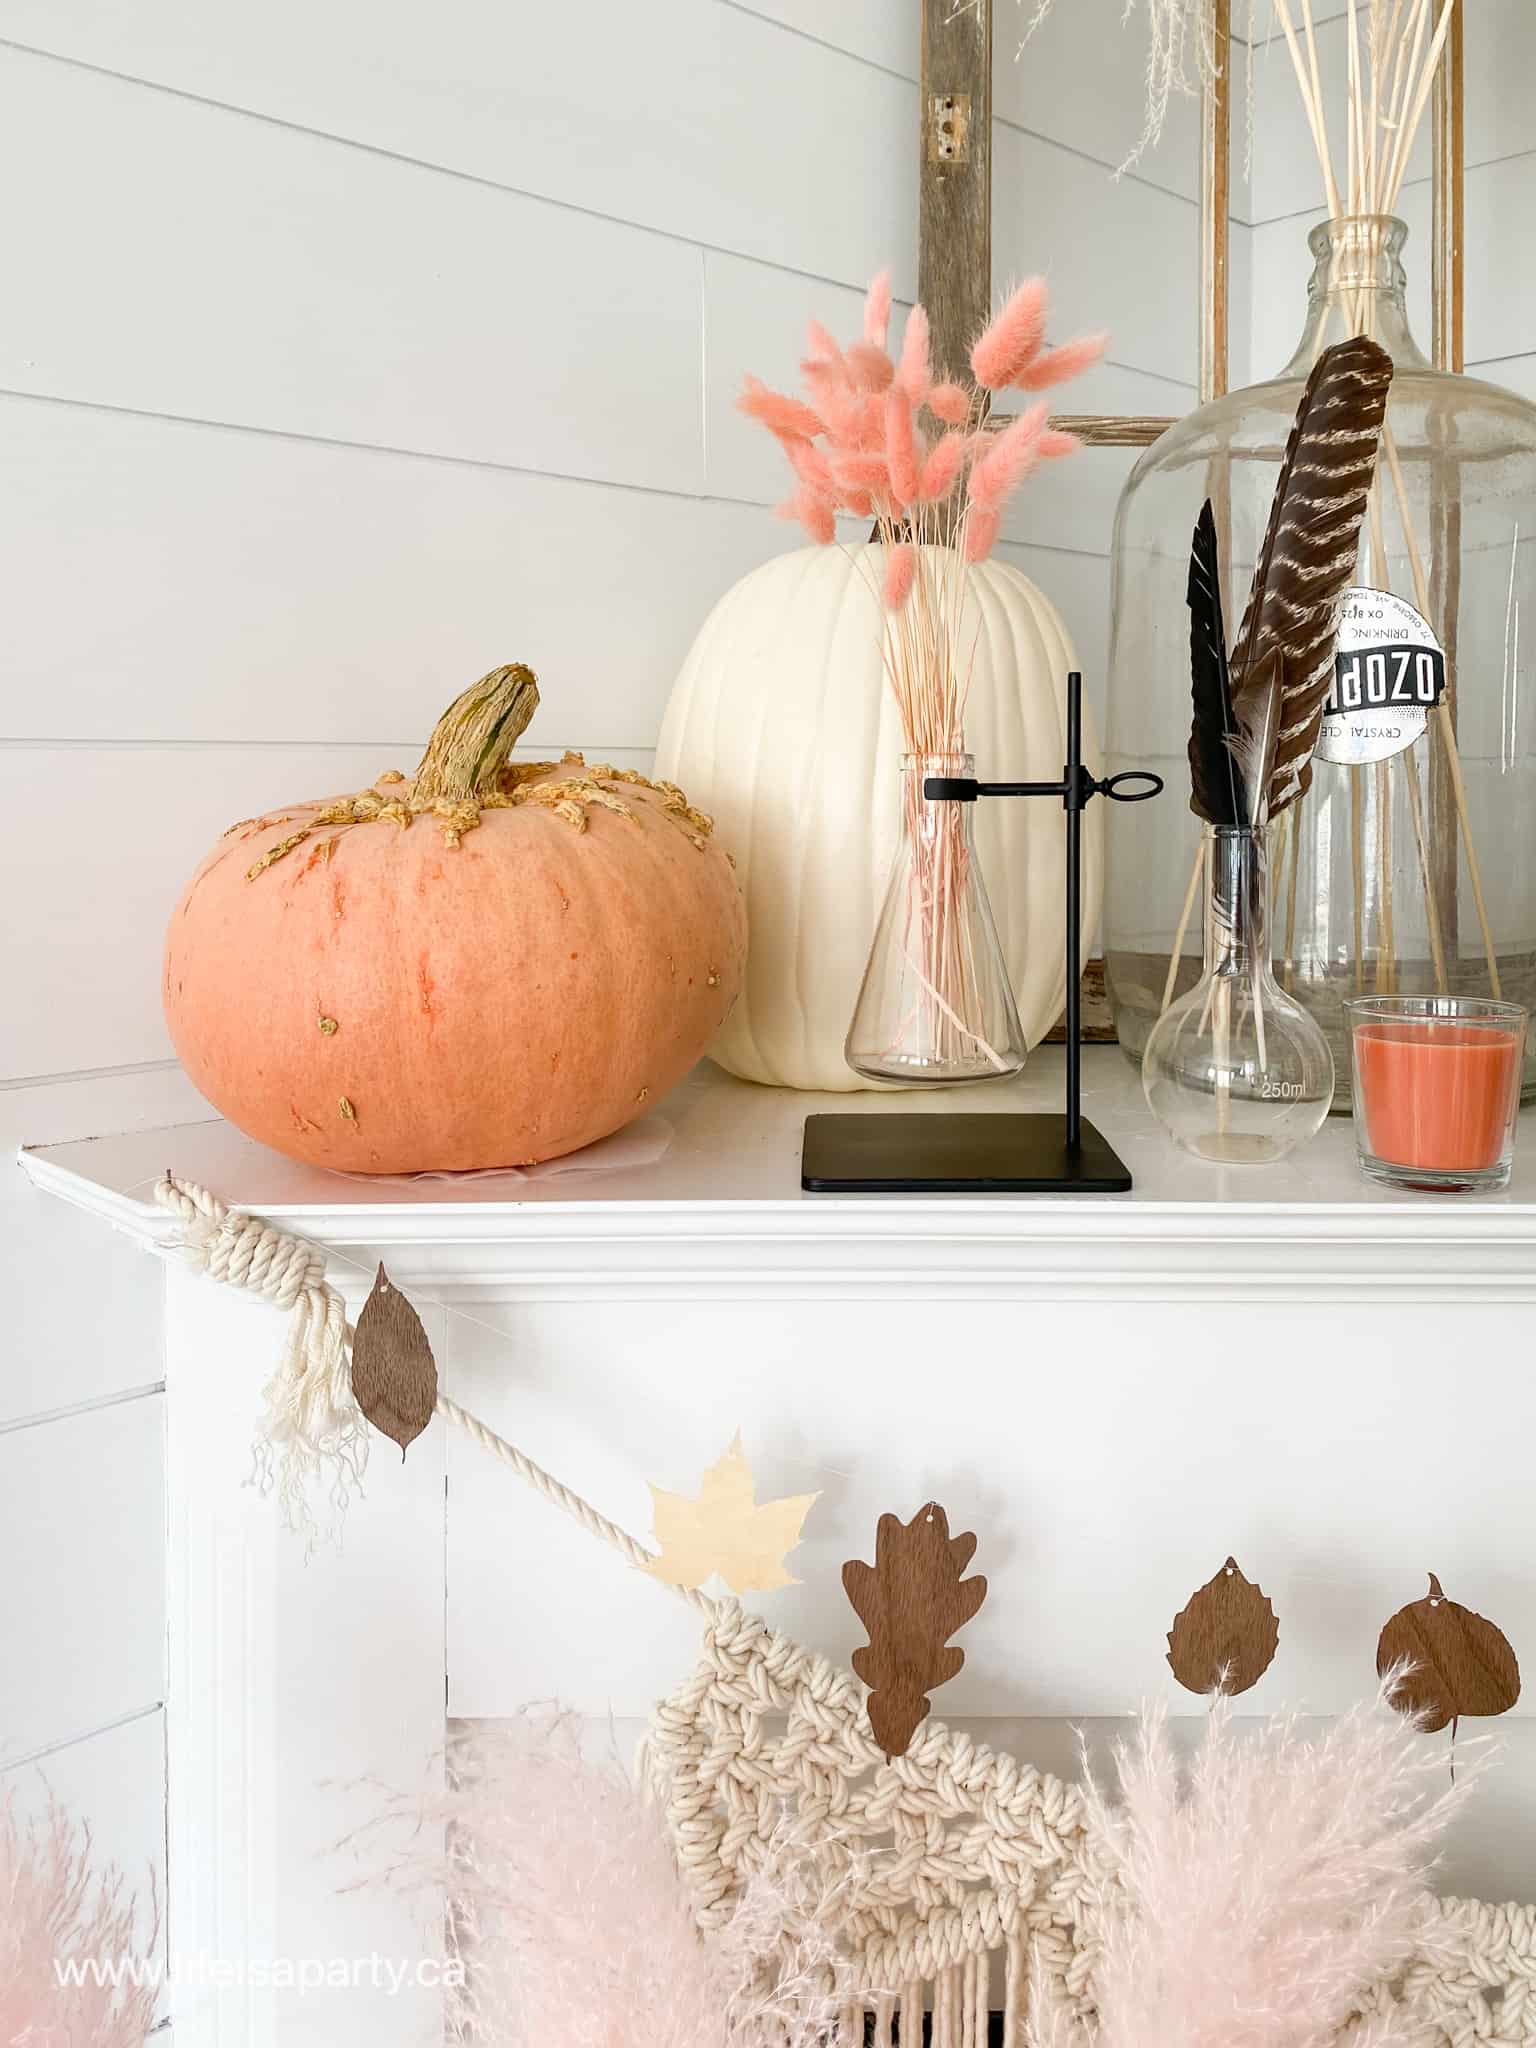
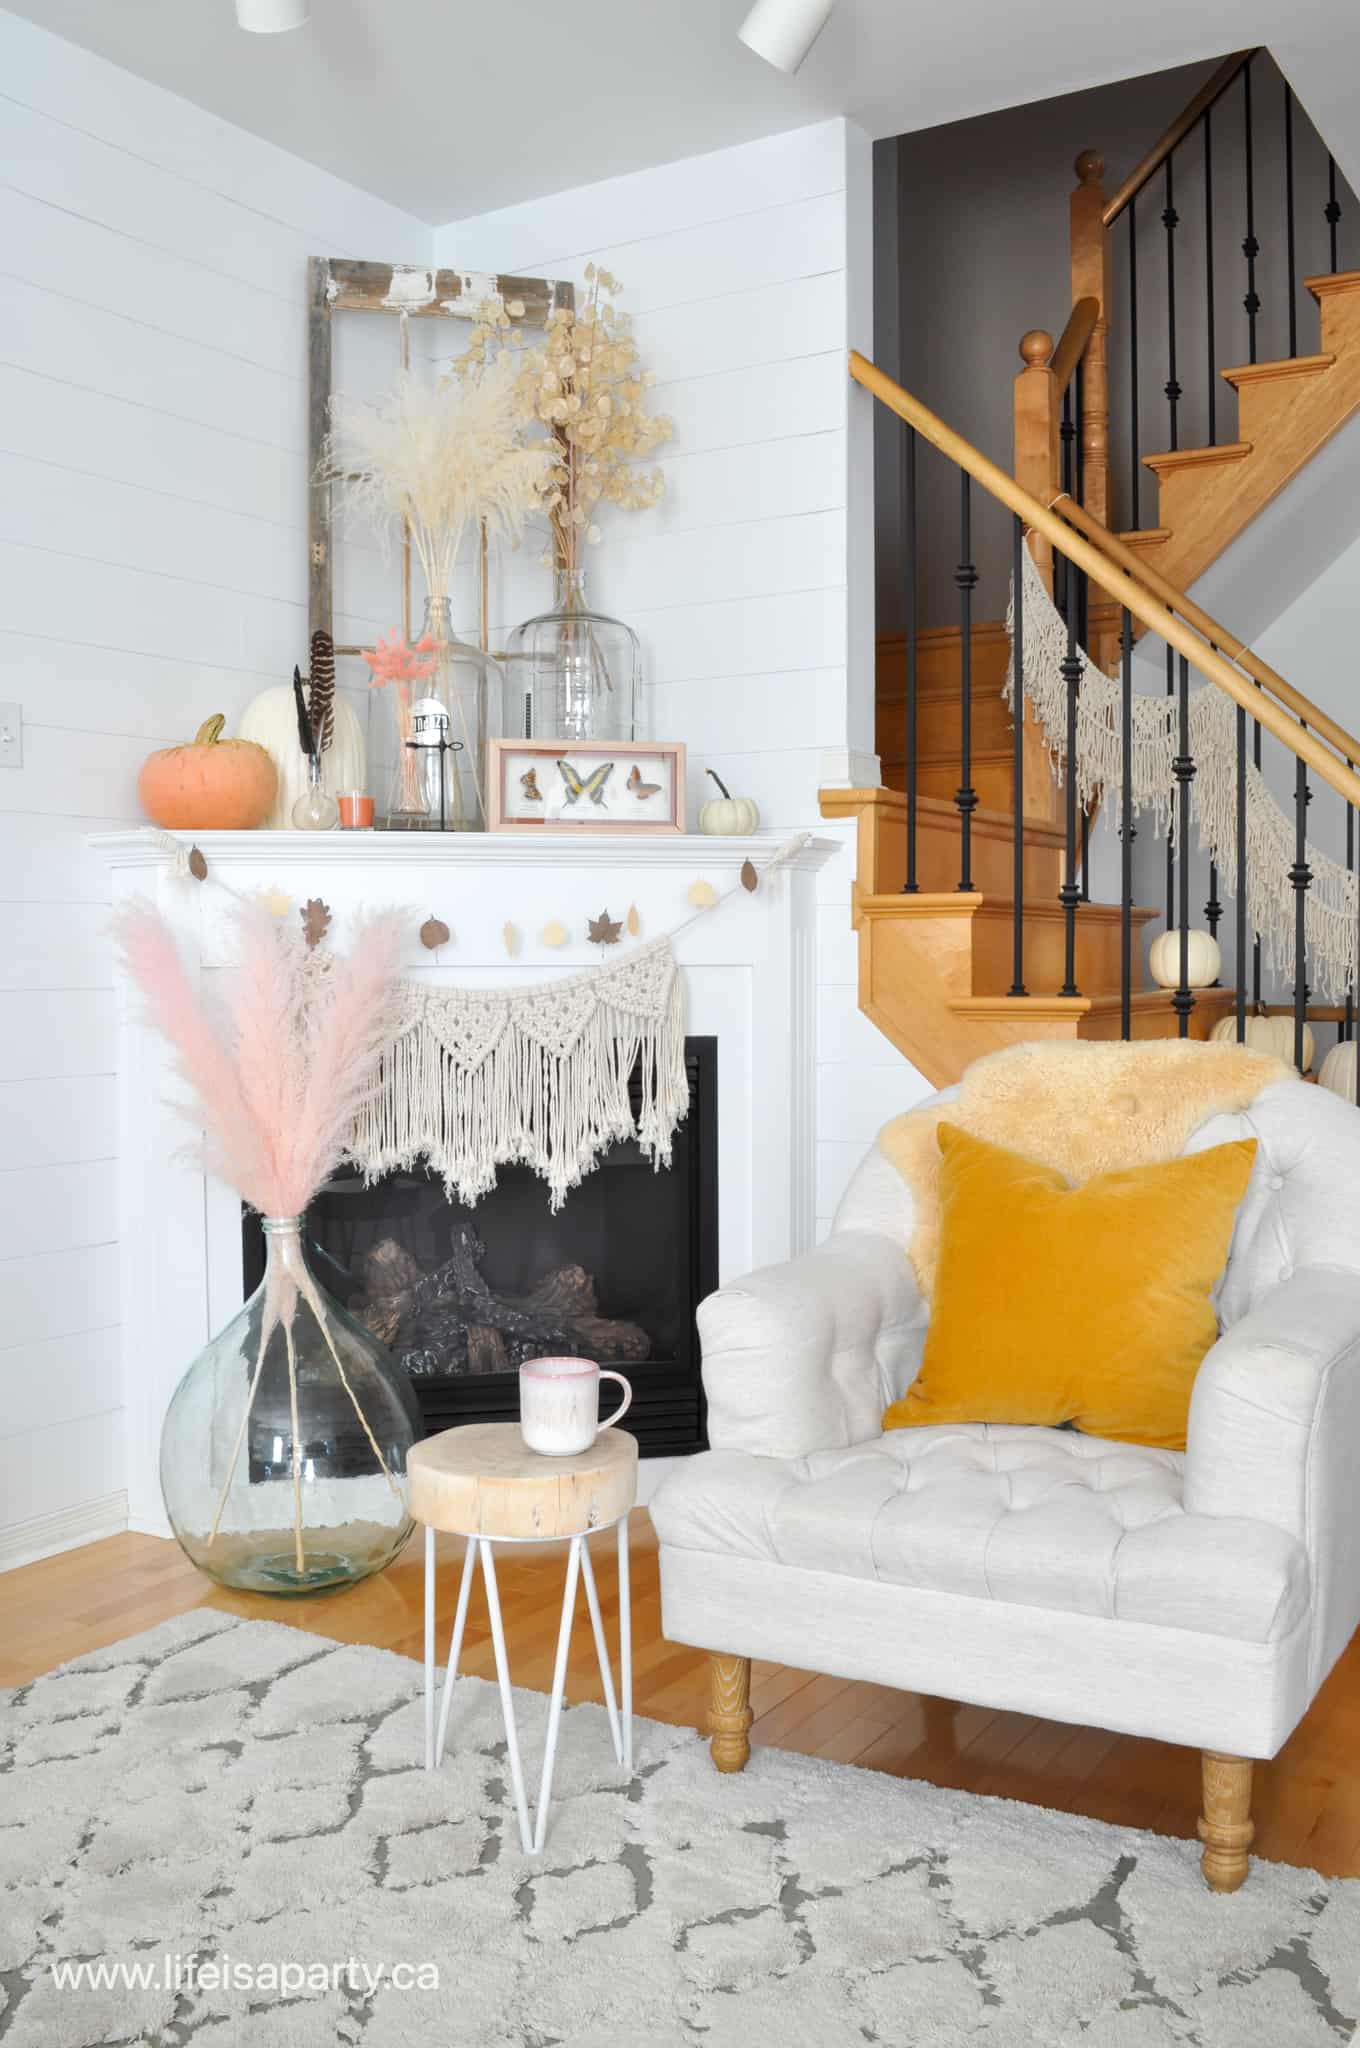
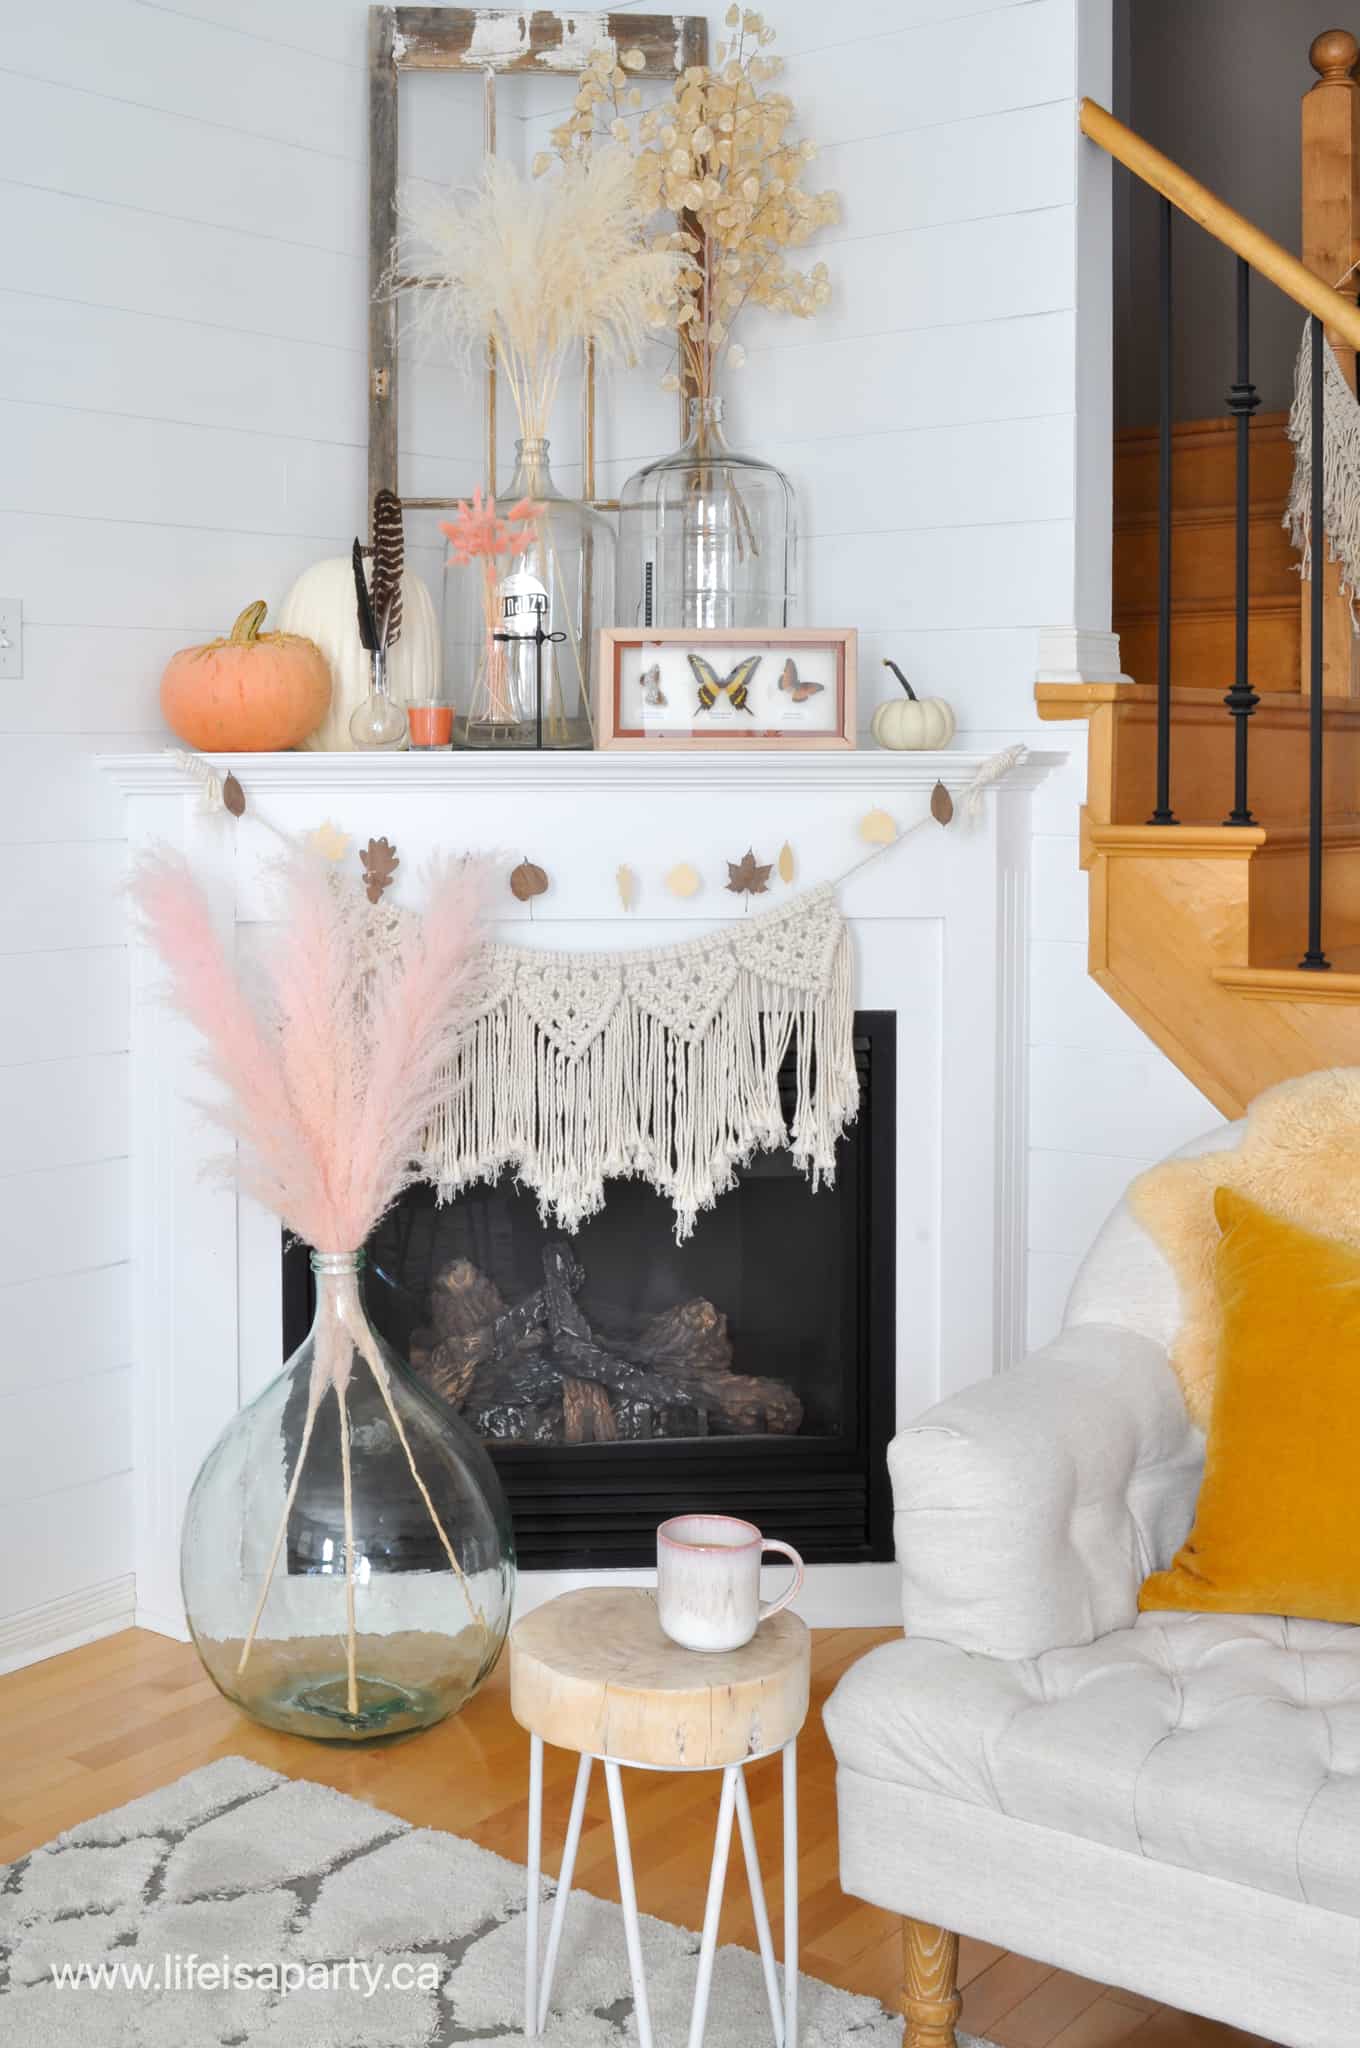
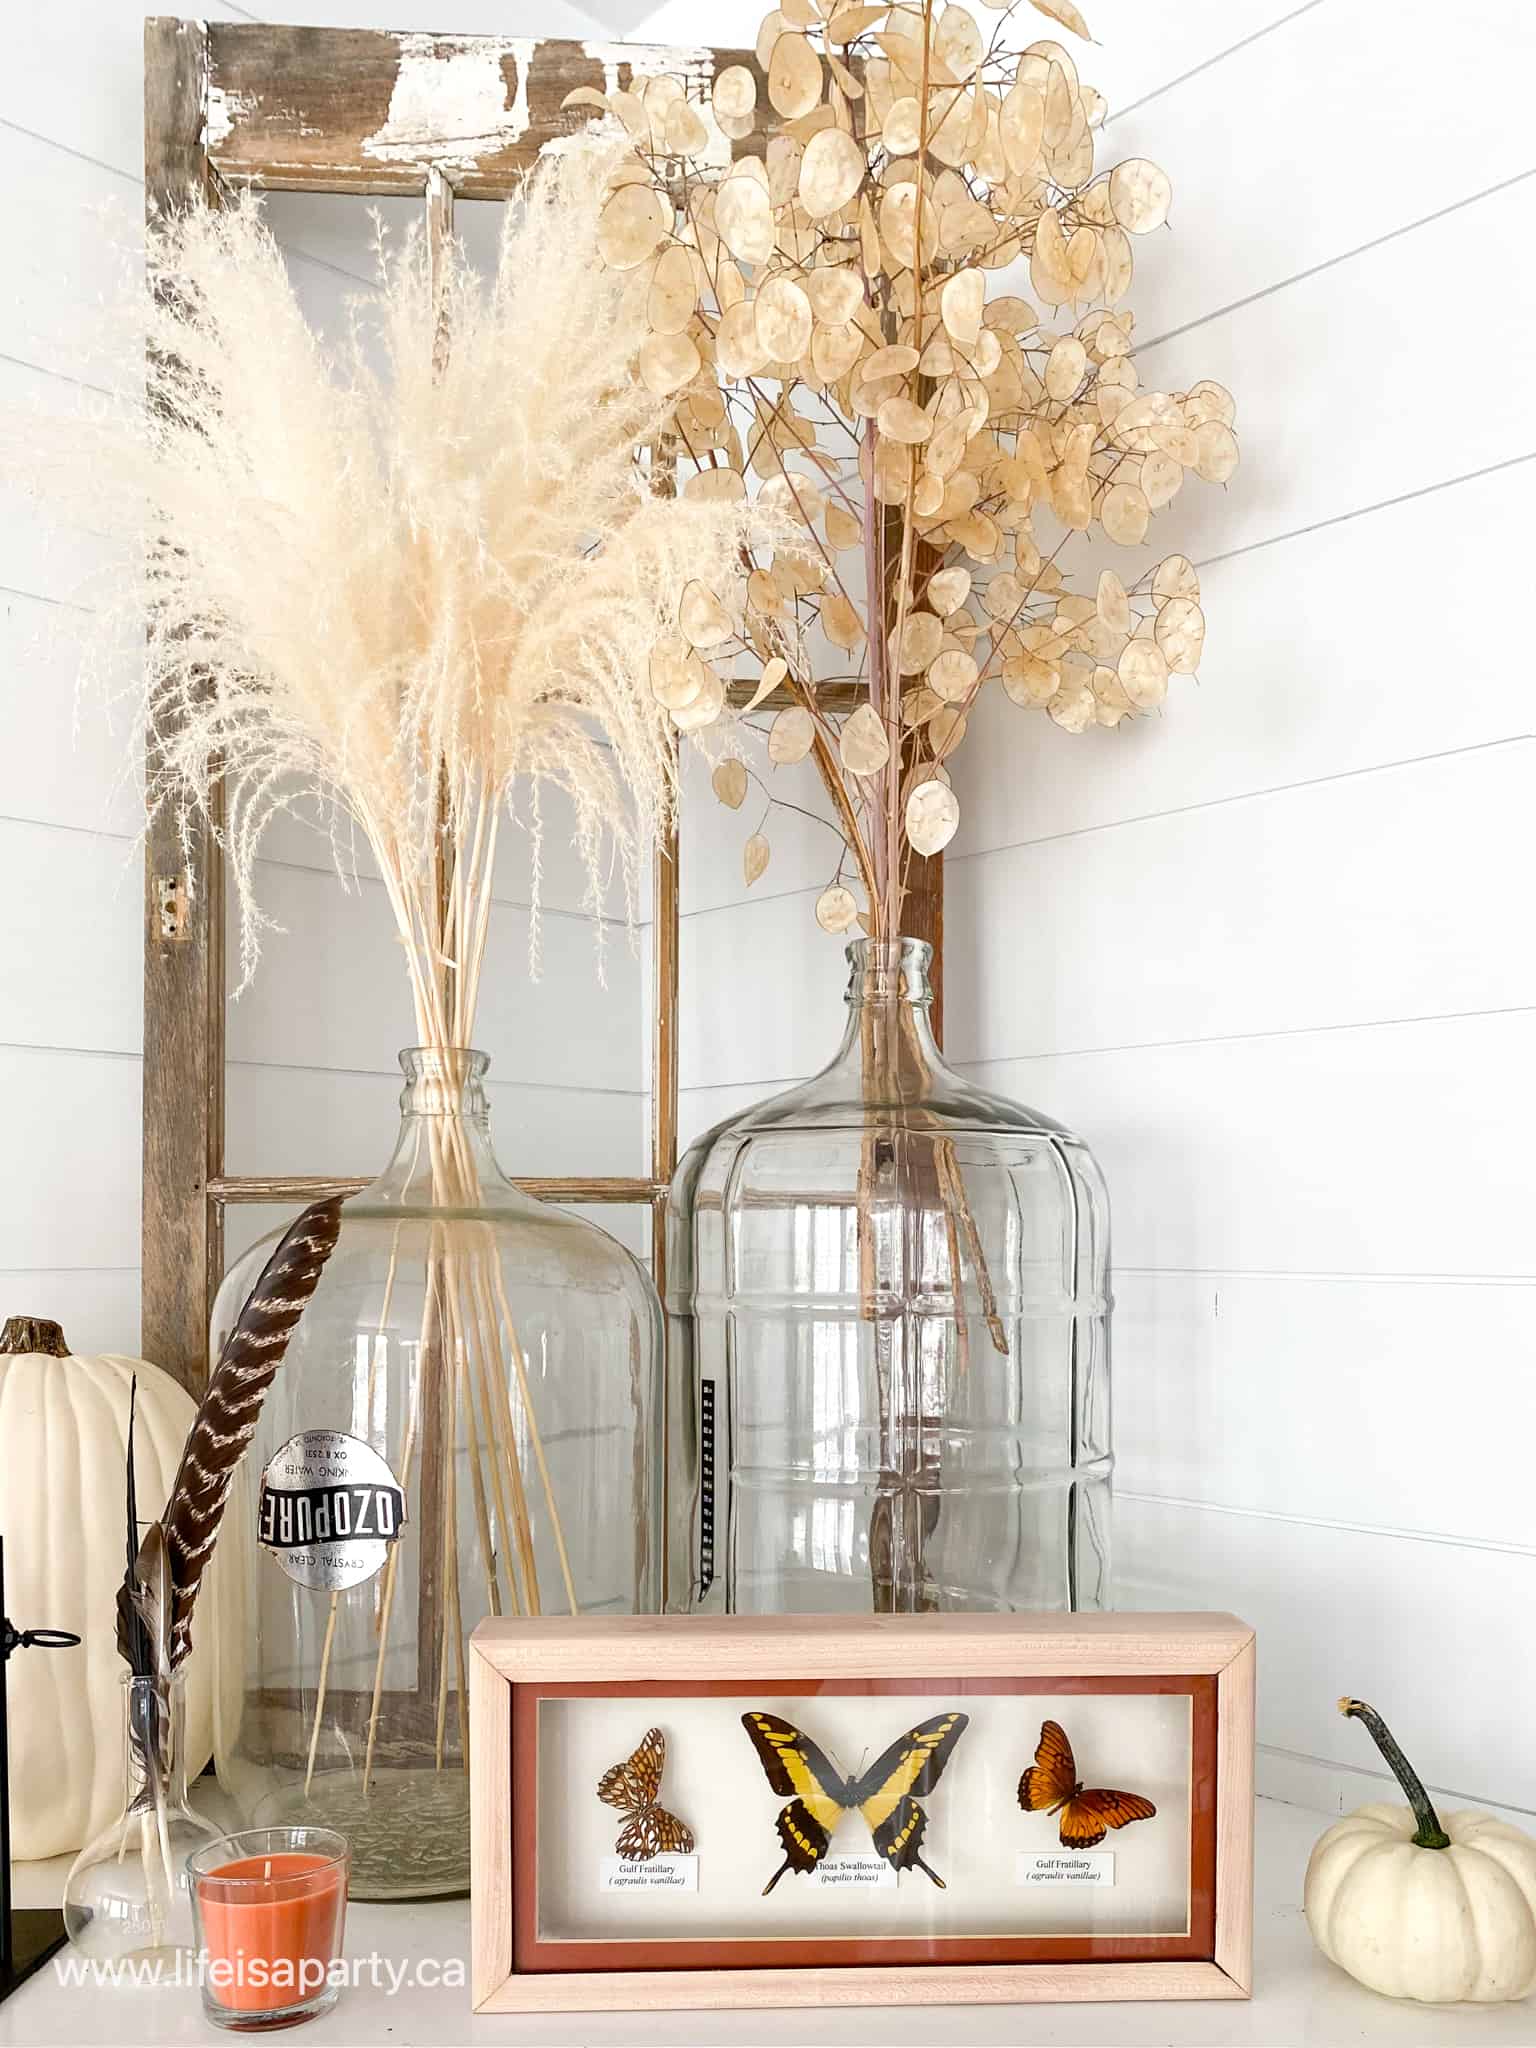
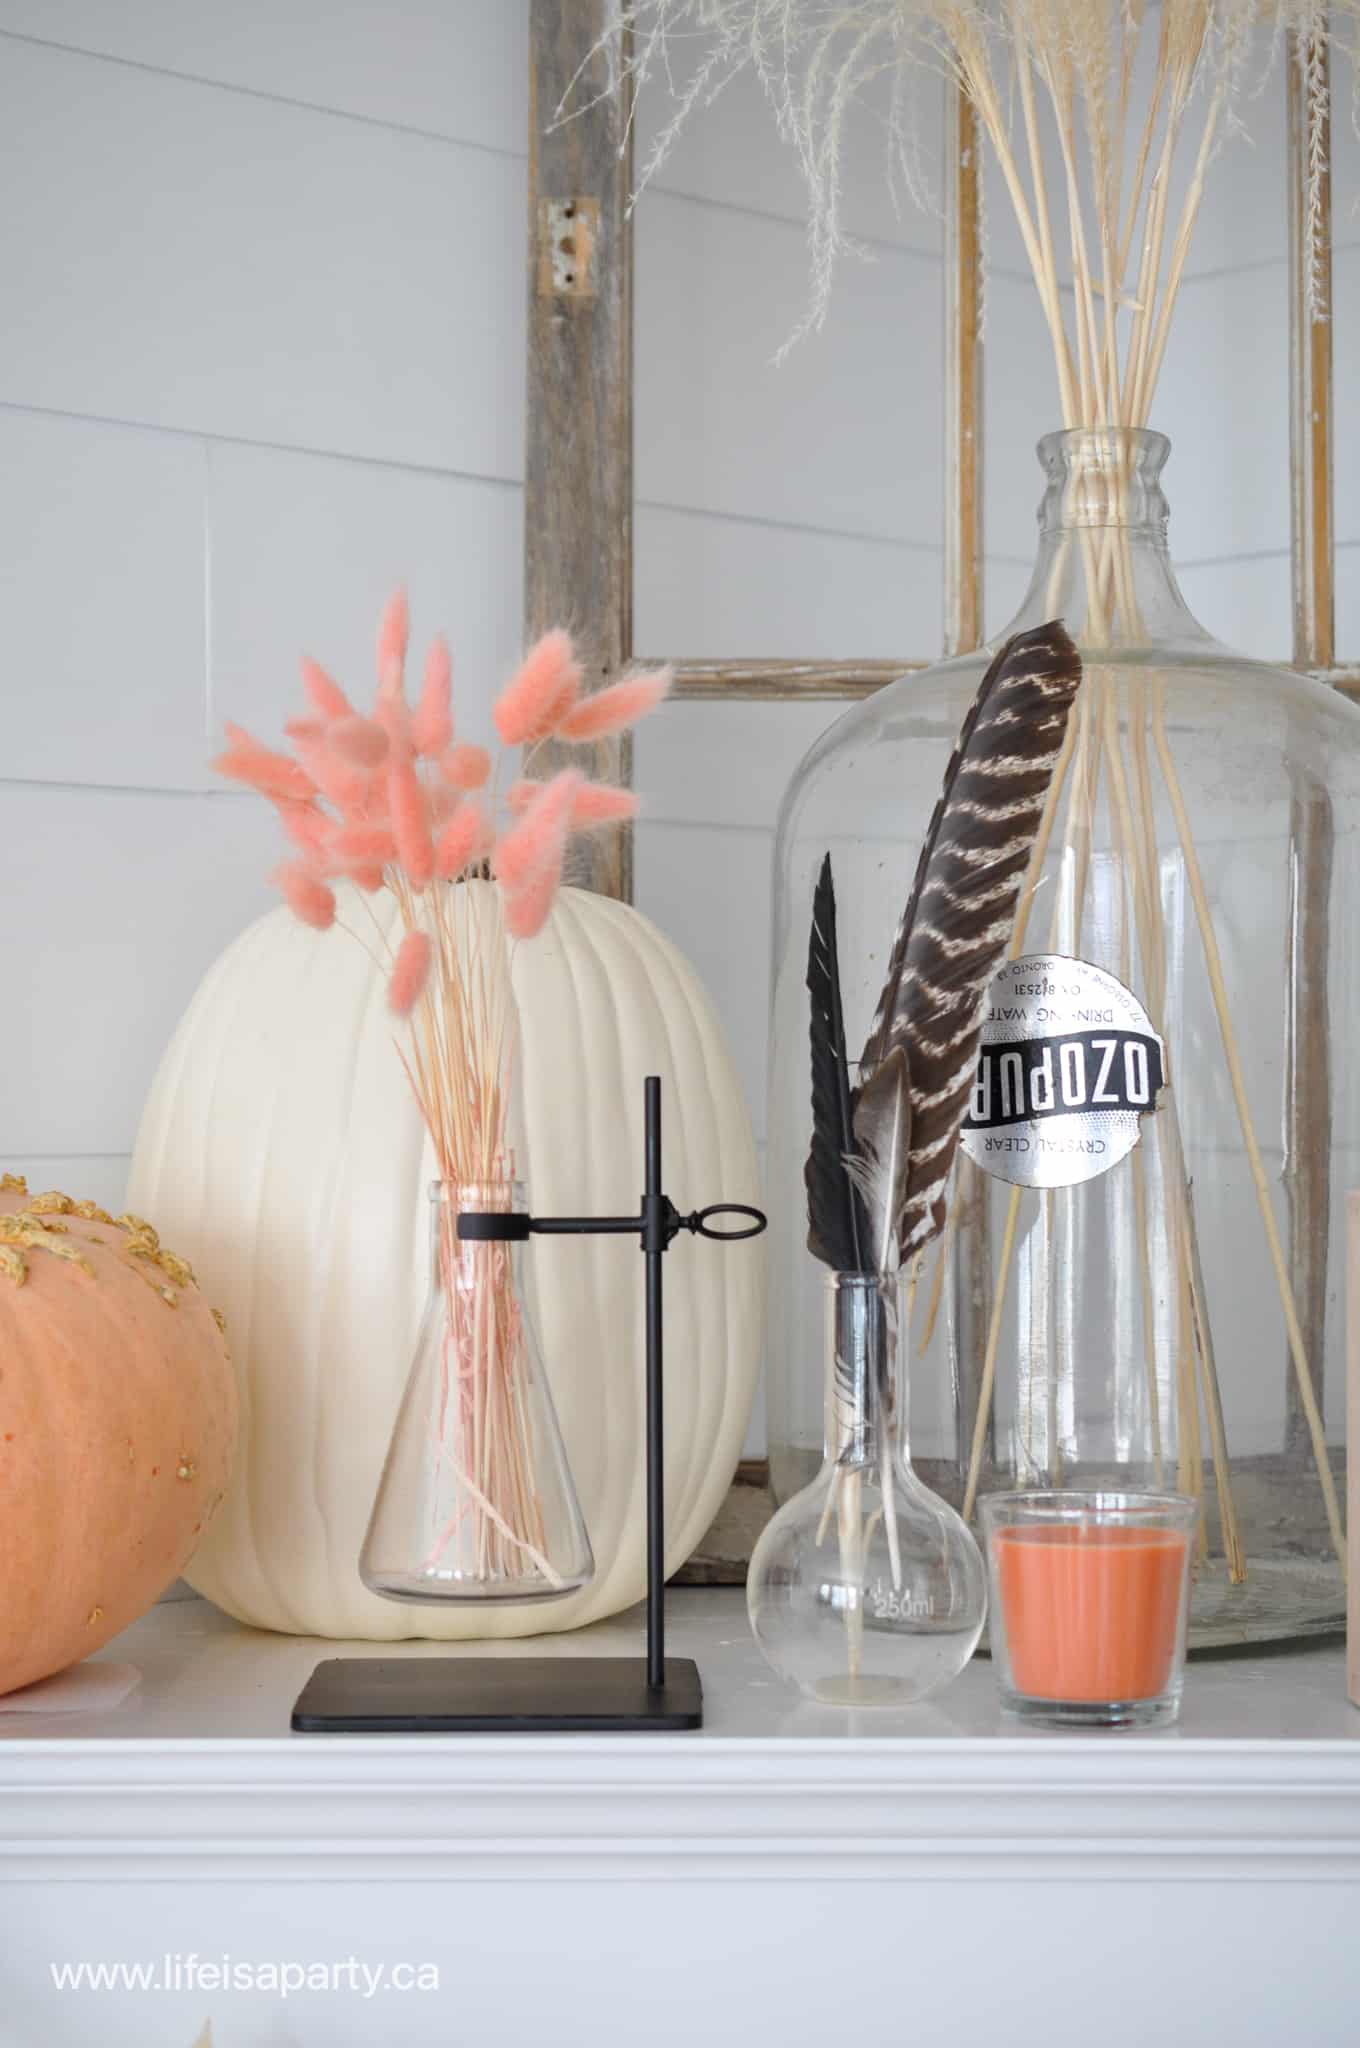
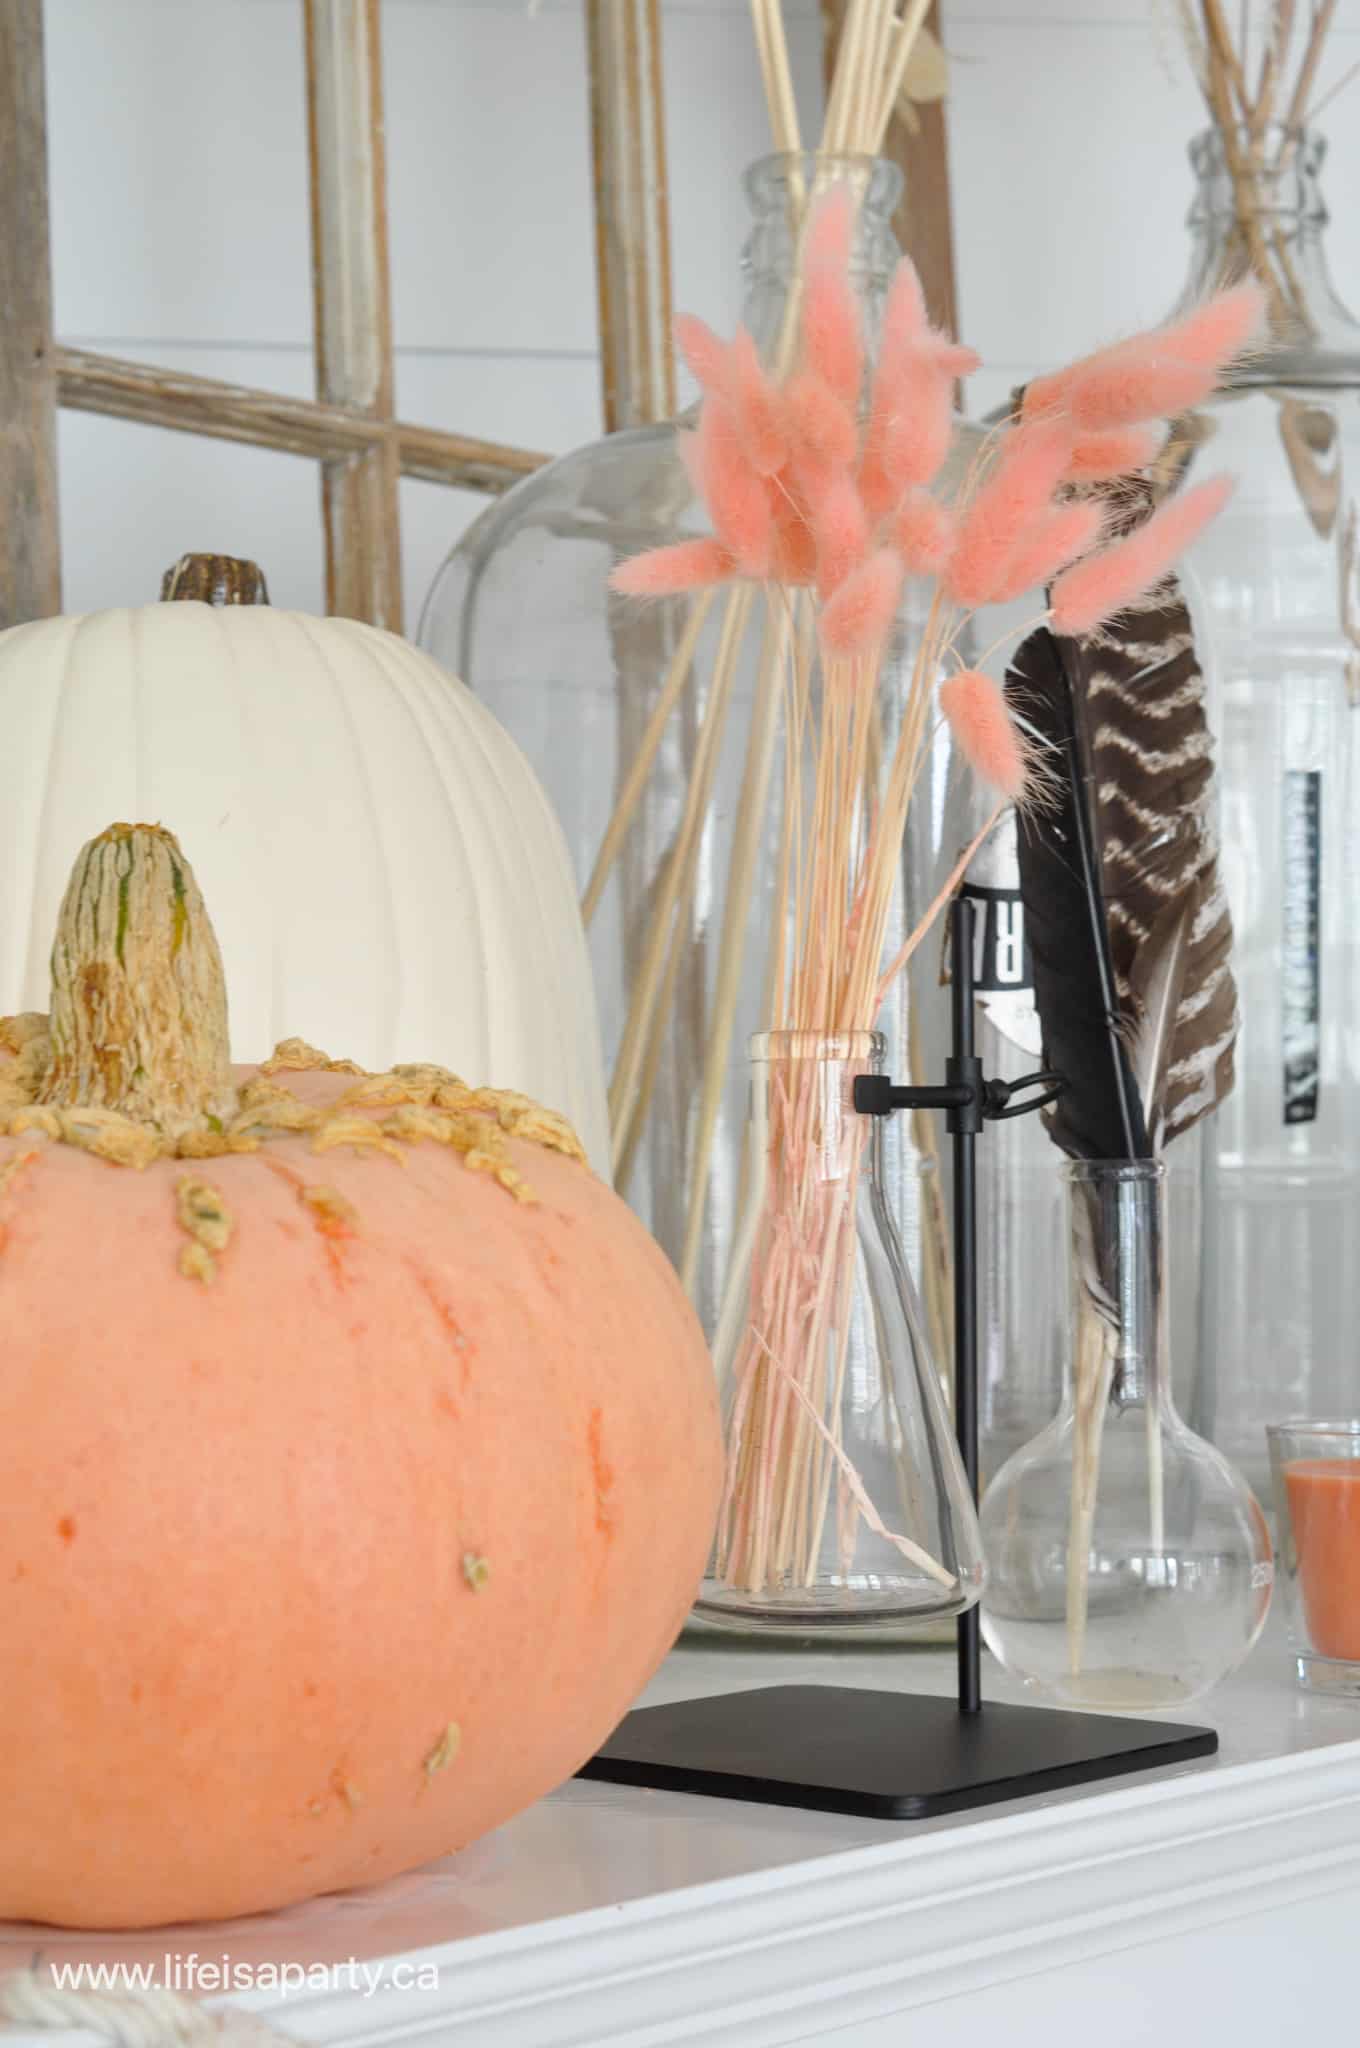
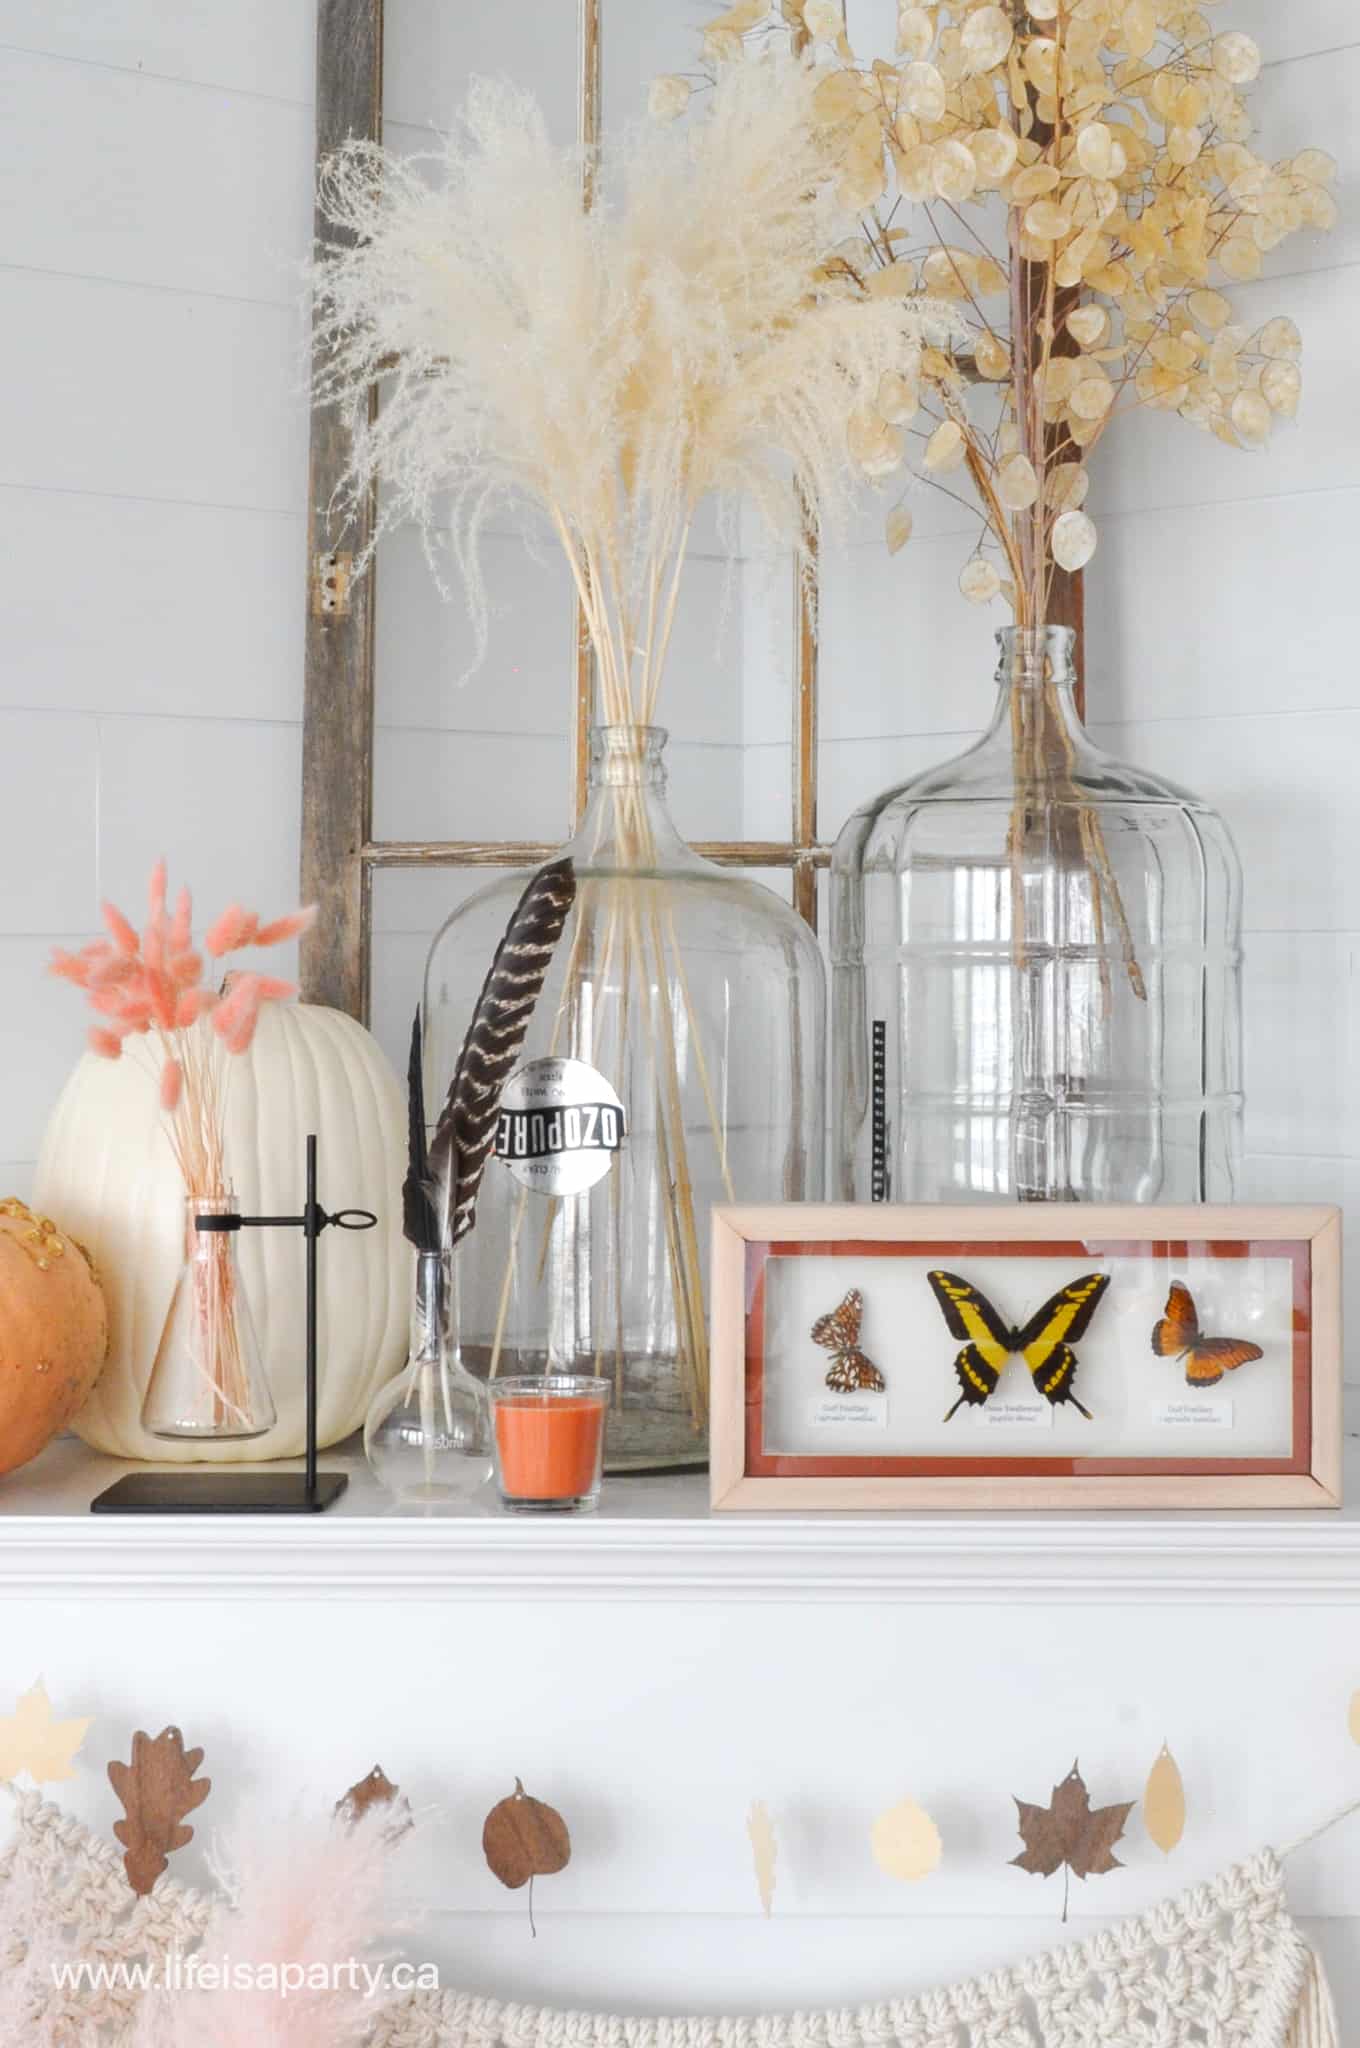
Over on the fireplace, there's more of the boho autumn feel.  There's also a little more of the science decor that I promised earlier.  I love the beaker on a stand -in fact I've been looking for a vintage one of these for years with no luck.  This one is from the craft store and I love it.  It makes a perfect vase, or a plant propagation station.  The candle is from Ikea.  It's peach and smells amazing.

Modern fall boho fall mantel with pumpkins and grasses.

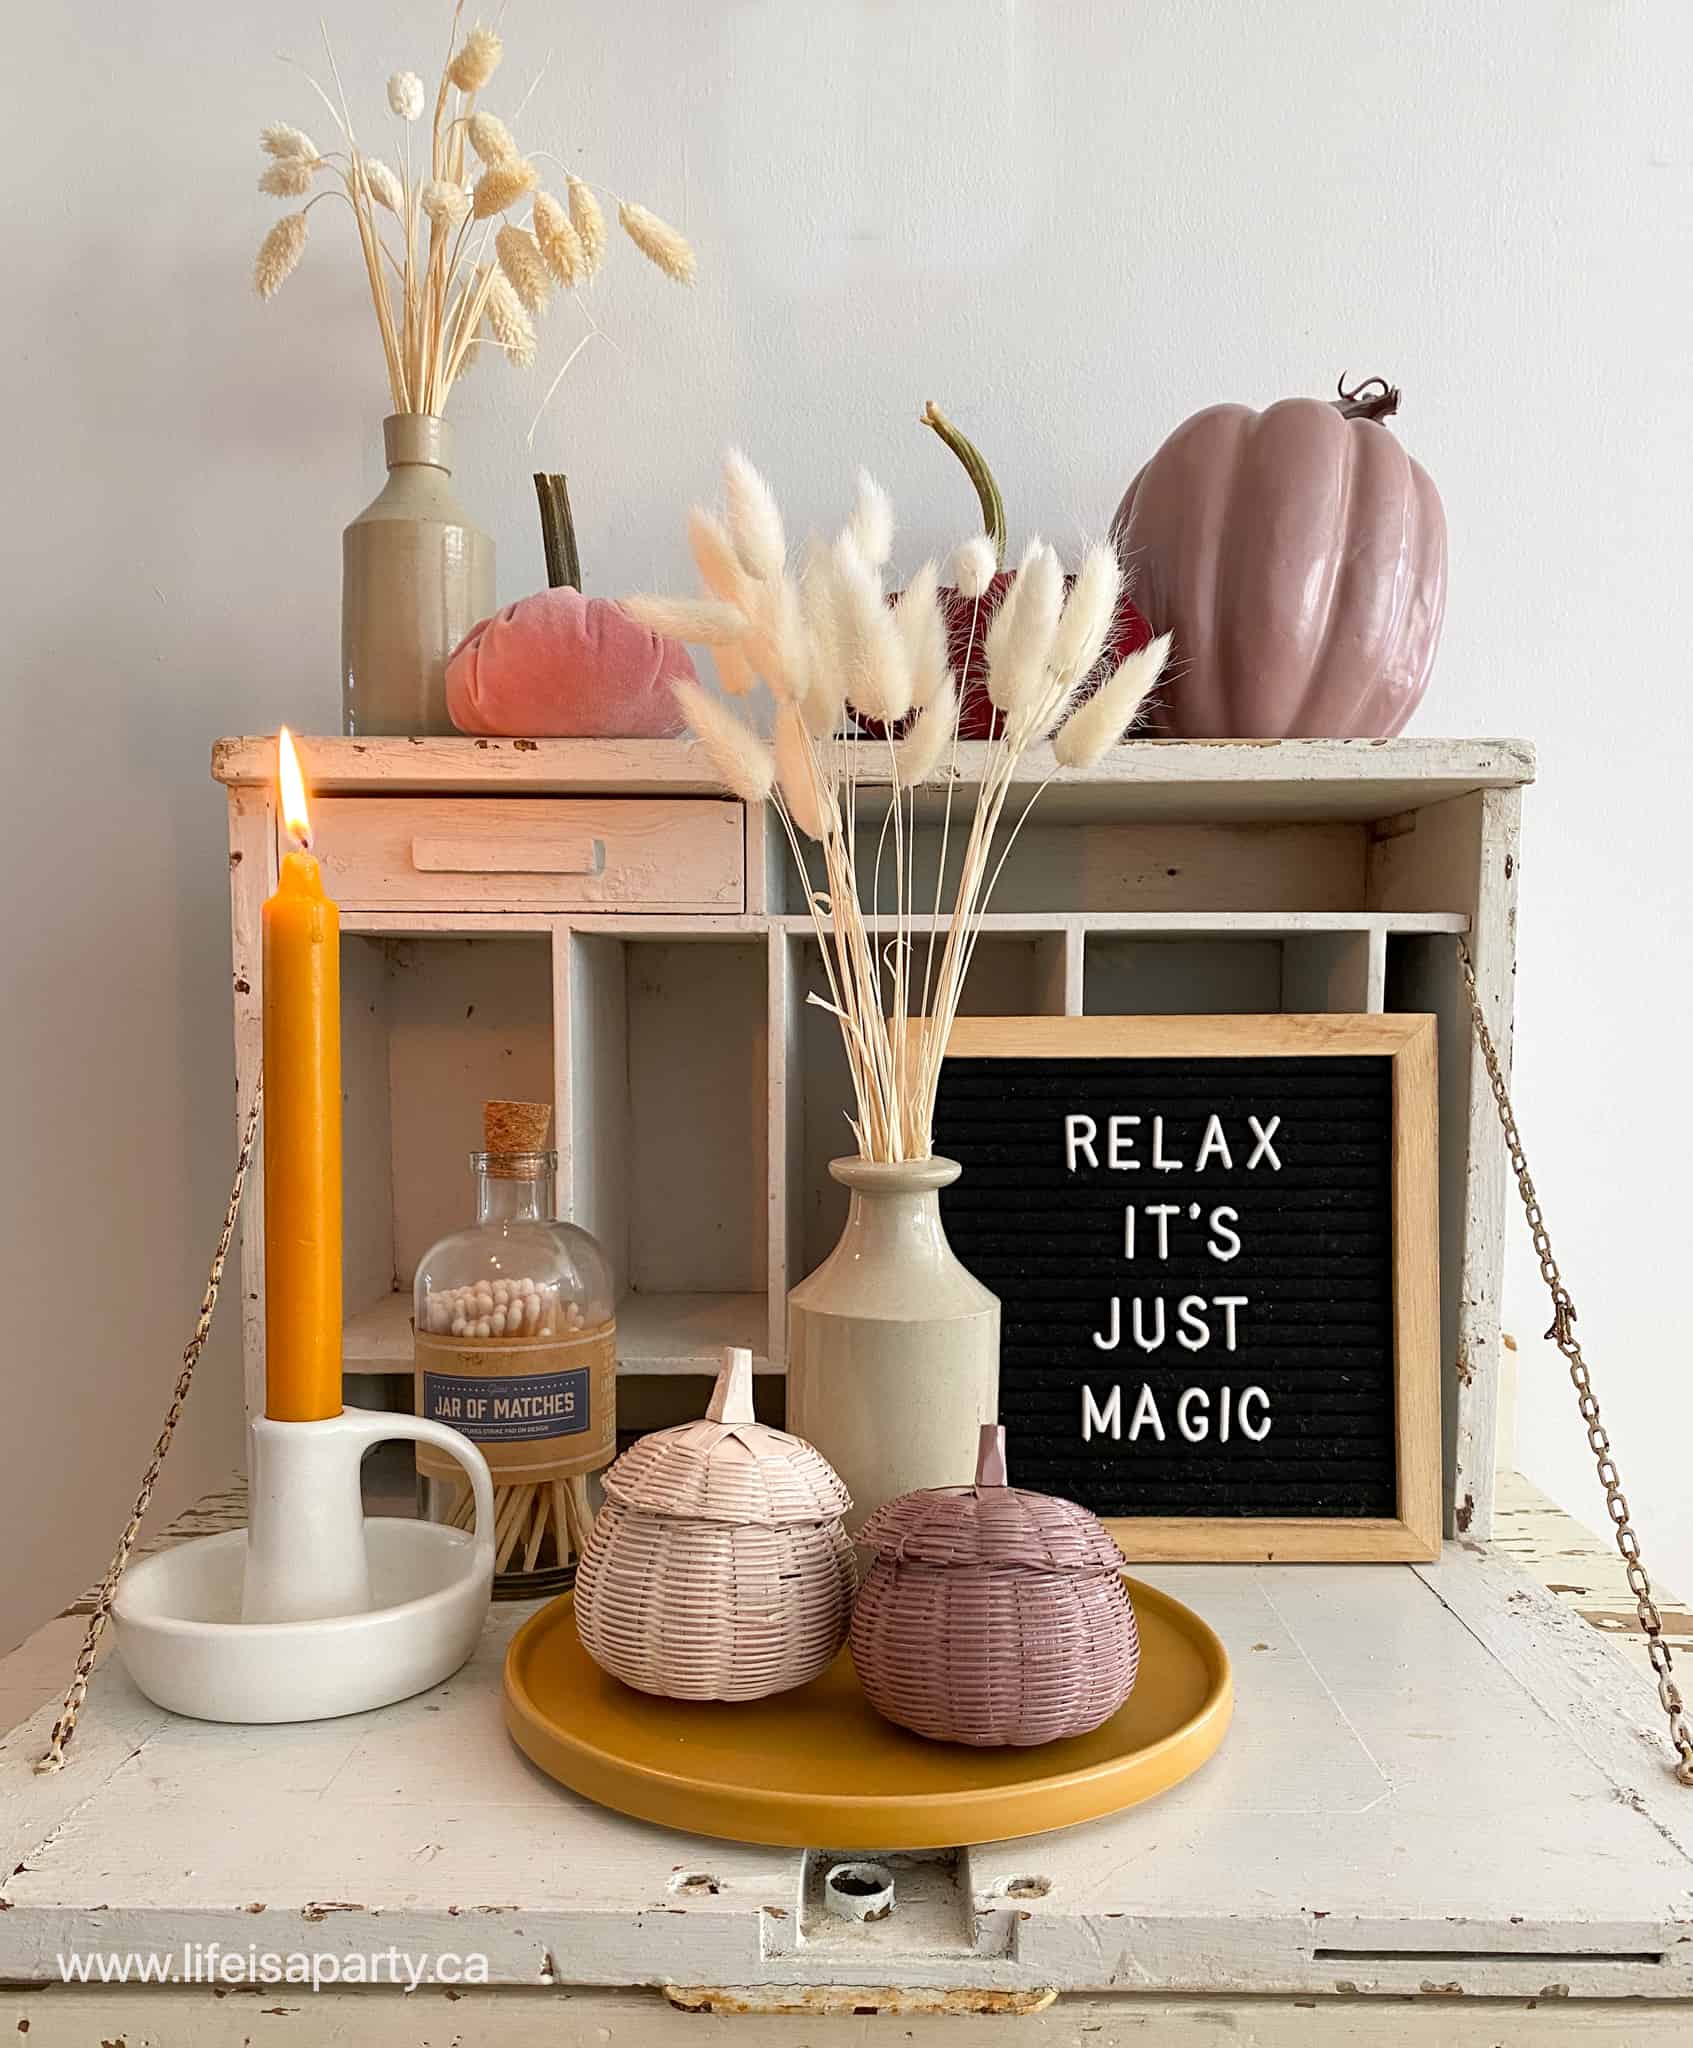
The real butterflies are another thrift store find.  I sanded down the dark frame and I love how it looks now.  And then there's a mix of dried grasses, and large vintage glass bottles and a demijohn.  Of course we had to have more pumpkins here too.  

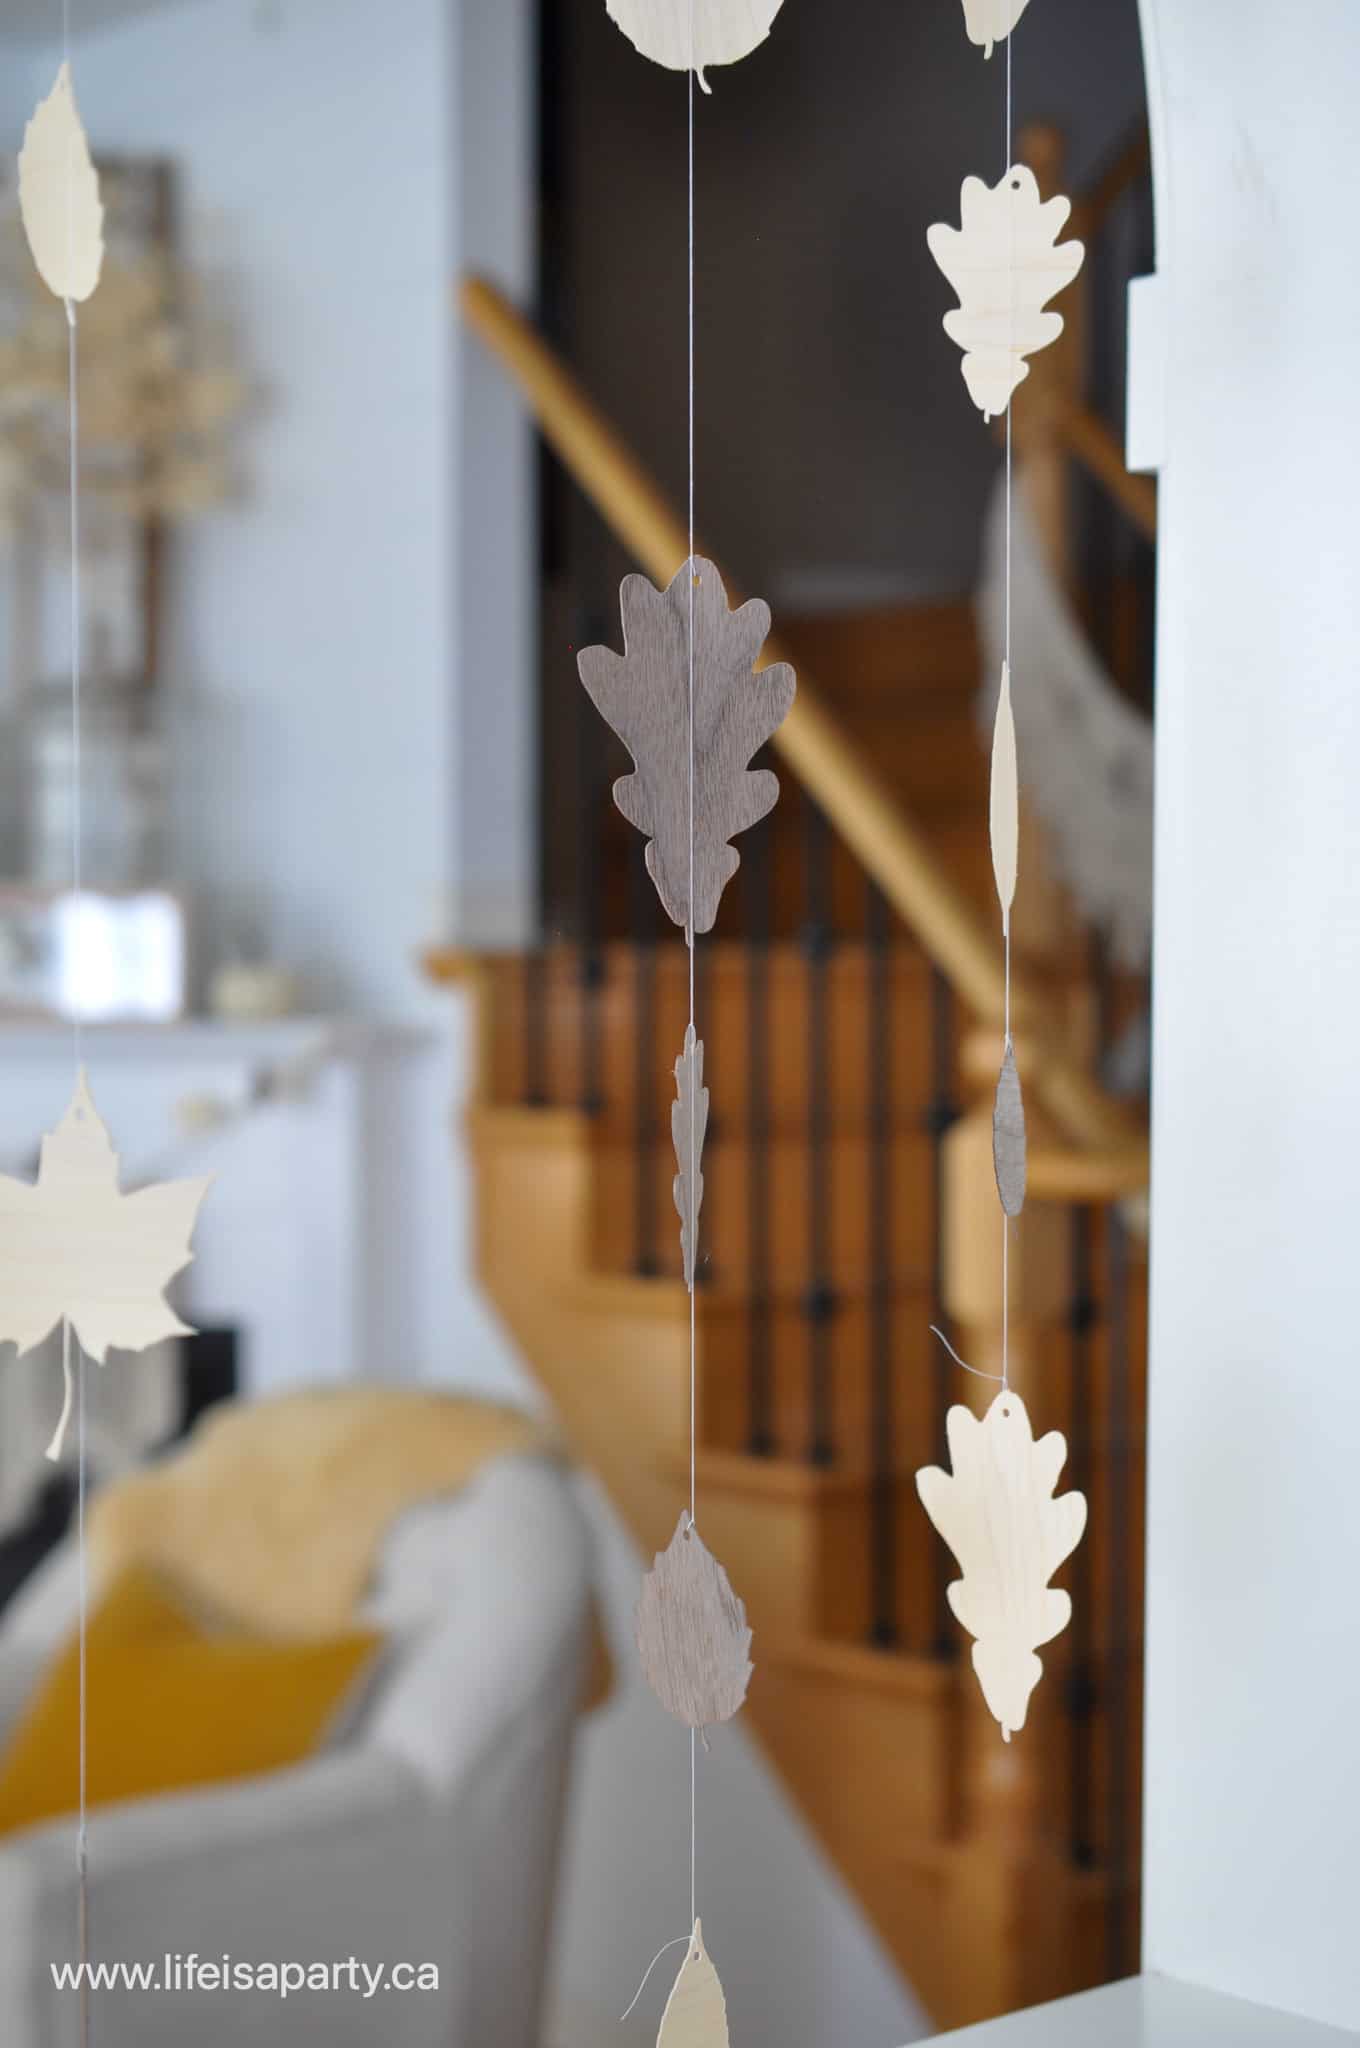
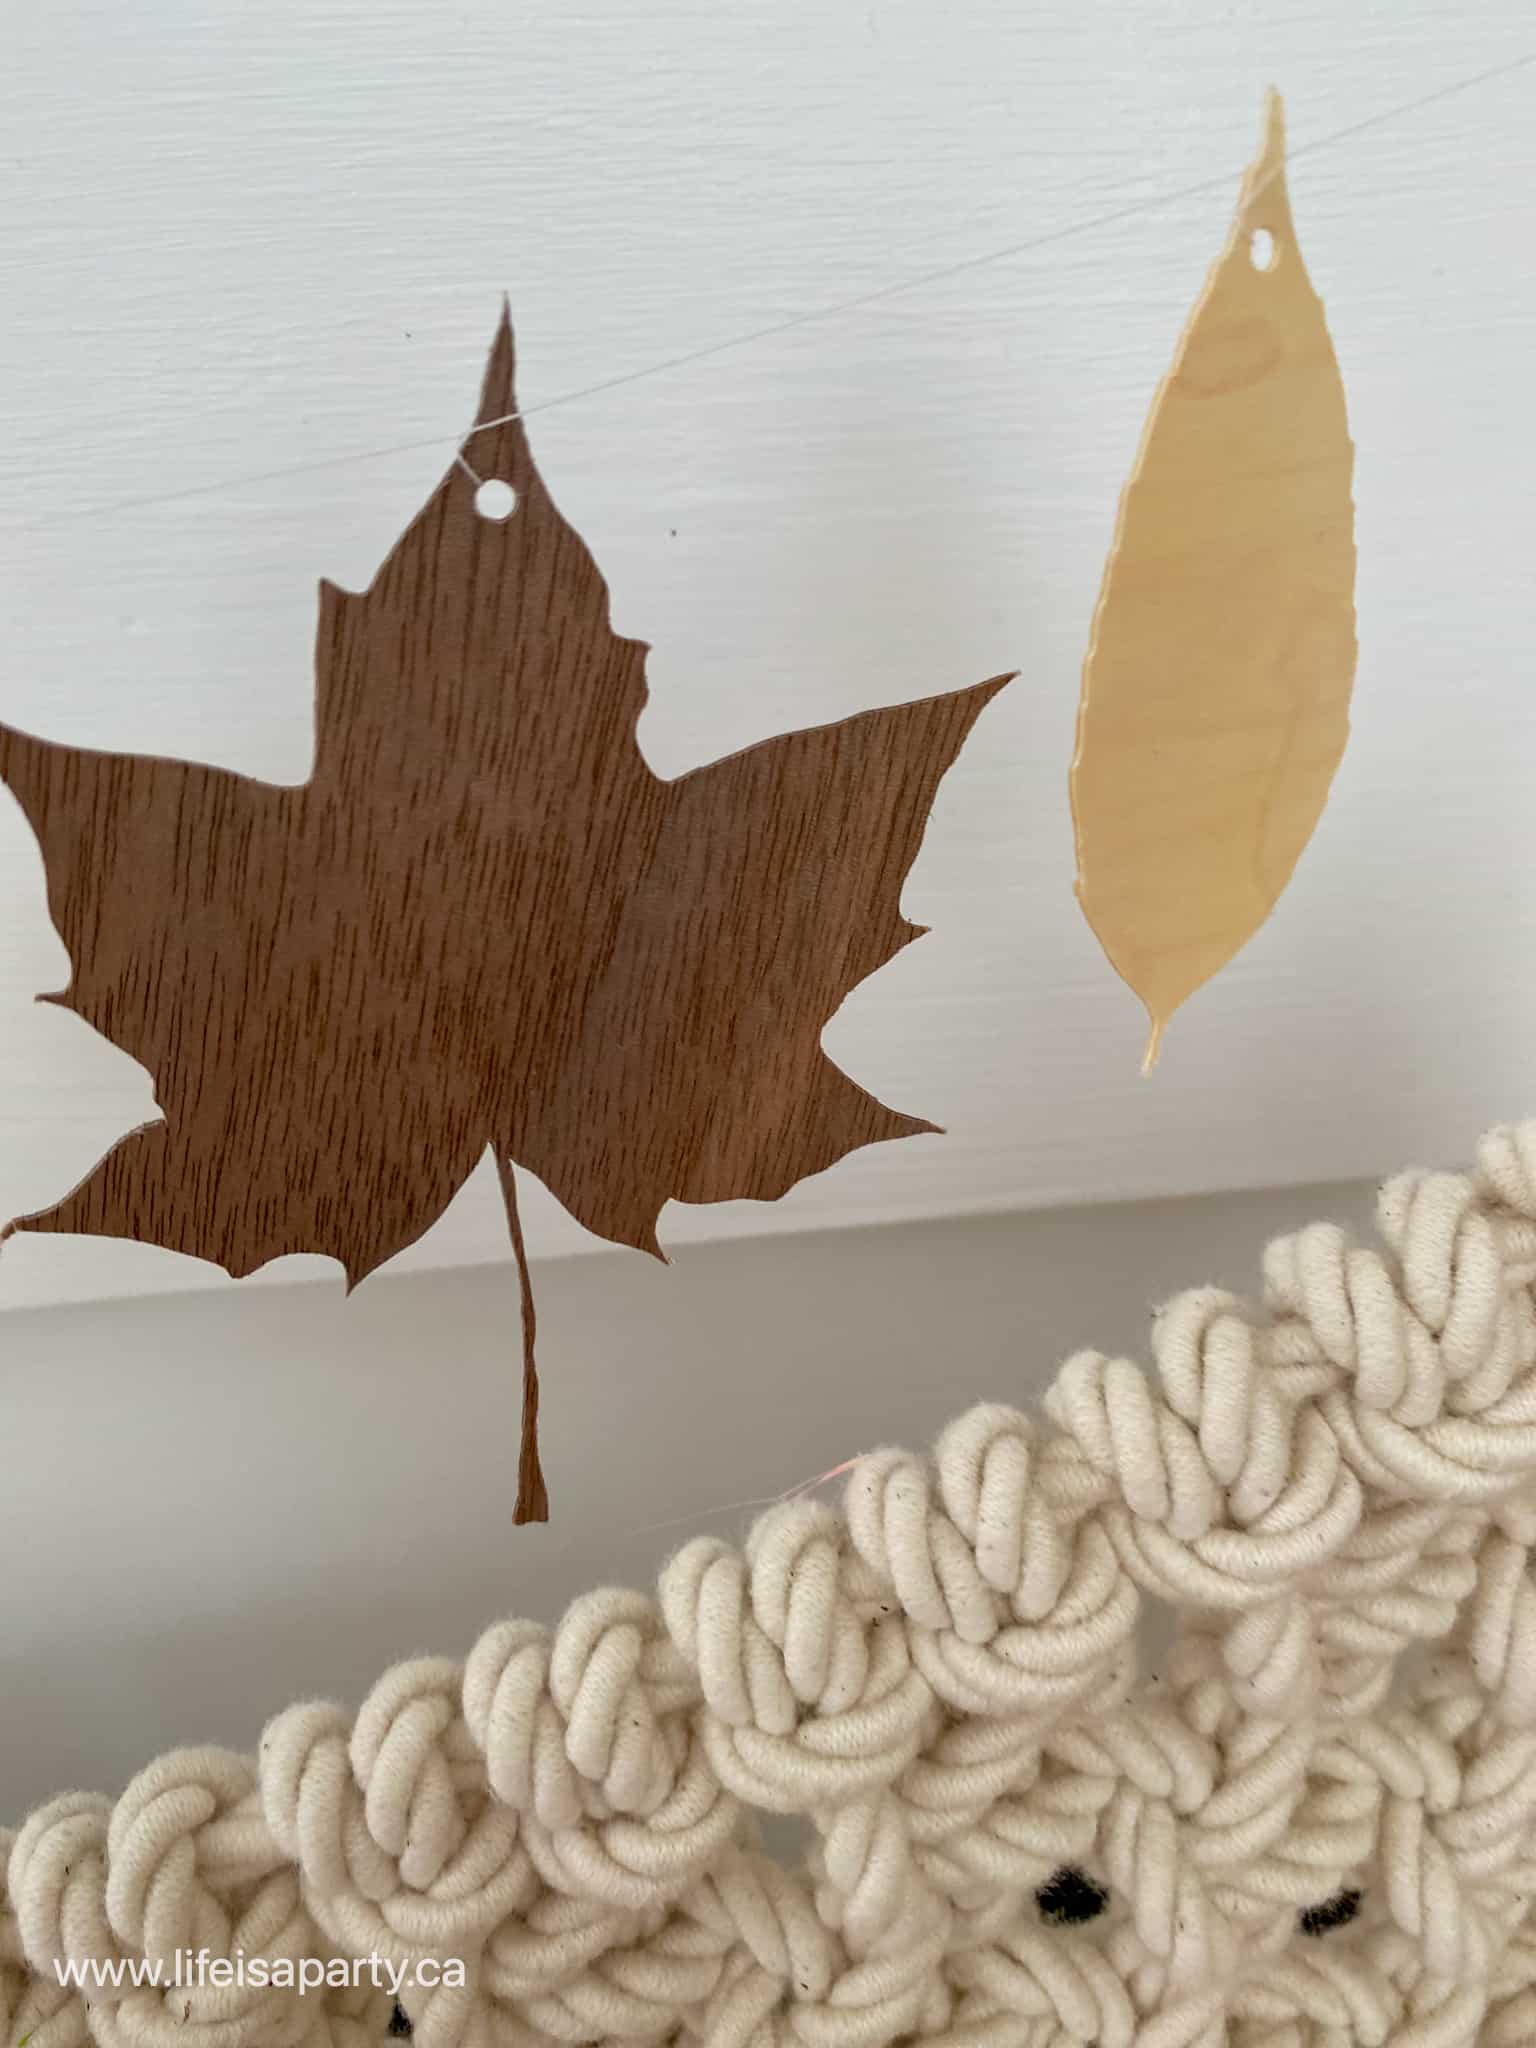
The wood leaves are a little DIY I did on my Cricut with some thin wood veneer.   You can read more details about this modern boho fall mantel here.

pink pumpkins

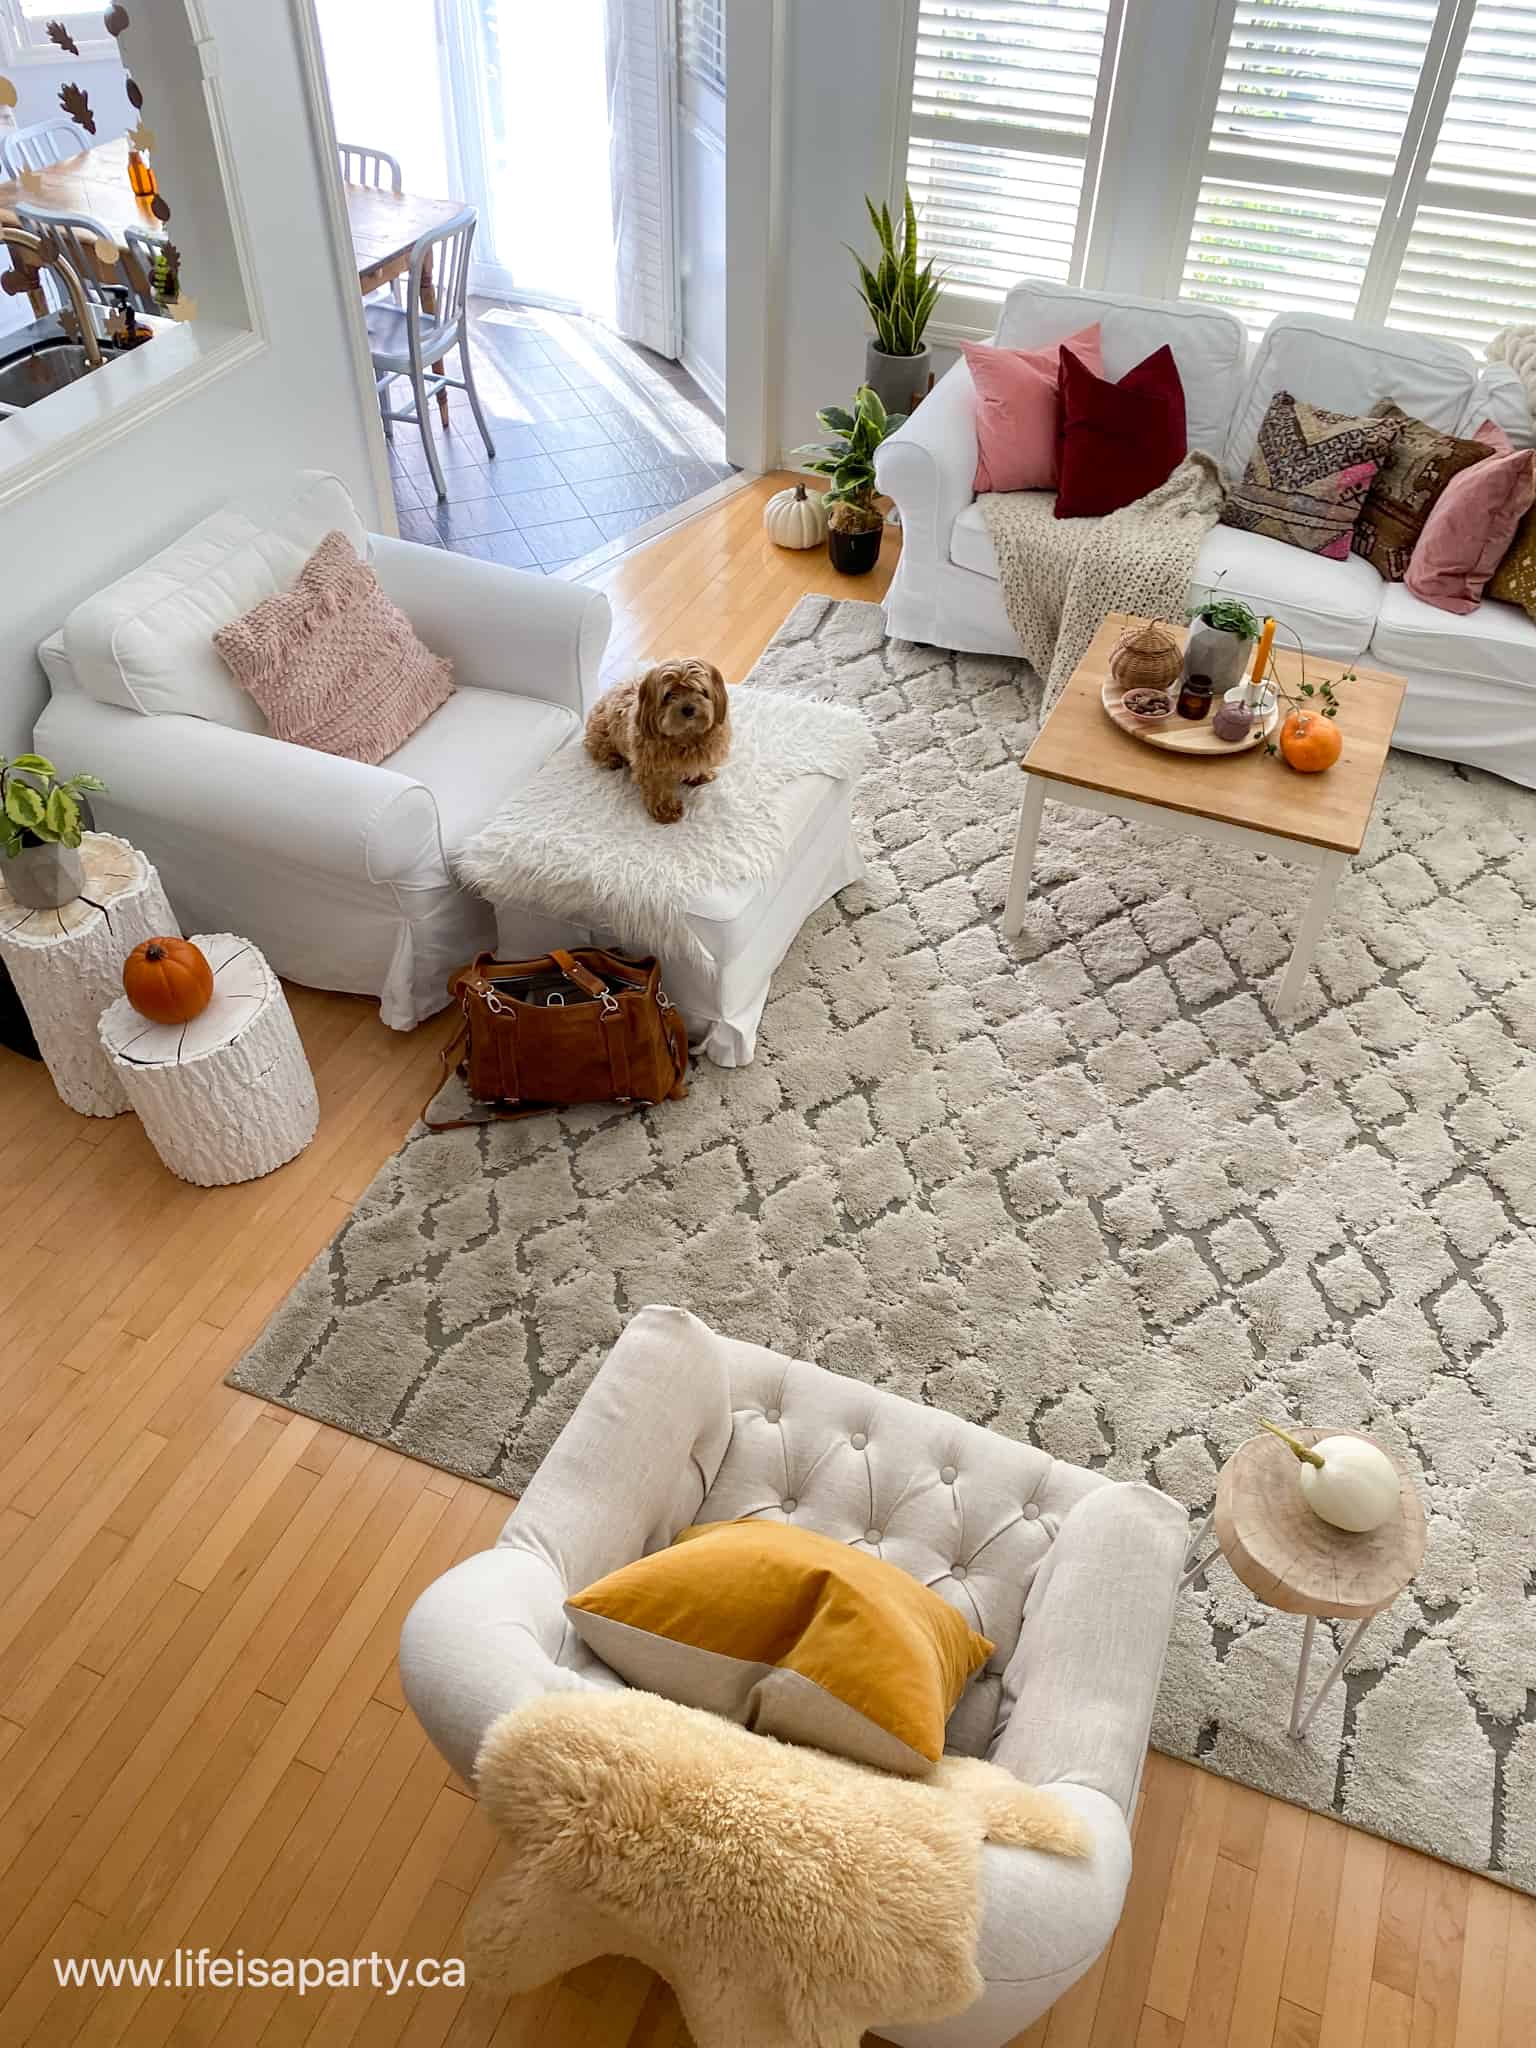
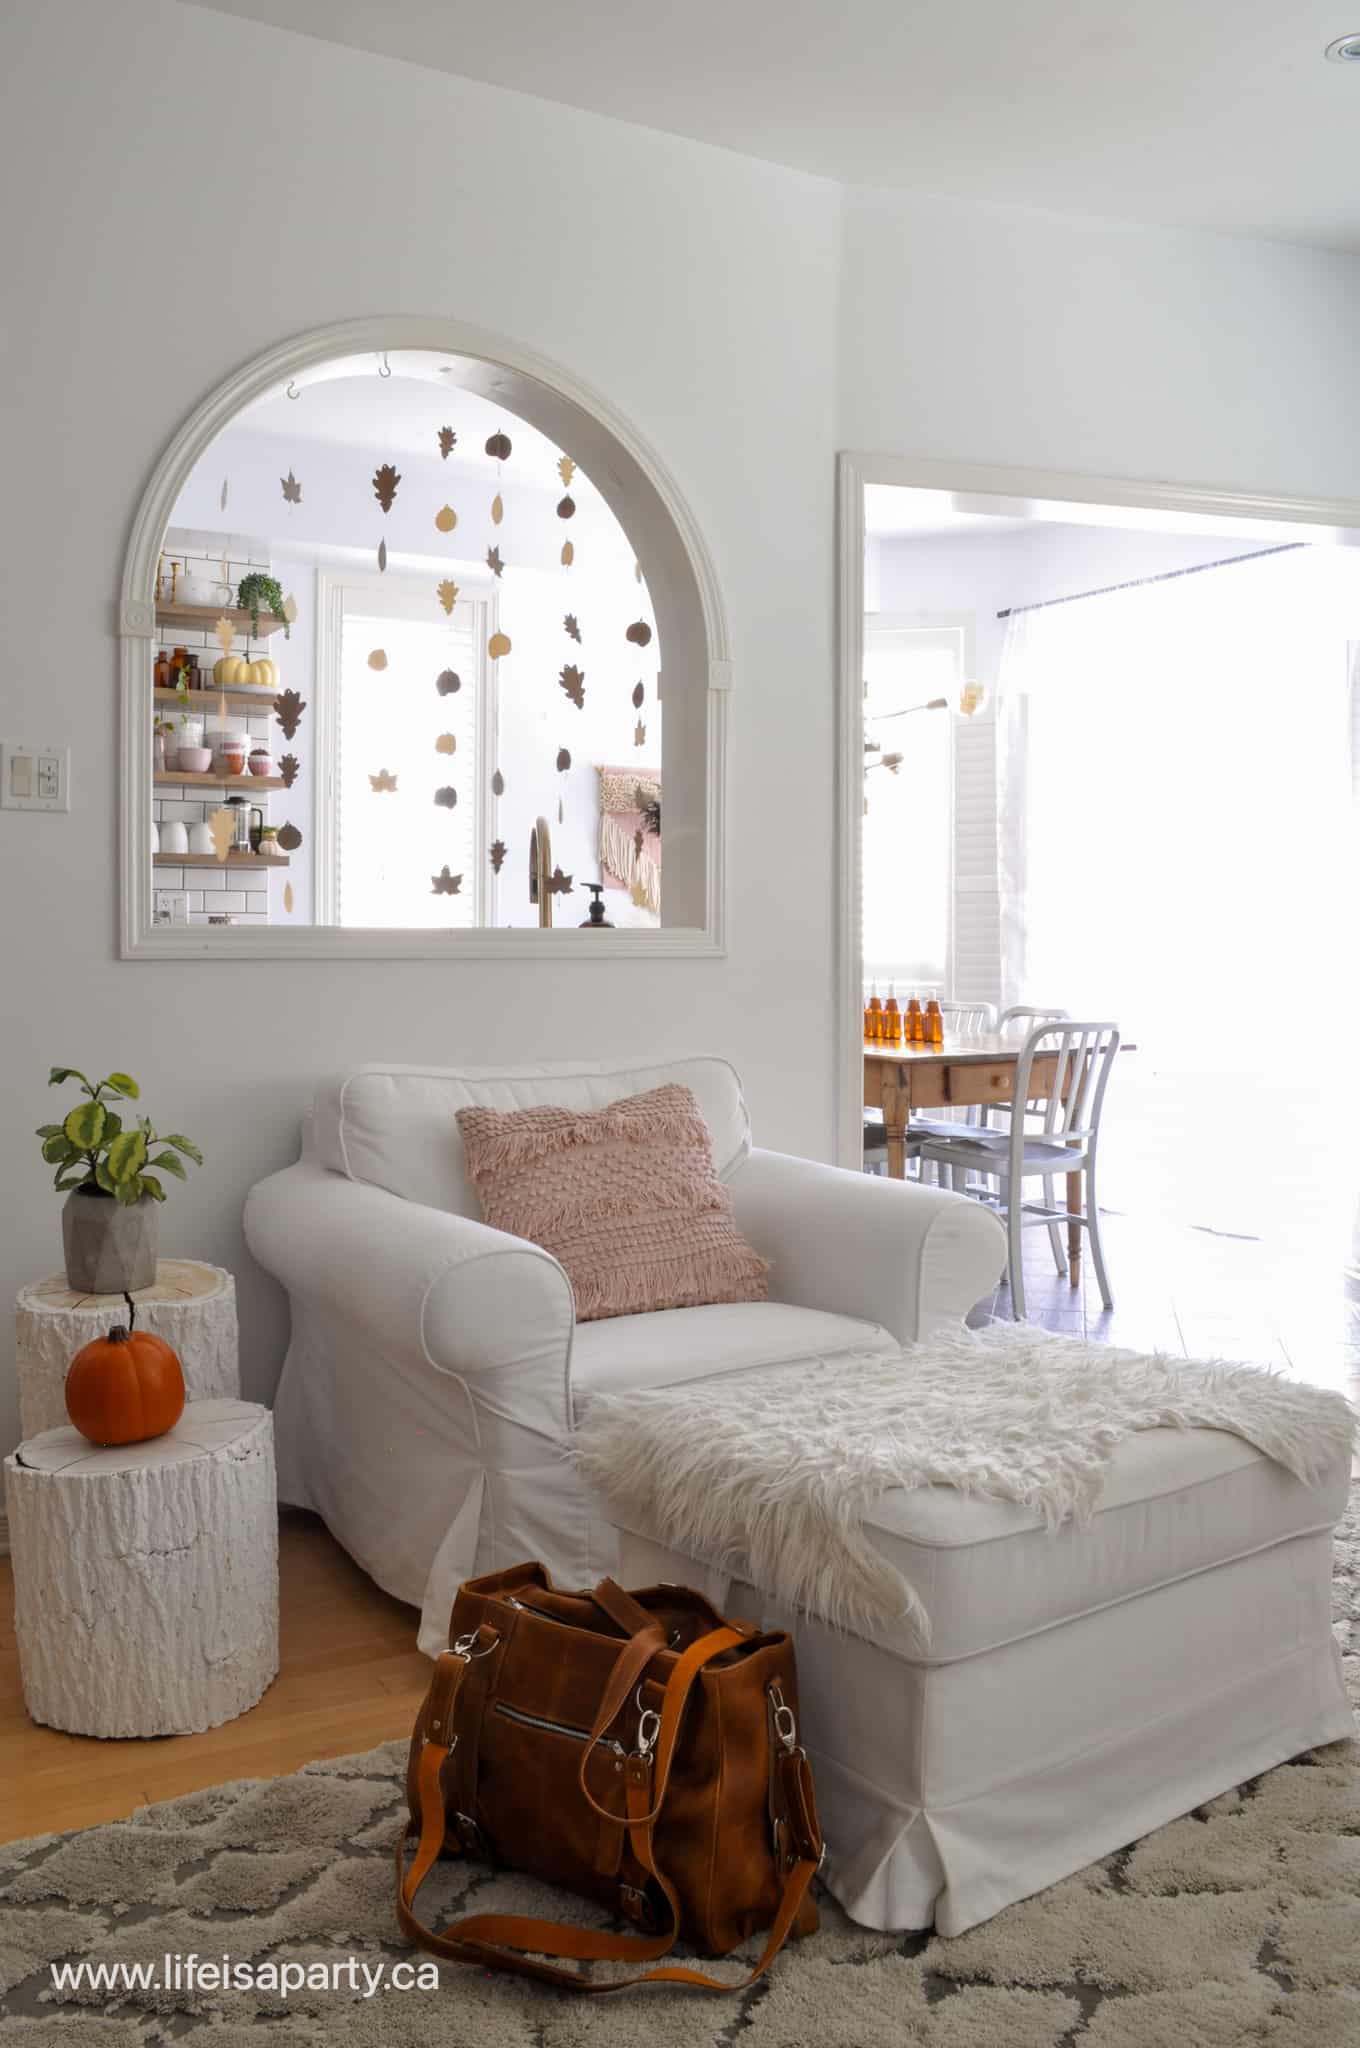
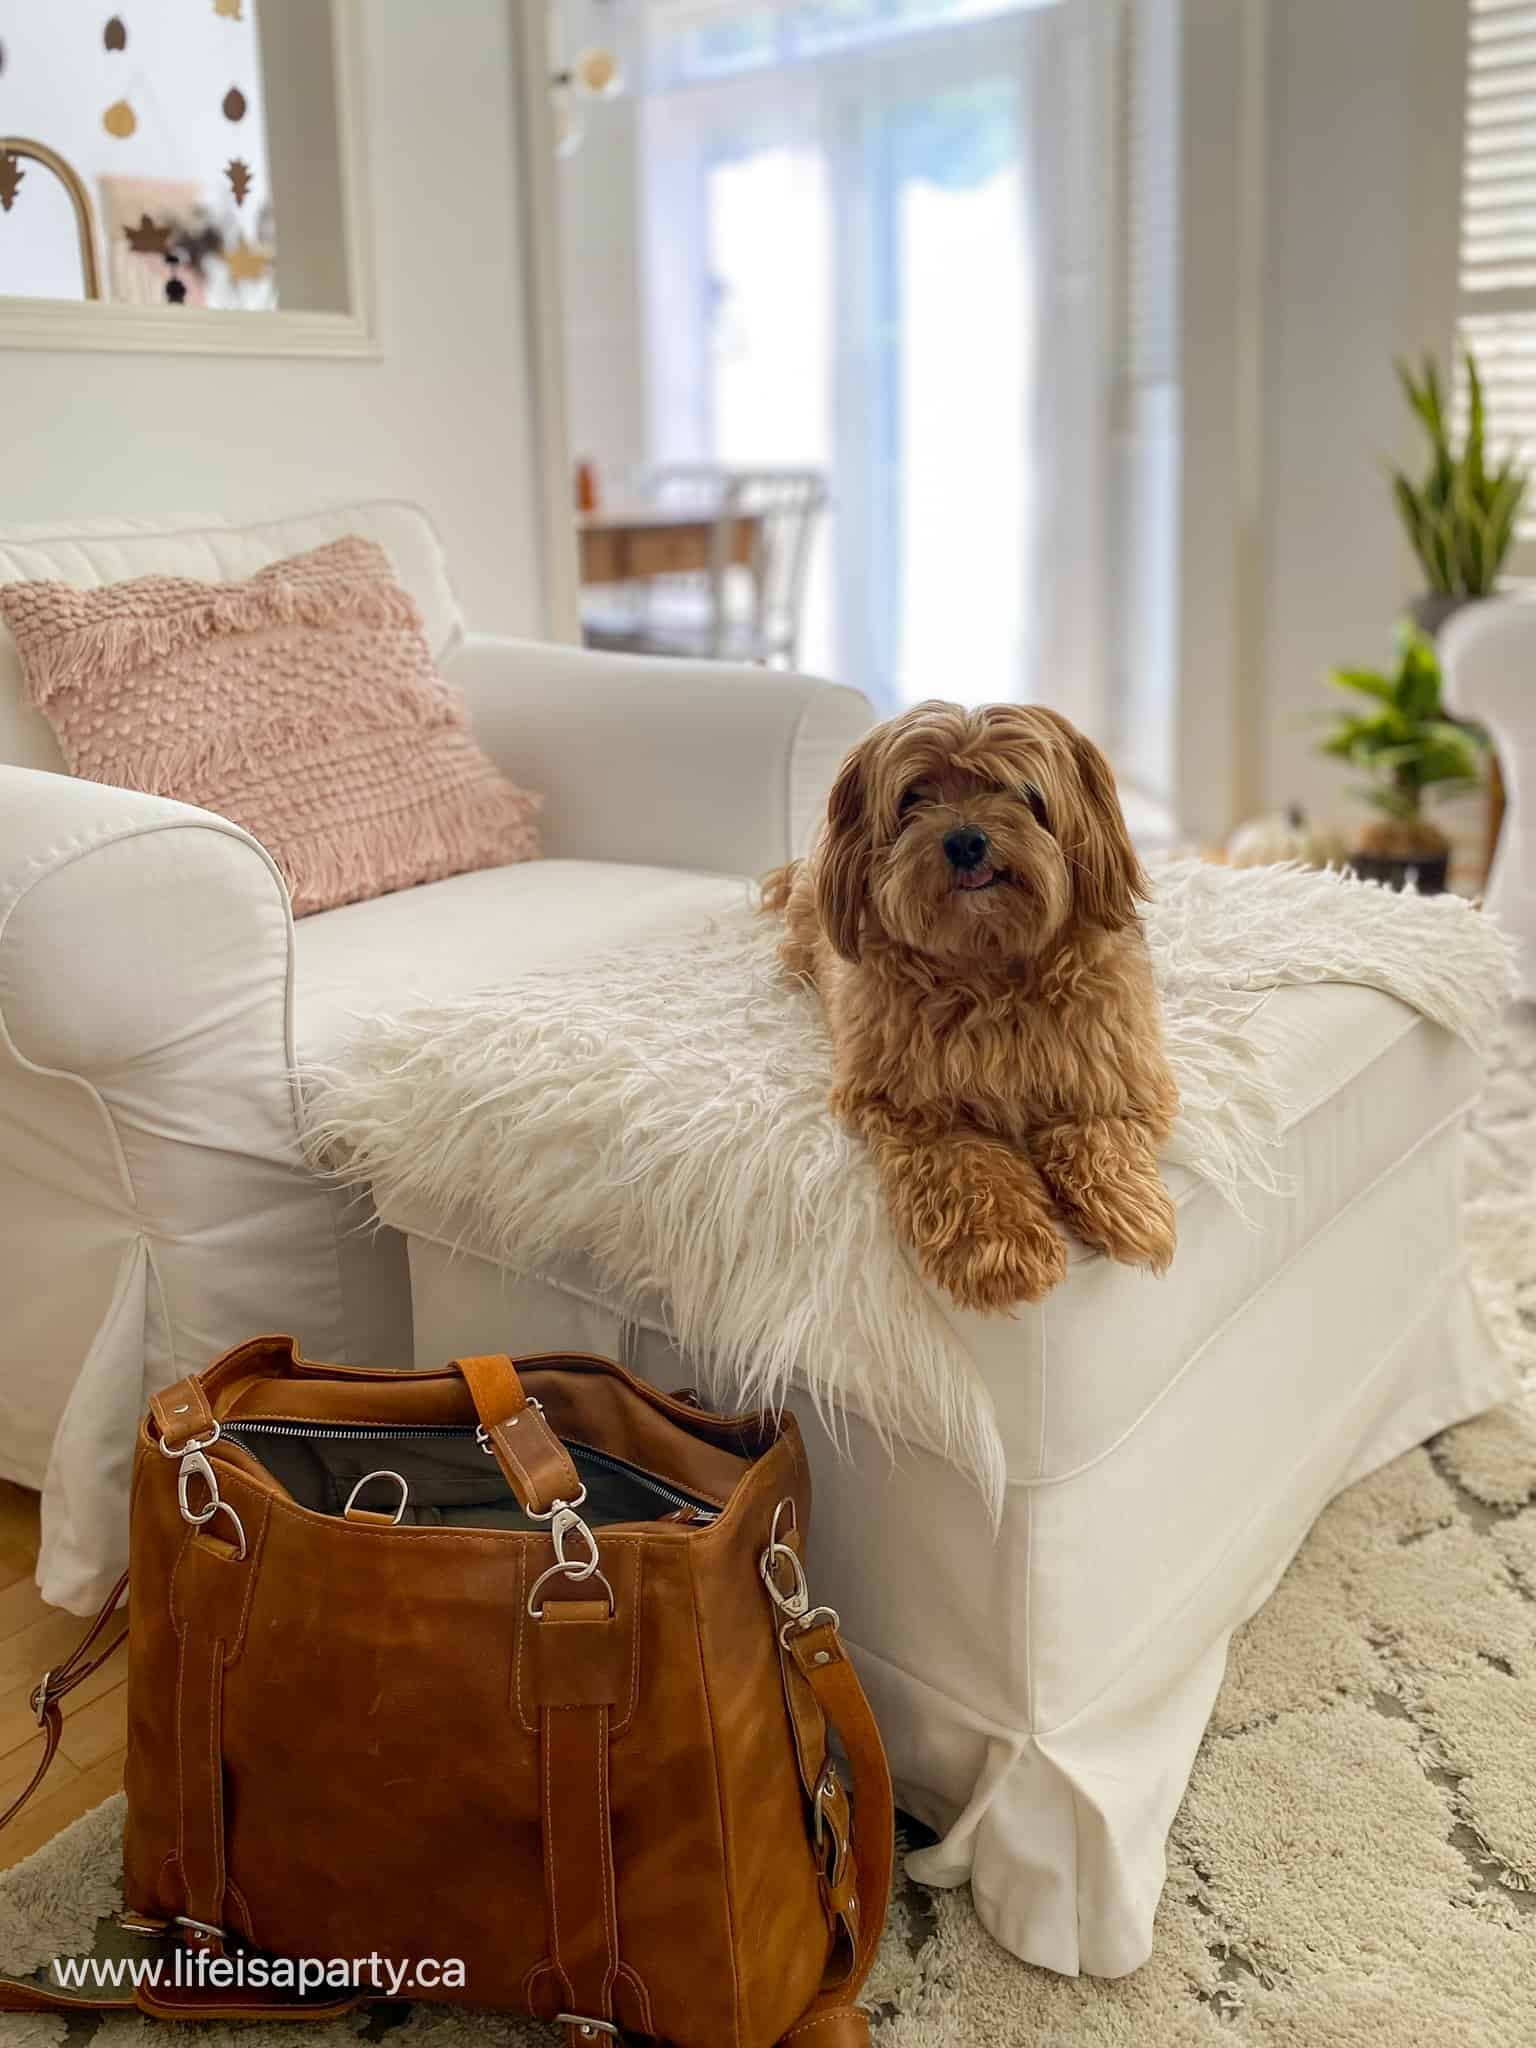
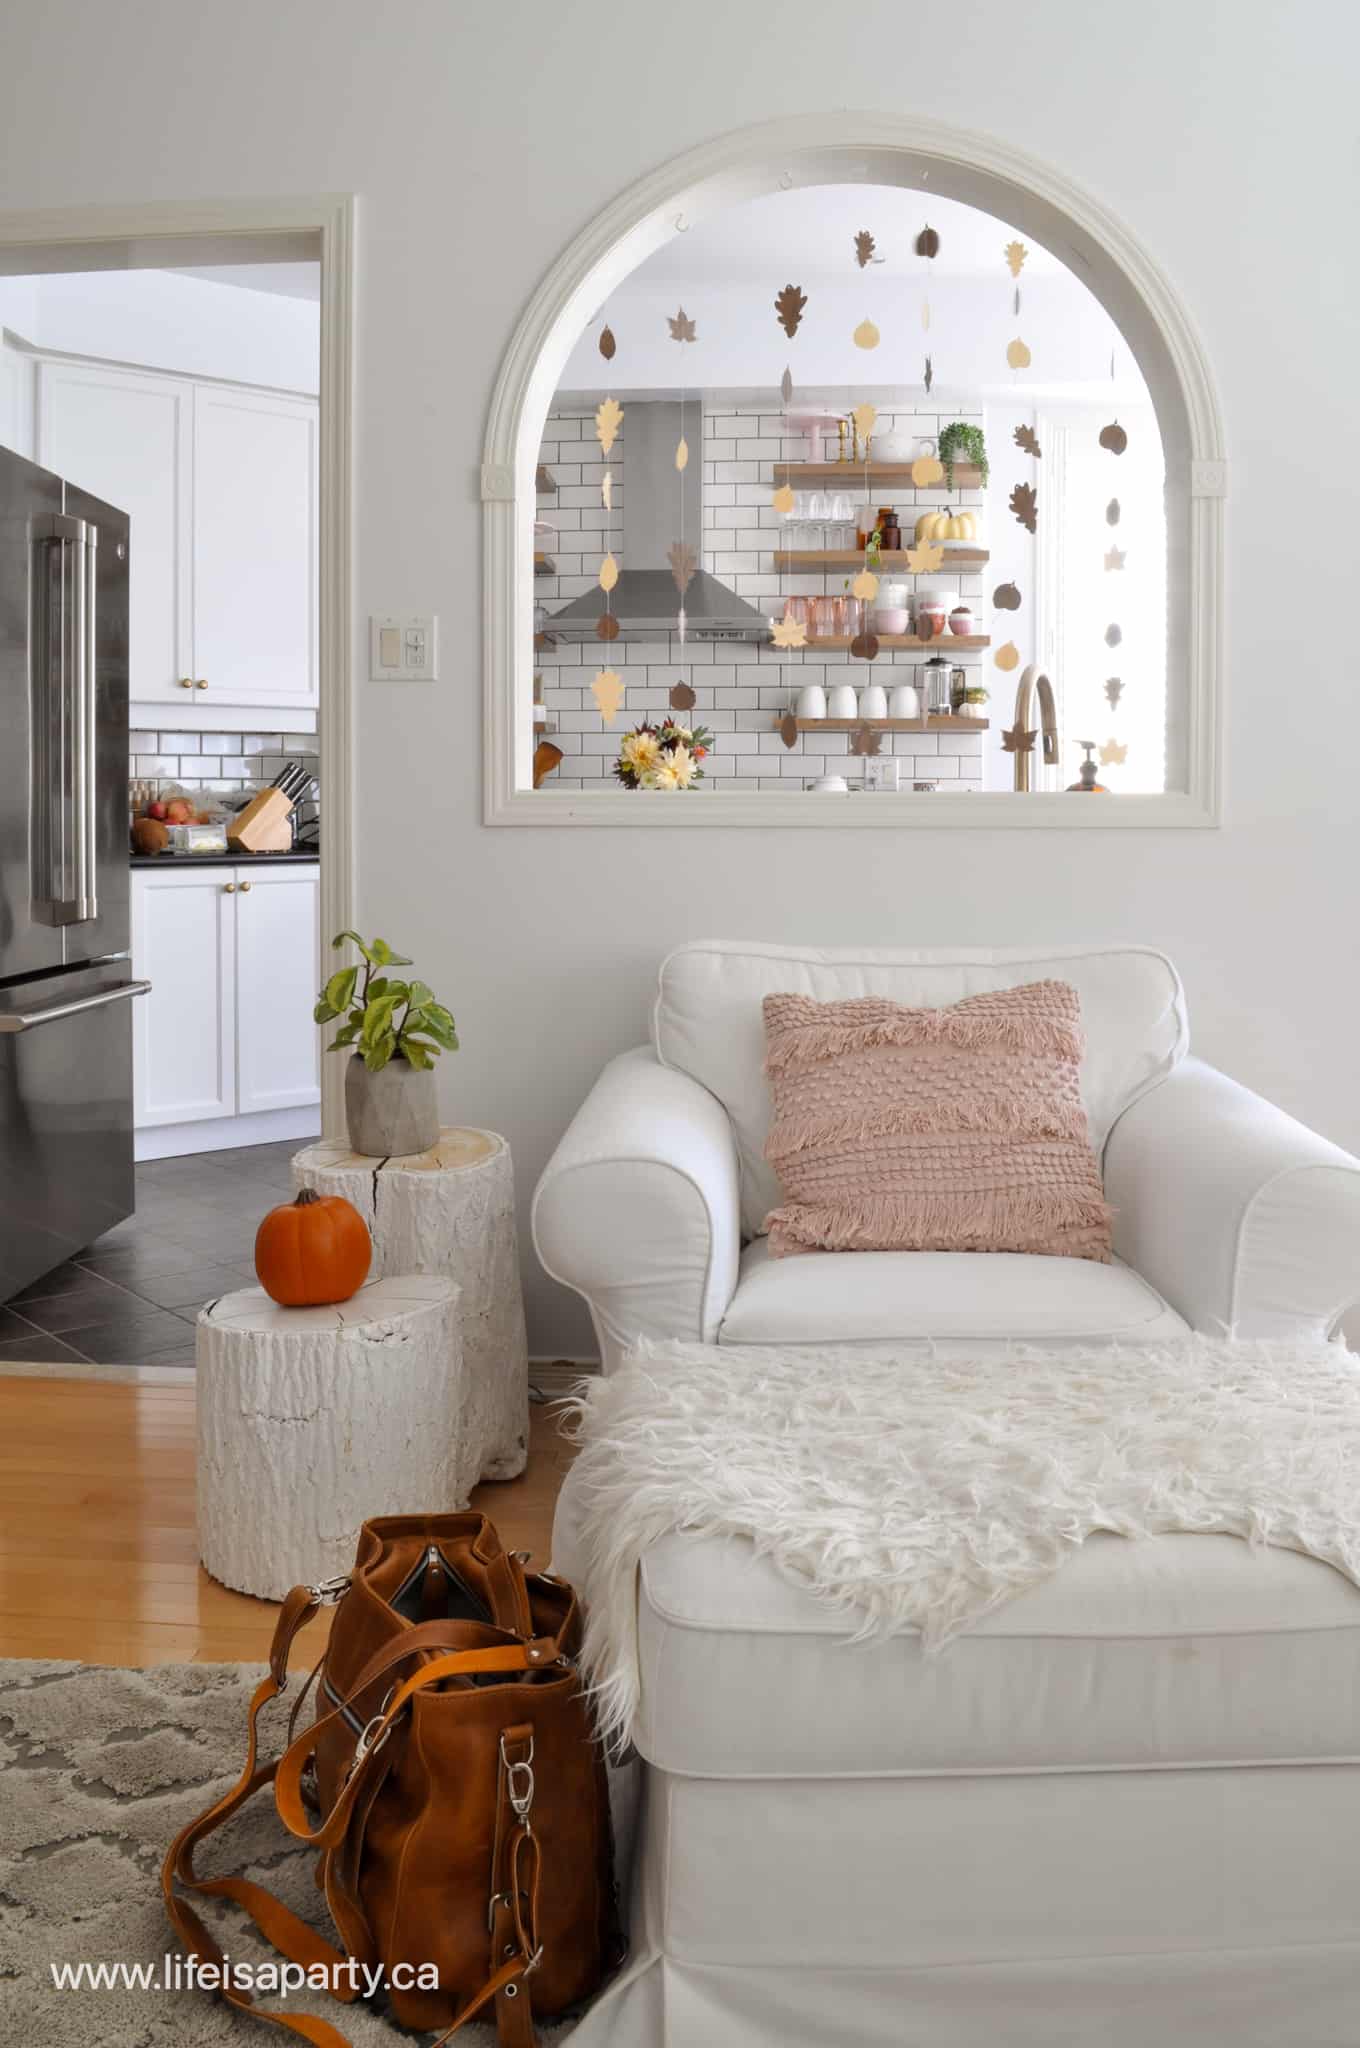
And here is the other side of the room, looking into the kitchen  and dining area.  This is my favourite chair, along with my favourite co-worker Oscar, and my new camera bag that I'm totally in love with.  I had it out to shoot this, and rather than place it out of shot, like I usually do, I included it here because it's so pretty, the perfect colour, and I will certainly spend my fall taking lots of gorgeous pictures.  As I get older, I find myself investing in really functional and beautiful pieces like this.  Life is too short for boring black canvas camera bags -or anything that's functional but not pretty.

fall decorating ideas
dog on chair
fall decor ideas

Heading into the kitchen I love these pretty plants and one little pumpkin.

boho fall decor

Fall Decorating Ideas in the Kitchen

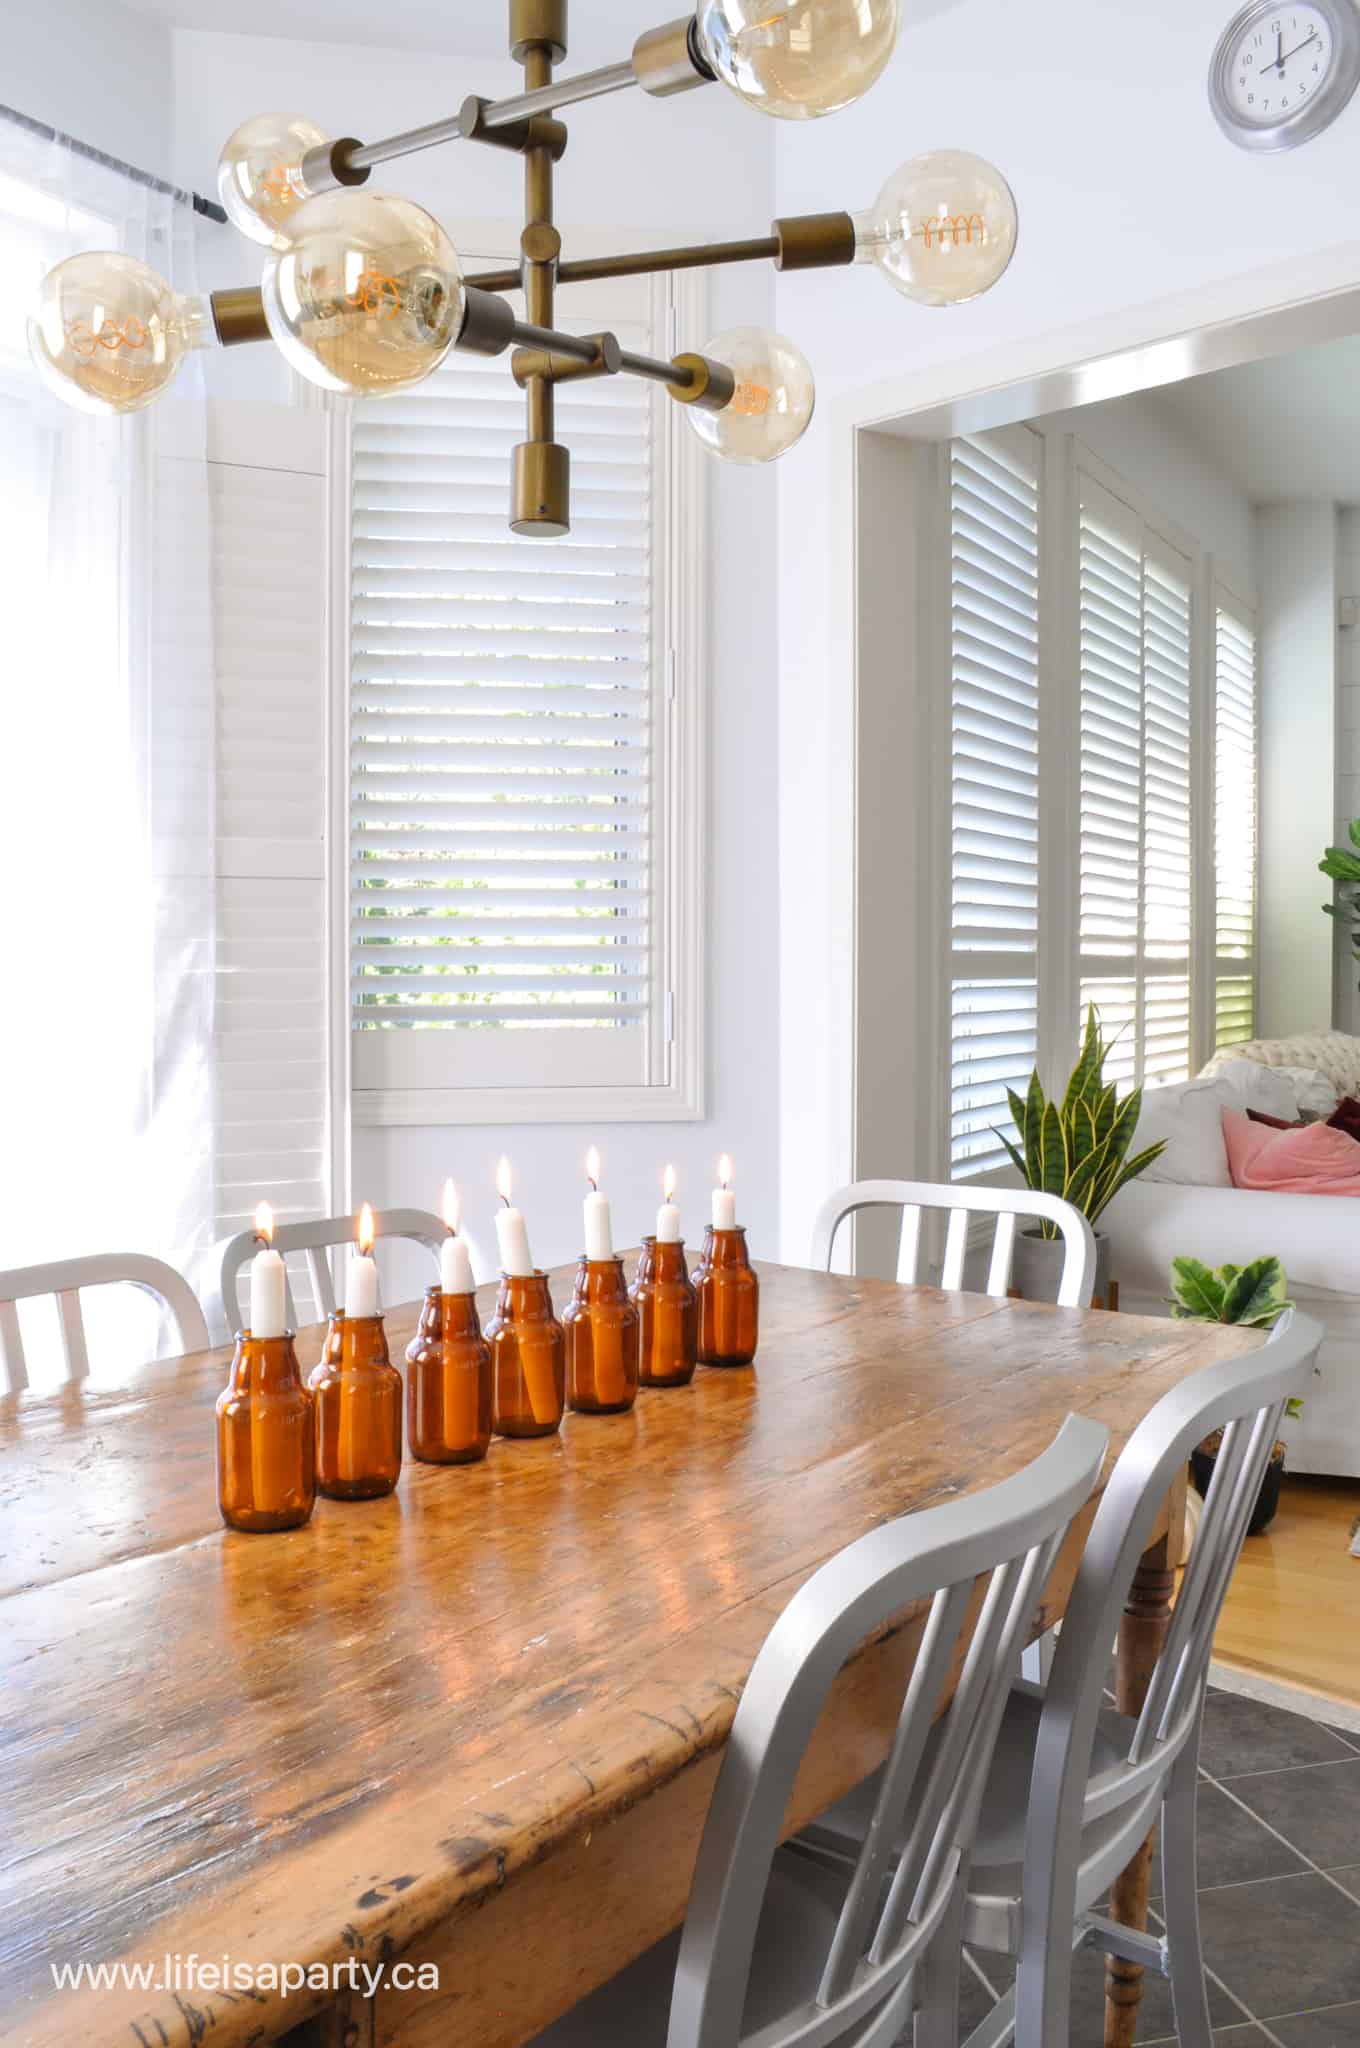
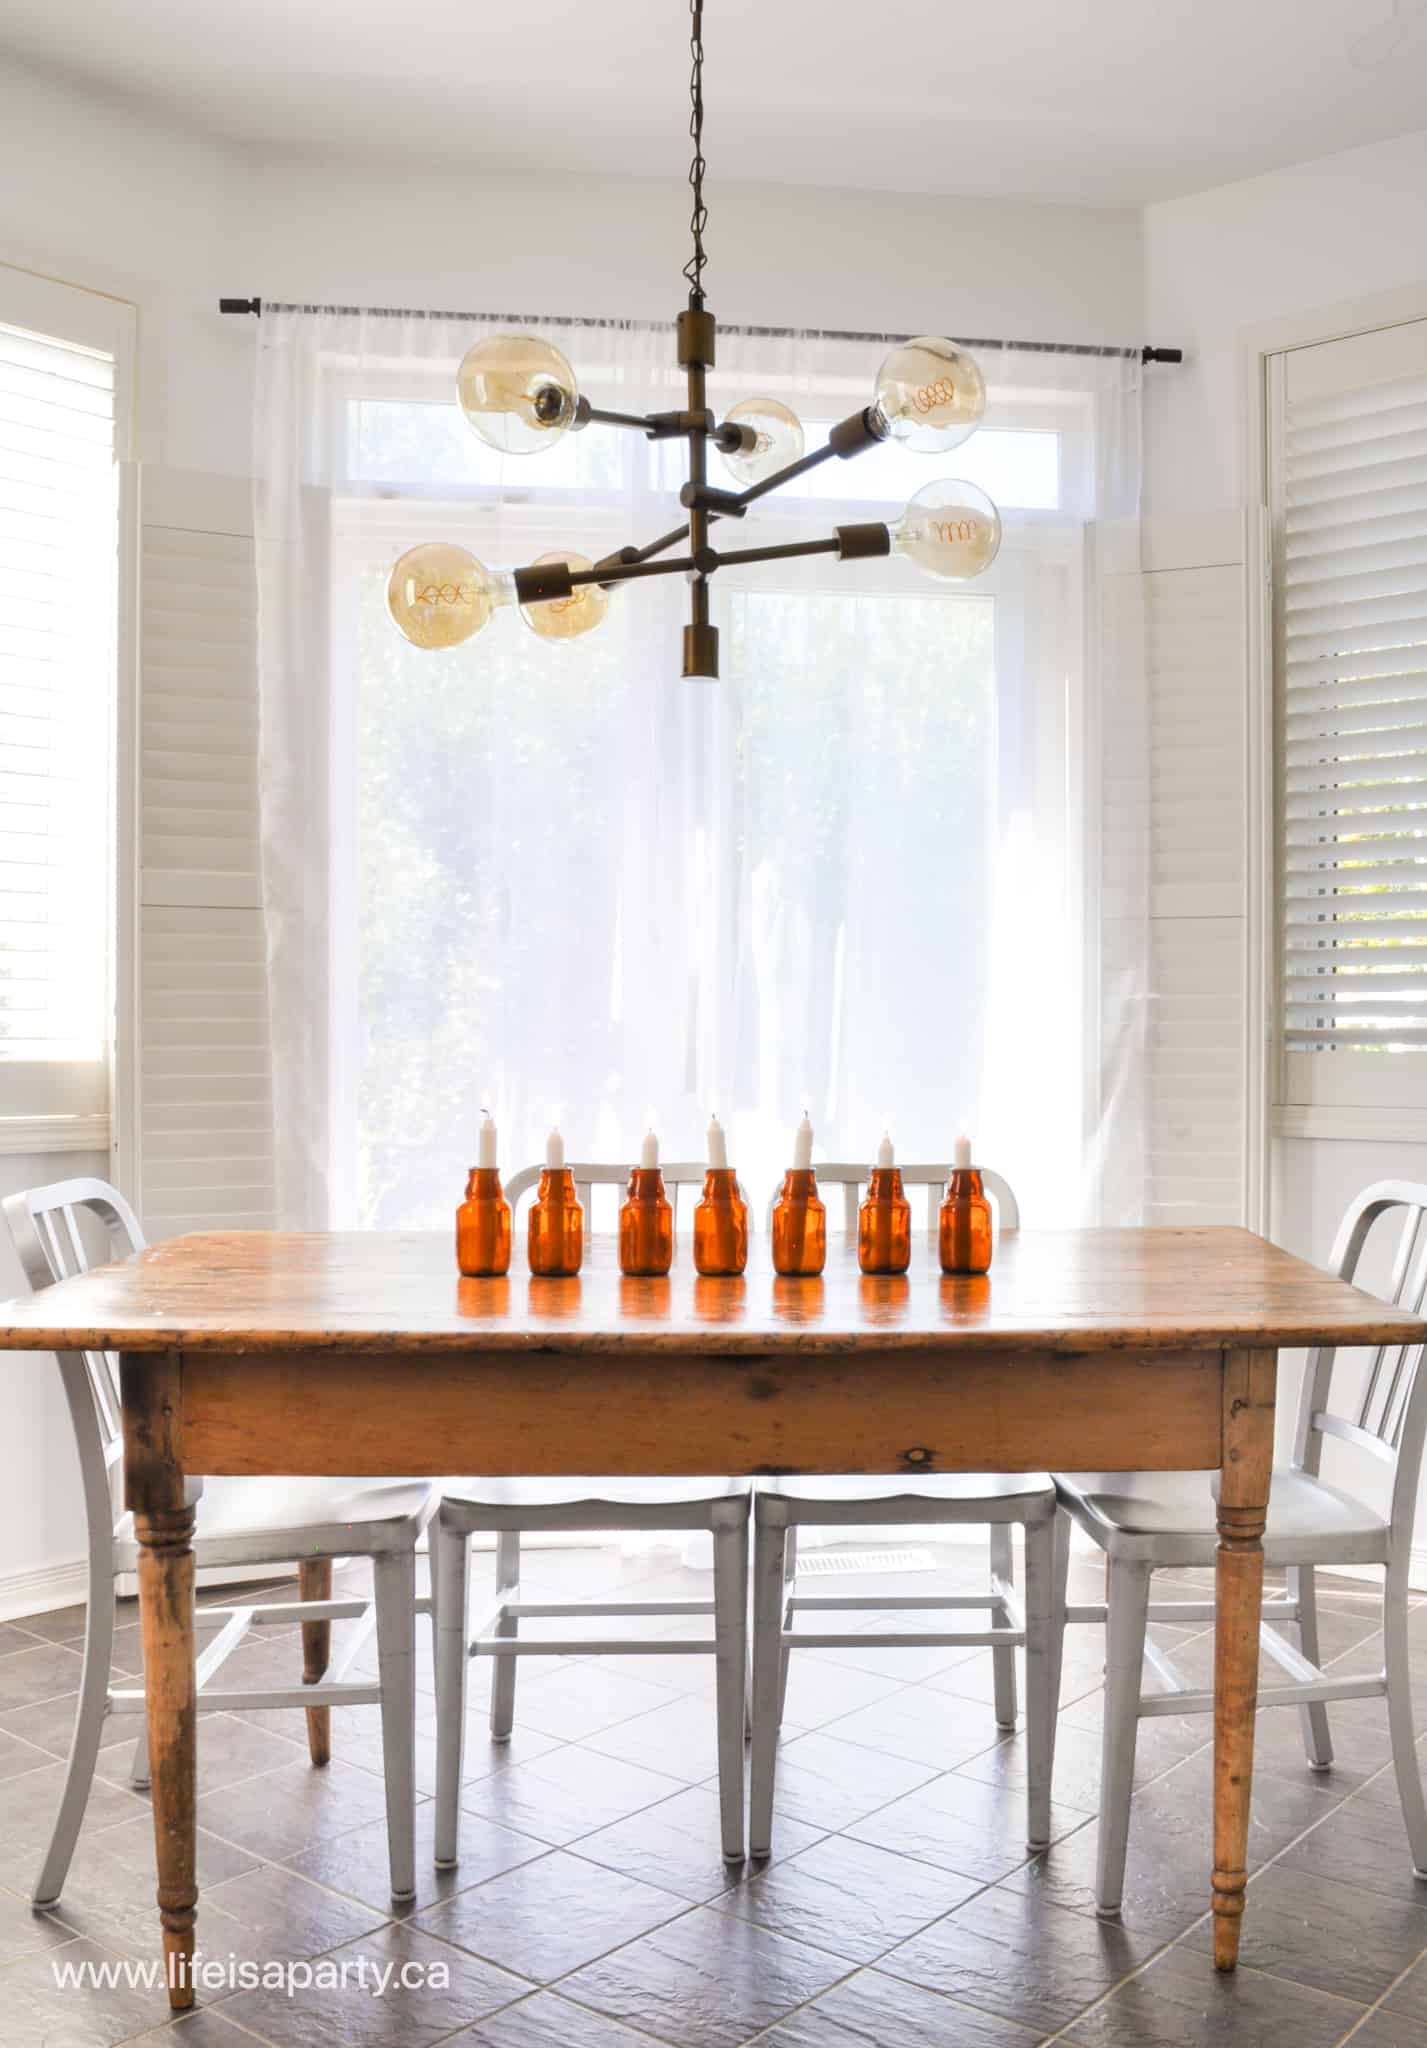
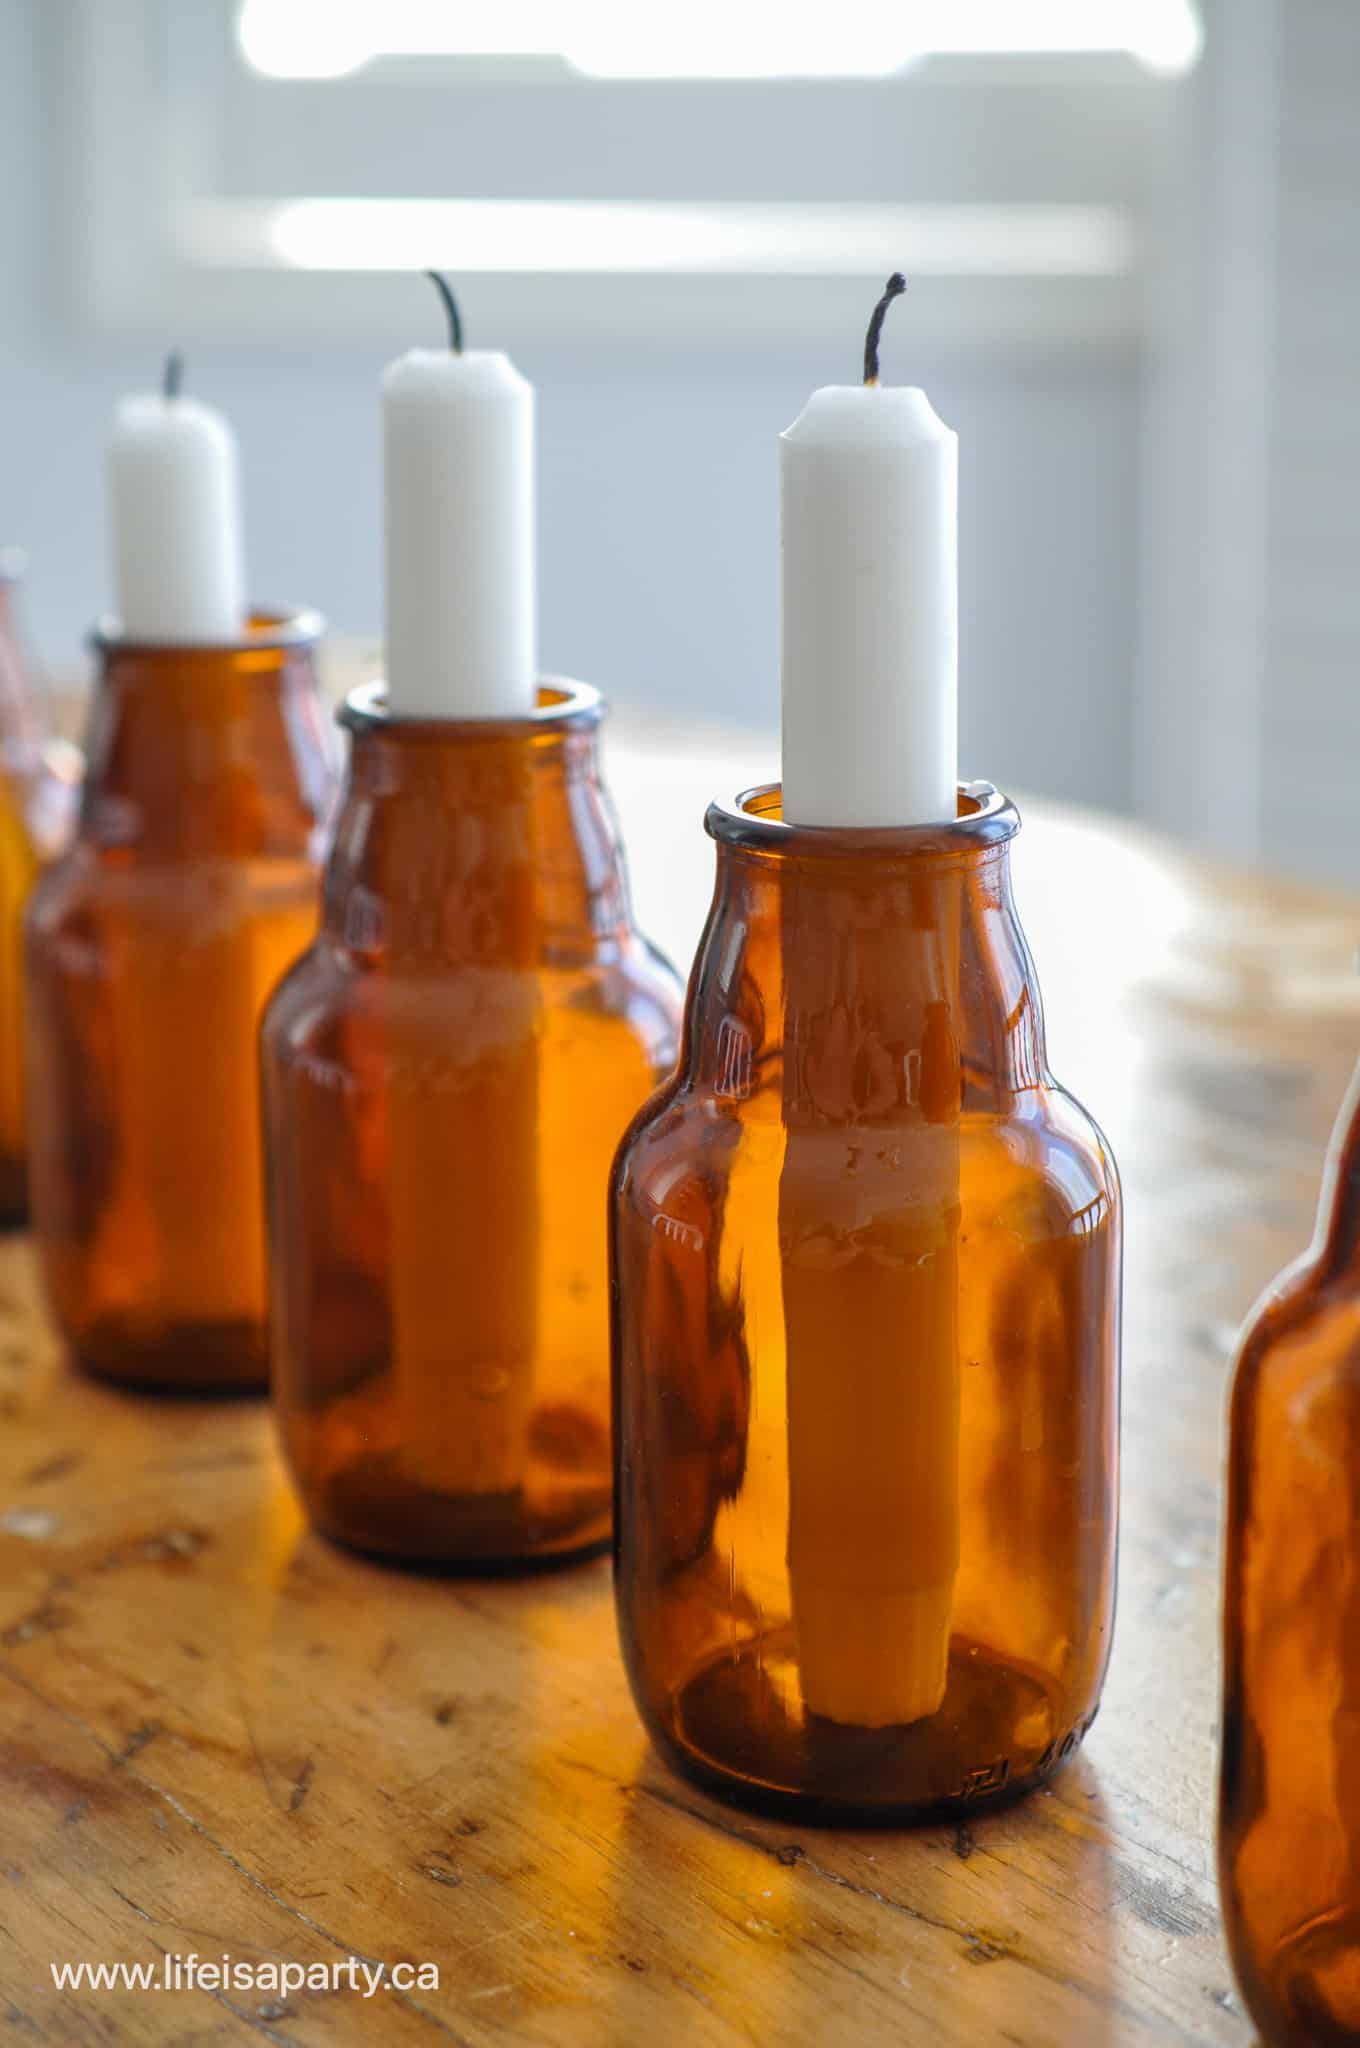
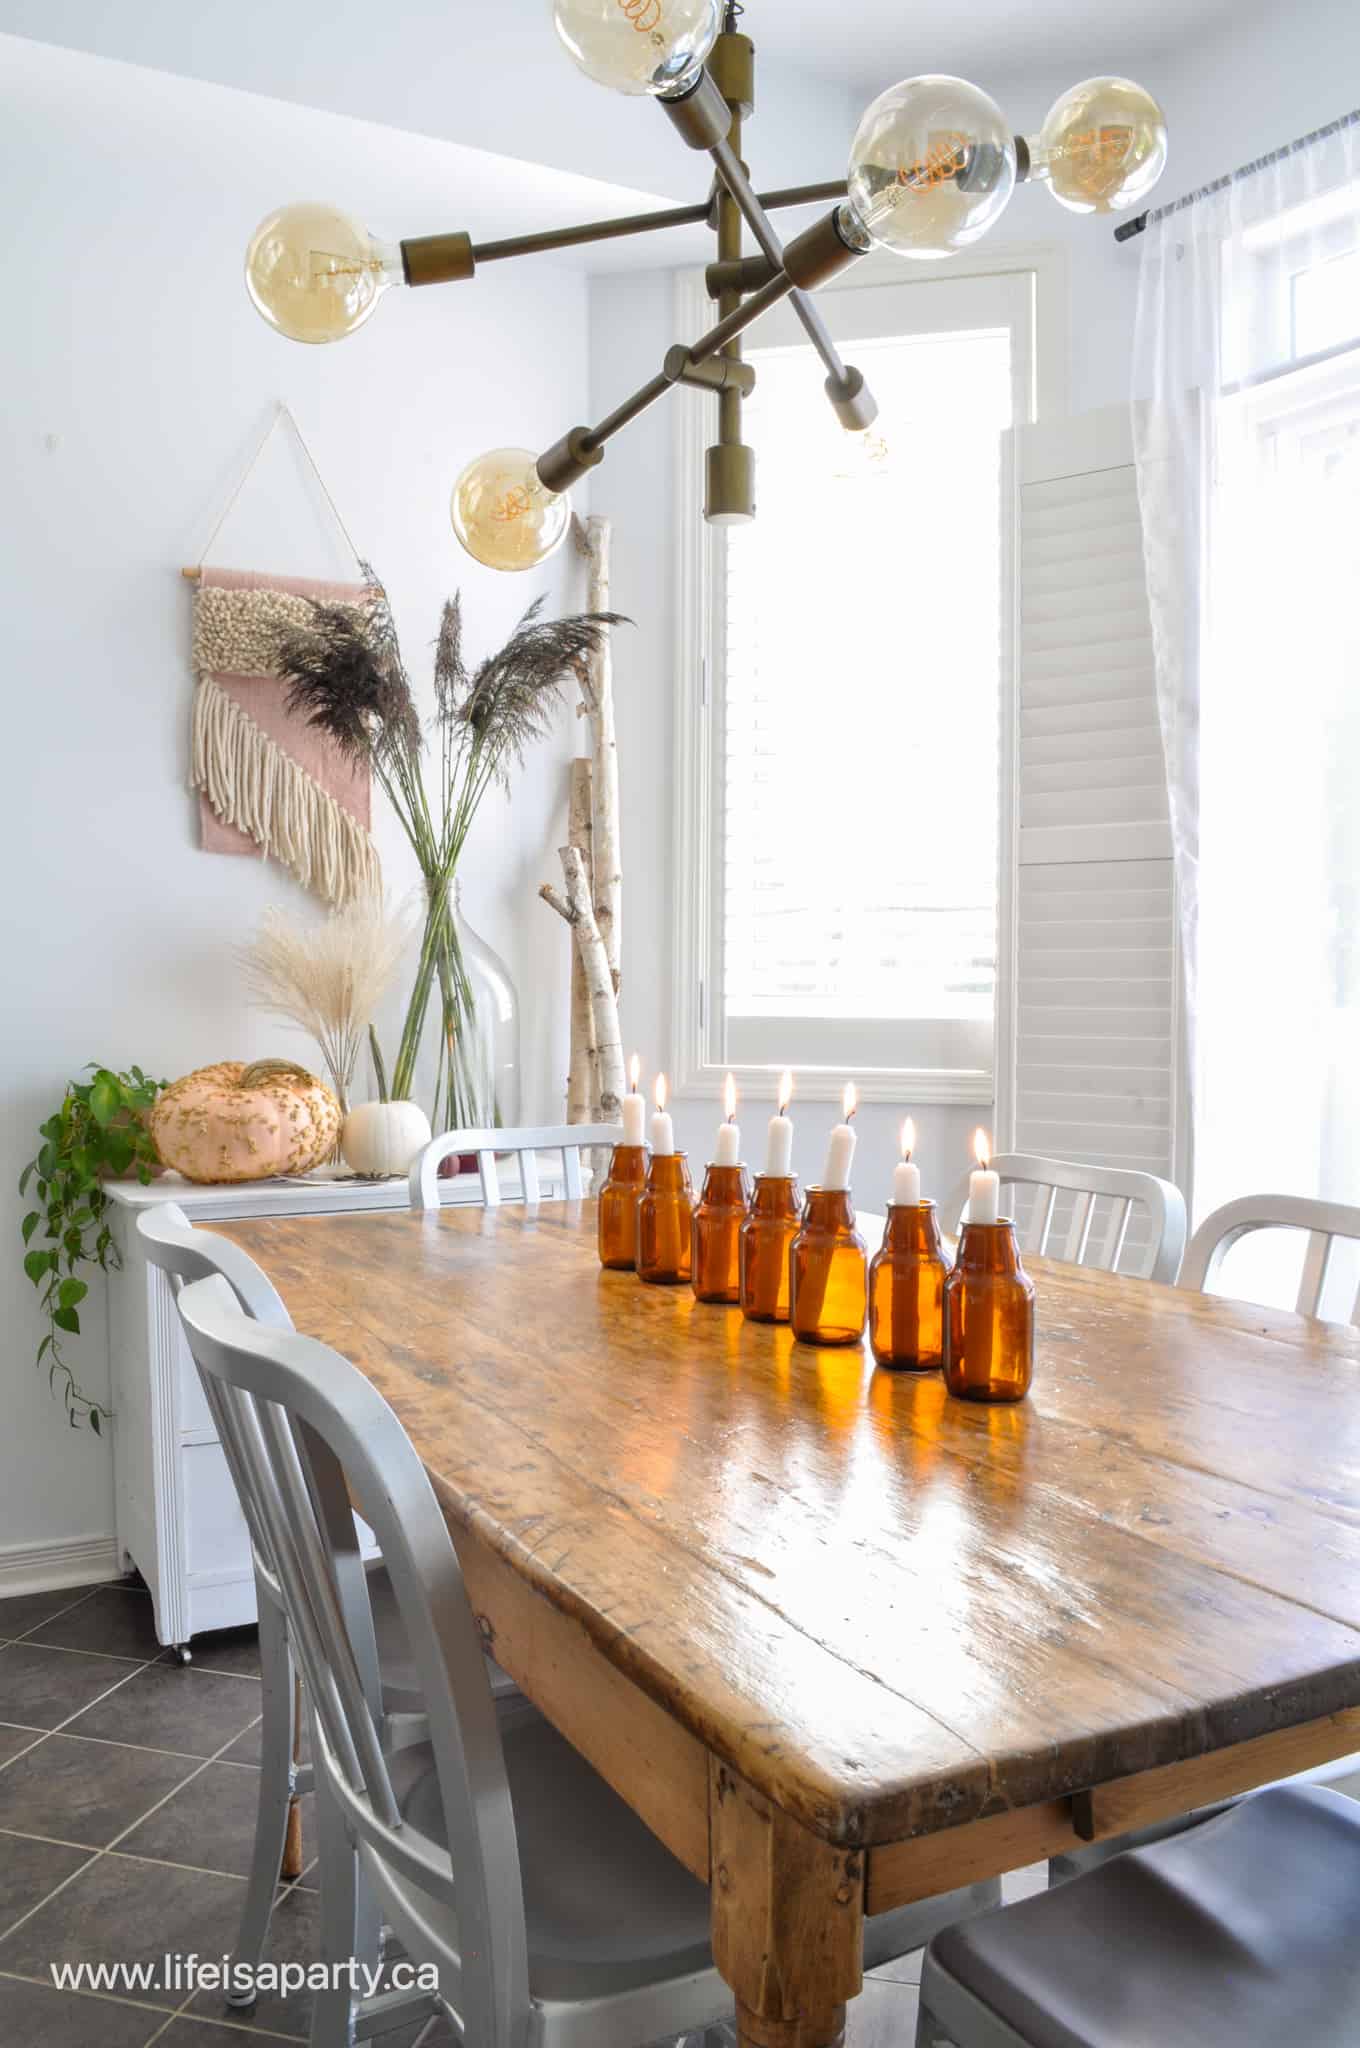
I love decorating and often seem to go with a more is more look.  But I have found that it can be a bit of a pain to live with on the kitchen table.  So I've kept things simple over here.  I found this set of amber glass bottles thrifting this summer, and thought they'd be really sweet together on a table.  They'd make great vases, but I used them as candle holders, with a mix-match of white candles inside.  They look so pretty all lit.

amber glass bottles with candles in them
dining table with amber glass
amber glass bottles with candles in them
kitchen decorated for fall

On the back area I've hung a pretty wall hanging in pink.  There's also more grasses, and more pumpkins.  I love to repeat elements when I decorate.  I feel like it helps make things feel cohesive and pulled together.

boho fall decor ideas
boho fall decorating ideas
pink and white pumpkin

Fall Flowers and Garden Pumpkins

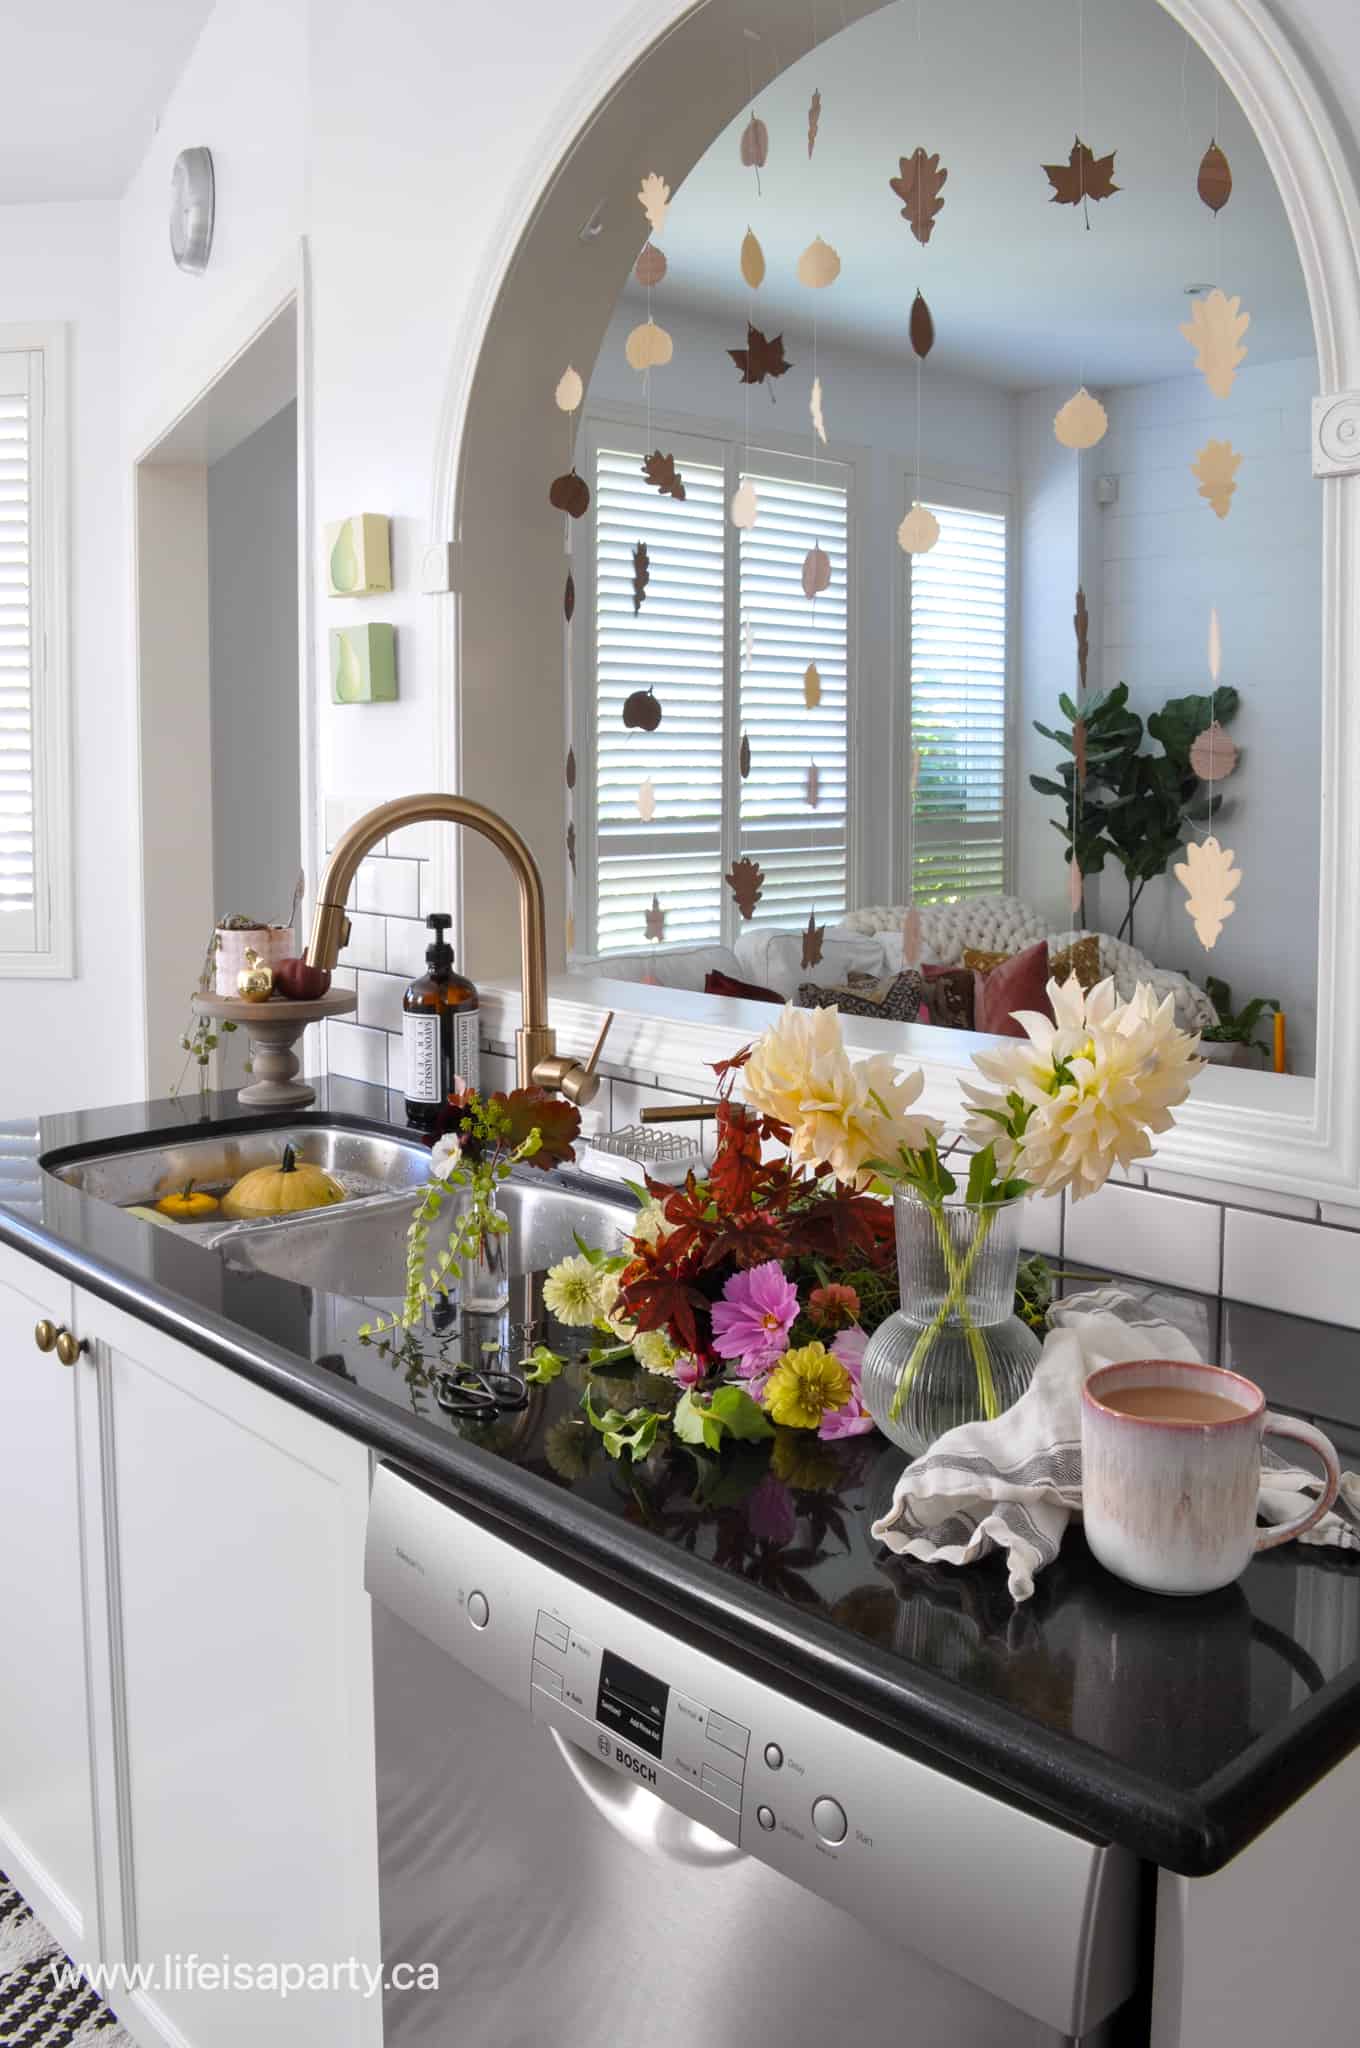
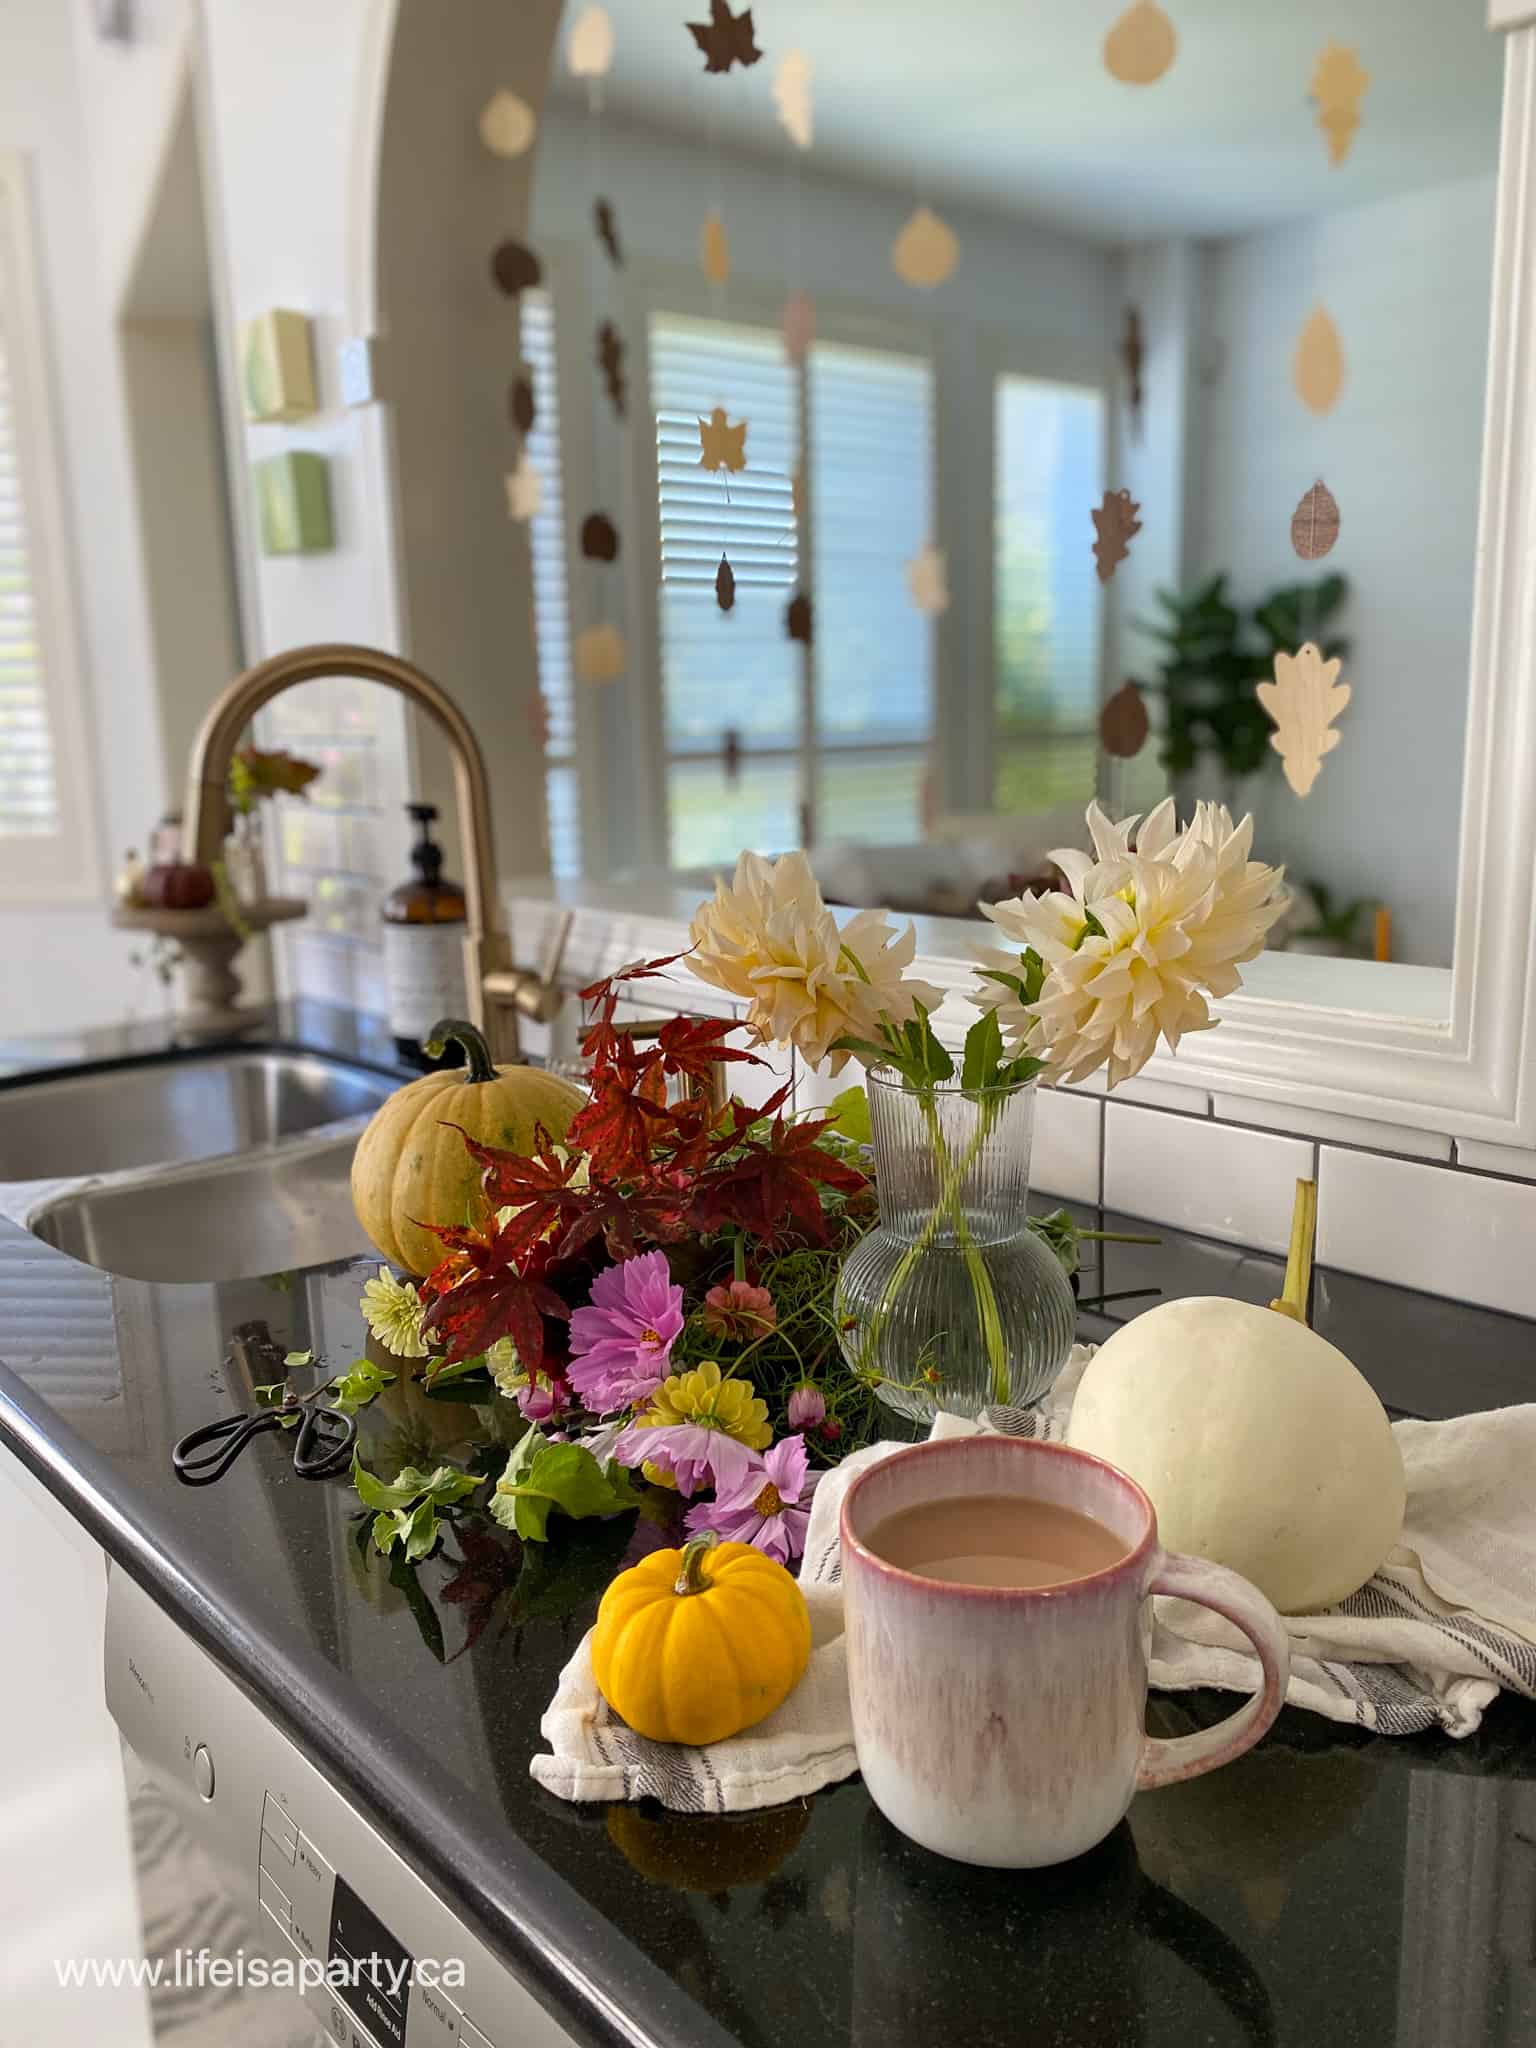
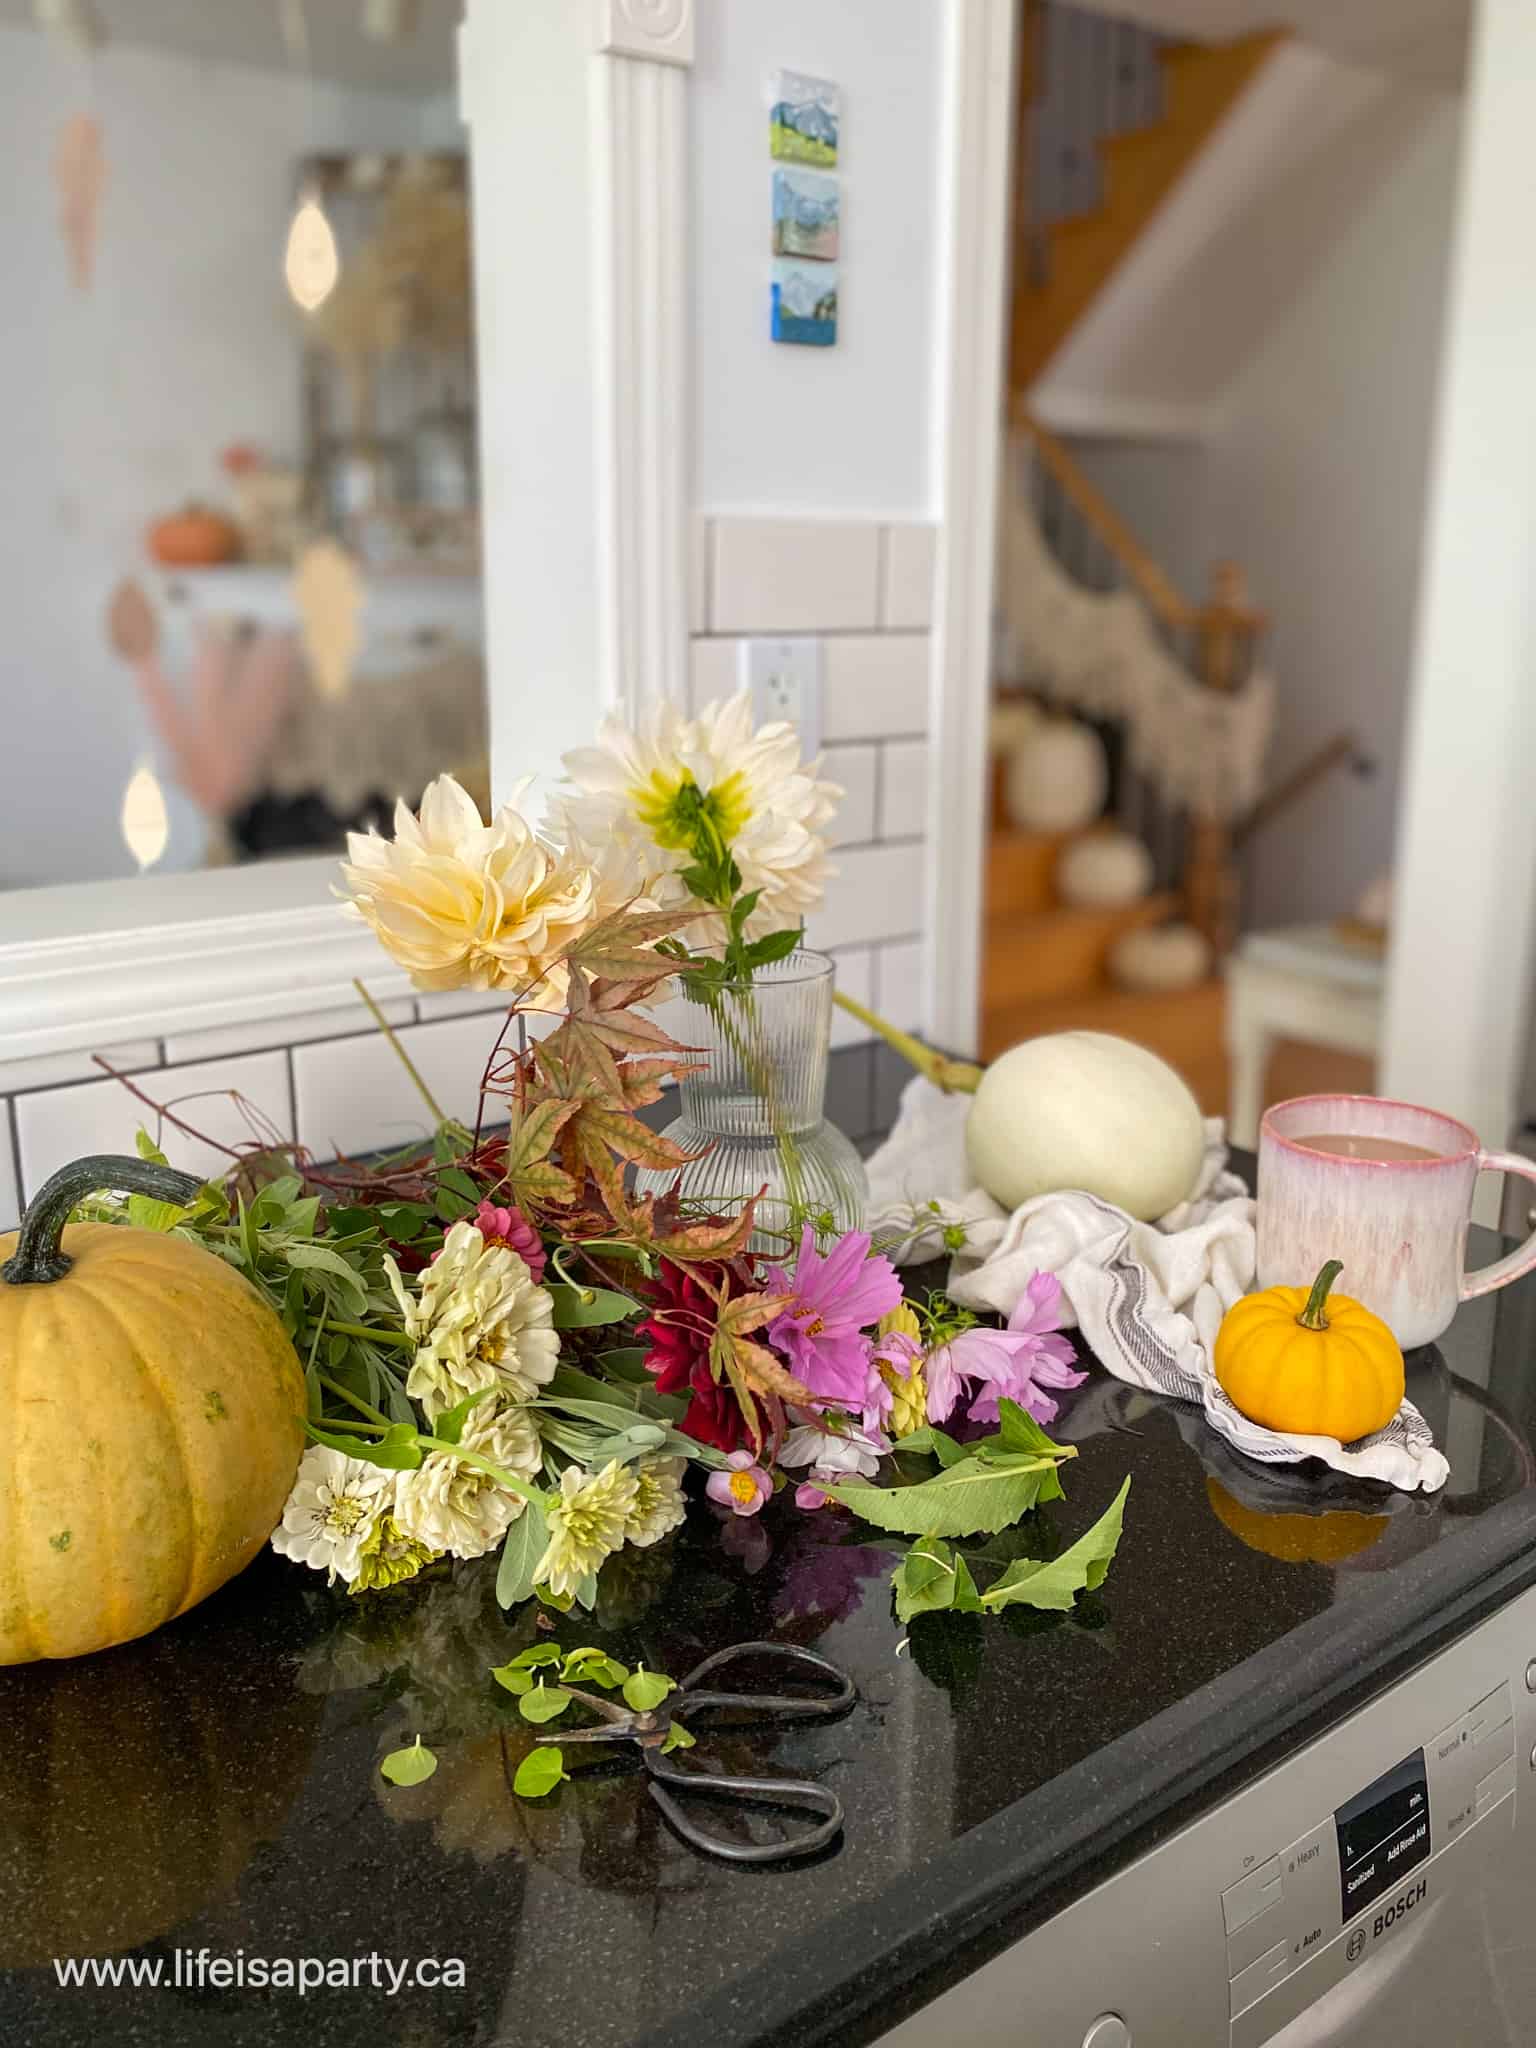
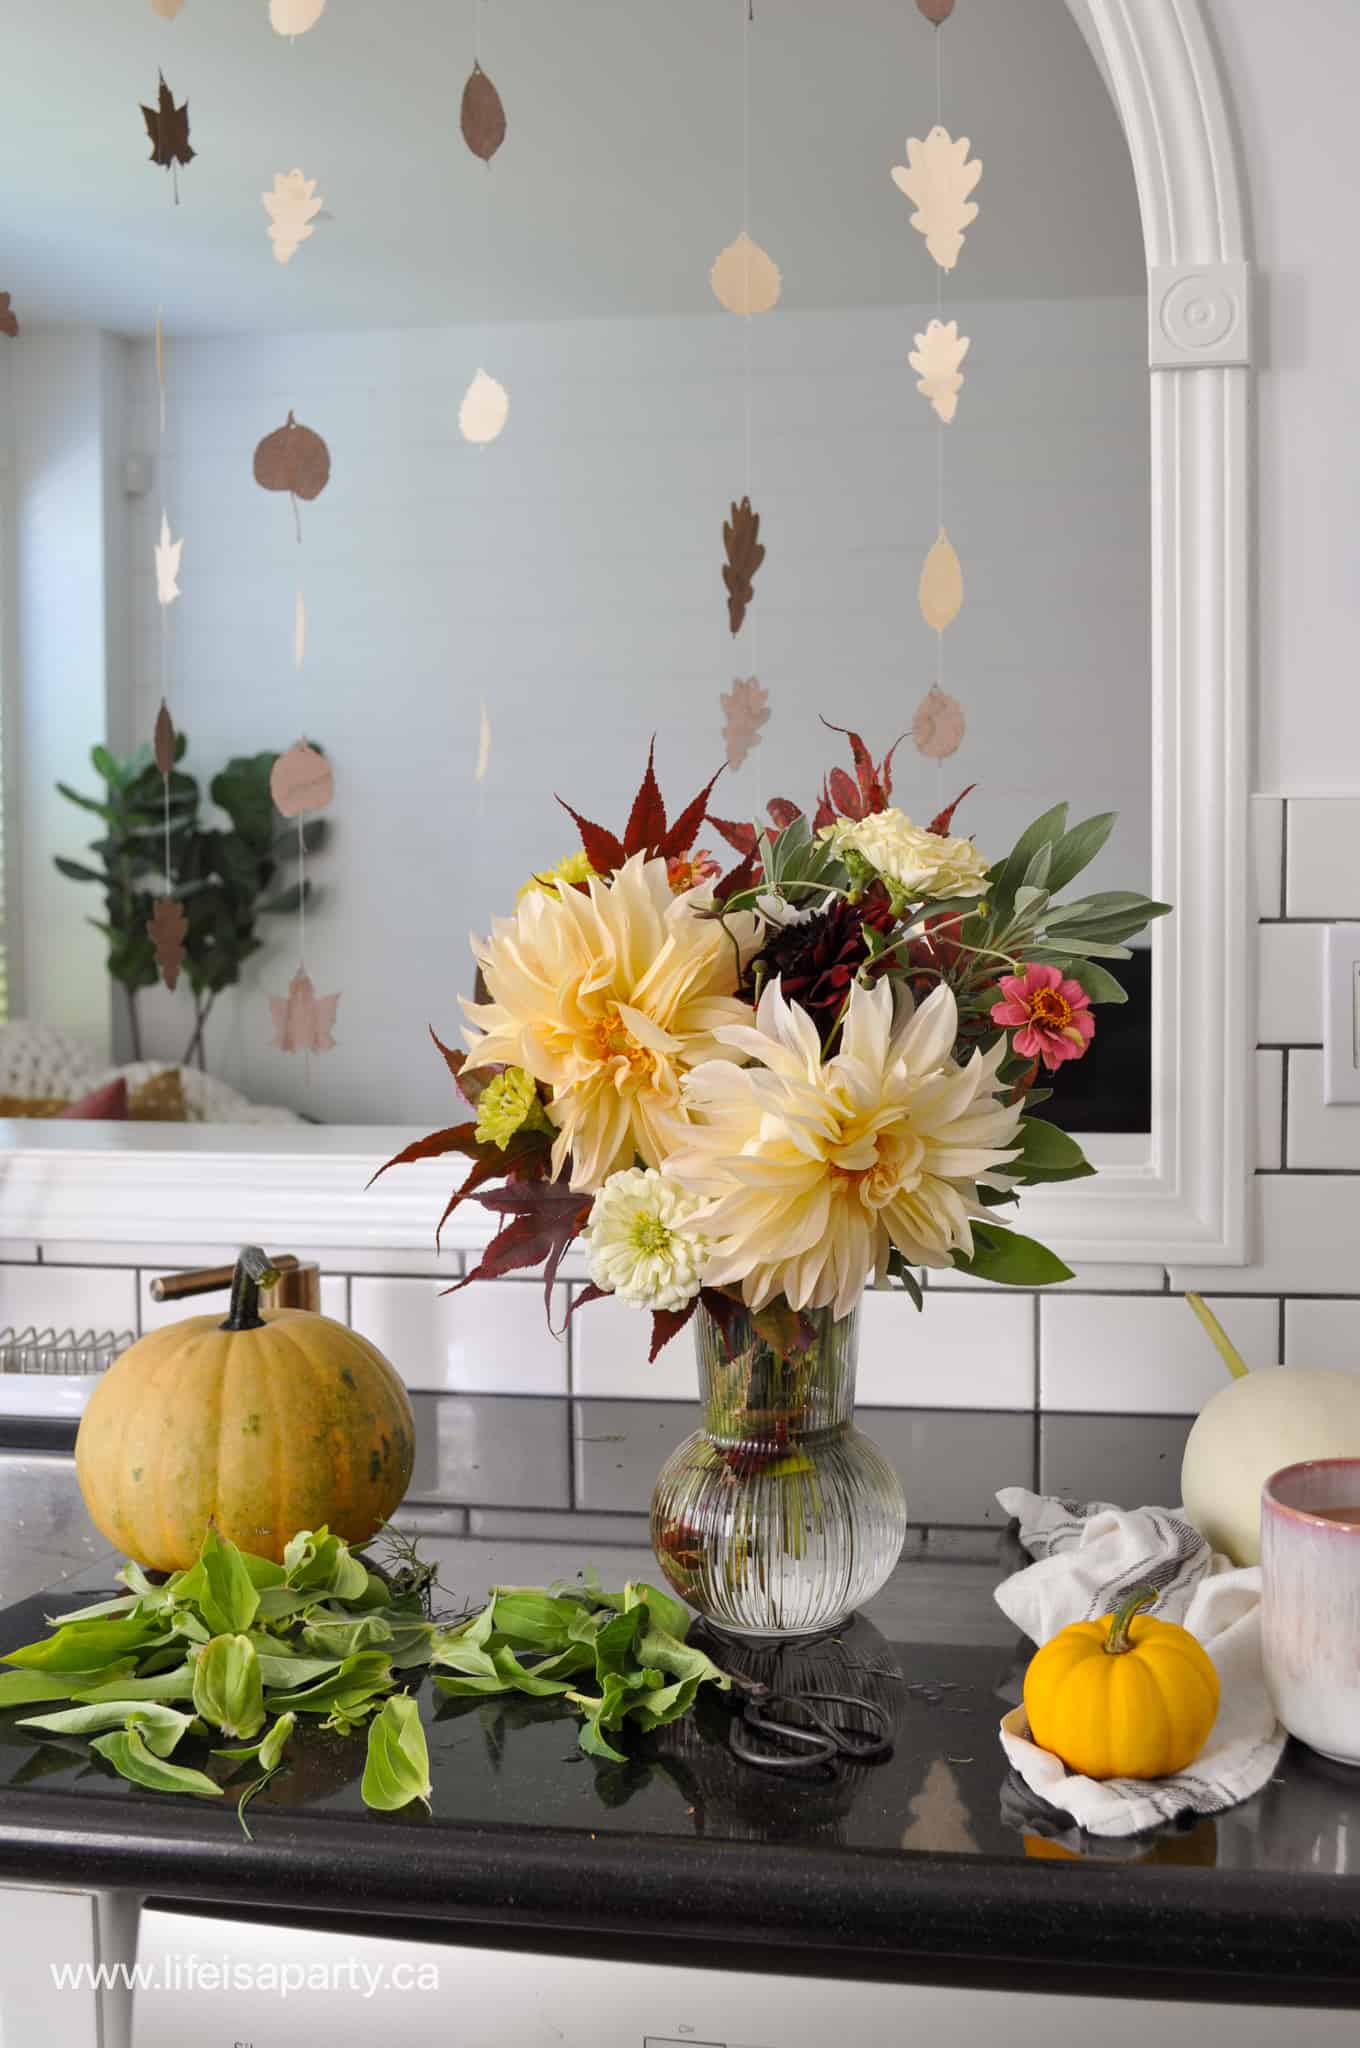
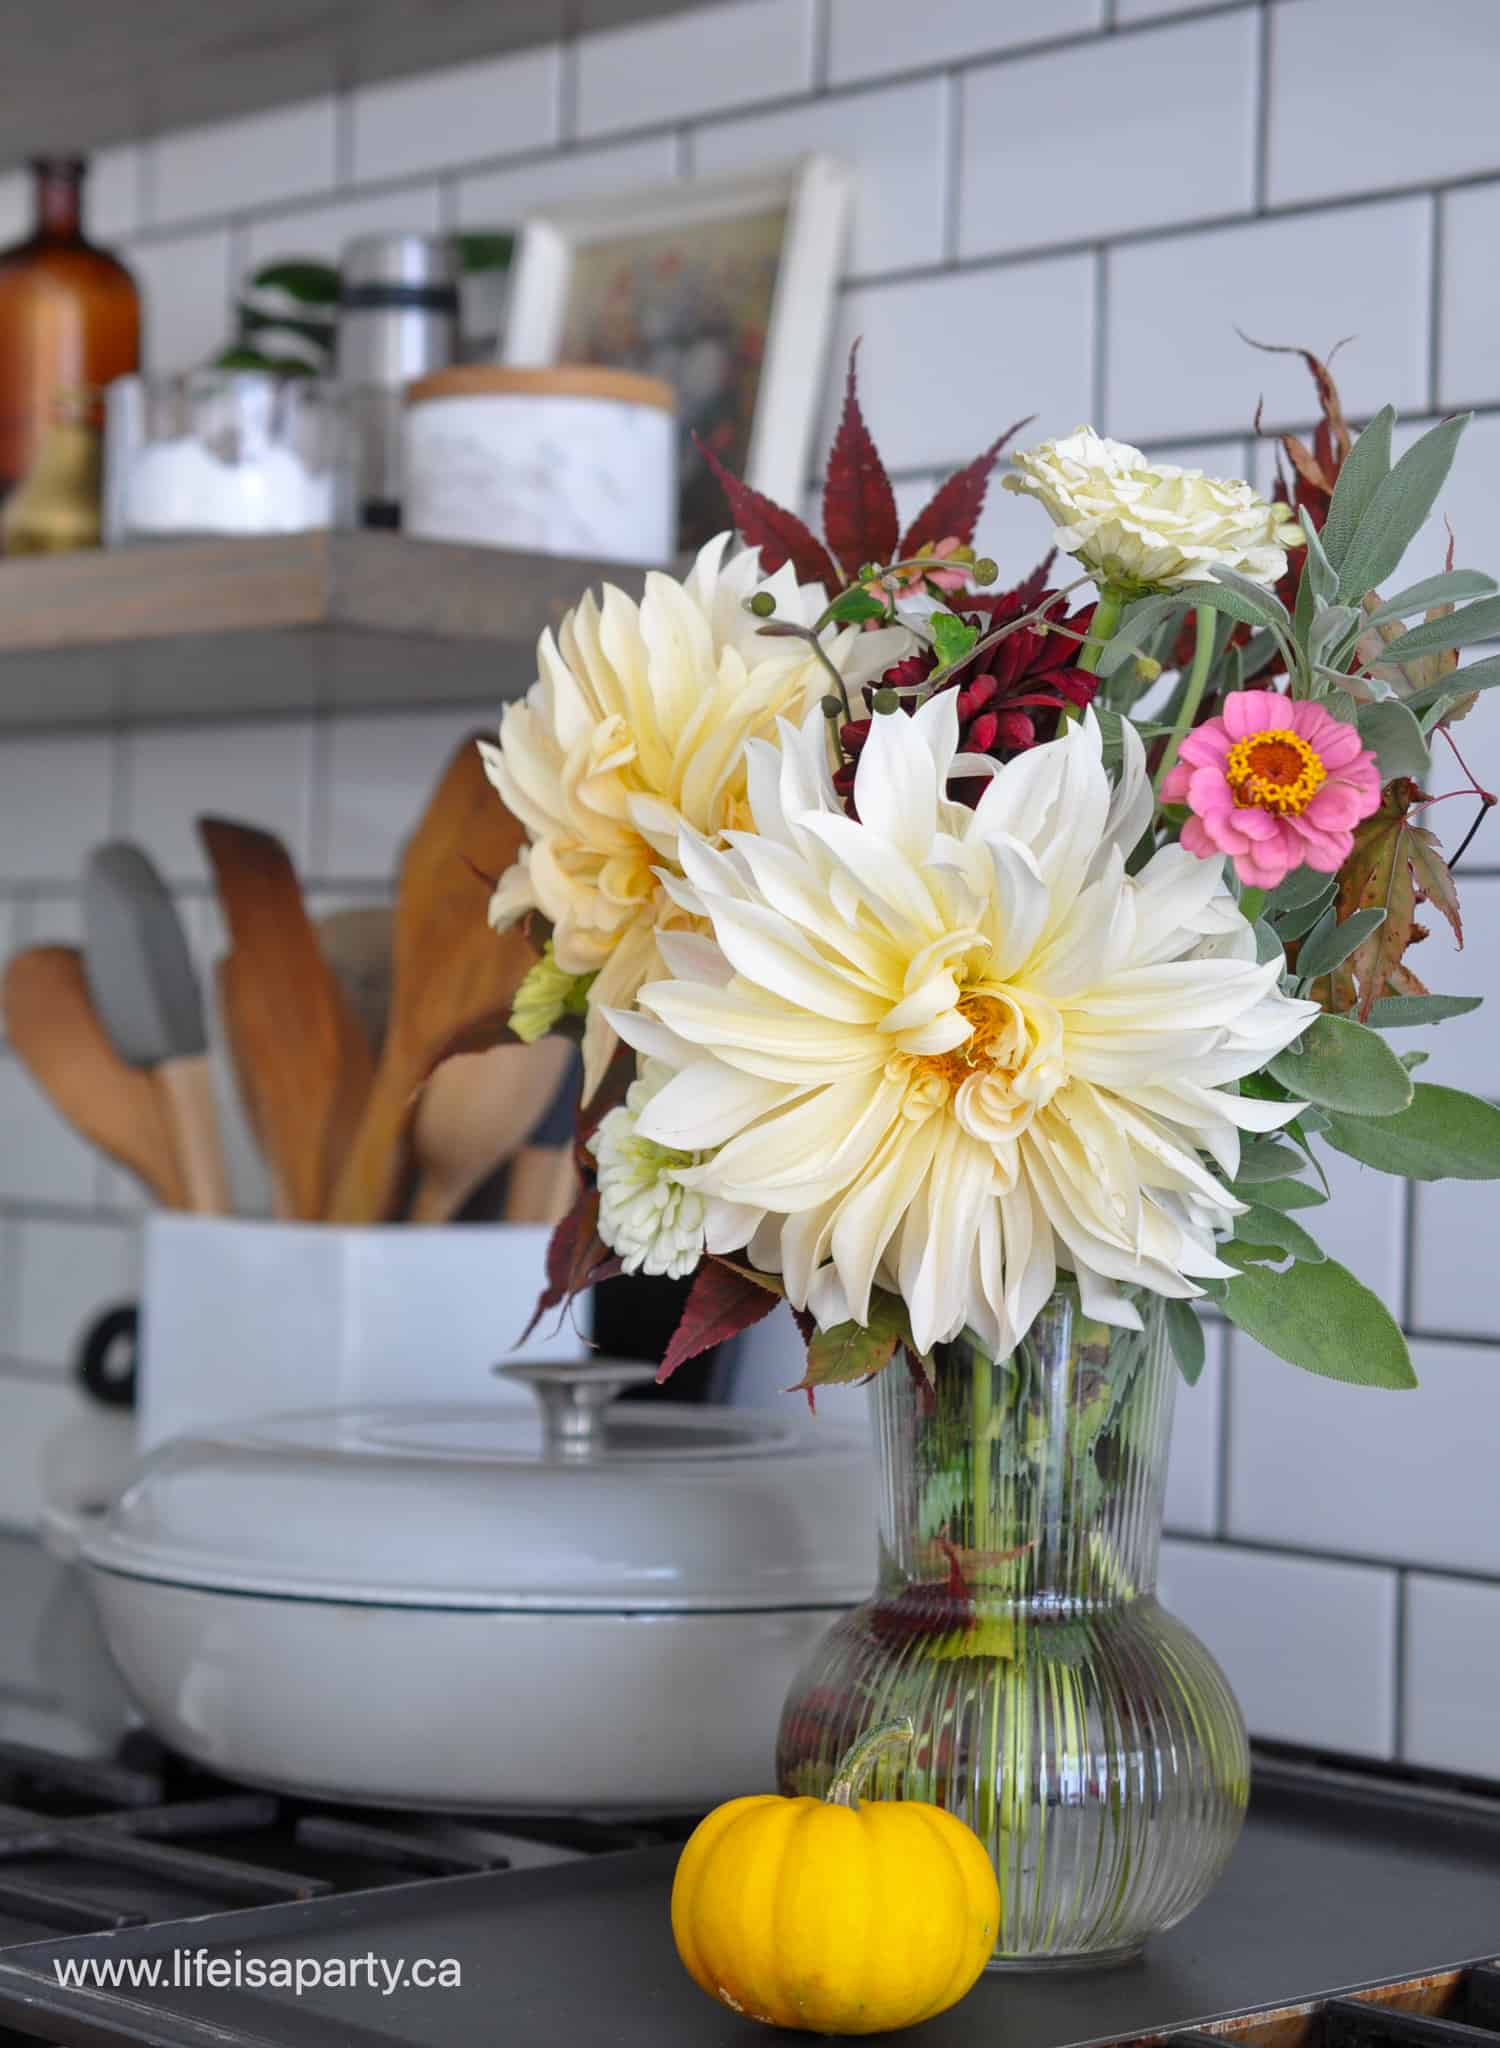
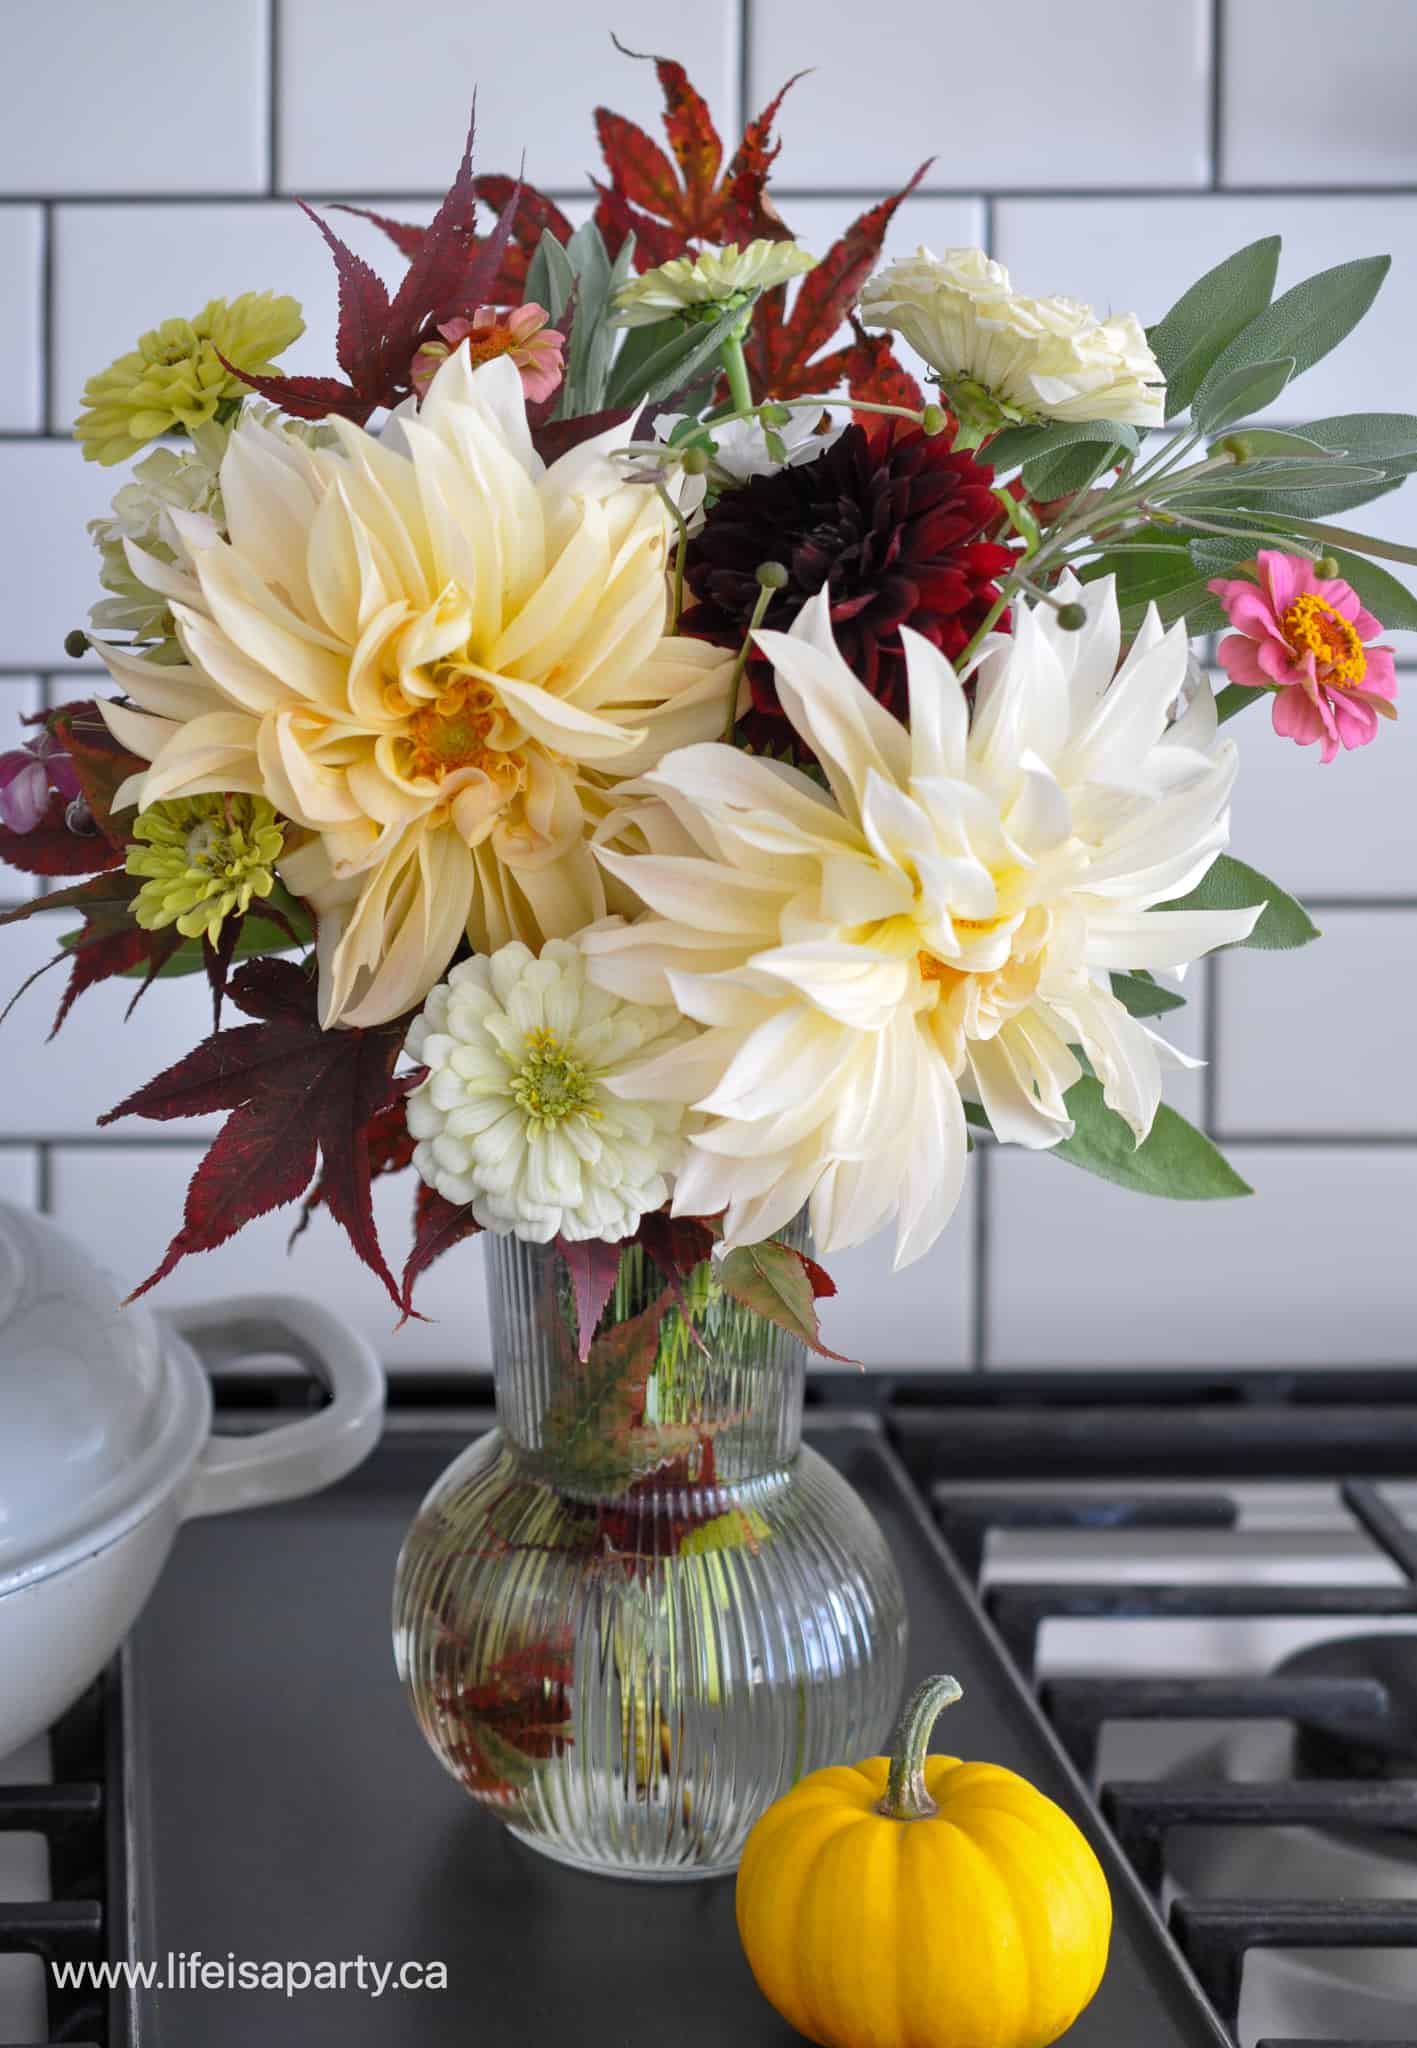
Over on the counter I've picked some flowers from my garden.  This was my first year experimenting with growing dahlias.  There were some lows, and lots of learning but also some highs like these beautiful big blooms.  I picked some other flowers and leaves in pinks and rusts to create a pretty arrangement.

fall kitchen decorating ideas
fall decorating ideas in the kitchen
fall flower arranging

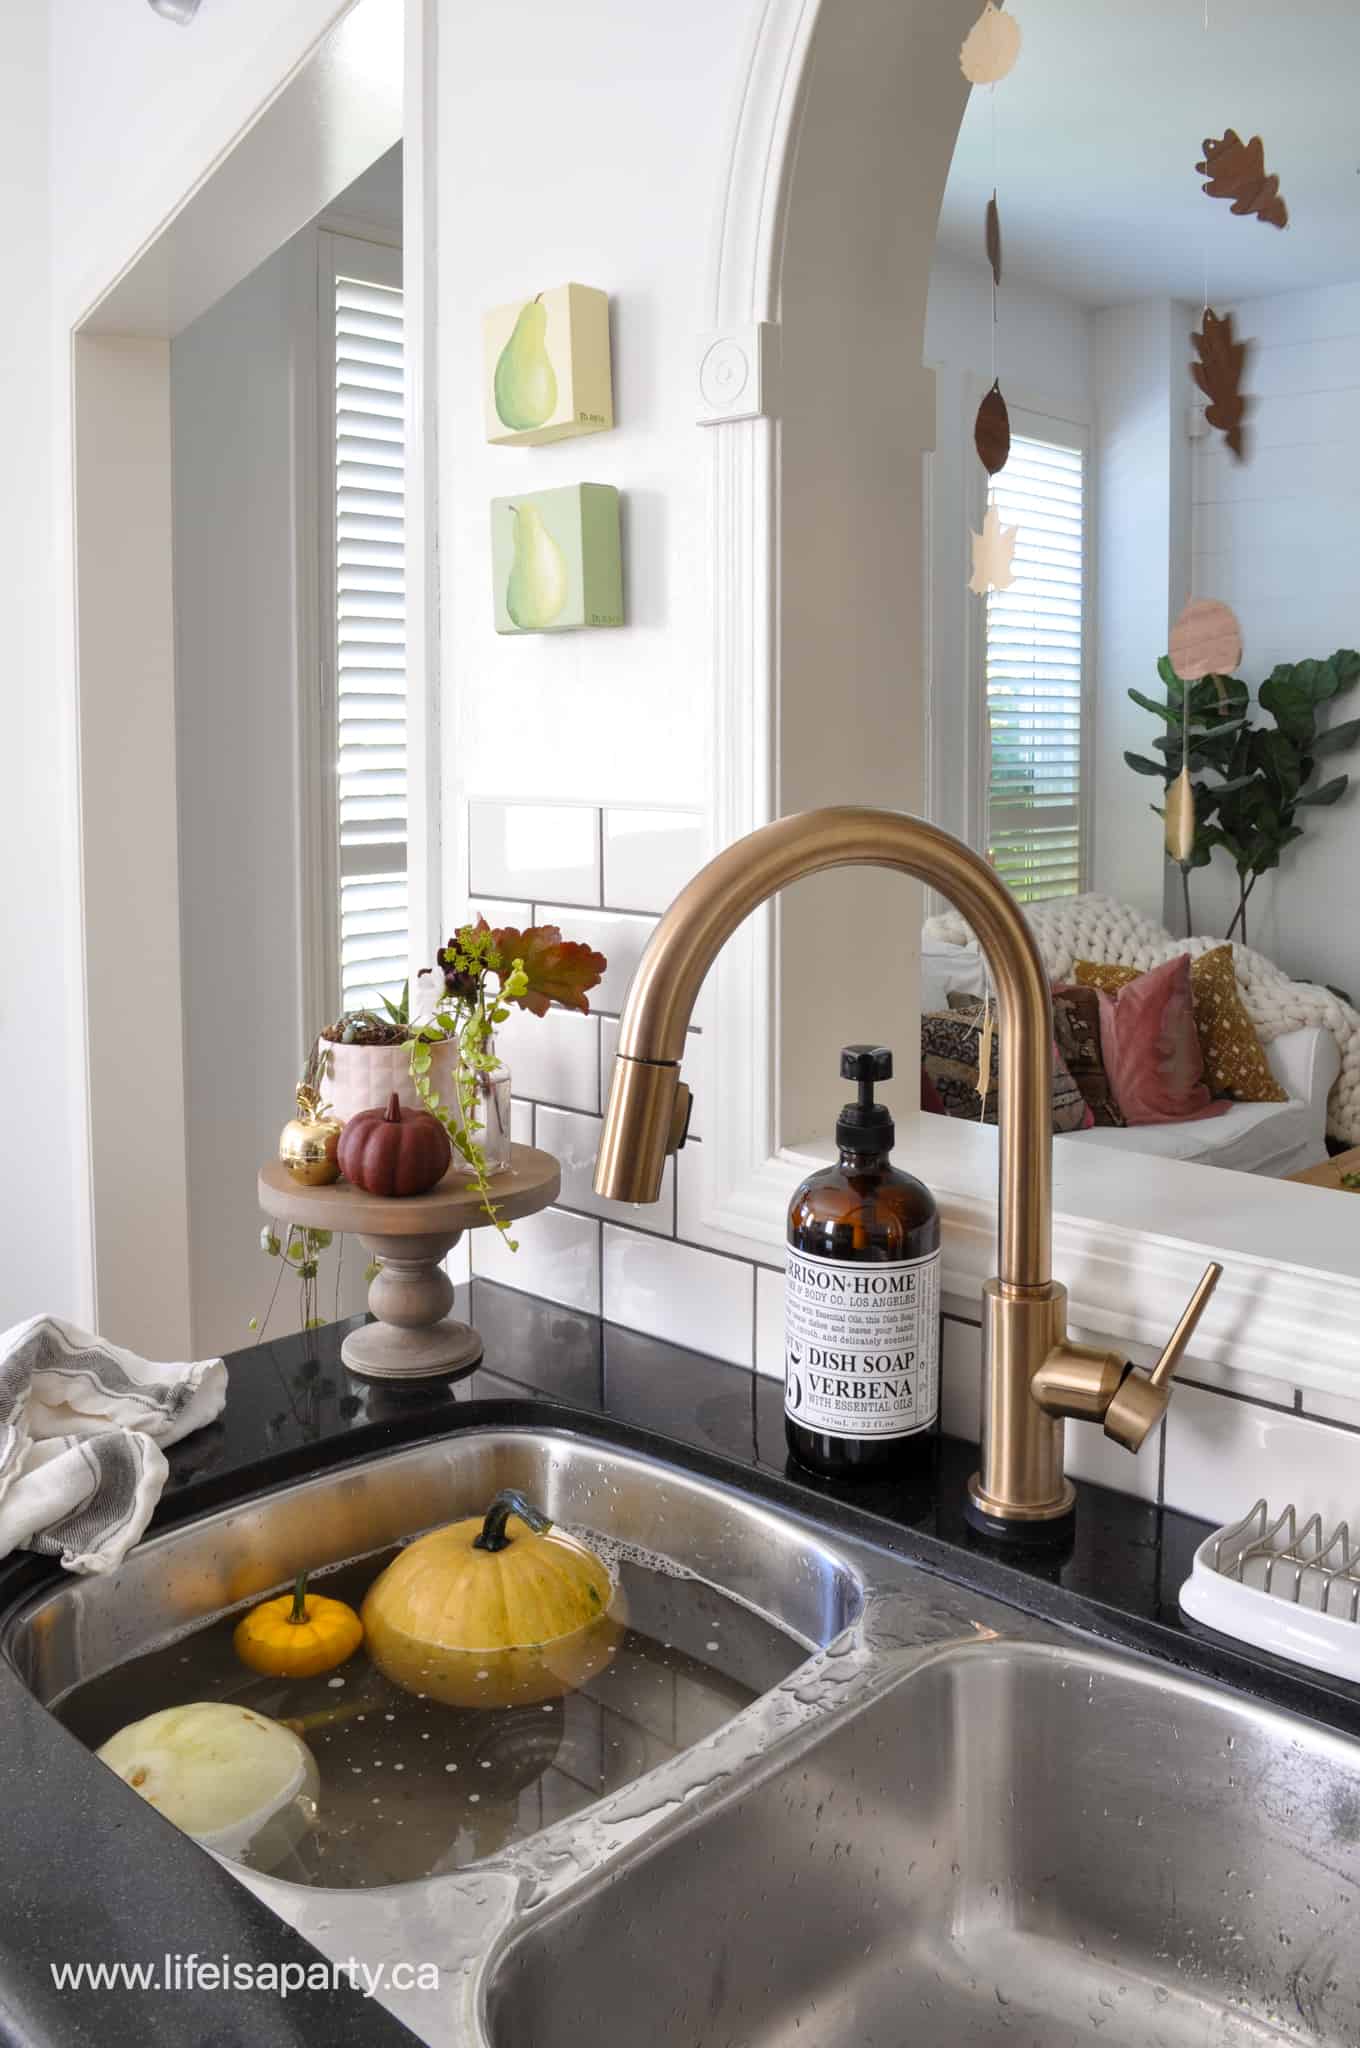
And in the sink are a few more of the pretty little pumpkins from my garden.  Be sure to give your pumpkins a bath to remove any dirt, which will help them to last longer too.  Some people add in bleach or vinegar too.  Another tip is to cut a small piece of parchment paper and put it under any of your real pumpkins that you're using inside to protect the surfaces they're sitting on.

washing pumpkins in the kitchen sink

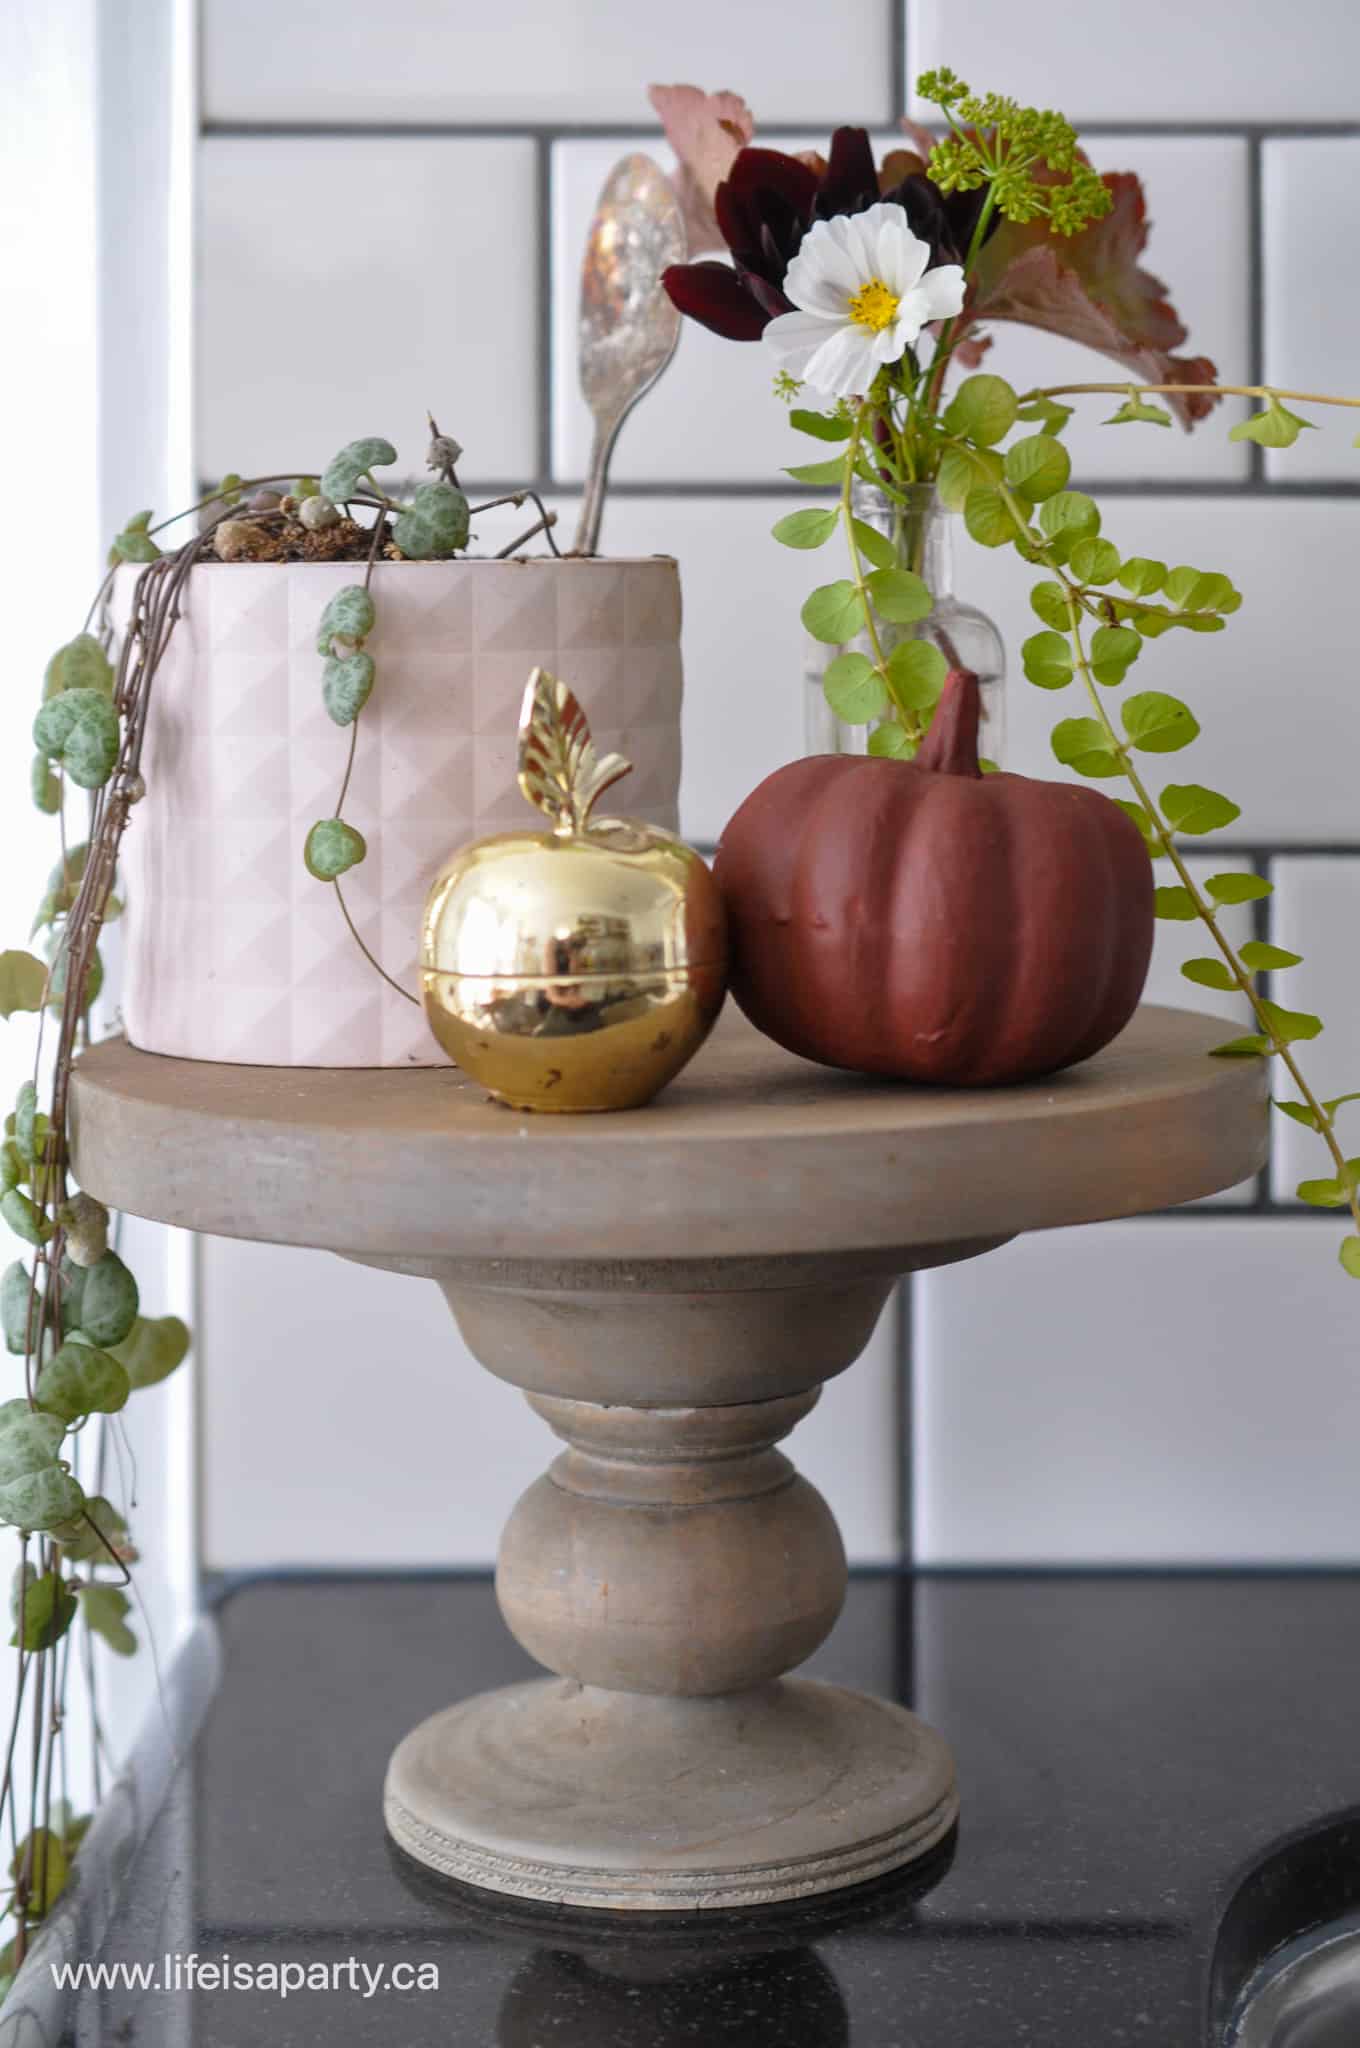
This little spot by the sink is looking pretty adorable with this tiny arrangement in a vintage bottle, a mini pumpkin painted rust, and an old apple Avon perfume bottle -a fun fall addition.

fall decorating ideas

And more of the wood veneer leaves that I cut out are hanging here.  I used some thread to hang them and they're the perfect fall touch here.  The wood makes them look modern, and they spin and twirl here and are so pretty.

wood leaves
fall decor ideas

Open Shelves

Over on the other side of the kitchen is one of my favourite views.  We gave this kitchen a bit of a makeover a few years ago and we added these open shelves to the space -see how we made our kitchen open shelves here.  It's so fun to decorate them for every season.  

fall kitchen shelves
fall kitchen decor

I've used the same colour scheme here of pink, peach, mustard yellow and rust.  I've also tried to include some pretty plants.  There's lots more amber glass tucked on these shelves too.  And we couldn't forget a few more pumpkins.

how to decorate kitchen open shelves for fall
boho fall open shelves
fall decor ideas
boho fall decorating
fall kitchen decorating

My finished flowers and the one mini pumpkin that grew this year look great here too.

fall flowers
fall flowers

Thanks so much for joining me and having a look around my home all decorated for fall.  I hope it gives you few little ideas of some fall touches you can add too.  With fall decorating ideas making our house cozy for fall, life really is a party!

More Fall Inspiration

  • Pumpkin shaped dinner roll recipe, with a herb stem.
    Pumpkin Shaped Dinner Rolls
  • Fall breakfast board
    Fall Breakfast Charcuterie Board
  • Halloween witch decorations
    Witch Halloween Decor
  • fall home decor
    Fall Decorating Ideas -Home Tour


Modern Boho Fall Mantel Ideas

Sep 15, 2021 · Leave a Comment

Modern Boho fall mantel ideas.

Modern Boho Fall Mantel Ideas: using elements like macrame, dried grasses, vintage glass bottles and seasonal elements to create fall mantel.

Modern Boho Fall Mantel Ideas
[feast_advanced_jump_to]

I love decorating for the seasons, and fall is one of my favourites.  This modern boho fall mantel is full of beautiful boho and fall touches.  This season I'm using a colour palette of pink, peach, and rust, and it's so perfect for fall.

Modern Boho Elements

This mantel is full of boho elements.  I've used things like macrame, vintage pieces, dried pieces, and seasonal elements to create a beautiful modern boho fall mantel.

boho fall mantel ideas

Macrame

This macrame bunting has been hanging here for years.  You can see how I made it here.  I love how much texture it adds to the space.  It's neutral so it goes with everything, and it's become such a great layering piece.

pink peach fall decor

Vintage Glass

I love adding some vintage pieces to every space.  This mantel has quite a few, but lets start with the large glass vintage bottles.  There is a large demi John on the floor, and above large vintage water bottles.  I've found them all second hand, usually on-line or local buy and sell groups.  

boho fall mantel

Dried Grases

The feeling of boho is often very 70's, and you can't think of the 1970's without thinking of dried flowers.  I know my mom definitely had some.  These days pampas grass is definitely having a moment.  This beautiful grass in pink and white is from one of my favourite etsy shops EverythingFrivolous.  The dried money plant is some from my mom's garden.

Butterflies and Scientific Glass

I love adding elements of nature to my decor, and these butterflies in orange, yellow, and brown tones are a beautiful addition, and the colours feel perfect for fall.  This piece is from a second hand store.  The frame was originally a dark reddish brown, and it didn't really go with our vibe.  I used my palm sander and it only took about 15 minutes to remove the old finish.  The raw wood finish looks  really great now.  

pampas grass in vintage glass bottle

I always love including scientific glass as a fun vase.  It adds interest instead of using a plain vase.  The piece with the feathers is another vintage find from an antique store.  The cute one in the stand is from Michaels.  It's part of their Halloween line, but I think it's perfect as a vase.

modern boho decor

Pumpkins and Leaves as Fall Elements

Since this mantel is for fall, I wanted to add some specific fall elements.  The pumpkins are a mix of real and faux.  The pink coloured one is so beautiful.  Here's a tip if you're adding real pumpkins to your home this fall, add a little parchment paper underneath your pumpkin to protect the surface it's sitting on.

boho fall mantel

There's nothing more beautiful in fall than the leaves.  We added  a really simple fall leaf garland and layered it over the macrame one.  I made the leaf garland with my Cricut and some very thin wood veneer.  It was really easy to make and I love how the wood leaves tie in with the wood vintage window frame that we're using for a background.

boho fall decor ideas
cricut wood veneer leaves

I love how pretty this modern boho fall mantel turned out.  And I can't wait to share my whole boho fall home tour with you next week!

how to decorate for fall

With this beautiful fall mantel, life really is a party!

Smart Cookie Party

Sep 9, 2021 · Leave a Comment

smart cookie party

Smart Cookie Party: the perfect way to celebrate back to school, or graduation, free cookie party printables included.

smart cookie party
[feast_advanced_jump_to]

We have a family tradition of having a special family back to school party on the first day -see last year's back to school dinner here, and the year before that special back to school party here.  I love creating a special back to school family dinner, during which we can hear all about our kids first day.  We've been doing it for so many years, starting in elementary school and no that they're in high school, it's something we all look forward to.  This year I thought a smart cookie party would be a great way to celebrate together.

Printables

I started out by creating some beautiful free printables for the party to set the tone.  This set is so adorable.  Just subscribe to the blog and gain access to our free printable library with hundreds of free printables, including the Smart Cookie Party Printables.  Subscribe below for instant download access.  You can download the digital file and print at home or at an office supply store.Subscribe below and find the download link in our Free Resource Library.  Free printables are such a fun way to make your own party supplies.

.  

Smart cookie free party printables.

Subscribe for instant access, download your digital printable file, print and enjoy!

This party set includes a printable banner, two posters, a pendant, two sets of lunch box notes -that I used as gift tags, and napkin ring holders, plus table scatter.  These printable would also be great for a graduation celebration. You could also use them for a teacher appreciation gift.  The small signs or lunch box notes also make a great free printable tag.  You could also use these printables to create special celebration on the last day of school.

Smart Cookie Banner

Let's start out with the adorable "One Smart Cookie" banner.  I printed these on cardstock on my home computer, then cut out, added holes with a mini hole punch, and threaded them into a banner.  So cute.

smart cookie printable banner
smart cookie themed party

Printable Signs

I created two fun signs you can use for your party.  The first is our large "You are one smart cookie".  We printed it onto card stock and used it as decor, you could also frame it.

cookie party ideas

The second printable sign is the "I love you more than milk loves cookies."  It was a great addition to the table.

cookie themed party

Pennant

I thought it would be fun to create a back to school pennant for the party.  Print this one on paper, and hot glue it to a dowel, then add some ribbons to decorate.

back to school party

Smart Cookie Printable Joke Cards

I also made a set of small cards.  These cards would be great as lunch box notes anytime. I used the joke set as napkin ring holders.  Just print, cut out the printable card, add a hole with a hole punch, and add to your napkin with some ribbon.  We had fun going around the table asking each other our jokes over dinner.

The size of these makes them perfect smart cookie gift tags, or bag toppers also.  Attach the free tag to sweet treats of homemade cookies in a cellophane bag, and anyone would love them.  Bring a bag of cookies to teacher night as a great gift.  Or use the cookie bag as a party favor with the free printable gift tags.

cookie themed party
cookie joke
smart cookie party

Mini Signs

There's also a mini version of the larger signs.  I printed them on white card stock, and used these as gift tags.  Attach them to the bags with ribbon or baker's twine.  I always like to get my girls a small gift, something like some new pens or pencils, and sticky notes are a great thoughtful small gift for back to school.  Lunch bags were the perfect treat bag that fit with our school theme, and the tags really dressed up the bags with a little piece of ribbon.  These little party favors were a hit.  These would also be great as an end of the school year gift during the last week too.  Or use them as gift tags on a package of cookies.

printable lunch box notes
cookie themed party

Smart Cookie Table Scatter

The last printable item in the printable set is the table scatter.  I used my Cricut machine to cut it out.  Up load the image, and use the print then cut feature to make it.  It worked perfectly for this.  It  would be more difficult to cut out by hand since it's so small, but you could if you don't own a Cricut machine.  It looked great as table scatter confetti for the party.

back to school party ideas
cookie table scatter confetti

Cookie Party Table

I kept the table quite simple with a white linen table runner, some white flowers, and our printable sign and table scatter.  

cookie party ideas
back to school party ideas

You really can't have a cookie party without cookies.  I baked some peanut butter, chocolate chip and oatmeal cookies for the party.  We used some large and small glass canisters as my cookie jars, and they looked great on the table.  

cookie party ideas

I also picked up some chocolate milk in glass milk bottle from the grocery store, and it looked so cute with the milk bottle image on the printables.  Our cookie bar was great.  Everyone enjoyed the cookies for dessert.  For a larger party, you could have some small bags for people to take some cookies home as yummy and cute gifts.  Homemade cookies make a great party favor, sure to be enjoyed by all.

milk and cookies party

Smart Cookies Decorated Chocolate Chip Cookies

I created a smart cookie for our printables and thought it would be a great idea to try and recreate it in real life.  The base is a chocolate chip cookie.  I decorated the cookie with some black icing, candy eyes, and a little pink icing.  These guys are a little wonky looking, but so adorable.  Use the black icing to create the glasses, and the smile.  Add the candy eyes, and just a drop of pink icing to make each cheek.  This might be a fun activity to do with your kids, if they enjoy decorating cookies.  It's suitable for all ages, from very little to middle school, right up to high school.

milk and cookies party
smart cookies

Not a baker?  No problem.  Use store bought cookies instead of baking.  Or make things easier with slice and bake cookies.

smart cookie

This little smart cookie party for back to school was so much fun.  I froze the extra cookies, so they'll be showing up in school lunches for weeks to come, and hopefully be a sweet reminder of this fun family party.

?This party themed worked so well for back to school, but it would also be great for a grad party.  A smart cookie graduation party theme would be so great for a graduation parties for your favorite graduate.  If you have a smart cookie graduating, they're sut eo love this theme a whole lot.

smart cookie party

With a smart cookie party to kick the school year off, life really is a party!

More Back To School Inspiration

You might also Book Themed Back To School Party here.

Book Themed Party: book page wreath, DIY mini book garland, book page table runner, and lots of fun vintage books and other pieces.

Also check out our Back To School Family Dinner Ideas here.

Back To School Printables and Family Dinner: decor ideas, dinner and free printable Back To School printables, and "All About Me" sheet.

You might also like our Notebook Paper Sugar Cookies here.

Halloween Movie Night Ideas and Free Printables

Sep 8, 2021 · 6 Comments

Halloween movie night free printables

We love movie nights, and Halloween Movie Night is extra spook-macular! Use our free printable movie ticket, poster, cupcake pics, bottled water wrap, and Halloween banners as decor plus there's ideas for a themed popcorn bar and snacks.

Halloween movie night free printables
[feast_advanced_jump_to]

Why We Love This Party

  • Movie night + Halloween = Dreadful Delight!
  • Here for the snacks!
  • Whether you're looking for a family freindly ghoul gala or a fright fest for you and your boo, Halloween movie night is where it's at!
  • The free printables take movie night from everyday to extra special!

We love a good movie night around here, so we thought it would be fun to create a Halloween Movie Night to celebrate the season and get into the Halloween spirit. This little party would be perfect for a Halloween family movie night, or a fun Halloween party, or Halloween Night or even as part of a summerween party. You might also like our Pink Halloween Party, Fall Themed Party, and Ghost Themed Foods.

Love movie night as much as we do? You might like our other anytime of year free movie night printables. We also have summer movie night free printables, Valentine's free movie night printables, and Christmas free movie night printables.

Free Halloween Movie Night Printables

The printables for this spooky season movie night are so cute. I hope you love them as much as I do. They're perfect for bringing your party together and they're available for free to Life is a Party subscribers in our Free Printable Library. Subscribe to the blog below for instant access.

To use the printables, just download and print on your home printer, or at your favourite office supply store or printer. Then use them to style your own party. 

Halloween Movie Night Free Pritnables

In our Halloween Movie Night printable set there's a fun movie night ticket, perfect for inviting your kids, family, or friends. 

Along with the movie night ticket, there's also a fun Halloween poster, cupcake picks, bottled water wrap, and several versions of a Halloween banner.

Halloween Movie Night free printable ticket invitation

Living Room or Backyard?

We love the idea of enjoying classic Halloween movies from the comfort of your own home by turning your living room into a Halloween movie theater. Set up a cozy evening on your couch with lots of pillows, throws, decor, and party snacks. And the best part? How about instead of wearing Halloween costumes, you wear Halloween pjs?

You could also create this Halloween movie night outside. Watch your favorite Halloween movies on an inflatable screen in the backyard with a outdoor movie projector. Invite friends to your outdoor movie night using our printable ticket. Light a bonfire and enjoy your perfect Halloween movie night in the moonlight.

The Snack Table

On the table I used some pink tulle as a tablecloth. It's really inexpensive and you can pick it up at the fabric store. It comes in all kinds of colours, but pink was perfect for our party. I love how it adds a bit of whimsy to the table. We also used some cute mini star lights, that fit with our printables and the Halloween feel perfectly. You could also add regular string lights.

how to host a Halloween movie night

I used a simple black frame to add our printable poster to the table. "Eat, Drink, and Be Scary" indeed! This is such a fun and easy way to add themed decorations to any party. Store your frame and switch out the poster for any occasion.

Eat Drink and Be Scary printable poster
Halloween movie night free printables

We also added in a few pumpkins, perfect for Halloween.

Halloween movie night party
halloween popcorn bar party snacks

DIY Pink Cauldrons

I thought it would be fun to serve our popcorn buffet in some pink cauldrons. 

We picked up some black plastic cauldrons at the dollar store, and spray painted them in three different shades of pink. Look for spray paint that is compatible with plastic. Remember it's best to do many light coats of spray paint to avoid drips in the paint and ensure a smooth finish. 

Once the paint was dry, I lined the cauldrons with plastic wrap to make sure they were safe for food for our Halloween treats. 

pink Halloween movie night party
pink cauldron Halloween decorations

For the party, I filled them with popcorn. I picked our family favourites and used buttered movie theatre style popcorn, white cheddar popcorn, and caramel corn. 

Here's another tip, depending on the size of your get together, if you don't want to fill them all the way, because they are quite large, add a little crumpled parchment paper in the bottom to take up a little space, and then add your popcorn.

These easy snacks were a big hit. You could also drizzle some homemade popcorn with some orange and white chocolate and add Halloween sprinkles, mini candy eye balls, and Halloween candy to the mix for a really fun popcorn treat to fit the spooky mood.

Also check out all our ghost themed snacks and Pink Halloween party with pink Halloween foods and Harry Potter themed snacks and treats for more ideas.

Halloween party snack foods

More Halloween Movie Night Snacks

I also included some adorable cupcake picks with our printable set. Just print them, cut them out with a large circle punch, and then use hot glue to attach a tooth pick to the back. The cupcake picks are a great way to dress up some simple store bought cupcakes.

Some more sweet treats for a Halloween movie night you might include are homemade caramel apples, and a candy bar assortment.

Halloween cupcake picks
Halloween party free pritnables

Here's another entertaining tip. I didn't have a dessert stand in the right size so I used a small pink plate, set on top of a small pink bowl, turned upside down.  

Halloween cupcakes

Drinks

For drinks for this party we served bottled water and dressed it up with some printable bottled water wraps.  Just print, cut, and attach to the bottle with some tape.

Our swamp water punch would be a fun Halloween option too.

halloween bottled water wraps free printable
Halloween movie night

Halloween Banners

One of my favourite elements to this party is the adorable Halloween banner. I used my Cricut and the print then cut feature. Because this banner is quite detailed, it worked really well to cut it out with the Cricut. 

If you don't have a Cricut, you could of course cut it out by hand, it would just take a little while. I also added some glitter details to the cut outs with different coloured glitters, and a glue stick. To create the banner I used a mini hole punch, some pink embroidery cotton, and a needle to thread them. 

I love this cute little banner, and I think it would be great decor for the whole Halloween season. The little spider is so cute. He would also look very cute with some spider webs.

how to host a Halloween movie night
printable Halloween banner
DIY Halloween banner

I also added a less intricate banner that would be easier to cut out, along with a simple "Happy Halloween" banner as well. Use any or all of them as a fun touch to your movie night, or as part of your Halloween decor after the party.

Family Halloween Movies

  1. Nightmare Before Christmas
  2. Hocus Pocus
  3. Curious George: A Halloween Boo Feast
  4. Charlie Brown and the Great Pumpkin
  5. Harry Potter
  6. Casper
  7. The Witches
  8. Beetlejuice
  9. The Adams Family
  10. Monsters Inc.

Date Night Halloween Movies

  1. Witches of Eastwick
  2. Ghostbusters
  3. Practical Magic

Subscribe For Free Halloween Printables

Don't forget to subscribe to the blog for instant access to these free printables.

Halloween Movie Night

With our free Halloween Movie Night printables, life really is a party!

Frequently Asked Questions

How do I access the free printables?

Subscribe for our Free Resorce Library (not the free praty planner) and the code will be instantly sent to your email. Can't find it? Check in your spam or junk mail folder.

What if I don't have a color printer at home?

You can print these at your local office supply store, or many public libraries of color printing a very minimal fee.

If you use these Halloween Movie Night Ideas or any other ideas on the my blog please leave me a rating and let me know how it went in the comments below. Thanks for visiting today.

More Halloween Inspiration

  • Halloween smores board with Halloween cookies, marshmallows, chocolate and more!
    Halloween Smores
  • Summerween party table with themed food.
    Summerween Party Ideas: BBQ & Pool Party Food
  • Ghost themed foods on a snack board.
    Easy Halloween Ghost Themed Food Ideas
  • Harry Potter snacks and treats board.
    Harry Potter Inspired Snacks and Treat Ideas

Mini Pineapple Upside Down Cakes

Sep 3, 2021 · Leave a Comment

mini pineapple upside down cakes

Mini Pineapple Upside Down Cakes: individual cakes made from scratch in a cupcake pan with traditional pineapples, and cherries.

mini pineapple upside down cakes
[feast_advanced_jump_to]

These mini pineapple upside down cakes, have all the goodness of regular pineapple upside down cake, but in adorable individual size!  Everything is cutter when it's mini, right?! 

mini pineapple upside down cake recipe

We made these individual pineapple upside down cakes as part of our Moana dinner and movie night -see all the details here.  They were the perfect addition to our island inspired menu, and the individual mini size was perfect!

individual pineapple upside down cakes

I love pineapple upside down cake, but this sweet treat it isn't something I grew up with. This is actually my mother-in-law's recipe, but I've given them a slight makeover by making the mini form of the classic dessert. I've made these mini desserts by baking them in a muffin cup pan. She's been making this cake for years. It's tested and true, and definitely a family favourite. Along with making it mini, I've also served it with whipped cream. It is really the perfect combination, because the cake itself is quite dense, so the light airy whipped cream is the perfect contrast. They're so good, and so mini, you might even need two. 😉

mini pineapple upside down cupcakes
I made these mini versions in a cupcake pan, so they're easy to make at home, without needing to buy a special pan to create them. Once you turn them upside down to serve they look so cute with the pineapple and the best part -the little red cherry!

individual pineapple upside down cakes from scratch
how to make mini pineapple upside down cake

Larger Size

These are quite mini when made in regular size muffin tins. Want to make them slightly larger but still serve everyone their own personal cake? Try making them in a jumbo muffin tin. If making ina. jumbo muffin pan be sure to adjust the timing to cook slightly longer.

Substitute The Pineapple

These mini pineapple cakes are best made with canned pineapple rings. Can you use crushed pineapple or pineapple tidbits in this recipe? I would not use crushed pineapple in this recipe. You could use a can of pineapple chunks or tidbits in this recipe in a pinch, just arrange them to cover the bottom of the cupcake tin.

You can try substituting fresh pineapple for this recipe, but canned may be sweeter. Be sure to cut the pieces so that they aren't overly thick, you want them to be the size of regular canned pineapple rings.

Recipe

mini pineapple upside down cakes

Mini Pineapple Upside Down Cakes

Individual pineapple upside down cakes with pineapple and cherries.
4.67 from 12 votes
Print Pin Rate
Course: Desserts
Cuisine: American
Prep Time: 15 minutes minutes
Cook Time: 20 minutes minutes
Total Time: 35 minutes minutes
Servings: 24
Calories: 248kcal
Author: Dannyelle Nicolle-Ramjist

Ingredients

  • 1 cup butter
  • 1 ½ cup white sugar
  • ½ cup sour cream
  • 6 eggs
  • 1 teaspoon vanilla extract
  • 2 cups all purpose flour
  • 2 teaspoon baking powder
  • ½ teaspoon salt
  • 12 pineapple rings 1 ½ cans 398 mL
  • 12 maraschino cherries
  • 4 tablespoon butter
  • 2 tablespoon brown sugar

Instructions

  • In the large bowl of a stand mixer,or in a large mixing bowl with an electric mixer, or by hand, cream 1 cup of room temperature butter and sugar together.
  • Add in the sour cream, eggs, and vanilla and fully combine at medium speed.
  • In another separate bowl combine the dry ingredients, the flour, baking soda, and salt.
  • Add the dry ingredients to the wet ingredients in the stand mixer and combine at a low speed to create the cake batter. Set aside.
    In a small pot, melt 4 tablespoon of butter with 2 tablespoon brown sugar over medium heat.
  • Spray 2 regular muffin tins with non stick spray to make 24 mini cakes. Add about ½ teaspoon of the melted butter and brown sugar mix to the bottom of each muffin tin.
  • Cut 12 canned pineapple rings in half, and then make several slits ¾ of the way through each pineapple piece, on the outside. Cut 12 maraschino cherries in half. In each cupcake spot, on top of the butter and brown sugar mixture add ½ of the pineapple ring, using your fingers to make it form a circle. Add ½ a maraschino cherry to the centre of each one in the bottom of each cup. Add the batter on top of the pineapple slices, evenly divided between the 24.
  • Bake the mini pineapple upside down cakes at 325 degrees for about 20 minutes, until a toothpick inserted in the middle comes out clean, and the middle springs back when you push it down with your finger.
  • Turn the mini pineapple upside down cakes out onto a cooling rack to cool. When cool, remove from the wire rack and store in an airtight container. Serve them with whipped cream.

Nutrition

Serving: 1g | Calories: 248kcal | Carbohydrates: 34g | Protein: 3g | Fat: 12g | Saturated Fat: 7g | Polyunsaturated Fat: 4g | Cholesterol: 75mg | Sodium: 186mg | Fiber: 2g | Sugar: 23g
Tried this Recipe? Tag me Today!Mention @LifeisaParty or tag #lifeisaparty!

These are sure to become one of your favorite recipes. With these individual mini pineapple upside-down cakes to enjoy, life really is a party!
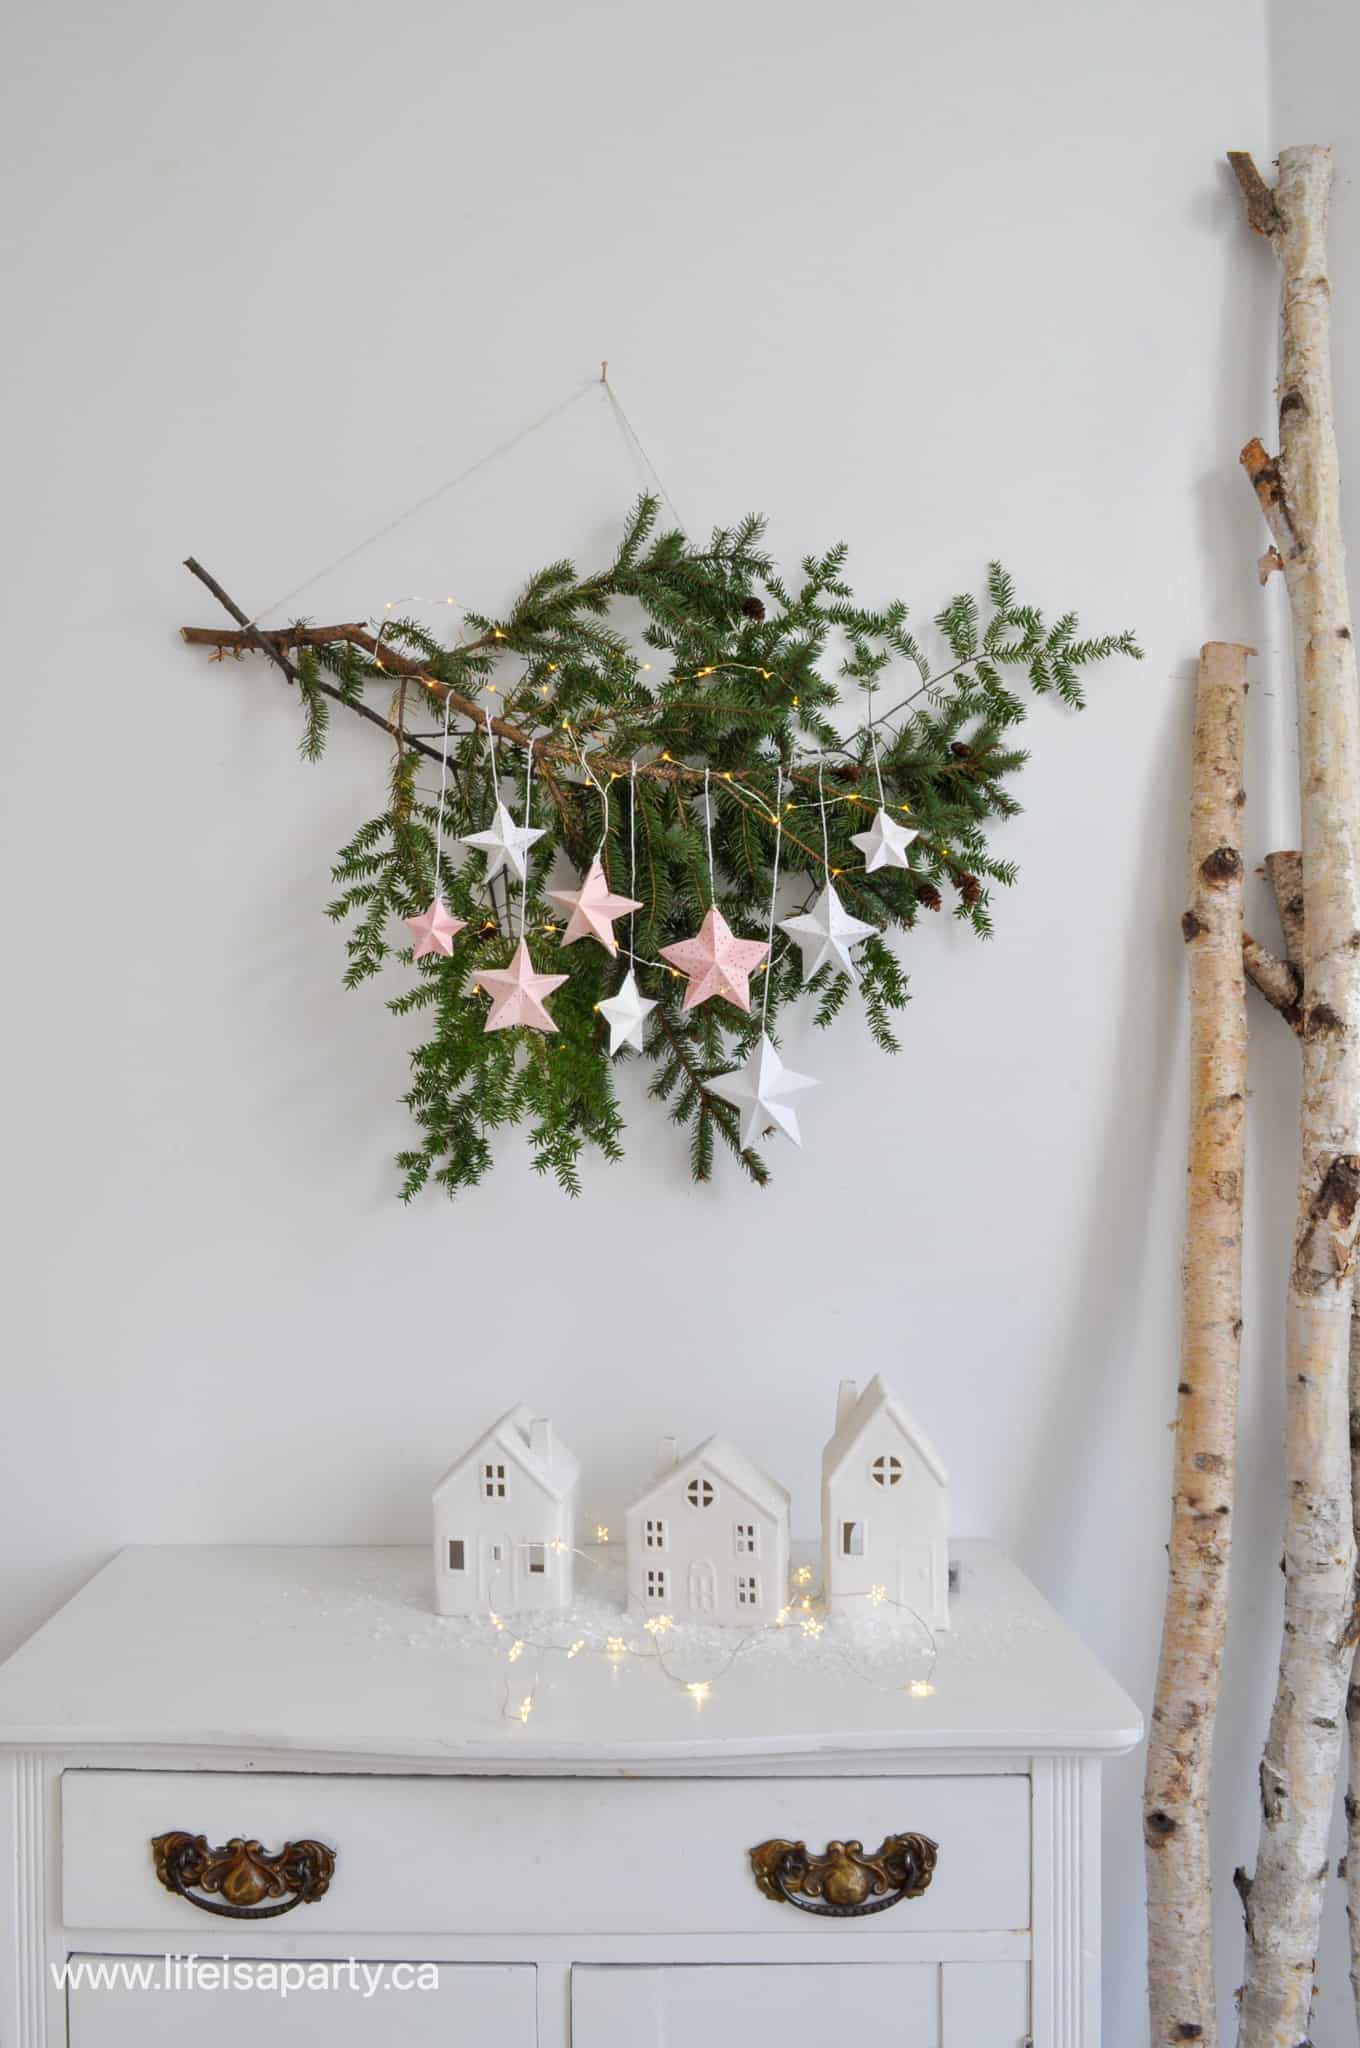

This recipe was part of our Mona Disney Princess Dinner and Movie Night -check out all the details about the whole party here

Disney Princess Dinner and Movie Toolkit

Love Disney Princess dinner and movie nights?  Buy our Disney Princess Dinner and Movie Toolkit.  The Toolkit includes 6 different Disney Princess movie nights with menus, all the recipes, inspiration, and printables for each one.  Check out more about the Disney Princess Dinner and Movie Toolkit by clicking here.

Easy Sweet and Sour Pork Kababs

Sep 2, 2021 · Leave a Comment

sweet and sour pork kebabs

Sweet and Sour Pork Kababs: the perfect combination of sweet, tangy, and savoury. Grill these on the bbq for a perfect tropical dish.

sweet and sour pork kebabs
[feast_advanced_jump_to]

These sweet and sour pork kebabs are so good.  The sweet and sour sauce is deliciously sweet and also has the perfect tang.  It is delicious paired with the bell peppers, onion, and pork in this recipe, not to mention the pineapple.  Pork and pineapple are always a match made in heaven and the addition of this great sauce takes it to the next level!  This sweet and sour pork recipe is easy to make, and so delicious.

how to make sweet and sour pork kebabs

Moana Inspiration

We enjoyed our sweet and sour pork kebabs as part of our Moana dinner and movie night -check out all the details here. It was the perfect tropical addition to our menu.  Serve with white rice or brown rice for a great dinner.  We were inspired by the movie.  There's a sweet scene in the movie where Moana eats some pork in front of Pua the pig. After saying "Mmmm, that's good pork" she notices Pua, and makes an excuse to leave. We wanted to make some good pork for the evening too, just don't tell Pua. 😉 Whether you're celebrating a movie night or not, you will love this truly good pork.

Balance of Flavors

The juicy pieces of pork tenderloin coated in the tangy sauce have a wonderful complex flavor.  We love making these into kababs and adding all our favorite vegetables like green bell pepper, red and yellow peppers, and red onions or green onions.  And don't forget the pineapple.  The pineapple adds more sweetness to the this dish and is such a great combination with the pork.  We used canned pineapple chunks for our sweet  and sour pork kebabs for the sake of convenience, but you can use fresh pineapple if you prefer.  Just remember that you will also need some canned or fresh pineapple juice in addition to the fresh pineapple, if you are not reserving the juice from the canned pineapple.

This easy homemade sweet and sour sauce has a perfect balance of sweet and sour.  Ingredients like the rice vinegar add the sour to the dish, while the pineapple juice, sugar and ketchup bring lots of sweet for the perfect sweet & sour combination.  Adding in the little bit of cornstarch thickens the homemade sauce and gives it the perfect viscosity applying it to our kebabs.

Pork

We used pork tenderloin to make our pork kebabs, but you could also use pork shoulder or pork chops cut into bite-sized pieces of 1-inch cubes for this sweet and sour pork dish.  

sweet and sour pork recipe

Substitute Chicken

Not a fan of pork, but love everything else?  You can substitute the pork in this dish with chicken if you prefer, and make sweet and sour chicken.  It's equally delicious in this dish.

easy sweet and sour kebabs
sweet and sour pork kebabs recipe

These sweet and sour pork kebabs are a real favourite, the sweet of the sauce, and the pineapple, combined with the savoury pork and vegetables, and the tang from the sauce is a winning combination you will love if you're a fan of sweet and sour dishes.  We love this tangy dish served with simple steamed rice.  Made with simple ingredients, it's sure to become one of your favorite delicious recipes.  This beautiful sauce comes together in just a couple of minutes and add so much amazing flavor to the dish.

Grilling

Grilling the pork and fresh produce adds such great flavor to this recipe.  But if you don't have access to an outdoor bbq to grill your sweet and sour pork kebabs you can cook this recipe on an indoor grill or on a grill pan.

how to make sweet and sour kebabs

Recipe

sweet and sour pork kebabs

Sweet and Sour Pork Kababs

Sweet and sour pork kebabs with juicy pork, peppers, onion, and pineapple.
No ratings yet
Print Pin Rate
Course: Main
Cuisine: Asian
Prep Time: 20 minutes minutes
Cook Time: 20 minutes minutes
Total Time: 40 minutes minutes
Servings: 8 kebabs
Calories: 276kcal
Author: Dannyelle Nicolle-Ramjist

Ingredients

  • 1 cup pineapple juice reserved from the can of pineapple chunks
  • ⅓ cup seasoned rice wine vinegar
  • ⅓ cup brown sugar
  • 2 tablespoon ketchup
  • 2 tablespoon soy sauce
  • 1 tablespoon water
  • 2 tablespoon corn starch
  • 1 red pepper cut into 1 inch pieces
  • 1 yellow pepper cut into 1 inch pieces
  • ½ red onion cut into 1 inch pieces
  • 398 mL can of pineapple chunks
  • 1 kg pork tenderloin cut into 1 inch pieces
  • 8-10 bambo skewers

Instructions

  • Begin by soaking your bamboo skewers in water for around 20 minutes to help prevent burning on the bbq.
  • To make the sweet and sour sauce, combine the pineapple juice, vinegar, brown sugar, ketchup, soy sauce, water, and cornstarch in a small saucepan and whisk together. Heat over a medium-high heat, stirring. Bring to a boil and let boil 1 minute. Remove from the heat and set aside.
  • To make the skewers, thread the pepper, onion, pineapple, and pork pieces on the soaked skewers.
  • Preheat the bbq to 400 degrees, and then cook the pork kebabs, turning every 3-4 minutes, until the pork is fully cooked. With each turn, baste the kebabs with the sweet and sour sauce, until it is all used up. Serve on a bed of rice and enjoy.

Nutrition

Serving: 1g | Calories: 276kcal | Carbohydrates: 23g | Protein: 34g | Fat: 5g | Saturated Fat: 2g | Polyunsaturated Fat: 3g | Cholesterol: 91mg | Sodium: 334mg | Fiber: 1g | Sugar: 17g
Tried this Recipe? Tag me Today!Mention @LifeisaParty or tag #lifeisaparty!

With sweet and sour pork kebabs to enjoy, life really is a party!  Happy cooking!
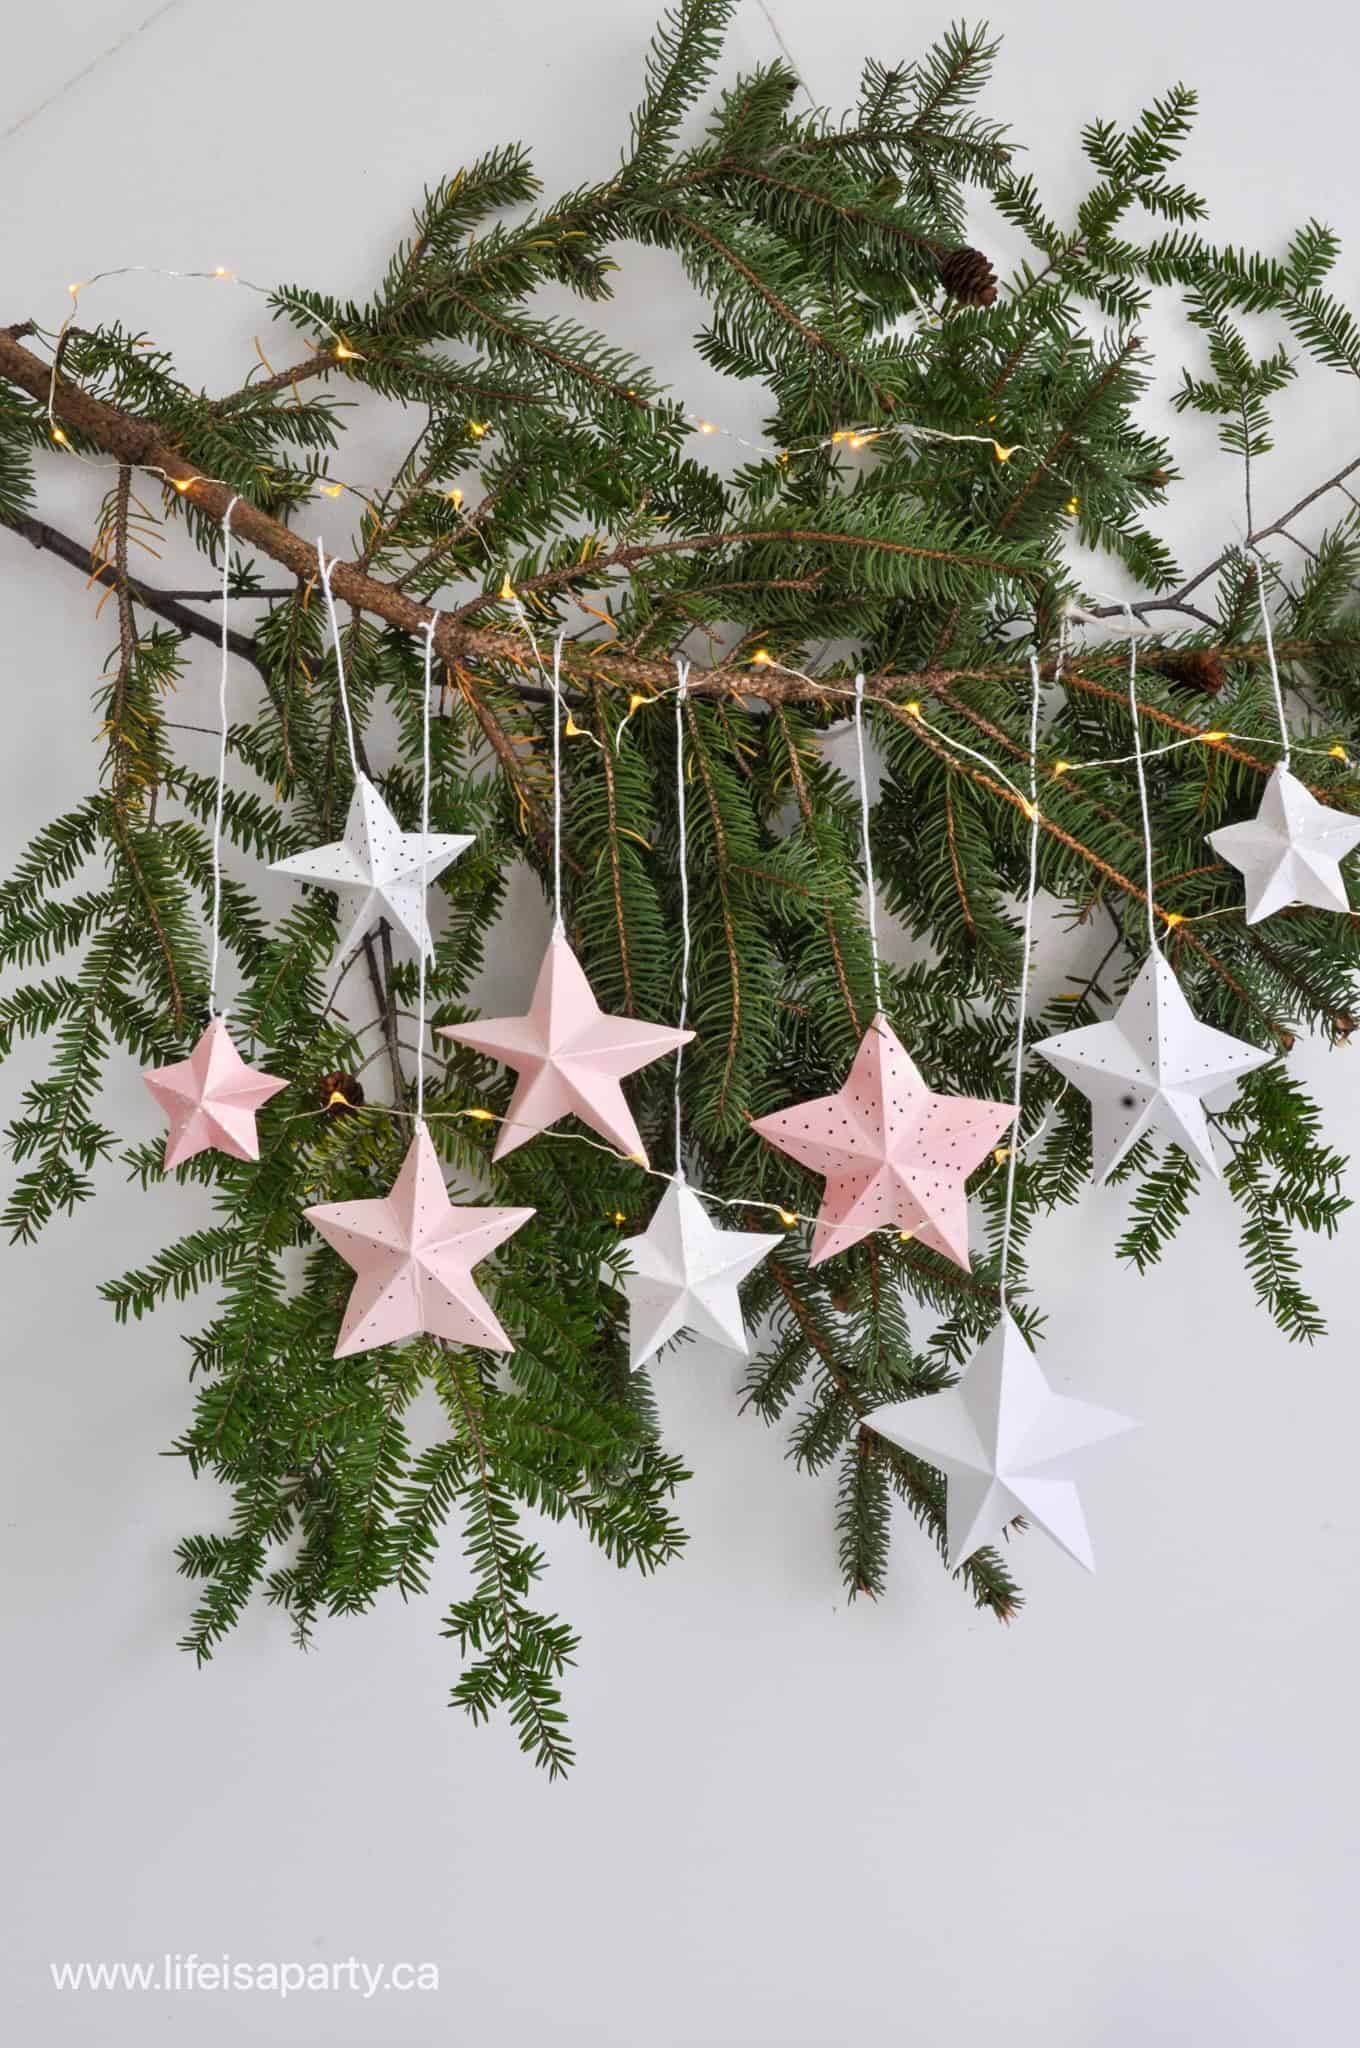
This recipe was part of our Mona Disney Princess Dinner and Movie Night -check out all the details about the whole party here.

Disney Princess Dinner and Movie Toolkit

Love Disney Princess dinner and movie nights?  Buy our Disney Princess Dinner and Movie Toolkit.  The Toolkit includes 6 different Disney Princess movie nights with menus, all the recipes, inspiration, and printables for each one.  Check out more about the Disney Princess Dinner and Movie Toolkit by clicking here.

DIY Cute Designs for Embroidery Insects

Sep 1, 2021 · 6 Comments

embroidery insects

Embroidery Insects: make your DIY embroidery patterns and create realistic embroidery bugs in custom colours.

embroidery insects
[feast_advanced_jump_to]

Embroidery insects are fun to make, and with our tutorial you can make your own embroidery pattern for any insect you like.  Stitch them in realistic colours, or add some whimsy with your own colour choices.

embroidery bug gallery wall

Science Themed Decor

For several years in the fall I've decorated with a bit of a scientific botanical theme.  You can check out my science themed fall home tours here, and here and here. These embroidery insects would be great any time of year, but I especially love this for fall mixed with lots of nature inspired decor, like pumpkins, grasses, leaves, acorns, pinecones.  When I first used this theme for fall home decor, I imagined a historical nature loving botanist woman, who loved spending time outside and collecting specimens, and coming home to study and document them.  

how to make your own embroidery pattern for insects

These embroidery insects are such a beautiful project.  We used small embroidery hoops as the frames for the these pieces, and used lots of different colours, and some beads to create them.  These were actually made by my 17 year old daughter Paige.  She enjoys embroidery, and is great at it.  I asked her to make these for me and she did an amazing job.  

dragon fly embroidery pattern

Use An Insect Image To Make Your Own Pattern

The pattern for the dragonfly embroidery was made with an image that we found on-line.  You could use this method to make a pattern and embroider any insect you like.  No need for an embroidery machine, these were all created by hand, which makes each one it's one little work of hoop art.

dragon fly embroidery
beatle embroidery
moth embroidery

You can either base your colours for the embroidery insects based on real insects, or you can get a bit more whimsical.

how to embroider insects

Recipe

embroidery insects

Dragonfly Embroidery Pattern

5 from 1 vote
Print Pin Rate
Prep Time: 20 minutes minutes
Cook Time: 3 hours hours
Total Time: 3 hours hours 20 minutes minutes
Author: Dannyelle Nicolle-Ramjist

Equipment

  • Cricut light pad

Materials

  • small embroidery hoop
  • cotton fabric
  • dragon fly image
  • embroidery needle
  • beads
  • embroidery cotton thread in black white, light blue, and greenish-blue

Instructions

  • To make the pattern for the dragonfly embroidery, start by choosing an image on-line and printing it. Make it large enough that you can see all the details. Don't worry about it fitting your embroidery hoop yet.
  • Place the image on the light pad image side down, or on a window in the light, and use a pencil to trace the outline and details on the backside of the image, to create your pattern. Make it detailed enough to be interesting, but not too detailed to actually embroidery.
  • Take a picture of your pencil sketch, and on a computer screen or ipad, size it to your fit nicely into your embroidery hoop. Place a white sheet of paper over the the computer or ipad screen and trace the pattern one more time, smoothly out any rough lines as you sketch. This will be your final pattern.
  • To transfer your pattern to the cotton fabric, place it under the pattern and use a pencil to lightly trace the pattern on to the fabric.
  • Place your fabric into the embroidery hoop, and begin to embroider the dragonfly. We used black, white, light blue, and greenish-blue colours, but the part of the beauty of creating your own is that you can use any colour combo you like. This one was inspired by the colours in the original photo. We used satin stitch for the solid areas, backstitch for the outlines, and a French knot for some of the details on the body, and eyes. You can also try adding the stem stitch and bullion knot for more details. The outlines are done with three strands of embroidery cotton thread, and the solid areas are done with two strands of embroidery cotton thread. You could also try adding some metallic threads for special effects.
  • Once the whole dragonfly is stitched, trim the excess fabric and hang it on the wall. You can use this pattern making process to create a pattern for any insect.
how to make an embroidery pattern
make your own embroidery pattern
dragon fly embroidery pattern

Free Dragonfly Embroidery Pattern

If you would like to use our dragonfly pattern, you can find it in our Free Resource Library for subscribers.  Subscribe below for free, for instant access to our Free Resource Library. 

To use this pattern, just print the image from the Free Resource Library scaled to fit the size of your embroidery hoop.

I love how the three embroidery insects look together as a little grouping.  We are hoping to add a few more to our embroidery insect gallery.  These are so fun, I love how they turned out.

With this amazing embroidery insects gallery wall, life really is a party!
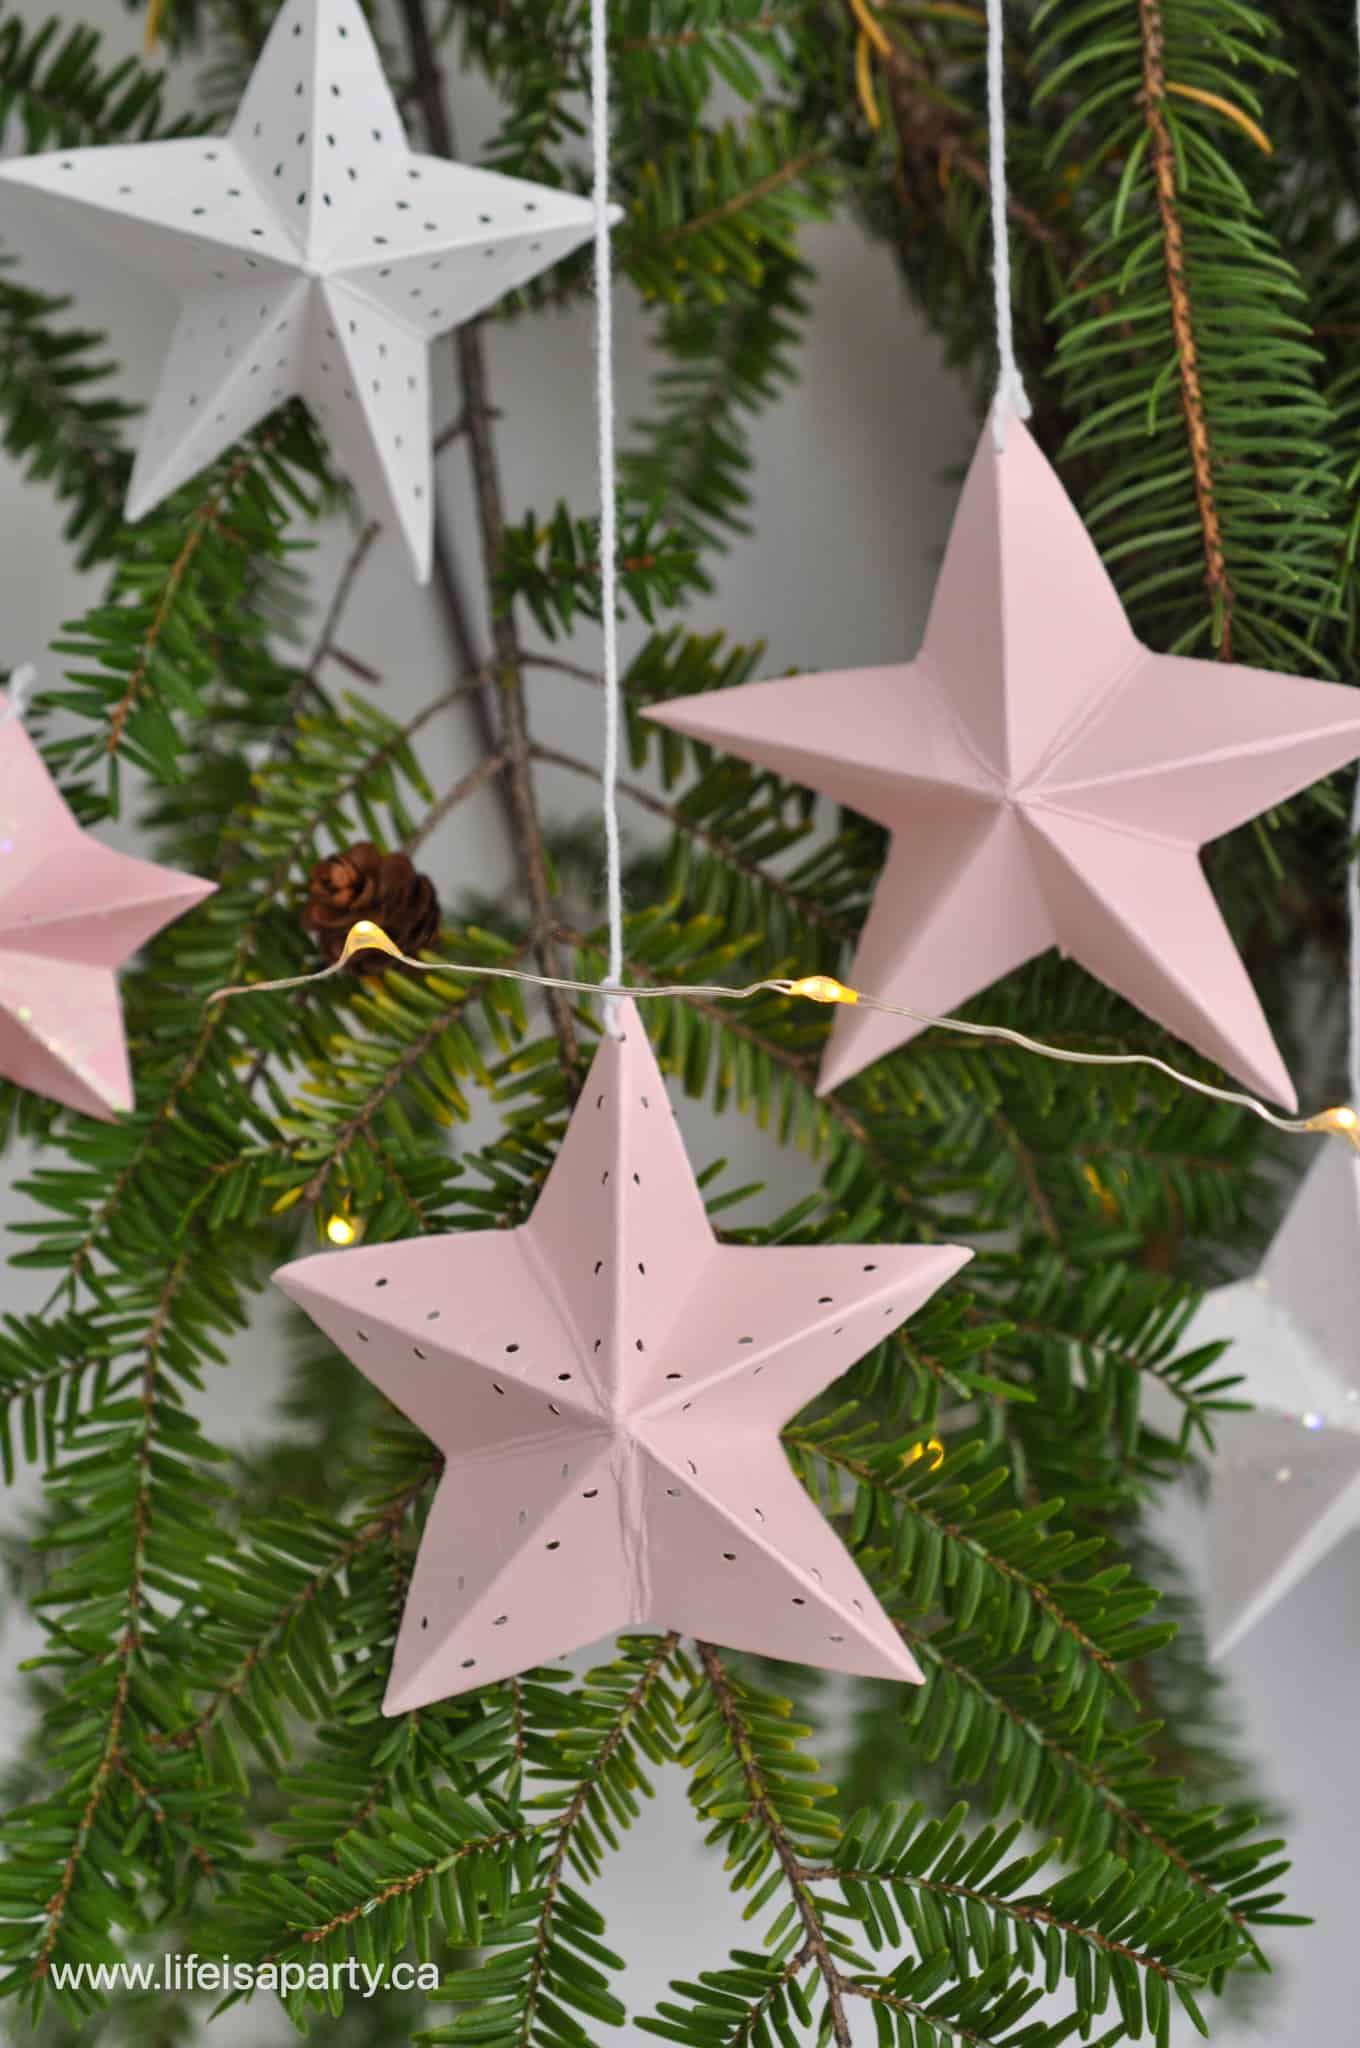
Beer Battered Coconut Shrimp Recipe

Aug 31, 2021 · Leave a Comment

coconut shrimp

Beer Battered Coconut Shrimp Recipe: these coconut shrimp are sweet and moist on the inside, and crispy and coconut covered on the outside. The perfect appetizer.

coconut shrimp
[feast_advanced_jump_to]

Coconut shrimp is such a favourite treat.  We often order it at a restaurant, but it's a great recipe to make at home too.   It was the perfect addition to our recent Moana movie night -see all the details here.  We were inspired by the song in the film about coconuts to include it as part of our themed menu.  And this old favorite was perfect.

coconut shrimp

What Kind of Shrimp Should I Use For This Coconut Shrimp Recipe?

For this recipe it's best to use raw shrimp that are peeled and deveined but have the tail still on.  If you can find the shrimp peeled and deveined you'll save yourself a lot of time, by being able to skip these steps.  You can use precooked shrimp, but you risk overcooking them during the frying process.  The size of the shrimp doesn't matter too much, just adjust youre cooking time to less or more depending on their size.  Look for the shrimp to turn pink and the coconut to turn golden brown to know they're done.  Defrost frozen shrimp according to the directions on the package.

easy coconut shrimp recipe

Do We Have To Chill Them Before Frying?

Chilling the shrimp after they've been battered helps the coconut to stick better while frying.  It gives time for the coconut to absorb some of the moisture from the batter, and holds it together better, a bit like glue.  This step ensures that you don't lose the coconut coating while you're cooking it.

how to make coconut shrimp

If you don't have time to chill in the refrigerator, you can speed up the chilling time by using the freezer for about half the time.  But do not skip this important step.

Why Three Steps To Coating The Coconut Shrimp?

We coated our shrimp first in flour, then in our egg and beer batter, and lastly in the coconut.  All three steps are important and shouldn't be skipped.  Start with flour, this enables the batter to stick better.  Next add the batter, this acts as the glue that holds the coconut onto the shrimp.

coconut shrimp recipe

Can I Make This Coconut Shrimp Recipe Ahead of Time?

Yes, prepare the shrimp with the flour, batter, and coconut, and extend the chilling time up to overnight in the fridge before frying.  Serve the fried shrimp immediately after frying.  If you want to make them even more in advance, freeze them individually on a parchment lined baking sheet, once they're frozen and won't stick together, you can store them in a ziplock bag in the freezer.  You can fry them from frozen, just adjust the cooking time.

how to make coconut shrimp at home

Serving Suggestion

We like to serve these beer battered coconut shrimp with a sweet chilli sauce for dipping.  It's a sweeter sauce with a little heat which pairs perfectly with the fried shrimp.  Any tangy sauce would be a great choice.  Some people like it with tartar sauce or cocktail sauce for dipping.

We love this recipe!  It's so delicious and easy to make.  It's sure to be a crowd pleaser and these fly off the plate.  This recipe is great for company.  Be prepared for them to disappear quickly!

Recipe

coconut shrimp

Coconut Shrimp Recipe

Delicious shrimp coated in coconut and fried golden brown.
No ratings yet
Print Pin Rate
Course: Appetizers
Cuisine: Asian
Prep Time: 20 minutes minutes
Cook Time: 20 minutes minutes
Total Time: 40 minutes minutes
Servings: 24
Calories: 69kcal
Author: Dannyelle Nicolle-Ramjist

Ingredients

  • ¼ cup all purpose flour
  • ½ teaspoon salt
  • ¼ teaspoon freshly ground pepper
  • 1 egg
  • ⅔ cup beer
  • ½ cup all purpose flour
  • 1 ½ teaspoon baking powder
  • 2 cups sweetened shredded coconut
  • 24 large shrimp
  • peanut oil or vegetable oil for frying

Instructions

  • Begin with adding salt and pepper to ¼ cup flour, and combine on a plate.
  • Next to make the beer batter mixture combine egg, ½ cup of flour, and baking powder in a medium bowl.
  • Place coconut on another plate or small bowl.
  • Line up the flour first, then the beer batter, then the coconut. Dip shrimp first in the flour mixture, then in the batter, and finally roll shrimp in the coconut. After coating place shrimp on a parchment paper lined cookie sheet.
  • Chill the coated shrimp in the fridge for 30 minutes, or the freezer for 15 minutes.
  • Fry the chilled shrimp in small batches of oil heated to 350 degrees F in a deep fryer, or deep pot. Use metal tongs to turn the shrimp part way through. Remove the shrimp from the oil when the shrimp has turned pink, and the coconut coating is golden brown after 2-3 minutes
  • Drain on paper towels. Seve immediately after frying, with Thai sweet chili sauce, or your favorite dipping sauce

Nutrition

Serving: 1g | Calories: 69kcal | Carbohydrates: 7g | Protein: 2g | Fat: 3g | Saturated Fat: 2g | Polyunsaturated Fat: 1g | Cholesterol: 19mg | Sodium: 155mg | Fiber: 1g | Sugar: 3g
Tried this Recipe? Tag me Today!Mention @LifeisaParty or tag #lifeisaparty!
coconut shrimp recipe

With this beer battered coconut shrimp recipe, life really is a party!
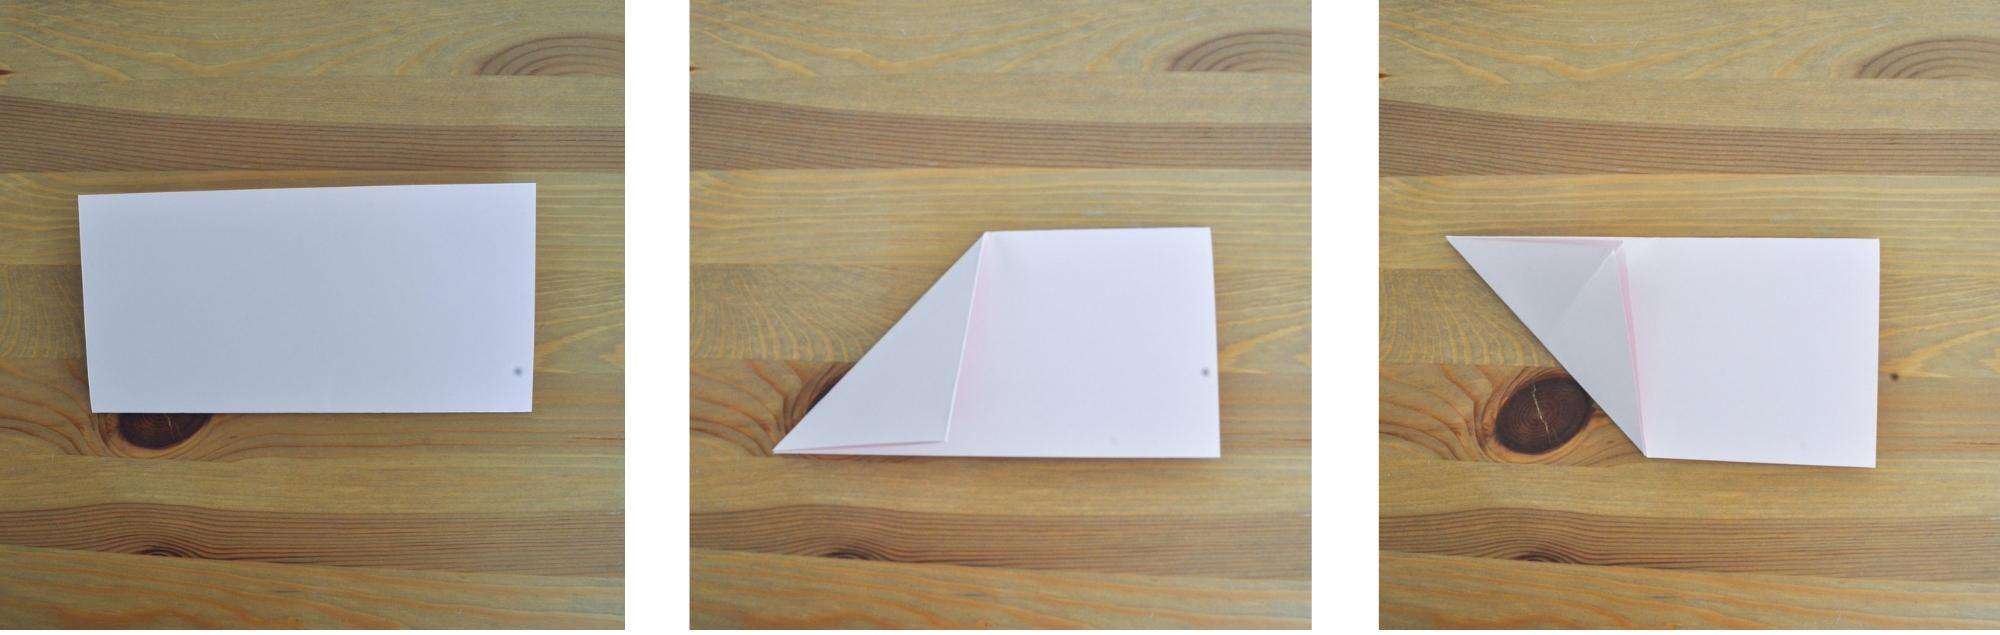
More Appetizer Recipe Inspiration

You might also like our Honey Garlic Chicken Wing Recipe here.

Honey Garlic Chicken Wing Recipe: these delicious and inexpensive chicken wings only have 6 ingredients making them easy to make.

Also try Guyanese Cheese Straws Recipe here.

Cheese Straws Recipe: spicy and savoury cheese shortbread straws, perfect for gift giving or as part of a charcuterie board.

You might also enjoy Homemade Breaded Onion Rings here.

This Beer Battered Coconut Shrimp recipe was part of our Mona Disney Princess Dinner and Movie Night -check out all the details about the whole party here.

Disney Princess Dinner and Movie Toolkit

Love Disney Princess dinner and movie nights?  Buy our Disney Princess Dinner and Movie Toolkit.  The Toolkit includes 6 different Disney Princess movie nights with menus, all the recipes, inspiration, and printables for each one.  Check out more about the Disney Princess Dinner and Movie Toolkit by clicking here.

Moana Themed Party -Dinner, Movie Night & Food Ideas

Aug 30, 2021 · Leave a Comment

Moana themed party ideas and menu with food.

There's something magical about turning a favorite movie into a full celebration. This Moana themed party has the complete dinner menu, DIY decorations, free printables, and a cocktail twist for a grown up version, everything you need to bring the island to your living room.

Moana themed party ideas and menu with food.

Quick Look

  • 🍽️ Menu: Coconut Shrimp, Sweet and Sour Pork Kebabs, Rice, Coconut Milkshakes, Mini Pineapple Upside Down Cakes
  • 🌴 Decor: tropical fruit, painted coconut Kakamora, seashells, macrame bunting
  • 🎟️ Free Printables: movie ticket invite, poster, food labels, cupcake toppers, drink flags
  • 🥥 Grown Up Twist: turn the coconut milkshake into a Moana cocktail with a shot of rum
[feast_advanced_jump_to]

With the new live action Moana movie now out, there has never been a better time to throw a Moana themed party. This Moana themed party has a full dinner menu, food ideas, and DIY party decorations perfect for movie night with family, friends, or for a Disney date night. You will love the fun ideas for Moana party decorations and printables, plus a grown up twist below to turn the whole night into an adult movie night too, with a cocktail.

This party is our final Disney Princess Dinner and A Movie Night. Check out the whole series for lots more fun ideas.

  • The Princess and the Frog dinner and movie night
  • Snow White themed dinner and movie night
  • Cinderella themed dinner and movie night
  • Beauty and the Beast themed dinner and movie night
  • Frozen themed dinner and movie night

Why We Love Moana

This party is our final Disney Princess Dinner and A Movie Night. Moana is Disney's most popular princess for a reason, she's strong, independent, and charts her own course without needing a prince to get there, and her island setting made for one of our favorite menus in the whole series. We set up our party as a family movie night, but it would also make an amazing Disney date night, or a really fun girls' night too. Our post is also full of Moana birthday party ideas if you're planning a Moana themed birthday party and looking for some creative ideas!

Moana party table with themed food and decorations.

Party Decorations

We had so much fun setting up our Moana-themed party movie night. Keeping things casual, we set everything up in the living room around the coffee table so we could enjoy dinner together while we watched the movie. Here's how we brought the island to life:

  • 🌿 Jungle Vibe: lots of house plants set the tropical scene, inspired by the movie's beautiful island setting. Use real or faux plants, or a mix like we did.
  • 🐚 Seashells: large conch shells for that beachy, palm tree, sun and sand feel. Tip: check thrift stores or second hand sites, they're much cheaper there than at the craft store.
  • 🧵 Macrame bunting: inspired by the macrame on Moana's skirt, added along the front of the table. You can read how I made the macrame bunting here.
  • 🍍 Tropical fruit: a fresh pineapple and three coconuts for the table, or add a full tropical fruit tray to the dessert table.
  • 🥥 DIY Kakamora coconuts: painted faces on our coconuts, inspired by the coconut pirates in the film. Simple craft paints work great, just free hand some scary faces. Fun activity to do with kids at a Moana birthday party too. These were everyone's favorite!
Moana food on a party table with decorations.
Moana party with food table decorations.

Moana party decorations DIY Kakamora coconut pirates

Moana Themed Free Party Printables

We made some really cute printables to go with our Moana party theme. I love the color scheme of pink, orange and red, inspired by tropical leaves and flowers.

  • Drink flags: add to paper straws for an easy finishing touch, perfect in the coconut milkshakes
  • Movie ticket: the perfect invitation to movie night for family or friends, or use it as a birthday party invitation
  • Moana poster: palm leaf design, framed for the party or as bedroom decor for a Moana fan afterward
  • Food labels: styled labels plus blank ones you can customize, also great as place cards
  • Cupcake toppers: little sail picks for desserts, just cut out and hot glue onto a toothpick
Printable Moana movie night ticket party invitations.
Printable Moana party decoration sign with sea shells.
Moana themed desserts with printable cupcake picks.
Moana party table with themed desserts and coconut milkshakes.

Free Moana Party Printables Here

All our free printables are available for to our subscribers in our Free Resource Library. Subsribe below for instant access.

Moana themed party printables.

Moana Themed Dinner Menu

Since Moana takes place in the tropics, we went with a tropical menu for the evening. 

  • Coconut Shrimp
  • Sweet and Sour Pork Kebabs
  • Rice
  • Coconut Milkshakes
  • Pineapple Upside Down Cakes
Moana party table with themed food and party decorations.

Coconut Shrimp

We love the song "Where You Are" from the film, which talks all about the coconut, and how the islanders use every part of the tree. It inspired us to make some coconut shrimp for our movie night. These were so yummy, and felt like a special treat for movie night. Get the Coconut Shrimp recipe here.

Moana party food coconut fried shrimp on a plate with dip.

Sweet and Sour Pork Kebabs and Rice

There's a sweet scene in the movie where Moana eats some pork in front of Pua the pig. After saying "Mmmm, that's good pork" she notices Pua, and makes an excuse to leave. We wanted to make some good pork for the evening too, just don't tell Pua. ;). We put together some Sweet and Sour Pork Kebabs, that we cooked on the bbq. The sweet and sour sauce is easy to make and so good. You'll love the Sweet and Sour Pork Kebas, find the recipe here.

We also made some simple rice to go with our meal.

Moana themed party food sweet and sour pork skewers on a plate.
Moana themed party table with Moana themed food and party decorations.

Coconut Milkshakes

For drinks we made our Coconut Milkshakes. They're a real favourite around here. They only have three ingredients, so they're really simple to make, and so delicious. Get our coconut milkshake recipe here.  Another idea would be to serve these in coconut cups. You'll want to make these last minute right before serving so that they don't melt.

Moana themed party drinks of coconut milkshakes with party straws.

Mini Pineapple Upside Down Cakes

Lastly, we finished our dinner with individual pineapple upside down cakes. These are a family favourite too, and a fun alternative to a Moana cake even for a birthday. Get the individual pineapple upside down cake recipe here. These awesome cakes were simple to make as individual servings cupcake pans to bake them in. We used our printable cupcake picks in each cake to make our own Moana boat!

Moana themed party dinner and movie night

Turn It Into a Grown-Up Movie Night -Coconut Cocktail

If you're hosting this as a Disney date night or a girls' night instead of a family movie night, it's easy to give the whole menu a grown up twist. The easiest place to start is the coconut milkshake. Just add a shot of dark or spiced rum to each glass before serving and you've got an instant Moana cocktail, no extra ingredients or planning required. It keeps all that tropical coconut flavor but turns movie night into something a little more special for the adults at the table.

Party table for Moana movie night with decorations and Moana themed food.

We had a lot of fun putting this movie night together, and I've been singing the songs from the Moana soundtrack for days! I love the messages of this movie, and really enjoyed this movie night.

  • Frozen themed menu, party decor and printables.
    Frozen Themed Party -Dinner and Movie Night
  • Beauty and the Beast party table with food and decorations.
    Beauty and the Beast Party -Themed Dinner and Movie Night
  • Cinderella Party table with Cinderella inspired food and DIY party decor.
    Cinderella Party -Dinner and Movie Night
  • Snow White Party with themed food and party decor.
    Snow White Party -Dinner and A Movie

With a Moana themed party dinner and movie night like this to enjoy, life really is a party!
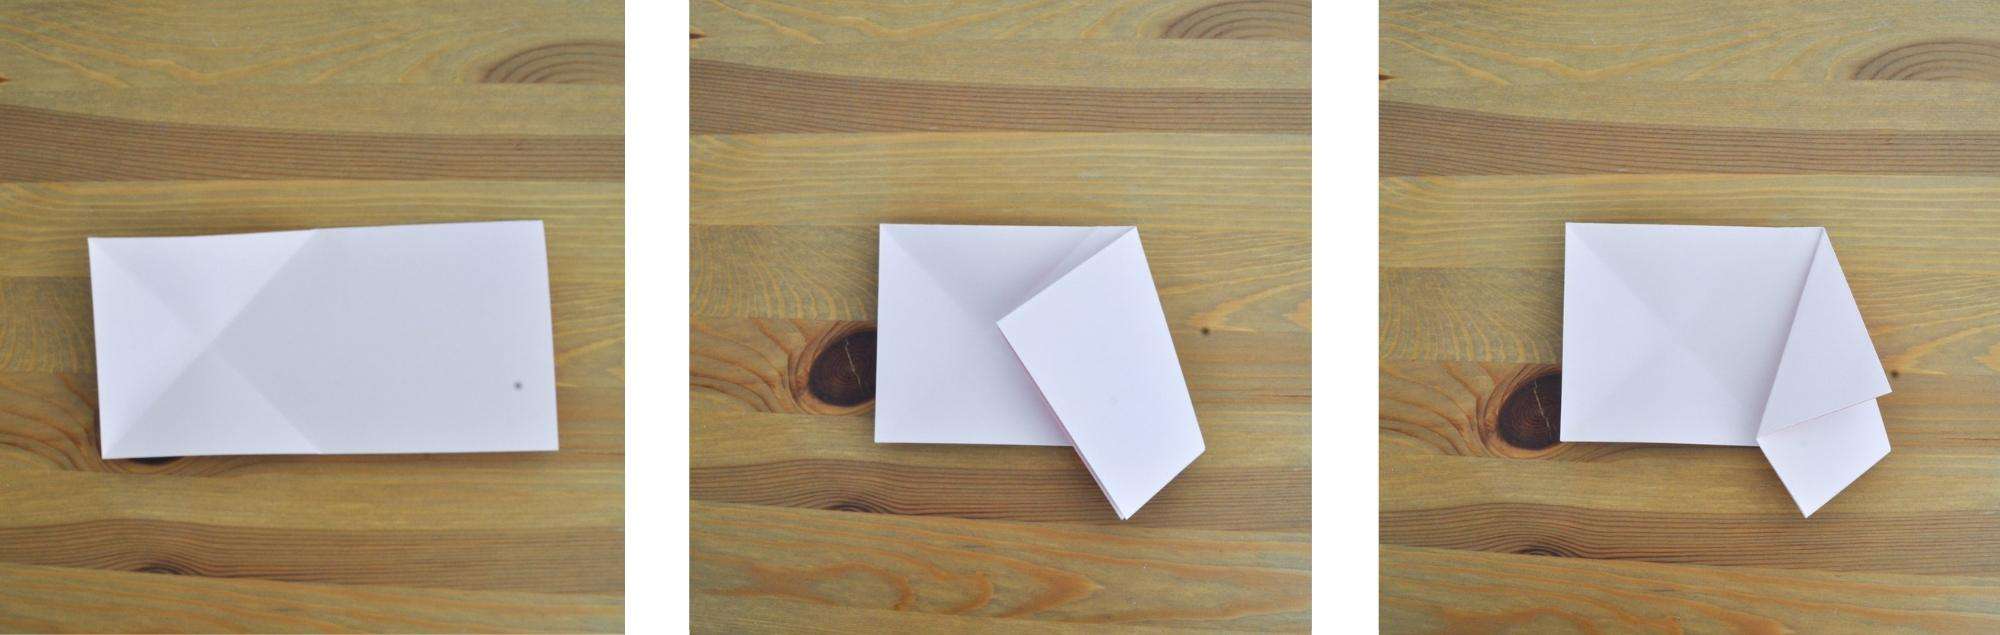
If you try this Moana Themed Party or any other ideas on my blog please let us know and leave a comment below. Thanks for visiting today!

Chip Charcuterie Snack Board

Aug 28, 2021 · 1 Comment

Chip charcuterie board with different chips, and salty snacks.

Chip Charcuterie Snack Board: calling all salty snack lovers! Combine all your favourite chips, Doritos, cheesies, and popcorn flavours for the ultimate snack board!  

Chip charcuterie board with different chips, and salty snacks.
[feast_advanced_jump_to]

I love chips.  They're so salty, and crunchy and delicious.  And there's so many amazing varieties.  When I was planning a special movie date night the other day -see all the details of the movie date night here,  I decided that a big chip charcuterie snack board was pretty much the ultimate snack!  Strictly speaking, charcuterie does mean cured meats, but these days everyone is using it to refer to this, a cheese board, any board of beautiful food, so that's the way it's intended here.  This just might be the best charcuterie board I've ever made.  

Adding in this truffle popcorn to this board would be a great addtion too.

chip board

I love the idea of lots of different flavours of fun chips, and snacks all grouped together.  If you're one of those people that love some sweet with their salty, you could certainly add in some sweet snacks, but not me.  I'll take my salty snacks straight up please.

I used a large board as my serving platter for our chip charcuterie snack board.  It worked great because it had a bit of an edge on it, so none of my chipies could get away. 😉

movie night snacks

What To Include On A Chip Charcuterie Snack Board

I had a lot of fun looking for all our favourite chips and snacks.  Part of the date turned into picking out anything we wanted in the chip aisle.  Here's what we went with:

  • white cheddar popcorn (it was movie night after all, so we needed some popcorn 😉
  • regular potato chips
  • salt and vinegar chips
  • dill pickle chips
  • potato ringolos (this is the Humpty Dumpty brand name, but they're basically potato rings)
  • plantain chips
  • Pringles
  • Doritos
  • crunchy Cheetos
  • potato sticks
  • chip dip

You could definitely just use all your personal favorite chips and snacks, but it's also fun to try a few new things.  If there's any new or special flavors you've been wanting to try, this is your chance.  There's a few things to think about as you choose.

chip charcuterie snack board

1. Different Textures and Shapes

Things like the popcorn, cheeses, plantain chips, Pringles, kettle potato chips and regular chips add some different textures to the board.  When it comes to shapes, the ringolos and potato sticks are some great options.  Pita chips would be a good addition too.

chip snack board

2. Colours

Let's face it, there's not a lot of different colour options when it comes to chips.  The Doritos and Cheese bring in some orange, and help break up all the beige.  If you're a fan of bbq or ketchup chips (is this just a Canadian thing?) they could add some colour variation too.  Or you could add in some blue tortilla chips and your favorite salsa as another great way to add in some colour.  You could also use colourful small bowls for holding your dips.  

potato chip board

3. Avoid Straight Lines

When your arranging all your epic chips, avoid putting them in straight lines.  Create some movement on your tray with flowing piles of different chips and snack options.

ultimate snack board

4.  Add Some Dip

You can't really have chips without dip!  We made a simple sour cream and onion dip.  The easy recipe is to use 1 container of sour cream, and one envelope of onion soup mix.  This old recipe made with simple ingredients is super easy, and really yummy with plain chips.  Use interesting dip bowls, like the pretty marble one we used here.

You could add a whole variety of different dips.  French onion dip would be a great choice, you could also try a dill pickle dip, ranch dip, or a tangy goat cheese dip.  Adding dips is an easy way to add a touch of tangy flavors and a fun way to make a more flavorful snacking experience.

movie night snack board

5.  Use A Board With A Lip

If you can find a board or tray with a lip around the side, use it for your chip charcuterie snack board.  It will help contain the chips, and avoid them all falling off the side as you eat them and move things slightly.  We used a large square tray and it worked perfectly.

6.  Shop At The Bulk Store

Not all chips are available at the bulk store, but look for some of the more interesting varieties.  We got the ringolos, and potato sticks at ours.  They also had cheeses, and plantation chips, along with lots more interesting varieties of great salty snacks.  I like that you can buy a small amount, rather than a large bag.  Since we were buying so many different ones for our board, being able to buy a few in smaller quantities was great.

movie night charcuterie board

7.  Storing Leftover Chips

We wanted to add lots of different varieties to our chip board, and we ended up with quite a few left overs in the end. Tie up the bags with a chip clip or twist tie, so they don't go stale and lose their crispness.  Did you know you can store chips in the freezer?  They will stay nice and crisp, and you can eat them right out of the freezer.  Chips taste great when they're really cold.  If you're chips or snacks do become stale at all during storing, you can sometimes bring them back to life by reheating them in the oven.  Place them on a baking sheet in a single layer and heat them at 350, for 5-8 minutes, watching them carefully to make sure they don't burn.  Allow them to cool, and enjoy them with their crunch back.  

movie night snacks

Snack boards of all shapes and kinds are definitely so much fun, and this chip board looks amazing and tasted great.  We loved ours for movie date night -see all the details and get the printable popcorn box here. This chip board would also be really great for entertaining too, especially if you want to bring your snacks to the next level.  

This board looks so much more exciting than a few regular bowls of chips on the table, and it would be easy to replenish as the party went on.  That's what makes it one of my favorite ways to serve any type of chip when entertaining.  I hope it's inspiring you to make one too.  Make one for your own movie nights.  It would also be the perfect way to create a great snack for game day that your party guests will love. This is the easiest way to make snacks for a crowd look great. Or you could make a version with Mexican food, using a variety of salsas, and tortilla chips make your own salsa board.  This would be perfect for cinco de mayo too.  And how perfect would this be as a dinner party appetizer for guests to enjoy before dinner.

Recipe

Chip charcuterie board with different chips, and salty snacks.

Chip Charcuterie Snack Board

The ultimate chip and salty snack board.
5 from 1 vote
Print Pin Rate
Course: Appetizers
Cuisine: American
Prep Time: 5 minutes minutes
Total Time: 5 minutes minutes
Servings: 10
Calories: 343kcal
Author: Dannyelle Nicolle-Ramjist

Ingredients

  • 5 cups white cheddar popcorn
  • 2 cups regular potato chips
  • 2 cups salt and vinegar chips
  • 2 cups dill pickle chips
  • 2 cups potato ringolos this is the Humpty Dumpty brand name, but they're basically potato rings
  • 2 cups plantain chips
  • 2 cups Pringles
  • 2 cups Doritos
  • 2 cups crunchy Cheetos
  • 2 cups potato sticks
  • 1 cup chip dip

Instructions

  • Arrange everything on a large tray with a lip around it.

Nutrition

Serving: 1g | Calories: 343kcal | Carbohydrates: 40g | Protein: 4g | Fat: 19g | Saturated Fat: 4g | Polyunsaturated Fat: 13g | Cholesterol: 5mg | Sodium: 356mg | Fiber: 3g | Sugar: 1g
Tried this Recipe? Tag me Today!Mention @LifeisaParty or tag #lifeisaparty!
chip snack board

With a chip charcuterie board to enjoy, life really is a party!
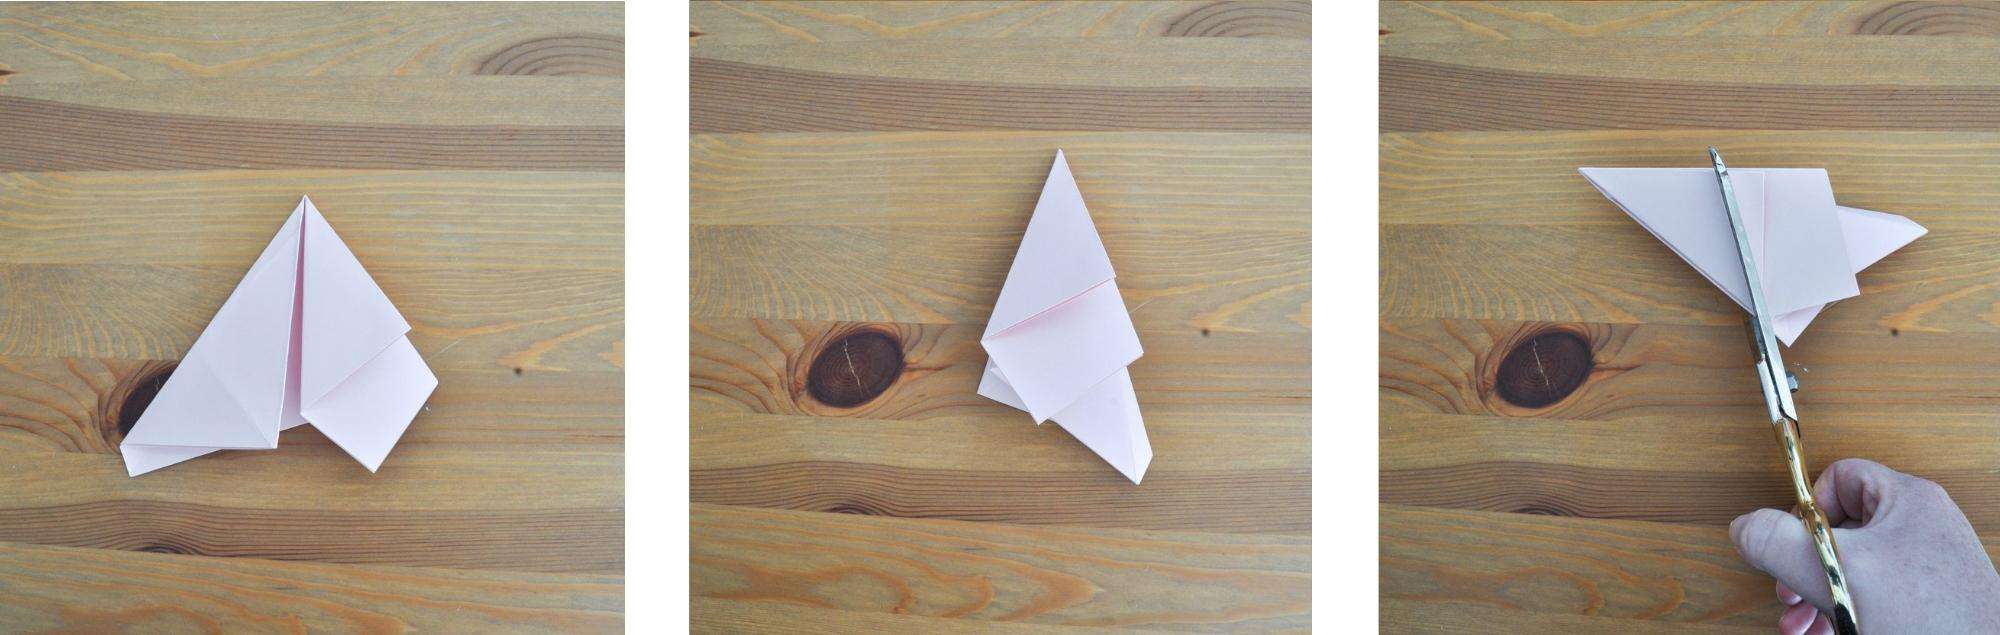
More Inspiration:

You might also like our Slow Cooker Spinach and Artichoke Dip recipe here.

Also check out our Individual Charcuterie Boards here.Individual Charcuterie Boards: perfect for entertaining or for date night, full of ideas for cheeses, meats, fruits, sweets and more.

You might also like How To Make The Perfect Cheese Board here.

How to Make the Perfect Cheese Board -learn how to combine sweet, salty, sour, spicy, crunch, and creamy to create the perfect cheese board!

Movie Date Night At Home

Aug 27, 2021 · Leave a Comment

movie date night at home

Movie Date Night At Home: take it to the next level with a Cricut made ticket, movie bunting, food pics, popcorn box, and movie genre dice.

movie date night at home
[feast_advanced_jump_to]

Movie date nights are even more special when they're at home.  We took ours to the next level with some fun touches made on our Cricut machine including a ticket to invite your date, a popcorn box, movie night bunting, food picks, and a movie die to help you choose what genre of movie to watch.  

Movie Date Night Ticket and Decorations

I thought it would be fun to create a special movie ticket for our date night on my Cricut.  I used simple black and white card stock to create the beautiful layered ticket.  This is the perfect invitation for a special movie date night at home.

Cricut movie ticket

I also made some matching movie night decorations using my Cricut.  This movie themed bunting is a fun addition to the front of the coffee table, it would also be cute as a wall decoration.  After cutting it, and gluing the layers together, I used some black and white bakers twine to string it together.

movie date night decorations
DIY movie decorations

The food picks also match the rest of our movie night pieces.  After cutting them out, and gluing them together, I used a glue stick to add tooth picks to the back of each one.  I used them here on our chip snack board, but they would be cute in cupcakes, or any stack you serve for movie night.

movie night snacks
movie night themed food picks
black and white movie night
movie date night at home

Recipe

movie date night at home

Movie Date Night Ticket and Decorations

No ratings yet
Print Pin Rate
Cook Time: 30 minutes minutes
Total Time: 30 minutes minutes
Author: Dannyelle Nicolle-Ramjist

Equipment

  • Cricut Machine
  • Cricut Cutting Mat
  • Glue Stick
  • Hole Punch

Materials

  • Cricut Design Space Cutting File
  • White Cardstock
  • Black Cardstock

Instructions

  • Open the Movie Date Night Ticket and Decorations cutting file in Cricut Design Space.
  • Add the white cardstock to the cutting mat and cut out the first white pieces. Remove them from the cutting mat, and set the pieces aside. Continue until of the white pieces are cut out. Next, add the black cardstock to the cutting mat and cut out the black pieces, and remove them from the cutting mat. Continue until all the black pieces are cut out.
  • Take care with some of the inner pieces that are quite small, like the centre of the "o" in movie, and the inside of the "a" in admit.
  • Use a glue stick to add the black and white layers to the movie ticket, the bunting, and the food picks.
  • Use a hole punch to add holes to the corners of the bunting flags and string them togerher with some black and white string.
  • Use a glue gun to attach tooth picks to the back of the food picks.
cricut movie night decorations
cricut movie ticket

movie date night at home

Movie Night Die

If you've ever struggled to choose what movie to watch this die is for you.  We added a different movie genre to each side.  Just roll the die and whatever it lands on can be your genre for the movie, helping to narrow down your choices.  This paper die is easy to make on the Cricut, using a marker with the drawing feature to add the names.  After it's cut out, just use glue to make it into a 3D cube, all ready for rolling.

DIY movie genre dice
movie genre dice

Recipe

Movie Die

No ratings yet
Print Pin Rate
Cook Time: 15 minutes minutes
Total Time: 15 minutes minutes
Author: Dannyelle Nicolle-Ramjist

Equipment

  • Cricut Maker
  • Cricut Cutting Mat
  • Glue Stick
  • Scoring Wheel Tip
  • Cricut Marker

Materials

  • White Cardstock
  • Movie Die Cutting File in Cricut Design Space

Instructions

  • Open the Cricut Design Space cutting file for the Movie Die.
  • Add the white cardstock to the cutitng mat, and follow the prompts on the Cricut to add the score wheel tip, the marker, and the fine point cutting blade.
  • Remove the cut die from the mat, fold along the score lines, and use a glue stick to glue the cube together.

Popcorn Box

I love salty snacks and thought it would be a fun idea to create a chip snack board to enjoy during the movie night.  Since popcorn is the classic movie snack, I knew I had to include some of it on our chip snack board too.  I used my Cricut to cut out the most adorable popcorn box, and postioned it as though it were spilling out on our tray.  You can read all about how to create the chip charcuterie snack board here.  The boxes would be great just to hold regular popcorn for a movie night as well.

cricut popcorn box
DIY popcorn box
black and white popcorn box

Recipe

Popcorn Box

No ratings yet
Print Pin Rate
Cook Time: 15 minutes minutes
Total Time: 15 minutes minutes
Author: Dannyelle Nicolle-Ramjist
Cost: $2

Equipment

  • Cricut Maker
  • Cricut Cutting Mat
  • Scoring Wheel Tip
  • Glue Stick

Materials

  • Black Cardstock
  • White Cardstock
  • Popcorn Box Cutting File in Cricut Design Space

Instructions

  • Open the popcorn box cutting file in Cricut Design Space.
  • Add white cardstock to the cutting mat, and follow the prompts in Cricut Design Space to add the scoring wheel tip, and the fine blade and cut out the white pieces. Remove the cut pieces from the mat, and set aside. Continue until all the white pieces are cut out, and then do the same to cut out the black pieces.
  • Fold the white pieces along the score lines to form the box, and glue it together with a glue stick.
  • Add the black decorative pieces to the box with a glue stick.

This movie date night at home was so much fun, and adding in all the fun Cricut details really took it to the next level.  It's the perfect way to take your next at home movie night with someone special to the next level!

how to have a movie date night at home

With a movie date night at home to enjoy, life really is a party!
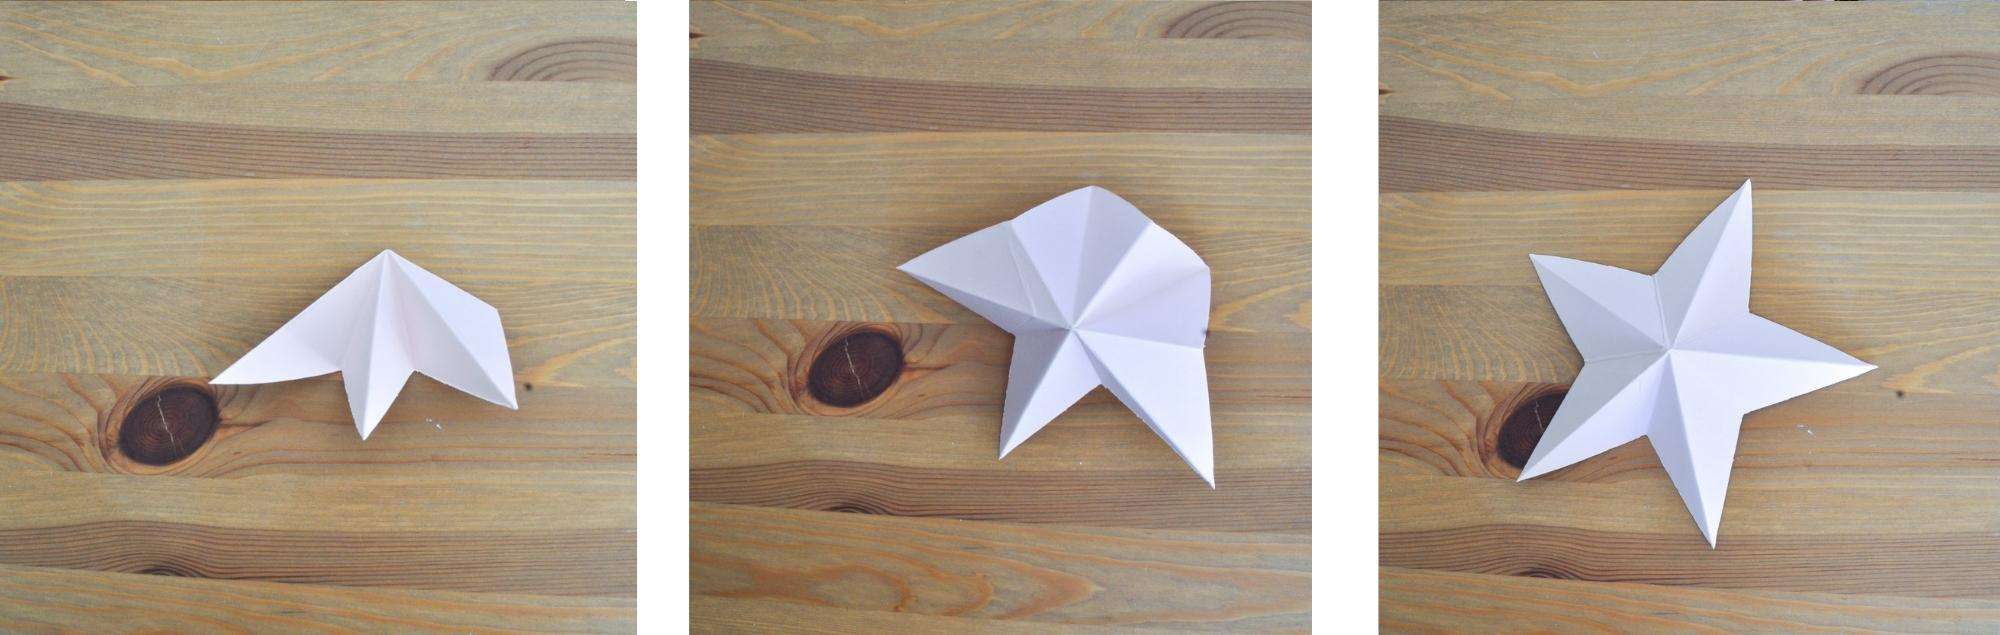
This post is sponsored by Cricut.  As always, all opinions are my own.  Thanks for supporting the brands that make Life is a Party possible.

Easy One Bowl Brownies

Aug 26, 2021 · 5 Comments

Easy one bowl chocolate brownies cut into squares on a white plate.

Easy One Bowl Brownies: easy to make, simple ingredients you already have in your pantry, and better than a store bought mix. Promise.

one bowl brownies
[feast_advanced_jump_to]

These Easy One Bowl Brownies are a real old family favourite around here.

Easy Brownie Recipe

A Family Favourite

I grew up on them. When I was in grade five my mom went from being a stay-at-home mom, to working as a housekeeper 3 mornings a week at, what we called at the time "the mansion". There was also a full-time cook named Rose. 

Rose made these chewy brownies at least once a week, and sometimes more, and it wasn't long before my mom was making them too. They're super easy. These are the best brownies, and that soon made them a staple at our house too.

One Bowl Brownies

Last week when my youngest Maddie decided she wanted brownie sundaes for her her birthday, I turned to my old standby one bowl brownie recipe. 

I hadn't made them for a while, and I have to say I was reminded how easy and yummy they were, and realized I'd never shared them here on Life is a Party before. If you don't have a go-to brownie recipe, then now you do. ;). Introducing what is sure to become one of your favorite brownie recipes next time you have a brownie craving.

If you're a brownie lover, you might also like our mini egg brownies.

how to make One Bowl Brownies

Don't Over Bake

Perfect brownies should be fudgy and kind of gooey inside, so be sure not to over bake these. Follow the timing on the recipe. These have a lovely crinkly top, and chewy fudgy middle. My personal favorite are the chewy brownie edges at the edges of the pan.

Homemade Vs. Box Mixes

If you've ever worried that making brownies from scratch will be too hard or time consuming then these are the right recipe for you. These one-bowl brownies are really easy to make, so no more clean up than from a box mix. These easy brownies are cheaper to make from scratch then from a brownie mix and they're more delicious too. And these brownies are made with items from the grocery store you probably have in your pantry right now, so you can whip them up anytime for an easy dessert. We use semi-sweet chocolate chips, so no special unsweetened chocolate or baker's chocolate is necessary for this great recipe. They're really great served with ice cream and this hot fudge sauce, or just on their own.

Easy Brownie recipe

We used our easy crackly top homemade brownies as part of some brownie sundaes, with toppings like chocolate sauce, peanut butter, and whipped cream. These chocolate brownies also delicious with a scoop of ice cream on top of the brownies. These easy homemade brownies are also a great lunch box treat, and because they're so quick and easy to make they're even great to bake last minute.I hope your family loves them as much as we do.

Recipe

Easy one bowl chocolate brownies cut into squares on a white plate.

Easy One Bowl Brownies

Easy one bowl chewy brownies.
5 from 1 vote
Print Pin Rate
Course: Desserts
Cuisine: American
Prep Time: 10 minutes minutes
Cook Time: 30 minutes minutes
Total Time: 40 minutes minutes
Servings: 12
Calories: 208kcal
Author: Dannyelle Nicolle-Ramjist

Ingredients

  • 1 cup white sugar
  • ½ cup margarine
  • 1 teaspoon vanilla
  • 2 eggs
  • 3 oz. semi-sweet chocolate
  • ¾ cup all purpose flour

Instructions

  • Cream the sugar and margarine together in the bowl of a stand mixer, or in a large bowl and use an electric mixer.
  • Add in 1 teaspoon vanilla and eggs, and mix until well combined.
  • Melt the chocolate in the microwave, and then add the melted chocolate chips to the batter, stir to combine.
  • Add the flour and combine, without over mixing.
  • Spray a 8 x 8 square baking pan with non-stick baking spray or line with parchment paper, and then add in the brownie batter. Bake at 350 degrees, for a bake time of 25-30 min. taking care not to over bake. The pan of brownies should be still slightly gooey in the middle when done. Cool on a wire rack and store in an airtight container.

Nutrition

Serving: 1g | Calories: 208kcal | Carbohydrates: 27g | Protein: 2g | Fat: 11g | Saturated Fat: 3g | Polyunsaturated Fat: 7g | Trans Fat: 1g | Cholesterol: 31mg | Sodium: 13mg | Fiber: 1g | Sugar: 21g
Tried this Recipe? Tag me Today!Mention @LifeisaParty or tag #lifeisaparty!
how to make brownies in one bowl

I love simple recipes like this one, with only one bowl to worry about cleaning up. With Easy One Bowl Brownies, life really is a party!
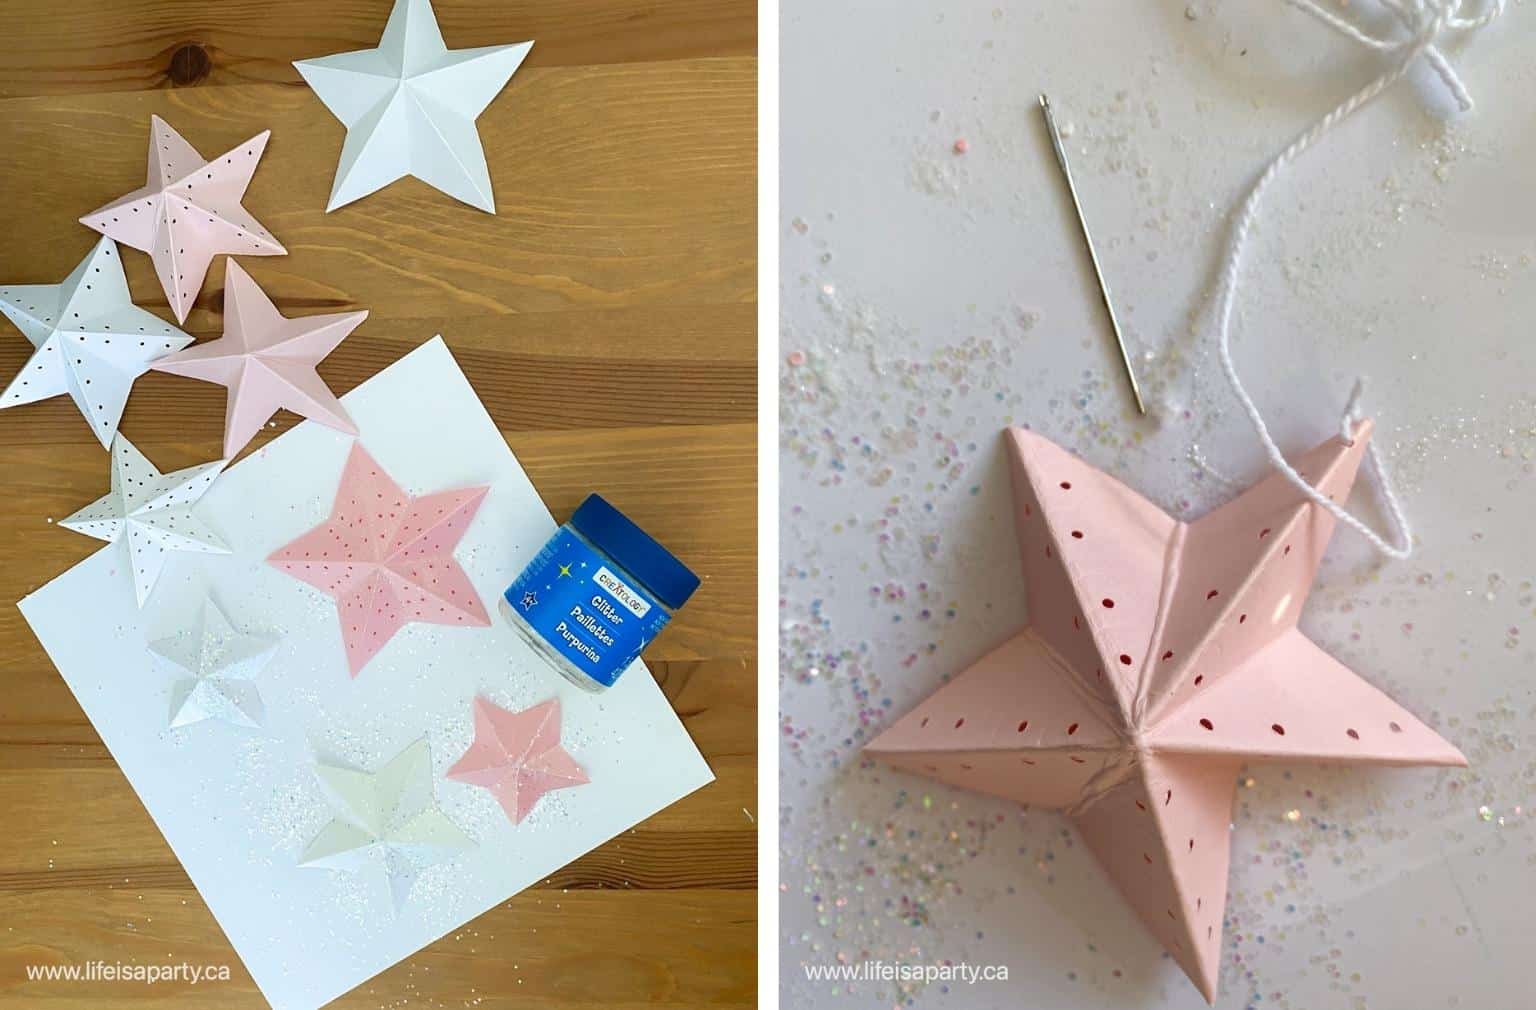
More Chocolate Recipes You'll Love

Also check out our Chocolate Charcuterie Board here.

Chocolate Charcuterie Snack Board: perfect for the chocolate lover, tips on building your board, and ingredient suggestions.

You might also enjoy our S'more Charcuterie Board here.

S'more Charcuterie Board: this s'more themed dessert board is perfect as a summer treat around a campfire, or for your camping themed party.
This recipe was part of our Frozen themed Disney Princess Dinner and Movie Night -check out all the details about the whole party here.

Disney Princess Dinner and Movie Toolkit

Love Disney Princess dinner and movie nights?  Buy our Disney Princess Dinner and Movie Toolkit.  The Toolkit includes 6 different Disney Princess movie nights with menus, all the recipes, inspiration, and printables for each one.  Check out more about the Disney Princess Dinner and Movie Toolkit by clicking here.

Hot Fudge Sauce Recipe

Aug 26, 2021 · 1 Comment

Homemade hot fudge sauce in a white ceramic pitcher with sauce dripping down the side.

This hot fudge sauce recipe is made with cocoa powder and pantry staples you almost certainly already have on hand. It is thick, deeply fudgy, and ready in about twelve minutes. I've been making this recipe for years, and it is one of those things I keep coming back to every single time.

hot fudge sauce

Quick Look

  • 📋 Recipe: Easy Homemade Hot Fudge Sauce
  • ⏲️ Ready In: 12 minutes
  • 👪 Servings: 8
  • 🔪 Difficulty: Easy
  • 💭 Top Tip: Don't skip the immersion blender step. It takes just a few minutes and creates a silky smooth texture that makes this sauce genuinely special.

Why You'll Love This Recipe

  • Made from pantry staples you likely already have on hand.
  • Ready in about 12 minutes from start to finish.
  • No heavy cream or chocolate bars required.
  • The immersion blender step creates an exceptionally smooth, silky texture.
  • Makes a beautiful and thoughtful homemade gift in a pretty jar.
[feast_advanced_jump_to]

There is something so satisfying about being able to make hot fudge sauce with cocoa powder rather than melted chocolate bars. No chocolate bars, no heavy cream, no grocery run required. Just butter, cocoa powder, sugar, evaporated milk, and vanilla. A pot, a few pantry staples, and about twelve minutes of your time.

I love this sauce because it delivers on the real thing. It is genuinely thick and fudgy, not thin like a chocolate syrup. When it hits cold ice cream it thickens on contact and creates that perfect melty, fudgy combination that store-bought jars just cannot replicate. And the flavor is rich and deeply satisfying without being bitter or intense. Coming from someone who is not a big chocolate lover, I cannot stop eating it. That tells you everything you need to know.

And the immersion blender step at the end? That is the secret. Two minutes of blending transforms the sauce into something truly silky and smooth.

If you love this recipe, you might also enjoy making a batch to go alongside a classic sweet crepe for a simple and special dessert. Or try drizzling it warm over a pan of easy one bowl brownies with a scoop of vanilla ice cream on top. We've made this recipe so many times. It was great as part of our Crepe Bar, and also as part of our ice cream sundae bar for our Frozen Thememd Dinner and Movie Night.

Spoon held above a white ceramic pitcher showing thick homemade hot fudge sauce dripping from the bowl of the spoon.

What Is the Difference Between Hot Fudge Sauce and Chocolate Sauce?

The difference is all about texture. Chocolate sauce is thin and pourable, similar to a chocolate syrup, and it stays that way even when cold. Hot fudge sauce is thick and rich, and it needs to be served hot because as it cools it becomes very thick and almost fudge-like in consistency.

That is actually what makes it so good over ice cream. The hot sauce melts the top of the ice cream slightly, and the cold ice cream makes the sauce thicken right on contact. The result is that perfect combination of melty and fudgy all at once. If you are looking for something that stays pourable at room temperature, this is not the sauce for you.

Hot Fudge Sauce Ingredients

Hot fudge sauce ingredients including butter, cocoa powder, sugar, evaporated milk and vanilla arranged in small bowls.

Here are a few notes on the key ingredients in this recipe. The full ingredient list and quantities are in the recipe card below.

  • Vanilla extract: Goes in at the very end, off the heat, and adds a subtle warmth that rounds out the chocolate flavor beautifully.
  • Butter: Gives the sauce its richness and contributes to that smooth, glossy finish.
  • Unsweetened cocoa powder: This is what makes the recipe a true pantry staple, and here is why it works just as well as a chocolate bar. Chocolate is essentially cocoa solids plus fat plus sugar. In this recipe we are building those same components separately. The cocoa powder provides the chocolate flavor. The butter provides the fat. The sugar provides the sweetness. And the evaporated milk adds the creaminess that whole milk solids contribute in chocolate. We are essentially constructing chocolate from its component parts. The butter and evaporated milk also rehydrate and bloom the cocoa powder as everything cooks together, which is what develops that deep, rich flavor. Any remaining graininess from the cocoa powder is then taken care of by the immersion blender step at the end, which is what gives the sauce its exceptionally smooth, silky finish.
  • White sugar: Sweetens the sauce and helps create the thick, fudgy consistency when boiled.
  • Evaporated milk: This is the ingredient that makes the recipe a great pantry recipe. Evaporated milk adds real creaminess and richness to the sauce without requiring fresh heavy cream. Because it lasts for months in your pantry unopened, hot fudge sundaes are always possible even when you haven't planned for them. You need about half a can, which is 6 fluid ounces. Make sure you are using evaporated milk and not sweetened condensed milk. The cans look very similar but they are not interchangeable. Sweetened condensed milk is much thicker and already heavily sweetened, and it will throw off both the texture and flavor of the sauce.

Equipment

  • Immersion blender: Because we are using cocoa powder rather than melted chocolate, the sauce needs a final blending step to break down any residual graininess and pull everything together into a silky smooth texture. The cooking process rehydrates and blooms the cocoa powder beautifully, but the immersion blender finishes the job. Two to four minutes of blending after the sauce comes off the heat is what transforms it from a good sauce into a great one. A regular blender would also work but use caution when blending hot liquids. The immersion blender directly in the saucepan is the easiest and safest option.

How to Make Hot Fudge Sauce

Butter and cocoa powder added to a white saucepan before making hot fudge sauce.
  1. Step 1: Combine and bring to a boil. Add the butter, cocoa powder, sugar, and evaporated milk to a medium saucepan and stir to combine. Bring to a boil over medium heat, stirring occasionally as it heats. Use a saucepan with fairly high sides since the sauce will bubble up as it boils.
Hot fudge sauce boiling vigorously in a white saucepan on a gas stovetop.
  1. Step 2: Boil for seven minutes, then remove from heat. Once the sauce reaches a full boil, let it boil for seven minutes. Keep an eye on it and stir occasionally to make sure nothing is catching on the bottom of the pan. Remove from heat when done.
Green immersion blender blending hot fudge sauce directly in a small saucepan on a wood table.
  1. Step 3: Add vanilla and blend until silky. Stir in the vanilla extract. Then use an immersion blender directly in the saucepan and blend the sauce for two to four minutes. This breaks down any remaining graininess from the cocoa and sugar and produces an exceptionally smooth, silky sauce. Take care not to splatter the hot sauce. Hold a folded tea towel loosely over the top of the pan while blending if you are concerned about splashing. Pour or spoon over your dessert right away while the sauce is still hot.

Expert Tip

Do not skip the immersion blender step. It is the thing that sets this recipe apart from most others. Blending the hot sauce for two to four minutes after cooking creates a texture that is genuinely silky and smooth in a way that simply stirring does not achieve. It takes almost no extra time and makes a real difference in the final result.

hot fudge sauce

How to Store and Reheat Hot Fudge Sauce

Store any leftover sauce in an airtight container or mason jar in the refrigerator for up to one week. It will thicken and solidify in the fridge, which is completely normal.

To reheat, transfer to a microwave-safe bowl and heat in 30-second intervals, stirring between each, until hot and pourable again. You can also reheat it gently on the stovetop in a small saucepan over low heat, stirring frequently.

Ways to Serve Hot Fudge Sauce

Because this is a true fudge sauce that needs to be served hot, it is best in situations where you are pouring it warm over something cold or freshly baked.

  • Hot fudge sundaes are the classic for a reason. Hot fudge over vanilla ice cream, topped with whipped cream and a cherry, is one of the great simple desserts. It also works beautifully as a topping station for an ice cream sundae dessert board where guests can build their own.
  • Brownies with ice cream are one of the best uses for this sauce. The hot fudge melts slightly into both the warm brownie and the cold ice cream, and the result is one of those combinations that is genuinely greater than the sum of its parts.
  • Crepes are a natural pairing. Drizzle hot fudge sauce over a crepe bar alongside fresh fruit and whipped cream for a beautiful and easy dessert spread.
  • Pancakes deserve more hot fudge than they usually get. Instead of reaching for maple syrup, try a generous pour of this sauce over a stack of small batch pancakes for a weekend breakfast that feels genuinely special.
  • Banana splits are another classic that this sauce is made for. The combination of hot fudge, cold ice cream, and banana is hard to beat.
Bowl of vanilla ice cream with hot fudge sauce beside a white pitcher of sauce.

Hot Fudge Sauce as a Gift

A jar of homemade hot fudge sauce makes a genuinely thoughtful gift. Pour the cooled sauce into a pretty glass jar and add a small label with simple reheating instructions: heat in 30-second microwave intervals, stirring between each, until hot and pourable. It keeps in the refrigerator for up to one week.

Pair it with a bag of good coffee or alongside a batch of brownies, and you have a complete gift that most people would genuinely love to receive.

Frequently Asked Questions

Why does hot fudge sauce thicken when it cools?

Hot fudge sauce is designed to be thick and fudgy, which means it behaves differently than a regular chocolate syrup. As it cools, the sugar and cocoa set slightly and the sauce becomes very thick. This is completely normal and exactly what you want. Just reheat it before serving and it will become pourable and smooth again.

Can I make hot fudge sauce ahead of time?

Yes. You can make this sauce ahead of time and store it in an airtight jar in the refrigerator. Reheat it in the microwave or on the stovetop just before serving.

Why do I blend the sauce with an immersion blender?

Blending the hot sauce for two to four minutes after cooking breaks down any remaining graininess from the sugar and cocoa powder and creates a much smoother, silkier texture than simply stirring achieves. It is a quick step that makes a real difference in the final result.

Can I make hot fudge sauce with cocoa powder instead of chocolate?

Absolutely, and we think it is actually the better way to go for a pantry-friendly recipe. Cocoa powder delivers a deep, pure chocolate flavor and means you do not need to have chocolate bars or chocolate chips on hand. The key is blending the sauce at the end, which takes care of any graininess and produces a silky smooth result.

Can I use sweetened condensed milk instead of evaporated milk in this hot fudge sauce recipe?

No. The cans look very similar but they are not interchangeable. Sweetened condensed milk is much thicker and already heavily sweetened, and it will throw off both the texture and flavor of the sauce.

More Recipes You'll Love

  • Easy one bowl chocolate brownies cut into squares on a white plate.
    Easy One Bowl Brownies
  • Ice cream charcuterie dessert board in the shape of an ice cream cone.
    Easy Ice Cream Sundae Charcuterie Dessert Board
  • Fluffy small batch pancakes for two ready to serve on a plate with syrup.
    Easy Small Batch Pancakes For Two Recipe
  • Two sweet crepes filled with whipped cream and folded in triangles on a vintage star-patterned plate, topped with fresh strawberries, raspberries, and caramel sauce.
    Easy Sweet Crepe Recipe

If you try this Hot Fudge Sauce or any other recipe on my blog please leave a star rating and let me know how it went in the comments below. Thanks for visiting today!

Bowl of vanilla ice cream topped with thick homemade hot fudge sauce.

Recipe

Homemade hot fudge sauce in a white ceramic pitcher with sauce dripping down the side.

Hot Fudge Sauce Recipe

Smooth and creamy hot fudge sauce perfect for topping ice cream or any dessert.
5 from 1 vote
Print Pin Rate
Course: Desserts
Cuisine: American
Prep Time: 5 minutes minutes
Cook Time: 7 minutes minutes
Total Time: 12 minutes minutes
Servings: 8 Servings
Calories: 348kcal
Author: Dannyelle Nicolle-Ramjist

Equipment

  • Immersion Blender:

Ingredients

  • ½ cup butter
  • 2 ½ tablespoon cocoa powder
  • 1 ½ cups white sugar
  • 1 cup evaporated milk (about ½ a standard can, or 6 oz.)
  • ½ teaspoon vanilla

Instructions

  • Combine butter, cocoa powder, sugar, and evaporated milk in a medium saucepan and stir to combine. Bring to a boil over medium heat. 
    ½ cup butter, 2 ½ tbsp cocoa powder, 1 ½ cups white sugar, 1 cup evaporated milk
  • Once boiling, boil for seven minutes, stirring occasionally. Remove from heat. 
  • Stir in vanilla extract. Use an immersion blender directly in the saucepan and blend for 2 to 4 minutes until silky smooth. Take care not to splatter the hot sauce. Serve hot. Store leftovers in an airtight container in the refrigerator for up to one week. Reheat in the microwave in 30-second intervals or on the stovetop over low heat. 
    ½ tsp vanilla

Notes

  • Evaporated milk: Make sure you are using evaporated milk and not sweetened condensed milk. The cans look very similar on the shelf but they are not interchangeable.
  • Leftovers: You will use about half a standard can of evaporated milk. Store the remainder in an airtight container in the fridge for up to a week.
  • Storage: Store leftover sauce in an airtight container or mason jar in the refrigerator for up to one week. It will thicken and solidify as it cools, which is completely normal.
  • Reheating: Reheat in a microwave-safe bowl in 30-second intervals, stirring between each, until hot and pourable. You can also reheat gently on the stovetop over low heat, stirring frequently.
  • Immersion blender: Do not skip the blending step. It is what makes this sauce silky smooth. Hold a folded tea towel loosely over the pan while blending to prevent splashing.
  • Serving: This sauce must be served hot. It thickens considerably as it cools and is not meant to be poured at room temperature.

Nutrition

Serving: 1g | Calories: 348kcal | Carbohydrates: 48g | Protein: 7g | Fat: 15g | Saturated Fat: 9g | Polyunsaturated Fat: 5g | Cholesterol: 45mg | Sodium: 187mg | Sugar: 37g
Tried this Recipe? Tag me Today!Mention @LifeisaParty or tag #lifeisaparty!

How To Make Easy Oven Roasted Carrots

Aug 25, 2021 · Leave a Comment

how to oven roast carrots

How To Oven Roast Carrots: oven roasted carrots are quick and easy, only 4 ingredients, deliciously tender and caramelized, great side dish.

how to oven roast carrots
[feast_advanced_jump_to]

Wondering how to oven roast carrots?  These easy oven roasted carrots are a great side dish with almost anything.  Serve these with a holiday dinner, or just as part of an everyday weeknight healthy side dish at dinner.  They cook in about 20-25 minutes, depending on how large you cut them, so they're quite quick to make, with just a few simple ingredients.

Only Four Ingredients

Simple roasted carrots are super easy to make.  Just four simple ingredients at you can find easily at the grocery store: 

  • carrots
  • extra virgin olive oil
  • salt
  • pepper

This delicious side dish is pretty foolproof, and I'm sure once you try them, they'll make it into your standard easy weeknight meals rotation.

roasted carrots

Why Roasted?

There's lots of ways to cook delicious fresh carrots, but what I love best about this carrot recipe is that roasting the carrots at a high heat brings out the natural sweetness of the carrots and causes those sugars to caramelize, making them a lovely golden brown.  To make sure they caramelize nicely, be sure not to overcrowd the pan, since they release a little liquid while they cook, and we don't want them to steam in their own juices.  Always place them in a single layer on the large baking sheet.  The other key to a nice caramelization is to use a high temperature, to add lots of nice colour to your caramelized carrots.

oven roasted carrot recipe

Other Variations on How To Oven Roast Carrots

Love sweet carrots?  Feel free to add a tablespoon of honey before roasting for sweet honey roasted carrots.   Or try adding pure maple syrup or brown sugar to sweeten them up. 

how to oven roast carrots

You can also add your favourite fresh herbs like fresh parsley or fresh thyme to this dish, but personally, I love them with just a sprinkle of salt old salt and black pepper.

Lots of over vegetable are delicious when roasted with just a little oil and some salt and pepper, just like our carrots.  Feel free to try a combination of roasted vegetables with your carrots.  Just cut the veggies to about the same size and add other varieties to the sheet pan such as sweet potatoes, regular potatoes, onions, or brussels sprouts.  It's such a good idea for bringing out the sweet flavor of regular carrots and many other vegetables.

How Long To Roast Carrots At 400 In The Oven?

How long it takes to cook oven-roasted carrots does depend on the size of the carrots, and your particular oven.  We cut our carrots into sticks and the cooking time was 20-25 minutes.  Be sure to flip the carrots half way through the cooking so that they don't bun on the bottom.  If your carrots aren't tender and caramelized after 25 minutes, just add another 2-5 minutes and check them again.  Also, don't make the mistake of removing them from the oven as soon as they are tender, make sure you give them long enough to brown.  This is caramelized sugars browning, and it really makes a much taster roasted carrot if you give it long enough to brown.  So if they're not quite browned yet, give them some more time, but do check them frequently so that they don't burn.

Leftovers

If you have any leftovers, which I never seem to, store them in the fridge in an airtight container and reheat in the microwave.

Recipe

how to oven roast carrots

How To Oven Roast Carrots

Easy and perfectly caramelized oven roasted carrots. The perfect side dish.
No ratings yet
Print Pin Rate
Course: Side Dish
Cuisine: American
Prep Time: 10 minutes minutes
Cook Time: 25 minutes minutes
Total Time: 35 minutes minutes
Servings: 4 servings
Calories: 110kcal
Author: Dannyelle Nicolle-Ramjist

Ingredients

  • 2 lbs carrots
  • 1 tablespoon olive oil
  • ½ teaspoon salt
  • ¼ teaspoon freshly ground pepper

Instructions

  • Preheat your oven to 400 degrees. Peel your carrots, and cut into carrot sticks. Try and make your carrots around the same size so that they'll cook evenly.
  • Place the carrots sticks on a baking sheet, and add the olive oil. Toss or stir to evenly cover the carrot sticks with oil, and make sure they're in an even layer. Sprinkle with salt and pepper.
  • Cook at 400 degrees, for around 20-25 minutes until the carrots are tender and soft, and slightly caramelized on the outside. Turn the carrots with a spatula half way through cooking. Enjoy

Nutrition

Serving: 1g | Calories: 110kcal | Carbohydrates: 19g | Protein: 2g | Fat: 4g | Saturated Fat: 1g | Polyunsaturated Fat: 3g | Sodium: 422mg | Fiber: 7g | Sugar: 8g
Tried this Recipe? Tag me Today!Mention @LifeisaParty or tag #lifeisaparty!
oven roasted carrot recipe

We enjoyed our oven roast carrots as part of our recent Frozen themed dinner and movie night -read all about here.  They're the perfect side dish for almost any main dishes, but we loved them with our Swedish meatballs and mashed potatoes.  They make a great easy addition to any dinner party menu.  These are the best roasted carrots and I'm sure you'll enjoy them, if your a fan of carrots.  Roasting them gives them the best flavor, and brings out all their natural sugars.  This simple recipe is my favorite way to cook carrots.

how to cook carrots

With a recipe for how to oven roast carrots, life really is a party!
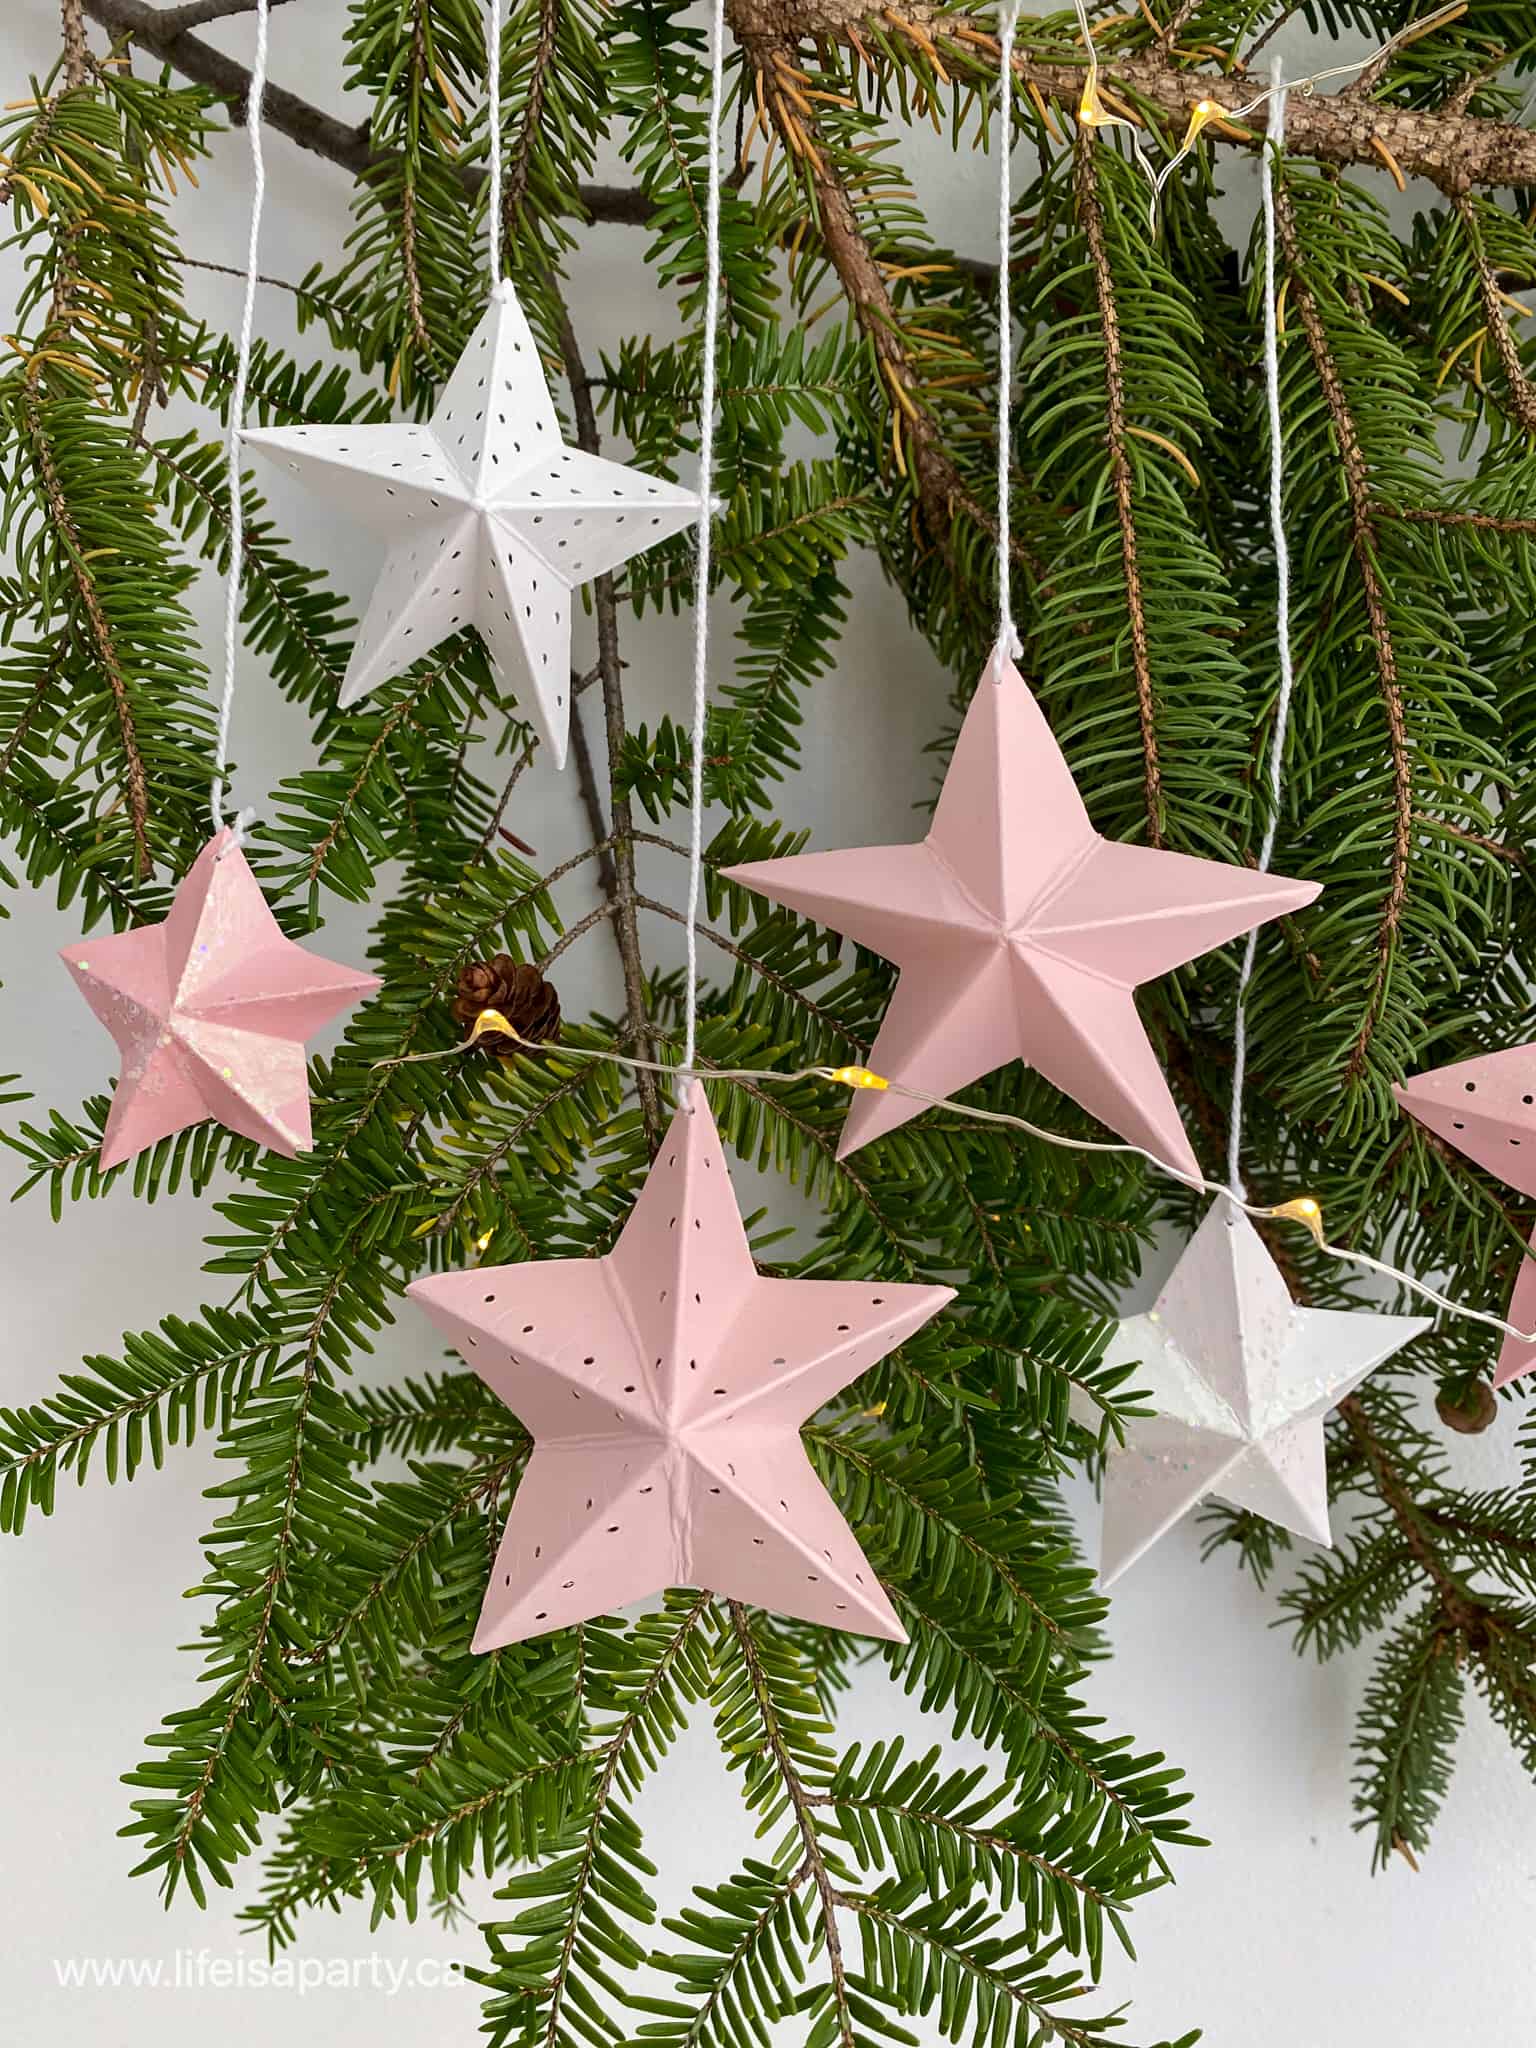
More Recipe Inspiration

You might also like our Mac and Cheese with Panko Breadcrumb Topping recipe here.

mac and cheese recipe with panko

Also check out our Homemade Slow Cooker Baked Beans recipe here.

Slow Cooker Baked Beans Recipe: once you've tried homemade baked beans you'll never want to go back to the canned version again.

You might also enjoy Crispy Panko Onion Rings recipe here.

This recipe was part of our Frozen themed Disney Princess Dinner and Movie Night -check out all the details about the whole party here.

Disney Princess Dinner and Movie Toolkit

Love Disney Princess dinner and movie nights?  Buy our Disney Princess Dinner and Movie Toolkit.  The Toolkit includes 6 different Disney Princess movie nights with menus, all the recipes, inspiration, and printables for each one.  Check out more about the Disney Princess Dinner and Movie Toolkit by clicking here.

Easy Recipe for Swedish Meatball Sauce

Aug 24, 2021 · Leave a Comment

Easy recipe for Swedish meatball sauce with meatballs in a skillet.

This recipe for Swedish Meatball Sauce is quick and easy and perfect to make with frozen meatballs for Swedish meatballs without the trip to Ikea!

recipe for Swedish meatball sauce
[feast_advanced_jump_to]

Why We Love This Recipe

  • Enjoy Swedish meatballs at home without the trip to Ikea!
  • These are quick and easy to make with frozen meatballs.
  • The sauce is creamy and the perfect gravy to enjoy with the meatballs and potatoes.
  • This recipe only has a few simple ingredients.

We used frozen Swedish meatballs from the grocery store freezer section and our easy homemade Swedish meatball sauce recipe.  The sauce is a beautifully rich and creamy one and sure to be a hit.  It only has a few simple ingredients. You can make the best Swedish meatballs at home, anytime you want to without a trip to Ikea.

This sauce was really tasty. I used frozen meatballs, so it was quick and easy. -Barb, Via Pinterest

We served our Swedish meatballs as part of our Frozen themed dinner and movie night -you can read all about it here.  They were the perfect Scandinavian food to go with our theme.  Love Scandinavian food? You might also like our Midsummer Swedish inspired picnic.

This dinner was a real hit with everyone.  These are very similar to Ikea meatballs, so next time you're craving the Ikea version, you can make this easy recipe at home. Serve them up with oven roasted carrots or zucchini pancakes as perfect side dishes. If you love a hearty main dish, you might also like our Beef, Guinness, and Mushroom Pie Recipe.

Ingredients

See the recipe card below for exact measurements.

Ingredients in small bowls to make a quick and easy Swedish meatball sauce.
  • Frozen Meatballs: We used frozen meatballs to make this a really easy recipe.  Choose your favorite, Italian meatballs, or Swedish meatballs from the freezer section.  The frozen meatballs cook directly from frozen in the oven.  You could make your own homemade Swedish meatballs if you prefer.  Make sure your homemade meatballs are fully cooked before adding to them to the Swedish meatball sauce.
  • Heavy Cream: The heavy cream (whipping cream) in this recipe adds a richness and creaminess to the sauce. Do take care to prevent your cream from curdling in the sauce, which can happen when the heat is too high and the proteins and fats to separate.
  •  Dijion Mustard: Adds great depth and flavor to the sauce. We used grainy Dijon, but regular Dijion is a great choice too.

Not A Great Slow Cooker Recipe

You might be wondering about making a slow cooker version of this recipe. Sometimes it's great to know that dinner is cooking itself in the slow cooker, especially on a busy day.  These are not a great slow cooker choice, for several reasons.  For one, you would essentially be making the thickened sauce on the stove top and going through all the same steps, but just in advance, to create a thick traditional sauce, and then pouring it into the slow cooker.  

So that makes the slow cooker version no savings on prep or cooking times.  Some slow cooker Swedish meatball recipes don't really thicken the sauce and come out with something far too runny.  The other problem is the high chance of the cream curdling if you add it at the beginning or things not being hot or creamy enough if you add it just at the end before serving.  It's best to make the easy Swedish meatball sauce on the stove top, right before serving over your meatballs.

Instructions

Expert Tip

The sauce has a roux base, which thickens it to create the creamy gravy sauce.  When you are cooking the roux, you must let the roux base brown.  If you don't let it brown enough at this stage the finished sauce will be too white, but if you let the roux brown too long it can burn and ruin the sauce, so take care to get it to the right shade of golden brown.

Frozen Swedish meatballs on a baking tray.
  1. Step 1: Place frozen meatballs on a baking tray and cook in the oven according to the directions on the package.
Making a roux for easy Swedish meatball sauce.
  1. Step 2: In a large skillet over medium high heat melt the butter and whisk in the flour to create a roux.
Browning a roux in a skillet for an easy Swedish meatball sauce.
  1. Step 3: Cook the roux until it becomes brown and smells nutty. Be sure not to undercook the roux or the sauce will be too white, and don't burn it either or the flavor will be ruined.
Making an easy Swedish meatball sauce in a skillet for frozen meatballs.
  1. Step 4: Add in the beef broth, cream, mustard, and Worcestershire sauce. Bring to a simmer over a low heat, taking care not to boil it after you add the cream.
Easy homemade Swedish meatball sauce in a skillet with meatballs.
  1. Step 5: Add the heated meatballs into the pan, and stir to combine with the sauce. Garnish with chopped parsley. The sauce will continue to thicken slightly as it sits.

Storage

Place any leftover meatballs and sauce in an airtight container.  Store leftovers in the refrigerator.

Frequently Asked Questions

Can I use this Swedish meatball sauce with homemade meatballs?

Yes make it and serve with homemade or frozen meatballs.

Why did my Swedish meatball sauce curdle?

Do not boil your sauce after you've added the cream. The heavy cream can split if the heat is too high and the proteins and fats separate.

Why is my Swedish meatball sauce so white looking?

If you don't cook the roux long enough, until it's a dark brown color the finished sauce will be too white and pale and lack depth of flavor.

More Recipes You'll Love

  • Mac and cheese with panko breadcrumb topping.
    Best Homemade Mac and Cheese with Panko Breadcrumb Topping
  • braised beef ragu recipe
    Braised Beef Ragu Recipe
  • Chicken sausage and shrimp gumbo in a cast-iron pot.
    Tiana's Chicken, Sausage, and Shrimp Gumbo Recipe
  • Steak Guinness and mushroom pie with golden puff pastry and rich gravy on white plate.
    Beef Steak, Guinness, and Mushroom Pie Recipe

recipe for Swedish meatball sauce

If you try this Swedish Meatball Sauce Recipe or any other recipe on my blog please leave a star rating and let me know how it went in the comments below. Thanks for visiting today!

Recipe

Easy recipe for Swedish meatball sauce with meatballs in a skillet.

Recipe for Swedish Meatball Sauce

Video

Use this easy sauce with frozen or homemade meatballs.
4.60 from 15 votes
Print Pin Rate
Course: Main
Cuisine: Swedish
Cook Time: 20 minutes minutes
Total Time: 20 minutes minutes
Servings: 3 cups
Calories: 257kcal
Author: Dannyelle Nicolle-Ramjist

Ingredients

  • ⅓ cup butter
  • ¼ cup all purpose flour
  • 2 cups beef stock
  • 1 cup heavy cream
  • 1 teaspoon dijion mustard
  • 1 tablespoon Worcestershire sauce
  • 1 teaspoon fresh parsley chopped

Instructions

  • Place frozen meatballs on a baking tray and cook in the oven according to the directions on the package.
  • In a large skillet over medium high heat melt the butter and whisk in the flour to create a roux. Cook the roux until it becomes brown and smells nutty.
  • Add in the beef broth, cream, mustard, and Worcestershire sauce. Bring to a simmer over a low heat, taking care not to boil it after you add the cream.
  • Add the heated meatballs into the pan, and stir to combine with the sauce. The sauce will thicken slightly more as it sits. Garnish with chopped parsley and enjoy.

Notes

Make this sauce and serve with any homemade or frozen meatballs.
This recipe is not a good one to make in a slow cooker.
The sauce itself has a roux base, which thickens the sauce to create the creamy gravy sauce.  When you are creating the roux you let the roux base brown.  If you don't let it brown enough at this stage the sauce will be too white, but if you let the roux brown too long it can burn and ruin the sauce, so take care to get it to the right shade of golden brown.
 

Nutrition

Serving: 1g | Calories: 257kcal | Carbohydrates: 7g | Protein: 3g | Fat: 25g | Saturated Fat: 16g | Polyunsaturated Fat: 7g | Trans Fat: 1g | Cholesterol: 72mg | Sodium: 287mg | Sugar: 2g
Tried this Recipe? Tag me Today!Mention @LifeisaParty or tag #lifeisaparty!

Frozen Themed Party -Dinner and Movie Night

Aug 23, 2021 · 2 Comments

Frozen themed menu, party decor and printables.

This Frozen themed party with dinner and movie night is so much fun We served Frozen themed food, with Swedish meatballs, Sven's roasted carrots, and Frozen Ice Cream Sundaes with plenty of chocolate. We've got some great Frozen inspired partyn decor and Frozen printables too.

Frozen themed menu, party decor and printables.
[feast_advanced_jump_to]

Do you want to build a snowman?  Do you want to have a Frozen themed party dinner and movie night?  This party was so fun to create, and one of the prettiest Disney Princess Movie nights that we've done so far.  

Frozen themed food table with Swedish meatballs, Sven's carrots, mashed potatoes, and party decor.

Why We Love This Party

  • The Frozen movies represent a new kind of Disney Princess that isn't waiting around for a handsome prince to save them.
  • The powerful love in this film is sisterly love.
  • The menu inspired by Norwegian and Scandinavian food is so good!
  • Chocolate! Anna and Elsa's favourite and ours too.

Disney Most Popular Princesses

When I was researching which Disney Princess was the most popular, Frozen topped many of the on-line lists.  It's certainly the best selling Disney Princess Movie of them all.  Things have shifted over the years in terms of the princess narrative.  It's been a while since any princesses have been waiting around to fall in love or be rescued by a handsome prince.  Frozen is a love story, but the saving love in the movie is sisterly love, and Elsa is a strong, independent and powerful princess turned queen.  This has appealed to girls of all ages.  We were excited to include Frozen as one of our Disney Princess dinner and a movie night. 

Check out our other Disney movie nights too. You might like our Cinderella Dinner and Movie Night, Beauty and the Beast Dinner and Movie Night, The Princess and the Frog Dinner and Movie Night, or Snow White Dinner and Movie Night.

You might also like our Winter Ice Skating Party Ideas.

Party Decorations

We went with the classic decor inspiration from the first Frozen movie, so lots of snowflakes, white and ice blue.  

I used some inexpensive tulle fabric from the fabric store in white and blue as a snow drift inspired table cloth on our two small tables.   I love to set these little parties up in the living room, so that we can enjoy dinner while we watch the movie  for movie night.  On top of the table cloth I used some snowflake table scatter, from my Christmas decoration box. 

Frozen themed party decor printables, balloons, and decorations.

Balloons always feel special for a party, even a small at home movie night.  I found this balloon arch kit with the balloons and the special tape to connect them at my favourite independent dollar store.  It worked really well as the backdrop for our table.

In front I added lots of pretty iridescent candle holders.  I thought the iridescent pieces worked really well with the ice and snow theme.  The candles look really beautiful when we lit them.  If you had smaller kids at your movie night, you could always opt for battery powered candles for safety.  We also used lots of mini twinkle lights on both tables.

DIY Snowballs

These DIY snowballs were a fun additon to our Frozen inspired party decor.  

To make the snowballs I found styrofoam balls in different sizes at the dollar store.  I used a small craft paint brush to cover them in white glue, and then rolled them in some faux snow and glitter.  After they dry they look great as snowballs .  

I added them and a bit of extra faux snow and twinkle lights to the bottom of one of the tables as a fun decoration.

Frozen themed dessert table with make your own sundaes.
DIY snowball Frozen movie themed party decorations.

Frozen Themed Free Party Printables

We made some beautiful Frozen printables for this party.  We started with our printable Frozen movie night ticket invitation.  These are so fun to print at home on your printer, or at a local office supply store, and use as a special invitation to friends or family for this movie night.

Frozen printable movie ticket invitations.

We also made a really sweet poster with a great quote from our favourite snowman Olaf -"I like warm hugs."  It's on our table in an inexpensive Ikea frame, which works perfectly.

Frozen printable party decor poster.

We also included a bottle water wrap, with another great quote from Olaf "some people are worth melting for."  

Frozen themed party printable water bottle labels "some people are worth melting for".There are also some cupcake picks, which we used in our sundae toppings.  Lastly we added this sign "Do you want to build an ice cream sundae?" as the perfect backdrop to our small ice cream sundae buffet.

Frozen ice cream sundaesOur free printables are available to all our subscribers. Subscribe below for instant access. Download and print on your home computer or at an office supply store, or print shop for your own Frozen party.

Frozen Themed Food Ideas

There isn't a lot of mention of food in Frozen, which made planning the themed dinner a little bit tricky.  We ended up going with food from the region of Norway and Scandinavia, where the movie is set as our inspiration.  

  • Swedish Meatballs with Homemade Sauce
  • Mashed Potatoes
  • Sven's Oven Roasted Carrots
  • Frozen Ice Cream Sundae Buffet with Hot Fudge Sauce and Easy One Bowl Brownies

Swedish Meatballs

Swedish meatballs are easy to make, delicious, and always a hit with grown ups or kids, so we served them as our main course.  Find the recipe for our Swedish meatballs sauce here.  

Mashed Potatoes

Along with our  Swedish meatballs, we served some mashed potatoes.  Pasta would be a great choice too, if you prefer.  

Frozen party table with themed foods and party decor.
Bowl of Swedish meatballs for a Frozen themed dinner.
Bowls of Swedish meatballs, roasted carrots, and mashed potatoes for a Frozen themed dinner.

Sven's Roasted Carrots

We also made Sven's Roasted Carrots.  These were a delicious choice that worked perfect with the meatballs, and I know Sven would approve. ;). Find the recipe for these easy oven roasted carrots here.

Frozen themed dinner table with snow themed party decorations.
Bowl of Sven's oven roasted carrots for Frozen themed dinner.

Frozen Themed Make Your Own Sundae

For dessert, we thought it would be fun to serve something that's actually frozen, and decided on a Frozen themed make your own sundaes.  

Frozen themed dessert table with make your own sundaes.

To fit our theme we added lots of great blue and white options for toppings, and went with vanilla ice cream.  

Waffle Bowls

For the sundae bowls we used waffle bowls decorated with blue chocolate and sprinkles.  

I picked up some blue chocolate and melted it in the microwave on a saucer, and then dipped the edge of the waffle bowls into the chocolate.  Before the chocolate set, we added blue and white sprinkles, including some snowflake sprinkles that fit our theme perfectly.  Lastly, we let the chocolate set before serving.

Frozen themed make your own sundae toppings in blue and white.
Frozen themed dessert sundea table with hot fudge and brownies.

Blue and White Sundae Toppings

For our themed sundae toppings we had:

  • shredded coconut
  • mini white chocolate chips
  • mini marshmallows
  • white and blue jelly beans
  • blue sprinkles
  • snowflake sprinkles

We served them all in vintage milk glass containers.

Frozen themed make your own sundae bar with toppings with printable cupcake picks.
Frozen themed make your own ice cream sundae bar with blue and white toppings and chocolate brownies and hot fudge.
Frozen printable cupcake picks used on a dessert table.

Don't Forget Elsa and Anna's Favourite:  Chocolate!

We also knew we had to to include some chocolate, since it's a favourite of both Elsa and Anna.  So we made some yummy and easy one bowl chocolate brownies -get the recipe here to add to the sundaes, along with the most delicious hot fudge sauce.  

Frozen themed dessert table with bowl of brownies with printable cupcake pick.

I'm not a real chocolate lover personally, and even I couldn't stop eating this amazing hot fudge sauce.  It's so good.

Frozen themed make your own sundae dessert table.
Frozen themed food table for a party with Swedish meatballs, Sven's oven roasted carrots, mashed potatoes, drinks and party decorations.

Frozen Recipes

  • Easy one bowl chocolate brownies cut into squares on a white plate.
    Easy One Bowl Brownies
  • Easy recipe for Swedish meatball sauce with meatballs in a skillet.
    Easy Recipe for Swedish Meatball Sauce
  • how to oven roast carrots
    How To Make Easy Oven Roasted Carrots
  • Homemade hot fudge sauce in a white ceramic pitcher with sauce dripping down the side.
    Hot Fudge Sauce Recipe

Frequently Asked Questions

How can I make this themed dinner quick and easy?

Use frozen meatballs, and already prepared mashed potatoes. Also buy mini carrots, so you don't have to peel and slice them. For dessert, pick up some store bought brownies and chocolate sauce. These already prepared foods will make this menu quick and easy.

What was Ellsa and Anna's favourite food?

Chocolate!

If you tried this Frozen Party and Menu or any other ideas on my blog please let me know how it went in the comments below. Thanks for visiting today!

Frozen themed party food table and dessert table.

With a Frozen themed dinner and a movie, life really is a party!
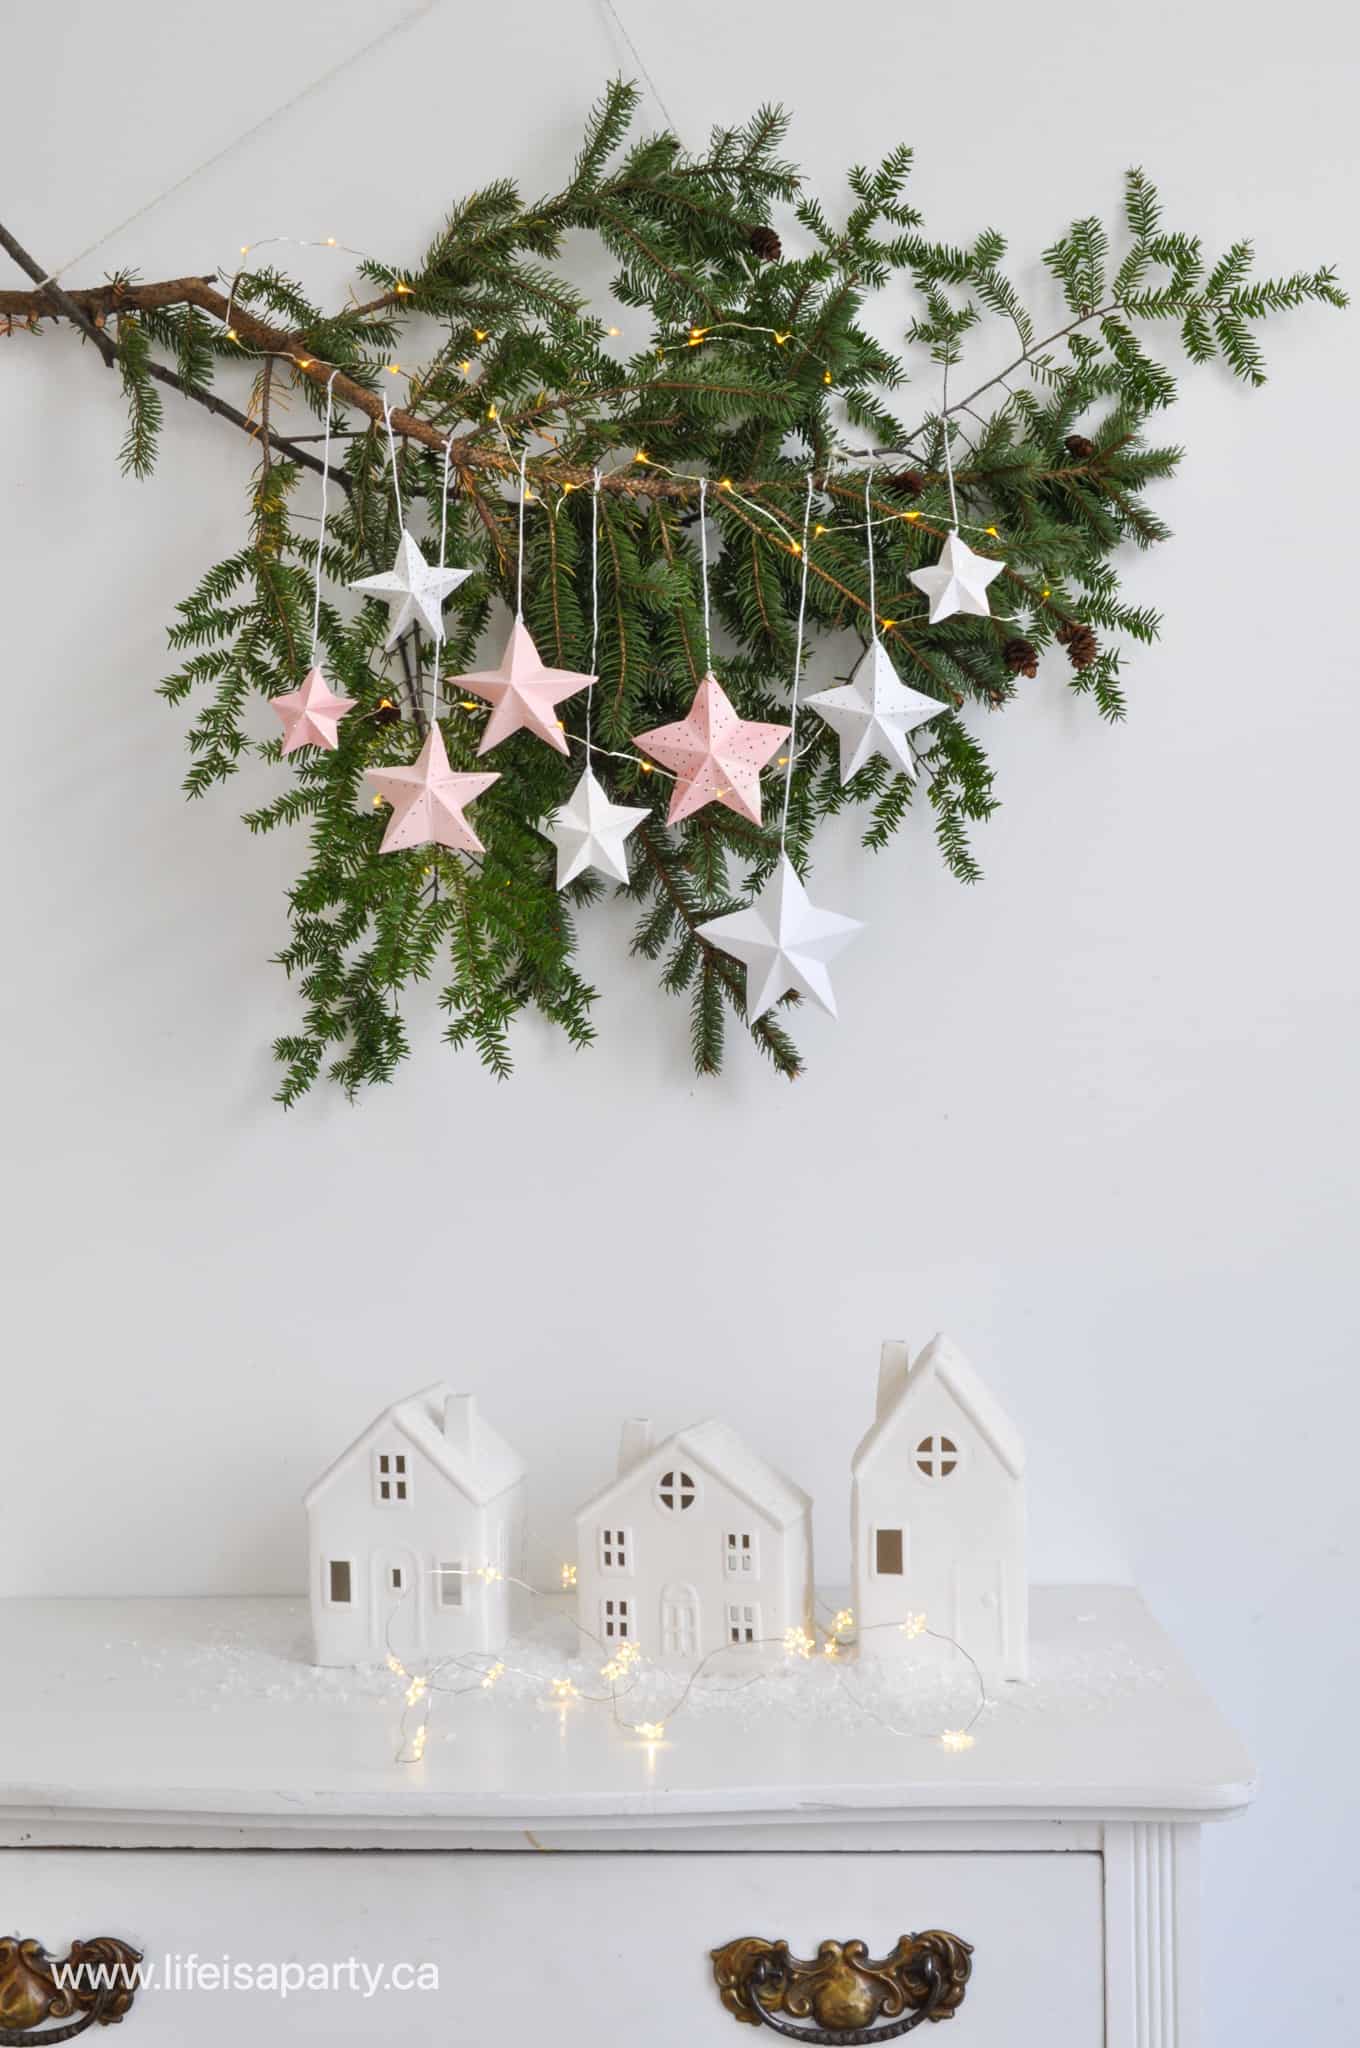
More Frozen Inspiration:

Check out our Frozen Birthday Party Part I with lots of Decoration and Activity Ideas here:

You might also like our Frozen Themed Party Food Ideas here:

Also check out our Frozen Inspired Chocolate Rice Krispie Treats Recipe here:

Frozen Themed Chocolate Rice Krispie Treats: inspired by Disney's Frozen these snowflake rice krispie cookies are perfect for your Frozen themed party.

The Grey Stuff Recipe

Aug 20, 2021 · Leave a Comment

the grey stuff

The Grey Stuff Recipe: made from vanilla and chocolate pudding, Oreo cookie crumbs, and cool whip, a Beauty and the Beast themed dessert.

the grey stuff
[feast_advanced_jump_to]

It wouldn't be a Beauty and the Beast party without "the grey stuff"!  It's such a fun, and yummy treat to include in any Beauty and the Beast inspired party -see all our party details here, plus more Disney recipes.  It's really quick and easy to make.  You're entire family will  love this easy recipe for the grey stuff.  It's one of Disney's most sought-after recipes.  This simple version is based off of the official recipe of the Disney World version.  Now you can enjoy all of your favorite Disney movies brought to life with a Disney entertainment inspired menu and delicious recipes.  We love finding easy and fun ways to bring the Walt Disney World's Magic Kingdom Park experience home with us.

beauty and the beast grey stuff recipe
Beauty and the Beast party table with food and decorations.

What Is The Grey Stuff?

All Disney fans will know the song "Be Our Guest" that's part of the film Beauty and the Beast.  In it Lumiere, the candle, sings about the grey stuff.

"Try the grey stuff, it's delicious. Don't believe me? Ask the dishes".

how to make Disney's grey stuff from Beauty and the Beast

When the film first came out viewers were curious about what the grey stuff was?  When the Be Our Guest restaurant opened in 2012 at Disney World theme parks the grey stuff became a very popular Disney food item at the beast's castle.  And it was just as delicious as the song said it would be!

The Disney version is quite easy to make at home, and an easy way to include this movie detail in your Beauty and The Beast themed movie night at home.  You'll love this copycat recipe, and have so much fun making it in your own kitchen.

grey stuff recipe

Tips For Making The Grey Stuff

  • don't make the pudding according to the package directions, we're using the pudding mix powder as an ingredient
  • use the whole Oreo cookie, don't remove the icing when you're making your oreo crumbs
  • to keep the Oreo's from turning into a paste in the food processor when you're trying to make a fine crumbs, don't over blend them, and try working with cold Oreos
  • refrigerate the grey stuff before piping to make it easier to work with, and better able to hold its shape
  • serve the grey stuff on its own, or on top of a cookie, cake, cupcake, or brownie or as a fruit dip.
the grey stuff recipe from Beauty and the Beast

We loved enjoying the grey stuff on our shortbread cookies, it would also be delicious on sugar cookies.  Use a piping bag to pipe it on top of the cookies.  It's also delicious served on cake for your own grey stuff gateau, or cupcakes.  You could also enjoy it piped into a mini ice cream cone.  There are so many different ways to enjoy the actual grey stuff.

It was the perfect way to a little Disney magic to our dessert for our Beauty and the Beast themed dessert.  Try it next time you're at Disney World in the Be Our Guest restaurant, but in the meantime, enjoy this make at home version any time you want a treat.

Recipe

the grey stuff

The Grey Stuff Recipe

Inspired by Beauty and The Beast, this sweet cookies and cream mousse is the perfect sweet treat.
No ratings yet
Print Pin Rate
Course: Desserts
Cuisine: American
Prep Time: 10 minutes minutes
Additional Time: 2 hours hours
Total Time: 2 hours hours 10 minutes minutes
Servings: 8 servings
Calories: 176kcal
Author: Dannyelle Nicolle-Ramjist

Ingredients

  • 1 ⅕ cups cold milk
  • 3.4 oz package instant vanilla pudding mix
  • 15 Oreo cookies
  • 8 oz container cool whip, thawed
  • 3 tablespoons instant chocolate pudding mix

Instructions

  • Add cold milk to the bowl of a stand mixer and add instant vanilla pudding mix. Mix at medium speed for 2 minutes, until pudding is slighly thickened. Refrigerate 1-2 hours until firm.
  • Place the oreo cookies in a food processor and pulse until turned into crumbs. Be careful not to over process and create a paste.
  • Fold the cookie crumbs, cool whip, and instant chocolate pudding mix into the chilled vanila pudding mixture, until fully combined.
  • Refrigerate the grey stuff for 1 hour before serving in small bowls, or piped onto cookies or cakes. Enjoy.

Nutrition

Serving: 1g | Calories: 176kcal | Carbohydrates: 30g | Protein: 2g | Fat: 6g | Saturated Fat: 2g | Cholesterol: 3mg | Sodium: 301mg | Fiber: 1g | Sugar: 20g
Tried this Recipe? Tag me Today!Mention @LifeisaParty or tag #lifeisaparty!
grey stuff recipe

With this grey stuff recipe, life really is a party!
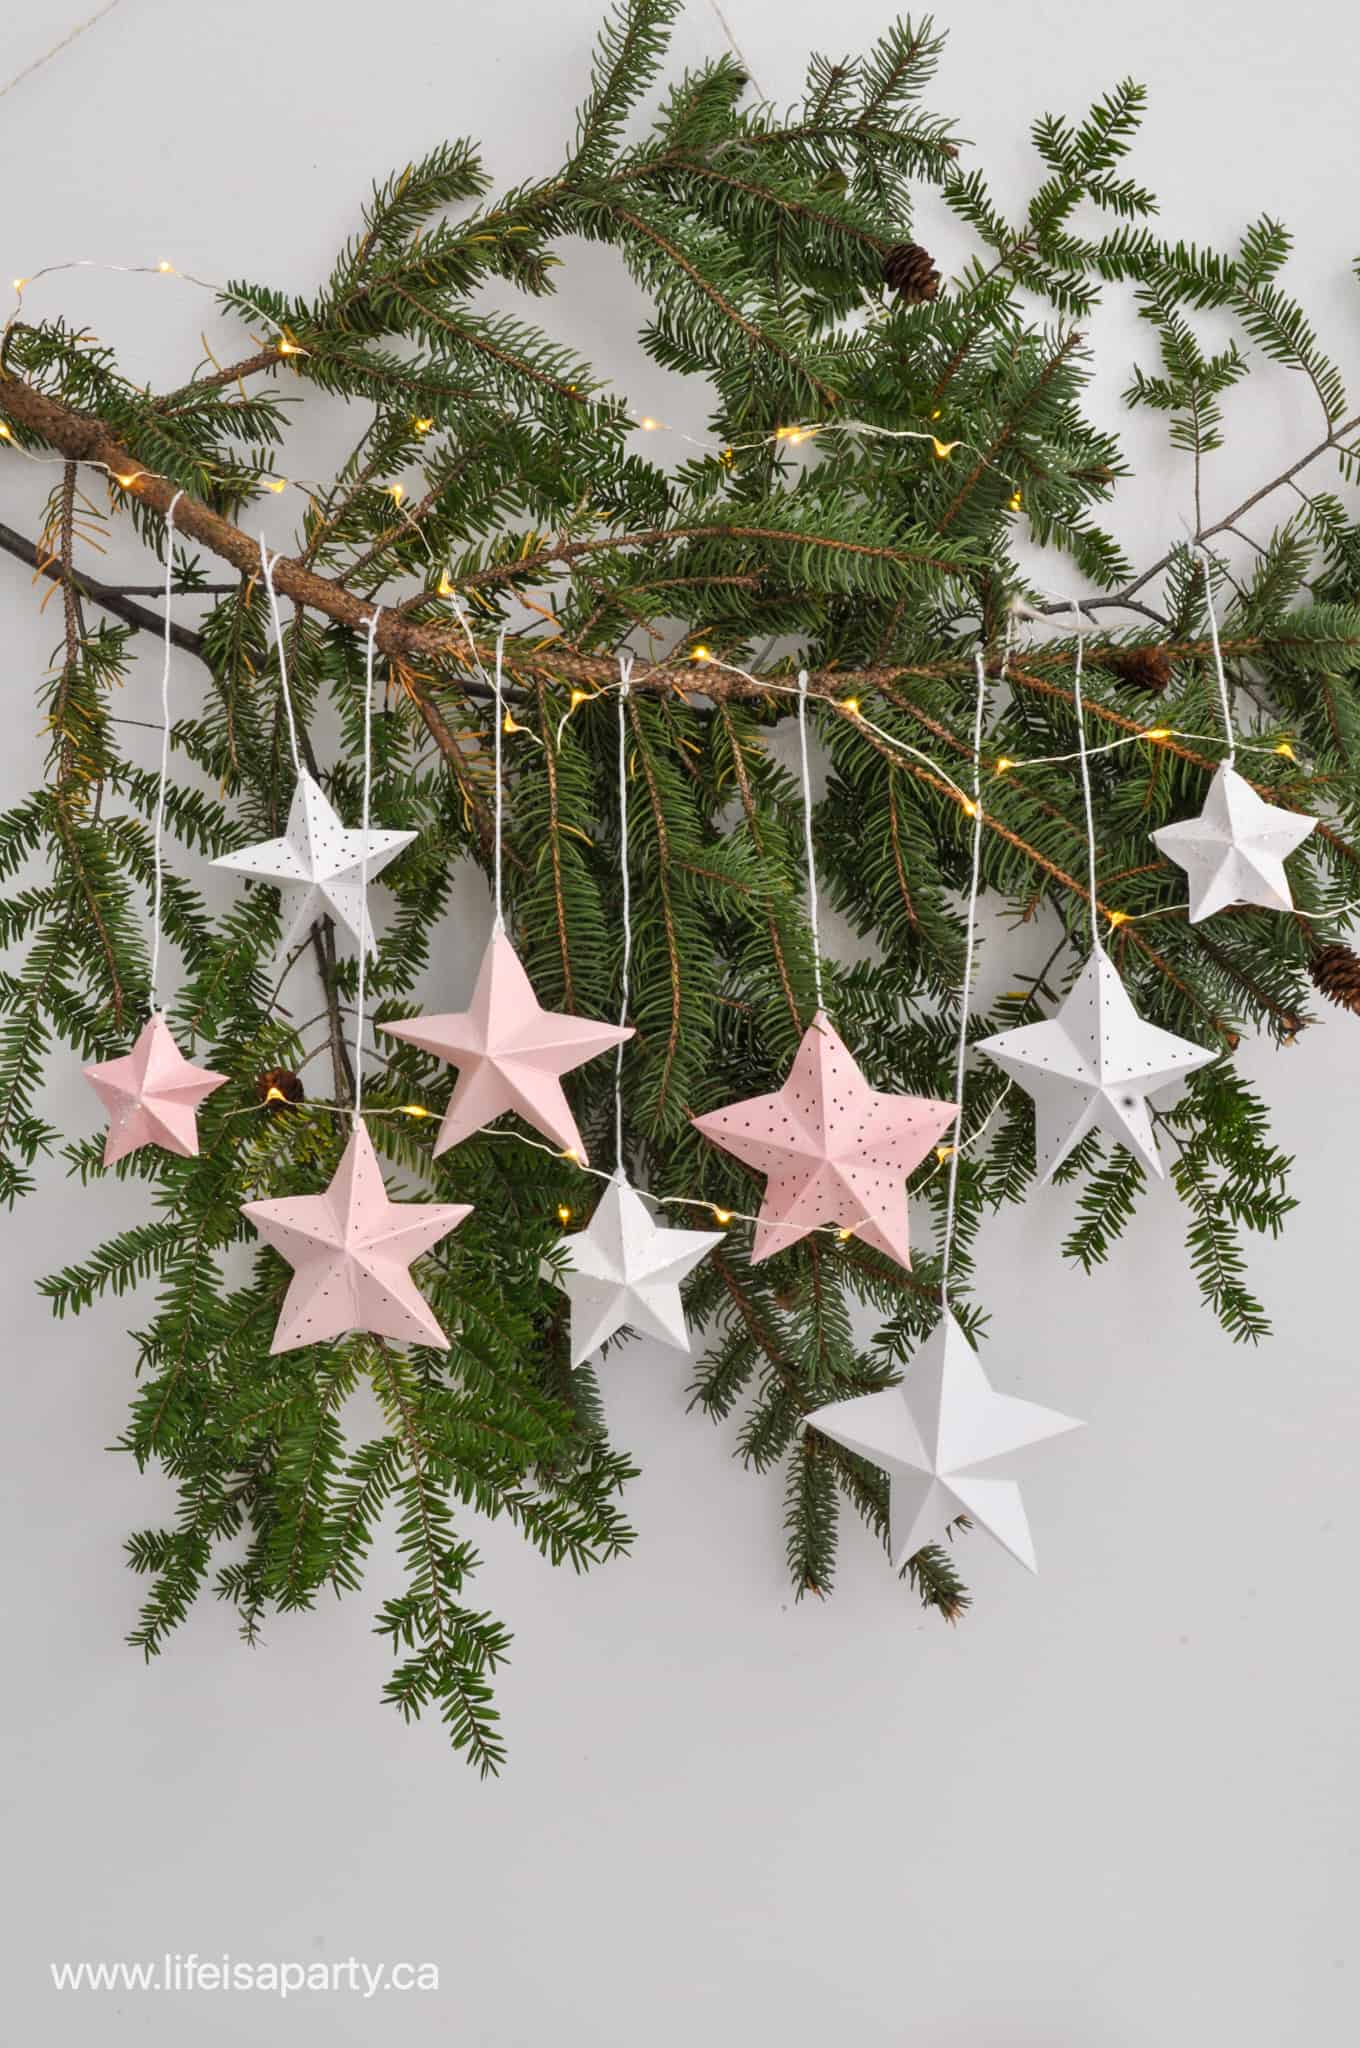
This recipe was part of our Beauty and the Beast themed Disney Princess Dinner and Movie Night -check out all the details about the whole party here.

Disney Princess Dinner and Movie Toolkit

Love Disney Princess dinner and movie nights?  Buy our Disney Princess Dinner and Movie Toolkit to help you create the perfect themed party.  The Toolkit includes 6 different Disney Princess movie nights with menus, all the recipes, inspiration, and printables for each one.  Check out more about the Disney Princess Dinner and Movie Toolkit by clicking here.

Vanilla Shortbread Cookies -Easy Cornstarch Recipe

Aug 19, 2021 · 1 Comment

Easy vanilla shortbread made with cornstarch.

These vanilla shortbread cookies are the ones your grandma made, just gently updated with vanilla bean paste for a little extra something special. Buttery, crisp, and melt in your mouth good.

Easy vanilla shortbread made with cornstarch.
[feast_advanced_jump_to]

Quick Look

  • 📋 Recipe: Vanilla Shortbread Cookies
  • ⏲️ Ready In: 40 minutes
  • 👪 Servings: 24 cookies
  • 🔪 Difficulty: Easy
  • 💭 Top Tip: Vanilla bean paste makes a real difference in a cookie this simple. The flavor is more intense than extract and the little black specks are beautiful.

Why You'll Love This Recipe

  • Made with just five simple ingredients you likely already have.
  • Cornstarch gives these cookies a crisp exterior and tender, melt in your mouth center.
  • Vanilla bean paste adds beautiful flavor and those pretty little black specks.
  • Perfect for rolling and cutting into any shape for any occasion.
  • A great make ahead cookie. Bake a few days before your party and store in a tin.

I grew up with this recipe. It comes straight from the back of the Canada Cornstarch box, the one every Canadian grandma had cut out and tucked into her recipe box. My own grandma and my mom both made these, and the taste is pure nostalgia.

I've updated the classic with vanilla bean paste, which adds intense vanilla flavor and those beautiful little black specks. If you want the pure nostalgic version, simply leave it out.

If you love simple elegant cookies, you might also love our Toblerone Shortbread and our Raspberry Almond Thumbprint Cookies. These vanilla shortbread cookies are also a staple on our Little Women vintage tea party table, alongside easy food processor scones and finger sandwiches.

Easy vanilla shortbread cookies with a scalloped edge.

Ingredients

Shortbread cookie ingredients in bowls on a wood table including cornstarch, powdered sugar, flour, butter and vanilla bean paste.
  • Cornstarch -the secret to that melt in your mouth texture. Cornstarch shortbread has a crisp exterior and tender center that traditional Scottish shortbread made without it doesn't have.
  • Vanilla bean paste -our upgrade to the classic recipe. More intense flavor than extract and those beautiful little black specks. Vanilla extract works too if that's what you have.

Variations

The base dough is wonderfully simple to customize. Try any of these:

  • Orange: Add 1 teaspoon of orange zest for a warm, citrusy twist.
  • Lemon: Replace the vanilla bean paste with 1 teaspoon of lemon zest for a bright, fresh flavor.
  • Lavender: Add ½ teaspoon of culinary lavender to the dough. Beautiful for a tea party spread.
  • Almond: Swap the vanilla bean paste for ½ teaspoon of almond extract.
  • Chocolate Dipped: Dip baked, cooled cookies halfway in melted dark or milk chocolate and let set on parchment.
  • Coarse Sugar: Before baking, sprinkle the cookie with coarse colored sugar.
vanilla bean shortbread cookie recipe

How To Make Vanilla Shortbread Cookies

Vanilla shortbread cookie dough formed in a stand mixer bowl with a spatula.
  1. Step 1: Mix the dry ingredients and add the butter. Combine the cornstarch, powdered sugar, and flour in the bowl of a stand mixer fitted with the paddle attachment. Add the softened butter and mix until the dough just comes together. Do not overmix, stop as soon as it comes together or the cookies will be less tender.
Vanilla shortbread cookie dough with vanilla bean paste mixed in, in a stand mixer bowl.
  1. Step 2: Add the vanilla. Add the vanilla bean paste and mix until evenly distributed throughout the dough.
Vanilla shortbread cookie dough rolled out on a floured surface with cookie cutters and cut cookies on a wood table.
  1. Step 3: Roll and cut. On a lightly floured surface, roll the dough out to about ¼ inch thick. Use your favorite cookie cutter to cut into shapes, or press with a cookie stamp for a beautiful embossed design. For the simplest version, roll the dough into 1 inch balls and flatten gently with a fork.
Vanilla shortbread cookies cooling on a wire rack.
  1. Step 4: Bake and cool. Place on an ungreased cookie sheet. Bake at 300°F for 15 to 20 minutes, until the edges are just beginning to turn golden. The tops will still look pale and that is correct. They firm up as they cool. Transfer to a wire rack and cool completely before storing or serving.

Expert Tips: How to Serve These at a Tea Party

  • Plan on 1 to 2 cookies per guest when shortbread is part of a larger spread with sandwiches and scones.
  • Arrange on a tiered tray for the prettiest presentation. They look lovely stacked simply or layered on a pretty plate or cake stand.
  • They pair beautifully with a pot of tea. Earl Grey, English Breakfast, or a floral herbal tea are all lovely choices.
  • Make ahead with confidence. These are actually better after a day or two once the flavors have had time to settle, and they keep well in an airtight tin for up to a week.
  • Pack a few into a cellophane bag, tie with a ribbon, and tuck in a tea bag for the sweetest little party favor.

More Cookie Inspiration

  • Cadbury mini egg cookies with flaky sea salt cooling on a wire rack with a bowl of pastel mini eggs alongside.
    Cadbury Mini Egg Cookies (Brown Butter, No Chill)
  • Homemade Rainbow Rice Krispies recipe.
    Rainbow Rice Krispies
  • Peanut butter and jam thumbprint cookies on a cooling rack with a jar of jam.
    Peanut Butter Thumbprint Cookies
  • Easy vanilla shortbread made with cornstarch.
    Vanilla Shortbread Cookies -Easy Cornstarch Recipe
Easy vanilla shortbread cookies made with just 4 ingredients.

Frequently Asked Questions

What are vanilla shortbread cookies?

Vanilla shortbread cookies are a classic British biscuit made with butter, flour, and sugar, with no eggs or leavening. The addition of vanilla gives them a fragrant, warm flavor. Cornstarch shortbread cookies add tenderness and a melt in your mouth texture that sets them apart from traditional Scottish shortbread.

Can I make shortbread without a stand mixer?

Yes. Use an electric hand mixer at medium speed, or work the butter in by hand with a wooden spoon. If mixing by hand, be careful not to overwork the dough, which can toughen the cookies.

How do I know when shortbread is done?

The edges should be just barely beginning to turn golden. The tops will still look pale and slightly underdone. That is correct. They firm up as they cool, and overbaked shortbread loses that tender texture entirely.

How long do shortbread cookies keep?

Store in an airtight container at room temperature for up to two weeks. For longer storage, freeze baked cookies for up to three months.

Can I dip these in chocolate?

Absolutely. Melt good quality dark or milk chocolate, dip the baked cooled cookies halfway, and let them set on parchment paper. Our Toblerone Shortbread takes the chocolate shortbread idea even further if you want to go all in.

Why do my shortbread cookies spread in the oven?

The most common reason is butter that is too soft or melted. Make sure your butter is at room temperature. It should be soft enough to hold an indent but not greasy. If your kitchen is warm, chill the shaped cookies on the baking sheet for 15 minutes before baking.

If you try these Vanilla Shortbread Cookies or any other recipe on my blog please leave a star rating and let me know how it went in the comments below. Thanks for visiting today!

Recipe

Easy vanilla shortbread made with cornstarch.

Vanilla Shortbread Cookies

Video

These vanilla shortbread cookies are made with cornstarch for a perfectly crisp, melt in your mouth texture. A simple five ingredient recipe ready in 40 minutes.
5 from 1 vote
Print Pin Rate
Course: Desserts
Cuisine: British
Prep Time: 20 minutes minutes
Cook Time: 20 minutes minutes
Total Time: 40 minutes minutes
Servings: 24 Cookies
Calories: 89kcal
Author: Dannyelle Nicolle-Ramjist

Ingredients

  • ½ cup cornstarch
  • ½ cup powdered sugar
  • 1 cup all purpose flour
  • ¾ cup butter softened
  • ½ teaspoon vanilla paste

Instructions

  • Combine the cornstarch, powdered sugar, and flour in the bowl of a stand mixer fitted with the paddle attachment. Add the softened butter and mix until the dough just comes together. Do not overmix.
    ½ cup cornstarch, ½ cup powdered sugar, 1 cup all purpose flour, ¾ cup butter
  • Add the vanilla bean paste and mix until evenly distributed through the dough.
    ½ tsp vanilla paste
  • On a lightly floured surface, roll the dough out to ¼ inch thick and cut into shapes with a cookie cutter or press with a cookie stamp. Or roll into 1 inch balls and flatten with a fork.
  • Place on an ungreased cookie sheet. Bake at 300°F for 15 to 20 minutes until the edges are just beginning to turn golden. Cool completely on a wire rack before storing or serving.

Notes

  • Love chocolate? Dip the baked cooled cookies in melted chocolate and let set on parchment paper.
  • Store in an airtight container at room temperature for up to one week.
  • Freeze baked cookies for up to three months.

Nutrition

Serving: 1g | Calories: 89kcal | Carbohydrates: 9g | Protein: 1g | Fat: 6g | Saturated Fat: 4g | Polyunsaturated Fat: 2g | Cholesterol: 15mg | Sodium: 46mg | Sugar: 2g
Tried this Recipe? Tag me Today!Mention @LifeisaParty or tag #lifeisaparty!

Braised Beef Ragu Recipe

Aug 18, 2021 · Leave a Comment

braised beef ragu recipe

Braised Beef Ragu: rich beef dish is slow cooked in the oven until fork tender. Serve with pasta or mashed potatoes, perfect comfort food.

braised beef ragu recipe
[feast_advanced_jump_to]

I've been making this braised beef ragu for over a year now, and I've been meaning to share the recipe.  I made it again for our Beauty and the Beast themed dinner and movie night the other day -check out all the details of the Beauty and the Beast party here..  We were inspired by the "Be Our Guest" song in the film to create a menu that featured beef ragu, since they mention it, and this recipe was perfect!  It's rich and flavourful and the perfect comfort food, especially for cooler weather as we head into fall and winter.  You'll definitely want to pin this recipe!

braised beef recipe

Braised Beef

Braised beef is any beef slowly cooked at a low temperature.  It's generally seared at a high temperature in a hot pan first, and then slowly cooked in a braising liquid.  The braising liquid is usually broth, and/or wine.  The slow cooking of the beef breaks down all the connective tissue, until it's fall-apart tender.  There's also often some sautéed vegetables included, most commonly onion, garlic, celery, and carrots.  The braising is a great way to tenderize less expensive cuts of beef and make them fork tender after hours of cooking in a rich braising liquid.  We usually use a beef roast, but you can braise many other cuts of beef also.

braised beef ragu

Beef Ragu

Beef ragu is an Italian meat sauce dish served with pasta.  This Italian food is usually tomato based, and this rich sauce sometimes includes vegetables.

how to make raised beef

Braised Beef Ragu

Our braised beef ragu combines the best of both of these dishes, using a beef roast that is slow cooked until it's tender, along with the traditional onion, garlic, celery, and carrots, there are also mushrooms included in our dish.  The braising liquid is beef stock and rich red wine, but there is also some tomato paste included to add the traditional tomato-based sauce flavour of a beef ragu.  Our dish slow cooks for several hours in a large dutch oven with a tight-fitting lid and the cooking liquid reduces, the vegetables take on the flavor of the wine and tomato mixture, and the beef becomes fork tender.  Before serving, the meat is shredded  and given a good stir to turn it  into a rich beef ragù sauce.  This one pot meal is sure to become one of your favorite things.

Our braised beef ragu is delicious served with a wide pasta noodle like a pappardelle pasta.  Cook the pasta until it is al dente, and then seve the meaty sauce over top for the perfect main course.  This dish is perfect for pasta night. But this rich beef stew meat is also delicious served over mashed potatoes, or some people love it served over polenta.  Either way, I know you'll love this easy beef ragu recipe.  You can also top the finished dish with a little freshly grated parmigiano reggiano cheese.

braised beef ragu
how to make beef ragu

Recipe Notes

Because we braised our beef ragu in the oven, some of the cooking liquids evaporated.  If you want more sauce with your finished dish, feel free to add a little hot water to the dish before braising, or save some pasta water to make the beef ragu a little more saucy.  Depending on if you use a cast iron dutch oven, or not, and if you have a tight fitting lid or not, and if you braise for 2 or 2 ½ hours the liquid amount will vary.  

When I used a casserole dish for baking there was more liquid left.  I usually add about a cup of hot water to it now for the dutch oven I have.  You don't want the sauce to be soupy, but you do want some liquid.  If you're serving it with pasta you may want a more liquid sauce, and you can add some of the pasta water.  If you're serving it with mashed potatoes you may want it a little less liquidy.  You can also save some of the potato cooking water to add as well.

When it's done cooking I shred the meat with two forks.  If the meat won't shred easily it, isn't done yet, so give it a little more time.  When you're shredding the meat, be sure to leave some large chunks and some small beef chuck pieces, and stir the liquid and veggies throughout.

Storing

Any leftover beef ragu can be stored in an airtight container in the fridge.  This sauce is even better the next day, and makes a great make ahead.  You can also freeze leftovers.  It's great frozen as an individual serving.  Reheat on a cold day for the perfect lunch or dinner for one.  

Meal Ideas

It's also wonderful served as a Sunday super.  As soon as any guests arrive in the house, they'll smell the wonderful aromas coming from the kitchen as it slowly cooks.  It does take quite a while to cook. so it's often a good choice for the weekend when you have a little more time.  Once it's prepped and in the oven, it doesn't take much looking after.  Do check on it every hour.  You may want to stir it, so that any beef on the top doesn't dry out.  You can also add a little water at any stage of the cooking if you feel it's drying out too much.  

I love to serve this dish for a dinner party.  I've 'often been asked for the recipe after ward.  I usually serve it with a big caesar salad and cheesy garlic bread, and have some freshly grated parmesan cheese to add to the top.  It's always a hit.  Be prepared for your guests to want seconds.  It's quite a heavy hearty meal, so best followed with a lighter dessert.

Recipe

braised beef ragu recipe

Braised Beef Ragu

Soft and tender braised beef with the carrots and mushrooms.
No ratings yet
Print Pin Rate
Course: Main
Cuisine: French
Prep Time: 20 minutes minutes
Cook Time: 2 hours hours 30 minutes minutes
Total Time: 2 hours hours 50 minutes minutes
Servings: 6
Calories: 621kcal
Author: Dannyelle Nicolle-Ramjist

Ingredients

  • 2 tablespoon olive oil
  • 2 lbs beef roast cut into 3 -4 inch pieces
  • 1 large onion diced
  • 3 carrots peeled and sliced
  • 3 stalks celery sliced
  • 8 oz mushrooms quartered
  • 4 cloves of garlic minced
  • ⅛ teaspoon red chilli pepper flakes
  • 3 cups beef broth
  • 2 cups red wine
  • 2 tablespoon tomato paste
  • 2 tablespoon balsamic vinegar
  • 1 tablespoon Worcestershire sauce
  • 2 bay leaves
  • 1 teaspoon fresh thyme chopped
  • 1 teaspoon fresh rosemary chopped
  • 1 teaspoon salt
  • ½ teaspoon black pepper

Instructions

  • Heat the oil in a dutch oven, and brown the beef pieces on all sides over high heat. Remove from the pan and set aside.
  • In the same pot saute the onions, celery, carrots, and mushrooms until softened, about 8 min. over medium heat.
  • Add the minced garlic, and red chili flakes and cook 1 min. longer.
  • Add the broth, wine, tomato paste, vinegar, Worcestershire sauce, bay leaves, thyme, rosemary, salt and pepper. Use a wooden spoon to scrape any browned bits off the bottom of the pan. Add the beef back to the pan, and bring the mixture to a boil.
  • Add a lid to the dutch oven, and cook in a 350 degree oven for 2-2 ½ hours, until the beef is fall apart tender. Use two forks to shred the cooked beef. Serve over pasta, or mashed potatoes.

Nutrition

Serving: 1g | Calories: 621kcal | Carbohydrates: 13g | Protein: 49g | Fat: 34g | Saturated Fat: 12g | Polyunsaturated Fat: 18g | Cholesterol: 181mg | Sodium: 1368mg | Fiber: 3g | Sugar: 5g
Tried this Recipe? Tag me Today!Mention @LifeisaParty or tag #lifeisaparty!
braised beef ragu recipe

With braised beef ragu, life really is a party!

More Recipe Inspiration

You might like our Best Homemade Mac and Cheese with Panko Breadcrumb Topping here.

mac and cheese recipe with panko

Also check out our Beef and Vegetable Soup Recipe here.

Beef and Vegetable Soup Recipe: this homemade version of your favourite think and chunky soup is delicious and easy to make.

You might also enjoy our Recipe for Swedish Meatball Sauce here.

recipe for Swedish meatball sauce

This recipe was part of our Beauty and the Beast themed Disney Princess Dinner and Movie Night -check out all the details about the whole party here.

Disney Princess Dinner and Movie Toolkit

Love Disney Princess dinner and movie nights?  Buy our Disney Princess Dinner and Movie Toolkit.  The Toolkit includes 6 different Disney Princess movie nights with menus, all the recipes, inspiration, and printables for each one.  Check out more about the Disney Princess Dinner and Movie Toolkit by clicking here.

Beauty and the Beast Party -Themed Dinner and Movie Night

Aug 16, 2021 · 5 Comments

Beauty and the Beast party table with food and decorations.

Our Beauty and the Beast Party Ideas for a themed Dinner and Movie Night are so much fun. We served beef ragu, French baguette for our themed menu, and we couldn't forget the grey stuff for dessert. We also set up a little a Gaston's Tavern are serving root beer. There were Beauty and Beast inspired decorations and printables too.

Beauty and the Beast party table with food and decorations.
[feast_advanced_jump_to]

Why We Love This Party

  • You've got to love a fairy tale where the princess saves the prince!
  • Belle's smart girl book loving vibes are a favorite.
  • French inspired food -yes please.
  • Adding a Gaston's Tavern inspired rootbeer area is so much fun.

When I decided to do a series of Disney Princess themed dinner and movie nights this summer, I knew right away that I wanted to include one of our favorite fairy tales, Beauty and the Beast. It is one of the most cherished animated films of all time. Perhaps because Belle is a smart book worm, or because the newer live action movie is so beautiful, or maybe because, in this case, the princess saves the prince? 

This party feels a little more grown up and sophisticated, probably because I was influenced by the live action version to use some beautiful vintage inspired pieces for the decor. You could find most of what I used at the thrift store, so it should be easy to recreate something similar at your house, with a little pre-planning and shopping.

If you're a Beauty and the Beast lover you must also check our Beauty and Beast Party Ideas for a birthday here. Be sure to check out our Frozen Dinner and Movie Night, The Princess and the Frog Dinner and Movie Night, Cinderella Dinner and Movie Night, Snow White Dinner and Movie Night and Moana Dinner and Movie Night.

Beauty and the Beast Party Decor

We set everything up in our living room around the coffee table to enjoy dinner while watching the movie on the big screen. If you prefer a Beauty and Beast dinner party, use our ideas to set up a dining room.

Book Page Runner

Inspired by Belle's love of books, we decided to make a table runner out of book pages.  

I picked up some old and really inexpensive books at the thrift store. Next I ripped out pages and used my hot glue gun to attach them together to create the table runner.

Beauty and the Beast party table table with book page table runner, clock, candle holder, and roses.

Lumiere and Cogsworth

I thought it would be fun to include a clock to symbolize one of our favorite characters, Cogsworth, and a gold candlestick to represent Lumiere. I had an old clock that was perfect, but if you didn't you could look at a thrift store for something similar. Remember it doesn't need to be exact, which mine isn't.. It's just to give the suggestion. The candlestick I used was also from the thrift store. It was originally wood, but we liked the shape, and spray painted it gold. Brass candlestick holders would work well too.

Beauty and the Beast lumiere inspired candle holder.
Beauty and the Beast lumiere inspired candle holder and party decor.

Enchanted Rose

To create an enchanted rose to use on our table I used a glass cloche. It was really simple to put together. 

Real life Beauty and the Beast inspired enchanted rose in a glass cloche with mini lights.

I used a piece of clear fishing line, and tied a fresh rose at the base. Next, I used clear tape to attach the fishing line to the top of the cloche so the rose would hang. Lastly, I used some battery powered mini lights in the cloche as well, to create a magical look. 

Just remember, if you're using a real rose like I did, not to put it together too early, as the rose will eventually wilt with no water source. Or you can use a faux rose instead.

DIY Beauty and the Beast  inspired enchanted rose in a glass cloche with mini lights.

I used the rest of the red roses, and a few rose petals that I tore off, on the table. I also decorated with some stacks of vintage books that I had.

Beauty and the Beast party table with food and decor.

Beauty and the Beast Free Party Printables

We also created some beautiful custom printables for the Beauty and the Beast movie night. Starting out with this gorgeous movie ticket invitation. Print these off on your home computer or office supply store, and use them as an invitation for your kids, and friends.

Printable Beauty and the Beast movie ticket invitation on a table with candles and roses.

We also included a poster with this printable set that says "tale as old as time".

Tale as old as time printable poster for Beauty and the Beast party decor.

There's also food labels to go with our themed dinner menu, and beautiful cupcake picks that we used in our grey stuff dessert.

Beauty and the Beast inspired party table with food and party decor.
Beauty and the Beast party printables collection.

You can access our Free Bauty and the Beast printables in our free resource library. Just subscribe below for instant access.

Gaston's Tavern

We also included a little tribute to our favourite bad guy, Gaston -an iconic character. We created a special little area for Gaston's Tavern. 

Where the coffee table decor was inspired by the beast's castle, this area is Inspired by the song lyrics, we were sure to use lots of antlers "... I use antlers in all of my decorating..." and included a faux deer head on the wall.

Beauty and the Beast party table with themed food and decor.

We created a printable Gaston's Tavern sign, that we added to the wall too. And based on the line "Belle what do you say we walk over to the tavern and look at my trophies?" I added some fun vintage trophies that I've found at antique stores to the table too.

Beauty and the Beast party at Gaston's tavern with trophies.

I thought it would be fun to have some root beer at the tavern or you could serve a homemade version of Disney's Lefou's brew recipe.

The glass beer steins are from the dollar store. I used my Cricut to add the logo to each glass, using permanent vinyl.  Tip: I should have used white colored permanent vinyl, rather than black, so it would shown up better when the mug is full of root beer. 

If you don't have a Cricut machine, you can create something similar by printing the logo on paper, and using glue to attach them to the mugs, or printing on sticker paper and adding stickers to the mugs.  I've included the small logos in the printable package.

Gaston's tavern root beer bar at a Beauty and the Beast party.
DIY Gaston's tavern beer mugs for a Beauty and the Beast party.

Beauty and the Beast Themed Food

Some Disney Princess movies don't have much food mentioned in them, and it's a little challenging to come up with a theme menu, but not this one. The famous Be Our Guest song is full of ideas of what to serve for dinner. And we were also inspired by the Beauty and Beast menu at the Be our Guest restaurant at Walt Disney World.

  • Braised Beef Ragu
  • Pasta
  • French Baguette
  • The Grey Stuff with Vanilla Shortbread Cookies
  • Rootbeer from Gaston's Tavern

We went with beef ragout, baguette, and the grey stuff. 

This beef ragu is a favourite of ours and I've been meaning to share the recipe for awhile. It's a braised beef sauce made with red wine, and beef broth, and it's rich and delicious. This is one of my favorite, most delicious recipes.

We served ours with pasta, it's also fantastic with mashed potatoes. Find the recipe for Braised Beef Ragu here.

Beauty and the Beast table with beef ragu, French Baguette, and the grey stuff.
Bowl of beef ragu at a Beauty and the Beast party.
Beauty and the Beast themed food table at party.

The grey stuff comes from the line in the song "try the grey stuff it's delicious, don't believe us ask the dishes". It's easy to make and so good, your kids will love it. Find the  easy recipe for The Grey Stuff here.  It's a delicious combination of oreo cookies, and vanilla pudding mix.

We used a piping bag to add to some delicious shortbread cookies. Find the vanilla shortbread cookie recipe here.

This is one of our favorite beauty and beast inspired simple treats. You could also serve the grey stuff on it's own in a small bowl, or as a cupcake topping, if you prefer.

The grey stuff served on cookies.
Beauty and the Beast inspired grey stuff served on shortbread cookies.

This movie night was so beautiful and so delicious. The food is really amazing for this movie night. It would also be a great date night, family movie night, or birthday party celebration.

Beauty and the Beast inspired dinner of beef ragu, French baguette and the grey stuff.

With all these fun Beauty and the Beast party ideas for a fun themed dinner and movie night, life really is a party!

Frequently Asked Questions

What food is mentioned in Beauty and The Beast?

This movie has many mentions of food including beef ragu, cheese soufflé and, most famously, the "grey stuff."

What is the grey stuff?

The grey stuff served in Disney parks at the Be Our Guest restaurant is a sweet mousse made of cookies and cream. Some people believe that the grey stuff in the original film is pate, because it's served on a platter of hors d'oeuvres.

Can I make these dishes ahead of time?

Yes, make the beef ragu the night before, it will be even better heated the next day. Make your cookies and grey stuff ahead of time, but pipe the grey stuff on the cookies just before serving to avoid the cookie becoming soggy.

If you tried this Beauty and Beast Party and Menu or any other ideas on my blog please let me know how it went in the comments below. Thanks for visiting today!

Beauty and Beast Recipes

  • braised beef ragu recipe
    Braised Beef Ragu Recipe
  • the grey stuff
    The Grey Stuff Recipe
  • Easy vanilla shortbread made with cornstarch.
    Vanilla Shortbread Cookies -Easy Cornstarch Recipe
  • Beauty and the beast party.
    Beauty and the Beast Party Ideas

How To Set A Table

Aug 6, 2021 · Leave a Comment

how to set a table

How To Set A Table: the basics for setting a casual table, and all the details of how to properly set a formal dining table.

how to set a table
[feast_advanced_jump_to]

The Purpose of Etiquette

Where do you start when it comes to how to set a table?  Begin with the fact that the purpose of etiquette is for everyone to feel comfortable.  The point of etiquette is not ever to try and trip people up or test them.  The purpose of standardized table settings is so that dinner guests know what to expect, and where everything should be.  This should help everyone feel comfortable and confident.  If you ever see your guests struggling, lead the way for them, and create an atmosphere so everyone feels at ease. 

There are no table setting or etiquette police.  With these basics you should be able to set a table you're proud of, and that you and guests feel comfortable at for any dinner parties, special occasions, or everyday life.  A properly set table with everything in the right place is the perfect way to make everyone feel comfortable and have a great time while you enjoy great food and quality time together.how to set a casual table

Casual Table Setting

For casual table settings for casual meals, some people like to start with a placemat, but for a casual table setting the plate directly on the table is fine too.  Next centre the plate in front of each chair.  As a general rule, forks go on the left (the only exception is if you are setting a formal dinner table setting and including an oyster fork) and knives and spoons go on the right. Place your dinner fork to the left of the plate.   Place the knife to the right of the plate.  The blade of the knife always faces in towards the plate.  The spoon goes to the right of the knife.

Place the napkin under or beside the fork, or on the centre plate -which ever you prefer.  You can also choose to include napkin rings, if you wish for an informal table.

Lastly, the water glass should be above the knife.

casual place setting

Formal Table Setting

For a formal table setting for a special occasion start with a base layer of a tablecloth, or a table runner and placemat, and /or charger plates on your dining room table.

Next layer on your dinner plate.  If you are serving salad, layer the salad plate next, followed by soup bowls if you're serving soup.

How To Set Formal Cutlery

For elegant table settings, to the left of the plate place the forks.  The cutlery is placed from the outside in towards the plate, by course.  We've included a salad fork and diner fork, as is traditional for North America.  You might also include a fish fork, or move the salad fork over if you're serving salad after the main course as some European countries do.

On the right side of the place setting place the knives and spoons, again working from the outside in.  Always have the knife blade pointing toward the plate.

Only set pieces you are planning on using for the meal. Never add extra cutlery or glasses that are not needed for the meal. 

The bread plate is traditionally above the forks.  If you have a large centrepiece there might not be room to place it there, so it can be shifted to the left side of the forks.  Some people include a butter knife set diagonally on the bread plate, but these days most people don't own a whole set of butter knives for each person, or expect to have one at their place setting. 

Above the dinner plate, place the dessert spoon and fork.  The fork should be on the bottom pointed to the right.  The spoon should be on the top, facing the opposite direction.  Some people to prefer to not set dessert cutlery and bring it out when coffee and dessert are served.

How To Set Formal Glassware

To the right of the plate, above the knives are the glasses.  Start by setting a water glass above the knife, this glass should be the easiest for the guest to reach.  Then work your way out by courses.  Typically you'd have a champagne flute next, if you're serving champagne or sparkling wine.  This is followed by your white wine glass typically paired with your fish or chicken, then lastly a red wine glass for your meat course.   These would be set on a diagonal.  You can also set up glasses in triangle or diamond if you're short on space. 

In keeping with the glasses being arranged in order of use, the coffee cup would be the furthest out, to the right of the cutlery.  Some people like to set coffee cups, and others prefer to bring them to the table when dessert is served.

The napkin can be placed on the dinner plate, to the left of the forks with a napkin ring, or under the forks.  Whichever you prefer the look of.

For a formal dinner, you can also include place cards.  Some people like to write the name on both sides of the place card.  This allows guests to find their spot, and other guests can easily read the names also.

Beautiful Centerpiece

For a special table you may want to start with some fresh flowers on the center of your table to add some visual interest.  Faux flowers are a great option for a table centerpiece.   Choose a floral arrangement to match your color scheme.  For a more casual table setting the centerpiece could even be a bowl of fresh fruit in the middle of the table. Candles are a great addition to the table, and easy way to add elegance.  Choose non-scented candles so that they don't compete with the food smells.  It's always nice to add some natural elements.  

Depending on the time of year, you might want include some seasonal touches for your next dinner party.  You could add in small pumpkins, and traditional orange with your fall flowers for a simple Thanksgiving table setting, Natural materials are always a great addition, especially to add a rustic feel,  For Christmas dinner you could add pine cones and votive candles to your centerpiece.

how to set a formal table setting

Printable Table Setting Infographic

All the table setting rules all in one place in this handy and printable How To Set A Table Infographic.  

how to set a table infographic

Want to print this?  Subscribe below to have access to our free printable library and download the pdf for printing.

With a beautifully set table, life really is a party!

More Inspiration

You might also like How To Host A Tea Party here.

How To Host A Tea Party: ideas on what to serve at a tea party, including some recipes, and tips about hosting.

Also check out How To Make The Perfect Cheese Board here.

How to Make the Perfect Cheese Board -learn how to combine sweet, salty, sour, spicy, crunch, and creamy to create the perfect cheese board!

Top 10 Picnic Ideas, Tips and Tricks

Aug 5, 2021 · 2 Comments

Picnic tips and tricks

Top 10 Picnic Do's and Don'ts: easy picnic ideas that will help you plan the perfect picnic and avoid all the mistakes.

Picnic tips and tricks
[feast_advanced_jump_to]

Picnics are such a fun activity.  Today we're sharing all our favourite picnic ideas and best picnic tips and tricks to help you have the best picnic ever.  Nothings better than fresh air and great food, enjoyed with great company.  Any warm day is the ideal time to have a picnic. 

1. Picnic Activities

Don't forget a few fun activities to do at the picnic besides of course eating great food.  Games like bocce ball, ladder ball, corn hole, or even a Frisbee or a kite are great picnic ideas.  Activities like these are an especially good options to keep young children happy if they're with you.  

Swimming is such a favourite picnic activity.  Bring a picnic to the beach, and enjoy the water, build a sandcastle, and enjoy the sun.  Water sports or boating are a perfect picnic activity too if you have the opportunity.

Not a fan of playing a picnic game or sports activities?  How about bringing a good book or a magazine for the perfect leisurely picnic activity?  Another quiet activity for a picnic is painting or sketching.  Since you're hopefully in a lovely spot with gorgeous scenery, it's a great time to pull out the sketch book, or try a little watercoloring.  Kids love this too.

Lots of people love to bring a music device to enjoy some tunes on a picnic too.  If you are bringing music though be sure you don't disturb others who are trying to enjoy the outdoors also, and might not love your choice in music.  If you're off on your own though, some music can be a great addition.  

picnic ideas

2. Food Packaging

Do take care in how you package your food.  There's nothing worse than  squished or soggy sandwiches, or a salad that leaks salad dressings all over everything else, unless of course it's food poisoning.  Make sure to keep hot foods hot and cold foods.  Keep cold foods cool with ice packs and a cooler.  Throw out any leftovers you're worried about.  Remember food safety especially for items like potato salad with mayonnaise.  If you're worried about having issues, then choose foods that are safe at room temperature.  Frozen water bottles are a great way a cool bag cold on a hot day, without the dripping mess of ice cubes as they melt.  If you are using ice cubes, make sure to pack them in ziplock plastic bags to avoid a mess of water at the bottom of the cooler when the ice melts.

To avoid the leaking issue with foods, choose containers like mason jars, or plastic containers that seal well.  When you're packing your picnic basket, be sure to put heavy items on the bottom, and lighter things like food items that you don't want to get squished or crushed on top.  Fresh fruit is great for a picnic, so take care to make sure it doesn't get crushed.

And when you're packing up your picnic foods, don't forget that you also are going to need some things like trash bags for after the picnic.  Throw some paper towels, hand sanitizer, and wet wipes in along with the garbage bags for easy picnic cleanup when you're all done.

picnic ideas

3. Colour Scheme and Decor 

Do remember to think about your colour scheme and some flowers even for a picnic.  It's amazing how adding a few special touches as picnic decor can take the festivities to a whole new level.  Things like real china dishes, glasses, a small cutting board and cloth napkins are a little trickier to transport, but make your picnic feel super luxurious.  I don't recommend these items for a backpack hike, but if you're parking your car nearby, some of these extras can take your picnic experience to the next level.  If you do need a lighter more easy to transport option, there are lots of beautiful disposable products too.  Beautiful paper plates, napkins, and cups with coordinated colors and patterns are a beautiful option.   Choose whatever works best for you, but remember to try and co-ordinate it for a pulled together look.  You don't have to be a food stylist to make it look great.  Go the extra mile with a few special touches, and you will create a successful picnic full of special memories.  Although things like coordinated accessories aren't necessary for a wonderful picnic, they really do make your picnic extra special.  They're especially great if it's a romantic picnic and you want to show someone special that they're worth going to some extra trouble for.

wood palate picnic

4. Bugs and Avoiding Them

Do remember to bring some insect repellent and look out for ants.  As cliche as it might sound, ants at a picnic are no fun, especially if they're the biting kind.  Bee stings can dampen the mood too.  Remember to look for insects when you pick your picnic spot and avoid them if you can.  I once accidentally set up a gorgeous, elaborate picnic right on top of an ant hill.  Needless to say we had to move everything and re-set up in a new area.  Lesson learned.  Always check your picnic area before setting it up.  You might also want to keep a small first aid kit on hand, just in case.  And take extra precautions if anyone is allergic.

Mosquitoes or black flies can be a real pain at a picnic too.  The best way to keep mosquitoes away is bug spray, or something like a citronella candle or coil can help keep them away from your picnic area too.

5. Sun and Shade

Do find some shade.  Too much sun in the great outdoors can be a bad thing.  A sun hat, or an umbrella are great options.  You could also look for a shady spot to set up your picnic blanket.  Lots of parks have an outdoor sheltered picnic area.  If you're picnicing on the beach a shade umbrella or shade tent is a great idea on really sunny days.  If you're a sun lover, it's a good idea to bring some sunblock, so you can enjoy the sun safety.

beach picnic

6. Take Out

Do remember that a great option for a picnic, especially if you're not so into packing up all the food yourself, is takeout.  My favorite picnic hack is to pick up food at your favourite restaurant.  Bring a blanket and find somewhere in the great outdoors with great views to enjoy your meal.  Even a take out pizza is a great option for easy picnic food.

It's not only restaurants, many grocery stores have a great grab and go food options.  Look for things like ready made sandwiches, a fruit tray, veggie tray, dips, fresh bread, cheeses, even ready made charcuterie boards to enjoy.  In the deli section you could find ready made salads, like pasta salads, fruit salad, and others.  These ready made picnic classics make preparing a picnic much easier.

7. Three Season Picnicking

Do picnic in spring, summer, and fall.  As soon as the weather is warm enough to enjoy being outside, and until it gets frosty can be picnic season.  In the spring and fall especially a waterproof plastic backed picnic blanket is one of my picnic essentials.  During those times of year, you may be more comfortable at a picnic table, rather than sitting on the ground.  Camp chairs are also a great option.  As well, a thermos with a hot drink, like tea, coffee, or hot chocolate is a great addition to a spring or fall picnic to warm up if you're feeling chilly.  

picnic ideas

8. BBQ or Campfire

Do bring a portable bbq on your picnic.  An inexpensive mini bbq that uses charcoal or a small portable gas bbq are a great addition to any picnic.  Some parks even have built-in bbqs where you supply the charcoal.  This can take a picnic to a whole new level. In some areas you can also light a fire, which is great for roasting hot dogs or s'mores charcuterie snack board too, or staying until it gets dark.  BBQs and campfires are prohibited in some areas, so be sure to check your local rules before starting one.  And if you're in an area that allows it, a campfire is one of my favorite ways to add a little warmth to spring and fall picnics.  In many picnic areas you can buy firewood.  Use an old school stick from the woods for your marshmallow roasting.  Don't forget to pack your portable camp chairs to sit around the fire.

beach picnic ideas

9. Rain Rain Go Away

Do check the weather forecast.  One of the few things that can really ruin a picnic is rain.  Check the forecast before you head out, and if you're meeting friends you might want to consider a rain date or some other backup plan.  Some parks have pavilions with a roof, which can be great if there's just a sprinkle.  If it's really raining though, even under a pavillion things often feel very damp and just aren't as much fun.   A unexpected picnic in your living room has a certain charm too, if you get rained out.

10. Breakfast, Lunch, or Dinner?

Don't forget that picnics are great any time of day -breakfast, lunch, or dinner.  A breakfast picnic is a great way to start off the day.  There's lots of fun portable breakfast foods like pastries, muffins, fruit and a thermos of coffee.  A sunrise picnic is just as special as a sunset picnic.  So be sure to think of all the possibilities when you're planning your next picnic.  

breakfast picnic ideas

Picnics are so much fun.  They're the perfect way to enjoy the outdoors, along with delicious food, and wonderful company.  Picnic's are one of my favourite ways to entertain.  Find a great place, pack some great food, and enjoy yourself.  With these great picnic ideas and top tips and tricks, you're sure to have your best picnic ever.

More Great Picnic Ideas

You might also like our Mushroom Themed Picnic here.

mushroom themed party

Also check out our Cherry Themed Picnic here.

cherry themed party ideas

You might also like The Butterfly Themed Picnic here.

butterfly theme party picnic

Cotton Candy Drink Recipe

Jul 29, 2021 · 1 Comment

Easy cotton candy drink for kids.

Cotton Candy Drink: this simple two ingredient drink is always a hit with kids. Easy recipe and tips for working with cotton candy.

Easy cotton candy drink for kids.
[feast_advanced_jump_to]

This two ingredient cotton candy drink couldn't be more simple to make, and it's beautiful and delicious.  So it's ticking all the boxes.  Any one with a sweet tooth will love it.  We love easy recipes that taste great, and when you can get all the ingredients at the grocery store.

Looking for an adult version? Check out our Cotton Candy Cocktail.

blue cotton candy drink

We made these drinks for our Cinderella Dinner and A Movie Night -see all the details here.  It was the perfect shade of Cinderella pale blue for our party.  We called them Cinderella sippers as a sweet treat to enjoy for our movie night.  They're great for any special occasions.  These cotton candy mocktails are great for kids or anyone who wants a non-alcoholic drink option.  Enjoy them at a bridal shower, birthday party, new year's eve, Mother's day, or the holiday season.

Cinderella inspired party table with themed food and party decorations.
cotton candy drink

You could also use pink cotton candy for these and make them a beautiful shade of pink instead of blue.  Or get really crazy and combine both for a purple.

Wouldn't these be fun drinks in the pink and blue colors for baby showers, or a gender reveal?  The colors are perfect for spring celebrations or a summer day.

kid friendly cotton candy drink

Watch The Magic

The magical part of this drink is that you put the cotton candy into a clear glass first, and then pour the sprite over the top.  The fun part is that the cotton candy instantly dissolves and the drink turns blue or pink!  It's so perfect for special events, because it feels magical.  Top the festive drinks with extra cotton candy and you can even add a sprinkle of pink luster dust, or edible glitter on top, or add blue or pink sanding sugar sugar to the rim of the glass for the perfect drink for celebrating.  You'll love the sweet flavor of this alcohol-free version.

Tips

A few tips about working with fluffy cotton candy.  As soon as the cotton candy gets exposed to moisture, even the moisture in the air, it begins to dissolve.  So for best results, don't prepare these in advance because your cotton candy melts with the moisture in the air.  Do them last minute, right in front of your guests.  Keep that cotton candy in an airtight sealed container right up until you're ready to use it so the cotton candy dissolve doesn't ruin the appearance.

cotton candy drink recipe

You could also add ice to this drink, to make it on the rocks.

We've tried this drink with ginger ale, and although it takes great, it didn't give the best color.  Sprite is the perfect pop to use for the cotton candy drink because it's clear, and will give you the best blue colour when the cotton candy dissolves.  Another great option would be a clear colored cream soda, or vanilla soda.  If you want a really bright pink color you could also try a raspberry ginger ale.

Adult Cotton Candy Drink Idea

Kids love this drink.  It's sweet and fizzy and a lot of fun and perfect for your next party.  Want a grown up friendly version?  Try adding vodka for a cotton candy cocktail.  Too sweet for you?  Swap out the pop for sparkling water for the fun cocktail version.  This adult drink version is perfect for bachelorette parties, or any special celebration.

Recipe

Easy cotton candy drink for kids.

Cotton Candy Drink

Easy two ingredient drink that kids love!
5 from 1 vote
Print Pin Rate
Course: Drinks
Cuisine: American
Prep Time: 2 minutes minutes
Total Time: 2 minutes minutes
Servings: 1
Calories: 263kcal
Author: Dannyelle Nicolle-Ramjist

Ingredients

  • ¼ cup cotton candy
  • 1 cup Sprite pop

Instructions

  • This cotton candy drink is super simple to make. Place a piece of cotton candy in the bottom of a glass, and top with Sprite. Serve in a champagne flute and a cotton candy garnish on the top of the glass.

Nutrition

Serving: 1g | Calories: 263kcal | Carbohydrates: 66g | Fat: 1g | Sodium: 36mg | Sugar: 64g
Tried this Recipe? Tag me Today!Mention @LifeisaParty or tag #lifeisaparty!
how to make a cotton candy drink

These drinks are so much fun and perfect for your birthday parties, girls' night -with big girls or little girls, or for new years, when kids love a fizzy drink.  

With cotton candy drinks, life really is a party!
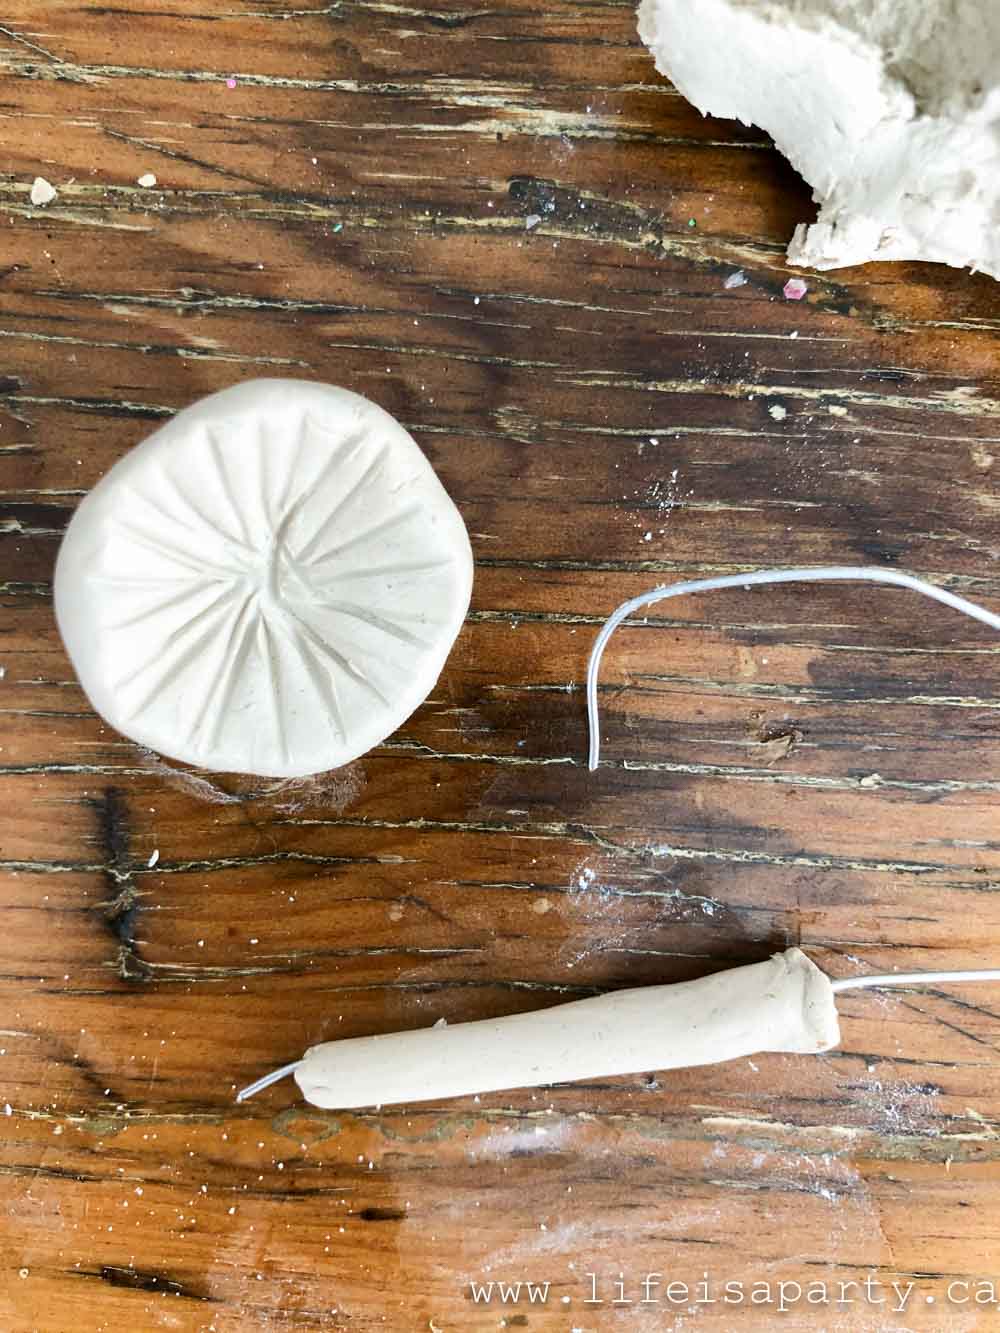
This recipe was part of our Cinderella themed Disney Princess Dinner and Movie Night -check out all the details about the whole party here.

Disney Princess Dinner and Movie Toolkit

Love Disney Princess dinner and movie nights?  Buy our Disney Princess Dinner and Movie Toolkit.  The Toolkit includes 6 different Disney Princess movie nights with menus, all the recipes, inspiration, and printables for each one.  Check out more about the Disney Princess Dinner and Movie Toolkit by clicking here.

More Drink Ideas

You might also like our Swamp Water Punch recipe here.

Also check out our Coconut Milkshake here.

Coconut Milkshake: Inspired by our favouraite Thai resturant, made with just three simple ingredients -coconut milk, ice, and condensed milk.

You might also enjoy our Blackberry Sparklers here.

Blackberry Sparklers: fresh blackberries are pureed for this cocktail, make it with alcoholic, or without for a non alcoholic mocktail version.

Pumpkin Stuffed Manicotti with Browned Butter and Sage Sauce

Jul 28, 2021 · 1 Comment

pumpkin manicotti with sage browned butter

Pumpkin Pasta Recipe: this pumpkin manicotti with sage browned butter sauce is comfort food at its best, a great fall and winter recipe.

pumpkin manicotti with sage browned butter
[feast_advanced_jump_to]

This easy pumpkin pasta recipe is a favourite of ours.  With a rich, creamy pumpkin filling inside tender manicotti, and the perfect browned butter and sage sauce this pasta dish is so delicious.

We recently had a Cinderella Dinner and A Movie Night.  We're watching Disney Princess movies this summer and pairing them with a dinner inspired by the film -see the whole Cinderella party here.  When we decided to do a Cinderella themed dinner, we knew that we had to include pumpkins, as a nod to the famous pumpkin turned into a carriage by the fairy god mother.  

Cinderella inspired party food, and DIY party decorations.
Pumpkin pasta dish inspired by Cinderella.

This pumpkin pasta dish is creamy and mild in flavour.  I think most kids will love it too.  The addition of the sage browned butter sauce is just what it needs.  This dish is especially perfect in the fall.  It is comfort food at its best.

Pumpkin Cannelloni with sage browned butter

Pasta

This pumpkin pasta recipe is an adaptation of a favourite of ours.  It was originally a recipe for pumpkin ravioli with sage browned butter sauce.  It's delicious, but making your own pasta from scratch and turning it into ravioli is very time consuming, labour intensive, and fiddly hard work.  We loved the flavours, but wanted an easier method for putting this together.  We thought about a few different options, like lasagna, or pasta sauce, but manicotti ticked all the boxes for us, since it allowed for the addition of the sage browned butter sauce, that really makes the dish.  This was much easier to make than making your own ravioli from scratch, and had all the great flavours of the original dish.  

We used manicotti for this recipe.  You could also use cannelloni pasta.  The difference between manicotti and cannelloni is that manicotti has ridges that give the pasta some bite, vs cannelloni which is smooth and more tender.  If you can't find manicotti shells or cannelloni at the grocery stores, you could also use jumbo pasta shells, or use large sheets of fresh pasta to make your own by wrapping around the filling.

Pumpkin

The pumpkin filling in this pasta is so good.  It has a richness and creaminess to it.  It's a little bit sweet, but savory too.  The pumpkin has a great texture, and the softness pairs perfectly with al dente pasta with a little bite to it.  We used canned pumpkin puree for our filling.  If you're using canned pumpkin be sure to get pure pumpkin instead of pumpkin pie filling.  Pumpkin pie filling has sugar and pumpkin pie spice added to it, so it won't work in this recipe.  You can use fresh pumpkin too, if you wish.  Just roast your pumpkin and puree it to a smooth consistency in your food processor.

Burnt Butter and Sage Sauce

The burnt butter in this recipe adds a wonderful nutty flavor, and the fresh sage cooked in the butter is delicious.

You could use a white sauce instead for this recipe as another option.  I would not use a red sauce.  The pumpkin and red sauce won't be a great combination.  The pumpkin is quite a mild flavor and pairs better with the burnt butter or Alfredo sauce.  

pumpkin pasta recipe
pumpkin cannelloni recipe

If you have any leftover pumpkin pasta, you can store it in an airtight container in the refrigerator.

This manicotti recipe with pumpkin and the browned butter and sage sauce is so good.  It's perfect for pumpkin season and you'll definitely want to add it to your fall repertoire.  The pumpkin is smooth and creamy and little bit sweet and the butter and sage is so rich and flavorful.  It's a taste of home, and real comfort food.

I like to serve this with a sweet Italian sausage, a green salad and some nice crusty bread for a lovely dinner.  A grilled meaty sausage is a great accompaniment, or keep it a vegetarian meal and serve it on it's own.  We didn't add cheese to our dish, but serving with some grated parmesan cheese would be delicious over the top.

Recipe

pumpkin manicotti with sage browned butter

Pumpkin Cannelloni with Sage Browned Butter Sauce

Pasta filled with a pumpkin and topped with a rich sage browned butter sauce.
5 from 1 vote
Print Pin Rate
Course: Main
Cuisine: American
Prep Time: 30 minutes minutes
Cook Time: 15 minutes minutes
Total Time: 45 minutes minutes
Servings: 4 servings
Calories: 1015kcal
Author: Dannyelle Nicolle-Ramjist

Ingredients

  • ⅓ cup butter
  • ½ onion diced
  • 1 tablespoon fresh sage chopped
  • 1 teaspoon fresh thyme chopped
  • 796 mL can pure pumpkin not pumpkin pie filling
  • ½ teaspoon salt
  • ¼ pepper
  • 1 cup heavy cream
  • 2 tablespoon brown sugar
  • ¾ cup butter
  • 24 sage fresh sage leaves
  • 325 g manicotti, or cannoli or fresh lasagna sheets

Instructions

  • To make the pumpkin filling for the pasta, begin by melting ½ cup butter in a large skillet, and saute diced onion, sage, and thyme over medium heat until the onion is softened and translucent.
  • Add the pumpkin purée, salt, peper, cream, and brown sugar to the pan. Stir to combine and heat through. Remove from heat and set pasta filling aside.
  • To make the burnt butter and sage sauce, melt ¾ cup of butter over medium-high heat in a medium sauce pan. Once the butter is melted and begins to foam add 24 whole sage leaves. Let the butter brown. Remove it from the heat when it begins to smell nutty, but isn't burnt black.
  • To prepare the manicotti noodles, boil it in a large pot of salted water until it's tender, according to the recommended cooking time on the package instructions. Unlike some stuffed pasta, this dish doesn't really get more cooking in the oven -just heated through, so make boil your pasta until it's as tender as you like to eat it, and then drain pasta shells.
  • Once pumpkin filling is slightly cooled, add to a piping bag and use it to fill the cooked pasta tubes.
  • Layer filled pasta in a large baking dish, and pour the sage browned butter sauce over it the top of the manicotti, and between layers.
  • Lastly heat the pasta dish in a preheated oven at 350 until the manicotti is heated through, around 15 minutes, and enjoy.

Nutrition

Serving: 1g | Calories: 1015kcal | Carbohydrates: 40g | Protein: 22g | Fat: 88g | Saturated Fat: 53g | Polyunsaturated Fat: 28g | Trans Fat: 3g | Cholesterol: 273mg | Sodium: 1287mg | Fiber: 6g | Sugar: 18g
Tried this Recipe? Tag me Today!Mention @LifeisaParty or tag #lifeisaparty!

With our pumpkin manicotti with sage browned butter, life really is a party!
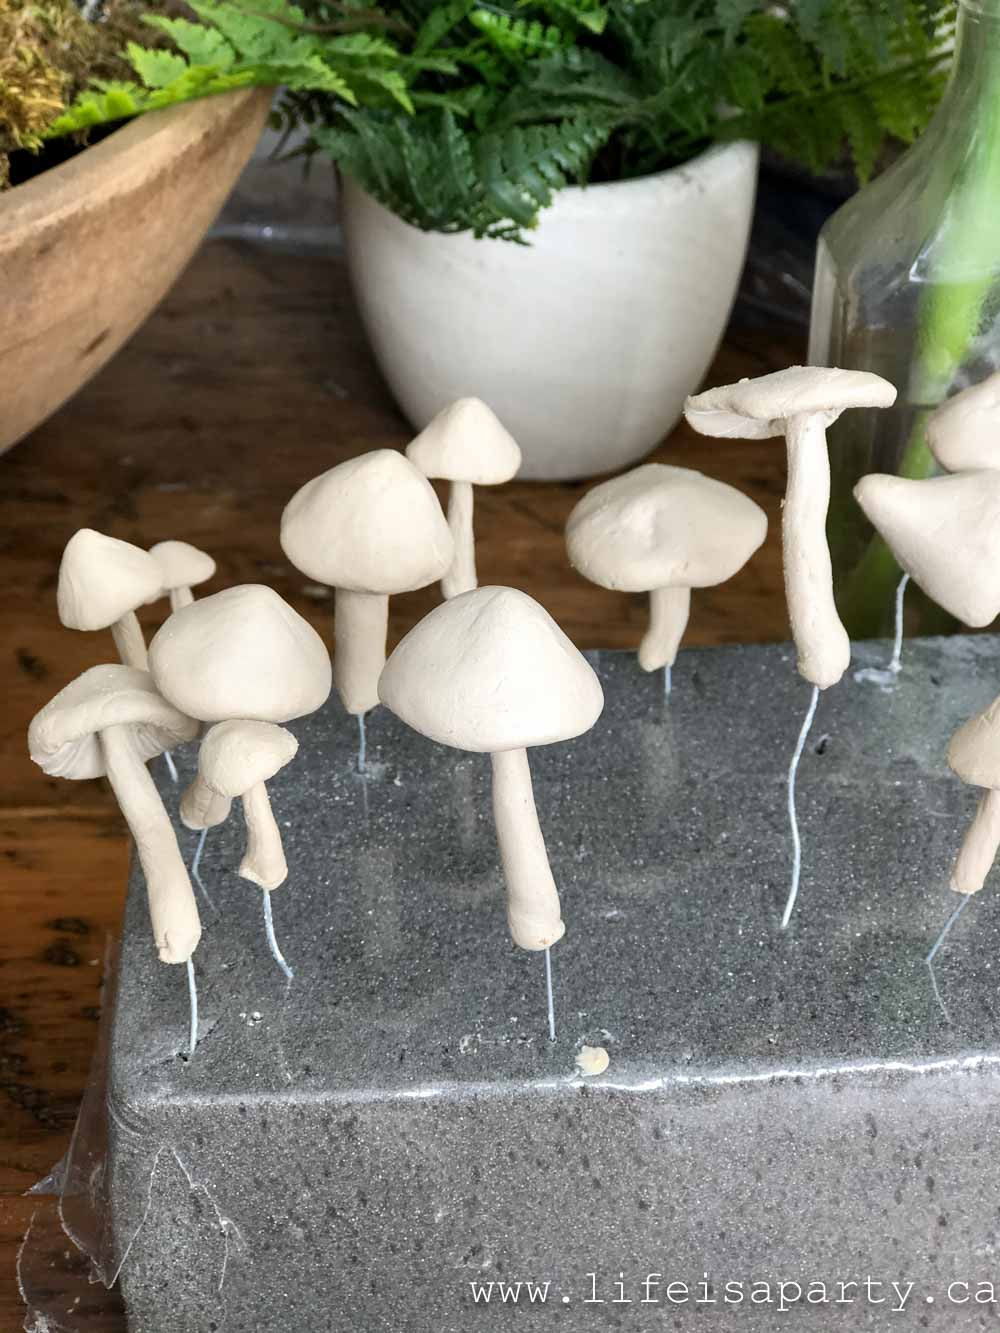
This recipe was part of our Cinderella themed Disney Princess Dinner and Movie Night -check out all the details about the whole party here. We had so much fun creating this Cinderella themed dinner menu.

Disney Princess Dinner and Movie Toolkit

Love Disney Princess dinner and movie nights?  Buy our Disney Princess Dinner and Movie Toolkit.  The Toolkit includes 6 different Disney Princess movie nights with menus, all the recipes, inspiration, and printables for each one.  Check out more about the Disney Princess Dinner and Movie Toolkit by clicking here.

Simple Wedding Cake and DIY Wood Wedding Cake Topper

Jul 26, 2021 · Leave a Comment

DIY wood cake topper on a naked cake with flowers.

Simple Wedding Cake and DIY Wood Wedding Cake Topper: make your own simple and rustic 1 tier wedding cake and Cricut cake topper.

DIY wood cake topper on a naked cake with flowers.
[feast_advanced_jump_to]

I love the trend in weddings these days for simple and rustic.  This DIY wedding cake and Cricut wood wedding cake topper were pretty simple to put together and definitely really inexpensive too.  I created the wood wedding cake topper with my Cricut machine.  I love that it can cut wood, and that you can customize it to say anything you'd like.  It's a great way to add a personal touch to your special day.  The DIY cake topper turned out great and would be perfect for your a simple wedding or a special bridal shower for DIY brides.  

Because you can personalize the cake topper, it's a great option not just for a wedding day.  Make a custom cake topper for any special occasions.  It's a great option to create a beautiful cake for a birthday, anniversary, baby shower, or any special day.  It also makes a special keepsake.

how to make your own cake topper

The Cake

The simple cake is as basic as it gets -and that's exactly what you need if you're busy putting together your own wedding cake or wedding shower cake.  I used two white cake mixes, and some homemade buttercream icing.  We made ours a naked cake, again so simple. Another great option is to pick up some inexpensive plain white cakes at the grocery store.  If there are no plain cakes at the grocery store, you can scrape the icing off, and add some white icing to create the look you want.  This cake is perfect for the bride and groom who love simple and rustic.  This is simple enough to do the day before your wedding day.

DIY wood wedding cake topper

Tips for Cutting Wood with a Cricut Machine

We made the custom wedding cake topper on our Cricut machine.  There's a few tips I'd love to share with you for working with wood, that might make the process go a little more smoothly. 

1. Choosing Your Font

If you're designing your own cake topper in Cricut Design Space choose your font carefully.  We wanted a script so that we could connect all the letters in our words to make a solid piece, but some fonts with thinner lines would not be a good choice to cut out in wood.  The letter lines need to be at least ⅛" thick for the best results.  We used the Cricut font Retro Script, and it worked great. Love Create Celebrate has a great video tutorial if you want to design your own topper.

2. Checking Your Wood Is Cut Through

Be sure to check that the topper is cut all the way through before unloading your project from the Cricut machine.  You can test this by gently pushing down on the cut piece to see if it moves.  You might also be able to remove any small circular inner pieces from the letters.  If it isn't cut through add more passes before you unload the mat.  This part is key, it has to be before you remove the mat from the machine.  After you remove it, you can't add more cuts, because it won't line up properly.

3. Doing Touch Ups with the True Control Knife

Also, once you remove the mat, if you have a few spots that aren't cut through, use the Cricut True Control knife to cut through any spots that need it.

4. Using Wood Glue

If you unfortunately have a few delicate pieces of the cake topper break, you can glue them back on with a tiny amount of wood glue.

5. Cutting Against The Grain

Against the grain on the wood sheet is stronger than with the grain.  We aligned our wood piece with the grain running side to side, rather than up and down to give those connections between the letters a little extra strength.

6.  Extra Wood For Practise

It took us two tries at making the cake topper, so you might want a few extra sheets of wood.  On our first attempt we had too many passes, and the cake topper broke.  Lastly on the second attempt we did the same amount of passes and it wasn't cut all the way through so we had to add some, and touch up some spots with the knife afterward.  It might take a few tries to make your project, so it's great to plan on having some extra material, just in case.

Cricut DIY cake topper

How To Make A Wood Cake Topper With Your Cricut

Recipe

DIY wood cake topper on a naked cake with flowers.

DIY Cricut Wood Cake Topper

No ratings yet
Print Pin Rate
Course: DIY & Crafts
Prep Time: 1 hour hour
Cook Time: 1 hour hour
Total Time: 2 hours hours
Author: Dannyelle Nicolle-Ramjist

Equipment

  • Cricut Maker
  • Cricut Knife Blade
  • Strong Grip Cutting Mat
  • Cricut True Control Knife
  • Self-Healing Mat

Materials

  • Cricut Bass Wood
  • Masking Tape
  • "Happily Ever After" Cut File

Instructions

  • Begin by opening our free "Happily Ever After" cut file in Cricut Design Space, and choose the "Make It" option.
  • Use a strong grip cutting mat and line your wood up in the top left corner. Use masking tape around the outside of the wood to tape down the edges, and give it extra hold.
  • Next, make sure your Cricut has the knife blade inserted.
  • Follow the prompts on the Cricut to cut out the cake topper. Note -wood takes many passes, so it takes a little extra time to cut out.
  • Next, once your topper is finished cutting, but before you remove the mat from the Cricut machine, check to make sure that it's cut all the way through. Genty push down on the wood to see if the cut piece is free, or try and remove any of the inner circle pieces from the letters. If they pop out, then remove your mat from the Cricut. If they don't, then choose to add more passes, and then check again until it's completely cut through.
  • Once your mat is unloaded, carefully remove the masking tape. Next gently remove the cake topper. Take care because it's fragile, especially any small end pieces of the letters.
  • Lastly, if you notice it's not cut all the way through in some spots, use the cricut true control knife and the self-healing mat to cut through any attached pieces. If your cake topper breaks at all, you can use tiny amount of wood glue to reattach any small pieces that need mending
how to cut wood with a Cricut

Once your topper is finished, use the two wood posts to insert it directly into the top of your wedding cake.  We decorated our cake with a few fresh flowers and rosemary too.  This is one of my favorite wedding DIY projects.  Using your cutting machine and some bass wood, this is a really budget-friendly idea for your big day.

DIY wood cake topper

This wedding cake was really simple to make, but the DIY wood wedding cake topper really takes it to the next level.  This cake is perfect for the bride and groom who love a simple rustic vibe, and it's very inexpensive to make yourself if you have a Cricut machine.  

how to make your own simple wedding cake

With a simple DIY wedding cake and wood cake topper, life really is a party!
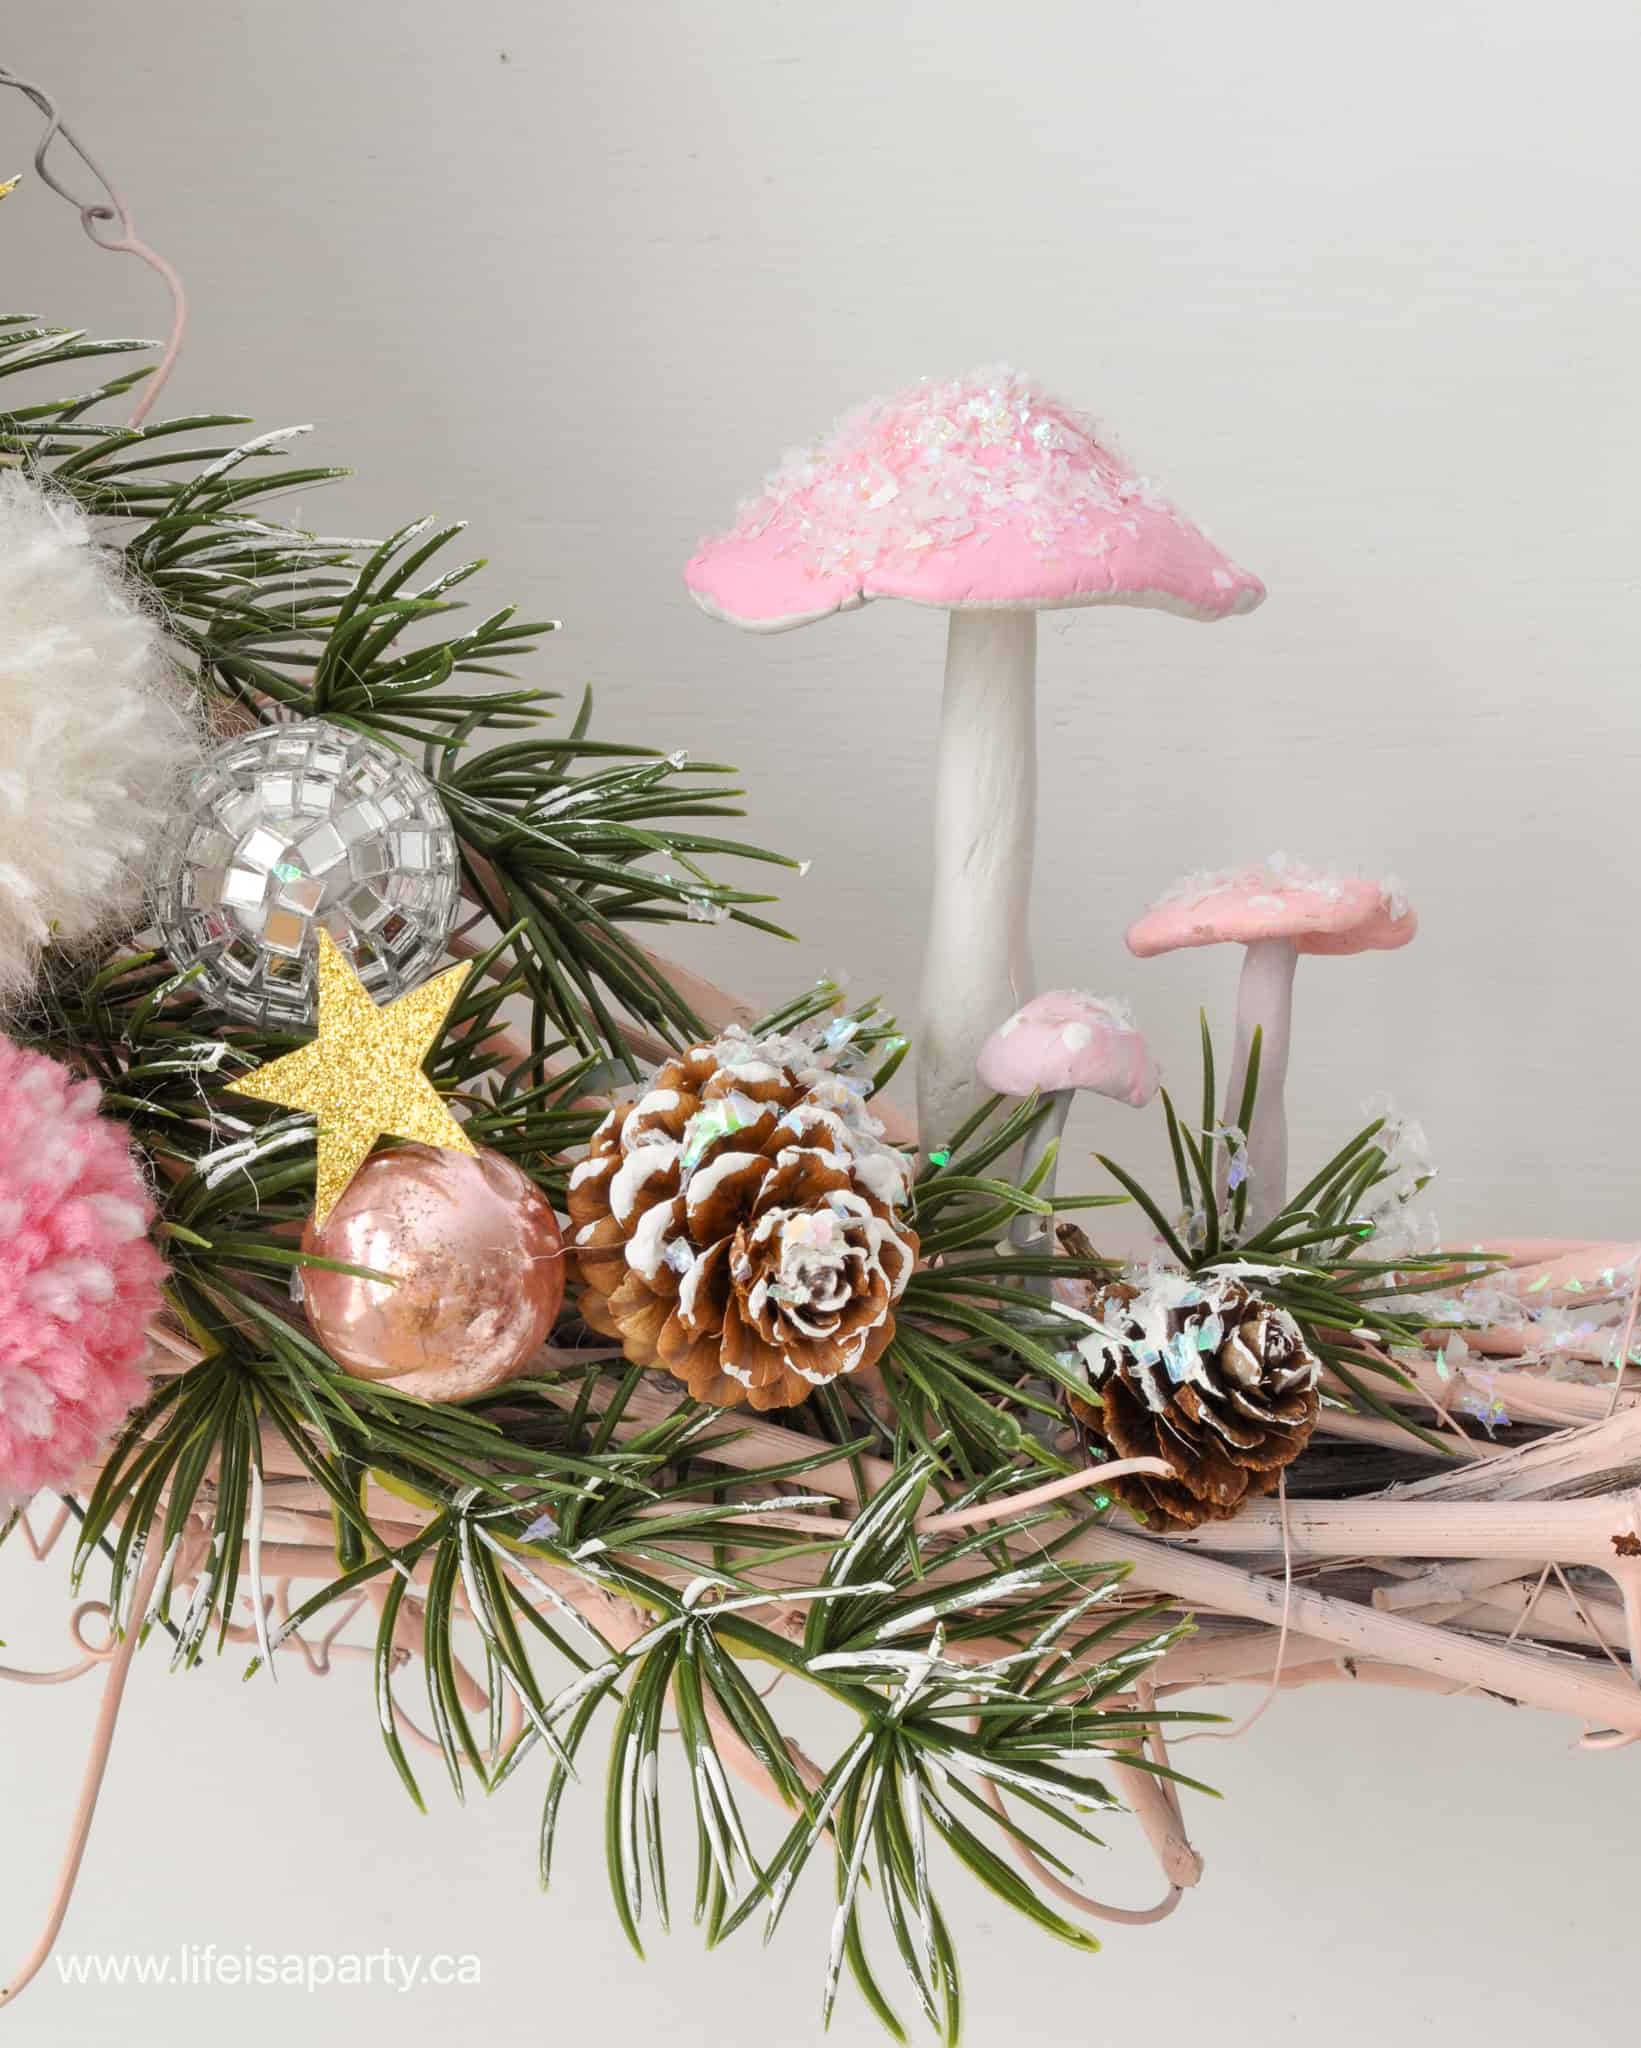
More Inspiration

We also used this beautiful wood cake topper as part of our Cinderella Dinner and Movie Night.  This simple wedding cake was the perfect centre piece for our party.  Therefore check out all the details for the Cinderella party here.


This project was part of our Cinderella themed Disney Princess Dinner and Movie Night -check out all the details about the whole party here.

Disney Princess Dinner and Movie Toolkit

Love Disney Princess dinner and movie nights?  Buy our Disney Princess Dinner and Movie Toolkit.  The Toolkit includes 6 different Disney Princess movie nights with menus, all the recipes, inspiration, and printables for each one.  Check out more about the Disney Princess Dinner and Movie Toolkit by clicking here.

Princess Movie Movie Night Toolkit E-Book

Cinderella Party -Dinner and Movie Night

Jul 26, 2021 · Leave a Comment

Cinderella Party table with Cinderella inspired food and DIY party decor.

This Cinderella Party Dinner and Movie Night is full of DIY Cinderella party decoration ideas, party printables, and a themed dinner menu of Cinderella inspired foods. It's full of great ideas for a movie night or a Cinderella themed party.

Cinderella Party table with Cinderella inspired food and DIY party decor.
[feast_advanced_jump_to]

Why We Love This Party

  • Cinderella is such a classic Disney princess movie, and the ultimate fairytale.
  • This menu is so delicious and pairs perfectly with the movie.
  • The printables are easy to print and use, and so much pretty detail.
  • We used sewing materials, faux pumpkins, a clock, and all the pretty blue and pink for our DIY decor ideas.

We are having so much fun creating our Disney Princess Dinners and Movie Nights! We're choosing our favourite Disney princess movies and creating a themed dinner that goes with the movie to enjoy while we watch it. This week we did a Cinderella Party and it was so great celebrating one of our favorite Disney Princess characters of all time.

We've also done a The Princes and The Frog Dinner and Movie Night, Snow White Dinner and Movie Night, Frozen Dinner and Movie Night, Beauty and the Beast Dinner and Movie Night, and a Moana Dinner and Movie Night.

Cinderella food table with decor and menu inspired from the movie.

Disney's Cinderella was first released in 1950, so it would definitely be considered a classic princess Disney movie. We all grew up with it and love it, especially those adorable mice. And the fairy godmother is pretty much a dream come true too. 

Cinderella Party Decorations

We set up table in the living room, to enjoy dinner as we watched the movie. We recommend wearing your princess tiara,magic wands, and high heels, if you don't have any glass slippers of your own.

For decor for our Cinderella movie night, we started out with some inexpensive blue tulle fabric in the classic Cinderella blue colour of our favorite princess. This flouncy fabric reminded me of her ball gown and was the perfect table cloth layer for our table. 

While I was at the fabric store I also picked up some more Cinderella party supplies, including some pink satin ribbon, and some inexpensive teal beading. In the movie the mice find some of the stepsister's cast offs to add to the dress they help sew for Cinderella, but when the step sisters see them on the finished dress, they rip them off and take them back ruining Cinderella's gown.

Cinderella inspired decor ideas with printables, sewing supplies, clock and pumpkins.

Another fun piece on the table for our Cinderella-themed party, also inspired by the mice sewing for Cinderella is the cloche of sewing supplies. I used some vintage scissors, more pearl beads, and some vintage wood spools of pink and blue thread that I found at an antique market to create a perfect little vignette. This is such a pretty addition to our party table.

DIY Cinderella party decorations of a glass cloche filled with pink and blue thread, gold sewing scissors, and a string of pearl beads.

As well I added some faux pumpkins to the table, a nod to the pumpkin carriage that the fairy godmother created so Cinderella could get to the royal ball in time. These pumpkins were some I had in my fall decor, and the white worked perfectly with our colour scheme of blue, pink, and white. Mini pumpkins would be a cute addition too.

As well, the clock tower plays an important role in Cinderella, since the magic spell ends at midnight, and everything turns back as it was, so we thought it was a good idea to include a vintage clock as a decoration.

Printable Cinderella poster sign party decoration in a frame.

Free Party Printables

The printables are the perfect addition to this Cinderella theme party. We framed the poster in a simple white frame and it looks beautiful for the party or as decor in a girl's bedroom afterward, for the little princess.  

Printable Cinderral movie ticket invitation.

The printable movie ticket invitations are the perfect way to invite your kids, family, or friends. Just print and give out as a Cinderella invitation.

We also made cute food labels for the food table, to go with our menu. We've included some blank ones too that you can customize or use as place cards for your own party guests. 

There's also round cupcake picks, that we used here on our drink glasses, and straw flags to add to straws, but would be a great addition to white cupcakes or the top of the cake for a child's birthday celebration

Cinderella party printables with poster, movie ticket invitations, food labels, and cupcake picks.

Subscribe below for instant access to our Free Resource Library where you can download these and many other free printables.

Cinderella inspired party table decorations.

Cinderella Dinner Menu

  • Pumpkin Cannelloni with Sage Browned Butter Sauce
  • Clock Bread
  • Happily Ever After Wedding Cake
  • Cinderella Sippers Cotton Candy Drinks

Pumpkin Pasta

Inspired by Cinderella's pumpkins, we knew we needed to include a pumpkin dish for our dinner. We made Pumpkin Cannelloni with Sage Browned Butter Sauce. It's a favourite here, full of rich and creamy pumpkin and sage flavours. It's mild and should be a great option for most kids who love pasta.  Find the recipe for our Pumpkin Cannelloni with Sage Browned Butter Sauce here.

Cinderella inspired menu and party decorations on a food table.
Cinderella inspired pumpkin pasta dish.

Clock Bread

We also had some clock bread.  This was really simple to put together.  

Cinderella inspired clock bread loaf.

I bought a fresh loaf from the bakery, and then used a food safe edible marker to add the clock hands and ticks. 

You could also do with individual bread rolls. Such a fun and easy addition to go with our party theme.

Decorating a loaf of bread with ediable marker to make it look like a clock for a Cinderella inspired menu.

The Drinks

We made these cotton candy drinks for our movie night called "Cinderella Sippers" to remind us of Cinderella's shoe, the famous lost glass slipper. 

They're so easy to make with just two ingredients, and they were the most perfect shade of Cinderella blue. Find the simple recipe for Cotton Candy Drinks here.  Edible glitter would be a great garnish to remind us of Cinderella's glass slipper even more. And if you're making this for adults for a party or a Disney date night, you might like our cotton candy cocktail version with alcohol.

Cinderella inspired blue cotton candy drinks.
Cinderella inspired food of pumpkin pasta, clock bread, blue drinks, and wedding cake.

The Wedding Cake

For dessert we made our own Happily Ever After wedding cake.  

Cinderella inspired dessert of cake.

Don't worry it was very simple to put together. I used two white cake mixes and a little homemade icing to make it. To save time you could use store bought icing too.

The cake topper is a Cricut project made from bass wood. You can find all the details of how to make the "happily ever after" cake topper here, as well as a free Cricut cut file for the project.  

If you didn't want to make a cake, you could always do cupcakes, but the cake was pretty easy to put together and so much fun. Somehow a wedding cake feels like the perfect ending to Disney Princess Party. You could also make it a birthday cake for the birthday girl if you were celebrating a birthday.

Cinderella party table with pumpkin pasta, faux pumpkins, clock bread and Cinderella dessert.

This party was so much fun to put together. And don't forget, it also pairs perfectly with the new Cinderella movie that's a live action version -which is really great idea for older kids too, or for date night.

With a Cinderella dinner and movie night like this, life really is a party.

Cinderella Recipes

  • DIY wood cake topper on a naked cake with flowers.
    Simple Wedding Cake and DIY Wood Wedding Cake Topper
  • Easy cotton candy drink for kids.
    Cotton Candy Drink Recipe
  • pumpkin manicotti with sage browned butter
    Pumpkin Stuffed Manicotti with Browned Butter and Sage Sauce

Frequently Asked Questions

Where did you find the vintage sewing supplies you used as decorations?

Look for them at antique stores, or grab some new from the fabric store.

Where can I find pumpkins to use in the decor when it isn't fall?

Look for the white pumpkins for sale online anytime of year.

Can I make this menu ahead of time?

Yes, make your pasta dish the night before and reheat. Be sure to make your drinks right before serving.

If you tried this Cinderella Party and Menu or any other ideas on my blog please let me know how it went in the comments below. Thanks for visiting today!

Snow White Party Decor -DIY Mirror, Mirror

Jul 22, 2021 · Leave a Comment

Snow White DIY mirror, mirror on the wall used as party decor.

Snow White Party Decor -DIY Mirror, Mirror: use Cricut vinyl to add mirror, mirror on the wall, who's the fairest of the all?

Snow White DIY mirror, mirror on the wall used as party decor.
[feast_advanced_jump_to]

You couldn't really have a Snow White and the Seven Dwarfs themed party without including the famous mirror, mirror on the wall. We made a simple and really cute version with our Cricut machine. Using the Cricut we cut out some vinyl and applied to a thrift store vintage mirror. It was really easy to make, and it turned out great. The mirror was such a great addition to our Snow White Dinner and Movie Night -see all the details of the party here if you missed it.

Snow White themed party decorations with forest inspired food table, and evil queen inspired dessert table.

I thought  it would be fun to create a more spooky area with a little dessert table and our poison candy apples for our Snow White party. The famous mirror was the perfect backdrop. I didn't have a vintage mirror that would really fit the bill, but then I remembered that I had a mirrored tray that might work. We some wire on the back of the mirror and hung the tray on the wall and it was perfect -along with some spooky fairy tale looking tree branches.

Snow White evil queen inspired party decor mirror, mirror on the wall.

If you didn't have a mirror that would work, the thrift store or an online market like Facebook would be a great place to look for an inexpensive wall mirrors for your DIY magic mirror. And you can use removable vinyl for this project, so that if you ever change your mind and want it back to the original, you can just remove the vinyl letters and have a normal mirror again.  Another cute option would be to use a hand mirror.  Just adjust the letters to a smaller size to fit a smaller mirror.

Materials

  • Cricut Removable Vinyl
  • Mirror, Mirror PNG From The Free Resource Library
  • Transfer Tape
  • Mirror
  • Cricut Machine
  • Cricut Standard Mat
  • Weeding Tools

How To Make a Snow White Mirror

We designed a " Mirror, Mirror on the Wall, Who's the fairest of us all?" text png to use on our mirror.  If you'd like to use it you can download from our Free Resource Library.  It's free to all our blog subscribers.  Subscribe below for free instant access.

Once you have the file downloaded from our Free Resource Library, you can upload it into Cricut Design Space.  Or make your own templates in Cricut Design Space choosing any font you like.

We used black non-permanent vinyl to make our mirror, incase we want to remove it later and change it back to a regular mirror.  Look for it at the craft store with the regular permanent vinyl.  If it's your first time working with non-permanent vinyl, it's easy to work with, and cuts pretty much exactly like regular permanent vinyl.  The non-permanent vinyl holds really well, but makes it easy to remove, without sticky residue if want to remove it later, and it's a great choice for projects like this one.  

We used a standard grip mat to cut it out and the non-permanent vinyl cutting setting.  After cutting it out, we removed the vinyl from the mat, and weeded it using the weeding tools.  After the wedding is finished apply the transfer tape to the vinyl and use the transfer tape to add the vinyl to the mirror.  Use the scraping tool to burnish the vinyl onto the mirror, and then slowly and carefully remove the transfer tape leaving the vinyl on the mirror and revealing the finished project.

Setting up Snow White evil queen inspired party decor with the mirror, mirror on the wall.

Recipe

Snow White DIY mirror, mirror on the wall used as party decor.

Snow White Party Decor -DIY Mirror, Mirror

Add vinyl letters to a vintage mirror to create your own mirror, mirror on the wall. Perfect as Snow White party decor.
No ratings yet
Print Pin Rate
Course: DIY & Crafts
Prep Time: 20 minutes minutes
Cook Time: 30 minutes minutes
Total Time: 50 minutes minutes
Author: Dannyelle Nicolle-Ramjist

Equipment

  • Cricut Machine
  • Cricut Standard Mat
  • Weeding Tools

Materials

  • Cricut Removable Vinyl
  • Mirror Mirror Cut File
  • Transfer Tape
  • Mirror

Instructions

  • Get the free Mirror, Mirror PNG file from our Free Resource Library.
  • Download it, and then upload it into Cricut Design Space. Adjust the size to fit your mirror.
  • Choose the "Make It" option. And following the prompts in Cricut Design Space, add you black non-permanent vinyl to the standard grip mat and load it into the Cricut. Choose premium vinyl as your material. Cut out the design.
  • Next remove your vinyl from the mat, and weed it using the weeding tools.
  • Apply the transfer tape to the vinyl.
  • Use the transfer tape to add the vinyl to the mirror.
Adding Cricut vinyl letters to transfer tape to make a DIY mirror, mirror for a Snow White themed party.
Adding vinyl letters to a vintage mirror for a Snow White inspired party.

I love this spooky addition to the party.  Our mirror turned out great, all it needs is an evil spirit to dwell in it and tell us how the fairest in the land really is.  This corner of the room has all the evil queen vibes now -including the little box with Snow White's heart in it from the woodsman (even if it is chocolate).

Snow White party decor inspired by the evil queen and mirror, mirror on the wall.

This DIY Mirror, Mirror is the perfect addition to our Snow White party decor!

This projects was part of our Snow White themed Disney Princess Dinner and Movie Night -check out all the details about the whole party here.

Disney Princess Dinner and Movie Toolkit

Love Disney Princess dinner and movie nights?  Buy our Disney Princess Dinner and Movie Toolkit.  The Toolkit includes 6 different Disney Princess movie nights with menus, all the recipes, inspiration, and printables for each one.  Check out more about the Disney Princess Dinner and Movie Toolkit by clicking here.

How To Make Homemade Old-Fashioned Candy Apples

Jul 21, 2021 · 1 Comment

Homemade old fashioned candy apples.

Homemade Candy Apples: easy to make delicious traditional fall carnival or fair style red hard candy coated apples.

homemade old fashioned candy apples
[feast_advanced_jump_to]

Candy apples are an old fashioned favorite.  Not to be confused with caramel apples or toffee apples that have a soft caramel coating, candy apples traditionally have a hard red candy coating on them.  The hard candy can be a little hard on the teeth, but is so yummy.  This candy apple recipe is just like the kind you used to get at the local or state fairs or the carnival or a Halloween party when you were a kid.  These are made with fresh apples that are dipped in a sweet candy coating that sets hard to make those shiny red candy apples.  

We couldn't create a Snow White party without serving some {poison} apples.  Well, we might have left out the poison part, and went with homemade candy apples instead. 😉 Read all about our Snow White Dinner and Movie Night here.

Snow White poison candy apples
Homemade red candy apples on a wood cake plate.

When I was a little girl we would go to the fair once a year as a family, in the fall.  We were allowed to get one special treat.  It was always a hard decision to make, between candy apples and cotton candy.  Candy apples always remind me of fall days as a child at the fair.  They fill me with smiles and happy memories.

how to make candy apples

These are the old fashion candy apples.  The candy coating on the outside is meant to be hard -like a lollipop.  These are not soft homemade caramel apples -see our recipe for those here.  These are easiest to eat sliced up, but traditionally are eaten off of the stick.

candy apple recipe

Red or Different Colors Of Candy Apples

I've made these candy apples in traditional bright red, but you can make them other colours by using first white food coloring and then different colored food colouring in any color you want.  I made some pastel pink candy apples last Halloween -see how to make them here.  And you could use the same concept and recipe to make candy apples in any color you like

how to make homemade candy apples

Candy apples are easy to make, but you will need a candy thermometer to make them.  These are inexpensive and available at any good kitchen store.

In addition, because the temperature of the candy is so hot, do be careful when you're dipping apples.  If the candy begins to harden before you're done dipping your apples, you can re-heat it and then dip some more.  This part is not for kids, definitely an adult only recipe.

Apples

What are the best apples to use for your making your candy apples? You can use any kind of apples that you like for making your candy apples.  A common choice for best candy apples are green apples like Granny Smith apples because they're a little tart and pair well with the sweet candy coating.  You do want to choose a type of apples that are a crisp apples for eating and not a baking apple for this recipe.  Gala apples or pink ladies are a popular choice too.

Removing The Wax On The Exterior of Apples

Most apples sold in the grocery store come with a wax coating on them that makes them shiny and appealing in the store.  The wax coating prevents the sugar coating from sticking well to the apples.  If you can buy your apples directly at the apple orchard, they generally do not have the waxy coating and work perfectly for making candy apples.  If you can only purchase the grocery store apples, you will have to remove the wax coating before you dip your apples.  

To remove the wax coating on the apples, begin by bringing a large pot of water to the boil on the stove.  Dip each apple in the hot water and then remove it using a slotted spoon.  Next use a cloth to wipe them off.  The water will melt the wax and you can remove it by wiping it with the cloth.  Be careful not to leave the apple in the hot boiling water too long though because it will start to cook the apple and cause it to turn brown.

Candy Apple Sticks

Because the apples are quite heavy, especially when dipped in the candy coating, you want to use a sturdy stick.  Popsicle sticks or lollipop sticks may be hard to work with.  Candy apple sticks tend to be larger and more sturdy.  Look for them with candy making supplies.  We used a wooden stick for each of our apples.  We cut them from a tree in the backyard and I love how rustic they look.

homemade candy apples
candy apple recipe

These candy apples are best eaten the same day they're made.  They will lose their crunch if it's too humid, or if they are not stored in an airtight container.

candy apples with tree branch stick

These are so much fun to make a and great idea for the fall season.  They're made from inexpensive and simple ingredients and everyone always loves them.  They were the perfect non-poison apples for our Snow White movie night.  They'd also be perfect for a carnival themed party.  And if you're looking for a great party favor for any special get together, these candy apples would be a great choice.

Recipe

Homemade old fashioned candy apples.

Homemade Candy Apples

Carnival style homemade candy apples with a hard candy coating.
5 from 1 vote
Print Pin Rate
Course: Desserts
Cuisine: American
Prep Time: 20 minutes minutes
Total Time: 20 minutes minutes
Servings: 6 -8 apples
Calories: 348kcal
Author: Dannyelle Nicolle-Ramjist

Ingredients

  • 2 cups white sugar
  • ¾ water
  • ½ cup white corn syrup
  • 6-8 apples
  • red food coloring

Instructions

  • We used small apples from an orchard that were not coated in wax. If you are using store bought apples that are coated in wax, you'll have to remove the wax to help the candy stick to the apples. For the stick for the apple, we used some sticks we cut from a tree branch. Cut them to about 6 inches. Twist off the apple stem and push the stick into the centre of the apple. Prepare a baking sheet with parchment paper that has been sprayed with non-stick cooking spray.
  • Next, to make the candy, add the sugar, water, and corn syrup to a medium saucepan and combine. Bring it to a boil over high heat. Reduce medium-high heat and add a candy thermometer to the mixture. Continue to boil until the candy reaches a temperature between 300-310 degrees or hard crack stage. Occasionally brush down the sides of the pan with cold water and a pastry brush to help prevent re-crystallization.
  • When the candy reaches 300-310 degrees remove from the heat, and add the food colouring. We added around a ½ teaspoon of red colouring to achieve the bright red color.
  • Finally, working carefully and quickly because the candy mixture starts to cool and set, tilt the pan and dip each apple individually. Coat the whole apple completely, and then let the hot candy syrup drip off slightly to avoid a large puddle of candy at the base, for the perfect candy apple. Place the dipped apples on the parchment lined large baking sheet to set. Take care working with the candy as it's very hot. Have a bowl of ice water standing by incase of any burns.

Nutrition

Serving: 1g | Calories: 348kcal | Carbohydrates: 91g | Sodium: 16mg | Fiber: 4g | Sugar: 85g
Tried this Recipe? Tag me Today!Mention @LifeisaParty or tag #lifeisaparty!

With homemade candy apples, life really is a party.

More Recipe Inspiration

You might also like How To Make Pink Candy Apples here.

pink candy apples

Also check out How To Make Homemade Caramel Apples here.

Caramel Apple Recipe: Easy, homemade Caramel Apples, perfect for Christmas gift giving, or anytime of year. Add your favourite toppings.

You might also like Homemade Sponge Candy Recipe here.

sponge candy recipe

This recipe was part of our Snow White themed Disney Princess Dinner and Movie Night -check out all the details about the whole party here.

Disney Princess Dinner and Movie Toolkit

Love Disney Princess dinner and movie nights?  Buy our Disney Princess Dinner and Movie Toolkit.  The Toolkit includes 6 different Disney Princess movie nights with menus, all the recipes, inspiration, and printables for each one.  Check out more about the Disney Princess Dinner and Movie Toolkit by clicking here.

Homemade Beef and Vegetable Soup Recipe

Jul 20, 2021 · Leave a Comment

homemade beef and vegetable soup

Beef and Vegetable Soup Recipe: this homemade version of your favourite thick and chunky soup is delicious and easy to make.

homemade beef and vegetable soup
[feast_advanced_jump_to]

This beef and vegetable soup recipe is nice and thick and hearty.  It's almost a stew.  It reminds me of the canned Campbell's chunky soup my mom used to buy when I was a kid.  This homemade version is easy to put together and the perfect meal with some delicious fresh bread.  It's full of tender chunks of beef and mixed vegetables, and is sure to become on of your favorite soup recipes.

chunky beef and vegetable soupI was inspired by our Snow White themed dinner and movie night to make it -you can read all about it here.  In the film Snow White finds the cabin in the woods and assumes it's the home of seven children, without a mother to cook and clean for them.  Her and her animal friends set about cleaning and cooking dinner.  The meal she makes them is a hearty soup boiling away over the fire in a large pot.  We don't get to know what kind of soup it is, but I imagine it's something nice and thick and hearty like our old fashioned vegetable beef soup recipe.

Snow White movie night
Snow White themed dinner

Beef Broth Vs. Tomato

A lot of people add tomato paste to a homemade beef and vegetable soup like this, but I much prefer it with just the beef flavour and brown beef caramel color, so I'm sharing my beef and vegetable soup recipe without tomato paste, tomato juice, fresh tomatoes, or tomato puree.  If you're looking for a tomato broth based homemade vegetable beef soup recipe, this is not the one for you. Our soup has a rich beef broth, that's almost like a rich gravy.  Adding in the red wine helps add a real depth to the flavour of the soup, and a richness.  And don't worry all the alcohol burns off as it cooks.

how to make homemade beef and vegetable chunky soup

Beef

Any stewing beef will work in the this recipe.  I used a outside round roast, and cut it up for my beef stew meat.  Chuck roast would be a good choice too.  I would not use ground beef for this recipe.  Cut up the beef to about 1 inch cubes, and if you're not using a lean meat, trim the fat as well.  The cooking time for this soup helps make for tender beef.

Veggies

We've used traditional carrots, onions, celery, potatoes, peas and carrots in our soup.  We like to use loads of veggies.  Green beans would be a good choice as well for this savory vegetable beef soup.  This soup is perfect if you're looking for healthy recipes.  As much as we love the canned Campbell's vegetable beef soup, if you're looking for easy soup recipes that use fresh ingredients and veggies and with less sodium, this is a great option.

Adding potatoes to this dish makes this one of my favourite one pot recipes, that has everything you need for a complete meal in it.  This is a good soup to make if you're craving something hearty.  It's also one of my favorite easy weeknight recipes.  And if you're running short on time, you can make it ahead of time and reheat it.

beef and vegetable soup recipe

If you have any leftovers of this soup, be sure to store it in an airtight container in the refrigerator, and reheat to serve.  This is everyone's favourite easy soups to make when you're craving a hearty dish.

beef and vegetable soup recipe

This is sure to become your favorite homemade beef vegetable soup recipes.   It is pure comfort food, hearty and delicious, and I'm sure you will love this great recipe.  It's one of the ideal cold or rainy day recipes, because it's so comforting and warm.

Recipe

homemade beef and vegetable soup

Beef and Vegetable Soup Recipe

Rich and hearty beef and vegetable soup, a homemade Campbell's chunky soup.
No ratings yet
Print Pin Rate
Course: Main
Cuisine: American
Prep Time: 20 minutes minutes
Cook Time: 1 hour hour 5 minutes minutes
Total Time: 1 hour hour 25 minutes minutes
Servings: 6 servings
Calories: 434kcal
Author: Dannyelle Nicolle-Ramjist

Ingredients

  • 1 ½ lbs stewing beef
  • 3 tablespoon flour
  • ¼ teaspoon black pepper
  • ½ teaspoon salt
  • 3 tablespoon olive oil
  • 2 stalks celery diced
  • 1 large onion diced
  • 2 teaspoon Italian seasoning
  • 1 tablespoon worcestershire sauce
  • 1 cup red wine
  • ½ teaspoon black pepper
  • 1 teaspoon salt
  • 1 bay leaf
  • 8 cups beef stock
  • 3 carrots peeled and slices
  • 4 potatoes peeled and cut in large cubes
  • 1 cup frozen peas

Instructions

  • Combine 3 tablespoon of flour with ¼ teaspoon pepper, and ½ salt on a plate. Roll the bite size beef pieces in the mixture to coat them. Add 2 tablespoon oil to a large pot or dutch oven and brown the beef over medium high heat, in several batches. Once it's browned, remove it from the pan.
  • Dice the celery and onion. Add 1 tablespoon of oil to the pot and saute the onion and celery pieces over medium heat, until the onion is transparent.
  • Next add in the Italian seasoning, bay leaf, salt and pepper. Add the worcestershire sauce and the red wine to the pot and use a wooden spoon to stir off any brown bites from the bottom of the pan. Now add the beef stock to the pan, along with the browned beef. Cover and let simmer over medium-low heat for 30 minutes.
  • Add the carrots that have been peeled and sliced, and the potatoes that have been peeled and cut into large cubes. Bring the pot to the boil over a medium-high heat and cook until the carrots and potatoes are tender, around 20 minutes over a medium heat.
  • Lastly, add the frozen peas, and bring the soup upto a boil again. Enjoy!

Nutrition

Serving: 1g | Calories: 434kcal | Carbohydrates: 64g | Protein: 18g | Fat: 10g | Saturated Fat: 2g | Polyunsaturated Fat: 7g | Cholesterol: 12mg | Sodium: 1348mg | Fiber: 9g | Sugar: 10g
Tried this Recipe? Tag me Today!Mention @LifeisaParty or tag #lifeisaparty!

With a beef and vegetable soup recipe, life really is a party!
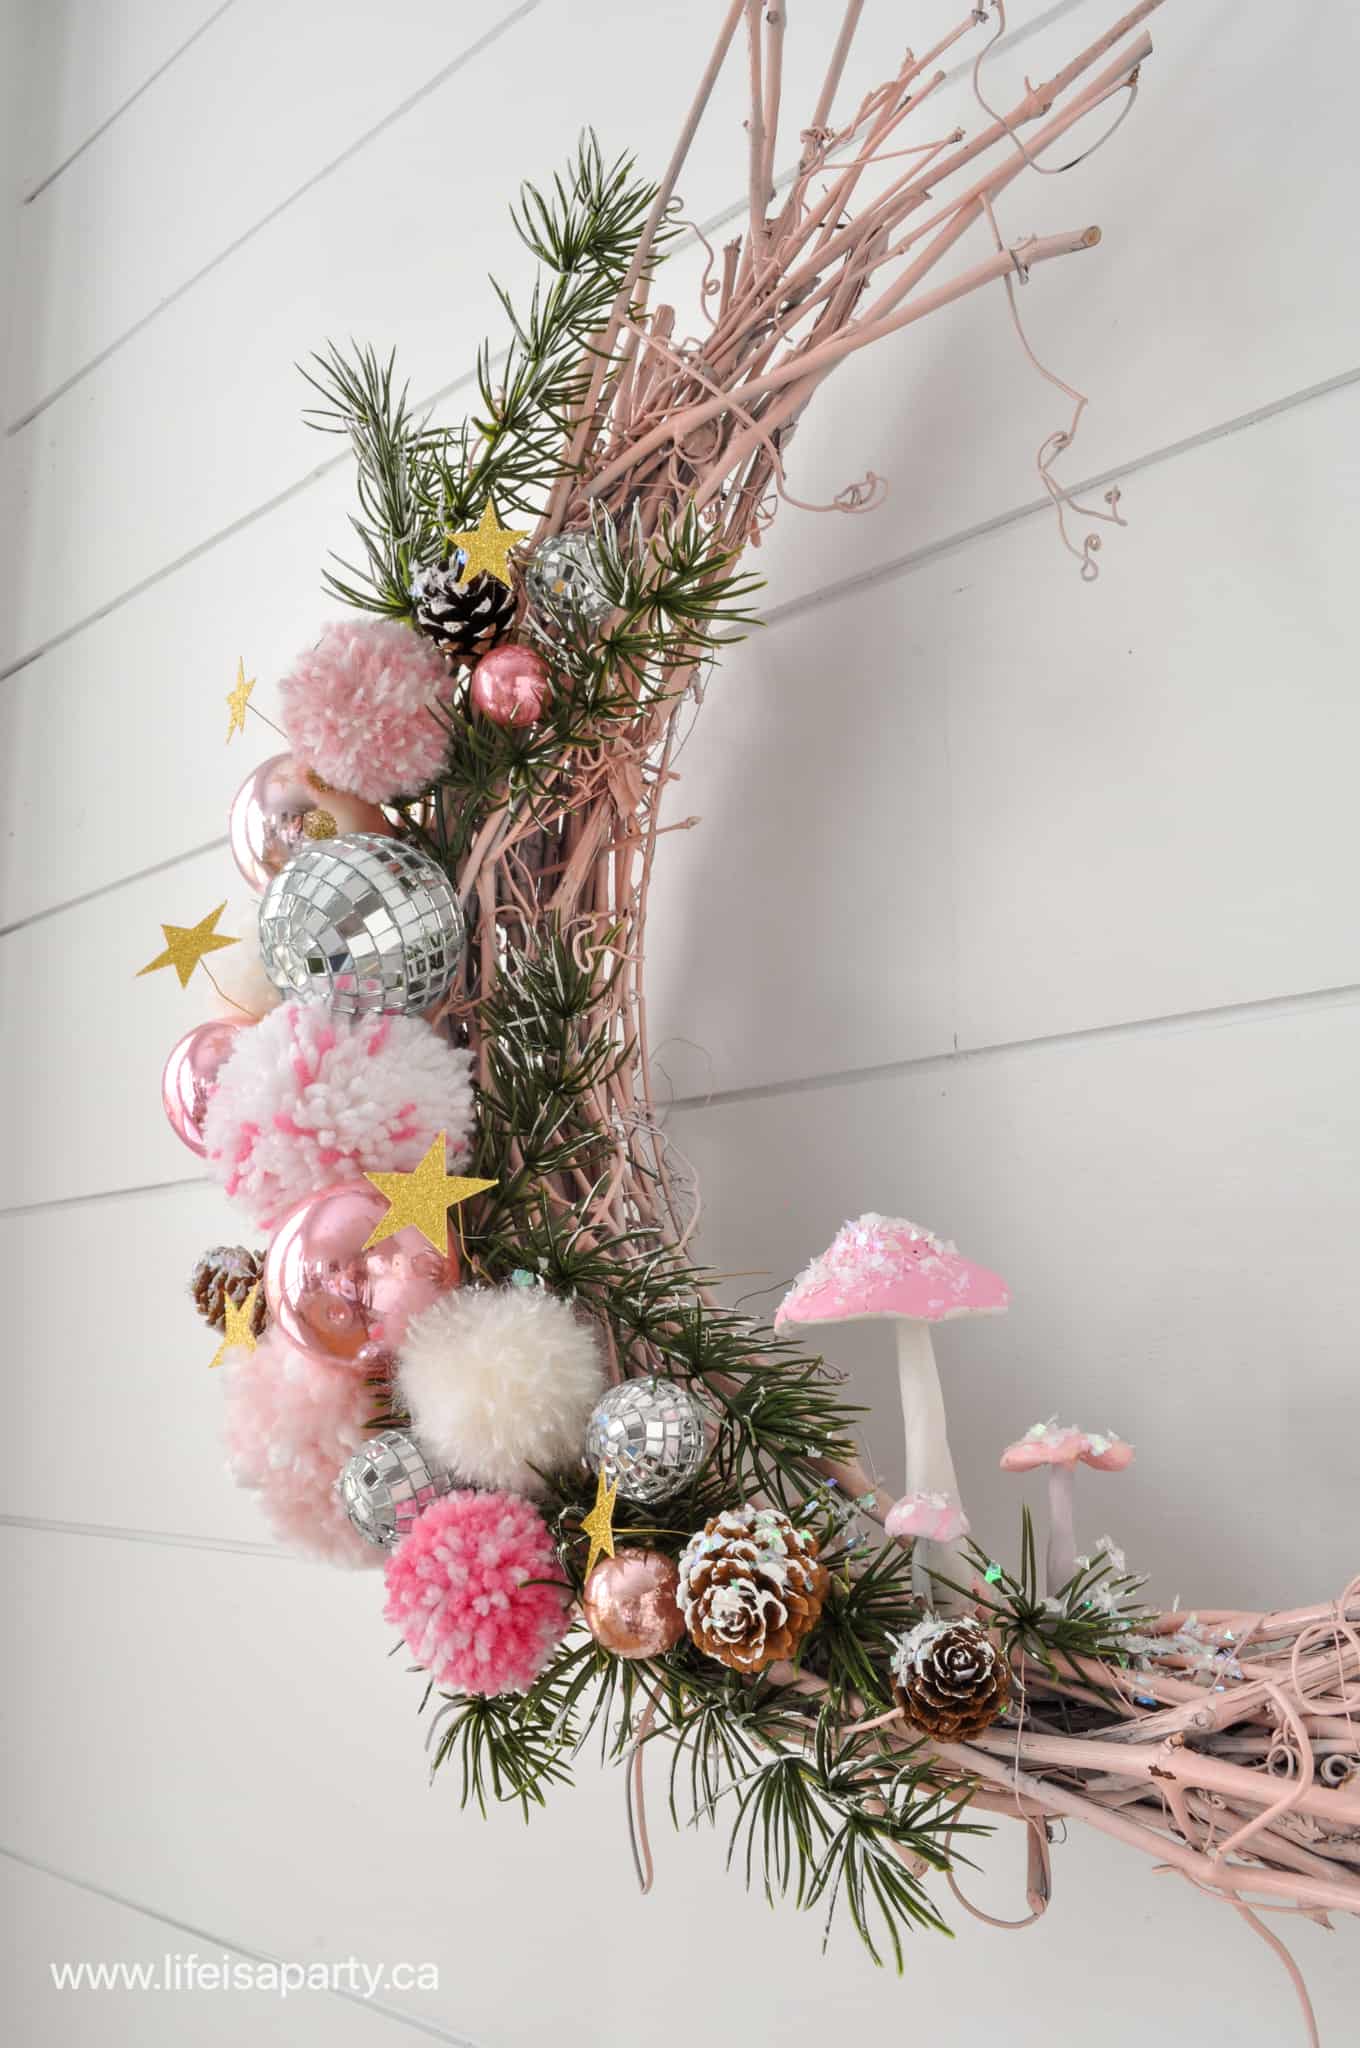
More Recipe Inspiration

You might also like Braised Beef Ragu Recipe here.

Braised Beef Ragu: rich beef dish is slow cooked in the oven until fork tender. Serve with pasta or mashed potatoes, perfect comfort food.

Also check out our Slow Cooker Beef Stroganoff here.

Slow Cooker Beef Stroganoff Recipe -easy, perfect for a busy weeknight, made with all fresh ingredients (no canned soups), and delicious.

You might also enjoy our Recipe For Swedish Meatball Sauce here.

recipe for Swedish meatball sauce

Snow White Party -Dinner and A Movie

Jul 19, 2021 · Leave a Comment

Snow White Party with themed food and party decor.

These Snow White themed dinner and party decor ideas, and Snow White printables are perfect for an at home movie night, or for a Snow White themed birthday party. Check out our Snow White menu taken right from the movie.

Snow White Party with themed food and party decor.
[feast_advanced_jump_to]

Why We Love This Party

  • Snow White is such a classic!
  • There are lots of fun foods in the movie that are easy to make at home and really delicious.
  • The forest decor and animals for this party were easy to put together and so cute.
  • The scary evil queen area with the posion apples and hearts in the woodsmen box are the perfect dark addition!

I'm wishing, I'm wishing, for the one I love... to have a Snow White party themed dinner and movie night with!  

Snow White is the second Disney Princess Themed Dinner and a Movie night.  You can check out all the details from our The Princess and The Frog dinner and movie night here. You might also like our Frozen themed movie night, Beauty and the Beast themed movie night, Moana themed movie night and our Cinderella themed movie night. We're having so much fun creating these special family nights this summer. Any of these ideas would also be great for a special Disney date Snow White movie night with someone special, or as a Snow White birthday party.

Snow White party table with Snow White themed food and party decorations.

Snow White Party Decor

Forest Tablescape

For our special Snow White themed dinner we started out with putting together the decor for the night. I wanted to create a forest feel in our living room. I found the cutest forest creatures at the dollar store. They're meant as garden decor, but were the perfect scale for our party. I also picked up a few clip on birds at the dollar store, as well.

Snow White themed food on a forest decorated table.

To make it look like a forest I used a large branch and some wild flowers on the table too. The blue birds were perfect to clip on to the branch amongst the leaves. 

I also used several wood cake stands -see how we DIY'd them here. To add even more of the forest feel to our food table, I added in some preserved moss, and a few acorns and pinecones too. I also had some ceramic mushrooms, that were the perfect touch.

Snow White party decoration of tree branches with a faux bird clip.
Snow White party decorations of faux squirrels, mushrooms and party food.

Evil Queen Party Decor

Our beautiful forest table, filled with friendly forest animals wasn't our only special spot for this party. I added a side table, but with a much darker feel. This area was inspired by the evil queen, and the poison apple. 

For this area, the first thing I did was add in this large birch tree, that I had from some decor in the past. It's one that I cut down and used cement to make a base for in a bucket. It was perfect for adding the spooky forest feel from the film. I also had some curly willow branches that I used on the table.

Snow White evil Queen themed party decor and food ideas, with tree branches, lantern, and poisin apples.
Snow White evil queen inspired party decor with branches, moss, and mirror mirror, plus themed food.

Mirror, Mirror On The Wall

It wouldn't be a Snow White party, without the famous mirror, mirror on the wall. I used my Cricut to add the saying to our magic mirror with vinyl. You can find a full tutorial to make the Mirror, Mirror here, along with the free cut file for your Cricut.  

If you don't have a Cricut, you could create a really similar effect with a dry erase marker. Just use the marker to to write out the phase "Mirror, mirror on the wall, who's the fairest of them all?" on a mirror. After the party, just erase the phase.

Snow White Free Party Printables

My favourite addition to our Snow White party table was the gorgeous printables. We made a cute sign with the phrase "I'm wishing for the one I love" our favourite line to sing from the movie. We printed it on card stock and used it on our table, or you could add it to any picture frames. 

Along with the sign we made a Snow White and the Seven Dwarfs movie ticket. Print these out and give them to your kids, date, or friends in anticipation of movie night as party invitations.

Snow White party table with themed food, and forest decorations.
Printable Snow White printable movie ticket invitations.

We also made menus, food labels, straw flags, dessert picks, and water bottle labels to fit our theme and color scheme.

Snow White free printable pack for parties and movie night.

This is an easy way to add some more fun details to your Snow White party decorations. My favourite is the bottled water label. Just print, cut, and wrap around regular water bottles, attaching them with your glue gun. Our water's from the Wishing Well Water Company, "quenching thirst and granting wishes since 1938" (when Snow White was first released). I love adding little details like this that really take things to the next level.

Subscribe below for instant access to these and many other free printables in our Free Resource Library.

Snow White wishing well  printable bottled water labels for a party.

Snow White Themed Foods

We love nothing more around here than a film and food pairing. It's so fun to create food inspired by the movie and enjoy it while watching. In the movie, Snow White comes to the cottage and makes the seven dwarfs dinner, giving us lots of different food ideas right from the movie. Their dinner is soup and bread, so that inspired our dinner as well.

  • Beef and Vegetable Soup
  • Bread 
  • Wishing Well Water
  • Apple Dumplings
  • Poison Candy Apples
  • Apple Lollipops
  • Chocolate Hearts
Snow White themed dinner of soup, bread, wishing well water, and apple dumplings on a table with wild flowers, mushrooms and faux animals.

Soup

I made a beef and vegetable soup, you can find the recipe here. 

Bread Rolls

In the movie, there are also rolls on the tables that look like little miniature loaves of bread, so I picked some up at local bakery and added them to our table.

Snow White soup on a table with forest branches and mushrooms.
Snow White inspired food of soup, bread, and desserts.
Snow White inspired dinner of soup and bread rolls.

Apple Dumplings

When the seven dwarfs invite Snow White to stay she offers to cook for them each day and they ask for gooseberry pie, plum pudding, and apple dumplings.  Apple dumplings are an easy favourite of ours, so we made them for our dinner too -find our apple dumpling recipe here.

Snow White inspired apple dumplings.

Candy Apples

Of course we had to include some poison apples inspired by the red apple that the witch gives Snow White in the movie. 

We made homemade candy apples, and they looked and tasted amazing for our princess party. You can find the recipe for our homemade candy apples here.  To make them feel extra rustic, I clipped some branches to use as the sticks for them.

Snow White inspired red candy apples.

Apple Lollipops

I also found a cute glass apple bowl at the dollar store, and used it to hold some apple flavoured lollipops. This was a really easy detail add. These would also be a great addition to a goodie bag if you were hosting this princess Snow White party as a birthday celebration.

Snow White themed dessert table with poisin apples, and the huntsman's wooden box with chocolate hearts inside.

Chocolate Hearts

In the movie the evil queen tells the woodsman to bring Snow White to the forest and kill her. She also tells him to bring her heart back to the queen in a box to prove he's done it. The woodsman lets Snow White go and instead puts a pig's heart in the box to satisfy the queen. 

I found a small wood box at the dollar store and used it to serve some chocolate hearts -for a delightfully gruesome detail for our princess party.

Snow White evil queen themed dessert table and decorations.

This party was so much fun. We had a great dinner together -and probably too many sweet treats too. The movie is a classic for a reason, and I'll be humming high ho, high ho, it's off to work we go for ages -along with all the other great songs from the movie.

With a Snow White themed dinner and movie night, life really is a party!
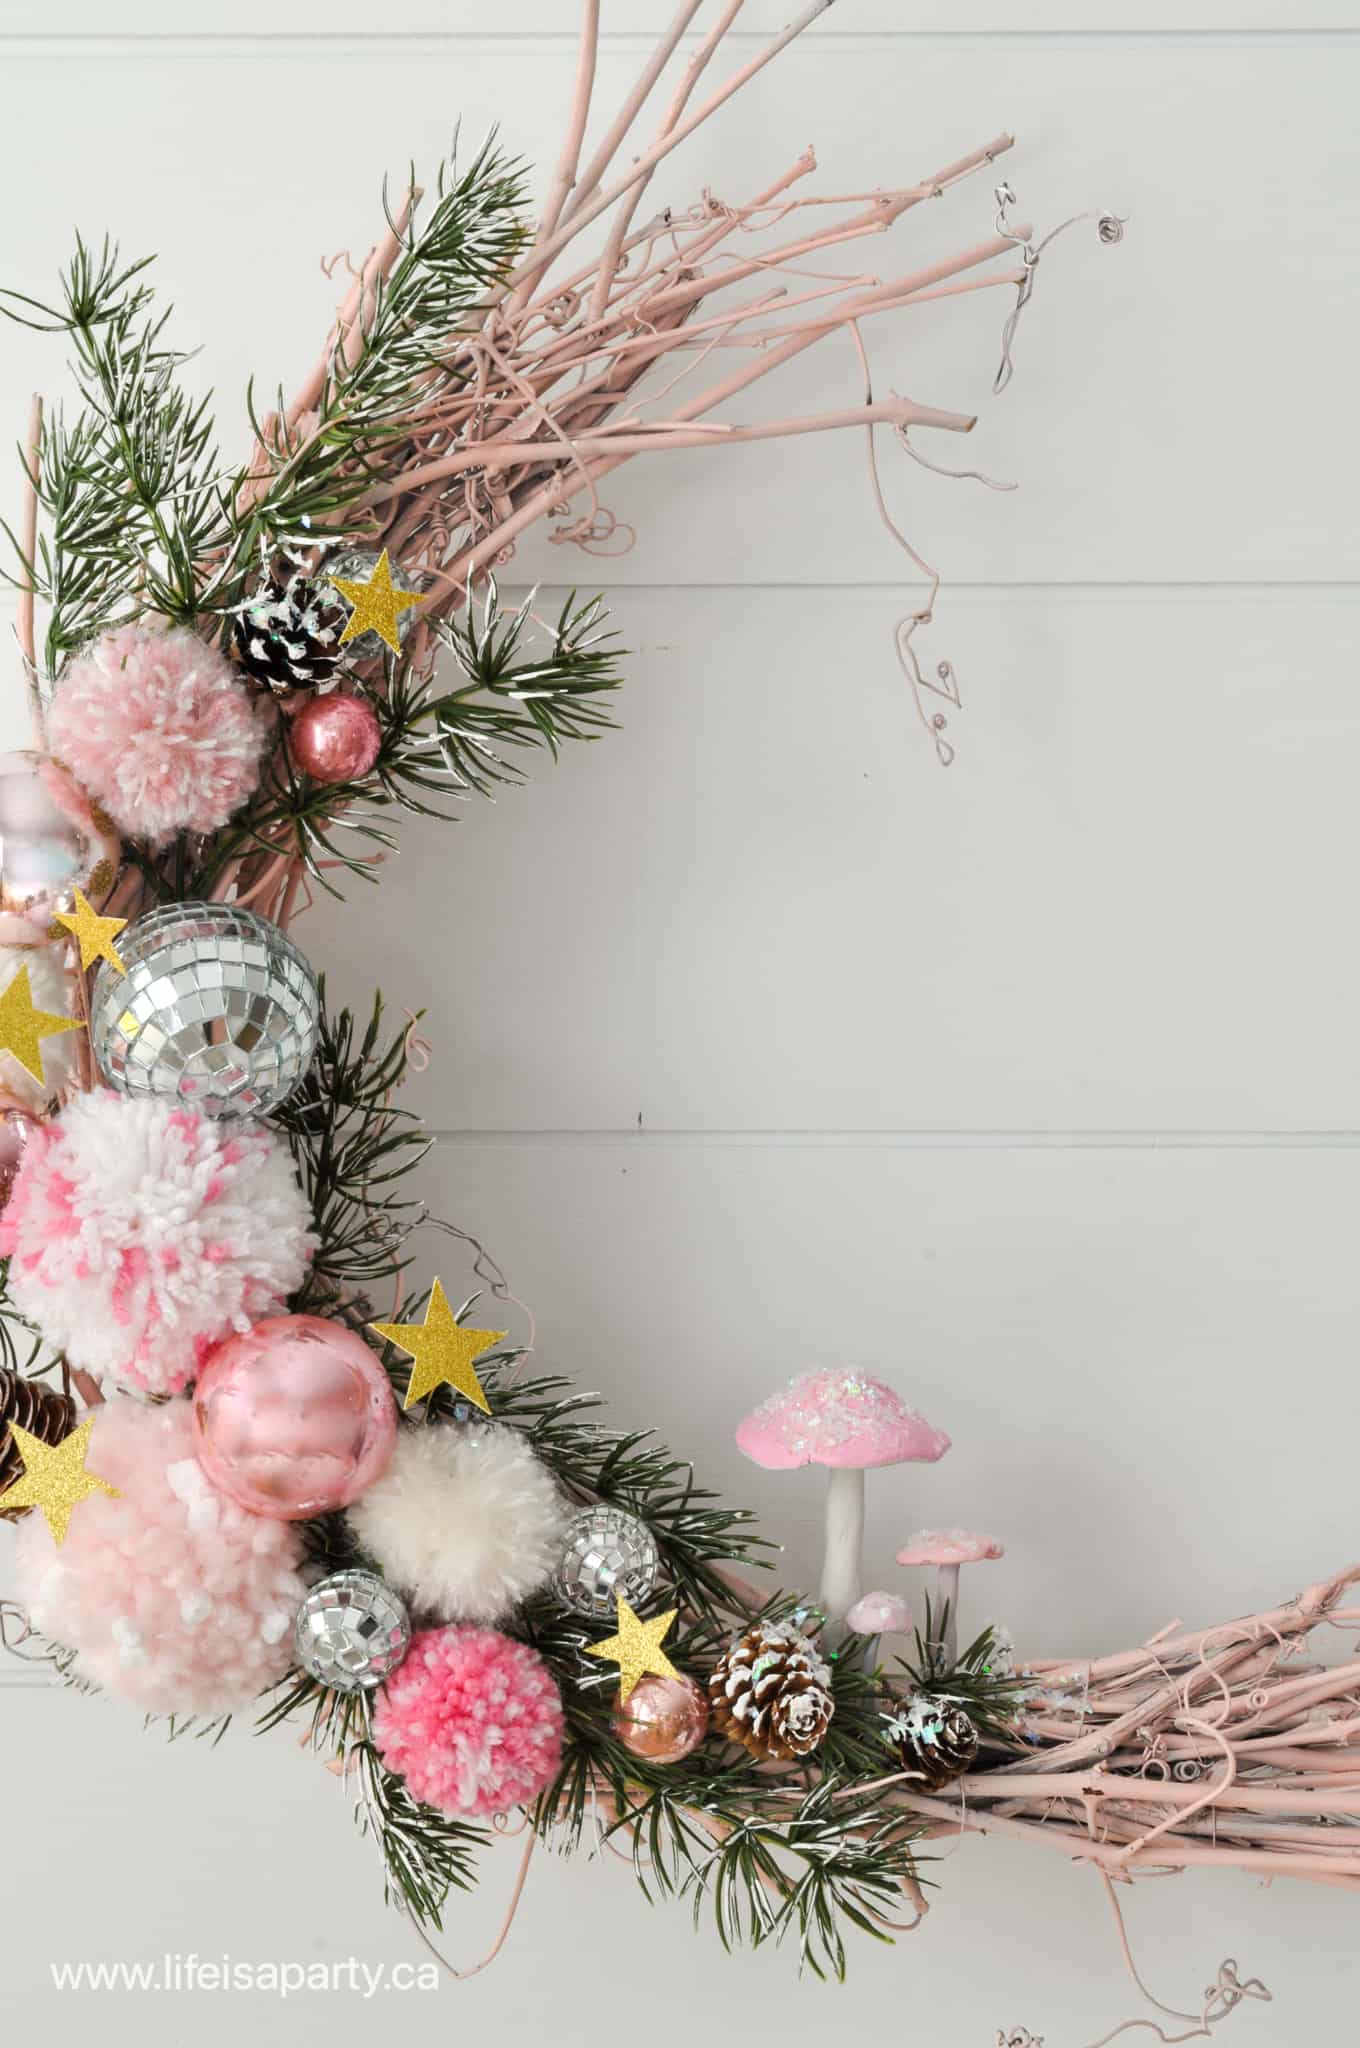
Frequently Asked Questions

What foods are in the Snow White movie?

Snow White makes the seven dwarfs a dinner of soup, and bread. When they ask her to stay they request gooseberry pie, plum pudding, and apple dumplings. The evil Queen gives Snow White a poison apple.

Can I make the candy apples ahead of time?

These candy apples are best eaten the same day they are made.

Where did you find the sticks for the candy apples?

We just used a branch from a tree we found in the yard. Cut them with some garden clippers to size.

Snow White Recipes and Craft

  • homemade beef and vegetable soup
    Homemade Beef and Vegetable Soup Recipe
  • Homemade old fashioned candy apples.
    How To Make Homemade Old-Fashioned Candy Apples
  • apple dumplings
    Easy Apple Dumplings Recipe
  • Snow White DIY mirror, mirror on the wall used as party decor.
    Snow White Party Decor -DIY Mirror, Mirror

If you tried this Snow White Party and Menu or any other ideas on my blog please let me know how it went in the comments below. Thanks for visiting today!

Paper Water Lily

Jul 16, 2021 · Leave a Comment

DIY crepe paper water lily flowers.

DIY Crepe Paper Water Lily -make these lilies in any colours as beautiful candle holders, and perfect The Princess and The Frog party decor.

DIY crepe paper water lily flowers.
[feast_advanced_jump_to]

This paper water lily is an easy to make and so beautiful as a candle holder.  We used crepe paper to make ours.  Crepe paper is really great for making any paper flowers, because it comes in many different colors and can easily be shaped.

DIY crepe paper water lily flowers.

Our water lilies were part of the the party decor for our The Princess and The Frog Dinner and Movie Night -you can read all about it here.  They were perfect for adding a swampy feeling to our table.  We added some simple lily pads made out of  card stock in various shades of green.  To make each lily pad, use scissors to cut out a lily pad shape from one piece of card stock and then scatter them on the table.

The princess and the frog party ideas with food and DIY decorations.
How to make paper water lilies.

Candles

The candles we used were small glass votives.  These yellow candles worked perfectly as the center of the flower.  Since the flowers are made of paper, we took care to use a candle in a glass holder to help reduce the risk of fire.  Battery powered tea lights would be a great choice too.  Never leave a candle unattended.

Materials

  • white and pink crepe paper
  • hot glue
  • white and pink card stock
  • hot glue gun
  • scissors
  • large circle punch (optional)

How To Make A Paper Water Lily

We started out by cutting a 2-inch circle from card stock with a large circle punch, or scissors. This is the base of our flower and what we will glue all the individual flowers to.  

Next we cut out 3 sets of 7 petals to make one water lily.  These will be our overlapping flower petals.  Using this many will create a nice full look to our finished flower.   Make a petal shape with a slight point at the tip from crepe paper. Make each set slightly smaller than the last, so that there are 3 sizes of petals. Cut the petals so that the grain of the paper is running the length of the petals.  This will allow us to shape the finished petals nicely.

To shape the cut out petals, form each petal with your fingers by gently pulling the ridges and making each petal slightly curved.

Now you're ready to assemble your flower.  Use hot glue to attach the 7 largest petals to the circle around the outer edge.

Next you'll glue the middle sized set of petals in a smaller circle, inside of the first set of petals.

Lastly glue the set of 7 smaller petals as an inner circle of petals.

Place a small yellow votive candle or battery powered tea light in the centre of each flower as the centre of the flower.  If you didn't want to use candles, you could make the centre with some yellow crepe paper.

Recipe

DIY crepe paper water lily flowers.

Paper Water Lily

4 from 2 votes
Print Pin Rate
Prep Time: 1 minute minute
Cook Time: 15 minutes minutes
Total Time: 16 minutes minutes
Servings: 1 Water Lily
Author: Dannyelle Nicolle-Ramjist

Equipment

  • hot glue gun
  • scissors
  • large circle punch

Materials

  • white and pink crepe paper
  • hot glue
  • white and pink card stock

Instructions

  • Cut a 2 inch circle from card stock with a large circle punch, or scissors.
  • Cut 3 sets of 7 petals, with a slight point at the tip from crepe paper. Make each set slightly smaller than the last, so that there are 3 sizes of petals. Cut the petals so that the grain of the paper is running the length of the petals.
  • Form each petal with your fingers by gently pulling the ridges and making each petal slightly curved.
  • Use hot glue to attach the 7 largest petals to the circle around the outside.
  • Next glue the middle sized set of petals in a smaller circle, inside of the first set of petals.
  • Lastly glue the set of 7 smaller petals as an inner circle of petals.
  • Place a small yelllow votive candle or battery powdered tea light in the centre of each flower.
crepe paper water lily
DIY water lily candle holder

These paper water lilies were the perfect touch for our The Princess and the Frog dinner and movie night.  These would be a great addition to to any The Princess and the Frog party as decor.  You can make them in any colours to match your party.  They'e an easy and fun craft project, and the finished look is really pretty.

DIY crepe paper water lily flowers.

With these easy and beautiful DIY crepe paper water lilies, life really is a party!  Happy crafting!
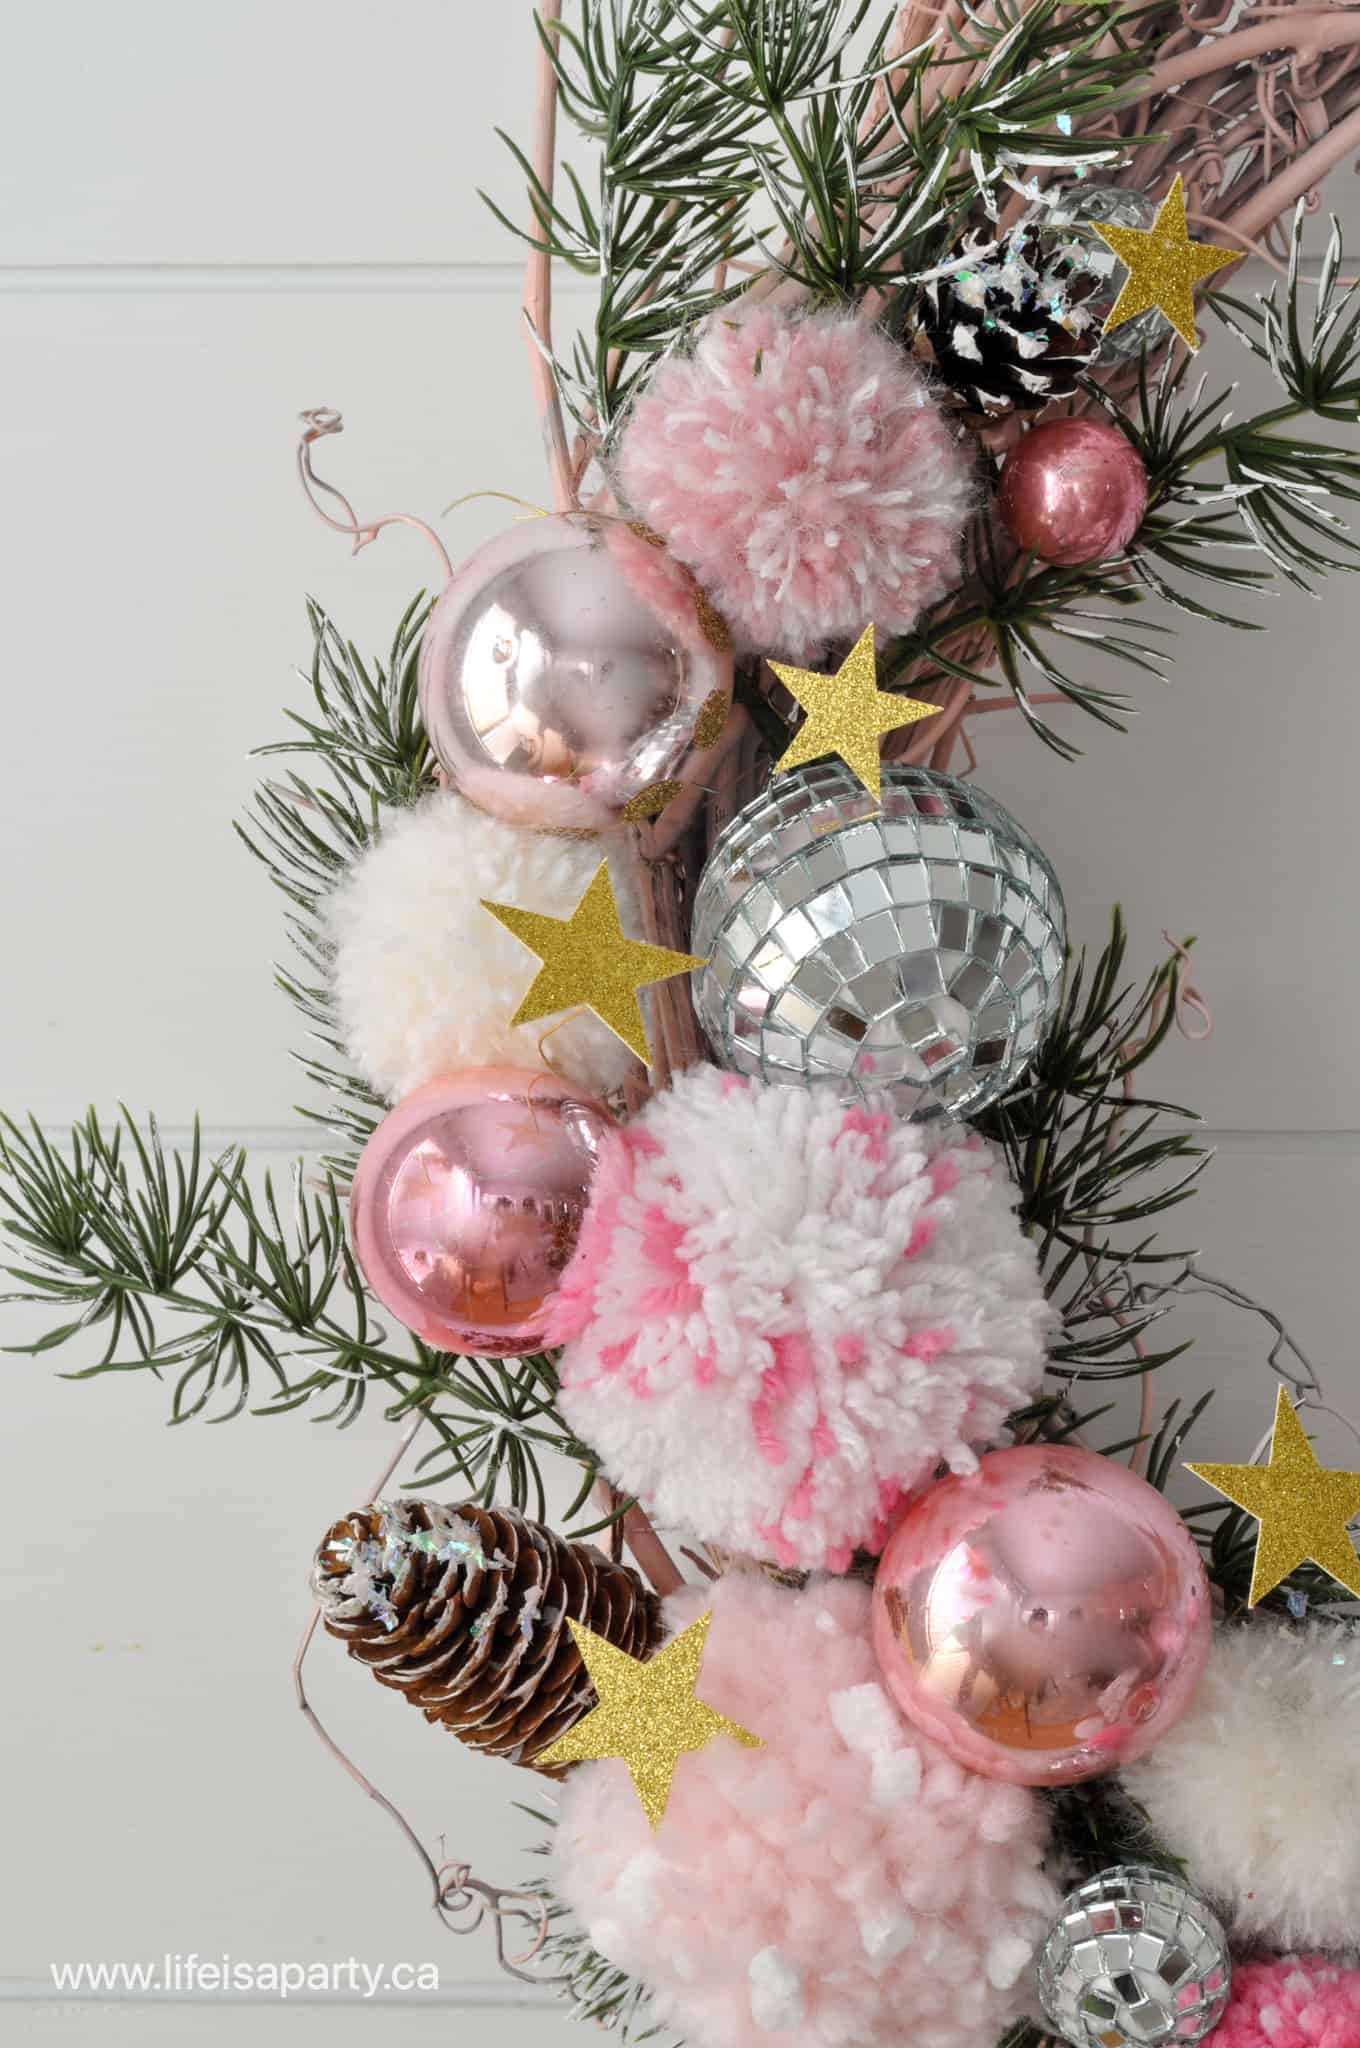
This project was part of our The Princess and The Frog themed Disney Princess Dinner and Movie Night -check out all the details about the whole party here.

Disney Princess Dinner and Movie Toolkit

Love Disney Princess dinner and movie nights?  Buy our Disney Princess Dinner and Movie Toolkit.  The Toolkit includes 6 different Disney Princess movie nights with menus, all the recipes, inspiration, and printables for each one.  Check out more about the Disney Princess Dinner and Movie Toolkit by clicking here.

More Craft Inspiration

You might also like our Giant Paper Flowers here.

How To Make Giant Paper Flowers: see how to turn regular paper into beautiful and inexpensive flowers, from large to small in a video tutorial. This diy is perfect for a wedding, shower, or home decor.

Also check out DIY Paper Christmas Stars here.

You might also like our DIY Paper Feathers here.

  • « Go to Previous Page
  • Page 1
  • Page 2
  • Page 3
  • Page 4
  • Page 5
  • Page 6
  • Interim pages omitted …
  • Page 21
  • Go to Next Page »

Primary Sidebar

Welcome!
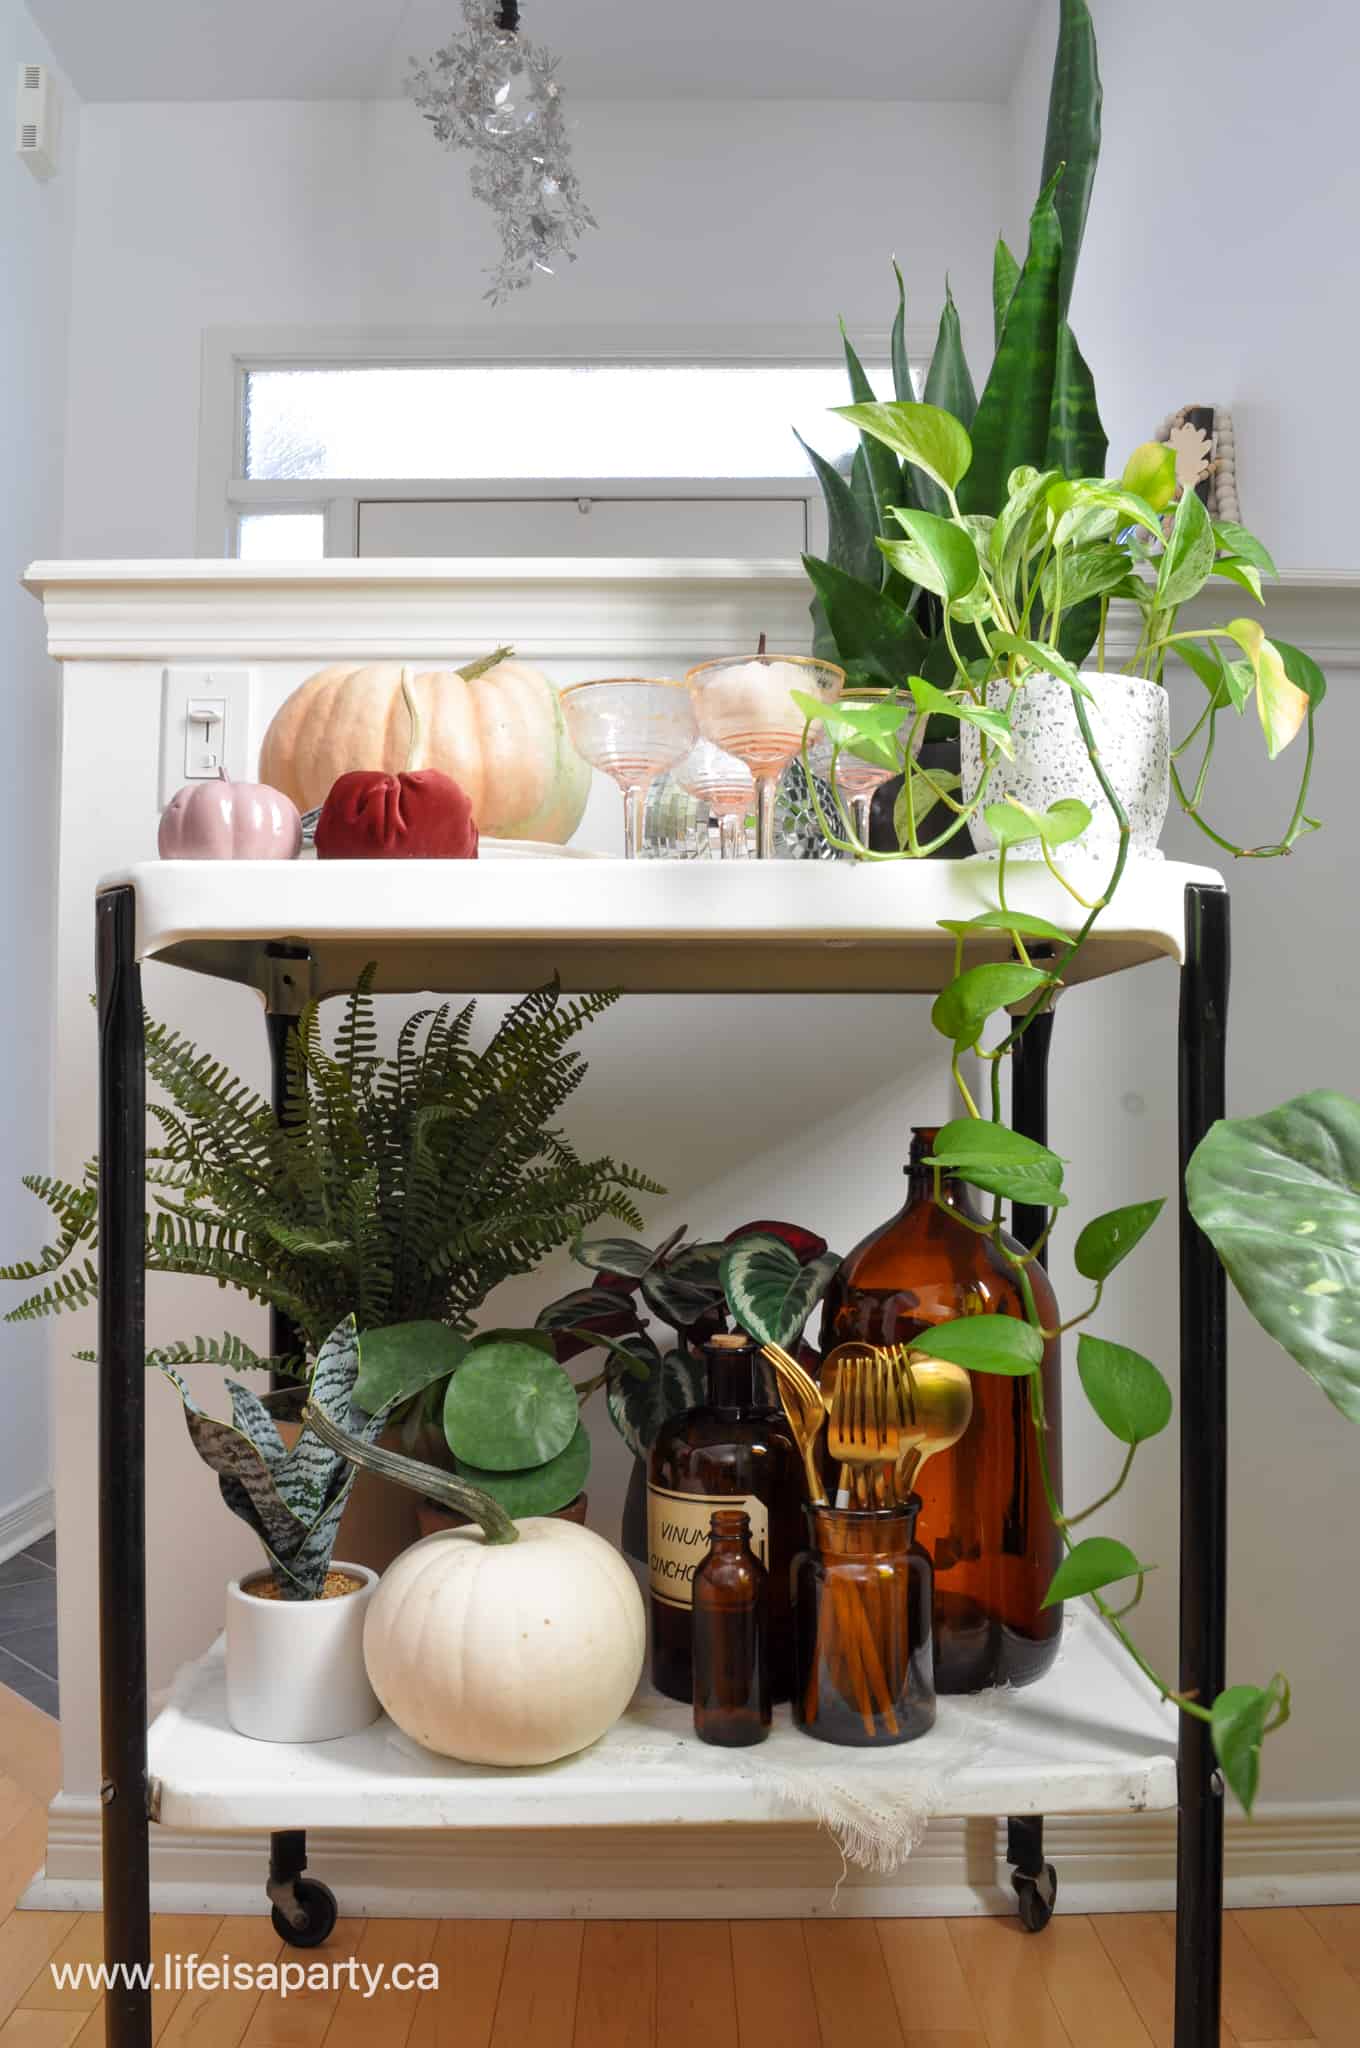
Life is a Party is all about helping you celebrate everyday with great food, entertaining and party inspiration, and seasonal crafts and home decor inspired by the holidays.

More About Dannyelle

Trending Recipes

  • Mac and cheese with panko breadcrumb topping.
    Best Homemade Mac and Cheese with Panko Breadcrumb Topping
  • Homemade iced capps in glasses on a wood table.
    Tim Hortons Copycat Iced Capp Recipe
  • Dirt Pudding no cream cheese in glasses with candy rocks, and fresh mint that looks like a little plant.
    Easy Dirt Pudding Recipe without Cream Cheese
  • Easy 3 ingredient coconut milkshake recipe.
    Easy Coconut Milkshake Recipe
  • Easy food processor scones on a plate with jam.
    Easy Food Processor Scones
  • Fluffy small batch pancakes for two ready to serve on a plate with syrup.
    Easy Small Batch Pancakes For Two Recipe

Fall Ideas

  • Modern Boho fall mantel ideas.
    Modern Boho Fall Mantel Ideas
  • Homemade pink candy apples on a cutting board.
    How To Make Pink Candy Apples
  • Pink Halloween party and decorations with pink treats snack table.
    Pink Halloween Party
  • thanksgiving table ideas
    Thanksgiving Tablescape Ideas
  • fall garden ideas
    Fall Garden Ideas
  • boho fall decor
    Boho Fall Decor Home Tour

Entertaining Ideas

  • Adult mermaid party table set on the beach with cake and shells.
    Adult Mermaid Party Ideas: A Beach Picnic Goodbye to Summer
  • Overhead view of tomato party table with pizza and appetizers.
    The Ultimate Tomato Party: A Tomato Girl Summer Garden Gathering
  • Camp themed party table with green gingham tablecloth, wildflowers, and Welcome to Camp banner.
    The Ultimate Camp Themed Party for Adults
  • Garden party table set under white pergola with vintage floral tablecloth, pink peony centerpiece in wooden tool caddy, white wicker chairs, and climbing white roses in background.
    Garden Themed Party
  • Complete mimosa bar setup on white console table with vintage silver ice bucket, labeled colorful juice bottles, small glass garnish bowls, and ribbon-tied champagne flutes on white lace tablecloth with flower wall backdrop.
    How to Set Up a Beautiful Mimosa Bar
  • Breakfast for dinner party table styled like a bed with star quilt tablecloth, gingham pillows, and cloud installation above.
    Breakfast for Dinner Party: Brinner Under the Stars
  • Recipe Index
  • Parties & Entertaining
  • Fall
  • Subscribe
  • Free Resource Library

Footer

back to top

as seen in:

Better Homes and Garden Logo
American Farmhouse Style logo.
Apartment Therapy logo.

About

  • Privacy Policy
  • About

Subscribe

  • Sign Up! for emails and updates

Contact

  • Contact

As an Amazon Associate I earn from qualifying purchases.

Copyright © 2025 Life is a Party

Share
Pin
Post
Share
Pin
Post

Rate This Recipe

Your vote:


A rating is required
A name is required
An email is required