• Skip to primary navigation
  • Skip to main content
  • Skip to primary sidebar
Life is a Party
  • Recipe Index
  • Parties & Entertaining
  • Fall
  • Subscribe
  • Free Resource Library
menu icon
go to homepage
  • Recipe Index
  • Parties & Entertaining
  • Fall
  • Subscribe
  • Free Resource Library
subscribe
search icon
Homepage link
  • Recipe Index
  • Parties & Entertaining
  • Fall
  • Subscribe
  • Free Resource Library
×
Home

Harry Potter Christmas Tree Ideas + DIY Ornaments

Harry Potter Christmas Tree Ideas + DIY Ornaments

Nov 15, 2025 · Leave a Comment

DIY Harry Potter Christmas tree with homemade ornaments, 7 Horcruxes, and motorized Santa tree topper in cozy living room.

Transform your home into Hogwarts this Christmas with these Harry Potter Christmas tree ideas! This complete guide shows you how to create a magical DIY Harry Potter Christmas tree with handmade ornaments, a cozy Weasley-inspired mantel, Dolores Umbridge Christmas tree including charming DIY cat plate ornaments, and your own Honeydukes candy cart. Whether you're looking for Harry Potter ornament ideas, or free printables, this Harry Potter Christmas decoration guide has everything you need to bring the Wizarding World into your holiday celebrations.
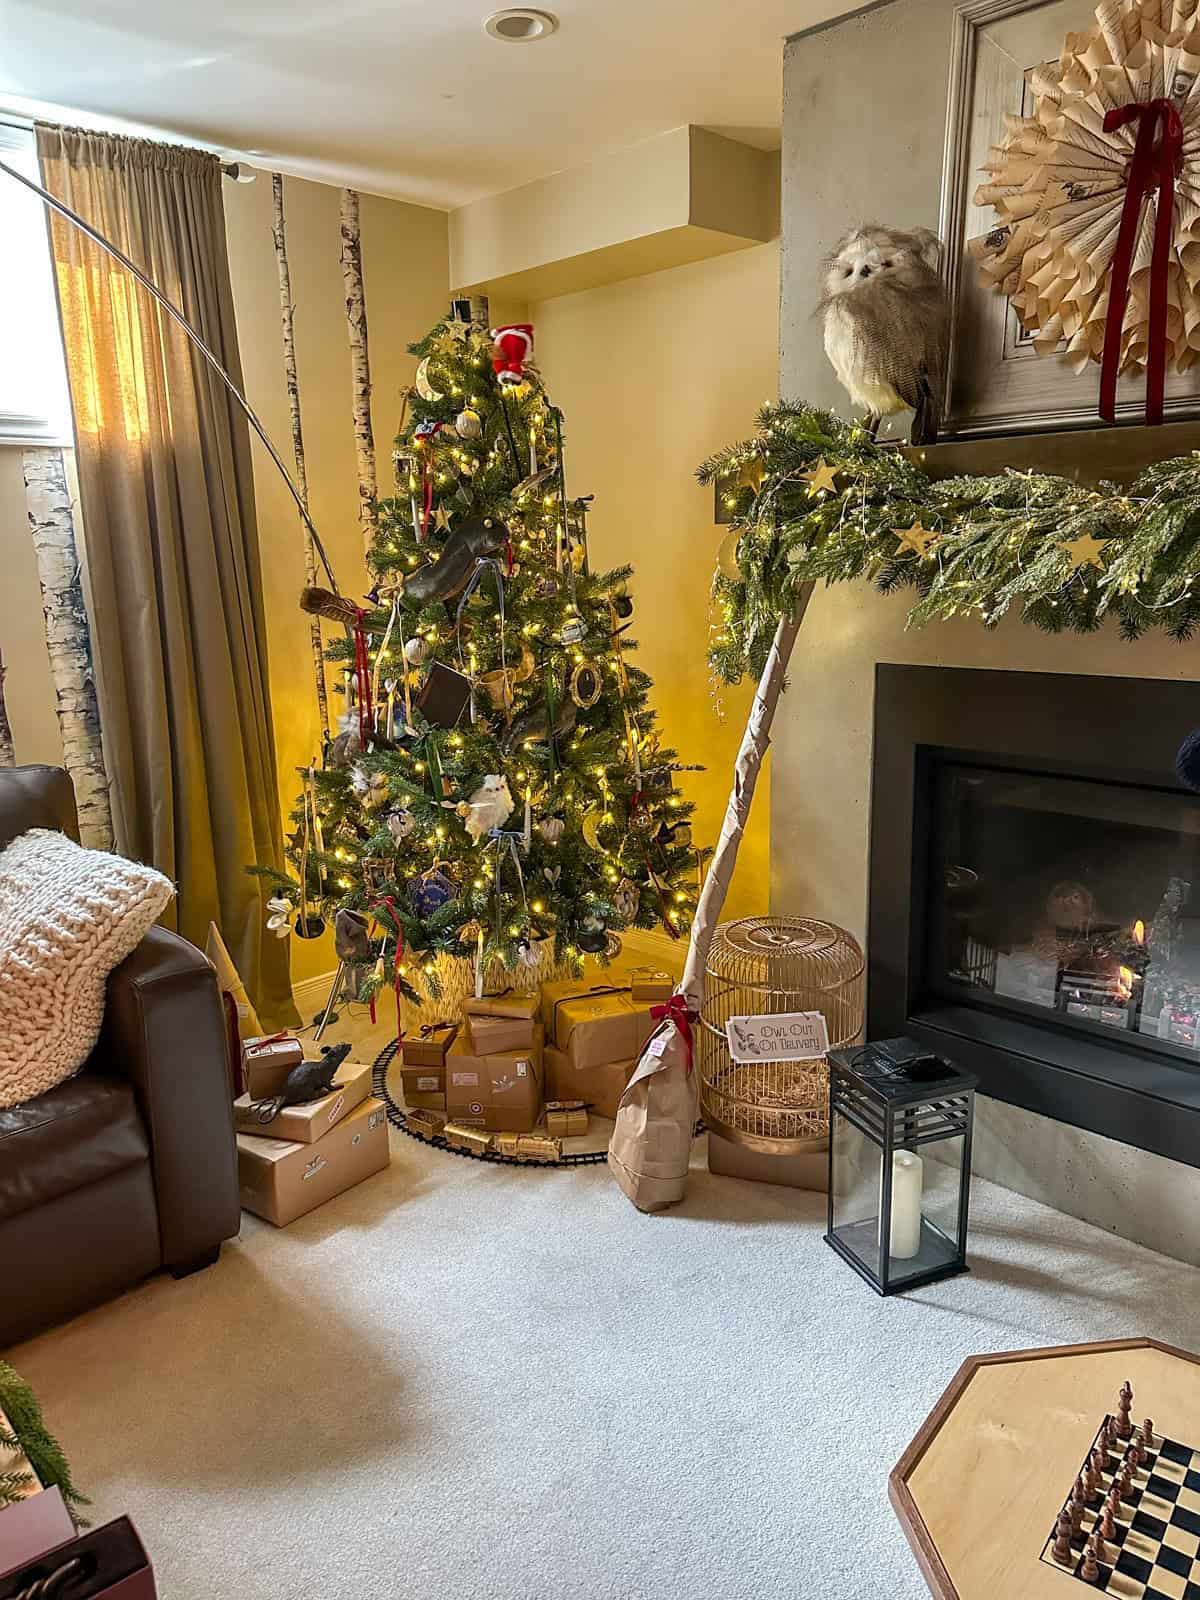
Harry Potter themed Christmas tree decorated in a living room beside a fireplace.

A Quick Look At This Post

  • 🎄DIY Ornaments: 15+ DIY ornaments tutorials
  • ⚡7 Horcruxes: as ornaments  
  • 🎅 Flying Santa Tree Topper: Full tutorial
  • 🧦 Weasley Sweater Stockings: tutorial and full Harry Potter Christmas Mantel
  • 🐱 DIY Umbridge Christmas Tree: DIY cat plate ornaments  
  • 🍫 Honeydukes Candy Trolly: with homemade treats, free printables, and mini candy Christmas tree
  • 💲Budget: $50-200+ depending on scope
  • ✂️Skill level: Beginner to intermediate
  • 🎁Free printables included: Chocolate frog boxes, Bertie Bott's Every Flavor Beans Boxes, Honeydukes labels, cat images, and more

Why You'll Love This Harry Potter Christmas Tree

  • Complete room transformation, not just a tree. Get ideas for decorating your entire space from tree to mantel to candy bar.
  • One-of-a-kind motorized flying Santa tree topper. This Santa circles the tree on a broomstick -I haven't seen anyone else do this!
  • Free printables for everything. Download chocolate frog boxes, Honeydukes labels, cat plate images, and more.
  • Budget-conscious and resourceful. Learn how to use thrifted finds and DIY projects to create magic without breaking the bank.
  • All 7 Horcruxes included. These life-size movie replicas displayed throughout the tree create a fun conversation piece.
  • Represents all four houses. House color ribbons for Gryffindor, Slytherin, Ravenclaw, and Hufflepuff mean everyone feels included.
  • Video tutorials included. Watch the full process in our YouTube series embedded throughout.
[feast_advanced_jump_to]
Youtube video

I love Harry Potter, and all the magic and coziness of the world it creates. I thought it would be fun to create a Harry Potter theme for my Christmas tree this year, and I had so much fun incorporating all the DIY ornaments and more.

Decorating the Christmas tree turned into a whole Harry Potter themed Christmas. I couldn't help myself!

I can see my family enjoying this tradition for years to come, cuddling up in front of the fire with the glow of the Christmas tree, eating candy off our Honeydukes trolley and watching Harry Potter movies the whole season.

The beauty of this project? You can do as much or as little as you want. Make one DIY ornament or create the full transformation. Start small this year and add more each Christmas. Make it your own!

I was able to reuse lots of my DIY Harry Potter decor from my previous DIY Harry Potter Decor and free Harry Potter printables post, and the printables got a little Christmas update. Plus, all my Harry Potter snacks and treats are perfect for any Harry Potter movie marathon night. Also check out our Harry Potter Christmas Party, with the menu taken right out of the pages of the book!

Planning Your Harry Potter Christmas Tree
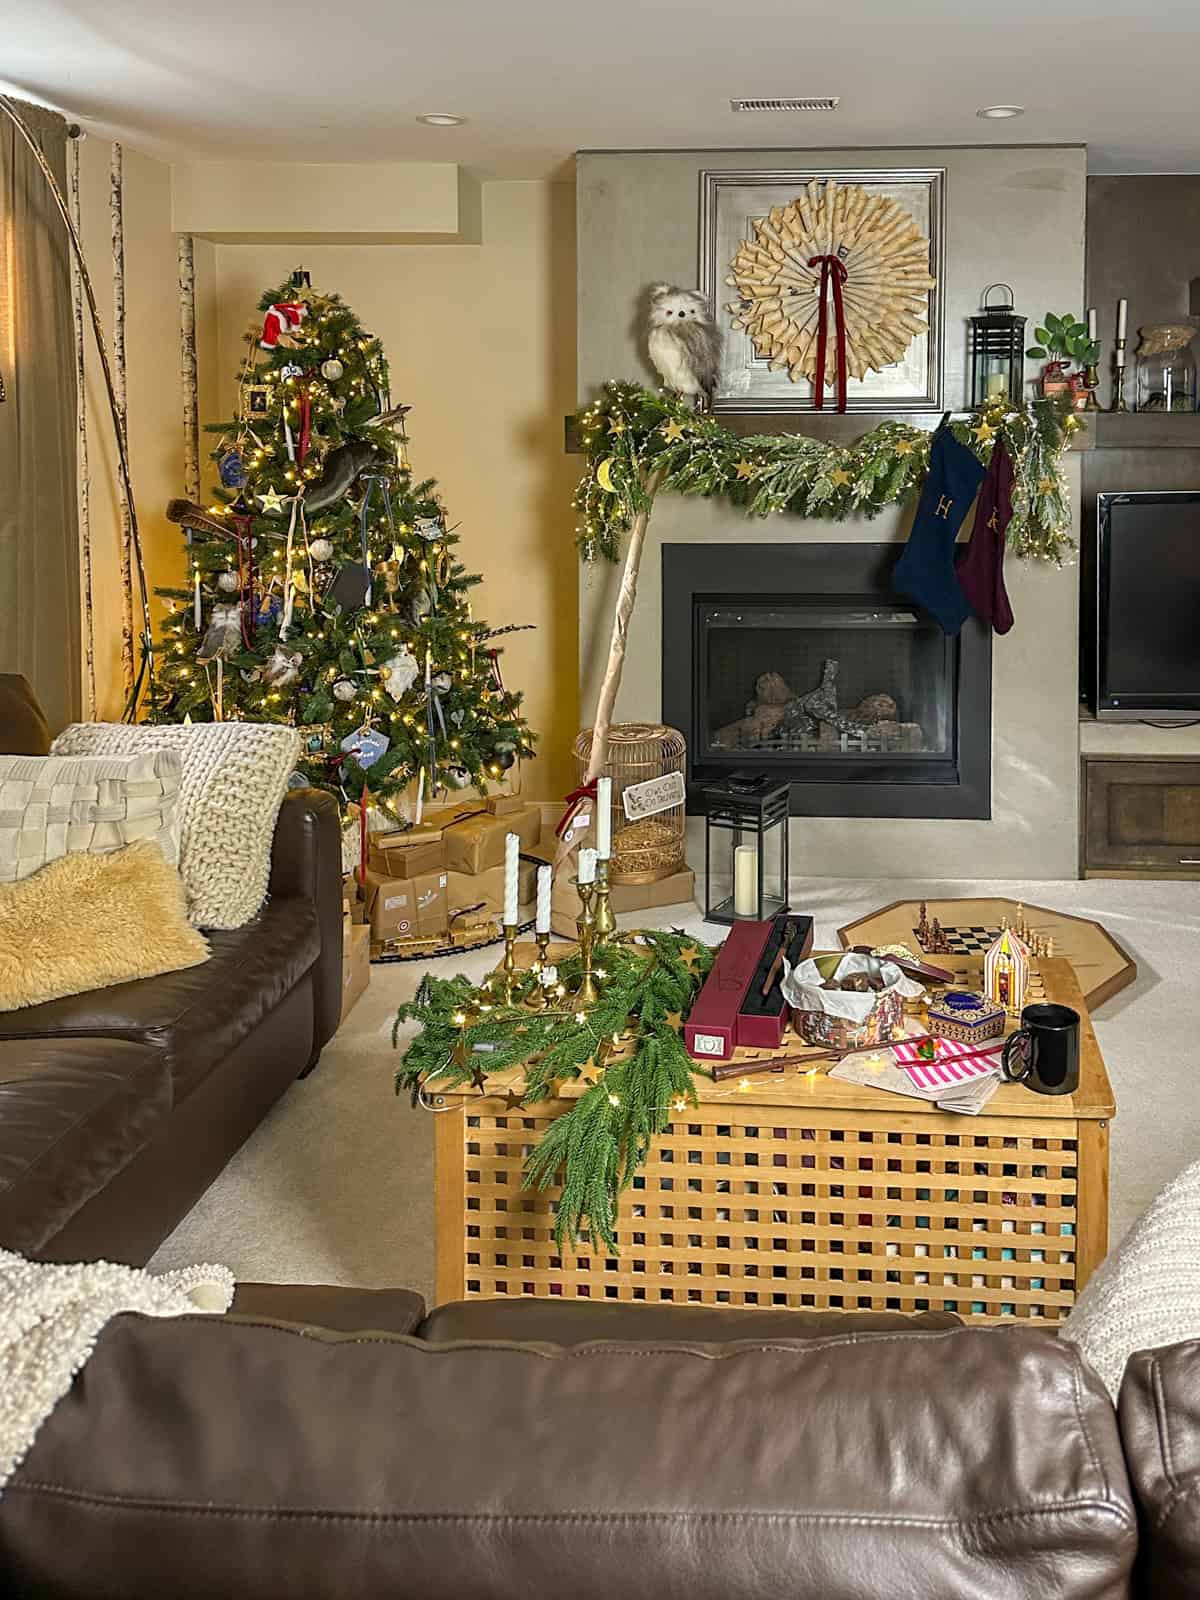
Harry Potter Christmas living room with decorated tree, Weasley stockings on mantel, and Honeydukes candy on coffee table.

When planning my tree, I wanted it both beautiful AND authentically on-theme. I didn't want it to look like I just threw store-bought ornaments on a tree, I wanted to capture the magic of Hogwarts at Christmas with vintage details and a cohesive aesthetic.

My Unique Approach: The 7 Horcruxes

I decided to display all 7 Horcruxes as ornaments throughout the tree. These life-size movie replicas are prominently featured and create such a fun conversation piece. Any true Harry Potter fans will immediately spot them and get excited.

Representing All Four Houses

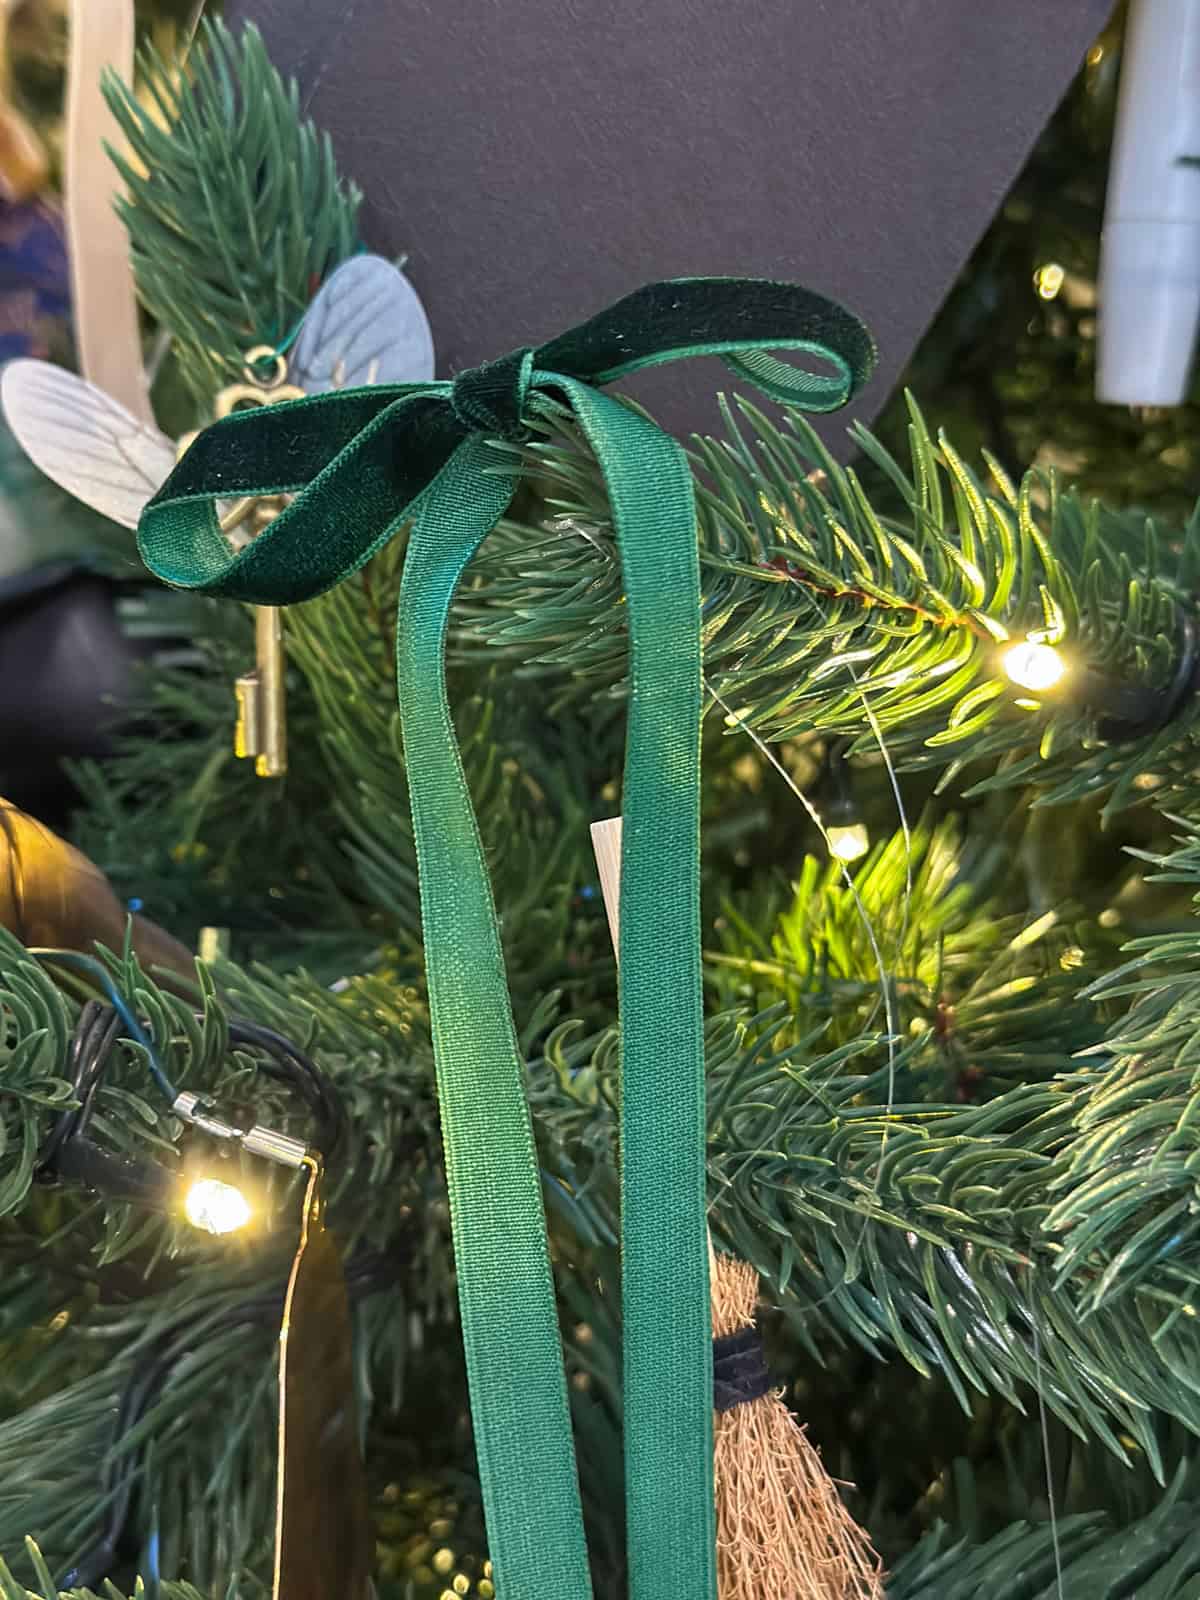
I wanted to include all the house colors using velvet ribbon bows in burgundy (Gryffindor), green (Slytherin), blue (Ravenclaw), and gold (Hufflepuff). But I didn't want to go for bold, bright colors. Fitting with my vintage aesthetic, I used softer versions of the house colors and I love how it turned out.
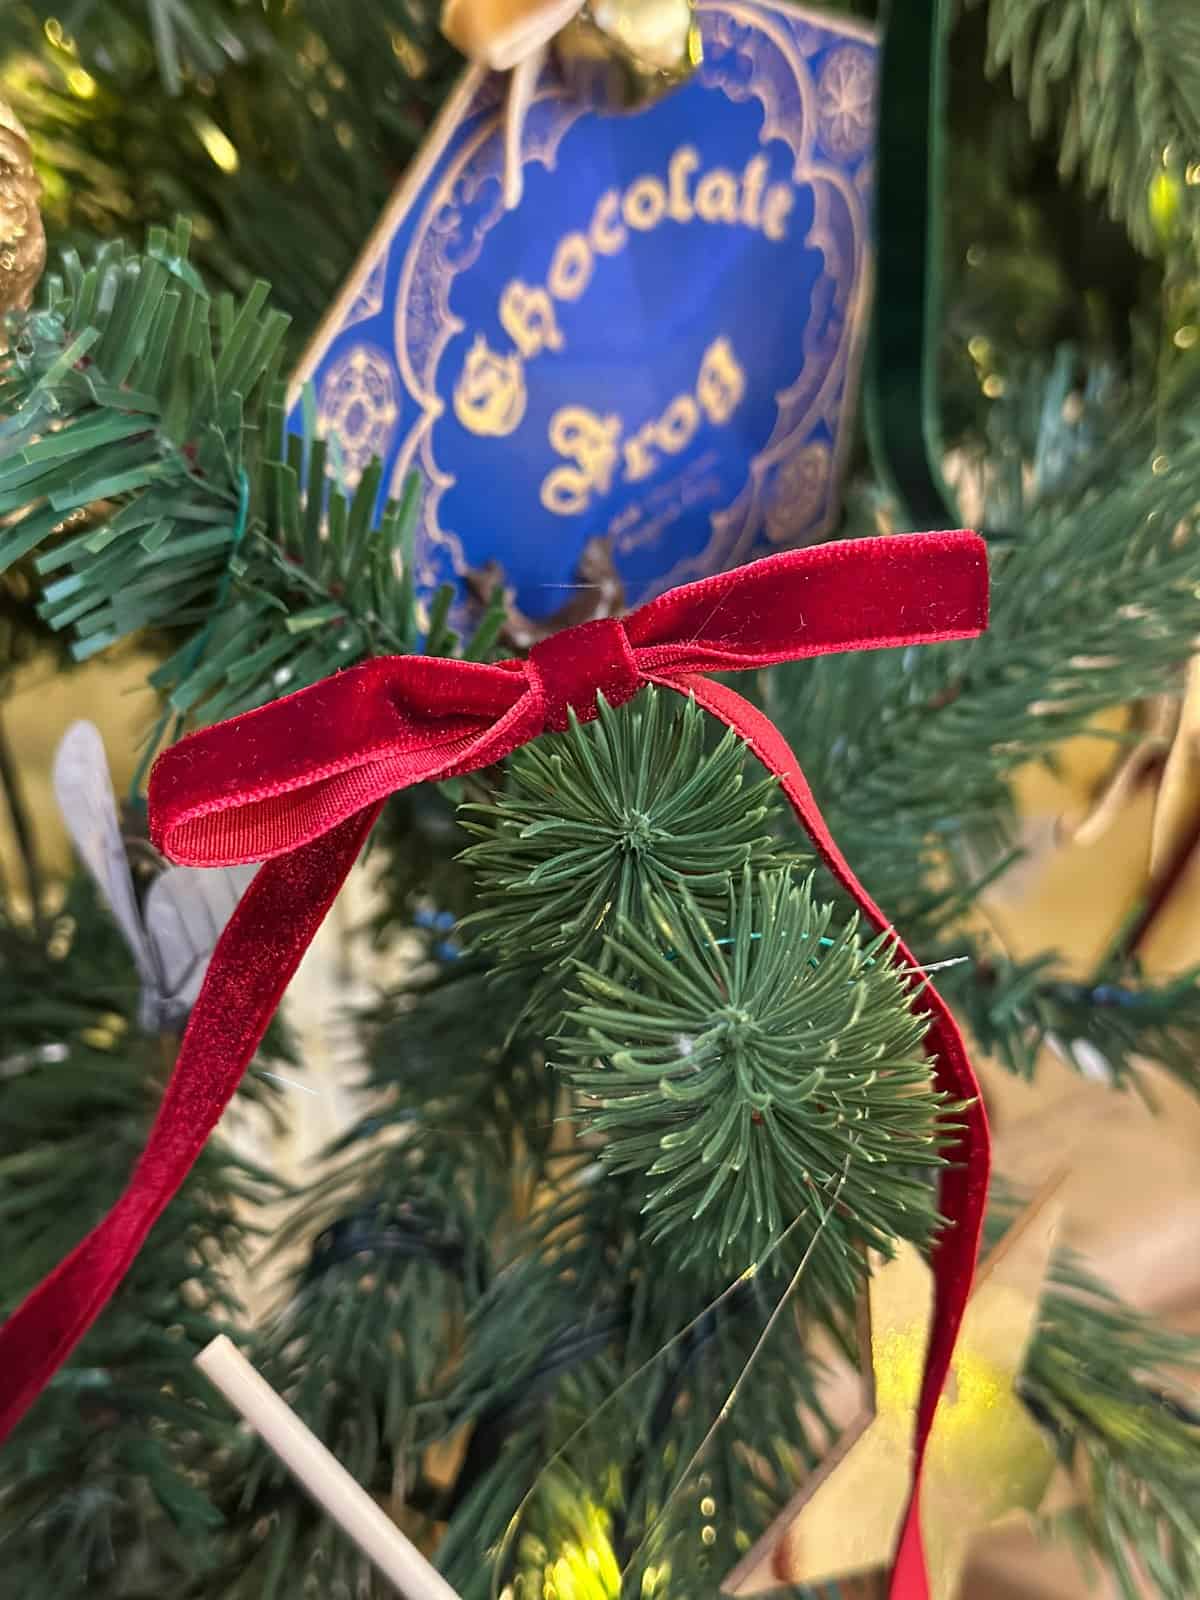
Gryffindor burgundy velvet ribbon bow tied on Harry Potter Christmas tree branch with chocolate frog box ornament in background.
Slytherin green velvet ribbon bow tied on Harry Potter Christmas tree with flying key ornament and twinkling lights.
Blue velvet ribbon bow representing Ravenclaw house colors on Harry Potter themed Christmas tree.
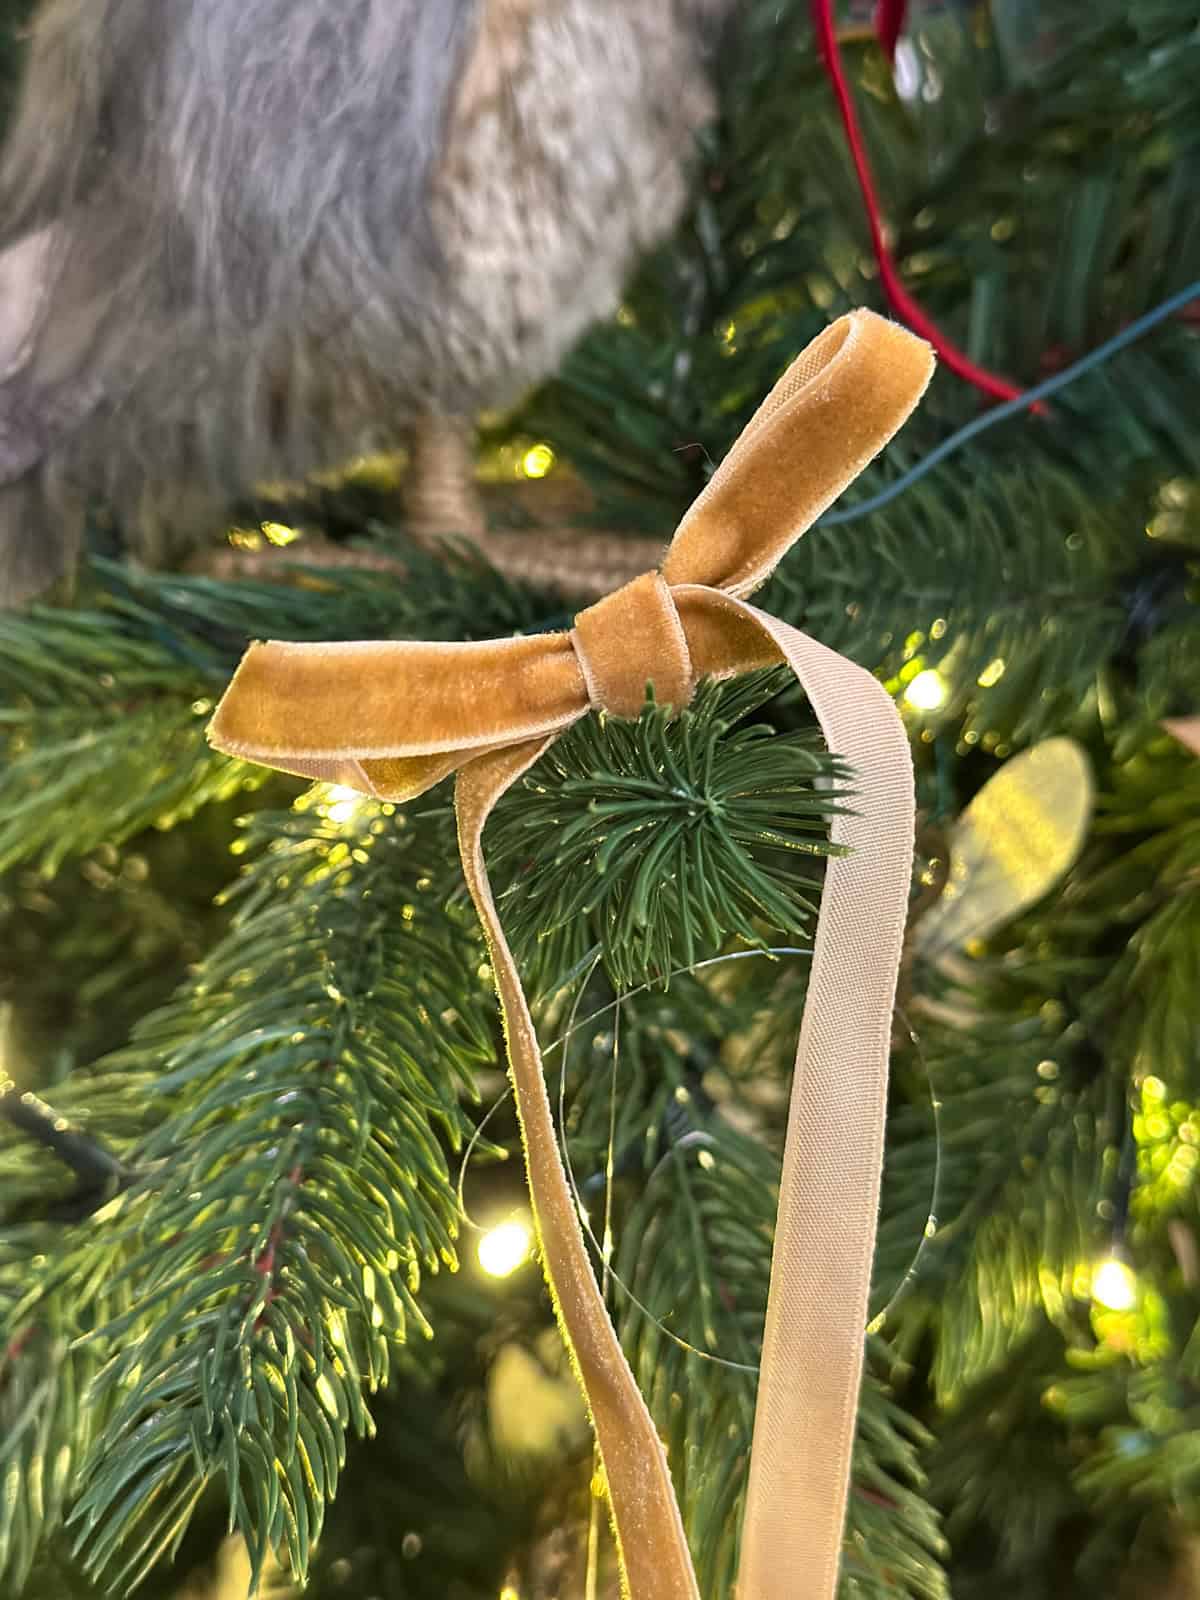
Gold velvet Hufflepuff house ribbon bow on Harry Potter Christmas tree with lights.

Movie Moment Ornaments

I also wanted to include some DIY ornaments representing favorite movie moments, like the flying car, Ministry of Magic toilet, Dobby's sock, and more. These details make people smile and spark conversations.

Timeline

I started gathering supplies in early November and spent several weeks crafting ornaments, working on them a little each evening. Sites like Temu and AliExpress were budget-friendly but take 2-3 weeks to arrive, so order early! I went mostly DIY because I love the making process, but there are great store-bought options too if crafting isn't your thing.

Essential Supplies & Where to Shop
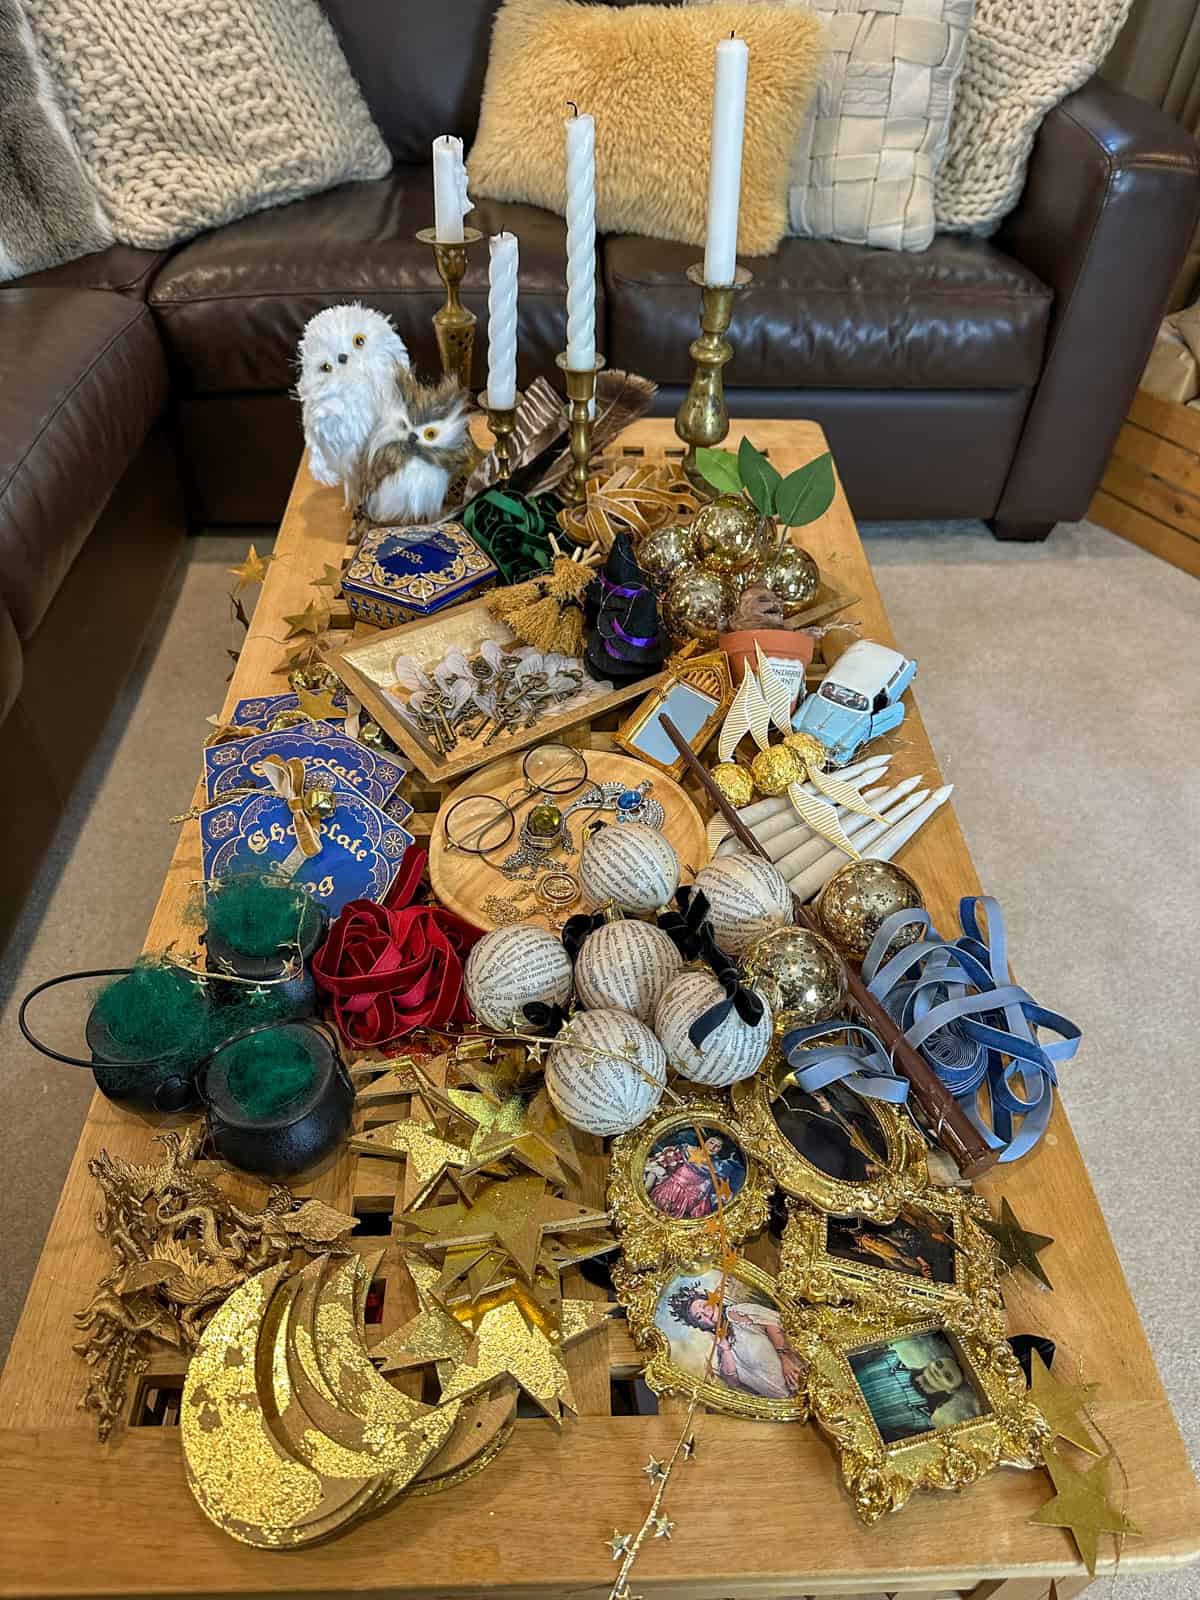
Collection of DIY Harry Potter Christmas ornaments on coffee table including book page balls, chocolate frogs, portrait frames, gold stars, house ribbons, and owl decorations.
  • Thrift stores are my favorite! I found vintage books, sweaters for stockings, mini plates, glass jars, brass candlesticks, the birdcage, and so many treasures for our Harry Potter Christmas here.
  • Dollar stores work for clear ornament balls, basic ribbons, craft paint, and candy.
  • Craft stores look for spray paint, Mod Podge, and quality ribbons.
  • Online shopping (Temu, AliExpress, Amazon) is great for chocolate molds, Horcrux replicas, specialty items, and hard-to-find pieces. Order early -Temu/AliExpress takes 2-3 weeks!
  • Bulk food stores for Honeydukes candy.
  • Pro Tip: Thrift first, then fill in gaps online. I saved hundreds!

The 7 Horcruxe Ornaments
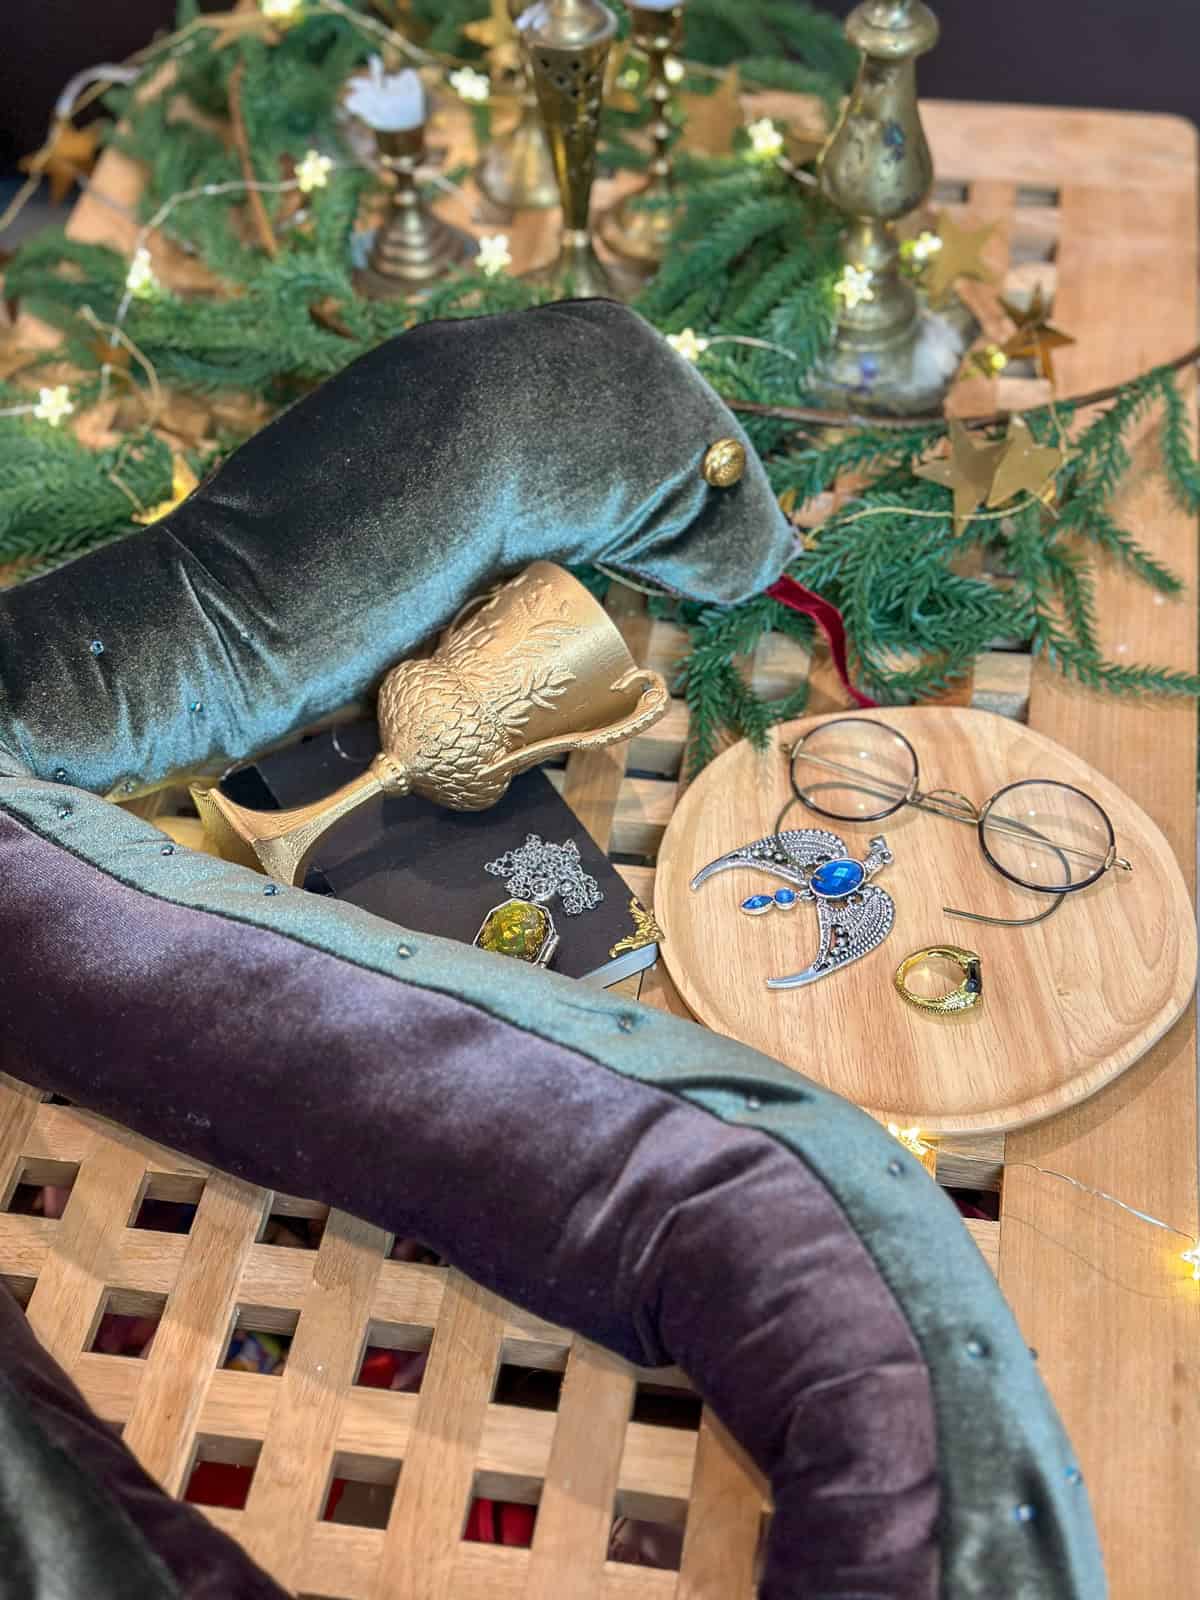
All 7 Horcrux Christmas ornaments for a Harry Potter themed Christmas tree.

One of my favorite unique touches is displaying all 7 Horcruxes as ornaments. These life-size movie replicas are prominently featured throughout the tree. True fans will immediately recognize them!
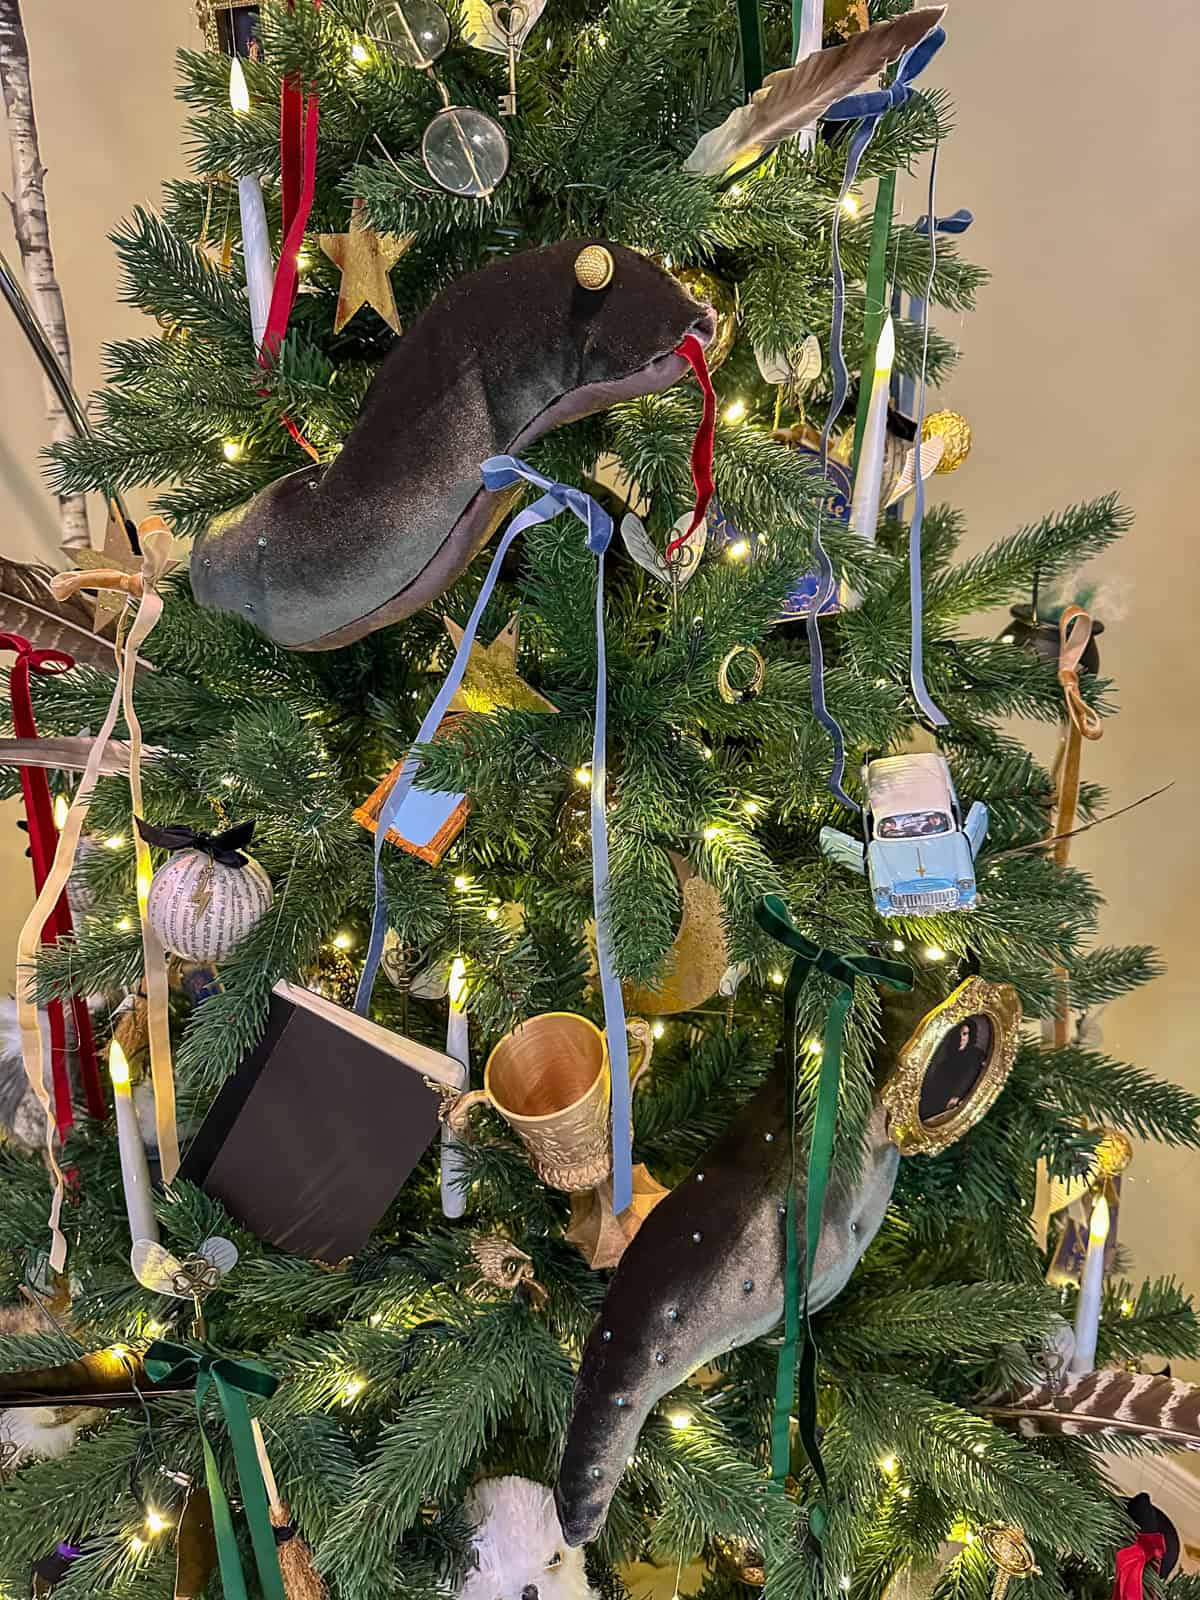
Harry Potter Christmas tree decorated with 7 Horcrux decorations.

Harry's Glasses

Round wire-frame glasses hung on the tree. I had a vintage pair, look for these at antique stores. The real glass looks great on the tree with the lights. Cost: $10
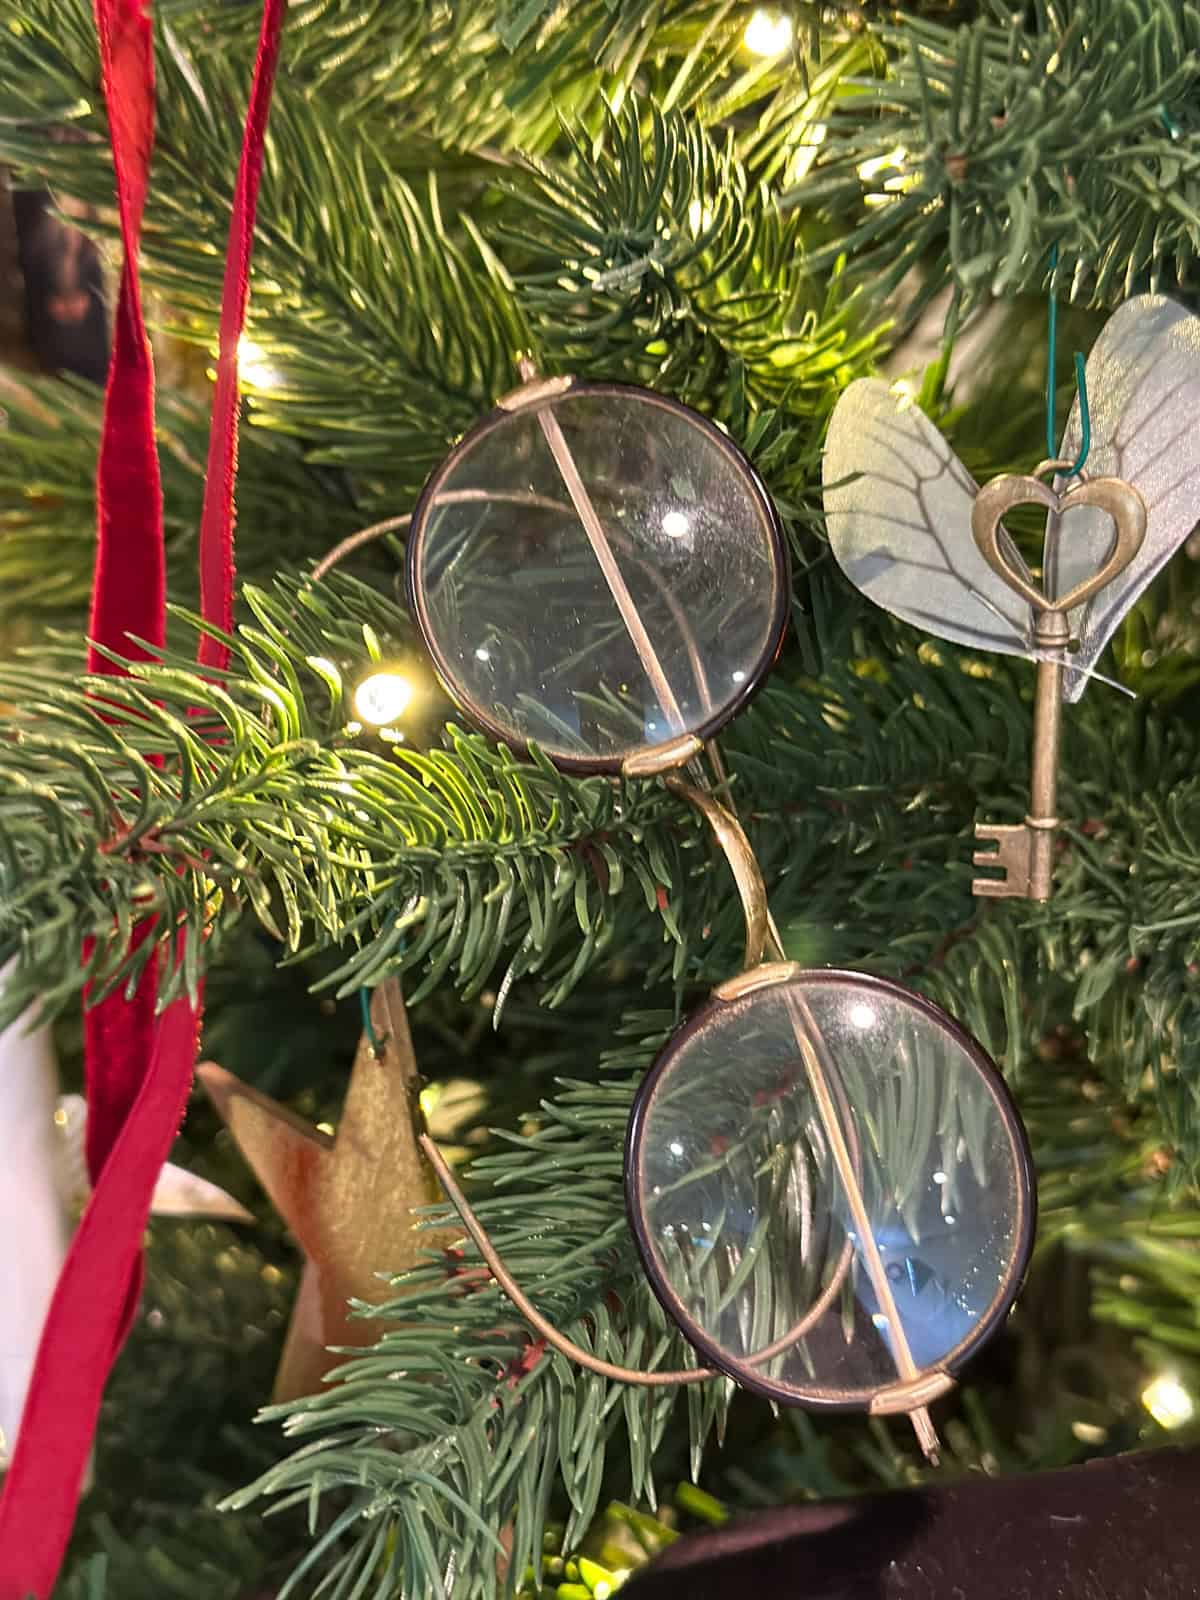
Harry Potter glasses Horcrux Christmas decoration made from vintage glasses.

Nagini the Snake

Life-size toy snake (4-5 feet) wrapped dramatically through branches. We bought some stretch velvet fabric in green and brown and cut out our giant snake. Next, we stitched it together on our sewing machine using a zig-zag stitch. Don't forget to add a ribbon snake tongue, and leave a hole for your stuffing. Then stuff your snake with pillow stuffing, and stitch the hole shut by hand. We added a gold button eye, and sewed some iridescent beads on the body of the snake for some glimmer. Once he's done, wrap him in and around the tree. Cost: $12
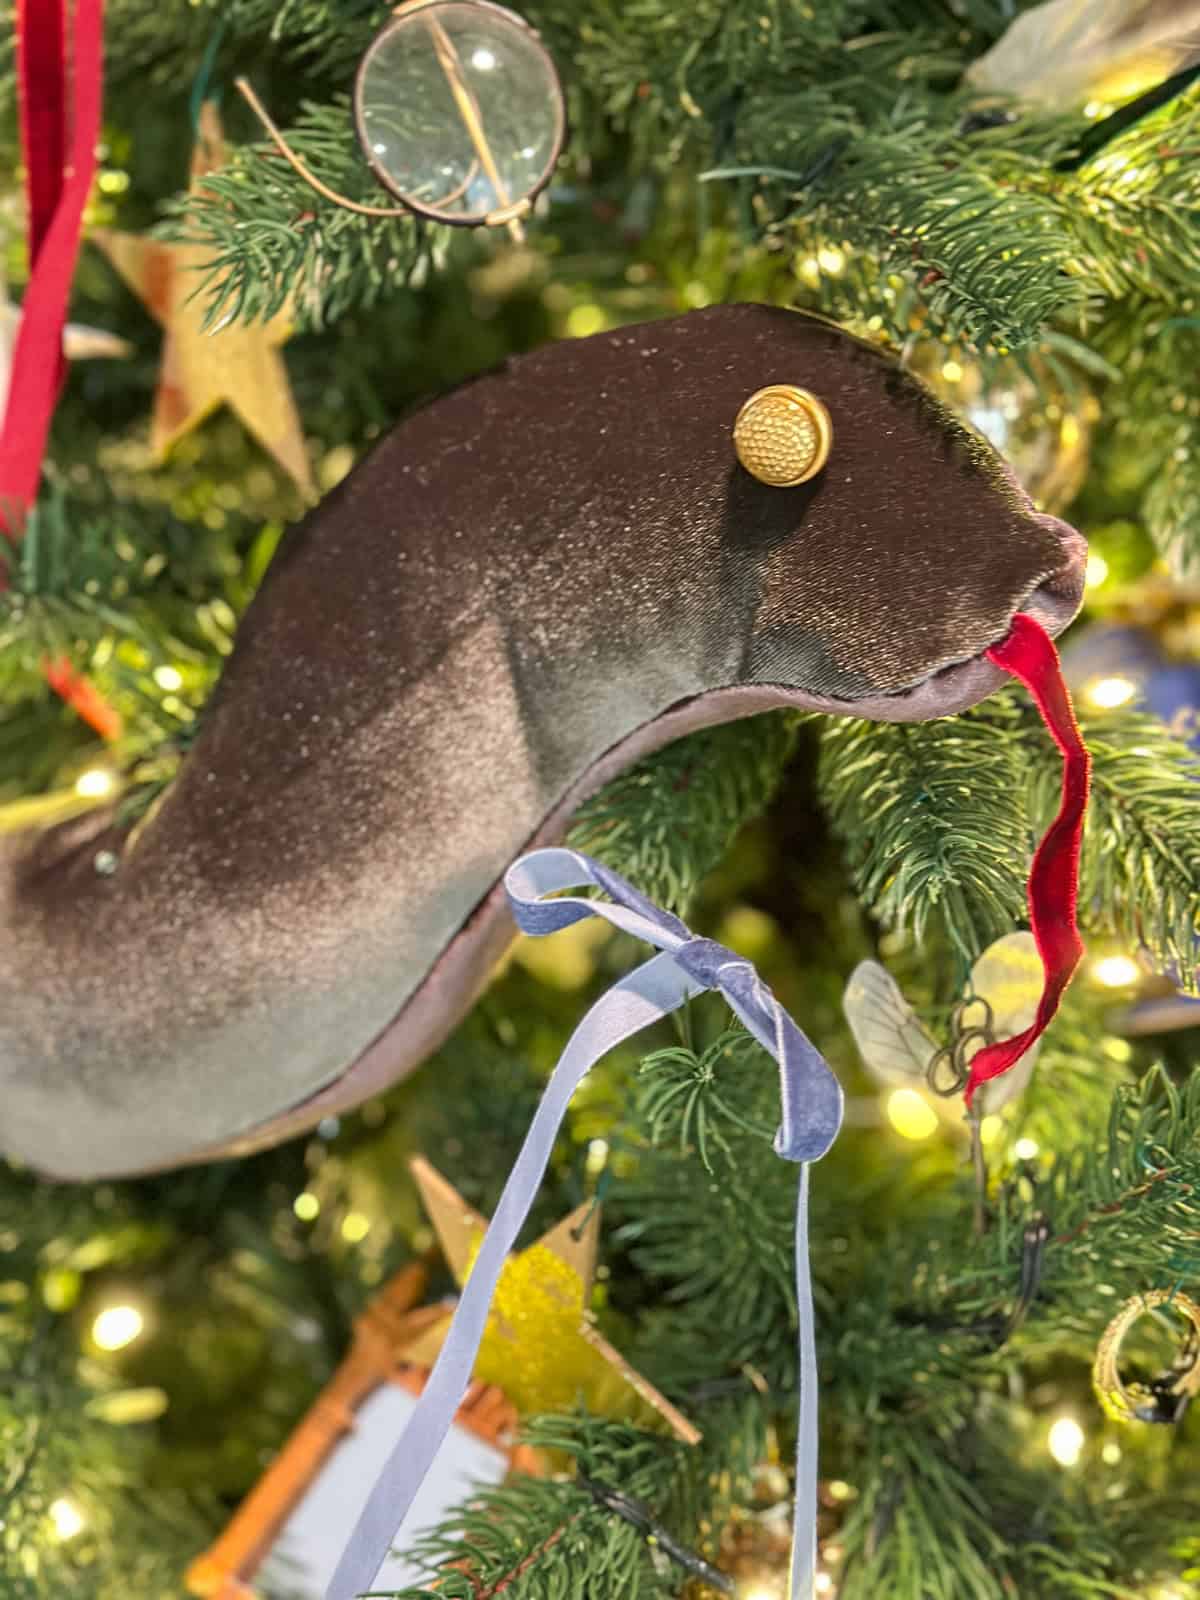
DIY Nagini snake ornament made from green and brown velvet, hanging on Harry Potter Christmas tree.

Hufflepuff's Cup

For our cup we used this free pattern to 3D-print it. It turned out so great. If you don't have a 3D printer, check your local library. After it was printed, we spray painted it gold. Cost: 3D print material $10, gold spray paint $20
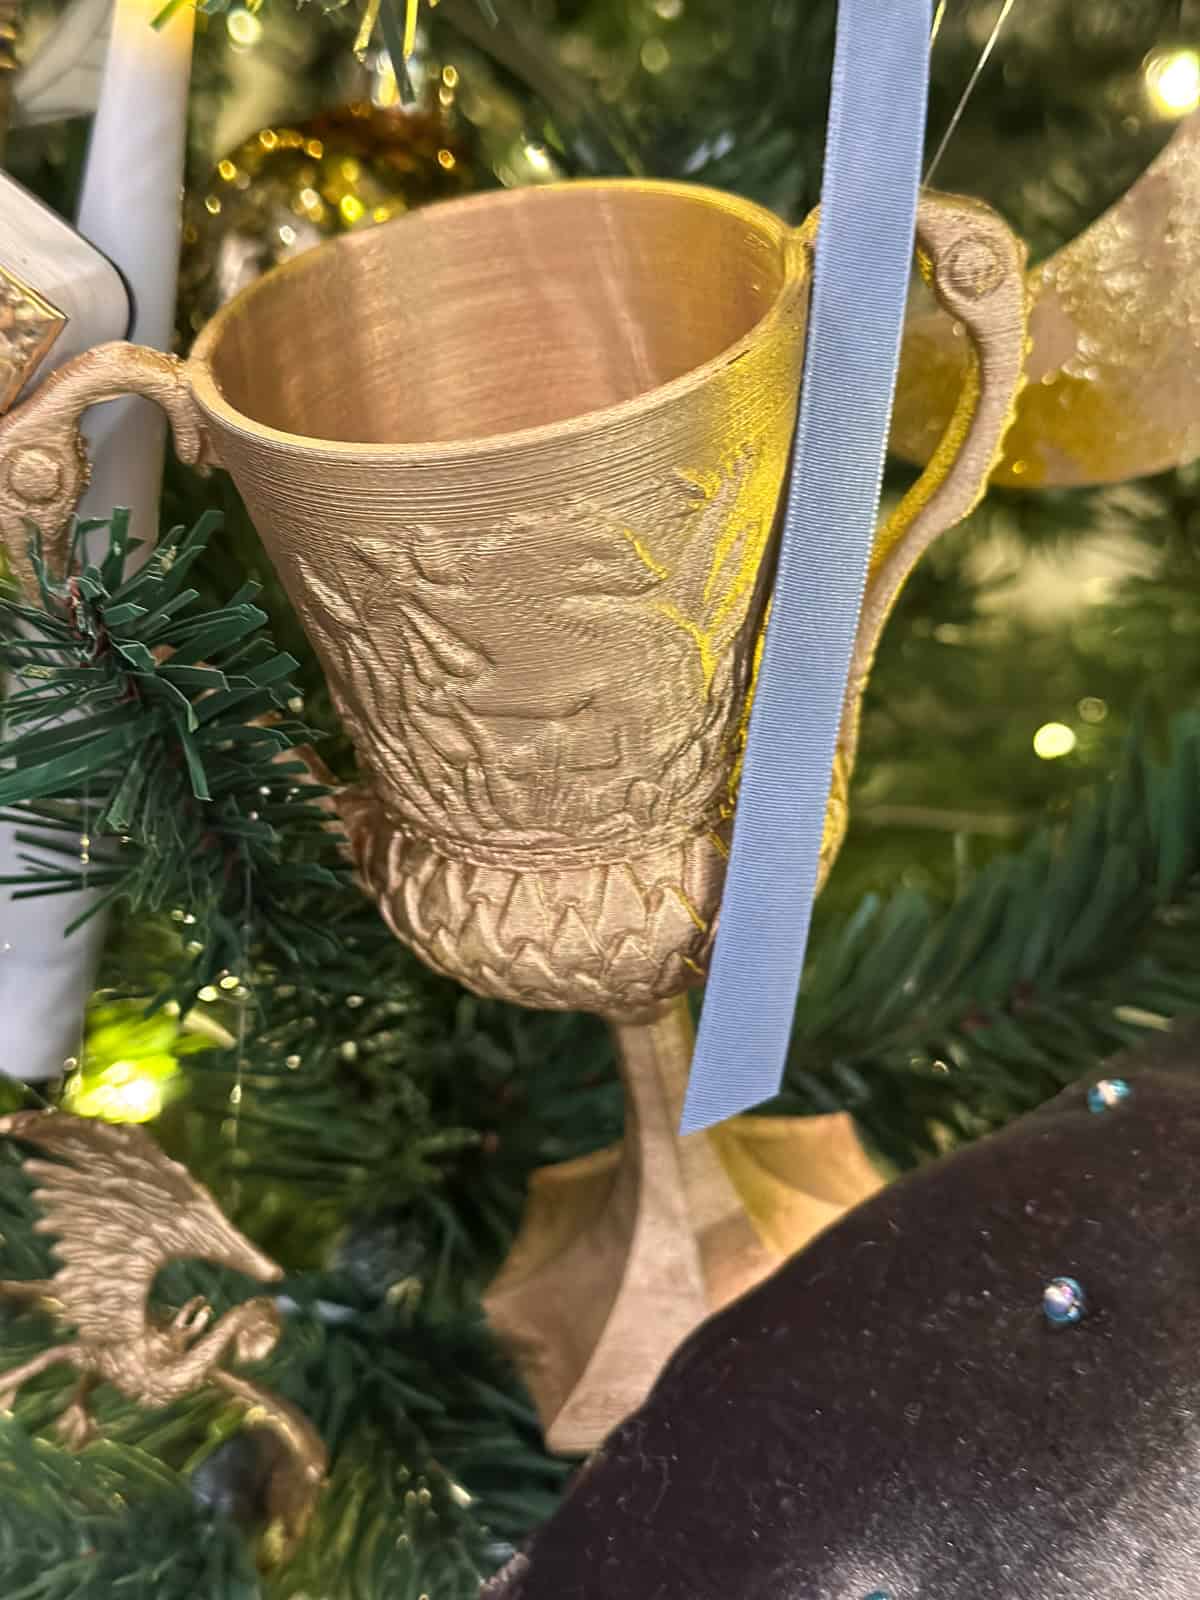
3D printed Hufflepuff cup Horcrux ornament spray painted gold hanging on Harry Potter Christmas tree.

Marvolo Gaunt's Ring

Our life-size ornate ring is an Aliexpress find. (search "Horcrux ring") Cost $4
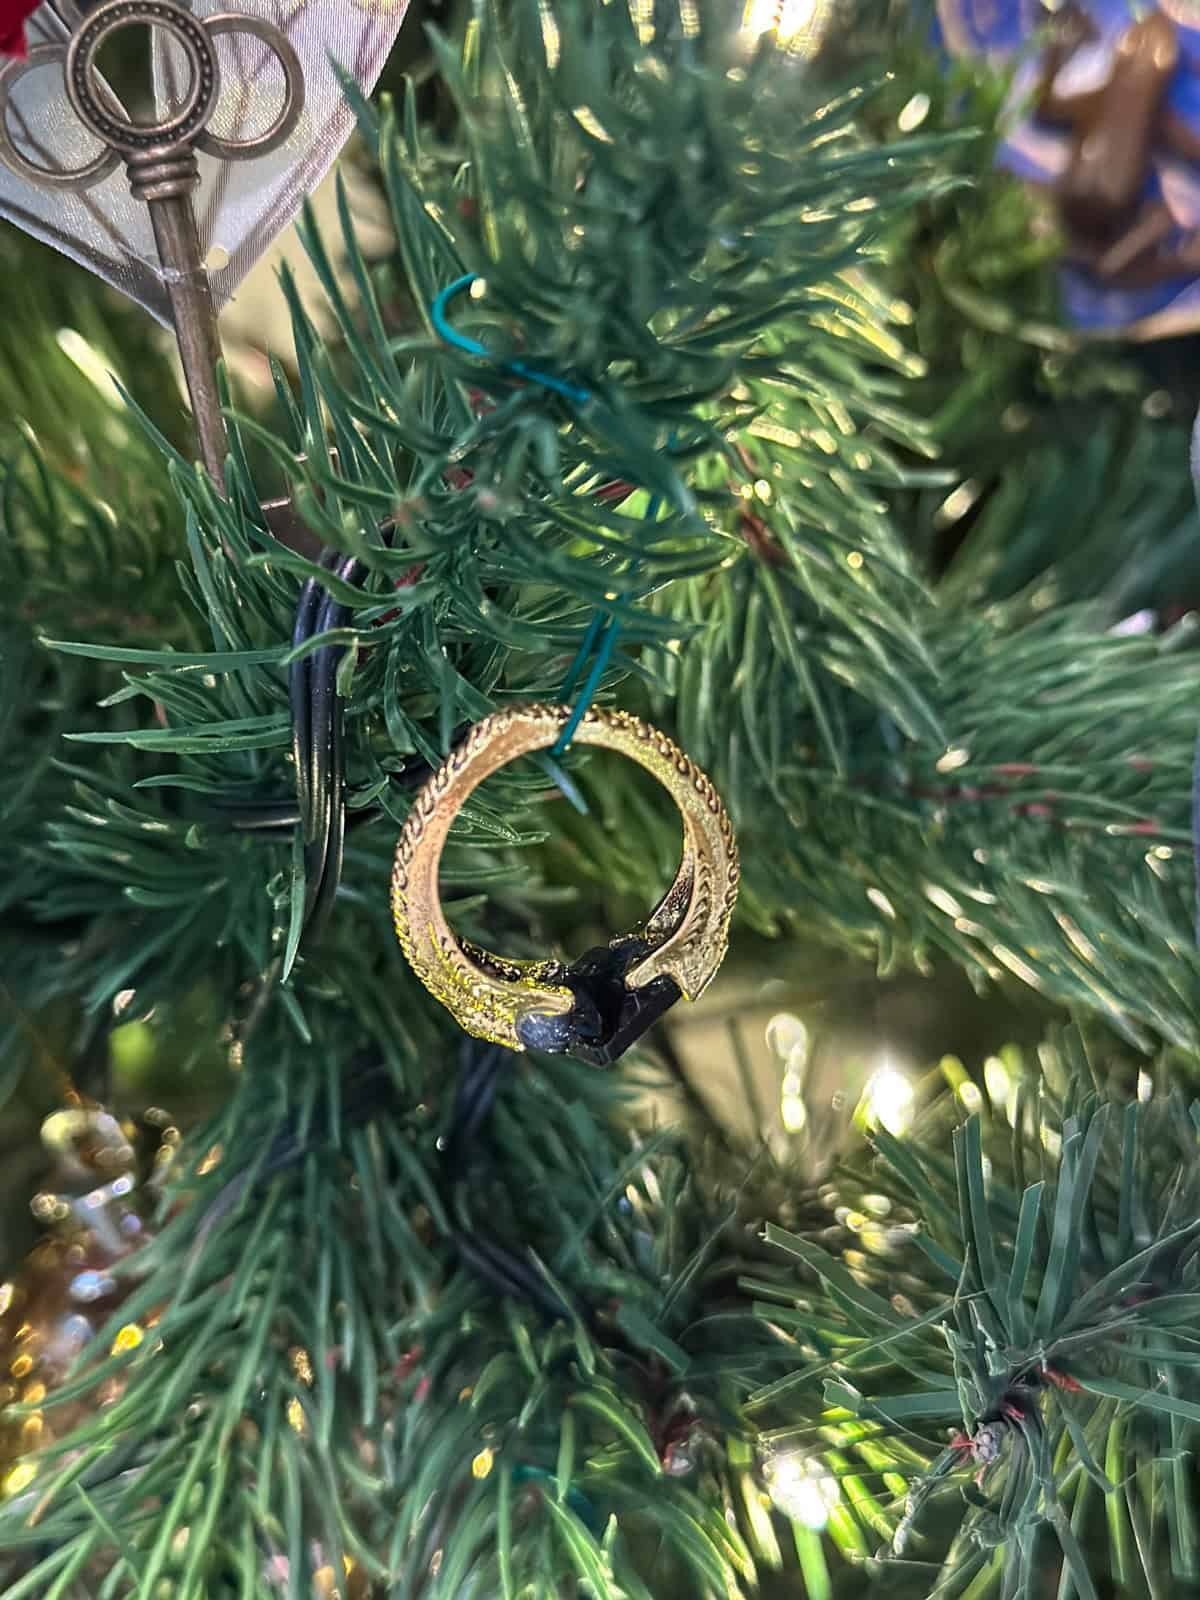
Marvolo Gaunt ring Horcrux ornament with gold serpent design and black stone hanging on Harry Potter Christmas tree.

Slytherin's Locket

This full-size locket matching the movie version was another Aliexpress find, and looks great. (search "Slytherin locket" or "Horcrux necklace") Cost $4
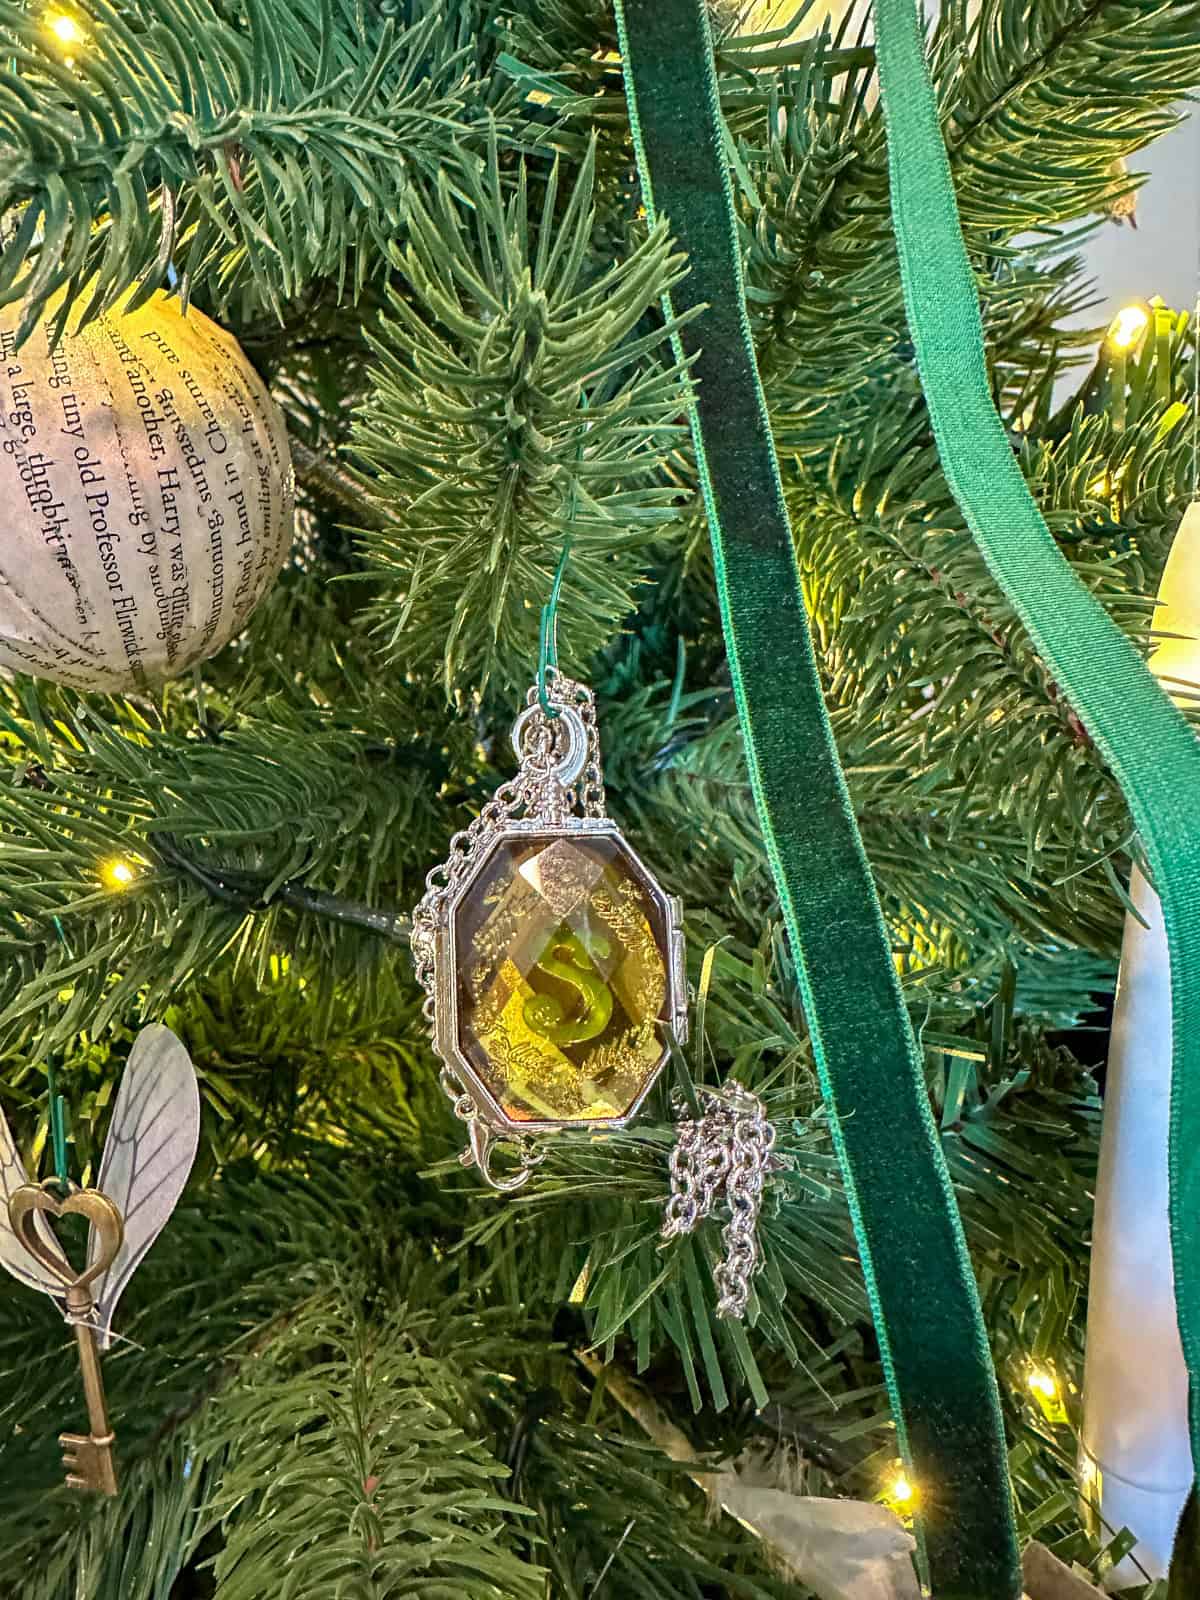
Slytherin locket Horcrux ornament with silver chain and green ribbon on Harry Potter inspired Christmas tree.

Ravenclaw's Diadem

Life-size diadem/tiara from Aliexpress. It comes as a necklace, but we removed the chain. (search "Ravenclaw diadem" or "Blue artificial gemstone crown necklace, lost crown, Magic Academy movie" Cost $4
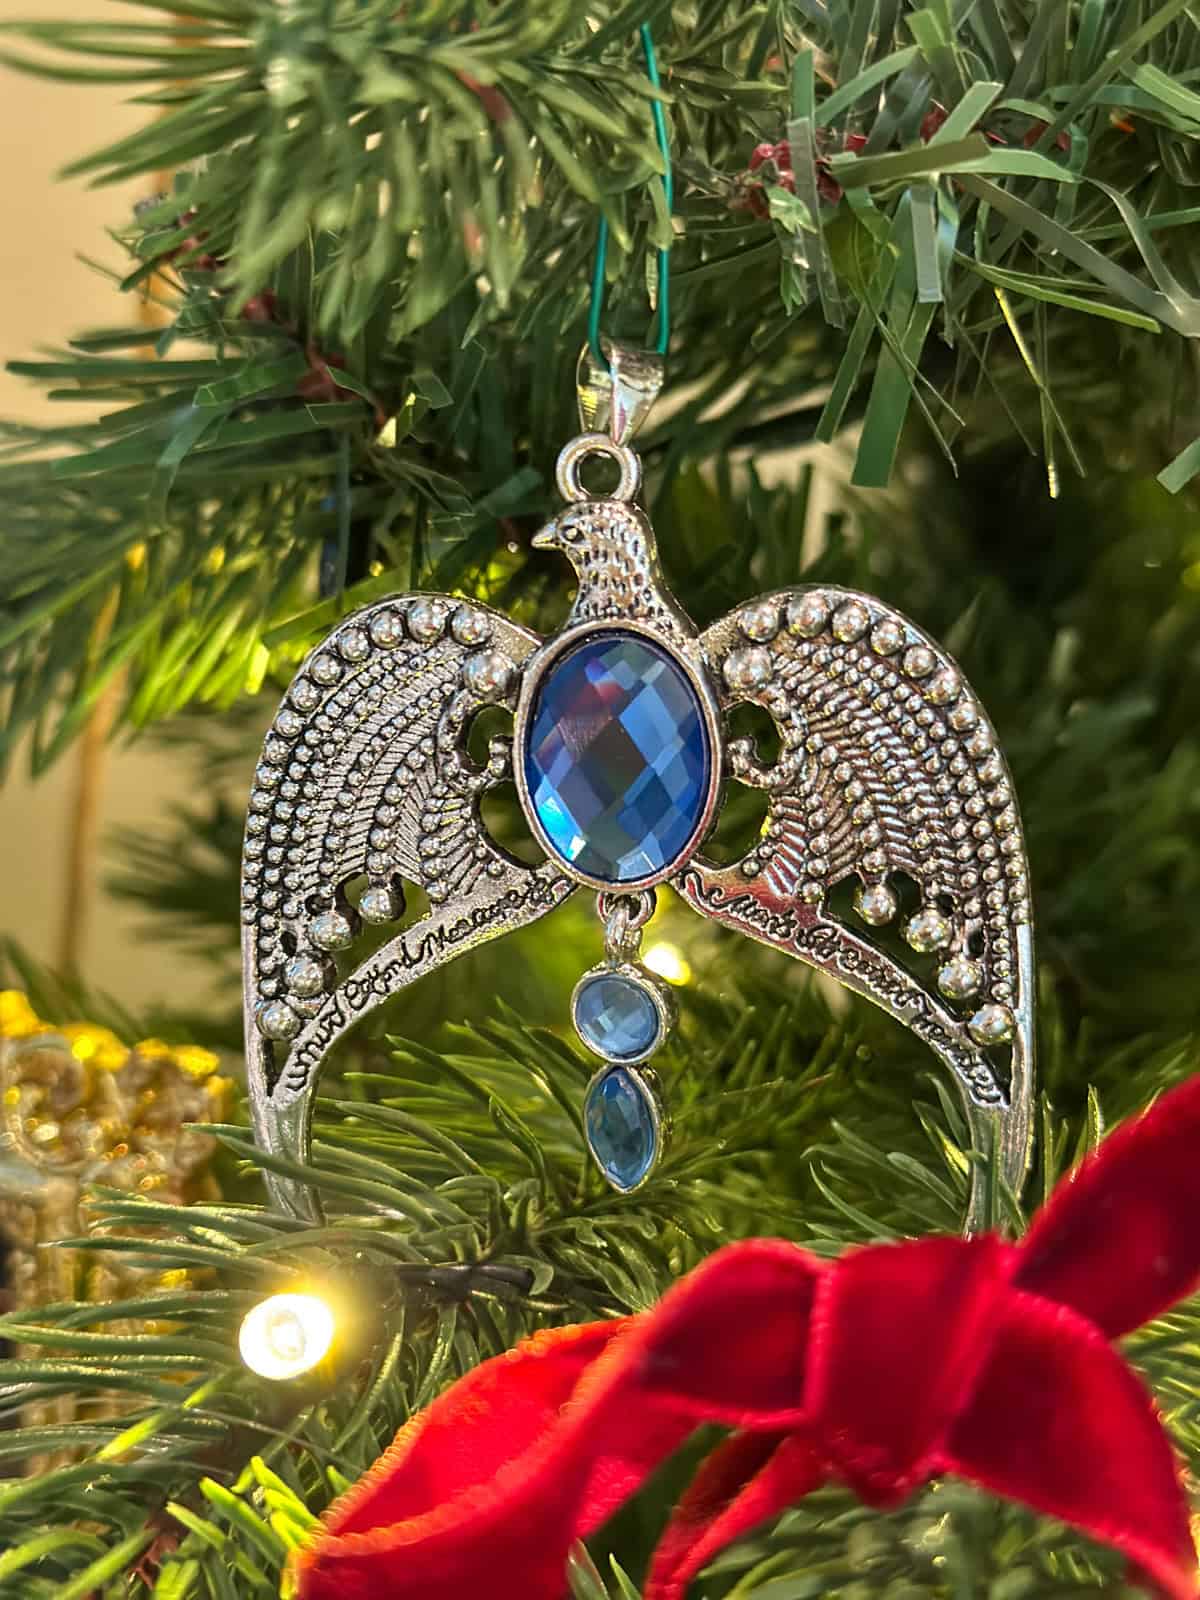
Silver Ravenclaw diadem Horcrux ornament with blue gemstones and eagle wings on Harry Potter Christmas tree.

Tom Riddle's Diary

We used a small black diary we had, and a thrifted picture frame that had gold corners. We removed the corners from the frame and added them to the diary corners. Cost free using supplies we had on hand.
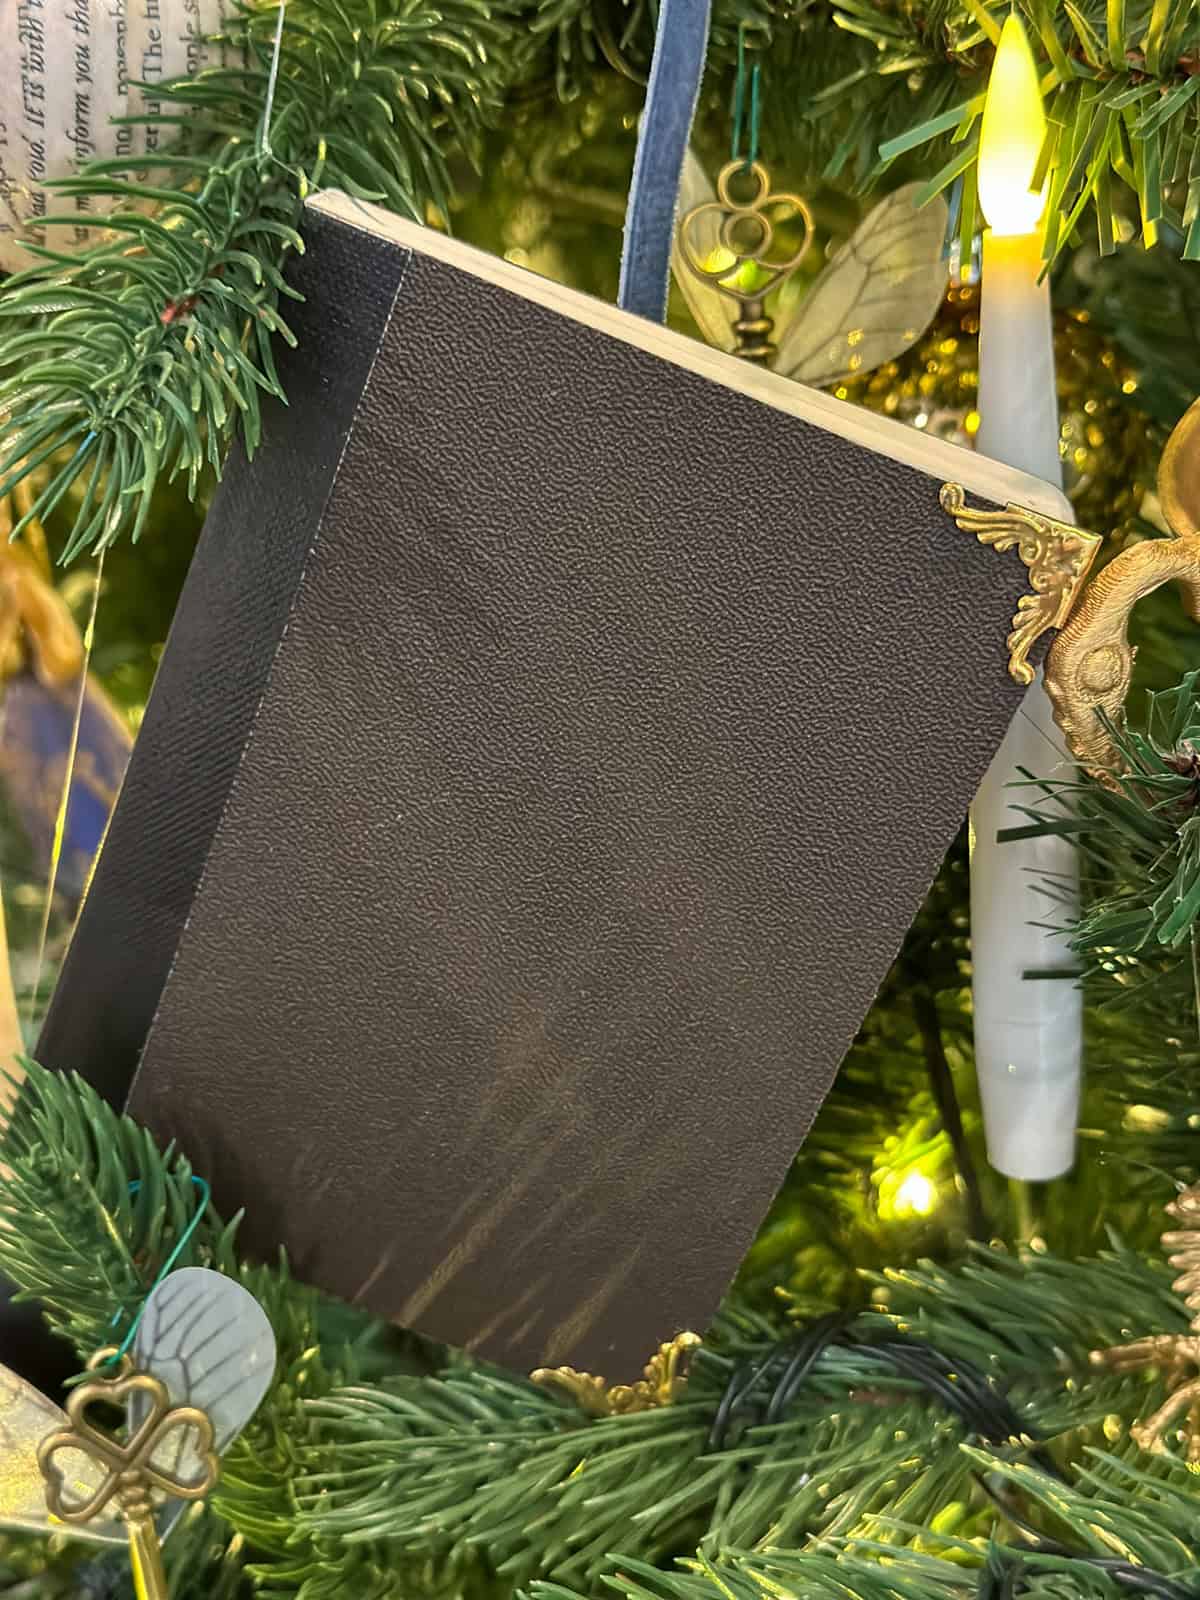
DIY Tom Riddle's diary Horcrux ornament on a Harry Potter Christmas tree.

Shopping tip: These movie-replica Horcruxes are almost exclusively on AliExpress, very inexpensive ($3-8 each) but allow 2-3 weeks for shipping. They're major conversation starters!

Save this post to Pinterest so you can find it again when you're ready to start crafting.

DIY Harry Potter Ornaments

Now for the fun part -creating magical ornaments! I'm sharing detailed instructions for featured projects plus quick summaries for easier ones.

Book Page Christmas Ornaments
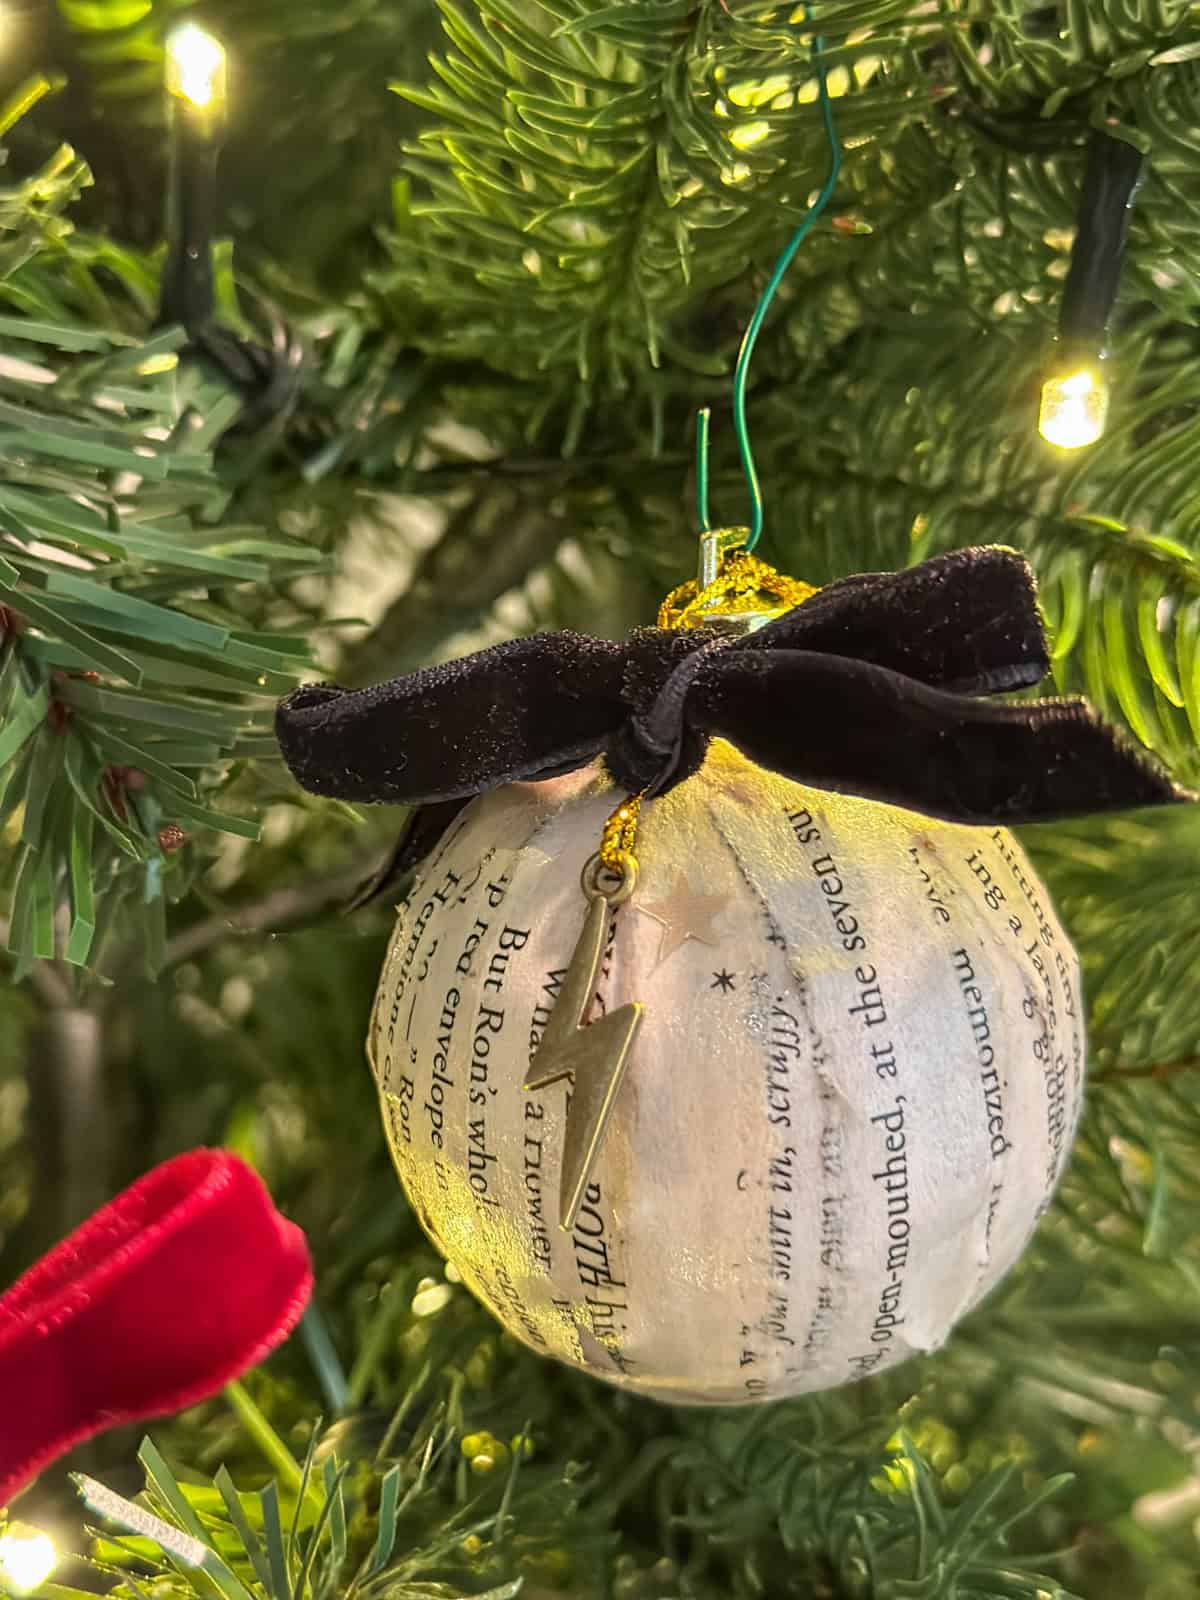
DIY Harry Potter book page Christmas ornament with black velvet bow and gold lightning bolt charm hanging on tree with twinkling lights.

These vintage-inspired ornaments are my favorites! They look elegant and cost just a few dollars using a thrifted Harry Potter paperback. Remove tops from upcycled plastic ornaments and tear book pages into thin strips (tearing gives nice rough edges). Use Mod Podge to glue strips around the ornament, overlapping as you go. Let dry completely. Tie small gold lightning bolt charms to the top with gold string, replace the cap, add a black velvet bow, and optionally add gold star stickers to the outside for extra sparkle. I used my Cricut to cut the stars out with a matte gold vinyl, but stickers work great too.

Materials: Old Harry Potter paperback ($3 thrift store), upcycled ornaments, Mod Podge, gold lightning bolt charms (search online), gold string, black velvet ribbon, gold vinyl stars.

Time: 15-20 minutes each (plus drying) | Cost: ~$2 each | Difficulty: Beginner

Portrait Ornaments
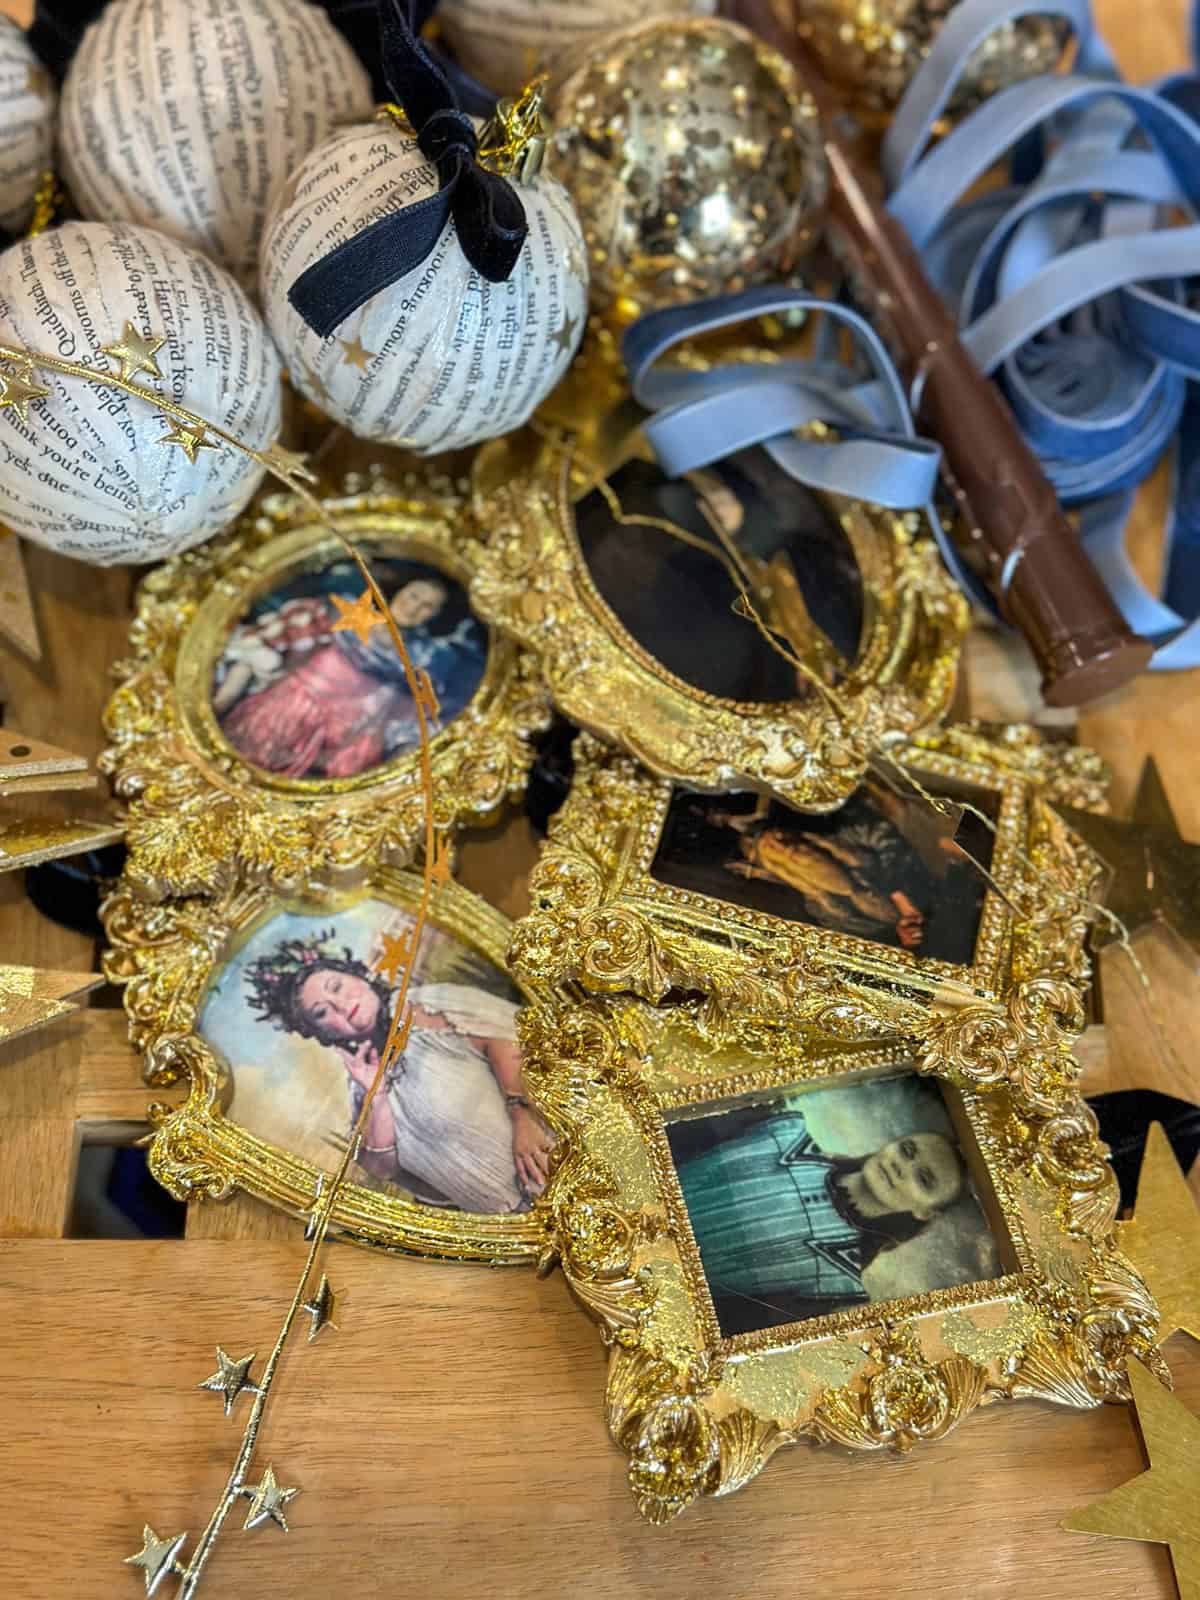
Homemade Harry Potter portrait ornaments in ornate gold frames with character images, book page ornaments, house color ribbons, and gold stars on table.
Professor Snape portrait ornament in ornate gold frame with gold leaf detail hanging on Harry Potter Christmas tree.

These framed portrait ornaments look like they came straight from Hogwarts! Look for ornate small resin frames online, or hunt for vintage ones at the thrift store. Spray paint gold and let dry. Apply gold leaf glue according to the package directions, and then add gold leaf, and brush off any excess with a soft paint brush. Print Harry Potter character images sized to fit your frames on cardstock or use our free printables. Hot glue images to frame backing, and then glue black velvet ribbon for hanging.

  • Materials: Small resin or vintage frames, character images or our printables, cardstock, gold spray paint, gold leaf and glue, hot glue, black velvet ribbon.
  • Time: 15 minutes each (plus paint drying)
  • Cost: $2-3 each
  • Difficulty: Beginner

Chocolate Frog Ornaments
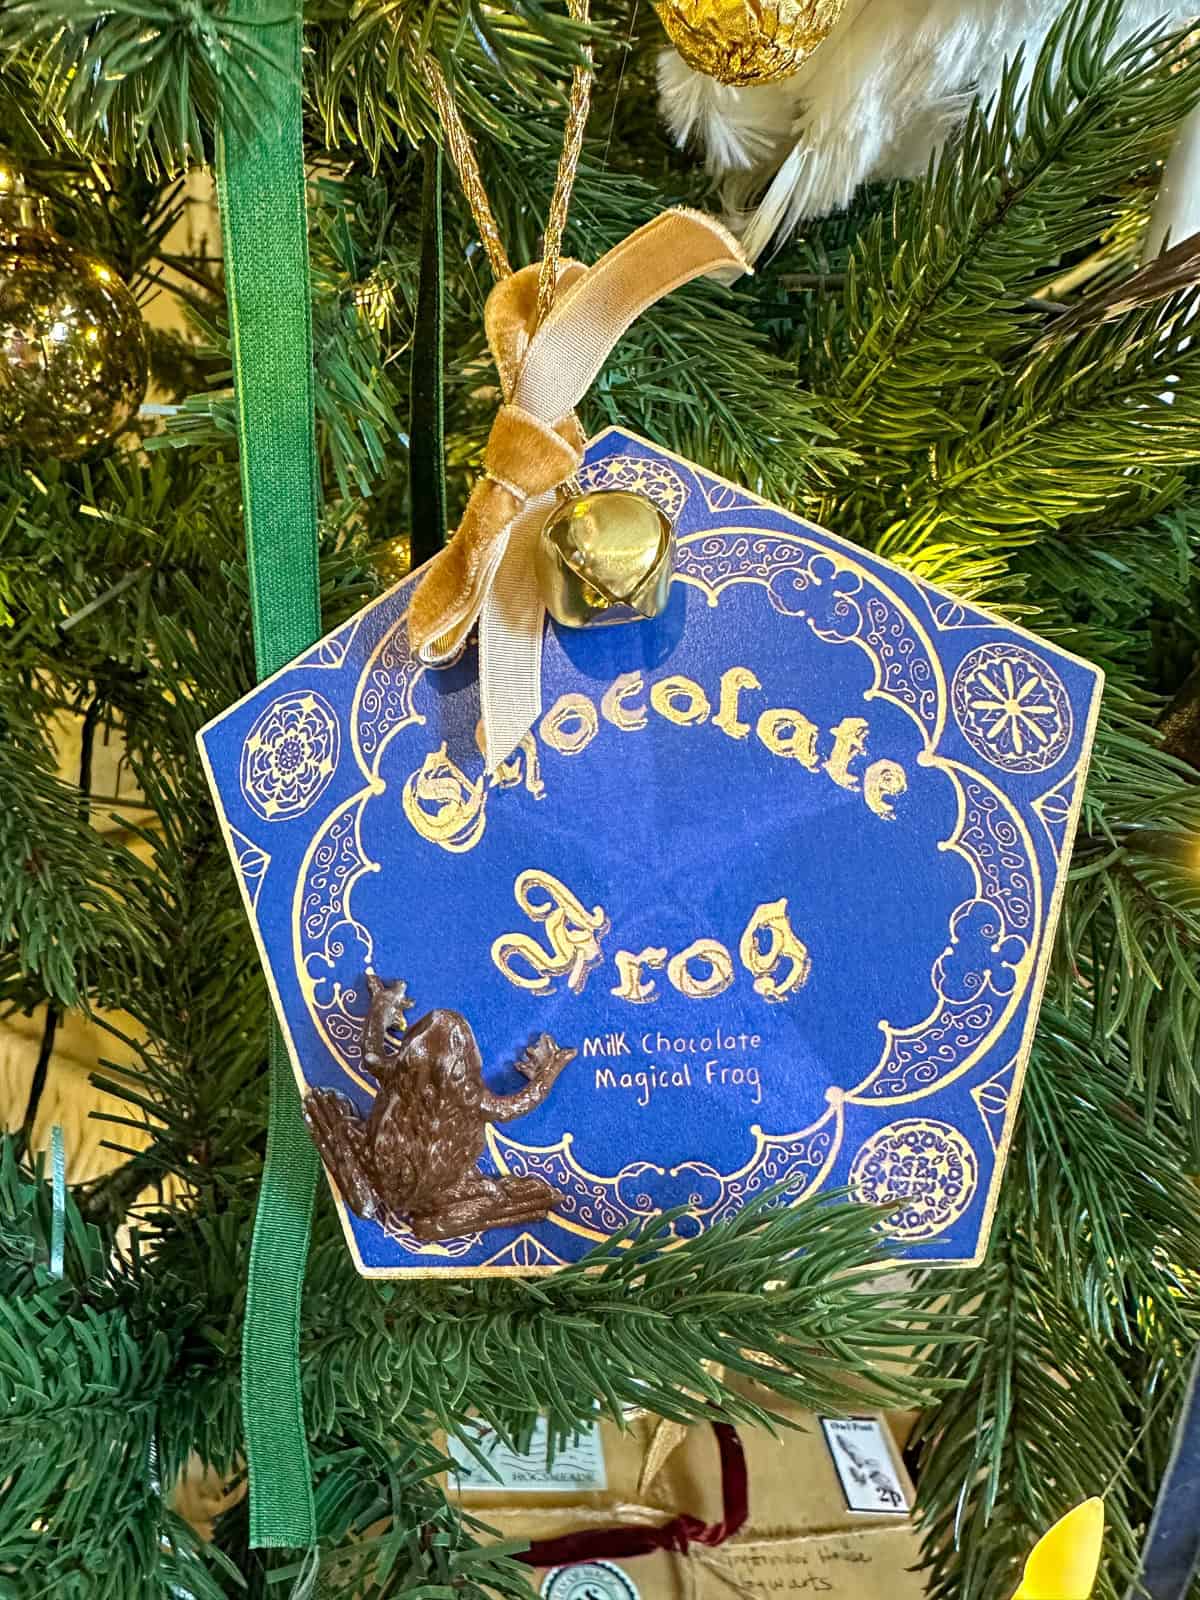
DIY Harry Potter chocolate frog Christmas ornament with box, chocolate frog, gold ribbon and bell.

These are so fun and whimsical! I was inspired by The Linen Rabbit, check out her instagram for some amazing Harry Potter Christmas decor.

Start with the flat version of our free printable chocolate frog box printed on copy paper. I used my Cricut to add gold foil to the letters, you could also use a gold paint pen, or leave as is. Cut it out. Then cut out a piece of thin balsam wood in the exact same size. Spray paint the wood gold, making sure to get the edges. Glue the printed image to one side with a glue stick. Add some gold ribbon and jingle bell to the top for hanging. For the chocolage frog, paint a children's small toy frog brown. We used acylic paint and gave it several coats, with a top coat of mod podge for shine. Or use brown spray paint. Hot glue the chocolate frog to the corner of the box.

The wood backing makes these sturdy and gives nice weight. The frog adds dimension and the jingle bell makes it feel festive.

  • Materials: Our flat chocolate frog printable, thin wood pieces (craft stores), Cricut or scissors, gold spray paint, brown acrylic paint, Mod Podge, small decorative chocolate frogs, hot glue, gold jingle bells, gold velvet ribbon, ornament hooks.
  • Time: 15-20 minutes each (plus drying)
  • Cost: $2-3 each
  • Difficulty: Beginner to Intermediate

Gold Stars and Moons
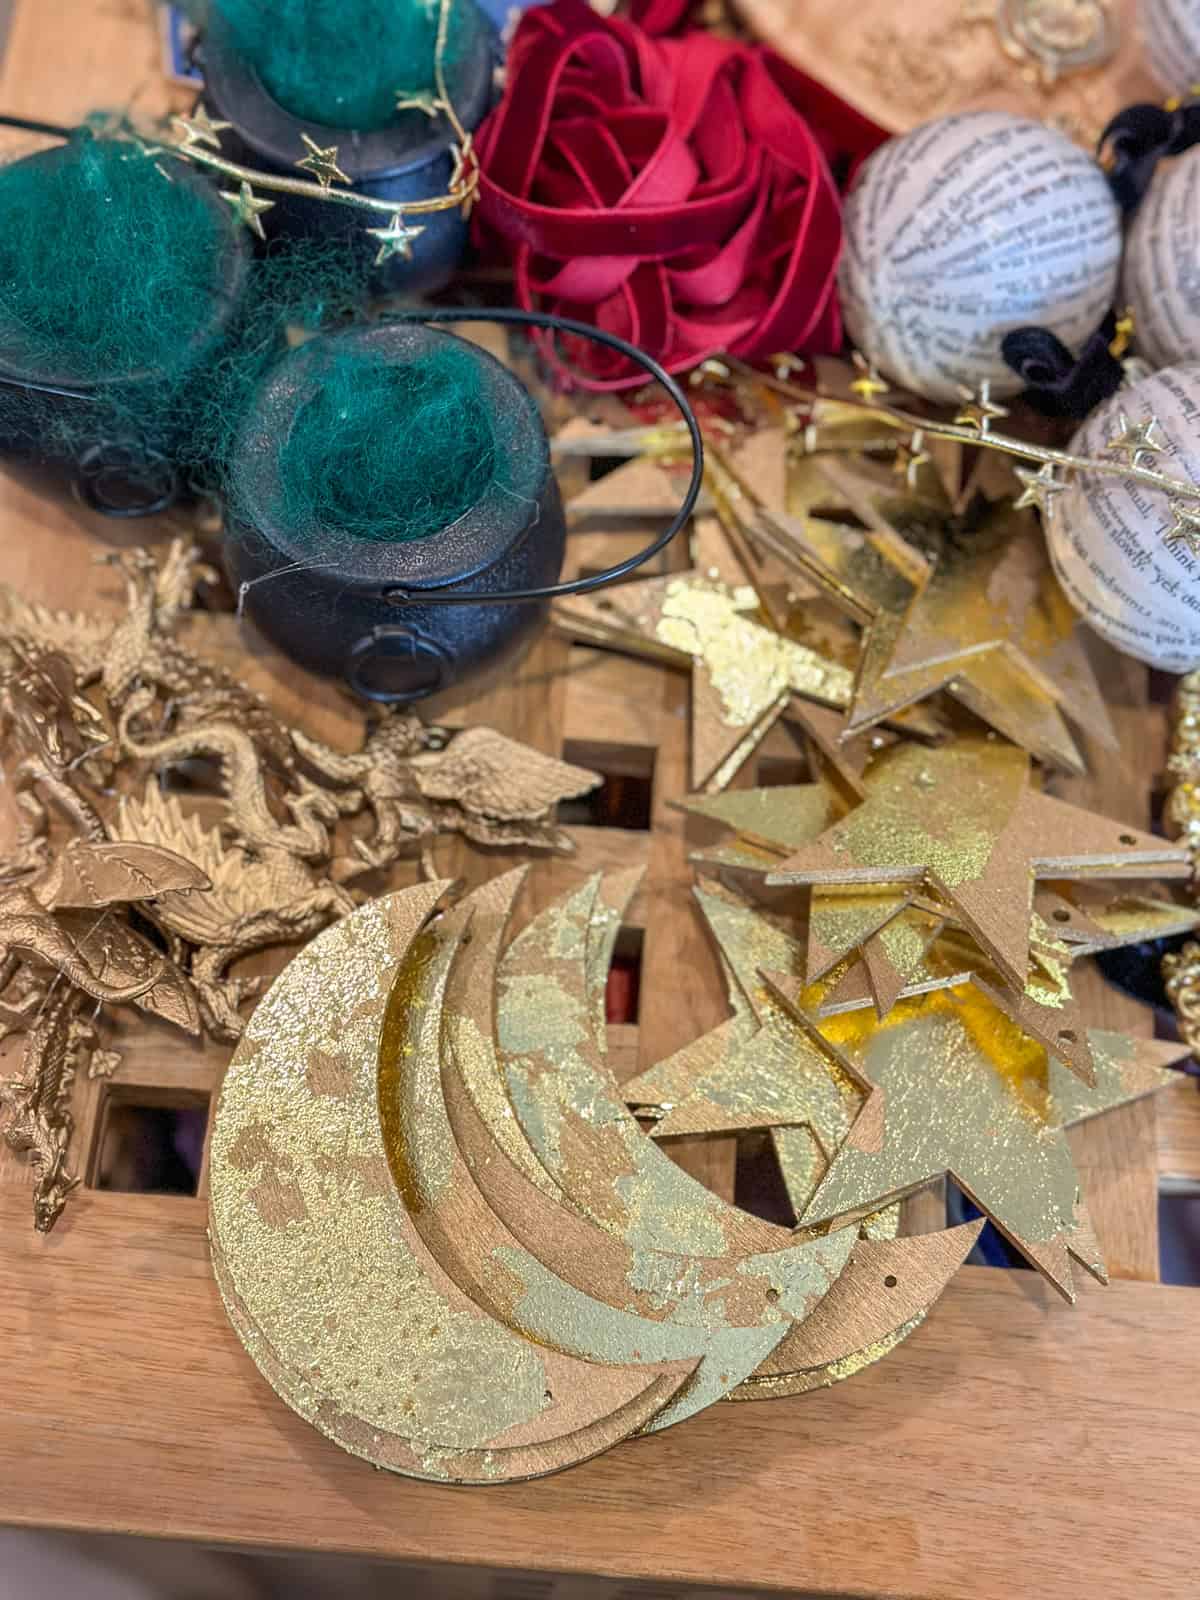
DIY gold stars and moons ornaments with glitter finish alongside cauldrons, velvet ribbons, and book page balls for Harry Potter themed Christmas tree.
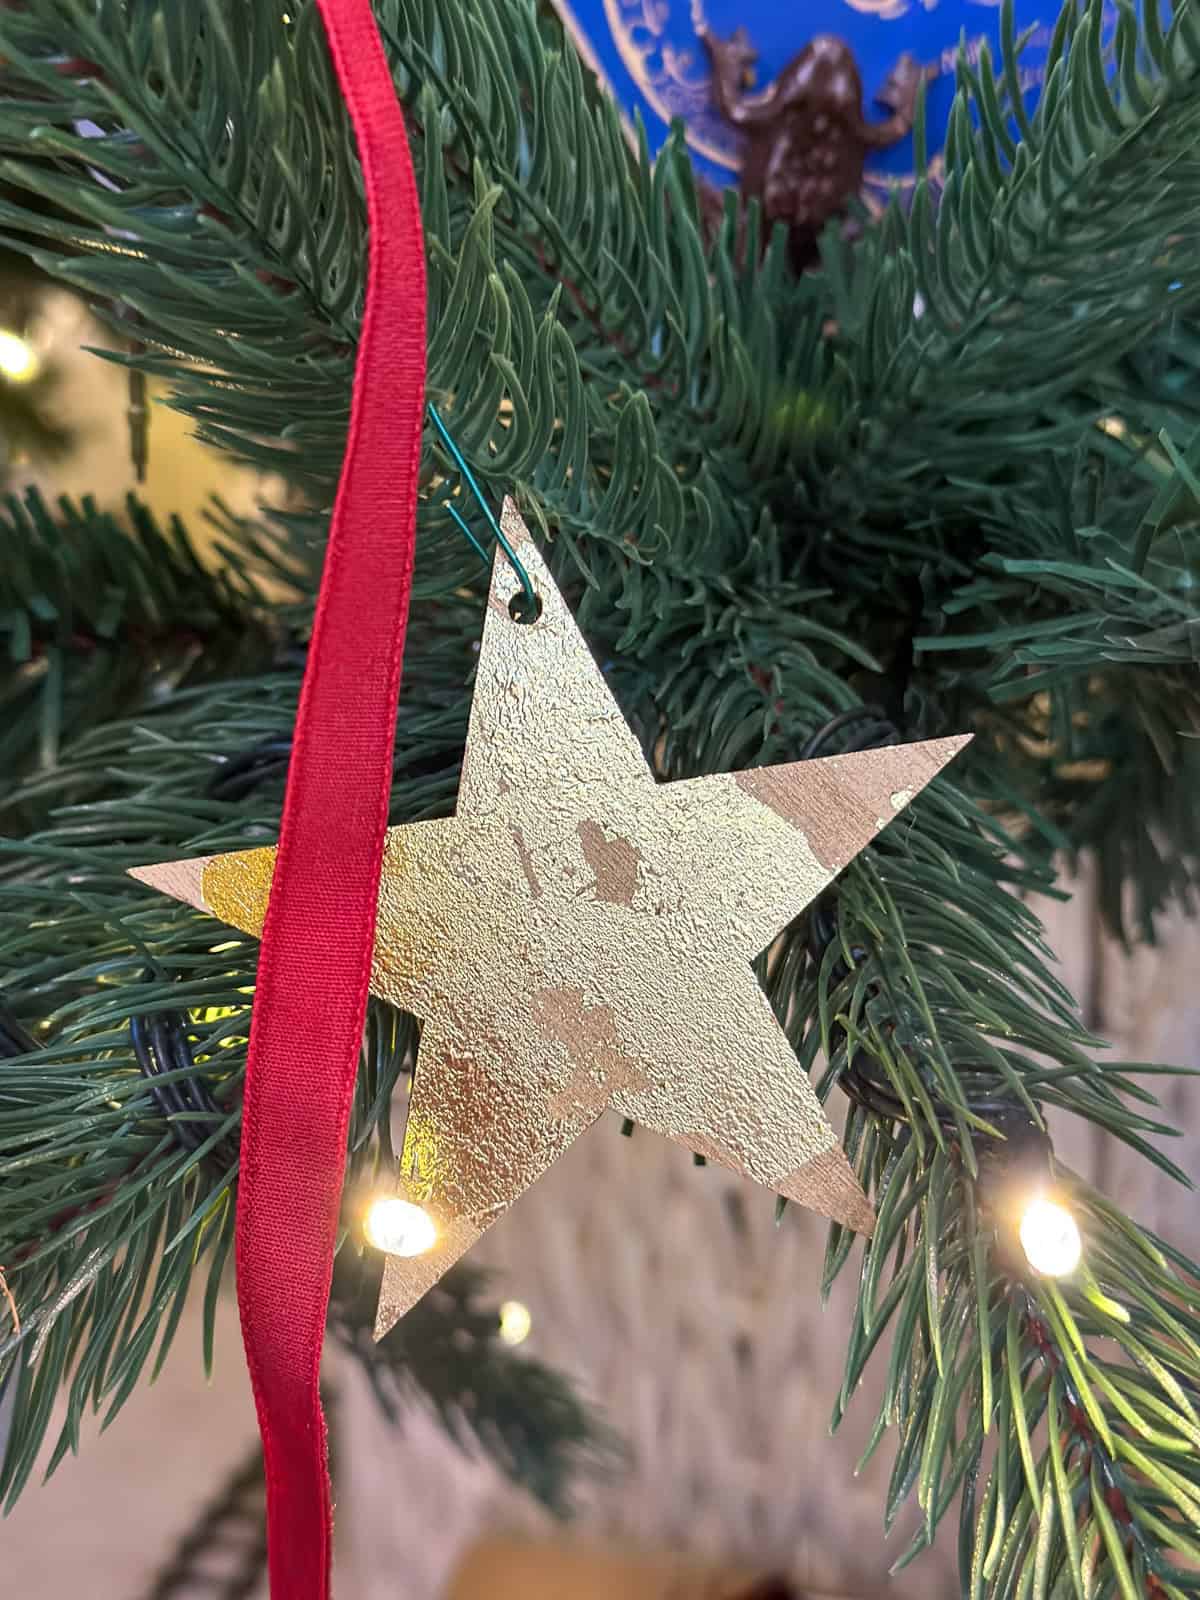
DIY gold star ornament with gold leaf detail  on a Harry Potter themed Christmas tree with twinkling lights.

In the great hall at Hogwarts, the trees are decorated with lots of stars and a celestial theme. I was lucky enough to get to see the actual sets at the Universal Harry Potter Experience in London last Christmas, and it inspired me.

For out stars and moons we started out with inexpensive wooden cutouts and gave them a base coat of gold spray. Then we added some gold leaf for extra sparkle. Apply the gold leaf glue according to the package directions, and carefully add the gold leaf, using a soft brush to remove any extra. We used imitation gold leaf, which is a bit cheaper and still looks great. ($0.50 each)

Quick & Easy Ornaments

Gold Dragons

Spray paint small toy dragons gold, add tiny gold eye hooks, hang with fishing line. Position at different angles for a flying effect. ($5 for pack of 6, gold spray paint $20)
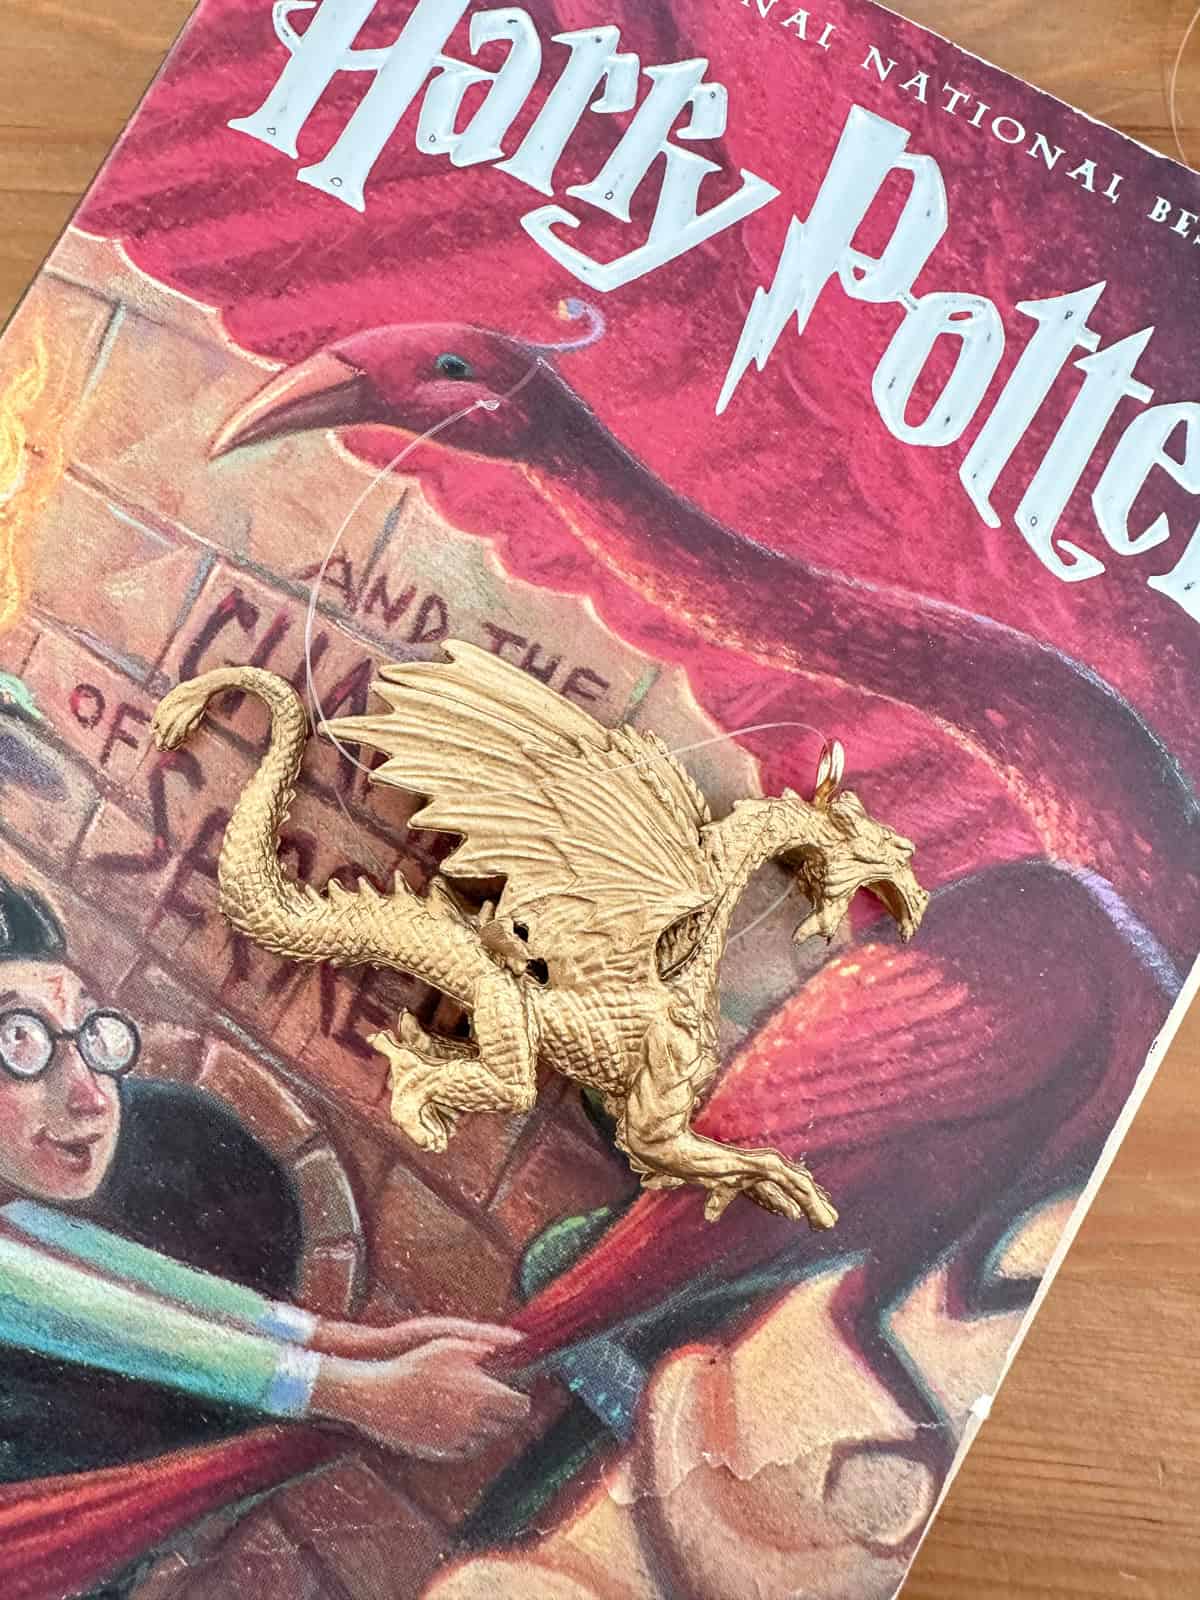
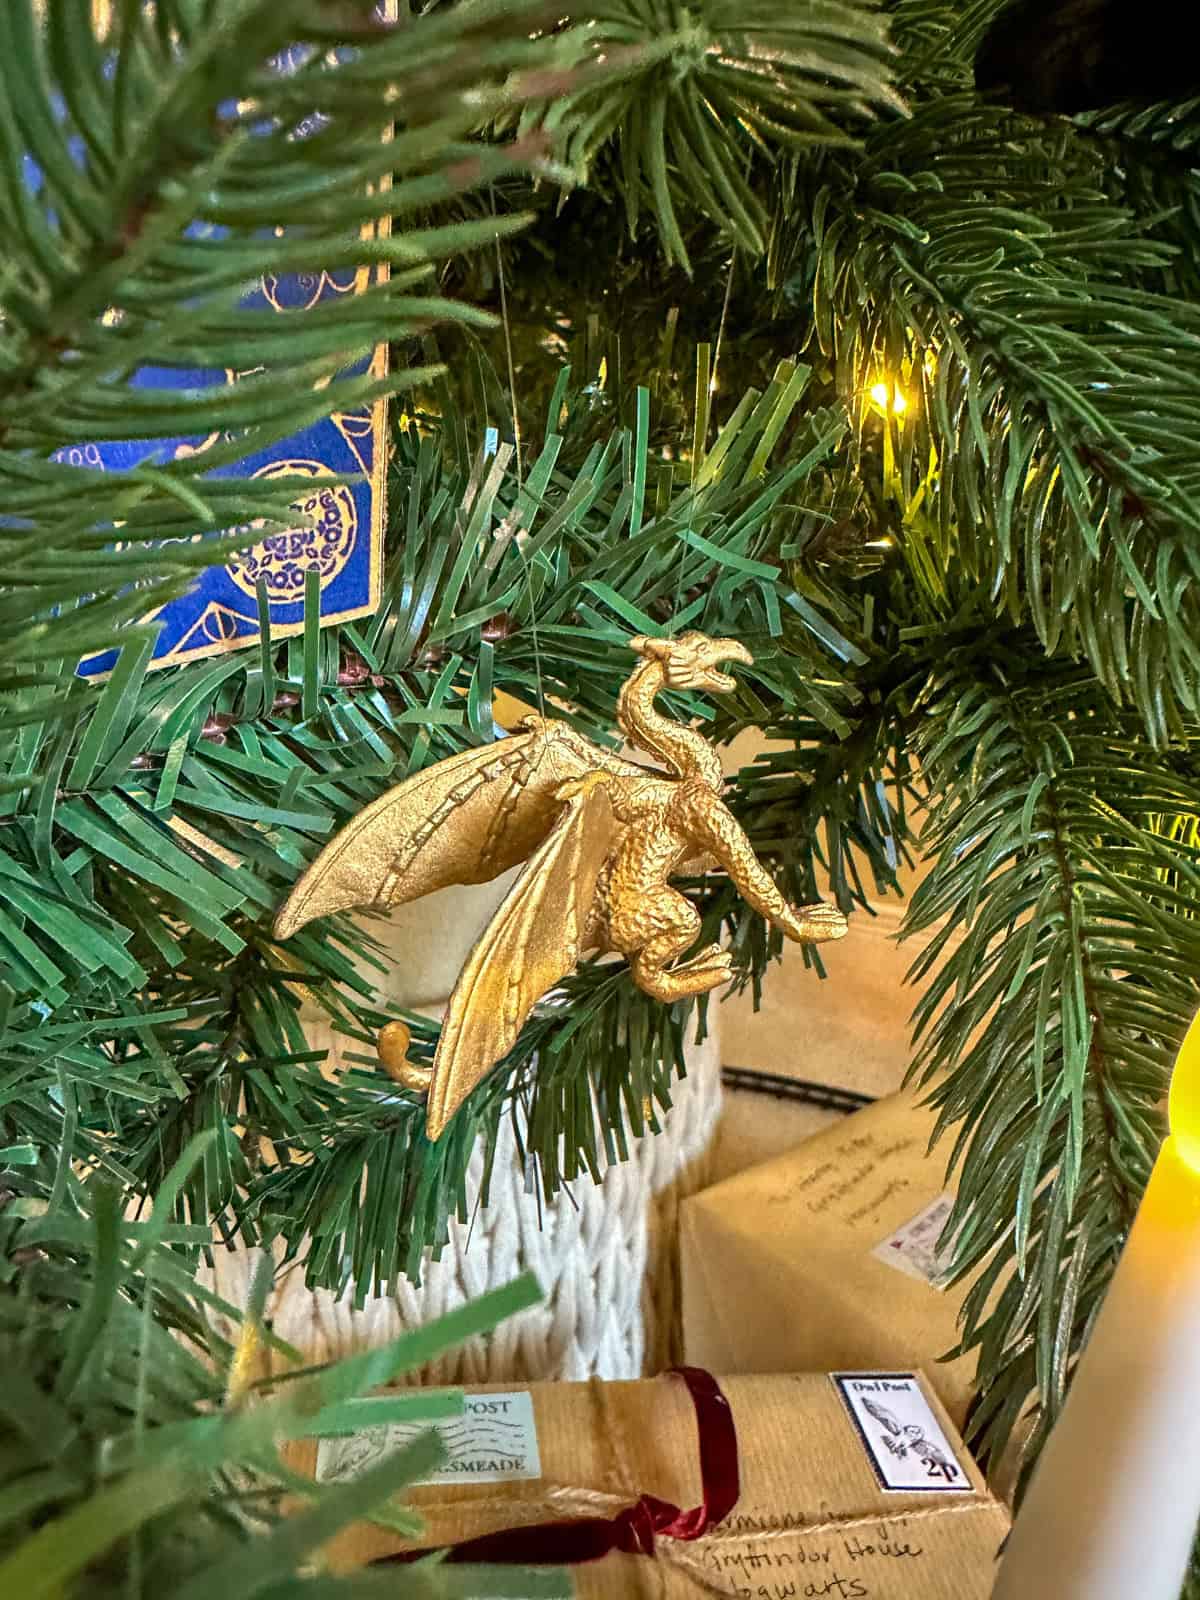
Gold spray painted dragon ornament on Harry Potter and the Sorcerer's Stone book for homemade Harry Potter ornaments and themed Christmas decorations.
DIY gold dragon Chrismas oranment hanging on a Harry Potter themed tree.

Mini Brooms

Halloween mini brooms get a second life! Cover any bright thread with black leather lacing and add fishing line for hanging. Position some horizontally like they're flying. ($0.50-$1 each)
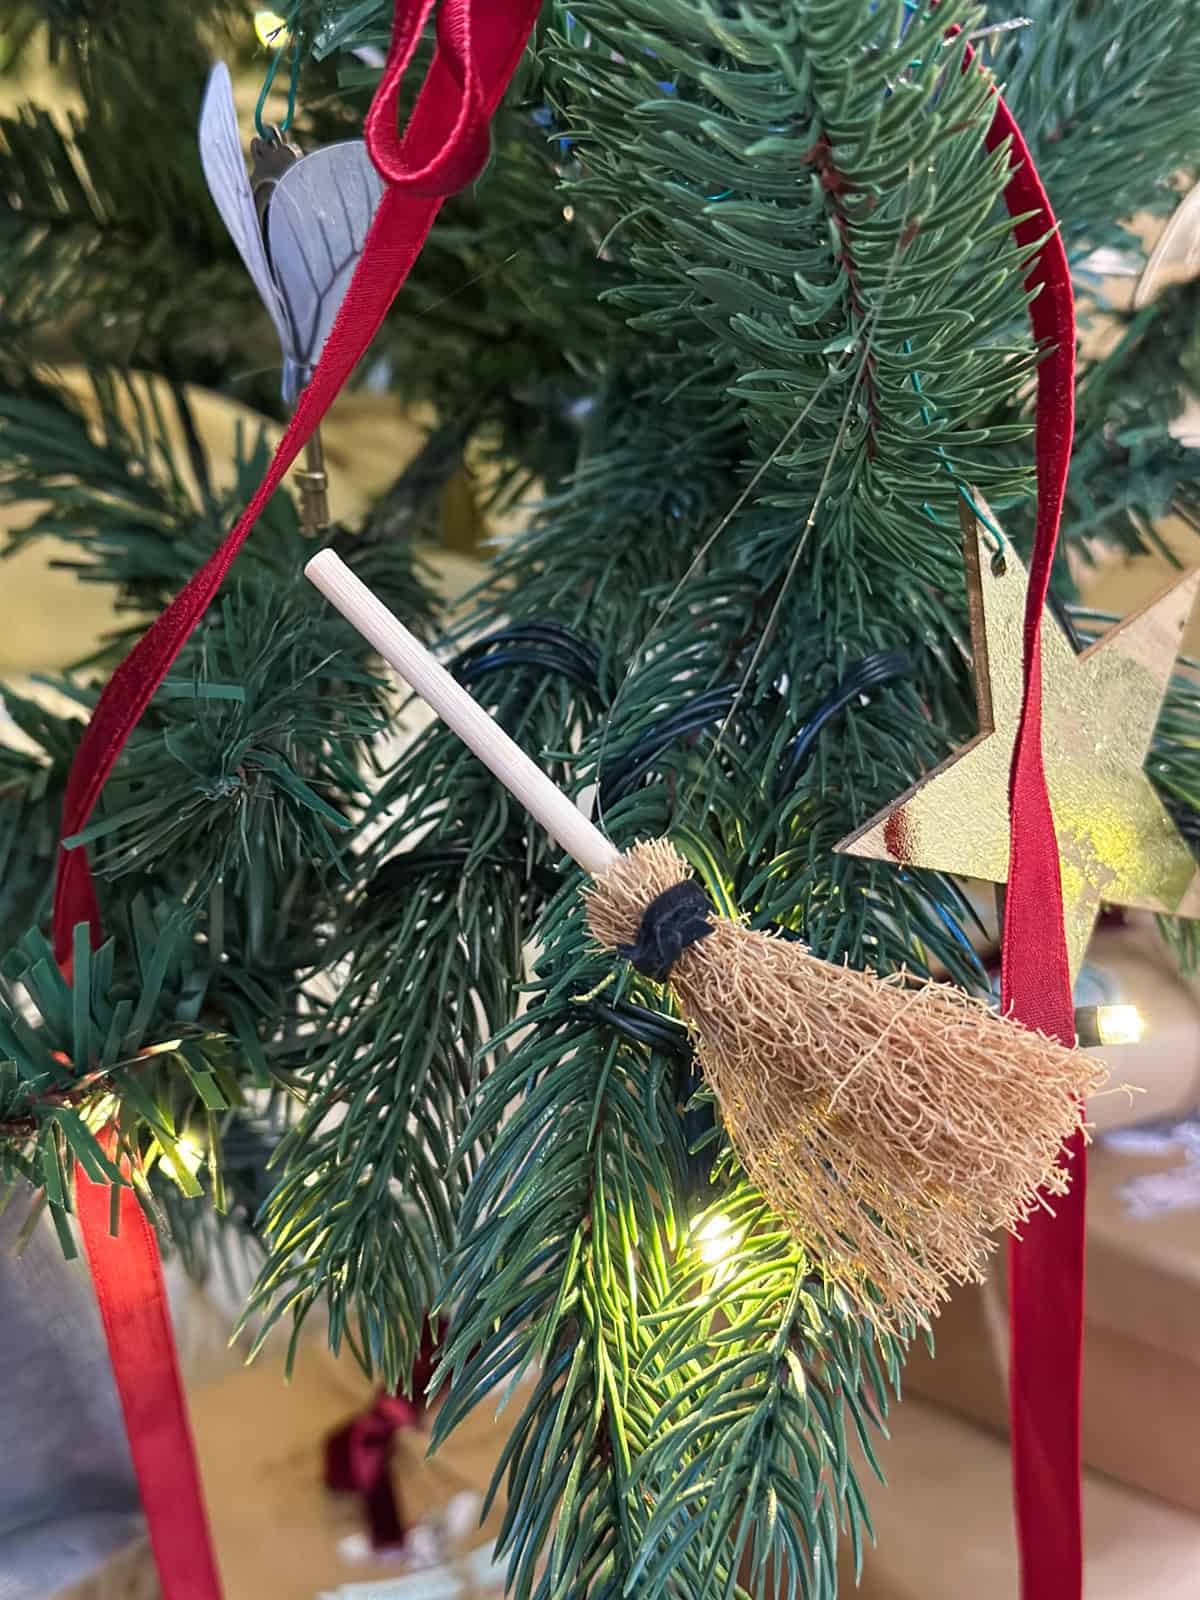
Halloween mini broom repurposed as Christmas ornament for budget Harry Potter Christmas tree.

Witch Hats

Small felt black witch hats from Halloween with ribbon. Use a needle and thread to add fishing line for hanging. ($0.50-$1 each)
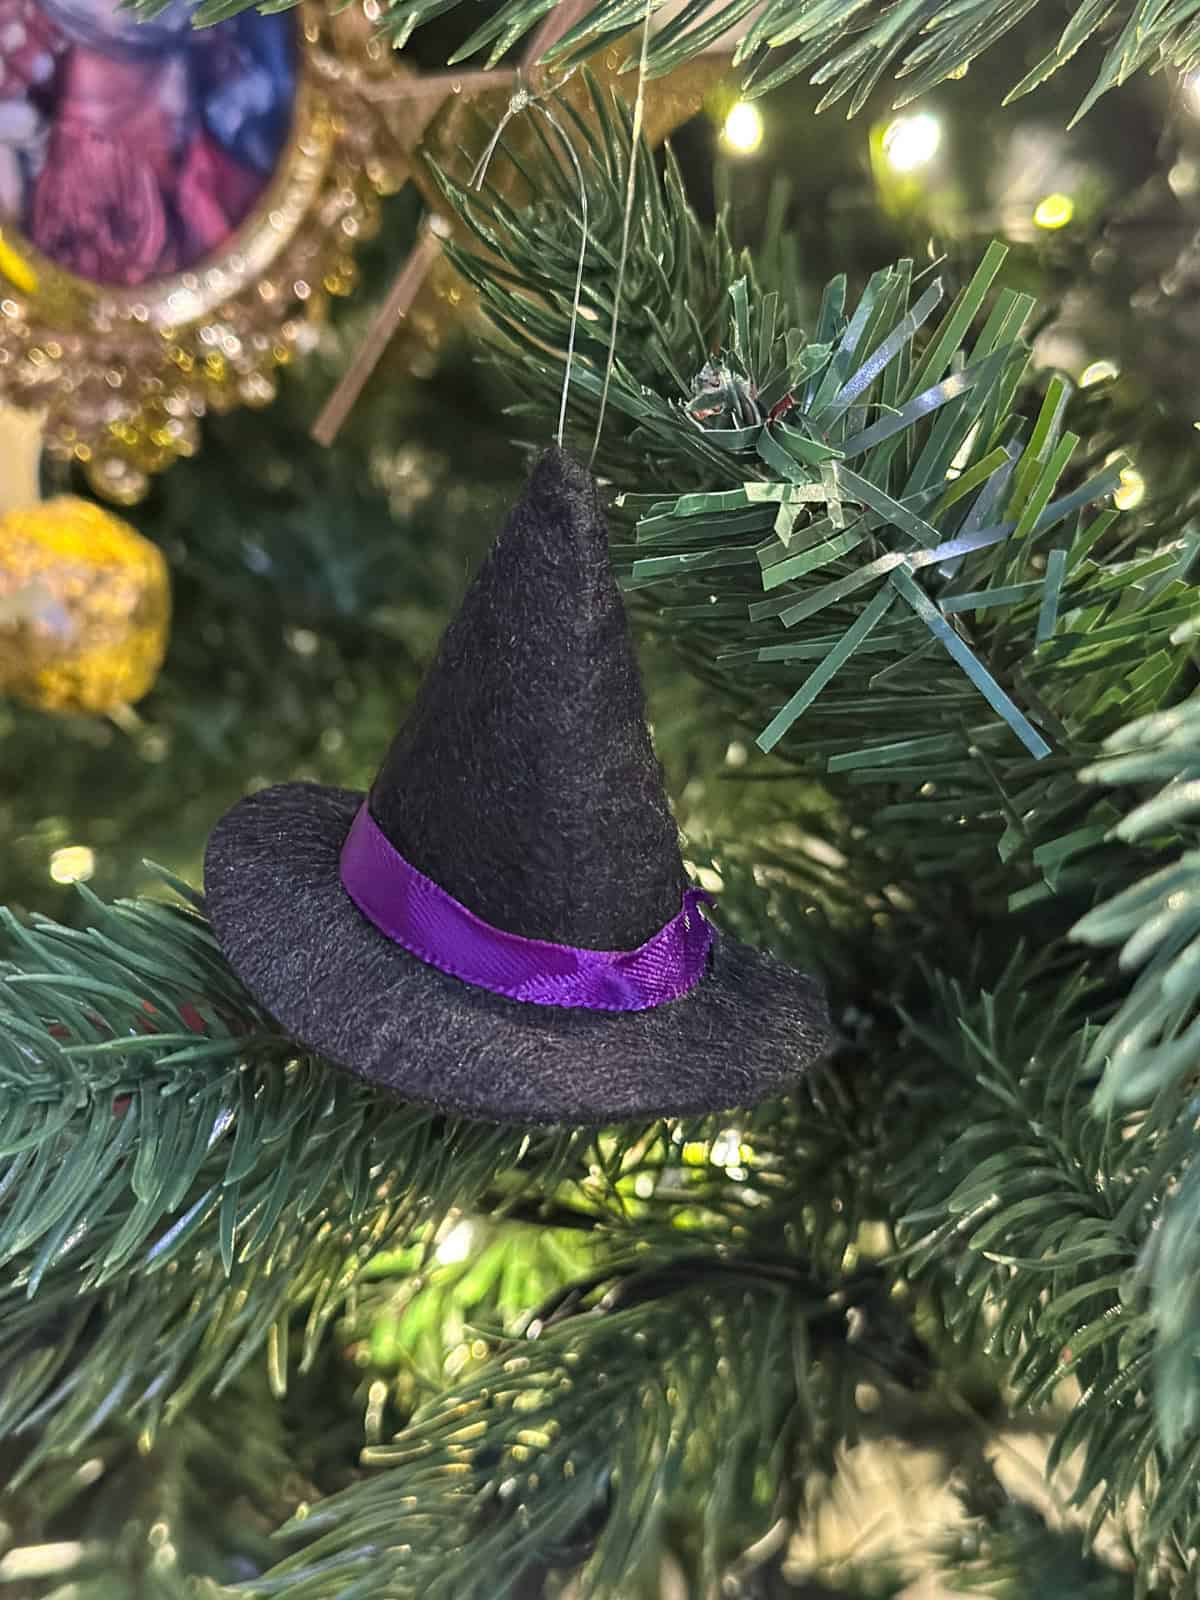
Black felt witch hat with purple ribbon repurposed from Halloween for homemade Harry Potter ornaments and holiday decor.

Cauldrons with Potions

Mini black cauldrons with green, and white wool tucked inside to look like bubbling potions. Use the cauldron handle for hanging. ($0.50-$1 each)
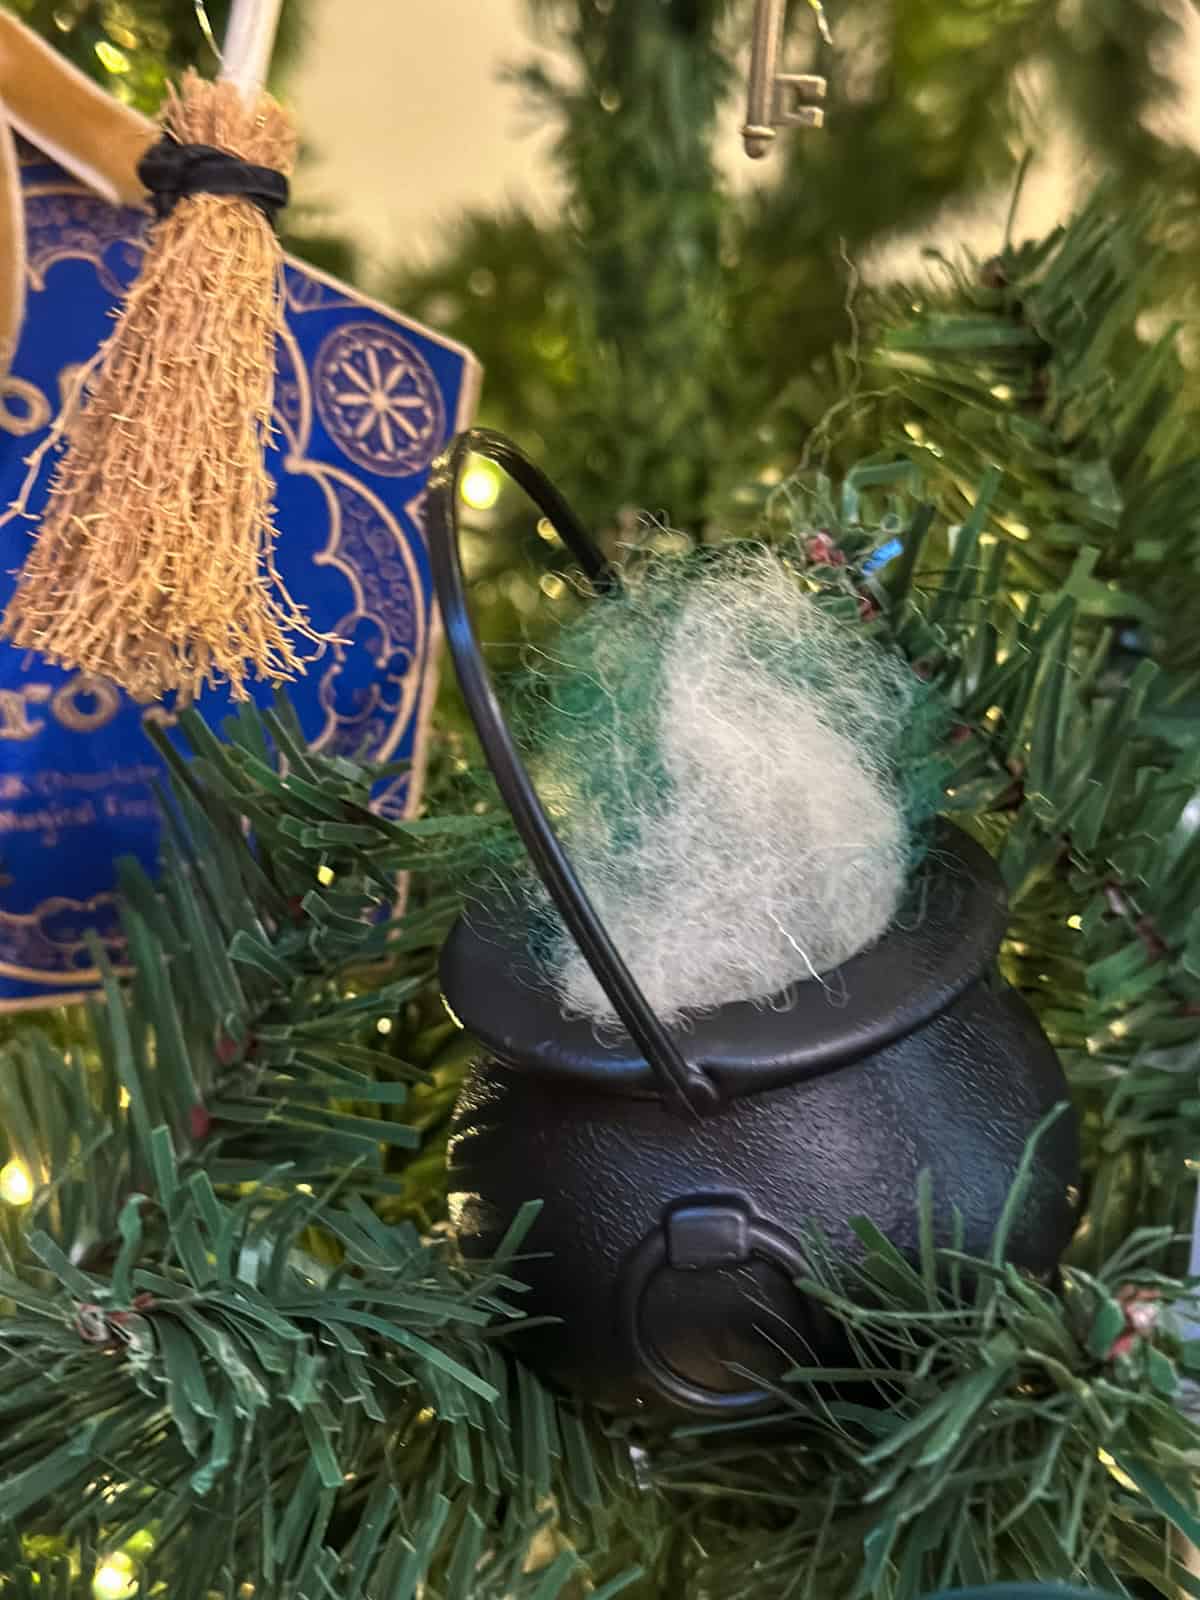
Mini black cauldron ornament filled with white wool potion on Harry Potter Christmas tree for DIY holiday decorations.

Floating Candles

Battery-operated floating candles with wand remote control (search "flameless floating candles Harry Potter style"). Hang with fishing line at varying heights. They flicker like real candles! This is one of my favorite details, and a must for Harry Potter in my opinion. Reuse them for Halloween decor too. ($20-30 for set of 10)
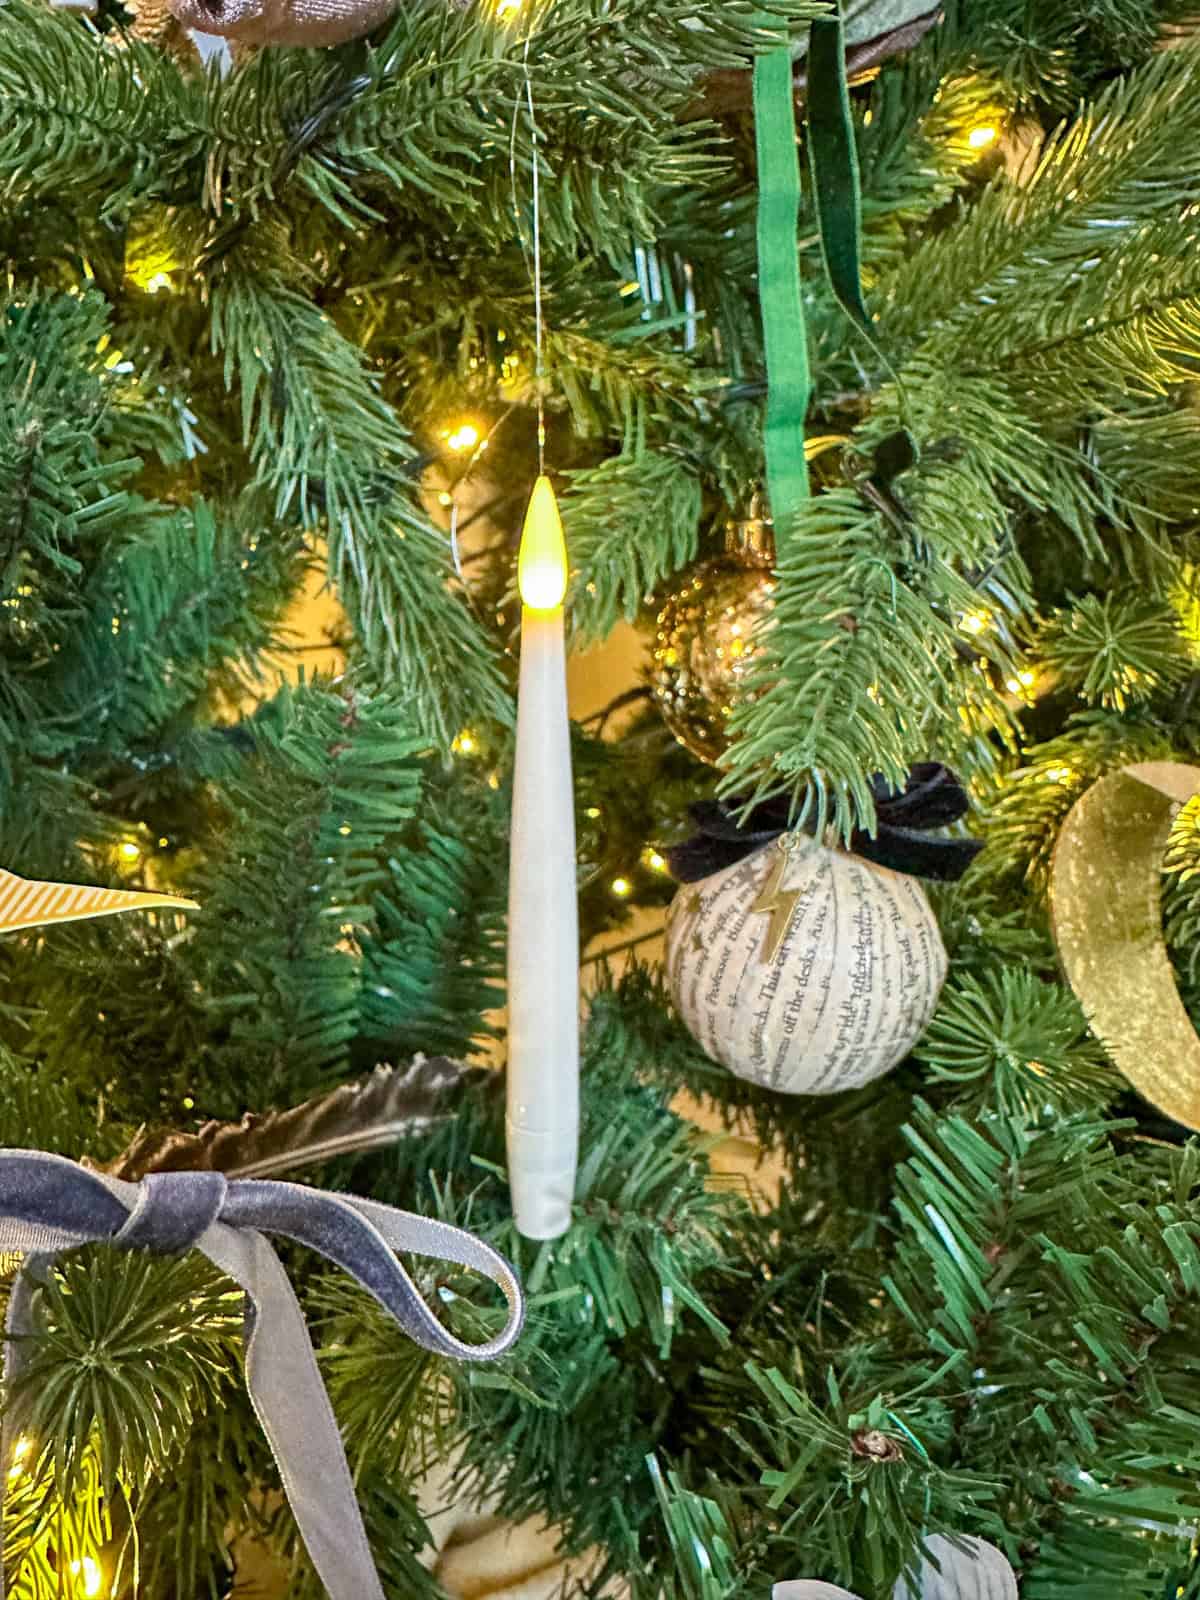
Floating candle on a Harry Potter themed Christmas tree.

Flying Keys

I ordered an easy kit that came with gold keys, and wings from Temu, check any where online. Use the included fishing line to tie wings on to the keys, and hang. Tip: If the wings come creased, use a warm iron to flatten them before attaching them to the keys. (Less than $0.50 each | 24 piece set)
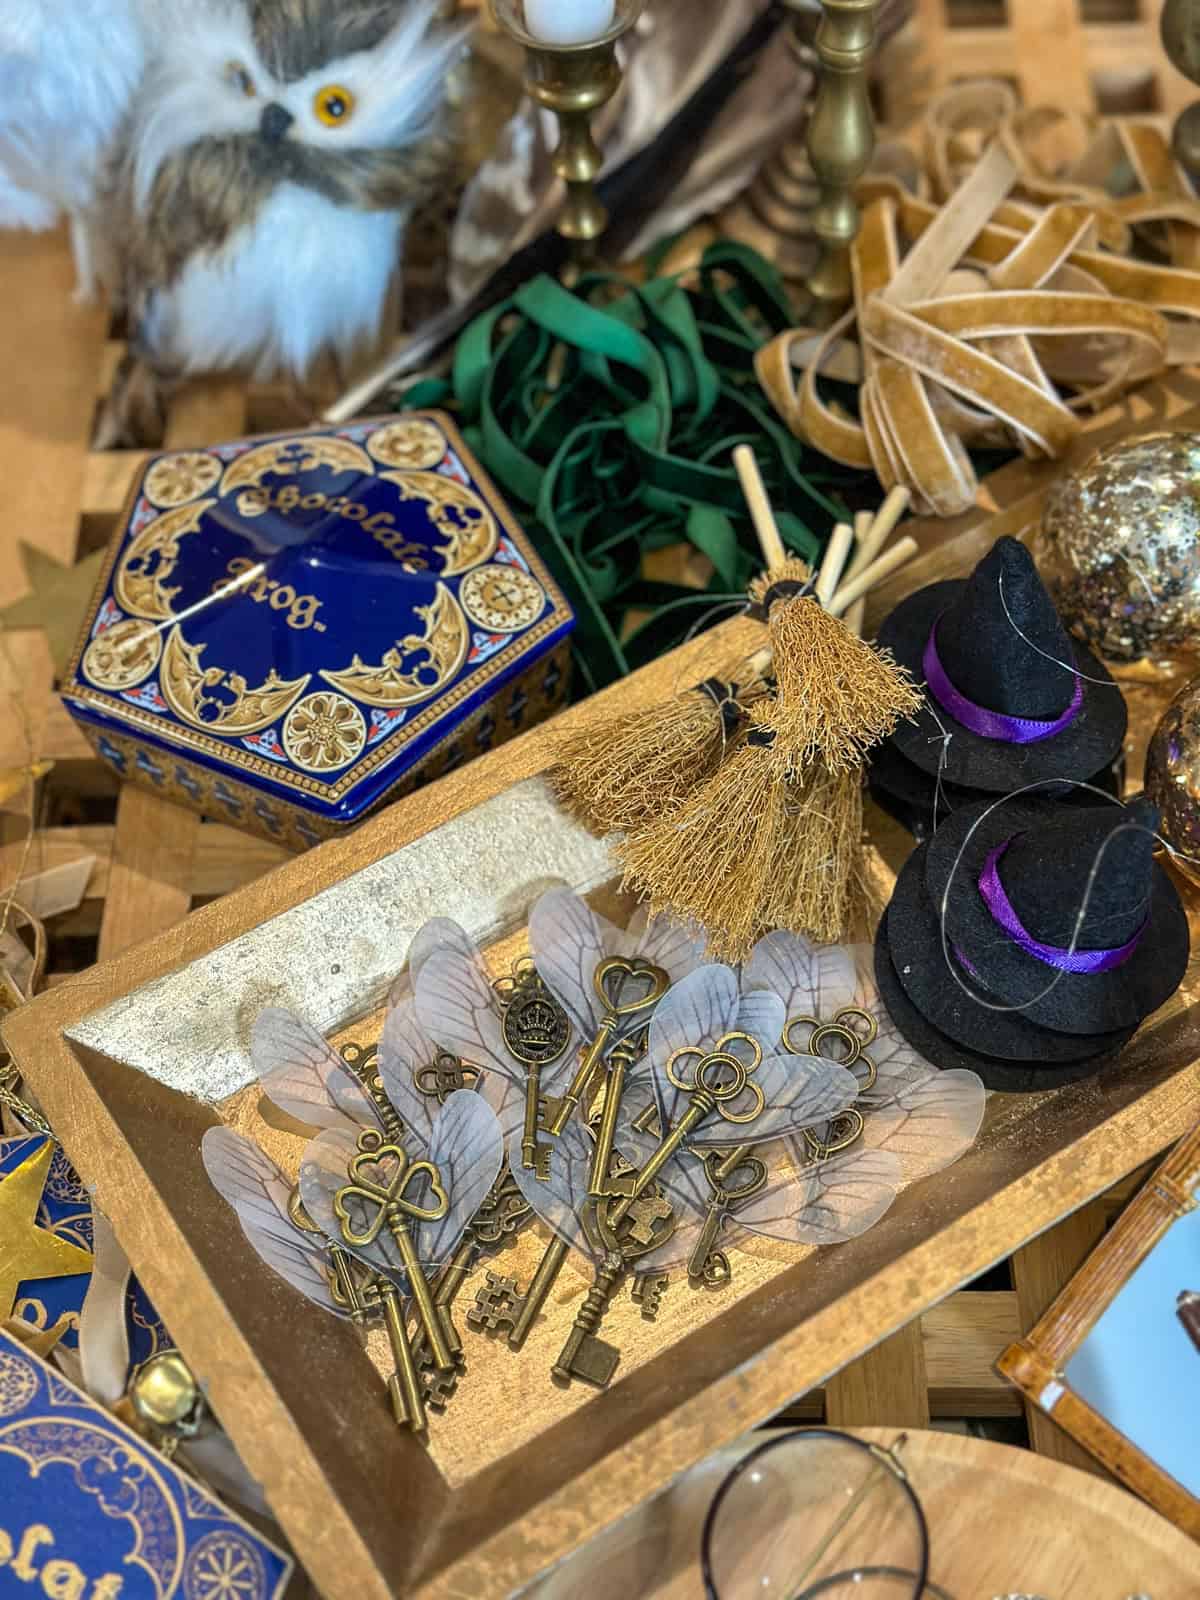
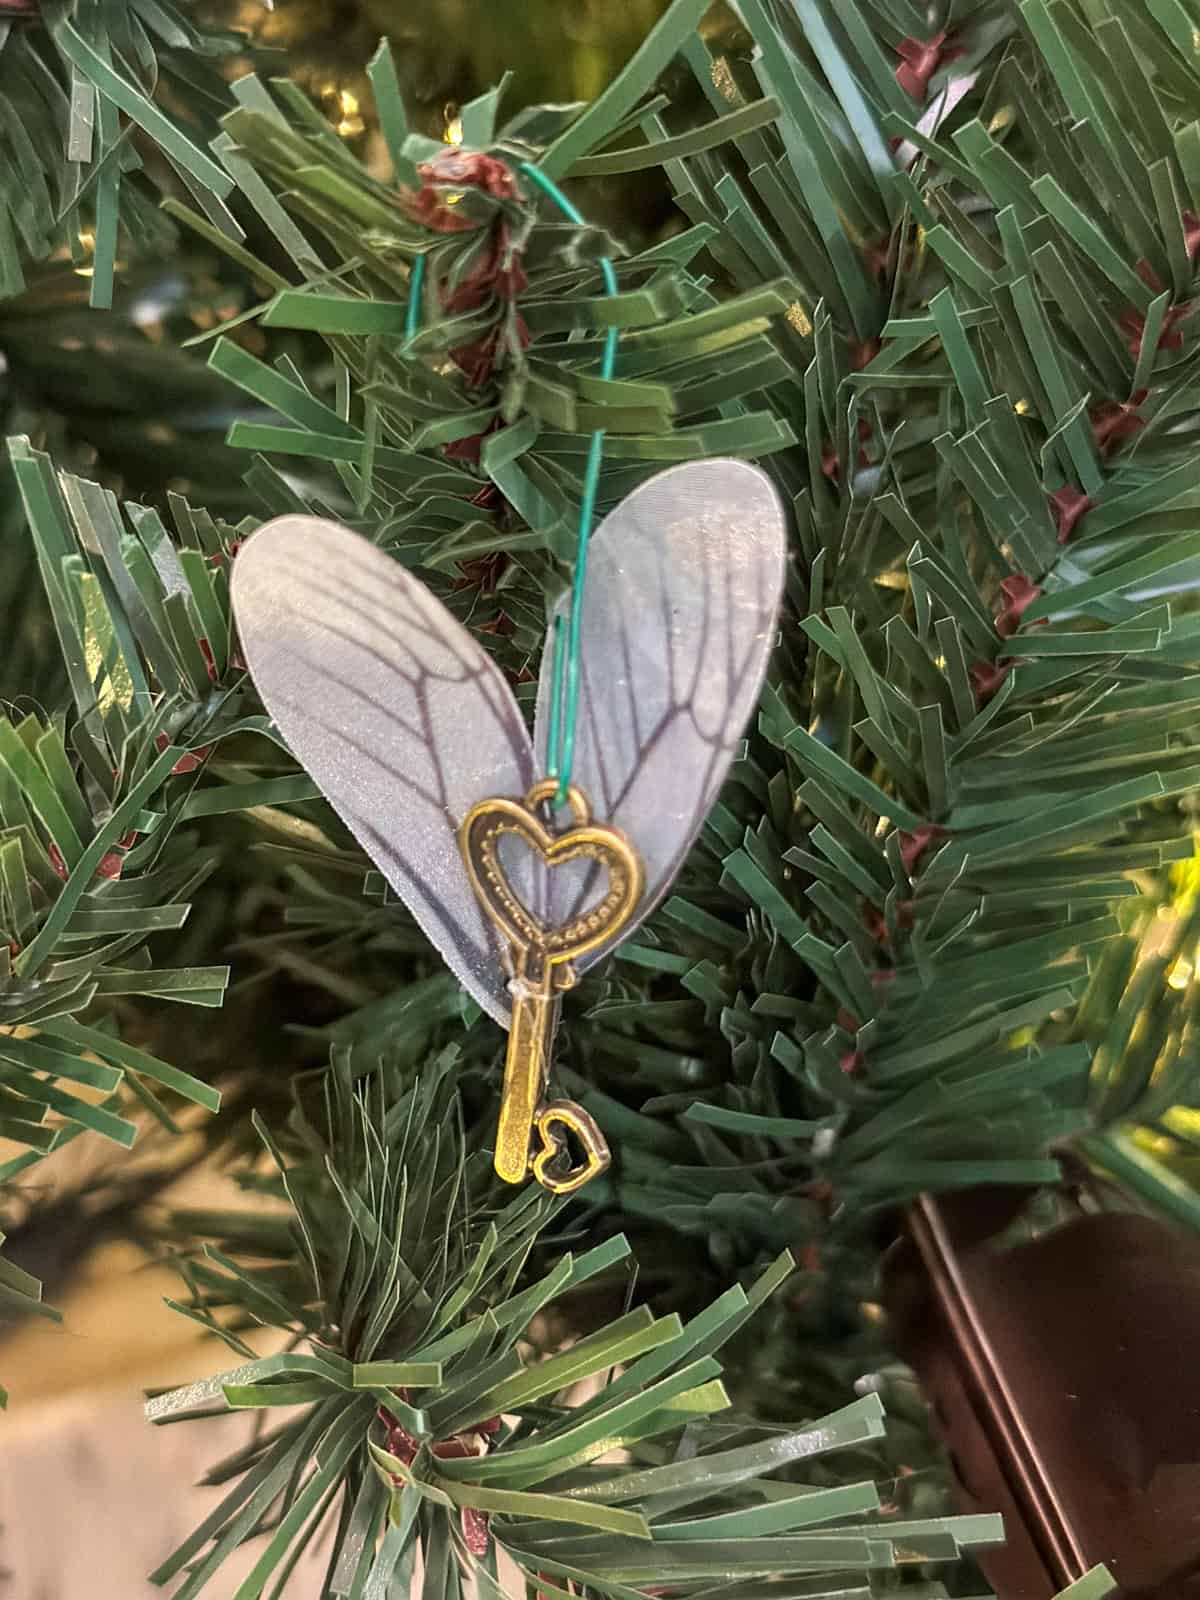
Flying keys ornaments with wings in gold tray for homemade Harry Potter Christmas decorations.
Flying key ornament on a Harry Potter themed Christmas tree.

Golden Snitch Chocolates

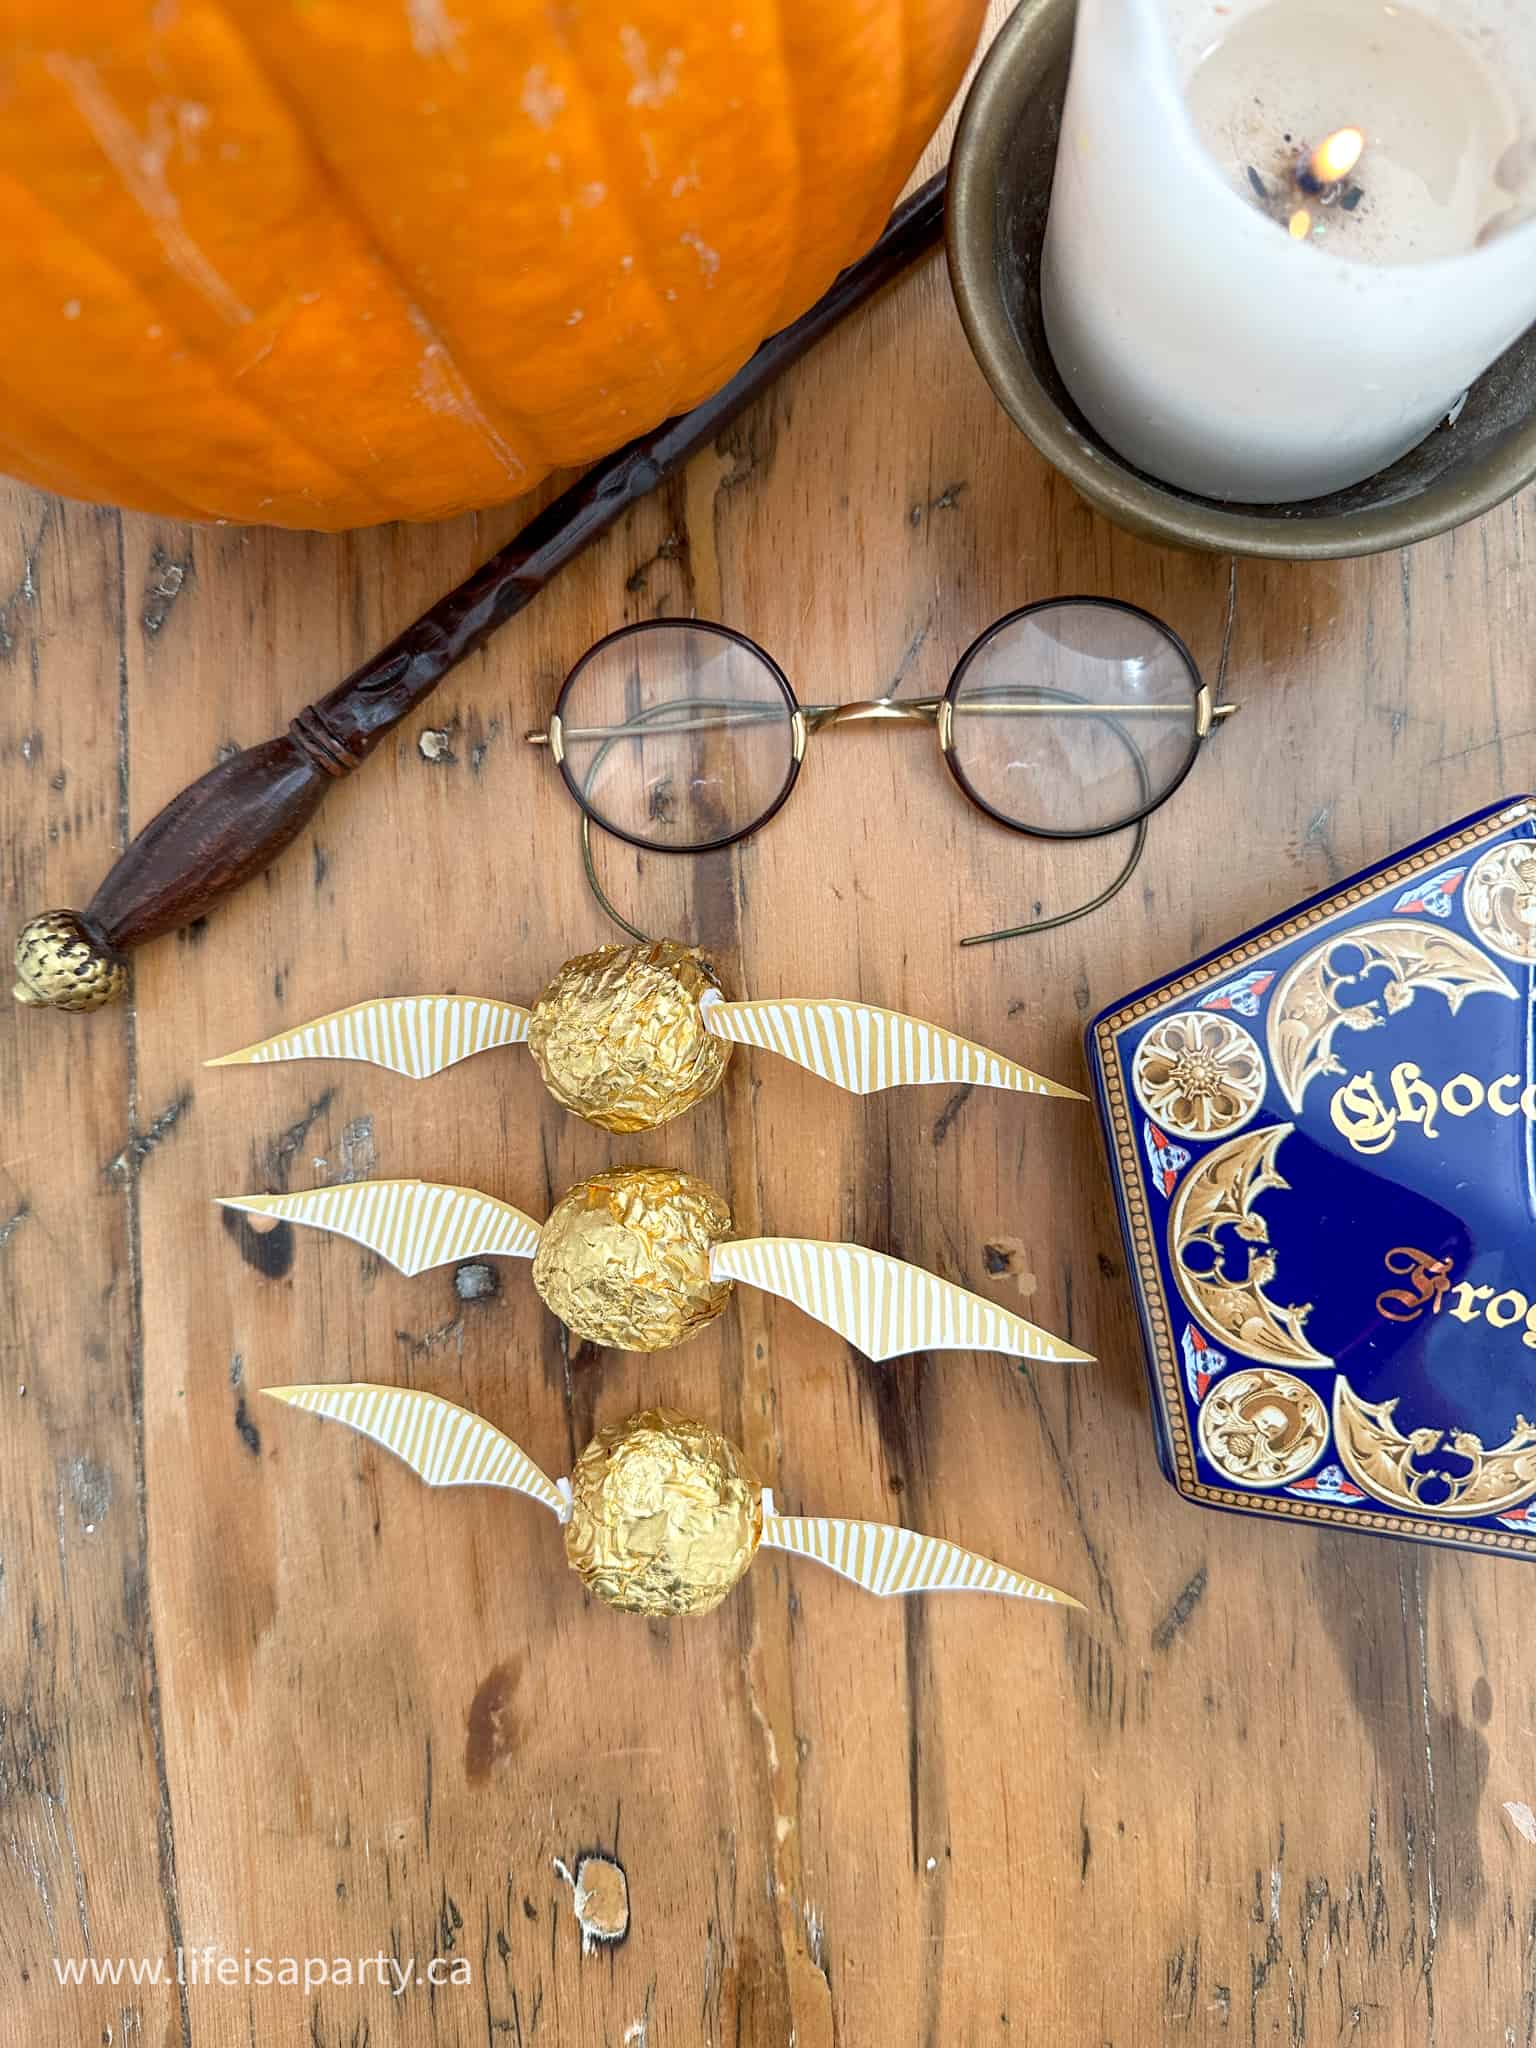
Ferrero Rocher chocolates with our free printable wings. Just print, cut them out, and attach with tiny dot of hot glue. Add a fishing line hanging sting with hot glue also. When I was a kid we used to get chocolate ornaments that were bells and Santas in foil, and the rule was after Christmas Day, you could eat them. Use the same rule for these cute treats. ($1 each)
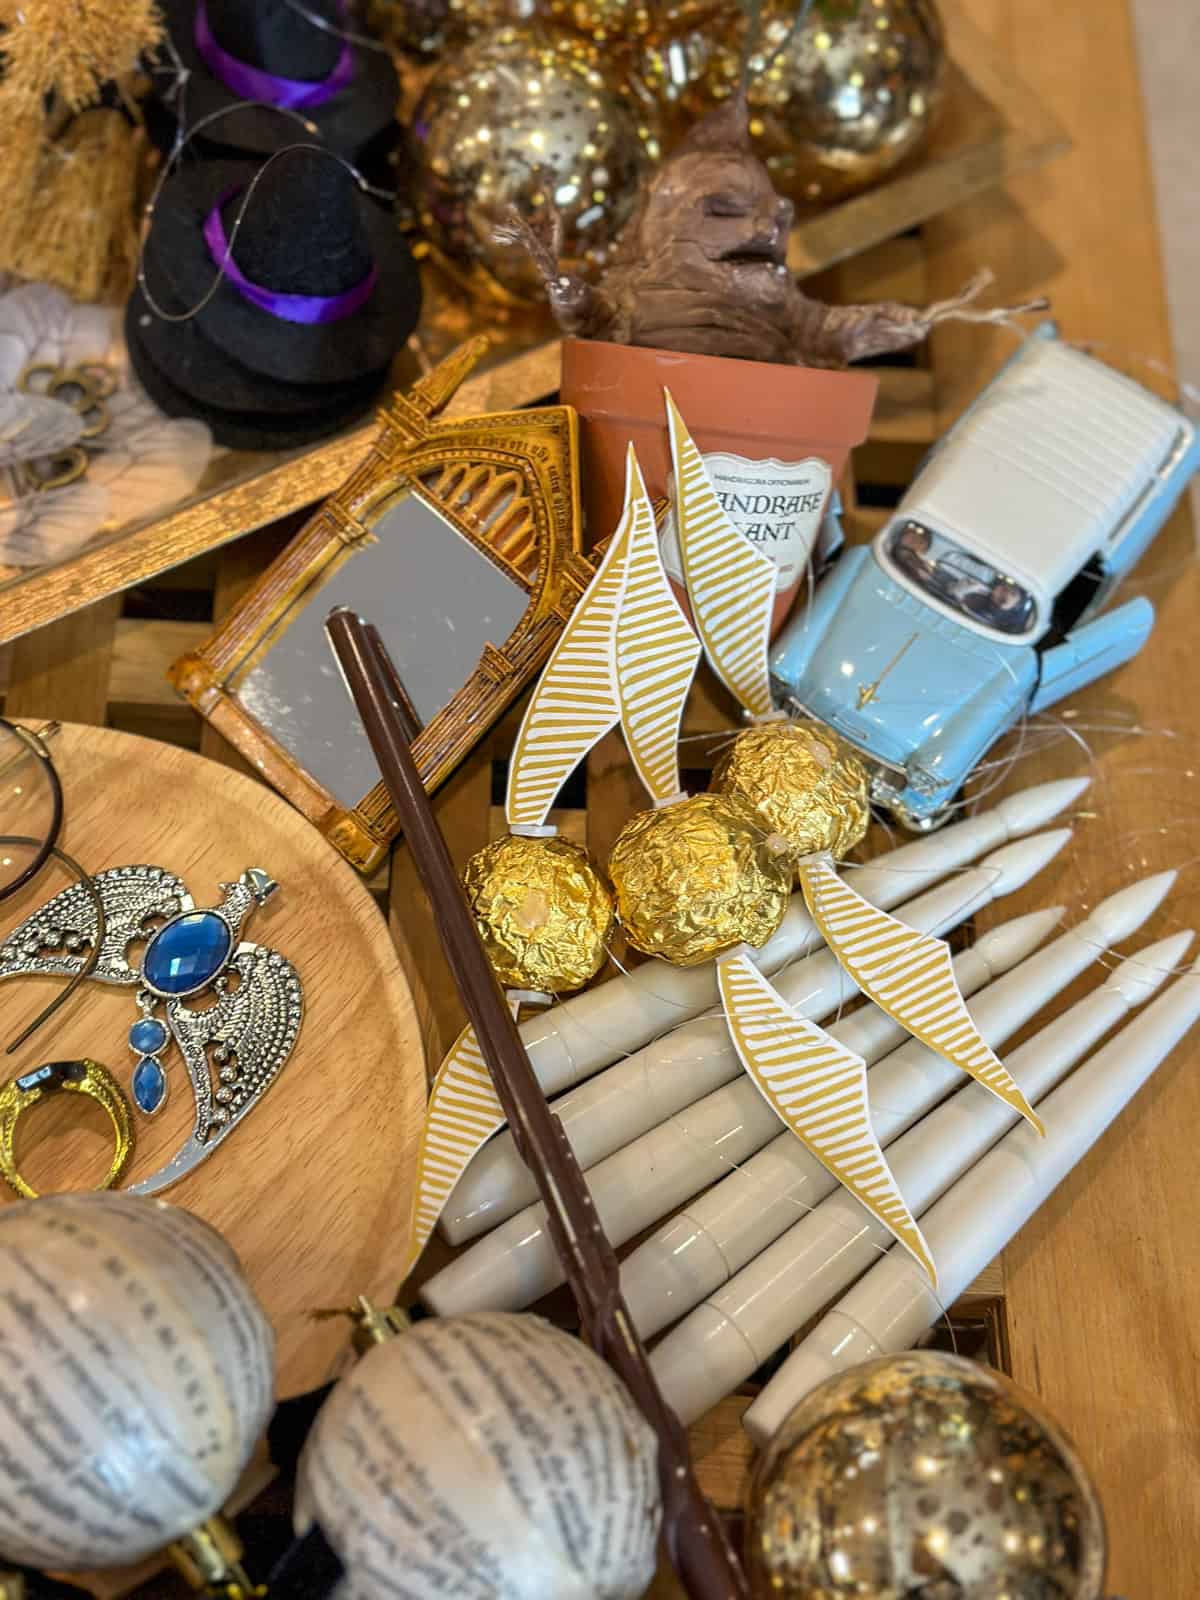
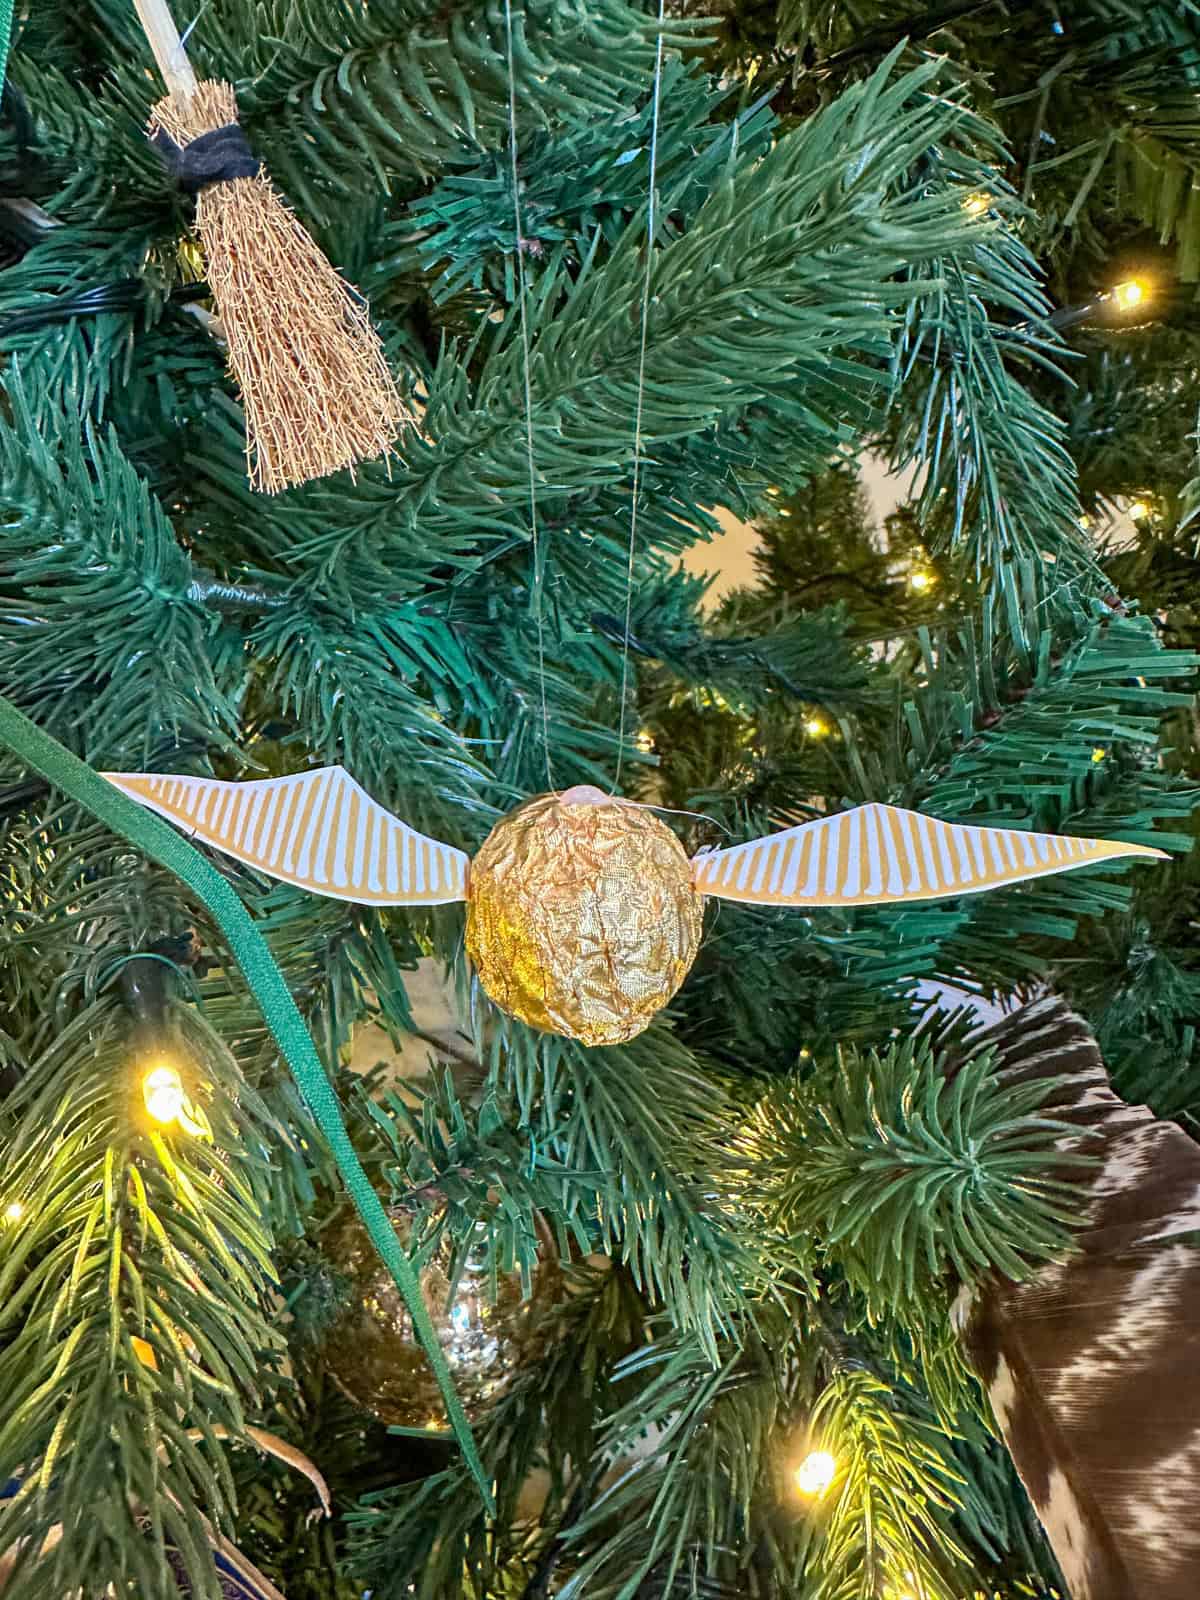
Ferrero Rocher golden snitches with free printable paper wings for homemade Harry Potter Christmas tree decorations.
DIY golden snitch Christmas ornament made with chocolate and free printable wings on a Harry Potter Christmas tree.

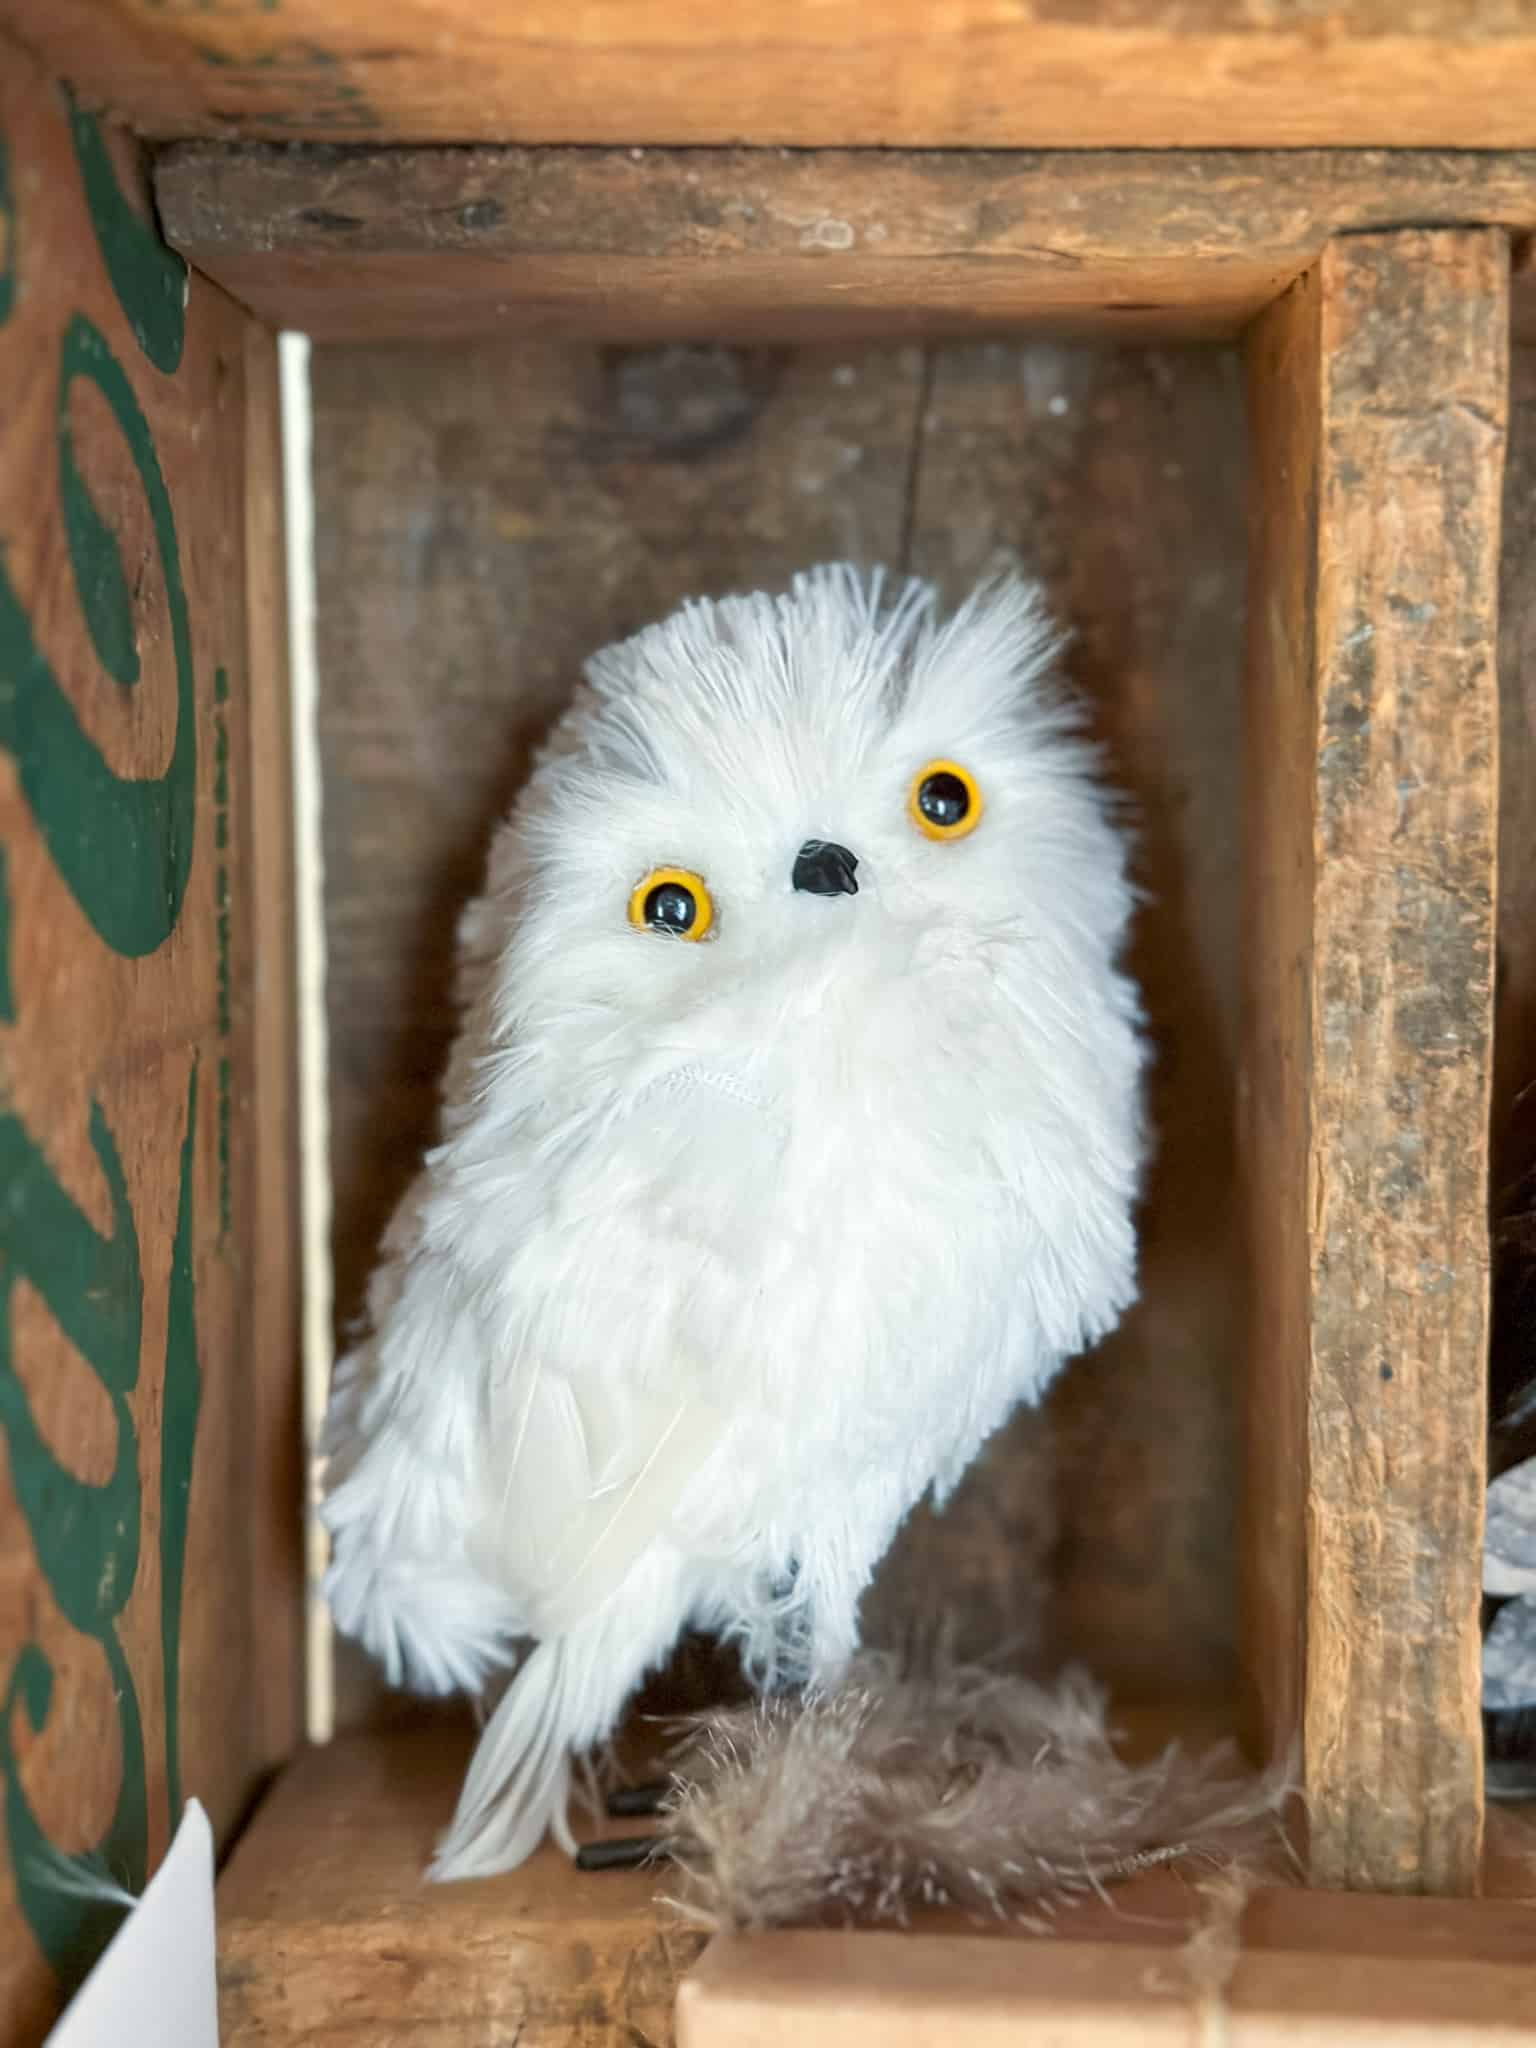
Owls and Feathers

Various small owl figurines plus loose feathers tucked in branches.
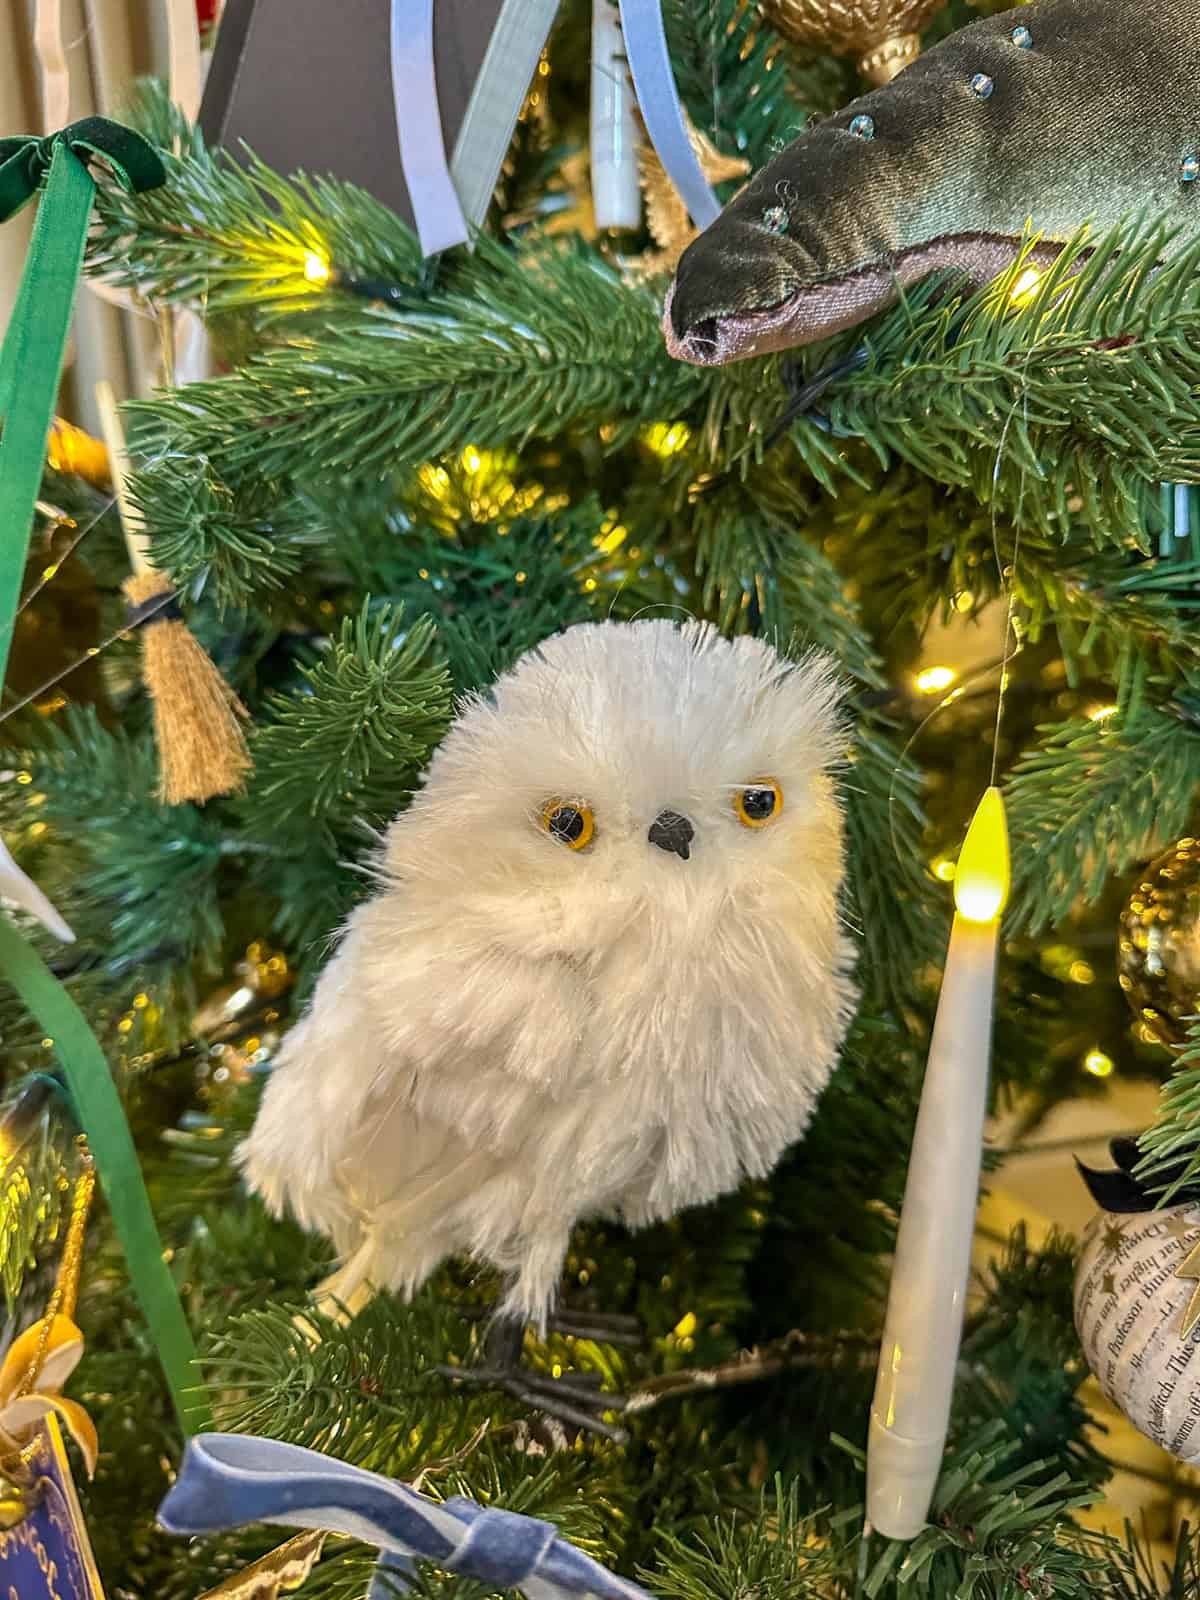
White owl oranment on a Harry Potter themed Chrismas tree.
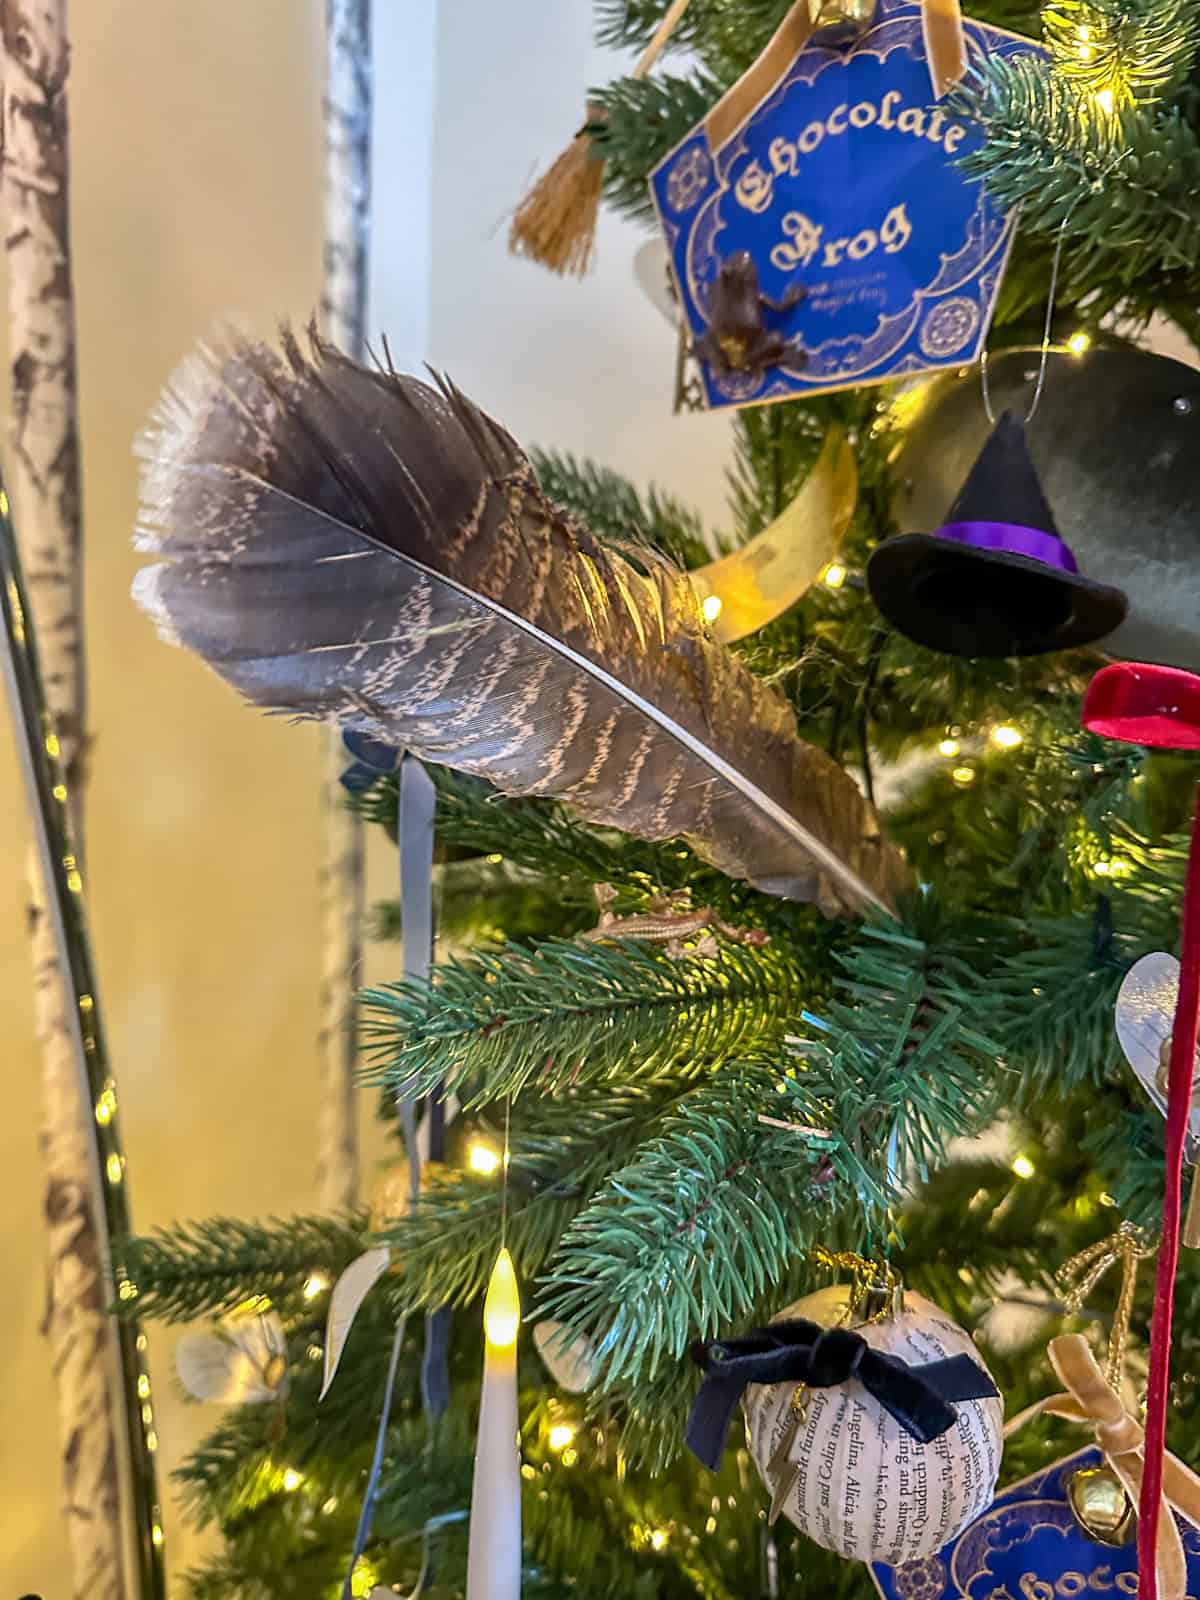
Real feather used as an ornament on a Harry Potter Christmas tree.

Movie Moments Additional Ornaments

Ministry of Magic Toilet

Tiny dollhouse white toilet with printable sign - always makes people laugh!
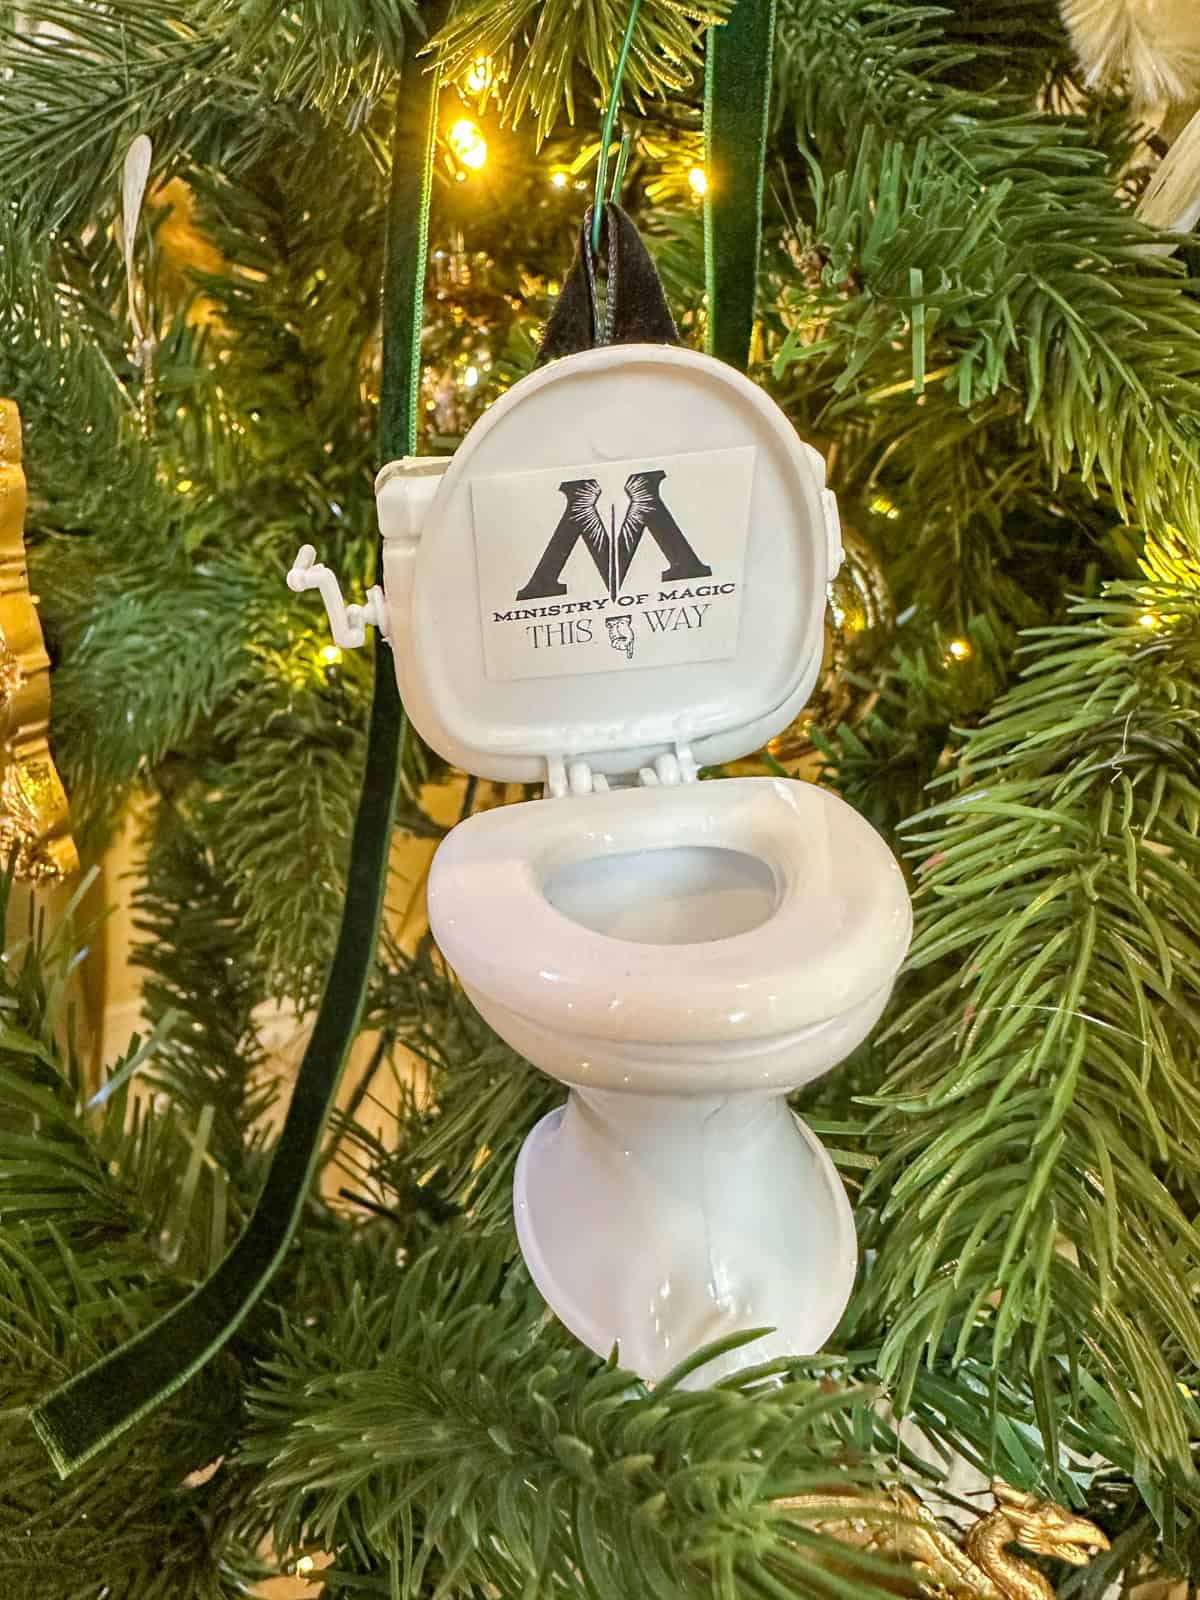
Ministry of magic this way sign on a miniature toilet used as a Christmas decoration on a Harry Potter Christmas tree.

Flying Car

Small toy car with tiny Harry and Ron cutouts in the windshield. Use our free printable to make your own.

Flying car ornament with Harry and Ron in windshield for Harry Potter Christmas tree decorations.

 Mirror of Erised

I found this inexpensive Mirror of Erised online and thought it was a great additon.(Cost $5)
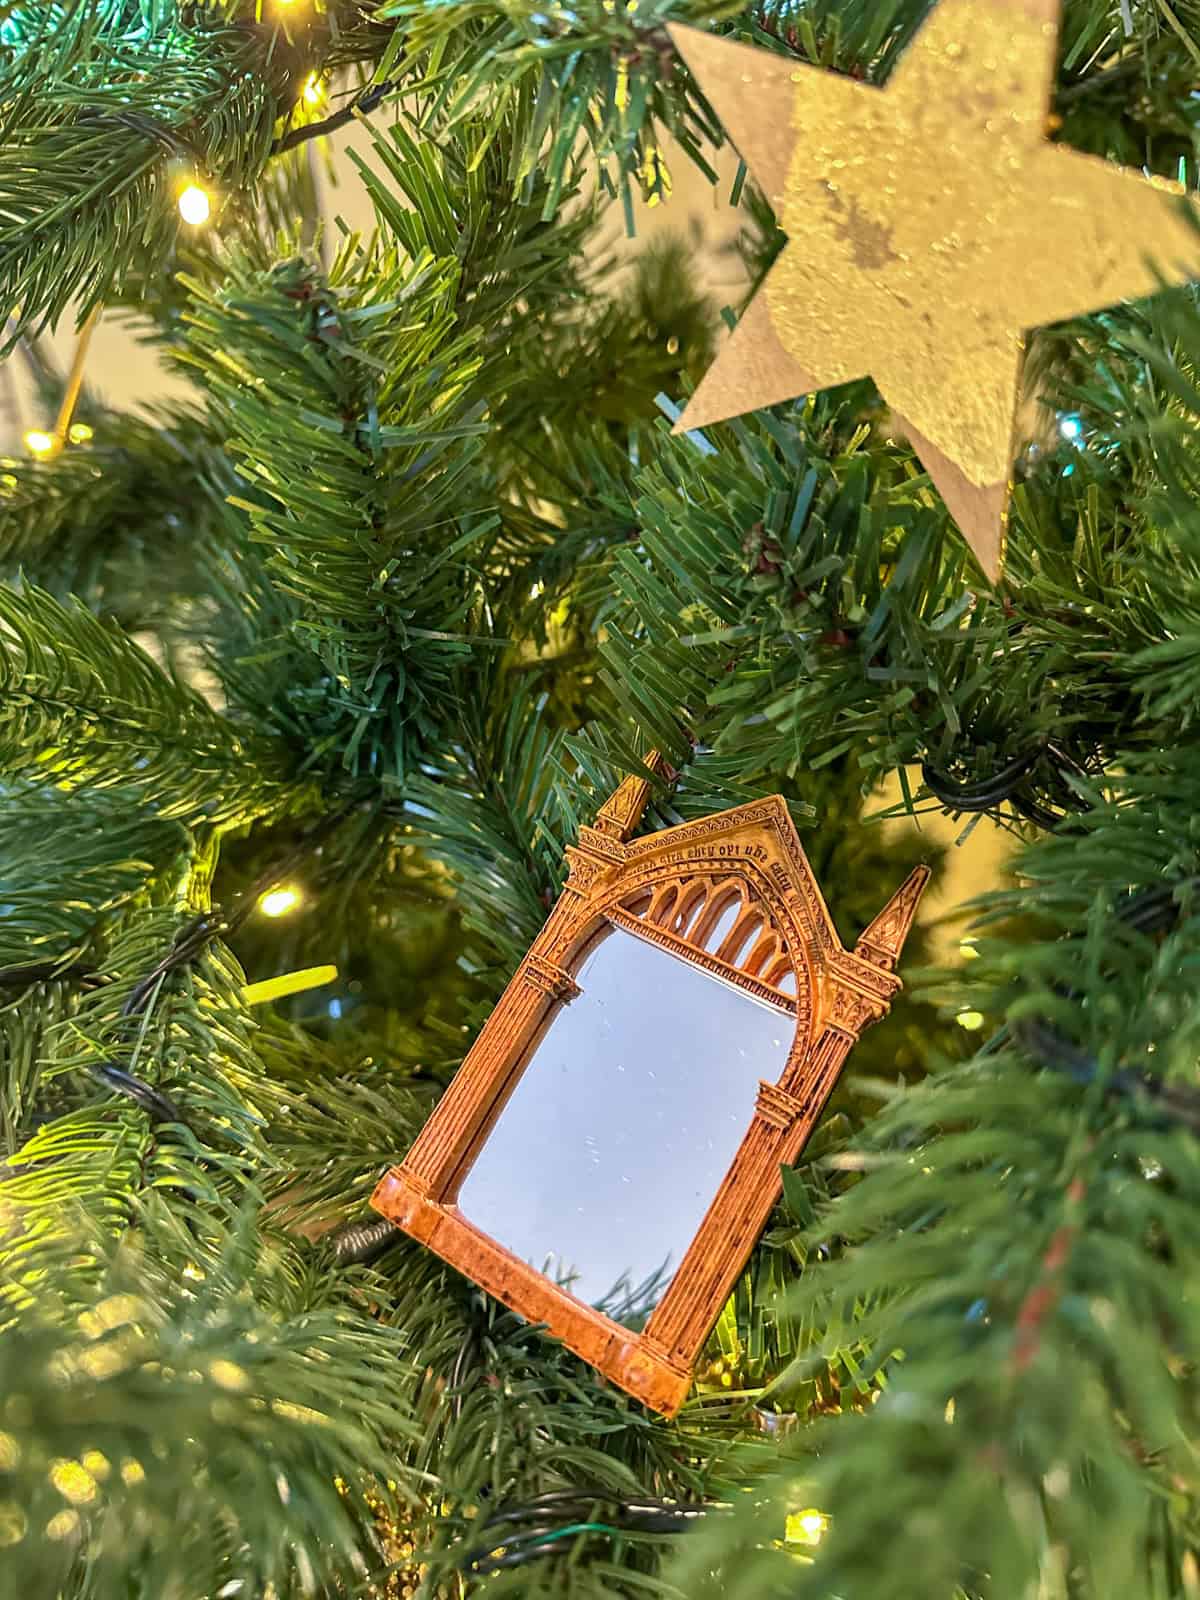
Miniature Mirror of Erised on a Harry Potter themed Christmas tree.

Time Turner

Look for inexpensive ones on-line at places like Temu, Alliexpress, or Amazon. (Cost $5)

Time turner ornament with gold chain on Harry Potter Christmas tree for DIY holiday decorations.

Dobby's Sock

Small sock on the tree representing freedom -watch everyone say awe as they notice it and remember Dobby.
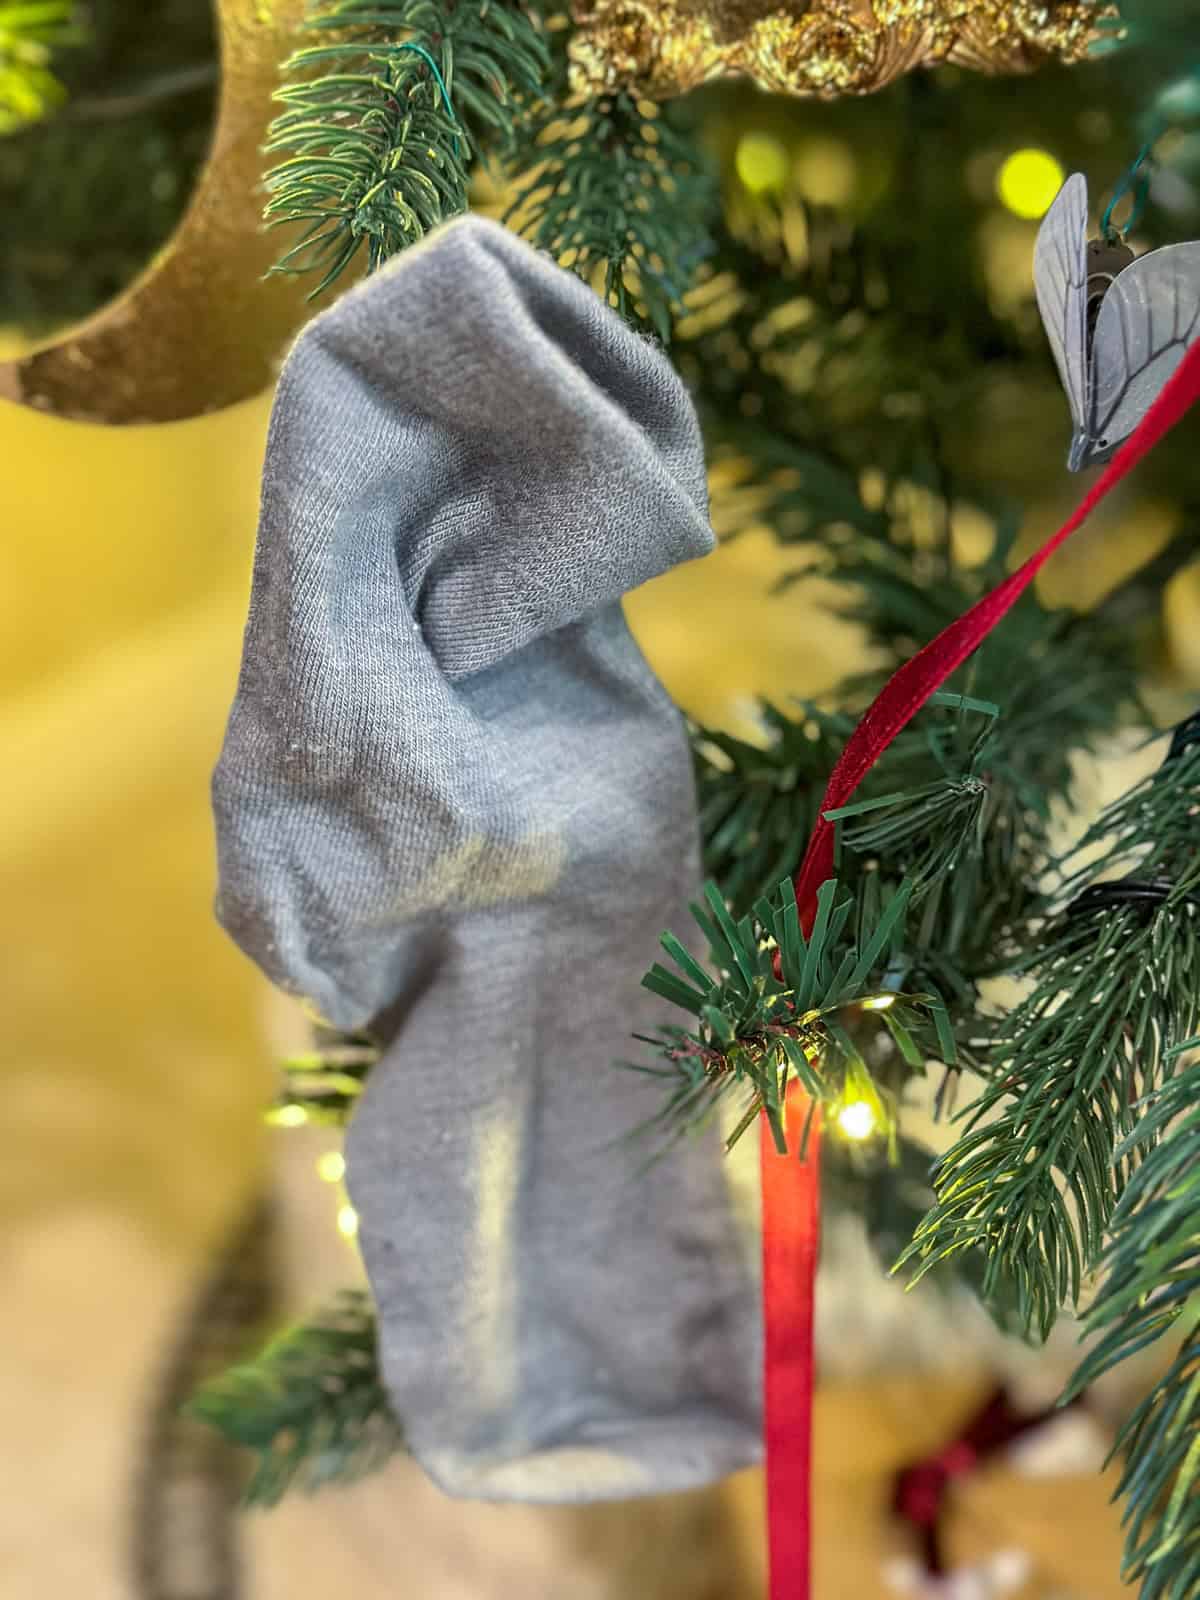
Dobby's sock ornament with red ribbon on Harry Potter Christmas tree for DIY holiday decorations.

Tree Topper: Flying Santa on a Broomstick
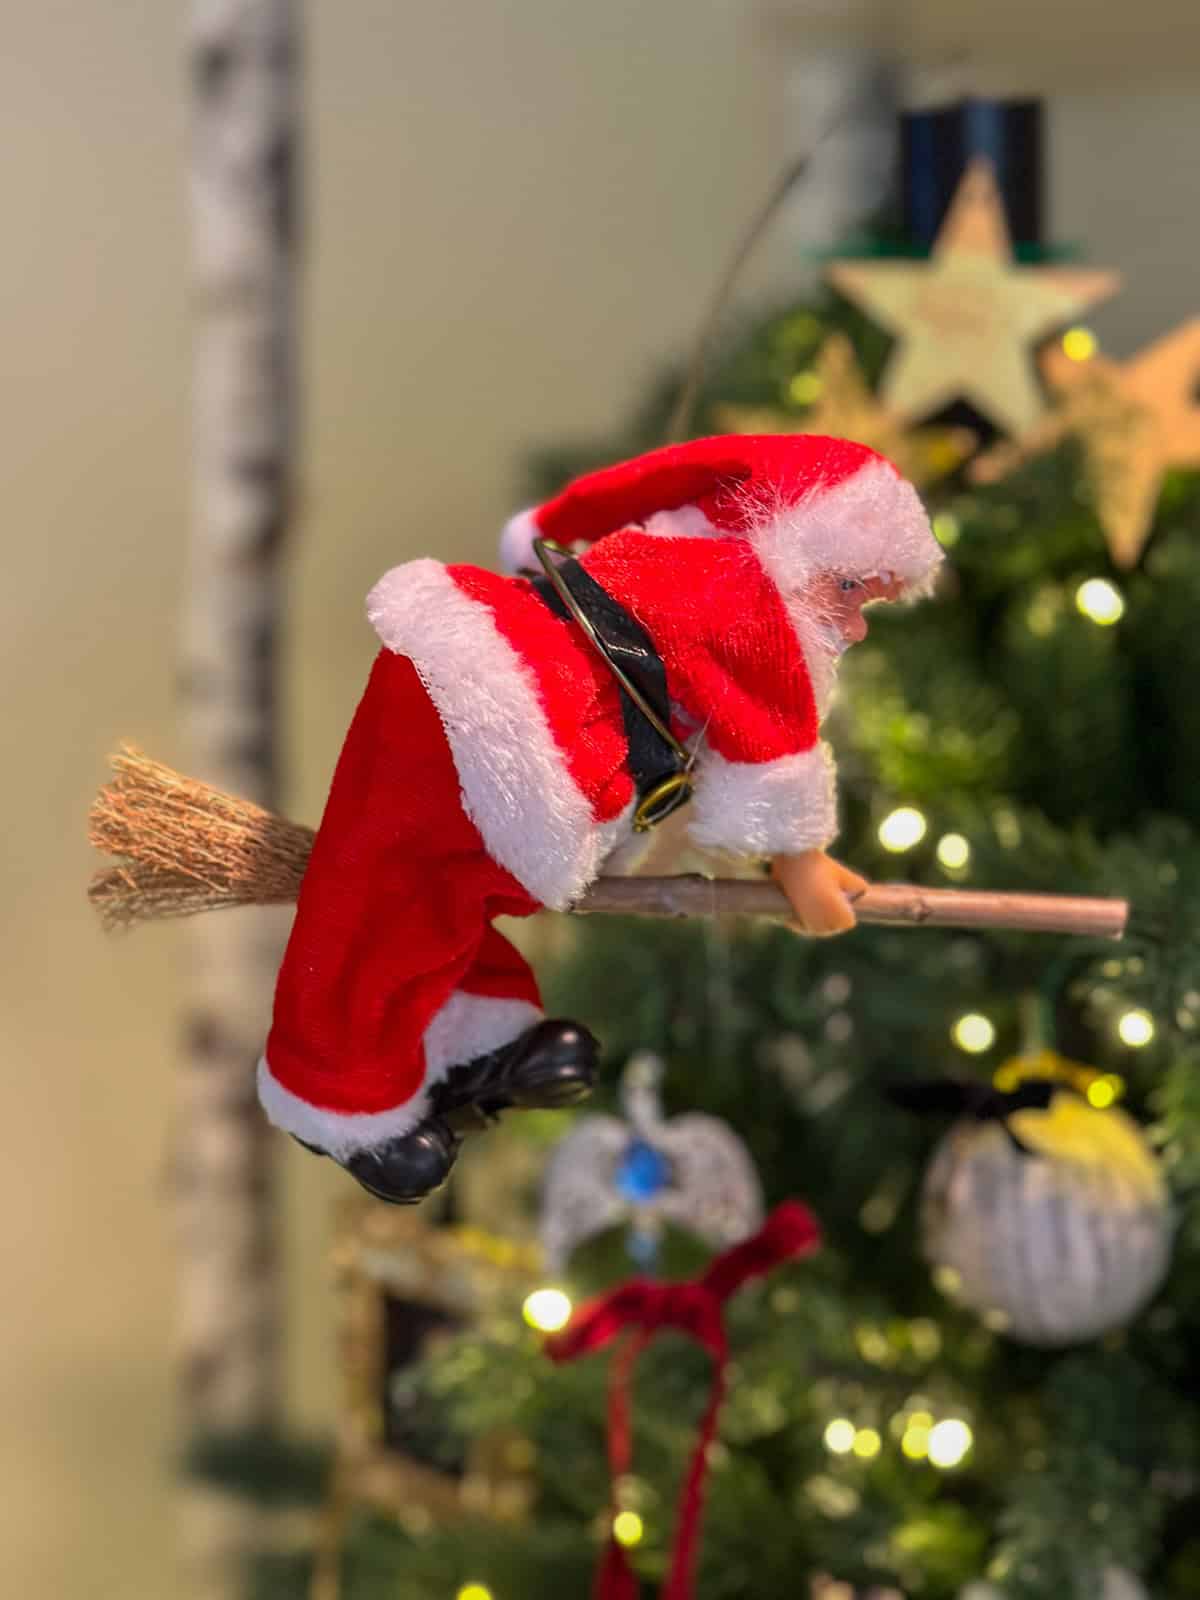
Motorized Santa flying on broom tree topper for Harry Potter themed Christmas tree decorations.

This is the most unique element! I haven't seen anyone else do this! And it was fairly simple to make and works perfectly.

We had the pleasure of going to the Harry Potter London experience last Christmas where you got to see the actual set where they filmed the movie with all the props.  It was really great, and especially great to visit in December and see it all decorated for Christmas.  When you first enter you get to see the great hall, and it's all set up for a Christmas feast, including all the Christmas trees.  The tree toppers are witches that fly around the tops of the trees on little brooms.  They're so cute -and inspiring!

I was also inspired by the scene in Harry Potter and the Order of the Phoenix, at Grimmauld Place with Harry, the Weasleys, Hermione and Sirius Black. The flying Santa is a magical Christmas decoration that flies on a broomstick. Remember the scene -you'll have to go back and look for it. 😉
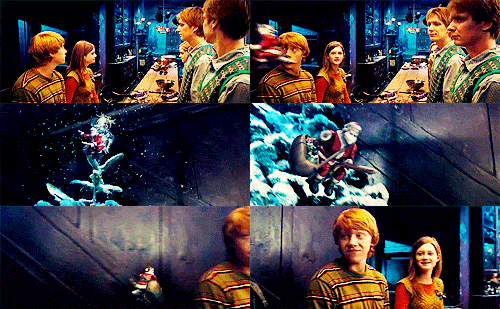
I thought it would fun to combine both ideas and a make a Santa flying on a broom stick that went around the top of the tree with a little motor. 

I found the Santa on-line.  If you want to make one too, be sure to look for one with movable legs, so you can sit him on the broom.  I made the broom with a stick and a stick and one of the minature brooms I used as ornaments. The motor is a disco ball rotator.  I was able to turn it upside down and attach it to my tree with some ziptipes.  I then connected a stiff wire -an old coat hanger and attached Santa on his broom!
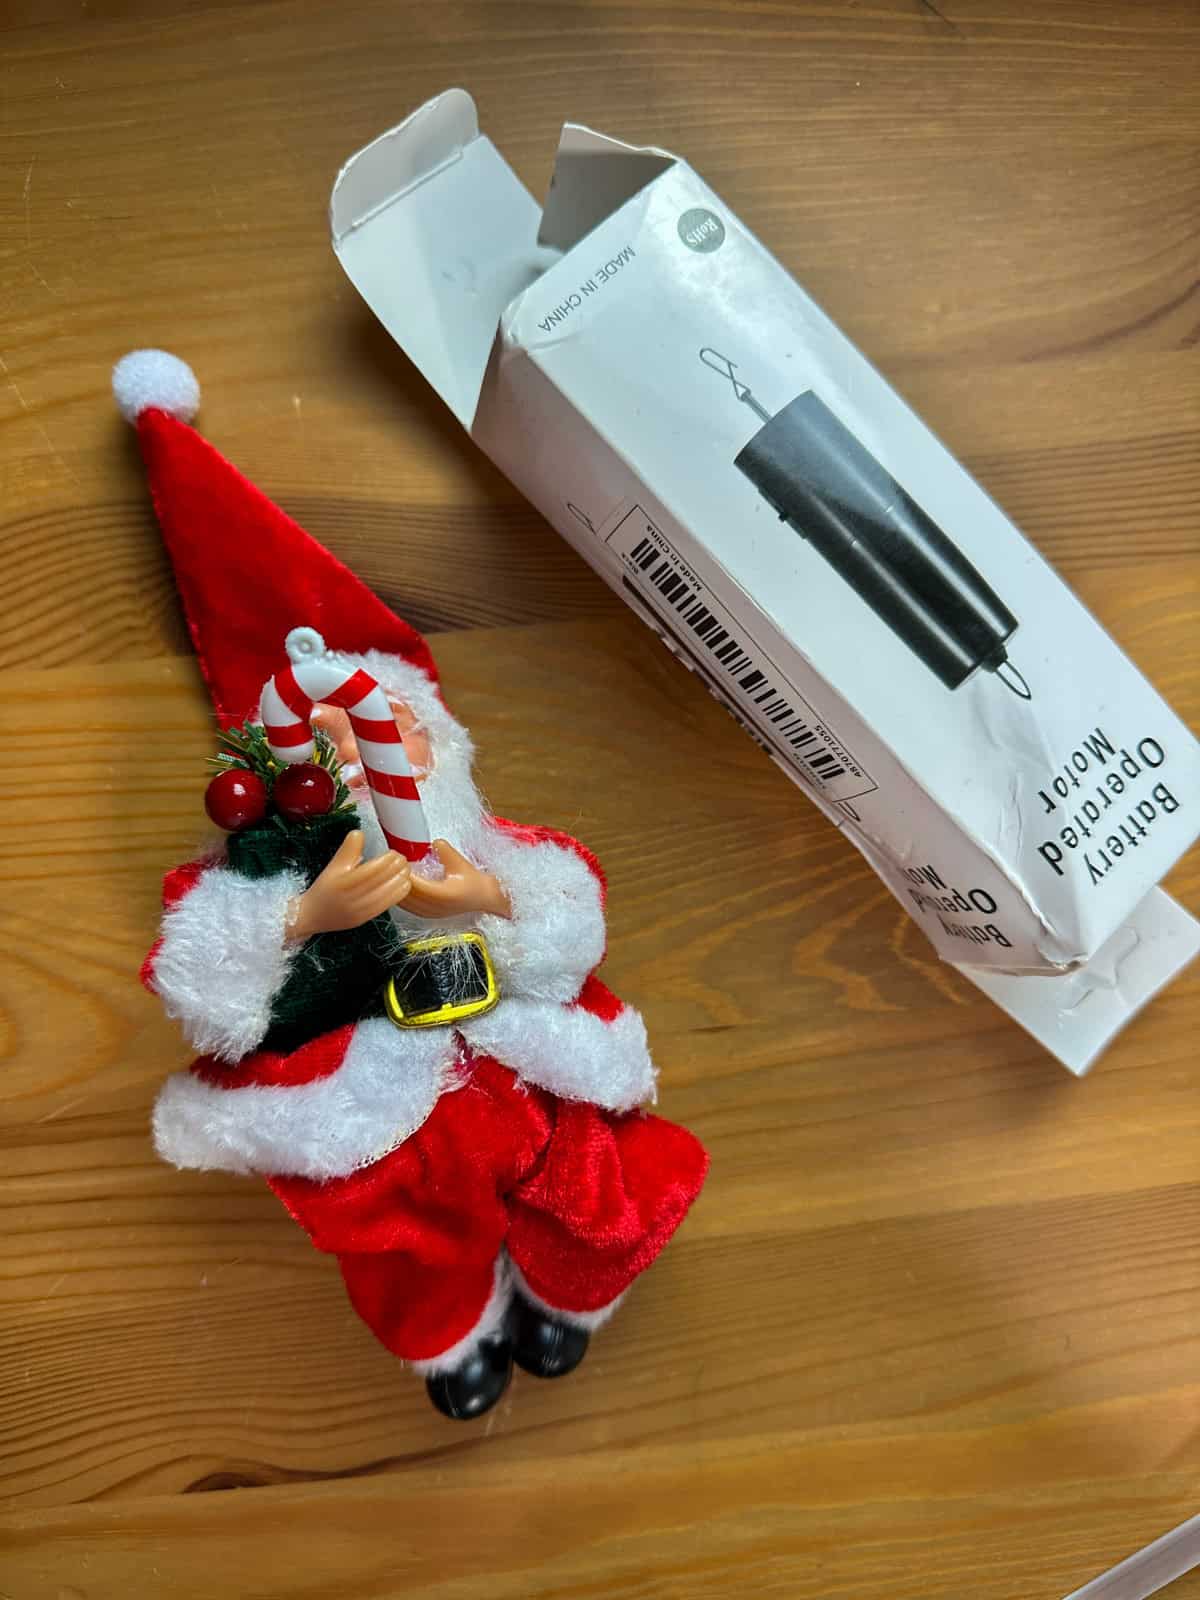
Santa figurine with candy cane and disco ball motor for DIY flying tree topper on Harry Potter Christmas tree.
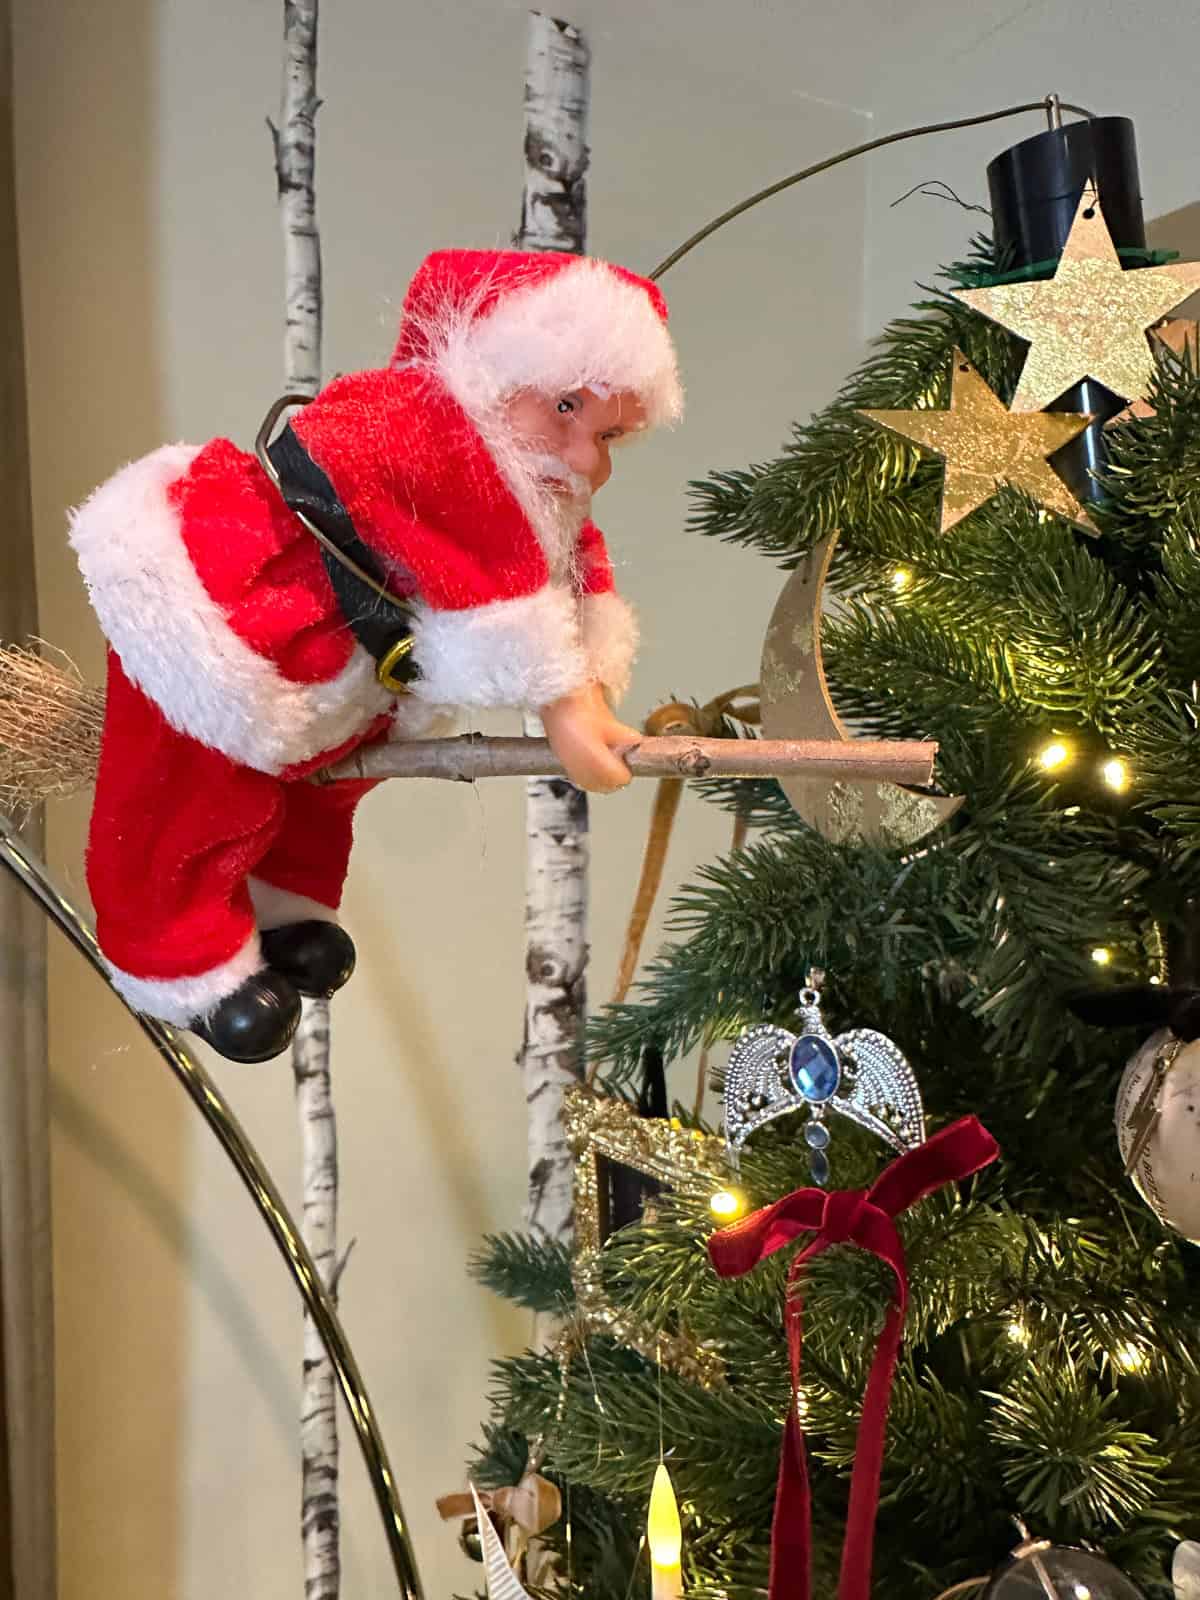
Motorized flying Santa on broomstick circling Harry Potter Christmas tree for unique DIY tree topper.

When turned on, Santa slowly circles the top like he's flying around it!

It's so magical I love it!

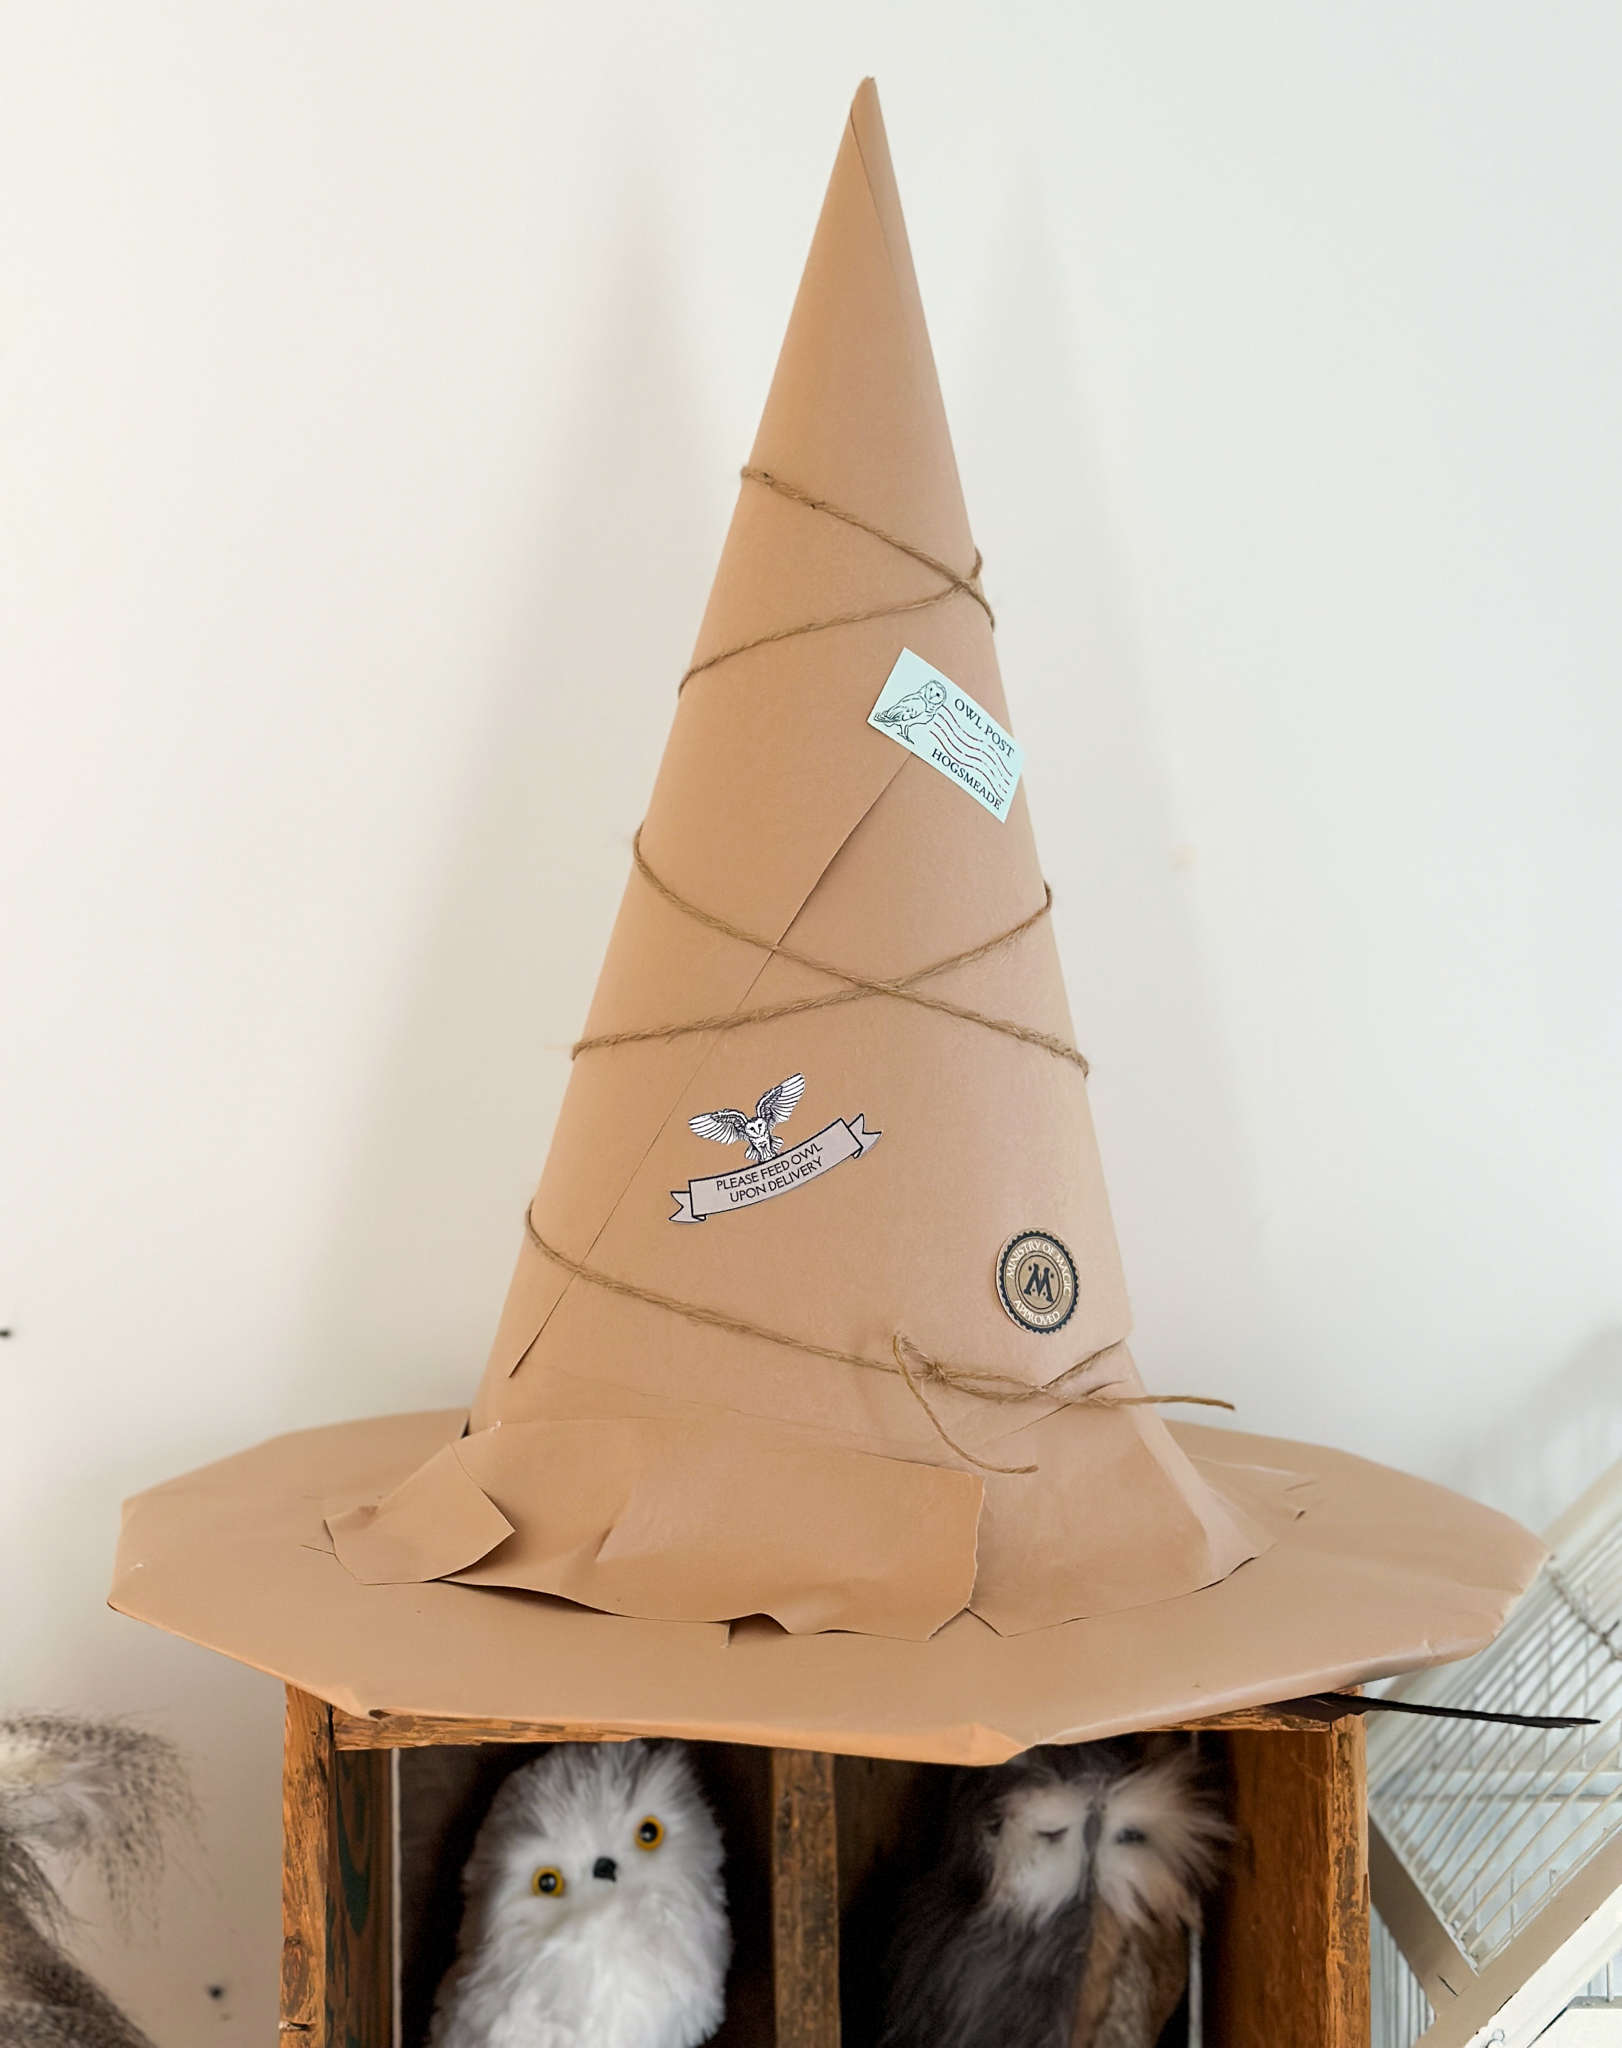
  • Alternative toppers: Sorting hat, Golden Snitch with large wings, Deathly Hallows symbol.
  • Materials: Disco ball spinner (be sure to buy one that has a hole in the bottom to insert the wire, and not one that has a chain hanging down), small Santa figurine (6-8 inches), decorative broom, wire, hot glue.
  • Cost: $10 for motor, $5-10 for Santa and broom

Styling Your Harry Potter Christmas Tree
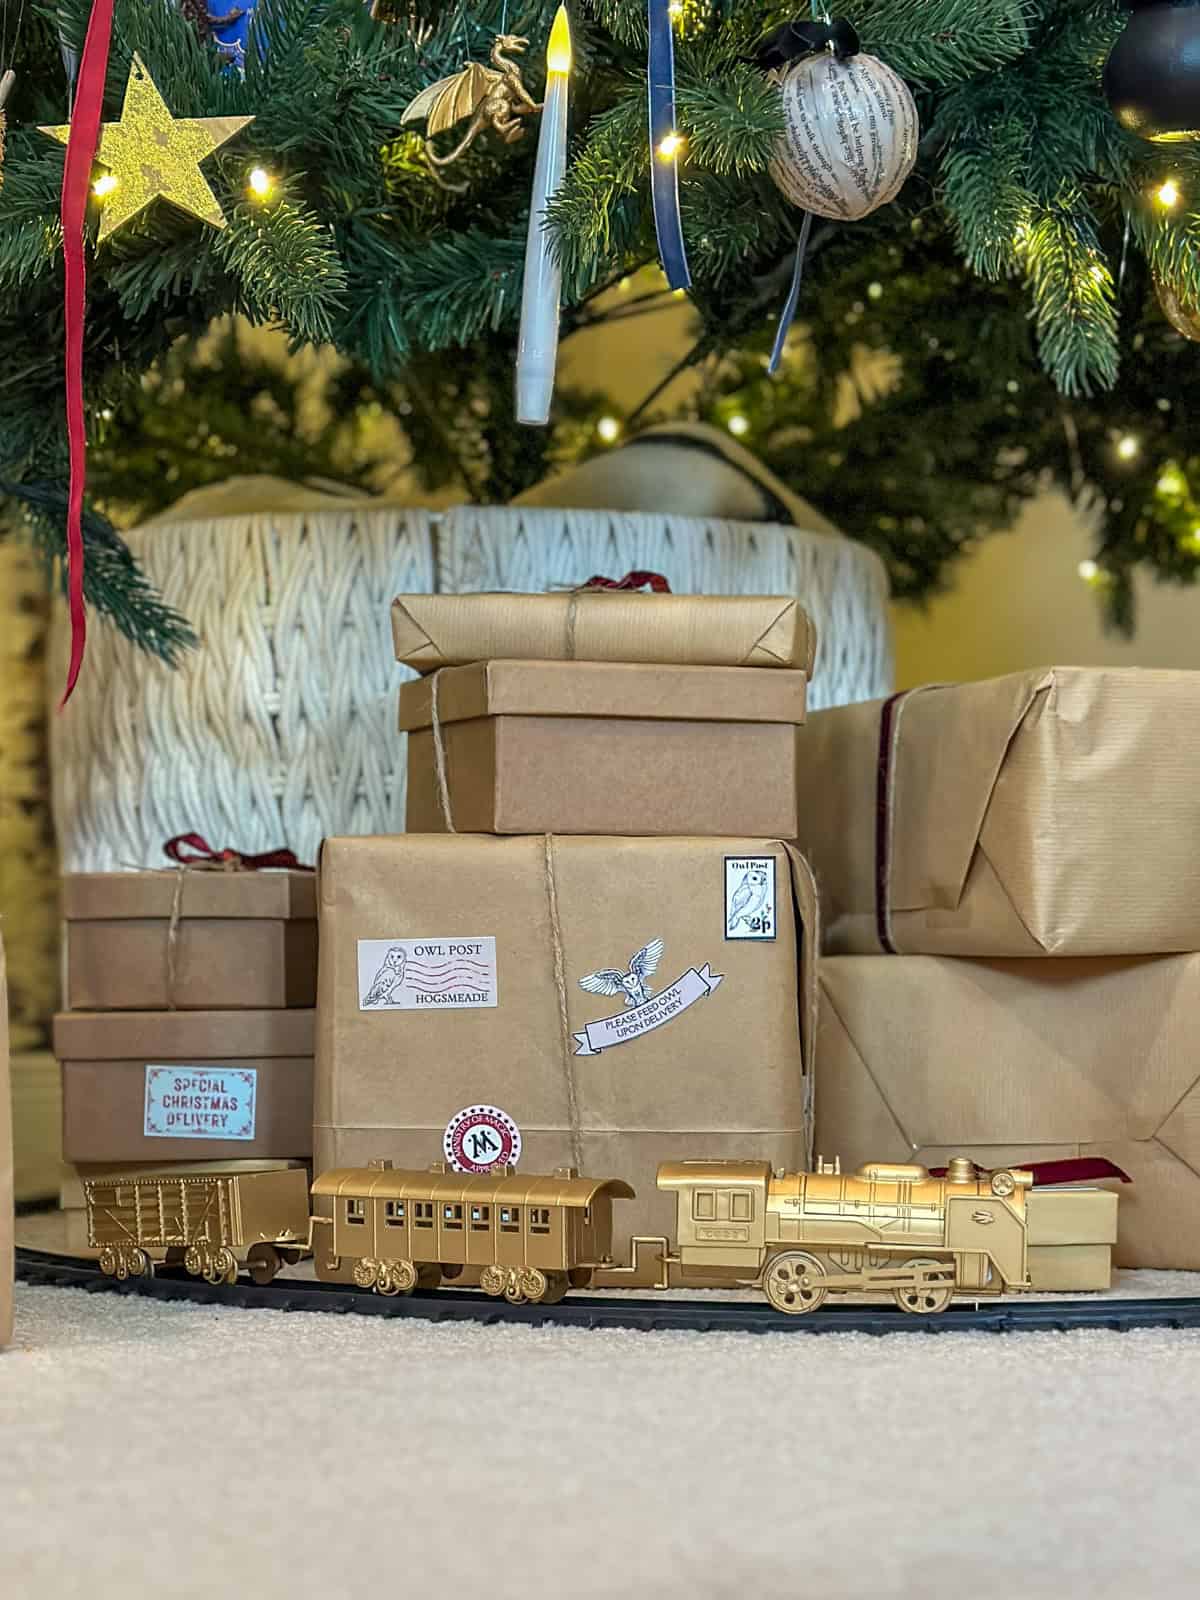
Gold Hogwarts Express train with owl post packages under Harry Potter Christmas tree for DIY holiday decorations.

Tree Base

Hogwarts Express Train: A gold toy train circling the base. I spray painted an inexpensive train set gold to match my color scheme.
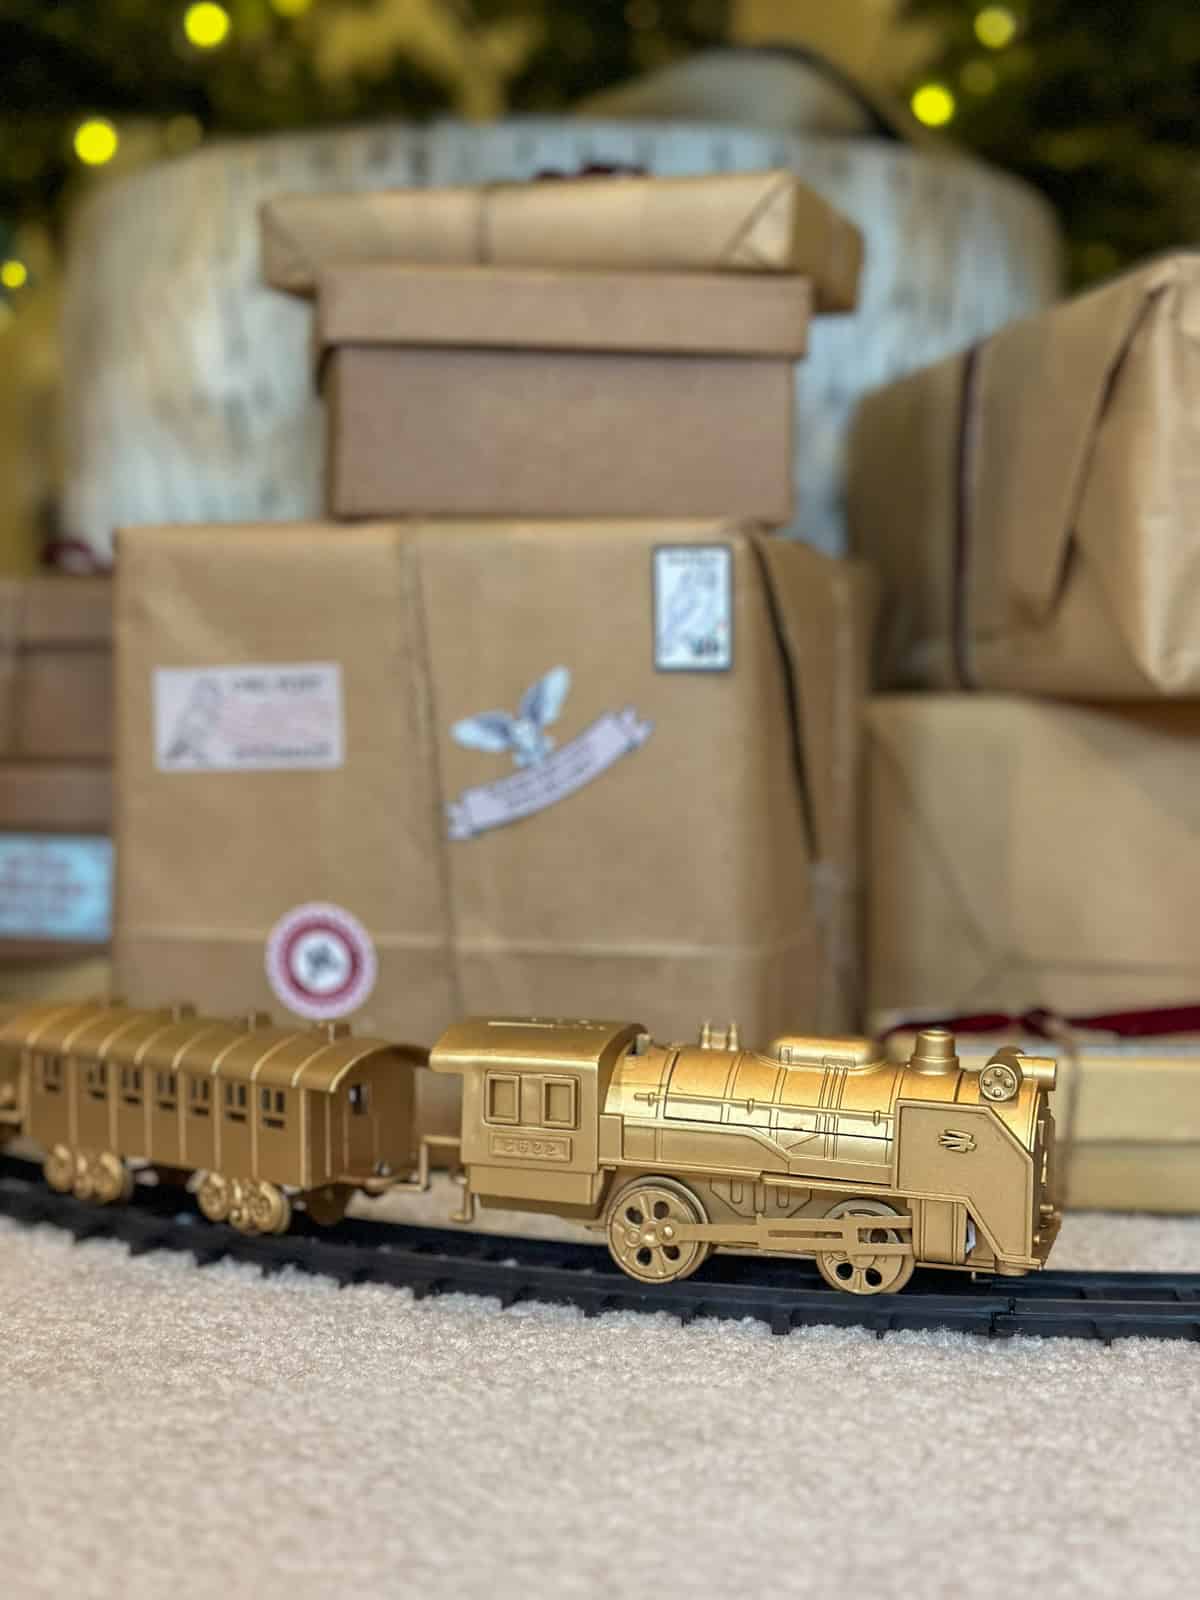
Gold Hogwarts Express train circling base of Harry Potter Christmas tree with owl post packages for DIY decorations.

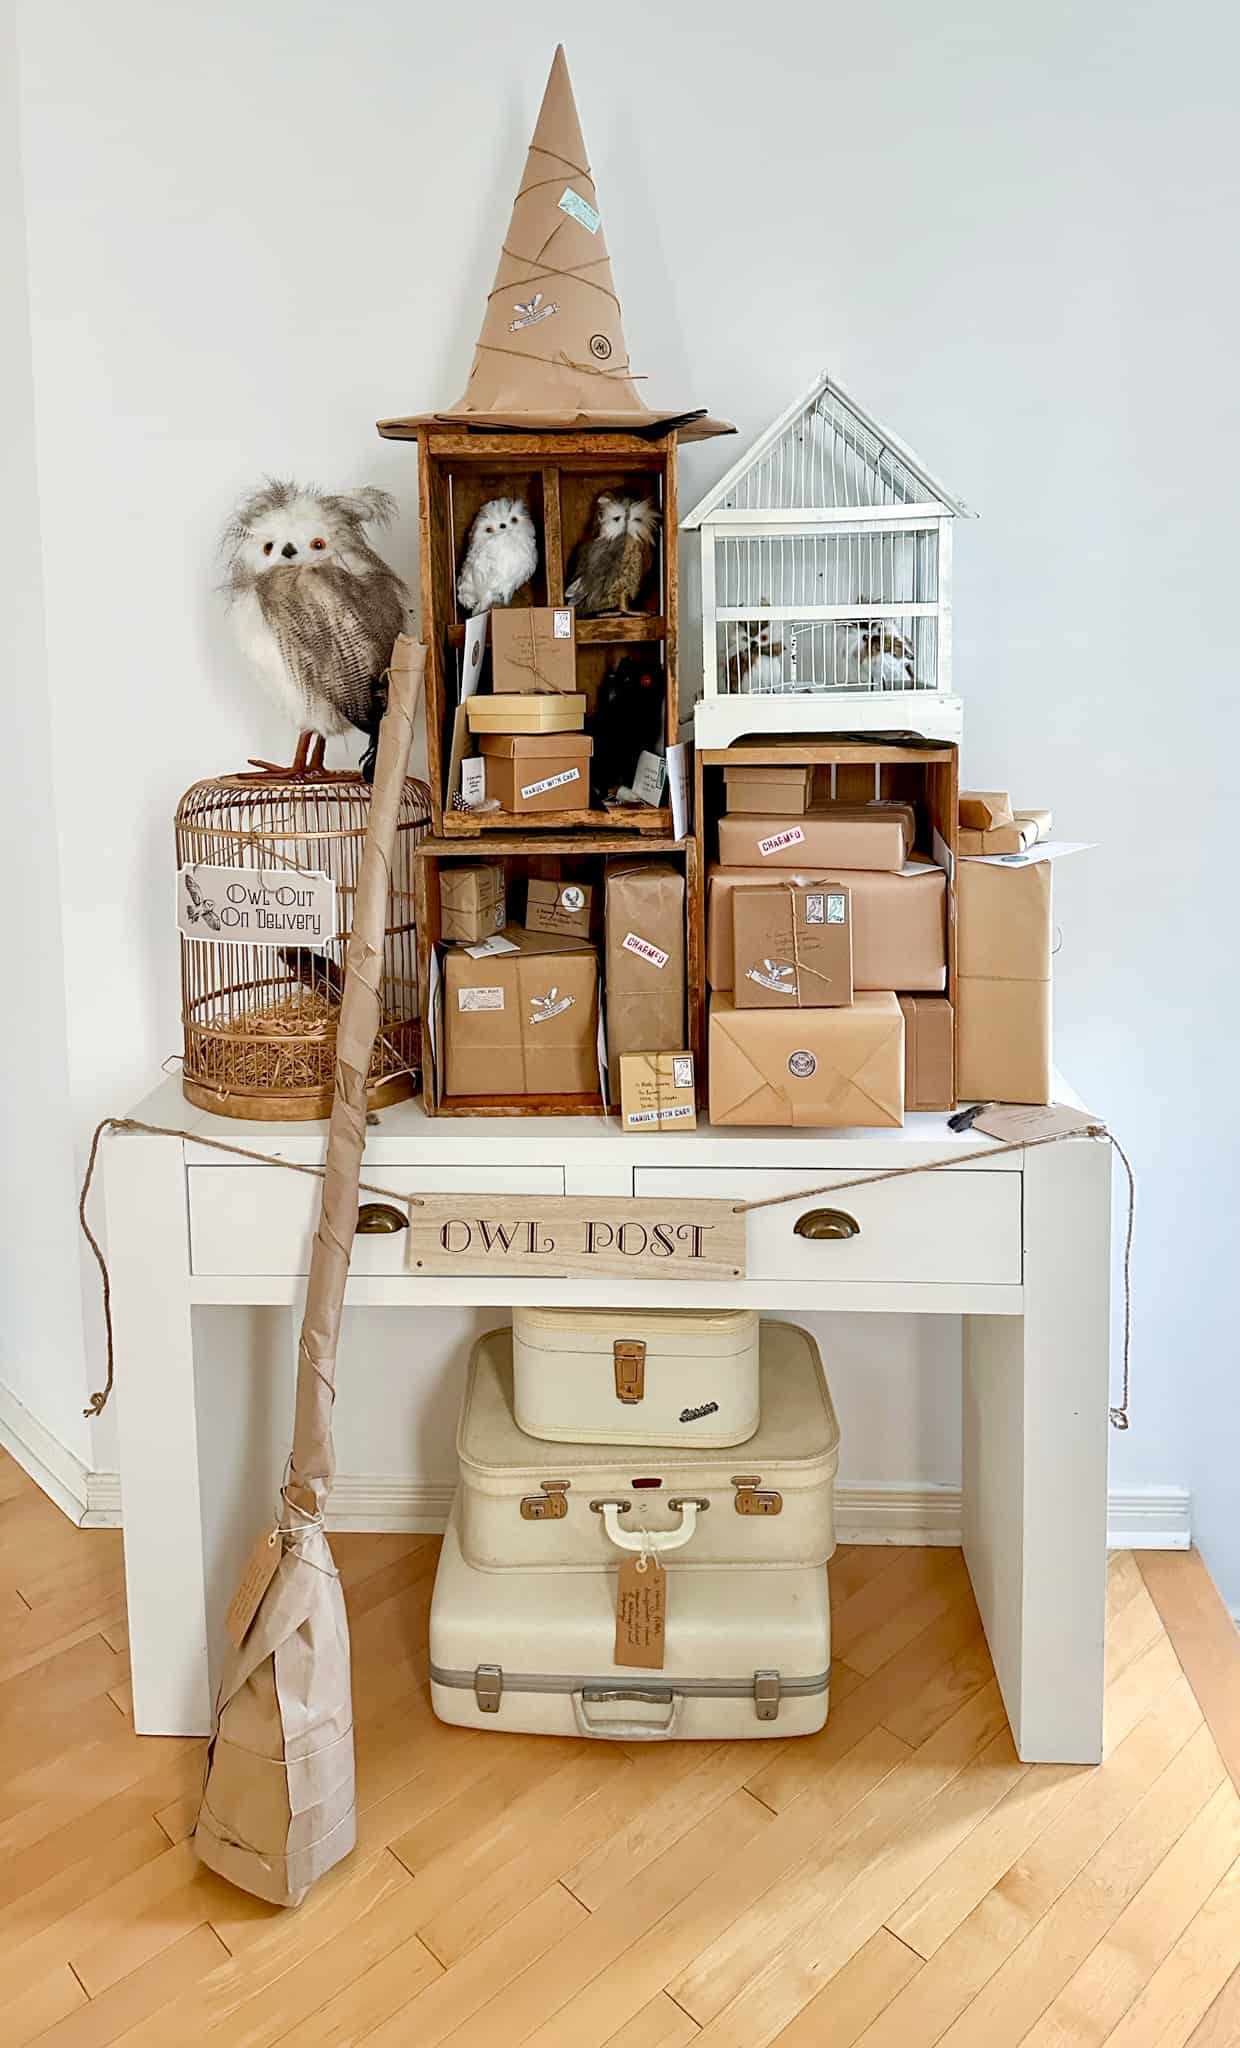
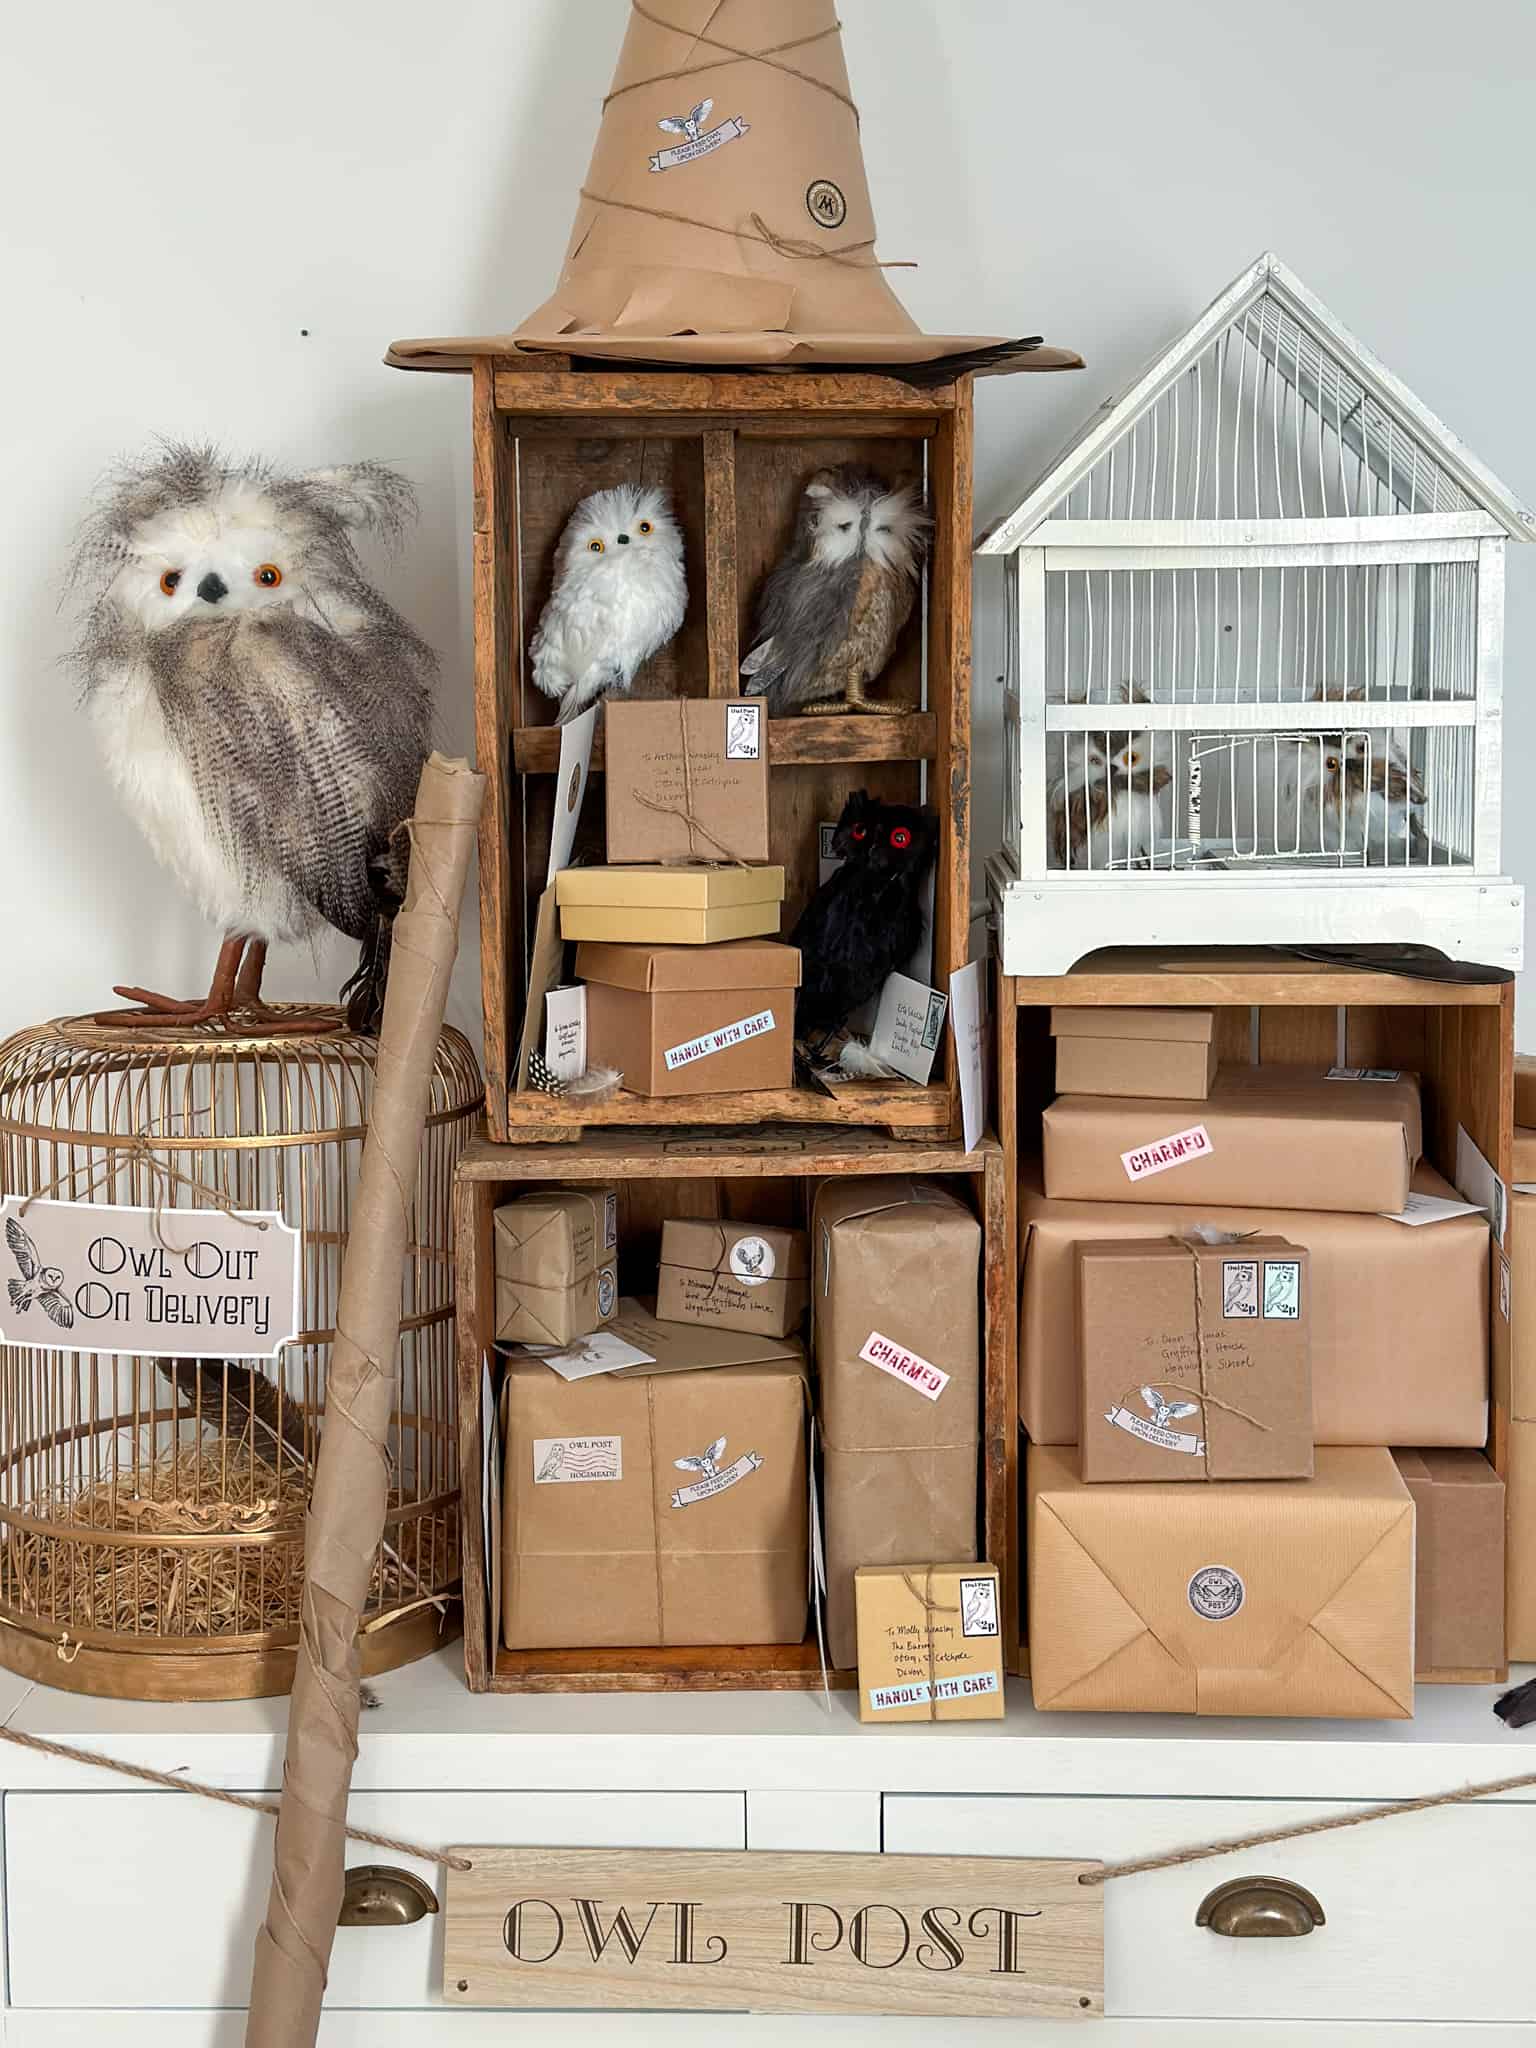
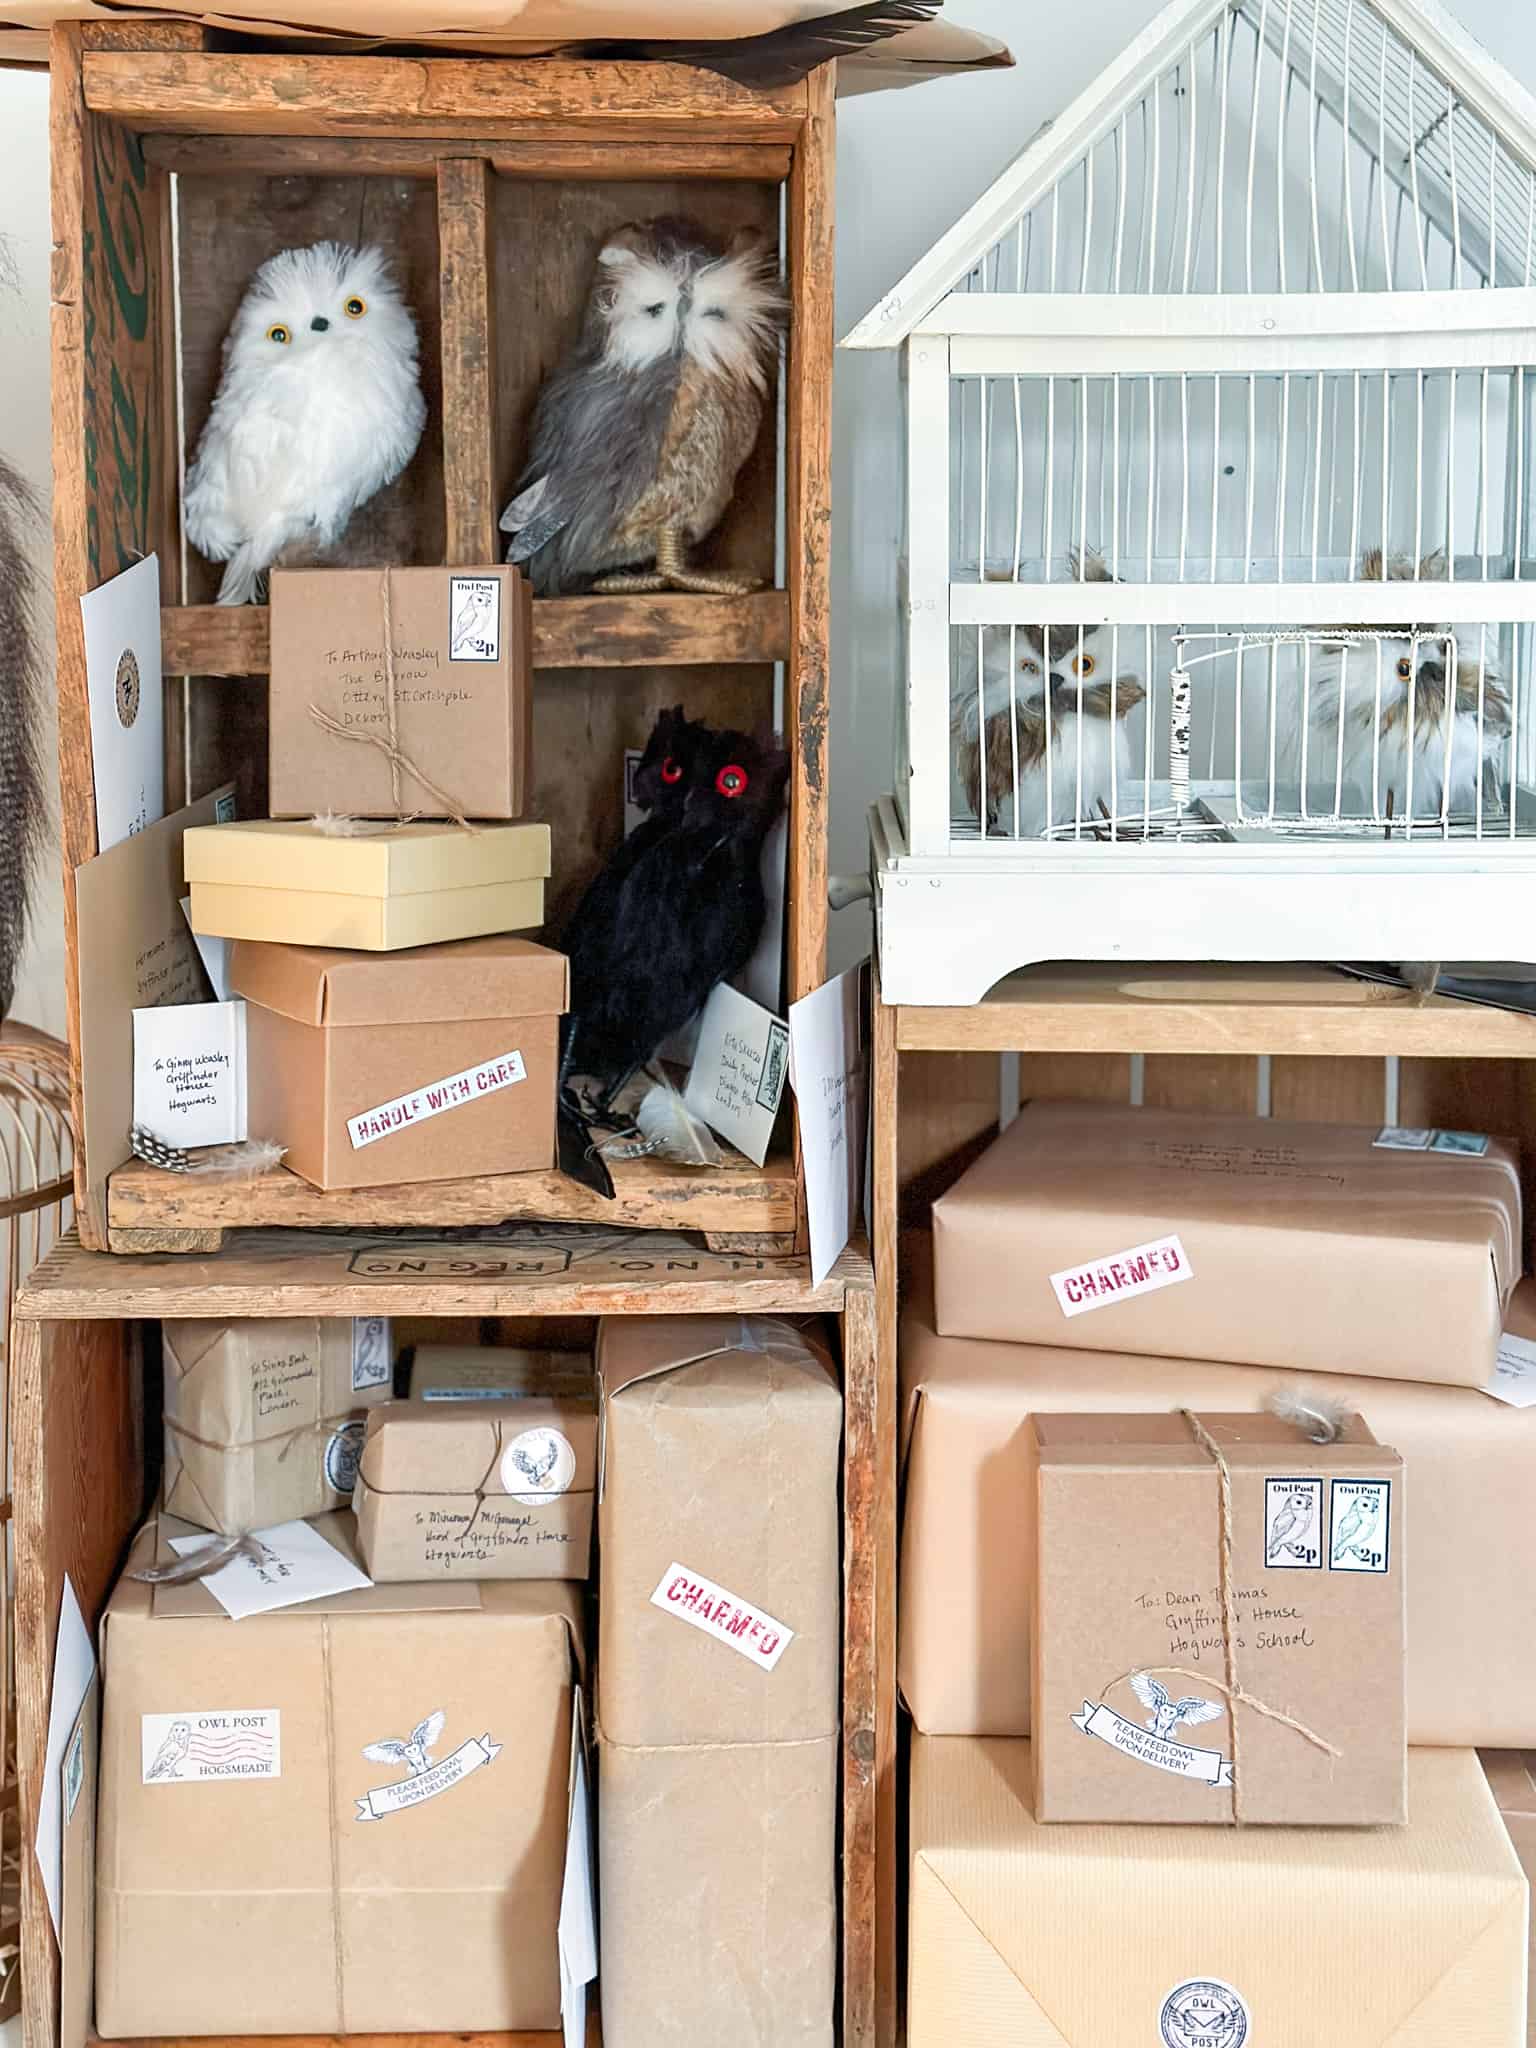
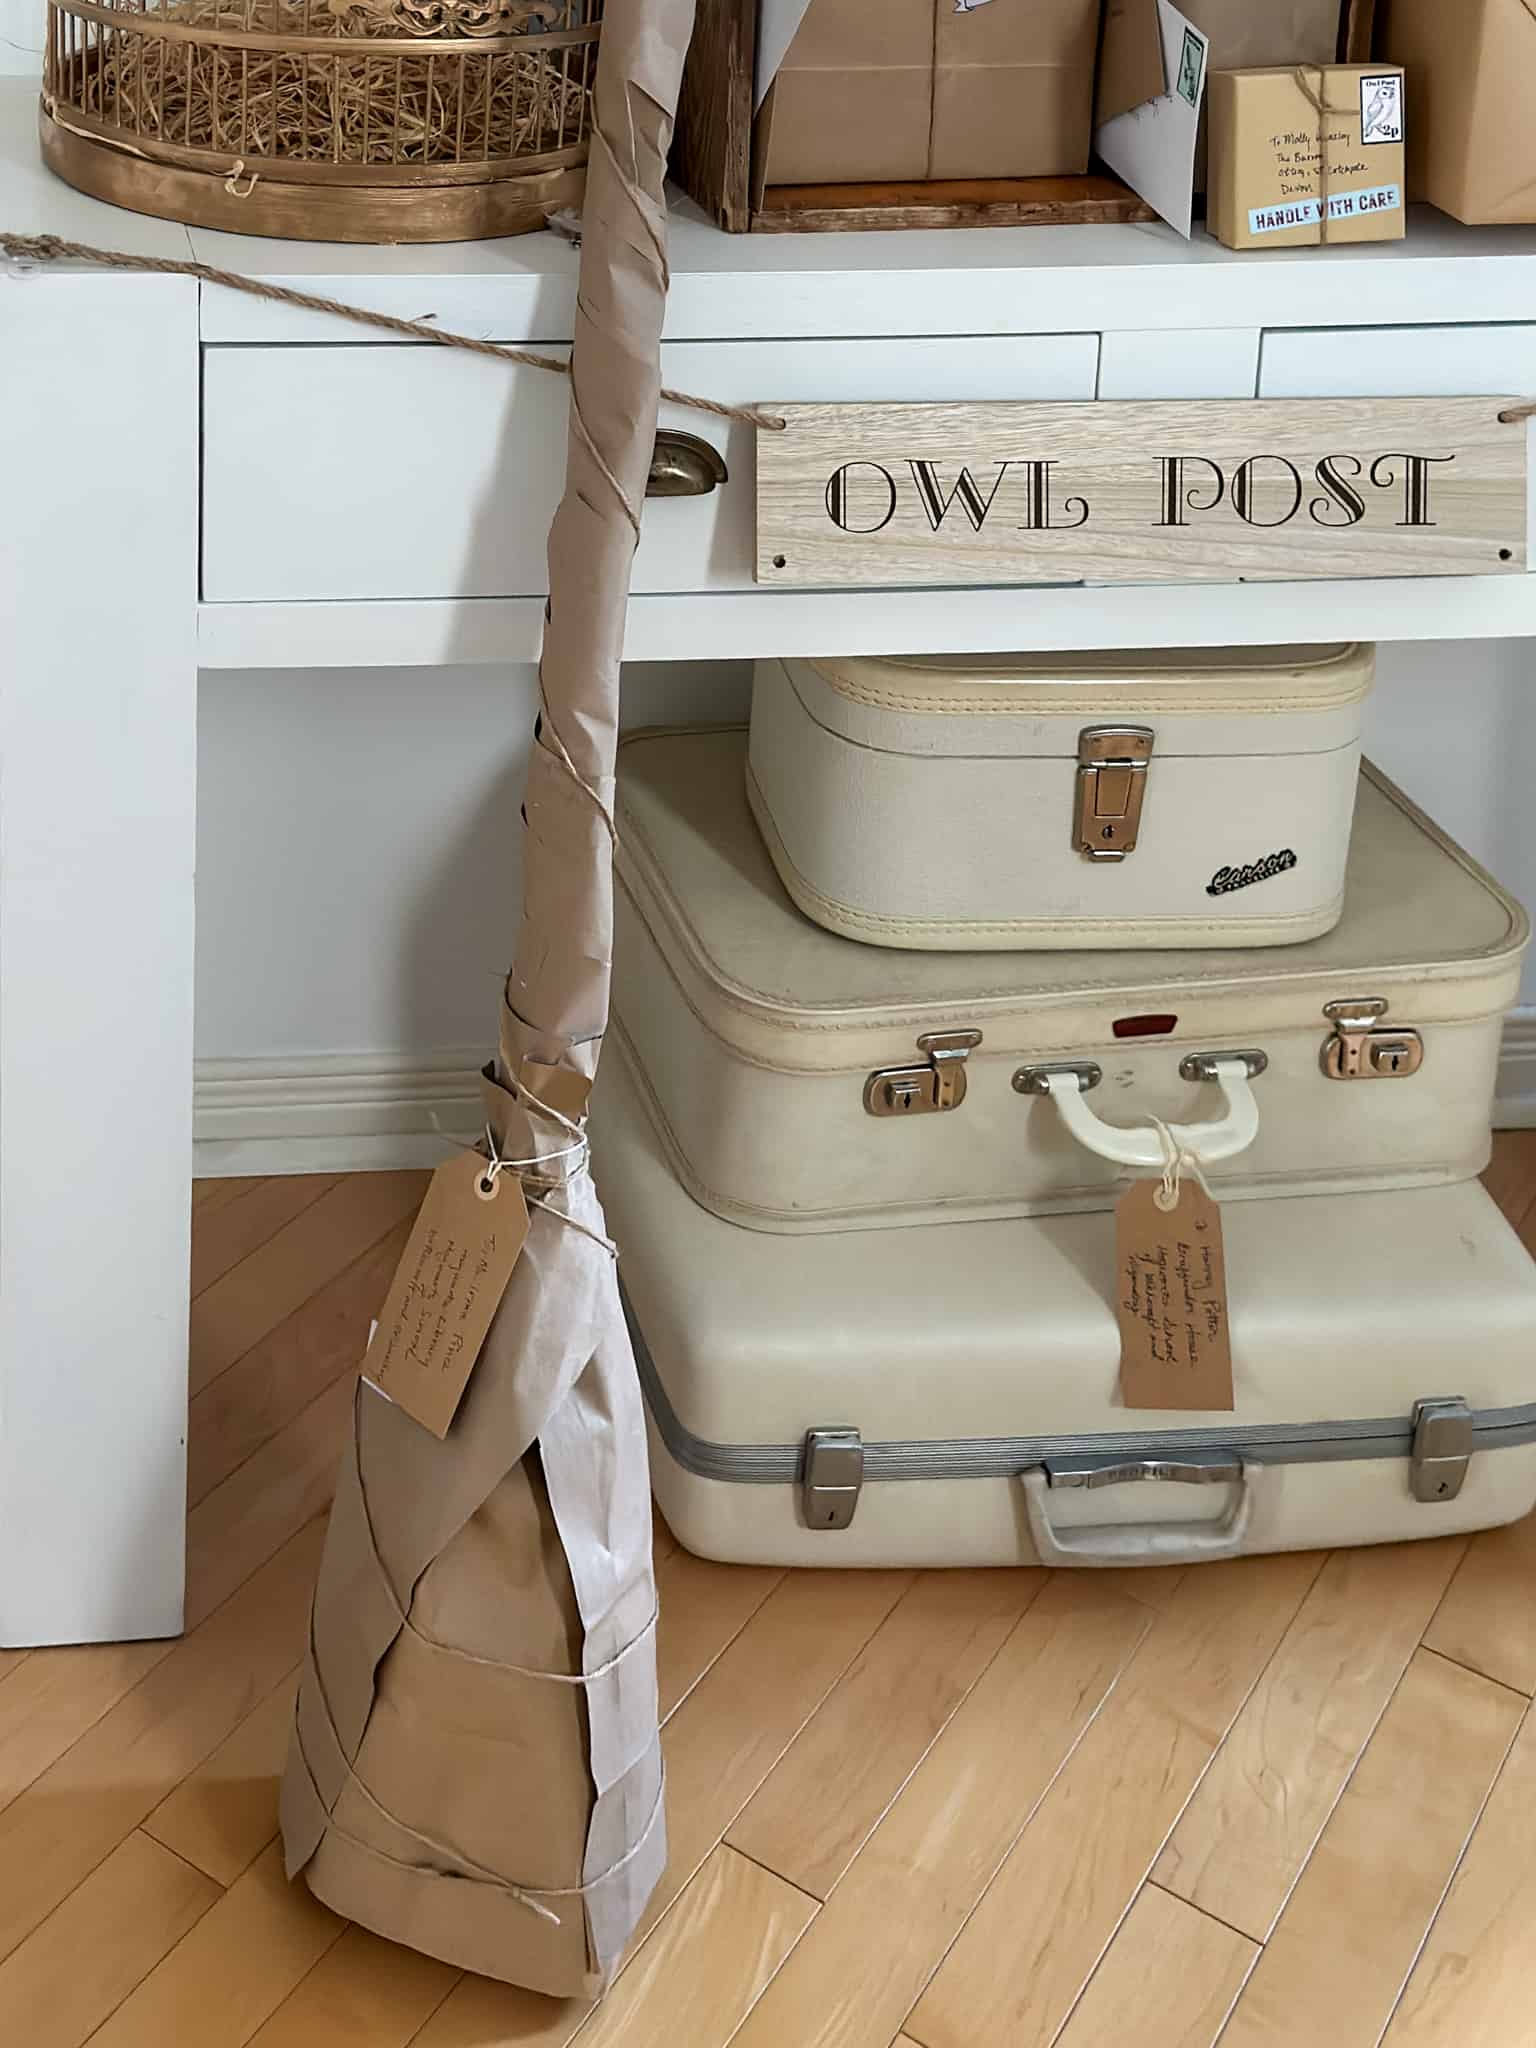
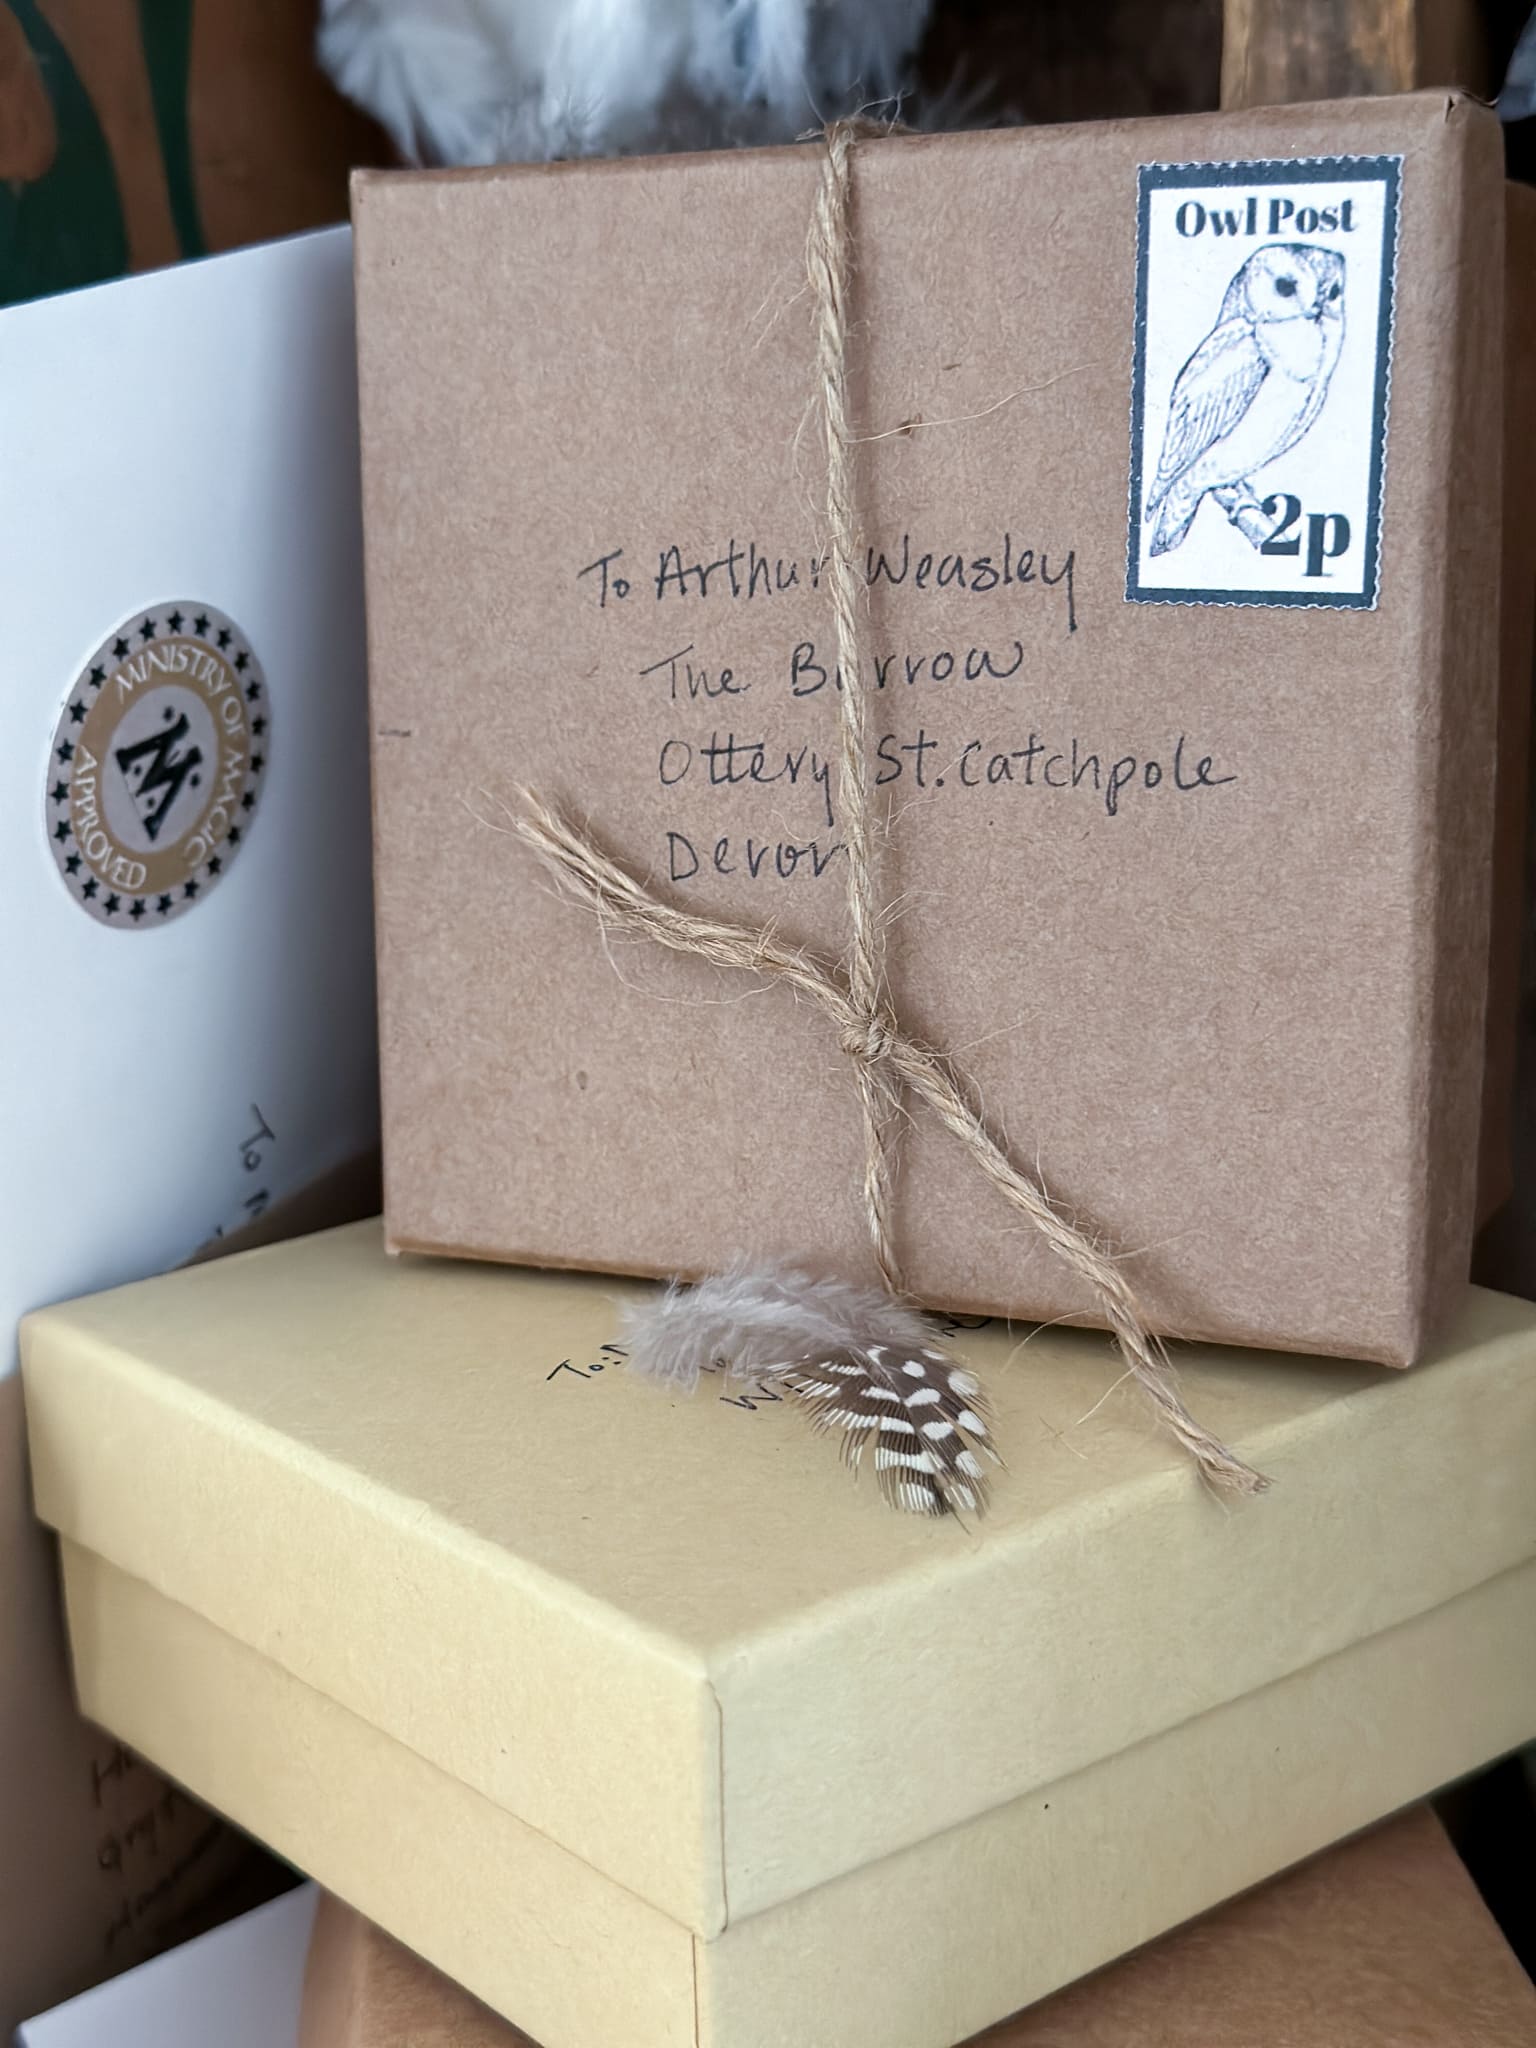
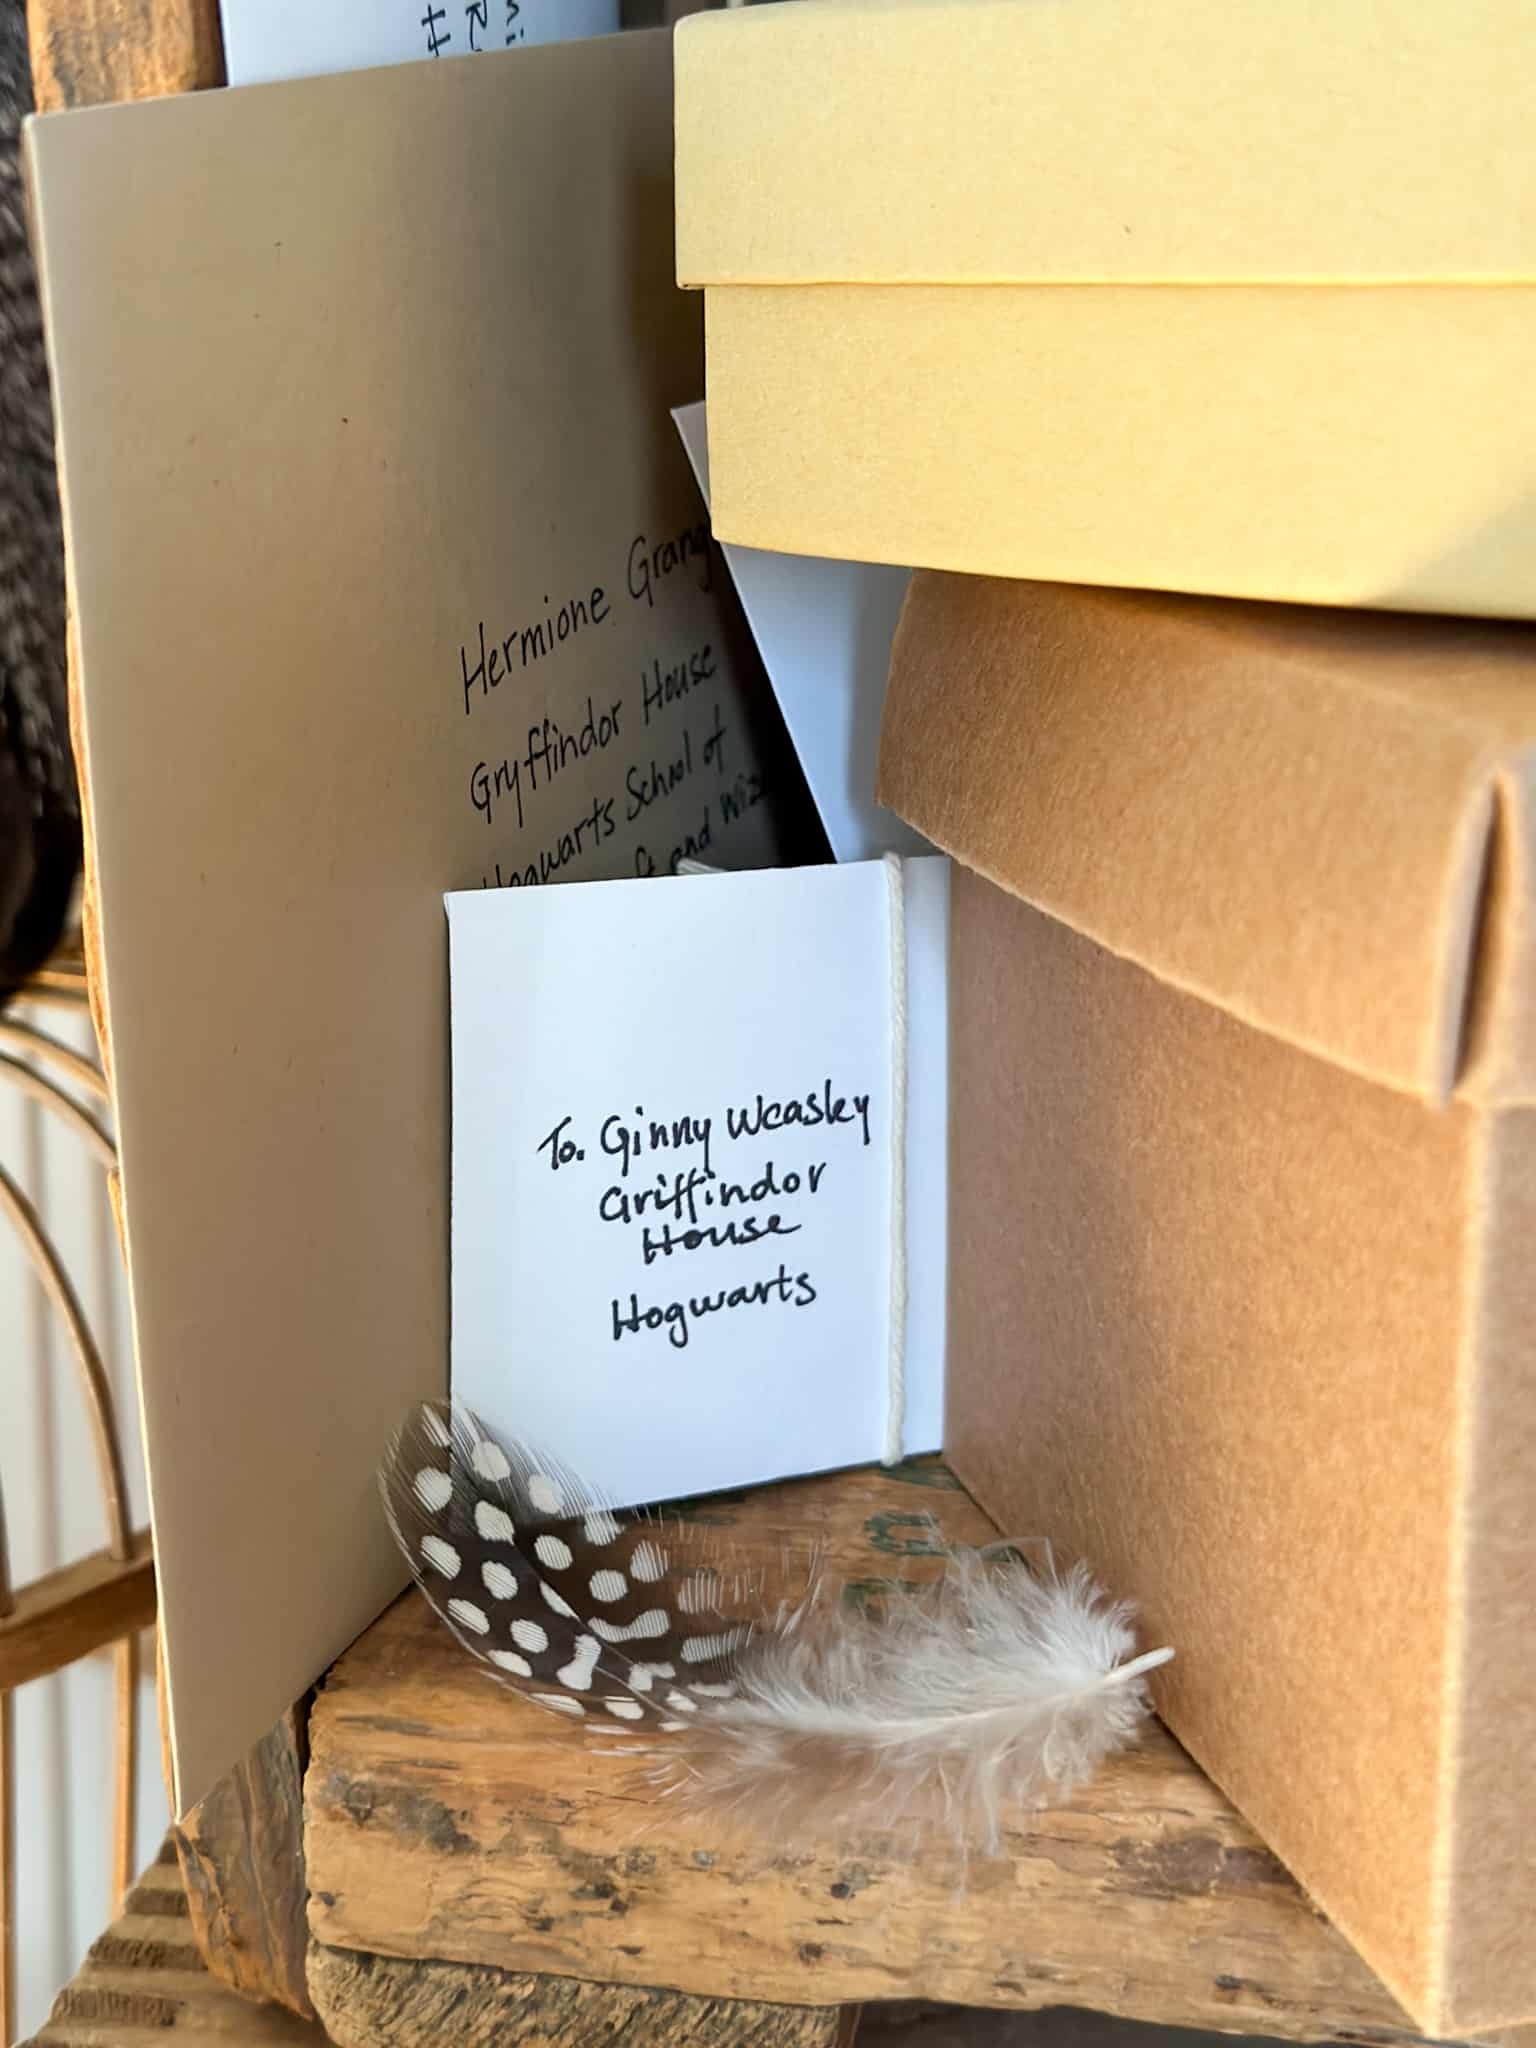
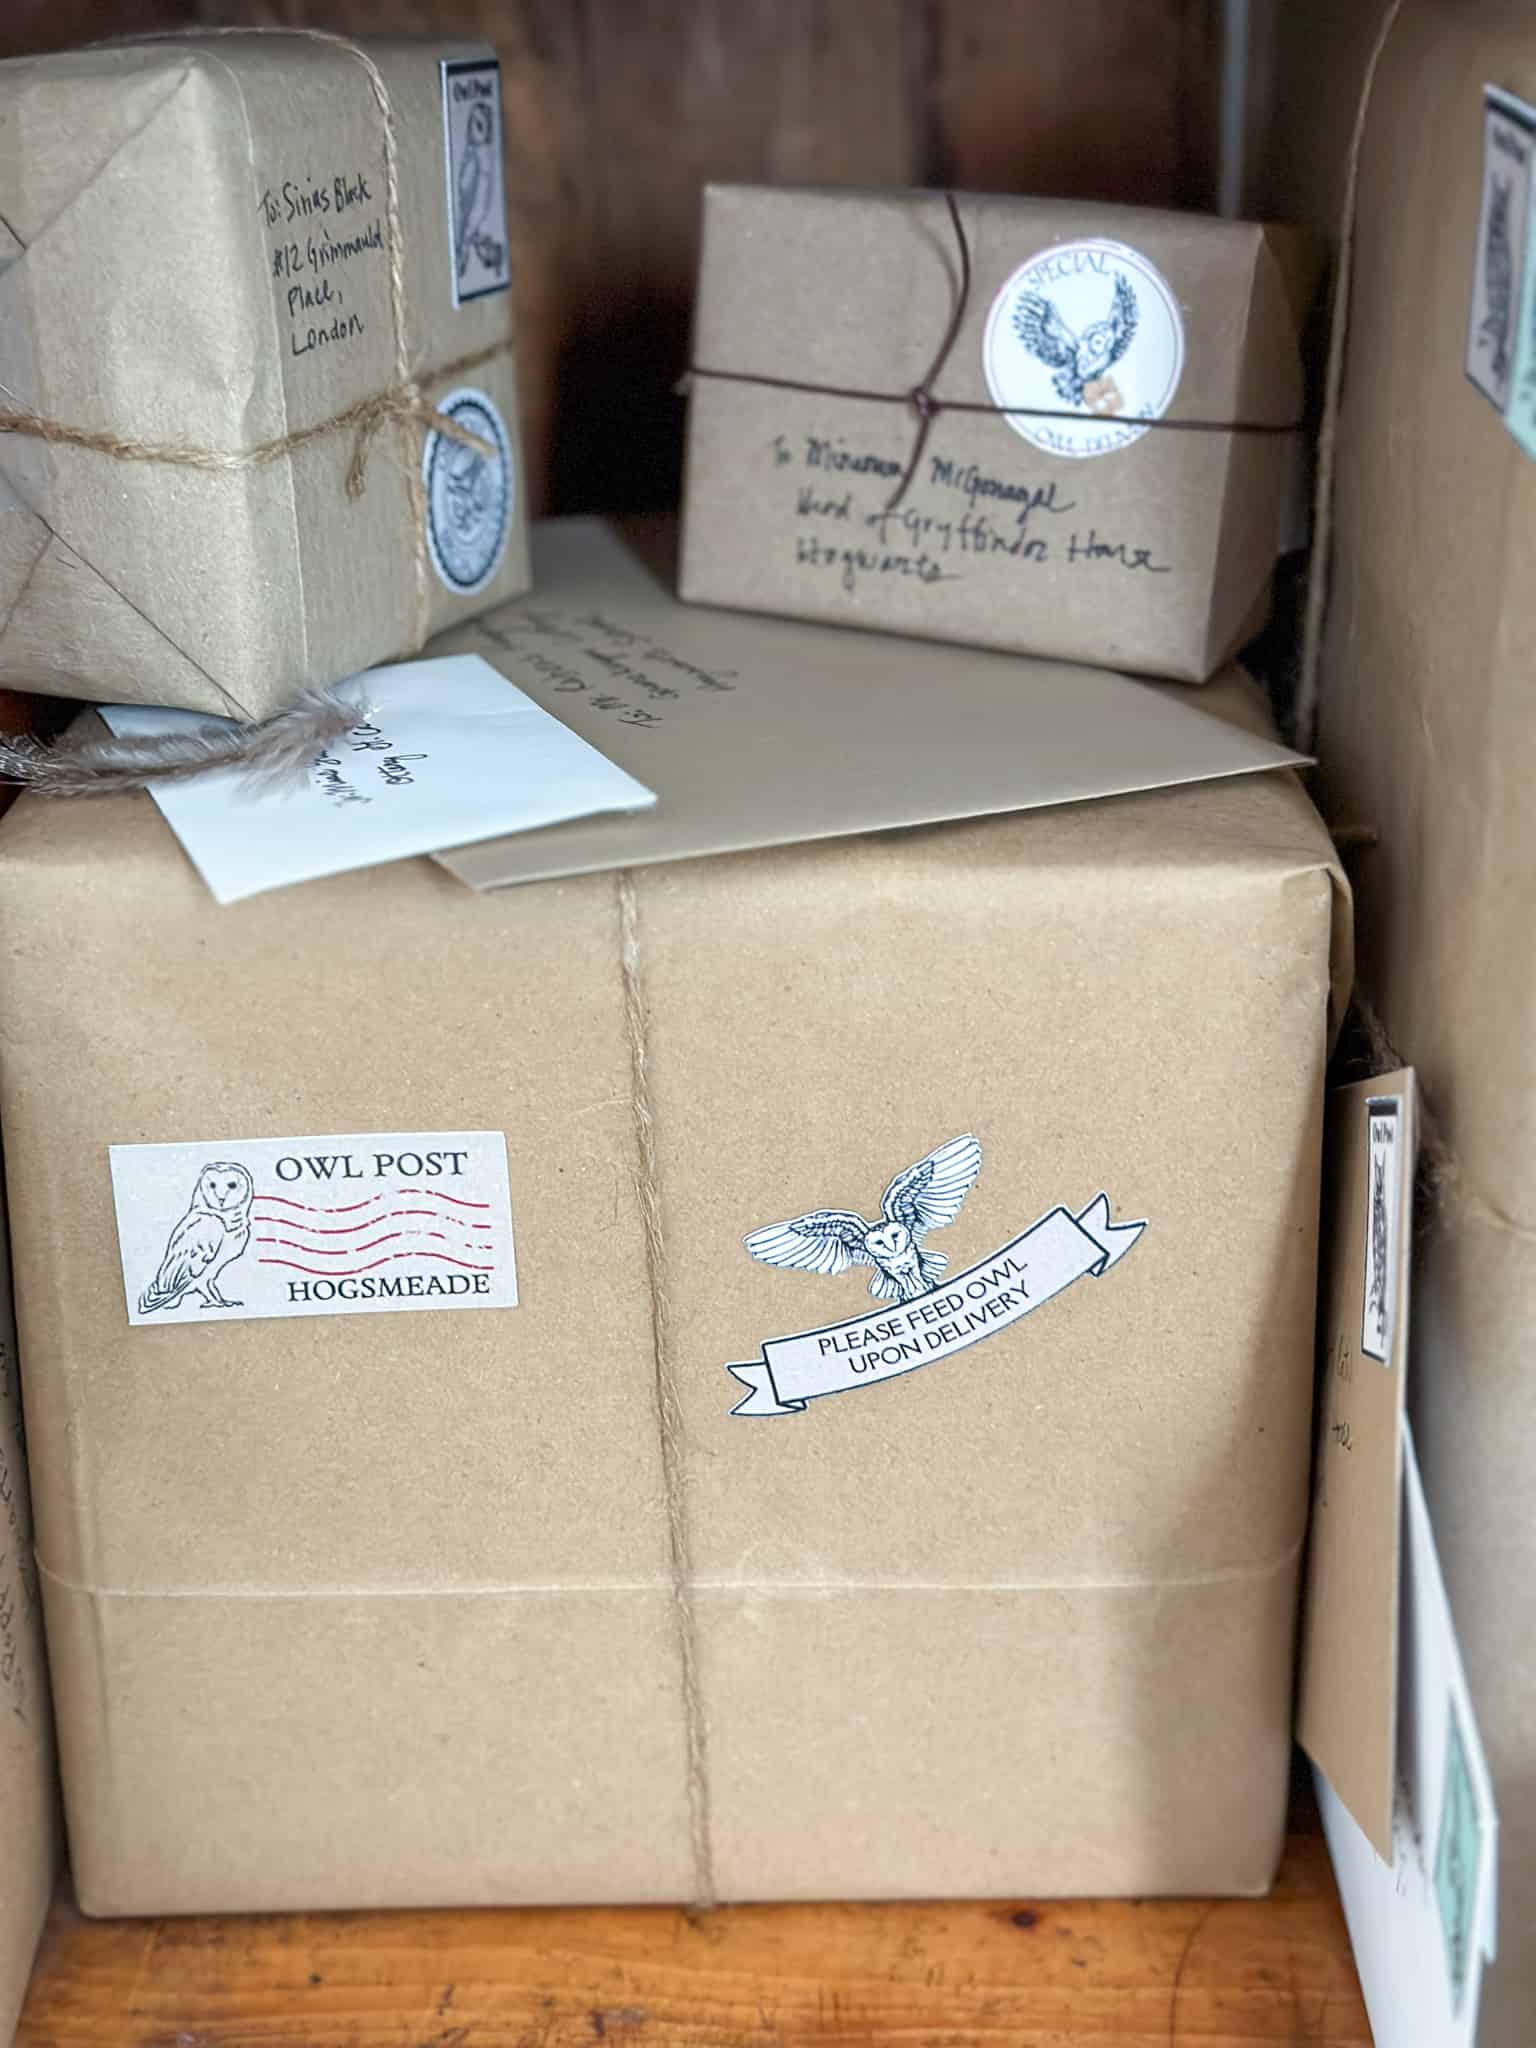
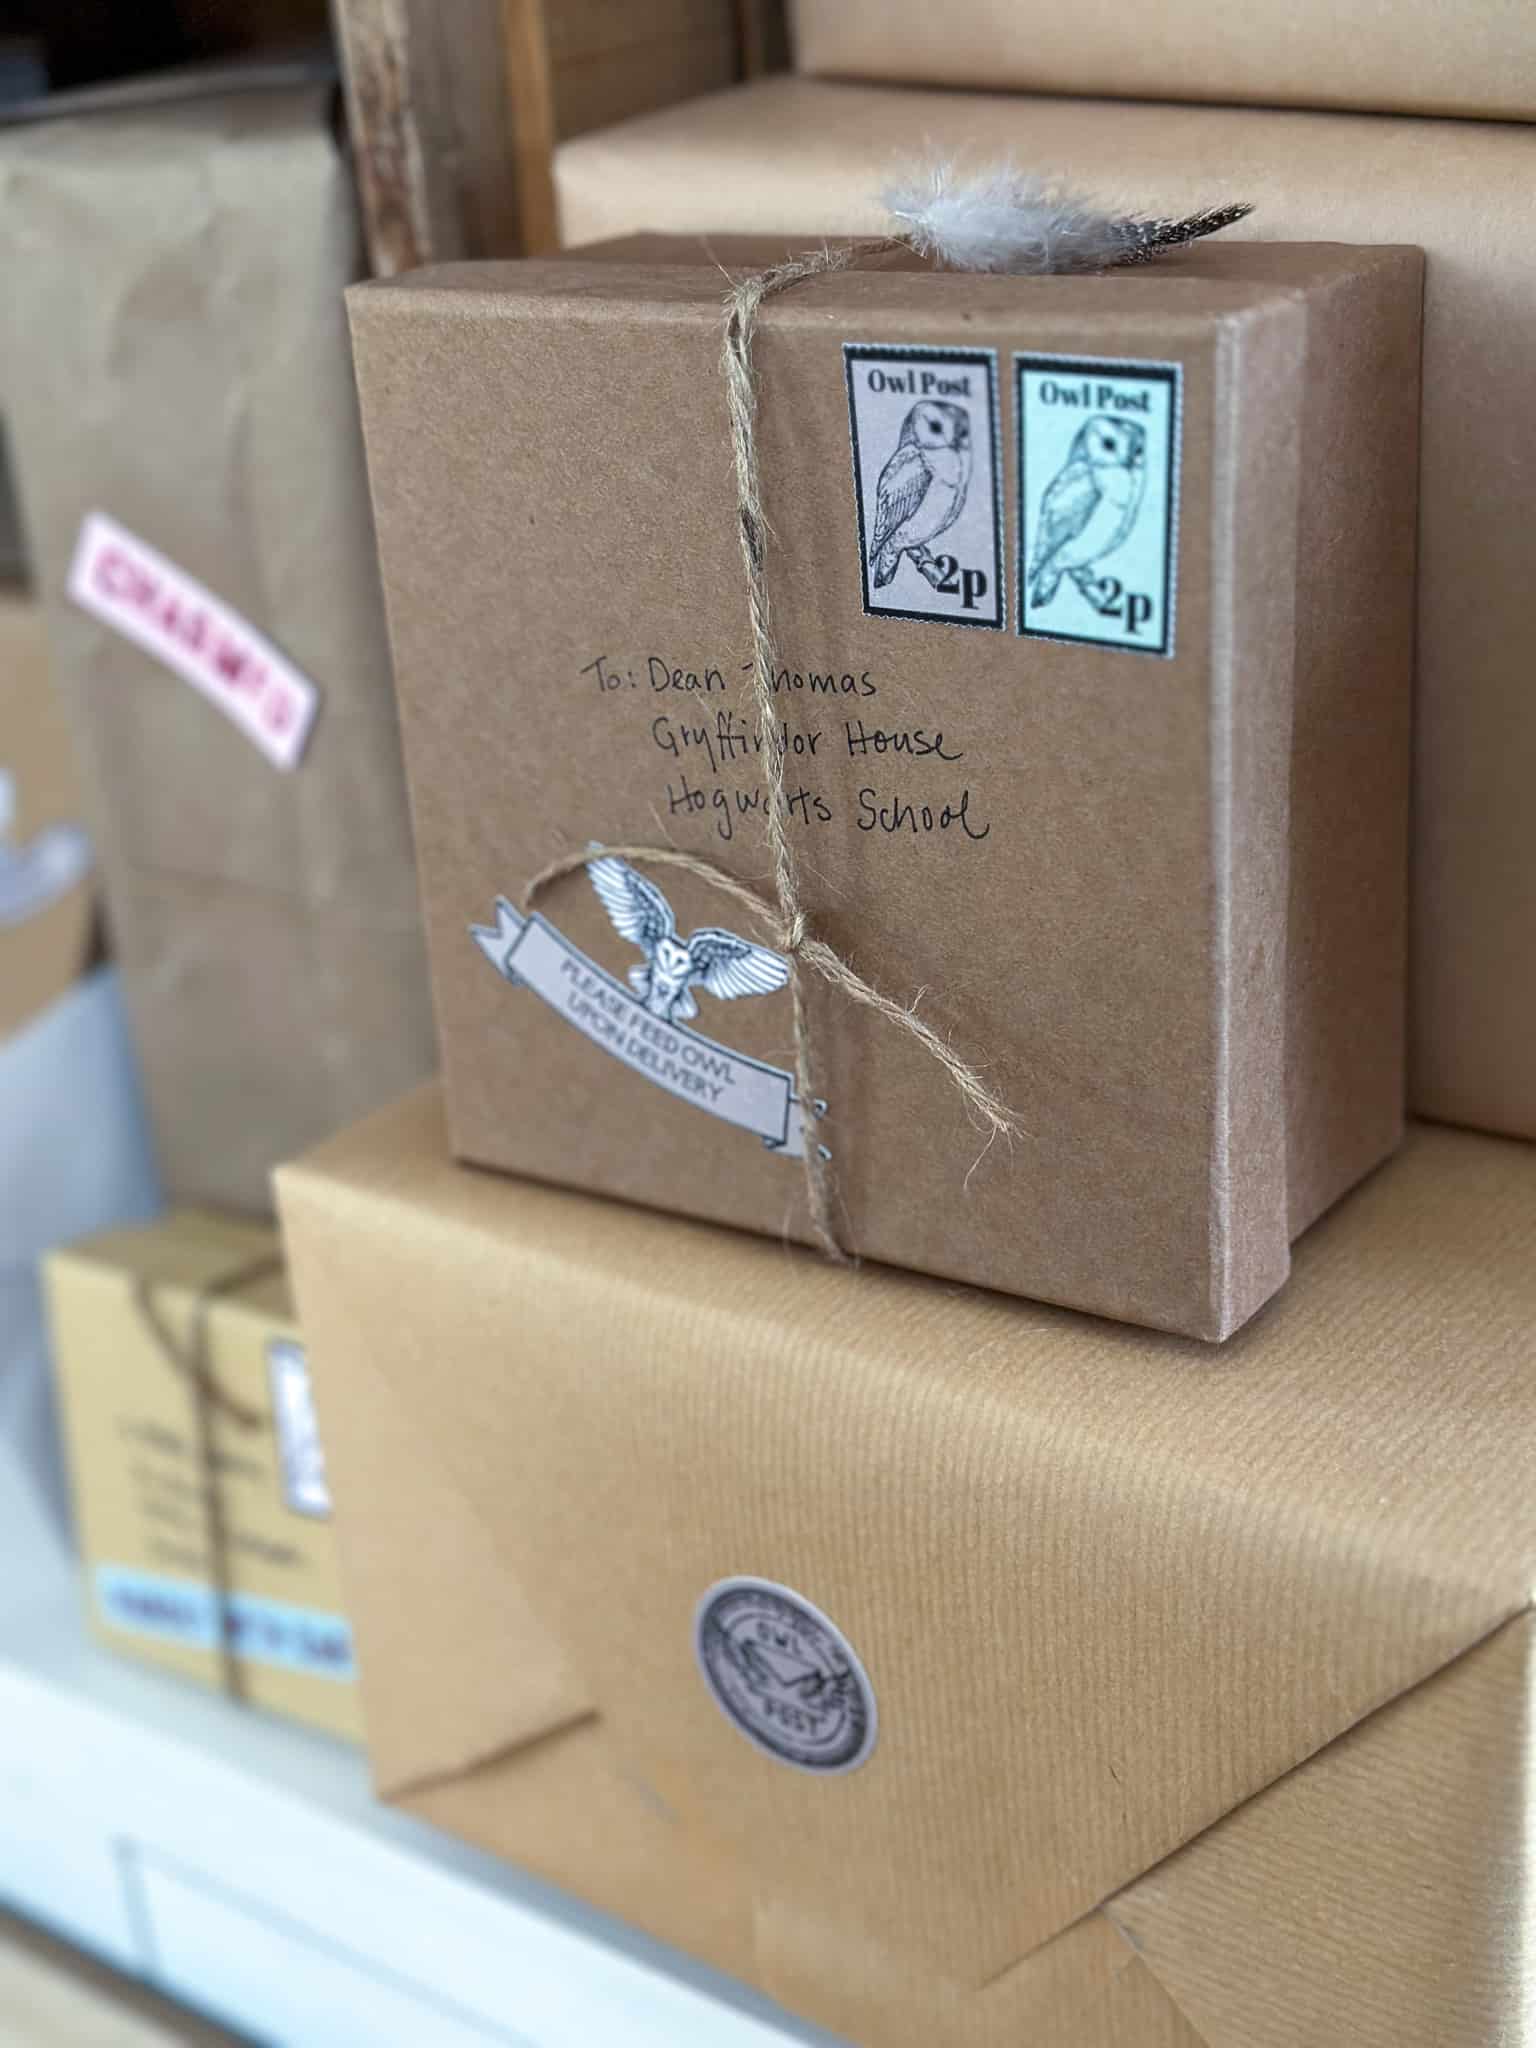
Owl Post Packages: Brown paper-wrapped packages with vintage stamps and "owl post" labels stacked around the base. Wrap boxes in kraft paper, tie with twine, add stamps and character name tags. Use our free printables!
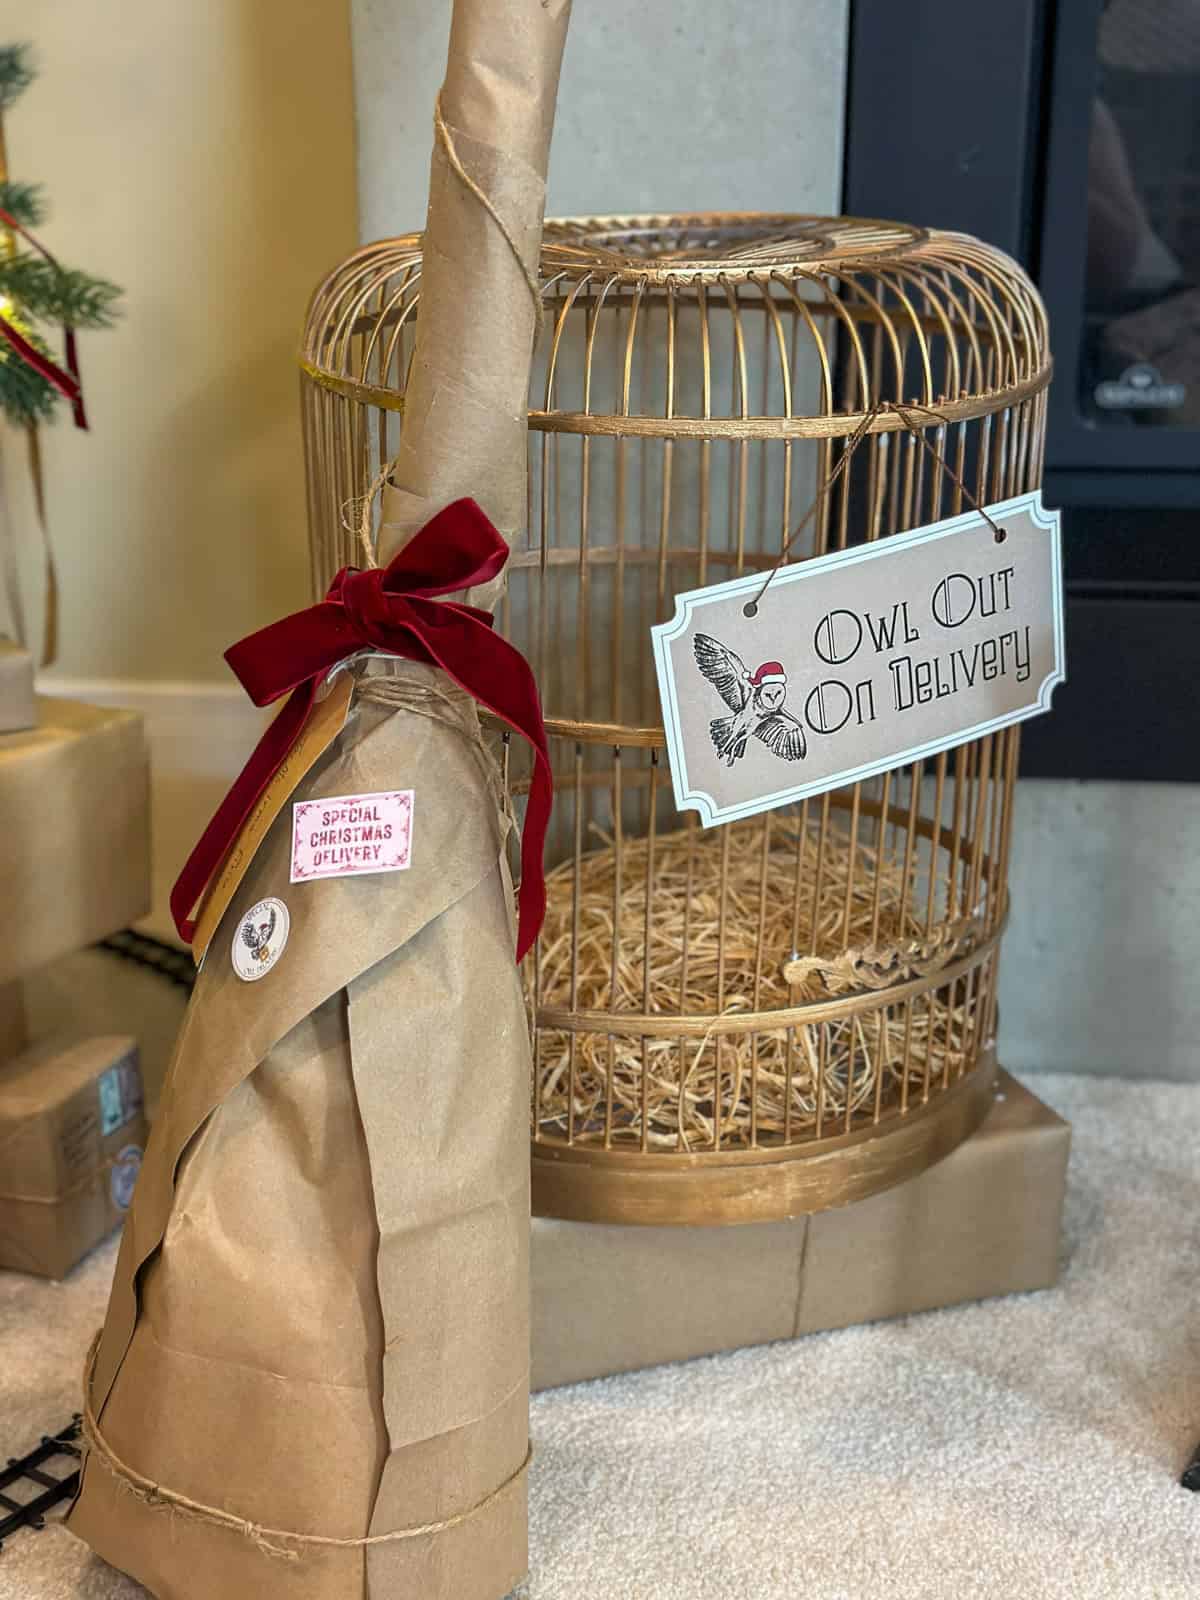
Vintage birdcage with owl out on delivery sign and owl post package for Harry Potter Christmas decorations.

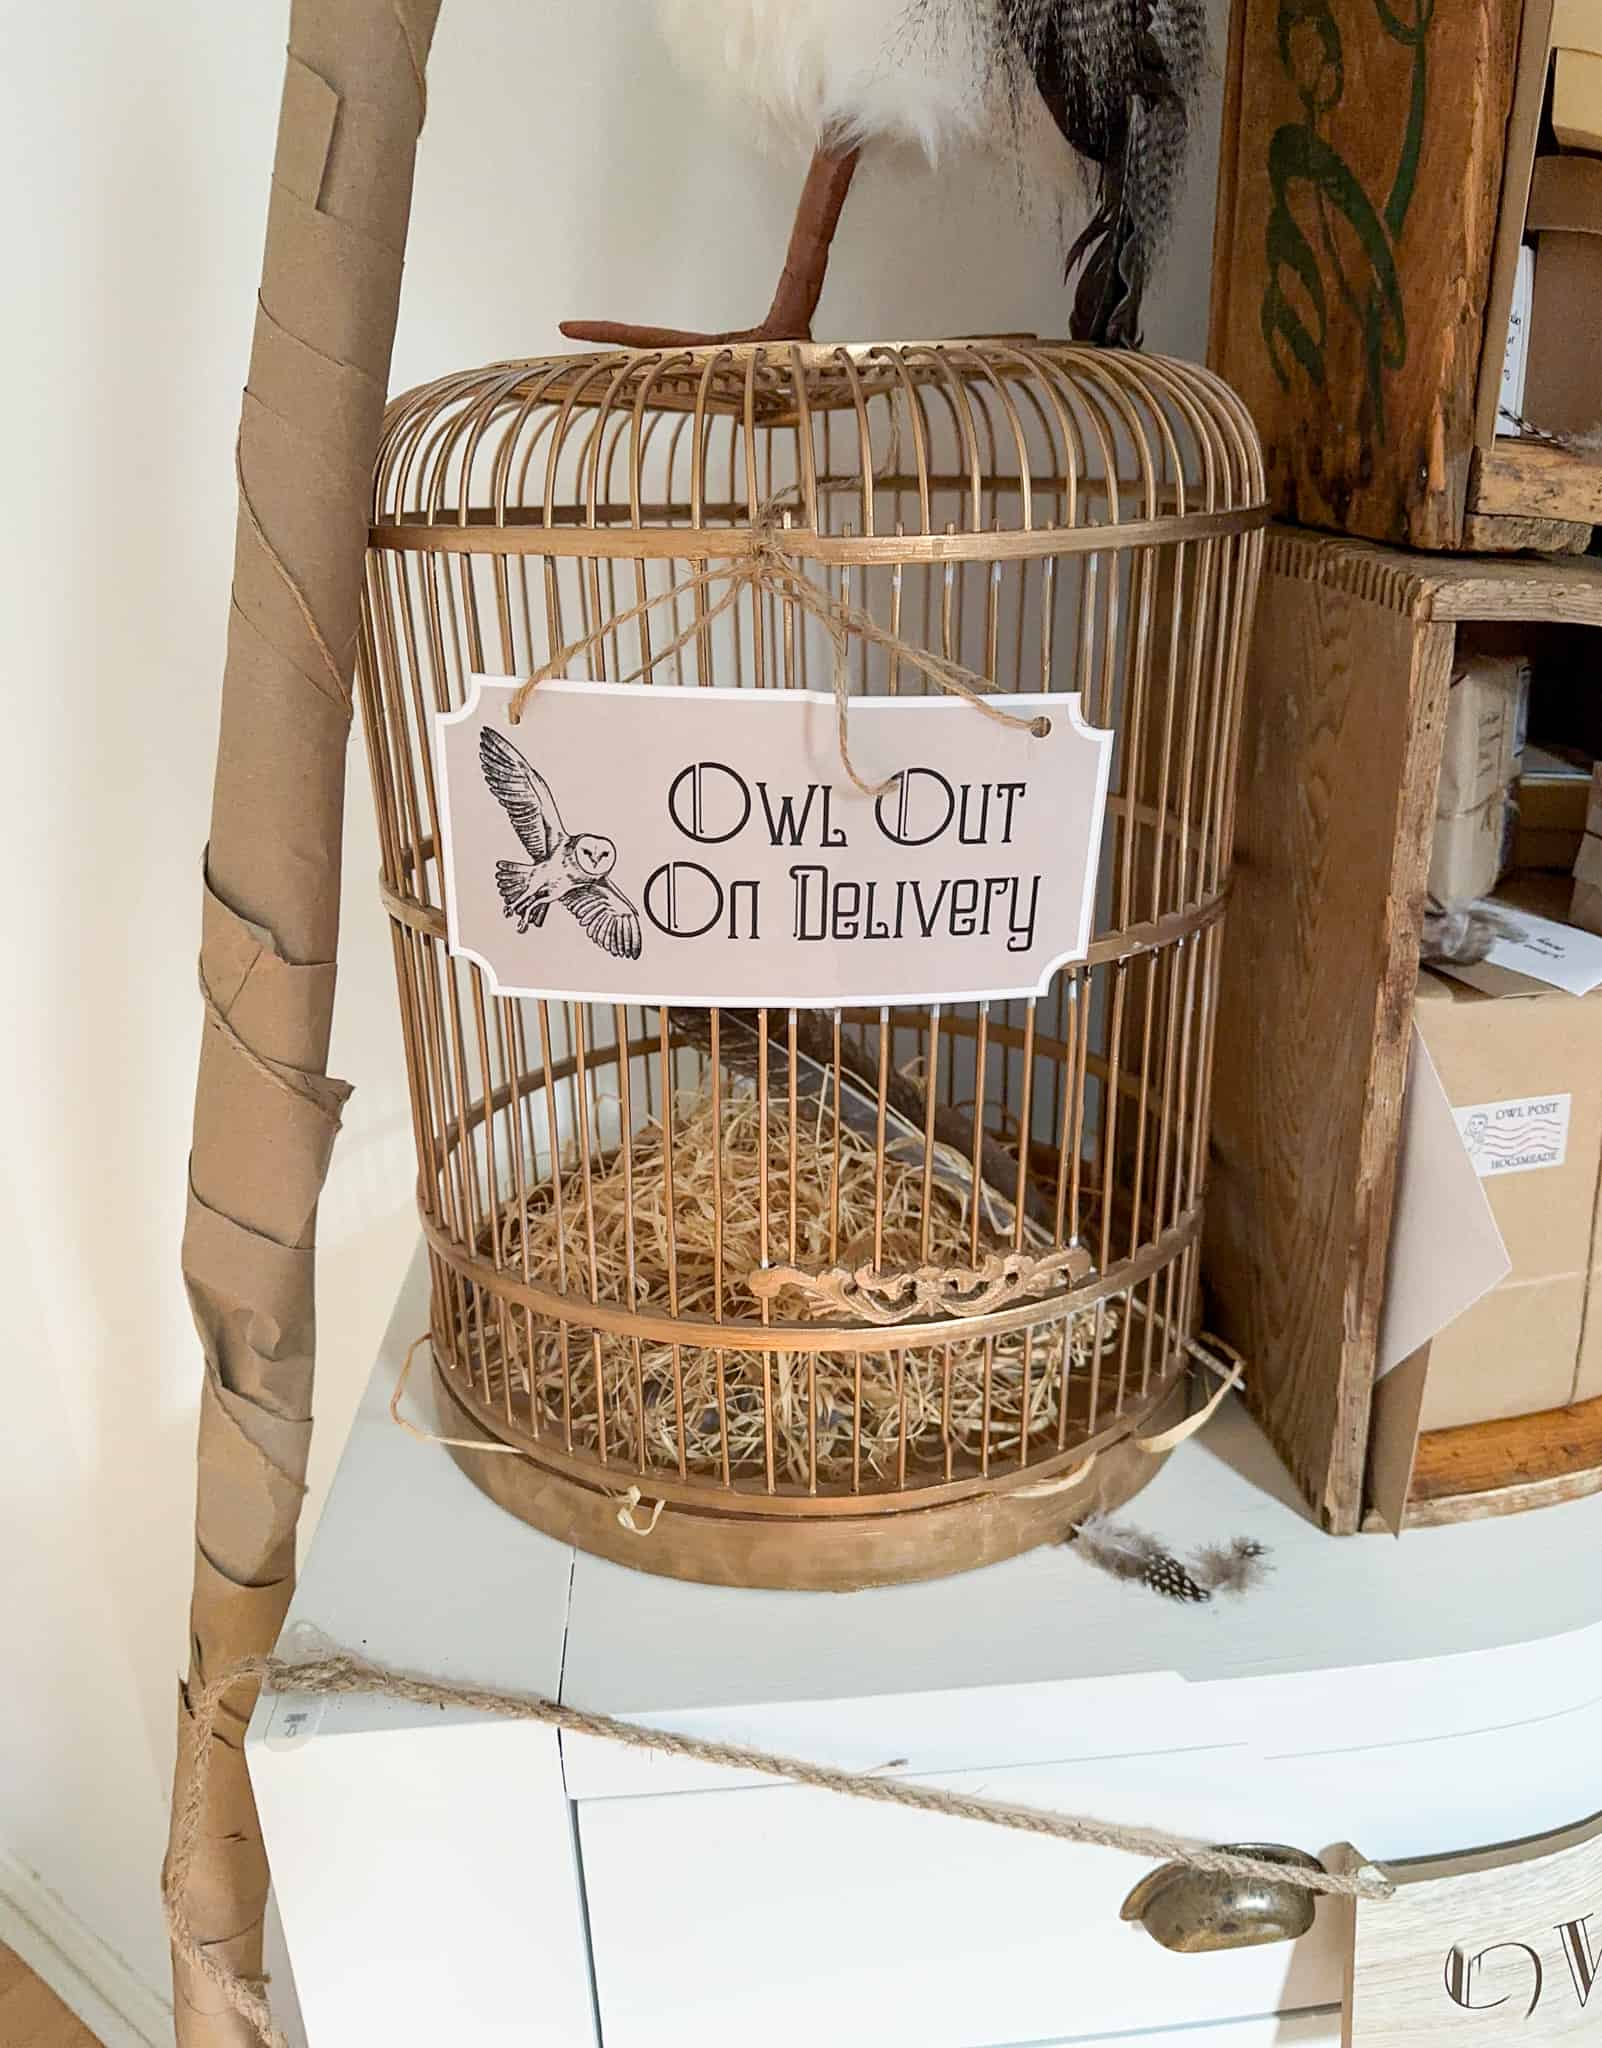
Vintage Birdcage: Gold birdcage with door open and free printable "Owl out for delivery" sign. Found mine at a thrift store for $10, and spray painted it gold.

Scabers: Look for a rat Halloween decoration, and don't forget to remove a toe. 😉
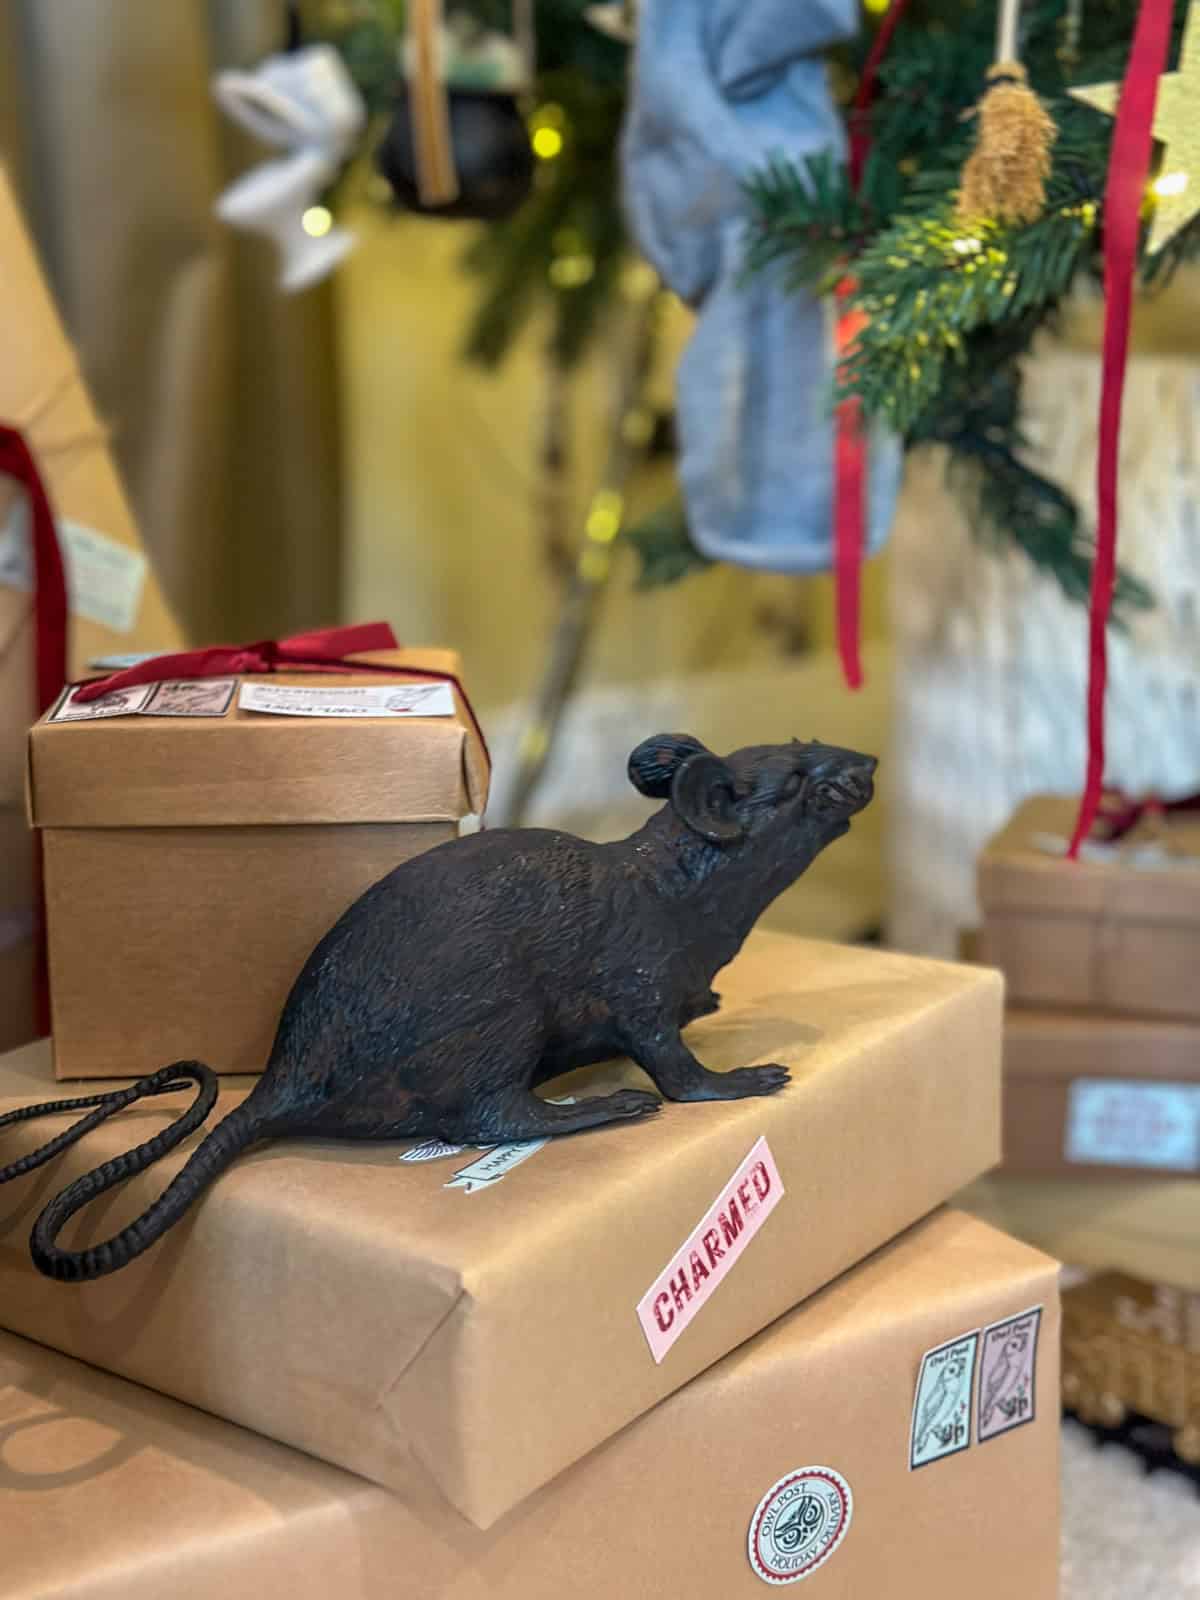
Scabbers rat decoration on owl post packages under Harry Potter Christmas tree for themed holiday decor.

Harry Potter Christmas Mantel Decor

Youtube video

I had so much fun decorating our Harry Potter Christmas tree, that of course, I had to extend the decor to the rest of the room. We love our cozy fireplace, and I wanted to match it to our tree. We started by layering garland on the front, and adding Christmas lights, then we decorated it with gold star ribbon, and more of our gold leafed star and moon ornaments. Then we added our Harry Potter book wreath, and what is a Christmas mantel without stockings? We also layered in a large owl, and our DIY Mandrakes.

DIY Weasley Sweater Christmas Stockings
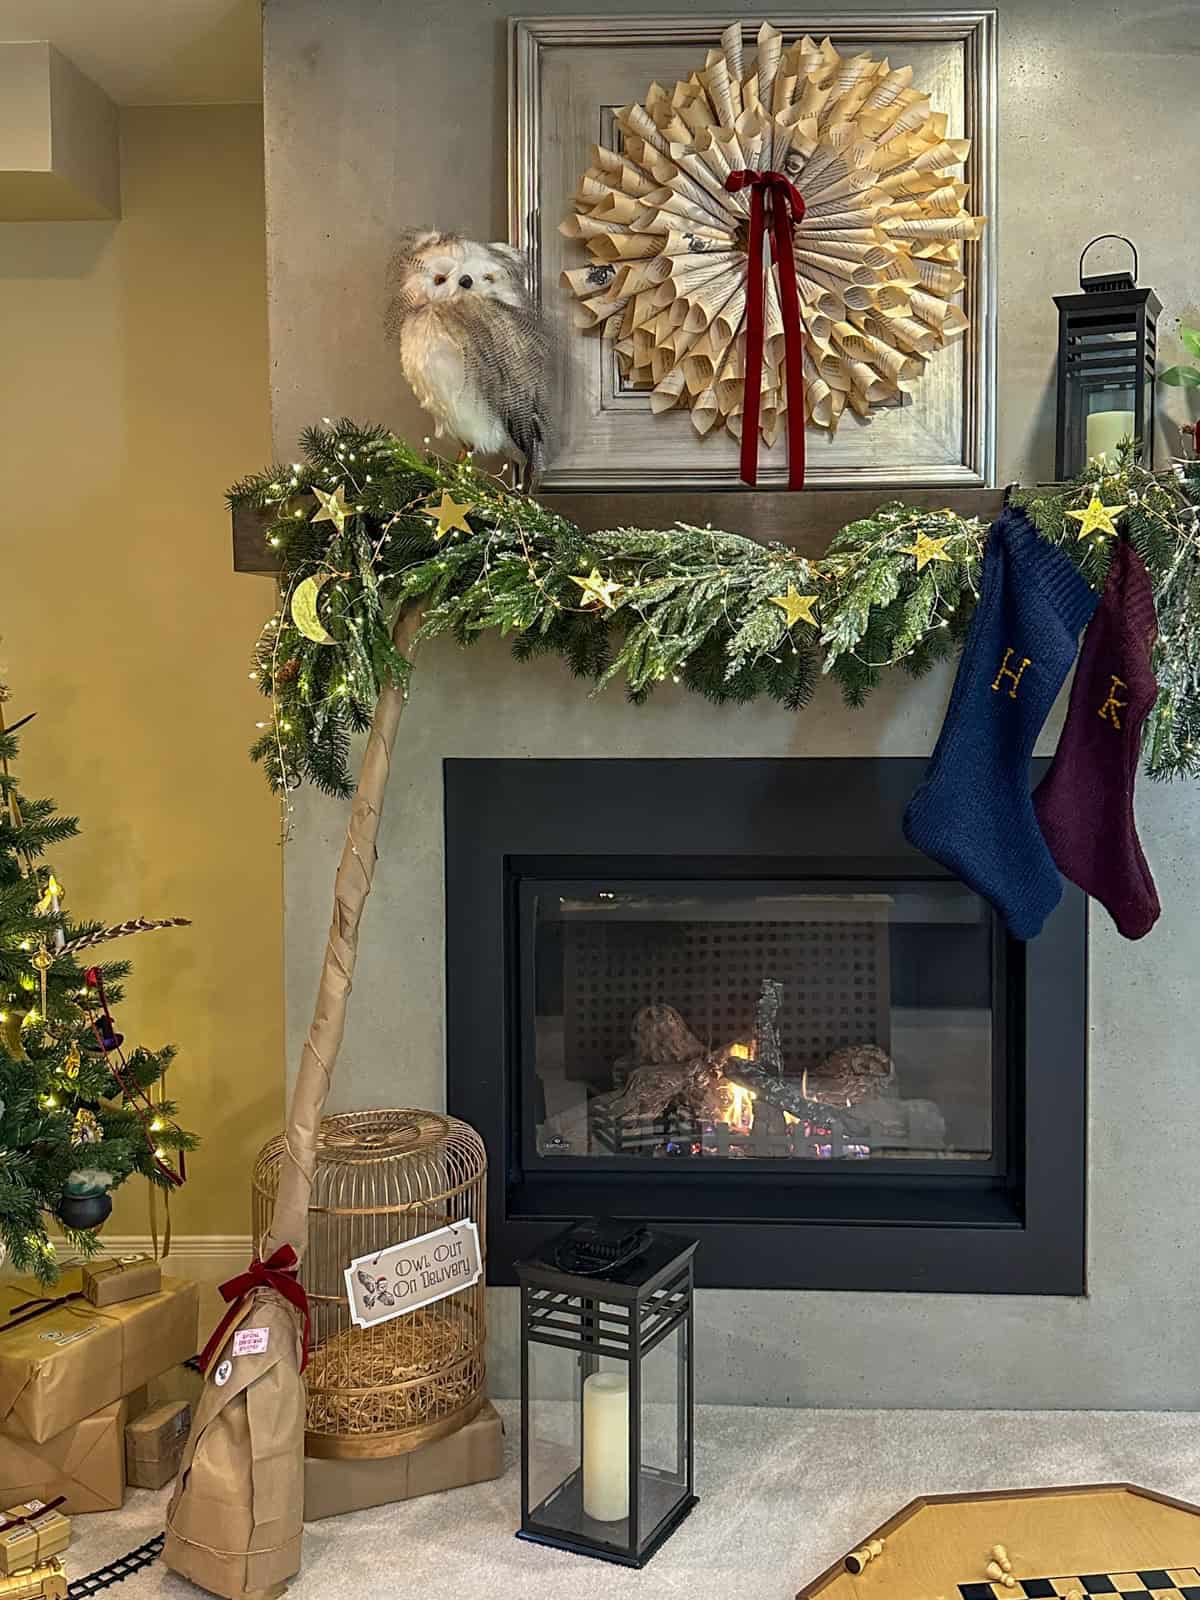
Harry Potter Christmas mantel with Weasley stockings, book page wreath, and gold star garland for DIY holiday decor.

What is a Christmas mantel without stockings? These are one of my favorite projects! They were inspired by the handmade sweaters that Mrs. Weasley makes for Ron and Harry in the first book.

I don't knit or crochet, so I found a cheater's way to make them. These are made from thrifted sweaters with stitched initials. I created one in maroon with "R" for Ron and one in blue with "H" for Harry. You could make stockings for your own family with their initials.

Find thrifted sweaters in Weasley colors ($5-8 each). Find or create a stocking pattern (free patterns online, trace an existing stocking, or freehand it on some large paper). Cut pattern pieces from sweaters, lining up the top cuff of the sweater with the ribbed edge of the bottom of the sweater. Remember, you'll need front and back. Then stitch the stocking together with your sewing machine.

Do be careful when working with the cut sweater pieces, as they can begin to unravel at the edges. Pin front and back pieces together with right sides facing. Sew around the stocking using a zigzag stitch (since sweater fabric stretches). Turn right-side-out, and add a hanging loop from ribbon.
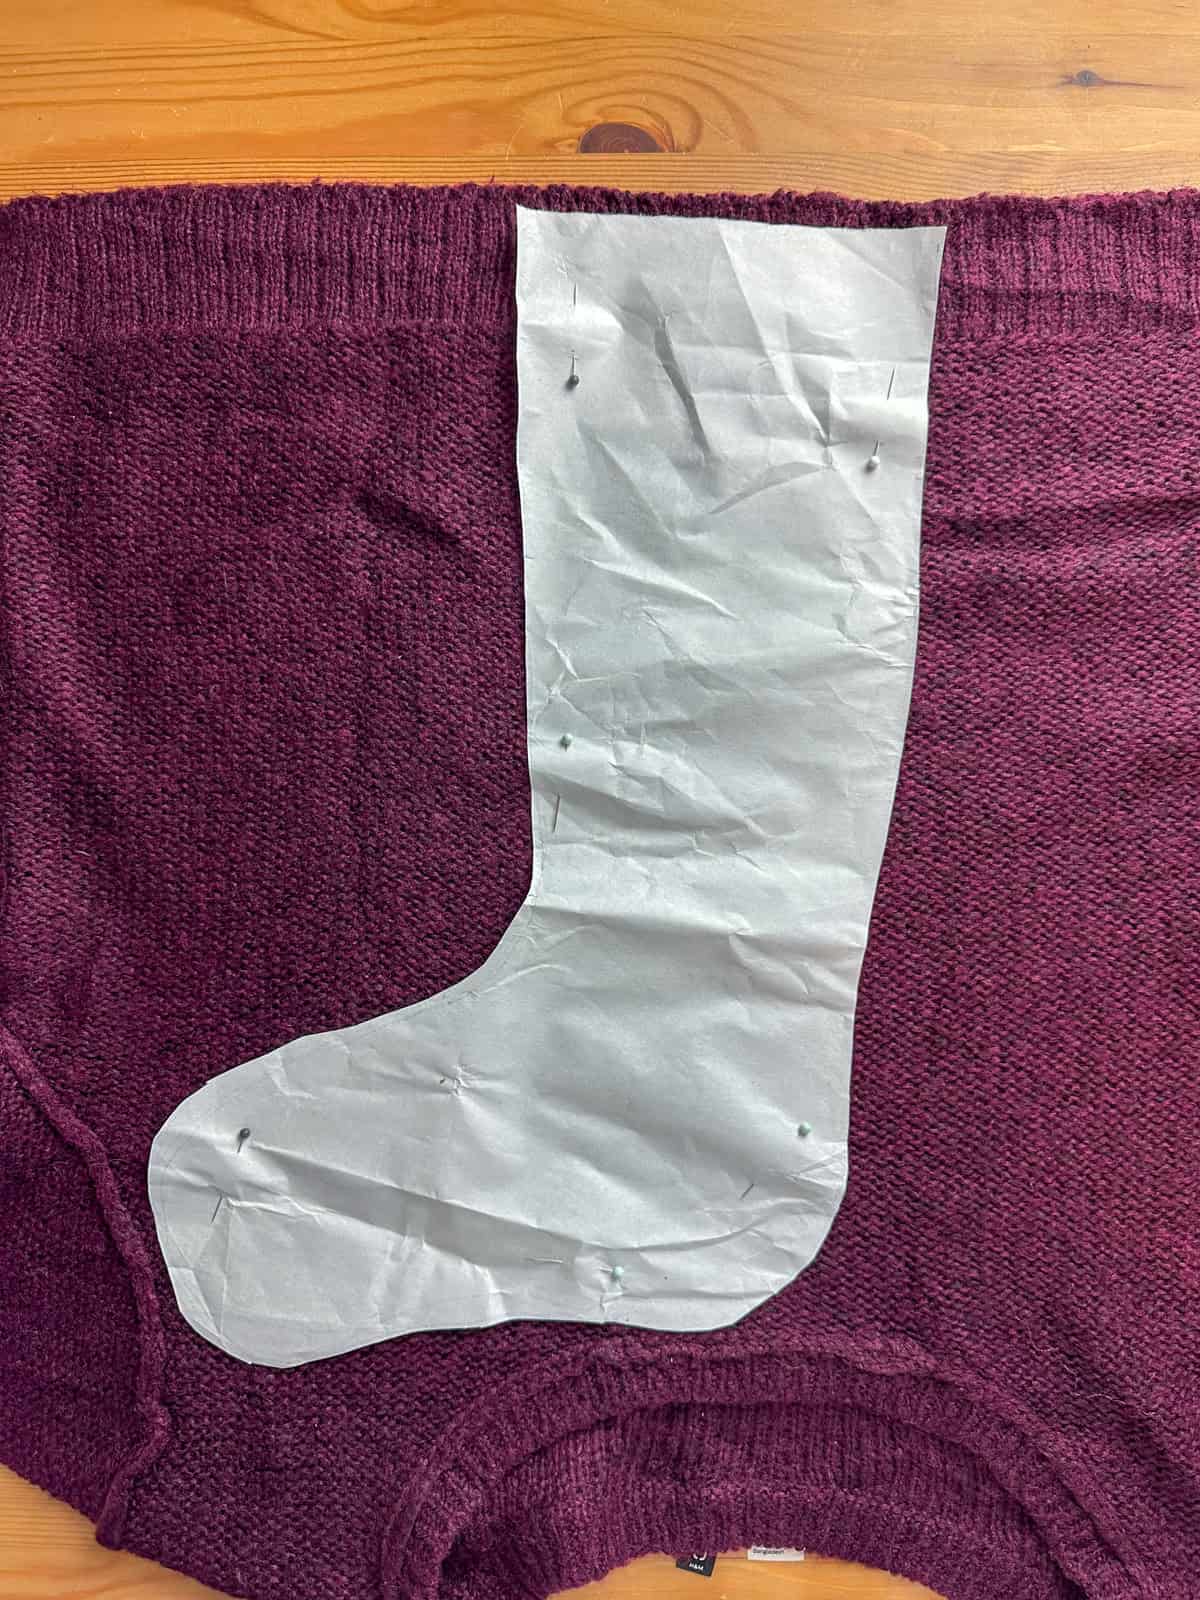
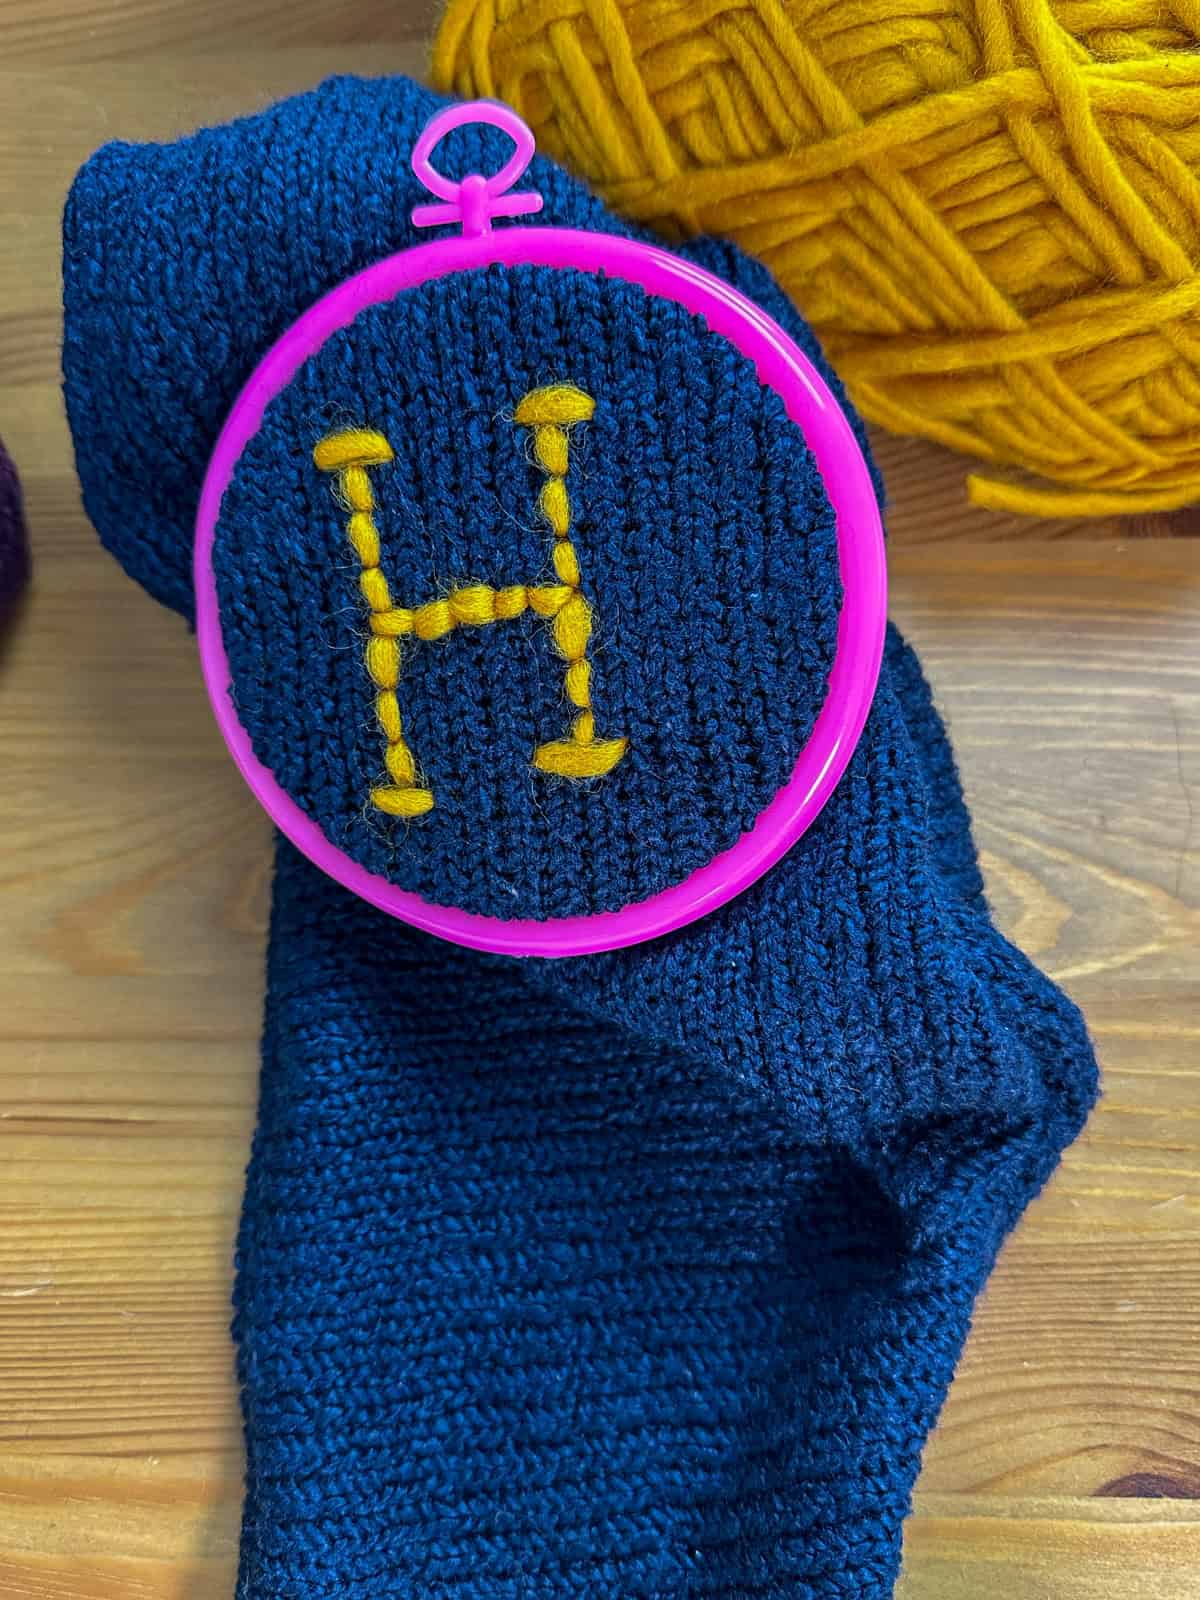
DIY Harry Potter stocking pattern on thrifted sweater for Harry Potter Christmas decorations tutorial.
DIY Harry Potter stocking  modeled on the sweaters Mrs. Weasley knits for Christmas, with an "H" for Harry stitched on it.

For the initial, use a small embroidery hoop on the front of the stocking, and stitch your letter with gold yarn and a darning needle using a simple back stitch, being careful not to stitch through the back piece by accident.
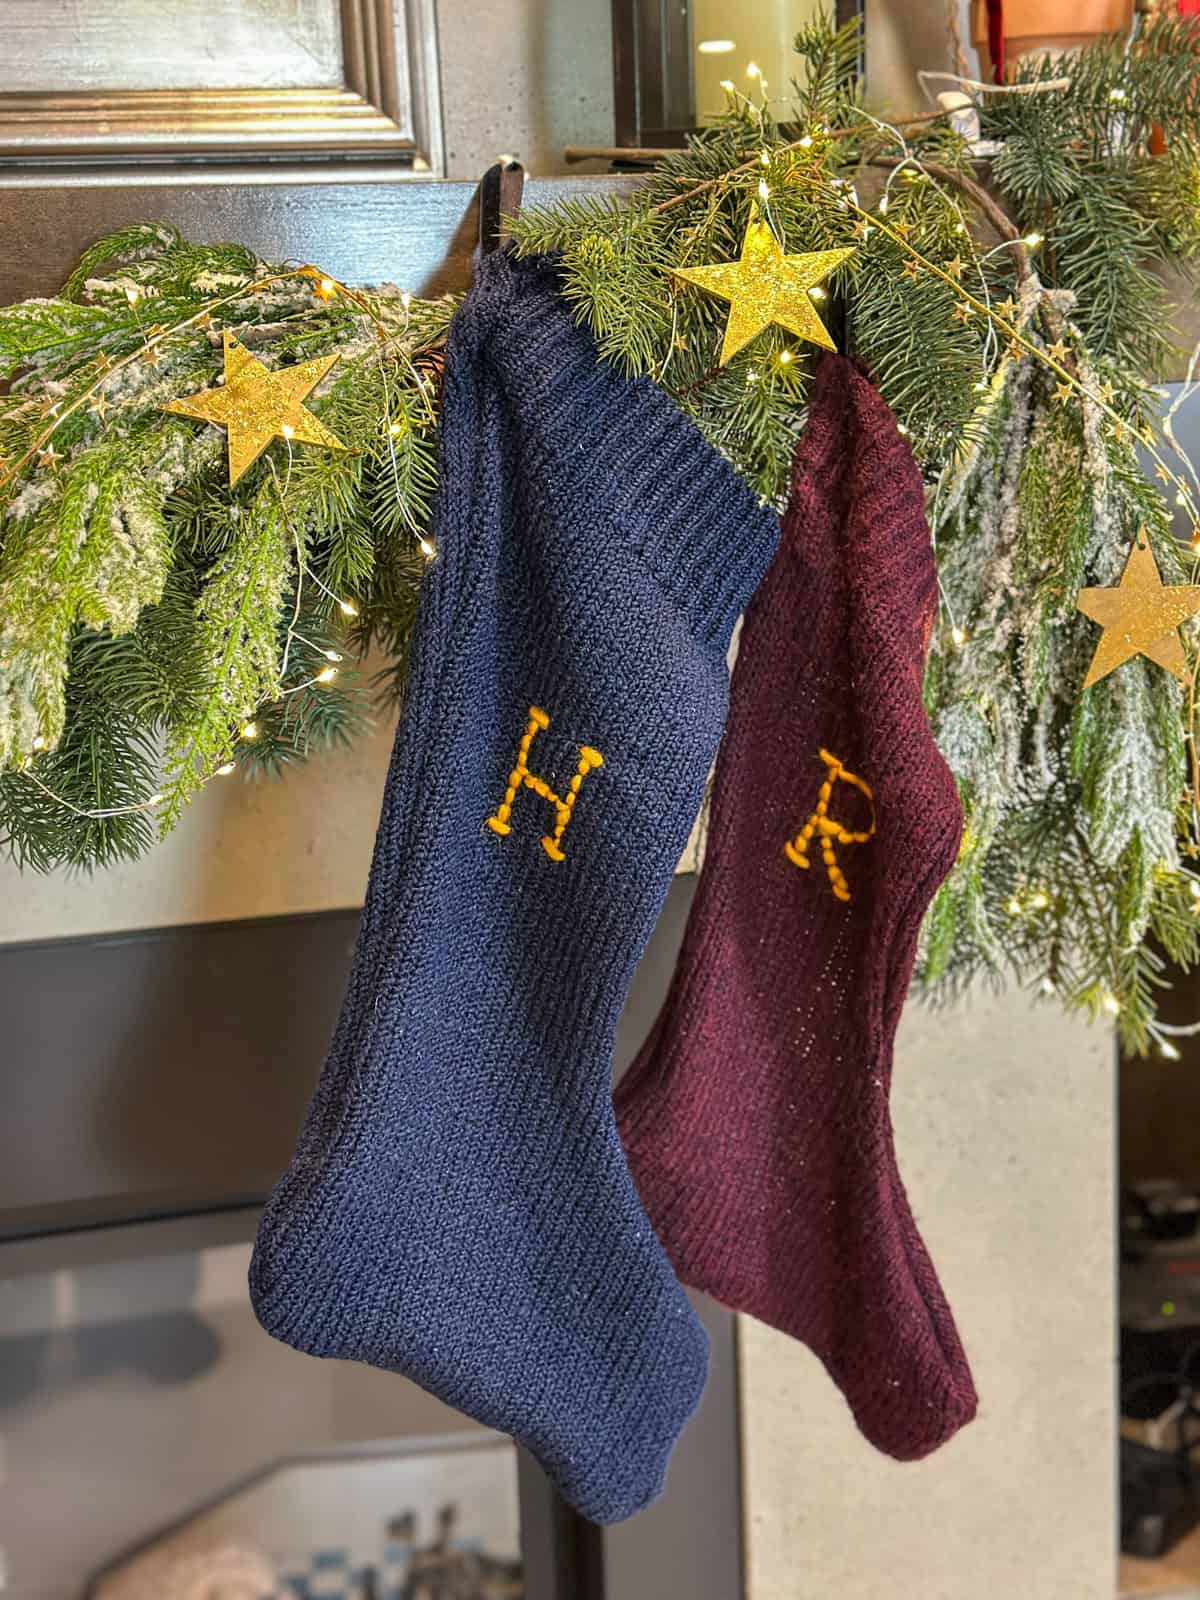
DIY Harry Potter Christmas stockings with stitched initials hanging on mantel for homemade holiday decorations.
  • Materials: Thrifted sweaters in maroon and blue, sewing machine, thread, gold yarn, embroidery hoop and needle, scissors, pins, ribbon.
  • Time: 30 minutes each
  • Cost: $5-8 each
  • Difficulty: Intermediate

DIY Harry Potter Book Page Wreath
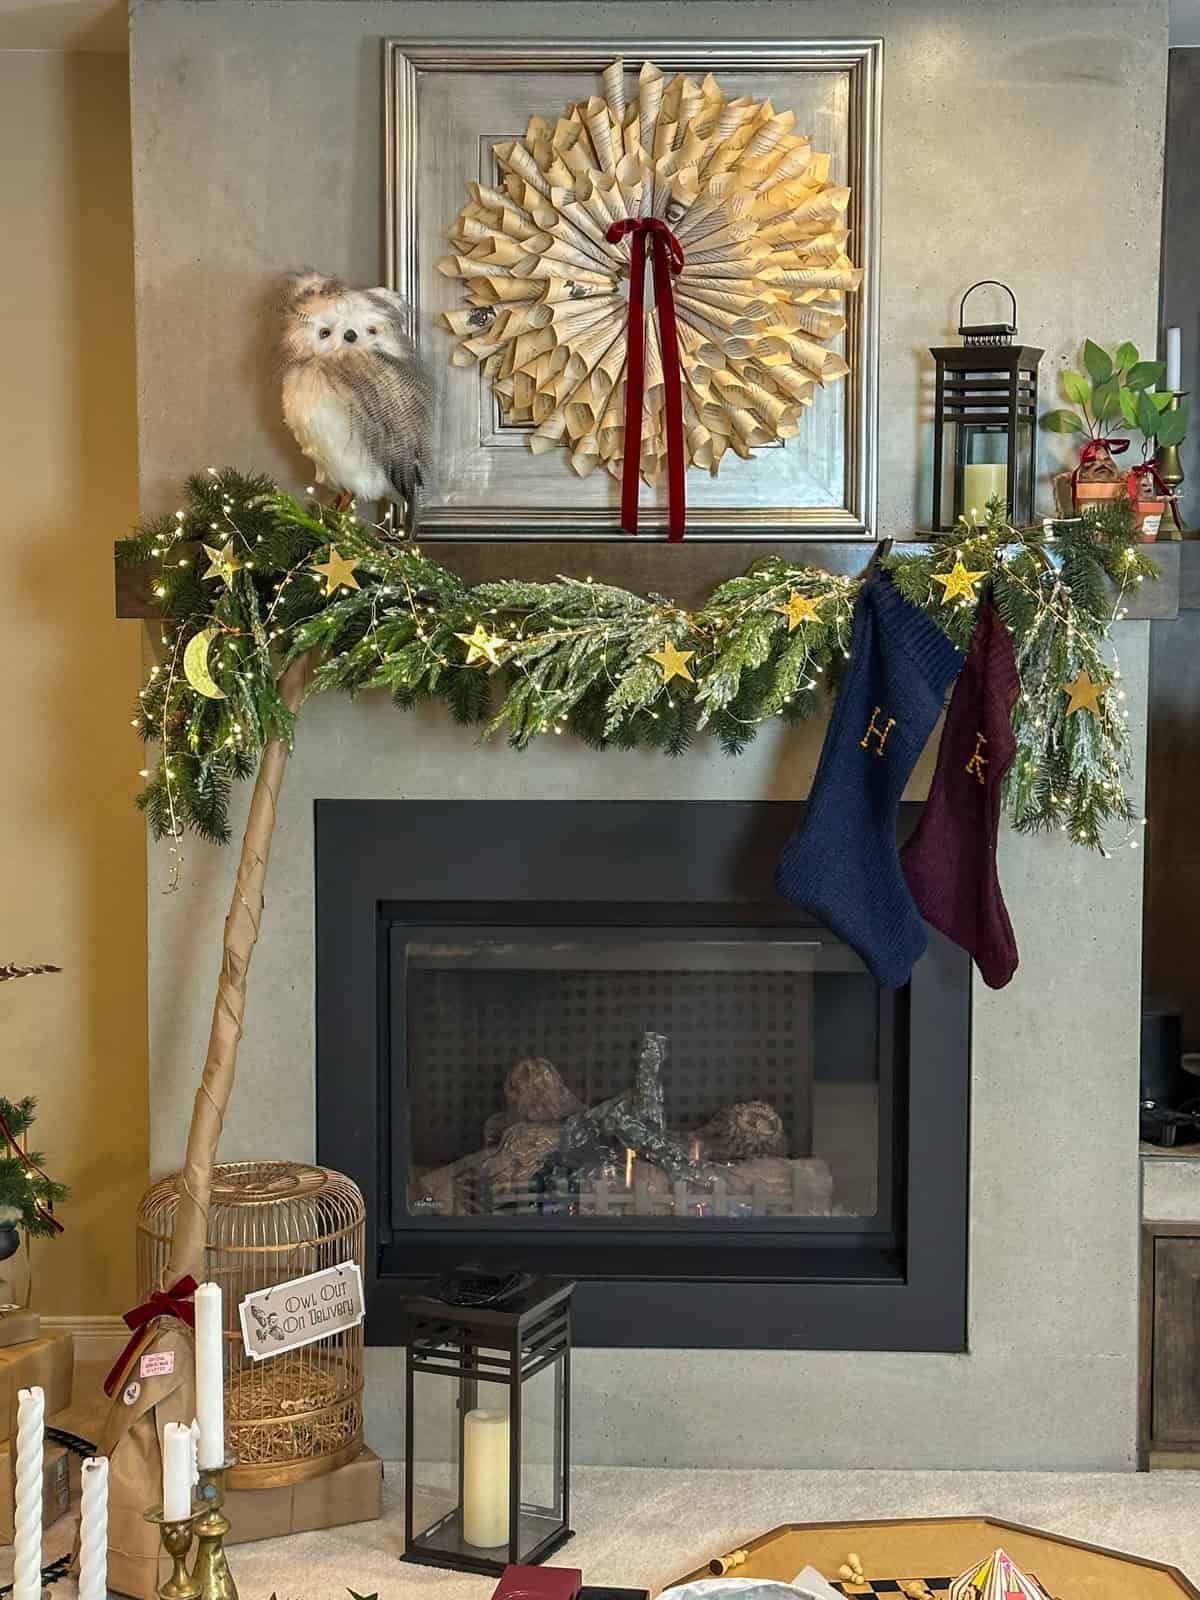
Harry Potter Christmas mantel with DIY stockings, book page wreath, and gold star garland for holiday decorating ideas.

This book page wreath is stunning and simple! Using pages from an old Harry Potter paperback creates a beautiful vintage focal point.

Create or purchase a wreath base (cut a ring from sturdy cardboard or use foam form, about 12-14 inches outer diameter). Tear pages from the Harry Potter book. Roll each page into a tube, keeping one end tighter to create a cone shape. Secure with a dot of hot glue. Starting with the outer edge, hot glue rolled pages side by side around the circumference with tight ends toward center. Continue adding rows, working toward the inner circle, nestling each row into the previous. Cover the entire front until no cardboard shows. Tie a large red velvet bow and hot glue to the bottom or top. Attach a wire for hanging.

This uses a LOT of pages, so put on a Harry Potter movie while you roll!
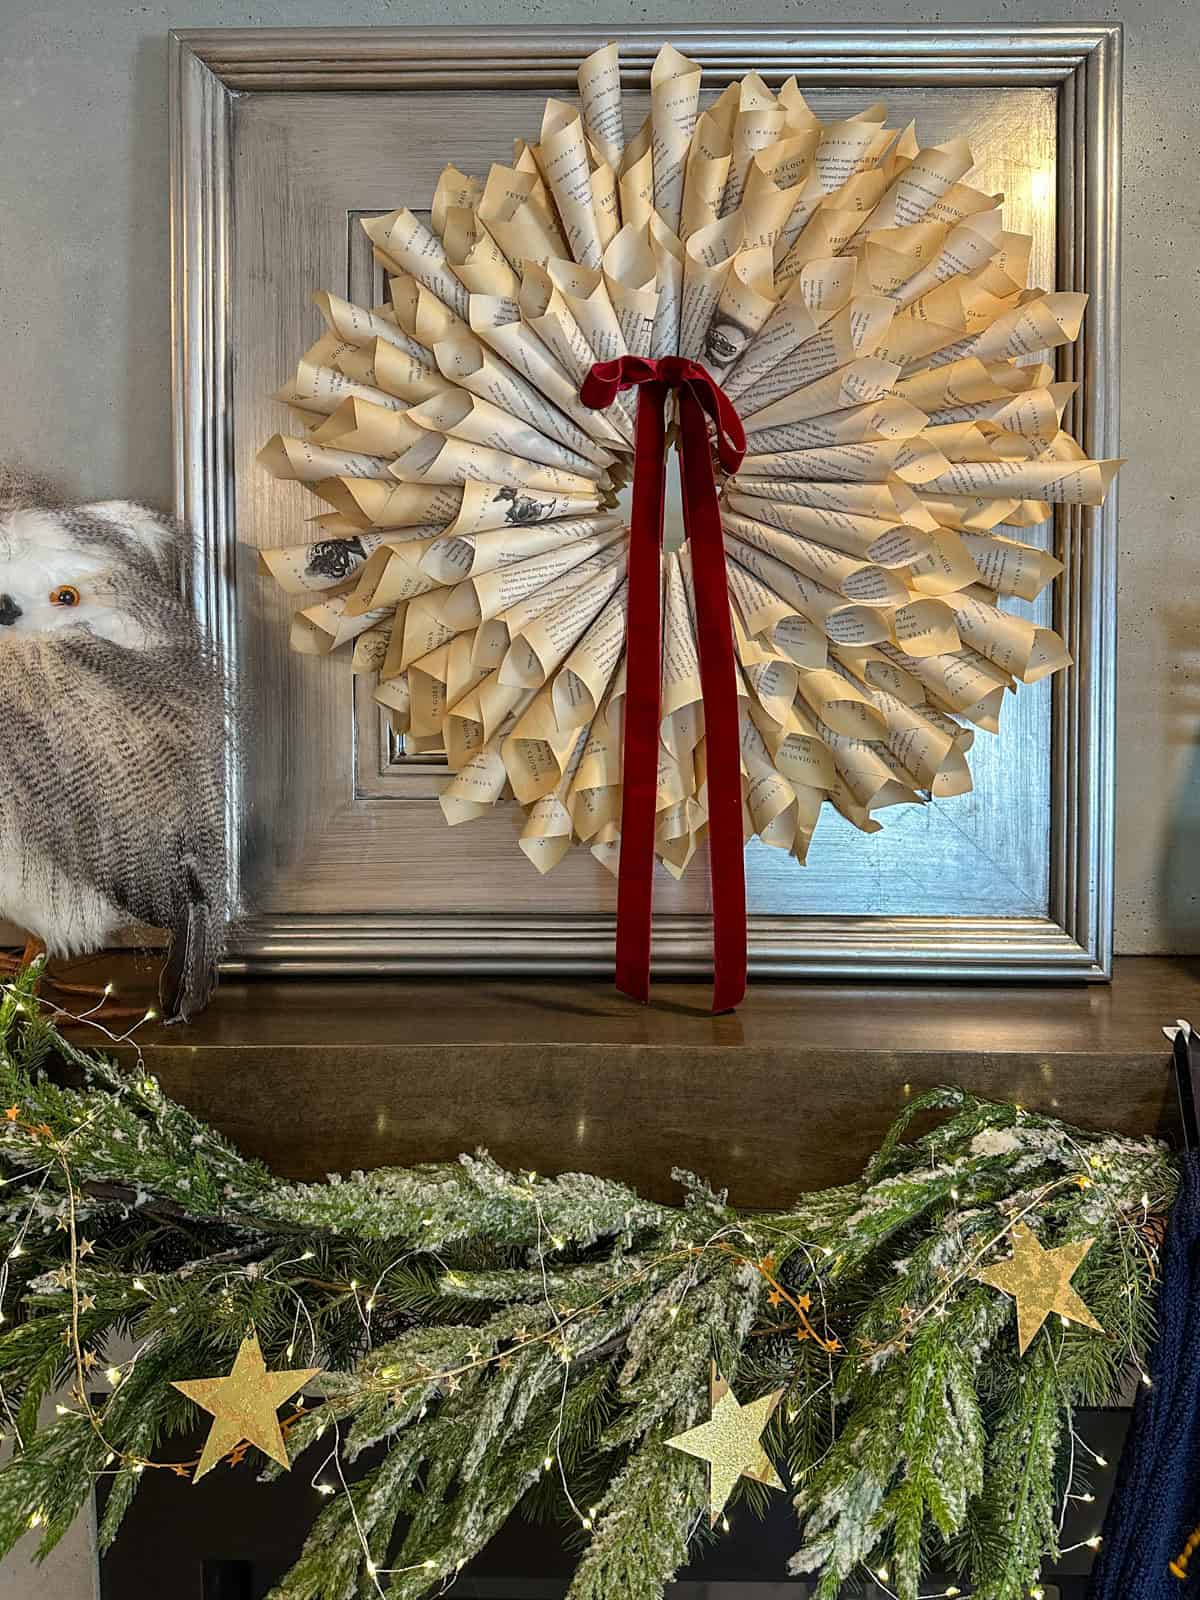
DIY Harry Potter book page wreath with red velvet bow on Christmas mantel for homemade holiday decorations.
  • Materials: Cardboard wreath base or foam form, old Harry Potter paperback ($3 thrift store), hot glue gun, red velvet ribbon.
  • Time: 2-3 hours (mostly rolling!)
  • Cost: ~$5
  • Difficulty: Beginner

DIY Mandrake Plants
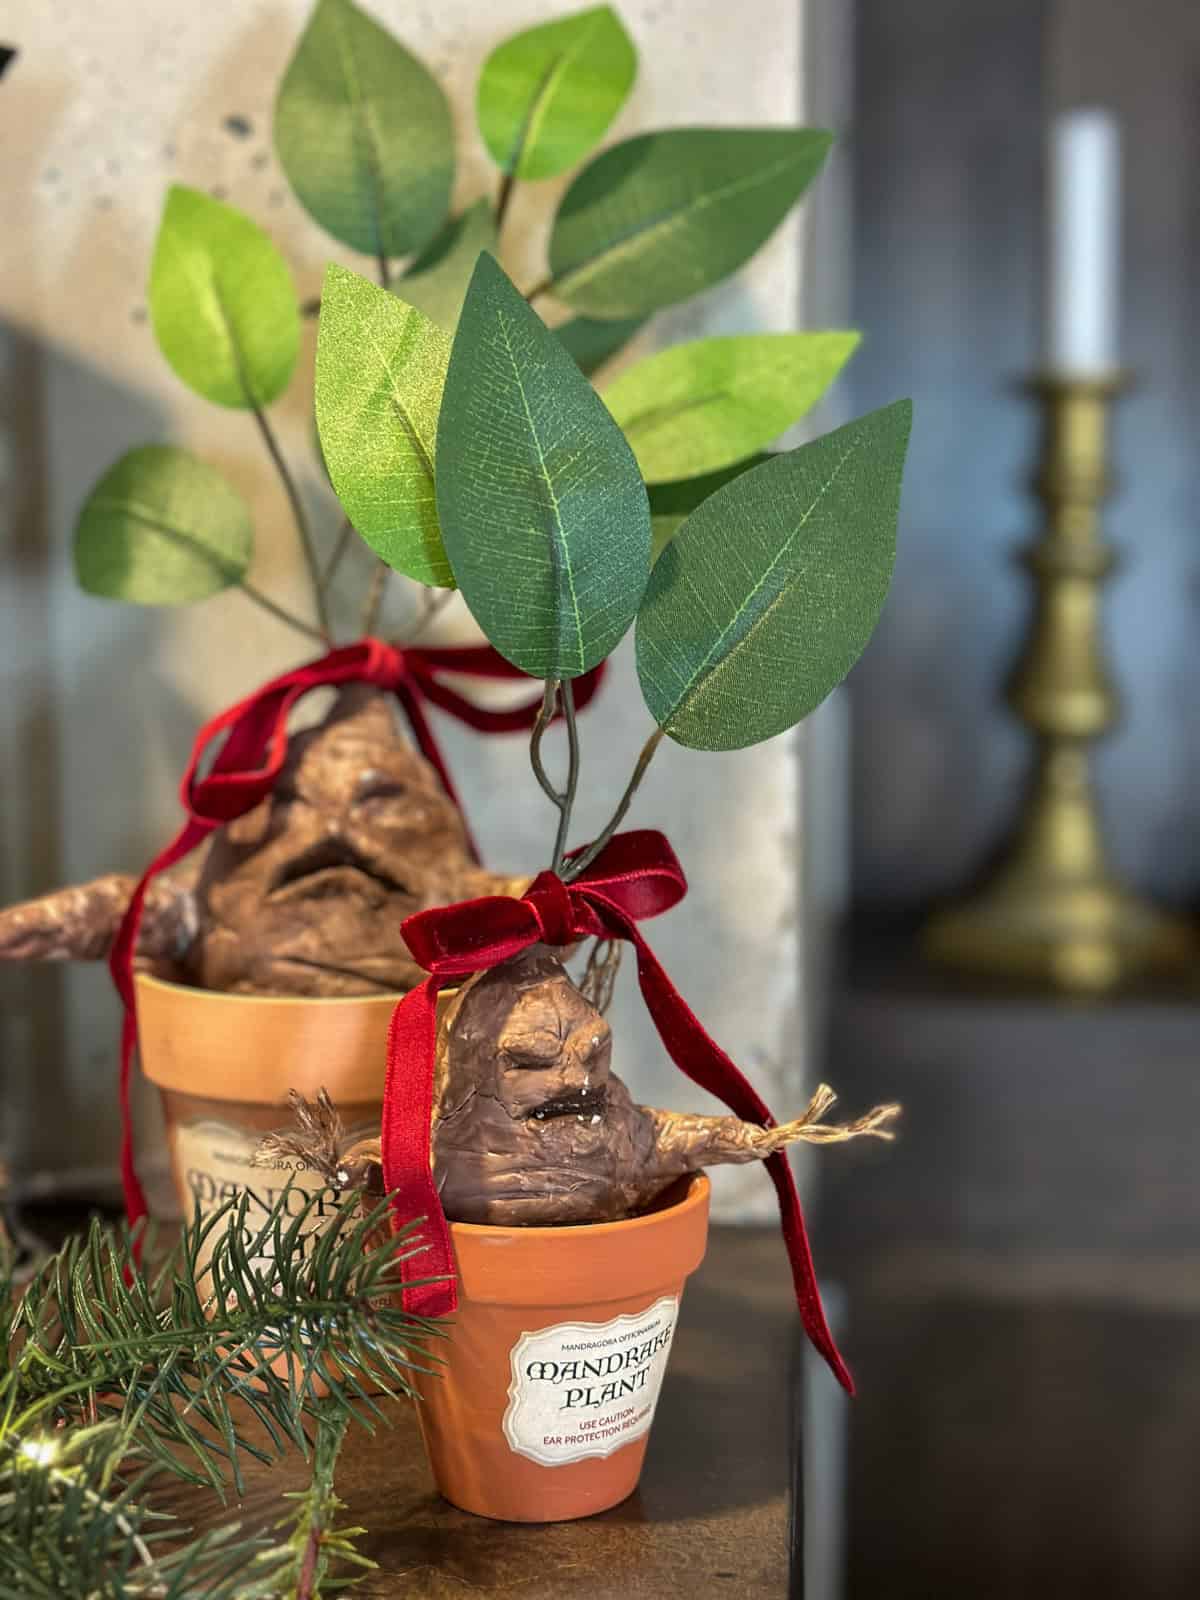
DIY mandrake plants with red bows in terra cotta pots with free printable labels for Harry Potter Christmas mantel decorations.

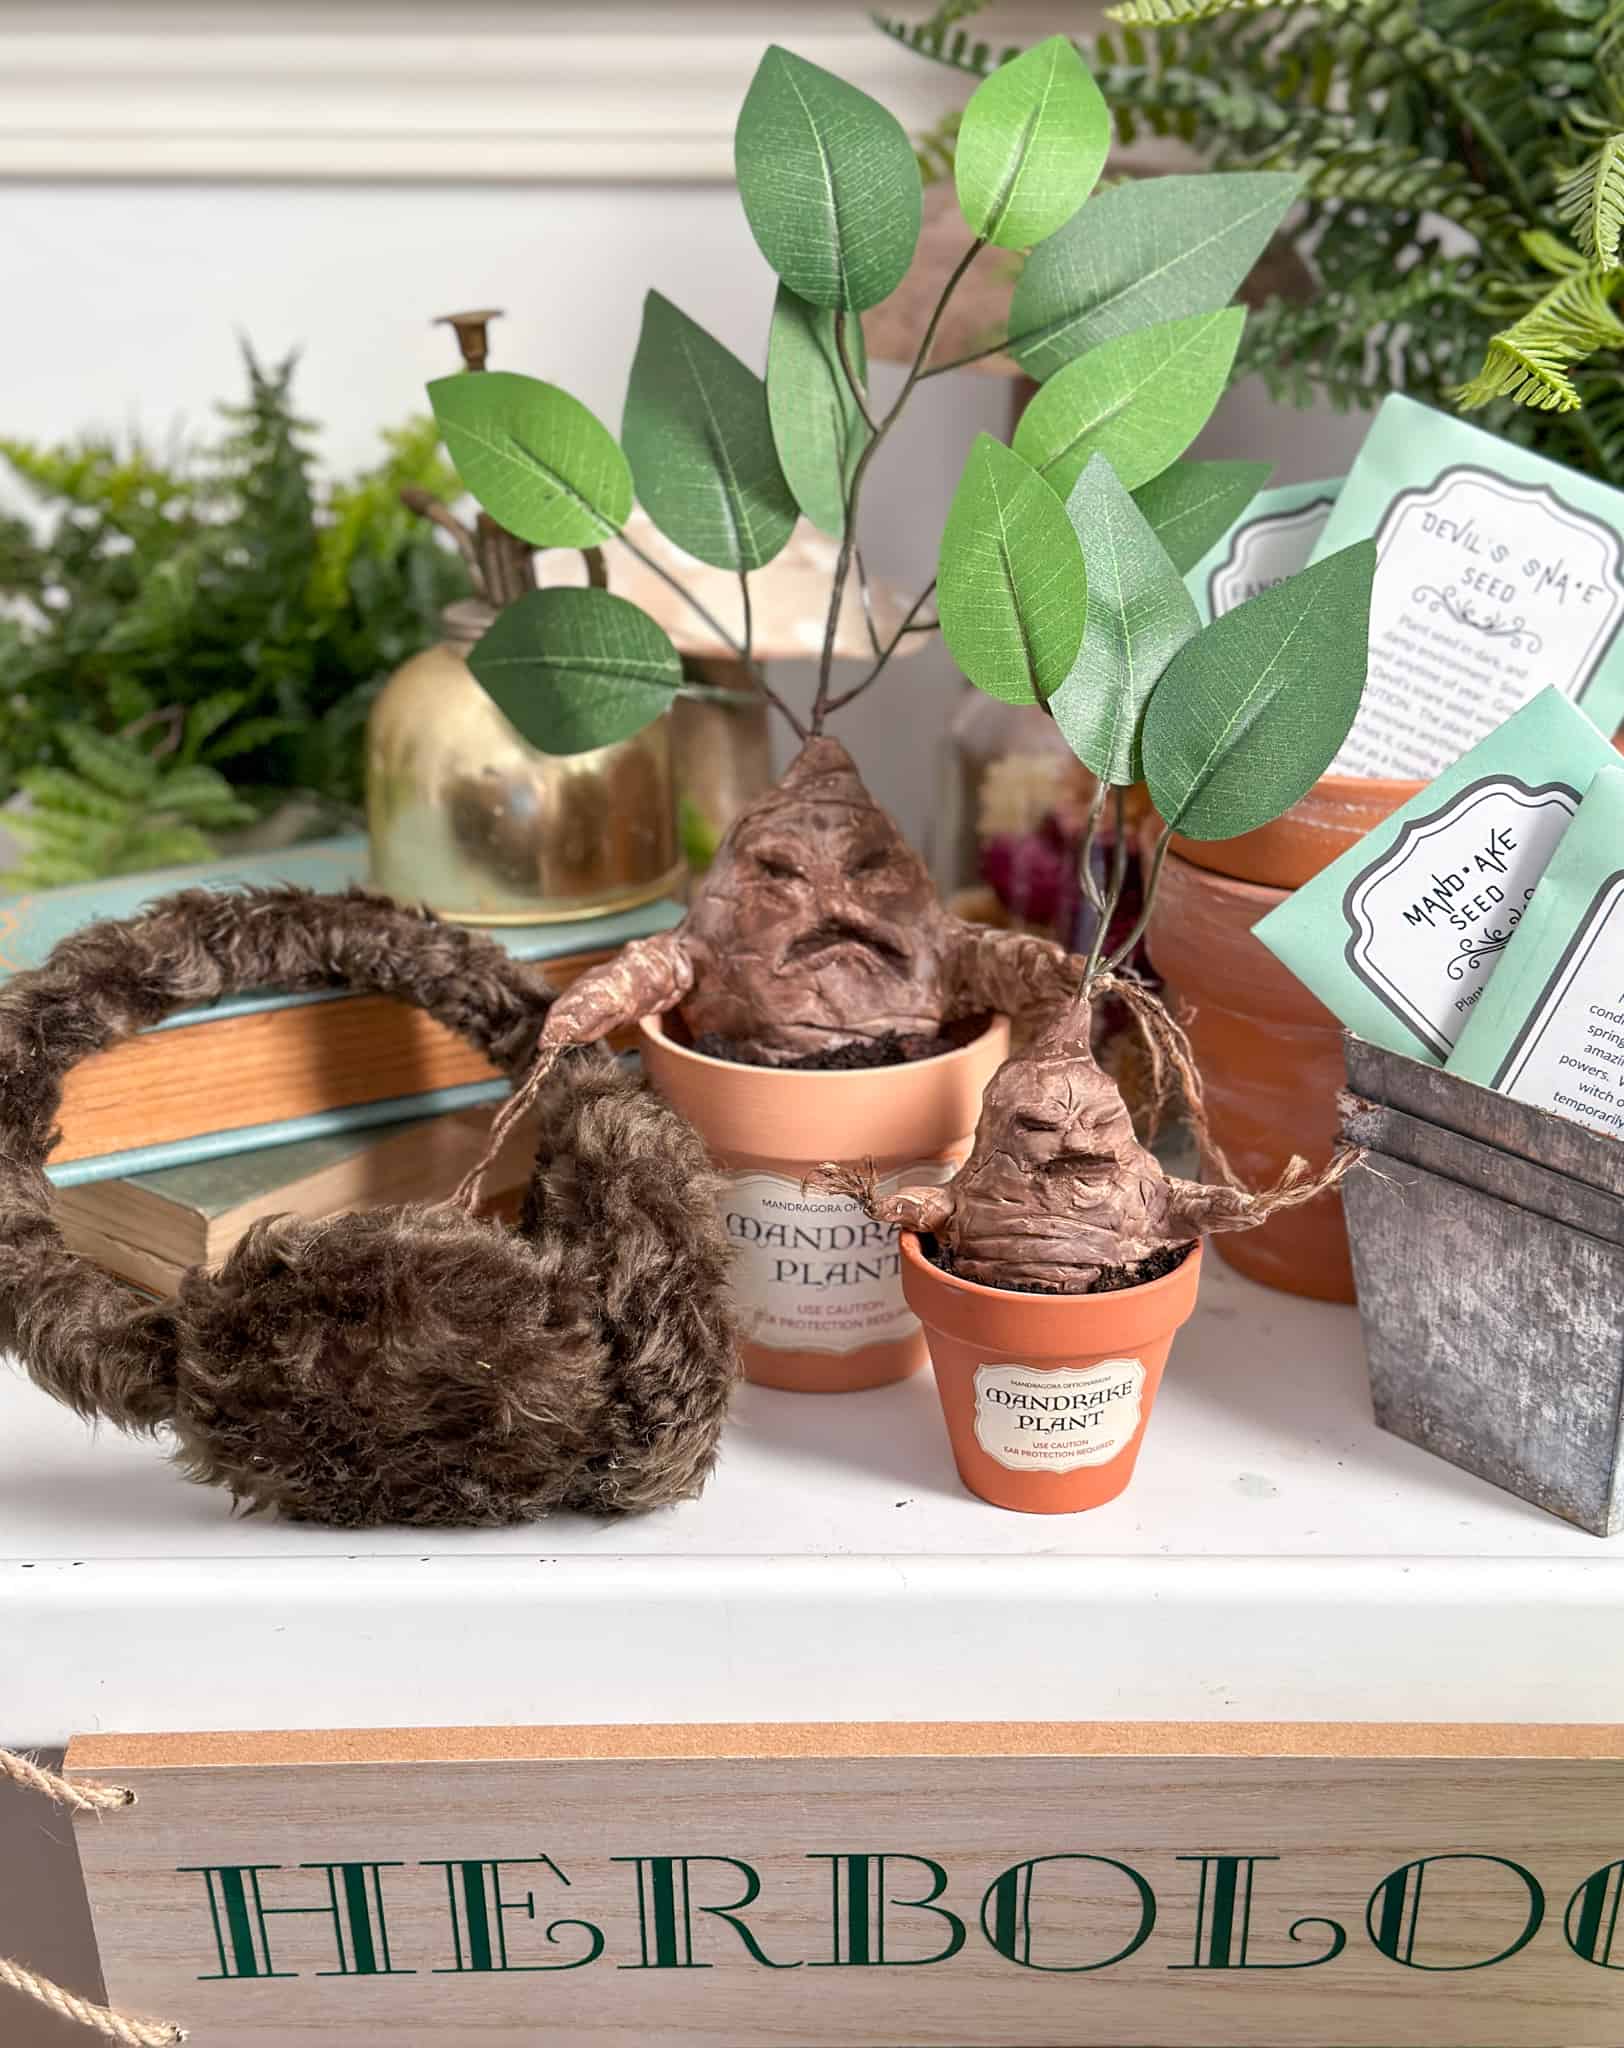
The mandrakes were a project I made for our DIY Harry Potter decor a few years ago. They're made out of air dry clay, that I moulded around a tin foil base, with pieces of twine for root like hands, and some faux leaves at the top. They're painted with acrylic paints and nestled into some little terra cotta pots, with free printable mandrake plant labels. For Christmas, we just added a red bow.

Wizards Chess: In front of the fireplace, we had to set up a game of Wizards' chess, or just regular chess in our case. We just love the scene in the first book, Harry Potter and the Sorcerer's Stone, where after their big Christmas feast in the great hall, and then playing in the snow, they come in and spend Christmas evening by the fire in Gryffindor common room playing chess and having a cozy dinner.
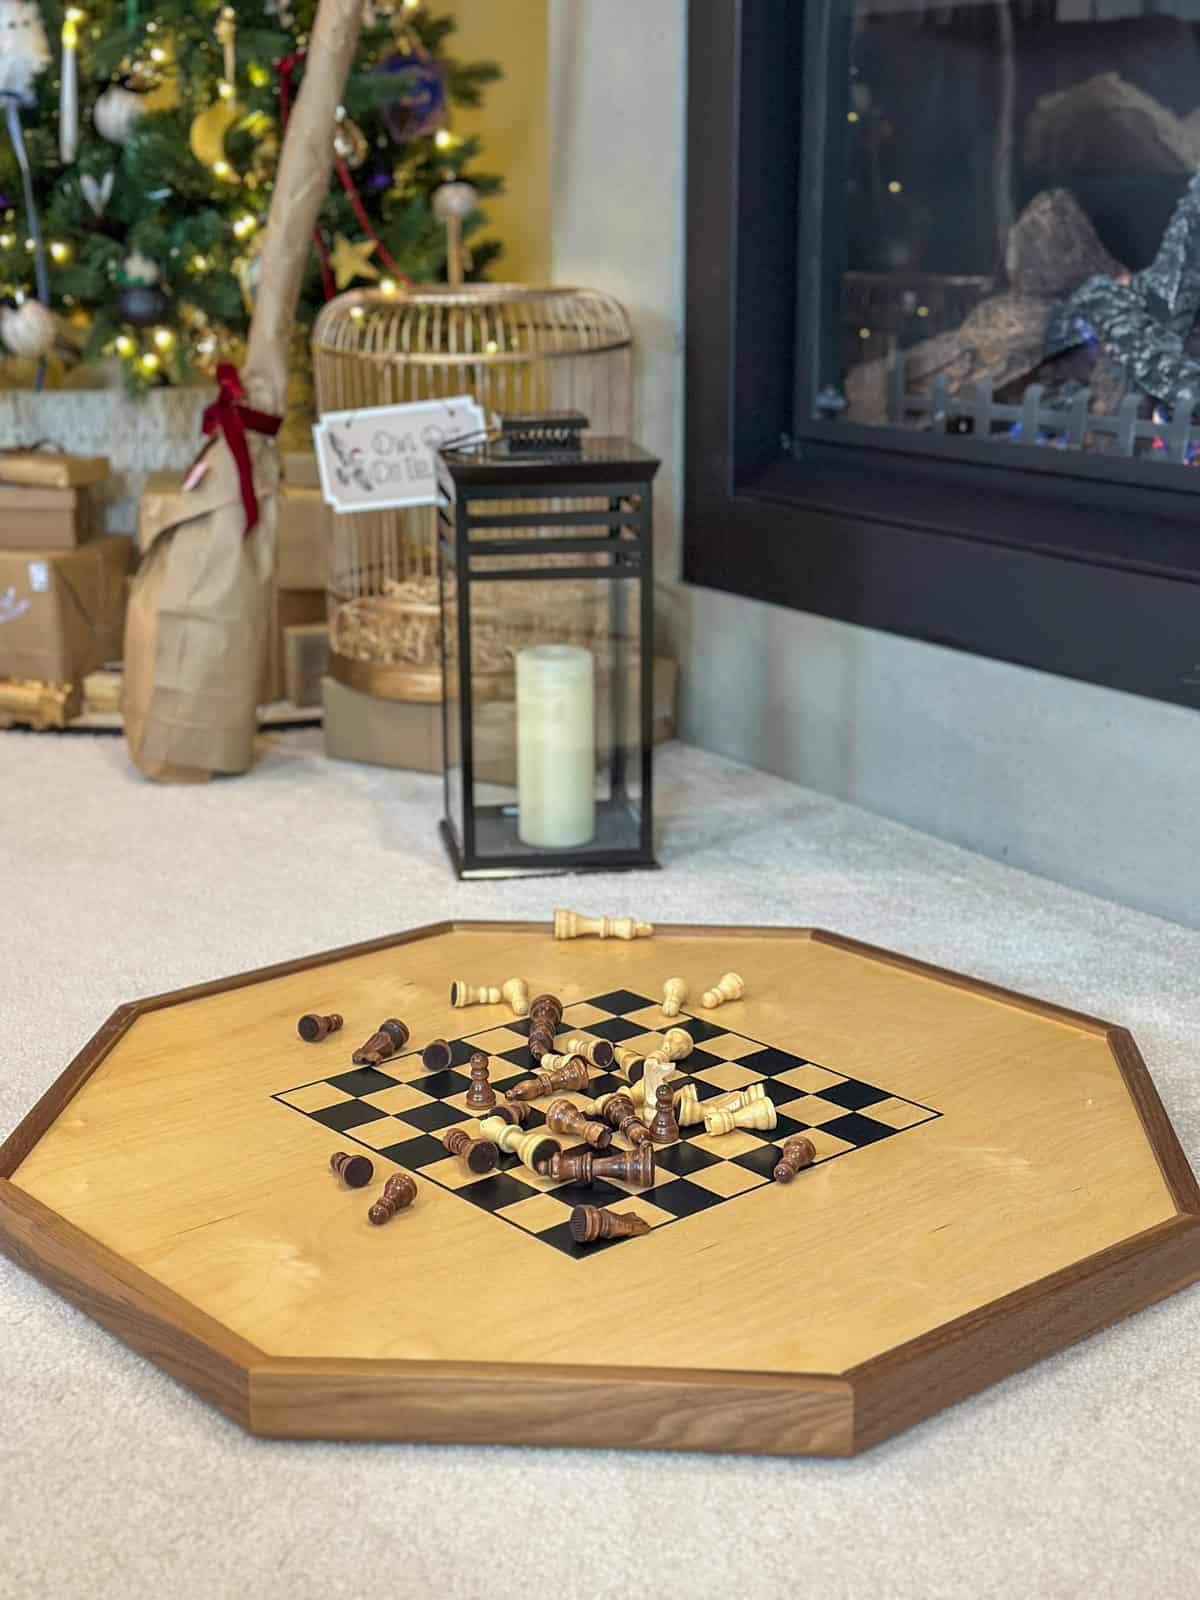
Harry Potter chess board display for DIY Christmas decorations and themed living room holiday decor ideas.

On built-in shelves: Vintage books, brass candlesticks at various heights, a pet spider in a vintage jar, and a mini dragon skeleton from the dollar store Halloween decoration, dressed up for Christmas with another red bow.
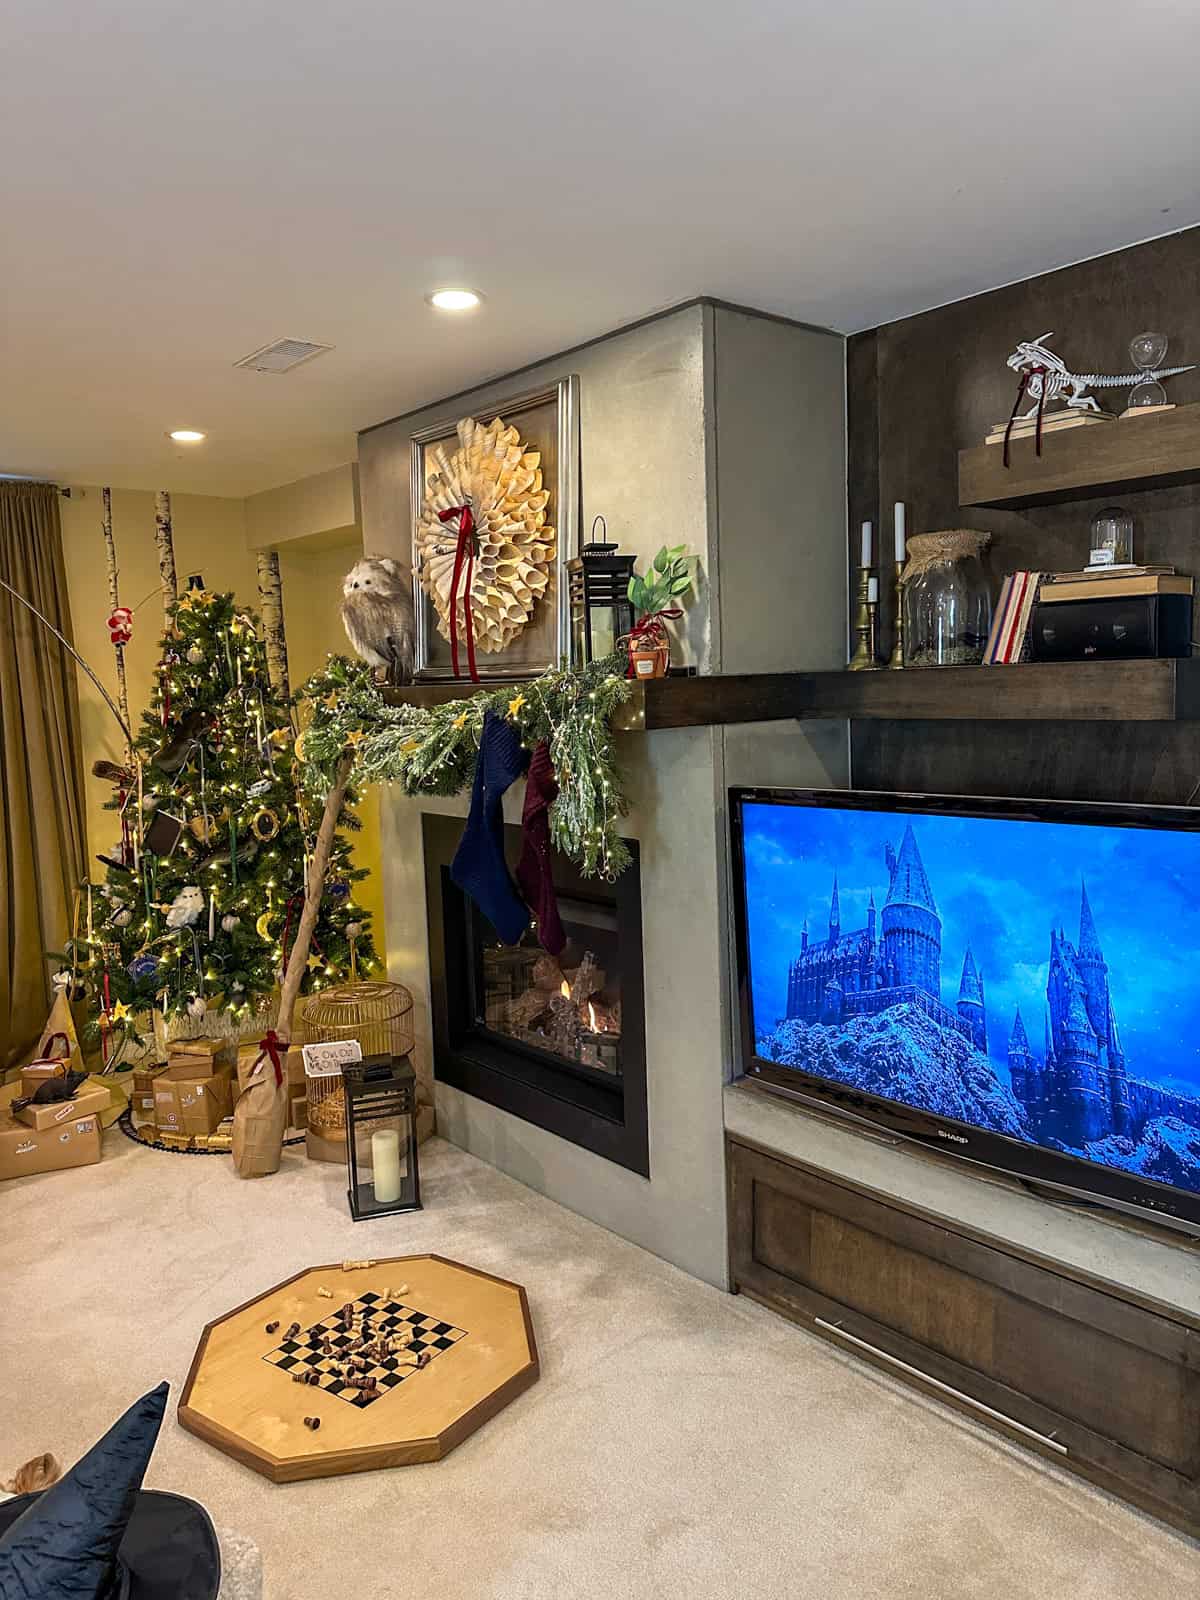
Harry Potter Christmas room with tree, mantel, stockings, and Hogwarts on TV for complete holiday decorating ideas.

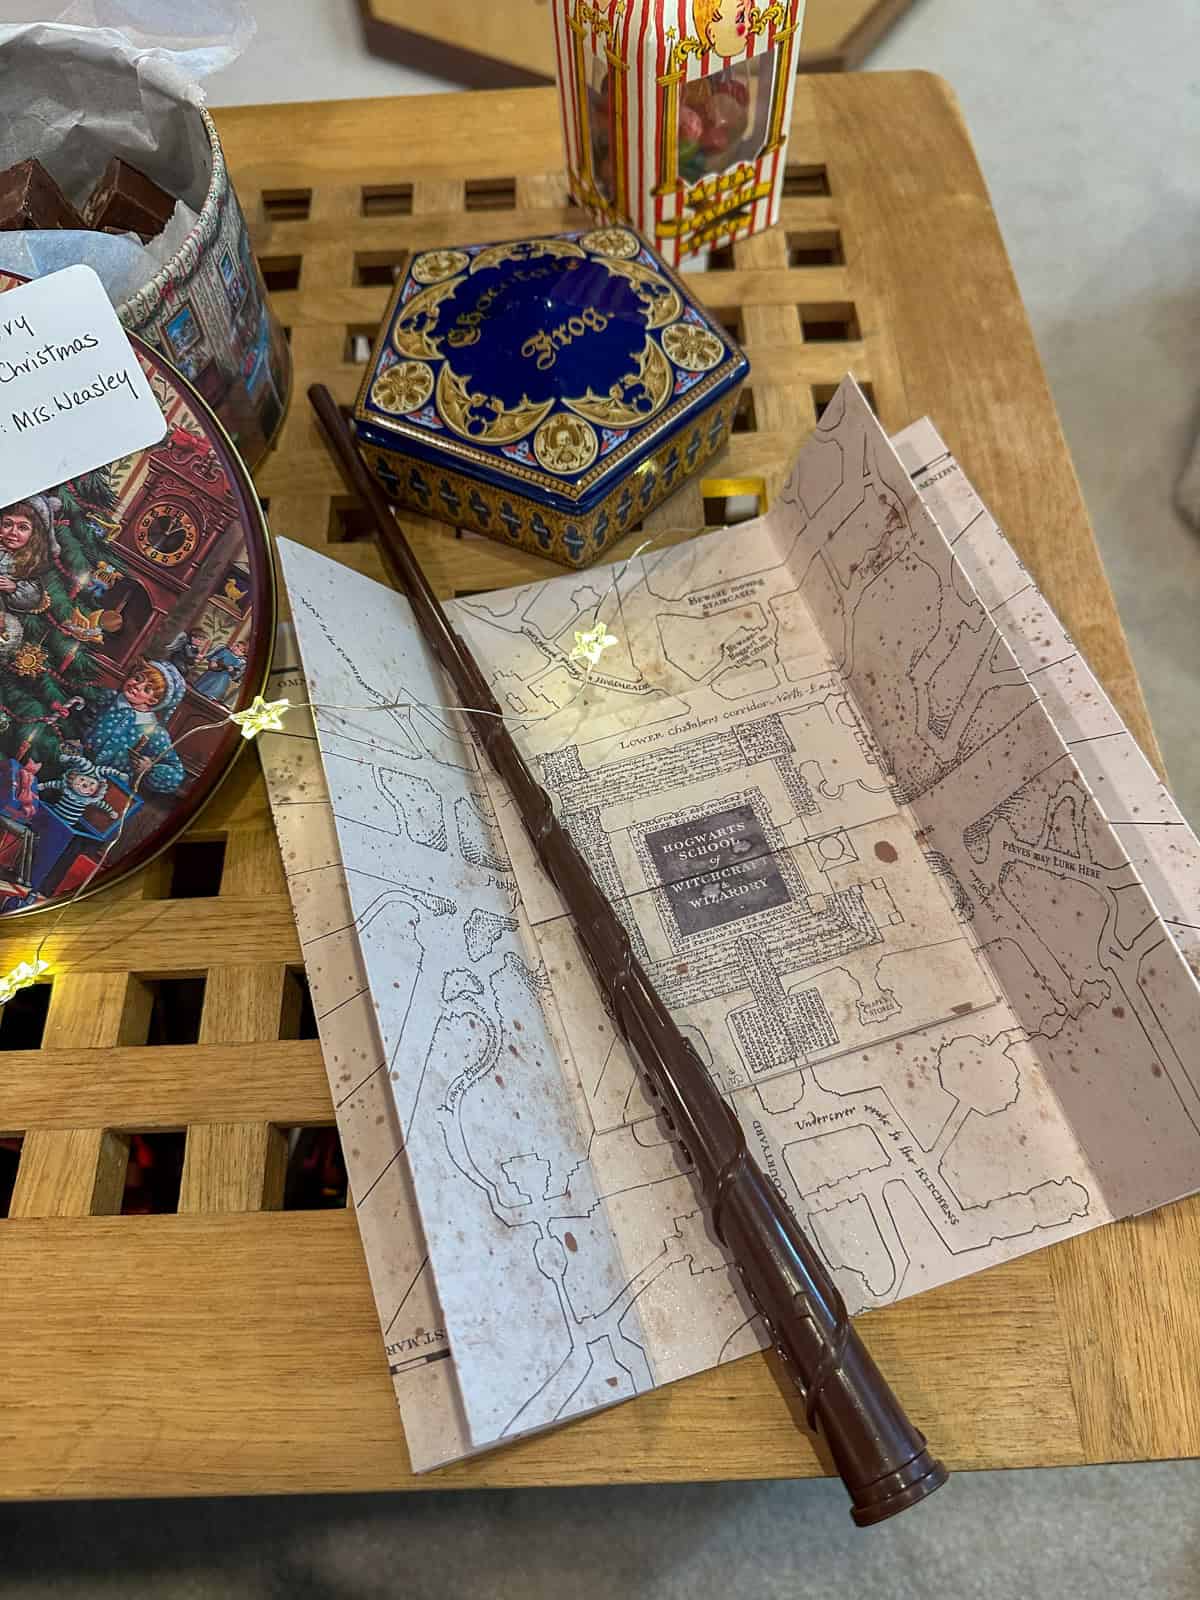
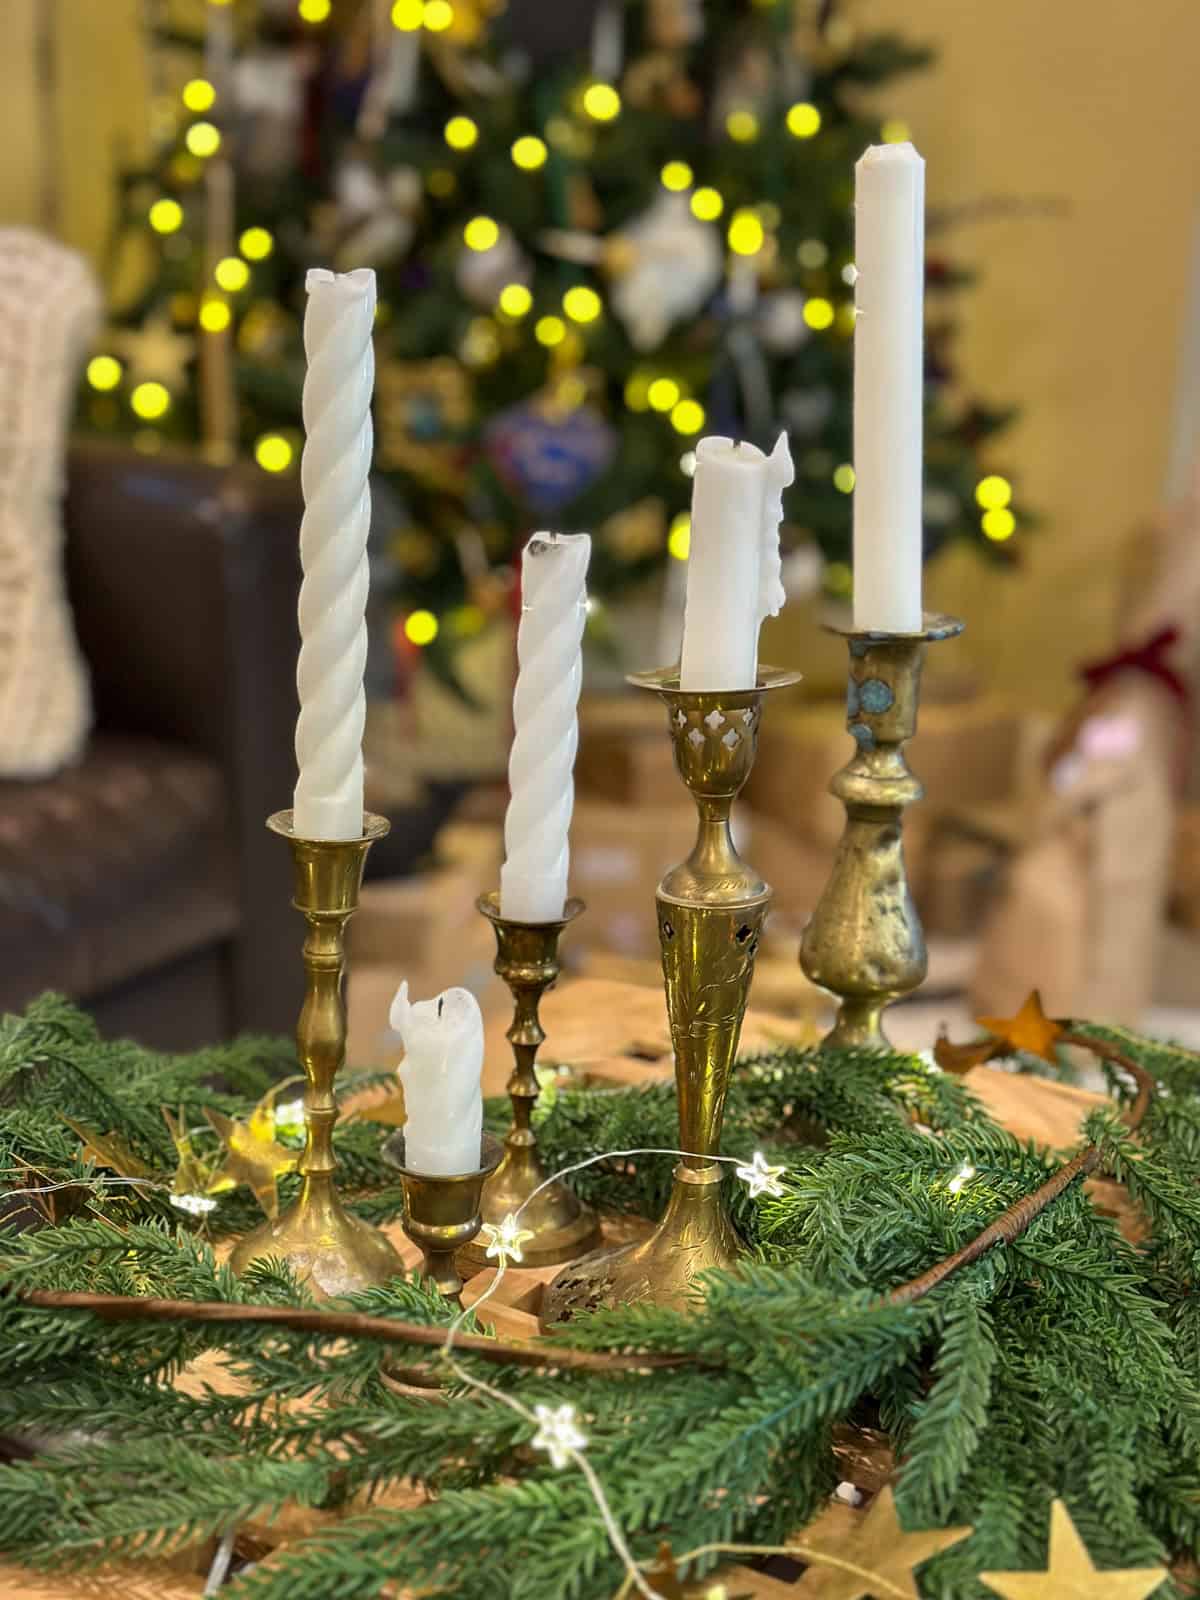
Coffee table: Over on the coffee table, we added more brass candlesticks, stars and garland. Someone is getting a new wand in an Ollivander's box for Christmas, which was actually a purchase from our visit to Universal Studios years ago. There's also a ceramic chocolate frog box with a few homemade chocolate frogs inside, a box of Bertie Bott's Every Flavour Beans, and Mrs. Weasley's fudge in a vintage tin. We also included a Mauder's Map, ordered online. We liked how it had different fold-out parts. And resting on top of it is the wand to turn the floating candles on and off on the Christmas tree.
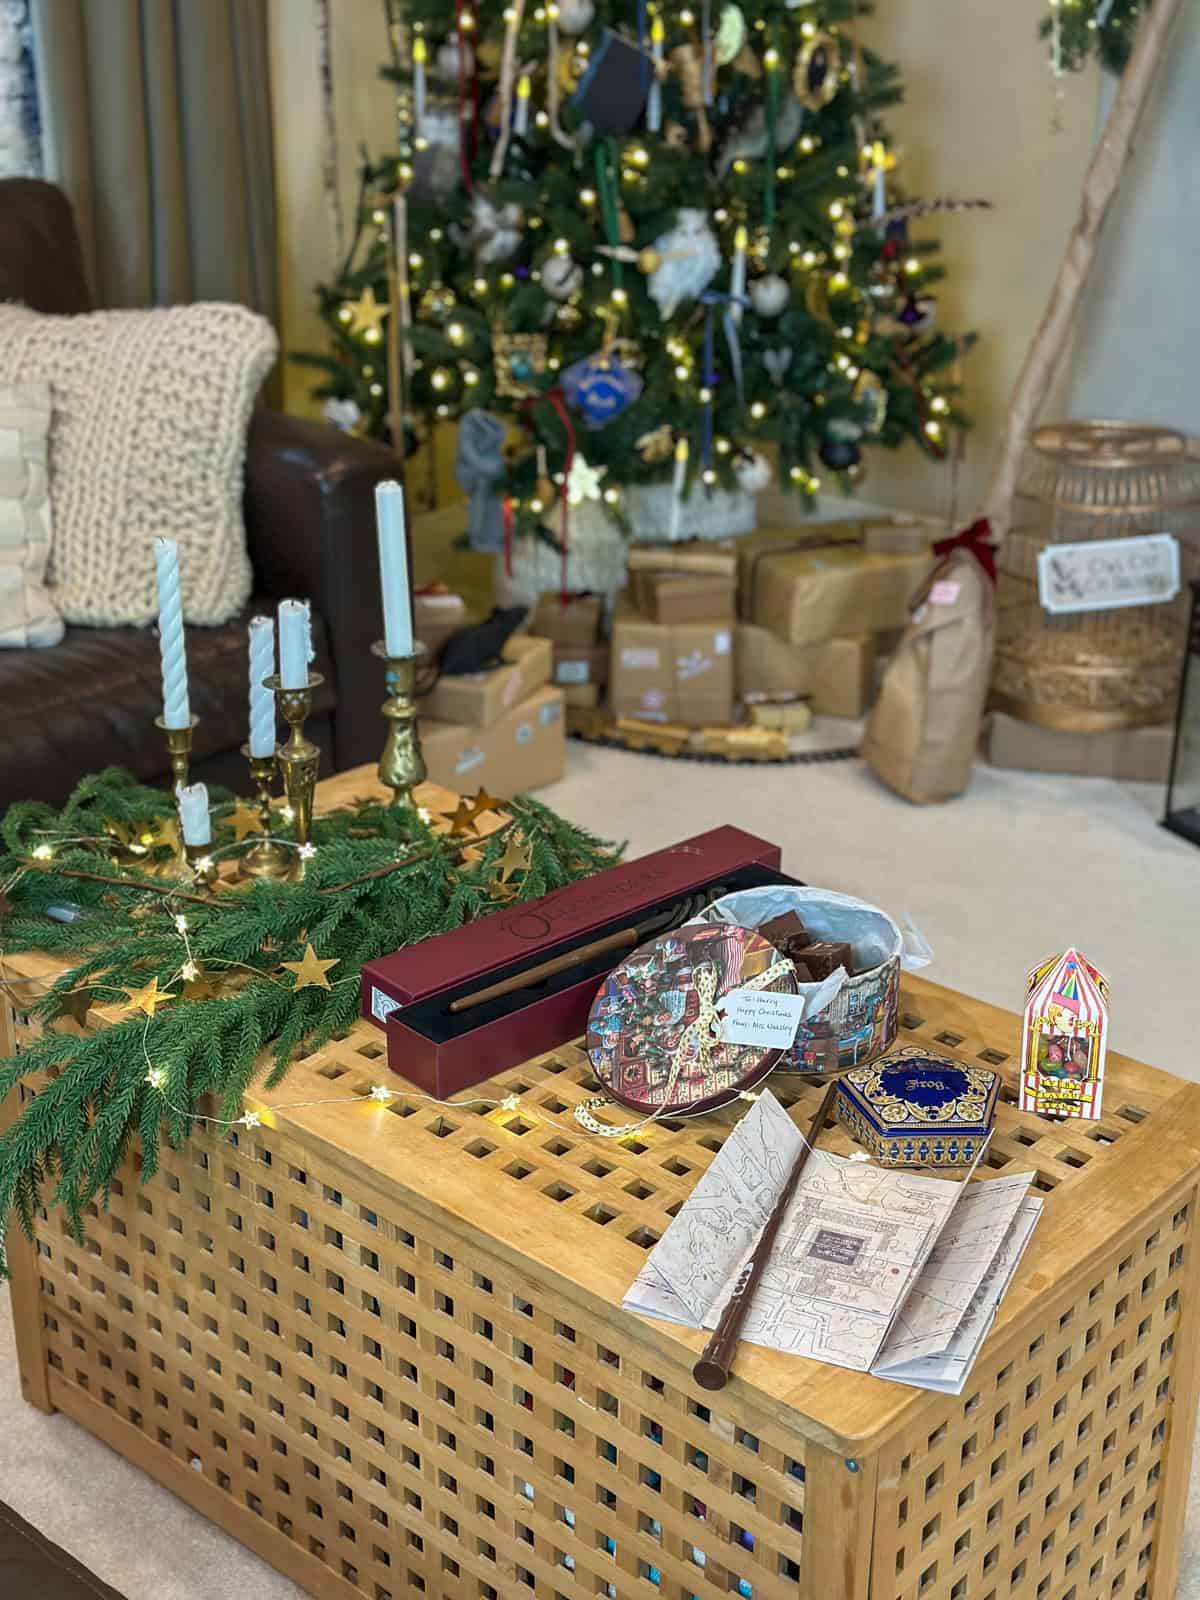
Harry Potter Christmas decorations on a coffee table with wand, chocolate frogs, and Marauder's Map for themed holiday decor ideas.
Vintage brass candlesticks with white candles and greenery on  a Harry Potter Christmas coffee table for themed holiday decor.
Marauder's Map with wand and chocolate frogs on coffee table for Harry Potter Christmas decorations and themed decor.

Mrs. Weasley's Fudge

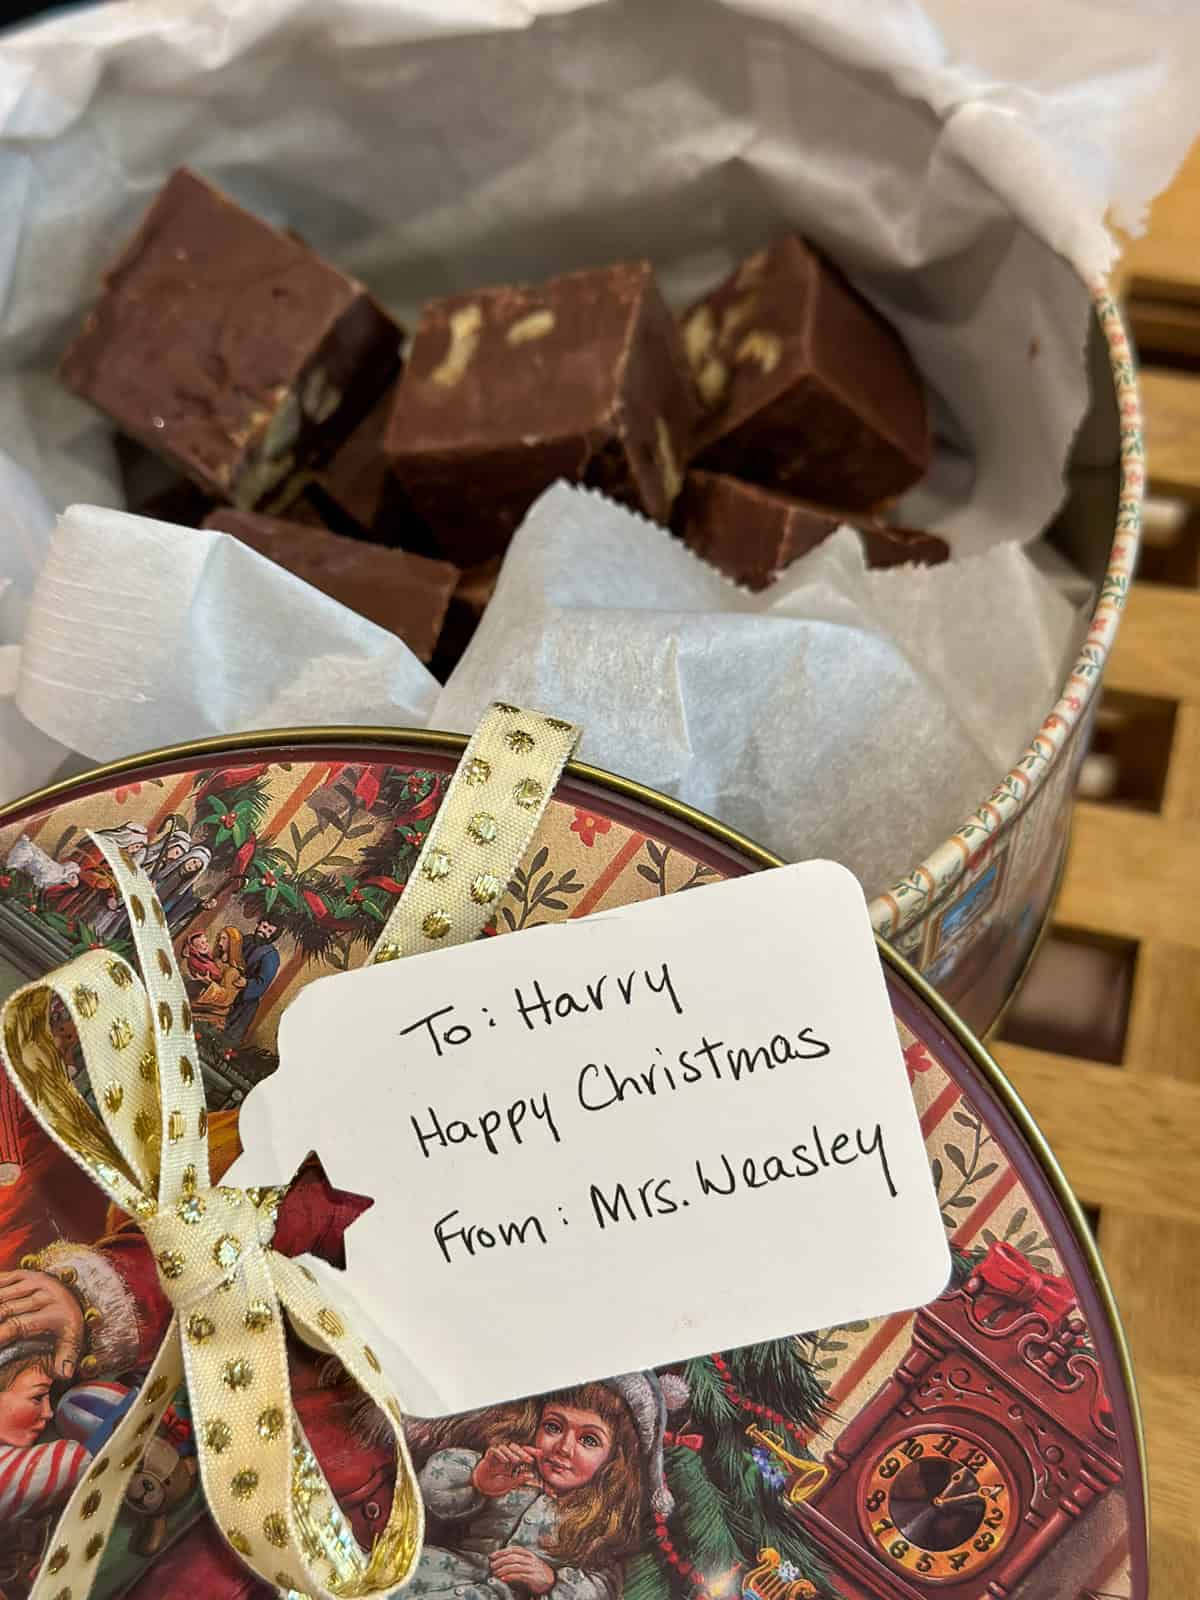
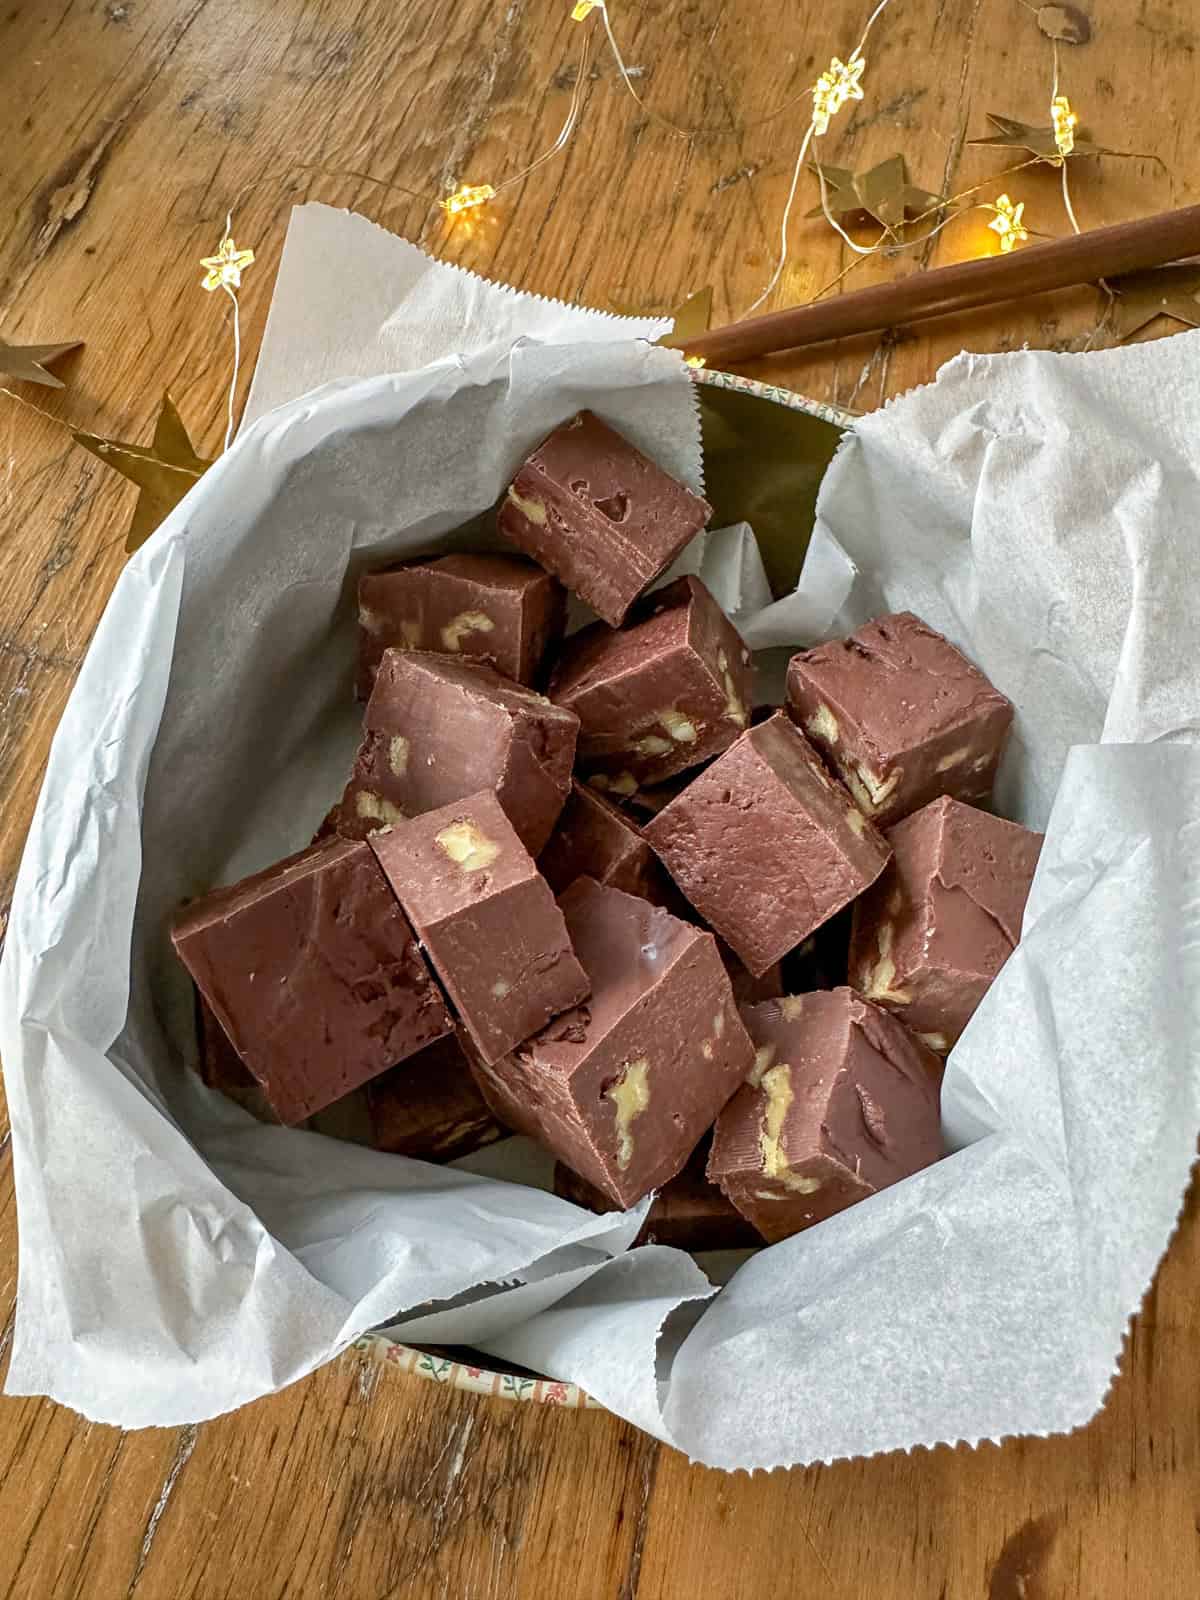
Mrs. Weasley's homemade fudge in vintage tin with gift tag for Harry Potter Christmas treats and holiday recipes.

Such a sweet detail! A vintage tin filled with homemade chocolate fudge with a tag reading "To: Harry, Happy Christmas From: Mrs. Weasley." Recreating the Christmas gift Mrs. Weasley sent Harry in the first book, Harry Potter and the Sorcerer's Stone, was such a fun detail. Make this simple homemade fudge with just a few ingredients. Find our Mrs. Weasley's Chocolate Walnut Fudge Recipe here. And be sure to place it in a Christmas tin. We found ours at the thrift store, and created a gift tag to go with it, tied with some starry ribbon.


Dolores Umbridge Christmas Tree

Youtube video

We were inspired by our favorite villain, to make our very own Dolores Umbridge Christmas Tree, and it could not be cuter -in an evil kind of way. 😉 While Umbridge isn't anyone's favorite character, her distinctive pink and cat aesthetic is undeniably charming. This tabletop tree is all pink, fluffy, and covered in cats -exactly as Umbridge would want it.
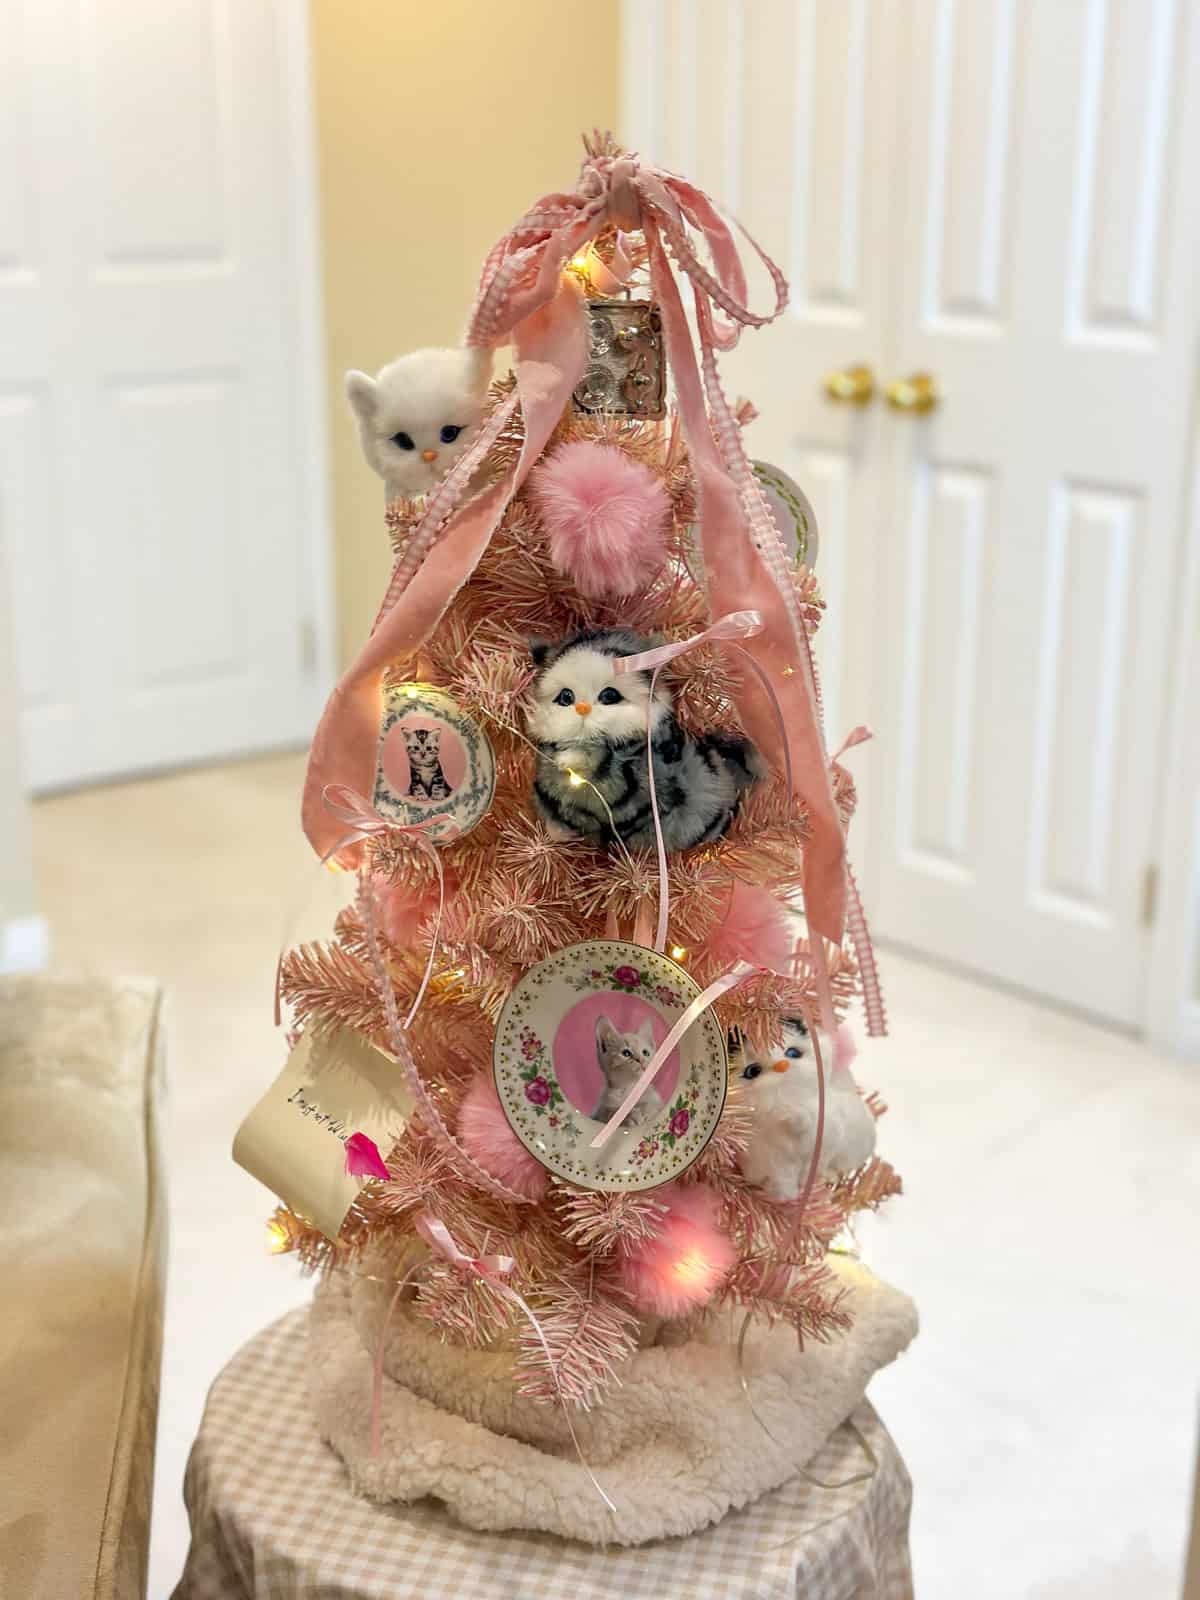
Dolores Umbridge pink Christmas tree with cat plate ornaments for Harry Potter themed holiday decorations.

DIY Cat Plate Ornaments

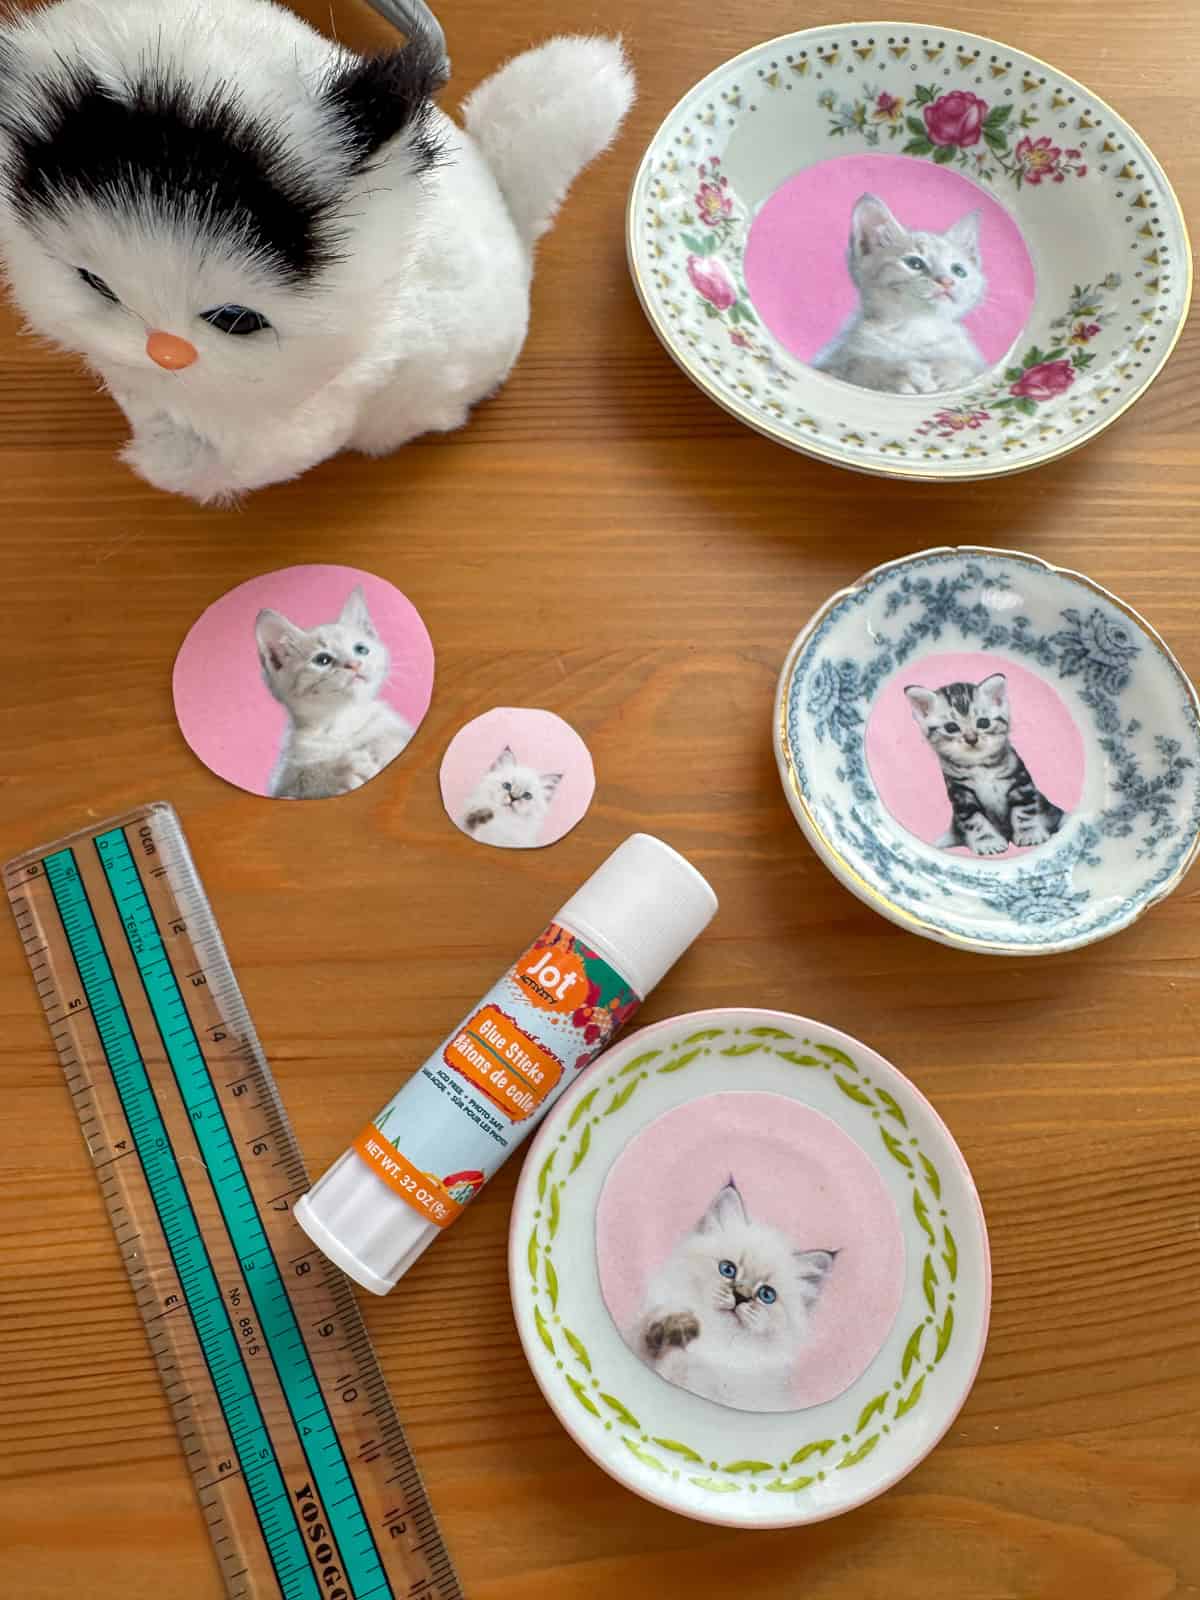
Supplies for making Umbridge cat ornaments with plates and free printables for Harry Potter Christmas crafts.
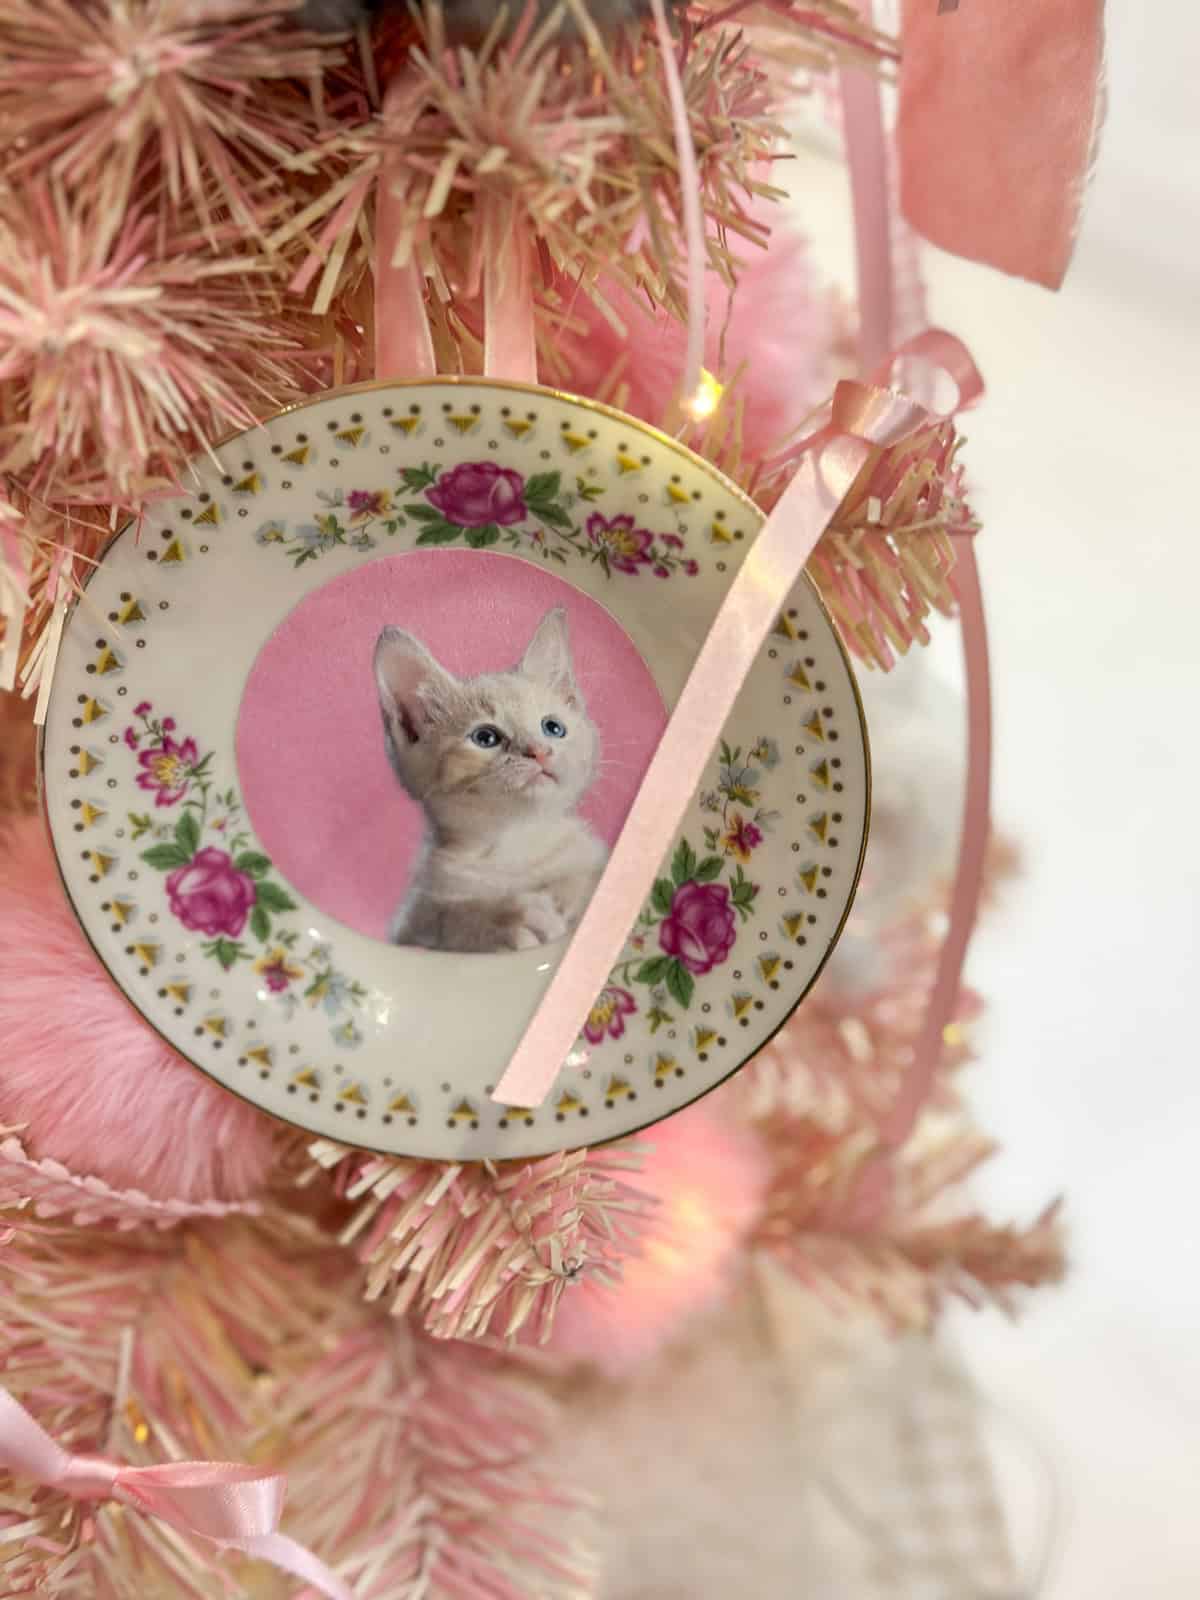
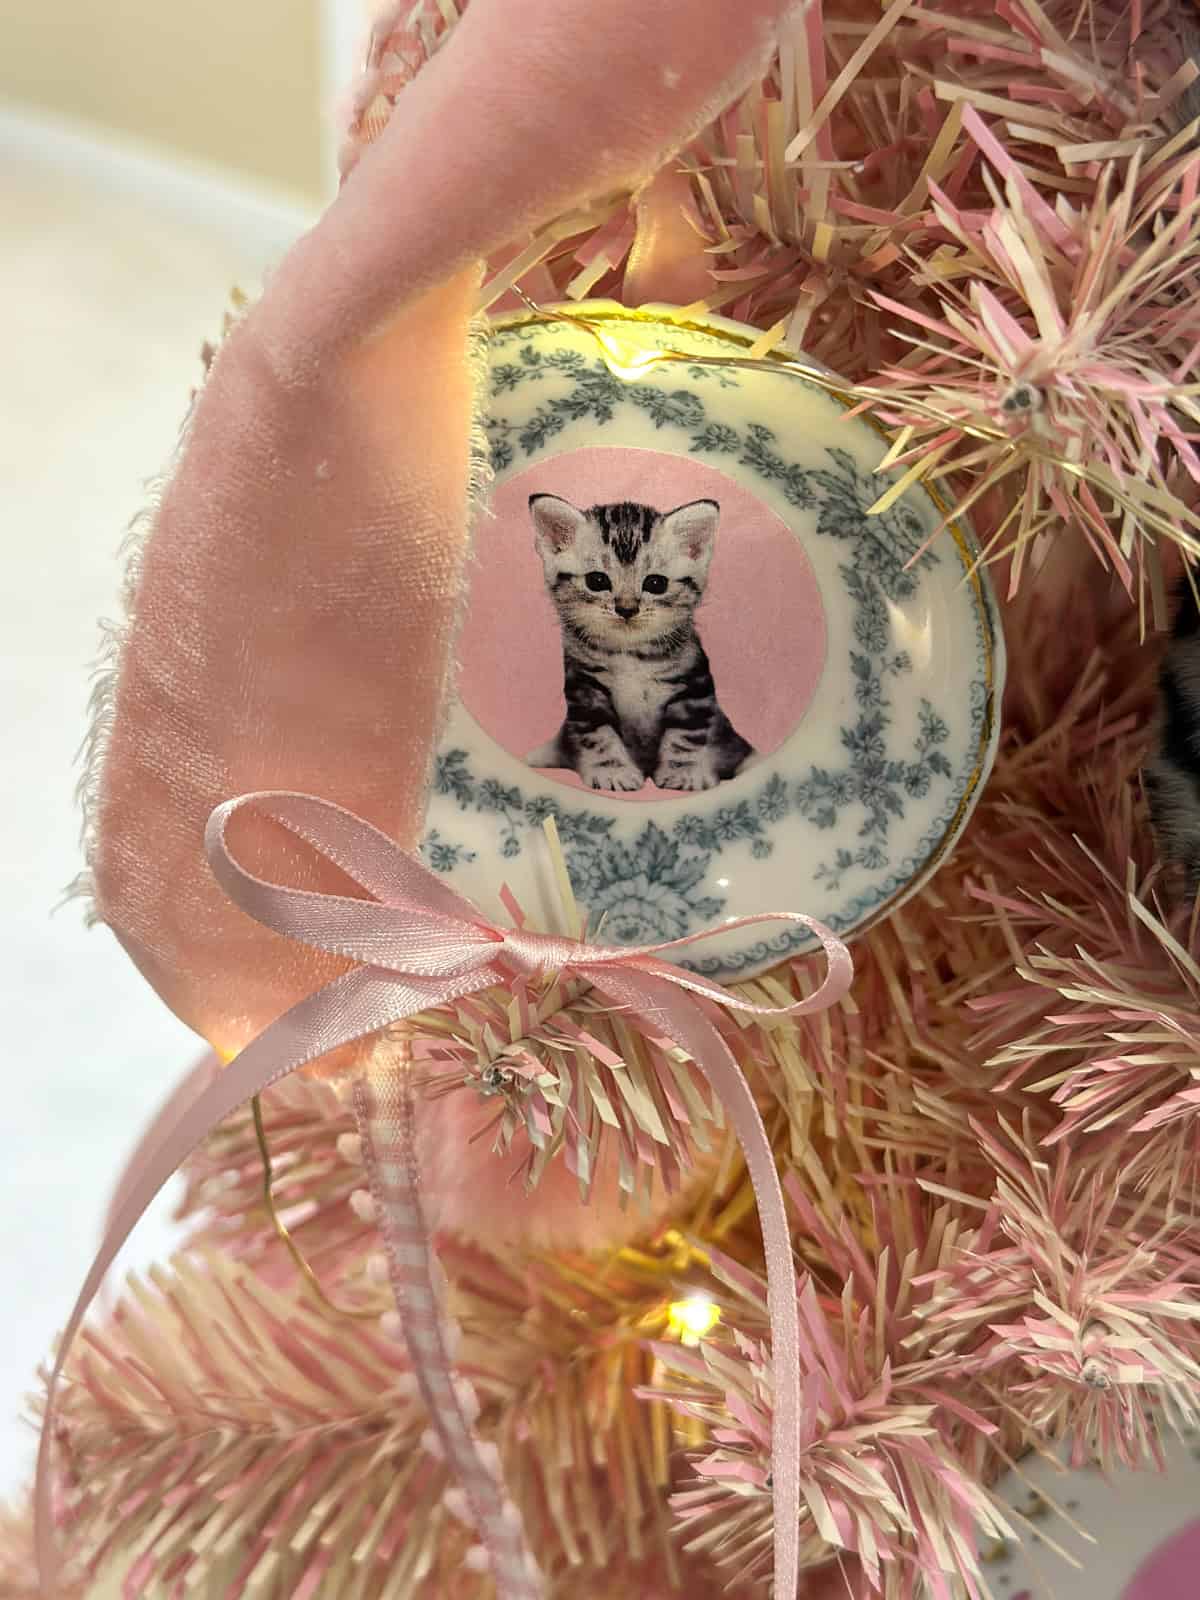
DIY cat plate ornament with kitten photo on vintage plate for Umbridge pink Christmas tree decorations.

These cat plate ornaments are everyone's favorite! Made with real china mini plates and our free cat printables, they're surprisingly easy.

Gather mini plates. We used a vintage mini espresso saucer, a butter pat plate, and a small doll plate. Look for these at antique stores, thrift stores, checking the kitchen sections, doll accessories, and decorative plate areas. Download and print our free cat images on copy paper and cut out carefully. Adjust the size with your printer if necessary. Decide if you want removable (use glue stick) or permanent (use Mod Podge). Apply glue to the back of the image, center on the plate and press firmly. If using Mod Podge, apply topcoat over the image. Let dry. Hot glue pink velvet ribbon to the back, creating a loop for hanging.

Mix different plate sizes for interest. The more ornate and vintage the plates, the better!

  • Materials: Mini plates (thrift stores, 2-4 inches diameter), our free cat printables, paper, scissors, glue stick OR Mod Podge, pink velvet ribbon, hot glue gun.
  • Time: 5-10 minutes each
  • Cost: $1-5 each
  • Difficulty: Beginner

Other Umbridge Tree Ornaments

Miniature Silver Tea Set: Dolores has a silver tea set on her desk, and it inspired us to find a miniature tea set from the dollhouse furniture section. Look for one that comes with a tray, and then simply hot glue the pieces to the tray, and add a velvet ribbon for hanging as an ornament. Cost $5
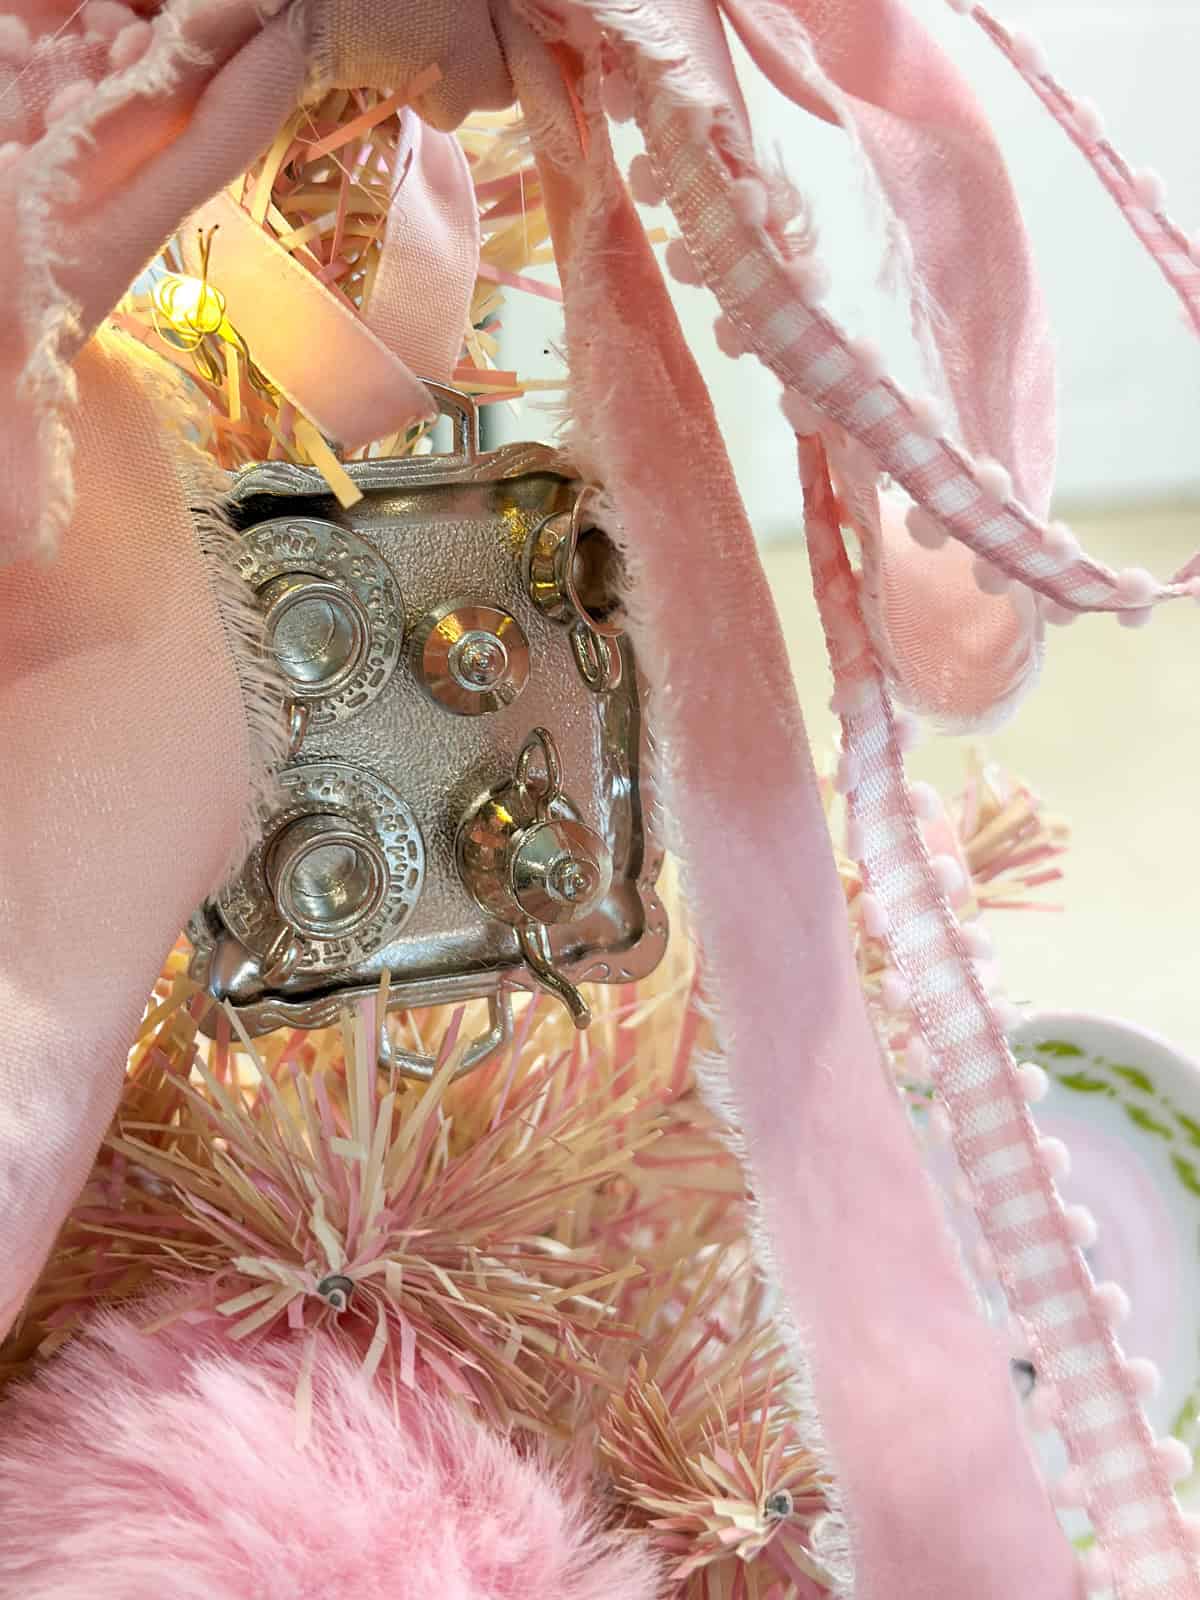
Miniature silver tea set ornament on Umbridge pink Christmas tree for Harry Potter themed decorations.

"I Must Not Tell Lies" Ornament: Inspired by the horrible scene from the movie when Harry has to serve detention as punishment in Order of the Phoenix, when the magic quill carved the words Harry has to write into his hand. We made a free printable of the phrase, just print it onto some cream colored cardstock, and cut it into a scroll shape, curling the top and bottom slightly. To attach the feather quill, use a small piece of wire inserted into the bottom of the feather shaft, and then make a hole in the paper and insert the wire, bend it against the paper, and use some tape to hold it in place. Bonus points for using a pink feather to match the tree. 😉
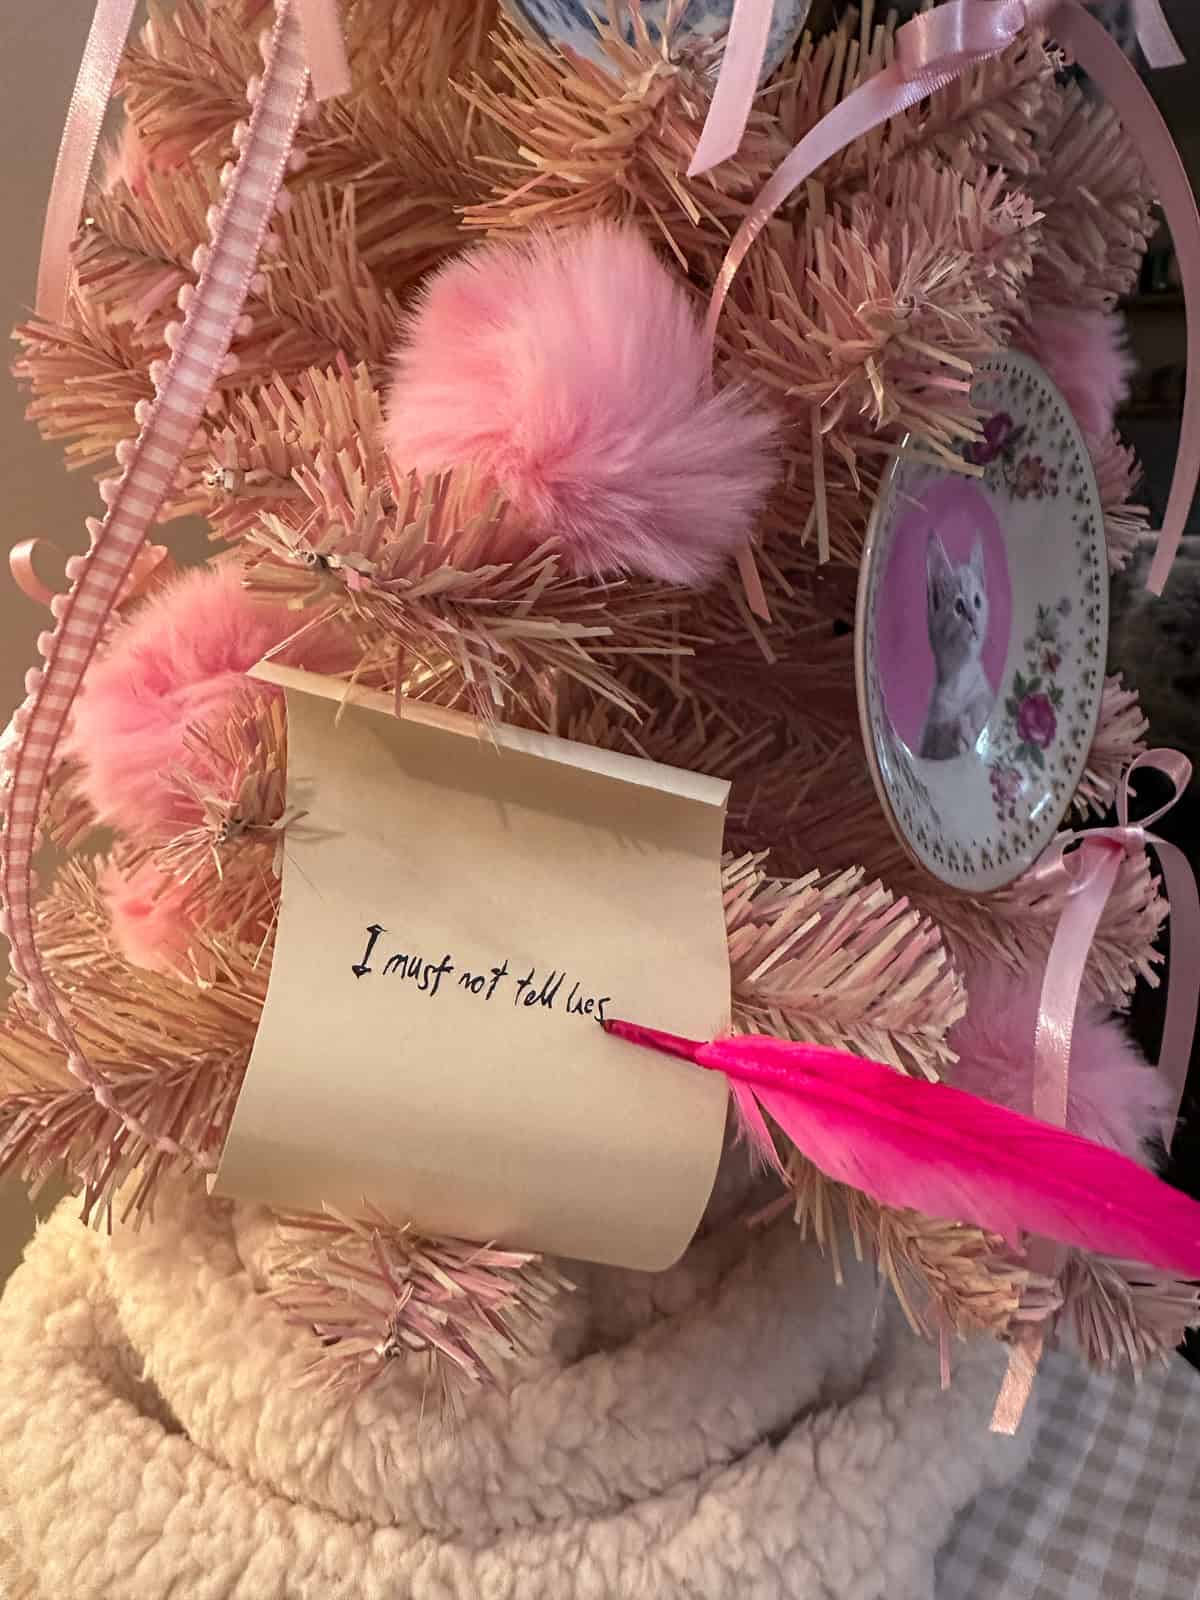
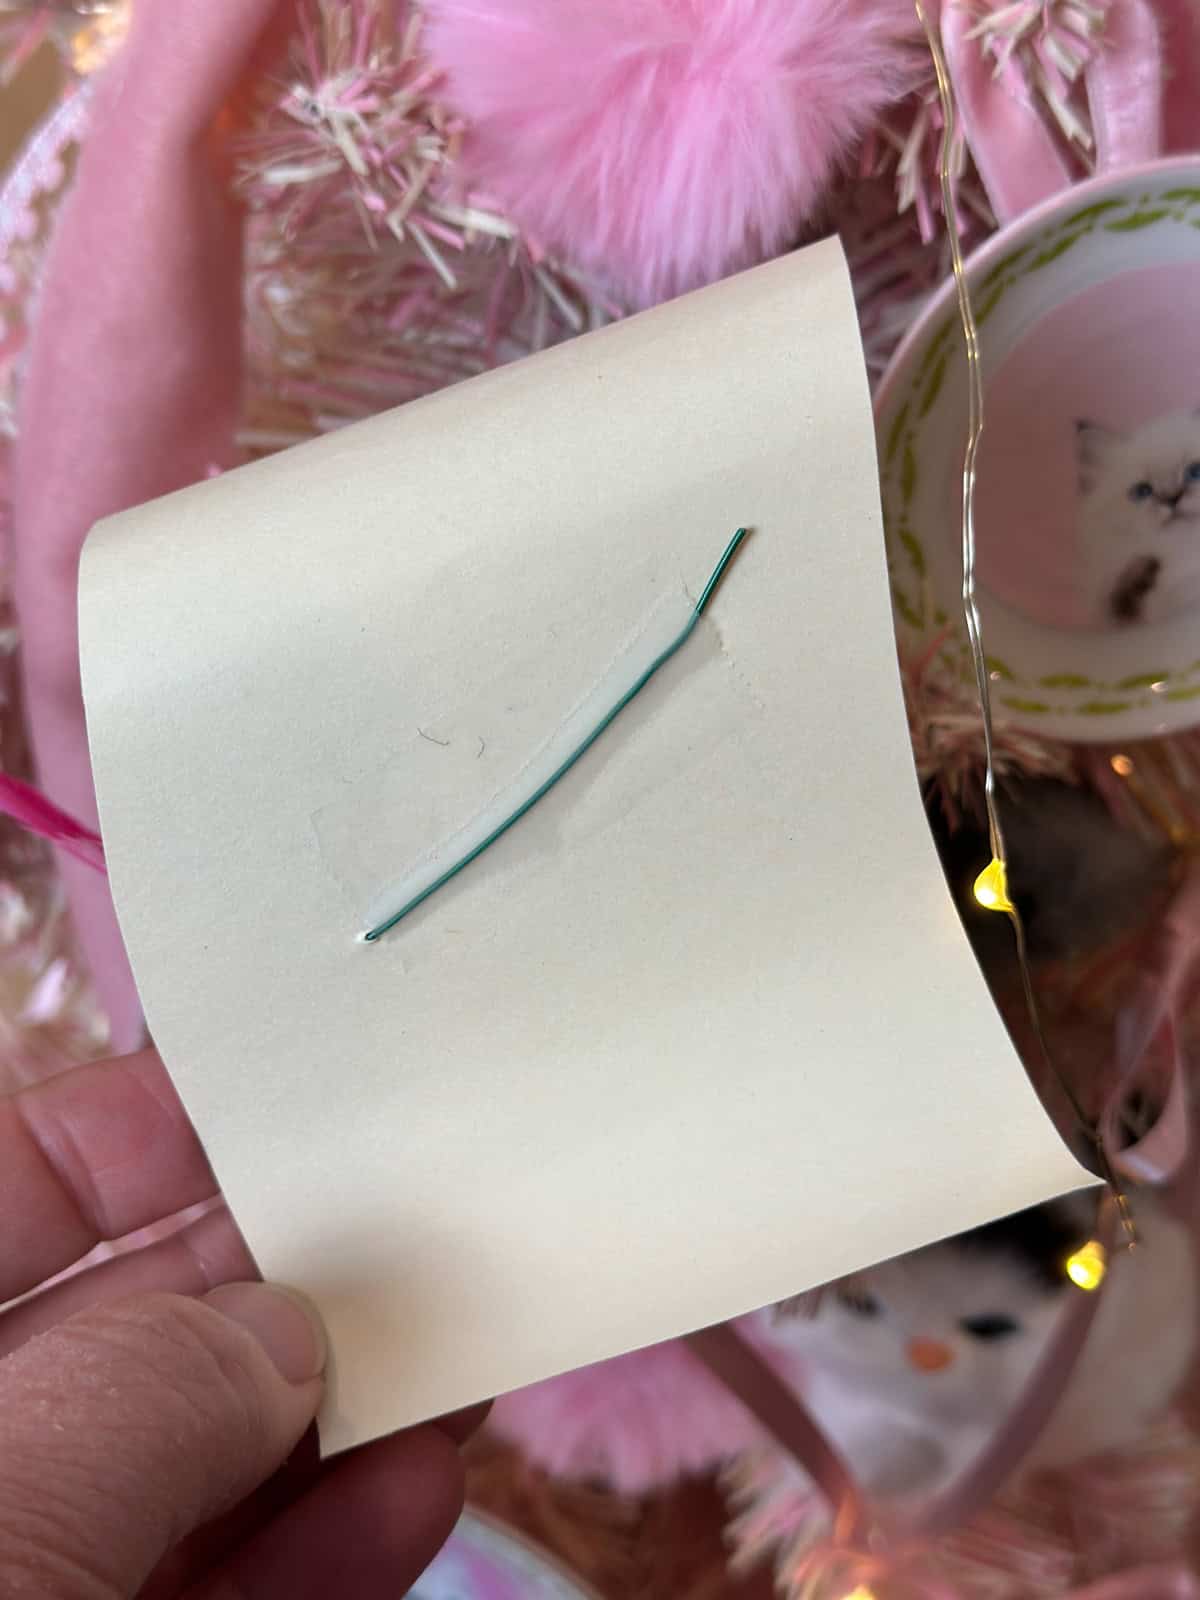
I must not tell lies DIY Harry Potter Christmas ornament with pink quill on Umbridge Christmas tree for Harry Potter themed decorations.
How to make a DIY Harry Potter Christmas decoration back detail.
Pink fluff ball fux fur Christmas ornaments on a Dolores Umbridge inspired Harry Potter Christmas tree.

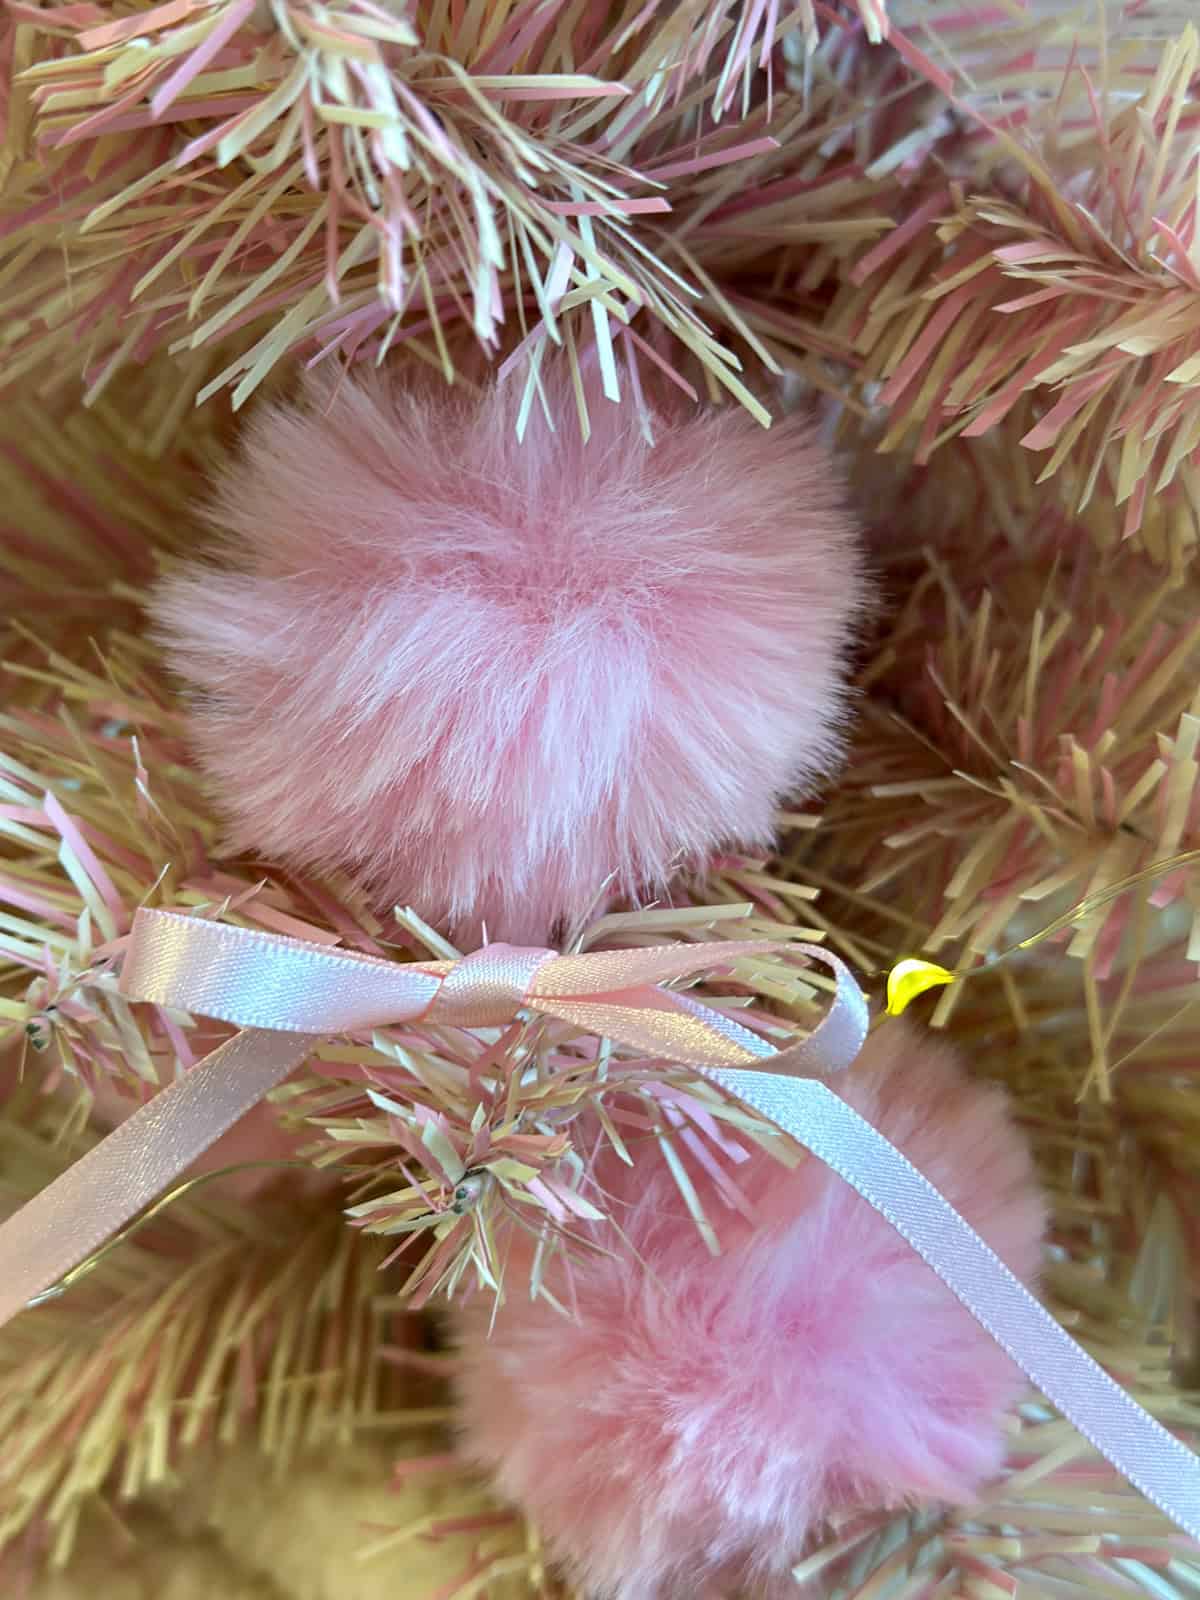
Pink Fur Balls: Fluffy faux fur pink pom-poms throughout, bringing all the fluffy kitten vibes. Cost $6 for 12

Kitten Figurines: We used small kitten decorations, made with faux fur, and about 4 inches tall and wide. You could also look for cat themed Christmas ornaments. Cost $6 each
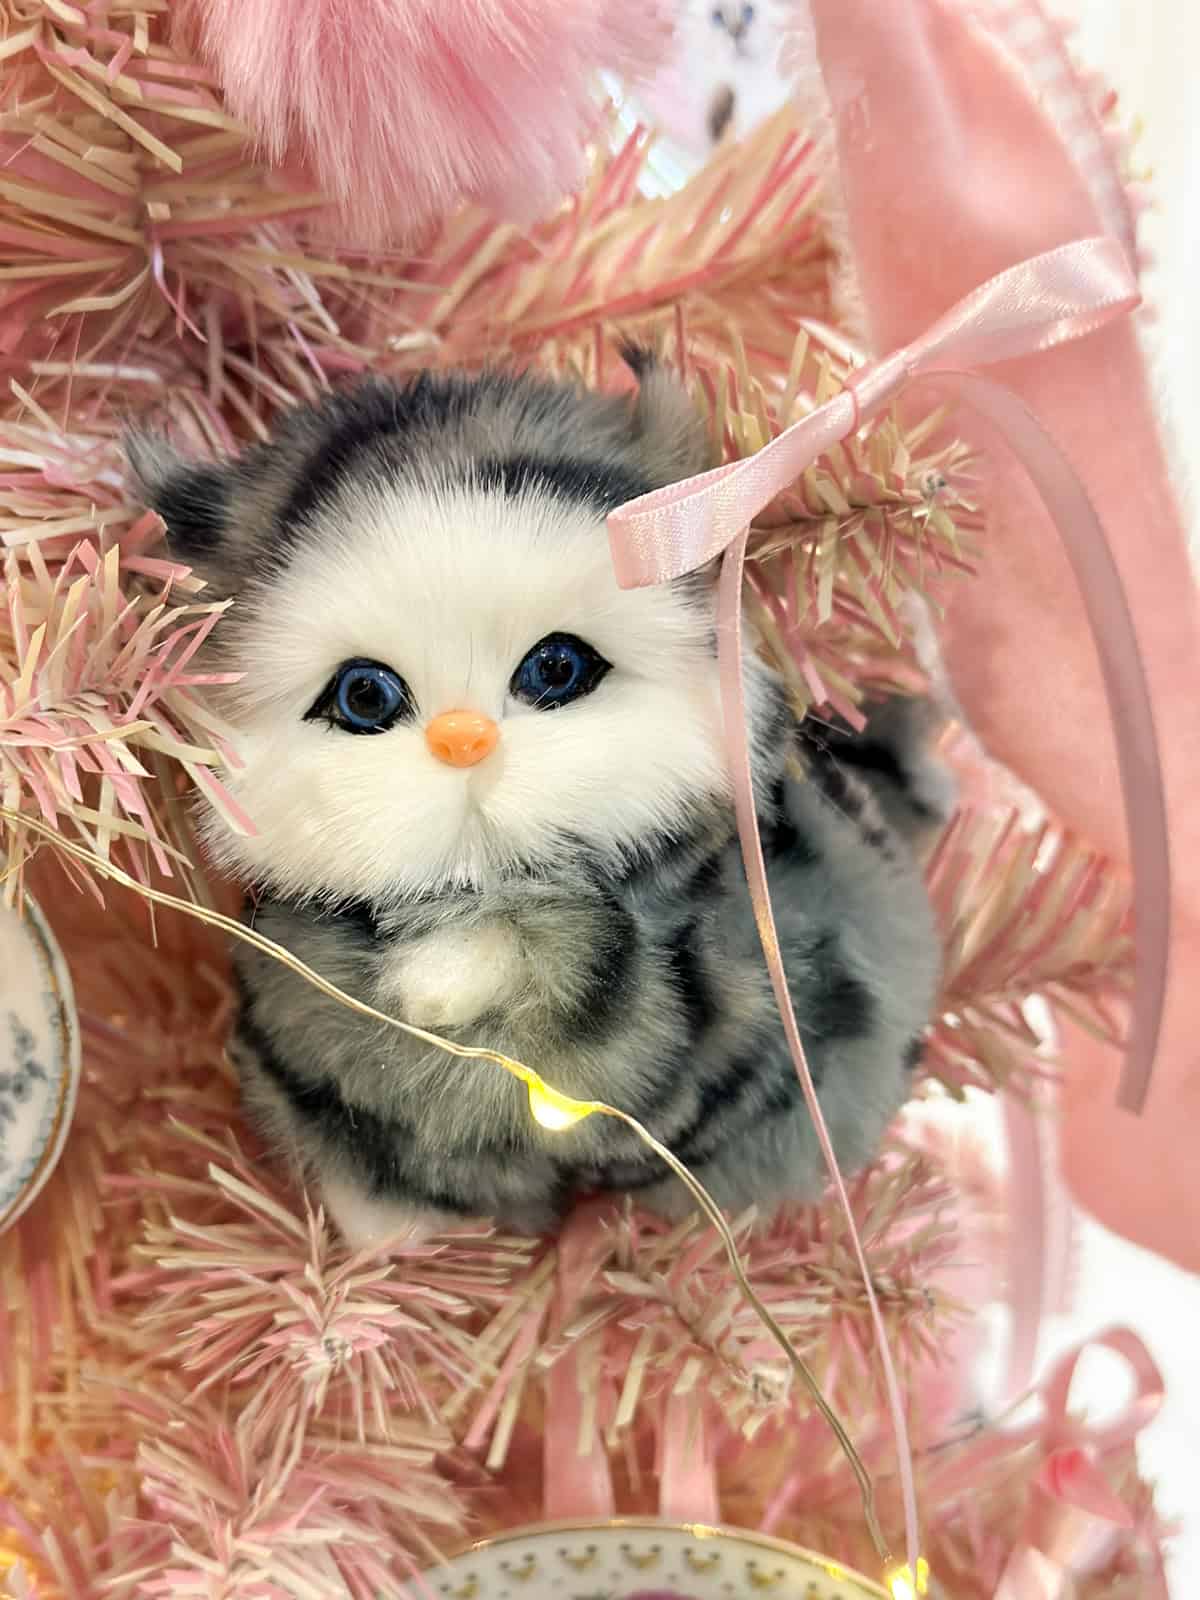
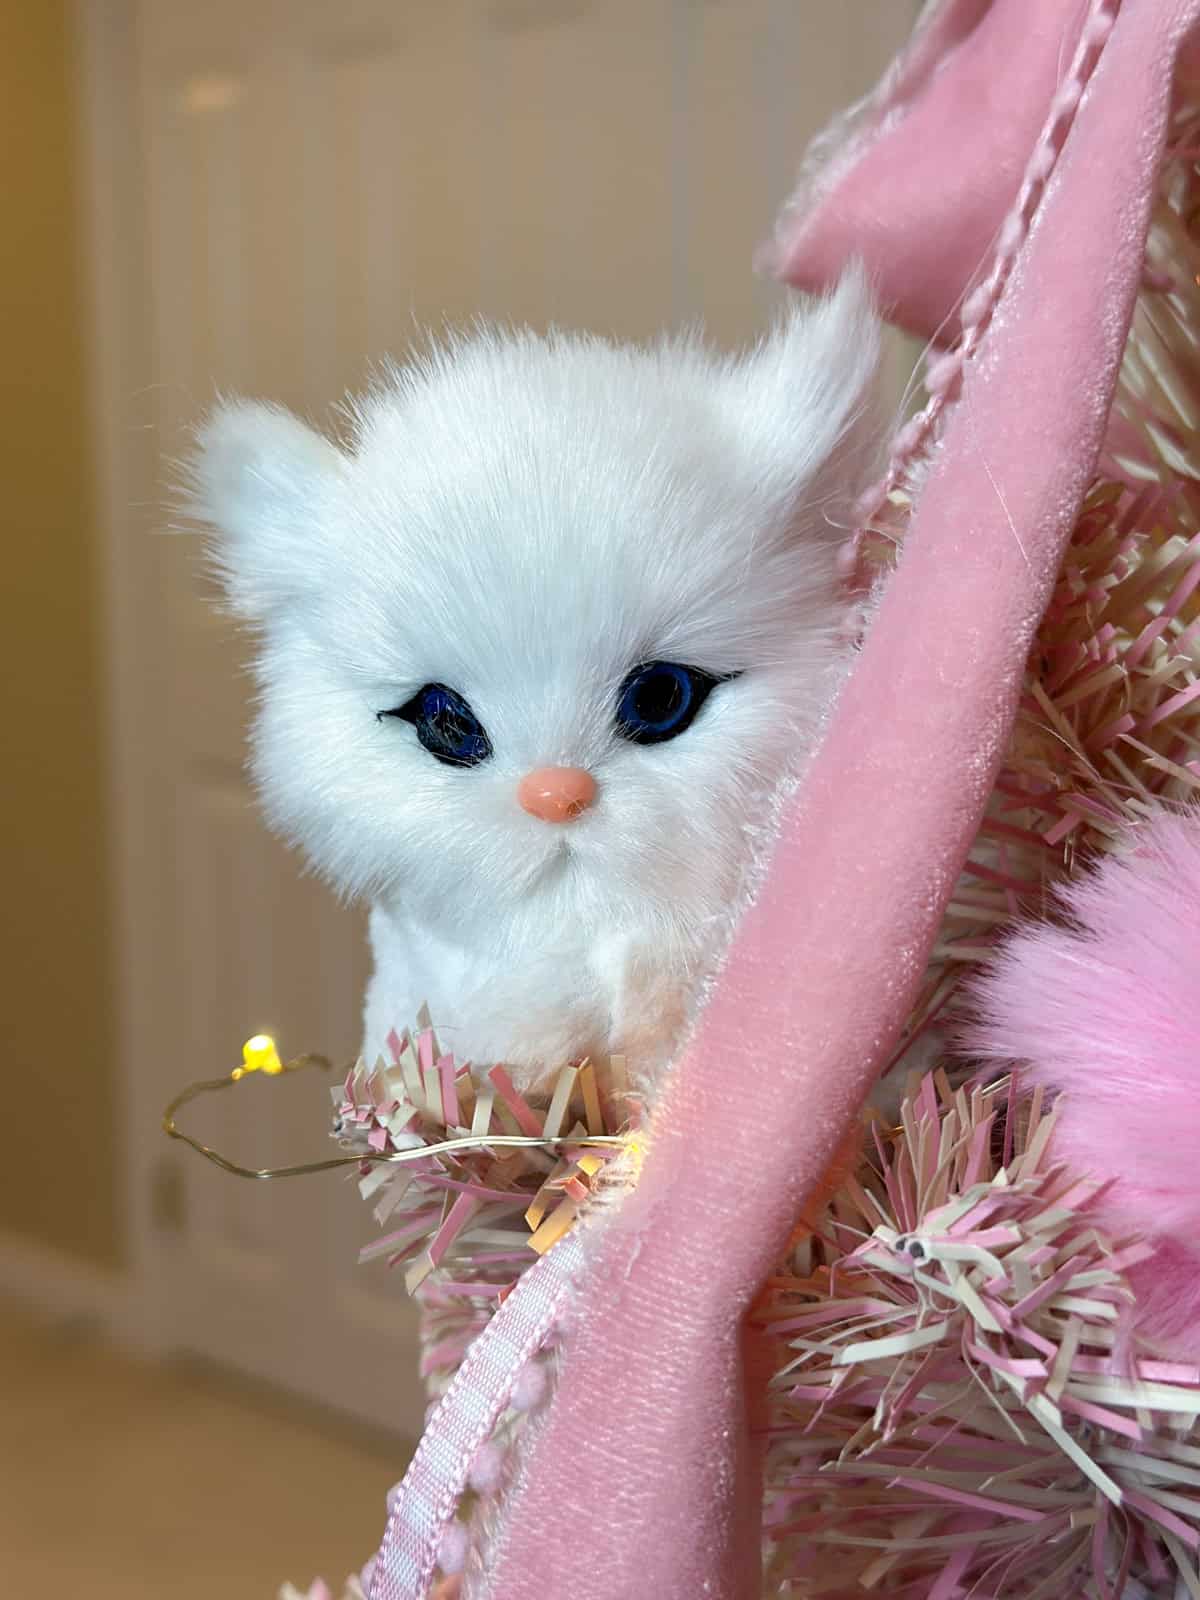
Cat Christmas ornament on a pink Dolores Umbridge-inspired Harry Potter Christmas tree.
Dolores Umbridge themed pink Christmas tree with cat oranments for a Harry Potter themed Christmas.

Pink Bows: LOTS of pink ribbon bows throughout, just tie into bows and rest on the tree branches. We also used a larger pink gingham and velvet ribbon bow for a simple tree topper.
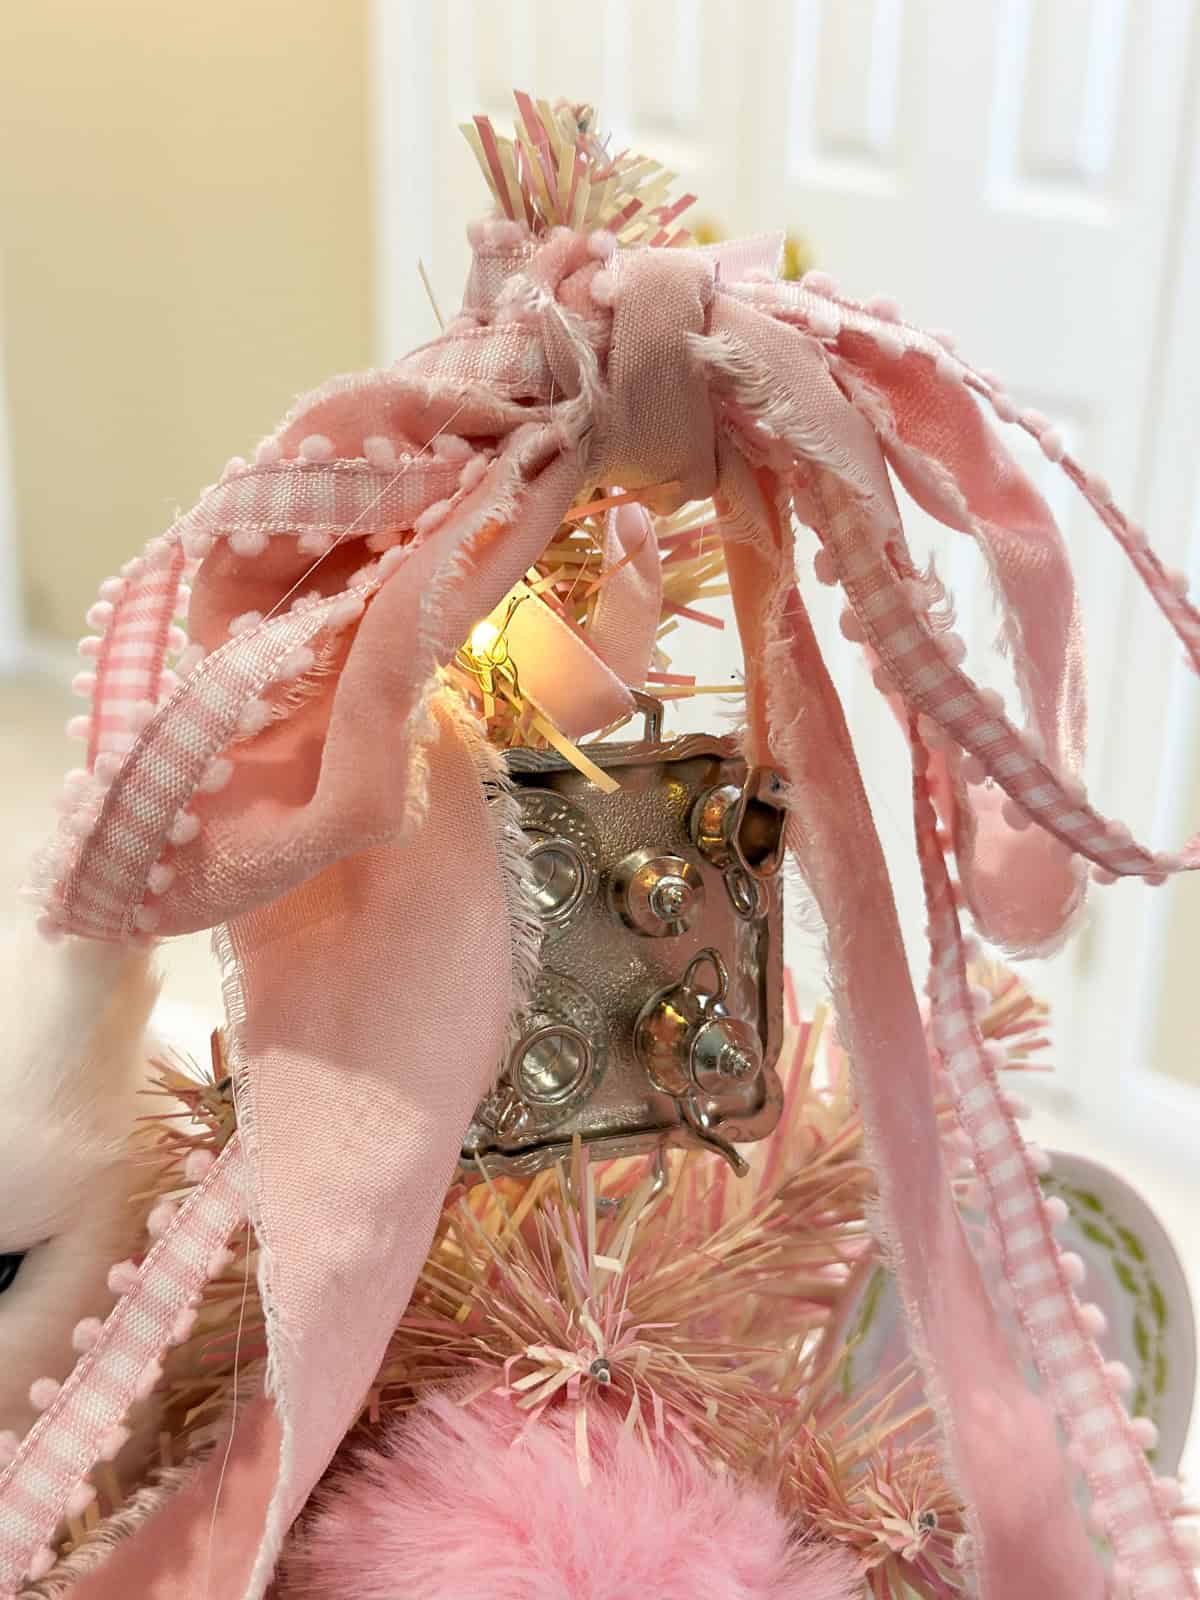
Pink gingham and velvet bow tree topper on a Dolores Umbridge themed pink Harry Potter Christmas tree.
Dolores Umbridge pink Christmas tree for Harry Potter Christmas decorations with DIY cat plate ornaments and pink bows.

This 3-foot tabletop tree sits on a side table styled very full, very pink, very Umbridge. We used a piece of Sherpa fabric as a simple cozy tree skirt. The cat plates are the stars displayed prominently. Use warm white or soft pink lights.

Tip: Not up for a whole Umbridge tree? Add your favorite elements to your larger Harry Potter tree.


Honeydukes Candy Bar

Youtube video

The grand finale is a complete Honeydukes candy shop! A vintage bar cart stocked with candy jars, homemade chocolate frogs, coconut ice, and sweets from the books.
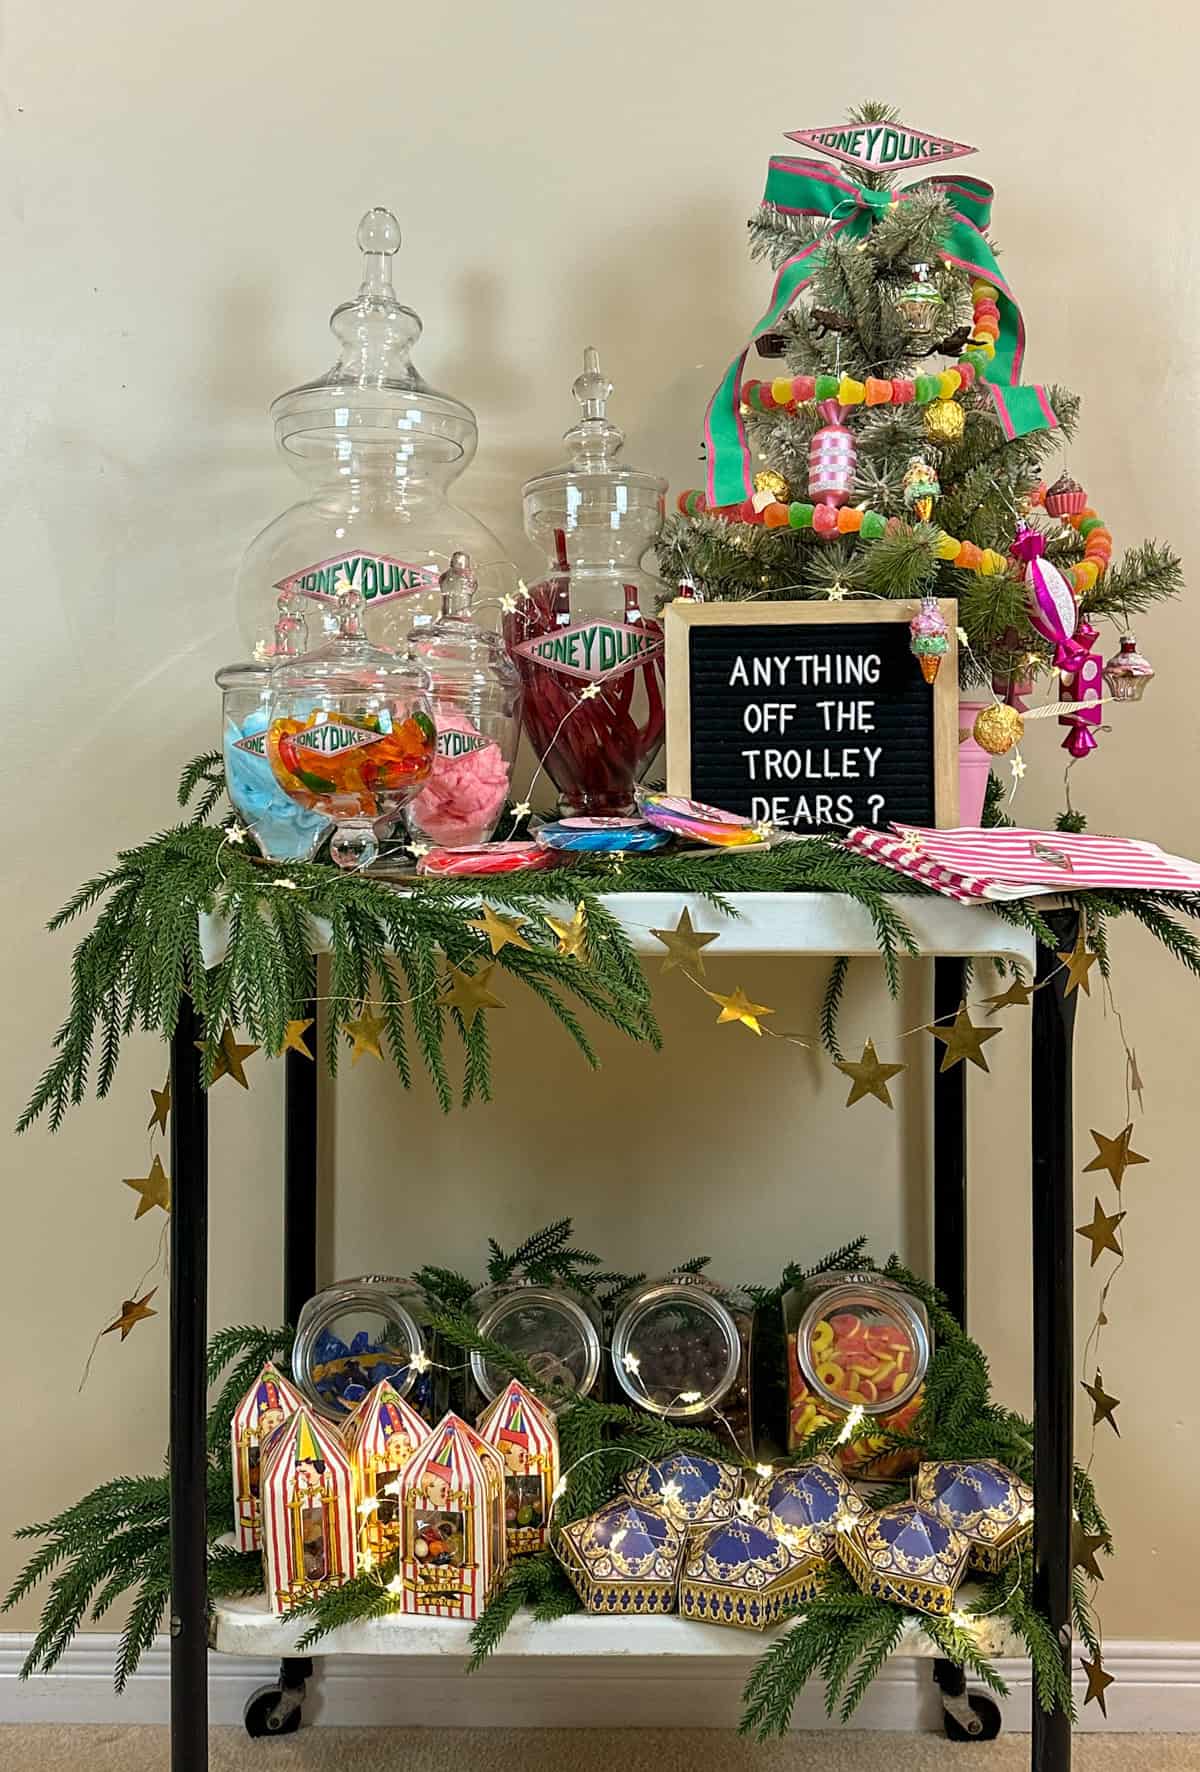
DIY Honeydukes candy cart decorated with garland, candy jars, chocolate frog boxes, and mini tree for Christmas.

Homemade Chocolate Frogs

Making your own is way cheaper than buying pre-made candy, really delicious, and surprisingly simple and even kids can help! I used 3D frog chocolate moulds (Temu, $7) and melting chocolate from the bulk food store.
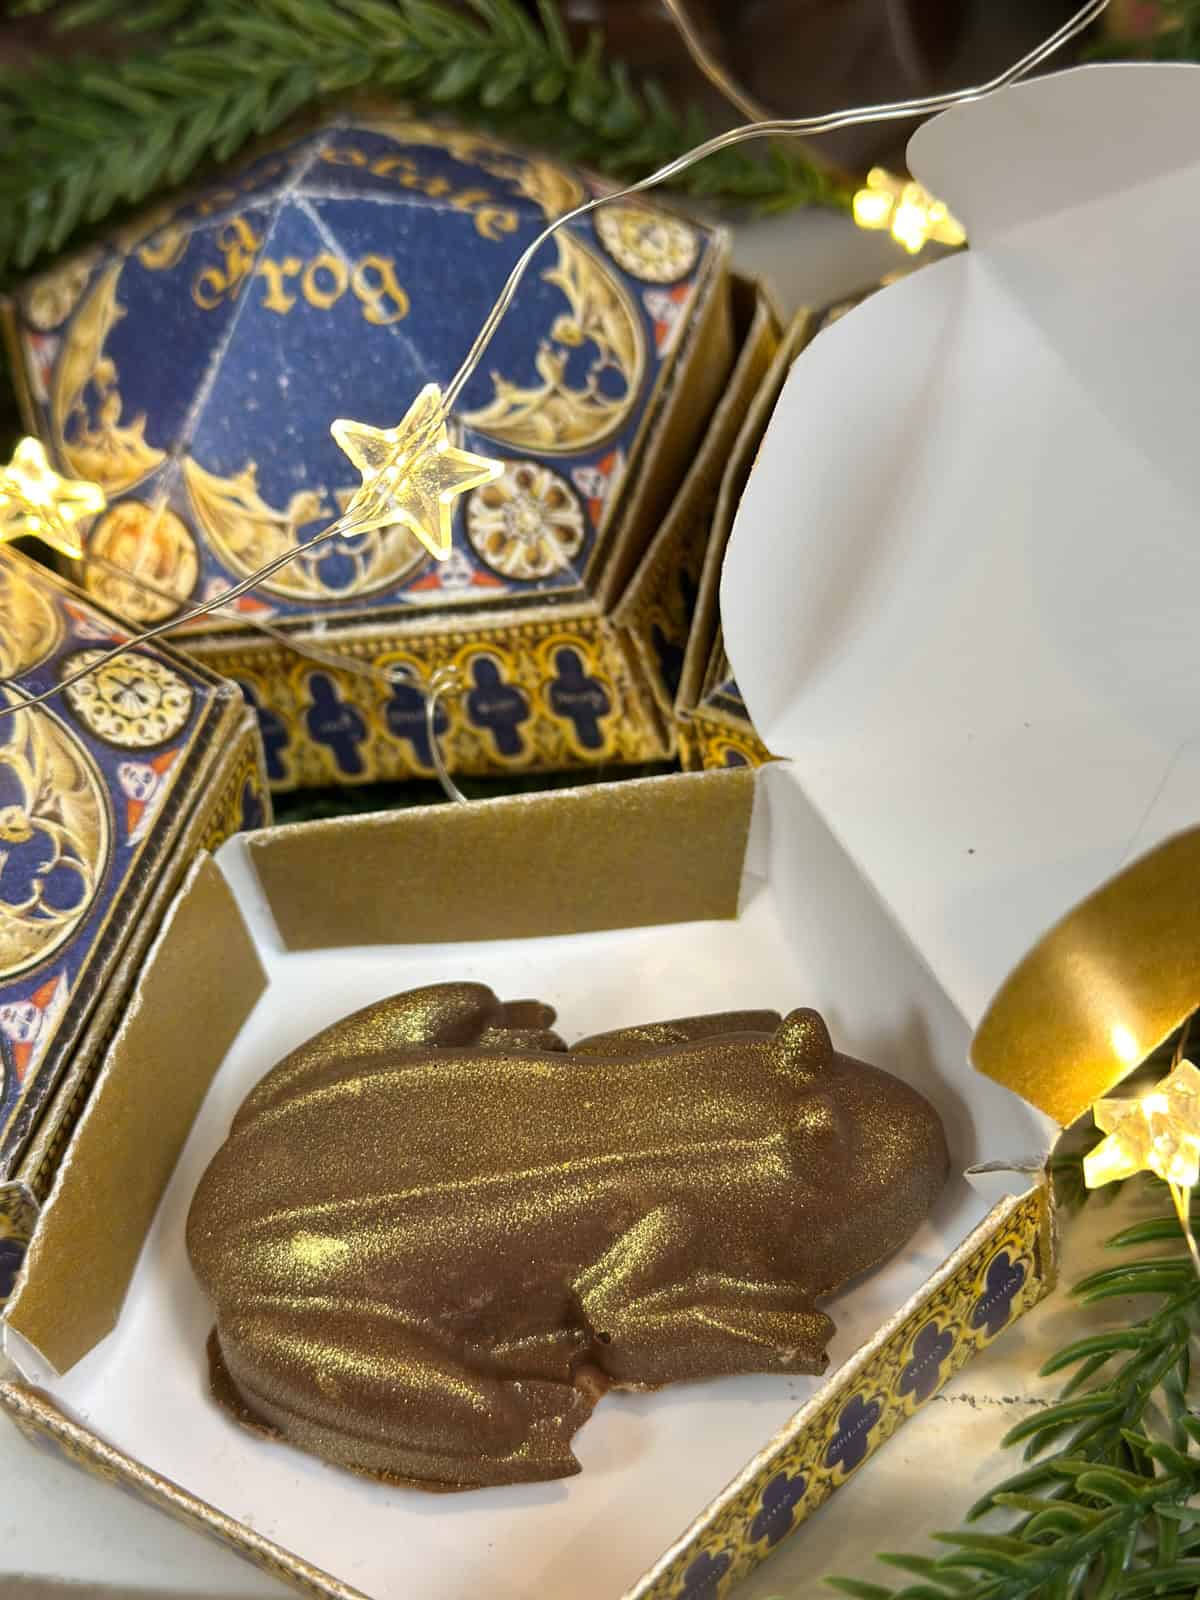
Homemade chocolate frog from Harry Potter in a free printable chocolate frog box.

To make your chocolate frogs, melt chocolate, pour into moulds, add filling if desired or make them solid chocolate. Since we were making our own, we experimented with adding peanut butter, rice Krispies, and chopped almonds into different ones. Try mini marshmallows, dried fruit, popping candy, jelly beans, cookie pieces or nuts in your own. Top with more chocolate, and refrigerate 15-30 minutes until set, then pop them out. To make them even more magical, we used edible gold spray paint to make them shine.

The homemade versions taste so much better than anything you'd buy, kids absolutely love helping, and they're so much cheaper than the store bought version.

Watch the full tutorial in my Honeydukes video above, then package in custom boxes (below).

Chocolate Frog Boxes

Harry Potter chocolate frog boxes made with free printables on Christmas garland for DIY Honeydukes candy cart.

Package your frogs using our free printable template! Subscribe below and download the free printable from our Free Resource Library, and print on cardstock. Cut out along solid lines and then begin to fold together. You also need to snip the edges of the box to form the sides. Use hot glue to hold the box together. Place the frog inside! You can secure the box top down with a small piece of clear tape. These also work great for gifting to guests.

Time: 5 minutes per box | Cost: Just ink and cardstock | Difficulty: Beginner

Download chocolate frog box template

Homemade Coconut Ice

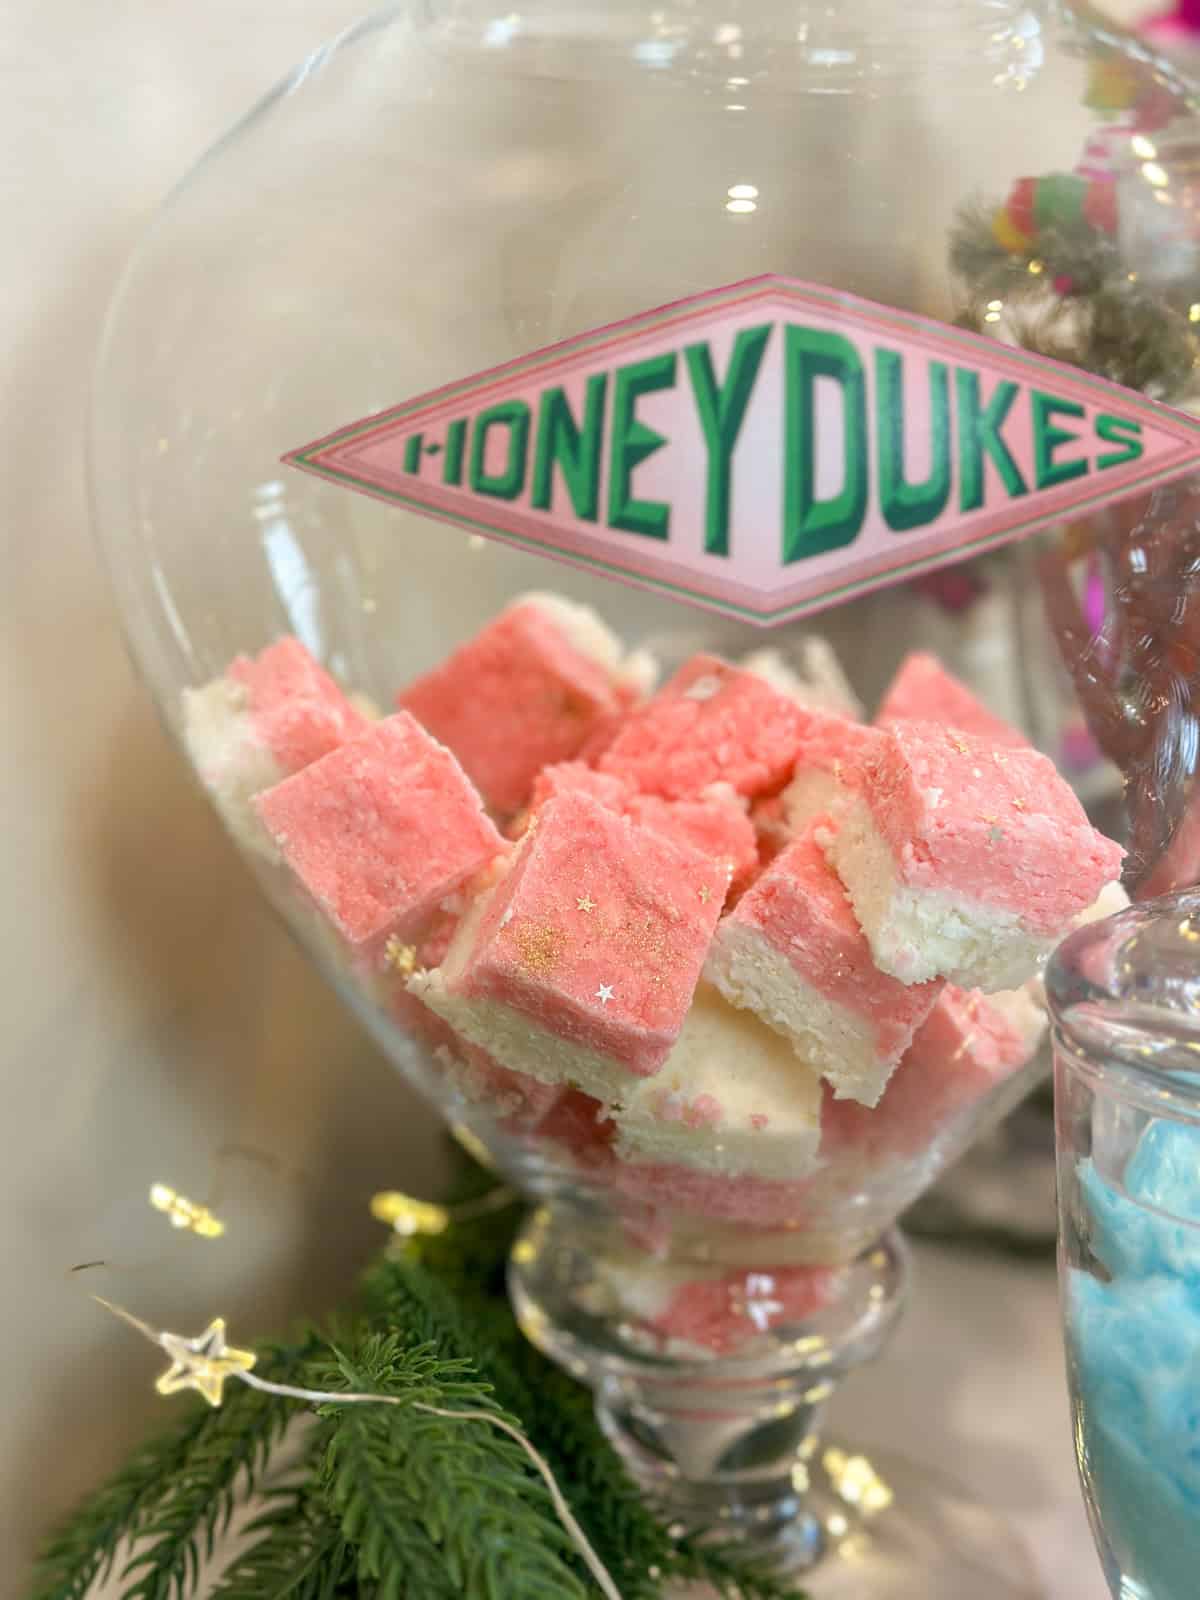
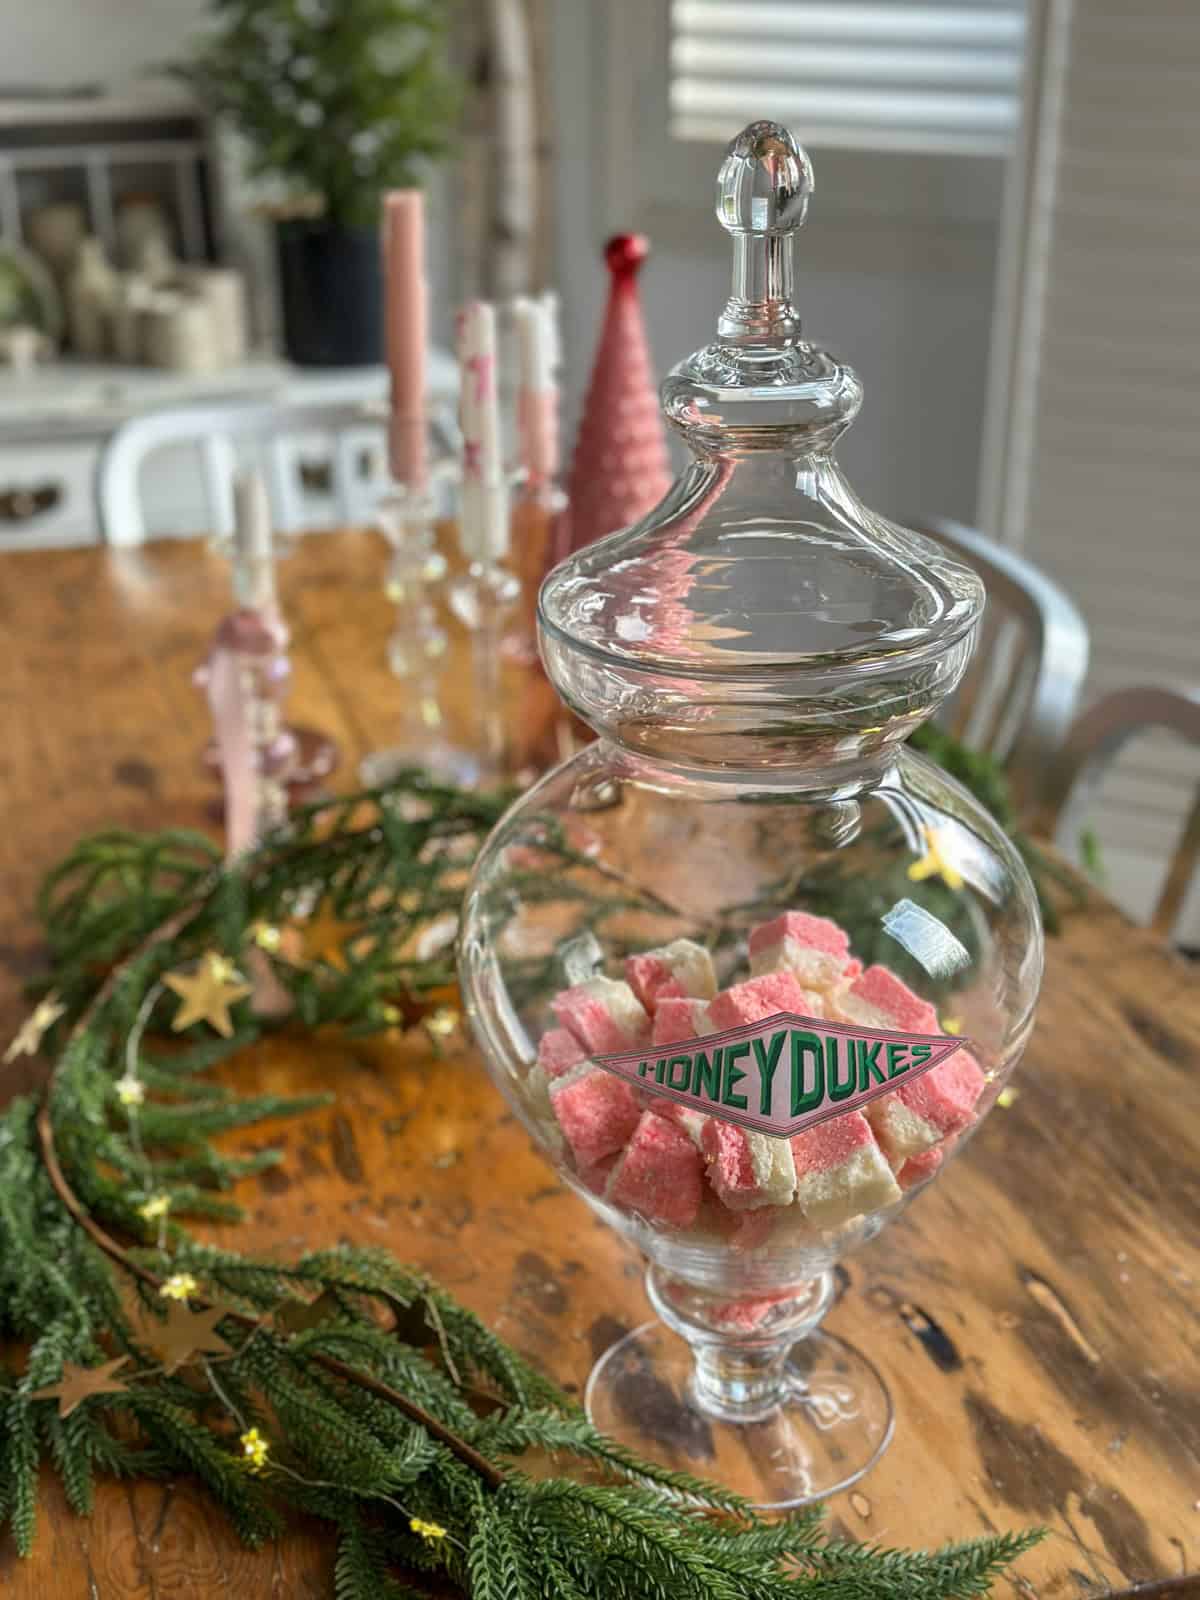
Homemade coconut ice in a large glass jar on a Harry Potter Honeydukes candy cart.

Another budget-friendly homemade candy! Traditional British coconut ice is surprisingly easy. It's a simple no-bake recipe kids can help with and it's really delicious. Find our Coconut Ice Recipe here.

Bertie Bott's Every Flavour Beans Boxes

DIY Bertie's Every Flavor Beans on a Harry Potter Honeydukes Christmas candy cart.

Create custom boxes using our free printables! Subscribe below and find the boxes in our Free Resource Library. Print on cardstock, cut and fold together. Use a craft knife to cut out the windows in the sides of the box, and glue in cellophane to cover them. Fill with jelly beans. I used gourmet jelly beans in mine, but if you want a more authentic every flavor bean experience, purchase a few boxes of actual Bertie Bott's beans and mix them with the regular gourmet jelly beans -and let your guests take their chances. 😉 These make great party favors too!

  • Time: 5 minutes per box
  • Cost: Minimal
  • Difficulty: Beginner

Honeydukes Candy Jar Setup

Harry Potter Honeydukes candy cart Christmas display with apothecary jars, mini tree, and free printable labels.

Collect glass jars in various sizes from thrift stores and clean thoroughly. Print our Honeydukes logos on regular paper or sticker paper, cut out and attach to jars as a sticker, or using a glue stick (I like this option because it's much easier to remove later.) Fill with candy!
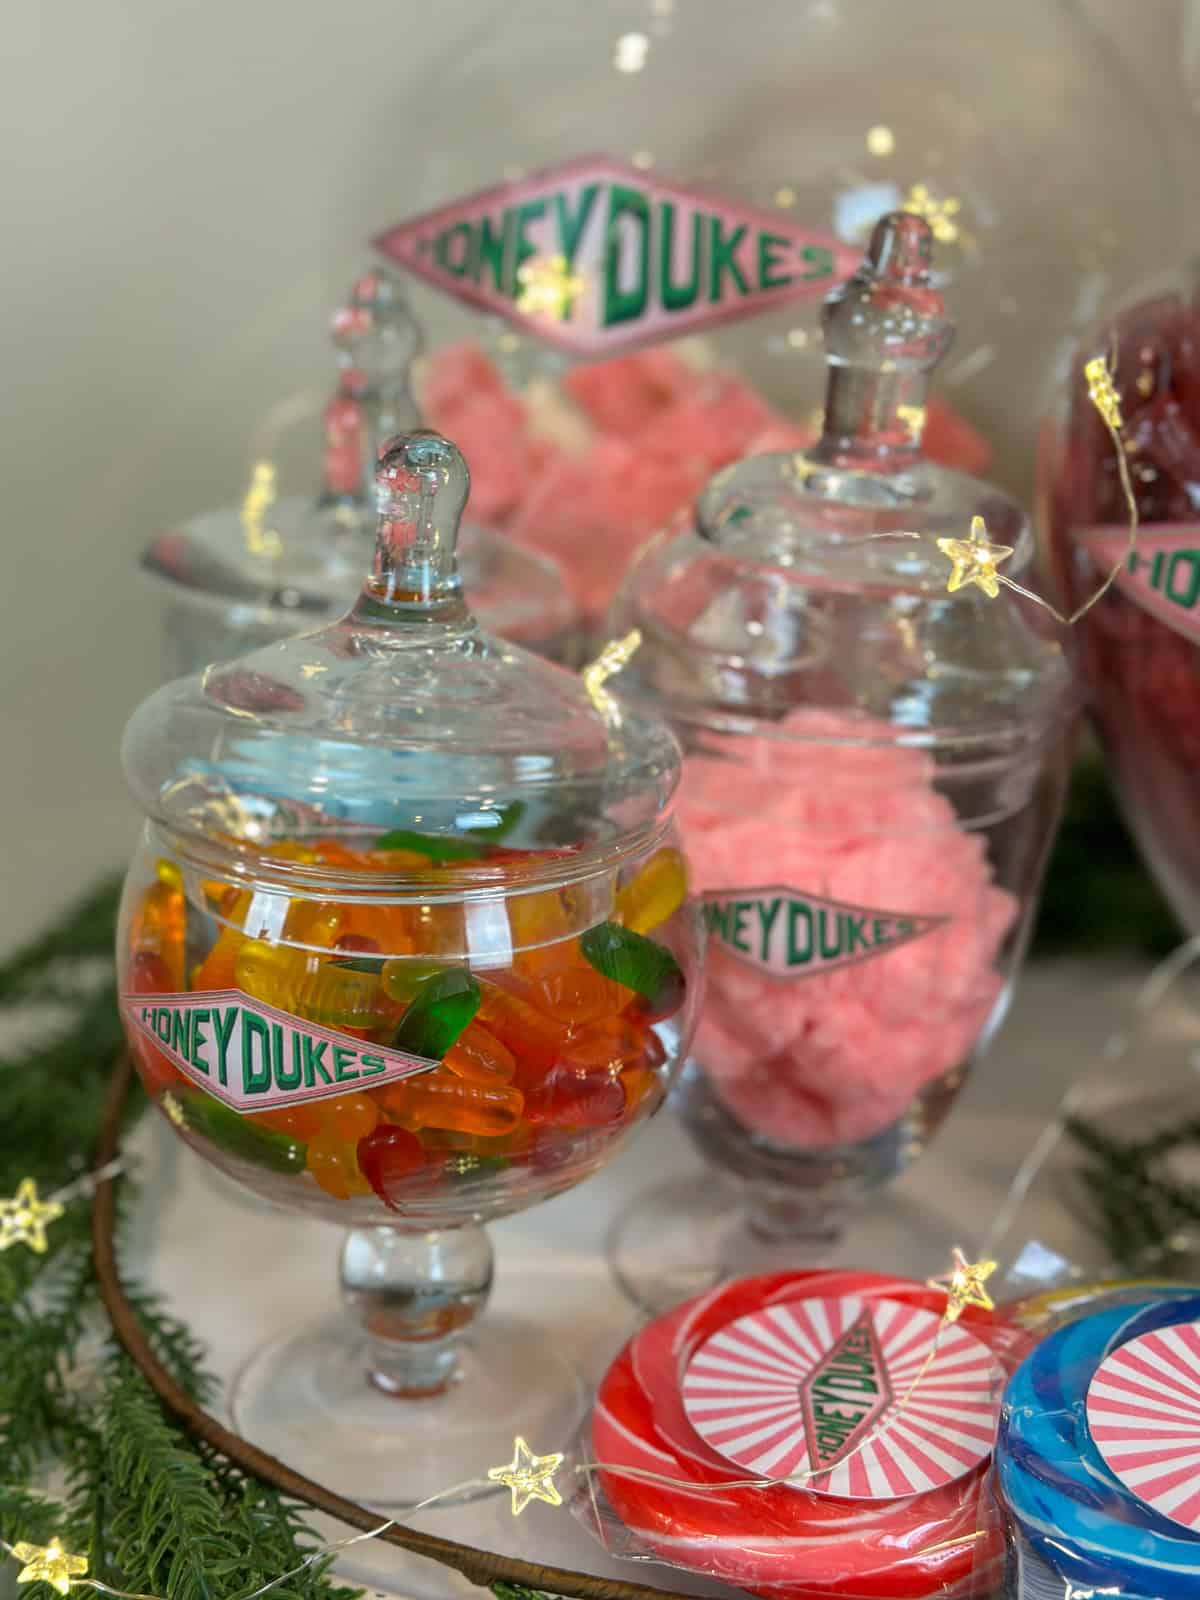
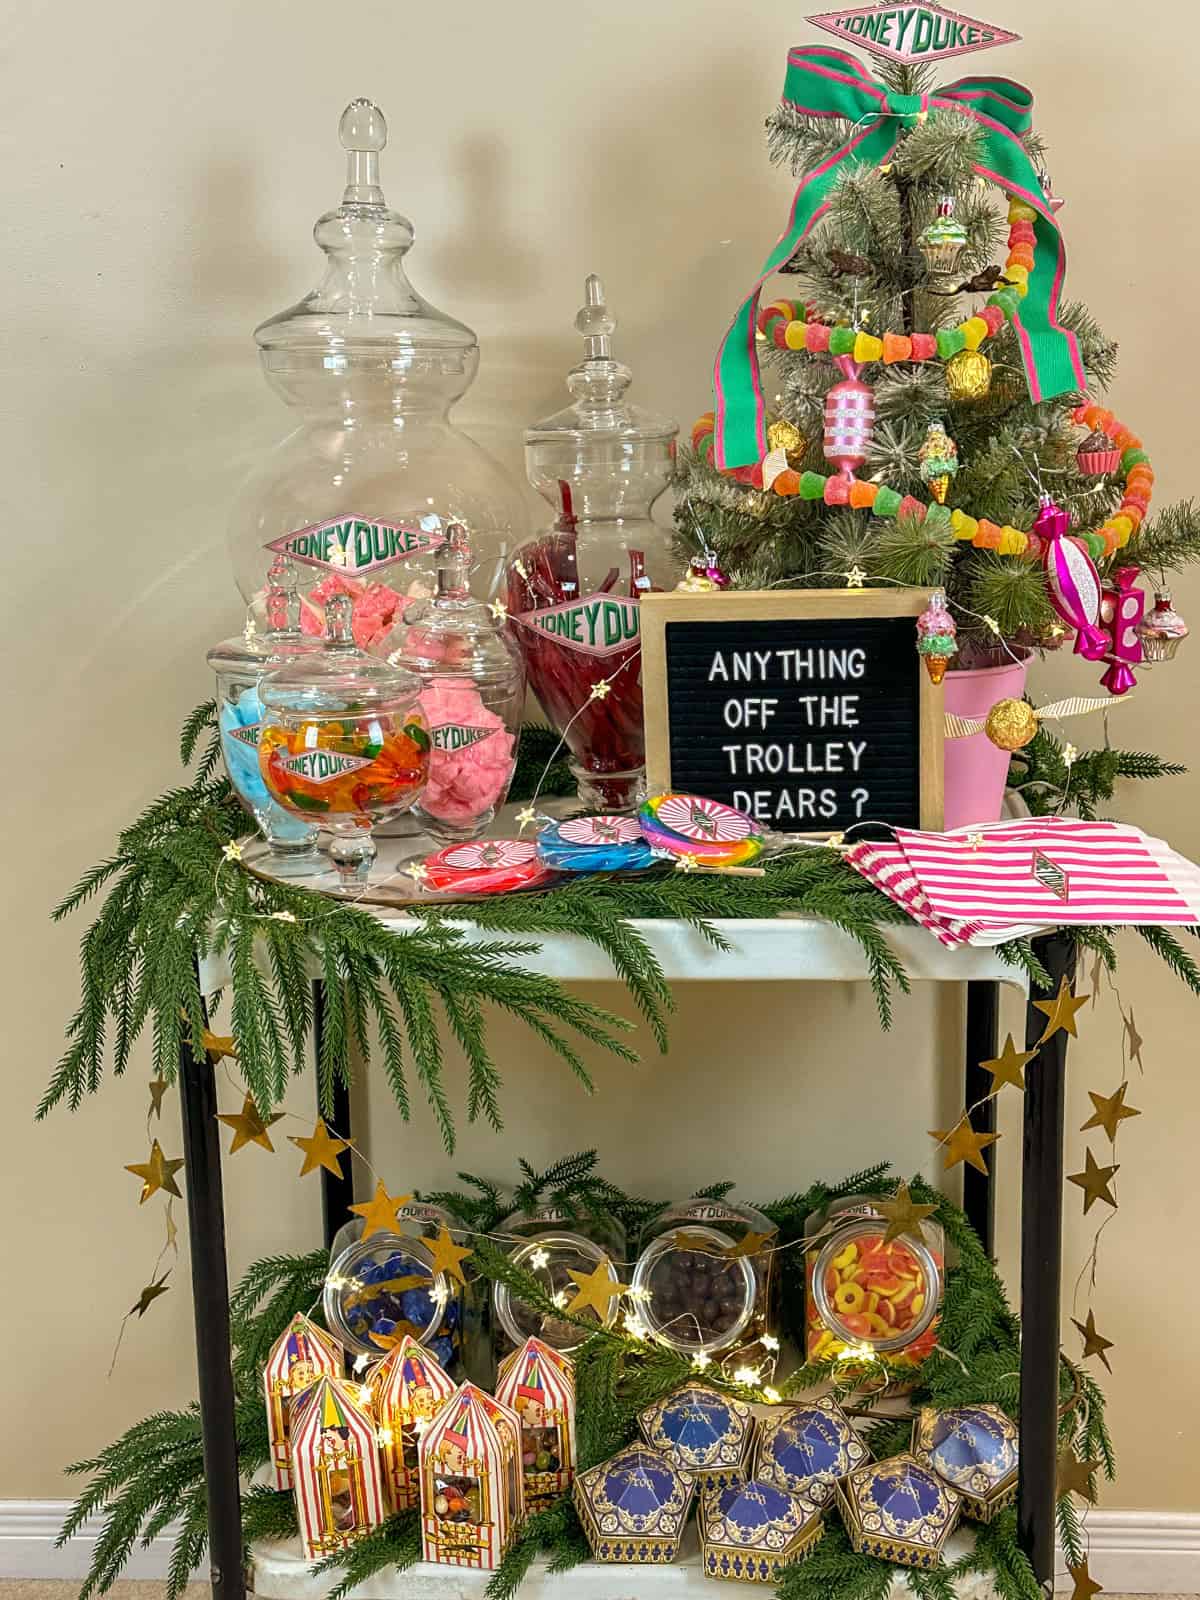
Candy in glass apothecary jars on a DIY Harry Potter Honeydukes candy buffet.
DIY Christmas Honeydukes candy trolley for a Harry Potter themed Christmas.

Authentic Honeydukes candy: Want to know all the actual candy mentioned in the books at Honeydukes? Check out this list if you're a stickler for details like this. ;). We used licorice wands (red licorice sticks), Peach Rings, Gummy Worms, Lollipops, Cotton Candy, and are favorite chocolates, since the book says "hundreds of different kinds of chocolate", plus our homemade coconut ice and chocolate frogs, and Bertie Bott's Every Flavor Beans.
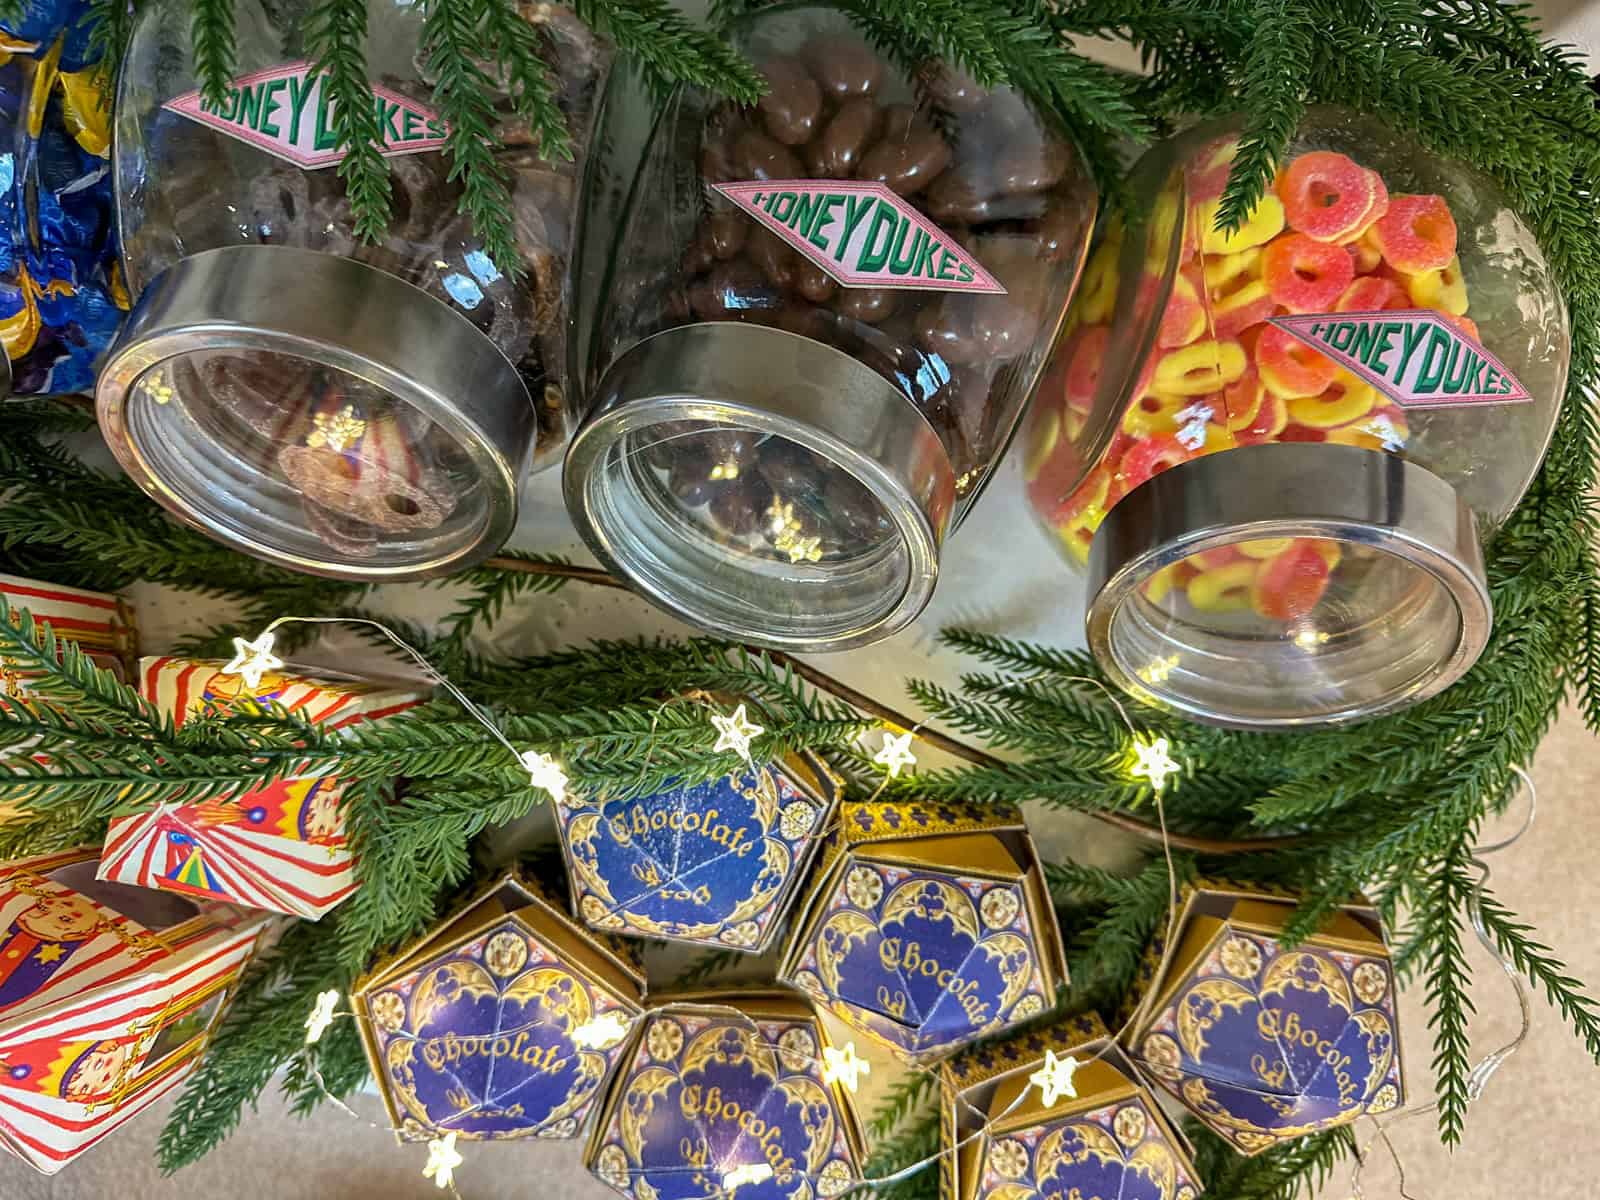
Glass candy jars filled with candy for a Harry Potter Christmas Honeydukes candy trolley.

We found our large lollipops at the dollar store in different colors. We added a round Honeydukes logo sticker to the front. Use our free printables and print onto sticker paper, or use regular paper and a glue stick to add them to the lollipop packaging.

Budget tip: Bulk candy stores let you buy exact amounts and choose colors that fit the aesthetic. Our cotton candy or candy floss wasn't strictly authentic, but it's inexpensive, takes up a lot of space, feels festive and special, and is a hit with kids.

Honeydukes Printables & Details

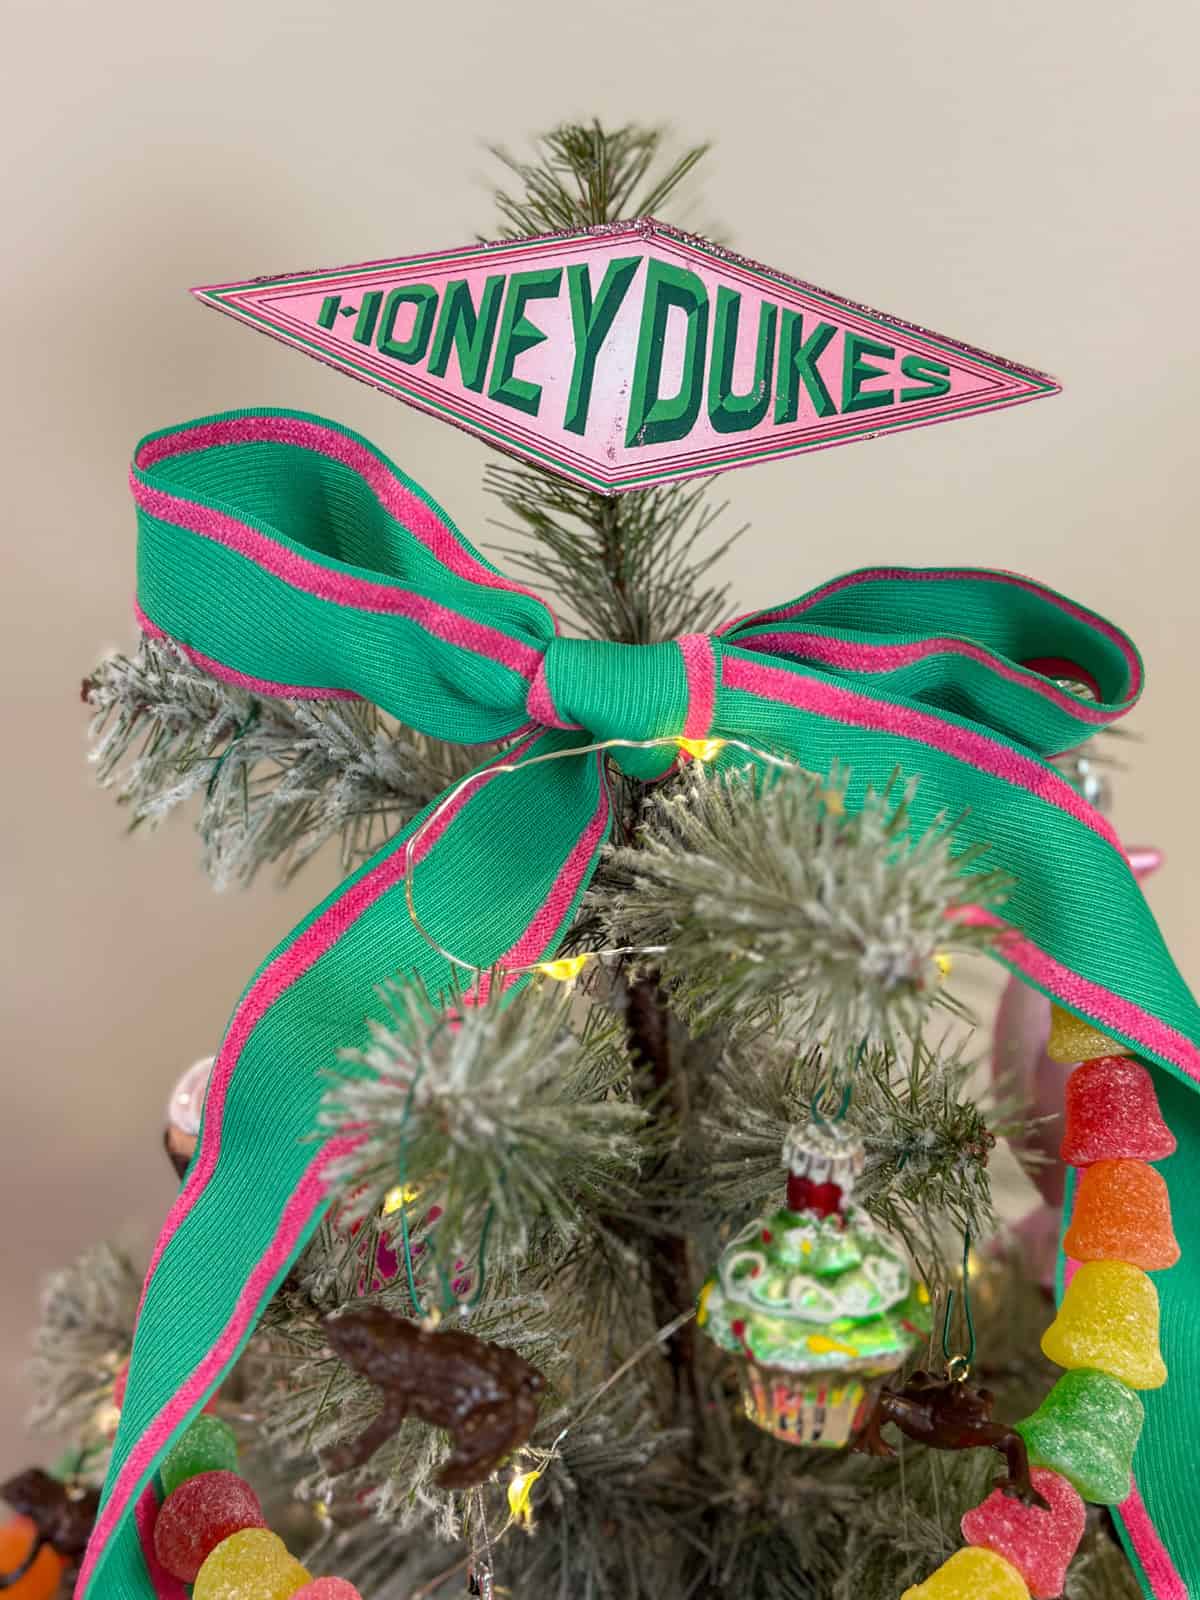
Using our free printables for: Jar logos, lollipop stickers, treat bag logo stickers and, Honeydukes tree topper.
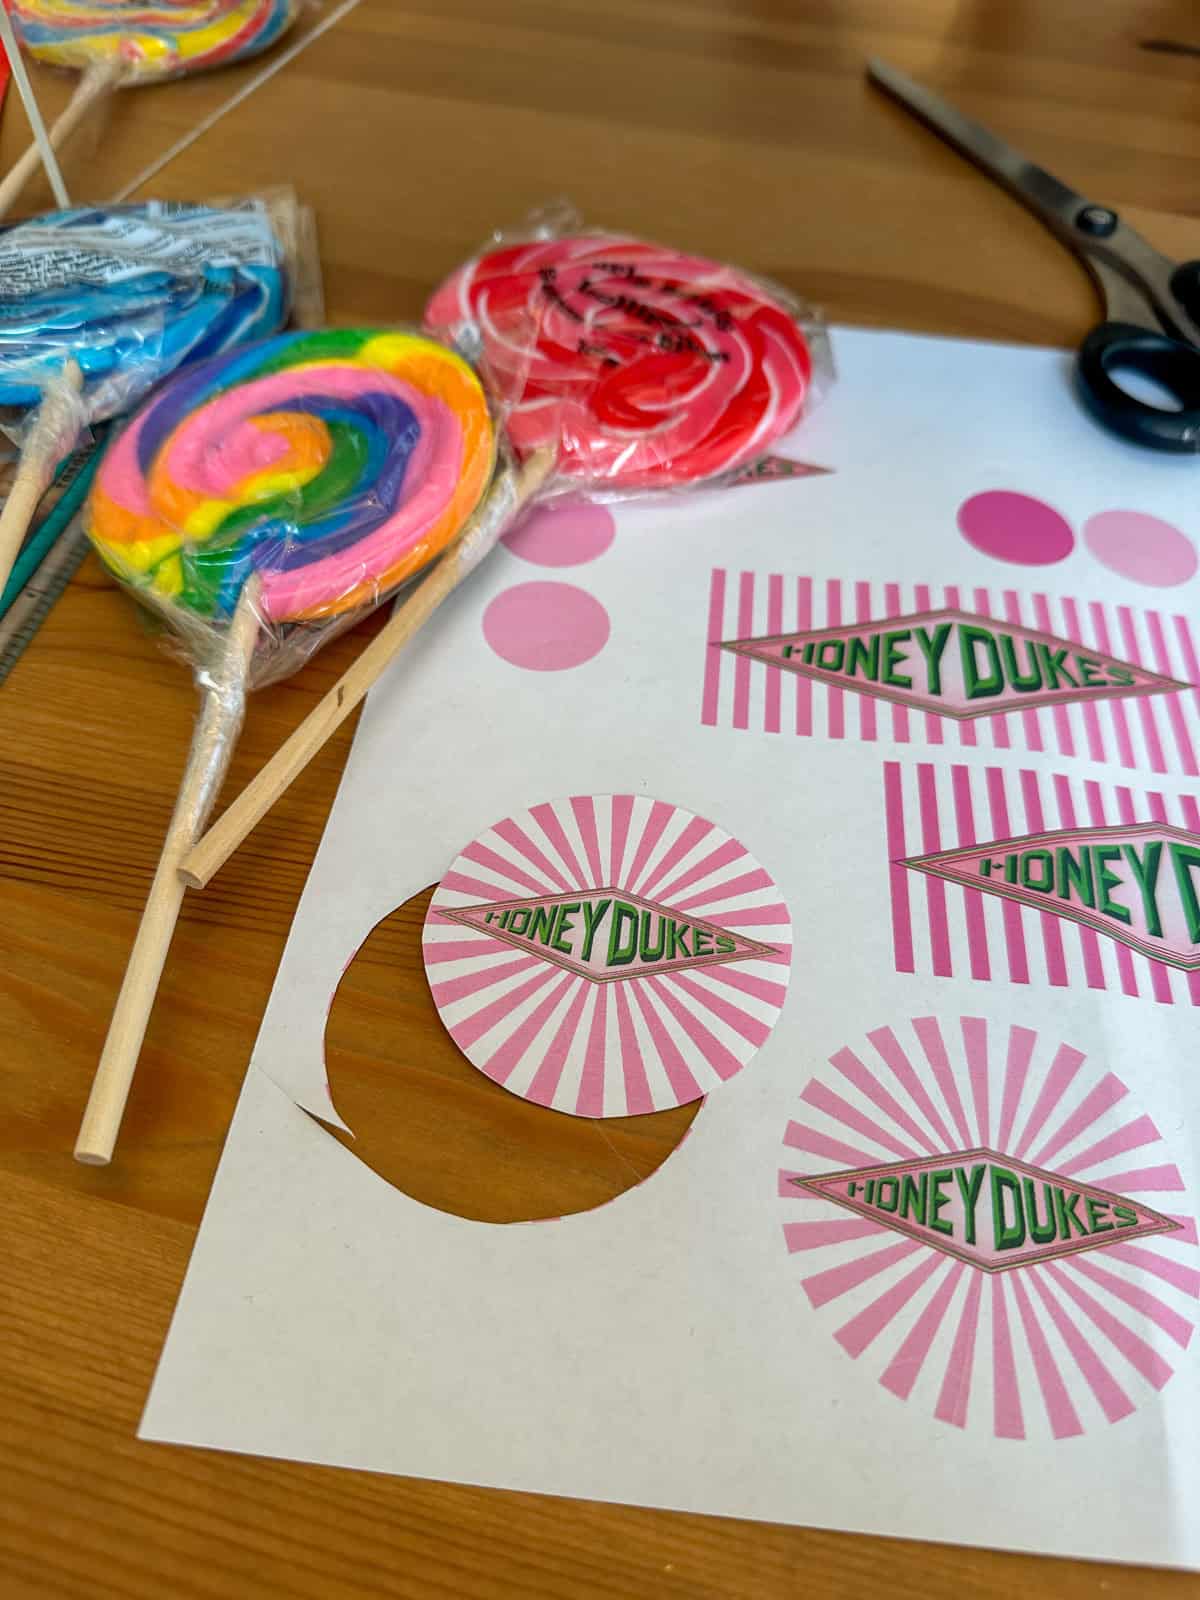
Adding free printable Honeydukes logo printables to lollipops and candy jars.
DIY Honeydukes Christmas tree topper for Harry Potter themed Christmas tree.

Treat Bags: We found pink and white striped paper treat bags online and added out Honeydukes logo stickers to the front. These are perfect for guests to help themselves nd take some treats home with them.
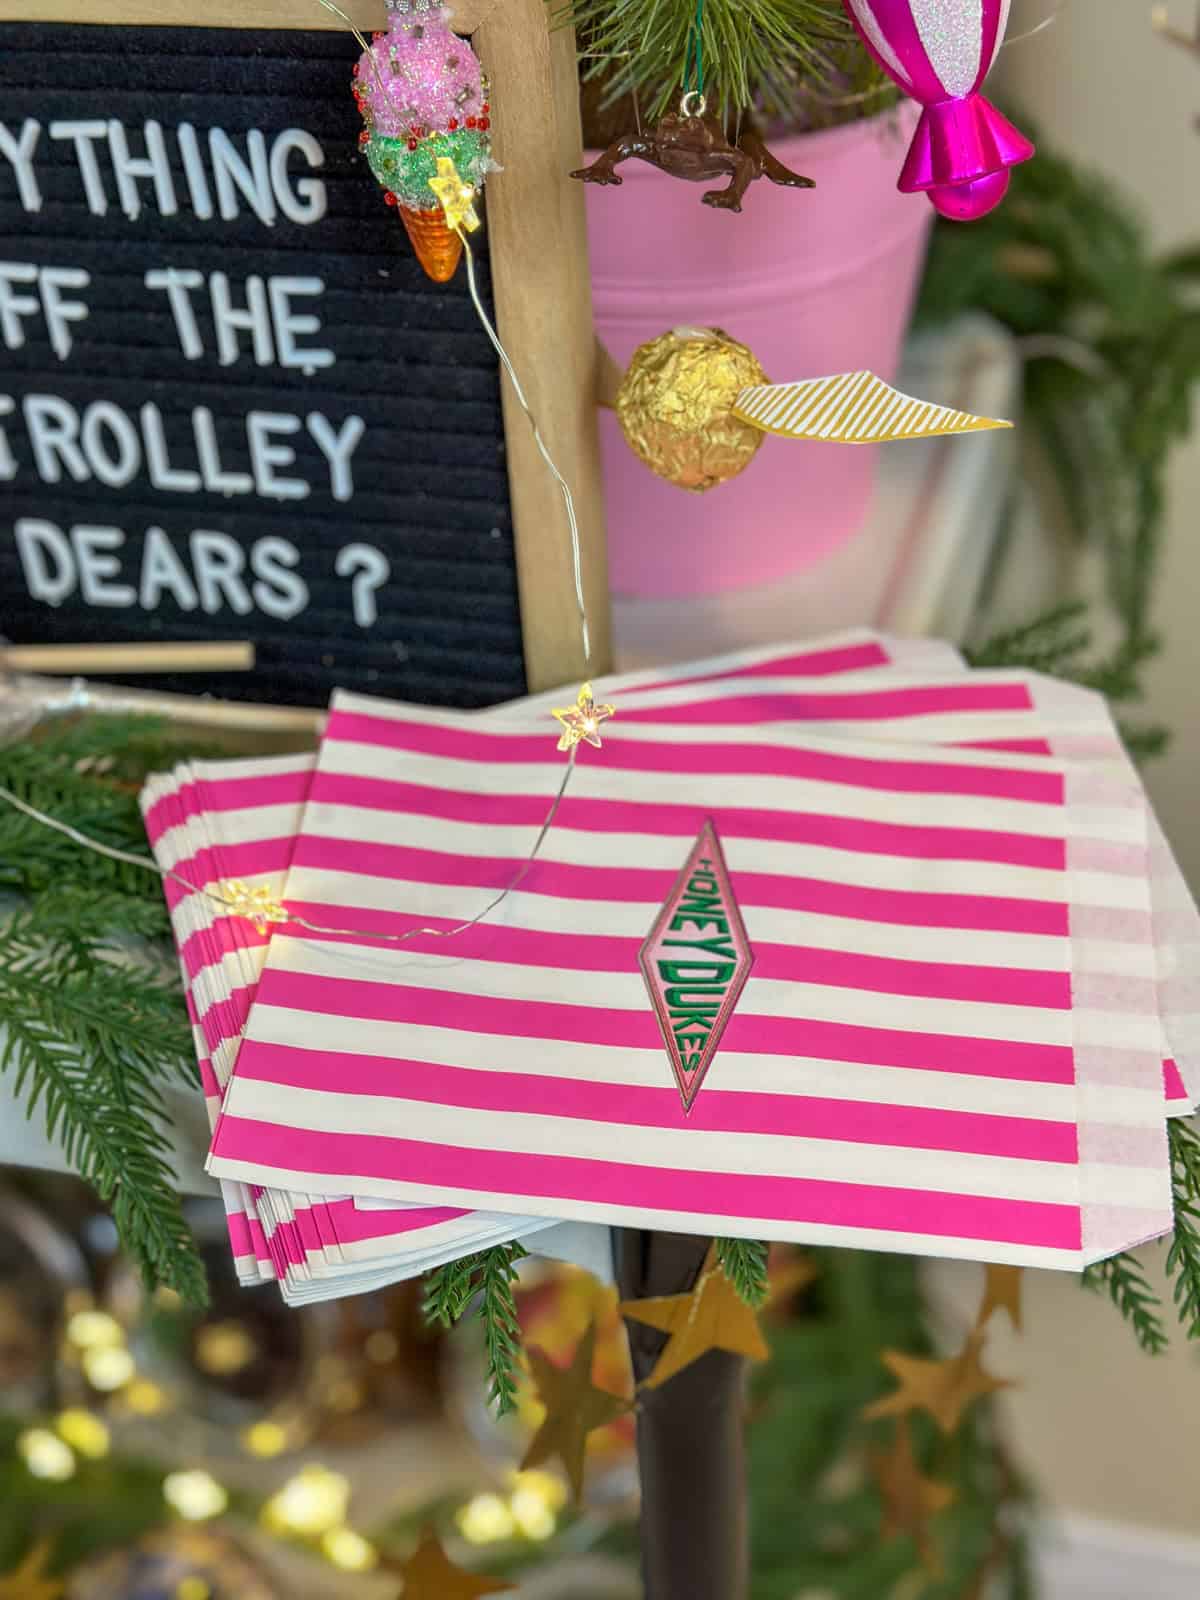
Honeydukes candy bags with logo stickers for Harry Potter Christmas candy cart.

Scoops and Tongs: Don't forget to stock this area with small scoops and tongs so everyone can help themselves without putting their hands in the jars.

Mini Honeydukes Tree: Small 2-3 foot tabletop tree styled with mini lights, cupcake, ice cream, and candy ornaments, DIY chocolate frog ornaments, gumdrop garland, chocolate snitches -see how we made these above, and Honeydukes logo topper.
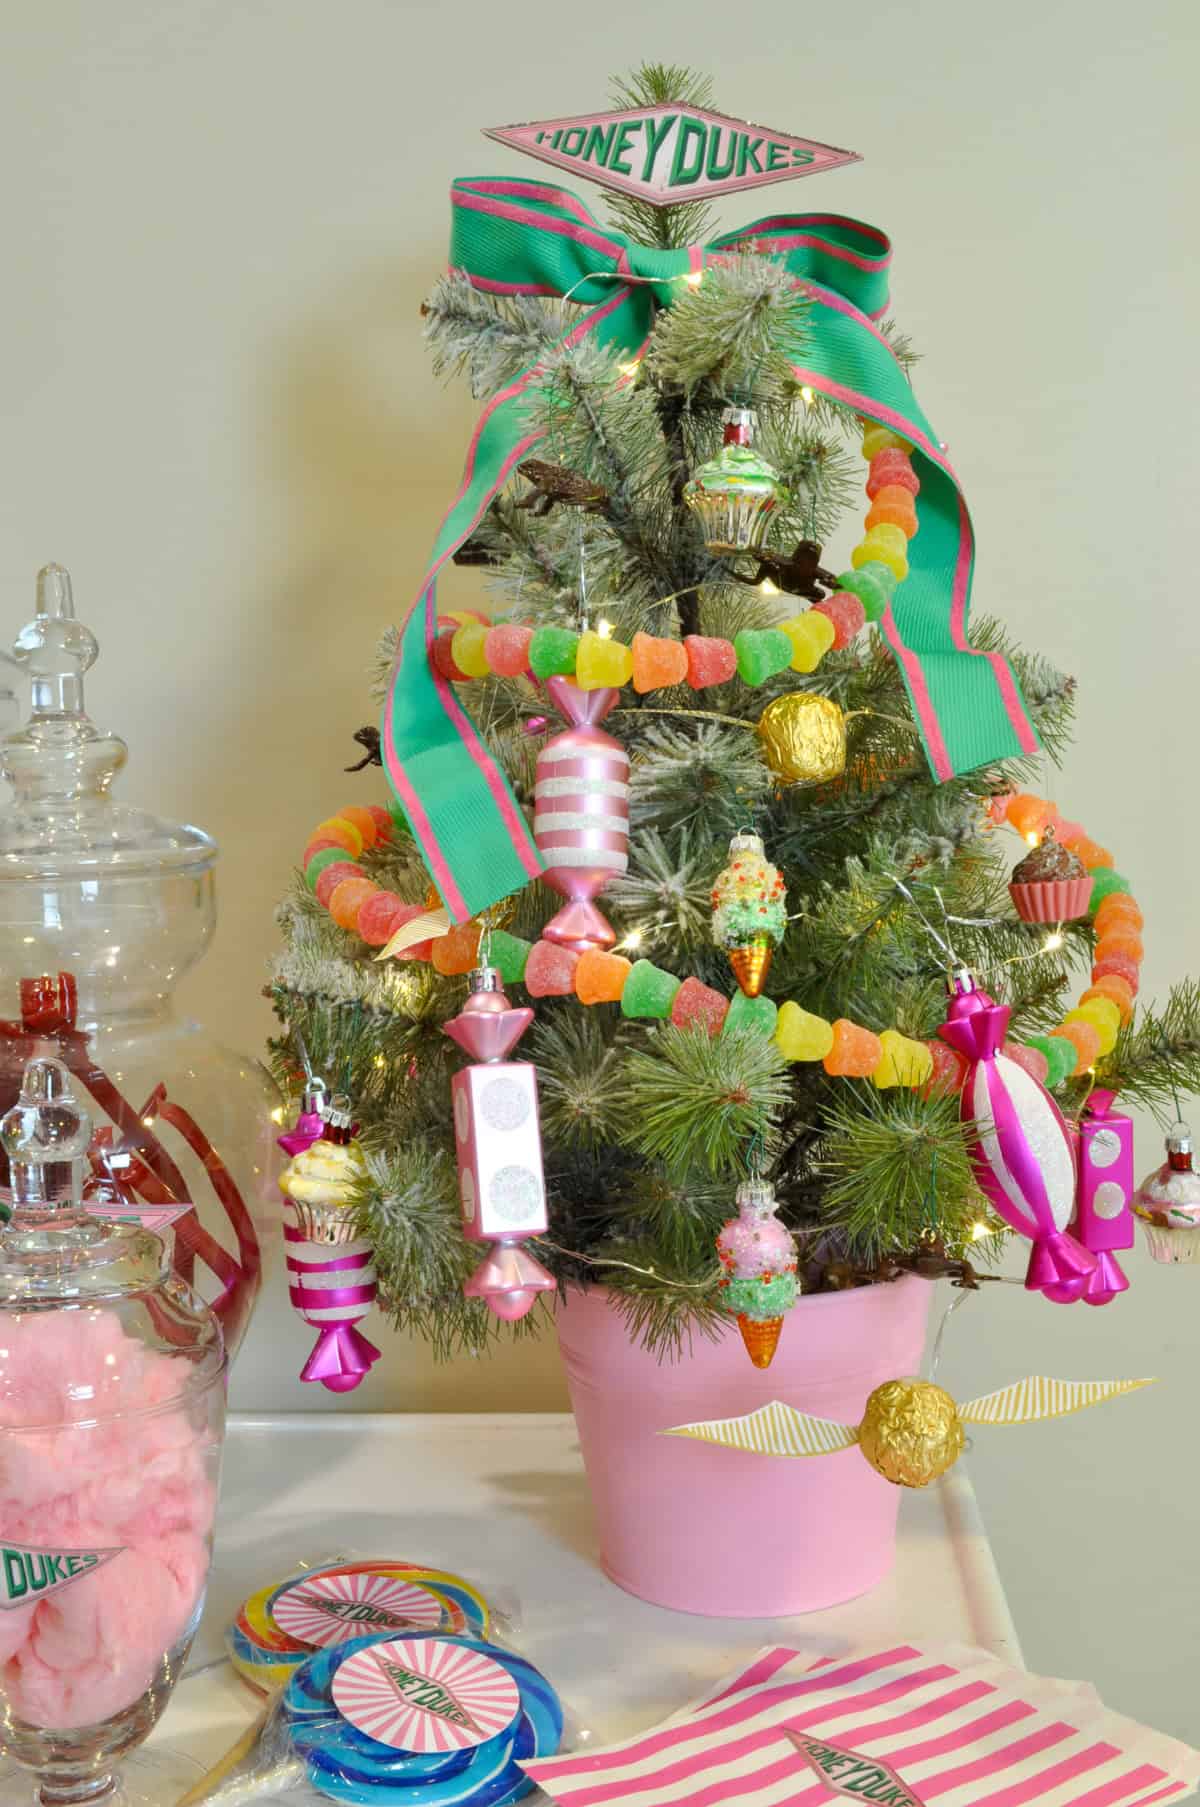
Harry Potter Honeydukes inspired candy themed mini Christmas tree.

Gumdrop Garland: Use wire to string real gumdrops onto wire to form a garland. You can use a thread and a needle, but this job is very sticky, and the wire is easier to use. Wipe the wire off with a warm wet cloth as necessary.
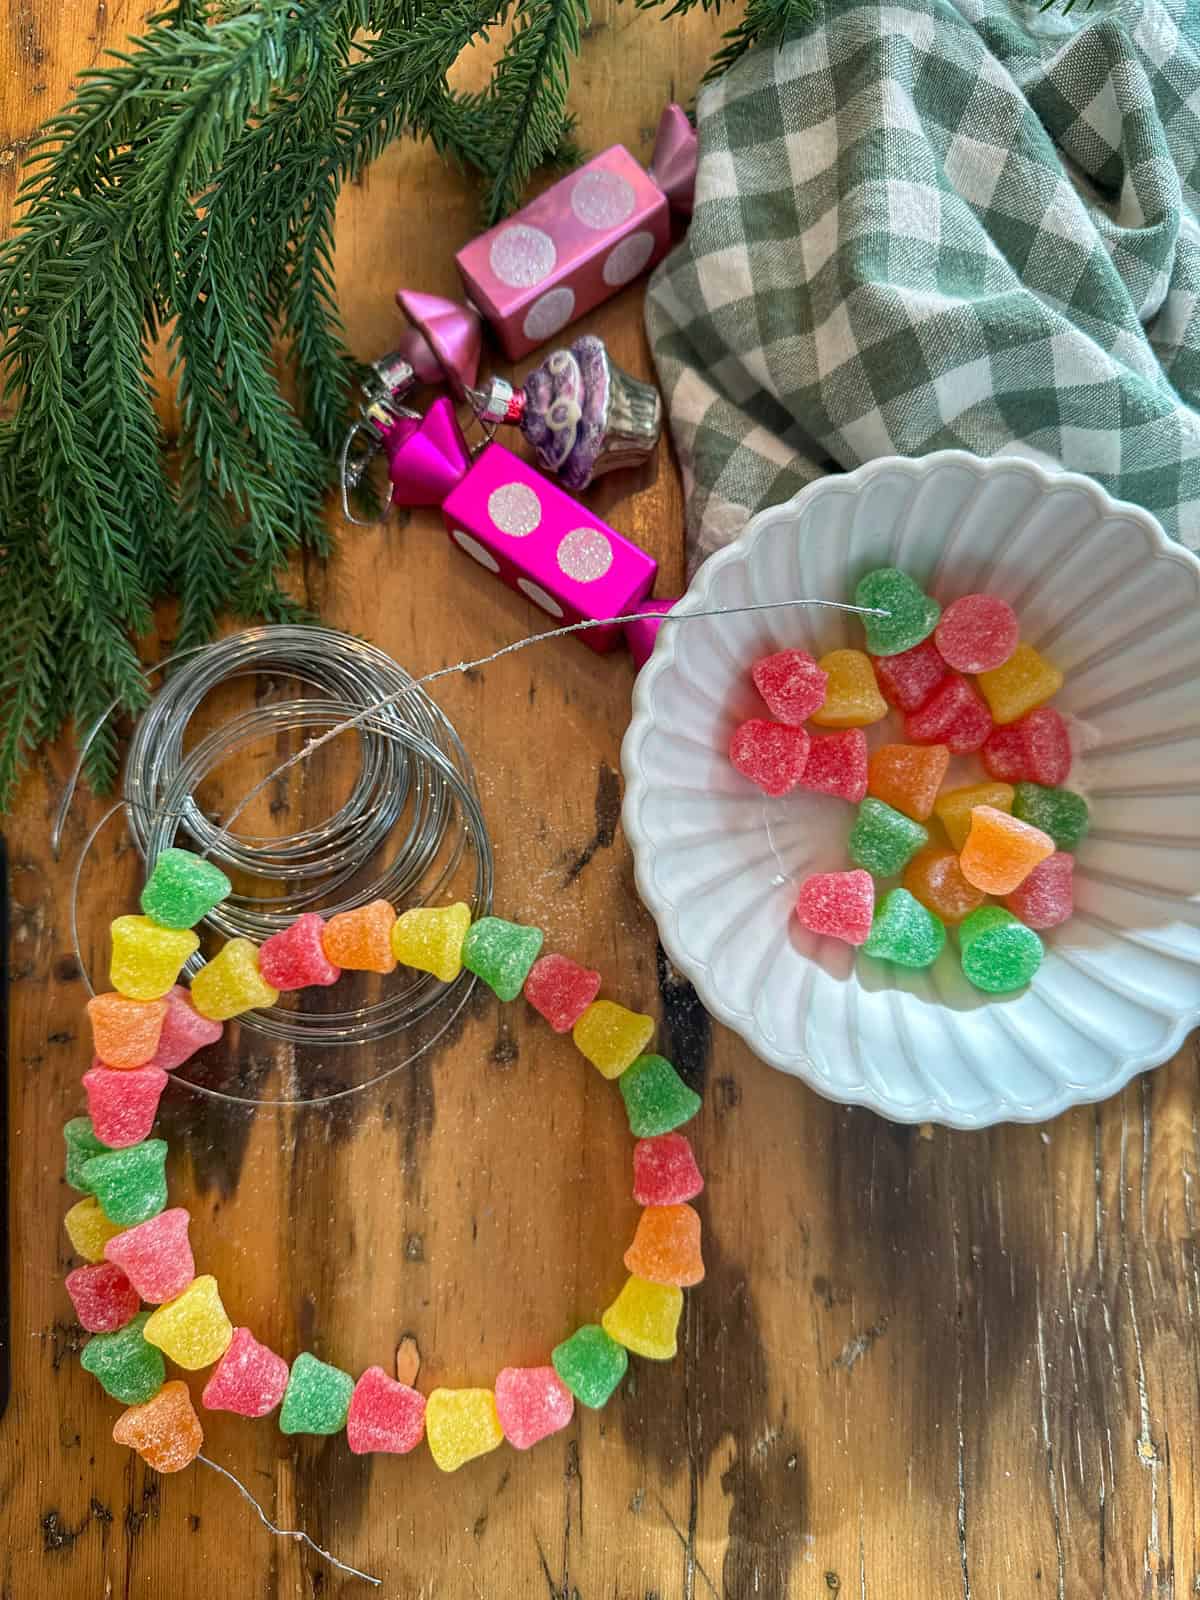
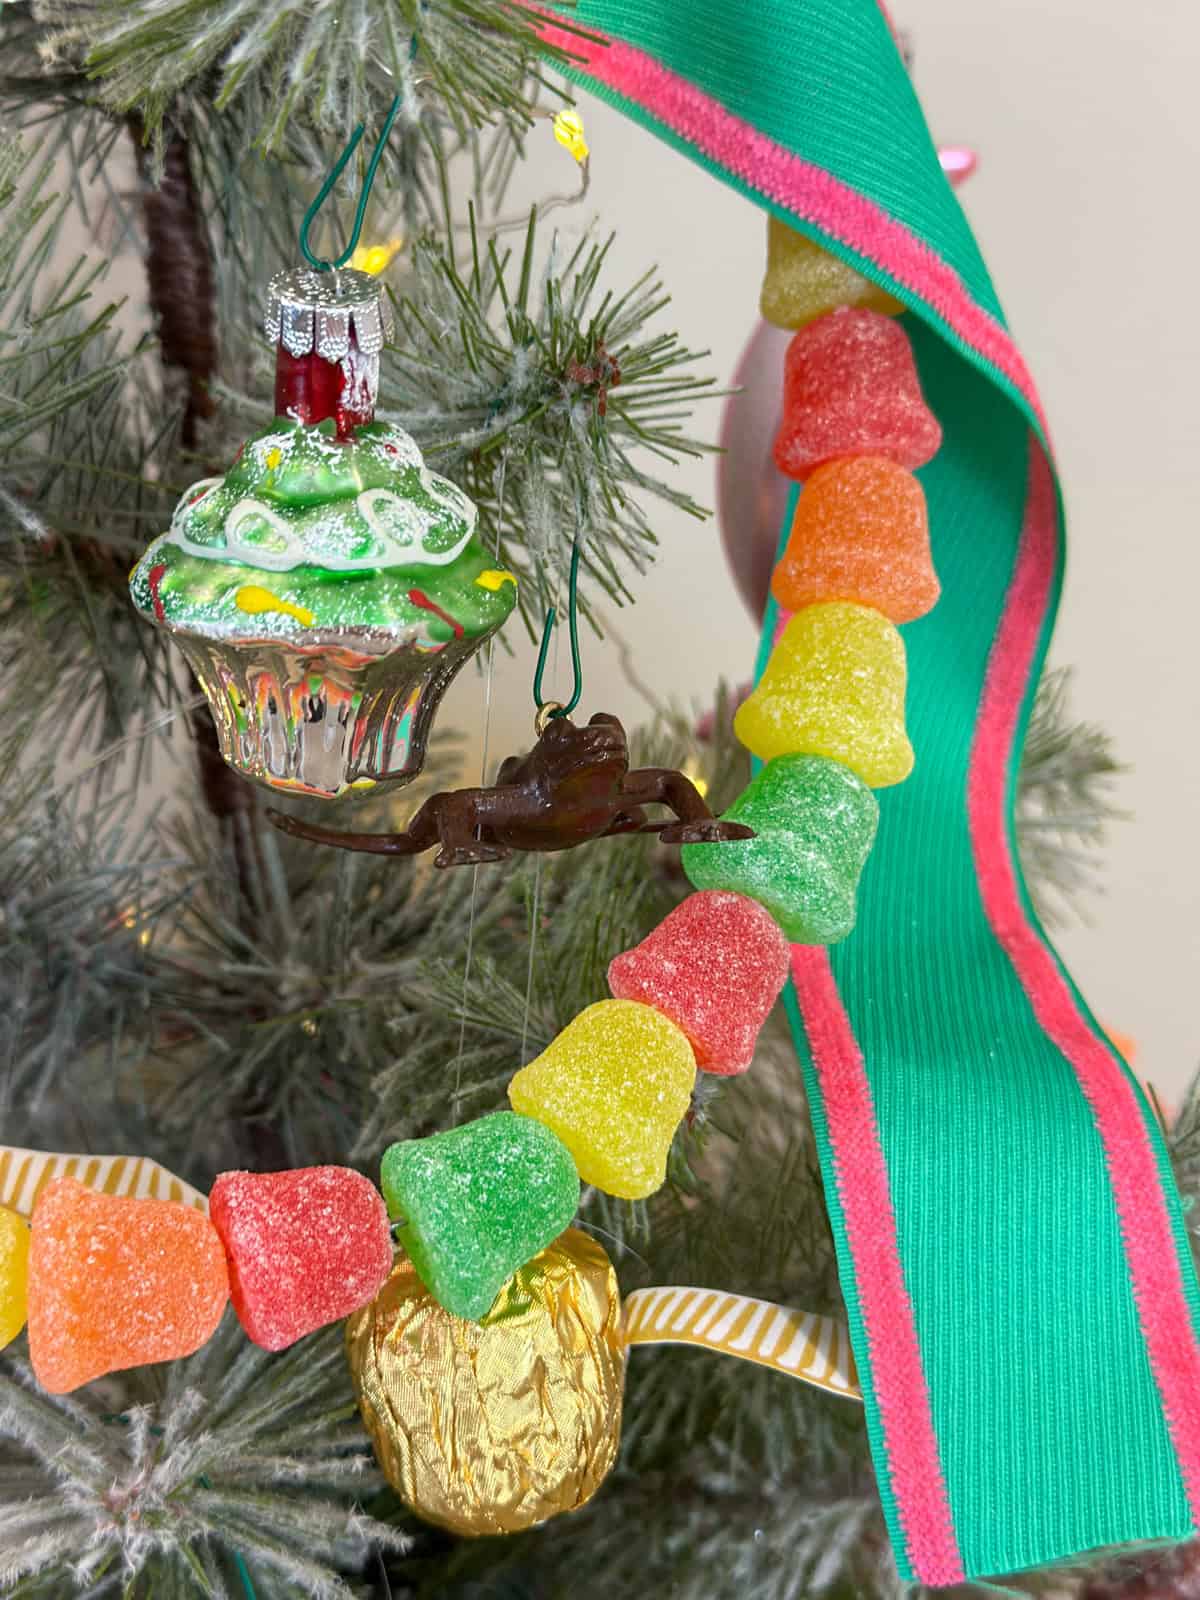
Making a real gumdrop candy garland for a Honeydukes Harry Potter inspired Chrsitmas tree.
DIY gumdrop garland on a Harry Potter Honeydukes inspired candy themed Christmas tree.

Chocolate Frog Ornaments: For our mini candy themed tree, we made small chocolate frogs. Using the same toy frogs we used for the larger chocolate frog ornaments, we painted them with several coats of brown acrylic craft paint, and then gave them a top coat of Mod Podge for the shine. To hang them, we added a small eyehook and a piece of fishing line.
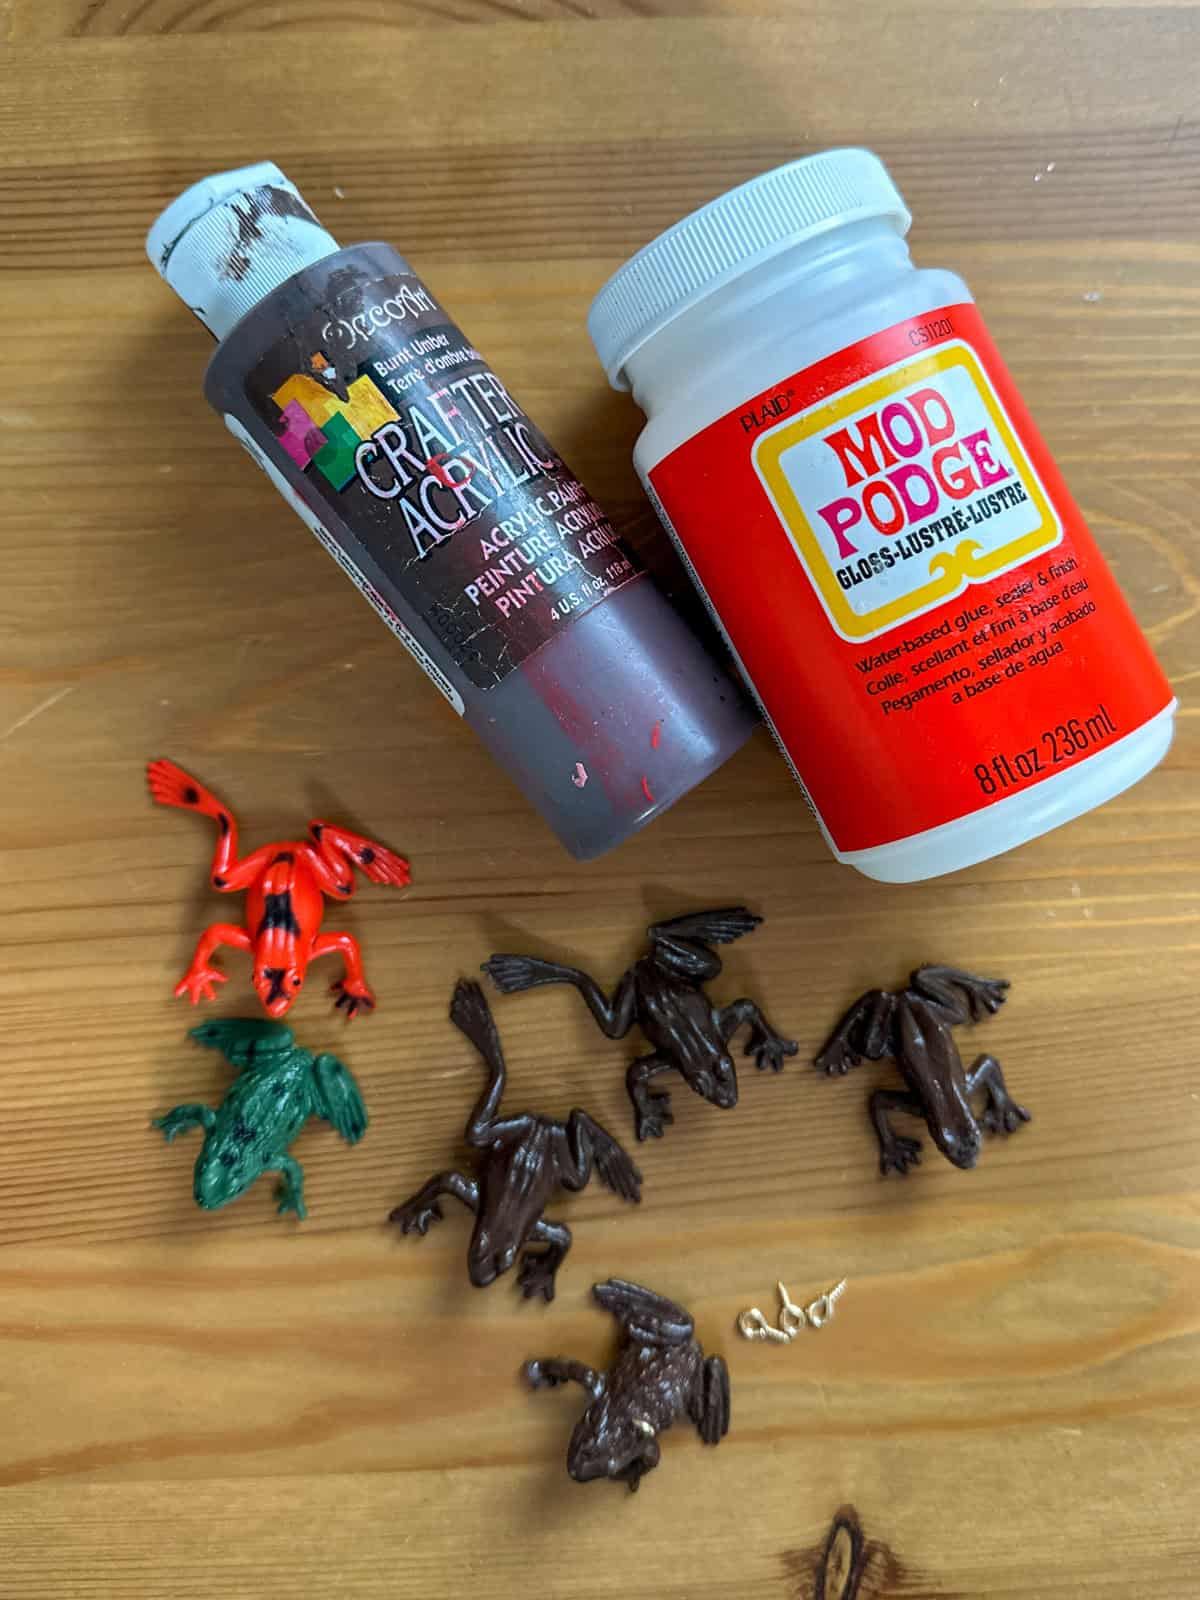
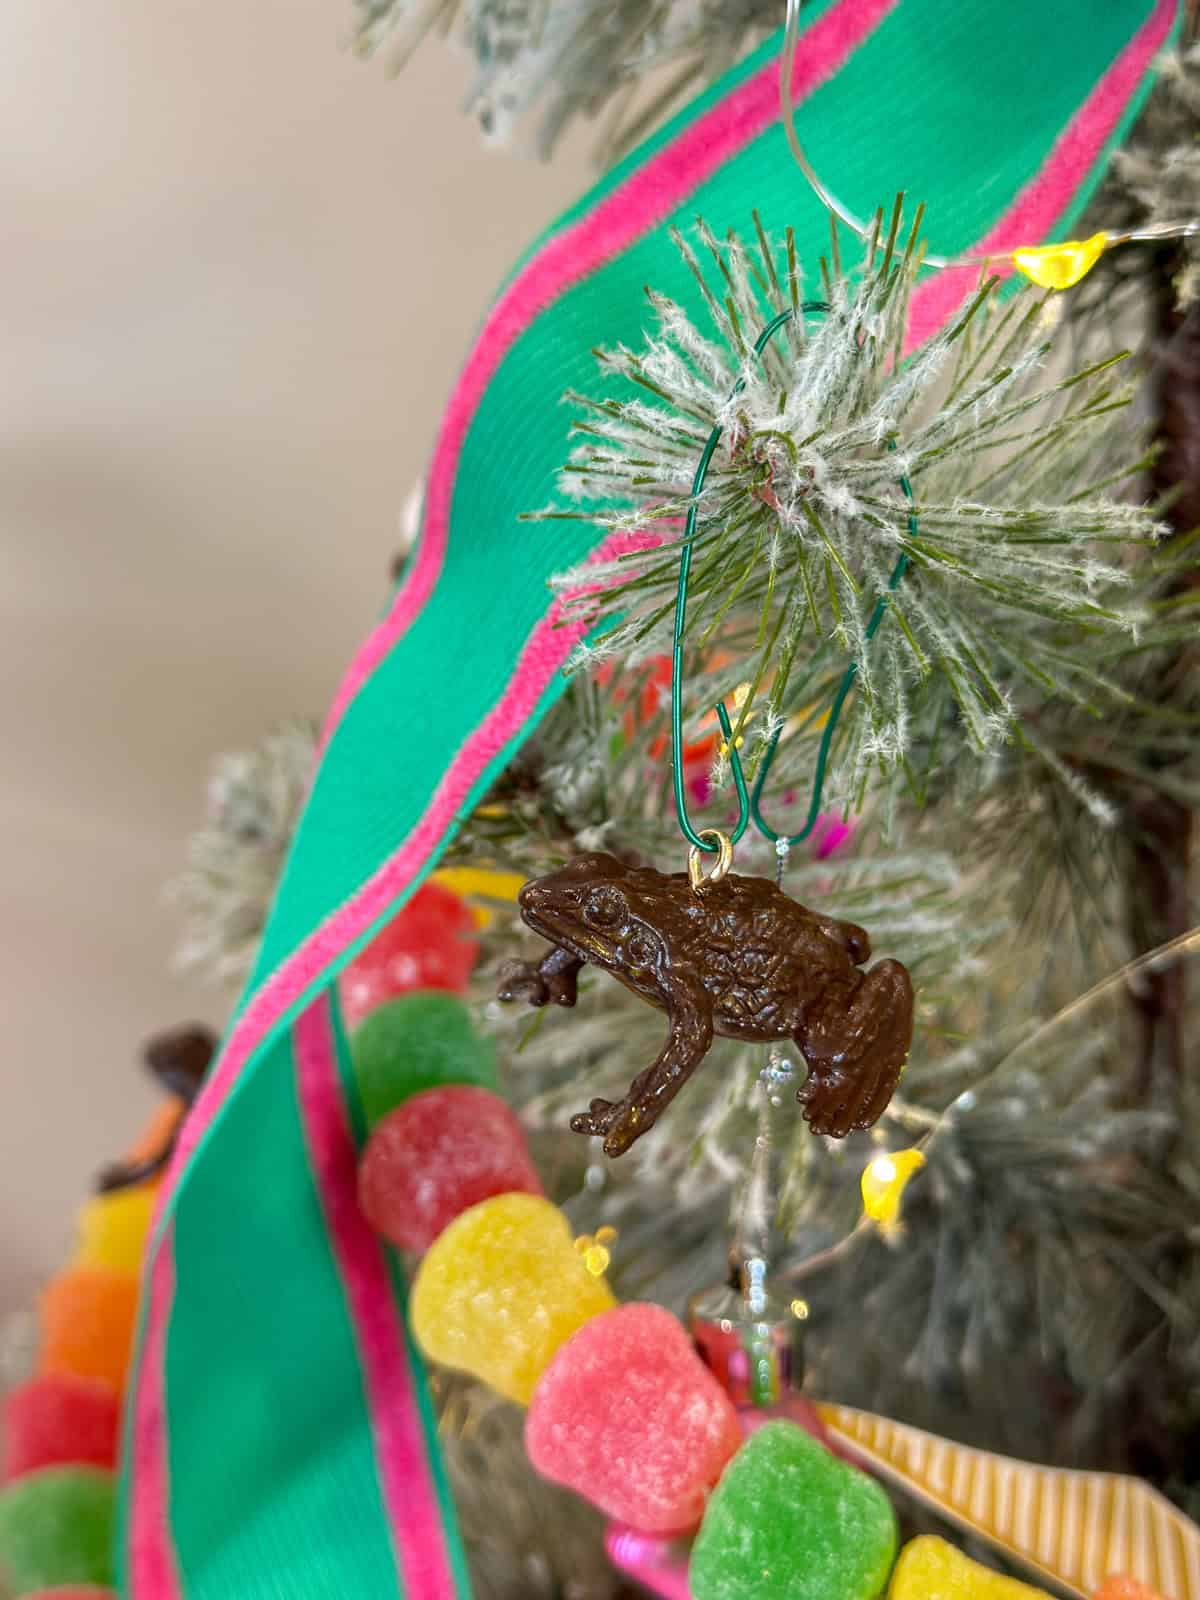
Toy frog, brown craft paint, and mod podge supplies to make chocolate frog ornaments for a Harry Potter themed Christmas tree.
DIY chocolate frog Chrismtas ornament on a Harry Potter themed Christmas tree.

"Anything Off The Trolley Dears?" Sign: Originally, I was thinking of the Honeydukes store, but since the trolley on the train is run by Honeydukes, and since we set up our candy on an actual trolley cart, it seemed perfect to add this quote with a simple letterboard. Get ready for your guests to say, "we'll take the lot!"

DIY Honeydukes cart with "Anything off the trolley dears?" sign, homemade gumdrop garland, and Christmas decorations.

Free Harry Potter Christmas Printables

All printables are completely FREE to download and print at home! Subscribe below for instant access. Check your email for the password to the Free Resource Library. Not there? Check your spam/junk folder in case it went there by mistake. Find the printables in our printable library under "Harry Potter" marked Christmas Harry Potter Free Printables.


Frequently Asked Questions

What was the total cost?

I spent about $250 The candy was a big expense, costing about $80 Biggest savings came from thrifting. You could do a scaled-down version for $50-75, focusing on just the tree with DIY ornaments.

Where can I find the Horcruxe Ornaments?

All the jewelry came from AliExpress. Search "Harry Potter Horcrux" or specific items. They're really inexpensive ($2-8 each) but take 2-3 weeks to ship - order early!

Do I need a Cricut to make the DIY ornaments?

No! While helpful for some cutting, everything can be done with scissors, or a craft knife.

Where did you get the motorized tree topper?

We used a battery powered motorized disco ball spinner. I ordered mine on Temu. We turned our spinner upside down and zip-tied it to the top of the tree. We attached our wire to a hole in the spinner, so look for one with a hole, and not the kind with a chain that hangs down. Cost $10-25

What are some Harry Potter Christmas tree topper ideas?

We love our DIY motorized Santa on a broomstick that flies around the tree top. We used a disco ball spinner to create the effect. Other great options are a large golden snitch, a sorting hat, or a large star to go with the celestial theme.


Budget Planning Tips

Where I saved money:

  • Thrifted everything possible. Books ($1-2), sweaters for stockings ($3-5), candlesticks, birdcage.
  • DIY instead of buying. We made so many decorations. Store bought licensed ornaments really add up quickly. Our advice -do a combination of DIY and store bought, and add a few special store bought ones to your collection each year. Making the chocolate frogs, Bertie Bott's Every Flavor Beans, fudge, and coconut ice was much cheaper than buying -and yummier! 😉
  • Ordered from Temu/AliExpress. Horcrux set $20 (vs. $50-80), chocolate molds $8, disco ball spinner $10, small items 50-75% less. Just order early -shipping takes 2-3 weeks!
  • Where I splurged: The biggest splurge was the candy! I usually buy candy for Christmas and stockings, so I viewed that as part of my regular Christmas spend. I also love to host around the holidays, and I hope my guests will enjoy the candy and take some home as party favors.
  • My total: $200-250 for everything.

You could do a beautiful version for $50-75, focusing just on the tree with DIY ornaments and thrifted finds, or build your collection over multiple years! Start with 5-8 ornaments Year 1, add Horcruxes Year 2, add mantel decor in Year 3, add Honeydukes Year 4.


Conclusion: Creating Your Own Harry Potter Christmas Magic

What started as "I'll make a few Harry Potter ornaments" turned into this complete Wizarding World Christmas wonderland -and I don't regret a single minute.

The best part? It's not about having the perfect Pinterest-worthy Christmas. It's about creating spaces where the people you love want to gather. Where you can slow down, light some candles, turn on the tree, pour some hot chocolate, and watch Harry Potter movies together. That's the real magic.

You don't have to do everything I did. Maybe you'll just make the Weasley stockings this year. Maybe you'll create a few book page ornaments. Maybe you'll go all out. Whatever you choose, I hope this guide showed you that creating magical spaces is actually doable -it just takes time, creativity, and a willingness to thrift and DIY.

Start where you are. Use what you have. Thrift what you can. Make what speaks to you. Skip what doesn't. Build slowly if needed. Make it YOUR version of a Harry Potter Christmas.

Thank you for spending this time with me. I hope you found inspiration, practical tutorials, and the confidence to try something creative this Christmas season.

Now go make some magic! ✨🎄


More Harry Potter Inspiration

  • Harry Potter snacks and treats board.
    Harry Potter Inspired Snacks and Treat Ideas
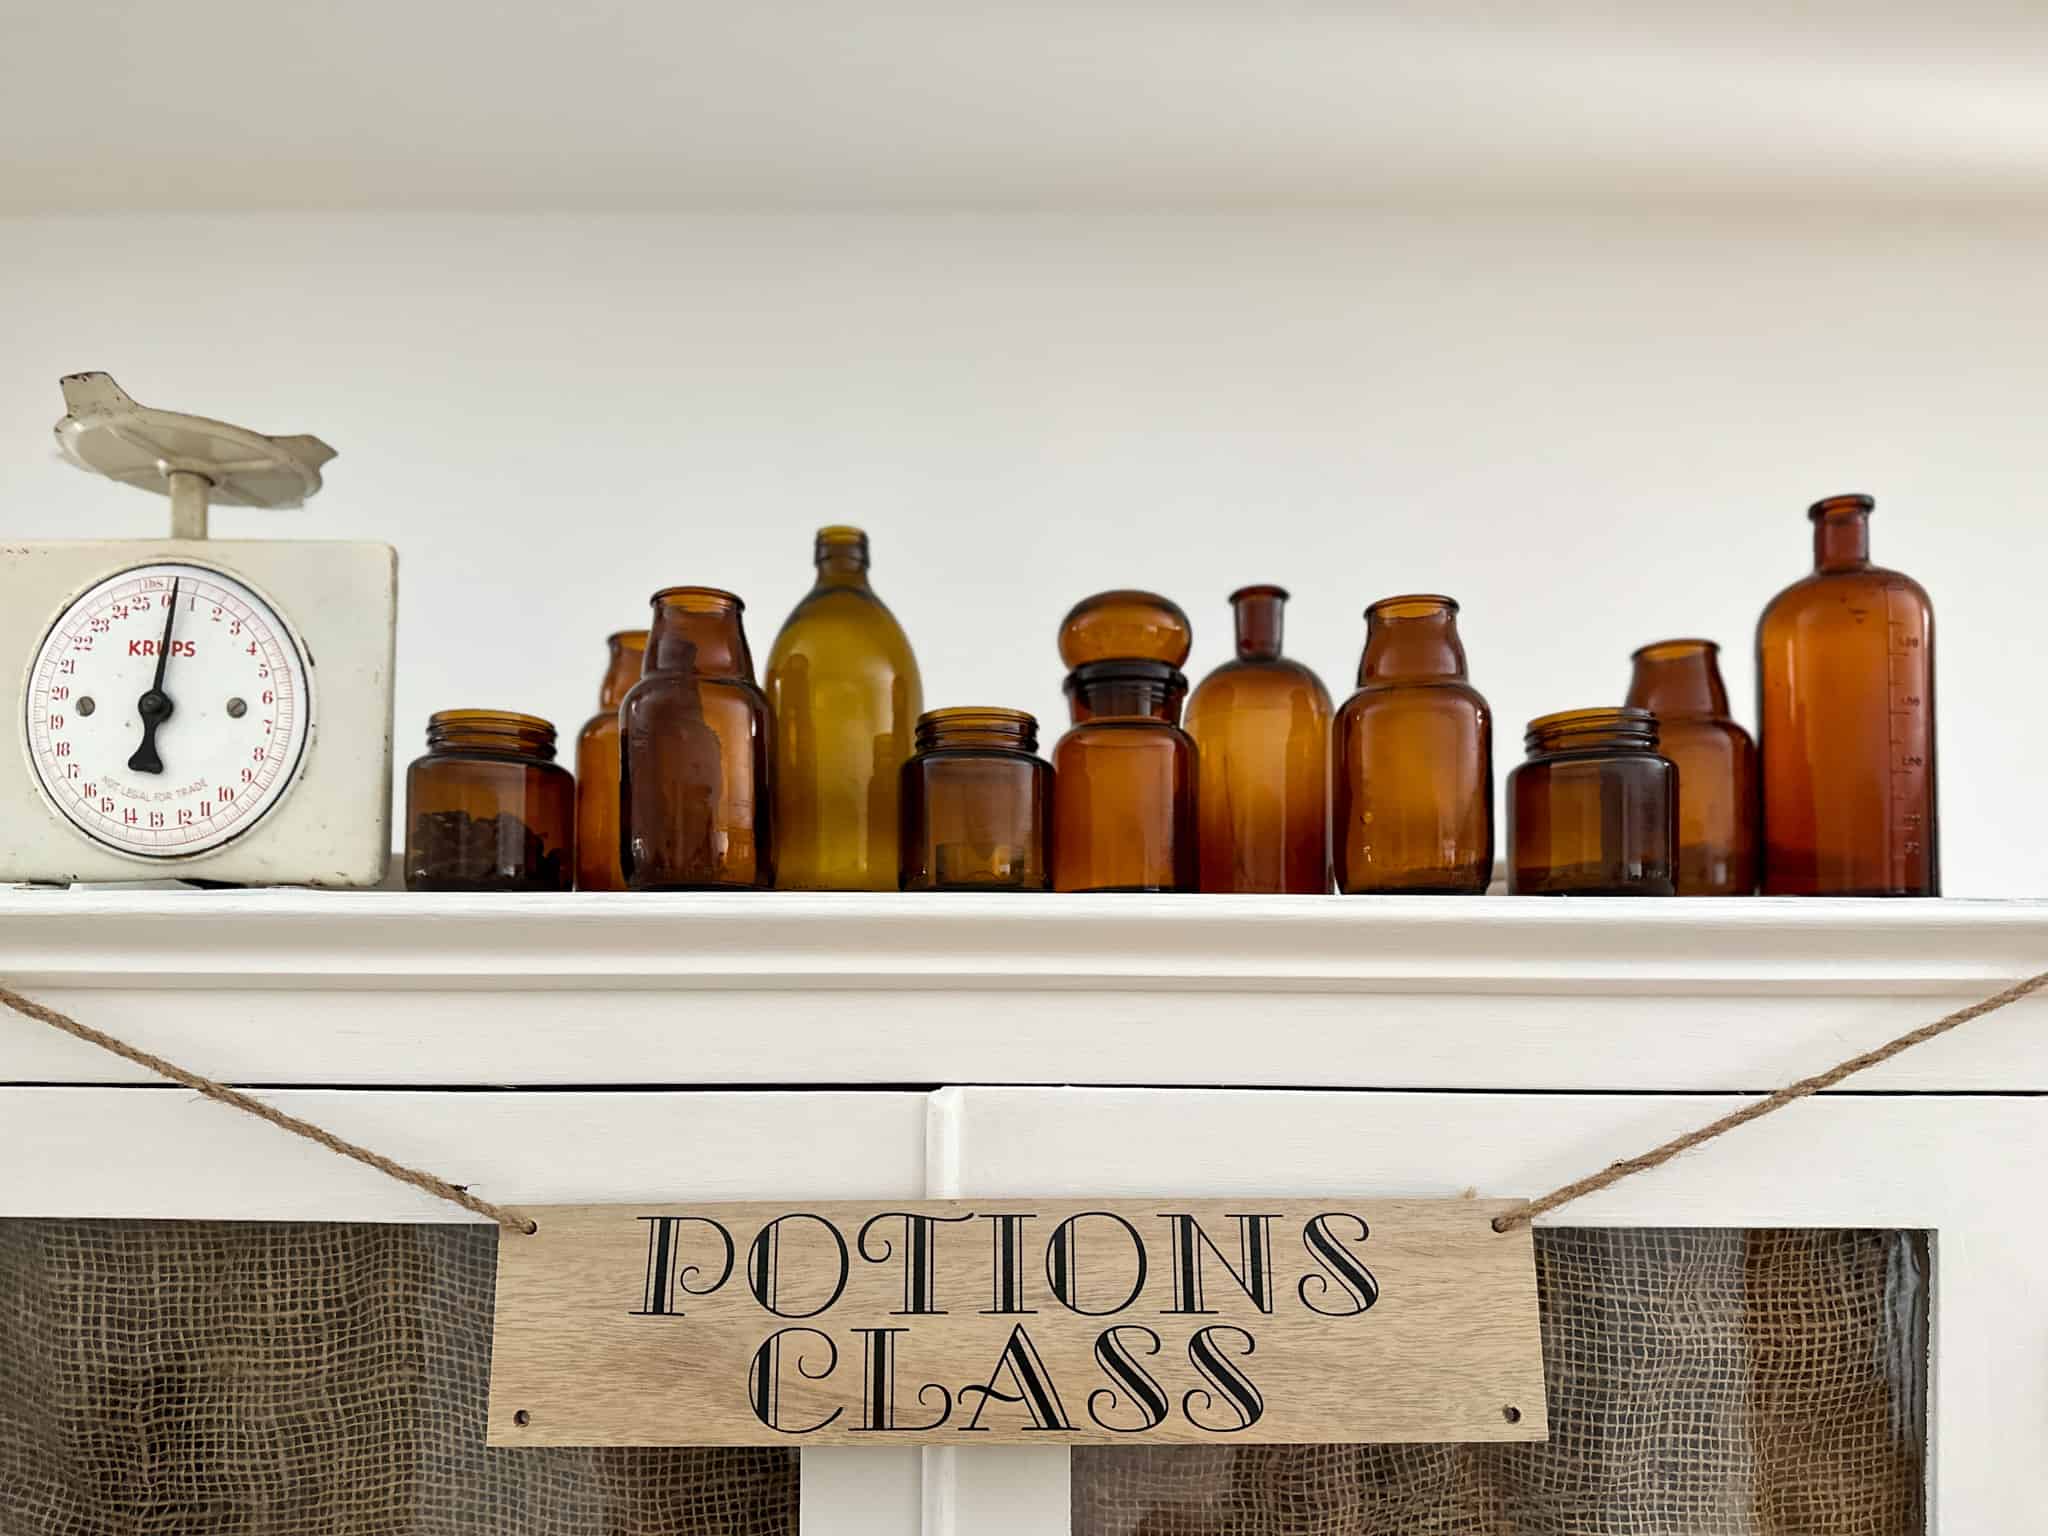
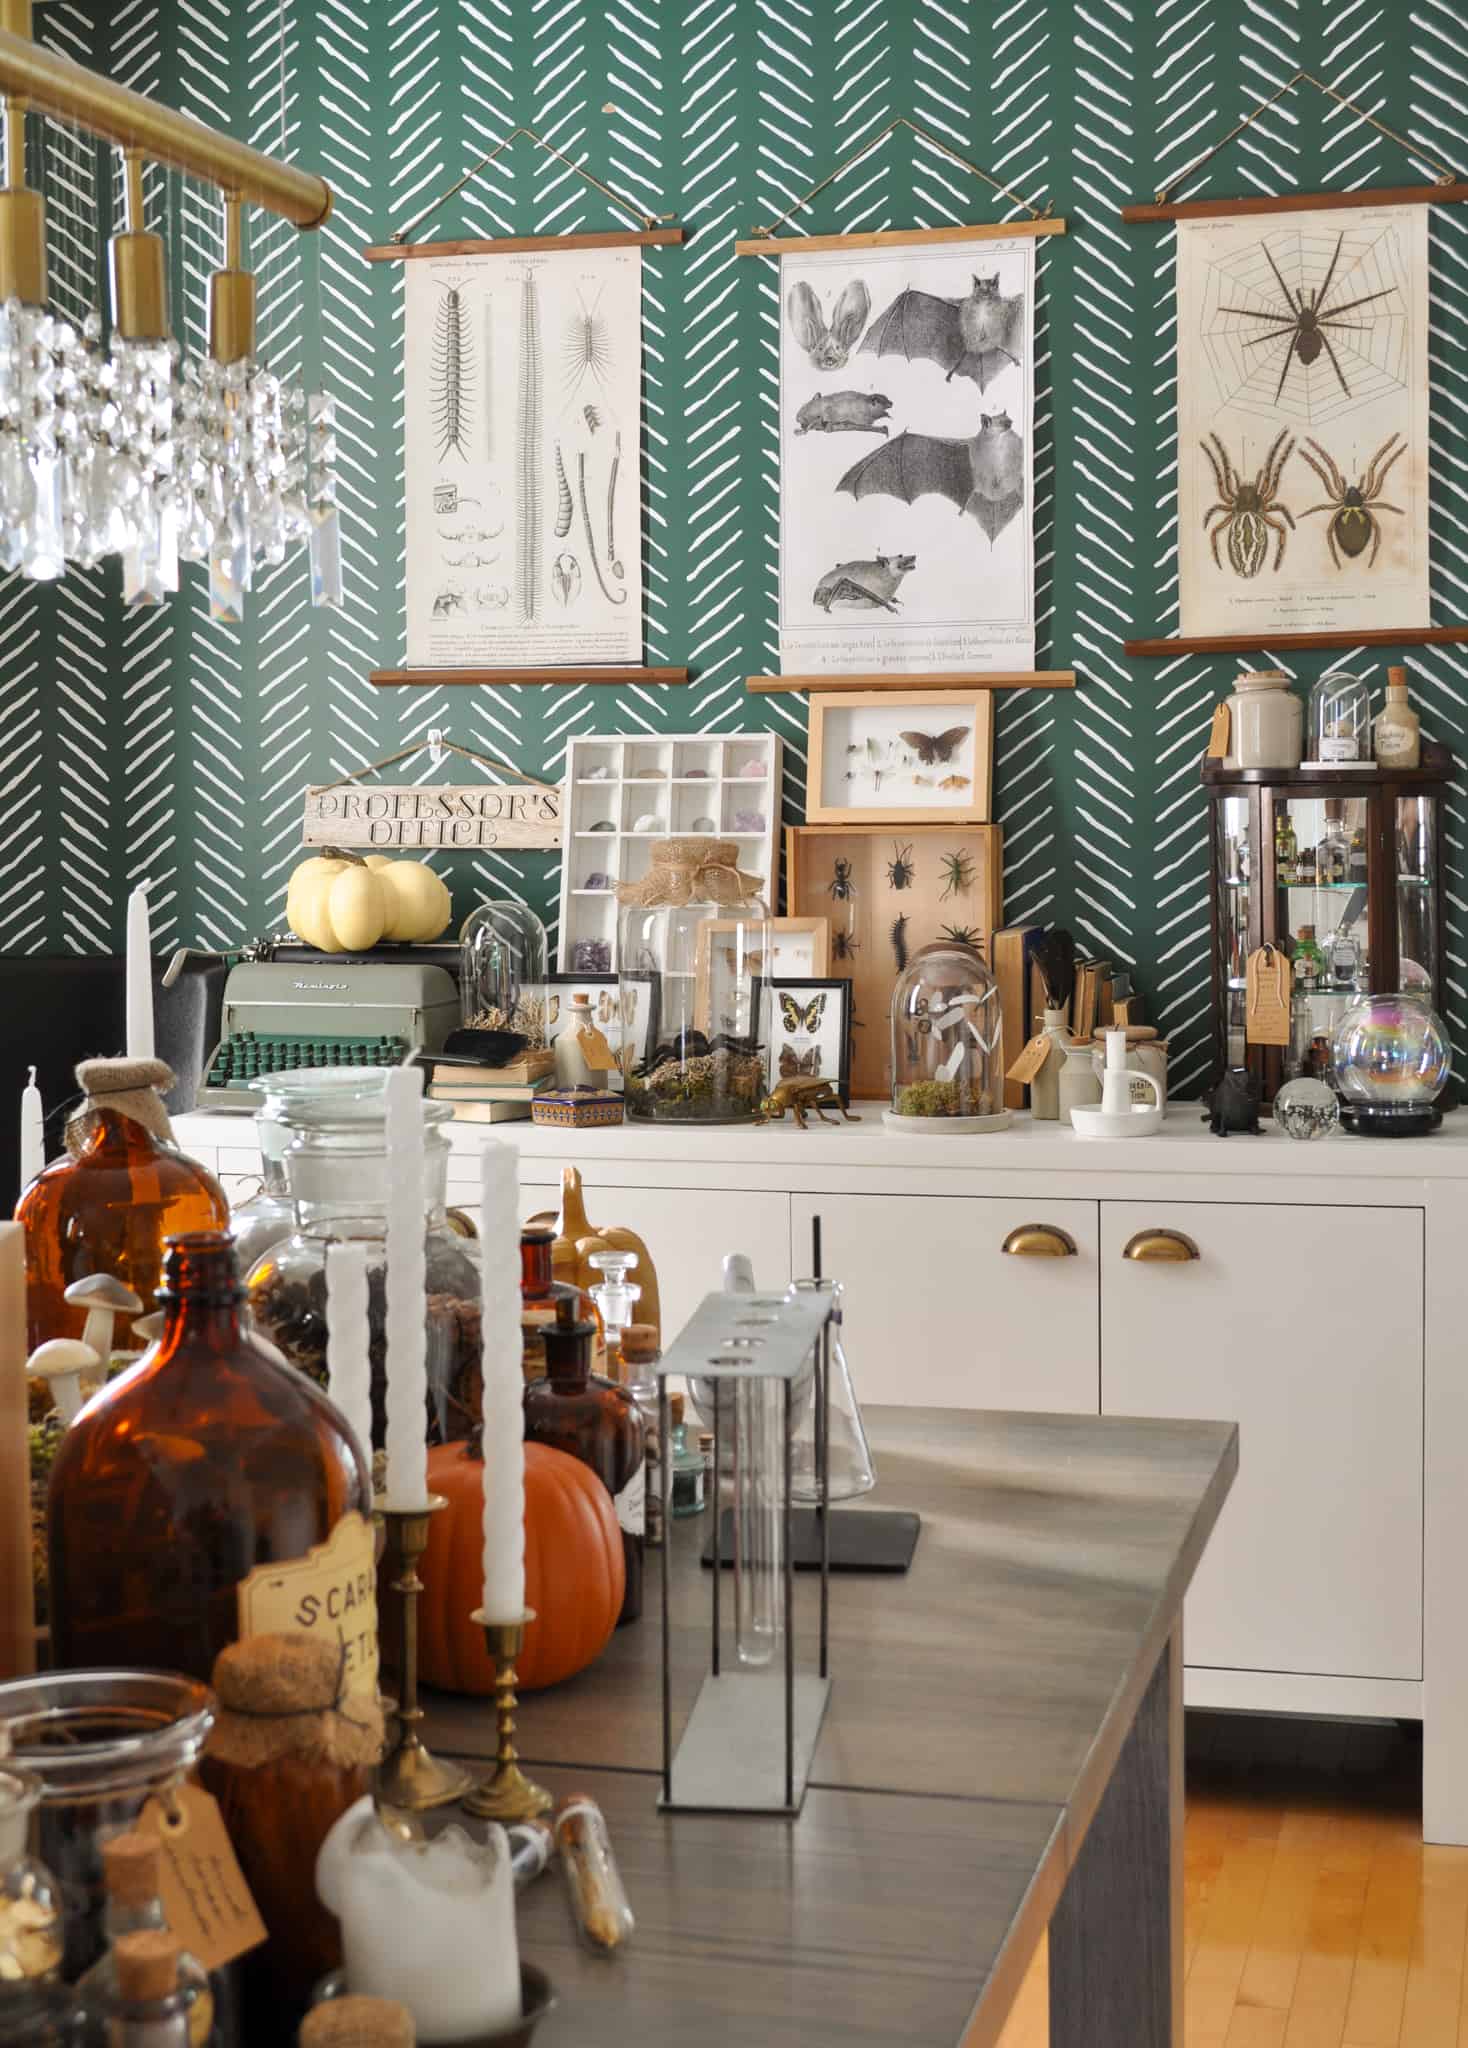
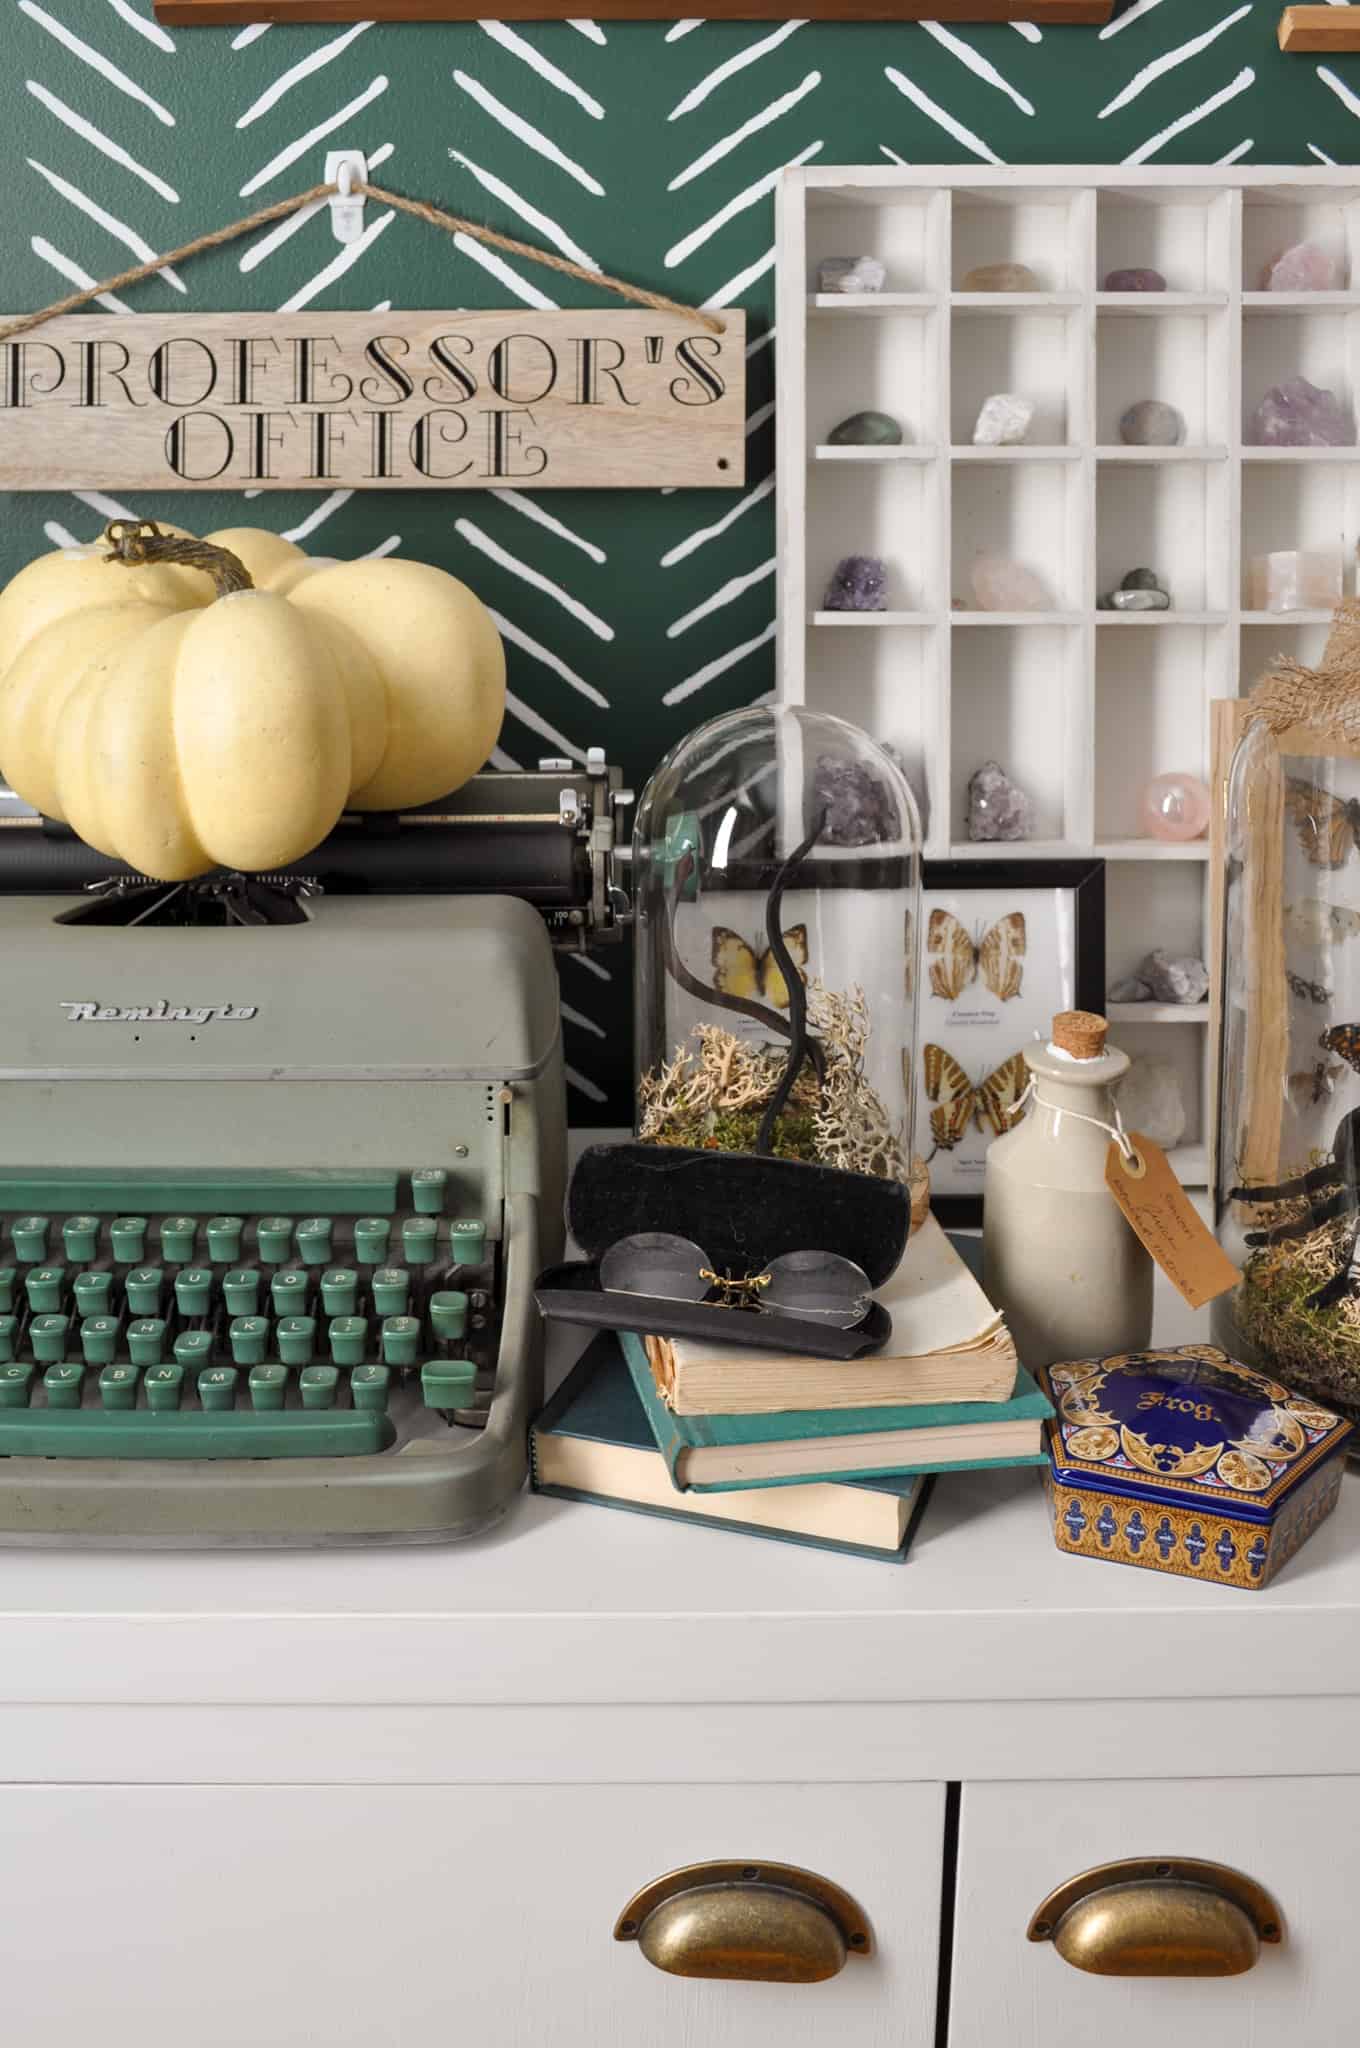
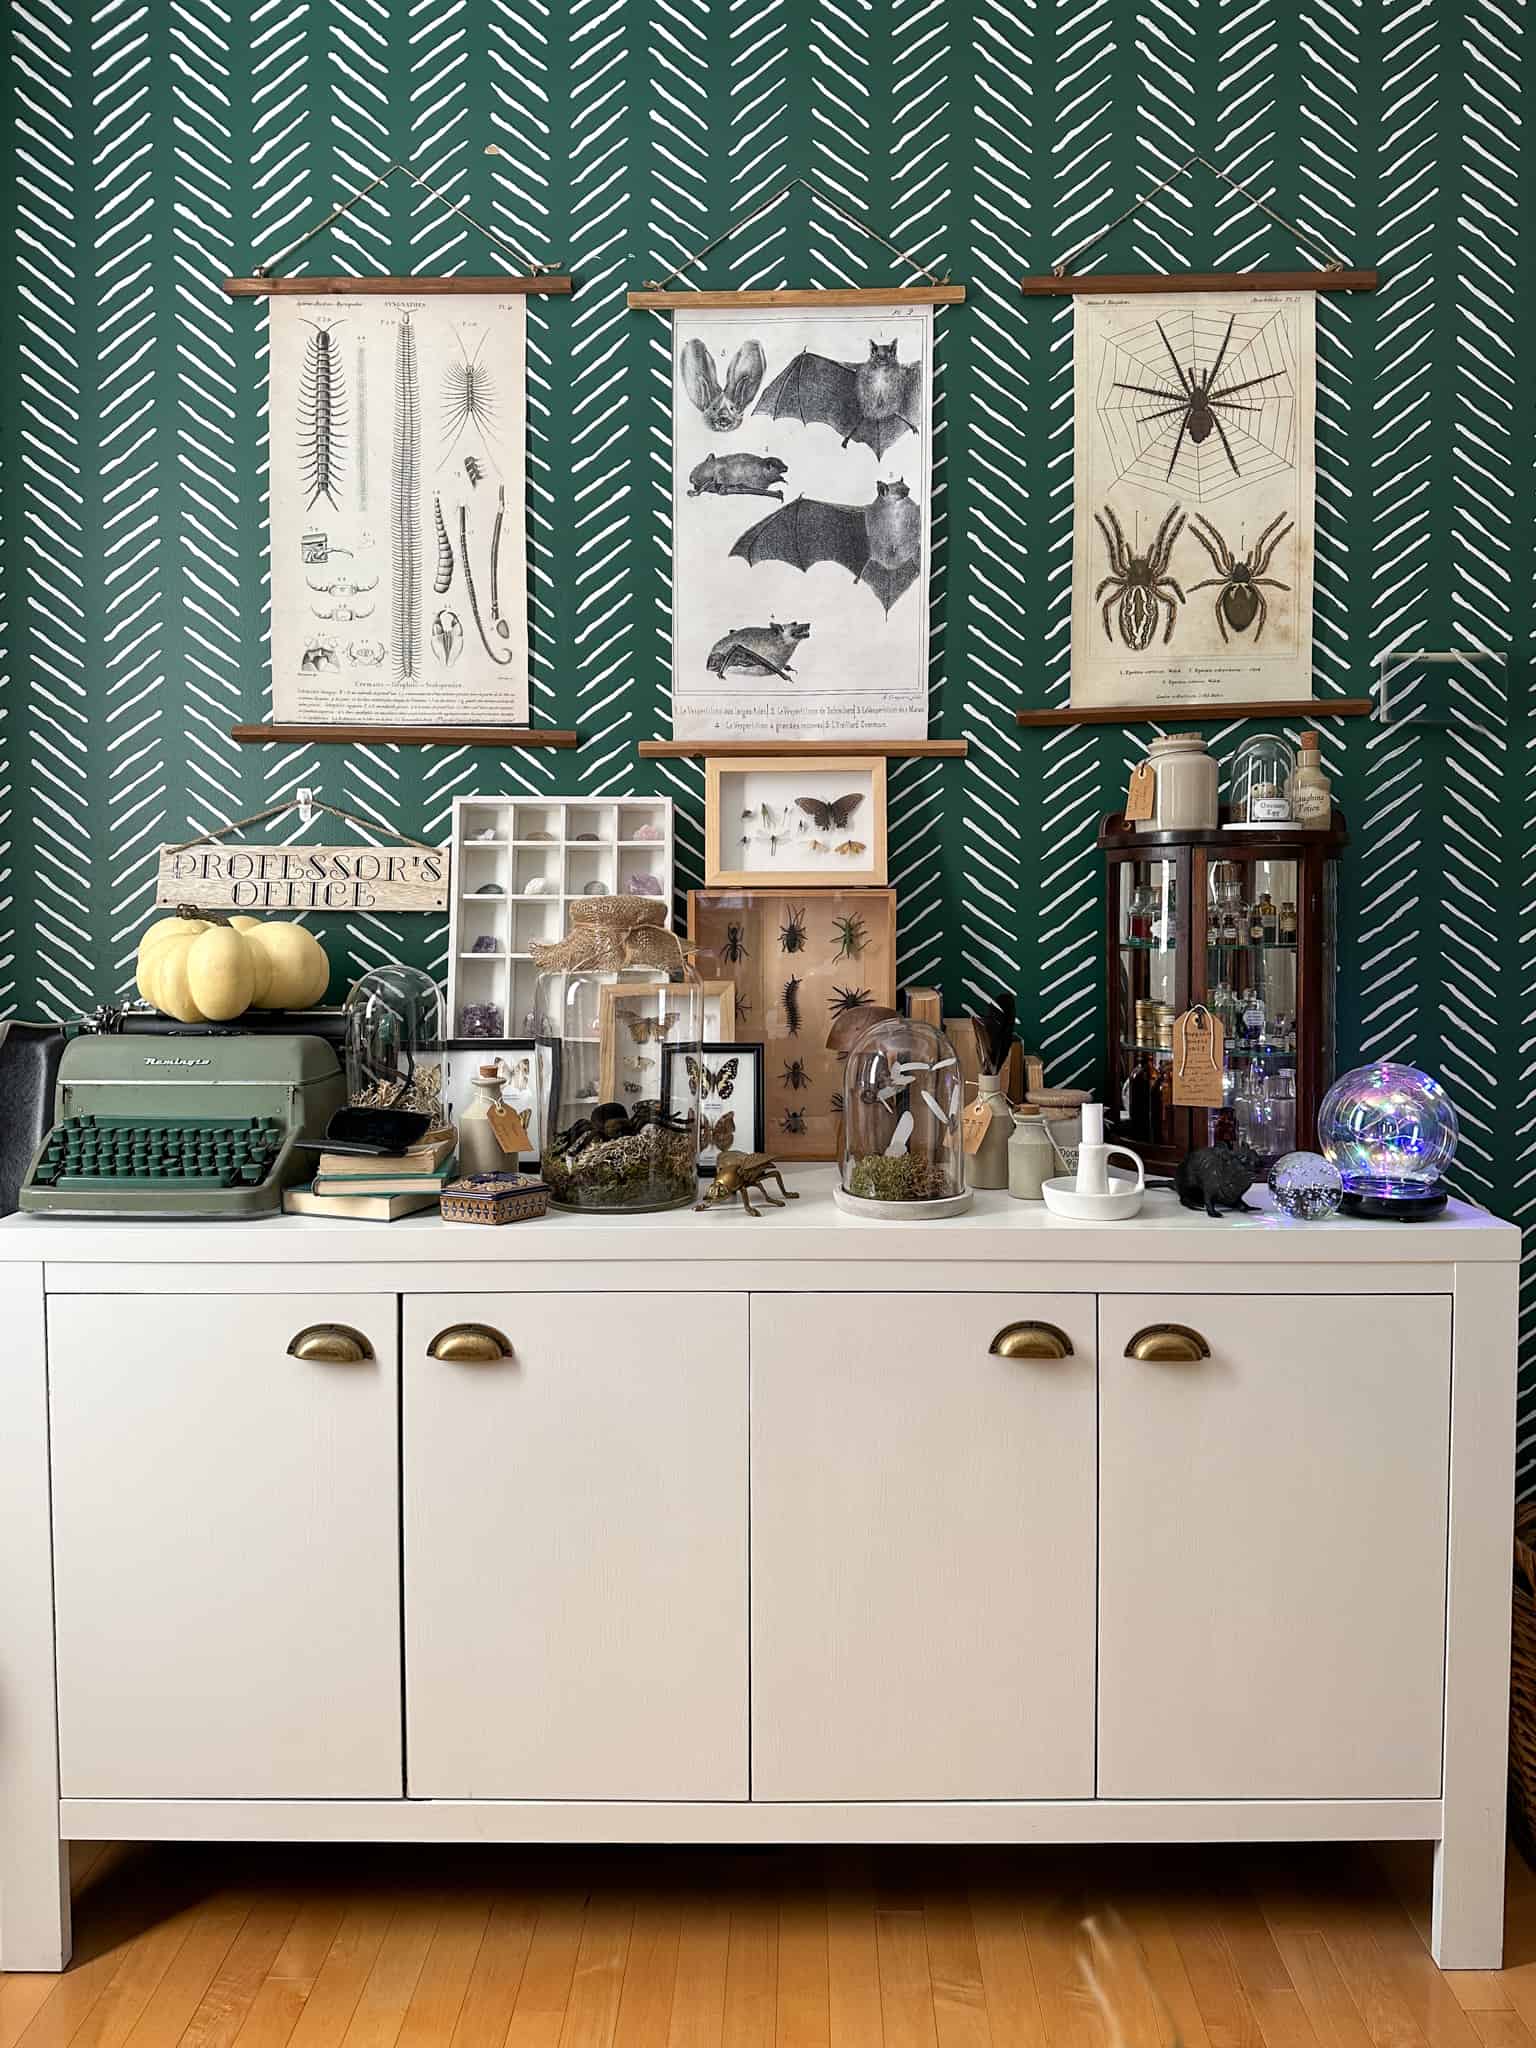
  • Harry Potter DIY Decor & Free Printables used to create this Potions Classroom.
    Harry Potter DIY Decor and Free Printables
  • Harry Potter family movie night ideas.
    Harry Potter Family Movie Night

Share Your Harry Potter Christmas!

Did you create any of these projects? I'd LOVE to see!

📸 Tag @lifeisaparty on Instagram
💬 Leave a comment below
📌 Pin your favorites to Pinterest

Your creations inspire me and other readers - please share!
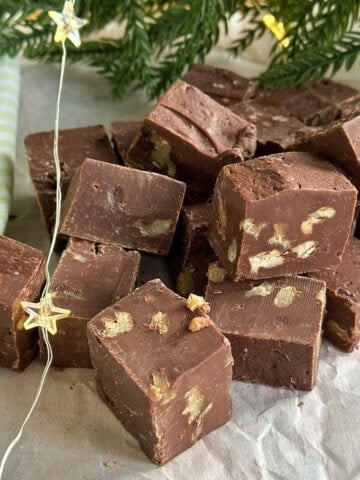
Easy Chocolate Walnut Fudge -Mrs. Weasley's Recipe

Nov 14, 2025 · 1 Comment

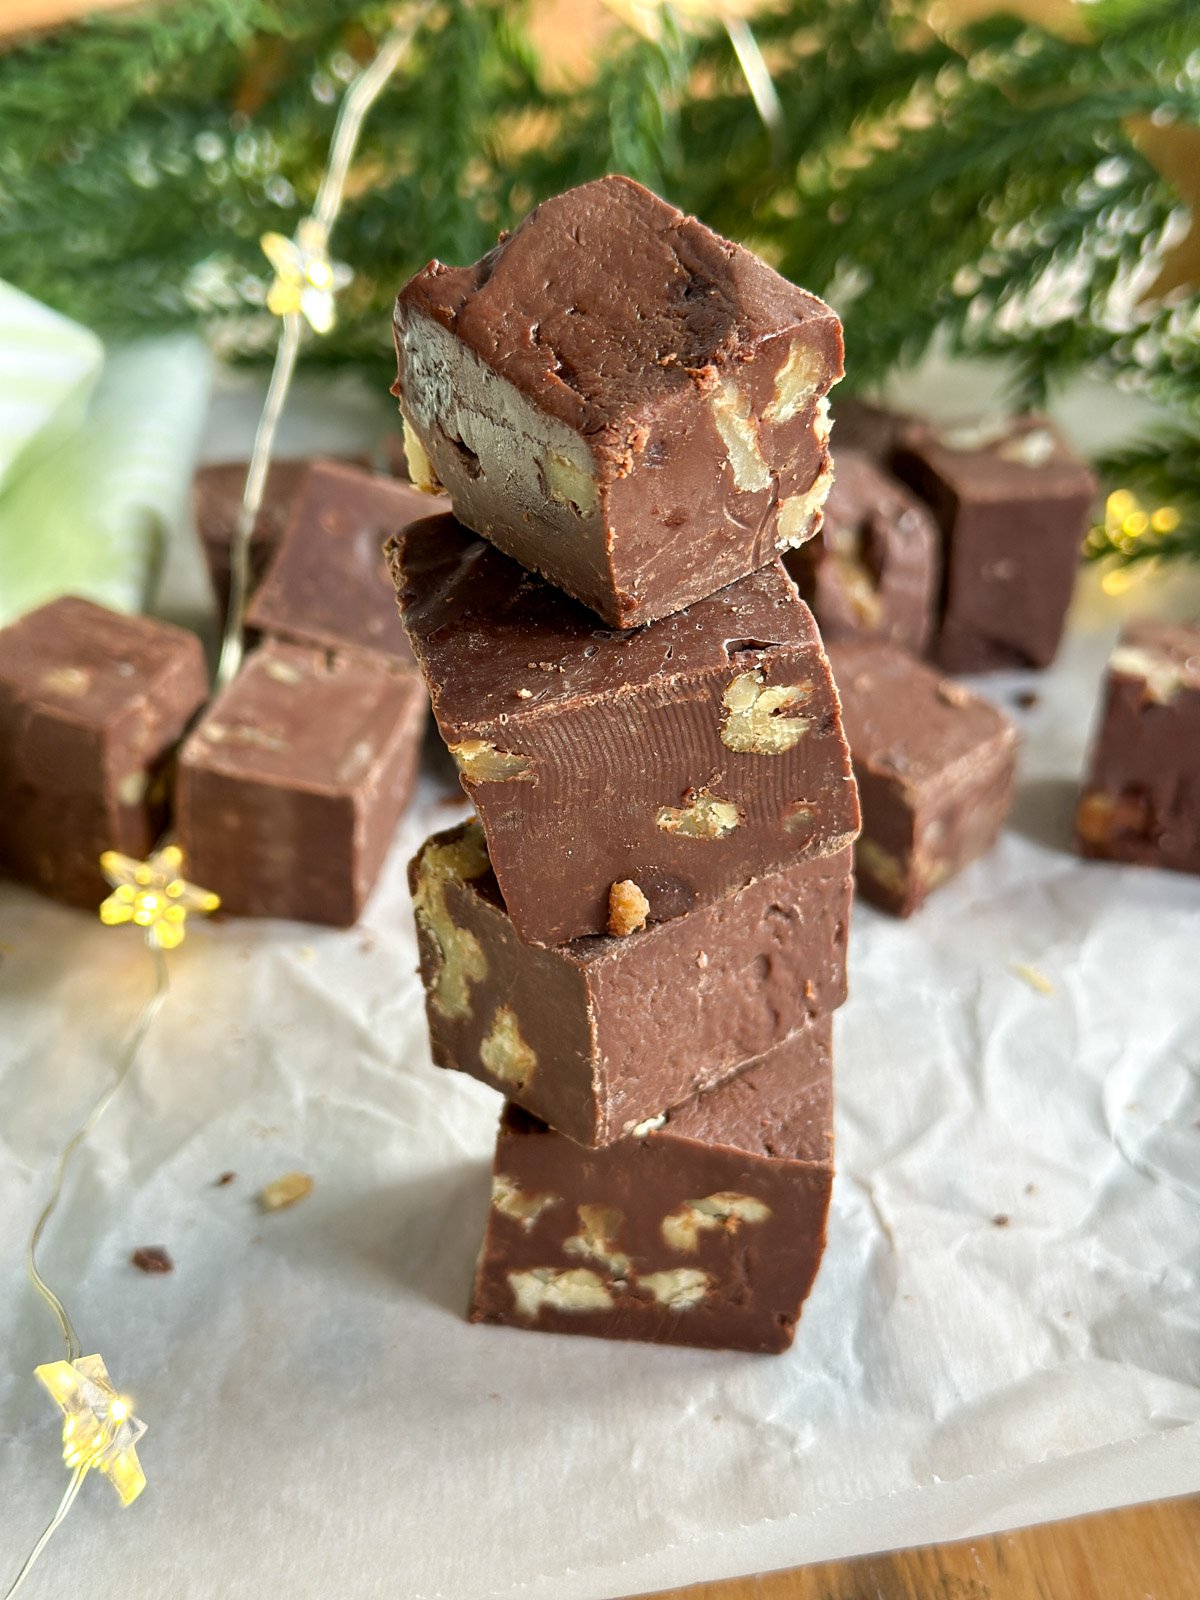
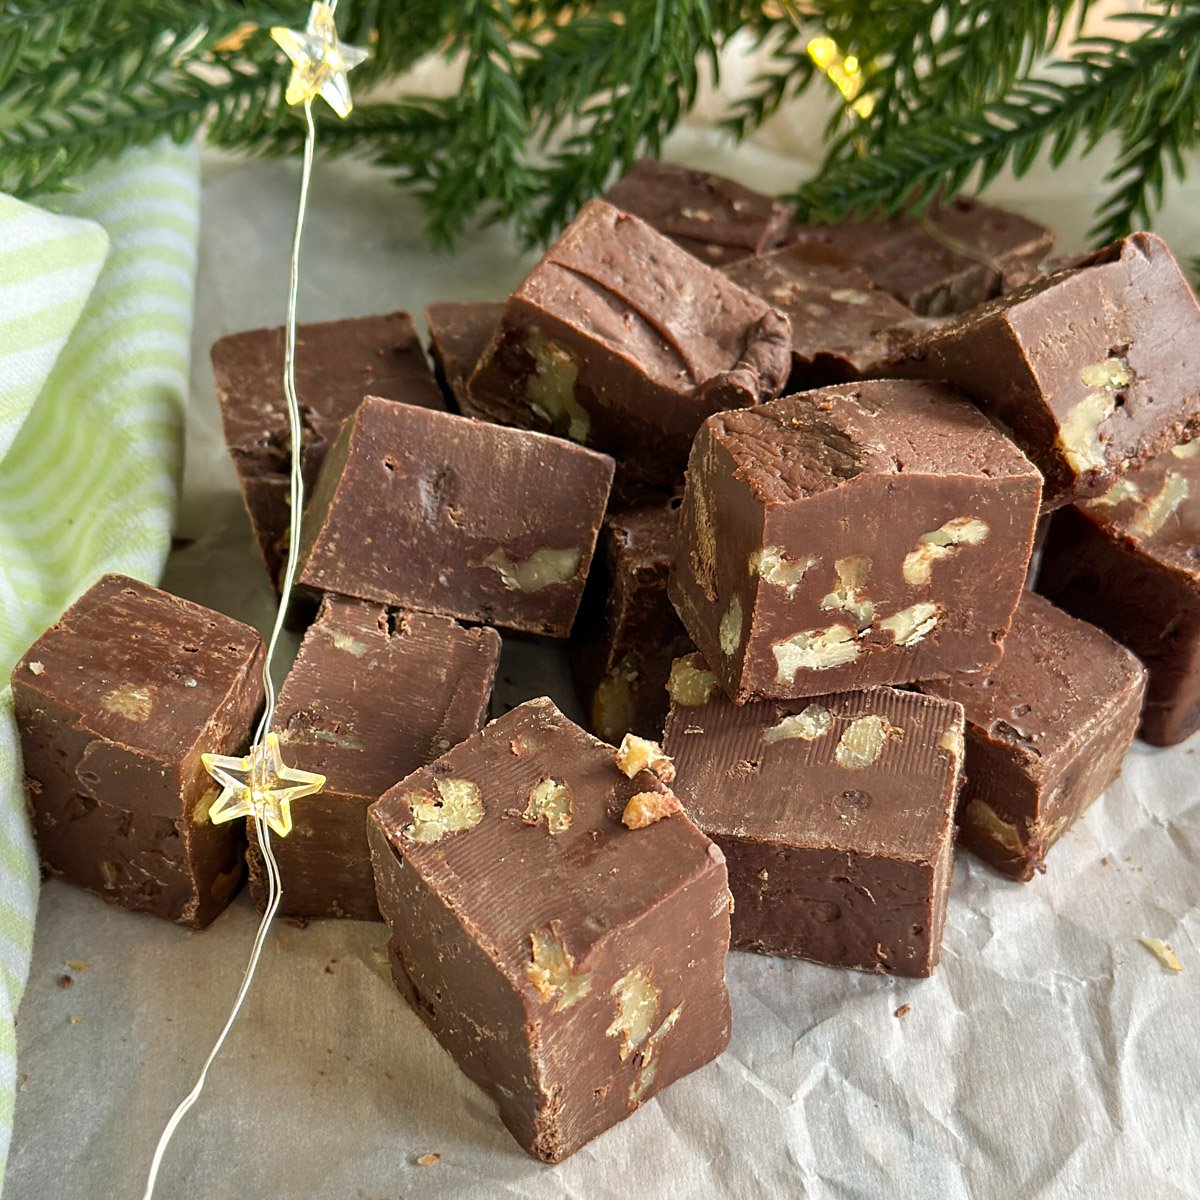
Easy chocolate walnut fudge made in the microwave with sweetened condensed milk, cut into squares.

This chocolate walnut fudge is a rich, creamy treat with crunchy toasted walnuts that's incredibly easy to make. Using just 5 ingredients and a simple microwave method, this condensed milk fudge is ready in about 10 minutes of active time. Perfect for holiday giving, Harry Potter parties, or anytime you want to share homemade chocolate fudge with the people you love.

A Quick Look At This Recipe

  • 📋 Recipe: Easy Chocolate Walnut Fudge
  • ⏲️ Time: Preapared in just 10 minutes, with 2 hours to set
  • 👪 Servings: 8 x 8 baking dish, 36 pieces
  • 🔪 Difficulty: Easy
  • 💭 Top Tip: Toast your walnuts first to bring out their flavor and add extra crunch to every bite of this chocolate fudge.

Why You'll Love This Chocolate Walnut Fudge

  • Incredibly simple. This condensed milk fudge comes together in just minutes with no candy thermometer or stove required.
  • Rich and indulgent. Creamy chocolate fudge with crunchy toasted walnuts in every piece.
  • Perfect for gifting. These chocolate walnut squares package beautifully for holiday treats or party favors.
  • No fuss microwave method. This easy fudge recipe takes all the guesswork out of candy making.
  • Inspired by Harry Potter. Based on Mrs. Weasley's gift to Harry, this recipe brings book magic to life.
[feast_advanced_jump_to]

Chocolate walnut fudge is a rich, creamy candy made with chocolate, sweetened condensed milk, and toasted walnuts. This classic combination creates a firm yet creamy texture with satisfying crunch in every bite. Unlike traditional fudge recipes that require a candy thermometer and careful temperature monitoring, this easy chocolate walnut fudge uses a simple microwave method that delivers perfect results every time.

The toasted walnuts are what make this chocolate fudge extra special. Toasting brings out the natural oils and deepens the nutty flavor while creating a crispy texture that contrasts beautifully with the smooth chocolate. The addition of sea salt is equally important, enhancing the chocolate flavor and creating that addictive sweet and salty balance that makes this fudge impossible to resist.

This condensed milk fudge recipe has been a favorite for generations, perfect for holidays, gifts, or anytime you want a homemade treat that tastes impressive but comes together in minutes.

The Inspiration: Mrs. Weasley's Christmas Gift

Tin of Mrs. Weasley's Christmas fudge for Harry Potter with a gift tag.

In Harry Potter's first year at Hogwarts, he experienced something he'd never known before. Christmas morning brought him an unexpected gift from Mrs. Weasley. Inside a package was a homemade sweater she'd knitted herself and a large box of homemade fudge. What a special gift this was for a boy who'd never received a real Christmas gift before.

The books don't tell us what flavor Mrs. Weasley made, but knowing her warm, loving personality and her talent for home cooking, chocolate walnut fudge feels exactly right. It's the kind of treat a caring mother would make, with love in every square. This recipe honors that beautiful moment when Harry realized he was finally part of a family who cared about him.

Whether you're making this chocolate fudge for your own family, packaging it as holiday gifts, or creating a Honeydukes inspired spread for a Harry Potter party, this simple recipe is perfect. You might also love our Harry Potter Christmas tree decorating ideas and our collection of Harry Potter snacks and treats for more magical inspiration. The fudge also made an appearance at our Harry Potter Christmas Party. Also check out our Honeydukes inspired Coconut Ice recipe.

Ingredients For Chocolate Walnut Fudge

  • Walnuts: They add wonderful crunch and nutty flavor to this chocolate fudge. Toasting them first in a dry skillet brings out their natural oils and deepens their flavor while making them extra crispy. You can substitute pecans if you prefer, or leave the nuts out entirely for smooth chocolate fudge.
  • Sweetened Condensed Milk: it's the secret to easy microwave fudge. This thick, sweet milk creates a creamy base that sets up perfectly without any temperature testing or candy thermometers. Make sure you're using sweetened condensed milk, not evaporated milk, as they're completely different products.
  • Semi-Sweet Chocolate Chips: These provide rich chocolate flavor that's not overly sweet. The semi-sweet variety balances perfectly with the sweetness of the condensed milk. You can use dark chocolate chips if you prefer a deeper chocolate taste, or milk chocolate for something sweeter.
  • Vanilla Extract: It rounds out the chocolate flavor and adds warmth. Pure vanilla extract gives the best flavor, but imitation vanilla will work in this recipe.
  • Sea Salt: Enhances all the flavors and balances the sweetness. This is one of the most important ingredients in this chocolate walnut fudge recipe. Just a small amount makes the chocolate taste richer and more complex, while also bringing out the natural flavor of the walnuts. The sweet and salty combination is what makes this fudge so irresistible. You can use regular table salt if that's what you have on hand, but sea salt gives the best flavor.

How To Make Chocolate Walnut Fudge

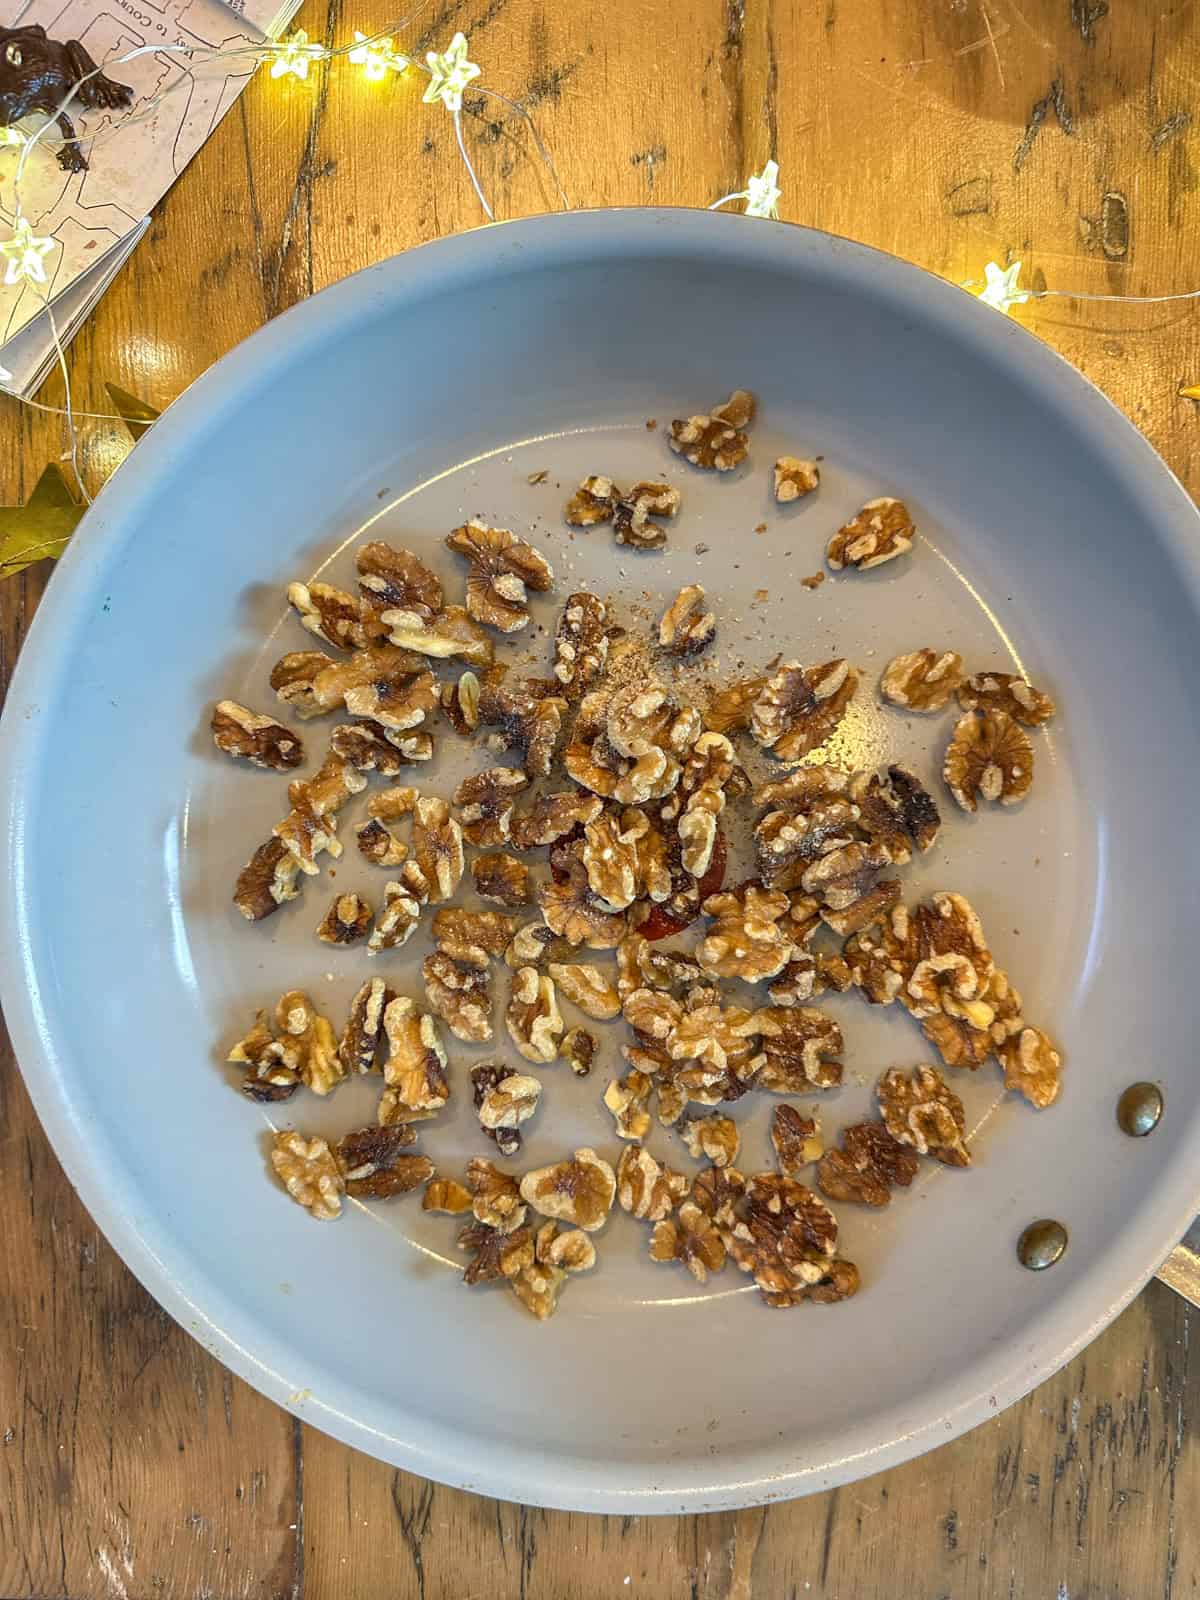
  1. Step One: Toast The Walnuts Place the walnuts in a dry skillet over medium heat. Toast them for 3 to 5 minutes, stirring frequently, until they're fragrant and lightly golden. Watch them carefully as they can burn quickly. Once toasted, remove them from the heat and set aside to cool slightly.
  1. Step 2: Combine Ingredients In a large microwave safe bowl, combine the sweetened condensed milk, semi-sweet chocolate chips, vanilla extract, and sea salt. Stir everything together briefly. The chocolate chips don't need to be mixed in completely at this stage.
  1. Step 3: Microwave In Intervals Microwave the mixture at 50% power for 1 minute. Remove and stir well. The chocolate will start to melt but won't be fully smooth yet. Microwave again at 50% power for another minute, then stir. Repeat this process until the chocolate is completely melted and the mixture is smooth and glossy. This usually takes 3 to 4 intervals total. Using 50% power prevents the chocolate from scorching and gives you more control over the melting process.
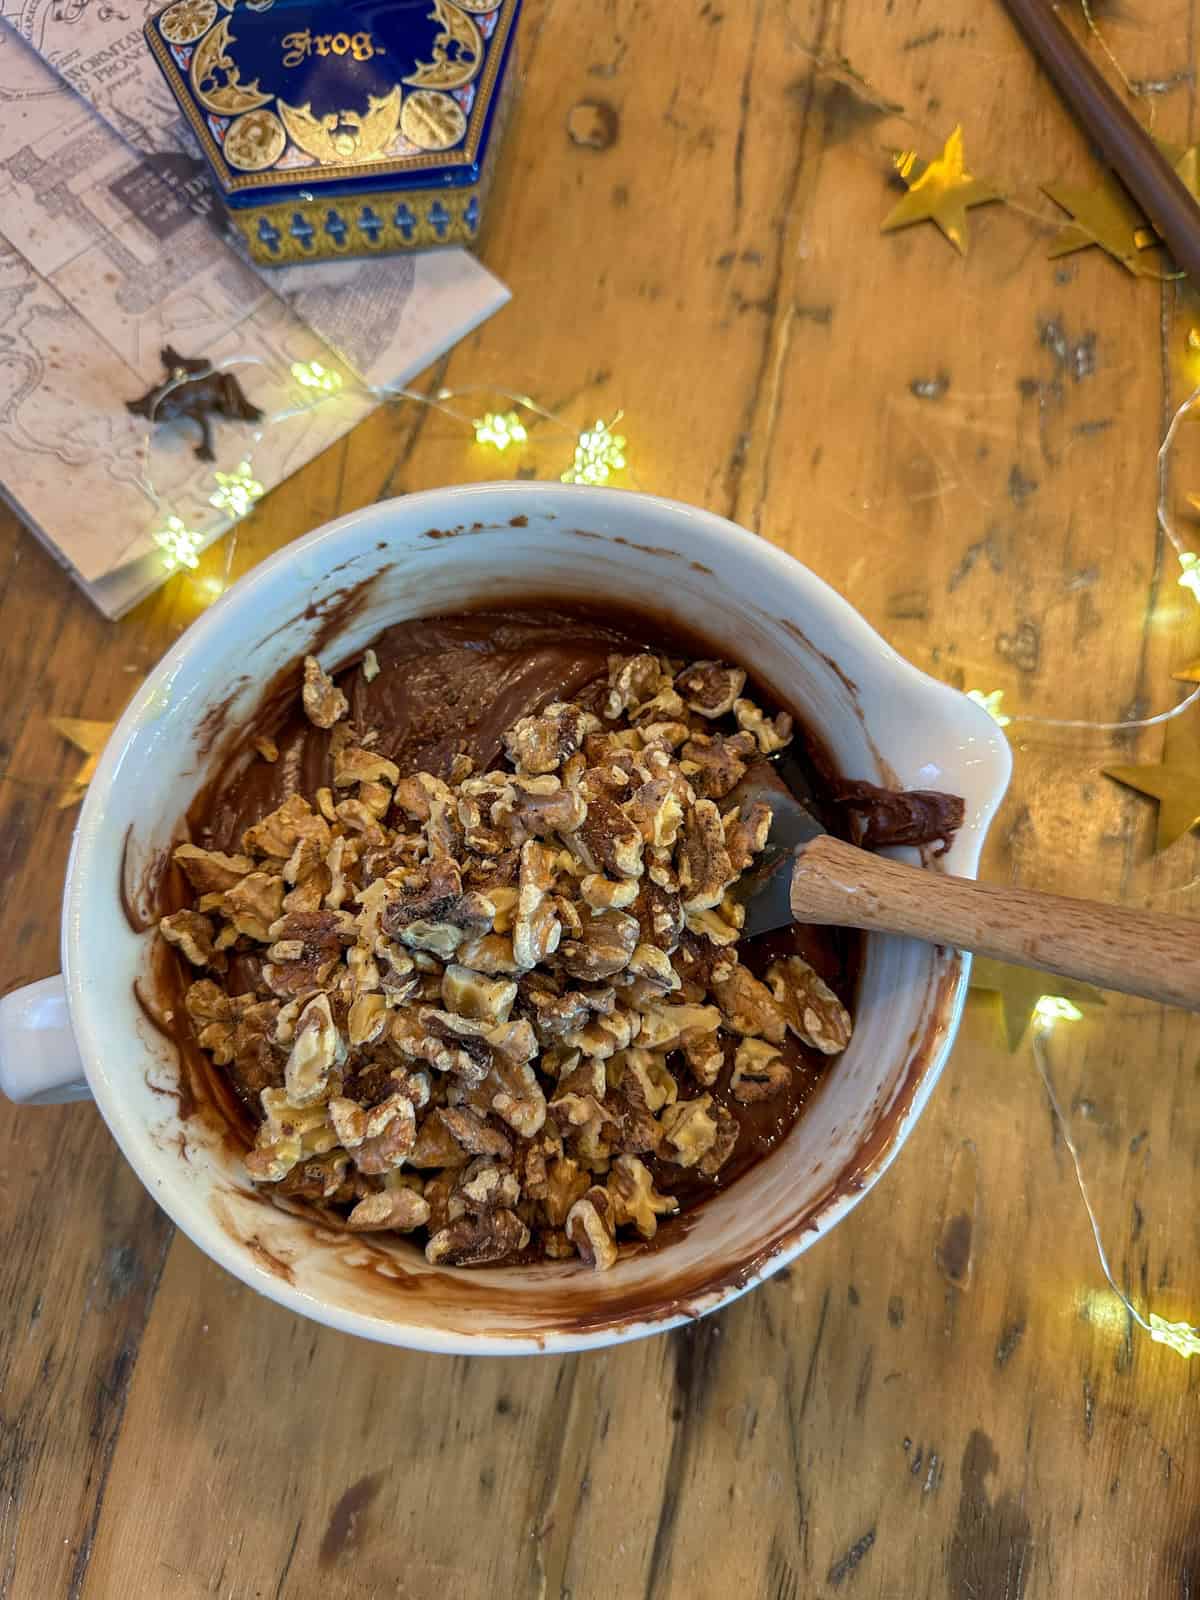
  1. Step 4: Add The Walnuts Stir the toasted walnuts into the melted chocolate mixture until they're evenly distributed throughout. Make sure every spoonful of fudge will have some crunchy nuts.
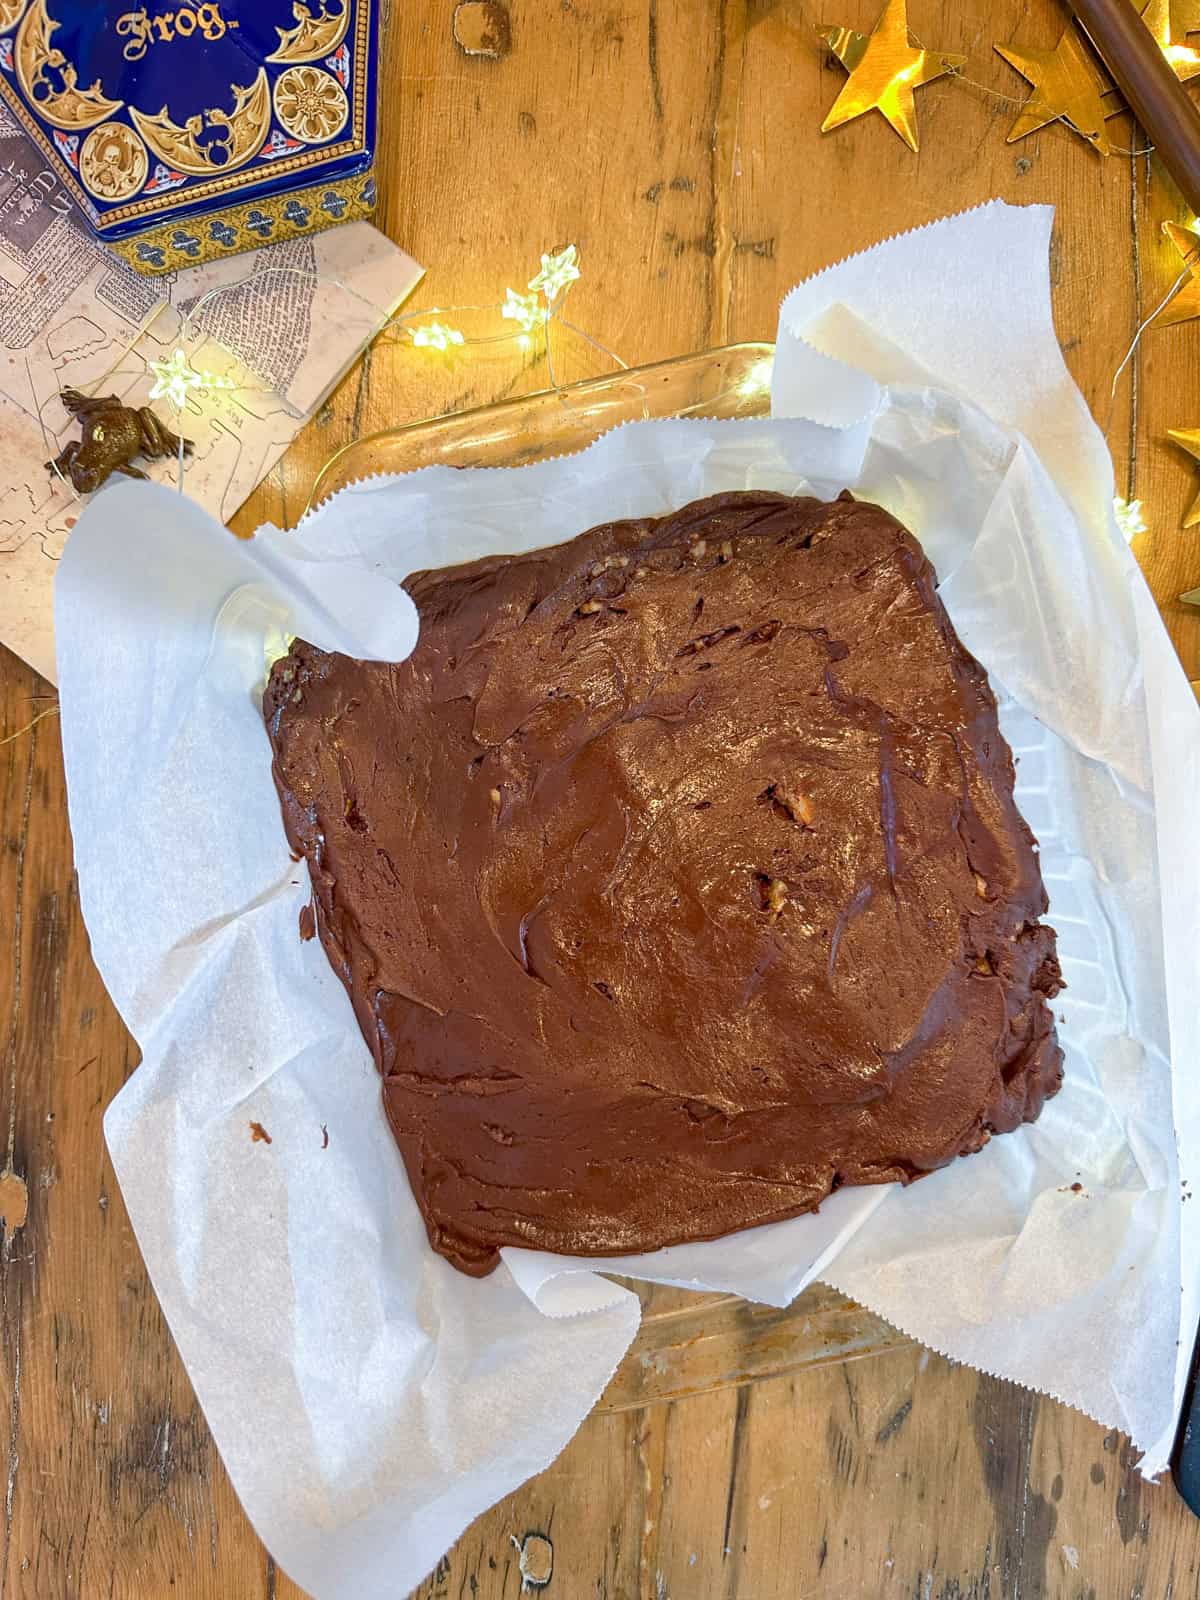
  1. Step 5: Pour Into Pan Pour the fudge mixture into a parchment lined baking dish. Use a spatula to spread it evenly into all the corners. Smooth the top as best you can, though it doesn't need to be perfect.
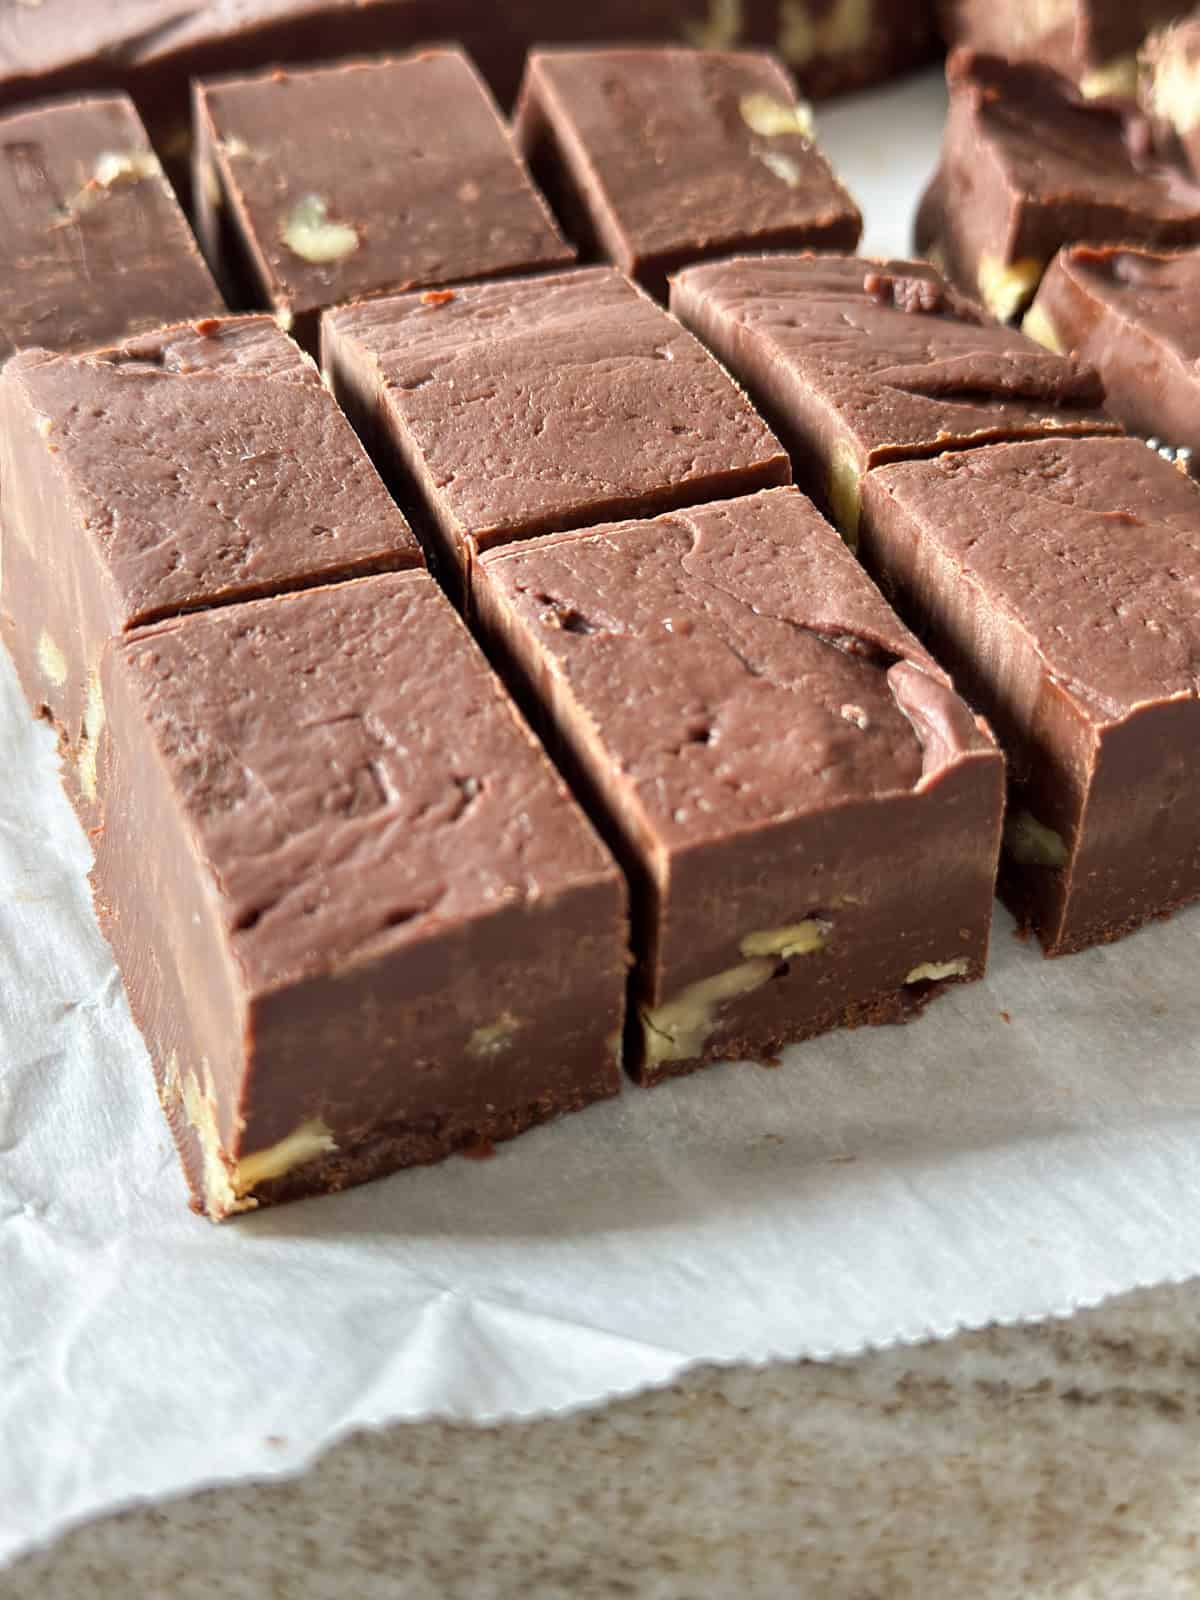
  1. Step 6: Let It Set and Cut Into Squares Allow the fudge to set at room temperature for about 2 hours, or refrigerate for 1 hour if you're in a hurry. The fudge is ready to cut when it's firm to the touch and doesn't leave an indent when you press it gently. Once set, lift the fudge out of the pan using the parchment paper overhang. Place it on a cutting board. Using a sharp knife, cut into 36 even squares (6 rows by 6 rows). For the cleanest cuts, wipe your knife clean between slices.
Stack of easy chocolate walnut fudge squares, with more pieces in the background.

Expert Tips For Perfect Chocolate Walnut Fudge

  • Don't skip toasting the walnuts. This is the secret to extraordinary chocolate walnut fudge. Toasting the walnuts for just a few minutes transforms them completely, bringing out their natural oils and creating a rich, deep flavor with extra crunch. Raw walnuts simply can't compare. This step only takes a few minutes but makes a huge difference in the final result.
  • The salt is essential. Don't reduce or skip the sea salt in this recipe. Even though it seems like a small amount, salt is what makes good chocolate fudge taste amazing. It enhances the chocolate flavor, brings out the nuttiness of the walnuts, and creates that perfect sweet and salty balance. The salt also prevents the fudge from tasting one-dimensional or overly sweet.
  • Use 50% power in the microwave. This lower power setting melts the chocolate gently and evenly without scorching. Rushing this step with full power can cause the chocolate to seize or burn. Patience here means smooth, creamy fudge every time.
  • Stir between each interval. Even if the chocolate doesn't look fully melted, stirring helps distribute the heat and ensures everything melts evenly. Don't rush to microwave again until you've stirred thoroughly.
  • Line your pan well. Letting the parchment paper hang over the sides of your pan makes removing the fudge effortless. You'll be glad you took this extra second when it's time to slice. An 8x8 inch pan gives you nice thick pieces, but a 9x9 inch pan works too if you prefer slightly thinner chocolate walnut fudge.
  • Be patient with setting time. Fudge that hasn't fully set will be difficult to cut cleanly. Give it the full 2 hours at room temperature, or speed things up with an hour in the refrigerator.
  • Clean cuts matter. For professional looking squares, wipe your knife clean with a damp cloth between each cut. This prevents the chocolate from smearing and gives you neat, bakery-worthy edges.

Frequently Asked Questions

Can I make this chocolate walnut fudge without nuts?

Absolutely. Simply leave out the walnuts for smooth, creamy chocolate fudge. You could also add other mix-ins like mini marshmallows, crushed candy canes, or dried cherries.

Can I use a different type of nut?

Yes. Pecans, almonds, or hazelnuts would all work beautifully in this chocolate fudge recipe. Toast them the same way you would the walnuts for the best flavor. Some people also love using salted peanuts for an extra salty-sweet combination.

Can I double this chocolate walnut fudge recipe?

Yes. Double all the ingredients and use a 9x13 inch baking dish instead of an 8x8 inch pan. The microwave melting time may need to be increased slightly, so watch carefully and stir between intervals until fully melted.

What pan size should I use?

An 8x8 inch pan gives you nice thick pieces of fudge. A 9x9 inch pan also works if you prefer slightly thinner squares. For a double batch, use a 9x13 inch pan.

Why do I need to use 50% power in the microwave?

Full power can overheat the chocolate quickly, causing it to seize (become grainy and hard) or scorch. The lower power setting gives you more control and ensures smooth, creamy chocolate walnut fudge. If your microwave doesn't have a 50% power setting, use the defrost setting or microwave in shorter 30 second bursts, stirring between each one.

Why is my fudge grainy or seized?

This usually happens when the chocolate gets too hot. Make sure you're using 50% power and stirring well between each interval. Remove the bowl from the microwave while there are still a few chocolate chips visible and stir until they melt from the residual heat. If your chocolate does seize, try stirring in a teaspoon of vegetable oil to smooth it out.

How do I know when my chocolate fudge is set?

The fudge is ready to cut when it's firm to the touch and doesn't leave an indent when you press it gently with your finger. If it still feels soft or sticky, give it more time. After 2 hours at room temperature, it should be perfectly set.

Can I use salted walnuts instead of regular walnuts in my chocolate walnut fudge? 

You can, and many people love the extra salty flavor throughout the fudge. If using salted walnuts, you might want to reduce the sea salt in the recipe slightly, though the amount is already quite small so it's up to your taste preference.

Can I make this on the stovetop instead? 

You can, though the microwave method is easier. To use the stovetop, combine the ingredients in a double boiler over simmering water, stirring constantly until the chocolate melts completely. Then proceed with adding the nuts and pouring into the pan

How do I store this chocolate walnut fudge?

Store your fudge in an airtight container at room temperature for up to 2 weeks. The airtight container is important to prevent the fudge from drying out. If you live in a very warm or humid climate, you can refrigerate it, though this may make the texture slightly firmer. For longer storage, freeze the fudge for up to 3 months.

Can I freeze this fudge?

Yes. Make sure to place in a freezer safe airtight container. Frozen chocolate fudge will keep for 2 to 3 months. When you're ready to enjoy it, thaw it slowly in the refrigerator overnight, then bring to room temperature for the best texture.

My fudge is too soft and won't set. What happened? 

This usually means the chocolate wasn't fully melted and combined with the condensed milk. Make sure you microwave long enough that the mixture becomes completely smooth and homogeneous before adding the nuts. If your fudge is still soft after 2 hours, pop it in the refrigerator for another hour or two.

More Candy Recipes To Try

  • Homemade marshmallow mug toppers with chocolate drizzle.
    Homemade Marshmallow Mug Toppers
  • Cashew coconut brittle recipe.
    Cashew Coconut Brittle
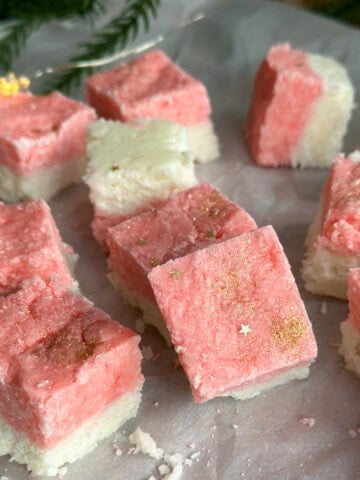
  • Homemade pink and white coconut ice recipe, cut into squares on parchment paper.
    Coconut Ice Recipe (Pink & White Coconut Candy)
  • How to make homemade pecan butter crunch candy.
    Pecan Butter Crunch Toffee Recipe

If you try this Chocolate Walnut Fudge or any other ideas on my blog, leave a rating and let me know how it went in the comments below. Thanks for visiting today!

Recipe

Easy chocolate walnut fudge made in the microwave with sweetened condensed milk, cut into squares.

Chocolate Walnut Fudge

Video

This easy microwave chocolate walnut fudge, has only 5 ingredients. The toasted walnuts, and sea salt make it extra special, and it's Mrs. Weasley's recipe. 😉
5 from 1 vote
Print Pin Rate
Course: Candy
Cuisine: American
Prep Time: 10 minutes minutes
Total Time: 10 minutes minutes
Servings: 36 pieces
Calories: 109kcal
Author: Dannyelle Nicolle-Ramjist

Ingredients

  • 1 cup walnuts
  • 1 can (14oz) sweetened condensed milk
  • 3 cups semi-sweet chocolate chips
  • 2 teaspoon vanilla extract
  • ¼ teaspoon sea salt

Instructions

  • Toast the walnuts in a dry skillet over medium heat for 3 to 5 minutes, stirring frequently, until fragrant and lightly golden. Remove from heat and set aside. This step is crucial for developing the best flavor in your chocolate walnut fudge.
  • In a large microwave safe bowl, combine the sweetened condensed milk, chocolate chips, vanilla extract, and sea salt.
  • Microwave at 50% power for 1 minute. Stir well. Continue microwaving in 1 minute intervals at 50% power, stirring after each interval, until the chocolate is completely melted and the mixture is smooth. This usually takes 3 to 4 intervals total. The chocolate should be glossy and fully combined with the condensed milk.
  • Stir the toasted walnuts into the melted chocolate mixture until evenly distributed throughout the fudge.
  • Pour the chocolate fudge into a baking dish lined with parchment paper and spread evenly with a spatula.
  • Let the fudge set at room temperature for 2 hours, or refrigerate for 1 hour if you're in a hurry. Once set, lift the fudge out of the pan using the parchment paper. Cut into 36 squares (6 rows by 6 rows) with a sharp knife, wiping the knife clean between cuts for neat edges.

Notes

Storage: Store in an airtight container at room temperature for up to 2 weeks. Refrigerate in warmer climates. Can be frozen for up to 3 months. Wrap tightly in wax paper or parchment paper, then aluminum foil or place in a freezer safe airtight container. Thaw in the refrigerator overnight.
Doubling the Recipe: Double all ingredients and use a 9x13 inch baking dish. Microwave time may need to be increased slightly.
Nut Variations: Substitute pecans, almonds, or hazelnuts for the walnuts, or omit nuts entirely for smooth chocolate fudge. Salted walnuts add extra salty-sweet flavor.
Chocolate Options: Try dark chocolate chips for a more intense chocolate flavor, or milk chocolate for something sweeter. Use high quality chocolate for the best tasting chocolate walnut fudge.
Microwave Tips: If your microwave doesn't have a 50% power setting, use the defrost setting or microwave in shorter 30 second bursts, stirring between each one.
The Secret to Amazing Flavor: Don't skip toasting the walnuts or the sea salt. These two steps transform this from good fudge to extraordinary chocolate walnut fudge.

Nutrition

Calories: 109kcal | Carbohydrates: 8g | Protein: 1g | Fat: 8g | Saturated Fat: 4g | Polyunsaturated Fat: 2g | Monounsaturated Fat: 2g | Trans Fat: 0.01g | Cholesterol: 1mg | Sodium: 18mg | Potassium: 100mg | Fiber: 1g | Sugar: 6g | Vitamin A: 8IU | Vitamin C: 0.04mg | Calcium: 13mg | Iron: 1mg
Tried this Recipe? Tag me Today!Mention @LifeisaParty or tag #lifeisaparty!

Coconut Ice Recipe (Pink & White Coconut Candy)

Nov 14, 2025 · 1 Comment

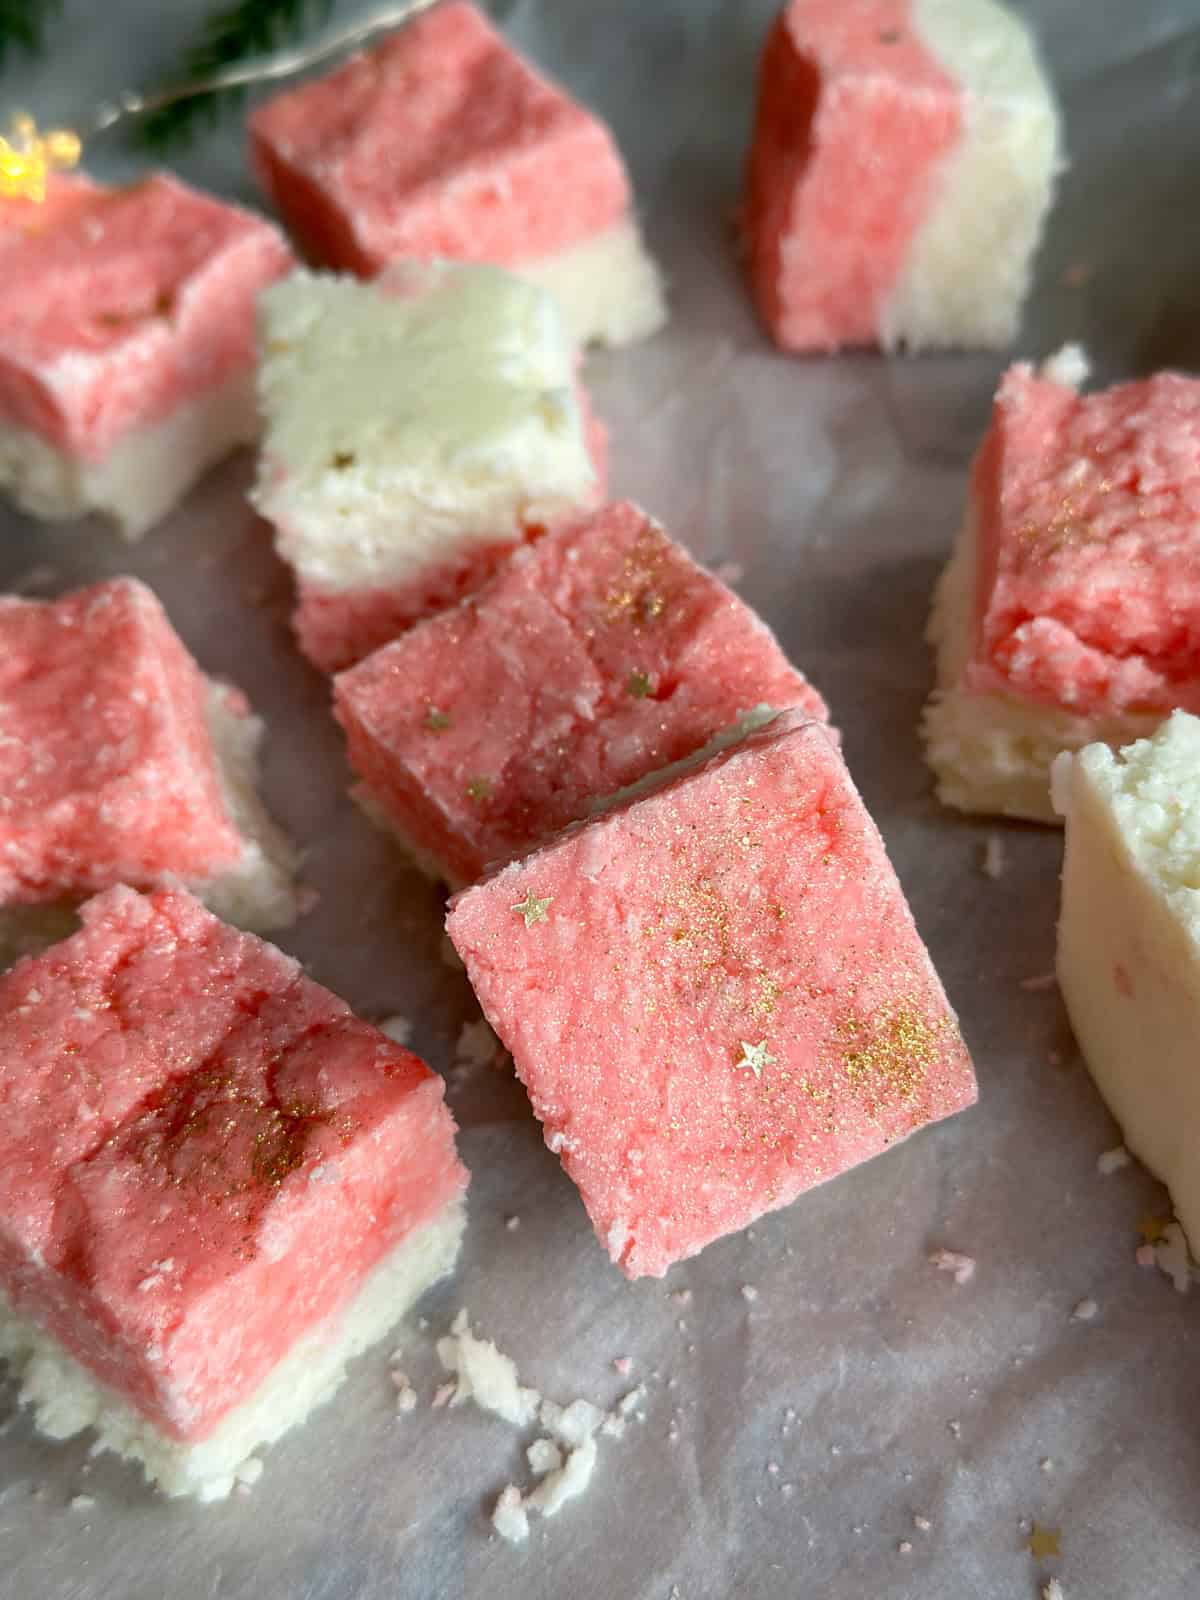
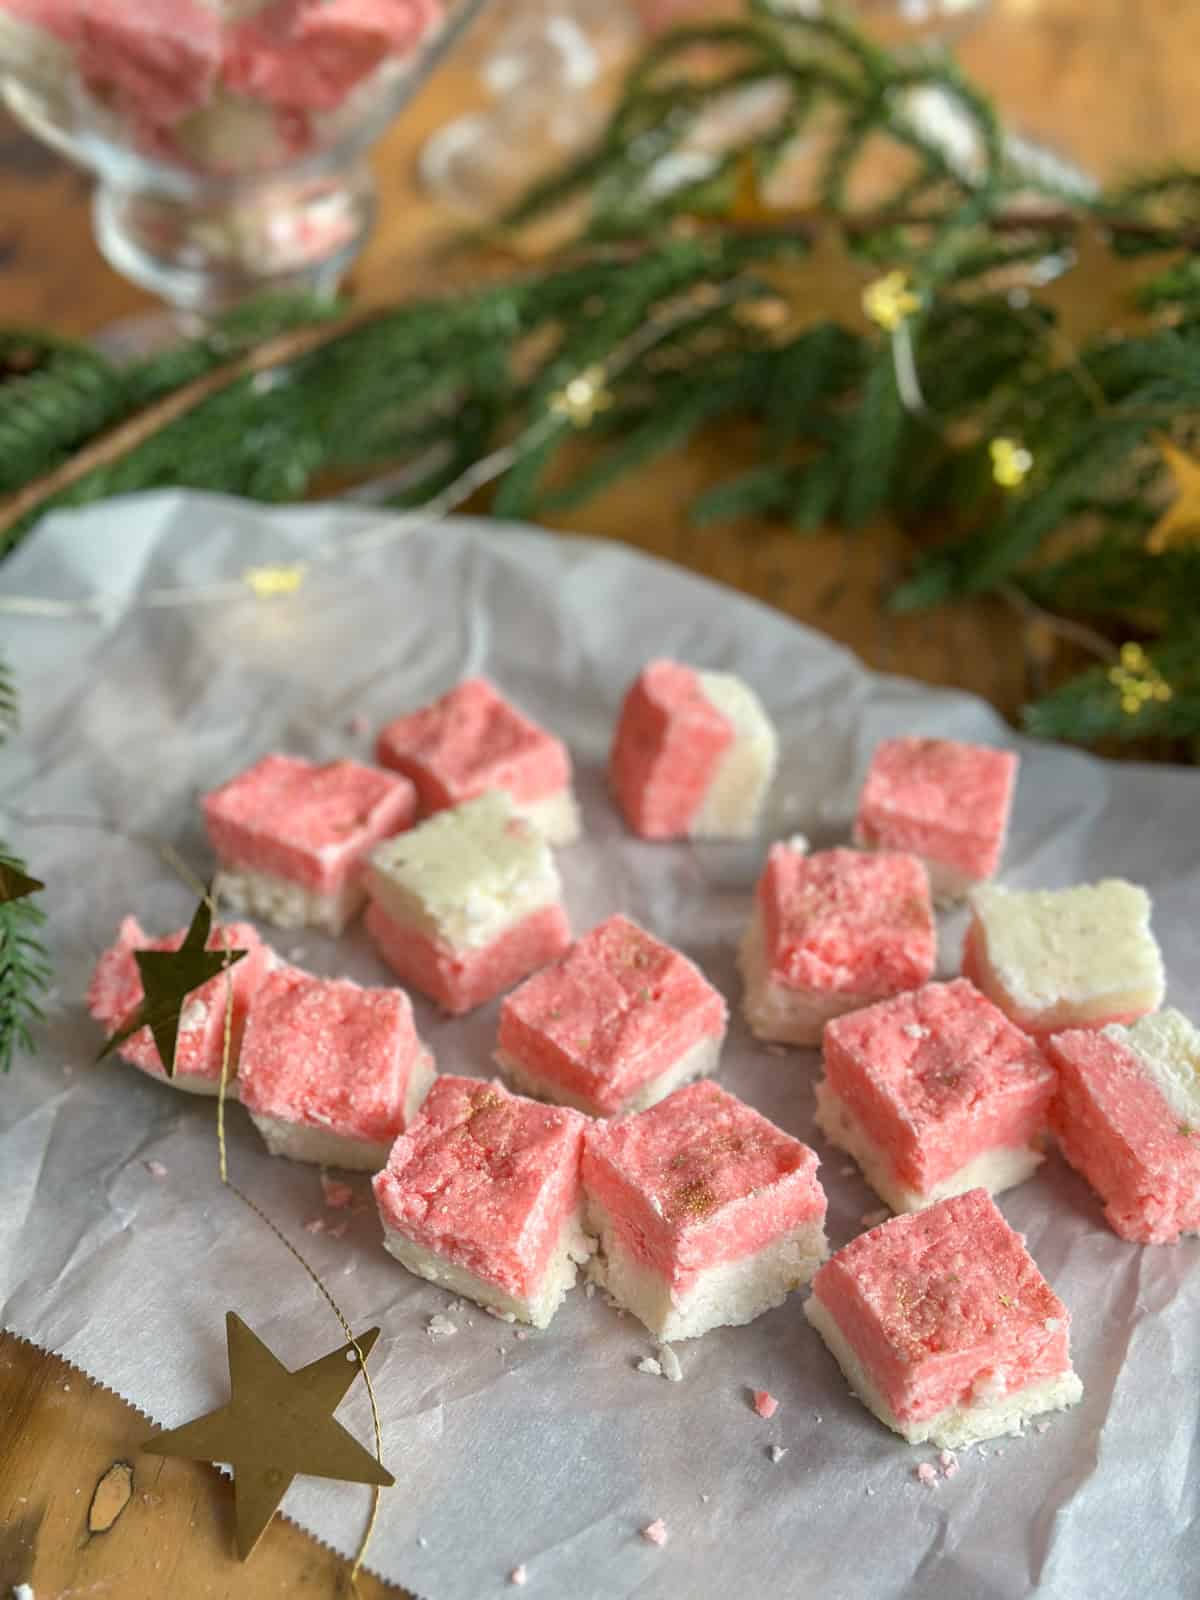
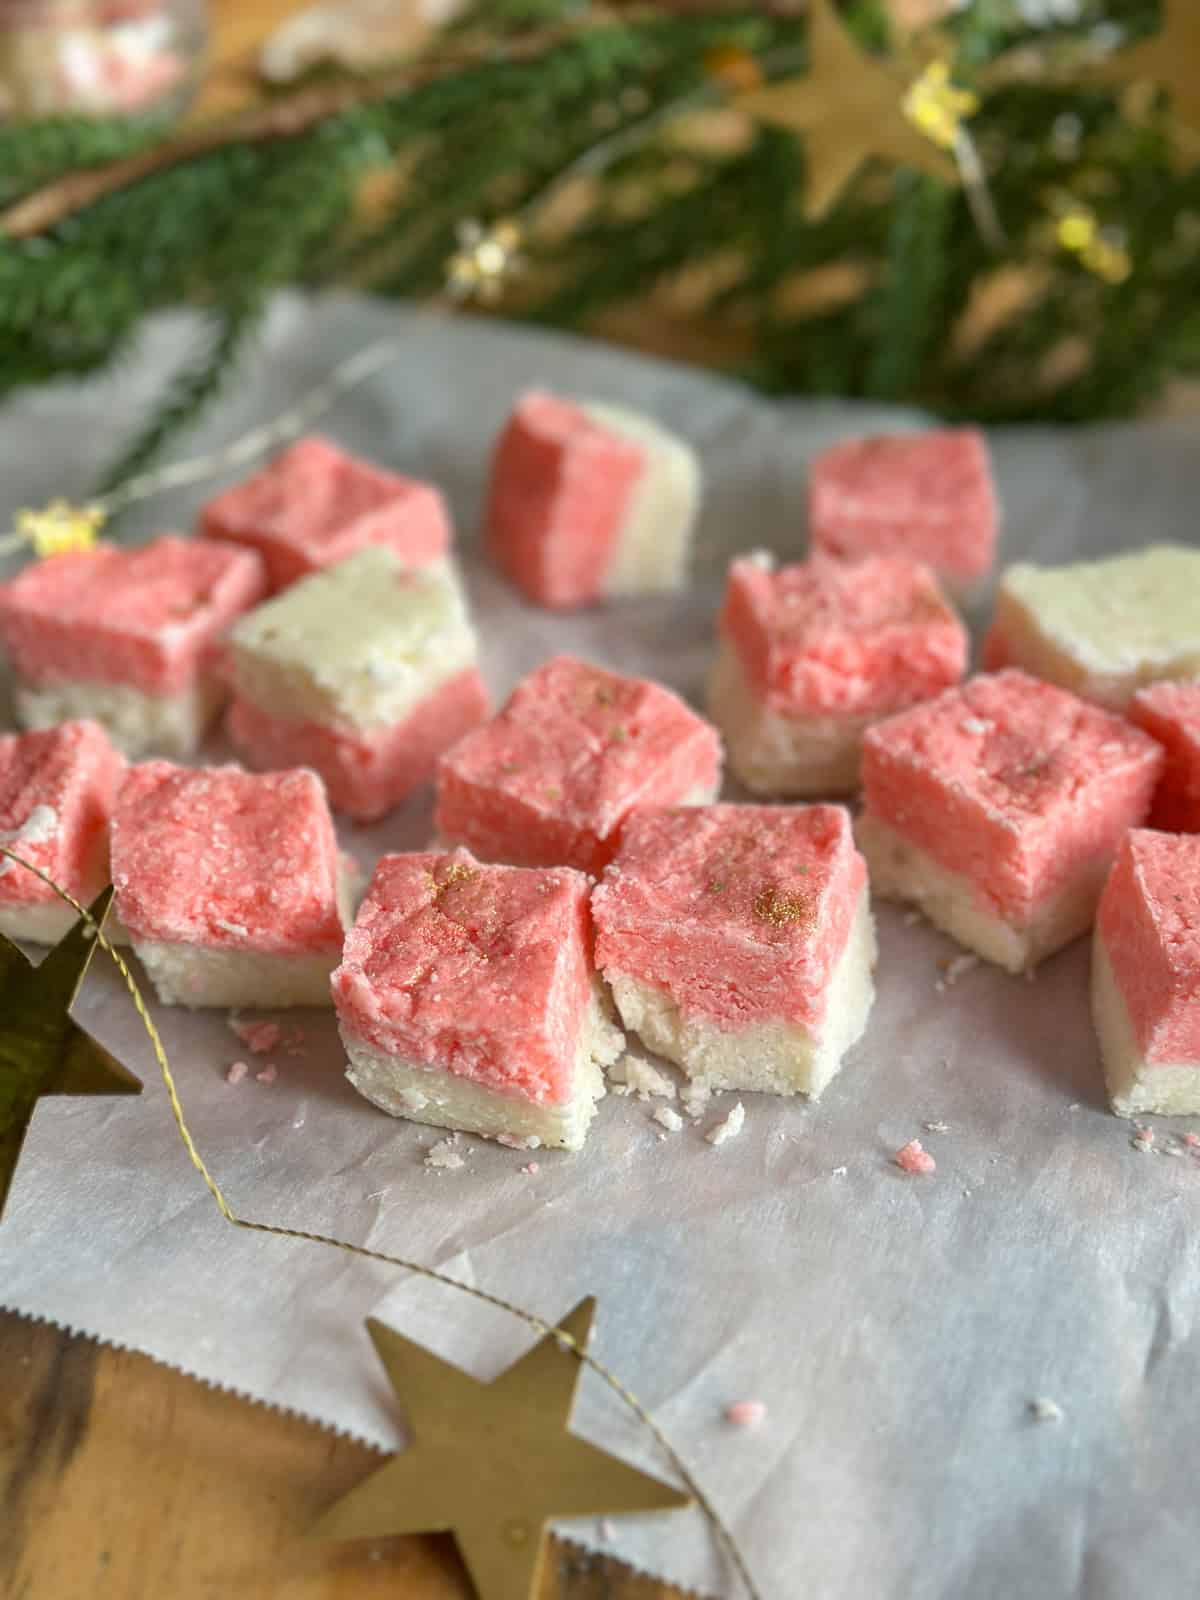
Homemade pink and white coconut ice recipe, cut into squares on parchment paper.

This coconut ice is a sweet, nostalgic treat with beautiful pink and white layers that's perfect for holiday gifts, Harry Potter parties, or anytime you want a simple no-bake dessert. Made with just 5 ingredients and ready in 2 hours, this classic candy is as easy as it is delicious.

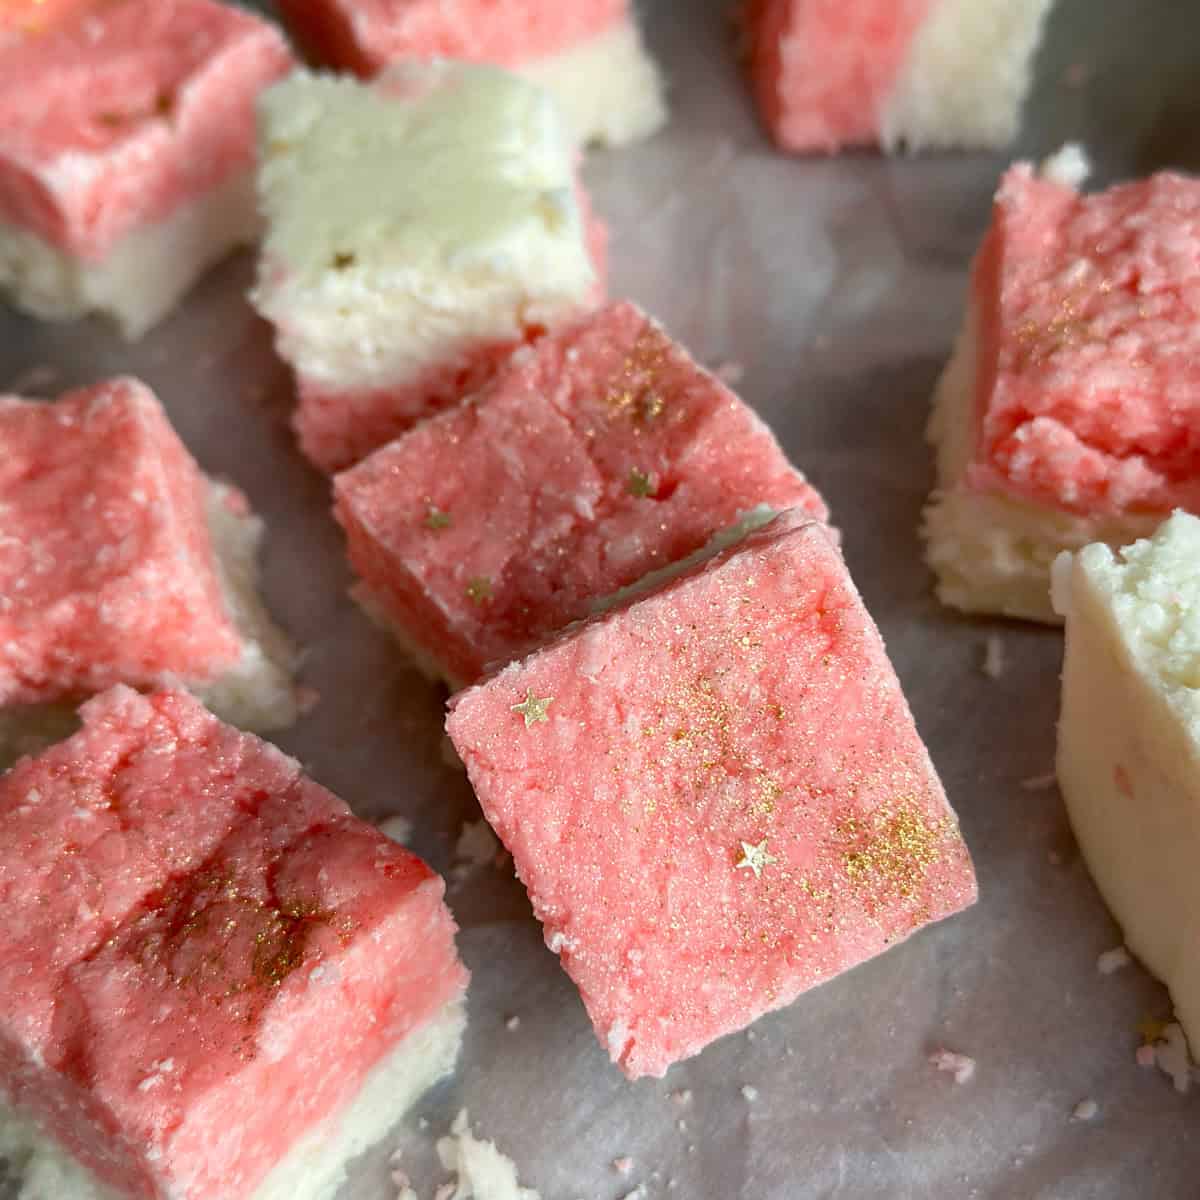
Pink and white coconut ice, cut into squares and decorated with star sprinkles.

A Quick Look At This Recipe

  • 📋 Recipe: Easy Coconut Ice
  • ⏲️ Time: 10 minutes to prepare, 2 hours to set
  • 👪 Servings: 8 x 8 baking dish, 36 pieces
  • 🔪 Difficulty: Easy
  • 💭 Top Tip: This no bake is great to make with kids, makes a lovely gift too.

Why You'll Love This Recipe

  • So simple to make. Just five ingredients and a stand mixer, no bake
  • Beautiful presentation. The pink and white layers look stunning and festive for any celebration.
  • Perfect for gifting. These sweet squares package beautifully for holiday treats or party favors.
  • Harry Potter approved. Inspired by the sweets from Honeydukes, this treat is perfect for themed parties, or any Harry Potter fans.

What makes coconut ice so special is its simplicity. With just a handful of ingredients and no complicated techniques, you can create a treat that looks impressive and tastes amazing. The texture is slightly grainy from the sugar, wonderfully chewy from the coconut, and just sweet enough to satisfy any candy craving.

We made this coconut ice for our Harry Potter Honeydukes sweets cart, where it fit right in alongside chocolate frogs and Bertie Bott's Every Flavour Beans. Coconut ice is mentioned in the Harry Potter books as one of the treats available at Honeydukes, the magical sweet shop in Hogsmeade. If you're planning a Harry Potter party or movie night, this authentic treat brings the magic to life. See it all in our Harry Potter Christmas tree post here. It also was featured at our Harry Potter themed Christmas Party. You might also like our Harry Potter Snacks and Treats, and our DIY Harry Potter Decor and Free Printables. Also check out our recipe for Mrs. Weasley's Chocolate Walnut Fudge.

Homemade coconut ice cut into squares, and in a large glasse Honeydukes jar.

What Is Coconut Ice?

Coconut ice is a sweet, chewy confection made from shredded coconut, sugar, and condensed milk. This no-bake treat has been a beloved candy popular in the UK, Australia, and New Zealand. The traditional version features two distinct layers in pink and white, creating a beautiful presentation that's perfect for celebrations and gift-giving.

Ingredients

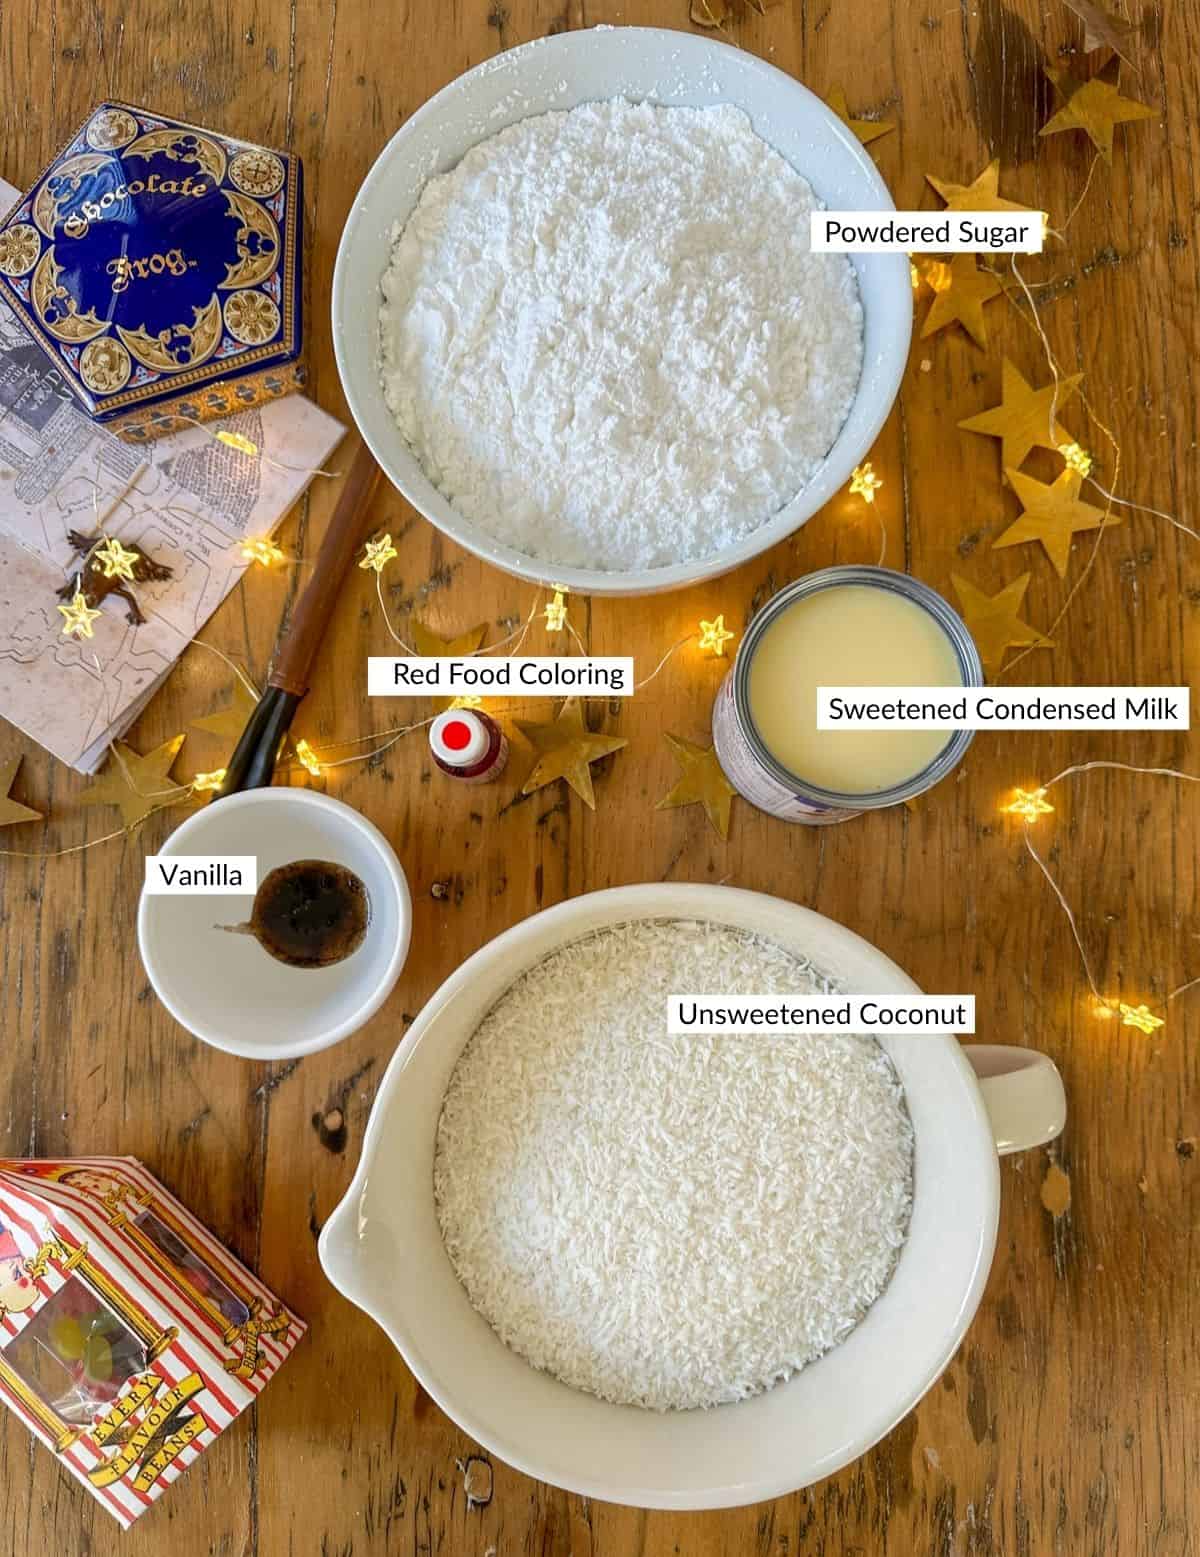
Coconut ice ingredients on in bowls on a table.
  • Sweetened Condensed Milk creates the base and provides sweetness and binding power. The thick, creamy consistency helps hold everything together while adding great flavor. Make sure to use sweetened condensed milk, not evaporated milk, as they're very different and this recipe will not work with evaporated milk.
  • Unsweetened Shredded Coconut gives this candy its signature texture and flavor. You can find it in the baking aisle near other coconut products. Don't substitute sweetened coconut, as the recipe is already quite sweet.
  • Powdered Sugar (also called icing sugar or confectioners' sugar) provides structure and that classic slightly grainy texture. The fine texture of icing sugar distributes evenly throughout the mixture and helps the candy set properly.
  • Vanilla Extract adds to the flavor. Pure vanilla extract works best, but imitation vanilla works as a substitute.
  • Red Food Coloring creates the traditional pink layer. Gel food coloring gives the best color, but liquid food coloring works too. Start with just 2 drops and add more if you want a deeper pink.
  • Optional: Star Sprinkles and Edible Glitter add a magical finishing touch, especially if you're making these for a Harry Potter party or special celebration.

How To Make Coconut Ice

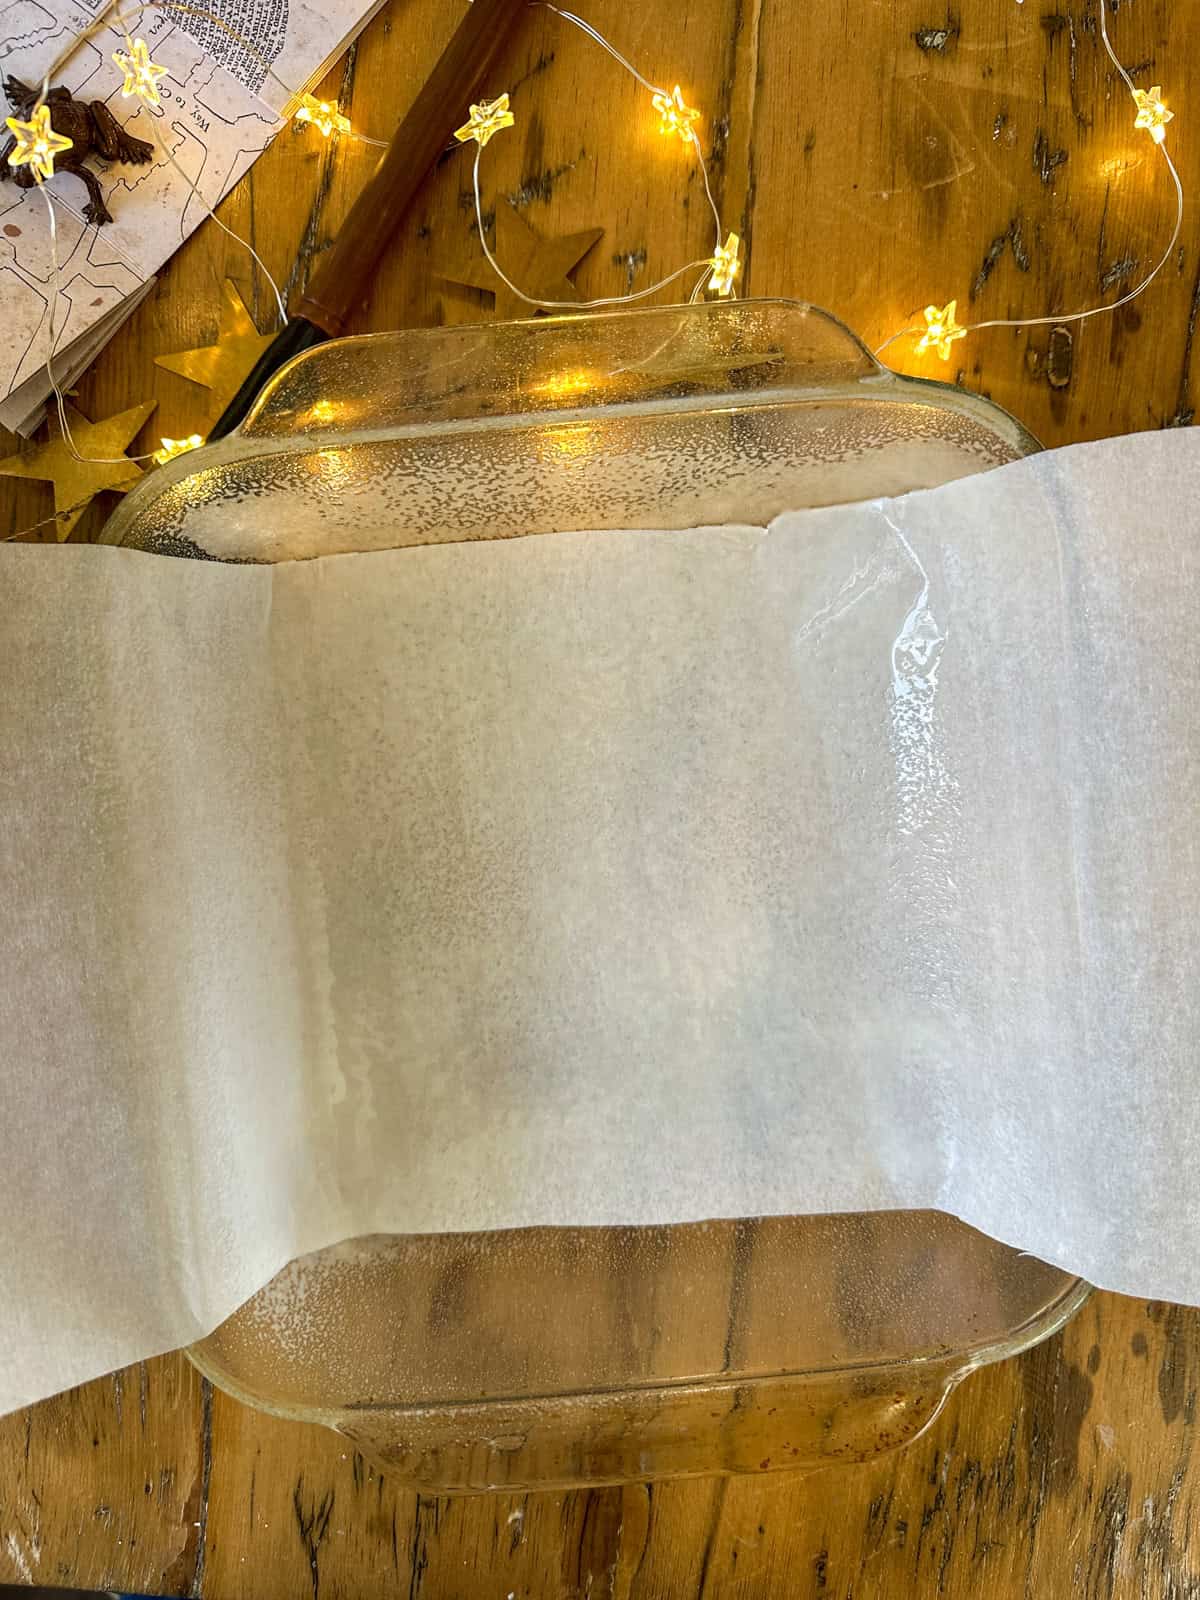
  1. Step 1: Prepare Your Pan Line an 8x8 inch baking dish with parchment paper, making sure the paper comes up the sides for easy removal later. Spray the parchment paper lightly with cooking spray. This step makes removing and slicing the coconut ice so much easier.
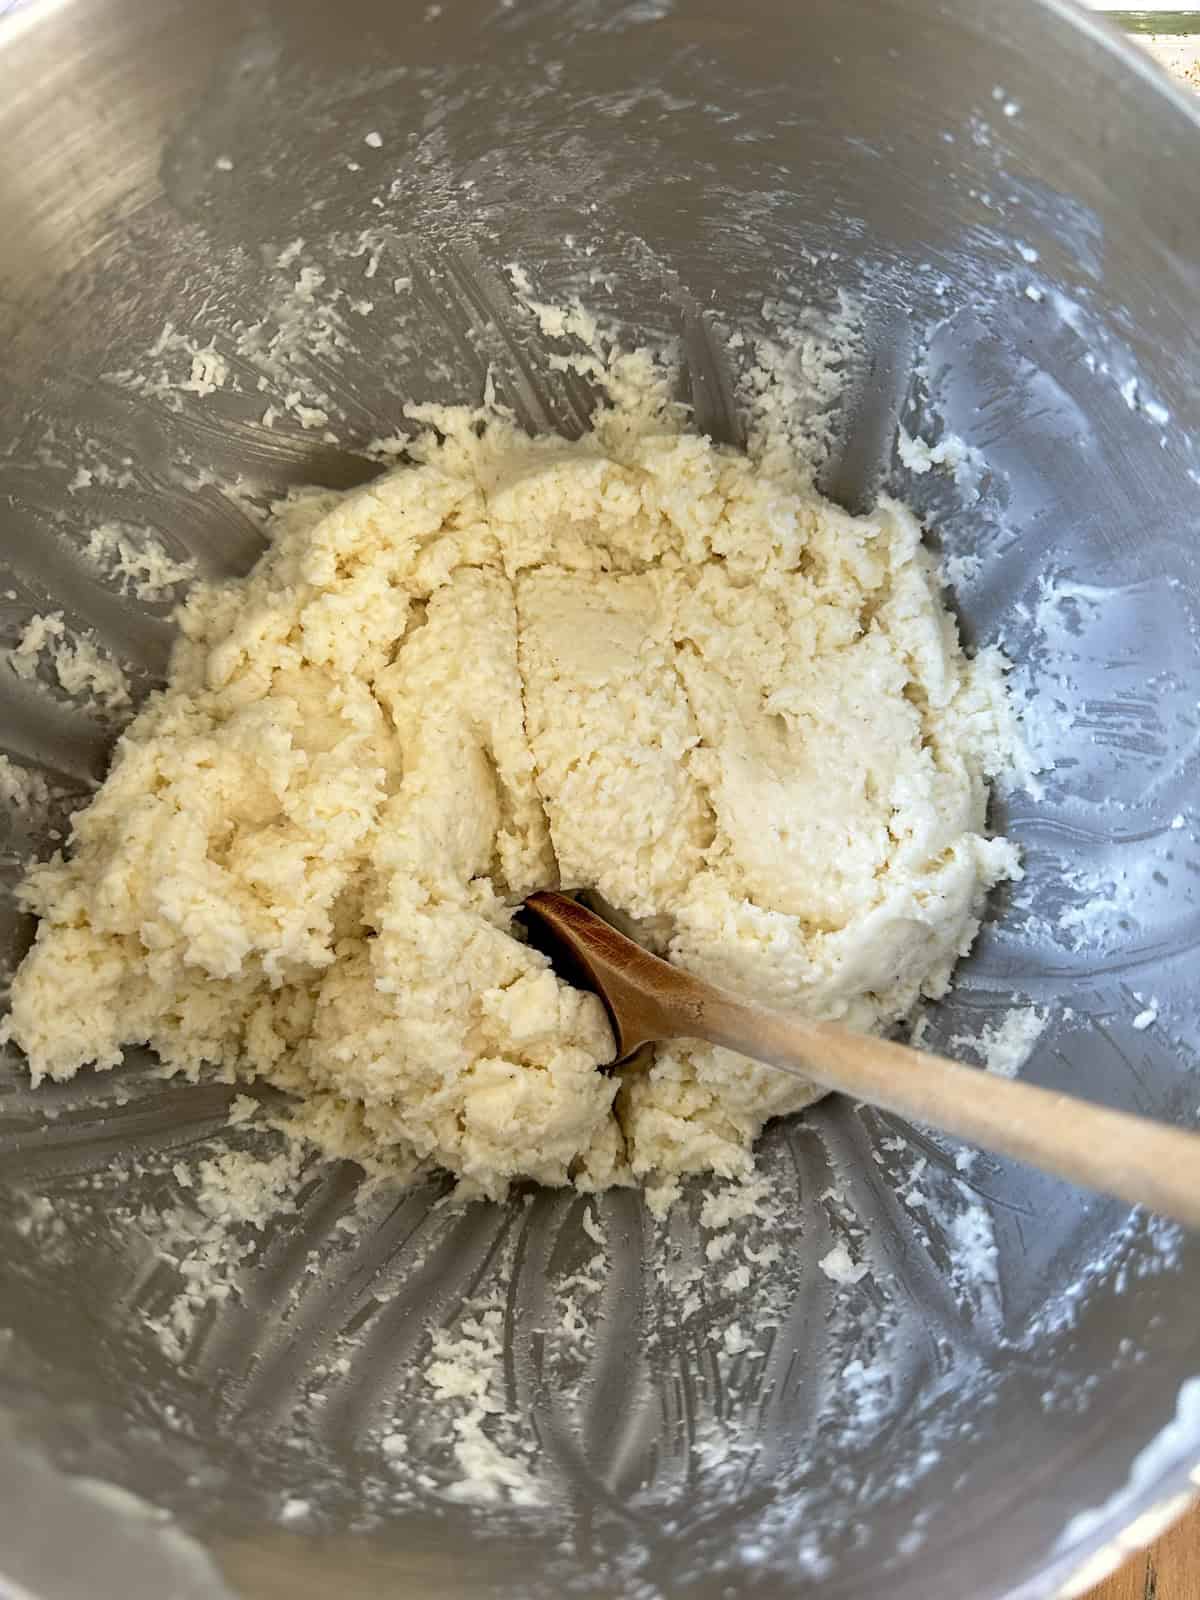
  1. Step 2: Mix The Base In the bowl of a stand mixer, combine the condensed milk, unsweetened coconut, powdered sugar, and vanilla. Mix on medium speed until everything is fully combined and the mixture is thick and sticky. This takes about 2 minutes. The mixture should hold together when pressed.
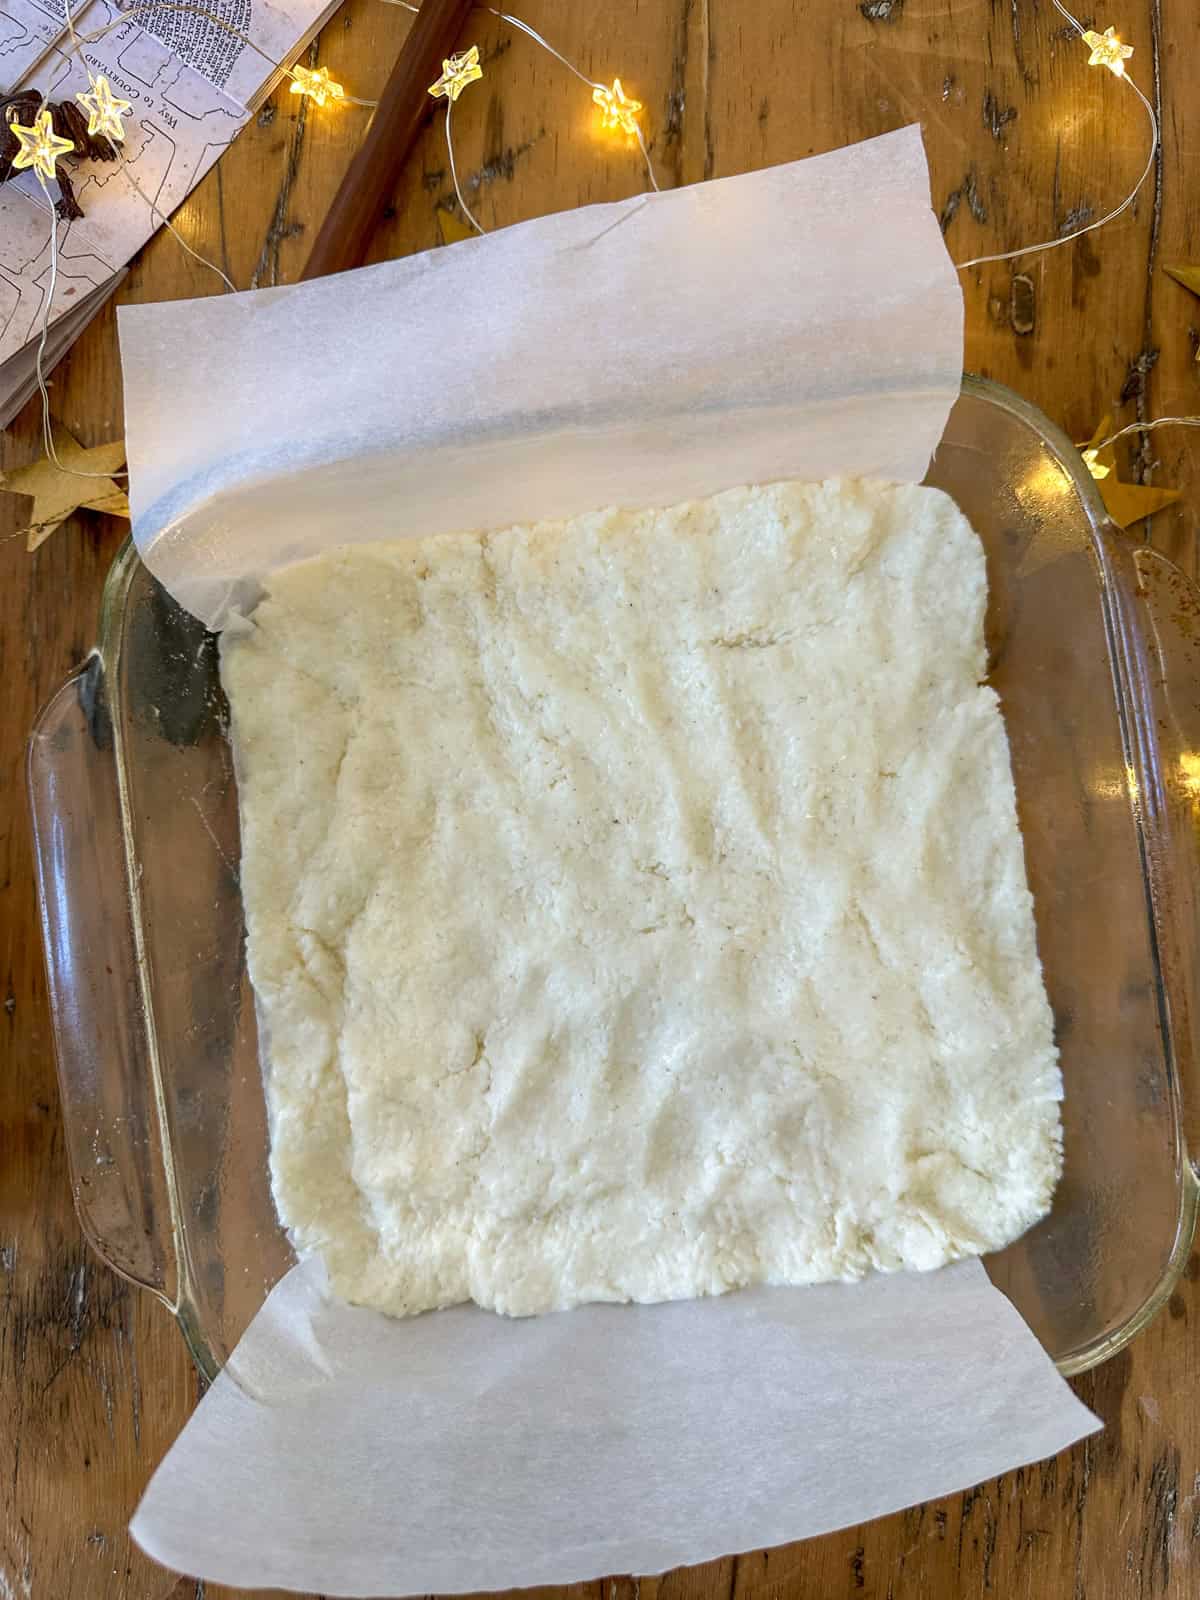
  1. Step 3: Press The White Layer Transfer half of the mixture to your prepared baking dish. Using clean hands or the back of a spoon, press it firmly into an even layer across the bottom of the pan. Make sure it's packed down well and reaches all the corners. The more evenly you press this layer, the better your final result will be.
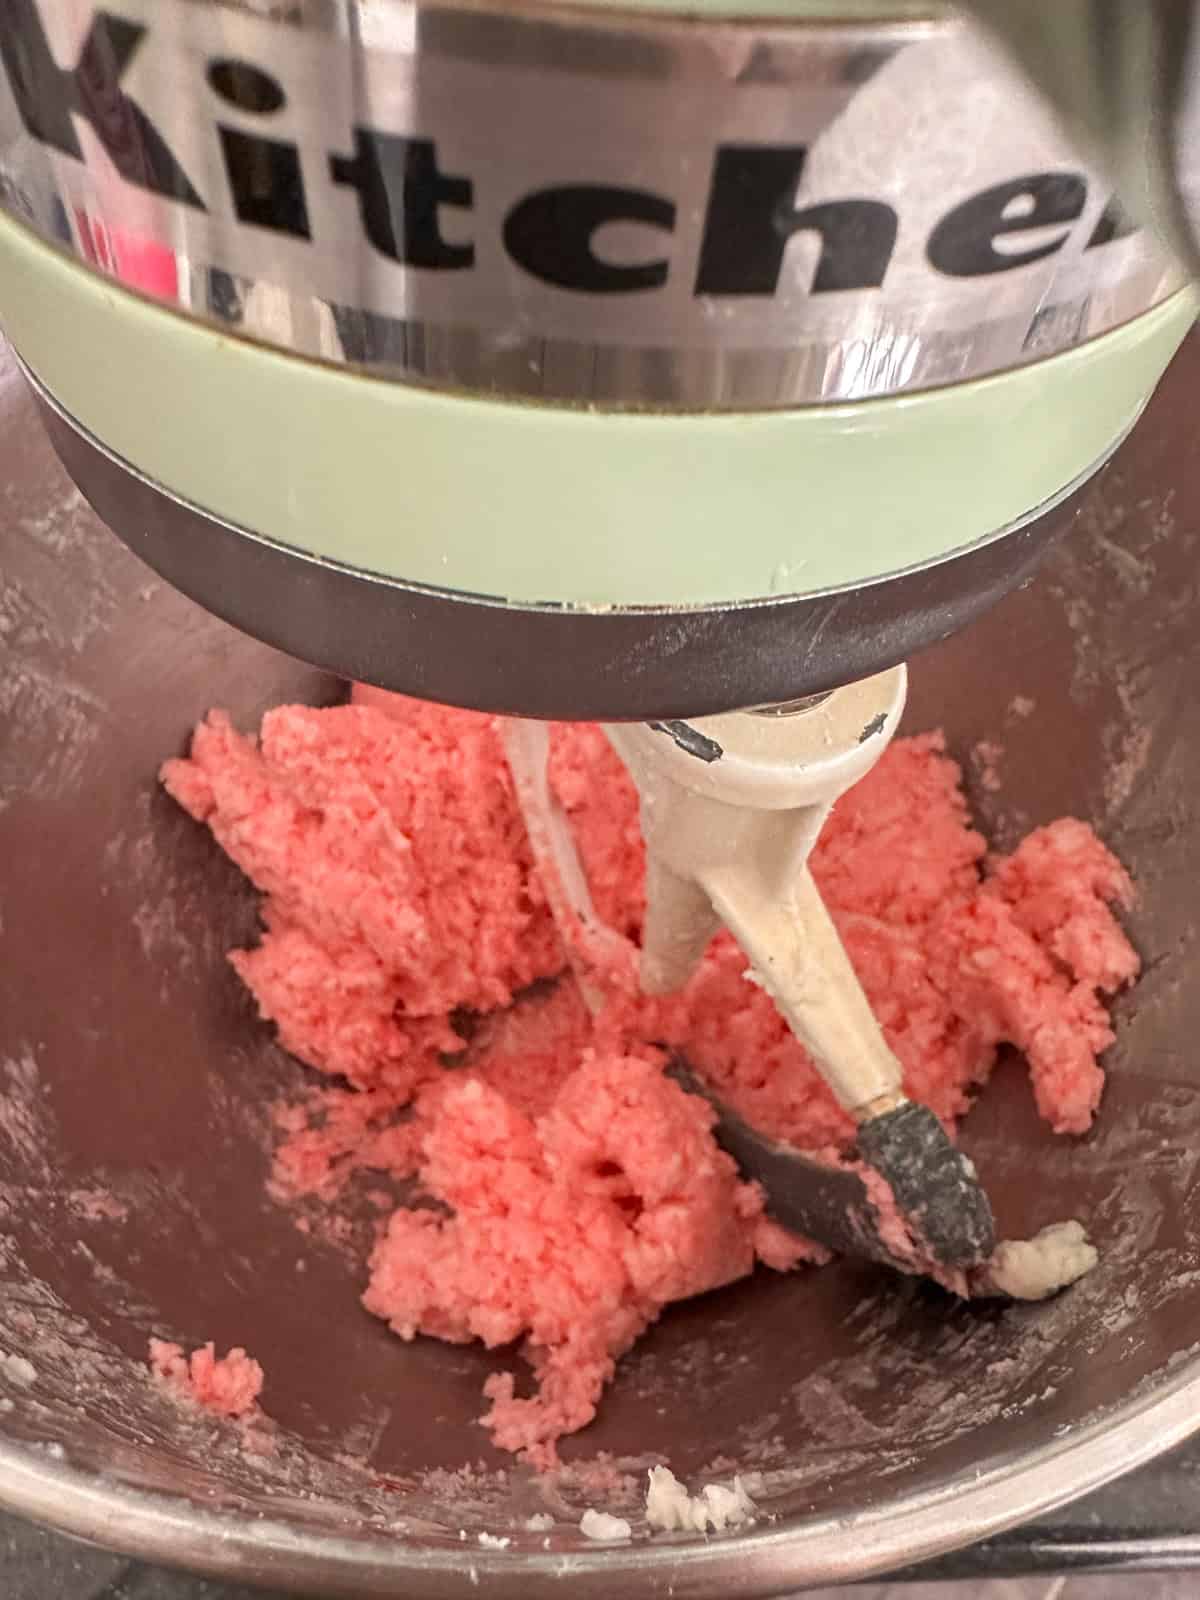
  1. Step 4: Color The Pink Layer Add 2 drops of red food coloring to the remaining mixture in the stand mixer bowl. Mix on medium speed until the color is fully combined and you have a uniform pink shade. If you want a deeper pink, add one more drop of food coloring and mix again.
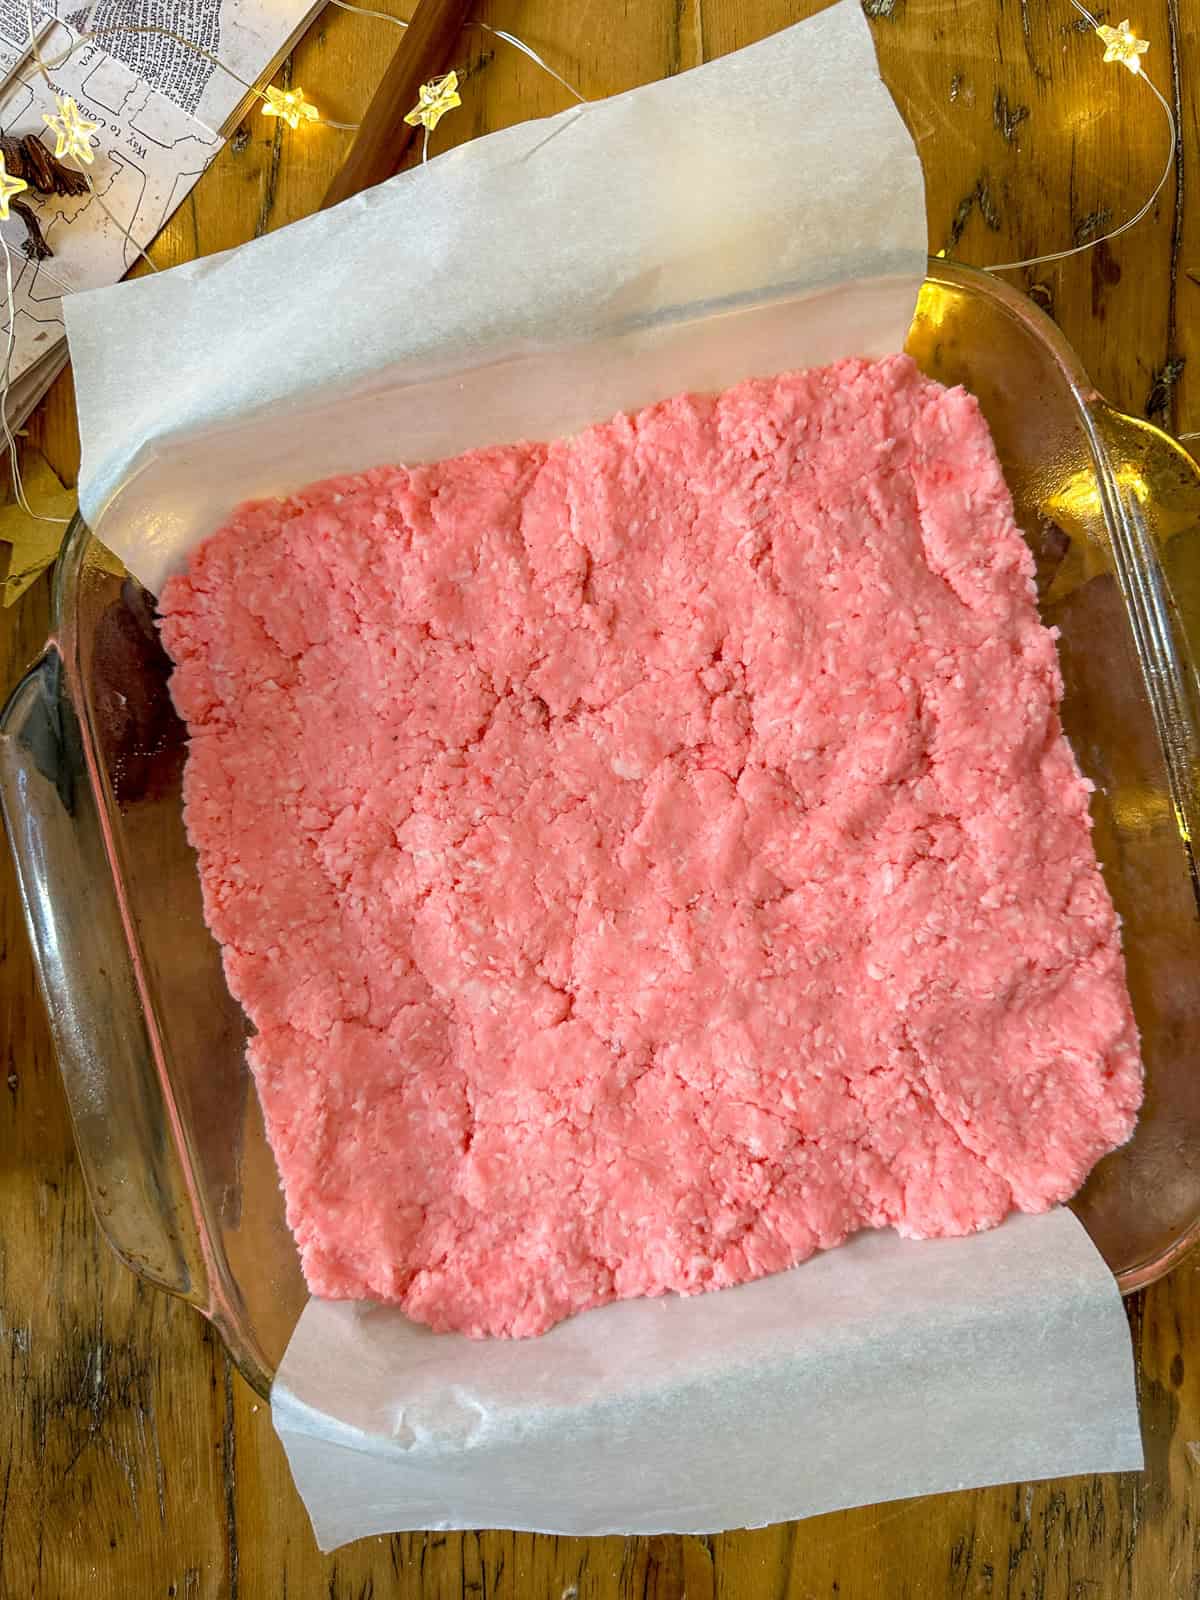
  1. Step 5: Add The Pink Layer Press the pink mixture evenly over the white layer in the baking dish. Again, press firmly and make sure the layer is even across the entire surface. If you're adding star sprinkles or edible glitter, gently press them into the top now while the surface is still slightly sticky.
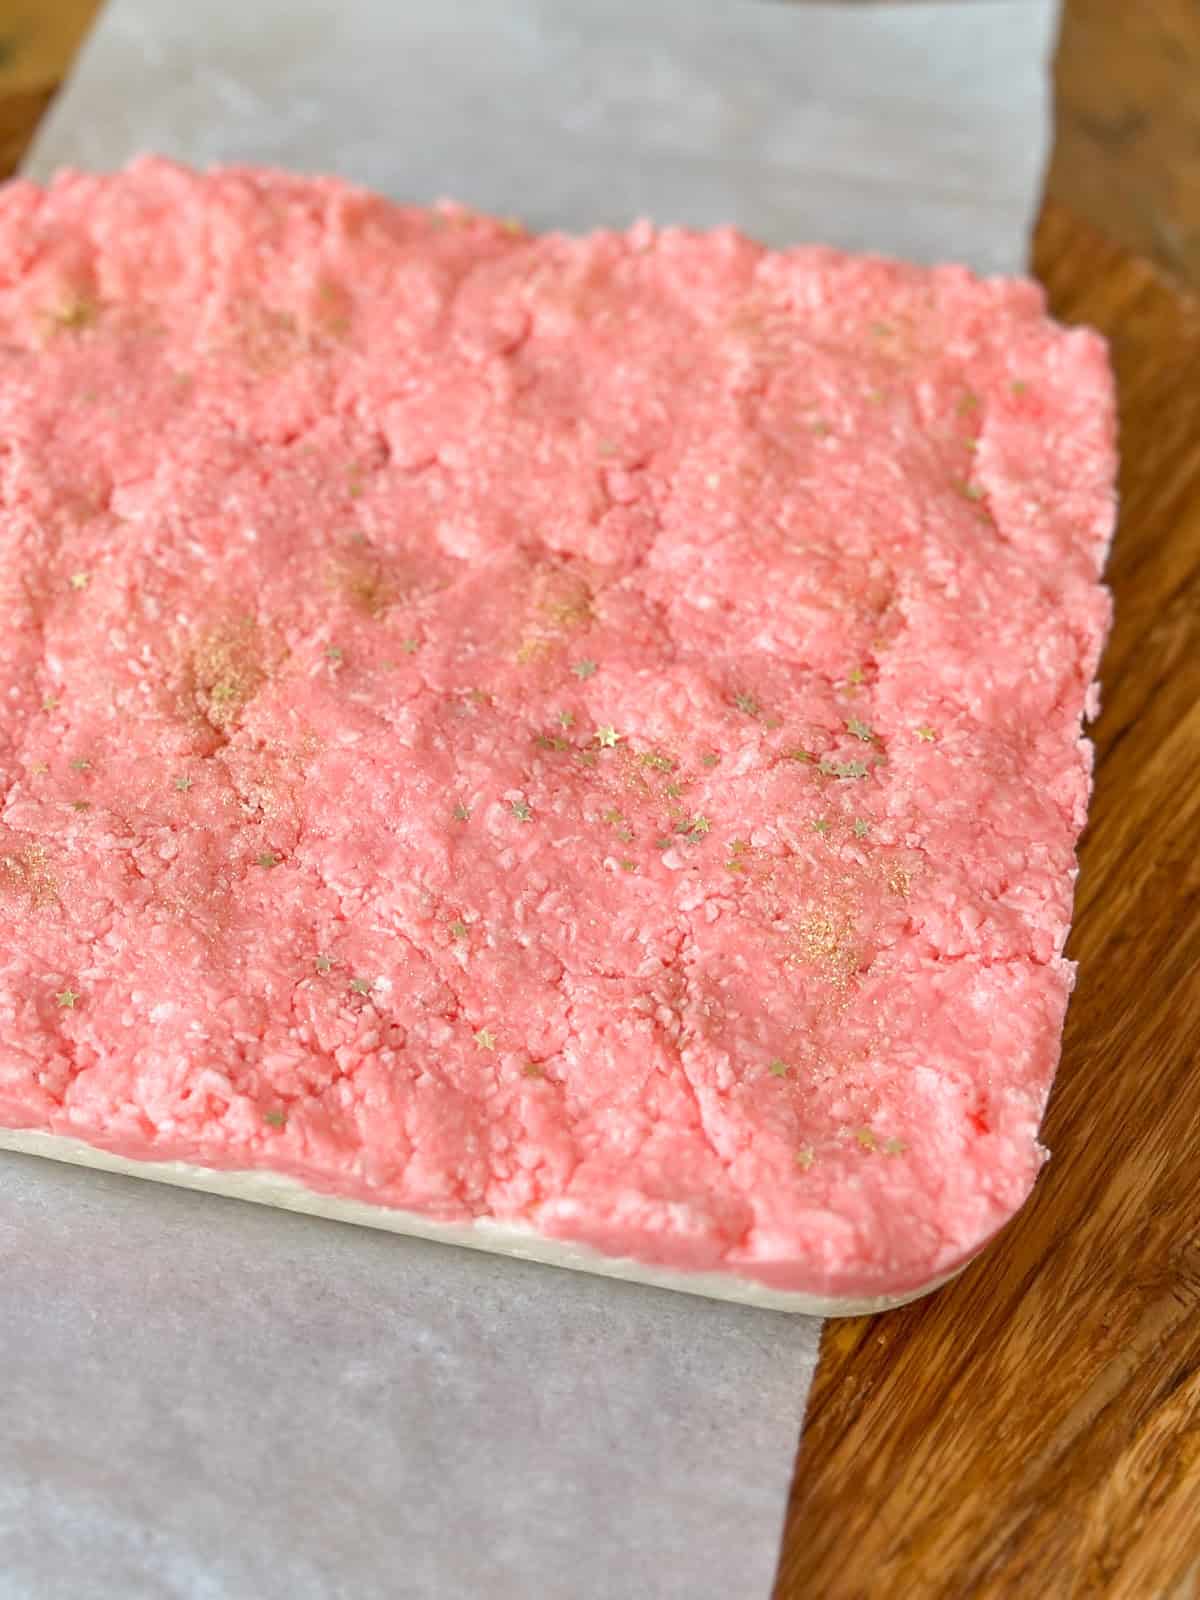
  1. Step 6: Chill Then Slice Cover the dish and refrigerate for at least 2 hours.  Remove the coconut ice from the pan by lifting the parchment paper. Place it on a cutting board. Using a sharp knife, cut into 36 even pieces (6 rows by 6 rows).
Coconut ice cut into squares on a piece of parchment paper with a glass canister in the background.

Expert Tips

  • Press firmly. The key to beautiful, clean layers is pressing each one firmly and evenly into the pan. Don't be shy about really packing it down.
  • Chill completely. Resist the urge to cut into your coconut ice too soon. A full 2 hours in the refrigerator ensures clean slices and prevents crumbling.
  • Customize your color. While traditional coconut ice is pink and white, you can make this treat match any theme. Try blue for a winter wonderland party, green for Christmas, or keep it all white for an elegant look.
Homemade coconut ice recipe, cut into squares.

Frequently Asked Questions

Can I make coconut ice without a stand mixer?

Yes. You can mix the ingredients by hand using a sturdy wooden spoon, though it will require more elbow grease. The mixture will be quite thick and sticky, so be prepared for a bit of a workout.

Why is my coconut ice too soft?

If your coconut ice isn't setting properly, it likely needs more chilling time. Make sure to give it a full 2 hours (or more) in the refrigerator. Also make sure you used condensed milk and not evaporated milk by mistake. This recipe requires condensed milk.

Can I use sweetened coconut in coconut ice instead of unsweetened?

It's best to stick with unsweetened desiccated coconut. Sweetened coconut will make the final result overly sweet and can affect the texture since it's usually moister.

How do I store coconut ice?

Store your coconut ice in an airtight container at room temperature for up to one week. For longer storage, keep it refrigerated for up to 2 weeks. You can also freeze coconut ice for up to 3 months. Let it come to room temperature before serving for the best texture.

Can I add other flavors?

Absolutely. Try adding a drop of peppermint extract to the pink layer for a festive twist, or replace the vanilla with almond extract or rose water for a different flavor profile.

 More Homemade Candy Recipes You'll Love

  • How to make homemade pecan butter crunch candy.
    Pecan Butter Crunch Toffee Recipe
  • Homemade sponge toffee recipe.
    Homemade Sponge Toffee Candy Recipe
  • Cashew coconut brittle recipe.
    Cashew Coconut Brittle
  • Homemade marshmallow mug toppers with chocolate drizzle.
    Homemade Marshmallow Mug Toppers

If you try this Coconut Ice or any other ideas on my blog, leave a rating and let me know how it went in the comments below. Thanks for visiting today!

Recipe

Homemade pink and white coconut ice recipe, cut into squares on a parchment paper.

Coconut Ice

Video

Easy coconut ice recipe with only 5 ingredients and no baking, it makes a sweet chewy candy treat -straight out of Honeydukes in Harry Potter.
5 from 1 vote
Print Pin Rate
Course: Candy
Cuisine: British
Prep Time: 10 minutes minutes
Total Time: 10 minutes minutes
Servings: 36 pieces
Calories: 86kcal
Author: Dannyelle Nicolle-Ramjist

Ingredients

  • 1 can (14 oz) sweetened condensed milk
  • 3 cups unsweetened shredded coconut
  • 3 cups powdered sugar
  • 2 teaspoon vanilla
  • 2 drops red food coloring
  • Optional: star sprikles and ediable gold glitter

Instructions

  • Line an 8x8 inch baking dish with parchment paper and spray with cooking spray.
  • In the bowl of a stand mixer, combine condensed milk, coconut, icing sugar, and vanilla. Mix on medium speed until fully combined and the mixture is thick and sticky.
    1 can (14 oz) sweetened condensed milk, 3 cups unsweetened shredded coconut, 3 cups powdered sugar, 2 tsp vanilla
  • Transfer half of the mixture to the prepared baking dish. Press firmly into an even layer across the bottom, making sure to reach all corners.
  • Add red food coloring to the remaining mixture in the stand mixer. Mix on medium speed until the color is fully combined and uniform.
    2 drops red food coloring
  • Press the pink mixture evenly over the white layer in the baking dish. If using sprinkles or edible glitter, gently press them into the top now.
    Optional: star sprikles and ediable gold glitter
  • Cover and refrigerate for at least 2 hours, or until firm enough to slice cleanly. Remove from pan by lifting the parchment paper. Place on a cutting board and cut into 36 even pieces (6 rows by 6 rows).

Notes

Storage: Store in an airtight container at room temperature for up to one week, refrigerated for up to 2 weeks, or frozen for up to 3 months.
Color Variations: Adjust the amount of food coloring to achieve your desired shade of pink, or use different colors to match party themes.

Nutrition

Calories: 86kcal | Carbohydrates: 12g | Protein: 0.5g | Fat: 5g | Saturated Fat: 4g | Polyunsaturated Fat: 0.1g | Monounsaturated Fat: 0.2g | Cholesterol: 0.01mg | Sodium: 3mg | Potassium: 39mg | Fiber: 1g | Sugar: 10g | Vitamin A: 0.1IU | Vitamin C: 0.1mg | Calcium: 2mg | Iron: 0.2mg
Tried this Recipe? Tag me Today!Mention @LifeisaParty or tag #lifeisaparty!

Pumpkin Shaped Dinner Rolls

Oct 9, 2025 · 1 Comment

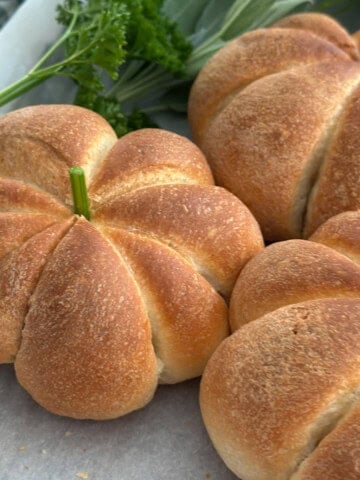
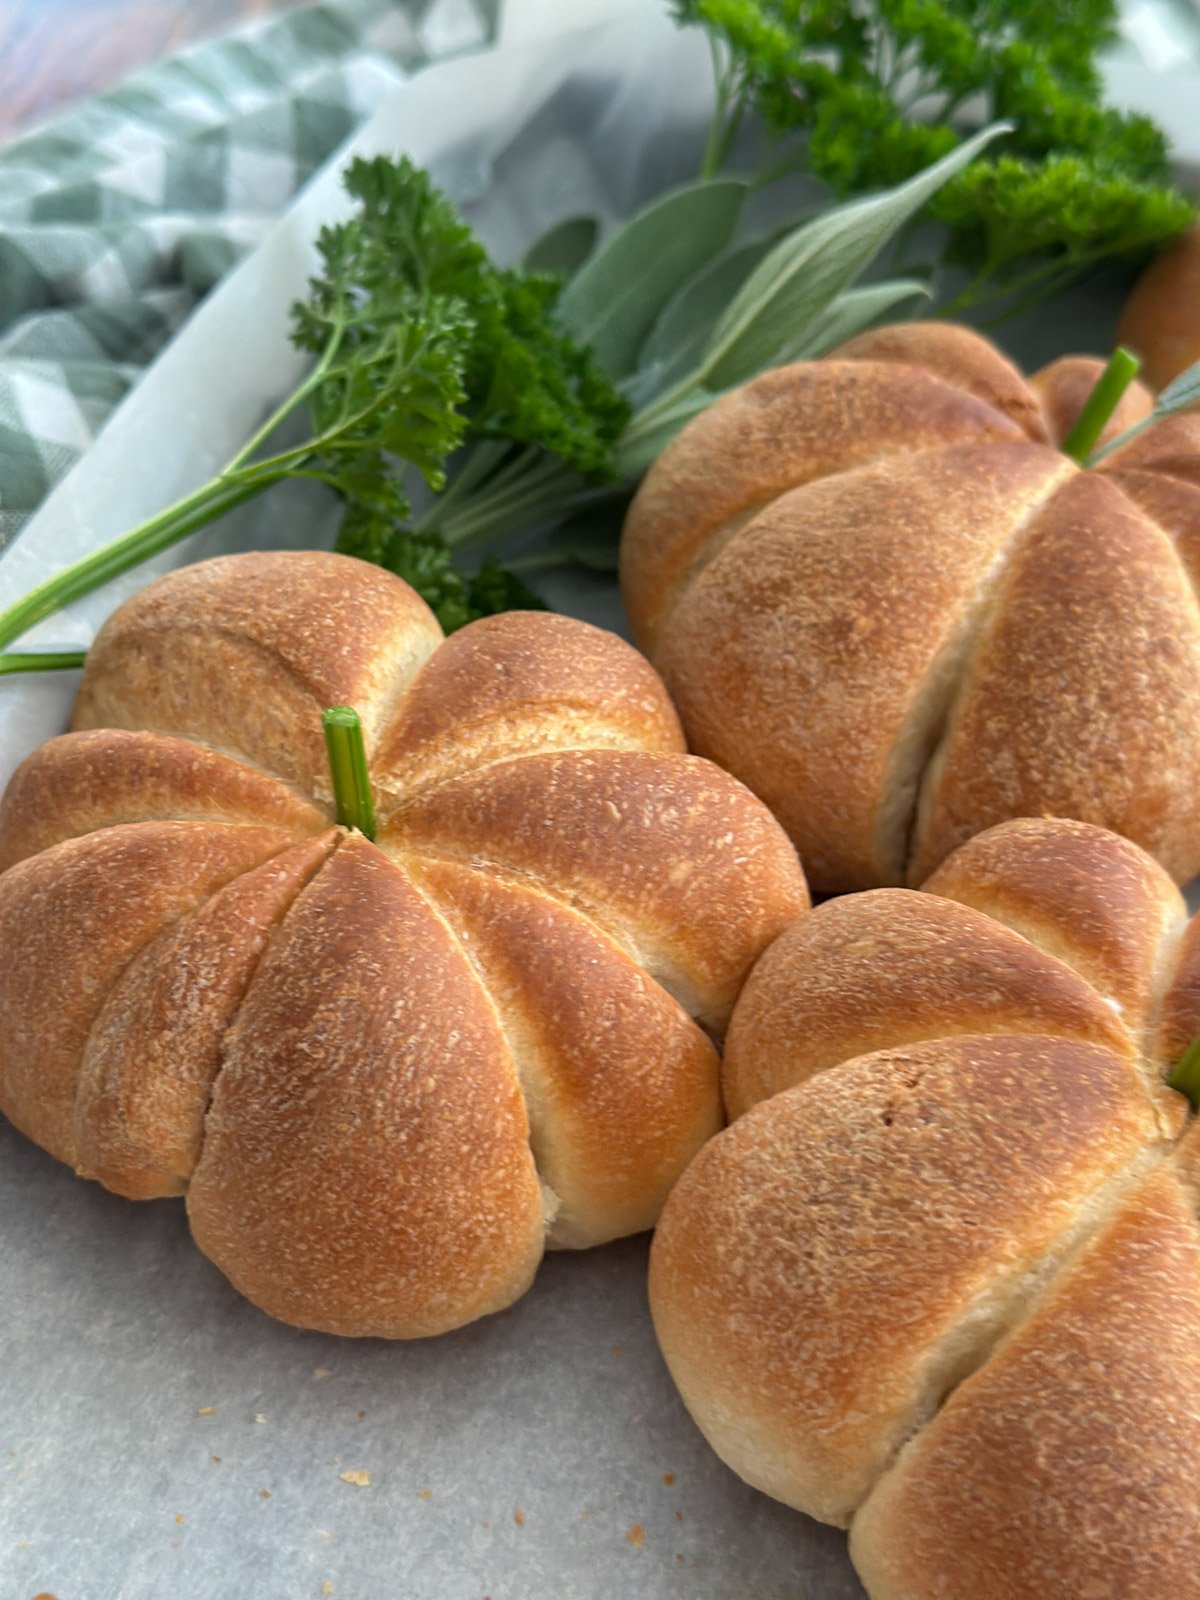
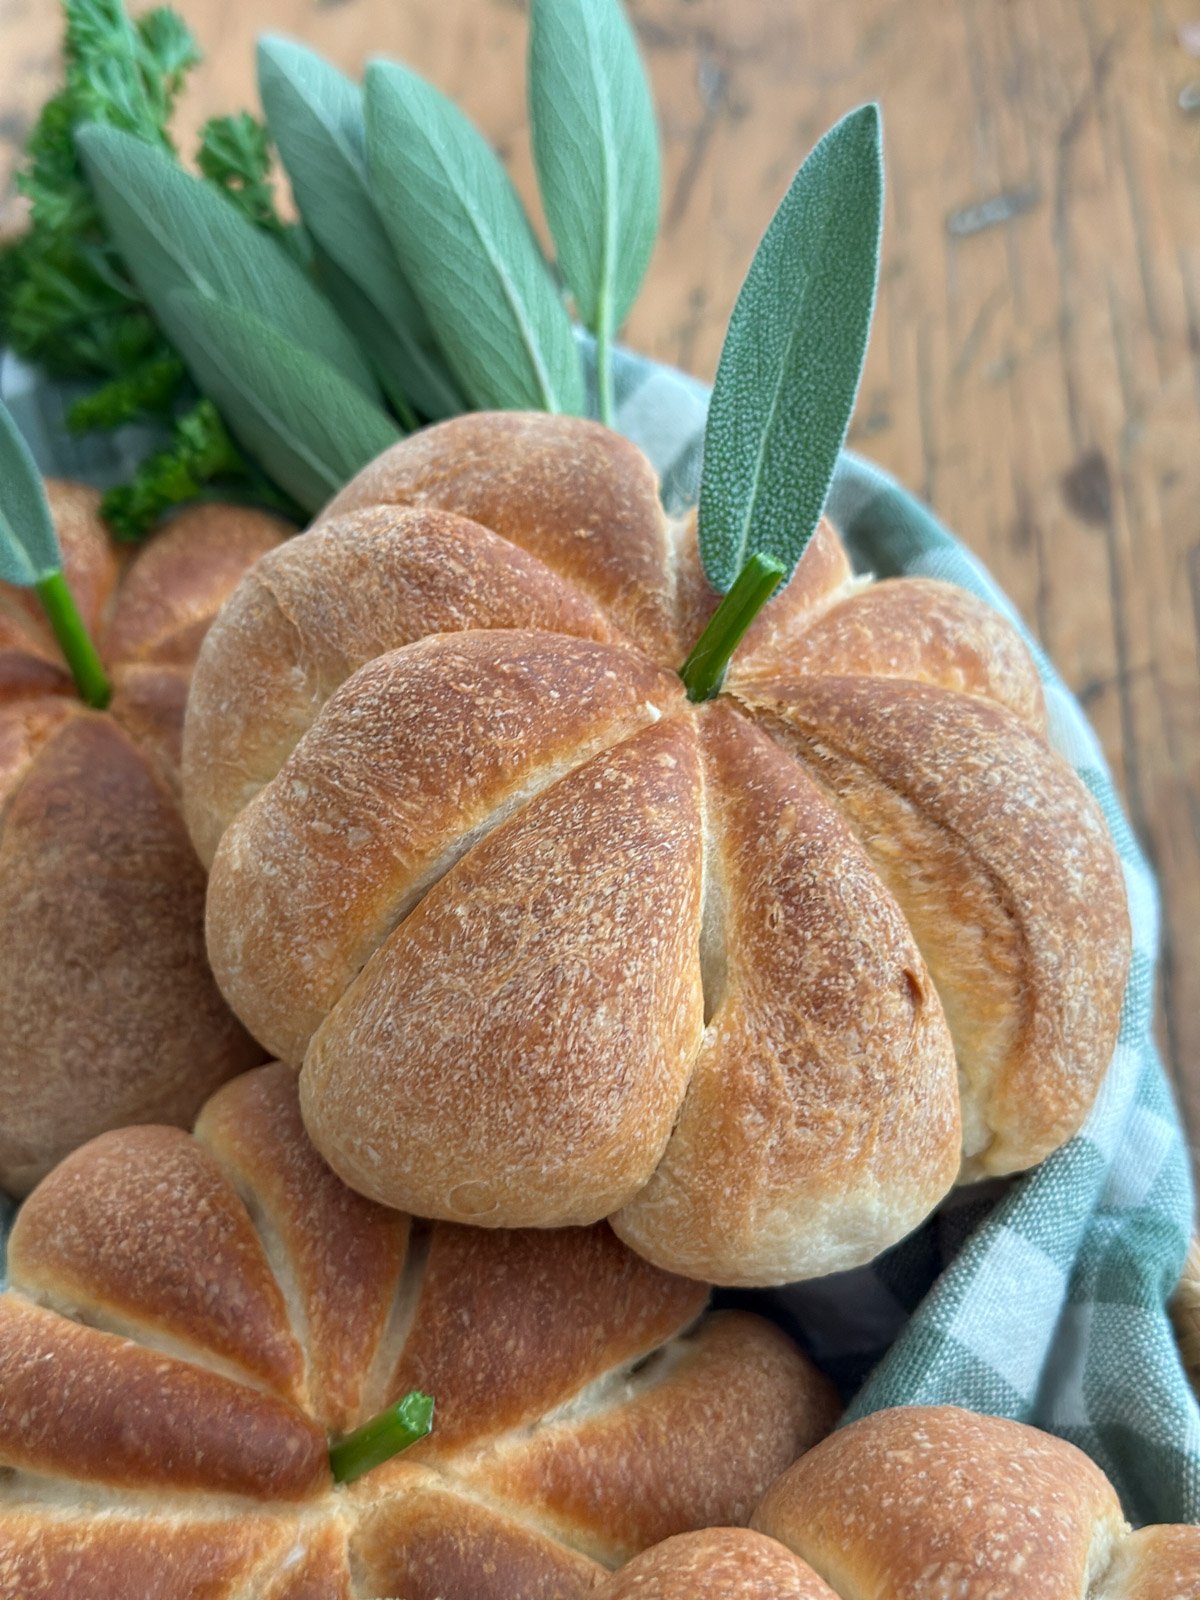
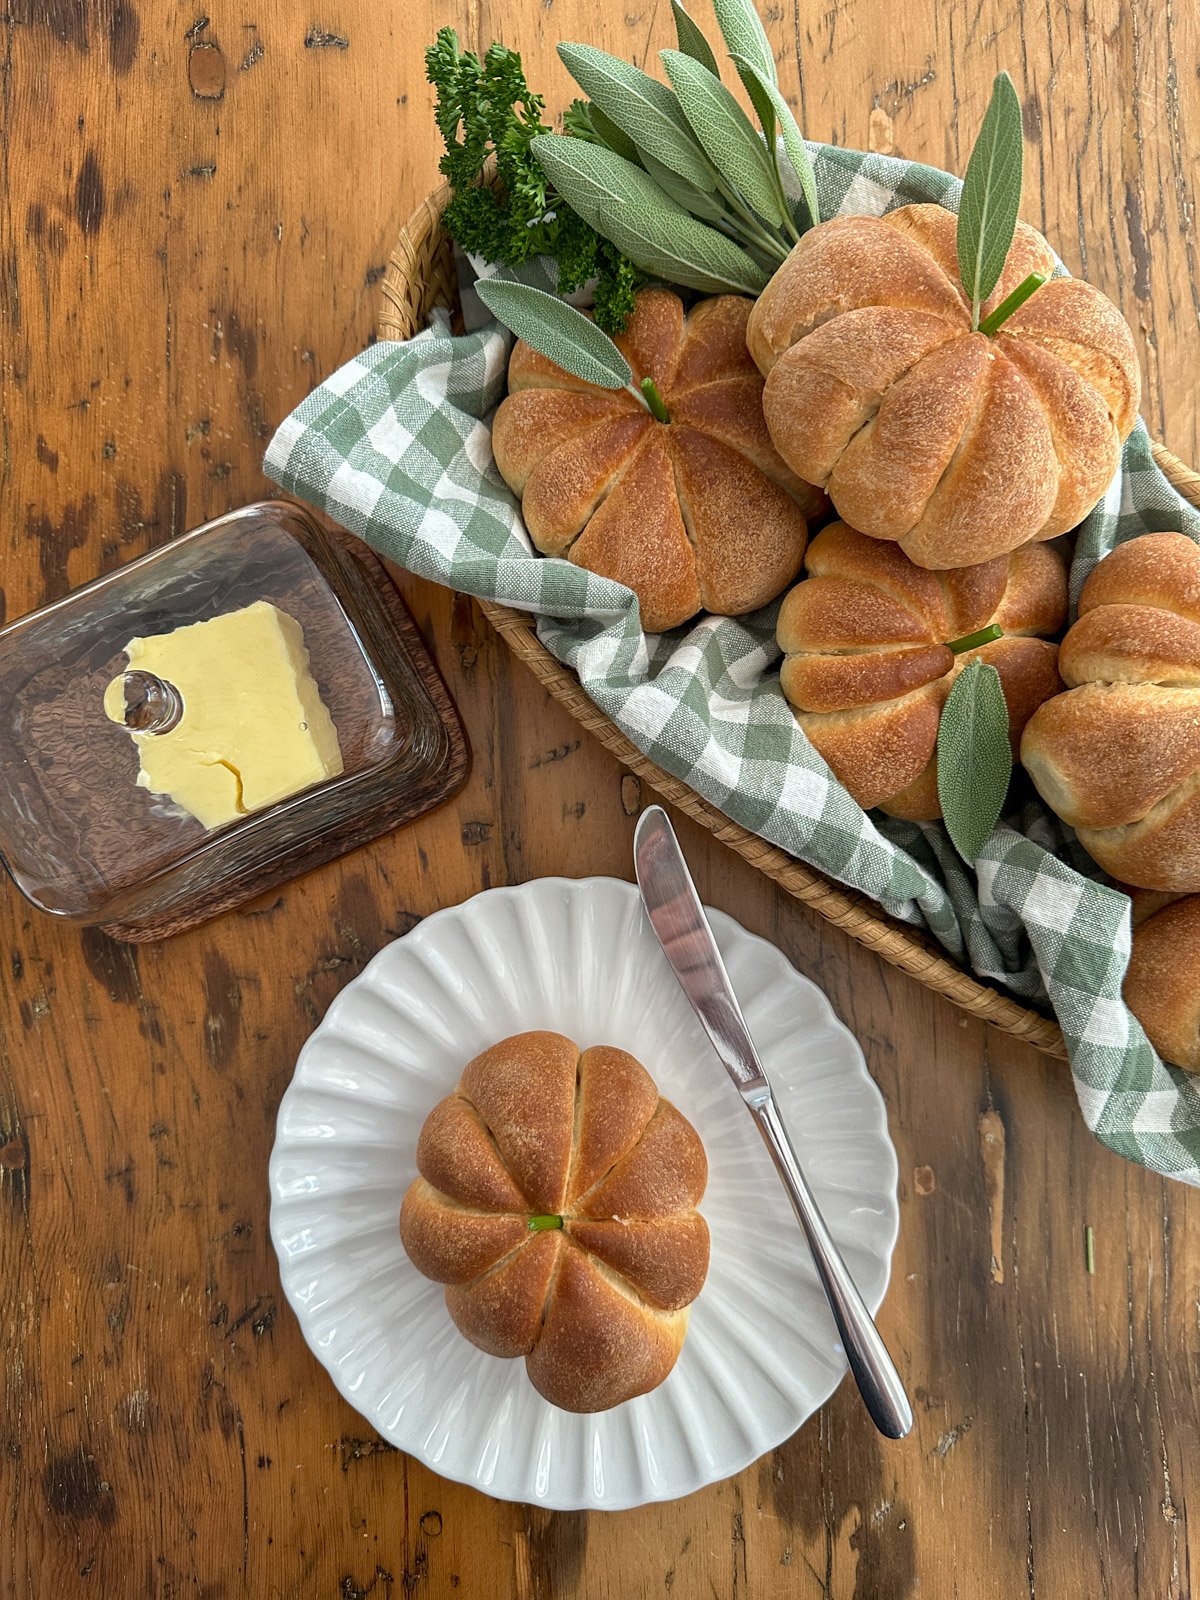
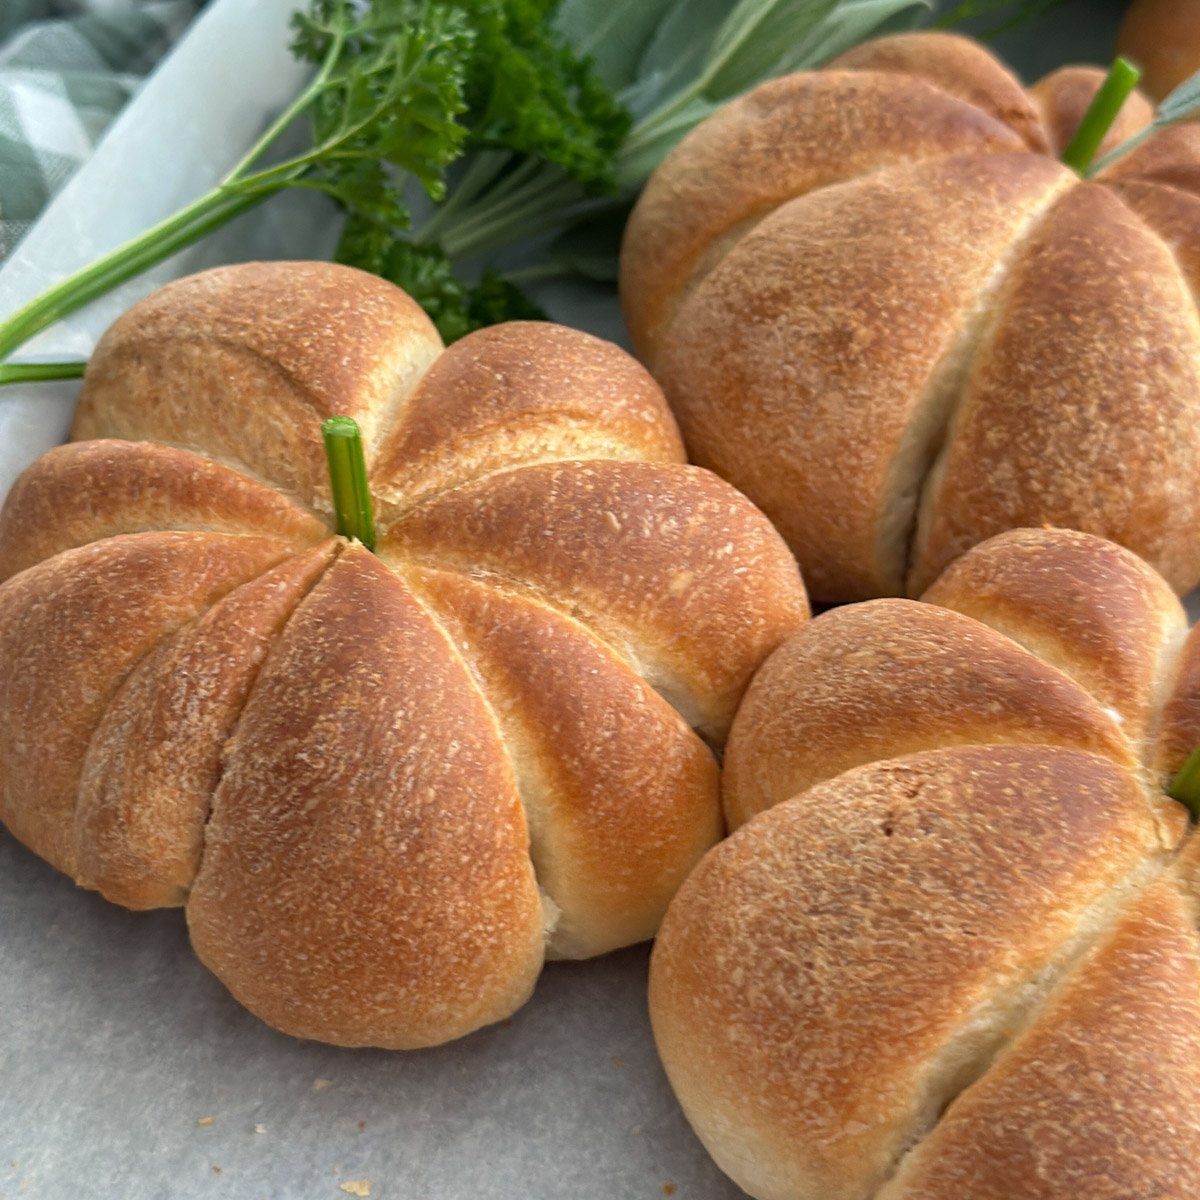
Pumpkin shaped dinner roll recipe, with a herb stem.

There's something magical about warm bread on a crisp fall day, especially when it comes out of the oven shaped like tiny pumpkins. These pumpkin shaped dinner rolls are soft, fluffy, and irresistibly cute. They look beautiful on any Thanksgiving table or fall gathering and are easier to make than you might think.

Pumpkin shaped dinner roll with an herb stem.

Why We Love This Recipe

  • These are so cute, and perfect for fall entertaining.
  • They're easy to make in the bread maker or by hand.
  • These rolls are soft and fluffy and delicious.
  • It's not difficult at all to form them into pumpkins.

A Quick Look At This Recipe

  • 📋 Recipe: Pumpkin Shaped Dinner Rolls
  • ⏲️ Ready: In 2 hours 50 Minutes
  • 👪 Servings: Makes 8 rolls
  • 🔪 Difficulty: Easy -Especially if you use the bread machine to make the dough.
  • 💭Top Tip: Make these for Thanksgiving or a fall get together and wow your guests!
[feast_advanced_jump_to]

This dinner roll recipe is one I use all the time and I thought it would be fun to shape into pumpkins for fall.  These turned out so great.  

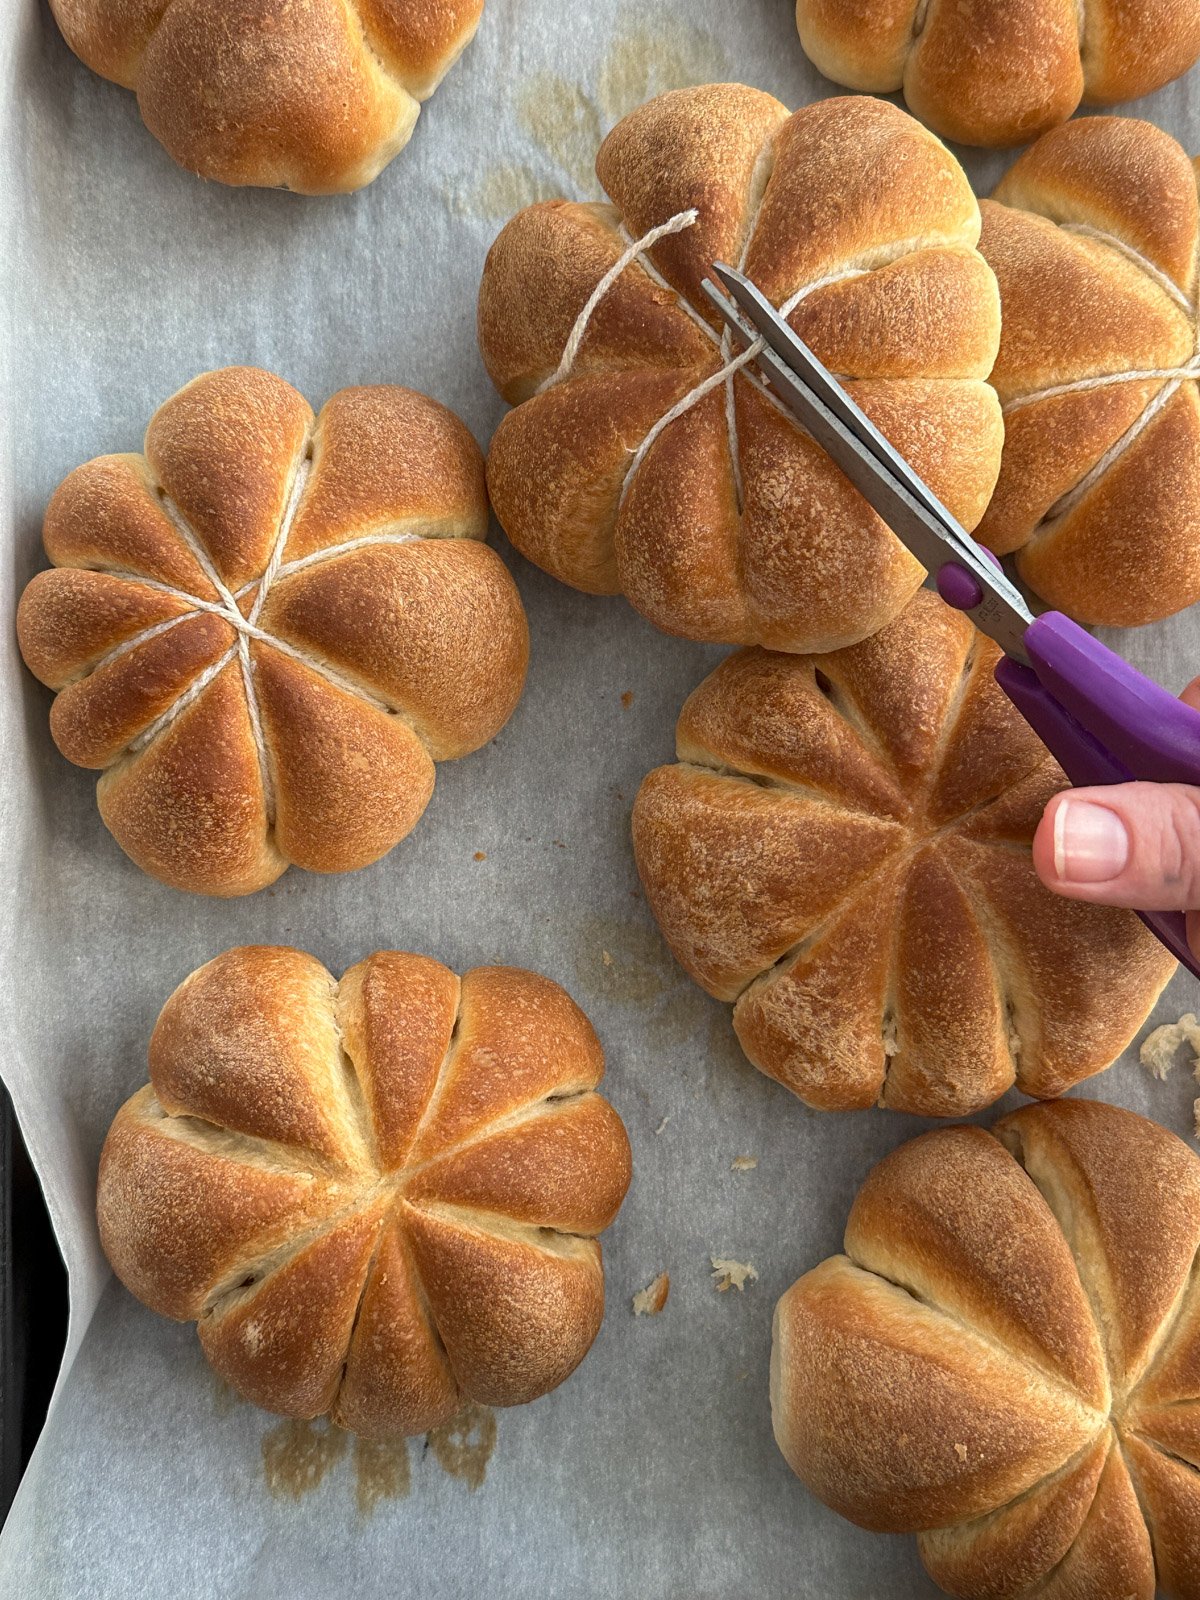
Whether you use a bread machine or mix the dough by hand, this simple recipe walks you through each step to create rolls that are as delicious as they are charming. The secret is a bit of kitchen string that gives each roll its pumpkin shape, and a touch of herbs for the perfect little stem on top.

These festive rolls are ideal for fall dinners, cozy Sunday meals, or any time you want to make your table feel special. 

They're very similar to our Heart Shaped Hamburger Buns that we made for Valentine's Day.  I think they'd be really delicious for your Thanksgiving dinner or any fall dinner party, like this Cozy Fall Soup Party. If you love pumpkin, you might also like our Pumpkin Spice Rice Krispie Treats, and Pumpkin Blondies.

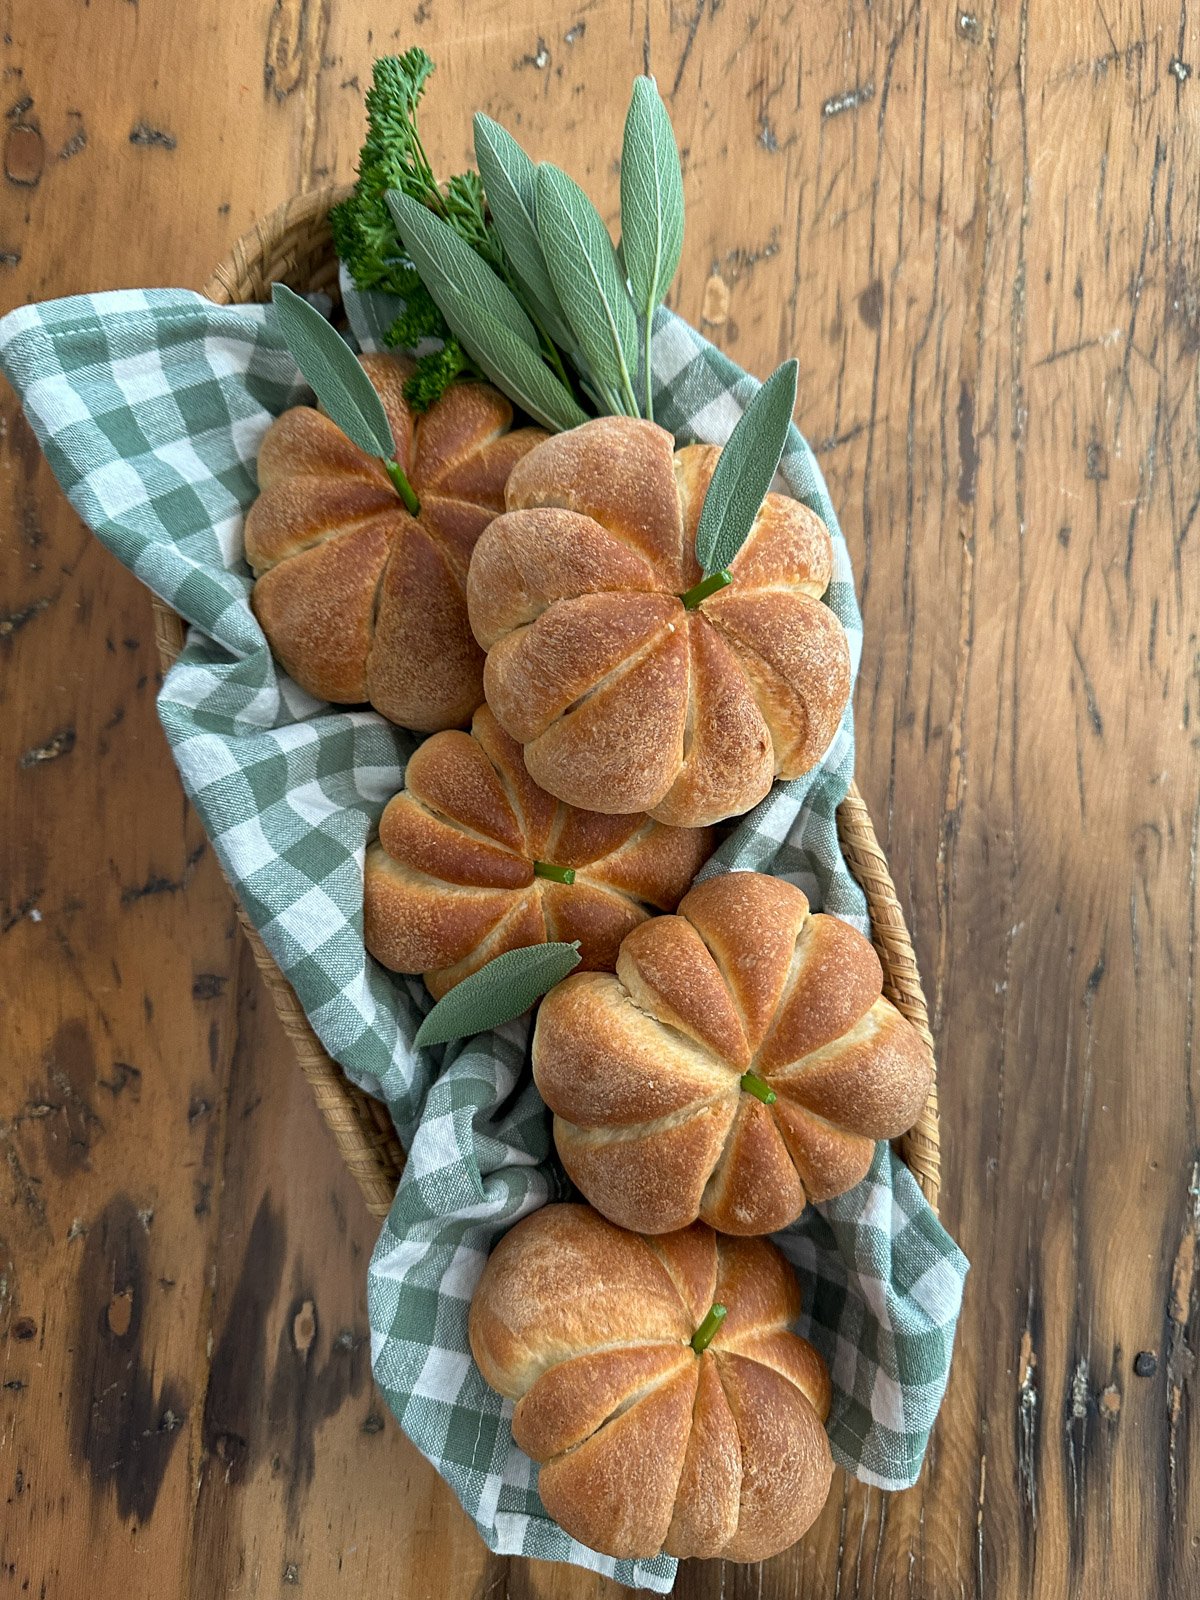
Pumpkin shaped dinner rolls in a wicker basket.

Use Your Bread Machine Or Make By Hand

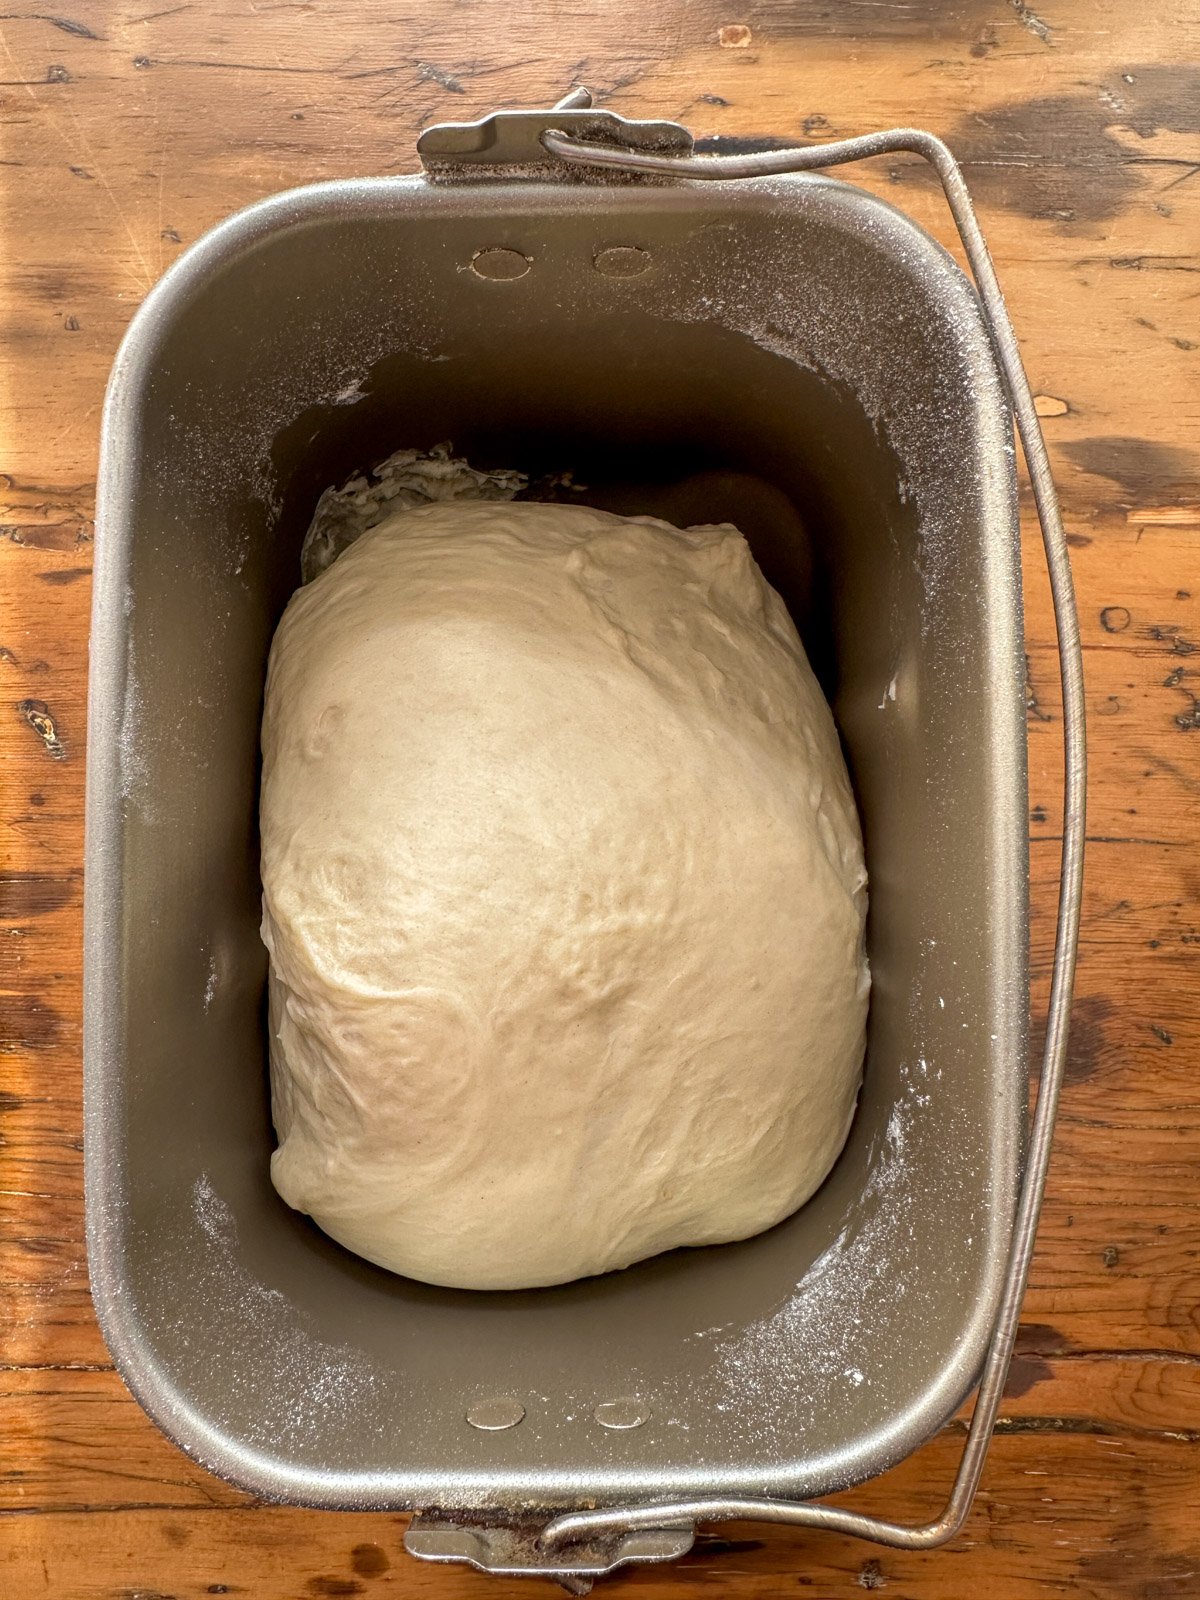
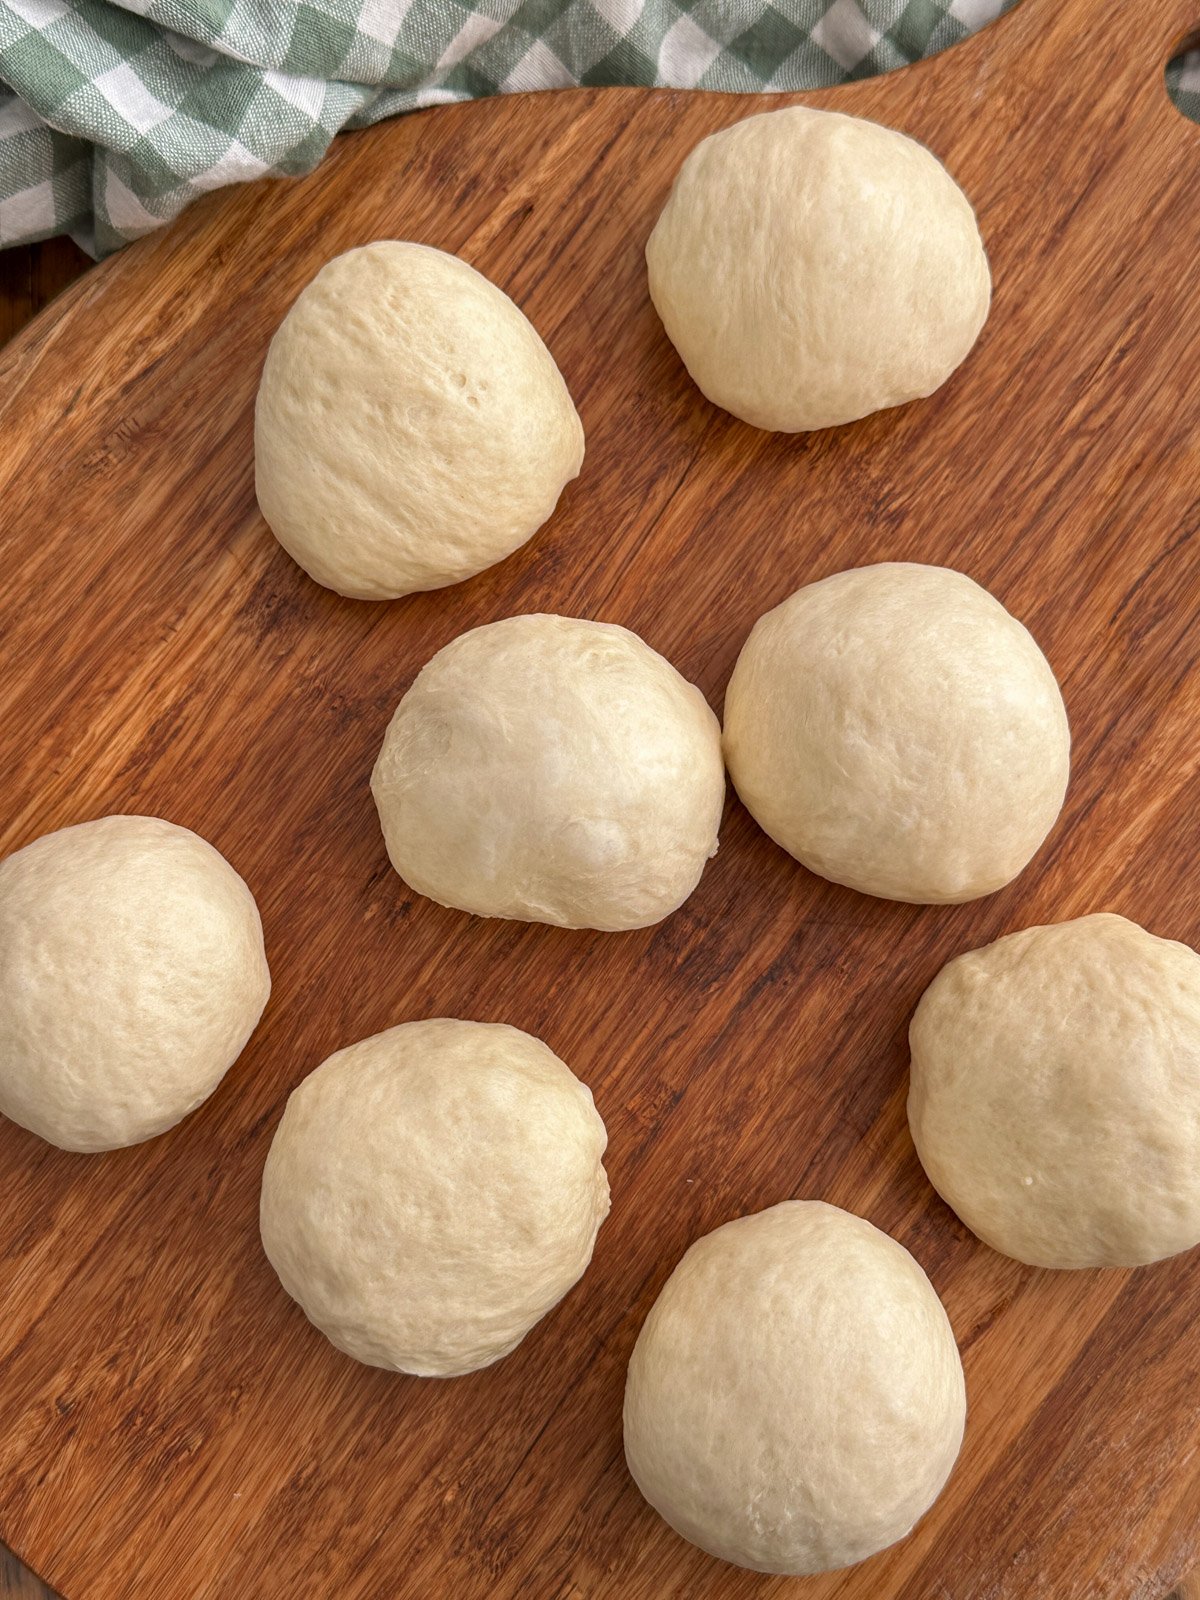
We made the dough for our pumpkin shaped rolls in the bread machine!  It doesn't get any easier than that, and the dough always comes out perfectly.  They take about 2.5 hours in my bread machine at the dough setting, and then you can take out the dough, form them into pumpkin rolls, let them rise and bake.  They are a little time-consuming, but most of the time is spent waiting and they aren't difficult to make at all.

You can also make the dough by hand if you don't have a bread machine.

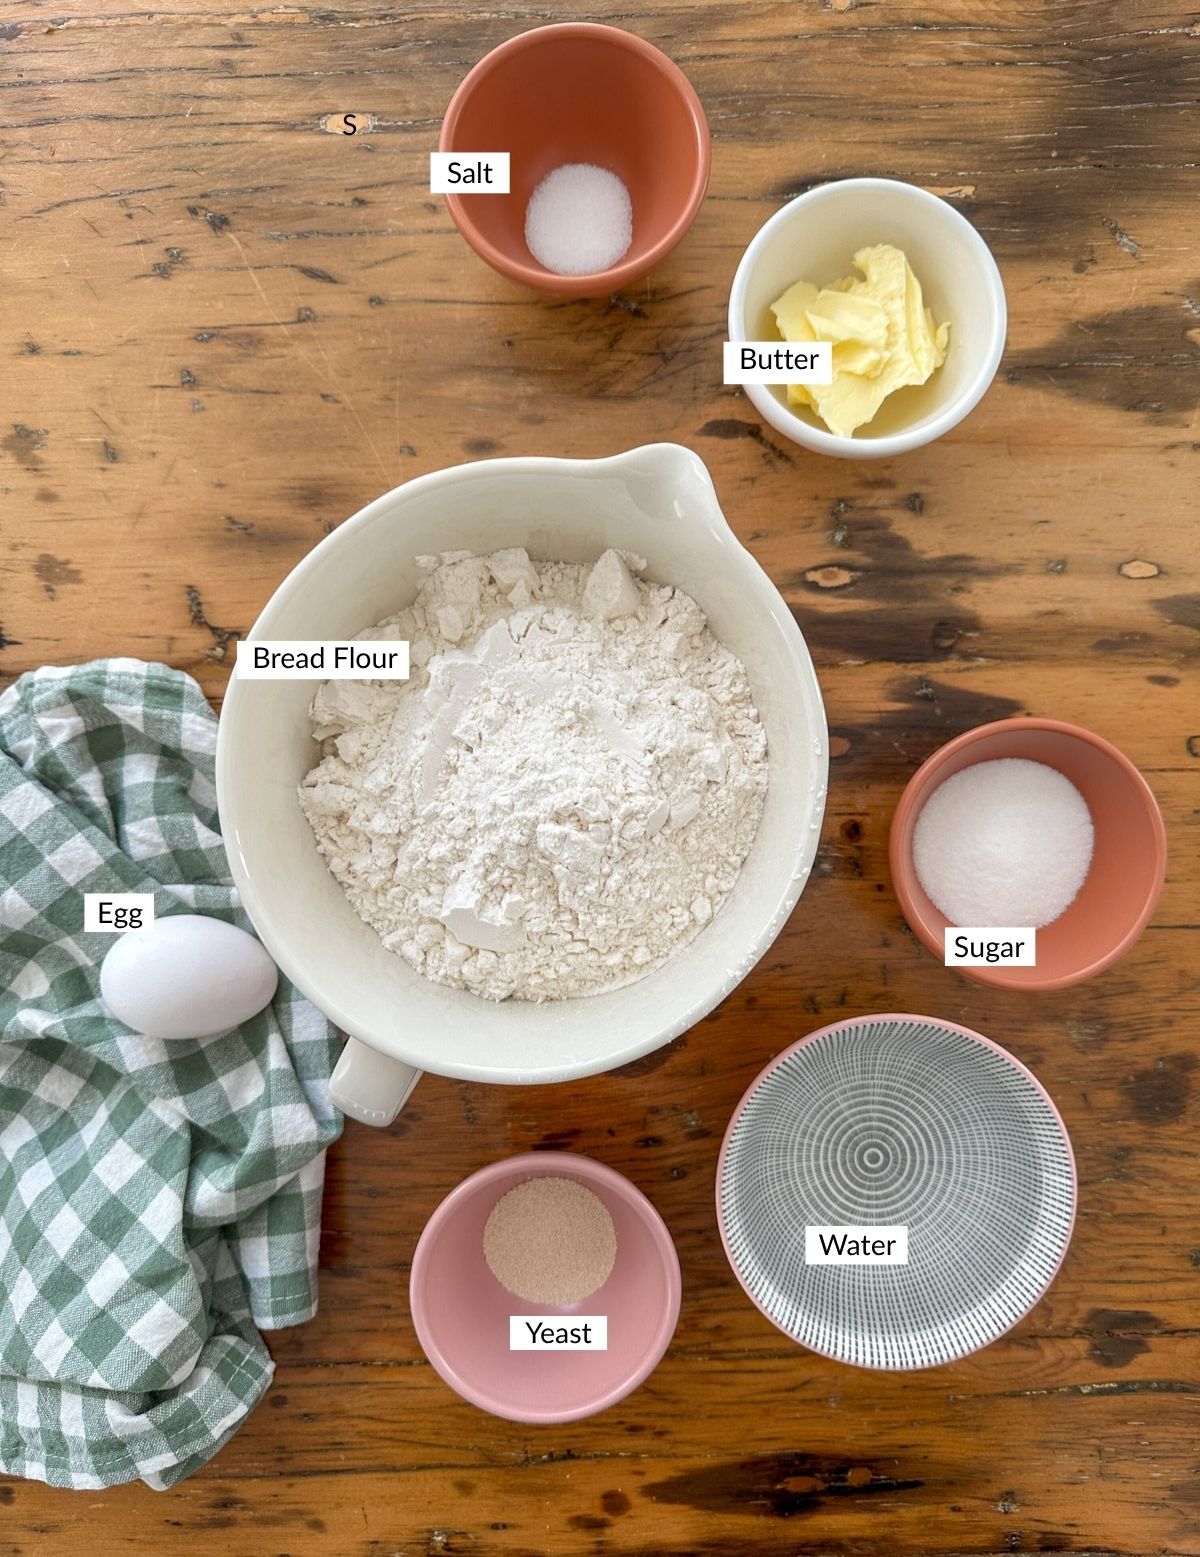
Ingredients

Pumpkin shaped dinner roll ingredients in bowls on a table.

Exact measurements and a full list in the recipe card.

  • Yeast: I use bread machine instant yeast, and it works great.  Top tip: store it in your instant yeast in the refrigerator in a sealed container to extend its life and keep it fresh.
  • Bread Flour: Bread and rolls are traditionally made with bread flour because it contains more protein that helps create stronger more elastic gluten, resulting in chewy rolls.
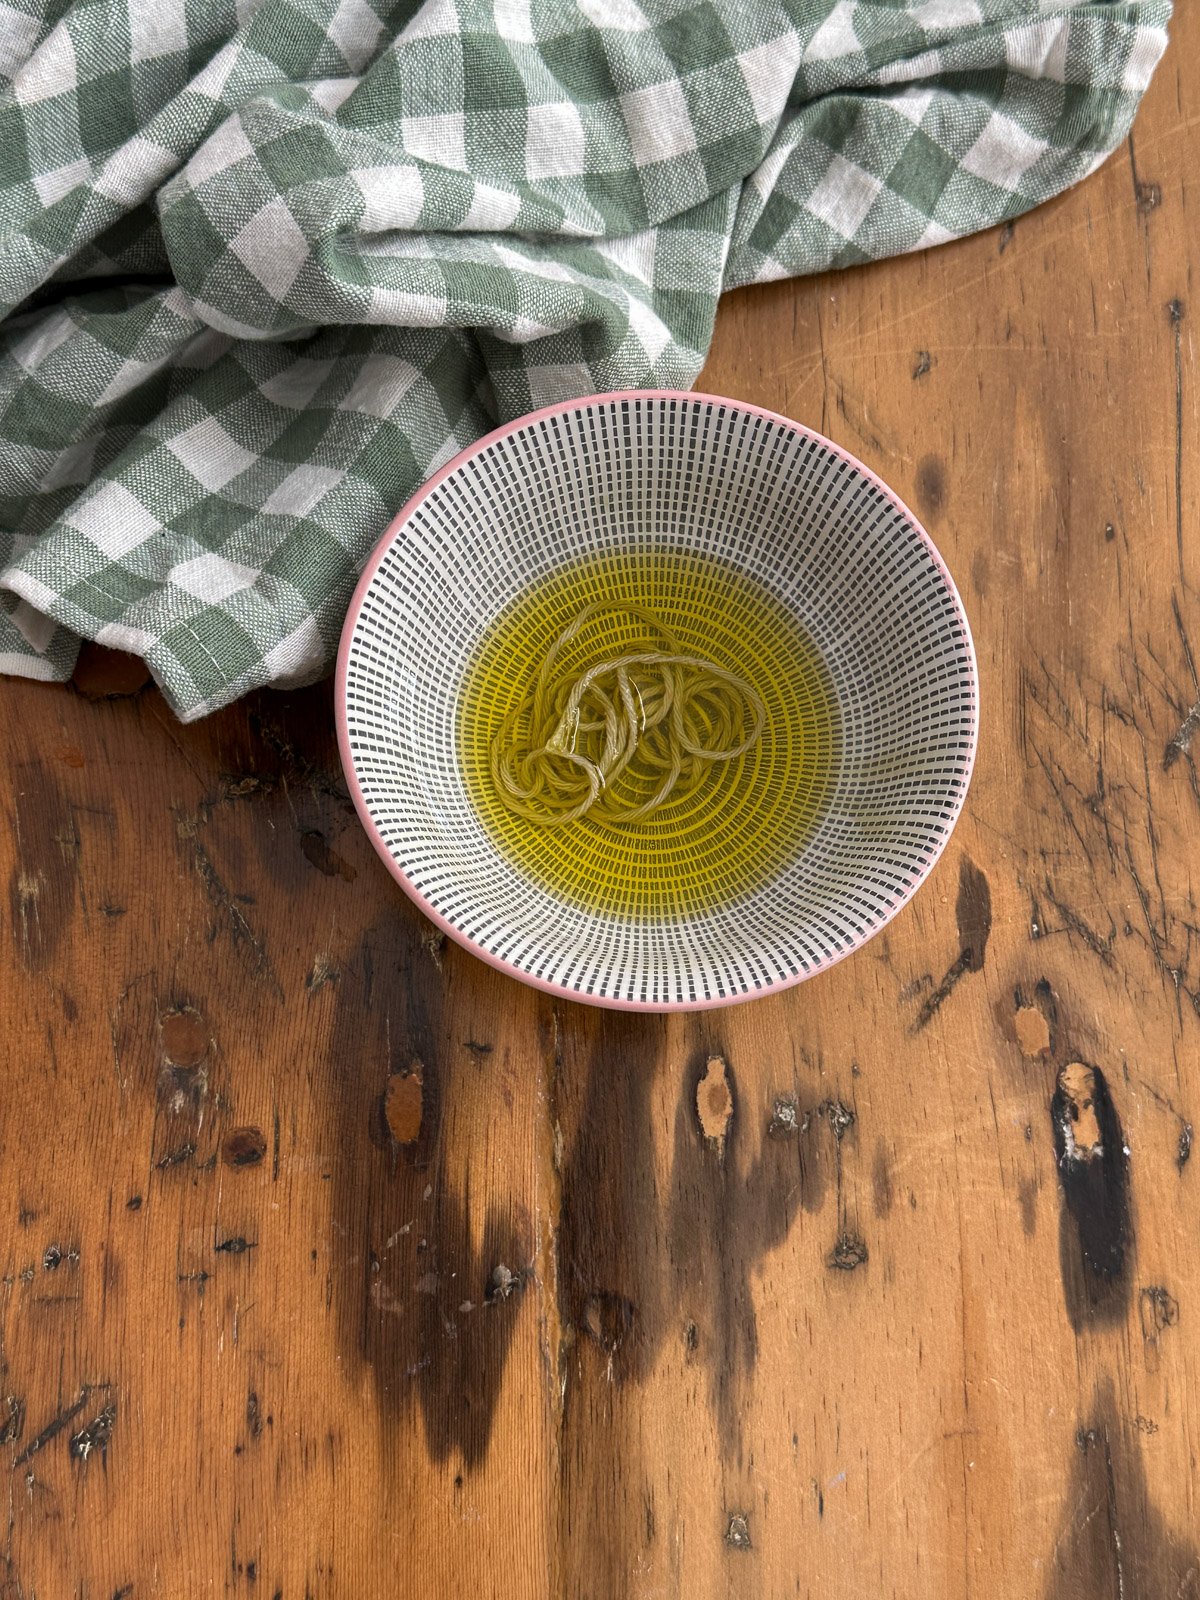
  • Kitchen String: This recipe uses kitchen string tied around the dough to create the pumpkins shape.  This basic, undyed string works best.  Do not use a dyed string that might leach into the dough, or a jute twine that might remove easily from the rolls.
  • Oil: We used olive oil to coat our string and finished rolls, but you can use vegetable oil if you prefer.

Substitutions

  • All Purpose Flour: you can substitute all purpose flour for the bread flour in this recipe.

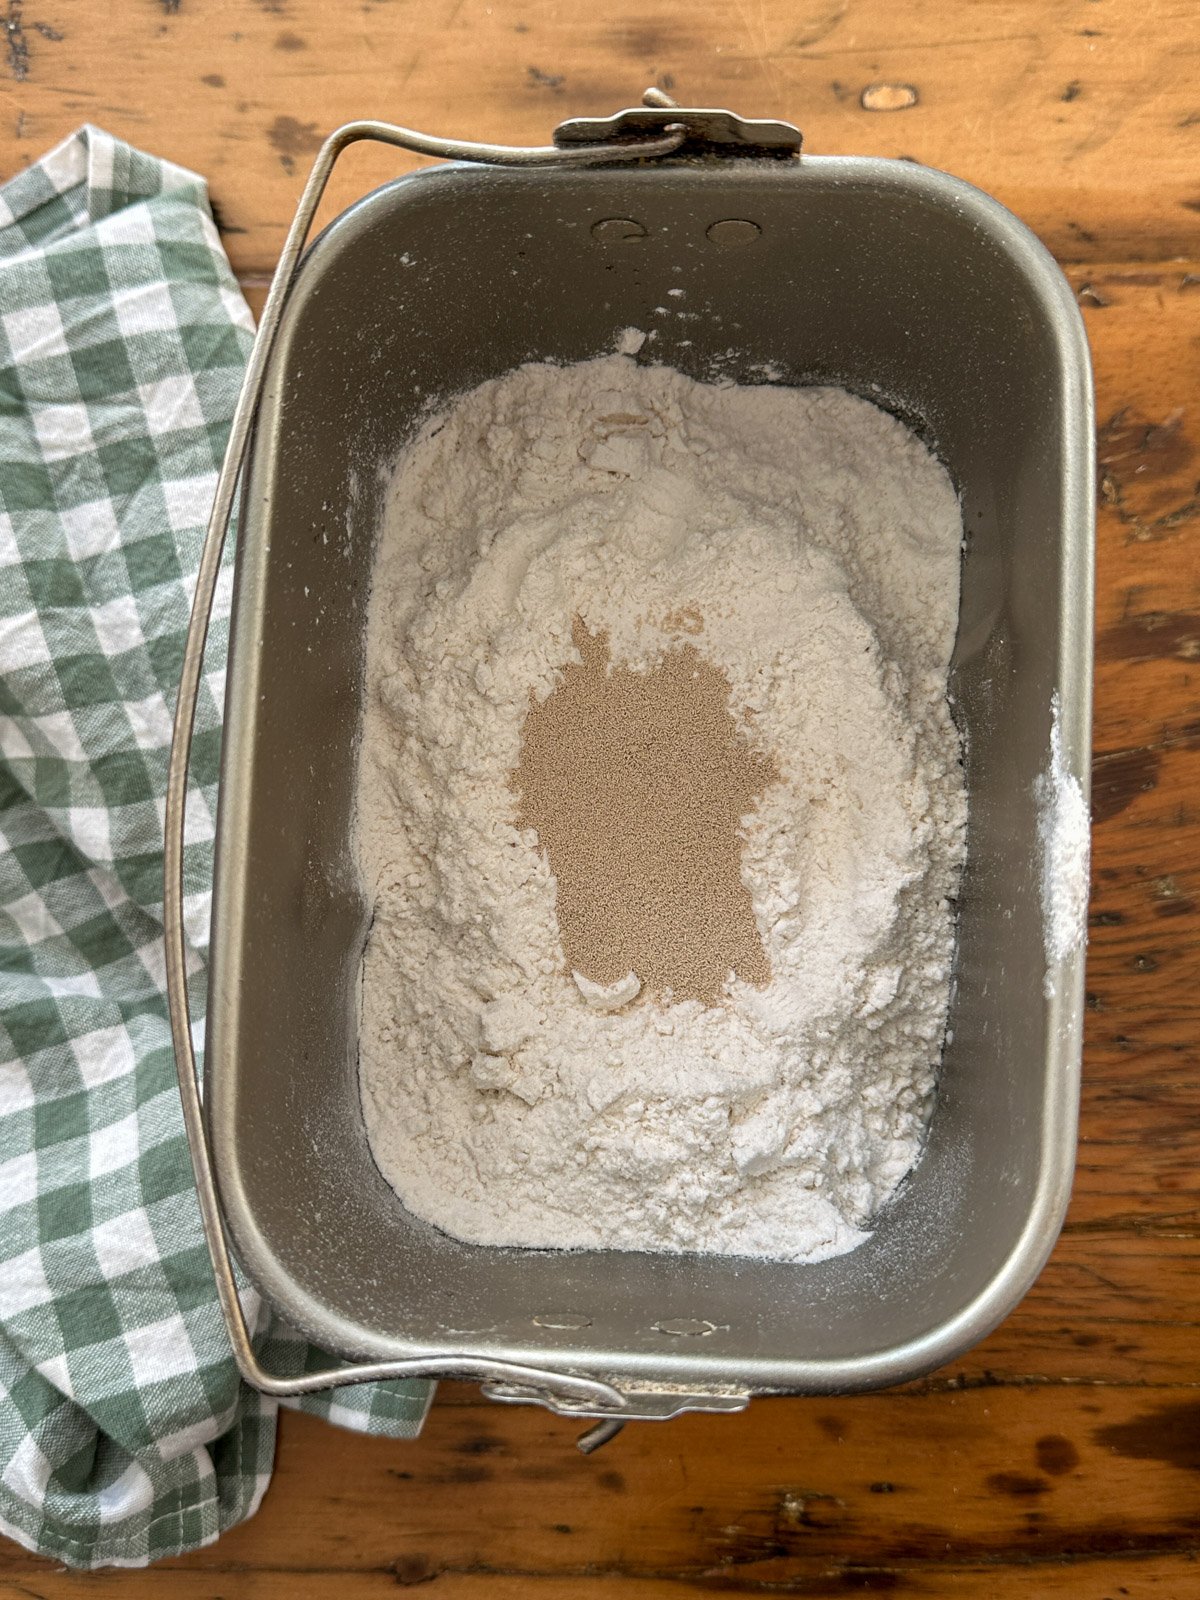
How To Make Pumpkin Shaped Dinner Rolls

Pumpin shaped dinner roll ingredients layered in bread making machine tray.

Step 1: If you are using a bread machine, layer all the ingredients into the bread maker. Starting with the butter, then warm water, sugar, egg and salt. Next, in the flour and lastly add the yeast. It's important to add the ingredients in order. And do not mix them together. Set your bread maker to the "dough" setting. 

If you are making your dough by hand, in a large bowl, dissolve the yeast in the warm water. Let sit for about 10 minutes, until the mixture is foamy. Add in the butter, sugar, egg, salt, and flour. Mix by hand or in a stand mixer until the dough comes together. If using a stand mixer with a dough hook, continue until the dough is smooth and elastic. If mixing by hand, turn the dough out onto a floured surface and knead until the dough is smooth and elastic. Place the dough in a large bowl, sprayed with oil, turning once to coat the top and cover with plastic wrap. Place it in a warm place to rise until it's doubled in size, about 1.5 hours.

Pumpkin shaped bun bread dough in a bread making machine tray.

Step 2: When your dough is finished, turn it out onto a floured surface and knead to remove any air bubbles. Then divide your dough into 8 equal pieces to make 8 rolls, dividing the dough in half, then dividing each piece in half, and half again to make them equal.

Dinner roll dough shaped into 8 equal balls.

Step 3: Shape each piece of dough first into a ball, then. And set the dough balls aside. 

Kitchen string cut into pieces and soaking in a bowl of olive oil, ready to use to tie pumpkin dinner rolls into shape.

Step 4: Cut 8 pieces of kitchen string about 3 feet long.  Pour your oil into a small bowl, and add in the string pieces and fully coat them in oil.

How to shape bread dough into a pumpkin using kitchen string.

To make your pumpkin shaped bun, wrap the string around the dough ball, crossing in the back to make 8 equal sections, and secure the string by tying it together with a knot.  Do these with all eight dough balls. The string should be taut, but not pressing into the dough ball.

Pumpkin shaped dinner rolls after rising.

Step 5: Place the tied dough balls on a parchment lined baking sheet, and brush the tops with oil.  Cover with a clean tea towel and leave to rise for about 30 minutes.

Baked pumpkin shaped dinner rolls on a parchment-lined baking tray.

Step 6: Preheat your oven to 350 degrees.

Cook for 20 minutes or until the baked rolls are golden brown and sound hollow inside when tapped on the bottom. 

Removing the kitchen string from pumpkin shaped rolls after they've been baked.

Step 7: Allow to cool for a few minutes, until they're cool enough to handle and remove the string, using scissors to cut the pieces and then pull them off of the rolls.

Pumkin shaped dinner rolls with parsely stems and sage leaves.

Step 8: To make a pumpkins stem use some herbs, we used parsley stems and sage leaves, poked into the top of the roll.

Expert Tips:

Be sure to oil your kitchen string before tying, so it's easier to remove after baking. And don't tie your kitchen string too tightly, we want it to be taut, but not digging into the dough when we first tie it. As the dough rises, the indents will be formed.

Storage

These pumpkin shaped rolls are best eaten the day they are made. Store any extras at room temperature in an airtight container. 

Serving Ideas

These pumpkin dinner rolls are wonderful with soups, stews, or roasted meats. Serve them at Thanksgiving with butter and honey, or use them as mini sandwich rolls filled with turkey and cranberry sauce for leftovers the next day.

Pumpkin shaped dinner roll with herb stem on plate beside a basket of more rolls.

Frequently Asked Questions

What if my sections of my pumpkin dinner rolls aren't even?

I think uneven sections are fine, they give the rolls some character, and make them look more organic and natural.

When should I remove the string from the pumpkin dinner rolls?

Wait until the roll has cooled slightly and is firm enough to handle safely. Cut the string at the top and gently peel off, pulling each loop open carefully so you don't tear the roll.

Can I use frozen or store-bought dough instead of making dough from scratch to make pumpkin shaped dinner rolls?

Can I make the pumpkin shaped dinner roll dough ahead of time?

Yes, prepare the dough through the first rise, then refrigerate overnight. Bring to room temperature before shaping and baking.

Can I freeze these pumpkin shaped rolls?

Once baked and cooled, freeze the rolls in an airtight container for up to two months. Thaw and then reheat gently in the oven before serving.

More Pumpkin Recipes

  • Pumpkin spice Rice Krispie treats recipe.
    How To Make Pumpkin Spice Rice Krispie Treats
  • How to make a pumpkin spice milkshake.
    Pumpkin Spice Milkshake Recipe
  • A loaf of moist pumpkin bread with walnuts on a cutting board.
    Moist Pumpkin Bread With Walnuts
  • Pumpkin blondies with pumpkin frosting.
    Pumpkin Blondies with Pumpkin Frosting

If you tried this Pumpkin Shaped Dinner Rolls  Recipe or any other recipe on the blog please leave a star rating and let me know how it went in the comments below. Thanks for visiting today!

Recipe

Pumpkin shaped dinner roll recipe, with a herb stem.

Pumpkin Shaped Dinner Rolls

Video

Tender, slightly sweet homemade pumpkin shaped dinner rolls.
5 from 1 vote
Print Pin Rate
Course: Side Dish
Cuisine: American
Prep Time: 2 hours hours 30 minutes minutes
Cook Time: 20 minutes minutes
Total Time: 2 hours hours 50 minutes minutes
Servings: 8
Calories: 288kcal
Author: Dannyelle Nicolle-Ramjist

Ingredients

  • 2 tablespoon softened butter
  • 1 cup warm water
  • 2 ½ tablespoon sugar
  • 1 egg
  • 1 teaspoon salt
  • 3 cups bread flour
  • 2 tsps instant yeast
  • ¼ cup oil
  • Optional: parsley stem and sage leaves

Instructions

  • For the Bread Maker: Add the butter, warm water, sugar, egg and salt to the bread maker. Next, add in the flour, and lastly, add the yeast. It's important to add the ingredients in order, and not stir the ingredients together. Set your bread maker to the "dough" setting.
  • To Make the Dough by Hand:  In a large bowl, dissolve the yeast in warm water. Let sit for about 10 minutes, until the mixture is foamy. Add in the butter, sugar, egg, salt, and flour. Mix by hand or in a stand mixer until the dough comes together. If using a stand mixer with a dough hook, continue until the dough is smooth and elastic. If mixing by hand, turn the dough out onto a floured surface and knead until the dough is smooth and elastic. Place the dough in a large bowl, sprayed with oil, turning once to coat the top and cover with plastic wrap. Place it in a warm place to rise until it's doubled in size, about 1.5 hours.
  • When your dough is finished, place it onto a floured surface and knead to remove the air.
  • Divide your dough into 8 equal pieces to make 8 rolls.
    Shape each piece of dough first into a ball, then. And set the dough balls aside. 
  • Cut 8 pieces of kitchen string about 3 feet long.  Pour your oil into a small bowl, and add in the string pieces and fully coat them in oil.
  • To make your pumpkin, wrap the string around the dough ball, crossing in the back to make 8 equal sections, and secure the string by tying it.  Do these with all eight dough balls.
  • Place the tied dough balls on a parchment lined baking sheet, and brush the tops with oil.  Cover with a clean tea towel and leave to rise for about 30 minutes.
  • Preheat your oven to 350 degrees. Cook for 20 minutes or until the baked rolls are golden brown and sound hollow inside when tapped on the bottom. 
  • Allow to cool for a few minutes, until they're cool enough to handle and remove the string, using scissors to cut the pieces and pull off of the rolls.
  • Optional: To make a pumpkin stem use some herbs, we used parsley stems and sage leaves, poked into the top of the roll.

Notes

Optional: Use parsley stems and sage leaves to create a stem and leaf for your pumpkin rolls, or cut a small piece of the dough into 8 tiny strips before forming the rolls, bake them on the baking tray with the pumpkin shaped rolls, and add them to the rolls after removing the string to make a bread stem.
Serve warm or at room temperature.

Nutrition

Calories: 288kcal | Carbohydrates: 39g | Protein: 8g | Fat: 11g | Saturated Fat: 3g | Polyunsaturated Fat: 3g | Monounsaturated Fat: 6g | Trans Fat: 0.1g | Cholesterol: 28mg | Sodium: 325mg | Potassium: 84mg | Fiber: 2g | Sugar: 4g | Vitamin A: 118IU | Vitamin C: 0.01mg | Calcium: 13mg | Iron: 1mg
Tried this Recipe? Tag me Today!Mention @LifeisaParty or tag #lifeisaparty!

20 Back To School Party Ideas

Aug 11, 2025 · Leave a Comment

Back to school party ideas of table decorations, apple balloons, book garland, and smart cookies with glasses.


Back to school is a special time of year for children and families.  It marks new beginnings, and it's worth celebrating.  Over the years I've thrown lots of back to school celebrations for my little ones each September and I've got lots of great back to school party ideas.  From DIY apple to pencils, to smart cookie ideas, let's get celebrating!

Why You'll Love Back To School Parties!

  • Transitions can be hard, but parities make them better!
  • It's a great chance to make your child feel special and celebrated, and help them get excited about the year ahead.
  • There's so many cute ways to incorprate the school, school supplies, apple theme.
  • Themed foods are so fun to make and eat.
  • It's a great way to make special memories.
[feast_advanced_jump_to]

Over the years I thrown many back to school family parties.  One of my favourite tradtiions was surprising my girls on the first day of school with special dinner when they got home and hearing all about their new teachers, classrooms, and seeing their friends.  

Every year I'd pretend I was to busy to plan it this year, and when they got home they'd find the table set for our own back to school party. I had a lot of fun over the years with different themes, decorations and foods.  You can find them all in our Back To School Ideas Section. So if you see an idea below and you want to find more about it, you can find the orginal party there. You might also like our Back to School Themed Foods and Treats, Back To School Snack Mix, or our Free Back To School Printables.

I've put them all together here to inspire your own back to school celebrations.  Some ideas are more elaborate than others, and some are really simple.  To me, it's all about making our kids feel special and celebrating the start of a new school year together with all it's possibilities and new potential.

I love to decorate for back to school with school supplies, vintage pieces and apples. Here are some of my best ideas.  

Book Page Table Runner

One of my favourite ideas was using old book pages as a table runner.  Look for old books at a thrift store, and tear out the pages to make a runner.  Hot glue them together.  Using different books for varations looks great. See the whole book themed party here.

Book themed party decorations of book page table runner, mini book bunting, and a book page wreath.

Chalk Board Table Runner

Use black wrapping paper, and write on it with a chalk, or even better a chalkboard marker to look like an old fashioned black board. See the whole back to school family dinner party here.

Back to school celebration.

Apple Centerpiece

Apples always make me think of back to school.  They look great just lined up down the center of the table.

Use them in a metal lunch box or vintage wood drawer as a centerpiece on the table.

Back to school party center piece with vintage drawer filled with apples, vintage globe, and flowers.

Apple Tealights

To make apple tea light holders fo the table, use a small knife to hollow out the center and insert a tealight.

Back-to-school table centrepiece with apples and succulents.

Apple Balloons

For apple balloons, use round red mylar balloons, these are from the dollar store, and add a brown construction paper stem, and green construction paper leaf.

DIY apple balloons.

School Supplies

Just sprinkling school supplies around is the perfect decoration for back to school. These pencils, rulers, and erasers look great in a mason jar.

Back to school party decorations including apples, school bus toy, and jar of pencils, rulers, and erasers.

Vintage school supplies have a special charm, including some vintage science pieces, vintage trophies, and old globes.

Vintage Globes

Vintage globes look great, along with some book page tassels.

DIY MIni Book Bunting

We made mini books with cardstock and old book pages to make a mini book garland to hang over our back to school table.

Easy DIY book bunting made from card stock and some old book pages, attached to string with mini clothespins.

Vintage Books

Stack beautiful vintage books from the thrift store under glass cloches for the prettiest back to school center piece.

Book themed centrepiece of vintage books stacked under and inside a glass cloche.

Pencil Box Cutlery Holders

These pencil boxes made the cutest cutlery holders.

DIY Book Page Plates

And these book page plates were a really simple DIY. We used white square plates, and then drew lines on the plates with non-permanent blue and red edible markers.

Gumball Pencils

We used test tubes and yellow, black and pink gumballs to make these pencil themed party favors.

Back to school table setting with gumball pencil party favors.

DIY Pencil Stirsticks

I used yellow straws, with a little pink tissue paper on the ends, tied with gold string to make the cutest pencil themed drink stir sticks.

Back to school with DIY pencil stir sticks.

Pencil Planter

I cut down some pencils and attached them to a planter with elastics to make the cutest back to school centerpiece.

Mini Chalkboard Place Cards

Use mini chalkboards as place cards on your back to school table.

Back to school party mini chalkboard place cards.

Library Card Place Cards

Library cards make adorable placecards for a back to school party. Fill in the name and year.

Paper Bags

Turn white paper bags into lined paper bread roll holders, all you need is a pink and blue marker and ruler for this cute DIY.

Ruler Ribbon

Add ruler or alphabet ribbon to glass bottles or glasses to add a fun back to school feel. You could also use back to school ribbon tied around napkins as a napkin ring.

Scientific Glass Used As Vases

Look for vintage scientific glass bottles at the antique store, or new ones at the craft store and use them as flower vases for your party.

Scientific glass used as a flower vase.

Book Page Drink Flags

Make your straws back to school themed by gluing a flag made of a book page and writing "school days" with a marker.

Back To School Food Ideas

You can't have a back to school party without some special back to school food.

Check out all our special back to school food ideas in this blog post.

Back to School themed foods snacks and treats.

Free Back To School Printables

Free printables are such a fun addition to your back to school celebrations.

Check out our Back to School free printable party set complete with printable pencil gift box, banners, cards, even pencil tip hats.

Back to school party set up with free printable banner, party hats, 3D pencil gift box and more.
Free printables for back to school, including pennants, posters, cupcake picks, and more in pink or blue.

You will also love our Smart Cookie back to school free printble set.

Smart cookie free party printables.
Smart cookie chocolate chip cookies.

And lastly you might like our back to school free printables with an "All About Me" sheet, lunch box notes, and more.

Frequently Asked Questions

When is the best time to have a back to school party?

If you're inviting friends over a week before school starts is a great time. If it's a famiy party some people like to set up a special breakfast on the first day. Our favorite is to have a special dinner on the first day of school and hear all about how everyone's day went over dinner.

Do you have a back to school party every year?

Yes, why not? Let it become a family tradition and your kids will look forward to it every year. You could even use the same decorations and eat the same foods each year.

How can I access the free back to school printables?

Subscribe to our Free Resource Library (not the free party planning guide) and we'll send you instant access. Don't see the email? Check your spam or junk email folder where it might have landed by mistake.

If you tried any of our Back To School Party Ideas or any other ideas on my blog, please let me know how it went in the comments below. Thanks for visiting today!

More Back To School Ideas

  • Back to school party ideas of table decorations, apple balloons, book garland, and smart cookies with glasses.
    20 Back To School Party Ideas
  • Back to School themed foods snacks and treats.
    Easy and Cute Back To School Themed Foods and Treats
  • Back to school snack mix trail mix recipe.
    Easy Back To School Snack Mix Recipe
  • Back to school free printables including bunting, pencil boxes, party hats and more all set up at a children's tablescape.
    Back To School Free Printables Pack

Halloween Smores

Jul 31, 2025 · 1 Comment

Halloween smores board with Halloween cookies, marshmallows, chocolate and more!
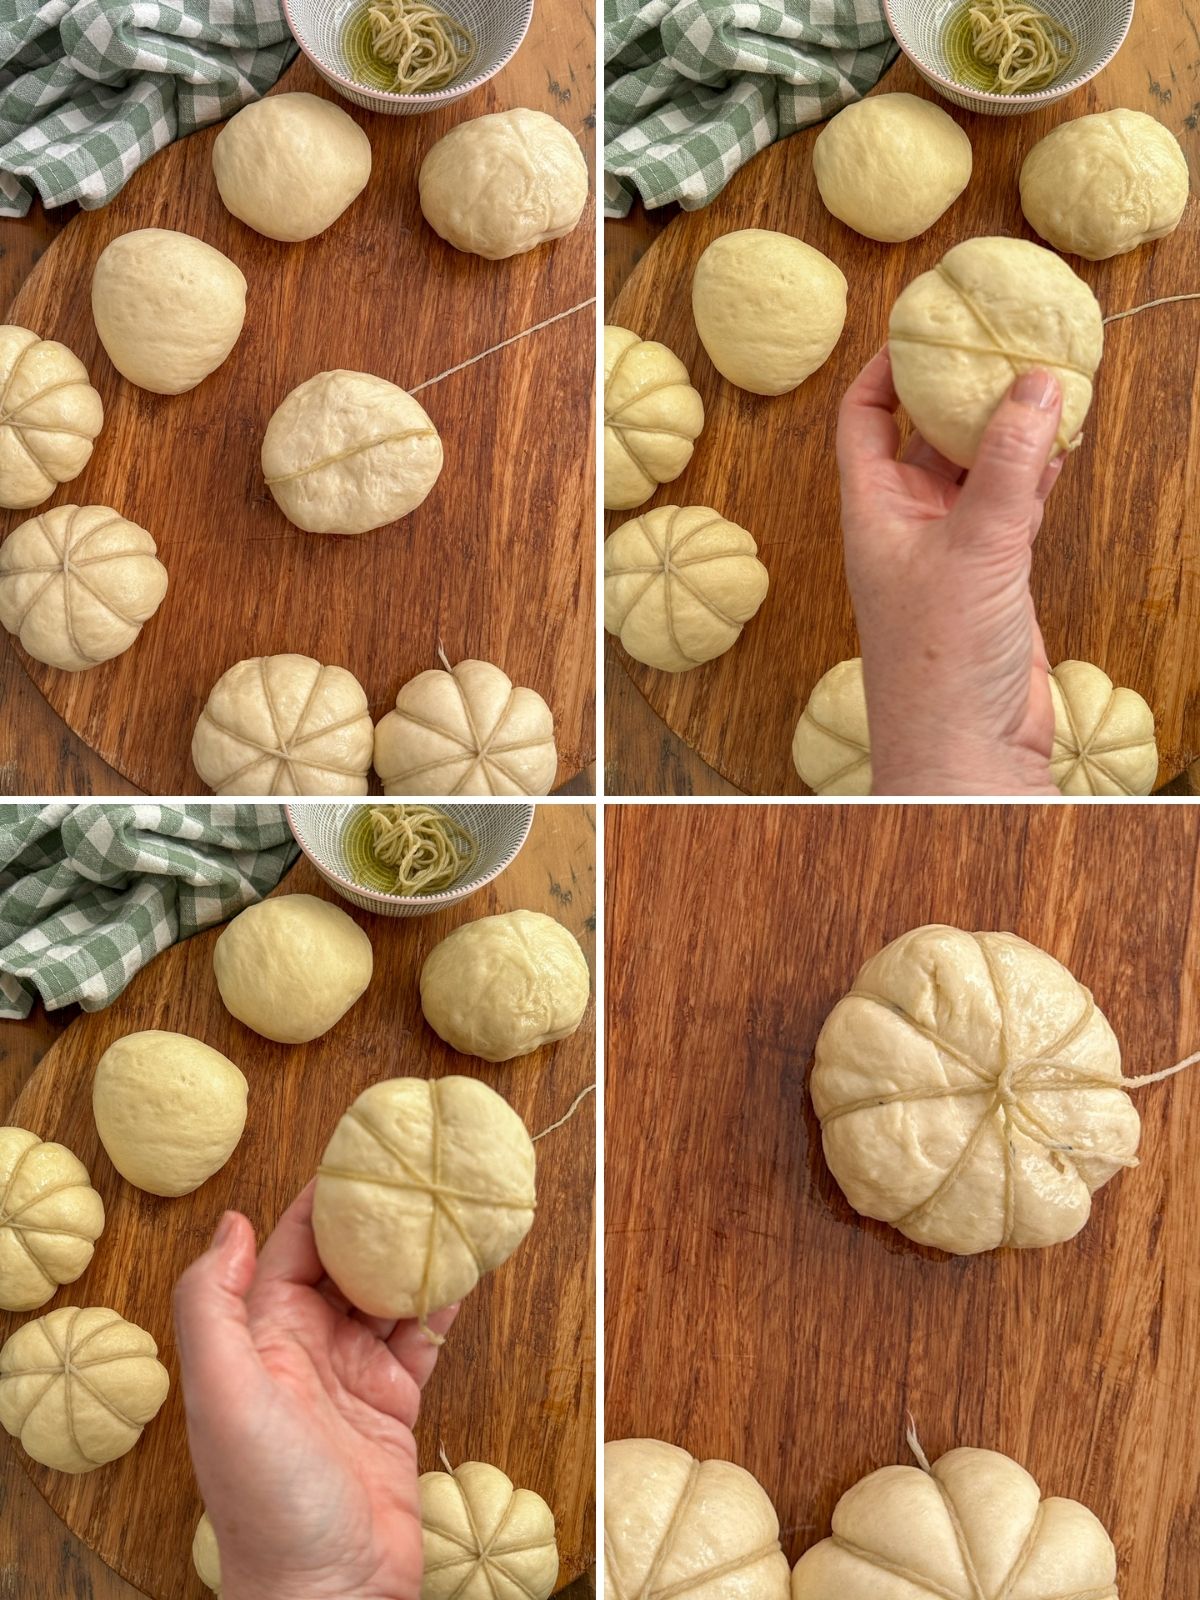
What could be better for celebrating Halloween than Halloween Smores? And we've made them extra spooky with Halloween inspired cookies, marshmallows, candies and more!  Don't be scared to trick or treat yourself to these!
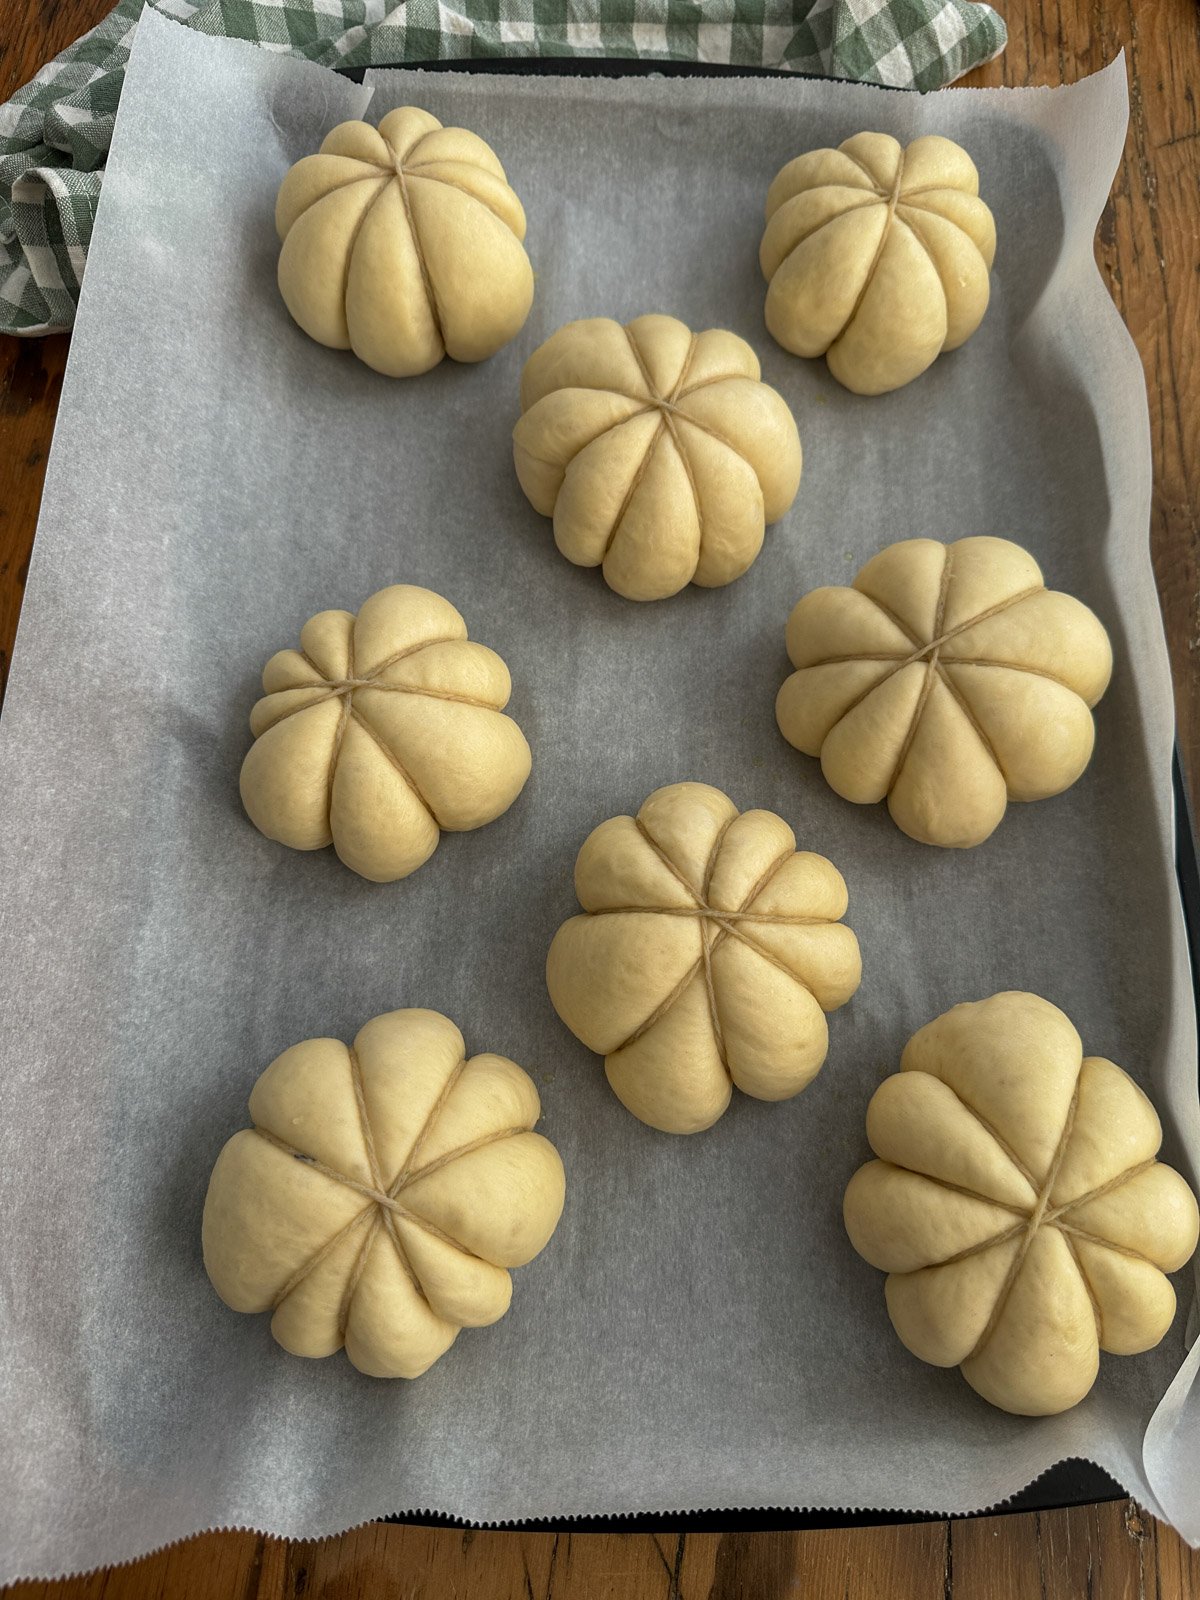
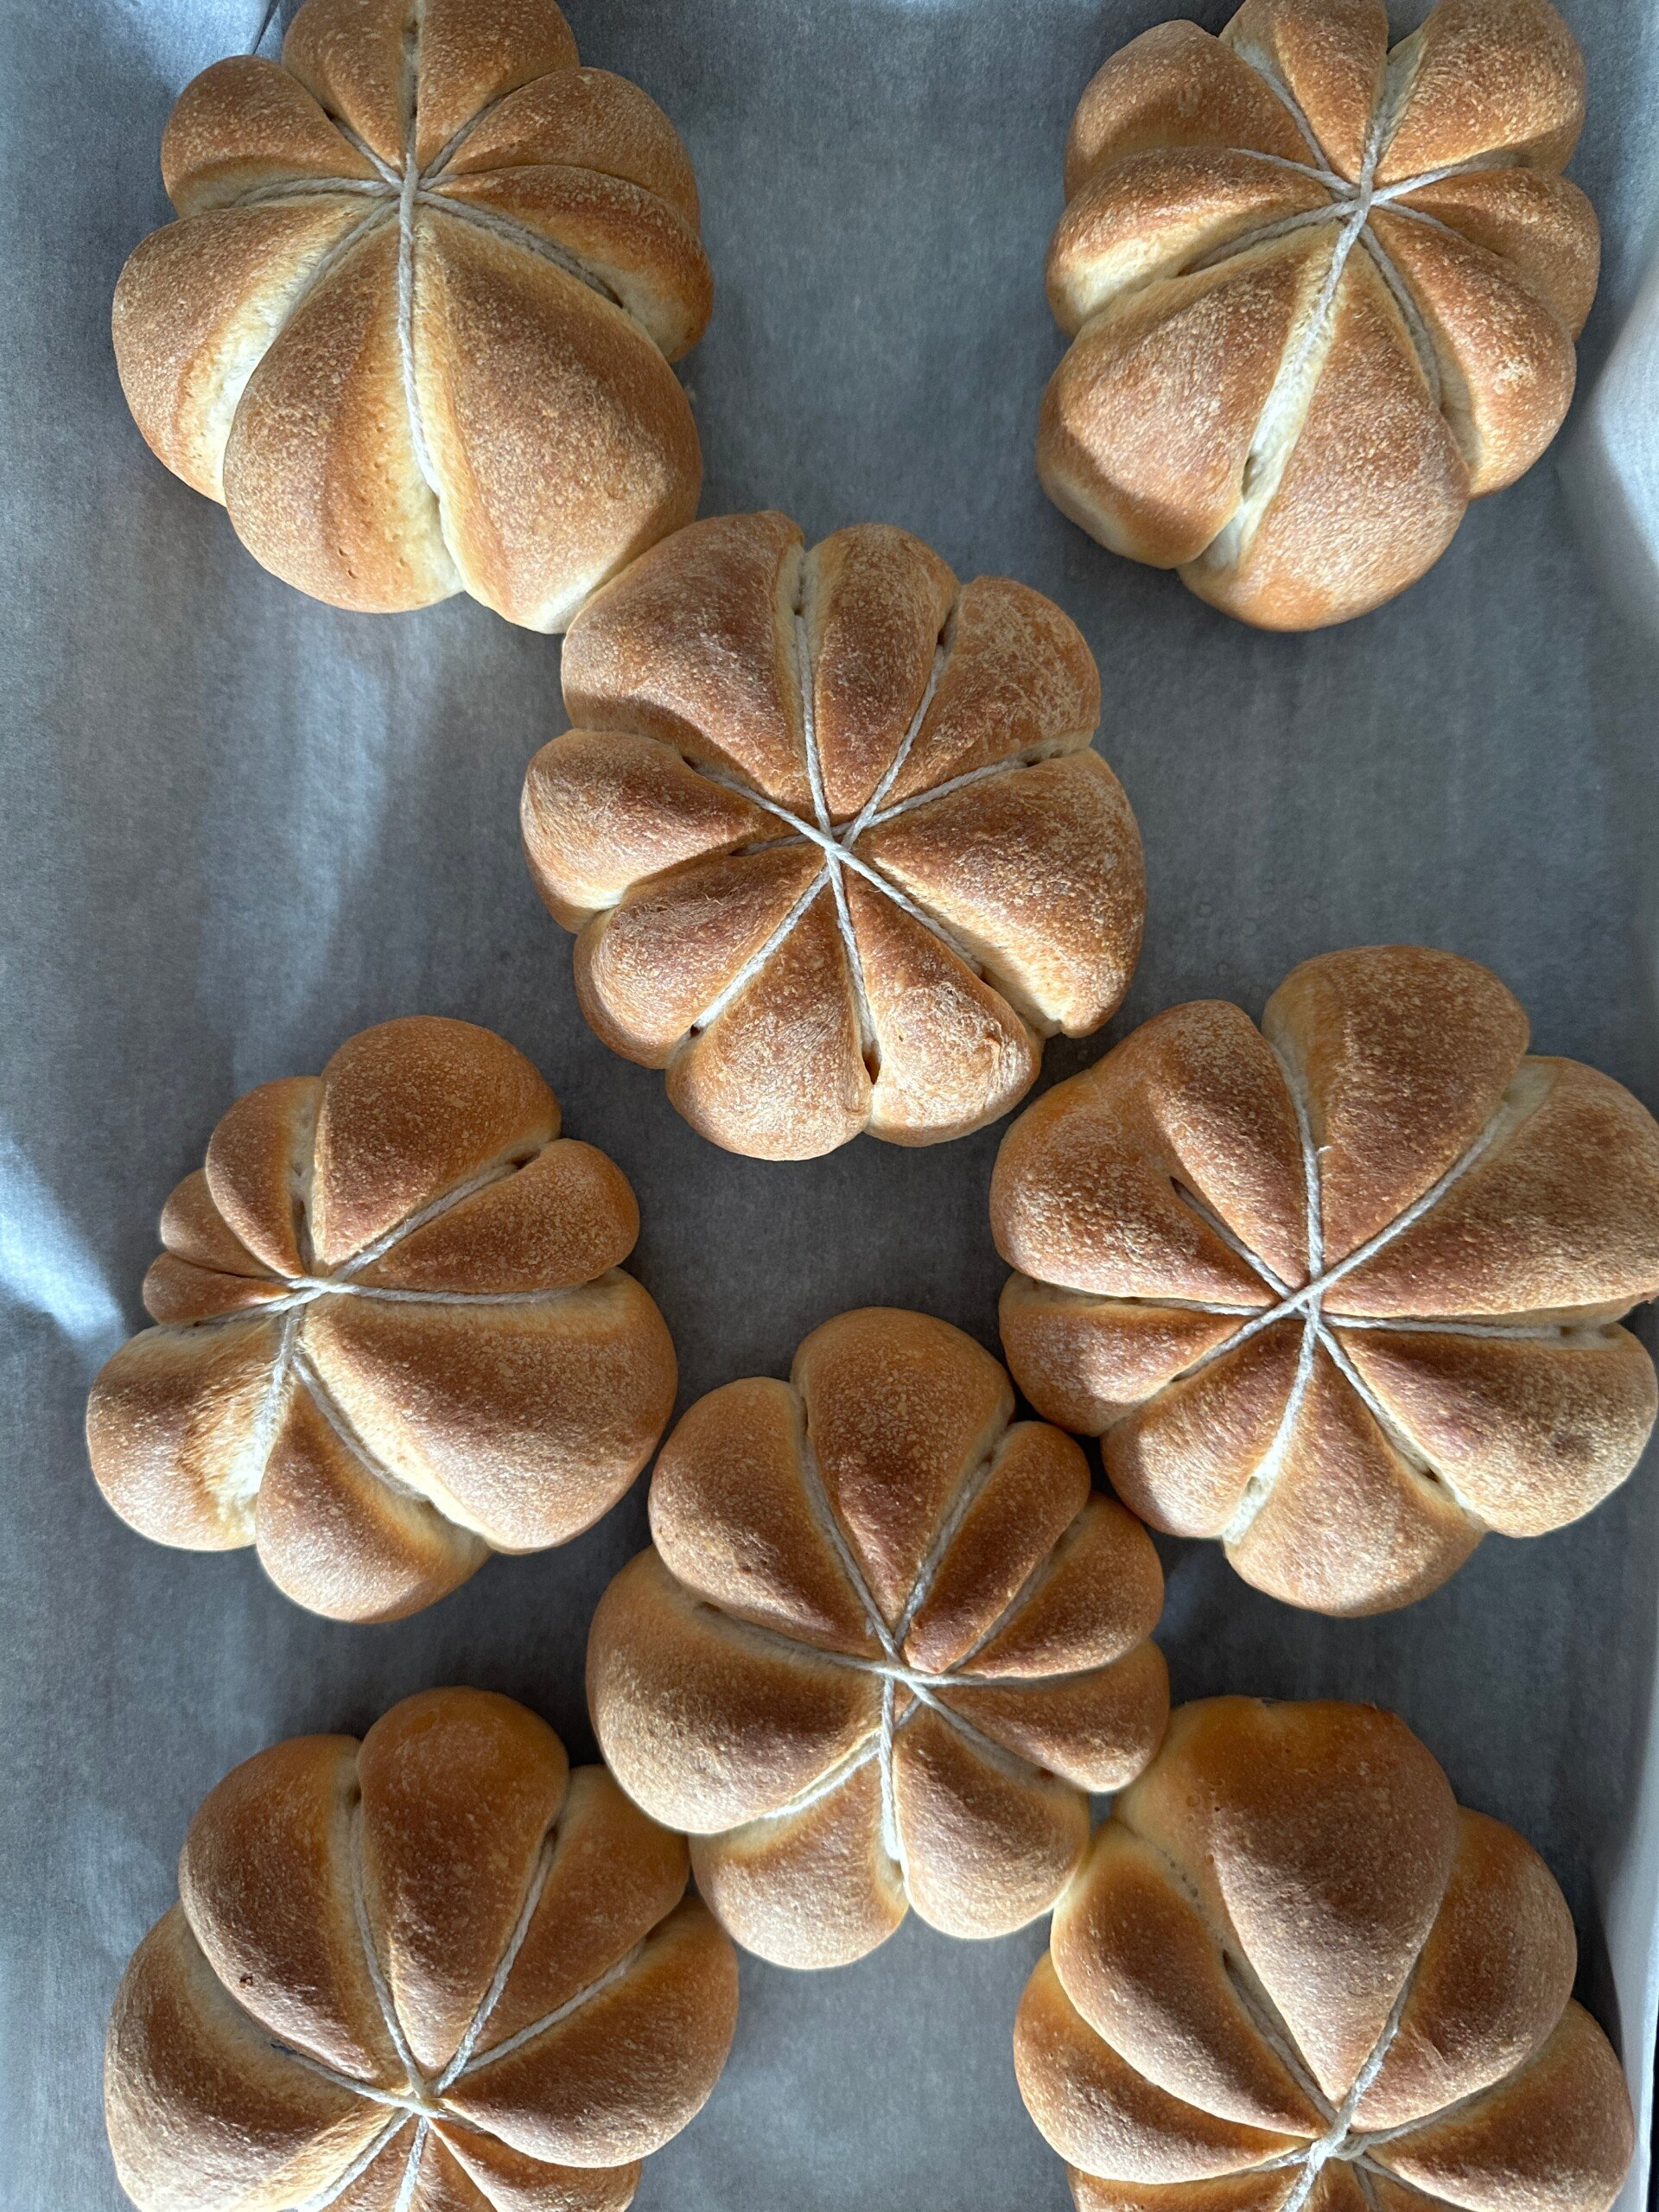
Halloween s'mores with chocolate, themed cookies, Halloween marshmallows and more!
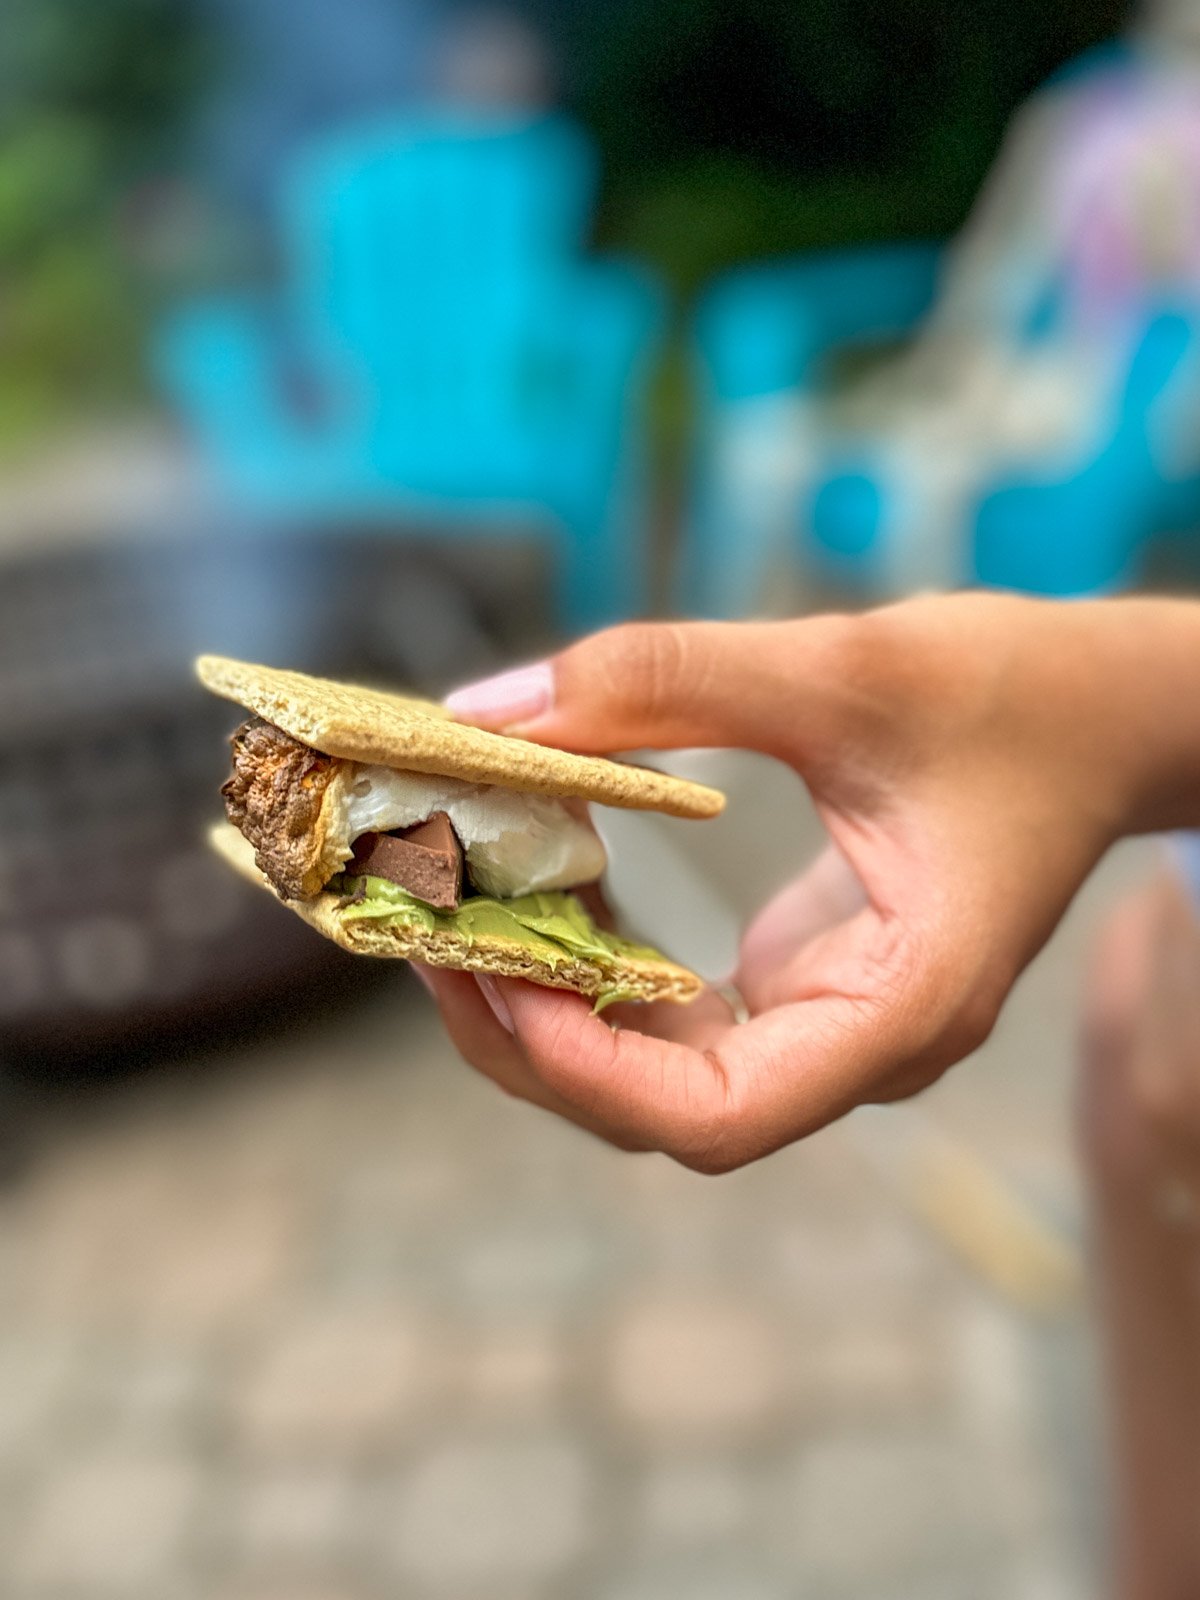
[feast_advanced_jump_to]

Why You'll Love This Recipe

  • Smores are amazing -anytime of year!
  • Adding holiday touches makes these extra fun.
  • All the cookie ideas are easy to make with store bought ingredients.
  • Kids love all these fun additions to make these smores extra special.

Smores are a real favourite around here... Smores Trail Mix, Smores Pizza, Smores Charcuteire Board... need I say mroe?

We had these for our summwerween party.  They are perfect for any Halloween celebration.  Enjoy them around a campfire with friends for the perfect spooky treat.

They'd also be the perfect easy addtion to a Halloween Movie Night with Free Printables, Fall Themed Party, or a Pink Halloween Party. And you might also like our Ghost Rice Krispie Treats.

Ingredients

Labeled Halloween smores board.

Marshmallows

  • Regular marshmallows with Ghost Faces:  we gave our regular marshmallows a Halloween makeover using an edible marker to add ghost faces.  Look for these edible markers at your local craft store, or cake decorating supply store.
  • Halloween Peeps: we used Frankenstein, skeletons, and pumpkins.  Look for these seasonally with candy supplies or online.

Cookies

  • Graham Cracker Mummies: we dressed up our regular graham crackers with white chocolate and candy eyes to make adorable and delicious mummy cookies.
  • Which Hats: We used round chocoalte covered cookies as the base, added a Hersey's Kiss with melted chocolate, and a few sprinkles.
  • Spider Chocolate Chip Cookies: we used storebought cookie dough, baked the cookies and added a chocolate melting wafer, and candy eyes, and piped chocolate spider legs. Homemade would be a great option too. Try our chocolate chip cookies made with shortening recipe here.

Chocolate

  • Peanut Butter Cups
  • Milk Chocolate
  • Dark Chocolate
  • Cookies and Cream Chocolate

Extras

  • Gummy Worms: the perfect creepy Halloween touch to your smores
  • Receses Pieces: we love those Halloween colors, and great taste.
  • Dulce De Leche: this thick and delicious caramel sauce is the perfect smores addition.  
  • Pistachio Cream: Love the Dubi trend?  Why not add pistachio cream for the perfect smore version.

Varations:

  • Chocolate: You can use any chocolate options that you love on your Halloween smore board.  Raid the chocolate bar section and try out chocolate bars with nuts, caramel, or coconut for different options.
  • Mint: Love mint?  Try adding chocolate mint patties.
  • Spreads or Sauces: We used dulce de leche, and pistachio cream, but other options include peanut butter or chocolate hazelnut spread, or your favorite jam.

How To Make A Halloween Smores Board

1. Mummy Cookies

To make the mummy cookies, start by melting some white chocolate wafers in the microwave in 20 second intervals.  

Add the melted chocolate to a ziplock bag and cut a very small corner off the bag to make a pipping bag.  Pipe the melted chocolate in lines across the graham cracker, and while the chocolate is still melted, add two candy eyes.  

Let the chocolate set before adding the cookies to your smore board.

Halloween mummy cookies made with white chocoalte, graham crackers, and candy eyes.

2. Witch Hat Cookies

For the witch hat cookies, use a round chocolate covered cookie as your base.  

Melt some Hersey's kisses and use it as the glue to add a Hershey's Kiss to the center of the round cookie to make the witch's hat.  Use enough chocolate so that it seeps out under the Kiss, and add Halloween sprinkles while the chocolate is still melted.  

Let the cookie set before adding it to your smore board.

Chocolate cookies and Hershey Kisses to make witch hat cookies.
Witch hat cookies made with chocolate round cookies and Hershey's Kisses.
Witch hat cookies made with round chocolate cookies, and Hershey's Kisses.

3. Spider Cookies

For the spider cookies, prepare your ready-to-bake cookie dough -or your favourite homemade recipe and bake in the oven.  While the cookies are still warm, add a chocolate disk on top in the center.  

The heat from the cookie will melt the chocolate.  When it's melted, add two candy eyes.  

Melt additional chocolate in the microwave in short intervals, and then add to a ziplock bag.  Cut a small corner of the bag off and use it as a piping bag to add 8 spider legs to the cookies, 4 on each side.  

Once the chocolate is set, add the cookies to the smore board.

Ready to bake chocolate chip cookies on a baking tray.
Spider chocolate chip cookies with chocolate spiders and candy eyes.
Spider cookie on a Halloween smores board.

Tip: Be sure to leave some of your cookies un-decorated to use as the bottoms of the smores.

4. Ghost Marshmallows

For the ghost marshmallows, use an edible food marker to add black eyes and a mouth to the side of a regular marshmallow.

Making ghost marshmallows with a black edible food marker.

5. Assemble The Board

To assemble the Halloween smores board, start by adding a bowl of the dulce de leche and pistachio cream.  We added some ghost and spider sprinkles on top, to make them a little more Halloween-ie.

Then add in your different marshmallows.

Next, add the cookies.  Be sure to add some undecorated cookies to use as the base of the smores.

Lastly, fill in with all the candy and chocolate options.

Bowl of dulce de leche on a Halloween smores board.
Bowl of pistachio cream on a Halloween smores board.

6. Making Smores

To make a smore, roast your marshmallow or Halloween peep over a fire until golden, then sandwich between two cookies, adding a layer of chocolate, or any other candy or spreads.

Ghost and skeleton roasting marshmallows over a fire for Halloween s'mores.
Halloween smores board with a campfire in the background.

Dubai Chocolate S'mores

Love the Dubai chocolate trend? Make your own Dubai chocolate smores with graham crackers, milk chocolate, roasted marshmallow, and a generous amount of pistachio cream.

Dubai chocolate s'mores with pistachio cream, milk chocolate, and graham crackers.

More Halloween Inspiration

  • Ghost themed foods on a snack board.
    Easy Halloween Ghost Themed Food Ideas
  • Halloween ghost shaped white chocolate covered Rice Krispie squares
    Halloween Ghost Rice Krispie Treats
  • Harry Potter snacks and treats board.
    Harry Potter Inspired Snacks and Treat Ideas
  • Homemade pink candy apples on a cutting board.
    How To Make Pink Candy Apples

Frequently Asked Questions

Can I make this Halloween smores board ahead of time?

Yes! Prep your cookies the day before and store in an airtight container.  Assemble your Halloweem smores board ahead of time and wrap tightly with plastic wrap until your ready to serve.

Do peeps roast like regular marshmallows?

Yes and no.  The outside of peeps has a sugar coating and when roasted will become slightly crispy -burled if you will, while the inside will become gooey like a regular marshmallow.  They work great for smores.

Where can I find Halloween peeps?

We bought ours out of season from a specialty candy shop we found online.  During the fall, look for them anywhere you buy candy.

If you try these Halloween Smores or any other ideas on my blog please let me know how it went in the comments below. Thanks for visiting today!

Recipe

Halloween smores board with Halloween cookies, marshmallows, chocolate and more!

Halloween Smores Board

Video

Smores just got a Halloween makeover with spooky cookies, marshmallows, candy and more.
5 from 1 vote
Print Pin Rate
Course: Dessert
Cuisine: American
Prep Time: 45 minutes minutes
Total Time: 45 minutes minutes
Servings: 12
Calories: 605kcal
Author: Dannyelle Nicolle-Ramjist
Cost: $25

Equipment

  • 2 small ziplock bags

Ingredients

  • 16 ready to bake chocolate cup cookies
  • 16 small chocolate melting wafers
  • 16 small candy eyes
  • 16 chocolate covered cookies
  • 16 Hershey's kisses
  • ¼ cup Halloween sprinkles
  • 16 graham crackers
  • ½ cup white chocolate
  • 16 candy eyes
  • 16 regular marshmallows
  • black ediable marker
  • 6 pumpkin peeps
  • 6 skull peeps
  • 6 Frankenstien peeps
  • 1 bar milk chocolate
  • 1 bar dark chocolate
  • 1 bar cookies and cream chocolate bar
  • ½ cup Reece's pieces
  • 1 coop gummy worms
  • 8 peanut butter cups
  • ½ cup pistachio cream
  • ½ cup dulce de leche

Instructions

  • To make the mummy cookies, start by melting some white chocolate wafers in the microwave in 20 second intervals.  Add the melted chocolate to a ziplock bag and cut a very small corner off the bag to make a pipping bag.  Pipe the melted chocolate in lines across the graham cracker, and while the chocolate is still melted, add two candy eyes.  Let the chocolate set before adding the cookies to your smore board.
  • For the witch hat cookies, use a round chocolate covered cookie as your base.  Melt some Hersey's kisses and use it as the glue to add a Hershey's Kiss to the center of the round cookie to make the witch's hat.  Use enough chocolate so that it seeps out under the Kiss, and add Halloween sprinkles while the chocolate is still melted.  Let the cookie set before adding it to your smore board.
  • For the spider cookies, prepare your ready-to-bake cookie dough -or your favourite homemade recipe and bake in the oven.  While the cookies are still warm, add a chocolate disk on top in the center.  The heat from the cookie will melt the chocolate.  When it's melted, add two candy eyes.  Melt additional chocolate in the microwave in short intervals, and then add to a ziplock bag.  Cut a small corner of the bag off and use it as a piping bag to add 8 spider legs to the cookies, 4 on each side.  Once the chocolate is set, add the cookies to the smore board.
  • For the ghost marshmallows, use an edible food marker to add black eyes and a mouth to the side of a regular marshmallow.
  • To assemble the Halloween smores board, start by adding a bowl of the dulce de leche and pistachio cream.  Then add in your different marshmallows. Next, add the cookies.  Be sure to add some undecorated cookies to use as the base of the smores. Lastly, fill in with all the candy and chocolate options.
  • To make a smore, roast your marshmallow or Halloween peep over a fire until golden, then sandwich between two cookies, adding a layer of chocolate, or any other candy or spreads.

Notes

Tip: Be sure to leave some of your cookies un-decorated to use as the bottoms of the smores.

Nutrition

Calories: 605kcal | Carbohydrates: 81g | Protein: 9g | Fat: 30g | Saturated Fat: 12g | Polyunsaturated Fat: 4g | Monounsaturated Fat: 10g | Trans Fat: 0.05g | Cholesterol: 6mg | Sodium: 268mg | Potassium: 327mg | Fiber: 4g | Sugar: 56g | Vitamin A: 14IU | Vitamin C: 0.1mg | Calcium: 111mg | Iron: 3mg
Tried this Recipe? Tag me Today!Mention @LifeisaParty or tag #lifeisaparty!

Summerween Party Ideas: BBQ & Pool Party Food

Jul 30, 2025 · Leave a Comment

Summerween party table with themed food.

Where are my Halloween lovers at?  We love it so much we're celebrating twice a year with a summerween party full of summer ideas like traditional bbq foods with a halloween twist, bobbing for peaches, watermelon and pineapple jack-o'-lanterns, and a pool party!

Summerween party table with themed food.
[feast_advanced_jump_to]

Why We Love This Party

  • It's so fun to celebrate Halloween in summer!
  • Our traditional BBQ foods got a Halloween makeover.
  • Instead of bobbing for apples, we were bobbing for peaches.
  • Our skeleton and witch friends love getting out for a summer bash!
  • We finished the night out with epic Halloween s'mores!

We love Halloween.  

And summer Halloween is another excuse to celebrate with a summer twist.  

If you're team Halloween, you will love the fun idea of a summerween party.  Let's go spooky summer!  All these ideas would be great for a Halloween pool party too, if you live somewhere warm.

You might also love our Halloween Movie Night with Free Printables, our Ghost Themed Snacks, Pink Halloween Party Ideas, and Halloween Smores.

Summerween party food table.

Summerween Decorations

We wanted to give Halloween a summer makeover, so we made our own jack-o-lantern beach balls.  

I picked up some beach balls at the dollar store and added fun jack-o-lantern faces to them with permanent vinyl cut out on my Cricut machine.  These were easy to make and so fun for our pool party.  

DIY Halloween beach balls and a skeleton in a floatie at a summerween party.

Our skeleton friend had a great time in the pool.  Just grab a pool floatie and give Mr. Bones some shades and a flower lei, and he's ready to party!

And it won't be summerween without a watermelon jack-o-lantern.  You won't find any real pumpkins in stores this time of year, so make your jack-o'-lanterns out of fruit instead for summerween.  

Watermelon jack-o-lantern for a summerween party.

We cut the top off the watermelon and carefully scooped out the fruit, then carved the cute face.  Add a candle and you're ready for summerween! 

We also made a pineapple jack-o-lantern.  These guys were such a hit at the party.

Pineapple jack-o-lantern at a summerweeen party.

For the rest of the decor, just raid your Halloween stash, but think summer colors like pink, and add some pretty garden flowers.

Summerween flower centrepiece with garden flowers in a pumpkin vase.

Ghosts

I thought it would be fun to invite some ghosts to the party, and they are all dressed up in their summer outfits.  

Summerween party with ghosts in colorful vintage floral sheets and sun glasses.

I found colourful vintage sheets at the thrift store.  Look for floral patterns and bright colors like yellow, green, blue, and pink.  And not only were they dressed up in summery colors, they had their shades on too, all set for summer sun.

Ghost in a floral vintage sheet for a summerween party drinking a orange pop float.

Activities

We had so much fun in the pool, but we also enjoyed bobbing for peaches.  

Bobbing for peaches at a summerween party.

It's bobbing for apples fun summer cousin.  This activity was easy to set up and such a fun summer twist on an old favorite.

Summerween Food Ideas

Our favorite part of the party had to be the summerween menu.  We went with classic bbq and pool party foods, but gave them all a Halloween makeover. I love the idea of making your summerween menu different from a regular Halloween party by focusing on classic summer foods, with a Halloween twist.

Summerween Halloween BBQ food table with burgers, salads, and drinks.

Burgers

We made jack-o'-lantern cheeseburgers.  They're really easy to make.  Just cut out a jack o lantern face in a cheese slice.  

Summerween burgers with jack-o-lantern faces made of cheese.

We used real cheddar for this so it held it's shape well even after it melted, and would recommend.

Halloween cheese burgers with jack-lantern faces.
Burger condiments in mini mason jars with pumpkin spoons for a summerween bbq.

Bug Pasta Salad

We love a good Greek pasta salad and we gave it a Halloween makeover using bug shaped pasta.  We found it at Bulk Barn if you're in Canada, but you could also look for it online.  Use it with your favorite pasta salad recipe for a great summerween side dish.

Summerween pasta salad made with bug shaped pasta.

Potato and Eye Ball Salad

We used store bought potato and egg salad -or make your favorite homemade version, and added a few egg eyeballs.  

Summerween potato salad with hard boiled egg eyeballs on top.

To make the eyeballs, hard boil some eggs for about 10 minutes.  Then peel and cool them.

Next, cut the hard boiled eggs in half.  Use the back of a metal icing bag tip to cut out the perfect size circle in the middle of your egg, using the tip of a knife to hollow out the circle.  Then cut a green olive with pimento in half and insert into the whole in the egg.  

These egg eyeballs were a great addition to the potato salad and perfectly creepy for all the summerween vibes.

7 Layer Dip

We had to make a 7 layer Mexican dip, and it really was the hit of the party -think guests asking to have some of the leftovers. 😉

Halloween 7 layer dip with a sour cream spiders web and black olive spider.

I put it together in a glass pie dish, so that you could see the layers.  My layers were refried beans, cream cheese, salsa, grated marble cheese, sliced black olives and green onions, sour cream, and guacamole.  I used a store bought guacamole, which worked out perfectly because, unlike a homemade version, it doesn't turn brown, so you can use it as the top layer and make it ahead of time.  

On top of that guacamole final layer, I decorated the dip with a sour cream spider web.  Use full fat sour cream, as it holds its shape better than low-fat.  I added the sour cream to a ziplock bag and cut the tip of the corner off to use it as a piping bag, then added my spider web.  

Halloween 7 layer dip with a sour cream spider's web and black olive spider on top.

The perfect finishing touch was a spider made out of black olives -remember, they have 8 legs, not 6. 😉

Drinks

For the drinks, I started out by making some cups.  I added ghost faces and jack-o'-lantern faces to plain plastic cups.  I used my Cricut to cut them out in permanent vinyl.  This worked really well, but if you don't have a Cricut you can use a simple permanent black marker to add the faces to the outside of the plastic cups.

Summerween drinks including coconut milkshakes in ghost face cups, and orange floats in jack-o-lantern cups.

For our ghosts, I wanted a white summer drink so we made our famous coconut milkshakes. These are really easy to make with just 3 ingredients and were a real hit with guests.  You can get our easy coconut milkshake recipe here.

Halloween ghost cups with milkshakes.

Pina coladas or vanilla milkshakes would also be great summer time options.

For the jack-o-lanterns, we made orange pop floats.  Just add a scoop or two of vanilla ice cream to your favourite orange pop for the perfect summerween drink.

Halloween orange pop float in a pumpkin cup.

Dessert

I scream, you scream, we all scream for ice cream.  Our ice cream sandwiches got a Halloween makeover and turned into little frozen coffins.  Just cut the edges off of regular ice cream sandwiches for the perfect summerween sweet treat.

Summerween ice cream sandwich coffin desserts.

Summerween S'mores

Since one of our favorite summer activities is to make s'mores, we thought it would be fun to make Halloween s'mores and it was!

See a whole blog post on exactly how we put together the Halloween Smores Board here.

Halloween s'mores with chocolate, themed cookies, Halloween marshmallows and more!

We gave our cookies and marshmallows a Halloween twist, and they were not only adorable but also delicious.  We had Halloween peeps and added ghost faces to regular marshmallows with an edible marker.

Making ghost marshmallows with an edible food marker.

In addition to regular graham crackers, we had witch hat cookies with chocolate cookies, with a Hershey's kiss on top, and chocolate chip cookies with a chocolate spider on top.  We added in some spooky gummy worms, and then lots of regular chocolate for the best Halloween s'mores ever.  

Halloween witch hat cookies on a smores tray.
Mummy cookies made with graham crackers, white chocolate, and candy eyes.

A campfire and s'mores were the perfect ending to our summerween evening.

Ghost and skeleton roasting marshmallows over a fire for Halloween s'mores.

This party was so much fun to put together and we really had the best time celebrating in the pool, having dinner, and around the fire.  I think this may become a yearly tradition for us!

Free Printable Summerween Party Checklist

Want to throw your own summerween party? Get our free Summerween party checklist. Subscribe below for instant access to our Free Resource Library, and grab your checklist.

Free printable summerween party checklist.

More Halloween Inspiration

  • Halloween smores board with Halloween cookies, marshmallows, chocolate and more!
    Halloween Smores
  • Summerween party table with themed food.
    Summerween Party Ideas: BBQ & Pool Party Food
  • DIY Cricut Halloween Cloche: use dollar store materials to make this haunted house, and graveyard silhouette cloche for Halloween.
    Spooky DIY Cricut Halloween Cloche
  • Halloween Mantel
    Halloween Mantel Decor

Frequently Asked Questions

What is a summerween party?

A summerween party is a celebration of Halloween in the summer.  Some people celebrate on June 22, others celebrate anytime in June, July, or August.  A summerween celebration usually includes a summer twist on a traditional Halloween party, think summer bbq food, swimming, and a campfire.

Do people dress up for Summerween?

Some people do dress up, but they put a summer twist on their Halloween costumes.  For a pool party, sometimes people just add a little Halloween element to their bathing suit, like a witch hat.

Why do people carve jack-o-laterns out of fruit for summerween?

Pumpkins aren't available in the summer, so for summerween carve a jack-o-lantern out of a watermelon, pineapple, or cantaloupe instead. Don't forget the candle.

If you try anything from this Summerween Parrty or any other ideas on my blog please let me know how it went in the comments below. Thanks for visiting today!

Daisy Themed Party Ideas

Jul 9, 2025 · Leave a Comment

Daisy themed summer picnic party table with yellow and white striped tablecloth, daisy cake, daisy deviled eggs, floral pizza, and fresh daisy flower arrangements.

This daisy themed party is full of cute daisy details, from a beautiful table setting and simple DIY daisy decorations to delicious daisy themed foods and desserts.  We love this cheery theme, perfect for a daisy themed birthday party, shower, picnic or summer party.

Daisy themed picnic with tulle canopy, yellow and white tablescape, and daisy-themed foods.

Why We Love This Party

  • Daisies are a theme that is perfect for kids or adults.
  • The easy color scheme of yellow and white is so pretty
  • We had so much fun with the daisy themed foods, and they were delicious.
  • We added simple DIY details that really tied the party together like using actual daisies, and adding daisy ribbon and diasy tulle canapy.
[feast_advanced_jump_to]

As someone who plans and photographs seasonal themed parties year-round, I loved how simple and impactful this daisy theme turned out.

Daisy themed party table with yellow and white striped tablecloth, daisy flower arrangements, and vintage style daisy cake.

We love a cute themed party.  We've had so much fun creating a strawberry themed picnic party, a cherry themed party, a mushroom themed party, and a butterfly themed party.  And this party is the most perfect summer daisy themed party.

Daisy Decorations

Daisy Canopy

We kept the decorations on theme, but quite simple.  The whole party was inspired by the daisy tulle I found at a thrift store for $2.  It was a nice, large piece that I thought would be so perfect for a daisy party.  I had it in my stash for months, and when the daisies started blooming in my garden and the wild, I knew it was time to create the daisy party I'd been dreaming of.

Daisy themed picnic with tulle canopy, and low table with cushions, yellow and white decor, and daisy themed food.

I wasn't sure whether to use the daisy tulle as a tablecloth or a canopy, but since we were outside, I decided to string it up as a canopy in the tree branches over our picnic table using some string, and it turned out so charming!

If you wanted to create a similar look, you could look for daisy tulle in a fabric store or on-line.

Tablescape

For the table we used a yellow striped tablecloth, and simple white dishes.  I thought my everyday white scalloped edge dishes were perfect, since the scallop kind of reminded me of daisy petals.  

A table with a glass of lemonade decorated with yellow and daisy ribbon.

And instead of investing in daisy cups to tie in with our daisy theme, I found some inexpensive daisy ribbon, paired with a couple of different widths and shades of yellow ribbon, and tied them onto these plain glass to dress them up perfectly on theme.

Daisy party table with yellow and white striped tablecloth, daisy flower arrangements, and daisy cake.

The stars of the show were the simple daisy flower arrangements and the daisy cake, but more on that later.  I used small mason jars as vases, and then used Shasta daisies and feverfew from my garden, along with a few different kinds of wild daisies I picked.  

Simple daisy flower arrangments in mini mason jars.

I really love that with just a very few simple daisy details, and without buying a whole bunch of daisy themed party supplies, we were able to use our everyday dishes and the table came together so beautifully.

Daisy Food Ideas

I wanted the menu for the party to be filled with daisy themed foods.  And I had so much fun coming up with some delicious daisy inspired items.

Daisy themed summer picnic party table with yellow and white striped tablecloth, daisy cake, daisy deviled eggs, floral pizza, and fresh daisy flower arrangements.

Daisy Deviled Eggs

I wanted to try and make some daisy deviled eggs.  They were fun to make and turned out so cute!  

Daisy flower shaped deviled eggs.

To make the eggs into flower shapes I started by boiling them for 10 min, and then removing the shells.  While they were still warm, I wrapped the egg up long ways with 6 skewers and plastic wrap.  You want to try and space the skewers around the egg as evenly as possible.  I did some as singles and some as doubles with two eggs, and the single egg turned out better, so my tip is to wrap each egg individually for the most control and best spacing possible.  

How to make a hard boiled egg daisy flower shaped.
How to shape a hard-boiled egg into a flower.
How to make daisy flower shaped hard boiled eggs.

Once the egg is wrapped with the skewers held in place by the plastic wrap, we added elastics to each end, to hold the skewers in place tightly.  I did have a couple eggs where the skewer dug into the egg and broke them, so remember that you want the skewers to be held in place firmly, but not for the elastics to be so tight that they break the egg.

Once the egg is bundled up, place it in the fridge over night or for a few hours.  Once you remove the skewers and plastic wrap the egg should be flowered shaped when you slice it in half.  You will also need to slice a very small slice off of the end, so thte egg will sit nicely on a plate.  

Use the tip of knife to carefully remove the yolks and make your favourite devilled egg recipe.  We used six eggs, 3 tablespoon of mayonnaise, 1 teaspoon mustard, and salt and pepper.  Then we piped the filling into the egg halves.  

They really looked great, and were a real hit at the party.  You can make this dish a day ahead of time, and store in the refrigerator until right before serving.

Daisy Brushetta

This easy appetizer was so delicious, easy to make and fit our theme perfectly.  

Daisy flower toasts bruschetta on a cutting board.

We started out by roasting some yellow cherry tomatoes with olive oil, minced garlic, salt and pepper at 350 for about 20 min. until they start to burst.

To make the daisy bruschetta, toast some good bread, cut it out with a flower cookie cutter, spread with boursin cheese, and top with the roasted yellow tomato in the center.  

We arranged the daisy brushettas with chive stems and basil leaves and they look so cute for our daisy theme.

Daisy Pizza

We also made a quick and easy daisy themed pizza, using pesto, chicken, corn, yellow tomatoes and bocconcini cheese.  It was a really yummy combination of flavors and looks so cute.

Daisy picnic with pesto sauce, and bocaccini cheese, yellow tomato, corn, and chicken flowers.

We started with premade dough and spread it with pesto.  Then we add flowers made of rotisserie chicken and canned corn, and bocconcini cheese and yellow cherry tomatoes.   Bake in a 400 for about 10 minutes, until the cheese is melted and the dough is cooked.

You could also make a more traditional pizza with tomato sauces, and cheese and tomato flowers. We thought the pesto with chicken and corn was a nice addition.

Serve this hot or even at room temperature for a picnic.

Drinks

Lemonade was the perfect drink for our daisy themed picnic party.  As a special touch we added camomile flowers to the drinks.  These would also be really fun frozen into ice cubes.

A table with a glass pitcher of lemonade with chamomile flowers in it and cookies.

Daisy Themed Sweets

Daisy themd party table with daisy desserts, including cookies and tarts.

Daisy Cake

The star of the show was the daisy themed cake.  I love our vintage style cake with the fondant daisy details.

Vintage style daisy cake in white and yellow.

We made a simple white cake with a cake mix, and then my daughter iced it with Swiss meringue, and vintage style details, in white and yellow.

The finishing touch was the fondant daisies.  We found a fondant cutter at a cake decorating supply store, and my daughter made simple homemade marshmallow fondant.  These were the perfect finishing touch to our cake and tasted delicious too, like marshmallows.

The cake was the perfect centerpiece for the party table too.

Vintage style daisy cake in white and yellow.

Daisy Tarts

We also made some simple daisy inspired tarts.  

Daisy tarts that are filled with custard and apricot jam.

We used premade pastry and cut them out with a daisy cookie cutter.  We fit them into a mini muffin tray and blind baked them.  Once they're cool, sprinkle with powdered sugar.

We filled ours with custard and apricot jam.  You can also make them with lemon curd.  

They're an easy and delicious daisy dessert.

Sugar Cookies

Lastly, we made some sugar cookies.  

Daisy sugar cookies at a daisy party.

Use your favourite sugar cookie recipe or take the short cut of using premade dough.  We baked circle cookies, and then used a buttercream icing to pipe layered daisies with yellow centers.  

I was lucky to have my daughter's help for these as well.  

Sugar decorated as daisies with white petals and yellow centers.

This daisy themed party came together with just a few charming touches-fresh flowers, cheerful yellow and white details, and the cutest daisy-inspired food. Whether you're planning a summer birthday, a garden shower, or just a sweet seasonal picnic, this theme is simple, affordable, and picture-perfect. 

Daisy themed picnic party with daisy inspired food and decor.
A daisy themed party set up in the garden with a canopy.

More Picnic Pary Inspiration

  • Daisy themed summer picnic party table with yellow and white striped tablecloth, daisy cake, daisy deviled eggs, floral pizza, and fresh daisy flower arrangements.
    Daisy Themed Party Ideas
  • Mushroom themed party picnic in backyard.
    Mushroom Themed Picnic Party
  • Cherry themed party table with food and cherry themed decor.
    Cherry Themed Party Ideas
  • Butterfly themed party ideas party table, food, and decorations.
    Butterfly Themed Party Ideas

If you try any of the ideas from this Daisy Themed Party or any other ideas on my blog please let me know how it went in the comments below. Thanks for visiting today!

Frequently Asked Questions

Can you make the daisy food ahead of time?

Yes. Make your cake, cookies, and tart shells the day before.  Just fill the tart shells the day of the party.  Also pre-make your deviled eggs, and roast the cherry tomatoes.  If you're serving the pizza at room temperature, you can make it ahead of time too.  I made the daisy pizza and daisy bruschetta toasts right before serving.

Where did you find the daisy ribbon?

I got it at Michaels craft store, but look for similar at a fabric store, or online.

Where did you get the daisy tulle?

I found this at the thrift store, but look for similar at the fabric store or online.

Earth Day Party and Eco-Friendly Entertaining Ideas

Apr 6, 2025 · Leave a Comment

Earth day party set with up cycled dishes and cutlery, home grown flowers, paper lanterns, and garden themed food.

An Earth Day party is the perfect time to celebrate with some eco friendly party ideas.  We're sharing reusable party supplies, and an earth inspired menu for the perfect celebration full of susainable enviromentally friendly ideas for entertaining.

Earth day party set up at a kitchen table with reusable decorations, and upcycled dishes.

Why We Love This Party

  • We love the earth and want to celebrate all of nature's gifts to us, and try to take good care of our planet.
  • It's the perfect excuse for a party!
  • It was so fun creating a nature inspired tablescape, with environmentally friendly entertaining ideas.
  • Our garden themed menu was delicious.
[feast_advanced_jump_to]

We set up our Earth Day celebration in our kitchen and used lots of eco-friendly party options.  We love the idea of a special dinner with family members and friends to celebrate Mother Nature on April 22nd, or anytime during Earth week.  

Since Earth Day is in the spring and this time of year is all about getting back outside we went with a fun garden and mother nature theme.  

It's still too cold where we live for an eco-friendly picnic, but if it's warmer where you are this would be a great party to take outside to your local park. Check out our tips for what to bring on a picnic.

Re-Usable Party Decorations

One time use party decorations are hard on the planet.  They take a lot of resources to create and often end up in landfill after one use.  Here are some ideas for beautiful at home party decorations that you can use over and over again and are perfect for a more eco-friendly party.

  • Paper Lanterns and Honeycomb Balls

Consider choosing paper lanterns instead of balloons.  This is a great way to reduce garbage.  Balloons are usually made of plastic and can break down to micro-plastics.  Paper lanterns are a great alternative.  They fold flat so you can reuse them over and over again.

Be sure to choose ones in your favorite colors so that they go with all your party decor.  Hang them in clusters with ribbons for a festive look.

  • Ribbons and Fabric Strips

Using ribbons and fabric strips is a great alternative to paper streamers.  They look amazing and festive and can be used over and over again as eco-friendly options.  

Store your ribbons in rolls to avoid creasing, or use a steamer or iron to flatten them if they become wrinkled during storage.  

Look for used ribbons at second stores, as an even more environmentally friendly party decoration option.

Fabric strips are great eco-friendly party decorations.  Look for vintage sheets at the local thrift shop as a way to reuse them, and tear them into long strips.  Tie them together with ribbons and lace to make a gorgeous backdrop or bunting for parties.

  • Re-usable Glass Bottles

These are great for parties and picnics and offer a great alternative to single serve cans of pop, plastic bottles of juice, and plastic water bottles that create a lot of waste.  

Fill them with juice, and wash them after the party to use again next time.  

We love these as a great reusable water bottle or filled with juice or lemonade as a more festive option.

Use these with biodegradable paper straws, and be sure to compost them after use.

  • Plates and Cutlery

Often when entertaining people choose disposable plates, and cutlery to make things easier, or because they don't have enough.  But the items create so much waste.  

Look for reusable dishes and cutlery at second hand stores, or antique fairs as a great option.  These mis-matched floral plates add so much to our party table.  They were inexpensive and are reusable. When shopping for mismatched dishes choose a color scheme or theme like floral to help it all go together well. 

We also used mismatched vintage cutlery.  Don't worry about finding a full matching set.  The mismatched patterns create interest and look great all mixed together for the cottage core look.  And they were really inexpensive at only $1 apiece.

  • Cloth Napkins

It's tempting when entertaining to use disposable napkins, but investing in some beautiful cloth napkins will not only impress your guests but be good for the earth and help create zero waste when we're entertaining. 

  • Flowers

We love decorating with fresh flowers for parties, but it's much better for planet earth if we can use local flowers.  

Shipping flowers uses a lot of resources.  Mother nature will thank you for choosing some from your own yard or community garden and reducing your carbon footprint when you're entertaining. See how to make your own potager garden here.

Or you could pick some wildflowers -just be sure to pick responsibly and leave some behind.  

Another great option is to shop for your flowers locally at a farmer's market or farm shop.

We also used a few dried flowers as eco-friendly party decorations, which are great to use when garden flowers aren't in season.

Lastly, we added some poted herbs. We love using these as decor, and also in cooking.

  • Candles

We picked up some old candles at the second hand store, along with some brass candle stick holders.  

To dress them up for our earth day party we got a little help from Mother nature.  We used pressed flowers and flower petals and adding them to the candles using a little melted wax as glue.  They looked so pretty.

Party Favors

We added some packs of seeds to each person's plate as a party favor.  We love the idea of planting flowers or wildflower seeds to help the bees.  Use them to make your own pollinator garden.

Menu Ideas

We had so much fun with our garden theme for this family dinner.  This would be great as an Earth Day dinner or lunch menu.

  • Flower Pot Bread

We made some bread in flower pots.  We bought these reusable containers at the garden centre.  Be sure to wash them and season them by rubbing them in olive oil and baking the in a 350 oven for about half an hour.  While they cooled we made some herbed bread dough in our bread maker.  Then we brushed the seasoned pots with garlic butter and added our dough to fill it about halfway.  Let it rise in a warm spot and then bake.  

Get our full flower pot bread recipe here.

  • Pasta with Veggies

We made a pesto pasta dish and loaded it with fresh veggies for our main dish.  Consider making a vegetarian dish for this party.  It's an excellent way to help the planet.  Vegetarian food requires less water, land, and resources to produce.

  • Dirt Pudding "Plants"

We finished our meal with a delicious and adorable dirt pudding.  Find the dirt pudding recipe here.  

These looked so adorable and making them with the kids would be fun and a great way to get young children involved in helping with this party.  Their little hands can help stir and add all the fun details like the candy rocks and mint sprigs.  Be sure to compost those wood spoons used as plant labels once you're done.

We have such a beautiful planet, that it's worth celebrating.  So often entertaining isn't very environmentally friendly.  

It can create a lot of waste and add to environmental issues.  But with some easy swap-outs, staying away from single-use items and substituting them for some beautiful reusable options, you can create a sustainable celebration that even Mother Earth would be happy to attend.

More Entertaining Ideas

  • Adult mermaid party table set on the beach with cake and shells.
    Adult Mermaid Party Ideas: A Beach Picnic Goodbye to Summer
  • Overhead view of tomato party table with pizza and appetizers.
    The Ultimate Tomato Party: A Tomato Girl Summer Garden Gathering
  • Camp themed party table with green gingham tablecloth, wildflowers, and Welcome to Camp banner.
    The Ultimate Camp Themed Party for Adults
  • Garden party table set under white pergola with vintage floral tablecloth, pink peony centerpiece in wooden tool caddy, white wicker chairs, and climbing white roses in background.
    Garden Themed Party

Frequently Asked Questions

How do you store your reusable party decorations?

Store your reusable party decorations in a sealable bin that is labeled in your storage area and use it whenever you entertain.

When is Earth Day?

Earth Day is celebrated on April 22 every year.

Where do you find the paper lanterns and honeycomb balls?

Look for them at the dollar store, with the party decorations at other stores, or on-line.

If you tried any of these Earth Day Party and Sustainable Entertaining Ideas or any other ideas on my blog please let me know how it went in the comments below. Thanks for visiting today!

The Best Birthday Party Home Decoration Ideas

Feb 20, 2025 · Leave a Comment

Princess and the frog party table with food and decorations.

Ideas for the best birthday party home decorations, that are affordable, fun and festive. Use your party theme, focal areas, DIY decor, photo backdrops, and more to decorate for the perfect at home party!

Princess and the frog party table with food and decorations.
[feast_advanced_jump_to]

We love hosting birthday party celebrations at home, and we've got lots of beautiful, easy, and affordable ideas to help you decorate for your at home birthday party.  Over the years, we hosted lots of kids and adult birthdays and the decorations are such an important part of the whole party for creating the right atmosphere.  

The main goal of decorating for a birthday party at home is to make the space feel festive and special. Check out all our ideas and tips below to make your at home birthday party decorations look amazing.

1. Theme

We always recommend starting any party planning by choosing a theme.

If it's a kids party, let them have some input into the theme.  Choose their favourite character, activity, toy, or sport as the theme for the party.  

For adults you can also think about their favorite hobbies, sports, or interests.  

Chances are if the theme is a real favorite, you'll already own some items that can be used as decorations such as toys, sports equipment, character posters, or items that would work as decor.  

Some of our favourite themes over the years have been things like a chocolate themed party, an art themed party, a cupcake themed party, an ice cream themed party, and a rock climbing themed party.  We even had favorite things themed birthday party where we had all the birthday persons favorite things.

2. Color Scheme

Once you've chosen your theme we really recommend choosing a color scheme.  Sometimes a certain theme lends itself to a particular colour scheme, and other times you can just go with the birthday person's favourite colour or colours.  

A rainbow theme is always great for a party too.

Rainbow themed dessert table with rainbow paper flower backdrop.

Top Tip: If you're planning a child's birthday and go with their favourite color, you may be able to reuse some old the decorations year after year, since their favourite colour is often the same year after year.

3. DIY Party Decorations

If you're crafty you will love creating some easy DIY party decorations. It's fun to make something to fit your theme and color scheme perfectly.

Birthday Banner

One of our birthday party home decoration ideas is to make your own DIY birthday banner.  

One year for an art party we picked up paint chips at the hardware store and used a stencil to write happy birthday.  This worked so well for the art theme, but could work for any party with paint chips in your party colors.

Homemade birthday banner using rainbow paint chips.

I also made a reusable felt birthday banner, by cutting out the banner from felt and gluing it together, or you could sew it.  Each year I added an accent that fit the party theme, and used double sided tape to attach it to the banner so that I could easily remove it and swap it out for something different the next year.

DIY felt happy birthday banner in pink.

Bunting

Bunting is a great addition to any party decor.  Make it inexpensively out of scrapbook paper to fit your party colour scheme.  Or use real fabric pieces and re-use it year after year.

Streamers or Ribbons

Streamers in your party colours are a great inexpensive and easy option too.  

Brown and white ruffled streamers and poka dot balloons on a stairway.

Or if you want the look but with something reusable, try using ribbons and lace in your party colours in place of streamers.  

Afterward, just roll up the ribbon and use them year after year.  If you're on a budget, second-hand stores are always a great place to find inexpensive ribbons.

Balloons

Balloons are a classic party decoration and so much fun.  Buy them to match your colour scheme.  

You can even make them extra special by making your own balloon garland using balloon garland tape.  It's inexpensive and easy to use to create beautiful balloon garlands in your party colours.  Save the balloon garland tape afterwards to reuse.

Paper Lanterns and Honeycomb Balls

I also love to use paper lanterns as an alternative to balloons.  They're slightly more expensive than balloons, but they're reusable.  And they fold flat to store.  Buy them in your kid's favourite colours, and use them year after year. Get more ideas for sustainable entertaining from our Earth Day Party and Eco-Friendly Party Ideas here.

Rainbow paper lanterns and rainbow flowers in mason jars.

Free Printables

We also love to use free printables to add to our themed party decor.  Search on-line for free or inexpensive party printables that fit your theme and colours and print them on your home printer or at an office supply store, or even at your local library. Can't find the perfect free printable? Make your own themed printables using free sites like Canva to design exactly what you're looking for.

You can create banners, cupcake pics, signs, water labels and more that really make your party pop.  These are a fun and inexpensive way to make custom birthday party decorations.

Snow White wishing well printable bottled water labels for a party.

Cricut Decorations

If you have a Cricut cutting machine, you can also use it to create more custom party decor.  Create your own banners, labels, party hats, table scatter and more using one of these machines at home.  

Don't have a cutting machine?  See if your local library has one available to use in their maker space.  Many local libraries have one that you can use in the library for free.

Paper lanterns decorated with butterflies hanging over a picnic table.

Flowers

Flowers always make an occasion feel festive and are such a great addition to any celebration.  

For our rainbow art party, we used flowers in every colour of the rainbow to create the prettiest display.  Most were from the garden, so not too expensive.  

Flowers in mason jar vases lined up in rainbow order.

And if your party is during the summer you can pick garden flowers or wildflowers to add flowers to the space without breaking the bank.  

Wildflowers in a mason jars decorating a party food table.
cherry themed party ideas picnic

Paper Flowers

If flowers aren't in season you can always add paper flowers.  I love this DIY birthday decoration idea, because it's an inexpensive DIY and so beautiful -find our tutorial with video on how to make paper flowers here.  

Make different paper flowers out of plain or color paper, and add paint as well.  These look amazing grouped together.  They do take a while to make, so if you want to incorporate some paper flowers into your birthday decorations, be sure to give yourself enough time to make them.

Party Table

The table where your guests are going to be sitting down to eat at the party is a place to make a statement.  

Start with a table covering like a table cloth, table runner,  piece of fabric from the fabric store, or some wrapping paper.  

teddy bear tablescape
Teddy bear themed tablescape with bear plates and glasses.

Use your theme and colour scheme to choose your plates, napkins and glasses, and feel free to use paper products to fit your theme, or do a mix of both.

Party table inspiration with a bookpage runner and rose napkins for a Beauty and the Beast party.

4.  Food

I love to make the food feel like part of the party decor by matching it to the theme.  

A dessert table is always so beautiful at a party.  A birthday cake doubles as party decor and dessert.  

Dog themed cake with dog toys and ribbons on top.

Try choosing foods that fit your party theme like a cupcakes or birthday cake -like this fire breathing dragon cake for a how to train my dragon party food idea.

For a board game party, we made a giant candyland themed dessert table, that was as beautiful as it was delicous!

There's so many great wall decoration ideas for a birthday party at home.  Making a backdrop behind your main food or dessert table is a great way to make big impact in your space.  

Nutcracker themed dessert table with decorations and sweet treats.

Some of my favourite ideas to decorate for a birthday party backdrop are to use streamers, ribbons, or vintage fabric to make a hanging backdrop.  You can also use paper streamers as a fun party backdrop.

Teddy Bear tea party ideas.

5. Party Favours

If you are planning to give your party guests a little party favor to go home with, it's always fun if they fit in with your party theme.

These simple teddy bear loot bags doubled as party decor.

DIY teddy bear decorations

6. Photo Backdrop

Another fun touch to your party decor is to set up a unique photo backdrop for guests to take a picture.  

7. Choose A Few Key Areas

We've got lots of great birthday decoration ideas, but don't let yourself get overwhelmed by them.  It's often a great idea to pick just a few areas and make them a real focal point of the party.  

You might want to set up just a few well decorated areas, instead of trying to decorate the whole space.  One or two areas with lots of fun decor may have more impact than scattering around the decorations in a big space.

Popcorn buffet for a winter movie night with signs and popcorn.

You do want to think about how the partygoers will use the space.  We often like to set up different stations throughout the party.  

Add something festive to the front door to welcome guests.  Have party favours by the front door so that no one forgets theirs as they're leaving.  Set up a drink station.  Have a main food table and/or dessert table.

Ice cream sundae building sation of a party.

Consider if your guests are going to be seated for a meal, or grab a seat in the living room.  Do you have outdoor space you can use?  What if it rains?  We've even been known to add a little themed decor to the washroom.  But you can do as little or as much as you like.

8. Budget

It can be tempting to spend too much on birthday party decorations.  We have a few tips on how to create affordable birthday party decor.  

Our number one tip is to invest in some reusable decorations like fabric banners, ribbons, paper lanterns, and entertaining pieces like platers and drink dispensers.  

You can look for these items at second hand stores, and add to your stash a little each year.  Pick colours you and your kids love and use them year after year.  

They may be more expensive than disposable the first time, but in the long run they're cheaper and better for the planet.  If you can't afford them all at once, buy a few things each year to add to your stash.

Borrow pieces from friends and family.  There's lots of entertaining pieces that only get used a few times a year, feel free to borrow things like a drink dispenser, platters, or even table cloths.  Just be sure to return in the condition you borrowed them.

Join a Facebook mom's group and see if you can buy and/or sell your gently used birthday party decorations.  Lots of party decor, even the disposable kind has lots of life left in it after one use, pass it on, or purchase it at a discount from another mom to help save money and the environment.

Don't go overboard.  I'm not always the best at following my own advice here.   But the truth is that it really doesn't need to look like pinterst.  Birthday parties are for such a short time that it really doesn't make sense to over spend on decor.  Spend your hard earned dollars on things that are more lasting than just a few hours of celebrating.

Frequently Asked Questions

How do I make my at home DIY party decorations look cohesive?

Choose a theme and a color scheme to help tie everything together for a cohesive look.

How to do a simple birthday decoration at home?

Choose a few key areas like the seating area, and the food table to make big impact, but keep it simple. Choose a color scheme and theme and choose food and decorations that fit for a fun and festive party, while still keeping it simple. Add homemade party decor instead of party shop disposable items.

How do I organize my birthday party at home?

Set up different stations like main course food, drinks, dessert, and party activities so that guests can help themselves.

How to decorate my party cheaply?

If you're on a budget for big impact with balloons and paper streamers. Make your own DIY banners and signs with free printables. Can't afford flowers? Pick wildflowers, use greens from your garden, or use house plants. Don't forget the candles. Need serving pieces, look at the thrift store.

More Birthday Party Inspiration

  • Teddy bear breakfast party with teddy bear themed food.
    Teddy Bear Breakfast Party Ideas
  • Rainbow art party ideas.
    The Rainbow Art Party
  • Board game night party with candyland dessert table and decor.
    The Ultimate Board Game Night With Candyland Inspired Snacks
  • Frozen themed menu, party decor and printables.
    Frozen Themed Party -Dinner and Movie Night

If you tried any of these At Home Birthday Party Decoration Ideas or any other ideas on my blog please let me know how it went in the comments below. Thanks for visiting today!

How To Make Your Own At Home Coffee Shop

Jan 25, 2025 · Leave a Comment

Iced coffee in glass with straw, coffee in mug with sticker logo, and hot chocolate in a tea cup on a table.

We love the new TikTok trend of turning your house or apartment into a popup coffee shop for the day for your friends and family.  A coffee house themed party is such a fun way to host and serve some great drinks and sweets.  A cafe at home is less formal and more fun than a dinner party.

Kitchen table covered in baked goods for an at home cafe party.
[feast_advanced_jump_to]

How fun is it to play store at home with all your besties?  

We love how playful this cafe pop up trend is and felt it was so much fun to play shopkeeper, but also fun for our friends to play customer, but without having to pay.  It was such a fun experience for all of us.

Why You'll Loved A Free At-Home Cafe

  • Everyone we know loves a good coffee.
  • We love an excuse to bake lots of homemade desserts (but you can also buy them if you prefer).
  • It's a more casual way to entertain -goodbye dinner party, hello coffee drop-in.
  • Open house style timing meant we could spend more time with our individual guests as they came and went at different times.
  • It's cheaper than cooking a full meal and providing alcohol for so many people.
  • It's less of a time commitment for guests, since most stayed for an hour or so.
  • All the baked goods were make ahead, so all we had to do at the party was make the coffee.
  • It's very family friendly. Kids would love it. Teens love it. Everyone loves it.

We chose to make our cafe at home free, some people like to include a pay what you can, or a tip jar to help recover some of the costs of ingredients.  You can do whatever works best for your budget and friend group. It's a great idea to state it right on your invitation so that guests know what to expect and can bring some cash if need be.

Choosing Your Time and Day

We ran our coffee shop experience like a drop-in, inviting our friends to stop by anytime between 1-4 on Saturday.  

At home coffee shop open sign on front door with wreath.

We think a weekend is best.  

We put a sign on the door, asking guests to come right in so we won't have to answer the door.  More on our custom signs below.  

We invited a large group of people for an open house style event.  You can also use this idea for a smaller group of friends and have a set start time.

We opened our shop in the afternoon, but the morning is also a great option too. Morning is especially good if you want to offer some savoury options, like a breakfast sandwich, or breakfast pastries.  

We kept ours simple with just desserts, so the afternoon was perfect. It also gave us a little more time in the morning to set up and finish baking.  Do keep your menu desires in mind when you set the time.

Coffee Shop Logo and Signs

We called our at-home coffee shop "Our House Cafe". and then hummed "Our house is very, very, very fine house" by Crosby, Stills, Nash and Young over and over in our heads every time we thought about it -sorry not sorry.  We liked this name and that it was kind of self-explanatory to our friends when they saw the invitation.

Naming the shop also gave me an excuse to make a cute little logo to use on our cups and signs.  We put together our simple logo in Canva.  

Ceramic coffee cups with paper sticker logo for at home cafe.

This is totally optional, but it does help make your cafe at home feel a little more like a real coffee shop.  And our guests loved this little detail.

Free Printables

We made some free coffee shop printables with the logo for our cafe at home menu, signs, cups and labels.  Sign up below for free instant access to them in our Free Resource Library. We've included some blank options, where you can fill in your own shop hours, and menu using a marker.  

We used our logo to make a sign for our front door inviting our friends to come straight in.

We also made some menus for the drinks.  It helps give your customers/guests an idea of what's on offer so they can choose from all the options.

At home cafe drinks menu for coffee on a table.

Tip: Handmade signs are great too.  Think brown paper and a Sharpie for a real coffee shop look.  Or use a chalkboard to write your menu.

We also printed some mini logos to add to our cups.

Pink glass glasses with at home cafe sticker logos on them.

Lots of people like to use take out cups for an at home coffee shop.  If you don't have enough cups, this is a great option.  

We loved the idea of using real cups and glasses because it creates less garbage, and is more environmentally friendly.  Check out more sustainable party ideas from our Earth Day Party and Eco-Friendly Entertaining Ideas here.

We also didn't really want our friends to take them "to go" since we wanted to hang out with them and chat.  

If you are using to-go cups, print your logo onto sticker sheets as an easy way to add it to cups.  We didn't want to deal with stickers on our real coffee cups, so I printed the logo onto copy paper and used a simple glue stick to glue them to the cups.  These hold really well, but wash off much easier than removing stickers.

You could also add your logo to little paper bags for baked goods.  We decided to use real plates.  You'll also need some napkins.

At Home Cafe Supplies:

You're going to need a few things to set up your at-home coffee shop:

  • cups -hot and cold
  • sticker logos for cups (optional)
  • straws
  • napkins
  • plates
  • menus
  • good coffee (don't forget decaf)
  • tea (have some decaf options here too)
  • sugar/sweetener
  • cream/milk/almond milk/oat milk
  • ice
  • baked goods
  • optional: take out boxes for baked goods

Keep in mind your guest list and their preferences if you know them.  You may need some vegan, gluten-free, nut-free, sugar-free options.

We liked using our regular dishes, but if you don't have enough, or prefer less clean up look for disposable options. 

At home cafe coffee bar set up with coffee maker and mugs and more on kitchen open shelves.

Coffee

Coffee is the real star of the show for your at-home coffee shop.  You will want to offer a few options.  

We used our Nespresso machine and stocked up on pods beforehand.  We also had some flavoured syrups, and a variety of creamer options, like cream, milk, almond milk and oat milk.  Our homemade gingerbread latte syrup would be a great addition during the holidays.

We actually forgot decaf coffee, which a few of our guests asked for, so learn from our mistake and be sure to have some on hand.

We also offered some iced coffee options for our coffee shop at home.  For this option make sure you have glasses for cold drinks too, and ice on hand. Our Tim Horton's copycat iced capp recipe would be a great additon too. You will just need a blender for this drink.

At home cafe drink options of iced coffee in glass, coffee in mug with logo, and hot chocolate in a tea cup.

I also made a crock pot of hot chocolate.  We were hosting around Valentine's Day and I thought it would be cute to offer a hot chocolate with pink whipped cream and sprinkles.  I served this in vintage tea cups.  It was easy to serve since I made a big batch in the crockpot and made the whipped cream ahead of time.  This would be a really great idea to include if you have kids attending too.

Some people might feel overwhelmed by all the options so having a few "specials" on the home coffee shop menu, like our Valentine's Day hot chocolate gives them an easy place to start.  And if you run out of your special because it's so popular, just write "sold out" over it on the menu cards or sign.

Don't worry about having to be a real barista and make great latte art or real coffee house coffee at home.  Just offer at least 4 options of drinks that are yummy and your friends will love it.

We also had some tea on offer for the tea drinkers.

Baked Goods

One of our favourite parts was all the sweet treats.  We made all our options from scratch, but you can buy them at your favourite bakery, or do a combination of homemade and store-bought items.  

You don't need too many options.  We think three to four is just about perfect.  

Try and include at least one thing that is chocolate for the chocolate lovers, and something kind of vanilla for those non-chocolate people.  Something fruity is also a good idea to include. 

Here's what we included:

  • Cake
  • Cookies
  • Donuts
  • Brownies
  • At least one vegan and gluten free option

We wanted a variety of items so we made a cake, which we served by the slice.  

Vintage style pink cherry cake with one slice out of it.

There were also cookies,   Try and make them big -coffee shop style.

Large biscoff cookies on a footed plater.

We also made some homemade donuts -check out our homemade honey cruller recipe here.  Our cafe was in the afternoon, so I made them and fried them in the morning.  These were such a hit and really felt special.  

Homemade honey cruller donuts on a large vintage plater.

We also had a few guests who were vegan and gluten-free and I wanted at least one homemade treat for them, so we made a little chocolate bark with peanut butter, dried fruit, and Valentine's sprinkles.  

Chocolate bark with dried fruit and chocolate on a footed plater.

And last but certainly not least we made some brownies.

Chocolate brownies stacked on a pink footed plate.

These were a good combination of items that could be made ahead and things that needed to be made the day of.  For the cookies, we made some the day before, and for one we made the cookie dough the day before and then baked them the morning of -which made the house smell amazing!  

We made quite a few options and did have leftovers.  We had some takeaway boxes for friends to easily take some home with them.  Little paper bags work well for this too. 

Set-Up

We had our free printable sign on the door asking guests to come in, and we were in our kitchen serving.  We had our menus on the dining room table and in the living room so guests could look at it, and then make their way to the kitchen to order.  Some people like to make an "Order Here" sign to make it more clear, just like a real coffee shop.

We set up our drinks on the kitchen counter and made them ourselves.  I covered serving the tea and hot chocolate and my daughter made all the coffee drinks. Enlisting the help of a teenager, if you have one, is great.

We set up the baked goods on the kitchen table with labels, on different cake stands, with serving pieces, plates and napkins.  If we weren't busy making drinks we could serve them, but if we were our guests could help themselves.  

Music

Don't forget to put on a coffee house inspired playlist to help set the atmosphere.

Our coffee shop at home was so much fun.  We really enjoyed hosting it and our guests had a great time attending too.  

I love the idea of hosting it a few times a year, with different seasonal treats each time.  Our Valentine's Day themed at home coffee shop was great.  It would be really fun to do one for Christmas, fall and spring too. 

Frequently Asked Questions:

What can I serve non-coffee drinkers at my at-home cafe?

Have some other options like tea, hot chocolate or cold drinks for those non-coffee drinkers.

Is it ok to serve store-bought treats at your at-home cafe?

Yes! You don't have to make all your baked goods -or any from scratch. Feel free to pick them up at your favourite bakery. Or do semi-homemade with something like a cake mix, or premade cookie dough that you bake at home.

Can I charge my friends to come to my at-home cafe?

If you need some help covering the costs, but you are not comfortable charging your friends, consider placing out a tip jar.  Use some paper to write tips, and toss in a few bucks.  Your friends will likely get the hint that it's expensive to host a party like this and drop in some money.  This is a playful way to hint that you could use some help covering the costs of the ingredients.

More Entertaining Inspiration

  • Earth day party set with up cycled dishes and cutlery, home grown flowers, paper lanterns, and garden themed food.
    Earth Day Party and Eco-Friendly Entertaining Ideas
  • Princess and the frog party table with food and decorations.
    The Best Birthday Party Home Decoration Ideas
  • summer garden party
    Summer Garden Party
  • Free movie night printables including a free ticket, popcorn banner, food labels, and signs.
    Free Movie Night Printables

If you tried this Cafe at home or any other party on my blog please let me know how it went in the comments below. Thanks for visiting today!

Elf on the Shelf Free Printables (2026) - 32+ Easy Ideas

Oct 7, 2024 · 1 Comment

Elf on the shelf posed inside a free printable taco.

⚠️ PARENTS: This post contains details about Elf on the Shelf printables and ideas. If your little ones are nearby, you might want to bookmark this for later!

We love Elf on the Shelf, but let's be honest coming up with new ideas every single night in December can feel overwhelming. Between holiday planning, shopping, baking, and everything else on your plate, the last thing you need is to stay up late scrambling for elf inspiration. That's exactly why we created these elf on the shelf free printables -to make your life easier and bring back the fun of this magical tradition.

Elf on the shelf posed inside a free printable taco.
[feast_advanced_jump_to]

A Quick Look At These Printables

  • 📋 Collection: 32+ Free Elf on the Shelf Printables
  • ⏲️ Setup Time: 5 minutes per idea (just print and pose!)
  • 🎁 What's Included: Props, signs, letters, games, and planning tools
  • 📅 Best Part: Use any ideas, in any order that works for YOU
  • 💭 Top Tip: Choose your favorites - you don't need to use all 32!

Why You'll Love These Elf Printables

  • More than enough ideas so you can pick and choose your favorites
  • Use them in any order that fits YOUR schedule and family traditions
  • Just print and pose - all extras are completely optional for added fun
  • Complete matching kit with cohesive, beautiful design throughout
  • Free planning tools included to customize your entire elf season
  • Perfect for busy parents who need quick, last-minute setup ideas

This isn't just a collection of random printables. We've created an entire matching elf on the shelf free printables kit with props, notes, pennants, arrival letters, goodbye letters, and planning tools. You get 32+ fun elf ideas to choose from, and here's the best part - you don't have to use them all. Pick your favorites, use them in whatever order makes sense for your family, and skip anything that doesn't fit your schedule.

All our easy elf ideas can be set up with just the printables. Just print, cut, and pose your elf. That's it.

Or, if you want to make things extra special, we've included optional activity suggestions and gifts from the elf that you can add. The extras are there if you want them, but they're never required. If you're looking for more Christmas party ideas, holiday celebration inspiration, or seasonal entertaining tips, we've got you covered throughout the blog.

Maybe you have an ugly sweater party coming up this December. Perfect - there's a printable for that day. Planning taco Tuesday? We've got you covered. Movie night on the calendar? Use the movie printable. The beauty of this system is that your elf tradition can work around your real life, not the other way around. And if you're planning other winter celebrations, these printables fit right into your seasonal festivities.

Your Complete Free Elf Printable Kit (2025)

Our complete elf on the shelf free printables kit includes everything you need for a stress-free December. Here's what you'll get when you subscribe:

  • 32+ printable props, signs, and accessories - From pizza boxes to superhero capes to welcome letters
  • Arrival and goodbye letters - Start and end the tradition with meaningful moments
  • Interactive activities - Coloring sheets, games, secret messages kids can actually do
  • Emergency letter - For when you forget to move the elf (it happens to everyone!)
  • Birthday letter - Celebrate kids with December birthdays in a special way
  • Free planning calendar - Customize your elf schedule to fit your real life
  • Supply shopping list - Optional extras organized so you can plan ahead
  • Blank note template - Create your own custom messages from the elf

Everything has a matching, cohesive design so your elf setups look polished and beautiful without any extra effort. And remember - pick your favorites, use what works, and don't stress about the rest. That's the whole point.

How to Download and Use Your Elf Printables

Our printables are free to subscribers.  Subscribe below for instant access to the free elf on the shelf printables PDF.  Check your email for the password to our Free Resource Library, and search in the Elf On The Shelf section for all the free printables.  

How Do I Print Them?

Find the link in the Free Resource Library and click on it. Print the props, notes, pennants and more on regular copy paper, or card stock for items that need extra strength or to stand up on their own. Use the 100% or full size setting on your printer, since the props are sized to fit your elf perfectly.

Print in color, then cut out and pose your elf with them. Don't have a color printer at home? No problem. Print them for a small fee at your local library or office supply store like Staples or FedEx Office. Most charge just a few cents per page for color printing.

Basic Supplies to Have on Hand

Here's what makes these elf setups so easy - you probably already have everything you need:

  • Printer and paper: Regular copy paper works for most props; card stock for items that need to stand
  • Scissors: For cutting out props
  • Tape: Clear tape or double-sided tape for attaching props to elf or surfaces
  • Hot glue gun (optional): For 3D props that need assembly
  • Basic household items: Things you already own like tissue, towels, crayons

That's it. No specialty craft supplies, no expensive materials, no running to multiple stores. Just print, cut, and set up.

Elf on the shelf free printable planning sheet calendar.

Planning Your Elf Season Your Way

We highly recommend creating a plan for your whole elf on the shelf season, but it should work for YOUR family's schedule, not against it. Use our free printable planning calendar to decide which ideas to use each night, matching the printables to what you're already doing.

Have an ugly sweater party coming up? Use the ugly sweater printable that day. Planning taco Tuesday? Perfect day for the taco printable. Movie night on the schedule? Use the movie ticket and popcorn box. When you align your elf tradition with your real life, it stops feeling like one more thing on your to-do list.

If you want to add optional extras like real donuts for donut day or a gift card for coffee shop day, use the free printable supply list to stay organized. Shop ahead of time or grab things as you go. All the extras are completely optional, so you can do every idea with just the printables if that's easier.

Remember: you don't have to use all 32 ideas. Pick your favorites, skip what doesn't work, and use them in whatever order makes sense. Use what brings joy, skip what creates stress.

I. Elf on the Shelf Arrival Ideas:

1. Elf On The Shelf Welcome Letter

Elf on the shelf with free printable arrival letter and pennants.

Start things off with a free printable Elf on the Shelf arrival letter.  

Elf on the shelf has arrived.  Whether you have a new elf, a returning elf, or multiple elves we've  got an arrival letter that will work for you.  There's also multiple pennants in large and small sizes that would work for elf's arrival.

Extra Idea: Check out our elf arrival breakfast idea next, if you want to make the arrival extra special.

Supplies Needed:

  • elf arrival letter, arrival pennant
  • extra idea:  see our elf arrival breakfast

2. Arrival Breakfast

Elf on the shelf arrival North Pole breakfast.

Celebrate Elf's arrival with a welcome breakfast party using our printable decorations -centre piece, Ho Ho Ho banner, bottled water wraps, straw flags, cupcake picks, and pennants.

Elf on the shelf arrival breakfast ideas.
Elf on the shelf arrival breakfast ideas with free printable decorations.
Elf on the shelf welcome breakfast printable bottled water wrap and straw flag.
Elf on the shelf free printable flag pennant.

For complete instructions, food ideas, and detailed setup: See our full Elf on the Shelf Arrival Letter and Breakfast post with photos and step-by-step directions for making this magical morning special.

Elf on the shelf welcome breakfast cinnamon buns with printable cupcake picks and Santa hat strawberries.

Supplies Needed:

  • All printables included in kit: printable centre piece, banner, bottled water wraps, straw flags, cupcake picks, pennants, welcome letter
  • glitter, hot glue, hole punch, dowel, ribbons, tape, glitter, white glue, faux snow, mini Christmas trees, string
  • cinnamon rolls, Christmas sprinkles, bottled water,  strawberries, mini marshmallows, regular marshmallows, hot chocolate, Elf on the Shelf cereal

II. Elf on the Shelf Food & Treat Ideas:

3. Elf on the Shelf Pizza Night

Elf on the shelf with free printable mini pizza and pizza box.

Elf is bringing pizza!  Set up the 3-D pizza box, with the paper pizza inside.  You could also add extra toys with pizza slices, by cutting the whole paper pizza into slices.

Extra Idea:  make it a real pizza night with a take-out pizza menu and money, or a pizza gift card, or use our "look in the freezer" note and have some frozen pizza there ready to bake for dinner.

Supplies Needed:

  • elf pizza box, pizza, and note
  • "Merry Crust-mas" pennant
  • Extra Idea:  take-out pizza menu and money, or a pizza gift card, or a frozen pizza and note to look in freezer

4. Taco Night Elf

free printable elf on the shelf taco idea.

Print the taco and tape your elf inside.  Add the elf note beside.

Extra Idea: Make it a real taco Tuesday!  Add some supplies to the table like a box of taco shells, seasoning, and salsa and make tacos for dinner.

Supplies Needed:

  • printable taco and elf note
  • "Taco bout a party" pennant
  • tape
  • Extra Idea: taco night supplies

5. Elf on the Shelf Donuts

Elf on the shelf free printable donut box.

Print the mini 3D donut box, printable donuts and elf note.

Extra Idea:  instead of using the free printable donuts, make real elf sized donuts with cheerios, icing, and sprinkles.  Add a gift card for donuts, or real donuts beside the elf to enjoy.

How to make real edible elf on the shelf mini donuts from Cheerios cereal.

Supplies Needed:

  • printable donut box and donuts
  • "Donut you love Christmas" pennant
  • hot glue
  • extra idea: elf sized donuts with cherries, icing, sprinkles, and edible glitter, or a donut gift card, or real donuts

6. Elf on the Shelf S'mores

Elf on the shelf free printable s'mores and campfire.

Elf is making s'mores.  Print the campfire and glue the tops together, to make it 3D.  Use a toothpick as a marshmallow roaster and tape on printable marshmallow.  Add printable elf s'more and elf note.

Extra Idea:  make real elf sized s'mores with golden graham cereal, mini marshmallows and chocolate chips.  Use a real mini marshmallow and toast over a candle.  Use the rest of the cereal, mini marshmallows, and chocolate chips  to make s'more trail mix for the kids.  Or  leave the supplies for regular sized s'mores and make them indoors  with the kids using a candle, or in the oven on a tray.

Supplies Needed:

  • campfire, marshmallow, s'more and elf note printable
  • toothpick or skewer
  • glue
  • Extra Idea:  mini elf s'more supplies, and/or regular s'more supplies

7. Elfbucks Elf on the Shelf Starbucks Free Printables

Elf on the shelf Starbucks elf bucks free coffee shop printables.

Set up an elf on the shelf coffee shop. Print the coffee cup and hot glue  together to make an elf sized cup.  Top with stuffing to make foam.  Dress the elf in the printable paper apron.  Cut the loop around the neck to put it on elf and tape closed.

Extra Idea: add a gift card for the coffee shop and bring the kids there to get a treat today.

Supplies Needed:

  • printable coffee cup, apron, and elf note
  • tape, stuffing as foam in cup
  • "Love you a Latte" pennant
  • Extra Ideas: gift card

8.  Cookie Baking

Elf on the shelf free printable mini oven.

Elf is baking cookies with the 3D oven and cookie sheet.

Extra Idea:  Add in some real baking items and bake cookies with your kids.  Make it easier with some ready-made dough, or buy ready-made cookies and add decorating supplies like icing and sprinkles.  Another option is to use play dough to play cookie making with a toy rolling pin and mini cookie cutters.

Supplies Needed:

  • elf baking printables and  elf note
  • hot glue
  • Extra Idea:  real baking items like a mixing bowl, rolling pin, cookie cutters, and sprinkles, or ready-made cookie dough, or cookies and decorating supplies, or play dough supplies and mini cookie cutters

III. Activities and Play Ideas:

9. Elf on the Shelf Movie Night

Elf on the shelf movie night free printables, including printable movie ticket.

Elf is ready for movie night!  Set up elf with the elf sized movie ticket and popcorn box.  

Extra Idea:  print the larger movie ticket and popcorn box for the kids.  Add in some real popcorn for the kids to enjoy.  Have a family movie night and watch "Elf" or your favourite family friendly holiday movie.

Supplies Needed:

  • movie night printables and elf note
  • "Movie Night" pennant
  • hot glue
  • real popcorn
  • favourite holiday movie to watch together
  • Extra Idea:  print large movie ticket for kids, and large popcorn box, choose a movie for movie night (we recommend Elf).

10. Skating Elf

Elf on the shelf free printable skates.

Print the mini skates, cut them out and use tape to make them 3D.  Then put them on your elf's feet, and set up the elf beside your ice cubes in the freezer.  Add the note to the front of the freezer door so that your kids know to look inside.

Extra Idea:  freeze a container of water for an elf sized skating rink.

Supplies Needed:

  • printable skates (in white or black) and elf note
  • tape
  • "Skating on thin ice" pennant
  • extra idea: elf sized rink frozen container of water

11. Elf on the Shelf Sled

Elf on the shelf free printable mini sled.

Print the sled and fold in half, then glue it together. Next, roll up the front and hot glue it to form the front of the sled.  Add in some string as a handle.  Set up some white towels as a snow hill.

Extra Idea: If it's snowy where you live, place out the kids sleds, or a gift of a new one and take the kids sledding today.Note you might want to wait to schedule this day, depending on the weather.

Supplies Needed:

  • printable elf sled and elf note
  • Sledding pennant
  • hot glue
  • string
  • white towels
  • Extra Ideas: real sleds (that you already own or new ones. and snow!

IV. Free Elf on the Shelf Printable Games and Interactive Ideas:

12. Elf on the Shelf Free Printable Coloring Sheet

Free elf on the shelf coloring sheet and mini elf coloring sheet.

Print the mini elf colouring sheet, and put some crayons in your elf's hand and on his sheet.  Leave the full size colouringsheet for the kids.  Print one for each child.

Extra Idea:  give your kids new crayons or markers to use on their colouring sheet.

Supplies Needed:

  • printable mini and large colour sheets and elf note (choose US or Can spelling)
  • crayons
  • Extra Idea: new crayons or markers gift

13. Elf On the Shelf Free Printable Playing Cards

Elf on the shelf free printable mini playing cards.

Elf is playing cards.  Set him up with a game of solitaire, or use some other toys to set up a card game with others.

Extra Idea:  print regular size playing cards for your kids to use.

Supplies Needed:

  • print elf sized cards, and elf note
  • Extra Idea:  print a set of regular cards for your kids to play with tie with ribbon

14. Secret Message From Santa

Elf on the shelf secret code letter from Santa letter  activity.

Print the secret message from Santa and the elf note.

Extra Idea: add a Christmas pen or pencil

Supplies Needed:

  • printable secret message and elf note
  • Extra Idea: Christmas pen or pencil

15. Elf on the Shelf Tic Tac Toe

Elf on the shelf printable tic tac toe.

Print the Tic Tac Toe, and elf note.  Set the elf up with another toy and red and green crayons to play tic tac toe.

Extra Idea: Use candy for the tic tac toe markers like red and green skittles that the kids can eat after the game.

Supplies Needed:

  • printable  tic tac toe sheet, and elf note
  • red and green crayon and extra toy
  • Extra Idea: red and green candies

16. Elf on the Shelf Free Printable Letter to Santa Template

Elf on the shelf free printable letter to Santa template.

Print one letter to Santa template for each child, and the elf note.

Extra Idea: include a Christmas pen or pencil.

Supplies Needed:

  • print letter to Santa and elf note
  • "Team Good List" pennant
  • Extra Idea: Christmas pen or pencil

17. Elf on the Shelf Candy Cane Hunt

Elf on the shelf candy cane hunt free printable.

Elf has hidden a box of candy canes around your house and the kids need to find them.  Hide the candy canes and leave the empty box with the elf note and elf on the table.

Supplies Needed:

  • printable elf note
  • box of candy canes (if your kids don't like mint, remember they come in lots of other neat flavours too.)

V. Quick & Simple Setup Ideas:

18. Elf on the Shelf at the Beach

Elf on the shelf free printable towel and sand bucket for the beach.

Set up your elf on a beach made of brown sugar. Use our printables to give your elf sunglasses, a beach towel, pail, and shovel, and don't forget the elf note.

Supplies Needed:

  • brown sugar
  • beach printables
  • tape

19. Elf on the Shelf Ugly Sweater

Elf on the shelf free printable ugly sweater.

Print and cut out the elf ugly sweater and use some tape to attach it to your elf.

Extra Idea:  pick up an ugly sweater for your kids and leave it as a present from your elf.

Supplies Needed:

  • printable sweater and elf note
  • tape
  • Extra Idea: ugly sweater for kids

20.  Elf School

Elf on the shelf free printable props.

Print the chalkboard on card stock, and use tape to create an A-frame.  Set up your elf beside it.  For extra fun add in some chalk as a prop, and other toys as students.

Supplies Needed:

  • printable chalkboard and elf note
  • tape
  • Extra Idea: chalk as a prop, extra toys as students

21. Elf Printable Fireplace and Joke

Elf on the shelf free printable joke idea.

Print the 3D fireplace and glue.  Use Kleenex to make a pillow and blanket.  Add the elf note.

Supplies Needed:

  • printable fireplace and elf note
  • hot glue
  • Kleenex pillow and blanket

22. Elf on the Shelf Free Spa Printables

Elf on the shelf printable spa kit.

Elf is having some me-time!  Use an empty Kleenex box as the base and wrap the printble bath tub around it to create the tub.  Cut a hole in the top for the elf to sit inside.  Wrap a Kleenex around the elf's head like a towel.  Tape the cucumbers over the elf's eyes.

Extra Idea:  make it a spa night for the kids too!  Pick up holiday scented bubble bath, or a bath bomb and leave it with the elf as a gift to use that night.

Supplies:

  • spa night printables and elf note
  • "Elf Care" pennant
  • tape
  • Kleenex box
  • Kleenex towel
  • Extra Idea:  holiday scented bubble bath or bath bomb

23. Free Printable Elf on the Shelf Computer

Elf on the shelf free printable mini laptop computer.

Print the elf sized laptop computer.  Cut out and fold in half.  Place it in the elf's lap with the elf note.

Supplies Needed:

  • printable elf computer and elf note

24. Elf on the Shelf Snowman Free Printables

Elf on the shelf free printable snowman face for toilet paper snowman.

Elf is making a toilet paper snowman!  Print the snowman face and buttons and tape to 3 stacked toilet paper rolls.

Supplies Needed:

  • 3 rolls of toilet paper
  • snowman printables and elf note
  • "Do you wanna build a snowman?" pennant
  • tape

25. Elf Laundry

Elf on the shelf in a washing machine and free mini laundry printables.
Elf on the shelf laundry idea and free printable.

Elf is doing the laundry.  If you have a front loading washer, position the elf inside at the front of the window, held in place with a little tape and towels.  Or set up the elf on top of the washer.  Place the elf sized detergent, with a stack of folded towels and the elf note on top or to the side.

Supplies Needed:

  • printable 3d laundry soap  and elf note
  • "We wash you a merry Christmas" pennant
  • hot glue
  • folded towels

26. Elf Gift Wrapping

Elf on the shelf free printable idea.

Print the elf wrapping station sign and tape to the wall.  Add some wrapping paper, ribbons, bows, and tape.  Use the tape to wrap around the elf.  Add a bow on his head.

Extra Idea: Spend some time wrapping gifts together with your kids for family and friends today.  Let them draw some cards and gift tags to go with them.

Supplies Needed:

  • printable sign and elf note
  • wrapping paper, ribbons, bows
  • tape
  • Extra Idea: wrapping supplies, gifts to wrap, paper and crayons or markers for card making

27. Elf on the Shelf Netflix "Elfix"

Elf on the shelf free printable Netflix elflix.

Elflix and chill.  Elf is relaxing with a little popcorn and tv.

Extra Idea: make it tv night at home with pjs and popcorn.

Supplies Needed:

  • printable tv and elf note
  • hot glue
  • "Elflix and chill" pennant
  • popcorn

28. Elfgram Instagram Elfie

Elf on the shelf free printable Instagram selfie  elfie.

Elf is taking selfies for "Elfagram"!  Print the elfagram frame and set up your elf in the frame, with the elf note.

Extra Idea:  Take a photo of your elf and kids and share it on your Instagram account with #lifeisaparty

Supplies Needed:

  • printable instagram frame, and elf note
  • "Elfie time" pennant

29. Dog Cookies

Elf on the shelf dog treat cookie idea and free printable.

For the family with a dog, this is a cute idea.  Set up the elf with the dog cookies and elf note.  Spread a few crumbs around as if the elf has been eating.

Supplies Needed:

  • printable elf note
  • dog cookies

30. Super Hero Elf on the Shelf Free Printables

Elf on the shelf free super hero printables.

Print the cape and mask, cut out and use tape to attach it to your elf.  Set up the elf with some other super hero toys, if you have them and the elf note.

Extra Idea: Watch your favourite super hero movie together today.

Supplies Needed:

  • printable super hero outfit and elf note
  • "Santa sent me" pennant
  • tape
  • other super hero toys

VI. Goodbye and Customizable

31. Elf on the Shelf Goodbye Letter and Suitcase

Elf on the shelf free printable goodbye letter and suitcase prop.

On Christmas Eve, pose your elf with the free good bye letter printable and suitcase.

Extra Idea: Have elf leave some Christmas pjs for the kids, or whole family to wear to bed on Christmas eve .

Supplies Needed:

  • printable good bye letter
  • "Goodbye be good" pennant
  • Extra Ideas: Christmas pjs.

32. Elf on the Shelf Free Printable Notes Template

Free printable elf on the shelf notes template.

All our ideas come with a cute free printable note from the elf.  If you want to add some different ideas, we've also made a free note template that you can print and write any message you like from your elf.

Use our Elf on the Shelf ideas to plan your whole December.  Download the whole Elf on the Shelf kit in our Free Resource Library and print the whole thing, or just the ideas you choose to use.  All these printables are free to use for personal use.  Do not sell, or share these free printables.

Elf on the shelf free printables.

VII. Emergency & Special Occasion Letters

33. Elf Didn't Move Letter

Free printble elf on the shelf letter from elf who forgot to move last night.

We've all been there -you completely forget to move the elf and wake up in a panic. This printable letter saves the day! Print it out and place it right where your elf is sitting. The letter explains that even elves need rest sometimes, and it's completely okay.

This is perfect for those nights when life gets busy and the elf stays put. Your kids will understand, and you can breathe a sigh of relief.

Supplies Needed:

  • printable "Didn't Move" letter, choose from one elf, or multiple elves

34. Birthday Letter from Elf

Free printble elf on the shelf birthday letter.
Free printable elf on the shelf birthday pennant flag.

Does your child have a December birthday during elf season? Make their special day even more magical with this birthday letter from the elf! Print it out and have your elf hold it on your child's birthday morning.

This is such a sweet way to acknowledge birthdays that happen during the busy December season. Kids love getting special recognition from their elf on their big day.

Supplies Needed:

  • printable birthday letter from one elf or multiple elves
  • birthday pennant

Last-Minute Elf On the Shelf Ideas (5 Minutes or Less)

Let's be real - some nights you're going to remember the elf at 11 PM when you're already exhausted. We've got you. Here are the absolute quickest setups from your printable kit that require minimal assembly and can be done in under 5 minutes.

No Assembly Required (Just Print and Pose)

These printables require zero assembly - just print, cut if needed, and pose:

  • Ugly Sweater - Print, cut, tape to elf. Done in 3 minutes.
  • Computer - Print, fold in half, place in elf's lap. 2 minutes.
  • Notes Template - Print, write a quick message, pose elf holding it. 3 minutes.
  • Letter to Santa - Print and place on table with elf and a pencil. 2 minutes.
  • Secret Message from Santa - Print the decoder and message, set on table. 3 minutes.
  • Playing Cards - Print, cut, set up a quick solitaire game. 5 minutes.
  • Instagram Frame - Print, fold to stand, pose elf in front. 3 minutes.
  • Didn't Move Letter - Print and place next to elf. 1 minute. (Seriously, this one saves you!)
  • Birthday Letter - Print and have elf hold it. 2 minutes.

Using Items You Already Have

These setups use the printables plus items you already have at home:

  • Beach Scene - Print beach props, sprinkle brown sugar, pose elf. 5 minutes.
  • Fireplace - Print and tape together, add tissue for pillow. 4 minutes.
  • Elf School - Print chalkboard, fold to stand, add toy students. 4 minutes.
  • Snowman - Print face/buttons, tape to toilet paper rolls. 3 minutes.

Elf on the ShelfEmergency Strategy

On those nights when you completely blank on moving the elf use the "Didn't Move" letter. Print it in 1 minute, place it next to your elf wherever they are, and you're done. Did you even do elf on the shelf if you didn't forget to move it at least once? It happens, and this turns your forgetfulness into a planned moment.

Get Free Elf on the Shelf Printables

Subscribe below for instant access to our Free Resource Library and look for these Elf on the Shelf free printables in the Elf on the Shelf section.

With 30+ free printable Elf on the Shelf ideas, life really is a party!

More Christmas Printables

  • letter to Santa free printable
    Free Printable Letter To Santa
  • Christmas movie night printables, tickets, decor, labels
    Christmas Movie Night Free Printables
  • Printable Christmas Advent Activity Cards in green with forest animals on them.
    Free Printable Advent Calendar Activities (60+ Ideas for Families)
  • Christmas baking party with free printables.
    Christmas Cookie Party

Frequently Asked Questions

How do I access the free elf on the shelf printables?

Sign up in the subscription box above for access to the free elf on the shelf printables, and check your email for the password to our Free Resource Library. Once you have access, search for the Elf on the Shelf section where you'll find all 34 printables ready to download as a PDF file.

What if I don't have a color printer at home to print these elf on the shelf printables?

You can have these elf on the shelf free printables printed at your office supply store like Staples, FedEx Office, or even your local library for a small fee. Most places charge just a few cents per color page. Just download the PDF to a USB drive or email it to yourself, and they can print them for you. Or go to the store's website and upload files to order your prints.

Is everything I need included in the free printable kit?

Yes! All the printables you need for each idea are included in your free kit - props, signs, letters, pennants, and notes. The only things you'll need to provide are basic supplies like scissors, tape, and a printer. Any "extra ideas" mentioned (like real donuts or gift cards) are completely optional ways to make the setups extra special, but every idea works perfectly with just the printables.

Do I need special paper or cardstock for these elf on the shelf printables?

Regular copy paper works perfectly fine for most of the elf on the shelf free printables. For props that need to stand up or have more structure (like the 3D boxes, or chalkboard), cardstock works better and gives a sturdier result. But honestly, regular paper will work in a pinch -you can always reinforce it with tape or glue if needed.

Do I have to use all 32+ elf on the shelf ideas?

Absolutely not! That's the whole point of giving you so many elf on the shelf free printables - pick your favorites, skip what doesn't work for your family, and use them in whatever order makes sense for your schedule. Some families use different ideas every night, and some only set up the elf a few times a week. All approaches are perfect. Use what brings joy, skip what creates stress.

When should I start planning my elf on the shelf season?

Start as early or as late as works for you. Some parents like to plan in November, printing all the elf on the shelf free printables and organizing supplies ahead of time using our free planning calendar. Others prefer to choose ideas night by night. There's no wrong approach -just what works for your family's schedule and style.

What if I forget to move the elf one night?

It happens to everyone! Use our "Elf Didn't Move" letter printable -just print it in 1 minute and place it next to your elf wherever they are. The letter explains that even elves need rest sometimes. You can also use the blank notes template to write a quick custom message. This turns your forgetfulness into a planned moment, and your kids will understand.

Can I customize any of the elf on the shelf printables?

Yes! We've included a blank notes template that you can print and write your own custom messages on. This gives you the flexibility to create your own ideas while still using the matching design of the kit. You can also write on many of the printables with markers if you want to personalize names or messages.

Are these elf on the shelf free printables suitable for multiple children?

Yes! The coloring sheets and activity printables work great for multiple kids - just print one for each child. The arrival and goodbye letters have options for single elves or multiple elves. If you have kids of different ages, you can choose ideas that appeal to each age group. The variety in the kit means there's something for everyone, from toddlers to tweens.

Can teachers use these elf on the shelf printables in their classrooms?

Yes, teachers are welcome to use these elf on the shelf free printables for their classroom elf! These are for personal use, which includes classroom use. You cannot sell them, redistribute them, or use them for commercial purposes, but they're perfect for bringing elf magic to your students.

How do I store the elf on the shelf printables for next year?

After Christmas, store all your cut and assembled props in a small plastic bin so they don't get crushed. Label it "Elf Props" and tuck it away with your Christmas decorations -and out of sight of the kids. Next year, you'll have everything ready to go and you can reuse your favorites or print new ones from our free kit. The printables hold up well if you keep them from getting bent or crushed.

What's the quickest elf on the shelf idea if I'm in a rush?

The quickest elf on the shelf free printables are the ones that require no assembly - just print, cut, and pose. Try the ugly sweater (tape to elf), computer (fold and place in lap), Instagram frame (fold to stand), or the "Didn't Move" letter (place next to elf). All of these take under 3 minutes to set up. Check our "Last-Minute Elf Ideas" section for more super-quick options.

If you try these Elf on the Shelf Printables or any other ideas on my blog please let me know how it went in the comments below. Thanks for visiting today!


**About the Author** Dannyelle Nicolle-Ramjist is a former classroom teacher (B.Ed., York University) and trained celebrant (M.Div., University of Toronto) who has been creating party ideas, seasonal celebrations, and free printables for 15+ years. Her work has been featured in Better Homes & Gardens, Country Living, Good Housekeeping, and Apartment Therapy. She specializes in making beautiful, meaningful celebrations achievable for busy families.

Easy Halloween Ghost Themed Food Ideas

Sep 8, 2024 · Leave a Comment

Ghost themed foods on a snack board.

These easy Halloween Ghost Themed Food Ideas are perfect for celebrating. Use our easy recipes and food ideas for a Halloween party, family celebration, or a night at home with your boo.

Ghost themed foods on a snack tray.
[feast_advanced_jump_to]

Ghost Food Ideas

It's almost Halloween and the time of the year to enjoy lots of ghost Halloween foods with your little goblins, or for you and your boo.  We put together this snack tray of ghost themed food as the perfect spooky party platter.

These would be amazing for a Halloween movie night with our free printables or for a pink Halloween party like ours, a summerween party, or even as a spooky addition to a Harry Potter snacks platter or Halloween Smores.

Ghost Pizza

We used mini naan bread to make little Halloween ghosts pizzas.  This is one of our favourite easy Halloween recipes.  The mini size was super cute, and the perfect oval shape.  If you can't find minis, you can also make larger ghost pizzas with regular naan bread or pitas.

Mini ghost pizzas made from mini naan bread.

To make them, we started by topping our mini naan bread with some pizza sauce and then added shredded mozzarella cheese to cover the tops.  We made little ghost eyes with sliced black olives.  The eyes might move around a little as the pizza cooks, so feel free to move them back into position when you remove them from the oven, or add the olives after cooking.  Bake the mini pizzas at 350° for about 5 minutes, or until the cheese is melted and bubbling.

Ghost Chips and Snacks

We were on the look out for ghost shaped snacks and we found Utz "Ghost Puffs" white cheddar flavored cheese puffs.

ghost themed snacks

We also grabbed some Ghosts and Bats crispy potato snacks at Trader Joe's.  These were a great addition to our snack board.  Look for ghost themed salty snacks at the grocery store leading up to Halloween.

Ghost shapped potato snack chips on a snack board.

Boo-berry Ghost Pies

We made spooky blueberry hand pies shaped like ghosts.  This recipe was super easy to make, and so cute.  

boo-berry ghost hand pies pop tarts

To make them, start with some pre-made pie pastry from the refrigerator section of the grocery store.  Roll out the sheets and use a knife or large ghost cookie cutter to cut out two matching ghost pieces for each pie.  

On one piece of the pastry, spread out a few tablespoons of canned blueberry pie filling.  On the other pastry piece, use a small round cookie cutter, or the large side of a metal icing tip to cut out two large round eyes.  Then place this piece directly on top of the other piece, and use a fork around the outside to seal the ghost pie.  

We were able to make 5 ghosts out of a double crust pastry.  Bake the ghost pies at 350°, for about 15 minutes, until the pastry begins to brown.  Let them cool, and then ice the tops of the pies with some white icing.

Ghost Chocolate Covered Strawberries

How cute are our ghosty chocolate covered strawberries? And they're easy to make at home.

Chocolate dipped strawberry ghosts.

Make some ghost covered strawberries by dipping some strawberries in melted white chocolate.  Be sure to wash and dry the strawberries first, and carefully remove the leaves.  Melt some white chocolate in the microwave.  If the chocolate is too thick, thin it with some vegetable shortening.  Completely cover the strawberries and then place them on parchment paper to set.  

Add a ghost face to the chocolate covered strawberries using some black icing.  Be sure to store these in the refrigerator.

How to make chocolate dipped strawberry ghosts.
White chocolate dipped strawberry ghosts.
How to make chocolate strawberry ghosts.

Ghost Cookies

Another fun addition to our ghostly food ideas were these easy ghost cookies.  We started out with Milano cookies from the grocery store.  You can also use nutter butter cookies for a similar ghost shape.  

Easy ghost cookies made with store bought cookies, and white chocolate.

To make them, melt some white chocolate in the microwave. If it's too thick you can thin it with a little vegetable shortening.  Dip the front of the cookies into the white chocolate and let them set on some parchment paper.  

While the chocolate is still wet add some little black candy eyes or and some star sprinkles.  Or let the chocolate set and then add some melted dark chocolate eyes using a ziplock bag with the corner sniped off to pipe the eyes, or use some black icing.  These are such an easy and yummy ghost dessert idea.

Ghost Peanut Butter Cups

We found a few fun premade ghost foods and ghost desserts to include on our spooky snack tray of ghostly foods, including these ghost shaped peanut butter cups.  

Peanut butter cup ghosts for halloween on a ghost themed snack board.

Look for them in the candy section at the grocery store, with all the Halloween treats.  We unwrapped some and add them to our boo-cuteire tray.  If you're a fan of peanut cups, you'll love the taste of these ghost version ones.

Ghost Marshmallows

Ghost peep marshmallows were a fun addition to our ghost treats.  Look for them with the Halloween candy and goodies at the store.  

Peeps ghost marshmallows.

They'd also be a great addition to some white hot chocolate, or make Halloween s'mores with them for another tasty Halloween ghost treat idea.

Ghost Rice Krispie Treats

We love rice Krispie treats so we had to make some these when we were thinking up ghost snacks.  

Ghost shaped rice krispie treats dipped in white chocolate with chocoalte chip eyes.

We made our regular rice Krispie squares and cut them into ghost shapes, and then put them on a stick for extra fun.  The rice Krispie treats are then dipped into melted white chocolate  and the eyes are made from simple chocolate chips.  These ghost Halloween treats are so delicious.  Get the full ghost rice krispie treats recipe here.

More Easy Ghost Food Ideas

Here are a few more easy ghost recipes that you might like.  Make easy ghost cheese strings.  Leave the cheese in the clear packaging and use a marker to add ghost eyes.  

Another cute and easy ghost food idea is to hard boil eggs, peel them and add a ghost face made out of seaweed.  Just cut out some small black circles using kitchen scissors and press the seaweed pieces lightly onto the peeled egg and it will stick and make the cutest egg ghost.  

Ghost cupcakes would be another easy ghost treat to try.  Just make vanilla cupcakes, and ice them with vanilla frosting.  Add two chocolate chip ghost eyes to turn them into easy ghost cupcakes.

Banana ghosts are another great idea, and also a healthy option.  Just peel a banana, cut it in half and add some chocolate chip eyes.  You can also turn this into a dessert by dipping the banana half in white chocolate, then adding the chocolate chip eyes.  Both ways are so cute, and delicious.

I hope these ghost ideas for Halloween inspire you for your next ghostly Halloween party.  Ghost party food is sure to impress your guests.  Or put together these easy Halloween ghost treats on a snack board like I did and enjoy them for a cozy Halloween night in with your boo.   

I also think these Halloween ghost ideas would be great for making a special lunch box for kids.  Or if your kids are bringing treats to school for a classroom Halloween party, one of these easy Halloween ghost recipes would be perfect.

Halloween ghost themed food ideas.

With these easy Halloween ghost themed food ideas, life really is a party.

Frequently Asked Questions

Can you make these ghost snacks ahead of time?

Feel free to make your ghost pies and cookies ahead of time, and store in a room temperature sealed container. You can make your pizza a day ahead too, and just reheat right before serving. Make the strawberries up to a day ahead and store in an airtight container in the refridgorator.

Where can you find the ghost chips and cheesies?

Look for them in grocery stores in the chip aisle starting around September through the end of August.

More Halloween Food Inspiration

  • Harry Potter snacks and treats board.
    Harry Potter Inspired Snacks and Treat Ideas
  • Homemade pink candy apples on a cutting board.
    How To Make Pink Candy Apples
  • Halloween ghost shaped white chocolate covered Rice Krispie squares
    Halloween Ghost Rice Krispie Treats
  • Pink Halloween party and decorations with pink treats snack table.
    Pink Halloween Party

If you try any of these Ghost Inspired Foods or any other ideas on my blog please let me know how it went in the comments below. Thanks for visiting today!

Easy and Cute Back To School Themed Foods and Treats

Aug 24, 2024 · Leave a Comment

Back to School themed foods snacks and treats.

14 Back to school themed foods and treats that are easy to make and perfect for celebrating the first day or at a back to school themed party.

Back to School themed foods snacks and treats.

Why You'll Love These Ideas

  • They're going to help kids get more excited about back to school. Any way to make transitions easier for kids are a plus!
  • They all taste great and are delicious treats.
  • Lots of them you can make with your kids for even more fun and memories.
[feast_advanced_jump_to]

If you're kids are heading back to school, there's nothing like some special back to school treats for students to help set the mood and get them excited.  

We've got lots of ideas for fun back to school themed foods that are perfect for a back to school party, class treats, or even as a treat for teachers during teacher appreciation.  

We hope some of these easy back to school treat ideas will inspire you to celebrate at home or at school.  Also check out our Free Back To School Printables, for your own celebrations. And for your own back to school family dinner inspiration here, and Back To School Party Ideas here..

Back to school sugar cookies that look like lined paper.

1. Paper Sugar Cookies

We made regular sugar cookies -get our sugar cookie recipe here, and cut them into squares.  After they were cooled we iced them with white frosting and let the frosting set until the top was hard.  Then we used edible food markers to add lines to make them look like lined paper.  They're so cute!  

You can even write a message on the "paper" cookie using the edible food marker, like your child's name or a back to school message if you wish.

Get all the details on how to make the lined paper back to school sugar cookies here.

Apple truffle pops on lollipop sticks in a mason jar.

2. Apple Truffle Pops

We made easy truffles, put them on a stick and then dipped them in melted red chocolate.  While the chocolate was still wet, we added a green M&M candy to look like a leaf and a small piece of green liquorice to look like the apple stem.  

These are so cute and delicous.  You could also use this same method to make apple cake pops instead of truffles if you prefer.  

Check out the full recipe to make the apple truffle pops here.

Back to school foods Rice Krispie treat pencils.

3. Rice Krispie Treat Pencils

If you're a rice krispie treat lover, you will love these rice krispie treat pencils for celebrating back to school.  

Make regular rice krispies, and then instead of letting them set in a pan, place the warm mixtue on waxed paper in long lines and use your greased hands to form them into long ropes.  Cut the ropes into pieces about 3 inches long  to form the pencils.  To decorate them, dip one end into melted pink chocolate to resemble the eraser on a pencil, and use melted milk chocolate to stick a hersey's kiss candy to the other end as the pencil tip.  Let the chocolate set and enjoy.

Back to school snack mix in a container with a lunch box note beside it.

4. Back To School Trail Mix

This back to school trail mix is full of back to school themed ingredients like alphabet cookies, freeze dried apples, book worms that are actually gummy worms, teeny tiny chocolate chip cookies, a few sweet treats like mini M&M's in the primary colours, chocolate covered pretels, and chocolate covered almonds, along with salted mixed nuts.  

It's the perfect treat for kids as an afternoon snack when they get home from school on the first day.  Or leave the nuts out of the recipe and use it as one of their school treats, or for a classroom party.  

Get the full recipe for the Back To School trail mix here.

Chocolate pretzel pencils.

5. Chocolate Pretzel Pencils

These cute little pencils are actually pretzels dipped in chocolate! 

Use large pretzel rods for this treat.  Melt some yellow chocolate and dip all but one end of the pretzel into it.  Let is set on a piece of parchment paper.  Once it's set, dip the other end into some melted pink chocolate to resemble the eraser end.  Let it set.  

Lastly, use some melted milk chocolate to add a chocolate chip to the other end to look like the pencil lead.  Let them fully set and enjoy.

Back to school themed foods apple cinnamon rolls.

6. Apple Cinnamon Rolls

We love baking prepared cinnamon rolls to celebrate special occassions.  This time of year, we wanted to make a back to school version.  

These would be a great treat for breakfast on the first day of school or as a sweet treat after school.  

Shop for the prepared cinnamon rolls in the refrigerated section of your grocery store.  The first step to make them into apple cinnamon rolls, is to add some apple pie filling.  Use about 1 cup of canned apple pie filling and place it on a chopping board and use a knife to chop the apples into smaller pieces.  Then roll out the cinnamon rolls all in once piece and spread out the filling on top of them.  

How to make easy apple cinnamon rolls.

Then roll up the cinnamon rolls and pull them apart gently into individual cinnamon rolls.  Place them in a baking dish and bake according to the package directions.

Apple cinnamon rolls made with store bought cinnamon rolls.
Apple cinnamon rolls in a baking dish.

To make the apple red frosting, add a few drops of deep red food colouring gel to your prepared icing.  Once the cinnamon rolls are baked and cooled, spread them with the red icing.  

Make a stem for your apple cinnamon rolls with a rolled cookie, and a leaf decoration from a piece of green construction paper.

Back to school apple cinnamon rolls.
Back to school pencil treats.

7. Marshmallow Pencil Treats

These treats are easy to make and perfect for back to school!

Use coloured mini marshmallows and a toothpick to make them.  Thread the marshmallows onto the toothpick to look like a pencil, starting with a pink one to look like an eraser, then filling in the rest of the toothpick with yellow marshmallows to look like a pencil.  Finish off the end with a chocolate chip to look like the tip of the pencil.  

These are not a good choice as back to school snacks for preschoolers or very young children.  This treat is best for older kids who understand not to eat the toothpick.  

You can also substitute a piece of spaghetti for the toothpick.  

Check out the recipe for making these marshmallow pencil back to school treats here.

Back to school apple donuts.

8. Apple Donuts

Make your donuts look like apples for back to school.  

Pick up some plain or honey glazed donuts at your favourite donut shop.  Also pick up some prepared frosting at the grocery store, or make your own.  Use a few drops of red food colouring gel to color the icing bright red.  Apply it to the donuts to make them look like apples.  Add a gummy candy leaf and stem made from a pretzel stick.

Smart cookie chocolate chip cookies.

9. Smart Cookie Chocolate Chip Cookies

We made regular chocolate chip cookies using premade dough from the refrigerated section of the grocery store.  Or you could use your favourite chocolate chip cookie recipe to make your own from scratch.  

After they were cooled, we added some icing glasses using some black icing, candy eyes glued on with more icing, a smile mouth, and some rosy pink icing cheeks.  

Our smart cookies are so adorable.  This idea is a fun one for kids to make themselves too.  

See more Smart Cookie ideas from our Smart Cookie Back to School party.

Back to school pencil cupcakes.

10. Pencil Cupcakes

This is one of our favorite back to school treats for kids.  

Use a cake mix and follow the directions on the package to make cupcakes.  Instead of baking them in regular paper cupcake liners, bake them in a flat bottomed ice cream cone instead.  Be sure to only fill the cones about ¾ full so that they don't overflow.  

Bake them according to the package directions for regular cupcakes.  Be sure to test them with a toothpick to make sure they're fully cooked before removing them from the oven.  Let them cool.

Back to school pencil cupcakes in a ice cream cone.
How to make a cupcake in an ice cream cone.

Once they're cool, dip the bottoms into melted pink chocolate to look like an eraser on the end of a pencil.  Let the chocolate set on a piece of parchment paper.  

Once set, frost the top of the cupcake with yellow icing.  Make your own icing or use store bought and add some yellow food colouring to make it yellow.  

Add a Hershey's kiss chocolate on top to look like the tip of a pencil.

Homemade old fashioned candy apples.

11. Candy Apples

Apples and back to school just go together.  So what could be better than a candy apple as welcome back to school treats for students?  

Candy apples are not difficult to make.  

Check out the recipe for full instructions on how to make your own candy apples here.

Back to school pencil gum ball treats.

12. Pencil Gum

These are quick and easy treats for students on the first day of school.  

Look for test tube containers at the craft store or online.  Plastic is a better choice for kids than the glass version.  

Fill them up with gum balls, starting with one black gum ball, filling in the middle with yellow gum balls, and finishing with one pink gum ball, to resemble a pencil.

Individual caramel apple trifles made in mason jars.

13. Caramel Apple Trifle

We love having a special back to school dinner on the first day of school to hear all about the day.  We always like to have a special apple dessert.  

These caramel apple trifles are festive and delicious.  Check out the full recipe to make them with pound cake, apple pie filling, custard, caramel sauce, and whipped cream.  Get the full recipe to make caramel apple trifle here.

Apple floats made with ice cream and apple juice.

14. Apple Floats

To make these special back to school apple floats, fill a glass about ⅓ full of apple juice, add a scoop of vanilla ice cream, then top off the drink with ginger ale for a little fizz, and a drizzle of caramel sauce.

We hope these welcome back to school treat ideas inspire you.  They're perfect for celebrating at home with family, as part of your back to school themed party foods, or even as classroom treats.  

More Back To School Inspiration

  • Back to school free printables including bunting, pencil boxes, party hats and more all set up at a children's tablescape.
    Back To School Free Printables Pack
  • Back to school celebration table set with chalkboard runner and apple centrepiece.
    Back To School Family Dinner Party
  • smart cookie party
    Smart Cookie Party
  • Book themed party with DIY decorations like book page wreath, mini book bunting, and book page table runner.
    Book Themed Party

If you tried any of our Back To School Treat Ideas or any other ideas on my blog please let me know how it went in the comments below. Thanks for visiting today!

Frequently Asked Questions

Can I make these back to school treats ahead of time?

Yes, most of them can be made ahead and stored in a air tight container or in the fridge the day ahead.

Can I use these ideas for my back to school party?

Yes, use these treats on a dessert table for a great back to school themed party.

Floral Gallery Wall

Aug 15, 2024 · Leave a Comment

Floral gallery wall with vintage and thrifted floral art work.

Floral Gallery Wall: Use antique and thrift store floral art pieces to create an inexpensive and beautiful gallery wall.

Floral gallery wall with vintage and thrifted floral art work.

Add some cottagecore charm to your space with a vintage gallery wall of floral art.  We made a floral gallery wall with vintage art, prints, floral plates, and needlework pieces full of charm and interest; and it was inexpensive to create since we used finds from the antique store and thrift store.  Use our no fail hanging method to create the perfect floral gallery wall in your space.

Floral gallery wall in a dinning room.

The Floral Art

I knew I wanted to add a collection of vintage floral art to my space to bring a little of the outdoors in with some rustic flower art.  It took me about a month to find all the pieces I used in my floral wall.  

Shop Your Home

I started out by shopping my own house.  We had a few older pieces that were perfect.  I also had some floral plates that I'd used for a mixed table setting and some plate holders from an old project that were perfect.  Lastly I found some embrodiery pieces that my daughter had made me that I wanted to include.  It's always nice to include sentimental pieces.  It would be really lovely to add in a pressed floral piece with flowers saved from a special occasion.  

Floral gallery wall

Antique Markets

The first place I went shopping for more floral wall art was the antique market.  I like to visit the ones with lots of different individual booths where there's lots of variety.  I found lots of great options. My only criteria was that the piece featured flowers.  I also wanted to make the sure the colours worked together. To check the colours I snapped pics on my phone as I went and referred to what I already had to make sure that it all worked together.  I wasn't strict about anything else.  The floral pieces were a collection of all different frames, different shapes and sizes, and different materials -from original art, to prints, to needlework, to plates, a few framed greeting cards, and a vintage floral botanical postcard.

How to hang a gallery wall.

Thrift Stores

I also found a few pieces at the thrift store.  I didn't want to invest too much in this floral wall, so finding some pieces at the thrift store helped to make this an inexpensive project.  Often smaller pieces are much cheaper than large pieces.  For a large wall like this, where small pieces on their own would get lost, putting together a gallery wall is a really cost effectvie way to fill a large space.  I also picked up a few empty frames from the thrift store.  I added a vintage post card - greeting cards, or an old calendar pages would be another economical option.  

On-line

You could also look for printable art on-line and print it at home or an office supply store and frame it to add to your flower gallery way.

How to hang a gallery wall.

I also wanted to be able to add to the floral wall decor over time, as I find other pieces out thrifting.  As I find more floral pieces I can add them on the sides of the gallery wall and expand it over time.

Before

I loved this dark green feature wall that I created a few years ago using a stencil -see how we created it here -  but it was time for a change. I needed to fill some nail holes, and then sand the stencilled wall smooth using a palm sander.  After sanding I painted the wall white to match the rest of the room and it was time to hang the vintage gallery wall.

Fool Proof Way To Hang A Gallery Wall

Laying It Out

Once I had all my pieces collected for the flower gallery wall, I started laying everything out on my dining room table. If you needed a larger space you could lay it out on your floor.  On the table I adjusted the pieces until I was happy with how all the pieces worked together, and how the shapes and sizes, colours and materials worked together.  Next I took a pic with my phone to make sure I liked the look of the arrangement.  If you're not happy at this stage, it's much easier to re-adjust things while they're on the table before they're hung on the wall.  I let this sit for a day or two, and came back to it, adjusting as needed until I was 100% happy with the arrangement of all the pieces together.

Paper template method for hanging a gallery wall.

Paper Templates

Once I was happy with the layout, it was time to make a template for each piece of art out of brown kraft paper.  I laid each piece on to the paper and traced around it, then cut out the template.  You can also use the backside of wrapping paper for this, or even an old paper bag that you've opened up.  Once you have the template cut out, it's time to mark exactly where the nail will go.  I lined up the paper with the art, and used my fingers to feel through the paper to exactly where the nail to hang it needed to go, and marked this spot on the paper with a x.

How to hang a picture using a paper template.

Taping Templates to the Wall

Next I arranged all the paper templates on the wall, hanging them with tape, in the same layout as they were on the table.  I made sure to take some time to ensure that the pieces were straight and that the spacing was even, and adjusted it as necessary.

Fool proof method for hanging a gallery wall with paper templates.

Hammering in the Nails

Next, was hammering in the nails through the brown paper where the x was marked. I used the template to get the nail in exactly the right spot.  Then I removed the paper and hung my floral art piece.  I repeated this until all the art was hung.

How to hang a picture using a paper template.

This method is fool proof.  It ensures that the nails are all in the right spots the first time, and prevents having to remove nails and adjust, leaving extra holes in the wall.  

Flower gallery wall.

Finishing Touches

I love how my floral gallery turned out.  It adds the perfect vintage cottagecore charm to the space.  I accessorized the buffet in front of the wall with lots of pretty vintage decor pieces like tea pots, and tea cups for more of that cottagecore vibe.  I also added a stack of vintage picnic baskets to add a little height and texture.

Stack of vintage picnic baskets.

And of course I had to add some real flowers to the space.  I picked this bouquet from my garden and they look like they've just come out of one of the floral pictures. 

Curtains

And the perfect finishing touch to the space was adding some light pink 100% linen curtains from TheHues.  They are breezy and pretty and add a lot of softness to the room.  The baby pink looks perfect with all the pinks in the art work, and the linen fabric helps add some texture to the white room, we loved being able to choose the style of the top and the length to fit our room perfectly.

Floral gallery wall dinning room makeover.
Pink linen curtains.

We hung our floral gallery wall in the dining room.  This would also be gorgeous as a floral wall in a bedroom space.  I also think it would be really pretty in an office space or to fill the large space over a couch in a living room.  Any flower lover would love this cottagecore addition to almost any room in their home.

Can you mix modern and rustic decor in one gallery wall?  

Having something like a theme will help pull the look together.  We mixed styles, materials, frames, sizes, and shapes, but the one thing that is tying it all together is that they're all floral art pieces.

How can I save money on art for a large space?

Purchase inexpenisve smaller art pieces and group them together in one large floral gallery wall.  Look for pieces at thrift stores and antique markets to save money.  Set a budget and skip expensive original art work in favour of less expensive prints.  Mix in plates and needle work for more interest and a lower price point.

Floral gallery wall.

Recipe

Floral gallery wall with vintage and thrifted floral art work.

How To Hang A Gallery Wall

Foolproof method of hanging a gallery wall with paper templates.
No ratings yet
Print Pin Rate
Prep Time: 30 minutes minutes
Cook Time: 10 minutes minutes
Total Time: 40 minutes minutes
Author: Dannyelle Nicolle-Ramjist
Cost: $100

Equipment

  • Hammer
  • measuring tape

Materials

  • 1 roll brown Kraft paper
  • 1 roll tape
  • 10-20 art pieces
  • 10-20 nails
  • 1 pencil

Instructions

  • Lay out your art pieces on a large flat space and arrange them into a gallery.
  • Place each piece of art on some brown Kraft paper, and draw around it on a pencil. Cut out a paper template for each art piece.
  • Mark each template with a x where the nail needs to go to hang the art.
  • Tape the paper templates onto the wall and adjust the spacing, also making sure they're straight.
  • Once you're happy with the arrangement of the templates, use a hammer to place a nail into the wall through the paper template at the spot marked with an x. Remove the paper and hang each art piece.

If you love flowers you will love this inexpensive floral gallery wall.  With a floral gallery wall like this one, life really is a party.

Bridgerton Party Game -Free Printable Bingo Game Cards

Jun 12, 2024 · 2 Comments

Free printable Bridgerton bingo party game.

This Bridgerton Party Game is perfect for Bridgerton themed party. Play Bridgerton bingo while you watch the show, and mark of the items as you see them in the episode, or play at a Bridgerton themed party with a caller.

Free printable Bridgerton bingo party game.
[feast_advanced_jump_to]

Dearest gentle readers... if you are a fan of Bridgerton then you will love this Bridgerton party game.  We made these free printable Bingo cards for our Bridgerton viewing party.  

They would also be a fun game for a shower, birthday party celebration, or any Bridgerton inspired party.  If you're looking for a fun way to add a game for your Bridgerton afternoon tea party for adults, this one is perfect. Or it would be great at a garden tea party, or a spring tea party too.

Our game card is inspired by one of your favourite period dramas, Bridgerton.  While we watch Penelope Featherington, Lady Danbury, and the Queen dancing, eating finger sandwiches at afternoon tea parties, and promenading, we can have a little fun with this Bridgerton party game.

Viewing Bingo

This Bridgerton party game is so much fun to play as you and a friend -or freinds, watch Bridgerton.  It should work great for any season and any episode.  Just print out the Bridgerton bingo cards and use a bingo dapper, or marker to mark off each square as you see the thing described in each box appear on the show.  

The items are all different things that occur or appear in most episodes of Bridgerton.  If you see them with their dance cards, you can mark it off on your bingo card.  If you see someone with a feather in their hair, you can mark it off on the bingo card.  

Race with your friends to see who can fill one line of their Bridgerton bingo card first, across, down, or diagonally and they're the winner! Don't forget to yell "Bingo"!

Bridgerton Bingo With A Caller

Good news if you're looking for a Bridgerton party game to play at a party instead of during viewing, you can also play this with a caller.  To play this bingo game with a caller at a special occasion like a bridal shower, baby shower, birthday party or an afternoon tea first cut out the caller cards, and place each one into a container.  To play, the caller reaches in, pulls out a card and calls it out to the group for them to mark off.  Extra points if your caller can muster a beautiful British accent.  The first person to get a line across, down, or diagonally wins the game.  

We've included 12 bingo different cards, so up to 12 people can play at once.

Bingo Markers

The easiest way to mark your bingo cards is with a bingo dapper.  If you don't have one, you can use a marker to tick them off or a highlighter to mark each square as you get it.  

Free printable Bridgeton bingo card and playing pieces.

If you want the cards to be reusable then use something to cover each square like a little plastic diamond gem, a button, or a penny.  Then once your round or episode is done, you can just brush off the diamonds, buttons or pennies and use the game card again.  You'll have a great time watching your tv show and marking off your squares as you go, or playing this at a Bridgerton party.  And we'll see if you're as competitive as the Bridgerton family is!

Get The Free Printables

Our free printables are available for instant download.  Just subscribe to the blog below and we'll have instant access to our Free Resource Library where you can download and print all this free printable and more.  Subscribe below, then check your inbox for the password to the Free Resource Library, if you don't see it check your spam folder.

Bridgerton Themed Prizes

If you're playing this game with friends it might be fun to include some Bridgerton inspired prizes for the winner.  It could be something simple like a copy of one of the Bridgerton books.  Another fun option would be some a cute tea inspired gift with fancy tea, vintage tea cups and some cookies.  Another great option, and one everyone can always use is a gift card or a bottle of champagne.  Or one more inspired by Lady Whistledown is a beautiful pen and some pretty stationary for writing.

Bridgerton themed party table with cake, cocktail, snacks, decor and party game.

Set Up

This is the perfect fun game for any Bridgerton fan to enjoy while watching the latest season, or to use as a Bridgerton party game at a larger event.  

For the viewing party just print the game cards on a color printer and cut them out.  A paper cutter works really well for this to get straight lines, but if you don't have one scissors are fine.  Then decided on using a bingo dabber or a reusable marker and you're all set.  

If you want to reuse the cards, be sure to print them on cardstock so that they're a little more study.  Print these at home on your color printer or at an office supply store.

For playing bingo with a caller, set up the same as above but also print out the caller cards and cut them into individual pieces and add them to a container you can draw from.

This Bridgerton bingo game is so much fun to enjoy while viewing or at a Bridgerton themed party.  I hope you have so much fun playing it with friends.

Bridgerton themed party table with lace tablecloth, flowers, candles, cake,and teacup charcuterie.

With these Bridgerton free printable bingo cards, life really is a party!

Frequently Asked Questions

How many people can play this Bridgerton party game?

Up to 12 people can play this Bridgerton bingo game at once.

Does any straight line win in Bridgerton bingo?

You can decide if any line wins, or if you want to play for a line across, up and down, or diagonally. Just make sure you decide and make it clear to all the players before the game starts.

What are some Bridgerton inspired prizes for a Bridgerton party game?

We love themed prizes like one of the actual Bridgerton books, a tea inspired gift, or a beautiful pen and stationery inspired by Lady Whistledown. Or there's always a bottle of champagne, or a gift card.

More Inspiration

  • Bridgerton themed party table with cake, cocktail, snacks, decor and party game.
    How To Host A Bridgerton Themed Viewing Party
  • Tea party set up under an outside pergola, with place settings and flowers.
    How To Host A Tea Party
  • Easy food processor scones on a plate with jam.
    Easy Food Processor Scones
  • Tea party table set for an adult tea party.
    How To Throw An Afternoon Tea Party For Adults

If you tried this  Bridgerton Party Game or any other idea on my blog please let me know how it went in the comments below. Thanks for visiting today!

How To Host A Bridgerton Themed Viewing Party

Jun 11, 2024 · Leave a Comment

Bridgerton themed party table with cake, cocktail, snacks, decor and party game.

Bridgerton Themed Viewing Party: themed foods, mocktail or cocktail, decor, and party game perfect for any Bridgerton themed party.

[feast_advanced_jump_to]

Where are my Bridgerton fans at?  Dearest gentle reader, I'm so excited to share my little Bridgerton watch party with you with ideas for food, decor, and even a game to play as you watch.

I set my party up as a viewing party to enjoy as we watch the show, especially great for enjoying a new Bridgerton season, but all these ideas would be great for any Bridgerton-themed party.  Bridgerton is one of my favorite shows, and I'm so excited for the premiere of Bridgerton this season.  If you're a Bridgerton fan you could also use these Bridgerton party ideas for a Bridgerton tea party, bridal shower, baby showers, a birthday, or any special occasion where you want to enter the Bridgerton world.

Bridgerton themed party table with flowers cake, tea cup charcuterie and decor.

Bridgerton Inspired Decor

As a viewing party I set up my Bridgerton party in the living room on the coffee table as the perfect way for us to watch the new episode of the latest season, and enjoy some refreshments.  

I started off with a lace tablecloth.  Look for these in the thrift store or an antique store.  The lace is the perfect extra touch of opulence.  

And of course we couldn't do Bridgerton without some lush floral arrangements.  We tried to make it look like we just picked the fresh flowers from an English garden.  I wanted showy flowers so I used peonies and roses in whites and pinks and a simple low glass vase, so we could see over it.  These pretty pastel shades were perfect.

I also added in a pretty brass candelabra, also. from an antique store.  The candle light is such a pretty addition.  

And one more pretty decor piece were these white gloves.  Also found at the antique store, they were the perfect little elegant decor to add to the table, as though someone from the Bridgerton family had just laid them down.

Bridgerton themed party table with flowers, candles, and lace tablecloth.

Bridgerton Themed Food Ideas

For this memorable event we had to have some Bridgerton inspired food.  We went with some savory snacks, a themed mocktail or cocktail, and  finished with a sweet treat.

Tea Cup Charcuterie

We stared off with our charcuterie tea cups, or "charcuterTEA".   To make one, start with a pretty fine china tea cup, but instead of a spot of tea, we're filling our delicate teacups with charcuterie for snacking while we watch.  This is such a fun way to serve charcuterie and so much easier for serving than a large charcuterie board.

Tip: Find vintage tea cups at the thrift store, an antique store, or places on line like Facebook Marketplace.

Teacup charcuterie cups with crackers cheese, and accompliments.

Choose an assortment of crackers and breadsticks.  Tall items work well, so look for taller breadsticks and crackers to create some height.  

Then add in some cheese.  We did some marble cheese, swiss cheese, and a baby bell.  Again try to add some height by slicing your cheese long ways.  

We also added a salami rose.  These are simple to make.  Just layer 4 round pieces of salami so that they in an overlapping line, then fold the whole line in half lengthwise, and roll into a simple rose.  

Teacup charcuterie with crackers, cheese, salami rose, and pickles arranged in a vintage teacup.

We also added a skewer with a pickled onion, gerkin, and half of the baby bell cheese.  Olives are a great option too.  For fresh fruit, we added a little cluster of grapes to the side.  

And finally we garnished it all with some delicate flowers of baby's breath and a rose bud as our finishing detail.  The floral decorations are the perfect Bridgerton touch.  Feel free to add some seasonal flavors with fruit or vegetables that are in season.

Prep these right before serving so that your crackers stay crisp and your cheese doesn't dry out.  This is such a great way to serve charcuterie.  Not only is it super cute, but it's nice that everyone gets their own personal serving to enjoy, and it's such an easy way to serve.

A teacup charcuterie with crackers, cheese, salami rose, fruit, and pickles in a teacup.

This would also be so perfect for a Bridgerton high tea, served alongside your tea sandwiches.

Sparkling Diamond Cocktail or Mocktail

Tea is fine for tea parties, but for a viewing party how about serving our Sparkling Diamond.  This pretty cocktail or mocktail version starts off with a special ice cube.  We used a diamond shaped ice cube tray to make the perfect ice cube for the occasion.  This cocktail is the real diamond of the season.  

Sparkling Diamond Bridgerton themed cocktail mocktail with diamond ice cubes.

Our sparkling diamond is made with sparkling lemonade.  We made an easy lemonade with simple syrup, lemon juice, and club soda, or use store bought sparkling lemonade.  If you want the cocktail version you can also add a shot of vodka.  

We served our sparkling diamonds in a crystal champagne coupe, over our diamond ice cubes with a sprinkling of silver edible glitter.  These are so fun to go with our party theme.  Queen Charlotte herself would name this drink this season's diamond!

Sparkling Diamond Bridgerton themed cocktail mocktail.

Bridgerton Inspired Cake

We needed a sweet treat for our viewing party and decided on a Bridgerton inspired cake.  

We used a simple cake mix and raspberry jam as the filling.  The cake is iced in Swiss meringue buttercream.  We used a simple plain tip and shell tip in two sizes with our piping bag.  The color scheme is pink and white.  

We were inspired by the cake and sweet tent in season 3 filled with beautiful vintage style cakes of the Bridgerton time period.  

These vintage style cakes are making a comeback, and this was perfect for our party with their delicate pattern, and great taste too.  

Tip: If you're not as confident in your cake decorating skills you could try serving some cupcakes with edible flowers on top for a similar look that's a bit easier to create, and very pretty with the floral accents.

Bridgerton style cake vintage style in white and pink.
Bridgerton themed cake pink and white vintage style for a Bridgerton themed party.

Bridgerton Bingo

For our get together we thought it would be fun to have a Bridgerton Party Game, so we created a Bridgerton Bingo game.  If you're a fan of party games you will love this one.  

On the bingo card each different square is filled with something to watch for as you view the tv show.  When you see the item, you can mark the square off with a bingo dabber or a marker.  As soon as someone has a complete line across, down, or diagonally they have bingo.  You and your friends can play the game as you watch the latest episode of the new season.  This game should work for any season of the show.

Bridgerton Bingo free printable game cards.

If you are hosting a Bridgerton-inspired party for a shower or birthday you can also play this game with a bingo caller.  The caller cuts out the cards for calling ahead of time and adds them to a container and then draws them out and announces them one by one until someone gets bingo.

Bridgerton bingo free printable game cards.

This Bridgerton bingo game is available as a free printable.  Just sign up for instant access to our Free Resource Library.  Once you subscribe to Life is a Party, you can access it, download it, and print it on your home printer or at an office supply store.

Bingo Prizes

Just for fun you might want to have a prize for the Bridgerton bingo that fits our themed.  Inspired by Penelope Featherington how about a beautiful pen and a stationary set.  Who knows who the next Lady Whistledown might be?  

Or inspired by the afternoon tea theme, how about a little tea themed gift basket with a vintage tea cup, English breakfast and Earl Grey tea, and some cookies?  It's perfect for a Bridgerton inspired tea time.  

Or you could go with a copy of the Bridgerton books as another great themed prize idea.

How to host a Bridgerton themed party with Bridgerton themed table with flowers and candles and lace tablecloth.

This party was so much fun to put together for enjoying the newest season of Bridgerton.  I'm sure any fellow Bridgerton fans would love it.  We had a great time enjoying snacks, cocktails, cake, bingo and a visit to the world of Bridgerton and high society.

Bridgerton themed party table with lace tablecloth, flowers, candles, cake,and teacup charcuterie.

Dearest reader, if you're looking for a fun way to enjoy this upcoming season or half season release of Bridgerton with some friends, this viewing party is perfect.  These ideas would be perfect for any Bridgerton inspired party or get together.  Any members of the ton, or your friends would love a party inspired by these fun ideas.  Could there be a better way to enjoy a new episode?

Bridgerton themed party cake with one slice on a plate.

With a Bridgerton viewing party to enjoy, life really is a party!

Frequently Asked Questions

Where did you find vintage teacups, gloves, and decor?

Look for vintage items at second hand stores, garage or estate sales, antique stores, or on line at sites like Facebook marketplace.

Can you make the Bridgerton cocktail into a cocktail?

Yes, just leave out the alchol and you have the perfect Bridgerton themed cocktail.

Does the Bridgerton bingo work for any season of Bridgerton?

Yes, so far. You should able to play the view version with any season or episode in the series so far.

More Inspiration

  • Tea party table set for an adult tea party.
    How To Throw An Afternoon Tea Party For Adults
  • Tea party set up under an outside pergola, with place settings and flowers.
    How To Host A Tea Party
  • Easy food processor scones on a plate with jam.
    Easy Food Processor Scones
  • Free printable Bridgerton bingo party game.
    Bridgerton Party Game -Free Printable Bingo Game Cards

If you use these Bridgerton Party Ideas or any other ideas on my blog please let me know how it went in the comments below. Thanks for visiting today!

Easy Zucchini Pancakes Recipe

Jun 10, 2024 · 1 Comment

Homemade zucchini pancakes stacked on a wood cutting board, topped with sour cream and chives.

This easy Zucchini Pancakes Recipe is made with fresh zucchini and fried for crispy edges. These are perfect served with a dollop of sour cream. They make a great side dish.

Homemade zucchini pancakes stacked on a wood cutting board, topped with sour cream and chives.
[feast_advanced_jump_to]

Why We Love this Recipe

  • It's a great way to use up garden zucchinis.
  • These make a great side dish.
  • These zucchini pancakes are crispy on the edges, and soft and tender inside.
  • They're only 5 ingredients and easy to make.

These easy zucchini pancakes or sometimes called zucchini fritters are the perfect side dish.  

Made with fresh zucchini and perfect for using up an abundance of fresh zucchini from the garden during zucchini season.  If you have too much zucchini, and you've already made stuffed zucchini or even easier unstuffed zucchini, you should try this easy and delicious recipe.  

We love their crisp edges and tender zucchini inside. 

Zucchini pancakes on a wood cutting board with sour cream and chives.

Ingredients

Zucchini pancake ingredients on a wood table.
  • Zucchini If you've ever grown your own zucchini in the garden, you know there comes a point near the end of the summer when you're looking for ways to enjoy these delicious fresh little squash.  And even if you don't grow them yourself, they're found easily at grocery stores year round, and at the farmer's market in the summer.  

Expert Tip: Draining The Zucchini

Zucchini are 94% water. After grating them it's best to drain some of the water.  This will keep the zucchini pancake mixture from becoming too wet and making soggy pancakes.  

The best way to do this is to grate the zucchini with the large holes of a box grater and then drain the shredded zucchini to remove the excess water.  Place the grated zucchini on a paper towel-lined plate, or on a clean reusable kitchen towel inside of a colander and let it sit to remove excess moisture.  Then squeeze the remaining water out of the shredded vegetables by squeezing the paper towel or clean kitchen towel and gently wringing the water out.  Try to remove as much liquid as possible.  Once it's drained it's ready to be used in the zucchini pancake batter.

  • Sour Cream and Chives We love to serve these with a little sour cream, flaky sea salt sprinkled over top, and some fresh chopped chives. 

Instructions

1. Wash 5 small zucchini and grate on the large side of a box grater, or with a food processor. Place the shredded zucchini on a plate or colander covered in paper towels or a clean tea towel. Let the zucchini drain for about 10 minutes. Then gently wring out the shredded zucchini to remove any more excess water.

grated zucchini

2. Place 5 cups of drained shredded zucchini in a large bowl. Next grate the onion into the zucchini mixture.

how to make zucchini fritters

3. Add the eggs, flour, baking powder, salt and pepper, and stir to fully combine. If you find your mixture is too wet, or if it becomes wet as the mixture sits while you're cooking, you can add more flour tablespoon by tablespoon until the mixture is no longer too wet.

Mixing zucchini pancake ingredients in a metal mixing bowl.

4. To cook the zucchini pancakes heat a few tablespoons of oil olive in a large skillet over medium-high heat and drop about 3-4 tablespoon of batter per pancake into the hot oil. Fry until they're golden brown on one side, and then flip over and cook on the other side.

Zucchini fritters frying in a frying pan with a little oil.
Flipping over zucchini pancakes in a frying pan.

Expert Tip: Zucchini Pancake Size

I like to make small pancakes, using only about 3 - 4 tablespoons of batter per pancake.  The smaller zucchini pancakes cook faster and get crispier.  With smaller pancakes you don't have to worry about the outside burning before the center is fully cooked either.  They're also easier to flip over in the pan.

5. Serve hot with a sprinkle of sea salt and some sour cream.

how to make zucchini pancakes

Storage

These zucchini pancakes are best eaten as soon as they are cooked, and still crispy.  If you need to keep them warm while cooking the rest, put them on baking sheet in a 300 degree oven for up to about 20 minutes.

Stack of small zucchini pancakes with sour cream and chives on top.

Frequently Asked Questions

Do I have to drain the zucchini?

Yes. Don't skip this step. Zucchini is very watery and if you don't drain your shredded zucchini your zucchini pancakes will be soggy instead of nice and crisp.

Can I make zucchini pancakes ahead of time?

Like most fried food, it's really best served right away. If you need to save sometime you could make the batter ahead of time, and fry the pancakes right before serving.

Can I use frozen zucchini in this recipe?

No, fresh is best here. Frozen shredded zucchini would be too watery and too mushy for this recipe.

Other Related Savory Recipes

  • Easy unstuffed zucchini made with zucchini zoodles.
    Unstuffed Zucchini
  • Stuffed zucchini with ground beef and rice.
    Easy Stuffed Zucchini with Ground Beef and Rice
  • easy Mexican lasagna
    Easy Vegetarian Mexican Lasagna Recipe

If you tried this Zucchini Pancakes Recipe or any other recipe on my blog please leave a star rating and let me know how it went in the comments below. Thanks for visiting today!

Recipe

Homemade zucchini pancakes stacked on a wood cutting board, topped with sour cream and chives.

Zucchini Pancakes Recipe

Video

Savoury zucchini pancakes panfried to golden brown and served with tangy sour cream.
5 from 1 vote
Print Pin Rate
Course: Side Dish
Cuisine: American
Prep Time: 15 minutes minutes
Cook Time: 15 minutes minutes
Total Time: 30 minutes minutes
Servings: 16
Calories: 81kcal
Author: Dannyelle Nicolle-Ramjist

Ingredients

  • 5 small zucchini 5 cups grated
  • ½ onion
  • 2 large eggs
  • ½ cup all purpose flour
  • 1 teaspoon baking powder
  • 1 teaspoon salt
  • ½ ground black pepper
  • olive oil for frying

Instructions

  • Wash 5 small zucchini and grate on the large side of a box grater, or with a food processor. Place the shredded zucchini on a plate or colander covered in paper towels or a clean tea towel. Let the zucchini drain for about 10 minutes. Then gently wring out the shredded zucchini to remove any more excess water.
  • Place 5 cups of shredded zucchini in a large bowl. Next grate the onion into the zucchini mixture.
  • Add the eggs, flower, baking powder, salt and pepper, and stir to fully combine. If you find your mixture is too wet, or if it becomes wet as the mixture sits while your cooking, you can add more flour tablespoon by tablespoon until the mixture is no longer too wet.
  • To cook the zucchini pancakes heat a few tablespoons of oil olive in a large skillet over medium-high heat and drop about 3-4 tablespoon of batter per pancake into the hot oil. Fry until they're golden brown on one side, and then flip over and cook on the other side.
  • Serve hot with a sprinkle of sea salt and some sour cream.

Notes

Be sure to drain the zucchini well before using in this recipe. Don't skip this step, or else the pancake batter will be too wet.

Nutrition

Serving: 1g | Calories: 81kcal | Carbohydrates: 12g | Protein: 5g | Fat: 3g | Saturated Fat: 1g | Polyunsaturated Fat: 2g | Cholesterol: 23mg | Sodium: 195mg | Fiber: 3g | Sugar: 6g
Tried this Recipe? Tag me Today!Mention @LifeisaParty or tag #lifeisaparty!

Easy Small Batch Pancakes For Two Recipe

May 28, 2024 · 1 Comment

Fluffy small batch pancakes for two ready to serve on a plate with syrup.

Looking for the best small batch pancakes? This easy pancake recipe for two makes four fluffy pancakes. It's just the right amount, with no leftovers and maximum deliciousness. Made from scratch with pantry staples like all-purpose flour and milk, or swap in buttermilk for an extra fluffy boost. This easy recipe cooks up in under 15 minutes.

Fluffy small batch pancakes for two ready to serve on a plate with syrup.

A Quick Look At This Recipe

  • 📋 Recipe: Small Batch Pancakes For Two
  • ⏲️ Ready In: 15 min.
  • 👪 Servings: 2
  • 🔪 Difficulty: Easy
  • 💭 Top Tip: Make it with regular milk or buttermilk

The best small batch recipe I've found! -Christin via Pinterest

Why You'll Love This Recipe

  • These are so much better than boxed mix!
  • They're quick and easy to make in about 15 minutes.
  • You can make them with regular pantry ingredients. Use regular milk, or buttermilk for extra fluffy pancakes.
  • These are perfectly portioned for two, because leftover pancakes just aren't as good as fresh ones.
[feast_advanced_jump_to]

Where are my pancake people at?  I have to admit that I used to be more of a savory breakfast person.  Bacon and eggs were my very favorite weekend morning breakfast.  This might have had something to do with the fact that I was raised by savory breakfast people.  Fast forward to being married with two children and somehow finding myself in a whole household of sweet breakfast people.  

Pancakes were on the menu every weekend when my girls were little, and I have to say I kind of love to start the day with them now too -I'm a sweet breakfast convert.

They loved these Jelly Donut Pancakes too. And for parents only, this Bailey's French Toast is the perfect brunch treat. You might also like our Pumpkin Bread with Walnuts, or Sweet Cake Like Cornbread.

Ingredients

Small batch pancakes for two labelled ingredients in bowls.
  • Buttermilk or Regular Milk: You can make this small batch pancake recipe with buttermilk or with regular milk.  The buttermilk tends to make slightly tangy and more fluffy pancakes, and they are really delicious.  Why are buttermilk pancakes more fluffy?  The buttermilk has some acidity to it and reacts with the baking soda to create more bubbles, more height to the pancakes, and fluffier overall texture.  Use buttermilk in this recipe instead of regular milk to make fluffy buttermilk pancakes.

Variations

If you like to jazz things up a little, you can add some other items to your pancakes.  

  • Chocolate Chips: Add some chocolate chips to the batter for delicious chocolate chip pancakes.  
  • Blueberries: If you love fresh blueberries, add them to the batter for blueberry pancakes.  
  • Bananas: Make banana pancakes by added sliced bananas into the pancake batter.
  • Toppings: You can also try different toppings on your pancakes too.  These are delicious served with fresh fruit like berries and whipped cream. Also try them with peanut butter, Nutella or jam as another fun option for pancake day.

Pancake Size

We made our pancakes medium sized, but you can make them bigger or smaller if you like.

  • ½ cup of batter = 4 pancakes.  
  • ⅓ cup of batter = 6 pancakes
  • ¼ cup of batter = 8 small pancakes
  • 1 cup  of batter = 2 big pancakes

Adjust your cooking time according to the size of the pancakes.  Smaller pancakes will cook more quickly, and larger pancakes will take longer to cook through.

How To Make Small Batch Pancakes

Dry ingredients for small batch pancakes for two, in a mixing bowl.
  1. Step 1: Combine flour, sugar, baking powder, baking soda, and salt in a large bowl, and use a whisk to stir the dry ingredients together.
Wet ingredients for small batch pancakes for two in a bowl.
  1. Step 2: In a separate bowl, add the milk, melted butter, egg, and vanilla and whisk to combine.
Small batch pancake batter in a mixing bowl.
  1. Step 3: Pour the wet ingredients into the dry ingredients, and stir together. Don't over mix, some small lumps are fine.
Small batch pancakes for two cooking on a griddle.
  1. Step 4: Heat a large frying pan or electric griddle over medium heat. Spray with non-stick cooking spray. Use a ½ cup measure to make 4 pancakes. When small bubbles appear on the surface of the pancake, flip it over and cook the other side until golden brown.
Maple syrup pouring on to a plate of small batch pancakes for two.

Storing Pancakes

We're making a small batch so that there's no leftovers, but just in case you can store these in an airtight container in the refrigerator. Reheat them in the microwave or toaster the next day.

Expert Tips

  • Buttermilk makes extra fluffy pancakes, but you can make these with regular milk and they're still great.
  • You'll know your pancake is ready to flip over when little bubbles form all over the surface.
  • Don't over mix your batter. A few lumps are fine. Over mixed pancake batter develops too much gluten and creates tough pancakes.

Frequently Asked Questions

Why aren't my pancakes fluffy?

Your baking powder or baking soda may be expired. Check the date on both of them to make sure they're in date. Also, using buttermilk will make more fluffy pancakes as the acid in the buttermilk reacts with the baking soda making bubbles. If you love fluffy pancakes then be sure to make these with buttermilk not regular milk.

Why are my pancakes tough?

Your pancakes may be tough if you over work the batter. Mix well, but don't worry about a few lumps in your batter. Avoid the temptation to over-stir the pancake batter which can develop too much gluten and make tougher pancakes.

How can I double this small batch pancake recipe?

If you're making this recipe for a crowd, you can double it, or even triple it. Just double or triple the ingredients all in one batch.

One plate of small batch pancakes with syrup and blueberries.

These are sure to become your go-to pancake recipe. With homemade pancakes for two, life really is a party!

More Breakfast Recipe Inspiration

  • Valentine breakfast board with heart-shaped waffles, heart-shaped eggs, bacon, sausage, fresh berries, and toppings on marble platter.
    Valentine Breakfast Board
  • Fluffy small batch pancakes for two ready to serve on a plate with syrup.
    Easy Small Batch Pancakes For Two Recipe
  • Old fashioned bear claw pastries with almonds on a cake plate.
    Old Fashioned Almond Bear Claw Pastries Recipe
  • Yogurt parfait board with fresh berries, granola, honey, peanut butter, dried fruit, and edible flowers on a wooden lazy Susan board.
    Yogurt Parfait Board

If you try these Small Batch Pancakes For Two or any other recipe on my blog please leave a star rating and let me know how it went in the comments below. Thanks for visiting today!

Recipe

Small batch of pancakes for only two people.

Small Batch Pancakes For Two Recipe

Video

Light and fluffy pancakes for two.
5 from 1 vote
Print Pin Rate
Course: Breakfast
Cuisine: American
Prep Time: 10 minutes minutes
Cook Time: 5 minutes minutes
Total Time: 15 minutes minutes
Servings: 4 Pancakes
Calories: 367kcal
Author: Dannyelle Nicolle-Ramjist

Ingredients

  • ¾ cup all purpose flour
  • 1 ½ tablespoon sugar
  • ¾ teaspoon baking powder
  • ¼ teaspoon baking soda
  • ¼ teaspoon salt
  • ¾ cup milk or buttermilk
  • 1 ½ tablespoon butter melted
  • 1 egg
  • ¼ teaspoon vanilla extract

Instructions

  • Combine flour, sugar, baking powder, baking soda, and salt in a large bowl, and use a whisk to stir the dry ingredients together.
  • In a separate bowl, add the milk, melted butter, egg, and vanilla and whisk to combine.
  • Pour the wet ingredients into the dry ingredients, and stir together. Don't over mix, some small lumps are fine.
  • Heat a large frying pan or electric griddle over medium heat. Spray with non-stick cooking spray. Use a ½ cup measure to make 4 pancakes. When small bubbles appear on the surface of the pancake, flip it over and cook the other side until golden brown.

Notes

Make these pancakes with regular or buttermilk.  They're extra fluffy when made with buttermilk.
We used ½ cup of batter to make 4 pancakes.  If you want smaller pancakes you could use a ⅓ cup of batter for 6 pancakes, or ¼ cup of batter for 8 small pancakes.  Or make really big pancakes with 1 cup  of batter each to make 2 pancakes.  Adjust your cooking time according to the size of the pancakes.  Smaller pancakes will cook more quickly, and larger pancakes will take longer to cook through.  
When you see bubble forms on top, it's time to flip the pancake.
Serve hot with butter and maple syrup.

Nutrition

Serving: 1g | Calories: 367kcal | Carbohydrates: 50g | Protein: 11g | Fat: 13g | Saturated Fat: 7g | Polyunsaturated Fat: 5g | Cholesterol: 123mg | Sodium: 779mg | Fiber: 1g | Sugar: 14g
Tried this Recipe? Tag me Today!Mention @LifeisaParty or tag #lifeisaparty!

Easy Vegetarian Mexican Lasagna Recipe

May 15, 2024 · 1 Comment

easy Mexican lasagna

Easy Vegetarian Mexican Lasagna: with layers of tortillas, beans, vegetables, and cheese this easy meal will be a hit with the whole family.

easy Mexican lasagna
[feast_advanced_jump_to]

If you love Mexican food, you will love this easy and delicious Mexican lasagna.  It's full of Mexican flavors.  Our version is a vegetarian dish full of beans and vegetables.  It's sure to become a new family favorite.  This is a great new option for taco night.  You'll love this quick and easy recipe on busy nights.

how to make Mexican lasagna

Tortillas

This isn't your traditional Italian lasagna recipe.  Instead of lasagna noodles this Mexican version uses layers of tortillas instead of layers of pasta for a fun twist.  Because tortillas are round we make our Mexican lasagna in a round spring form baking tin.  It works perfectly, because the large tortilla fit right inside.  Lots of versions of this recipe use a traditional lasagna casserole dish, and have to cut the round tortillas to make them fit the pan.  It's much easier to use a round baking dish, and there's not cutting of the tortillas necessary.  They fit perfectly in an 8 inch springform pan.

Mexican lasagna recipe

Vegetarian

Our Mexican lasagna is a vegetarian version.  There is no meat in our recipe.  This is perfect for anyone who is looking for a meatless option, and it's so flavorful and hearty with the beans that you won't miss the meat.  We love this option for anyone trying to cut back on red meat, or for a vegetarian.  It's perfect for a meatless Monday option too.  The beans combined with the corn kernels and peppers makes a hearty filling  and is a great twist.

If you wanted to, you could add ground beef to the recipe.  Just brown a pound of ground beef to the vegetable mixture.  Or try adding ground turkey or chicken.

Mexican lasagna recipe without meat

Cheese

We used marble cheese for our Mexican lasagna.  If you want to make this into a vegan dish, you could substitute a vegan cheese, in place of the regular cheese.

We like marble as a mild variety that's a great melting cheese.  If you prefer you could do a mixture of mozzarella cheese and cheddar cheese.  Monterey jack cheese would be a really great option too, or if you want to add a little more spice you could use pepper jack cheese as a great option.  We've layered 2 cups of cheese in our baked casserole, making sure to save a little extra for the layer of cheese on top.  If you love cheese, feel free to add extra, and make this more cheesey.

easy vegetarian Mexican lasagna recipe

Storage

Store leftovers in the fridge wrapped in plastic wrap or in an airtight container.

Easy Mexican Lasagna

Serving Suggestions

We serve our Mexican lasagna with a sprinkling of fresh cilantro leaves, along with some salsa and sour cream.  Homemade guacamole or fresh avocado slices or slices of green onions would be a great addition too.  Add all your favorite toppings and enjoy.  We wanted this to be a dish the whole family would love, so we didn't add much spice.  If you like things more on the spicy side feel free to add some hot sauce to your individual servings, or add some green chilies, or cayenne pepper as great options to spice up the whole casserole by adding it to the filling.

vegetarian Mexican lasagna

The ultimate Mexican casserole is perfect for taco Tuesday.  If you love Mexican-inspired flavors, you will love this.  It's also a great make ahead meal, that you can prepare ahead of time and bake right before serving.   This  easy Mexican lasagna recipe is sure to become your new favorite Mexican recipes.  It's a delicious twist on traditional lasagna that your whole family will love.

Recipe

Easy Mexican Lasagna

Easy Vegetarian Mexican Lasagna Recipe

Easy vegetarian Mexican lasagna made with layers of beans, cheese and tortillas.
5 from 1 vote
Print Pin Rate
Course: Main Course
Cuisine: Mexican
Prep Time: 15 minutes minutes
Cook Time: 20 minutes minutes
Total Time: 35 minutes minutes
Servings: 8 Servings
Calories: 404kcal
Author: Dannyelle Nicolle-Ramjist

Ingredients

  • 1 small onion diced
  • 2 cloves garlic minced
  • 1 small orange bell pepper chopped
  • 1 small yellow bell pepper chopped
  • 1 teaspoon olive oil
  • 650 mL jar spagetti sauce
  • 1 ½ teaspoon dried basil
  • 1 teaspoon chili powder
  • 1 teaspoon cumin
  • 341 mL can corn
  • 540 mL can black beans rinsed and drained
  • 540 mL can white kidney beans rinsed and drained
  • 2 cups marble cheese shredded
  • 5 large flour tortillas
  • ½ bunch fresh cilantro
  • ½ cup salsa
  • ½ cup sour cream

Instructions

  • In a large skillet over a medium heat, add olive oil and saute chopped onion, bell peppers, and garlic until the peppers are soft and the onion is transparent.
  • Next add in the spices, and tomato sauce. Stir to combine.
  • Add in the canned corn kernels, and the beans that have been rinsed and drained. Stir everything to together.
  • In an 8 inch springform pan, begin by layering 1 torotilla on the bottom of the baking dish, and add ¼ of the bean mixture and about ⅕ of the cheese. Then repeat this four times with a layer of tortillas, the filling mixture and cheese. Finish the top of the lasagna with the 5th tortilla and a layer of the remaining cheese.
  • Bake at 350 degrees F for about 20 minutes. Serve with fresh cilantro, and salsa and sour cream on the side.

Nutrition

Serving: 1g | Calories: 404kcal | Carbohydrates: 49g | Protein: 18g | Fat: 16g | Saturated Fat: 8g | Polyunsaturated Fat: 6g | Cholesterol: 36mg | Sodium: 988mg | Fiber: 9g | Sugar: 5g
Tried this Recipe? Tag me Today!Mention @LifeisaParty or tag #lifeisaparty!

With this easy vegetarian Mexican lasagna, life really is a party!

veggie Mexican lasagna recipe

More Recipe Inspiration

You might also like Homemade Mac and Cheese with Panko Breadcrumb Topping here.

mac and cheese recipe with panko

Also check out our Easy Beef Burrito Bowls here.

You might also enjoy Easy Stuffed Zucchini with Rice and Ground Beef here.

Easy Stuffed Zucchini: this easy recipe is made with ground beef and rice for a quick, healthy and hearty dinner.

The Best Sweet Cake-Like Cornbread Recipe

May 7, 2024 · 1 Comment

Easy and moist sweet cornbread pieces stacked together and spread with butter.

This is the best Sweet Cake-Like Cornbread Recipe. It's quick and easy to make and delivers a sweet, cake-like cornbread that is moist and delicious. The honey adds sweetness, and depth of flavor. You and your family will love it.

Easy and moist sweet cornbread pieces stacked together and spread with butter.
[feast_advanced_jump_to]

Why You'll Love This Recipe

  • It's sweet like cake, and perfect if you have a sweet tooth.
  • This cornbread is nice and moist and has a lovely texture.
  • It's very quick to make. Have it in the oven in about 10 minutes.
  • You probably have all the ingredients right now in your pantry and refrigerator, so you can make it anytime.

You will love this homemade cornbread recipe.  It is sweet and cake-like and so, so good.  It's not only the perfect accompaniment to your dinner, but also a great snack or breakfast too.  It is pretty great just about anytime really.  

It's also really simple to make.  You can put it together in about 10 minutes and it's so worth the minimal effort it takes to make it.  If you're a fan of sweet cornbread, this is the best cornbread recipe.

You might also like our Homemade Mac and Cheese with Panko Breadcrumb Topping, Pumpkin Bread with Walnuts, or Banana Snack Cake.

Sweet cornbread cut into squares with butter on top.

I'm kind of new to cornbread.  I didn't grow up eating it.  The first time I tried this recipe was at a friend's house.  They were having a tex-mex menu and served this cornbread.  I thought it was so good I had to have the recipe.  I'd tried cornbread before but never really loved it.  It was always just kind of dry and crumbly.  Not this recipe though.  This one was sweet and moist and almost cake-like.  It complimented the meal of spicy and bbq food so well.  I've been making it ever since and my family and friends all love it.  It makes a really delicious side dish for a bbq menu.  And it's perfect for feeding a lot of people.

I also love the leftovers.  It's such a lovely breakfast with a drizzle of honey, or jam.  It's a delicious way to start your day.  And with a cup tea in the afternoon around 2 pm it's the perfect pick me up.

Sweet cornbread in a baking dish and cut up into squares on a cake plate.

Ingredients

  • Honey: Our cornbread recipe is sweet and it gets its sweetness from two ingredients, sugar and honey.  That touch of honey helps add a depth of flavor.  Honey also has a higher sugar count and caramelizes faster than regular sugar, which contributes to that golden brown crust on the outside of the cornbread.  Even a little honey in baked goods also helps them last longer and stay moist longer.   

How To Make Sweet Cake-Like Cornbread

Mixing the wet and dry ingredients for asy sweet cornbread recipe.
  1. Step 1: Preheat the oven to 350 degrees F. In a large bowl combine the cornmeal, flour, sugar, baking powder and salt. In separate bowl combine the oil, melted butter, honey, eggs and milk. Stir with a whisk to fully combine.
Sweet cornbread batter in a mixing bowl.
  1. Step 2: Add the wet ingredients to the dry ingredients and stir with a wooden spoon to fully combine, but don't over stir.
Sweet cornbread batter in a glass baking dish before baking.
  1. Step 3: Spray an 8 x 8 baking pan with non-stick cooking spray and then pour batter into the pan.
Glass baking dish of cake like sweet cornbread.
  1. Step 4: Bake in a preheated oven for 35 minutes, until a toothpick inserted into the center comes out clean, but take care not to over bake.

Expert Tip: Don't Over Cook

If this cornbread is accidently over cooked, it can become a bit too dry and crumbly.  Something you want to avoid.  One of the secrets to a moist cornbread recipe is actually in the baking.  You want the cornbread to be fully baked and not have any wet batter in the middle, but you don't want to over bake it at all.  

To see if it's finished baking use the toothpick test.  When the cornbread is golden brown on the top, insert a wooden toothpick about an inch deep into the center of the top of the cornbread.  If the toothpick is dry when it's removed then the cornbread is ready.  If its wet from unbaked batter, then it needs to cook longer.  Set your timer for 2-5 minutes, and check it again.  As this sweet cornbread bakes it often develops a crack in the middle, this is normal.

Storing The Cornbread

Store any leftover cornbread in a airtight container or covered in plastic wrap at room temperature.

Serving Ideas

This delicious cornbread makes a great side dish.  We often serve it with bbq ribs, our homemade macaroni and cheese -get the recipe here, and our slow cooker baked beans -get the recipe here.  This is the best homemade cornbread recipe if you like a sweet cornbread.

Plate of BBQ food with sweet cornbread.

Frequently Asked Questions

Why is my cornbread dry?

You overbaked it. You want to take your cornbread out of the oven as soon as the center is fully cooked and tooth pick inserted into it comes out dry.

Can I make cornbread ahead of time?

Yes. Feel free to make this recipe the day before serving and store in an airtight container at room temperature.

Can I adjust the sweetness of the cornbread recipe?

Yes. If this cornbread is too sweet for you feel free to add less sugar to the recipe.

Squares of sweet cornbread with butter on top and a drizzle of honey.

More Recipe Inspiration

  • How to make homemade baked beans in a slow cooker.
    Homemade Slow Cooker Baked Beans
  • Mac and cheese with panko breadcrumb topping.
    Best Homemade Mac and Cheese with Panko Breadcrumb Topping
  • Marinated grilled flattened chicken recipe.
    Marinated, Grilled, Flattened Chicken Recipe
  • Homemade sweet beer bbq sauce.
    Homemade Sweet Beer Bbq Sauce Recipe

If you try this Sweet Cake-like Cornbread Recipe or any other recipe on my blog please leave a star rating and let me know how it went in the comments below. Thanks for visiting today!

Recipe

Easy and moist sweet cornbread pieces stacked together and spread with butter.

Sweet Cake-Like Cornbread Recipe

Video

Sweet cake-like easy to make cornbread.
5 from 1 vote
Print Pin Rate
Course: Side Dish
Cuisine: Tex-Mex
Prep Time: 10 minutes minutes
Cook Time: 35 minutes minutes
Total Time: 45 minutes minutes
Servings: 12
Calories: 235kcal
Author: Dannyelle Nicolle-Ramjist

Ingredients

  • ½ cup cornmeal
  • 1 ½ cups all purpose flour
  • ⅔ cup sugar
  • 1 tablespoon baking powder
  • ½ teaspoon salt
  • ⅓ cup vegetable oil
  • 3 tablespoon melted butter
  • 1 tablespoon honey
  • 2 eggs
  • 1 ¼ cups milk

Instructions

  • Preheat the oven to 350 degrees F. In a large bowl combine the cornmeal, flour, sugar, baking powder and salt. In separate bowl combine the oil, melted butter, honey, eggs and milk. Stir with a whisk to fully combine.
  • Add the wet ingredients to the dry ingredients and stir with a wooden spoon to fully combine, but don't over stir.
  • Spray an 8 x 8 baking pan with non-stick cooking spray and then pour batter into the pan.
  • Bake in a preheated oven for 35 minutes, until a toothpick inserted into the center comes out clean, but take care not to over bake.

Notes

To see if it's finished baking use the toothpick test.  When the cornbread is golden brown on the top, insert a wooden toothpick about an inch deep into the center of the top of the cornbread.  If the toothpick is dry when it's removed then the cornbread is ready.  If its wet from unbaked batter, then it needs to cook longer.  Set your timer for 2-5 minutes, and check it again.  
As this sweet cornbread bakes it often develops a crack in the middle, this is normal.

Nutrition

Serving: 1g | Calories: 235kcal | Carbohydrates: 31g | Protein: 4g | Fat: 11g | Saturated Fat: 4g | Polyunsaturated Fat: 4g | Monounsaturated Fat: 3g | Trans Fat: 0.2g | Cholesterol: 38mg | Sodium: 246mg | Potassium: 88mg | Fiber: 1g | Sugar: 14g | Vitamin A: 168IU | Vitamin C: 0.01mg | Calcium: 98mg | Iron: 1mg
Tried this Recipe? Tag me Today!Mention @LifeisaParty or tag #lifeisaparty!

How To Throw An Afternoon Tea Party For Adults

May 2, 2024 · 1 Comment

Tea party table set for an adult tea party.

How To Throw An Afternoon Tea Party For Adults: not just for little girls, ideas for a gorgeous table, flowers, and three course menu.

Tea party table set for an adult tea party.
[feast_advanced_jump_to]

Why We Love This Party

  • We love tea!
  • The food -the three courses of finger sandwiches, scones, and sweets are so delicious!
  • It's an excuse to use your vintage china tea cups, get out the good napkins, and add fresh flowers to set a beautiful table.
  • It feels special and a little different from a regular lunch or dinner party.

A tea party is such a great way to celebrate a birthday party, baby shower, bridal shower, engagement party, Mother's day, or just an afternoon with your girl friends.  

Check out our Valentine tea party for more girly inspiration. You might also like our Fall tea party, Winter tea party, Garden Tea Party, or our Christmas tea party.

And tea parties aren't just for little girls.  This stunning tea party celebration was for adults and we all loved it. From the gorgeous decor, fresh flowers and table setting to the delicious menu this elegant tea party was filled with special touches.  A tea party theme is such a great idea for a special get together.

Tea party table set for an adult tea party with flowers, food, and place settings.

This tea party was for my sister's birthday.  She planned it all herself, did the food and flowers, and invited 7 of her closest friends for an afternoon of fun.

Tea party floral arrangements.

Guest List

For a party like this you will want to invite all your favourite girl friends.  It's a good idea to keep the party fairly small, so you can all sit at one table together.  Let your guests know ahead time of there is a dress code, like semi formal, or even hats.

Tea party flower arrangements on a table.

Flower Arrangements

Set the tone for your high tea party with a gorgeous table setting.  Nothing says special occasion like gorgeous fresh flowers.  For this party my sister, who used to be a florist made the most beautiful arrangements.  She used seasonal spring flowers, many from her own garden to create these arrangements.

Spring floral arrangement with hellebores for a tea party.

The arrangements use big bold flowers like peonies and roses, mixed with some smaller spring blooms.   The vases are just simple glass that coordinates, but don't take away from the flowers.  These gorgeous flowers made the party feel like a garden tea party.

Spring floral arrangement peonies and roses for a tea party.

The Table

A high tea is the perfect time to pull out all the stops for your table.  Use your best dishes, get out your real cloth napkins and tablecloth and don't forget your china teacups.  

We turned each napkin into a flower blossom for the perfect special addition to each plate.

We used vintage tea sets with matching pink petalware cups and saucers, cream and sugar, and a teapot perfect for this special occasion.  If you want to use some pretty antique teacups or teapots, it's the perfect excuse to look for them at antique shops, thrift stores or even at a yard sale.  As well, you can look for serving pieces like cake stands with pretty floral patterns.

Tea party place setting with flower napkins and flower arrangements.
Napkin folded into flower for a tea party place setting.

You set the mood with the gorgeous and elegant table and flowers, and you should also consider the music.  It's lovely to have some classical music playing softly in the background to make the occasion feel even more special.

The Tea

It won't be a tea party event without tea.  There is an art to making a good cup of tea.  

It starts with boiled water and a warmed tea pot.  Add some of the hot water and swirl it around your tea pot to warm it, then dump out the water.  Add your tea bags or loose leaf tea to the pot and add the hot water.  Be sure to allow your tea time to steep.  Depending on the variety you should let it sit between 2-5 min.  

As soon as you make a fresh pot of tea, remember to refill and boil your kettle for the next pot.  

And be sure to serve your black tea with some milk (not cream) on the side and sugar.  You might also want to include some honey, or lemon wedges.

Plate of tea sandwiches at a tea party table.

You should offer your guests some different varieties of tea.  Making one kind per pot.  

Black tea is the traditional kind to serve at a tea party.  Try varieties like English breakfast, orange pekoe, and Earl Grey.  Remember to have some decaf black tea options as well.  

You can also offer guests a variety of herbal tea options, or green tea.

While hot tea is what's traditionally served at tea parties, it always nice to have a cold beverage option like iced tea or lemonade, and some cold water available.

Another fun addition at adult tea parties is to offer guests a glass of champagne or sparkling wine to enjoy.

Tea party pink tablescape with flowers and food.

Tea Party Menu

High tea includes three different courses of finger foods.  These are often served on a three tier platter for 2-3 people.  The bottom tier is for finger sandwiches and savory bites, the second layer is for scones with jam and cream, and the top layer is for sweets and desserts.  See our complete tea party food guide for more ideas.

Because our party was for a larger group the food was served on larger platters for everyone to share and help themselves.

Plate of tea sandwiches for a tea party.

Tea Sandwiches

The first course of a tea party is savoury and usually consist of tea sandwiches.  These are small and often dainty and easy to eat in just a few bites.  Traditionally tea parties were for small bites.  The meal was designed to hold you over from lunch until a late evening meal.  Because of that a traditional tea party is filled with mini sandwiches, and small desserts.  The food is dainty and small crustless sandwiches that are easy to eat are the norm.

Egg salad on a mini croissant tea sandwiches.

It's a good idea to use a variety of different breads and sandwich fillings to make your first course.  Traditional tea sandwiches usually consist of some vegetarian options like egg, cheese, and cucumber, and some poultry and meat options like chicken, turkey, and ham.  There is often also a fish option like tuna or salmon offered.  

For a smaller group you can offer less variety with just 3-4 options.  

Remember to cut your sandwich into small pieces and offer an elegant mix of options like fingers, triangles, open face, toast cups, mini croissant or brioche.

Tea sandwiches of chicken salad in a toast cup for a tea party.

For our tea party we had:

  • egg salad tea sandwiches on mini croissants
  • cucumber sandwich fingers
  • chicken salad in toast cups
  • ham and cheese sandwiches
  • turkey and cranberry mayo sandwiches -recipe here

tea party for adults

Scones

The second course in the traditional afternoon tea menu is scones.  

Classic scones are sweet and served with butter and jam, and often include clotted cream.  Clotted cream can be difficult to find outside of the United Kingdom, so whipped cream is an acceptable substitute.  Look for clotted cream outside of the UK in speciality shops.  

You can offer a variety of jams as part of your traditional scone toppings.   Strawberry jam is the most common.  We also served some lemon curd as another option.   Scones also come in many different flavors.  Plain scones are always a good idea,  find our easy food processor scone recipe here.

Plate of scones with a glass cover at a tea party.

Tea Party Desserts

Plate of homemade butter tarts at a tea party.

The final course of your delicate spread of tea is dessert.  

We like to offer a variety of desserts including something chocolate, lemon, vanilla, and berry flavored.  With something from each of these categories, you're pretty much guaranteed to have at least one option that everyone will enjoy.

Just as with the traditional sandwiches, you want to keep everything quite small in size and delicate.  You can also include some fresh fruit.  There's also often a whole cake, that is then sliced and served.  Cupcakes are a great easy option too.

Mini individual trifles in glasses at a tea party.

For our dessert we served:

  • individual mini raspberry trifles
  • butter tarts -recipe here
  • chocolate chip shortbread -recipe here
  • chocolate and coconut hello dolly bars
  • chocolate coconut cookies -recipe here
  • raspberry jam sandwich cookies -recipe here
  • fresh strawberries
Chocolate nest cookies with candy eggs on a food plate.

Tips For Preparing the Tea Party Food

Prepping Ahead

Sandwiches are quick and easy to make, but making lots of them and having them fresh to serve, along with scones, and desserts can be a little tricky.  

Try to make your sandwich fillings the night before the party, and also set the table then.  You can also make most of the desserts the day before, or pick some up at the bakery.

I usually try to bake the scones fresh the morning of.  When they're first baked they have a sort of crisp outside, and are soft on the inside.  They lose the crisp outside as they're stored.  So if possible bake them the morning off, or pick them up at a bakery.

Tea party table with floral arrangements.

You will also need to assemble your sandwiches the morning of your party.  Make an assembly line and put them all together.  Store them in an airtight container or tightly wrapped in plastic wrap so that they stay nice and moist, and cut them and put them out on trays before guests arrived.  Keep the platters covered with plastic wrap until you sit down at the table, so that they do not dry out.

Let Guest Bring Something

If your guests offer to bring something, don't be afraid to accept.  A dessert item is easy for someone to bring, either a homemade sweet or cookies, or something from the bakery.

Table set for high tea for adults with pink plates, rose napkins and flowers.

Store Bought Options

And don't be afraid to use some store bought options for a party like this.  You want to have quite a few different options, and it can be a great deal of work to make it all yourself.  Buying some options will make this afternoon tea event much easier.

The main event of a tea party is the food and enjoying it all with many cups of tea.  And it's often a long afternoon of eating and drinking and talking with friends.

Tea Party Favors

It's always fun to send guests home with a special little party favor.  For a tea party a small tin of loose leaf tea or a box of specialty tea bags is a lovely party favor.  For our tea party, because the floral arrangements were so special they were given to guests to take home and enjoy after the party as a special party favor.  Other great ideas for a tea party take home party favors are a package of two homemade scones and mini bottle of jam, or an antique tea cup.

Mini trifle for a tea party.

I hope these adult tea party ideas have inspired you.  We had the most wonderful afternoon, enjoying the beautiful table, and amazing food, and so many cups of tea, pretending we were in our own episode of Downton Abbey, or something come to life from a favorite book.  I just love all the pretty and vintage touches from our own afternoon tea party.  It really is such a fun theme, and a real favorite of mine.

Tea party table set for an adult tea party with flowers, food, and place settings.

With a high tea party for adults like this one to enjoy, life really is a party!

More Tea Party Inspiration

  • Tea party table set for an adult tea party.
    Tea Party Food: The Complete Guide to Sandwiches, Scones and Sweets
  • Green gingham tablecloth with vintage teacups, candelabra, tulips and daffodils set for a Little Women party.
    Little Women Party: A March Sisters Vintage Tea Party
  • Winter tea party with snowflake decor and menu.
    Winter Tea Party: Snowflake Theme Decor and Menu
  • Christmas tea party with table decor, menu, and recipes.
    Christmas Tea Party

Frequently Asked Questions

How many tea sandwiches do I need per person?

As a general rule we suggest 3-5 per person. They are quite small, but with three courses we want our guests to have room for scones and sweets too.

Can I prep ahead of time?

Yes, set your table the night before, do your flowers, and start preping the food. You can make your sandwich fillings, and make the desserts or pick them up ahead of time. The day of the tea party bake your scones and put together all your sandwiches.

What can I serve other than tea of the non-tea drinkers.

You can certainly serve coffee to anyone who dislikes tea. I promise the tea party police won't arrest you. 😉 Also have a cold drink option like iced tea, lemonade, and water.

If you try any of these Adult Tea Party Ideas or any other ideas on my blog please let me know how it went in the comments below. Thanks for visiting today!

Teddy Bear Breakfast Party Ideas

Apr 26, 2024 · Leave a Comment

Teddy bear breakfast party with teddy bear themed food.

Teddy bear breakfast party with cute DIY teddy bear decorations, party favours, and teddy bear themed food ideas. It's full of inspiration for anyone who wants to throw a teddy bear themed party.

Teddy bear breakfast party with teddy bear themed food.
[feast_advanced_jump_to]

Why You'll Love This Party

  • The teddy bear food was so cute and really delicous.
  • The teddy bear tablescape was adorable.
  • The guests loved the DIY teddy bear favor bags full of teddy bear items.

This teddy bear themed breakfast party was so much fun.  We had lots of bear themed foods, and cute bear party decorations. It's sure to give you lots of ideas for your own teddy bear party.

You might also like our Bunny Breakfast, Teddy Bear Tea Party, or Breakfast Picnic Ideas.

Our teddy bear breakfast was at the end of a birthday sleepover.  We went out for dinner the night before, and my daughter had just a few special friends sleepover.  Our teddy bear breakfast was the perfect grand finale to our birthday celebrations.  

The teddy bear theme is so perfect for a themed birthday party.  We love it for younger kids, and that it works for boys and girls.  It would also make an adorable teddy bear first birthday party, or to celebrate a baby shower.  

All the bear details were a huge hit, and I had so much fun putting them all together.

Teddy bear themed table with gingham table cloth and teddy bear food.

Teddy Bear Decorations

Teddy Bear Bunting

We love decorating for birthdays. Check out our best ideas for decorating for at home birthday parties. We kept the decor pretty simple for this special day, but I couldn't resist a few simple teddy bear decorations.  

I made a simple teddy bear bunting out of brown craft paper and card stock using my Cricut machine.  Look for image #M3EDB595F for the pattern I used, or create something similar by hand.  

DIY teddy bear decorations and DIY teddy bear loot bags.

Once the paper tedddy bears were cut out and glued together, I strung them together with some brown embroidery cotton and hung them on the back wall of our party room, which was the kitchen.  I love making my own custom party supplies, and this bunting turned out so cute.

Teddy bear party decorations and themed loot bags.

Teddy Bear Letter Board

I also wanted to add a cute saying, so I used a letterboard to write "love you bear-y much".  If you were celebrating a baby shower try writing "we can bearly wait" or for a first birthday "bearly one year old".  The letter board worked great, but other options are a chalkboard, or a banner.

Teddy bear party decor "I love you beary much" letter board and garland.

Teddy Bear Goodie Bags

We set our party favors off to the side.  They were filled with teddy bear goodies like teddy bear socks, teddy bear stickers, gummi bears, and teddy graham cookies.  They were a huge hit.  

To make the bags I used regular paper bags and cut the top to look like bear ears.  Then I used a black sharpie and some card stock to make the cute little face.  These were really easy to make and such a cute addition to the party.  

Teddy bear party DIY favour bags.

Teddy Bear Table

For the main table we started out with a light brown gingham tablecloth.  I couldn't find the color I wanted, so I went to the fabric store and bought some material.  You can hem the edge with a sewing machine, or iron-on tape, or fray the edges for a rustic look like I did.  

Teddy bear tablescape with teddy bear inspired plates and glasses.

Teddy Bear Centrepiece

The food was the main star of the table, but we wanted a rustic, woodsy, forest vibe to go with our theme so we served it all on wood serving pieces.  I used some large round wood pieces as platters, and lined with some teddy bear waxed paper.  

Along with the gorgeous food I added a pot of myrtle to the table for some height, and few tiny white pansies in terracotta pots.  Ferns would be a great choice too.  We also added some white flowers from the garden, their ferny leaves helped create the woodland feel.  

I also tucked in some wood mushrooms which were whimsical and fun.  The different sizes of plants, flowers in small vases, and various sizes of mushrooms helped add interest to the table.

Teddy bear party table with teddy bear plates, glasses and food.
Teddy bear party breakfast food ideas.

Place Settings

For the place settings I wanted to incorporate our bear theme.  I'm not always a fan of paper plates, but was inspired by them to use small wood plates and add some ears so they looked a little like bears.  I cut some small round pieces of wood, and placed them at the top to make the plates into bears temporarily and they looked so cute.  Large wood buttons would work well for this too.  

We found some teddy bear glasses that were perfect at the Japanese dollar store.  We used simple white linen napkins.

Teddy bear breakfast party place setting with teddy bear plates and glasses.

table ideas for teddy bear party

Teddy Bear Themed Food

I love seeing cute Japanese influenced teddy bear food and it was one of the influences that led me to the teddy bear theme.  We were serving breakfast, but some of these ideas would work anytime of day.

Bear Food Yogurt Parfait Board

My daughter thought it would fun to include some typical foods that bears eat.  This led me to create this fun yogurt parfait board.  When you think of bears favourite foods, berries and honey usually come to mind.  

We used strawberries, blueberries, and blackberries on this breakfast board, along with greek yogurt, and honey in a bear shaped bottle.  We also added in some homemade granola -get the recipe here.  And lastly we added in some chocolate chip teddy bear cookies, honey or chocolate flavor would be great additions too.  

It would have also been fun to include some real honeycomb if you can find some in your area.  It's sometimes available at farmers markets.  Another fun addition would be honeycomb cereal.

Here's a list of what to include:

  • strawberries
  • blueberries
  • raspberries
  • blackberries
  • greek yogurt
  • honey in a bear bottle
  • real honeycomb
  • homemade Christmas granola
  • teddy bear cookies in chocolate chip, honey, and chocolate
  • honeycomb cereal
Teddy bear themed yogurt and granola breakfast board.

We thought it would also be fun to add in some smoked salmon, because salmon is another typical real bear food.  If you wanted to include smoked salmon you could include it as part of a bagel board with cream cheese, cucumbers, capers, lemon, and dill as well.

Bear Eggs and Toast

We made another breakfast board for our teddy bear party, and this one featured bear shaped eggs and toast.  

I used a hard boiled egg mold to shape the eggs.  It's very easy to use, you just hard boil some eggs, remove the shells and while they're still warm place them in the molds over night.  When you remove them the eggs are teddy bear shaped and so cute.  

We served the eggs with some sausage and bacon and our teddy bear shaped toast.  We used a bread cutter to cut out the teddy bear shape and then toasted it topped with butter.  These were so cute and easy to make.

Teddy bear breakfast board with teddy bear toast and teddy shaped hard boiled eggs.
Teddy bear shaped hard boiled eggs and toast.

Teddy Bear Donuts

We wanted to include a few sweet treats and these donuts were so easy to include.  We picked up some chocolate dip, double chocolate and old fashioned glazed donuts at the donut shop.  Any flavor of brown or beige donut works really well for this.  

Then we used round chocolate melting wafers to make ears, a face, and nose.  These were so adorable and so easy to make.  They were a crowd favourite at the party too.

Teddy bear donuts made with chocolate chips and chocolate wafers.
Teddy bear donuts decorated with chocolate chips and chocolate wafers.

Bear Claws

We also made some bear claw pastries for the party.  Get the easy homemade old fashioned bear claw recipe here.  These are made with store bought frozen puff pastry so they're super quick to put together.  The shape gives them their bear claw name, and placing the sliced almonds on the ends to really look like bear claws was so cute.  These are not only cute, but really delicious with their crispy puff pastry and smooth and creamy almond filling inside.

Bear claw pastries with almond filling.

More Ideas -Teddy Bear Pancakes

If we were serving more people I would have also included some bear face pancakes.  Just add ears to circle of pancake batter and make the face detail afterward with some more chocolate chips and round chocolate wafers.

Teddy bear themed tablescape and foods.

Teddy Bear Ice Coffee

We also found some really cute silicone teddy bear ice cube molds and could not resist making teddy bear ice cubes with frozen coffee to use in the cutest ice coffees ever.  We half filled the glass with cold coffee and then added a pump of vanilla syrup and topped it up with milk for a delicious start to the morning.  

I made the ice cubes ahead of time and had them stored in a ziplock bag in the freezer.  We also made a pot of coffee and chilled it in the fridge.  This made it quick and easy to serve our teenage and adult guests.  

Teddy bear ice coffee with a bear shaped ice cube.

You could also use this mold for juice or regular ice for younger kids.

We had so much fun at this little teddy bear birthday party brunch.  The decor was so sweet, and the food was delicious.  I love this idea for a child's birthday.  It was the perfect after sleepover brunch for my teen daughter and her friends to enjoy.  This idea would be perfect for any teddy bear themed party.  It's especially cute for first birthday parties, or baby showers.

Teddy bear party with themed table setting and food.

With all these  teddy bear themed party ideas, life really is a party!

Frequently Asked Questions

Can you make the teddy bear food ahead of time?

The pastries are best made the morning of. All the yogurt board ingredients can be prepped ahead of time. Make your eggs and mold them the day before. Cook the bacon and sausage and make the toast right before serving. And pick up the donuts the morning of the party.

Where can I find the teddy bear egg mold and toast cutter?

Look for these items on line or any where that sells bento box supplies.

What should I put in a Teddy bear themed favor?

We included individually wrapped teddy bear cookies, gummi bears, stickers and socks. A teddy bear book or toy would be a great addition for younger kids.

More Ideas and Inspiration

  • Teddy Bear tea party ideas.
    Teddy Bear Tea Party
  • Old fashioned bear claw pastries with almonds on a cake plate.
    Old Fashioned Almond Bear Claw Pastries Recipe
  • Easter bunny themed Easter breakfast ideas with bunny pancakes and decor.
    Easter Bunny Breakfast Party
  • Yogurt parfait board with fresh berries, granola, honey, peanut butter, dried fruit, and edible flowers on a wooden lazy Susan board.
    Yogurt Parfait Board

If you use these Teddy Bear Breakfast Ideas or any other ideas on my blog please let me know how it went in the comments below. Thanks for visiting today!

Old Fashioned Almond Bear Claw Pastries Recipe

Apr 24, 2024 · 3 Comments

Old fashioned bear claw pastries with almonds on a cake plate.

This Old Fashioned Bear Claw Recipe is easy to make because it's prepared with time saving store bought puff pastry and a simple almond filling. The bear claws are sweet, crispy, and delicious.

Old fashioned bear claw pastries with almonds on a cake plate.
[feast_advanced_jump_to]

Why You'll Love This Recipe

  • The puff pastry makes them quick and easy to make.
  • They're so flaky, the filling gives the perfect almond taste, and the icing adds sweetness.
  • They acutally look like a bear claw, which is very cute.
  • They're perfect for a sweet breakfast treat, or a snack.

These old fashioned bear claws are the perfect easy pastry.  Bear claws are a buttery pastry filled with almond filling and cut in the shape of a bear's claws.  They make a great breakfast pastry, weekend brunch item,  or sweet treat.  My favorite thing about these danish pastries is the perfect combination of crispy pastry and smooth and creamy almond filling inside.  This bear claw recipe is sure to become a favorite.

You might also like our Easy Banana Snack Cake, Small Batch Pancakes For Two Recipe, and Honey Cruller Donut Recipe.

Ingredients

  • Puff Pastry: We've used frozen puff pastry for our pastry so these almond bear claws are really quick and easy to put together.  The puff pastry adds a wonderful buttery taste and flakey texture to these almond bear claw pastries.  Frozen puff pastry is easy to find in the freezer section of your grocery store.  It comes in sheets, already rolled out and ready to use.  You do need to defrost it before using it, according to the directions on the box.
  • Almond Filling: Bear claws are traditionally made with a sweet almond paste filling inside.  The taste is very similar to an almond danish or the filling of an almond croissant.  Look for almond paste at your grocery store in the baking section.
  • Icing: Bear claws are traditionally baked with a sprinkling of sliced almonds.  Some people also like to sprinkle them with coarse sugar or cinnamon sugar before baking to create a sugary crust on the outside.  We prefer a quick almond icing instead of the sugar sprinkled on top.   The icing glaze is made almond flavored with the addition of a little almond extract, you can use vanilla instead if you prefer.  We love how the almond icing goes with the sliced almonds on the outside, and the almond filling inside.

Variation

  • Chocolate Almond Bear Claws: If you are a chocolate lover, you might like to try adding chocolate to the traditional almond bear claw.  To make the chocolate version add about 1 teaspoon of chocolate chips to each pastry, on top of the almond filling, before folding the pastry over and sealing it all inside.  
Bear claw pastries made with puff pastry.

How To Make This Recipe

1. Divide each of the 2 puff pastry sheet into 6 equal rectangles, giving you 12 rectangles in total.

2. To make the filling combine the almond paste, butter, flour and ¼ cup powdered sugar in a food processor. Beat an egg in a small bowl, and add half of the egg into the food processor, and save the other half for later. Combine all these ingredients until a smooth almond filling is formed.

3. Divide the almond paste mixture evenly between the 12 pastry pieces and place it in the center of each rectangle.

Puff pastry with almond filling ready to be made into old-fashioned bear claw pastries.
Puff pastry rectangles folded over almond filling for old fashioned bear claw pastries.

Fold dough over and seal the edges, using a fork to press down firmly along the edges of dough. Use a sharp knife to make 4 short slits along one side of the pastry to make the bear's claws.

Take care not to cut the slits too deep into the pastry.  If the slits are too deep and not sealed the pastry will leak out during the baking.

Bear claw pastries being brushed with egg wash and ready to be baked.
Forming pastry into bear claw pastries with sliced almond claws.

4. Brush the pastry with the leftover egg wash, and then sprinkle with sliced almonds, or add one sliced almond to make 5 bear claws. Arrange the bear claw pastry on the baking sheet lined with parchment paper or sprayed with nonstick cooking spray. Place dough with a slight curve, to create the bear claw shape.

5. Bake in a preheated oven at 400 F for 12 minutes until they are golden brown. Let the pastries cool on a wire rack.

6. To make the glaze, combine 3 tablespoon powdered sugar, milk, and almond extract in a small bowl and stir until well combined. Drizzle the glaze over the cooled individual bear claws.

Storage

This delicious pastry is best enjoyed the day you make it.  Save any leftovers in an airtight container at room temperature.

Old fashioned bear claw pastries on a cooling rack drizzled with icing.

Expert Tip: Be sure to seal your pastry very well, and not make the slits too deep. If the slits are too deep the filling will seep out of the pastry as it cooks and overcook on the baking pan.

Traditional bear claw recipe pastries cooling on a rack.

Frequently Asked Questions

Why did the filling leak out of my bear claw?

If you're filling leaked out during the baking of your bear claw you didn't seal the side of the pastry well enough, and you also cut your slits too deeply.

Can I sprinkle the almonds all over the bear claw?

Yes, many people sprinkle the sliced almonds all over the pastry before baking. We love how they look like bear claws, but either version works.

Can I make these bear claws ahead of time?

These are best eaten the day they are made. You can make the filling ahead of time and store it in the fridge. The day off you just need to put them together, bake, and then add the quick glaze on top.

More Recipe Inspiration

  • Easy food processor scones on a plate with jam.
    Easy Food Processor Scones
  • How to make rainbow pop tarts.
    Rainbow Pop Tart Recipe
  • Oatmeal chocolate chip muffin recipe.
    Easy Oatmeal Chocolate Chip Muffins
  • Easy and moist sweet cornbread pieces stacked together and spread with butter.
    The Best Sweet Cake-Like Cornbread Recipe

If you try these Old Fashioned Almond Bear Claw Pastries or any other recipe on my blog please leave a star rating and let me know how it went in the comments below. Thanks for visiting today!

Recipe

Old fashioned bear claw pastries with almonds on a cake plate.

Old Fashioned Almond Bear Claw Pastries

Video

Easy to make with store bought frozen puff pastry and a delicious almond filling.
5 from 2 votes
Print Pin Rate
Course: Breakfast
Cuisine: American
Prep Time: 10 minutes minutes
Cook Time: 12 minutes minutes
Total Time: 22 minutes minutes
Servings: 12
Calories: 227kcal
Author: Dannyelle Nicolle-Ramjist

Ingredients

  • 2 sheets frozen puff pastry dough
  • 1 egg
  • ¼ cup powdered sugar
  • ¼ cup butter
  • 4 oz. almond paste
  • 1 tablespoon flour
  • 3 tablespoon powdered sugar
  • 1 teaspoon milk
  • ¼ teaspoon almond extract
  • ¼ cup sliced almonds

Instructions

  • Divide each of the 2 puff pastry sheet into 6 equal rectangles, giving you 12 rectangles in total.
  • To make the filling combine the almond paste, butter, flower, and ¼ cup powdered sugar in a food processor. Beat an egg in a small bowl, and add half of the egg into the food processor, and save the other half for later. Combine all these ingredients until a smooth almond filling is formed.
  • Divide the almond paste mixture evenly between the 12 pastry pieces and place it in the center of each rectangle. Fold dough over and seal the edges, using a fork to press down firmly along the edges of dough. Use a sharp knife to make 4 short slits along one side of the pastry, taking care to make sure the edge is still very well sealed so that the filling doesn't seep out of the slits as it bakes.
  • Brush the pastry with the leftover egg wash, and then sprinkle with sliced almonds, or add one sliced almond to make 5 bear claws. Arrange the bear claw pastry on the baking sheet lined with parchment paper or sprayed with nonstick cooking spray. Place dough with a slight curve, to create the bear claw shape.
  • Bake in a preheated oven at 400 F for 12 minutes until they are golden brown. Let the pastries cool on a wire rack.
  • To make the glaze, combine 3 tablespoon powdered sugar, milk, and almond extract in a small bowl and stir until well combined. Drizzle the glaze over the cooled individual bear claws.

Notes

This is very important.  Be very careful when you're sealing the pastry.  Use fork tines to seal it completely.  Then cut the slits that make the pastry look like a bear claw within the sealed area.  If the area with the slits isn't well sealed, the almond filling will seep out of the pastry during the cooking and over cook, and burn.

Nutrition

Serving: 1g | Calories: 227kcal | Carbohydrates: 22g | Protein: 3g | Fat: 15g | Saturated Fat: 5g | Polyunsaturated Fat: 9g | Cholesterol: 26mg | Sodium: 128mg | Fiber: 1g | Sugar: 8g
Tried this Recipe? Tag me Today!Mention @LifeisaParty or tag #lifeisaparty!

DIY Cottagecore Christmas Aesthetic Decor Ideas

Dec 8, 2023 · 1 Comment

Easy cottagecore Christmas decor ideas

DIY Cottagecore Christmas Aesthetic Decor Ideas: natural elements, mushrooms, crafts, and vintage decor and more.

Easy cottagecore Christmas decor ideas.
[feast_advanced_jump_to]

If you love the cottagecore look, you'll love cottagecore Christmas decor even more!  It's the perfect mix of bringing the outdoors in, diy crafts, and vintage nostalgic pieces to make the most joyful festive season.  My home is looking like a little winter forest, with lots of mushrooms, pinecones, and some gorgeous vintage pieces thrown in to set the stage for all our celebrating this holiday season.  My annual holiday home tour is one my very favourite blog posts of the year, and I'm so excited to invite you into my home to see how I have it all decorated for Christmas this year.  I hope it gives you lots of fun ideas for your own Christmas decorations.

Front Door

I love to decorate my front door as a way to welcome guests in, and give them a little taste of what's to come inside.  I wanted to add some mushrooms this year, so I got busy creating a few different DIY versions.  The planter has some gorgeous DIY concrete mushrooms, you can see how I made the concrete mushrooms here.

Cottagecore Christmas front door

The front door is layered with some grapevine, and then has greens tucked in, and then I added some fun DIY mushroom ornaments, made out of wood and concrete so they could stand up to the ice and snow here.  See how I made the DIY wood mushrooms here, and the DIY concrete mini mushrooms ones here.

DIY mushroom ornaments
Pink Christmas wreath
DIY Concrete mushrooms

The wreath is an old favourite, and it's perfect to add some pink.  Pink has become one of my favourite colors to decorate with for the holidays.  See a full blog tutorial on how to make the Christmas wreath here.  Now let's head inside.

DIY pink Christmas wreath

Console Table

We have a console table at our entrance and it's always a favourite to decorate for each season.  This Christmas it has the sweetest collection of small, neutral Christmas objects.  I found the wood shelf cubbies at a thrift store, and had so much fun adding all kinds of mini Christmas objects.  It's a collection I add to each year.  And it's surrounded by a collection of trees.  My favourite new addition is the disco ball ice bucket acting as a tree holder.

Christmas console table
cottagecore christmas collections
neutral christmas decor

Dining Room

The Trees

This Christmas I wanted to make the dining room feel like a magical forest inside.  I cut down 5 saplings, and made some reusable tree stands out of some pipe from the hardware store and concrete.  We covered up the mechanics with some faux snow.  I also ordered some plug-in mini lights.  They turn on and off with a remote and look so great, and no worry about having to change out the batteries all the time.  One tree even had the cutest bird's nest in!  And don't worry, birds only use their nest for hatching eggs, and build a new one each year so there's no home-less birdies. 😉  My favorite thing for this year's Christmas decor has to be the trees.  They're so magical at night all lit up.

forrest themed Christmas decor
nest with bird Christmas ornament
Christmas tree branches with lights

I also added in one smallish Christmas tree here too.  It's got lights on it and decorated with beautiful ribbons in a color palette of creams, pinks, and green.  Which sets the stage for all our Christmas decor this year.

Christmas tree with ribbons

Dining Table

On the table we added a collection of pinecones.  I love bringing the outdoors in each season, especially at Christmas.  I found about 8 different kinds of pinecones and sorted them by type into some vintage ironstone bowls.  The bowls were collected from different antique stores, and they really show off the dark pinecones well.  And just to add a little magic of Christmas, they got a sprinkling of faux snow too.

Christmas cottagecore dining room
Christmas pinecone centrepiece
pinecones in ironstone

I also just love mushroom decor.  It's the perfect touch for your cottagecore christmas décor.  I have a collection of DIY mushrooms made from paper mache and clay.  They look festive nestled into moss, and sprinkled with snow.  

cottagecore Christmas mushrooms

And lastly there's a collection of mostly thrifted old brass candlesticks.  What could be more magical at Christmas than candle light?  It's one of winters simple joys.

Christmas pinecone centrepiece

Buffet Table

At the back of the room is a buffet table.  It's against a feature wall, you can read all about how we created the green stencilled feature wall here.  The green is always so perfect for Christmas.  Because there was a lot going on in the room already with the trees, and the pinecones, I wanted to keep things fairly simple back here.  I used more candlestick holders and some large vintage glass jars.  One is filled with more pinecones and snow, one with more mushrooms, and one with a candle.  I love how pretty this little grouping is.

woodland Christmas decor
vintage glass jars with candles
glass jar terrarium
candle in vintage glass jar

Stairs

The stairs are decorated with layers of garland.  I started with my DIY macrame garland -see the tutorial to make it here.  I usually keep it up all year round, and layer more on top for Christmas.  Along with greens, there are layers of star garland, pom poms.  This year, I've tried to add lots of snow elements, and pom pom garland gets repeated over and over to create the snowy effect.

stairs decorated for Christmas
stairs decorated for Christmas cottagecore

At the bottom of the stairs we have a small table.  There's a little collection of mini ironstone pitchers with bottle brush trees inside.  On the table a little woodland inspired tree.  See how I made the DIY velvet acorn decorations here.  I also added some little wood mushrooms dressed up with glitter for the holidays.  On this table is also one of my favourite little advent calendars.  Each day leading up to the holidays a new little woodland friend is added to the scene.

cottagecore Christmas decor
woodland mini Christmas tree
velvet acorn
wood animal advent calendar

The Living Room

Fireplace

Our living room is feeling so cozy and pretty this year.  I started in here with the fireplace mantel.  It's a corner fireplace, so sometimes feels a little tricky.  I have an old antique door in the background, and beautiful curtain mini lights in front.  They're just the backdrop to the most beautiful collection of glass candlestick holders, mini Christmas trees in glass and ceramic, and mushrooms in wood, metal and glass.  I love this combination and it's so pretty with the candle lit and lights on at night.  I covered it all in faux snow as a finishing touch.

cottage core Christmas decor living room
cottage core Christmas fire mantel
glass candlesticks and Christmas trees
Christmas mushroom decor
cozy cottagecore Christmas living room

On the front of the mantle the garland matches the stairs.  But it also has a layer of twigs underneath.  It adds a nice extra layer of interest and ties in well with our forest of trees in the dining room.

Christmas Tree

Our Christmas tree is actually two trees from Ikea, but together to make it taller.  I love a sparse tree, and this is a great way to create the look on a budget.  I've layered on a combination of glass iridescent and pink ornaments, glass icicles, vintage pink ornaments, and mushrooms.  We usually do our Christmas presents in our basement family room at Christmas, so rather than gifts under the tree, we've decorated it to match.  It's an unexpected delight.  I used some large DIY paper mache mushrooms I made last Christmas and some wooden ones, along with some birch logs, pine cones, and lots and lots of faux snow.  I love this little detail so much, and it brings the tree to the next level.  

Oscar is my dog, and in need of a haircut, but still very willing to sit for a photo in exchange for a doggie cookie.

cottagecore Christmas tree
Havanese dog at Christmas
mushroom Christmas tree
mushrooms under a Christmas tree

Couch and Coffee Table

The couch is looking cozy and like the perfect spot to snuggle up for some holiday movie watching.  There's some cozy sherpa pillows and a throw.  There's also some fun mushroom pillows.  I ordered some mushroom fabric here, and sewed them into the cutest pillows.  They're the perfect mushroom touch for our Christmas cottage core vibe.

cottage core Christmas living room

On the coffee table there's more mushrooms and trees, to match the fireplace mantel.  There's also a bowl full of pretty vintage ornaments.  It's so fun collecting these.  I'm always on the lookout for them, especially at garage sales, or thrift stores.  They're hard to find, but such a treat when you do.  

Christmas mushrooms

Kitchen

Table

Over on the kitchen table I've kept things really simple this year.  I tend to do a lot of creating here, especially over Christmas, so I wanted some pretty things that I could move really easily and that weren't too elaborate.  I went with a collection of trees.  The large one that looks like a real norfolk pine is actually faux.  It's nestled into a vintage bowl and covered with more faux snow.  There's also a few iridescent trees -iridescent is a favourite of mine, especially for Christmas and I love adding little bits of it here and there.

cottagecore Christmas decor ideas
cottagecore Christmas
tabletop Christmas trees

Behind the table we have a little cabinet.  It's another favourite spot to decorate for each season.  I started out with the Dec 25 poster.  It's available as a free printable.  I printed it at the office supply store as a colour Engineer's print, it's a really inexpensive way to create large art pieces.  I used some wood at the top and the bottom to hang it.  Look for the free printable in our Free Resource Library.  It's available to all subscribers.  Subscribe below for free instant access.

gingerbread Christmas decor

Gingerbread Details

This year we're seeing gingerbread everywhere and I designed a few pieces with gingerbread that are perfect for Christmas.  The first was this felt banner of Amsterdam canal houses.  I made them with my Cricut machine, you can find the full tutorial here.  Then I also designed some matching canisters.  I added the vinyl houses to two different sized glass canisters, that are holding flour and sugar, perfect for all our holiday baking.  

gingerbread kitchen canisters

And at the back of the table is my ever growing collection of vintage Santa mugs.  I've been collecting them for several years.  They're very hard to find where I live, and basically everytime I see them I buy them.  This year I found a collection of 5 at an antique store and I was so thrilled.  On the same antiquing day I also picked up this wood shelf.  The openings were the perfect size for the Santa mugs and I love how they look in my kitchen for Christmas.  And on the table, one more cutie, a mini version of the norfolk pine, and another vintage container with snow.  There's also some lovely leaning birch poles, I love how they tie in with the birch logs under the Christmas tree, and the birch poles on the front porch.

vintage Santa mugs

Shelves

I always love decorating my open kitchen shelves.  I started out with adding more snow inspired pompom garland.  On most shelves there's also a few assorted Christmas trees and some mushrooms.  I also made the cutest gingerbread houses.  They're actually made of long lasting gingerbread salt dough.  This is so perfect for somewhere like this, where they look so cute, but might get a little dusty and stale sitting out.  Instead of throwing them out, we can save them for next year. Find the recipe for the Gingerbread salt dough everlasting gingerbread houses here.  You might have noticed that they match the other gingerbread decor I made.  I copied their shapes and details and I love how it all matches.

open kitchen shelves decorated for Christmas
gingerbread house on kitchen shelves
salt dough gingerbread house
mini Amsterdam canal house gingerbread house
mini gingerbread house
cottage core Christmas decor ideas
cottagecore Christmas kitchen shelves

New to me this year is the gingerbread man cutting board, perfect for serving holiday treats.

cottagecore Christmas kitchen

And I couldn't resist making a cute gingerbread man canister for my tea bags as well.  I love using seasonal canisters, and it's easy to make them with a Cricut machine.  Time for a cup of tea.

diy gingerbread man canister

Pass Through

Over by the sink area, we have a passthrough to the living room.  Keeping the snow theme going, I've hung some strung pompoms to make it look like it's snowing, along with a real pine branch.  And more mushrooms and trees right beside the sink.

cottagecore Christmas kitchen decor
cottage core Christmas decor

It wouldn't be Christmas without Christmas cookies.  Our holiday baking is just getting underway, and the first thing we've made is gingerbread this year.  There's nothing like the smell of it, to get you in the Christmas spirit.

cottagecore Christmas decor kitchen

I just love how things turned out this year with my decor. The cottagecore decor has all come together.  I really love bringing the outdoors in, mixing in lots of whimsical details, like mushrooms, and adding lots of vintage finds.  I'm especially excited to have the house all ready for my daughter's return.  She's away at University and we haven't seen here since August, so we can't wait until she's home on Christmas eve with us!  I truly wish you a very happy and joyful seasons greetings and a happy new year.

With a house all decorated and full of cottagecore Christmas ideas and inspiration, life really is a party!

More Christmas Decorating Inspiration

You might also like our Woodland Enchanted Christmas Decor here.

You might also like our Rustic Scandinavian Christmas Decor here.

Easy Salt Dough Gingerbread Recipe for Houses and Ornaments

Dec 4, 2023 · Leave a Comment

Everlasting gingerbread houses made from gingerbread salt dough.

This easy salt dough gingerbread recipe is perfect for making long lasting gingerbread houses and ornaments. We decorated ours with white hot glue and puffy paint to look just like real gingerbread. And the cinnamon in the salt dough gingerbread, gives it a great cinnamon smell and look of real gingerbread.

Everlasting gingerbread houses made from gingerbread salt dough.
[feast_advanced_jump_to]

Why You'll Love this Recipe

  • These pretty houses and ornaments will last forever -or at least a lot longer than real gingerbread.
  • The cinnamon in the dough makes them smell like real gingerbread.
  • It's much easier to build gingerbread houses with white hot glue, and it looks like real icing.
  • The puffy paint gives the gingerbread the look of real frosted cookies.

I love the idea of gingerbread, but I'm not a big fan of the actual taste.  Gingerbread houses and gingerbread ornaments are so beautiful.  But by the time they sit and are admired for weeks, they may not taste too great, or be stale and dusty.  

Gingerbread salt dough is the perfect way to get the look, without wasting real gingerbread.  

These also smell amazing!  The cinnamon in the recipe makes them smell like real gingerbread cookies.  These gingerbread salt dough ornaments and houses will last year after year also.  So you can enjoy them even longer than the real thing.  They're really easy to make too.

You might also like our Homemade Christmas Crackers, DIY Paper Feathers, or Mini Macrame Christmas Ornaments.

Many people have made salt dough ornaments, but another great idea is to use the gingerbread salt dough to make a mini gingerbread house.  I love how cute the mini size is, and they're easier to make with salt dough than with real gingerbread, because you can use hot glue and paint, instead of royal icing!  You'll get the look and smell of gingerbread, and you can use them year after year.

You can also make homemade ornaments with the gingerbread salt dough.  They smell really amazing and would look beautiful on a Christmas tree.  Ornaments would be really fun to make with kids -since there's no glue gun required.  

The salt dough is lovely and soft and smooth and easy to roll out and work with.  Kids could choose their favourite cookie cutters and make all different handmade ornaments.  Saltdough gingerbread men are a great choice too.  

Materials

  • Cinnamon: The cinnamon in this recipe is strictly for the smell and look of gingerbread.  We're not going to be eating it.  So be sure to use an inexpensive cinnamon for your gingerbread salt dough recipe if you can.  We got ours in the bagged spices section of our grocery store and used the cheapest store brand.  Even your old cinnamon at the back of the cupboard is fine for this recipe.   Some gingerbread salt dough recipes use less cinnamon, but this one really gives the deep brown color of real gingerbread when it's baked, and it smells so good as well.
  • White Hot Glue: We used hot glue to put our salt dough gingerbread houses together.  This works much better than craft glue, since it dries so quickly.  You can use regular hot glue, but it dries clear and doesn't look quite like icing.  You can paint it over it with a little white acrylic paint to make it look a little more like icing, but we have an even better solution.  Use white hot glue to glue your salt dough houses together.  You can order hot glue sticks in all different colors, and white is the perfect one to look like real icing.  Make sure to get the size that will fit your hot glue gun, we used mini. Add as little or as much of the glue as you like.  After getting the house secured together, you can go back and add more to look like snowy icing, or icicles if you wish.
white hot glue sticks
  • Dimensional Paint: To make our icing details, we used some dimensional paint.  Look for this at the craft store.  We found ours with the t-shirts, fabric paint, and tie-dye.  This puffy paint adds some dimension, and looks more like real icing than plain white craft paint would.  
gingerbread salt dough and puffy paint
  • Canal Houses Pattern: We made our gingerbread houses into Amsterdam Canal Houses.  I made a series of crafts inspired by the canal houses for a European feel.  We used the Cricut to make a felt banner and some kitchen canisters with the same design -see the blog post of how I made these here.  I love how it all coordinates.  Even the white icing details on the front were all the same too.
salt dough gingerbread house

To make the pattern to cut our the salt dough, I cut out the houses on my Cricut -you can access my cut file in Cricut Design Space here.  I adjusted the size so that they were about 5 inches tall.  Once I had the cardboard pieces, I cut out two, one for the back and one for the front, then I used the same piece to cut out two side pieces that were the same width, and worked out the height, based on where the roof began to slant.  Then I made two roof pieces of the same width, and adjusted the height so that they would meet in the middle.  My DIY pattern pieces worked really well.  

How To Make Saltdough Gingerbread

Step 1: Make The Dough

Combine the flour, salt, and cinnamon in large bowl. Add in ¾ cup of water and mix with to combine. If the dough is dry add up to 2 tablespoon more of water, to make a smooth soft dough.

cutting out salt dough gingerbread

Step 2: Roll The Dough Out and Cut The Pieces

Roll out the gingerbread salt dough on a piece of parchment paper with a rolling pin, to a thickness of around ¼ - ⅛ inch. Cut out your gingerbread house pieces with a knife. Or use cookie cutters to cut out your cinnamon ornaments. Don't forget to make a hole with a disposable straw in the top of each ornament for hanging. Re-roll leftover dough to make more.

Expert Tip: You want the salt dough to be thick enough that it looks like real gingerbread and will be strong enough to form a house, but thin enough that it will bake and dry out well. Aim for ¼ - ⅛ inch thick.

Step 3: Bake the Salt Dough Gingerbread

Place the pieces on a cookie sheet lined with parchment paper to bake. Bake in a 200 degree oven for 30 min - 2 hours depending on the size of the pieces, and thickness of the dough. See note below on baking time.

Step 4: Decorate

Let the salt dough gingerbread fully cool and then decorate with dimensional puffy paint.

Expert Tip: We found it was easiest to paint the fronts of the houses first, while they were flat, and then let them dry overnight before putting them together.  You can glue it first and then paint if you want to finish this in one day, we just found it easier apply the white puffy paint while the pieces were flat on the table.

Decorating gingerbread salt dough gingerbread houses with white puffy paint.

If your making a gingerbread house, let the paint dry and then use white hot glue to assemble the house.

gingerbread salt dough houses

If your making a Christmas ornament, after the paint dries overnight, add some pretty ribbon for hanging.

I love the little canal houses, but you could also do a more traditional gingerbread house shape, if you prefer, and add a little chimney too.

Amsterdam canal house gingerbread salt dough

The salt dough worked perfectly for making mini gingerbread houses.  If you wanted to make larger houses, you would have to adjust the baking time, and might want to make the dough slightly thicker so it would be stronger.  Thicker dough means even longer baking time.  You would want to make sure the salt dough was very dry so that it would be strong enough to hold for a larger house.  You should definitely experiment with it, if you want a larger gingerbread house.

gingerbread salt dough house

Baking Time

Baking time varies based on how thick your dough is rolled out and how big your piece is.  Smaller ornaments, or pieces like the roof will dry out more quickly than the larger pieces.  Bake your salt dough at a low temperature for the drying process.  You can also air dry your salt dough, but it takes longer.  It does take quite a long time even in the oven.  We baked some of our larger pieces for 2 hours.  

You should start with ½ hour increments and keep checking it.  

It will continue to dry out and harden after it's baked, so it doesn't have to be completely and perfectly dry when you remove it from the oven.

how to make salt dough gingerbread

Frequently Asked Questions

What if my salt dough gingerbread turns white?

As your salt dough dries in the oven, the salt will rise to the top, and the cinnamon salt dough will look lighter and even white sometimes.  Don't panic.  We've put quite a lot of cinnamon in our cinnamon salt dough recipe, so that it will be quite dark on the side that is on the baking sheet.  Once baked, flip the ornament or house piece over and you will see the dark gingerbread colour.  This side will also be nice and flat.  Do your painting and decorating on this side.  You can also use a little olive oil on a paper towel and rub it over the lighter side to darken it up.  

What If my salt dough gingerbread is puffy?

Sometimes if you dry out your salt dough gingerbread in an oven that is too hot it will puff up.  If you're dough is puffing up, reduce the oven temperature, or alternatively try the air dry method, although it will take much longer.
If your dough is only puffing up slightly, just use the flat side that was against the tray as your good side.  This side should also be darker.

How long will my salt dough gingerbread last?

Properly dried salt dough gingerbread can last for years, even decades. Make sure to store it in a dry container.

cinnamon salt dough gingerbread recipe
salt dough gingerbread houses

With gingerbread salt dough houses and ornaments, life really is a party!

More Christmas Inspiration

  • Cricut gingerbread decor felt gingerbread house banner and gingerbread canister with vinyl gingerbread houses
    DIY Gingerbread Decor Ideas To Make With Your Cricut
  • homemade gingerbread latte syrup
    Homemade Gingerbread Latte
  • Life sized gingerbread house made out of cardboard boxes for kid's play house.
    Life Size Cardboard Gingerbread House!
  • Gingerbread milkshake with homemade gingerbread syrup.
    The Best Homemade Gingerbread Milkshake Recipe

Recipe

Everlasting gingerbread houses made from gingerbread salt dough.

Salt Dough Gingerbread

Long lasting salt dough gingerbread houses and ornaments.
No ratings yet
Print Pin Rate
Course: DIY & Crafts
Cuisine: American
Prep Time: 20 minutes minutes
Cook Time: 2 hours hours
Additional Time: 15 minutes minutes
Total Time: 2 hours hours 35 minutes minutes
Servings: 6 mini houses
Calories: 139kcal
Author: Dannyelle Nicolle-Ramjist

Materials

  • 1 ½ cups all purpose flour
  • ½ cup salt
  • ½ cup cinnamon
  • ¾ cup + 2 tablespoon water

Instructions

  • Combine the flour, salt, and cinnamon in large bowl.
  • Add in ¾ cup of water and mix with to combine. If the dough is dry add up to 2 tablespoon more of water, to make a smooth soft dough.
  • Roll out the dough on a piece of parchment paper with a rolling pin. To a thickness of around ¼ - ⅛ inch. Cut out your gingerbread house pieces with a knife. Or use cookie cutters to cut out your cinnamon ornaments. Don't forget to make a hole with a disposable straw in the top of each ornament for hanging. Re-roll leftover dough to make more.
  • Place the pieces on a cookie sheet lined with parchment paper to bake. Bake in a 200 degree oven for 30 min - 2 hours depending on the size of the pieces, and thickness of the dough.
  • Let cool and decorate with dimensional puff paint. If making a gingerbread house, let paint dry overnight and then use white hot glue to assemble the house. If making a Christmas ornament, after the paint dries overnight, add some pretty ribbon for hanging.

Nutrition

Serving: 1g | Calories: 139kcal | Carbohydrates: 32g | Protein: 4g | Sodium: 9433mg | Fiber: 6g

DIY Gingerbread Decor Ideas To Make With Your Cricut

Nov 20, 2023 · Leave a Comment

Cricut gingerbread decor felt gingerbread house banner and gingerbread canister with vinyl gingerbread houses

DIY Gingerbread Decor Ideas To Make With Your Cricut: make a gingerbread house banner with felt and iron-on vinyl and a glass canister.

Cricut gingerbread house felt banner and matching gingerbread canister with vinyl gingerbread houses
[feast_advanced_jump_to]

Gingerbread is this years hottest Christmas decorating trend.  I thought it would be fun to make some of our own DIY gingerbread decor.  This gingerbread house felt banner is the perfect piece to use in your kitchen or even on your mantel for the holiday season.  And our second project is a gingerbread house canister.  We were inspired by the Amsterdam canal houses, and our gingerbread version is so sweet.  We added so many sweet white details to look like royal icing.

Felt

I love making handmade ornaments for the holidays and felt banner is such a great addition.  No need for salt dough gingerbread cookies, hot glue, or puffy paint, our gingerbread house Christmas decorations are made out of felt and iron-on vinyl.  There's no mess involved in making these gingerbread ornaments, and they will last forever.  These tiny gingerbread houses were inspired by Amsterdam canal houses, and they could not be any sweeter.  They have all the cuteness of regular gingerbread man decorations, but with the added charm of a European feel.

gingerbread banner

Materials for the Felt Gingerbread House Banner

  • Gingerbread House Banner cut file -Cricut Design Space
  • brown felt
  • white iron-on vinyl
  • Cricut Maker
  • old cutting mat
  • painter's tape
  • rotary blade
  • Cricut Easypress

How To Make The Gingerbread House Felt Banner

Cut File

Find the cutting file in Cricut Design Space.  Be sure to follow me "Life is a Party -Dannyelle Nicolle-Ramjist" so you can find all the projects I share in Cricut Design Space.  You can adjust the size if you want your gingerbread houses larger or smaller.  There are five different designs.  We cut out two of each for a banner with 10 houses on it.  When you're ready to make the project, click Make It.

Using The Rotary Blade

We cut our felt out on the Cricut Maker, using the rotary cutting blade.  I highly recommend it.  The rotary blade cut through the felt so perfectly and easily.  After choosing felt as your material.  Click on "Edit Tools" to switch the tool from the fine point blade to the rotary blade.  And also switch out the blade on the actual Cricut Maker.

Adding Your Felt To The Cutting Mat

A tip for adding your felt to your cutting mat is to use an old mat so that you don't ruin a new one with all the felt fibers, and reinforce the stickiness by going around the outside with some painter's tape.  That will hold your felt in place for the cut perfectly without ruining your Cricut cutting mat.

Weeding

Once your felt is cut out, also cut out the iron-on vinyl in white vinyl.  And then weed it.  This intricate pattern is difficult to weed.  Take your time and work carefully using your weeding tools to help you.

diy gingerbread felt banner

After your design is fully weeded it's time to iron it on.  We used the Cricut Easy Press.  Choose felt and iron-on vinyl as your materials in the Cricut Heat app, or use the Cricut Heat Guide to check the timings and temperature.  Be sure to wait for the transfer to cool before peeling off the backer piece.

how to make gingerbread decor

We used some brown embroidery cotton and a needle to stitch our banner together.  No need for a hole punch to make a little hole, just use a needle to add one long stitch to each one to create the banner.  The finished banner is fun layered with other garland and holiday decorations.  We used some stick on removable hooks and tied the ends of the garland for an easy addition to our kitchen decor.

gingerbread house banner

More Banner Options and Ideas

We love the plain and simple look of this banner and made our banner 2-D but you could make it more 3-D, if you prefer, by cutting out two felt pieces, sewing them together and stuffing them.  Just be sure to do your iron-on before stitching so you have a nice flat surface.  You might to also make your white icing details slightly smaller, to accommodate the sewing seam around the outside. 

Other options are to add a heart in red, pink, or white cut from felt and strung between each house.  Or you could use beads.  Wood beads would be a great addition or felted wool ball beads between the houses in a pattern.

gingerbread house decor ideas

We also thought that these little felt houses would be adorable as individual homemade ornaments.  To make these into Gingerbread house ornaments you could either make the 3-D version or flat ones like these.  Just add some ribbon sewn to the top for hanging on the Christmas tree, or use ornament hooks.  These gingerbread Christmas tree ornaments would be especially perfect for commemorating a new house purchase this year.  You could add the house number and year of purchase to the back of the ornament with iron-on as a special keepsake to remember the year you bought the new house.  This is such a nice idea as a gift as well.

Another great idea is to make them into felt food for kids to play with, again either the 3-D version, or the flat ones.

You could even use them as adorable custom made gift tags for a personal touch.  Just cut out the gift receiver's name in vinyl and iron it on to the back and tie it to a gift with ribbon.

gingerbread decor ideas

Gingerbread House Canister Materials

  • glass canister with straight sides
  • alcohol wipes
  • brown vinyl
  • white vinyl
  • Cricut
  • Cricut Design Space Canister cut files
  • Cricut
  • cutting mat

Making the Canister

Sizing the Cut File To Fit Your Canister

Measure the distance around the circumference of your canister.  Open the cut file in Cricut Design Space.  Click on "Shapes" on the left side menu and add a square to your canvas.  Unlock the squares dimensions on the top menu, adjust the size to be the same as the distance around your canister and the height.  Make sure this new rectangle representing your canister size is behind the houses and adjust their size by selecting them all and using the scale button.  You can slice or add more houses to get the right number of houses to fit your own canister.  Then use the align button and distribute horizontally to get them all as evenly spaced as possible.  When you're happy with the design, be sure to attach as many houses together as will fit on your 12 x 12 cutting mat.  This will make it easier to apply the house pieces in a straight line.  Now cut out the houses in brown vinyl and white details in white vinyl.

gingerbread decor dit

Weeding

Once the items are all cut out, weed your base of the house and the white icing details.  The white vinyl is very intricate and you will have to take your time weeding it, and making sure to get all the tiny details. Now apply transfer tape to each individual section of white, one piece per house.  Use your scraper to apply the transfer tape.

Layering The Vinyl

Next you want to apply the white details pieces onto the brown vinyl, this step is easier to do while it's flat, before it's on the curved surface of the canister.  Try and line up the sides of the windows and place them evenly onto the brown background house pieces. 

Applying To The Canister

Once all the white house details are in place, it's time to apply the houses to the glass canister.  Clean the glass surface with an alcohol wipe to remove any grease or residue.  Then apply a large piece of transfer tape over a whole row of houses, and use your scraper to apply it.  Without removing the backer piece, position the houses on the canister, making them as straight as possible.  Apply a piece of tape to one edge to hold the vinyl in place once you remove the backer.  Then starting on one side slowly remove the backer and flatten the vinyl into place, smoothing it out to remove any air bubbles as you go.  

gingerbread canister

I tried several methods of applying the vinyl, and this is the easiest way to get a nice straight line of houses.

Once the houses are applied all the way around the canister, it's finished and ready to use in the kitchen.  We tied a ribbon around ours, we like pink, but red bows would be so festive too.

Canister Ideas

I filled two slightly different sized canisters with dry ingredients all ready for baking.  One is holding white sugar, and the other is full of all purpose flour.  This airtight container is perfect for holding ingredients, but it would also be so much fun full of actual gingerbread.  And how perfect for gift giving would one of these custom canisters with gingerbread men be?  You could include the canister with one of your favorite gingerbread recipes, or cookie dough, and a gingerbread cookie cutter, and some cute sprinkles for the top of your cookie.  That would be a next level holiday gift.  Everyone always loves an edible treat, or what they need to make one.  You could even make a smaller version and fill it with hot chocolate mix.  Such a fun idea for the holidays.  We love creative ways of giving practical gifts.  

If you have an annual party making real gingerbread houses, this banner and the canisters would be a great addition to your decor.  Happy decorating and we hope we've given you a few new ideas that you love.

These DIY gingerbread decor pieces are so fun to make.  The best part is that you can personalize them to whatever size you need.  They make a great addition to your Christmas ornaments and decor, or they're also great for gift giving.

gingerbread house diy decor

With beautiful DIY gingerbread decor like this made with your Cricut, life really is a party!

DIY Paper Christmas Cloche Lantern with Free Cricut Pattern

Nov 20, 2023 · Leave a Comment

DIY paper Christmas cloche cricut

DIY Paper Christmas Cloche Lantern with Free Cricut Pattern: use regular card stock and dollar store cloches to create a Christmas village.

[feast_advanced_jump_to]

These DIY paper Christmas cloche lanterns are one of my favorite little Christmas crafts.  They were really inexpensive to make, since most of the supplies came from the dollar store, but they're so beautiful that no one would ever know. 😉 Use them as Christmas decorations for the holidays, or all winter long,  They'd also make beautiful handmade gifts.

Cloches

I was inspired to make the DIY Christmas cloche with some very inexpensive plastic cloches I saw at dollar tree.  These are such great value and a very low price.  You could of course, use glass cloches instead if you prefer.  Just resize the cut file to fit your glass dome.  I wouldn't make these any smaller than they are now.  I think this size works, but any smaller and your Cricut machine may have trouble with the tiny details.  If you can't find the dollar tree cloches, another great way to make them is to look for cloches at the craft store, or Ikea, or even the thrift store.  Just resize the file to fit your cloche.

We used the black plastic base of the cloche, the black adds a little weight visually and grounds the scene, but you could paint it out white with some craft paint if you prefer.  You could also use a small round wood slice as the base instead, which would be really beautiful, especially if you're going for a rustic or woodland look for your holiday decor.

Regular White Cardstock

I designed this project to use regular 8.5 x 11 cardstock.  Using basic materials that you might already have on hand helps keep the costs down for this little project and looks amazing.  You could experiment with different scrapbook paper if you wanted to.  Something with a bit of a luster would be beautiful too, and add a little more sparkle for the holiday season.  I wouldn't cut out this project with glitter cardstock.  The glitter cardstock is a bit more stiff and inflexible because of the glue used to hold the glitter.  Because this project is so small, I would be difficult to curve glitter cardstock to make the round rings.  

how to make a Christmas paper lantern

Materials Needed:

  • cloche -Dollar Tree
  • battery powered tea light candle
  • white card stock
  • PNG file -free to subscribers in our Free Resource Library
  • faux snow
  • white vinyl
  • cutting mat
  • Cricut
Cricut paper cloche lantern

Subscribe For Free Cut Files

This file is free.  Just subscribe below and you'll have access to our Free Resource Library.  Subscribe, we'll send you the password for the library, then download the zip file.  


Christmas Village

I've designed three different buildings.  I thought it would be fun to have these in a variety of shapes, so you can make three different little cloches and set up a small village Christmas vignette.  Add a Christmas tree or two, and some more artificial snow and you have the sweetest winter wonderland decor for the whole Christmas season.  I used a combination of a glass Christmas tree, a flocked tree, and a white bottle brush tree.  Keeping them all white and cream makes a really pretty winter scene.  Another great decor idea is to use these as windowsill decorations.  They're small size is perfect.

Cricut DIY Christmas village

Faux Snow

I love covering the base in faux snow.  I used a bit of faux snow from the dollar store.  Also look for some sparkly iridescent snow.  Another option for a little more sparkle is to just add a sprinkle of white glitter on top of your snow.

Recipe

DIY paper Christmas cloche cricut

DIY Paper Christmas Cloche Lantern

No ratings yet
Print Pin Rate
Cook Time: 20 minutes minutes
Total Time: 20 minutes minutes
Author: Dannyelle Nicolle-Ramjist

Equipment

  • cutting mat
  • Cricut

Materials

  • cloche -Dollar Tree
  • battery powered tea light candle
  • white card stock
  • PNG file -free to subscribers in our Free Resource Library
  • faux snow
  • white vinyl

Instructions

  • Open a new canvas in Cricut Design Space.
  • Click on Upload on the left hand side of the canvas.  Click on Upload Image.  Click on Browse and then then find the "PaperHouseClocheLantern-LifeisaParty.zip" file in your download files.  In Design Space, click on the file, then click on the first image to upload, and click Open. Next select Complex as your image type. And press Continue in the bottom right.  Now click on any areas of the image that you want to to remove, paying attention to the small cutouts in the house, and the snowflakes.  Use the "+" to zoom in to see it better if you need to.  When you're finished click Apply & Continue on the lower right.  Next click on the Cut Image option, and then click on Upload in the lower right corner.  Now click Upload Image again, and do the same for the other images. Once all the images are uploaded, select them by clicking on all three, and then click on Add To Canvas in the lower right.
  • When you bring all three onto the canvas they will all be selected, so be sure to click somewhere else on your canvas to deselect them.  Now let's scale them to fit the small cloche.  Select the house image.  At the top of the canvas look for the size menu.  With the dimensions locked, change the width to 6.5 inches, and press enter.
  • To adjust the trees size, select the image, and with the dimensions locked, change the width to 10 inches.
  • .To adjust the snowflakes, select the image and with the dimensions locked, change the width to 1.8 inches.
  • If you want to add lots of snowflakes to your cloche, select the snowflake image and click on Duplicate -it has a plus symbol, at the top of the layers menu, on the right side.
  • Make sure the color of the house and trees match, so that they will cut on the same mat, and make sure the color of the snowflake image is something different, so that it will cut out on a different mat.  Change the color at the top of the canvas on the left, beside the operation.
  • Click on Make It on the top right of the canvas.
  • Adjust your material size to 8.5 x 11 for the house and trees, or to whatever size cardstock you are using.
  • Set your materials to cardstock for intricate cuts, for the house and trees image, and to vinyl for the snowflakes.
  • Carefully remove your cardstock from the cutting mat and weed your vinyl snowflakes.
  • To assemble the cloche, use a little bit of tape or glue dots to create a small ring with the house image, large enough for the tea light to fit inside. Fit the trees image inside the cloche lid, with a small piece of tape.
  • Add fake snow to the cloche base and add the house and tea light, then place the cloche on top.
  • Finally, add the vinyl snowflakes to the outside of the cloche.

Christmas cloche ideas

YouTube Video

Prefer to see exactly how I did it rather than read the instructions.  Check out this YouTube video to see how I made these DIY Paper Christmas Cloche Lanterns step-by-step.
 

Youtube video

Halloween Version

You might also like our Halloween version of this craft.  Click here for a full tutorial and the free cut files to make our Halloween Cloche Lantern.  Be sure to pin this post to Pinterest so you can find it in October. 😉

DIY Cricut Halloween Cloche: use dollar store materials to make this haunted house, and graveyard silhouette cloche for Halloween.

As soon as I made the first one, I loved how my DIY cloche came out.  It's such a perfect craft for the holidays.  Add a mini tree or two and you can but all three cloches together to make the sweetest little Christmas village.  Or just choose your favourite and make one decorative cloche.  Either way, each little cloche is  adorable, and a great idea if you're looking for an easy project to make with your Cricut for the holidays, that doesn't require a whole bunch of expensive craft supplies.  These would be a really fun thing to make for a Christmas crafting night with girl friends too.  And because the supplies won't break the bank, it won't be expensive to host either.  

I hope these cloche ideas have inspired you.  Be sure to subscribe for the free cut files.

With these sweet DIY paper Christmas cloche lanterns, life really is a party!

More Cricut Inspiration

You might also like our Cricut Advent Calendar here.

Cricut Advent Calendar: free SVG cut file to create a reusable paper box advent calendar to fill with treats, activities, or gifts.

Also check out our DIY Moon Shaped Christmas Wreath with Cricut Stars here.

And you might also like 25 Christmas Projects You Can Make With Your Cricut here.

25 Christmas Cricut Projects: inspiration and ideas for all your Christmas crafting with your Cricut machine using paper, fabric, metal, leather, and more.

How To Make DIY Velvet Acorns

Nov 16, 2023 · 1 Comment

DIY velvet acorn

How To Make DIY Velvet Acorns: use real acorn caps, stretch velvet, and wooden skewers to create the acorn point.

[feast_advanced_jump_to]

These DIY velvet acorns are the perfect addition to your home decor.  I used some of them as Christmas ornaments.  They're also gorgeous in a small bowl as seasonal decor for the Christmas or the fall season.  If you love acorns too, be sure to check out these acorns I made out of old Easter eggs too.

These velvet acorns also be lovely as a simple garland, or used to decorate a napkin ring for a fall or holiday table.  These are so much fun to make that they're a little addictive.  The combination of the natural elements with the real acorns and the rich texture of the velvet and beautiful colors makes them such a favorite craft for this time of year.

velvet acorn Christmas ornaments
how to make velvet acorns with a pointy end

The Velvet

We used some beautiful stretch velvet is an assortment of lovely colors.  Our stretch velvet is from Fabric Wholesale Direct. They have an amazing assortment of beautiful colors in stretch velvet.  We used pink, dusty rose, champagne, peach, and off white to make our fabric acorns, and all the colours look so great together.  We used some shades of pink, but fall colors would be beautiful for a touch of autumn too.  Make them to match your own fall decorations, or Christmas decorations, or personal style.  

The stretch velvet works really well for this craft.  It has some give and you can create some tension which helps create the point at the end of the acorn.  Regular velvet would be hard to work with, and hard to maneuver into the signature acorn point at the end.  The stretch velvet also doesn't fray, so it's easy to work with, and you can do your stitching very close to the edge.

DIY velvet acorns

Making The Acorn Points

The secret to making the true acorn shape with the slight point on the end is using a wooden skewer inside to create the tip.  Without the tip these faux acorns can be too round, and end up looking like little mini velvet pumpkins.  

how to make a velvet acorn

Real Acorn Caps

The caps on our acorn crafts are real acorn caps.  In the autumn season look for some oak trees, and you're sure to find some acorn caps.  You won't need the acorn nut for this craft, just the acorn top.  If your acorns are fresh, and not dried out, you can remove the cap of the acorn, and spread the little acorn hats out on a cookie sheet and put them in a low oven for about 20 minutes or so to help make sure they are dried out.

Materials:

  • acorn caps
  • hot glue
  • hot glue gun
  • stretch velvet
  • thread
  • wooden skewers
  • stuffing

DIY Velvet Acorns

Acorn Caps

Begin by collecting some acorn caps.  Look for them below oak trees.  If you want to hang the acorns like I did, be sure to choose acorns that have stems on the top that you can tie a thread to for hanging.  If you are just displaying your acorns in a bowl, then you don't need to use acorns with stems.  You only need the cap fo the acorn for this craft.  If they're dirty, give them a wash and let them dry before using them.

easy diy velvet acorns

Sewing The Bottom

To make the bottom piece of the acorn choose some beautiful colors of stretch velvet.  Cut the velvet into a small circle.  For our acorn caps a 3.8 cm diameter circle was the perfect size.  You may need to adjust it slightly if your acorn caps are a little larger or smaller than ours were. 

Once the circle of velvet is cut out, the next step is sewing the acorn bottom.  You want to create a running stitch around the perimeter of the circle, quite close to the edge.  Leave a long end of the thread at each end, so that it's easy to pull it together, and gather the velvet together from the bottom of the acorn.

diy fall decor

Gather the bottom velvet piece together in stages, beginning by only gathering it slightly, and then stuffing it with a small amount of stuffing or even cotton balls.  You don't want to over stuff it.  

how to sew an acorn

Creating The Pointy End

Next, you will push a wooden skewer through the stuffing and all the way to the bottom of the fabric.  Then you will carefully fully gather the acorn, pulling the threads all the way, until tight, and tying them off, leavin the end of the wooden skewer sticking out of the end.

velvet acorn tutorial

Next you will cut off the wooden skewer with some garden clippers, leaving some sticking out of the top.  You will need to adjust the length according to your acorn cap.  The acorn cap should press against the end of the skewer and maintain the point shape.  You don't want the skewer too long, or it would be visible.  Leave it just long enough to fit within the acorn cap, but also stick out enough to create the point of the acorn shape as the skewer is pressing against the inside of the acorn cap.

diy velvet acorns

Attaching The Cap To The Bottom

To attach the acorn cap to the velvet, use your glue gun to apply a bit of glue to the inside of the acorn cap.  You want to press the bottom on to the cap, making sure the raw edge of the velvet is contained within the cap, and hold it firmly while the small amount of glue sets.  You don't want to use too much glue, as you don't want a little glue to show beyond the acorn cap.  Hot glue works better than craft glue for this step because you need the glue to set quickly and hold strongly even with the pressure of the wooden skewer pushing against it on the inside.

how to sew a velvet acorn

Hanging The Acorns

Once the glue is set the acorn is finished.  If you want to create acorn ornaments like I did, tie a thread onto the stem of the acorn to hang it from.  You can then tie those threads to some ribbon or baker's twine to create a garland, or leave them plain and display them in a small bowl.  The possibilities are endless for how to display these little fall treasures.

DIY stretch velvet acorn

Recipe

velvet acorn

How To Make DIY Velvet Acorns

5 from 1 vote
Print Pin Rate
Cook Time: 20 minutes minutes
Total Time: 20 minutes minutes
Author: Dannyelle Nicolle-Ramjist

Equipment

  • Glue Gun
  • Needle
  • scissors

Materials

  • Acorn Caps
  • Hot Glue
  • Stretch Velvet
  • Thread
  • Wooden Skewers
  • Stuffing

Instructions

  • Begin by collecting some acorn caps.  You only need the cap fo the acorn for this craft.  If they're dirty, give them a wash and let them dry before using them.
  • To make the bottom piece of the acorn choose some beautiful colors of stretch velvet.  Cut the velvet into a small circle.  For our acorn caps a oooo inch diameter circle was the perfect shape.  You made need to adjust it slightly if your acorn caps are slightly larger or smaller than ours were. 
  • Once the circle of velvet is cut out, the next step is sewing the acorn bottom.  You want to create a running stitch around the perimeter of the circle, quite close to the edge.  Leave a long end of the thread at each end, so that it's easy to pull it together, and gather the velvet together to from the bottom of the acorn.
  • Gather the bottom velvet piece together in stages, beginning by only gathering it slightly, and then stuffing it with a small amount of stuffing or even cotton balls.  You don't want to over stuff it.  
  • Next, you will push a wooden skewer through the stuffing and all the way to the bottom of the fabric.  Then you will carefully fully gather the acorn, pulling the threads all the way, until tight, and tying them off, leavin the end of the wooden skewer sticking out of the end.
  • Next you will cut off the wooden skewer with some garden clippers, leaving some sticking out of the top.  You will need to adjust the length according to your acorn cap.  The acorn cap should press against the end of the skewer and maintain the point shape.  You don't want the skewer too long, or it would be visible.  Leave it just long enough to fit within the acorn cap, but also stick out enough to create the point of the acorn shape as the skewer is pressing against the inside of the acorn cap.
  • To attach the acorn cap to the velvet, use your glue gun to apply a bit of glue to the inside of the acorn cap.  You want to press the bottom on to the cap, making sure the raw edge of the velvet is contained within the cap, and hold it firmly while the small amount of glue sets.  
  • Once the glue is set the acorn is finished. 

Video

diy acorn Christmas ornaments

These DIY velvet acorns are a little bit fiddly because they're quite small, but this really is an easy DIY project, and they're so sweet.  I used mine as ornaments for a simple little woodland inspired Christmas tree.  We paired them with some little mushroom ornaments and ribbon for our tree.  They'd be really beautiful hung on to some tree branches in a vase also.  These are such a great way to bring some of the outdoors in, and make such beautiful decor in your living room, or anywhere in the fall or for the holidays.  Make them in beautiful colors as an easy way to add a pop of color to your living space.  You could even add some glitter to the acorn caps, it you wanted to.

fall acorn decor ideas

With these beautiful DIY Velvet Acorns, life really is a party!

Harry Potter Inspired Snacks and Treat Ideas

Oct 23, 2023 · Leave a Comment

Harry Potter snacks and treats board.

These Harry Potter themed snacks and treat ideas are easy to make and perfect for your next Harry Potter themed party or movie marathon.

How to make a Harry Potter snack board.
[feast_advanced_jump_to]

Whether you're having a Harry Potter party, or a Harry Potter movie night, we've got the best themed snacks!  We can't wait to share all our Harry Potter food ideas with you.  

These would be so fun to serve at a halloween party, or a Harry Potter birthday party, or a Harry Potter movie marathon, or a Halloween movie night.  Any Harry Potter fans will love all your tasty treats, and feel like they're at the wizarding world of Harry Potter!  Check out all our fun Harry Potter themed decor ideas and more Harry Potter free printables here. And you might also like our Harry Potter Christmas Tree, and our Harry Potter Christmas Party with a menu taken right out of the pages of the book.

These Harry Potter treat and snack ideas are such a fun way to make the Harry Potter books come to life!

Large Harry Potter themed snack board on a table decorated with Harry Potter decor and candles.

Easy Harry Potter Themed Snack Ideas

We've arranged all our sweet treats on a large board.  This is such a great way to serve all your magical snacks.  All your fellow potterheads will love these themed food.  

We went with our sweet tooth when we were planning our magical treats.  Our board is filled with desserts and sweet treats.  Here's what we included:

  • chocolate frogs
  • jelly slugs
  • Bertie Bott's Every Flavour Beans
  • Harry Potter Hershey Kisses
  • Pumpkin Pasties/Pies
  • Caramel Sorting Hats
  • Pumpkin Juice Hot Chocolate
  • Spider Cookies
  • Magic Chocolate Wands
  • Gringotts Gold
  • Ferrero Rocher Golden Snitches
  • Butter Beer

Video

See how it looks all put together below.

Youtube video

Large Harry Potter themed snacks and treats board.

Chocolate Frogs

Inspired by the trolly snacks on the Hogwarts Express, and Honeydukes, our Harry Potter snacks started out with candy.  

We found the chocolate frogs at the party store, but you can find them on-line too.  They are so cute, and each one comes with a wizard card, just like in the movie.  

We had this special box from our trip to Universal studios and it's the perfect addition to our board.  

Harry Potter snack board with chocolate frogs, and mini pumpkin pies.

Jelly Slugs

Another fun sweet treat is the jelly slugs.  These are also from the party store, but easy to find on-line as well.

Harry Potter snack board with Happy Birthday Harry cupcakes and jelly slugs.

Bertie Bott's Every Flavour Beans

We had to include some Bertie Bott's every flavour beans, and we can't wait to see if our guests are brave enough to try them, and risk getting a gross flavor.

Harry Potter snack board with bugs of butter bear and pumpkins.

Harry Potter Hershey Kisses

We also found the Harry Potter special edition Hershey Kisses, and thought they were such a fun addition.

Harry Potter Hersey kisses on a table with a wand and glasses.

Pumpkin Pasties/Pies

Another Hogwarts Express treat from the trolley that everyone loved were the pumpkin pasties.  These sweet little pumpkin pies were the perfect fall flavors for back to school at Hogwarts.  

We've made our homemade version with some store bought pastry, and pumpkin pie filling.  We used a muffin tin to make our mini pies, and added a cute jack-o-lantern pastry top, that's so much fun.

Harry Potter themed pumpkin tarts on a cooling rack with a magic wand.
Harry Potter pumpkin tarts on a snack board.

Harry Potter Birthday Cake Cupcakes

We couldn't have a Harry Potter-themed party tray without including Harry Potter's birthday cake!  Hagrid made this cake for Harry Potter's birthday and brought it to him when he first picked him up to bring him to Hogwarts.  

We made cupcake sized versions, which are perfect for a dessert board.  

We used a simple cake mix and then the fun part was decorating with the pink and green icing inspired from the movie.  We used a simple ziplock bag with a very small hole in the corner to make a piping bag to add the words.

Harry Potter birthday cake cupcakes.
Harry Potter birthday cucakes on a themed snack board.

Caramel Sorting Hats

Once Harry got to school it was time for the sorting hat to put him and all the first years into their Hogwarts houses.  We made our own sorting hats out of caramel squares.  

This was quite easy to do, and these little sorting houses are so cute.

To make them start by removing the wrapper and warming up a caramel square in the microwave until softened, for about 10 seconds.  Don't over do it.  

Then shape one square into the top of the hat, using the tip of knife to create eyes, and a mouth, and adding some eyebrows with a tiny broken off piece of caramel.  

Next, use the tip of the knife to make an indent in the bottom and add a red, green, blue, or yellow M&M.  

Finally, use another caramel to make a round base for the hat.  Put the two together to completely conceal the M&M inside.  

Your guests can take a hat and the color inside reveals the Hogwarts house colors and which house the sorting hat has placed you in -this was such a crowd favourite!

Homemade Harry Potter caramel sorting hats treats on a Harry Potter themed snack board.
Cutting open homemade Harry Potter caramel sorting hats to reveal your house.

Butterbeer

Harry, Ron, and Hermione loved to visit The Three Broomsticks for a butterbeer in the Harry Potter series.  We've made our own version.  

To make it, add about 1-2 tablespoon of caramel sauce to a glass and fill with cream soda.  Top it off with some whipped cream, and another drizzle of carmel sauce.  

These are so good, your taste buds will thank you.  These are definitely on of our very favourite Harry Potter recipes.  

We served our butter beer up in chilled beer mugs and they were the perfect accompaniment to our snacks.

Two mugs of butterbeer with Harry Potter glasses and magic wand.

Pumpkin Juice Hot Chocolate

For another drink option, we found these pumpkin hot chocolate bombs at Target and they reminded us of pumpkin juice.  

These aren't authentic pumpkin juice, which is made with pumpkin puree, and apple cider, but I thought they'd be a fun addition, and perfect for sipping while movie watching, preferably in a Harry Potter themed mug.

Harry Potter snacks orange chocolate pumpkin hot chocolate bombs.

Spider Cookies

Inspired by the spider Aragog and his children we made some spider cookies.  

To make these we used store bought chocolate chip cookie dough and baked them.  If you want to make them from scratch, check out our favourite chocolate chip cookie recipe here. When they were hot out of the oven we added a small round disk of meltable chocolate on top.  The heat from the fresh baked cookies melted the chocolate and then we added the candy eyes on top.

And when they were cooled we piped on 8 legs with melted chocolate in a ziplock bag with the corner snipped off to make a piping bag.  

These are such a simple recipe, but they're the perfect treat as a nod to the spiders in Harry Potter world.

Easy spider cookies on a white serving tray.
Harry Potter themed snack and treat board with chocolate chip spider cookies.

Magic Chocolate Wands

We also included some Harry Potter chocolate wands.  

The best part is that these are actually pocky biscuit sticks.  These are so yummy and super easy, and really do look like wands.

Larege Harry Potter themed snack tray with treats and desserts, plus butterbeer.

Gringotts Gold

I also added some chocolate coins to our snack board.  Inspired by the gold in the vault at Gringotts Wizarding Bank that Harry's parents have left to him, they're another easy fun addition.

You can find Gringotts chocolate coins on-line, or just look for regular chocolate coins at the party store (which are a little bit cheaper).

Ferrero Rocher Golden Snitches

We used Ferrero Rocher chocolate to make our own golden snitches.  

To make them, we removed the brown packaging and sticker on top, so we're just left with the chocolate in gold paper. 0 

Then we made some printable wings, cut them out, and glued them onto the gold paper using glue dots.

Coconut Ice

Coconut ice cut into squares on a piece of parchment paper with a glass canister in the background.

We were inspired by the coconut ice at Honeydukes. Our homemade version is really simple to make as a no-bake recipe with just 5 ingredients. Cut it into squares, and serve it in a glass jar, just like at Honeydukes candy store. Find the full coconut ice recipe here.

Homemade coconut ice cut into squares, and in a large glasse Honeydukes jar.

Mrs. Weasley's Chocolate Walnut Fudge

Tin of Mrs. Weasley's Christmas fudge for Harry Potter with a gift tag.

Remember Harry's first Christmas at Hogwarts, and how Mrs. Weasley sends him a handmade sweater and box of fudge? We've got the recipe, and it's easy and delicious, and the perfect addition to your Harry Potter themed snacks and treats. Get the full Mrs. Weasley's Chocolate Walnut Fudge recipe here.

Chocolate walnut fudge cut into squares in a parchment-lined tin.

Free Printable Wings

You can use our free printable golden snitch wings to make some for your own snacks inspired by the magical world of Harry Potter.  Just subscribe below for instant access to our Free Resource Library, and find these free printables inside.

Harry Potter themed golden snitch chocoaltes with free printable wings.

Simple Doable Recipes

I wanted to make this dessert board very doable, so although there are a lot of things included, they're all really simple recipes.  

Use a cake mix and store bought icing to make the cupcake birthday cakes really easy to make.  

For the pumpkin pasties/pies, use store bought pastry and pie filling.  

Our spider cookies, were refrigerated cookie dough.  

For the butterbeer you can use store bought butterscotch/caramel sauce, and even spray whipped cream if you like.  

Have fun collecting your candy.  We had great luck finding the Harry Potter candy at the party store.  If you have trouble finding them in stores, look for them online.  

These official Harry Potter treats are a little on the expensive side.  We found buying them in small quantities was enough, especially when they were mixed with all the other treats.  

They were definitely worth getting though, because they added a certain authenticity to the desert board.

If you're prepping for a large themed party, feel free to get ahead by making the baked treats like the cupcakes, pumpkin pasties/pies, and cookies a few days ahead and popping them in the freezer.  

Favor Bags

I love serving this on a large board because everyone can see all the fun and themed options.  

It also means that you just need a few of everything, so you don't end up with 12 trays full of everything and too much food.  

But even with our smaller quantities, you might still want to have some plastic goodie bags available for guest to help themselves to the remaining candy and make their own goodie bag to go home with.

Harry Potter themed food tray with snacks and deserts for a party.

We loved all our Harry Potter treat and snack ideas.  Everything was really delicious and perfect for snacking on during a movie marathon, or for serving guests for dessert at a Harry Potter birthday party or Halloween party.  

Frequently Asked Questions

Where can I buy Harry Potter snacks?

We found a lot of our store bought Harry Potter snacks and candy at the party store. You can also look on-line for some of the specialty candy.

What Harry Potter snacks can I make at home?

You can make butter beer, Harry's birthday cake cupcakes, pumpkin pasties/pies, and spider cookies at home.

More Spooky Recipe Inspiration

  • Ghost themed foods on a snack board.
    Easy Halloween Ghost Themed Food Ideas
  • Halloween ghost shaped white chocolate covered Rice Krispie squares
    Halloween Ghost Rice Krispie Treats
  • How to train your dragon themed party food ideas.
    How To Train Your Dragon Party Ideas
  • Homemade old fashioned candy apples.
    How To Make Homemade Old-Fashioned Candy Apples

With Harry Potter inspired treats and snack ideas, life really is a party! 

If you tried any of our Harry Potter Snacks and Treats or any other idea on my blog please let me know how it went in the comments below. Thanks for visiting today!

Harry Potter DIY Decor and Free Printables

Oct 20, 2023 · 10 Comments

Harry Potter DIY Decor & Free Printables used to create this Potions Classroom.

You will love these Harry Potter DIY decor ideas & Free Printables. We've put together a Potions Classroom, Professor's Office, Herbology Class, and Owl Post decorations and included all the free printables to recreate them at your house. These ideas will transform your Harry Potter themed party, movie marathon, or Halloween party.

Harry Potter DIY Decor & Free Printables used to create this Potions Classroom.
[feast_advanced_jump_to]

Calling all Harry Potter fans!  This Halloween I've transformed my dining room into a little piece of Hogwarts.  Using things I found around the house, some antique and thrift finds, and DIYing a few fun pieces, we've transformed our home. I hope you find it inspiring. Also check out our Harry Potter themed snacks and treats too. You might also like our Harry Potter Christmas Tree with more free printables, and our Harry Potter themed Christmas Party ideas, with the menu taken right out of the pages of the book.

DIY Harry Potter potions classroom with potion bottles, potion ingredients and magic wands.

Potions Class

We were inspired by the Harry Potter books, and set up the main dining room table as a Potions class.  A lot of the decor for the entire Harry Potter party was inspired by my own collection of vintage and antique items.  And some of the items I used were from the thrift store and the antique shop.  

I set up the potions class on our dining room table. On one end we added a library card catalogue box.  It gives the whole display some height and I can imagine it filled with recipes for potions.

Harry Potter party decorations of a potion making classroom with bottles, and potion ingredients.

Since it's the first thing you see when you walk into the room, we topped it with some of my favourites.  The candelabra is an inexpensive antique fair find.  

I was inspired by the large hanging dragon skeleton in the defense against the dark arts classroom in the films, and wanted to add our own little dragon skeleton.  This one is from the dollar store and he was the perfect size for your class.  

I also included some round Harry Potter style glasses, another antique fair find, and a wand.  

Harry Potter party decorations of candles, round glasses, a magic wand, and a dragon skeleton.

Potion Ingredient Bottles

I wanted the table to be covered in potion ingredients.  I used lots of vintage bottles. I've been collecting these for years, and they were perfect.  You could also use glass jars from the dollar store.  

Some of them had glass stoppers.  For those without lids, we added corks to the ones we could as an easy DIY.  We found some corks at the craft store.  For those without corks that would fit, I used some burlap and tied it around the top to make our own lids.  It's a great idea to look for all different varieties and sizes.  Using different kinds of bottles also help it look more authentic and collected.

DIY Harry Potter potions classroom potion bottles and labels.

I already had a large collection of amber glass, and these were perfect to include.  I left some empty, and lined the top of a cabinet with them, as though they were spare and waiting for more ingredients to be collected and added to them.

DIY Harry Potter potion classroom decorations with large vintage glass bottle filled with dried thistles, vintage books, and more potion bottle ingredient bottles.
DIY Harry Potter party decor of a potion making classroom full of potion ingredients in vintage glass bottles with printable labels.

Potion Ingredients

I wanted to fill the bottles with different ingredients.  Not wanting to go down the really gross and strange route of things like toad eyeballs, etc.  I instead was thinking about a witch or wizard being out in their garden and collecting ingredients in the fall.  In our potion bottles I used things like pinecones, and acorns, and thistle weed tops, and feathers.  I also went to the bulk food store and bought little amounts of things like black rice, and dried beans and lentils, and spices like cloves and cinnamon sticks.  These were perfect for our bottles.  

I even had a couple that I left un-filled but added a lid to, and added a label for an invisible ingredient. 😉

DIY Harry Potter decor of a vintage amber glass bottle with a printable label on it, and other ingredient bottles.
DIY Harry Potter potions classroom with vintage bottles of ingredients with printable labels.

Potion Ingredient Labels

Next, I added labels to my potion ingredients.  For some of them I thought hand written labels were perfect.  I wanted to make it look as though a witch had been out collecting ingredients.  So for things like the pinecones and other common things you could find while out gathering I used some blank labels and wrote the name of the ingredient, the place they were collected, and the date.

DIY Harry Potter decor with vintage glass bottles of potion ingredients, vintage books stacked, mushroom, and candles.

For the other potion bottles, I wanted to make it look like they'd been collected over time, and bought from different shops, so I wanted the labels to all be different.  I created different labels, in different sizes to fit our bottles.  

If you want to create something similar you can use our free printable labels, available as a free download  in our Free Resource Library for subscribers.  There's also included some blank labels, so you could write your own names on them.

Collection of vintge glass bottles filled with potion ingredients, and marked with printable labels for a Harry Potter party.

I was inspired to make the labels based on actual ingredients mentioned in the Harry Potter books.  This website had an alphabetical list of every potion ingredient that is mentioned in the Harry Potter books.  

I love adding this element of authenticity.  You don't have to go to this much detail, but I thought it was a fun extra detail.

Vintage glass bottles filled with potion ingredients and printable labels for Halloween Harry Potter decorations.

To add the labels to the bottles, I used a glue stick, to glue them to the bottles.  This is the perfect way to firmly attach them to the bottles, but in a non-permanent way.  It's easy to remove them and wash off any residue.  You could also print the labels on sticker paper, which is even easier, but a little more difficult to remove if you want to later.

Vintage glass bottle labeled as Dried Igana Liver for a Harry Potter party.

More Potion Class Details

I wanted to add some other details to the table of things I thought might be in a potions class.  I used my imagination to think of some other items.

Vintage glass bottles labeled with potion ingredients for Harry Potter themed party decorations.

This large bowl of mushrooms, looks like they're ready to be picked and added to a potion.  I used an antique wood bowl. There's some floral foam inside, covered in dried moss, and then the mushrooms are added.  Some of them I made from polymer clay and painted, you can see how I made the DIY clay mushrooms here.

Harry Potter potion class decorations with vintage glass bottles of ingredients, scientific glass, and mortal and pestle.

Scientific Glass

I've also been collecting scientific glass for sometime.  I have a few vintage pieces from antique sales, and some new pieces from the craft store.  They often carry them around Halloween time, and they're the perfect touch.  

The potion bottles were placed mainly down the centre of the dining table.  I wanted it to look as though the students were about to use them to make some potions.

Table of Harry Potter inspired potions and test tubes for a Harry Potter party.

More Magical Accessories

A few more items that seemed fitting were a magnifying glass, a feather that resembles a quill, and some vintage books piled together.  And since it's Halloween, I scattered a few faux pumpkins throughout.  I also added lots of candles in different brass candle stick holders found at antique and thrift stores.

Harry Potter inspried potions classroom with vintage glass bottles of potion ingredients and a mortal and pestle.

I thought it would be fun to add some magic wands to the table.  We had one we purchased from Ollivander's wand shop in Diagon Alley when we visited Universal.  The Harry Potter wands come in such cool boxes, that I added it to the table, opened up to reveal the wand, all ready for a student in the class to use. 

DIY Harry Potter party decorations of potion bottles with labels, a magic wand, and a bowl of faux mushrooms.

I also made a Potions Class sign for this area.  We used a Cricut machine to cut out the words.  I hung it up on my china cabinet.  Since my china dishes didn't really fit the vibe, I hung some burlap with tacks on the inside of the cupboard doors, which worked perfectly.  On top of the cabinet I added a vintage scale for weighing out ingredients, and lots of empty amber glass bottles waiting to be filled with potions as the students make them.

Harry Potter "Potions Classroom" sign hanging on a cabinet full of vintage amber glass bottles and scale.

Professor's Office

On the back buffet, I thought it would be fun to create a professor's desk area as another one of our Harry Potter party decorations.  

DIY Harry Potter inspired party decorations of a professor's office desk filled with potions, insects, and candles.

I started with a vintage typewriter, and beside it I added a stack of vintage books, and a pair of glasses that I can imagine a professor using to type and work on wizard paperwork.  

I also added a chocolate frog box.  We purchased this chocolate frog box as a souvenir when we visited The Wizarding World of Harry Potter at Universal Studios.  I also picked up a Harry Potter chocolate frog snack at the party store, and added one to the box.  I can imagine a professor working away here at the typewriter, and indulging in this treat.  The only thing missing is a cup of tea.

Harry Potter DIY decorations of a professor's desk with vintage typewriter, and faux insects.

Spooky Artwork

I found these vintage printable art pieces online.  They're authentic old vintage botanical prints.  I had them printed as large colored engineer prints at the office supply store.  This is an inexpensive way to make colour prints.  I added some wood strips to the top and bottom and they look great as Halloween art.  There are lots of different vintage botanical prints are available but the centipede, spider, and bat anatomy posters were so perfect for Halloween, and for the Harry Potter witchy vibes.  Get the spider free printable here. Find the bat free printable poster here.  And get the centipede free printable poster here.

DIY Harry Potter decorations with printable large bat, and insect posters.

Along with the artwork, I added another sign.  This one is labeled Professor's Office.  I made it with the Cricut also, and used the same font to unify it with the other one.

Harry Potter decorations of a professor's desk area with vintage typewriter, glasses, and insects.

Insects

In keeping with the insect and bat anatomy posters, I wanted to add some more insects.  I had some real, preserved insects, but I also made a display with some plastic dollar store bugs.  

The plastic bugs were in bright primary colours.   I used some paint in blacks, browns, and greens to make them look more real.  A stick pin was added to the insects backs to make them look pinned in place, and then I hot glued them into the shadow box.  See how I made the faux insect specimen box it here.

DIY Harry Potter decor of a large faux spider in a glass jar, insect specimens, and a chocolate frog container.

Along with these insects I added a large dollar store spider to a large vintage glass jar, along with a burlap top.  This area was taking on the look of a collection of magical beasts, and I also added in some plastic snakes, that I also painted to look more realistic, and placed them under a glass cloche.  

DIY Hogwarts decorations of vintage insect posters, framed insect specimens, a large faux spider in a glass jar, and a chocolate frog container.

I also added a collection of rocks and minerals.  The little shelf of cubby squares is from a  thrift shop.  I thought these seemed like something a witch or wizard might use for magic spells.  

On the other end I placed a collection of vintage books.  Since the original titles of the books weren't very magical, I placed them spine side facing in.  

Cubie shelf of rock and mineral samples.

I also found a faux rat at the dollar store, that reminded me of Scabbers.  He got a little makeover with some paint.  I should have cut off one toe, to make him more authentic.

Small vintage cabinet filled with Harry Potter potions, crystal balls, and faux rat.

This crystal ball that lights up is from the dollar tree, and it reminded of something that might have been used in Divination class at Hogwarts.  I also had this glass ball, which seemed perfect to add.

DIY Harry Potter decorations of small cabinet filled with potions, crystal balls, and faux rat.

Flying Keys

We also created some flying keys.  I had some beautiful vintage keys, which worked perfectly for this little DIY project.  

The wings were made from some vellum paper and hot glued them to the sides of the keys.  I tied some fishing line around them and then used clear tape to attach them to the top of a cloche.  In the bottom of the cloche I added some dried moss.  This little project was such a fun detail to add.

DIY Harry Potter flying keys in a glass cloche.

Potions Cabinet

I found this little cabinet for $10 at the thrift store while I was planning my Harry Potter decor and thought it would be a great addition.  It's one of my best Harry Potter party ideas.  We set it up, and filled it with potions.  

On the main table I added lots of potion ingredients.  In this little cabinet I wanted to add lots of finished potions.  These are in much smaller bottles, and mostly liquids.  Again I searched online, and found a complete list of every potion mentioned in the Harry Potter books.  I used these names to make authentic labels for the little bottles.  If you want to make something similar, you can print my tiny labels.  The small potion labels are available as a free printable in our Free Resource Library.  There are also a sheet of blank labels, if you want to make your own.

DIY Harry Potter party decorations with vintage cabinet filled with small bottles of potions.

The bottles are a mix of vintage and new ones from the dollar store.  I filled them with water, and used food colouring to dye some of them.  The labels are glued onto the bottles with a glue stick.  I also found a tiny magnifying glass.  The cabinet is filled with small things, and it turned out great.

DIY potion bottles with printable labels for Harry Potter halloween party.
Small glass potion bottles with free printable labels for Harry Potter party.
DIY Harry Potter small glass bottles with printable potion labels.
Vintage glass bottles with Harry Potter potion labels on them and a small magnifying glass.
Small glass potion bottles and tins with labels for a Harry Potter party.

The bottom of the cabinet is filled with some empty glass bottles and vials, ready for the potions the students will be making.

Empty clear glass and amber glass vintage bottles.

On the front of the cabinet is a label saying "Professor Access Only - Out of bounds to anyone who does not wish to die a very painful death.  -NO STUDENT ACCESS- ".  So no little wizards are permitted access.

Hand written "Professors Access Only" sign on a potion cabinet for a Harry Potter party.

Herbology

In another corner of the room, on our little vintage bar cart, I set up a Herbology classroom to fit in with our Harry Potter theme.  I started out by adding lots of faux plants, and garden supplies, like trowels, and plant pots.  

DIY Harry Potter herbology class decorations.

Up on the top, I added some seed packages.  They're all ready to be planted by Hogwarts students.  

I created the printable seed packages, and you can access them in the Free Resource Library.  The seeds are authentic plants that were all mentioned in the Harry Potter books.  They're an easy and fun DIY to make.  Just cut them out, fold, and glue together.  I filled them with some dry rice so that they look, feel, and sound like real seed packages.

Free printable Harry Potter herbology seed packages.

I also created a Herbology textbook cover.  It's also in the Free Resource Library for subscribers.  Print it out on legal size paper to fit most books.

Harry Potter free printable Herbology text book cover.

It was so much fun adding lots of details to this spot.  I sewed a sack out of some old paint drop cloths, and added a "Dragon Dung" label.  You can access it also in the Free Resource Library.  Print it onto some printable iron-on, making sure to mirror the image, and then iron it onto your cloth sack.  Alternatively, you could print it onto sticker paper, and add it to the sack that way.  We filled the sack with some soil and leaned it against the cart.  It's such a fun detail.

DIY Harry Potter herbology class room dragon dung bag with free printable label.

I also added a Herbology sign to the cart, made with my Cricut machine.

DIY Harry Potter herbology classroom decorations.

Mandrake Plants

One final detail to this section, was to create some mandrake plants.  I made a base with some tinfoil, and added some twine to make root hands.  Then I covered the form with a layer of air dry clay, and formed the mandrake plant.  I added details with the back of a knife, and stuck a piece of a silk plant into the top.  After the mandrake plant dried, I painted it, and frayed the twine to make it look more like plant roots.  See how I made the mandrake plants part one here, and part two here.

DIY Harry Potter mandrake plants.

I made two, in different sizes, to fit into two different sized small terracotta pots.  I potted them with a little bit of soil, and added a label to the front of the pots.  You can find the free printable mandrake plant labels in the Free Resource Library.

And let's not forget the ear protection. I had an old set of earmuffs. I removed the covering and hot glued on the brown faux fur to match the ones in the movie.

Owl Post

Our last area of our DIY Harry Potter decorations was to create an Owl Post near the front door.  Inspired by the owl post at Universal Studios, we made some cubbies out of some old crates to hold owls, packages, and letters.  

Harry Potter DIY owl post post office, with owls, packages, and letters.

Owls

The vintage coke crate with it's sections worked perfectly to hold some small owls.  I also had some old vintage bird cages.  

DIY Harry Potter owl post office with packages, letters, owls, and free printables.

I used spray paint to make one white, and one gold.  The white one has two small owls in it.  The gold one has a "Owl Out On Delivery" sign.  

Free printable owl out on delivery sign for DIY Harry Potter owl post office.

You can access this free printable owl sign in the Free Resource Library.  This cage was the perfect perch for a large owl.  Once the owls were all positioned, I filled all the other nooks and crannies with packages and letters.

Small owl in DIY owl post office for Harry Potter party.

Packages and Letters

We collected small boxes for weeks, and wrapped them all in brown paper.  I also collected different envelopes in white and brown paper, in various sizes.  

Wood crates full of packages, letters, and owls for DIY Harry Potter owl post office.

Inspired by Universal Studios, I wanted to add a witch hat parcel.  I created a witch hat out of a cut up cardboard pizza box and poster board.  After making the shape of the hat, I covered it in brown paper and stamps, and tied it with twine.  It looks so authentic.  

Witch hat wrapped in brown paper and twine, with free printable owl post stamps at a Harry Potter owl post office for party.

I also made a witch's broom parcel.  An old bamboo stake from the garden was used as the broom handle.  I bulked it up using my hot glue gun and some cardboard, then shaped a broom bottom with cardboard.  Then it was all wrapped up in brown paper to make a package and it looks so perfect for our Harry Potter inspired Owl Post. Hogwarts acceptance letters would be a great addition too.

Witches broom wrapped in brown paper and twine in a DIY owl post office for Harry Potter party.

Addresses

I addressed the packages and letters all to real characters from the Harry Potter books, and tried to work out authentic addresses for everyone.  It's amazing what you can find on the internet!  I wrote the addresses right onto the brown paper packages or envelopes.  Mail needs stamps and owl mail needs owl stamps.  

Brown paper box with address and owl stamps in a owl post office at Harry Potter party.
Envelop addressed to Ginny Weasley in an owl post office at Harry Potter party.

I created some free printables with owl post stamps in a few different designs to use on all the packages and letters.  We also made some postmarks to add to the packages.  These are all available in the Free Resource Library.  

I printed them on sticker paper, and cut them out using my Cricut machine.  These worked perfectly for adding to our letters and parcels.

Packages and envelopes in an owl post office at Harry Potter party.
Packages wrapped in brown paper and twine, with Harry Potter character addresses and printable owl stamps in owl post office at Harry Potter party.

Where Do I Get The Free Harry Potter Printables?

All the free Harry Potter printables for the signs, owl post, and labels are in our Free Resource Library.  This library is free for our subscribers to use.  For instant access sign up below, and look for an email with the library password sent via email.

Harry Potter free printables for Owl post office, potion ingredients and potion bottle labels, herbology text book. mandrake plant label, and seed packages, and golden snitch wings.

I had so much fun creating this little piece of Hogwarts in my own dining room.  I had a great time adding all the special details.

I admit, I may have gotten a little carried away.  I hope some of these creative ideas inspired by our favorite scenes in the Harry Potter movies help you create a great themed party.  If you're planning a themed birthday party, movie watching marathon, or Halloween party I hope some of these DIY ideas help transform your living space.  If you love Harry Potter, these fun ideas are an easy way to create your own Harry Potter universe. Your Harry Potter party guests will love it.  Our decor has been a huge success with all our friends and family.  

Harry Potter potions classroom decorations at Harry Potter themed party.

With all these fun Harry Potter decor ideas, life really is a party!

Frequently Asked Questions

How do I access the free Harry Potter printables?

The free printables are all available in our subscribers Free Resource Library. For instant access, just subscribe in the box above. Check your email for the access password (and if you don't see it check your email junk file).

How much did all this cost?

I already had most of the vintage items I used for the decor. I did purchase some ingredients to use in the bottles from the bulk food store, and a few things from the dollar store like plastic insects, the dragon skeleton, and craft supplies like air dry clay, paint, and glue. The biggest expense were the owls, which I purchased on-line. I spent about $100 on supplies, because I had most of the items already. If you are creating something similiar be sure to look at second hand and antique stores, as well as dollar stores.

Where did you find the owls?

I ended up buying most of the owls on-line. Just be sure to get your measuring tape out and work out the sizes, as the pictures on line can be a little deceiving.

More Harry Potter Inspiration

  • Harry Potter snacks and treats board.
    Harry Potter Inspired Snacks and Treat Ideas
  • Harry Potter family movie night ideas.
    Harry Potter Family Movie Night
  • Halloween witch decorations
    Witch Halloween Decor

If you tried any of our Harry Potter DIY Decor or Free Printables or any other ideas on my blog please let me know how it went in the comments below. Thanks for visiting today!

Cricut Design Space Weld vs Attach

Oct 10, 2023 · Leave a Comment

Cricut Design Space weld vs. attach

Cricut Weld vs Attach: Learn what weld and attach mean in Cricut Design Space and exactly when to use each option.

[feast_advanced_jump_to]

Cricut Weld Vs Attach

There's a lot of special Cricut terminology for different things and it can be hard to figure out or remember when to use Cricut weld vs attach. We'll look at the differences of each of these functions, and when you will want to use either of them.

Attach Tool

The attach tool is one of the important tools in Cricut Design Space. Use attach when you want to attach things together on the cutting mat.

The Attach Tool allows you to hold the attached image, text, cut, draw, or score line in place relative to another item on the canvas, and also on the cutting mat. Without using attach, each element of the project would cut out separately.

If you have score lines or writing on a card for example, you will want to attach it together so that it cuts out the card with the score line and writing in place, rather than as a separate element.

How Do I Attach?

You will find the attach button at the bottom of the layers panel on your Cricut Design Space canvas on desktop. To attach items, select all of your items to attach in the layers panel. You can select all of the items to attach by holding down the shift key and selecting items, or clicking select all at the top of the canvas in desktop, or by using your mouse to click and drag a selection box around items. Once items are selected then clicking Attach in the lower right corner. When items are attached you will see them grouped together under the word attach in the layers panel.

Cricut Attach
attach results Cricut

Troubleshooting Attach

If you're having trouble attaching, and Design Space has the attach button grayed out and unavailable to click on, you might need to ungroup items first. Look at the layers panel on the right of your canvas in desktop. If the items are grouped with the group tool, they will say grouped in the layers panel. To ungroup, select the group and click the ungroup button at the layers panel on the top right hand corner of your canvas in desktop. Once they are ungrouped each item will be in a different layer in the layers panel. You should now be able to select any elements of the design you want and click on the attach button.

What's The Difference Between Group and Attach in Cricut?

Group and attach are similar but slightly different. Group will hold things together on your canvas.  (The canvas is the place in Cricut Design Space where you work on your design, before cutting it out.) Attach will hold things together on your cutting mats or Cutting preview screen (a mat or cutting preview screen is where you go after pressing the Make It button, it gives you a preview of how the project will cut out on the cutting mat, it's a last chance to check on the positions of things, and colors before actually cutting them out).

Some people like to describe group like a paperclip, it holds things together just while working on the canvas. And attach is like glue (non-permanent, because you can easily un-attach).

Using Attach To Help Arrange Things On Your Mat

While the primary use of attach is to hold projects together when necessary, Cricut attach can also be a great way to arrange things to fit as many as possible within a set amount of space. You can arrange things on a mat in the cut preview screen, but this arrangement will not be saved for printing the project in the future, whereas attaching things on the canvas will be cut the same way with the same mat layouts anytime you make the project.

To do this, arrange the separate pieces on your canvas screen in the specific place you would like them. Then select all the separate images and use the attach feature to fit as many as you can into the cutting mat space. Now they will stay in the right position relative to one another when you move to the cutting mat, positioned so that they save the most space and materials. This can be a really great feature when you're cutting out big projects, like a flower petals, where you can turn pieces to fit the most on your paper.

Stickers

A great example of when to use attach to arrange things on the cutting mat is when you're making stickers. You may want to cut as many stickers as possible out of your sticker paper, and not waste any. To do this create a 9.225 x 6.75 inch square by choosing a square from the shape menu and then unlocking and adjusting it's dimensions. This is the maximum size for Cut Then Print, as this time. Next arrange your sticker images so that you can fit as many as possible in the square without overlapping. Now hide the square or delete it. Next select all and attach. Now the stickers will all print and cut out in the exact location they are on your canvas. If you ever want to edit and change it, just choose the detach button at the bottom of the layers panel on desktop.

The Weld Tool

What does weld mean? Welding takes two items and makes them welded into one new image or word. It can be used to combine several shapes into a new single item, or to weld letters together. Use weld button when you want to get rid of the cut lines between two objects or letters and permanently hold them together as one. You could think of weld like using super glue. The welded items will form one new solid image or shape, and the separate layers will become one new layer called weld result in the layers panel.

How Do I Weld?

To weld objects together make sure they have overlapping cut lines and, select them all. You can select them by using your mouse and clicking and dragging a selection box around them. You can also select them in the layers panel by clicking on one, and then clicking the rest while holding down the shift key. If the items to weld are the only things on your canvas, you could also click select all at the top of the canvas. Once the items are selected, press Weld in the Combine Menu at the bottom of the layers panel on the bottom right of your design screen on desktop.

Cricut Weld

After you weld the items will be called Weld Result in the layers panel in the top right corner of desktop. Also, if the items are different colors before welding, they will become one color once welded together, and the overlapping lines will disappear.

Weld Result Cricut Design Space

When Do I Use The Cricut Weld Tool?

This is one of the common questions around the weld feature, as it's sometimes confusing about when to use Cricut weld vs attach, or other tools. If you want to take two items and form them into one new single image, then weld is the tool you need. It's really great for combining simple shapes to make more complex designs. Use one large and two small circles from the basic shapes welded together to make your own designs for Mickey Mouse for example. You can make all kinds of different shapes by using this useful tool.

Welding Script Font Together

When working with a cursive font, some fonts will cut out as individual letters unless you weld them together first into a single word. To weld a script text together, make sure that each letter of the word is touching. To move individual letters you will need to adjust the letter spacing. You can adjust the whole word with the letter space tool, or adjust individual letters by selecting them individually and moving them into place so that each of the cursive letters is just touching. Next select all of the letters and then use the welding tool to weld the script letters into one word.

Tip: If the inside of a letter disappears after welding, undo and select the whole word and make it much larger. Try the weld again at a larger side. Once you have your welded image created with the no problems use the scale feature and then make it the smaller size again.

How Do I UnWeld?

There is no unweld function in Cricut Design Space. Pro tip though, once objects have been welded together you can use the undo button to go back, but only while you have the canvas open. When you open a saved project you can't un-weld or undo, so be sure that you want something welded before you choose to weld. It is permanent. If you want more tips and tricks all about unweld check out this blog post: How To Unweld In Cricut Design Space -here.

Unite

Unite is new and similar to weld, but allows you to still access all the individual pieces.  After you unite two or more items, you can still select them individually, move them, rotate them, and edit them.  You can also add more items to unite, by dragging them and dropping them under unite in the layers panel.  Use unite when you want to join individual items, so that they cut out as one single item, but you also want to be able to edit them afterward.  

Unite in Cricut

You can also Undo Unite, in the Combine Menu.  Unlike weld, you can easily undo unite, by selecting it and then clicking on undo unite.  This makes Unite the prefered choice over Weld for many designers.

undo unite Cricut

You can also make unite permanent, similar to weld, by choosing Merge Layers in the Combine Menu.  When you Merge Layers, you will no longer see the individual items in the layers menu, instead there will be just one item in the layers menu.  You can not undo Merge Layers, just like you can not undo Weld.  The only way to go back to Un-Merge is to you use the undo button at the top left menu of your canvas, just like weld.

When Do You Cricut Weld vs Attach

Once you understand the differences and how to use both weld and attach, it's really easy to know when to use each.

Choose Attach If:

  • you want to hold items together on the cutting mat
  • you want to permanently arrange things on the cutting mat

Choose Weld If:

  • you want to make new shapes and new designs out of two or more existing shapes
  • to remove the overlapping cutlines of two items
  • you want to cut out a script font as all one word

With understanding Cricut Weld vs Attach, life really is a Party!

More Cricut Posts You Might Enjoy

Check out How To Connect Cursive Letters On Cricut Blog Post here.

You might also like How To Sharpen A Cricut Blade here.

Also check out How To Use Cricut Transfer Tape here.

Spooky DIY Cricut Halloween Cloche

Sep 25, 2023 · 8 Comments

DIY Cricut Halloween Cloche: use dollar store materials to make this haunted house, and graveyard silhouette cloche for Halloween.

DIY Cricut Halloween Cloche: use dollar store materials to make this haunted house, and graveyard silhouette cloche for Halloween.

DIY Cricut Halloween Cloche Decor
[feast_advanced_jump_to]

It's halloween and time for all the spooky cute halloween decorations.  This mini halloween cloche is so cute, and really inexpensive to make with dollar store craft supplies.  We used our Cricut machine to cut out the detailed silhouette insides, and the free halloween cloche pattern is available at the bottom of this post.

cricut halloween ideas

DIY Halloween Cloche Supplies:

  • plastic cloche
  • black cardstock
  • black vinyl
  • battery powered tea light candle
  • black craft paint
  • small paint  brush
  • Cricut
  • Cricut regular grip cutting mat
  • Haunted House PNG file -available in our Free Resource Library

halloween cloche ideas

Free PNG File For Project

To access the free PNG file that includes the trees layer, the haunted house, and the bats, go to our Free Resource Library and click on the Zip file that contains the PNG files.  It will be added to your downloads file.  Then, when you're in Cricut Design Space you can upload the PNG files there.  

How do you access the Resource Library?

The library is free to all our subscribers.  Subscribe below for free, and receive instant access to our Free Resource Library as our way of thanking you for becoming a subscriber.

Dollar Tree Plastic Cloche

This DIY halloween decoration started out with a trip to the dollar tree.  They have really inexpensive plastic cloches that are perfect for this project.  If you can't find this cloche, you can scale the project to fit inside of any cloche.  A glass dome cloche would be a great option for this project too.  The pattern is really detailed, and will therefore work really well for a larger size removable glass cloche too.

The dollar tree cloche has a black base, which works really perfectly for our Halloween vibes.

halloween cloche

Battery Powered Tea Light Candle

While we were at the dollar store we also picked up a pack of battery powered tea light candles.  These are really inexpensive and the ones we found also have a slight flicker, like a real candle which creates a really nice effect.  The ones we found were white, and therefore contrasted too much with our black cloche base, and our black cardstock silhouettes, so we painted it black.  I used some craft paint and couple of quick coats and it worked really well to paint out the white candle base.  Just make sure to let it dry, before fitting it into your Halloween cloche.

Cricut 

We used a Cricut machine to cut out the very intricate silhouette pattern.  Nonetheless, if you really wanted to create this without a Cricut machine, you could indeed use scissors and an exacto knife to cut it out yourself, but it would be challenging, since the halloween scene is so detailed.

To create it with a Cricut machine, just upload the image to Cricut, scale the image to fit into the mini cloche, and cut it out.  The house and tree silhouettes are cut out of black cardstock.

Flying Bats

To add the bat detail on the outside of the cloche, we used black vinyl.  You won't need transfer tape to apply, since they're so small.  Just use your hands when you apply them like a sticker, to the outside of the cloche.

cricut halloween cloche

Recipe

DIY Cricut Halloween Cloche: use dollar store materials to make this haunted house, and graveyard silhouette cloche for Halloween.

DIY Cricut Halloween Cloche

No ratings yet
Print Pin Rate
Cook Time: 20 minutes minutes
Total Time: 20 minutes minutes
Author: Dannyelle Nicolle-Ramjist

Equipment

  • Cricut cutting machine

Materials

  • plastic cloche
  • black cardstock
  • black vinyl
  • battery powered tea light candle
  • black craft paint
  • small paint brush
  • Cricut regular grip cutting mat
  • Haunted House Zip File available to all our Subscribers in the Free Resource Library

Instructions

  • To create the silhouette pieces for inside the cloche, first Open a new canvas in Cricut Design Space.
  • Click on Upload on the left hand side of the canvas. Click on Upload Image. Click on Browse and then then find the haunted house png file in your download files. Click on the file, then click on the first image to upload, and click Open. Next select Complex as your image type. And press Continue in the bottom right. Now click on any areas of the image that you want to to remove, paying attention to the small cutouts in the house. Use the "+" to zoom in to see it better if you need to. When you're finished click Apply & Continue on the lower right. Next click on the Cut Image option, and then click on Upload in the lower right corner. Now click Upload Image again, and do the same for the other images. Once all the images are uploaded, select them by clicking on all three, and then click on Add To Canvas in the lower right.
  • When you bring all three onto the canvas they will all be selected, so be sure to click somewhere else on your canvas to deselect them. Now let's scale them to fit the small cloche. Select the haunted house image. At the top of the canvas look for the size menu. With the dimensions locked, change the width to 6.5 inches, and press enter.
  • To adjust the trees size, select the image, and with the dimensions locked, change the width to 10 inches.
  • To adjust the bats, select the image and with the dimensions locked, change the width to 1.5 inches.
  • If you want to add lots of bats to your cloche, select the bat image and click on Duplicate -it has a plus symbol, at the top of the layers menu, on the right side.
  • Make sure the color of the haunted house and trees match, so that they will cut on the same mat, and make sure the color of the bat image is something different, so that it will cut out on a different mat. Change the color at the top of the canvas on the left, beside the operation.
  • Click on Make It on the top right of the canvas.
  • Set your materials to cardstock for intricate cuts, for the haunted house and trees image, and to vinyl for the bats.
  • Carefully remove your cardstock from the cutting mat and weed your vinyl bats.
  • Paint the white candle base black using some craft paint. You may need two coats. Let it fully dry.
  • To assemble the cloche, use tape to create a small ring with the haunted house silhouette, large enough for the candle to fit inside. Fit the tree silhouette inside the base of the cloche lid, with a small piece of tape, then place the cloche on top. Finally, add the vinyl bats to the outside of the cloche.
cricut halloween decor

This is the perfect Halloween decoration for celebrating spooky season.  It would look great lighting up your Halloween tabletops, if you're hoping to add a spell of whimsy.  Mix this little piece in with your favourite Halloween skull decorations, and spooky ghosts for the perfect spooky decor this season. 

cricut halloween cloche

With this spooky DIY Cricut Halloween Cloche, life really is a party!

More Halloween Inspiration

In addition to the post about you might also like to check out our Halloween Movie Night here.

Halloween movie night

Also be sure to check out our Halloween Witch Decor here.

witchy halloween decor shed

Finally, you might also like another Halloween idea.  Check out our Pink Halloween Party with pink decor and snack ideas, here.

Easy Back To School Snack Mix Recipe

Aug 24, 2023 · 1 Comment

Back to school snack mix trail mix recipe.

This easy Back To School Snack Mix is loaded alphabet cookies, book worm gummy worms, freeze dried apples, mini cookies, and more. It's the perfect treat to make with your kids and help them get excited about back to school.

Back to school snack mix trail mix recipe.
[feast_advanced_jump_to]

Why We Love This Recipe

  • It's super quick and easy to make.
  • Treats like this one help get kids excited about back to school.
  • It's filled with yummy items that fit our back to school theme perfectly.
  • It makes a great lunch box or afterschool snack.

It's that time of year again, time for back to school and we're getting the kids excited about it with a fun back to school snack mix.  This is such a fun theme, and so much fun for celebrating the first day of school.  Love back to school food ideas? Check out our Easy and Cute Back to School Treat ideas, Back To School Party Ideas, and a Back To School Family Dinner Party. You might also like our Free Back To School Printables perfect for celebrating.

We love snack mixes or trail mix and our favorite is a perfect combination of salty and sweet.  If you prefer just a sweet treat, you could go for unsalted nuts, or leave them out entirely.

back to school trail mix

Make It With The Kids

This is a really easy, no-bake recipe, the perfect cooking activity to do with kids.  Not only can they help you assemble it, no cooking required, but it would be fun to shop for the ingredients together.  Have them pick out some of the different flavors and ingredients to include, and be sure to let them add in some of their favorites.  

Ingredients

back to school snack mix
  • Alphabet Cookies: The first ingredient in our snack mix is alphabet cookies.  We found ours at Trader Joes.  If you can't find these, look for other alphabet cookies at Walmart, or Earth's Best.  These are the perfect back to school snacks.  Your kids will love looking for the letters to spell out their names, or other words as they snack.  The ones we used are cinnamon flavoured and pair perfectly with the apples we also included.
  • Mini Cookies: We wanted to add some mini cookies to our fun snacks.  So many of us grew up taking cookies to school as part of our lunches.  We used the Trader Joe's tiny chocolate chip cookies, and they're so good.  You could use any mini cookie that you like, such as mini chips ahoy, or oreos. 
  • Fruit: We wanted to include some real fruit in our snack mix and used freeze dried cinnamon apples.  The texture of the freeze dried apples is crunchy and they're really delicious.  The cinnamon is a welcome addition as well, but if you prefer, they're also available plain.  If you can't find the freeze dried apples, or prefer the texture of dried fruit, then dried apples would be a great addition as well.  
  • Chocolate: We added in some milk chocolate covered pretzels.  They're a family favourite, and milk chocolate is usually a good choice for kids.  Dark chocolate could be a good option too, or plain regular pretzels. We also included some chocolate covered almonds, again they're a family favourite.  There are so many chocolate snacks to choose from.  
  • Candy: I wanted to add a little candy in our snack mix as a special treat.  If you're looking for a healthier version, you could leave these out, or just add smaller quantities.  Colourful M&Ms seemed like a very "back to school" addition in their bold primary colours.  We opted for mini M&Ms, but choose whichever is your preference.  Peanut M&Ms would be a good choice too, if you're including nuts. We also added in some gummy worms.  These made me think of book worms, and seemed like the perfect snack idea to include for younger kids, and gummy fans.
  • Nuts or No Nuts: We made our snack mix with lots of mixed nuts in it, since it's one of our favourite salty snacks.  See nut free options below.

Substitutions

  • Nut Free: If you are making this snack mix to be part of school lunches, you may want to leave them out or substitute something that is allergy friendly and safe to bring to school.  The nuts in our snack mix helped create that salty sweet combo that so many of us love.  Ideas for substitutions for your salty snack mix are something like popcorn, snack crackers like goldfish or Annie's cheddar bunnies, or any pretzel variety.
  • More Fruit Options: I think raisins would be a great dried fruit to include as well, since they always make me think of the little raisin boxes that are perfect for a school snack.  You could include other dried fruits as well in the snack mixture.  If you're looking to make it a little healthier, a great way would be to substitute some of the sweets for more dried and freeze dried fruit options like apricots, mango, cherries, cranberries, banana chips or whatever your family favourites are.
  • More Chocolate Options: You might want to add plain chocolate chips to your mix, peanut butter chips, or mini peanut butter cups.
  • Keep It Sweet: We used roasted and salted nuts, but if you don't love the salty combination with the sweet, you could use unsalted nuts.

How To Make It

  1. Step 1: To make the snack mix, combine all the above ingredients in a large bowl and mix together. Take care not to break the cookies or other ingredients as you stir.
  1. Step 2: Store the snack mix in an airtight container.

Back To School Gift

This snack mix would make a great thoughtful gift for kids or teachers.  Package some up in a cellophane bag and tie it tightly so that it's airtight.  Use our free printables for packaging.  Choose a gift tag from our back to school free printable collection.  Just print, cut out, and tie on to the bag with a ribbon as the perfect little gift.

back to school snack mix

Free Printable Gift Tag

We also have a really cute free printable pencil gift box.  It would be perfect for gift giving to your kids or teacher.  Just seal the snack mix in a cellophane bag and then put it into the cute pencil shaped gift box.  

With back to school snack mix, life really is a party!

More Back To School Ideas

  • back to school lunch box notes
    Free Printable Lunch Box Notes
  • Caramel apple trifles made in mason jars.
    Caramel Apple Trifle
  • Back to school party family dinner
    Back To School Family Dinner Ideas
  • Back to school party ideas.
    Back to School Family Dinner

Frequently Asked Questions

What if I can't find the alphabet cookies?

If you're having trouble getting the alphabet cookies we used, do a quick on-line search for other options like the Walmart brand, or other store brands. You could also substitue alphabet cereal.

Can you make this nut free?

Yes. Leave out the nuts, and it you want something salty substitue something like popcorn or snack crackers.

Our school doesn't allow snacks with candy, what can I do instead?

No problem, leave the candy out and use more types of freeze dried fruit, or dried fruit instead.

If you tried any of our Back To School Snack Mix or any other ideas on my blog, please leave a star rating and let me know how it went in the comments below. Thanks for visiting today!

Recipe

Back to school snack mix trail mix recipe.

Back To School Snack Mix

Video

Sweet, and salty trail mix with lots of fun back to school themed treats.
5 from 1 vote
Print Pin Rate
Course: Desserts, Snack
Cuisine: American
Prep Time: 5 minutes minutes
Total Time: 5 minutes minutes
Servings: 24 1 cup
Calories: 53kcal
Author: Dannyelle Nicolle-Ramjist

Ingredients

  • 4 cups alphabet cookies
  • 4 cups mini cookies
  • 2 cups freeze dried cinnamon apples
  • 2 cups gummy worms
  • 1 cup mini M&Ms
  • 2 cups mixed salted roasted nuts
  • 2 cups salted and roasted almonds
  • 2 cups salted and roasted cashews
  • 2 cups chocolate covered almonds
  • 3 cups chocolate covered pretzels

Instructions

  • To make the snack mix, combine all the above ingredients in a large bowl and mix together. Take care not to break the cookies or other ingredients as you stir.
  • Store the snack mix in an airtight container.

Notes

Make this trail mix nut free by substituting any favourite salty snack in place of the nuts.

Nutrition

Serving: 1g | Calories: 53kcal | Carbohydrates: 8g | Protein: 1g | Fat: 2g | Saturated Fat: 1g | Polyunsaturated Fat: 1g | Cholesterol: 1mg | Sodium: 20mg | Sugar: 5g
Tried this Recipe? Tag me Today!Mention @LifeisaParty or tag #lifeisaparty!

Back To School Free Printables Pack

Aug 23, 2023 · 1 Comment

Back to school free printables including bunting, pencil boxes, party hats and more all set up at a children's tablescape.

These Back To School Free Printables are perfect for all your photos and celebrations. Use our printable pennant flags, and add the grade for a fun photo prop. We've also included lunch box notes, pencil party hats, banners, cupcake picks and table scatter. And you will love our free printable pencil box. Just print on cardstock, cut, fold, and use for gift giving. And the whole set is available in pink or blue, or print both and mix and match.

Back to school free printables including bunting, pencil boxes, party hats and more all set up at a children's tablescape.
[feast_advanced_jump_to]

Why We Love These Printables

  • They're free! Subscribe below and access them in our Free Resource Library.
  • They come in two color waves.
  • They're perfect for a party or family celebration.
  • The pennant with personalized grade addition is perfect for back to school photos.
  • The pencil box is perfect for gift giving -to students or teachers.

Back to school is a special time of year, and this free printable pack is perfect for celebrating, parties, photo props, and gift giving. They really help make things feel special.

You might also like our Easy and Cute back to school treats and snacks, Back To School Snack Mix, and Marshmallow Pencil Snacks, perfect for adding a back to school themed food to your celebrations. And find our Back To School Party Ideas here.

Back To School Free Printables: pennant flags, lunch box notes, pencil party hats, banners, cupcake picks and more in pink or blue.

How To Access Free Printables

We share all our free printables with our blog subscribers.  All you have to do is subscribe below for instant access.  You will receive an email with the secret password for our Free Resource Library.  

Use the password to access the entire Free Resource Library full of fun free printable pdf files.  Click on the downloads, and then print on your home printer, or at an office supply store, and enjoy.  We hope you love these back to school freebie printables as much as we do!

Make sure you subsribe for Free Printables (and not the free party planning guide) to get instant access.

Make It Pink, Make It Blue

This back to school theme printable pack comes in two different color waves.  Choose the pink, or the blue/green color, or choose to mix and match them.  They coordinate well, or you can choose your favourite color.

First Day Of School Pictures Pennant Flags

We've included several pennants in our printable pack.  We loved using a ruler to attach them to as the handle of the flag, but you could also use a wooden dowel.  

We also included individual grade banners that you can add to the pennants.  And because we're in Canada, and lots and lots of our readers are in the USA, we included an option for "Grade One" or "1st Grade" because it seems that what you say depends on where you live.  

We also did all the banners in pink or blue, so you can pick and choose and just print the ones you want.  

There's several different pennant flag designs to choose from and also different sizes.  The mini's are really cute tucked into a back to school gift too.  And the first day of school printable flags are perfect for photos.

first day of school sign flag

These are so great to mark the beginning of a new grade with a back to school photo.  And you can re-use them year after year, just changing out the grade banner.  Whether it's your first time or your kids are are headed into grade 8, they make a great addition to first day of school signs.

back to school printables

Back To School Banner

We have a few different banner options in the printable back to school bundle.  Use the shapes and cut them out by hand or if you're a Cricut user, upload them into Cricut Design Space and cut out with the Cricut.  We also added some glitter to the apple and the star for a little extra fun.  We used a tiny hole punch at the top and then strung them with a darning needle on to some embroidery cotton.  These are such a cute banner and they come in either pink or blue/green, choose on or mix and match them.

back to school party
back to school printable banner

Lastly the small circles can be used for a cute banner too. 

Back To School Printable Small Cards

We have some cute small cards with four different designs.  We used them tied to the back of the chairs for our back to school party.  

These would also be great as lunch box notes.  Write a message on the back and tuck one into your child's lunch for a fun surprise.

back to school printables

These would also work well as a gift tag for back to school gift for a child, or a teacher.

back to school free printables

There's also a set of library inspired cards in the set.  You could use these as cards, lunch box notes, or gift tags too.  They'd also be cute as place cards for a table.  Just use a sharpie to write the person's name and leave one on each plate for a cute addition to your back to school table.

Signs

We've also added a cute free printable sign that says "Back to School" with the cutest apple background.  Choose from pink or blue.  Print one out and use as decor in a picture frame for any back to school party.  This one might also be a nice addition to classroom decor or on your classroom door for the beginning of the year, if you're a teacher.

back to school table ideas

Pencil Party Hat

We thought it would be a fun idea to include a party hat in this collection.  Just subscribe for the free download, print it out on card stock, and use tape or a glue gun to put it together.  Then punch a hole on each side and tie on some ribbons or elastic.  This is such a cute addition to your start of school year party for younger kids.

pencil party hat

Free Printable Paper Pencil Box

We've also included the cutest free printable pencil gift box.  This box prints out on two sheets of cardstock.  After it's printed, cut it out with scissors.  Next you will need to fold on all the score lines.  Some of the lines are printed or indicated with a color change, for others you will have to be guided by the shape.  

We don't always add score lines, because they take away from the final look of the project, so we've left them out where we think you can easily be guided by the shape itself.  

pencil gift box free printable

Once all the score lines are folded, assemble the pencil using some hot glue.  First make the yellow body of the pencil box, then add on the black tip.  The pink eraser part is the lid for the box, you will have to glue the seam together to make that part 3D, but don't glue it to the pencil, as it's designed to be a removable lid.  Once it's all put together you can add some ribbon around it if you like.

The pencil gift boxes are a great way to give a start of the school year gift to your students or teachers.  Some student or teacher gift ideas are small school supplies, gift cards, or even snacks.  

If you have a meet the teacher night during the first week of school, this gift would be great to bring along with you to meet the new teacher.

pencil treat box free printable

These pencil treat boxes would also be great for gift giving to a classroom teacher around the holidays, or at the end of the school year as a last day of school gift.

Back To School Table

Having a special family meal together on the first day of school to hear all about how it went is one of our favourite  first day of school traditions.  One of my favorite things to do on the first day when my kids were little was to set up a beautiful back to school table to surprise them with after school on the first day.  It was a fun way to kick off what we all hoped would be a great year and new school season.  We loved hearing all about new friends, first day activities, and new teachers.  This dinner was always a great start to a new year.  

back to school confetti table scatter

We've included a table scatter confetti set. You can cut these out on your Cricut if you have one, or by hand.

back to school printable pack

With these adorable back to school free printables, life really is a party!

More Inspiration

  • Back to school family dinner ideas.
    Back To School Dinner
  • Back to school notebook paper sugar cookies.
    Notebook Paper Sugar Cookies for Back to School
  • Back to school marshmallow pencil snacks made with marshmallows and chocolate chips.
    Back To School Marshmallow Pencil Snacks
  • Back to school dinner ideas.
    First Day of School Dinner

Frequently Asked Questions

How can I access the printables?

Just subscribe and you'll receive an email with the password to access our Free Resource Library. (Check your spam/junk folder if you don't see it.) Look for the Back To School printables section in the Free Resource Library, click on them and print!

What if I don't have a color printer at home?

You can get these printed at a local office supply store, or most libraries will let you use their color printer for a very small fee.

How do I cut these out with my Cricut machine?

Use the png files and upload them to Cricut Design Space. Use the print then cut feature to cut out the banner and table scatter, or to make stickers.

If you try any of the Free Back To School Printables or any other ideas on my blog please let me know how it went in the comments below. Thanks for visiting today!

Mushroom Themed Picnic Party

Aug 1, 2023 · Leave a Comment

Mushroom themed party picnic in backyard.

This Mushroom Party picnic with mushroom decor, and mushroom themed sweet and savoury foods is the most beautiful party.

Mushroom themed party picnic in backyard.
[feast_advanced_jump_to]

Why We Love This Party

  • Mushrooms are the cutest and we love how trendy they are right now.
  • Outside was most beautiful setting, and we including lots of fun mushroom decor ideas.
  • Our menu of mushroom themed food including great savoury and sweet options.

Our mushroom themed picnic party with mushroom themed decor and mushroom themed food ideas was so much fun.  We had the best afternoon enjoying our sweet little picnic, and I'm so excited to share all the fun details with you.

We love themed picnics. You might also like strawberry themed picnic, cherry themed picnic, butterfly themed picnic, or our daisy themed party.

Mushroom party with mushroom party decor and food.

The Mushroom Decor

We set up our picnic in our backyard, in a nice shady spot under the apple tree.  The table was actually a table top with screw on legs.  Instead of adding the legs, we set it up on baskets to create the perfect picnic table height.  You could also use a sturdy board on top of baskets.  

We then draped it with a white linen table cloth.  We surrounded the picnic with blankets and pillows for a really comfy and pretty spot to sit and enjoy.  

Mushroom themed picnic party table with mushroom food and decor.

Mushroom Centerpiece

One of the highlights of the table and our mushroom party decorations were these gorgeous mushroom vases.  You can purchase the mushroom vases here and here.  

I love the colours they came in, and they set the tone for a muted pastel colour scheme rather than bright colors.  We filled our vases with garden flowers, and some Queen Anne's lace.  They were so beautiful.  

We also added in some tall wood mushrooms for a little height and contrast to the delicate flowers and vases -find similar wood mushrooms here.

Mushroom themed party table with glass mushroom vase filled with flowers.
Mushroom themed tablescape with pink glass mushroom vase willed with flowers.
Mushroom themed tablescape with a green glass mushroom shaped vase filled with flowers.
Mushroom themed centrepiece with glass mushroom vase filled with wildflowers.

The floral candle holders were a fun DIY.  I pressed some garden flowers in some heavy books and when they were dry I used some mod podge to glue them to some old glass yogurt containers.  

We used some citronella candles in ours, so not only were they beautiful, but they helped keep any bugs away too.

PInk glass mushroom vase filled with flowers, and a glass candle holder with dried flowers on it.

The Place Settings

We used simple side plates and black forks for our place settings.  The cute glasses with ribbed glass are from Ikea.  I love that they work for just about any drink, and they're sturdy and inexpensive.  

The star of the show was the mushroom napkins.  I ordered this fabric from spoonflower.  They have so many amazing options available.  You can order them as napkins, or buy the fabric and make them yourself.  I loved the colours and pretty pattern, and they added so much to our mushroom themed table.  These were a great alternative to something like using a mushrooms paper plate, because we can reuse these over and over, and they gave a similar effect to the table.

Mushroom themed party table with mushroom napkins, flowers and food.
Mushroom party table with mushroom themed foods and decor.
Mushroom themed party table with stump chocolate cake with meringue mushrooms and flowers on it.

Mushroom Themed Food Ideas

Stuffed Mushroom Caps

We started out with some savoury themed mushroom foods.  These little nibbles were perfect for our mushroom-themed party.  I love this stuffed mushroom recipe.  These ones are made with breadcrumbs.  Lots of recipes use cream cheese, but I prefer these, and they're a little more picnic friendly.  Serve them hot or at room temperature.

Mushroom themed party food of stuffed mushrooms and mushroom bruschetta.

Mushroom Bruschetta

This mushroom bruschetta is such a favorite.  It's so easy and any mushroom lover is sure to love it.  

Start out by slicing mushrooms, and adding them with some minced garlic, diced onion, salt and pepper, fresh thyme, butter, and a little bit of worcestershire sauce to a frying pan.  Saute everything until the onions are translucent.  Cut some baguette slices and toast lightly.  Spread them with some boursin cheese and then top with the mushroom mixture.  These are so yummy and easy to make.

Mushroom bruschetta on a marble and wood serving tray.
Mushroom themed appetizers on a marble and wood serving board.

Tree Stump Cake with Meringue Mushrooms

The star of the show was our tree stump cake.  It was a lot of fun to create and the gorgeous centerpiece of the table.  I love using the food as part of the decor and incorporating it instead of having a separate food table.  If you like to bake, this cake is a fun project.  It would make a lovely birthday cake, if you were celebrating with a mushroom picnic.  

To create it we started out by baking this chocolate cake recipe.  We layered it with chocolate frosting.  For the outside of the cake we made it look like bark by melting chocolate, spreading it on some parchment paper and then rolling up the paper with the melted chocolate.  Once it's set, unroll the parchment and you have nice long shards of chocolate that look like bark.  We frosted the sides of the cake, and then added the chocolate shards.  It creates such a pretty bark effect.

Wood stump chocolate cake decorated with meringue mushrooms and real flowers.
Chocolate wood stump cake with chocolate bark, meringue mushrooms, and cake crumb moss.

We also wanted to add some mushrooms to our tree stump and some moss.  We made edible moss by crumbling some green cake.  The mushrooms are made from meringue and put together with melted chocolate.  Then we sprinkled some with some cocoa powder to make them look more like wild mushrooms.  These were so cute on the cake and a really delicious crunchy addition.  If this party was for a 1st birthday, it would be fun to make a smaller or cupcake version as a smash cake.  The meringue mushrooms would make great cupcake toppers too.

Homemade chocolate stump cake with chocolate bark and mushrooms.
Homemade chocolate stump wood look cake.

Lastly we added some fresh flowers.  Do a little research before hand, and make sure the flowers are edible.   The flowers really added to our woodland feeling.

Chocoalte wood stump cake with meringue mushrooms.

Mushroom Cookies

We also made some mushroom cookies.  These were so yummy and so cute.  We used this recipe for peanut butter thumbprint cookies, but instead of making a heart, we make a mushroom indentation.  Just be sure that when they come out of the oven you quickly go over the indentation with the back of a small spoon before they cool.  

We used raspberry jam for the red mushroom tops, and vanilla frosting for the polka dots and the mushroom stem.  The combination of the peanut butter and jam is a match made in heaven, making these cookies not only adorable and perfect for our mushroom theme, but also so delicious.

Mushroom serving tray filled with mushroom thumbprint cookies.

If you were making goodie bags for your guests, these would be really cute in a cellophane bag tied with some pretty ribbon for guests to take home.

Mushroom themed outdoor picnic party.

This party was so much fun and I can't think of a better way to spend an afternoon with friends.  A mushroom themed party would be perfect for a baby shower, birthday party, or first birthday party for the little girl who loves mushrooms.  Adding fairies to this theme would be really cute too.  These ideas would also be perfect for a woodland party.  Keep these ideas in mind for your next party.

With a mushroom themed picnic party to enjoy, life really is a party!

Frequently Asked Questions

Can I make the food ahead of time?

Yes, make your stuffed mushrooms ahead of time and bake just before serving. Prepare your mushroom toppings for the mushroom bruschetta ahead of time, and assemble just before serving.

How do you make the low picnic table?

Use a table top or board and use two or three solid square baskets or bins down the centre to hold it up.

More Mushroom Inspiration

  • DIY mushroom wreath
    Mushroom Spring Wreath
  • DIY velvet mushroom craft in pink and white.
    DIY Velvet Mushroom Craft
  • Stuffed mushroom recipe.
    Easy Italian Stuffed Mushrooms Recipe
  • DIY felt mushrooms.
    Felt Mushrooms

If you tried this Mushroom Themed Party or any other ideas on my blog please let me know how it went in the comments below. Thanks for visiting today!

Cherry Themed Party Ideas

Jul 28, 2023 · Leave a Comment

Cherry themed party table with food and cherry themed decor.

This cherry themed picnic party is full of ideas for party favors, party decor, and simple recipes for cherry lovers.

Cherry themed party table with food and cherry themed decor.
[feast_advanced_jump_to]

Why We Love This Party

  • A simple color scheme of cherry red with black and white really popped.
  • Our cherry themed food was easy to put together and so delicious.
  • We had real cherries, to celebrate cherry season.
  • Did we mention we love cherries -taste + cuteness = trending!

This backyard party was a lot of fun to put together.  It would be great for a special occasion like a birthday party, bridal shower, or baby shower, but we enjoyed it as a party theme for a simple summer party to celebrate cherry season.  

We love creating themed parties like this daisy themed party, this strawberry themed party, or this mushroom themed party.

A cherry themed table set up outside with food and cherry decor.

Cherry Tablescape

We set up in our backyard, and used a coffee table in our setting area.  I love how casual and relaxed this set up is.  

I started off using some pretty and inexpensive cherry fabric as a simple table cloth.  The material had some red cherries, with some grey dots, so this set our simple color scheme for the table.  

We used some seasonal Queen Anne's lace wild flowers in vintage glass bottles for flowers.  

Cherry party food with cherry toast, fresh cherries, cherry pop, cherry cheesecake, and cherry cakepops on a table.
Cherry thememd party with cherry cakepops and wild flowers.

Another beautiful addition to our party party supplies and one that helped set the theme was the vintage cherry cake plate.  It was a gift years ago from a friend.  I love theme parties, so when I decided on a cherry theme I knew this would be perfect.  Cherries were a popular vintage theme, so if you're planning something similar it's worth having a look around a antique shop for a some cherry inspired kitchenware to include.

Cherry bruschetta on a cherry cake plate.

Cherry Place Settings

For our place settings we went with classic white plates, and a stripped napkin, with black cutlery.  On top, instead of napkin rings, we added some cherry party decorations with these miniature wood berry baskets filled with fresh cherries.  

They looked so cute, and were a great way to send our guests home with cherry theme party favors at the end of the night -that is if they could resist eating them.

Place setting at a cherry party with mini wood berry basket filled with fresh cherries.
Mini wood berry box filled with fresh cherries.

Another cute touch to our cherry-themed party were the cherry printed paper straws -buy them here.  

I found some black cherry pop in cute bottles and used some red and white twine to tie the paper straws right to the bottles.

Cherry pop bottle with cherry printed paper straw tied to it.

The Cherry Themed Food

Cherry themed party table with cherry table cloth, cherry themed food, and wild flowers.

Cherry Toast

My favourite part of the party was the beautiful cherry inspired foods we served.  We started out with some cherry themed bruschetta.  

Cherry bruschetta with roasted tomatoes.
Cherry bruschetta with roasted tomatoes, chives, and basil to look like cherries.

To make them, we toasted some bread, spread it with boursin cheese, and then added roasted grape tomatoes that looked like cherries.  

To roast the tomatoes we tossed them in some olive oil, with a little minced garlic and salt and pepper in a baking dish.  We roasted roasted ours in a 350 oven for about 20 minutes.  Serve them warm, or room temperature. 

We added stems with fresh chives, and a leaf of fresh basil.  

Cherry themed party table with food, place settings, and decor.

These cherry toasts certainly looked like they'd just been picked from some cherry trees nearby, but not only were they adorable, but they were delicious!  The roasting of the tomatoes brings out their sweetness and the combination of that with crunchy toast, and creamy cheese, and the freshness of the herbs was heavenly.  You want to make these on the party day, just before serving. 

Cherry themed party in the garden.

Cherry Cheese Cake

We also made some classic cherry cheese cakes.  We served these in individual glasses, which makes them perfect for a picnic and not having to worry about cutting and serving.  These are a very easy no-bake recipe.  Use this recipe, and swap out the topping for canned cherry pie filling.

No bake cherry cheesecake in a footed glass.

Cherry Cake Pops

And finally we also made some cherry cake pops.  Aren't these just the cutest?  And they were so yummy too.

To make them we used a cherry mix, broken into crumbs and mixed with icing to create the cake balls.  Next, we used some green straws -to look like cherry stems.  These were dipped in red chocolate candy coating.  I tied two of the finished cake pops together with some green ribbon to make it look like a cherry leaf.  

Cherry cake pops on a cake stand with wild flowers.

These would also be adorable as a cherry themed favor.  Just wrap them up in a cello bags for gift giving.

Homemade cherry cake pops on a cake plate.

We kept our menu quite simple but cherry pies would be another great addition.  Vanilla cupcakes with a cherry on top would be sweet too.  Cherry cookies or sugar cookies decorated to look like cherries would all be great additions too.  And since it's summer, you couldn't go wrong with a cherry custard or black cherry ice cream cone.

Cherry themed party table in the garden.
Cherry themed party table set up in the garden.

With all these cherry themed party ideas, life really is a party!

Cherry themed picnic table set up in the garden with cherry themed food and decorations.

Frequently Asked Quetions

Can I make the food ahead of time?

Yes, you can prep the cherry cake pops and cherry cheese cake the day before. Store the cake pops in an airtight container at room temperature, and the cheese cakes in the refrigerator. For the cherry toasts, you can roast the tomatoes ahead of time and sereve at room temperature. Do not assemble them ahead of time though, or they might go soaky.

Where is the cherry fabric from?

We found our fabric at a craft store. If you can't find any at your local fabric store, try looking on line for it.

More Party Inspiration

  • Strawberry themed party ideas with table setting, flowers, and food.
    Sweet Strawberry Theme Party
  • Mushroom themed party picnic in backyard.
    Mushroom Themed Picnic Party
  • Butterfly themed party ideas party table, food, and decorations.
    Butterfly Themed Party Ideas
  • How to throw a Swedish inspired midsummer picnic.
    Swedish Inspired Midsummer Picnic

If you try this Cherry Themed Picinc or any other ideas on my blog please let me know how it went in the comments below. Thanks for visiting today!

Easy Ice Cream Sundae Charcuterie Dessert Board

Jul 14, 2023 · 1 Comment

Ice cream charcuterie dessert board in the shape of an ice cream cone.

This easy ice cream sundae charcuterie dessert board is perfect for entertaining. We made it in the shape of an ice cream cone, and it has everything you need for the perfect ice cream sundae including cones, sauces, nuts, candy, brownies, and a cherry for the top!

Ice cream charcuterie dessert board in the shape of an ice cream cone.
[feast_advanced_jump_to]

Why You Will Love Recipe

  • I scream, you scream, we all scream for ice cream! Who doesn't love ice cream?
  • It makes for easy entertaining where guests can help themselves.
  • It looks amazing and brings the wow factor. How cute is it that we made it in the shape of an ice cream cone?
  • You can prep it all ahead of time and just add ice cream right before serving.

Love frozen treats? You might also enjoy our easy coconut milkshake recipe, and if you're a desset board fan, check out our S'mores Charcuterie Board. You might also enjoy our Ice Cream Party Ideas: Sundae Bar, Activities, and Decor, and Ice Cream Sundae Kit Gift Basket.

Charcuterie?

Strictly speaking, this isn't actually charcuterie.  Charcuterie actually means cured meats, but over the years it's become so popular, and come to include cheese and crackers and all sorts of additions to that.  And eventually, people started using the word for any kind of food that's gathered together on a board.  

Ice cream dessert board made in the shape of an ice cream cone.

Our ice cream sundae charcuterie board doesn't include any cured meats, so you might want to refer to it as an ice cream board, or desert board.  Basically, we gathered together all our favourite ice cream sundae toppings and sweet treats, and created a beautiful board out of them.  This the perfect way to serve a crowd the easy way, and would be a very welcome addition to your next get together.  It is the easiest dessert for a large group because guests can serve themselves and cater to their own taste buds adding all their favorite things to their sundaes or cones.

Choosing a Board

When making your own dessert charcuterie board, you will want to start with a large board.  We thought it would be so much fun to make our ice cream sundae board in the shape of an ice cream cone, so I used my largest marble board as the base.  I arranged the cones in the shape of the ice cream cone, and then put the rest of the toppings in the shape of the ice cream.  Start arranging with your largest toppings, and work the smaller ones in and around them.    A large wooden board would work great as the base too.  We used a few small bowls and pitchers to hold some of the toppings.  I think it came out really cute.

Ice cream charcuterie dessert board and ice cream bowls.

Ingredients

Ice cream charcuterie dessert board ingredients.
  • Ice Cream Cones

We started out by forming the ice cream cone portion at the bottom.  I used a combination of our favourite ice cream cones, including sugar cones, waffle bowls, and chocolate dipped ice cream cones.  Waffle cones would be a great addition too. We also added a few round hazelnut wafer cookies.  

Selection of different ice cream cones and waffle bowls on an ice cream sundae dessert board.
  • Baked Goods

Any baked goods workout great on your fun dessert board.  We included some chocolate brownies on ours.  Any cookies or mini cupcakes are a great choice to include.  

Chocolate chip cookies would be great to include too.  Not a baker?  Feel free to include store-bought items.

Ice cream toppings on a make your own ice cream sundae bar board.
  • Ice Cream Sauces

You can't have an ice cream sundae without some yummy sauces.  Our favourite is homemade hot fudge sauce -find our full recipe here.  This is the best chocolate sauce ever, and worth the trouble to make from scratch, but if you're short on time pick some up at the grocery store.

We also made some caramel sauce -find our recipe here.

You could also include some strawberry sauce, or a dark chocolate version of the chocolate sauce.

Ice cream sundae board with chocolate and caramel sauce.
  • Nuts

Nuts are a classic addition to an ice cream sundae.  We added chopped peanuts, walnuts, and sliced almonds to our board.  We also included some toasted coconut chips for all the coconut lovers.

A make your own ice cream sundae charcuterie board with ice cream bowls and spoons.
  • Fresh Fruit

Lots of people love fresh fruit with their ice cream.  We included classic bananas with ours.  To help keep the bananas from turning brown, sprinkle them with a little lemon juice.

Strawberries, or any berry would also be great to include.

  • Candy

A great way to add some fun to your gorgeous dessert charcuterie board is to add in some candy.  

We started with some chocolate treats for all the chocolate lovers.  We added chocolate-covered pretzels.  They're a favourite around here -that sweet and salty combination.  We also had to include some mini reese's peanut butter cups.  Any of your favourite chocolate bars cut up into candy pieces would be great to include.  Chocolate chips would be a great addition too.

Ice cream toppings on a make your own sundea dessert board, including a bowl of cherries.

We also added some gummy bears -one of our favorite sweets for a make your own ice cream sundae bar.  Gummy worms would be great too.

And lastly we also included some mini candies that are like mini m&ms.  The different colors are a nice addition to the board.

  • More Tasty Treats

What's an ice cream sundae without sprinkles? We included some fun rainbow sprinkles.  Chocolate sprinkles would be great too.

We also added a small bowl of homemade whipped cream.  You could also include a can of whipped topping instead.

A ice cream charcuterie board with a bowl of homemade whipped cream.

And lastly we had to add a cherry on top.  We put some maraschino cherries in a small bowl and positioned it at the top of our ice cream cone shape for the perfect finishing touch.

  • Ice Cream

We went with classic vanilla ice cream, and chocolate ice cream.  We liked to keep it classic and let guests add flavors with the toppings, but you could also include different flavors of your favorite ice cream flavors.  

For the best way to disguise our ice cream container for serving, we tied a tea towel around it.

Serving Pieces

Be sure to add some spoons and tongs and an ice cream scoop, so that guests can help themselves to everything.  And of course you'll need some bowls for anyone wanting to make a sundae rather than an ice cream cone.

Make your own ice cream sundae charcuterie dessert board in the shape of an ice cream cone.

Make Ahead

We added our ice cream on the side.  This means we could prep the ice cream charcuterie board ahead of time without worrying about the ice cream melting. Store your whipped cream in the refridgerator until serving too, and slice your bananas at the end. Just bring out your pints of ice cream when it's time to serve.

A ice cream sundae in a bowl in front of an ice cream charcuterie dessert board.

This is the perfect dessert for entertaining.  It's such an easy and fun way to serve dessert, since guests can serve themselves and add all their favorite toppings to their ice cream.  Use this idea for your next ice cream party, or birthday party celebration.  Or it would be great as a movie night candy board, or snack board, or even for Valentine's Day if you love ice cream.

Ice cream dessert board in the shape of an ice cream cone.

Frequently Asked Questions

Can I make this ahead of time?

Yes, add your sliced bananas at the last minute so they don't turn brown, and keep your whipped cream in the fridge and ice cream in the freezer until serving time. Make the rest and wrap with plastic wrap until you're ready to serve.

Could I include fruit?

Yes, try adding fresh berries like strawberries, raspberries or blueberries, and pineapple as a great addition to the bananas.

Where is the best place to buy the toppings?

We love shopping for small quantities like these at the bulk store where you can a small amount of lots of different things for a great price.

More Ice Cream Inspiration

  • homemade strawberry rhubarb ice cream
    Strawberry Rhubarb Ice Cream Recipe
  • Ice cream party sundae bar with colorful toppings in mason jars and DIY cone backdrop.
    Ice Cream Party Ideas: Sundae Bar, Activities & Decor
  • Easy 3 ingredient coconut ice cream recipe.
    Easy 3 Ingredient Coconut Ice Cream
  • Homemade kit kat ice cream recipe.
    Kit Kat Ice Cream Recipe

If you try this Ice Cream Sundae Charcuterie Board Recipe or any other recipe on my blog please leave a star rating and let me know how it went in the comments below. Thanks for visiting today!

Recipe

Ice cream charcuterie dessert board in the shape of an ice cream cone.

Ice Cream Sundae Charcuterie Dessert Board

Video

Everything to make the perfect ice cream sundae, just add ice cream to all these delicious toppings and treats.
5 from 1 vote
Print Pin Rate
Course: Desserts
Cuisine: American
Prep Time: 10 minutes minutes
Total Time: 10 minutes minutes
Servings: 12
Calories: 328kcal
Author: Dannyelle Nicolle-Ramjist

Ingredients

  • ½ cup maraschino cherries
  • ¼ cup rainbow sprinkles
  • ¼ cup mini m&ms
  • ¼ cup chopped walnuts
  • ¼ cup chopped peanuts
  • ½ cup slivered almonds
  • ⅓ cup toasted coconut chips
  • ½ cup chocolate covered pretzels
  • ½ cup mini peanut butter cups
  • 2 banana, sliced long ways
  • 8 chocolate brownies
  • ½ cup whipped cream
  • ½ cup chocolate sauce
  • ½ cup caramel sauce
  • 6 sugar cones
  • 6 chocolate dipped ice cream cones
  • 4 waffle bowls
  • 6 hazelnut rolled wafer cookies
  • 1.5 quart vanilla ice cream
  • 1.5 quart chocolate ice cream

Instructions

  • Arrange the cones and waffers in a triangle at the bottom of a large board to resemble the shape of a ice cream cone. Then arrange the rest of the toppings as the top of the ice cream cones shape.
  • Serve with ice cream and let choose their favorite toppings to create their own ice cream sundaes.

Notes

Just add ice cream right before serving, and enjoy the perfect ice cream sundae.

Nutrition

Serving: 1g | Calories: 328kcal | Carbohydrates: 41g | Protein: 6g | Fat: 16g | Saturated Fat: 6g | Polyunsaturated Fat: 9g | Cholesterol: 43mg | Sodium: 296mg | Fiber: 2g | Sugar: 19g
Tried this Recipe? Tag me Today!Mention @LifeisaParty or tag #lifeisaparty!

With an ice cream charcuterie dessert board, life really is a party!

Butterfly Themed Party Ideas

Jul 14, 2023 · Leave a Comment

Butterfly themed party ideas party table, food, and decorations.

Butterfly party ideas for watercolored and gold butterfly party decorations, butterfly mini-cakes and butterfly sugar cookies. Set up outside as a picnic this is the prettiest party ever.

Butterfly themed party ideas party table, food, and decorations.
[feast_advanced_jump_to]

Butterflies are the perfect theme for a summer celebration, whether it's for big girls or little girls!  We set up the prettiest butterfly theme party in our backyard for a girlfriend get together and it was so much fun.  A butterfly themed party is so perfect for garden parties. I'm excited to share all the fun ideas and little details that made our party guests love it.

Butterfly party ideas with butterfly food and decorations.

DIY Butterfly Party Decorations

I started out with making the butterfly party supplies, by customizing some things with gorgeous handmade paper butterflies.  We wanted to use lots of pink for our colour scheme, but add in some pastels for all the summery vibes.  I watercolored some watercolour paper that I picked up at the local dollar store, and then adding gold foil wing details over top with my Cricut machine foil tool, and then cutting out the paper butterflies in different sizes with the Cricut.  If you'd like to make something similar, find my Cricut Design Space cut files here.  

If you didn't have a Cricut you could use a butterfly template to cut out the butterfly shape by hand or use plastic butterflies.  I used these pretty pastel coloured butterflies to create the perfect DIY party decorations.  These butterflies had lots of gorgeous gold foil detail and it sparked in the sun during the party.

Butterfly themed party tablescape.

Butterfly Paper Lanterns

My favourite butterfly party decoration was the beautiful butterfly lanterns we hung over our party table, covered in lots of butterflies.  We used ours over our main picnic table, but they would also look amazing hanging over a dessert table too.

To make them I hot glued our paper butterflies on to the lanterns in a way that made them look like they were flying up the lanterns.  I placed the largest butterflies in the middle, and then placed smaller ones on the top and bottom.  

These paper lanterns are such a nice alternative to helium balloons, since you don't have to worry about picking them up on the day of the party.  And the lanterns are reusable, which is nice.

Hanging paper lanterns with butterflies for a butterfly themed party.
DIY butterfly paper lantern party decoration.
DIY butterfly paper lantern party decorations.

DIY Cake Toppers

We also used the paper butterflies to create our own cupcake toppers.  We hot glued the butterflies onto some wooden toothpicks.  The mini cakes are made from stacking some pink cake rounds -cut out with cookie cutters.  We layered them with jam and icing, and piped a pretty little icing flower on the top of the cakes, and added our little butterfly cake toppers to each one. We wanted to make it look like a butterfly was landing on a flower.  Our little butterfly cupcakes mini-cakes turned out so cute!  The cake toppers would also be beautiful grouped together on a larger cake or butterfly birthday cake.

Individual pink party cakes with paper butterfly cake toppers.
Individual cakes with butterfly paper toppers and flowers.

butterfly mini cakes

Butterfly Drink Decorations

We used the same paper butterflies with beautiful gold foil butterfly illustrations on the wings to add to each glass.  We had some gorgeous vintage pink champagne coupes and we added a little flutter butterfly to each one, by cutting a slit onto it and adding it to the rim of the glass.  You could also make these into name cards by adding the guests name on to each one.  These were such a lovely addition to the table and perfect for sipping sparking wine or sparkling lemonade and adding a little butterfly magic. 

DIY paper butterfly decorations for glasses.

The Butterfly Party Table

We were setting up a picnic so we used a low coffee table in our party area of the garden and then added pillows and blankets around the outside so our guests would be comfortable.  

I love this idea for a picnic, because you can still set a gorgeous table with no fear of things getting knocked over, like they might on a traditional picnic blanket.  

We draped our table with a vintage lace tablecloth, and then added some colorful flowers as a centerpiece.  We used flowers with the party colors for the floral arrangements, so a mix of wild flowers, and pretty pink peonies.

Butterfly party ideas with butterfly decorations, and butterfly themed food.

For each place setting we started with a small white plate and then layered on some pretty floral napkins.  I wanted to add some floral to the table and these napkins were the perfect way to do it.  I actually used two tea towels with coordinating patterns and cut them in half, and sewed a hem on the cut side to make the napkins. 

Butterfly picnic party with DIY butterfly decorations and themed food.

Butterfly Napkin Rings

To create the custom napkin rings, I used some clear acrylic butterflies -shop for them here, and added the guests names in gold foil cut out on my Cricut machine.  I tied them with the prettiest frayed edge ribbon -shop for it here.  

The butterfly names served as a beautiful napkin ring, a place card and a sweet take home butterfly party favor after the party.  If you had little guests for a magical butterfly birthday party, these would be a great addition to their goodie bags too.

DIY personalized butterfly napkin rings.

Butterfly Party Favor Boxes

On each place setting we also added a cute little butterfly favor box.  We made these butterfly party favors on our Cricut.  You can find our butterfly favour box cut pattern here in Cricut Design Space if you'd like to make one.  Each one is cut from one sheet of pink cardstock and folded together.  

We added a chocolate to each one for a little sweet treat.  These are a fun way to add another small party favor to the table.

DIY paper butterfly favor boxes.
DIY paper butterfly favour boxes for a butterfly party.

Butterfly Sugar Cookies

We made the beautiful sugar cookies with lots of color to match our paper butterflies as part of our party food.  

We started out with our favourite sugar cookie recipe -find it here and used a butterfly-shaped cookie cutter to cut them out.  

To decorate them I made a very thin white icing, and then added in a swirl of colored icing and used a toothpick to create a marble effect.  Then I dipped in each cookie.  I love how easy this cookie decorating method is and it looks so beautiful.  

While the icing is still wet add on some color coordinated sprinkles, edible gold glitter, and some little bits of 24K edible gold leaf -buy it here.  Your guests will love these stunning cookies.

They'd make a lovely addition to favor party bags too, sealed in a cello bag and tied with a ribbon.

A plate of butterfly sugar cookies on a butterfly themed tablescape.
Butterfly sugar cookies with marbled icing and sprinkles.
Butterfly themed party decorations.

This party theme makes your heart flutter.  These butterfly party ideas would be perfect for a girls get together, bridal shower, or baby shower theme.  And also our butterfly party ideas would be perfect for birthday parties.  Any birthday girl would love all our beautiful butterflies!  How sweet would this be for a 1st birthday party?  Just be sure to add their own pair of butterfly wings for the guest of honour.  

Butterfly picnic with butterfly themed DIY decorations and food.

We had so much fun thinking of creative ways to add so many pretty butterfly details. With a butterfly party ideas like this, life really is a party!

Frequently Asked Questions

Can I make these decorations without a Cricut?

Yes, use butterflies from the craftstore to add to paper lanterns, make cupcake picks, and add to glasses instead. Use letter stickers or a paint pen to write names on the butterfly napkin rings/favors.

Can you make the butterfly cake and cookies ahead of time?

Yes, make your cookies and cakes the day before and store in an airtight container, or store them in the freezer for longer.

If you tried this Butterfly Themed Party or any other ideas on my blog please let me know how it went in the comments below. Thanks for visiting today!

More Party Inspiration

  • Mushroom themed party picnic in backyard.
    Mushroom Themed Picnic Party
  • Cherry themed party table with food and cherry themed decor.
    Cherry Themed Party Ideas
  • Strawberry themed party ideas with table setting, flowers, and food.
    Sweet Strawberry Theme Party
  • summer garden party
    Summer Garden Party

Best Homemade Mac and Cheese with Panko Breadcrumb Topping

Jun 15, 2023 · 3 Comments

Mac and cheese with panko breadcrumb topping.

Best Homemade Mac and Cheese with Panko Breadcrumb Topping: creamy macaroni and cheese recipe with crispy panko breadcrumbs.

Mac and cheese with panko breadcrumb topping.
[feast_advanced_jump_to]

This mac and cheese recipe with panko is from a old friend that always makes the most delicious food.  She gave the mac and cheese recipe to my sister, and when she made it for us, I had to have the homemade mac and cheese recipe too.  I've been making it ever since and it's such a family favourite.

Homemade Mac and cheese with panko bread topping.

I love this creamy baked mac and cheese.  It's the perfect side dish for just about any occasion, and kids especially will love it as a main dish too.  The secret ingredient that sets this homemade baked macaroni and cheese apart and take it to the next level is the panko bread crumbs.  They create a top layer of crispy breadcrumbs that is better than regular bread crumbs. We love the creamy texture of the mac and cheese, combined with the perfect buttery crunch of the buttered bread crumbs recipe.  

Mac and cheese with panko breadcrumb topping in a glass baking dish ready to bake.

Video:  See How We Made our Mac and Cheese with Panko Breadcrumb Topping

And the other thing that sets this recipe apart is using different types of cheeses in the creamy sauce.  The combination of the different cheeses; sharp cheddar (you could also use extra-sharp cheddar here if you prefer) along with the gruyere cheese, and the parmesan cheese creates the best results and a delicious creamy macaroni and cheese.  If you've ever been intimidated by making your own béchamel sauce, this easy baked macaroni and cheese isn't difficult to make and it is the ultimate comfort food.  This bechamel sauce comes together quickly and easily and adds so much creaminess to the dish.

Homemade Mac and cheese sauce in a sauce pan.

We don't recommend using pre-shredded cheese for this recipe.  Shred your own cheese to avoid the additives they use to keep the pre-shredded cheese from sticking together.  It can slightly affect the texture of the cheese when it's melted and it may not give you the stringy gooey cheese pull quite as well as cheese you grate yourself.

Making creamy baked Mac and cheese sauce.
Mac and cheese recipe with panko breadcrumbs on a plate.

Recipe

Mac and cheese with panko breadcrumb topping.

Best Homemade Mac and Cheese with Panko Breadcrumb Topping

Video

Rich and creamy Mac and cheese with a crispy bread crumb topping.
5 from 1 vote
Print Pin Rate
Course: Side Dish
Cuisine: American
Prep Time: 20 minutes minutes
Cook Time: 25 minutes minutes
Total Time: 45 minutes minutes
Servings: 8 servings
Calories: 569kcal
Author: Dannyelle Nicolle-Ramjist

Ingredients

  • 1 cup panko bread crumbs
  • 2 tablespoon butter melted
  • 16 oz dry macaroni pasta
  • ⅓ cup all purpose flour
  • ⅓ cup butter
  • 2 ¾ cup milk
  • ½ cup light cream
  • ½ teaspoon dry mustard
  • 1 teaspoon onion powder
  • ½ teaspoon salt
  • ¼ teaspoon black pepper
  • 3 cups sharp cheddar cheese grated
  • ½ cup gruyere cheese grated
  • ½ cup parmesan cheese grated and divided

Instructions

  • Preheat oven to 400 degrees.
  • To make the breadcrumb topping, combine panko breadcrumbs, 2 tablespoon melted butter, and ¼ cup parmesan cheese. Set aside.
  • Cook the elbow macaroni until al dente, in a large pot of salted water. When it's cooked drain the elbow pasta and run it under cold water until it's completely cool. Set aside.
  • To make the creamy cheese sauce, melt ⅓ cup butter in a medium pan, over medium heat. Add the flour and onion powder and stir until it's a smooth sauce. Cook for 2 min.
  • Whisk in the milk, cream, dry mustard powder, salt, and black pepper to taste. Cook over medium heat while stirring, until mixture thickens. Let mixture boil for 1-2 minutes while stirring.
  • Remove from heat and stir in cheddar cheese, gruyere swiss cheese and remaining ¼ parmesan cheese. Stir until cheese is melted and well blended.
  • Add in the cold cooked macaroni to the cheesy sauce and stir to fully combine. Pour into a greased 9 x 13 baking dish.
  • Top the macaroni and cheese with panko topping. Bake at 400 for 20-25 minutes, until bubbly and golden brown on top. Do not overbake. Cool 10 minutes before serving and enjoy.

Nutrition

Serving: 1g | Calories: 569kcal | Carbohydrates: 39g | Protein: 24g | Fat: 36g | Saturated Fat: 20g | Polyunsaturated Fat: 11g | Trans Fat: 1g | Cholesterol: 102mg | Sodium: 878mg | Fiber: 2g | Sugar: 6g
Tried this Recipe? Tag me Today!Mention @LifeisaParty or tag #lifeisaparty!

This recipe creates the best baked mac and cheese.  If you have any leftovers store them in the fridge in an airtight container. 

Mac and cheese in a glass baking dish before adding panko breadcrumb topping.

Like a little more heat? Feel free to add some hot sauce, or cayenne pepper for a little kick.

Baked homemade Mac and cheese with panko breadcrumbs on a plate.

We love this dish to go along with bbq, but it's good anytime of year.  It's especially a great addition to any meal around the holiday season.  And also travels well for pot lucks.  I hope you enjoy it as much as my family does.  This easy recipe truly is the best mac and cheese.

Baking dish of homemade macaroni and cheese with panko breadcrumbs.

With this homemade mac and cheese recipe panko, life really is a party!

More Inspiration

You might also like our Homemade Baked Beans recipe here.

Also check out our Marinated, Grilled, Flattened Chicken Recipe here.

You might also like our Homemade BBQ Sauce Recipe here.

  • « Go to Previous Page
  • Page 1
  • Page 2
  • Page 3
  • Page 4
  • Interim pages omitted …
  • Page 21
  • Go to Next Page »

Primary Sidebar

Welcome!

Life is a Party is all about helping you celebrate everyday with great food, entertaining and party inspiration, and seasonal crafts and home decor inspired by the holidays.

More About Dannyelle

Trending Recipes

  • Mac and cheese with panko breadcrumb topping.
    Best Homemade Mac and Cheese with Panko Breadcrumb Topping
  • Homemade iced capps in glasses on a wood table.
    Tim Hortons Copycat Iced Capp Recipe
  • Dirt Pudding no cream cheese in glasses with candy rocks, and fresh mint that looks like a little plant.
    Easy Dirt Pudding Recipe without Cream Cheese
  • Easy 3 ingredient coconut milkshake recipe.
    Easy Coconut Milkshake Recipe
  • Easy food processor scones on a plate with jam.
    Easy Food Processor Scones
  • Fluffy small batch pancakes for two ready to serve on a plate with syrup.
    Easy Small Batch Pancakes For Two Recipe

Fall Ideas

  • Pumpkin shaped dinner roll recipe, with a herb stem.
    Pumpkin Shaped Dinner Rolls
  • Fall breakfast board
    Fall Breakfast Charcuterie Board
  • fall home decor
    Fall Decorating Ideas -Home Tour
  • Modern Boho fall mantel ideas.
    Modern Boho Fall Mantel Ideas
  • thanksgiving table ideas
    Thanksgiving Tablescape Ideas
  • fall garden ideas
    Fall Garden Ideas

Entertaining Ideas

  • Complete mimosa bar setup on white console table with vintage silver ice bucket, labeled colorful juice bottles, small glass garnish bowls, and ribbon-tied champagne flutes on white lace tablecloth with flower wall backdrop.
    How to Set Up a Beautiful Mimosa Bar
  • Breakfast for dinner party table styled like a bed with star quilt tablecloth, gingham pillows, and cloud installation above.
    Breakfast for Dinner Party: Brinner Under the Stars
  • Circus themed dinner party dining room transformed into a big top, with a dramatic DIY pink and red tulle tent ceiling draping from floor to ceiling, fully set dinner table with red and pink striped tablecloth, lit brass candlesticks, and the hot dog buffet backdrop visible in the background.
    Circus Party Ideas: Elevated Dinner Party
  • Harry Potter Christmas party with food from the first book, set up by the fireplace and Christmas tree.
    Harry Potter Christmas Party Ideas
  • Elf on the shelf arrival letter and breakfast.
    Elf on the Shelf Arrival Letter + Welcome Breakfast Ideas (2026)
  • Iced coffee in glass with straw, coffee in mug with sticker logo, and hot chocolate in a tea cup on a table.
    How To Make Your Own At Home Coffee Shop
  • Recipe Index
  • Parties & Entertaining
  • Fall
  • Subscribe
  • Free Resource Library

Footer

back to top

as seen in:

Better Homes and Garden Logo
American Farmhouse Style logo.
Apartment Therapy logo.

About

  • Privacy Policy
  • About

Subscribe

  • Sign Up! for emails and updates

Contact

  • Contact

As an Amazon Associate I earn from qualifying purchases.

Copyright © 2025 Life is a Party

Share
Pin
Post
Share
Pin
Post

Rate This Recipe

Your vote:


A rating is required
A name is required
An email is required