• Skip to primary navigation
  • Skip to main content
  • Skip to primary sidebar
Life is a Party
  • Recipe Index
  • Parties & Entertaining
  • Fall
  • Subscribe
  • Free Resource Library
menu icon
go to homepage
  • Recipe Index
  • Parties & Entertaining
  • Fall
  • Subscribe
  • Free Resource Library
subscribe
search icon
Homepage link
  • Recipe Index
  • Parties & Entertaining
  • Fall
  • Subscribe
  • Free Resource Library
×
Home

Easy Dirt Pudding Recipe without Cream Cheese

Easy Dirt Pudding Recipe without Cream Cheese

Jun 14, 2023 · 2 Comments

Dirt Pudding no cream cheese in glasses with candy rocks, and fresh mint that looks like a little plant.

This dirt pudding without cream cheese is one of those recipes that looks seriously impressive but only has three real ingredients. No Cool Whip, no cream cheese, no powdered sugar. Just chocolate pudding, Oreos, and milk.

Dirt Pudding no cream cheese in glasses with candy rocks, and fresh mint that looks like a little plant.

Quick Look

  • 📋 Recipe: Easy Dirt Pudding Without Cream Cheese
  • ⏲️ Ready In: 10 minutes (plus optional chill time)
  • 👪 Servings: 4 individual cups
  • 🔪 Difficulty: Easy
  • 💭 Top Tip: Leave some larger Oreo chunks when you crush them. Bigger pieces create that satisfying texture contrast that makes this dessert so good.

Why You'll Love This Recipe

  • Only 3 real ingredients and no baking required.
  • No cream cheese, no Cool Whip, and no powdered sugar needed.
  • Ready in 10 minutes and easily made ahead.
  • Served in individual cups so there is no cutting or serving mess at parties.
  • The plant pot styling is completely unique and makes these look so special.
[feast_advanced_jump_to]

We love a dessert that works double duty. These little dirt cups are easy enough for a Tuesday afternoon but look beautiful enough to set out at a garden party or spring celebration. We originally made them for our Earth Day party and they were such a hit.

What makes this version different from most dirt pudding recipes out there is how simple it really is. A lot of recipes swap out the cream cheese for Cool Whip, powdered sugar, or butter. This one uses none of those. Chocolate pudding mixed with half a bag of Oreos, topped with the remaining crumbs, and dressed up with chocolate rocks and a sprig of fresh mint. That is genuinely it.

The individual cup format is also our favorite way to serve this. You can see all the layers through a clear glass, everyone gets their own portion, and there is no slicing or scooping required at the table. But if you want to make this in one large container, you can do that too.

If you love easy no-bake chocolate desserts, you might also enjoy our individual brownie chocolate trifle cups, which use a similar layered format and are just as quick to pull together.
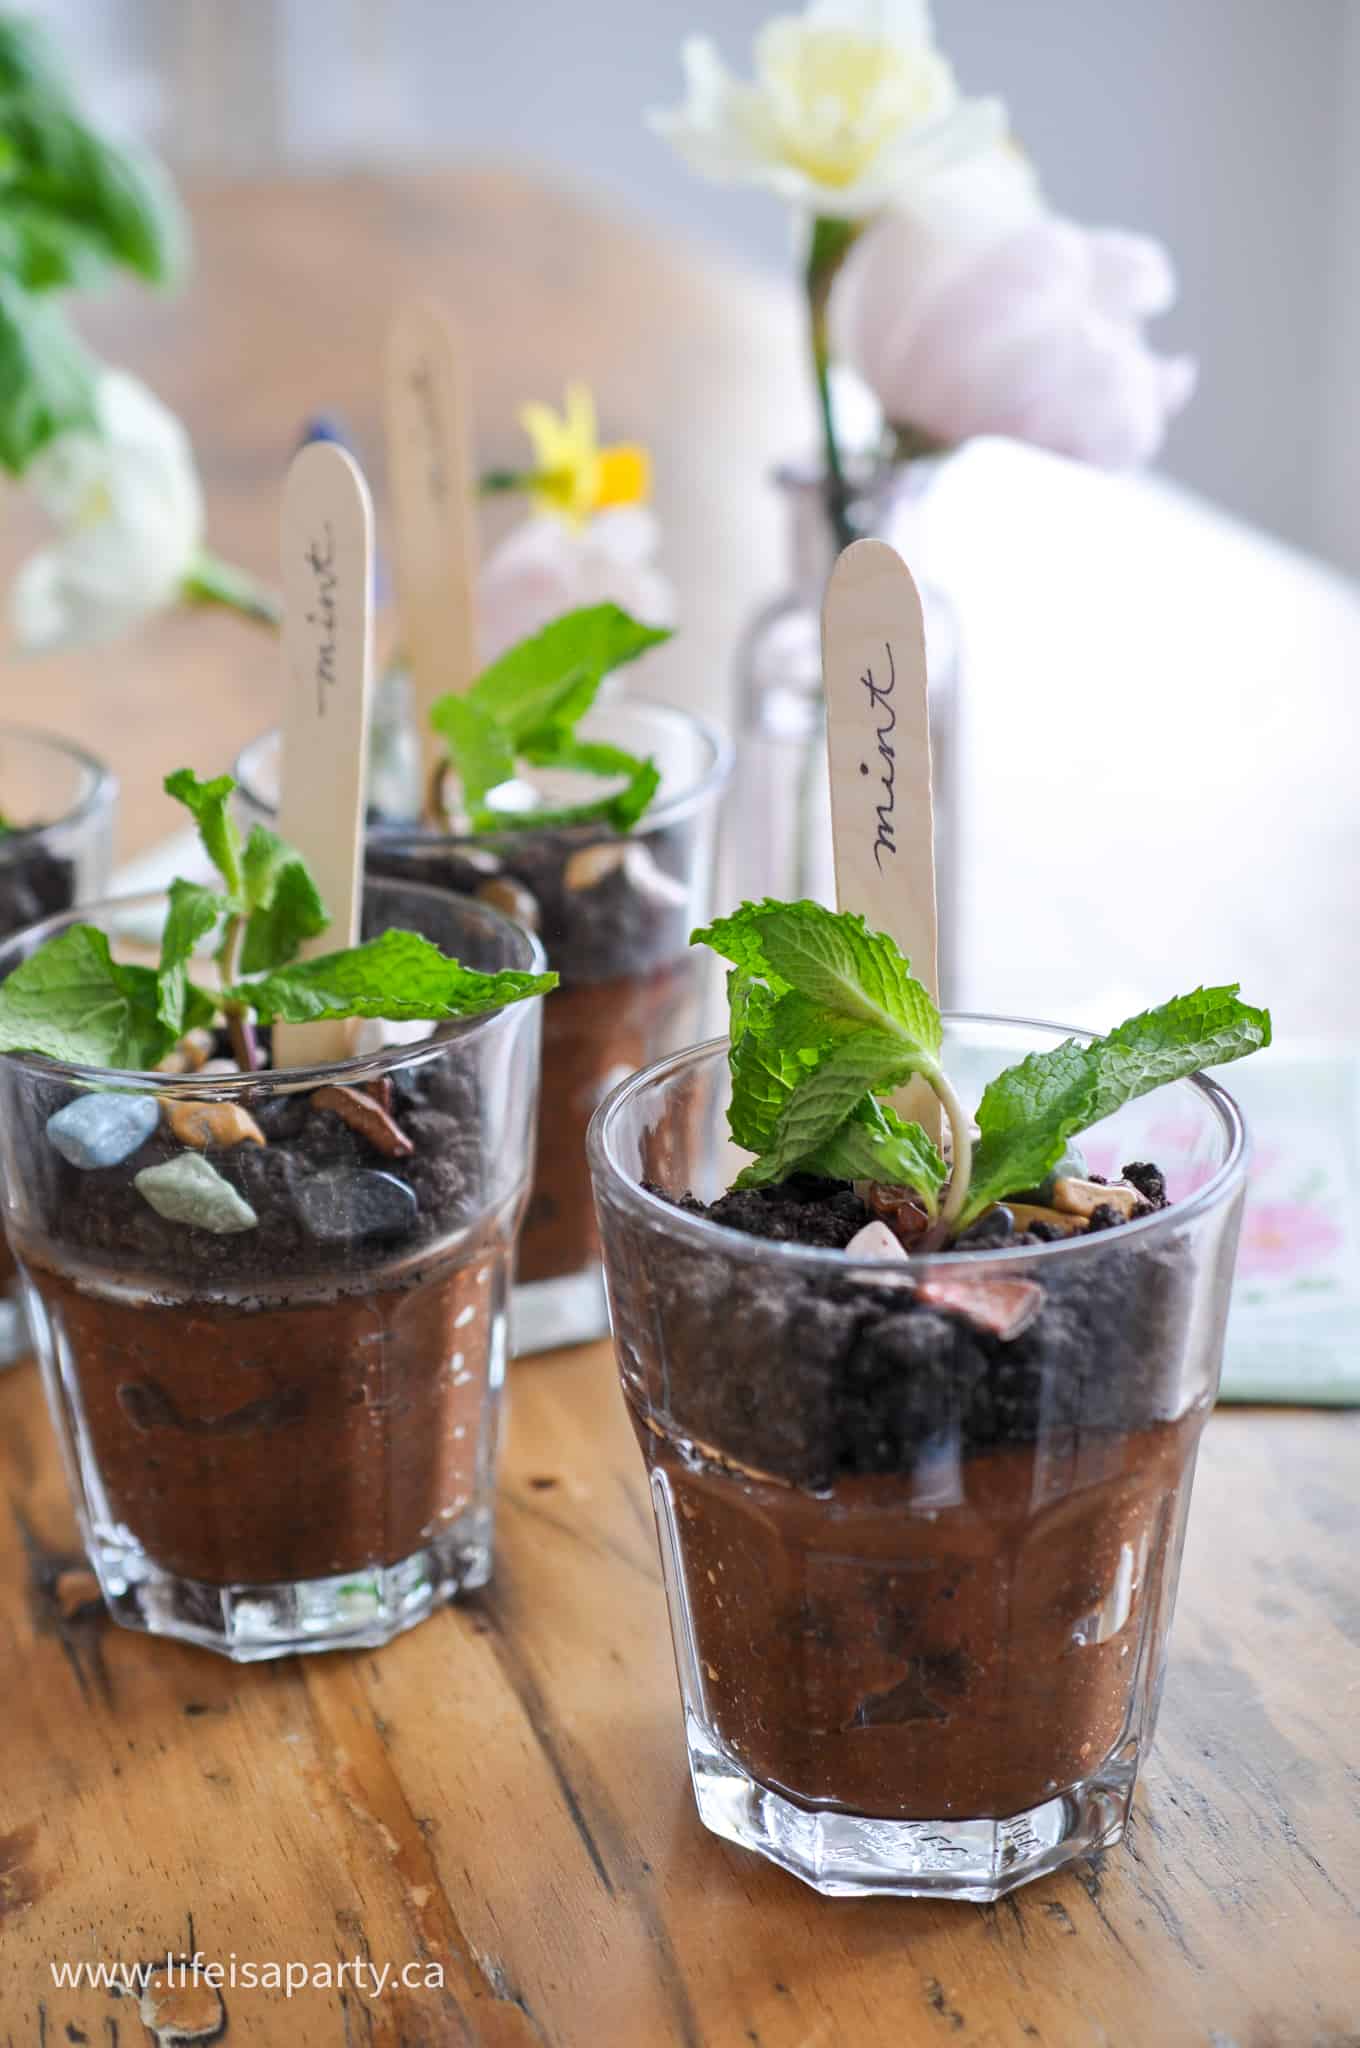
Individual oreo dirt pudding that looks like mini plants.

Ingredients

Dirt pudding without cream cheese ingredients.

See the recipe below for exact measurements.

  • Instant Chocolate Pudding Mix: Instant pudding is the base here. It sets quickly and gives you that rich chocolate color that looks exactly like real dirt. Make sure you pick up the instant variety and not the cook-and-serve type. If you are really pressed for time, you can use prepared pudding cups and skip the milk entirely.
  • Oreo Cookies: We used a 225-gram bag of mini Oreos for this recipe. We crush the whole cookies, filling and all, because the frosting helps bind the crumbs together and adds a little sweetness. Use a rolling pin and a zip-close bag for the easiest cleanup. If you use a food processor, pulse carefully so you do not turn everything into a fine powder. You want some texture.
  • Milk: Cold milk is all you need to mix the instant pudding. Use whatever you have on hand.
  • Chocolate Rocks (optional garnish): These are the detail that makes the plant pot look so realistic. In Canada, you can find chocolate rocks at Bulk Barn. They are chocolate inside with a candy coating. If you cannot find them locally, look for them online.
  • Fresh Mint (optional garnish): Mint is purely decorative here, but it genuinely looks like something is growing out of the dirt. Any fresh herb or edible flower works well. Add it right before serving so it stays fresh.

Instructions

Step 1. Mix the pudding. Combine the instant chocolate pudding mix with 2 cups of cold milk in a stand mixer or with a hand mixer. Beat until smooth and thick.

Step 2. Crush the Oreos. Place your Oreos in a zip-close bag and use a rolling pin to crush them. Leave some larger chunks in the mix. Those bigger pieces create the best texture. If you use a food processor, pulse in short bursts and stop before everything becomes a fine crumb.

Making instant chocolate puding to use in dirt pudding recipe.
Adding crushed Oreos to dirt pudding recipe.

Step 3. Combine. In a large bowl, mix the pudding with half of the crushed Oreo crumbs until fully combined.

Step 4. Fill the cups. Divide the pudding mixture evenly between 4 individual cups.

Step 5. Add the top layer. Sprinkle the remaining crushed Oreos evenly over the top of each cup to create the dirt effect.

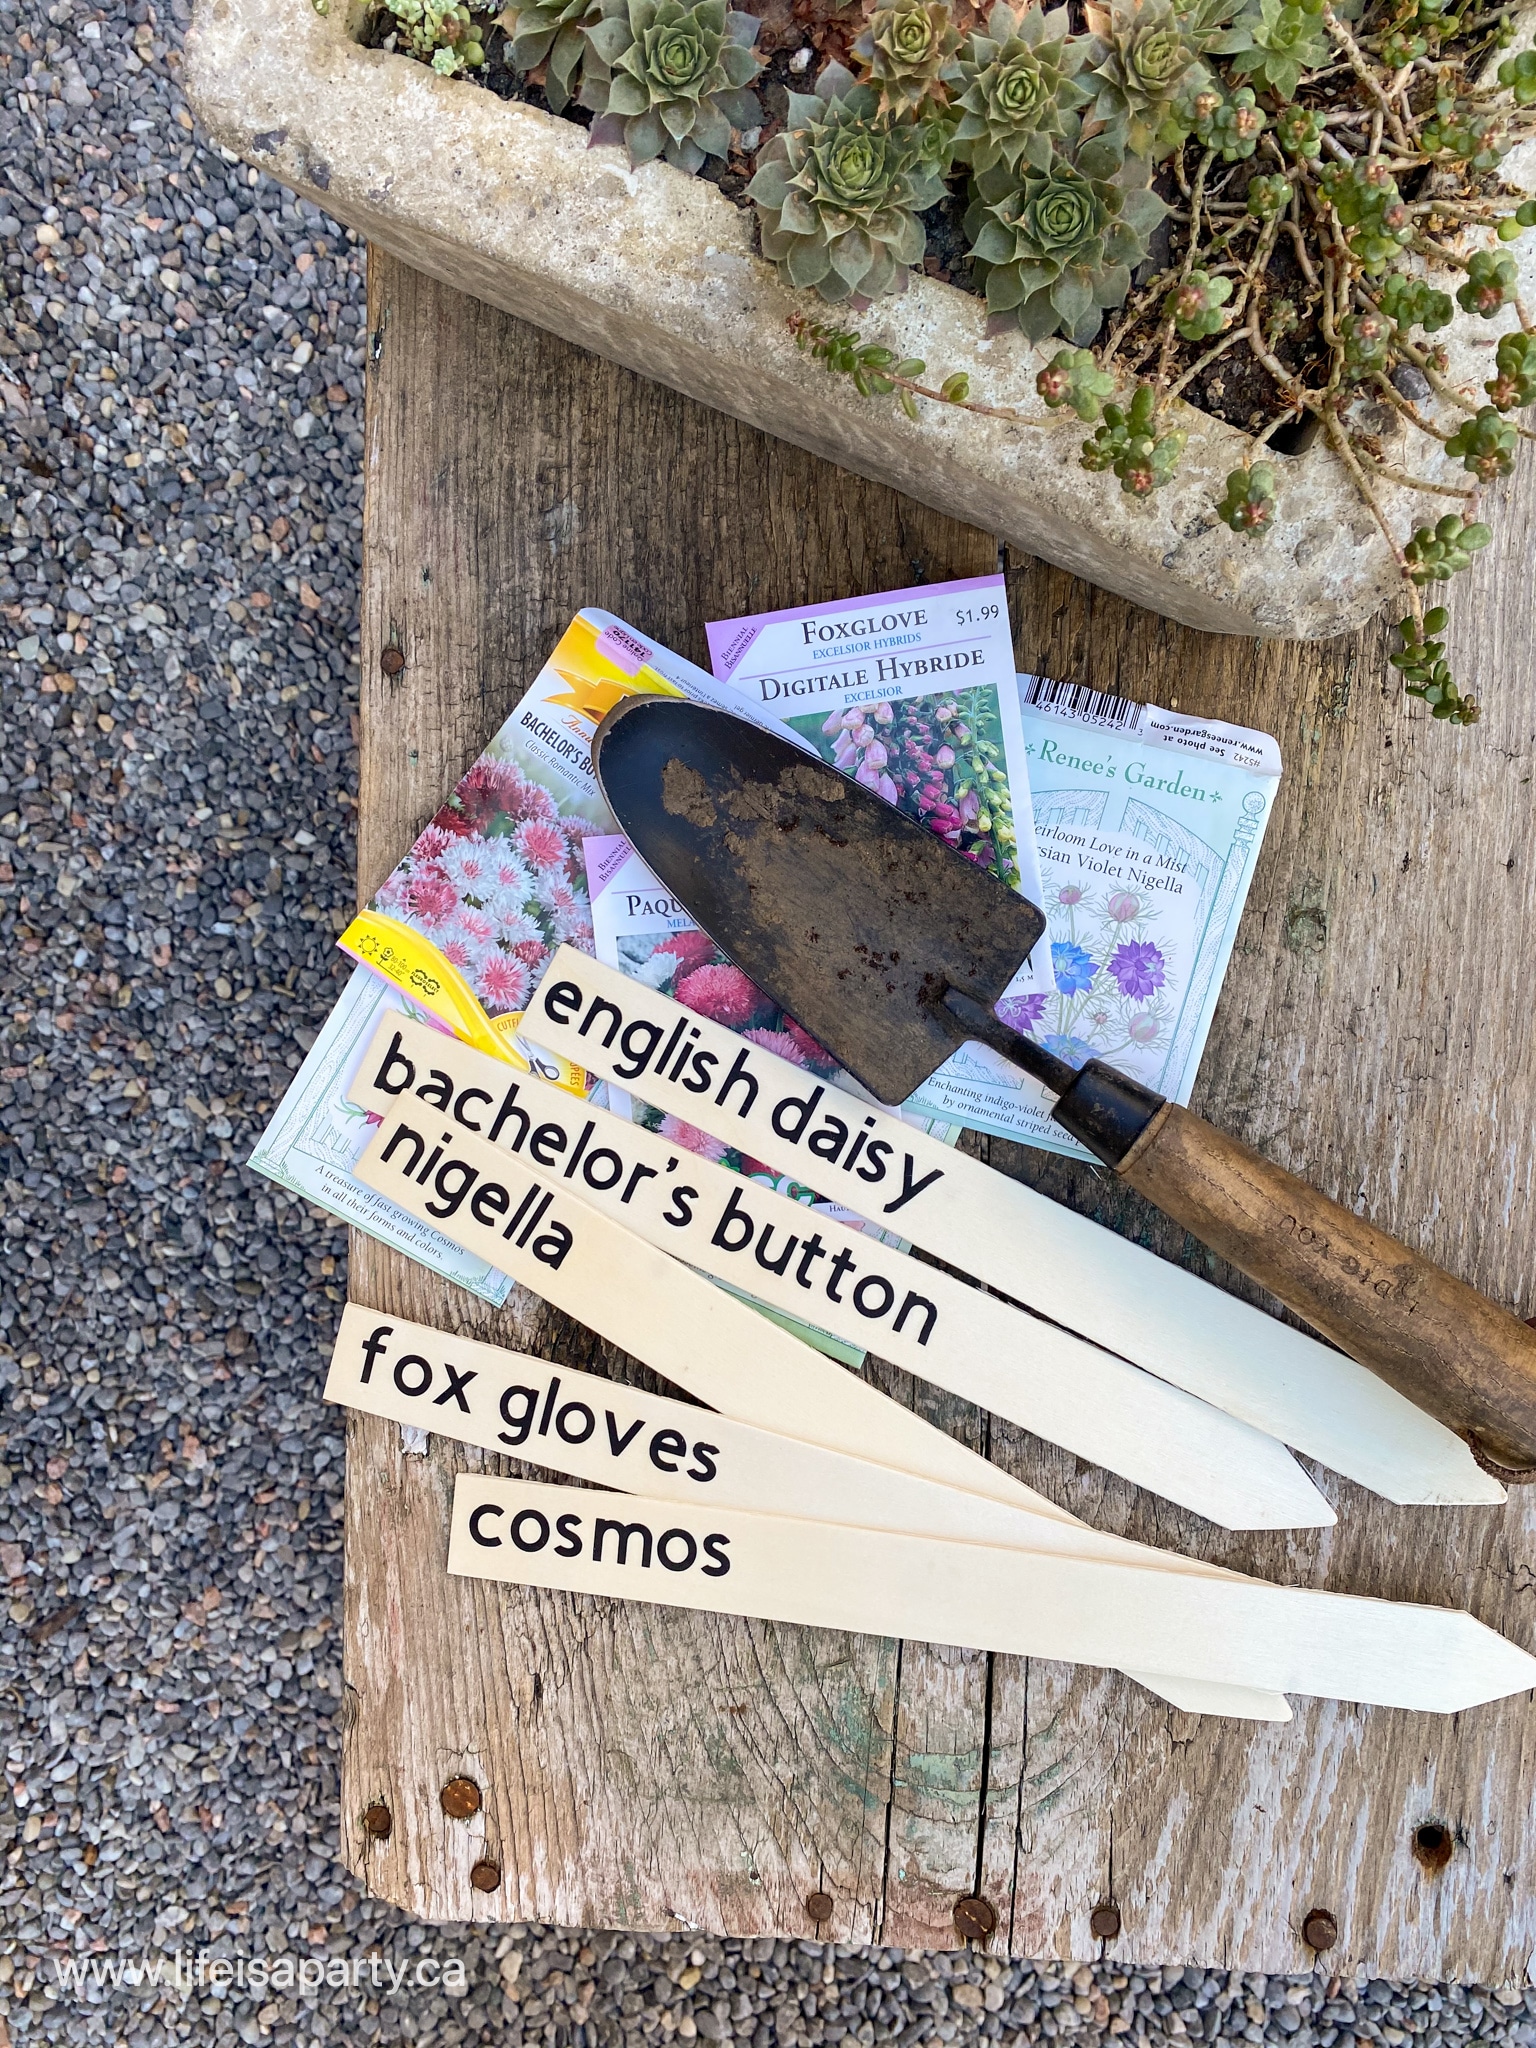
Writing "mint" on wooden spoons to look like plant labels in dirt pudding cups.
Layering pudding and oreo crumbs to make dirt pudding cups.

Step 6. Decorate. Top each cup with a small handful of chocolate rocks. Tuck in a sprig of fresh mint so it looks like something is growing out of the dirt. For an extra fun touch, write "mint" on the handle of a wooden spoon with a marker and press it into the cup like a plant label.

Expert Tips

  • Leave bigger Oreo chunks. This is the tip that makes the biggest difference. Resist the urge to crush everything into fine crumbs. A mix of sizes gives you a crunch in every bite and looks more realistic.
  • Add the mint right before serving. Fresh herbs wilt quickly once they are in the pudding. Tuck them in just as you are setting out the cups.
  • Use clear cups. The layered look is part of the charm here. Clear glass cups let you see the contrast between the chocolate pudding and the Oreo crumbs.
  • In a rush? Use pre-made pudding cups instead of the instant mix. Stir your Oreo crumbs right in and you are done in five minutes flat.
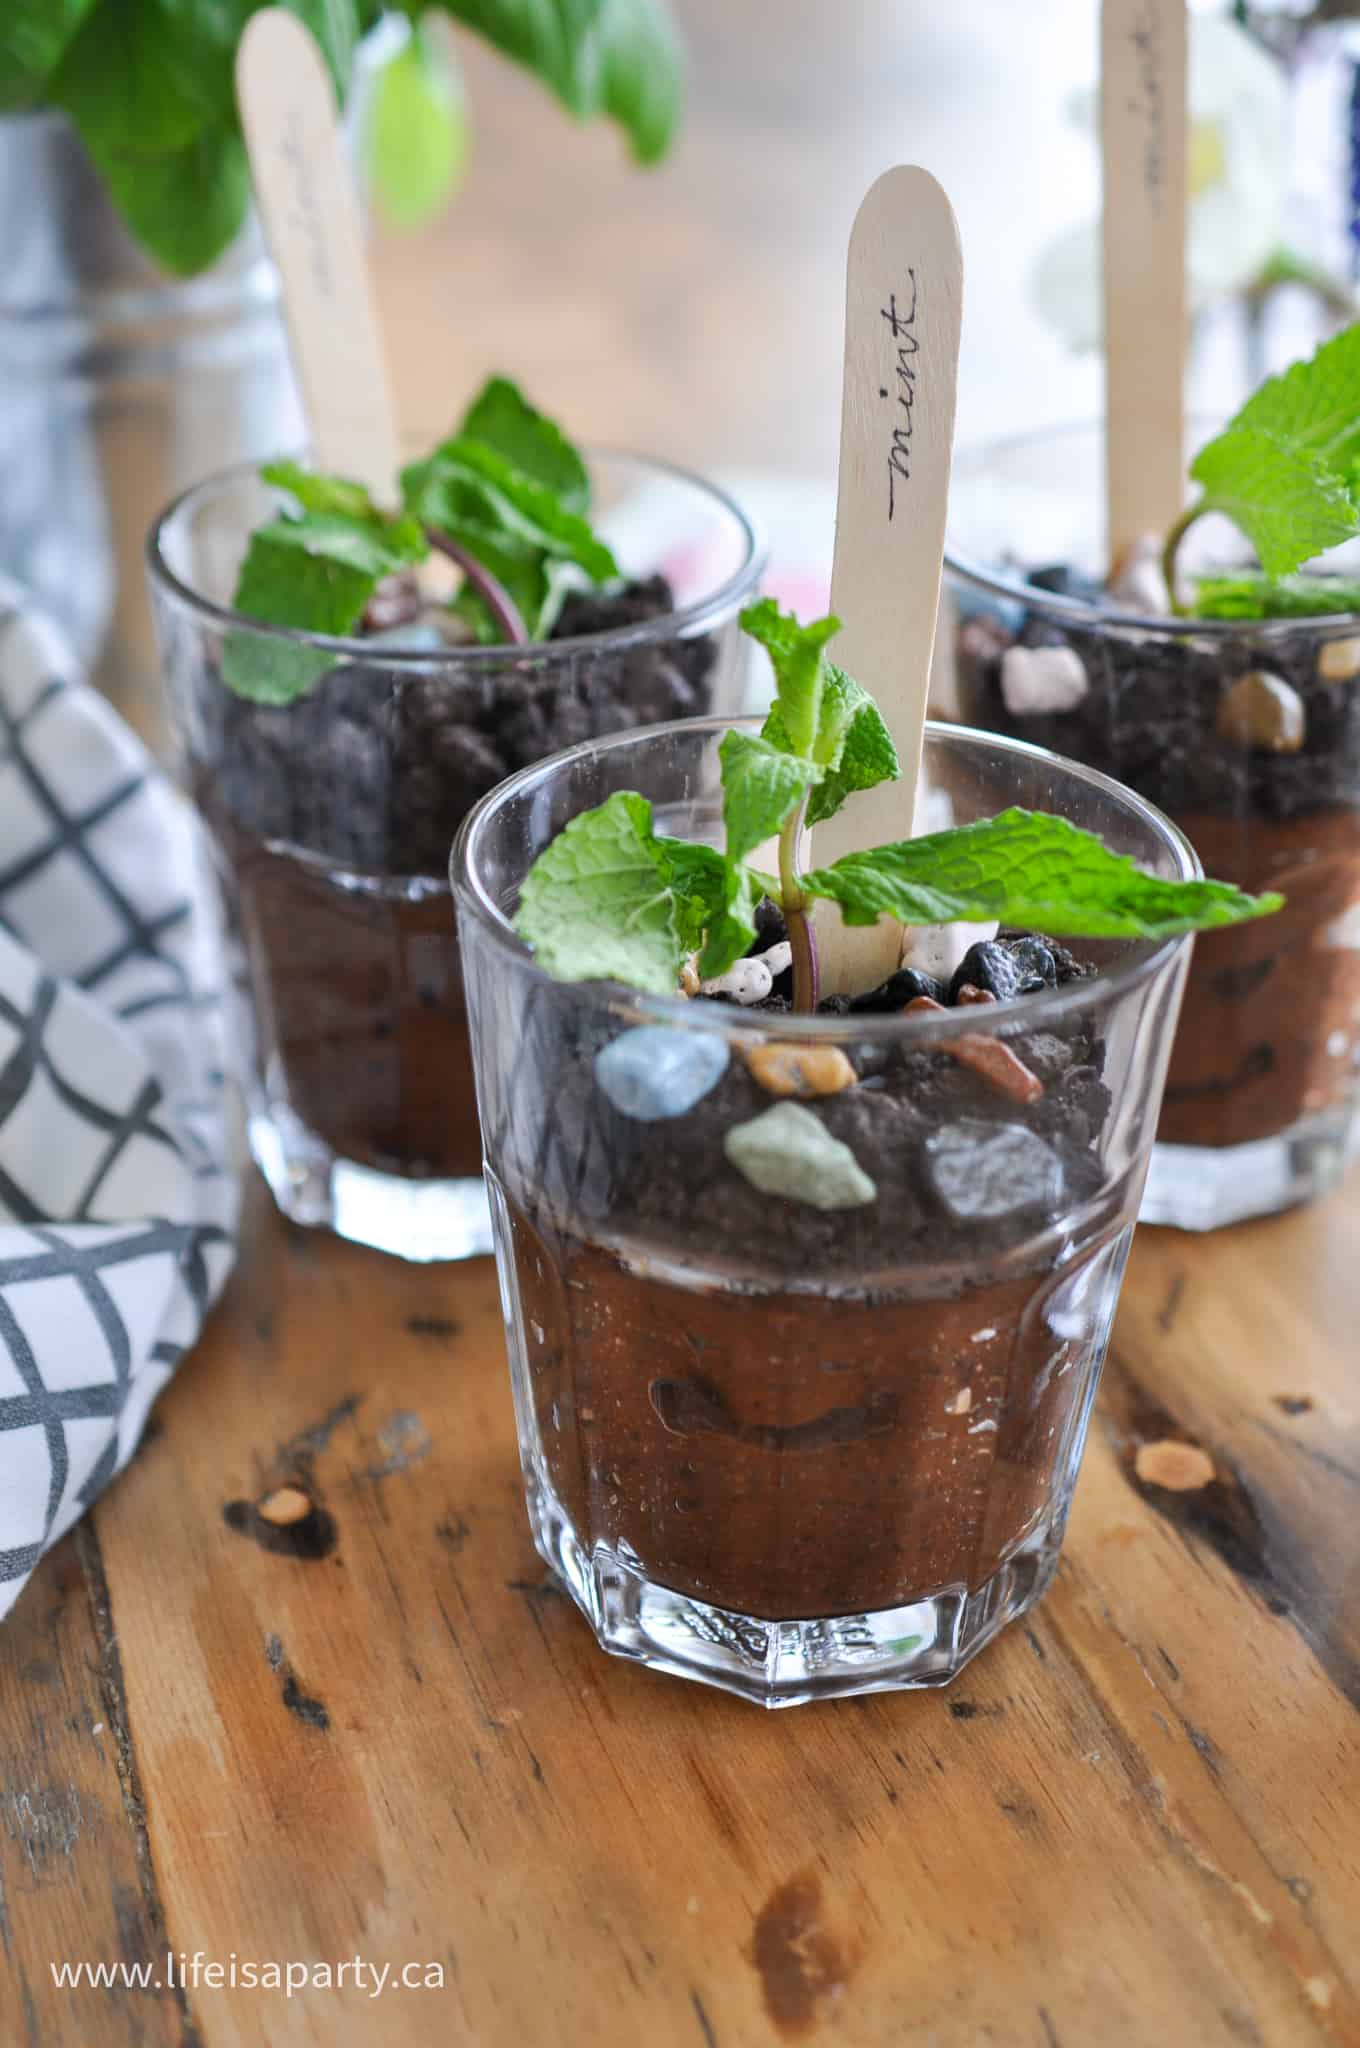
Individual dirt pudding cups made without cream cheese.

Variations and Serving Ideas

  • Make it in a large trifle bowl. If you would rather serve this family-style, layer everything in a big clear bowl instead of individual cups. You will likely need to double the recipe to fill it properly. Our mini individual trifle cups post has great tips on layering desserts for a crowd in different size vessels.
  • Sand bucket presentation. For a summer party or a kids' birthday, layer this in a clean sand bucket and use the shovel as the serving spoon. Use Golden Oreos instead of regular ones, and vanilla pudding instead of chocolate and the whole thing becomes a "sand" pudding instead of dirt.
  • Add gummy worms or candy bugs. If you are making this with or for kids, tuck some gummy worms into the top layer so they look like they are crawling out of the dirt. Little candy insects work beautifully too. We skipped these for our garden party version because we wanted a more realistic plant pot look, but they are such a fun addition.
  • Clay pots. For a dinner party or a garden themed celebration, serve each portion in a small real clay pot. Line the inside with a cupcake liner first, then fill and decorate as usual. It looks amazing on a table and guests always do a double take.
  • Easter version. Tuck a few mini eggs into the top layer and swap the wooden spoon plant label for a little flag that says "spring." So fun for an Easter table. For more Easter dessert inspiration, our Easter trifle with mini eggs is another no-bake favorite worth bookmarking.
  • Vanilla pudding option. You can use vanilla pudding if you prefer, but in our opinion chocolate pudding is the better choice here because the color is so much more convincing as dirt. Vanilla pudding turns the whole thing a pale beige that does not quite land the same way visually.

Storage and Make-Ahead

Store your dirt pudding cups covered in the refrigerator for up to 3 days. The Oreo crumbs will soften over time as they absorb moisture from the pudding, so for the best texture serve these within the first day or two.

To Make Ahead: assemble the cups up to 24 hours in advance, cover with plastic wrap and refrigerate. Wait to add the mint sprigs, chocolate rocks, and any other garnishes until right before serving so everything stays fresh and crisp.
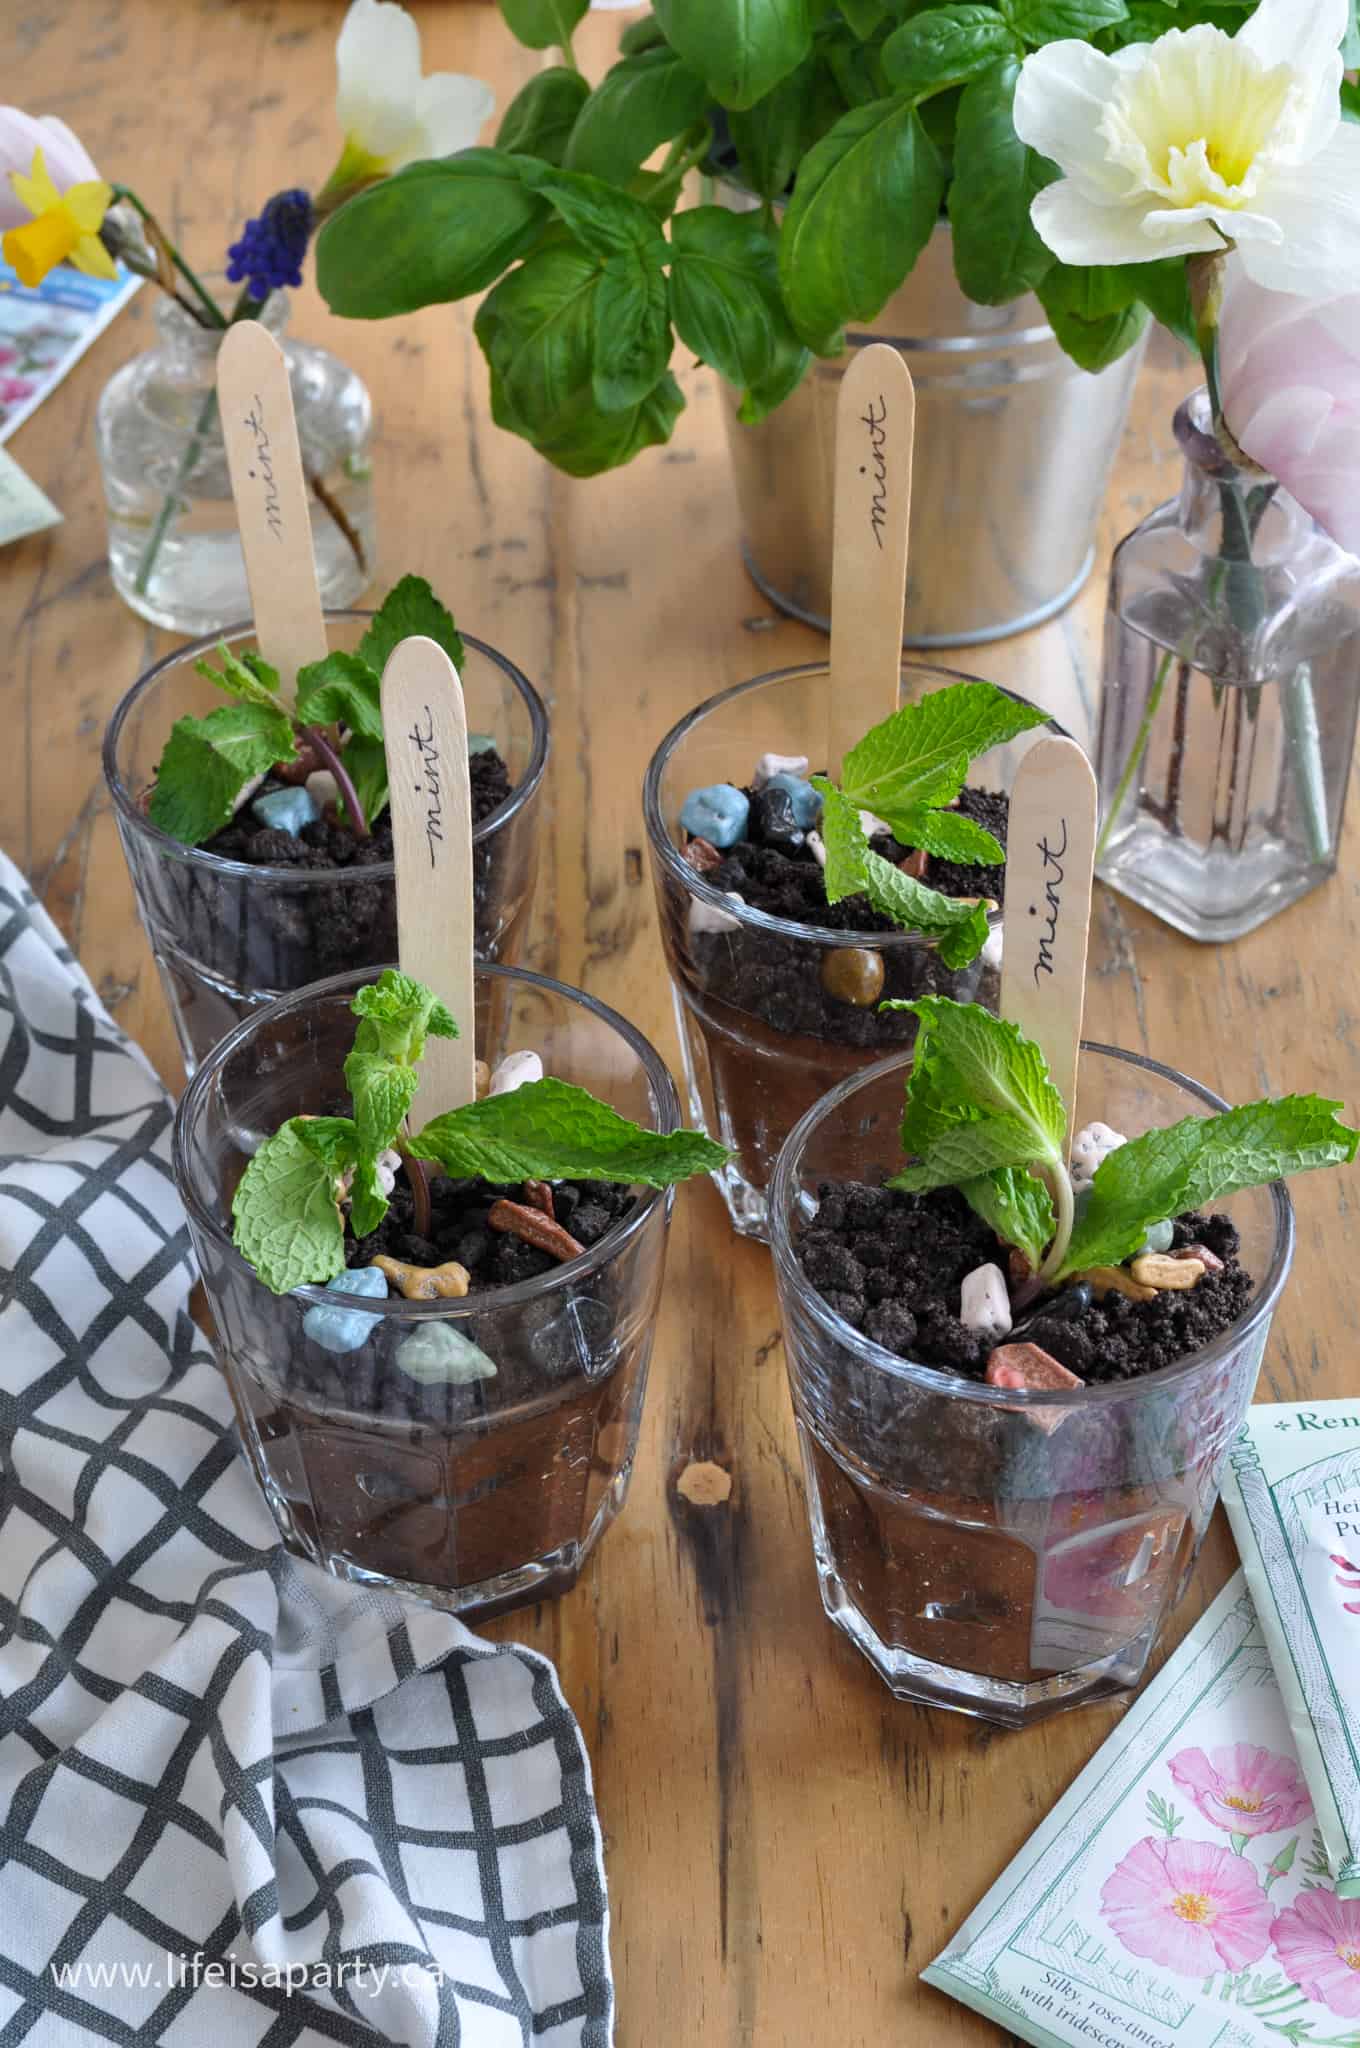
Oreo dirt pudding cups with wooden spoon plant labels, and candy rocks.

Frequently Asked Questions

Why make dirt pudding without cream cheese?

There are a few good reasons. Some people find the cream cheese version too rich or heavy. Some people have a dairy sensitivity that makes cream cheese an issue even when regular milk is fine. And sometimes you just do not have cream cheese on hand and want to make dessert anyway. This recipe works beautifully without it, and it is actually simpler than most versions.

Can I make this without Cool Whip?

Yes, and this recipe already does. No Cool Whip, no whipped topping of any kind. Just pudding, milk, and Oreos. It is genuinely the most minimal version of dirt pudding you will find.

Can I use vanilla pudding instead?

You can, but chocolate pudding looks more realistic as dirt and gives you a richer chocolate flavor throughout. If you prefer vanilla, go for it, but keep in mind the visual effect will be different.

Can I use Double Stuf Oreos?

Yes. The finished pudding will be a little sweeter because of the extra cream filling, but it tastes great.

Can I make this the night before?

Absolutely. Assemble the cups the night before and refrigerate them. Hold off on adding the mint and chocolate rocks until right before serving. The Oreo crumbs will soften slightly overnight, which some people actually prefer.

Can I double this recipe?

Yes, easily. Double all ingredients and fill 8 cups, or transfer the whole thing into a large trifle bowl or serving dish.

Can I use prepared pudding cups instead of making the pudding?

Yes. Skip the pudding mix and milk entirely and stir your Oreo crumbs directly into the prepared pudding. This makes the recipe even faster and requires zero mixing equipment.
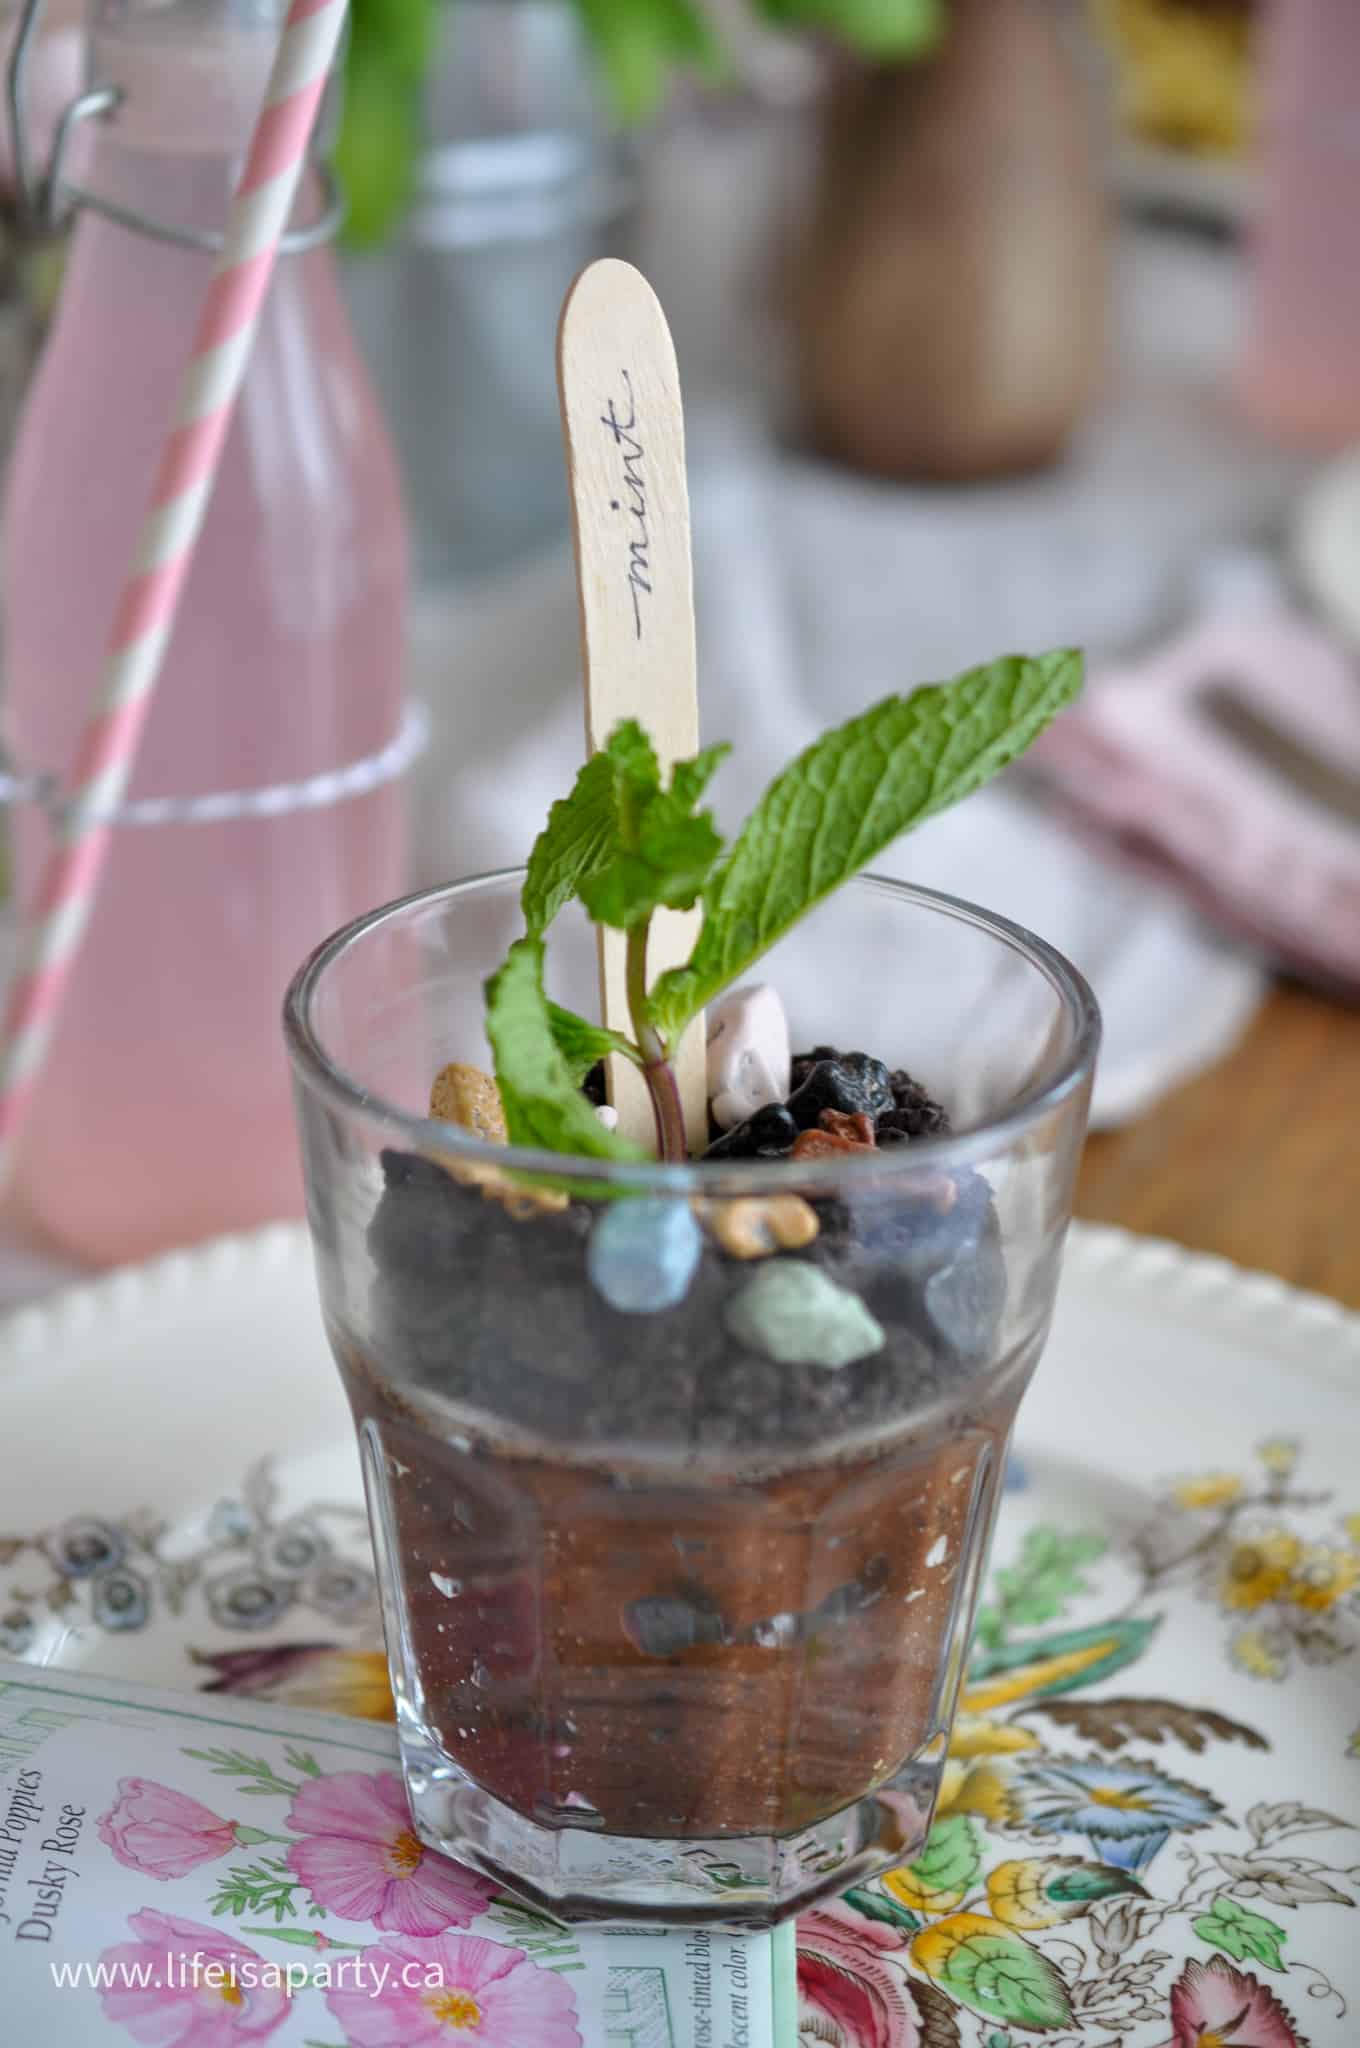
Making Oreo dirt pudding cups without cream cheese.

If you try this Dirt Pudding Without Cream Cheese Recipe or any other recipe on my blog please leave a star rating and let me know how it went in the comments below. Thanks for visiting today!

More Dessert Recipes

  • Individual chocolate brownie trifle in a glass with gold spoons.
    Mini Chocolate Brownie Trifles
  • Group of individual trifles in glass dessert bowls.
    Easy Individual Mini Trifle Cups Recipe
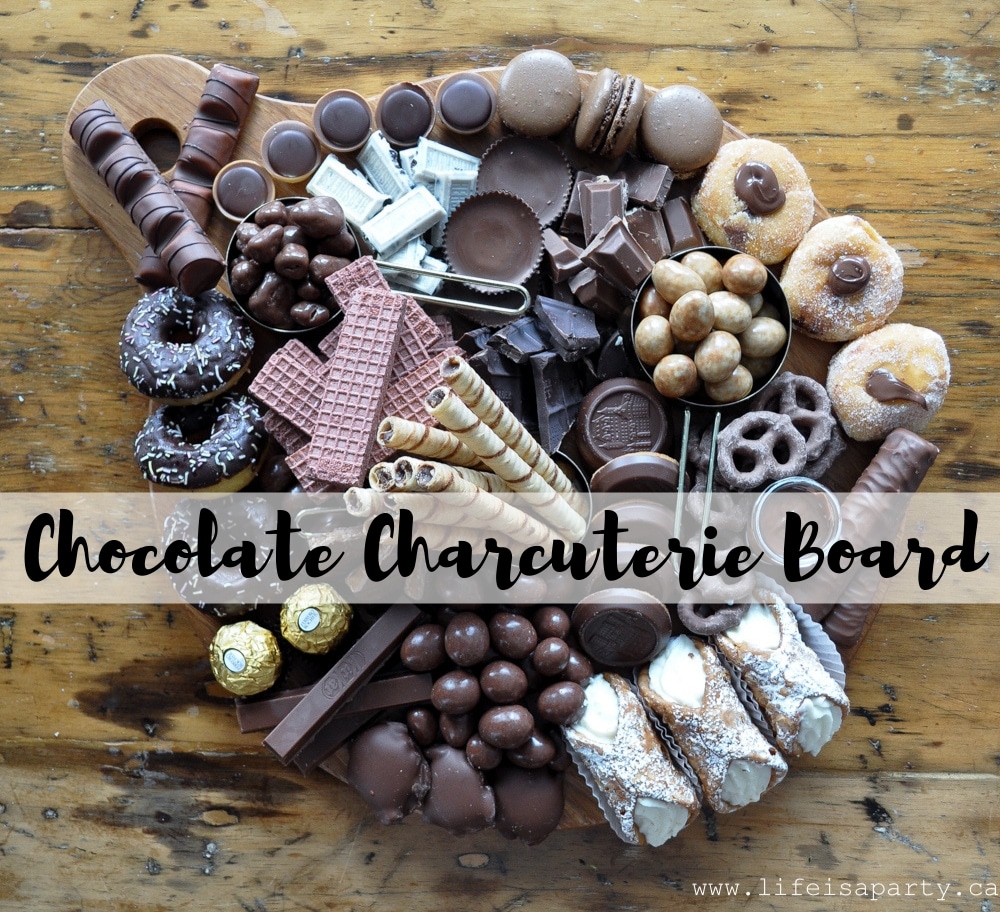
  • Chocolate charcuterie dessert board.
    Chocolate Charcuterie Board
  • Ice cream charcuterie dessert board in the shape of an ice cream cone.
    Easy Ice Cream Sundae Charcuterie Dessert Board

Recipe

Dirt Pudding no cream cheese in glasses with candy rocks, and fresh mint that looks like a little plant.

Easy Dirt Pudding Recipe without Cream Cheese

Video

Easy dirt pudding with just 3 simple ingredients, and no cream cheese.
5 from 2 votes
Print Pin Rate
Course: Desserts
Cuisine: American
Prep Time: 10 minutes minutes
Total Time: 10 minutes minutes
Servings: 4 servings
Calories: 123kcal
Author: Dannyelle Nicolle-Ramjist

Ingredients

  • 1 pkg instant chocolate pudding mix
  • 2 cups cold milk
  • 225 gram oreos mini or regular
  • ¼ cup chocolate rocks optional
  • 4 pieces fresh mint sprigs optional

Instructions

  • Mix the chocolate instant pudding mix with 2 cups of cold milk using a hand mixer or stand mixer until smooth and thickened.
    1 pkg instant chocolate pudding mix, 2 cups cold milk
  • Crush the Oreos using a rolling pin and a zip-close bag, or pulse in a food processor. Leave some larger chunks for the best texture.
    225 gram oreos
  • In a large bowl, mix the pudding with half of the crushed Oreo crumbs until fully combined.
  • Divide the pudding mixture evenly between 4 individual cups.
  • Sprinkle the remaining crushed Oreos evenly over the top of each cup.
  • Decorate with chocolate rocks and a sprig of fresh mint so it looks like something is growing from the dirt. For a fun extra touch, write "mint" on the handle of a wooden spoon and press it into the cup as a plant label.
    ¼ cup chocolate rocks, 4 pieces fresh mint sprigs

Notes

  • Leave some larger Oreo chunks when you crush them. A mix of crumb sizes creates the best texture.
  • Add your mint garnish right before serving so it stays fresh and does not wilt.
Nutrition

Serving: 1g | Calories: 123kcal | Carbohydrates: 16g | Protein: 6g | Fat: 4g | Saturated Fat: 2g | Polyunsaturated Fat: 2g | Cholesterol: 12mg | Sodium: 172mg | Sugar: 8g
Tried this Recipe? Tag me Today!Mention @LifeisaParty or tag #lifeisaparty!

Easy Father's Day Table Setting Ideas

Jun 13, 2023 · Leave a Comment

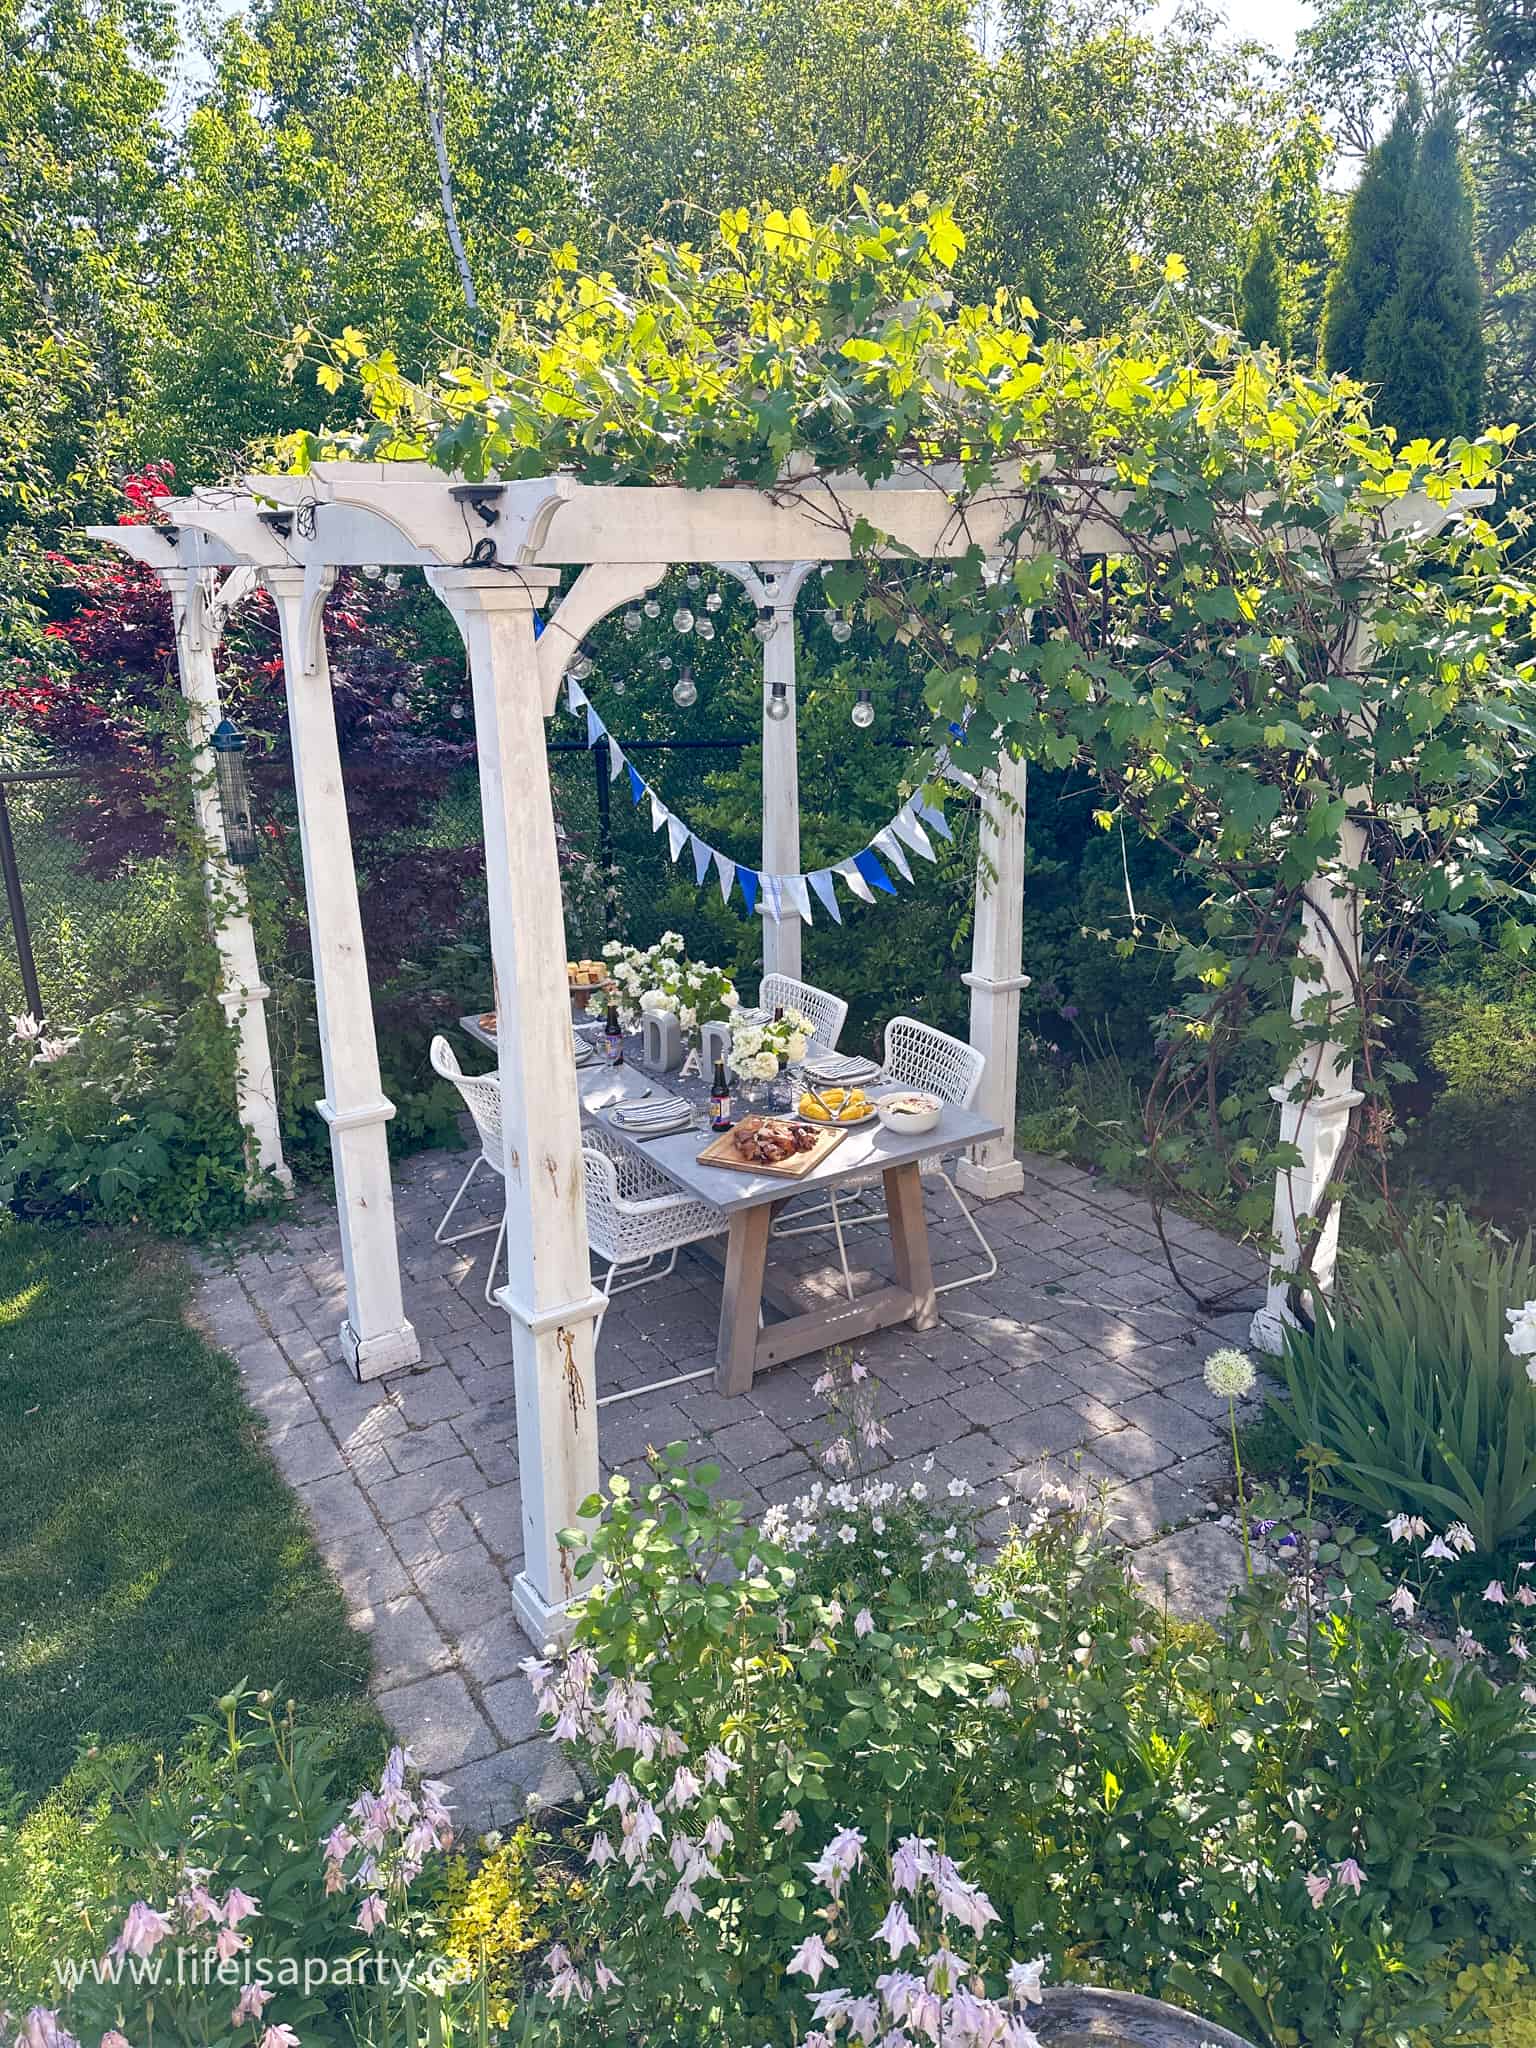
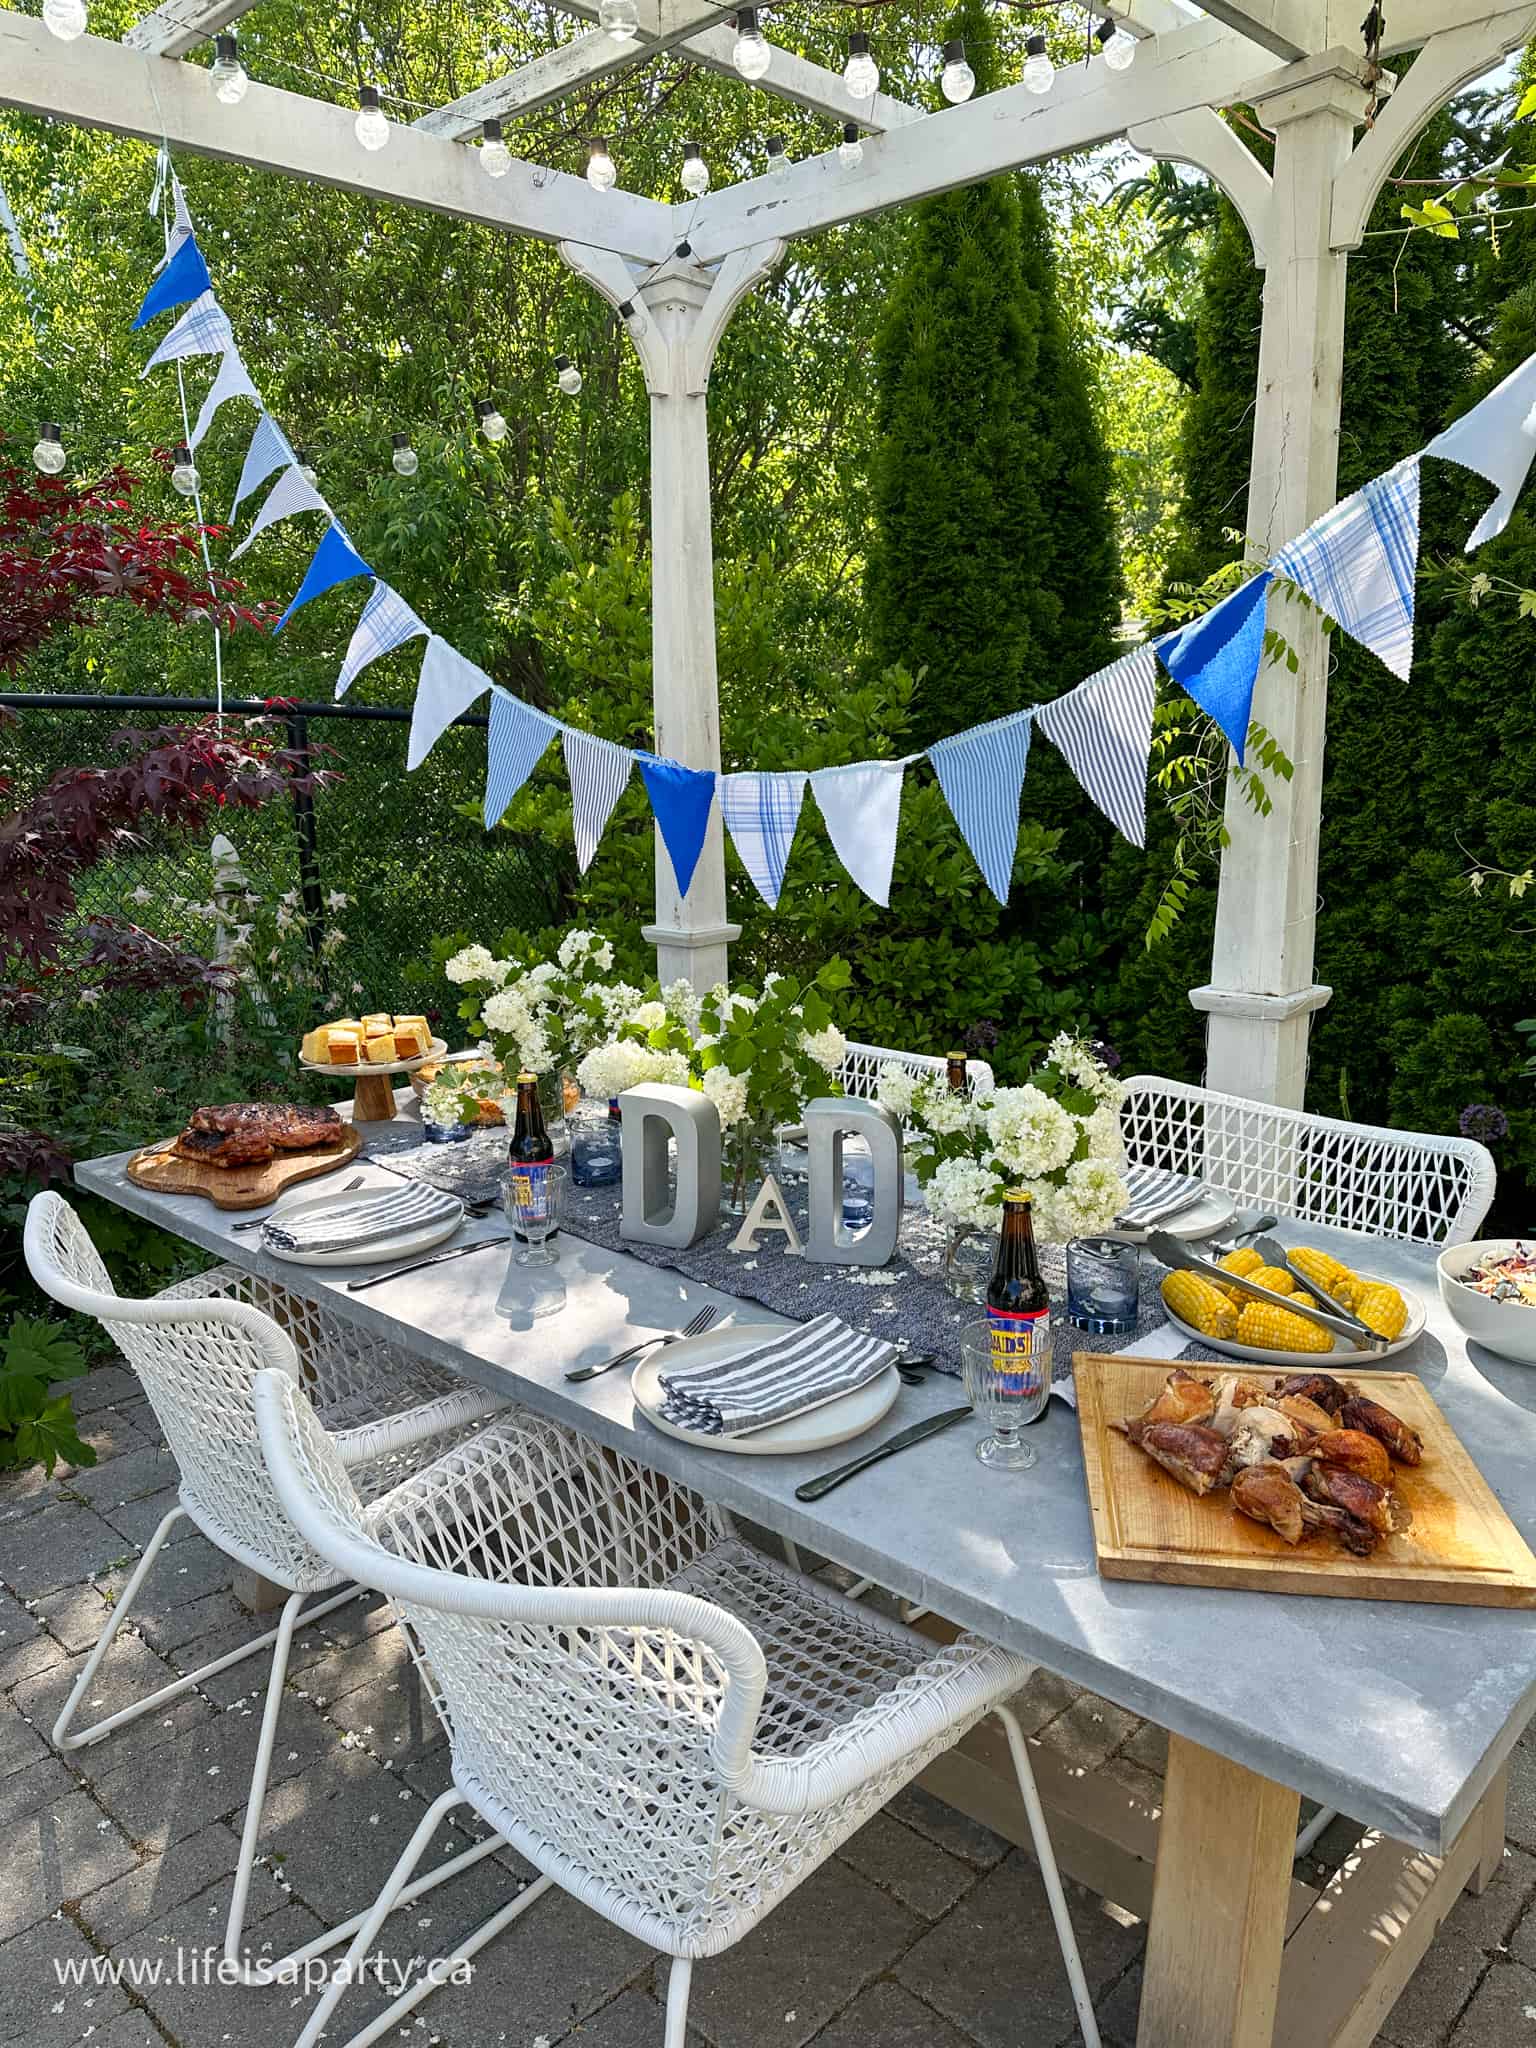
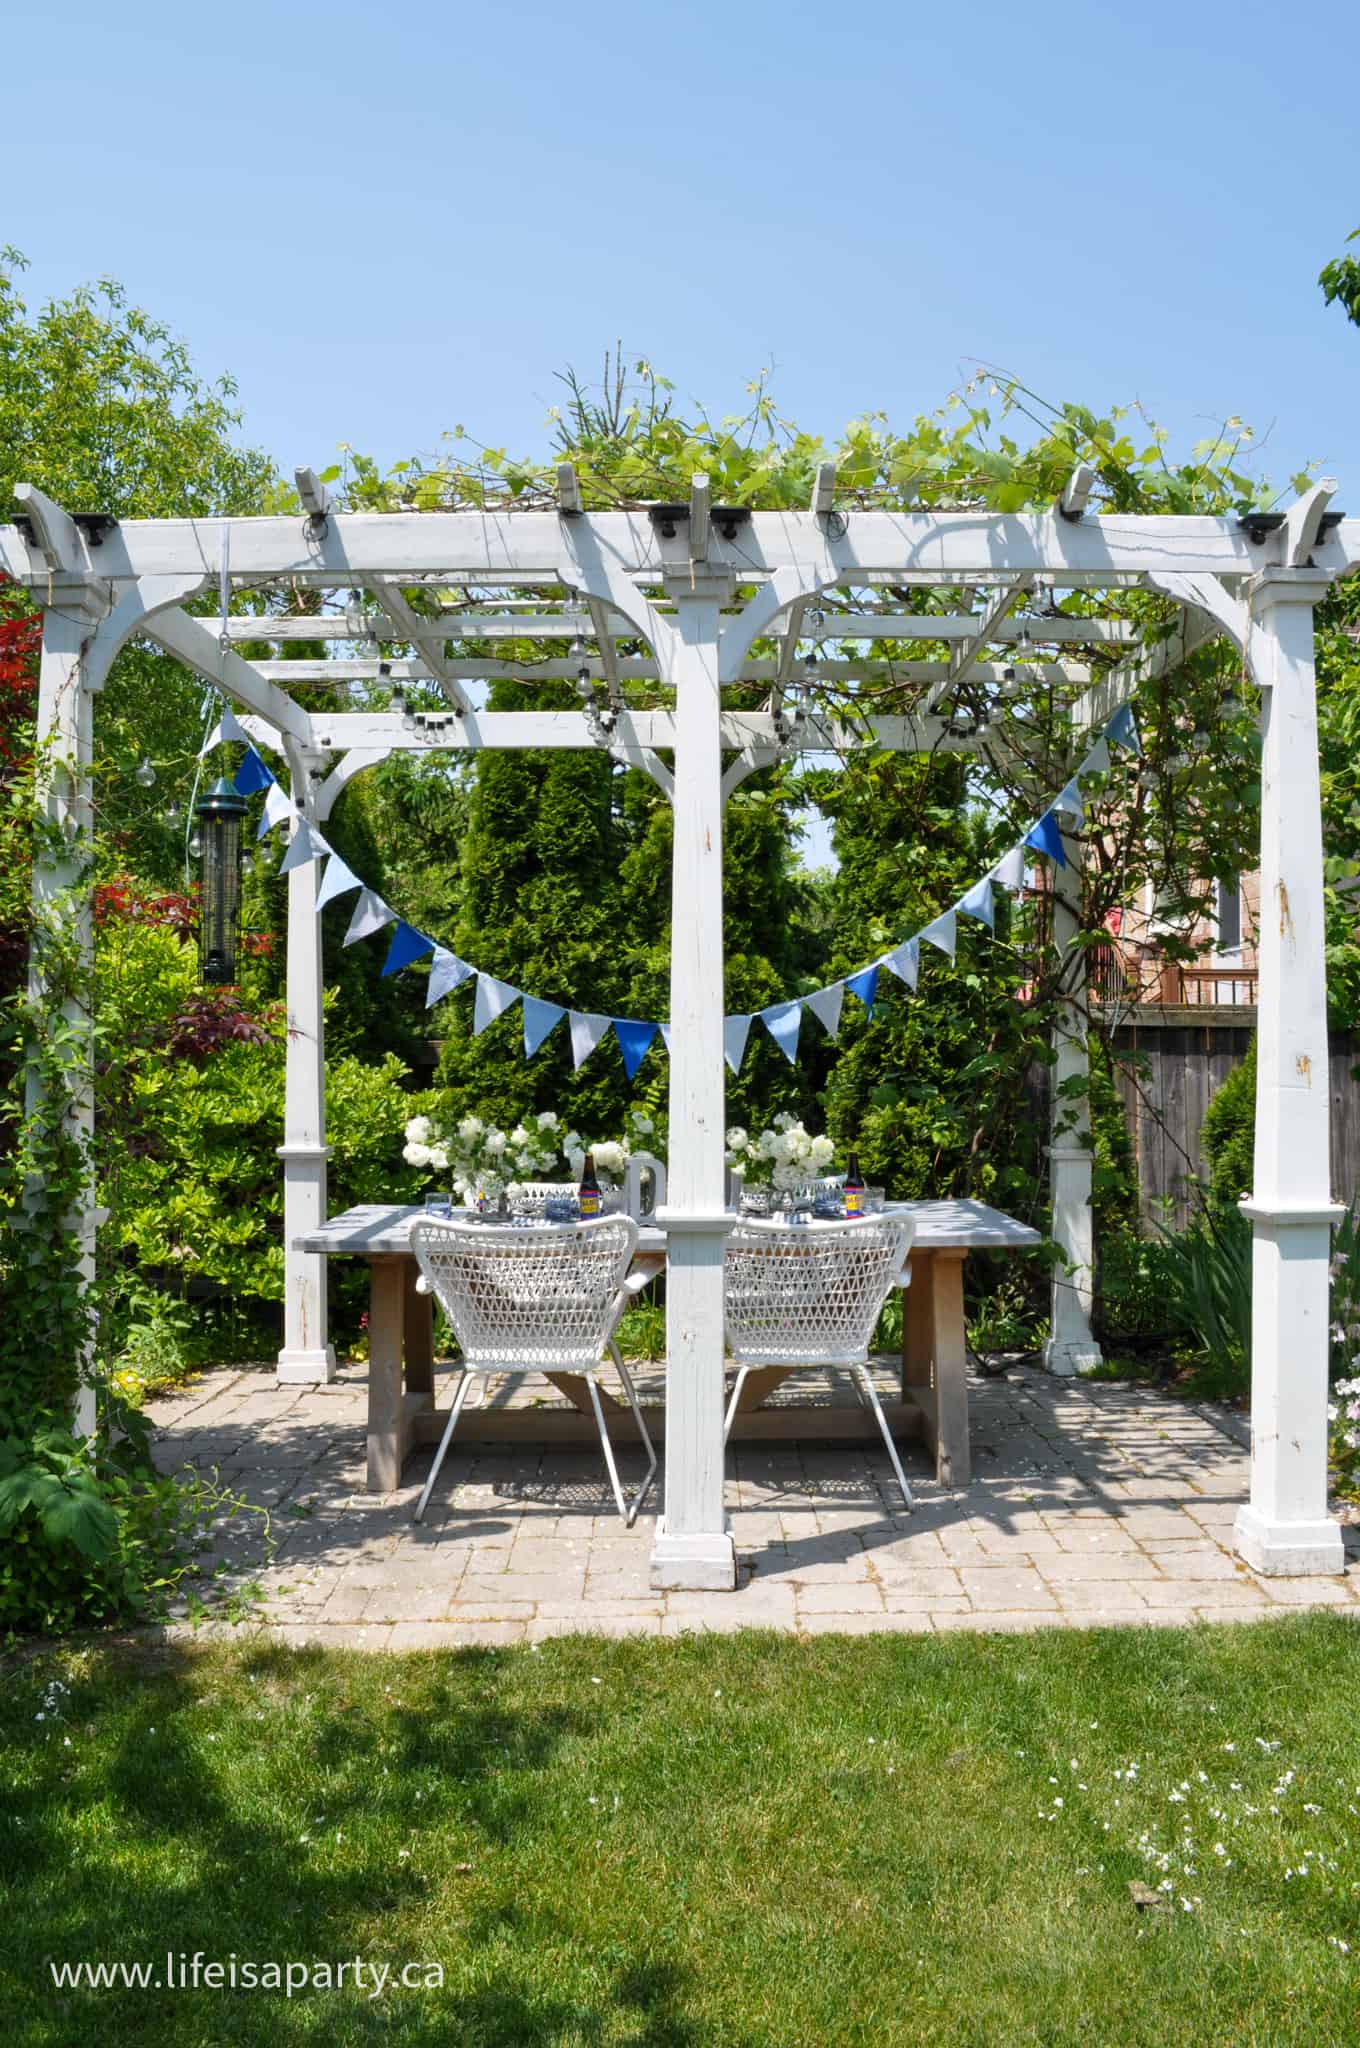
Father's Day party ideas and tablescape.

Easy Father's Day Table Setting Ideas: Fathers day table ideas that are simple, and masculine, and inspired by men's wear with DIY bunting.

Father's Day party ideas and tablescape.
[feast_advanced_jump_to]

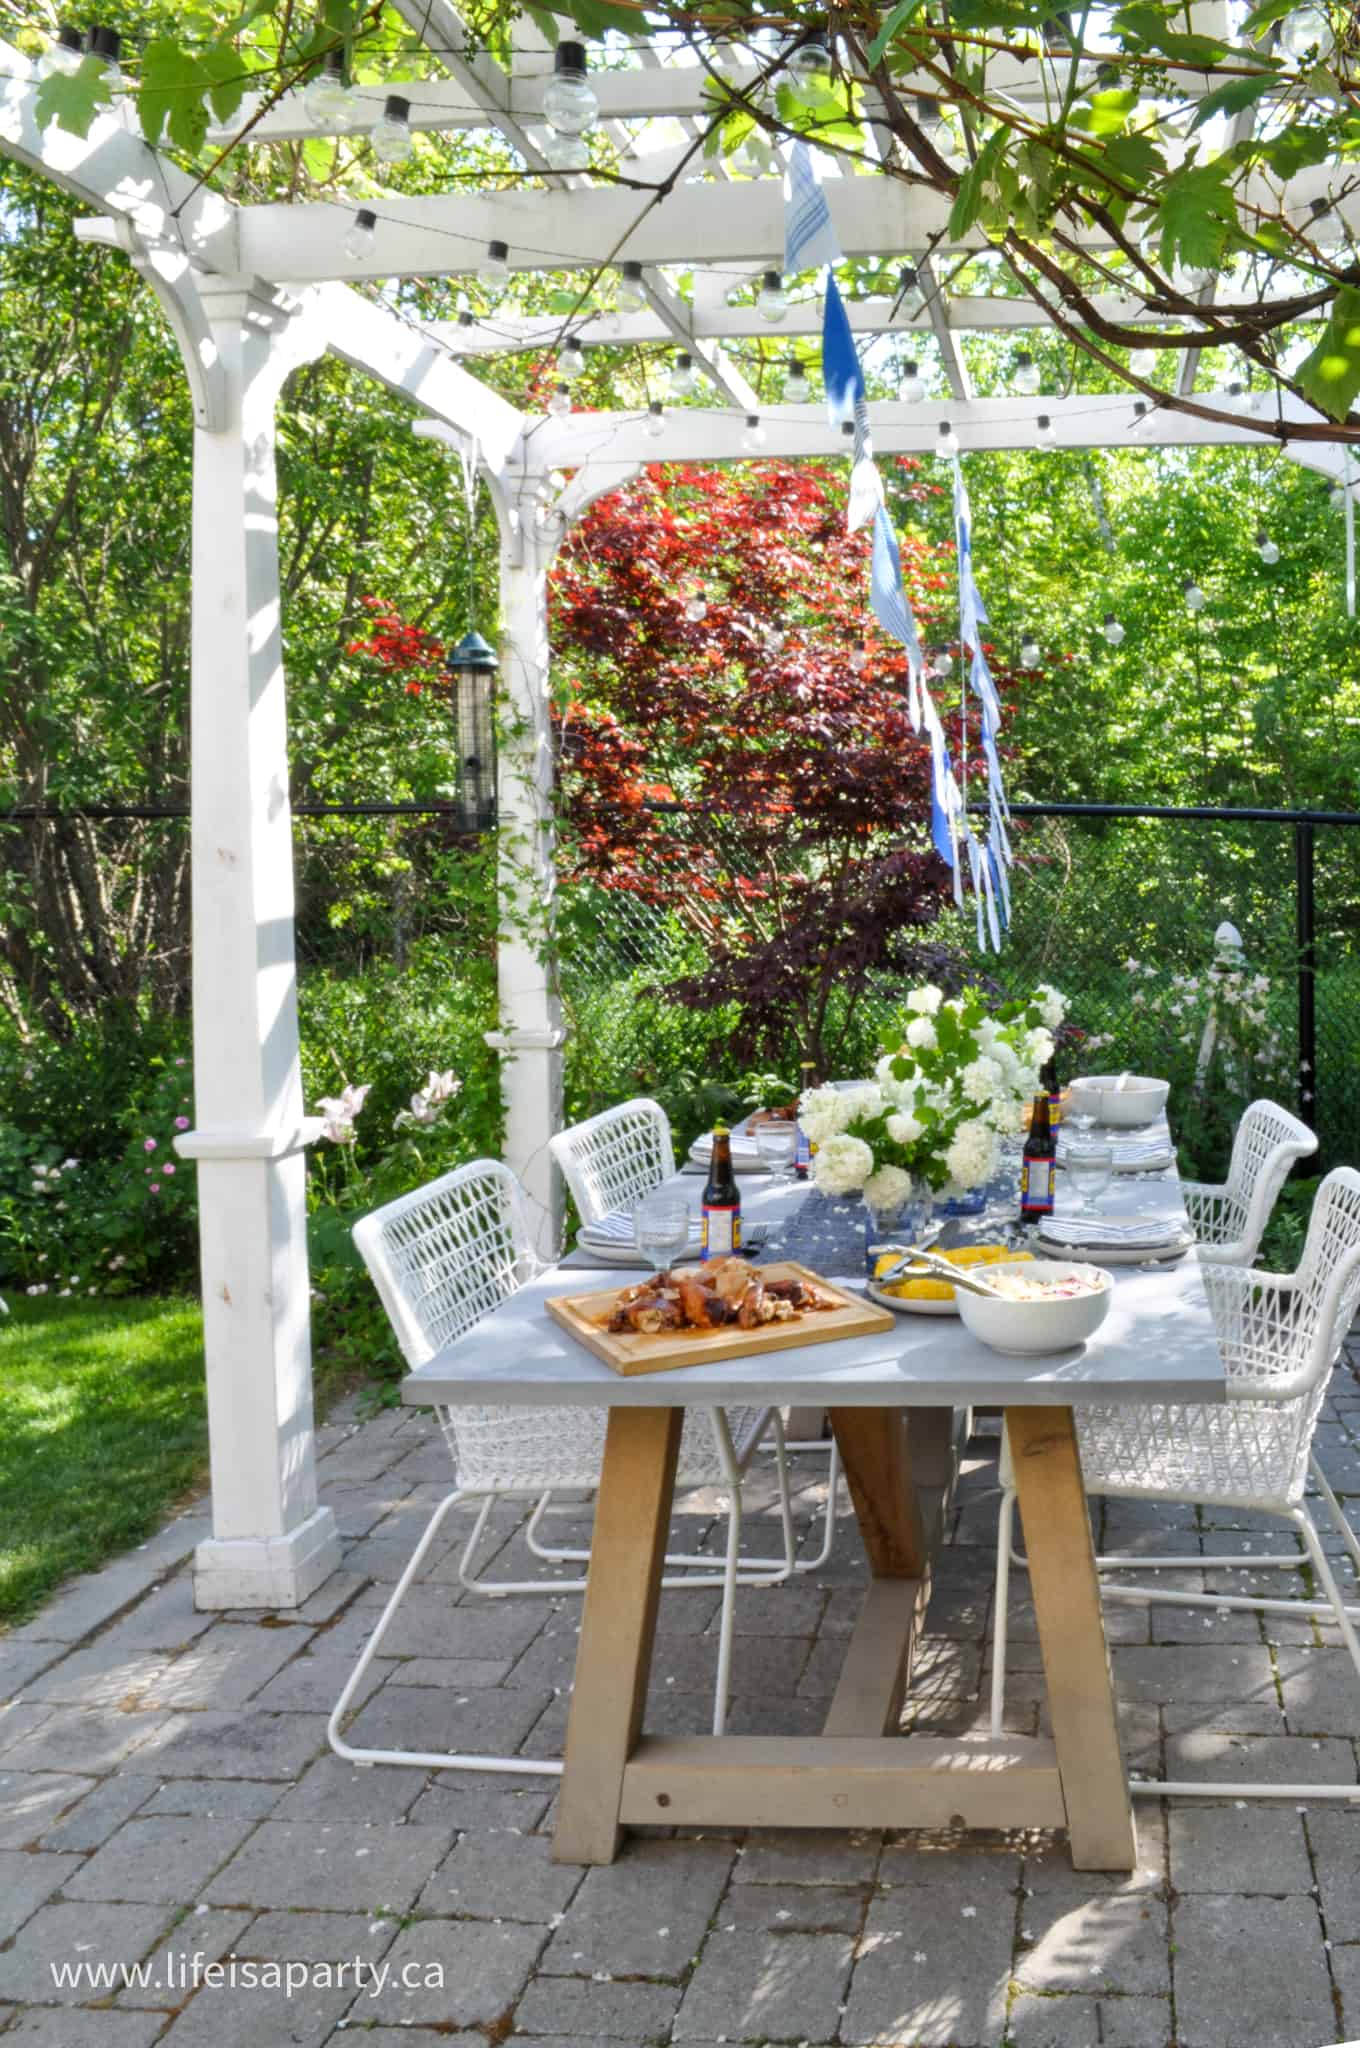
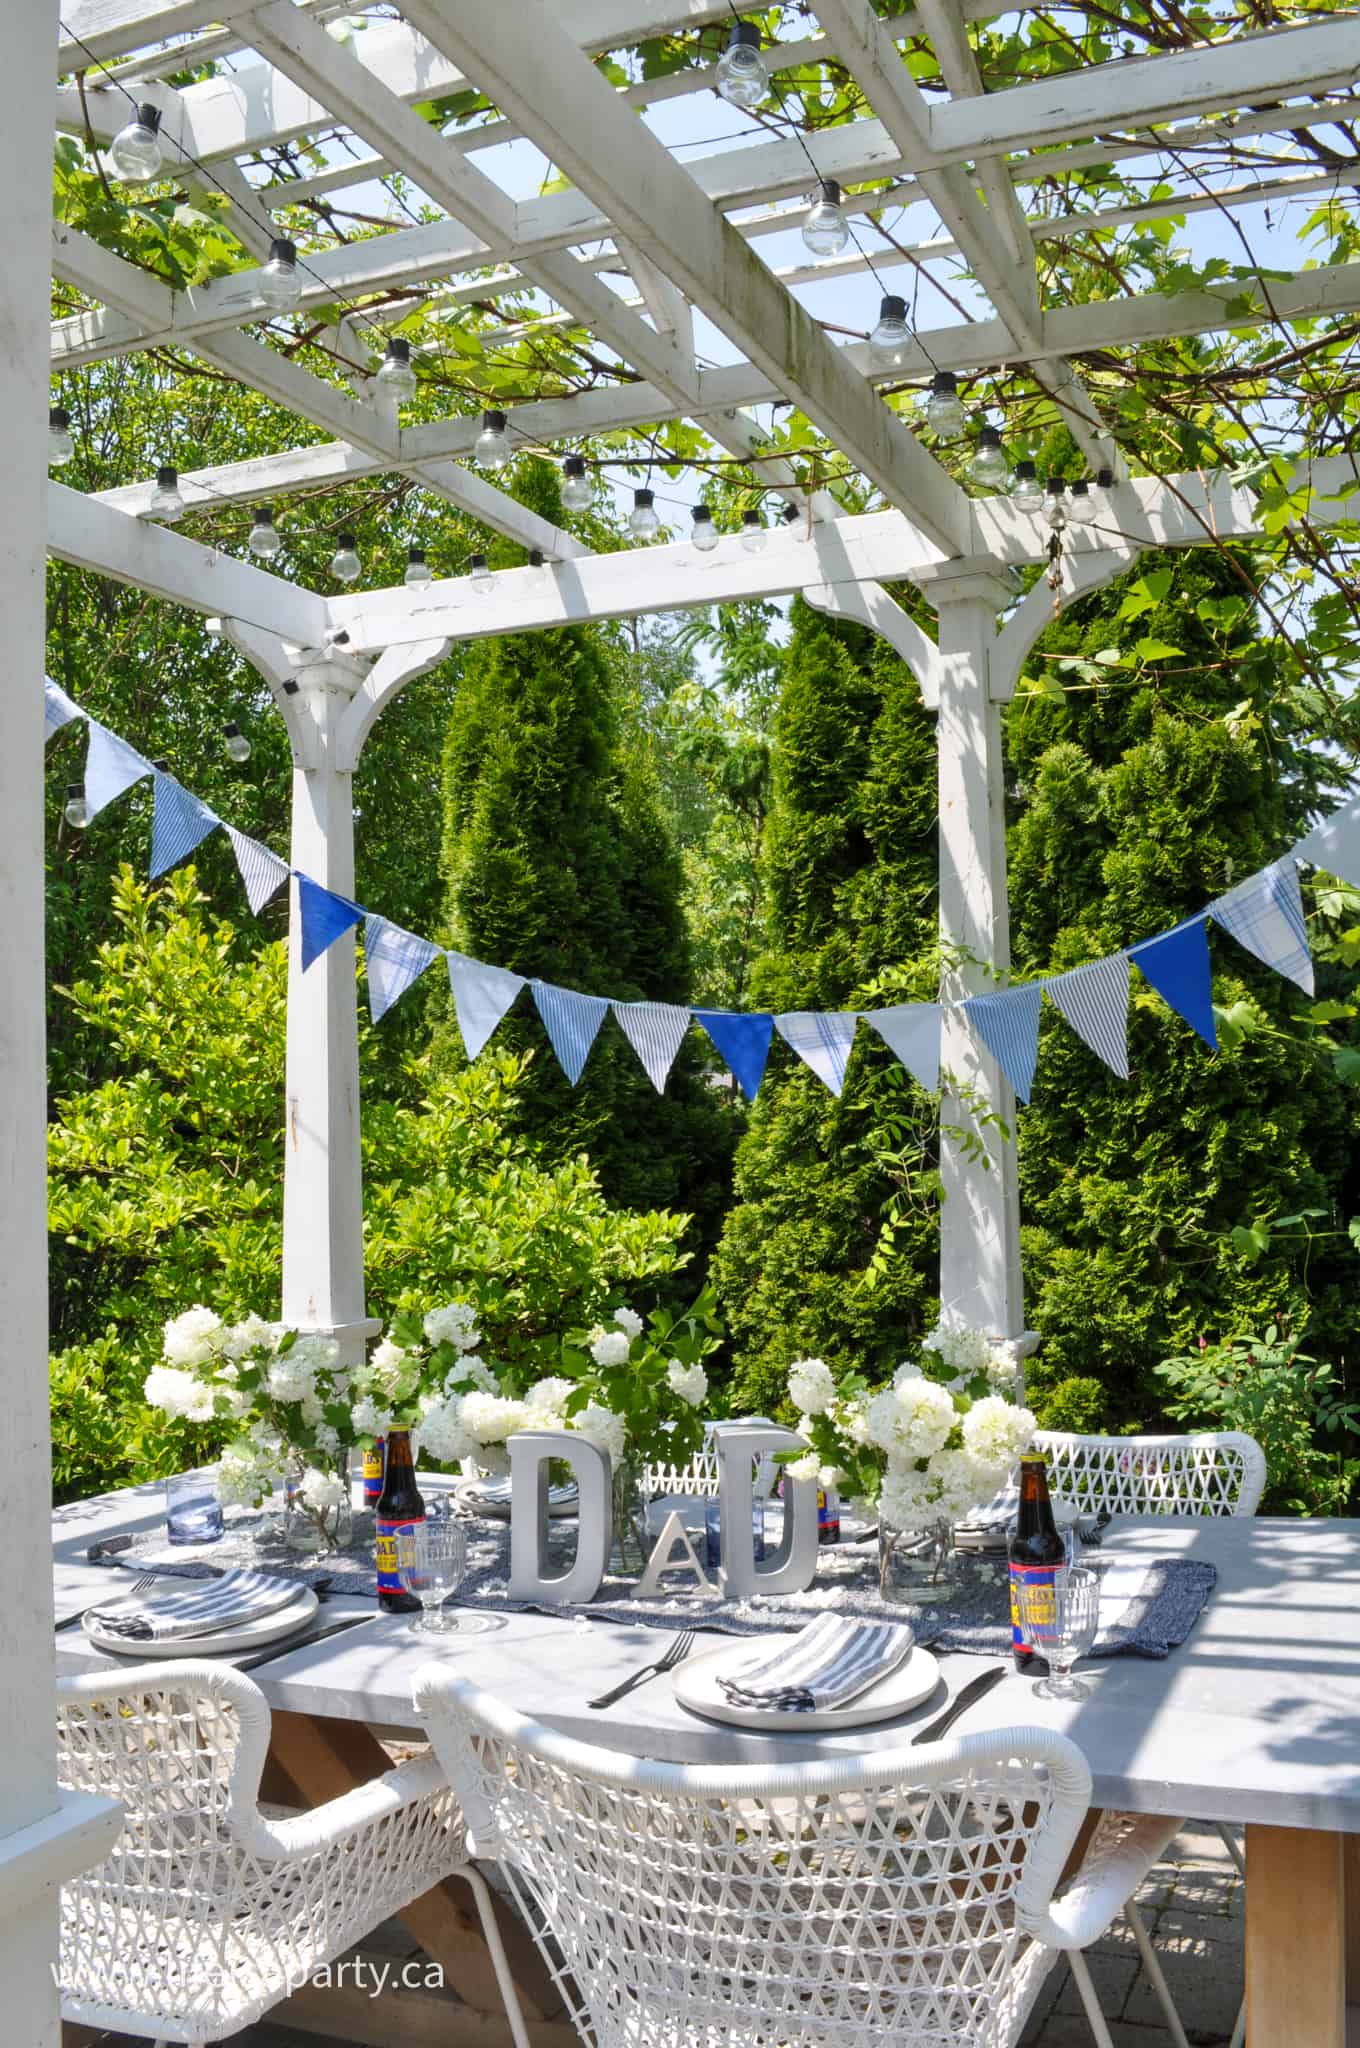
For this year's Father's Day we set a beautiful outdoor dining table, and today we're sharing all our best Father's day decoration ideas.  These Fathers Day table ideas are perfect for a Father's Day bbq, but if you're inside you can bring these ideas indoors too, at your kitchen or dining room table, or for a buffet table set up.  We wanted to keep things fairly simple and classic, not too fussy and somewhat masculine for our Father's Day table decorations.  What better way to show the best dad some love, than to set a handsome table and enjoy a delicious meal together of dad's favorite things?  Oh and don't forget to throw in a few a great gifts and Father's day card, or a homemade gift if you have young kids.

fathers day table ideas

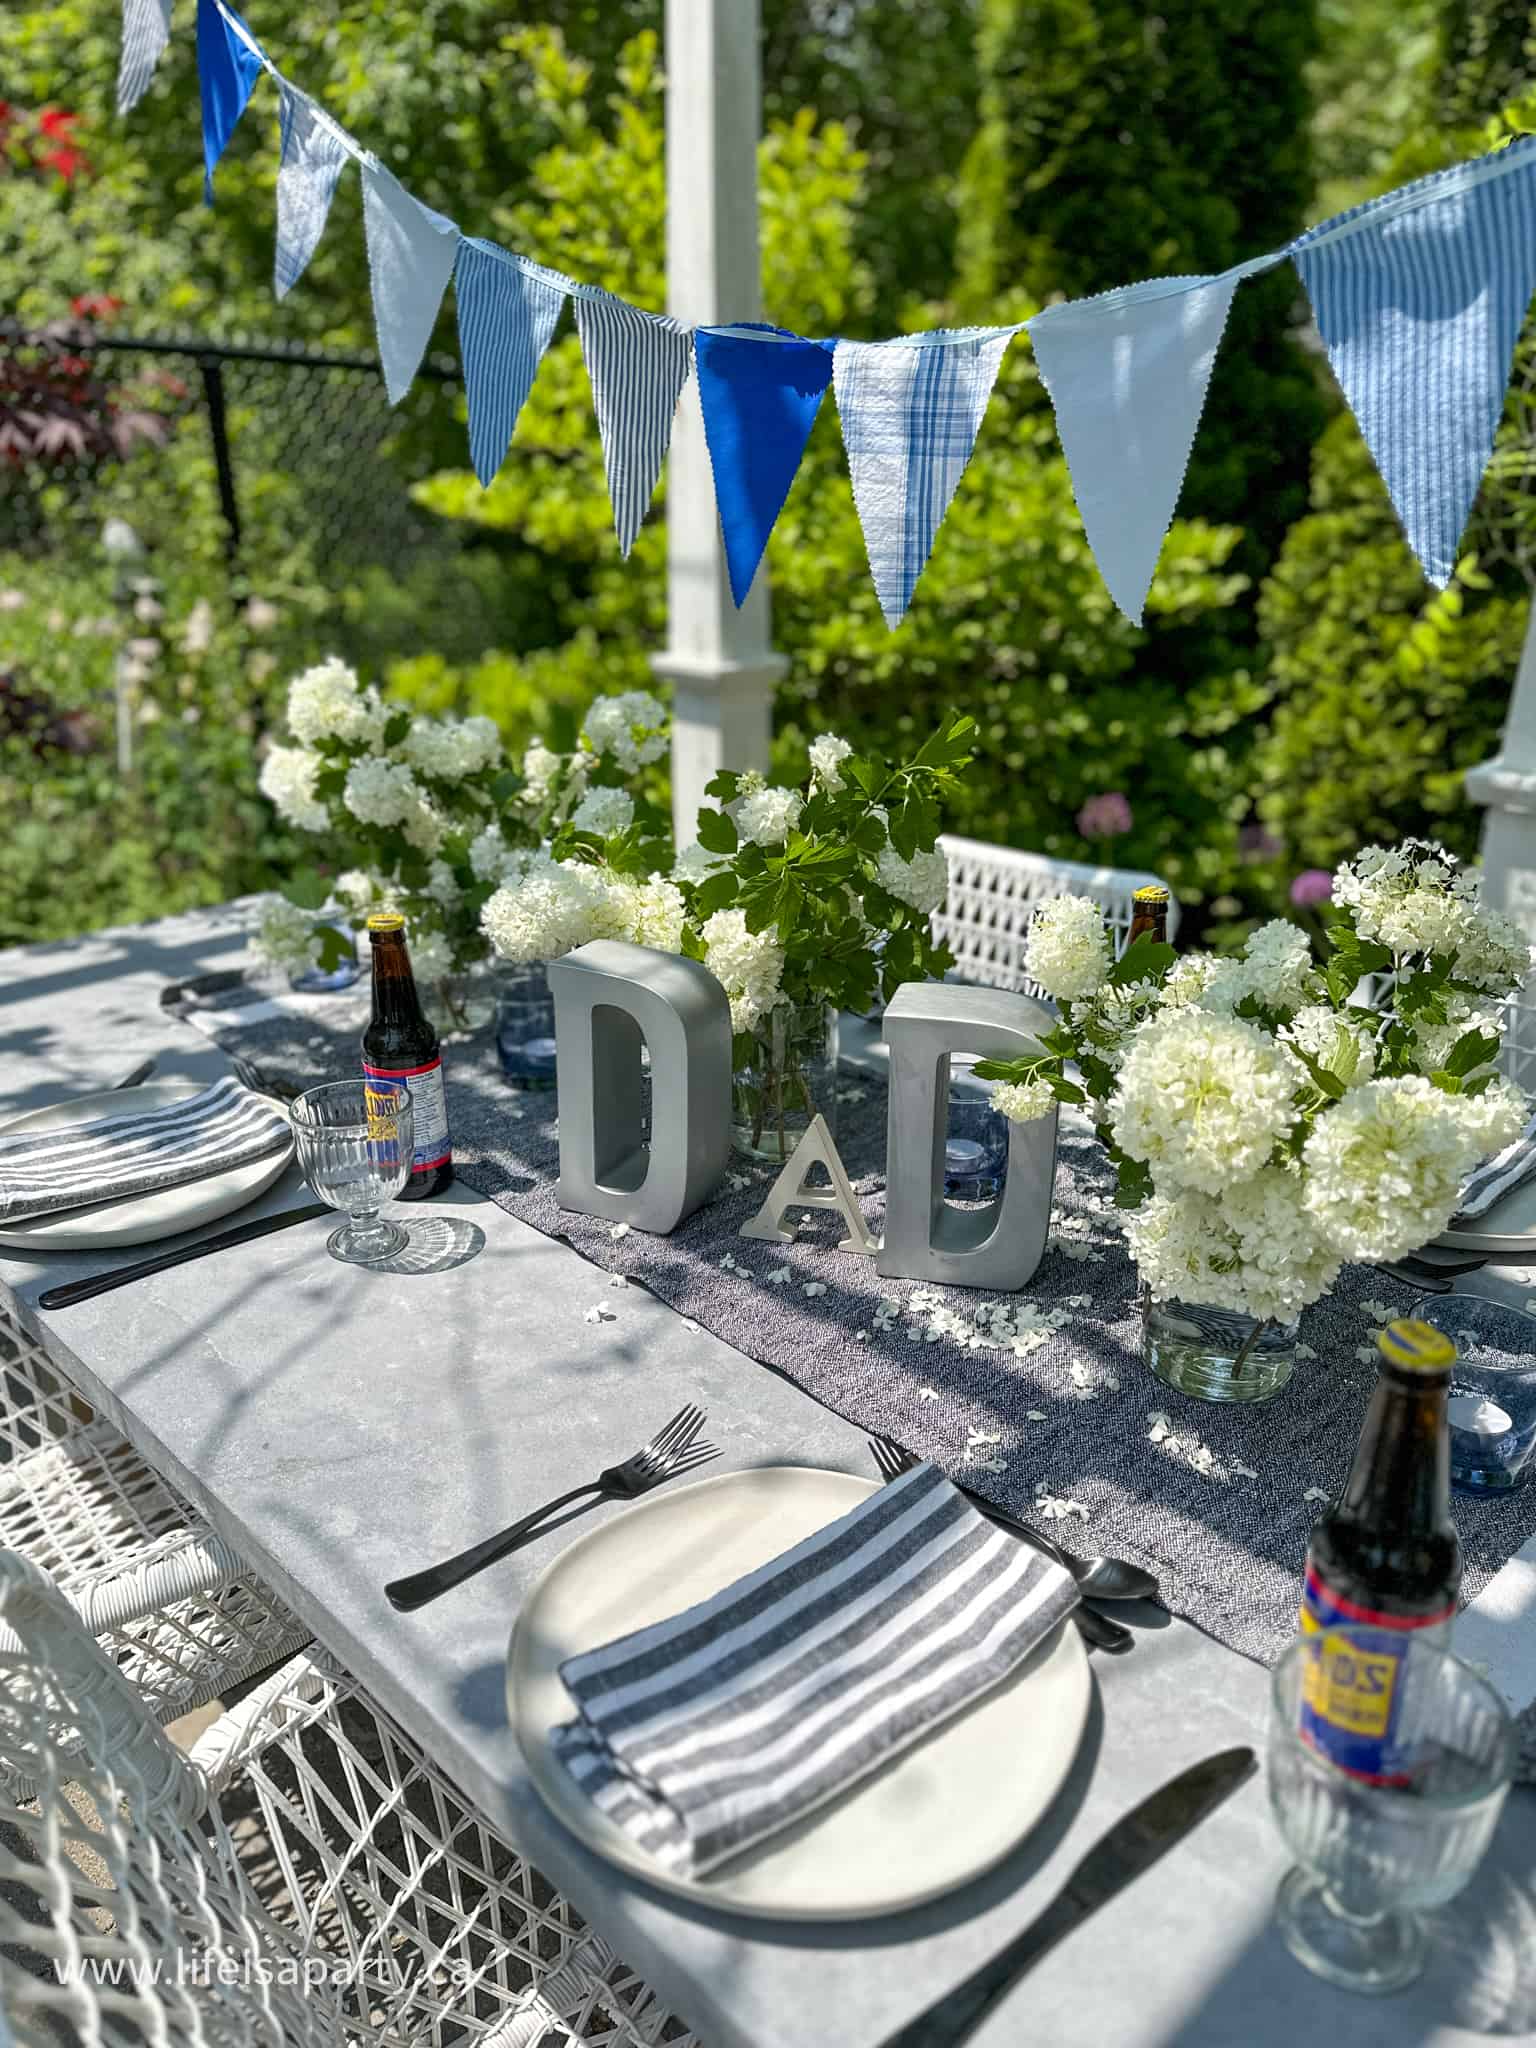
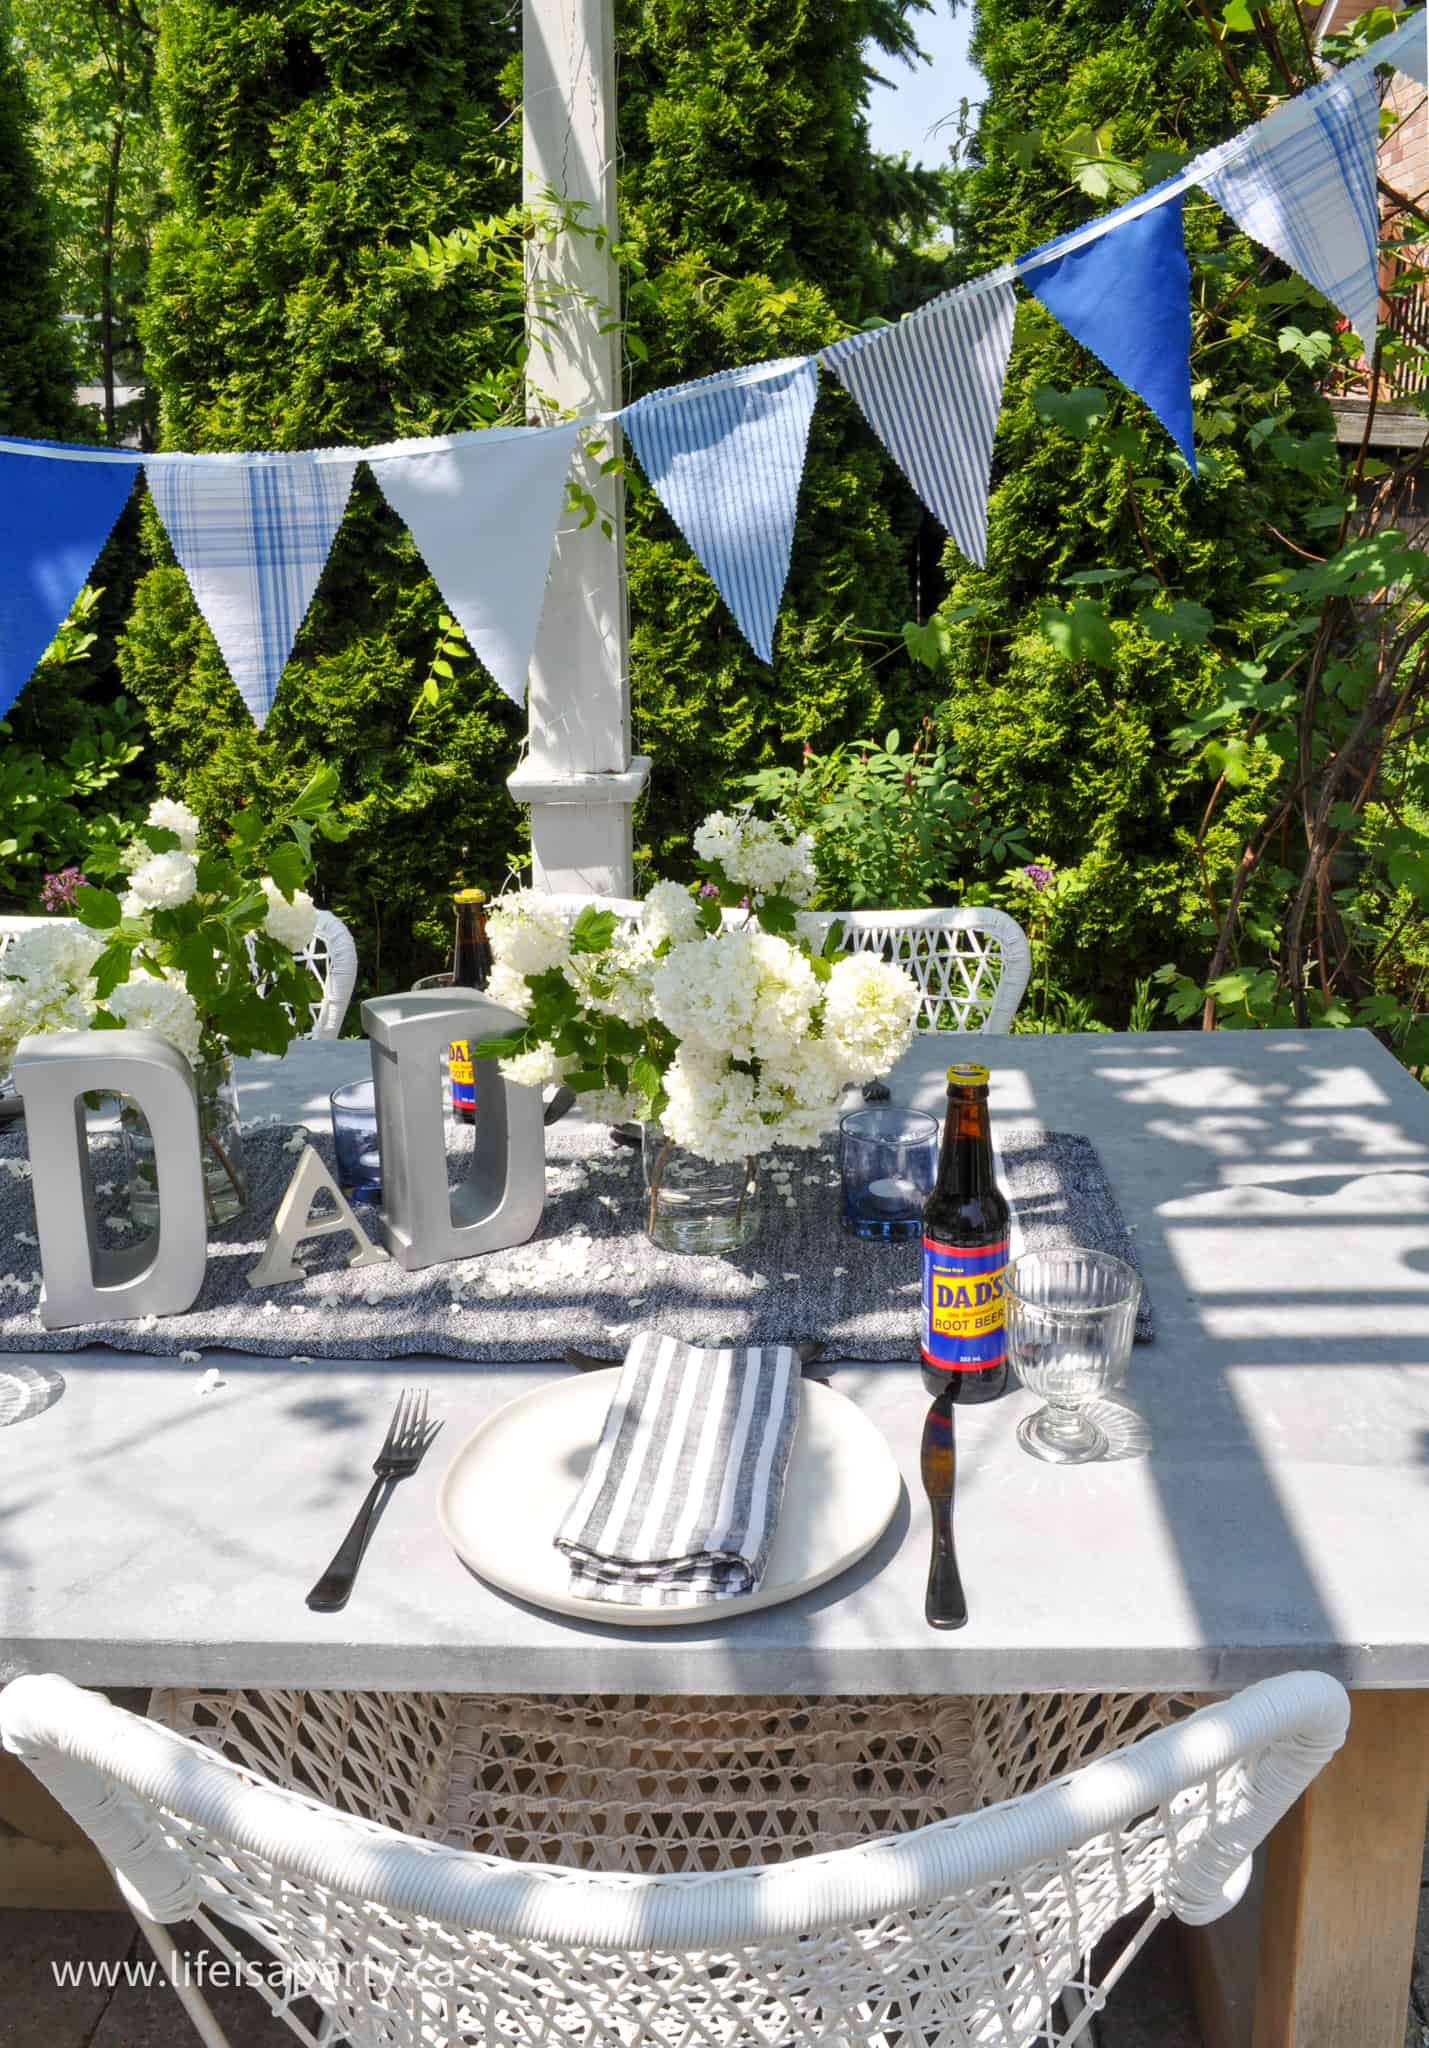
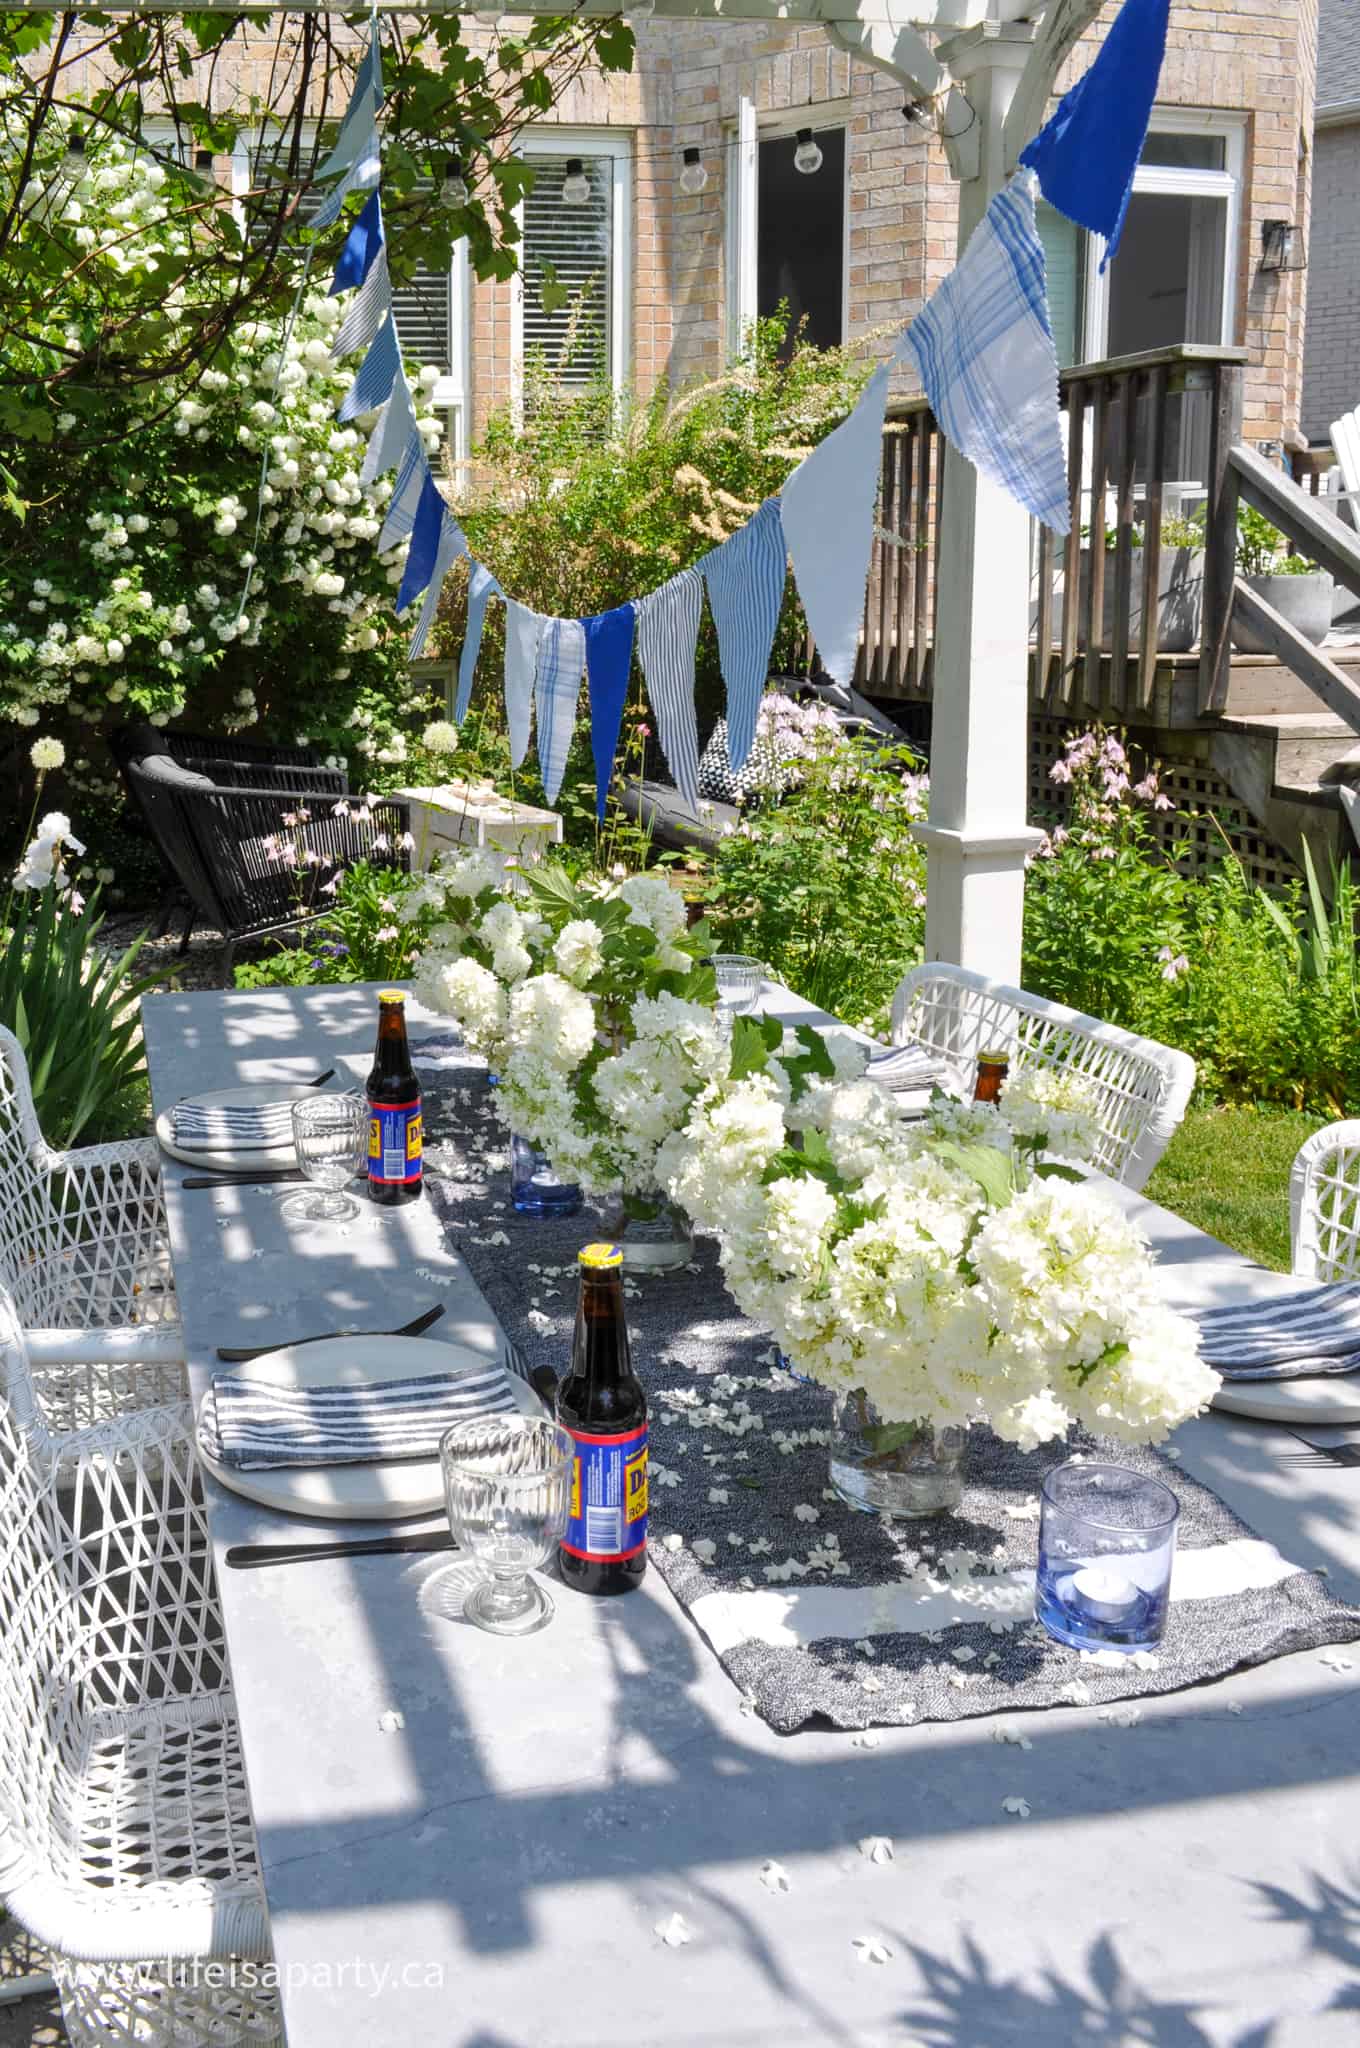
We started with a color scheme of classic black and white, with a little blue added in for Father's Day.  Our Father's Day decorations are inspired by a fun theme of a classic men's shirt, so stripes had to be involved.  We started the table with a table runner.  It's a great choice rather than a tablecloth for a simple, unfussy masculine feel to the table.  

fathers day table ideas

Father's Day Centerpiece

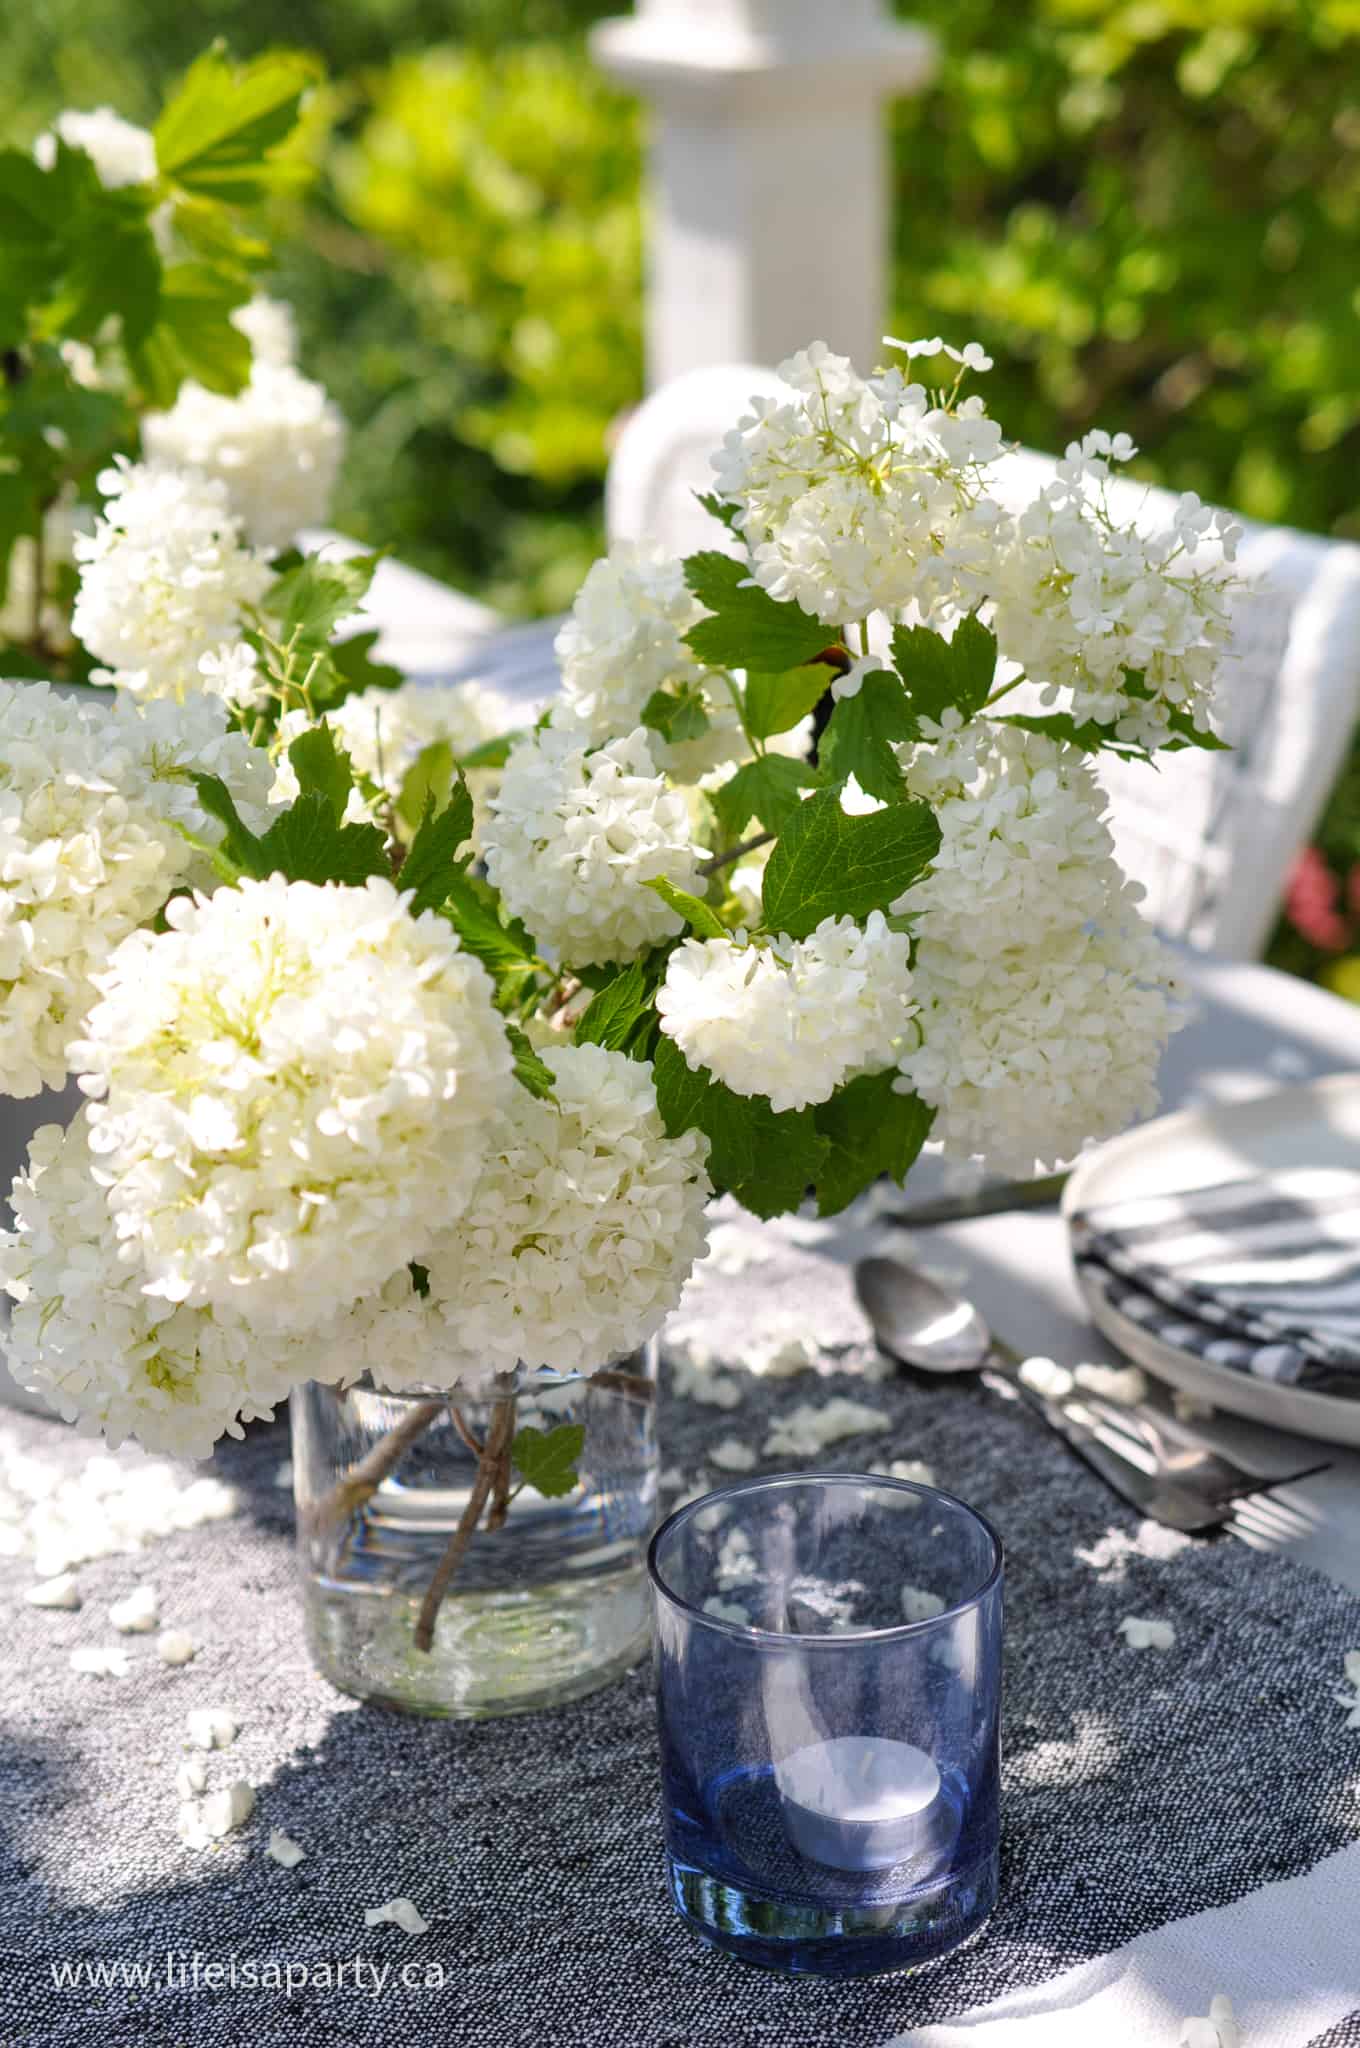
As a centrepiece for the table for dad's day, I went with blooms from our snowball tree.  They're in classic straight sided vases, again unfussy and masculine feeling.  I used just one type of flower, again for a great way to add simple, unfussy flowers.  I also added in a few blue candle votives.  Votive glass will keep the candles from blowing out if there's a wind, and citronella candles will help keep the bugs away for outdoor dining.  The blue here helps tie in the bunting.

Father's Day centrepiece

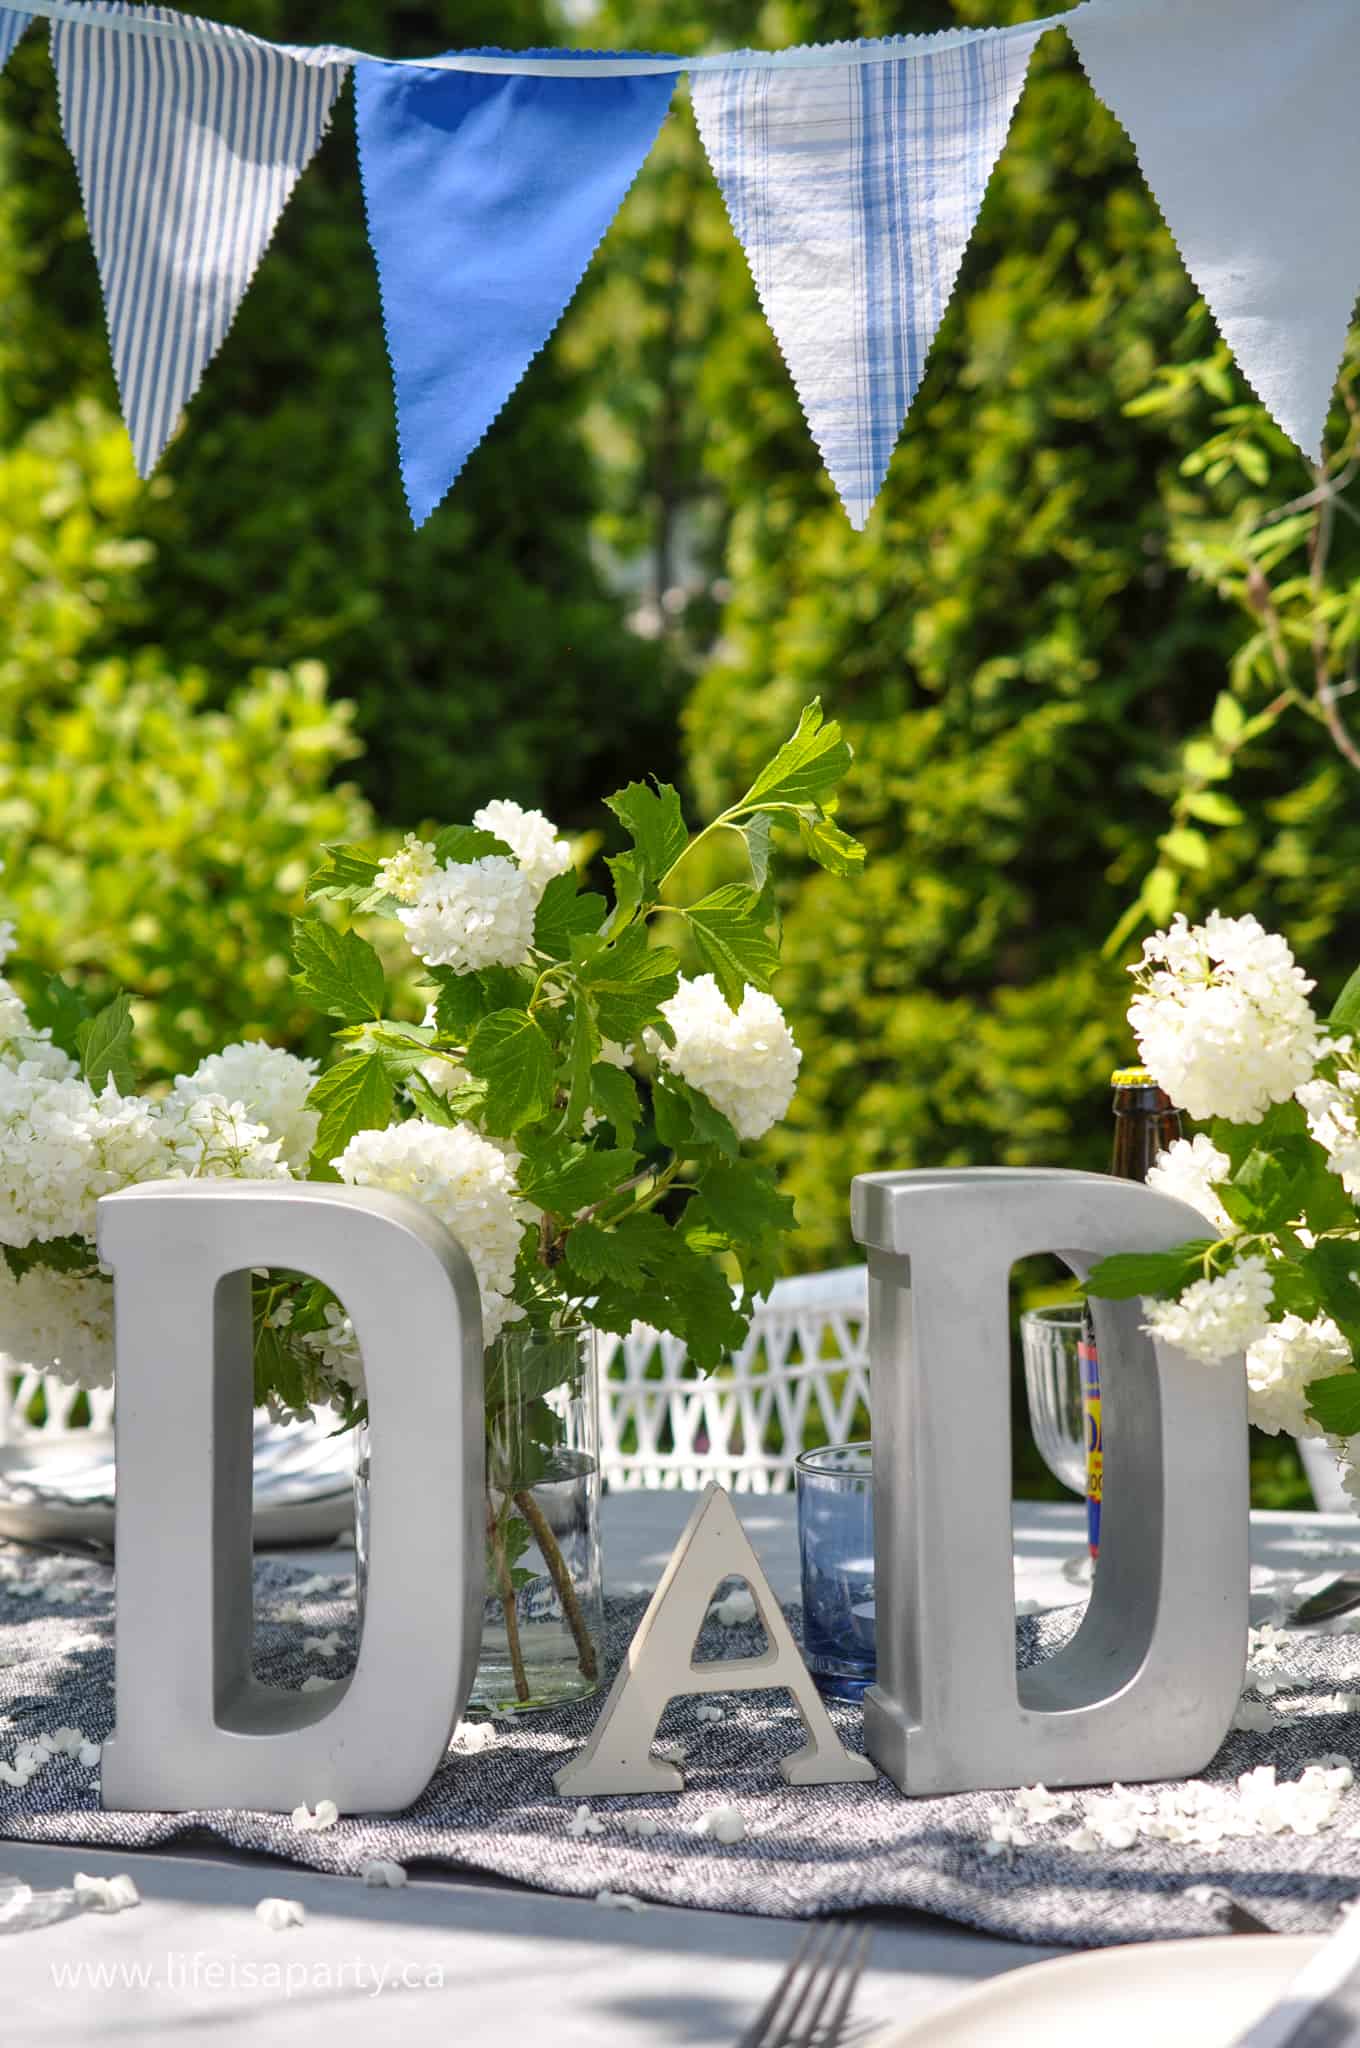
And more of my  favorite Father's day décor ideas, we spelled out "Dad" with some letters.  My "D"s are actually bookends, and the "A" is from a craftstore.  You could look at the craft store for letters that all matched, or mix and match like mine.  This is a really simple but great idea, that adds so much fun to this special occasion.  The letters are a creative way to really set this table apart for Father's day.  The napkins are also simple, and the stripes are reminiscent of men's wear, without being to much. 

fathers day centrepiece idea

Place Settings

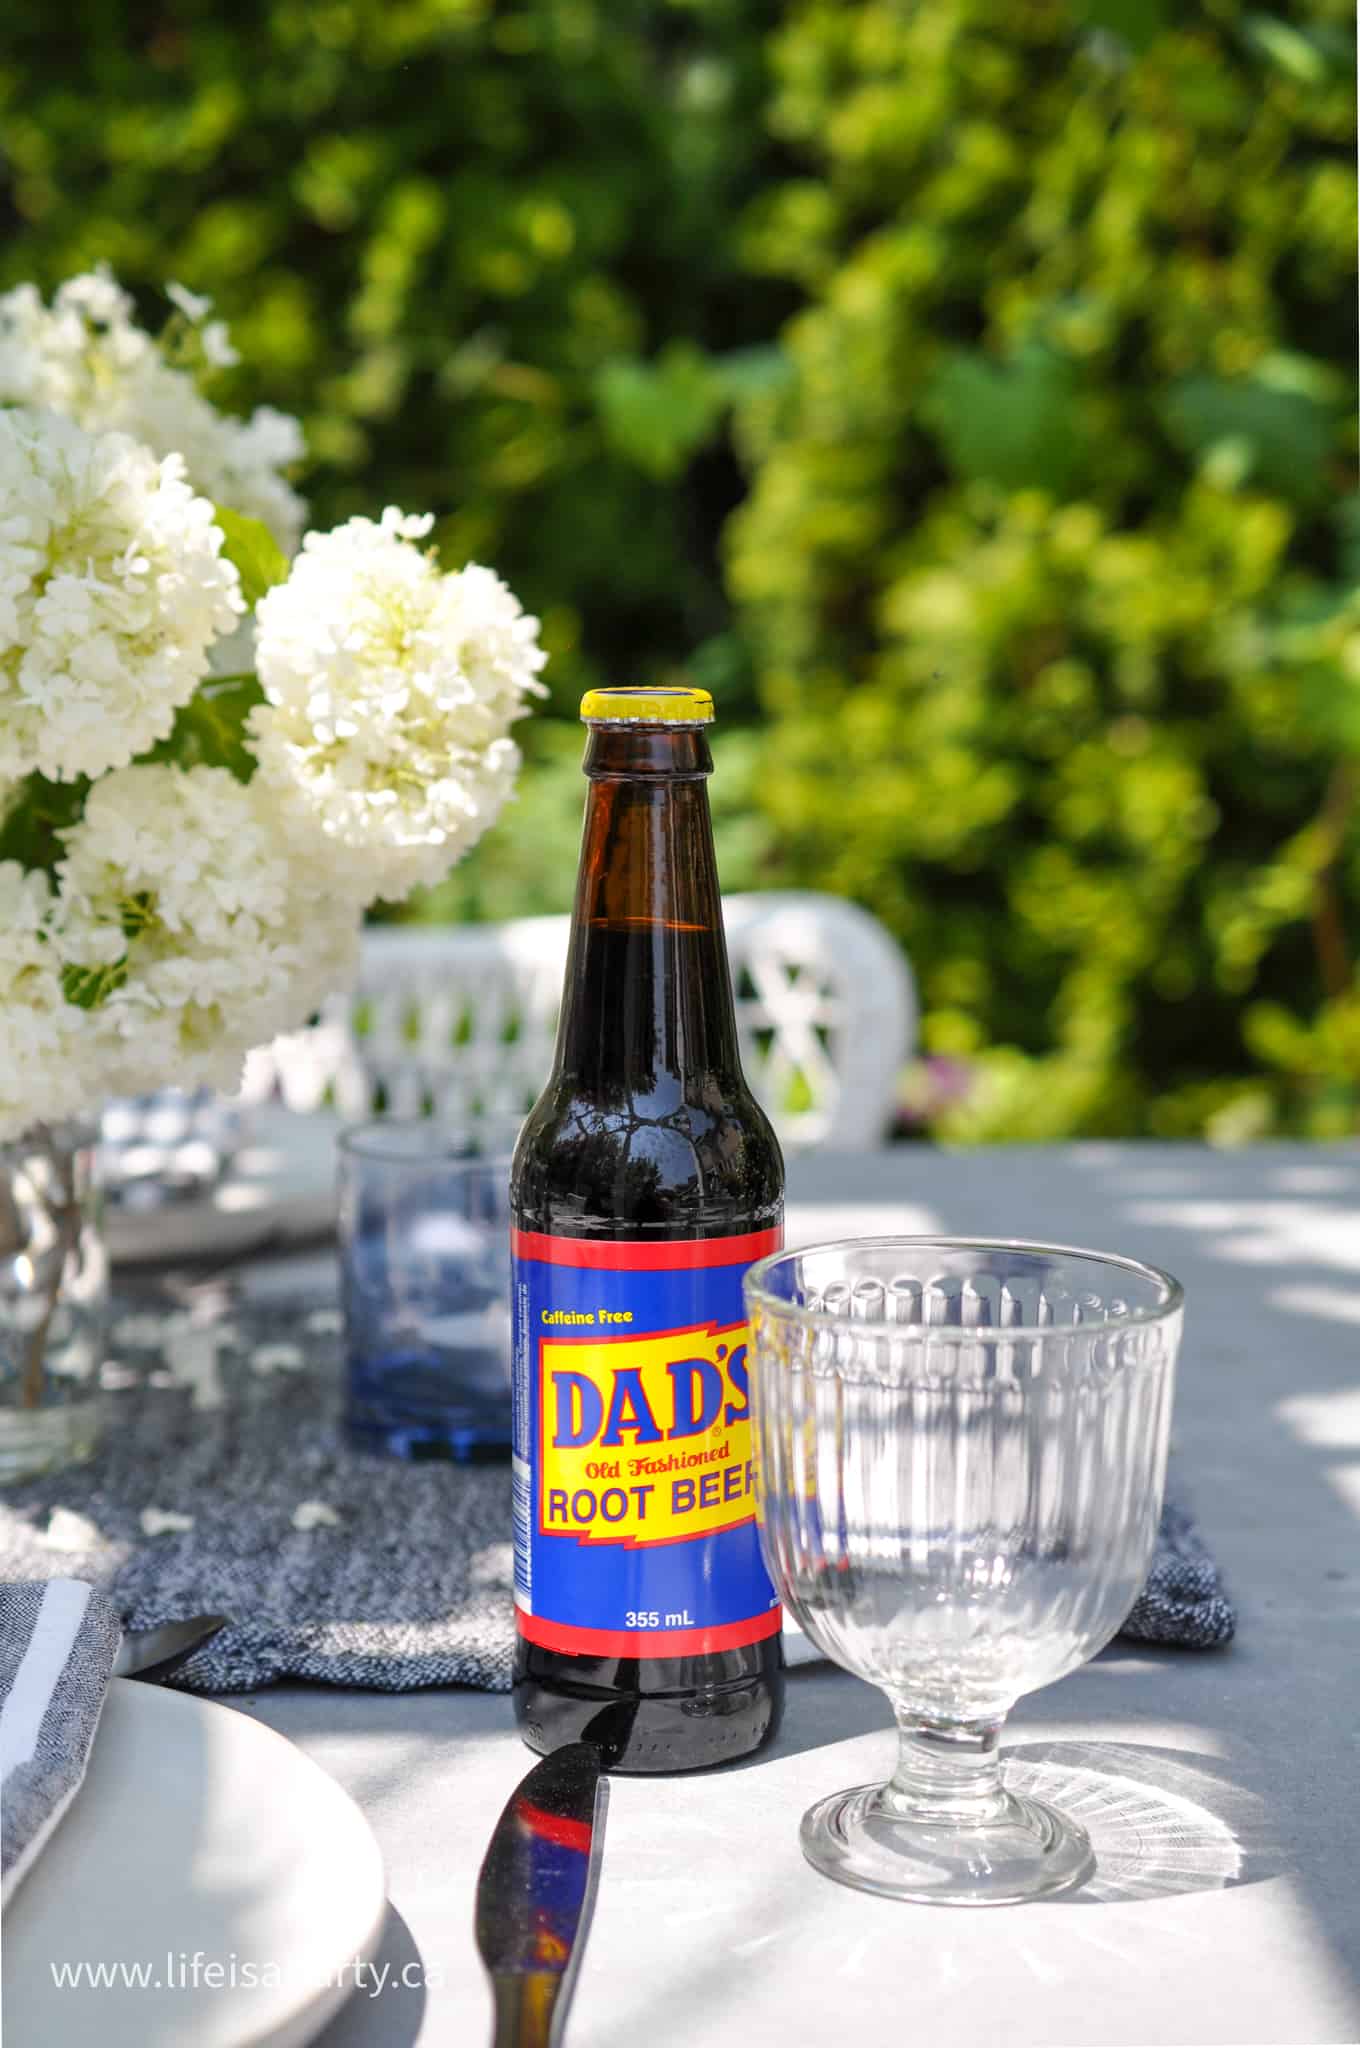
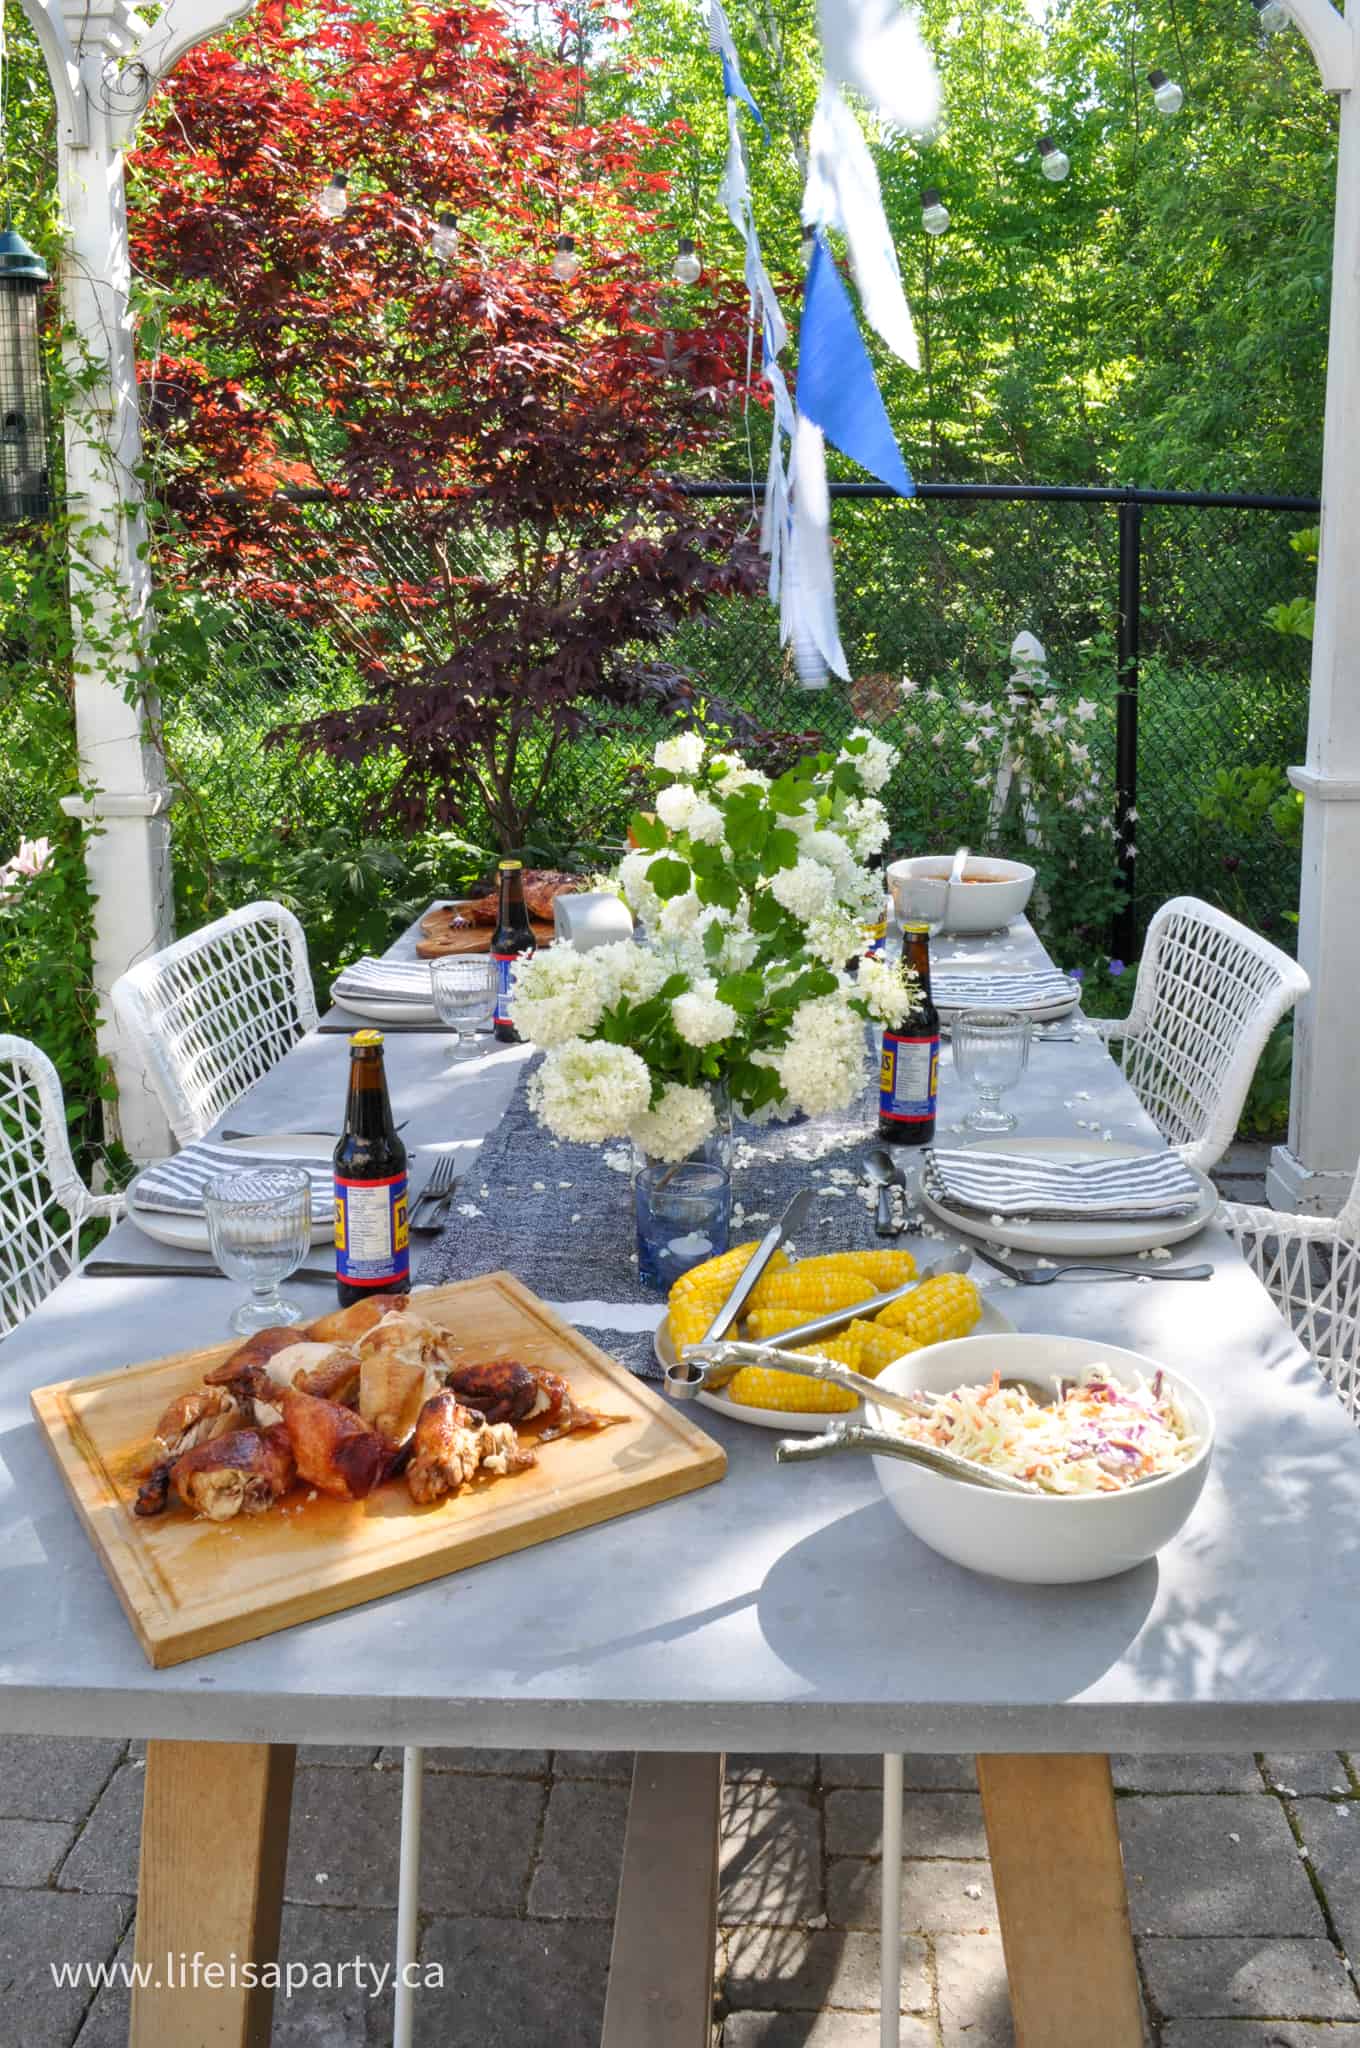
For the place settings, we again went for no fuss, simple.  Skip the paper plates and elevate your bbq with real dinner plates, and black cutlery for a masculine feel.  We had to include some Dad's root beer.  It's such a fun way to add to our Father's Day decor, and one of Dad's favorites, that the entire family also loves.  It's always a nice thing when your party decor doubles as a favorite food loved by kids of all ages, and most of all dad.

Father's Day place setting
fathers day table ideas

Father's Day Bunting

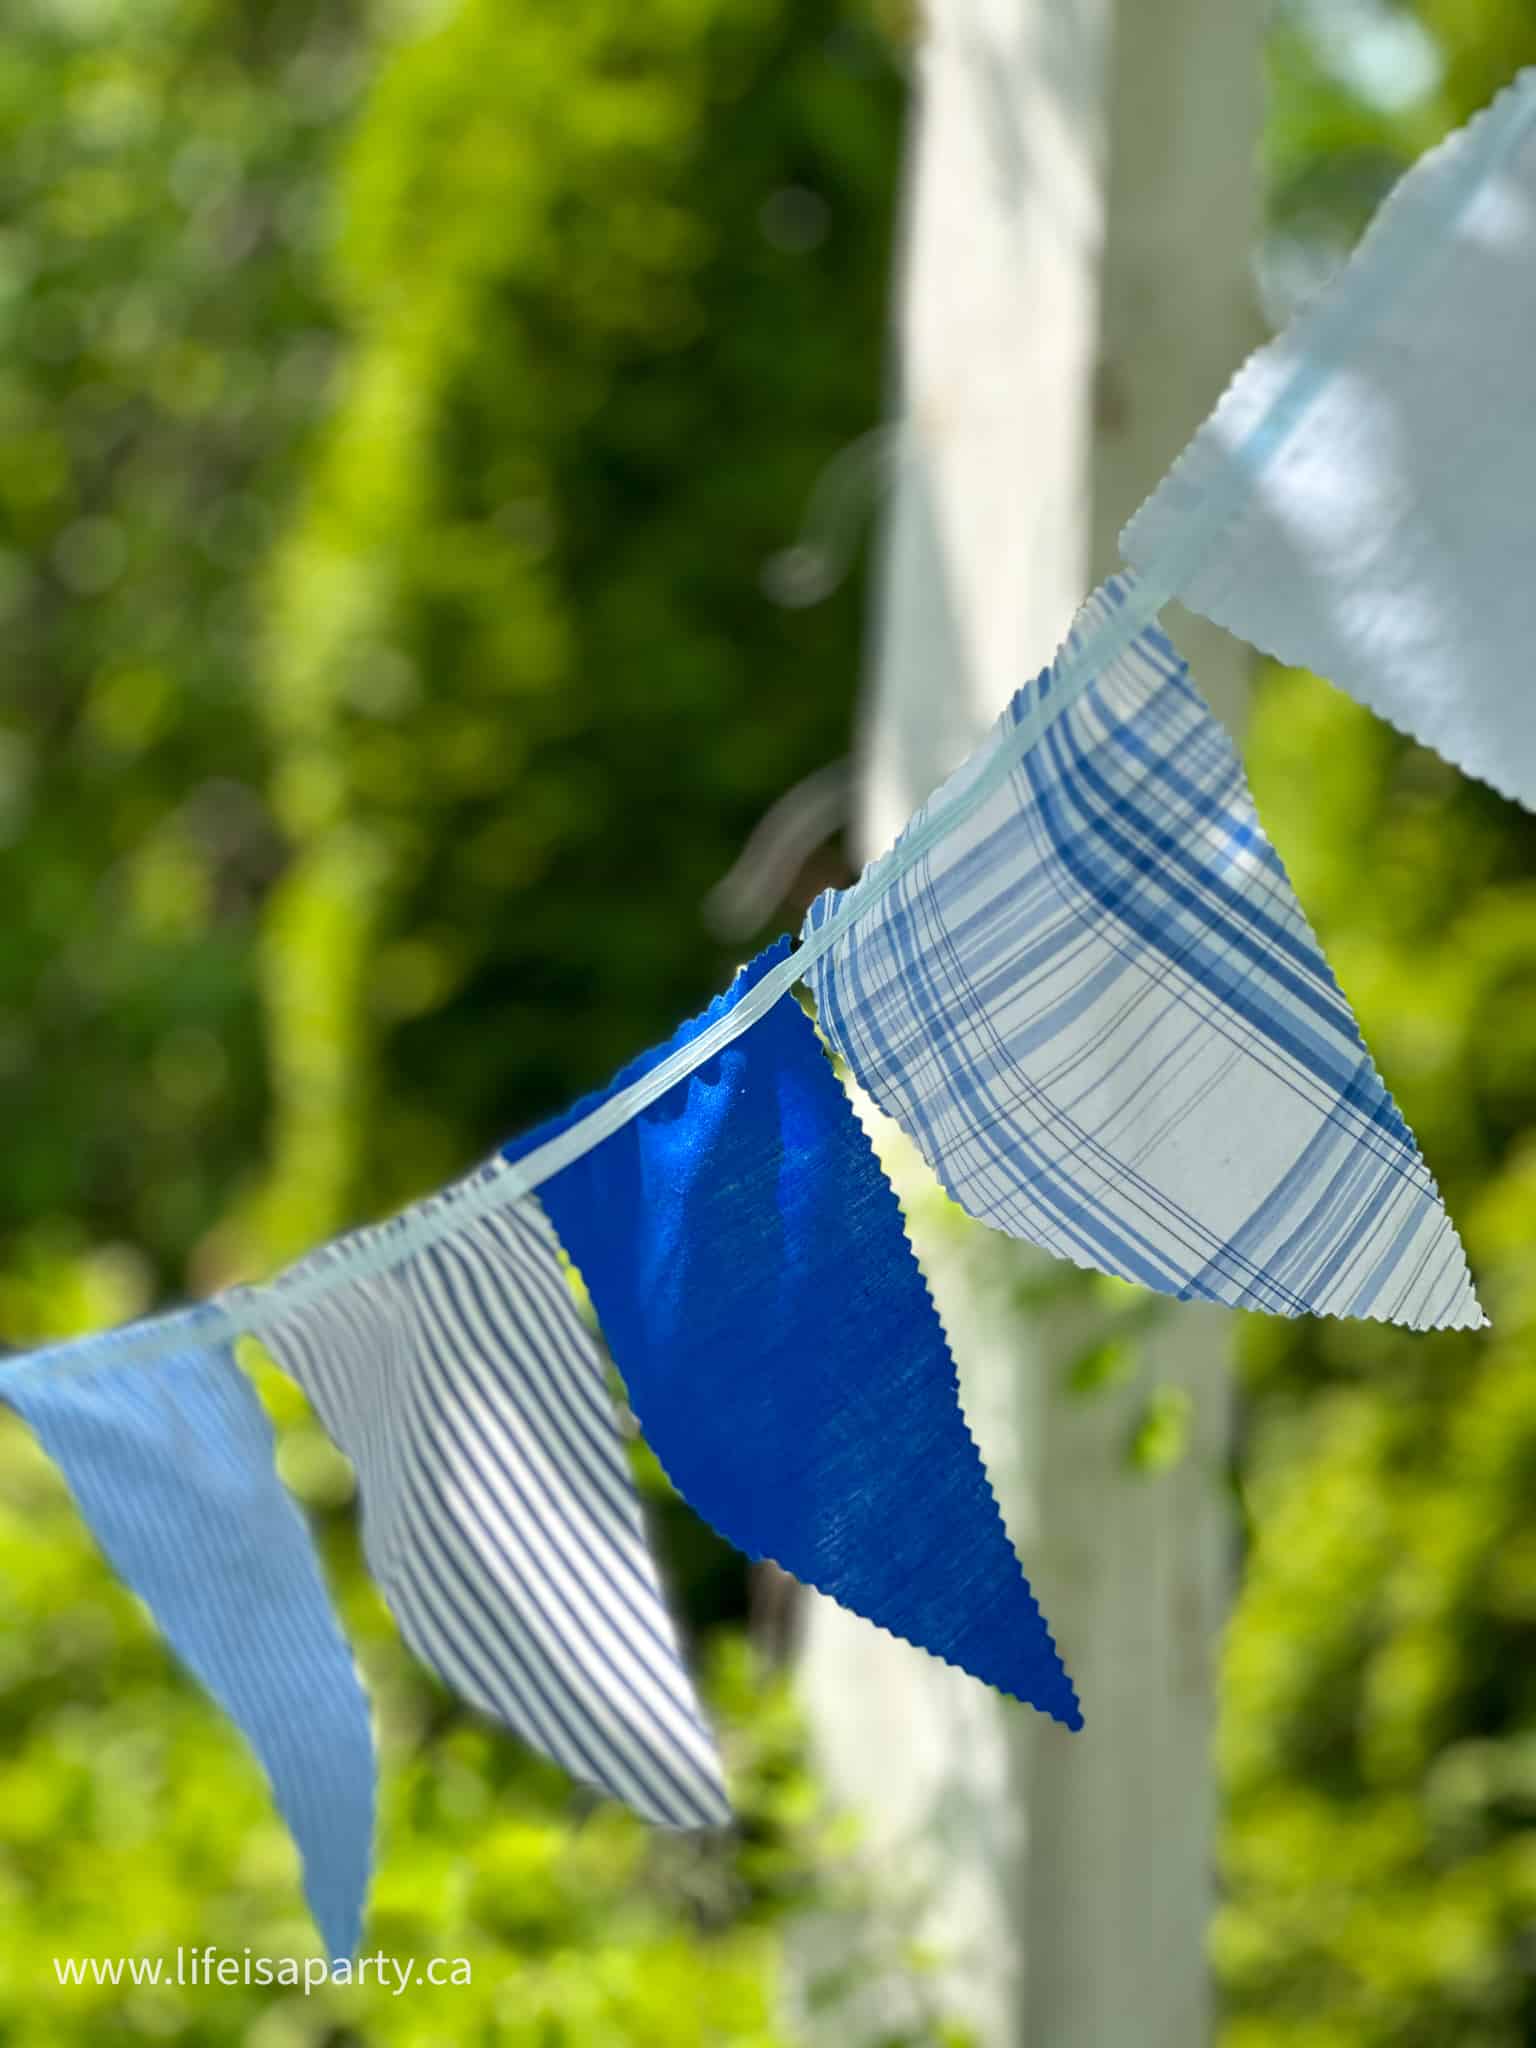
We also made some of our own Father's day party supplies with this DIY bunting.  Fun DIY projects like this one add a personal touch and are the perfect way to add a classic dad detail.  Rather than going with something like napkins inspired by dad's tie, or necktie napkin rings, we're adding that men's wear inspiration in a slightly more subtle way.  We made our bunting out of old men's shirts.  Use dad's old shirts for a personalized touch, or as Father's Day approaches look for them at garage sales or the thrift store.  We used pinking sheers to cut them out as bunting triangles with a zigzag edge.  Then we stitched them to a ribbon.  These fun crafts were a little bit of effort, make it easier and no-sew by using fabric glue to attach them to the ribbon.  

fathers day table ideas
fathers day diy bunting banner

We went for classic blues in solids, checks and stripes, but you could use your choice of colors that your dad loves.  This handmade Father's Day party décor feels extra special and was very easy and inexpensive to make.  Save it and use this happy Father's day banner year after year for all your Father's day tablescapes, starting with their first Father's day for a new tradition or use it for any special day.

Father's Day outdoor table ideas

This table was perfect for our backyard bbq, and dear ol' dad loved it.  But it would also work really well in the dining room, or for a Father's Day brunch.  

fathers day table ideas

Father's Day Menu

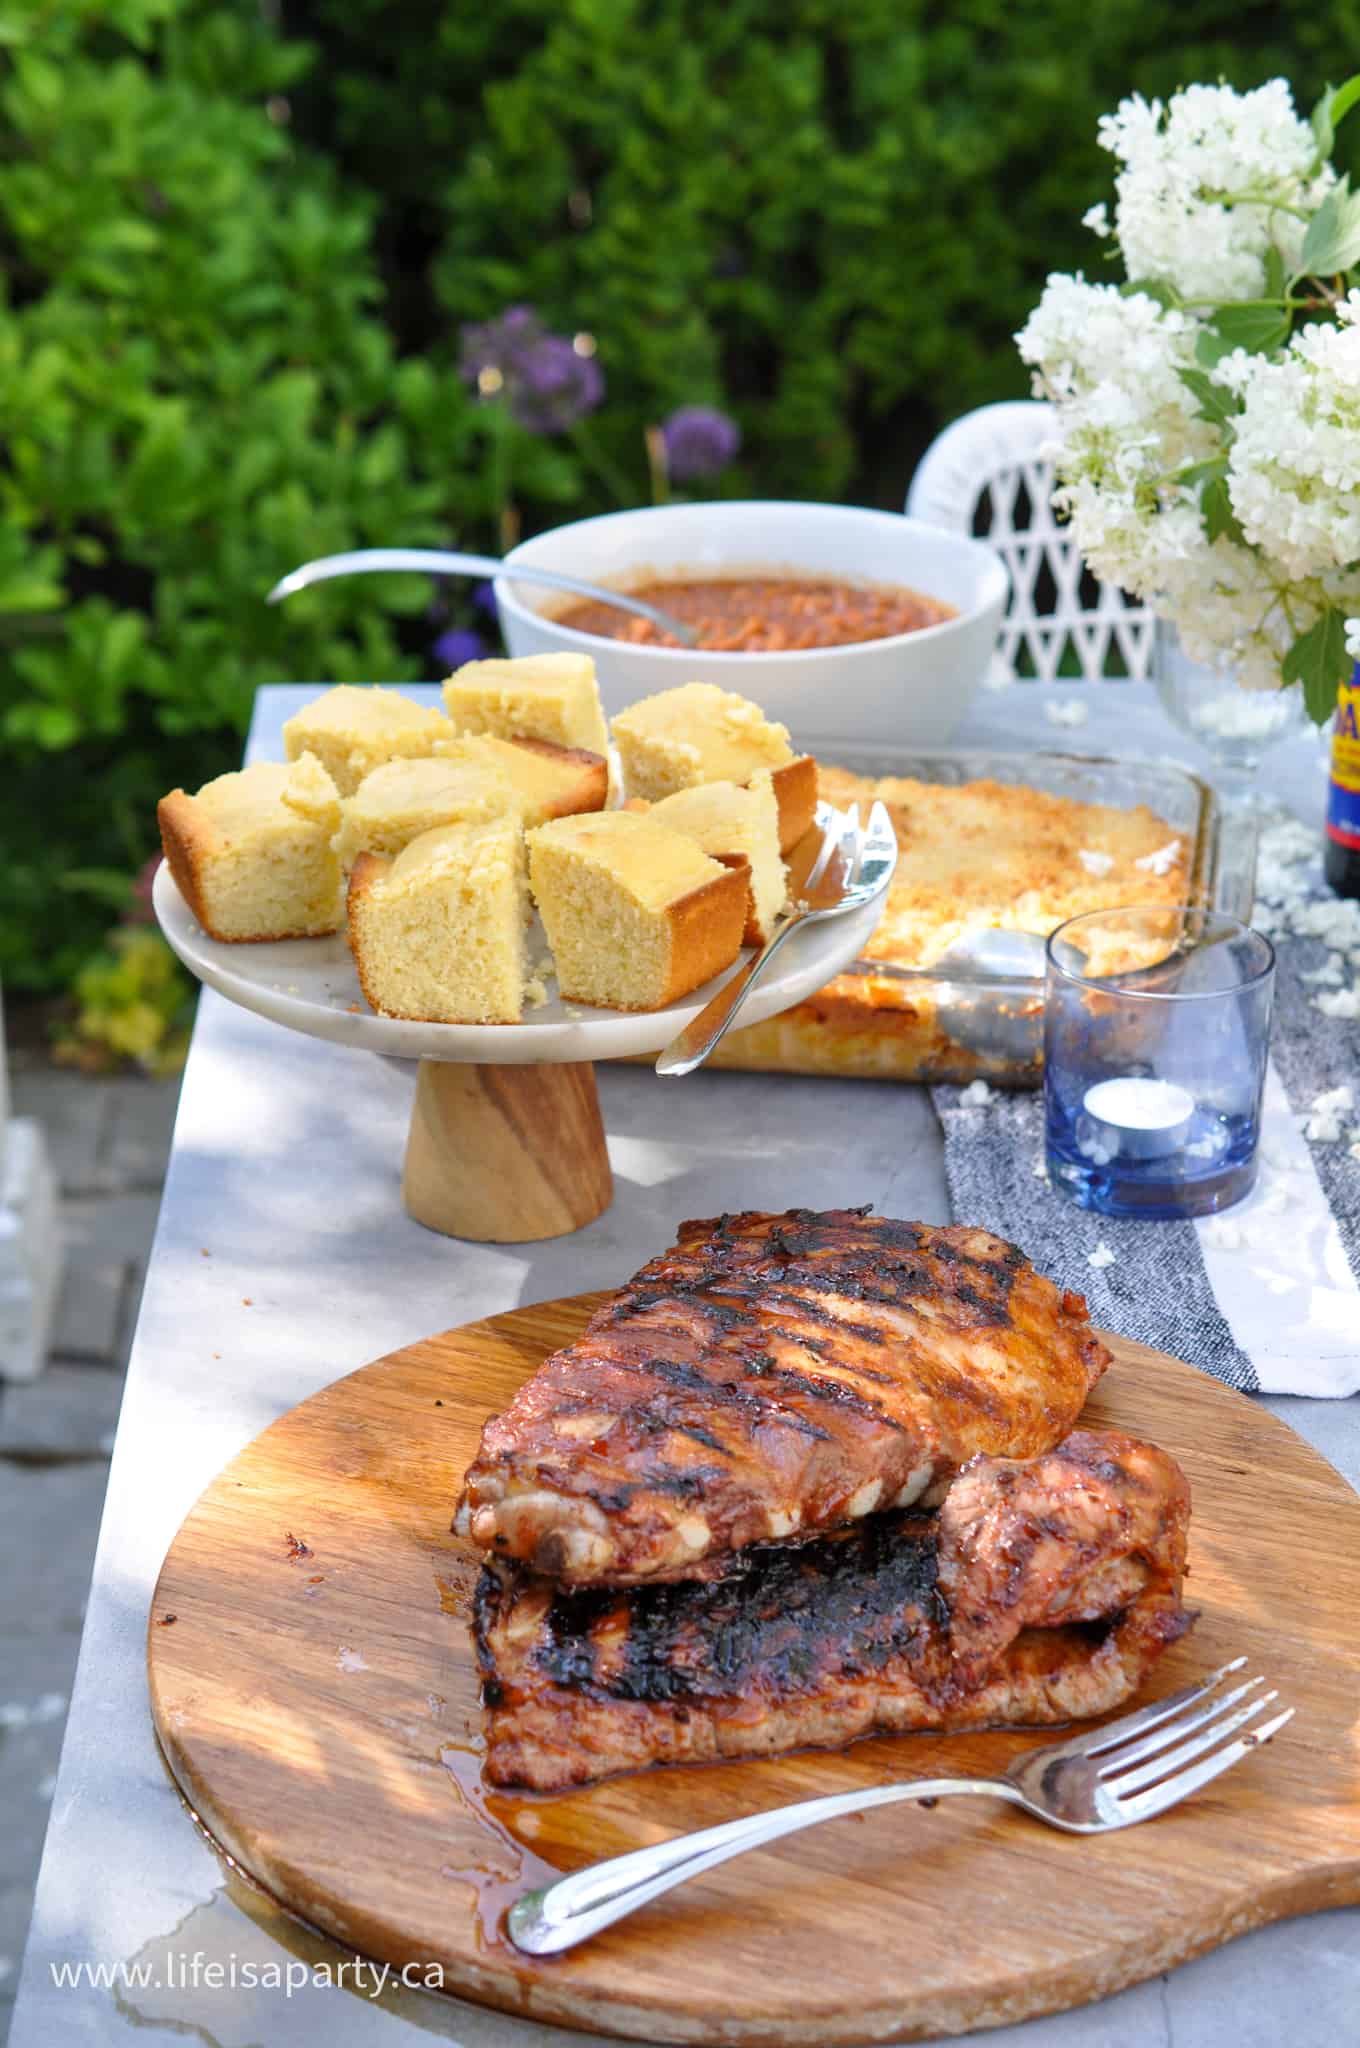
Since the way to Dad's heart is through his stomach, our Father's day dinner menu centered on classic bbq.  This is perfect for the grill master dad.  Be sure to choose a menu that suit's father's taste buds.  We started out with ribs, and grilled whole flatten chicken -get the chicken recipe here.  Then we added in our favourite sides, like homemade mac and cheese -recipe here, homemade baked beans -recipe here, coleslaw, corn on the cob, and cornbread. And for dessert, especially for the dad with a sweet tooth, we enjoyed a homemade banana pudding pie -get the recipe here.

  • bbq ribs
  • marinated grilled flattened chicken
  • homemade Mac and cheese with panko bread crumb topping
  • homemade slow cooker baked beans
  • coleslaw
  • corn-on-the-cob
  • sweet homemade cake-like cornbread
  • quick and easy banana pudding pie
Father's Day bbq
Father's Day bbq ideas
fathers day table ideas

It was a feast that everyone loved, but one of the best parts was spending time with family cooking all the great food together.  The most important thing is always family time.

Fathers Day table ideas

I hope these Fathers day table ideas give you a little inspiration for your Father's day celebrations, and that you have a wonderful time celebrating with the whole family!

More Inspiration For Father's Day

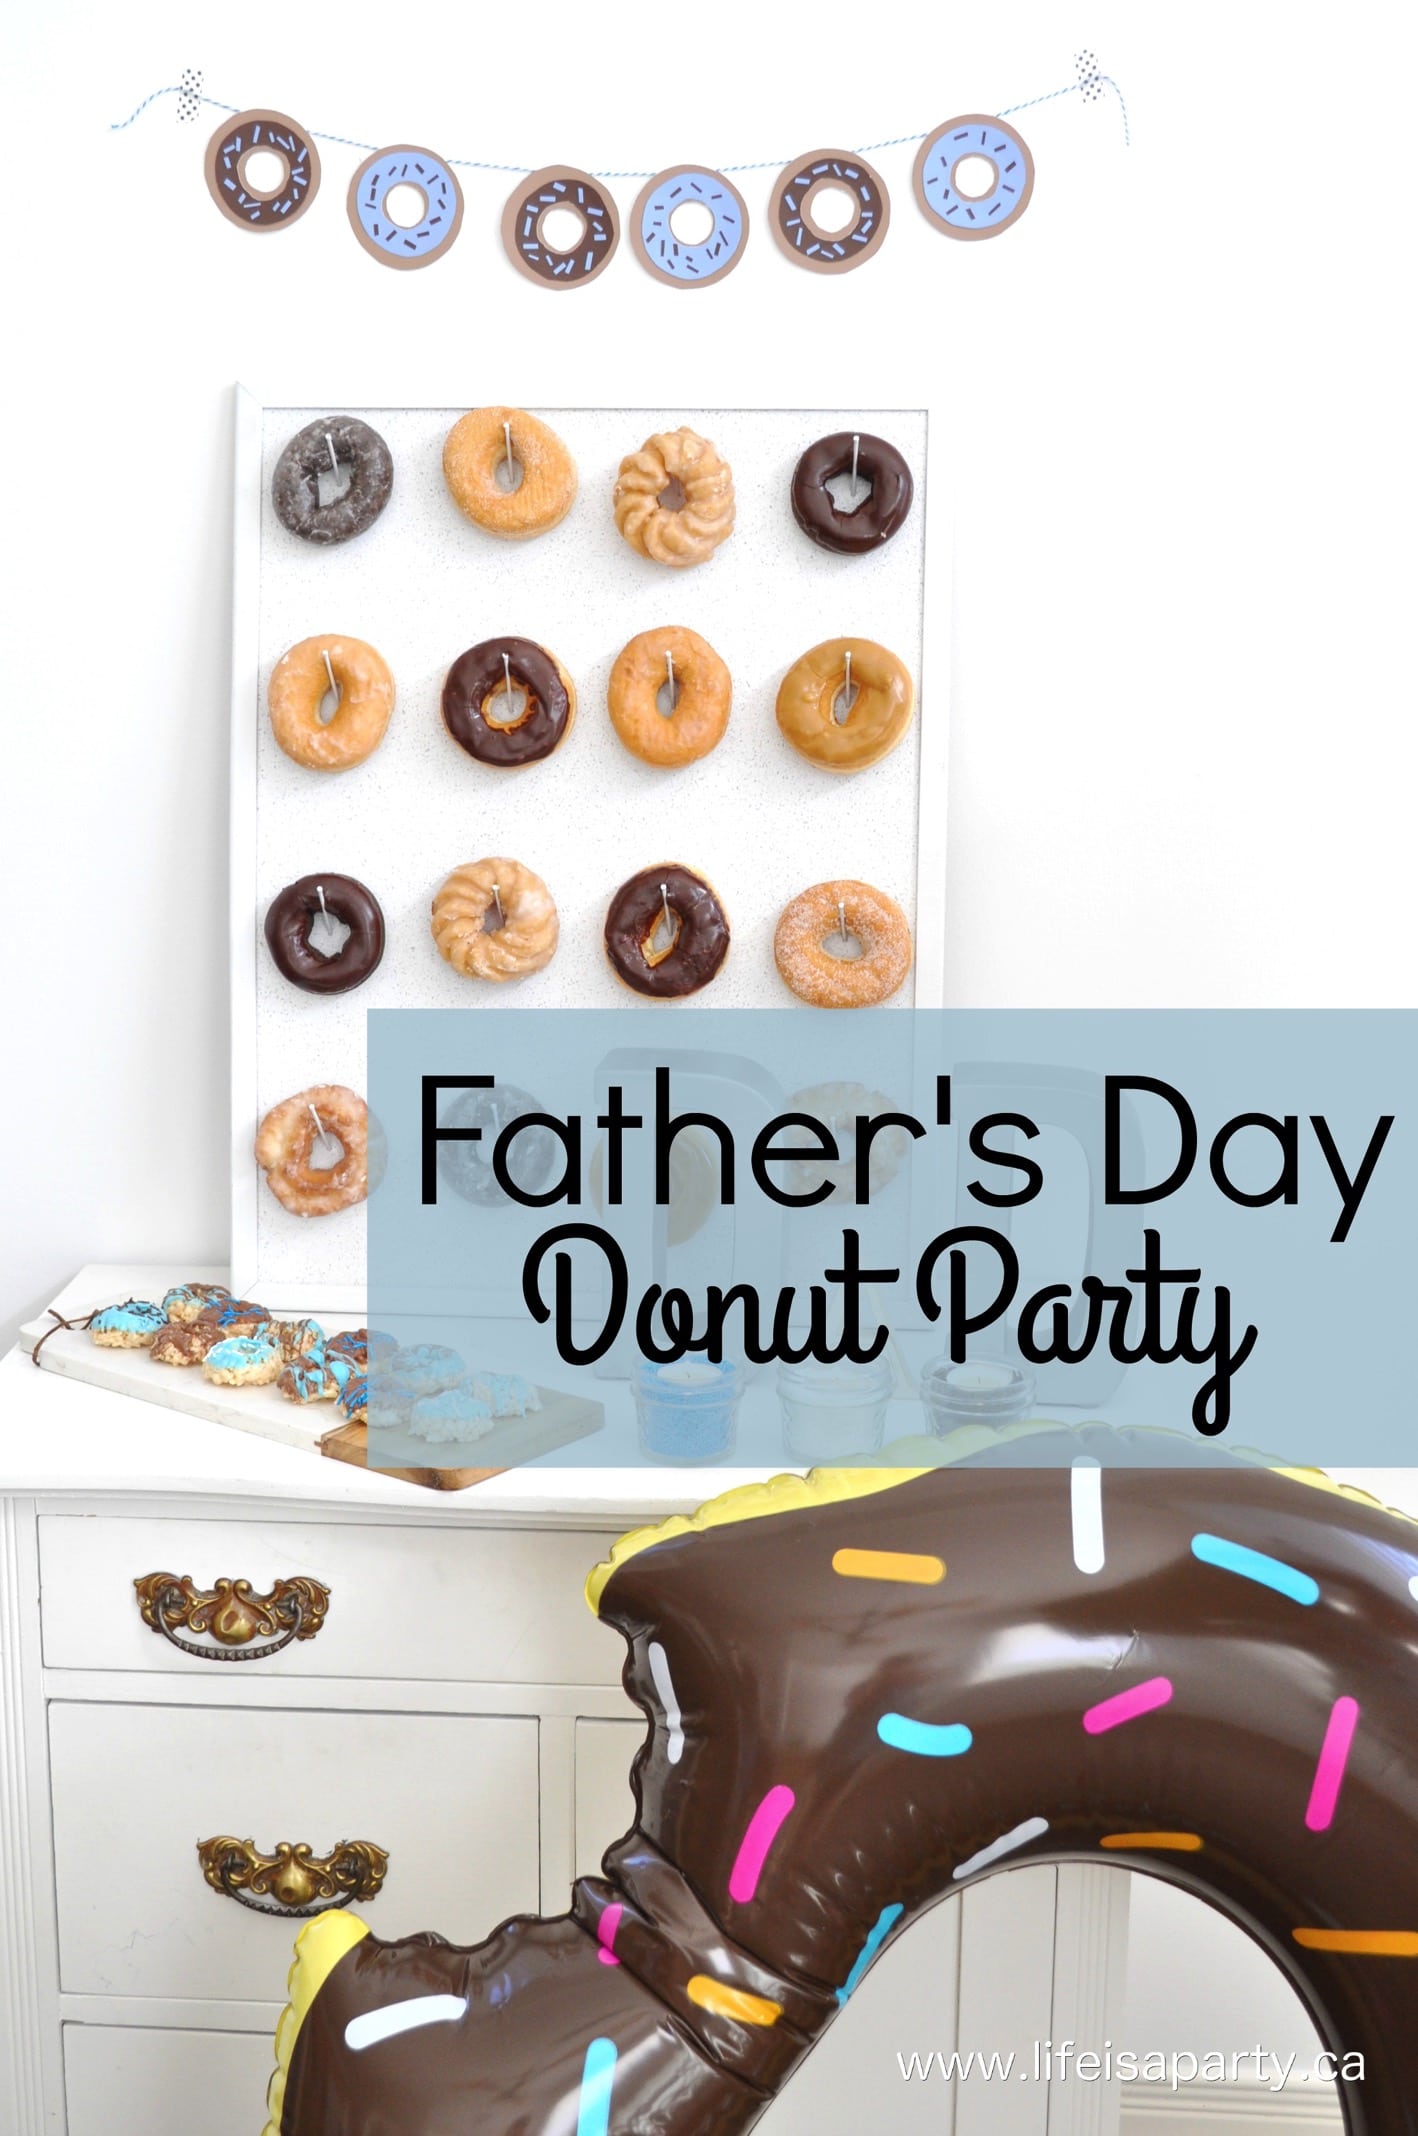
You might also like our Donut inspired Father's Day party here.

Father's Day Donut Party Ideas -Easy DIY Donut Wall how-to, Donut banner, rice krispie donuts, and sprinkle candle holders.

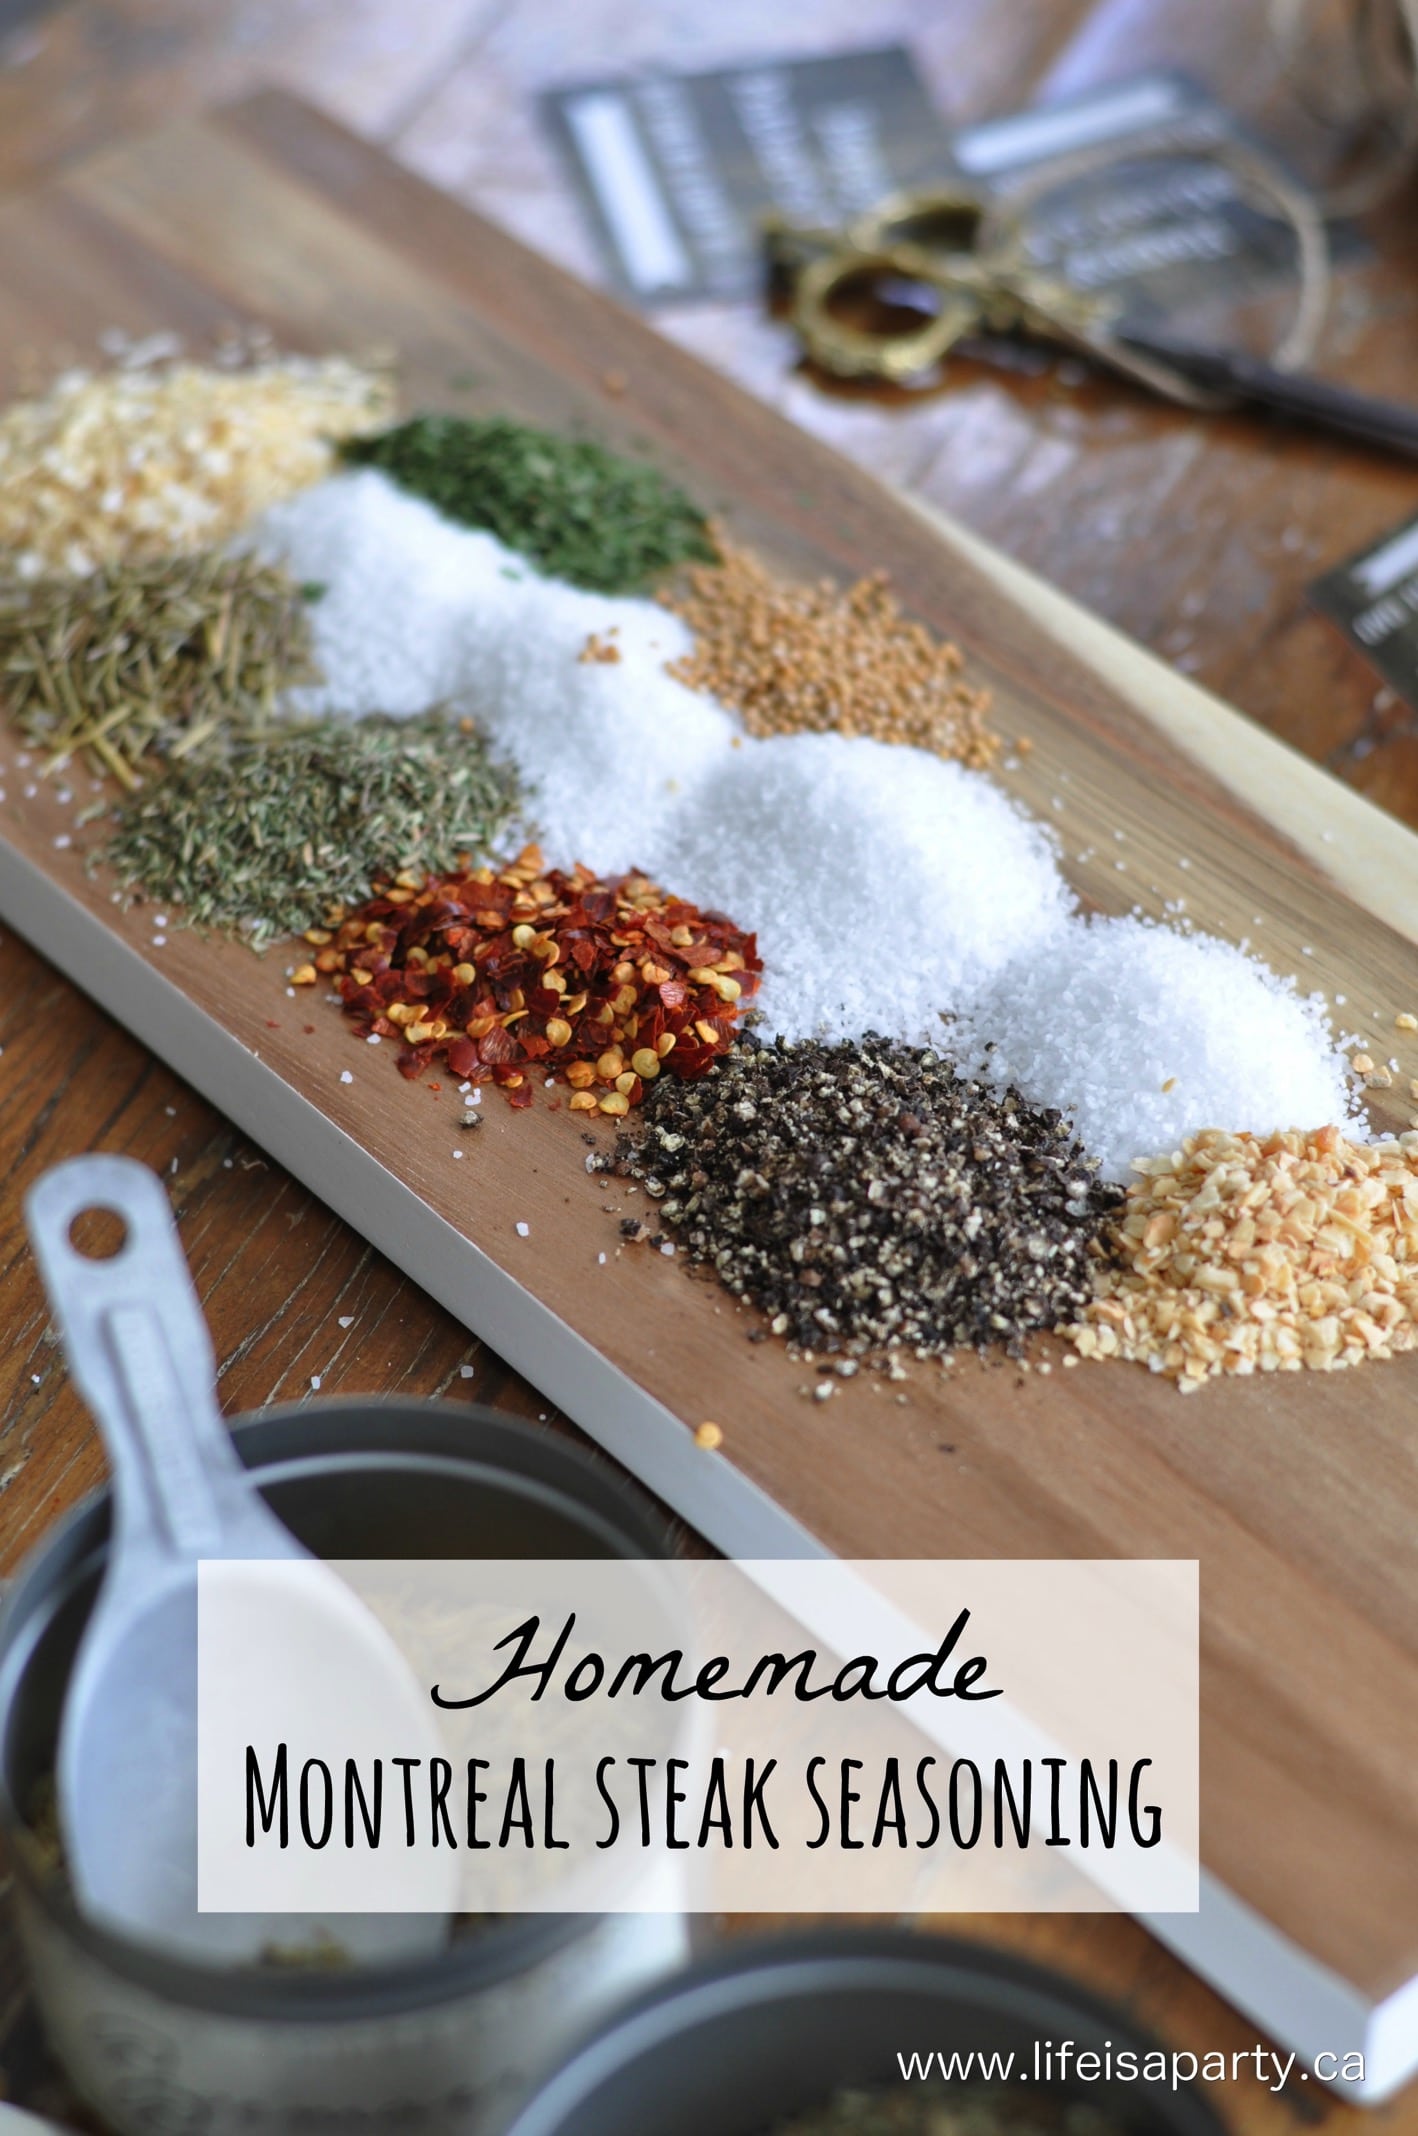
Also check out our Homemade Montreal Steak Spice Father's Day gift idea here.

Homemade Montreal Steak Seasoning: Easy to make and delicious recipe, plus free printable Father's Day gift labels.

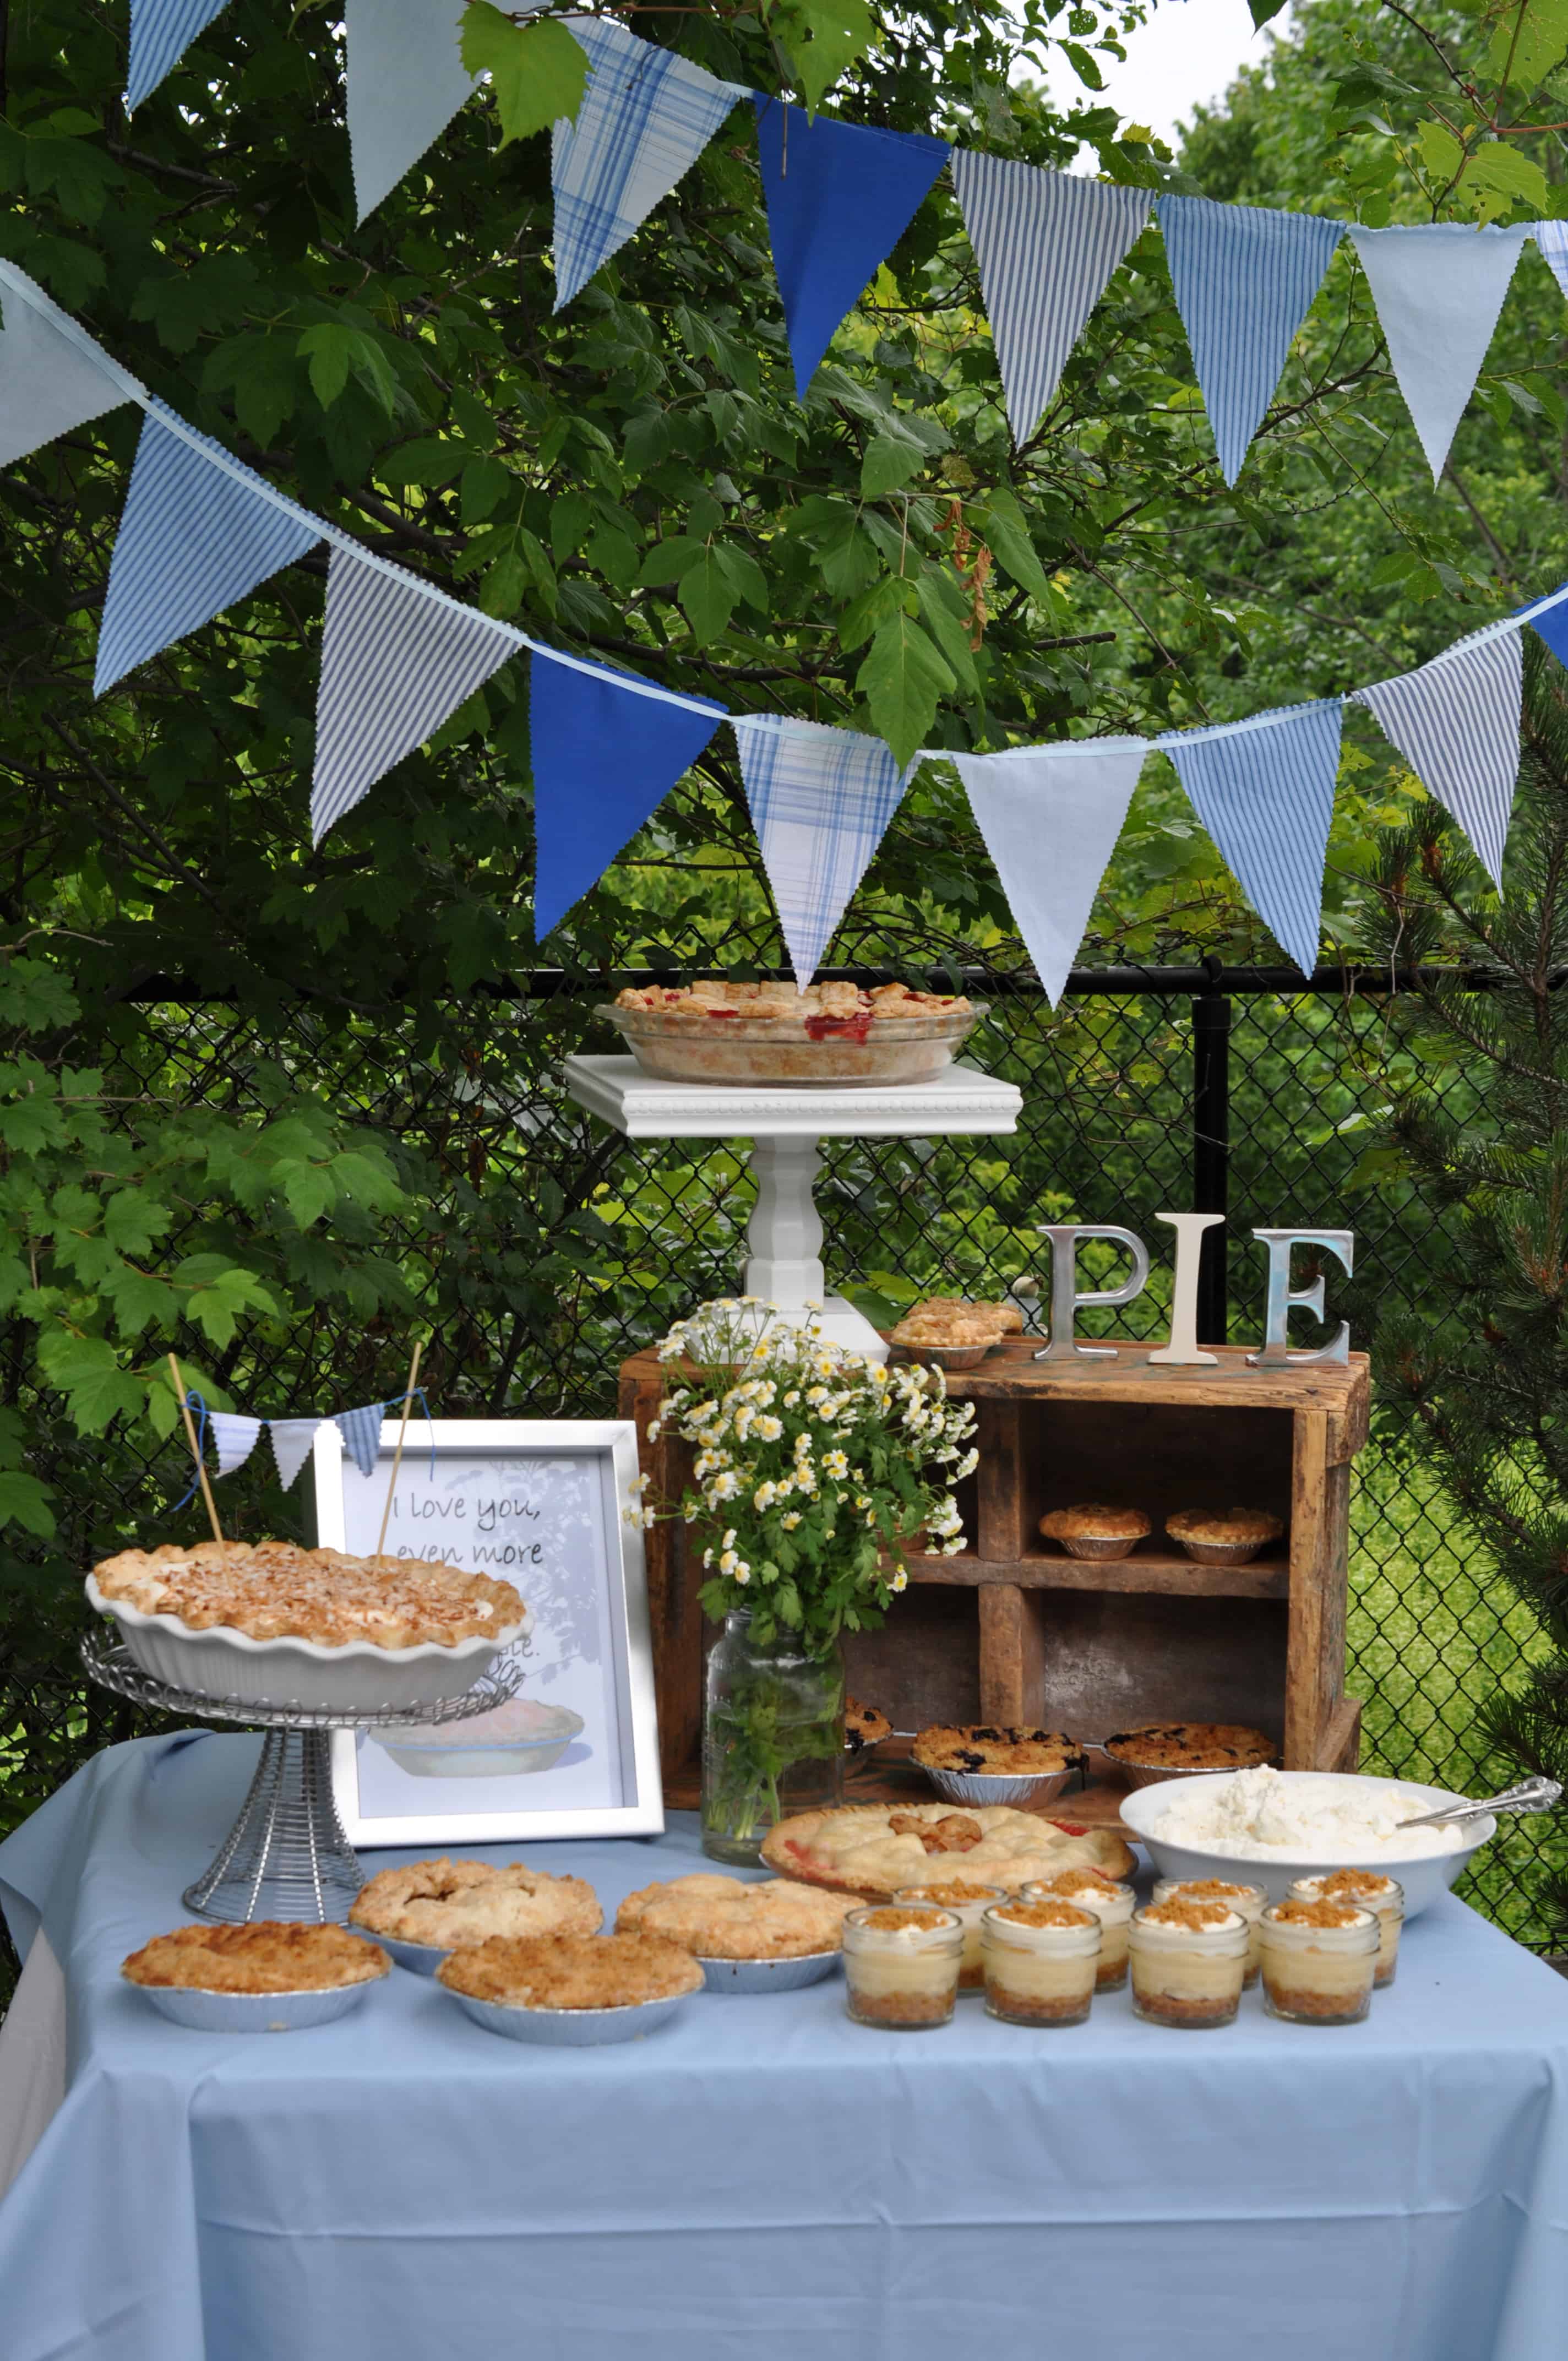
You might also like our Father's Day Pie Stand party here.

Yogurt Parfait Board

May 8, 2023 · 2 Comments

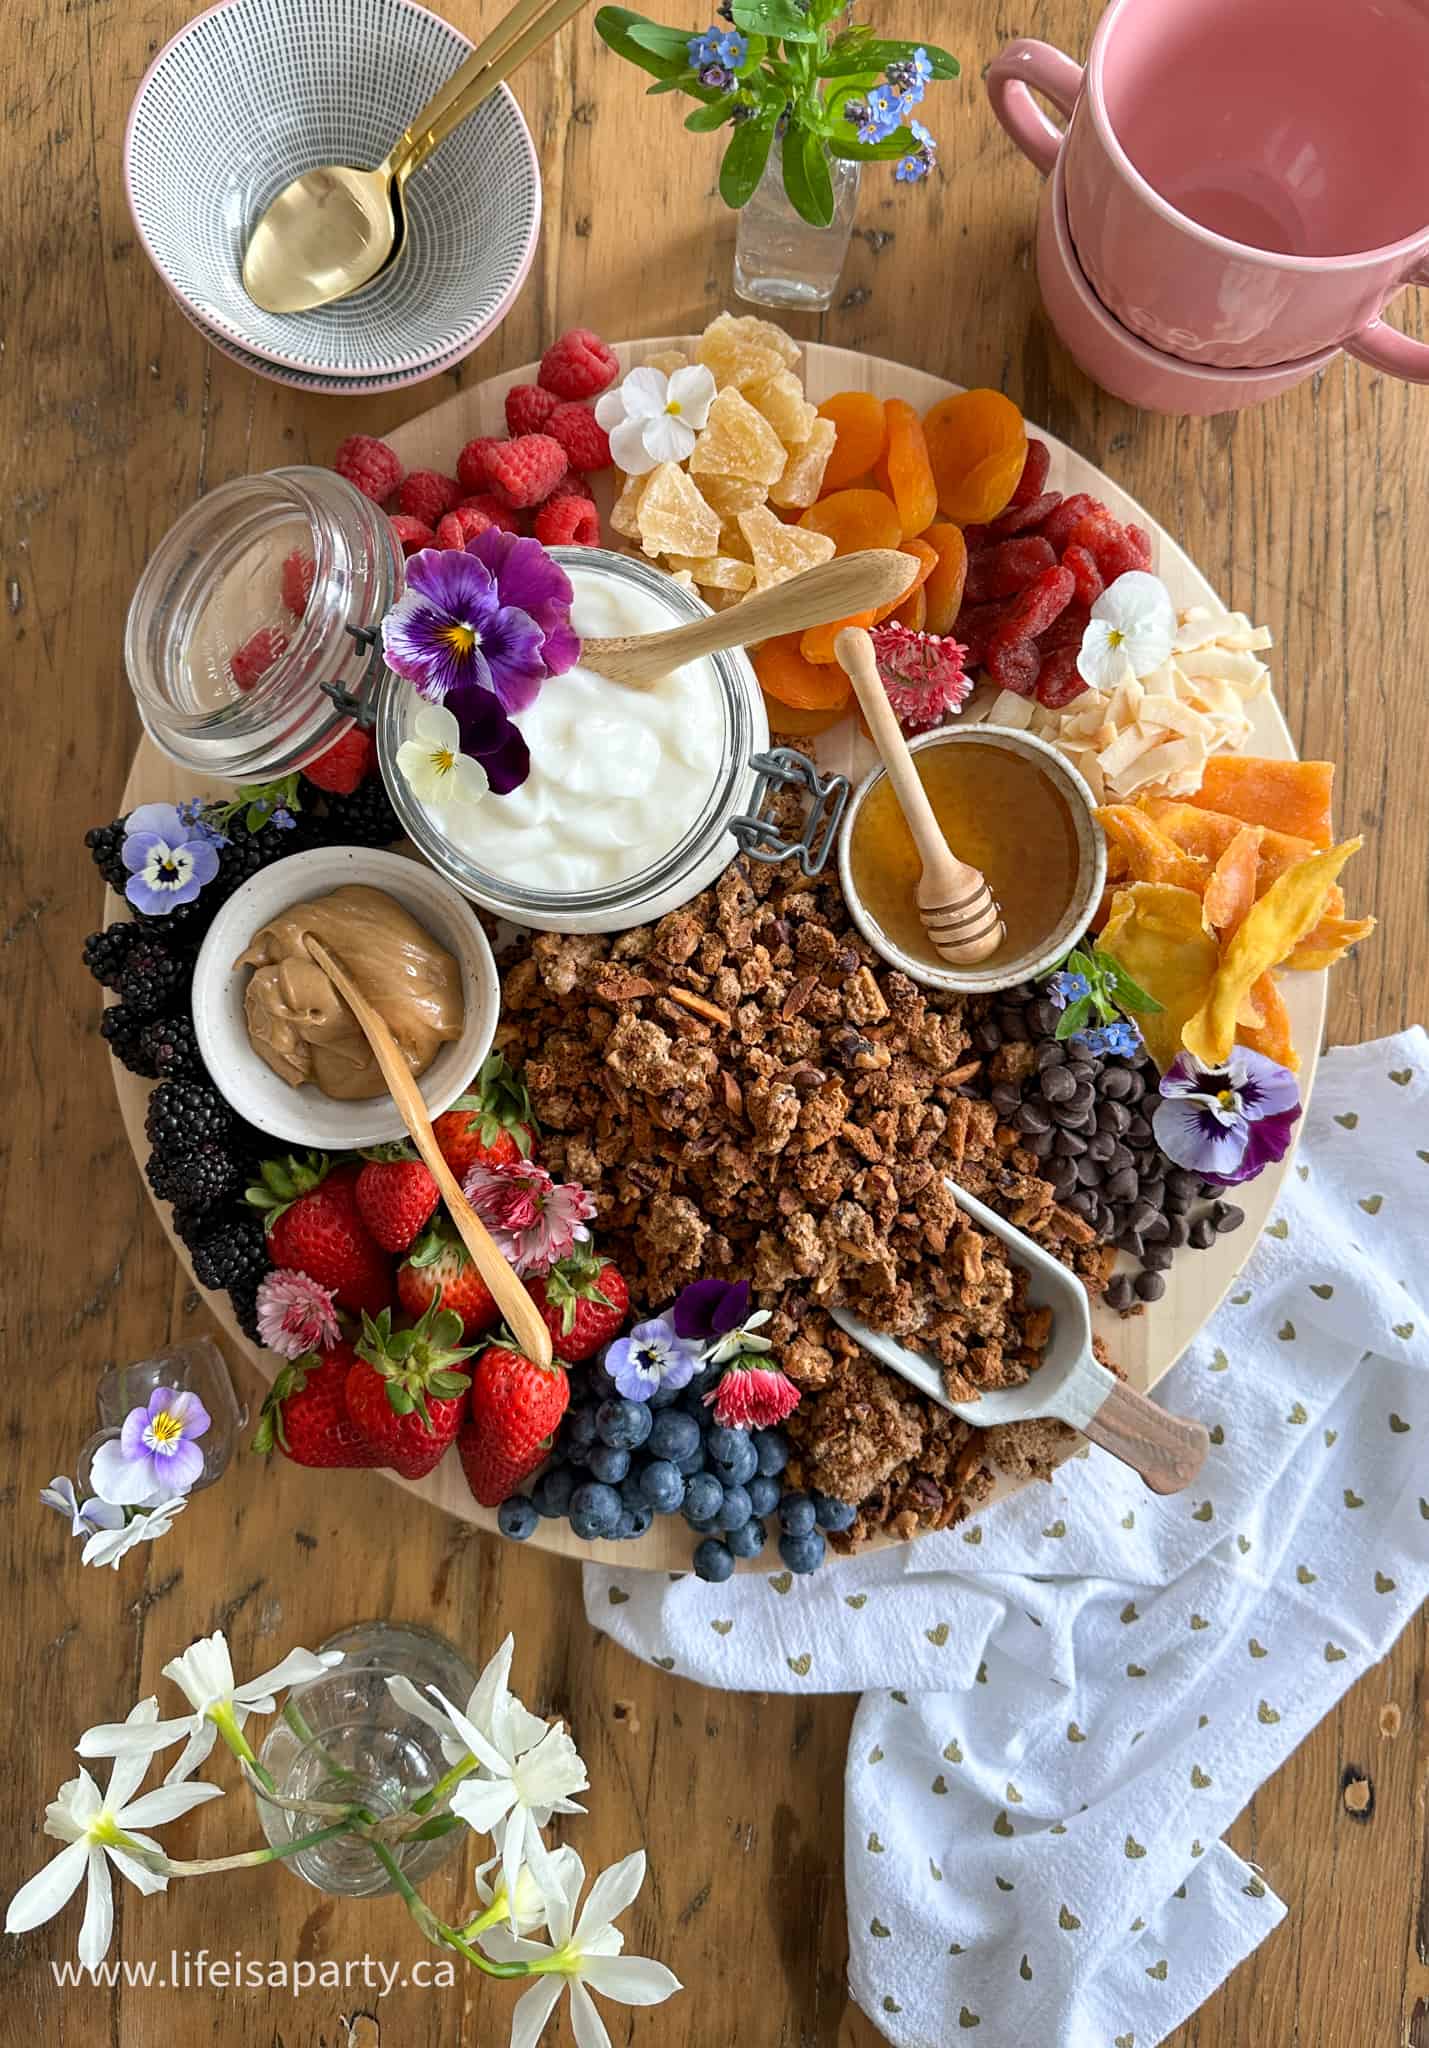
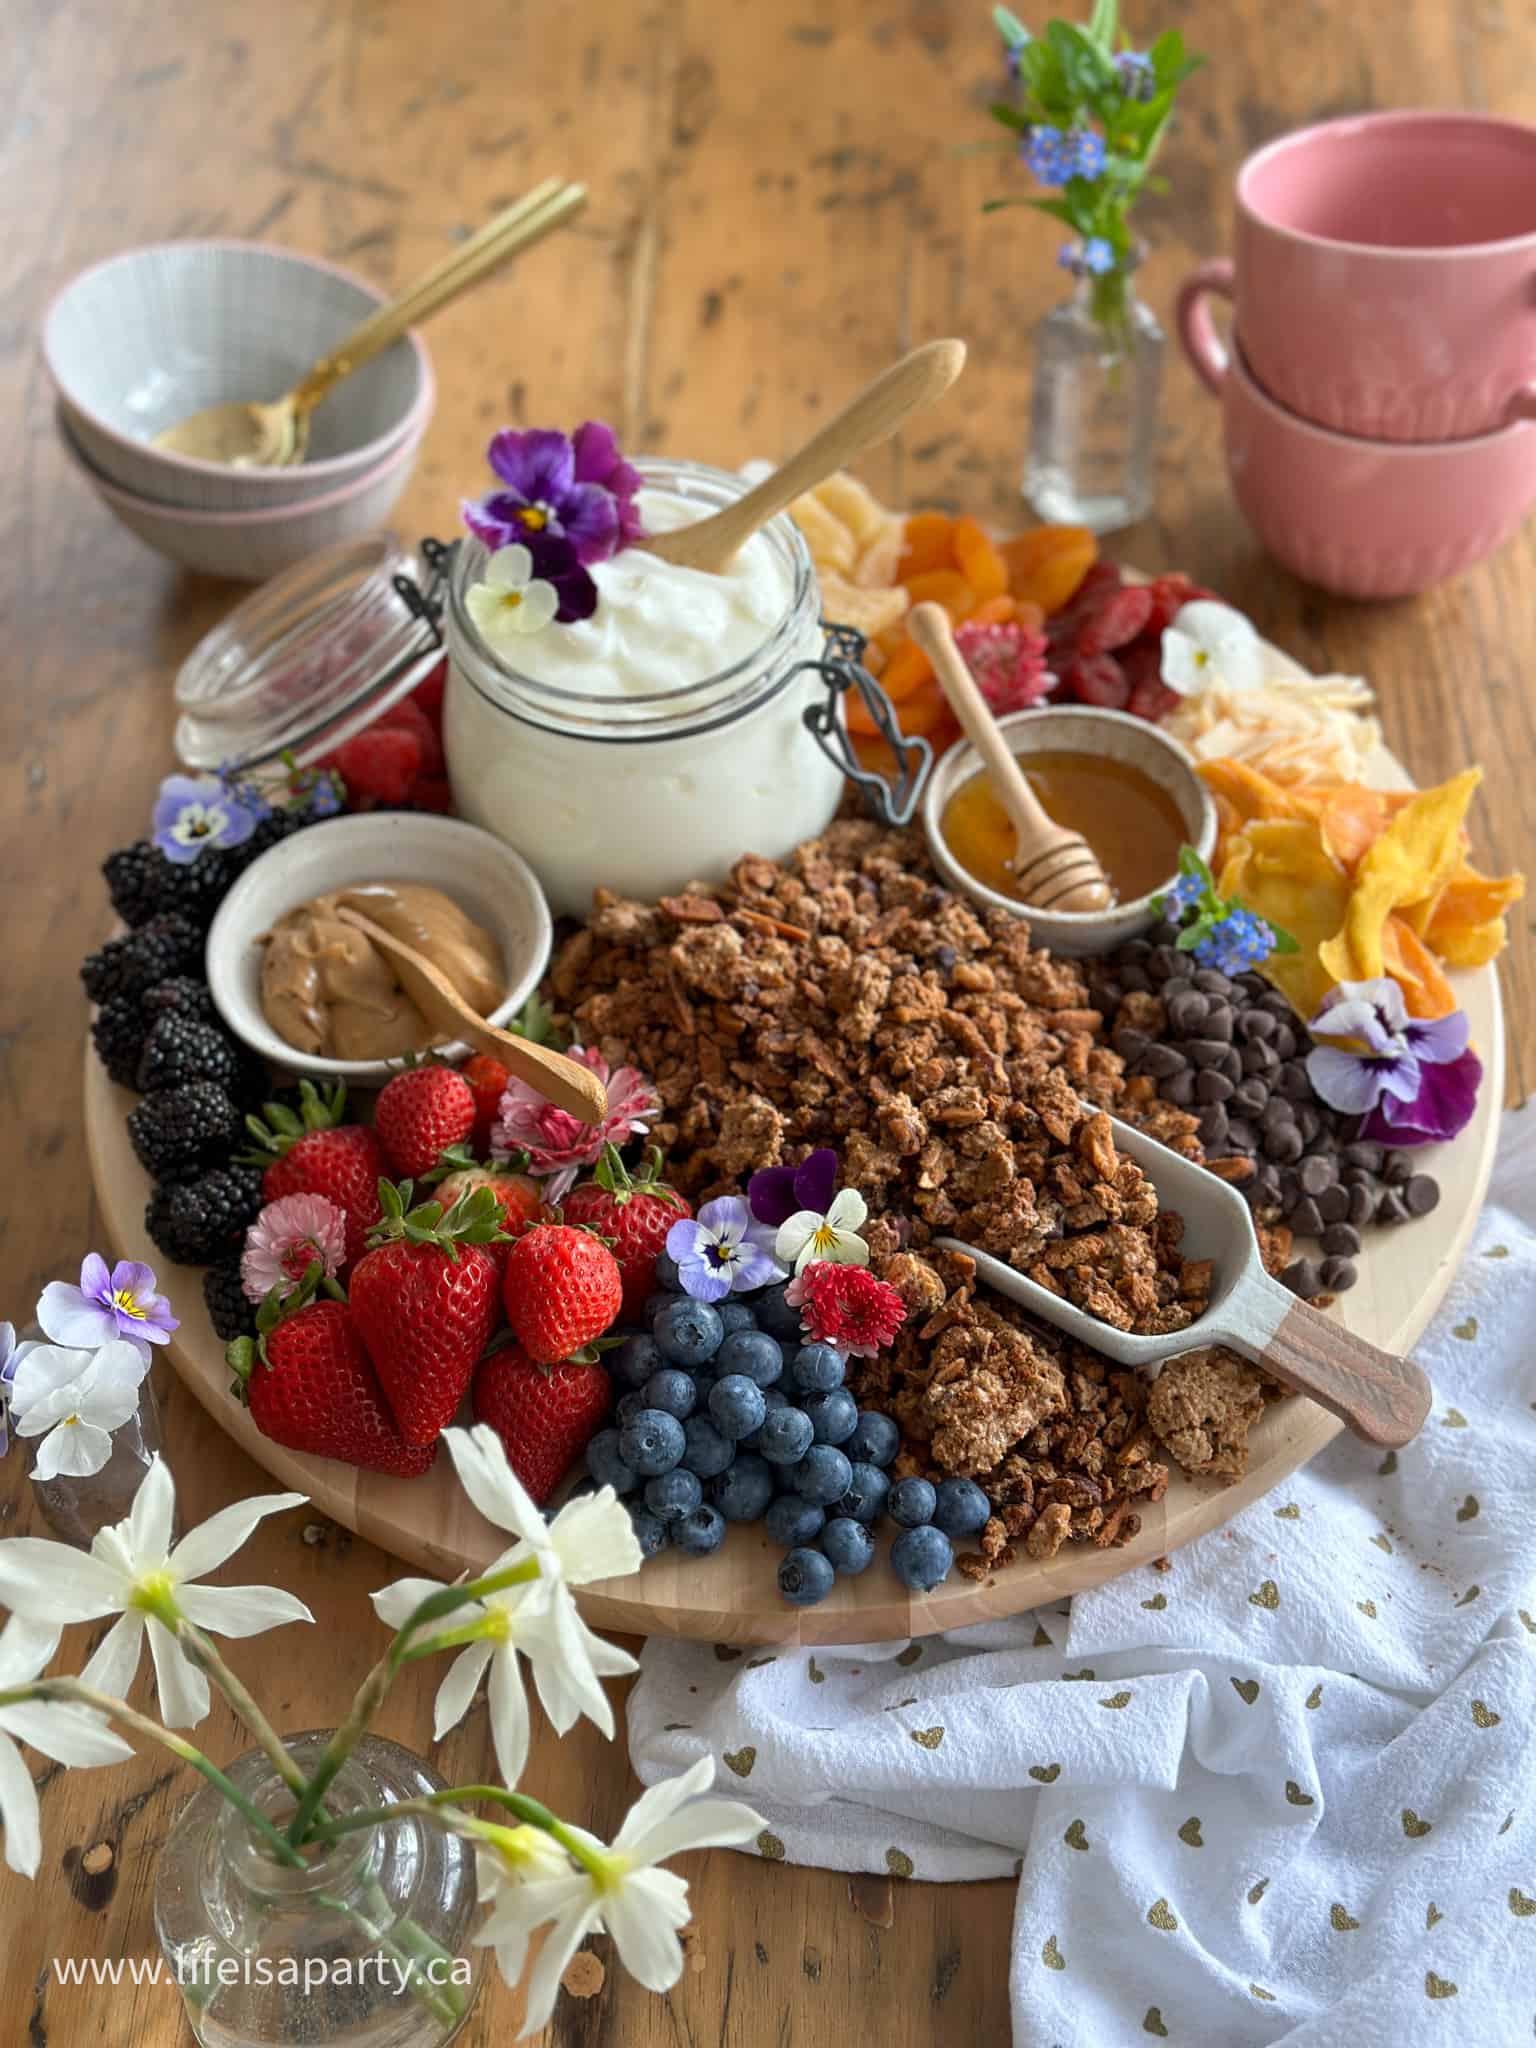
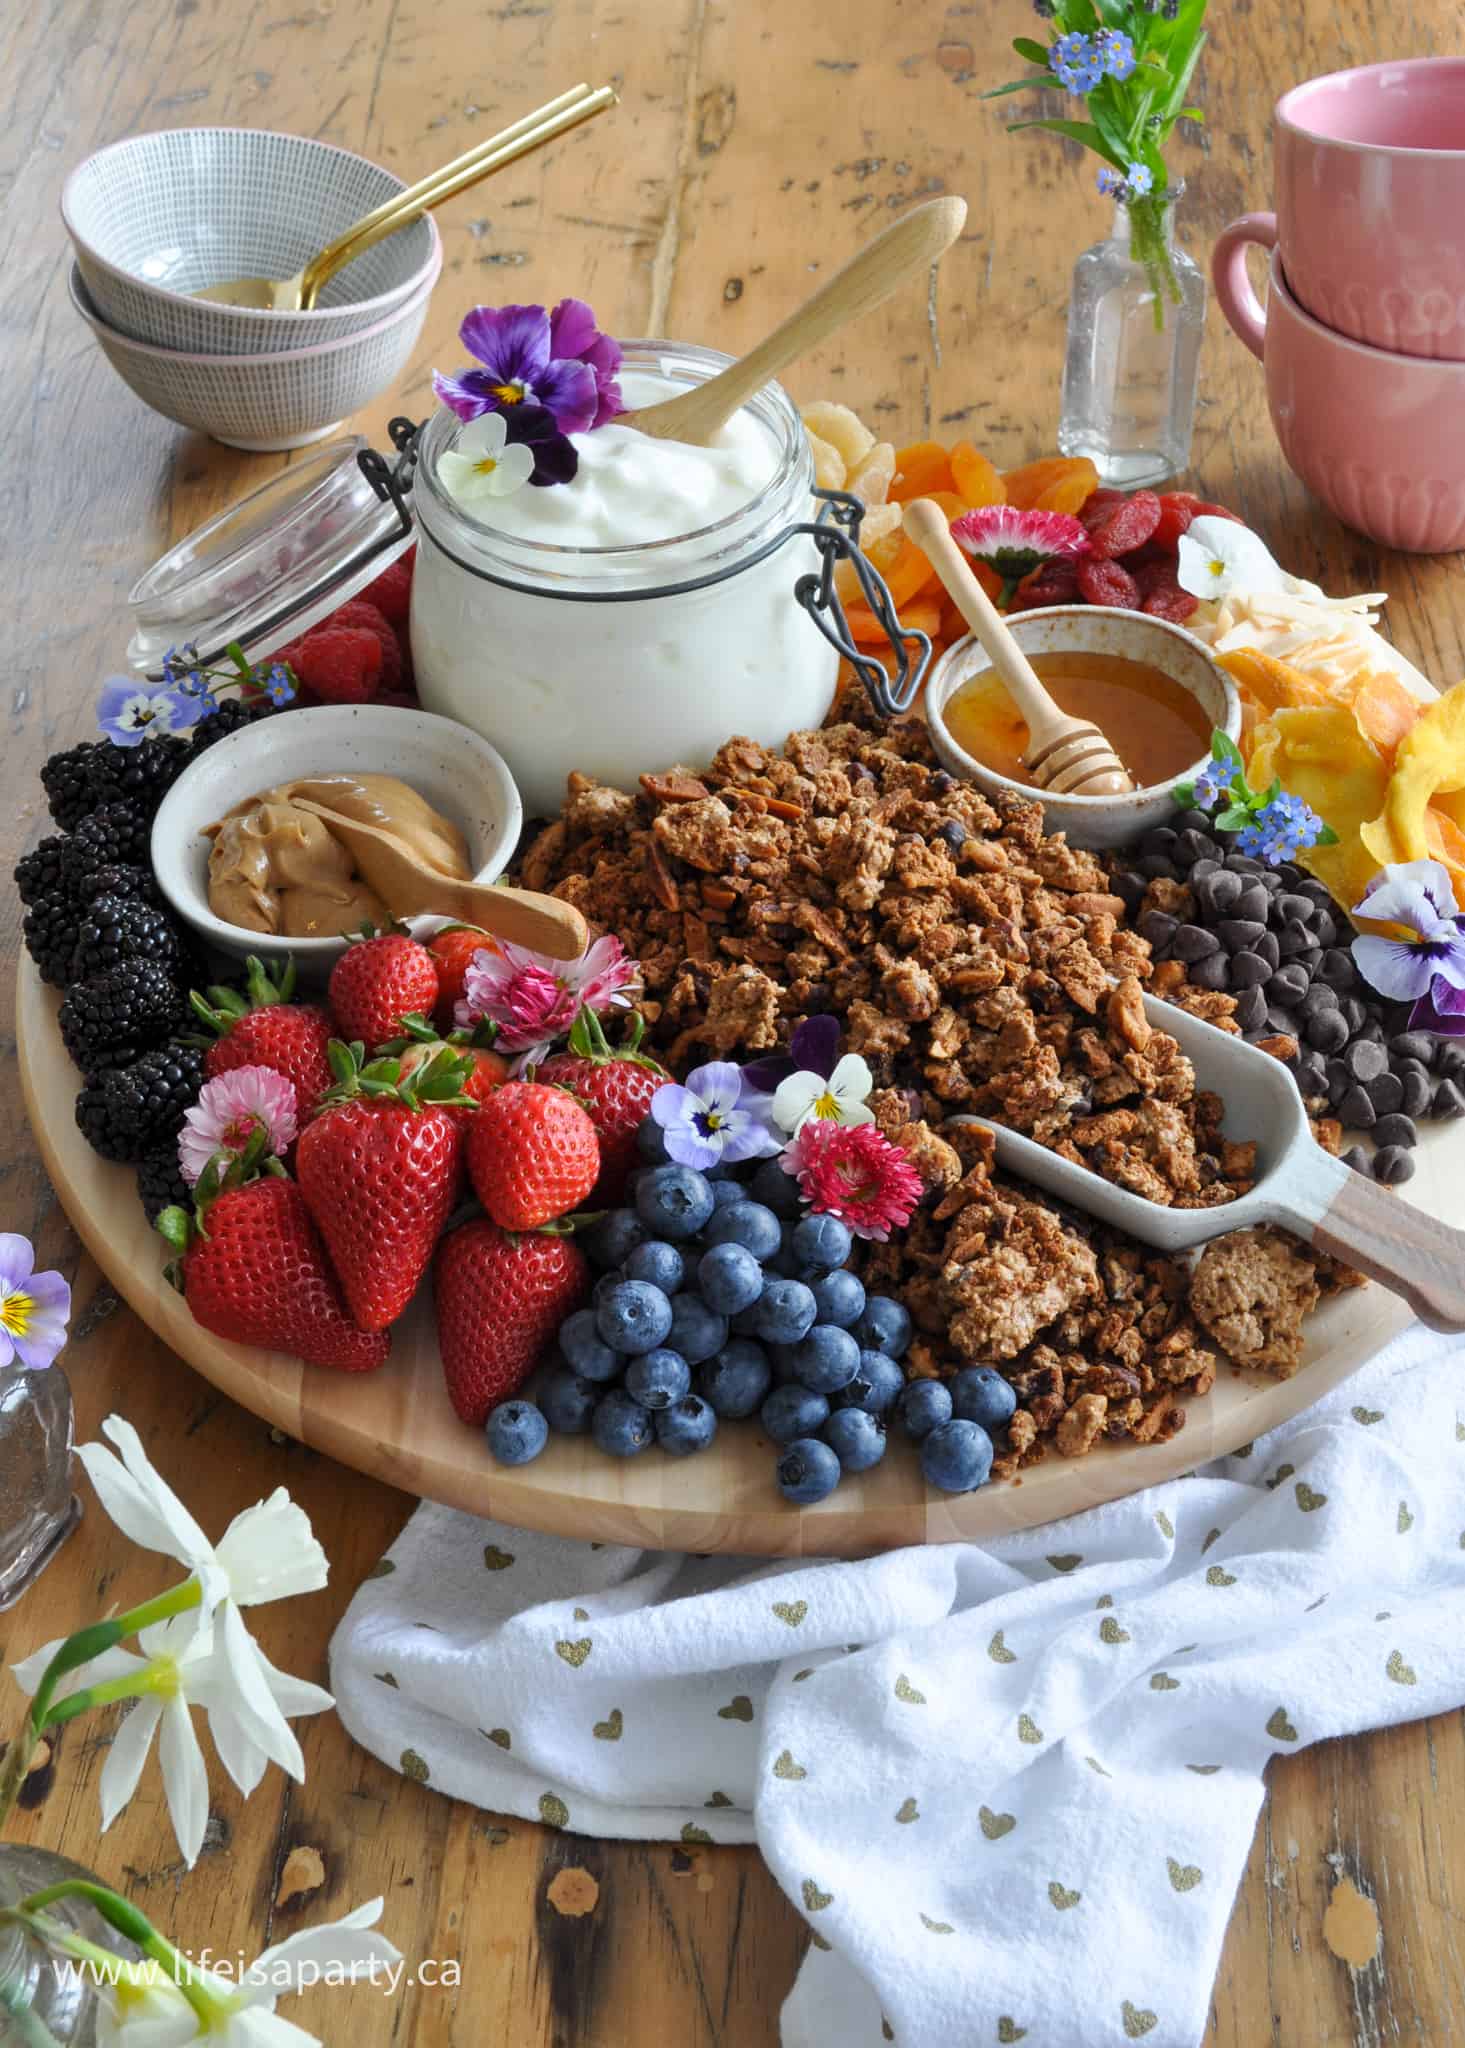
Yogurt parfait board with fresh berries, granola, honey, peanut butter, dried fruit, and edible flowers on a wooden lazy Susan board.

A yogurt parfait board is the most beautiful no-cook spread you can put on a brunch table. Fresh fruit, crunchy granola, honey, and all the toppings your guests could want are arranged on one stunning board that lets everyone build exactly what they love.

Yogurt parfait board with fresh berries, granola, honey, peanut butter, dried fruit, and edible flowers on a wooden lazy Susan board.
[feast_advanced_jump_to]

Quick Look

  • 📋 Recipe: Yogurt Parfait Board
  • ⏲️ Ready In: 20 minutes
  • 👪 Servings: 6-8
  • 🔪 Difficulty: Easy
  • 💭 Top Tip: Place all your bowls and serving vessels on the board before adding any loose ingredients. It is much easier to arrange everything else around them once they are in place.

Why You'll Love This

  • Nothing to cook. Just arrange and serve.
  • Completely customizable for every guest's taste.
  • Works as a grazing starter while you finish other dishes.
  • Scales easily for a small gathering or a crowd.
  • Beautiful enough to be the centerpiece of the table.

If you love a showstopping spread that does most of the work for you, this yogurt parfait board is going to become a go-to. It is the kind of thing guests talk about. Not because it was complicated, but because it looked like you really thought about them. Fresh berries, dried fruit, granola, honey, chocolate chips, peanut butter, and edible flowers are all arranged on one generous board so everyone can build their own parfait exactly the way they like it.

We set ours up as the appetizer course for a Mother's Day brunch, but it works just as well for a baby shower, a bridal shower, a holiday breakfast, or any morning when you want to make people feel a little special. It is also a perfect way to keep guests happily grazing while you are finishing up the rest of the menu. And we love it as a way to offer a lighter choice for anyone who wants that option.

If you love easy entertaining ideas, you might also enjoy our homemade crunchy granola recipe. It is what we use on this board and it makes the whole thing taste extra special. This strawberry rhubarb compote would make an amazing addtion to this board also. You might also like our Easter Bunny Breakfast for more breakfast ideas.

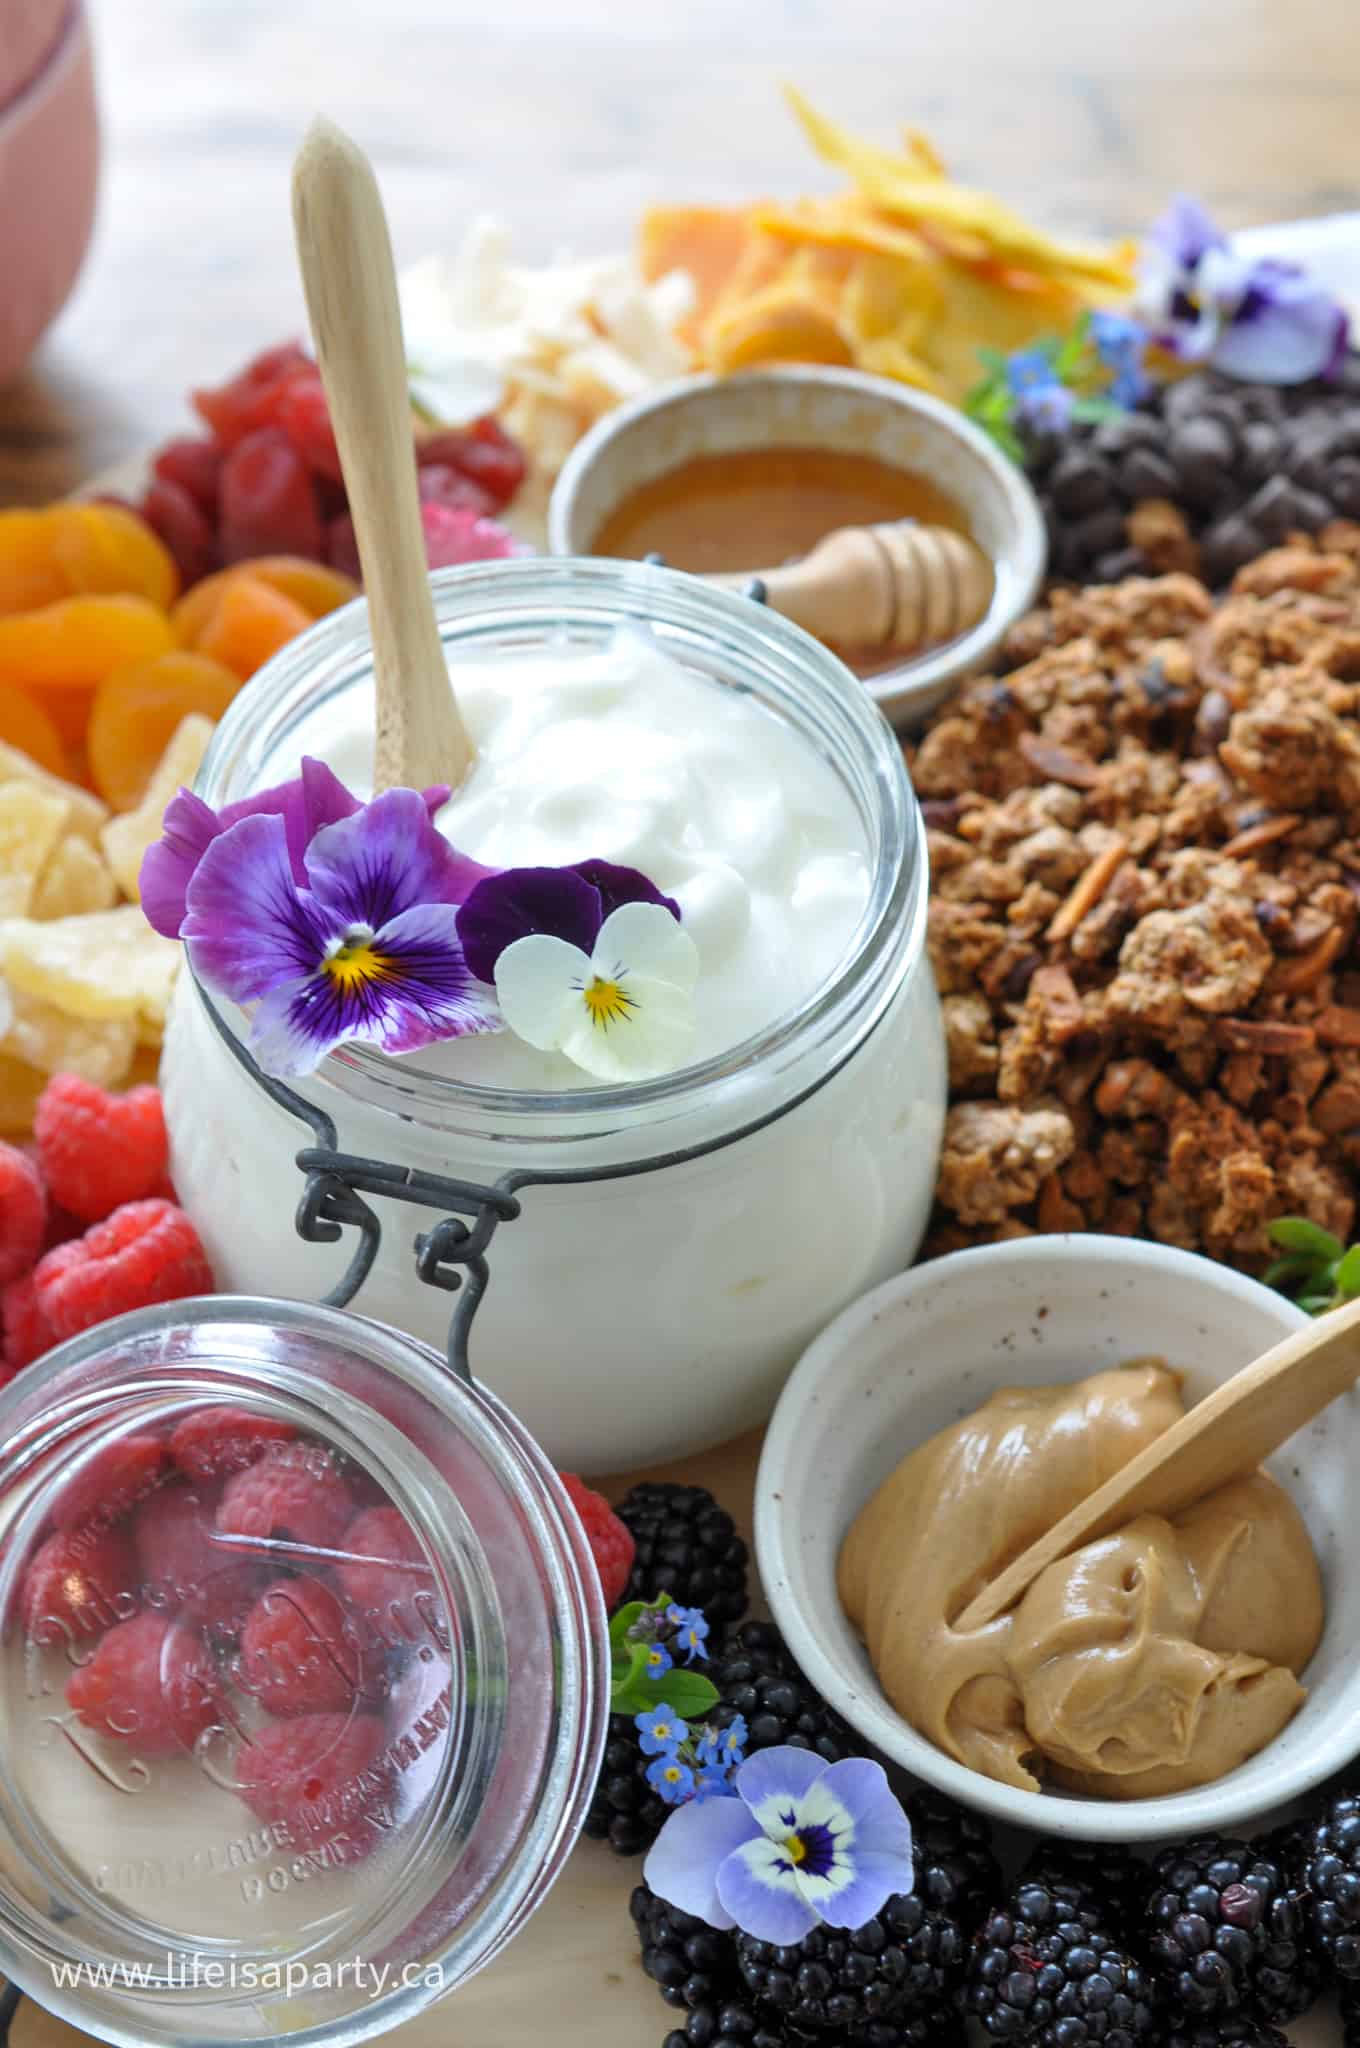
Yogurt parfait board with vanilla yogurt in a mason jar surrounded by granola and toppings.

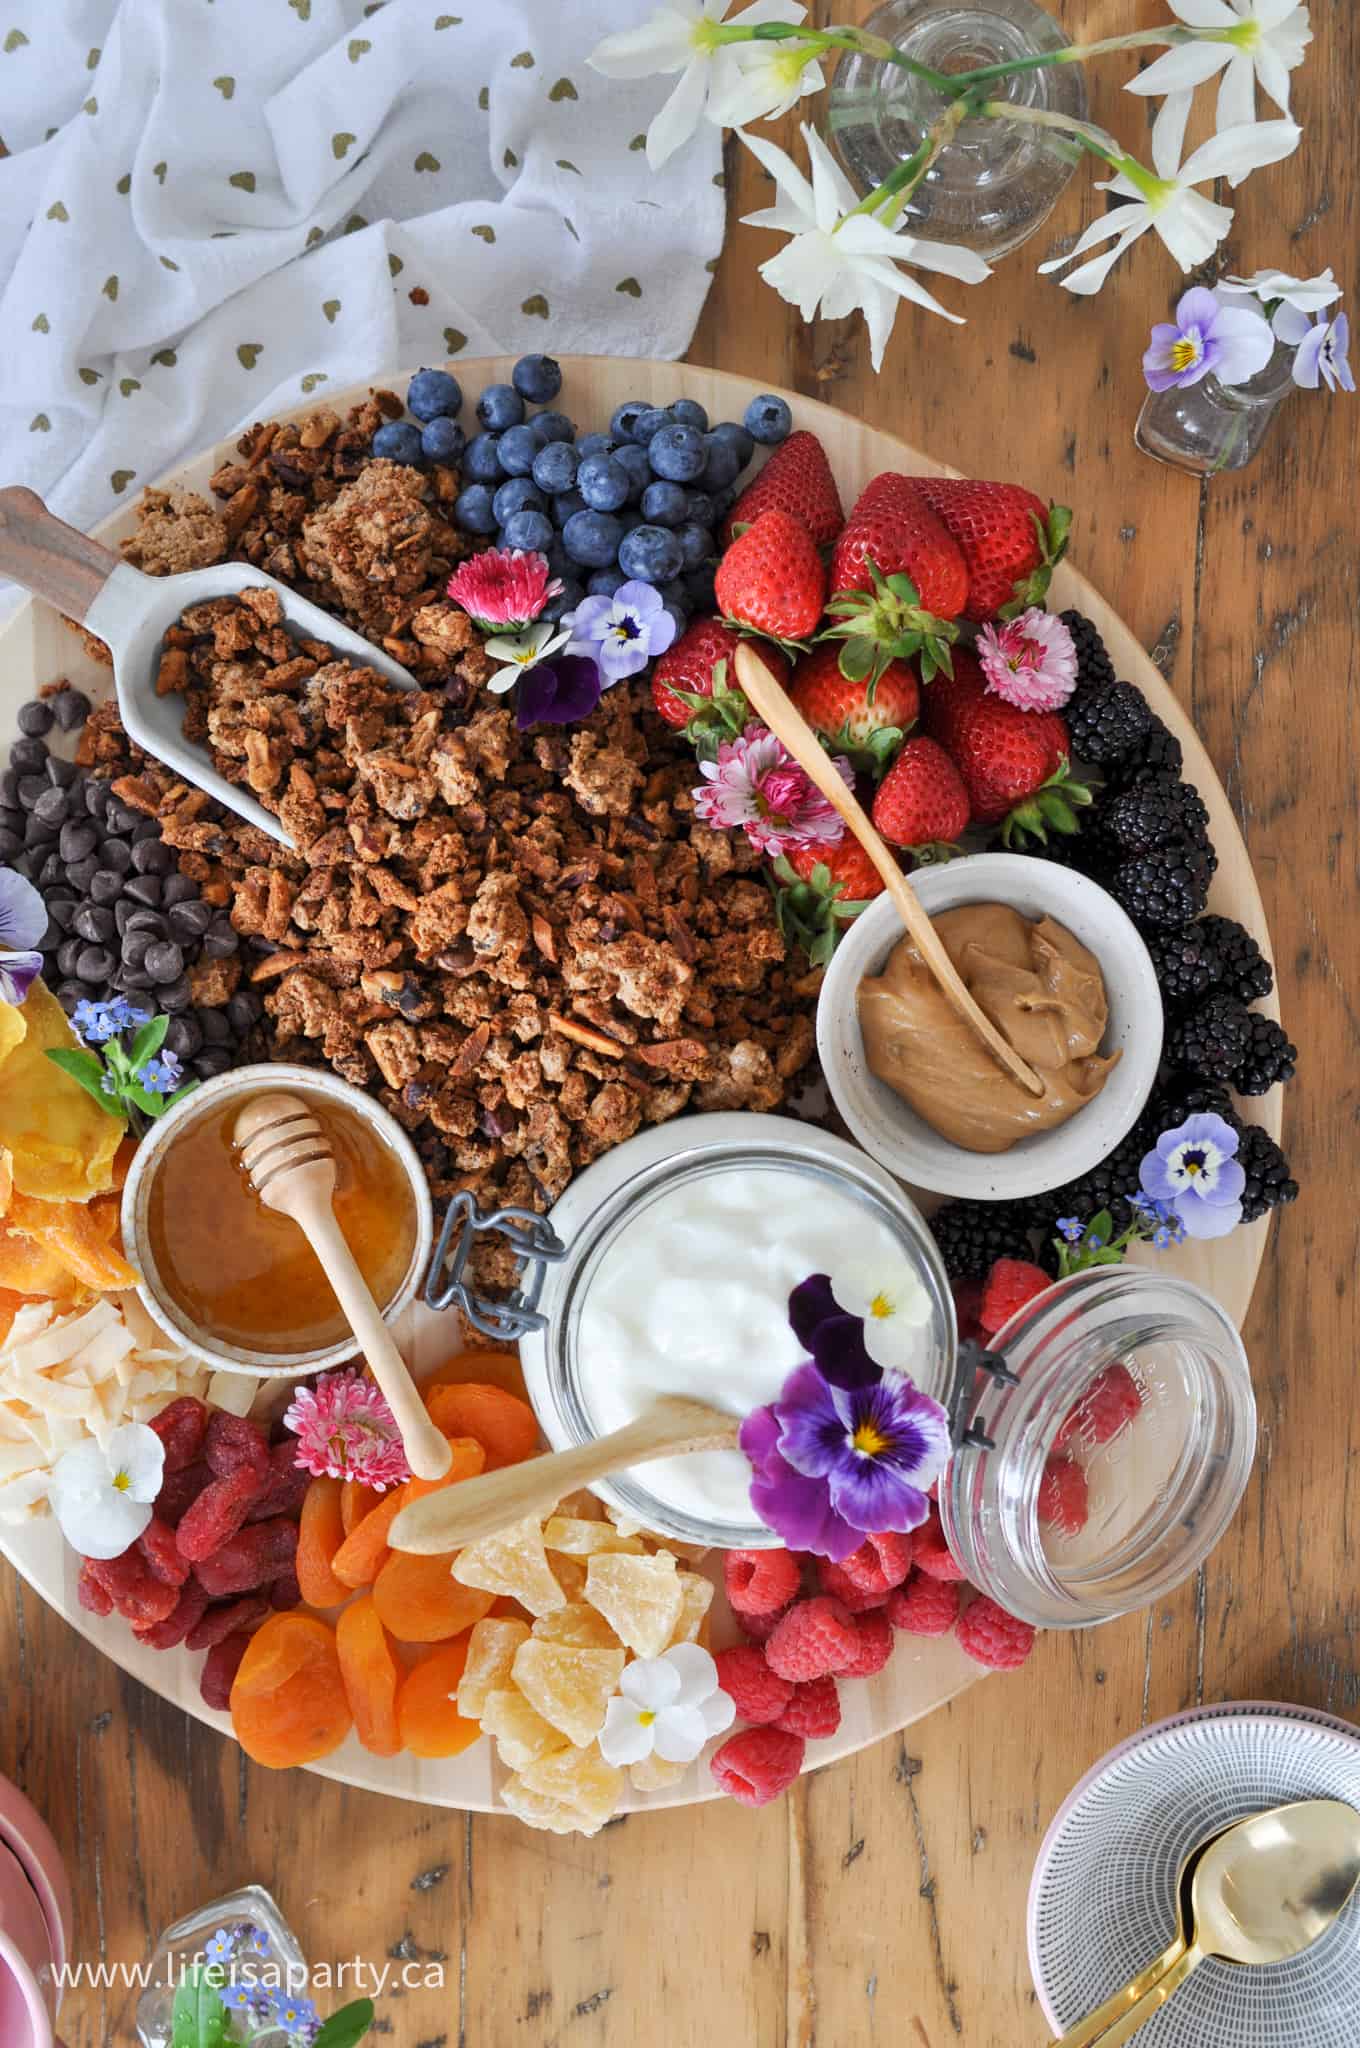
What Goes on a Yogurt Parfait Board

The beauty of this board is that there are no strict rules. Use this as a starting point and build from what you have, and what you like.

Yogurt

  • Vanilla yogurt (a crowd-pleasing base everyone tends to enjoy)
  • Plain Greek yogurt (great for guests who prefer less sweetness; set honey or maple syrup nearby)
  • A flavored option like strawberry or peach, great if you want to offer a second variety on a larger board
Vanilla yogurt in a mason jar on a yogurt parfait board.

Granola

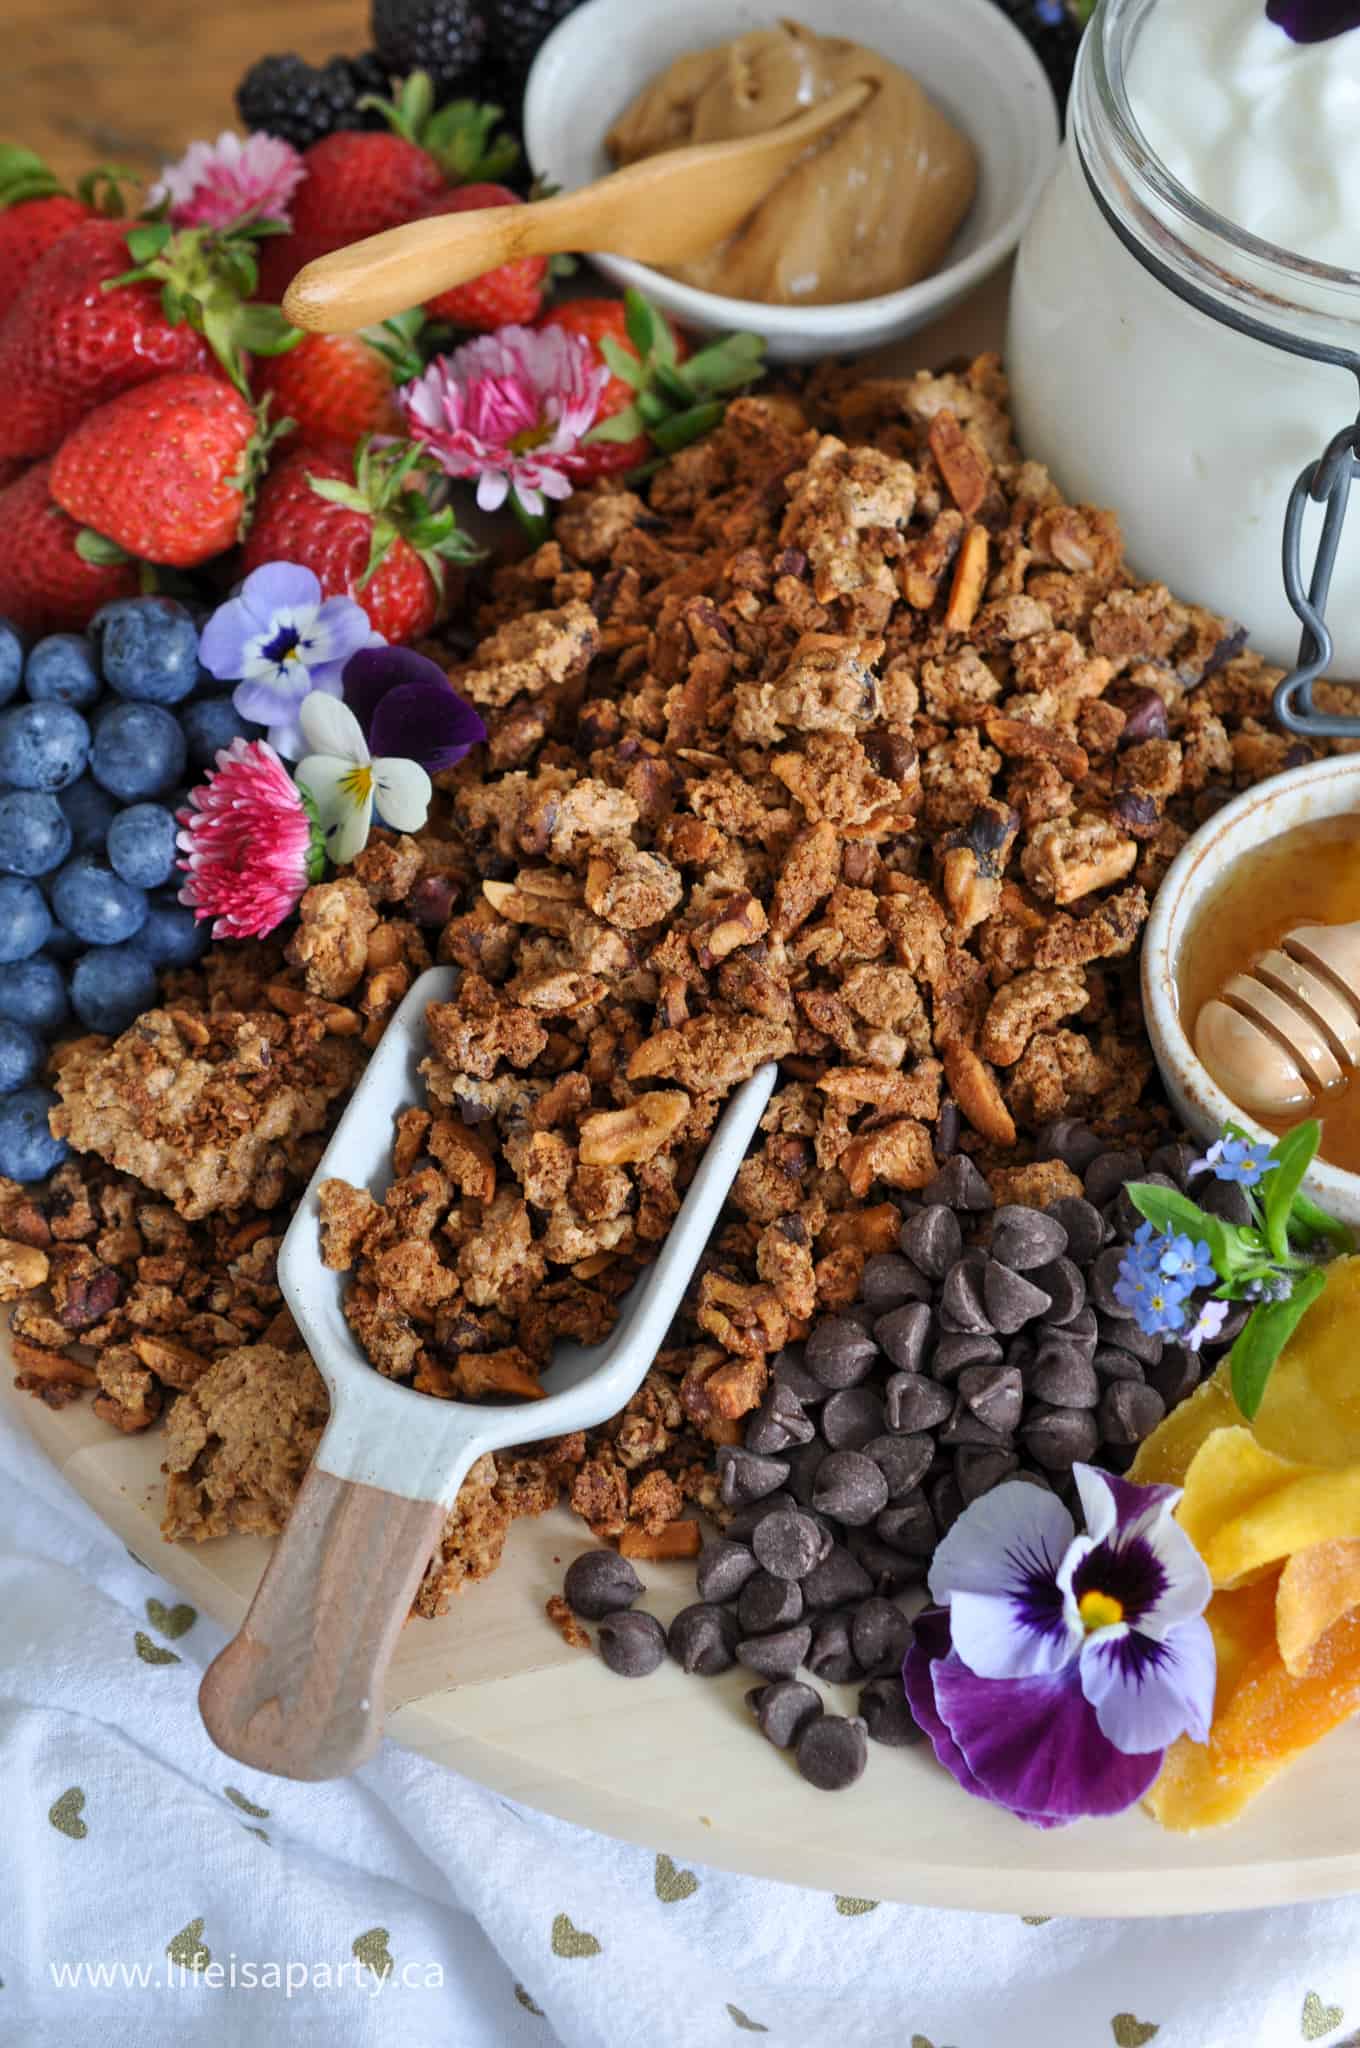
  • Homemade chunky granola is worth the effort here. The clusters hold up beautifully and the flavor is so much better than store-bought. Our homemade granola uses a special oat flour technique for perfect clusters.
  • A good store-bought option works just fine if time is short. Choose one that is genuinely crunchy rather than soft.
Homemade chunky granola in a mound on a yogurt parfait board.

Sweeteners and Spreads

  • Honey (with a dipper for mess-free drizzling)
  • Maple syrup
  • Peanut butter or almond butter
Small bowl of honey with a wooden honey dipper on a yogurt parfait board.
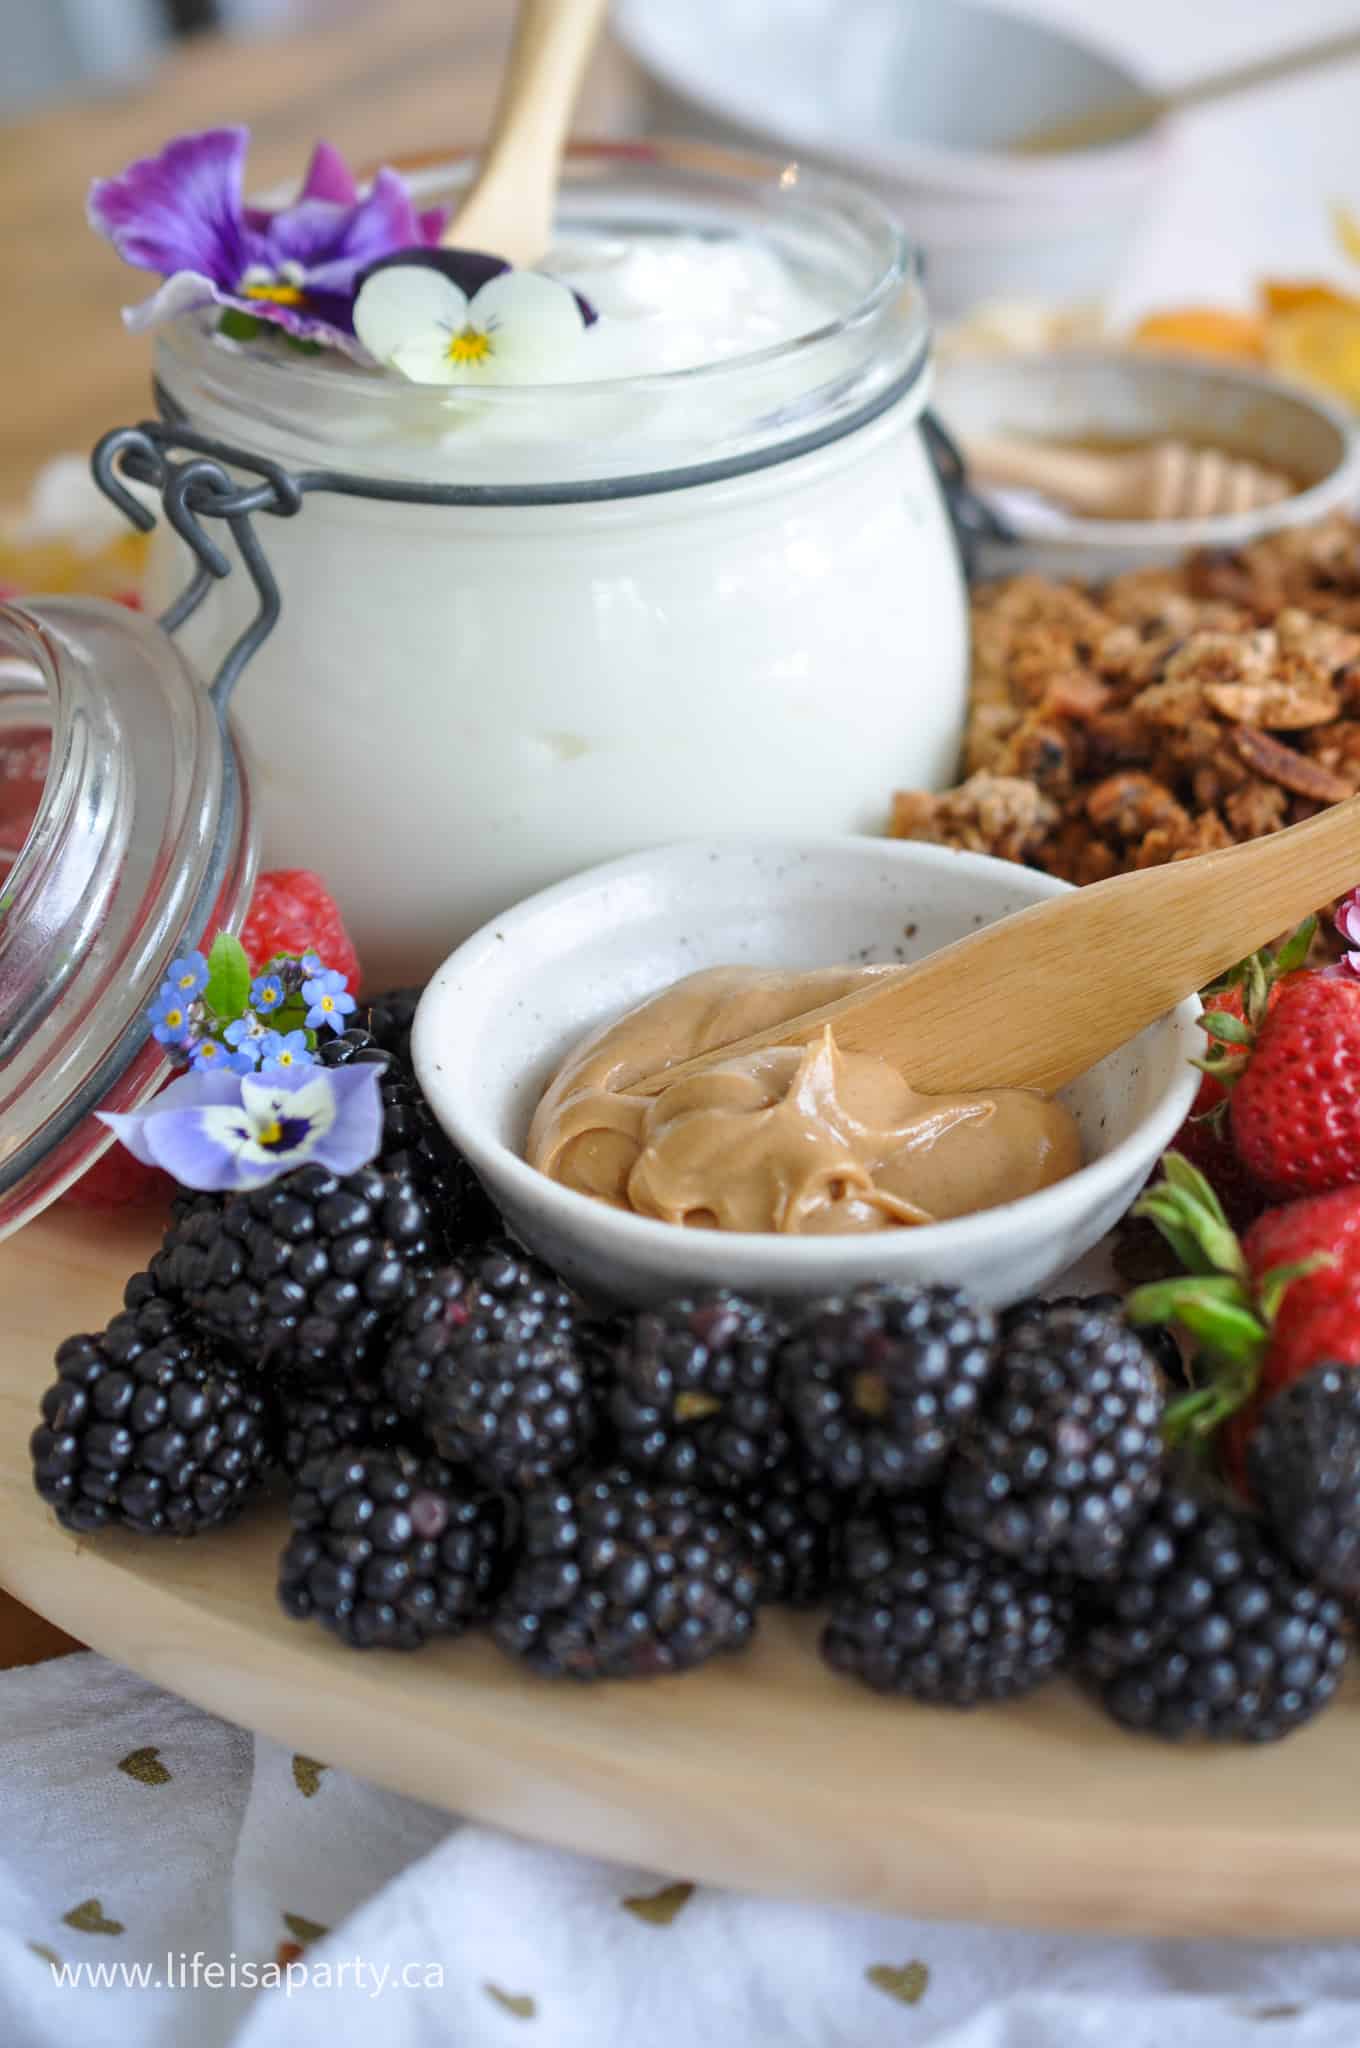
Small bowl of peanut butter on a yogurt parfait board.

Fresh Fruit

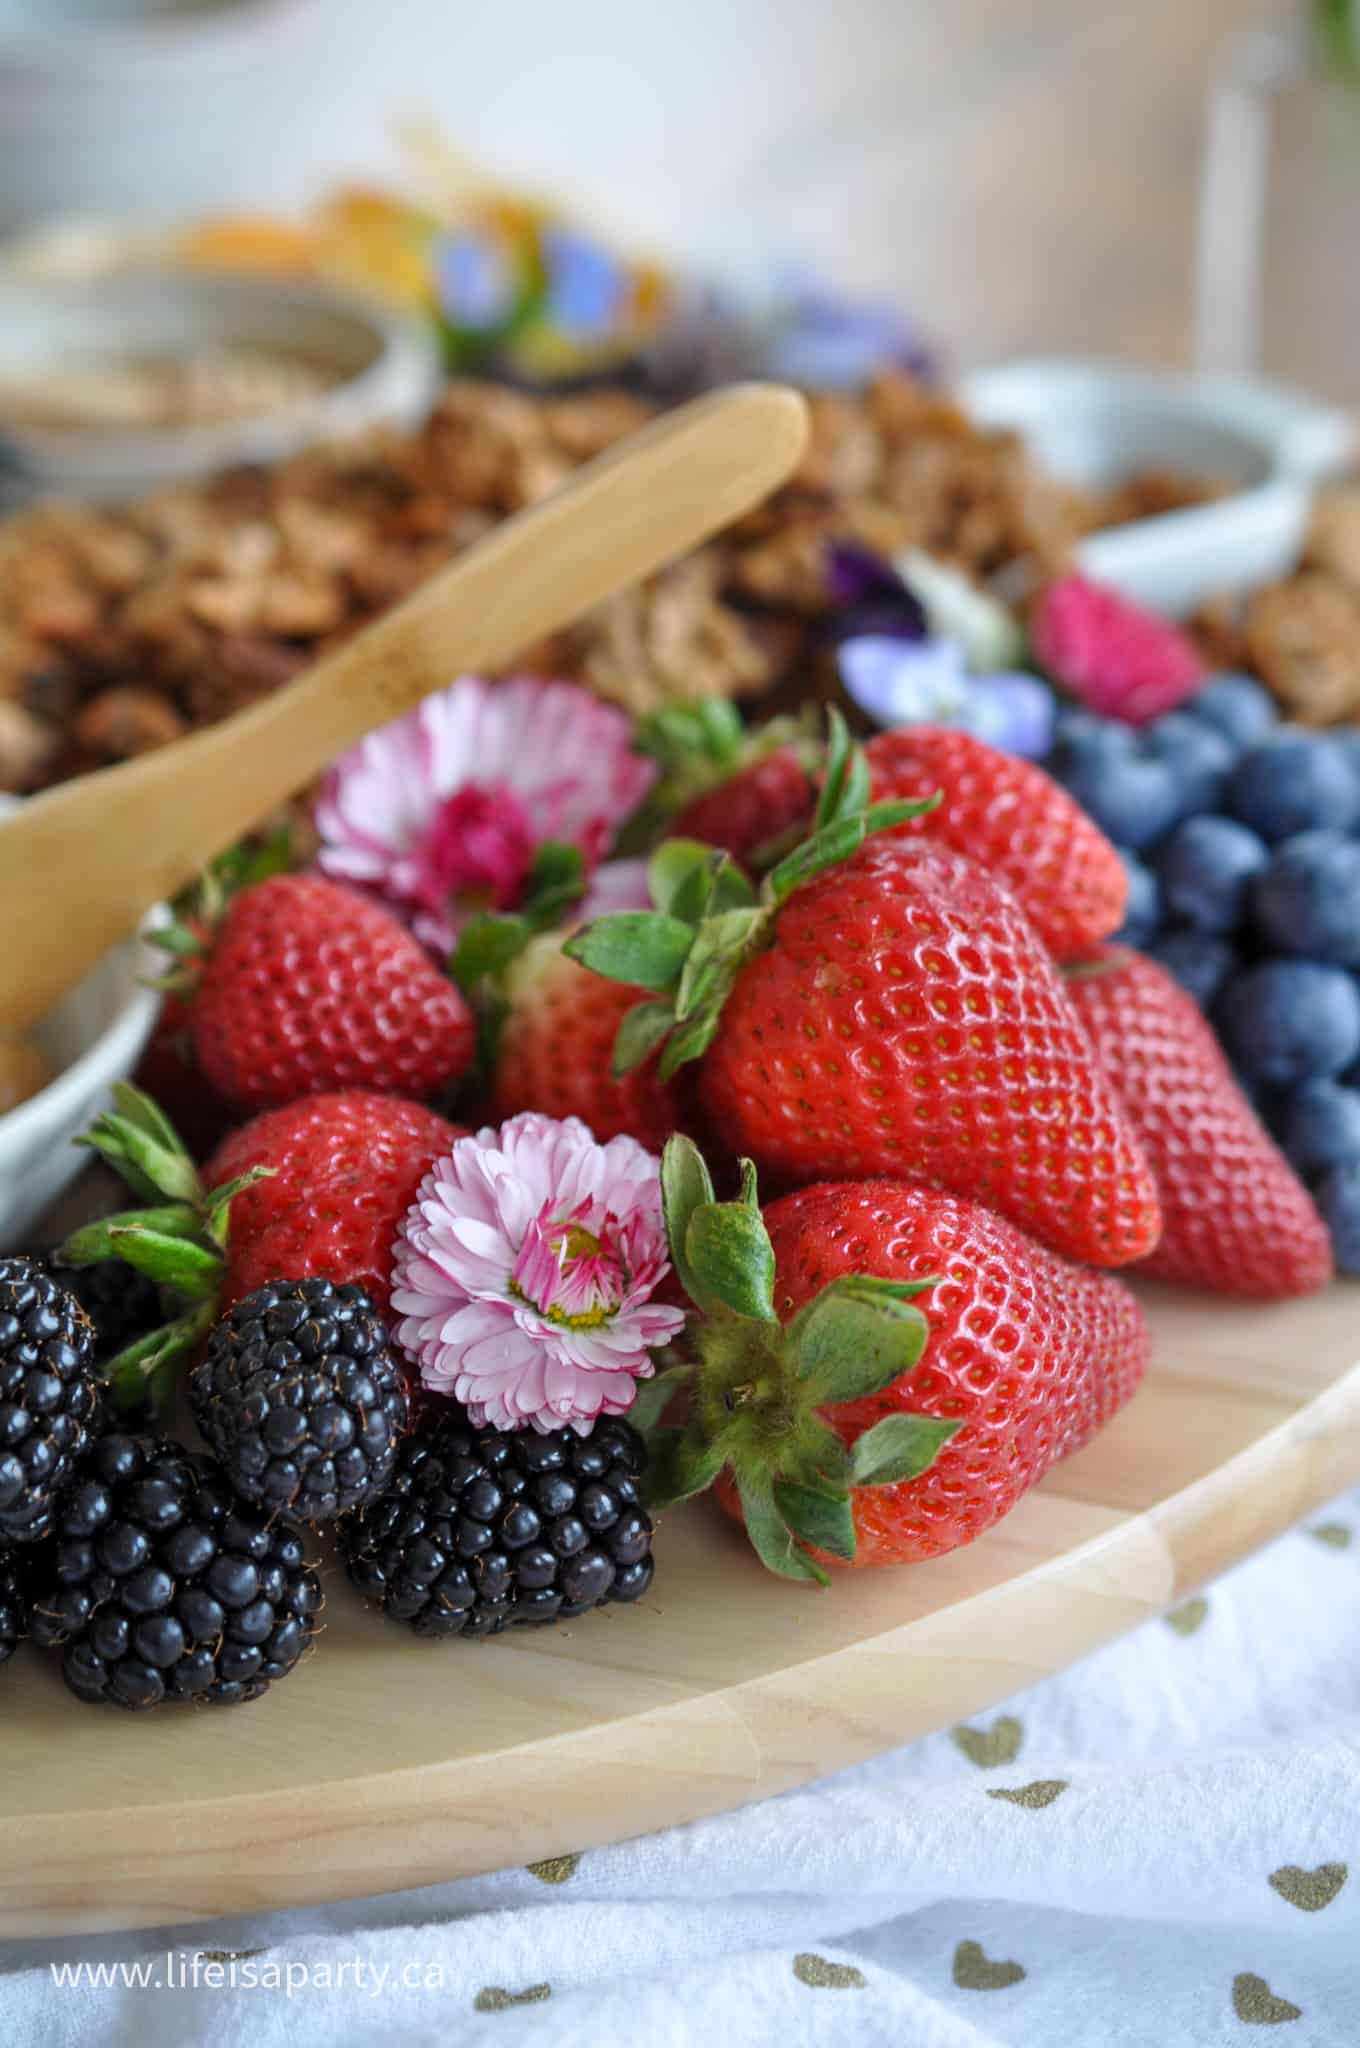
  • Strawberries, raspberries, blackberries, blueberries
  • Any seasonal fruit works beautifully. Orange slices, sliced peaches, or melon are all great in summer.
A yogurt parfait board with fresh berries, granola, honey, peanut butter, dried fruit, and edible flowers.
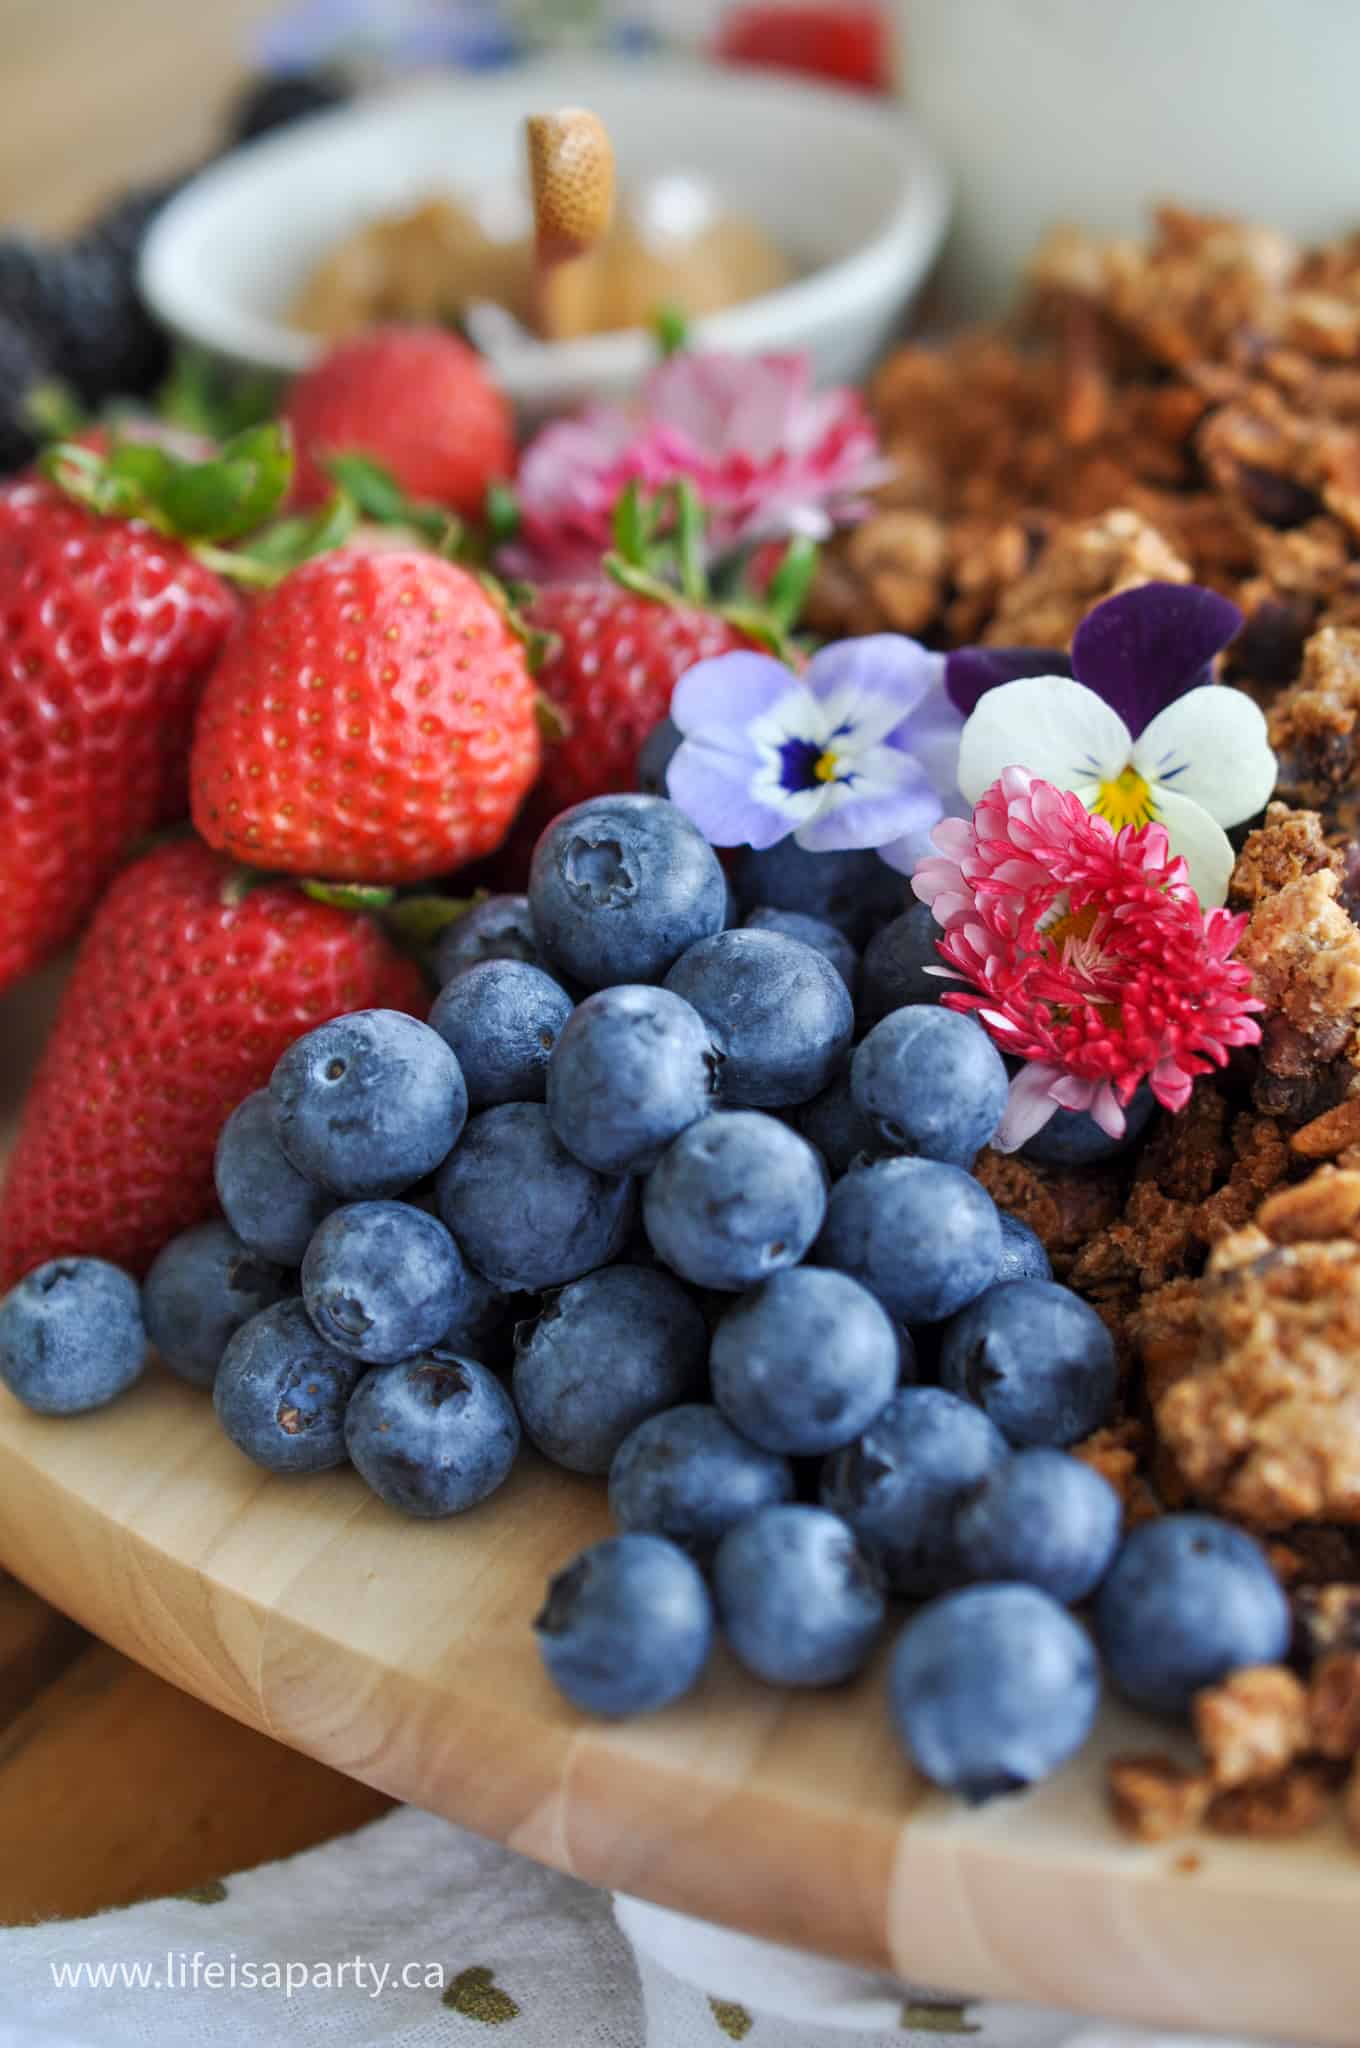
Close up of fresh blueberries on a yogurt parfait board.

Dried Fruit

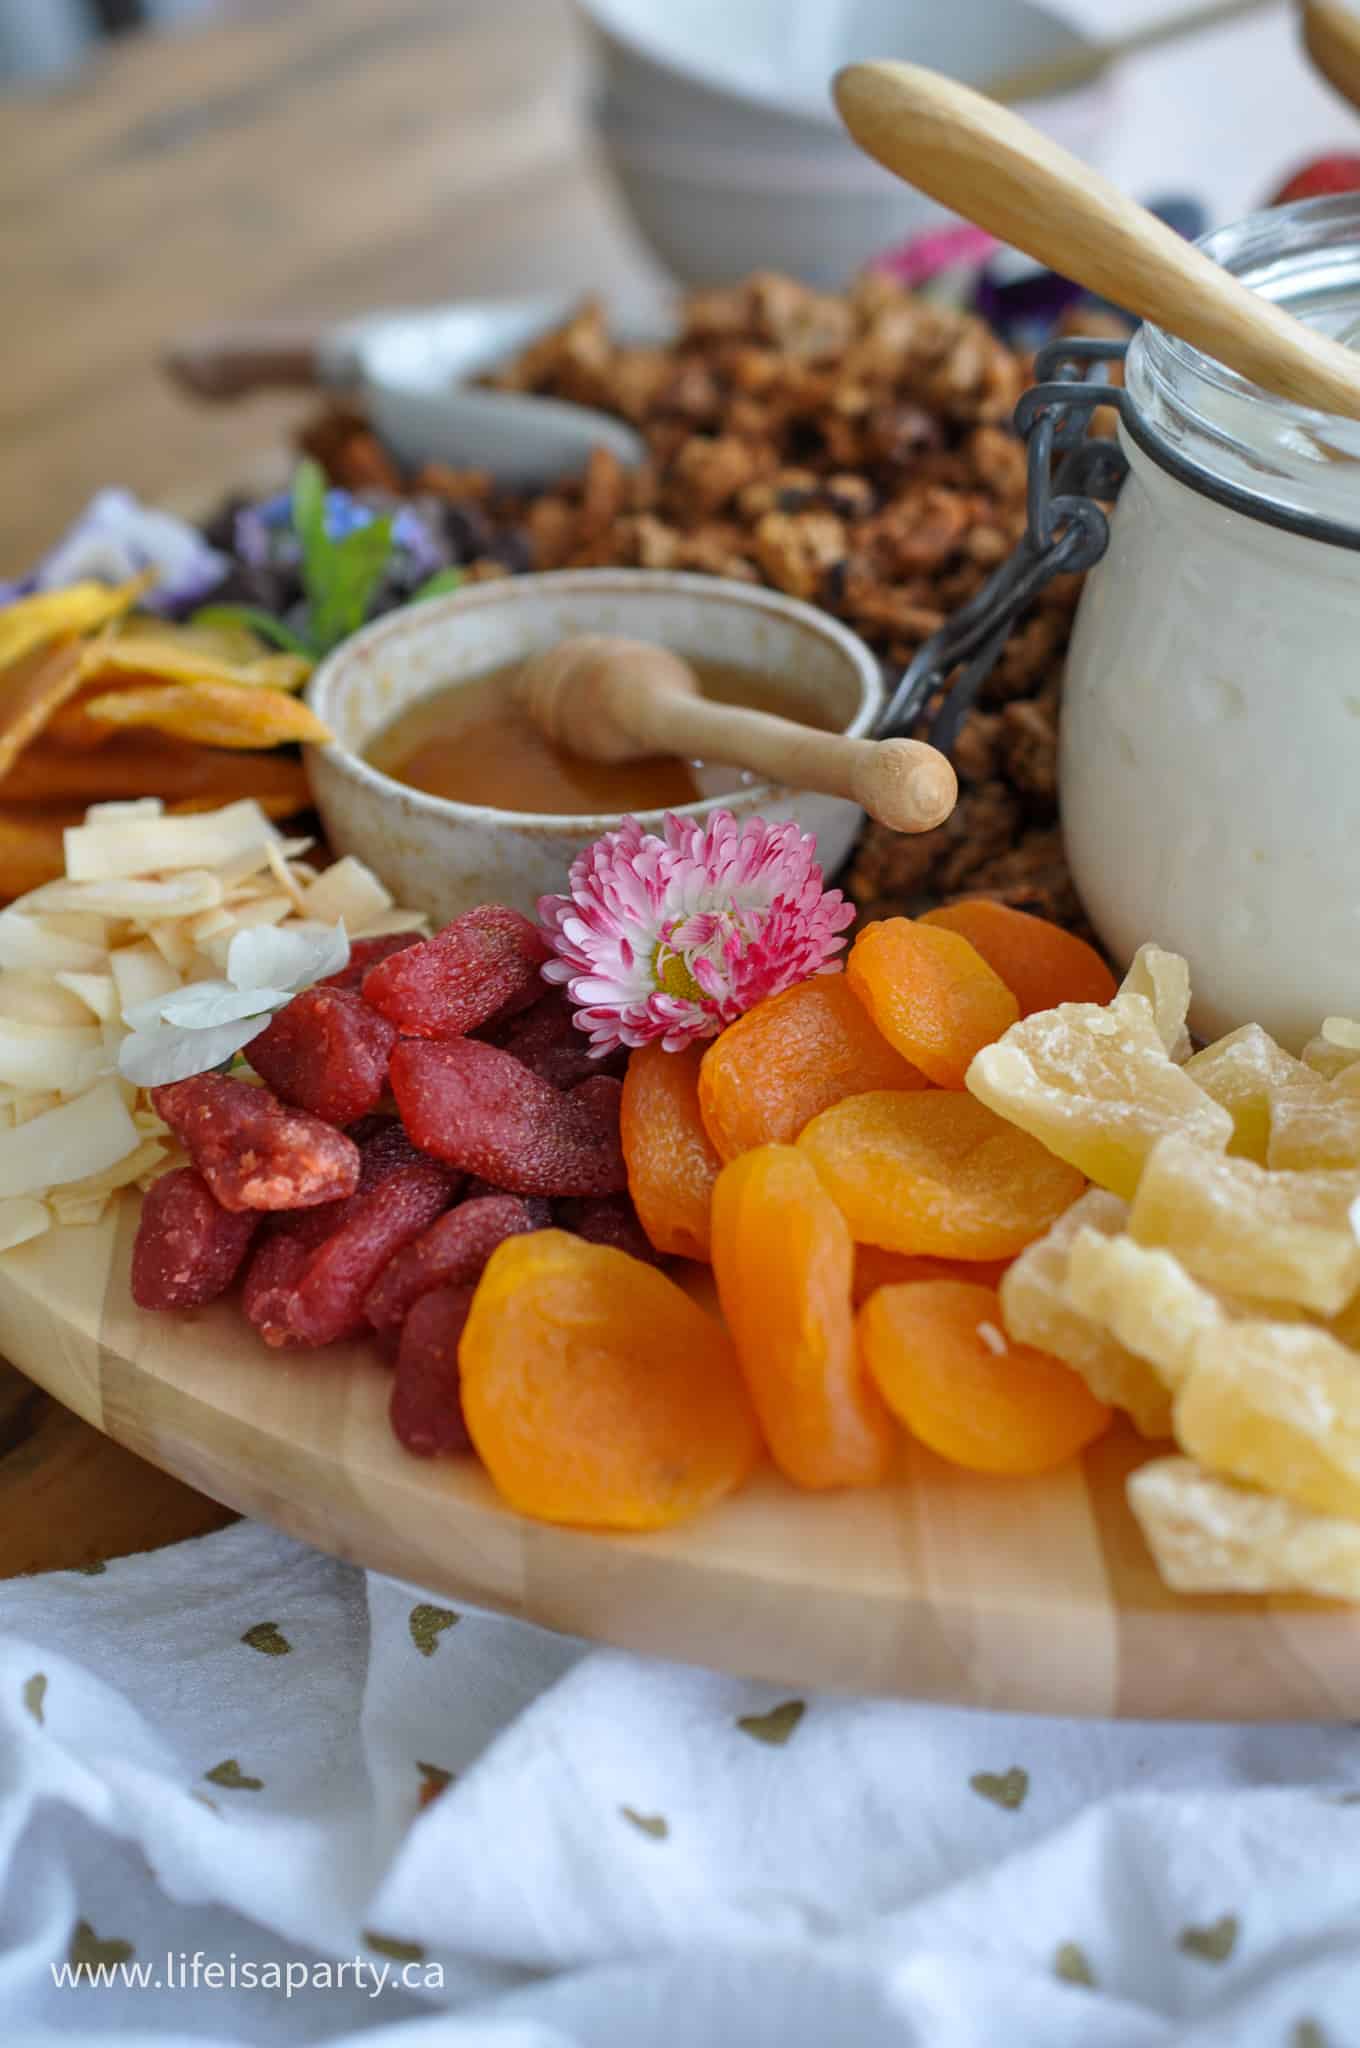
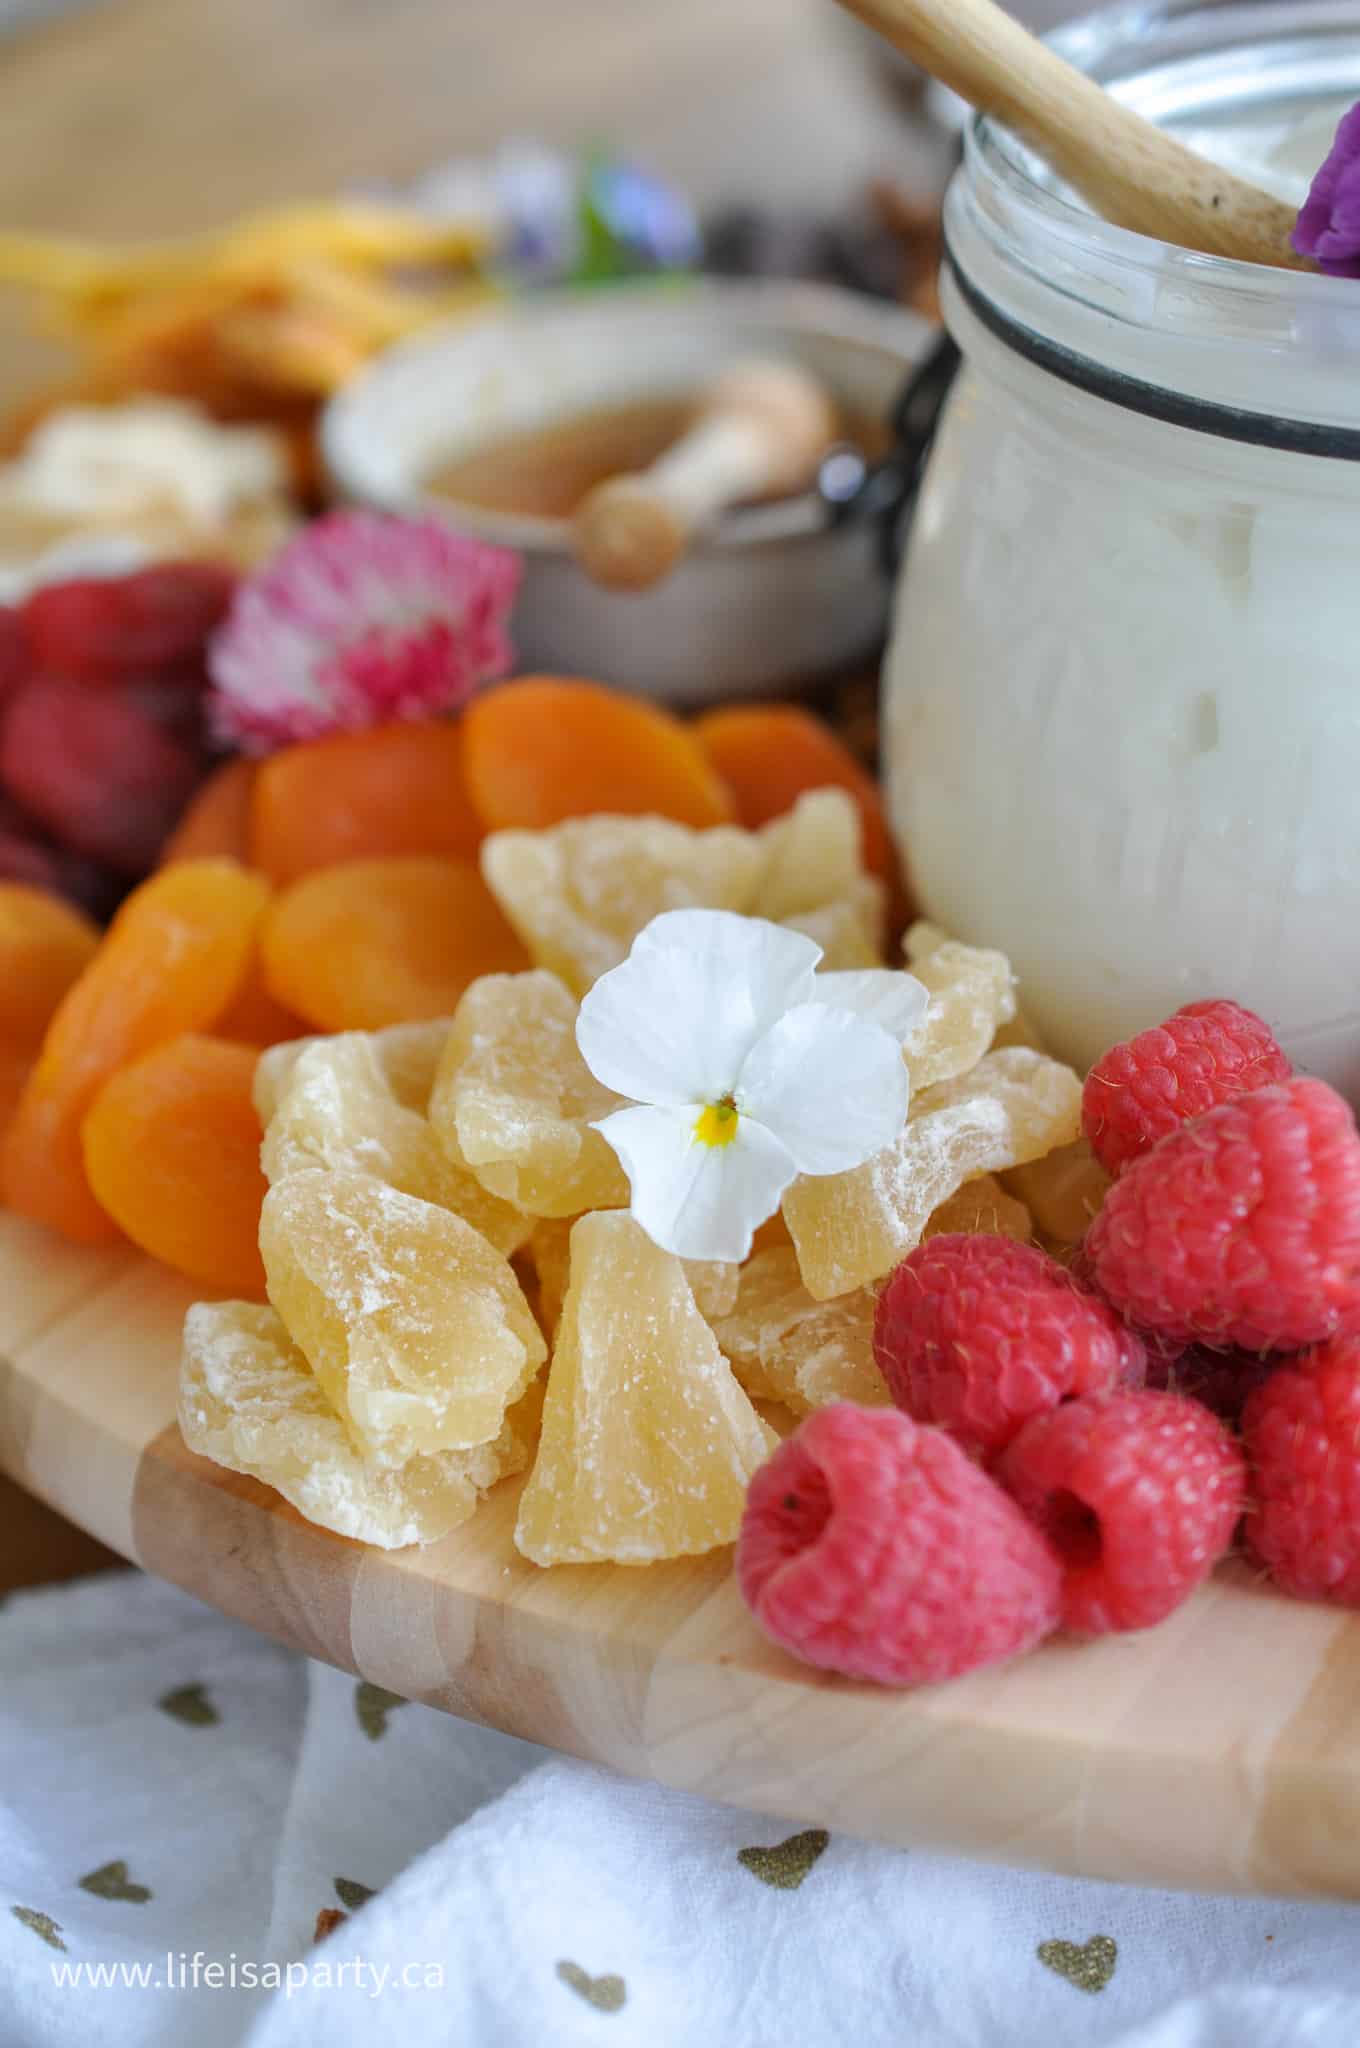
  • Dried mango, dried apricots, dried pineapple, dried strawberries, coconut chips, raisins
  • Keep dried fruit grouped together on the board away from anything wet so it stays dry and does not get mushy
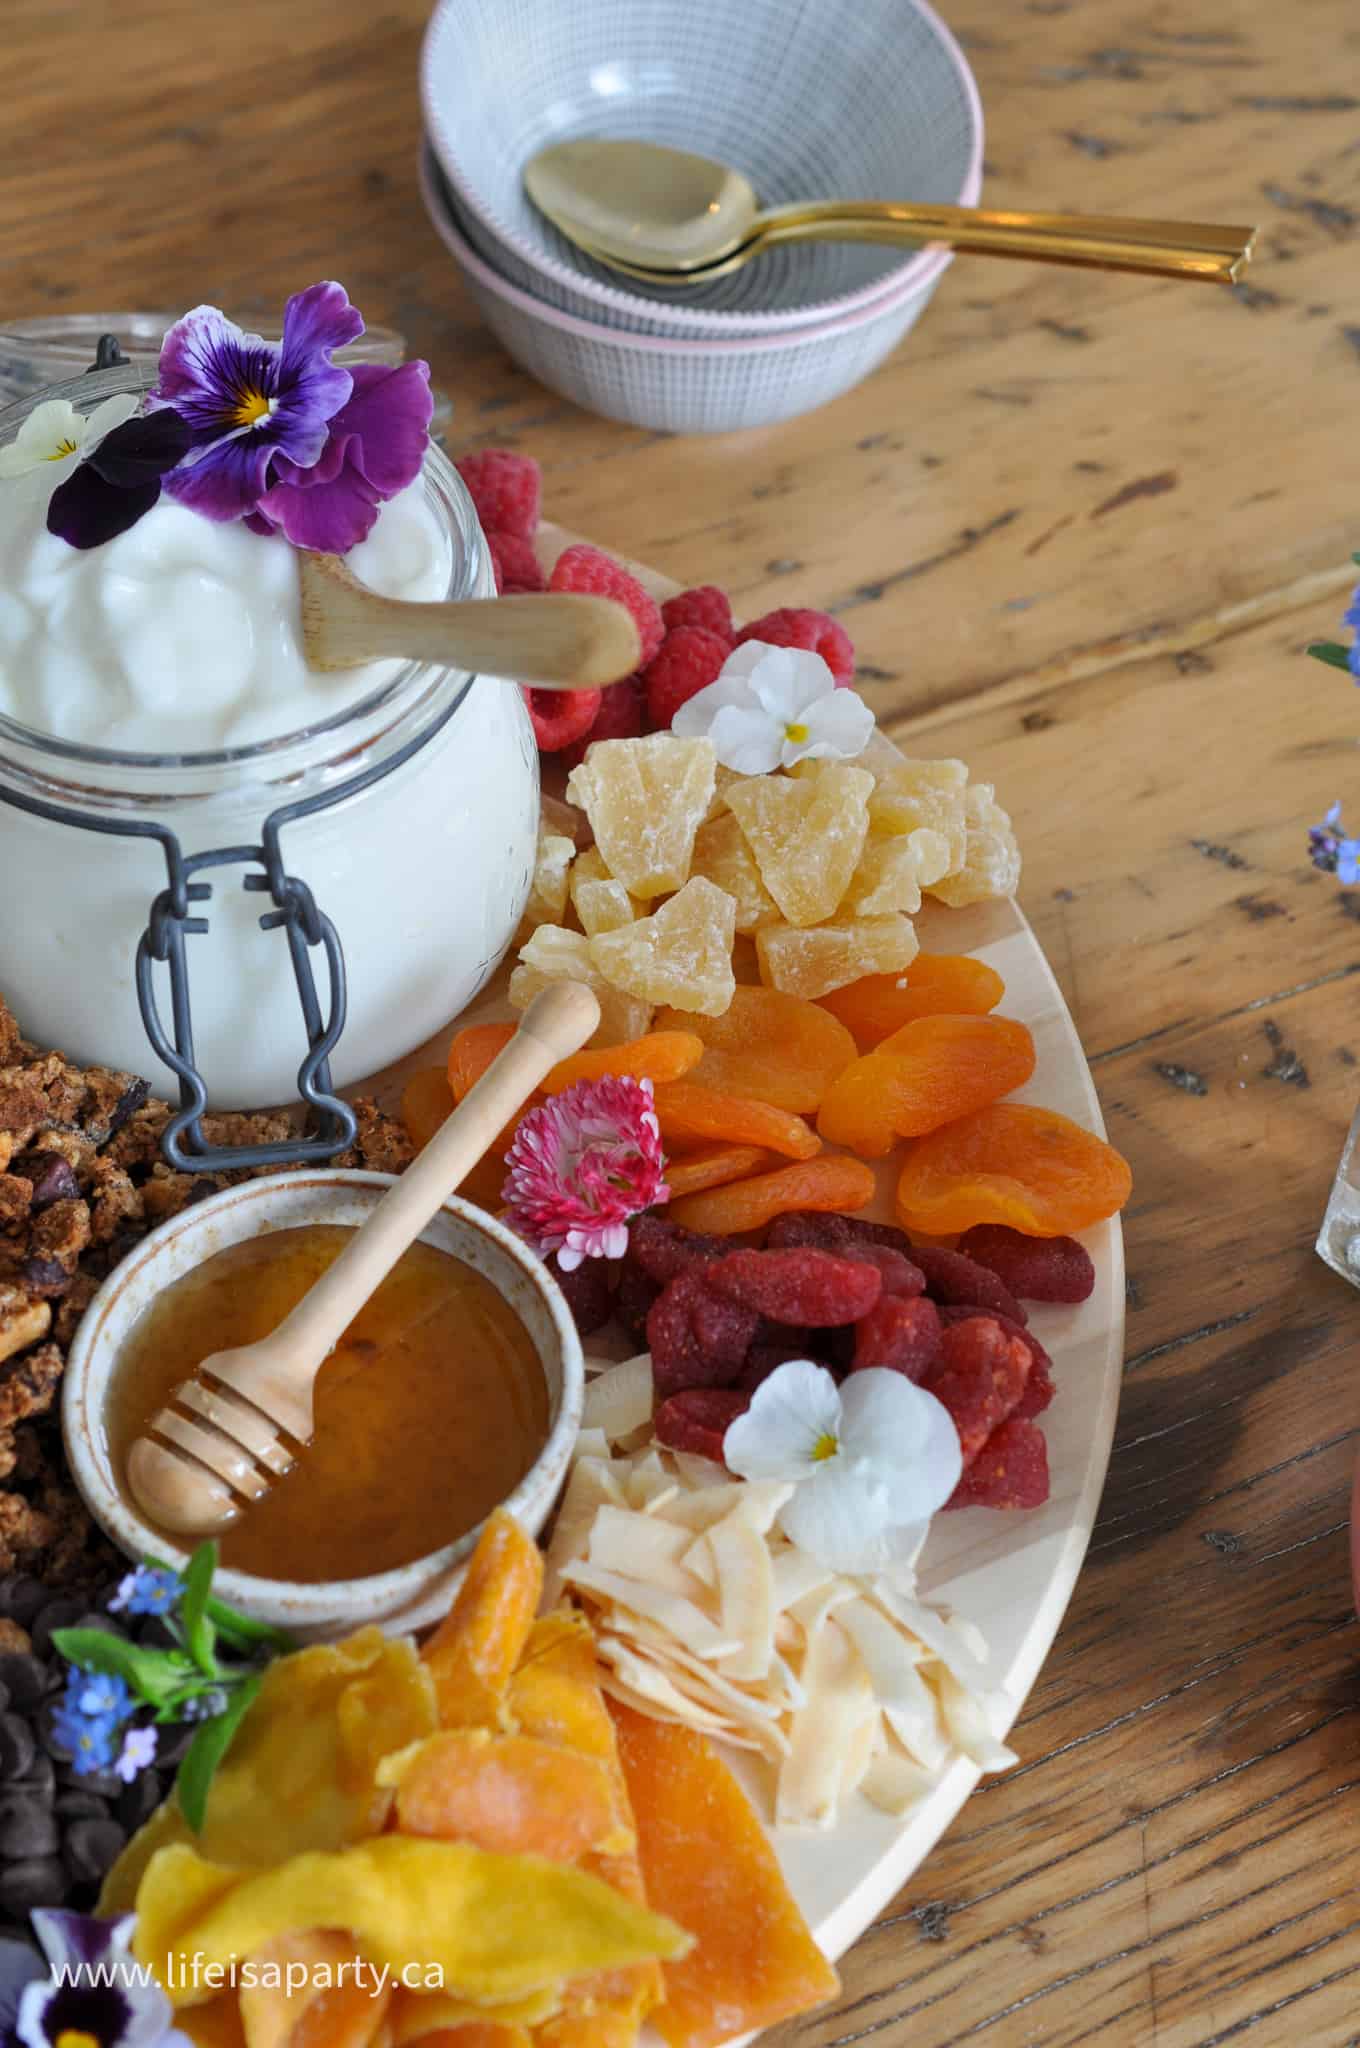
Dried mango, coconut chips, dried strawberries, and dried apricots arranged on a yogurt parfait board.
Dried pineapple with an edible flower garnish, arranged on a yogurt parfait board.

Add-Ins

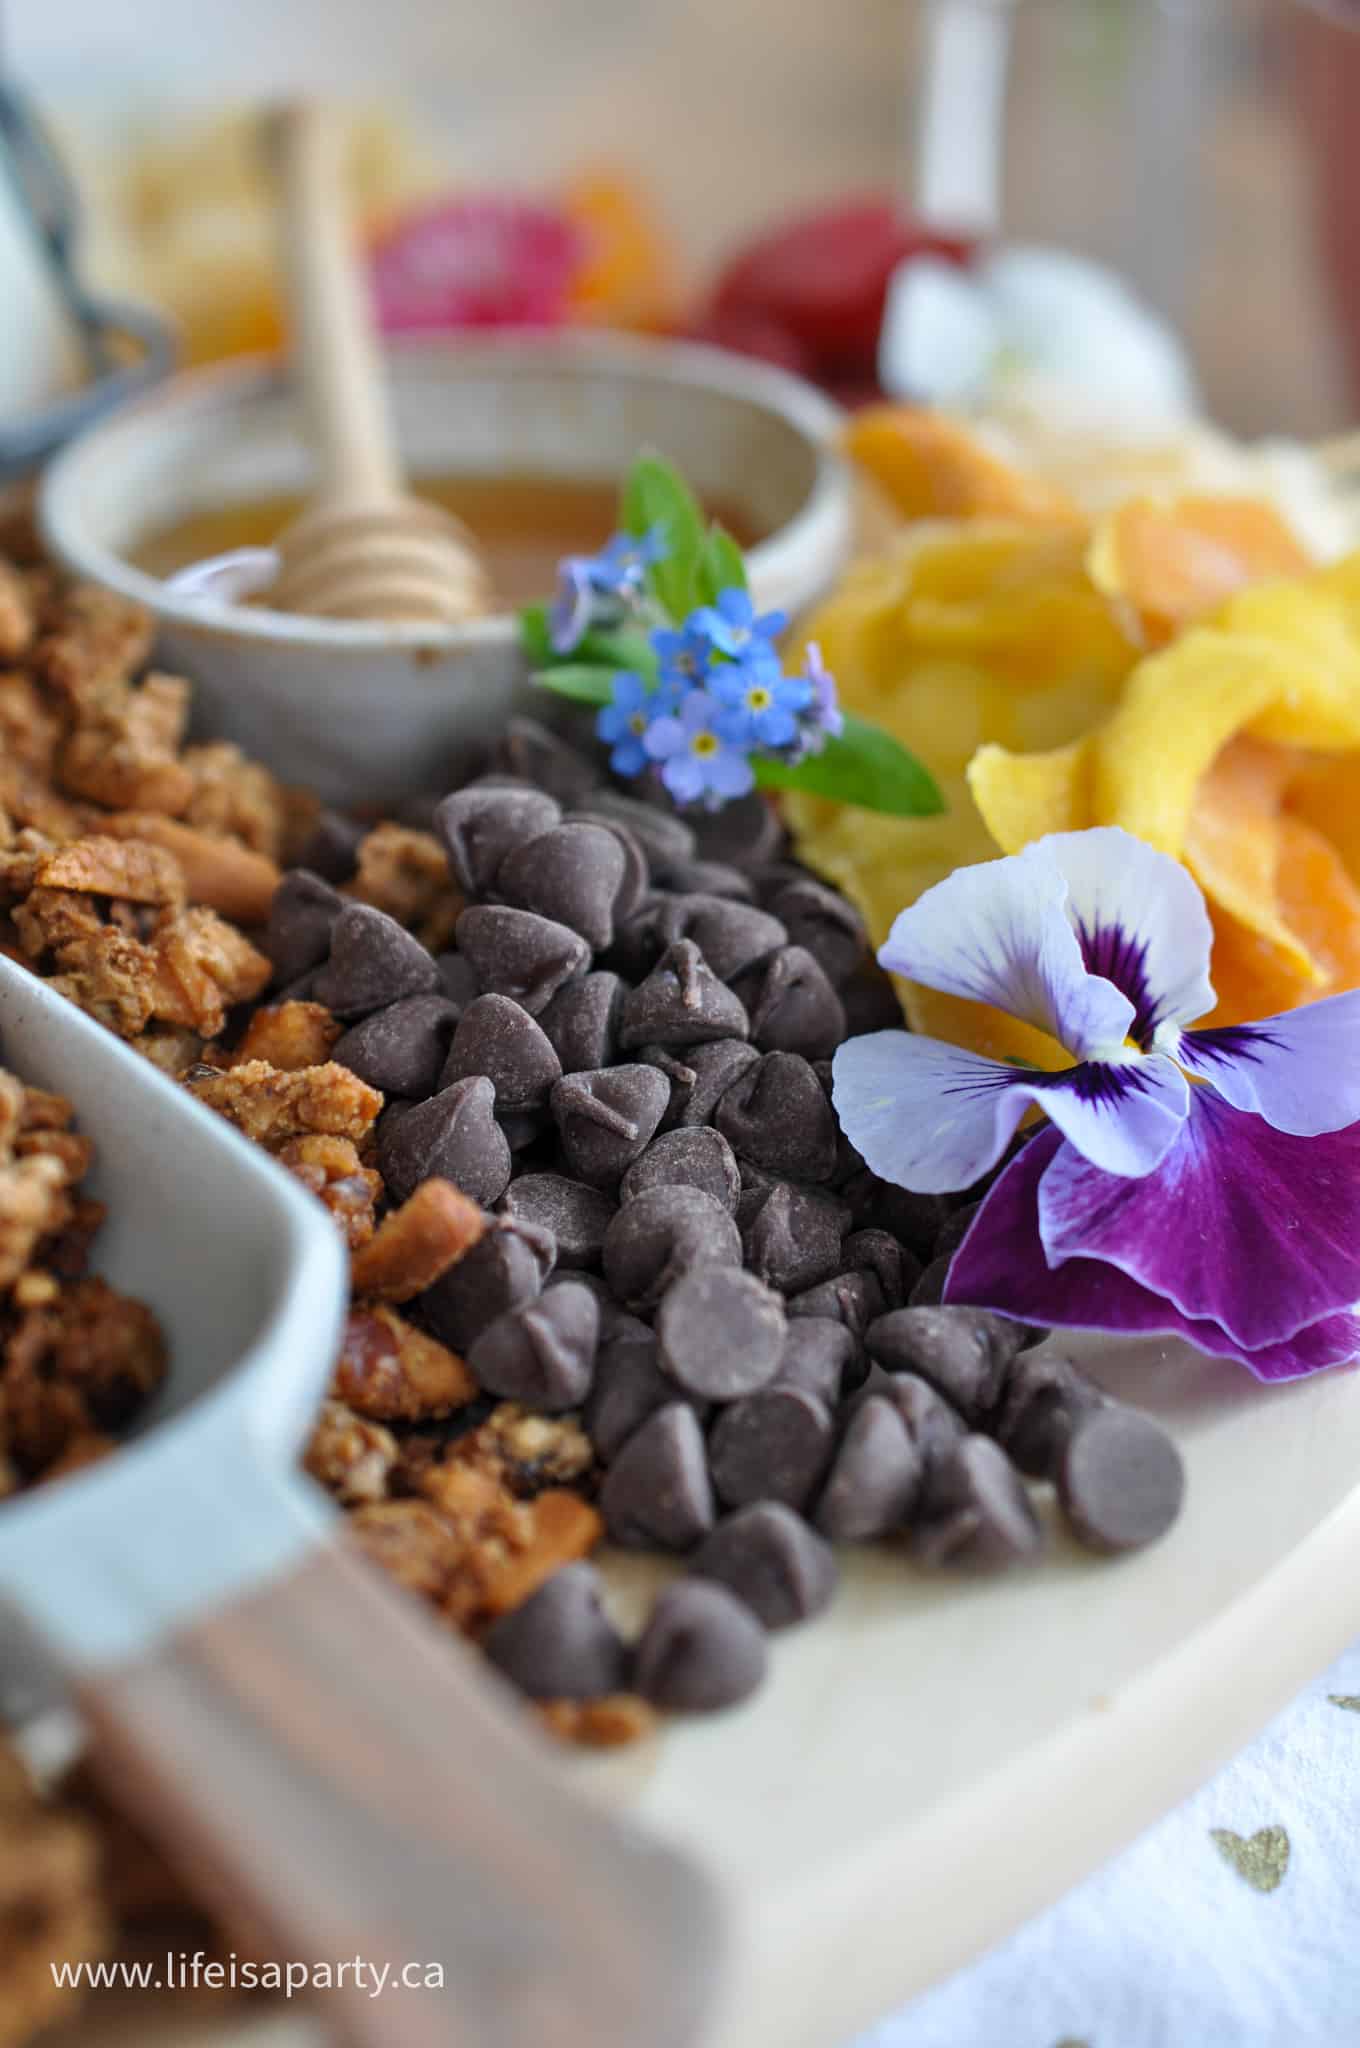
  • Semi-sweet chocolate chips (milk chocolate or dark are great options too for a larger board)
  • Chopped nuts or seeds
Semi-sweet chocolate chips scattered on a yogurt parfait board.

Finishing Touch

  • Edible flowers such as pansies, English daisies, or violas. They are completely optional but they take the board from pretty to genuinely stunning. Look for them at the grocery store or farmers market, or use your own garden flowers as long as you know they are edible and pesticide-free.
Fresh strawberries, raspberries, blackberries, and blueberries arranged on a yogurt parfait board.

What Board or Tray to Use

Any large wooden board, marble slab, or serving tray works well. We love using a lazy Susan style board because it spins and every guest can easily reach what they want without stretching across the table.

Match the size of your board to your number of guests. A board that looks full and abundant is always more beautiful than one that looks sparse. If you are serving 6 to 8 people, a 16 to 18 inch board is a good starting point. For a smaller group of 4, go slightly smaller so the board still looks generous.

Yogurt parfait board with edible flowers including pansies, English daisies, and forget me nots tucked between the toppings.

How to Assemble a Yogurt Parfait Board

  1. Place your bowls on the board first. Add yogurt to a mason jar or small bowl and position it near the center. Add honey to a small bowl with a dipper and peanut butter to a separate small bowl. These are the only items that need containment.
  2. Add the granola directly to the board in a generous mound near the center where it is easy for guests to scoop.
  3. Arrange your fresh berries on one side of the board. Make sure they are washed and fully dried before adding them to the board. Whole berries work best as they keep the board looking clean and prevent juice from bleeding into everything around them.
  4. Arrange dried fruit, chocolate chips, and coconut chips on the other side of the board.
  5. Tuck edible flowers into any remaining spaces as a final flourish.
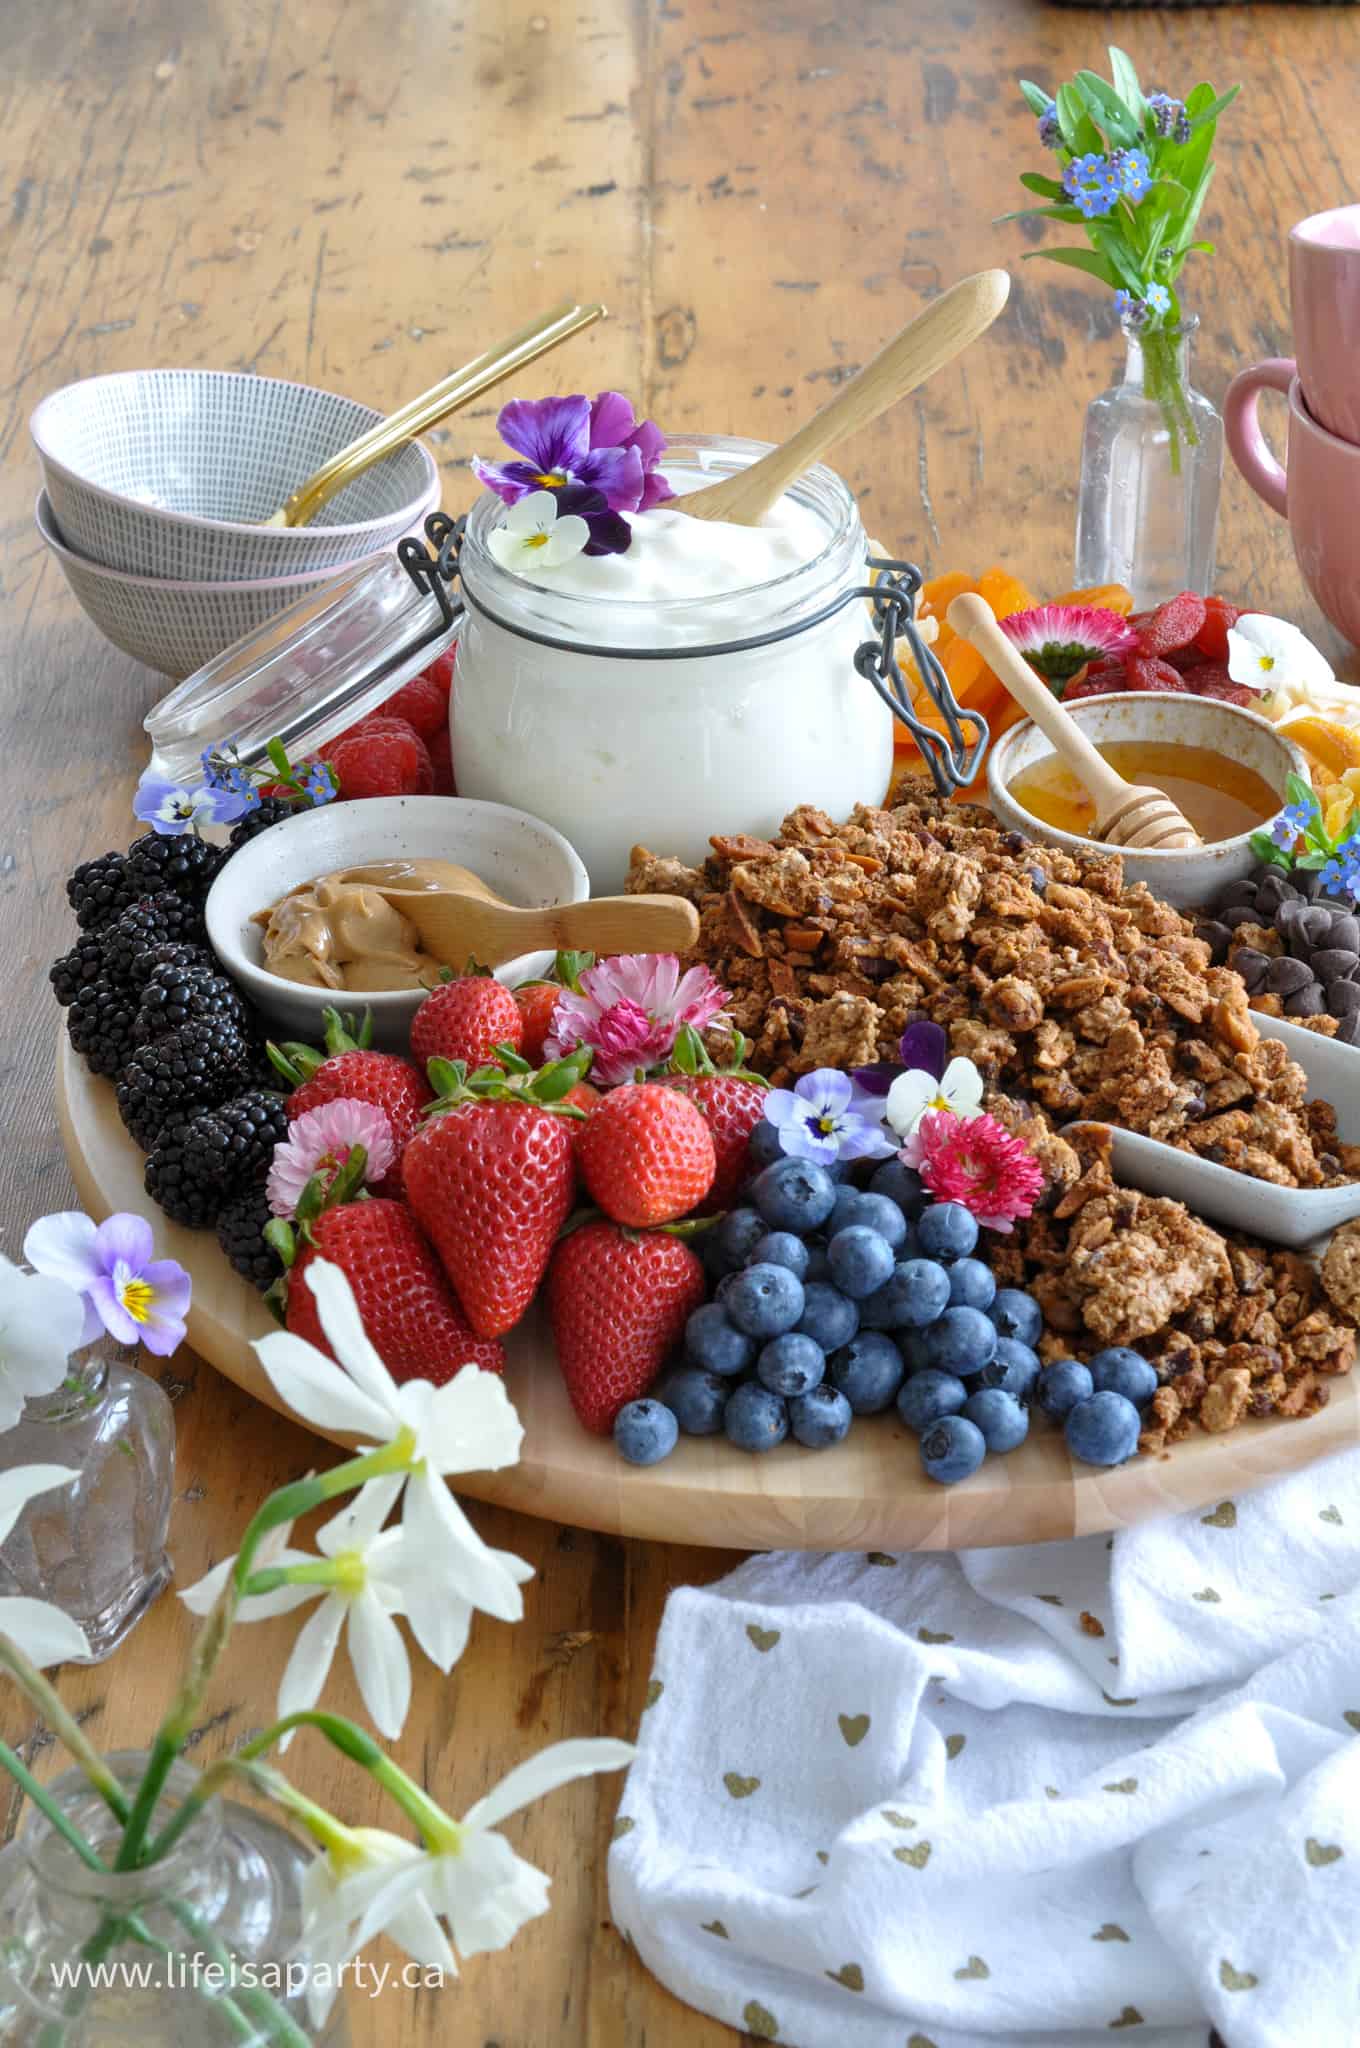
Full yogurt parfait board ready for guests to build their own parfaits.

Tips for the Best Yogurt Parfait Board

  • Scale up easily. For 10 to 12 guests, double the quantities and use a larger board or add a second smaller board alongside.
  • Prep ahead. Wash and dry your berries the night before and store them in the fridge. The morning of your event all you need to do is assemble.
  • Do not leave yogurt out for more than 60 minutes. Set out only what will be eaten quickly and keep the rest chilled. Refill as needed.
  • Keep berries whole. Whole berries hold their shape, look more beautiful on the board, and prevent juice from bleeding onto everything around them.
  • Think about color when you arrange. Alternate colors as you place the berries rather than grouping all one color together. The contrast makes the board look more abundant.

When to Serve a Yogurt Parfait Board

This board works beautifully across seasons and occasions. A few of our favorites:

  • Weekend brunch with friends: the board becomes the activity as much as the meal
  • Mother's Day brunch: elegant, light, and completely stress-free to pull together
  • Bridal or baby shower: the edible flowers and pretty glassware fit the occasion perfectly
  • Holiday morning breakfast: a relaxed way to feed a crowd before the main meal
  • Breakfast party: works perfectly as the first course of a morning gathering, letting guests graze while you finish other dishes.

Frequently Asked Questions

Can I make a yogurt parfait board the night before?

You can prep all the components the night before and store them separately in the fridge. Assemble the board the morning of your event. Do not add fresh fruit that browns quickly, like bananas, until right before serving.

What type of yogurt is best for a parfait board?

Vanilla yogurt is the most crowd-friendly option. Plain Greek yogurt is a great choice if you want something less sweet. Just make sure honey or maple syrup is on the board so guests can add their own sweetness. Offering two varieties on a larger board gives guests options.

How much yogurt do I need per person?

Plan on roughly half a cup of yogurt per person as a starting point if this is one course of a larger meal. If the board is the main event, plan for a full cup per person.

Do I need to use edible flowers?

Not at all. They are a beautiful optional finishing touch but the board is gorgeous without them. If you do use flowers from your garden, confirm they are edible and have not been treated with pesticides.

Can I use store-bought granola?

Yes. Look for a genuinely crunchy variety with good cluster formation. Our homemade chunky granola is the version we always use and the clusters hold up beautifully even after a while on the board, but a good store-bought option works well too.

If you try this yogurt parfait board or any other recipe on my blog please leave a star rating and let me know how it went in the comments below. Thanks for visiting today!

More Breakfast and Brunch Ideas

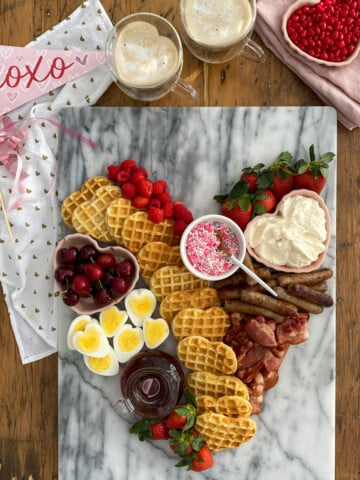
  • Valentine breakfast board with heart-shaped waffles, heart-shaped eggs, bacon, sausage, fresh berries, and toppings on marble platter.
    Valentine Breakfast Board
  • Fluffy small batch pancakes for two ready to serve on a plate with syrup.
    Easy Small Batch Pancakes For Two Recipe
  • Old fashioned bear claw pastries with almonds on a cake plate.
    Old Fashioned Almond Bear Claw Pastries Recipe
  • Yogurt parfait board with fresh berries, granola, honey, peanut butter, dried fruit, and edible flowers on a wooden lazy Susan board.
    Yogurt Parfait Board
Completed yogurt parfait board with fresh berries, granola, dried fruit, and edible flowers ready to serve.

Recipe

Yogurt parfait board with fresh berries, granola, honey, peanut butter, dried fruit, and edible flowers on a wooden lazy Susan board.

Yogurt Parfait Board

Video

A stunning no-cook breakfast spread with fresh fruit, crunchy granola, honey, and all the best toppings. Perfect for brunch entertaining.
No ratings yet
Print Pin Rate
Course: Breakfast, brunch
Cuisine: American
Prep Time: 15 minutes minutes
Total Time: 15 minutes minutes
Servings: 8
Calories: 609kcal
Author: Dannyelle Nicolle-Ramjist

Ingredients

  • 3 cups vanilla yogurt
  • 3 cups homemade granola or store-bought granola
  • ¼ cup honey
  • ¼ cup peanut butter or almond butter
  • 1 cup strawberries
  • 1 cup raspberries
  • 1 cup blueberries
  • 1 cup blackberries
  • ½ cup dried mangos
  • ½ cup dried apricots
  • ½ cup dried pineapple
  • ½ cup dried strawberries
  • ½ cup coconut chips
  • ¼ cup semi-sweet chocolate chips
  • Edible flowers such as pansies or violas (optional)

Instructions

  • Place your bowls on the board first. Add yogurt to a mason jar or small bowl and position it near the center. Add honey to a small bowl with a dipper and peanut butter to a separate small bowl.
    3 cups vanilla yogurt, ¼ cup honey, ¼ cup peanut butter
  • Add the granola directly to the board in a generous mound near the center where it is easy for guests to scoop.
    3 cups homemade granola
  • Arrange your fresh berries on one side of the board. Make sure they are washed and fully dried before adding them to the board. Whole berries work best as they keep the board looking clean and prevent juice from bleeding into everything around them.
    1 cup strawberries, 1 cup raspberries, 1 cup blueberries, 1 cup blackberries
  • Arrange dried fruit, chocolate chips, and coconut chips on the other side of the board.
    ½ cup dried mangos, ½ cup dried apricots, ½ cup coconut chips, ¼ cup semi-sweet chocolate chips
  • Tuck edible flowers into any remaining spaces as a final flourish.
    Edible flowers such as pansies or violas

Notes

  • Make ahead: Wash and dry your berries the night before and store them in the fridge. The morning of your event all you need to do is assemble.
  • Food safety: Do not leave yogurt out for more than 60 minutes. Keep the rest refrigerated and refill as needed.
  • Granola: Our homemade chunky granola holds up beautifully on the board. A good store-bought crunchy granola works well too.
  • Scaling up: For 10 to 12 guests, double the quantities and use a larger board or add a second smaller board alongside.
  • Nutrition note: Nutritional information will vary based on the individual parfait each guest builds and the toppings they choose.

Nutrition

Calories: 609kcal | Carbohydrates: 91g | Protein: 16g | Fat: 22g | Saturated Fat: 8g | Polyunsaturated Fat: 5g | Monounsaturated Fat: 8g | Trans Fat: 0.01g | Cholesterol: 5mg | Sodium: 112mg | Potassium: 747mg | Fiber: 11g | Sugar: 63g | Vitamin A: 1956IU | Vitamin C: 25mg | Calcium: 235mg | Iron: 4mg
Tried this Recipe? Tag me Today!Mention @LifeisaParty or tag #lifeisaparty!

How To Make A Cricut Doormat With Iron-On Vinyl

Apr 14, 2023 · 12 Comments

How to make a custom doormat with your Cricut machine and iron-on vinyl.

How to make a doormat with Cricut Iron-On Vinyl to form a stencil that is more leak proof than any other methods. This is the easiest and most effective method for creating a doormat with Cricut. The results have nice crisp edges, even with intricate paterns.

How to make a custom doormat with your Cricut machine and iron-on vinyl.
[feast_advanced_jump_to]

Why You'll Love This Craft

  • Creating your own custom Cricut doormat is cheaper than buying one that's custom made for you.
  • You can create any look you like with a custom design and colors.
  • This method of stenciling gives the best crisp results.
  • Using iron-on vinyl to make your stencil is easier than other ways of making a doormat with your Cricut.

There's several popular methods for using your Cricut to create a doormat.  We're going to use iron-on vinyl to create a stencil, and look at why it's the easiest and most effective way to use your Cricut to make a doormat.  

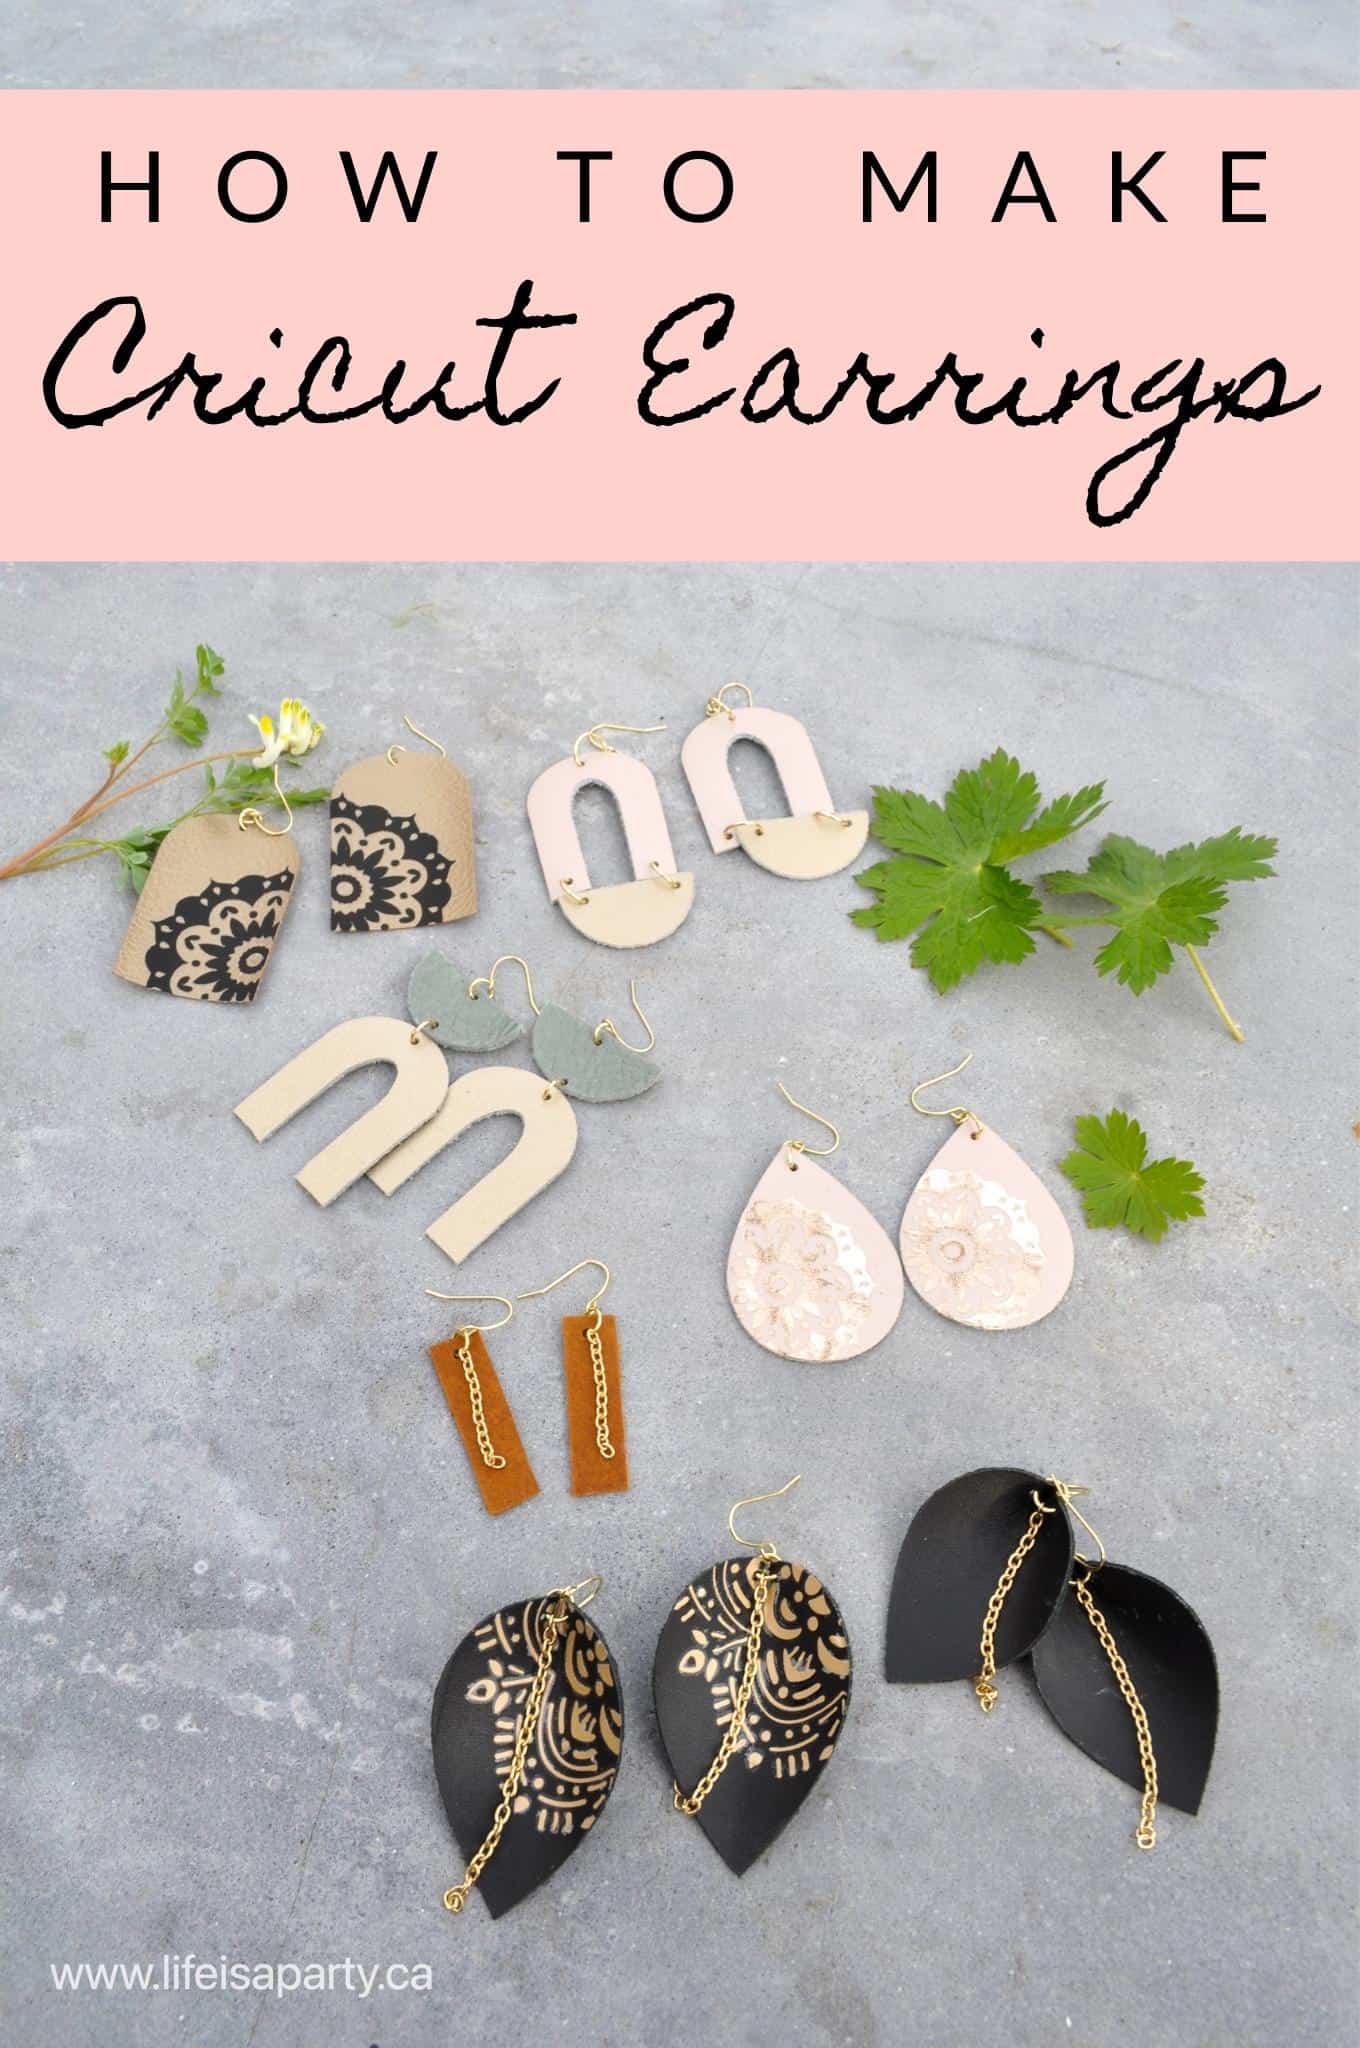
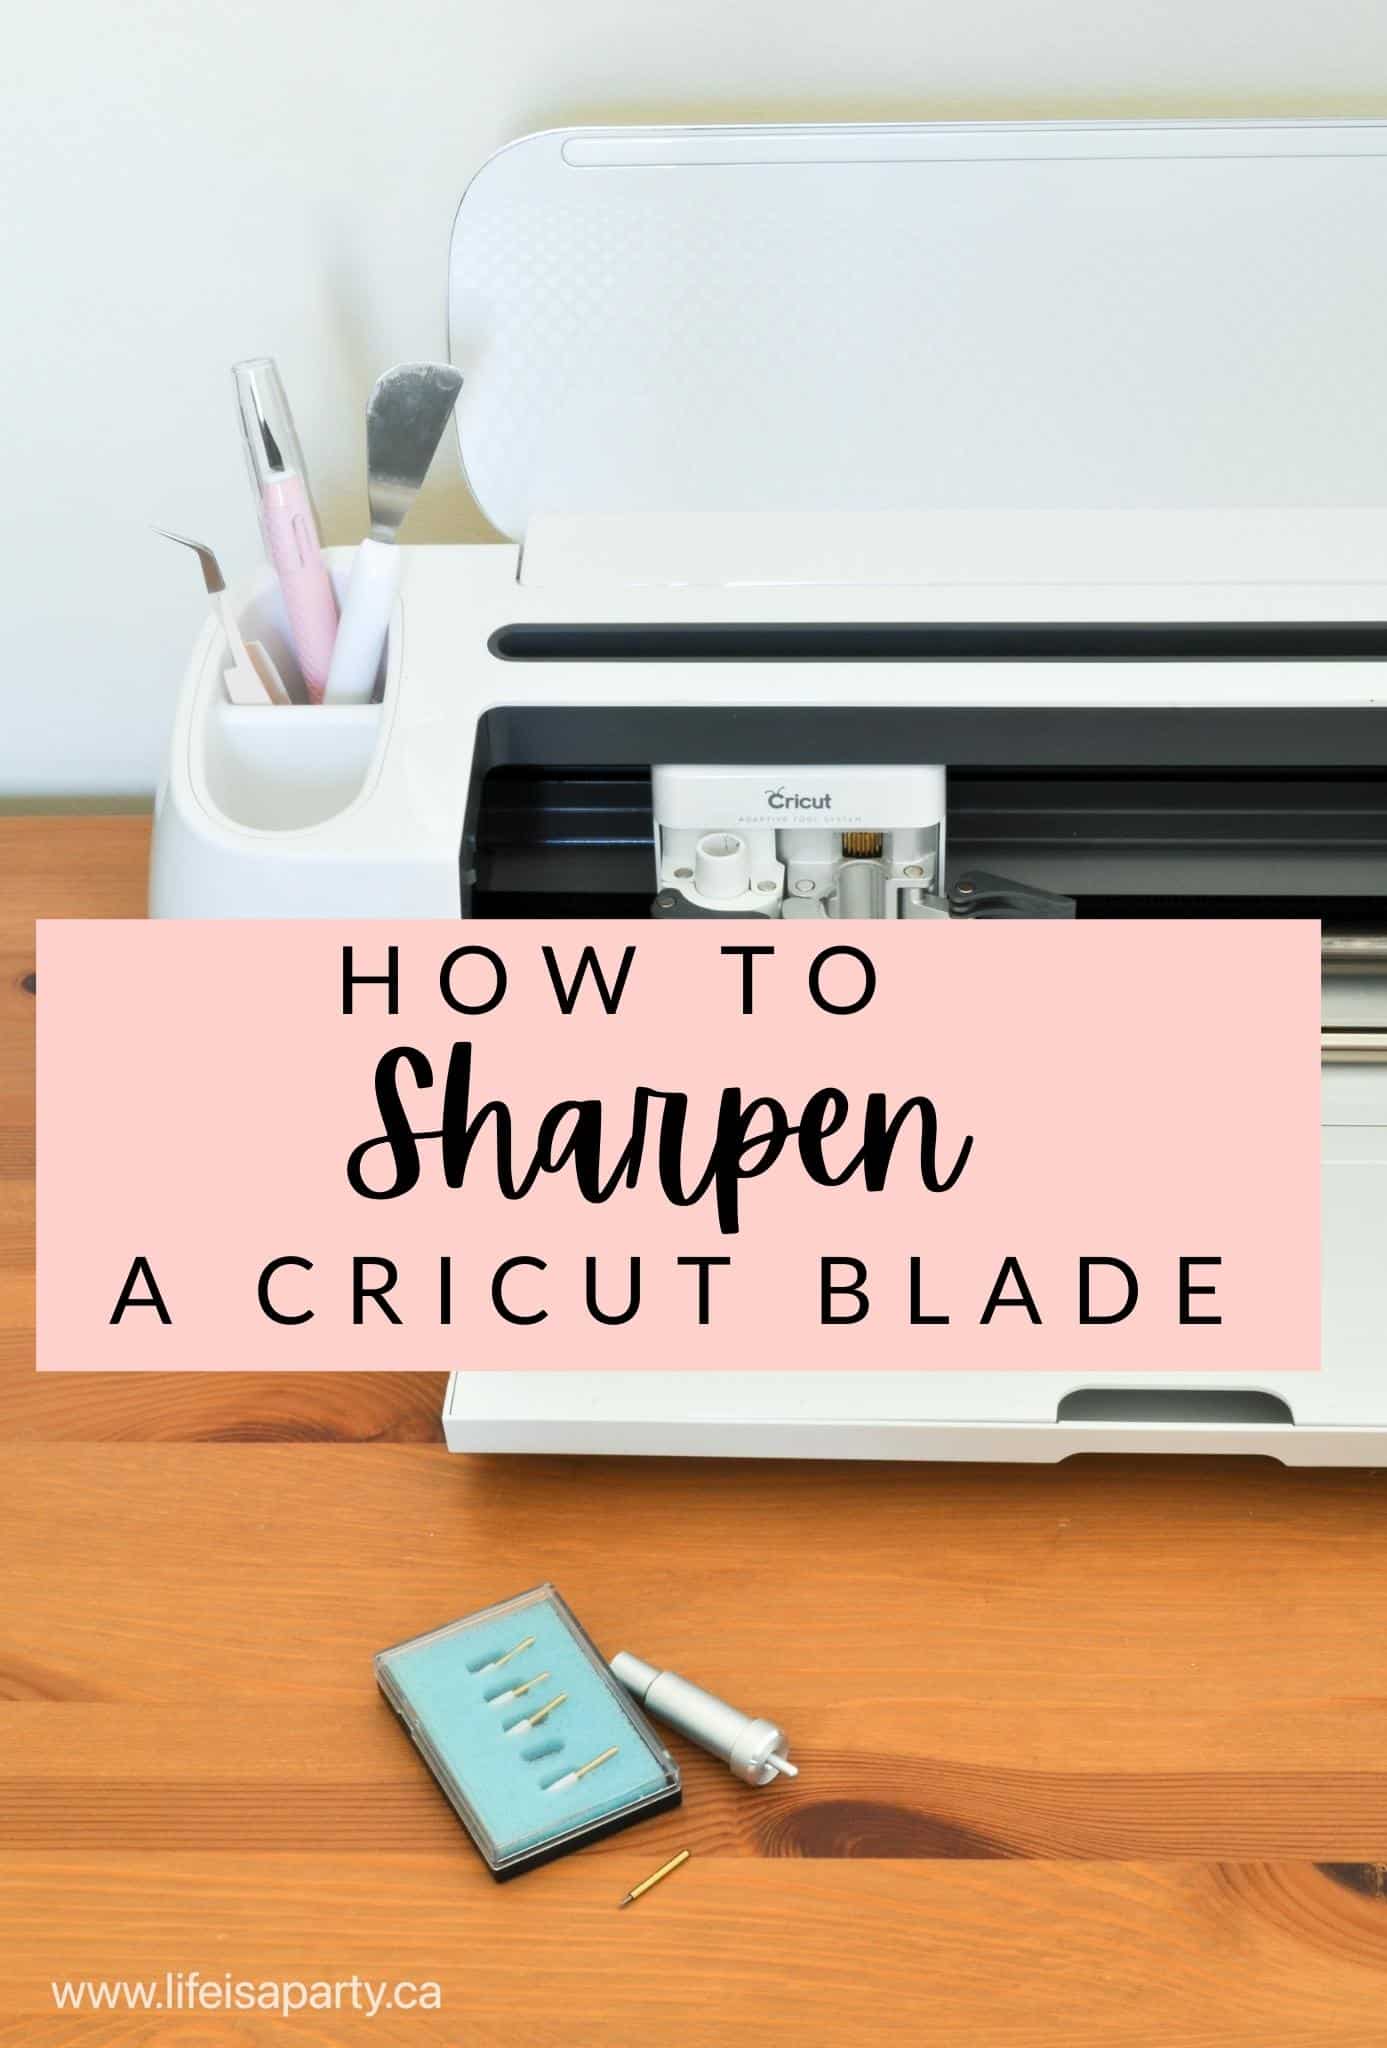
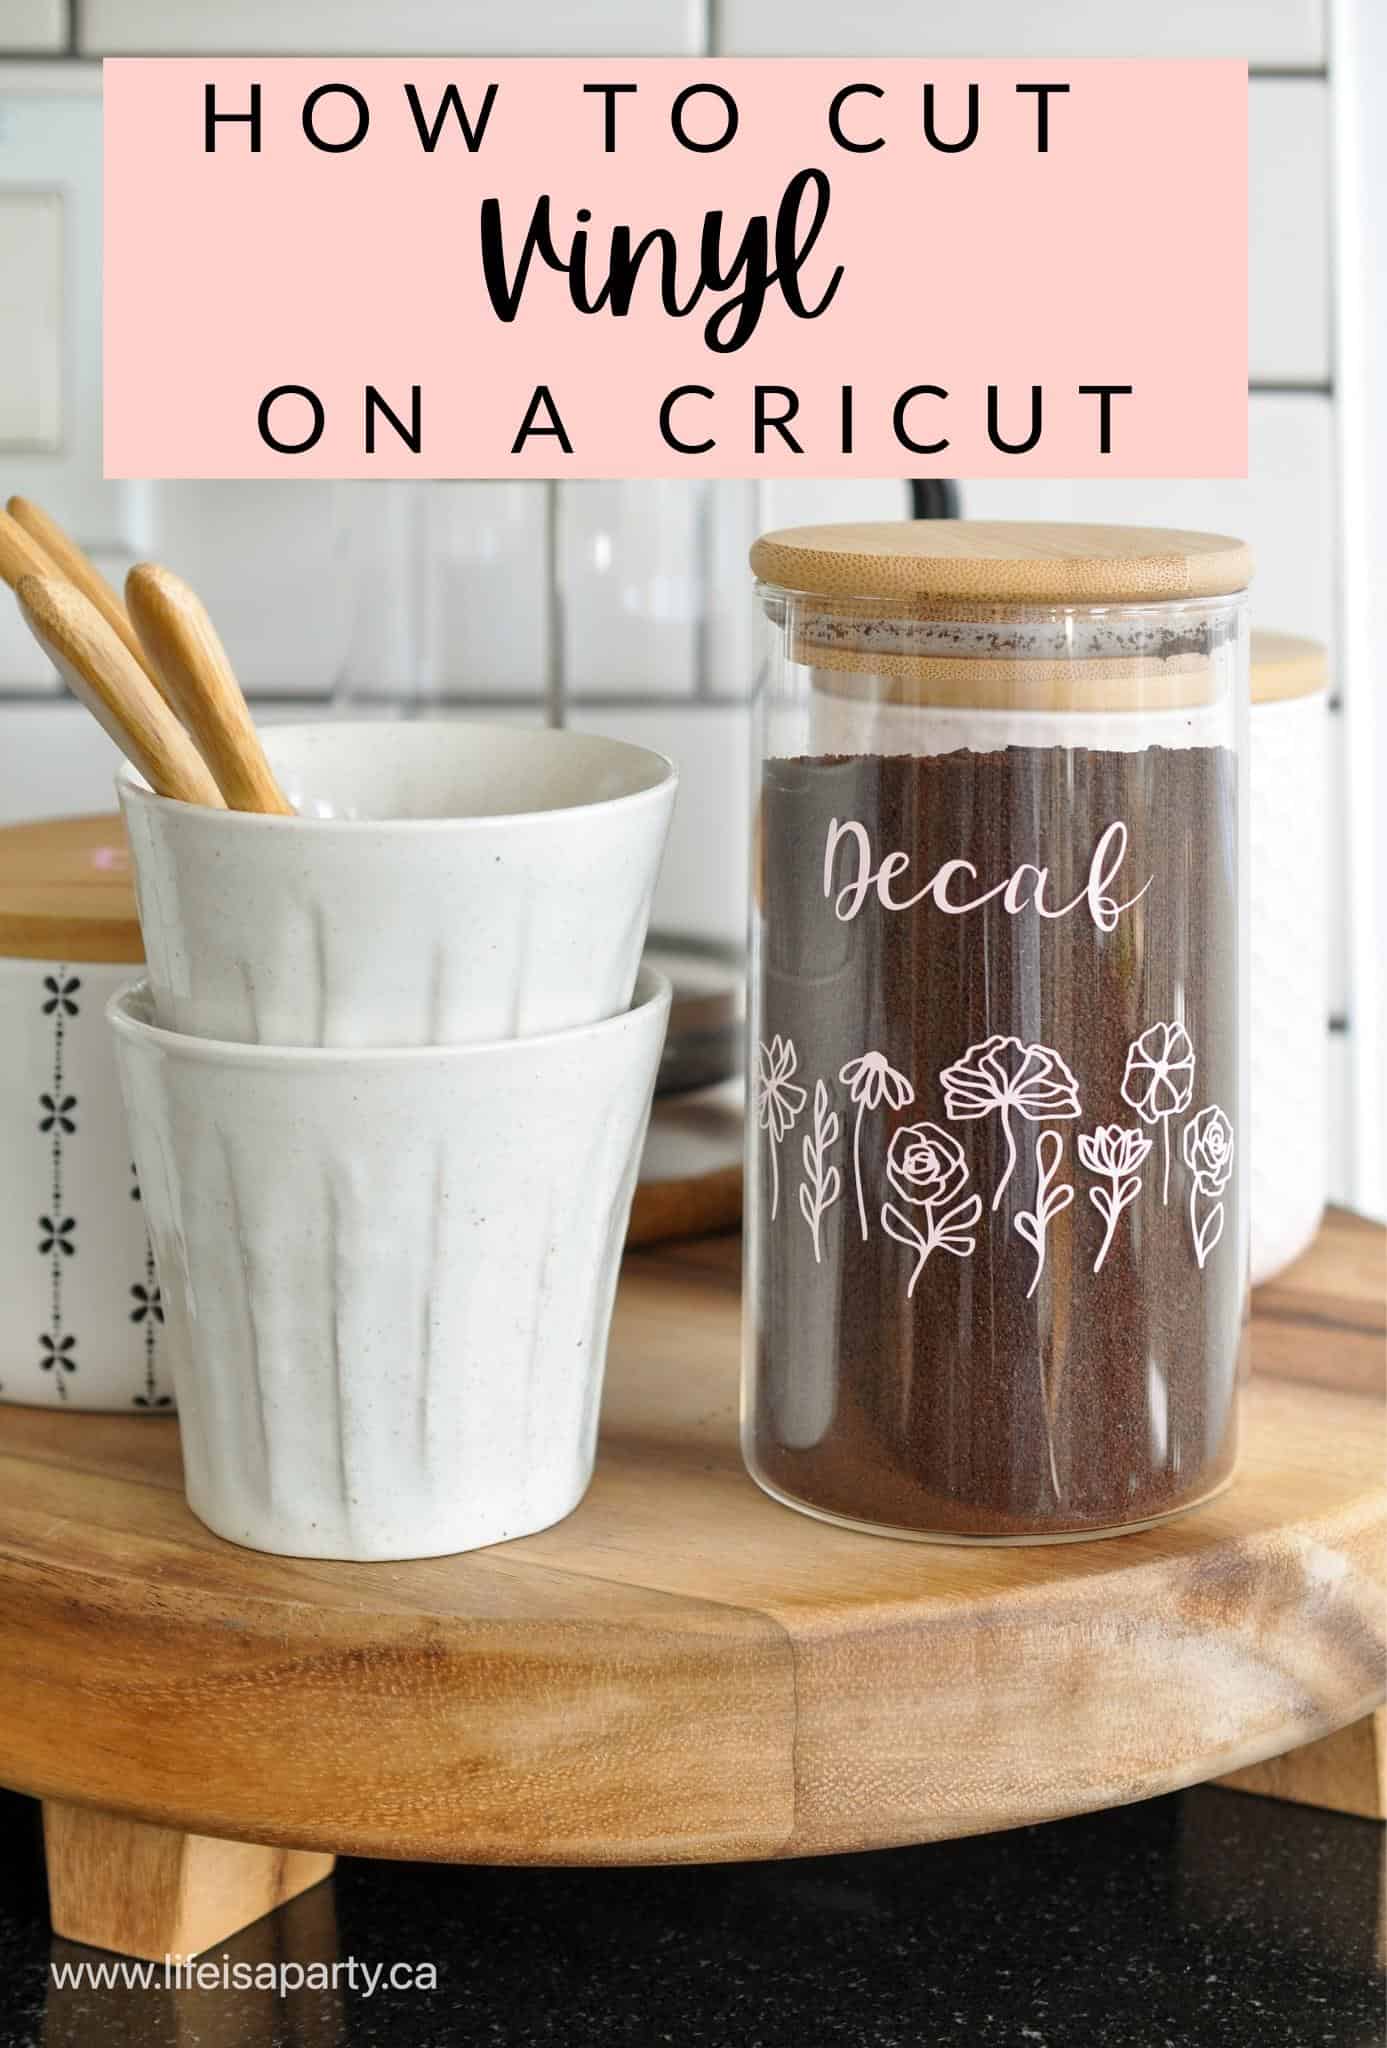
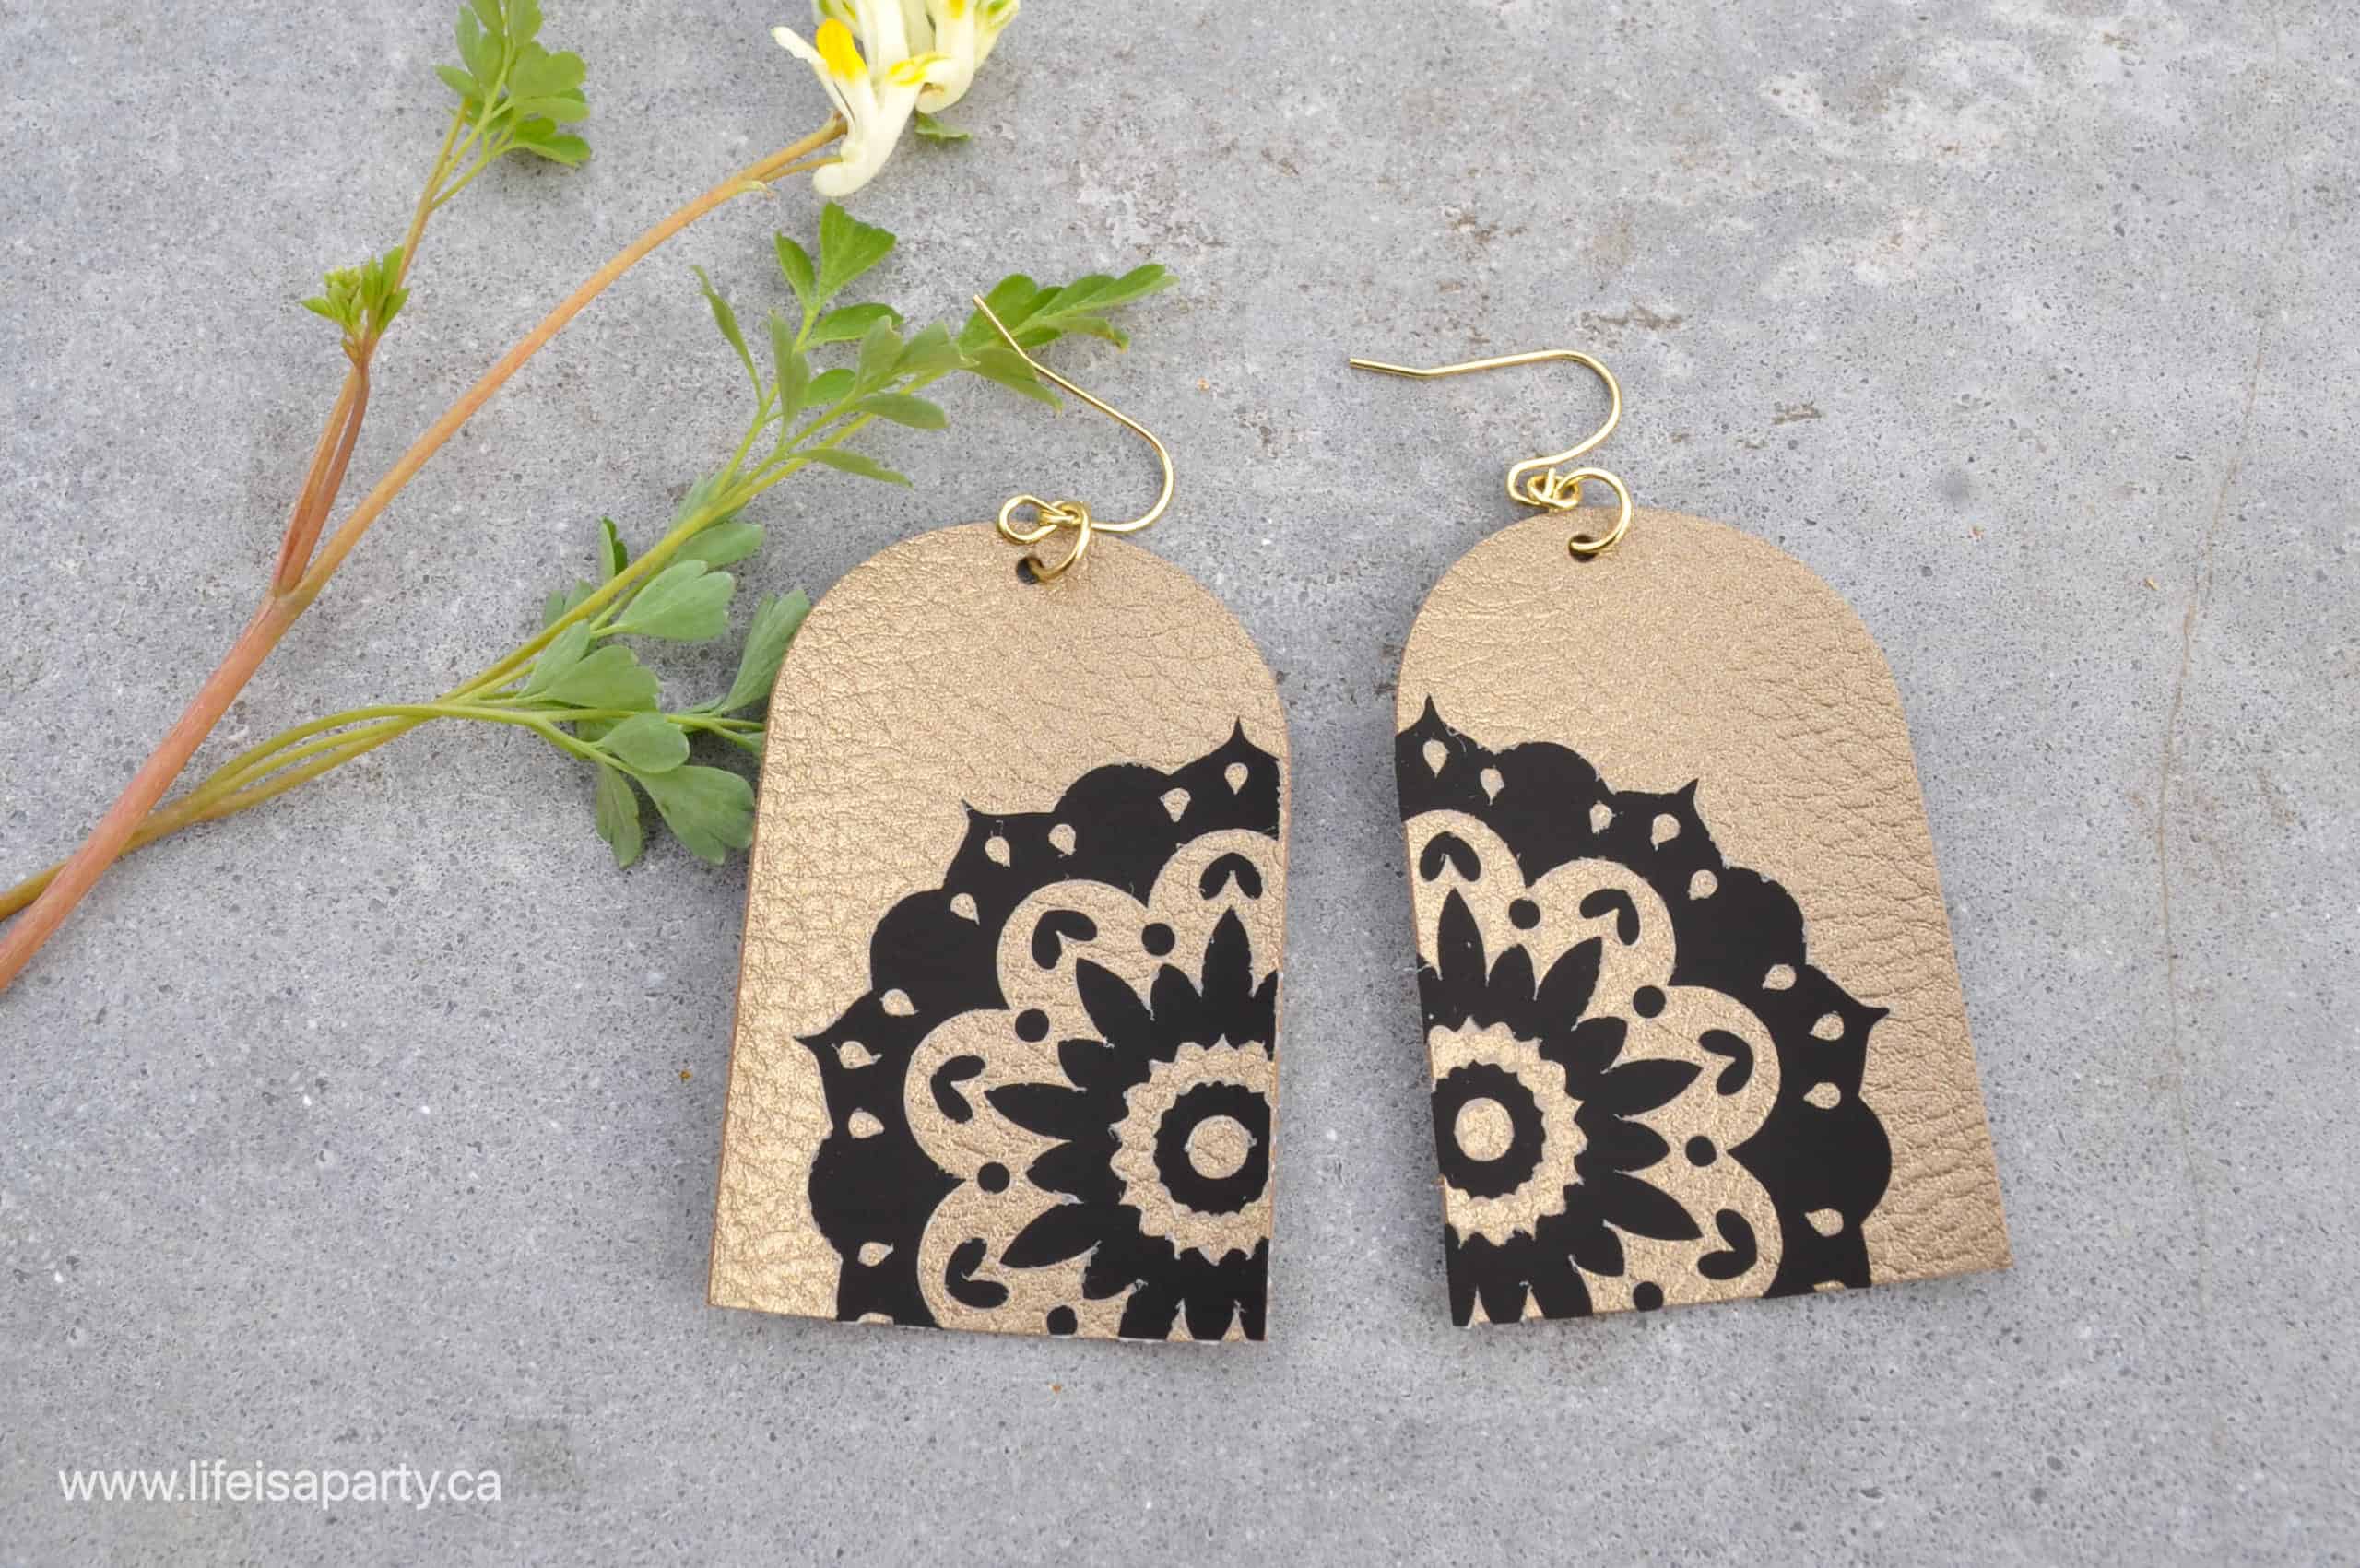
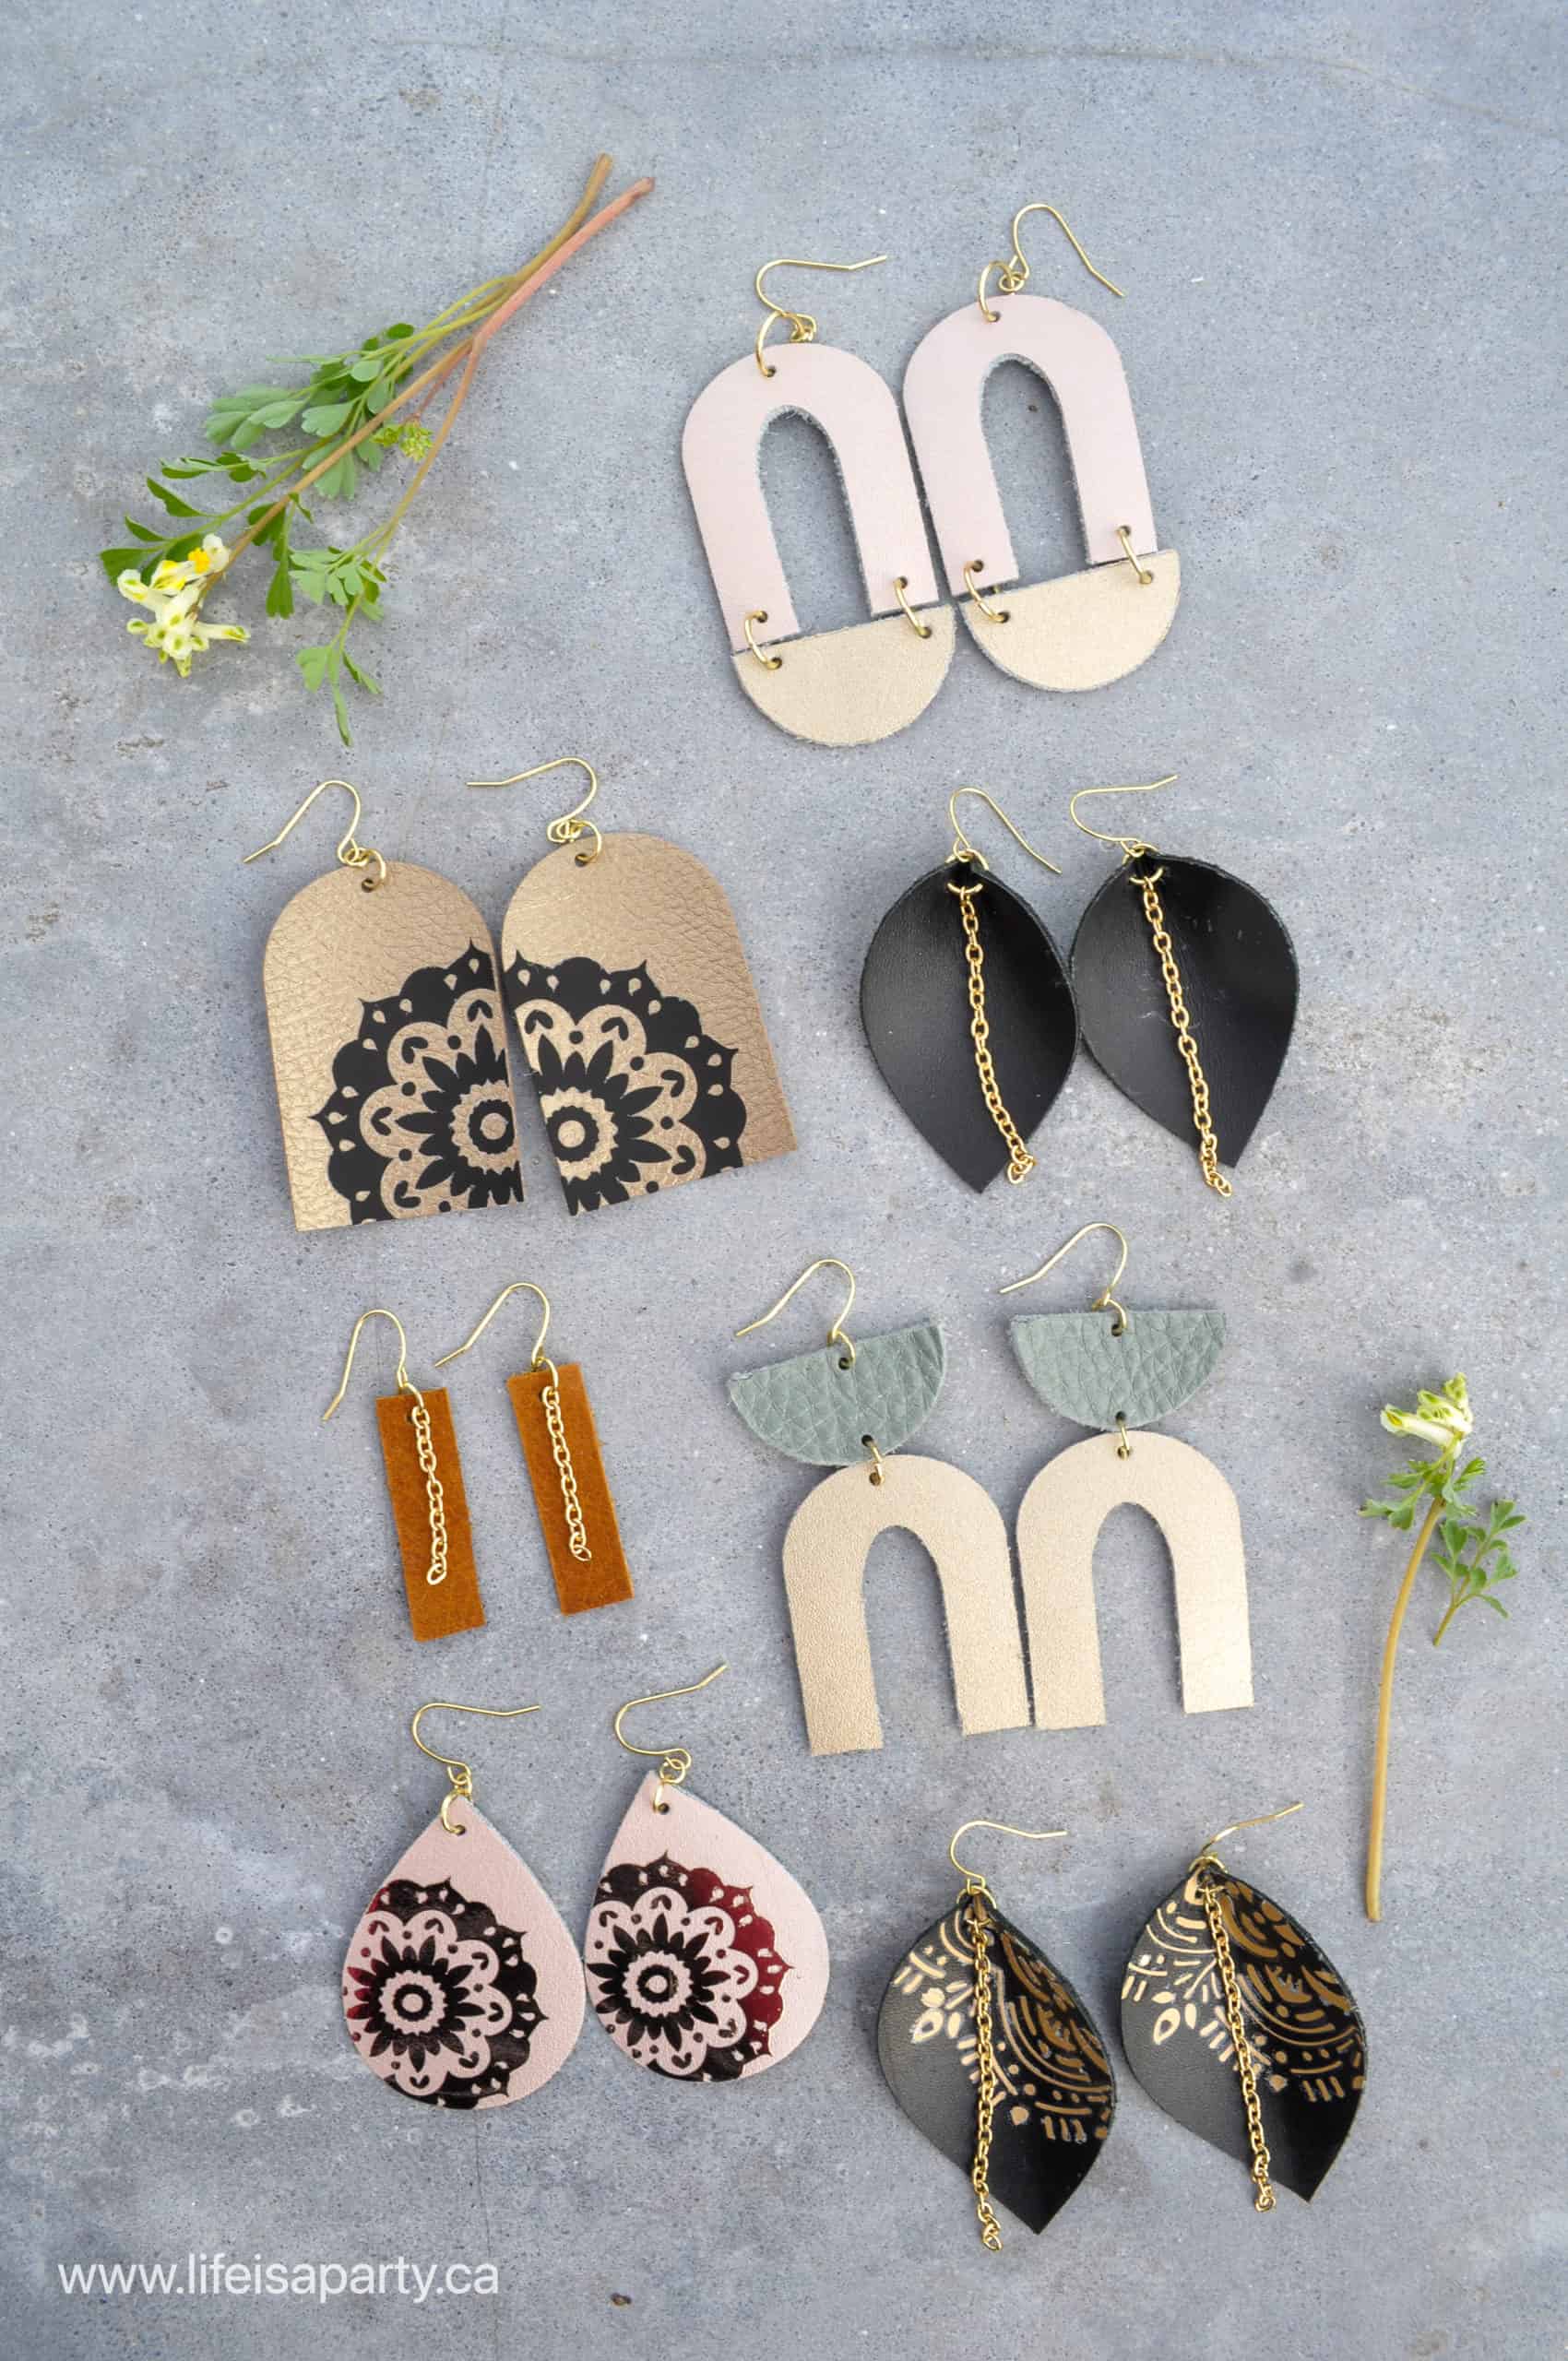
You might also like How To Sharpen Your Cricut Blade, How To Make Earrings With Your Cricut, and the Beginner's Guide to Cricut Mats.

Create a Custom Look

Making a custom doormat is a fun way to create exactly what you're looking for.  Take a boring, plain doormat and choose your own saying, name, house number, fonts, and colors to create your custom look.  These are great for decorating your front porch, or for giving as gifts for friends to use at their front door, or even for selling.  Start with a blank doormat and turn it into a funny doormat that welcomes guests, or a pretty doormat that matches your personal style.  

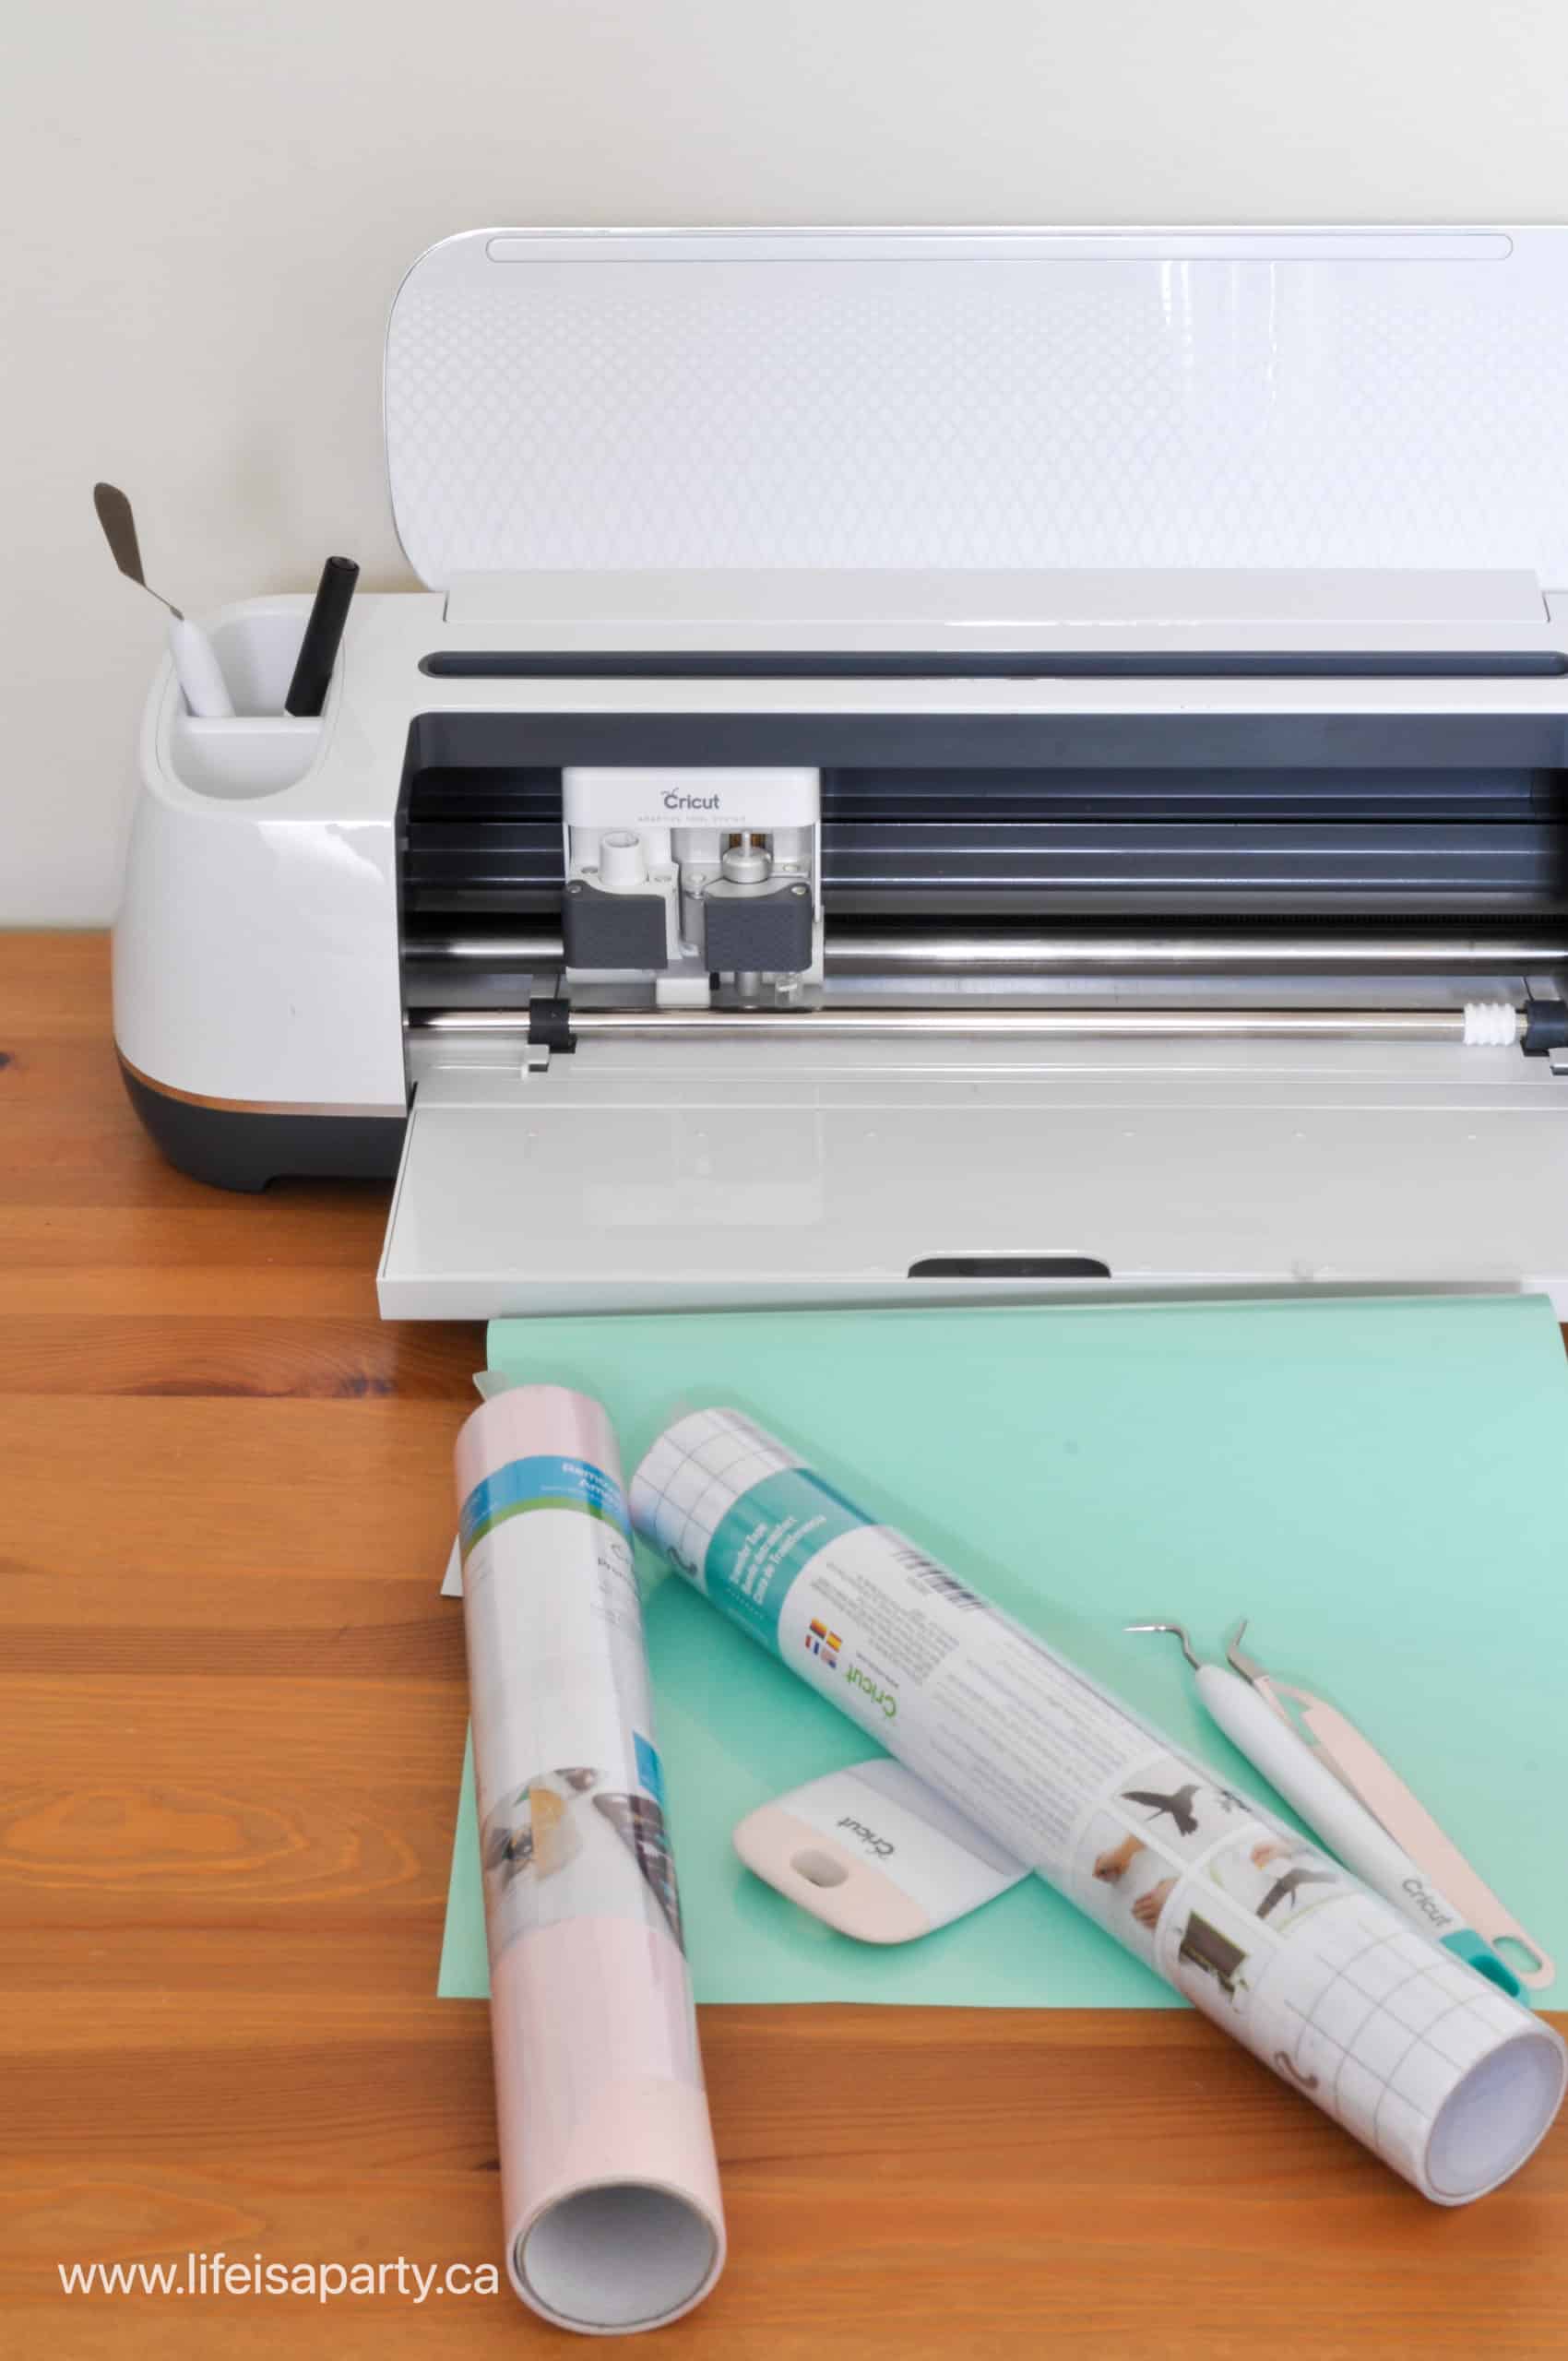
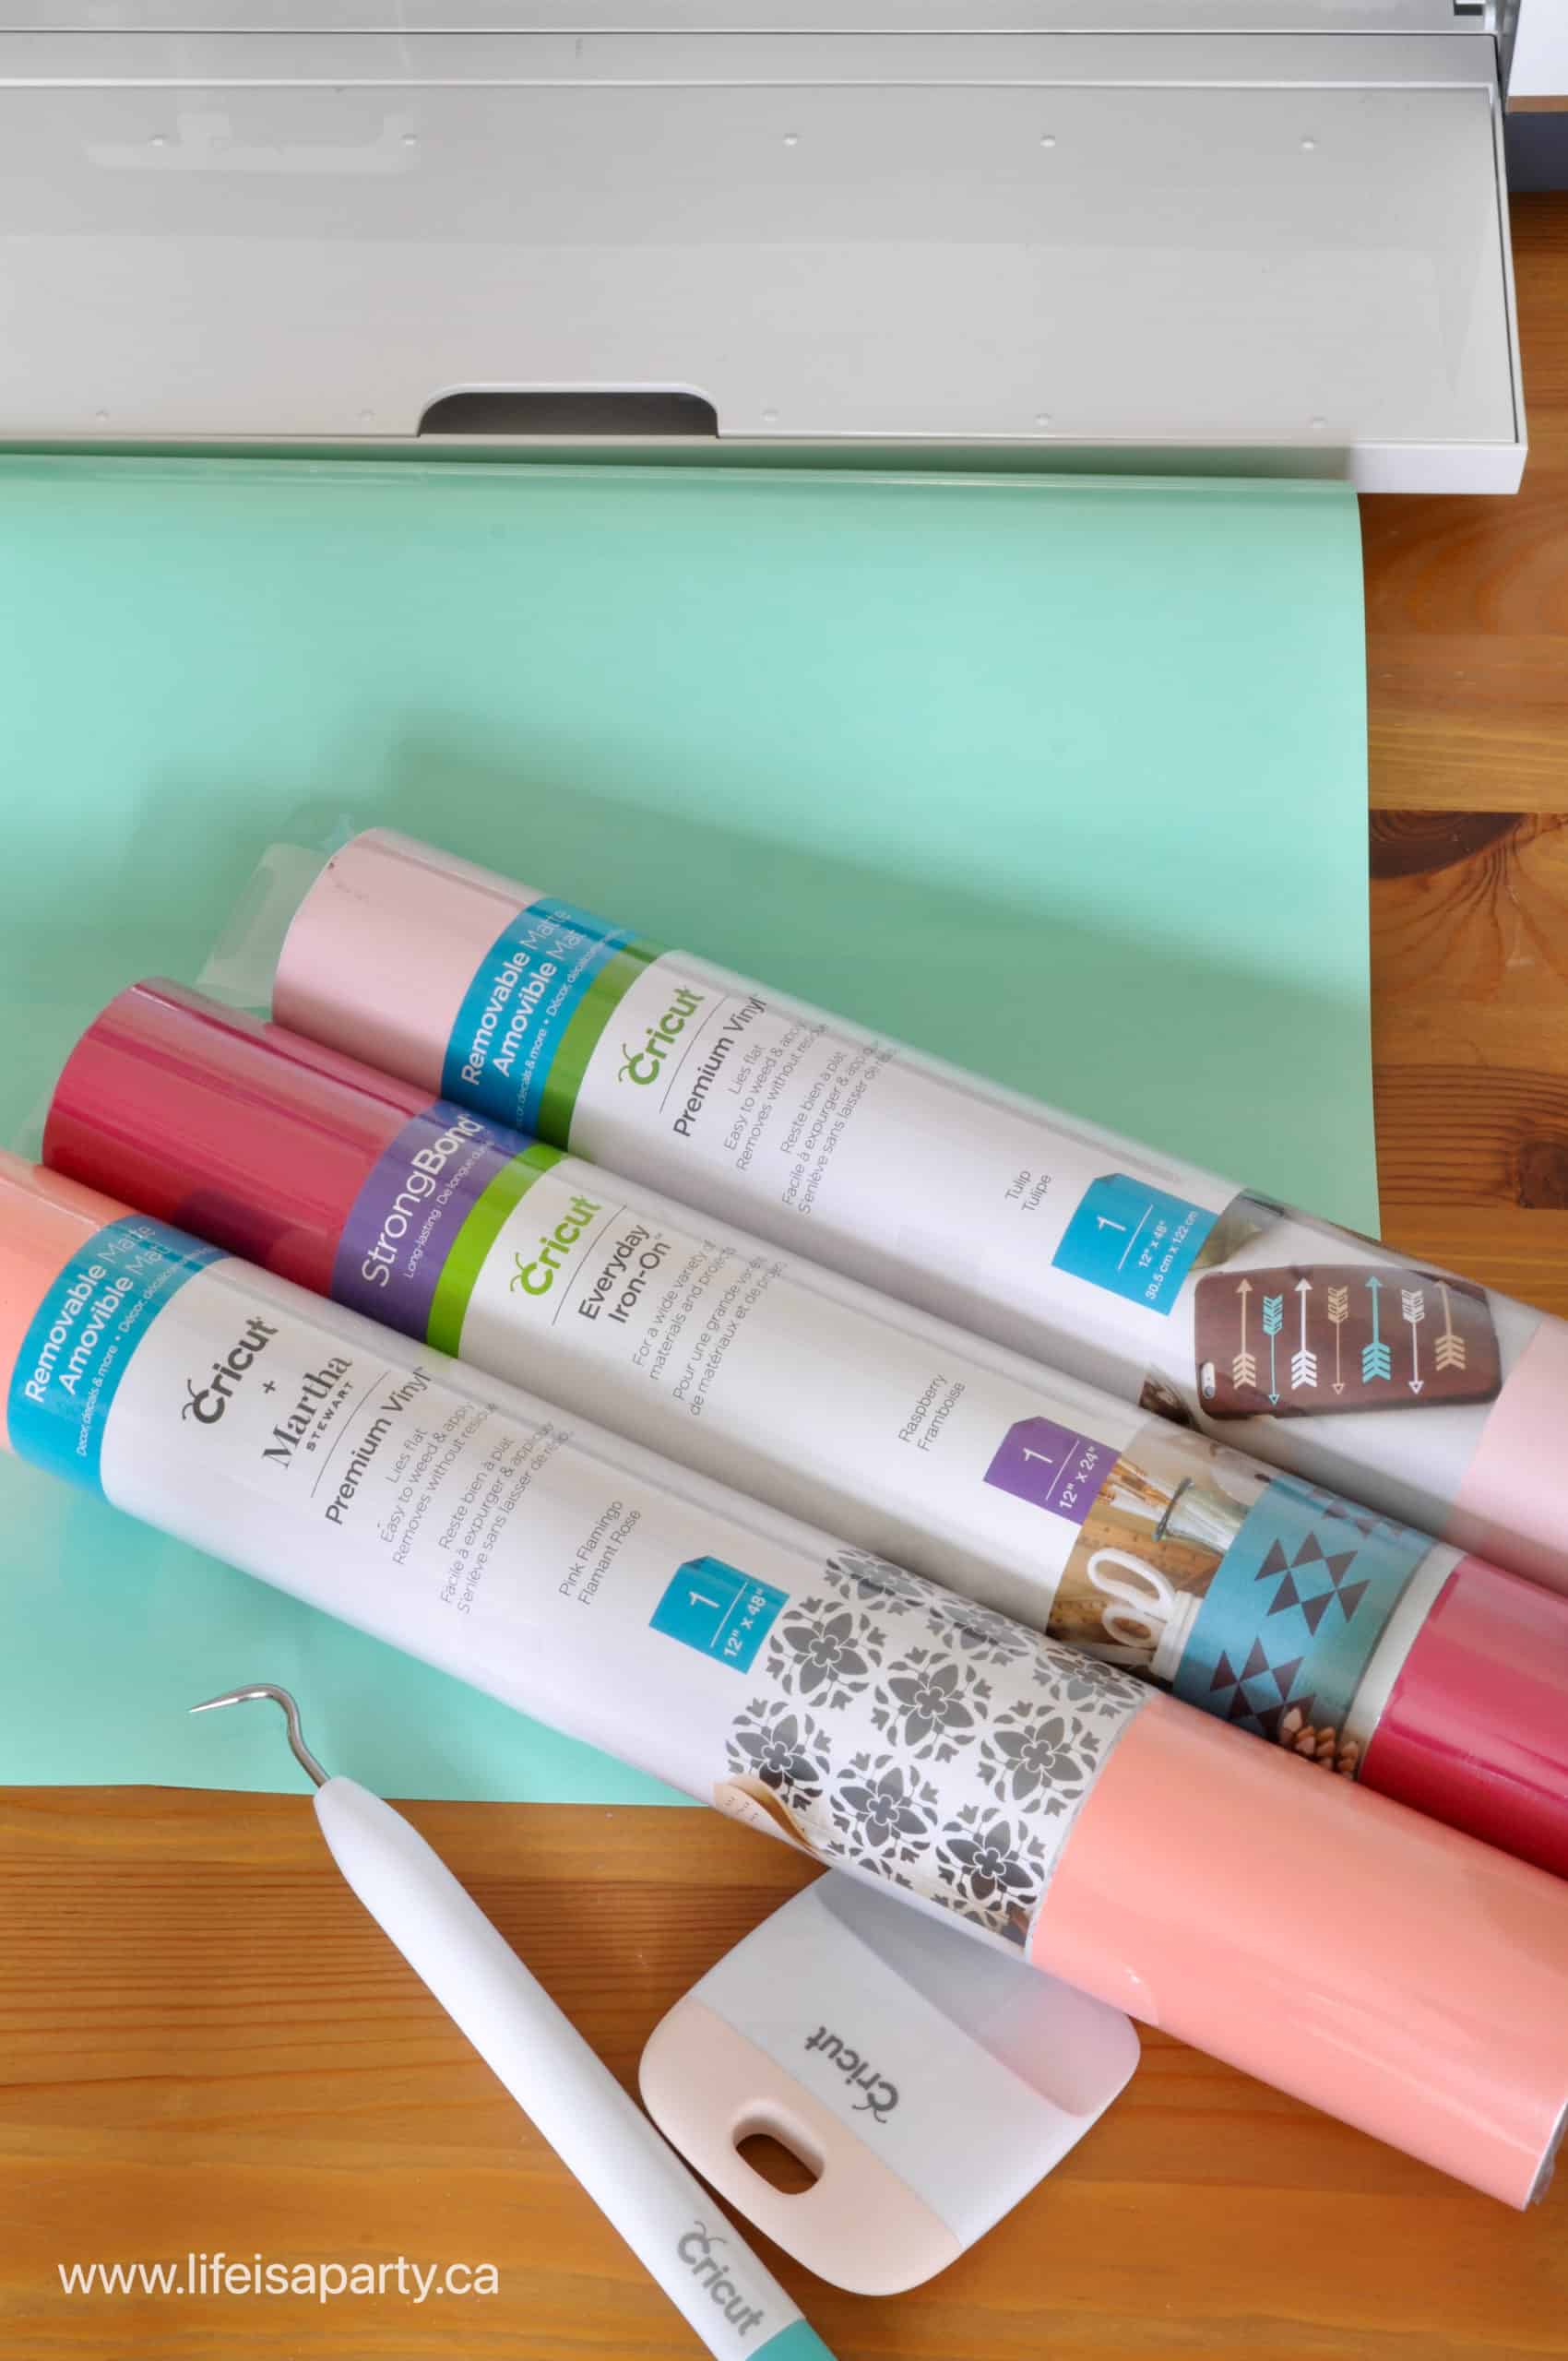
Materials:

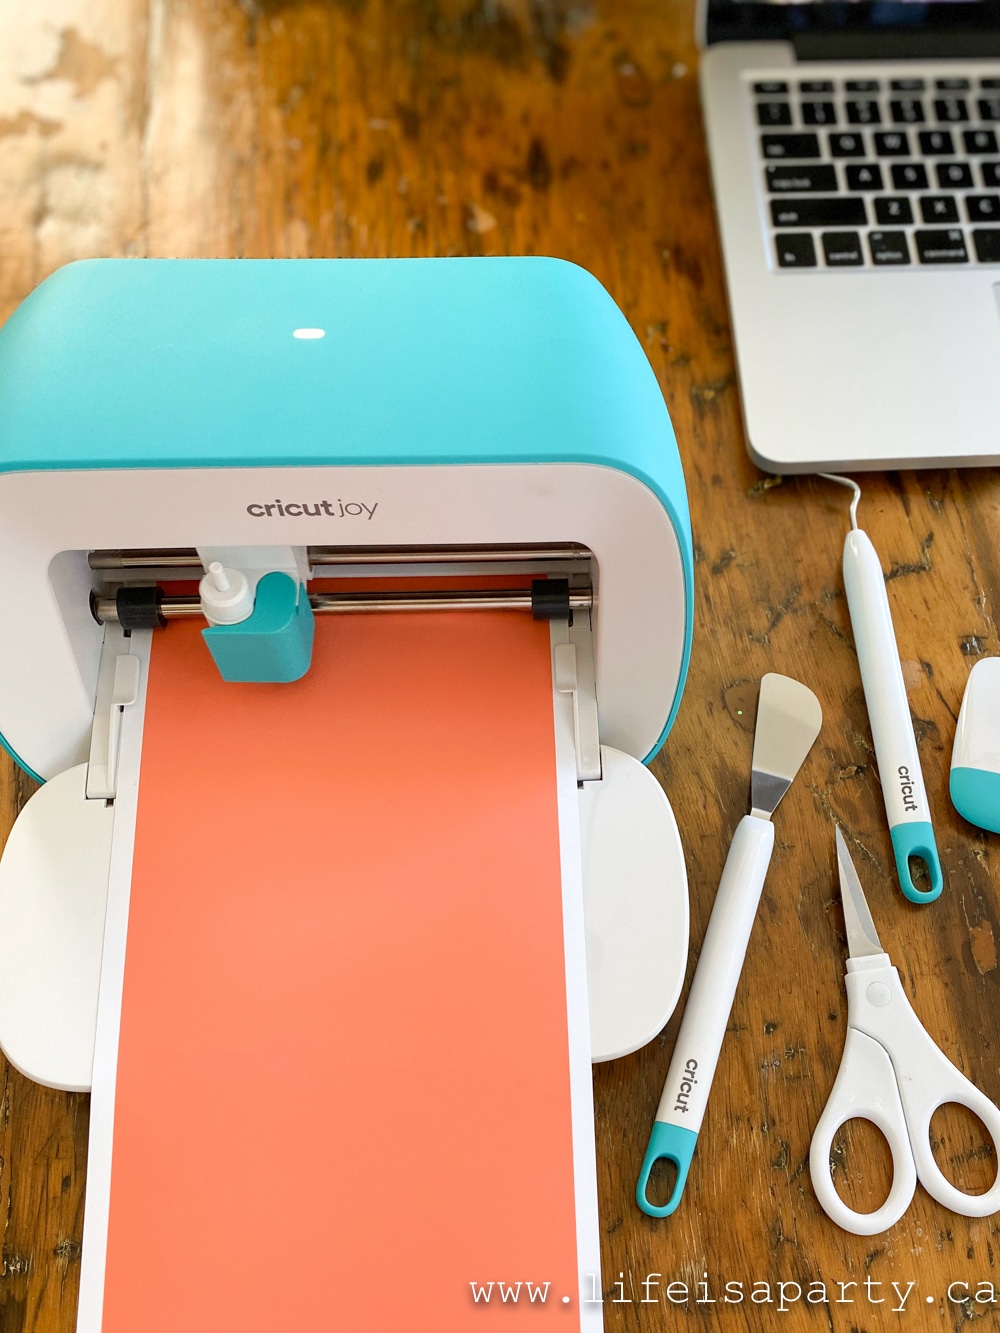
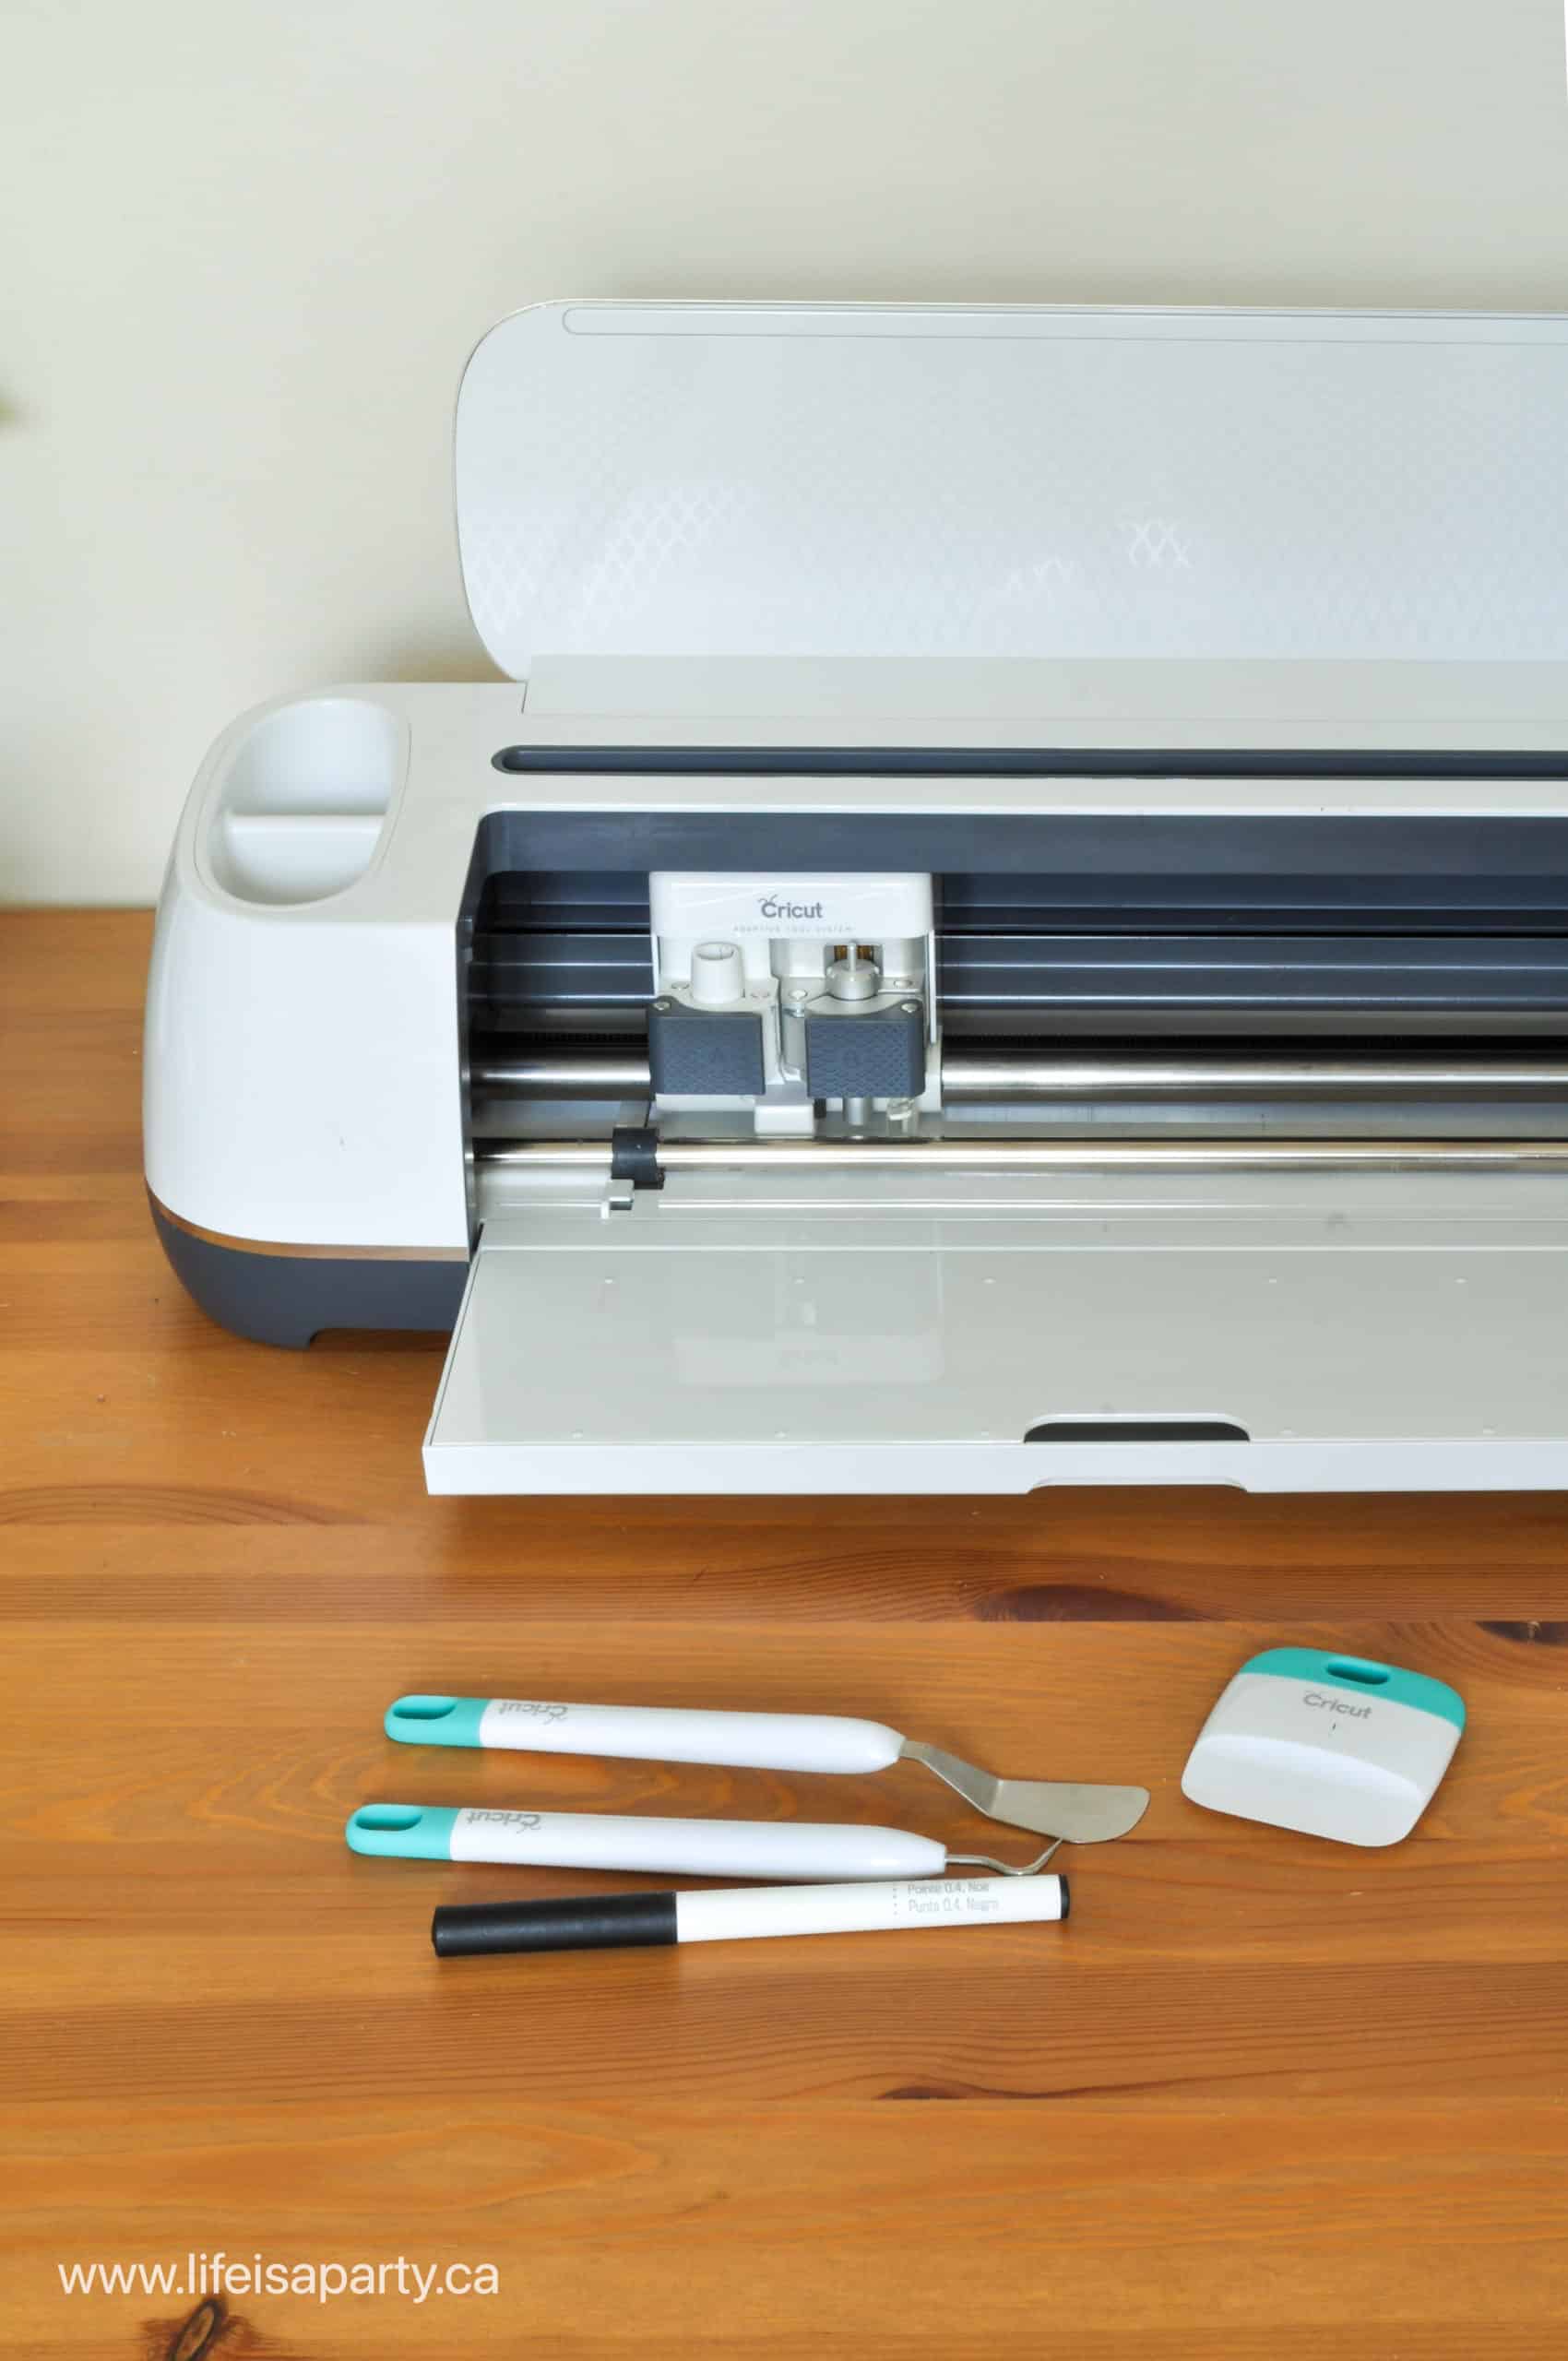
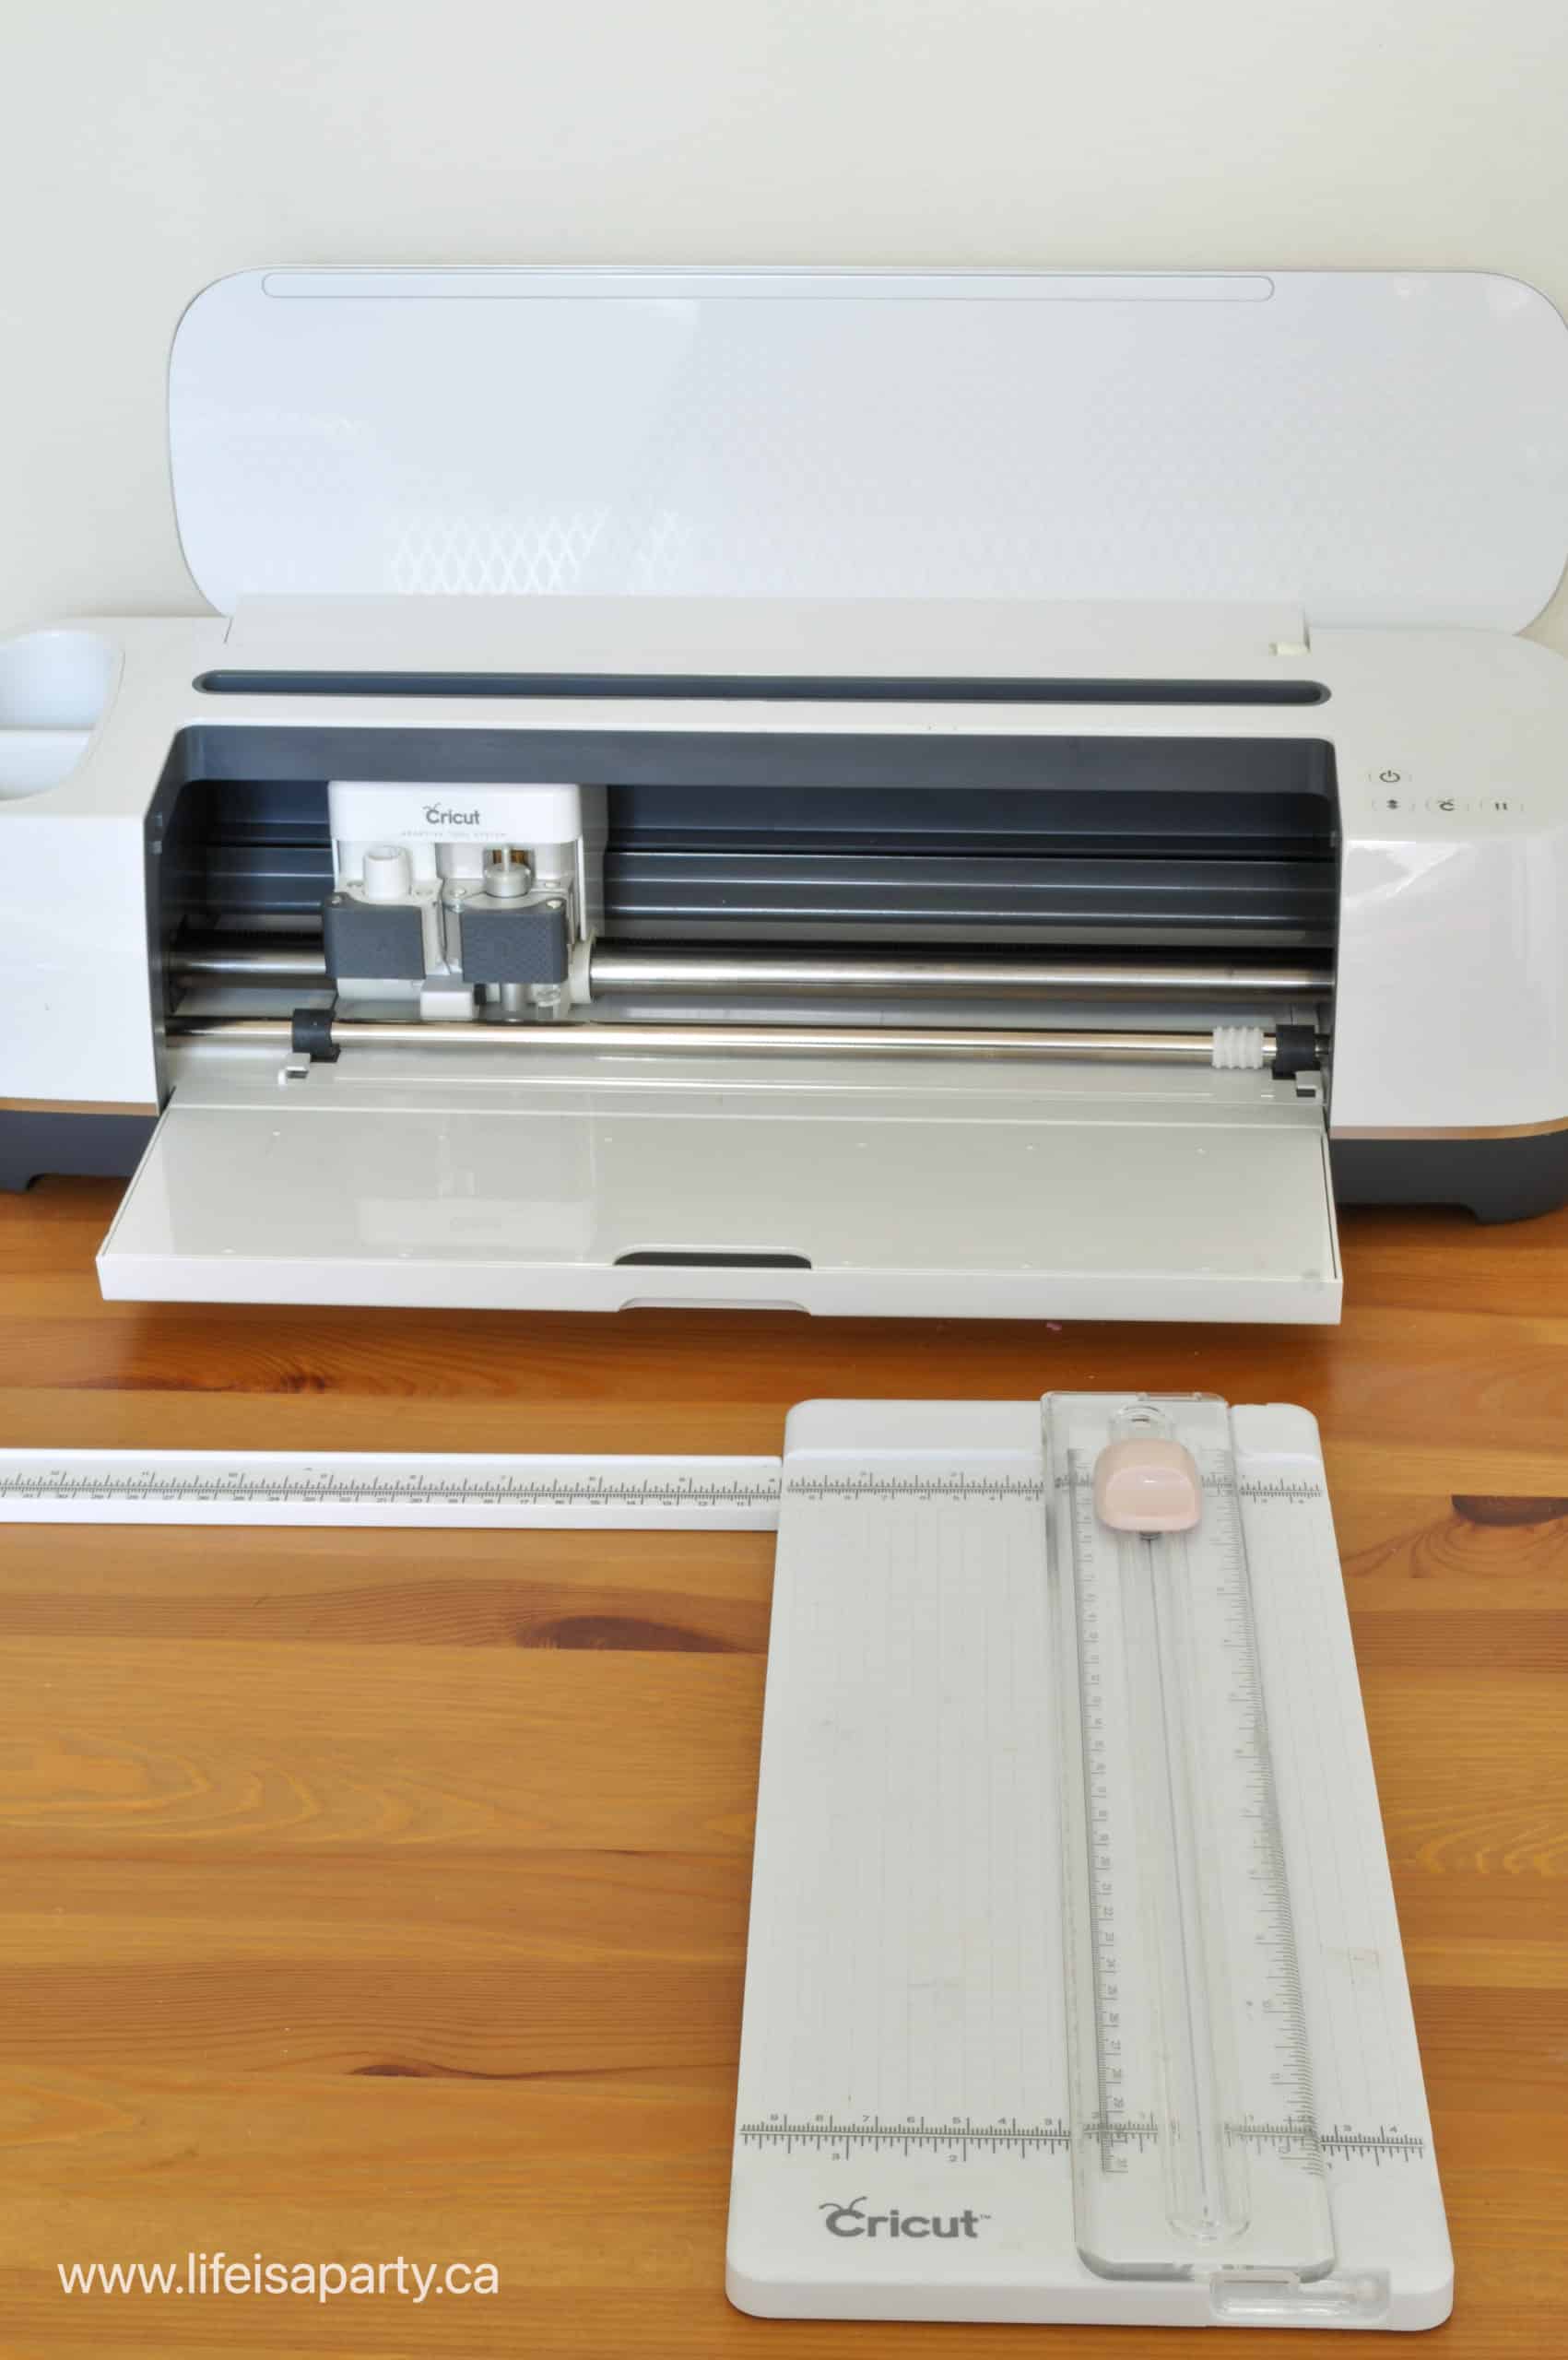
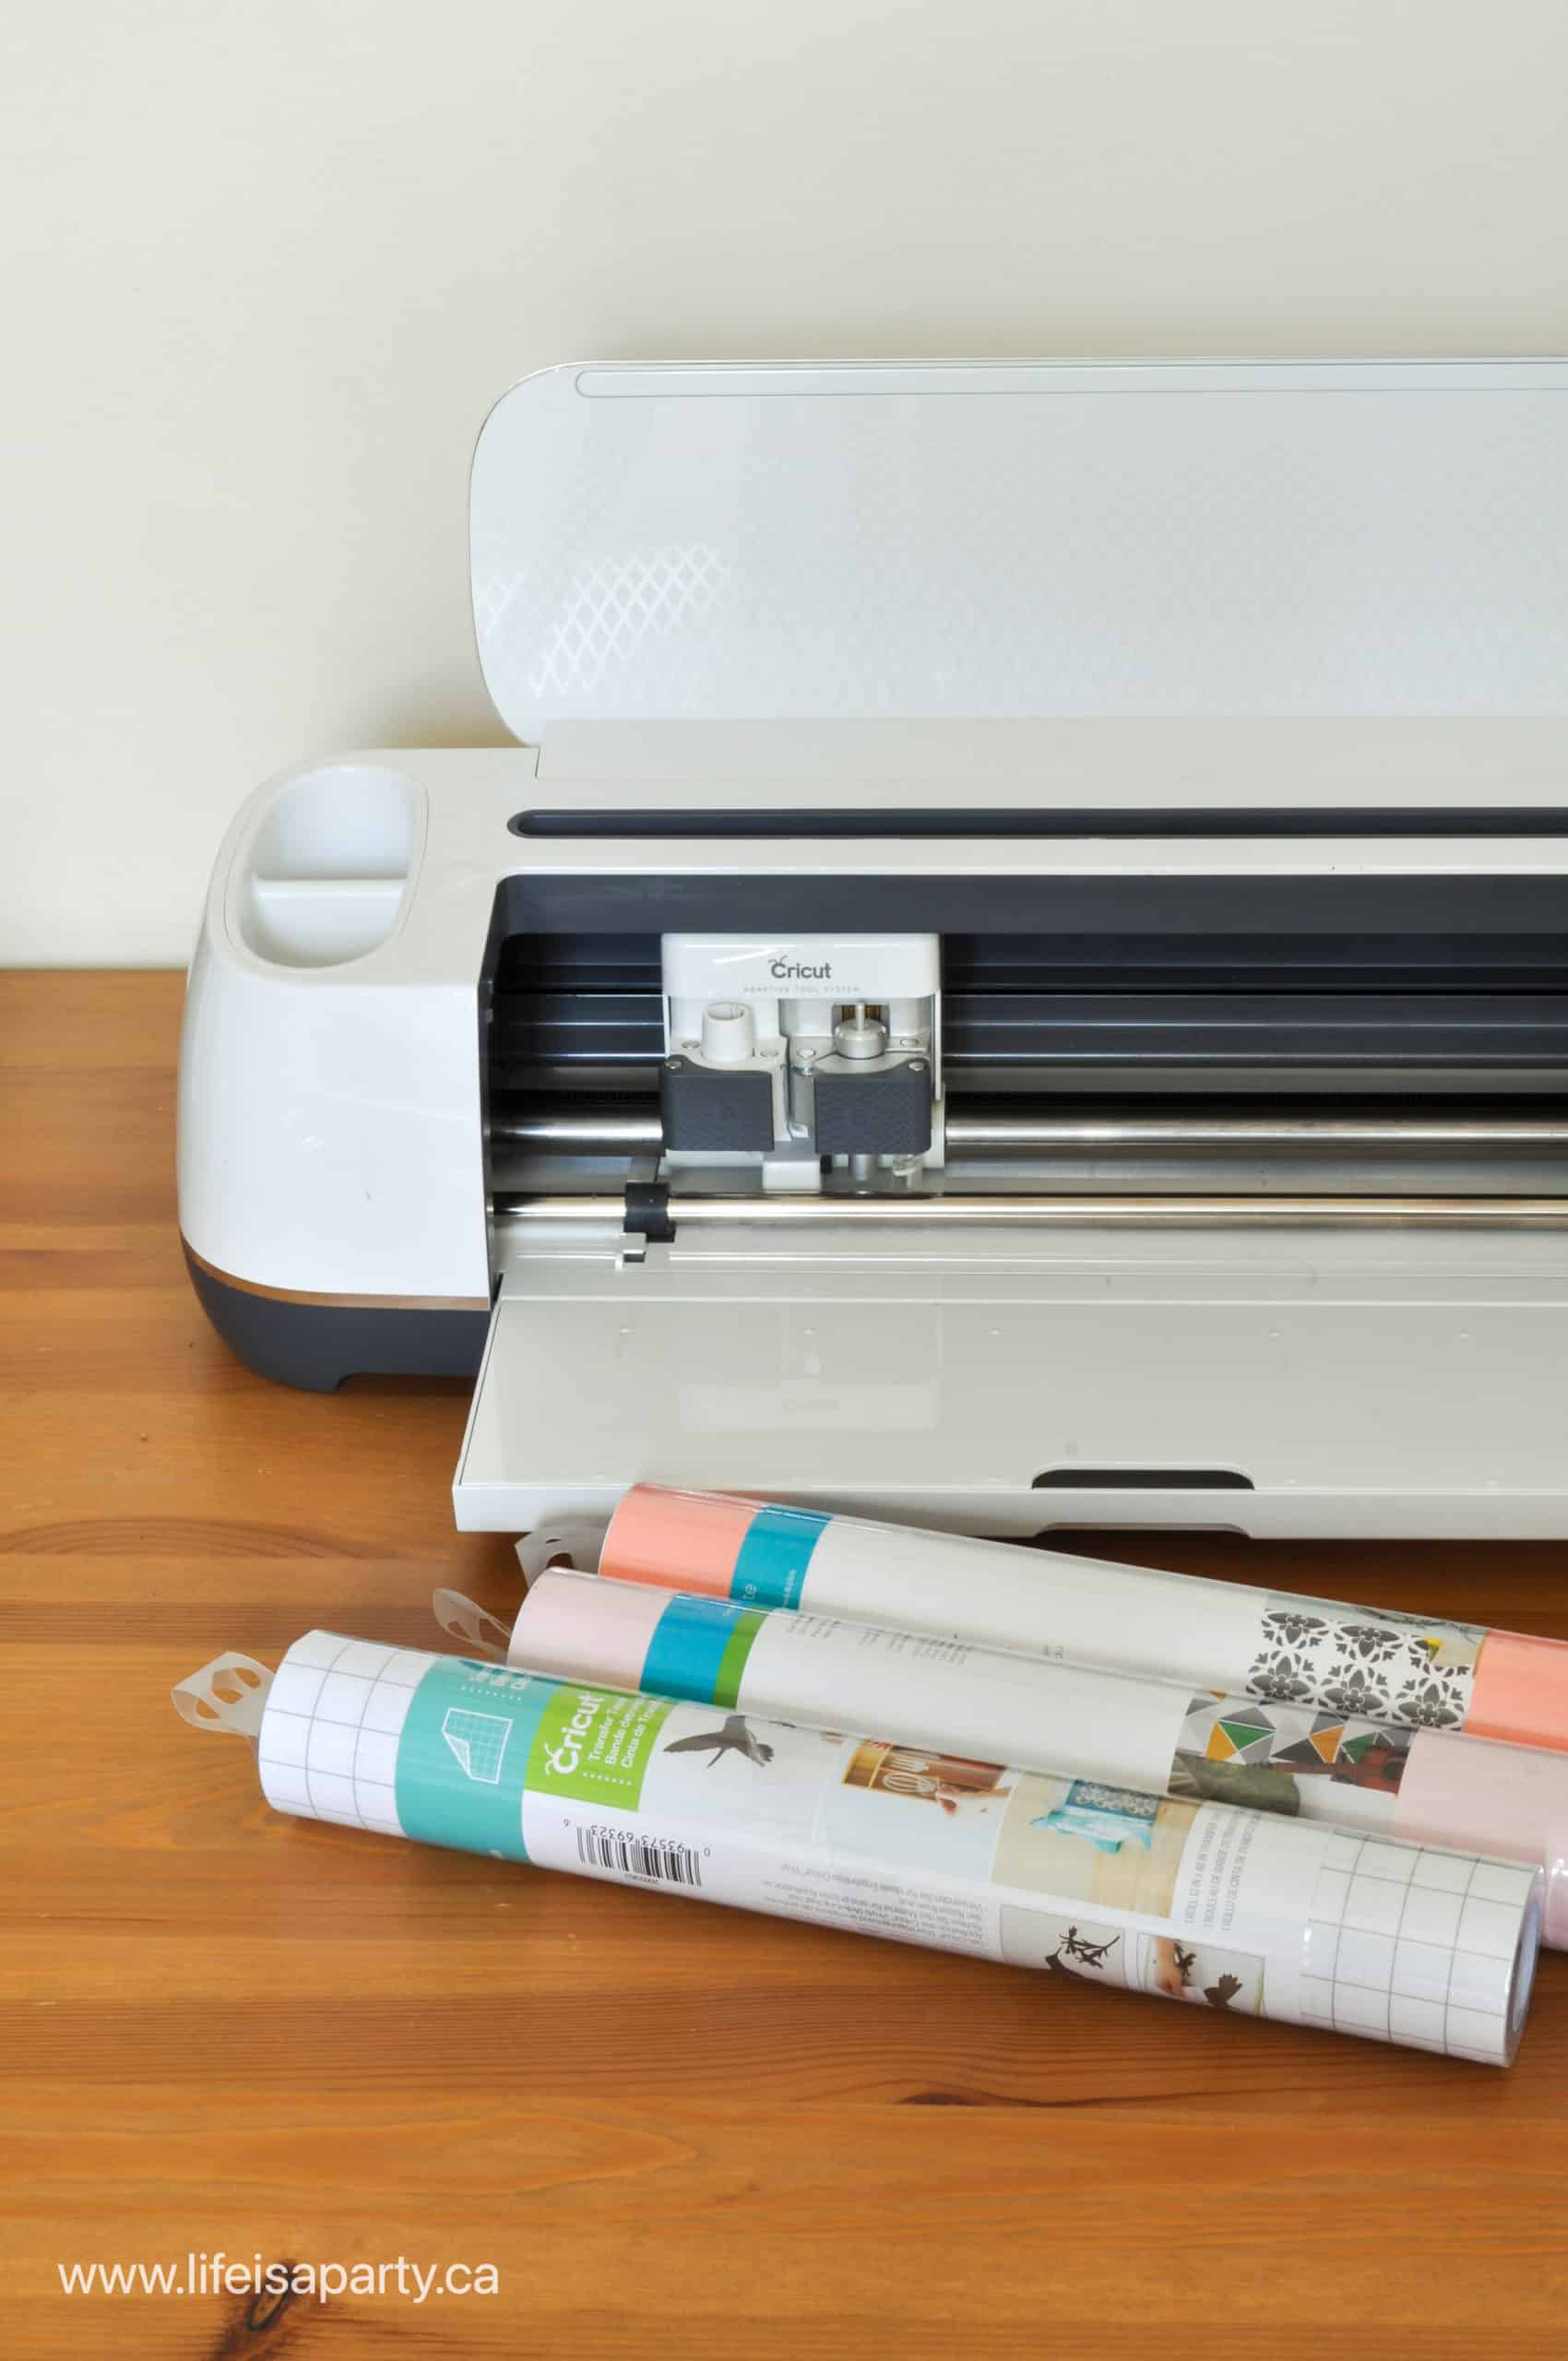
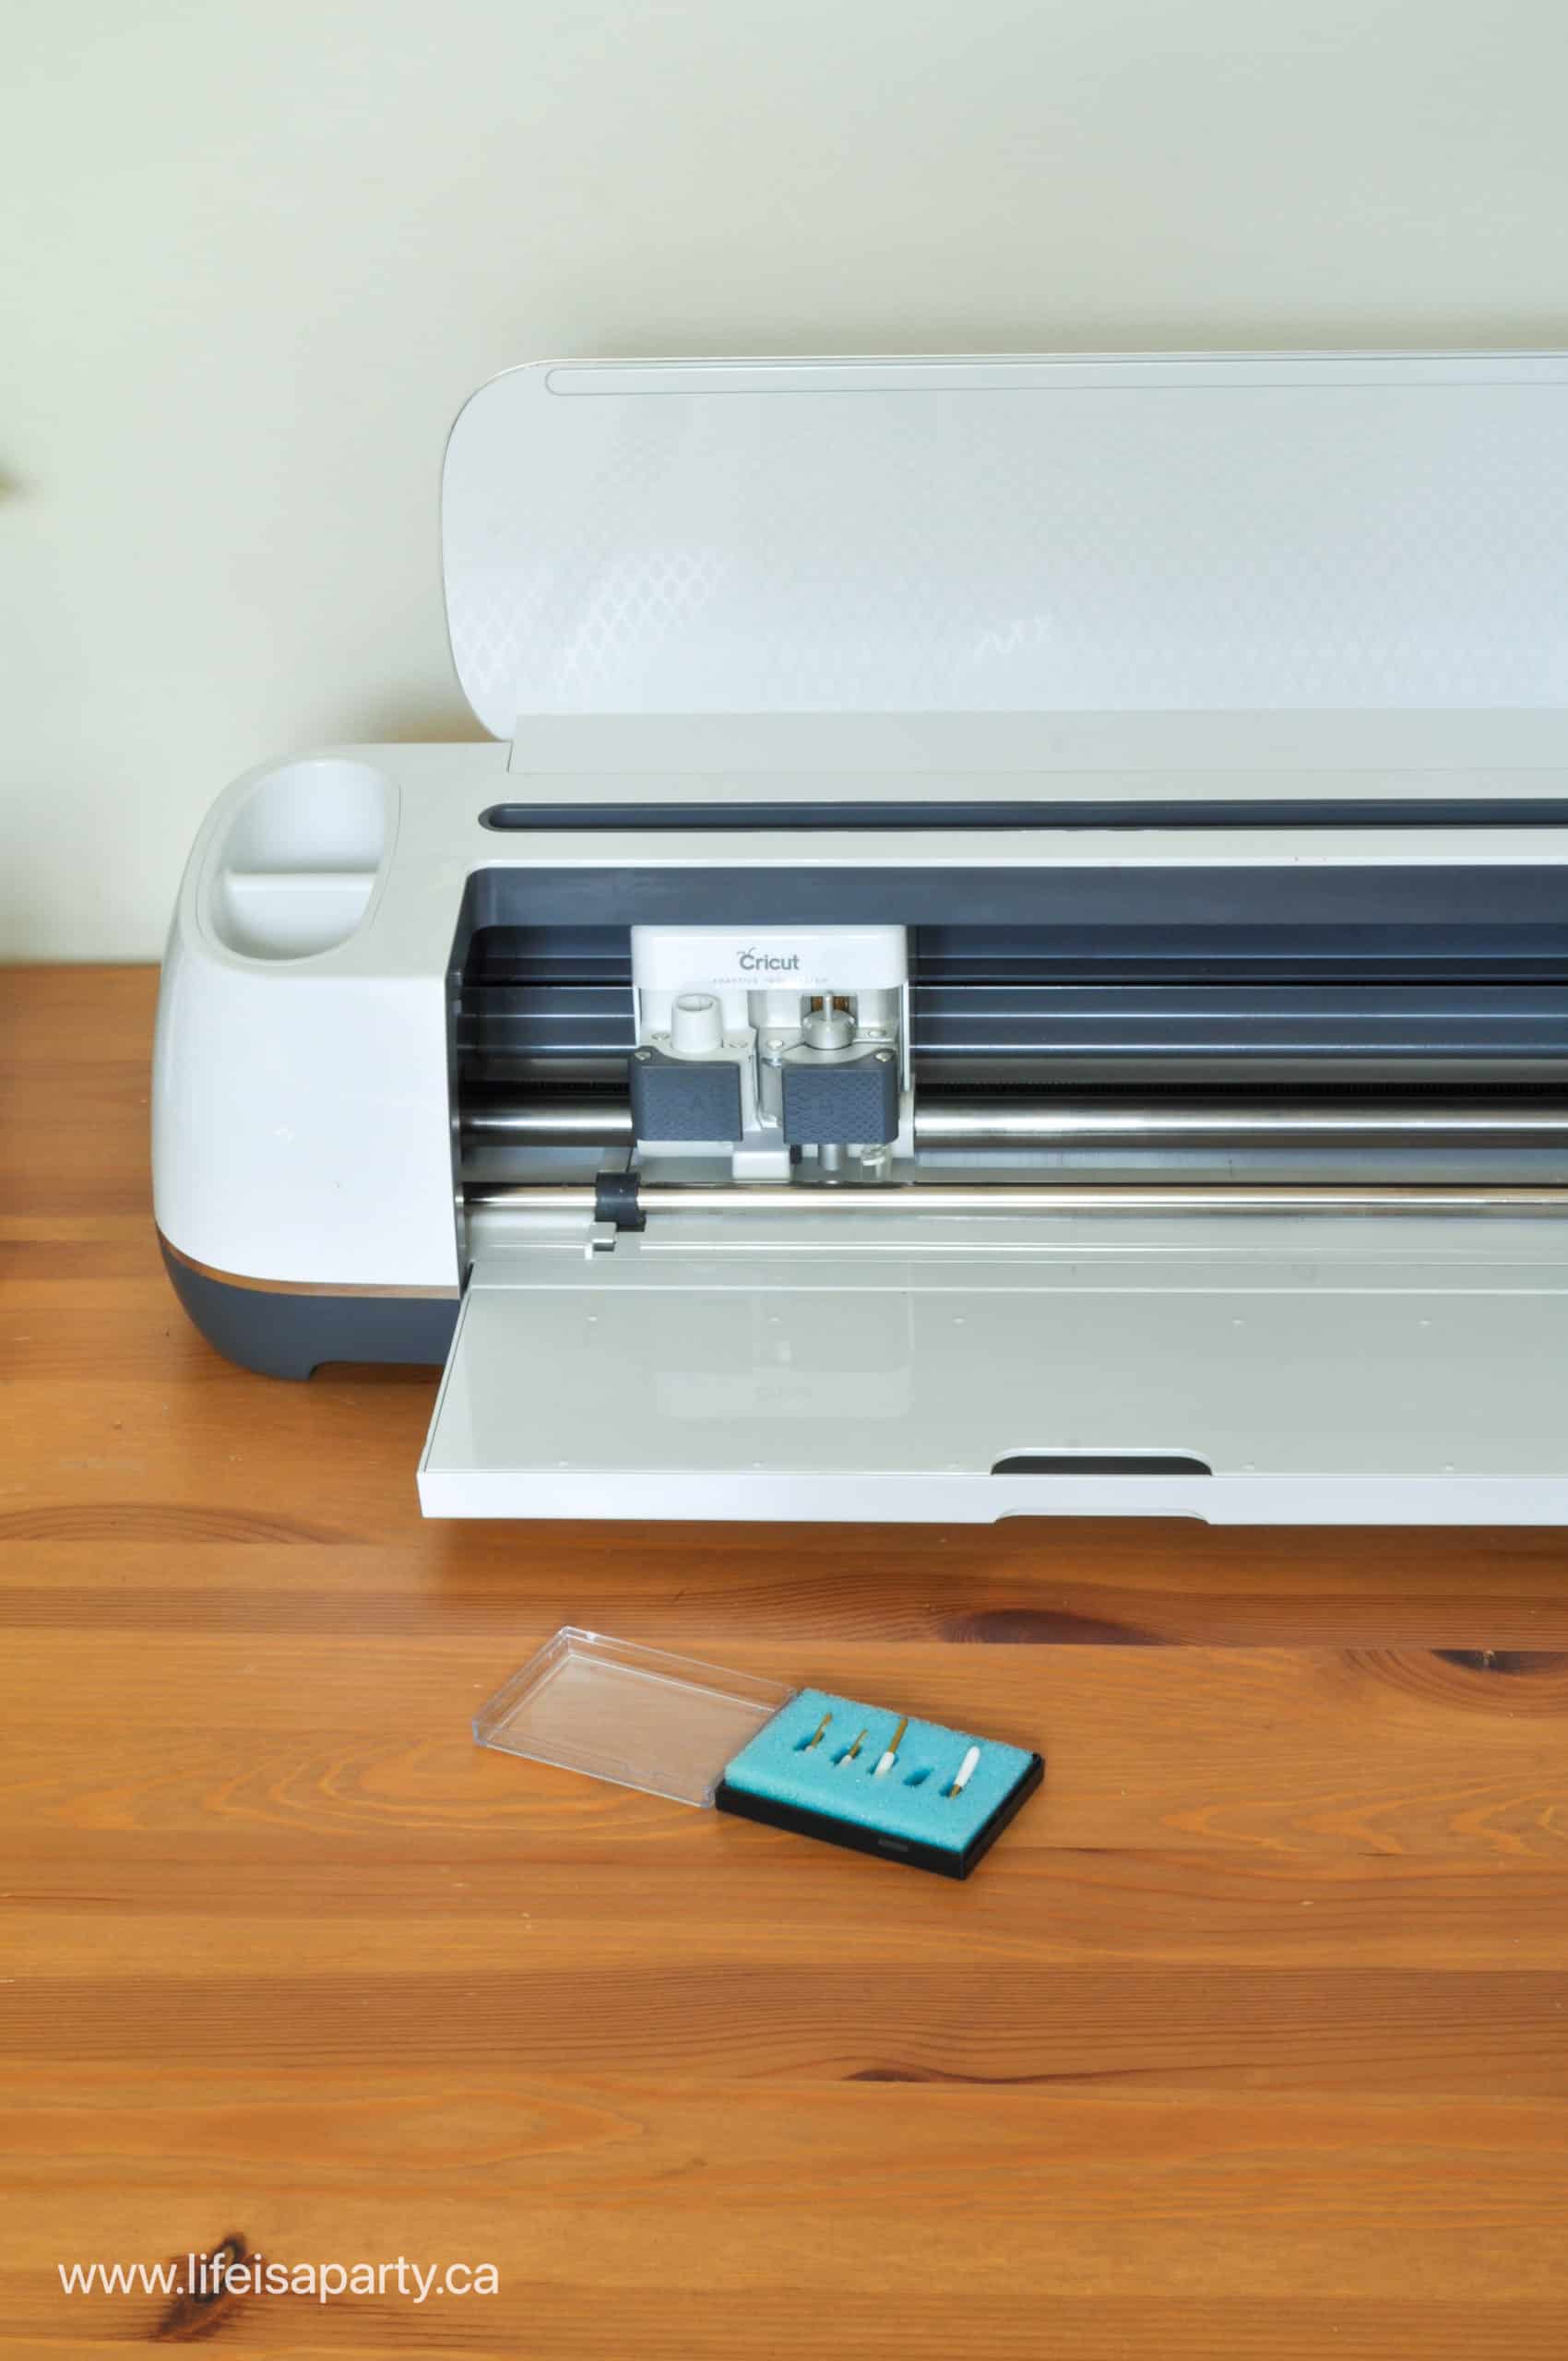
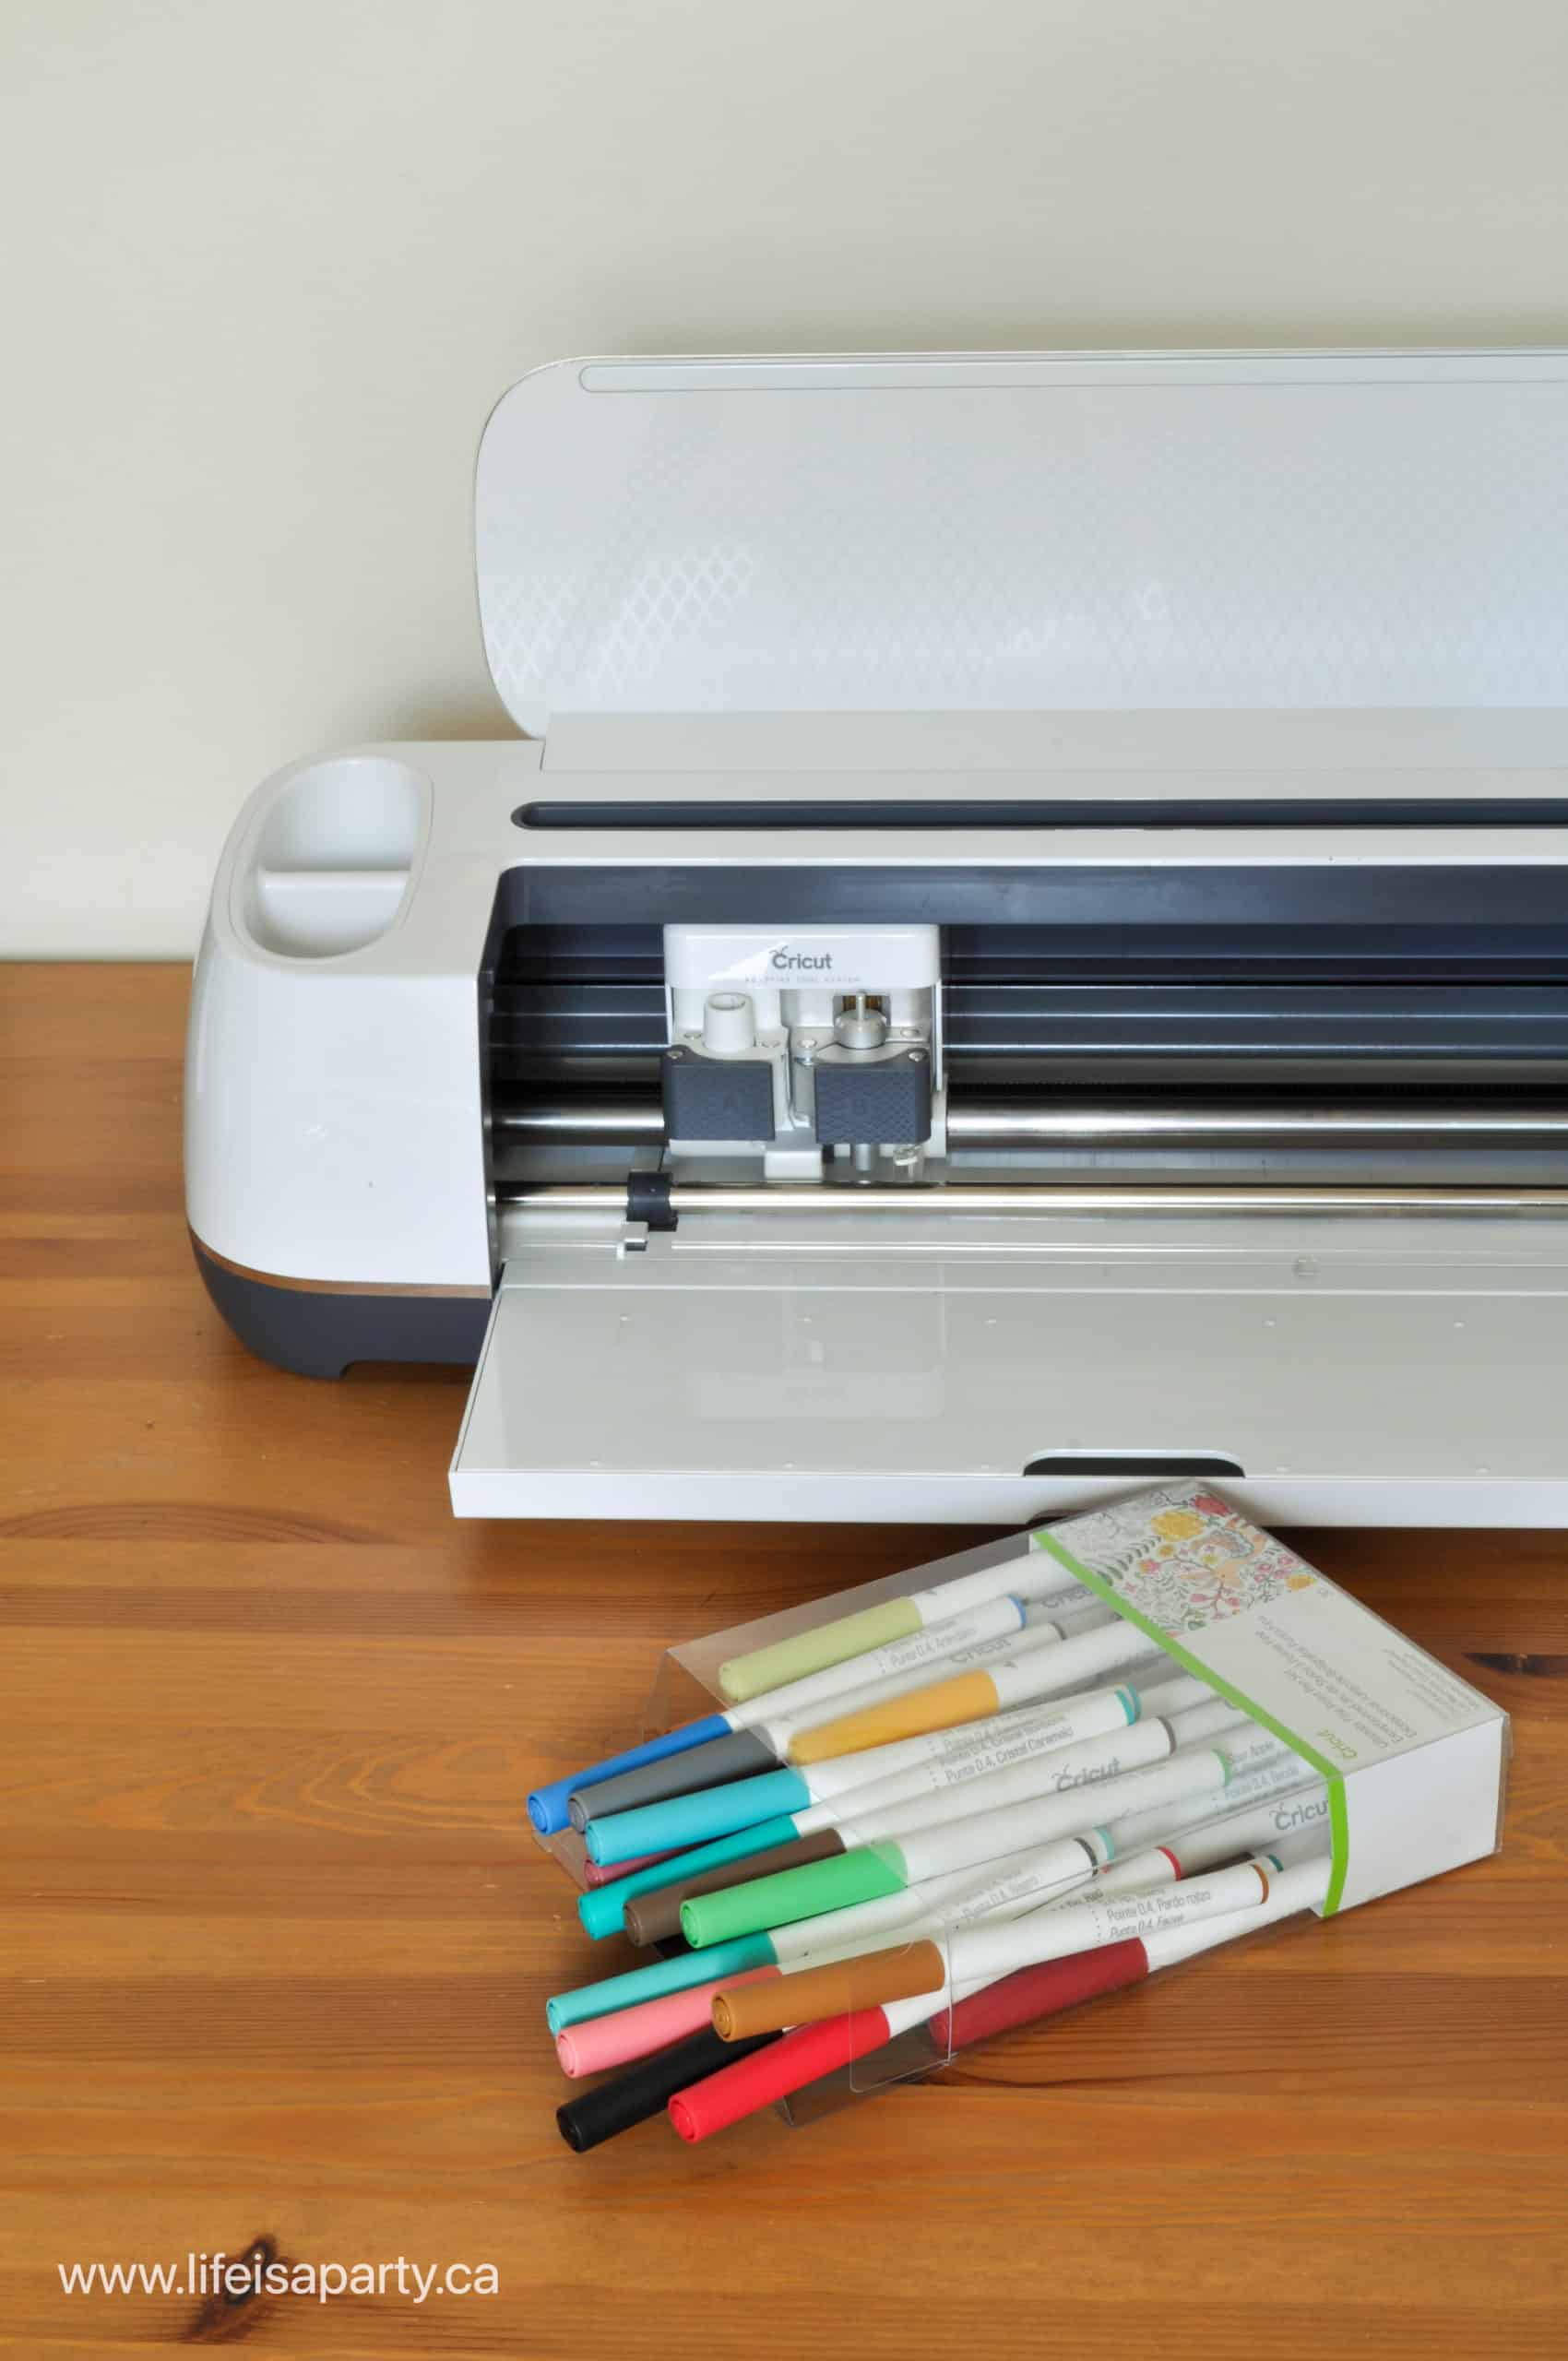
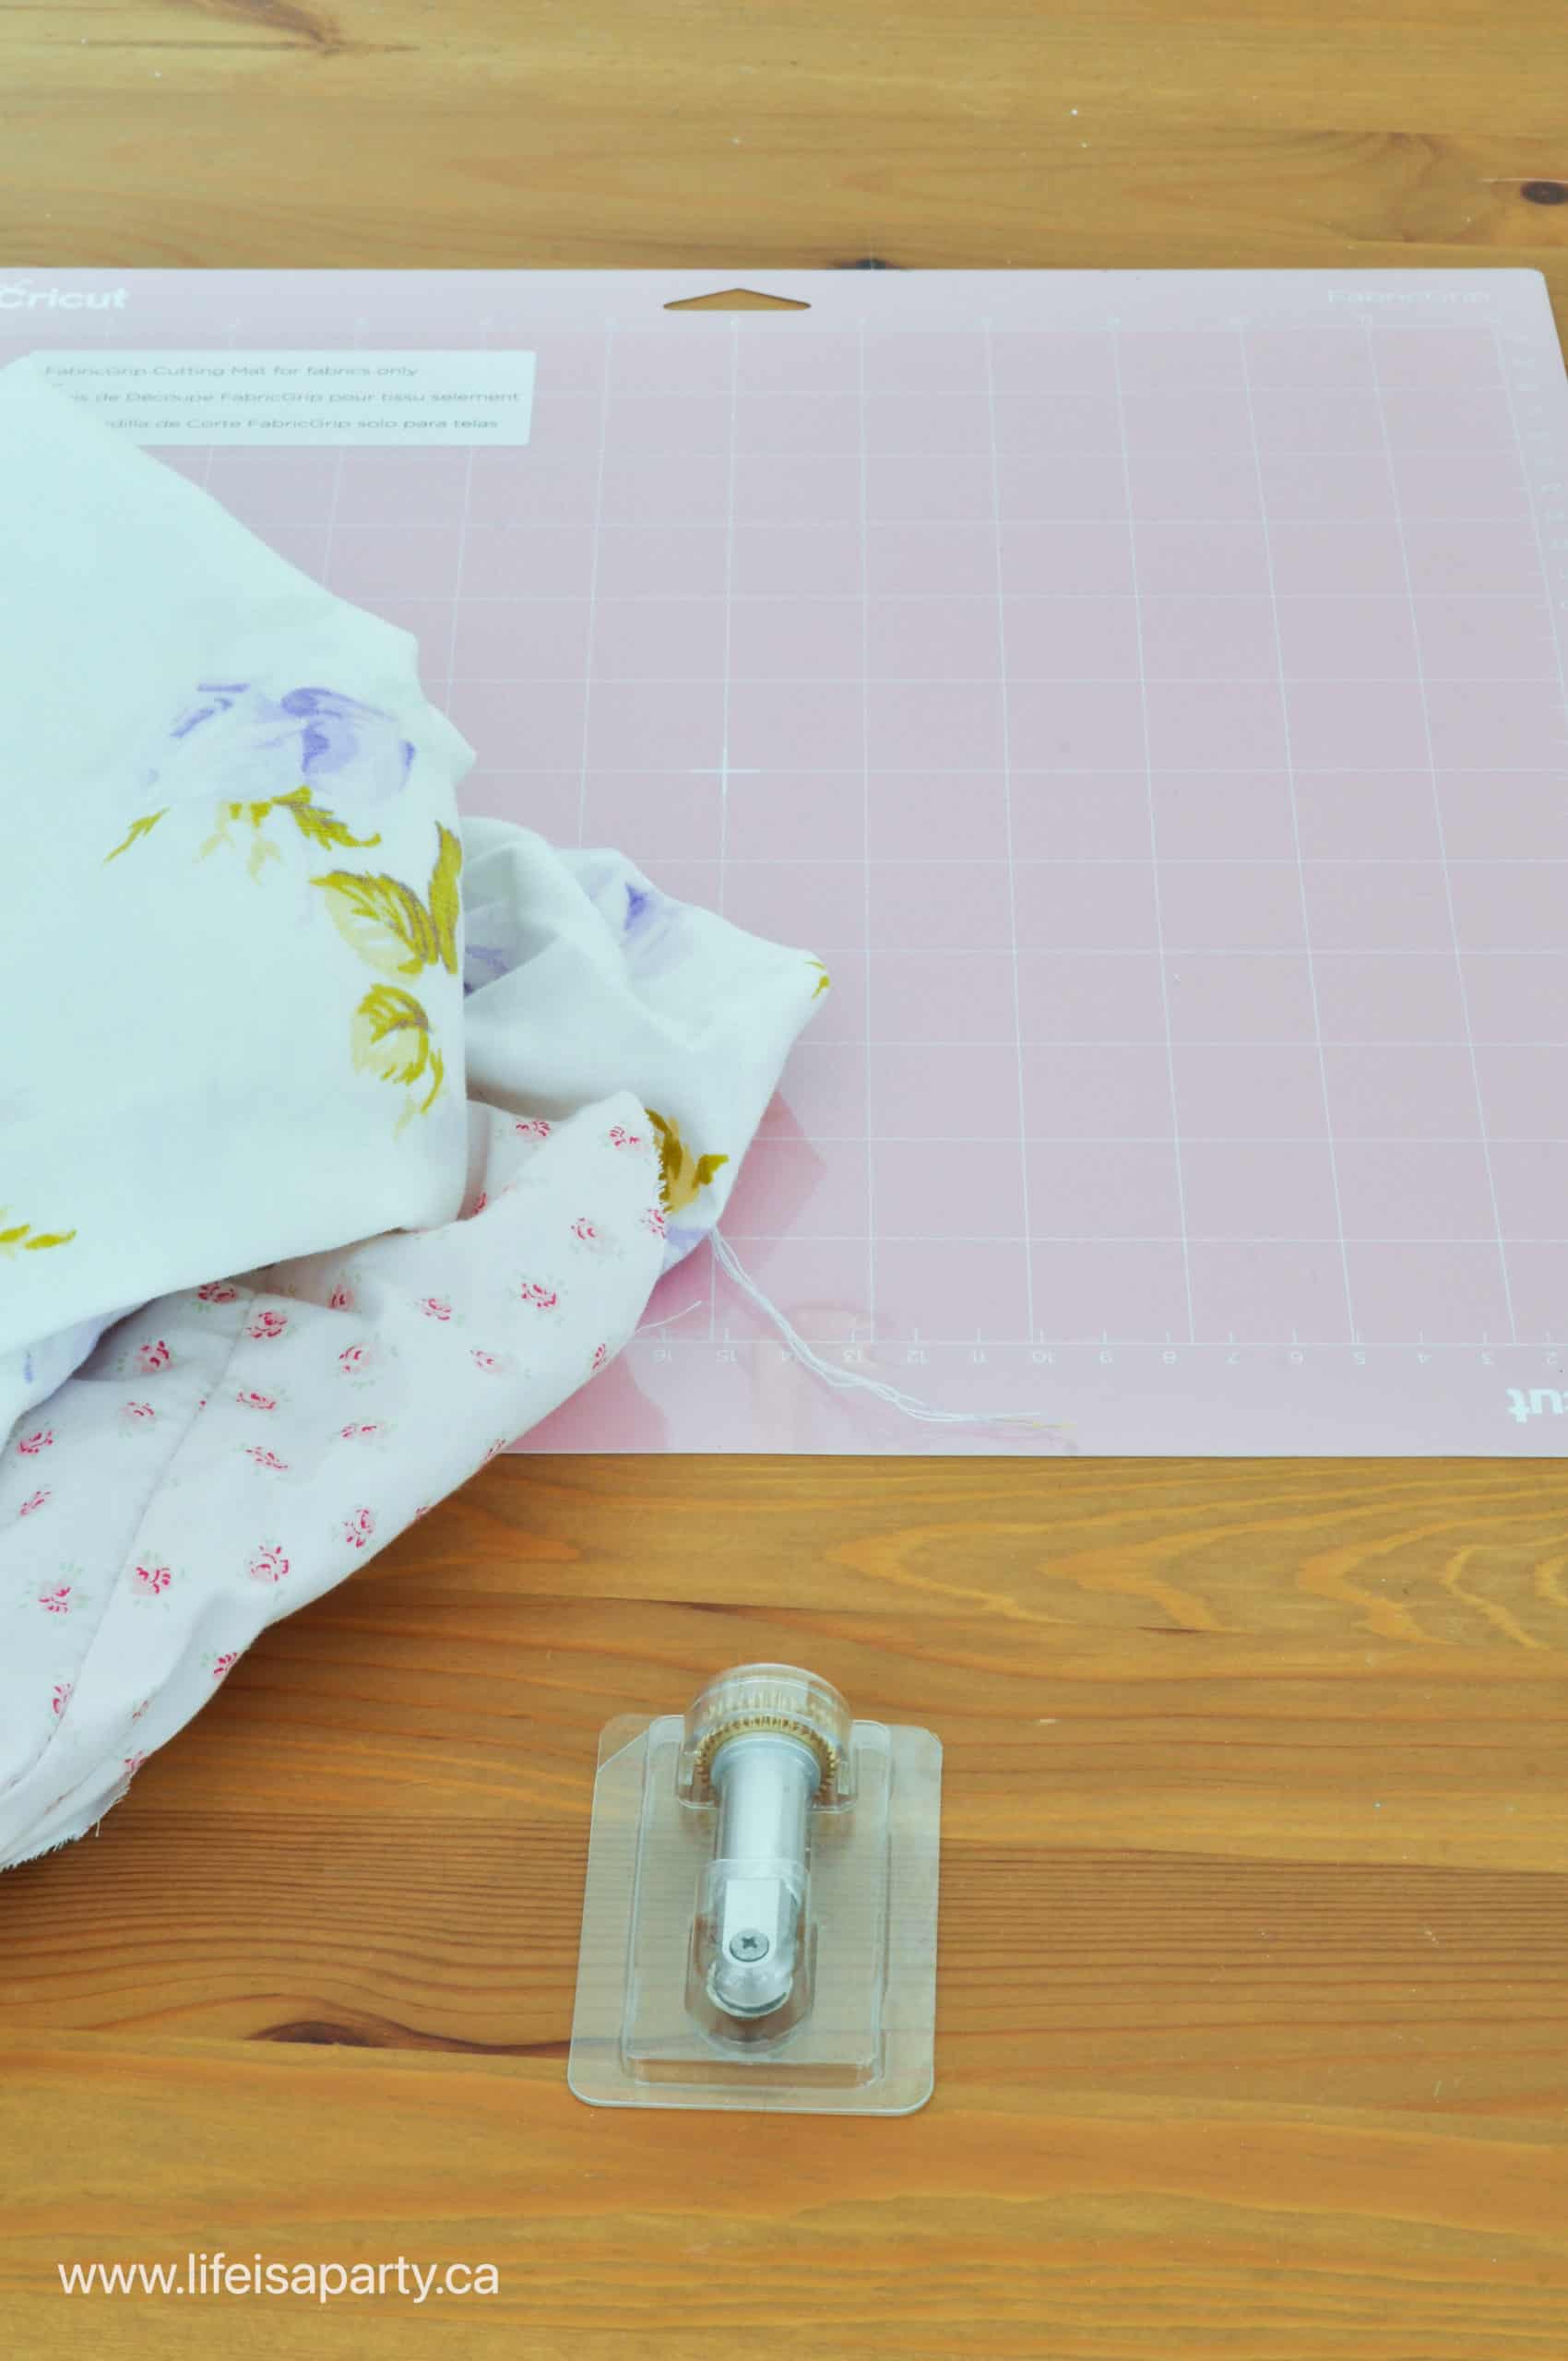
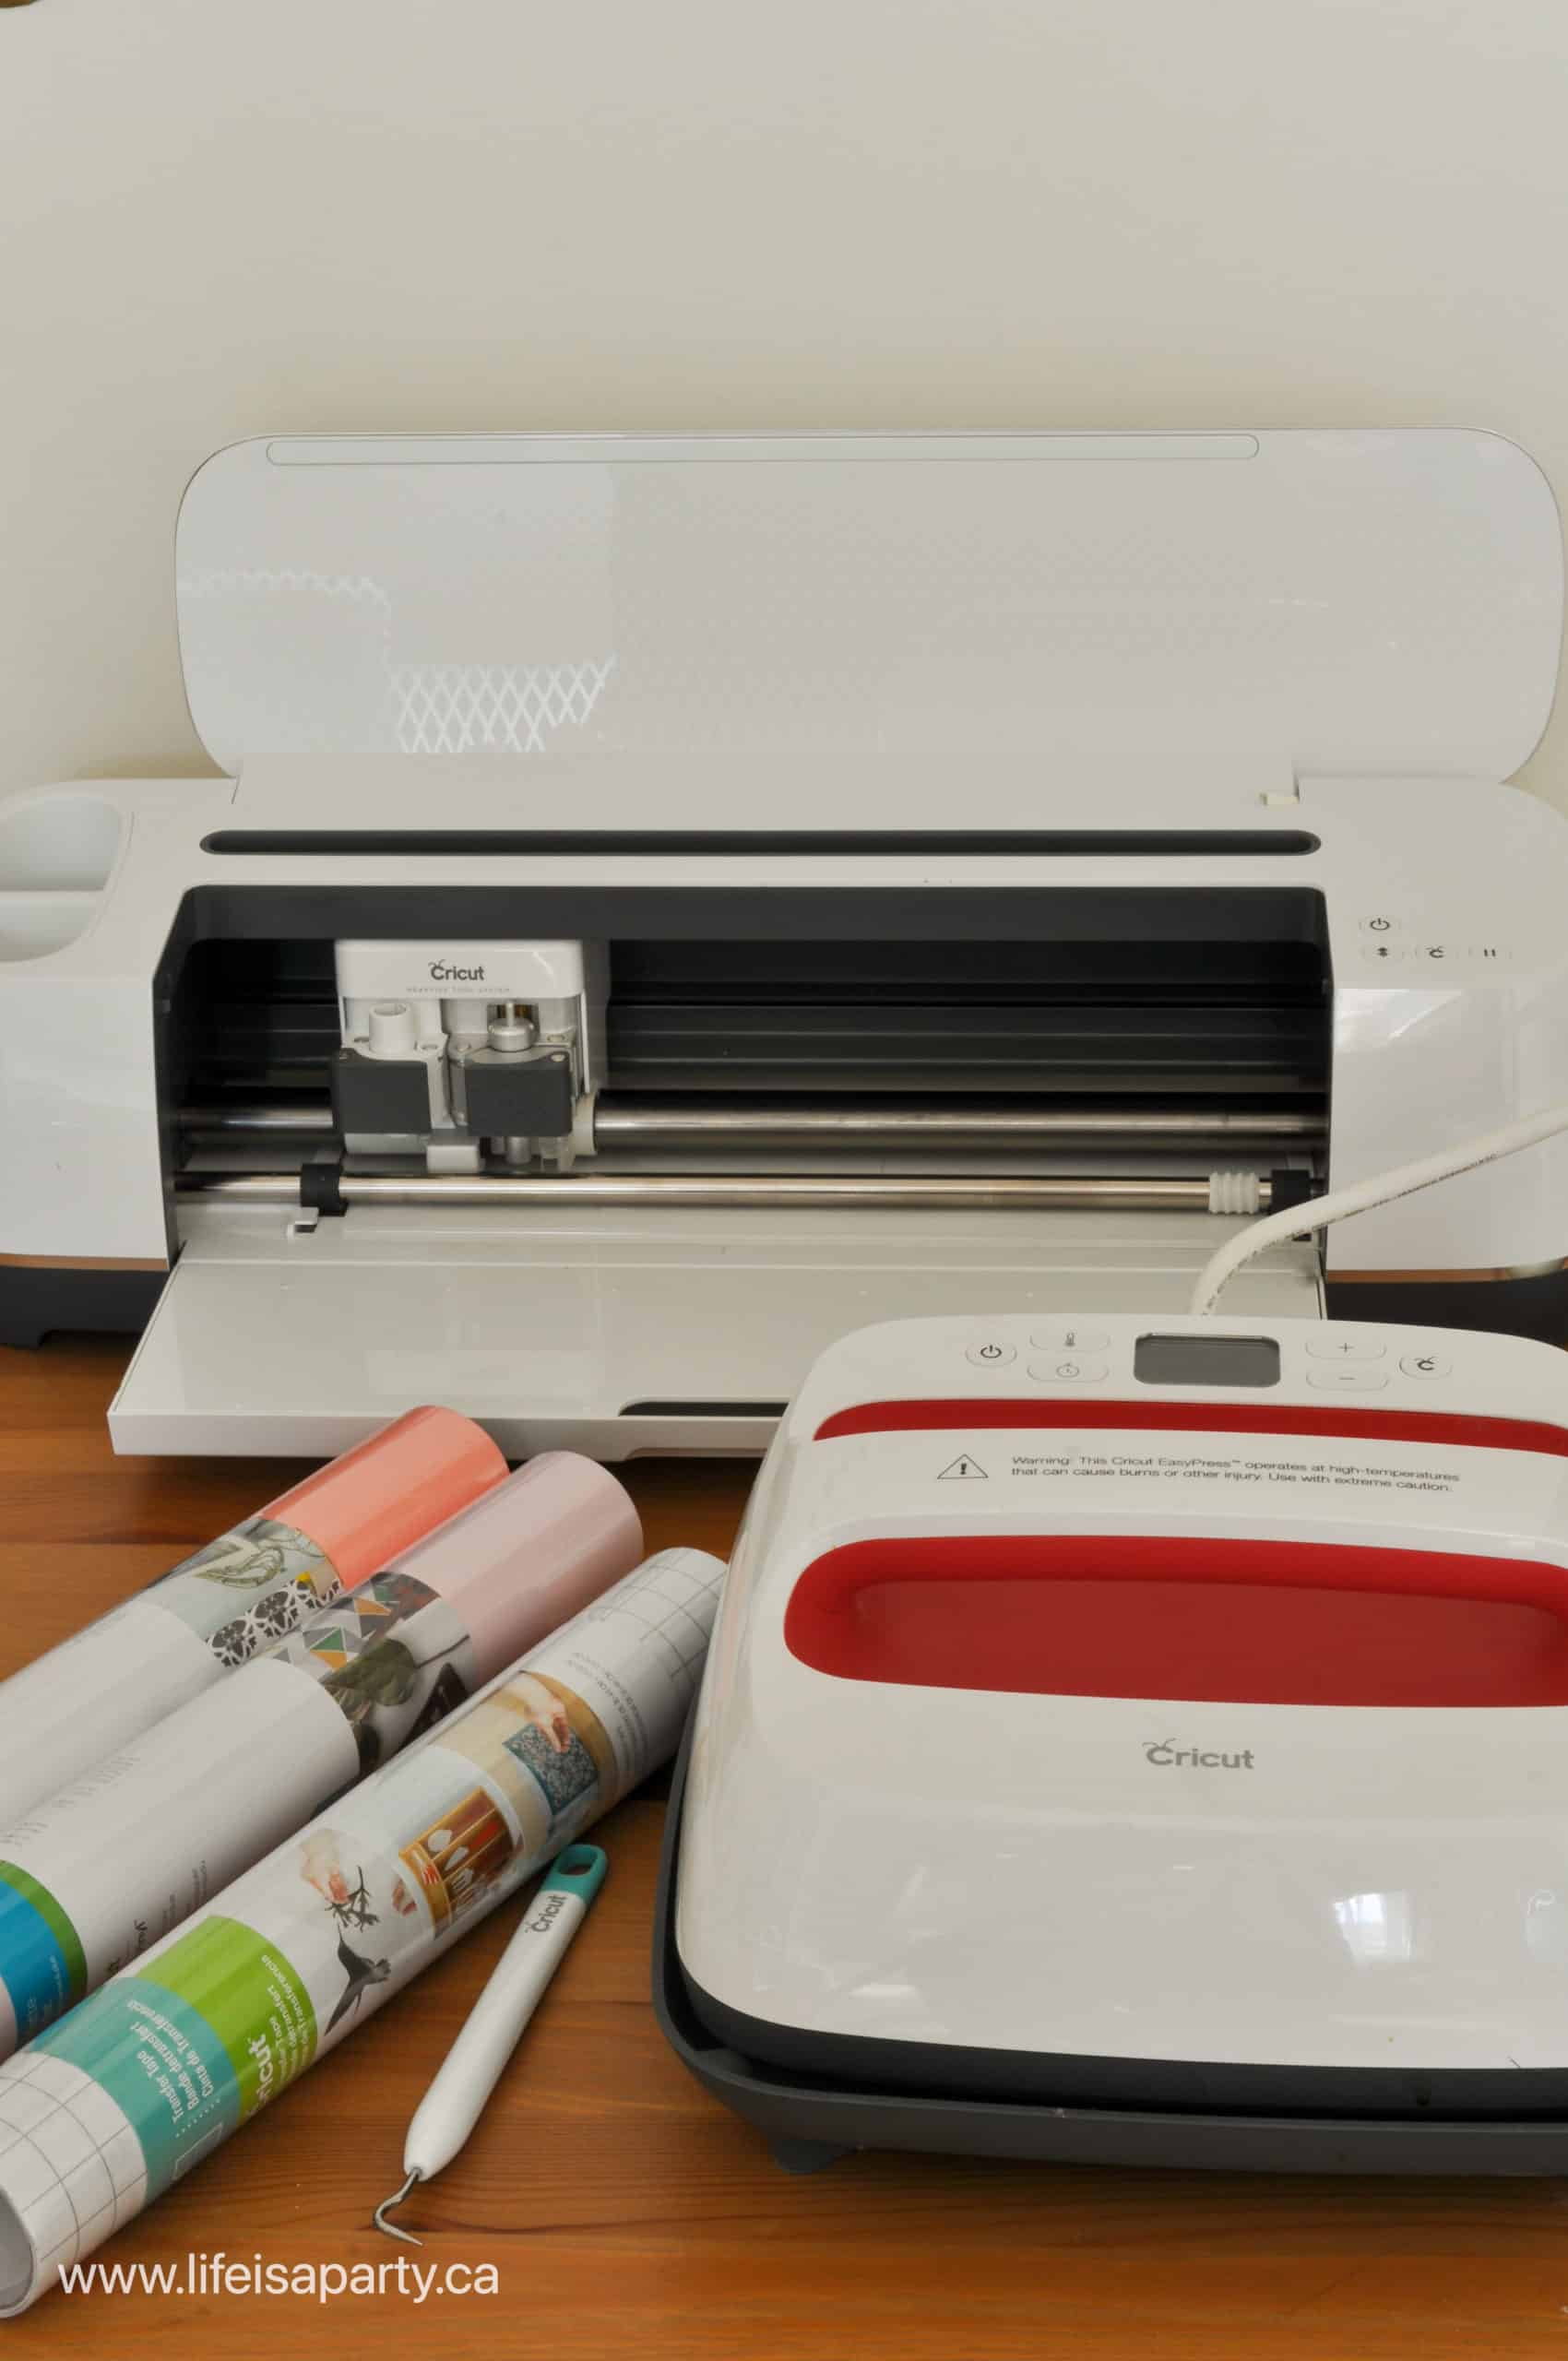
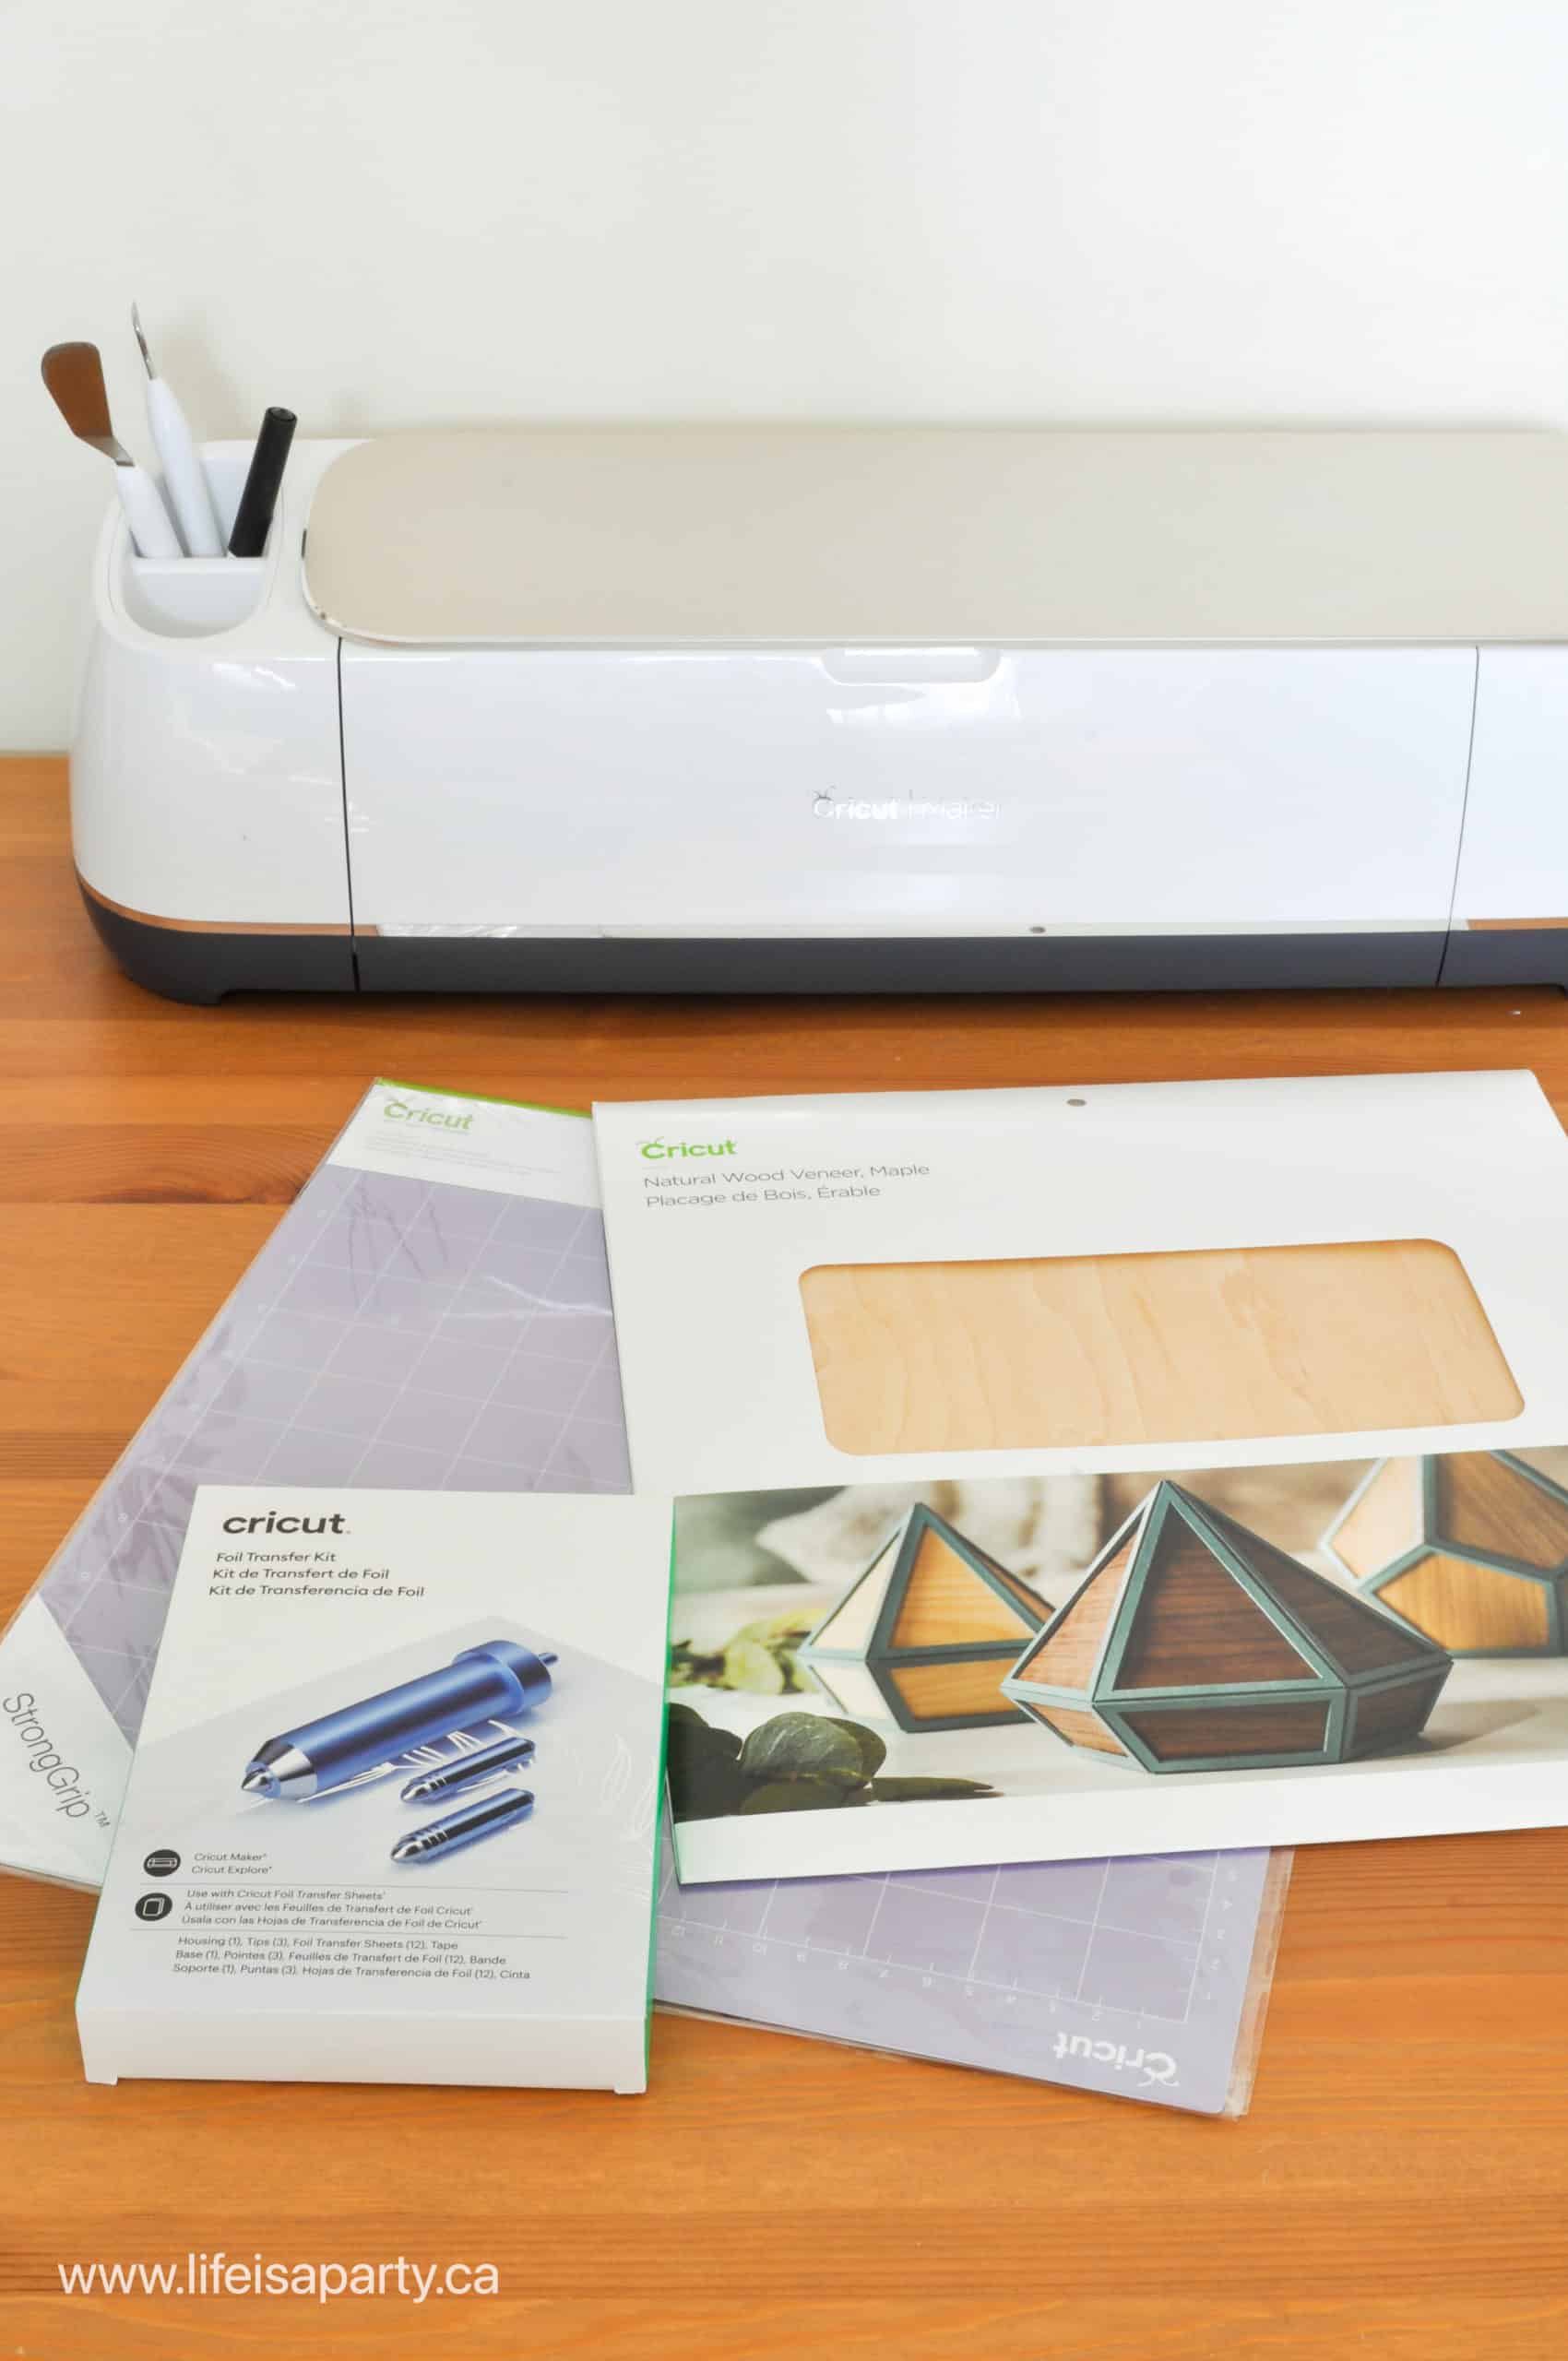
Supplles for making a custom doormat using your Cricut machine and iron-on vinyl.

Why Iron-On Vinyl?

There's many popular different ways to create a doormat using your Cricut machine.  Using iron-on vinyl to create a stencil is the easiest way to create a doormat with your Cricut.  I've tested out several other popular methods, but they all have more draw backs than advantages. 

Regular Vinyl

One popular method is to cut out regular adhesive vinyl and then adhere it to your doormat to create a stencil.  The problem with trying to create a doormat this way is that you can not use transfer tape with a doormat.  The doormat itself is too rough and textured for the transfer tape to adhere to it, making it impossible to peel off of the vinyl.  

Some people try to use vinyl as a sticker stencil.  The problem is that the sticker stencil is quite large -large enough to fit a doormat, and also usually full of a detailed design, including intricate fonts.  It's extremely difficult to remove the vinyl from the backing and then stick it down on to large doormats without it getting all stuck to itself and turning into a sticker ball, rather than a nice flat stencil.  

If you do manage to get it down onto your mat, the regular vinyl doesn't stick well to the outdoor mat, so it won't create nice crisp lines for you stencil. The paint often seeps under the stencil and results in a messy paint job.

Stencil Vinyl

You might think Cricut stencil vinyl would be easier to use.  It is almost as difficult to work with vinyl stencil as it is to work with regular vinyl for this project.  It has the same problem, since it's also sticky on the back, and hard to move from the carrier sheet to the doormat.

Freezer Paper Stencil

Some people like to use freezer paper and then iron it onto the mat.  The small bit of wax melts into the coir material of the doormat and sticks, helping create crisp edges to the stencil.  The problem with using freezer paper is that it's so delicate that it's very difficult to get it off of the sticky cutting mat all in one piece.  

Some people work in small pieces rather than the entire design, and then piece it together on the doormat as a work around, but it's still flimsy, and very difficult to work with, without tearing it when removing it from the Cricut mat.  It's also difficult to position the cut out part of the design, like the inside of letters.  

And with all of these methods you will still need something like painter's tape, or straight pins to help hold certain places down, as well as a hair dryer or iron to try and help make either one stick to the doormat.  Both of these methods often result in frustration and wasted materials.  I found the best way to create a doormat is to use iron-on vinyl to create a stencil with your Cricut machine.  This is such a good option for saving frustration.

What Kind Of Paint Should You Use For A Doormat?

We used regular acrylic craft paint for our doormat.  It offered the best range of colors for our rainbow color scheme.  It is not the most durable paint.  We gave it two coats of paint in most places and applied it until it was opaque.  It may wear off after a season or two, depending on how much foot traffic your welcome mat gets.  You could spray it with a clear outdoor acrylic spray to help protect it.  You could also use a detail brush to touch up any areas that need it in the future.

Some people like to use different kinds of paint for doormats that are more durable.  Many people recommend using flex seal, because it gives really great coverage and is long lasting.  It's available in limited colors, but it's a great option if you're just using black or white.  Just make sure you spray it in a well-ventilated area.

Another option is using an outdoor acrylic paint, or an exterior paint that will be more long lasting and hard wearing then regular acrylic paint.

Free "Hello Sunshine" Cricut Cut File

If you want to create a mat exactly the way I did, search for "Life is a Party" using the search bar on the home page of Cricut Design Space.  Scroll down to the bottom of the screen to the Community Members section, and click on the follow button for "Life is a Party -Dannyelle Nicolle-Ramjist".  On my profile page, click on the "Hello Sunshine Doormat" project, and choose to customize or make it.  Or use this link directly to the Cricut Design Space cut file.

Video Tutorial

Check out our step by step tutorial video, to see exactly how to create your own custom doormat.


Youtube video

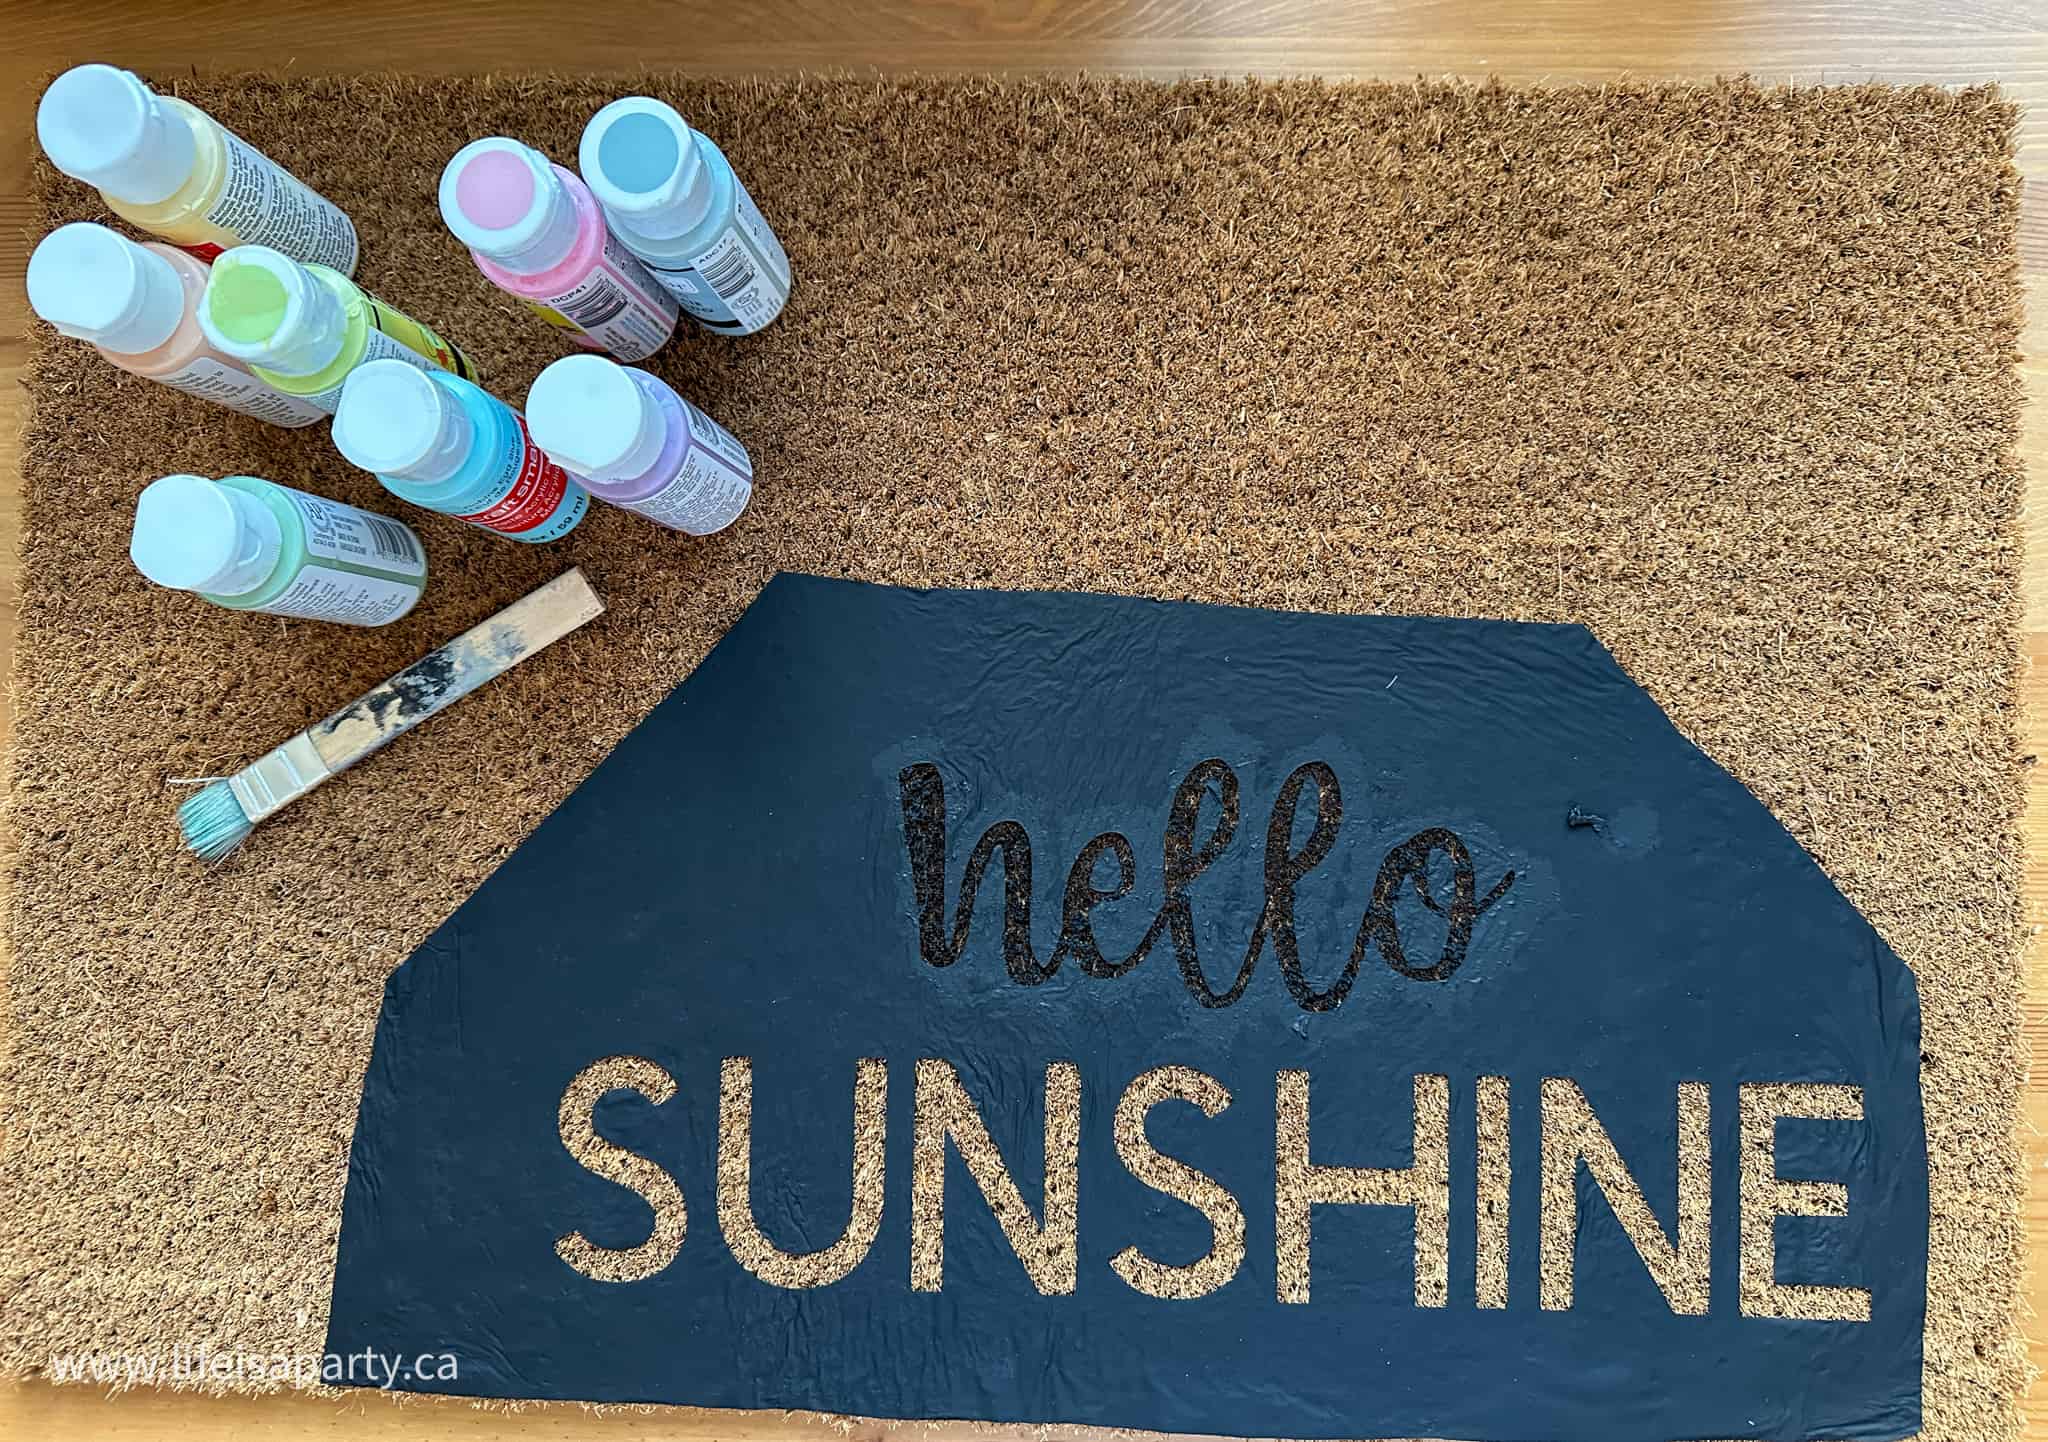
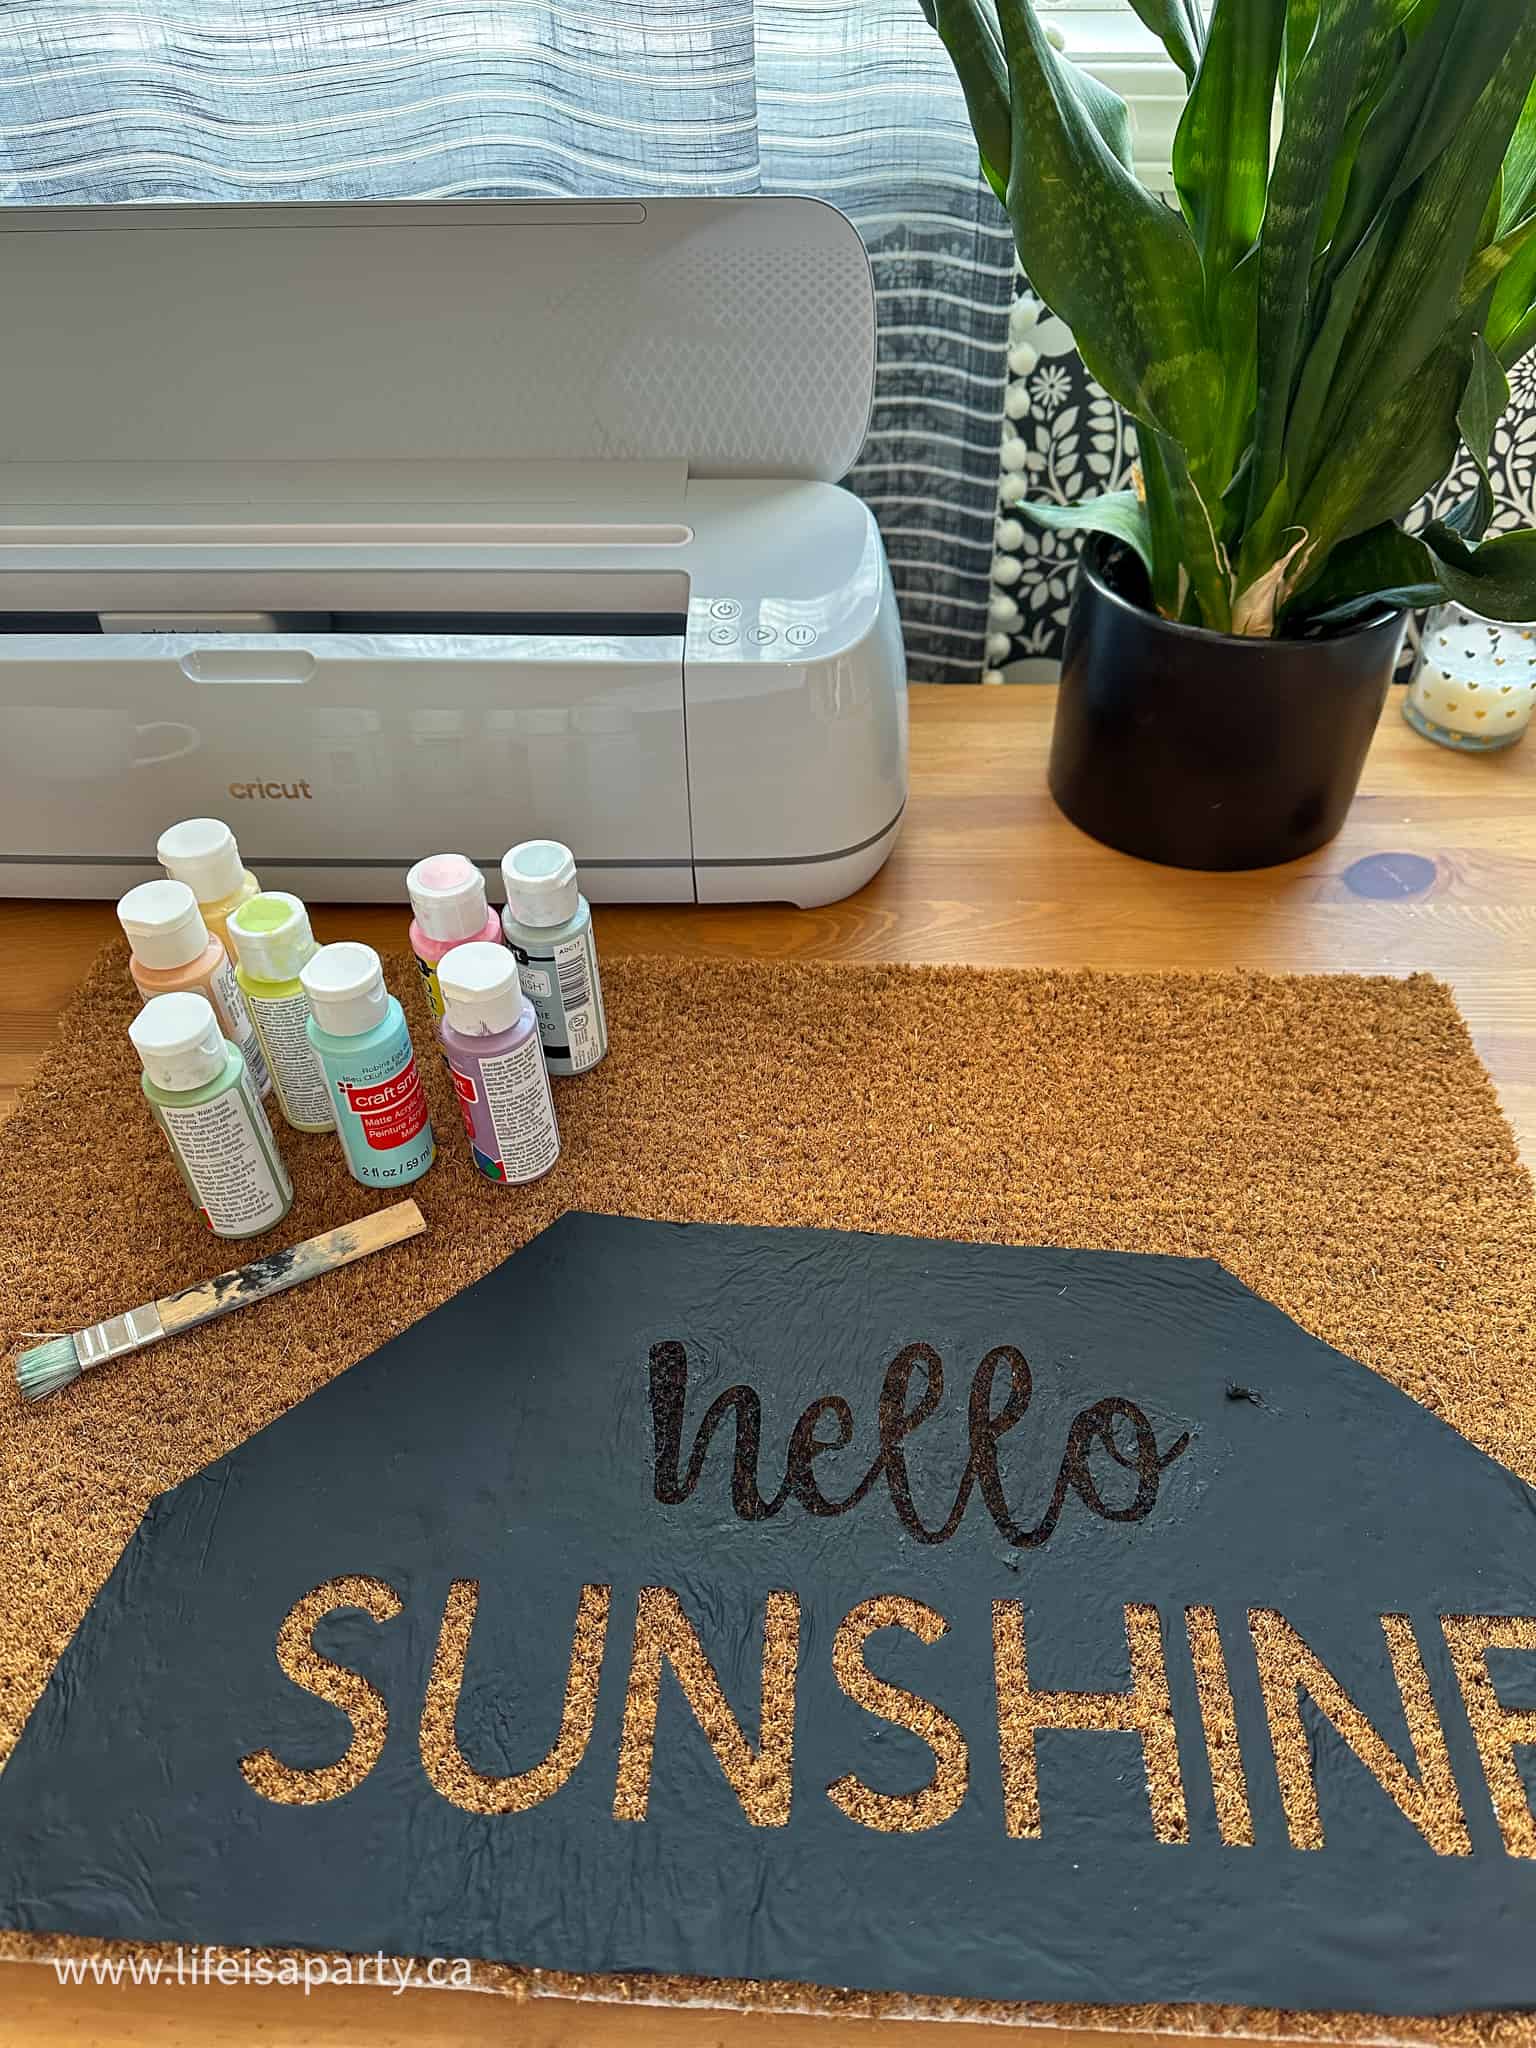
Cricut iron-on vinyl stencil for a custom doormat applied to the doormat, with acrylic paints.

Instructions:

1. Design Your Mat In Cricut Design Space

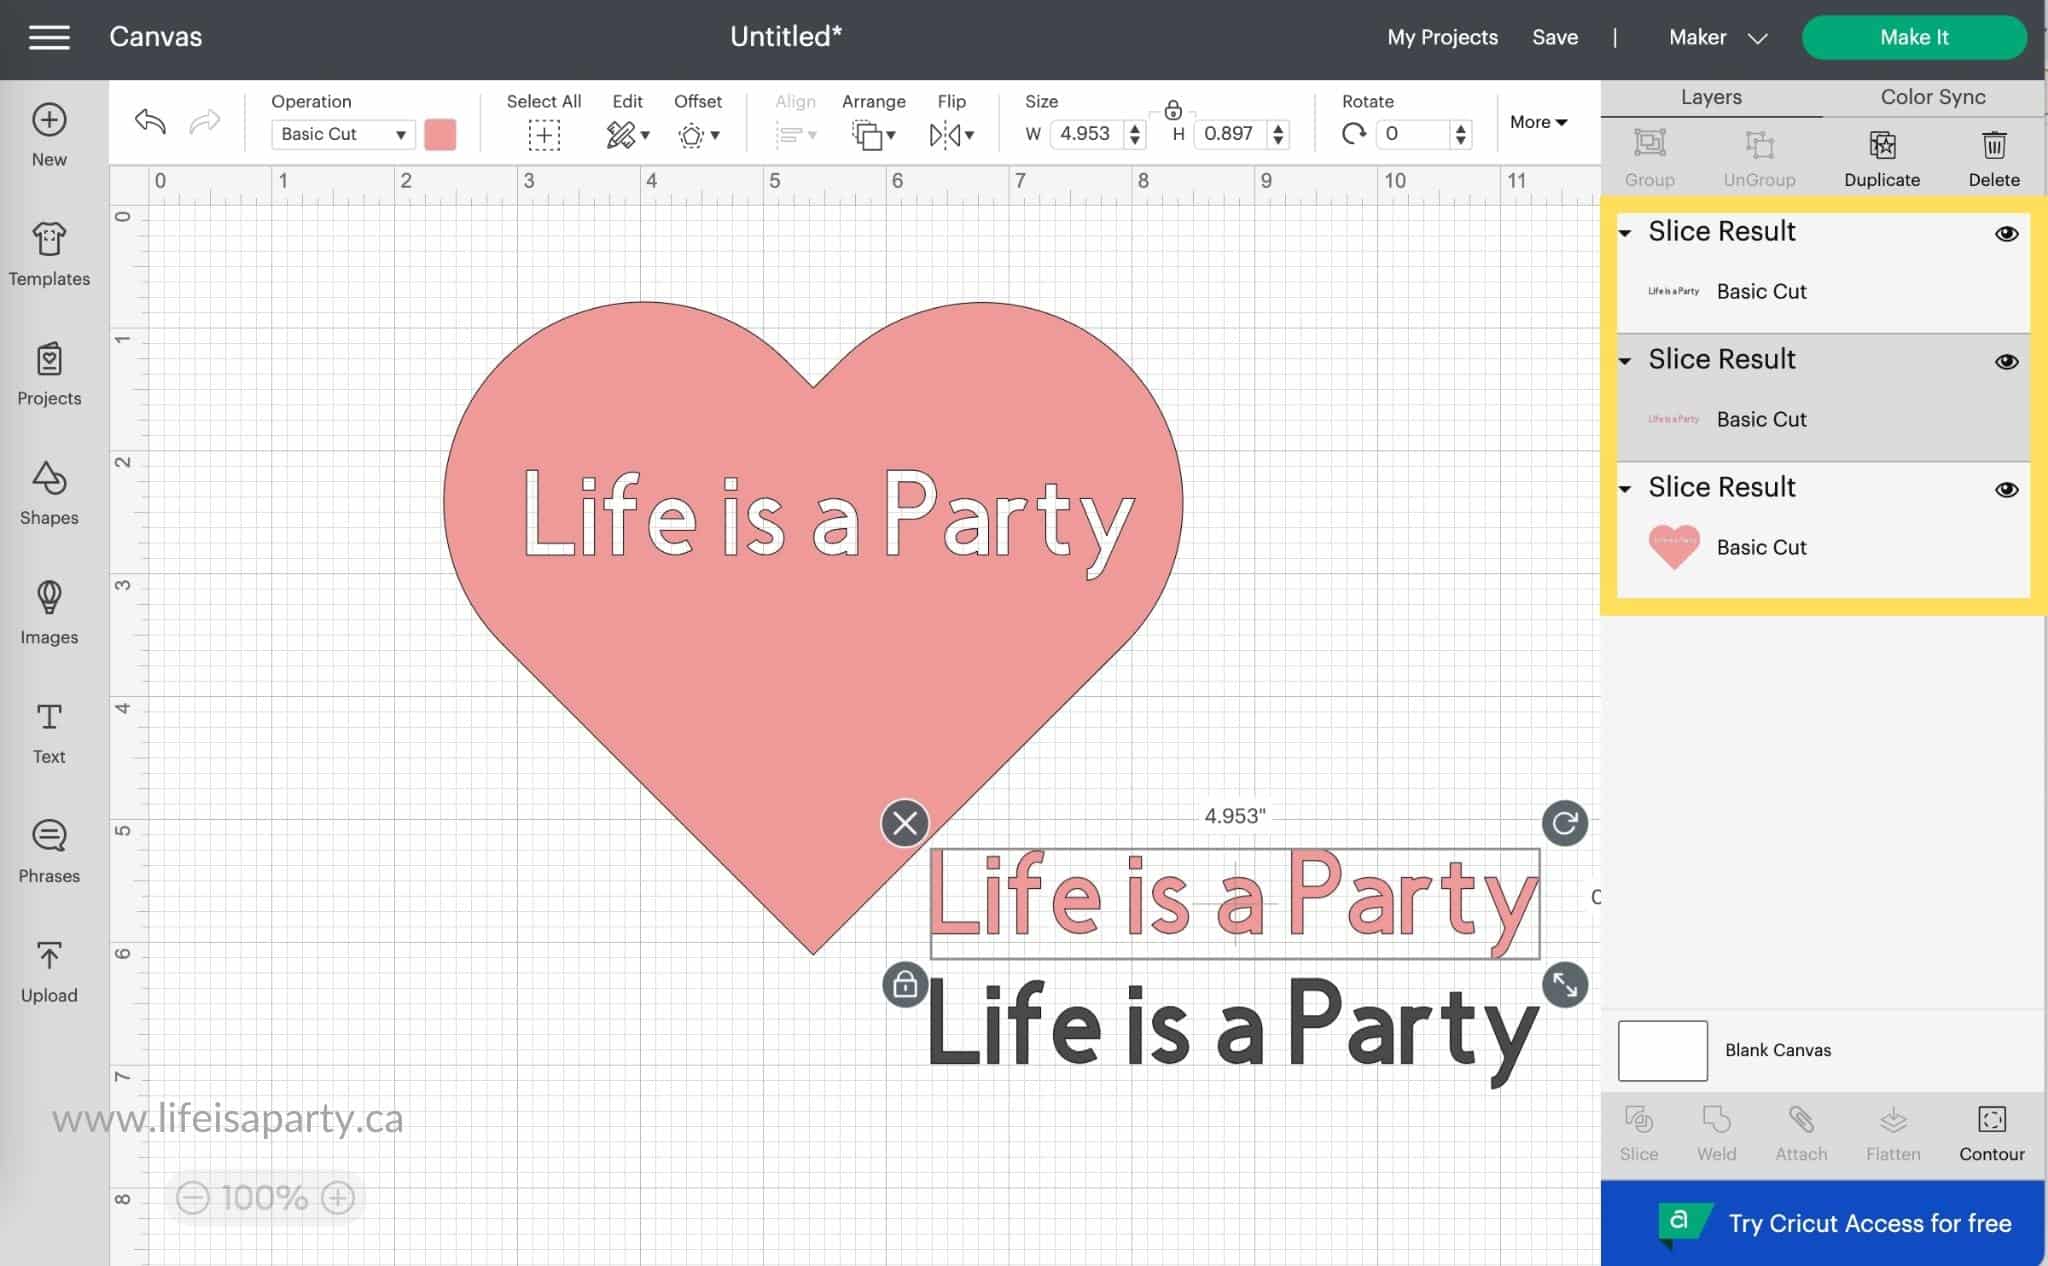
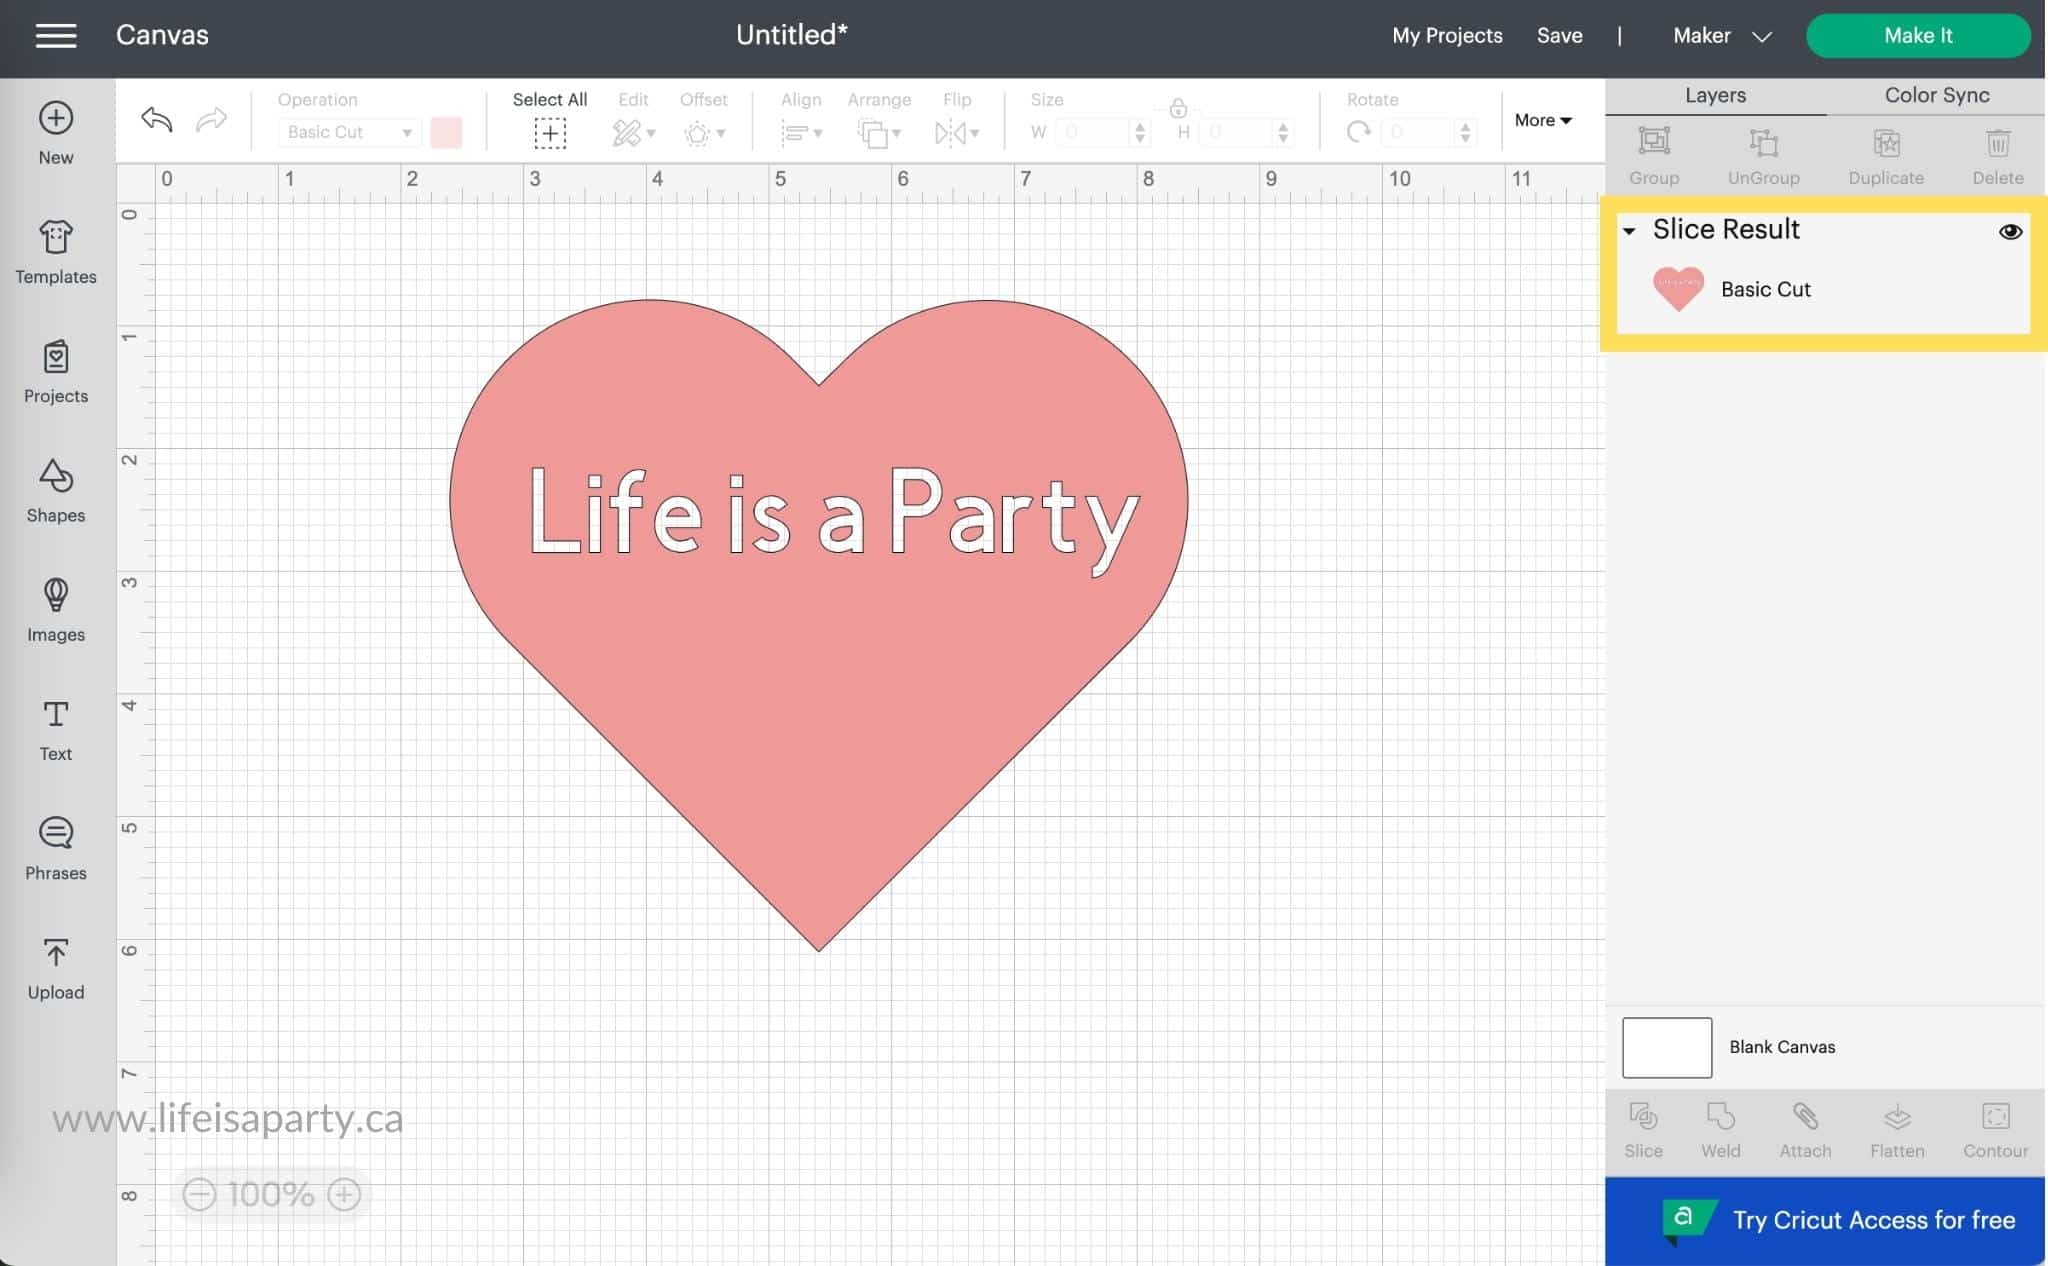
Create a mat template by adding a square shape to the canvas, unlock the measurements and adjust to the size of your doormat. Change the colour to brown.

Add a text box and type the word "hello". Change the font to Babette.

Add another text box with the word "summer" all in capital letters, in the Cricut Sans font.

Drag the text boxes down to the lower right of the brown rectangle mat template and adjust the font sizes. Use the letter space box along the top menu to adjust letter spacing in the word "summer".

When you're happy with the word sizes, select both and use the align center along the top menu to align them.While they're still both selected use the attach button at the bottom of the layers panel to attach them.

Use hide button beside the brown square mat template to hide it from the canvas so that it will not cut out. Use the save button to save your project.

Or use our "Hello Sunshine" Cricut design in Cricut Design Space.

2. Cutting Out Your Iron-On Vinyl Stencil

Click make it. Be sure to turn mirror on. Select your iron-on vinyl from the materials list. We used a Cricut Maker 3, so we took advantage of the ability to create oversize pieces and used smart vinyl. If you are using a regular Cricut you could make the design a smaller size, cut it out in multiple pieces, or use a 12 x 24 inch cutting mat.

If you're using smart iron-on vinyl, feed the smart vinyl into your Cricut with the shiny side down. If you're cutting your iron-on vinyl out on a mat, be sure to to apply it shiny side down.

3. Weed Your Vinyl

After the material is cut on the Cricut, use your weeding tool to remove the letters. Remember you're reverse weeding this project and removing the letters, and keeping the background to create a stencil.

4. Apply The Stencil To The Mat

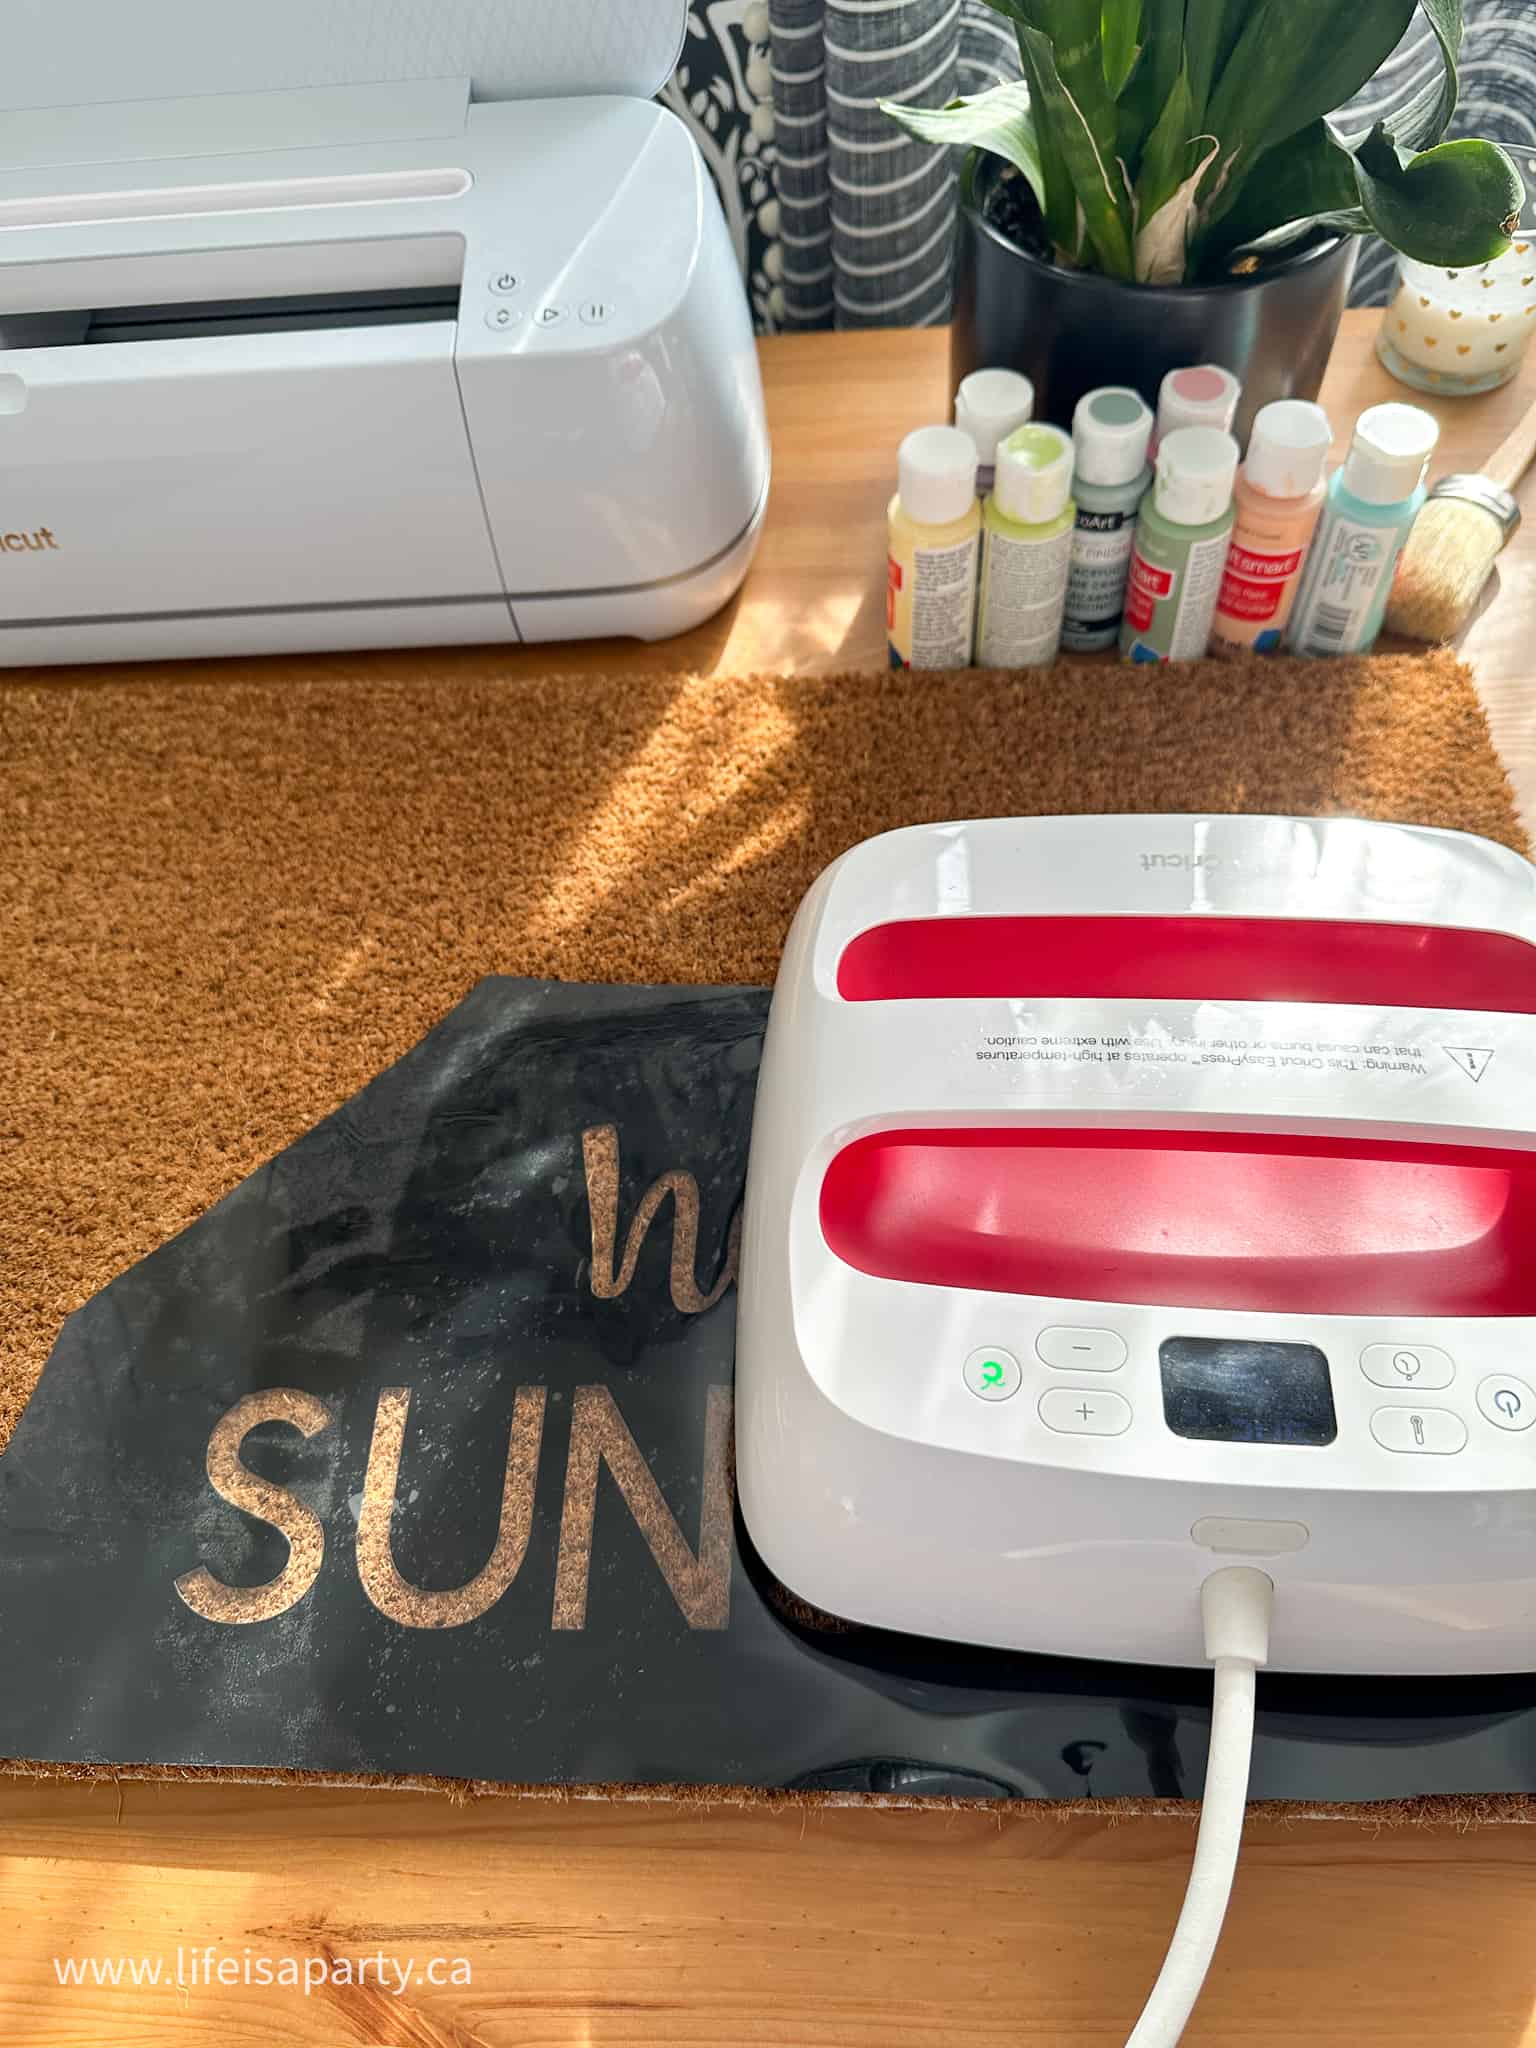
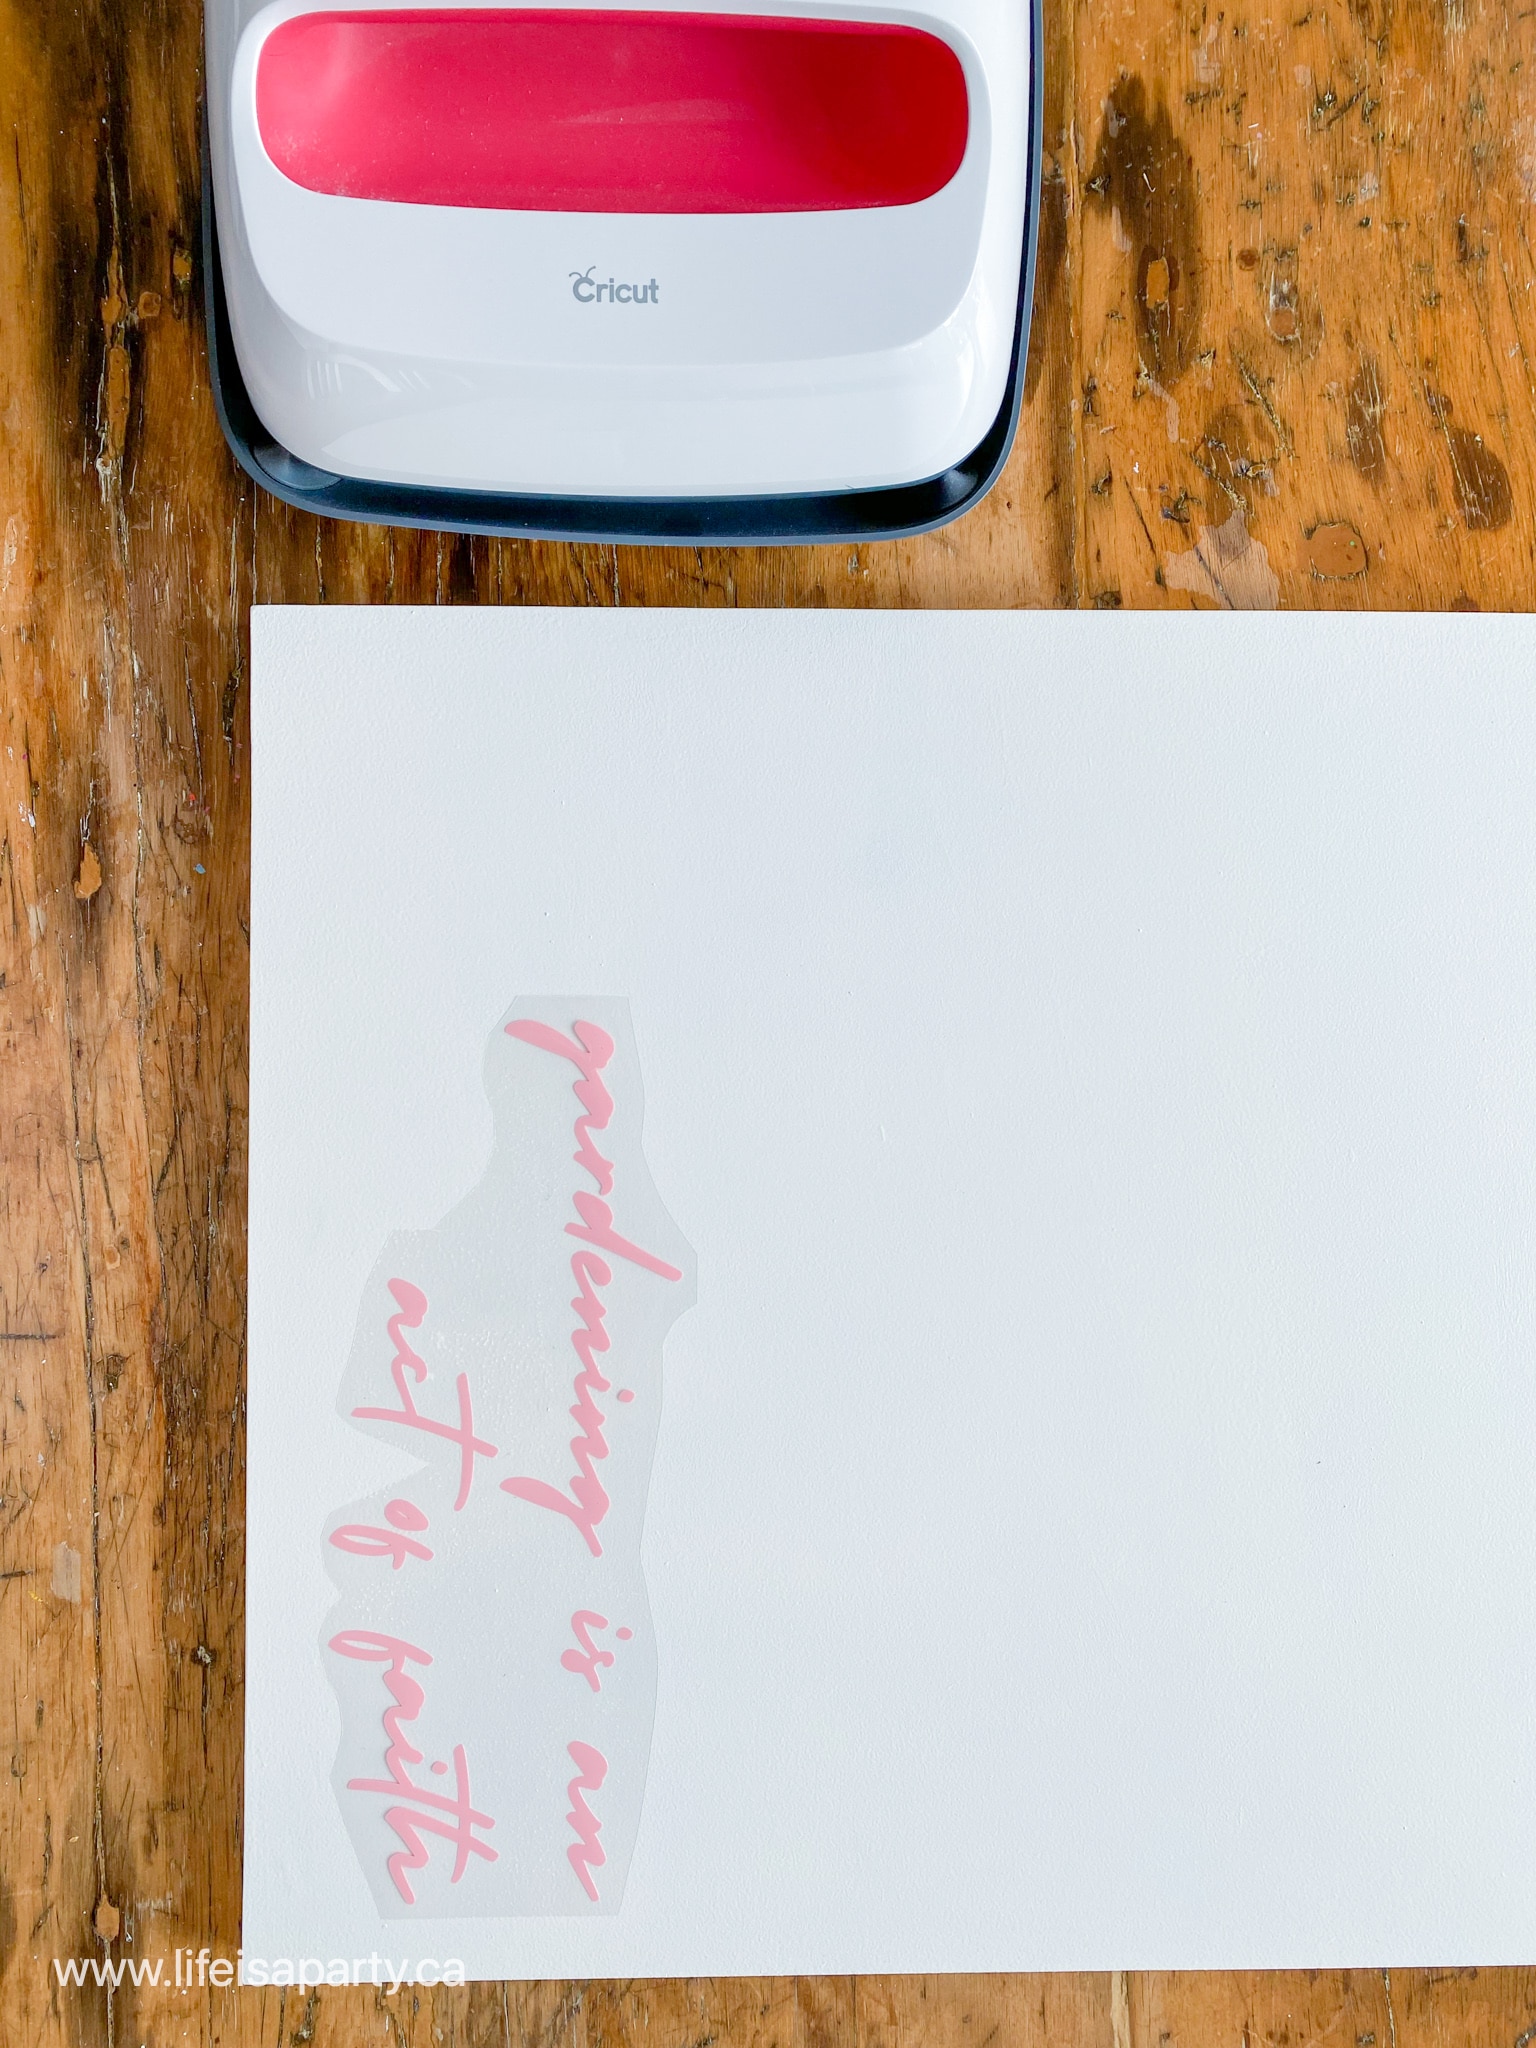
Position your iron-on stencil on your blank coir doormat and use the Easy Press or an iron to apply it. We pressed at 310 degrees for about 30 sec. at a time. Slowly work the heat press over the entire piece, moving your Easy Press section by section. While the vinyl is still hot, use a small scraper tool to burnish it. Take special care around the inside of the letters, and any very small pieces,

Applying Cricut vinyl stencil to doormat with EasyPress iron.

Once the iron-on is cool to the touch, you can try to slowly remove the backer piece. If the vinyl is not fully adhered, repress again. This part may take several attempts, and touch ups in some areas. Save the backer piece, and set aside for later.

Applying iron-on vinyl cut out on a Cricut to a doormat to make a paint stencil.

5. Paint Your Doormat

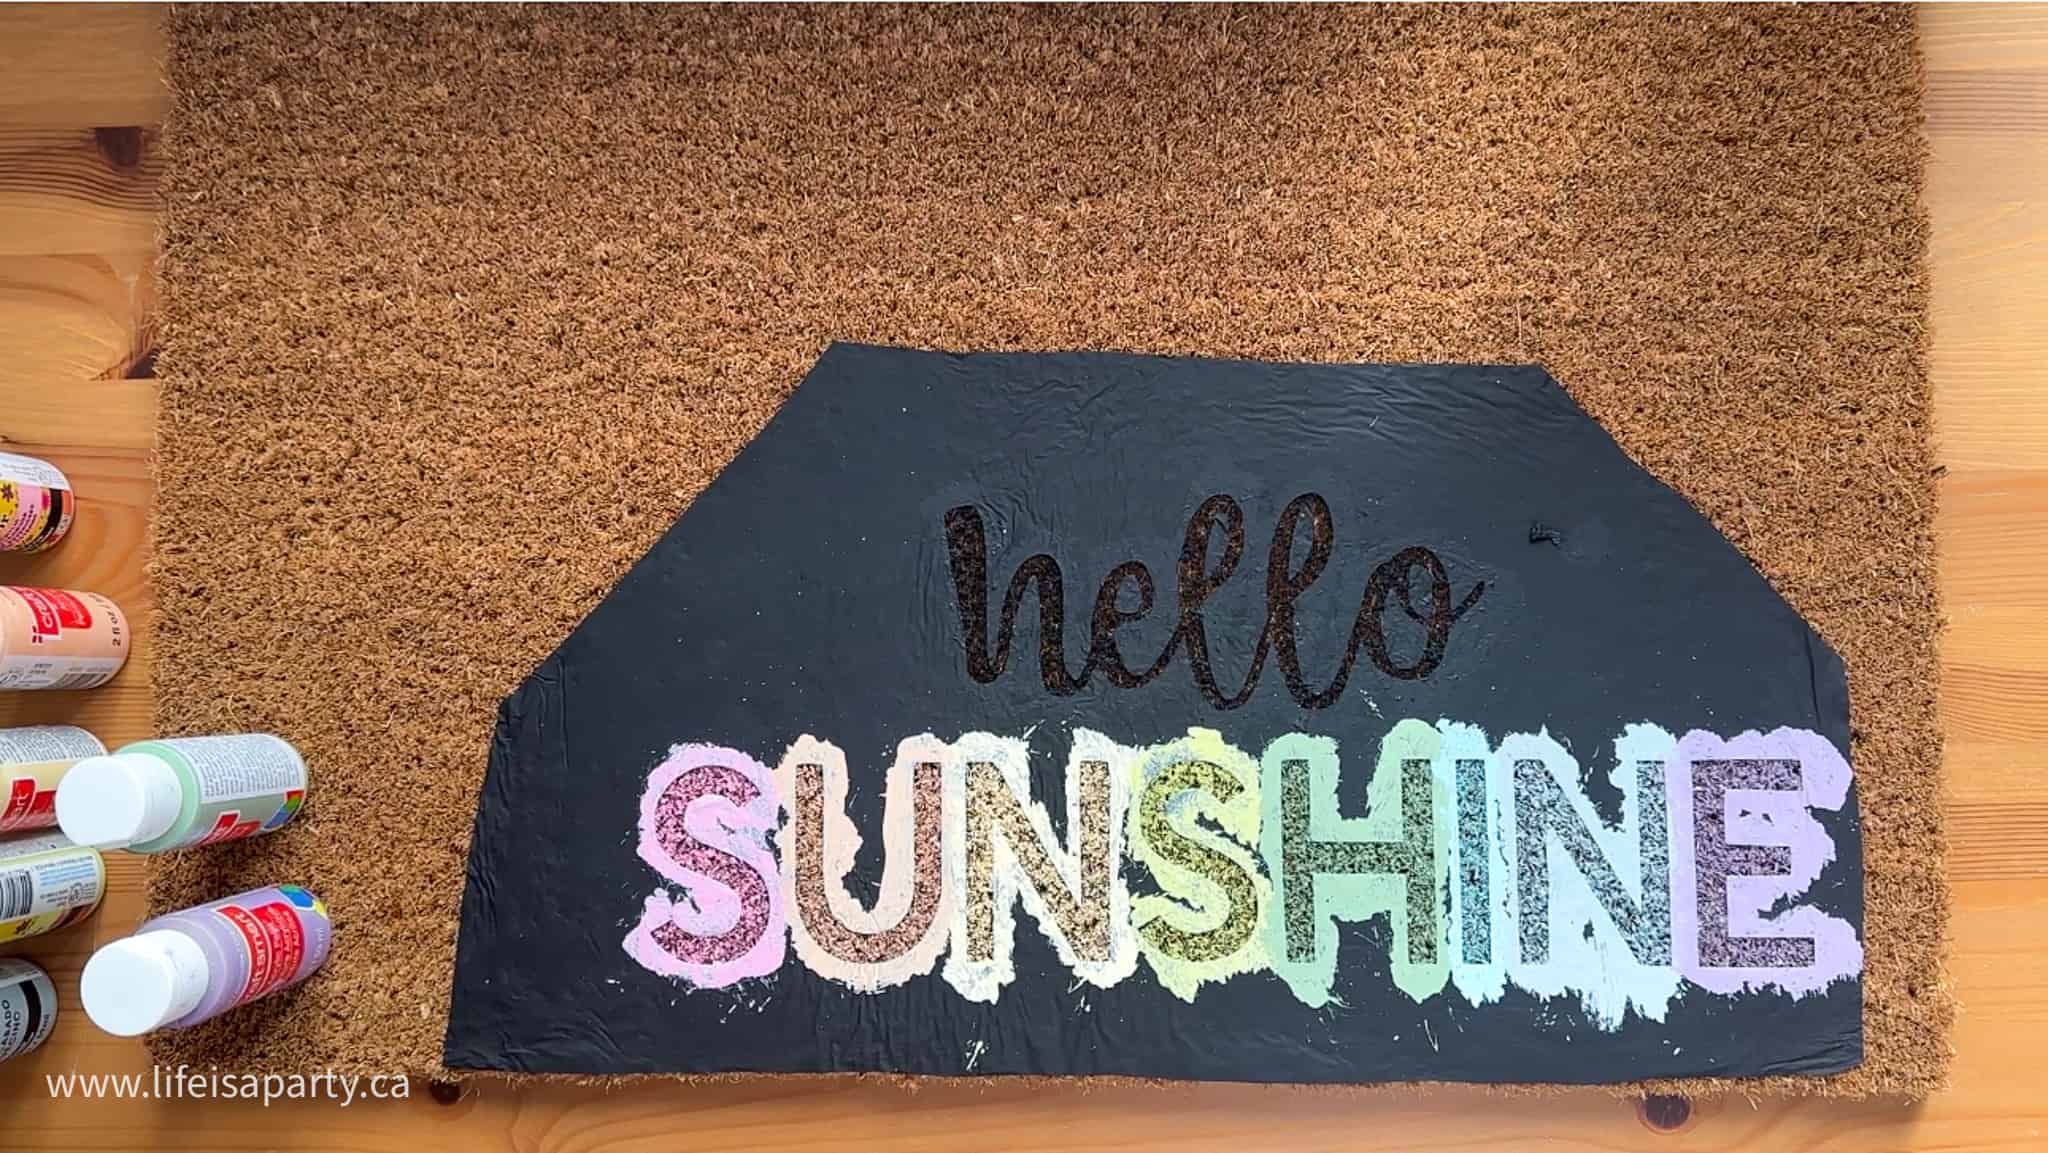
Use a dapping down motion to stencil the letters with your paint, using a regular paint brush or stencil brushes. Use just a little bit of paint for each coat, so that excess paint doesn't seep underneath, and so you create nice crisp edges to your letters. You may want to give it a second coat of paint for full coverage. We used black paint for "hello" and rainbow colors for "Sunshine".

Using Cricut iron-on vinyl as a doormat stencil and applying paint.

6. Remove The Stencil

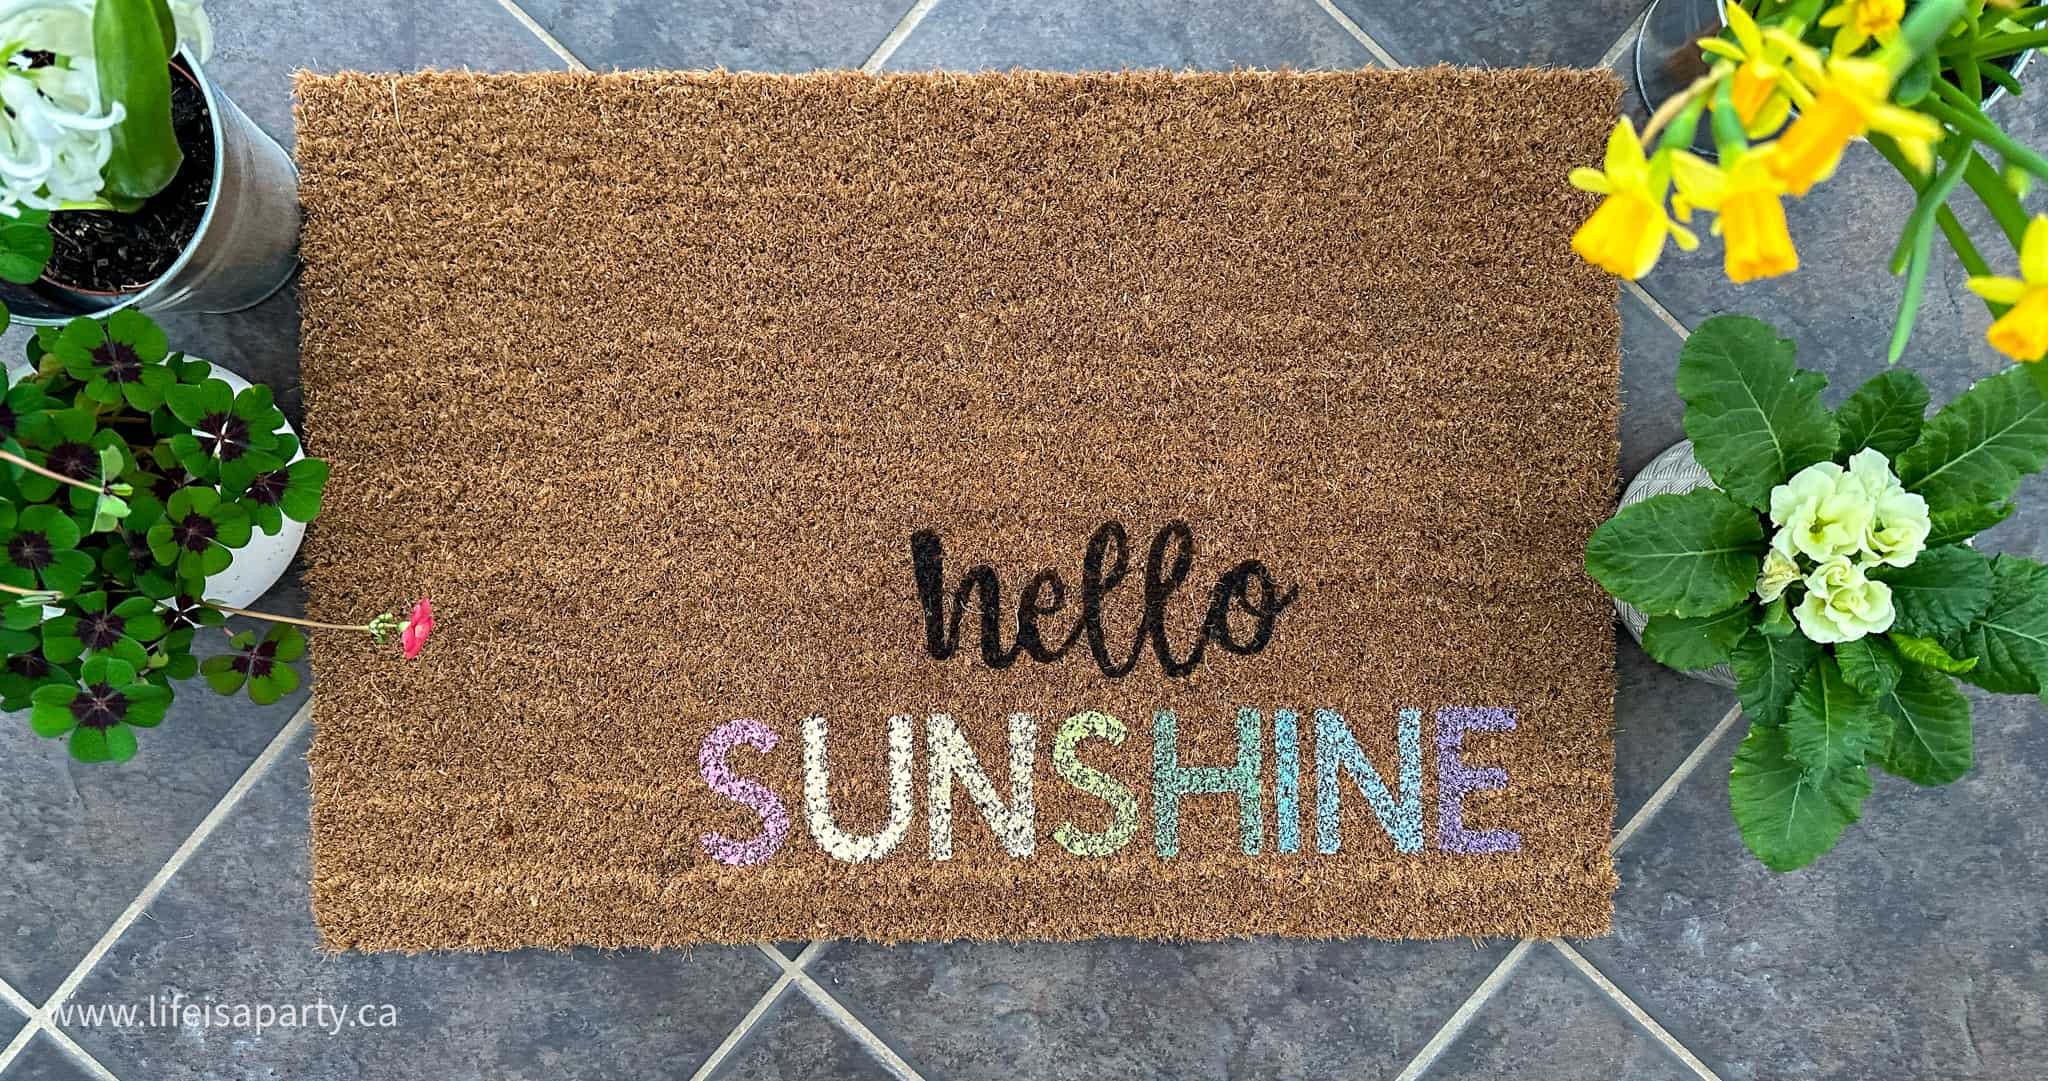
Once the paint is dry remove the iron-on vinyl, by peeling it off of the doormat. If it's difficult to remove, use the Easy Press at 310 degrees and press for 20 seconds. Be sure to replace the backer piece before pressing so that the vinyl doesn't stick to your Easy Press. Use the weeder tool to remove little pieces, like the insides of the letters

Hello Sunshine custom doormat made with a Cricut iron-on vinyl stencil.

Expert Tips

Because the heat transfer vinyl is removed after it's used as a stencil don't worry if there's a few wrinkles in it after you've applied it to the doormat.  The main important thing is that it's well sealed around the edges of the words or images.  

Also, because the vinyl will be removed after it's used as a stencil, feel free to use up any colors you're not too fond of, or look for iron-on vinyl that's on sale, because the color or pattern won't matter at all.

More Cricut Inspiration

  • How to sharpen a Cricut blade using household items step by step guide.
    How To Sharpen A Cricut Blade
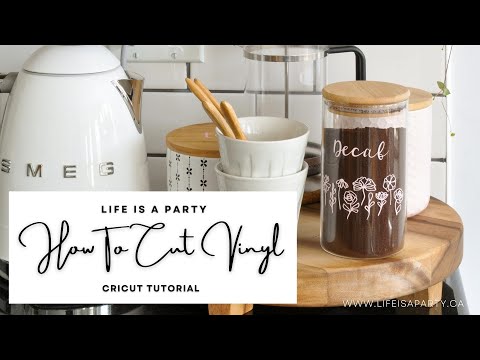
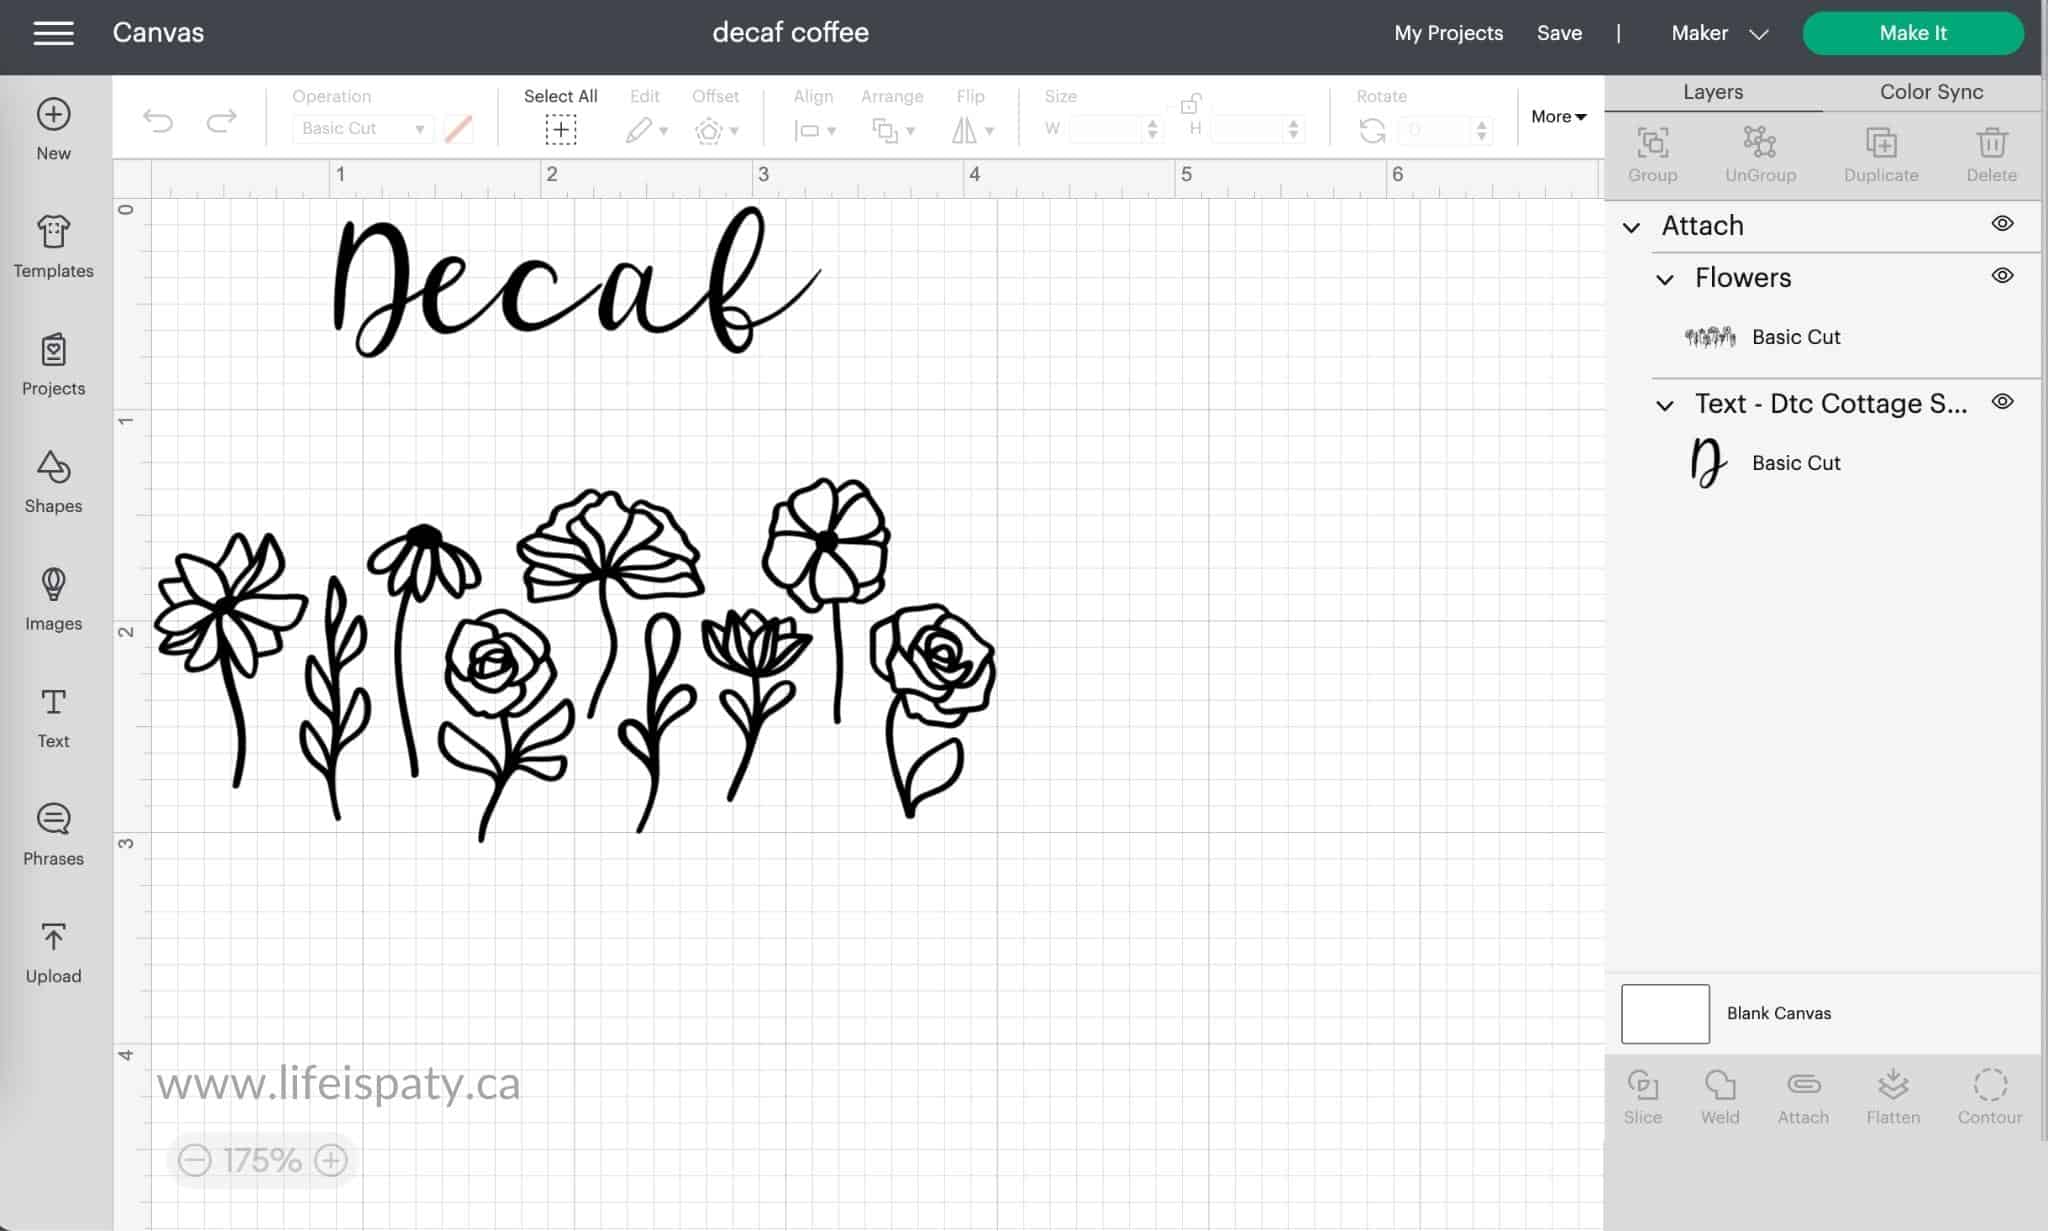
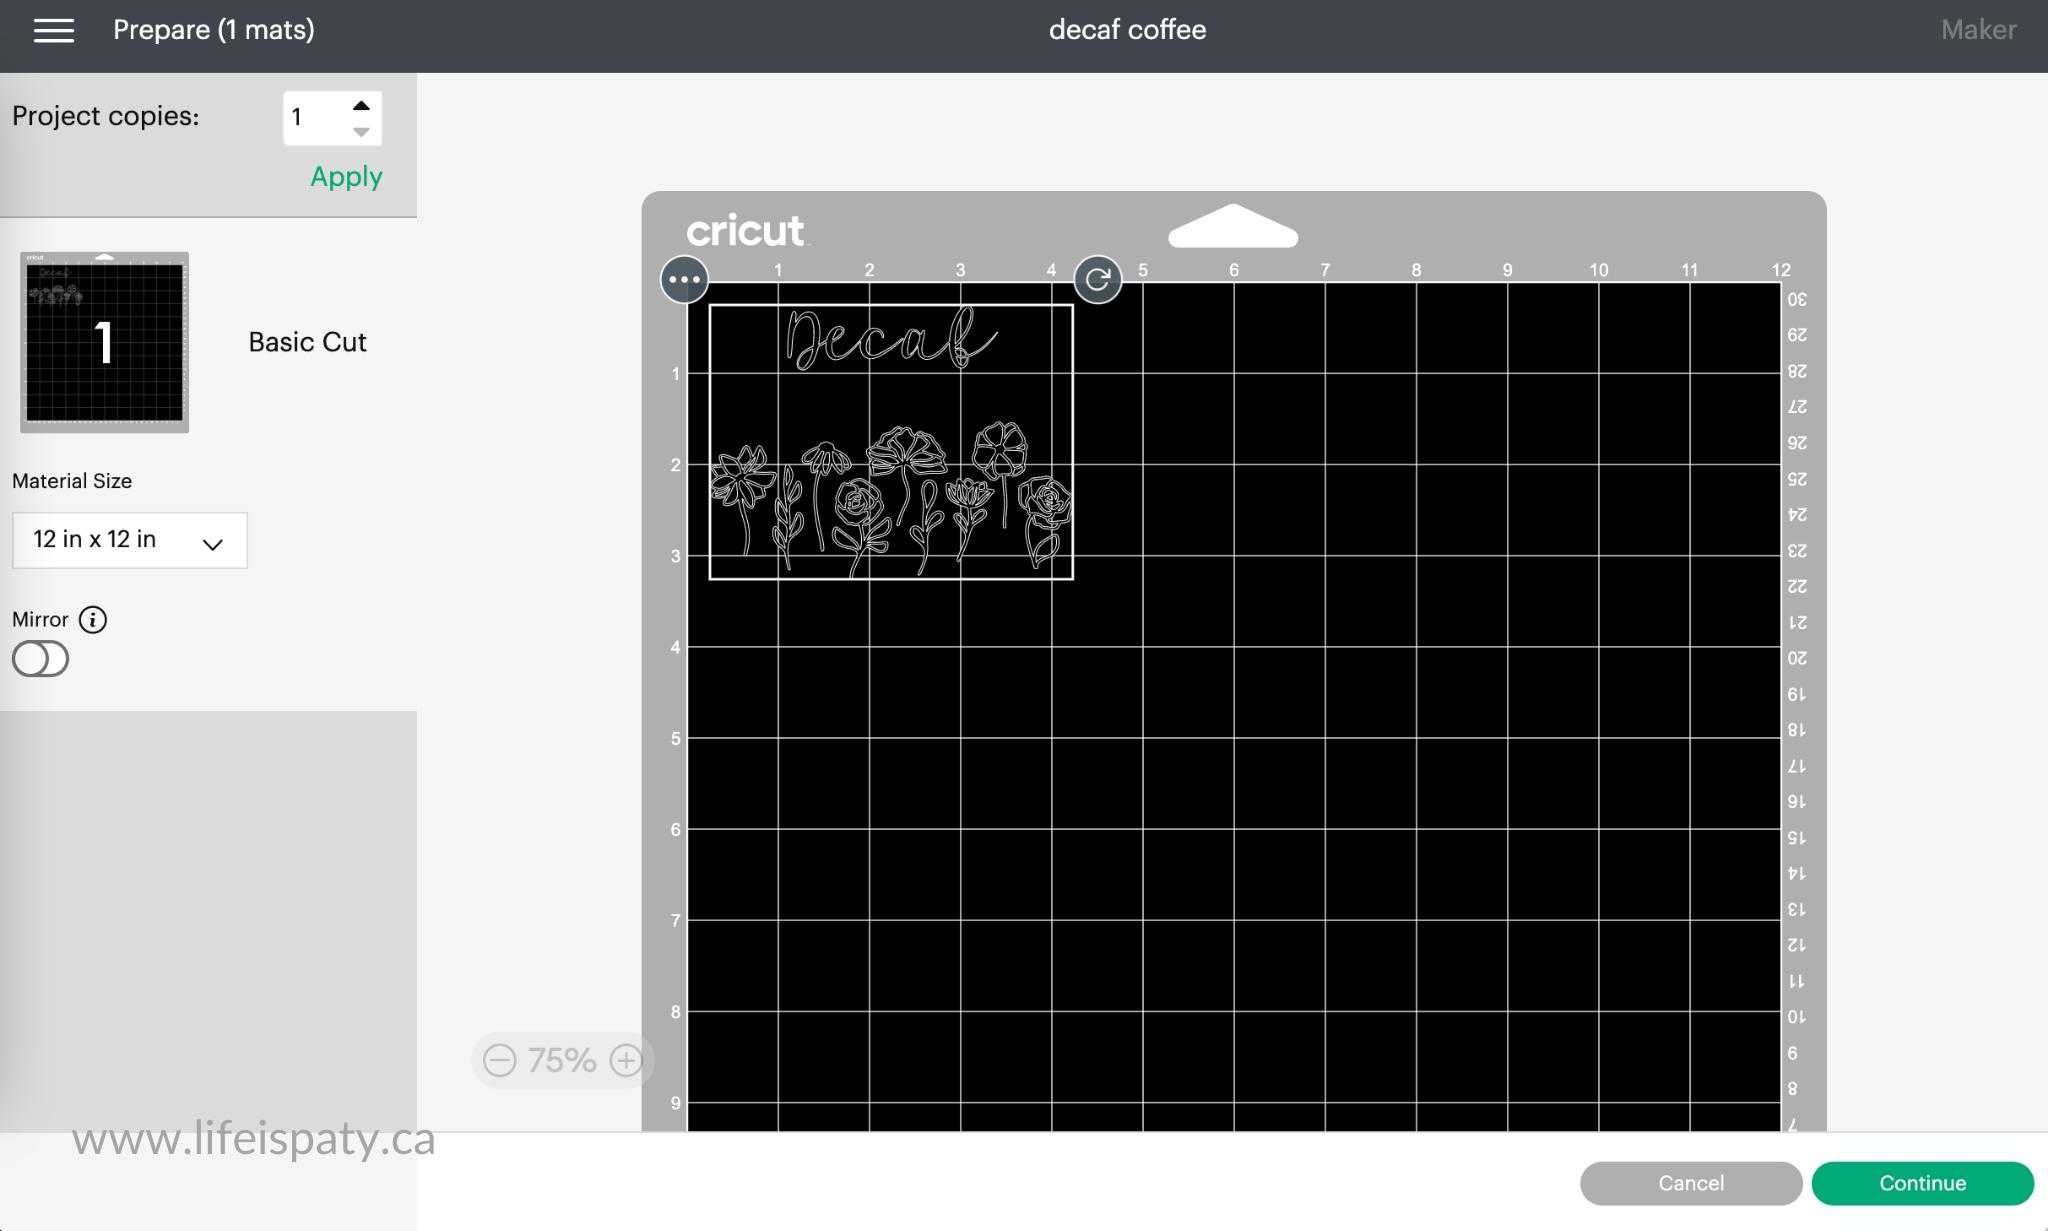
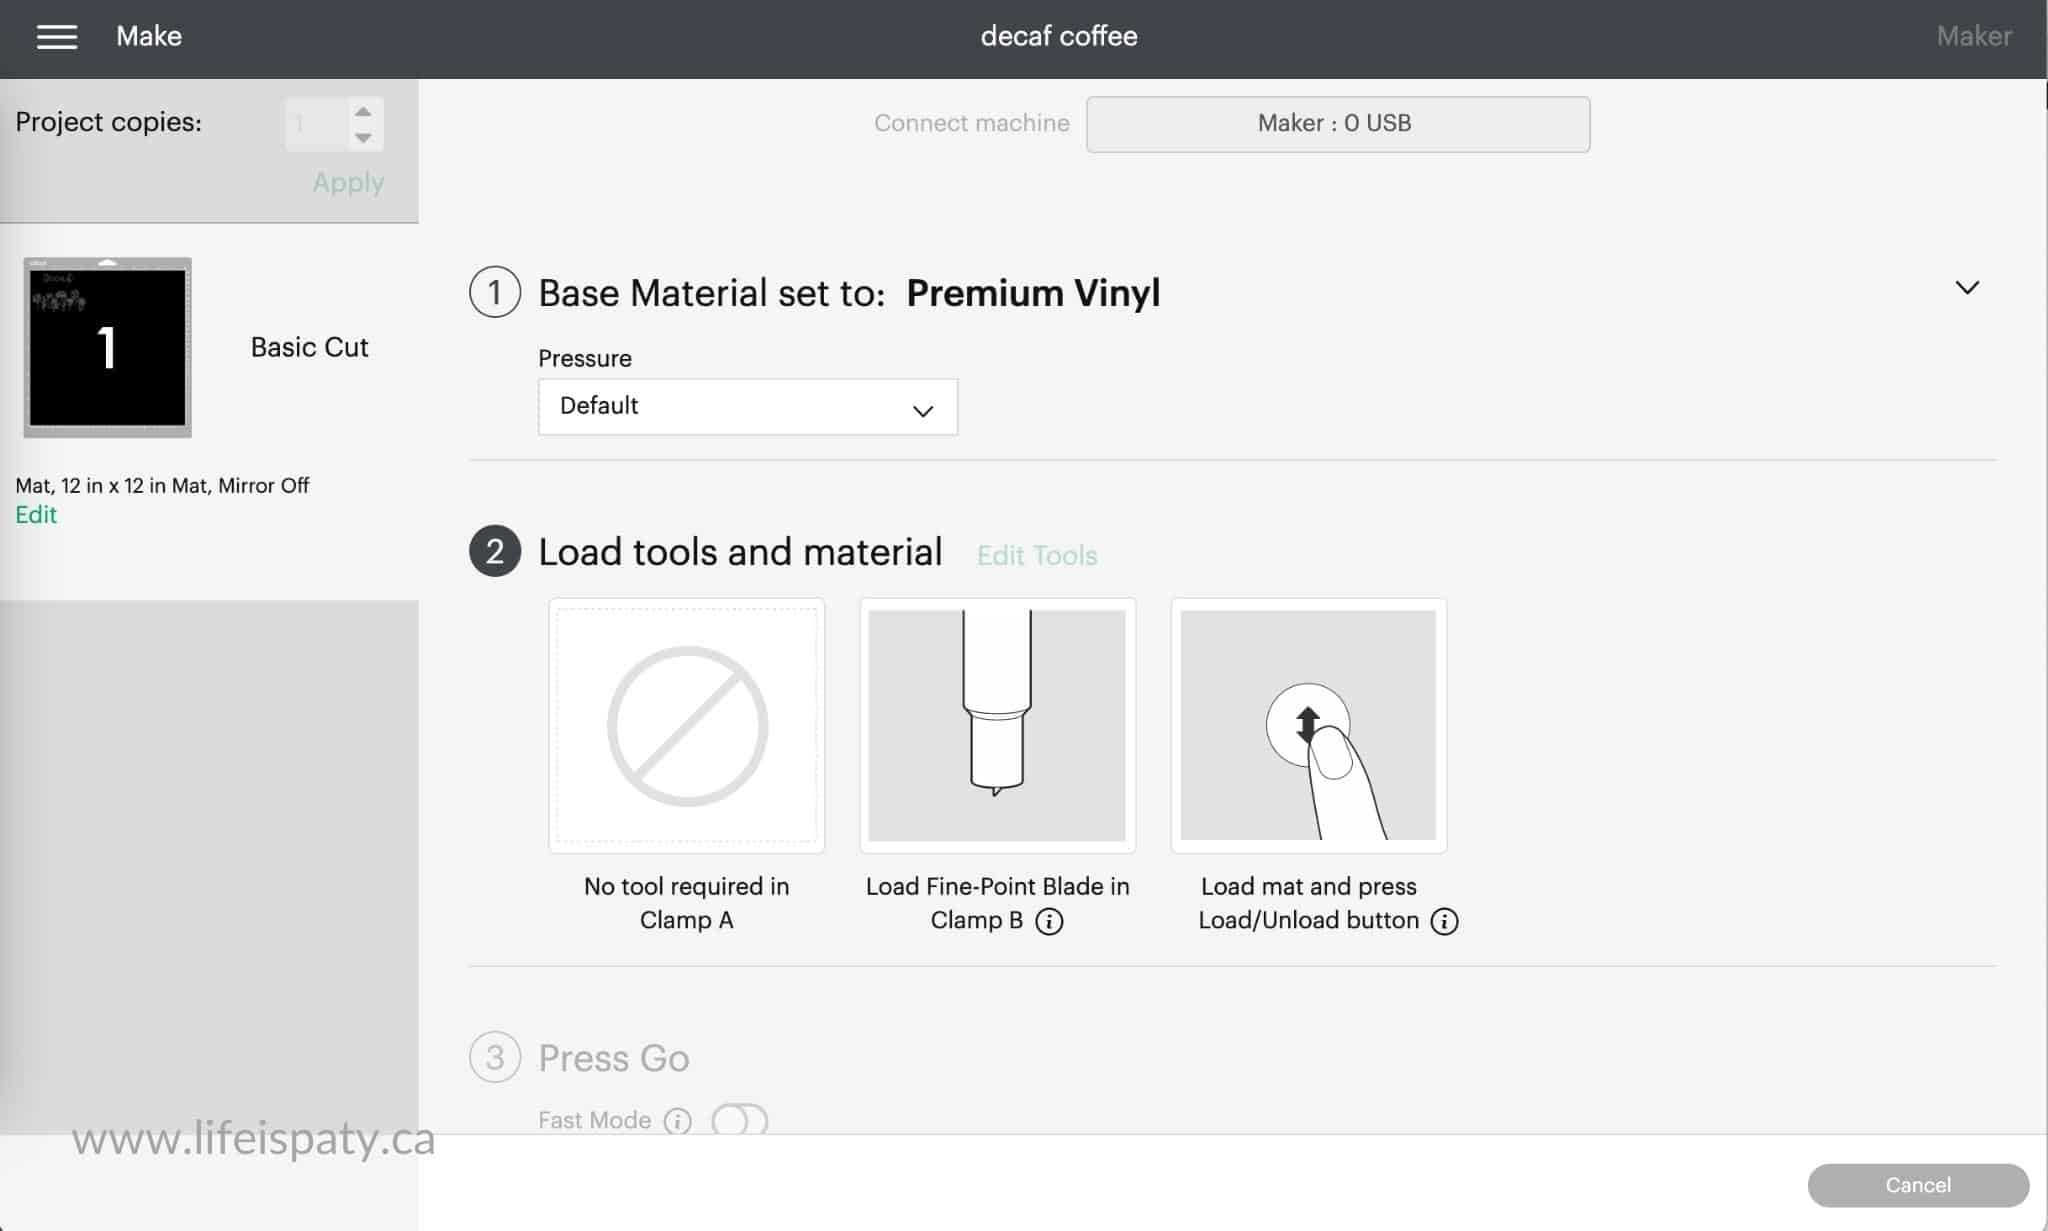
  • How to cut vinyl on a Cricut machine to make a decal for a glass canister.
    How To Cut Vinyl On Your Cricut Step By Step Beginners Guide
  • Cricut transfer tape with a Cricut machine in the back ground.
    How To Use Cricut Transfer Tape
  • How to make earrings with your Cricut machine,
    How To Make Earrings With A Cricut

Frequently Asked Questions

Why isn't my iron-on vinyl sticking to my doormat?

It can be difficult to get the stencil completely stuck to the mat, and you do want it to be well stuck down in order to get nice crisp edges on your paint. Take your time and repress any spots that are not adhered well.

Why am I having trouble removing the used stencil from my doormat?

If you're having trouble getting the used stencil off of your doormat, don't pull too hard and damage the mat. Instead, reheat the vinyl by placing the backer piece over it, and repressing it. This should re-heat the glue enough to make it easy to remove.

Why is my paint wearing off after one season?

Acrylic craft paint isn't the hardest wearing. You can either try using an outdoor or exterior paint, spray acrylic paint with a protective clear acrylic sealing coating, or touch up any areas that need it with a small paint brush.

Can I reuse the iron-on vinyl stencil for my Cricut doormat?

No. After making the mat, you will remove the stencil and it's only good for one time use.

If you try this Doormat Made With A Cricut Iron-On Stencil or any other idea on my blog please leave a star rating and let me know how it went in the comments below. Thanks for visiting today!

Recipe

How to make a custom doormat with your Cricut machine and iron-on vinyl.

How To Make A Doormat With Cricut and Iron-On Vinyl

5 from 1 vote
Print Pin Rate
Cook Time: 1 hour hour
Total Time: 1 hour hour
Servings: 1 Doormat
Author: Dannyelle Nicolle-Ramjist
Cost: $20

Equipment

  • Cricut Easy Press or iron
  • Cricut cutting machine

Materials

  • blank coir door mat
  • iron-on smart vinyl or regular vinyl with a standard grip cutting mat
  • craft paints
  • paint brush
  • "Hello Sunshine" Cricut Design Space Cut File

Instructions

  • Create Design
    If you want to create a mat exactly the way I did, search for "Life is a Party" using the search bar on the home page of Cricut Design Space. Scroll down to the bottom of the screen to the Community Members section, and click on the follow button for "Life is a Party -Dannyelle Nicolle-Ramjist". On my profile page, click on the "Hello Sunshine Doormat" project, and choose to customize or make it.
    If you want to create a different version, follow this tutorial and change the words, fonts, and locations to create your own design. Begin with a blank canvas in Cricut Design Space.
    Create a mat template by adding a square shape to the canvas, unlock the measurements and adjust to the size of your doormat. Change the colour to brown.
    The next step is to add a text box and type the word "hello". Change the font to Babette.
    Add another text box with the word "summer" all in capital letters, in the Cricut Sans font.
    Drag the text boxes down to the lower right of the brown rectangle mat template and adjust the font sizes. Use the letter space box along the top menu to adjust letter spacing in the word "summer".
    When you're happy with the word sizes, select both and use the align center along the top menu to align them.While they're still both selected use the attach button at the bottom of the layers panel to attach them.
    Use hide button beside the brown square mat template to hide it from the canvas so that it will not cut out. Use the save button to save your project.
  • Cut Out The Iron-On Vinyl
    Click make it. Be sure to turn mirror on. Select your iron-on vinyl from the materials list. We used a Cricut Maker 3, so we took advantage of the ability to create oversize pieces and used smart vinyl. If you are using a regular Cricut you could make the design a smaller size, cut it out in multiple pieces, or use a 12 x 24 inch cutting mat.
    If you're using smart iron-on vinyl, feed the smart vinyl into your Cricut with the shiny side down. If you're cutting your iron-on vinyl out on a mat, be sure to to apply it shiny side down.
  • Weed Stencil
    After the material is cut on the Cricut, use your weeding tool to remove the letters. Remember you're reverse weeding this project and removing the letters, and keeping the background to create a stencil.
  • Apply Stencil To The Mat
    Position your iron-on stencil on your blank coir doormat and use the Easy Press or an iron to apply it. We pressed at 310 degrees for about 30 sec. at a time. Slowly work the heat press over the entire piece, moving your Easy Press section by section. While the vinyl is still hot, use a small scraper tool to burnish it. Take special care around the inside of the letters, and any very small pieces.
    Once the iron-on is cool to the touch, you can try to slowly remove the backer piece. If the vinyl is not fully adhered, repress again. This part may take several attempts, and touch ups in some areas. Save the backer piece, and set aside for later.
  • Paint The Doormat
    Use a dapping down motion to stencil the letters with your paint, using a regular paint brush or stencil brushes. Use just a little bit of paint for each coat, so that excess paint doesn't seep underneath, and so you create nice crisp edges to your letters. You may want to give it a second coat of paint for full coverage. We used black paint for "hello" and rainbow colors for "Sunshine".
  • Remove The Stencil
    Once the paint is dry remove the iron-on vinyl. If it's difficult to remove, use the Easy Press at 310 degrees and press for 20 seconds. Be sure to replace the backer piece before pressing so that the vinyl doesn't stick to your Easy Press. Use the weeder tool to remove little pieces, like the insides of the letters

Notes

Because the heat transfer vinyl is removed after it's used as a stencil don't worry if there's a few wrinkles in it after you've applied it to the doormat.  The main important thing is that it's well sealed around the edges of the words or images.  
Also, because the vinyl will be removed after it's used as a stencil, feel free to use up any colors you're not too fond of, or look for iron-on vinyl that's on sale, because the color or pattern won't matter at all.

Rainbow Grilled Cheese Recipe

Apr 3, 2023 · 1 Comment

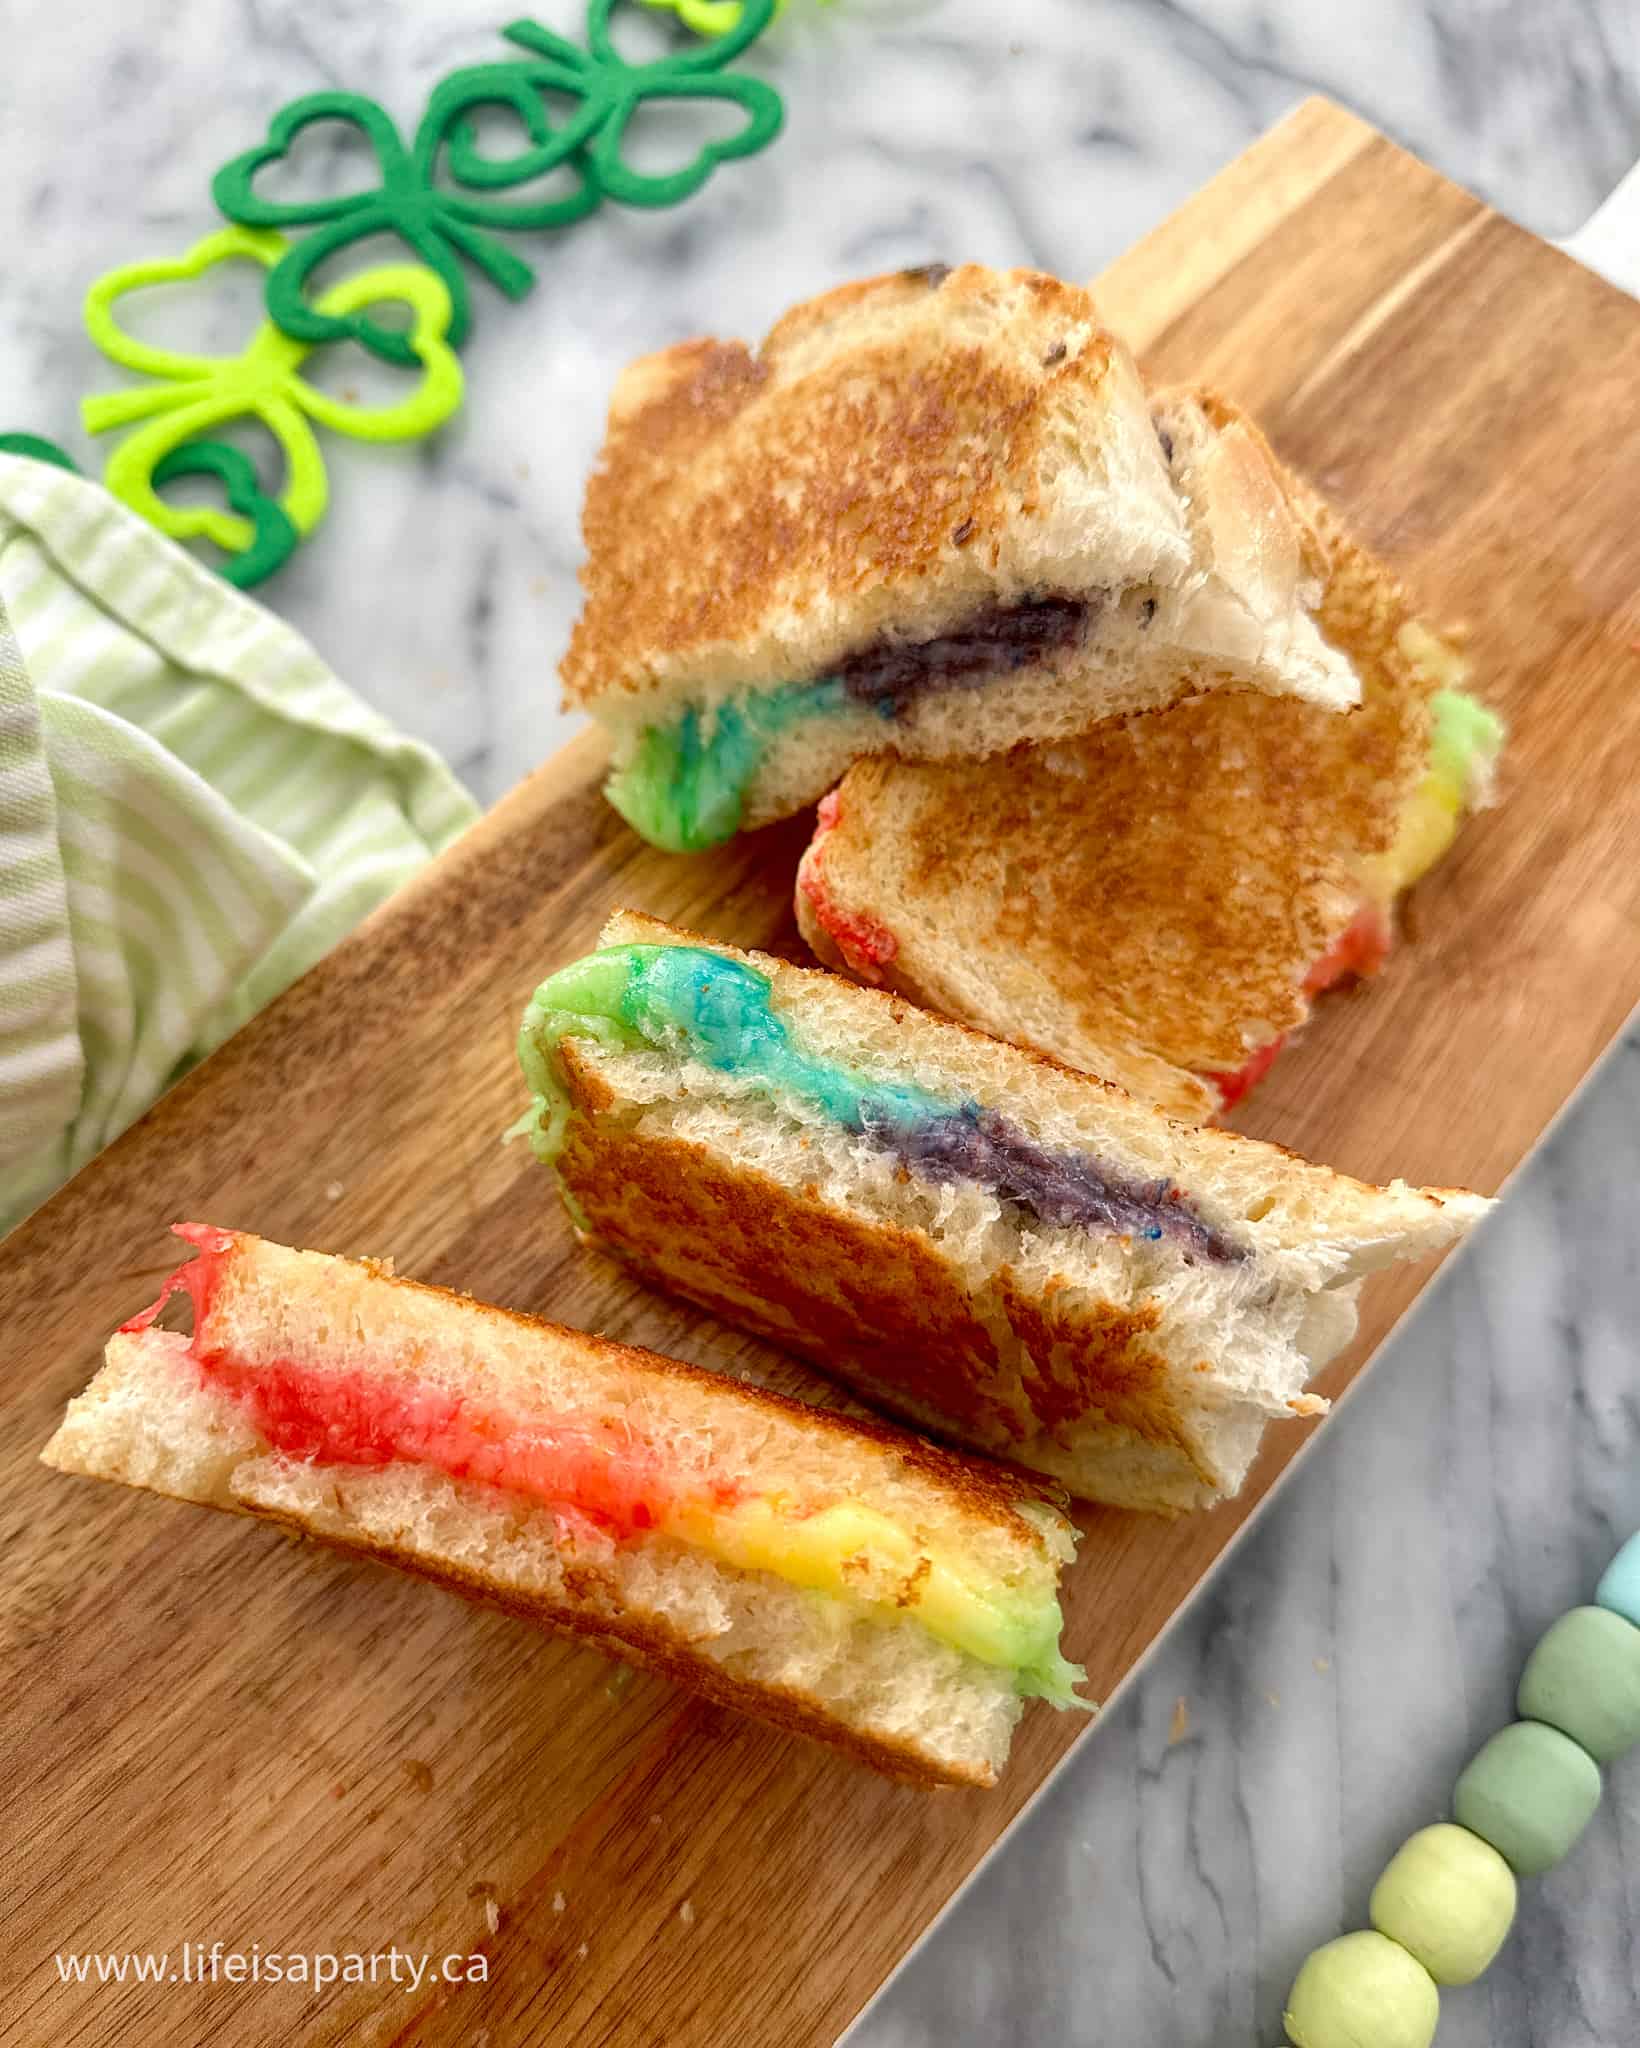
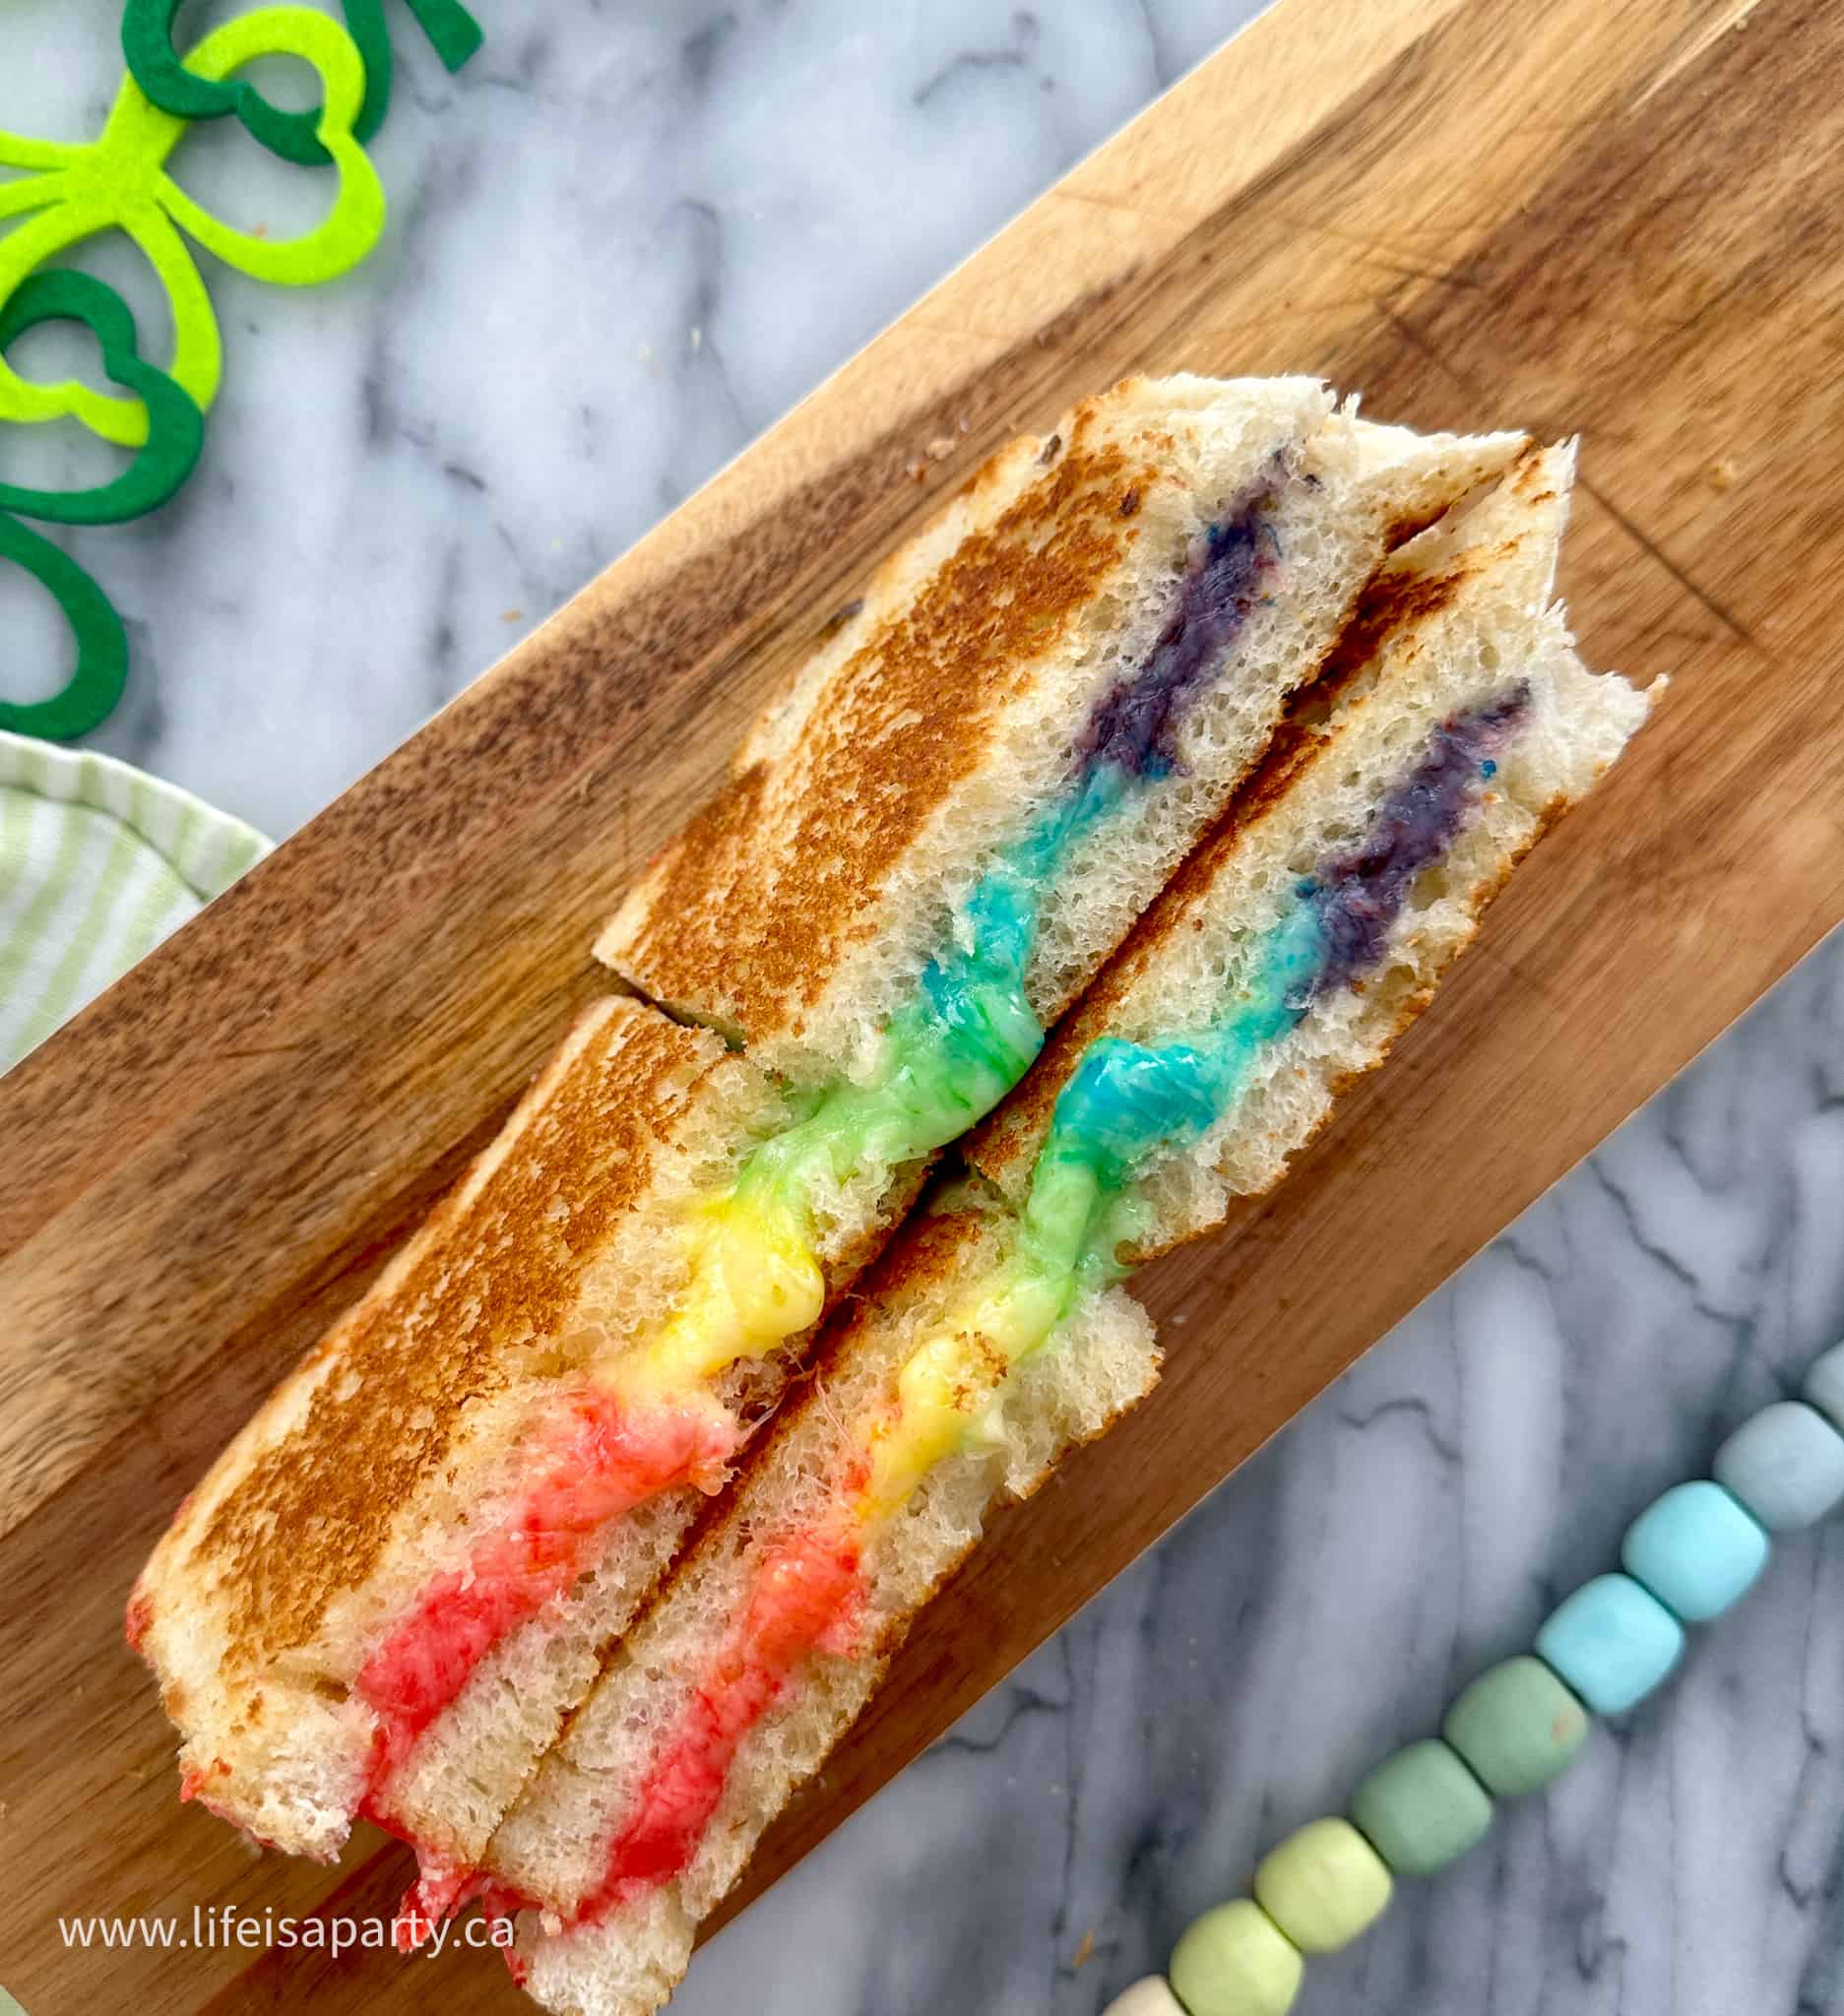
A rainbow grilled cheese sandwich cut in half on a cutting board.

These rainbow grilled cheese sandwiches are easy to make at home using regular food coloring, and so much fun for the rainbow lover.

rainbow grilled cheese sandwich cut in half on a cutting board.
[feast_advanced_jump_to]

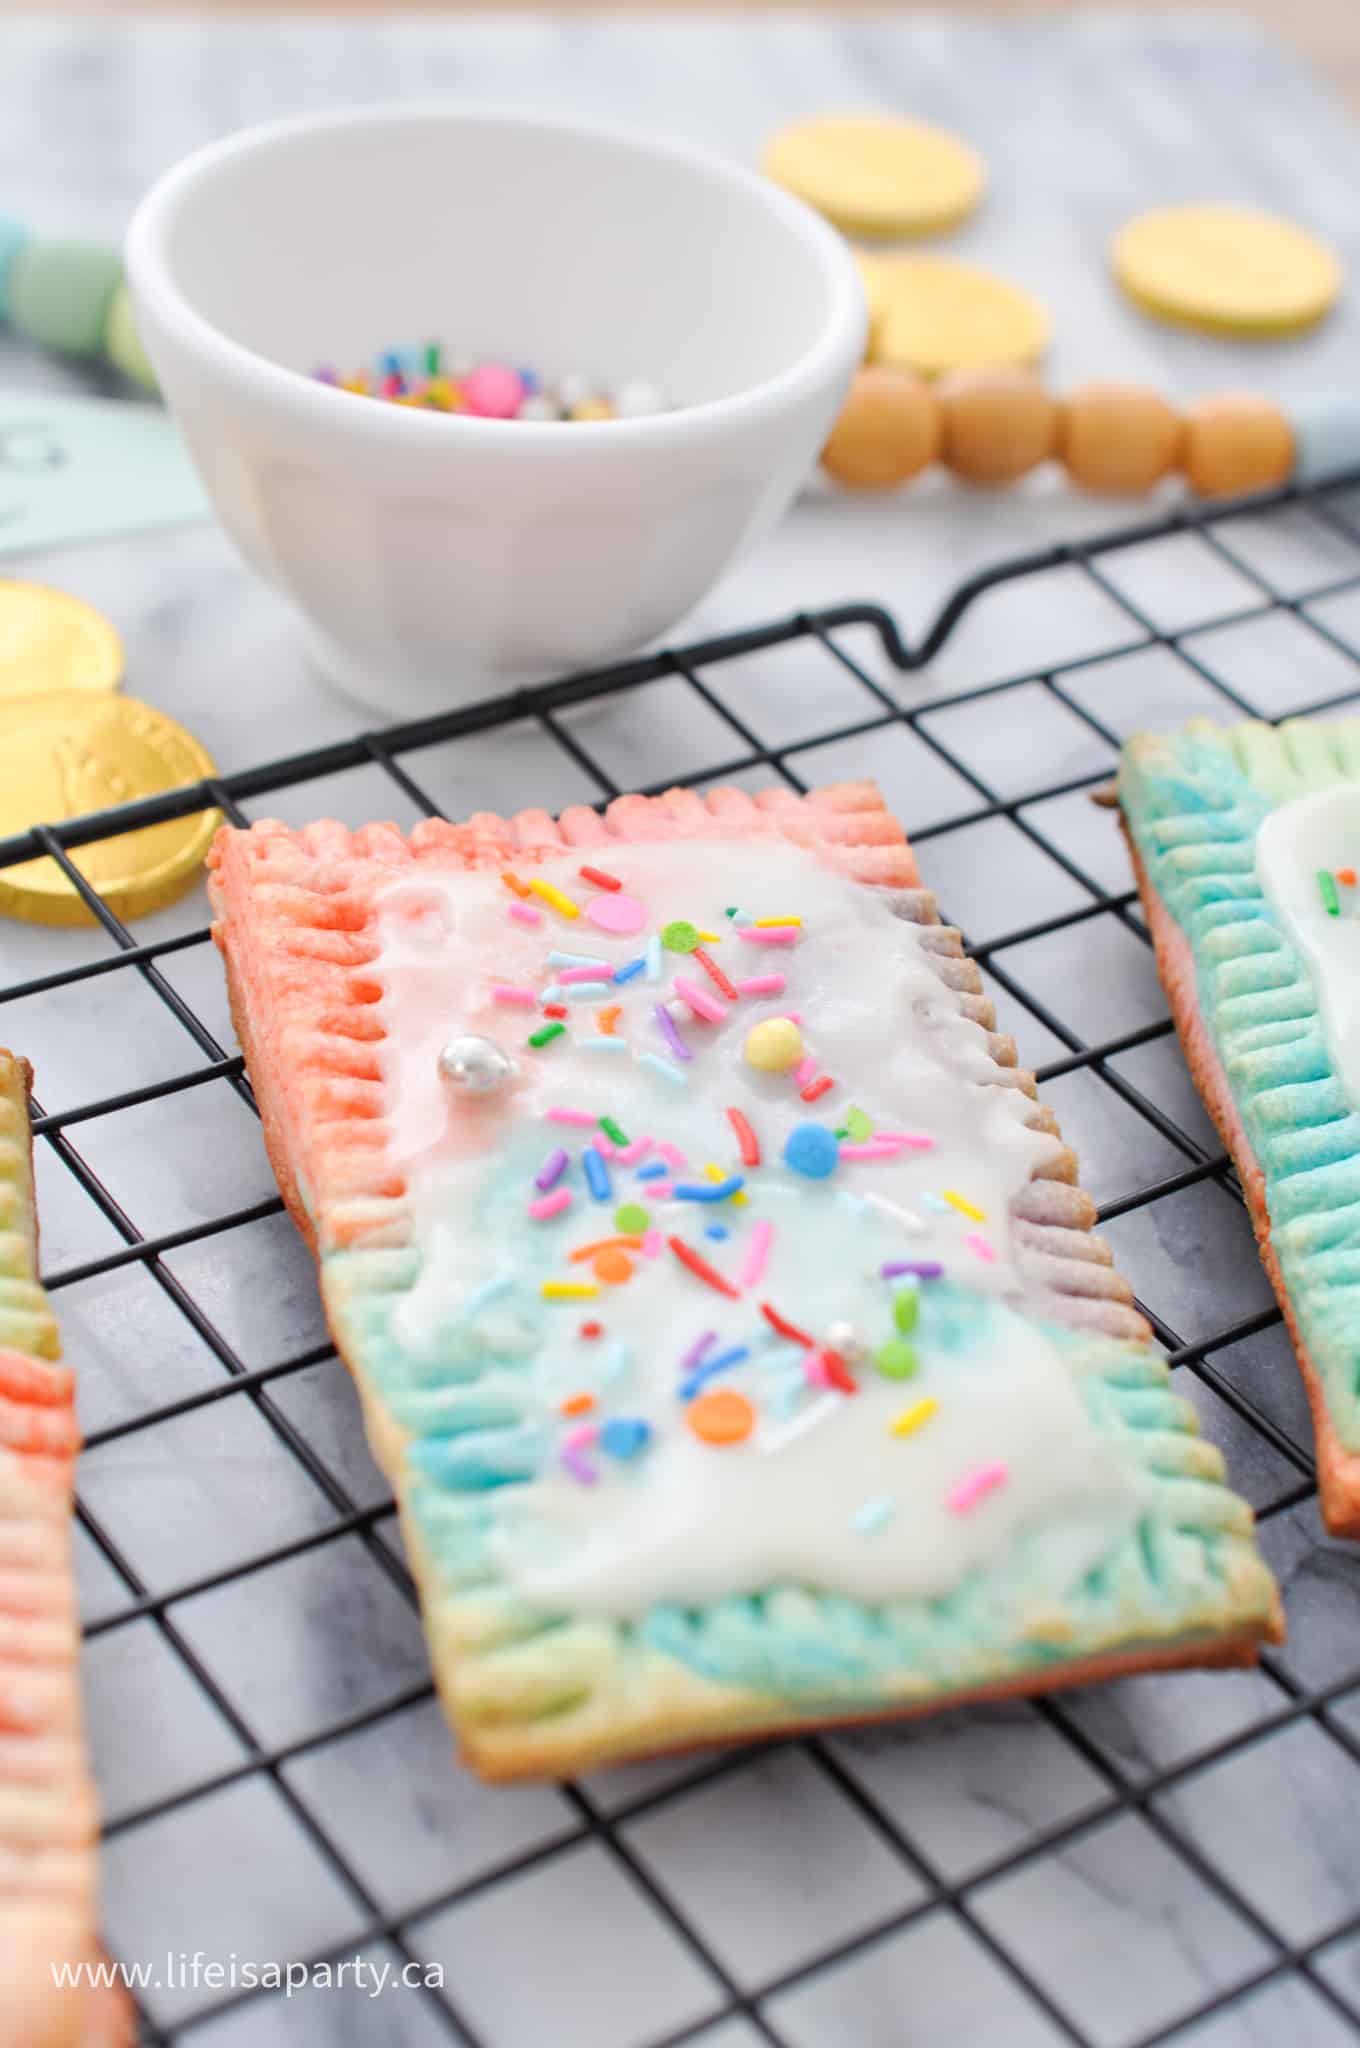
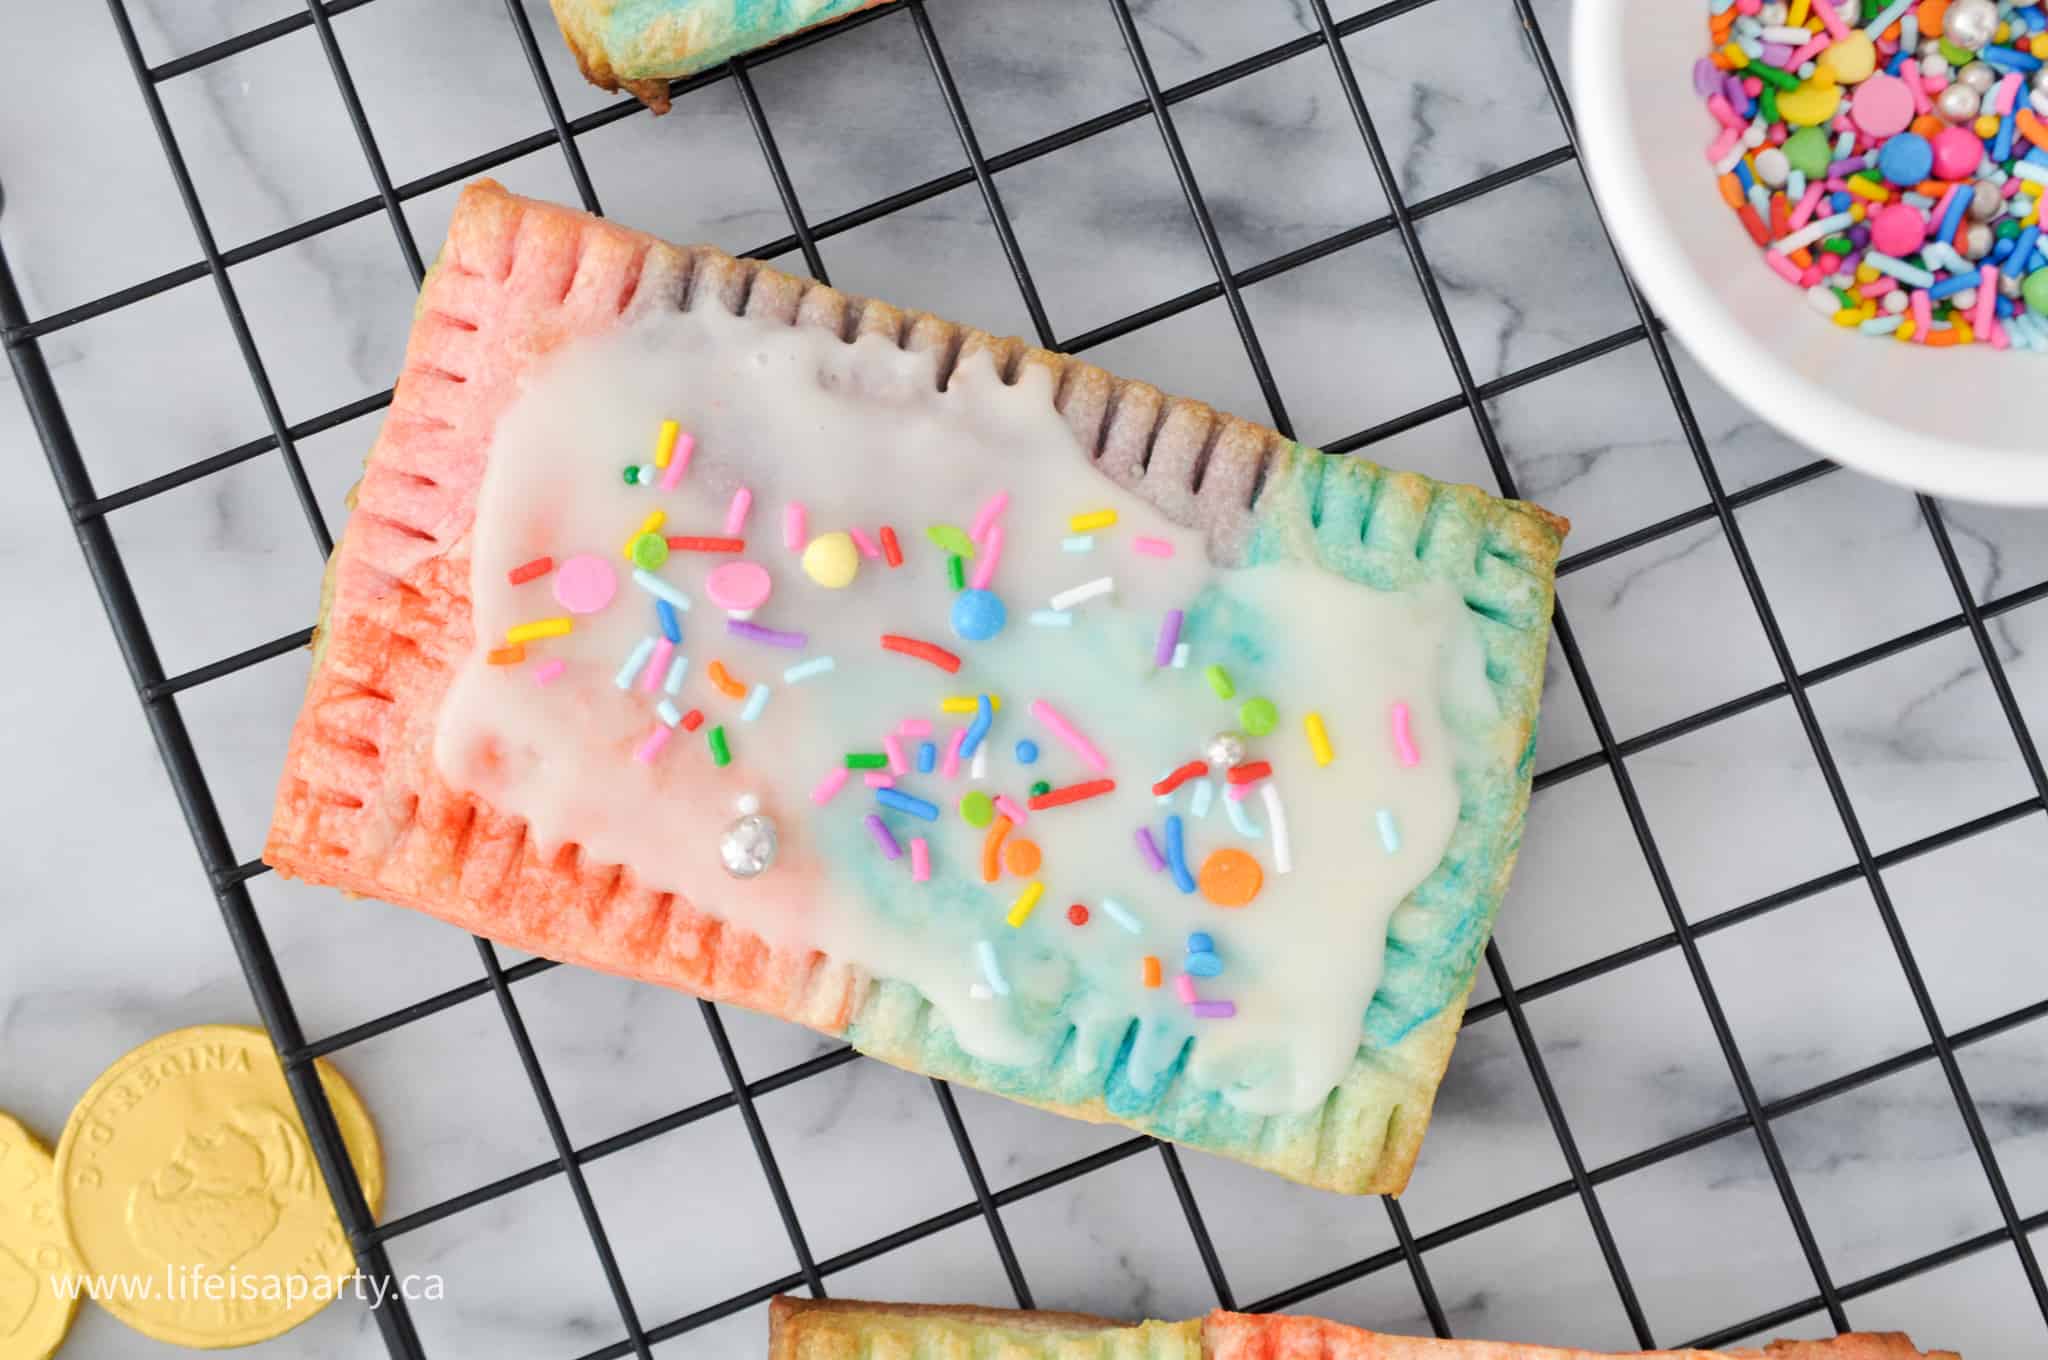
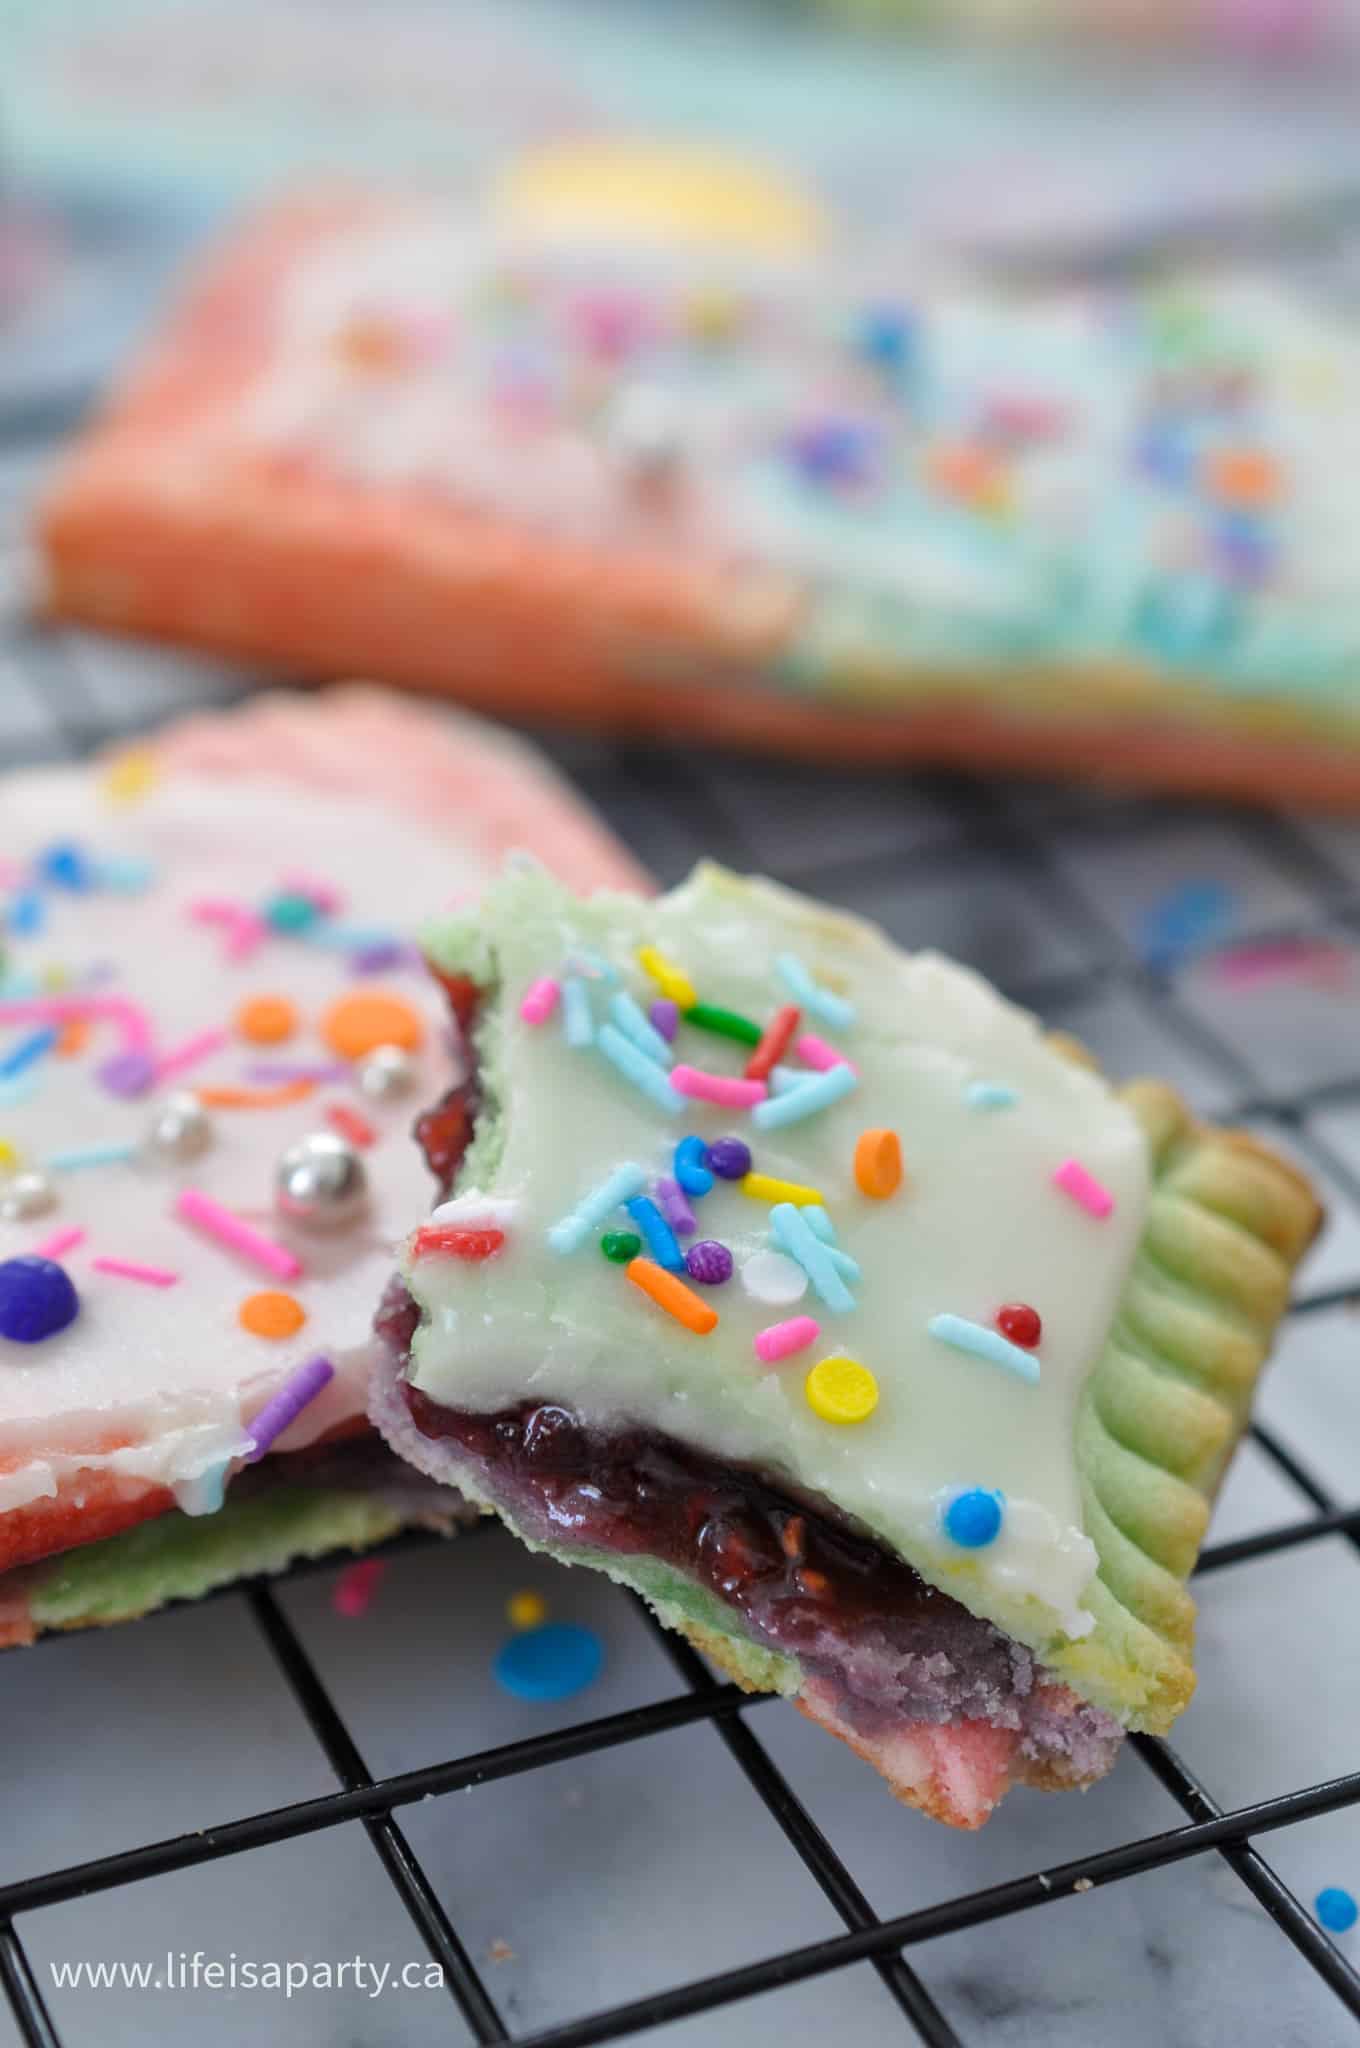
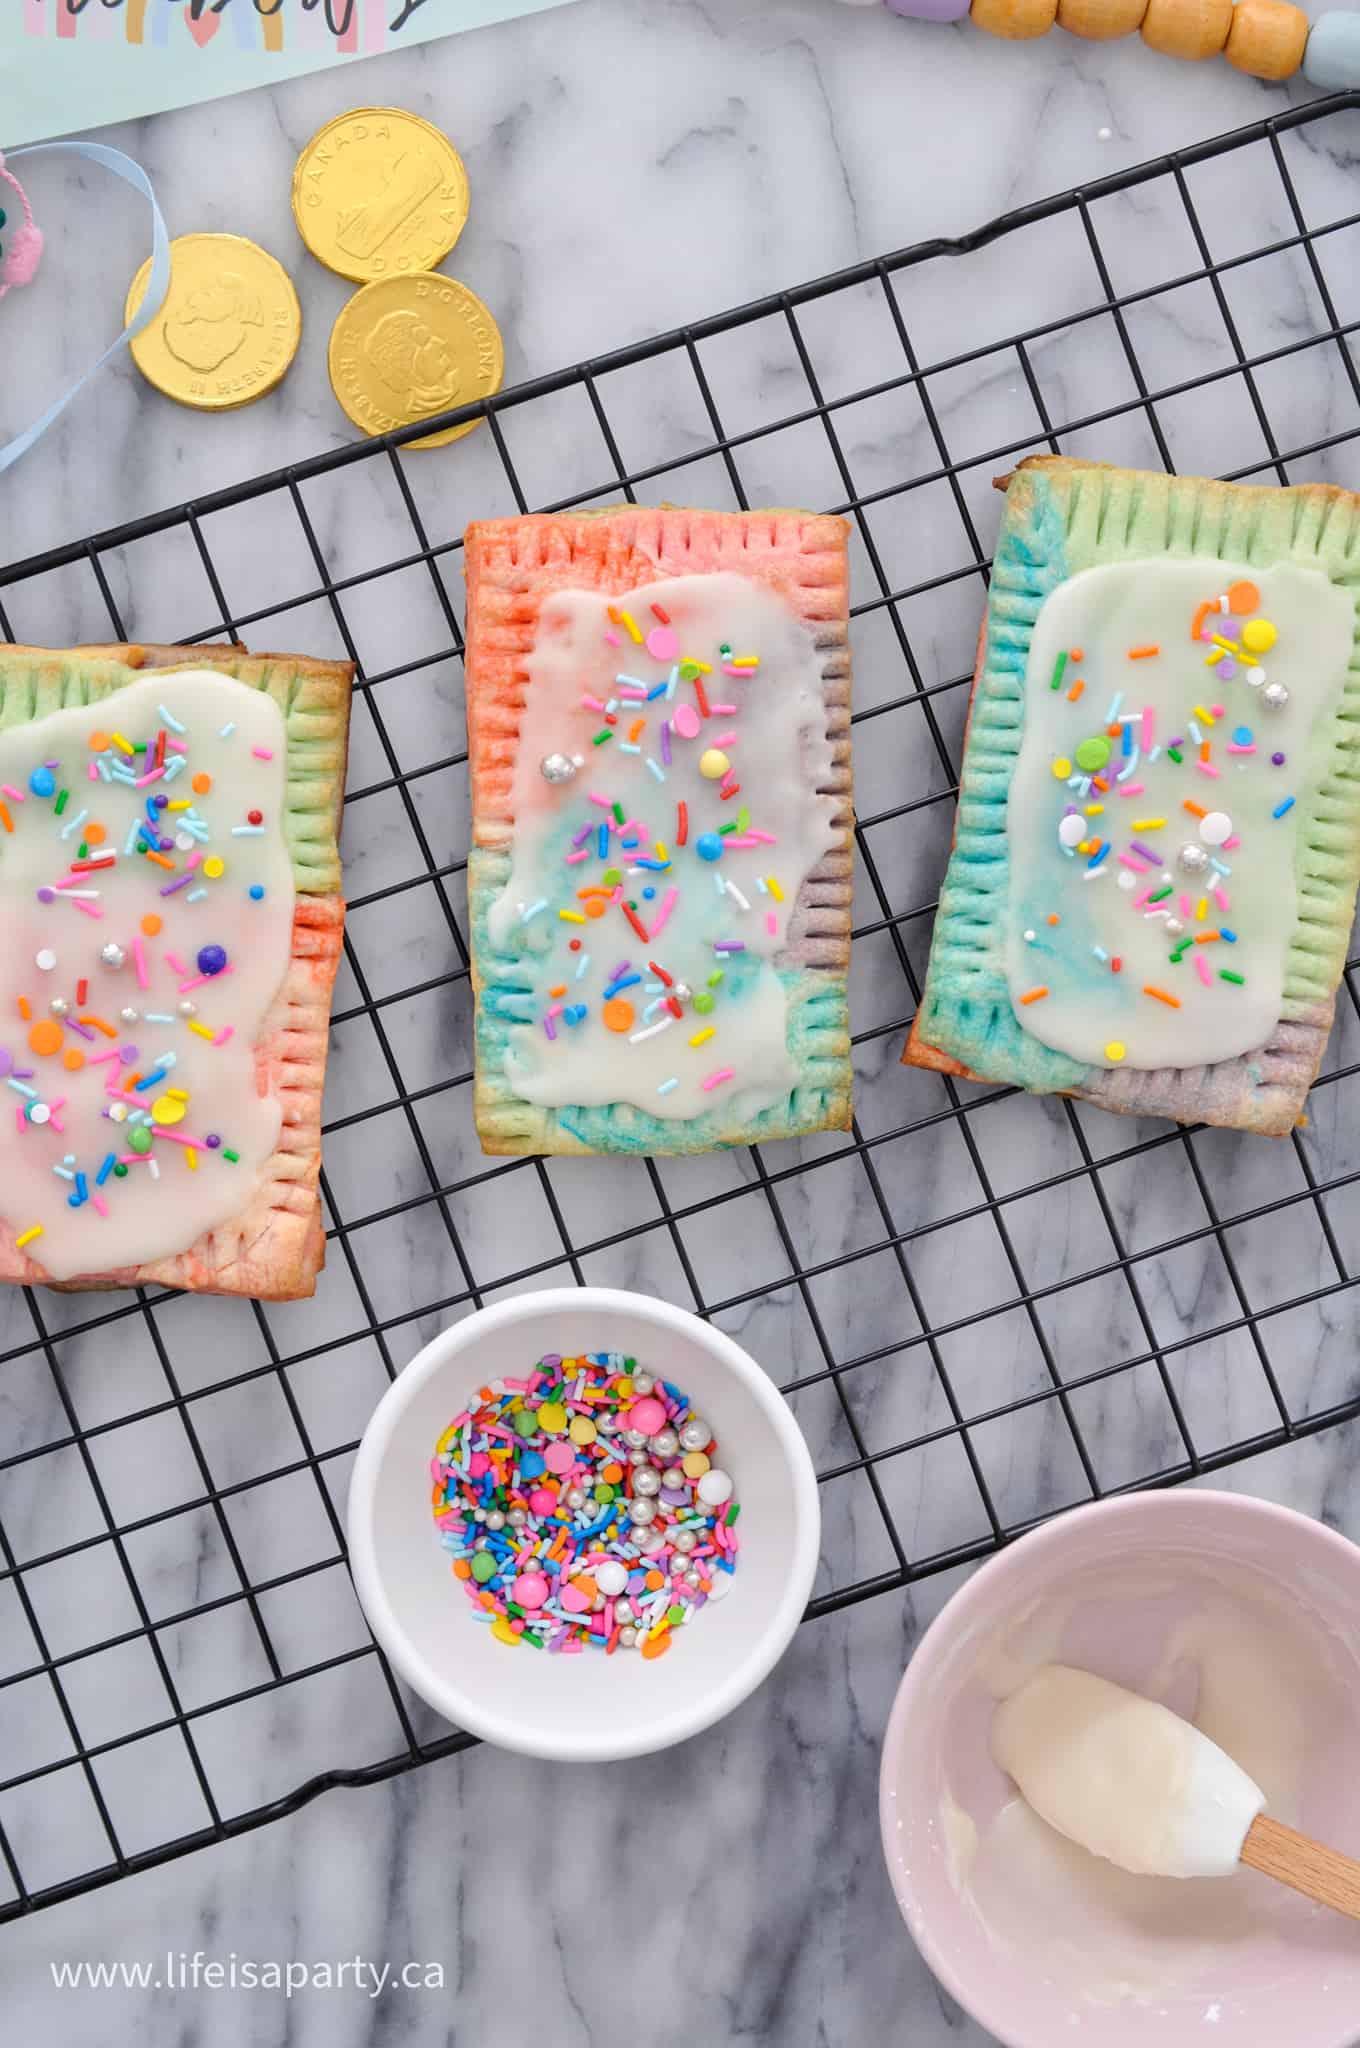
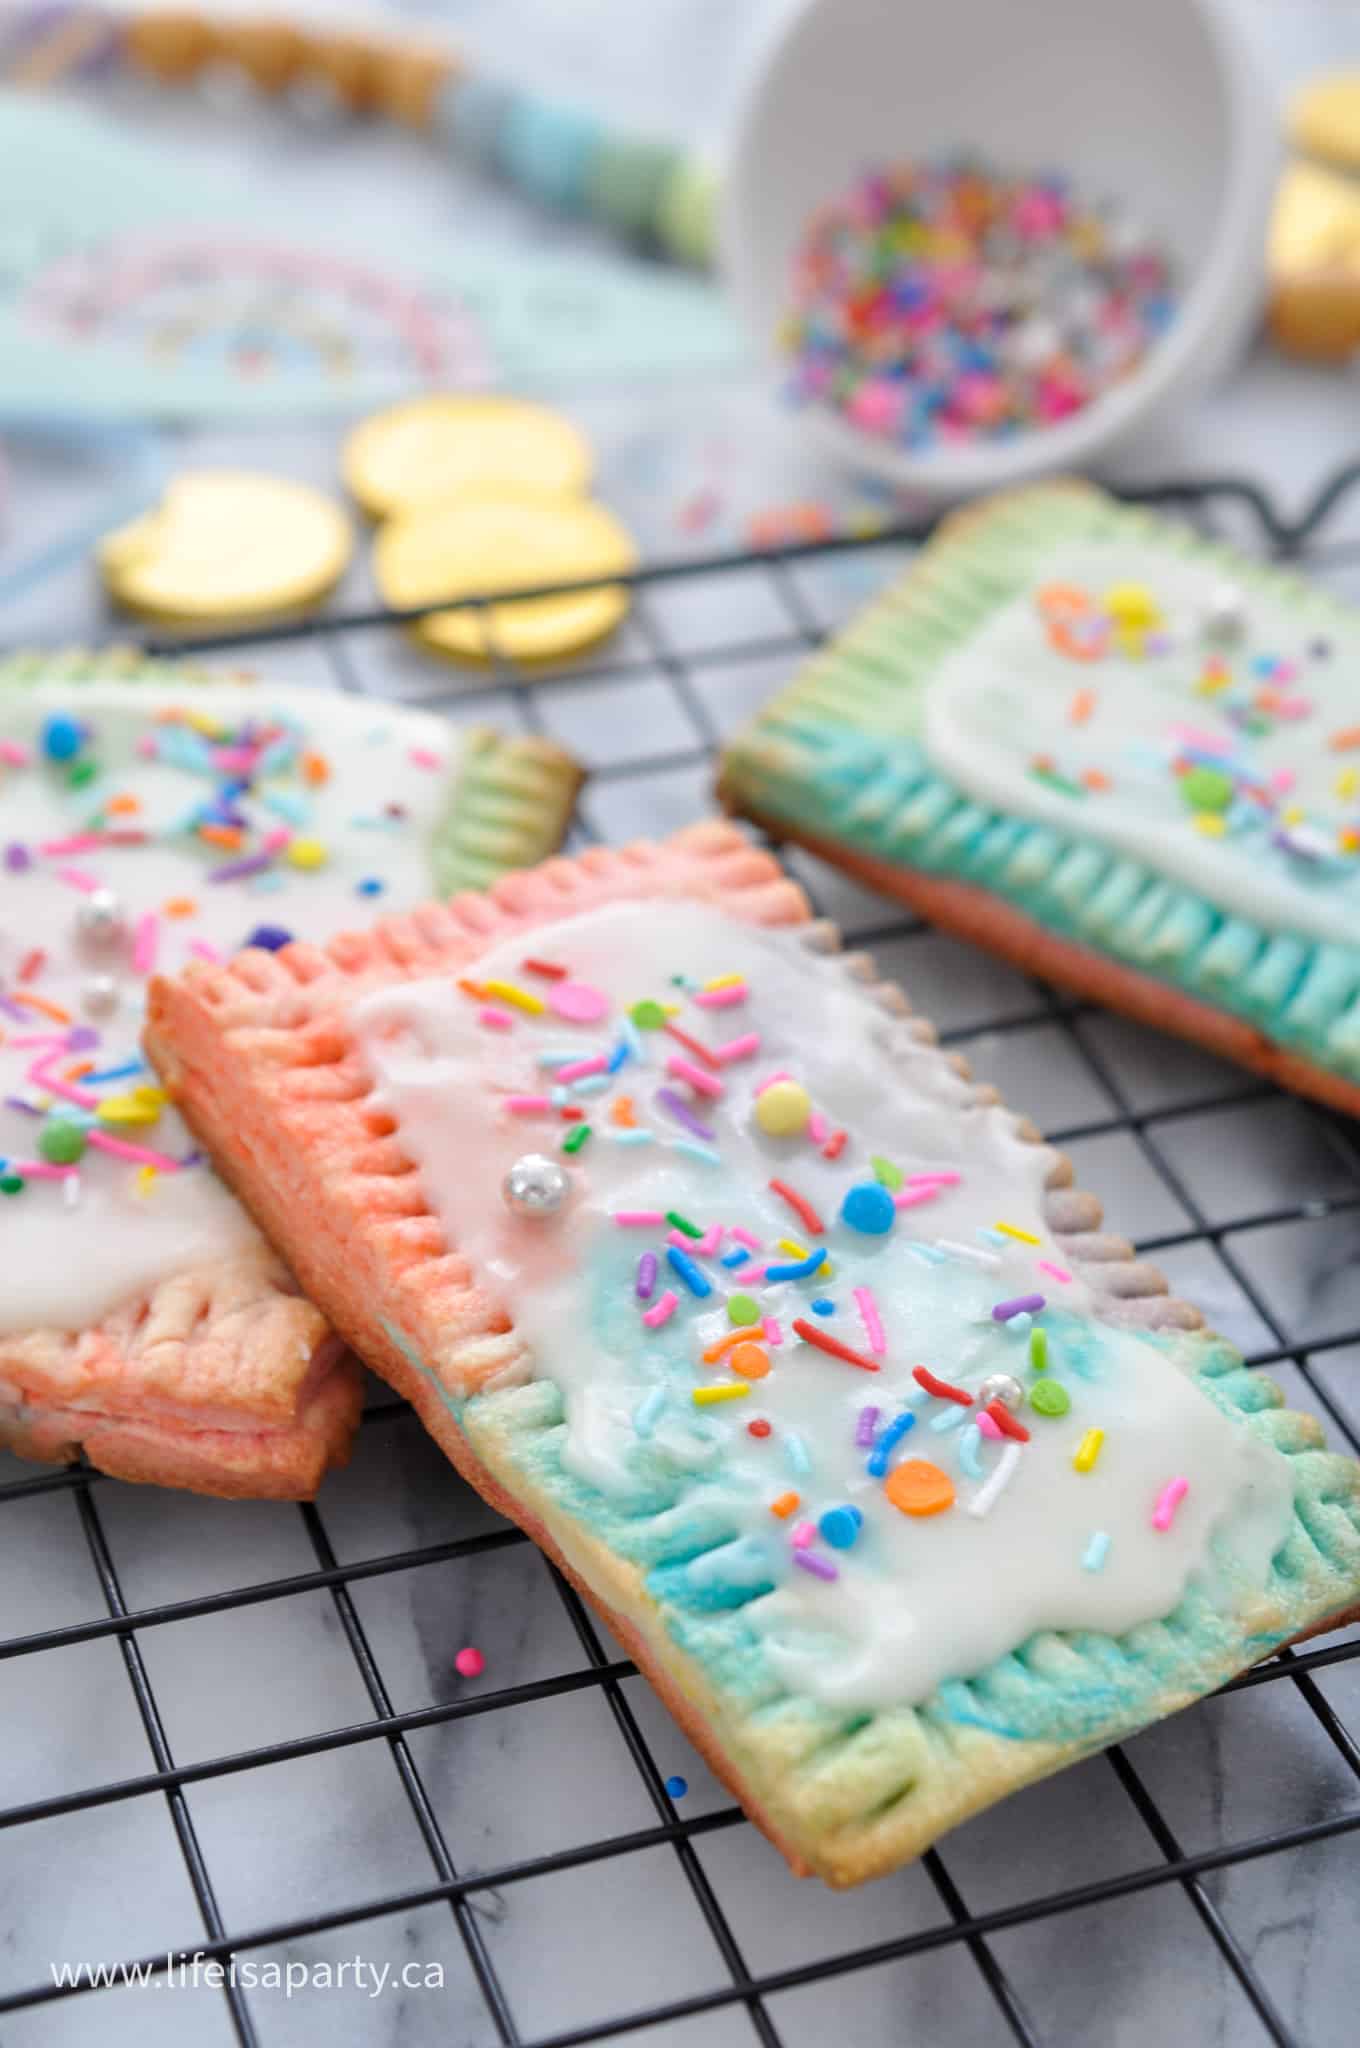
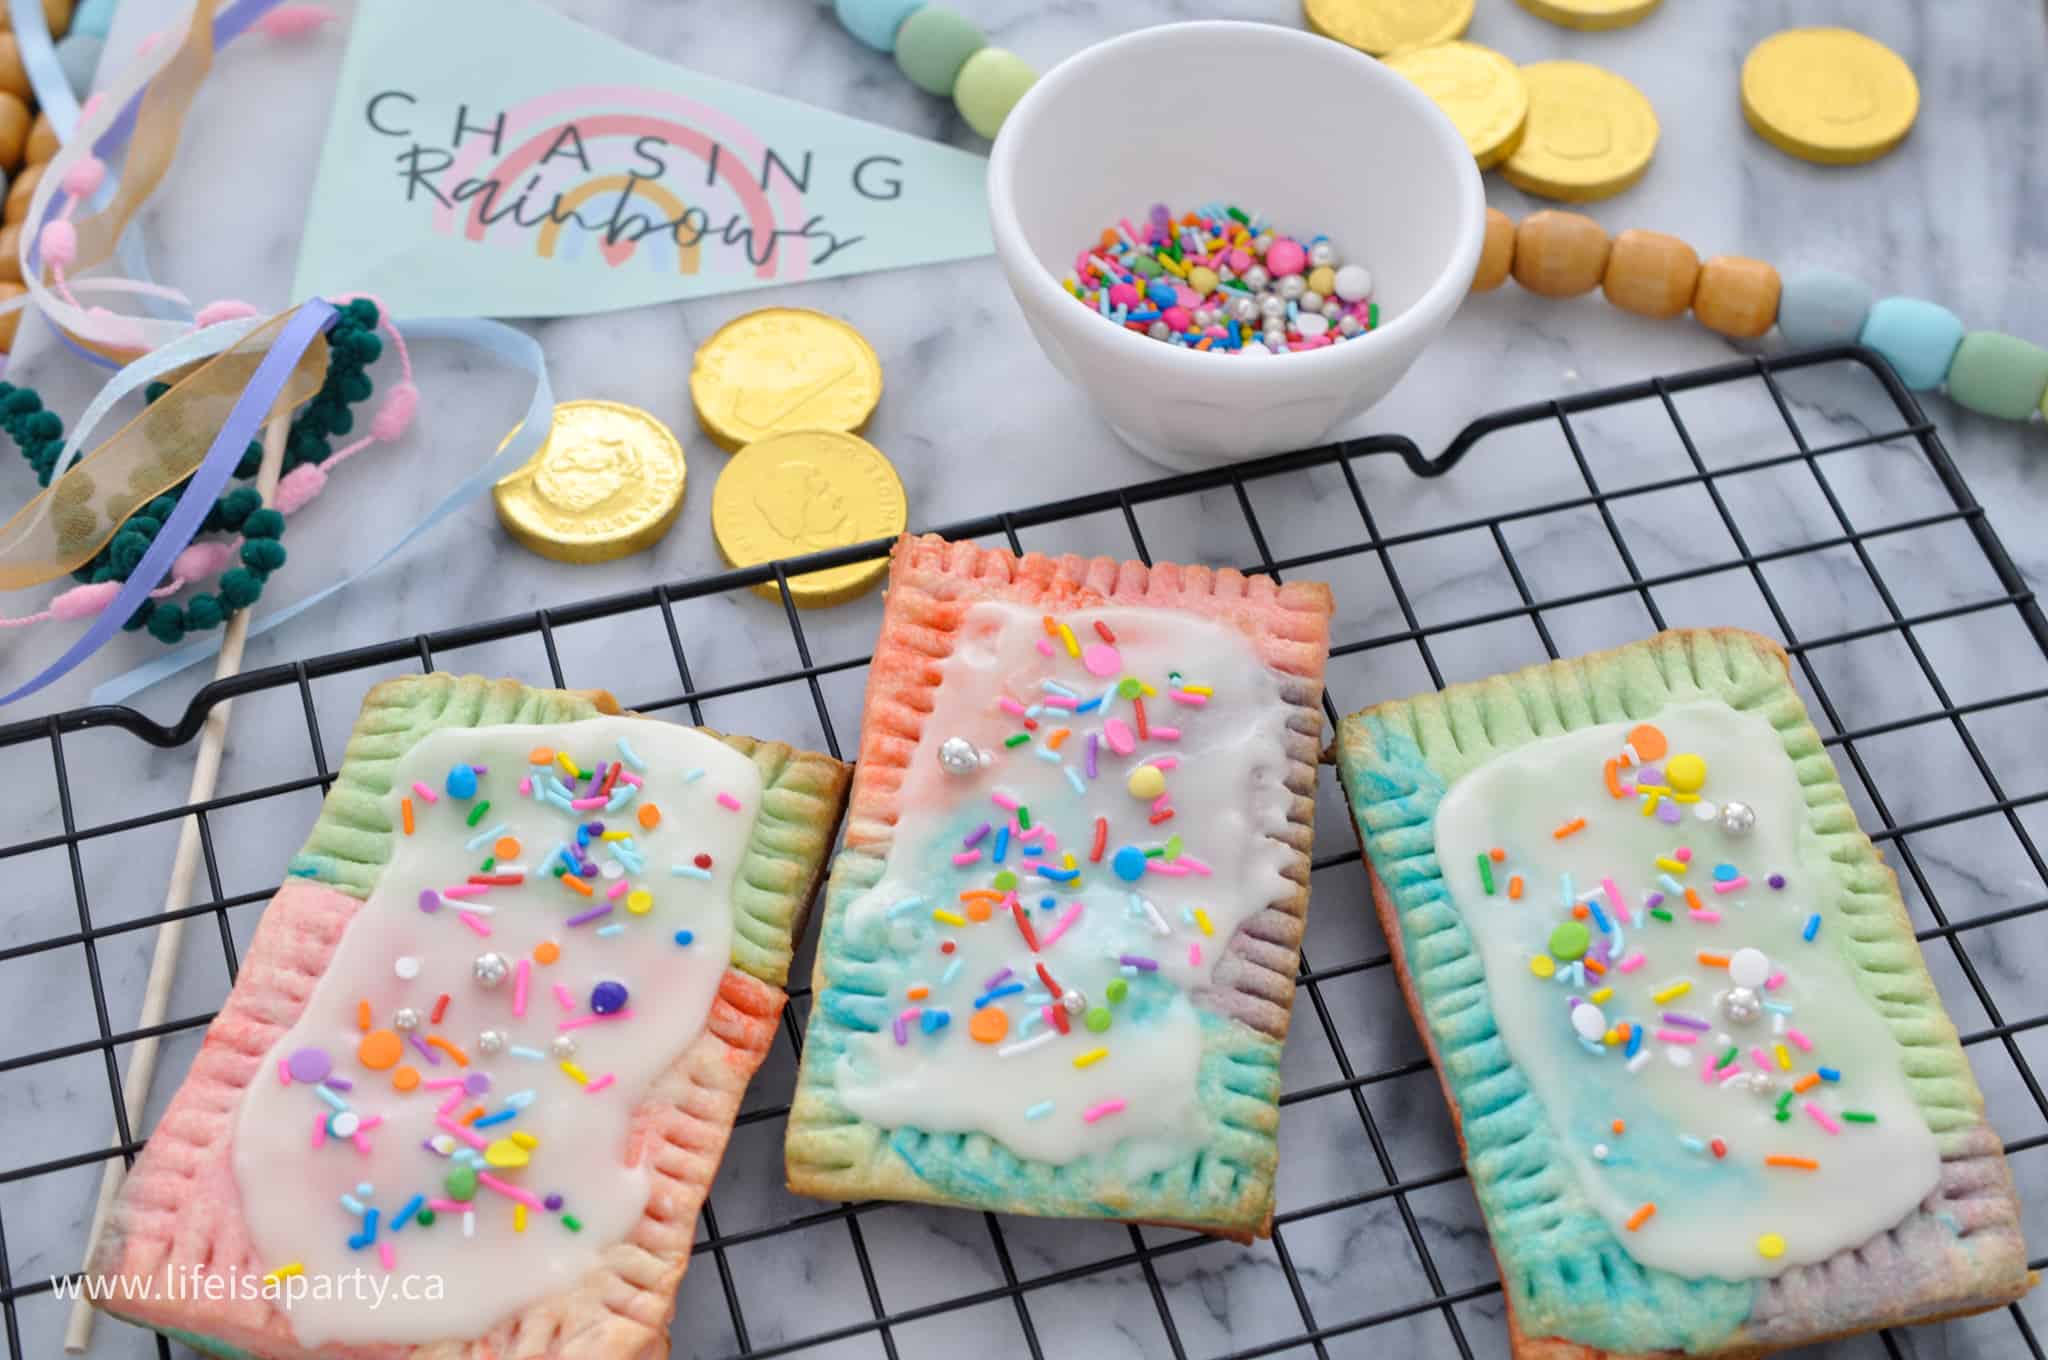
What's better than a regular grilled cheese? A rainbow grilled cheese! This rainbow grilled cheese recipe is easy and so fun and perfect for celebrating something special, or making an ordinary day into a celebration. We love rainbow food like our Rainbow Poptarts, or our Rainbow Rice Krispie Treats. We made ours for St. Patrick's Day, but a rainbow grilled cheese would also be great for a rainbow, unicorn, or art themed party, or for celebrating Pride.

Rainbow grilled cheese sandwich on a cutting board.

Why We Love This Recipe

  • We already loved the great taste of grilled cheese, adding rainbows turns good to great!
  • The rainbow cheese pull can not be beat.
  • This kid-friendly recipe is easy to make and a great one to do with children.
  • All you need is cheese, bread and food coloring so you probably have all the simple ingredients to make it at home right now.
  • It only takes around 15 minutes to make, so it's quick!

Kid Friendly

These are easy to make and a very kid friendly recipe. Children might need a little help with the actual grilling, and grating. But there's plenty of food coloring drops to add, stirring, piling of cheese, and buttering to keep kids busy with this easy rainbow grilled cheese recipe.

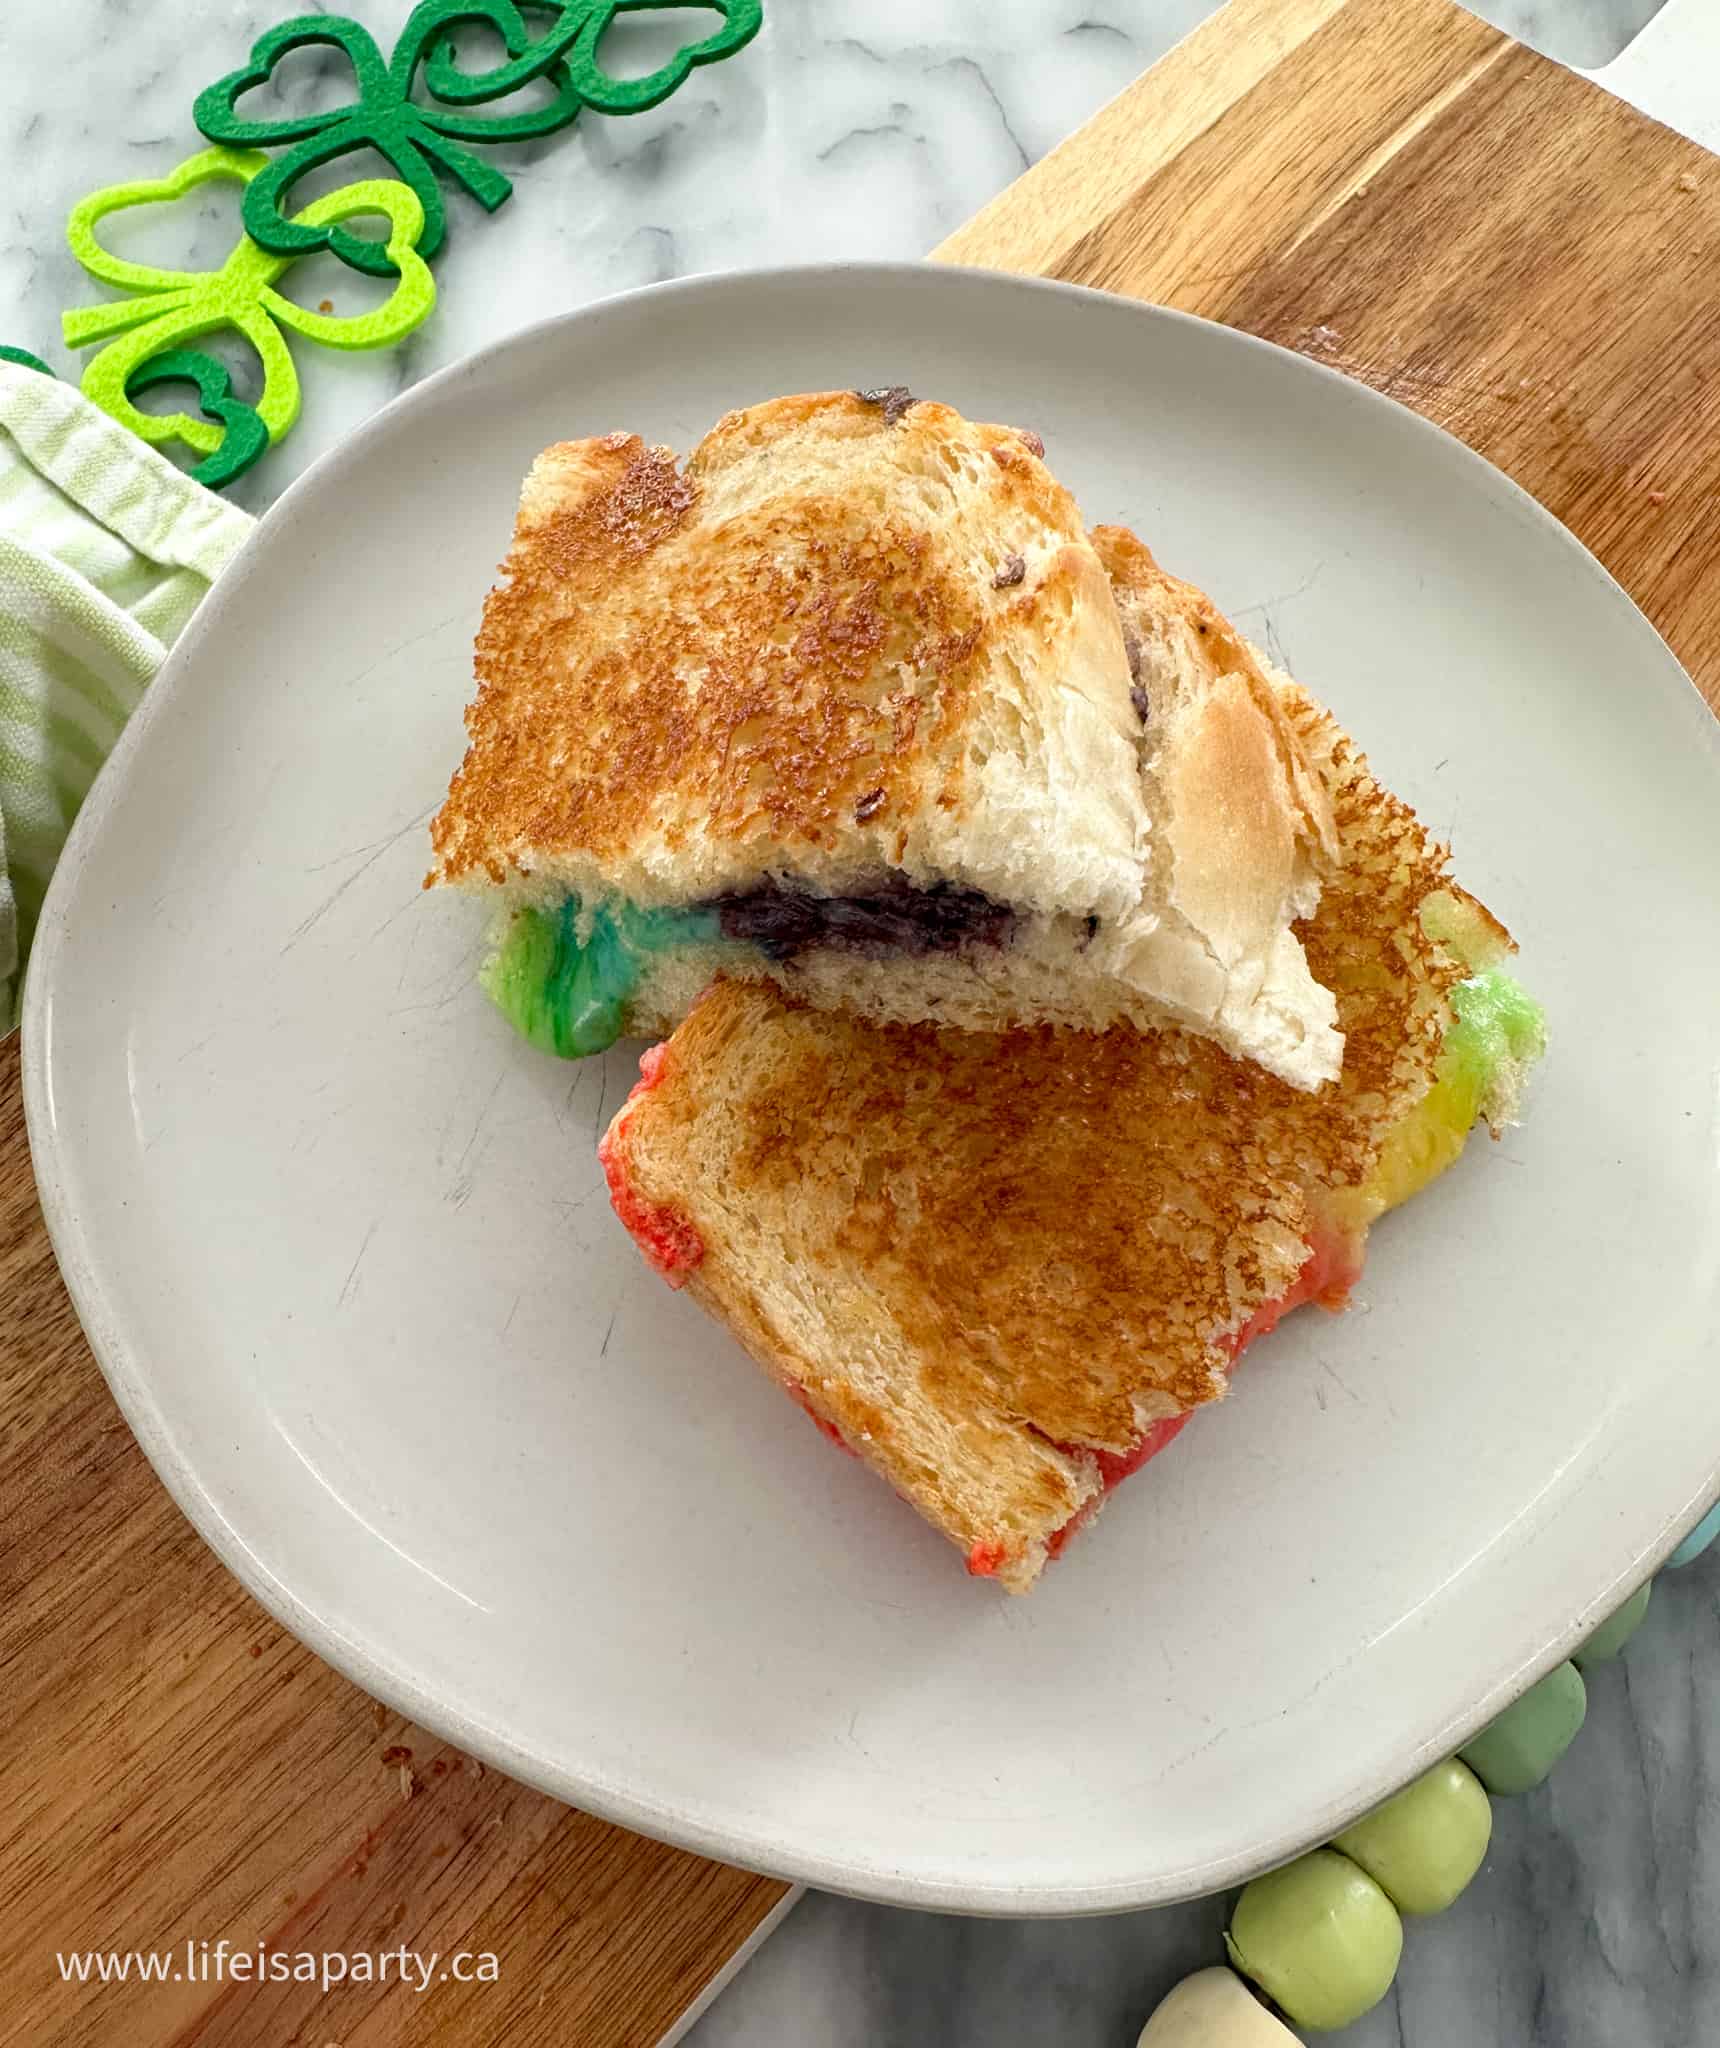
Half of a rainbow grilled cheese sandwich on a plate.

Ingredients:

  • Food Colouring -We created our colors of the rainbow using white cheese and food dye. If you're uncomfortable using food dyes, there are natural food colorings available at specialty shops. We used inexpensive liquid food coloring for ours. You could also use gel food coloring for this recipe. Use the primary colors and mix them for the secondary colors. If you want darker colors, just add more drops of food coloring.
  • Cheese -We mainly used mozzarella cheese. It's a great cheese for this because it's white so it takes the dye easily, it's inexpensive, and it has a mild taste, which tends to appeal to kids. It's also a great melter, and has a really good cheese pull factor, meaning you'll get those lovely stringy bits when you pull the cheese apart. We also added in a little Swiss cheese, for flavour, but also for an increased cheese pull factor.

Tip: The thick cheese layers really add to the rainbow factor. With a good amount of cheese, you'll be able to see each colour well, and get a great cheese pull when you pull your sliced sandwich apart.

  • Bread -A good crusty white bread works great for this sandwich. We sliced ours quite thickly, which worked great with a thick layer of cheese.  The thick cheese layers really add to the rainbow factor. With a good amount of cheese, you'll be able to see each colour well, and get a great cheese pull when you pull your sliced sandwich apart.

Variations

You could also try using white cheddar, havarti, or provolone, or any combination of these and the mozzarella and Swiss cheese for different flavors.

Regular sandwich bread is a great and easy option for the bread.

Gluten Free: If you want to make your rainbow grilled cheese gluten free, you can substitute gluten free bread for this recipe.

Instructions

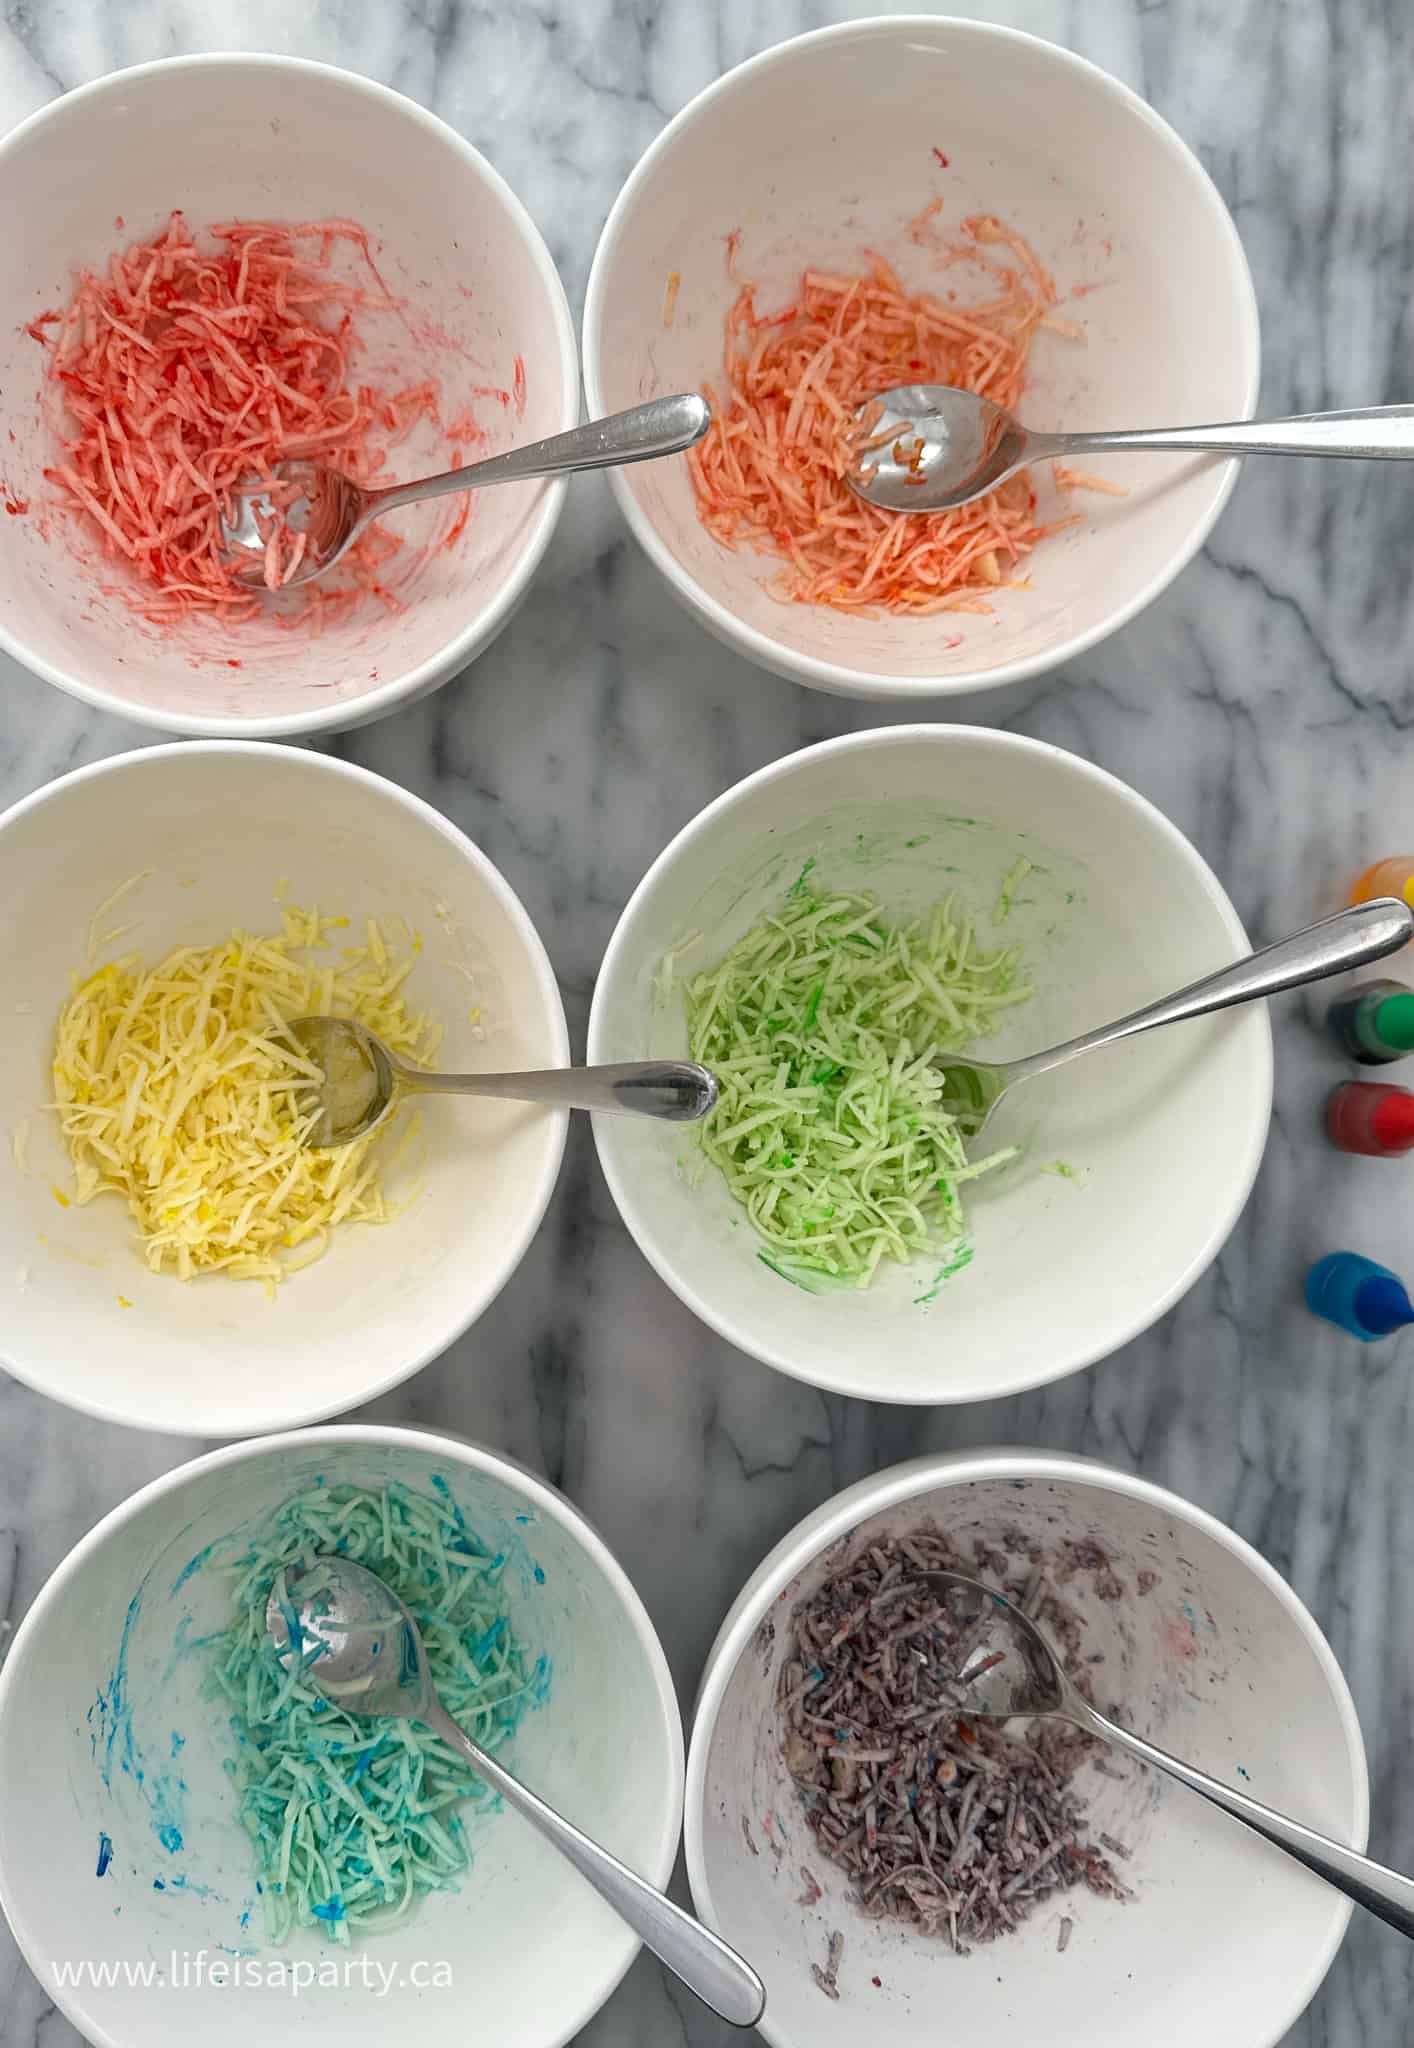
1. Begin by grating your cheese. Place shredded cheese into 6 different bowls. Use all mozzarella cheese, or mix in a few some Swiss cheese, or any other cheese you prefer.

2. Dye the cheese by adding around drops of food colouring to a bowl and stirring the bowl of cheese until it's fully combined and the cheese is coloured. To create the orange cheese use drops of red, and yellow food colouring. To make the purple cheese, use red and blue food colouring.

Six white bowls with grated mozerella and Swiss cheese in them, eached dyed a different color of the rainbow.

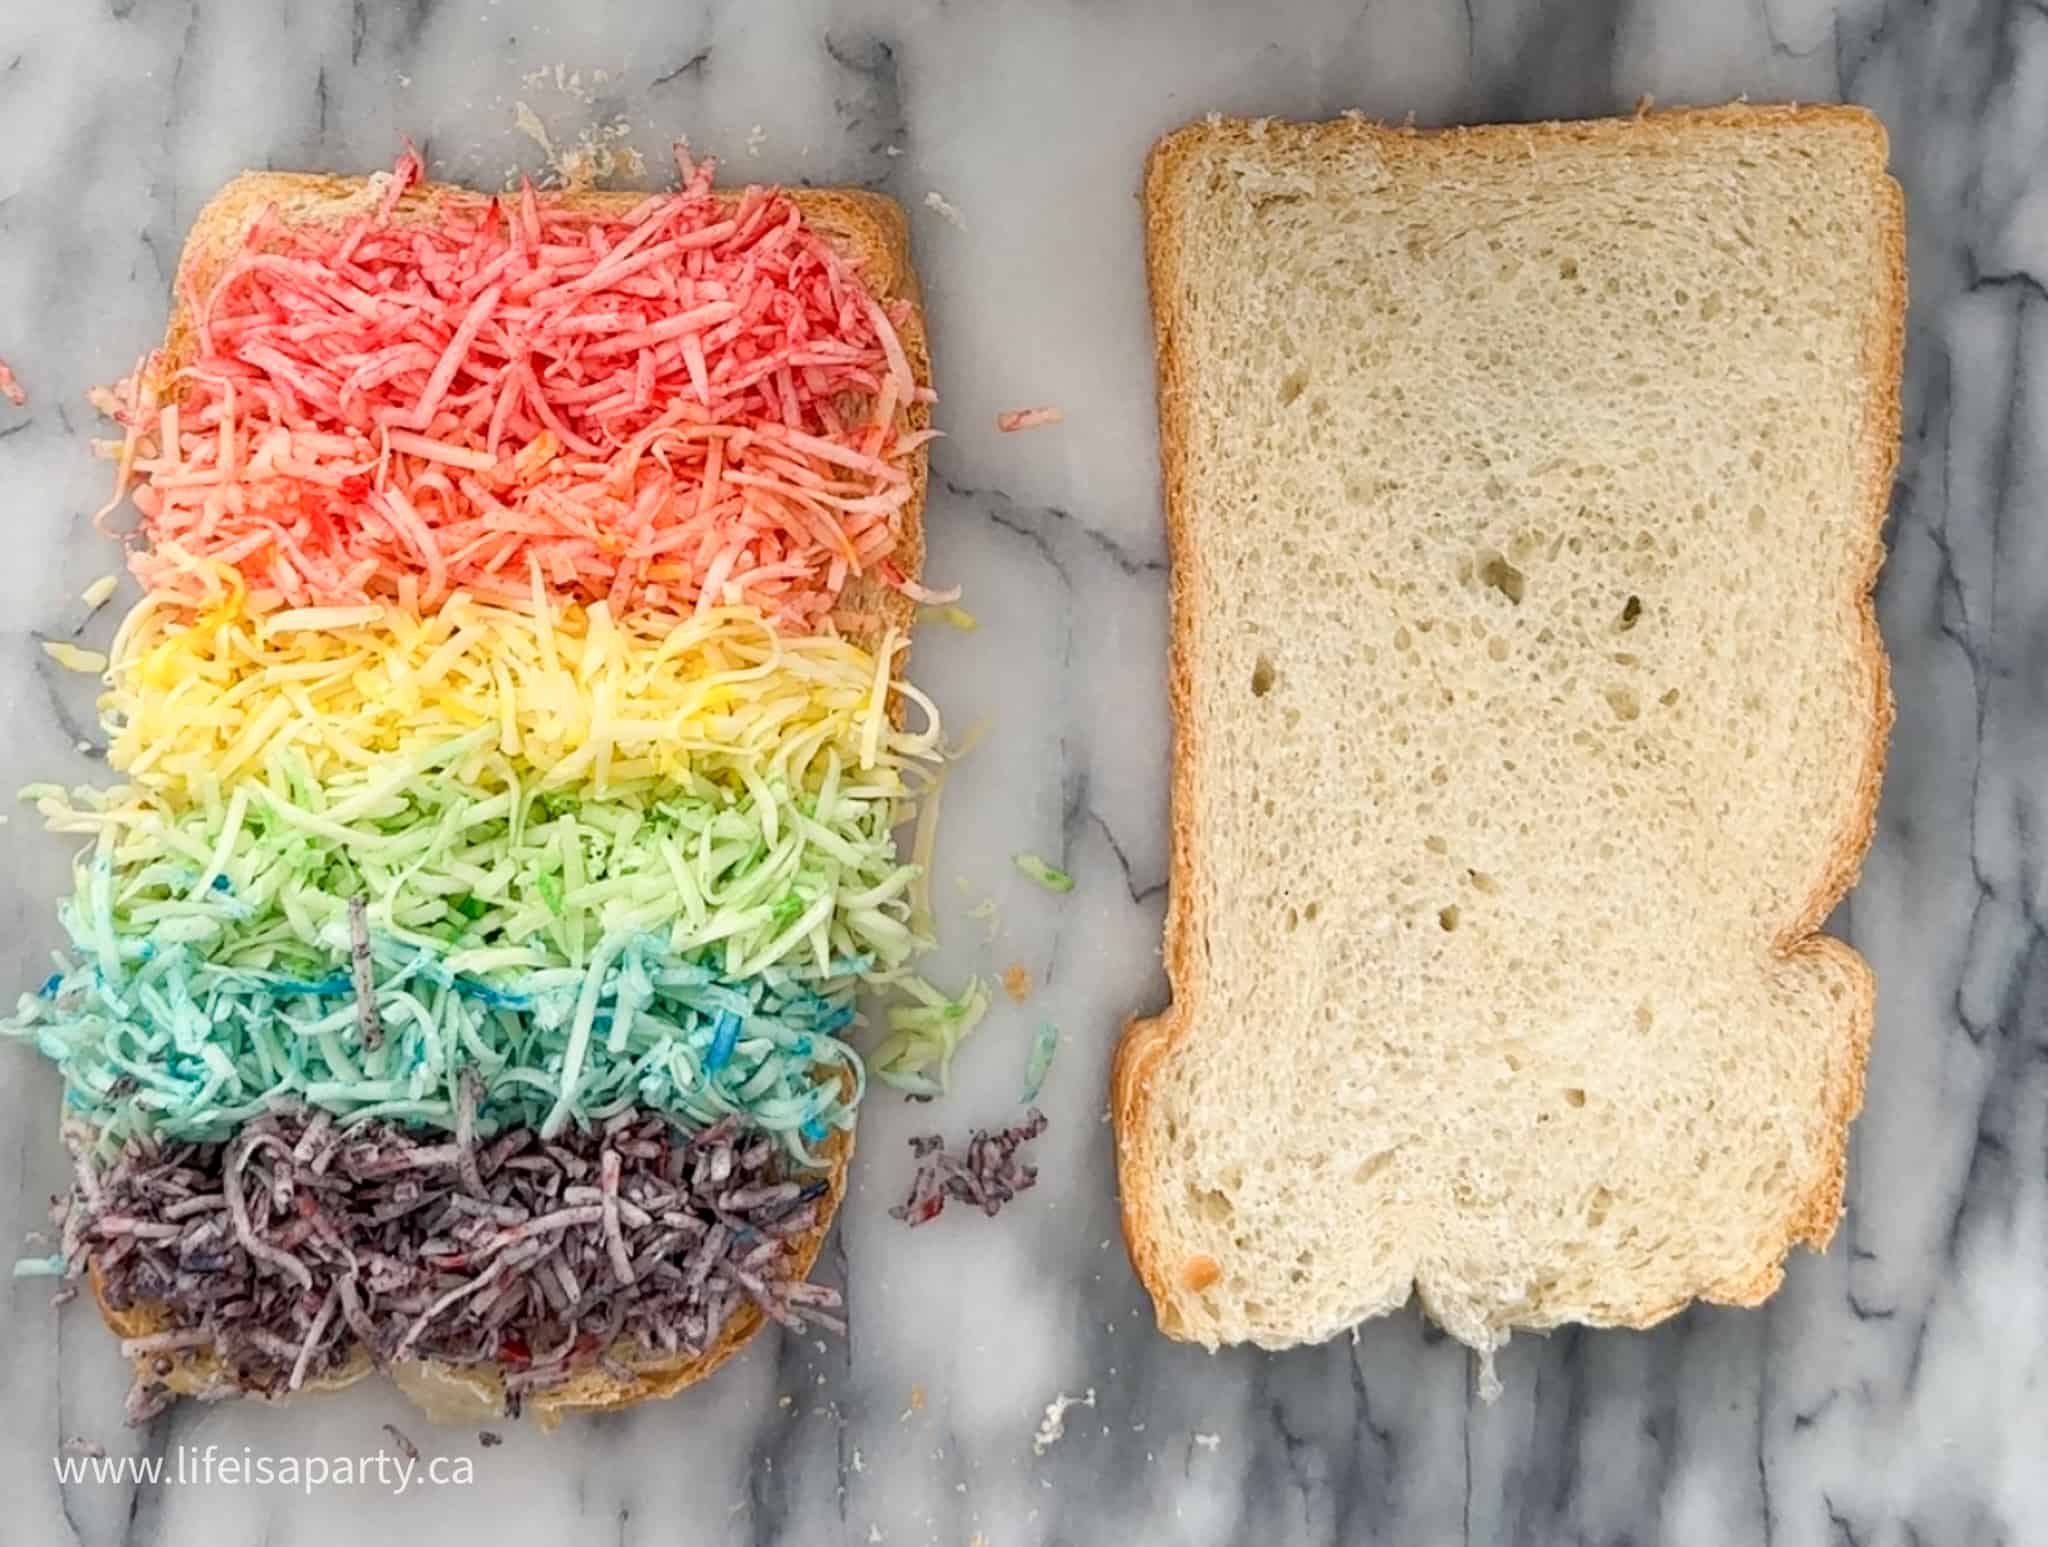
3. Next, butter the outside of each of the bread slices. Lay out the bottom two pieces of bread, butter side down, and arrange the cheese on top of the unbuttered side. Create six equal lines of coloured cheese in a rainbow pattern, in rainbow order: red, orange, yellow, green, blue, and purple. Divide the cheese evenly between the two cheese sandwiches. Then place the top slice of bread on each of the sandwiches, buttered sides out.

Making a rainbow grilled cheese sandwich with one slice of bread covered in rows of rainbow cheese, next to a plain slice of bread.

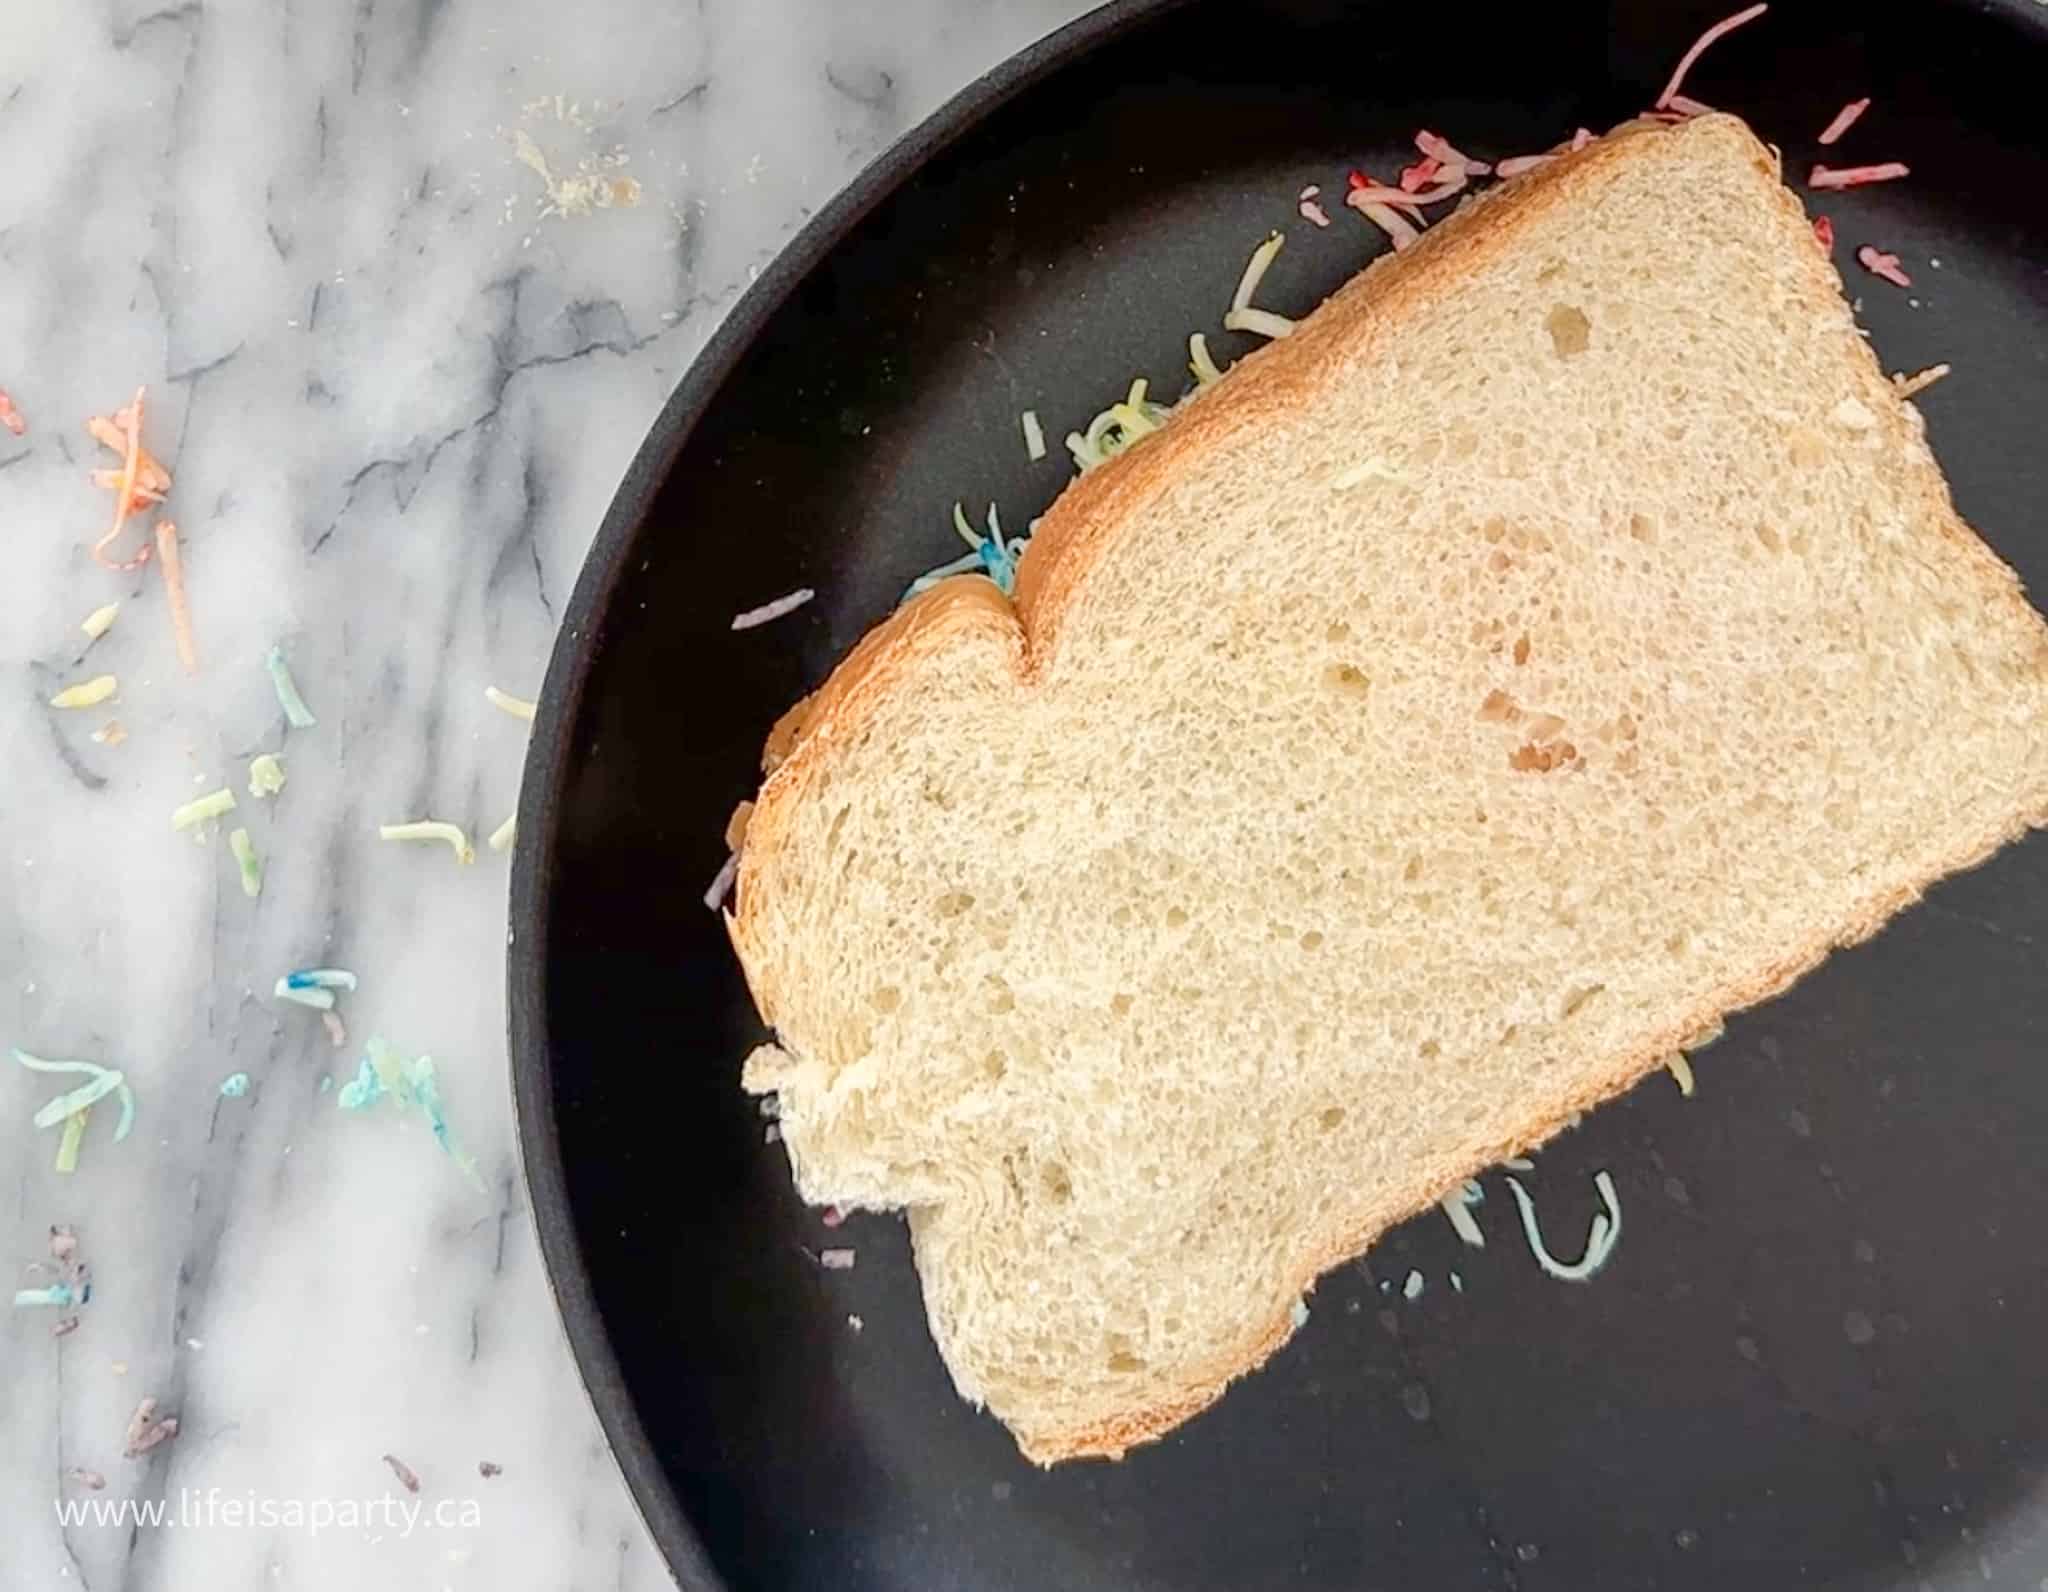
4. Place the sandwiches in a frying pan, and cook over medium heat. Flip the sandwiches when the first side is golden brown, and cook the other side to golden bread as well. You may want to put a lid on the frying pan, as an easy way to help the cheese melt well. 

An uncooked rainbow grilled cheese sandwich in a frying pan.

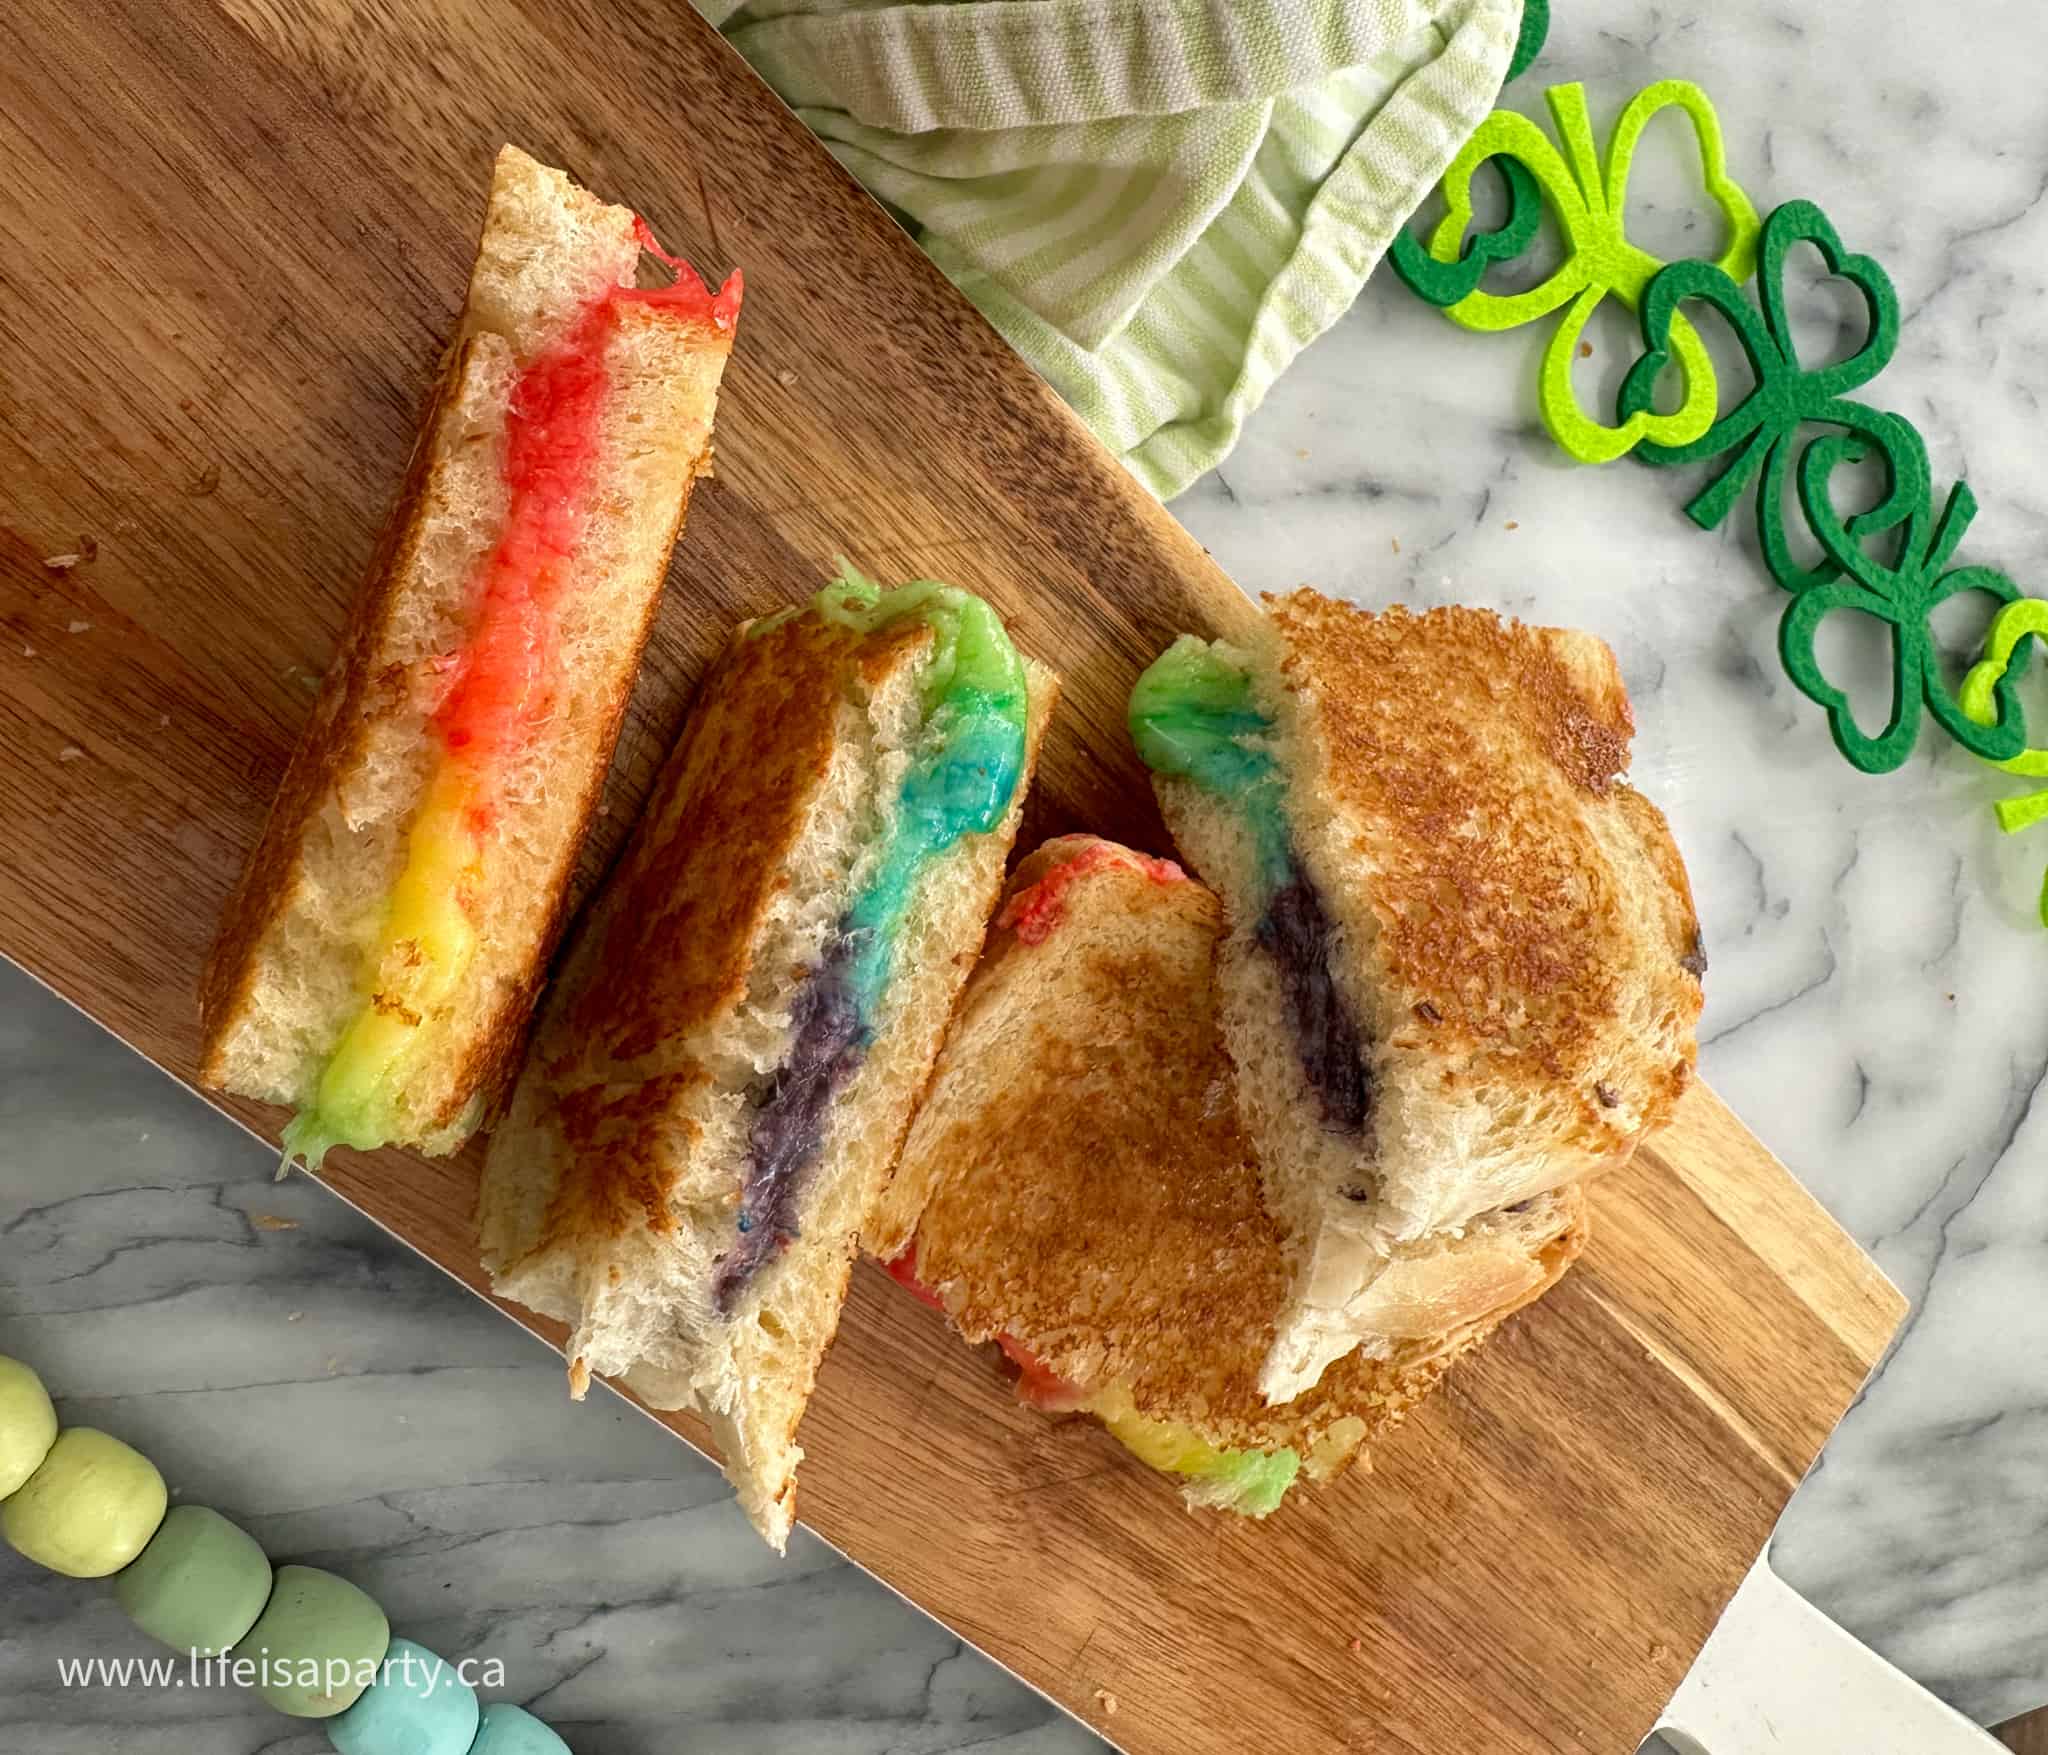
5. To serve your sandwich, make sure to cut the sandwich in half, in the opposite direction that your cheese is running so that when you pull it apart you have the rainbow effect with the melted cheese.

Storage

Your rainbow grilled cheese is best eaten as soon as it's made. If you making your rainbow grilled cheese for a party and want to dye your cheese ahead of time you can make it the day before and store it in a sealed container in the refrigerator, then cook the sandwiches right before serving.

A rainbow grilled cheese sandwich sliced in four on a wood cutting board.

Tip: Use a lid on your frying pan to help the cheese melt.  This traps the warm air, and with a thick layer of cheese like we used on this sandwich, really helps to make sure all the cheese is nice and melted.

Frequently Asked Questions

Can you put food colouring in cheese?

Yes. Use liquid or gel food colouring with shredded cheese and stir to combine.

What food colouring is best for a rainbow grilled cheese?

We used regular liquid food colouring from the grocery store. You can also use a small amount of gel food colouring. Also look for natural food colouring dyes at the health food store.

How do you get the best cheese pull?

Use great melting cheeses like mozzarella and Swiss cheese. Make sure to add a generous amount of cheese to the sandwich. Ensure the cheese is fully melted by adding a lid to the pan as you grill it to hold in the heat.
  • How to make rainbow pop tarts.
    Rainbow Pop Tart Recipe
  • Homemade Rainbow Rice Krispies recipe.
    Rainbow Rice Krispies
  • How to dye baby's breath and make rainbow baby's breath.
    How To Make Rainbow Baby's Breath
  • Rainbow art party ideas.
    The Rainbow Art Party

If you tried this Rainbow Grilled Cheese Recipe or any other recipe on my blog please leave a star rating and let me know how it went in the comments below. Thanks for visiting today!

A rainbow grilled cheese sandwich on a wood cutting board.

Recipe

A rainbow grilled cheese sandwich cut in half on a cutting board.

Rainbow Grilled Cheese Recipe

Video

Grilled cheese filled with rainbow coloured strips of cheese.
5 from 1 vote
Print Pin Rate
Course: Sandwich
Cuisine: American
Prep Time: 10 minutes minutes
Cook Time: 5 minutes minutes
Total Time: 15 minutes minutes
Servings: 2 Sandwiches
Calories: 1026kcal
Author: Dannyelle Nicolle-Ramjist

Ingredients

  • 4 slices bread
  • 2 tablespoon butter room temperature
  • 3 cups total of grated mozzarella cheese or a combination of mozzarella and swiss cheese
  • 5 drops food colouring -red, yellow, green, blue

Instructions

  • Begin by grating your cheese. Place ½ cup of shredded cheese into six different bowls. Use all mozzarella cheese, or mix in some Swiss cheese, or any other cheese you prefer, for a total of ½ cup of cheese in each of the small bowls.
  • Dye the cheese by adding around 10 drops of food colouring to each bowl and stirring the cheese until it's fully combined. To create the orange cheese use about 5 drops of red, and 5 drops of yellow food colouring. To make the purple cheese, use about 5 drops of red and 5 drops of blue food colouring.
  • Next, butter the outside of each of the slices of bread.
  • Lay out the bottom two pieces of bread, butter side down, and arrange the cheese on top of the unbuttered side. Crete six equal lines of colored cheese in a rainbow pattern, in rainbow order: red, orange, yellow, green, blue, and purple. Divide the cheese evenly between the two cheese sandwiches. Then place the top slice of bread on each of the sandwiches, buttered sides out.
  • Place the sandwiches in a frying pan, and cook over medium heat. Flip the sandwiches when the first side is golden brown, and cook the other side to golden bread as well. You may want to put a lid on the frying pan, as an easy way to help the cheese melt well.
  • To serve your sandwich, make sure to cut the sandwich in half, in the opposite direction that your cheese is running so that when you pull it apart you have the rainbow effect with the melted cheese.

Notes

Make your cheese even darker by adding a few more drops of food coloring if you wish.
Place a lid on top of the pan to help the cheese melt while you're cooking it.
Want to make these for a party or get together? Prepare your cheese ahead of time, wrap the bowls with plastic wrap, and store in the refrigerator until you're ready to prepare and cook the sandwiches.

Nutrition

Serving: 1g | Calories: 1026kcal | Carbohydrates: 35g | Protein: 61g | Fat: 71g | Saturated Fat: 42g | Polyunsaturated Fat: 23g | Trans Fat: 1g | Cholesterol: 225mg | Sodium: 1639mg | Fiber: 2g | Sugar: 5g
Tried this Recipe? Tag me Today!Mention @LifeisaParty or tag #lifeisaparty!

With this easy rainbow grilled cheese recipe, life really is a party!

How To Make Rainbow Baby's Breath

Apr 1, 2023 · 2 Comments

How to dye baby's breath and make rainbow baby's breath.

How to make rainbow baby's breath using fresh baby's breath and food coloring to dye the flowers and create your own rainbow!

How to dye baby's breath and make rainbow baby's breath.
[feast_advanced_jump_to]

Why You'll Love This Project

  • The rainbow baby's breath is so beautiful!
  • It's easy to make.
  • You only need regular food coloring and baby's breath for this project.

Video

I wanted to use some rainbow baby's breath on a special Easter table as a centerpiece, and decided to try and make my own. I used simple food coloring and fresh flowers and got great results.

You might also like How to Make Your Fake Plants Look Real, DIY Lightbulb Flower Vases, DIY Mason Jar Oil Lamps, or Eggshell Planters.

DIY rainbow baby's breath as the centre piece down the middle of a table.

Different Methods of Dying Baby's Breath

There are a few popular methods for creating rainbow baby's breath. If you purchase it from a local florist, or somewhere like trader joe, it is usually created with a special florists spray paint. The florist spray paint is expensive and hard to find.

Some DIY's like to make it using regular spray paint. This works best for dried baby's breath, but you can do it on fresh as well. This method works well, and you can easily control the exact shade of the color by choosing spray paint in bright or pastel colors, whichever you prefer. The draw back to this method, is again that it's expensive to purchase all six colors for a rainbow.

We decided to try the food coloring method.

For this method you cut fresh baby's breath, and put the stems in food coloring mixed with some water. The flower stems drink the water and the color goes up the stem and into the white flowers to make them change color.

Materials

For this project you need:

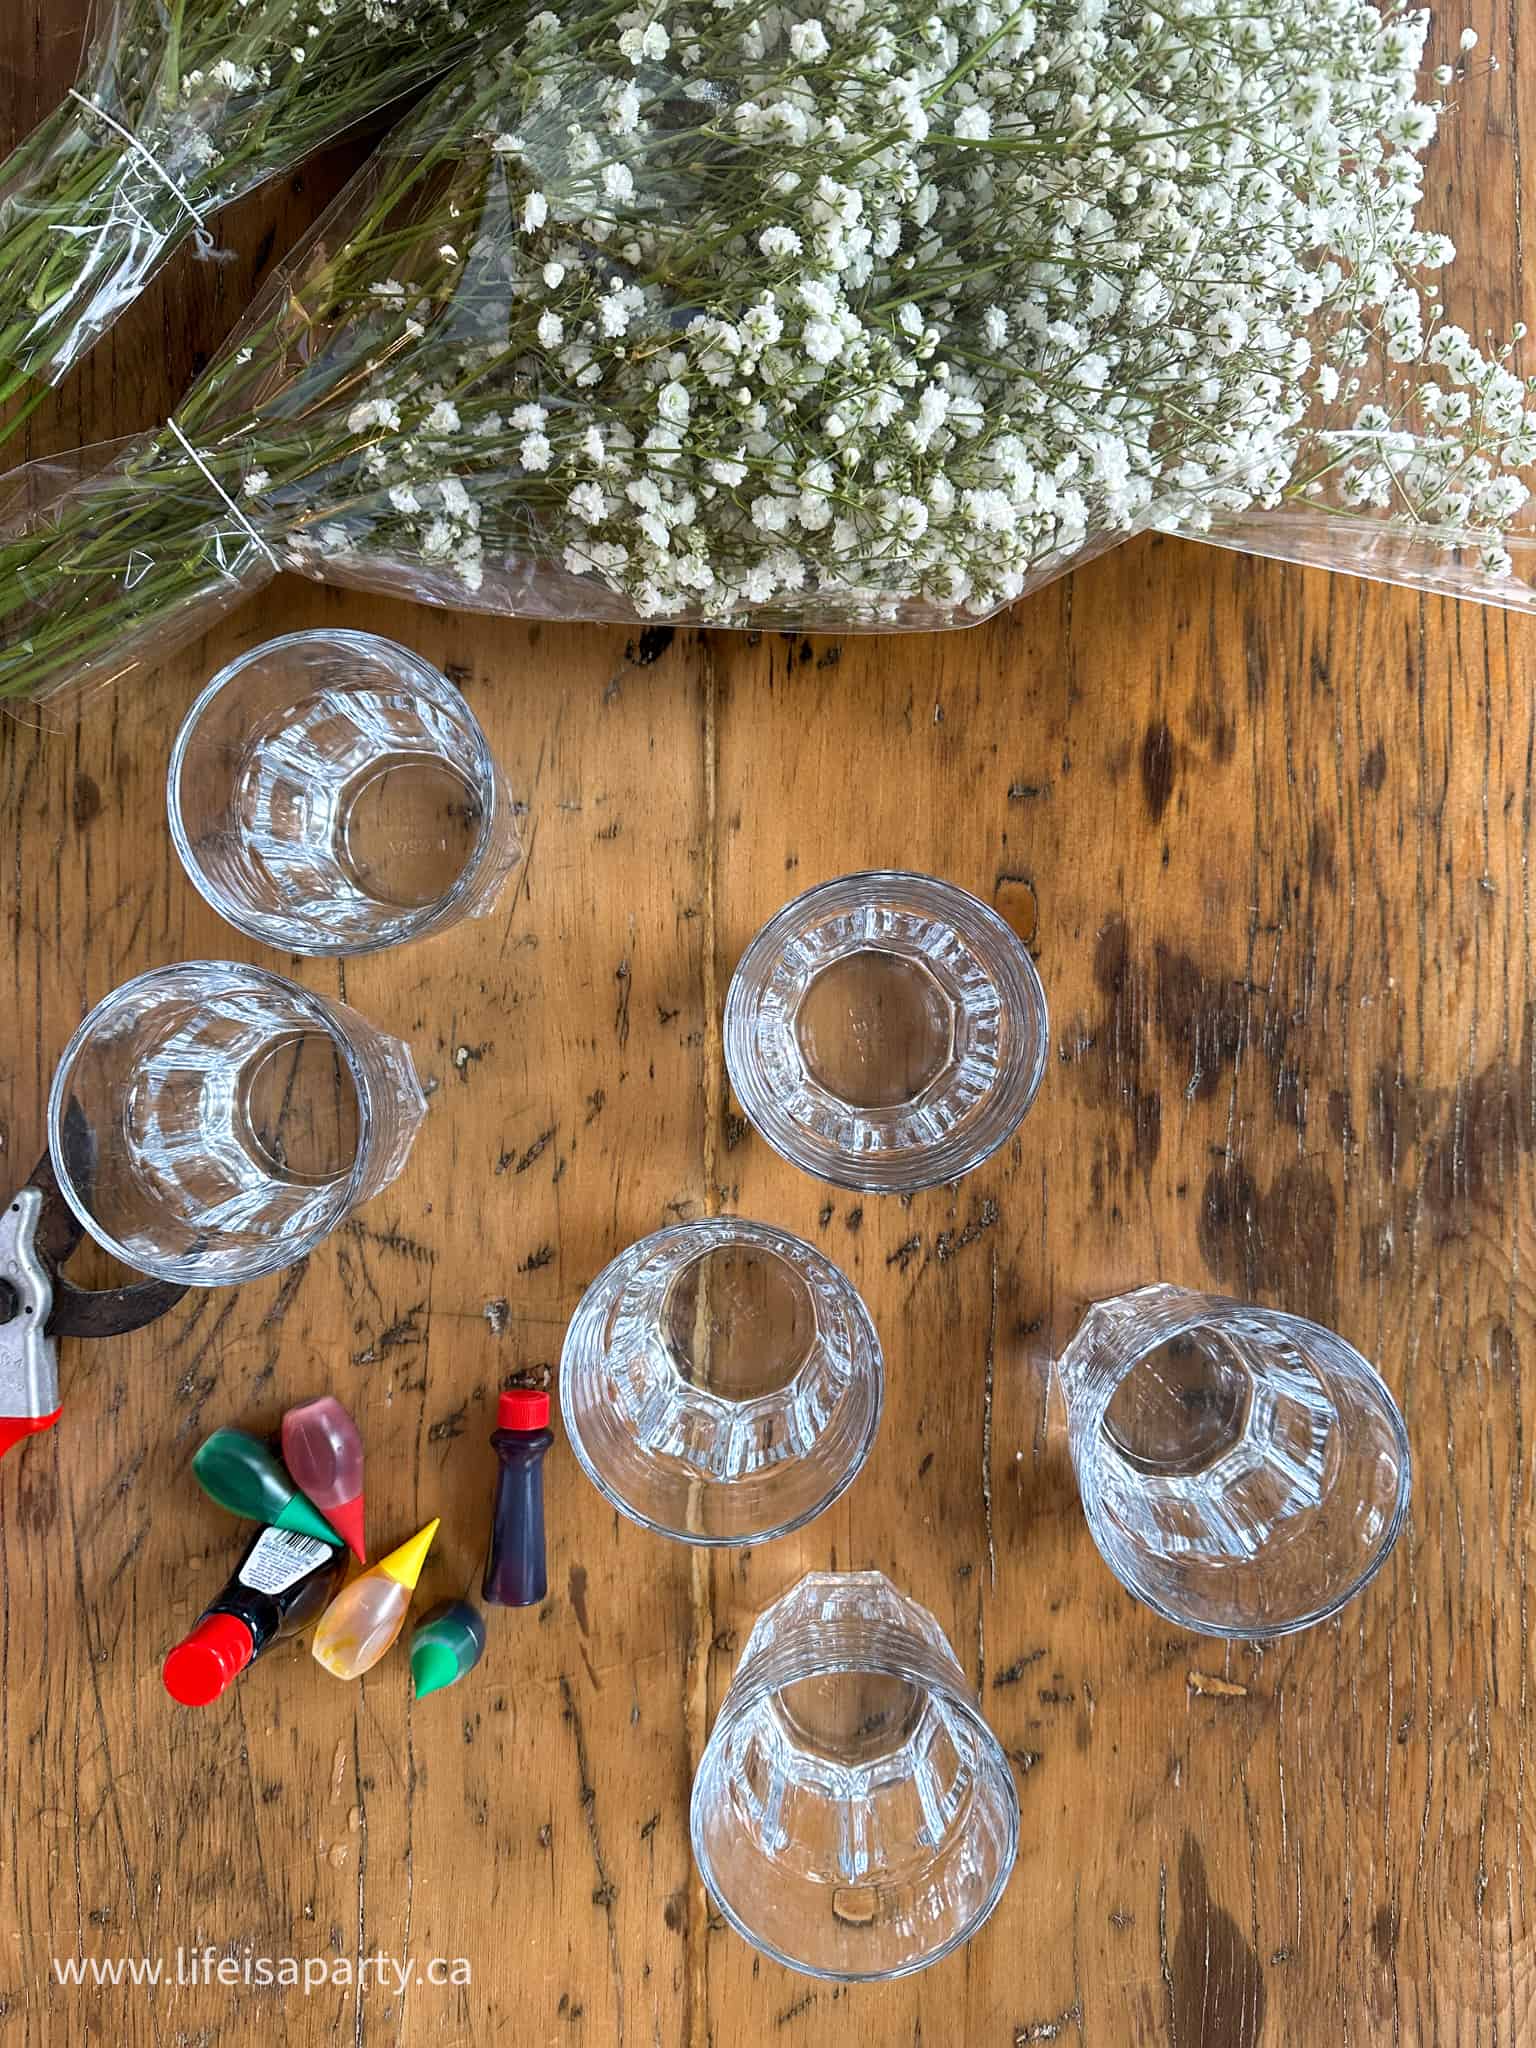
  • Fresh baby's breath
  • Food coloring
  • Water
  • Six Glasses
Fresh aby's breath, food coloring, and glasses ready to dye the baby's breath.

How To Dye Baby's Breath

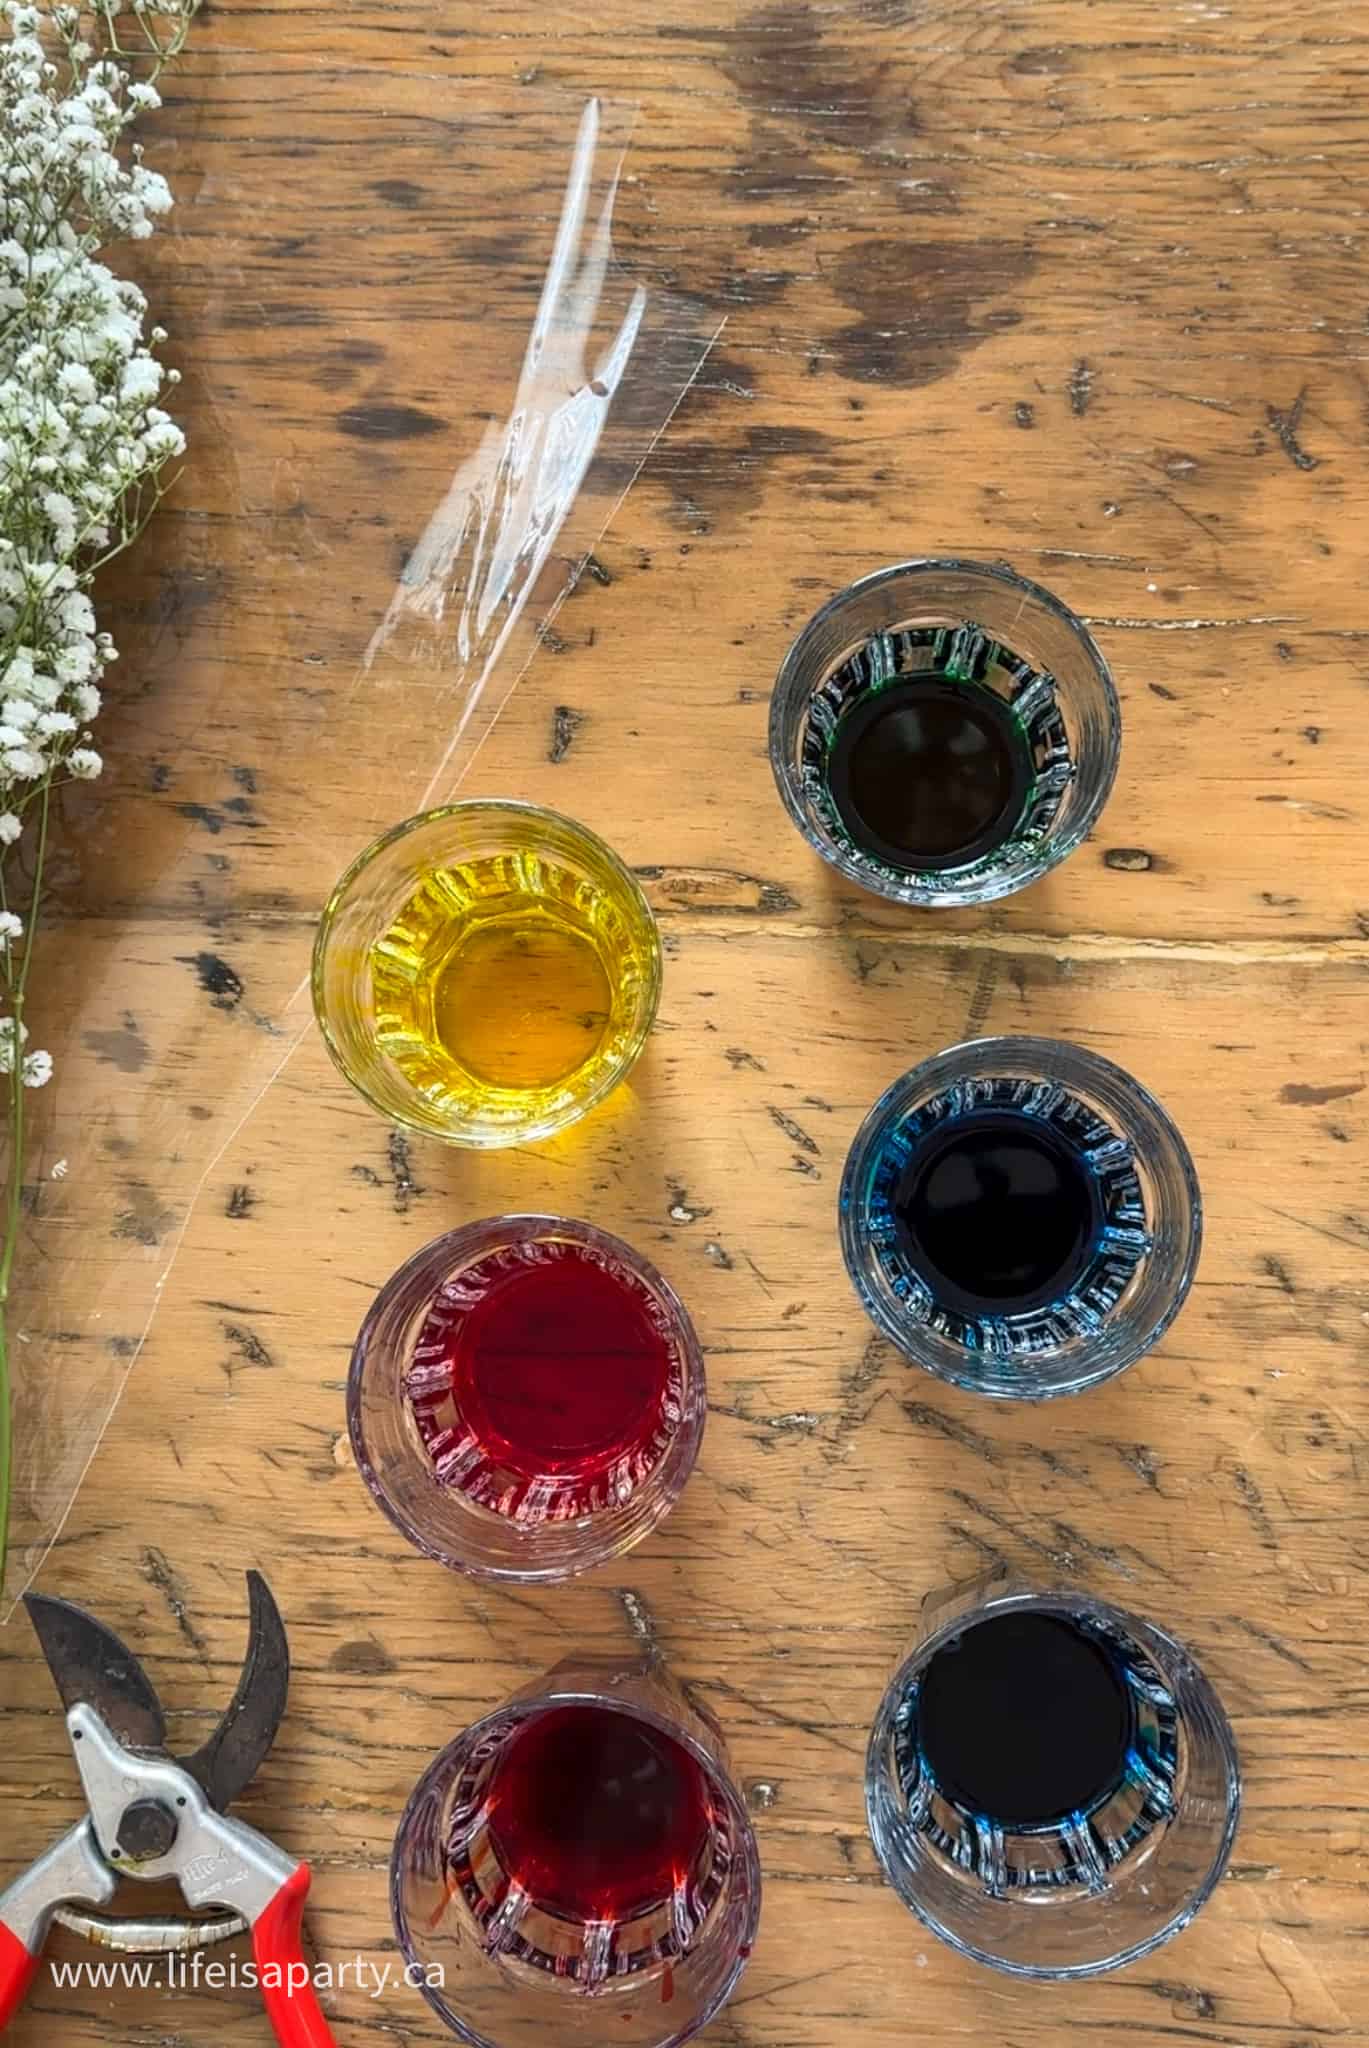
1. Begin by mixing about ½ cup of water in each glass. Then add about 1 teaspoon of food coloring in each of the six rainbow colors to create a different color in each glass. To create orange, mix half yellow and half red. To create purple mix half red and half blue.

Making rainbow baby's breath with food coloring in water.

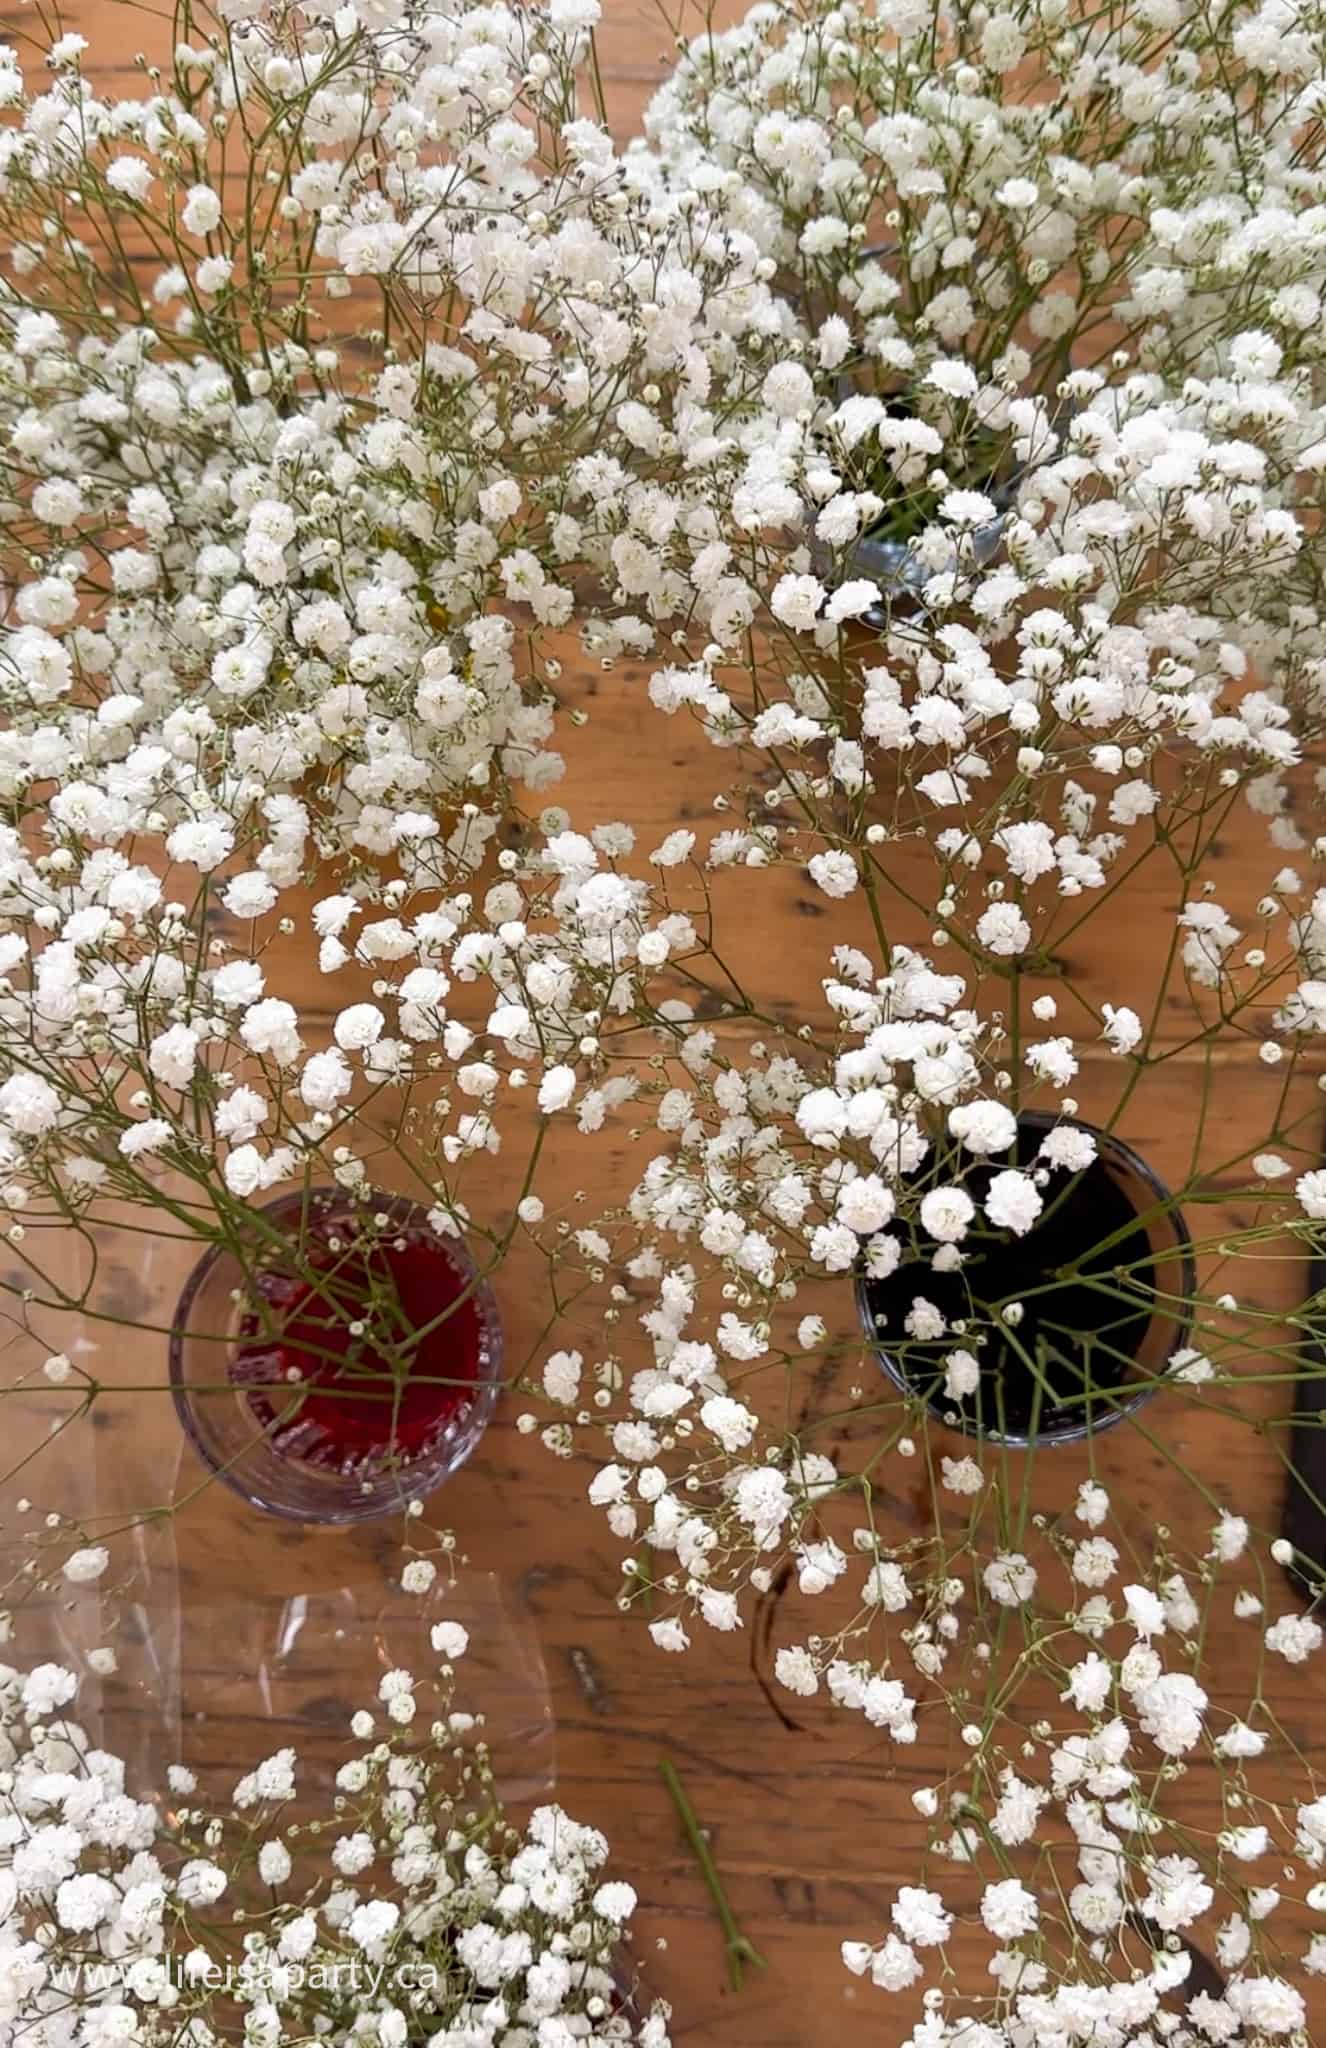
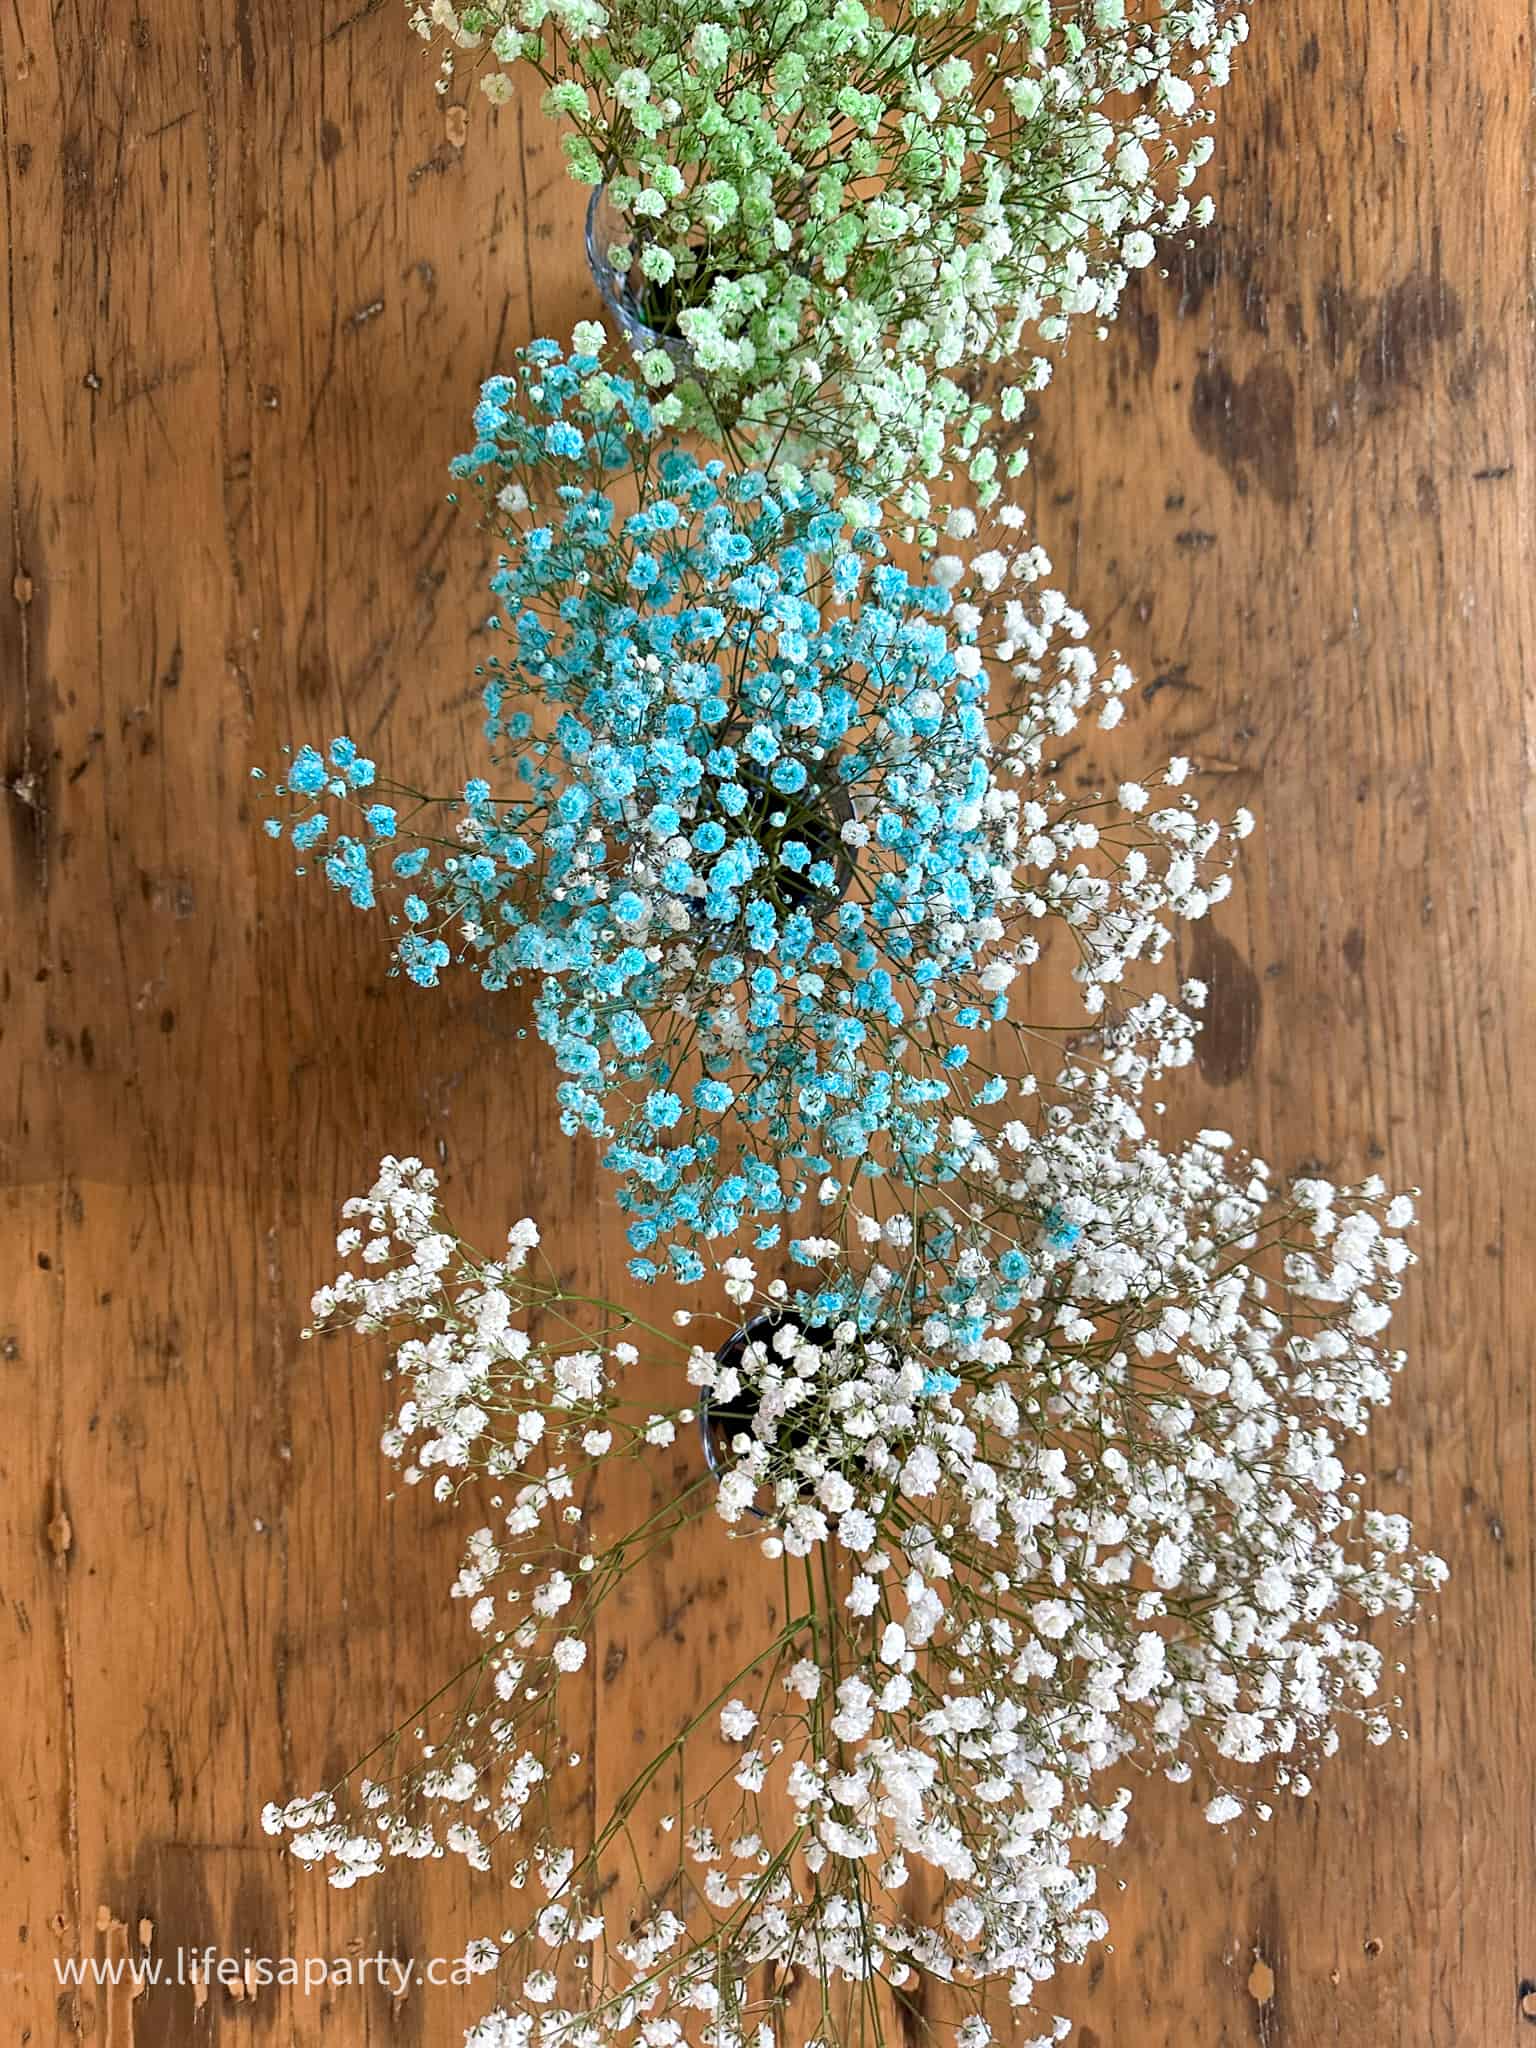
2. Give each stem of a baby's breath a fresh cut and place in the colored water.

Making rainbow baby's breath with food coloring in water.

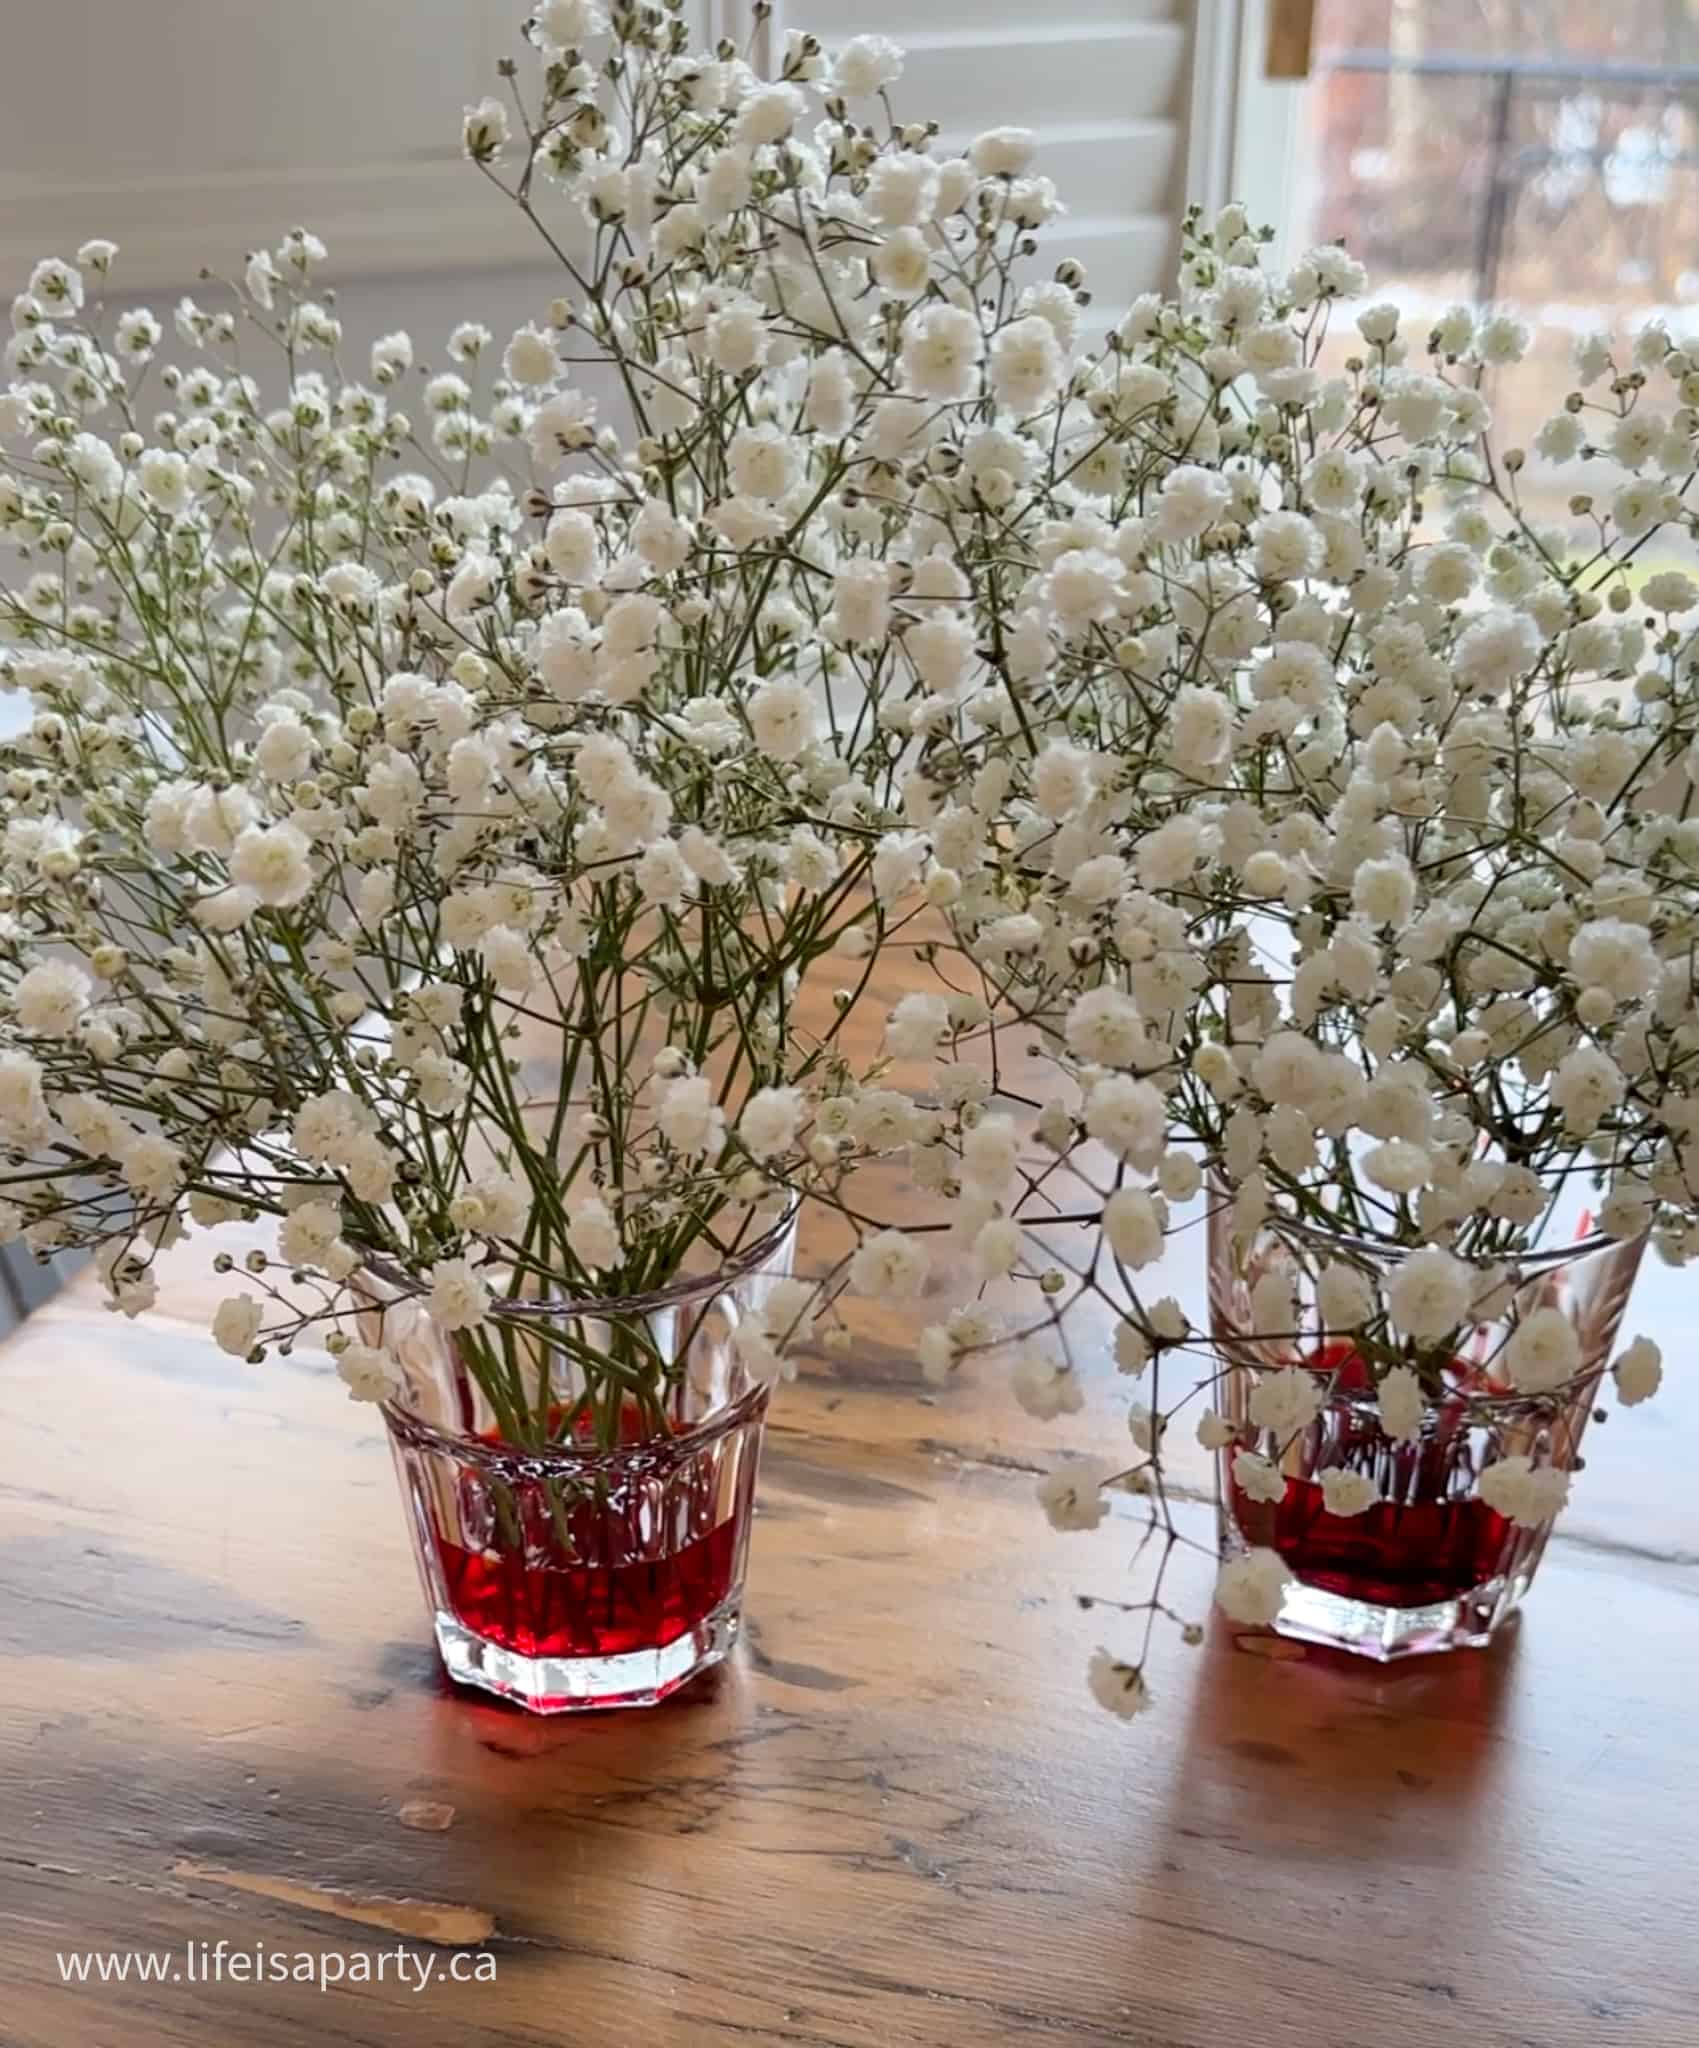
3. If some stems don't absorb the color after a few hours or overnight, recut the stem and place it in the colored water again. There's no specific time to leave the flowers. Some of the flowers changed color within a few hours, some need to stay in the colored water overnight.

diy rainbow baby's breath

4. Once the desired color intensity is reached, remove the stem from the colored water and place it in regular clear water, and arrange as desired, or dry them to use as dried flowers. The pigmentation of the flowers will vary depending on how much food coloring you use, and how long you let the flowers stay in the colored water. You can also adjust the color palette by using different shades of dye.

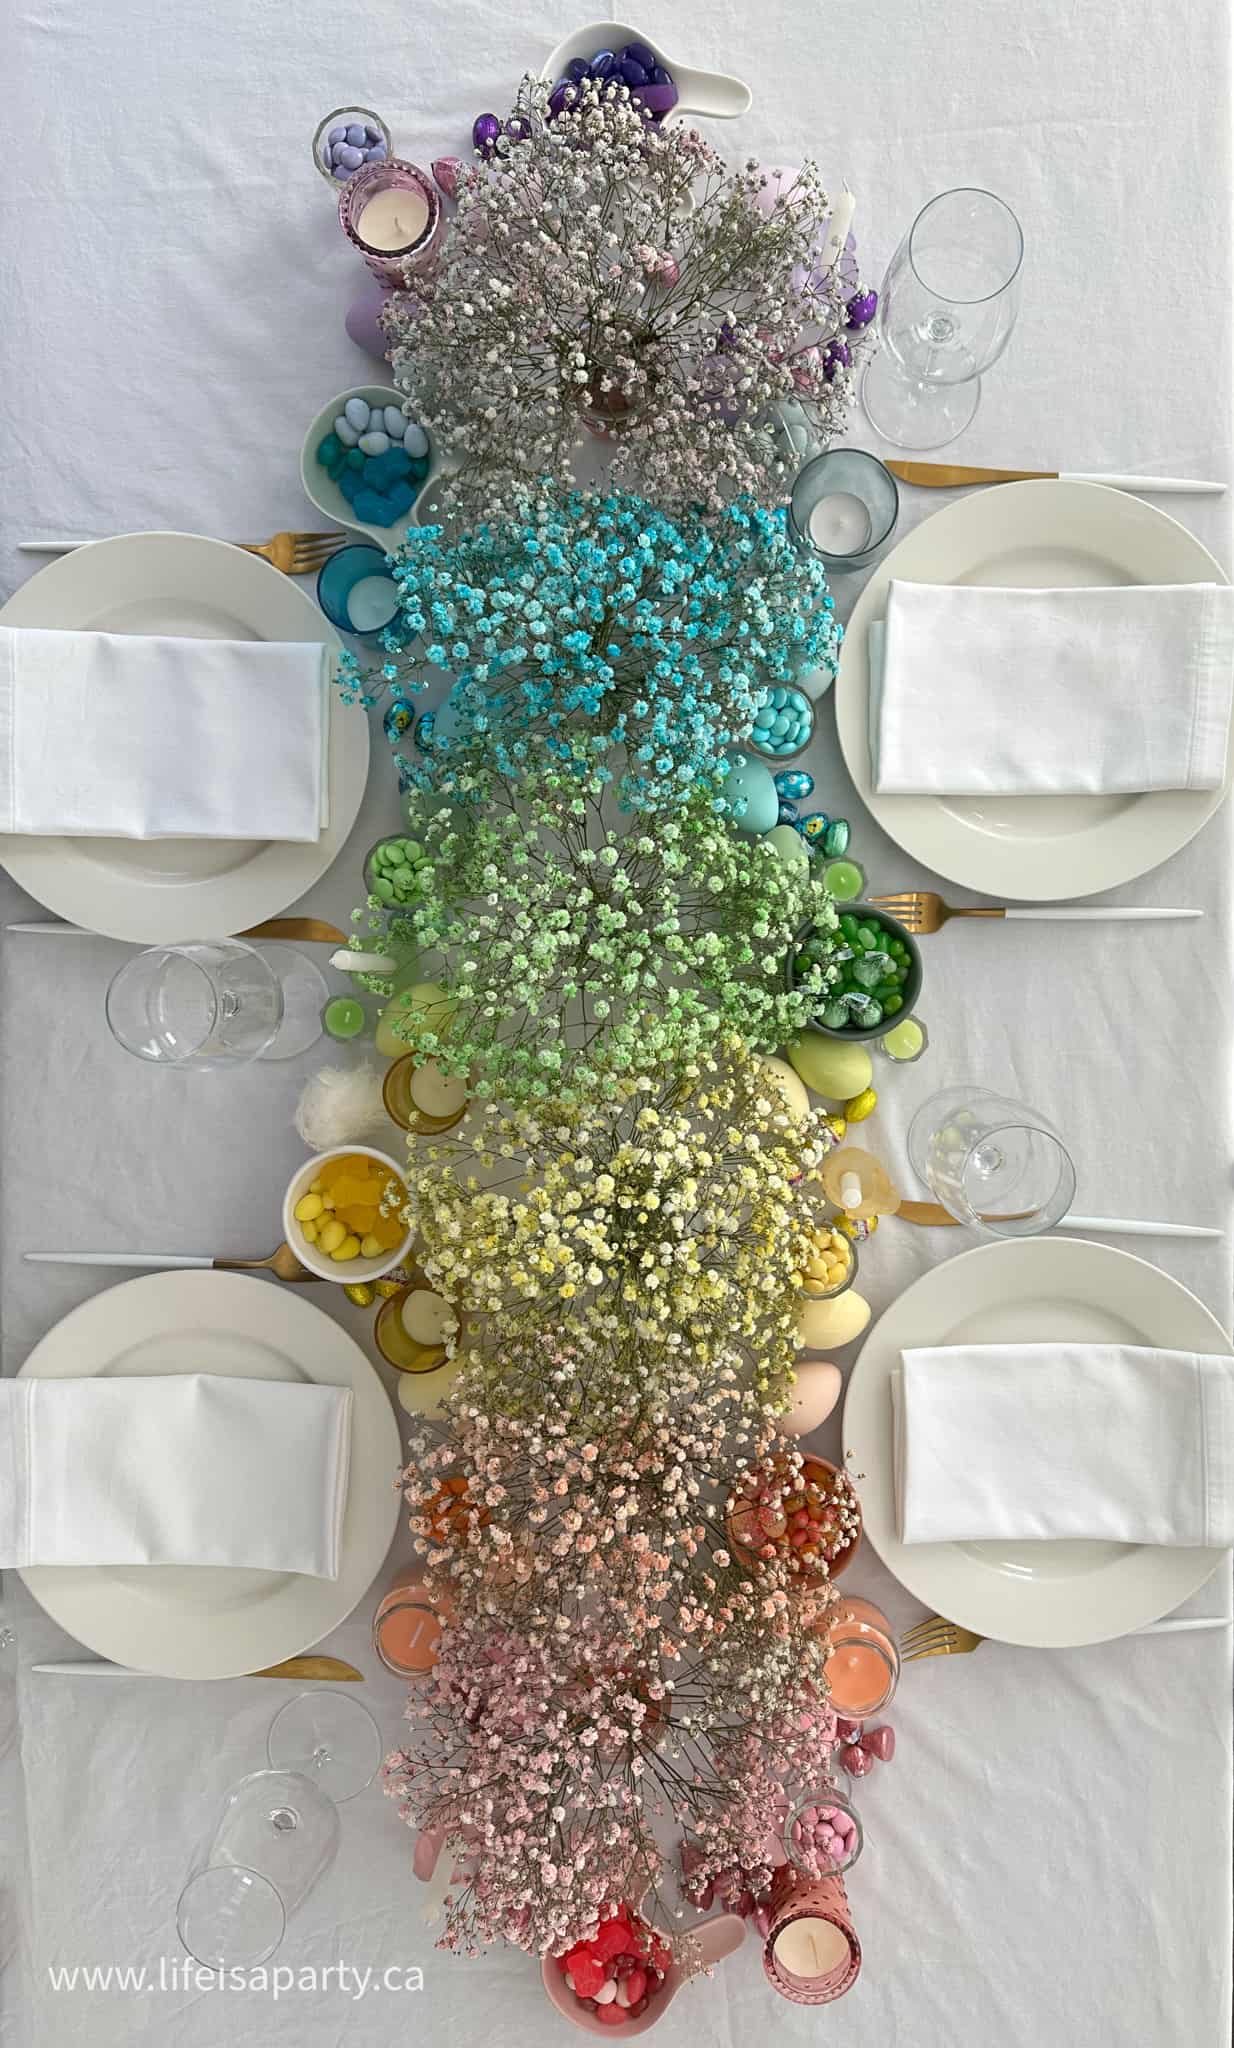
Table with rainbow baby's breath down the ceter of the table.

Tips:

Use the freshest flowers possible. The freshest flowers take the color the fastest. Also when your making your selection of flowers, look for the most open, largest blooms, since they'll show the color the best.

Also be sure to work very gently with the baby's breath. The flowers often become tangled together, and when you are pulling them apart you may lose flowers, or worse, kink the stem. If the stem is kinked then it won't be able to draw the colored water up the stem to dye the flower.

How Long Does It Take?

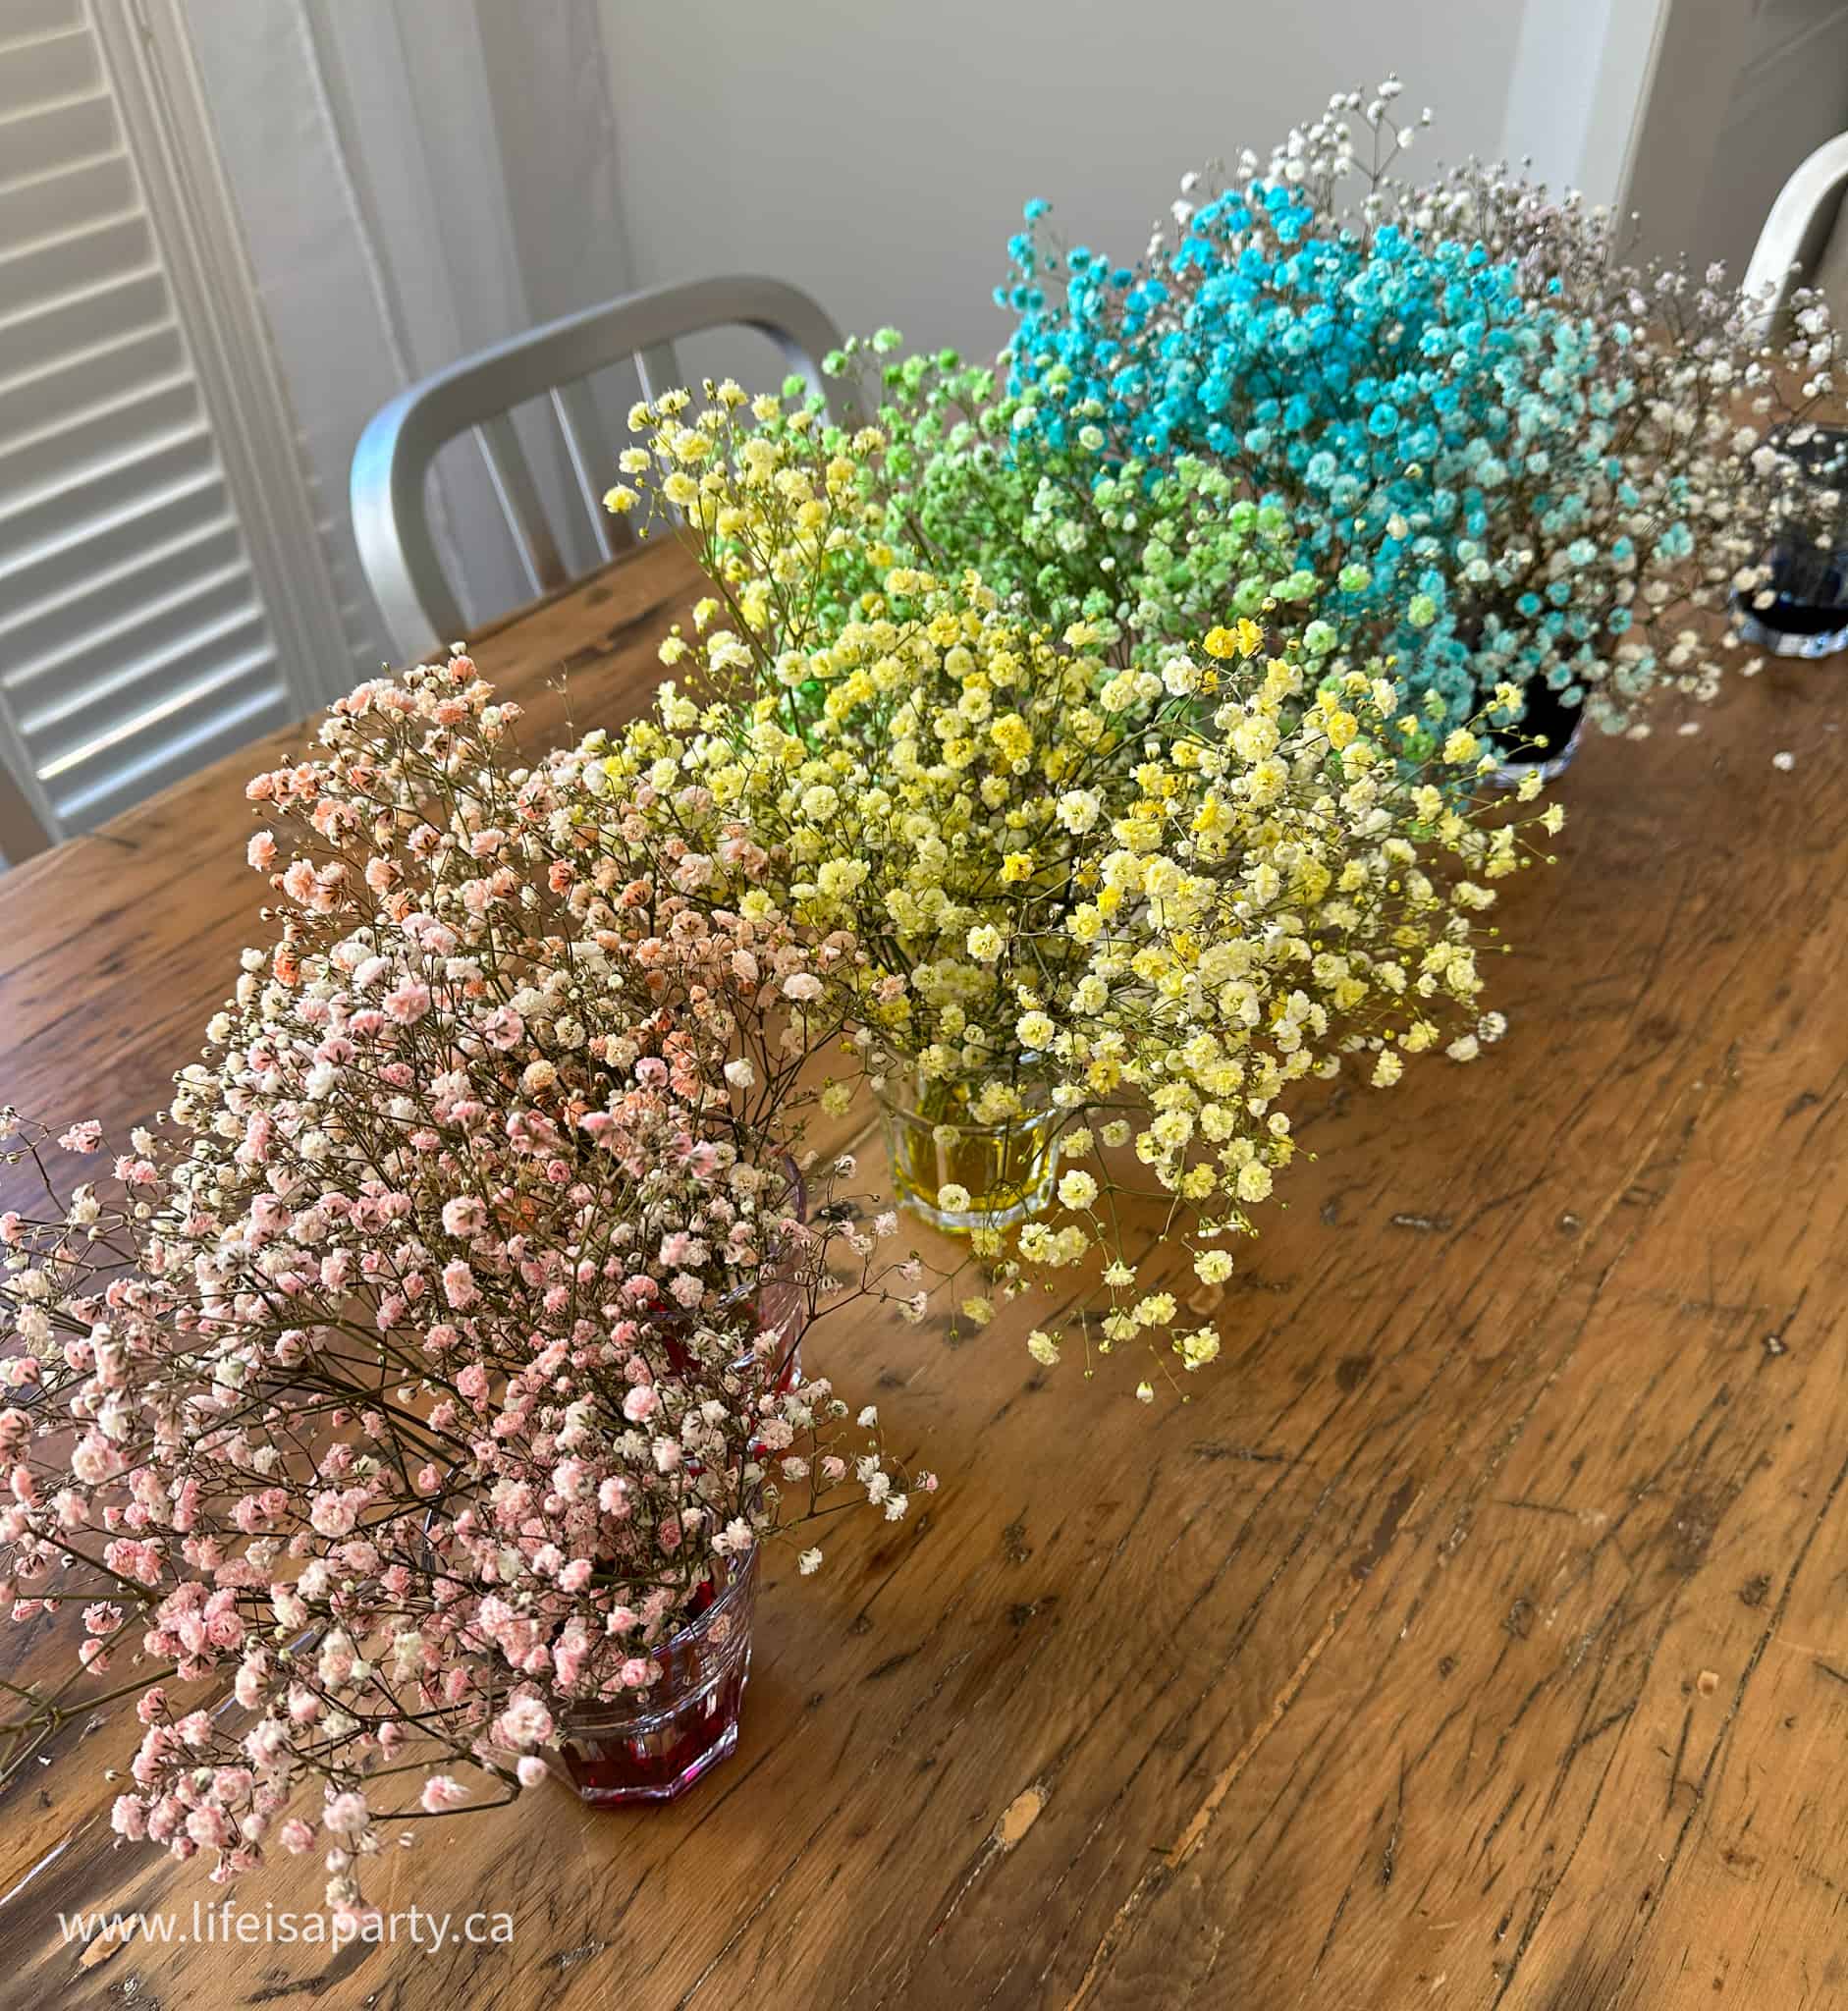
Here's how the flowers looked after about 3 hours in the dye:

Dying baby's breath into rainbow colours.

And here's the flowers after we left them overnight in the food coloring dye:

Dying rainbow baby's breath with food coloring.

The green and blue dye started to show up on the flowers within only an hour or two.  After overnight we did find that blue and green were quite dark, so we removed them from the dye and put them in water so that they didn't become darker.  The pink, orange, and purple took the longest for us.  We had them in the dye for about 18 hours.

Rainbow Table Centerpiece

We used these flowers in small bunches in rainbow order as one of the focal points for our rainbow Easter table. These beautiful flowers were perfect, and went wonderfully with the rest of my tablescape. And after Easter, we can dry the flowers and use them in other floral designs or crafts. These would be lovely used in flower clouds. I've used all the colors separately, but you could combine them for a beautiful bouquet arrangement.

Rainbow easter table with DIY rainblow baby's breath.

These would be perfect for a rainbow party, art party theme, St. Patrick's Day, Valentine's Day, Mother's Day, or any celebration. Use them as decorations or as floral gifts for a special occasion or as an anniversary gift.

With knowing how to make rainbow baby's breath, life really is a party!

More Rainbow Inspiration

  • A rainbow grilled cheese sandwich cut in half on a cutting board.
    Rainbow Grilled Cheese Recipe
  • How to make rainbow pop tarts.
    Rainbow Pop Tart Recipe
  • Homemade Rainbow Rice Krispies recipe.
    Rainbow Rice Krispies
  • rainbow Easter table
    Rainbow Easter Table

Frequently Asked Questions

How long does it take?

We saw some change after just a few hours, but for most of our flowers we left them in the dye for about 18 hours.

Can you use gel food coloring for this project?

I used regular liquid food coloring for mine. I haven't tried it with gel food coloring. If you do try it, please let me know in the comments below how well it worked.

Why didn't my baby's breath change color?

The flowers change color as the stems drinks up the colored water. If your flowers are older, they may not drink up the water, and change color as well as fresh baby's breath does.

If you try our tutorial on How To Make Your Own Rainbow Baby's Breath or any other ideas on the blog please let me know how it went in the comments below. Thanks for visiting today!

Recipe

How to dye baby's breath and make rainbow baby's breath.

How To Make Rainbow Baby's Breath

5 from 2 votes
Print Pin Rate
Course: DIY & Crafts
Prep Time: 15 minutes minutes
Additional Time: 18 hours hours
Total Time: 18 hours hours 15 minutes minutes
Author: Dannyelle Nicolle-Ramjist

Equipment

  • scissors or garden clippers or a sharp knife

Materials

  • fresh baby's breath
  • food coloring in blue red, yellow, and green
  • six glasses
  • water

Instructions

  • Begin by mixing about ½ cup of water in each glass. Then add about 1 teaspoon of food coloring in each of the six rainbow colors to create a different color in each glass. To create orange, mix half yellow and half red. To create purple mix half red and half blue.
  • Give each stem of a baby's breath a fresh cut and place in the colored water.
  • If some stems don't absorb the color after a few hours or over night, recut the stem and place it in the colored water again. There's no specific time to leave the flowers. Some of the flowers changed color within a few hours, some need to stay in the colored water overnight.
  • Once the desired color intensity is reached, remove the stem from the colored water and place it in regular clear water, and arrange as desired, or dry them to use as dried flowers. The pigmentation of the flowers will vary depending on how much food coloring you use, and how long you let the flowers stay in the colored water. You can also adjust the color palette by using different shades of dye.

Rainbow Easter Table

Mar 27, 2023 · Leave a Comment

rainbow Easter table

Rainbow Easter Table -use DIY rainbow baby's breath flowers, rainbow candles, rainbow Easter eggs, and rainbow candy on this colourful table.

rainbow Easter table
[feast_advanced_jump_to]

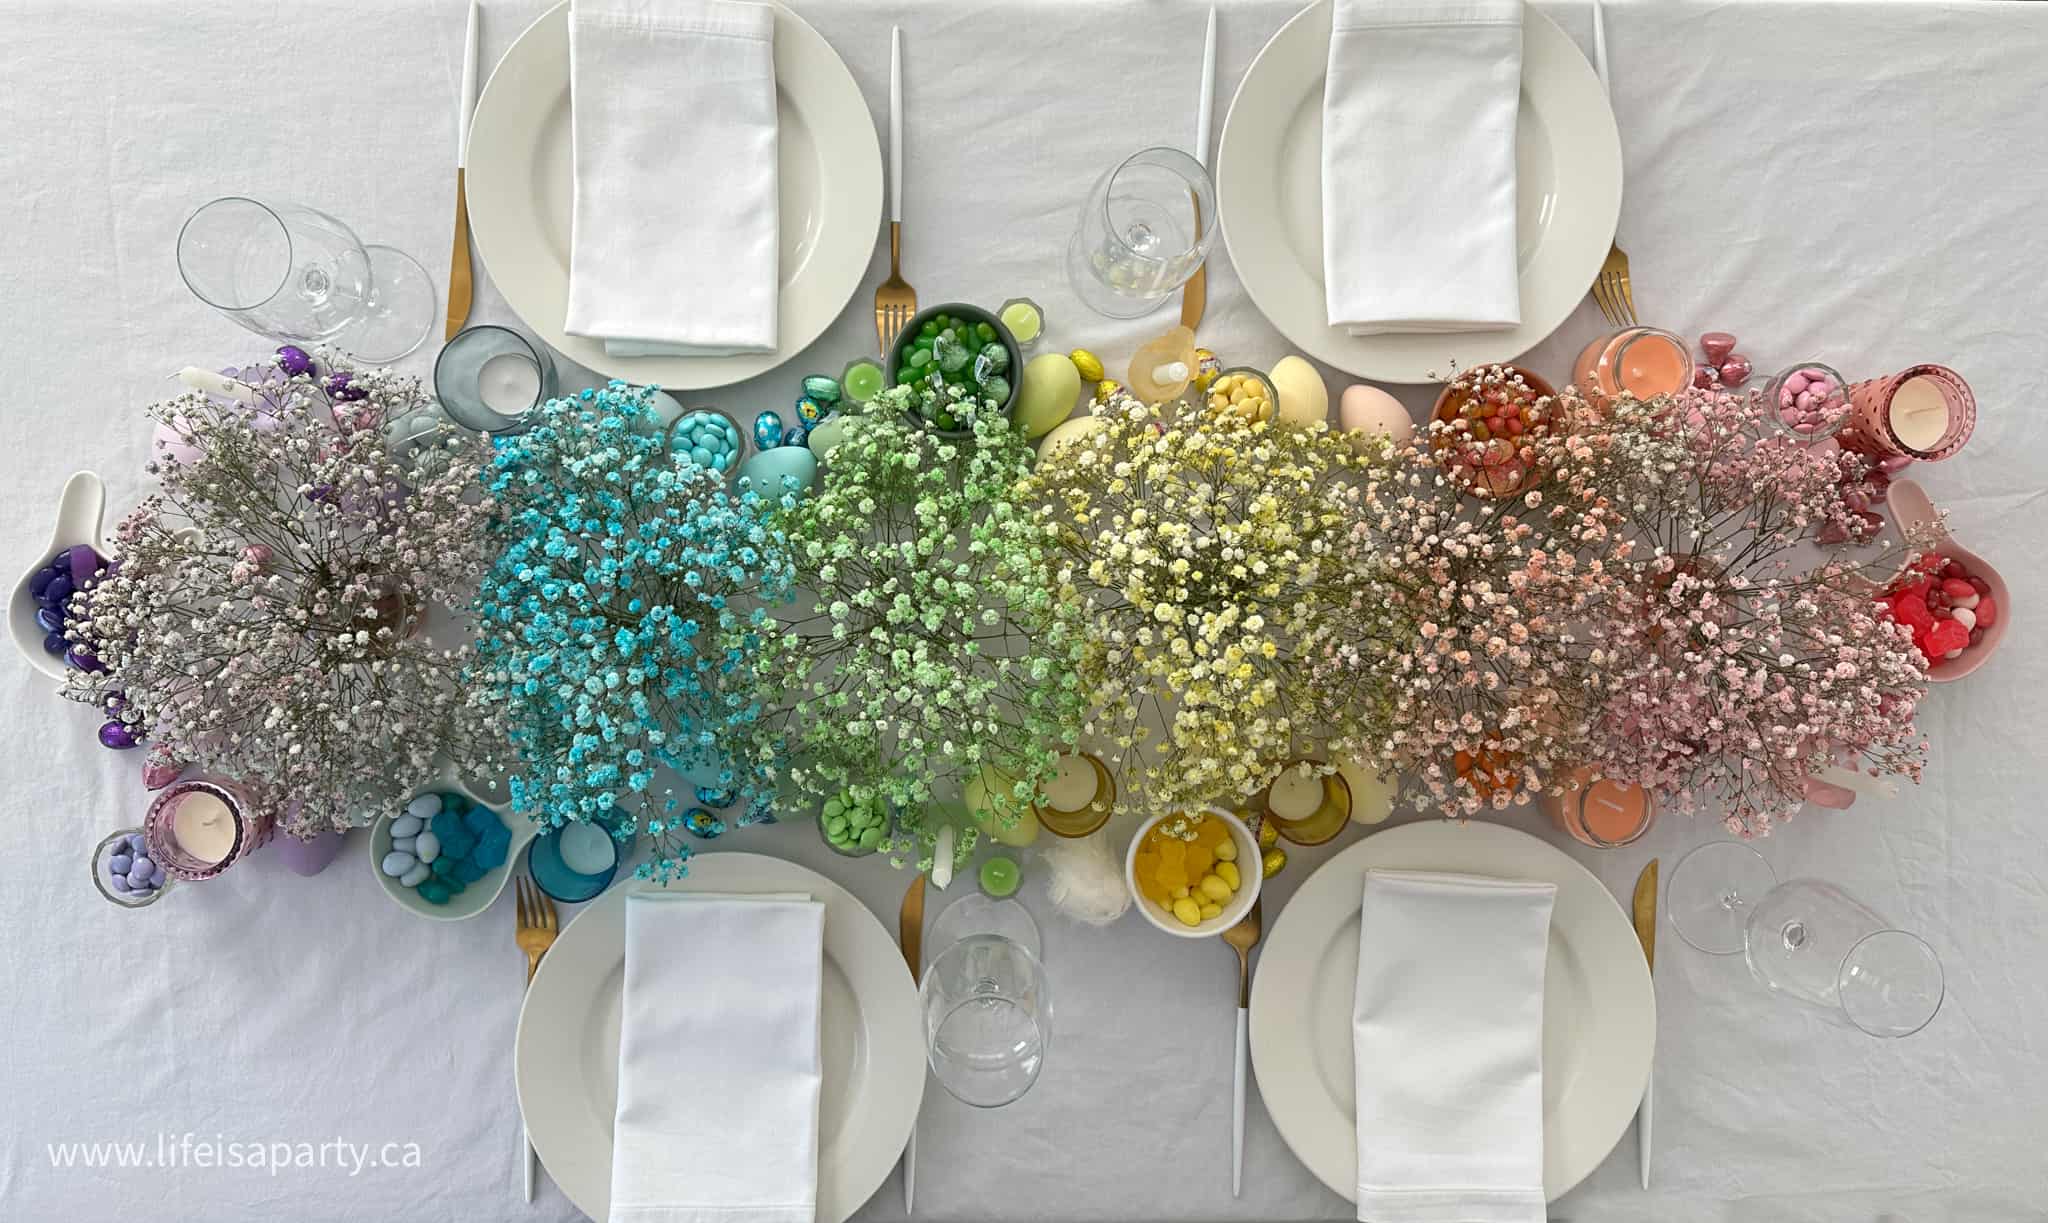
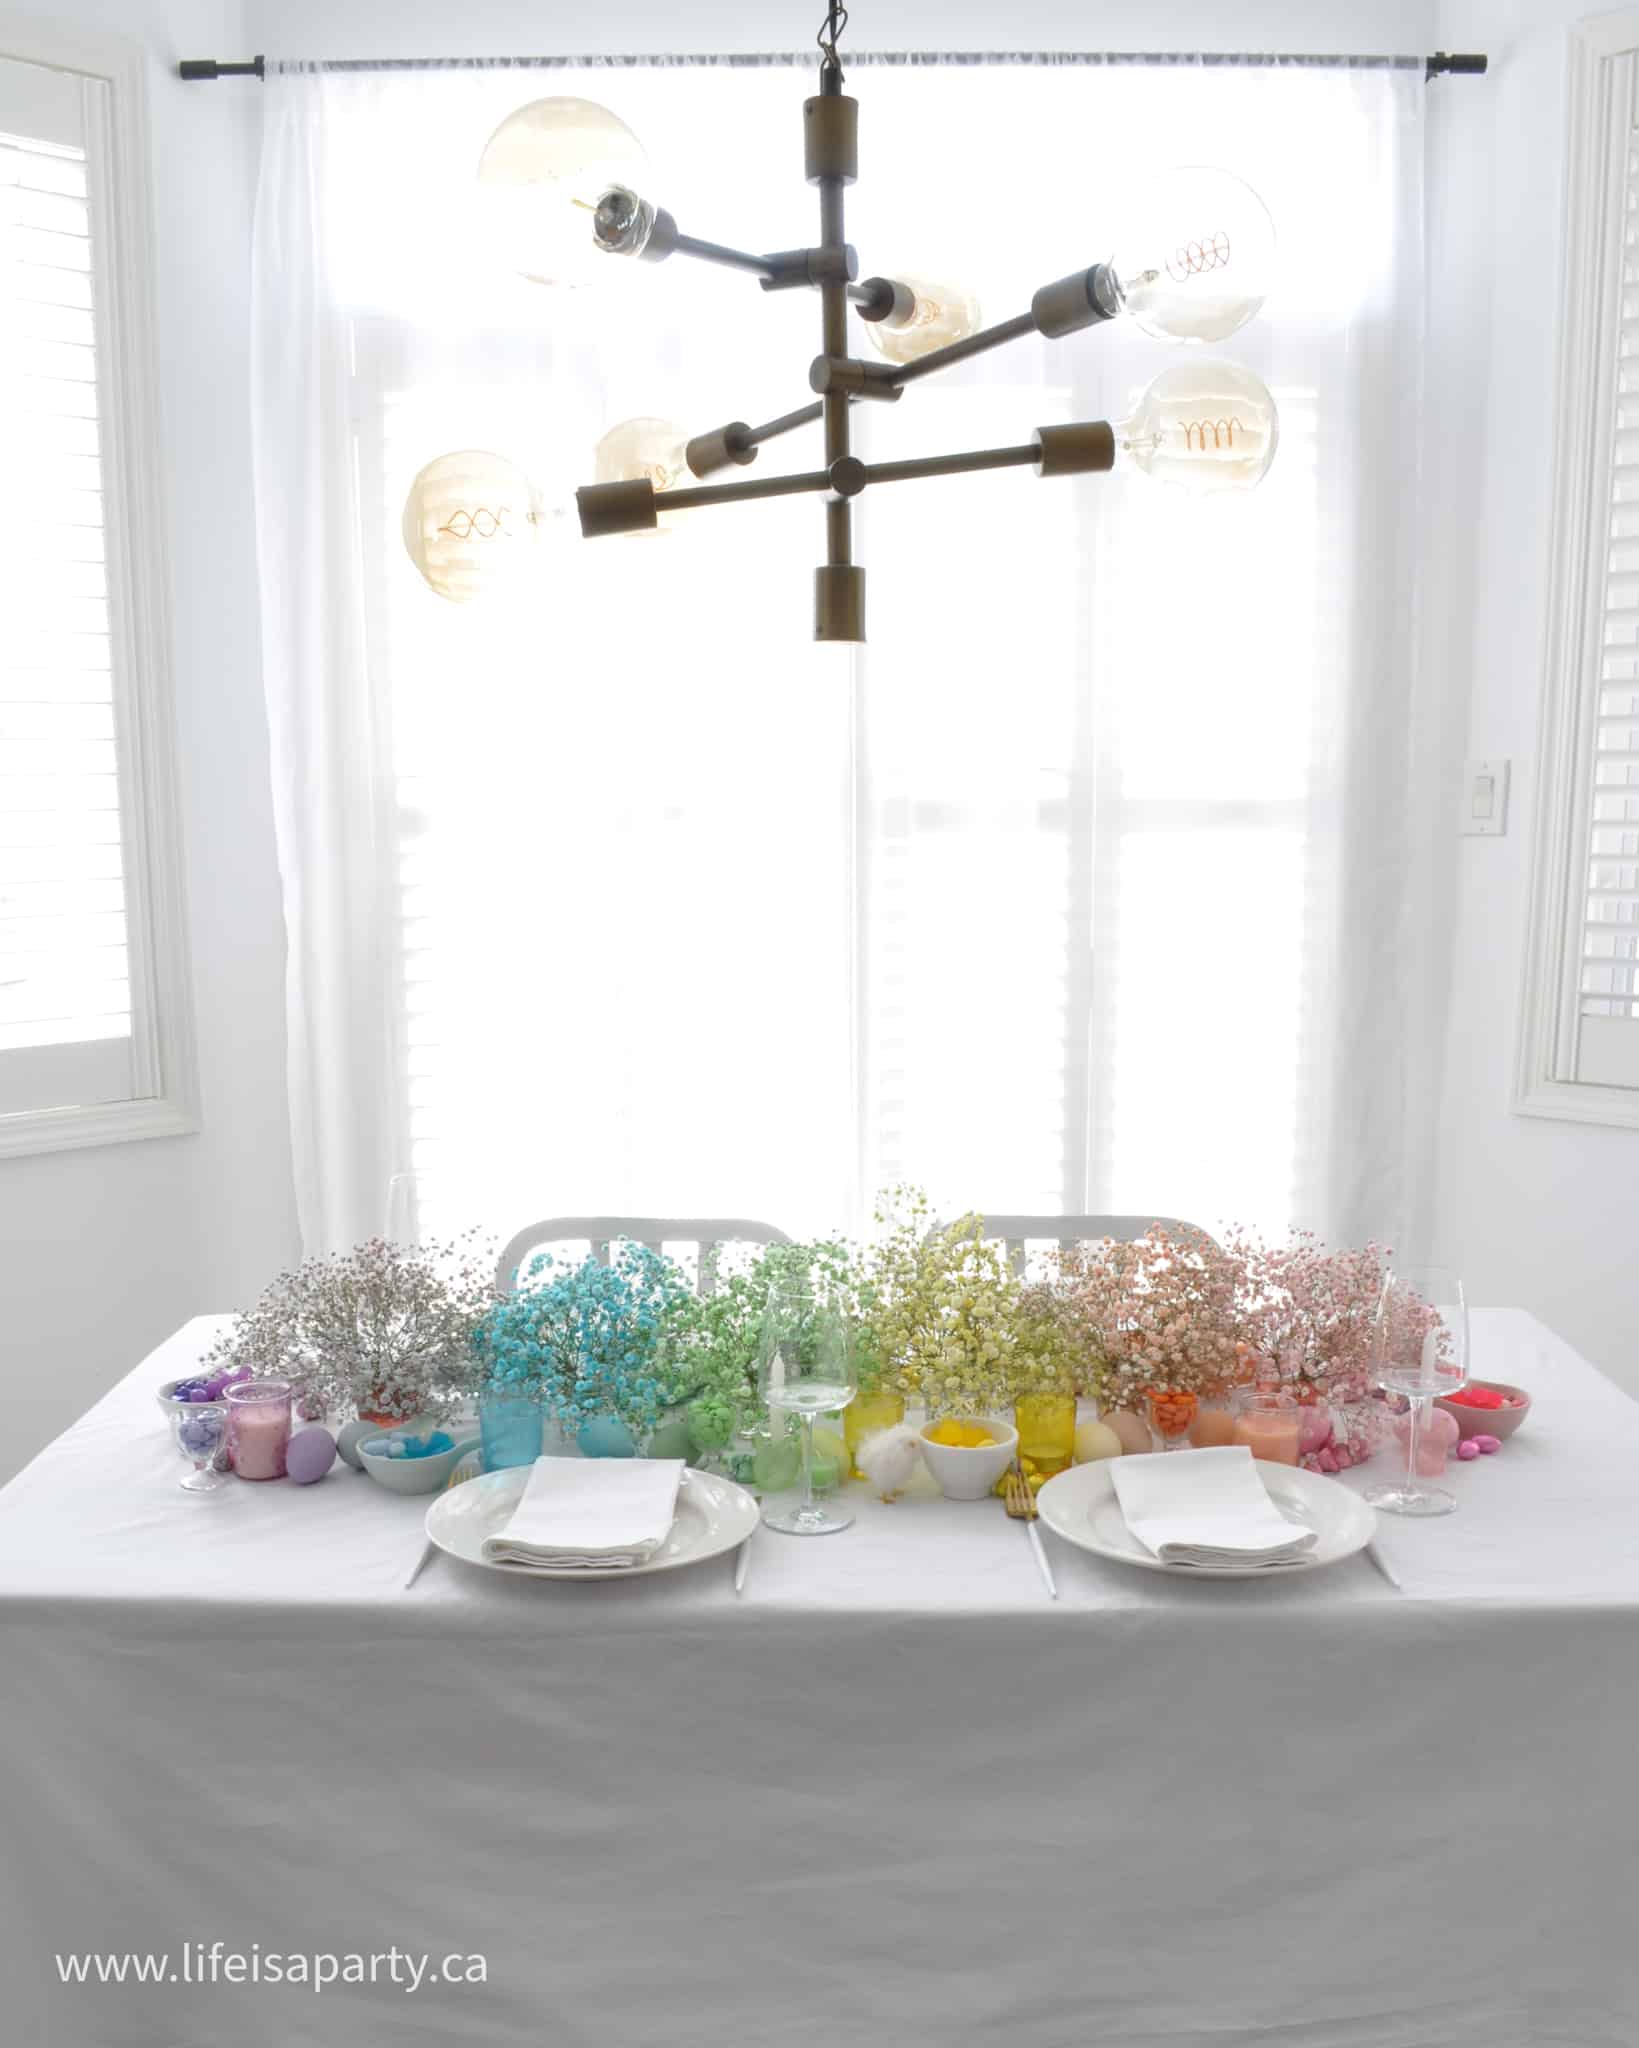
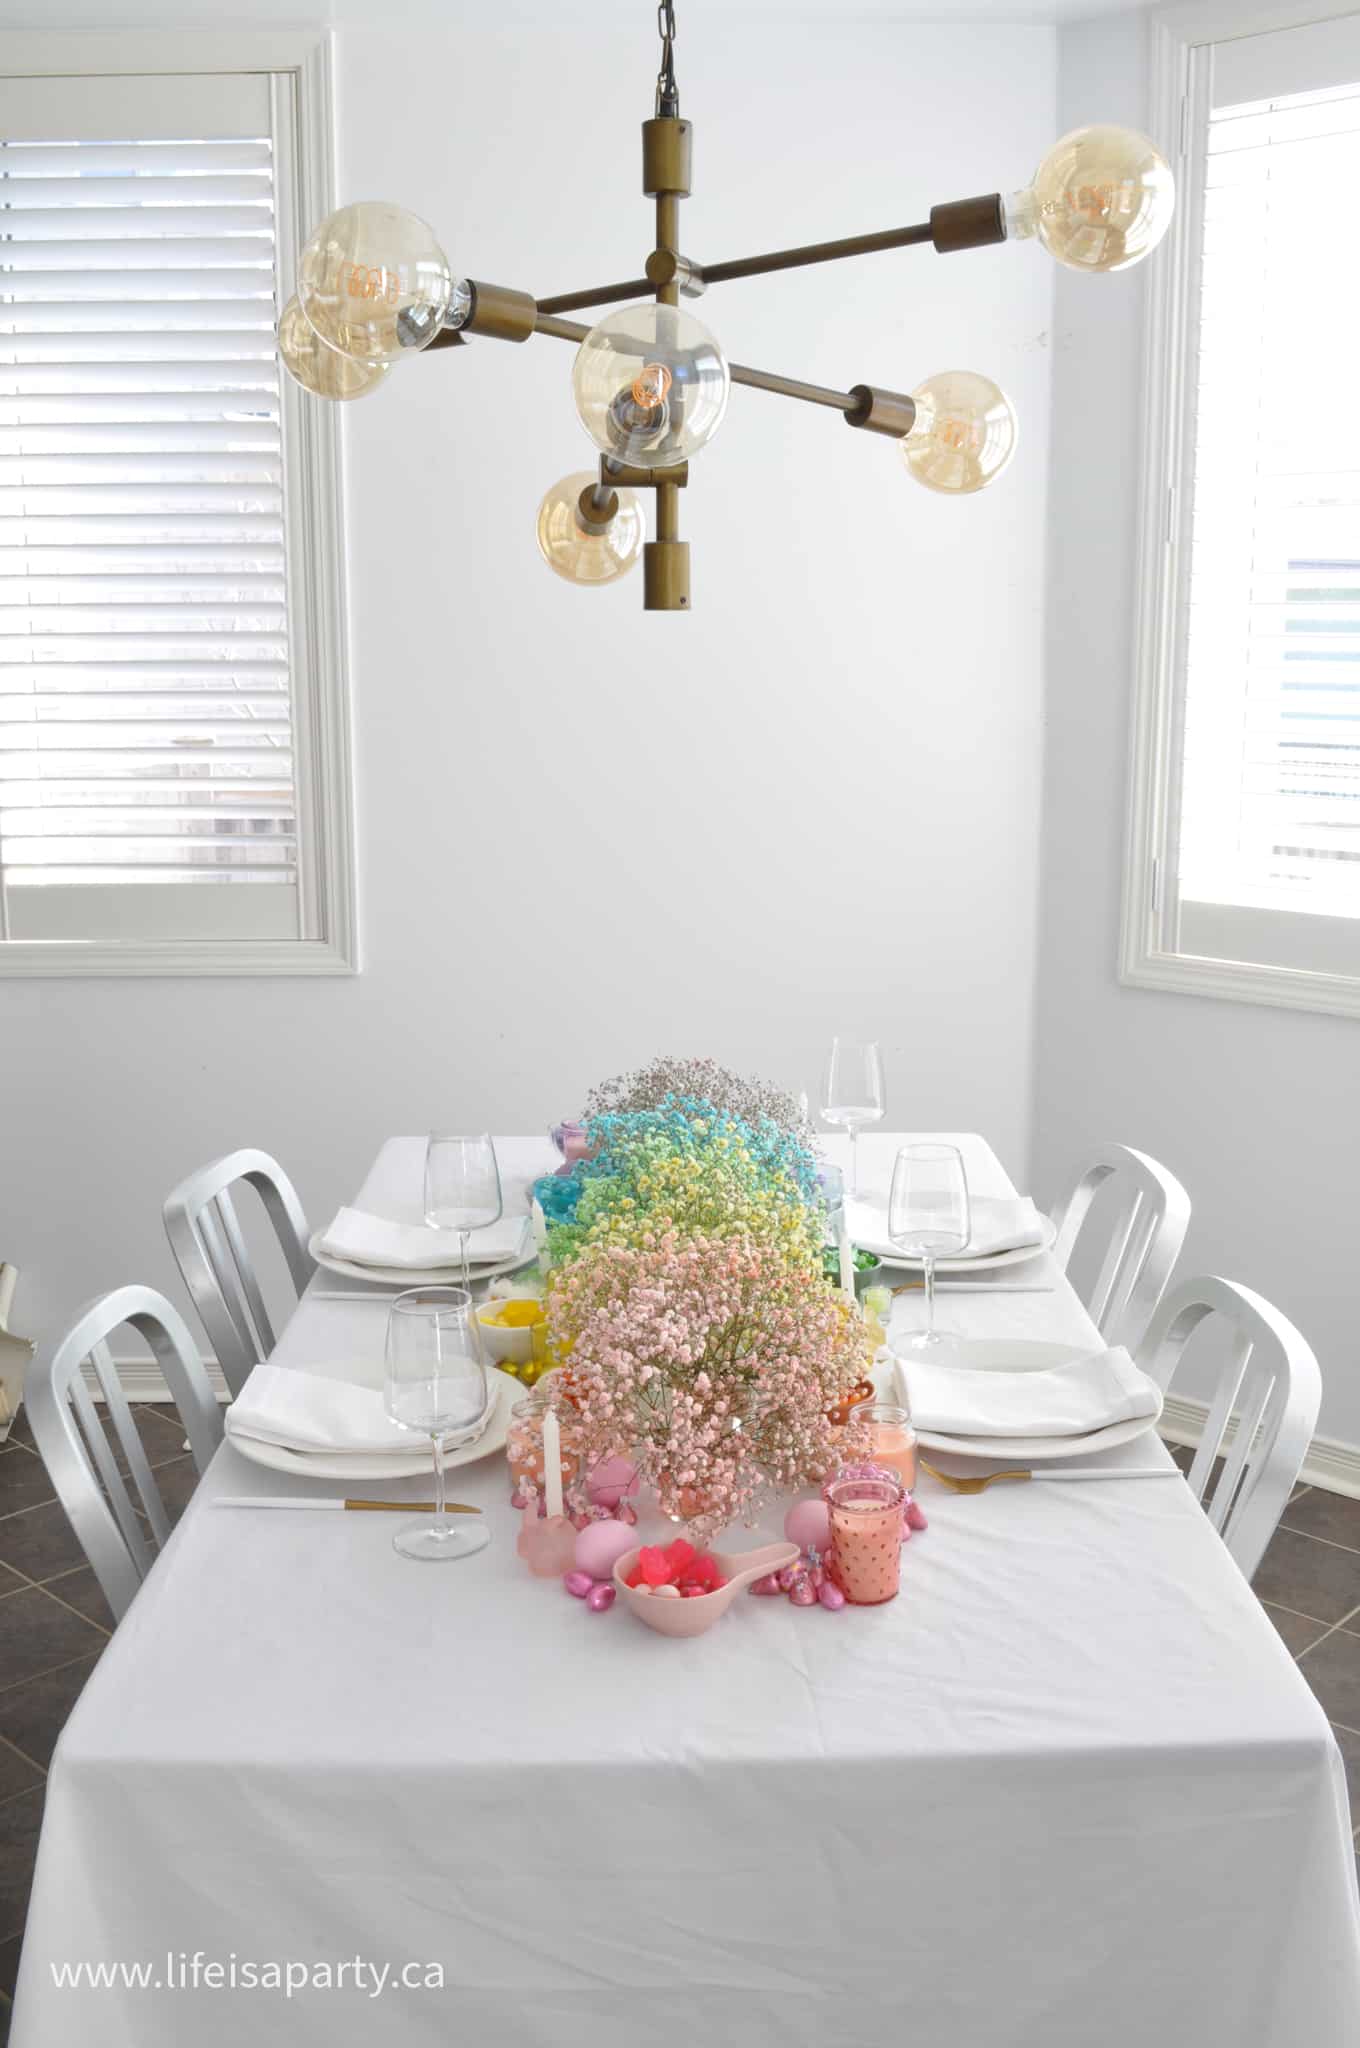
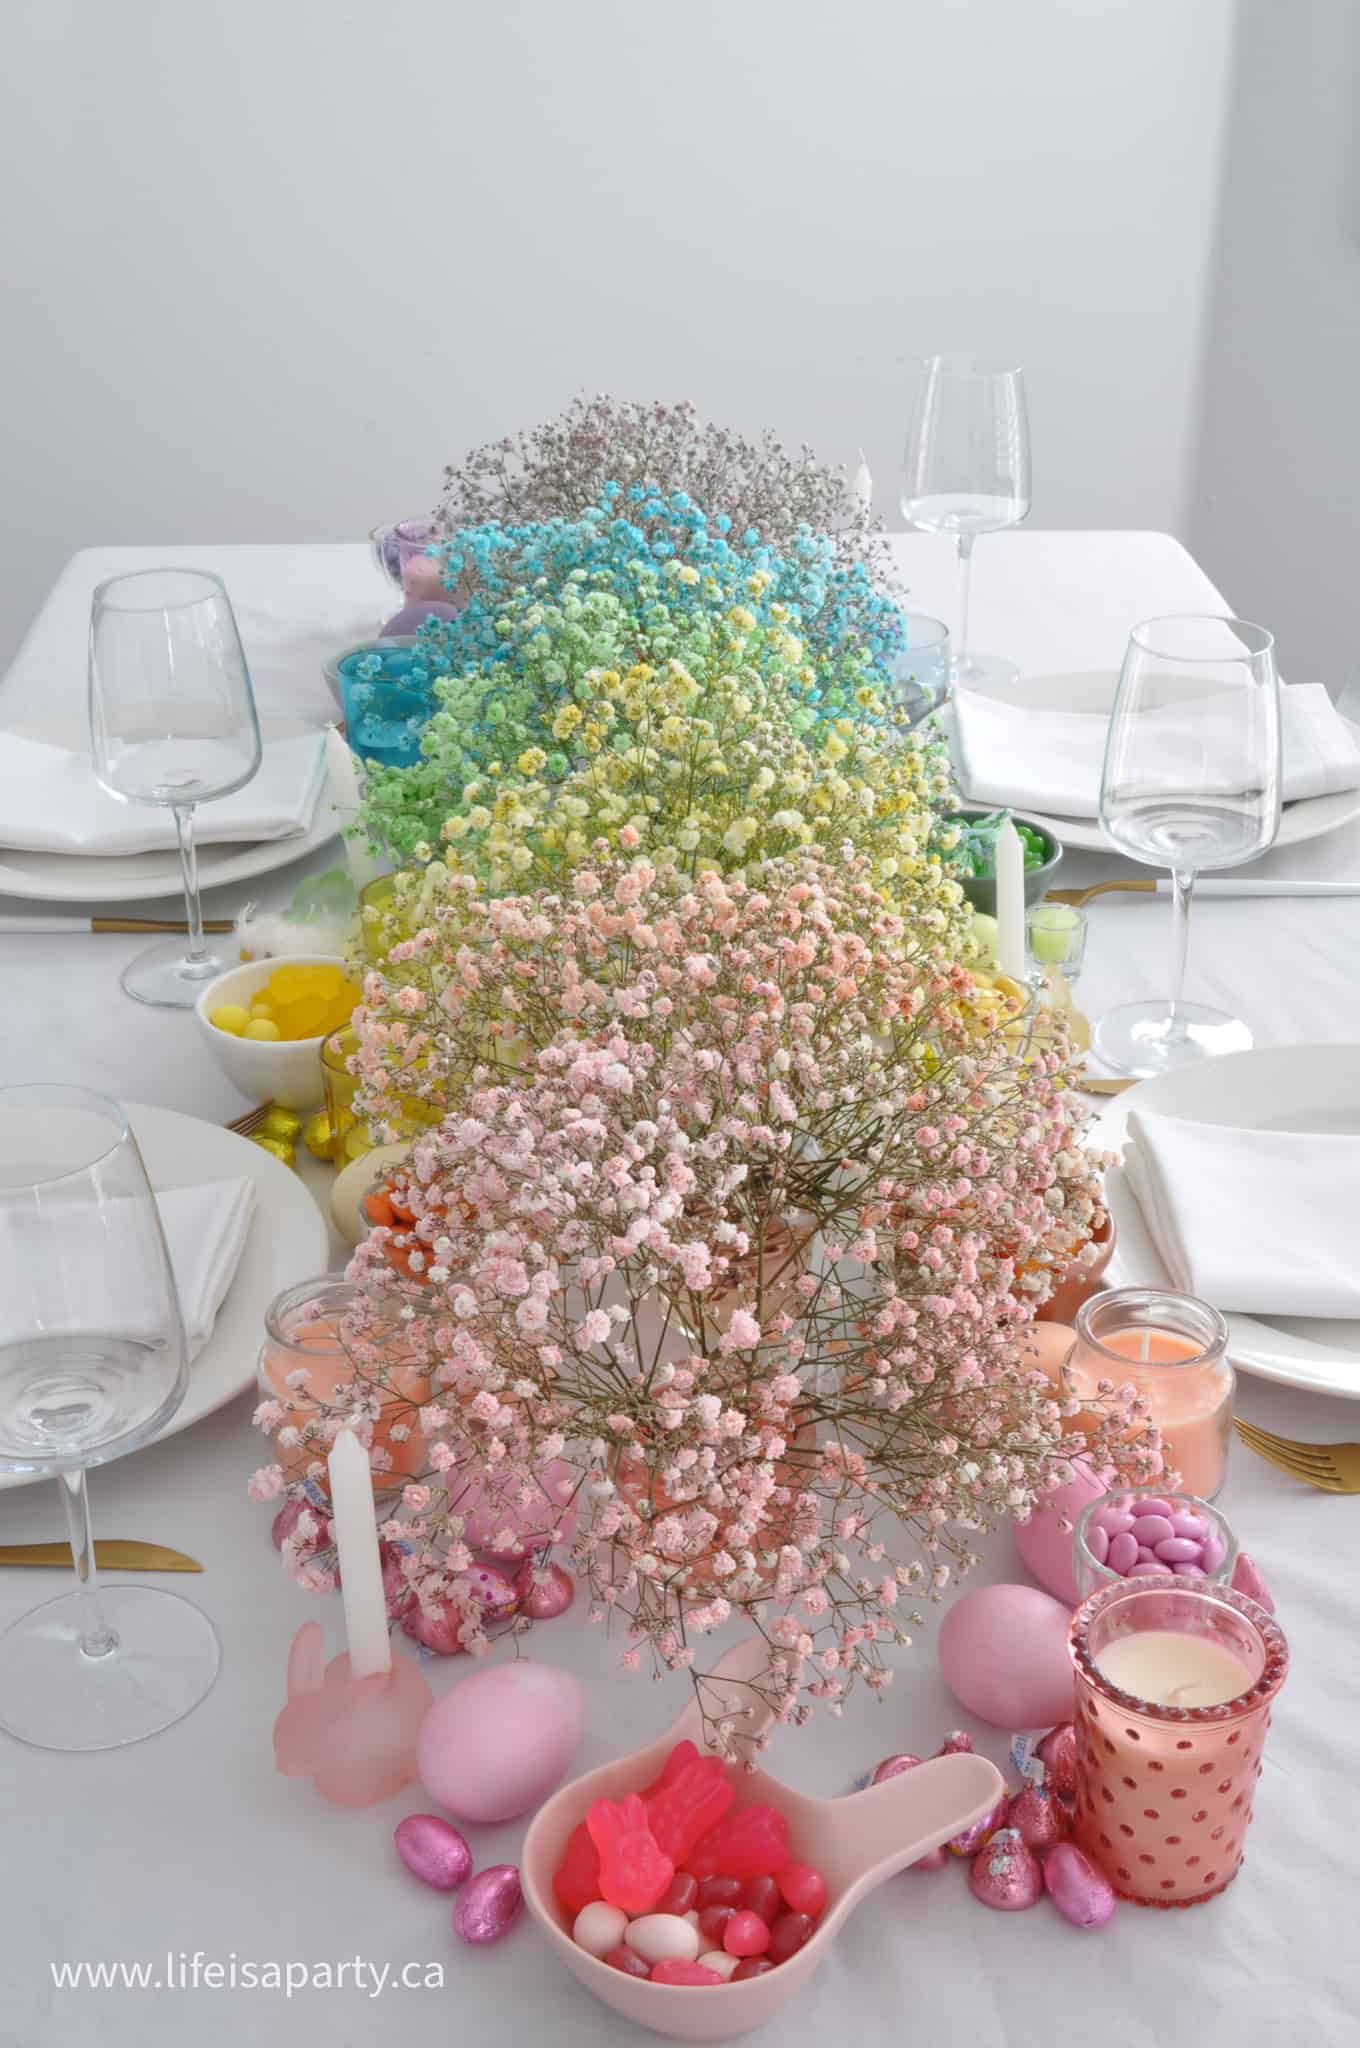
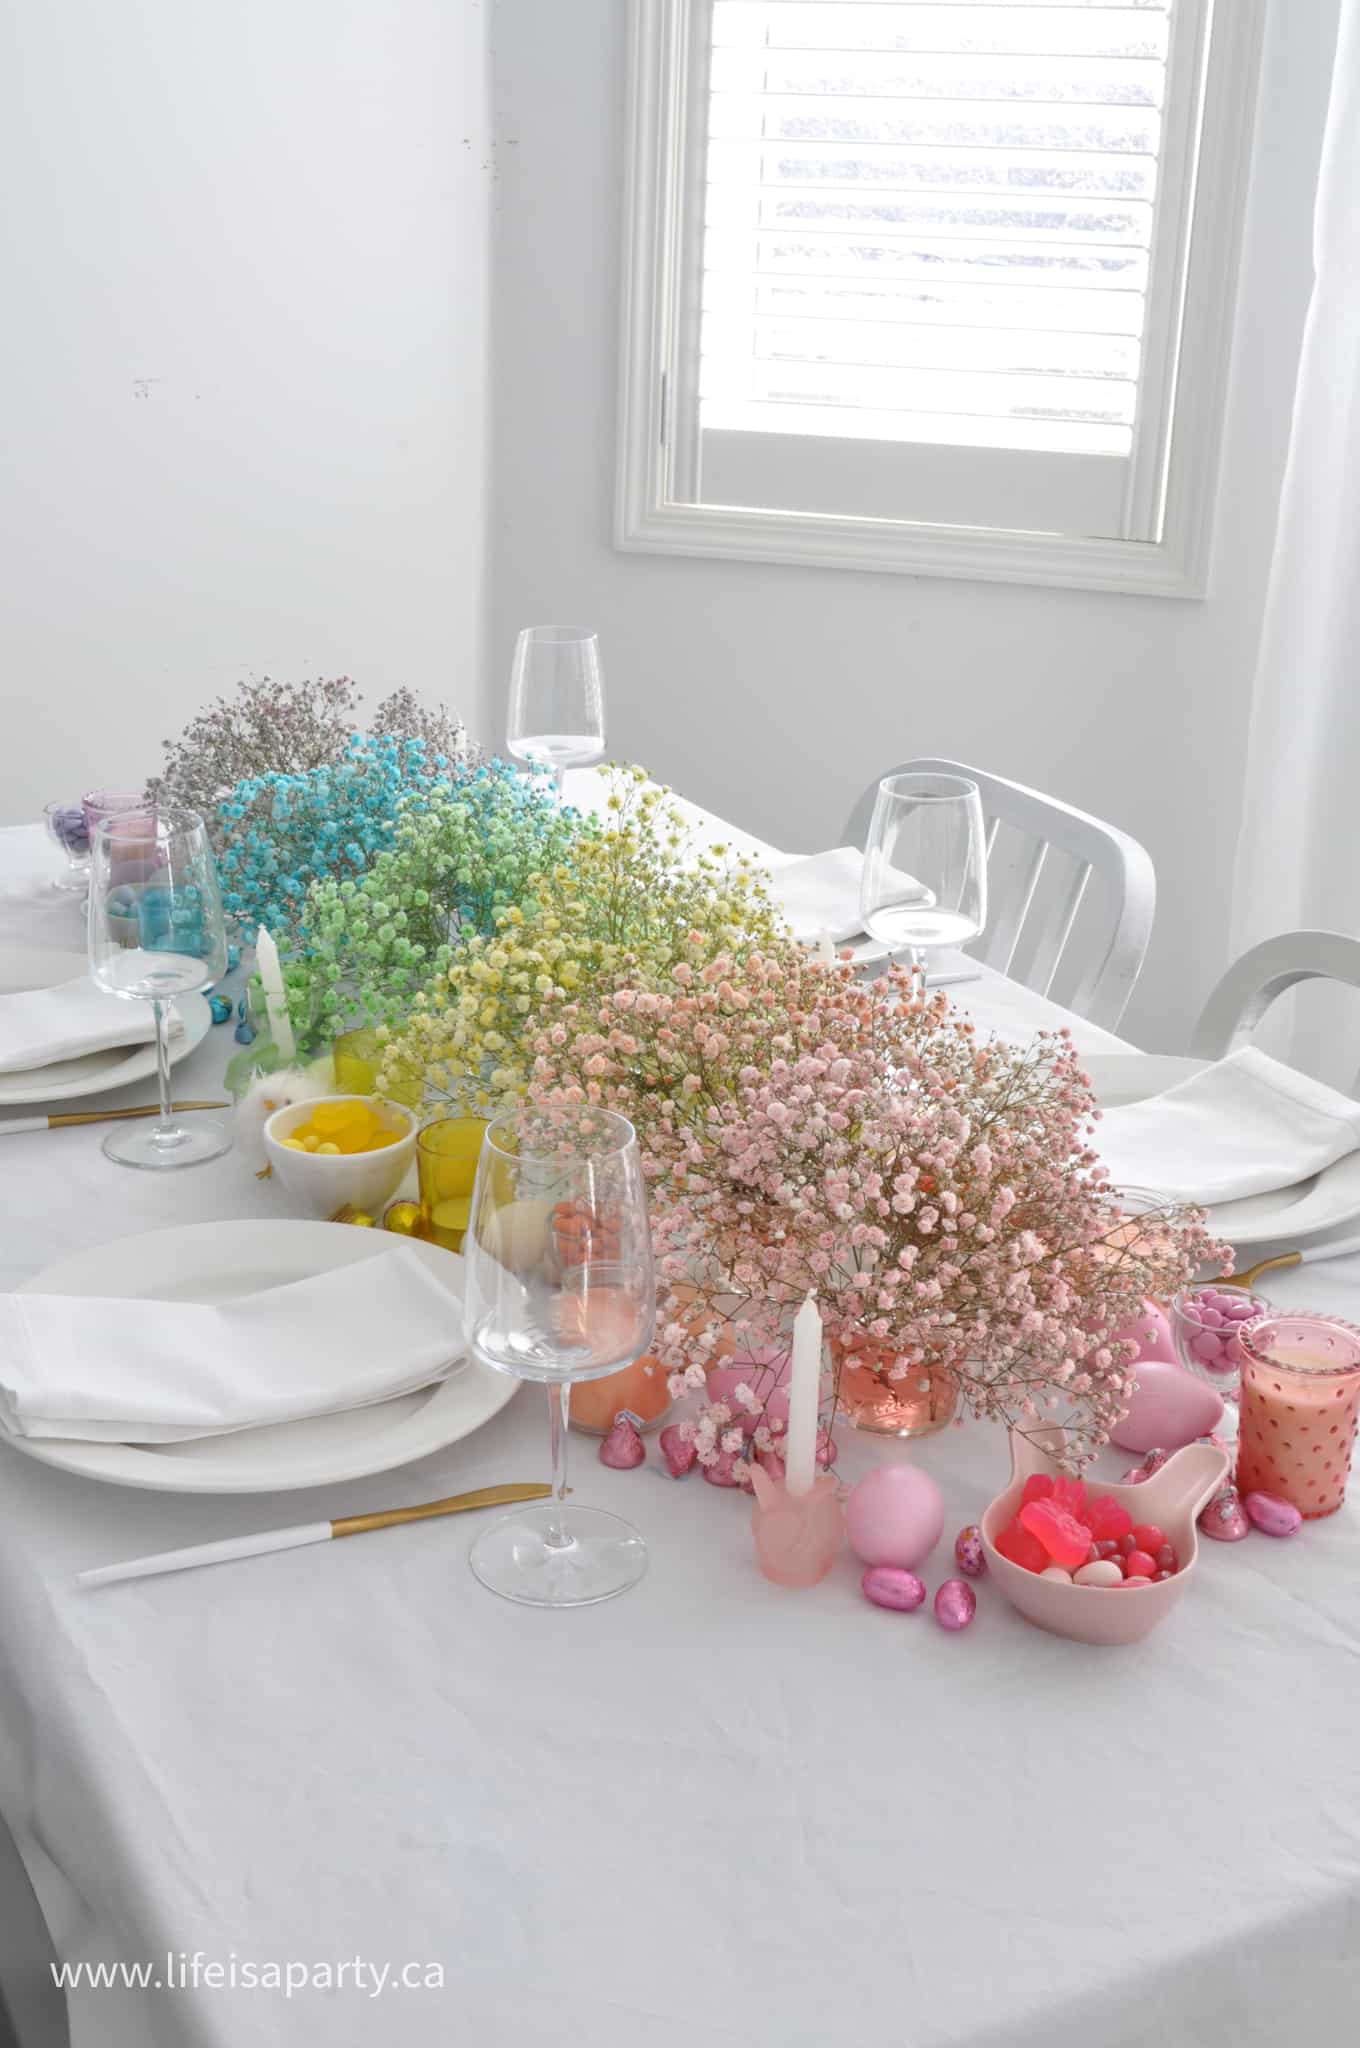
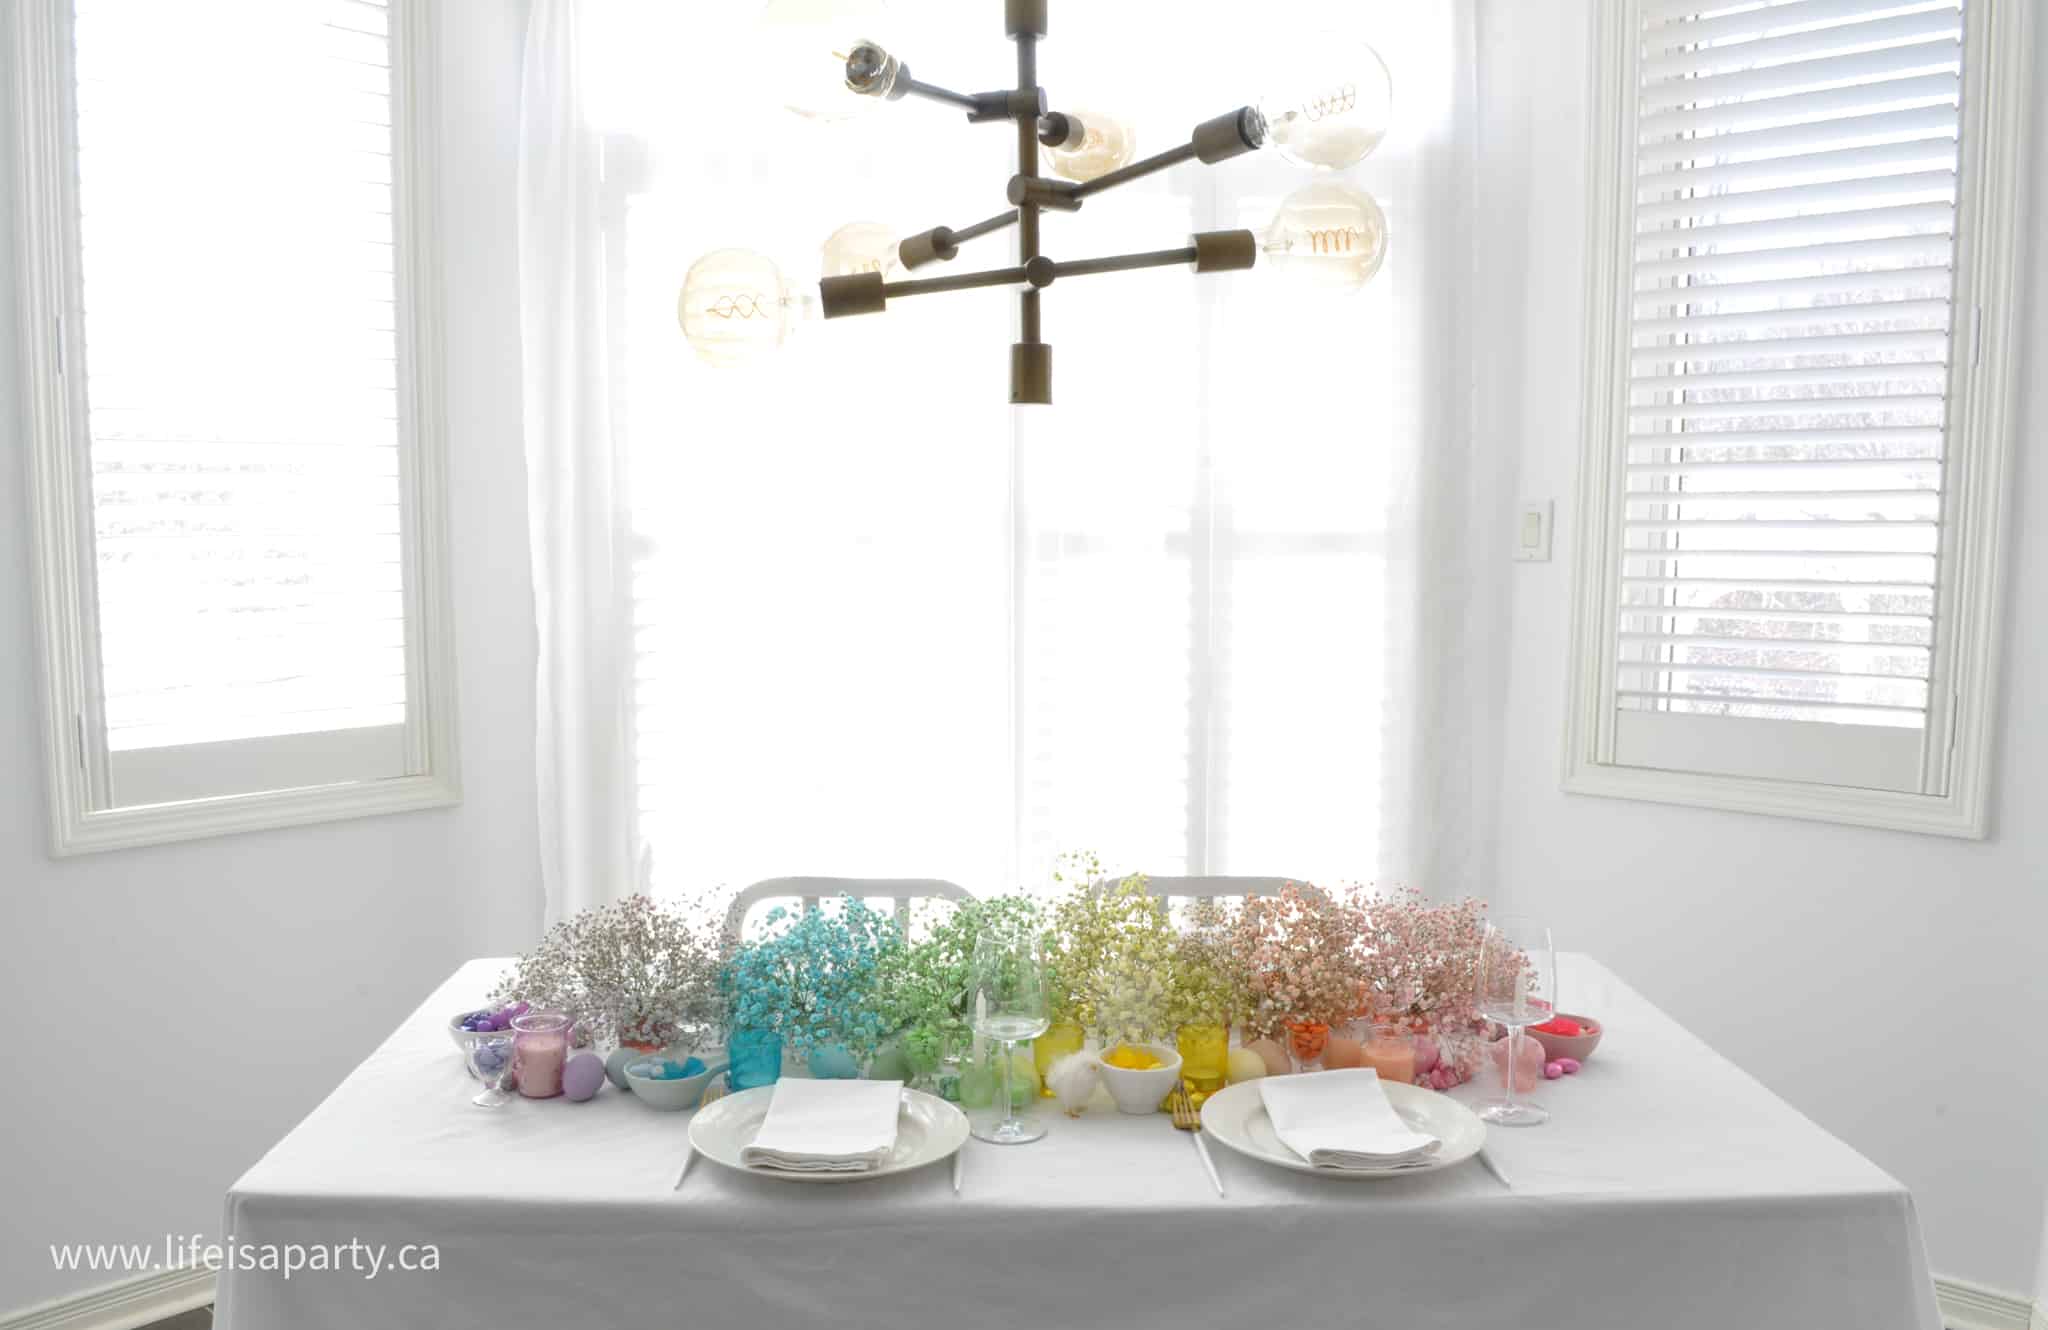
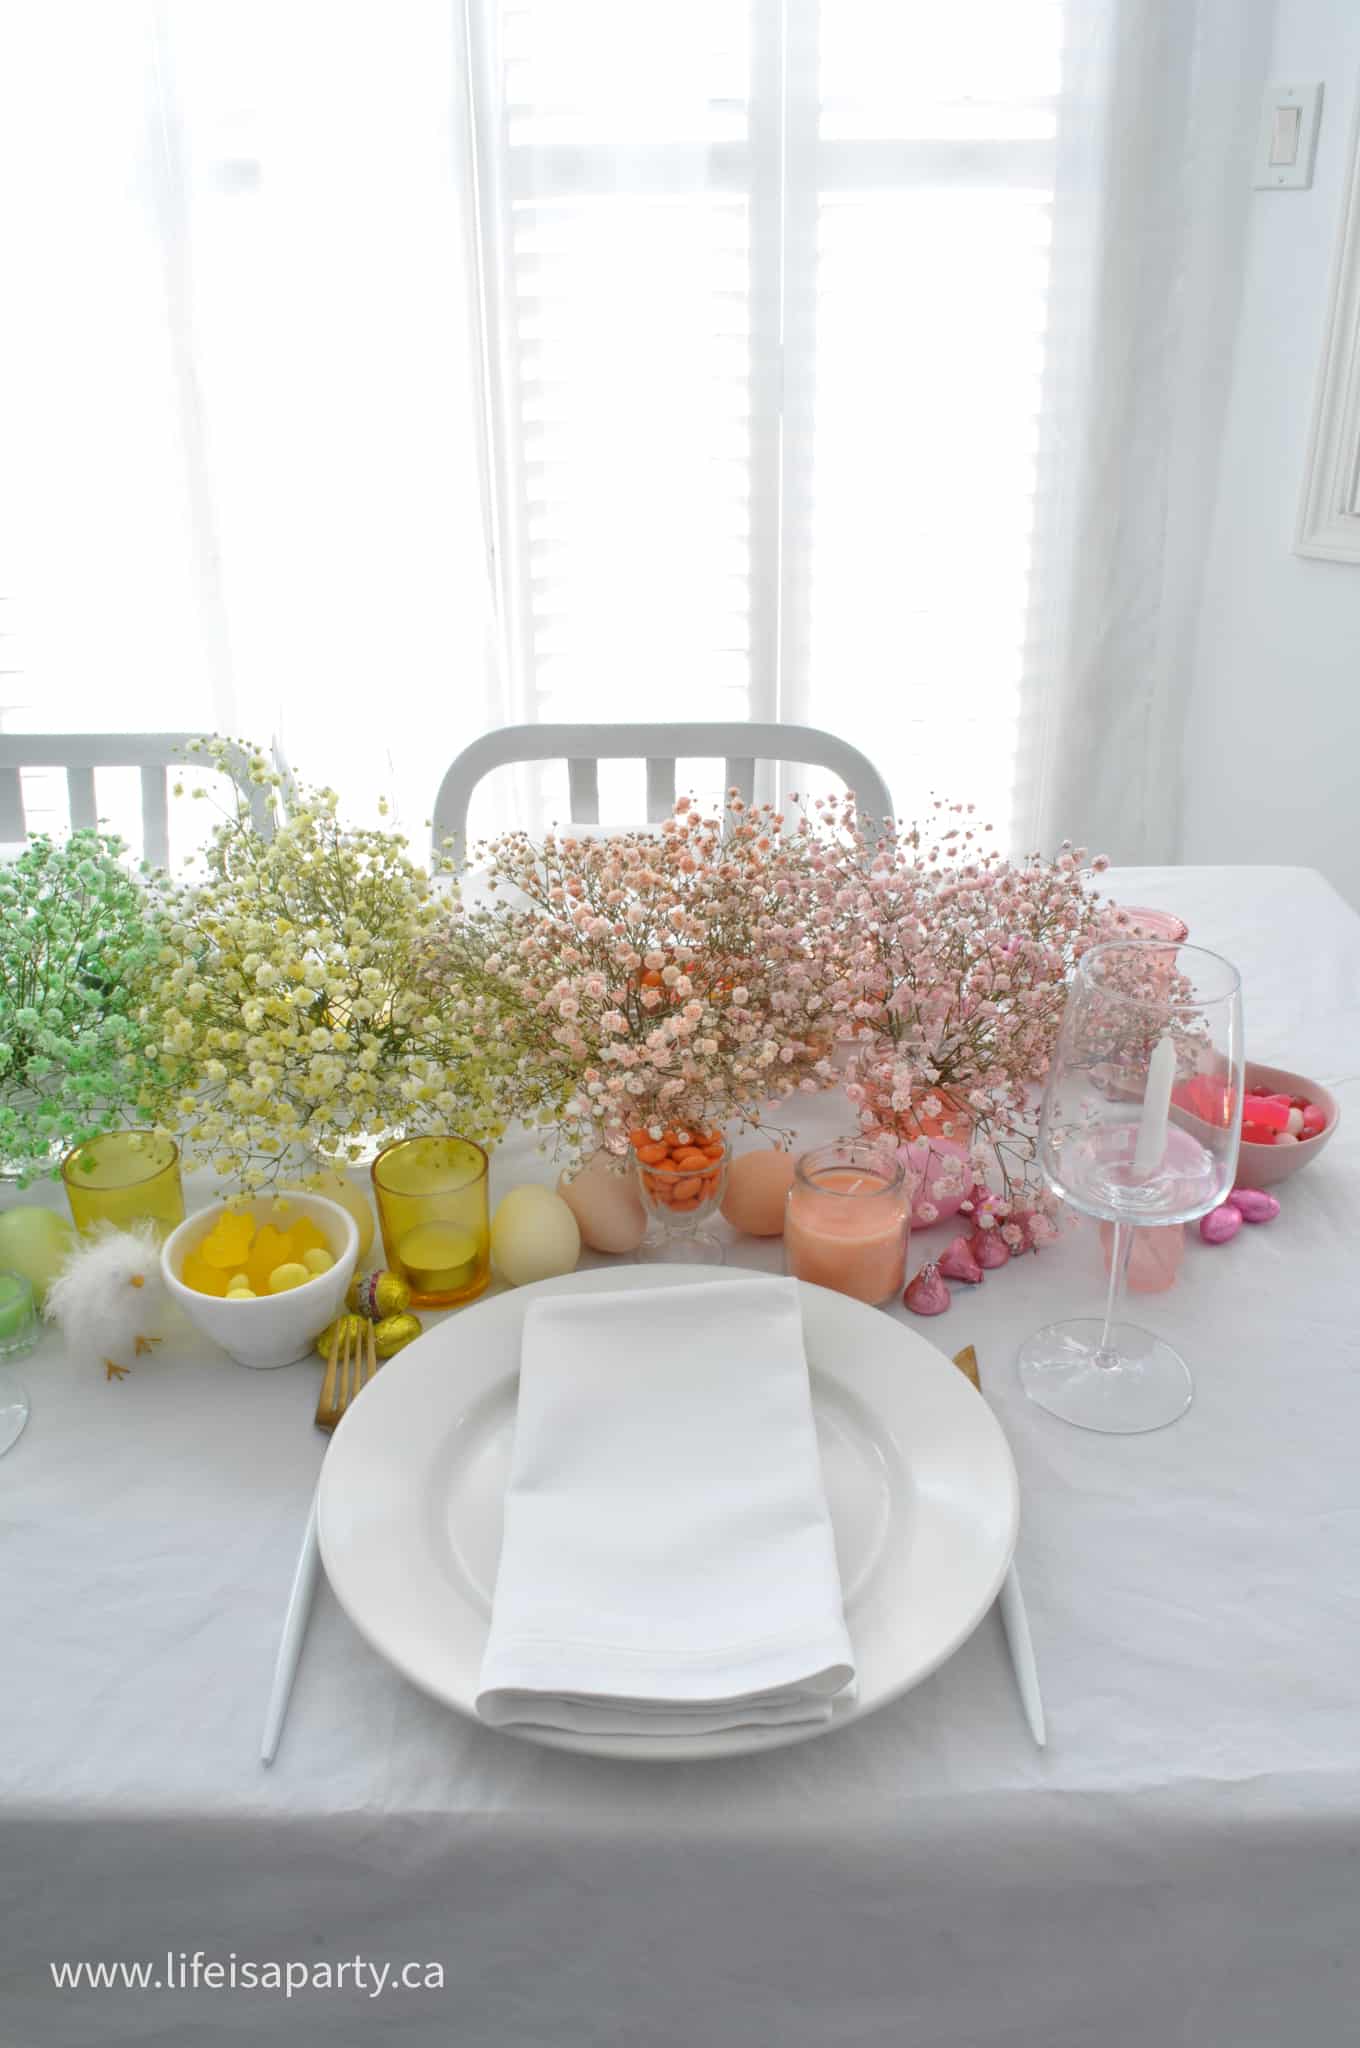
This Easter set a rainbow Easter table to delight your guests. We used DIY rainbow baby's breath as our rainbow flowers, rainbow candles, rainbow Easter eggs, and rainbow candy to make all of our rainbow dreams come true with this beautiful Easter tablescape.

how to set a rainbow table

We started out with a basic white table cloth on the dining table and then it was time for the star of the show, our rainbow Easter centerpieces.

Rainbow Flowers

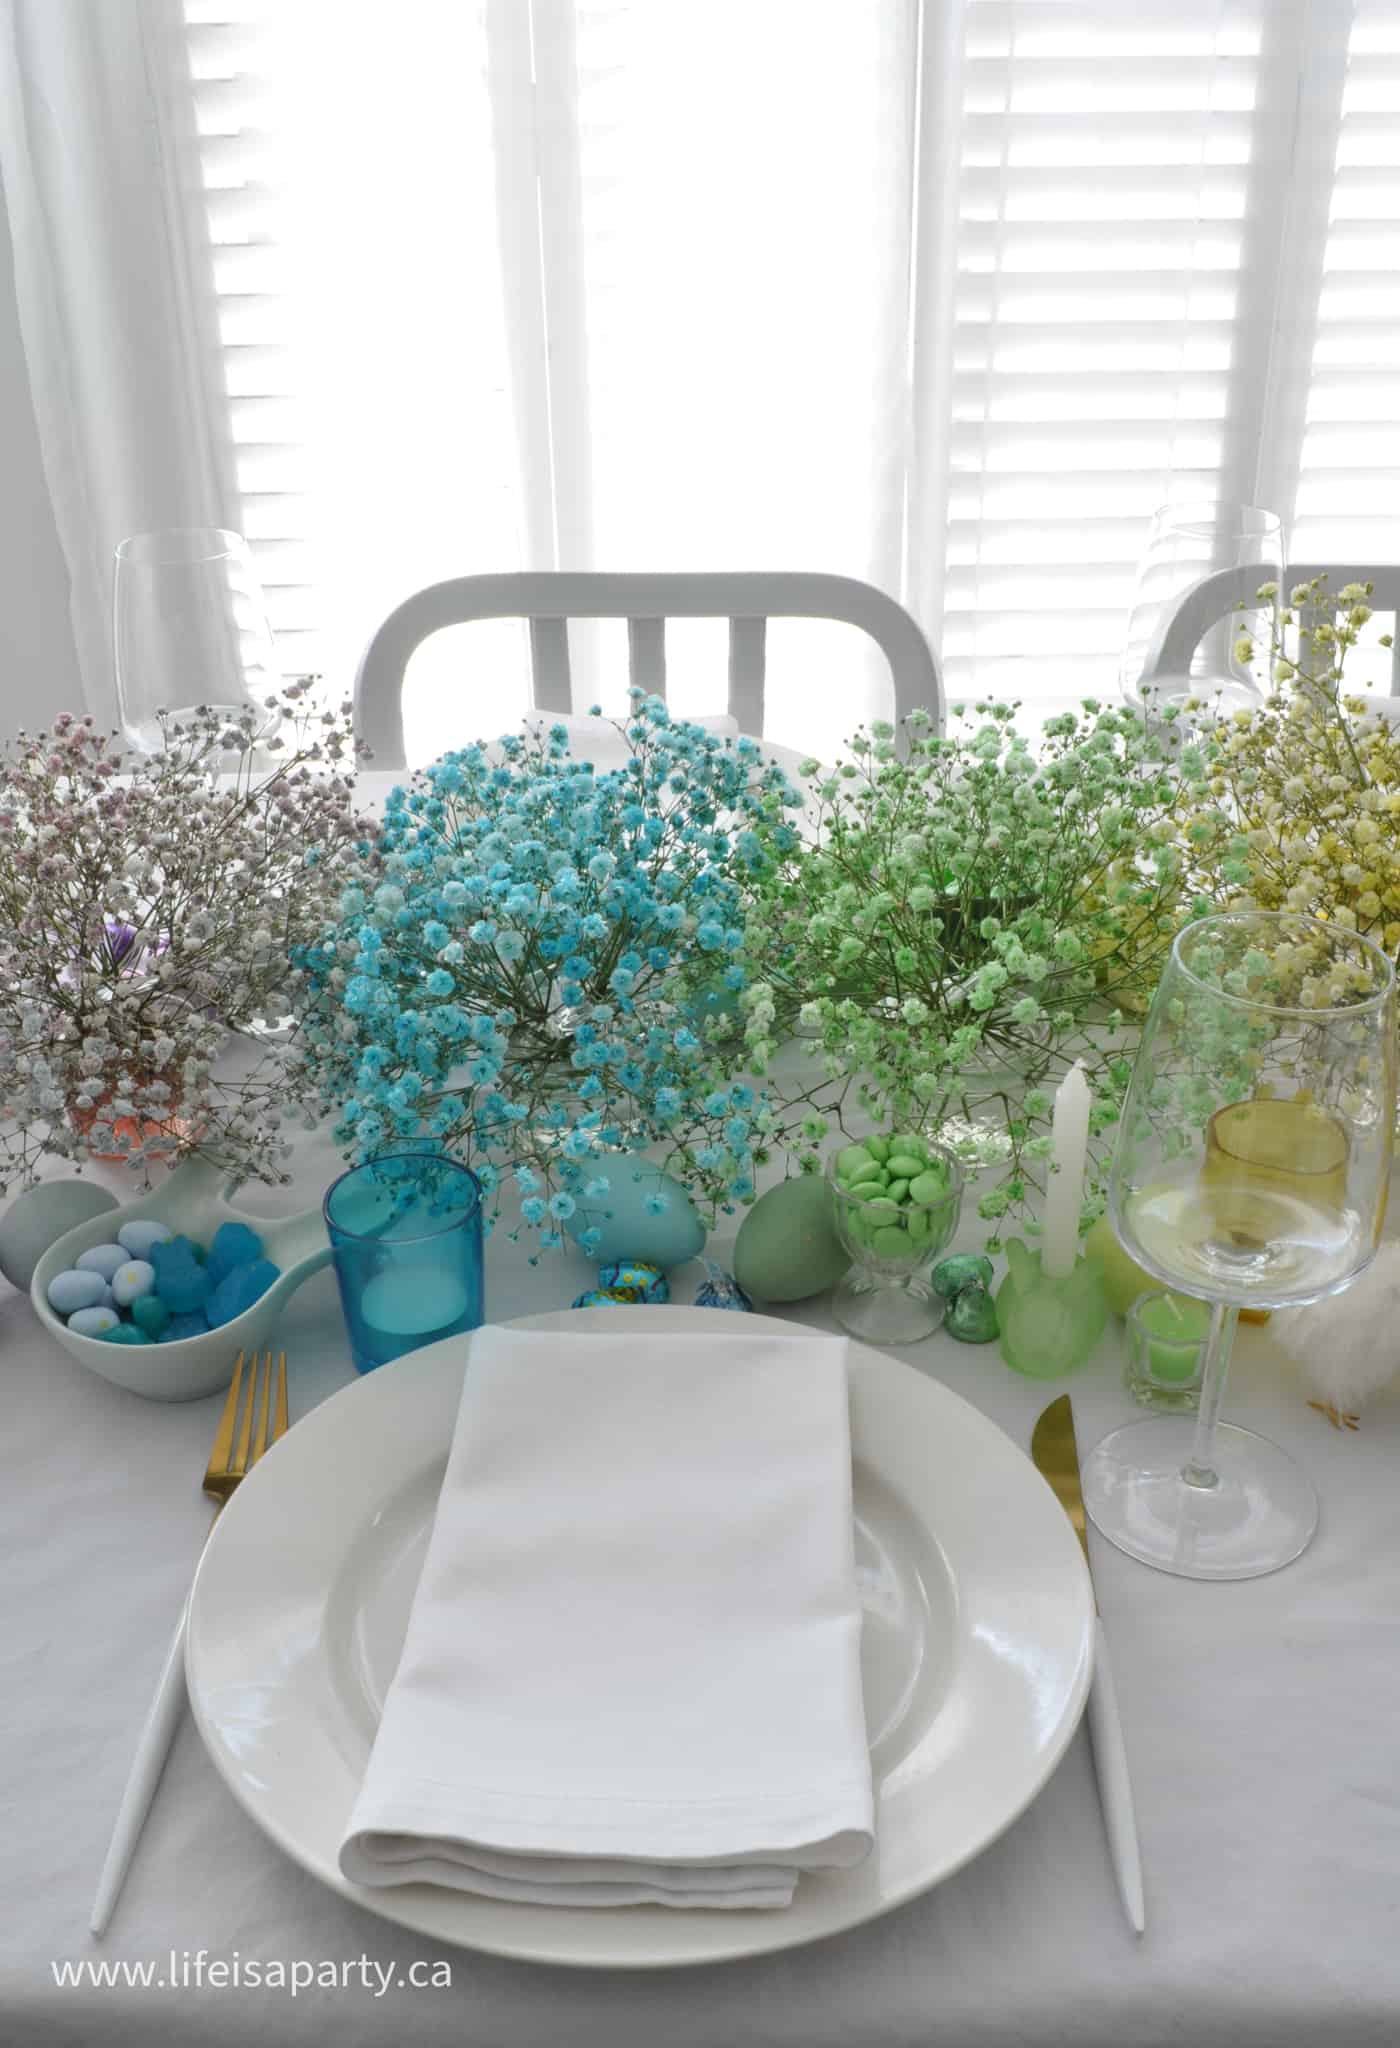
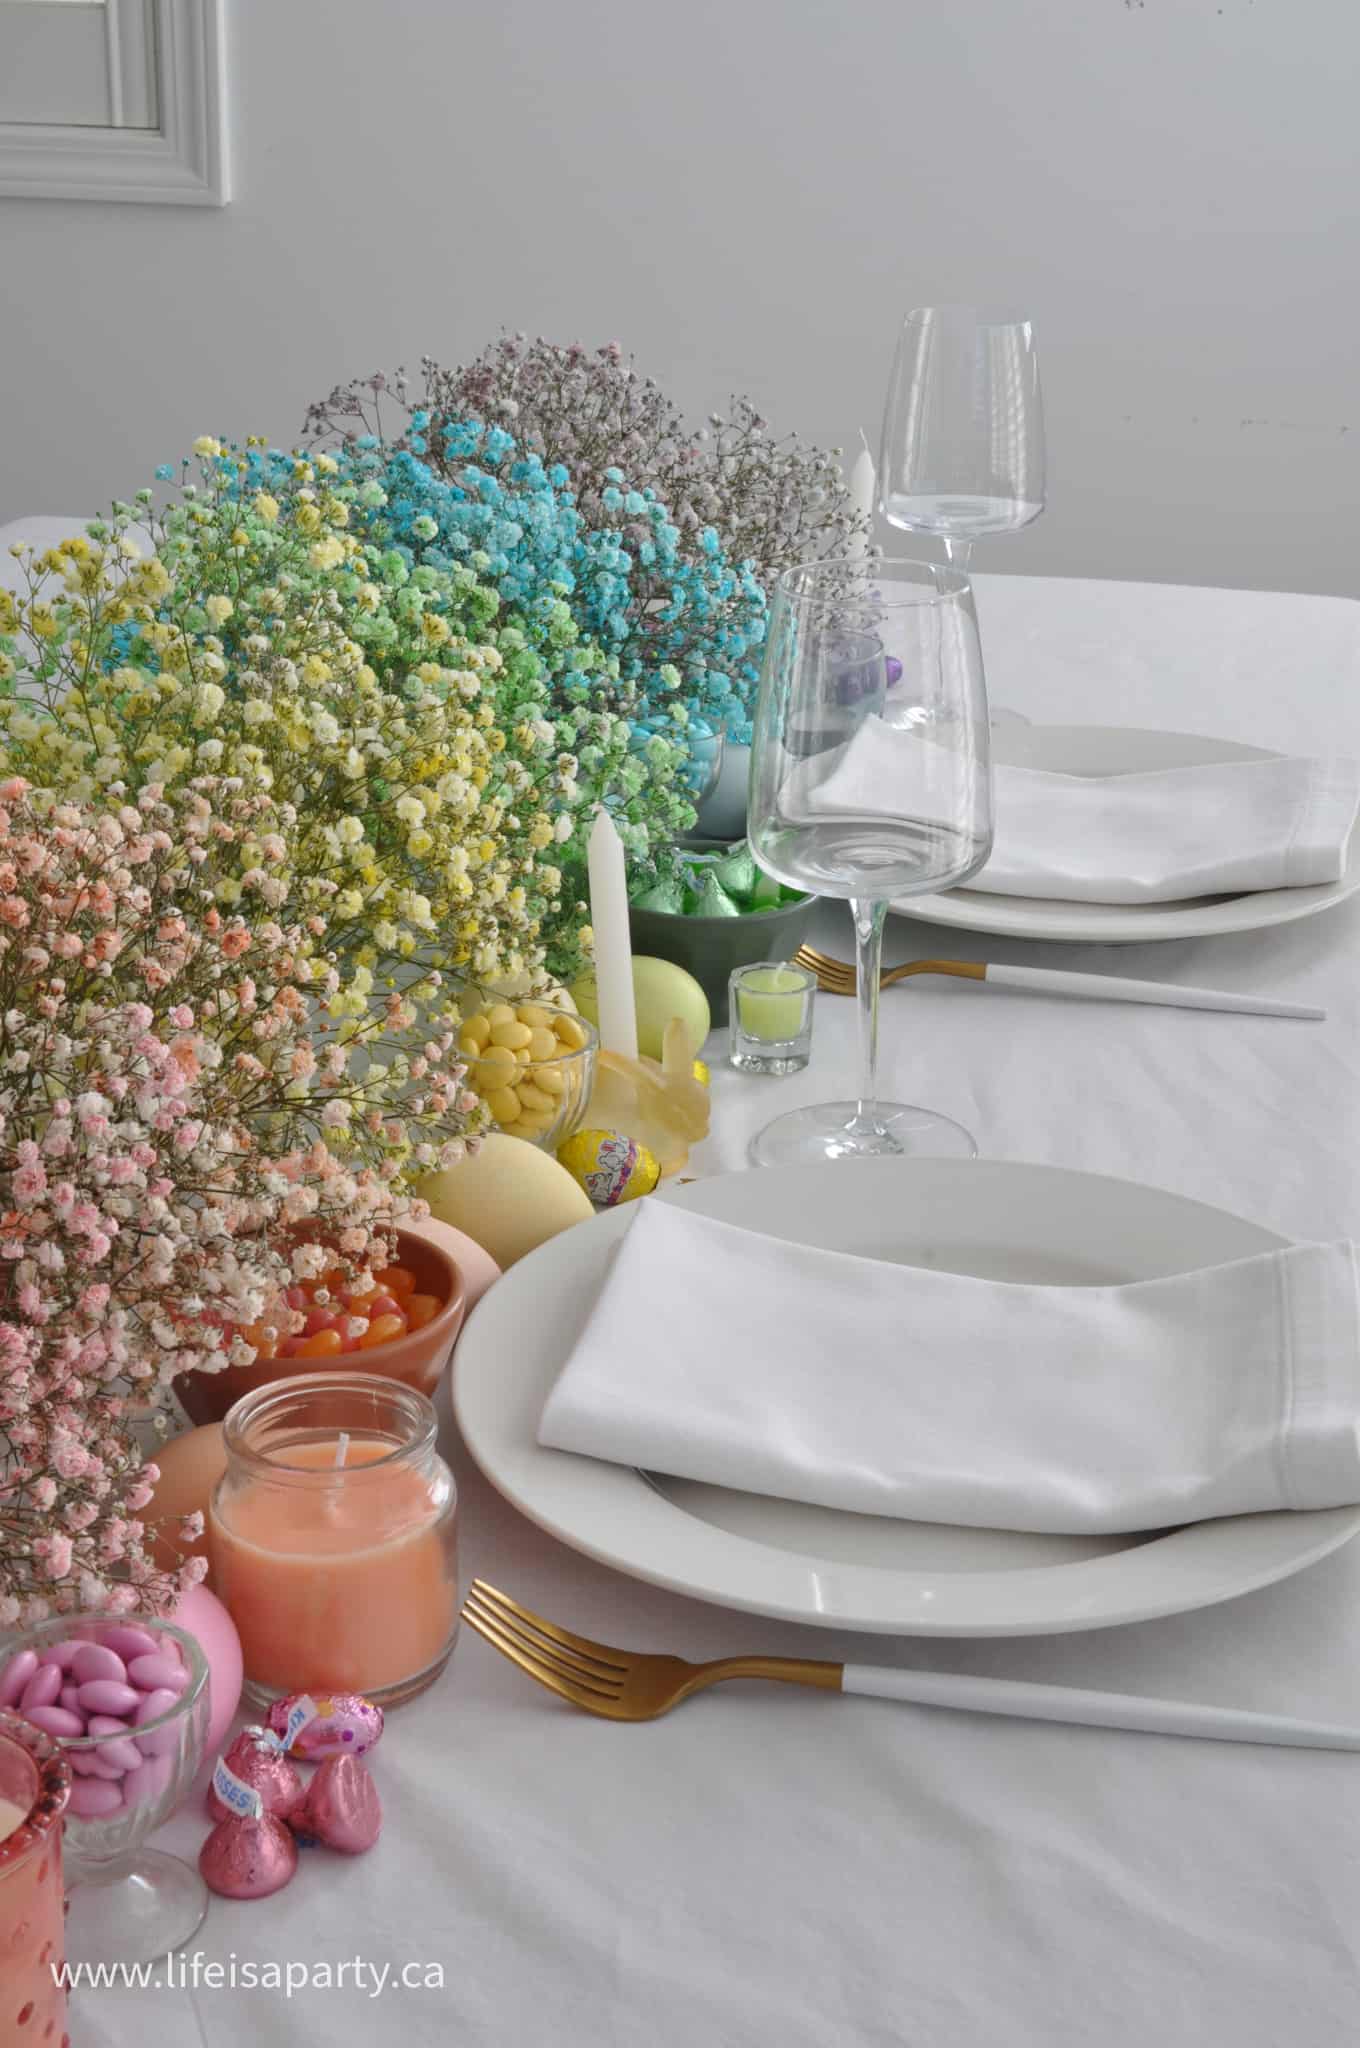
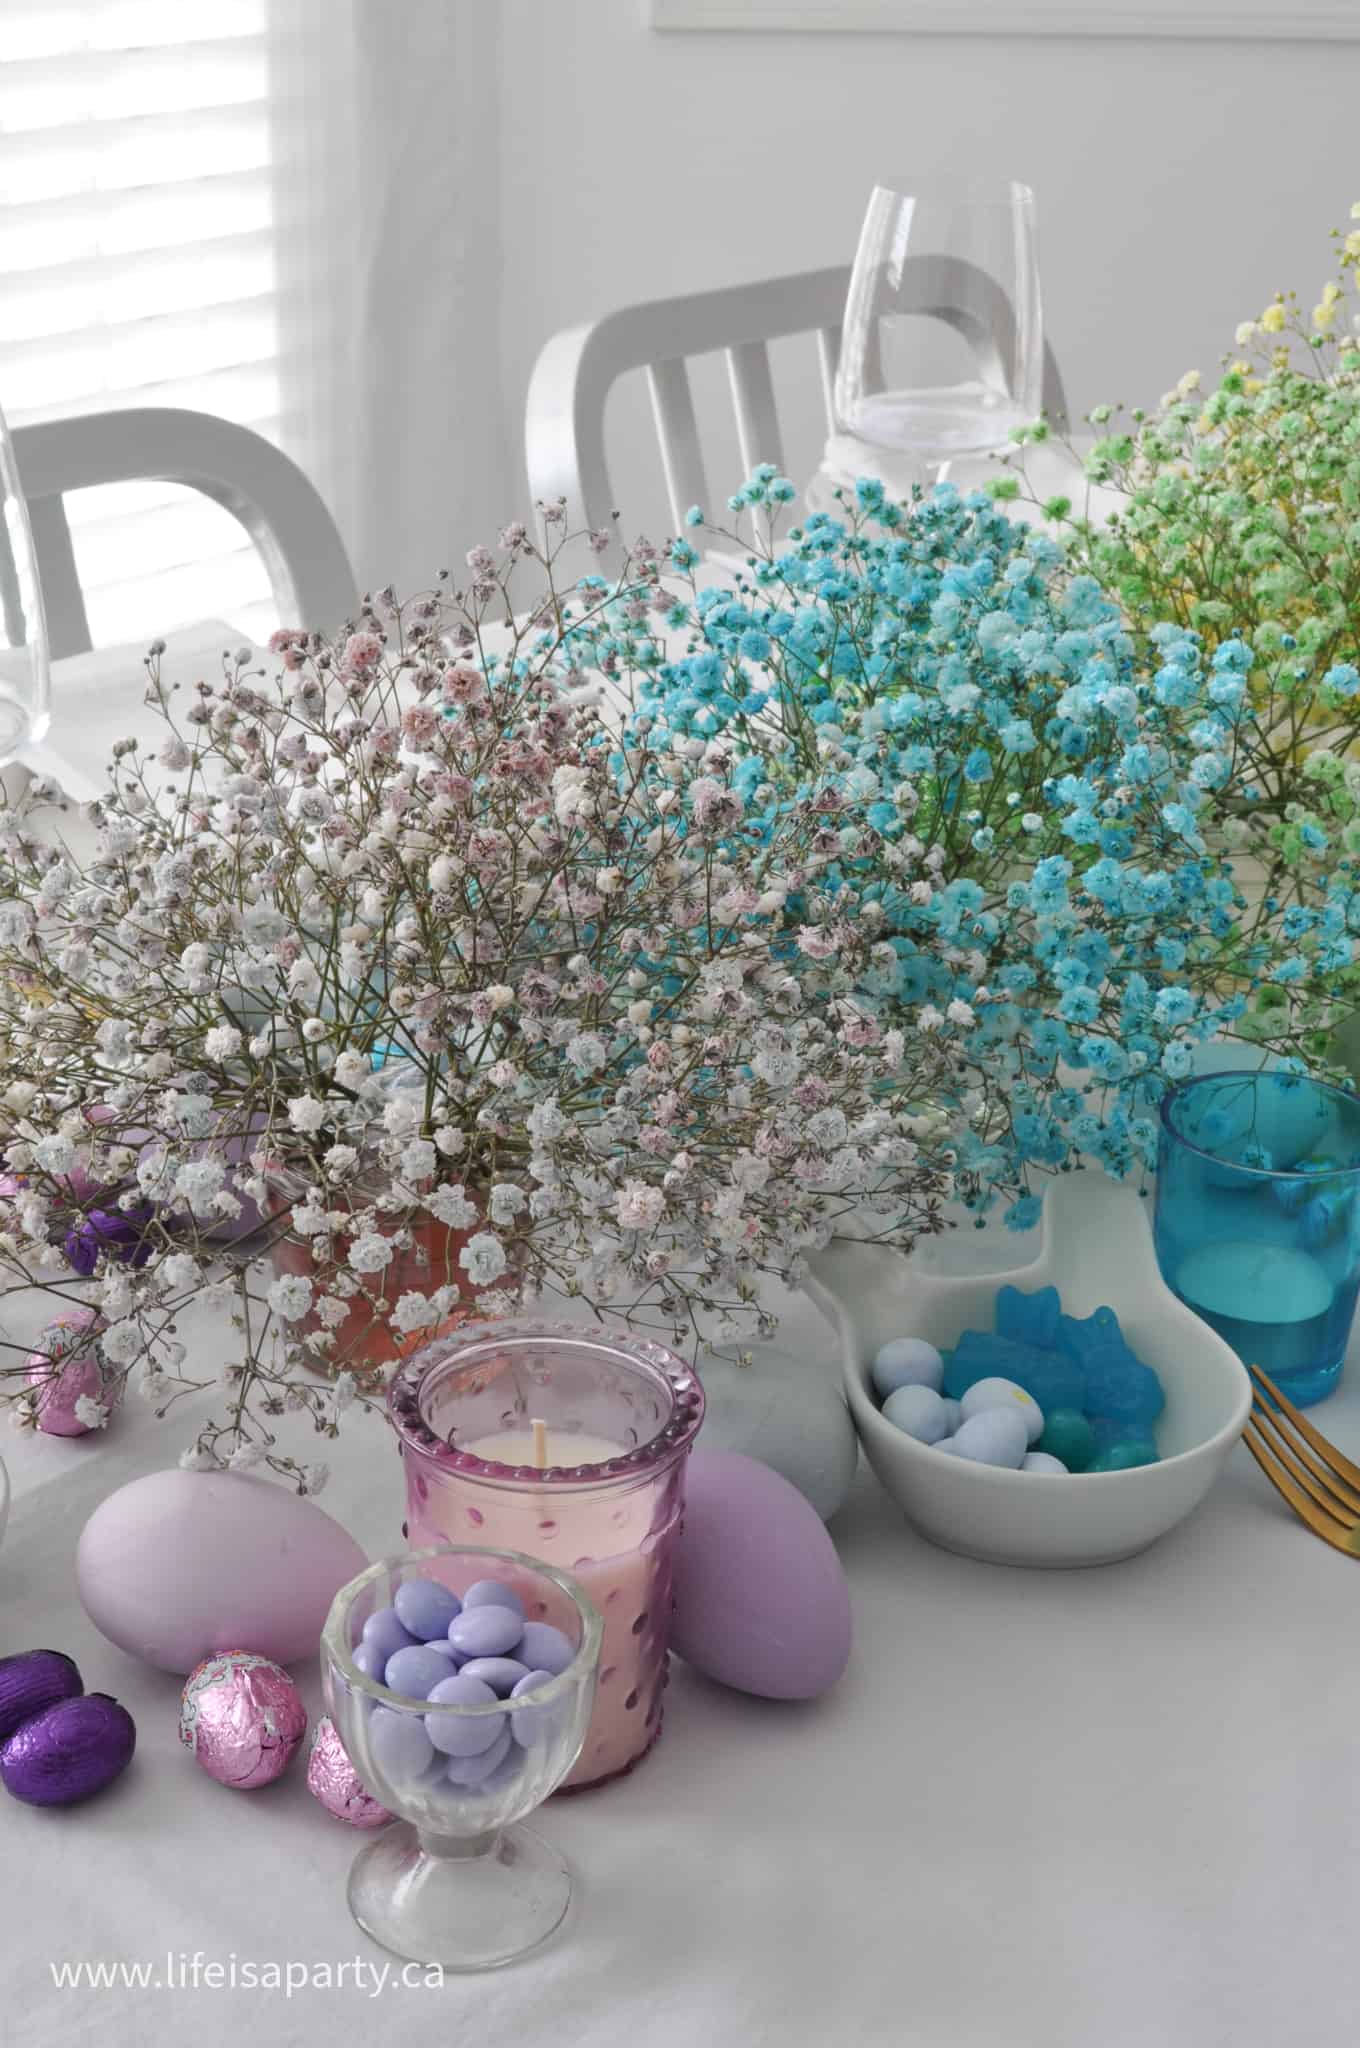
We started out with rainbow flowers. We used baby's breath and dyed six little bunches each a different rainbow color. This is a really fun DIY that you do with food coloring. Check out this blog post with all the details about exactly how to dye your own rainbow baby's breath. You can also buy rainbow baby's breath already dyed and ready to use.  Another option would be to do bouquets of different flowers in rainbow colors. I really like the baby's breath though, because it's nice and low to the table and looks great with all our other Easter decorations tucked in around it.

DIY rainbow flowers

I arranged each bouquet in a mini mason jar with water, and then laid them out in rainbow order down the centre of the dining table.

DIY rainbow baby's breath

When Easter is over and it's time to put all the Easter table décor away, we can upcycle these pretty flowers by drying them and using them in crafts or as dried flower arrangements in home décor.

Easter Eggs

You couldn't have an Easter table without some Easter eggs. I used some plain craft eggs from the dollar store and painted them in rainbow of colours to go with our table. I used two shades of each color, and did two of each so that we could have one for each side of our Easter table centerpiece. This would be a great way to get family members and kids involved in this table by painting eggs together.

rainbow Easter tablescape

Easter table ideas

Candles

I thought it would be a nice addition to our rainbow table to add some candles. First I shopped my house and found lots of pretty tea light home decor in rainbow colors that I could use on our Easter table. I tried to add a little unity to the candles by using all glass candle holders. There were a few colors I was missing, so I picked up a few at the dollar store to complete our rainbow.

rainbow party tablescape
rainbow party

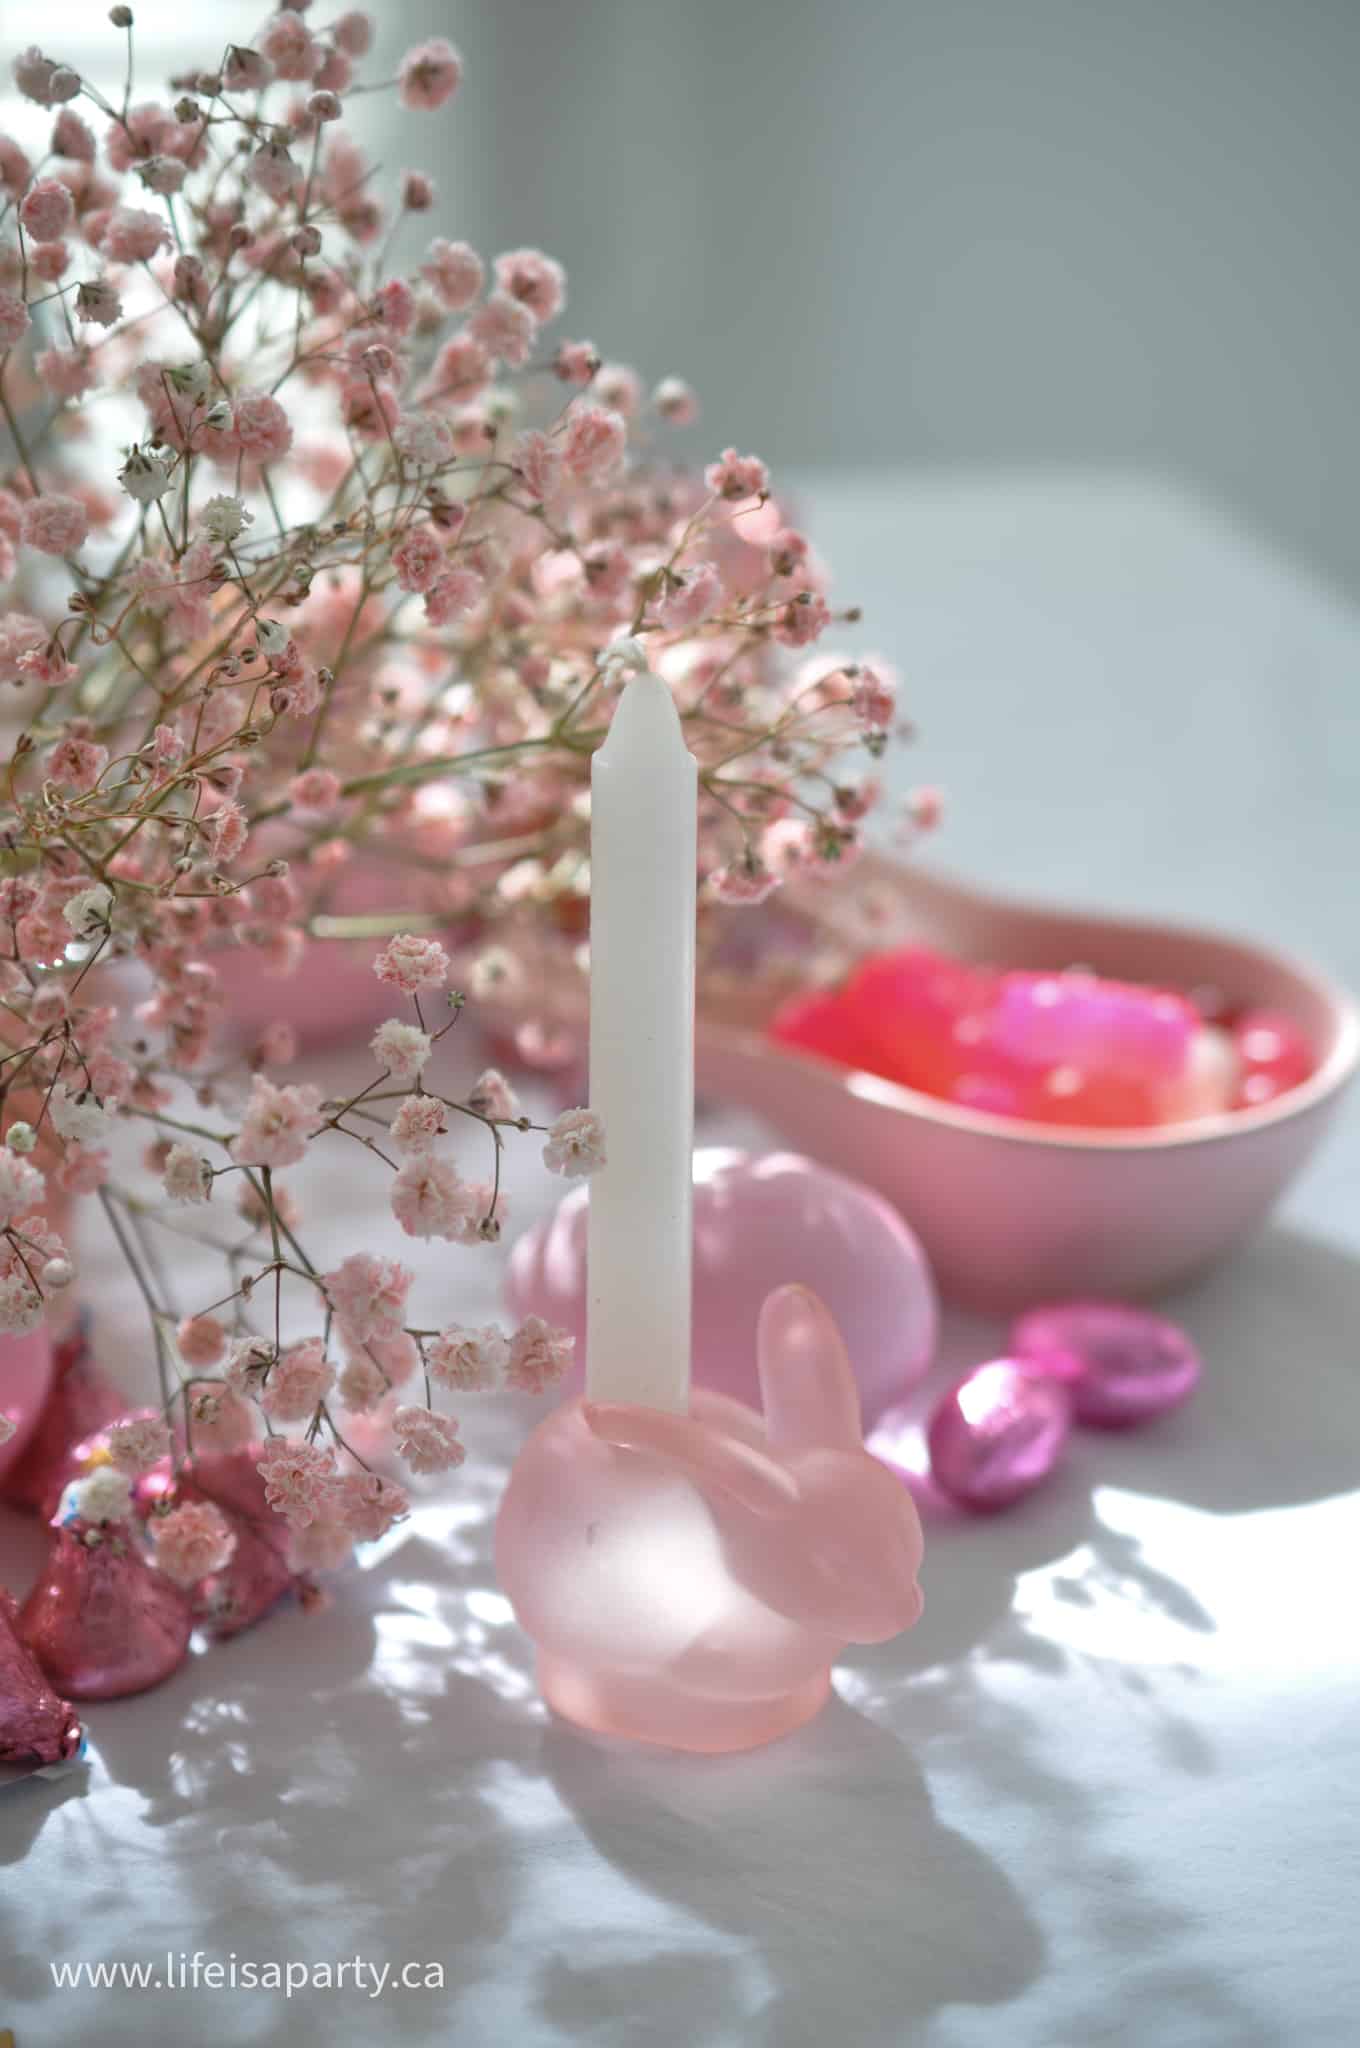
I also had some small Easter bunny candle holders that were such a fun addition. They were the perfect way to add some Easter bunnies to the table. You could also make your own matching bunny decorations by painting some dollar store bunnies with the same rainbow colors that you used on the Easter eggs to add some bunny ornaments, which is so perfect for Easter.

rainbow table

Rainbow Candy

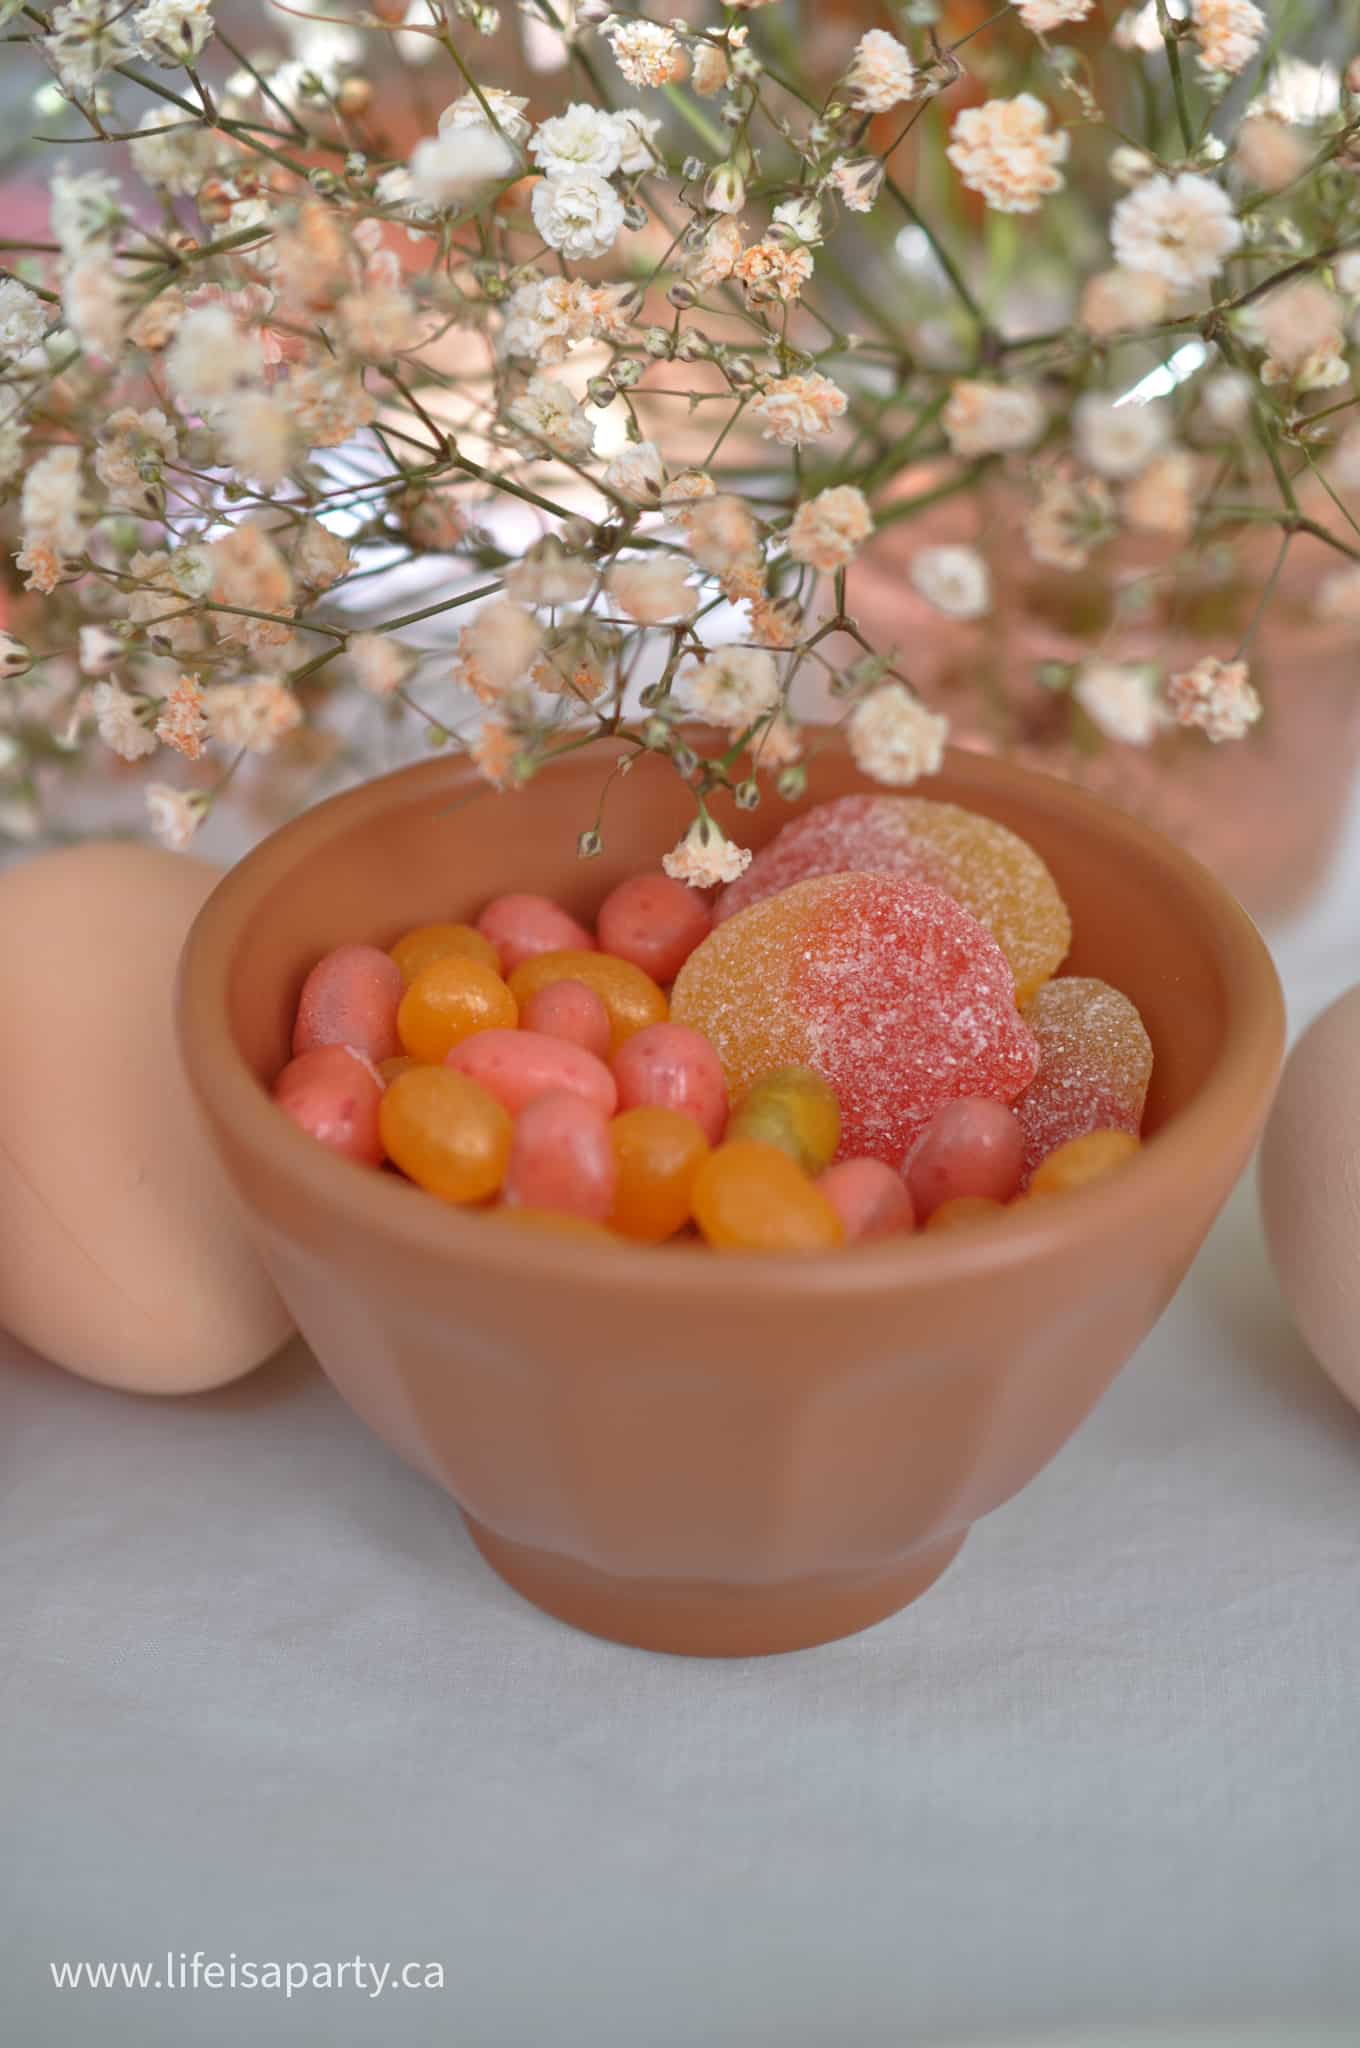
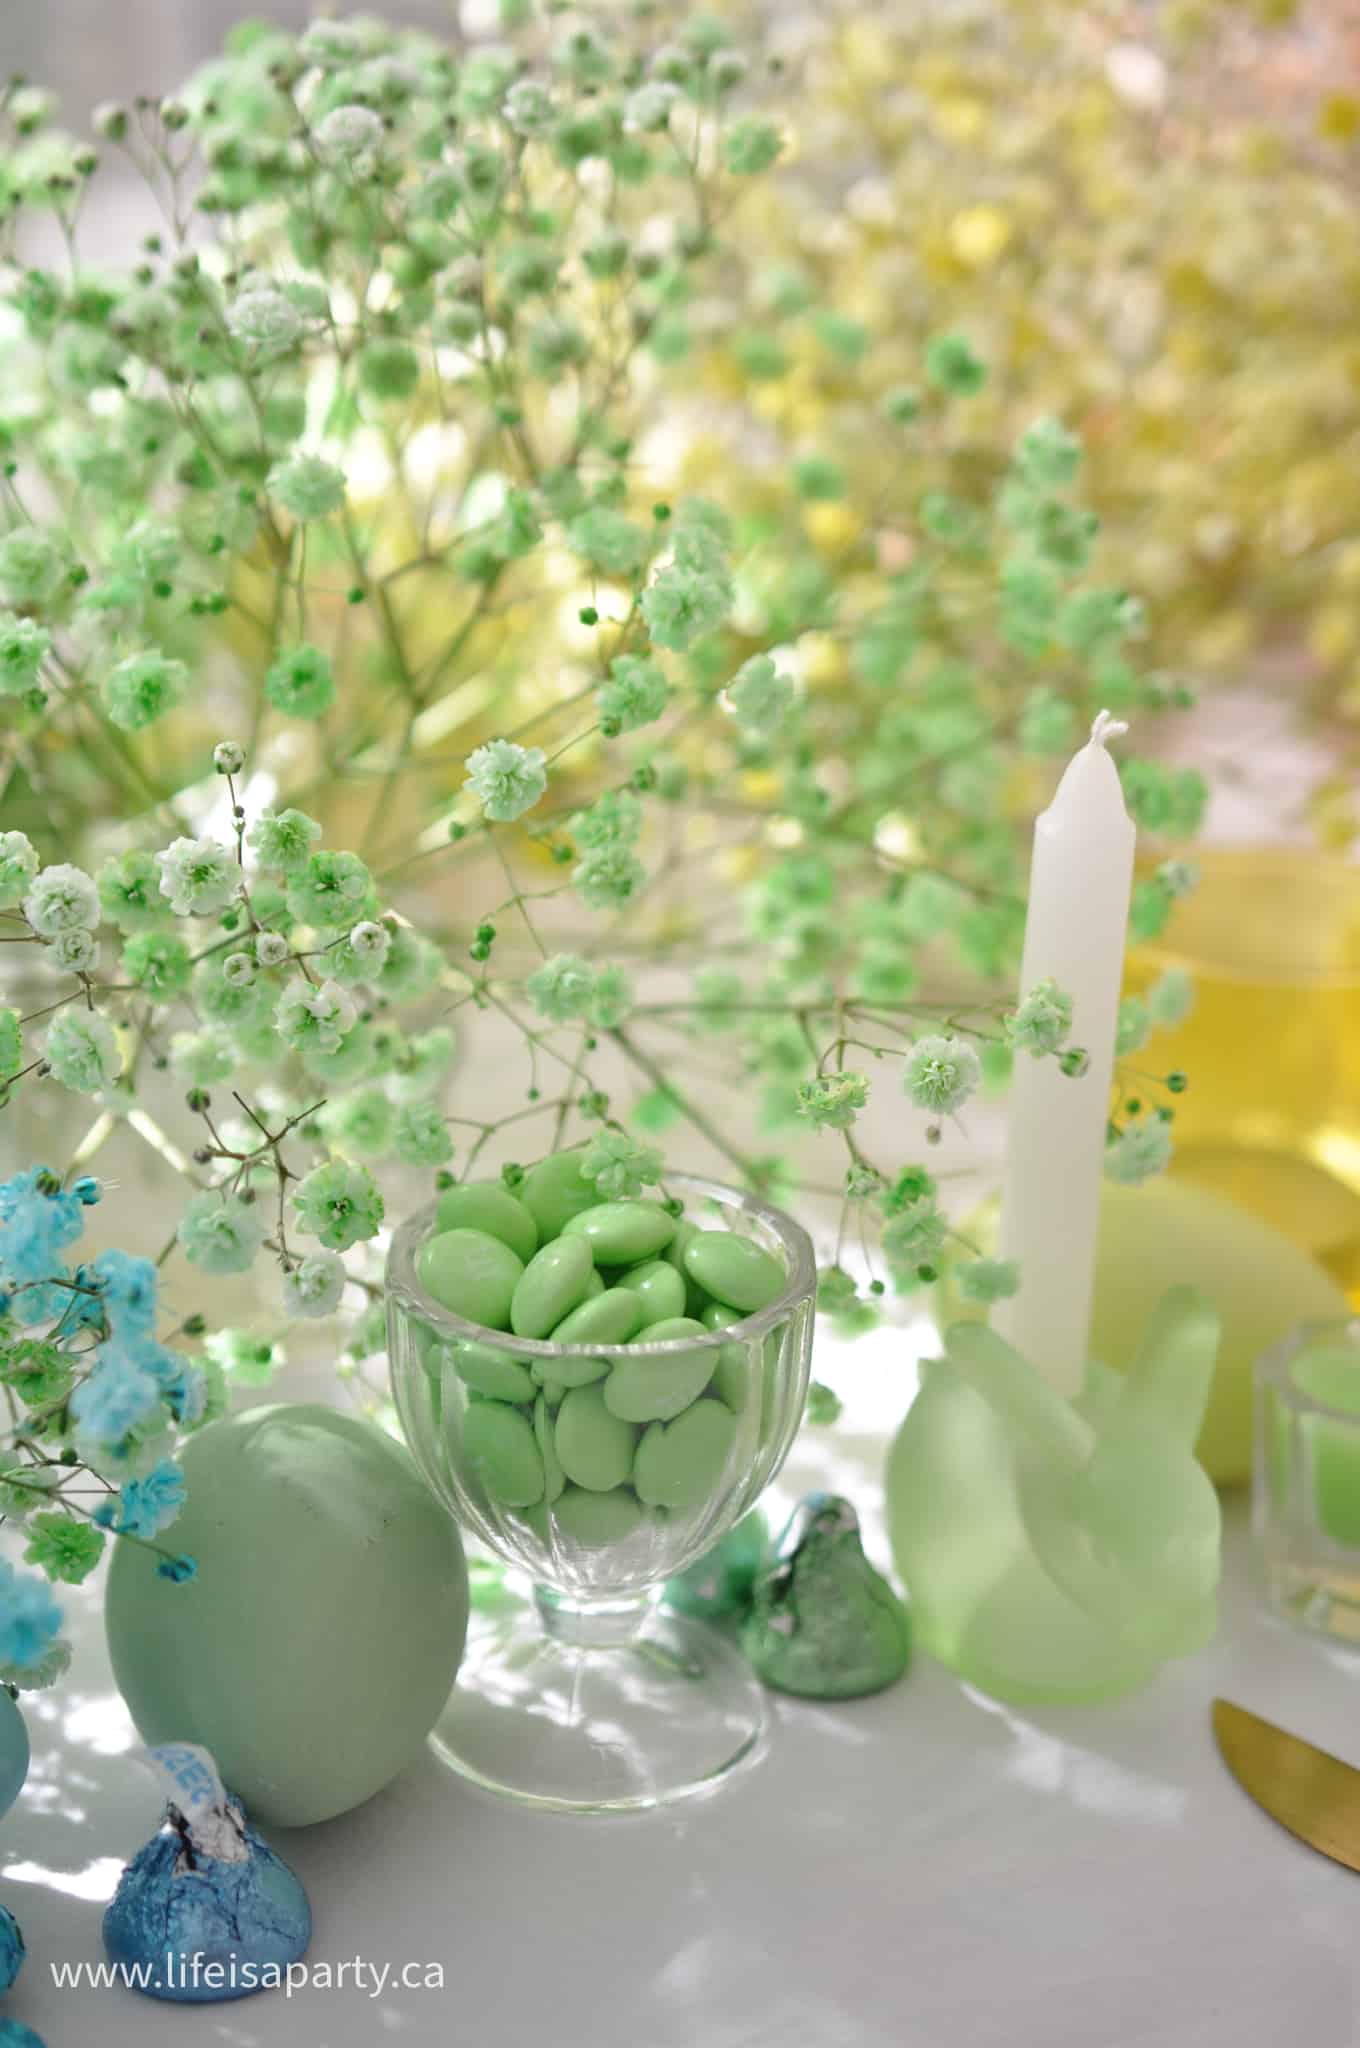
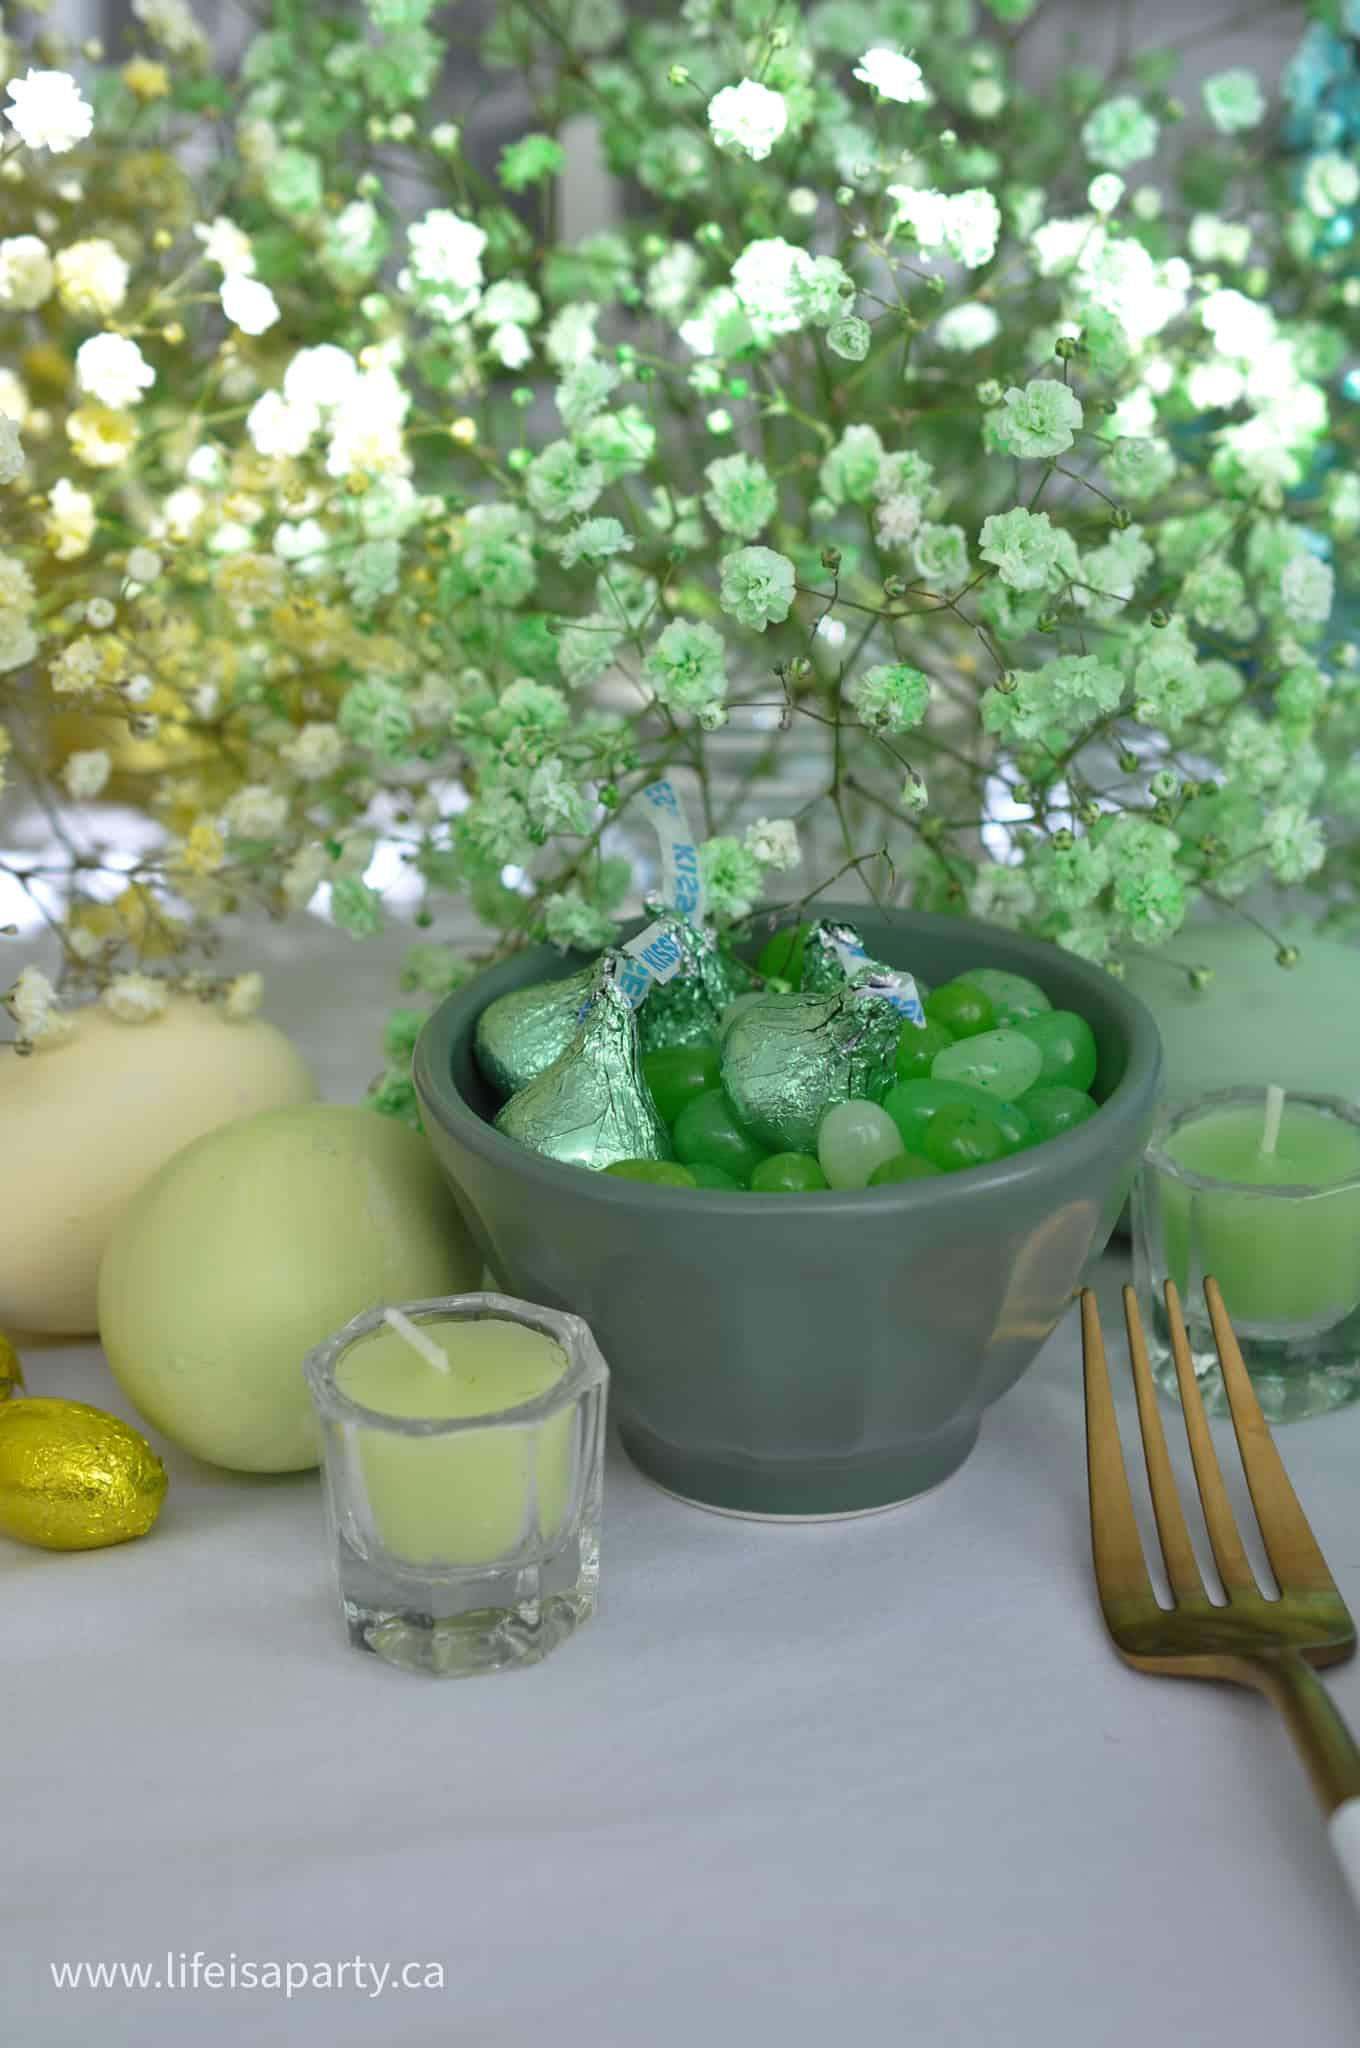
We also added in some candy, because you can't have Easter without candy! I shopped at the bulk food store, which made it easy to find candies in every color I needed and buy small quantities. This would be another fun element to do with kids, because it was fun hunting for candy by color.

rainbow easter table
rainbow easter tablescape

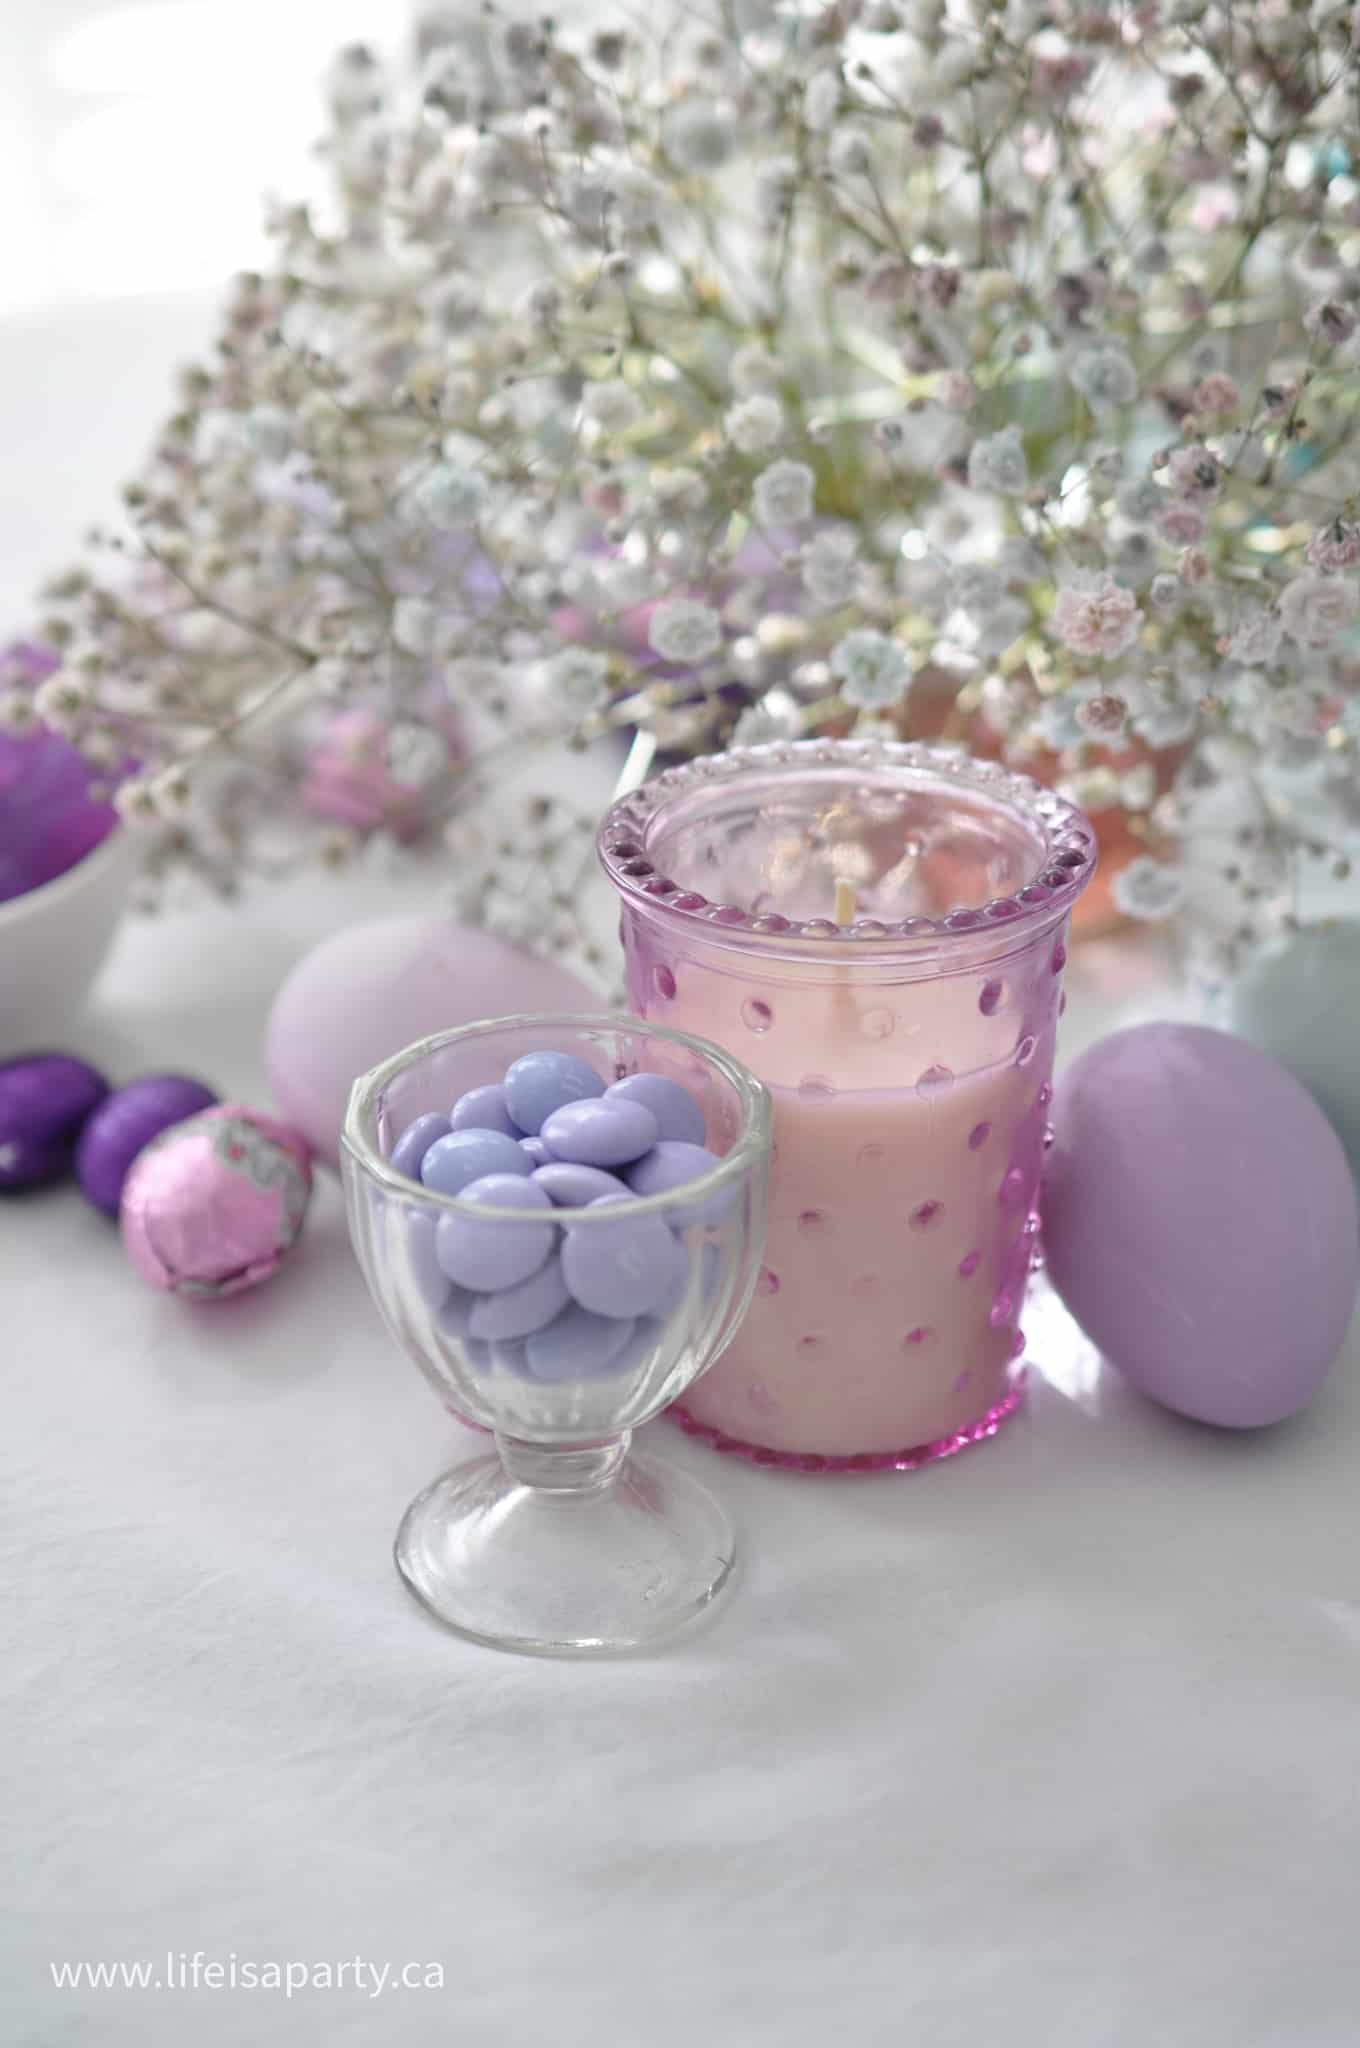
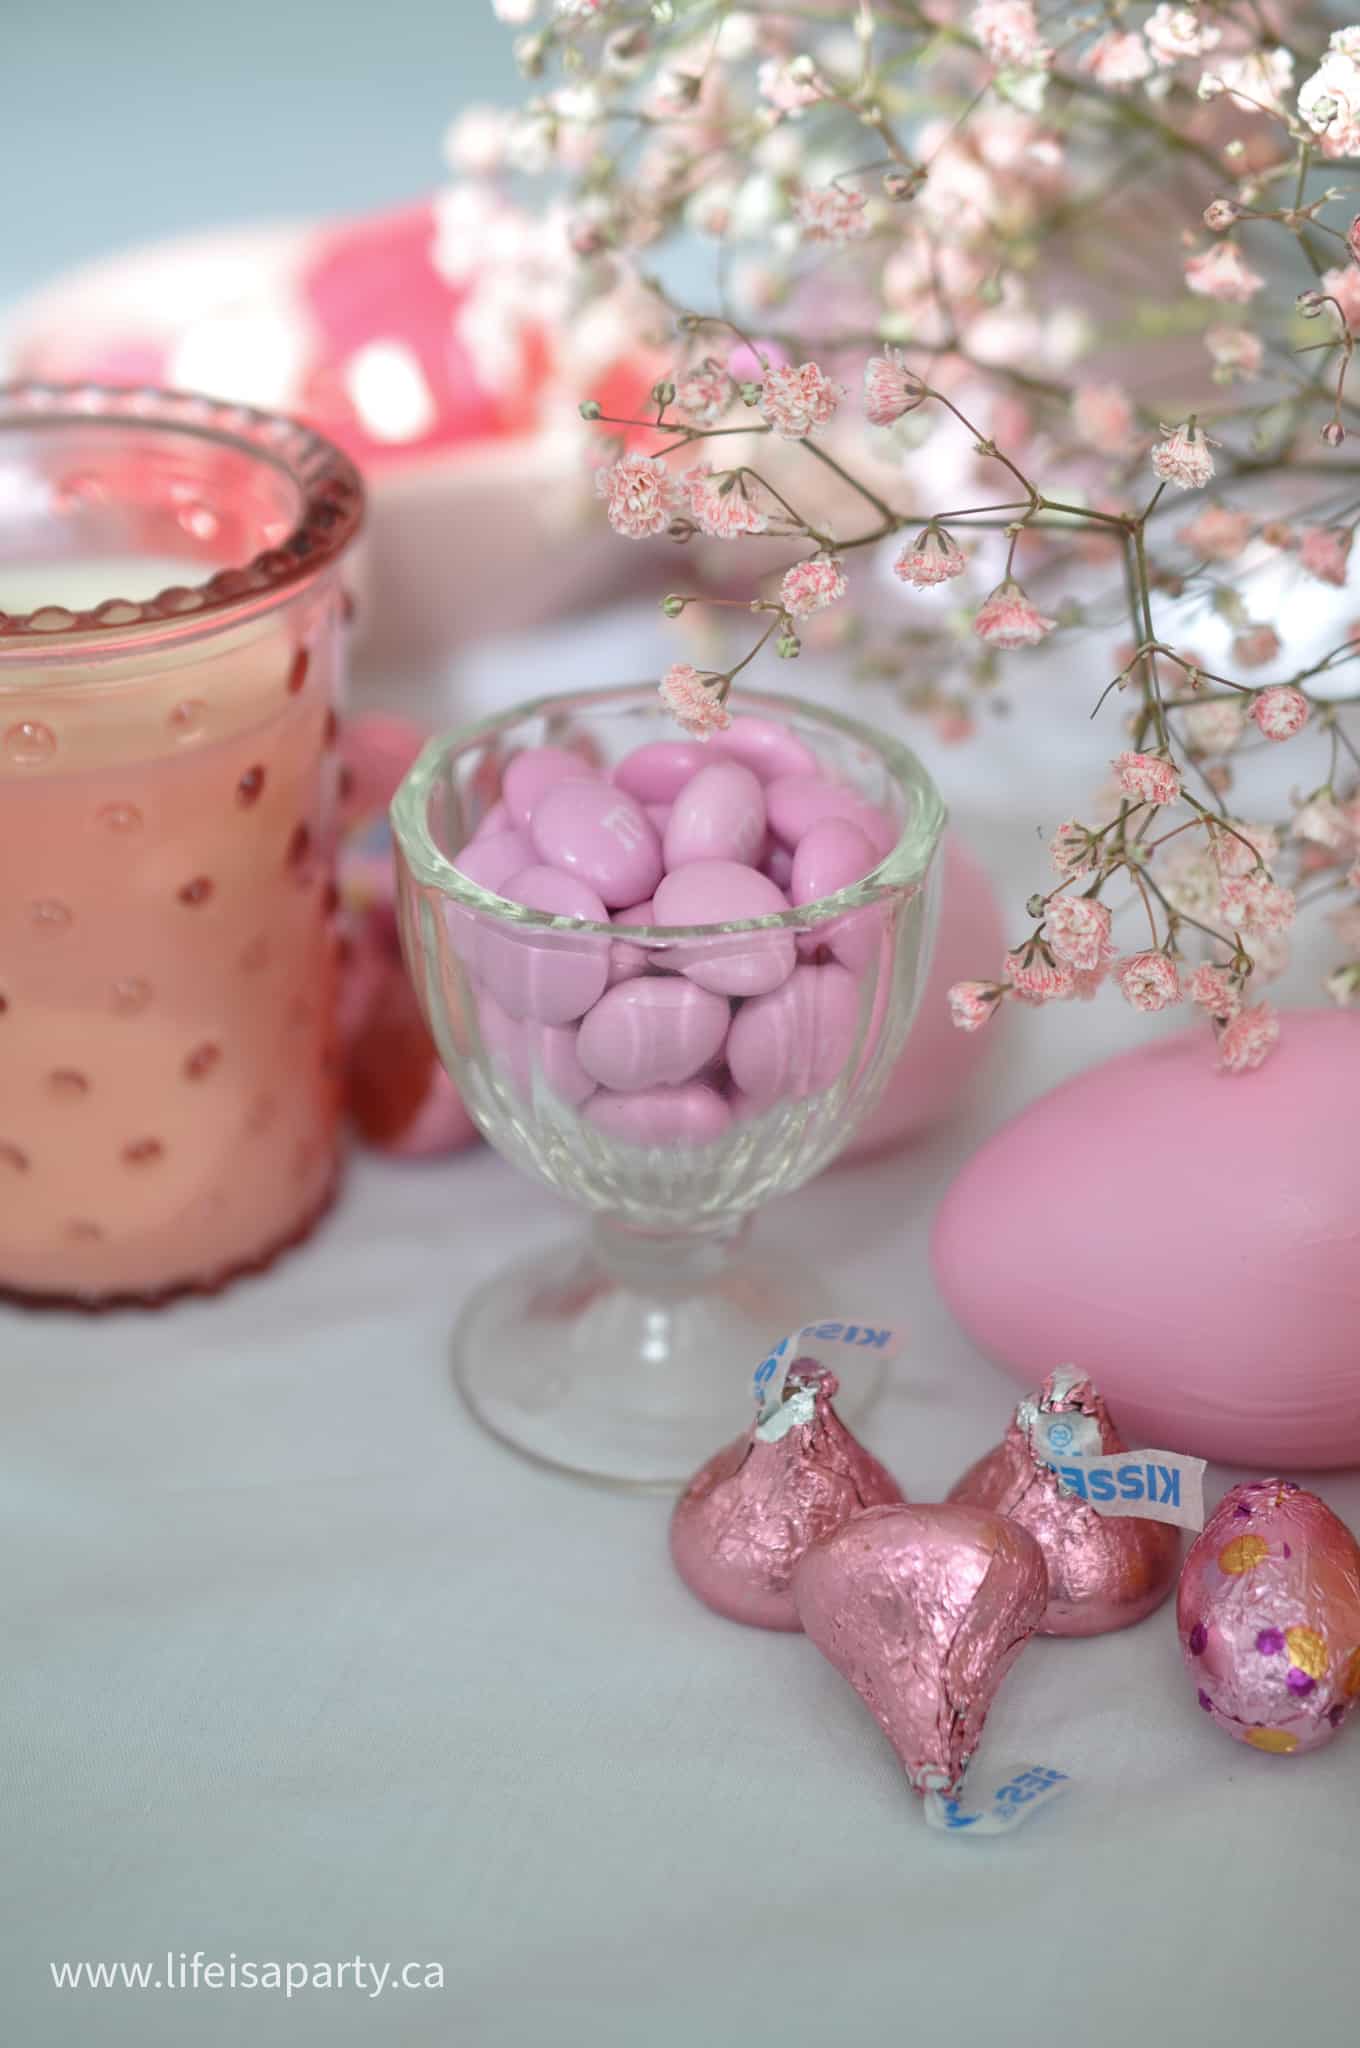
I bought some wrapped candy, like chocolate eggs, and Hershey kisses that I scattered on the table. I also used some vintage glass egg cups and filled them with with M&Ms and Smarties. Lastly I did a small bowl of assorted candies in each color. I included a mix of jelly beans, jube jubes, and Easter eggs in most of the bowls. Marshmallow peeps would be a great addition too. I had some cute bunny bowls and then mixed in some small ceramic ones in each color of the rainbow.

Rainbow Easter Table
easter table ideas
rainbow candy

This would be a great way to use up some candy from an Easter egg hunt. You might want to have some small bags on hand, so guests can pack up some candy at the end of dinner and take it home with them.

pink rainbow candy ideas

Place Settings

For each of the place settings, I kept things really simple. I used all white plates, and napkins. This gold and white cutlery worked perfectly with the white place settings. And lastly, just a plain straight sided wine glass. We wanted to keep the focus on the beautiful rainbow table centerpieces as our bold pop of color, so we kept the Easter place setting simple and classic.

rainbow easter table

This rainbow Easter table is sure to bring lots of joy to our Easter celebration. I love how it turned out. I think it's the kind of table, with so many small details, that guests will love sitting at and noticing different details all night long. As the light fades into the evening we can light the candles and linger around our rainbow together. I just love how happy and fun this Easter table turned out.

DIY rainbow table

With a Rainbow Easter Table to enjoy, life really is a party.

More Easter Table Inspiration

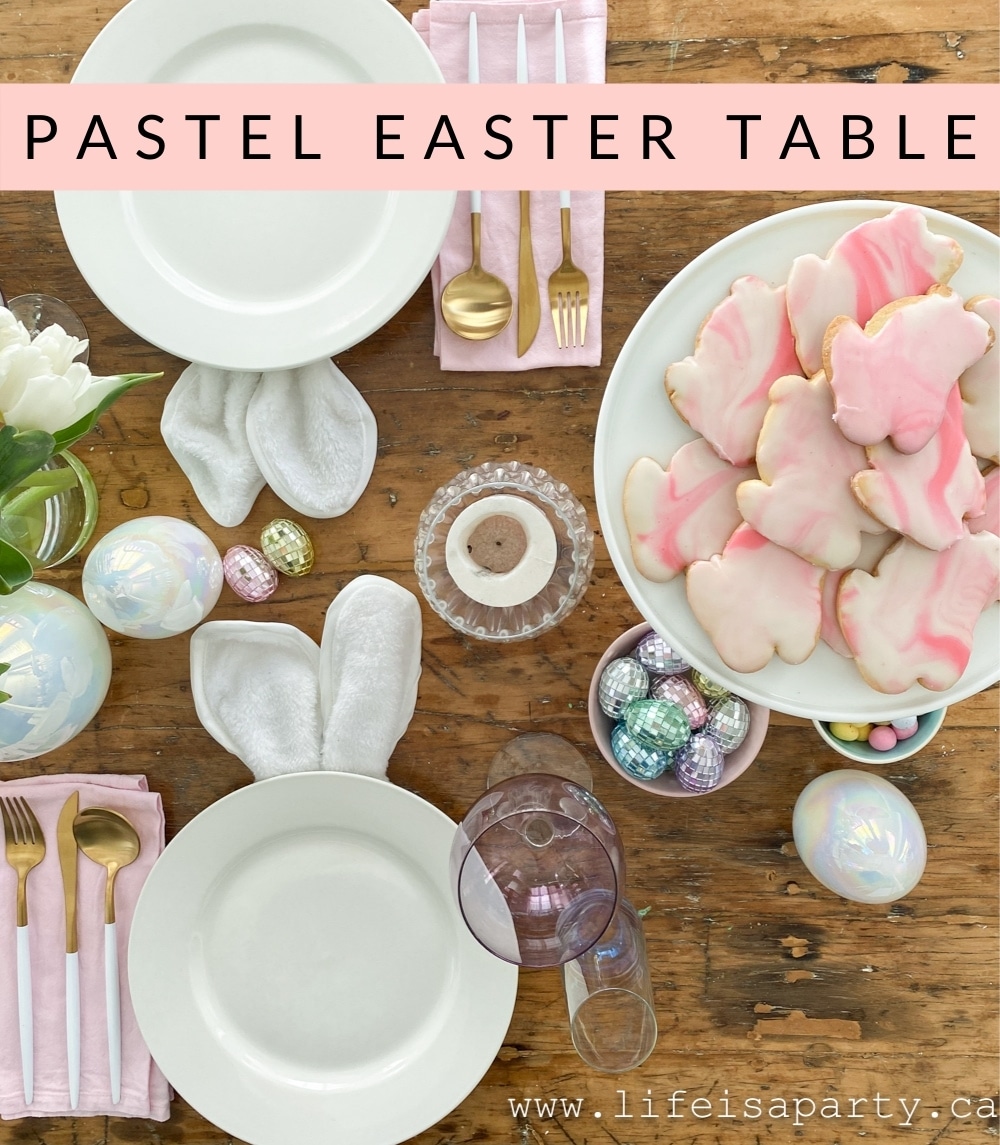
You might also like our Pastel Easter Table here.

Easter Table Ideas: bunny plates and chairs made from dollar store bunny ears and tails add some whimsy to this pastel & iridescent table.

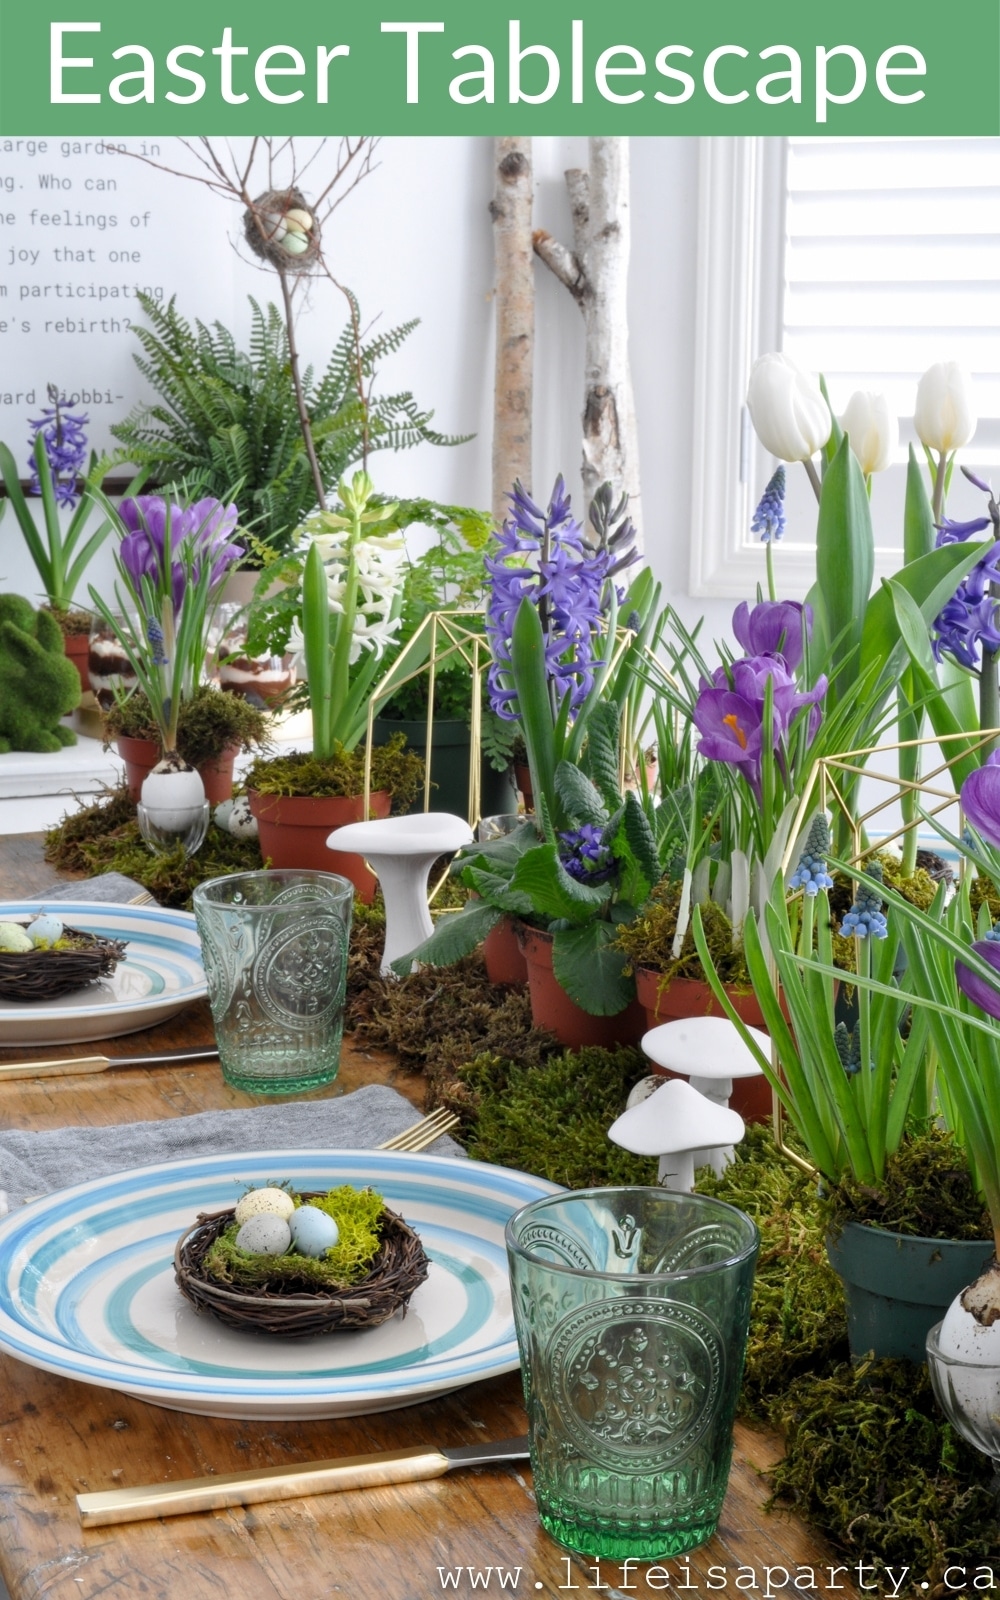
Also check out our Easter Tablescape with moss and spring flowers here.

Easter Tablescape

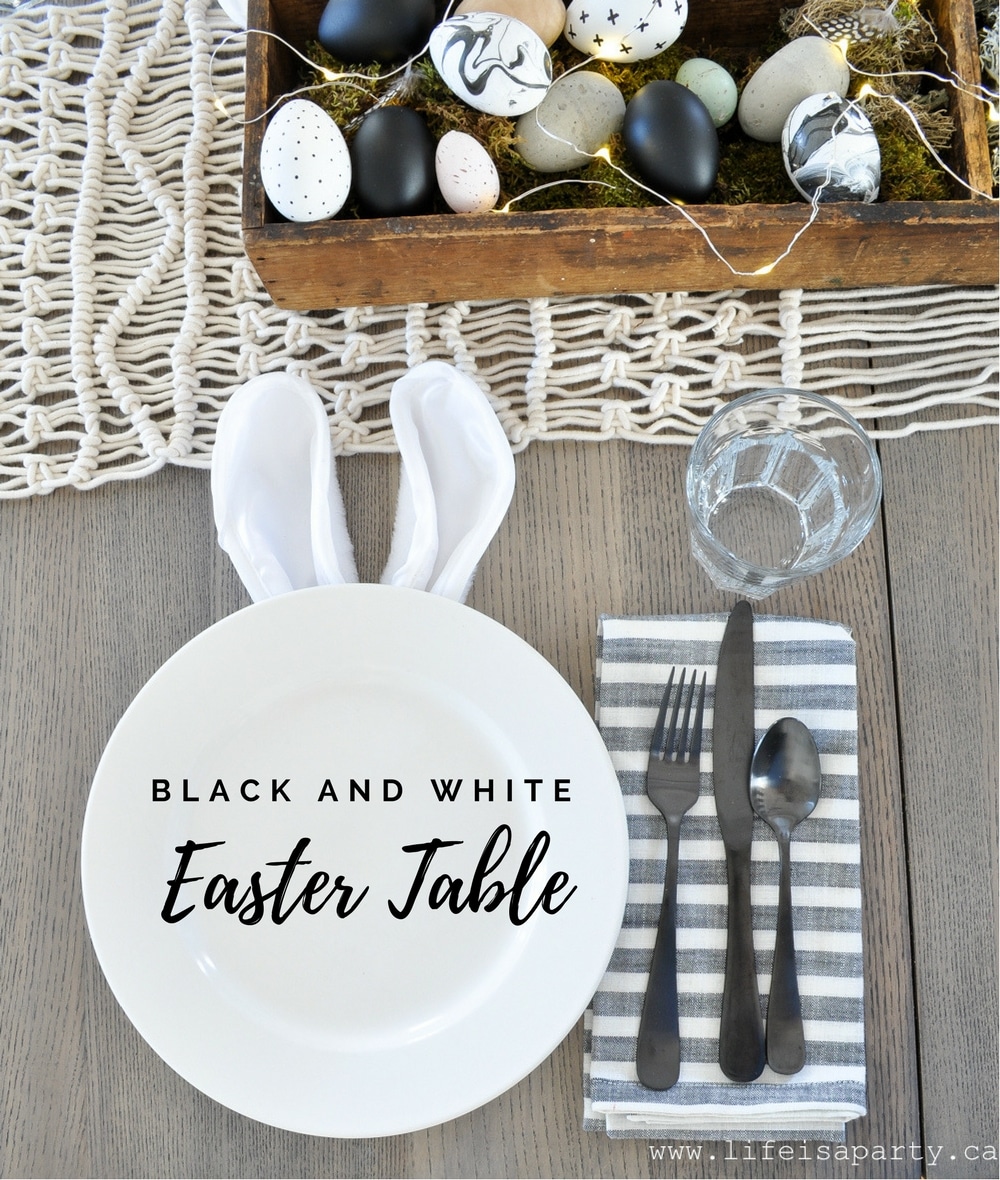
You might also enjoy Black and White Easter Table here.

Easy Baileys French Toast Recipe

Mar 13, 2023 · 1 Comment

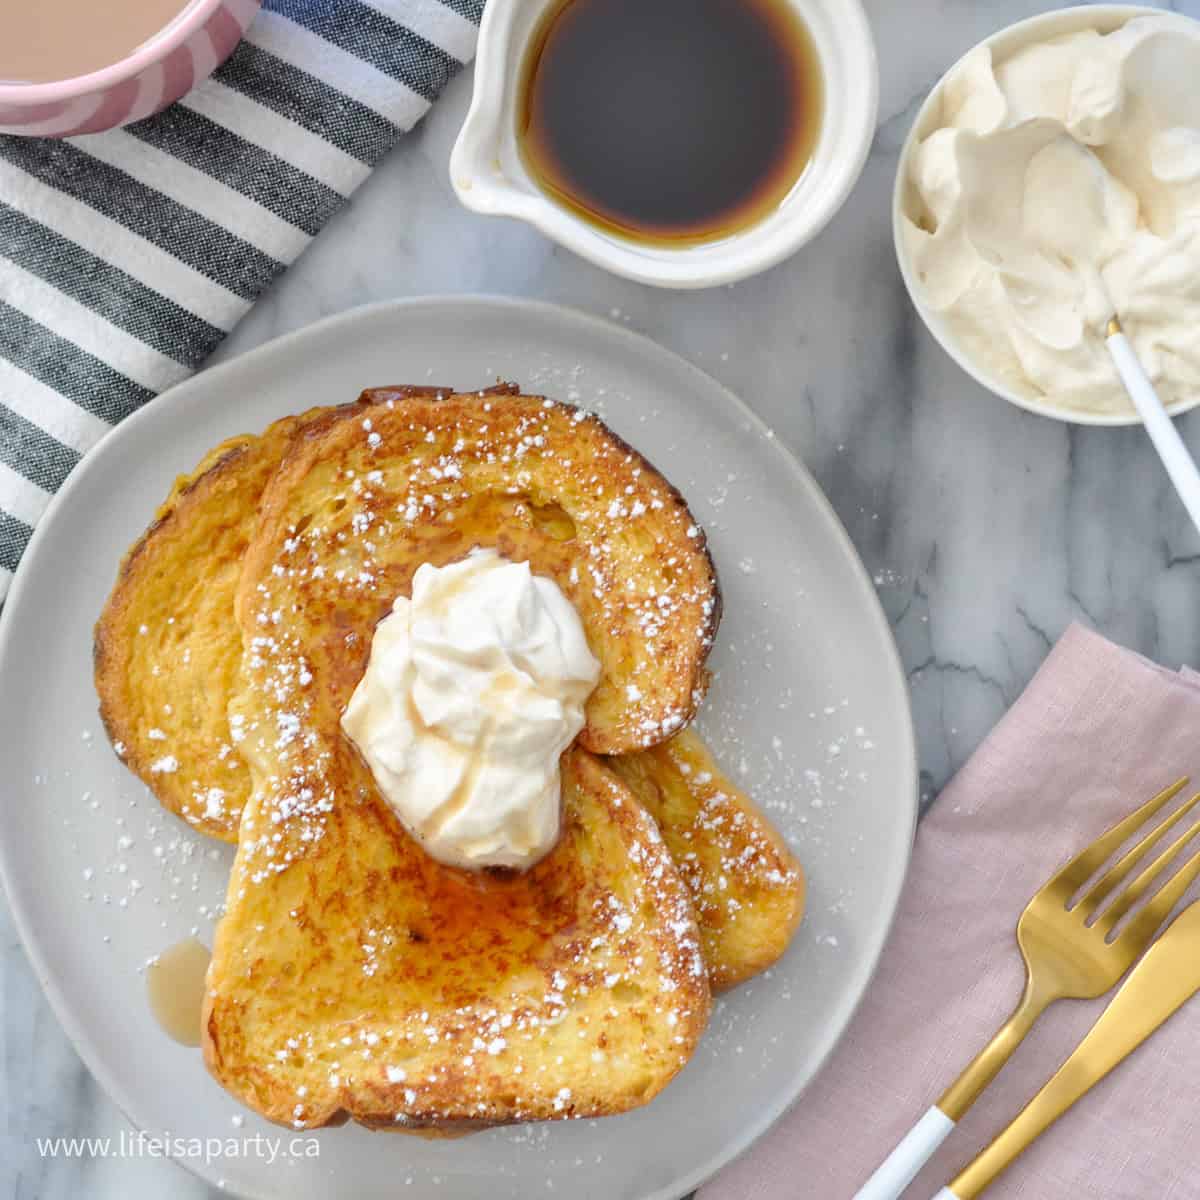
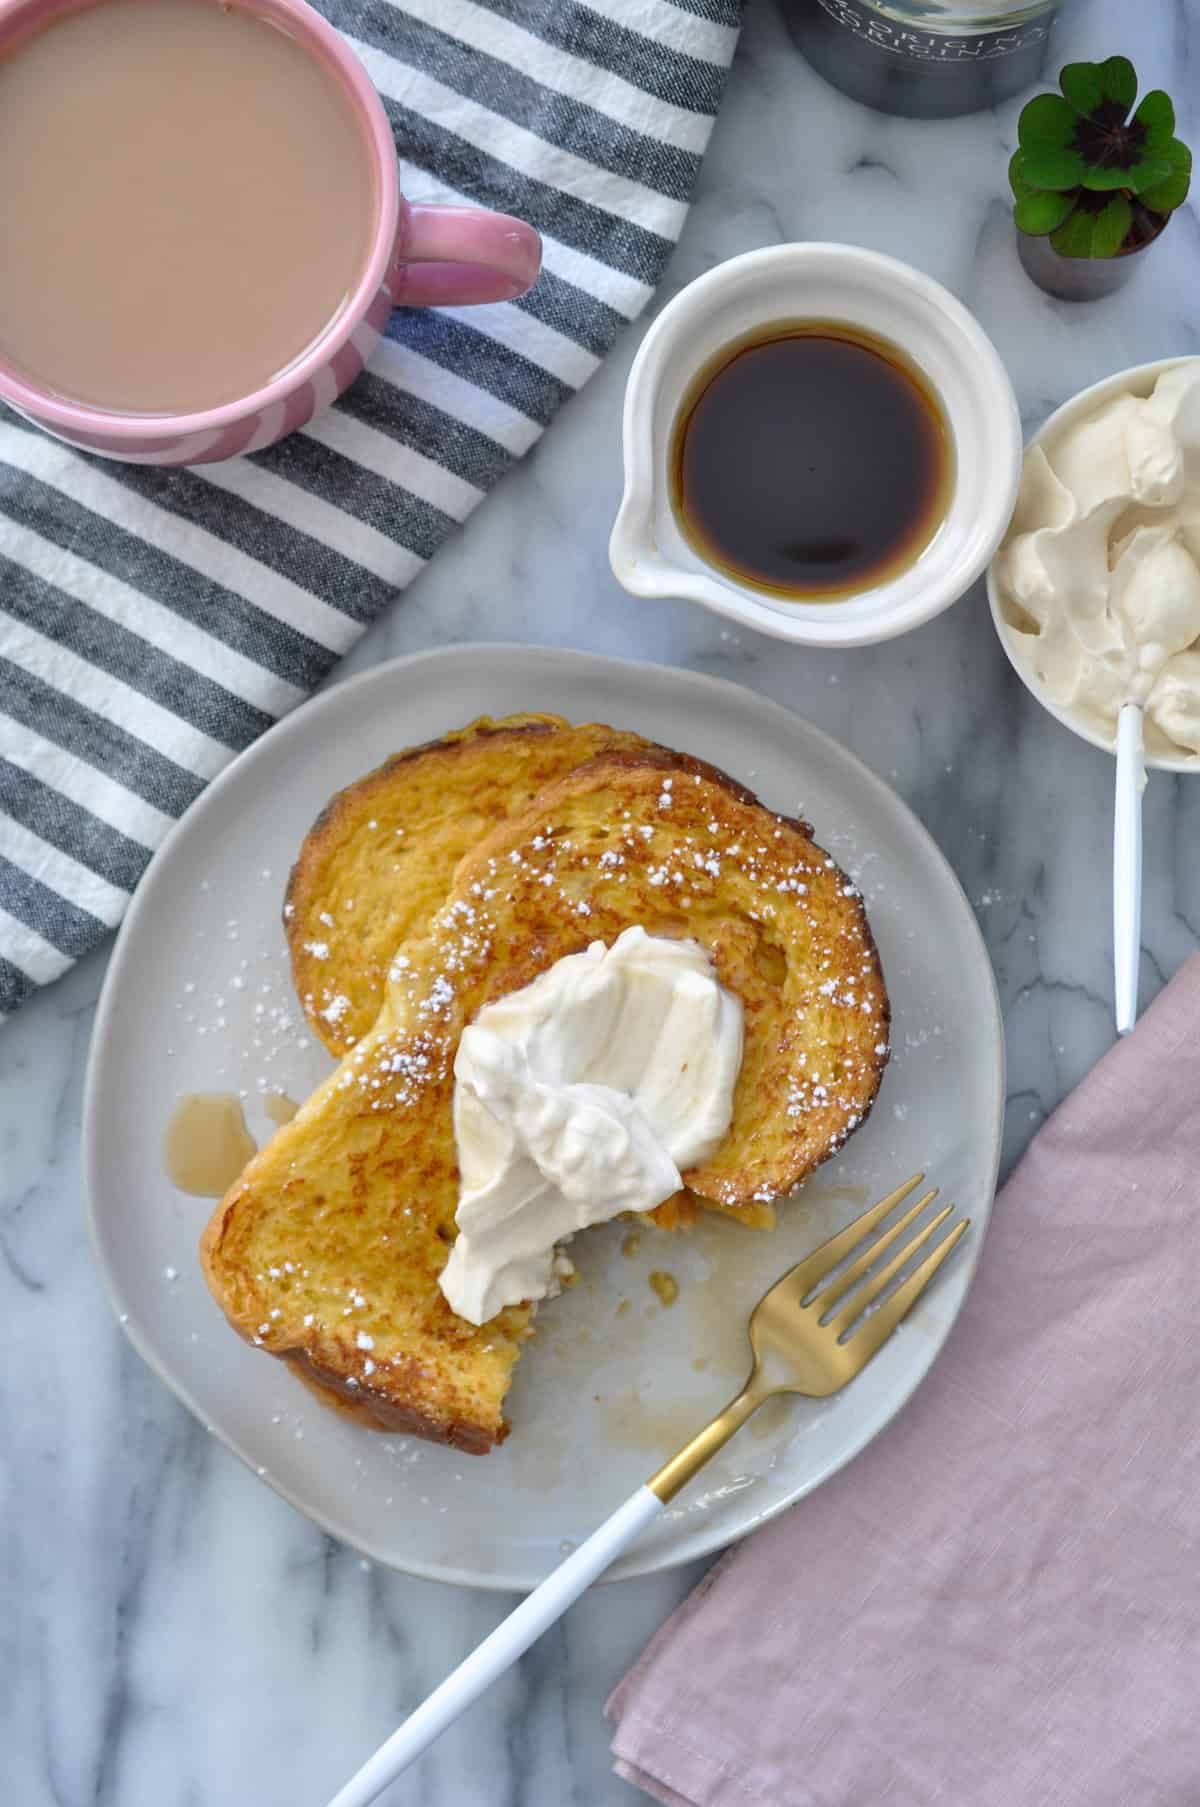
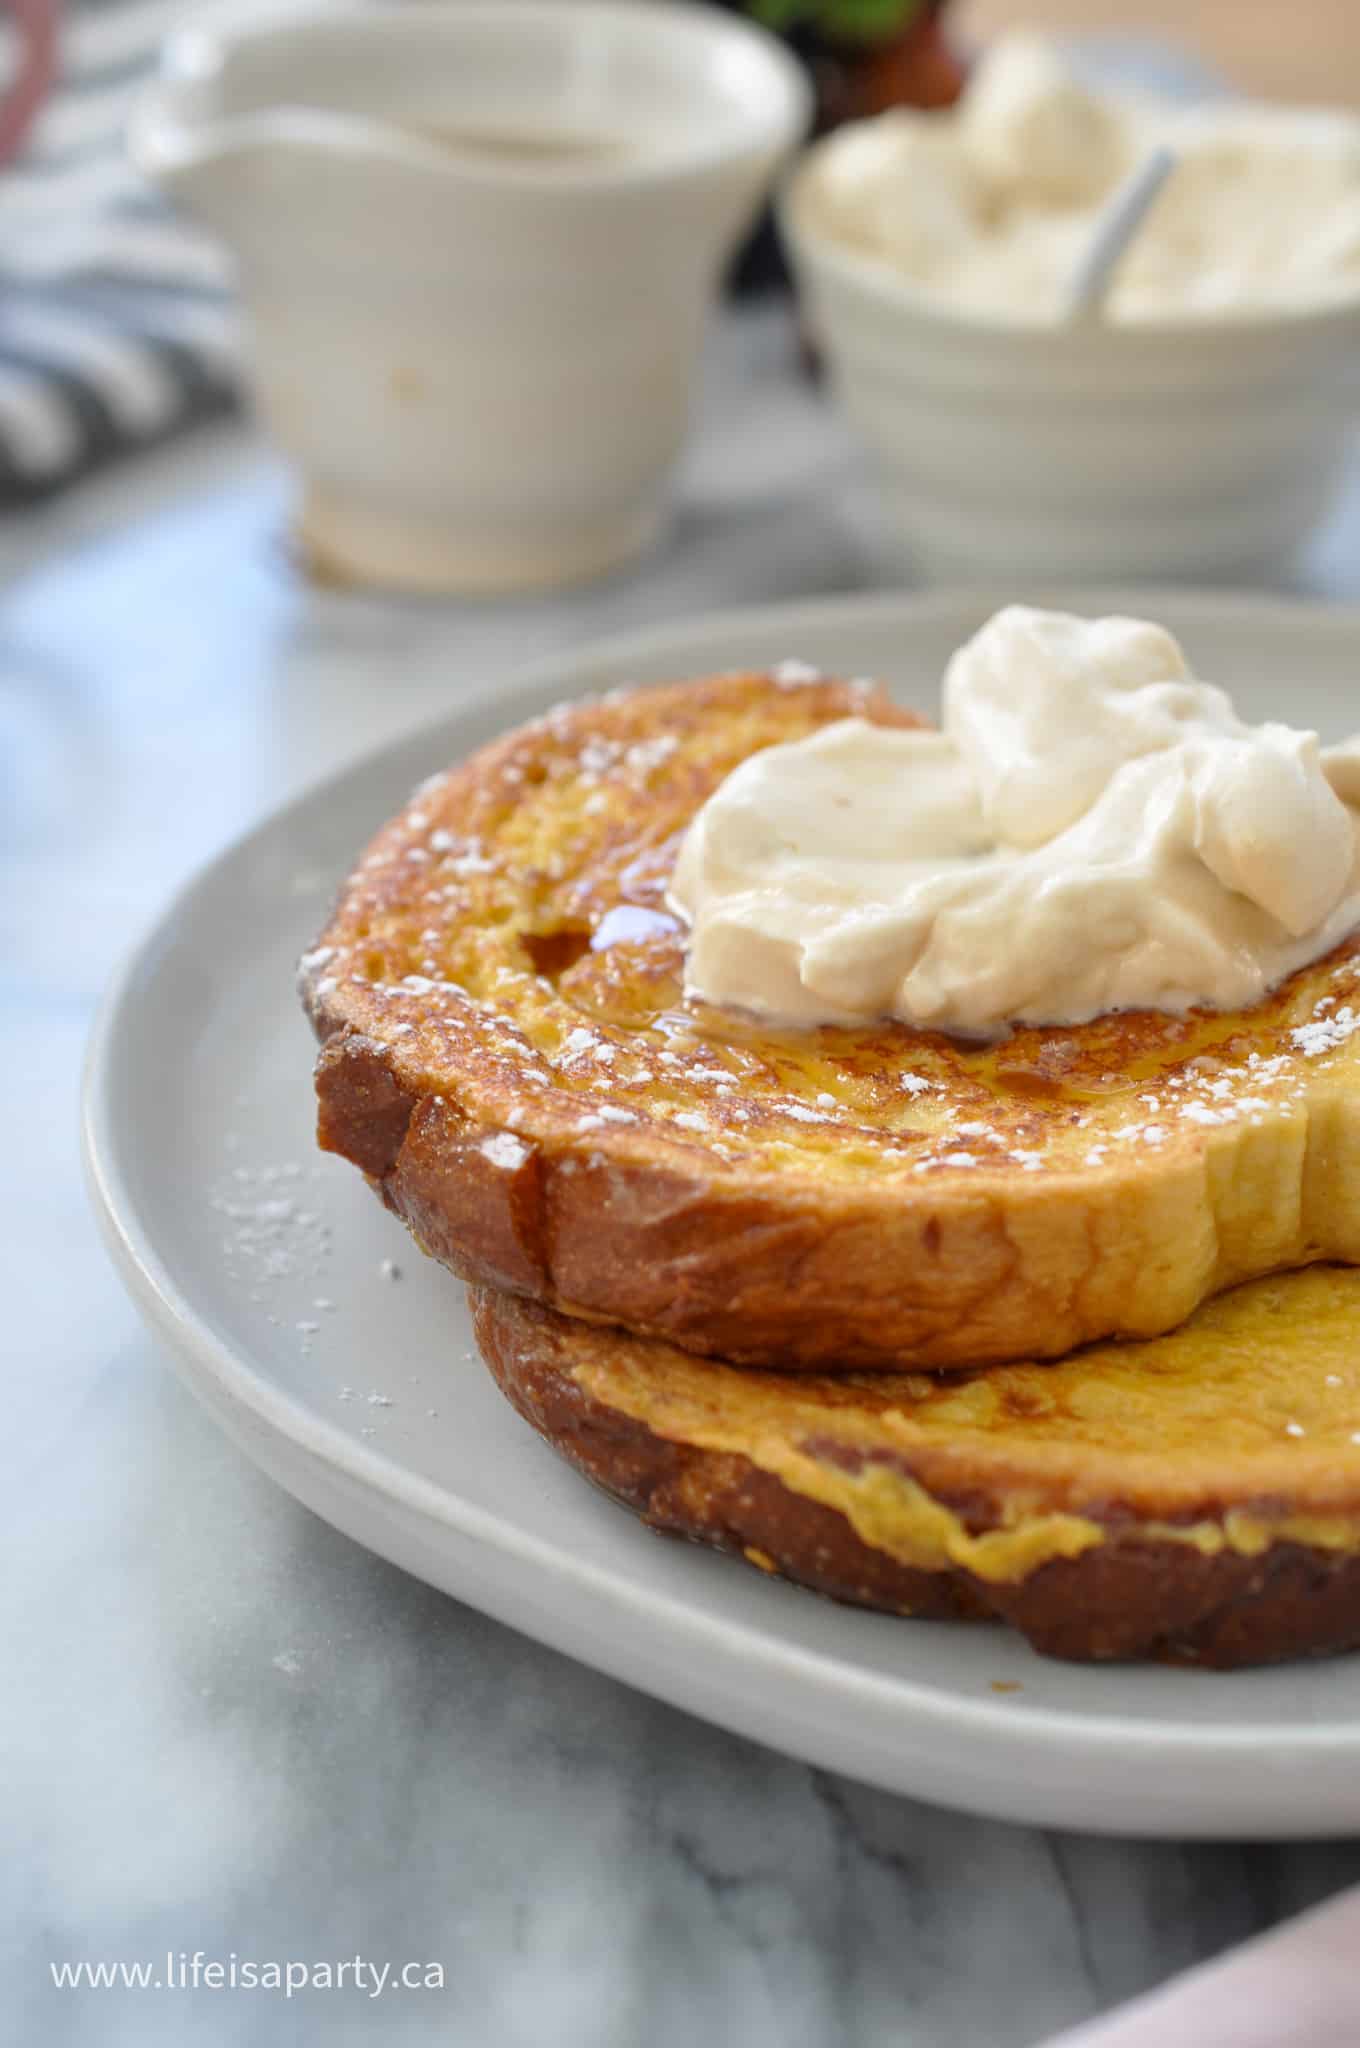
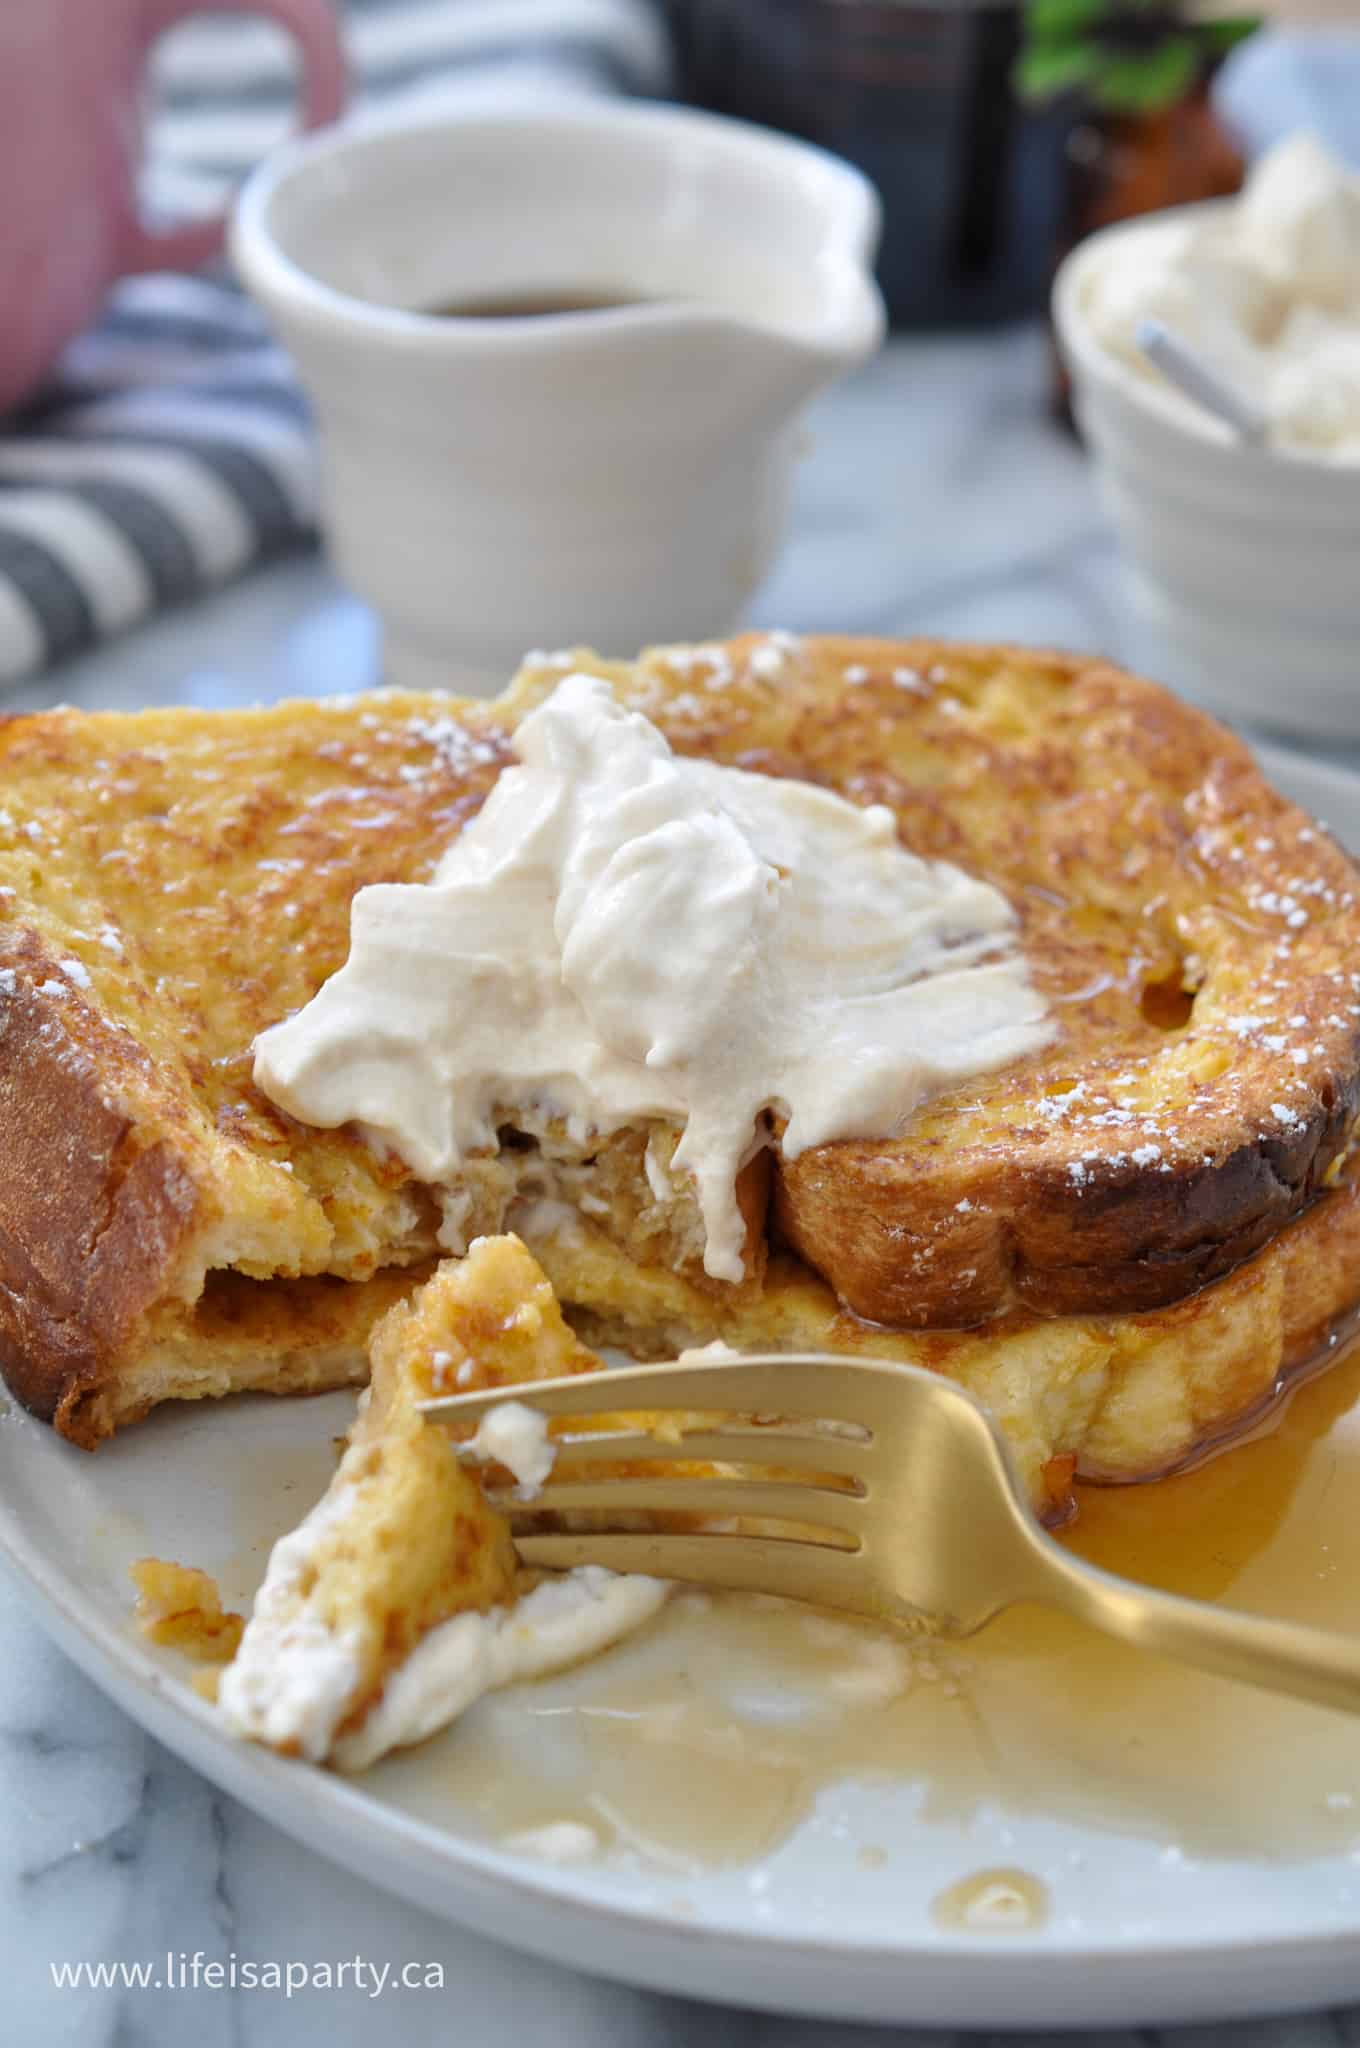
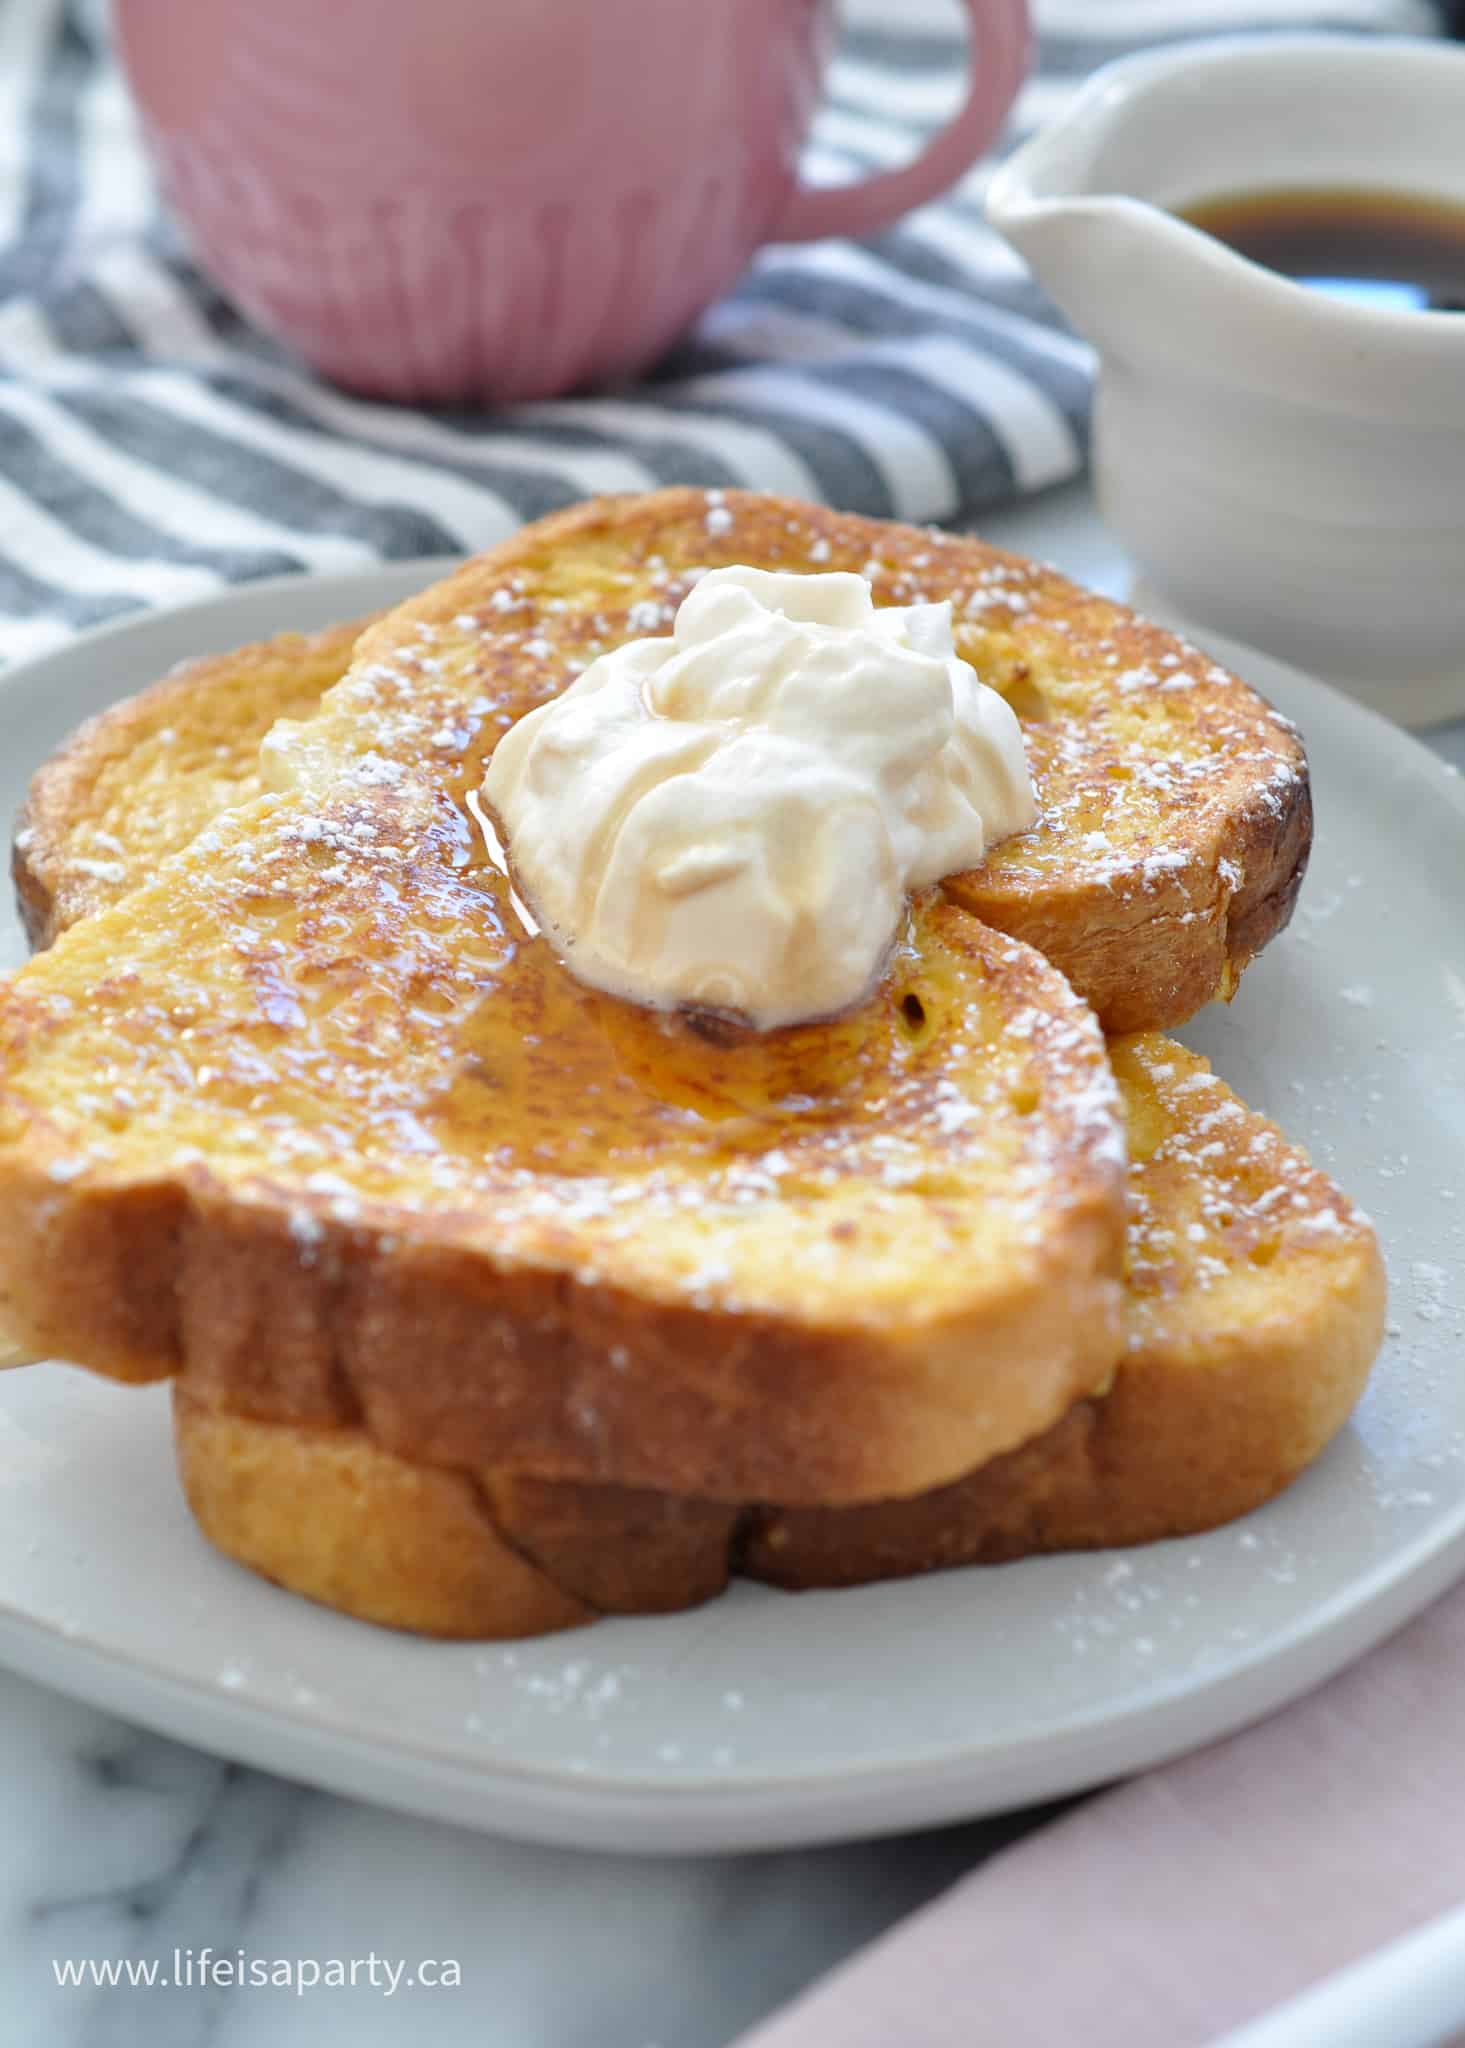
Bailey's French toast on a plate with maple syrup and Baileys whipped cream.

This easy Baileys French Toast Recipe is the perfect boozy breakfast or brunch. French toast made with Irish cream has great flavor and you'll love it for a special occasion like Christmas, or St. Patrick's Day.

Bailey's French Toast Recipe
[feast_advanced_jump_to]

This Baileys French Toast is the perfect treat for brunch. If you're a fan of Bailey's Irish Cream, then you'll love this recipe. It's especially great as a St. Patrick's Day treat or Christmas morning treat, but it's wonderful for any special occasions, or just to turn your regular weekend breakfast into something special with a decadent French toast.

Why We Love This Recipe

  • French toast is a quick and easy recipe that only takes about 15 minutes to make.
  • This recipe is delicious! Any Irish cream fan will love it.
  • Baileys Irish Cream takes everyday french toast to the next level, and really makes this dish speical.

This is the perfect brunch for a French toast lover. We also love this French Toast Casserole -which is also a Christmas morning favorite. We also adore these Small Batch Pancakes For Two, or these Jelly Donut Pancakes and Honey Cruller Donuts are so good too, and Eggnog Bread Pudding. And it's perfect for celebrating St. Patrick's Day! Check out our St. Patrick's Day Tablescape also.

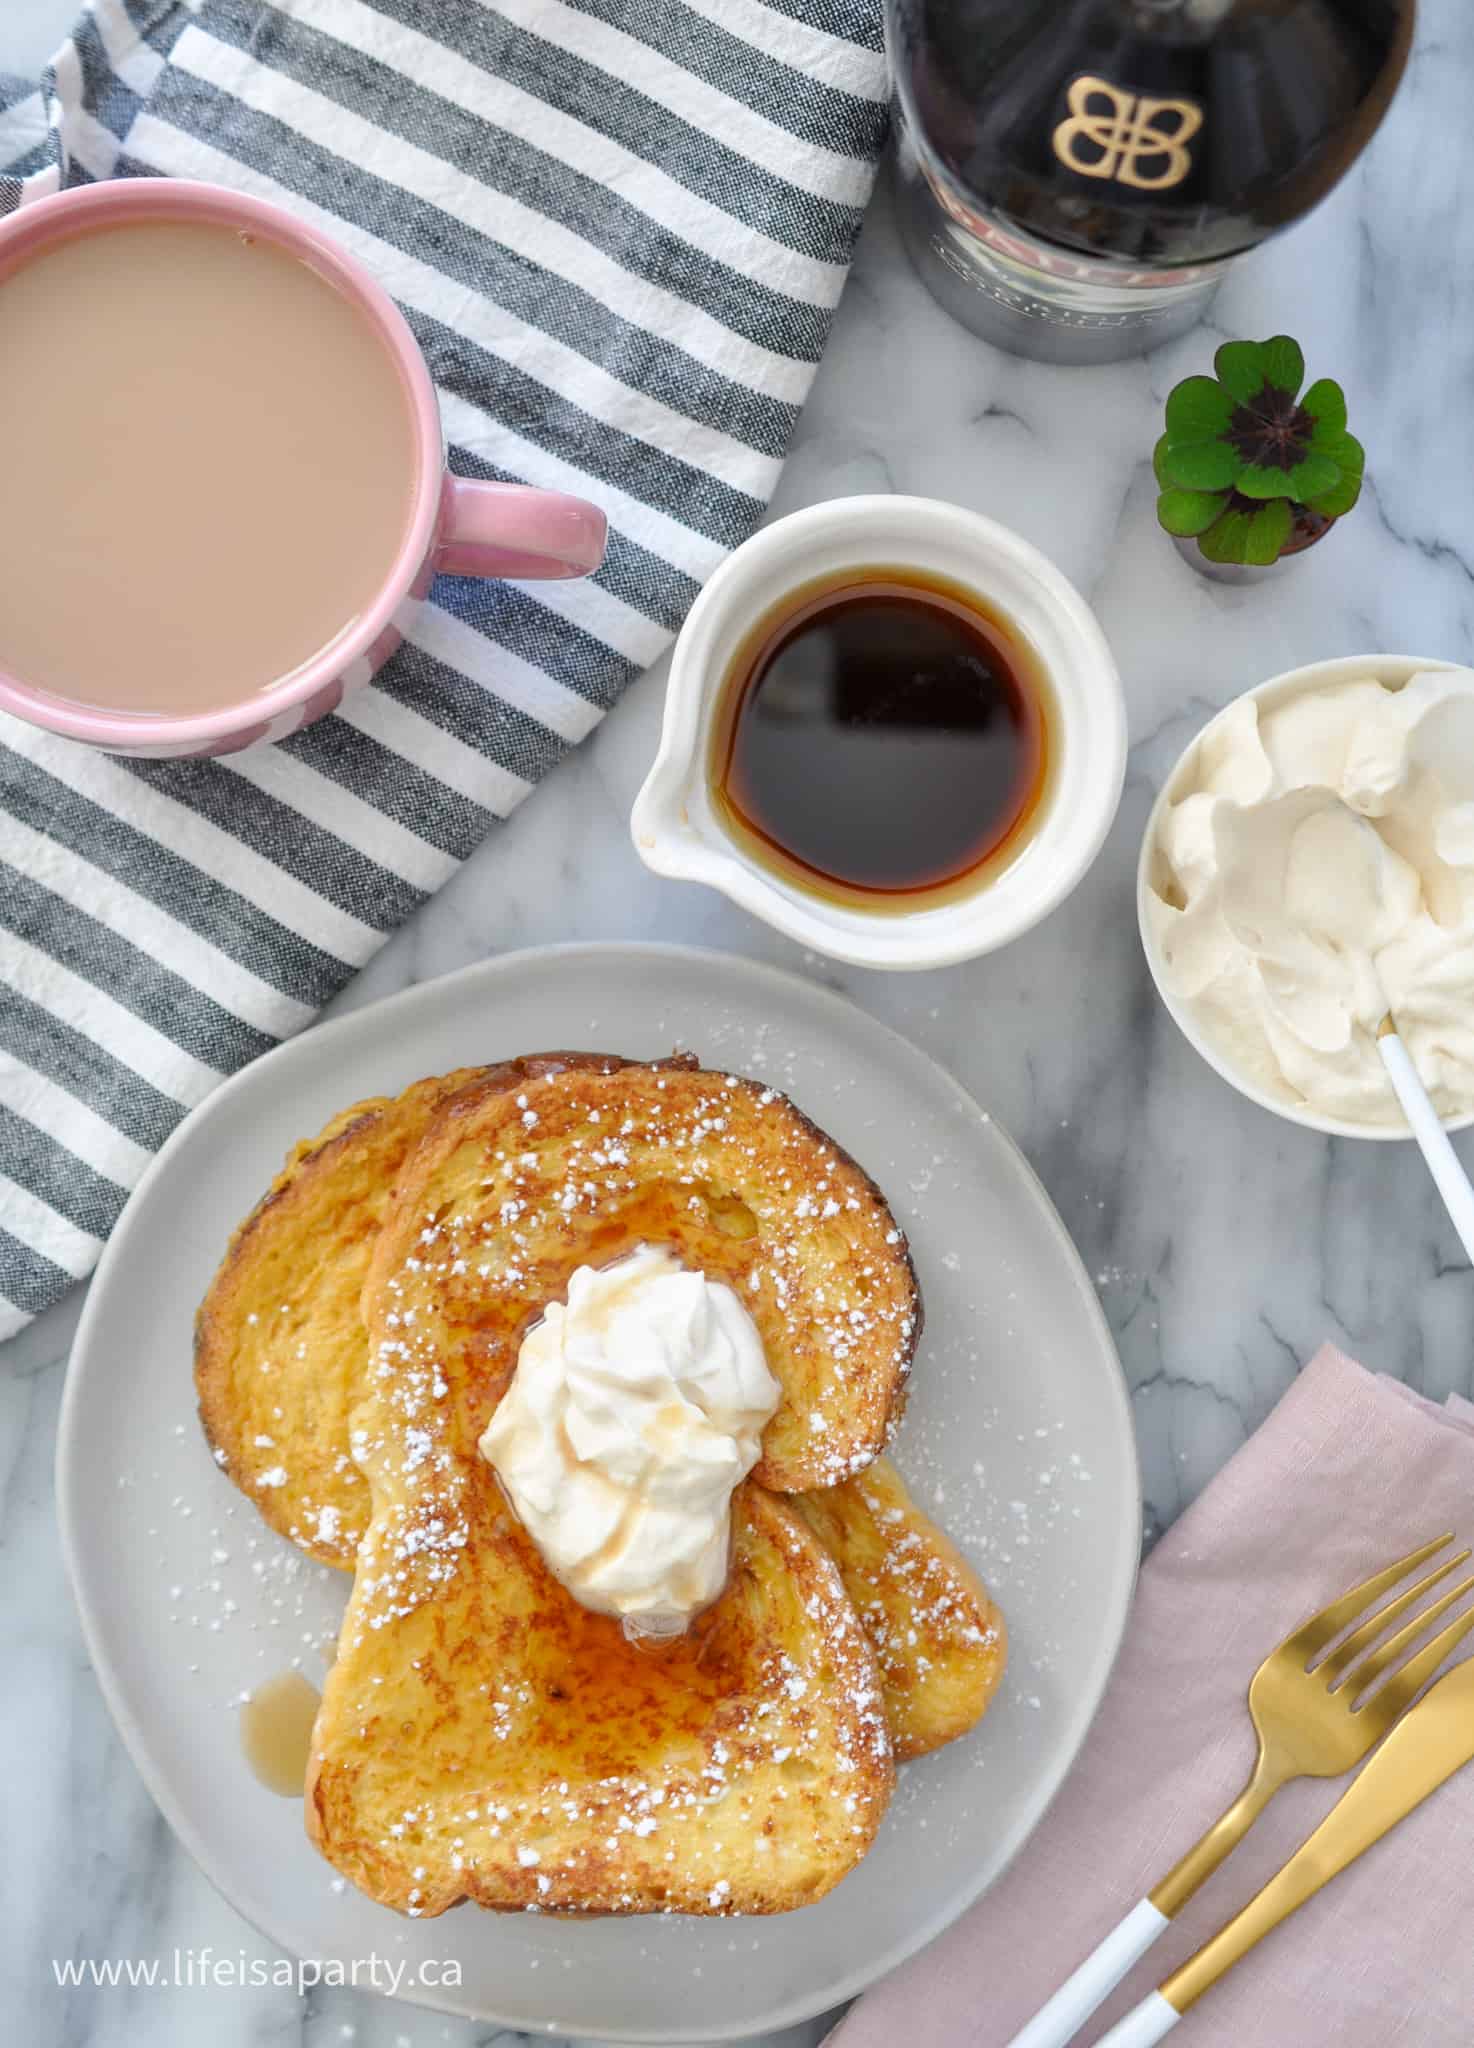
Baileys French toast with whipped cream, syrup, and a cup of tea.

Ingredients

  • Baileys Irish Cream -Baileys Irish cream is a alcoholic beverage made with cream, condensed milk, cocoa, and Irish whiskey. The baileys adds so much flavor to this recipe that you can skip adding vanilla extract to the french toast.
  • Baileys Whipped Cream -We served ours with some Baileys whipped cream for our boozy brunch. This is a great way to accentuate the Baileys flavor even more. You could also do a regular whipped cream if you prefer. And we've served ours with a drizzle of syrup, for us it has to be pure maple syrup for the best taste.
  • Bread -We're using a thick sliced white bread for this recipe. The best bread for this recipe is a sturdy bread. The thick slices of bread work very well for soaking up the egg mixture without getting too soggy. You could also use something like an egg bread, Italian loaf, French bread, Challah bread, or brioche bread. French toast is traditionally made with stale bread, as a way of using it up. So if you've got some bread that's been around for a couple of days, this is a great way of reviving it, and turning it into a special treat.
Pouring maple syrup over Baileys French toast.

Options

Fresh berries, or sliced bananas are a great accompaniment. You can also add a sprinkle of ground cinnamon if you're a cinnamon lover.

If you're a chocolate lover, this Baileys French toast recipe is great with some shaved chocolate over top, or a drizzle of chocolate syrup, since there's actually cocoa in the Irish cream it pairs very well together. You might even want to serve this with a hot chocolate, or better yet an Irish coffee.

How To Make This Recipe

1. Begin my making the whipped cream. In the bowl of a stand mixer combine ½ cup whipping cream, 2 tablespoon baileys, and 1 teaspoon sugar. Whip until soft peaks form. Set aside.

Making Baileys Irish Cream whipped cream in a stand mixer.
Making Baileys whipped cream in a stand mixer.

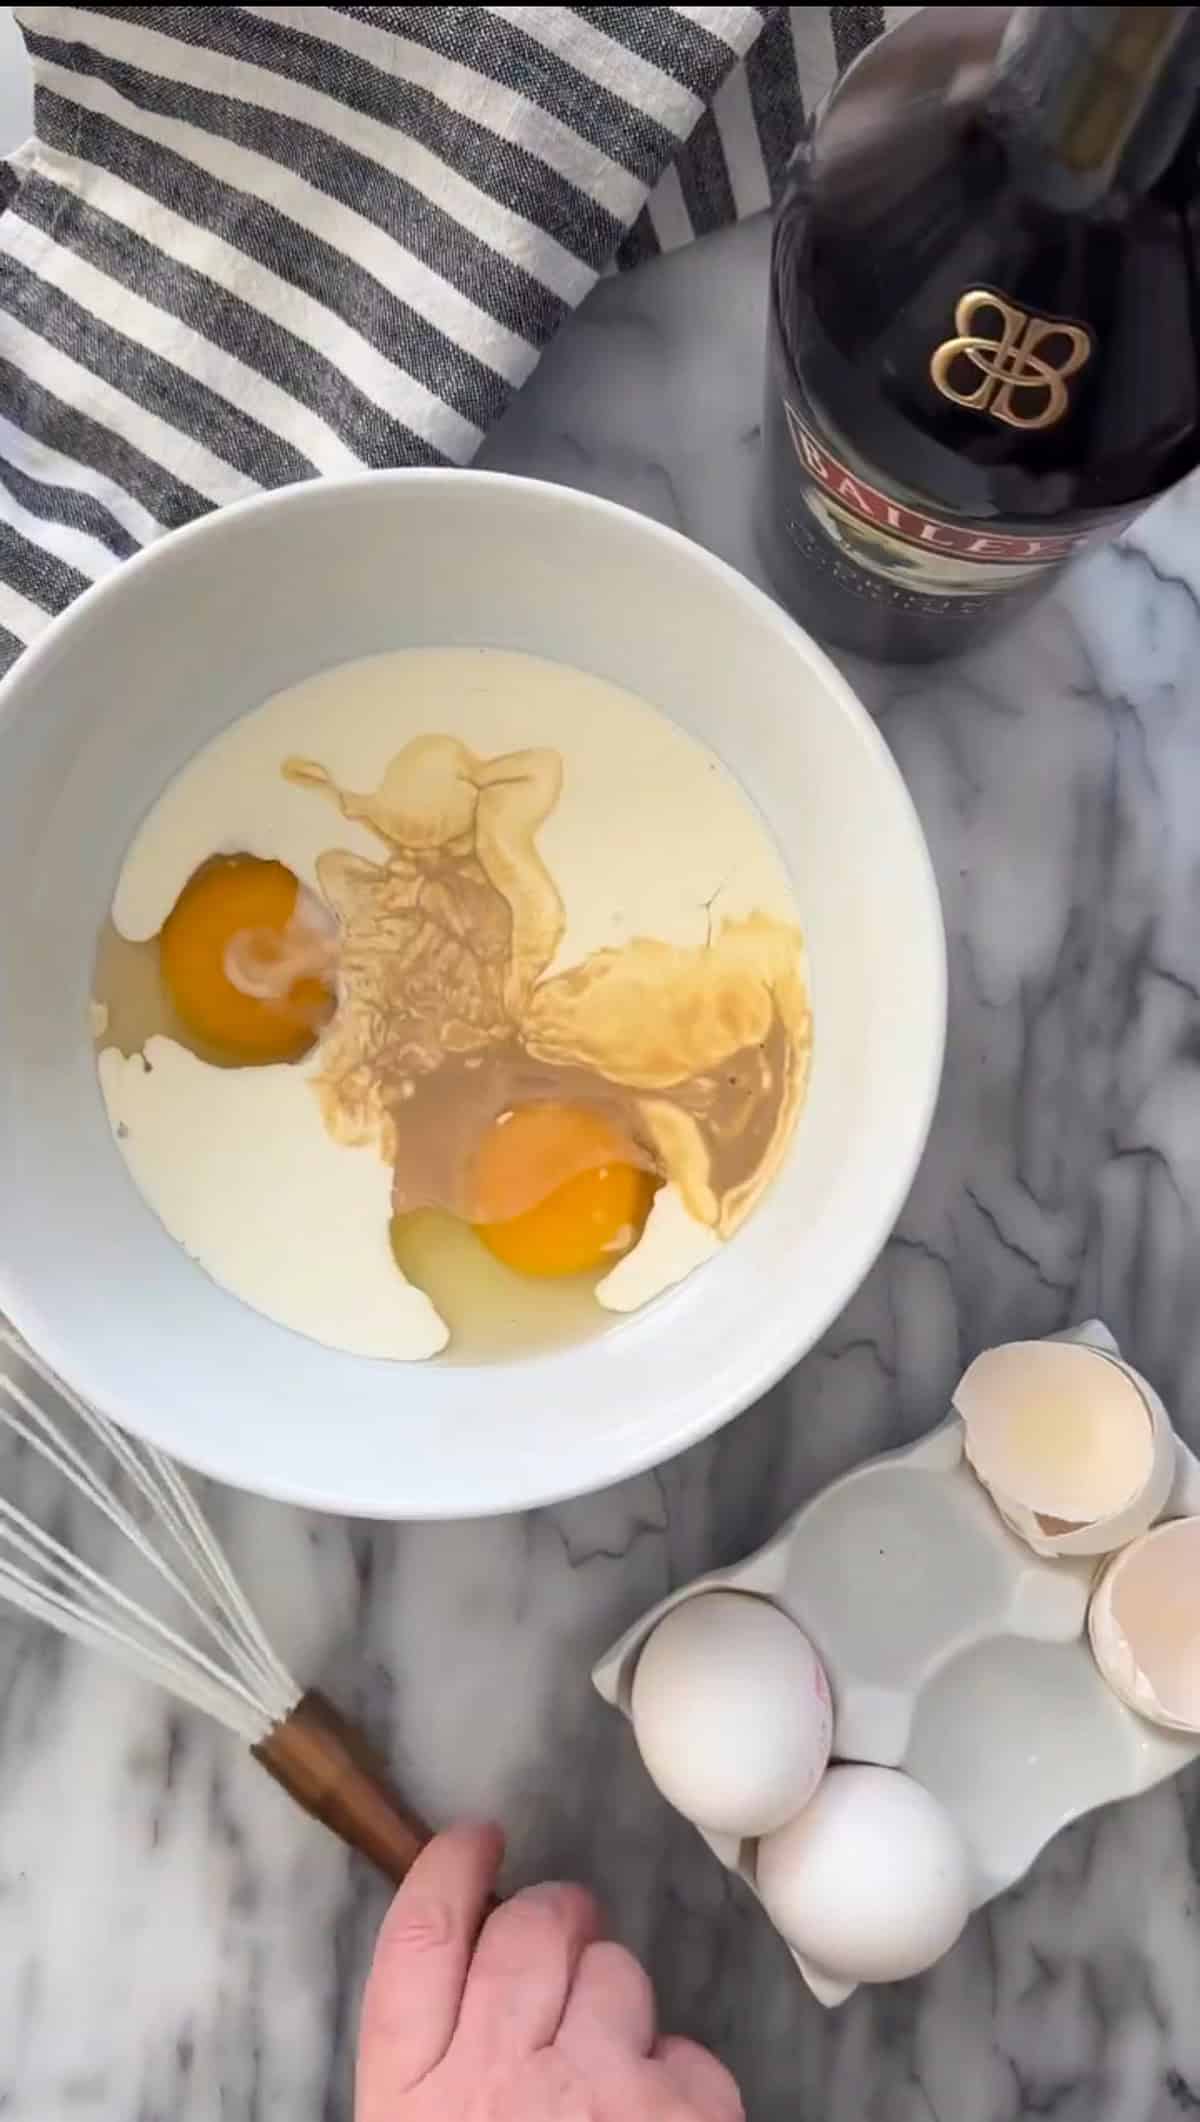
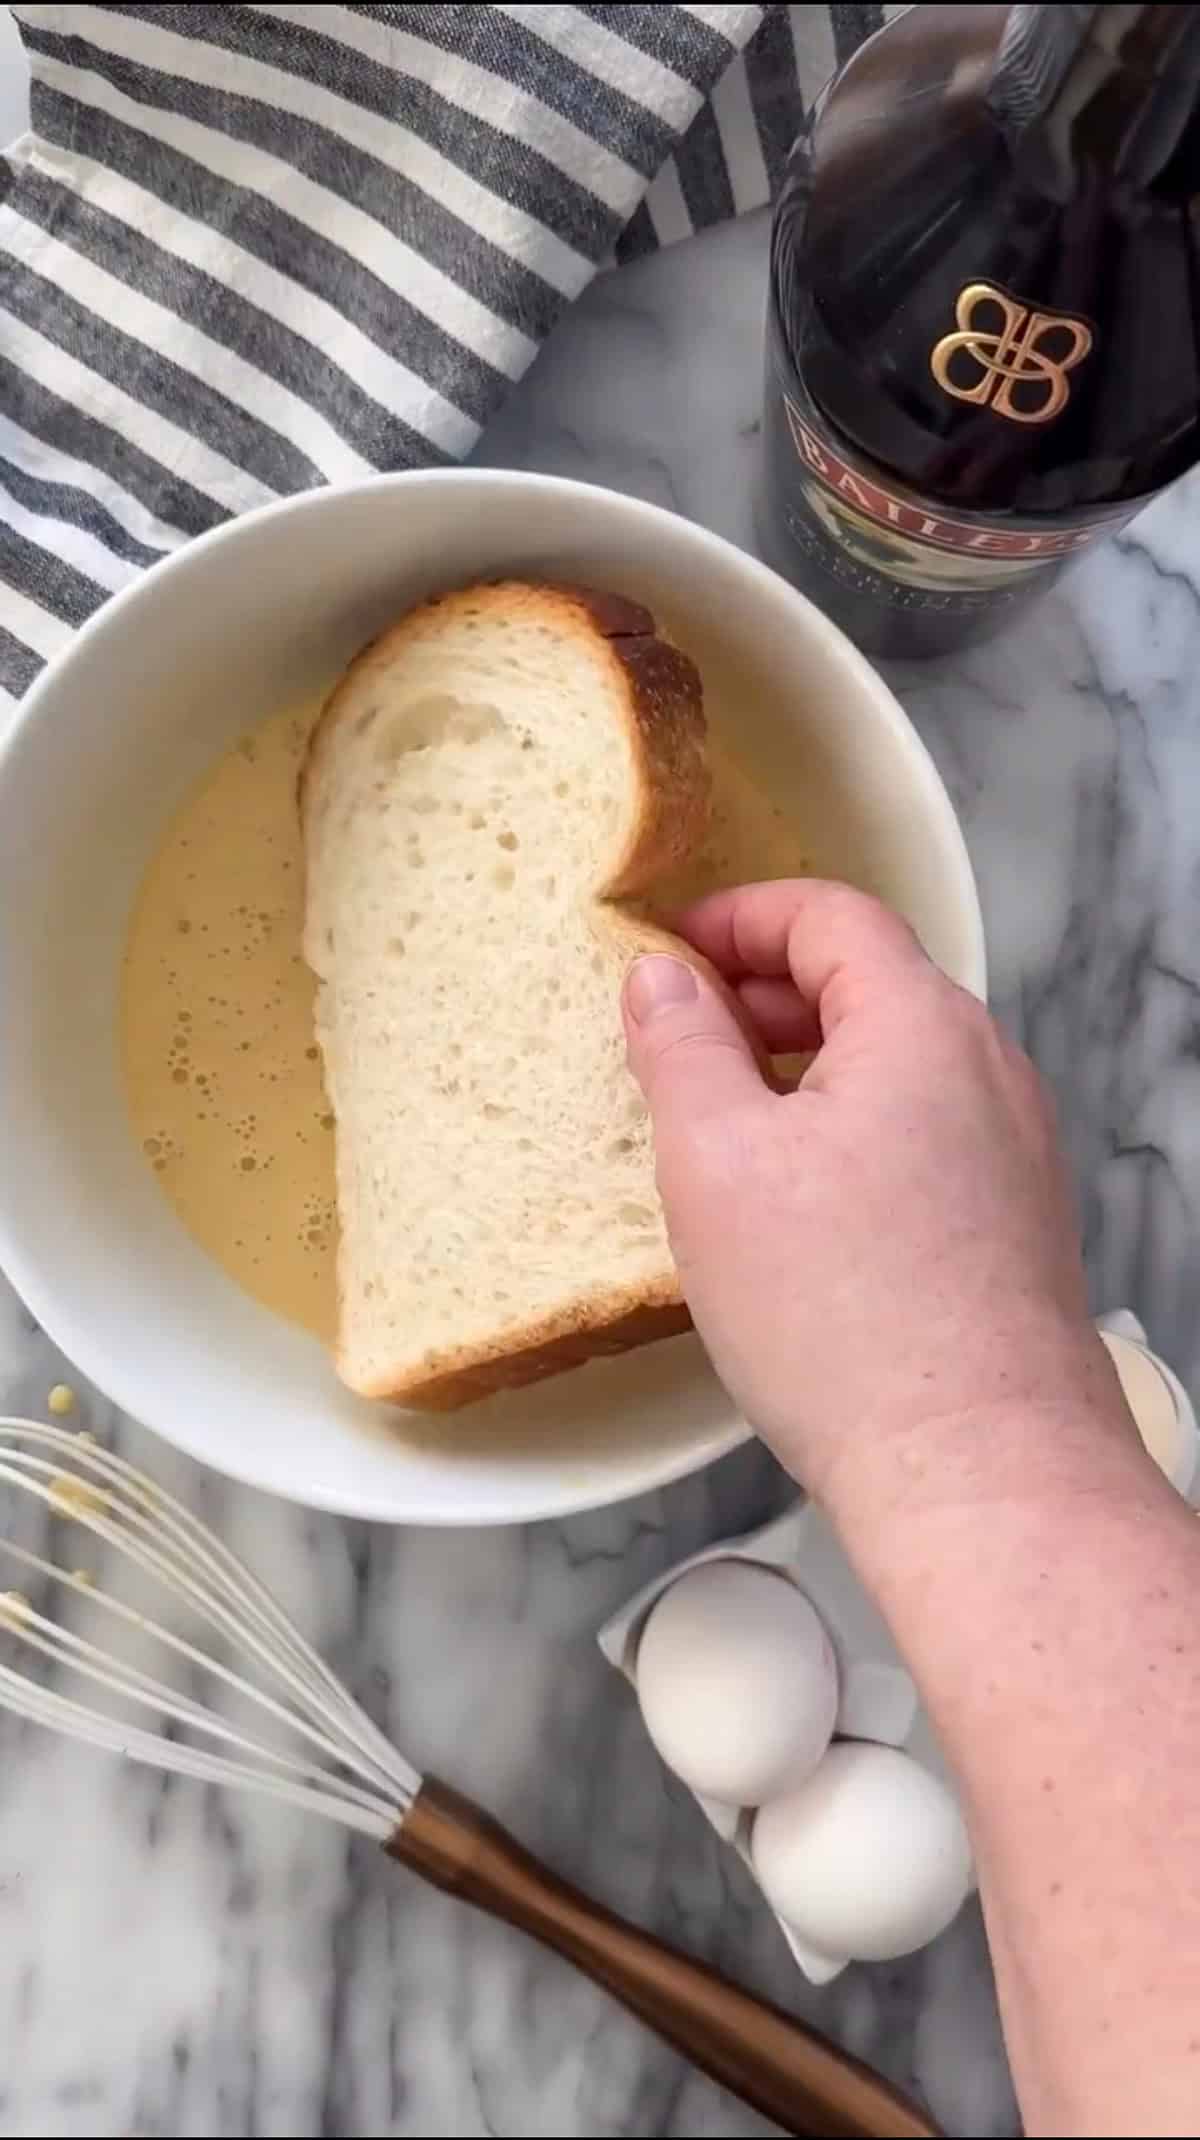
2. In another medium bowl, combine 2 eggs, ⅓ of milk or heavy cream, or half and half, and ⅓ cup of Baileys. Whisk together until fully combined. Dip each slice of bread into the baileys mixture until completely coated.

Mixing the ingredients in a bowl for the egg mixture for Baileys french toast.
Making Baileys French toast by dipping bread into egg mixture.

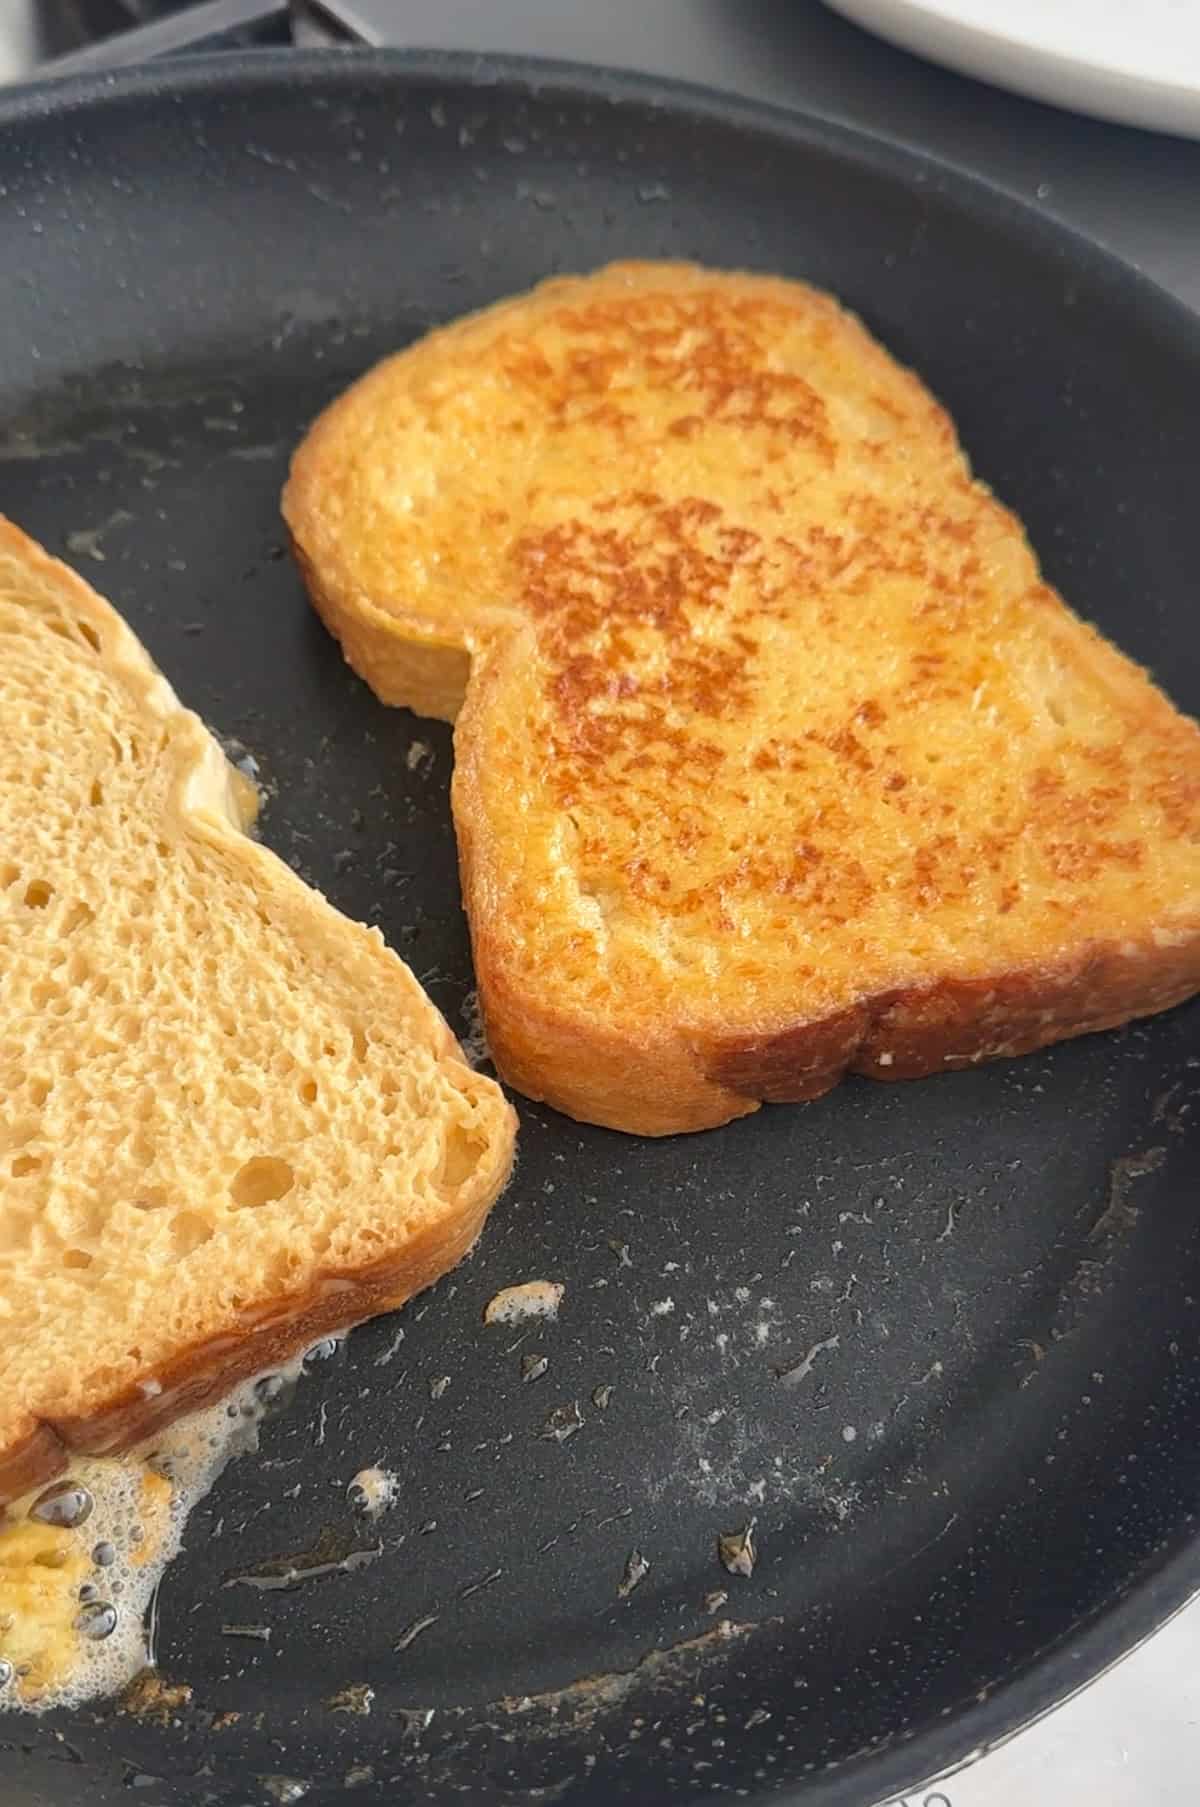
3. Melt the butter in a large skillet over medium heat and cook a couple of minutes per side, until the french toast has a golden brown edge.

Baileys French toast frying in a pan with butter.
Baileys French toast with Baileys whipped cream and syrup.

4. Serve hot with an optional dusting of icing sugar, drizzles of chocolate sauce, maple syrup, fresh fruit, and a generous dollop of baileys whipped cream.

Serving and Storing

This is boozy french toast made with Irish cream liqueur is a perfect brunch dish, with great flavor. If you're making this for a crowd at your next brunch, double or triple the recipe. Cook a few at a time and place the rest on a baking sheet in a single layer covered in foil in a low oven to stay warm until serving.

This is best eaten fresh, but you can store any leftovers in a sealed container in the refrigerator. Re-heat to serve.

Two pieces of Bailey's French toast on a plate with Baileys whipped cream.

Cooks Tip: We like to cook the French toast bread slices in fresh butter, rather than using a cooking spray, because the butter adds great, rich flavor to our this decadent recipe.

Two pieces of Baileys French toast on a plate with Baileys whipped cream, and small piece on a fork.

Frequently Asked Questions

Can I serve this dish to kids?

No. As a general rule, alcohol burns off with cooking, but these French toasts cook so quickly that it may not have a chance to. Also, we topped it with Baileys whipped cream, which contains alcohol.

Can I use fresh bread for this recipe?

Yes. The only problem with using fresh bread is that sometimes it might become too soggy when dunked in the egg mixture and fall apart. We recommend using thick sliced bread, which should help with this problem, but if you're using fresh regular sliced bread, just work quickly and carefully and it should be fine.

How do I know when my French toast is done?

It should be browned on the outside, and set on the inside. Make a small cut in the center to make sure the middle is cooked through and not soggy. If your bread is getting too brown on the outside and not cooked in the middle, turn the temperature of the burner down a little.

Two pieces of Baileys French toast on a plate with Baileys whipped cream and syrup.

More Breakfast Recipe Inspiration

  • Bailey's French toast on a plate with maple syrup and Baileys whipped cream.
    Easy Baileys French Toast Recipe
  • Christmas breakfast board
    Christmas Breakfast Board
  • Fall breakfast board
    Fall Breakfast Charcuterie Board
  • Easy overnight French toast casserole recipe.
    Easy Overnight French Toast Casserole

If you tried this Baileys French Toast Recipe or any other recipe on my website, please leave a star rating and let me know how it went in the comments below. Thanks for visiting today!

Recipe

Bailey's French toast on a plate with maple syrup and Baileys whipped cream.

Easy Baileys French Toast Recipe

Video

French toast made with Baileys Irish cream, served with whipped cream and maple syrup.
5 from 1 vote
Print Pin Rate
Course: Breakfast
Cuisine: American
Prep Time: 10 minutes minutes
Cook Time: 5 minutes minutes
Total Time: 15 minutes minutes
Servings: 4 Slices
Calories: 719kcal
Author: Dannyelle Nicolle-Ramjist

Ingredients

For The Whipped Cream

  • ½ cup whipping cream
  • 2 tablespoon Baileys Irish cream
  • 1 teaspoon sugar

For The French Toast

  • 2 eggs
  • ⅓ cup cream or milk
  • ⅓ cup Baileys Irish cream
  • 4 slices bread
  • 1 tablespoon butter
  • ¼ cup maple syrup

Instructions

  • Begin my making the whipped cream. In the bowl of a stand mixer combine ½ cup whipping cream, 2 tablespoon Baileys, and 1 teaspoon sugar. Whip until soft peaks form. Set aside.
  • In another medium bowl, combine 2 eggs, ⅓ of milk or heavy cream, or half and half, and ⅓ cup of Baileys. Whisk together until fully combined. Dip each slice of bread into the baileys mixture until completely coated.
  • Melt the butter in a large skillet over medium heat and cook a couple of minutes per side, until the french toast has a golden brown edge.
  • Serve hot with an optional dusting of icing sugar, drizzles of chocolate sauce, maple syrup, fresh fruit, and a generous dollop of baileys whipped cream.

Notes

Fry the Baileys French toast in a little melted butter for added flavor.
Don't forget to make the Baileys whipped cream for that extra punch of great Baileys taste.
This recipe is not for children as the French toast doesn't cook long enough to remove the alcohol, and the whipped cream also contains Baileys.

Nutrition

Serving: 1g | Calories: 719kcal | Carbohydrates: 48g | Protein: 19g | Fat: 51g | Saturated Fat: 30g | Polyunsaturated Fat: 17g | Trans Fat: 2g | Cholesterol: 323mg | Sodium: 506mg | Fiber: 2g | Sugar: 21g
Tried this Recipe? Tag me Today!Mention @LifeisaParty or tag #lifeisaparty!

Rainbow Pop Tart Recipe

Mar 11, 2023 · 2 Comments

How to make rainbow pop tarts.

This Rainbow Pop Tart Recipe uses store bought pie dough and food coloring, making it quick and easy to make. Don't forget the frosting and rainbow sprinkles for this for this fun and delicioius recipe.

How to make rainbow pop tarts.
[feast_advanced_jump_to]

Rainbow food is so much fun to create and to eat. We love these rainbow grilled cheese, and these rainbow rice krispy treats. So I had to make some rainbow pop tarts. These are great to make with kids and would be really fun addition to your St. Patrick's Day celebrations, for a rainbow or unicorn themed party, or celebrate Pride. Rainbow pop tarts are so fun, you could make them anytime to add a little sunshine to your day.

Rainbow poptart with icing and sprinkles on a cooling rack.

This is a simple recipe full of simple ingredients, that's so much fun to make. Making your homemade pop tarts rainbow, just takes it up a notch! Everything really is better when it's rainbow colored. These are a great idea for celebrating, or just for fun.

Rainbow pop tart on a cooling rack with bowl of rainbow sprinkles.

Kid Friendly Recipe

This is a really kid friendly easy recipe. You know how often recipes say that, and then there's lots of steps that kids can't actually do on their own? This is not the case with our homemade pop tarts recipe. They can mix in the food coloring, cut the rectangles, spread the jam, fork the edges, make the icing, add the sprinkles -they can do it all.

Ingredients

  • Pre-made Dough

We used store bought pie crust for our pop tarts, making this recipe really easy to put together. You could, of course make your own pie dough from scratch, just use your favourite pie dough recipe if you're so inclined.

I was a little worried about using pre-made pastry for this recipe. Typically with pie dough, you don't want to over work it, because it can become tough. I was worried that working in the food coloring was going to make for a very tough and unappealing dough. In fact, I nearly quit on the first color thinking this was going to be a fail. I'm so glad I continued because they turned out to be delicious.

I'm not sure if it's the fact that store-bought pop tarts don't exactly have a pie crust consistency to them anyway, but these one's tasted so good, even with working the dough to add in the food coloring. It just works, so don't worry about the over work problem to create the rainbow effect.  You can even use your stand mixer to mix in the dough, which is easier than working it with your hands.

  • Jam Options

You can make your pop tart filling with any sort of jam you like, using homemade jam or a store-bought version for whatever tart flavors you like. The traditional flavor would be a strawberry filling. Use strawberry preserves or sweet homemade strawberry jam. We prefer raspberry so we used raspberry jam for ours because it's a favorite. The best part of making homemade, is that you can change up the ingredients to whatever your favorite is .

rainbow pop tarts

How To Make This Recipe

1. Divide the two pie crusts into 6 equal balls.

2. Use food coloring to dye each ball of dough a different color of the rainbow. Start with red, and add 3-5 drops of food coloring to the middle of the ball and then use your hands to work the color though the the dough until it's distributed evenly. You may want to wear gloves to protect your hands from the food coloring, or mix the dough in your stand mixer, or food processor. Mix each color individually until they're all done. Add more or less food coloring to create lighter or more vibrant colors, whichever you prefer. You can use the primary colors to create a new color. To make orange add red and yellow. To make purple, mix red and blue together.

Cutting a store bought pie pastry crust into pieces to make a rainbow pop tart.
Making rainbow pastry for rainbow pop tarts.

3. Prepare a lightly floured surface and break each colored dough ball in half. Arrange the balls of colored dough so that there's a good mix. Flatten them together first with your hands, and then use a rolling pin to roll them out into a large sheet, about ¼ inch thick.

Making rainbow pie pastry and rolling it out.
Cutting out poptarts from rainbow pastry to make rainbow poptarts.

4. Traditional pop tarts are 3 x 5 inches. Cut a 3 x 5 inch rectangle template from the pie crust box, or use a ruler and a knife or pizza cutter to cut out 6 rectangles.

5. Place 3 rectangles onto a prepared baking sheet sprayed with non-stick cooking spray, or lined with parchment paper.

6. Add about 1 tablespoon of jam to each rectangle, leaving about ½ inch around the edge with no jam. You can use any kind of jam you like for the filling.

Making a rainbow pop tart adding jam to the pastry, on a baking sheet.
Unbaked rainbow poptarts on a baking tray.

7. Next, place another rectangle on top. Use a fork to go around and seal the edges so that none of the jam escapes. Bake the pop tarts at 350 degrees for about 10 minutes, until the edges are just turning golden brown. Let the pop tarts cool on a wire rack.

Rainbow pop tarts on a cooling rack with a bowl of icing and rainbow sprinkles.

8. While they're cooling make your simple icing. Place the powdered sugar, milk and a splash of vanilla in a small bowl and stir to fully combine. When the pop tarts are fully cool, spread the icing on top of each one, and while the icing is wet, sprinkle with colorful sprinkles. Store in an airtight container at room temperature.

Homemade rainbow pop tarts with rainbow sprinkles in the background.

Storage

Store any leftover rainbow poptarts in a sealed container at room temperature.

Frequently Asked Questions

Can I use homemade pie pastry in the recipe instead?

Yes! If you prefer homemade pie pastry you can absolutely make your own. You can add the food coloring with the wet ingredients as you make the dough, or work it in afterwards like we did.

How big are pop tarts?

Pop tarts are 3 x 5 inches.

Can I try different kinds of jam inside?

Yes, choose your favourite. We love raspberry, or traditional strawberry jam inside best.

More Tarts and Pastries

  • Easy food processor scones on a plate with jam.
    Easy Food Processor Scones
  • Old fashioned bear claw pastries with almonds on a cake plate.
    Old Fashioned Almond Bear Claw Pastries Recipe
  • Browned butter raspberry tart recipe.
    Brown Butter Raspberry Tarts
  • Butter tarts with raisins recipe.
    Classic Butter Tarts with Raisins Recipe

If you tried this Rainbow Pop Tarts Recipe or any other recipe on my blog please leave a star rating and let me know how it went in the comments below. Thanks for visiting today!

Recipe

How to make rainbow pop tarts.

Rainbow Pop Tart Recipe

Video

Rainbow Pop Tarts made with store bought pastry and food colouring to make the colours of the rainbow.
5 from 2 votes
Print Pin Rate
Course: Breakfast, Desserts
Cuisine: American
Prep Time: 20 minutes minutes
Cook Time: 10 minutes minutes
Total Time: 30 minutes minutes
Servings: 3
Calories: 871kcal
Author: Dannyelle Nicolle-Ramjist

Ingredients

  • 2 deep dish pie crusts
  • 3-5 drops food coloring -red, orange, yellow, green, blue, purple
  • 3 tablespoon jam
  • ¼ cup powdered sugar
  • 1 tablespoon milk or heavy cream
  • splash vanilla extract
  • 2 teaspoon rainbow sprinkles

Instructions

  • Divide the two pie crusts into 6 equal balls.
  • Use food coloring to dye each ball of dough a different color of the rainbow. Start with red, and add 3-5 drops of food coloring to the middle of the ball and then use your hands to work the color though the the dough until it's distributed evenly. You may want to wear gloves to protect your hands from the food coloring, or mix the dough in your stand mixer, or food processor. Mix each color individually until they're all done. Add more or less food coloring to create lighter or more vibrant colors, whichever you prefer. You can use the primary colors to create a new color. To make orange add red and yellow. To make purple, mix red and blue together.
  • Prepare a lightly floured surface and break each colored dough ball in half. Arrange the balls of colored dough so that there's a good mix. Flatten them together first with your hands, and then use a rolling pin to roll them out into a large sheet, about ¼ inch thick.
  • Traditional pop tarts are 3 x 5 inches. Cut a 3 x 5 inch rectangle template from the pie crust box, or use a ruler and a knife or pizza cutter to cut out 6 rectangles.
  • Place 3 rectangles onto a prepared baking sheet sprayed with non-stick cooking spray, or lined with parchment paper.
  • Add about 1 tablespoon of jam to each rectangle, leaving about ½ inch around the edge with no jam. You can use any kind of jam you like for the filling.
  • Next, place another rectangle on top. Use a fork to go around and seal the edges so that none of the jam escapes. Bake the pop tarts at 350 degrees for about 10 minutes, until the edges are just turning golden brown. Let the pop tarts cool on a wire rack.
  • While they're cooling make your simple icing. Place the powdered sugar, milk and a splash of vanilla in a small bowl and stir to fully combine. When the pop tarts are fully cool, spread the icing on top of each one, and while the icing is wet, sprinkle with colorful sprinkles. Store in an airtight container at room temperature.

Notes

Let your pop tarts fully cool before adding the icing.  Be sure to add the sprinkles while the icing is still wet before it sets so that they will stick.
Store any leftover pop tarts in an airtight container at room temperature.

Nutrition

Serving: 1g | Calories: 871kcal | Carbohydrates: 101g | Protein: 9g | Fat: 47g | Saturated Fat: 14g | Polyunsaturated Fat: 29g | Cholesterol: 12mg | Sodium: 542mg | Fiber: 4g | Sugar: 24g
Tried this Recipe? Tag me Today!Mention @LifeisaParty or tag #lifeisaparty!
Homemade rainbow pop tarts with rainbow sprinkles on a cooling rack.

St. Patrick's Day Free Printables

Mar 8, 2023 · Leave a Comment

St. Patrick's Day free printables set.

These St. Patrick's Day Free Printables are perfect to use as decor and party decorations, in a St. Patrick's Day craft project, or in your classroom. The set incudes cupcake picks, banner, art, small cards, and pennant flags.

St. Patrick's Day free printables set.
[feast_advanced_jump_to]
St. Patrick's Day Free Printables set.

These free St. Patrick's Day printables are sure to add some fun to your festivities this year while celebrating your favorite Irish holiday. They're a great way to make the day extra special with some decorations for fun holiday activities. These St Patricks Day printables are great for any parties or celebrations you're planning, but also great free St. Patrick's day decoration ideas for around the house too. The adorable images and iconic symbols of the holiday will be loved by kids of all ages.

Also be sure to check out St. Patrick's Day Tablescape for more inspiration.

Video

Printing Your St. Patrick's Day Printables

Print these St. Patricks Day printables on your home computer. Or, if you don't have a home color printer, just download the pdf file and send to your nearest office supply store, or print shop, or even print at your local library.

Get The Printables Here

Our printables are free to subscribers.  Subscribe below for instant access.

Lucky Banner

Print the Lucky banner and use for your St. Patrick's Day party, as home decor, or in your classroom.

Print on cardstock for the best results and use a paper trimmer to cut them out into the pennant shape. Add holes in the corners with a hole punch,  Next string the banner together with green string or with ribbon, so that it spells Lucky, with one image on one ned and two images on the other.

Free Printable St. Patrick's Day "Lucky" Banner and garland.

"You're My Lucky Charm" Art

Print the "You're my Lucky Charm" art in the large or small art piece size and add it to a frame as cute home decor.  It also makes a really beautiful piece to use as a party decoration.  

Look for inexpensive frames at the dollar store, or at thrift stores.

St. Patrick's Day free art printable art, pennant flags and cards.

Circles -Cupcake Picks, Gift Tags, or Table Scatter

Print the circles on card stock, and use a large 1 inch circle punch or regular scissors to cut them out.

Use them in lots of different ways. To create cupcake picks, hot glue a tooth pick on the back. These look so cute inserted in a cupcake for a special St. Patrick's Day treat.  Make them double sided by gluing another circle on the back. 

You can also use these small circles as gift tags, just punch a small hole in the top and use ribbon to attach to a gift or favor bag, writing a message or name on the back.

You can also use as table scatter mixed with rainbow confetti or green confetti or gold coins for your St. Patrick's Day table or as party decor for a St. Patrick's Day celebration. The smiling pots of gold are a favorite.

You can also make a small banner from these circles by taping the backs to some string, or punching two small holes in the top of each circle and stringing them into a banner to use as party decor.  These would also be fun to use in St. Patrick's Day crafts, or to make into stickers by printing on sticker paper.

Free St. Patricks Day printable cupcake picks small circles.

Cards

Use the square cards in our St. Patrick's day printables pack as gift tags, little notes, or decorations.

How fun would it be to use these on St Patrick's day as lunch box notes for younger kids? Such a sweet surprise from mom or dad at snack time with a little message written on the back!

Four St. Patrick's Day free printable small cards.

Pennant Flags

These flags are the perfect way to wish someone a happy saint Patrick's day.

To make them, choose your size and print them on card stock. Cut them out, and then fold the back flap over. Use hot glue to attach the flag to a wood dowel, paper straw, or wood skewer. Feel free to glue on some glitter to the front to add a little extra special glitz. Lastly, tie some leprechaun color ribbons, or rainbow colour ribbons to the handle.

Some fun ideas are to use these as cute decor, or to decorate for a party. Include them in your St. Patrick's Day photo booth as props too.

Two free printable pennant flags for St. Patrick's Day decorated with ribbons.

More Ideas For Using St. Patrick's Day Free Printables

There's a variety of fun ways you can use our fun St. Patrick's Day printables for fun activities and easy craft ideas. Feel free to use the printables as part of a St. Patrick's Day rainbow crafts or a leprechaun trap. Use the small circles to decorate craft projects, or glue them onto your leprechaun trap. Use the flags as a fun craft with little kids. They can use regular glue to attach the wooden dowel, and then choose ribbons to decorate them.

Free printable St Patricks Day party decorations.

Make the cupcake picks from the circles and add them to a sensory bin or playdough mats as a fun way to celebrate St. Patty's Day with your little leprechaun.

St Paddy's free printable decorations for a party or home decor.

Another fun idea is to use the small cards to create your own scavenger hunts. Use them to write your own scavenger hunt clues on the back. This would be such a fun activity to do with older kids as part of your St. Patrick's Day celebration at home, or as part of your fun games for a party. Use the Lucky banner over a pot of gold at the end of the hunt.

Free printable St. Patty's Day party decorations.

Print out two sheet of the circles, cut them out, and then use them as an easy matching activity. This would be a really fun and easy St Patrick's Day activity for a classroom with elementary students ore as part of your family St. Patrick's Day activities.

Kids St. Patrick's Day free printable set.

We love how these adorable St. Patricks Printables turned out.  They have so many fun uses.  Good luck with all your St. Patrick's' Day festivities, weather you're celebrating with family, putting together a party, creating kids activities, making St. Patrick's Day crafts, or creating educational activities. With these free St Patrick's Day printables to enjoy, life really is a party!

These printables are for personal use only.

Frequently Asked Questions

What if I don't have a color printer?

You can get these printed at a business supply store. Or use the color printer at your local library.

Can I use these in items I sell?

No these printables are for personal use only.

What if I don't have a circle punch?

You can also use regular scissors to cut out the cirlces.

More St. Patrick's Day Inspiration

  • Soft, fluffy homemade rainbow marshmallows with beautiful pastel layers.
    Rainbow Marshmallows
  • St. Patrick's Day free printables set.
    St. Patrick's Day Free Printables
  • St. Patrick's Day tablescape with vintage Irish figurines, shamrock plants, green glassware, and vintage postcards on rustic table with linen runner.
    St. Patrick's Day Table
  • St. Patrick's Day dinner and movie ideas for at home celebrations.
    St. Patrick's Night In -Dinner and Movie Ideas for St. Patrick's Day

If you use these St. Patrick's Day Free Printables or any other ideas on my blog please let me know how it went in the comments below. Thanks for visiting today!

Rainbow Rice Krispies

Mar 4, 2023 · 1 Comment

Homemade Rainbow Rice Krispies recipe.

These Rainbow Rice Krispies in a rainbow arch in every color of the rainbow are the cutest! Using the standard, easy rice krispie treat recipe and some food coloring, you just need to form, slice, and enjoy.

Homemade Rainbow Rice Krispies recipe.
[feast_advanced_jump_to]

Why We Love This Recipe

  • Just like regular rice Krispie treats, this recipe is easy to make, and no-bake.
  • We love the soft pasel rainbow colors, but you can make them brighter just by adding more food coloring.
  • These are great to make with kids.
  • They taste so good!
  • They're perfect for a rainbow special occasion.

These rainbow cookies are perfect for celebrating. Make them for a St. Patrick's Day celebration, your next rainbow birthday party, art or unicorn themed party, or just for anytime. Or make these rainbow Rice Krispies to celebrate the first day of spring.

We love rainbow food, like our rainbow poptarts, or our rainbow grilled cheese sandwiches.

These rainbow Rice Krispies are really easy to make, there's just quite a few steps involved. I think they're worth the effort, because they're really so cute. This fun treat is sure to impress friends and family. And what could be yummier than a good old rice krispie square?

Rainbow Rice Krispies treats on a marble counter.

Ingredients

  • Marshmallows -You can use regular large marshmallows or mini marshmallows in this recipe. Do make sure they're fresh, because they melt more easily.
  • Food Coloring -We used inexpensive liquid food coloring from the grocery store in this recipe. These produced the soft pastel colors that we loved. If you want a more vibrant rainbow, you can use more intense gel food coloring.

Substitutions

Not a fan of food coloring? Look for natural food dyes in the health food section of the grocery store.

How To Make This Recipe

Rather than putting these colorful treats into a baking pan and making squares out of them, we form them into the perfect rainbow arches.

We started with a long purple tube like piece that was our center, and then built out each color, arch, by arch. It's pretty easy to shape.

Tip: The rice krispies are super sticky when they're warm, and you need to work with them while they're warm so that they're nice and pliable. To fix this problem you can coat your hands with a little butter, or spray with non-stick cooking spray.

Do be careful if you're baking with kids for this step. Make sure they're not too hot for little hands.

1. Make each of the colors of the rainbow separately and add them layer by layer until you've built the whole rainbow. The layers use different amounts of ingredients, since we want our arches to be even, so need a smaller amount of rice Krispies treats for the center, and more as we move outward. Be sure to follow the amounts of ingredients for each specific layer in the recipe card below.

Start by creating the purple layer of the rainbow as the first layer.

Combine the butter with the marshmallows. Heat in a small pan over medium heat, until all the marshmallows and butter are melted. Remove from the heat and add the purple food colouring and stir to fully combine. Then stir in the rice krispies, and combine fully.

Melted marshmallows and butter for making rainbow rice Krispie treats.
Making purple rice Krispies with red and blue food coloring.

While it's still warm, turn the mixture out onto a piece of wax paper or parchment paper, and form it into a long tube like shape, about 14 inches long. Use a spatula to shape it while it's warm, and then your hands once it's cool enough to handle. Coat your hands with butter, or spray them with nonstick cooking spray to avoid them sticking to the rice krispie treats.

Forming rainbow rice krispie treats, starting with the purple.

2. Next create the blue layer of the rainbow with your second batch. Combine butter and marshmallows. Heat in a small pot over medium heat, until all the marshmallows are melted. Remove from the heat and add the food coloring into the marshmallow mixture and stir to fully combine. Then stir in the rice krispies.

While it's still warm, turn the mixture out onto another piece of parchment paper sprayed with cooking spray, and form it into a rectangle shape that's about 14 inches long -the same length as the purple centerpiece. Flip it onto the purple layer and use your hands to shape it into an even layer and form the blue arch.

Making the blue layer of rainbow Rice Krispie treats.
Making rainbow rice krispie treats adding the blue layer.

3. Next create the green layer of the rainbow. Combine the butter with the marshmallows. Heat in a small pot over medium heat, until all the marshmallows are melted. Remove from the heat and add food colouring to the melted marshmallows and stir to fully combine. Then stir in the rice krispies.

While it's still warm, turn the mixture out onto a piece of parchment paper sprayed with cooking spray, and form it into a rectangle shape that's about 14 inches long -the same length as the purple centerpiece. Flip it onto the blue layer and use your hands to shape it evenly and form the green arch.

Adding the green layer of rainbow rice krispie treats.
Making rainbow Rice Krispie treats, adding the orange layer.

4. Next create the yellow layer of the rainbow. Combine the butter with the marshmallows. Heat in a small pot over medium heat, until all the marshmallows are melted. Remove from the heat and add food colouring and stir to fully combine. Then stir in the rice krispies.

While it's still warm, turn the mixture out onto a piece of parchment paper sprayed with cooking spray, and form it into a rectangle shape that is about 14 inches long -the same length as the purple centerpiece. Flip it onto the green layer and use your hands to shape it evenly and form the yellow arch.

5. Next create the orange layer of the rainbow. Combine the butter with the marshmallows. Heat in a small pot over medium heat, until all the marshmallows are melted. Remove from the heat and add food colouring and stir to fully combine. Then stir in the rice krispies.

While it's still warm, turn the mixture out onto a piece of parchment paper sprayed with cooking spray, and form it into a rectangle shape that's about 14 inches long -the same length as the purple centerpiece. Flip it onto the yellow layer and use your hands to shape it evenly and form the orange arch.

6. Lastly create the red layer of the rainbow. Combine the butter with the marshmallows. Heat in a small pot over medium-low heat, until all the marshmallows are melted. Remove from the heat and add food colouring to the melted marshmallow mixture and stir to fully combine. Then stir in the rice krispie cereal.

While it's still warm, turn the mixture out onto a piece of parchment paper sprayed with cooking spray, and form it into a rectangle shape that's about 14 inches long -the same length as the purple centerpiece. Flip it onto the orange layer and use your hands to shape it evenly and form the red arch.

Making the red layer of rainbow Rice Krispie treats.
Slicing rainbow rice krispie treats.

7. Let the colorful rainbow rice krispie treats set and then cut into slices ½ - ¾ inch thick. Optional: add some gold sprinkles to one side as some gold at the end of the rainbow. Be sure to add them right after you cut the slices, so that it's sticky enough for the sprinkles to stick. Or dip one end in some melted chocolate or candy melts and then sprinkle with gold sprinkles.

Rainbow Rice Krispie treat cookies.

Storage

Store these at room temperature, in an airtight container, or wrapped with plastic wrap.

Rainbow Rice Krispies Party Favors

These rainbow treats are a great addition to party. They would be a really fun idea to use as a party favor, just package them up individually in a cello bag and tie with some rainbow ribbon for gift giving.

These rainbow cookies are a crowd pleaser. And once you make your cereal treats rainbowed shaped, you might never want to go back to make them into a boring square shape in a baking dish again.

More Recipe Inspiration

  • A rainbow grilled cheese sandwich cut in half on a cutting board.
    Rainbow Grilled Cheese Recipe
  • How to make rainbow pop tarts.
    Rainbow Pop Tart Recipe
  • Ice cream charcuterie dessert board in the shape of an ice cream cone.
    Easy Ice Cream Sundae Charcuterie Dessert Board
  • Dirt Pudding no cream cheese in glasses with candy rocks, and fresh mint that looks like a little plant.
    Easy Dirt Pudding Recipe without Cream Cheese

Frequently Asked Questions

Can I just make one big batch and divide it up instead of making six small batches?

No, because you need the rice Krispies mixture to be warm to form the arches, so you will want to make a new small batch for each color. Otherwise by the time you divide the batch into six, add food coloring, and form each arch it will be cooled off and set and too hard to work with.

Can I make these rainbow rice Krispie treats in a baking pan?

Yes, if you want regular squares that have rainbow layers, just add them to an 8 x 8 baking pan sprayed with cooking spray. You might want to even up the amounts though, so that each layer is the same size.

How do I make the colors of my rainbow rice Krispie treats brighter?

If you want bolder more vibrant colors, try using gel food color and adding more until you're happy with the color.

Rainbow rice krispie treat cookies on a table.

With these amazing rainbow Rice Krispie treats, life really is a party!

If you tried this Rainbow Rice Krispies Recipe or any other recipe on my blog please leave a star rating and let me know how it went in the comments below. Thanks for visiting today!

Recipe

Homemade Rainbow Rice Krispies recipe.

Rainbow Rice Krispie Treats

Video

Rice Krispies made in the colors of the rainbow with food colouring and shaped into a rainbow arch.
5 from 1 vote
Print Pin Rate
Course: Desserts
Cuisine: American
Prep Time: 10 minutes minutes
Cook Time: 12 minutes minutes
Additional Time: 10 minutes minutes
Total Time: 32 minutes minutes
Servings: 20 cookies
Calories: 150kcal
Author: Dannyelle Nicolle-Ramjist

Ingredients

Total For Entire Recipe:

  • 7 ½ cups rice krispies
  • 4 ½ tablespoon butter
  • 400 g bag of regular marshmallows
  • food coloring
  • optional: gold sprinkles and white chocolate

Purple Layer

  • ½ tbsp butter
  • 8 large marshmallows or 1 cup mini marshmallows
  • 1 cup rice krispies
  • purple food coloring or red and blue food coloring

Blue Layer

  • ½ tablespoon butter
  • 8 large marshmallows or 1 cup mini marshmallows
  • 1 cup rice krispies
  • blue food coloring

Green Layer

  • ¾ tablespoon butter
  • 10 large marshmallows or 1 ¼ cup mini marshmallows
  • 1 ⅓ cup rice krispies
  • green food coloring

Yellow Layer

  • ¾ tablespoon butter
  • 10 large marshmallows or 1 ¼ cup mini marshmallows
  • 1 ⅓ cup rice krispies
  • yellow food coloring

Orange Layer

  • 1 tablespoon butter
  • 12 large marshmallows or 1 ⅔ cup mini marshmallows
  • 1 ½ cup rice krispies
  • orange food coloring or red and yellow food coloring

Red Layer

  • 1 tablespoon butter
  • 12 large marshmallows or 1 ⅔ cup mini marshmallows
  • 1 ½ cup rice krispies
  • red food coloring

Instructions

  • Purple Layer
    Start by creating the purple layer of the rainbow as the first layer. Combine ½ tablespoon butter with 8 large marshmallows, or 1 cup of mini marshmallows. Heat in a small pan over medium heat, until all the marshmallows and butter are melted. Remove from the heat and add purple food colouring (two drops of red and two drops of blue) and stir to fully combine. Then stir in 1 cup of rice krispies. While it's still warm, turn the mixture out onto a piece of wax paper or parchment paper, and form it into a long tube like shape, about 14 inches long. Use a spatula to shape it while it's warm, and then your hands once it's cool enough to handle. Coat your hands with butter, or spray them with nonstick cooking spray to avoid them sticking to the rice krispie treats.
  • Blue Layer
    Next create the blue layer of the rainbow with your second batch. Combine butter and marshmallows. Heat in a small pot over medium heat, until all the marshmallows are melted. Remove from the heat and add the food coloring into the gooey marshmallows mixture and stir to fully combine. Then stir in the rice krispies. While it's still warm, turn the mixture out onto another piece of parchment paper sprayed with cooking spray, and form it into a rectangle shape that's about 14 inches long -the same length as the purple centerpiece. Flip it onto the purple layer and use your hands to shape it into an even layer and form the blue arch.
  • Green Layer
    Next create the green layer of the rainbow. Combine the butter with the marshmallows. Heat in a small pot over medium heat, until all the marshmallows are melted. Remove from the heat and add food colouring to the melted marshmallows and stir to fully combine. Then stir in the rice krispies. While it's still warm, turn the mixture out onto a piece of parchment paper sprayed with cooking spray, and form it into a rectangle shape that's about 14 inches long -the same length as the purple centerpiece. Flip it onto the blue layer and use your hands to shape it evenly and form the green arch.
  • Yellow Layer
    Next create the yellow layer of the rainbow. Combine the butter with the marshmallows. Heat in a small pot over medium heat, until all the marshmallows are melted. Remove from the heat and add food colouring and stir to fully combine. Then stir in the rice krispies. While it's still warm, turn the mixture out onto a piece of parchment paper sprayed with cooking spray, and form it into a rectangle shape that is about 14 inches long -the same length as the purple centerpiece. Flip it onto the green layer and use your hands to shape it evenly and form the yellow arch.
  • Orange Layer
    Next create the yellow layer of the rainbow. Combine the butter with the marshmallows. Heat in a small pot over medium heat, until all the marshmallows are melted. Remove from the heat and add food colouring and stir to fully combine. Then stir in the rice krispies. While it's still warm, turn the mixture out onto a piece of parchment paper sprayed with cooking spray, and form it into a rectangle shape that's about 14 inches long -the same length as the purple centerpiece. Flip it onto the yellow layer and use your hands to shape it evenly and form the orange arch.
  • Red Layer
    Lastly, create the red layer of the rainbow. Combine the butter with the marshmallows. Heat in a small pot over medium-low heat, until all the marshmallows are melted. Remove from the heat and add food colouring to the melted marshmallow mixture and stir to fully combine. Then stir in the rice krispie cereal. While it's still warm, turn the mixture out onto a piece of parchment paper sprayed with cooking spray, and form it into a rectangle shape that's about 14 inches long -the same length as the purple centerpiece. Flip it onto the orange layer and use your hands to shape it evenly and form the red arch.
  • Let the colorful rainbow rice krispie treats set and then cut into slices ½ - ¾ inch thick. Optional: add some gold sprinkles to one side as some gold at the end of the rainbow. Be sure to add them right after you cut the slices, so that it's sticky enough for the sprinkles to stick. Or dip one end in some melted chocolate or candy melts and then sprinkle with gold sprinkles.

Notes

When working with rice Krispie mixture to form it, be sure to spray your hands with butter or non-stick cooking spray so that they don't stick to the mixture.
If you are making this recipe with kids, be sure that the mixture is not too hot for little hands, or let an adult do this step.
Store these at room temperature, in an airtight container, or wrapped with plastic wrap

Nutrition

Serving: 1g | Calories: 150kcal | Carbohydrates: 28g | Protein: 1g | Fat: 4g | Saturated Fat: 3g | Polyunsaturated Fat: 1g | Cholesterol: 8mg | Sodium: 95mg | Sugar: 15g
Tried this Recipe? Tag me Today!Mention @LifeisaParty or tag #lifeisaparty!

The Beginner's Guide to Cricut Mat Sizes and Types

Mar 3, 2023 · Leave a Comment

Cricut mat sizes, and types and when to use each one.

The Beginner's Guide To Cricut Mat Sizes and Types: learn exactly which cutting mat to use for which project, with free printable guide.

Cricut mat sizes, and types and when to use each one.
[feast_advanced_jump_to]

When you first get a Cricut machine it feels like there is a lot to learn, and it can be very confusing. Today we're going to take a deep dive into Cricut mats. We talk about what they are and how to you use them, and then get into how you know what Cricut mat sizes to choose, and what colour mat you need which depends on the material your cutting. It can feel a little complicated at first, but I promise that by the end you'll know exactly what mats to buy and when to use them for all your Cricut projects.

What Is A Cutting Mat?

First things first, what are Cricut cutting mats, and why do I need one? A cutting mat is what you use to hold your material while the cutting machine is cutting it. They are sticky to hold your material as the blade passes through it. If your mat isn't sticky enough (they lose their stick with use) then your material may slide out of place and be ruined during the cutting process. Check out this post on The Best Way To Clean A Cricut Cutting Mat.

The different mats come in different colours. Each colour is a different level of tack or stickiness designed to hold different materials.

Cricut mats are covered in a 1 inch grid to make lining things up and measuring easier. If you're having trouble picturing a finished project size, use the grip mat like a ruler to figure your finished project size. There is also centimetre metric measurements along 2 sides.

Mats have a top and bottom, the top is the edge with the hole for hanging at the top. You can feed either the top or bottom into your Cricut machine. Varying which end you feed into your machine will help your cutting mat wear more evenly. You can not feed the sides of the mat into the Cricut machine first.

Do I Always Need A Mat?

No you don't always need a cutting mat. If you have a Cricut Maker 3, a Cricut Explorer 3, or a Cricut Joy machine then you can use smart materials without a mat. Keep in mind though that this only works for what Cricut labels smart material, and even with these newer machines many materials still require a mat to cut them. Chances are that even with a new machine you will still need to use a mat sometimes.

Cutting out vinyl on a Cricut joy machine.

Cricut Cutting Mat Colours and Types

In the Cricut world, cutting mats come in different colours and the colours correspond to different types of cricut mats. The different types of mats have different grip strengths. One of the most common questions is which mat do I use?

The Cricut can cut such a wide variety of materials. For each new project, you will have to choose which cutting mat is best for the material you using.

which cricut cutting mat to use

Blue -Lightgrip Mat

The blue mat is the light grip mat and is designed to be used for lighter materials. You would choose this blue lightgrip mat to cut more delicate materials, and lightweight materials.

You would use this mat to cut out:

  • scrapbook paper
  • light cardstock
  • regular office copy paper or printer paper
  • vellum
  • construction paper
  • wrapping paper

Green -The Standardgrip Mat

The green mat is the standard grip mat and is the mat you will probably use 90% of the time to cut the most common materials. This mat is the most of the multi-purpose mats, and standard mats can be used with a wide range of medium-weight materials.

Custom  stickers are being cut out on a Cricut machine.

You would use the Standard Grip mat for cutting:

  • cardstock
  • permanent or removable vinyl
  • Iron-on (HTV -heat transfer vinyl) vinyl
  • sticker paper
  • infusible ink

Purple -StrongGrip Mat

This purple mat is the strong grip mat, and used for heavier material that requires a stronger, sticky-er mat to hold them. At times this mat is used with the addition of painters tape around the outside of the thicker material, for even greater hold. The purple stronggrip mat is necessary for heavyweight materials.

how to use cricut cutting mats
  • heavy cardstock
  • glitter cardstock
  • balsa wood, or basswood
  • chipboard
  • poster board
  • leather
  • cork
  • magnet sheets

Pink -The Fabricgrip Mat

The pink mat is the fabric mat, and designed to hold fabric. This fabric grip mat is used with bonded fabric for the Explore machine , or with the rotary blade for the Cricut Maker machines.

  • fabric
  • felt
  • crepe paper

Free Cricut Mat Cheat Sheet Here

We have a free cheat sheet that you can print and refer to anytime you need to see what materials you can cut with which Cricut cutting mat. Never get confused about the different grips again. It's available for free to any of our subscribers. Subscribe below for instant access.

Cricut cutting mat cheat sheet

What If I Don't Choose The Correct Mat?

Since Cricut cutting mats come in different grip strengthsIf you use a mat that is not sticky enough to hold your material, it may slide during the process and ruin the cut.

If you choose a type of mat that is too sticky, it may be difficult to remove your material resulting it rolling and curling or ripping.

Cricut Cutting Mat Sizes

Cricut cutting mats come in a variety of sizes and are available at the craft store. The different sizes are useful for cutting out different size projects. The material size will help you choose the cutting mat size.

Cricut cutting mat guide

Explore and Maker Series Cutting Mats

12 x 12 Mat with 11.5 x 11.5 Cutting Space

The standard cutting mat size for all of the Explore and Maker series Cricut machines is 12 x 12. You will definitely need this size of mat in your collection. You can buy the lightgrip, standardgrip, stronggrip, and fabricgrip mats in this size. A lot of the materials, like scrapbook paper, cardstock, and vinyl are sold in 12 x 12 sheets.

The mat size is slightly larger than the cutting area. Cricut Design Space requires a ½ inch margin to ensure that the edge of a projects isn't cut off.

Applying a sheet of card stock onto a green Cricut cutting mat.

12 x 24 Mat with 11.5 x 23.5 Cutting Space

If you are making larger projects, you can also get a 12 x 24 size mat. This is excellent for big projects like larger signs. It allows you to make larger projects, without having to split a design up into smaller pieces.

There is also something called Larger Than Mat projects, these are often things like a large character cutout that you might use as party decor. These projects are larger than even the largest mats and are typically carefully divided into pieces that are then glued together. The over size 12 x 24 mat is very helpful for these projects.

Cricut Card Mat 2 x 2

This new Cricut mat is based on the popularity of the Joy card mat. It allows all Explore and Maker machine users to cut out up to 4 folded greeting cards at a time, and is compatible with all of Cricuts insert and cutaway cards.

Cricut Joy Cutting Mats

4.5 x 6.5 Mat with 4 x 6 Cutting Area

This is the regular sized mat for the Cricut Joy, that you will use most often.

4.5 x 12 Mat with 4.5 x 11 Cutting Area

This is the longer mat for the Cricut Joy, that will allow you to cut longer projects on your Joy.

Cricut Joy Card Mat

This mat is specially design to be used for card making. It is compatible with all of Cricuts insert and cutaway cards.

Circut Joy with carring case and cutting mat.

How Many Cutting Mats Do I Need?

This depends on what materials you are cutting on your Cricut machine. You will definitely need green standardbrip mats. I recommend having at least two of them, so that if you are cutting out a large project you can be loading one into the machine, and unloading the first one during the second cut time. This will help cut down the cutting time of larger projects.

You may want to buy the rest of the mats as you need them. It of course handy to have at least one of each colour, and perhaps the oversized version of the green mat. You may also want to have a new spare one on hand for each colour also. There's nothing more frustrating than getting already to cut out a new project and discovering you can't make it because your old mat is worn out and not sticky enough.

Mat Care

How do you care for your Cricut cutting mat?

The first step to maintain a sticky mat is to be sure to clean off any leftover paper, or debris after cutting. Use the scraper tool with a little bit of pressure or use tweezers to remove anything from the machine mat. Some people like to use a lint roller to remove debris from their cutting mat, especially after cutting fabric.

The second step, and one of the easiest ways to keep your mat sticky is to always replace the transparent cover to any cutting mat after you're finished using it, and to store it with this protective cover in place. This will greatly increase the life of your mat.

Another tip is to rotate the mat and use the bottom as the top sometimes. Often the top of the mat, in the left corner is the first area on a mat to lose its stick, because it's the most used. When cutting smaller materials you can place your material in another less used area, and move the object on the cut preview screen.

What If My Cutting Mat Isn't Sticky?

If you're cutting mat has lost its stickiness you can clean your Cricut mat. Read all about how to use baby wipes, or mild dish soap to to clean a cutting mat that isn't sticky anymore here.

How to clean a Cricut cutting mat with Dawn and baby wipes.

Cricut mats don't last forever. You can expect to get around 40-50 cuts out of your mat before having to replace it. Watch for sales, or multi packs to help save on the cost of replacing them.

TroubleShooting

If you're material is sliding around during the cut and moving on the cutting mat then it may be time for a new mat. If you don't get a clean cut, your mat may have lost its stickiness. You can try cleaning it to restore some of the stick -see how to clean your Cricut mat here or you may have chosen the wrong tack level for your material. Use our free cheat sheet to help you decide on the right mat.

Storing Cricut Mats

The main thing to remember is to always store your Cricut cutting mats with the transparent cover on them. This will protect your mat from dust and debris and extend it's life. You will also want to ensure that the mat is somewhere where it can lay, stand, or hang flat and that it doesn't become bent.

All the Cricut cutting mats come with a small hole in the top, that's handy for storing them. If you're lucky enough to have a craft room, lots of crafters like to store their mats hanging on the wall with a simple hooks. You can also use this method inside a craft closet or on the back of a door with a removable command hook.

I store my regular size mats on my bookcase, standing vertically. This means I can find them easily, and they're always close at hand for using. It's easy to find any different colour I need.

For the extra long 12 x 24 inch mats, I saved the original shipping box that they came in to help protect them from bending and have it tucked in the side of my craft closet. Since these ones are so large, under a bed or couch might be a good spot too.

Cricut cutting mat basics

You now know everything you need to all about Cricut mat sizes and types.  Happy Cricut crafting!

More Helpful Cricut Information

You might also like our post on How to Make Earrings with a Cricut here.

Cricut leather earrings

Also check out How To Sharpen A Cricut Blade here.

how to sharpen a Cricut blade

You might also enjoy How To Cut Vinyl on a Cricut here.

How To Cut Vinyl On Your Cricut -Step By Step Guide For Beginners, including prepping design, cutting, and transferring.

Peanut Butter Thumbprint Cookies

Jan 25, 2023 · 1 Comment

Peanut butter and jam thumbprint cookies on a cooling rack with a jar of jam.

Peanut Butter Thumbprint Cookies are the perfect combination of peanut butter and jam. We've made them with heart shaped thumbprint centres so they're perfect for sharing the love. We've even included a free printable Valentine for gift giving -but these cookies are so good you'll want to enjoy them year round.

Peanut butter and jam thumbprint cookies on a cooling rack with a jar of jam.
[feast_advanced_jump_to]

Why We Love This Recipe

  • Peanut butter cookies... enough said.
  • Nothing goes with peanut butter like jam -the perfect combo.
  • The heart shaped thumbprints are so cute!
  • They're easy to make-no rolling out, no cookie cutters, one bowl, and simple ingredients.
  • They're perfect for giving to your Valentine and we even included some free printable Valentine's to match.

We go together like peanut butter and jam! For Valentine's Day I thought it would be fun to combine two of my favorites, peanut butter and jam, for the perfect cookie. We made these peanut butter thumbprint cookies extra cute with a heart shaped thumbprint filled with our favourite jam.

These are so sweet for celebrating Valentine's Day or love any time of year with the heart shaped center. You might also like our Valentine Breakfast Board here.

Heart shaped peanut butter thumbprint cookies with jam in the middle.

Ingredients

  • Jam or Jelly

Depending where you're from you might prefer peanut butter and jam or peanut butter and jelly. We used raspberry jam to make our cookies. You can use any flavor jam or jelly that you like.

Other classic jams or jellies that go well with peanut butter are strawberry or grape.

If you prefer to avoid the tiny seeds that are often in jam, feel free to use seedless jam or jelly, whichever you prefer.

  • Crunchy or Smooth Peanut Butter

If you prefer crunchy peanut butter in general you can use it here as well, and it will give the cookies a crunchy texture.

We used regular peanut butter that is smooth.

Filling peanut butter thumbprint cookies with raspberry jam.

PB and J Valentine Cards Free Printables

I thought these would be fun to make these for Valentine's Day and designed a few free printable Valentine cards that you can use for giving these to someone special.

Subscribe below for instant access to our Free Resource Library where you can download the free printable and print on your home computer or local office supply store.

Where I come from we usually say peanut butter and jam, but I know others usually say peanut butter and jelly so I've made Valentines in both versions and you can choose whichever version you prefer.

Peanut butter thumbprint cookies in cello bags with free printable Valentine cards.

More Options

  • Peanut Butter and Jam Sandwich Cookies

Another option is to make easy peanut butter cookies with this same recipe, and not add the heart thumbprint, but instead to do the traditional crisscross design made with a fork pushed into center in one direction, then again in the opposite way.

These are perfect cookies if you want regular peanut butter cookies. This peanut butter cookie recipe is sure to become your new go to.

Another option though to create a different kind of peanut butter and jam cookie is to use two regular style peanut butter cookies and turn them into sandwich cookies by adding jam between two and sandwiching them together.

This option is a slightly less fiddly option, with all the same great taste.

  • Chocolate Thumbprint Cookies

You could make these into peanut butter chocolate thumbprint cookies by replacing the jam or jelly with chocolate ganache.

To make a chocolate filling, heat heavy whipping cream and then stir in chocolate. The chocolate will melt and you can add the filling to the centre of the cookie to create chocolate peanut butter thumbprint cookies.

  • Chocolate Blossom

You could make these into traditional chocolate peanut butter blossom cookies, and instead of creating the thumbprint before baking, leave them round and as soon as they come out of the oven, push a Hershey kiss into the center. Or one more option, make the peanut butter cookies and add in some chocolate chips for the chocolate lover.

Instructions

1. To make the peanut butter cookie dough, add the butter, creamy peanut butter, white sugar, and brown sugar to a large mixing bowl and use a hand mixer, or into the bowl of a stand mixer with the paddle attachment. Cream the ingredients together until the mixture is light and fluffy.

2. Add in the eggs and vanilla and combine.

3. Next add the dry ingredients of flour, baking soda, baking powder, and salt to the wet ingredients. Combine at a low speed to start, and then until completely combined, taking care not to over mix.

4. Use a 1-inch cookie scoop or a tablespoon to scoop out the cookie dough balls and then shape the dough into 1-inch balls by rolling in your hand. Next, place the balls on ungreased cookie sheets, about 2 inches apart. Then flatten the balls slightly and use your pinky finger, or the back of your small spoon to create a heart shaped thumbprint in the center of each ball.

Making the heart shaped thumbprints in a peanut butter thumbprint cookies.

5. Bake the cookies at 350 degrees in a preheated oven for 8-10 minutes, until just beginning to become light golden brown.

6. As soon as you remove the baked cookies from the oven, while they are still hot, use the back of a small teaspoon to push down the middle of each cookie again in a heart shape, and then remove them from the cookie sheet and place them onto a cooling rack.

Using a small spoon to make heart shaped thumbprints in peanut butter thumbprint cookies.

7. While the cookies are still warm on the wire rack, use small spoons to carefully add ½ teaspoon of jam to the centre of each cookie in a heart shape. The heat of the cookie will help the jam melt into place. Having said that though, you may want to add the jam as needed, since they're tricky to store in an airtight container once the jelly thumbprint cookies are all filled. If you are adding the jam after the cookies are cooled, you can warm up the jam in a microwave for just a few seconds to make it easier to work with and less stiff.

peanut butter and jam thumbprint cookies

Peanut butter thumbprint cookies with jam jar on a wood table.

Frequently Asked Questions

Should you fill the cookie with jam before or after baking?

Fill these cookies after baking. Make the perfect heart shaped indent before and again right after baking and fill the indent with jam for the perfect heart shape.

What to use instead of thumb for thumbprint cookies?

No need to use your thumb, use the back of a small measuring spoon instead.

Should I use chunky or smooth peanut butter for my peanut butter cookies?

You can use either. Chunky peanut butter will add some peanut texture to your finished cookies.

Expert Tip

Use the back of a small measuring spoon to make your "thumbprints".

Peanut butter thumbprint cookies cooling on a rack.

More Cookie Recipes

  • Jam Jam cookie recipe, with cookies laying on a marble serving tray.
    Best Homemade Jam Jam Cookie Recipe
  • raspberry almond thumbprint cookies
    Raspberry Almond Thumbprint Cookies
  • Brown sugar shortbread caramel thumbprint cookies.
    Brown Sugar Shortbread Caramel Thumbprint Cookies
  • Easy vanilla shortbread made with cornstarch.
    Vanilla Shortbread Cookies -Easy Cornstarch Recipe

If you tried this Peanut Butter and Jam Thumbprint Cookie Recipe or any other recipe on my blog please leave a star rating and let me know how it went in the comments below. Thanks for visiting today!

Recipe

Peanut butter and jam thumbprint cookies on a cooling rack with a jar of jam.

Peanut Butter Thumbprint Cookies

Video

Classic peanut butter cookies with heart shaped thumbprints filled with jam.
5 from 1 vote
Print Pin Rate
Course: Desserts
Cuisine: American
Prep Time: 15 minutes minutes
Cook Time: 1 hour hour 10 minutes minutes
Total Time: 1 hour hour 25 minutes minutes
Servings: 6 dozen
Calories: 89kcal
Author: Dannyelle Nicolle-Ramjist

Ingredients

  • 1 cup butter room temperature
  • 1 cup peanut butter
  • 1 cup white sugar
  • 1 cup brown sugar
  • 2 eggs
  • 1 teaspoon vanilla extract
  • 2 ½ cups all-purpose flour
  • 1 teaspoon baking soda
  • 1 teaspoon baking powder
  • ½ teaspoon salt
  • ½ cup raspberry jam or jelly

Instructions

  • To make the peanut butter cookie dough, add the butter, creamy peanut butter, white sugar, and brown sugar to a large mixing bowl and use a hand mixer, or into the bowl of a stand mixer with the paddle attachment. Cream the ingredients together until the mixture is light and fluffy.
  • Add in the eggs and vanilla and combine.
  • Next add the flour, baking soda, baking powder, and salt to the peanut butter mixture. Combine at a low speed to start, and then until completely combined, taking care not to over mix.
  • Use a 1-inch cookie scoop or a tablespoon to scoop out the cookie dough balls and then shape the dough into 1-inch balls by rolling in your hand. Next, place the balls on ungreased cookie sheets, about 2 inches apart. Then flatten the balls slightly and use your pinky finger to create a heart shaped thumbprint in the center of each ball.
  • Bake the cookies at 350 degrees in a preheated oven for 8-10 minutes, until just beginning to become light golden brown.
  • As soon as you remove the baked cookies from the oven, while they are still hot, use the back of a small teaspoon to push down the middle of each cookie again in a heart shape, and then remove from the cookie sheet and place them onto a cooling rack.
  • While the cookies are still warm on the wire rack, use a small spoon to carefully add ½ teaspoon of jam to the centre of each cookie in a heart shape. The heat of the cookie will help the jam melt into place.

Notes

If you prefer, use the back of a small measuring spoon instead of your finger to make the thumbprint.
You may want to add the jam to the baked peanut butter cookies as needed, since they're tricky to store in an airtight container once the jelly thumbprint cookies are all filled. If you are adding the jam after the cookies are cooled, you can warm up the jam in a microwave for just a few seconds to make it easier to work with and less stiff.
Store cookies in an airtight container.

Nutrition

Serving: 1g | Calories: 89kcal | Carbohydrates: 11g | Protein: 1g | Fat: 5g | Saturated Fat: 2g | Polyunsaturated Fat: 2g | Cholesterol: 12mg | Sodium: 81mg | Sugar: 7g
Tried this Recipe? Tag me Today!Mention @LifeisaParty or tag #lifeisaparty!

Valentine's Day Movie Night With Free Printables

Jan 23, 2023 · Leave a Comment

Valentine's Day movie night free printables including tickets, banners, snack labels, and decorations.

Start your Valentine's Day movie night with a printable ticket invitation that makes staying in feel like a special occasion. Create a memorable evening at home with festive decorations, themed snacks, and our complete free printable pack for date night or family fun.

Valentine's Day movie night free printables including tickets, banners, snack labels, and decorations.

Quick Look

  • 💕 Occasion: Family or Date Night Valentine's Movie Night
  • 🎟️ Free Printable Pack: Movie tickets, banners, pennants, snack labels, and decorations
  • 🍿 Snack Bar Setup: Popcorn buffet, Valentine candy, and cotton candy drinks
  • 🎬 Movie Lists: 10 family-friendly films plus 10 romantic date night picks
  • 💰 Budget-Friendly: Use what you have at home plus a few dollar store finds

Why You'll Love This Valentine's Day Movie Night

  • It's Free (Seriously): Our complete printable pack includes everything you need to make the night feel special without spending a fortune.
  • Family or Romantic: We've included movie suggestions and setup ideas for both family movie nights with kids and romantic date nights with your partner.
  • Easy to Pull Together: Most decorations come from our free printables. Add some balloons, and snacks and you're all set.
  • Makes Memories: Creating a special movie night tradition at home is more memorable than fighting crowds at restaurants and theaters.
  • The Printables Are Adorable: Movie tickets to invite everyone, XO banners, snack labels, pennants, and even cute Valentines to hand out make everything feel intentional and coordinated.
[feast_advanced_jump_to]

Valentine's Day Movie Night is such a fun way to spend time with family, girlfriends, or your significant other. Skip the crowded restaurants and overpriced theater tickets this Valentine's Day and create something even better at home. Our free printables include movie tickets, decorations, snack labels, and more to transform your living room into the coziest celebration spot.

We love a good movie night. Check out our all season movie night free printables. You might also like our Halloween movie night ideas and free printables, and our Christmas movie night free printables. Also check out 20 At Home Valentine's Day Ideas.

Free Printables

Use our Valentine's Day Movie Night free printables to create an extra special movie night.

Free Valentine's Day Movie Night Printables

To access the printables, just subscribe to Life is a Party below and then download the printables in our Free Resource Library. When you subscribe you'll be sent an email with the password for instant access.

Free Printable Movie Tickets

Start the evening off right with a movie ticket invitation from our free printable pack:

Free printable Valentine's Day movie night tickets for inviting family or partner.

How to Use Them:

  • Save as Keepsake: These make sweet Valentine's Day mementos
  • Surprise Your Partner: Slip the ticket on their pillow or in their lunch box
  • Invite the Kids: Hand out tickets at breakfast to build excitement for movie night
  • Make It Official: Use the tickets as actual "admission" to your living room theater

Valentine's Day Movie Night Decorations

Banners

What's Included: Printable XO letters and large circles in our free pack

  • Hang Anywhere: Drape across the TV, over the couch, or above your snack table
  • Cut and Hole Punch: Cut out the XO letters and circles, then hole punch the tops
  • String Together: Thread ribbon or twine through the holes to create your banner
  • Add Glitter: Brush on craft glue and sprinkle with pink or red glitter for extra sparkle
DIY Valentine's Day banner with printable XO letters and circles for movie night decorations.
Close-up of handmade Valentine XO banner with pink and red glitter accents.

Pennant Flags

What's Included: Heart-themed pennants in multiple designs

  • Display Ideas: Stick in popcorn boxes, mason jars, or candy bowls for festive touches
  • Cut and Attach: Cut out pennants and hot glue to wood skewers, dowels, or straws
  • Personalize: Add ribbon bows or glitter accents to make them extra special
Valentine's Day printable pennants on wooden sticks for movie night decor.
Two free printable Valentine's day paper pennants on dowels with ribbons.

Signs

What's Included: Multiple printable signs for decorating your space

  • Mix Frame Sizes: Use different frame sizes for visual interest
  • "I Love You More Than Popcorn": Frame this printable for your snack table
  • "Will You Be My Valentine": Display prominently as your movie night invitation
Valentine's Day movie night printable sign "I love you more than popcorn" in picture frame.

Simple Decorating Ideas

Create a Festive Atmosphere:

  • Tablecloth: Inexpensive pink tulle from the fabric store creates a whimsical base
  • Lighting: String mini heart-shaped lights around your viewing area
  • Balloons: Pink and white balloons with heart prints add instant festivity
  • Keep It Simple: You don't need much beyond the printables to create the mood

Valentine Movie Night Printable Food Signs and Labels

Valentine's Day movie night snack bar with printable labels, popcorn, and candy.

Food Table Signs

Make Your Snack Station Look Professional:

  • Easy Setup: These labeled stations help guests know exactly where to find treats
  • "Movie Night Drinks" Sign: Frame this printable to label your beverage station
  • "Movie Night Snacks" Sign: Use in a small frame to mark your popcorn and candy area
  • Perfect Frame Size: 5x7 frames work beautifully for these signs
Valentine's Day movie night ideas

Individual Food Labels

Label Everything on Your Snack Table:

  • Pre-Made Labels: We've included labels for popular movie night snacks and drinks
  • Blank Labels: Customize these to add your own food items
  • Tent Card Style: Fold labels in half to create standing place cards
  • Keep It Organized: Labels make your spread look intentional and help guests identify options
valentine movie night ideas

Small Circle Decorations

Versatile Printables with Multiple Uses:

  • Multi-Purpose: These small circles add festive touches wherever you need them
  • Cupcake Toppers: Attach to toothpicks and stick in cupcakes or treats
  • Gift Tags: Tie onto pop bottles, candy bags, or party favors
  • Mini Garland: String circles together to create a cute banner
  • Drink Markers: Use to identify whose drink is whose

Valentine Cards to Hand Out

Sweet Additions to Your Movie Night:

  • For Guests: Hand out cute Valentines as party favors when guests arrive or leave
  • Table Decor: Scatter around the snack table for added decoration
  • With Treats: Attach to candy bags or popcorn boxes as personalized touches
  • Keepsakes: These make sweet mementos from your Valentine's movie night
free Valentine's Day party printables

Valentine Movie Night Snacks

Valentine's Day movies

We set our Valentine's Day snack bar up on the coffee table, in front of the couch for easy access while movie watching.

The coffee table is covered in some inexpensive pink tulle from the fabric store as a fun and whimsical tablecloth. I also added a string of mini heart shaped lights.

We blew up a bunch of cute pink and white Valentine's Day balloons with hearts on them to help add to the sense of occasion.

Valentine's Day movie night party
Popcorn Buffet

The Star of Your Movie Night Snack Bar:

  • Time-Saving Tip: Buy three different store-bought varieties instead of making from scratch
  • Buttered Popcorn: Classic movie theater style everyone loves
  • White Cheddar Popcorn: Savory and addictive option
  • Caramel Corn: Sweet and crunchy treat
  • Other Options: Try kettle corn or pink popcorn for extra Valentine's flair
  • Serving Style: Individual popcorn boxes let everyone create their own custom mix

Setup Ideas:

  • Heart Napkins: Add festive napkins for easy cleanup and extra Valentine's touches
  • Simple White Bowls: Serve each popcorn flavor in its own bowl
  • Individual Boxes: Provide cute popcorn boxes for everyone to fill with their favorites
movie night popcorn buffet

Valentine's Day Candy

Sweet Treats for Your Candy Station:

  • Add Your Favorites: Include chocolate hearts, pink M&Ms, or any Valentine candy you love
  • Classic Conversation Hearts: The iconic Valentine candy everyone expects
  • Cinnamon Candy Hearts: For those who like a little spice with their sweetness
  • Heart-Shaped Marshmallows: Perfect for snacking or topping hot chocolate
  • Heart-Shaped Bowls: Display candy in heart-shaped bowls for extra cuteness
Valentine's Day party candy

Valentine's Day Drinks

Pink Cotton Candy Drinks

For a special non-alcoholic drink that the kids would love, create these pink cotton candy drinks. See our blue cotton candy drink recipe here for complete instructions.

How to Make Them:

  • Add Cotton Candy: Place pink cotton candy in the bottom of champagne glasses
  • Pour the Soda: Use ginger ale or Sprite (Sprite is clearer and creates a pinker drink)
  • Watch the Magic: The cotton candy dissolves into a fizzy pink drink right before your eyes
  • Garnish: Top with a small tuft of pink cotton candy for beautiful presentation
  • Fancy Glassware: Use champagne flutes even for kids to make them feel special

Adult Drink Options:

  • Simple Wine: Red wine pairs perfectly with chocolate treats and movie watching
  • Champagne Version: Use prosecco or champagne instead of soda for adults
  • Rosé: Pink wine creates a beautiful Valentine's Day drink
cotton candy drinks

Favorite Valentine's Day Family Movies

If your Valentine's movie night is a family affair, then we have some suggestions for movies that would be perfect for a Valentine's Day family movie night. Some are great for very young kids and others would be perfect for tweens or young teens.

Best Family-Friendly Valentine Movies

Our Top 10 Picks for All Ages:

  1. The Princess Bride (1987) - Classic fairy tale adventure with romance, humor, and unforgettable quotes
  2. Be My Valentine Charlie Brown (1975) - Sweet Peanuts special perfect for youngest viewers
  3. Enchanted (2007) - Disney princess meets real world in this charming musical comedy
  4. Lady and The Tramp (2019) - Heartwarming tale of romance and spaghetti dinners
  5. Gnomeo and Juliet (2011) - Garden gnome romance that's funny for kids and parents
  6. Shrek (2001) - Unconventional love story with humor the whole family enjoys
  7. Cinderella (2015) - Beautiful live-action retelling of the classic romance
  8. Beauty and the Beast (2017) - Stunning adaptation with incredible music and visuals
  9. Frozen (2013) - Celebrates sisterly love alongside romantic love
  10. The Princess Diaries (2001) - Teen discovers she's royalty in this sweet coming-of-age story
Valentine's Day party

Favorite Date Night Valentine's Day Movies

If you and your significant other are looking for a romantic movie to enjoy together for Valentine's Day, we've got some more adult suggestions, including lots of classic movie ideas to enjoy with your true love.

Best Romantic Movies for Couples

Our Top 10 Picks for Date Night:

  1. The Notebook (2004) - Epic love story that spans decades, perfect for a good cry
  2. When Harry Met Sally (1989) - Witty rom-com about friendship turning into love
  3. Sleepless In Seattle (1993) - Sweet romantic comedy with Tom Hanks and Meg Ryan
  4. Bridget Jones's Diary (2001) - Hilarious and heartwarming modern romance
  5. Pride and Prejudice (2005) - Beautiful adaptation of Jane Austen's classic
  6. Sense and Sensibility (1995) - Another stunning Austen romance with incredible cast
  7. A Star Is Born (2018) - Emotional modern love story with unforgettable music
  8. The Bridges of Madison County (1995) - Mature romance about a life-changing love affair
  9. Breakfast At Tiffany's (1961) - Iconic Audrey Hepburn classic with style and romance
  10. Out of Africa (1985) - Sweeping romantic drama set against beautiful landscapes
Valentine movies

A Valentine's movie night would be a really fun Valentine's Day tradition to start with your family or partner, and our free printables should help take it from a regular weekend activity to something really special and memorable. Subscribe below for instant access to the free printables. 

Valentine Movie Night ideas

With a Valentine's Day Movie Night like this for family fun with kids, or as a date night, life really is a party!

More Valentine's Day Inspiration

  • Date night fondue with cheese fondue and dippers at a coffee table.
    Fondue Date Night
  • Heart shaped hamburger on a plate with fries.
    Heart Shaped Hamburgers
  • Valentine breakfast buffet with mini pancakes, heart shaped sausage, yogurt parfaits, and fresh strawberries.
    Valentine's Day Breakfast

Frequently Asked Questions

How do I make movie night family friendly?

Choose a movie that is appropriate for all ages. Use our movie night ticket to invite everyone and get them excited. Serve snacks and drinks that everyone will enjoy. Decorate the space for the occasion.

How do I make my Valentine's Day movie night romantic?

Decorate the space for Valentine's day, and light some candles. Serve some fancy drinks like cocktails or sparkling wine. And offer some Valentine's day themed snacks that are romantic like strawberries and chocolate. Choose a romantic movie.

What would you serve for dinner for a Valentine's Day movie night?

Our top pick is heart shaped pizza, either homemade or takeout. And don't forget the popcorn and candy, which no movie night is complete without.

What if I don't have a color printable to make the printables at home?

Don't worry, you can upload them to an office supply store and have them printed there very inexpensively.

5. What should I serve at a Valentine's Day movie night?

A popcorn buffet with multiple flavors is perfect for movie night. Include buttered, white cheddar, and caramel corn so everyone can choose their favorite. Add Valentine candy like conversation hearts, cinnamon hearts, and chocolate. For drinks, try our pink cotton candy drinks for kids or champagne for adults.

How do I make a Valentine's movie night special without spending a lot?

Use free printables for all your decorations including tickets, banners, and snack labels. Inexpensive tulle from the fabric store makes a festive tablecloth. Pick up Valentine balloons from the dollar store. Buy popcorn and candy you already love from the grocery store rather than expensive specialty items.

Can I use these printables in my classroom?

Yes! These printables are perfect for classroom Valentine's Day parties. You can print as many copies as you need for your students. The movie tickets make adorable tickets to play classroom movie theatre, and the decorations work great for classroom celebrations. These are for personal use only and cannot be resold or redistributed.

How far in advance can I prepare for Valentine movie night?

Print and cut all the printables 1-2 days ahead. Set up decorations the morning of your movie night. Buy popcorn and candy anytime, don't open until right before serving. Cotton candy drinks must be made right before serving or the cotton candy dissolves completely.

If you have tried any of these Valentine's Day Movie Night Ideas or any other ideas on my blog please let me know how it went in the comments below. Thanks for visiting today.

Free Cricut Box Template With Scalloped Edge

Dec 11, 2022 · Leave a Comment

Cricut favour box free SVG cut file.

Free Cricut Box Template With Scalloped Edge: free svg cut file to create a favor box / gift box / treat box with full tutorial.

Cricut favour box free SVG cut file.
[feast_advanced_jump_to]

These little paper boxes are perfect as gift boxes, treat boxes, or candy boxes. Use our free Cricut box templates to create them with your Cricut machine. The free svg cut files are available in our Free Resource Library for all of our subscribers. Subscribe below for free. Our box designs are particularly special because of their cute scalloped edge.

scalloped box cricut free cut file

Cut the bottom and top box pieces out in different colors of card stocks to make the scalloped edge more noticable. This special box is available in two different sizes from the free svg files. Or use the scale button to make the entire design bigger or smaller in Cricut Design Space.

free favor box cricut cut file

Use the paper gift box for small gifts like a gift card, jewelry, or any other small item. These scalloped edge boxes are also great for food treats, candy, or baked good, especially around the holidays or for Valentine's Day. We've topped ours with paper trees (tree cut file free download included also) which is perfect for the holiday season. We used ours as favor boxes on a Christmas table. This the type of box that would also be great plain for any gift giving occasion. Or top with paper flowers for a shower favor, or summer occasion, or Valentine's Day. Or even use these little boxes as a great way to store items like small craft supplies.

free treat box cut file Cricut

YouTube Full Tutorial:

If you prefer to see how to make the scalloped box, be sure to watch the youtube video tutorial for a step by step tutorial.


Youtube video

Materials Needed:

  • cardstock
  • scoring wheel or scoring stylus
  • Cricut machine with the fine point blade
  • SVG files -Small Favor Box Bottom, Tall Favor Box Bottom, Favor Box Lid, Tree-optional
  • hot glue gun and glue
free cut file scalloped edge box Cricut

How to Make a Cricut Box with a Scalloped Edge

To Make The Box

1. Subscribe to Life is a Party, and access the free gift box svg files in the Free Resource Library. Download the zip file to your computer. In Cricut design space, start a new canvas, and click the Upload button, on the left menu. Upload the box bottom and lid digital files, and add to canvas.

2. Make sure that the pink cut lines are all changed to scored lines, by clicking on each of the pink solid lines and changing the operation from cut to score. When it's changed to score the line will change from solid to dotted lines in Cricut Design Space. There are four lines on each piece to change.

3. Attach the score lines to each box piece by selecting the entire piece and pressing attach at the bottom of the layers panel.

4. Change colors and use the duplicate button to cut multiple boxes at one time.

5. When you're ready to cut the boxes, follow the prompts in Cricut Design Space to insert the scoring tool -either the scoring wheel or scoring stylus, and fine point cutting blade. Place your card stock on a regular green Cricut mat and insert the cutting mat into the machine.

6. To assemble the cut pieces into a box, fold along all the scoring lines, and use hot glue to glue the smaller tabs in place to create the box bottom and lid. Hot glue is the quickest and easiest way to assemble the boxes, but if you prefer you can use a tape runner with adhesive, or double-sided tape, or even white glue. Clothes pins work well to hold sides of the box in place while white glue dries.

Cricut treat box free cut file

To Embellish The Box With Christmas Tree and Name Tag

7. To decorate the box with trees, upload the tree SVG, and use scale and duplicate to create different sizes. Assemble cut trees, and glue to top of the box lid.

8. To make the name tag for the favor boxes, add the flag shape to the canvas. Find the flag shape, by clicking the shape button on the left side, and adjust the size to 2 inches x 0.5 inches. Add font, filtering by writing fonts. Adjust the font to fit the tag, and attach the tag and font together. Duplicate and edit the names for all the guests. Make sure the operation for the text is set to writing.

9.Click make it, and follow the prompts to insert the marker into clamp A.

cricut gift box free file

You can make this project on any Cricut cutting machine, including the Cricut Maker, or one of the Cricut Explore Air machines. If you are working with the Cricut Joy, you may have to use the scale button to adjust the size of the box top and bottom so that it will fit the Cricut Joy.

We thought these boxes would be a fun way to create place cards and party favors all in one. For our holiday table we added names and cute paper Christmas trees to the top and then filled them with a little bit of holiday baking in cellophane bags. They make a really adorable take home favor for family and friends. We used both the tall and shorter sizes. Use both, or choose your favorite one.

free svg cricut gift box

With a beautiful free Cricut box template with scalloped edges, life really is a party.

More Cricut Ideas

Be sure to check out how we used this same free Cricut box template to create a beautiful re-useable advent calendar here.

Cricut Advent Calendar: free SVG cut file to create a reusable paper box advent calendar to fill with treats, activities, or gifts.

You might also enjoy our post about The Best Cricut Accessories You REALLY Need here.

Also check out How To Use Flatten In Cricut Design Space here.

what does flatten mean on Cricut

Woodland Enchanted Forest Christmas Decorating

Dec 6, 2022 · 16 Comments

Woodland Christmas decor ideas for a fireplace mantel with trees, mushrooms, lights, and garland.

Woodland Enchanted Forest Christmas Decorating Ideas: mushrooms, pine cones, and mini Christmas trees create a rustic natural whimsical Christmas.

Woodland Christmas decor ideas for a fireplace mantel with trees, mushrooms, lights, and garland.
[feast_advanced_jump_to]

Welcome to my home all decorated for Christmas full of woodland christmas decorating ideas with lots of mushrooms and mini Christmas trees to create an indoor enchanted forest. I love the holiday season, and sharing my home all decorated for Christmas is always my favourite blog post of the year.

Dining Room

Console Table

In our entryway we have a console table that I love to decorate seasonally. The "Our cheeks are nice and rosy and comfy cozy are we." is a fun DIY that's part of The Cricut Course. If you are a Cricut owner and interested in learning how to make one, check out The Cricut Course, which includes a full tutorial on how to design it and create it.

Christmas console table decoration

I've used a vase of twigs and decorated them with some mini vintage ornaments. In front of them are a few mini Christmas trees, including a white flocked Christmas tree and some different mushrooms. I used lots of fun mushrooms in my decor this year. I love to repeat different elements to help everything flow well, so I knew I wanted to have a few mushrooms and moss by the front door as a great way set the woodland theme right from the start.

woodland Christmas decor

My color scheme for this year included lots of creams, whites, and wood tones, with some pretty green, pink, and iridescent added into. I wanted to make sure that my forest theme wasn't too rustic, so the pink and iridescent helped to bring in the whimsy and enchanted feeling that I was hoping for.

Christmas console table decor

Bar Chart

This little bar cart is always a fun spot to decorate. I picked this pretty little faux Norfolk pine, and I love the addition of this woodland Christmas tree. I've also added lots of pretty little mini Christmas trees. I like mixing all the different ones together like wood, paper, and bottle brush. One single vintage Christmas ornaments looks gorgeous in a pink vintage champagne glass.

Christmas bar cart
Christmas bar cart

The Cheers banner is an old one, but looks festive, especially layered with pom pom garland and wood bead garland. On the lower shelf are more vintage glasses and Christmas trees. And beside the bar cart I have one small tree. It's undecorated, with just some clear lights on it for some sparkle.  Christmas bar cart

Dining Room Table

It's always fun to decorate the dining room table. I used lots more mini trees and mushrooms here. The antique wood dough bowl is the centerpiece. It's filled with floral foam, topped with moss, and has faux mushrooms tucked into it. I made some of the mushrooms with air dry clay -find the tutorial here, and some of the others were made of paper mache. I also tucked in lots of natural materials like acorns, and pine cones. And the whole bowl was sprinkled with faux snow and glitter. The final result is so beautiful, and will be a gorgeous centerpiece all winter long.

Christmas dining room decor
Woodland Christmas table decoration
DIY mushrooms
Woodland Christmas decor ideas
paper mache mushroom

Buffet

The buffet has a beautiful handmade wood candle holder filled with pink and white candles. The banner is a favourite one, that I keep up all year long, because there's always something to celebrate. These pieces are the perfect backdrop for a Christmas village of handmade paper houses. I made these houses years ago out of old cereal boxes -see how here, and they look so sweet tucked into my forest of mini Christmas trees. The pastel colors of the houses add some holiday cheer.

woodland Christmas dining room decor
Christmas glitter house village

The Stairs

On the stairs I kept the garland fairly simple with a macrame one that I keep up all year round -see the tutorial to make it here. On top of that I layered some faux evergreen garland, and new to me this year this gorgeous gold star garland. Again the stairs help add a little whimsy to our woodland theme.

I couldn't resist adding some mushrooms to the stairs too. I love the scale of these large wood mushrooms with mini Christmas trees and then the little white ceramic houses. It make me things of fairies living in them, and I think they're really adorable, especially with flickering battery operated tea lights in them at night.

Christmas stair garland
Christmas house under a mushroom
Christmas staircase decor

This little table at the bottom of the stairs gets dressed up with rustic Christmas decorations this time of year too. If you dream of a white Christmas, you'll love this spot. This little white box is perfect for displaying some woodland Christmas decorations. This small space is full of tiny decorations, like white bottle brush trees, wood trees, tiny houses, and the cutest vintage reindeer.

neutral rustic Christmas decor
woodland Christmas decor

In front of this display is my favourite advent calendar. I got it last year and love that it's reusable. Everyday you add different woodland creates.

white Christmas decor

Living Room

woodland Christmas decor

Over in the living room the coffee table has more trees, mushrooms and vintage Christmas ornaments. Most of the Christmas ornaments in a beautiful footed wood bowl, have come from thrift stores, or antique shops. It's fun collecting them over the years, and I'm always on the look out for them, especially pink ones.

enchanted forest Christmas decor

There's also lots of natural decorations. I used an antique ironstone small bowl and creamer that I filled with floral foam, moss, and more clay mushrooms. I love these snowy pinecone lights, that are a dollarama purchase, but so cute.

mushroom Christmas decor
vintage Christmas decorations
woodland Christmas decorating ideas

Fireplace Mantel

Over on the fireplace I've repeated the same garlands as on the staircase. I layered the handmade macrame garland with the evergreen garland, and the gold sparkly stars. The fireplace is actually a corner fireplace, so I used a vintage door as a backdrop, and then layered a curtain of mini lights. They really add the magical and cozy feel at night.

On the actual mantel I made a whole forest of mini Christmas trees and mushrooms surround by moss and faux snow. I love using some iridescent snow, glitter and stars to make it feel even more magical. I've also added natural elements like the real pinecones, and acorns.

The mini Christmas trees are a mix of ones I've collected over the years. I love the mix of wood rustic Christmas trees, with the sparkle of iridescent glass, as well as a bottle brush flocked tree, and pottery white Christmas tree. I love pink Christmas decor pieces, but the rustic touches help make it not feel like too sweet, like a baby girl's nursery.

The best part of this mantel decor is probably the mushrooms. They are a mix of a large wood mushroom, some smaller ceramic mushrooms and some paper mache mushrooms that were part of my DIY projects this Christmas. The mushrooms really take this mantel to the next level, and the perfect addition to create our enchanted forest Christmas theme.

I also layered in a real birch tree. This one is in a tin pail of cement, and the perfect thing to add so much depth and magic to this fireplace display.

woodland forest Christmas

The Christmas Tree

Our woodland tree is one of my favourite things this year. I wanted to purchase a faux tree that was sparse, but tall enough for my 10 ft. ceilings. To save money I bought two smaller Ikea trees, and put them together by using the middle section twice. It worked really well.

woodland pink Christmas
woodland Christmas trees

The Christmas tree decorations are a combination of beautiful glass ones that add sparkle and more of the enchanted feeling, and assorted pink vintage ornaments and vintage white ornaments, including a pink vintage Christmas tree topper on the top of the tree. There's also a combination of mushroom ornaments, including these homemade ornaments of velvet mushrooms -see the tutorial to make velvet mushrooms here. And to add a little more glass sparkle, there's also a set of glass icicles on the tree. The garland on the tree is some simple Christmas tree ribbon, which is a frayed edge white velvet ribbon.

vintage Christmas ornament pink
DIY velvet mushroom Christmas decoration

The star of the show for this Christmas tree though, has to be at the base of the tree. We created a woodland feel here by creating a skirt of preserved moss and more of our DIY paper mache mushrooms. I made these mushrooms with a base of chicken wire, tinfoil and newspaper. I topped them with strips of old book pages, and then painted them with watered down paint, and sealed them with mod podge. The mushrooms are nestled in the moss, and then they're all sprinkled with faux snow and glitter for a woodland glam look. I created a cohesive look by nestling in some of the Christmas ornaments into the moss as well. There's also more pine cones and acorns amidst the snowy moss. I absolutely love how this turned out. It's one of my favorite things this year, and I hope it inspires you with lots of ideas and Christmas inspiration.

mushrooms under the Christmas tree
DIY paper mache mushrooms
woodland Christmas tree
woodland Christmas decor
woodland forest Christmas

The Kitchen

Pine Cone Collection

On our kitchen table there's a collection of pine cones. I collected pine cones from 7 different tree species. It was so much fun to spend some time in the woods collecting them, and trying to find as many different varieties of cones that grow in my area. To display them, I bought a collection of vintage ironware. They're mostly pudding bowls, but also some other bowls and a platter. I found them at different antique stores, and I think these beautiful simple white pieces will be great to use for entertaining or as decor afterward.

Woodland Christmas
pine cone Christmas decor
pine cone centrepiece

I sorted each variety of pine cone into a different bowl or container. If you're worried about bringing in some woodland creatures with the pine cones, you can wash them with bleach, and then bake them in the oven at a low temperature which will also help them open more. I love the natural look of these holiday decorations. pine cones make really beautiful christmas décor, but they'll be beautiful all winter long. I also added in one concrete mushroom to tie in with all my other mushrooms.

pine cone centrepiece Christmas
pine cone candle
pine cone Christmas decor

Coffee Bar

I also have a Christmas coffee bar in my kitchen. The Have A Cup Of Cheer poster is one I designed and had printed as a large color engineer print -see how I made it here. I love this way to add inexpensive holiday art to a space. I've layered some garland over the art -including this pretty DIY star garland, see the tutorial to make it here.

Christmas coffee bar

We have the space set up with our cappuccino maker and homemade gingerbread latte syrup, perfect for making a special seasonal drink. Find the recipe for the homemade gingerbread latte syrup here.

Christmas coffee bar

Open Kitchen Shelves

Decorating my open shelves has become one of my favourite holiday traditions. This year I wanted to continue the enchanted woodland theme here too, so I used more mushrooms and mini artificial Christmas trees. These reproduction vintage deer are a fun addition.

kitchen open shelves decorated for Christmas
Christmas kitchen shelves
pink Christmas mugs
vintage santa

The pine cone Christmas wreath is a fun addition to the oven vent hood. Hung up the easy way, with a very strong magnet.

kitchen shelves decorated for Christmas

I have a small but hopefully growing collection of vintage Santa mugs. I'm always on the lookout for them and hope to find more. They look so cute grouped together here.

vintage Santa mug collection

I found this adorable little vintage piece of Christmas art at an antique booth a few weeks ago, and it looks so sweet layered in a collection fo mushrooms.

mushroom Christmas decorations

On the other side of the kitchen, I'm cutting some homemade marshmallows to use as cup toppers for hot chocolate. Find the recipe to make them here. If you've never made homemade marshmallows they're not that hard to make, and they really do taste amazing. They also make great gifts this time of year.

woodland Christmas decor ideas
homemade Christmas marshmallows

I always like to add a little Christmas beside the kitchen sink -more mushrooms and another cute mini tree.

woodland forest Christmas decor
mushroom Christmas decorations

The pass through to the living room is looking so gorgeous all dressed up for Christmas with some themed ornaments. These plain wood mushrooms got a little bit of a makeover with some white glue and different sized of iridescent glitter. I hung some real pine branches and then the mushroom garland, garlands of felt balls and wooden beads, as well as more whimsical star garland.

mushroom Christmas garland
mushroom Christmas decoration
Christmas mushroom garland

The house is all decorated for the big day, but we'll be celebrating all month long, and I hope you will too. Wishing you and your whole family a very merry Christmas and Happy New Year. With all these woodland Christmas decorating ideas, life really is a party!

More Christmas Inspiration

  • Harry Potter Christmas party with food from the first book, set up by the fireplace and Christmas tree.
    Harry Potter Christmas Party Ideas
  • Elf on the shelf arrival letter and breakfast.
    Elf on the Shelf Arrival Letter + Welcome Breakfast Ideas (2026)
  • DIY Harry Potter Christmas tree with homemade ornaments, 7 Horcruxes, and motorized Santa tree topper in cozy living room.
    Harry Potter Christmas Tree Ideas + DIY Ornaments
  • Homemade pink and white coconut ice recipe, cut into squares on parchment paper.
    Coconut Ice Recipe (Pink & White Coconut Candy)

Homemade Gingerbread Latte

Nov 30, 2022 · Leave a Comment

homemade gingerbread latte syrup

Homemade Gingerbread Latte: Copycat gingerbread latte Starbucks recipe with an easy homemade gingerbread coffee syrup recipe.

homemade gingerbread latte syrup
[feast_advanced_jump_to]

You can make a delicious gingerbread latte at home with our copycat gingerbread latte Starbucks recipe. You can enjoy it from the comfort of your own home. During the holiday season when you're craving festive flavors, this gingerbread syrup recipe is perfect for entertaining, enjoying on your own, or even for gift giving in a pretty glass jar with a little happy holidays tag for the coffee drinkers on you Christmas list.

It would make a great addition to a At Home Coffee Shop party too.

Homemade Gingerbread Latte: Copycat gingerbread latte Starbucks recipe with an easy homemade gingerbread coffee syrup recipe.

If you enjoy the taste of a gingerbread cookie, then our gingerbread latte recipe is for you. Make your own gingerbread syrup, with our easy recipe, full of gingerbread flavors, and made with simple ingredients that you may have on hand. You could probably make this simple syrup in less time than it takes you to go the coffee shop and wait in line. And more good news, it will definitely be cheaper to make them at home. Make the gingerbread latte syrup and store in the fridge in a container with an airtight lid, ready for anytime you want to make own latte. It's easy to make a Gingerbread latte. Start with an espresso, add steamed milk, frothed milk, and a little bit of gingerbread syrup. For a sweeter drink add more, or if you prefer less sweet, add less of the gingerbread syrup.

gingerbread simple syrup recipe

Starbucks copycat gingerbread latte syrup recipe

gingerbread coffee syrup recipe

homemade gingerbread latte recipe

Fresh Ginger Substitute

Ginger: if you don't have any fresh ginger you can substitute with ground ginger. Use ½ teaspoon ground ginger in place of the 1 ½ tablespoon of fresh for this recipe.

how to make a gingerbread latte

Sweeter Version

Like a sweeter or less sweet version? Adjust the amount of gingerbread syrup to your taste. We used 1 tablespoon for one espresso shot, but feel free to add or less. For an authentic copycat Starbucks gingerbread latte recipe, you might add up to 3 tablespoon with two shots of espresso.

gingerbread latte syrup recipe

Iced Gingerbread Latte

Prefer iced coffee to a hot latte? Use this the gingerbread simple syrup to bring that classic gingerbread flavor to your iced coffee and enjoy the gingerbread latte taste in an iced gingerbread latte version.

gingerbread coffee syrup recipe

Want to make more for enjoying or gift giving?  Feel free to double, or triple this batch.  This recipe makes about 2 cups of syrup. Make an extra bottle to give to a friend.

Recipe

homemade gingerbread latte syrup

Homemade Gingerbread Latte

Make gingerbread lattes at home with this homemade gingerbread syrup.
No ratings yet
Print Pin Rate
Course: Drinks
Cuisine: American
Prep Time: 10 minutes minutes
Cook Time: 5 minutes minutes
Total Time: 15 minutes minutes
Servings: 30
Author: Dannyelle Nicolle-Ramjist

Ingredients

Gingerbread Syrup

  • 1 cup water
  • 1 cup white sugar
  • 1 tablespoon molasses
  • ½ teaspoon ground cinnamon
  • ½ teaspoon ground nutmeg
  • 3 whole cloves
  • 1 ½ tablespoon peeled and grated fresh ginger

Instructions

  • In a small saucepan combine water, sugar, molasses, cinnamon, nutmeg, cloves and fresh ginger. Stir to combine.
  • Bring the mixture to a boil over high-medium heat. Let boil for 5 minutes, to create a thicker syrup.
    Let the mixture cool to room temperature and pour it through a wire sieve to strain out the ginger and cloves. Then store in an airtight container, like a mason jar, or bottle in the refrigerator.
  • To make the gingerbread latte, make one shot of fresh espresso in your espresso machine. And add one third of steamed milk, and one third of frothed milk to your hot coffee. Lastly add your gingerbread syrup. We used 1tbsp, but adjust according to your taste, for a more or less sweet drink.
Tried this Recipe? Tag me Today!Mention @LifeisaParty or tag #lifeisaparty!
Christmas coffee bar

With our homemade gingerbread latte Starbucks recipe, life really is a party!

More Ideas:

You might also like our Gingerbread Milkshake here, made with the same gingerbread syrup.

Gingerbread Extreme Milkshake Freakshake: Recipe for gingerbread syrup and gingerbread extreme milkshakes. Perfect treat for the holidays.

Also check out our Gingerbread House Cookies here.

Gingerbread House Cookies: a classic gingerbread cookie recipe perfect for Christmas cookie ornaments or mini houses.

You might also enjoy our Gingerbread themed Christmas Breakfast Board here.

Christmas breakfast charcuterie board

Cricut Advent Calendar with Free SVG

Nov 22, 2022 · Leave a Comment

Cricut advent calendar made of small boxes, including a free SVG cut file.

Cricut Advent Calendar: free SVG cut file to create a reusable paper box advent calendar to fill with treats, activities, or gifts.

Cricut advent calendar made of small boxes, including a free SVG cut file.
[feast_advanced_jump_to]

This Christmas countdown advent calendar is fun to make, and one you can use year after year. Fill each little box with little treats like a chocolate, a note, or one of our printable advent activity cards that you can do together as a family, a bible verse, or a small gift like little toys. And you can reuse this DIY advent calendar year after year.

advent calendar

Make your own advent calendar in any colors to suit your holiday decor. It' so beautiful it will make a welcome addition to your holiday season. This Cricut project would also make a lovely Christmas gift to someone with small children, or for grandchildren.

free sag cut file for advent calendar

Make sure it's ready to go on December 1st, and start counting down to a merry Christmas each day. It's such a fun way to build anticipation, and spread some of the celebrating out.

Cricut Christmas countdown calendar

Christmas Advent Calendar Materials:

You'll need a few different materials to make this easy advent calendar. We used white sticker paper along with the print then cut feature to make ours. But you could easily use regular copy paper for your print then cut and then use a glue stick to apply the numbers to the boxes if you didn't have any sticker paper.

how to make an advent calendar with your Cricut
  • Cricut machine
  • card stock -we used white and brown kraft paper style, and green
  • hot glue and hot glue gun
  • scoring wheel or scoring stylus
  • fine point blade
  • Cricut cutting mat
  • sticker paper
  • printer
  • optional: faux snow, toy deer, twinkle lights
  • small treats
  • free svg files (subscribe below for instant access in our free resource library)
  • sticker file in Cricut Design Space

Cricut Christmas advent calendar

Cricut Advent Calendar Tutorial Video

Prefer to see exactly how to make it?  Check out the video below to see the entire process:


Youtube video

How To Make The Advent Calendar

1. Begin by downloading the free svg file. Our files are free to subscribers in our free resource library. Become a subscriber below for instant access.

To Make The Boxes

2. Open Cricut Design Space, and start a new project.

3. Click the upload button on the left side, and click on browse. Find the advent box bottom cut file, click on it to upload to Cricut Design Space, then upload the advent box lid file the same way. Once they're uploaded select both and add to your canvas.

4. Once you have the lid and bottom on your canvas, you need to change the purple/pink cut lines to score lines. This step is important. Select each of the cut lines, and change the operation on the top menu from cut to score. There are four score lines to change for the lid, and another four lines to change to score for the box bottom.

5. After the score lines are changed, select the entire box lid using your mouse and click on attach at the bottom of the layers menu. Then select the entire box bottom and click on attach for it. This is another important step, which will make sure that the score lines are in the right places.

6. You need 24 boxes for the advent calendar. We did 12 white and 12 brown and mix and matched them. Using a different color for the tops and bottoms helps the pretty scalloped edge to really show up. You can do one color, or multiple colors. We duplicated our original box top and bottom and then changed the color of the second one to brown. Then we selected and used duplicate until we had 24 boxes, 12 white and 12 brown. Don't worry about arranging them on the canvas, Cricut Design Space will automatically arrange them on the cutting mats.

7. Save your project and click Make It.

8. Set your material to card stock, and follow the prompts in Cricut Design Space to add the score wheel when necessary.

9. To assemble the boxes, fold along all the score lines, and then use hot glue to glue the lids and bottoms together, taking care to make the them as square as possible.

To Make The Trees

10. To make the decorative trees for the top, start with a new canvas in Cricut Design Space. Upload the tree file in the same way we did for the boxes and add the tree to your canvas. To create different sizes of trees, duplicate both pieces of the original tree, and then unlock the dimensions by clicking on the lock on the top menu. Then with both trees from the set selected (you need the sizes of both pieces of one tree to match) use the scale button to make the tree short and fat, or tall and skinny. Duplicate the original trees to make as many new ones in different sizes as you wish. You can also change the colors to different shades of green. Once you're happy with your trees, save your design and click make it.

11. Cut out your trees from different colors of green card stock.

Cricut countdown Christmas calendar svg

12. To assemble the trees, slot the top and bottom pieces together. Use hot glue to glue them to the centre of some of the box lids. Every box doesn't need a tree, we just added some trees to the top of the advent calendar mountain.

To Make The Numbers

13. To make the numbers for the advent calendar you're going to use my Cricut Design Space file. Search for Life is a Party in the search box on the homepage of Cricut Design Space.  Scroll to the bottom of the page and look for Life is a Party under community members. Follow Life is a Party and look for the advent calendar numbers file.  Click on customize.  Adjust the color of the circles, and the font.  If you're wondering why this file is in Cricut Design Space instead of an SVG, it's so that you can easily adjust the color of the stickers, and the font.

14. Next, select all, then click on the flatten button, to turn the design into a print then cut operation.

15. Follow the prompts to print the numbers using your printer and white sticker paper. Next, cut out the circle stickers on the Cricut

Cricut advent calendar

16. Add the number stickers to the boxes.

Assemble The Calendar

17. Add special treats to the boxes such as small toys, chocolate, candy or gift cards. Or try a different Christmas joke, or love note for each day. Or use our advent activity cards to add a different activity for each day.

We set up a little mountain with our advent boxes, with the tree boxes scattered along the top.  After they were all positioned I added some twinkle lights, a few cute deer, and a sprinkling of faux snow.  It looks so great in my home, that it doubles as Christmas decor.

Advent Activity Calendar

When my kids were little they loved having an activity calendar. The activities are great ways to add some screen-free ways celebrating to your holidays. Each day there is a different Christmas activity for the kids or family to do together. Some of them are easy, like read a Christmas story book together, some of them take more planning like decorating the Christmas tree. Never done an activity advent calendar before? I promise it will be your one of your favourite new traditions and create life time memories for you and your kids.

activity advent cards
Free printable advent activity cards for an advent calendar, with gold stars on them.
Free printable advent activity cards with activities printed on them and a star pattern.

Your whole family will have so much fun with this countdown calendar, no matter what you fill it with. Try one of our suggestions for extra special fillers, or fill the entire thing with different items each day to keep them guessing. This cute calendar will keep everyone delighted right up until Christmas day. This beautiful project is sure to become one that you use year after year.

cricut Christmas craft ideas

With a reusable homemade advent calendar made with your Cricut, life really is a party!

More Cricut Inspiration

  • Cricut gingerbread decor felt gingerbread house banner and gingerbread canister with vinyl gingerbread houses
    DIY Gingerbread Decor Ideas To Make With Your Cricut
  • DIY paper Christmas cloche cricut
    DIY Paper Christmas Cloche Lantern with Free Cricut Pattern
  • Cricut Design Space weld vs. attach
    Cricut Design Space Weld vs Attach
  • DIY Cricut Halloween Cloche: use dollar store materials to make this haunted house, and graveyard silhouette cloche for Halloween.
    Spooky DIY Cricut Halloween Cloche

Sweet Strawberry Theme Party

Jul 14, 2022 · Leave a Comment

Strawberry themed party ideas with table setting, flowers, and food.

Sweet Strawberry Theme Party with DIY party decorations made with Cricut, picnic tablescape, and strawberry dessert menu.

strawberry themed party ideas
[feast_advanced_jump_to]

Why We Love This Party

  • This trendy strawberry themed picnic is so cute and we love the color scheme of pink and red.
  • Is there any better way to celebrate strawberry season than with a picnic?
  • We love strawberries, so an afternoon full of strawberry food was so delicious.

Strawberry Picnic Party

I'm so excited to share our strawberry picnic. Since everyone loves fresh strawberries in the summer it seemed a strawberry party theme was the perfect idea for a casual summer get together.

I love throwing themed parties. This daisy themed party was so much fun, and you also might like our cherry themed party, and our mushroom themed party.

We used our Cricut to make lots of DIY strawberry party decorations.

I love making custom party decor with my Cricut for any celebration.  For our strawberry themed picnic party we had so much fun creating custom party decor with our Cricut Maker 3. These projects may look fancy, but they were actually really quick and easy to create.  

This sweet party would be perfect for celebrating a fun date night, or a dessert party with friends. It would also be really sweet as a bachelorette or girls' night theme, or for a baby shower, or wedding shower. Lots of the inspiration I found was for a 1st birthday party, which would also be so adorable. Really any special occasion this summer would be perfect for a strawberry themed picnic.

Strawberry themed outdoor picnic table with setup with food, flowers, and decor.

As soon as I thought about having a strawberry theme, I knew I wanted to set up our party outside and take advantage of beautiful summer weather, so we went with a fun picnic set up. We used a low coffee table piled high with strawberries, flowers, and treats, and surrounded by blankets and cushions for party guests to lounge on while they enjoyed.

Strawberry themed party table with placesettings, flowers, and strawberry desserts.

DIY Strawberry Theme Party Decorations

DIY strawberry party decorations with Cricut machine.

Video

Prefer to see exactly how I did all the projects for this party?  Check out this YouTube video with all the details.


Youtube video

Large Sign

I used my new Maker 3 Cricut machine to create the strawberry decorations, including our beautiful welcome sign. The Maker 3 can cut vinyl up to 12 feet long making it perfect for creating any oversized projects. We took advantage of this amazing new feature to create our "Strawberry Fields Forever" sign. Inspired by the Beatles song lyrics we created the design in Cricut Design Space.

Creating the Design

To make your own open a new canvas, and add a text box. We used Merlot font (which is unkerned, so be sure to unchecked the only kerned fonts box to find it) to write Strawberry Fields and our font size was 205. Adjust the line spacing, and individual letter spacing for the "F" to create the look we did.

DIY large party sign made with wood background and vinyl letters.

We added another text box with "Forever" and used Cricut Sans font, size 112, letter spacing 0.5. Our sign was 18 x 24 inches, so we added a rectangle with those dimensions to the canvas to help us find the perfect font size. Once the design was ready, we used the "hide" feature, by clicking on the eye icon beside the rectangle in the layers panel. This hides the rectangle so that it's not cut out, but you can easily unhide it for design purposes in the future if you need to.

Or use our Strawberry Fields Forever design in Cricut Design Space here.

The Sign Backing

For the backing of our sign we used some plywood. Look for finished on one side plywood at the home improvement store. We were able to buy a 2ft x 2ft piece for this project. We wanted our sign to be 12 x 24 inches, so we took advantage of the cutting available at the home improvement store and had it done there. After the plywood was cut to size. I also sealed the wood with a poly seal. Sealing helps make sure that the vinyl adheres well. After the sealer dried the wood was ready for me to apply the vinyl. We cut the lettering with permanent white smart vinyl.

How to make your own party sign with wood background and vinyl letters made with Cricut.

After weeding the vinyl piece, I used transfer tape and transferred each piece to the sealed plywood. I love how our DIY strawberry sign turned out.

Strawberry fields forever large party sign for strawberry themed party.

Strawberry Baskets

I also made some strawberry baskets with my Cricut. I love how easy these were to make and they look so great on our table filled with fresh strawberries. You could also use them as strawberry themed party favors.

Basket of fresh strawberries in a DIY berry basket made with Cricut.

To make the strawberry baskets with your Cricut, search for "Market Berry Baskets" in Cricut Design Space. You can alter the size if you'd like to or just click make it. We cut ours out of Cricut Kraft Board in natural, using a standard grip cutting mat, and a fine point blade. After the pieces are cut out, use your glue gun to put the baskets together. I loved the look of the natural brown cardstock, but you could also make them in the traditional light green of strawberry baskets if you wanted to.

DIY berry basket made with Cricut.

These look so great down the centre of table filled with fresh strawberries for nibbling on.

Placesetting at strawberry themed party with DIY strawberry favour box on each plate.

Card Stock 3D Paper Strawberries

We also made some really adorable paper strawberries. Ours are filled with strawberry truffle candies for our guests to enjoy, or to take home. These are one of my very favourite additions to our strawberry party theme. They were quite easy to make using my Cricut machine. Look for project "Zooey Deschanel's 3D Strawberry" in Cricut Design, and choose make it. Or use our file in Cricut Design Space here.  

We cut ours out of different shades of pink and red cardstock. The strawberry seeds are gold iron-on vinyl, and the perfect easy way to add this fun detail.

DIY strawberry shaped favor box made from cardboard on each plate at strawberry themed table.

Adding The Seeds

To add the seeds to the strawberries, cut out and score your cardboard strawberry, and cut out and weed the vinyl seeds made with gold iron-on vinyl. To apply the seeds to the strawberry, preheat the Cricut Easy Press Mini according to the Cricut Easy Press guide for your size of easy press and a base material of cardstock. Then apply the vinyl, press, and peel the liner when cool to the touch.

How to make a DIY strawberry shaped favor box with cardstock using Cricut.

Assembling The 3D Strawberries

To assemble the strawberry use hot glue to glue it together. Don't forget to add a treat inside as you glue. We included some individually wrapped strawberry chocolates in ours. These are perfect as a party favor for guests to take home. They look so cute on each person's plate setting, waiting for them to arrive and enjoy. You could even add favor tags, or names to use as place cards.

Strawberry themed tablescape with strawberry favor boxes and pink and red flowers.

Strawberry Themed Party Straws

I couldn't resist making some strawberry themed straws for our picnic. Using the "strawberry social paper straw topper" design from Cricut Design Space, or look for our strawberry cut file in Cricut Design Space here.

I used green instead of brown card stock, and I made some in red and some in pink.

DIY strawberry straws, with 3D cardstock strawberries on paper straws.

To assemble them, fold over the strawberries on the score line, and glue 4 of them together to make a fan shape, then glue them to the backing and add the leaves to the top of the strawberries. Lastly, hot glue your strawberry to a paper green, red, gold, or pink straw.

These would also make really adorable cupcake toppers in strawberry cupcakes too, just hot glue them to a toothpick instead of a straw. You could even adjust the size of these in Cricut Design Space and use them to make a cute strawberry themed banner.

Strawberry Picnic Table

Once you've made all your strawberry theme party supplies with your Cricut, it's time to set up our strawberry picnic party! We started by finding a shady spot with enough space in the backyard for our party area. This would be a lovely set up a local park or lake too.

Strawberry themed party table set up in backyard with buntng , flowers, and food.

Blankets and Throws for Lounging

We laid out some blankets, throws, and pillows for lounging around a short coffee table. And overhead we strung some simple picnic bunting in the branches. The bunting was super easy to make using an old cut up inexpensive white table cloth, some hot glue, and twine. Using a small table for a picnic allows you to set a really beautiful table and not worry about spilling, but still enjoy sitting around the table on the ground. The best of both worlds.

Flowers and Strawberries Centrepiece

To set the table I layered a pretty pink gingham table runner. Gingham is always perfect for a picnic setting, and helps set the mood. We went with a beautiful red and pink color scheme for our adorable theme. Down the centre of the table I wanted to use lots of strawberries and flowers. We filled our DIY strawberry baskets with lots of ripe strawberries to enjoy while we gathered.

Strawberry themed party table with pink and red strawberry decor, flowers, and food.

The table was also decorated with some beautiful red and pink flowers. We used garden roses, sweet william and peonies. I thought it would be a fun node to our theme to use some vintage mason jars as the vases, thinking of strawberry jam. If you didn't have vintage jars, upcycling some strawberry jam glass jars from the grocery store would be a great way to continue the theme. I just love how full and lush our centrepiece of strawberries in our handmade baskets, and flowers turned out.

Strawberry themed birthday table with flowers, and strawberry food.
Mason jar full of fresh flowers in pink and red, including roses and sweet William.
Basket of fresh strawberries with flowers in the background.

Guest Welcome

For our strawberry sign, we set it up beside a cute vintage picnic basket, and a pot of real strawberries. These look so beautiful as decor, and you can plant them in your garden afterward to be reminded of your picnic year after year.

"Strawberry Fields Forever" sign for a strawberry themed party with a planter of strawberry plants.
Planter of strawberry plants in front of a "strawberry fields forever" sign at a strawberry party.

The Place Settings

For the place settings at the table, we used some simple white dishes. You could definitely use paper plates for a picnic, but there's something about using real ceramic ones that makes the whole party feel a bit more special and elevated. The gold cutlery was perfect to tie into the gold straws, and the gold strawberry seeds on the 3D paper strawberries we made. We used some DIY pink ombre napkins -see exactly how to make the napkins here. For glassware, we used some simple stemless wine glasses, I love using these because they work for wine, water, or soft drinks. The strawberry straws look adorable in the glasses, ready for some strawberry lemonade. And at each place setting we also included our DIY 3D strawberries with strawberry chocolates inside for everyone.

Strawberry themed table with strawberry desserts, strawberry lemonade, flowers, fresh strawberries, and placesettings.
Strawberry favor box on a plate with strawberry lemonade in the background.

Strawberry Theme Party Food

I wanted our strawberry party to include lots of different strawberry themed foods for our picnic so that it was a dessert table in itself. On the morning of the party the last thing I did was go to my favourite local bakery and pick up some amazing strawberry sweets.

We chose mini cakes, macaroons, pink donuts, and strawberry pastries. You can't really have a strawberry themed party without strawberry shortcake!

Along with all the fresh strawberries on the table, there were lots of beautiful strawberry treats to enjoy and the food made our party table look even more beautiful.

For drinks, I made a batch a strawberry pink lemonade, perfect for sipping all afternoon.

Plater of strawberry donuts, macarons, and strawbery shortcakes on a party table.
Plater of strawberry desserts at a strawberry party.
Strawberry themed birthday party table with flowers, fresh strawberries, decorations, and food.
Plater of strawberry desserts in front of fresh flowers at a strawberry themed party.
A strawberry donut, strawberry shortcake, and cannoli on a platter at a strawberry party.

We had so much fun at this strawberry themed picnic that all our hard work and last minute shopping for treats was worth it. Our big day of picnicking was such a fun treat. This would be an amazing strawberry birthday theme too. Whether you're celebrating a first birthday, dessert with friends, a baby or wedding shower, girls' night, or date night a strawberry picnic is the perfect summer theme. Happy party planning!

A strawberry picnic set up with a low table and cushions, bunting, fresh flowers, placesettings, and decor for a strawberry themed party.

This post is sponsored by Cricut Canada. As always, all opinions are our own. Thanks for supporting the brands that make Life is a Party possible.

More Strawberry Inspiration

  • homemade strawberry rhubarb ice cream
    Strawberry Rhubarb Ice Cream Recipe
  • Easy strawberry shortcake push pops.
    Strawberry Shortcake Push Pops
  • Strawberry cobbler in a mason jar.
    Easy Homemade Strawberry Cobbler
  • Easy donut strawberry shortcake.
    Easy Donut Strawberry Shortcake

Frequently Asked Questions

Can you set up ahead of time?

Because this party is outside, you can not set up too far ahead of time. You can get all your supplies ready ahead of time, and ask someone to help you set up right before your party.

Where did you get the flowers?

We used a combination of flowers from the farmer's market and from our own garden. This is a great way to use in-season flowers. You could also order flowers from your local florist in red and pink.

What if I don't have a Cricut machine?

Many local libraries offer Cricut machines that are available to use in their makerspaces. Or you could make a sign with a chalkboard, or letter board and use store bought berry boxes.

If you tried any of these Strawberry Themed Party Ideas or any other ideas on my blog please let me know how it went in the comments below. Thanks for visiting today!

How To Connect Cursive Letters On Cricut

Jun 22, 2022 · Leave a Comment

How to connect cursive letters in Cricut Design Space.

How To Connect Cursive Letters On Cricut: learn how to use letter spacing and ungroup letters to connect letters in Cricut Design Space.

How to connect cursive letters in Cricut Design Space.
[feast_advanced_jump_to]

If you've ever added a cursive font to your Cricut Design Space canvas and noticed that the letters weren't touching this tutorial will teach you everything you need to know to connect them. Don't worry you can use any pretty script font, cute font, font style, or fancy script font you like with great results with these simple beginner methods in this free tutorial.

How To Connect Cursive Letters On Cricut YouTube Video

Prefer to learn by watching? Check out the YouTube video below to see exactly how to do it.


Youtube video

Kerned Fonts vs. Unkerned Fonts

Kerned text means that that the spacing between the letters has been automatically adjusted to look pleasing. Unkerned texts are not adjusted.  

Do I Need To Worry About This With A Kerned Font?

Lots of cursive fonts in Cricut Design Space are kerned, and when you add them to your canvas the letters will already be spaced out perfectly and touching. When you cut out these letters, they will automatically cut out all as one word. If your font is already kerned in Cricut Deisgn Space you'll be able to skip all the steps below. You can filter for only kerned fonts when you're choosing your font. To do this, click on the font, and then make sure the "only kerned fonts" box is checked, so that Cricut will only show those options.

unlearned text Cricut Design Space

Unkerned Fonts

There are still some unkerned cursive Cricut fonts though that you might see if you don't have the "only kerned fonts" filter box checked under fonts, or if you upload free fonts you may also have unkerned fonts, where you will have to manually adjust the lower case letters so that they are touching and then weld the letters together before cutting so that it cuts out as all one word rather than individual letters. There are a few different ways to adjust the letter spacing, and it's very easy to do, and doesn't take much time.

Whether you are cutting out words or using the writing feature with a pen, you'll want to make sure that the letters are connected together first.

Adjusting Letter Spacing Of The Whole Word

The first thing I like to do is to adjust the letter spacing of the entire word of a script font. You can use the letter spacing tool in the text edit menu at the top of the screen in desktop, between the font size and the line spacing tool. The letter spacing tool will equally adjust the spacing between the letters of the entire word. If you can't see the text edit menu bar, you need to first make sure a text box is selected. Adjust the letter spacing up and down arrow button. Adjust the spacing until the font tails are touching and where you like them. Don't forget to weld the script text together to cut them out as all one word and not individual letters.

how to connect cursive letters on Cricut

Adjusting The Spacing Of Individual Letters

You can also adjust the spacing of individual script letters within a word. To do this, make sure the word is selected and click on advanced at the right hand side of the text menu on the top toolbar of your canvas in desktop. Then choose Ungroup To Letters.

how to connect script font in Cricut

Now you can click on the individual letters and adjust each letter space by itself. Don't forget to weld them together afterwards if you want them to cut out as all one continuous word and not individual letters.

how to connect cursive on Cricut

Tips On How To Connect Cursive Letters On Cricut:

  • start your adjustments in the middle of the cursive text word and work outward so that you don't have to move every single letter
  • use the left and right arrow keys on your keyboard to adjust the letters from side to side. This the best way to keep the letters aligned on the bottom.

Combining Adjusting The Letter Spacing Of Whole Word And Individual Letter Adjustment

I usually begin adjusting a word with using the letter spacing tool, and getting the word adjusting so that most of the letters are touching and in a position I'm happy with. Then secondly I usually ungroup the individual letters and fine tune the spacing by adjusting individual letters as needed. I find using both methods together gives the best and easiest results.

Welding The Letters Together

If you don't weld the newly spaced letters together, even though they are touching they will still cut out as individual letters.

unkerned text

If you want the word to cut out as a single word, without cut lines between letters you must first use the weld tool to join them together. Don't forget this important final step. The easiest way to check your work is to look on the cut preview screen for any overlapping cut lines to make sure you haven't forgotten before cutting out on your Cricut machine.

To use the weld feature to weld a word together select the entire word by holding down the shift key and dragging a selection box around it with your mouse. You can also use the select all button at the top of the canvas in desktop if it's the only item on your canvas. You can also select it by holding down the shift button and clicking on each letter in the layers panel. Once your word is selected, click on the weld button at the bottom of the layers panel in the lower right corner of your canvas in desktop.

welding text Cricut Design Space

Once it's finished it will say weld result in the layers menu.

how to connect writing on Cricut

Now when you go to Make It, you will see on the cut preview screen that each of the letters will cut out all together as one word.

Welding Cricut Design Space

Troubleshooting Connecting Cursive Letters

Why Did The Loops Fill In When I Weld?

Sometimes if a font is quite small, the loops will fill in when you weld it together. If this happens, use the undo button to unweld the word. Next, make the word much lager with the scale button or font size. Now with the whole word still selected, weld the word again. It should weld together without filling in any loops. You can now adjust the size of the font back to the smaller size.

Why Did My Word Cut Out As Individual Letters?

You forgot to weld your letters together. Don't forget to select all the letters of your word and weld them together. This is like super gluing all the individual letters together and will ensure that each word cuts as all one piece.

I Moved Each Letter And Now My Text Isn't Lined Up At The Bottom

If you move each individual letter with your mouse, it can sometimes be hard to line up the text horizontally. You might have thought that you could use the align feature. But, it unfortunately doesn't work for this if you have any letter included with downward strokes, like g or p for example. If you use align bottom, the downward stoke letters will be moved to far up. So how do you fix this problem? The answer is to adjust the spacing of the individual letters using only the left and right arrows on your keyboard. That way they only adjust from side to side, and stay in place horizontally.

How Do I Curve The Text?

If you want to curve the text of unkerned cursive letters that needs to be attached and welded, you will have to do it before ungrouping to individual letters. The curve text function in Cricut Design Space is only available to you before you ungroup the letters. After you ungroup the letters the curve function will disappear from the text edit menu at the top of Cricut Design Space.

Curving cursive letters Cricut

It can be slightly difficult to adjust the curve to your desired amount when the letters are spaced out. Begin by adjust the letter spacing and curve until you are happy, and then choose to ungroup and adjust individual letters lastly for some fine tuning. Once you are happy don't forget to weld the letters together.

curving connecting letters on Cricut

Where Is The Unweld Button?

There is no unweld function in Cricut Design Space. You can use the undo button to go back if you decide to you want to unweld. Unfortunately this only works while you are editing in Cricut Design Space. If you open a saved project, you will not be able to use the undo button to reverse the weld function. Read this entire blog post all about how to unweld and what options you have here. It is sometimes helpful to think of weld as similar to permanent glue. It can not easily be undone.

how to curve connected script font Cricut

I hope this tutorial on how to connect cursive letters on Cricut has been helpful and that your feeling confident to use letter spacing, and ungrouped letters to create exactly what you want to in Cricut Design Space.

More Helpful Cricut Posts

  • Cricut mat sizes, and types and when to use each one.
    The Beginner's Guide to Cricut Mat Sizes and Types
  • How to sharpen a Cricut blade using household items step by step guide.
    How To Sharpen A Cricut Blade
  • Cricut transfer tape with a Cricut machine in the back ground.
    How To Use Cricut Transfer Tape
  • How to slice in Cricut Design Space.
    How To Slice In Cricut Design Space

DIY Graduation Party Decorations

Jun 1, 2022 · Leave a Comment

DIY Graduation Party Decorations

DIY Graduation Party Decorations: use your Cricut to create banners, custom stickers, a cake topper and balloon decals.

DIY Graduation Party Decorations
[feast_advanced_jump_to]

Heading into graduation season, we're celebrating all the graduates with a fun graduation party with lots of cute DIY graduation party decorations made on our Cricut machine. It's such a great way to make your own custom DIY graduation decorations. These ideas would work well for a high school grad party or for a special party on graduation day. Even if you don't think of yourself as creative, Cricut allows you to create beautiful and co-ordinated events, and turns a daunting task into a fun one! We used Cricut Design Space, the free software where you design your projects, and Cricut fonts and images and our best graduation party ideas to create all our custom DIY graduation party decorations!

Cricut Graduation Projects

For our party we used a black, white and gold party decor color scheme, but you could also incorporate the school colors if you'd like to as a fun way to personalize the decor. These would look great with the addition of one or two bright colors also. The best part about creating your own custom party decorations is that you can choose all your own colors and designs for any special occasions.

Graduation party decor

DIY Graduation Party Decorations Materials:

  • Cricut Cutting Machine
  • Standard Grip Cutting Mat
  • White Card Stock
  • Black Card Stock
  • Gold Glitter Card Stock
  • White Glitter Card Stock
  • Black Glitter Card Stock
  • Black Glitter Vinyl
  • Gold Glitter Vinyl
  • Gold Foil Vinyl
  • Black Embroidery Cotton
  • Hot Glue Gun and Glue
  • Glue Stick
  • 3D Adhesive Foam Squares
  • Black and White Baker's Twine
  • Cricut Sticker Paper
  • Printer
  • Snack Bags
  • Lollipop Sticks

Bunting and Graduation Banners

It's always a great idea to create a backdrop for a food or dessert table for a party, it helps create a real focal point. We also wanted to incorporate the graduation year. We cut our banners and bunting out of cardstock and strung them with some baker's twine in black and white.

how to decorate for a graduation party

Graduation Year Banner

I wanted the 2022 banner to be a little larger than the rest, so I started with a black canvas and added the rounded arch shape from the shapes menu. I sized the outer black piece to be 6 inches wide. The layered white piece is 5 inches wide, and the font is Cricut Sans, font size 400, with an .25 offset gold layer behind it.

I cut it with black cardstock for the back, white cardstock for the next layer, gold glitter offset for the numbers, and black cardstock for the numbers. Layer the pieces together using a glue stick and small square adhesive 3D foam squares on the numbers to add height and interest.

Cricut graduation banner

Once they were glued together, we used a hole punch to add holes to each corner and black and white baker's twine to string them together to form the banner.

Congrats Banner

The congrats banner was made in much the same way as the graduation banner, but slightly smaller. The rounded arch from the shapes menu was 4 inches wide and white for the back piece, and 3.3 inches wide and black for the layer on top. We used the Cricut Sans font, lower case, font size 268 to write "congrats".

how to make bunting on your Cricut

To assemble the banner we used a glue stick to attach the white card stock scalloped bunting piece to the black layer. The letters are attached with 3D foam adhesive squares to add dimension. After glueing, we added holes to the corner with a hole punch and strung them together with black and white bakers twine.

Scalloped Bunting

I wanted to repeat the scalloped shape, and made a plain bunting to go with the others that was slightly smaller. Add the rounded arch from the shapes menu to your canvas and adjust the width to 2.5 inches. We added a .125 inch circle to each upper corner and used the slice tool to create a hole for stringing. I cut out 10 of each, which fit on one 12 x 12 sheet of cardstock in white, white glitter, black, black glitter, and gold glitter.

graduation bunting DIY

We randomly strung the different colours with baker's twine to create a pretty bunting. We strung ours as part of the food table but these would be great strung outside for a backyard graduation party or over a gift table for a graduation celebration. Paper decorations are such an easy way to decorate on a budget.

Personalized Balloons

We picked up some really inexpensive mylar balloons at the dollar store and personalized them with our Cricut and some vinyl. To create the designs search for "graduation" images in Cricut Design Space. There are tons to choose from, we used Adventure Begins #M9AE555E, and used contour to remove the design at the bottom. We also used the Cricut Sans font to write 2022, and congrats to match the banners. All three pieces were sized to fit,  using the scale button to be about 7 inches wide to fit nicely on our balloons.

how to personalize a balloon with Cricut

We cut the "Let the adventure begin" out of foil vinyl, and the black and gold removable vinyl. Once the pieces are all cut out of the vinyl, use your weeding tool to weed them. Next, cut a piece of regular transfer tape to fit the gold vinyl, and use a scraper to burnish it. Now use the transfer tape to place in on the front of the balloon and your fingers to gently burnish it onto the balloon, then carefully remove the transfer tape.

DIY graduation party decor made with Cricut

For the glitter vinyl, be sure to use strong hold transfer tape. I was worried it might be too sticky to remove from the balloon, but it worked out great.

You could customize this project for your own party theme and colors. You could even add a personal touch with the graduate's name, or school name. These would be great for high school graduation parties or a college graduation celebration. You could even use these as an inexpensive graduation centerpiece.

how to decorate a balloon with Cricut

Graduation Cap Champagne Glasses

These were one of my favourite DIY graduation party decoration ideas. And they were really easy to make with this DIY tutorial. Search for "Graduate Champagne Glass" in projects. We chose to customize ours, because our glasses were slightly larger, so be sure to test it for size before cutting a whole set out. We cut them out of black card stock, and glued them together with a hot glue gun.

graduation party caps

To make the tassel, I used some black embroidery thread and then used a darning needle to add it to the centre of the cap, with a small piece of tape on the inside to hold it. Be sure to make sure they're all the same length, we did this by lining the tassel up with the point of one corner of the hat. Once they're finished place them on to some champagne glasses.

DIY graduation party

These would also make fun party favors for party guests, friends and family members filled with a sweet treat like M and Ms or any other candy in your party colors.

graduation party ideas

DIY Stickers

One more fun addition to our special grad party was to make our own custom stickers using the Cricut Print Then Cut feature. To make these we chose some designs from Cricut images. Search "graduation" in images for lots of great options. We used the "Let the adventure begin #M9AE555E and "Class of 2022" #M39F801BE. We layered the images with a circle shape, and a scalloped circle shape, from the shapes menu. I thought the scallops would tie in well with the scalloped shaped bunting and banners. We made our finished stickers about 1.5 inches Don't forget to flatten the designs when you're finished so that you can use Print Then Cut.

cricut stickers

DIY Graduation Party Decorations: use your Cricut to create banners, custom stickers, a cake topper and balloon decals.When you're ready to make it, you'll be prompted to print the stickers on your printer. We used Cricut sticker paper, which worked really well. Next you place the sticker paper, backer side down, and cut it out on your Cricut. The black registration marks around the outside of the sticker sheet allow the Cricut to read where the images are and cut them out perfectly. If your stickers are not lined up perfectly, you need to calibrate your Cricut machine. You will see the calibration button on the hamburger menu, by clicking on the top left corner of your screen. Follow the prompts to calibrate your machine for perfect sticker cuts.

graduation stickers made with Cricut

Kiss Cut or Die Cut

You can create kiss cut or die cut stickers. When you are browsing your materials, choose sticker paper from the list for a kiss cut, or heavy cardstock for a die cut.

We chose images from Cricut, but you could also personalize the stickers with your own text, or school colors. You could even upload the school logo, or a photo of the graduate. This is such a cute way to add a special touch for the big day.

graduation party favour ideas

I used the stickers on treat bags. We picked up some of our favourite cookies and placed them in treat bags with the sticker. These could be enjoyed at the party, or taken home as party favors. You could also use these stickers to decorate candy jars, paper cups, or as straw toppers. The die cut stickers would make fun party favours too.

black and white graduation party ideas

DIY Cake Topper

It's not really party without cake, is it? We made a fun cake topper and added it to an inexpensive cake as the perfect table centerpiece.  It looked great on the table, and was a delicious treat to enjoy.

black and white graduation party decorations

To make the cake topper we opened a canvas in Cricut Design Space, and added "Graduation Cap Cake Topper" from projects. We customized it by adding the graduation year. To do this we used Cricut Sans, font size 83 to add the year. We used the offset at 0.25 to create the outline of the numbers. Ungroup the letters, under advanced settings to move them around and get the right spacing. We changed the color of the main part of the cake topper to gold, and also made the offset outline of the numbers gold. Then we selected each offset one at a time and the main cake topper and welded them together. Welding them takes away the individual cut lines, and cuts them out all as one piece.

To cut out our cake topper we also cut out an extra main gold piece, but used the mirror setting. That gave us a gold glitter piece for the back as well, and hid the sticks we glued to the back.

how to make graduation cake topper with Cricut

We cut our topper out of gold glitter cardstock and black glitter card stock. To put them together, we used 3D foam adhesive pieces for the black numbers and grad cap to add dimension. We used a glue gun to add two long lollipop sticks to push into the cake, then used more hot glue to add our back piece.

Cricut graduation cake topper

For the party we just pushed the lollipop sticks into the cake for the perfect grad cake that matched the rest of our DIY party decorations. If you were serving cupcakes you could easily make something similar that was small enough to use as cupcake toppers.

Cricut graduation party ideas

Graduation Party Set-Up

We set up all our custom DIY graduation party decorations to create an area where we could celebrate after the graduation ceremony. The food was kept simple.  We served cake, and sparkling lemonade, and guests could enjoy the cookies or take them home as a party favor. We hung the banners and bunting with simple tape. One of my favourite additions were the flowers.  We used a combination of grocery store roses, and flowers from the garden made a gorgeous all white arrangement.

black and white graduation ideas
graduation party

To keep things easy, and focused on celebrating all the decorations can be made weeks ahead of time. For the balloons, cut out the vinyl ahead of time, and apply the vinyl to the balloons the day of. The balloons should last for days. We ordered the cake from our favourite bakery.  The cookies were store-bought  to keep things really simple for the actual party day.

make your own graduation party decorations

I hope these decoration ideas help inspire you for your own graduation party. Choose your colors, and get creating, and celebrate your university or high school graduates! With a these gorgeous DIY graduation party decorations, life really is a party!

DIY graduation party decor ideas

This post is sponsored by Cricut Canada.  As always, all opinions expressed are my own.  Thanks for supporting the brands that make Life is a Party possible.

How To Make Earrings With A Cricut

May 18, 2022 · Leave a Comment

How to make earrings with your Cricut machine,

Make beautiful one of kind earrings with your Cricut machine. See how to design leather & faux-leather earrings in Cricut Design Space, cut, add iron-on vinyl, and assemble.

How to make earrings with your Cricut machine,
[feast_advanced_jump_to]

Why We Love This Craft

  • These are fun to make, with all different colors and styles to match your fashion.
  • You can use leather or faux leather.
  • Add in other materials like iron-on vinyl or chain for even more looks.
  • Handmade Cricut ear ring are great for yourself, to give as gifts, or to sell.
Handmade leather earrings made with Cricut cutting machine.

Cricut earrings are a simple project to make and there are so many ways you can combine materials to make endless combinations. We're using Cricut leather for ours, but there is faux leather available too. There are many different colours you can use as well. We also added some Iron-On vinyl to ours, which increases the possibilities for different colour combinations and patterns.

Materials:

Labelled picture of the materials need to create earrings with the Cricut.
  • Cricut Maker machine: I used my Cricut Maker machine to make this project with the deep cut blade to cut out the leather. You can also use the Explore with the deep cut blade. If you have a Cricut Joy, you will have to use the faux leather and the fine point blade for this project.
  • Cricut deep cut blade
  • strong grip mat
  • painter's tape: Use the paint's tape to help hold the leather to the mat for cutting.
  • leather or faux leather: Cricut makes leather and faux leather that you can use for this project. You can also look for leather at craft stores or on-line.
  • sharp scissors: These are just for trimming any fuzzy edges of the back of the leather after it's cut into shape.
  • earring wires
  • jump rings: Look for different sizes, small, medium, and large.
  • chain: This is optional to add some interest to your earrings. Choose whatever thickness and silver or gold that you prefer.
  • needle nose pliers
  • wire cutters: These are for cutting the chain to the right length.
  • leather hole punch: Earrings need a hole in the top to connect the earring findings too. I didn't include these as part of my design. Most of my earrings are cut out of real leather, using the Cricut Maker machine, and knife blade. This tiny hole is too fine to cut out well with real leather and the knife blade.

I used a leather punch for this step. It's similar to a paper hole punch, but stronger and with more hole size options. You can pick one up at a craft store.

If you were making faux leather earrings, you might want to include the hole at the top, and any other holes you were using to connect pieces together as part of your design in Design Space. Faux leather can be cut with a regular fine point blade, and can make these kind of small detailed cuts. If you are including these are part of the design, add a small circle from shapes and position it and size it to fit. Select the earring and the circle and click the slice button. Delete the original circle, the cut out circle, so that you're left with the earring with the hole in the top.

  • Cricut easy press mini: The easy press mini worked great for this project. Check the Cricut Heat Guide for guidance on timings and settings. If you don't have an easy press mini, you can also use a regular iron for this step.
  • iron-on vinyl: We used shiny gold and mat gold, but you can use whatever colors you like.

Watch the Video On How To Make Earrings With A Cricut

If you prefer to see how to make the earrings, check out the YouTube video below.


Youtube video

Design Your Earrings

Start by opening a new project in Cricut design space to create your earring design. You can either choose from some of the earring projects in ready made projects, or design your own cricut cut file using simple shapes.

To design your own, go to the shapes button on the left side on desktop, and choose one or more different shapes for your earrings. We made a few designs and used the semi-circle, square, teardrop, and arches. Play around with different sizes and combinations until you're happy with it. You might want to think about joining several shapes, as well as using different colours of genuine leather or faux leather or faux suede. Make some in larger or a smaller size, depending on your preferences.

Rectangle Earrings:

Start with a square from the free shapes and adjust to 1.5 x .43

Teardrop Shape Earring:

Add a teardrop from the shapes and adjust to 2 inches long.

Inverted Pinched Teardrop:

Add a teardrop from the shapes and adjust to 2 inches long, rotate the shape 180 degrees.

Arch and Semi Circle:

Start with the solid arch. Duplicate and make a smaller one. Use align to centre it horizontally. Select both arches and use the slice tool to cut out the centre. Delete the extra pieces. Add a semi-circle, and rotate it 270 degrees. Make the semi-circle the same width as the width of the arch. The finished size for the arch is a height of 1.75", with a width of 1.324" and the semi-circle is 1.324 wide and 0.667 tall.

Solid Arch:

Add an arch shape from the shapes, size 2.2 x 1.45"

Cricut design space screen showing leather earring designs.

Design The Iron-On Vinyl Overlay

For some of our earrings, we added some heat transfer vinyl on top of the leather. This is a fun way to add more detail and different layers to your earrings. You can choose any colour of iron-on vinyl, including foil iron on, which add a little sparkle. Combining the different material adds a lot of interest to the earring design.

To create our iron-on vinyl overlay we started by searching for "mandala" in images. Look for ones that are not too fine and detailed because it will be really difficult to weed, when it's made small enough to fit onto an earring. The larger and chunkier the lines, the easier it will be to weed and work with.

We choose Mandalas #M4A771F6 and also Mandalas #M4A771F6 (from Cricut Design Space).

Once you've chosen your image lay it over your earring shape and change the colour to gold -or whatever colour you choose, and then play around with size and rotate the mandala until you're happy with the design. I liked it off-centre and oversized. Next, select the mandala and the earring in the layers panel and slice. Delete the extra layers, so that you're left with the exact pattern to fit the earring.

Once we're completely happy with the design, we'll use the duplicate button to make an exact copy so that we have a full pair of earrings cut out that match perfectly.

Cutting Out The Earrings and Vinyl

Leather

I cut out most of the earring shapes in real leather using the Maker cutting machine and a the knife blade.

You can also cut out leather on the Cricut Explore or Cricut Explore Air using the deep point blade.

I love the weight of the leather, and how it hangs, as well as the texture and natural variations. I didn't find the leather hard to work with, although you may find it helpful to do a test cut first. There are many different kinds of leather to work with. Choose different colours or even metallic leather for a little bling.

Settings

When you're ready to make your earrings, click on the Make It button on the top of the canvas. This will bring you to the cut preview screen. Make sure everything looks right and that the sizing looks good on the mat, then press the continue button.

Next you set your Base Material. Click on Browse All Materials, and type leather in the search bar. You will see lots of different leather options.

I chose the Tooling Leather 4-5 oz. material settings for my cuts, which uses the knife blade in the Maker.

The genuine leather uses the deep cut blade, and is compatible with the Explore and the Maker.

Real leather varies greatly in thickness, so it can be a little tricky to know which settings to use on your Cricut. Here's a few tips:

  • use a small ruler to measure the thickness of your leather piece
  • before unloading your cutting mat from the machine, check to make sure it's cut through. If it isn't press the cut button again, and keep doing this until it's cut through.
  • do a small test cut before cutting out your whole project so that you don't waste materials.
  • cut out one set of earrings at a time, and adjust the settings for the next cut if you find it over or under cut the previous set.

Preparing The Cutting Mat

Use the stronggrip purple mat for cutting leather and tape the outside of the leather onto the cricut mat with painter's tape.

Take some care though, I found that some of my leather was marked by the painters tape. Either flip the leather over, or apply the tape with a very thin overlap to avoid this problem. Note that I found a more clean cut with the leather good side up.

Taping a piece of leather to a Cricut cutting mat to make DIY leather earrings.

The leather may leave a lot of debris on your mat, so use an older stronggrip mat for this job if you have one. You can clean the mat afterward with your scraper and the baby wipe or dish soap method afterward -read more about how to clean your mats here. Some people also like to cover their mat with transfer tape before cutting something messy like leather. That way, when you are finished you just peel off the transfer tape and are left with a clean mat underneath. This might be something you'd like to try.

After cutting the leather, you may need to trim any frayed edges with some sharp edges to clean them up slightly.  Cut just the frayed bits, taking care not to cut into the shape.

Black leather cut into teardrop shapes with Cricut machine.

Faux Leather

You can also make these earrings out of faux leather. It's very similar to leather but much thinner and easier to cut. It's a great option if you'd like to make these earrings with a Cricut Joy, because you can cut it with a regular fine point blade. You can also cut the faux leather with a regular green standardgrip mat.

Some people don't like the back of faux leather, and cut out an extra and glue them together with a glue like E600, or cover the back with iron-on vinyl. You can also leave it plain, which ever look you prefer.

Iron-Vinyl

To cut out your iron-on vinyl, use the iron-on vinyl setting on the Cricut and make sure your fine point is in place. Use a standard grip green mat, and apply the vinyl backing side or shiny side down.

Once your iron-on is cut out it's time to weed it. Use the weeding tool to remove the negative pieces from the design. This can be tricky with such small pieces, so take your time, and make sure to work in good light.

Adding iron-on vinyl to to leather earrings with a Cricut easy press mini.

Applying the Iron-On

We used our Cricut Easypress Mini to apply the iron-on, you can also use a household iron -see Cricut's heat guide for settings.

Adding iron-on vinyl to handmade leather earrings with a Cricut easy press mini.

Set the Easypress Mini to low, and wait for the light to turn green when it's ready to use.

Align your iron-on vinyl and use the Easypress Mini for about 10 seconds to apply the design. Wait for it to cool, and then carefully peel off the backer sheet.

Adding iron-on vinyl to leather earrings made with Cricut.

The heat guide suggested a much longer pressing time, but we found it was too long and created ghosting -where the glue had over melted and oozed out around the design leaving a white line around it. My advice is to practise with scrap pieces of leather and iron-on and work out the best timing for your materials.

If you under press the iron-on it won't stick to the leather, and will peel off with the backing piece. You can always press it more if you have this problem.

If you over press the iron-on it will create the ghosting effect where there's a white outline of glue, or it won't stick to the leather and will come off with the backing piece. If you've got ghosting you can usually remove the excess vinyl by heating it up again and carefully peeling it off of the leather. You can then try again with a new piece.

Assembling The Earrings

To put the DIY leather earrings together you will need some earring hardware including jump rings, the earring hooks, chain, needle nose pliers and wire cutters.

Jump Rings

To open the jump rings, use two sets of needle nose pliers to grasp each side and twist the ring in opposite directions. Use jewelry pliers to close the ring by twisting it back together in the same way.

Making leather earrings with jump rings and needle nose pliers.

Leather Punch

For all of the earrings, except for the inverted pinched teardrop, and the arch and semi circle earrings, begin by creating the hole in the top of the earring with the leather punch. As a general rule you want the hole to be placed at a depth of about half of the depth of the jump ring you're using, from the edge of the leather. We used assorted jump rings that came in a small, medium, and large, and adjusted the spacing of where the hole in the leather was accordingly.

Leather hole punch used on DIY Cricut earrings.

Hanging Direction

A word about hanging direction as you begin to actually put the earrings together. There are several styles of earring wires to choose from, I went with the really simple earring wire style, but choose whichever you prefer. When you're putting the earrings together, you will want to make sure that the finished earring hangs so that it faces outward. This will depend on the direction of and how many jump rings you use. Every jump ring changes the direction. If you don't want extra jump rings, you can also twist the actual earring wire. Use your small needle nose pilers and twist the direction of the hanging loop on the ear wire, if you want to avoid adding extra jump rings to turn the hanging direction of your earring. This will make more sense when you start putting the earrings together.

Adding chain details to DIY Cricut leather earrings.

Rectangle Earrings:

To put together the rectangle earrings, use the pliers to twist the direction of the earring wire, and add a medium jump ring ring to the top hole in the earring, along with a piece of chain. Cut two matching lengths of chain with wire cutters to your prefered length, longer or shorter than the leather rectangle.

DIy brown leather earrings with chain detail, made with Cricut machine.

Teardrop Shape Earring:

To assemble the popular teardrop shape earring with the vinyl overlay, use a medium jump ring to the leather piece, and then a smaller jump ring to attach it to the earring wire.

Pink teardrop leather earrings made with Cricut machine.

Inverted Pinched Teardrop:

To make the inverted teardrop earrings, you want to make two small holes at the top of your earring about 1 cm apart using the leather punch, these will be used to pinch the leather together. Cut two matching pieces of chain, slightly longer than the earring. To assemble the earring, put a medium jump ring through the first hole, the chain, the second hole, and the earring (in that order), then close the jump ring.

Black leather earrings with gold chain detail made with Cricut machine.

Top Arch and Bottom Semi Circle:

For the earrings with the arch on top, and the semi circle on the bottom, use the leather punch to create one hole at top of the arch, and two holes at the bottom, one on each side. Take care to centre the holes, as you want the earrings to be well balanced. You can create a paper template of the earring, and fold it in half at each stop to find the exact centre spot for the holes if you want to. For the semi circle, make two holes on the flat side, lined up with where they'll attach to the arch piece.

To put it all together, use a large jump ring at the top of the leather arch, into a small jump ring, and then into the ear ring wire. Next, attach the semi circle to the bottom of the arch with two large jump rings.

DIY pink and gold leather dangling earrings made with Cricut machine.

Top Semi Circle and Bottom Arch:

For these earrings, start by making an earring hole in the top and bottom of the semi circle piece. You will want to take care to make sure these are centre, so that your earrings hangs well when it's put together. You can use a paper template, folded in half to help if you need to. Next punch a hole in the top of the leather arch, again right in the centre.

Now the final step is to attach the semi circle to the earring wire with one large jump ring. Twist the ear wires to make it hang straight. Next, use another large jump ring to attach the arch to the bottom of the semi circle.

Semi-circle and arch leather dangly earrings made with Cricut machine.

Solid Arch:

Use a medium jump ring in the faux leather arch, then a small jump ring to attach them to the earring wire.

Leather earrings with iron-on vinyl made with Cricut machine.

Customize

You can play around with the sizes and number of jump rings, as well as the chain you use to create any look you love. There's no right or wrong way, just have fun and enjoy the creative process. There is no end of different ways of putting together combinations of leather and faux leather in different colors, vinyl top layer colours, or jewelry finding metal finishes. Cricut jewelry is my new favourite hobby. It's such an easy project and has such amazing results.

Use these as your own earrings, or give them to friends and family as great gifts. These are also the easiest way to create gorgeous earrings to match any outfit. I hope the step by step tutorial on how to make earrings with a Cricut has been helpful. With beautiful earrings like these, life really is a party!

Seven different pairs of leather and faux leather earrings made with Cricut machine.

More Cricut Posts

  • Cricut mat sizes, and types and when to use each one.
    The Beginner's Guide to Cricut Mat Sizes and Types
  • How to sharpen a Cricut blade using household items step by step guide.
    How To Sharpen A Cricut Blade
  • How to clean a cricut mat using Dawn soap, scraper and baby wipes.
    The Best Way To Clean A Cricut Cutting Mat
  • Cricut transfer tape with a Cricut machine in the back ground.
    How To Use Cricut Transfer Tape

If you have tried any of these Cricut Earring Ideas or any other ideas on my blog please let me know how it went in the comments below. Thanks for visiting today!

Recipe

How to make earrings with your Cricut machine,

Cricut Ear Rings

Make earrings using your Cricut to cut out leather, suede, or faux leather and iron-on viny.
No ratings yet
Print Pin Rate
Prep Time: 30 minutes minutes
Cook Time: 2 hours hours
Total Time: 2 hours hours 30 minutes minutes
Servings: 7 Paris of Earrings
Author: Dannyelle Nicolle-Ramjist
Cost: $20

Equipment

  • Cricut cutting machine
  • Cricut Knife Blade
  • Strong Grip Mat
  • Cricut Easy Press Mini
  • leather hole punch
  • Needle Nose Pillers
  • Wire Cutters
  • sharp scissors

Materials

  • Leather, Suede, or Faux Leather
  • Iron-On Vinyl
  • Painter's Tape
  • Jewlery Chain
  • Earring Wires
  • Small and Medium Sized Jump Rings

Instructions

  • Start by opening a new project in Cricut design space to create your earring design. You can either choose from some of the earring projects in ready made projects, or design your own cricut cut file using simple shapes.
    To design your own, go to the shapes button on the left side on desktop, and choose one or more different shapes for your earrings. We made a few designs and used the semi-circle, square, teardrop, and arches. Play around with different sizes and combinations until you're happy with it. You might want to think about joining several shapes, as well as using different colours of genuine leather or faux leather or faux suede. Make some in larger or a smaller size, depending on your preferences.
    Rectangle Earrings: Start with a square from the free shapes and adjust to 1.5 x .43
    Teardrop Shape Earrings: Add a teardrop from the shapes and adjust to 2 inches long.
    Inverted Pinched Teardrop Earrings: Add a teardrop from the shapes and adjust to 2 inches long, rotate the shape 180 degrees.
    Arch and Semi Circle Earrings: Start with the solid arch. Duplicate and make a smaller one. Use align to centre it horizontally. Select both arches and use the slice tool to cut out the centre. Delete the extra pieces. Add a semi-circle, and rotate it 270 degrees. Make the semi-circle the same width as the width of the arch. The finished size for the arch is a height of 1.75", with a width of 1.324" and the semi-circle is 1.324 wide and 0.667 tall.
    Solid Arch Earrings: Add an arch shape from the shapes, size 2.2 x 1.45"
  • To create our iron-on vinyl overlay we started by searching for "mandala" in images. Look for ones that are not too fine and detailed because it will be really difficult to weed, when it's made small enough to fit onto an earring. The larger and chunkier the lines, the easier it will be to weed and work with.
    We choose Mandalas #M4A771F6 and also Mandalas #M4A771F6 (from Cricut Design Space).
    Once you've chosen your image lay it over your earring shape and change the colour to gold -or whatever colour you choose, and then play around with size and rotate the mandala until you're happy with the design. Next, select the mandala and the earring in the layers panel and slice. Delete the extra layers, so that you're left with the exact pattern to fit the earring.
    Once we're completely happy with the design, we'll use the duplicate button to make an exact copy so that we have a full pair of earrings cut out that match perfectly.
  • Cutting Out The Earrings
    Leather: When you're ready to make your earrings, click on the Make It button on the top of the canvas. This will bring you to the cut preview screen.
    Next you set your Base Material. Click on Browse All Materials, and type leather in the search bar. You will see lots of different leather options. Real leather varies greatly in thickness, see the tips above to get the best cut.
    Use the stronggrip purple mat for cutting leather and tape the outside of the leather onto the cricut mat with painter's tape. Take some care though, I found that some of my leather was marked by the painters tape. Either flip the leather over, or apply the tape with a very thin overlap to avoid this problem. Note that I found a more clean cut with the leather good side up. The genuine leather uses the deep cut blade, and is compatible with the Explore and the Maker.
    Faux Leather: You can also make these earrings out of faux leather. It's very similar to leather but much thinner and easier to cut. It's a great option if you'd like to make these earrings with a Cricut Joy, because you can cut it with a regular fine point blade. You can also cut the faux leather with a regular green standardgrip mat.
  • Iron-Vinyl: To cut out our iron-on vinyl, use the iron-on vinyl setting and make sure your fine point is in place. Use a standard grip green mat, and apply the vinyl backing side or shiny side down.
    Once your iron-on is cut out it's time to weed it. Use the weeding tool to remove the negative pieces from the design. This can be tricky with such small pieces, so take your time, and make sure to work in good light.
    Applying the Iron-On: We used our Cricut Easypress Mini to apply the iron-on, you can also use a household iron -see Cricut's heat guide for settings.
  • Rectangle Earrings: To put together the rectangle earrings, use the pliers to twist the direction of the earring wire, and add a medium jump ring to the top hole in the earring, along with a piece of chain. Cut two matching lengths of chain with wire cutters to your preferred length, longer or shorter than the leather rectangle.
  • Teardrop Shape Earring: To assemble the popular teardrop shape earring with the vinyl overlay, use a medium jump ring to the leather piece, and then a smaller jump ring to attach it to the earring wire.
  • Inverted Pinched Teardrop: To make the inverted teardrop earrings, you want to make two small holes at the top of your earring about 1 cm apart using the leather punch, these will be used to pinch the leather together. Cut two matching pieces of chain, slightly longer than the earring. To assemble the earring, put a medium jump ring through the first hole, the chain, the second hole, and the earring (in that order), then close the jump ring.
  • Top Arch and Bottom Semi Circle: For the earrings with the arch on top, and the semi circle on the bottom, use the leather punch to create one hole at top of the arch, and two holes at the bottom, one on each side. Take care to centre the holes, as you want the earrings to be well balanced. You can create a paper template of the earring, and fold it in half at each stop to find the exact centre spot for the holes if you want to. For the semi circle, make two holes on the flat side, lined up with where they'll attach to the arch piece.
    To put it all together, use a large jump ring at the top of the leather arch, into a small jump ring, and then into the earring wire. Next, attach the semi circle to the bottom of the arch with two large jump rings.
  • Top Semi Circle and Bottom Arch: For these earrings, start by making an earring hole in the top and bottom of the semi circle piece. You will want to take care to make sure these are centre, so that your earrings hangs well when it's put together. You can use a paper template, folded in half to help if you need to. Next punch a hole in the top of the leather arch, again right in the centre.
    Now the final step is to attach the semi circle to the earring wire with one large jump ring. Twist the ear wires to make it hang straight. Next, use another large jump ring to attach the arch to the bottom of the semi circle.
  • Solid Arch:  Use a medium jump ring in the faux leather arch, then a small jump ring to attach them to the earring wire.

Notes

Every jump ring changes the direction. If you don't want extra jump rings, you can also twist the actual earring wire. Use your small needle nose pilers and twist the direction of the hanging loop on the ear wire, if you want to avoid adding extra jump rings to turn the hanging direction of your earring. This will make more sense when you start putting the earrings together.

How To Sharpen A Cricut Blade

May 1, 2022 · 4 Comments

How to sharpen a Cricut blade using household items step by step guide.

If you've been searching for how to sharpen Cricut blade, you've probably heard about the aluminum foil method. While it may clean your blade, it doesn't truly make it sharp again. In this guide, I'll walk you through the easy, proven way to restore your Cricut blade's cutting edge using items you already have at home.

How to sharpen a Cricut blade using household items step by step guide.
[feast_advanced_jump_to]

There is a very popular "tip" in the Cricut community that you can sharpen your Cricut blades using a sheet aluminum foil.

Spoiler alert, this doesn't actually sharpen the blade at all.

So why doesn't it seem to work and why do so many Cricut crafters swear by it?  We'll answer that along with how to sharpen your Cricut blade with some common household items.

Many Cricut crafters like to save money and instead of replacing dull blades with a new blade whenever they stop cutting well, they want to sharpen the old blades. I'm all for it.  Who doesn't like to save a little money, and reuse old materials?

The fact is that I have often had to put a replacement blade in my Cricut machine, and would love to be able to sharpen them instead. After a while, a used blade will get dull, especially when cutting thicker materials. You will notice with intricate cuts in things like paper and cardstock that it can start to pull and tear on the Cricut mat when the blade becomes dull. Or you may find that the different materials don't cut all the way through to the cutting mat when the blade is dull.

You might also like our Beginner's Guide to Cricut Mats, The Best Way To Clean A Cricut Mat, and How To Make a Doormat with Cricut and Vinyl Iron-On.

Why Does Everyone Say To Use A Ball Of Aluminum Foil?

Many Cricut experts advise users to use a ball of aluminum foil to sharpen their dull fine point blades.  With this method, you are supposed to plunge your blade carefully into a foil ball over and over to sharpen it.  

Cricut users aren't the only ones who swear by a sheet of aluminum foil to sharpen a blade. Lots of people use this tin foil technique for sharpening scissors too, and swear by it. This is probably where Cricut users got the idea of using aluminum foil.

Cricut fine point blade removed from housing before sharpening, beside a tinfoil ball.

The truth is that cutting aluminum foil or punching a blade into a piece of aluminum foil doesn't really sharpen the blade. So why do so many users say it works?

If you think about sharpening a blade of a knife, you need to drag the blade along something abrasive, at the right angle, on both sides to restore the dulled edge of the metal. The same is true of a Cricut blade. The Cricut brand blade is in fact a very tiny knife. It has a tip on the end of two sharpened edges.

When you cut through a aluminum foil ball it is in fact, if anything, you're probably dulling the blade, and wearing off the sharp edge, because it is quite a hard material.

Why are your cuts better afterward then?

If aluminum foil in fact does not work to sharpen a Cricut blade, why do so many people swear by it?

The act of plunging the blade into foil may be cleaning the blade. If there is any debris from cutting sticky materials like adhesive vinyl, or glitter, or any dirt on the blade, then the friction caused by cutting through the aluminum foil is likely cleaning it off. So it may in fact genuinely feel like a better cut afterward, but this is because the blade is cleaner, not sharper.

It's probably ok to occasionally use the aluminum foil method to clean your blade, but doing this every time you cut, like some Cricut experts suggest is probably dulling your blade rather than sharpening it.

How Can You Sharpen A Cricut Blade With Household Items

If you think of your Cricut blade as a teeny tiny knife, you will realize you need to sharpen it in the same way you would sharpen a knife blade. You can use a method similar to sharpening a straight edge razor.

Remember seeing this method in the movies? A barber would use a strap of leather and pull the blade along it to sharpen it before shaving a man's beard.  There was another section of the sharpener that had an abrasive substance on it, and it acts as a very fine sandpaper that restores the edge on the blade.

Because a straight edge razor isn't used to cut anything more coarse than a beard, the blade doesn't generally nick, or roll, it just loses its edge with wear. By pulling it away from the cutting edge on a slightly abrasive surface the edge is restored. In the same way a Cricut blade loses its edge with wear.  It too can be restored by being pulled away from the sharp edge on a flat, slightly abrasive surface.

If you're interested in a detailed demonstration and explanation of this check out this video from a professional knife sharpener -Joe Calton,  who applies his knowledge to sharpening his wife's dull Cricut blades.

In order to sharpen the Cricut blade with easily accessible household materials, the video recommended creating an abrasive surface from regular toothpaste.  It also mentioned how the toothpaste cleaned teeth, by containing the fine abrasive that acts as a polish.  

I had trouble with the toothpaste method.  Mine was gummy rather than abrasive.

Then I remembered how Vim cleanser has a fine grit to it, and drys with a powdery residue sometimes.  I ended up using Vim cleanser to create my abrasive surface, and it worked perfectly.

How to sharpen your old Cricut blade using household cleanser and paper.

A Word Of Caution

A word of caution, you will need to find the best angle to sharpen your Cricut blade. You want to pull along the existing edge to restore it.

Too much pressure in the wrong place may damage the edge.

With a large knife it's quite easy to see and feel that you are holding the knife at the right angle. This is much trickier with the teeny tiny cutting edge of the Cricut blade. But, if your blade is dull and destined to be thrown out anyway, you have nothing to lose by trying this method.

Materials:

  • mild abrasive material like toothpaste or Vim cleanser
  • natural light
  • piece of paper
  • small pliers
  • dull fine point Cricut blade 
  • magnifying glass
Materials for sharpening Cricut blade including Vim cleanser, and paper.

How To Sharpen Your Cricut Blade With Vim Cleanser

Watch our YouTube video below for a demonstration.


Youtube video

1. First, apply a tiny amount of Vim cleanser to a piece of clean paper in a smear, and allow it to dry. You can hurry up the drying process by using a hairdryer. The cleanser will act as an abrasive to create a rough surface to sharpen the blade, almost like a very fine sandpaper.

I did also experiment with toothpaste first, which was recommended in the video I linked above. The brand I was using didn't dry very well. It remained gummy on the paper, and I found it hard to work with. A different brand of toothpaste might have worked. I remembered that Vim cleanser can leave a dry powdery residue and decided to try it. It worked really well for me.

2. Once the cleanser is dry, you are ready to sharpen the blade. First remove the blade from the quickswap tools housing. Even a dull blade is sharp enough to cut yourself, so do take care. You may want to use some pliers to remove it from the fine point blade housing.

3. Find a spot next to a window, with good natural light. You may also like to use some magnifying glasses.  Even an inexpensive one from the dollar store will help you see the blade edge more clearly.

Holding the blade in your fingers, or with some small pliers, drag the blade away from the cutting edge at the same 45 degree angle as the cutting edge.  Do this about 15 times on each side of the blade. Take care to hold the blade at the same angle as the existing blade edge. You can use a magnifying glass to look at your blade as you go.  This will help ensure the angle is working and the blade is being sharpened.

4. When you are finished you can make a test cut, and insure you have a sharp blade. If not, you can continue to sharpen it until it makes nice clean cuts again.

How Many Times Can You Sharpen A Cricut Blade Like This?

You could sharpen the blade like this over and over again. Essentially, until the blade becomes too short, you can re-sharpen as many times as you like. This method will greatly expand the average useful life of a premium fine point blade.

Can You Use This Method For Other Cricut Blades?

About 90% of the time most Cricut users will use the premium fine-point blade. It cuts a lot of different materials like paper and vinyl. But there are lot of different blades for Cricut machines too. Some of the different types of cricut blades are the deep point blade, the wavy blade, the cricut joy blade, the cricut knife blade, bonded fabric blade, perforation blade, and the cricut rotary blade. These blades are all for getting the best cuts out of a variety of different materials. Many of the blades use the quickswap housing adaptive tool system, to make switching blades as simple and easy as possible for Cricut machine users.

You can use this method to sharpen your deep-point blade.  Instead of holding the blade at a 45 degree angle like the fine point blade, the deep cut blade has a steeper blade angle of 60 degrees. It is also made of stronger steel and may be harder to sharpen with this simple method. I wouldn't try this method on any other Cricut blades.

I hope you try this method of sharpening your Cricut blade. It really helps to extend the life of your blades, and save you money. It's definitely worth a try. It is an easy method that uses simple household materials that most people will have on hand.

Frequently Asked Questions

Does using tinfoil to sharpen your Cricut blade work?

No. It may be cleaning your blade which may improve it's performance, but it does not sharpen it.

Can I resharpen all my Cricut blades?

You can resharpen your fine-point blade and your deep-point blade. Remember that the angle of the blade is 45 degrees for the fine-point and 65 degrees for the deep-point blade.

How many times can I resharpen my Cricut blade?

You can resharpen it over and over, until the blade becomes too short to work with.

Is sharpening a Cricut blade worth it?

Yes! Sharpening your Cricut blades can extend their life significantly and save you money. Since it only takes a few minutes and requires inexpensive household items, it's definitely worth trying before buying a replacement.

If you try Sharpening Your Cricut Blade or any other idea on my blog please let me know how it went in the comments below. Thanks for visiting today!

More Cricut Posts

  • Cricut mat sizes, and types and when to use each one.
    The Beginner's Guide to Cricut Mat Sizes and Types
  • How to make earrings with your Cricut machine,
    How To Make Earrings With A Cricut
  • Cricut transfer tape with a Cricut machine in the back ground.
    How To Use Cricut Transfer Tape
  • How to cut vinyl on a Cricut machine to make a decal for a glass canister.
    How To Cut Vinyl On Your Cricut Step By Step Beginners Guide

Recipe

Materials for sharpening Cricut blade including Vim cleanser, and paper.

How To Sharpen A Cricut Blade

Use household items to sharpen the edge of your dull Cricut fine-point blade.
5 from 1 vote
Print Pin Rate
Prep Time: 5 minutes minutes
Cook Time: 10 minutes minutes
Total Time: 15 minutes minutes
Author: Dannyelle Nicolle-Ramjist
Cost: $2

Equipment

  • small pliers
  • magnifying glass

Materials

  • mild abrasive material like toothpaste or Vim cleanser
  • dull fine point Cricut blade 
  • small piece paper
  • natural light

Instructions

  • First, apply a tiny amount of Vim cleanser to a piece of clean paper in a smear, and allow it to dry. You can hurry up the drying process by using a hairdryer. The cleanser will act as an abrasive to create a rough surface to sharpen the blade, almost like a very fine sandpaper.
    I did also experiment with toothpaste first, which was recommended in the video I linked above. The brand I was using didn't dry very well. It remained gummy on the paper, and I found it hard to work with. A different brand of toothpaste might have worked. I remembered that Vim cleanser can leave a dry powdery residue and decided to try it. It worked really well for me.
  • Once the cleanser is dry, you are ready to sharpen the blade. First remove the blade from the quickswap tools housing. Even a dull blade is sharp enough to cut yourself, so do take care. You may want to use some pliers to remove it from the fine point blade housing.
  • Find a spot next to a window, with good natural light. You may also like to use some magnifying glasses.  Even an inexpensive one from the dollar store will help you see the blade edge more clearly.
    Holding the blade in your fingers, or with some small pliers, drag the blade away from the cutting edge at the same 45 degree angle as the cutting edge.  Do this about 15 times on each side of the blade. Take care to hold the blade at the same angle as the existing blade edge. You can use a magnifying glass to look at your blade as you go.  This will help ensure the angle is working and the blade is being sharpened.
  • When you are finished you can make a test cut, and insure you have a sharp blade. If not, you can continue to sharpen it until it makes nice clean cuts again.

How To Use Cricut Transfer Tape

May 1, 2022 · 2 Comments

Cricut transfer tape with a Cricut machine in the back ground.

How To Use Cricut Transfer Tape: step by step guide on how to use Cricut transfer tape with vinyl projects.

Cricut transfer tape with a Cricut machine in the back ground.
[feast_advanced_jump_to]

Years ago, when I first started using my Cricut machine, I didn't think that transfer tape was really that necessary. It didn't take me long with trying to add vinyl with intricate designs to projects and messing up the spacing, or putting things on crooked to learn that transfer tape is pretty much essential for vinyl projects. Using transfer tape for your projects is the best way to transfer vinyl and a real game changer.  This step by step guide will show you exactly how to use Cricut transfer tape.

What Is Transfer Tape?

Transfer tape, sometimes called transfer paper, is essentially a carrier for your cut adhesive vinyl decals to your actual project -like a mug, or sign, water bottle or phone case, just to name a few possibilities. Without transfer tape it's hard to move the delicate cut vinyl pieces from their backer to the actually project without damaging them or placing them without the right spacing or at a wrong angle.

Transfer tape ensures that you can transfer the cut vinyl in exactly the same placement as it appears on the vinyl backer.

Cricut transfer tape

When Do You Use Transfer Tape

Transfer tape is generally only used for vinyl Cricut projects. After cutting a vinyl pattern on your Cricut machine, it will be on a backer piece. The goal of transfer tape is to "transfer" the cut design from the backer to the final project surface without damaging it, or ruining the spacing or layout of a piece. It is a great help when working with vinyl.

Whenever you have a cut out piece of vinyl to go onto a project's surface, you will need to use transfer tape for the best results. Transfer tape is especially helpful when working with larger projects.

How Does Transfer Tape Work?

Once you have a vinyl piece cut out and weeded you will place the clear transfer tape directly over the top and remove the vinyl backing paper. You can then move and position the vinyl to your exact desired location, and move it easily from transfer tape to its final resting place.

How To Use Cricut Transfer Tape For Your Project

Check out my YouTube video below that walks you through the whole process of how to use Cricut transfer tape, step by step.

Youtube video
Transfer tape is easy to use, even for Cricut beginners.

The first thing to do is to cut out your vinyl on your Cricut machine with a kiss cut, and remove it from the cutting mat. Next, you will need to weed the excess vinyl with the weeding tool, so that you are left with your vinyl design on its own carrier sheet.

To use the transfer tape, cut a piece large enough to cover your entire design. Remove the transfer tapes paper backing, and use the grid pattern on the tape to help line things up over the whole design in a straight line, then apply the sticky side of the transfer tape to the top of the vinyl design.

Next use the scraper tool to barnish the vinyl on to the piece of transfer tape.

how to apply Cricut transfer tape

Now, slowly remove the vinyl from it's backing sheet at a 45-degree angle. If the vinyl isn't sticking to the tape, go back and burnish it with the scraper tool some more.

Cricut vinyl transfer tape

Now carry the design on the transfer tape to the surface of your project. Use the grid to help line up your placement. Then use the scraper application tool again to burnish the craft vinyl onto the project surface.

how to use Cricut transfer tape

Lastly, slowly remove the transfer tape from the vinyl, leaving the vinyl cutouts in place on the finished project.

applying Cricut transfer tape

Vinyl Transfer Tape Tips

For A Curved Surface

Cut slits into the transfer tape if you're applying the design to curved surface. This will help to get things to lay smoothly and avoid air bubbles even if it's not a flat surface.

Troubleshooting Transfer Tape

Sometimes working with transfer tape is tricky. It can be challenging to get the vinyl to stick to the transfer tape, and also to get the tape off of the vinyl. You need the tape to be sticky enough to adhere to the vinyl, but not so sticky that it then won't allow you to remove it from the vinyl.

If you can't get the tape off of the vinyl project, remember to pull back at a 45 degree angle, work slowly, and do some extra burnishing if necessary especially on little pieces of the vinyl as you remove the tape.

If you don't have a Cricut scraping tool to use for burnishing, you can also use the edge of a credit card or gift card, or your finger nails.

You can also stick the transfer tape onto a clean towel or any cloth before using it to reduce the amount of tackiness of transfer tape.

Also you can reuse transfer tape several times, it will become less sticky the more times you use it.

If it isn't sticky enough to adhere to the vinyl, you may need to start with a new piece again.

Make sure the project area you are sticking your adhesive vinyl design to has a clean surface. You may clean the area first with an alcohol wipe, before transfering your vinyl.

When To Use Strong Grip Transfer Tape

There are different strengths of transfer tape, with different purposes. Regular grip is what you need for any regular vinyl. The standard grip works well for any regular vinyl project. The strong grip transfer tape is a high tack transfer tape. If you are working glitter vinyl the texture on it makes it difficult for regular transfer tape to adhere to it. For these projects the best choice to use is strong grip transfer tape because of its extra strong bond.. It's extra tack makes it perfect for working with this type of vinyl.

A word of caution though, strong grip transfer tape is too strong for normal vinyl projects.  If you use strong grip on permanent or removable vinyl, you own't be able to get the vinyl off of the transfer tape and onto your project.  I've learned this lesson the hard way, one day when I was out of regular transfer tape and thought I would use the strong grip.  Be sure to only use strong grip for the materials it's recommended with.

how to use Cricut transfer tape

Which Transfer Tape Is The Best?

There are many different types of transfer tapes available, from different brands. The best idea is to experiment with the different types and see which one you like working with best. I find that the Cricut transfer tape is the best transfer tape. I like that is is clear, and has the grid lines, making it easier to line up on final projects. Other people like other projects, so be sure to try a few out.

What Can I Use Instead Of Transfer Tape?

Sometimes you may run out of transfer tape, or find it too sticky for your project. There are a few other options that some people like to use. You can use painter's tape instead of transfer tape. Just overlap pieces to make it large enough to cover the design. Some people also like to use contact paper. You can also use Press and Seal Saran Wrap as a transfer tape alternative. Some people like to use the Press and Seal in a situation where they're transferring vinyl to a surface like poster board, where the transfer tape might be too sticky and mark the surface of the poster board.

I hope this step by step on how to use Cricut transfer tape has been helpful.  It is a really important step when working with vinyl.  It can be a little tricky the first time or two you're using it, but after that it should be a pretty easy step.

More Cricut Posts

You might also like our post on the Best Cricut Machine For Cutting Vinyl here.

best Cricut for cutting vinyl

Also check out How To Clean Your Cricut Mat here.

How to clean a Cricut cutting mat

You might also enjoy The Best Cricut Accessories You REALLY Need here.

How To Cut Vinyl On Your Cricut Step By Step Beginners Guide

Apr 30, 2022 · 5 Comments

How to cut vinyl on a Cricut machine to make a decal for a glass canister.

How To Cut Vinyl On Your Cricut -Step By Step Guide For Beginners, including prepping design, cutting, and transferring.

How to cut vinyl on a Cricut machine to make a decal for a glass canister.
[feast_advanced_jump_to]

Cutting vinyl on your Cricut is one of the most common and fun projects to create with your Cricut machine. But it can also be a little stressful the first few times. You might not know where to start and feel stressed out about making a mistake and ruining expensive material. We've put together a step-by-step easy tutorial to help you get started on how to cut vinyl on Cricut, that you can refer back to again and again whenever you need to. Whether it's your first time creating a vinyl projects, or you want to know the basic steps you're in the right place.

how to cut vinyl on cricut

Does It Matter Which Machine I'm Using?

Don't worry all the Cricut machines function pretty much the same way. Whether you are using a Cricut Maker, Cricut Explore Air, Cricut Joy, or the newer Maker 3 or Cricut Explore 3 any Cricut Explore machine, Cricut Maker machine or the Joy can all cut vinyl.

The Cricut Joy is obviously smaller, and has a smaller cutting mat, so that will affect how large of a project you can create. If you want to make a project larger than your Cricut Joy, you can also sometimes divide the project in several smaller cuts.

Want to know about the best Cricut machine for cutting out vinyl, check out this post.

Does It Matter Which Device I'm Using For Design Space?

All the Cricut machines use Cricut Design Space software to run. The Cricut machine needs some instructions about where to cut, and that is all done through Cricut Design Space. You can use Cricut Design Space on your desktop, iOS device, or Android device. They are all pretty similar, but desktop offers the most functions, and in general is the best device to work from if you have it available. Other than a few functions that aren't available though, the biggest difference is that some of the buttons will be in slightly different places for iOS and Android devices.

So no matter which device you're using don't worry, they will all work very well for cutting vinyl.

Which Vinyl Should I Use?

There are several different kinds of vinyl, and which type of vinyl to use all depends on what kind of Cricut projects you are making.

how to cut vinyl on Cricut

Permanent Vinyl

Permanent vinyl is an adhesive vinyl that will stick to your project surface permanently with a strong bond due to it's stronger adhesive. It's often used for surfaces that will receive a lot of wear and tear, like a phone case, or areas that might get wet like a the outside of a cup or mug.

Removable Vinyl

Removable vinyl is perfect for projects that you don't want to be permanent. It's used for things like a removable vinyl decal for the wall, or for decor that you might want to remove and change later. It doesn't leave any residue when it's removed.

Iron-On Vinyl

Cricuts heat transfer vinyl (HTV) is called Iron-on vinyl. It's applied to a surface with heat. It's often used for adding vinyl to clothing like t-shirts, but it can also be used on wood, paper, and other surfaces. This post will focus on how to cut regular vinyl, permanent or removable.

Printable Vinyl

If you want to add an image to a project, you can use printable vinyl. It can be printed at home with your laser printer.

Smart Vinyl

If you are using a Cricut Maker 3, an Explorer 3, or a Cricut Joy machine you can use new smart vinyl. Smart vinyl does not require a cutting mat. To use it, follow the directions below, but instead of putting the vinyl on a cutting mat to cut, load it directly into the machine. Smart vinyl is not compatible with the Cricut Maker, or the Cricut Explore Air 2.

How To Cut Vinyl -Step-by-Step Guide for the Cricut Beginner

Materials:

  • Cricut Cutting Machine
  • Brayer
  • Cricut Vinyl
  • Scraping Tool
  • Green Standard Grip Cutting Mat
  • Weeding Tool
  • Transfer Tape
  • Project Blank ie. mug, cup, phone case or other

If you prefer to learn by seeing, check out our YouTube video tutorial below.


Youtube video

Step 1-Preparing The Design In Cricut Design Space

Open Cricut Design Space and create a new project as your first step. You can create your own designs in Cricut Design Space, use a ready made project, or an image from Cricut Access or an svg file using the upload button to add your cut file. You can resize your design to work perfectly for your project, and even change the colours to coordinate with your vinyl and give you a better idea of the finished project.

Once you're happy with it, you're ready to hit the Make It button, in the top right on desktop.

Cricut vinyl decaf coffee label

Step 2 -Cut Preview Screen

Once you click Make It, you'll be taken to the cut preview screen. Here you can see a preview of how your project will be cut out. Check to make sure it's laid out properly, the sizing looks good, and that the right objects are grouped together on the same mats for cutting. When you are happy click the continue button at the bottom, and you'll be moved to the next screen.

cutting vinyl with a cricut

TroubleShooting

You may need to use the Attach function to hold your design together. If you go to the cut preview mat and things are out of place, go back to the project canvas and attach anything you need to.

If you find that something you would like to cut out of the same colour of vinyl as something else is on a different mat, there are a couple ways to fix it. This sometimes happens when you're using more than one svg or Cricut image and the colors don't match exactly.

One way is to go back to the project canvas and use the Color Sync function. Click on the Color Sync button at the top of the layers panel on desktop. Move objects by clicking on them in the layers panel and use your mouse to move them to the right color.

The other way to fix it is to adjust the mats in the cut preview screen. Click on the three dots in the corner of an object on the cut preview screen, and select Move Object, then select the cutting mat you'd like it to be on. It will be moved to the mat selected, and you can then click on it and move it into position with the objects, ready to cut.

Step 3 -Add The Vinyl To A Cutting Mat

Which Cricut Cutting Mat Do You Use For Vinyl?

The first thing to do is get your Cricut cutting mat ready, by laying a green standard grip mat on a flat surface. Remove the protective sheeting and lay aside to replace after you're finished using the cutting mat. Lay your piece of vinyl in the top left corner of the cutting mat, lining it up and keeping it straight.

The green standard grip mat is the best mat to use with regular vinyl projects.

Which Side Of The Vinyl Goes Up?

Add the vinyl to the cutting mat with the paper backing side down and the shiny side of the vinyl facing up. When cutting permanent or removable vinyl, it's always vinyl side up.

Do You Remove The Vinyl Backing Before Cutting?

Do not remove the backing of the vinyl before cutting it.

Use your fingers, a brayer tool, or a scraper tool to smooth out the vinyl and remove any air bubbles.

how to cut vinyl

Step 4 -Cut Settings

Power on your Cricut and make sure your Cricut machine is connected to your device, via bluetooth, or with the cable. You can select the machine at the top of the screen.

Next you will select the base material. This is the material you are cutting, in this case vinyl. There are several different vinyls to choose from. If you don't see the vinyl you are looking for on the screen, Browse All Materials, on top right. You can use the search feature in the top right corner to type vinyl and see all the different types of vinyl. Select your vinyl type for this project from the list. If it's a vinyl that you will use often, like the premium vinyl, you can click on the star beside it to have this vinyl setting added to your favourites list for next time you're looking for a cut setting.

For older machines, you will have to use the smart dial on the top of the machine and turn it to the right setting.

how to cut vinyl on cricut

Once you have selected the base material, you can also choose the pressure setting for your cut. There is less, default, and more available to choose from. You will probably want to leave it at the default setting.

Next, you will be prompted to load tools and materials. For cutting vinyl, you'll be using a fine point blade. Make sure the premium fine-point blade is loaded in the blade housing, as prompted, and now load your cutting mat into your Cricut. Line up the mat with the guides and push the Load/Unload button with the arrows on it.

Lastly, make sure your machine has nothing behind it so that the mat can feed in and out, and press the Go button to begin the cut.

If your cut uses multiple mats, remove the vinyl after each cut, add the new colour, load it into the machine and press the Go button for the next cut. Repeat this process until your entire project is cut out.

Test Cutting

If you are working with a new material for the first time, it's often recommend to do a test cut. In the long run this can help you save costly materials. To create a test cut you would add a simple shape like a square or circle to a new canvas and size it to be less than an inch in size. Proceed to cut it with the default settings for the material. Once it's cut, determine if you has cut through, or whether you should add pressure. If the cut isn't successful, do another cut with adjusted settings until it's successful, and take note of the settings for actual project, or create custom settings for a specific material.

Is it worth the effort to test cut? Anyone who's wasted a full sheet of material before would probably say yes. The idea is to do a tiny cut and make sure the settings are perfect for the right cut before proceeding with the project. Yes, it does take a little extra time, but in the long run it might save you time and material, rather than making a mistake on the larger project. Most common materials, like everyday vinyl will work just fine with the default settings, but it can be trickier with less common materials like glitter vinyl, where you may find it worthwhile to test cut, or if you are using a different brand Cricut.

Step 4 -Weeding

After your vinyl is cut and removed from the Cricut mat, it's time to weed the design. Weeding means to remove the excess vinyl from the carrier sheet, leaving just the cut image.

What Is A Kiss Cut?

Your vinyl has been cut with a kiss cut, meaning that the vinyl is cut through, but the paper liner on the back is still intact.

Use a weeding tool to remove the excess vinyl. It can be difficult to see the cut lines sometimes especially with intricate designs, so be sure to work in a well lit area for removing the little pieces.

how to cut a vinyl decal on your cricut

Step 5 -Applying The VInyl To Your Project

If you are applying the vinyl to a hard washable surface like a cup, mug, or phone case you will want to prepare the surface before adding the vinyl to remove unseen dirt, or oils that may keep the vinyl design adhesive backing from adhering well to the final project. For best results, you may use an alcohol wipe to clean it before adhering the vinyl.

using transfer tape on vinyl for cricut

The next steps are to apply the vinyl to your project, using a piece of transfer tape, sometimes called transfer paper. You can read more about using How To Use Transfer Tape here. To use the transfer tape, cut a piece large enough to cover the entire image. Next, remove the backing piece and place the clear transfer tape top layer over the entire design. Use the grid pattern on the Cricut transfer tape to line up the design. Next, use a scraper tool to burnish it. Once the craft vinyl is fully adhered, slowly pull the transfer tape with the vinyl layer stuck to it, off of the paper backing. Now transfer the vinyl to your final product by placing the transfer tape on to your piece and burnishing it. Lastly, slowly remove the transfer tape a little bit at a time, at 45 degree angle.

applying Cricut vinyl
how to cut out vinyl with your Cricut machine
Cricut vinyl project

Cutting vinyl on your Cricut machine is an amazing way to personalize and decorate countless projects. This ultimate guide walks you through each step on how to cut vinyl on your Cricut, making it easy to do even for a beginner. Save this post for reference in the future by pinning it to your Cricut board in Pinterest.

More Cricut Tutorials

You might also like our post on How To Clean A Cricut Mat here.

How to clean a Cricut cutting mat

Also check out our post on The Best Cricut Accessories You REALLY Need here.

You might also like our post on The Best Cricut Machine For Cutting Vinyl here.

best Cricut for cutting vinyl

How To Slice In Cricut Design Space

Apr 18, 2022 · 2 Comments

How to slice in Cricut Design Space.

How To Slice in Cricut Design Space: step by step guide of how to slice on Cricut, including when to use this tool for cropping, making new shapes, and creating a split monogram.

how to slice in Cricut Design Space
[feast_advanced_jump_to]


Slice is an important tool within Cricut Design Space that will allow you to slice shapes and text that you want to create with your Cricut machine.

What Actually Is Slice?

I like to think of the slice tool like a cookie cutter, because that's how it functions. It might be helpful to picture your dough, cookie cutter, and the cookie cut out of the dough, as the material, the item you're slicing out, and the piece that is sliced out of the material. You can then delete any items you don't want in your design. There are many different ways to use the slice tool in your Cricut projects which is sure to make it one of your favorite tools in Cricut Design Space.

When Do You Use Slice?

To Create a Hole, or Slice Text Out Of An Object

Slice is a great way to remove or slice some text or a shape out of another object and leave a hole there. Again think of the cookie cutter, or hole punch if that's helpful. So it's great for slicing text out of a shape, or adding a hole to an object when you're making something like a gift tag.

Create New Shapes

One of my favourite ways to use the slice function is to create new shapes and make new shapes. For example, slice a circle into a crescent moon shape. With weld and slice working together you can create just about any shape you want from the free basic shapes in Cricut Design Space.

Crop Items or Cut Off Unwanted Parts

If you have an item and you want to crop it, or remove a certain part of it, slice works really well for this. You would use a free shape, and make it large enough to cover the unwanted part, then select both and slice. Then simply delete the unwanted parts.

Cut An Item Into Multiple Pieces

Let's say you have an item that has a single image and some text and they aren't different layers. You can use the slice tool to separate the text item from the rest and move it around wherever you would like it in your design.

Things You Need To Know About Slice

  • You have to have two overlapping layers to use slice. You cannot use slice on individual layers. This one is pretty logical if you think about it, you need something as a bottom layer to slice out of, and you need the item you're using to slice with (the dough and the cookie cutter).
  • Slice only works on two layers at a time. If you have more than two layers selected the slice tool will be grayed out and unavailable to select.
  • You can slice text.

Where Is The Slice Tool?

Desktop -on your desktop device slice is located at the bottom of the layers panel, on the lower right corner of your canvas.

how to slice in Cricut design space

iOS -you will find it under the actions menu. So first click on the actions menu at the bottom of your screen, and then look for the slice button.

using slice in Cricut

Android -on an Android device using the Cricut Design Space app you will find the slice button as part of the actions menu, so first click on the actions button, and then look for slice.

how to slice on cricut

Troubleshooting Slice -Why Is Slice Grayed Out?

If your slice tool is grayed out and unavailable to select in Cricut Design Space, it's a sign to you that you aren't fitting the requirements for using it. The most common issues would be that you have more than two layers selected at once.

Remember slice only works for two layers at a time. It won't work on a single layer, and it won't work for three or more layers selected at once, so first check that you only have two overlapping layers selected.

Often when something is grouped you are not able to slice. To fix this ungroup the items, then select just two overlapping items at a time to slice them.

How To Use Slice

If you prefer to a video, check out our YouTube video here all about how to slice, and the different ways to use it.


Youtube video

For our first example we've added a heart to a new canvas from the free shapes.

Next, select the text tool and type out a word or phrase to add it to your canvas. You can change the font to one of your own or use one of the free fonts, or size to fit your design.

Then position the text over the heart, and make sure both the heart and the text are selected.

how to slice in Cricut Design Space

Click the Cricut slice tool, at the lower right of the canvas, at the bottom of the layers panel, on desktop.

slice in Cricut
how to slice in Cricut Design Space

After the slice, you will see the "slice results" in the layers panel. You will have three different parts now -the original shape that is now sliced, for us the heart with the the text cut out of it. There will also be the text that was sliced out of the heart -which is the pink text for our example. And lastly there is the original black text.

how to slice on Cricut

We can delete the pink and black text and we're left with the new design with the text sliced out of it.

Using Slice To Crop An Object

Sometimes if you're using someone else's image cut file, or a image from Design Space, there may be elements of it that you would like to crop out.

using slice in Cricut Design Space

To do this in Cricut Design Space all you have to do is select a free shape by clicking on shapes and selecting one that will cover what you want to crop.  Next, when it appears on your canvas, adjust the size and place it over top of what you'd like to crop out.

how do you slice on a Cricut

Then select the item layer, and the shape layer and press the slicing tool button. This will create new cut paths .Look for the slice result in the layers panel and use delete to remove the slice result and the original shape.

how to use slice on Cricut

Using Slice To Create New Shapes

Sometimes when you are designing you want a shape that isn't available in the free shapes menu library. You can often create the shape yourself from two different shapes using slice and/or the weld tool to create your own new shapes at no additional cost.

The first thing to do to create a crescent moon shape from free shapes is to start with a new canvas, and then add a circle shape. Next use the duplicate button to add another circle to the canvas. Now position the circles so that they are overlapping to create a crescent moon.

how to use slice in Cricut Design Space

Select both layers and choose the slice feature. You will be left with a new crescent shape, along with the the other two slice results. You can delete the results you don't want and use the new free crescent shape moon design in your Cricut projects.

how to use slice in Cricut
how do you use the slice function in Cricut

This example is quite simple, but you can also use this method for more complex designs with multiple slices, and also welding pieces together to create lots more new shapes.

Using Slice To Cut An Item Into Multiple Items

Sometimes when you're using already made images from someone else, or Cricut Design Space there are elements that you would like to move around, but the item is a single-layer image, so you can not select certain elements and move them. The slice option is a great tool to help. As we did with the cropping example, we start by selecting a shape from the free simple shapes library that covers what we want to slice.

slice in Cricut
when to use slice in Cricut

Next we'll select both items and click slice. Now we can look at our slice results in the layers menu, and delete the shape we used as well as the shape cut out piece. The text will now be it's own layer and we can delete it, re-size it, move it to the top, or do whatever we like with it, because it has become it's own layer.

how does slice work in Cricut
when would you use slice in Cricut

Creating A Split Monogram

A popular project that uses slice is to create a split monogram made by slicing individual letters and adding in a name. It's very simple to do.

Open a new canvas, and click on the text button, and type a letter in the text box. Choose any font or font size that you like.

how to make split monogram with slice in Cricut

Next, add a square shape to the canvas, and click the lock on it's dimensions, then use the scale button in the lower right corner of the bounding box to drag it into a long and narrow rectangle. Select the letter and the rectangle and click on slice.

how to make a split monogram in Cricut

Now delete, the rectangle, and the pieces cut out of the centre of the rectangle.

creating a split monogram in Cricut

Now, create another text box and type out the name, choosing your font and sizing it to fit in the empty spot. Then move the name to the middle of the cut out letter.

how to make a split monogram with your Cricut

To add a line to the top and the bottom of the split, add a square to the canvas and unlock the dimensions.  Size it to form a thin line the width of the monogram.  Now use the duplicate button to copy it.  Position one at the top and one at the bottom.  Select both lines and the monogram and then click the weld button.

how to make a slit monogram in Cricut Design Space

That's how easy it is to create a split monogram using the slice function.

There are so many different projects you can make using slice. I hope you've found these explanations and examples helpful. Be sure to check you the youtube video if you prefer to see a live demonstration of how to use slice. With all these cool tricks for using slice, life really is a party!

Subscribe For Lots More Cricut Projects and Tips and Tricks

Just for subscribing we'd love to send you our free e-book 10 Mistakes You're Making With Your Cricut and How To Avoid Them.

You might also enjoy The Best Way To Clean A Cricut Cutting Mat post here.

How to clean a Cricut cutting mat

Also check out How To Weld In Cricut Design Space post here.

What Does Flatten Mean In Cricut Design Space?

Apr 18, 2022 · Leave a Comment

How to flatten in Cricut Design Space.

What does flatten mean on Cricut: discover how to use the flatten tool in Cricut Design Space and also how to unflatten.

How to flatten in Cricut Design Space.
[feast_advanced_jump_to]

What Does Flatten Mean On Cricut?

Flatten is a tool in Cricut Design Space that is used to turn multi layered designs into one single layer so that you can use the Print Then Cut feature. Print Then Cut allows you to send a flattened print image to your home printer then cut it out with your Cricut machine.

Cricut Design Space has five main tools: the attach tool, the slice tool, the weld tool, the contour tool, and the flatten tool. These are all very important tools when designing in Cricut Design Space. Most Cricut cut files, or svg files contain different layers within them. These are usually the different cuts that the Cricut machine will make when cutting out a multi-layer project. When you decide that you would like to use the Print Then Cut feature, you must reduce the image from a multi-layered image to one individual layer. You are basically flattening all the layers down to one single printable image layer.

What Is Print Then Cut

The only time you will use the flatten tool, is to prepare an item for Print Then Cut, so what exactly is the Print Then Cut feature of Cricut Design Space? Print Then Cut allows you to use your home printer to print an item, and then use the Cricut to cut it out perfectly. It's often used for making stickers with printable sticker paper. When the flattened image is printed on your home printer using the Print Then Cut feature, Cricut will add a black border around the printed image, which acts as a registration mark. After it's printed you will add the printed design to your cutting mat, and the Cricut machine will use sensors to read the cut sensor marks to line up the cut perfectly.

There is a maximum size for print then cut images, they can only be 6.75 x 9.25 inches. Unfortunately this is the max size regardless of the Cricut mat size.

You can not use Print Then Cut with the Cricut Joy machine. It does work with all the Explorer series and Maker series machines, including the Cricut Explore Air, Cricut Maker, and Maker 3.

When Do You Use The Flatten Tool?

The only time you will need to use the flatten tool in Cricut Design Space is if you want to use the Print Then Cut feature. It's a tool used to prepare an svg file or image for Print The Cut. If you are not using the Print Then Cut feature on your Cricut machine, then you will never need to use the flatten tool.

Is There Ever A Time When You Don't Need To Flatten Before Using Print Then Cut?

If you have a single layer image then you won't need to flatten it before using Print Then Cut. If you choose a Cricut Print Then Cut image from Cricut Design Space, it's also ready to go as a single image without using the flatten tool.

How Do You Flatten In Cricut Design Space?

If you're a visual leaner, check out this YouTube video to find out what Flatten Means in Cricut, and How To Unflatten.


Youtube video

If you want to use Print Then Cut, then first you will have to flatten your image in Cricut's Design Space.

Once your svg cut files are uploaded to your canvas, or you have chosen an item from Cricut Design Space you can flatten it. 

what does flatten mean on Cricut

Select all the layers using the select all button at the top of the canvas, or by using your mouse and shift to select all, or by holding down shift and selecting each item in the layers panel.

what is flatten on Cricut

Once you have the selected layers, click on the flatten button in lower right corner of the canvas screen, at the bottom of the layers panel.  You will see in the layers button that all the layers have condensed or flattened  into one layer that says Print Then Cut

what does flatten mean on Circuit

If you wish to unflatten your image, you can select it and you will see that the flatten button has turned to unflatten at the bottom of the layers panel on desktop.  Click it to unflatten the item.

Can I Unflatten?

Yes, you can unflatten in Cricut Design Space. The unflatten button does not appear, until after you've used the flatten tool.  After you've flattened something, you'll notice that when it is selected the flatten tool is changed into an unflatten button.  Click on it and the previous layers will be restored and the item will be unflattened.

how to unflatten on Cricut

Is Weld The Same As The Cricut Flatten Tool?

The weld tool is not the same as the flatten tool. The weld button is used to make new shapes by combining separate shapes into one new shape with no individual cut lines. Weld will combine shapes into a single shape without overlapping cut lines. It's a great way to make new designs out of different shapes and turn them into a single customized image. You can also use weld to to combine the letters of a word so that there are no cut lines in between. Weld is used for creating new shapes with new cut paths, whereas flatten combines layers in preparation for Print Then Cut projects.

More Cricut Posts

You might also like our FREE E-BOOK -10 Mistakes You're Making With Your Cricut and How To Avoid Them.


Also check out How Unweld in Cricut Design Space -here.

You might also like The Best Cricut Accessories You REALLY Need here.

Also check out our How To Clean A Cricut Mat tutorial here.

How to clean a Cricut cutting mat

Best Cricut Machine For Cutting Vinyl

Apr 18, 2022 · Leave a Comment

best Cricut for cutting vinyl

Best Cricut Machine For Cutting Vinyl: if you're looking for the best Cricut for vinyl consider costs, size and type of projects.

best Cricut for cutting vinyl
[feast_advanced_jump_to]

If you are shopping for a Cricut machine, it's very helpful to know what items you will be cutting most, and what kind of projects you will be doing in order to get the best machine that suits your needs.  If you're looking for the best Cricut for vinyl, here are some things to consider.

Which Cricut Is Best For Vinyl?

When it comes to cutting vinyl, all of the Cricut machines will do a great job, including the Cricut Joy, and all of the Cricut Explore -Cricut Explore Air and Cricut Maker machines. They can all cut vinyl, including intricate designs. The main difference between the Cricut machines in going to be cost, size, and materials it can cut. So how do you choose which one to get as a vinyl cutter?

Size Of Projects

If you want to make larger vinyl projects on your Cricut, you probably do not want the Cricut Joy. Its small size means that it can't cut anything wider than 4.5 inches. It can however create long projects. With the matless vinyl for Cricut Joy you can create projects up to 20 ft. long at once. And even if you want to create wider projects, you can sometimes break a project up into sections, as a work around, if the Cricut Joy is your only option.

best cricut for cutting vinyl

All of the Cricut Explore and Maker machines can cut a width of 12 inches. The standard mats are 12 x 12, but you can also purchase 12 x 24 inches for longer projects.

The Cricut Explore 3 and the Maker 3 can cut new smart vinyl, that does not require a cutting mat. The new smart materials are available on a roll, that you can feed into the machine for much longer cuts. The width is slightly wider than with a mat, at 13 inches, and the vinyl rolls come in lengths up to 75 ft, so a great option for larger projects!

For most standard crafters the 12x12 regular mat will be fine, which works with any of the Explore or Maker machines, which might make them a great choice if project size is a factor.

Types Of Vinyl

It doesn't matter which different type of vinyl you use, they should all cut the same in all of the Cricut machines, whether it's permanent vinyl, removable adhesive vinyl, glitter vinyl or HTV vinyl. So you can make vinyl decals, t-shirt vinyl, tote bags, even window cling vinyl. You can pair your Cricut machine with the Cricut easy press for lots of amazing projects that use a heat press.

best cricut for vinyl

There is one exception to that rule, which is the printable vinyl . The Cricut Joy does not have the Print Then Cut feature, so if you want to use the Print Then Cut feature for printable vinyl sheets, then the best vinyl cutter for you may be any of the Explore or Maker machines.

Explore or Maker?

This is a great question, and one that lots of first time buyers of Cricut machines have. Out of the Cricut Explore and Maker Series machines, which Cricut machine is the right machine for you to buy? I usually tell people that it depends on two factors -price and what materials they want to cut. We're talking about cutting vinyl specifically so it may just be a matter of price.

best Cricut for vinyl

Materials

Which Cricut machine will give you the best results in terms of performance? All the Cricut machines will do a great job and can cut out detailed designs, with precise cuts. I don't think one does any cleaner cuts than the other. The different Cricut machines have things that set them apart from one another, but the quality of the cuts isn't one of those factors. Whether you're vinyl cutting, doing paper crafts, greeting cards, or different projects, my experience is that all the Cricut machines do a quality job with the cutting process.

The Explore series machines can't cut all the fancy things that the Maker can, but then again, are you ever going to even use your Cricut for engraving or cutting fabric? The answer for many people is no, in which case I would wholeheartedly suggest any of the Explore series machines.

The Explore machine can still handle 100 different materials, including bonded fabric and some wood. The best thing about the new Maker 3 machines is that they have 10x the cutting force and can cut 300 different materials, including thicker materials like balsa wood. This is the biggest difference between the different Cricut models.

If vinyl is your primary material the Explore series machines are a perfect choice. If you also want to cut lots more materials now and/or in the future, the Maker series machines may be your best choice.

best Cricut for cutting vinyl

Cost

There is a price difference between the Explore series machines and the Maker series machines.

Explores are cheaper. If the Explore machine is cheaper and does a great job on the materials that you want to cut then it's a clear winner and the right choice!  So, if you primarily want to use your Cricut for cutting out vinyl, then I recommend the Explore series machines as the best Cricut cutter for you.

If, however, you want to use your Cricut for a wide variety of materials, then a Maker series machine might be a good idea, and the right Cricut machine for you. This is a machine that will last you a long time, and you will not outgrow quickly. Some people get an Explore series machine as a starter machine, to see how much they use it and if they even need the capabilities it offers.

best Cricut for cutting vinyl

A Word About Small Business

If you are investing in a Cricut machine with the intention of starting a small business and selling projects, be warned that Cricut Explore machines are not recommended for commercial use. These are for the at home crafter, and not recommended for business. The Maker series of machines promise commercial grade experience, according to Cricut. Many people love to use Cricuts for their small business for their ease of use , and accurate cuts, as well as being able to buy them and other supplies easily at craft stores. If cutting vinyl, or other materials is for a business venture, then the Cricut Maker might be worth the extra cost.

best Cricut for vinyl

I hope you've found this information helpful as you try to decide the best Cricut machine for you and your needs.  With the right Cricut machine to cut vinyl projects, life really is a party!

More Great Cricut Posts

You might also enjoy The BEST Cricut Accessories You REALLY Need here.

Also check out the How To Clean A Cricut Cutting Mat Tutorial here.

How to clean a Cricut cutting mat

The Best Way To Clean A Cricut Cutting Mat

Apr 8, 2022 · Leave a Comment

How to clean a cricut mat using Dawn soap, scraper and baby wipes.

How To Clean A Cricut Mat: tips and tricks to extend your mat life by cleaning with baby wipes, and dish soap cleaning.

How to clean a cricut mat using Dawn soap, scraper and baby wipes.
[feast_advanced_jump_to]

Sometimes, after many uses in your Cricut machine, Cricut cutting mats lose their stickiness, but before you throw your's out and buy a new mat, there are some ways to clean your Cricut mat and make it sticky again! And most of the cleaning methods are really quite easy and simple to do, with no need for special products. Cleaning your Cricut mat whenever it needs it is a really good idea , and can really extend the life of your mat.

How Often and When To Clean A Cricut Cutting Mat

On average a Cricut cutting mat will last for 40-50 cuts. They do not last forever, but you can certainly extend the lifetime of your mat by cleaning it every once in awhile. If your mat isn't holding items very well anymore, than it's time to clean it. Or if you've just cut something that's left alot of debris behind, like glitter cardstock, then it might be time to clean it.

All these methods will help extend the life of the mat, but they will eventually wear out and need to be replaced with a new Cricut mat.

Tips For Keeping Your Mats Clean

It's inevitable that a mat will eventually get dirty, and ultimately need to be replaced, but we want to get as much use out of mats as we can. Remember these tips to keep your mats from need a big clean too often:

  • Always store the mats with their plastic covers.
  • Occasionally or after cutting something messy like glitter vinyl, run a lint roller over your mat to remove debris.
  • Use the right mat for the right job. Choose a lower tack mat or higher tack mat depending on the needs of the material you're cutting.
  • Rotate your mat from time to time. The upper left corner tends to see the most use. Remember you can move object on your mat in the print preview screen, or load the mat upside down to spread out the use a little more.


Youtube video

Use Baby Wipes to Clean Cricut Mats

Our number one favorite way to clean a Cricut cutting mat is to try using alcohol-free baby wipes. This method is quick and easy way and really does a great job to get your mat sticky again. Just remember it must be an alcohol-free baby wipe, otherwise you may act as an adhesive remover and remove the adhesive, not just the dirt. Wet wipes seem to be a brand that works well. To clean your Cricut mat with a baby wipe, simple use the wipe and rub the mat in circular motion, to remove any dust, dirt, or debris. Slowly work your way around the entire mat, and be sure to also get to the edges of your mat. Some people also like to use a plastic scraper to remove larger pieces. No plastic scraper? Try using the edge of an old credit card, or a plastic gift card.

how to clean cricut cutting mat with baby wipes

Pay particular attention to the top of your mat, since area tends to receive the most wear and tear by being the most frequently used spot.

Once you've finished wiping the entire mat, let it dry fully before using it. This usually takes around 10 min. Afterward, your mat should once again have a sticky surface and be ready to use again. Remember to store your clean mats with the plastic cover on them. Always putting the plastic cover on your sticky mats for protection.

Recipe

how to clean a Cricut mat with baby wipes

How To Clean A Cricut Mat With A Baby Wipe

How to extend the life of our Cricut cutting mat, by cleaning with a baby wipe.
No ratings yet
Print Pin Rate
Course: Cricut
Prep Time: 5 minutes minutes
Cook Time: 5 minutes minutes
Total Time: 10 minutes minutes
Author: Dannyelle Nicolle-Ramjist

Materials

  • Alcohol Free Baby Wipes

Instructions

  • Make sure your baby wipes are alcohol free, otherwise they might damage the mats adhesive. To clean the dirty cutting mat, use a baby wipe, and wipe the mat in a circular motion, until the entire surface is clean.
  • Let the mat dry, and then be sure to add the protective cover to keep it clean.

Use Dish Soap To Clean Your Cricut Mat

Another great way to clean your mats is to use a mild dish detergent. It works really well, but is a bit more involved and tends to take a little longer for them to dry complete.

how to clean cricut cutting mats

To wash your mats with dish soap, place your dirty mats in a sink full of warm to lukewarm water, you don't use hot water or cold water. Add in some mild dish detergent, a lot of people like to use Dawn dish soap. Use a wet paper towel and clean the entire surface of the mat slowly rubbing it in a circular motion to remove all the debris right to the edges of the mat. You can also use a soft brush to scrub your mats. Just be careful that you're not accidently removing all the adhesive by scrubbing too vigorously. 

Once the mat is clean, for best results you must leave it to air dry. Try resting it on a flat surface or on your drying rack to dry. Once it's dry, you should have a sticky mat again.

cleaning cricut cutting mats with dish soap

Recipe

how to clean a Cricut mat with Dawn dish soap

How To Clean A Cricut Cutting Mat With Dish Soap

No ratings yet
Print Pin Rate
Course: Cricut
Cook Time: 5 minutes minutes
Additional Time: 10 minutes minutes
Total Time: 15 minutes minutes
Author: Dannyelle Nicolle-Ramjist

Equipment

  • cleaning cloth
  • scrub brush

Materials

  • mild dish soap like Dawn

Instructions

  • Wet your dirty mat in the sink, and add some mild soap like Dawn, to the surface. Scrub gently in a circular motion with a cleaning cloth or scrub brush, taking care not to scrub too hard and remove the adhesive.
  • Let the mat dry on a flat surface. Once dry, be sure to add the protective layer to keep it clean.

Using Other Cleaning Products And Methods To Clean Your Cricut Mat

Many people like to use L.A. Awesome cleaning product from the Dollar Tree in the US, or look for it online, to clean their mats. Definitely try the milder cleaning methods of baby wipes and dish detergent first, but if that isn't enough and your mat still isn't clean and sticky you have nothing to lose by trying a more aggressive cleaning method.

To clean a Cricut mat with L.A. Awesome cleaner, first remove any debris you can, then spray the mat and let it sit for 5-15 minutes. Use similar cleaning methods to above with something like the Cricut scraper tool to remove dirt and residue. Do not clean the mat too aggressively or this cleaning process may remove all the adhesive from your mat, and rather than be a sticky cutting mat again after washing it maybe ruined.

I don't recommend using something like a Magic Eraser or an all purpose cleaner , because they're just too strong of cleaners and may remove all the adhesive.

Can I Add Adhesive To An Old Mat?

Some people recommend adding new adhesive to old mats. Keep in mind that DIY's like this can lead to voiding your Cricut warranty so if you choose this method, proceed with caution. If you add too much adhesive you risk getting the adhesive inside of the cutting machine and damaging it.

The basic method of adding new adhesive to your cutting mat is to use painter's tape or masking tape around the border of the mat, where the guide wheels are, to keep it free from adhesive. You can then apply a spray adhesive. If you are applying a repositionable adhesive spray be sure to do it in a ventilated area, and protect the surface underneath from over spray. Let the adhesive set 10-15 minutes or according to the package instructions.

What About The Pink Fabric Mat?

The pink fabric mat is special. It's not as sticky as the other mats and requires a little bit of special care. Do use tweezer to remove large debris and if necessary try the baby wipes or dish detergent method taking care to be gentle and not accidentally scratch the more delicate adhesive off.

Cleaning Up After Cutting Felt

Felt is the worse offender when it comes to messy materials in your craft room to cut with your Cricut. Because it's so fuzzy it always leave behind residue on a cutting mat. We have a few suggestions to help tackle felt.
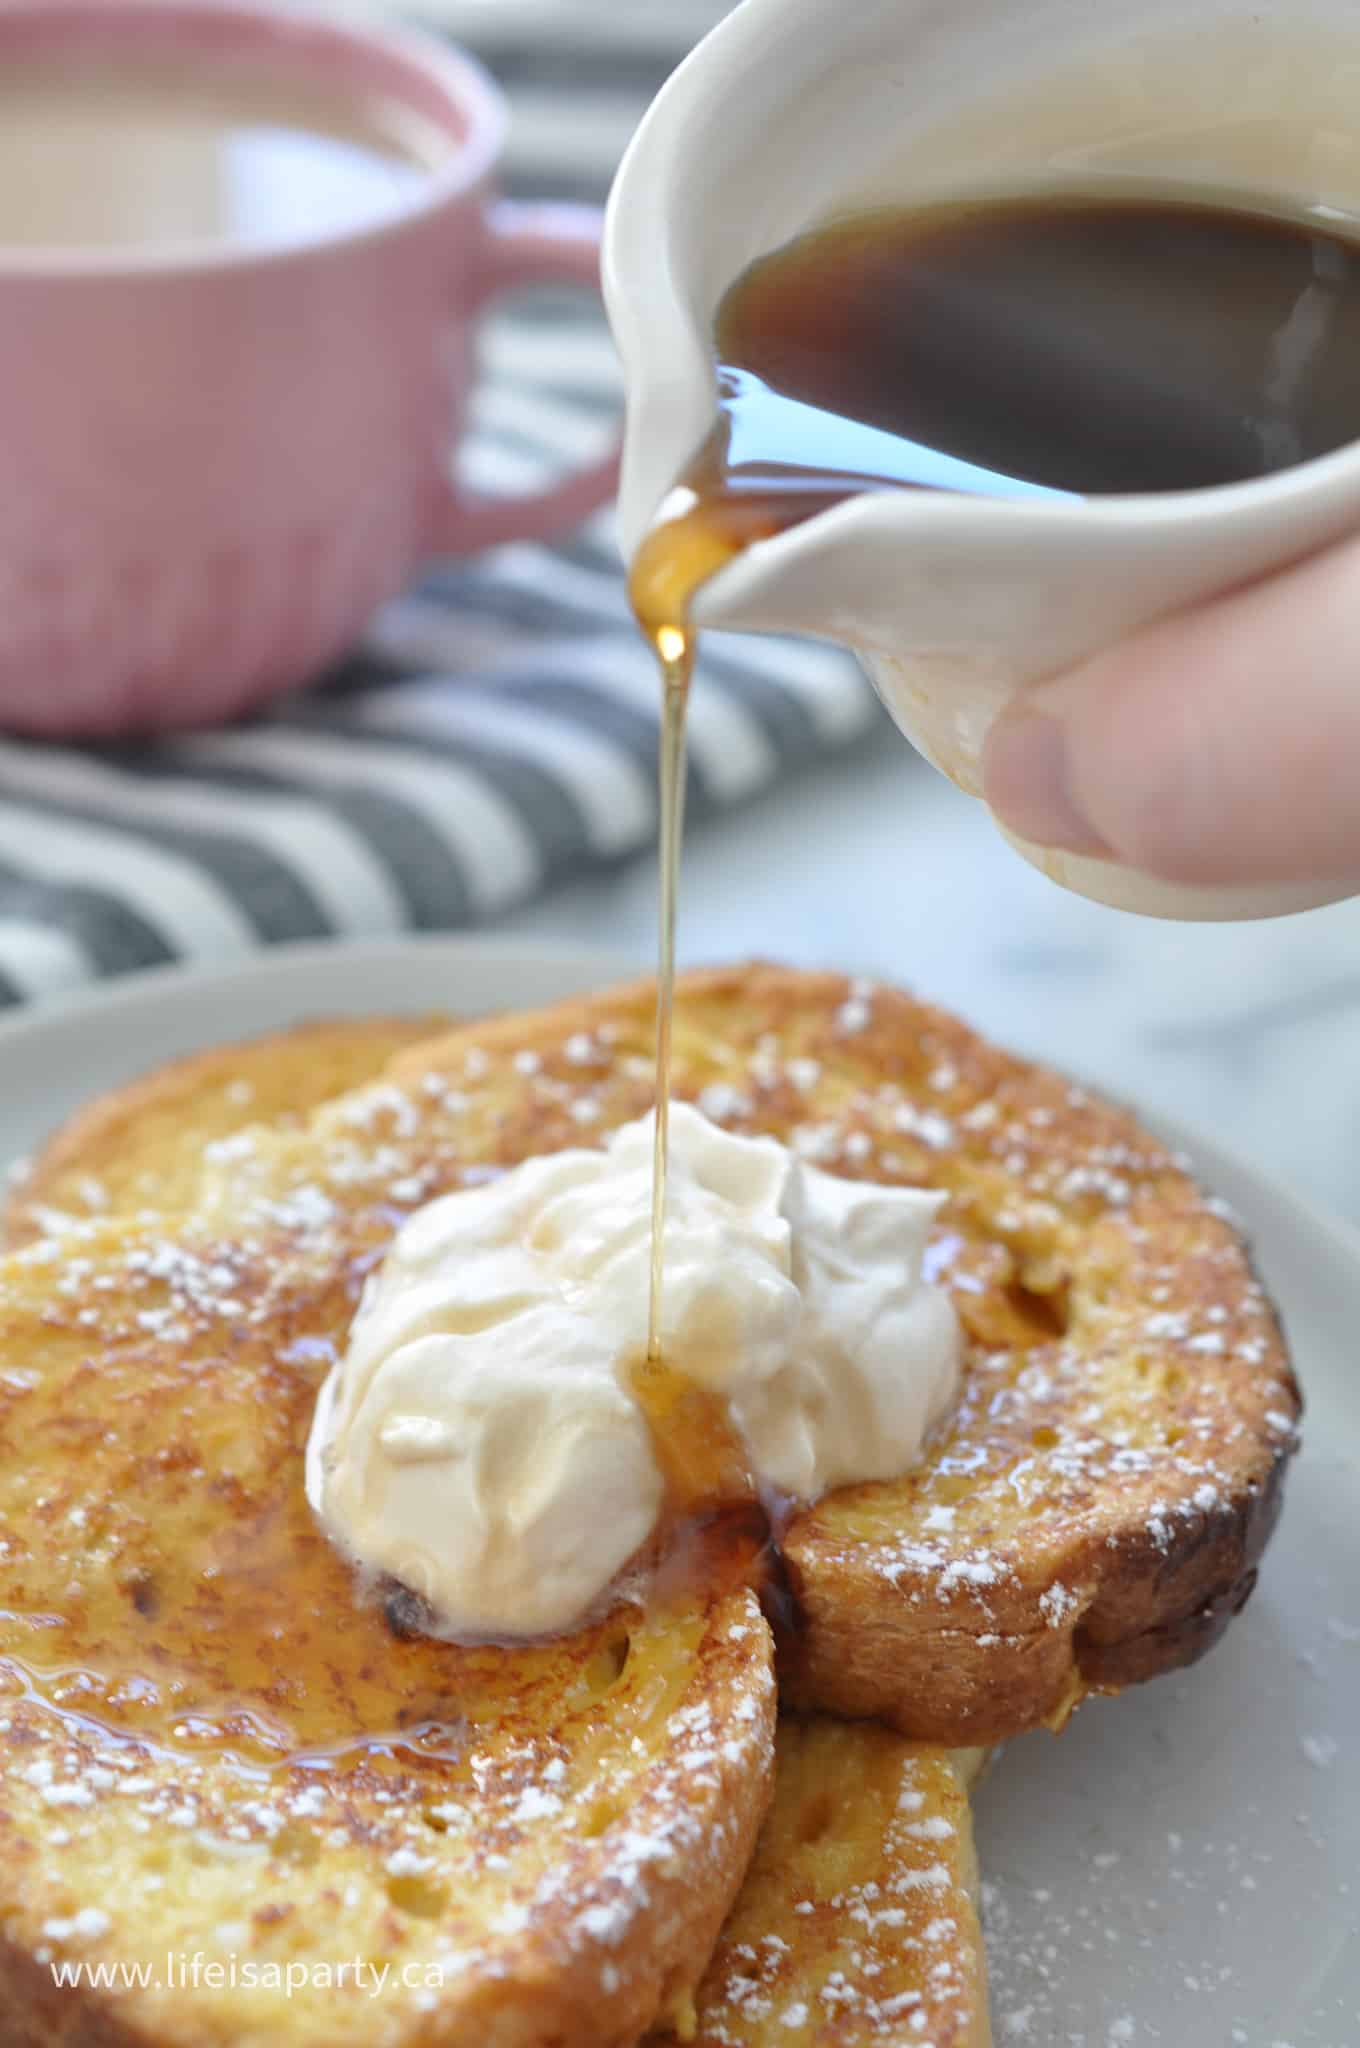
  • Use a dedicated mat just for felt so that it doesn't ruin multiple mats.
  • Try lining your mat with a piece of transfer tape, sticky side up and applying the felt to it. When you're finished, or when the transfer tape is no longer sticky, you can peel it off and have a clean mat underneath. Transfer tape is less expensive than new mats, so you might find this method worthwhile.  Some people use it for for more than just felt as well.
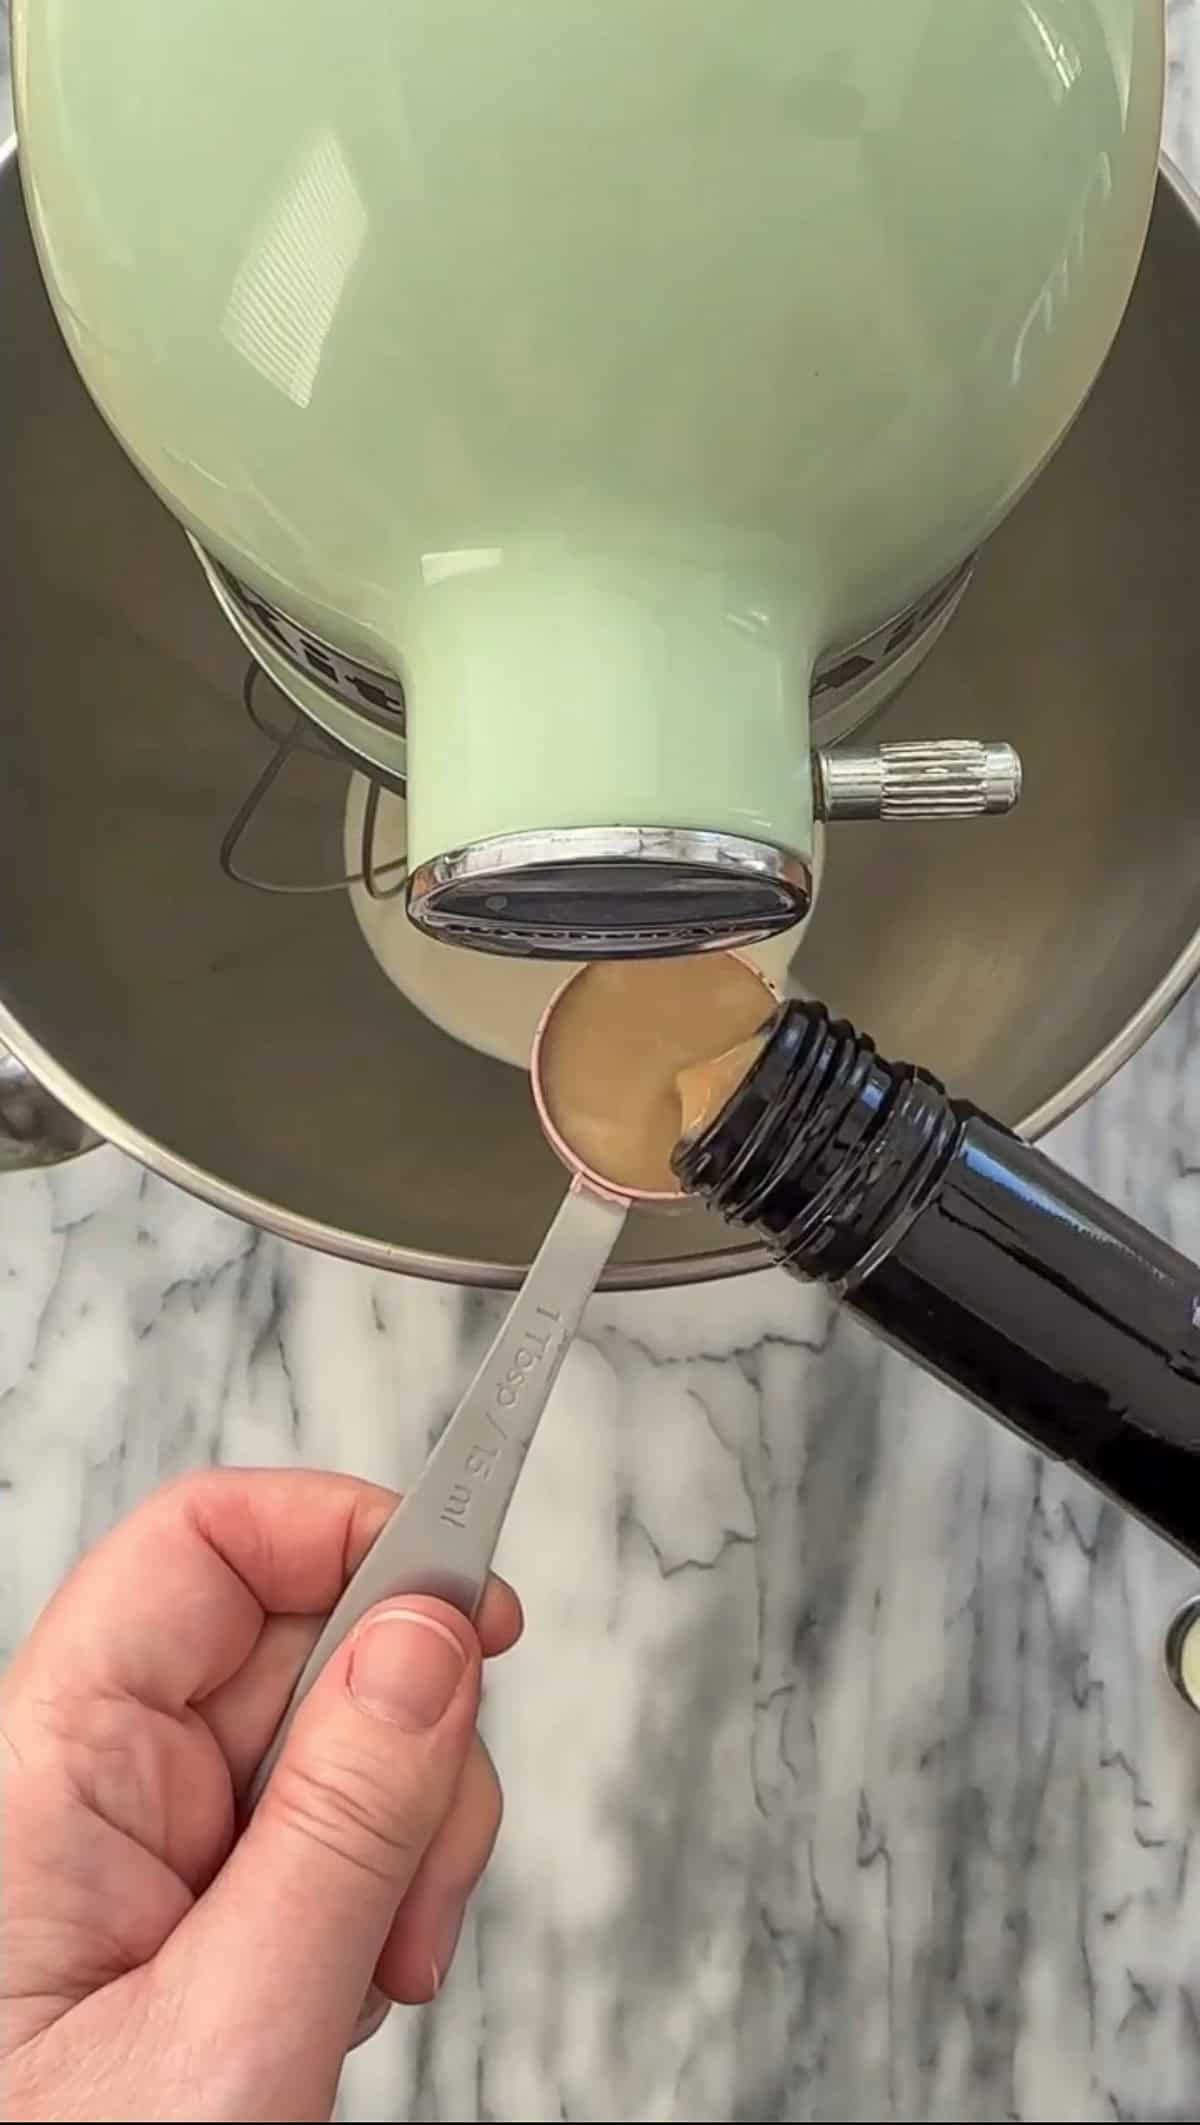
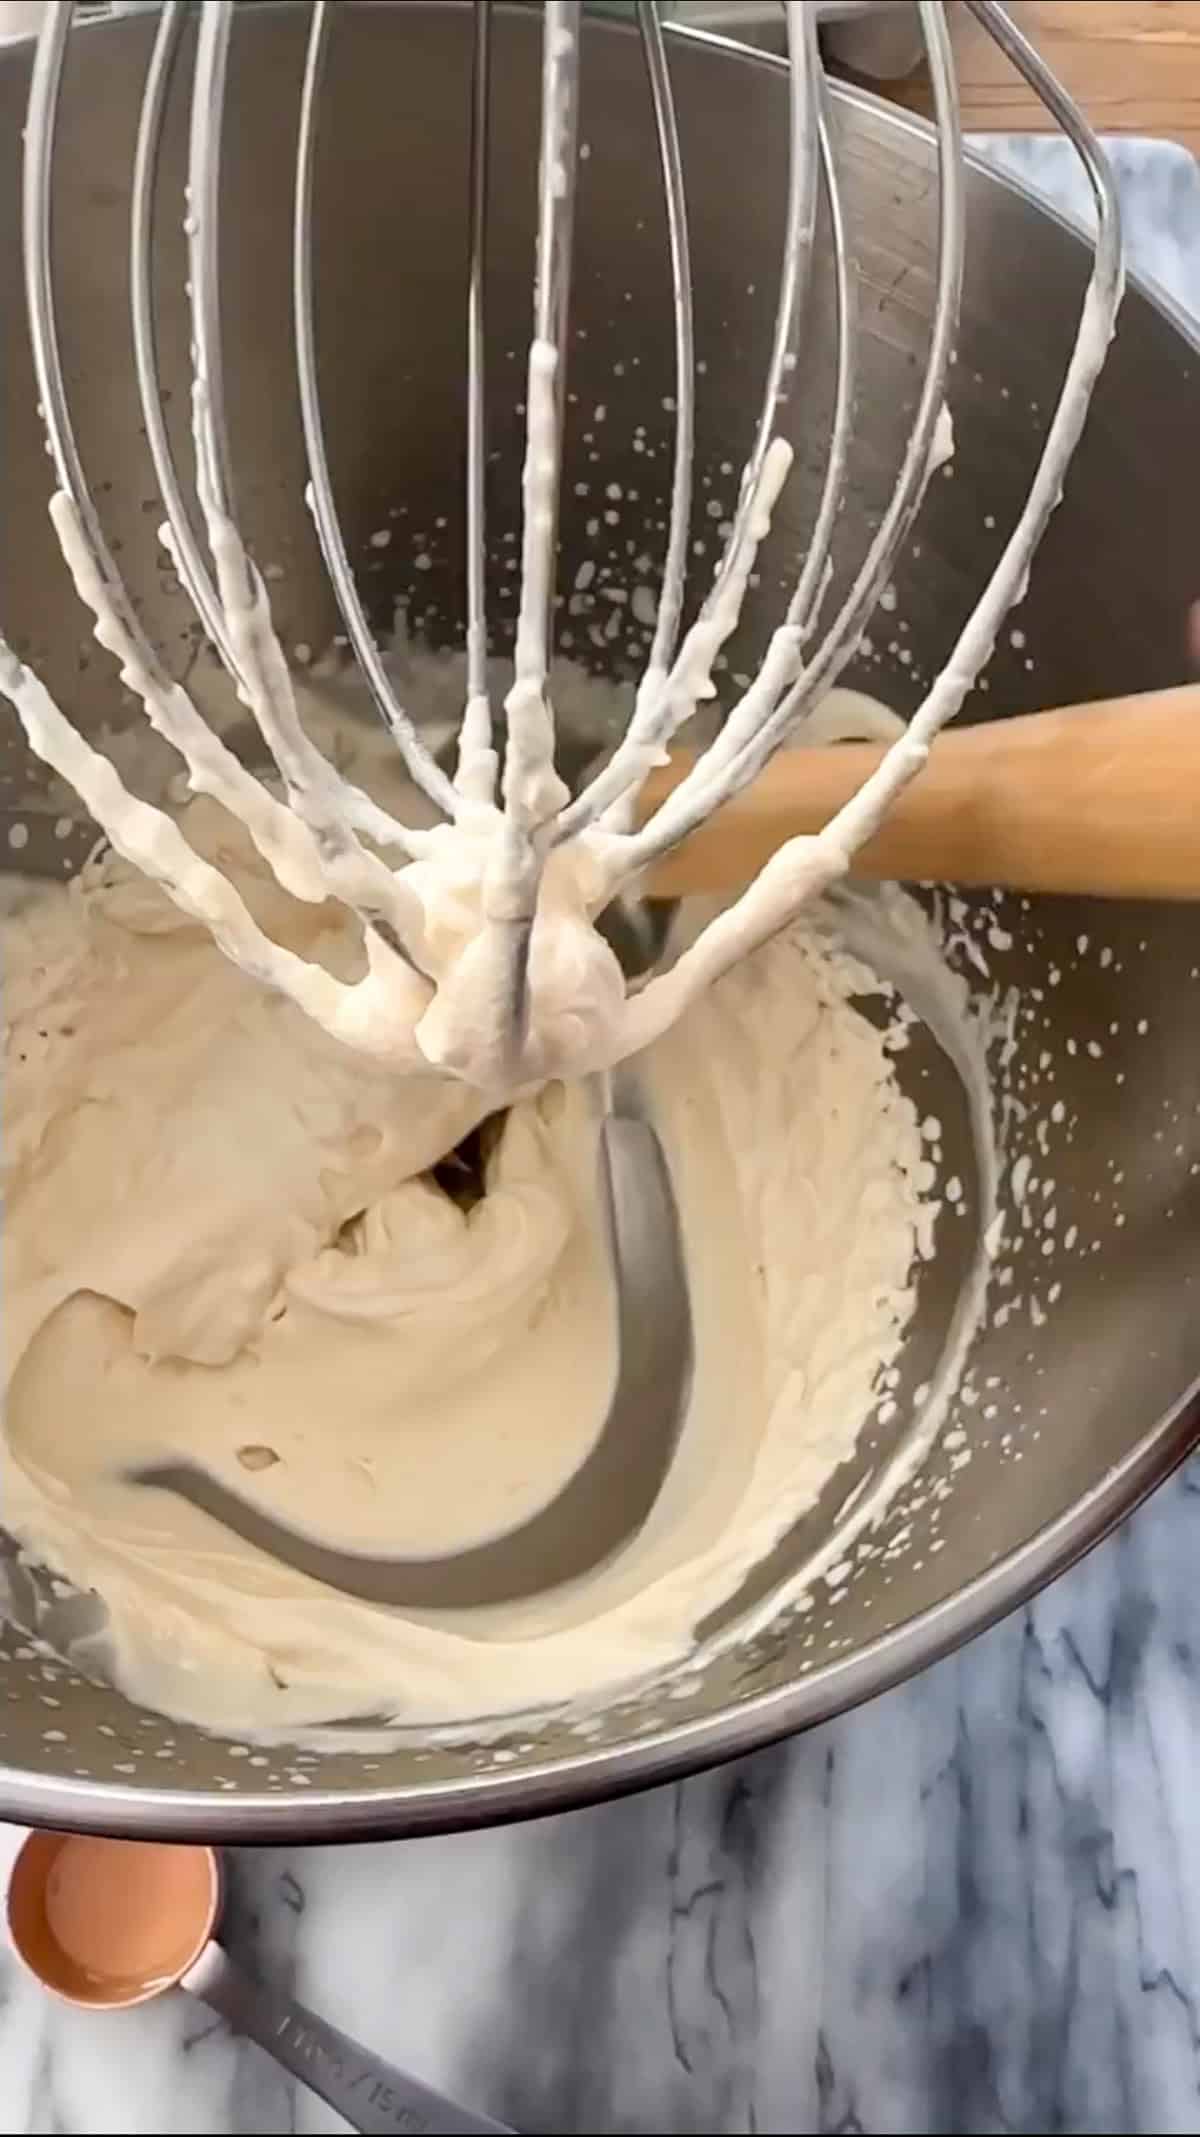
Even with these tips your cutting mats will not last forever, but these ideas can help extend their life.  

With clean cutting mats that are ready to use with your Cricut, life really is a party!

More Cricut Tips

You might also like The Best Cricut Accessories You REALLY Need post here.

How To Unweld In Cricut Design Space

Apr 8, 2022 · Leave a Comment

How to unweld in Cricut Design Space.

How To Unweld In Cricut Design Space: when to weld, how to use it and how to unweld in Cricut Design Space.

How to unweld in Cricut Design Space.
[feast_advanced_jump_to]

One of the questions we've heard a lot from Cricut Design Space users is how to unweld in Cricut?  Let's start by going over how to weld, and then answer that question.

What Is Weld and When Do You Use It?

When you're creating a design for your Cricut machine in Cricut Design Space you can take two different objects and weld them together to form one new object.

Combining Letters

The weld feature is useful when you're working with cursive letters. When combining script font so that a word cuts out as one without cut lines between the individual letters. The items must be touching to weld them together, so you may have to first adjust the letter spacing for the individual letters of a word to get them into the correct position. Once the letters are welded together using the cricut weld tool, you won't be able to edit the text. If you click on the word a text box won't open. Once welded the single word is treated like an image rather than text that can be edited.

Combining Shapes

Weld is also a great way to combine shapes to make new image. Again welding different shapes together removes the overlapping cut lines and creates new shapes. For example without weld these circles would cut out as three different circles, but when they are welded together it forms Micky ears and cuts it out as one shape and one individual layer.

unweld in Cricut design space

How Is Weld Different From Attach?

Welding items together is the best way to make one single image out of two or more separate images, or to combine multiple basic shapes into one single shape for new designs. Weld takes different layers and combines them into one.

A lot of people wonder what the difference is between the attach tool and weld. The attach function is like holding things in place with a paperclip. They remain distinctly separate, and removable. They are attached on a canvas so that their placement won't change on the cutting mat .

Think of the weld function like permanent glue. Be sure you want it to stay like that before using weld. It's a great tool to combine two or more separate shapes into one single customized image.

How To Weld?

To weld two or more objects together, make sure each single layer is selected, and then click on weld at the bottom of the layers panel in Cricut Design Space. If the individual objects were a different color before welding, they will will now appear as one color.

You can tell these are welded together now because they are referred to as "Weld Result" on the layers panel.

How To Unweld in Cricut?

How to unweld is one of the most common questions for Cricut users, but the answer is bad news.

There is, unfortunately, no unweld button in Cricut Design Space.

The only way to unweld is to use the Undo button. To use the undo, click on the back arrow at the top left of Cricut Design Space.

Undo Keyboard Shortcuts

You can also use keyboard shortcuts Ctrl + Z on PC or Command + Z on a Mac.

Undo will get rid of your last function in Cricut Design Space. If you just used weld, then the undo button will undo your weld. If however, you used weld sometime ago, you will have to undo everything you've done since then to get back to the weld to undo it. This can be very frustrating and time consuming.

can you unweld in Cricut design space


Youtube video

More Unweld Options

There are two other ways to work around there being no unweld function, the first is to save a project before welding with a different name, that way if you're unhappy with the weld, you can open the unwelded project and work from there.

Make A Duplicate

Another option when designing in Cricut Design Space is to make a duplicate of the objects before welding so that if you're unhappy latter you can use the unwelded pieces.  Select your objects before welding and use the duplicate button at the top of the layers panel to make a copy.  Group the duplicate together and then use the hide button -which looks like an eye icon beside the item in the layers panel.  This will keep a copy of the items, cut not show up on the canvas, or cut preview screen.  If you need it, you can go back and un-hide it, and work with it.

how to unweld in cricut
Unweld Cricut Design Space

Save A Copy Of The Unwelded Items

Another option that some people like to use is to save a copy of the project before welding.  Go to the Save button at the top right side of the canvas, and then choose Save As.  Give it a name and add Step #1, when you resave the project be sure to give it another name, then you'll have the project saved at this stage if you need to go back to it.  Unfortunately, like using the undo button, you will lose all the other work you've done beyond this save.  For this reason, I think the duplicate copy using the hide feature is a better solution than this one.

unweld options Cricut Design Space
how to unweld in Cricut

Both of these suggestions require extra steps before hand, and you may not realize ahead of time that you're going to want to go back, so they aren't perfect solutions to this problem, unfortunately, but if you find yourself doing a lot of designing with weld, and then becoming frustrated when you want to make changes, these ideas might be good to try and incorporate into your regular workflow.

unweld cricut

With some unweld options to try in Cricut Design Space, life really is a party.

More Cricut Posts

You might also like The Best Cricut Accessories You  REALLY Need post here.

The Best Cricut Accessories You REALLY Need

Apr 5, 2022 · Leave a Comment

The best Cricut accessories, incluidng Cricut markers, vinyl, wedding tools and blades.

The Best Cricut Accessories You REALLY Need: with so many Cricut accessories available we'll tell you which ones you need to begin with.

The best Cricut accessories, incluidng Cricut markers, vinyl, wedding tools and blades.
[feast_advanced_jump_to]

There are so many cool products you can get to use with your Cricut. But, which accessories are the ones you really need to get started and will get the most use out of?

I've had a Cricut for over 10 years -that's a long time, and have been lucky enough to work with Cricut and been sent some really cool Cricut accessories over the years. Let me share with you the best accessories that I've found most helpful and used over and over again, and would definitely recommend for the beginner. There are some accessories that are nice to have, but can wait until later. Let's start with what the new cricut owner needs.

My Must Have Cricut Accessories

  • Basic Tool Kit
  • Brayer
  • Transfer Tape
  • Extra Standardgrip Mat
  • Replacement Blades
  • Cricut Pens
  • Storage Solutions

The Cricut Basic Tool Set

I would highly recommend the basic tools kit for anyone starting out as my number one cricut accessory. I've used all the tools at one point or another. You can buy these Cricut tools individually, but it's a better deal to purchase the whole kit.
My favourites are the weeding tool, which you will need to weed any vinyl project you make. The sharp little hook like end makes it easy to grab the vinyl you're weeding away.

The best cricut accessories

The scraper tool is great for getting any little bits off of your mat that have been left behind when removing a project from your cutting mat. There is also an XL scrapper, that is helpful, but this is one of those accessories that's nice to have but that you can get later.

I really like the Cricut scissors. I'm sure all of us already have scissors, so what makes these ones make it to my must have list for new Cricut users? They are small enough to use for intricate projects, the ends are nice and pointed for getting into tiny corners, and they are very sharp, making them a really great tool. Store these with your Cricut machine and don't let anyone use them around the house to keep them nice and sharp.

The spatula tool is really helpful for paper craft projects. To avoid tearing paper with intricate designs as you remove it from the cutting mat, use the spatula tool to lift the paper off the mat from underneath. This also helps avoid the paper curling.
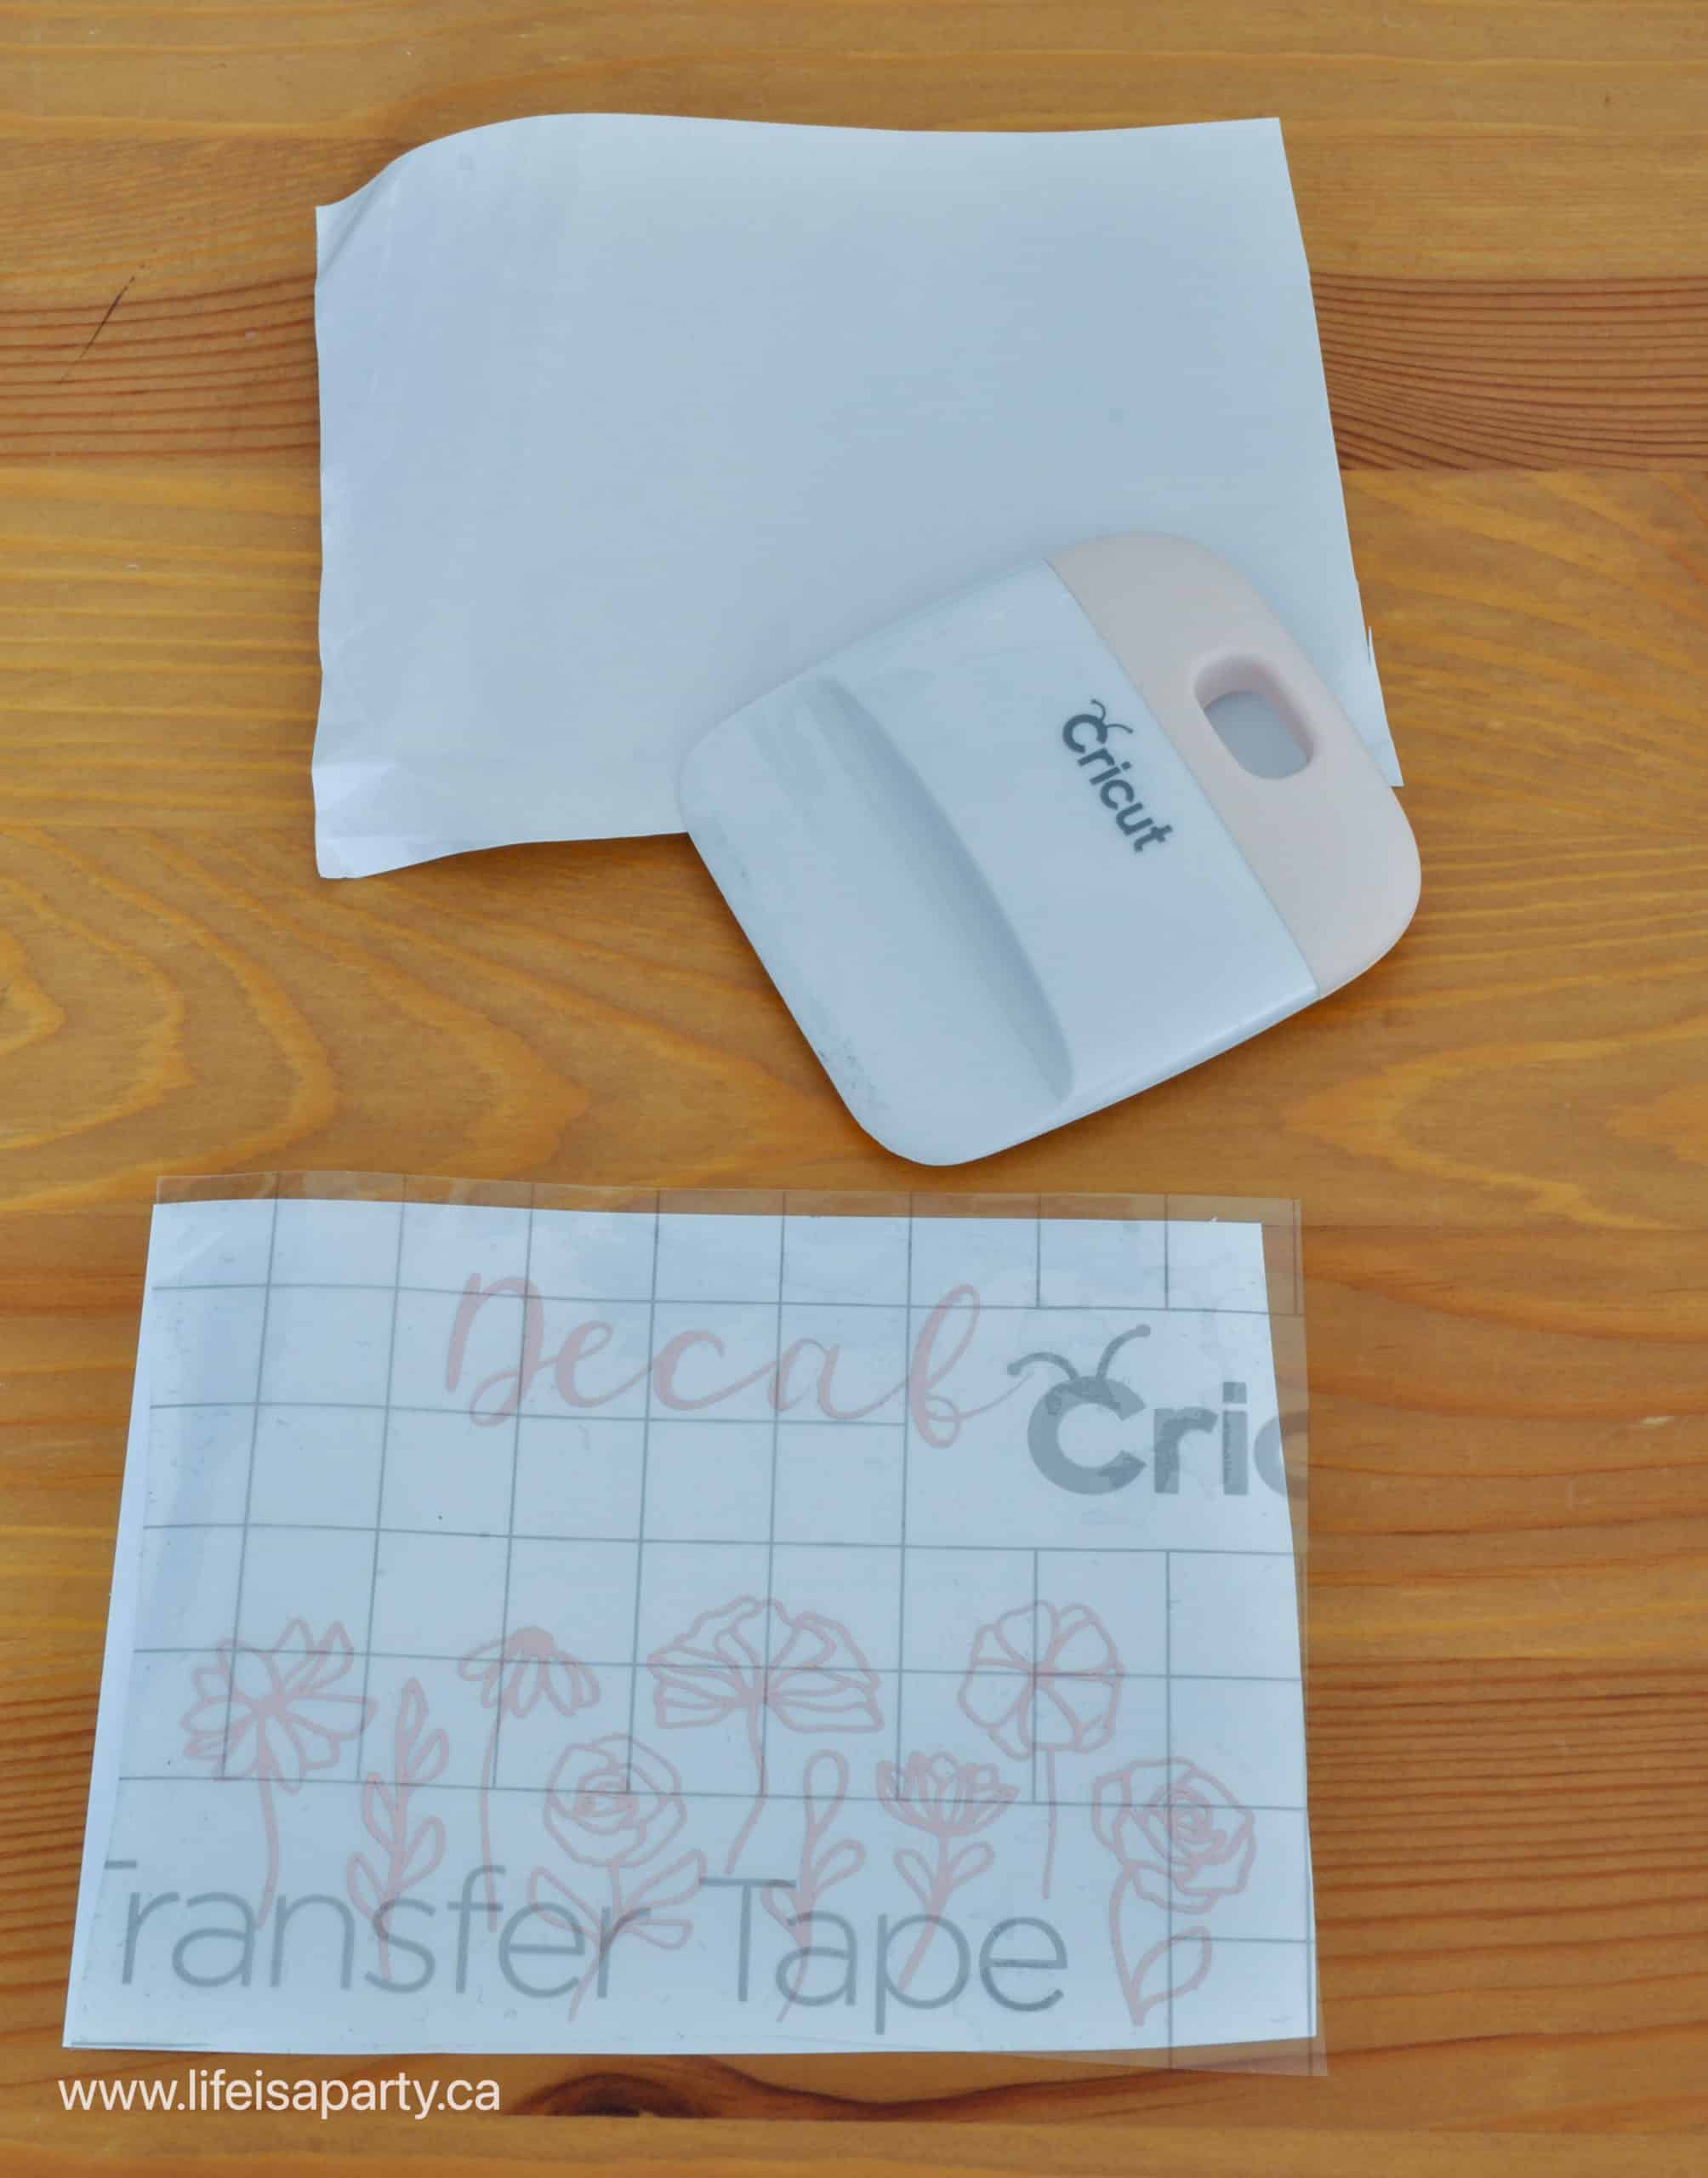
The Brayer

This tool is so helpful to run over materials you are adding to the cutting mat. Can you use your hands to pat things down? Yes of course, cut the brayer applies even pressure over the entire material, and is faster too. This is a tool you will use all the time.

The Paper Trimmer

This is a tool that I was sent and was surprised at how much I use it. I have a larger paper trimmer, but this is the one I grab all the time. It's lightweight, easy to store, and really useful. I use it to cut paper when I need a straight edge. I also love that you can replace the cutting blade really easily, so if it gets dull from using it alot, it's not ruined. Swap out the blade for a new one, and it will cut perfectly again. It also has a ruler guide that pops out for aligning larger pieces, like 12 x 12 -a lot of people don't know about this feature and it's really useful.

favourite Cricut accessories

Transfer Tape

When I first started cutting out vinyl on my Cricut Machine, I didn't think I really needed transfer tape. Big mistake. It's so much easier to apply your vinyl when using the transfer tape. It not only helps to line things up with the grid, or keep them aligned exactly the way they cut out, but it also keeps you from accidentally stretching or messing up your vinyl trying to transfer it with your fingers. I like the Cricut brand transfer tape, partly because of the grid printed on it that makes it easy to line up. One time I did buy extra strength tape, thinking it might be better, but it was too sticky and I couldn't get my vinyl project off of it. I learned later that it's only for things like glitter vinyl, so avoid the mistake I made and stick with the regular transfer tape.
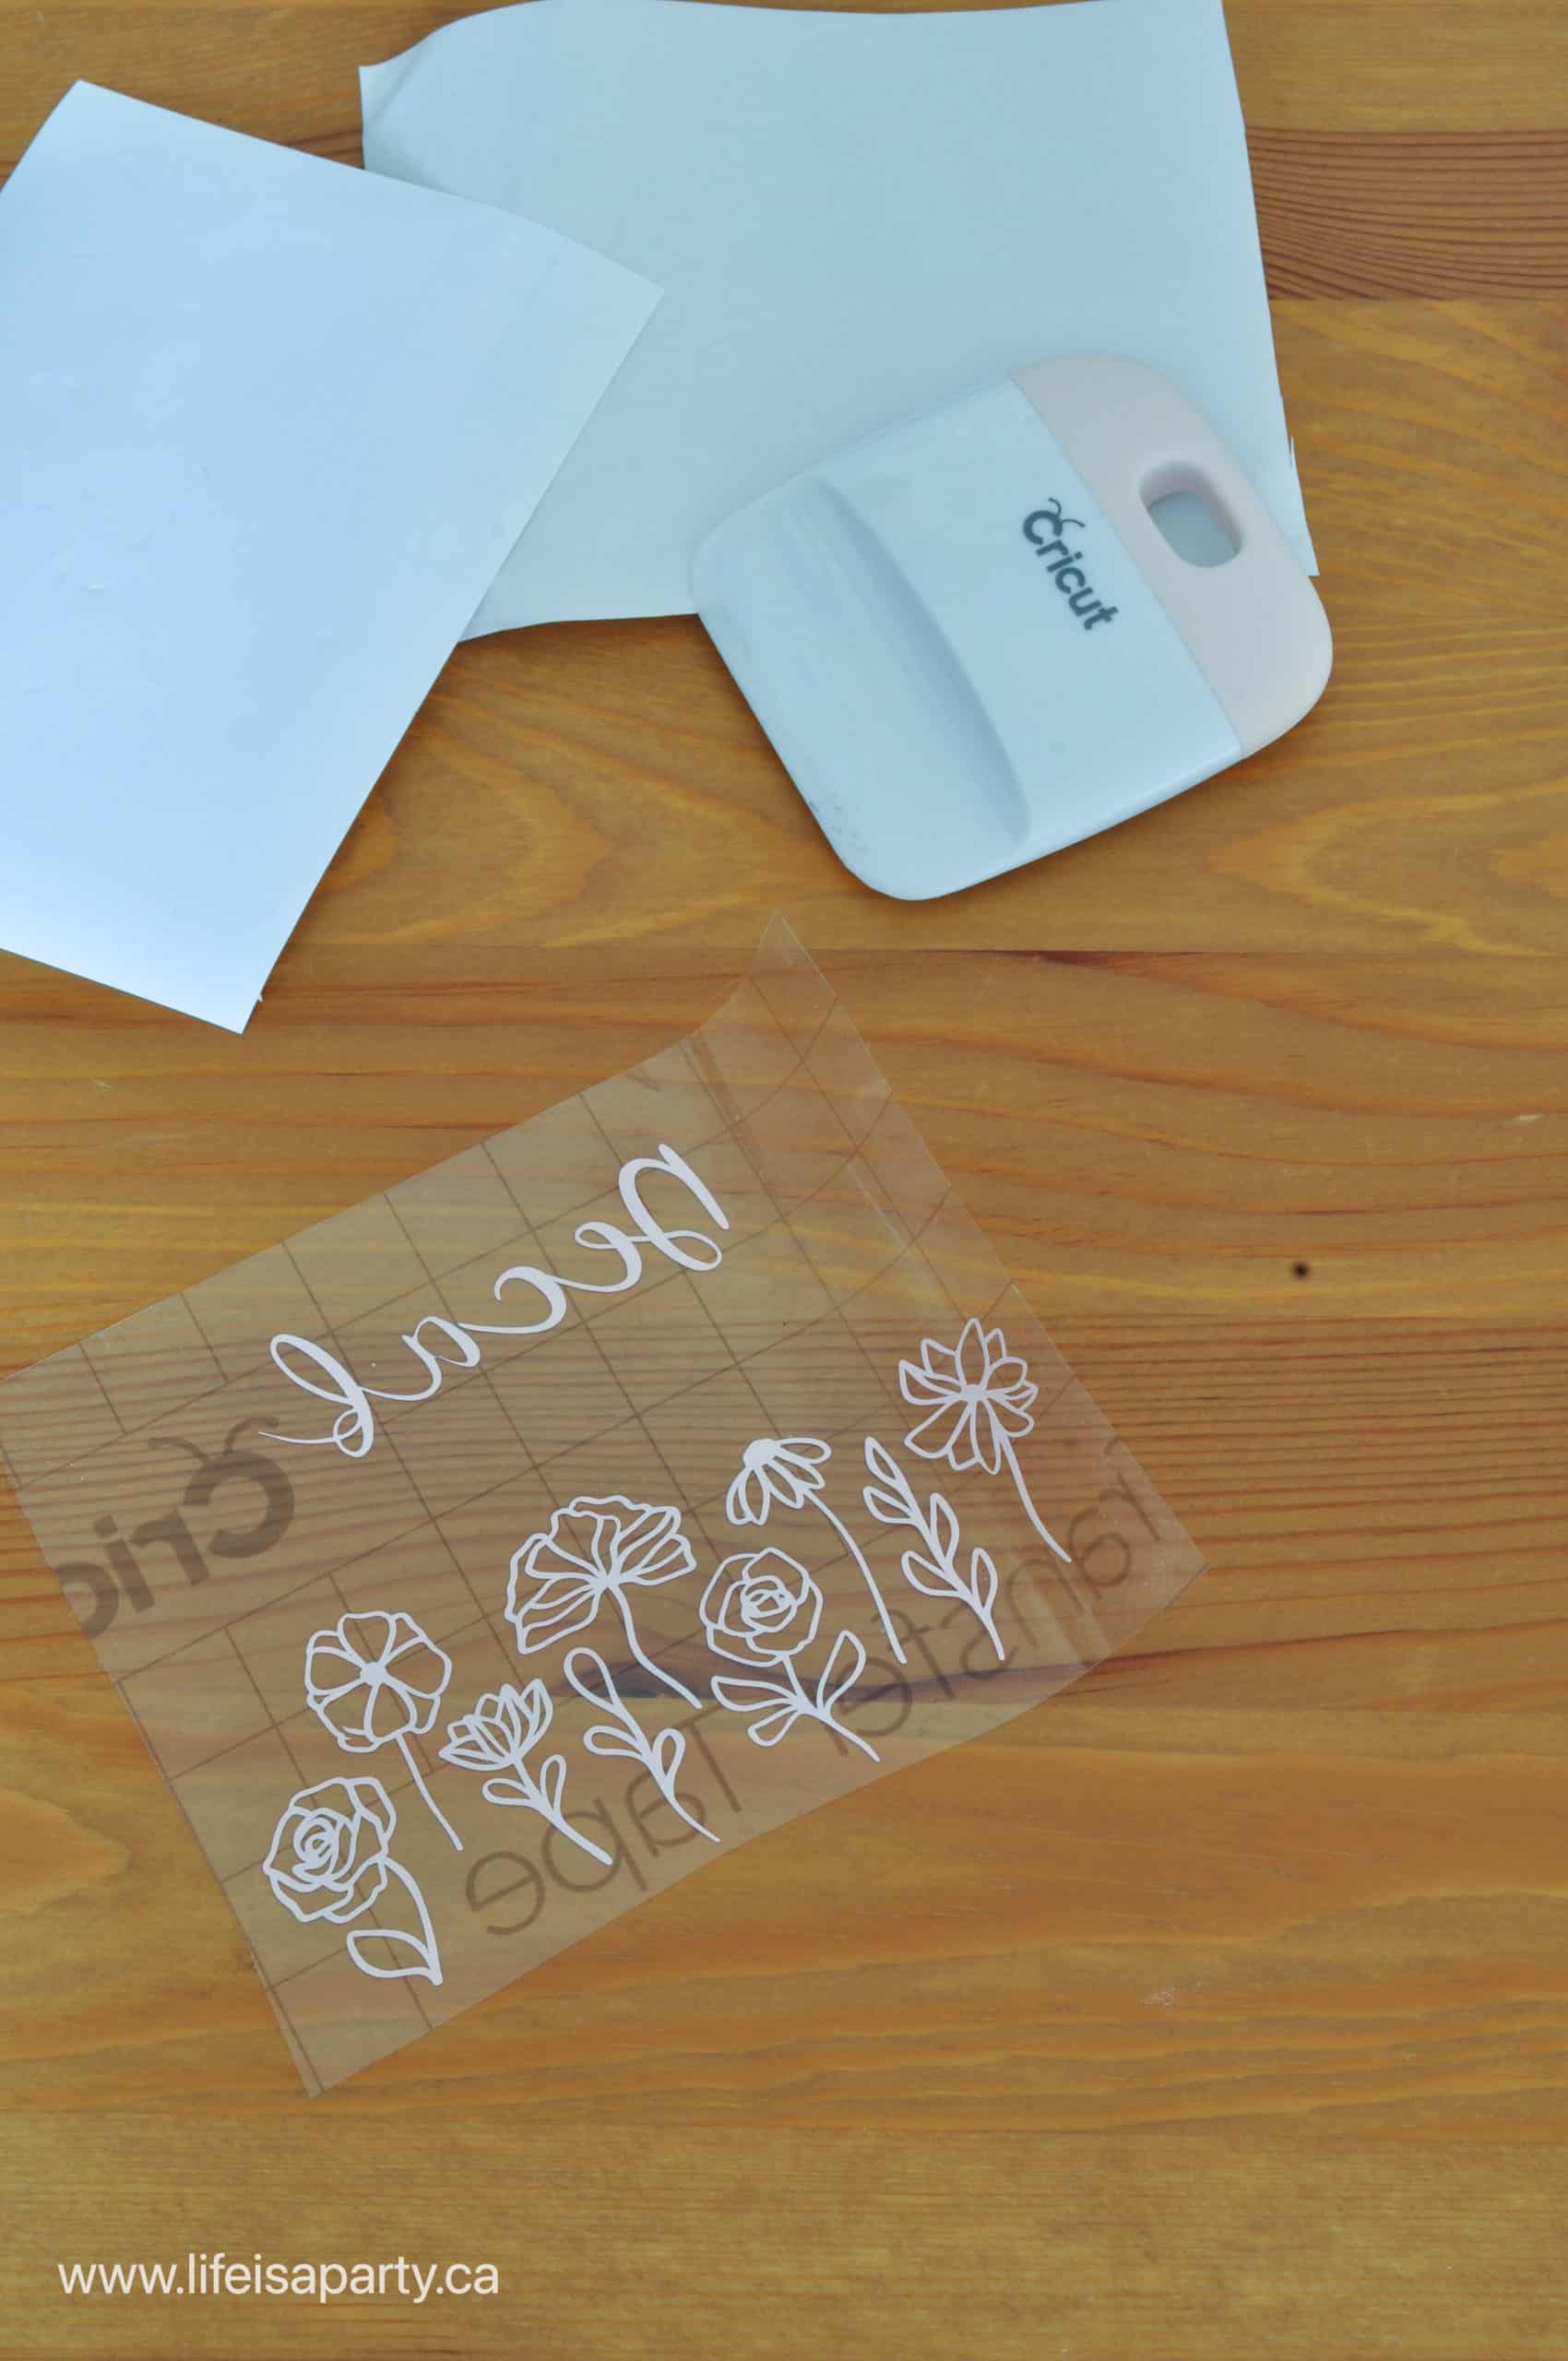
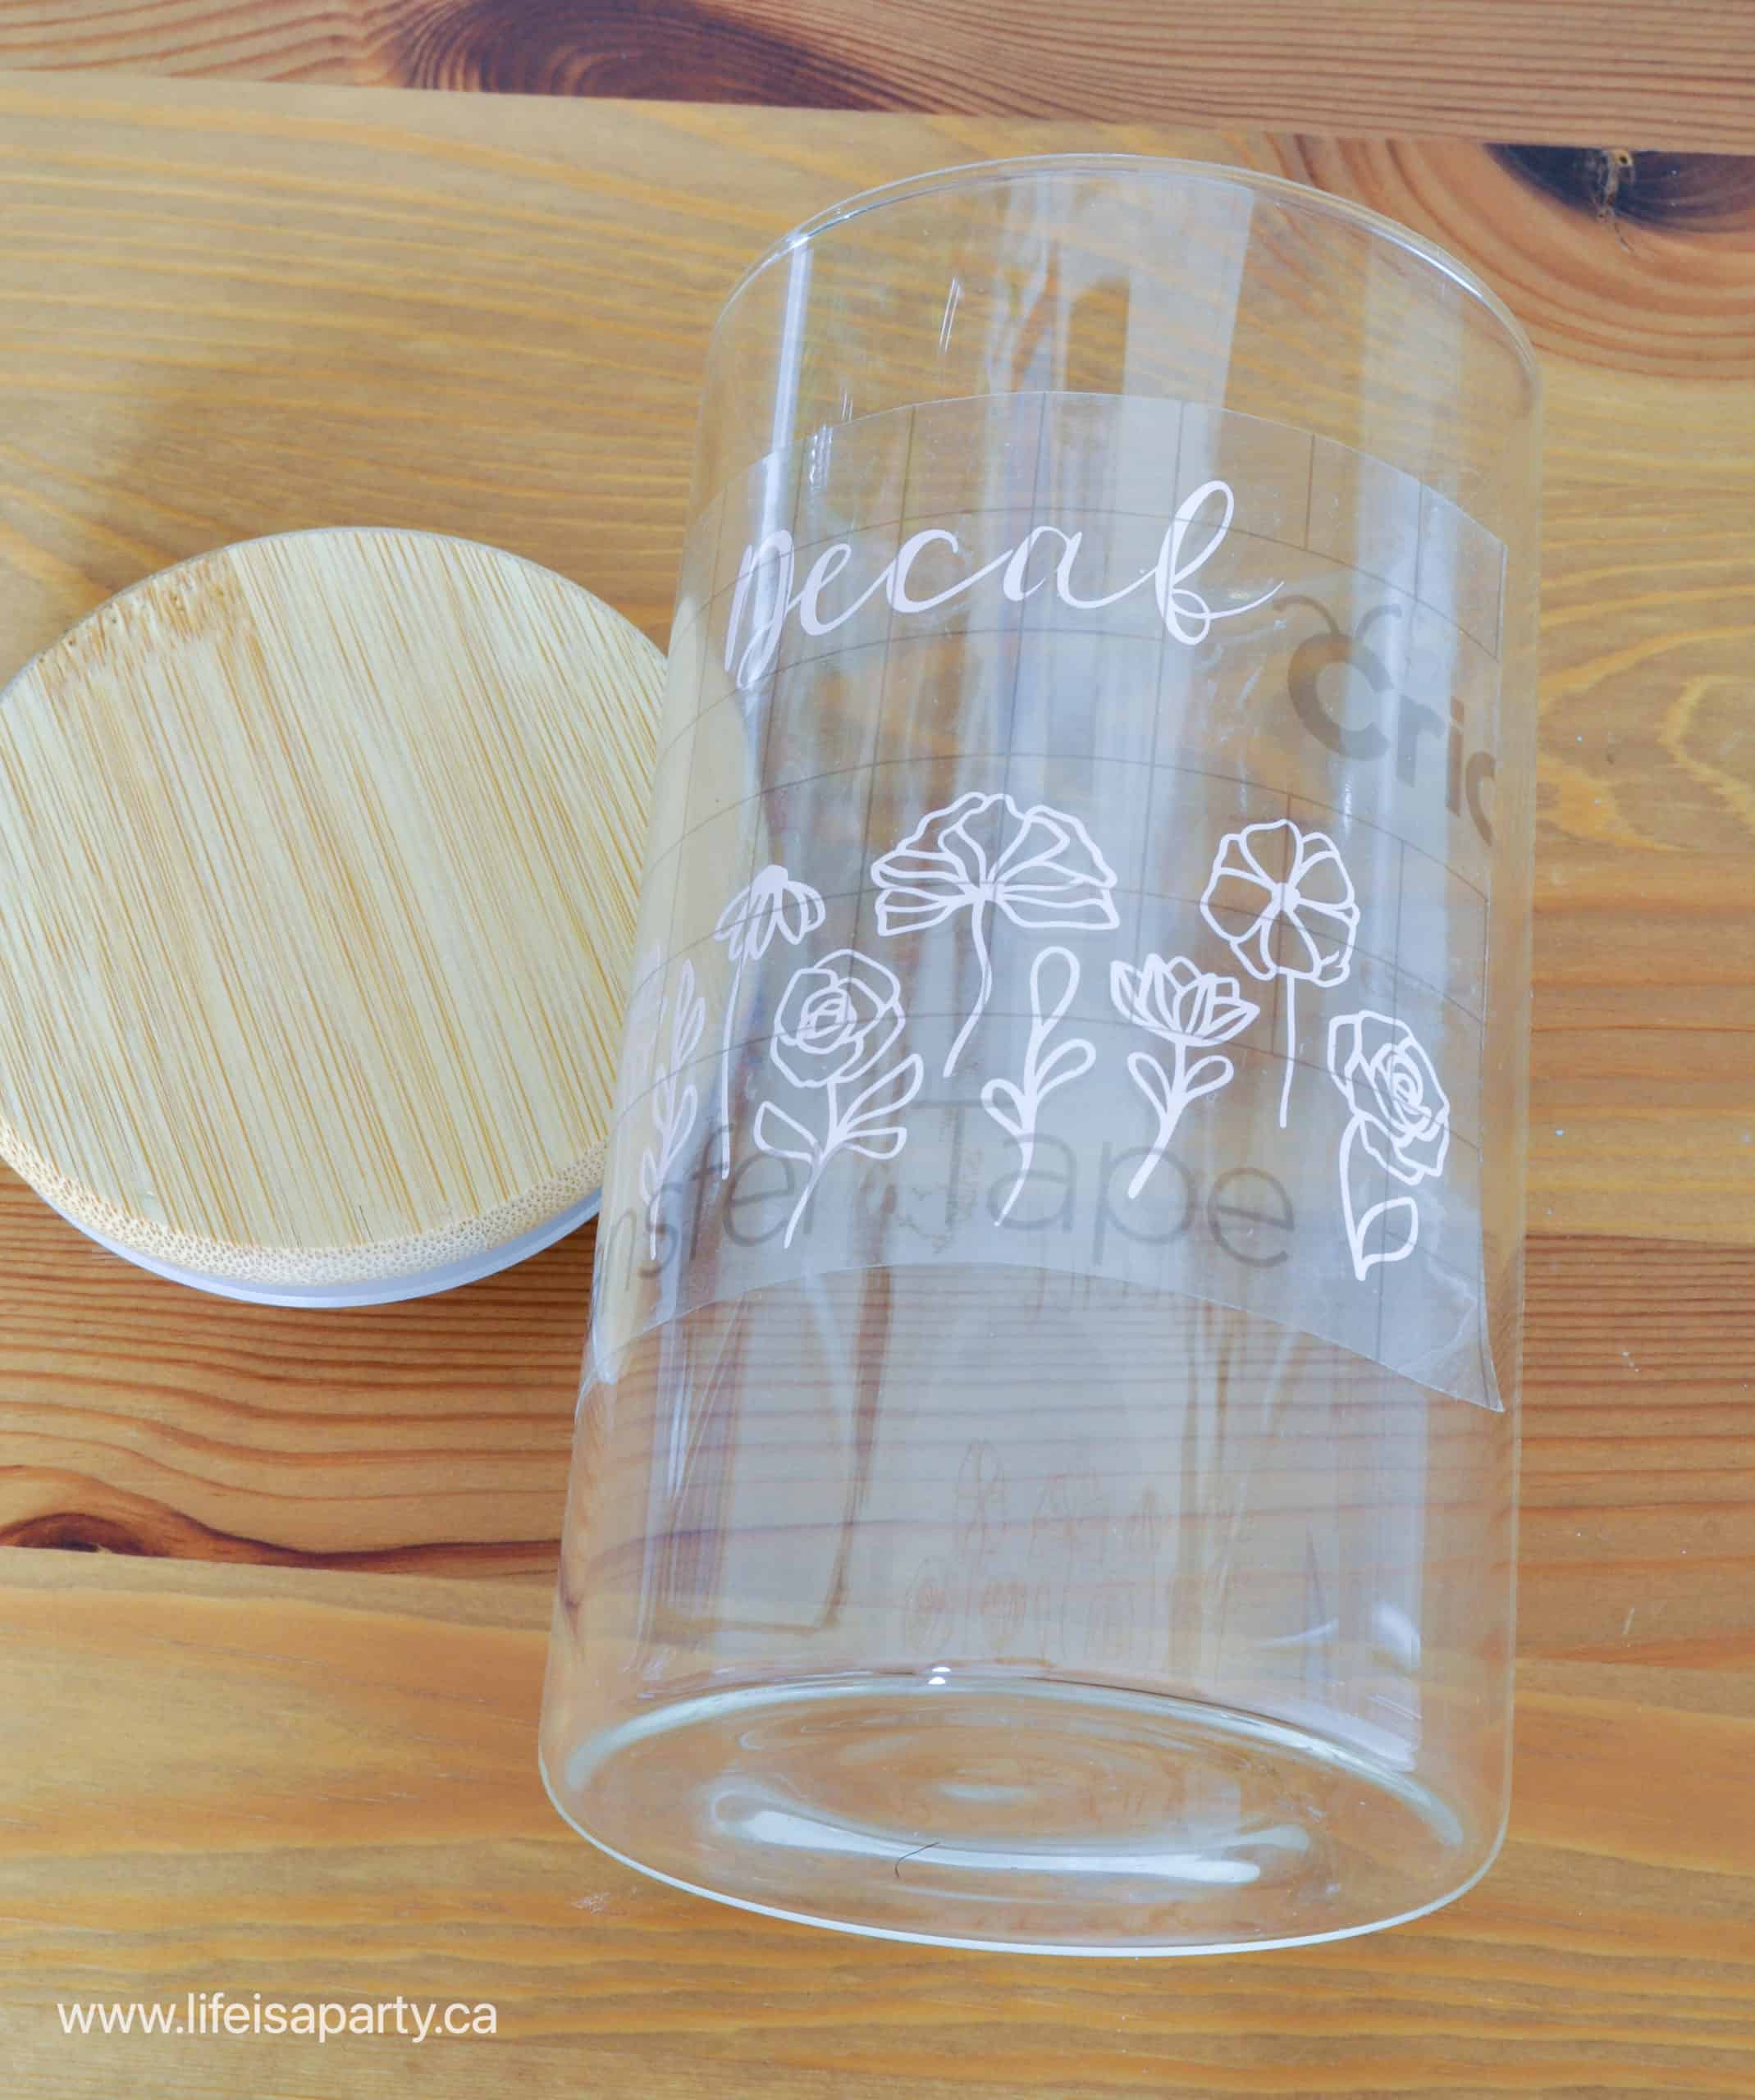
Cricut Accessory Favorites

Extra Standardgrip Mat

You don't have to have an extra mat, but it's one of those things that can make life a little bit easier for you. All Cricut mats do run out of stick and need replacing eventually, so you'll have to buy a new mat at some point.

But there is another reason to get at least one of the green mats that you'll use most often right away. Very often when you're cutting out a project on your Cricut machine, the project will require multiple mats to cut it all out. You can run one mat through the machine, remove the material, and reload it for the next cut. But, it's much faster if you have two mats and you can be cutting out the next one, while your removing the material from the mat of your first cut. This system will just speed things up for you, and since you ultimately need to buy more mats at some point, it just makes sense to get at least one more green one right from the start.

If you are cutting larger projects, you might also want to invest in the larger size cutting mat. The 12x24 mat is really useful for big projects, but not something you likely need right away as a beginner -so consider it in the nice to have category.

Extra Replacement Blades

Another item you will need eventually is a replacement fine point blade. This is the most commonly used blade, and over time they wear out and need replacing. You can replace just the blade, not the entire housing. You won't need a replacement blade right away, you'll have many, many great cuts before you need to put a new one in. But, it will need replacing eventually, and it can be very frustrating when you realize it's time to replace the blade and you're in the middle of a project, but don't have one on hand. So I think it's better to buy one and have it ready.

the Cricut accessories you really need

You can store it on the magnetic strip inside your tray in the Cricut Maker and Explorer machines -in fact this is what that strip is designed for, and that way you won't lose this small part or not be able to find it when you do need it.

Cricut Pens

The Cricut machines are designed to work perfectly with their pens. Make sure you purchase the ones that are compatible with your machine -there are specific pens for joy or explorer and maker machines. They come in lots of different and beautiful colours, and if you work with paper at all, I think they're worth getting.

best Cricut accessories

Storage Solutions

It's a good idea to think about storage solutions right from the beginning. If you are fortunate enough to have a craft room, you might want to consider how you will store your Cricut machine, accessories, and materials. If things are packed away and hard to get to, then you will be far less likely to use them regularly. So consider where you will put things and in what kind of storage.

Different bins or shelves can be helpful for organizing paper and vinyl supplies that you don't want to wrinkle or crease while storing. Lots of people enjoying housing their Cricut supplies on a rolling cart for easy access. This is a great way to keep all your supplies together, and makes it easy to roll everything to your work area for a project and roll it back when your finished.

Difficulty in storing extra supplies is just one of the arguments for not over buying, especially in the beginning when you're not sure of what materials you will end up using the most. I recommend buying materials for individual projects. Many Cricut crafters are tempted buy bundle packages that save money, but if you never use the supplies or don't love the colours and end up having to store them and have money tied up in them are they really such a great bargain? These are all things to consider.
Cricut Accessories That Are Nice To Have For Specific Materials

A lot of what you need depends on the different materials you will be cutting for different cricut projects. These specific accessories are nice to have, but not essentials for the beginner. As you work with your Cricut and become more confident, these supplies make sense for working with special materials.
For Paper Projects:

If you plan to use your Cricut for a lot of paper projects, you will find the scoring tool very helpful. You can also use the scoring stylus, but it doesn't score as deeply and most paper crafters prefer the scoring wheel. There are two different scoring wheels available, the single scoring wheel and the double scoring wheel. The single is recommended for thinner and lighter materials like paper, and the double is recommended for cutting heavier materials like card stock.

A variety pack of card stock in different colours that you use often is also really helpful to have on hand, if you find you do a lot of paper crafts. Look for sales at craft stores for these. Many cricut crafters also have a strong preference for a solid core cardstock, rather than the white core cardstock. If a cardstock is solid cord, it means that the core runs all the way through the cardstock down to the core, whereas white core cardstock has the colour on the top and bottom layer, but is white in the middle core. Many people don't like the white showing on the edges of their cut projects.

Cardstock also comes in many weights, from 65lbs, to 110 lbs. Many people have a preference for working with a weight of 80lbs. You can experiment and figure out what you like best, but it's good to keep these things in mind and not stock up before you figure out if you prefer a certain weight and solid core vs. white core.

For Fabric Projects:

If you have a Cricut Maker series machine you can cut fabric using the rotary blade. You will also need the pink fabric mat. Another great accessory for someone who sews is the washable ink fabric pen, which allows you to add patterns or stitch lines to fabric as well. These are probably all on the must have, buy right away list for anyone who uses their cricut for sewing projects, but more on the nice to have list for anyone who will only use their cricut for sewing occasionally. I wouldn't recommend the bonded fabric blade right way, because it's specially for fabric with a bonded adhesive backing, and the rotary blade is for regular fabric.

best Cricut accessories for fabric

For Vinyl Projects

If you plan to use your Cricut many for vinyl projects then the main thing you'll need is vinyl. There are lots of different brands of adhesive vinyl available. Different users have different brand preferences. I tend to use Cricut brand, but lots of other makers have lots of good to say about other brands too. My advice would be to buy small quantities and experiment a little in the beginning until you find what you like working with best. You will definitely need the weeding tool, and transfer tape for vinyl work, which I've already mentioned.

best Cricut accessories

For work with Heat Transfer Vinyl (HTV) the Cricut easypress is definitely nice to have. You can use a household iron with HTV, but the Easy Press is easier -thus the name. I don't think it's something the beginner needs, but is definitely nice to have if you plan on using HTV or infusible ink often. It's also available in different sizes, depending on the projects you plan to make with it.

Cricut Joy Projects

If you have a Cricut Joy, I would get all the things I mentioned on list at the beginning, the toolkit, extra mat, pens, just be sure things like the mats and pens are specifically for the Joy. I think the card mat and card inserts that work with it are fun for making cards too, probably in the nice to have category, along with the Cricut Joy carry bag. Because this little machine is so light and portable compared to the larger machines, the carry case is definitely handy to transport it safely. There are some other joy specific products, like labels that are great if that's something you want to make, but not necessary.

best Cricut Joy accessories

Wood, Engraving, Leather, Foil

There are lots of fun accessories for the Cricut machine that allow you to cut and use these more unusual materials. The foil tool is a fun accessory if you want to add foil to project -something like a special paper card. Is this a must have? Certainly not. Is this a nice to have? If you will use it, it is very cool.
There are several things that only the Maker machines can do, and if you bought one, chances are you wanted to experiment with some of these materials. I feel the same way about most of these as I do about the foil tool. Very nice to have, but not necessary for the beginner. The engraving tool can create some really cool projects, nice to have if that's something you'd like to do with your Cricut.

Cricut accessories

The Cricut can cut leather, faux leather and wood. Some people even use the engraving tool to tool leather. There are really some amazing things you can create but you will need things like a stronggrip mat, and a deep-cut blade or knife blade, as well as the actual wood, leather, or faux leather. Definitely buy these supplies with a specific project in mind. These materials are actually harder to cut, and may involve a bit of experiment so they are not on my must buys for a beginner, in fact, even someone very experienced might never try these materials. So please don't feel the need to buy all these specialty materials at the beginning.

Blanks

You may hear people talk about blanks in the Cricut community and wonder what they are talking about? A blank is a general term for a blank item that you can add something you've made on your Cricut to. Things like plain tote bags, t-shirts, cups, signs backgrounds, and mugs are all nice to have, but especially at the beginning I would buy these as needed for specific projects so that you have the size you need and aren't storing blanks that take up a lot of room.

the best Cricut accessories

With all the best Cricut accessories that you will really use, life really is a party!

Free DIY Cricut Easter Bunny Banner

Apr 1, 2022 · Leave a Comment

easter bunny banner Cricut free cut file

Cricut Easter Banner: Free SVG cut files or printable pdf to create a bunny Easter banner perfect for Easter and spring celebrations.

easter bunny banner Cricut free cut file
[feast_advanced_jump_to]
Free Cricut SVG Bunny Banner

Free Bunny Banner Cut Files and PDF

I have a free cut file for you to use with your Cricut machine, or print the free PDF and cut it out by hand.

Cricut Easter Banner

I love Easter crafts that are simple, and this one is really quick and easy to put together. To access the free cut files that you can use with a cutting machine to make this, or for the PDF version just subscribe to Life is a Party. You'll be given immediate access to our Free Resource Library where you can download the free file to make this. The PDF version can be printed and cut out by hand, as part of our free printables collection.

Bunny Treat Box

I used this adorable bunny banner as part of a children's Easter table. Pair it with our Bunny Treat Box full of easter eggs. The free cut and Easter SVG files and PDF for the bunny treat box are included with the bunny banner files. You can access the full tutorial with instructions on how to make it here. These bunny svg files are such a fun Easter projects to do with kids, or as a family.

Free SVG Cricut Bunny Treat Box

Cricut Easter Banner Materials

  • free cut files
  • white cardstock
  • Cricut marker
  • pink, blue, or a other colour of cardstock for the glasses
  • glue stick
  • yarn, twine. or ribbon
  • hole punch or tape

You can cut this out on your Cricut Maker, or any of the Cricut Explore machines including the Cricut Explore Air. It is not compatible with the Cricut Joy, because it's too big to cut out with this machine.

how to make an Easter banner with your Cricut

How to Make The Bunny Banner

Youtube video

To make the cute banner with the free PDF, download it from our Free Resource Library, print it, and cut it out with scissors.

In Cricut Design Space

To make the bunny banner with your Cricut machine, download the free svg file, and upload it to Cricut Design Space on a new canvas.

Next, ungroup the project.

Select the bunny face, and change the operation from basic cut to pen.

Then, select the bunny outline and the face -but not the glasses, and use the attach button to attach them together.

Now, use the duplicate button to create as many copies of the bunny and the glasses as you would like. I did five for my banner, with two sets of the glasses.

Then cut out the bunnies and the glasses from cardstock, adding the marker when prompted in Cricut Design Space.

Assembly

To create the banner, start by adding the glasses to the bunnies. You won't want to use a hot glue gun to add a dab of glue for this project, since the glasses are so delicate. A glue stick works really well to add the glasses to the bunnies.

Use a hole punch to add holes to the top of the bunnies ears and string them together with a piece of twine, yarn or ribbon or use tape to attach the yarn to the back of each bunny image. Hang up your Easter garland and enjoy all spring long.

How To Use Your Bunny Banner

There are so many different ways to use this fun project to decorate for your Easter holiday. These Easter Cricut projects would be a great decoration for your Easter egg hunt, or on your front door. Or create some extras and use a cute bunny as name tags on your Easter buckets.

Cricut Easter Banner

The beautiful banners make lovely home decor, or great gifts. I thing my favourite way to use the simple Easter banner is over a dining table, like we did for our Easter table. Combining the banner with our bunny treat boxes has to be one of my favorite Cricut Easter ideas. Happy crafting!

Cricut Bunny Banner with Free Cut File SVG

Don't forget to subscribe below for access to the Free Resource Library.

More Easter Ideas

You might also like our DIY Sequin Easter eggs here.

Sequin Easter Eggs: Easy diy sequin Easter eggs made from styrofoam Easter eggs. Make them with any pattern and in any colours, and use year after year.

Also check out our Gold Leaf Easter eggs here.

Gold Leaf Easter Eggs: how to make easy DIY gold and pastel Easter eggs with gold leaf and craft paint.Perfect for your Easter decorating.

You might also like our DIY Cement Easter eggs here.

Cricut Bunny Treat Box Free Cut File

Mar 30, 2022 · Leave a Comment

bunny treat box Cricut free cut file

Cricut Bunny Treat Box Free Cut File: use our free SVG, DXF, and PDF files to create the bunny treat box with a cutting machine, or by hand.

bunny treat box Cricut free cut file
[feast_advanced_jump_to]

These little bunny treat boxes, are so much fun and perfect for Easter or any time for the bunny lover. Use them to hold Easter eggs, or any yummy treat. They'd make a great addition to Easter baskets, your Easter table, an egg hunt, or as a great way to give any Easter treats.

Free Bunny Treat Box Cut Files

This Easter treat box is really easy to make. They can be made from one sheet of regular copy paper -in fact I found they're best made of paper, since it's easier to manipulate the bunny ears and not bend them that way. I prefer to use regular letter size copy paper, instead of white cardstock. If you wanted to try different materials, you could try coloured copy paper -pastel colours rather than bright colours would be cute for spring. If you wanted the boxes to be bigger, you could scale the design in Cricut Design Space and cut out of a 12 x 12 scrapbook paper. These might be cut with a floral paper for Easter too.

The glasses are a fun addition to the project, and you can make them in any colour. But if they're not for you, feel free to leave them out.

Bunny Treat Box free SVG files

The face is created using the Cricut markers, so you don't have to worry about gluing on tiny bits after they're cut, which makes this project so much easier.

The free cut files are for personal use only, and the zip file contains svg format, dxf format, and pdf files. Get the free files by becoming a subscriber below and access the files in our free resource library.

Bunny Treat Box Materials:

  • free bunny treat box cut files from our resource library
  • regular white copy paper or a colour of your choice
  • 1 mm black Cricut marker
  • pink, blue, or any colour of card stock for the glasses
  • glue
  • optional: pom poms bunny tail
  • Easter treats to go inside like Easter eggs or jelly beans

Video Tutorial


Youtube video

How To Make A Bunny Treat Box

If you don't have a Cricut machine, download and print the PDF file, and use scissors to cut out the box and assemble it.

Cricut Design Space

To make the bunny treat box in Cricut and cut out with your Cricut Maker or Cricut Explore Air, open Cricut Design Space or the Cricut Design Space App and start a new project. Upload the free SVG files -Bunny Treat Box SVG file from our free resource library.

Ungroup the items.

Using the layers panel at the side, select the eyes and mouth and change the operation from cut lines to pen for the bunny face.

Select the four lines that form a square and change the cut layer operation to score, changing them from cutting lines to scoring lines.

Select the box outline, score lines, and face -but not the glasses and attach.

Make It

Now you're ready to choose Make It and cut out the bunny treat box.

Select 81/2 x 11 as your mat size, and cut out the bunny treat box with regular white copy paper -choosing the right weight when you select materials. Follow the instructions on the screen to insert a black marker, and also a scoring tool -either the scoring wheel or the scoring stylus will work for this project.

Choose a colour of cardstock and cut out the glasses with your cutting machine.

You may choose to colour in the eyes with the marker to make them solid, after the bunny treat box is cut out, but before you fold it to make it easier. Also glue on the glasses. If you are adding a bunny tail, you can glue it on also. A glue stick will work great for the glasses, but depending on how big of a pom pom you add for a tail, you might want to use your hot glue gun, just for this element if you choose to add it.

Free bunny treat box cut file and printable

Assembly

To assemble the Bunny Treat Box, use the score lines to fold in the sides of the box. Gently guide the ears through the slits in the side of the box, doing one side at a time, and adding your treats into the box.

These bunny treat boxes are such a fun way to give a little Easter treat, or any time of year. They even make adorable Easter decorations. And they are a very fun Cricut Easter craft to make with kids or friends for gift giving or as part of a spring celebration. These cute boxes will add a little joy to your Easter holiday. With the help of a Cricut machine, or by cutting out the simple design by hand with the PDF, I hope you'll love these craft projects.

free bunny box

We added one adorable bunny candy box to each place setting for an easy table, and it was such a great addition along with our matching bunny bunting. The bunny bunting is very easy to make too and such a fun idea. Use the free svg cut file to make the bunny faces and then string them onto some yarn or ribbon and hang for an adorable Easter decoration that matches the paper box at each place setting. Our step by step tutorial to make the bunny bunting is coming soon.

Bunny treat box with glasses

With a cute and easy project like this, life really is a party!

Subscribe For Free Cut Files

Subscribe below for the free files from our Free Resource Library.

More Easter Ideas

You might also like our Free Printable Easter Jokes here.

Easter Jokes: bring a smile with clean, kid-friendly jokes. Free printable perfect for egg stuffers, lunch box notes, and more.

Also check out our Free Vintage Easter Printables here.

Free Vintage Easter Printables: these antique Easter postcards are available as a free download, to print and enjoy for decor, and crafting.

You might also like our Bunny Breakfast ideas here.

Easter Bunny Breakfast: bunny themed children's Easter breakfast your kids will love with bunny deocr, and bunny themed foods.

Cricut Valentine Card

Feb 11, 2022 · 1 Comment

Cricut Valentine's Day card free SVG

Free Cricut 3D Pop Up Box Card for Valentine's Day: use our free cut file to create this Valentine mailbox that folds flat for mailing.

Cricut Valentine's Day card free SVG
[feast_advanced_jump_to]

This Free Cricut Valentine Box Card is the perfect way to send a little love, for Valentine's Day, or anytime of year. Use our free cut file and cardstock to send a little love.

I'm excited to share this beautiful Valentine Box Card. If you're not familiar with box cards they are 3-D boxes, that fold flat for mailing. They're similar to a pop-up card. You can flatten them to fit in an envelope to send to someone, and then the recipient can pop them open to create a 3-D box like card to enjoy. Or make one as a cute addition to the a shelf in your craft room. I'm sharing the free Cricut design space cut file, so that anyone with a cricut machine can cut this out and enjoy it. It will work for a Cricut Joy, any Cricut Maker machine, or a Cricut Explore machine.

free circuit pop up 3d box card

I just love the idea of sending a handmade Valentine's Day card to a sweet heart, or even a best friend. There are so many Cricut valentine ideas and cute cards and cricut projects you can make with a cutting machine, but I thought this card design was extra special and so much fun. It has a special pocket in the centre where you can insert cards, like a gift card, or a special message. It's a great way to send handmade valentines this year.

valentine mailbox box card cricut

This project is fairly easy to put together, just a little time consuming. I think it's suitable for most skill levels.

Free Cricut Cut File

This design is available for free to Life is a Party subscribers. There's a link to the free cut files in our Free Resource Library. If you're not yet a subscriber, subscribe below.

Materials:

All you'll need to make this sweet card is your Cricut machine, a standard grip cutting mat, card stock -I used light pink, white, grey, and rose pink for mine, and some tacky glue

  • Cricut machine
  • Free Cricut Design Space File -subscribe for the free link
  • Standard Grip Mat
  • Card Stock -light pink, white, grey, rose pink
  • Tape
  • Tacky Glue
how to make a Valentine's Day card with your cricut

How To Make The Cricut Valentine Mailbox Box Card

Check out the video below for the full cricut tutorial.

Youtube video

Begin by opening up the free Cricut design space file. To access the link to the free file, subscribe below.

Once you open your free Cricut design space file, you're ready to cut out the card. Choose your cardstock colours, and follow the prompts on the cutting preview screen to add materials at the right times. We cut ours out with of medium card stock and used the "more" pressure setting.

After your card pieces are all cut out of card stock, it's time to assemble it. Because we want the card to be able to fold flat when it's finished, when you are gluing the main parts together take the time to bend it flat in each direction to ensure each piece is properly lined up.

Begin by gluing together the outer mailbox piece, with tacky glue along the flap. I tried a few different gluing methods for this but I found that glue tape or a glue dot didn't work that well here, and decided on regular glue. Hold the glued piece in place for a few seconds until it is set.

Next assemble the insert #2 to hold a gift card. Fold this piece to create the pocket that can hold the gift card. It's best to use scotch tape on the bottom and sides to great the pocket -this ensures the space is large enough for the gift card, and that the glue doesn't accidently get in the way.

Next add the three card inserts. Begin by gluing the piece labeled #1 to the front of the inside of the box. Next glue #3 to the back of the inside of the box. Lastly, fold in the tabs at the top and bottom of #2 and use these as spaces against the back or front to glue it into the middle of the card. After gluing in these pink pieces, be sure to let it dry for a few minutes before moving on to the embellishments.

Now embellish the front of the card with the mailbox white piece. Add an "XO" above the mail slot on the front.

To assemble the love letters, fold the flap over on the dashed line and glue in place. Add a heart to the front of each one, decide on which ever heart colour and size you prefer.

Next decorate the top of the card by gluing various letters and hearts to the top. Vary the sizes and colours. There are extra hearts and letters that you can add as a little bit of confetti to the card envelope.

The finished cricut Valentine cards should fit in any A7 envelope.

free valentine cricut card

Recipe

Cricut Valentine's Day card free SVG

Cricut Valentine Card

Cricut 3D Pop Up Box Card for Valentine's Day
5 from 1 vote
Print Pin Rate
Course: Cricut
Prep Time: 20 minutes minutes
Total Time: 20 minutes minutes
Servings: 1 Card
Author: Dannyelle Nicolle-Ramjist

Equipment

  • Cricut Machine
  • Standard Grip Mat

Materials

  • Free Cricut Design Space cut file -see our Free Resource Library
  • 1 sheet white card stock
  • 1 sheet rose pink card stock
  • 1 sheet grey card stock
  • 1 sheet light pink card stock
  • tacky glue
  • gift card optional

Instructions

  • Begin by opening up the free Cricut design space file. To access the link to the free file, subscribe below.
  • Once you open your free Cricut design space file, your ready to cut out the card. Choose your cardstock colours, and follow the prompts on the cutting preview screen to add materials at the right times. We cut ours out with of medium card stock and used the "more" pressure setting.
  • After your card pieces are all cut out of card stock, it's time to assemble it. Because we want the card to be able to fold flat when it's finished, when you are gluing the main parts together take the time to bend it flat in each direction to ensure each piece is properly lined up.
  • Begin by glueing together the outer mailbox piece, with tacky glue along the flap. I tried a few different gluing methods for this but I found that glue tape or a glue dot didn't work that well here, and decided on regular glue. Hold the glued piece in place for a few seconds until it is set.
  • Next assemble the insert #2 to hold a gift card. Fold this piece to create the pocket that can hold the gift card. It's best to use scotch tape on the bottom and sides to great the pocket -this ensures the space is large enough for the gift card, and that the glue doesn't accidently get in the way.
  • Next add the three card inserts. Begin by gluing the piece labeled #1 to the front of the inside of the box. Next glue #3 to the back of the inside of the box. Lastly, fold in the tabs at the top and bottom of #2 and use these as spaces against the back or front to glue it into the middle of the card. After gluing in these pink pieces, be sure to let it dry for a few minutes before moving on to the embellishments.
  • Now embellish the front of the card with the mailbox white piece. Add an "XO" above the mail slot on the front.
  • To assemble the love letters, fold the flap over on the dashed line and glue in place. Add a heart to the front of each one, decided on which ever heart colour and size you prefer.
  • Next decorate the top of the card by gluing various letters and hearts to the top. Vary the sizes and colours. There are extra hearts and letters that you can add as a little bit of confetti to the card envelope.
  • The finished cricut Valentine cards should fit in any A7 envelope.

Video

Youtube video

I know your friends and family will love this handmade valentine's day card. Or, use it anytime of year when you want to send a little love. Remember if you love giving valentine's day gifts, you can also add a gift card to this handmade card. Or make a sweet treat by including a gift card to your favourite restaurant, ice cream, or coffee shop. If you love paper crafts then this is the perfect cricut valentine's day project.

I hope you have a very happy valentine's day! With great Valentine's day crafts like this to create on your cricut, life really is a party!

free valentine cricut card

Easy Milk Chocolate Fondue Recipe

Jan 26, 2022 · 1 Comment

milk chocolate fondue

Easy Milk Chocolate Fondue Recipe: only two ingredients for this quick and delicious recipe, plus lots of dipper ideas.

milk chocolate fondue
[feast_advanced_jump_to]

Milk chocolate fondue is an easy dessert and perfect for just about any time. We used ours as part of a special Fondue Date Night -check out all the details of the evening and other fondue recipes including cheese fondue here. It's especially perfect for a Valentine's Day celebration, since strawberries and chocolate are both pretty required for love day. But really this recipe is perfect for just about any chocolate lovers -and a great idea for New Year's Eve fun tradition, a birthday dinner, or any special occasion. The whole family will love this sweet treat, and you will love how easy and fool proof it is.

If you're a chocolate lover, you might also like our Easy Browse Trifle Recipe.

What Kind Of Chocolate To Use For Chocolate Fondue

You can really use any type of chocolate you would like for this fondue. We've used milk chocolate, but if you want it to be a little less sweet feel free to substitute in dark chocolate or bittersweet chocolate. Feel free to use milk chocolate chips , semisweet chocolate chips, or a chocolate bar, or melting wafers. Choose the best chocolate you can for this recipe, since it's the main ingredient. I wouldn't use use white chocolate chips for this recipe, as it would be too sweet.

easy milk chocolate fondue recipe

Equipment

Melting Chocolate

To melt the chocolate a double boiler is a really helpful and definitely safer for not burning chocolate. Melting chocolate can be a little bit tricky, because it can burn easily. A double boiler really helps. If you don't have one, you can make your own by using a metal mixing bowl over a pot of boiling water in a medium saucepan. Just be careful not to get any water in with your chocolate, because this will ruin the consistency. Another options is using a microwave and a microwave-safe bowl. I always recommend using your microwave at only half power to avoid burning the chocolate. Or use a heavy saucepan at a low heat on the stove top, stirring often to avoid burning. If melting bars of chocolate, be sure to break them into smaller pieces first.

Fondue Pots

To serve your fondue using the double boiler kind of fondue pot that has water in a pot that the ceramic fondue pot sits in is the best. These help prevent your fondue from burning while you're enjoying it. Another option are simple candle ceramic fondue pots, but again be careful it doesn't burn. Help prevent this by giving it a stir every so often. An electric fondue pot is a great option too, because they usually have a very even heat.

Don't have a fondue pot? No problem. You can just serve your chocolate fondue in a ceramic bowl, and microwave it to reheat it if necessary. Another great option is to borrow a fondue pot from a friend, or look for one at a thrift store. Thrift stores seem to always have them. One more option is to make and serve your chocolate fondue in a mini slow cooker. Your regular size one is probably too big and might lead to burning, but a small crockpot on the warm setting would be perfect.

Fondue Forks

Don't forget you'll also need some fondue forks for dipping. Don't have any fondue forks? Use simple wood or bamboo skewers.

2 ingredient chocolate fondue recipe

Milk Chocolate Fondue Individual Servings

Not into a communal pot? If you prefer individual servings, especially for kids or serving a crowd, give everyone their own individual bowl of chocolate fondue. Use individual ramekins for serving, along with a small plate of dippers.

Chocolate fondue in heart shaped bowl with a platter of dippers and flowers on the table.

What To Serve With Chocolate Fondue

We love to use a variety of dippers for our easy chocolate fondue. Be sure to include lots of fresh fruit. There are some suggestions below, but be sure to include your favorite fruit, as it's sure to be your favorite dippers. You can also try baked goods like rice krispie treats, brownie squares, vanilla wafers, or banana bread, plus candy, and even something salty like pretzel rods make great dippers. Some of the best chocolate fondue dippers are:

  • banana slices
  • strawberries
  • apple slices
  • oranges
  • pineapple
  • rice krispie squares
  • angel food cake
  • pound cake cubes
  • donut holes
  • cream puffs
  • pretzels
  • potato chips
  • brownie bites
  • shortbread cookies
  • banana bread
  • gummy candies
  • wafer cookies
  • graham crackers
  • chocolate chip cookies
  • dried fruit
  • nuts
  • gummy candies
  • rolled wafer cookies
  • marshmallows -storebought or try our Homemade Coffee Marshmallows
Plater of chocolate foudue dippers with fruit, marshmallows, and cookies.
Chocolate fondue dippers including candy, pretzels, and cookies.
Bowl of milk chocolate fondue with dippers in the background.
easy chocolate fondue recipe

Easy Simple Ingredients

Many chocolate fondue recipes call for heavy cream and other ingredients, and risk splitting. Our recipe is so with only two simple ingredients. It's quick to make a foolproof, and guaranteed to be a hit with the chocolate lover. If you're looking for a very easy version that sure to be a crowd pleaser at your next dinner party this fun dessert is perfect.

More Milk Chocolate Fondue Options:

Want to experiment with different flavors? Try adding some vanilla extract. Or make it peppermint chocolate fondue with the addition of peppermint extract for the chocolate mint lover. Love peanut butter? Stir in a few spoonfuls to make peanut butter chocolate fondue, and serve with peanut butter cookies for dipping.

Recipe

milk chocolate fondue

Easy Milk Chocolate Fondue Recipe

Easy milk chocolate fondue with just two ingredients.
5 from 1 vote
Print Pin Rate
Course: Desserts
Cuisine: American
Prep Time: 5 minutes minutes
Cook Time: 5 minutes minutes
Total Time: 10 minutes minutes
Servings: 4 servings
Calories: 405kcal
Author: Dannyelle Nicolle-Ramjist

Ingredients

  • 1 ½ cups milk chocolate or semi sweet chocolate chopped or chips
  • 300 mL can sweetened condensed milk

Instructions

  • In a saucepan combine sweetened condensed milk and chocolate. (I used chocolate bars, broken into small pieces, chocolate chips would be great also.)
  • Heat over low heat in a heavy saucepan, or in a double boiler while stirring until chocolate is completely melted and combined with the sweetened condensed milk.
  • Serve while warm with assorted dippers such as: strawberries, bananas, pineapple, grapes, blueberries, cookies, marshmallows, Rice Krispies, brownies, pretzels, gummy candies, nuts, dried fruit. Store leftovers of the chocolate fondue in the refrigerator, and reheat in the microwave.

Nutrition

Serving: 1g | Calories: 405kcal | Carbohydrates: 46g | Protein: 6g | Fat: 22g | Saturated Fat: 12g | Polyunsaturated Fat: 8g | Cholesterol: 18mg | Sodium: 99mg | Fiber: 2g | Sugar: 38g
Tried this Recipe? Tag me Today!Mention @LifeisaParty or tag #lifeisaparty!
quick chocolate fondue recipe

This is one of my favorite easy recipes and makes a perfect chocolate fondue. It's a great addition to a fondue party, and sure to be appreciated by anyone with a sweet tooth. With easy milk chocolate fondue, life really is a party!

Coffe table set with chocolate fondue, platter of fondue dippers, candles and flowers.

More Inspiration

Enjoy this milk chocolate fondue as part of a romantic meal with our at home date night fondue -check out all the details here.

Fondue Date Night

You might also like our chocolate charcuterie board here.

Chocolate Charcuterie Snack Board: perfect for the chocolate lover, tips on building your board, and ingredient suggestions.

Also check out our Christmas Fondue Party with lots more fondue recipes here.

Fondue Date Night

Jan 26, 2022 · 1 Comment

Date night fondue with cheese fondue and dippers at a coffee table.

For our Fondue Date Night we made cheese fondue & chocolate fondue. We've included all the recipes, plans, a shopping list, & free printable conversation starters for you to create your own easy at home fondue date night.

Date night fondue with cheese fondue and dippers at a coffee table.
[feast_advanced_jump_to]

Why We Love This Fondue Date Night

  • Finger food is romantic.
  • Melted cheese followed by melted chocolate just can not be beat!
  • These recipes are easy to make and delicious.
  • Fondue is the kind of meal you can linger over and have great conversation as you dip.
  • This is much cheaper to do at home, with the most expensive items being the cheese and fresh fruit.
  • Fondue is the kind of thing you don't do everyday so it feels extra special.

It's always nice to go out for a date night, but there's also something extra nice about a special date night at home. Fondue is the perfect date night food, enjoyed snuggled up on the sofa together with some candles lit for a romantic night. 

You might also enjoy our Christmas Fondue Party, Valentine Breakfast Board, or 20 At Home Valentine's Day Ideas.

We put together everything you need to create the perfect at home fondue date night, including recipes, a shopping list, a schedule for the night, and even table decor ideas. 

We've thought of everything so that you don't have to. 

Follow our instructions for the perfect fondue date night. This is the perfect way to celebrate Valentine's Day at home, or a great way to celebrate a special occasion like an anniversary. It's also great for any at home romantic date night.

Coffee table in front of couch set up for date night with cheese fondue and flowers.

Cozy Coffee Table Date

  • DIY Table Runner
  • Fresh Flowers
  • Candles

This cozy romantic dinner works out great at a coffee table in your living room. Set things up so you can sit on the couch together or add lots of throw pillows to the floor, maybe even a cozy sheepskin rug.

Coffee table set up for date night with X and O table runner flowers and place settings.

DIY Table Runner

If you like DIYs, use some plain craft paper to make a table runner. Use craft paint to add X's and O's or hearts in a simple hand drawn pattern. Or find some pretty wrapping paper to use as a table runner. The runner will add a little interest to the table and is easy for clean up, since fondue can be a little drippy.

Pink tulips, candles, and disco ball set up on a coffee table.

Fresh Flowers and Candles

It won't be date night without fresh flowers, candles and chocolate. We've got chocolate covered with dessert. Pick up some fresh flowers and add them to the table in a pretty vase to add a little romance to the setting. Light some candles or battery powered twinkle lights or string lights to create the perfect romantic atmosphere.

These little touches add so much to a romantic cozy date night.

Coffee table in front of couch set up for date night with place settings for two and flowers.

Preparation Schedule

Sometimes when it comes to date night at home, the hardest part is getting it organized. We've planned out a whole schedule for you so you know exactly what to do to get ready.

Before Date Night

  • Set a date for your romantic fondue night and get it on the calendar.
  • If you have children, make a plan for them like early bedtime, a movie in their room, or a sleepover at Grandma's house.
  • Shop for groceries.
  • Don't worry if you don't have a fondue pot. You can serve the fondue in a bowl, and reheat it in the microwave if necessary. Or pick one up at your favourite kitchen store, look for an inexpensive one at a second-hand store, or borrow one for the night.
  • Print the conversation starter cards.

On Date Night

  • Put on some romantic music.
  • Make a cocktail or mocktail, or pour a glass of wine.
  • Start cooking by roasting the potatoes, add asparagus for the last 10 min. of cooking.
  • While the potatoes are cooking, put together a tray of your cheese fondue dippers.
  • Prepare your chocolate fondue dippers.
  • Make chocolate fondue.
  • Make the cheese fondue.
  • Toast the garlic bread.
  • Have dinner together.
  • Use the conversation cards.
  • Reheat the chocolate fondue, and have dessert.
Cheese fondue for date night set up on a coffee table with a platter of dippers.

Fondue Date Night Menu

Cheese Fondue with roasted potatoes and asparagus, and other dippers.

For our date night we had a classic cheese fondue for our main course. All our recipes for this date night are easy recipes. What could be better than enjoying melted cheese with an array of yummy dippers?

You can use a traditional fondue melting pot for this recipe, or an electric fondue pot, even a small crockpot works well with an extension cord. Don't forget the fondue forks as well.

Below are our suggestions for dippers for your date night cheese fondue. We liked including potatoes, some different meats, and veggies for a complete meal. The granny smith apples are perfect for that sweet and salty combo -if you're a fan. Just remember to coat them with a little lemon juice so that they don't turn brown.

fondue date night

Find our Cheese Fondue Recipe here.

Or subscribe below and download our free Fondue Date Night mini book that includes all the recipes, schedule, and grocery list.

Pof of cheese fondue with dipped bread dripping in cheese.

Cheese Fondue Dippers

We chose:

  • green apple slices
  • kielbasa
  • spicy salami
  • garlic bread
  • roasted asparagus
  • roasted potatoes for our cheese fondue dippers.

The possibilities are endless. You might also like to try:

  • grapes
  • carrot and celery sticks
  • cherry tomatoes
  • French bread
  • gherkin pickles
  • cooked mini meatballs
  • crusty bread
  • soft pretzels
Top view of cheese fondue on a table set for two, with platter of fondue dippers.

Recipe

fondue dippers

Roasted Potatoes and Asparagus

Oven roasted potatoes and asparagus pieces that are perfect dippers for cheese fondue.
5 from 1 vote
Print Pin Rate
Course: Side Dish
Cuisine: American
Prep Time: 5 minutes minutes
Cook Time: 20 minutes minutes
Total Time: 25 minutes minutes
Servings: 2
Calories: 440kcal
Author: Dannyelle Nicolle-Ramjist

Ingredients

  • 1.5 lbs mini potatoes
  • 2 tablespoon olive oil
  • salt
  • pepper
  • 1 lb fresh asparagus

Instructions

  • Wash your mini potatoes and slice any large ones in half. Toss the potatoes with 1 tablespoon of olive oil, and sprinkle with salt and pepper.
  • To prepare the asparagus, snap the tough ends off with your fingers. Toss with 1 tablespoon of olive oil and sprinkle with salt and pepper. Set aside for now.
  • Roast the potatoes on a baking sheet at 425 for 10 minutes. Then turn the potatoes and continue to cook for another 10 minutes along with the asparagus, adding it to the baking sheet and cooking until both are tender .

Nutrition

Serving: 1g | Calories: 440kcal | Carbohydrates: 73g | Protein: 9g | Fat: 14g | Saturated Fat: 2g | Polyunsaturated Fat: 12g | Sodium: 326mg | Fiber: 8g | Sugar: 4g
Tried this Recipe? Tag me Today!Mention @LifeisaParty or tag #lifeisaparty!

Dessert

Chocolate Fondue with Fruit and Sweets

Fondue date night with chocolate fondue in a heart shaped bowl and a platter of dippers.

Find our Milk Chocolate Fondue Recipe here.

Or subscribe below and get all the recipes, schedule, and grocery list as part of our Fondue Date Night mini book as a free download.

Platter of chocolate foundue and dippers.

For our chocolate fondue dippers we used:

  • bananas
  • pineapple
  • strawberries
  • blueberries
  • chocolate chip cookies
  • pretzels
  • poke sticks
  • biscotti
  • rolled wafer cookies
  • heart shaped rice krispies
  • marshmallows
  • chocolate hearts
  • cinnamon lip candies

Any of your favourite fresh fruits, vanilla cookies, angel food cake, or candies that pair well with chocolate would be a great choice. Visit the bulk store to find lots of great dippers, so you can buy a small quantity and have lots of variety. Also look for ready made cookies in the grocery store bakery section to make preparation a little easier. Want to take this up a notch further? Serve it with a bowl of ice cream on the side.

Chocolate fondue in a pink heart shaped bowl, and a platter of dippers with fruit, cookies, and candy.
Chocolate fondue and platter of dippers on coffee table.

Fondue Date Night Grocery Shopping List

  • garlic
  • 8 oz. Gruyere cheese
  • 8 oz. Swiss cheese
  • cornstarch
  • dry mustard
  • lemon
  • nutmeg
  • brandy (optional)
  • white wine for fondue
  • green apples
  • 1.5 lbs mini baby potatoes
  • olive oil
  • kielbasa
  • spicy salami
  • 1 lb fresh asparagus
  • garlic bread or baguette
  • 1 ½ cups milk or semi-sweet chocolate chips or chocolate bars
  • 1 can condensed milk
  • dippers for chocolate fondue such as: strawberries, bananas, pineapple, blueberries, pretzels, cookies, gummy candy, dried fruit, nuts
  • wine, cocktail, or mocktail ingredients
  • flowers for the table
A coffee table with vase of flowers and chocolate foudue and fondue dippers.

Free Printable Conversation Starters

Get the conversation flowing over dinner with our fun and free Conversation Starter Cards. Print these out ahead of time on your home printer, or at an office supply store and add them to the table for the night. 

Subscribe below for access to these free printables without the watermark in our Free Resource Library full of free printables.

Free printble date night conversation starter cards.

Subscribe For Free Fondue Date Mini Book

Want to enjoy this fondue date night and give your partner the gift of an unforgettable date night experience? Subscribe to the blog and we'll send you our Fondue Date Night mini book with the recipes, shopping list, schedule, conversation starters and more.

Free printable fondue date night recipe book, schedule, shopping list, and conversation starter cards kit.

With a fondue date night at home, life really is a party!

Frequently Asked Questions

What is the etiquette for eating fondue?

You must not ever double dip. Some people suggest using your fondue fork for dipping and then placing the dipped item on your plate, and eating with a dinner fork. Others feel it's appropriate to eat off your fondue fork, if you don't let your lips touch it.

What if you drop your food into the fondue pot?

Old Swiss custom is that a man who drops his food in the fondue pot buys the next round of drinks, and that a woman kisses her neighbour.

Can I store the leftovers?

Yes, store any leftover fondue in the refrigerator in an airtight container, and reheat the fondue in the microwave before serving.

If you tried this Fondue Date Night or any other party idea on my blog please let me know how it went in the comments below. Thanks for visiting today!

More Fondue Inspiration

  • Christmas fondue party with menus, recipes, and decor.
    Christmas Fondue Party
  • Caramel apple fondue recipe and topping ideas.
    Easy Homemade Caramel Apple Fondue
  • S'more milk chocolate fondue.
    Easy S'mores Fondue Recipe
  • milk chocolate fondue
    Easy Milk Chocolate Fondue Recipe

Hot Chocolate Charcuterie Board

Dec 15, 2021 · 7 Comments

Easy hot chocolate charcuterie board filled with hot chocolate mix, whipped cream, chocolate, marshmallows, and cookies.

This Hot Chocolate Charcuterie Board has all the fixings for making the perfect hot chocolate. It's great for holiday or winter entertaining. Your guests will love helping themselves to everything they need.

hot chocolate charcuterie board
[feast_advanced_jump_to]

Why You'll Love This

  • Everything looks amazing on a board.
  • It's easy to for guests to help themselves.
  • We included so many delicous toppings -like homemade marshmallows, chocolate, and freshly whipped cream!

This hot chocolate charcuterie board is perfect for sharing with friends over the holiday season or anytime during the winter. It's full of all the treats you need to make the most delicious cup hot chocolate and is a really fun way to share with a crowd. Your guests will love it and it will take your cup of hot chocolate to the next level! This is perfect for any hot chocolate lovers.

You might also like our DIY Hot Chocolate Mix Recipe, Homemade Marshmallow Mug Toppers, Coffee Marshmallows Recipe, Chocolate Charcuterie Board, Easy Chocolate Brownie Trifle, or our S'mores Charcuterie Board.

hot cocoa bar

Is It Really Charcuterie?

No, it isn't really charcuterie, in the traditional sense. The word charcuterie really means a cured meat products board, but in recent years this term has been used not just for a traditional charcuterie board filled with an assortment of meats, but also cheese boards, and even sweets boards. 

It seems to have a become a term that's interchangeable for any snack or dessert board, and here we're even using it for drink items.

Strictly speaking this is not really charcuterie, but a dessert board, but we're taking our cue from popular culture here. With dessert charcuterie boards becoming more and more popular, we think you'll love our classic hot chocolate version.

hot cocoa charcuterie board

Ingredients

Hot chocolate charcuterie board ingredients.

Here are the yummy hot chocolate toppings we included on ours:

  • Hot Chocolate Mix: you can use our easy recipe to make your own or use store-bought. Remember to boil the kettle and warm some milk.
  • Whipped Cream: Homemade is best. Just whip cream with a little sugar and vanilla. Or use the canned version.
  • Candy Canes: these are perfect for chocolate mint lovers.
  • Belgium Chocolate Wafers: We love this Belgium chocolate because it's such great quality.
  • White Chocolate Wafers: For the white chocolate lovers.
  • Chocolate Chips: Just to add a little more chocolate flavor to your hot chocolate.
  • Rolo Chocolate and Caramel Candies: Add these for the caramel lovers to melt in their hot chcolate.
  • Chocolate Spoons: We found these at the dollar store and they are always such a crowd pleaser.
  • Marshmallows: Mini Marshmallows, Regular, and our Homemade Marshmallow Mug Toppers -or grab some store-bought ones. Homemade marshamallows are actually not too hard to make, and the best thing about homemade marshmallows taste is they are much lighter and fluffier, and more delicate than store-bought ones. We used cookie cutters to cut the snowflakes and hearts, but you could do any shape you liked. We drizzled some with melted chocolate and added sprinkles too.
  • Wafer Cookies: Vanilla, and Chocolate these are the perfect cookies to dip in a hot chocolate.
hot chocolate with homemade marshmallows

Variations

We put the hot chocolate mix right on the charcuterie board. As another option you could instead make a crockpot full of hot chocolate.

Here's some other options for addtions to the board:

  • White Chocolate Chips
  • Milk Chocolate Chips
  • Chocolate Syrup
  • Hot Chocolate Bombs
  • Hershey Kisses
  • Peanut Butter Cups
  • Caramel Sauce, or Syrup
  • Mint: We added candy canes to our board for the mint lover, another great option would be some chocolate mint candies, or crushed peppermint candies, or peppermint sticks.
hot chocolate dessert board

How To Make A Hot Chocolate Charcuterie Board

1. Start with a large tray or cutting board. We used a lazy Susan, which is perfect for a party, because guests can spin the board and reach things from all sides. We added our small bowls of whipped cream, hot chocolate mix, and then candy canes. The bowls help contain the ingredients and add some height to the board. We added small wooden spoons for serving.

how to serve hot chocolate at a party

2. Next, add all the rest of the chocolate, marshmallows, and cookies around the board to fill in all the other spaces.

hot cocoa charcuterie board

Keep these hot chocolate charcuterie board ideas in mind for your next holiday party, Christmas eve, or as a great addition to movie night. It's sure to be a hit at any holiday gatherings.

With a hot chocolate charcuterie board to enjoy, life really is a party!

Frequently Asked Questions

Can I make this hot chocolate charcuterie board ahead of time?

Yes. Store your whipped cream in the fridge wrapped in plastic wrap until right before serving. Also wrap the board tightly in plastic wrap so that the marshmallows don't drry out before serving.

Can I use something other than hot chocolate mix?

Yes, a great option is to leave the hot chocolate mix off the board and make hot chocolate in a large crock pot so it's hot and ready to serve. Guests can add in extra chocolate, marshmallows and fixing from the board to personal their own.

Can I add alcohol to my hot chocolate charcuterie board?

Yes, serve alcohol like Bailey's Irish Cream, Whisky, Rum, Mint Liqueur, Kulauh, or Amereto for great flavor pairs. Choose 1-3 options and serve on the side for guests to help themselves.

More Inspiration

  • S'mores charcuterie board with graham crackers, marshmallows and chocolate for summer entertaining.
    S'mores Charcuterie Board
  • Chocolate charcuterie dessert board.
    Chocolate Charcuterie Board
  • DIY hot chocolate mix recipe in a mason jar.
    DIY Hot Chocolate Mix Gift Idea
  • Homemade marshmallow mug toppers with chocolate drizzle.
    Homemade Marshmallow Mug Toppers

 If you try this Hot Chocolate Charcuterie Board, or any other recipe on my blog please leave a star rating and let me know how it went in the comments below. Thanks for visiting today!

Recipe

Easy hot chocolate charcuterie board filled with hot chocolate mix, whipped cream, chocolate, marshmallows, and cookies.

Hot Chocolate Charcuterie Board

Video

Perfect for entertaining, let guests help themselves to make the perfect hot chocolate with all their favourite toppings.
5 from 1 vote
Print Pin Rate
Course: Drinks
Cuisine: American
Prep Time: 10 minutes minutes
Total Time: 10 minutes minutes
Servings: 12
Calories: 578kcal
Author: Dannyelle Nicolle-Ramjist

Ingredients

  • 1 cup Hot Chocolate Mix
  • 1 cup Whipped Cream
  • 12 Mini Candy Canes
  • 1 cup Belgium Chocolate Wafers
  • 1 cup White Chocolate Wafers
  • 1 cup Chocolate Chips
  • 1 cup Rolo Chocolate and Caramel Candies
  • 12 Chocolate Spoons
  • 1 cup Mini Marshmallows
  • 1 cup Regular Marshmallows
  • 12 Marshmallow Mug Toppers
  • 12 Wafer Cookies -Vanilla and Chocolate

Instructions

  • Put whipped cream, hot chocolate mix, and candy canes in small bowls and add to a large board or tray.
  • Fill in the board by arranging the rest of the ingredients around the bowls.

Notes

Be sure to serve with boiled water and warmed milk for making the hot chocolate.

Nutrition

Calories: 578kcal | Carbohydrates: 82g | Protein: 4g | Fat: 30g | Saturated Fat: 18g | Polyunsaturated Fat: 1g | Monounsaturated Fat: 7g | Trans Fat: 0.02g | Cholesterol: 9mg | Sodium: 188mg | Potassium: 256mg | Fiber: 3g | Sugar: 68g | Vitamin A: 63IU | Vitamin C: 0.2mg | Calcium: 89mg | Iron: 2mg
Tried this Recipe? Tag me Today!Mention @LifeisaParty or tag #lifeisaparty!

Homemade Marshmallow Mug Toppers

Dec 9, 2021 · 4 Comments

Homemade marshmallow mug toppers with chocolate drizzle.

Homemade Marshmallow Mug Toppers: use our marshmallow recipe to create mug toppers perfect for enjoying with hot chocolate and gift giving.

Homemade marshmallow mug toppers with chocolate drizzle.
[feast_advanced_jump_to]

Have you noticed these cute marshmallow mug toppers at stores like Target this Christmas. They're so cute and perfect for topping your hot chocolate.  But they can also add up, so I thought why not make my own?  

homemade marshmallow recipe

This marshmallow recipe is a favourite that I've made lots of time. Check out my recipe for  Coffee Flavored Marshmallows.  You might also like our Oreo Marshmallows, Chocolate Marshmallows, Bailey's Marshmallows, Strawberry Marshmallows, and this Hot Chocolate Charcuterie Board.

Homemade marshmallows are actually quite easy to make, and the taste is amazing.  Generally speaking, a homemade version of anything usually tastes better than store bought.  And marshmallows are no exception to that.  Homemade marshmallows are so much lighter and fluffier than store bought.  

how to make marshmallows

Marshmallow Mug Toppers

To turn these homemade marshmallows into mug toppers, I made then in a more shallow pan than usual.  I used a cookie sheet which was perfect.  Making these marshmallows thinner than normal homemade marshmallows, allowed me to use a cookie cutter to cut then into fun shapes, perfect for floating on top of your mug of hot chocolate.

homemade marshmallow toppers recipe

I used a snowflake and a heart cookie cutter shape to make mine, but the possibilities really are endless.  I've noticed some store bought ones shaped like houses, or mittens, or candy canes.  All these would work great too.  The only thing to consider is the size of our average mug and the size of the cookie cutter.  You want a finished marshmallow that will fit inside your mug easily.

Adding Chocolate and Sprinkles

The finished marshmallows are perfect on top of hot chocolate as is, but if you want to make them even more special, consider adding some special toppings to your marshmallows.  We drizzled some with melted semi-sweet chocolate, and added some sprinkles.   You could use dark, milk, or white chocolate for your drizzle, or even dip them melted chocolate.  

We choose some sprinkles, and added them while the chocolate was still melted so they would stick.  Any sprinkles would work, including Christmas ones for the holidays, or snowflakes for any winter day.  You could also add coloured sugar instead.  Another great option or the mint lover is crushed candy cane pieces.

Packaging Your Marshmallows

Once your marshmallows are finished, package them up for gift giving.  Marshmallows will last up to three weeks, in an air tight container.  We packaged ours in cellophane bags, tied with twine.   Package them separately, or use a larger bag to add more.  

Homemade marshmallow mug toppers packaged in a cello bag and tied onto a jar of homemade hot chocolate mix.

These are really perfect for gift giving.  Check out our homemade hot chocolate mix gift here with the recipe.  The homemade hot chocolate mix and marshmallow mug toppers make a really great gift, especially around the holidays.

how to make marshmallows at home

Special Equipment

Homemade marshmallows aren't difficult to make, but you do need a couple of special pieces of equipment. 

You will need a candy thermometer.  These are easy to find on-line, or at any good kitchen store.  They're aren't expensive at all.  If you are a fan of homemade candy, you'll use a candy thermometer over and over.  You can't make this recipe without one, because you have to bring the sugar mixture to the exact right temperature.

You'll also need a stand mixer.  This recipe is whipped for up to 15 minutes.  You wouldn't be able to do this by hand, and it would would be difficult with even a hand mixer.  A stand mixer is the perfect equipment for this job.

marshmallow mug toppers

We've seen these cute little marshmallows in lots of stores, but we knew we could make better ones at home, and for a fraction of the price.  These turned out so great.  They're super cute, really delicious, and perfect for gift giving.

Recipe

Homemade marshmallow mug toppers with chocolate drizzle.

Homemade Marshmallow Mug Toppers

Video

Homemade marshmallow mug toppers, make them any shape you like and add chocolate and sprinkles to decorate.
5 from 2 votes
Print Pin Rate
Course: Candy, Desserts
Cuisine: American
Prep Time: 20 minutes minutes
Cook Time: 8 minutes minutes
Additional Time: 12 hours hours
Total Time: 12 hours hours 28 minutes minutes
Servings: 24
Calories: 129kcal
Author: Dannyelle Nicolle-Ramjist

Ingredients

  • 3 7 g packages unflavoured gelatine
  • 1 cup very cold water divided
  • 1 cup white corn syrup
  • 1 ½ cup white sugar
  • ¼ teaspoon salt
  • 1 teaspoon vanilla
  • ½ cup cornstarch
  • ½ cup powdered sugar
  • ½ cup semi sweet chocolate chips
  • 1 tablespoon sprinkles

Instructions

  • Place ½ cup of wter, and the gelatine in the bowl of a stand mixer, with the whisk attachment.
  • In a pan combine the remaining water, corn syrup, sugar, and salt. Cook over a medium high heat, until a candy thermometer reaches 240 degrees F. This will take about 8 minutes. As soon as it reaches 240 degrees, remove it from the heat.
  • With the mixer running on low speed, pour the sugar mixture down the side of the bowl slowly. Once the sugar mixture is all added, turn the mixer onto high speed. Let the mixture whip for about 12-15 minutes, until the outside of the bowl is lukewarm and no longer hot, and the mixture is light and fluffy. In the last minute, add the vanilla to the mixture.
  • Meanwhile, prepare your pan. To make the marshmallow thin enough to be cut out with a cookie cutter, we used a cookie sheet. Spray the cookie sheet with cooking spray. Combine the cornstartch, and powdered sugar in a bowl, and use it to coat the sprayed cookie sheet. Reserve the extra cornstarch, and powdered sugar mixture.
  • Ater the marshmallow mixture is finished whipping, use an oiled spachula to spread in evenly into the cookie sheet. Sprinkle the marshmallows with more of the cornstarch and powdered sugar mixture. Let set at least 4 hours, or overnight.
  • To create the mug toppers, use cookie cutters to cut out shapes. Coat the cut edeges with the cornstarch and powdered sugar mixture.
  • To decorate the marshmallow cut outs, melt chocolate in the microwave, and use a ziplock bag with the corner snipped off to drizzle the marshmallows with chocoalte. While the chocolate is still melted add sprikles.

Nutrition

Serving: 1g | Calories: 129kcal | Carbohydrates: 31g | Fat: 1g | Saturated Fat: 1g | Polyunsaturated Fat: 1g | Sodium: 34mg | Sugar: 28g
Tried this Recipe? Tag me Today!Mention @LifeisaParty or tag #lifeisaparty!

With these homemade hot chocolate mug toppers, life really is a party!

More Inspiration

  • DIY hot chocolate mix recipe in a mason jar.
    DIY Hot Chocolate Mix Gift Idea
  • Easy hot chocolate charcuterie board filled with hot chocolate mix, whipped cream, chocolate, marshmallows, and cookies.
    Hot Chocolate Charcuterie Board
  • Stack of homemade coffee marshmallows showing mocha color and fluffy texture.
    Homemade Coffee Marshmallows Recipe
  • Homemade Bailey's marshmallows recipe.
    Homemade Bailey's Irish Cream Marshmallows Recipe

DIY Hot Chocolate Mix Gift Idea

Dec 8, 2021 · 5 Comments

DIY hot chocolate mix recipe in a mason jar.

DIY Hot Chocolate Mix Gift Idea: make your own hot chocolate mix, easy recipe, perfect to make with kids, great for inexpensive holiday gifts.

DIY hot chocolate mix recipe in a mason jar.
[feast_advanced_jump_to]

During the holiday season I'm always looking for fun and easy DIY gift ideas, and this homemade hot chocolate mix is perfect. It's really easy to put together, and would be a great one to do with kids.

DIY hot chocolate mix gift

When it's cold outside everyone loves a cup of hot chocolate and our hot chocolate mix recipe makes it easy for you to make your own, and package it up to give as Christmas gifts.

Also check out our Hot Chocolate Charcuterie Board, or if you're a chocolate lover, check out our Easy Chocolate Brownie Trifle Recipe. And for more gifts ideas check out Wine and Cheese Basket and DIY Breakfast Gift Basket.

Hot Chocolate Mix Ingredients

This mix uses all dry ingredients, so it's easy to put together. To make the hot chocolate with the mix, you combine ¼ cup of the finished mix with 1 cup of boiling water. Alternatively, to make the hot chocolate extra creamy, you could add a cup of hot milk. Another option is to try making with warm coconut milk.

homemade hot chocolate mix recipe

Our recipes used dry milk powder, unsweetened cocoa, dairy free creamer, powdered sugar, and a little salt. It's a really easy recipe. You can make this by simply mixing the ingredients together, but you can also combine them in the bowl of a food processor , and use this to mix it really well, and remove any lumps.

how to make homemade hot chocolate mix

It is important to use unsweetened cocoa powder and not hot chocolate mix in this recipe. And the quality of the cocoa for this recipe matters too. Look for a dutch processed dark cocoa powder for best results, and a rich chocolatey hot chocolate. Not all hot chocolate mix recipes include non-dairy creamer, but we felt the addition of the powdered creamer leads to a creamer, slightly thicker hot chocolate, which is really delicious. We also added just a little bit of salt. It doesn't make the finished product salty at all, it just helps wake up all the other flavours.

I love that this recipe uses ingredients found easily in grocery stores, or you might even have them in your pantry. This dry mix has a long shelf life, and will last for months, so feel free to double or triple it for a big batch, perfect for lots of gift giving.

Packaging Ideas

Once you have your hot chocolate mix all put together, it's fun to package the dry mix up as the perfect gift. Homemade gifts are always a great idea, especially around the holidays.

homemade hot cocoa mix recipe

To get the hot cocoa mix ready for a holiday gift, package it up in any airtight container. I love using vintage mason jars, a pint jar, or a mason jar with the flip lid, but any jar will do.

You might even up-cycle a glass jar and use something like an old jam jar. Just make sure it's nice and clean. Then add in your mix and seal it up, ready for gift giving.  We've decorated ours with some twine and yarn, ribbon would be lovely too.

I've added a little extra to my jars, by attaching homemade marshmallows. You could also tie a cinnamon stick, or candy canes to the front of your jars.

easy DIY hot chocolate mix giftCheck out the recipe for these Homemade Marshmallow Mug Toppers recipe here.  These are the perfect addition to the DIY hot chocolate mix for gift giving, or just enjoying yourself.
homemade marshmallow mug toppers

If you like, you can leave a little room at the top of the jar, and add in some special ingredients to the top, like semi-sweet chocolate chips, dark chocolate pieces, white chocolate chips, crushed up peppermint candy, caramel candies, or mini marshmallows. Just add them to the top of your homemade mix .

how to make hot chocolate mix

Another nice option for gift giving is to package the homemade cocoa mix in a cellophane bag or small plastic bag. A great gift idea is to give this with a mug, and tuck the hot chocolate mix inside for the perfect mug of hot chocolate. I love this idea to include as part of a care package all winter long too.

easy DIY hot chocolate mix gift idea

Be sure to include a gift tag with the instructions on how to make the hot chocolate. We used ¼ cup of hot chocolate mix with 1 cup of hot water, or warmed milk. Write the instructions on some white cardstock, or a gift tag and attach with some baker's twine.

Hot chocolate bombs have become really popular in the last few years. To make your own, use this mix in the centre of your chocolate sphere, along with some marshmallows, ready to make a perfect mug of hot cocoa.

Fun Add-Ins

If you love a flavoured hot chocolate, feel free to play with some add-ins. Looking for a Mexican hot chocolate? Try adding some cinnamon and cayenne pepper.

Love mocha? Try adding some instant espresso powder to the mix.

And there's always things extra chocolate chips, caramel sauce, or pieces of candy canes. The possibilities are almost endless.

For adults, some Baileys Irish cream would be a fun addition too.

Recipe

DIY hot chocolate mix recipe in a mason jar.

DIY Hot Chocolate Mix Gift

Make your own hot chocolate mix made with just 5 ingredients.
5 from 2 votes
Print Pin Rate
Course: Drinks
Cuisine: American
Prep Time: 5 minutes minutes
Total Time: 5 minutes minutes
Servings: 15
Calories: 133kcal
Author: Dannyelle Nicolle-Ramjist

Ingredients

  • 2 cups powdered milk
  • 1 cup powdered sugar
  • ⅓ cup non-dairy creamer
  • ½ cup cocoa powder
  • ½ teaspoon salt

Instructions

  • Combine all the ingredients in a bowl and whisk together. Or combine the ingredients in the bowl of a food processer and pulse until fully combined and there's no lumps. Store in an airtight container, like a mason jar.
  • To serve, combine ¼ cup of hot chocolate mix with 1 cup of boiling water, and stir. For a creamer version, use warm milk in the place of water.

Nutrition

Serving: 1g | Calories: 133kcal | Carbohydrates: 24g | Protein: 6g | Fat: 1g | Saturated Fat: 1g | Cholesterol: 3mg | Sodium: 220mg | Fiber: 1g | Sugar: 20g
Tried this Recipe? Tag me Today!Mention @LifeisaParty or tag #lifeisaparty!
easy hot chocolate mix recipe

This recipe makes the best hot chocolate, perfect for a cold night -or any time!  With DIY hot chocolate mix gift ideas like this one, life really is a party!

More Ideas

You might also like our Ho Ho Ho Hot Chocolate Bar here.

Ho Ho Ho Hot Chocolate Bar: set up the perfect Christmas hot chocolate bar with our printable package that includes labels, poster, bunting, and more.

Also check out our Coconut Hot Chocolate Recipe here.

Hot Chocolate with Coconut Milk: it's easy to make and so delicious, perfect for anyone with dietary restrictions, or vegatarian.

You might also like our Christmas Dessert Board here.

Rustic Scandi Cottage Christmas Decorating Ideas Home Tour

Nov 30, 2021 · 12 Comments

rustic Scandinavian cottage Christmas decor

Rustic Scandi Cottage Christmas Decorating Ideas Home Tour: cozy cottage and vintage pieces mix with Scandi natural elements for Christmas.

rustic Scandinavian cottage Christmas decor
[feast_advanced_jump_to]

Welcome to my Christmas home tour for 2021 and Merry Christmas! This year my home is full of rustic Scandi cottage Christmas decorating ideas, with a little boho and pink thrown into the mix. I hope it gives you lots of fun ideas for your own home. I love decorating for Christmas, and this post is probably my favourite one of the year. So come on in and enjoy a look around.

The Front Porch

We had a little snow over the weekend, and now it really feels like Christmas! I put together an arrangement of greens that I collected on a forest walk. The yarn covered sticks from last year are a fun addition -see how I made our DIY yarn covered sticks here, along with some pretty stars.

Christmas Front Porch decor

Doormat and Wreath

I'm most excited about my door mat, and pretty Christmas wreath. You can find the full tutorial on how to make the moon shaped Christmas wreath here. I love the pom poms, mushrooms, and stars. They're all little hints of what's to come inside. And the Christmas doormat is a fun DIY. I was inspired by a beautiful Antropologie doormat with a red Santa and decided to try and create my own pink version with a inexpensive IKEA doormat.

pink Anthropologie inspired Santa DIY doormat

A sprinkling of snow, pretty lanterns, vintage skates, and some natural accents like birch logs and pinecones, set the stage for our rustic Scandi cottage Christmas decorating ideas and what's to come inside.

The Dining Room

Our tour begins inside with the dining room, which is the first room you enter through the front door.

Christmas dining room decor

Console Table

This little console table is always a favourite to decorate. This year I've used this vintage rustic old toolbox, and filled it with mini Christmas trees. I wanted to add a real cozy feel to my decor this Christmas, for all the rustic Scandi and cottage Christmas vibes. My color scheme this year is lots of whites and creams, natural wood, with some pink, and traditional greens. And just for fun, I've added in a few sprinkles of iridescent to the color palette. It goes so well with the pink, and adds a little of that holiday magic and whimsy we love.

Christmas entry table

I have some fun mirrored birds above the console table, and on top I've layered a bunch of fun garlands -a look I've repeated in several places this Christmas to make it feel cozy and festive. I've gone for a combination of raw wood, felt balls, and pom poms, with some pink and stars mixed in everywhere.

mini Christmas trees in a vintage white box
cottage Christmas decor

Bar Cart Holiday Decor

Next, over on the bar cart, we've got a little forest of Christmas trees to create our own mini winter wonderland. I brought in a real birch tree. It's set in a little quick setting cement, and strung with fairy lights. And beside it is a real pine tree, also just decorated with Christmas lights this year. I'm lucky to live with the woods nearby and lots of places for winter walks. One of my favourite things to do at Christmas is to bring the outdoors in. Real trees can be messy, but there really is nothing like them to make it feel like Christmas!

Christmas bar cart
Christmas bar cart decor

This summer, at a little antique store I found these beautiful vintage pink champagne coupe glasses. There were only four, but they've become such a favourite and inspired the bar cart decor this Christmas. There are lots of little Christmas trees, and pretty glasses for sipping Christmas cheer over the holidays. I've added more of the layered garland, and a pretty cheers garland too.

vintage pink champagne coupes
how to decorate a bar cart for Christmas

Dining Room Table

I've kept things pretty simple on the dining room table this year. I've layered a knit table runner and a sheep skin to create a cozy feel here. On top of that is an antique wooden dough bowl filled with vintage Christmas decorations. These vintage Christmas ornaments are some of my very favourite Christmas decorations. I always have my eye out for them at thrift stores, flea markets, garage sales, and antique stores.

cottage Christmas decor ideas

I've also added a beautiful white paper Christmas tree. I love the warmth and texture of these beautiful paper trees that I've used in a few different spots this year. And I've also added some little touches of vintage brass in a few spots, including a few candlestick holders here.

Christmas dining room decor ideas
vintage Christmas ornaments in a wood bowl
rustic Scandi Christmas decor ideas

Buffet Area

This little forest of mini trees and candles might just be my favourite spot this year. Getting these little trees out each year always gets me in the Christmas mood. I've used a combination of bottle brush trees, glass trees, wooden trees, and paper. I love mixing and matching. The key to it looking great together is to stick to a colour scheme. I used whites, creams, wood, pink, and iridescent for this grouping, and tried to include different textures, and heights.

pink Christmas decor ideas
mini Christmas tree forest

Living Room Cottage Christmas Decorating Ideas

Headed into the living room, next we have this cute little rustic chippy white paint table. I've hung some cute little house shelves above it, that feel very Scandinavian. For the holiday season this small space is full of little mini treasures. I used a white shelf with lots of little cubby holes, and filled it with mini bottle brush Christmas trees, wooden ornaments, and pine cones. It's the perfect little backdrop to more trees.

rustic Scandi cottage boho decor ideas
vintage cottage Christmas decor
rustic Scandinavian Christmas decor

In front is one of my favorite Christmas decorations, a wood advent calendar. You start out with the little wood tree, and each day in December you add a different woodland animal to the scene. I love that it's reusable year after year, and it could not be cuter.

Up on the house shelves, there's a small collection of creamers, and they're dressed up for the holidays with more mini bottle brush trees. And below there's a beautiful vintage wicker basket and a stack of vintage wool blankets in creams and pinks. All these little bits add up to the cutest cottage style Christmas display.

rustic Scandi cottage Christmas decor

Stair Garland

On the stairs, I've kept things relatively simple. Because the stairs are open, I could drape them all in garland, but it feels a little overwhelming for my more simple Scandi cottage boho look. Instead I've played off the asymmetrical fireplace mantel beside them, and only decorated one side. I've added lots of cozy layers here again. I started with the macrame garland -see my DIY macrame bunting tutorial here to make your own. Layered on top is some pretty faux fir garland, and more pom poms, felt balls, raw wood, and star garland.

Christmas stair garland ideas
boho Christmas decor

Fireplace Mantel

The fireplace mantel this year is decorated with lots more mini Christmas trees, and brass candlestick holders. Because it's a corner fireplace I've created a backdrop for the scene with some faux falling snow. I used different sized pom poms from the craft store, and strung them together with some thread. They're hung like a curtain, and such a fun addition that adds to the cozy feel I want this Christmas.

cottage Christmas mantel decor
pink Christmas mantel decor ideas

I've also hung more macrame garland, and a fun asymmetrical garland on top. I love the asymmetrical look of the fir garland, along with more layers of garland in front. And the white Christmas stockings were hung with care.  You can read all about our asymmetrical fireplace mantel here.

boho Christmas mantel ideas

Coffee Table Festive Decorating Ideas

The coffee table is always another favourite place to decorate for Christmas because it's in the centre of the room where we spend so much time, so I always save some of my very favourite pieces for here. This year I've started with a large round log piece, and painted the top in a soft pink with craft paint. Here are some of my favourite little Christmas trees, a new white flocked one, a raw wood one, and a brass look one. They make the prettiest forest, and perfect setting for these little vintage deer. They were a gift from my sister a few years ago, and they're perfect here curled up together in the snow. Add in a few candles, and twinkle lights and you have a the best Christmas display in the evening with all the lights out and the candles and lights twinkling.
Scandi boho Christmas decor
rustic Christmas coffee table decor
vintage deer Christmas decor

On the couch I've created a cozy feel with lots of pretty pillows. I love a seasonal pillow like nobody else, and this new skier pillow is definitely my new favourite. It's mixed with some cozy knit, velvet, and boho fringe for the perfect festive pillowscape.

Anthropologie snowy day skier pillow

Behind the couch we have a pass through to the kitchen. Lately I've been loving hanging things here for the different seasons -see my flower curtain here, and fall leaves here. For Christmas I wanted to add snow, and made the snowy curtain of pom poms for here that inspired the fireplace. I also added a bit of greenery, with some real pine clippings.

decorating a pass through for Christmas

The Christmas Tree

I love a real tree for Christmas. There's nothing like the smell, and look of a real tree. Even though it's a bit messy, and you have to remember to water it, and when it's time to remove it I always think to myself next year I'll get an artificial, I just can't seem to. It's the one traditional decor thing I just can't seem to quit. It reminds me of being a little girl and going to my Grandma's farm in the snow with my family to get a tree each year.

I love a wild tree, untrimmed, imperfect, and sparse. A real farmhouse Christmas tree for me. It's been referred to as a Charlie Brown tree -and this one is even a little more sparse than usual, but its imperfections kind of add to the beauty for me. I've decorated it with the most beautiful and delicate traditional vintage glass ornaments. They're such sentimental ornaments for me. I remember my mom putting similar ones on the tree when I was a little girl and all us kids being told not stick our fingers into the centre and break them!

rustic cottage Christmas tree

vintage pink Christmas ornamentNext, I've also added in some glass iridescent Christmas tree decorations . They look so magical with the sun shining in, and at night with the fairy lights. I love the subtle mix of old and new together. I've topped the tree with a beautiful pink vintage tree topper, and for garland I used some delicate pom pom yarn, which ties in with the snowy curtains in the pass through and fireplace, and all the pom pom garlands around the house beautifully. To hold the tree, I love to use a vintage galvanized wash tub, with white tree skirt tucked in around the tree. I've added some faux fur sheep skin, and cozy throws, and a few presents that I've managed to get purchased and wrapped so far at the bottom of the tree.

sparse Christmas tree real
pink Christmas present wrapping

Beside the tree is a favourite spot, This new Christmas tree throw blanket will be perfect for snuggling up under watching Christmas movies.

cozy cottage Christmas decor

Cottage Christmas Decorating Ideas in the Kitchen

On the farm table in the kitchen, I've used this pretty tray to create a grouping of trees and candles. It's perfect for containing some faux snow without it getting everywhere. I've also included a few mushrooms this Christmas, and this tray has a few of my favourites, sprinkled with iridescent snow.

farm house table Christmas decor
cozy cottage Christmas decor ideas
cottage Christmas kitchen decor ideas
Christmas mushroom decorations
farmhouse table Christmas decor
pink mini Christmas trees

This little cabinet area is always a favourite to decorate and this year I made this fun pink art work. I love how it feels vintage with the typography, and the pink colour. I ordered a colour engineer print, which is a really inexpensive option, and used some wood strips to hang it. I've layered in lots of pretty garland, to match the rest of the house over top of the poster.

vintage cottage Christmas decor pink

Underneath, I used an old vintage portable desk that I love, and added in some of my favourite Santa mugs, these ones are not vintage, so they're perfect for sipping hot chocolate all holiday season.  Beside them is one of my favourite vintage Santas, and some tins that will soon be filled with Christmas treats.

pink Christmas vintage decor

Open Shelves

The open shelves in the kitchen are another great spot to decorate. Ever since we swapped out our upper cabinets for these DIY open shelves -see how we made them here, I've loved changing up this area every season. On the shelves this years, there's more of the same colour scheme from the rest of house, creamy white, pink, and some green. I've also added some of my favourite vintage decorations for the Christmas season here. It is always fun hunting for these at antique markets and thrift stores, and adding to the collection over the years. I think the Santa mugs are my favourite of all.  The pom pom garland helps tie in with the pom poms in the pass through and living room.
open kitchen shelves decorated for Christmas
how to decorate open kitchen shelves for Christmas
open shelves in the kitchen decorated for Christmas
cottage Christmas kitchen decor

Over on the other side of the kitchen, the pine and pom poms make for a pretty view from the sink.  And I always like to decorate a little spot beside the sink with some favourites.  Have you spotted the snowy mushrooms on the front door wreath, coffee table, kitchen table, and now repeated here again.  These ones are in a pretty vintage pink tea cup and sprinkled with iridescent snow, surrounded by bottle brush trees.  And on the other side of the sink, we're ready to make a hot chocolate with marshmallows and sprinkles.
kitchen Christmas decorations
Christmas mushroom decor
pink Christmas decor

Thanks so much for joining me for this tour full of rustic Scandi cottage Christmas decorating ideas, it truly is probably my biggest and best post of the year, so I hope you've enjoyed it.

  • « Go to Previous Page
  • Page 1
  • Page 2
  • Page 3
  • Page 4
  • Page 5
  • Interim pages omitted …
  • Page 21
  • Go to Next Page »

Primary Sidebar

Welcome!

Life is a Party is all about helping you celebrate everyday with great food, entertaining and party inspiration, and seasonal crafts and home decor inspired by the holidays.

More About Dannyelle

Trending Recipes

  • Mac and cheese with panko breadcrumb topping.
    Best Homemade Mac and Cheese with Panko Breadcrumb Topping
  • Homemade iced capps in glasses on a wood table.
    Tim Hortons Copycat Iced Capp Recipe
  • Dirt Pudding no cream cheese in glasses with candy rocks, and fresh mint that looks like a little plant.
    Easy Dirt Pudding Recipe without Cream Cheese
  • Easy 3 ingredient coconut milkshake recipe.
    Easy Coconut Milkshake Recipe
  • Easy food processor scones on a plate with jam.
    Easy Food Processor Scones
  • Fluffy small batch pancakes for two ready to serve on a plate with syrup.
    Easy Small Batch Pancakes For Two Recipe

Fall Ideas

  • Pumpkin shaped dinner roll recipe, with a herb stem.
    Pumpkin Shaped Dinner Rolls
  • Halloween witch decorations
    Witch Halloween Decor
  • fall home decor
    Fall Decorating Ideas -Home Tour
  • Modern Boho fall mantel ideas.
    Modern Boho Fall Mantel Ideas
  • Homemade pink candy apples on a cutting board.
    How To Make Pink Candy Apples
  • Pink Halloween party and decorations with pink treats snack table.
    Pink Halloween Party

Entertaining Ideas

  • Adult mermaid party table set on the beach with cake and shells.
    Adult Mermaid Party Ideas: A Beach Picnic Goodbye to Summer
  • Overhead view of tomato party table with pizza and appetizers.
    The Ultimate Tomato Party: A Tomato Girl Summer Garden Gathering
  • Camp themed party table with green gingham tablecloth, wildflowers, and Welcome to Camp banner.
    The Ultimate Camp Themed Party for Adults
  • Garden party table set under white pergola with vintage floral tablecloth, pink peony centerpiece in wooden tool caddy, white wicker chairs, and climbing white roses in background.
    Garden Themed Party
  • Complete mimosa bar setup on white console table with vintage silver ice bucket, labeled colorful juice bottles, small glass garnish bowls, and ribbon-tied champagne flutes on white lace tablecloth with flower wall backdrop.
    How to Set Up a Beautiful Mimosa Bar
  • Breakfast for dinner party table styled like a bed with star quilt tablecloth, gingham pillows, and cloud installation above.
    Breakfast for Dinner Party: Brinner Under the Stars
  • Recipe Index
  • Parties & Entertaining
  • Fall
  • Subscribe
  • Free Resource Library

Footer

back to top

as seen in:

Better Homes and Garden Logo
American Farmhouse Style logo.
Apartment Therapy logo.

About

  • Privacy Policy
  • About

Subscribe

  • Sign Up! for emails and updates

Contact

  • Contact

As an Amazon Associate I earn from qualifying purchases.

Copyright © 2025 Life is a Party

Share
Pin
Post
Share
Pin
Post

Rate This Recipe

Your vote:


A rating is required
A name is required
An email is required