• Skip to primary navigation
  • Skip to main content
  • Skip to primary sidebar
Life is a Party
  • Recipe Index
  • Parties & Entertaining
  • Fall
  • Subscribe
  • Free Resource Library
menu icon
go to homepage
  • Recipe Index
  • Parties & Entertaining
  • Fall
  • Subscribe
  • Free Resource Library
subscribe
search icon
Homepage link
  • Recipe Index
  • Parties & Entertaining
  • Fall
  • Subscribe
  • Free Resource Library
×
Home

Chocolate Chip Shortbread Cookies

Chocolate Chip Shortbread Cookies

Dec 17, 2012 · 3 Comments

Chocolate chip shortbread cookie recipe.

Chocolate Chip Shortbread Cookies -an easy, no fail, delicious recipe. Makes a big batch too, perfect for sharing and gift giving.

Chocolate chip shortbread cookie recipe.
[feast_advanced_jump_to]

This easy chocolate chip shortbread recipe is easy to put together and a real crowd pleaser.  Enjoy all the goodness of tender buttery flavor of shortbread cookies with happy addition of chocolate! 

Cookie Week

Welcome to Cookie Week, 'cause it just seemed like the right thing to do the week before Christmas! I'll be sharing some of our family favourites all week -look for more cookie week recipes at the bottom of this post. I come from a long line of cookie makers. My Grandma loved to bake cookies, and when I was a little girl, after a kiss and hug for Grandma, my next stop when I went to her house, was usually the cookie tin.

My mom is a great baker too. But since my mom's become so busy working and gardening in all her spare time -yes even in December, she's still banking roses and making sure she has all the required bird feeders and seed combinations to attract just the right birds -most of the cookie baking seems to fall to me.

I have to say that as I whipped up multiple batches today, I couldn't help but think how much easier and faster it is for me than my poor Grandma. With my stand mixer, food processor, dish washer and convection oven, it really didn't take too long to whip these up, so I hope that this Christmas you'll try a little baking too. 😉
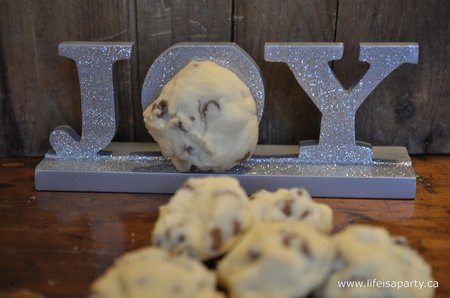
how to make Chocolate Chip Shortbread Cookies

Shortbread Get's Even Better With Chocolate

This year we let everyone in our little family choose one favourite kind of cookie to make.  So today I'm sharing Maddie's choice, Chocolate Chip Shortbread, after I convinced her that a regular chocolate chip cookie wasn't Christmas-y enough. 😉 This recipe is from an old friend, Laurie, and these are truly easy and really delicious. They also make a very big batch, which is perfect for gift giving this time of year.  

If you're a chocolate lover like my Maddie is, these are a great little twist on classic shortbread cookies.  This chocolate chip shortbread cookie recipe has all the melt in your mouth tenderness and buttery texture of traditional shortbread recipes, with a little chocolate added too.   They're one of my favorite cookies to make at Christmas, and year round when you want a sweet treat.  They're also a great addition to your cookie tray during the holidays.  I also love them for gift giving.  They're relatively quick to make since there's no fooling around with a cookie cutters or a rolling pin.  They're absolutely perfect for a cookie exchange because they a little more special than plain shortbread cookies, they make a large batch, and everyone always loves them.

Chocolate Chip Shortbread Cookies Recipe

Butter

You must use real butter for shortbread cookies.  You might be able to get away with something like margarine in other kinds of cookie recipes.  But for shortbread only high quality butter will do.  Some people like to use unsalted butter for baking, and then add salt to the recipe, but just use regular salted good quality butter in all my baking, including this shortbread dough.  Real butter helps create the melt in your mouth cookies, that shortbread is known for.  For best results always use real butter for your this most iconic cookie.
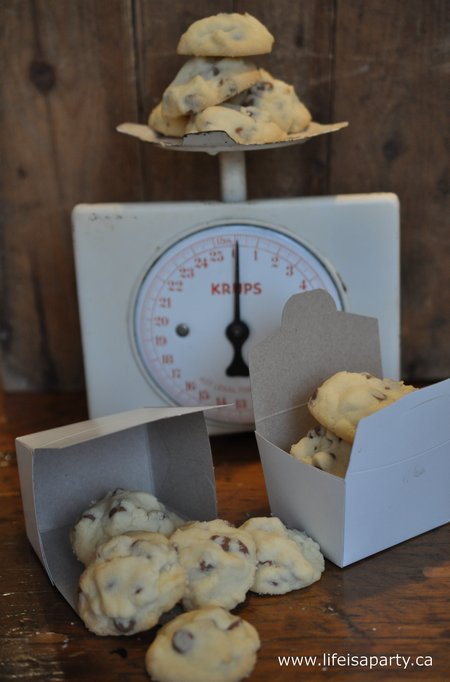
Chocolate Chip Shortbread

Chocolate

A simple recipe that is always very well received, great for a tea party too, or anytime. I sometimes make them with milk chocolate chips and sometimes with regular semi-sweet chocolate chips and they're very good with either.  So use whichever you prefer.  You could use dark chocolate too if it's your favourite.  The milk chocolate is of course the sweetest, and reduces as the chocolate gets darker.  I usually make these cookies with chocolate chips, but you can use mini chocolate chips or chocolate chunks if you prefer.

I usually tend to make these cookies quite small, but if you're opting for the chocolate chunk shortbread cookies you can make the cookies larger and just increase the baking time if necessary.

Storing

Store your chocolate chip shortbread cookies in an airtight container.  Many people that shortbread cookies improve with age.  You can make these cookies in advance of when you when you need them and store for days and even a week or more in a cool dry place in a sealed container.  These cookies also freeze well in a freezer bag or sealed container and keep in the freezer for up to 4 months.
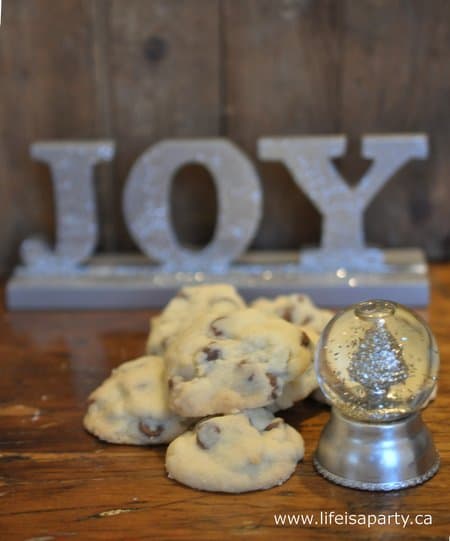
Chocolate Chip Shortbread Recipe

I hope you love this chocolate chip cookies.  What could be better than enjoying one with a warm cup of coffee or tea?

Recipe

Chocolate chip shortbread cookie recipe.

Chocolate Chip Shortbread Cookies

Sweet shortbread cookies with chocolate chips.
5 from 1 vote
Print Pin Rate
Course: Desserts
Cuisine: British
Prep Time: 15 minutes minutes
Cook Time: 1 hour hour
Total Time: 1 hour hour 15 minutes minutes
Servings: 5 dozen
Calories: 112kcal
Author: Dannyelle Nicolle-Ramjist

Ingredients

  • 2 cups butter room temperature
  • 1 cup fruit sugar
  • 1 cup rice flour
  • 2 ½ cups all purpose flour
  • 12 oz chocolate chips

Instructions

  • Cream butter and sugar in the bowl of a stand mixer fitted with the paddle attachment.
  • Mix in rice flour and all purpose flour until combined, being sure to scrape down the sides of the bowl occasionally.
  • Add in the chocolate chips, and fully combine.
  • Drop by teaspoonful on cookie sheets making 1-inch balls. Bake at 300 degrees F, for 20-30 min. until just turning golden brown around the edges. Cook the cookies on a wire rack, and store them in an airtight container.

Notes

Chocolate Chips: I sometimes make these with milk chocolate chips and sometimes semi sweet chocoalte chips. Either is delicous.

Nutrition

Serving: 1g | Calories: 112kcal | Carbohydrates: 10g | Protein: 1g | Fat: 8g | Saturated Fat: 5g | Polyunsaturated Fat: 2g | Cholesterol: 16mg | Sodium: 49mg | Fiber: 1g | Sugar: 3g
Tried this Recipe? Tag me Today!Mention @LifeisaParty or tag #lifeisaparty!

With Chocolate Chip Shortbread Cookies, life really is a party!

More Cookie Recipe Inspiration

You might also like our Cherry Snowball Cookies here.
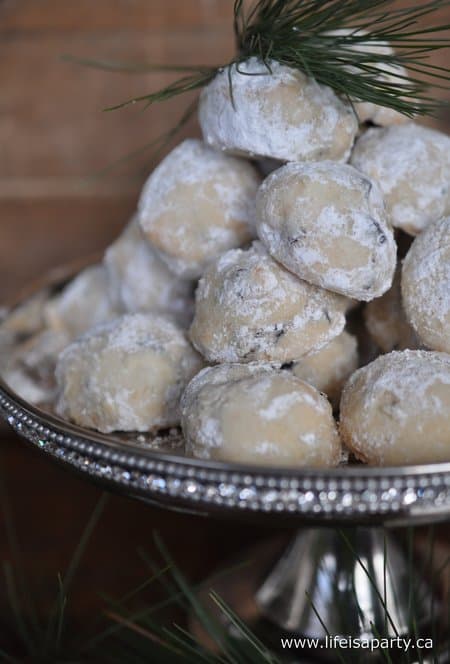
More Christmas Cookie Inspiration

Also check out our Brown Sugar Shortbread Caramel Thumbprint Cookies here.
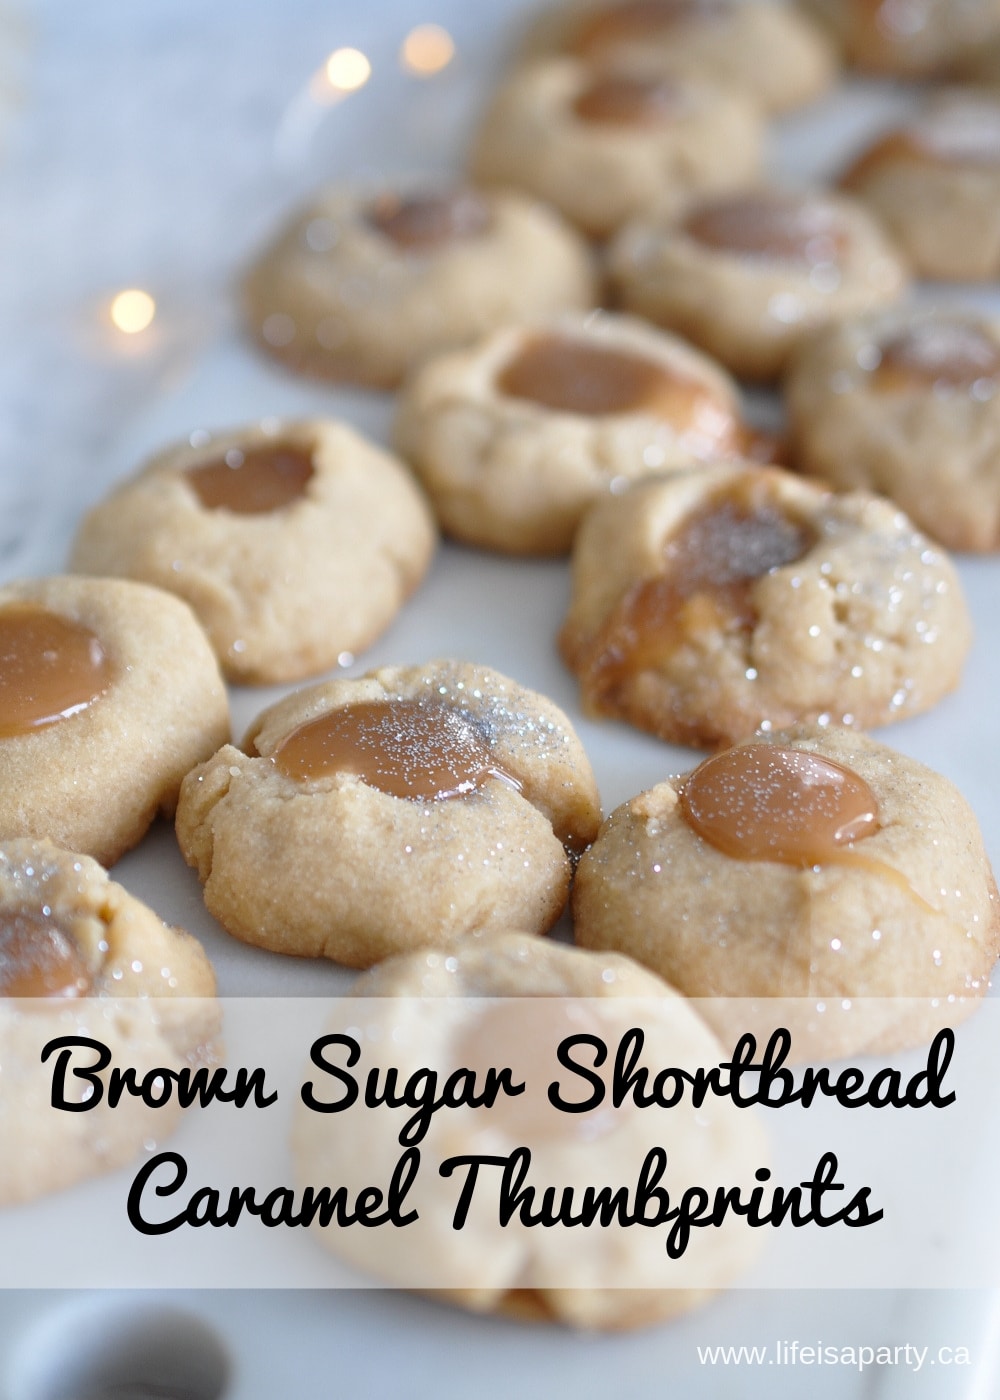
Brown Sugar Shortbread Caramel Shortbread Cookies: The brown sugar makes the shortbread cookie rich and the oozy, gooey caramel centres are perfect.

You might also enjoy our Raspberry Almond Thumbprint Cookies here.
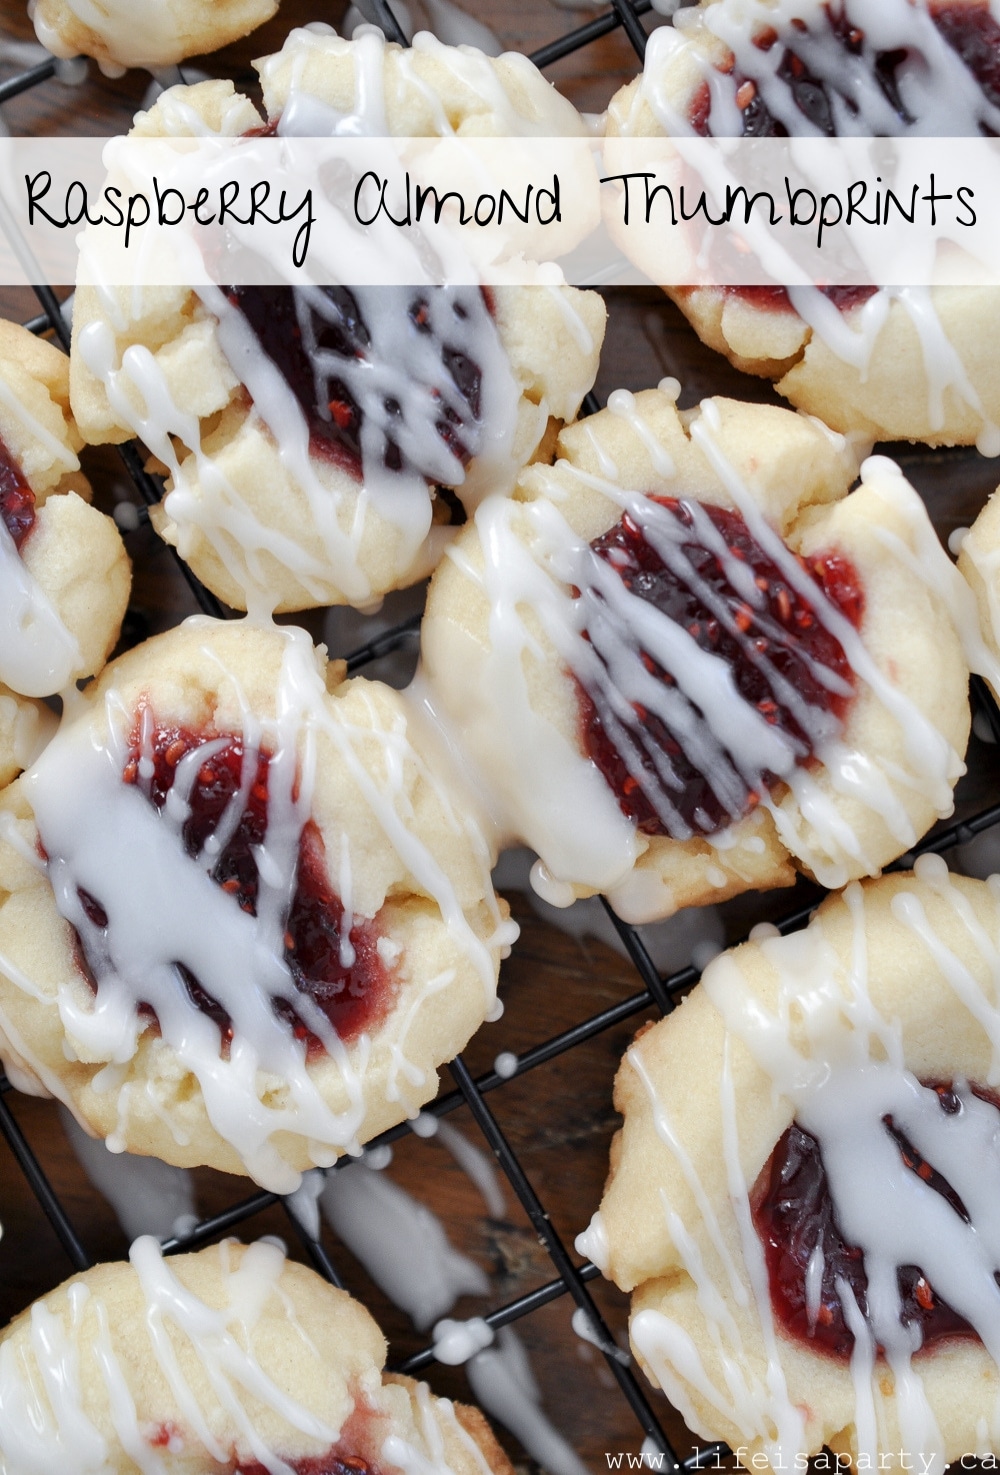
Raspberry Almond Thumbprint Cookies: with an almond shortbread base, raspberry jam filling, and a drizzle of almond icing on top these cookies are perfect.

Nutcracker Themed Little Girls Room

Dec 13, 2012 · 2 Comments

Nutcracker Christmas decor ideas.

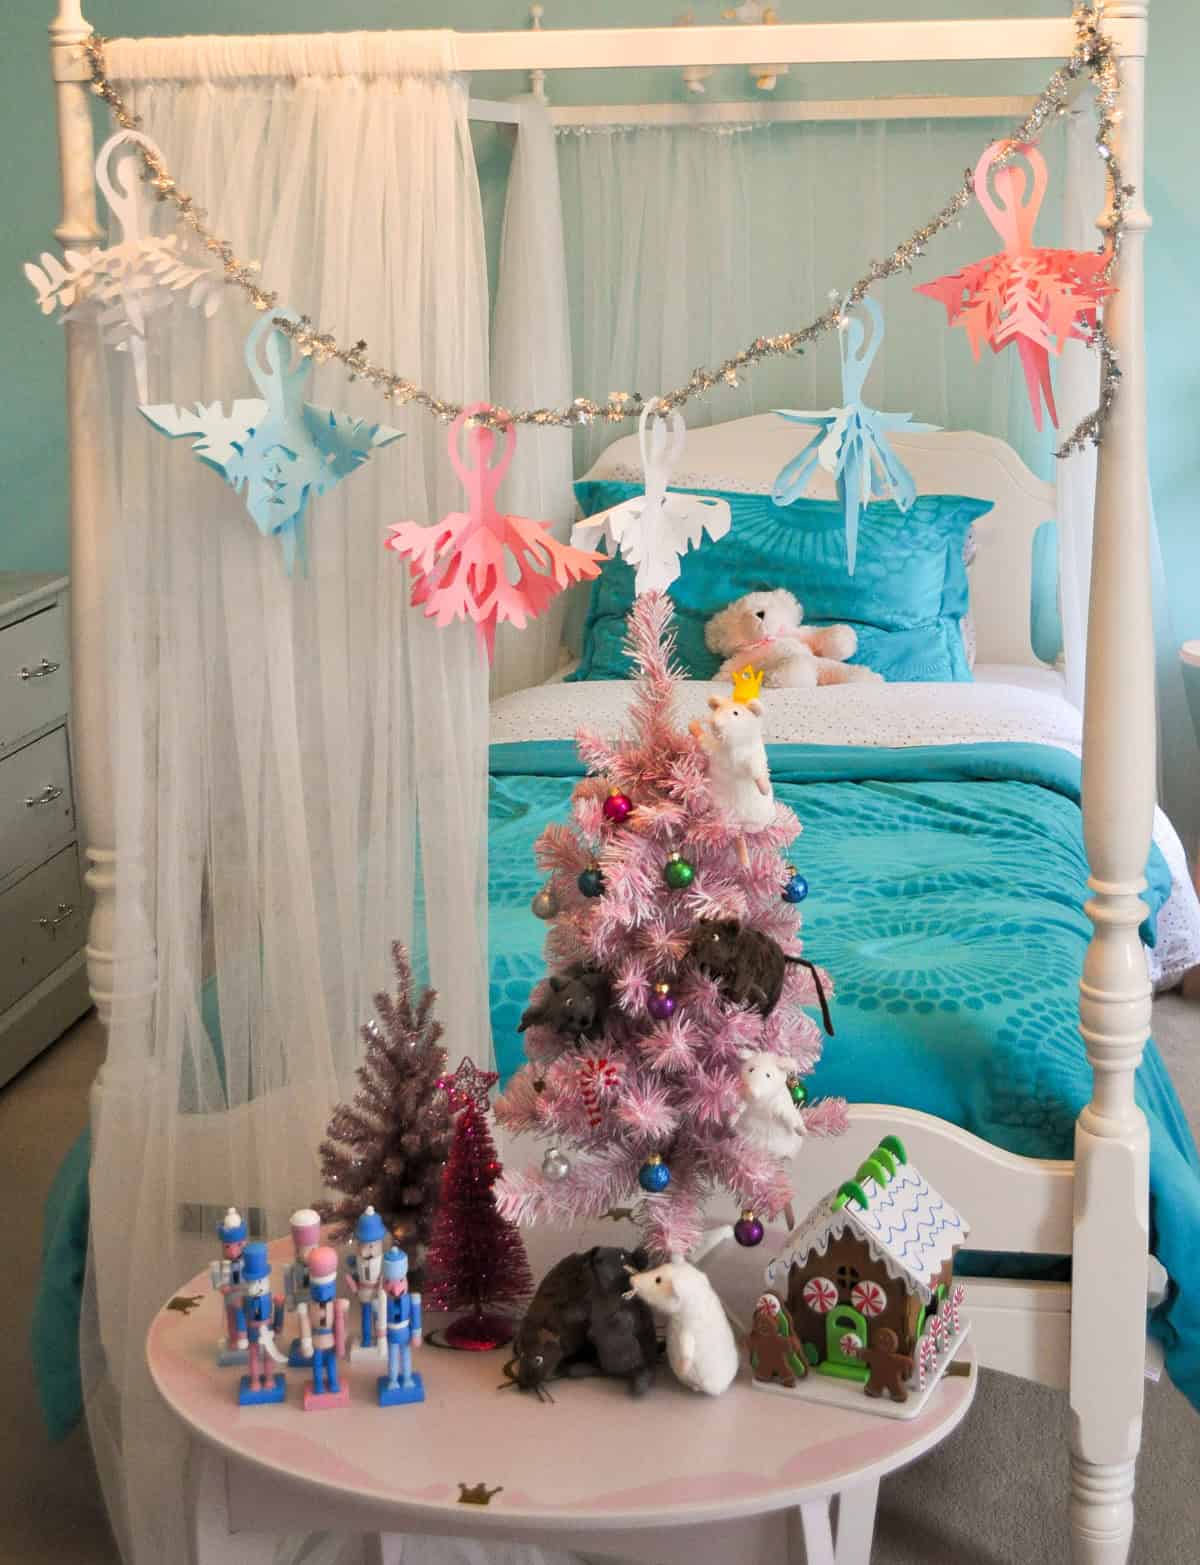
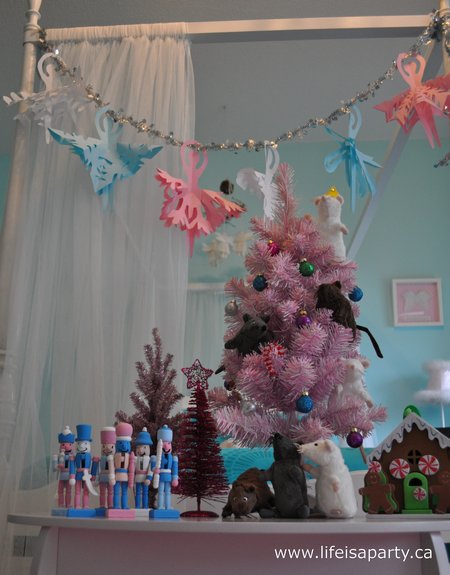
Nutcracker Themed Christmas Decorations: A little mouse army, and mouse king, paper snowflake ballerinas, and pastel coloured nutcrackers make for the perfect Nutcracker themed children's room.

Nutcracker Christmas decor ideas.

I wanted to decorate my daughter's room for Christmas. The problem is that my kids really play in their rooms, and they're full of toys, books, games, and crafting supplies. So, in Paige's room, I settled for one little area to set up a small Christmas vignette.

Nutcracker Themed Christmas Decorations: A little mouse army, and mouse king, paper snowflake ballerinas, and pastel coloured nutcrackers make for the perfect Nutcracker themed children's room.

She decided she wanted to go with a Nutcracker theme. This was a little challenging, but I love what we eventually came up with.

Nutcracker Themed Christmas Decorations: A little mouse army, and mouse king, paper snowflake ballerinas, and pastel coloured nutcrackers make for the perfect Nutcracker themed children's room.

We started out looking for some nutcrackers. Since her room is pink and aqua, that's the colour scheme we wanted to go with. I found a cute set of six unpainted ones that we could decorate ourselves. Instead of using the paint colours from the set, we did them all in aqua, pink, and white. I love how they turned out, especially the cute little faces and smiles that Paige gave them all.

Nutcracker Themed Christmas Decorations: A little mouse army, and mouse king, paper snowflake ballerinas, and pastel coloured nutcrackers make for the perfect Nutcracker themed children's room.

We also needed some mice and the mouse king. I found the perfect thing at IKEA. These little mice were only .99 cents, and came in white, brown and grey. We got a couple of each.

Nutcracker Themed Christmas Decorations: A little mouse army, and mouse king, paper snowflake ballerinas, and pastel coloured nutcrackers make for the perfect Nutcracker themed children's room.

For our mouse king, I made a cute little crown out of felt and added a few gems. Then, we tucked the mice into and around the little Christmas tree.

Nutcracker Themed Christmas Decorations: A little mouse army, and mouse king, paper snowflake ballerinas, and pastel coloured nutcrackers make for the perfect Nutcracker themed children's room.

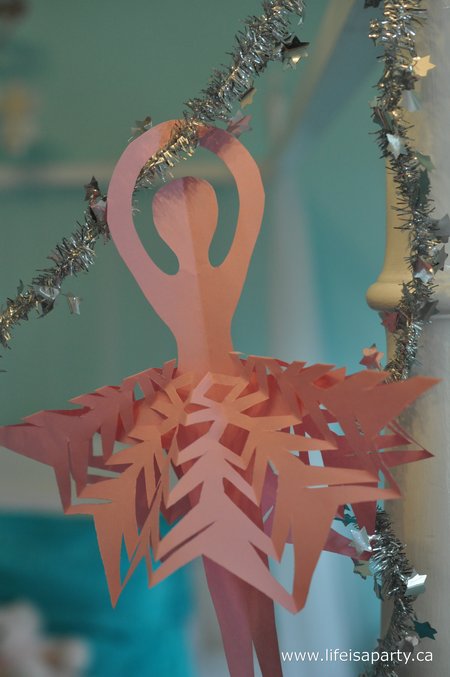
For our sugar plum fairy ballerinas, I saw the cutest idea from krokotak.com for these snowflake ballerinas.

Nutcracker Themed Christmas Decorations: A little mouse army, and mouse king, paper snowflake ballerinas, and pastel coloured nutcrackers make for the perfect Nutcracker themed children's room.

With pretty, Nutcracker Themed Christmas Decorations for a little girls room like this, life really is a party!

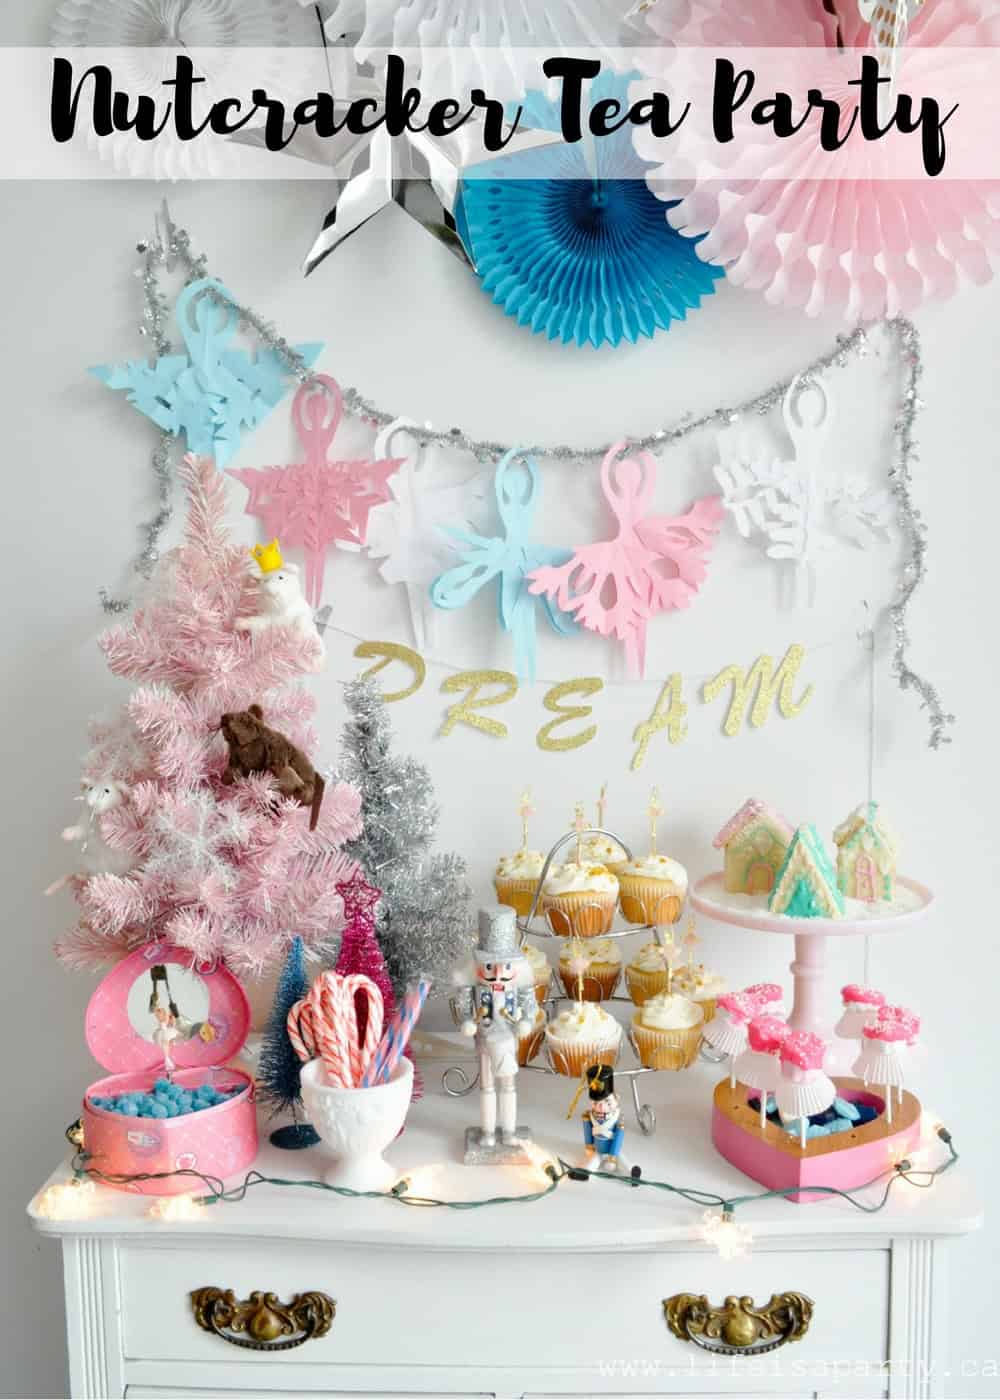
You might also like The Nutcracker Christmas Tea Party:

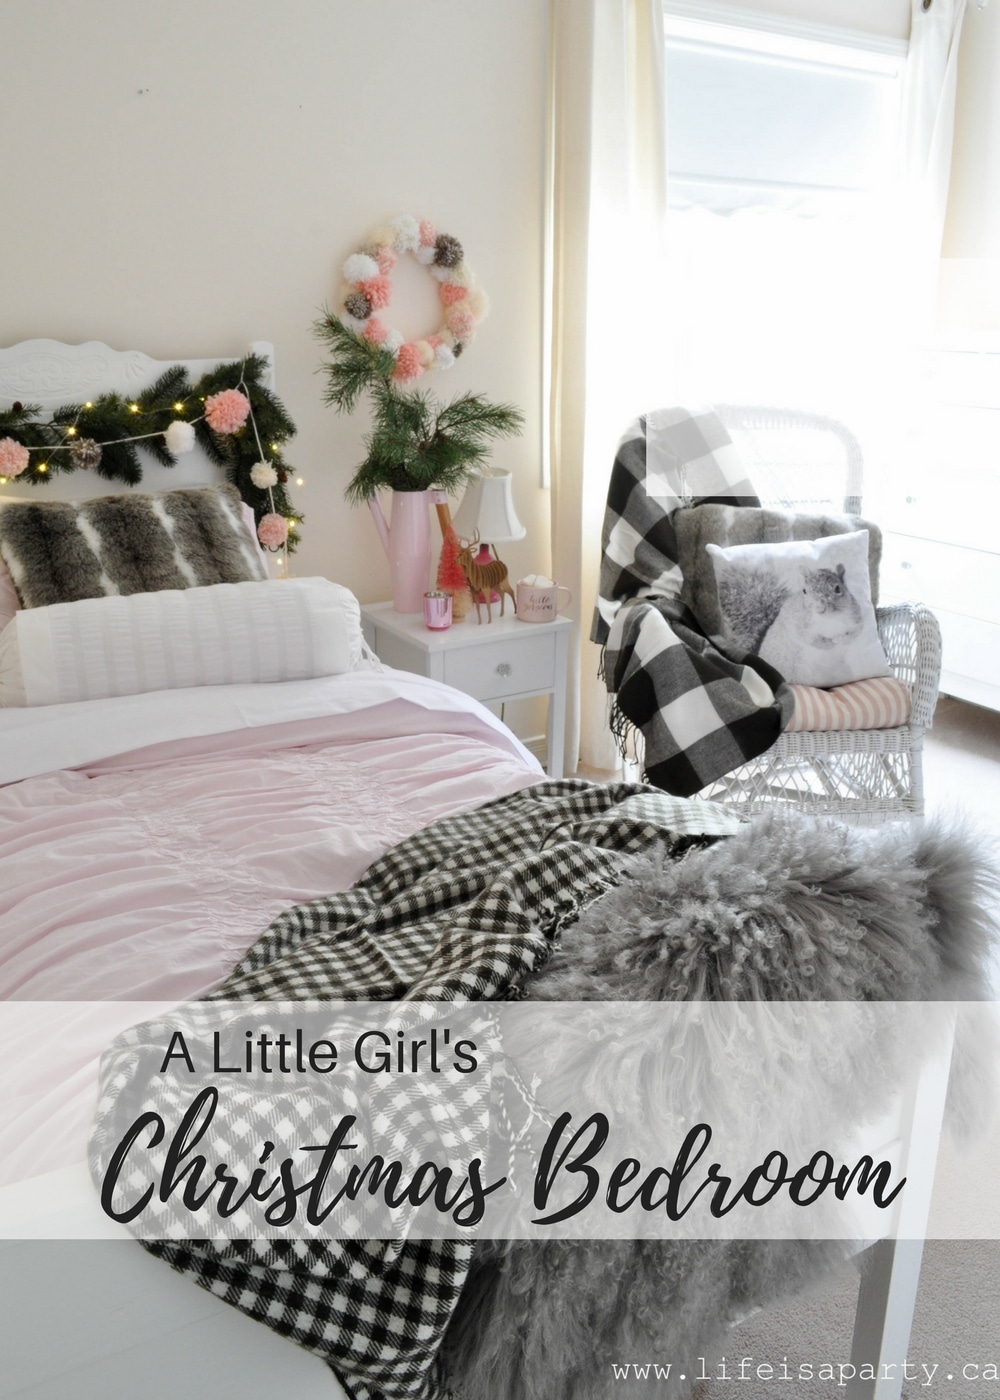
Also check out our Little Girls Christmas Bedroom here.

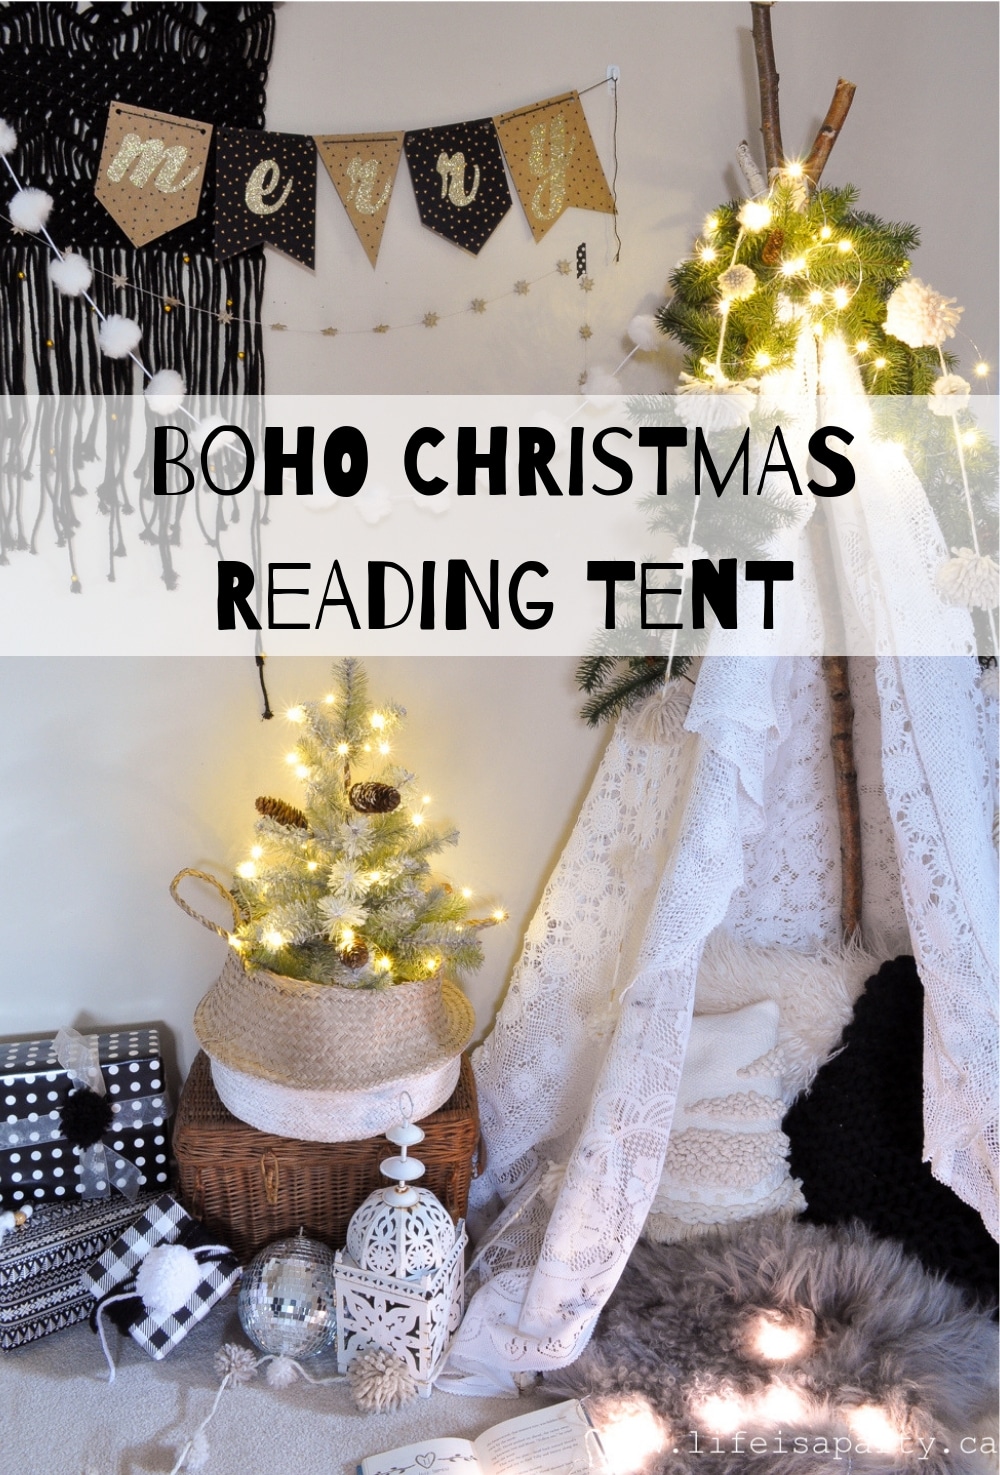
You might also like our Boho Reading Tent here.

Boho Christmas Reading Tent: See how to make an inexpensive reading tent fort for kids with birch poles and an old table cloth.

Hot Chocolate Gift Basket

Dec 12, 2012 · 3 Comments

Easy hot chocolate gift basket.

Hot Chocolate Gift Basket: the perfect inexpensive hostess gift idea, perfect for Christmas gift giving, or a teacher gift idea.

Easy hot chocolate hostess gift basket.
[feast_advanced_jump_to]

Today I'm sharing another gift idea for under $10.  This little hot chocolate gift basket idea is perfect for a host, hostess, neighbour, teacher, coach, or friend.

Image

Hot Chocolate Gift Basket Ideas

One of the keys to an inexpensive, yet impressive gift is the packaging. I love that the bulk food store carries several different flavours of hot chocolate mix. I bought some and then put them into cute little mason jars, because everything looks good in a mason jar. 😉

hot chocolate gift basket ideas

I also added some candy canes, and a few different kinds of marshmallows.

hot chocolate gift basket

Chocolate Spoons

I picked up some chocolate spoons at the dollar store too. Here's a pic of the package so you know what to look for. I used these in a hot chocolate buffet for an event last year and they were a big, big hit, so I thought they'd be fun to add to this gift. I took them out of the box and wrapped them up individually in cello bags and tied them with baker's twine.

chocolate spoons

Adding Label Tags

I made some simple little brown paper tags, and attached them to the mason jars with more aqua baker's twine.

how to make a hot chocolate gift basket

Wood Tray Instead Of A Gift Basket

I put everything together in a little wooden tray, also from the dollar store, that I painted aqua with some craft paint and filled with some silver basket filler.

hot chocolate gift basket

With a hot chocolate gift basket like this for giving, life really is a party!

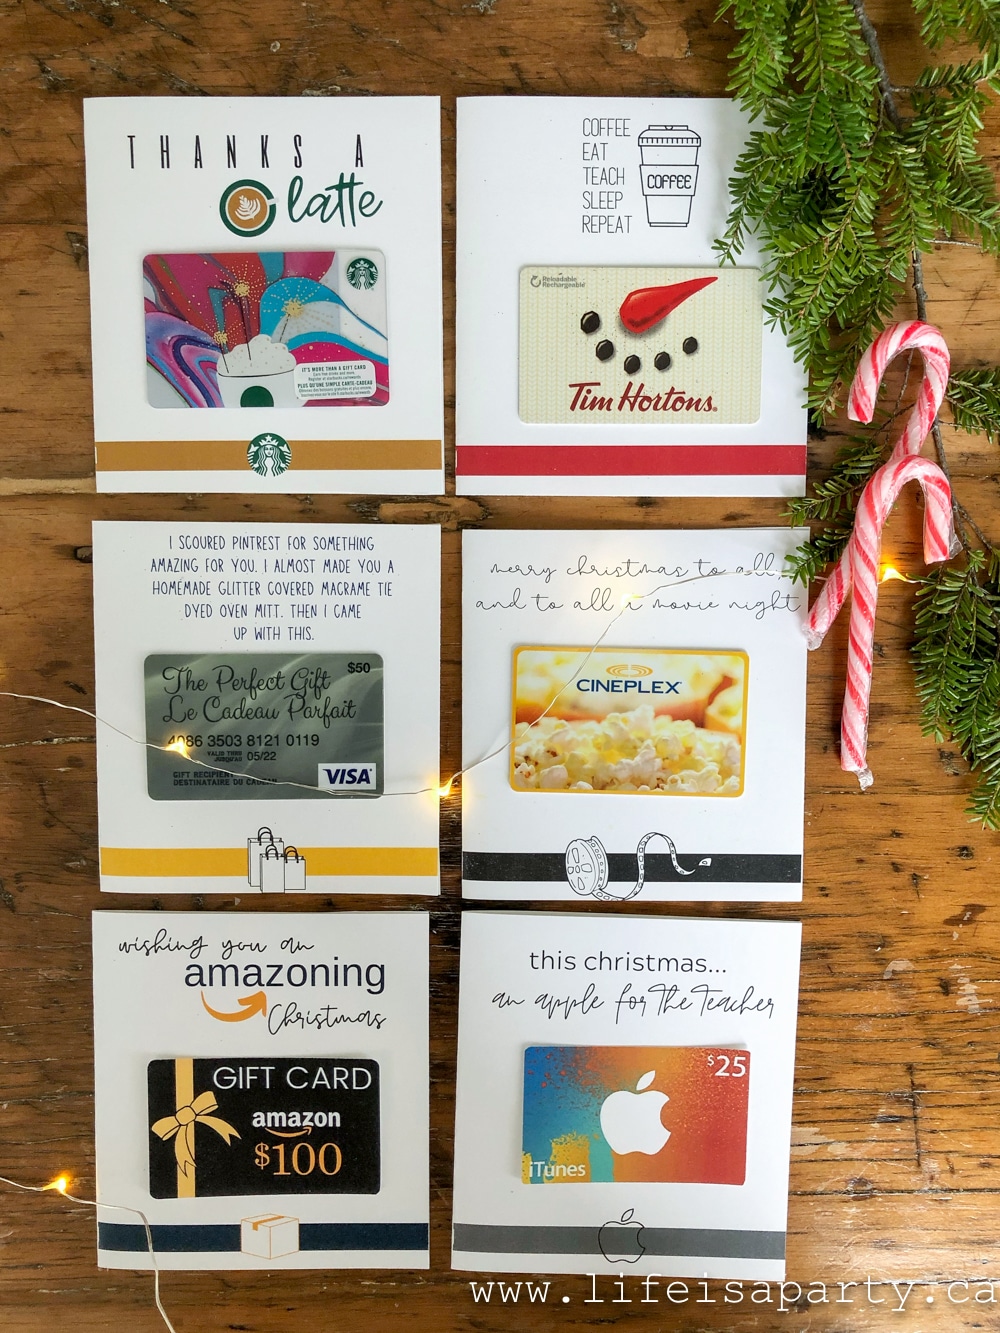
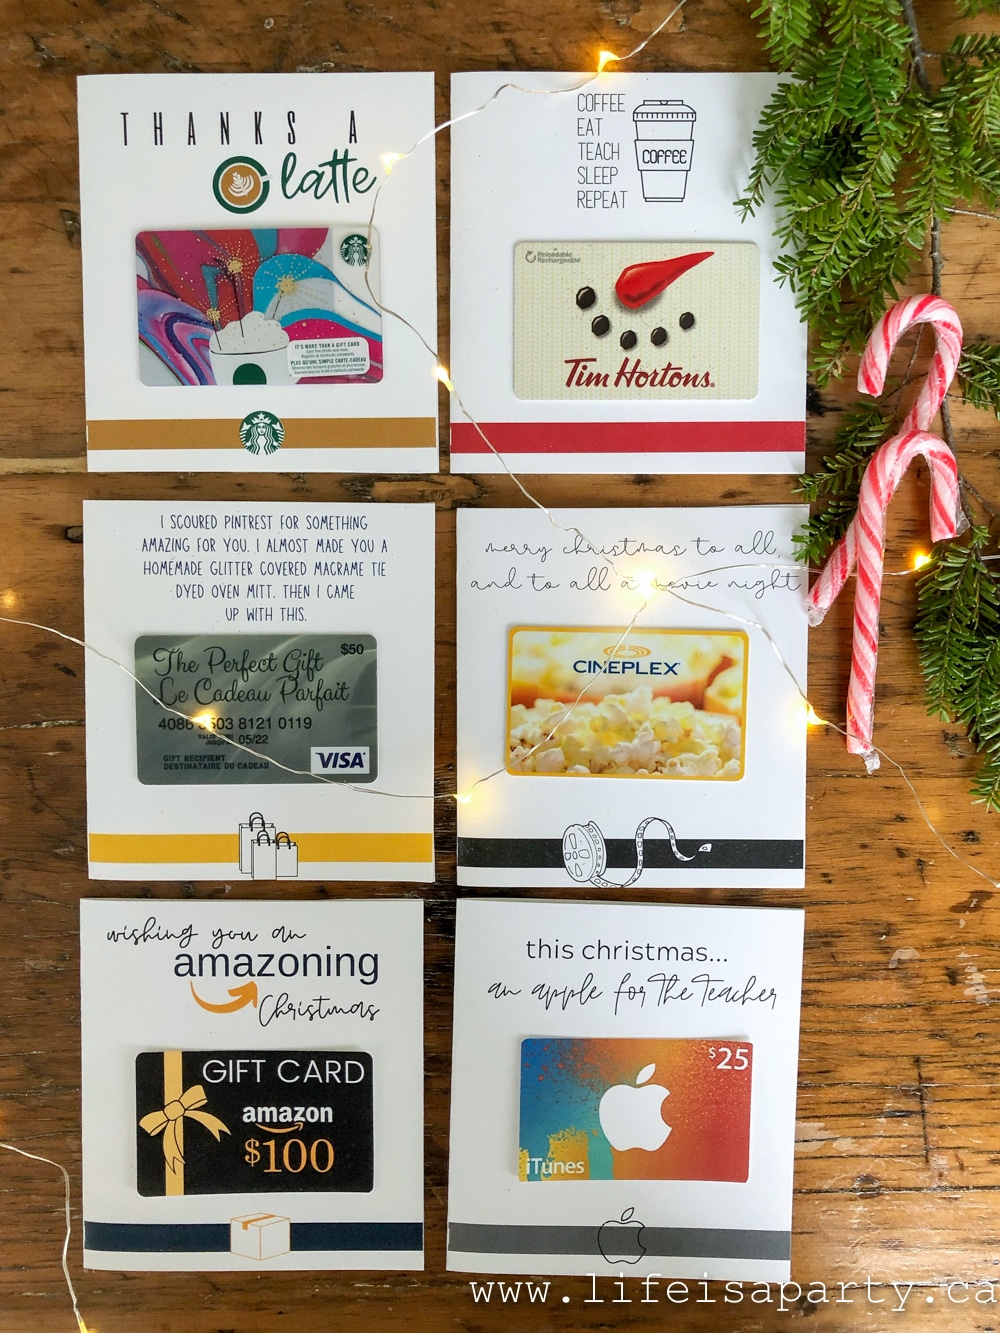
You might also like Printable Gift Card Holders here.

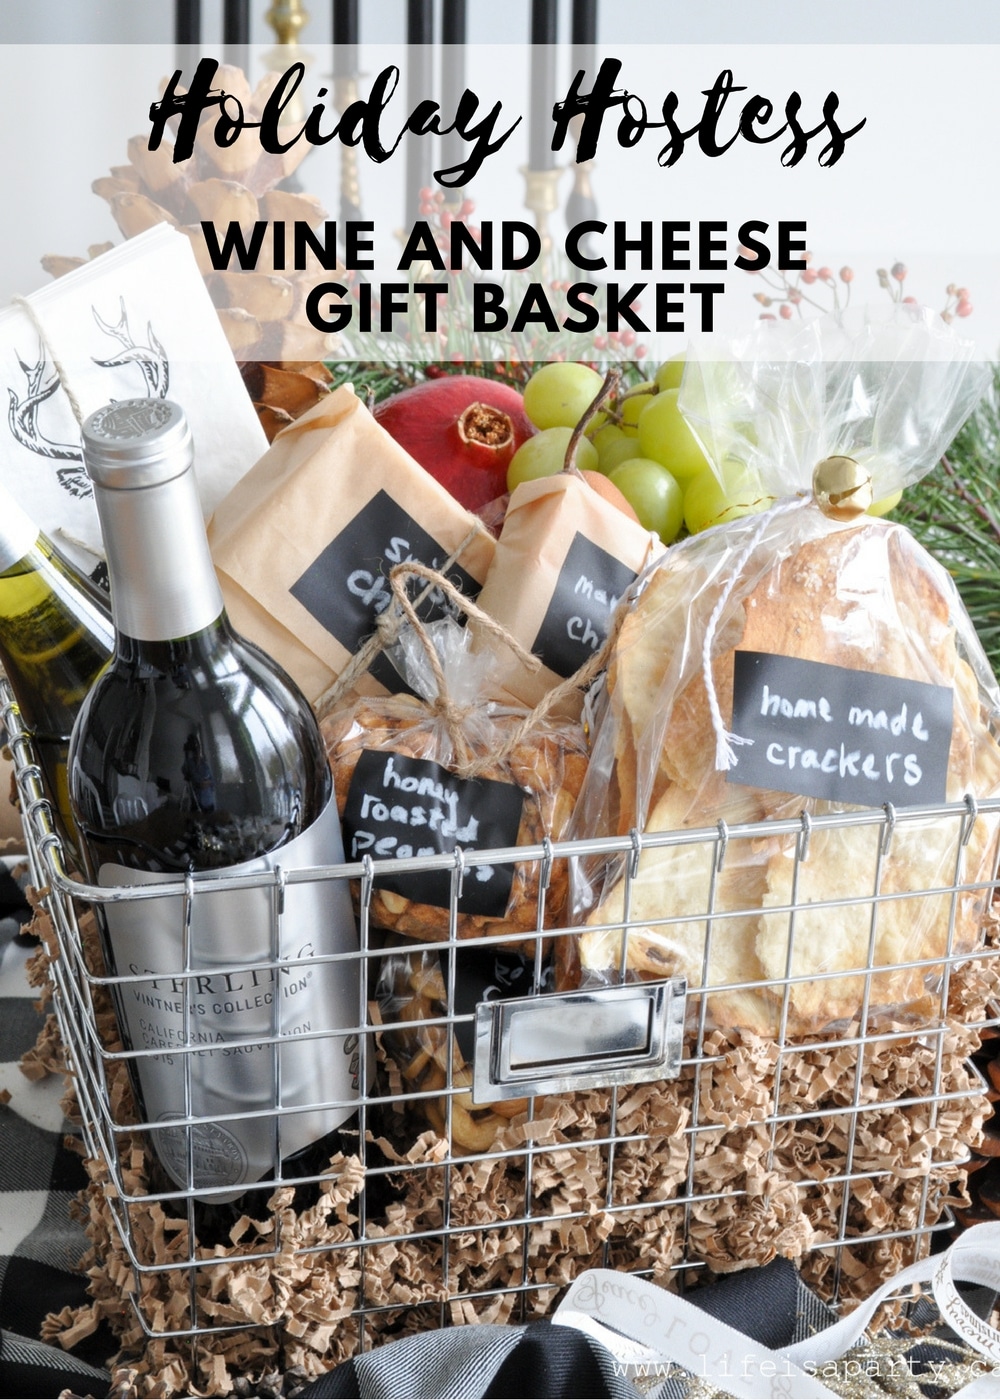
You might also enjoy Holiday Hostess Wine and Cheese Gift Basket here.

DIY Wood Grain Faux Bois Wrapping Paper

Dec 11, 2012 · 5 Comments

DIY woodgrain wrapping paper craft.

DIY Wood Grain Faux Bois Wrapping Paper: make your own wrapping paper and gift bags with a special wood grain painting tool -full tutorial.

DIY wood grain wrapping paper craft.
[feast_advanced_jump_to]

What better to go with our woodland Christmas theme than wood grain faux bois wrapping paper?  This DIY faux bois wrapping paper is easy to make, and looks so good!  Great for Christmas or anytime of year.

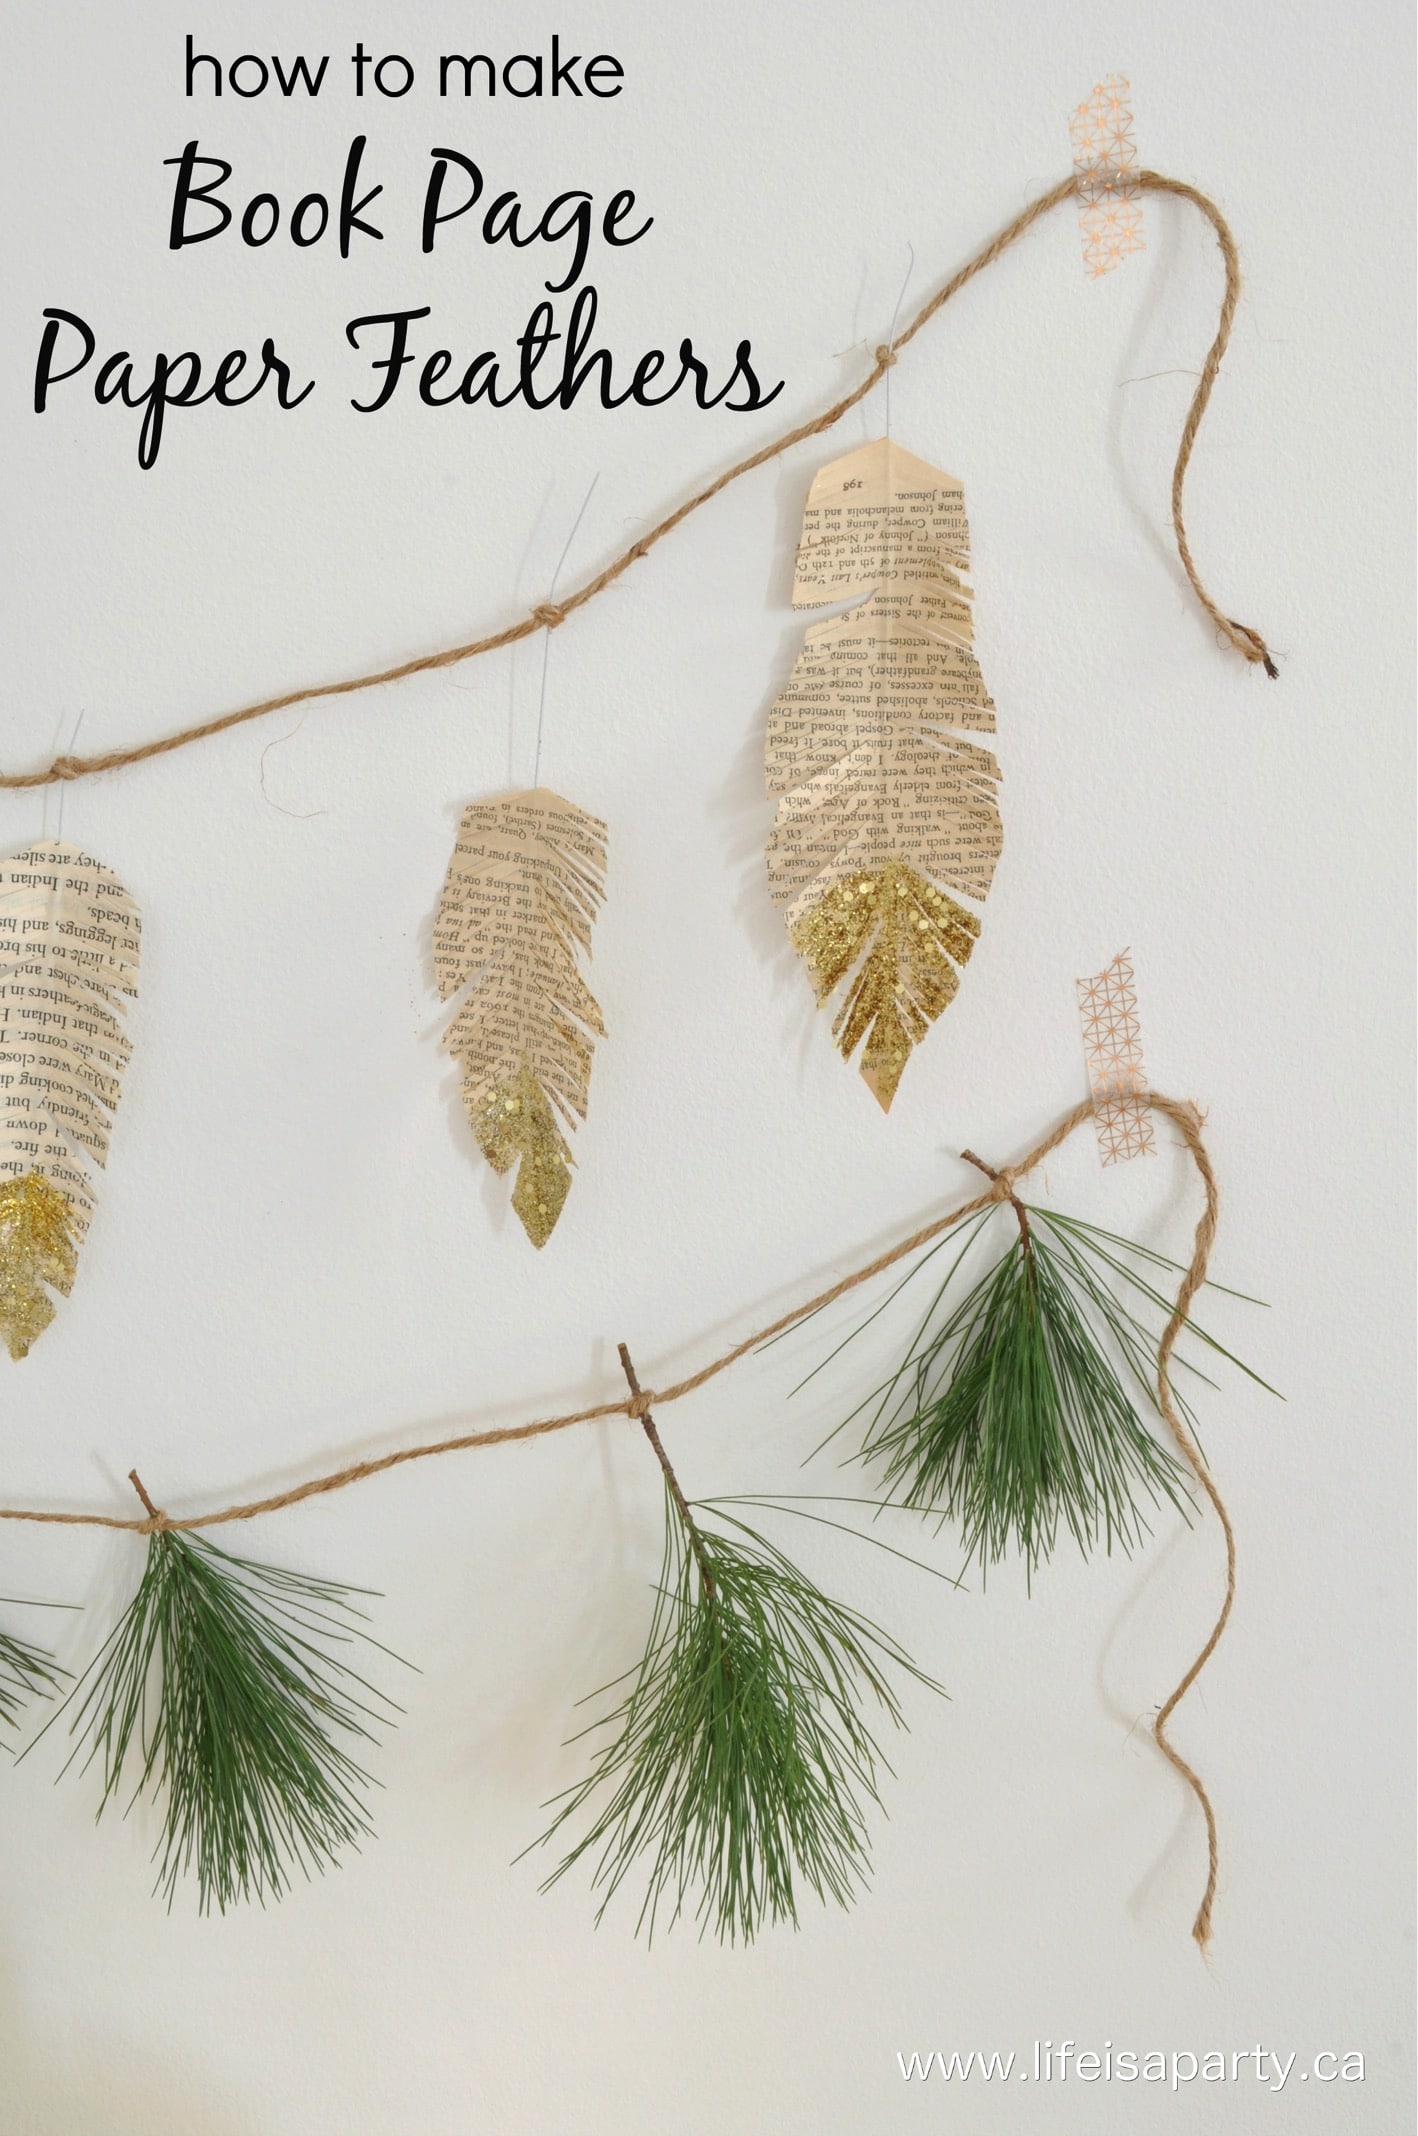
We love making pretty packages for Christmas. Check out our Christmas wrapping party here. You might also like our DIY Paper Feathers.

Materials:

how to make your own wood grain wrapping paper
  • brown kraft paper on a roll and brown brown paper bags -We wanted used brown paper for our base, but what paper is a great option too. This method worked great on paper gift bags too.
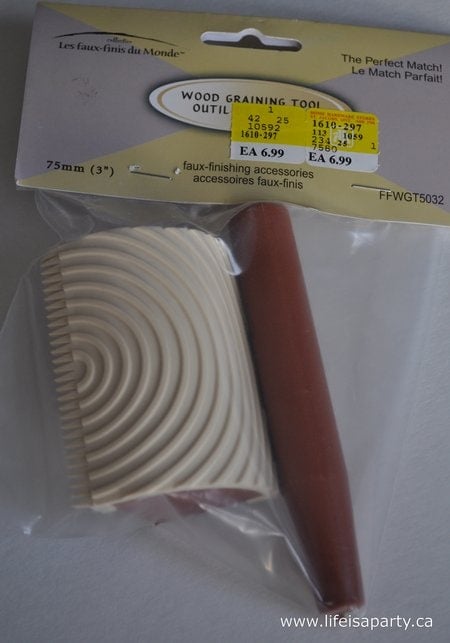
  • wood graining tool -This is essential for this project. I found mine at the local hardware store -Home Hardware if you're in Canada. Look for them on-line. They come in different sizes and designs.
  • craft paint -We used metalics for Christmas, but this would look great with brown or black paint oo.
  • acrylic glazing medium -This product helps keep your paint from drying too quickly and makes it easier to work with for a project like this.
wood graining tool

How To Make DIY Faux Bois Wrapping Paper

1. Start with some kraft paper, craft paint -I used silver and white, and acrylic glazing medium. Mix the craft paint with the glazing medium, 1 part paint to about 2 parts glazing medium.

2. Paint this mixture all over the paper in a thick-ish coat.

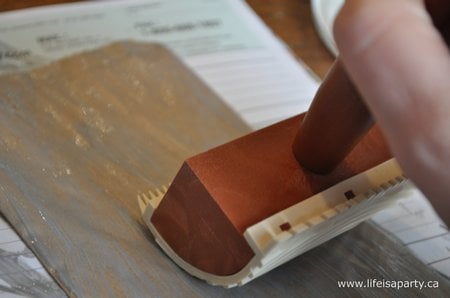
3. Using the graining tool, slide it through the glaze, and rock it slightly to create the grain effect as you move down the paper in lines.

It takes a little getting used to, there is definitely a little learning curve! But keep experimenting until you get a look you're happy with, and once you get the hang of it, it's pretty easy, honest. 😉

The glaze in the paint extends its drying time, so you have a while to play around with it. If you don't like it, paint over it again and keep trying.

how to use a wood grain painting tool on paper

You can do it on wrapping paper sheets, paper bags, or kraft paper gift bags.

Top Tips: Truth in blogging, I did find it a little difficult to do a big sheet of wrapping paper, but with practice it gets easier. I found it was drying before I finished the whole sheet, but I just had to add the glaze-paint mixture a bit more thickly and work in sections. The little gift bags are much easier to work with. I did one side of the bags, let it dry completely, and then did the other side.

DIY Wood Grain Faux Bois Wrapping Paper: make your own wrapping paper and gift bags with a special wood grain painting tool -full tutorial.

Once the paint dried, I gathered up some simple woodland embellishments, like twine, snowflakes, feathers, pine cones, tinsel, some twigs painted silver, and some great wood grain ribbon from Walmart.

DIY Wood Grain Faux Bois Wrapping Paper: make your own wrapping paper and gift bags with a special wood grain painting tool -full tutorial.

I really like the mix of the rustic with the silver sheen and sparkle for Christmas. I also used some wood veneer business cards that I stamped and wrote on for gift tags.

diy faux bois wood grain wrapping paper

Jingle bells were a fun addition too.

wood grain wrapping paper tutorial

This package is wrapped in white paper, and then just has a band of the wood grain paper -great way to add the wood grain detail, and not use up too much of the precious paper. 😉

diy wood grain wrapping paper
DIY Wood Grain Faux Bois Wrapping Paper: make your own wrapping paper and gift bags with a special wood grain painting tool -full tutorial.

With packages this pretty, life really is a party!

Frequently Asked Questions

Where did you find the wood graining tool?

I got mine at Home Hardware. Look for them on-line.

Do I have to add the glazing medium?

Yes, it really does make a difference. It makes the paint eaiser to work with, and slows down the drying time so you can create the wood grain effect.

Where can I buy the glazing medium?

I got mine at an art supply store. Look for it on-line also.

Recipe

DIY woodgrain wrapping paper craft.

Wood Grain Faux Bois Wrapping Paper

Give paper and gift bags a wood grain effect, perfect gift giving.
No ratings yet
Print Pin Rate
Prep Time: 5 minutes minutes
Cook Time: 10 minutes minutes
Total Time: 15 minutes minutes
Author: Dannyelle Nicolle-Ramjist
Cost: $20

Equipment

  • wood grain tool
  • paint brush

Materials

  • brown kraft paper
  • paper gift bags
  • craft paint
  • acrylic glazing medium

Instructions

  • Mix the craft paint with the glazing medium, 1 part paint to about 2 parts glazing medium.
  • Paint this mixture all over the paper in a thick-ish coat.
  • Using the graining tool, slide it through the glaze, and rock it slightly to create the grain effect.

Notes

The glaze in the paint extends its drying time, so you have more time to work with it.  If you're not happy with your results, paint over it and try again.
Working in larger areas is more difficult.  Add the paint and work in sections to make it easier.
When working with gift bags, do one side, allow to fully dry, and then turn over and do the other side.

More Inspiration

  • Everlasting gingerbread houses made from gingerbread salt dough.
    Easy Salt Dough Gingerbread Recipe for Houses and Ornaments
  • Cricut gingerbread decor felt gingerbread house banner and gingerbread canister with vinyl gingerbread houses
    DIY Gingerbread Decor Ideas To Make With Your Cricut
  • DIY paper Christmas cloche cricut
    DIY Paper Christmas Cloche Lantern with Free Cricut Pattern
  • DIY velvet acorn
    How To Make DIY Velvet Acorns

DIY Tree Stump End Tables

Dec 10, 2012 · 8 Comments

DiY tree stump end table.

DIY Tree Stump End Table: what wood to choose for tree stump end tables that will keep its bark, and not fall off as it dries, and how to paint them.

DiY tree stump end table.
[feast_advanced_jump_to]

I've been wanting some a DIY tree stump table for ages. This is a really easy project, that only requires a few steps. This tree stump side table project is sure to add lots of natural beauty to your home.

My problem has been that I live near the city, and don't have access to things like trees and chainsaws anymore. There is a little place near my house though that sells firewood. One day I stopped in to see if they had any good stumps, and how much they'd be. I struck gold.

DIY Tree Stump Table Materials:

  • honey locust hardwood tree stumps
  • sandpaper
  • primer that blocks heavy stains
  • gloss white paint
  • white felt 
  • wood glue

How To Make Tree Stump End Tables

1.Choosing Your Wood

The guy who ran the place where I bought the wood was interested in my project, and when I told him I wanted the bark to stay on to add texture, he suggested some honey locust hard wood he had. He said that honey locust was the only wood he knew of that kept its bark even after it's dry. Update: after eight years the bark is still attached and looks great!

I went in for one stump, but the only thing better than one great stump is, of course, two. So I went for it and got two. He cut one to make it a little shorter for me, so I'd have two heights.

With other types of trees, the bark will usually fall off as it drys. You can still use other types of trees, and remove the bark before painting or staining. For the bark removal process, use a wood chisel or a flat tip screwdriver to get underneath the back of the back and pry it off the stump. Take care not to gouge the wood underneath. Having to use wood filler for this project would take away from the natural beauty of these unique pieces.

how to make wood stump end tables

2.Drying The Wood

The next step is to let the DIY tree stump table dry. It's important to let the wood dry out a little before bringing it into your house for this project. If the wood isn't dry enough, it may split as it drys too quickly with the high temperatures of indoors and you'll be left with large cracks down your stump, it might even slit in half. The only way to avoid this is to let it dry slowly for quite a long time, from a couple of months, up to a year, in a dry place like a garage or barn. This requires a lot of patience. We let ours dry for a couple of weeks in the garage, it did eventually crack when it was in the house.

I also found that the first and second spring that these large stump tables were in my home, they sprouted leaves. Several times I had to break off green leaves shooting out from the entire tree stump. I'm sure that this is because I was impatient and didn't let my own tree stump coffee table dry out enough before bringing it inside.

3.Primer

Next I headed to the hardware store and picked up a primer designed to cover the natural wood tannins, and some gloss white paint. Primer is an important step in this project. Without the top coat of white paint may appear yellow in some areas.

tree stump end tables

4.Sanding The DIY Wood Stump Table

For our DIY project, the next step was to sand the tops of the tree trunks. I sanded the tops of the them smooth, with some sandpaper. You can do it by hand or make it quicker with any electric sander, like a belt sander, or a palm hand sander. This will give the top of your stump a smooth finish. Be sure to clean the dust off of your wood stump side table well before painting.

We only sanded the top of the DIY tree stump table, as ours had bark on the sides, but if you were using wood from a different type of tree that won't keep it's back and removing it to, you could also sand the sides and rough edges of the stump and remove any rough spots.

5.Painting

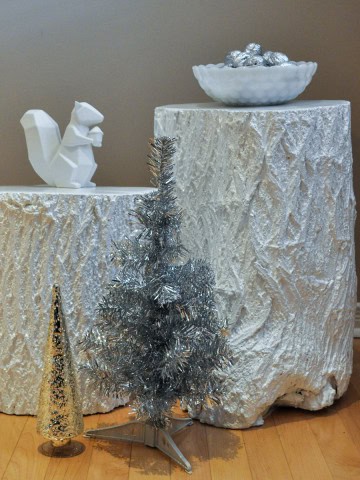
Next I primed and painted the entire stump with the glossy white paint. I used several coats. Because I choose a glossy finish I didn't add a sealer. I love the look of the glossy white for a modern mix with the natural elements. You could instead do a color of your choice that matched your decor.

If you choose to leave the tree trunk tables with a more natural look, you could leave them un-primed or painted and finish the wood with just a few coats of polyurethane. Look for a non yellowing one.

6.The Bottom Of The Log

I also covered the bottom of the stump tables with some white felt to help protect the floors from any scratches. The felt is glued with some wood glue.

painted tree stump end tables

I love, love, love how they turned out. They're even cooler than the West Elm version.

DIY tree stump end tables
how to make a tree stump end table

I set them up as little tables in my dining room, and love how they look with our woodland theme for Christmas. Perhaps after Christmas I'll move them into the living room, or family room as a coffee table.

tree stump end tables
silver walnuts

With my DIY tree stump end tables, life is really a party!

how to make wood stump end tables

More Inspiration

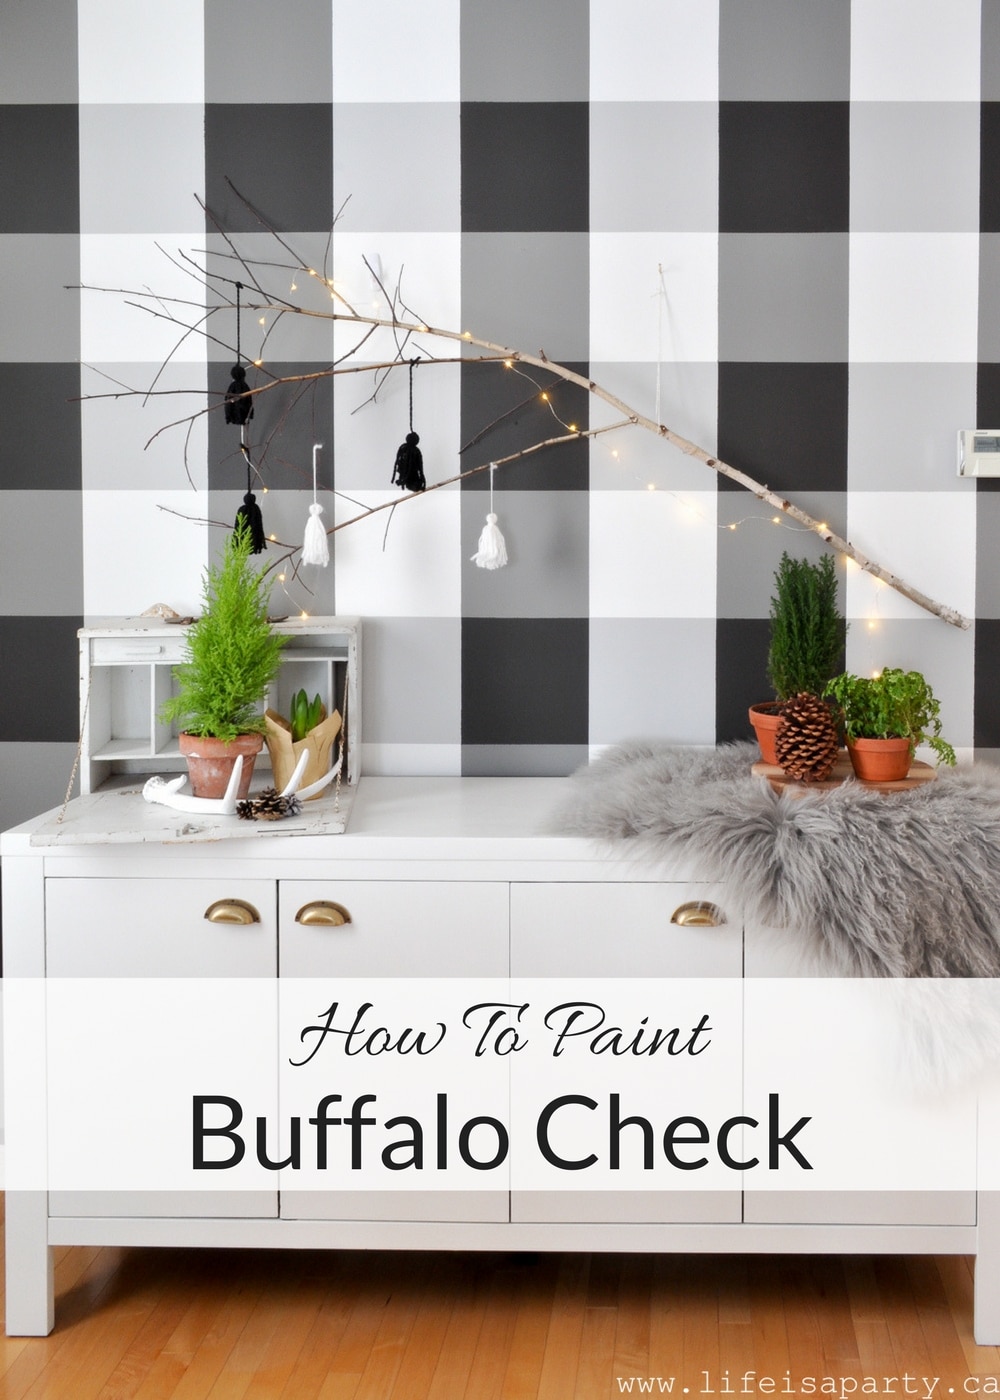
You might also like How To Paint A Buffalo Check Feature Wall.

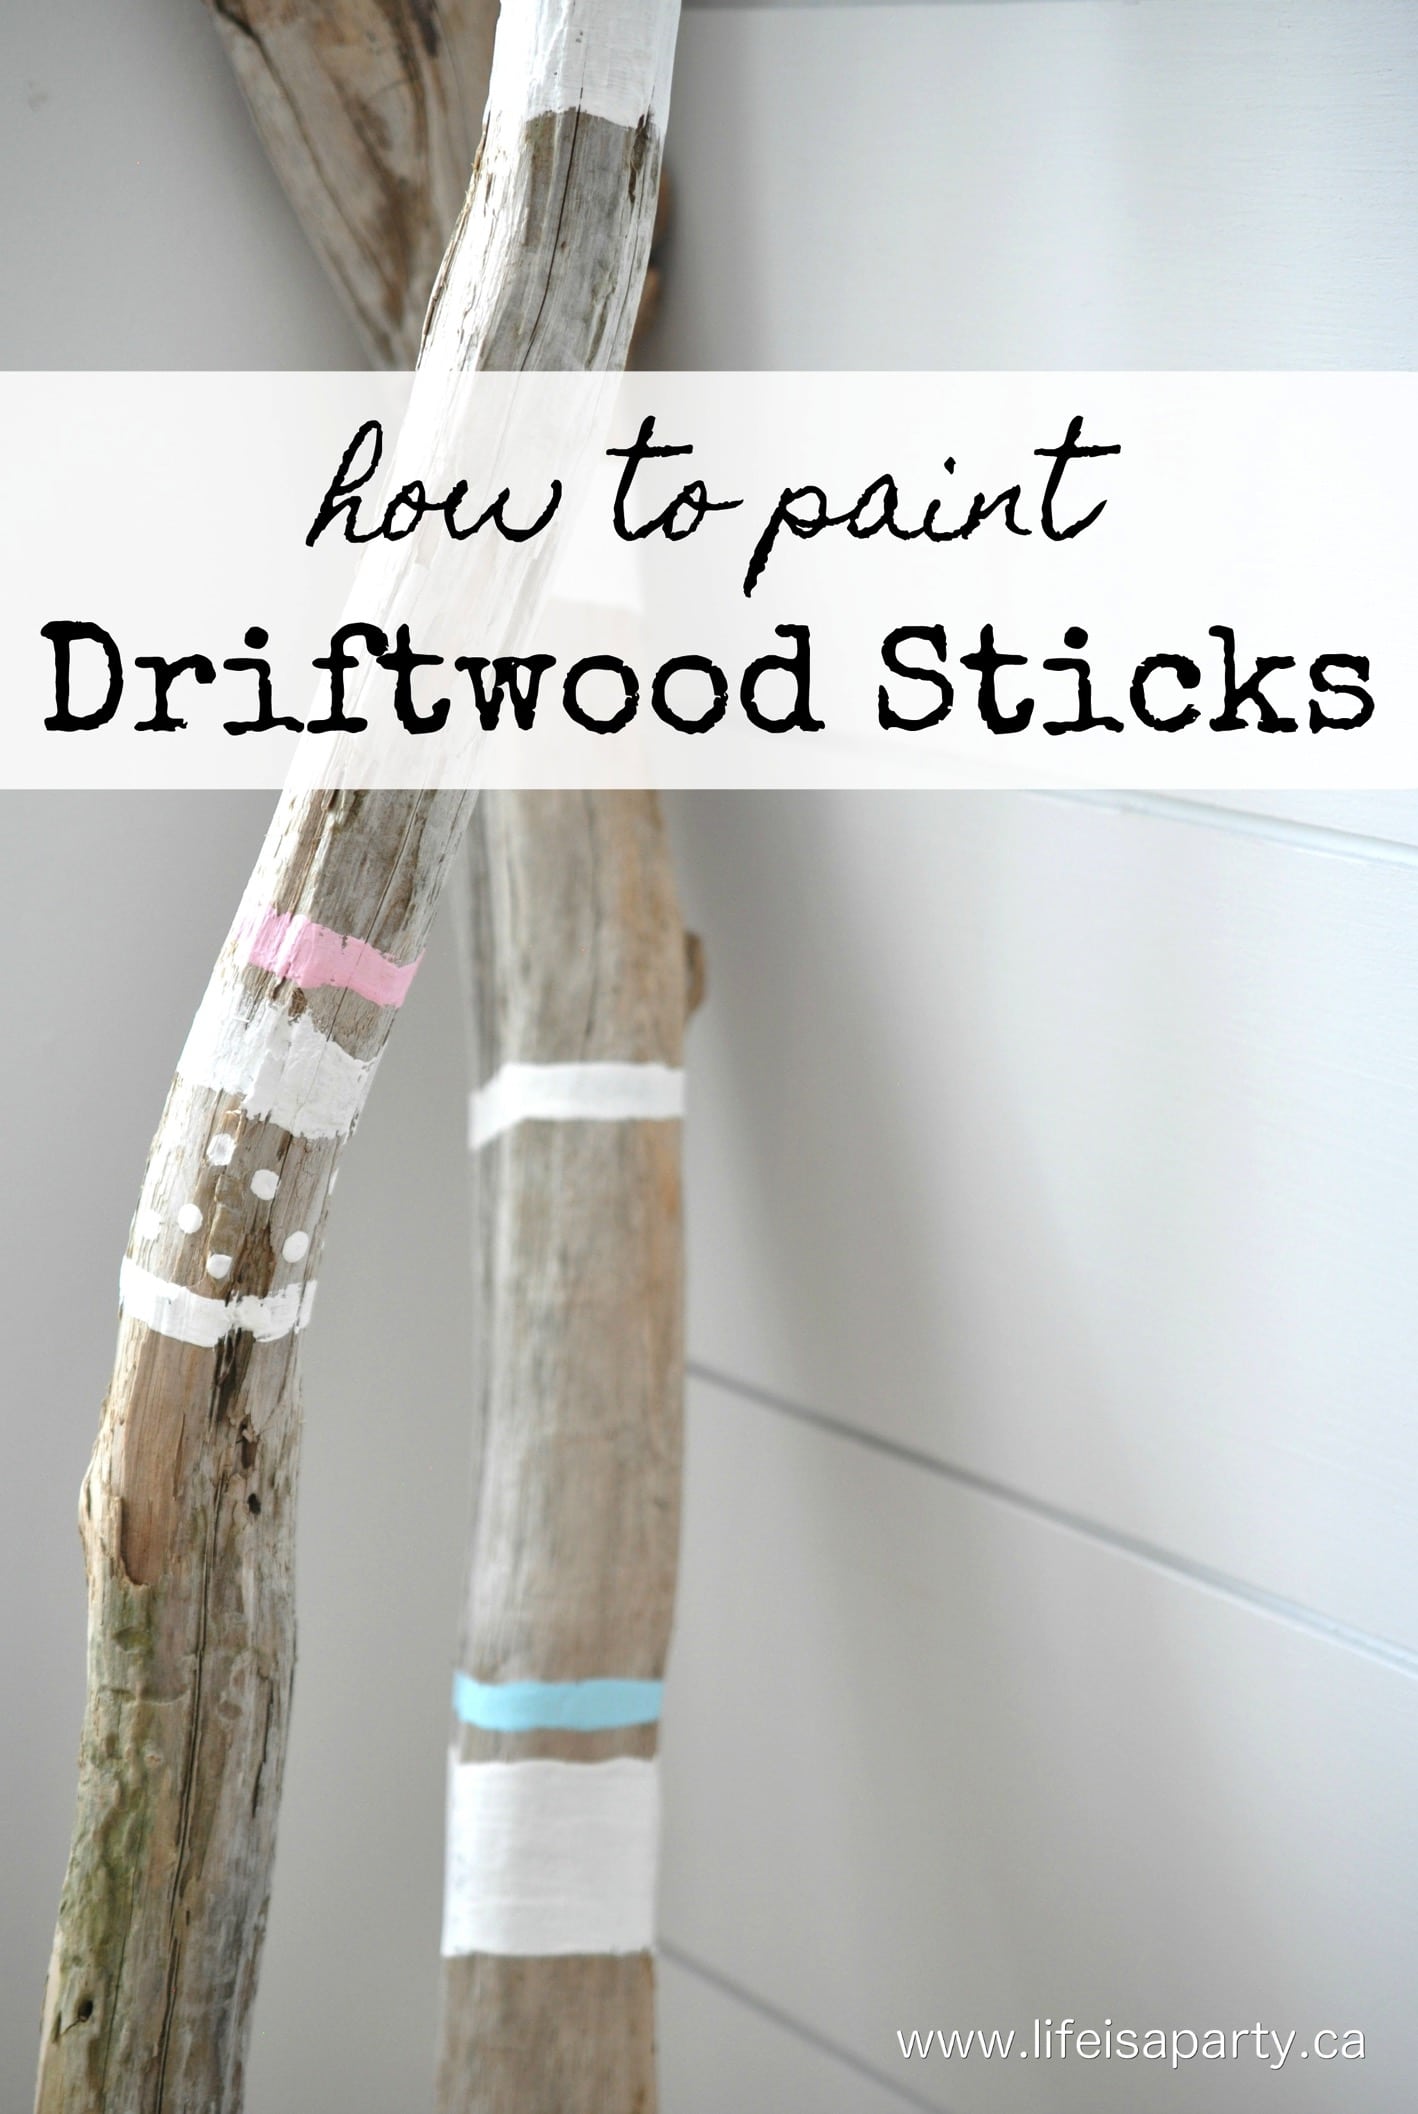
Also check out DIY Boho Driftwood Sticks here.

DIY Boho Painted Driftwood Sticks: Easy tutorial using found driftwood sticks and paint to add a little boho to any room.

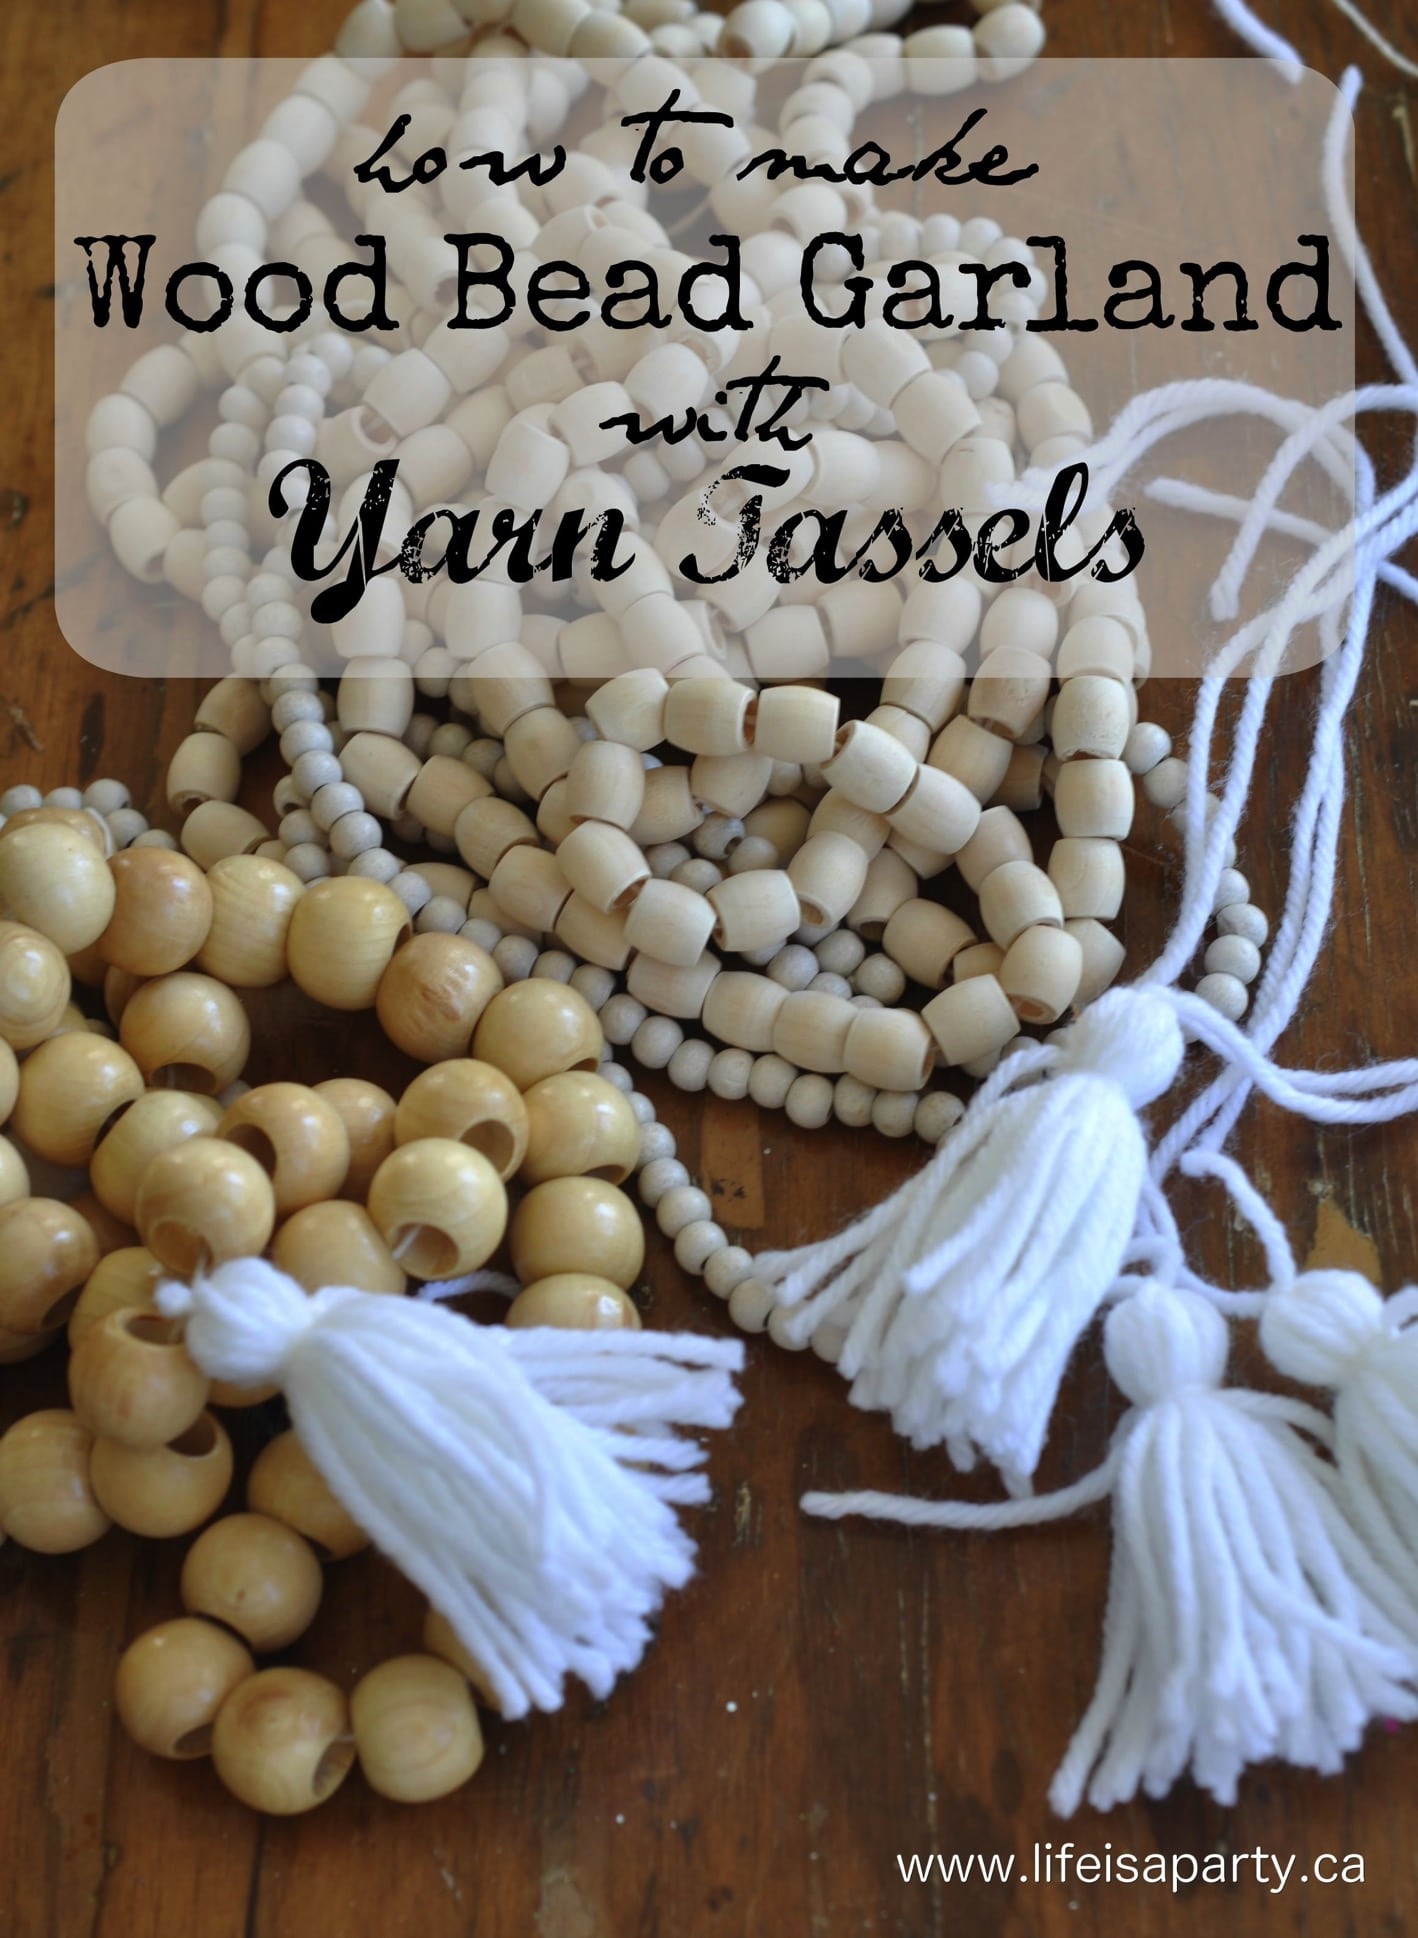
You might also enjoy our How To Make Wood Bead Garland.

How to make Wood Bead Garland with Yarn Tassels: easy DIY for tassels and garland. Great way to add texture to home decor.

Bakers Gift Basket Ideas

Dec 7, 2012 · 7 Comments

Christmas sprinkles gift basket.

Bakers Gift Basket Ideas: DIY Christmas sprinkle gift set and a Christmas cookie themed holiday ornament make the perfect inexpensive gift.

Christmas sprinkles gift basket.
[feast_advanced_jump_to]

I wanted to share these sweet little bakers gift basket ideas that would be great for the baker in your life. I put this together for less than $10.

Image

Christmas Sprinkles

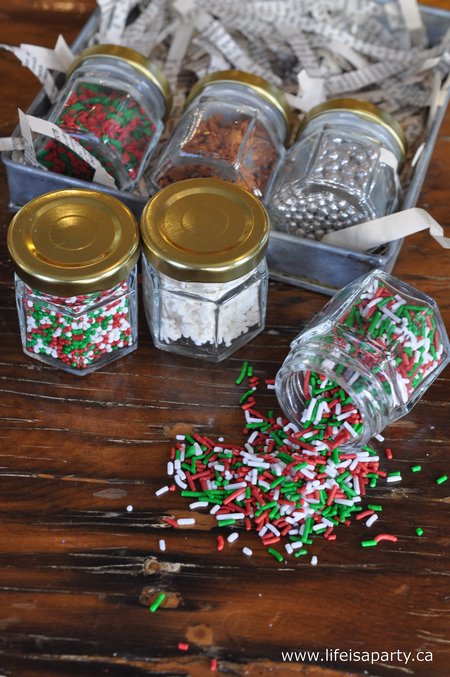
I found these little jars for .79 cents each. They're the tiny size, sometimes used for little individual servings of jam.

cheap hostess gift ideas

I went to the bulk food store and found all the Christmas sprinkles. I love how pretty they are in their little jars, and it's just the right amount for your holiday baking.

bakers gift basket ideas

Packaging Them Up

I found the little metal tray thrifting, but what would also work great is the bottom of the little box from your Christmas cards, wrapped up in some pretty holiday paper. I put some shredded book pages in the bottom of the tray.

bakers gift basket ideas

A Cookie Ornament

I added this sweet gingerbread cookie Christmas ornament. Doesn't get much more cute than this sweet little gift.

With bakers gift basket ideas like these, life really is a party!

You might also like Printable Christmas Gift Card Holders here.

You might also enjoy Holiday Hostess Wine and Cheese Gift Basket here.

A Woodland Christmas Tree

Dec 6, 2012 · 2 Comments

Woodland Christmas tree ornaments.

Woodland Christmas Tree: decorated with lots of easy DIY ornaments you'll be inspired to create your own woodland Christmas tree.

Woodland Christmas tree ornaments.
[feast_advanced_jump_to]

I'm so excited to share my Woodland Themed Christmas Tree with you this year.  I've had so much fun making and collecting all the woodland Christmas ornaments.  I just love how it turned out.  This rustic Christmas tree is perfect for celebrating the holiday season with a woodland theme.

The Tree

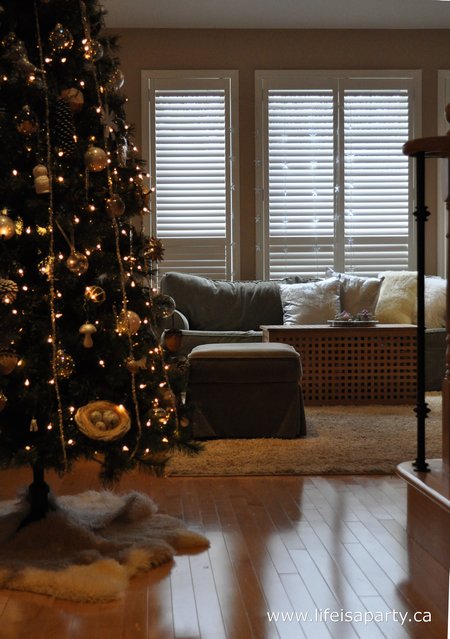
When we finally finished renovating our basement a few years ago, I was able to move the family tree, with all our homemade and vacation ornaments downstairs, and have a themed tree upstairs. The kids call it "Mom's Tree".

This faux tree was found on Kijiji for a great deal. I wanted a skinny tree so I could fit it at the bottom of our stairway. It's very nice here since you can enjoy it from the living room, and the dining room. The first year I decorated it all in snowflakes, silver and white. When I decided to do a woodland theme this year, I knew I could use a lot of the ornaments I already had and just add a few new ones for a woodland feel. All the glass, silver and glitter help my woodland theme take on a snowy, glitzy feel, which I really like, with just a little rustic added in.  The silver adds a little sparkle and woodland glam.

Woodland Christmas Tree

DIY Woodland Animal Ornaments

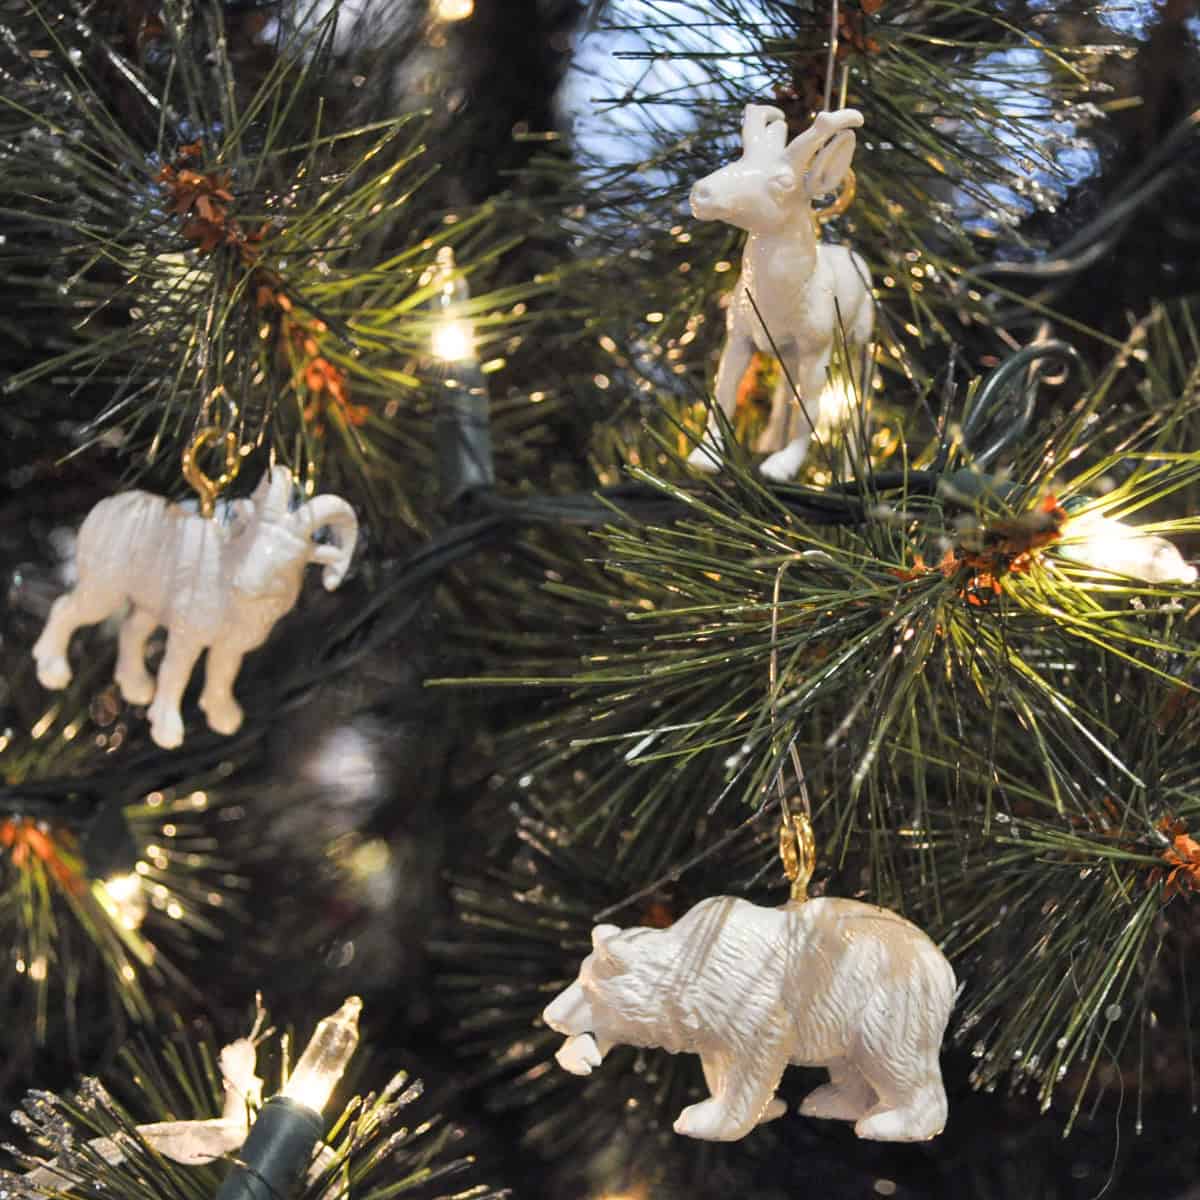
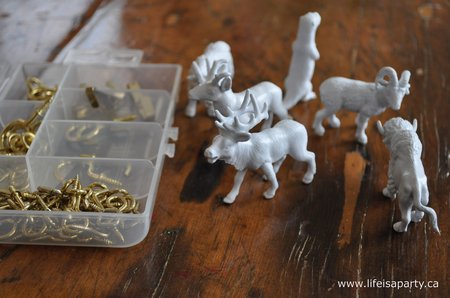
My first idea for ornaments for my woodland themed tree was to buy a tube of cute woodland creatures plastic toy animals from the craft store and spray paint them white and hang them on the tree. I used little screw-in eye hooks on their backs, which worked great. They're my new favourite. I love how these adorable woodland creatures turned out.  The white color scheme really helps them to stand out against the green tree.  These white ornaments are an easy DIY and not expensive to make.

DIY woodland Christmas ornaments

Birch Bark Ornaments

I wanted to include lots of natural elements in our Christmas tree decorations.  We also made some birch bark Christmas ball ornaments. I bought some empty glass balls at craft store, and removed the tops from them.

DIY birch bark Christmas ornaments

Then I used small strips of birch bark, peeled off some birch wood, and curled them with scissors like you would ribbon. I just slipped them into the balls and put the tops back on.

how to make birch bark Christmas ornaments

They look so sweet on the beautiful tree. I really like how they turned out.  They were simple to make, and their rustic style is perfect for our woodland-themed Christmas tree.

DIY birch bark Christmas ornaments

Feather Ornaments

Another idea for some natural decorations was to incorporate some feathers.   I made another set of glass ornaments with feathers inside.  I picked up the feathers at the craft store too.  They have lots of different colors and kinds, but I thought these dotted speckled ones were the perfect fun addition.

DIY feather Christmas ornament

Pinecones

I also wanted to use some pinecones, as more natural materials on the the woodland themed tree. I made two types of pinecone ornaments. For the first one I used some pine cones leftover from making my white pine cone wreath, that had been spray painted white. I just added little round screw-in eye hooks to the tops, and then used a hook to hang them on the tree.  This was a great way to turn them into ornaments and easily hang them on the tree.  Adding ribbon would be a nice option too.

pinecone Christmas tree ornament

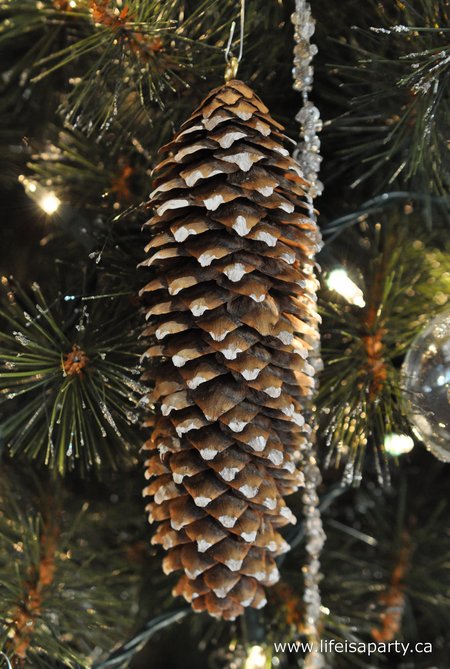
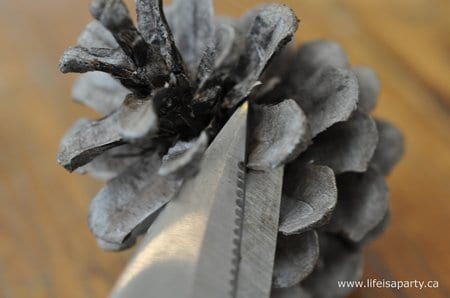
I also had these fun, large spruce cones. To decorate them I just added a little white paint to just the tips to make them look snow covered, since I wanted the tree to be a combination of silver, white, glass and glitter, but also mix in some natural brown for a natural look on our woodland-themed tree.

pinecone Christmas ornament

Acorn Ornaments

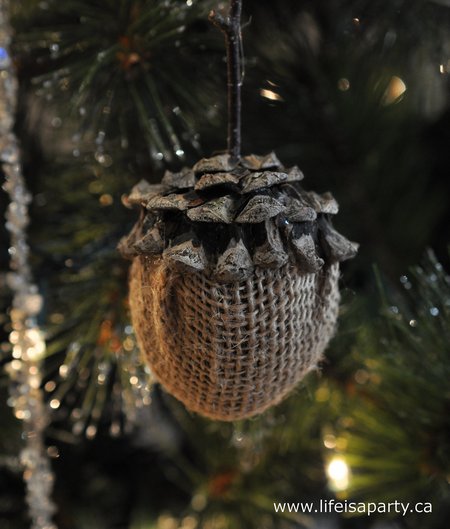
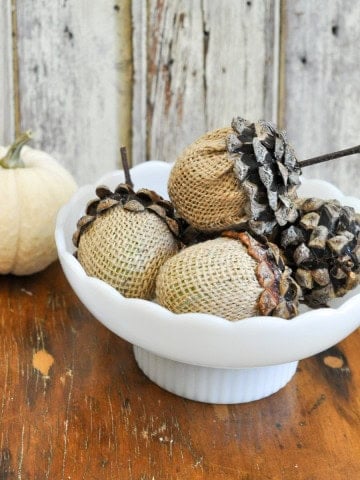
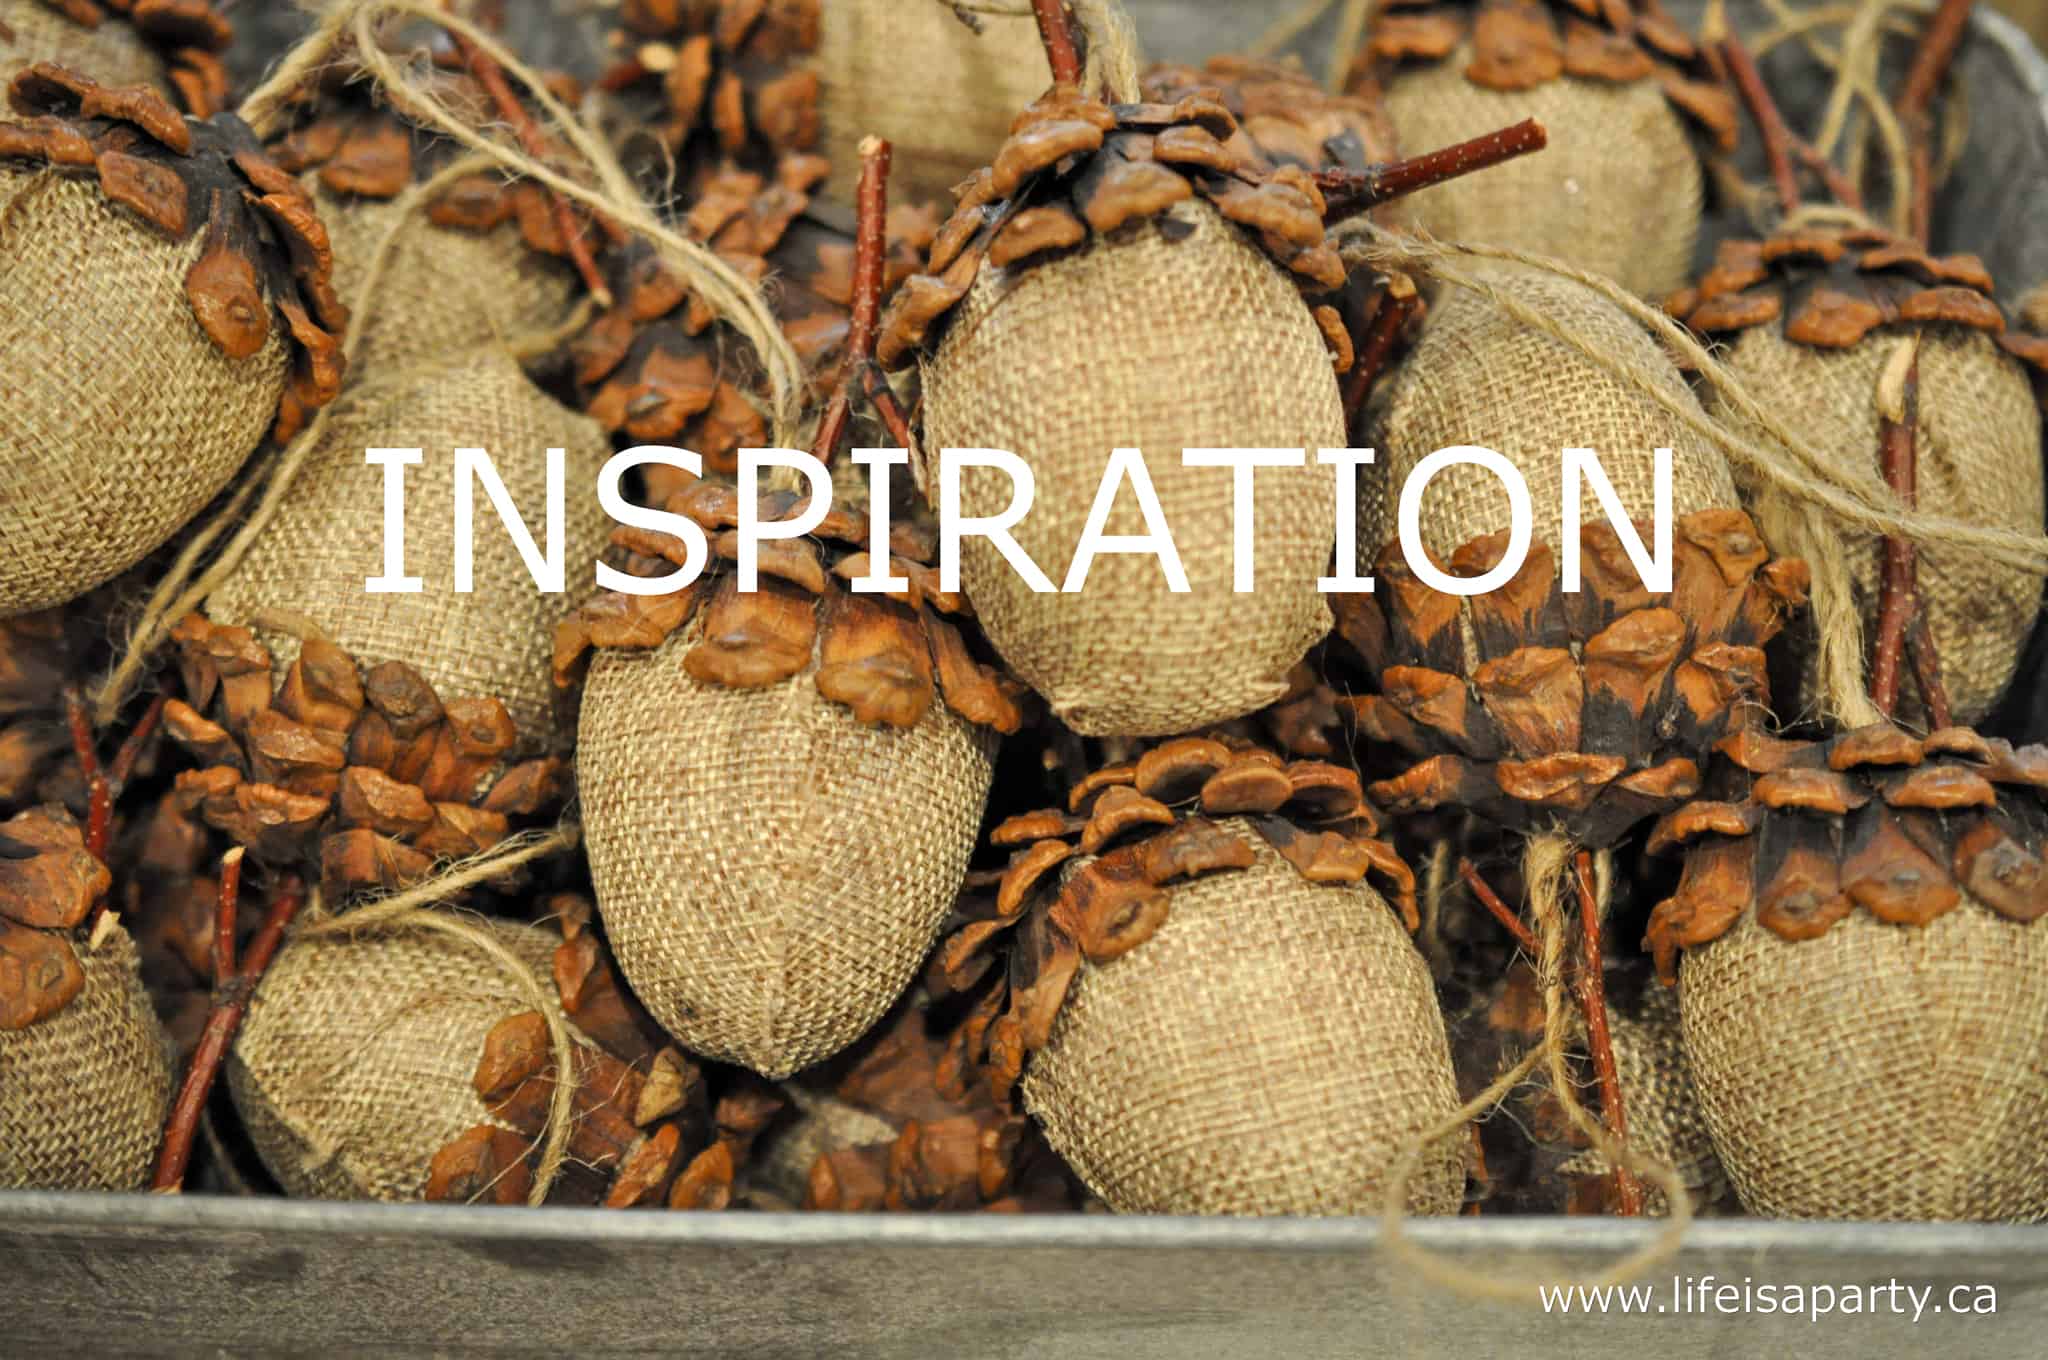
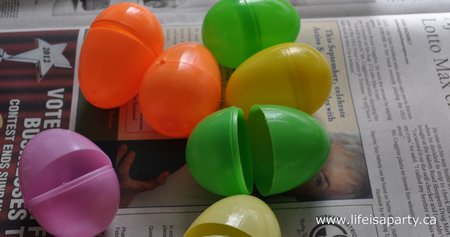
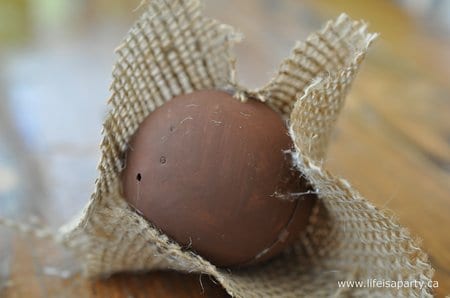
Another natural element I added were the acorns made from Easter eggs that I made this fall, see the whole tutorial here. I just added some clear fishing line to the stem to hang them from.  They're a perfect addition.

DIY acorn Christmas ornament

Rustic Decorative Balls

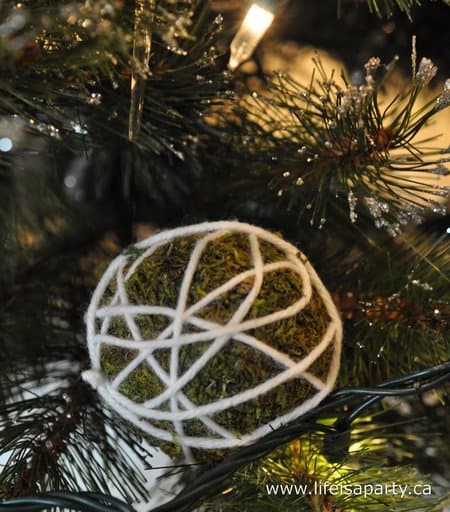
I also added a few different decorative balls. These birch balls where made by hot gluing strips of birch bark to styrofoam balls. I also used some twig balls, and fun moss balls. To add a little pop of color and texture to the moss balls, I wrapped them in some white, fuzzy yarn. Love how they turned out.

a-Woodland Christmas Tree Ornaments 131

They look great tucked into the tree as holiday decorations.

a-Woodland Christmas Tree Ornaments 107

Store Bought Woodland Ornaments

When I decided to do a woodland theme, I started seeing so many cute decorations in stores. A lot of them are more of the red, felt, rustic lodge style that won't work with my silver, and glitter winter woodland look. But here's some that I found that really fit my look and that I couldn't resist.

collage1
collage2 woodland christmas tree ornaments

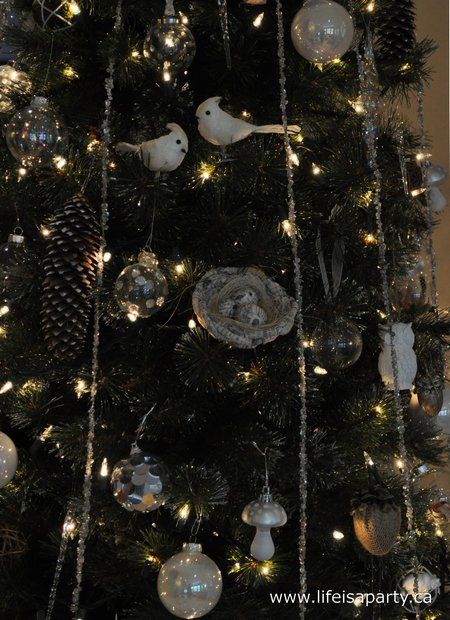
1. White Owl  2. Book Page Nest  3. Glitter Acorn  4. Silver Mushroom 

Silver, White, and Glass Balls

I mixed all these new ornaments, bought and handmade, in with the white, glass, and silver ones I already had for our woodland tree. Like these pretty little bird figurines, and lots of glass balls.  The mix of different styles of rustic natural decorations and sparkly, silver, glass, and snowflake ornaments adds so much interest to this tree.  We used a beautiful snowflake tree topper for the tree and it finishes it off perfectly.

a-Woodland Christmas Tree Ornaments 109

Tree Skirt

And as a tree skirt at the base of the tree, I used beautiful, warm,and fuzzy sheepskin rugs. The creamy one is real, from IKEA, and the white one is faux, a fun find at HomeSense. I love how they connect with the beautiful pillows on the couch.

a-Woodland Christmas Tree Ornaments 150

With a fun woodland winter wonderland tree like this, life really is a party!

More Christmas Inspiration

You might also like our Christmas Home Tour 2018 here.

Christmas Home Tour 2018 -Black and White Scandinavian design with a little boho. Lots of natural elements, cozy texture and Christmas twinkle lights.

Also check out our Christmas Home Tour 2016 here.

You might also enjoy DIY Woodland Mugs here.

DIY Mugs: Woodland Mugs using carbon paper to transfer an image and a ceramic marker. So much better than sharpie marker mugs the don't last.

Woodland Christmas Decor

Dec 5, 2012 · 15 Comments

Woodland Christmas decor ideas.

Woodland Christmas Decor: forest creatures, natural elements like pinecones and acorns and DIY ornaments create a magical Christmas.

Woodland Christmas decor ideas.
[feast_advanced_jump_to]

This year I'm bringing the outdoors in with lots of woodland Christmas decor.  This theme is perfect for the holidays and adds a little magic to the season.

You might also like our Boho Christmas Decor Ideas.

A Table Top Forrest with Woodland Animals

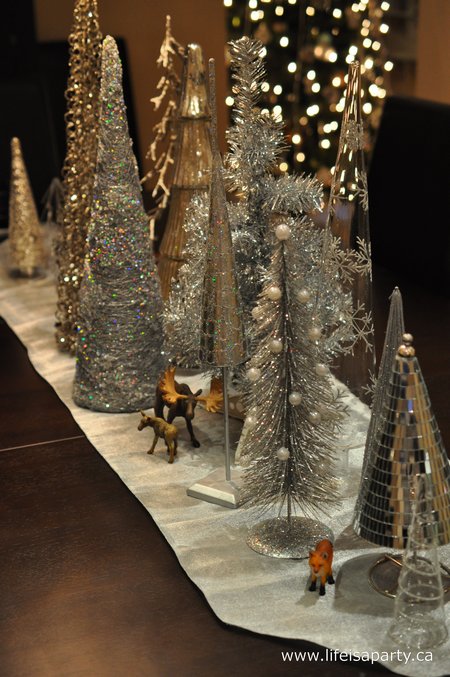
I have collected lots of table top Christmas trees over the past few years, and love the way they look all mixed together on my dining room table. This year, to go with our Woodland Christmas decor theme, I thought I'd add a few little woodland creature friends to the forest.

Woodland Christmas decor

I originally planned on painting all the little woodland animals white -you know how I love a little spray painting. 😉 But after seeing it all together, I kind of liked how they looked. Not to mention the kids pleading in the background. What do you think, should I paint them?

woodland themed Christmas decorations

I found most of them at the craft store. I started out with one of those tubes of North American animals, but I didn't like how the animals weren't to scale. (Maybe you didn't know I was quite that particular about things -well I am, and just the thought of the raccoon being the same size as the deer was bugging me.) So, I found these other, larger animals. At first I thought it might be a little expensive to get enough of them but...about nine or so 50% off coupons later and it worked out great. 😉 Most of them worked out to be a dollar or two.

forest themed Christmas decor

I have to say I kind of love them. At first glance it's just a regular, shiny, silvery Christmas tree display.

Woodland Christmas Decorations

But then, you see them, hiding in the trees, and you can't help but smile, even at the skunk.

Woodland Christmas ideas

It's going to be hard to put them away after Christmas.

Woodland Christmas Decor

Deer Head

deer head

Sometime in October I got the idea that I wanted to add a deer head to my dinning room for our Christmas and build a whole woodland Christmas decor theme around him. I thought of a few options, and was buying supplies for another version when I laid eyes on this guy. A plain, brown paper, paper mache deer head. I decided I should bring him home, and abandoned my other plans. I gave him a few good coats of white gloss spray paint, and loved him even more. 😉

deer head decoration

Homemade Picture Frame

I knew I wanted to surround him with an old picture frame, painted silver. Of course when you need something you can't find it. I looked at all my local thrift stores and couldn't find exactly what I was looking for.  When I was driving by the Habitat for Humanity Re-Store and had an idea. What if I bought some old trim and made my own frame? I found this piece of trim for a $1 -sold!

wood frame

Once I got it home, I had a little help cutting it to size, with all the right angles. I glued it together, stapled it, clamped it, and then filled the little gaps and sanded them smooth.

deer head decoration

After a few coats of silver spray paint, I think my $1 frame turned out pretty well.

deer head

Boxwood Wreath

I needed one more finishing touch for the deer head, a little wreath around his neck. The box wood wreath came from trimming up my box wood and I made a little wreath. I just bent a coat hanger into a circle to make the form, and then wired little bunches of box wood around the form.

deer head decoration

It's the perfect natural element for this spot.

deer head

More Woodland Christmas Decor

To finish off the display I used this gorgeous little black wrought iron tree my sister gave me a few Christmas' ago. I love the little pompom garland, reminds me of little snow balls.

deer head

I usually have some Black and White photos of Paris hanging here, but decided to change them out to go with our woodland theme too. These sweet little prints are printed onto wood veneer and I thought the snowshoes and feather were perfect with everything else. I framed them in some in-expensive IKEA frames, and I like the way the white frames match my dear, deer head -affectionately referred to by all my family, friends, and visitors as the moose.

pine cones

I didn't do too much else on the table, just some candles, and the silver bowl, filled with some pinecones.

deer head
deer head

Woodland Entry Table

Woodland Christmas decor

I thought it would be fun to add a woodland touch to the entry area too.  The deer look so sweet in the fresh pine boughs on the table.

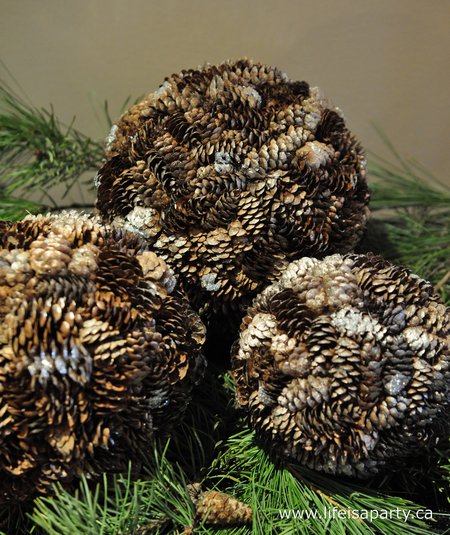
DIY pinecone balls

These easy DIY pinecone balls were a great little Christmas project.

Woodland Christmas Tree

One of my favourite woodland touches this Christmas is my woodland themed Christmas tree.  

woodland Christmas tree

With lots of DIY woodland animals it's the perfect touch for our theme.

Woodland Christmas tree

You can read all about all the details of the woodland Christmas tree here.

DIY Woodland Christmas ornaments

All the woodland Christmas decor details came together so beautiful.  This might be one my favourite Christmas themes ever.

With Woodland Christmas decor, life really is party!

Easy Puff Pastry Desserts with Jam, Cream, and Fresh Berries

Dec 3, 2012 · 1 Comment

Easy puff pastry dessert.

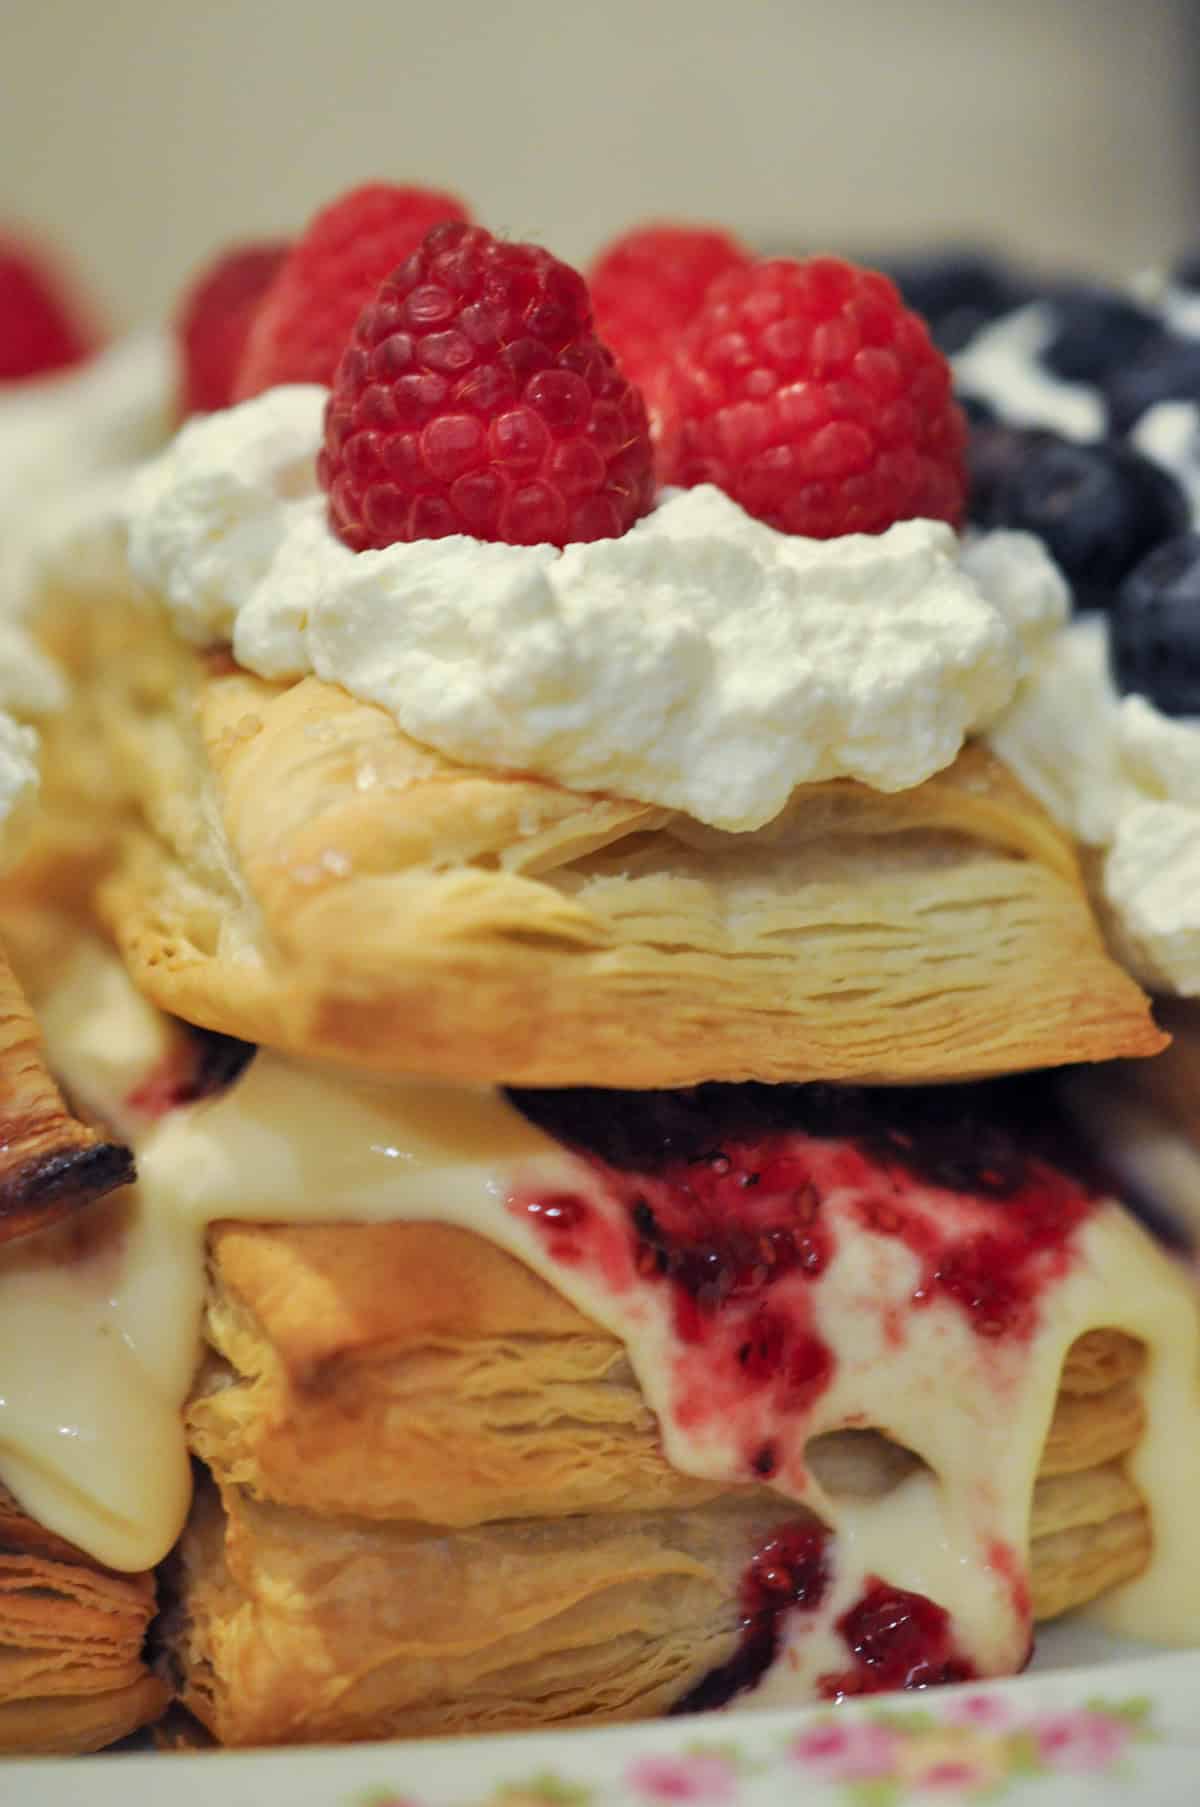
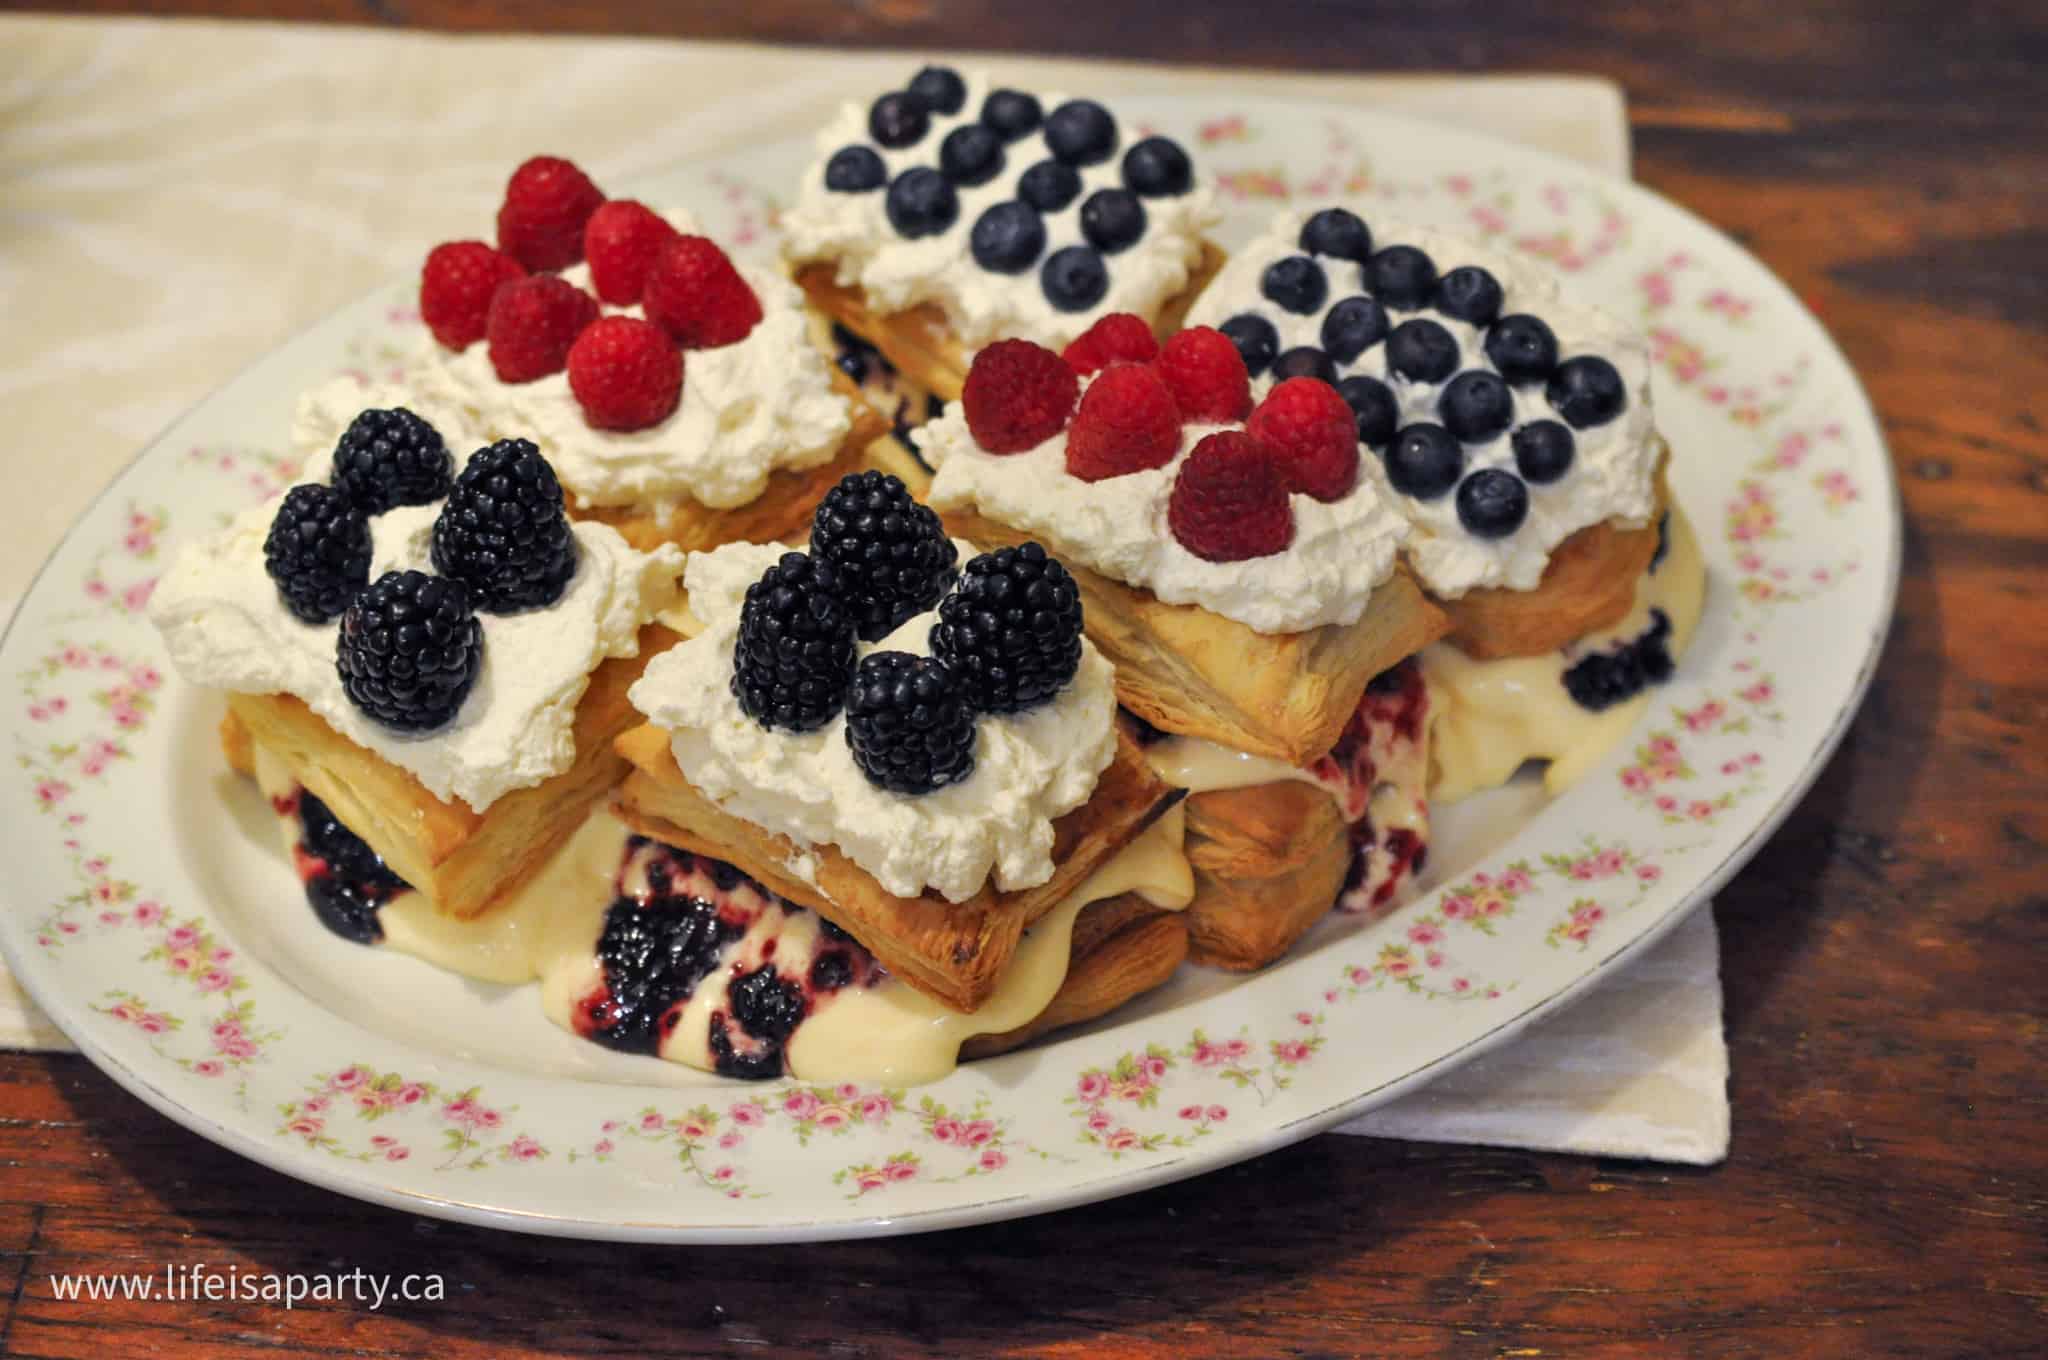
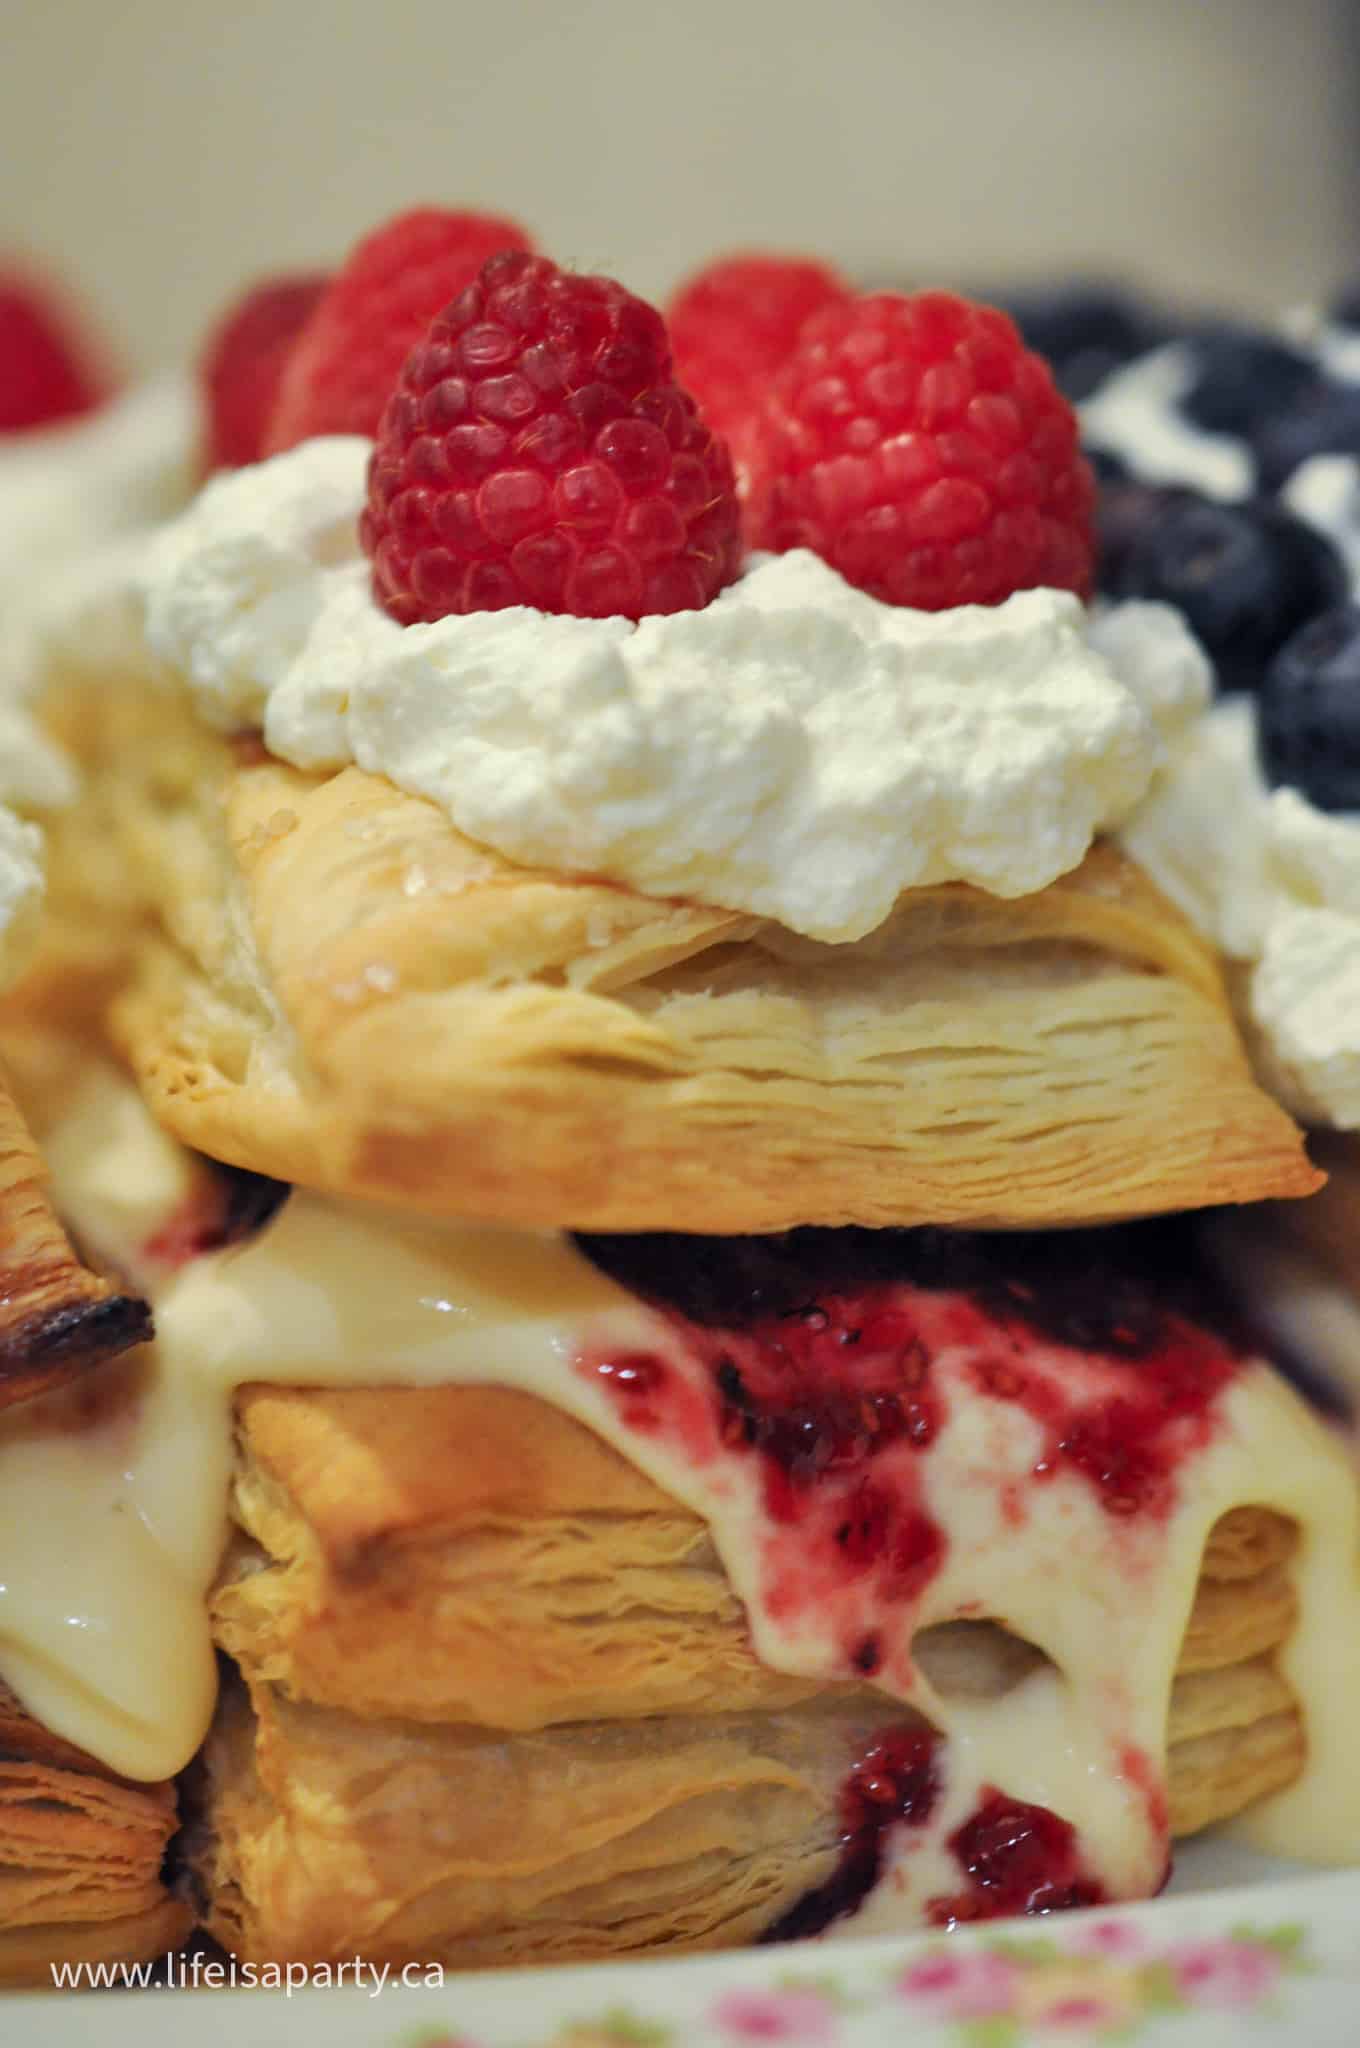
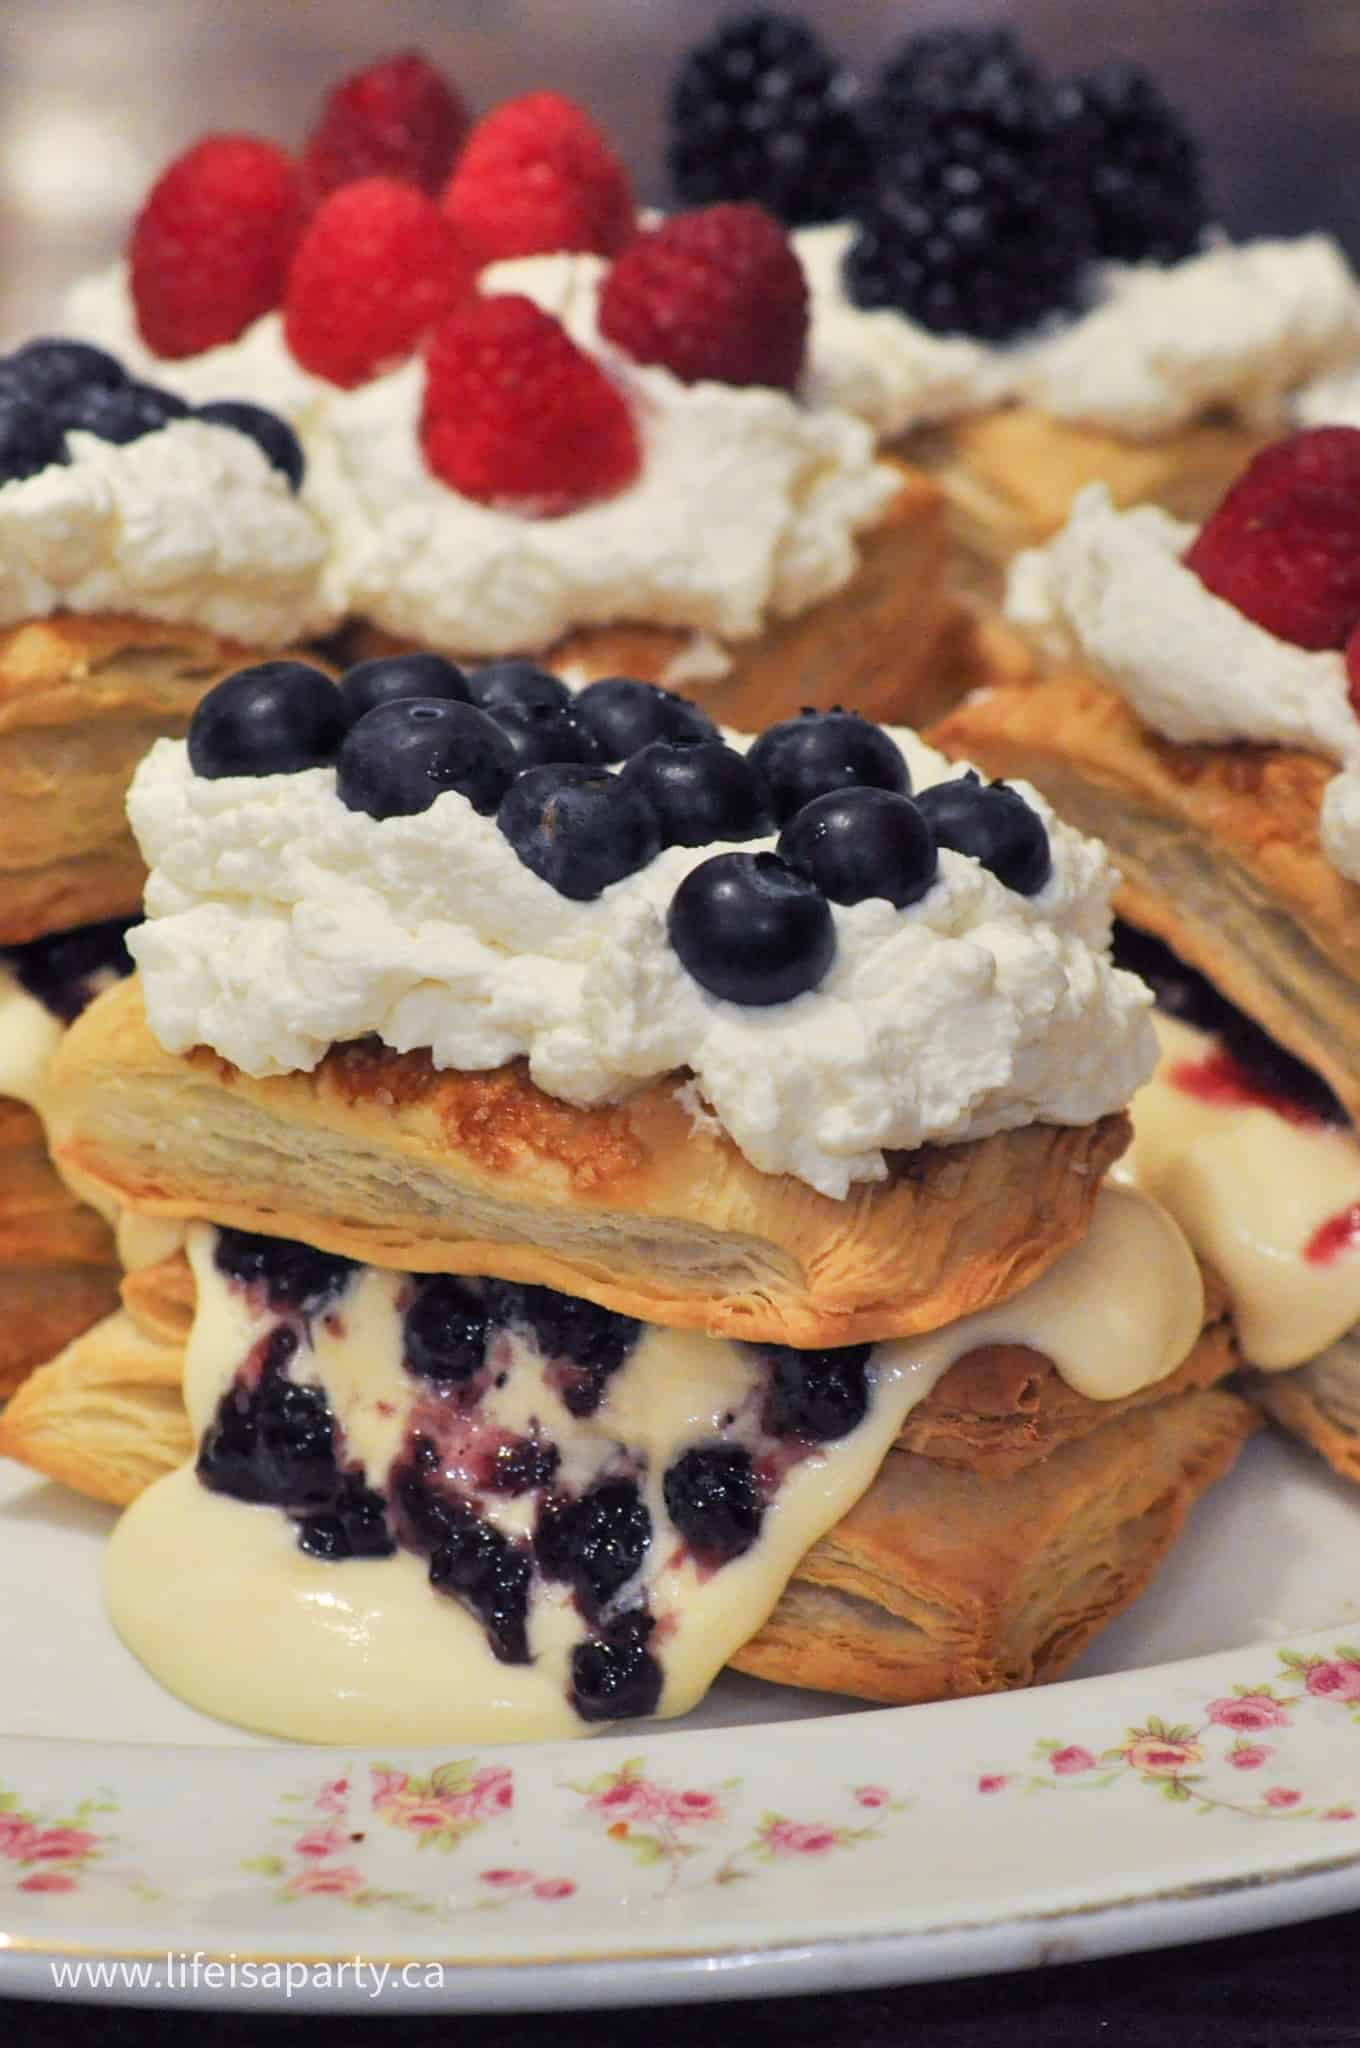
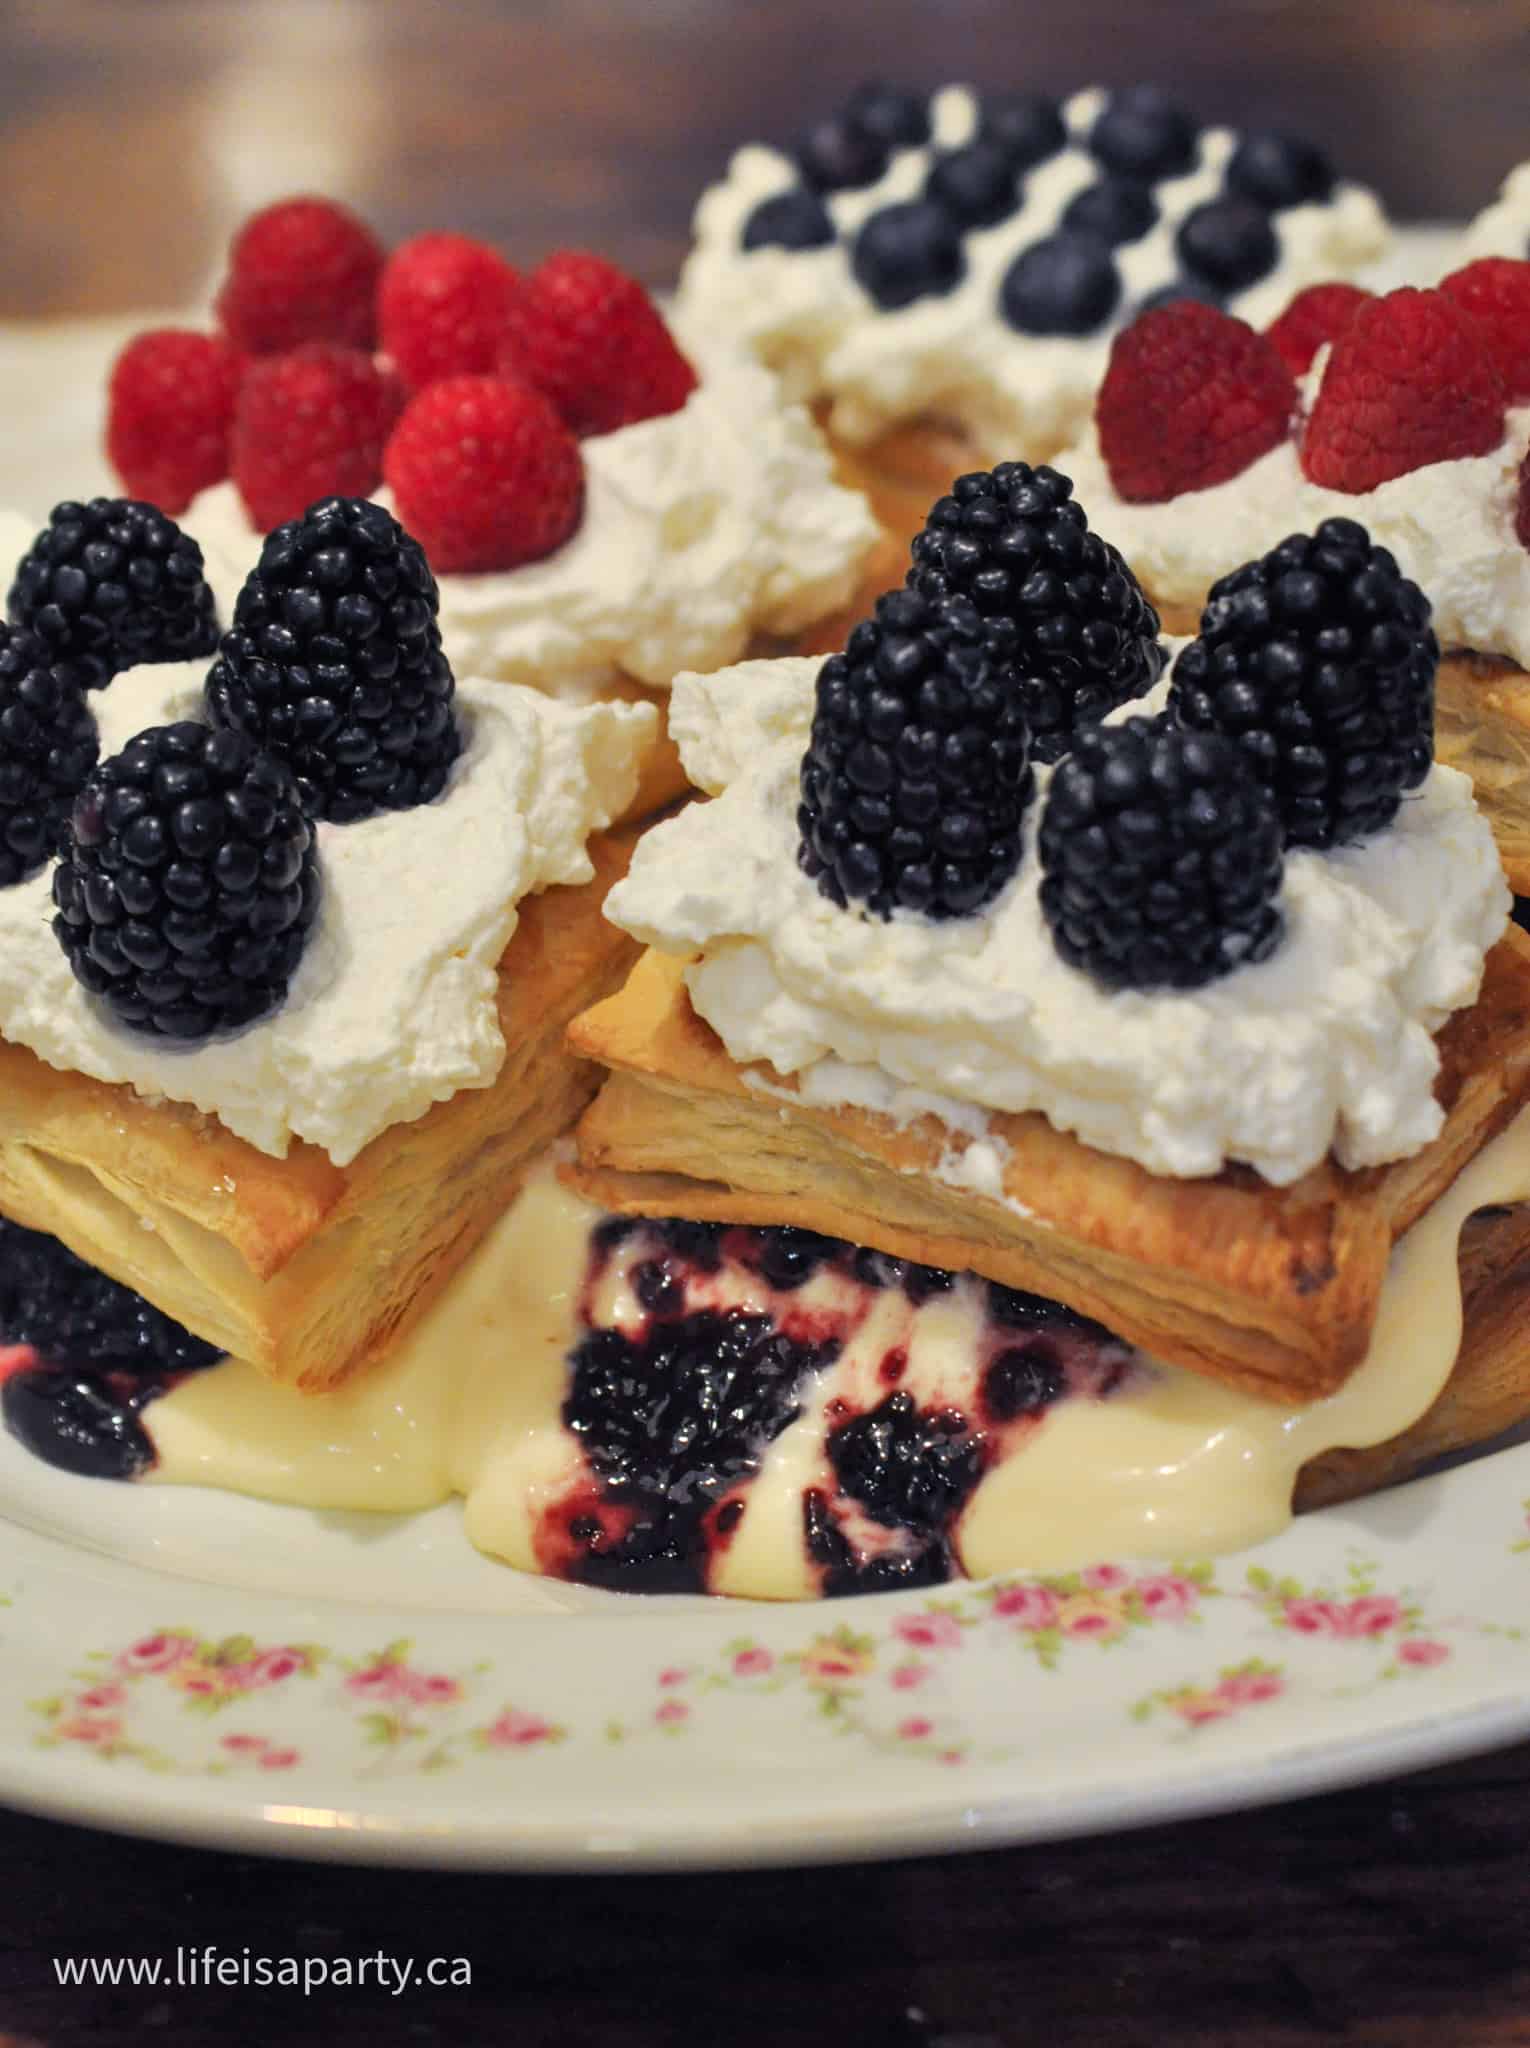
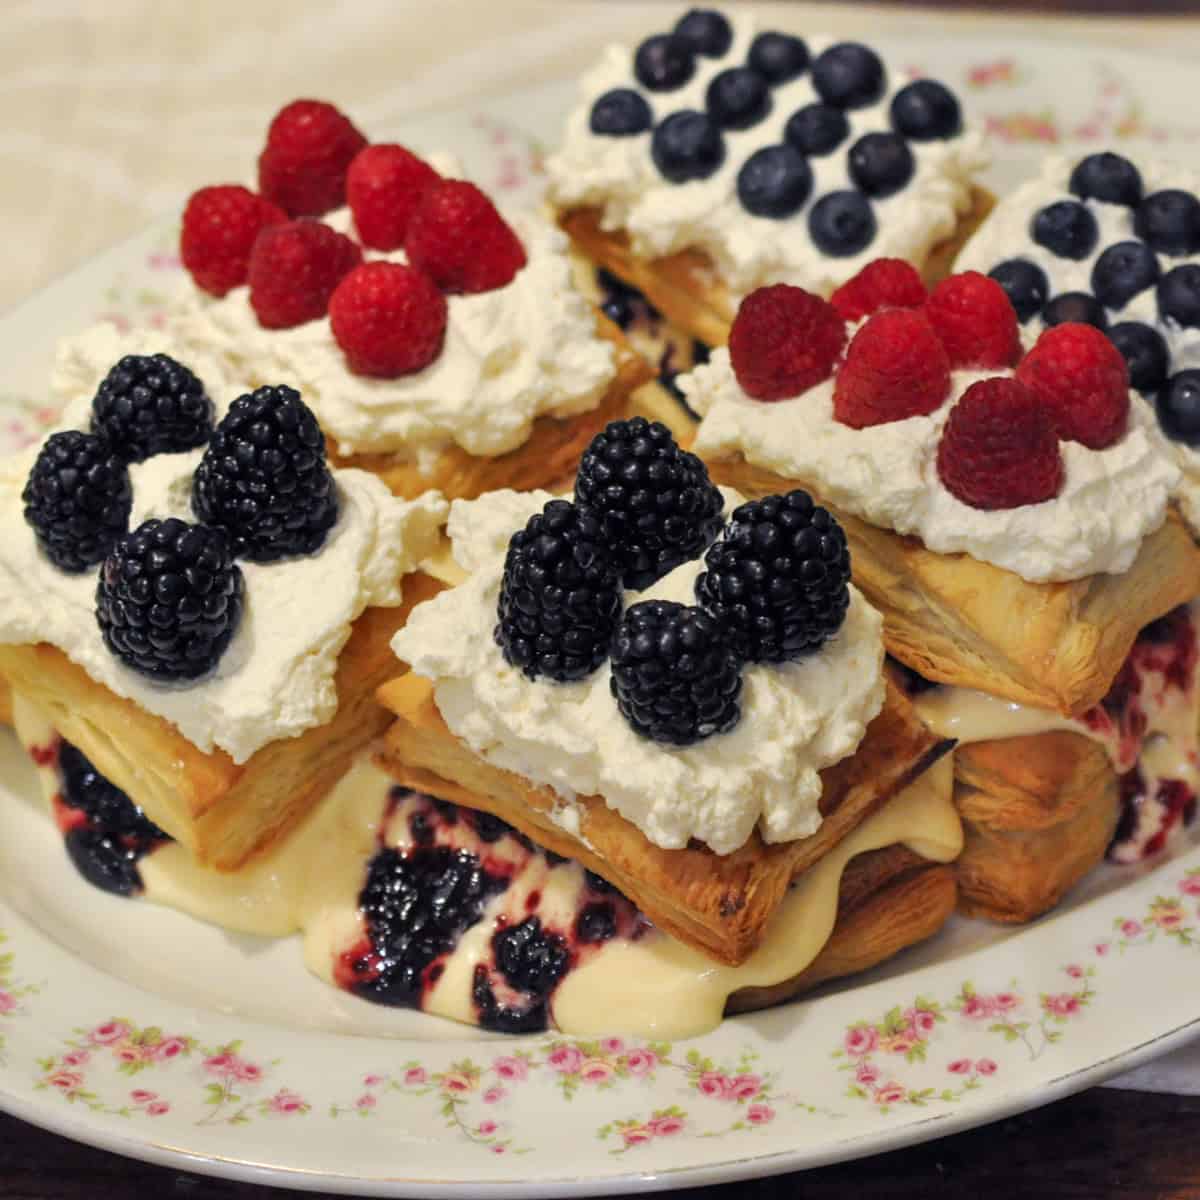
Easy Puff Pastry Dessert: this dessert will remind you of a homemade version of a Flakie. The perfect combination of pastry, jam, cream, and fresh fruit. It's quick, easy and perfect for guests.

Easy puff pastry dessert.

Remember Flakies? My favourite lunch box Vachon treat, I think maybe they're just a Canadian thing? For my American friends, let me explain. When I was kid we often got these these little packaged treats in our lunch boxes There were lots of different varieties, like moon cakes, and caramel filled cakes, but my favourite was a Flakie. It consisted of puff pastry, some kind of icing/whip cream -ish layer, and then jam, followed by a puff pastry lid, coated in a light sugar topping. Yum! .

Easy Puff Pastry Dessert: this dessert will remind you of a homemade version of a flakie, quick, easy and perfect for guests.
Image

Here's my homemade and more grown up version -an easy puff pastry dessert with jam, pastry cream and fresh berries.  It's a really quick and easy dessert made with store bought ingredients but guaranteed to impress your guests.

homemade vachon flake

This weekend I made my version for guests and it was a total hit. Not exactly like the flaky version, but really good.  It is so easy -like a little bit of a cheaters version easy, so I thought you might want to put it into your own rotation over the holidays if you're looking for a little wow factor, without too much work. 😉

easy puff pastry dessert

Cheater's Pastry Cream

I made a bit of a cheater's version of pastry cream.  Pastry cream is a custard filling used in French pastries.  It's a little lighter and thicker than an English custard or custard sauce.  We made our cheater's version by combining whipped cream and canned custard.  I made homemade whipped cream with sugar and vanilla, and then folded in the canned custard.  This makes a beautiful velvety cream more substantial than just whipped cream, but lighter than custard.  It's easy to make and really delicious.  It's a great addition to lots of different pastries and deserts, and worked wonderfully with our puff pastry desserts.

easy puff pastry dessert

Different Flavors

I thought it would be fun to create different flavors of our cream and jam pastries.  I was guided by what fresh berries were easily available.  Strawberry jam with fresh strawberries would be a great one to try too.  You could make a version of this dessert with almost any fruit and sweet jam or pie fillings.  The combination of the sweet and concentrated jam flavor with the freshness and tartness of the fresh berries works really well together.  The fresh fruit really elevates this dessert, and makes it look and taste so wonderful.

easy puff pastry dessert flakie
puff pastry with jam and whip cream dessert

You can make these puff pastry part of this dessert a day ahead of time and store in an airtight container at room temperature.  Assemble the dessert up to a few hours ahead of serving.

Variations

You could also make this dessert with a hazelnut chocolate spread like Nutella.  Add some cocoa powder to the whipped cream and pastry cream filling for a chocolate version.  Top with strawberries for a great combination, or just sprinkle the top with some powdered sugar.

easy puff pastry and jam desserts

For a Valentine's Day verison try cutting out your puff pastry with a heart cookie cutter before you bake it.  The heart shape is such a cute twist on these delicious desserts for Valentine's Day.

puff pastry with jam and whip cream dessert 046

This is such an impressive dessert, with just a few simple ingredients.  These berry and jam puff pastries are the perfect sweet treats for a quick last minute dessert, because they don't take a lot of time or energy to put together and taste so great.  They're great with a cup of coffee and the perfect size for afternoon tea.  We love the different flaky layers and the creamy sweet filling combined with the tart fresh berries on top.  It's a wonderful combination and one of my favourite jam desserts.

puff pastry and jam dessert ideas

Recipe

Easy puff pastry dessert.

Easy Puff Pastry Dessert

Flaky puff pastry with custard and fruit.
5 from 1 vote
Print Pin Rate
Course: Desserts
Cuisine: American
Prep Time: 10 minutes minutes
Cook Time: 20 minutes minutes
Total Time: 30 minutes minutes
Servings: 6
Calories: 441kcal
Author: Dannyelle Nicolle-Ramjist

Ingredients

  • 2 sheets of frozen puff pastry
  • 1 teaspoon milk
  • 1 tablespoon coarse sugar
  • 473 mL container whipping cream
  • 1 teaspoon vanilla
  • 3 teaspoon sugar
  • 1 cup custard
  • 6 tablespoon jam -I used blackberry raspberry, and blueberry
  • ½ pint of berries -I used blackberries raspberries, and blueberries

Instructions

  • First, defrost your store-bought puff pastry, then roll out each puff pastry sheet. There are two, and cut each sheet of puff pastry into six equal squares with a sharp knife, giving you 12 pieces in total. Brush six with a little milk and sprinkle with coarse sugar. Bake on a baking sheet until golden brown, according to the package directions and then let cool completely on a cooling rack.
  • Meanwhile, make the cheaters pastry cream. First whip your cream and near the end of whipping add 1 teaspoon of vanilla and 3 teaspoons of sugar. In a small bowl combine about half a can of custard with equal parts whipped cream, save the other whipped cream for the top.
  • Now to assemble the desserts, lay down a square of puff pastry, and then top with your pastry cream. Spoon 2 tablespoon of jam filling over the cream and then put the lid on. Top that with more whipped cream and the same fruit as the jam you used inside.

Nutrition

Serving: 1g | Calories: 441kcal | Carbohydrates: 34g | Protein: 5g | Fat: 33g | Saturated Fat: 20g | Polyunsaturated Fat: 11g | Trans Fat: 1g | Cholesterol: 114mg | Sodium: 80mg | Fiber: 1g | Sugar: 20g
Tried this Recipe? Tag me Today!Mention @LifeisaParty or tag #lifeisaparty!

With an easy, and impressive puff pastry dessert like this, life really is a party!

More Dessert Inspiration

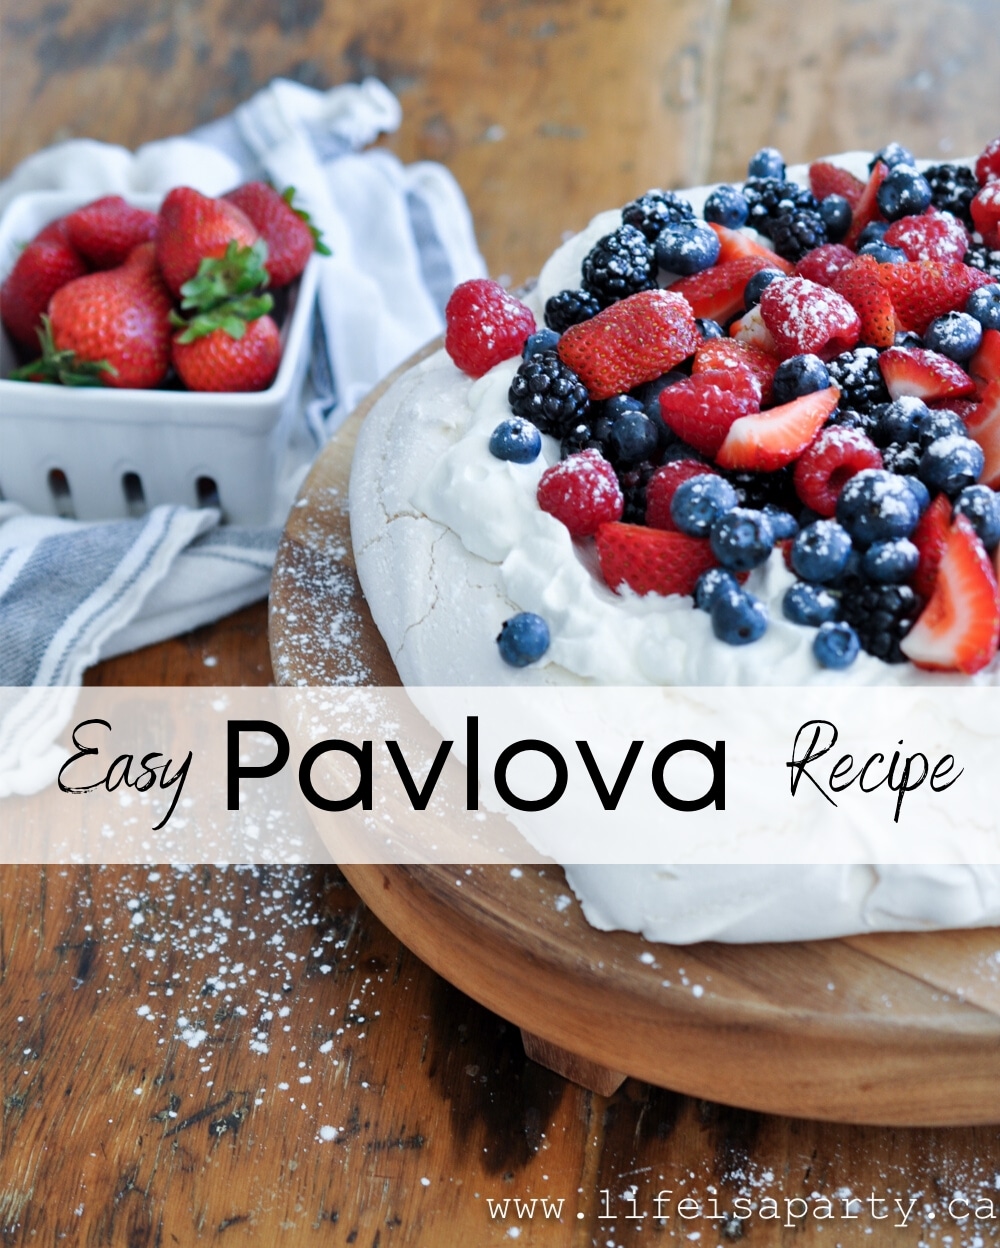
You might also like our Easy Pavlova Recipe here.

Easy Pavlova Recipe: a favourite, easy to make, no-fail pavlova recipe. Make with summer berries, or any other favourite fruit.

Also check our Classic Cheese Cake here.

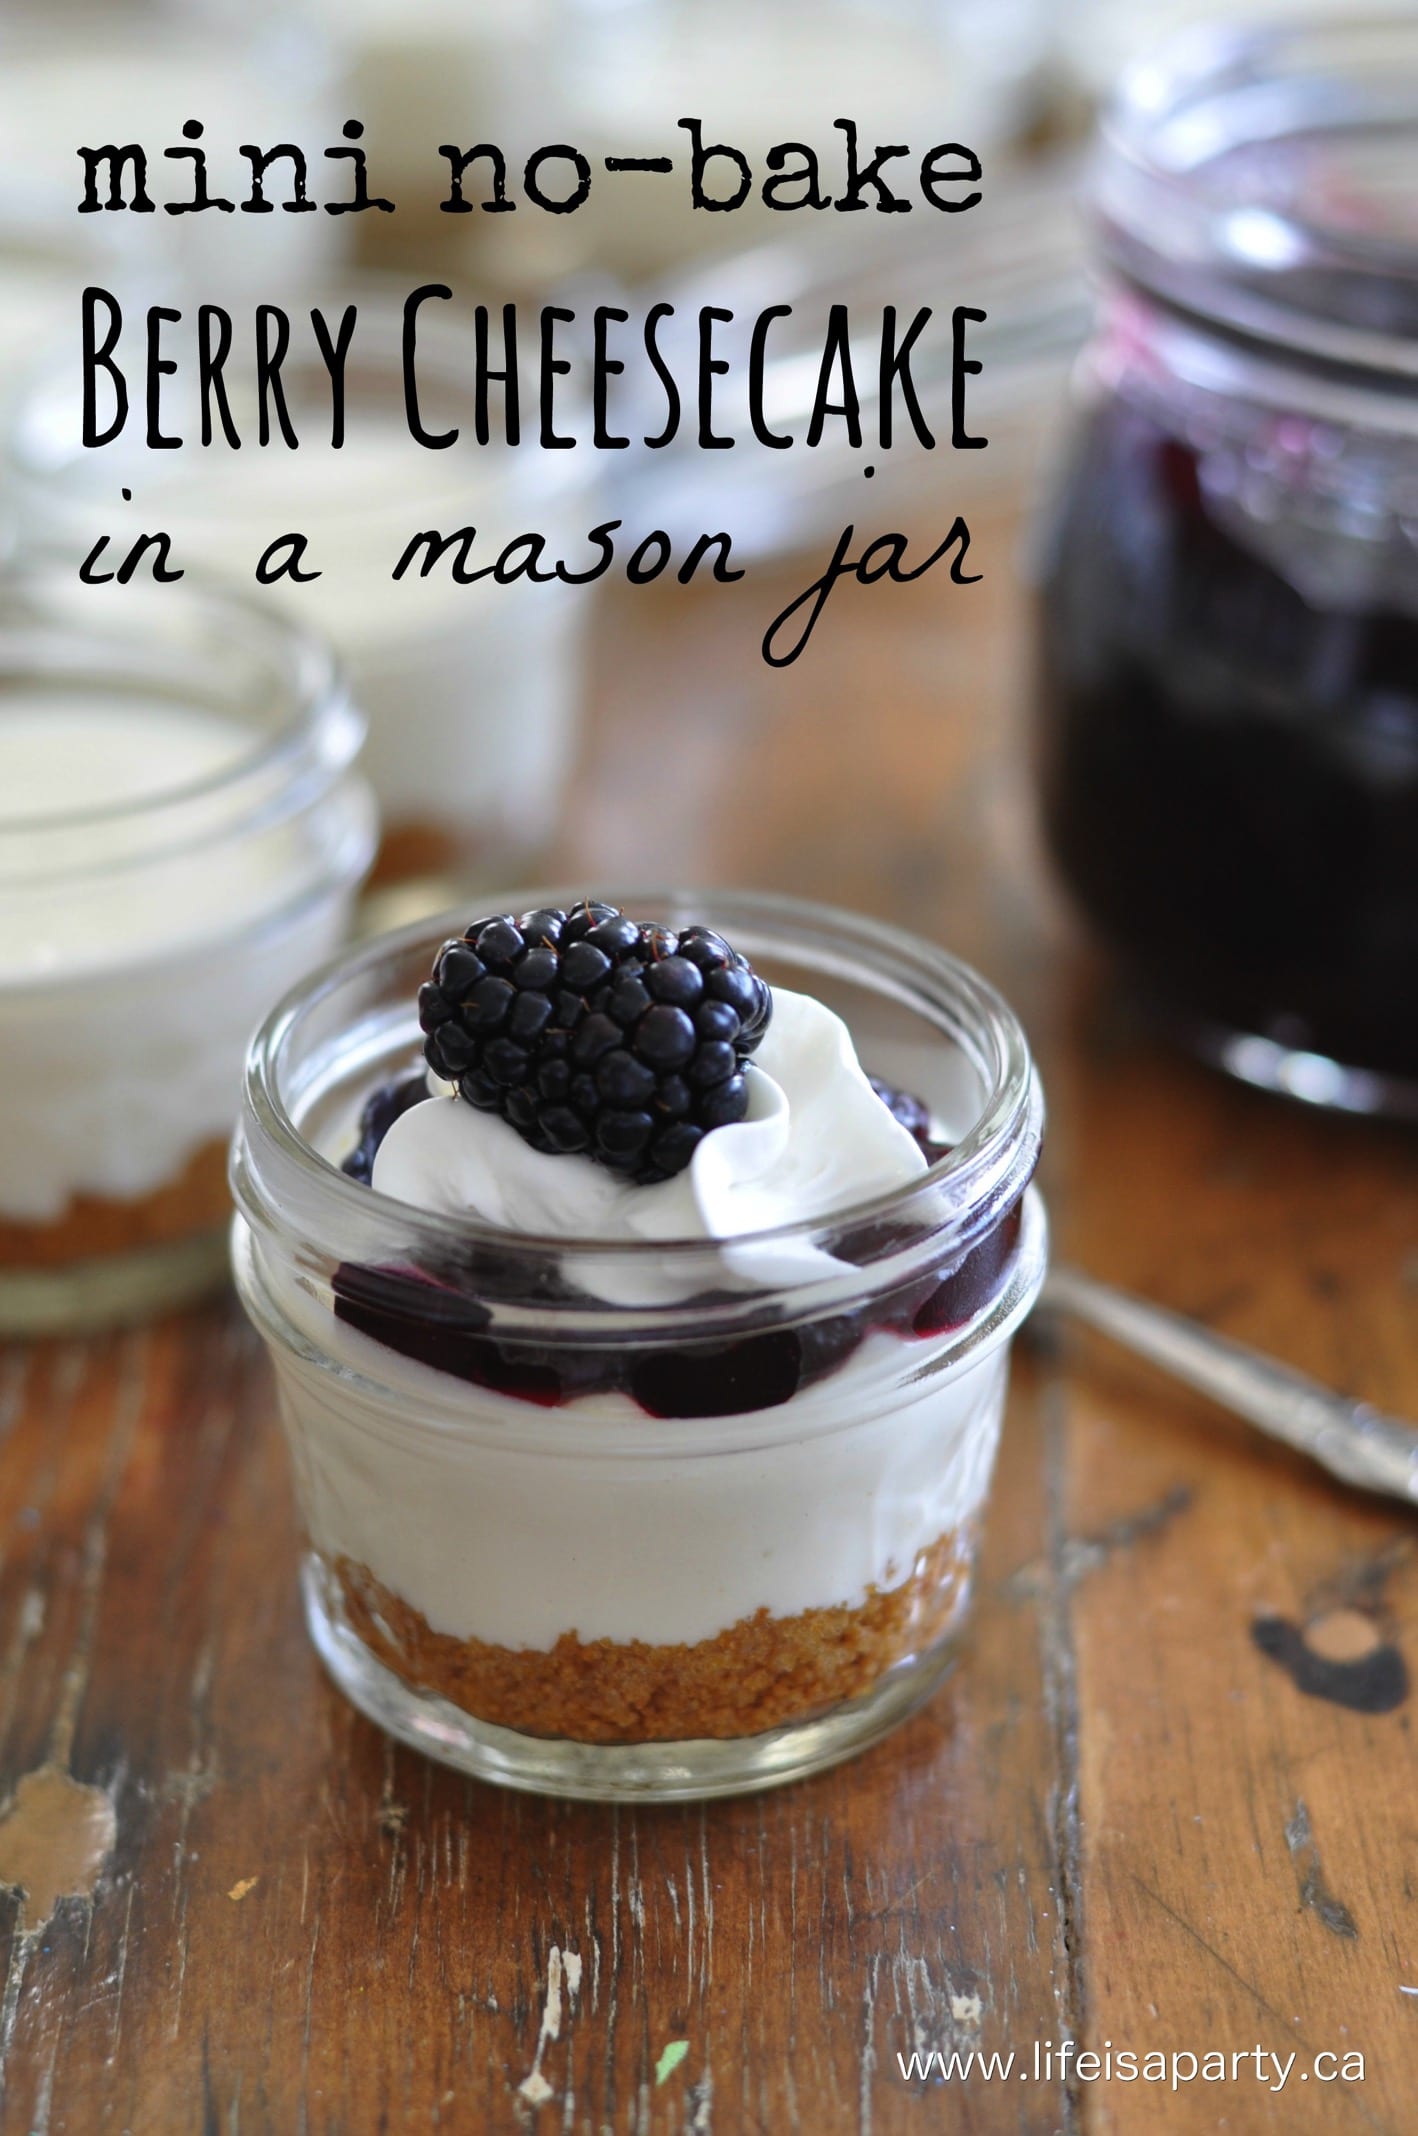
You might also enjoy Mini No-Bake Cheesecake in a Mason Jar here.

Mini No-Bake Berry Cheesecake In A Mason Jar -the perfect cute, portable, easy treat! Top with any fruit you like best. Indiviual serving size.

Giving to Charity and a Christmas Ornament Keepsake -Hostess Gift

Nov 30, 2012 · 4 Comments

Giving to charity hostess gift idea.

Christmas Hostess Gift: give a thoughtful and world changing gift this year with a donation to charity and DIY keepsake ornament.

Giving to charity hostess gift idea.
[feast_advanced_jump_to]

I wanted to share this great gift idea as part of the Christmas Gifts for under $10 series -perfect for a host/hostess, bus driver, neighbour, or friend.

Image

Let's face it none of us really needs another candle, box of chocolates or bottle of wine this Christmas...okay you might make an argument for the wine, but still. Here's an idea to give something with a little more meaning.

Charity Gifts That Do Some Good

I'm always inspired by the World Vision catalogue that comes around each year filled with charity gifts for people in developing countries, and I love the idea of giving things like animals, and education because they're the gifts that keep giving and provide a brighter future.

So, I was wondering how to make these meaningful gifts a little less expensive and suitable for a hostess gift, and also give something to the recipient as a keepsake as well. Here's what I came up with.

Christmas Hostess Gift

The Gift of Fruit Trees

World Vision offers 5 fruit trees for $30. The trees could do a lot for a family. They offer fruit which helps provide nutritious food and vitamins for a family, given enough to create an orchard they could provide an opportunity for a family to create a small business, and they offer natural beauty, shade, and oxygen to the area. Win, win, win. At only $30 for five here's how I turned this into a fun under $10 gift.

Christmas hostess gift under $10

A Keepsake Ornament

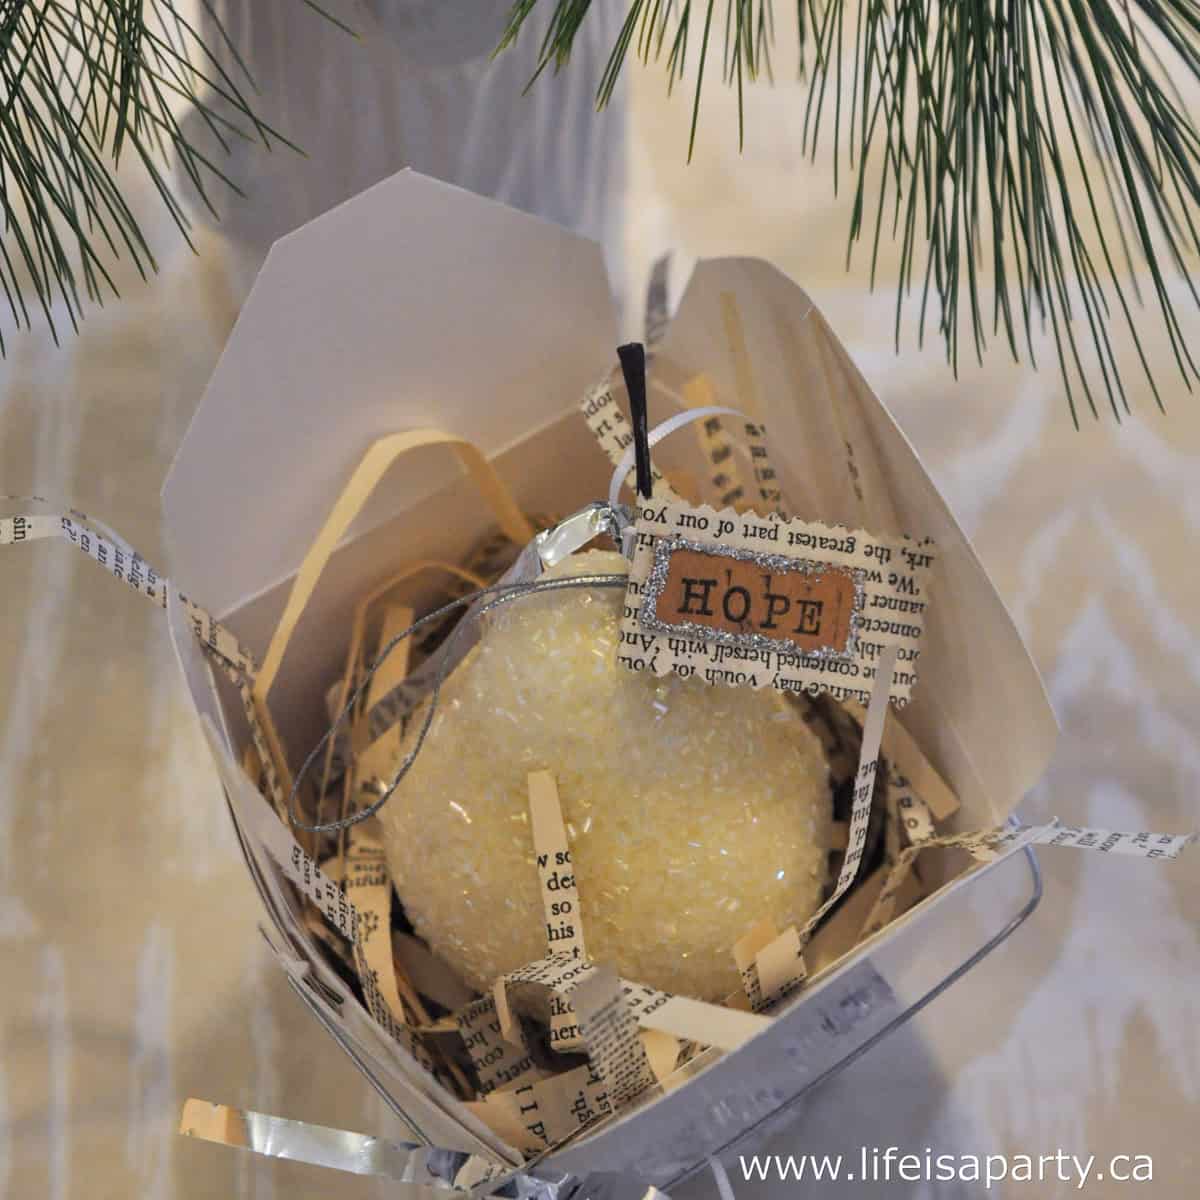
You can make three or four of these sweet keepsake ornaments, with a glittered covered pear, and then divide up the fruit trees, to make gifts for under $10. I already had the fruit ornament, but you could find any plastic fruit and even glitter it yourself. Then I made a little tag that says HOPE. I used rubber stamps on card stock, glittered the edges, and mounted it on a little piece of book page paper cut with special scissors, then I tied it to the pear with some silver ribbon.

charity Christmas gift idea

I purchased the fruit trees, and printed out the description, you can purchase and print it here, and packaged it up with one of the keepsake ornaments in a fun little Chinese take-out box, with shredded book pages. Now, when you are invited somewhere for dinner or a party over Christmas you can let the host know that you bought a fruit tree in a developing country in their name, and that each year they put the ornament on their Christmas tree they'll remember the gift of the fruit tree.

Christmas hostess gift idea

With a thoughtful, and meaningful Christmas hostess gift like this, life really is a party!

Also check out our Holiday Hostess Wine and Cheese Gift Basket here.

Also you might enjoy our Printable Christmas Gift Card Holders here.

DIY Pine Cone Christmas Balls

Nov 29, 2012 · 5 Comments

DIY pinecone ball Christmas ornaments.

DIY Pinecone Christmas Balls: Easy to make and beautiful. Made with simple pinecones glued to styrofoam balls. Perfect for Christmas.

DIY pinecone ball Christmas ornaments.
[feast_advanced_jump_to]

I was recently visiting a Christmas tour of homes, and one of the houses had some pretty pine cone balls. I thought they'd work really well with our winter woodland theme this Christmas and decided to make some.

Materials:

  • small spruce cones
  • styrofoam balls
  • hot glue gun and hot glue
  • silver spray paint (optional)
  • glitter and glue (optional)

The hardest part was finding small pine cones -actually they're spruce cones. After driving around a few neighbourhoods, I managed to find and collect some. I didn't even have to wear all black. 😉 Along with lots and lots of little spruce cones, I used three different sized large styrofoam balls from the dollar store, and lots and lots and lots of hot glue.

DIY Pinecone Christmas Balls

How To Make Pine Cone Balls

1. When you first collect the cones from outside they will be closed up.  They need a little heat to open up.  After I collected my pinecones I left them near the heat vent in my home for a few days and they opened up quite a bit. (You could also so place them on a cookie sheet in a very low oven for a few hours.)

2. Then I just glued them onto the styrofoam ball, as close together as possible, and varying the directions they went in to try and make it look random.

3. You could leave the balls just like this or add a little spray paint to them.  I sprayed them very, very lightly with a little silver spray paint, to just add a little sheen. Then I added some glue and glitter in just a few small spots to add a little Christmas sparkle.

DIY Pinecone Balls

I love all their rustic texture, and the little hit of silver and glitter to add a little Christmas magic.

how to make a pinecone ball

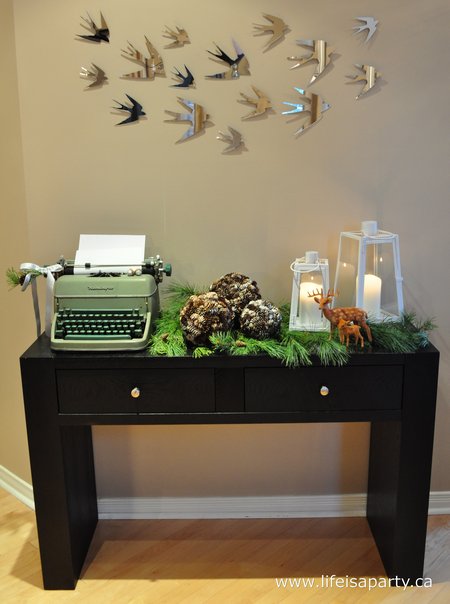
I added the balls and some greens to my console table. They're nested beside my vintage typewriter.

rustic Christmas decor vintage typewriter

They type writer has a special letter started.

dear Santa, I can explain...

On the table there's also some candle lanterns and two sweet little woodland deer.

DIY Pinecone Christmas Balls

It makes a happy greeting when Christmas visitors arrive, and the pine smells so good.

how to make a pine cone ball

With DIY Pine Cone Christmas balls to decorate this Christmas, life really is a party!

More Christmas Craft Ideas

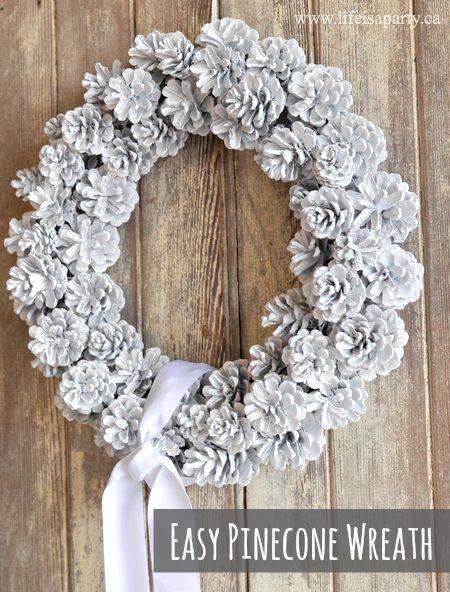
You might also like How To Make A Pine Cone Wreath here.

How to make a Pinecone Wreath

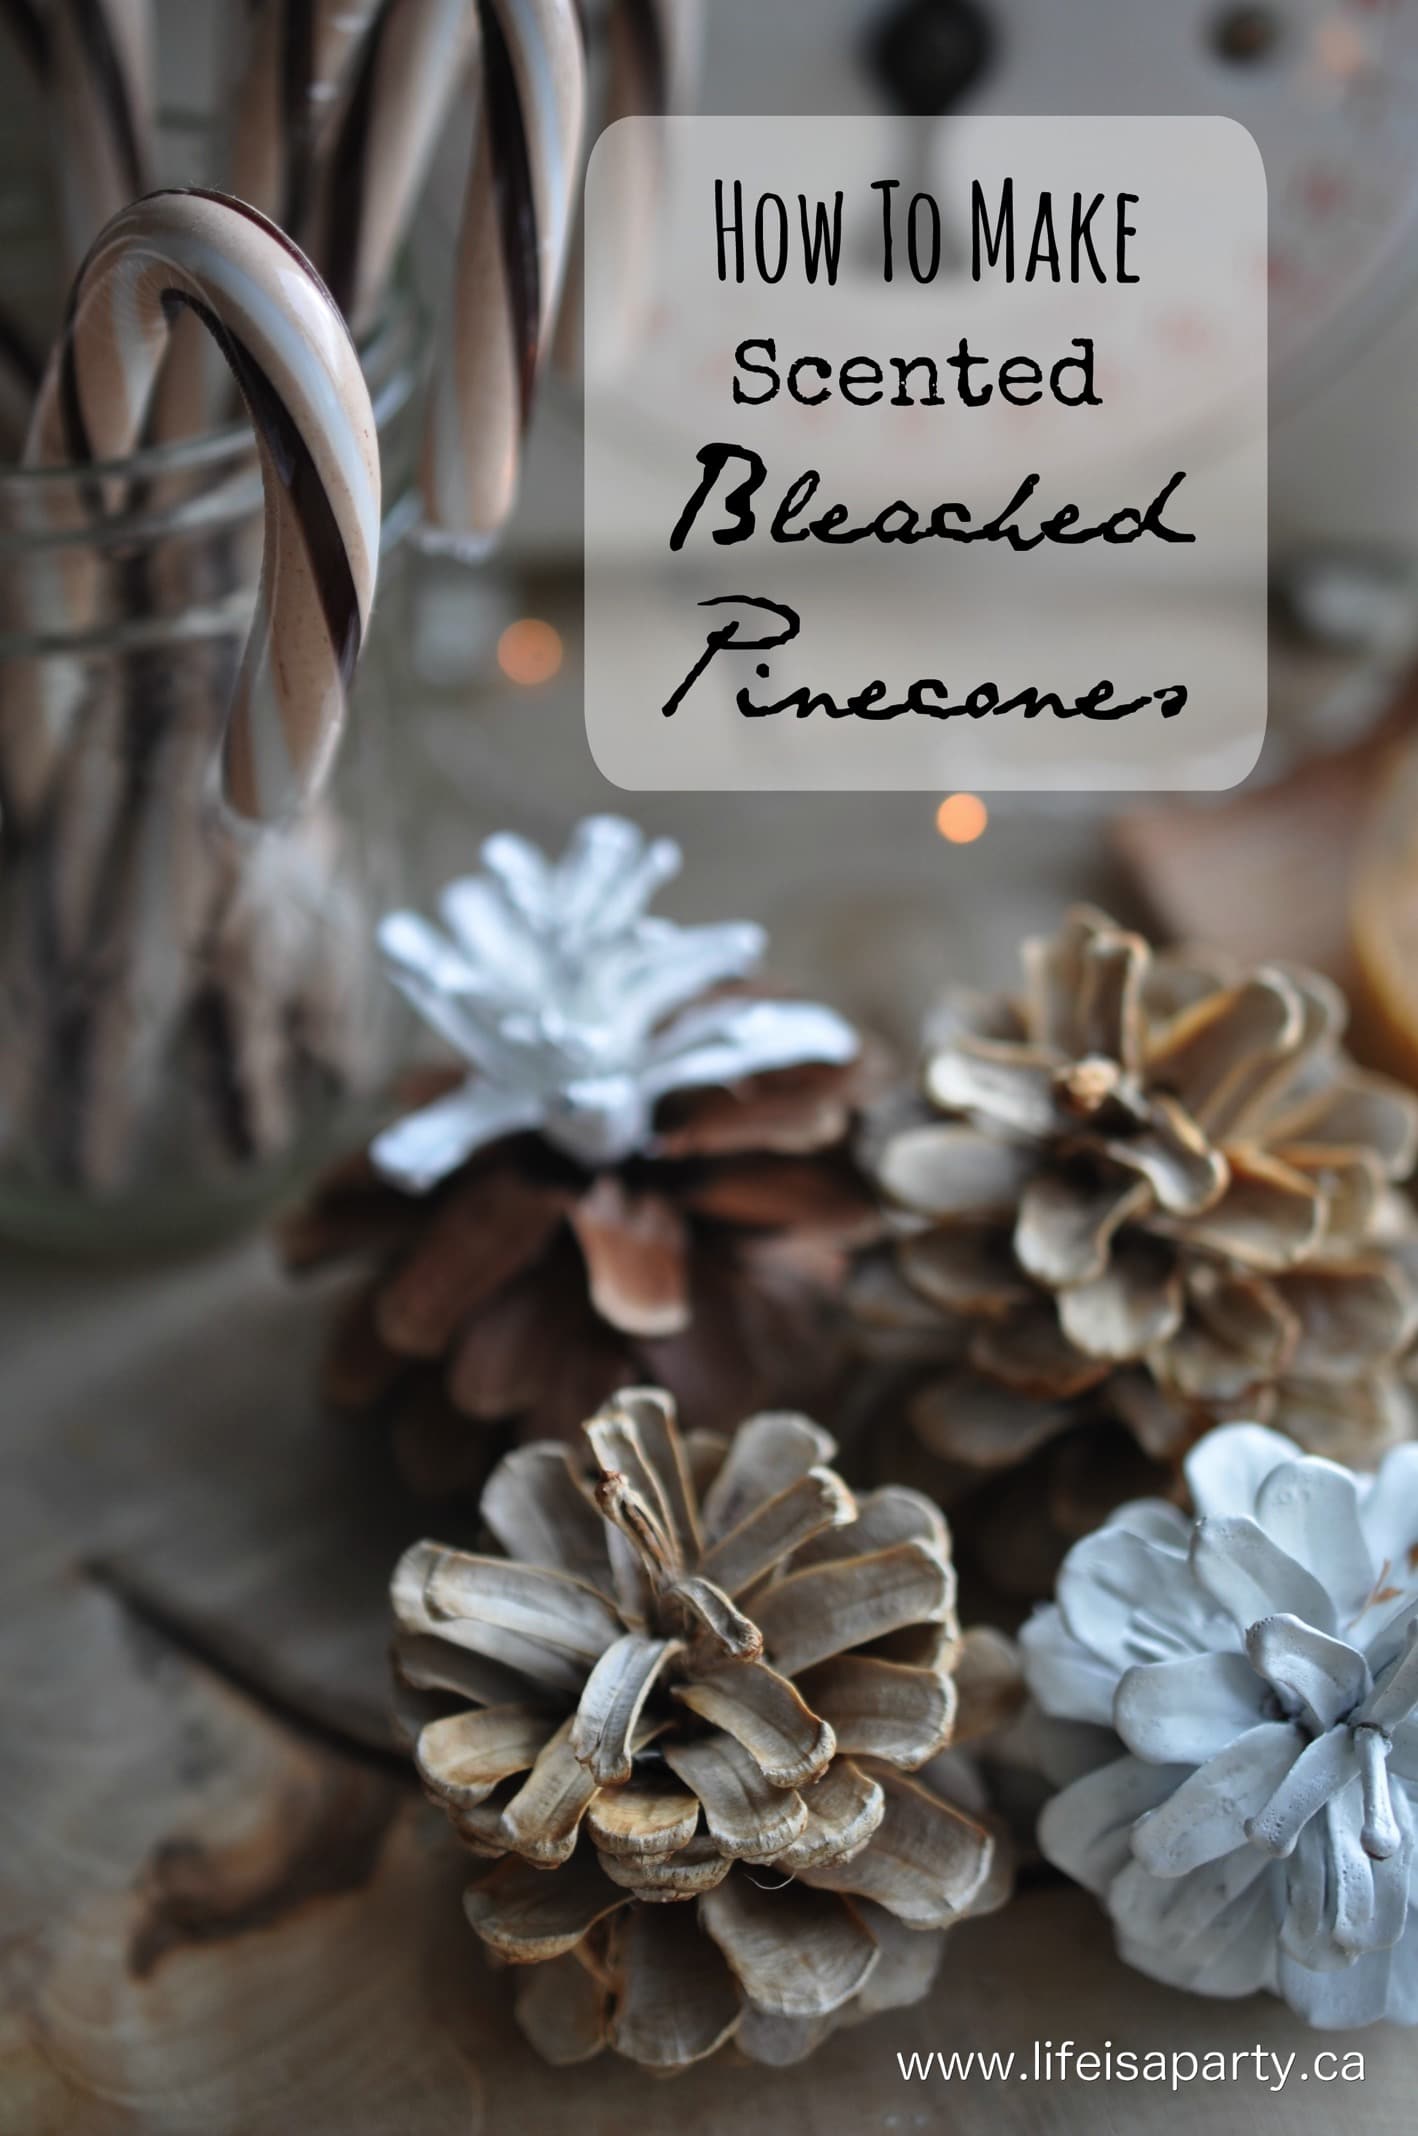
Also check out our Scented Bleached Pine Cones here.

Scented Bleached Pinecones -use simple household bleach to whiten and brighten natural pinecones, and then add any scent to them you like.

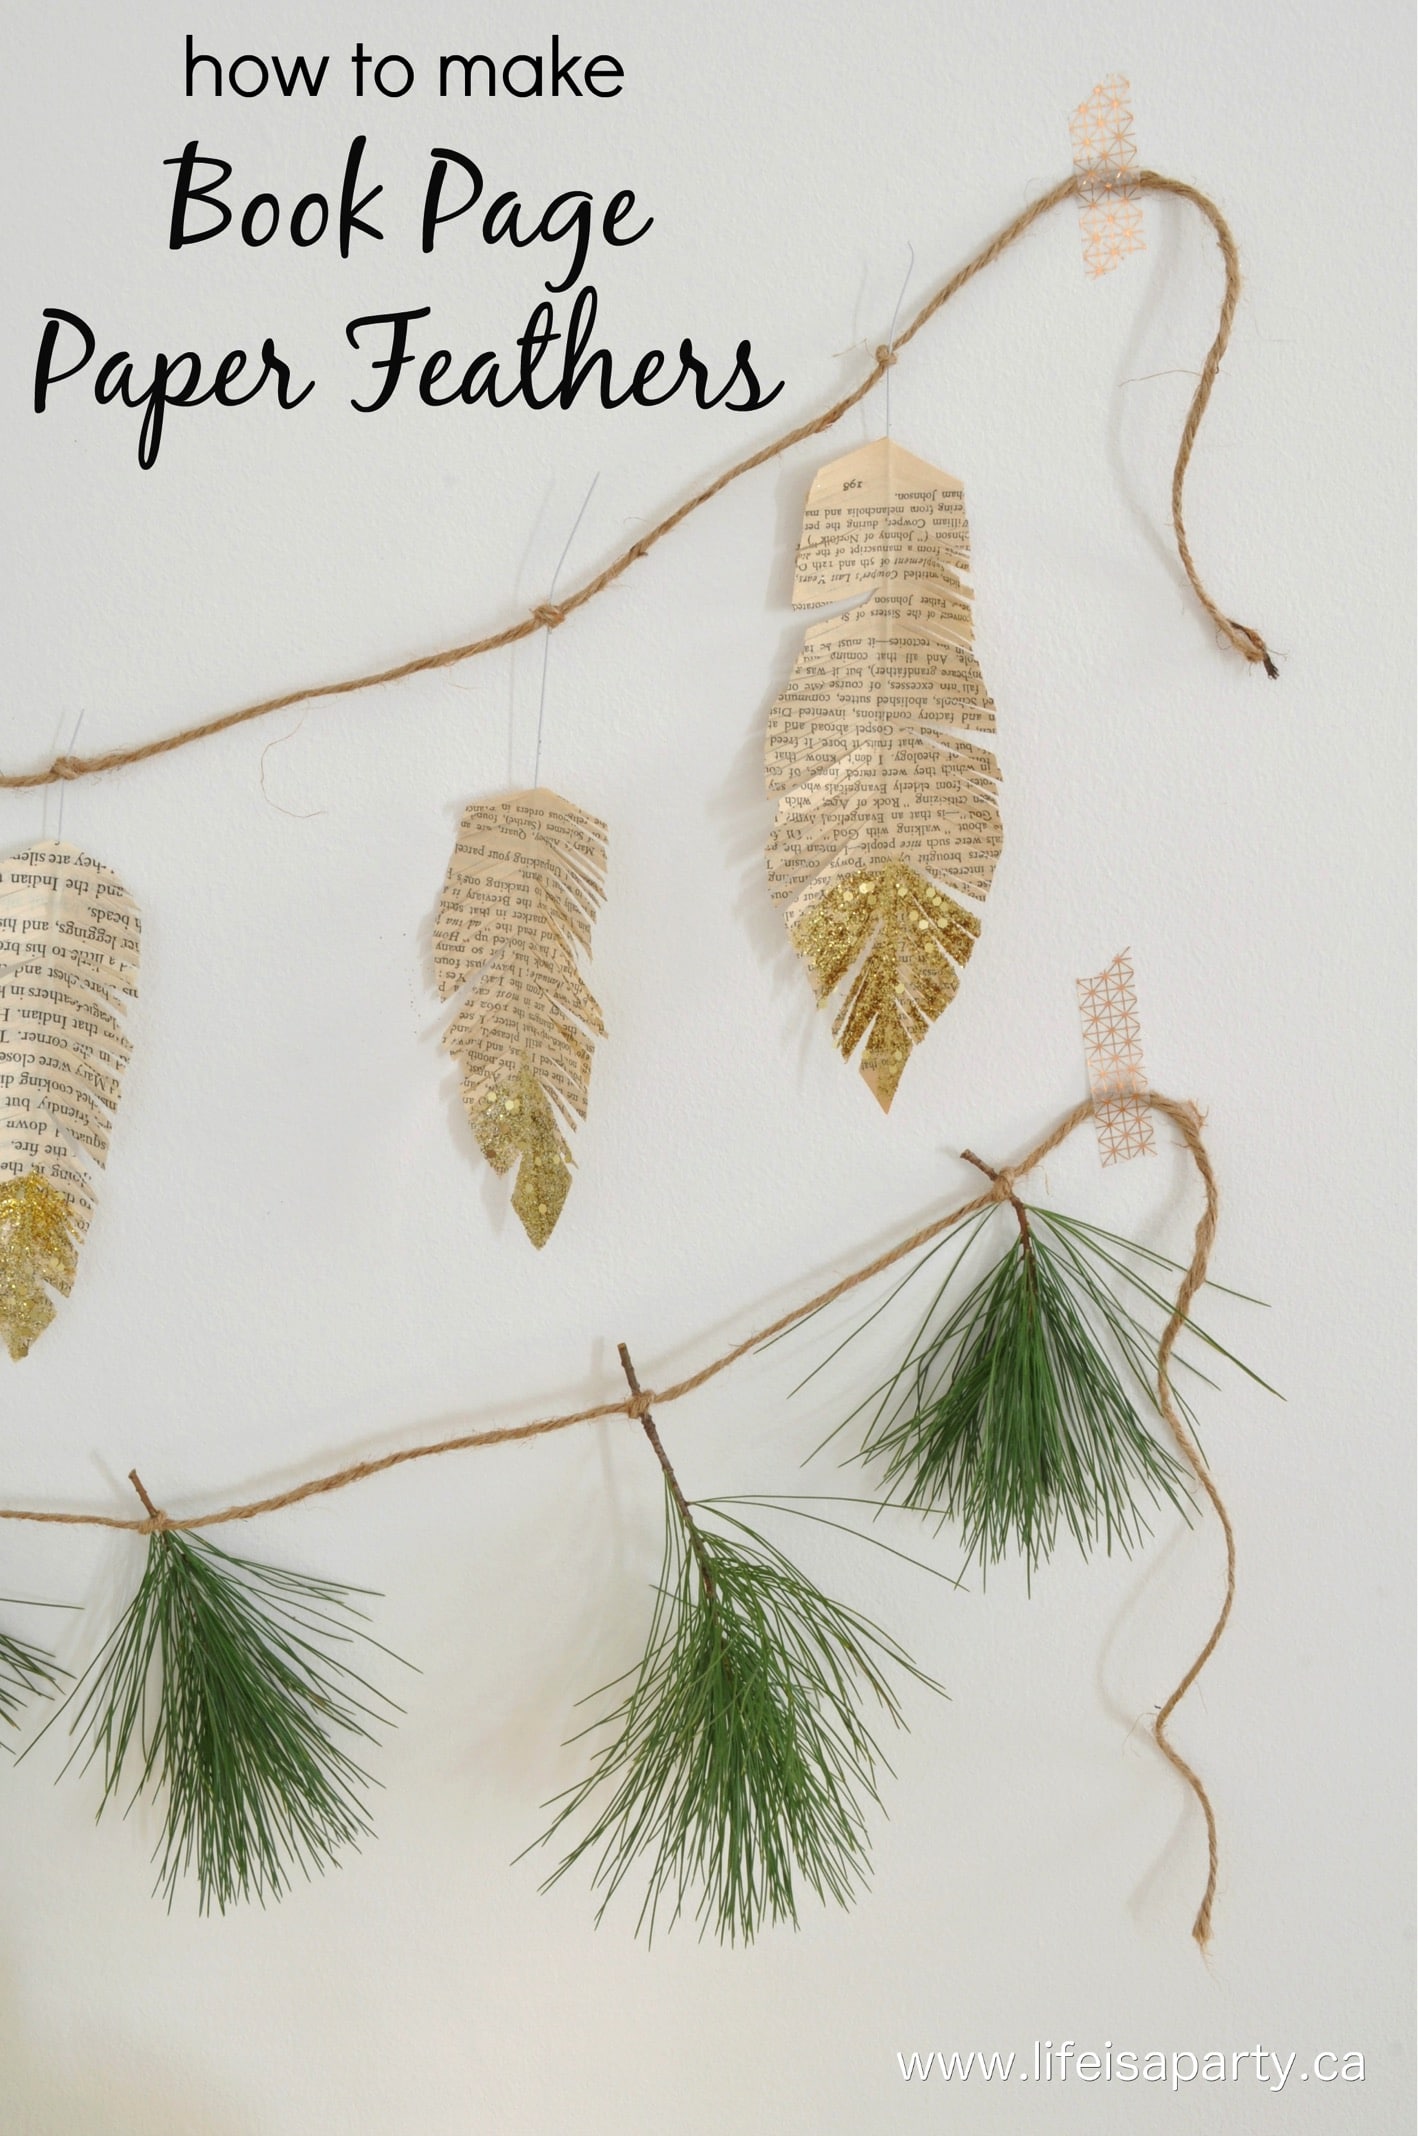
You might also enjoy our Paper Feather Garland here.

Easy Pancake Mix In A Jar With Free Printable

Nov 23, 2012 · 3 Comments

Pancake mix in a jar gift.

Pancake Mix In A Jar: perfect for gift giving this homemade pancake mix in jar is a delicious, easy to make, and inexpensive gift idea.

Pancake mix in a jar gift.
[feast_advanced_jump_to]

This pancake mix in a jar is a favourite of mine.  It's easy to put this gift together and it makes the most delicious homemade pancakes.  Stir together the dry ingredients, and add the dry mix to a jar and canister, and print the free printable recipe tag for the gift recipient.  The recipe tag tells the gift recipient exactly what to add, and what measurements to make a delicious homemade pancake batter.  Give this along with some maple syrup for the perfect homemade thoughtful gift of fluffy pancakes.

Today I'm sharing my very favourite pancakes with you. I grew up on Aunt Jemima and thought that was what pancakes tasted like. When I got married my husband started making us pancakes from scratch -what a difference, and the real maple syrup didn't hurt either. This batch of pancakes is so light, and fluffy, and yummy. If you've never tried them before consider it Christmas holiday homework. 😉

Pancake Dry Ingredients:

To make these into an in-a-jar recipe, combine these dry ingredients in a mixing bowl and whisk together:

  • 1 ½ cups all-purpose flour
  • 3 tablespoons sugar
  • 1 ½ teaspoons baking powder
  • ½ teaspoon baking soda
  • ½ teaspoon salt

Variation

Want to make these into chocolate chip pancake mix?  Just add a ½ cup of chocolate chips to the dry pancake mix when your mixing it together.  

Jar or Canister

All together the dry ingredients are just under 2 cups.  This will fit in a pint mason jar or canister that can hold 16 oz.  

I used a cute canister from the dollar store to put the homemade pancake mix into.  A canning jar or any glass jar that can hold 2 cups works great too.  For the holidays, you can decorate the glass mason jar or canister with some fresh pine and ribbon and tie on the recipe tag.

DIY pancake mix in a jar

Pancake Mix Instructions Printable Gift Tag

This cute free printable label gives the recipient the list of wet ingredients to add.  You can download the free printable labels from our Free Resource Library.  It's free and gives you instant access to this printable and lots of others.  Subscribe below for access.

I printed the recipe tag on card stock, cut it out, and added a little glitter to the printable tags -cause everything is better with glitter. Then just punch a hole in the top, and tie it onto the canister with a little Christmas ribbon for the holidays, or regular ribbon anytime of year.  For another option, you could print the recipe onto sticker paper, and then stick it to the side of the glass jar.  This would work best on a canister with straight sides.

On the free printable gift tags are the instructions for what to add to the mason jar pancake mix.  

Combine in a large bowl:

  • 1 ½ cups milk or buttermilk
  • 3 tablespoon melted butter
  • ½ teaspoon vanilla
  • 2 eggs

Add dry ingredients and mix until just combined.  Cook batter into pancakes on a hot griddle or frying pan.  Once small bubbles form on the top, flip over until the other side is golden brown.  Serve with maple syrup and enjoy!

Pancake Mix in a Jar

Syrup

Along with the pancake mix-in-a-jar, I thought it would be nice to include some syrup. I found this delicious looking raspberry syrup, but real maple syrup would be great too.

raspberry syrup

Gift Giving

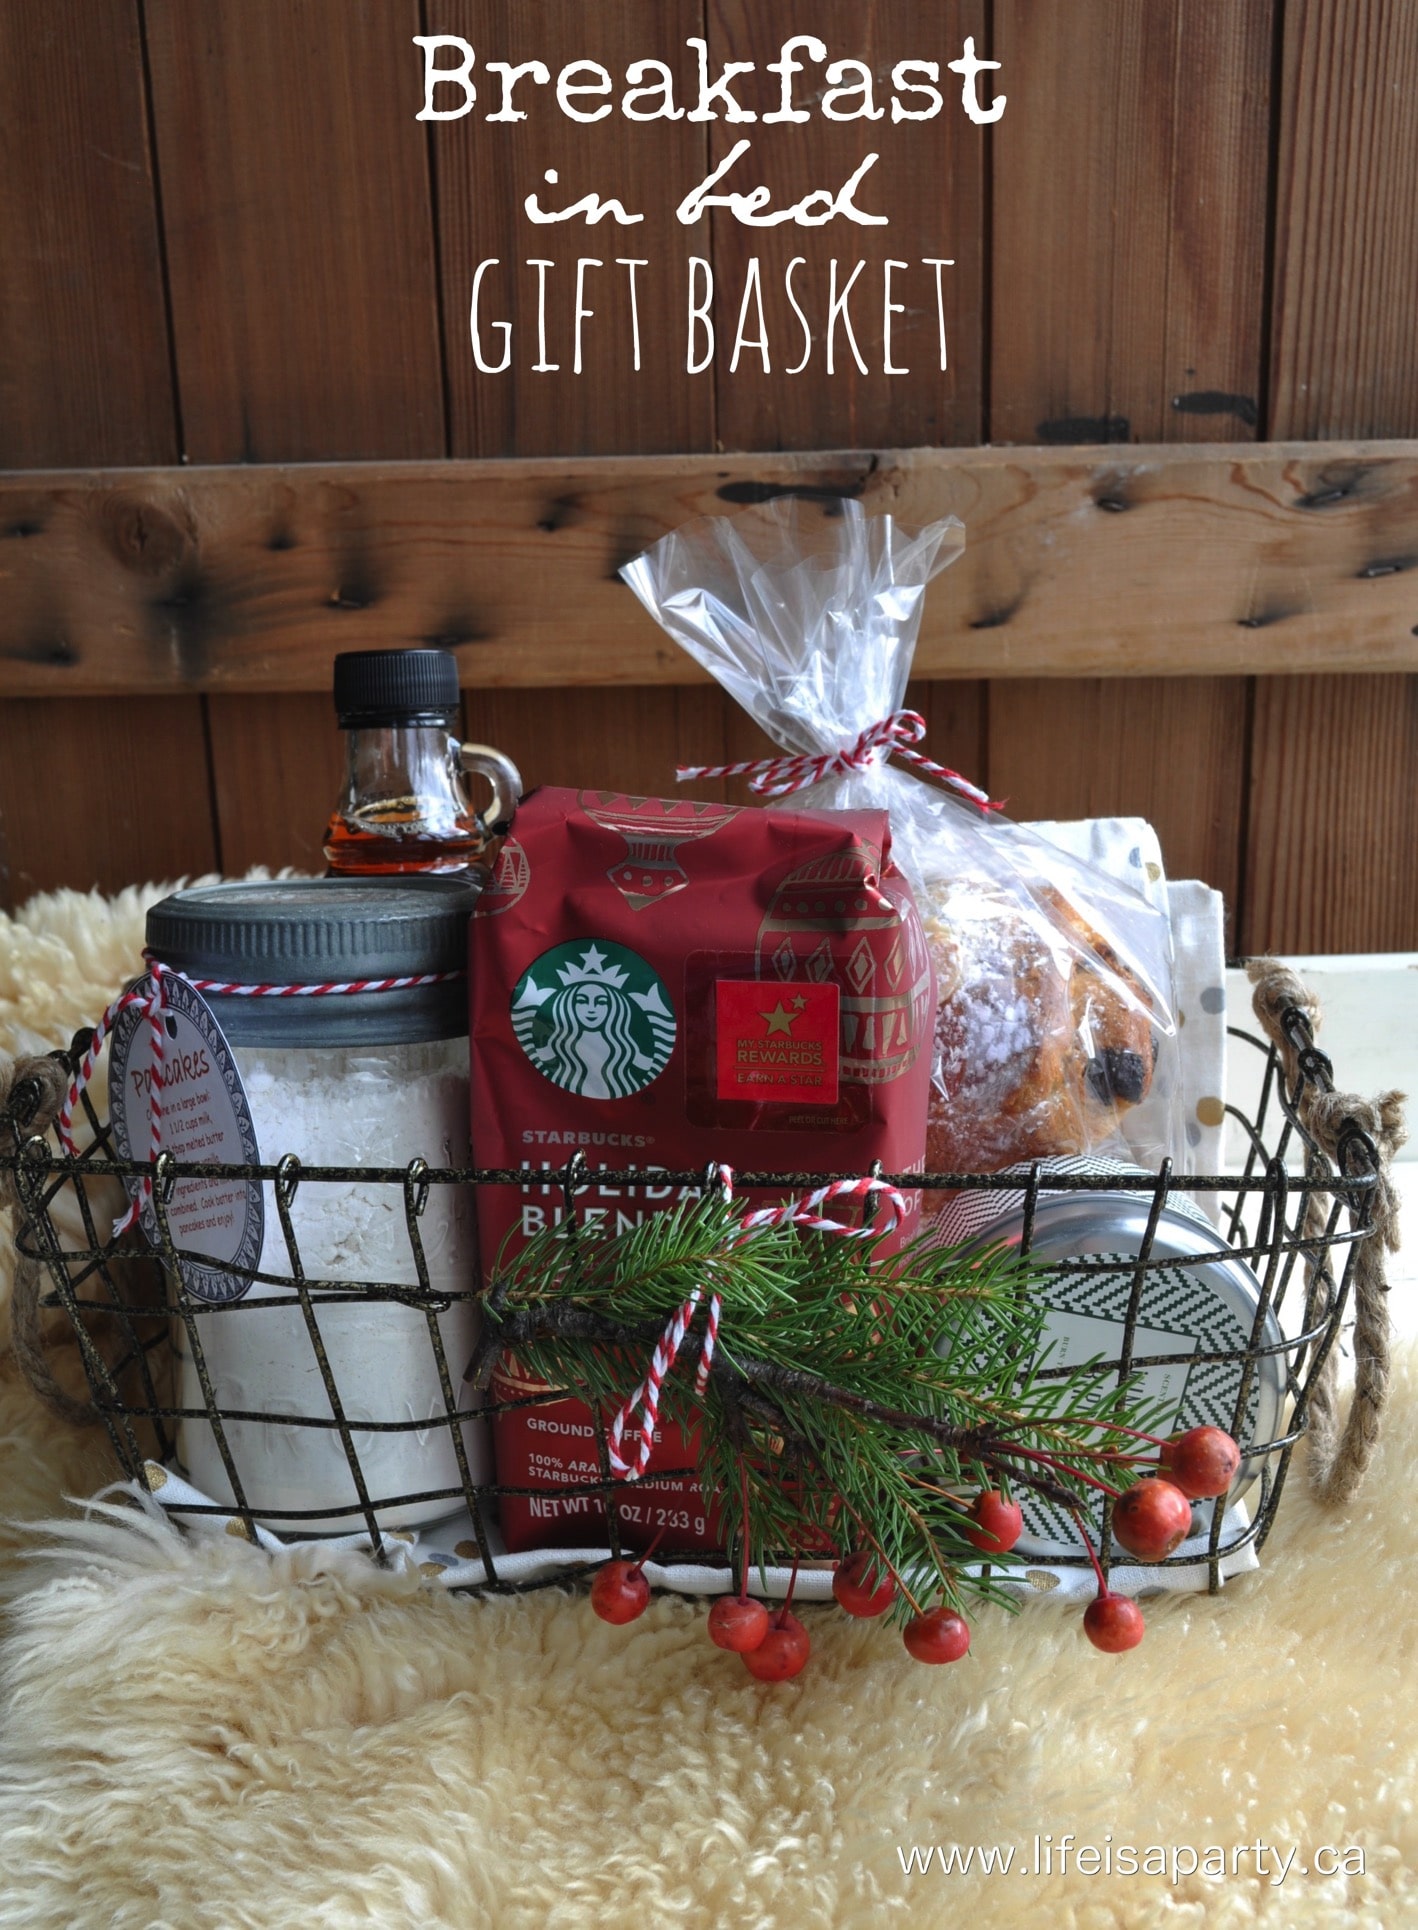
My syrup was around $5, the canister $1, and I had the other ingredients, making this a great under $10 Christmas gift or hostess gift anytime of year.  I think this would be really fun to bring as a hostess gift for a dinner party, and mention something like "you made us this beautiful dinner so here's something to help with breakfast tomorrow".  Want some more ideas about a breakfast gift basket?   Check out this post where I used this DIY pancake mix in a jar, along with other breakfast items for the perfect breakfast gift basket.

Breakfast in Bed Gift Basket: perfect, thoughtful gift, includes a recipe and homemade mix for pancakes, and free printable.

Not only is this pancake mix in a jar a great hostess gift, it's so easy that it would be a great project to make with kids who want to make homemade items for gift giving.  You could easily make this pancake mix with kids at girl guides, in a classroom, or as part of a youth group, or any other club.  They could mix it together and package it for gift giving and give it to someone special this holiday season, or for Mother's Day or Father's Day.

Pancake Mix in a Jar

With pancake mix in jar, life really is a party!

More Breakfast Recipe Inspiration

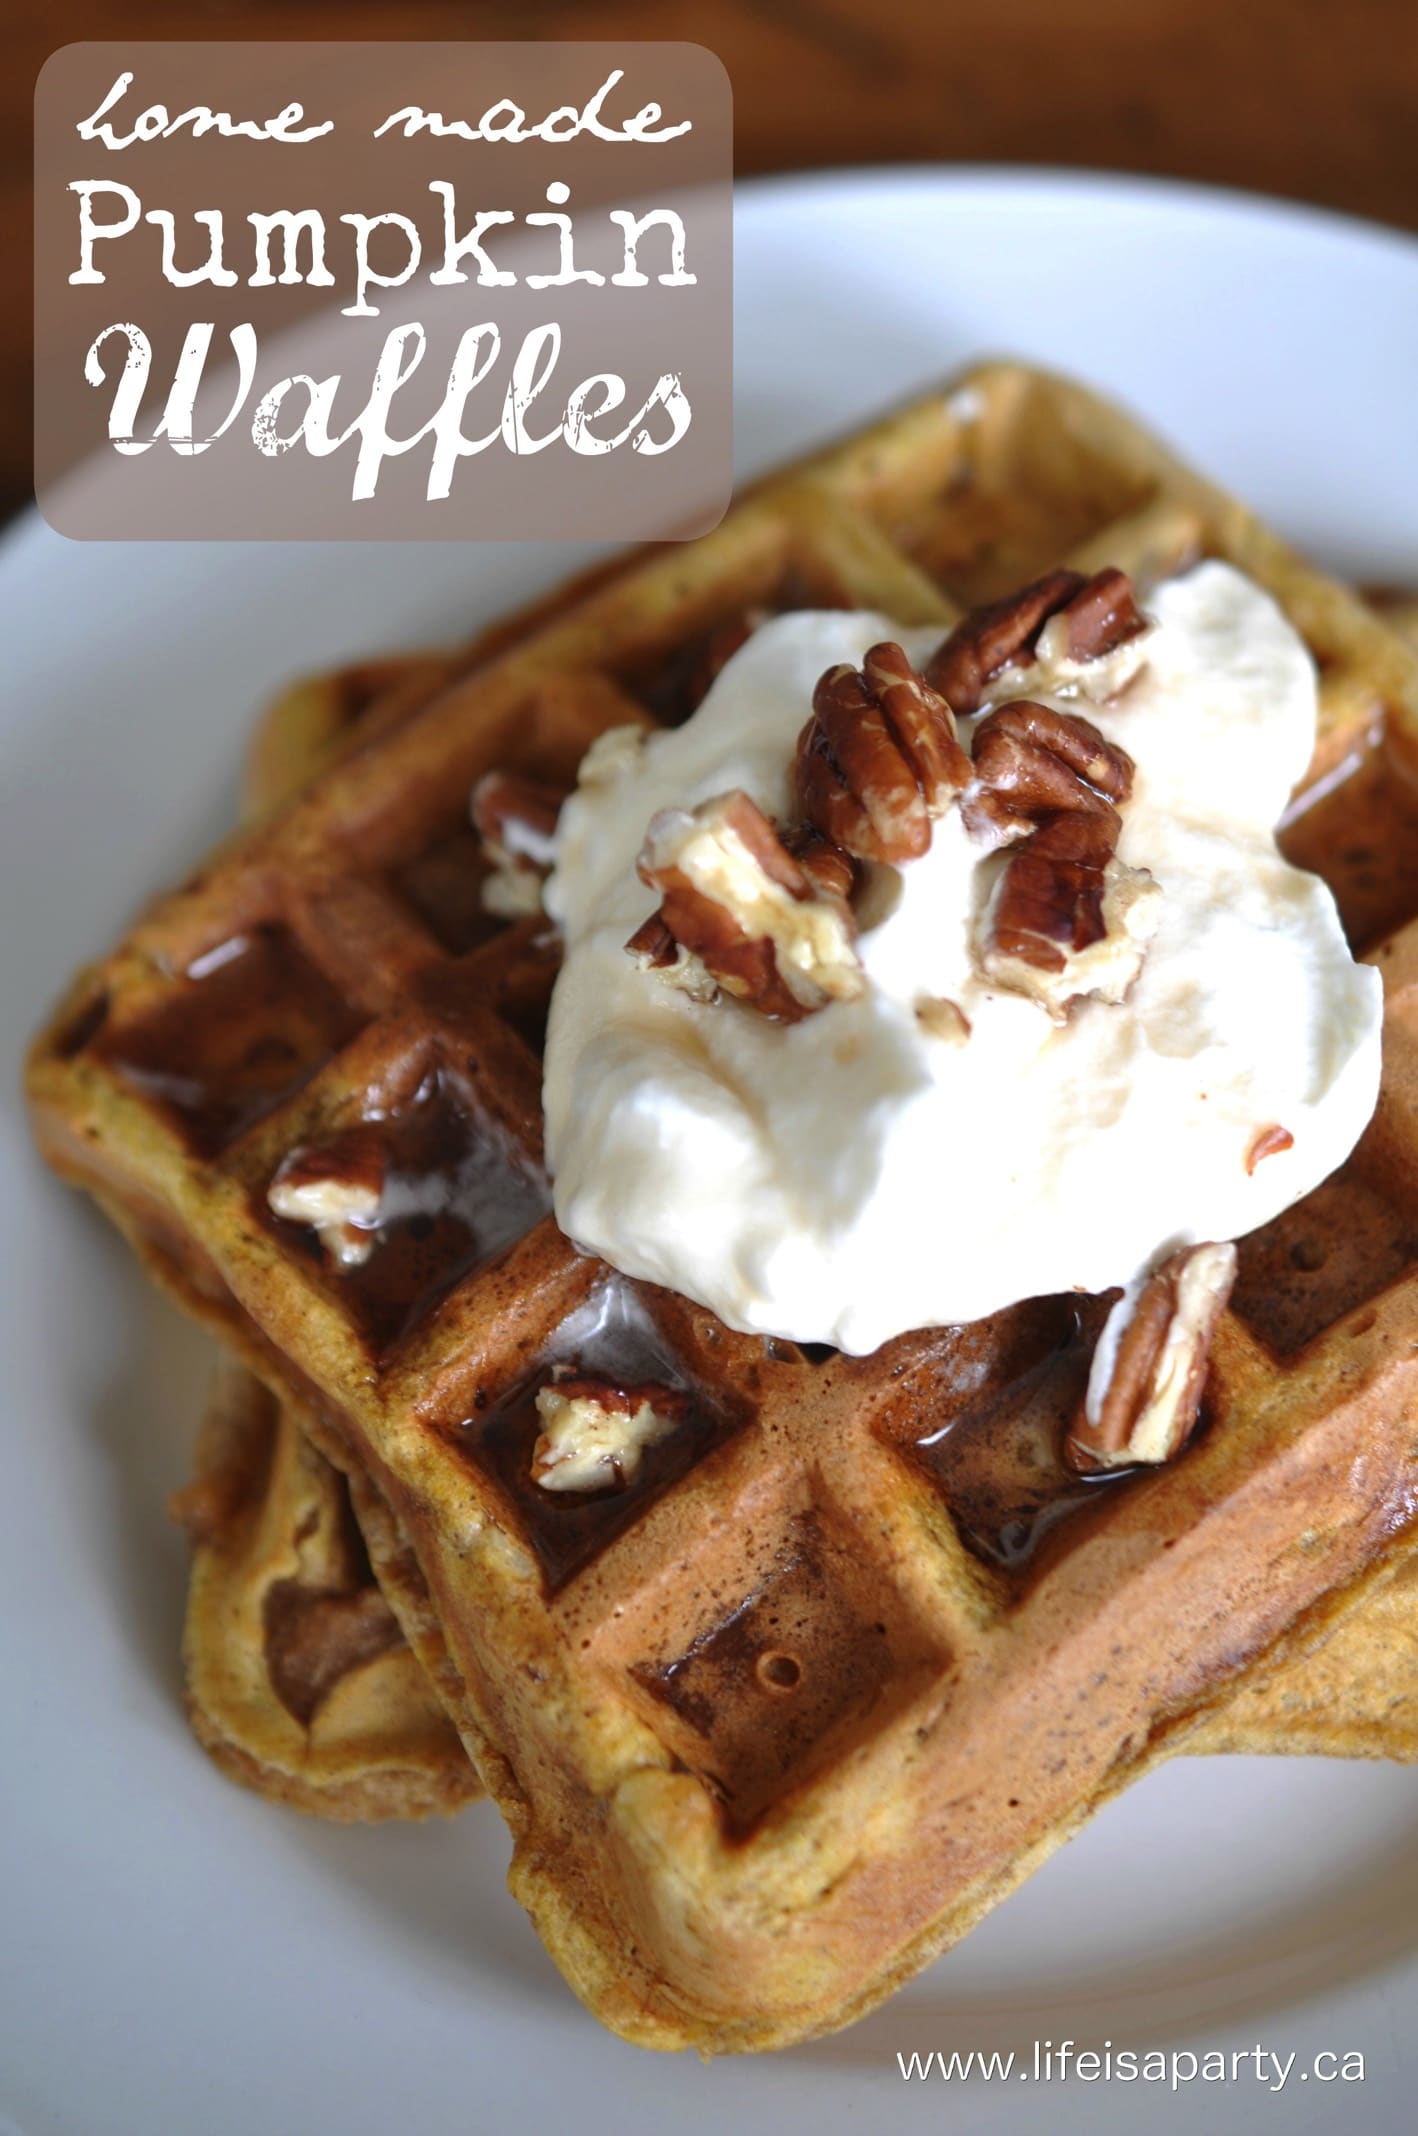
You might also like our Pumpkin Waffle recipe here.

Homemade Pumpkin Waffles -easy recipe for pumpkin waffles, perfect morning treat, and easy to freeze extras for a quick weekday breakfast later.

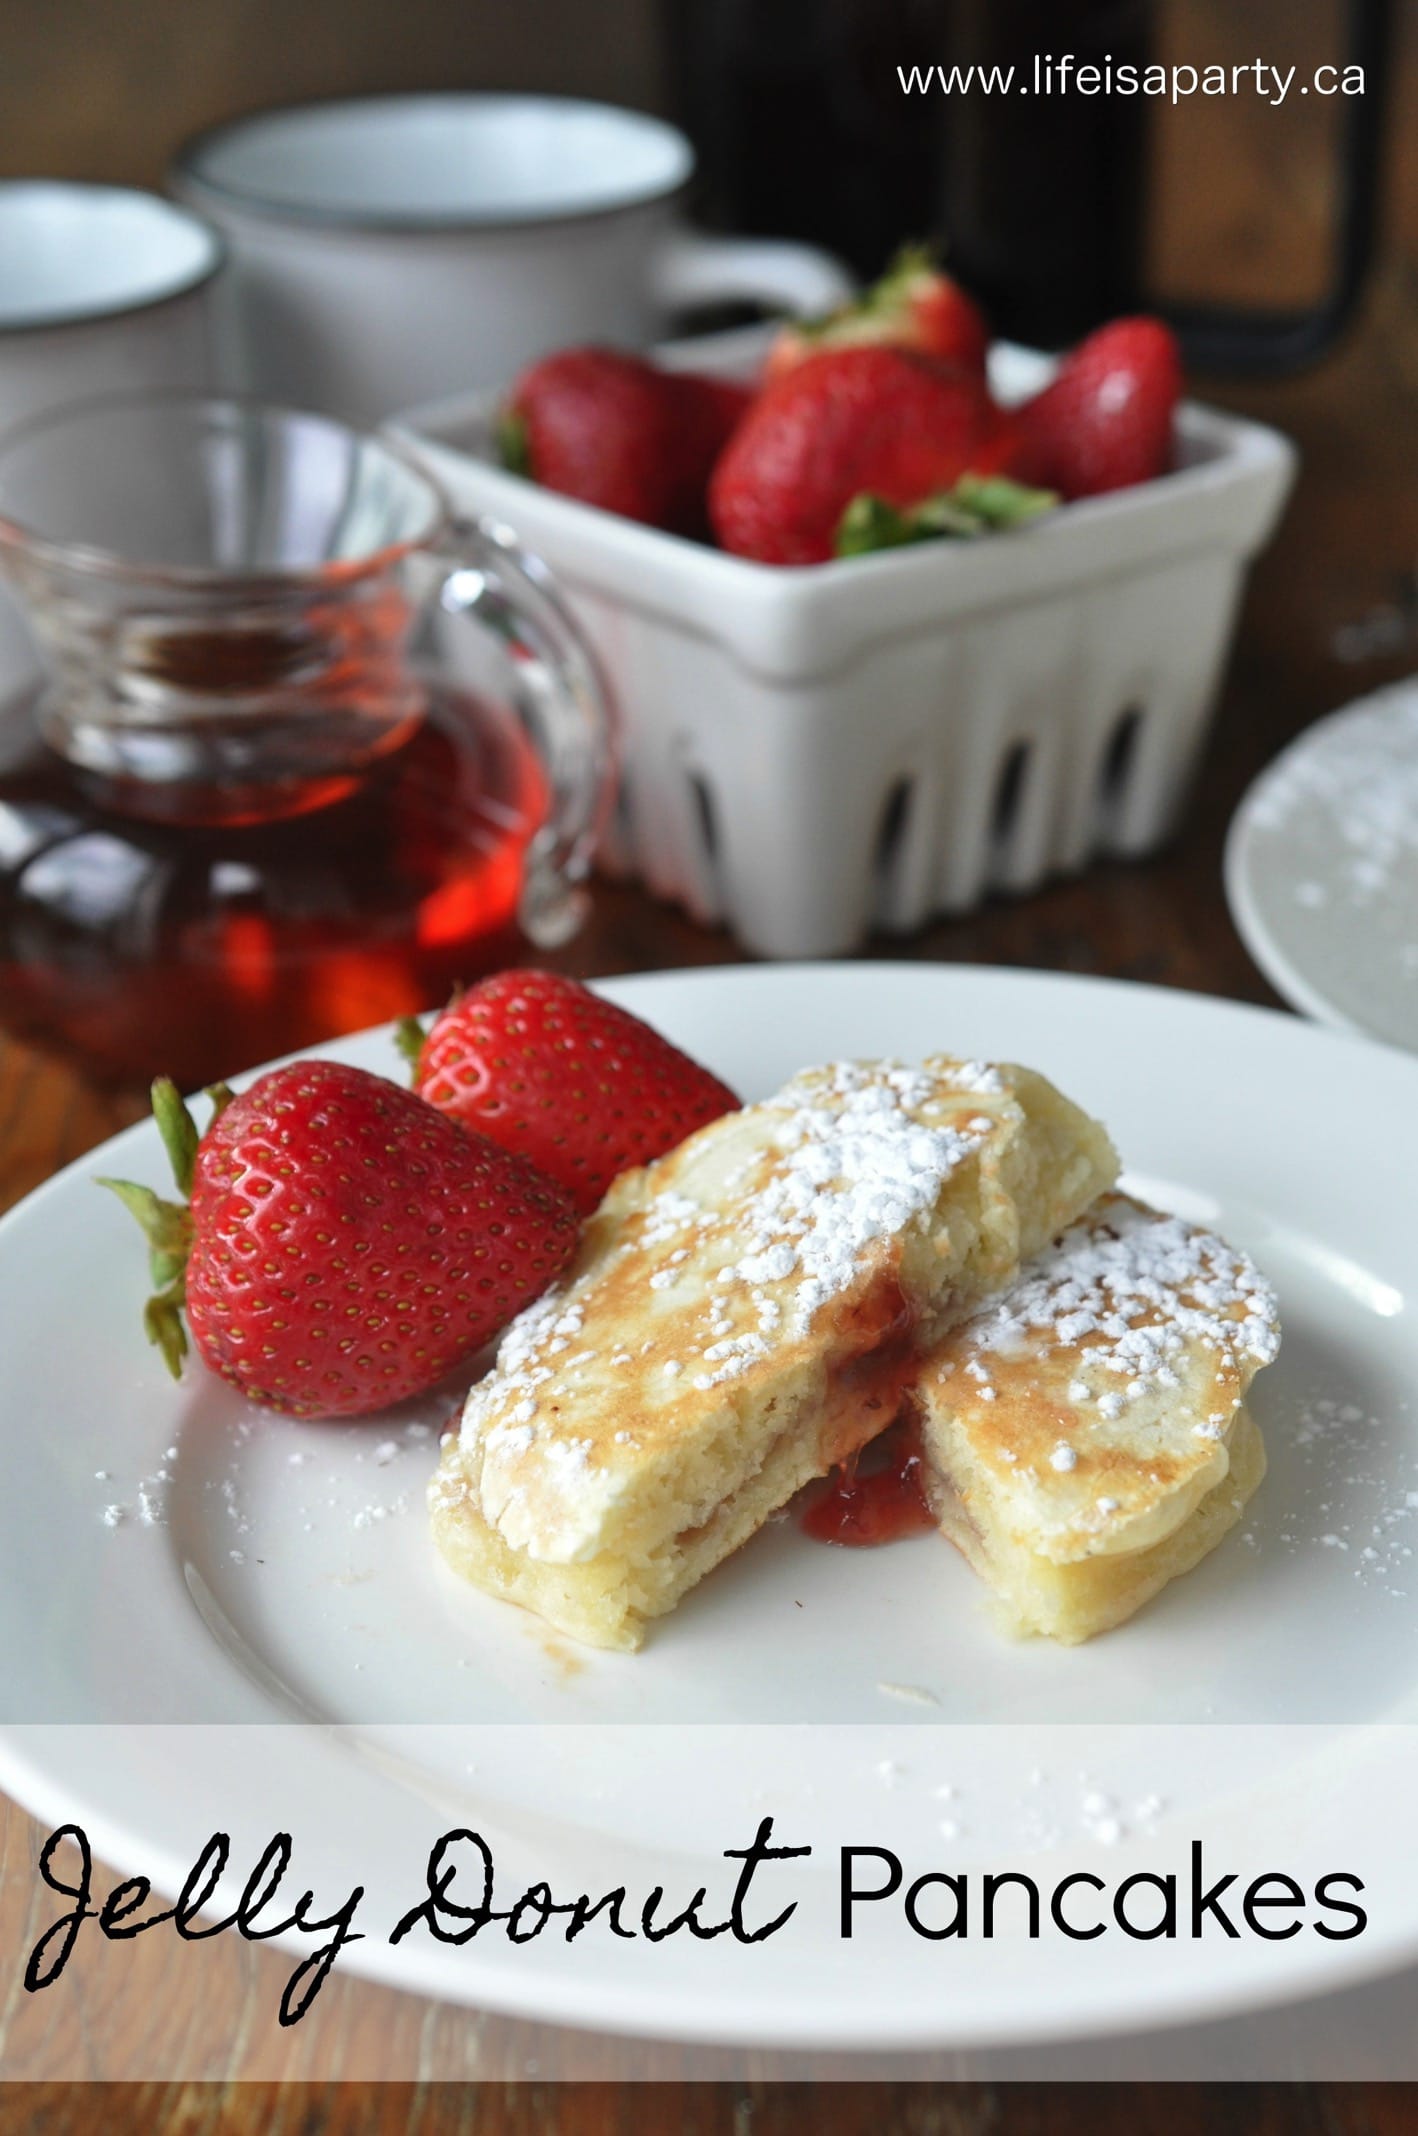
Also check out our Jelly Donut Pancake recipe here.

Jelly Donut Pancakes: Your two favourite treats combined! Cut into a delicious pancake with a surprise inside -your favourite jam!

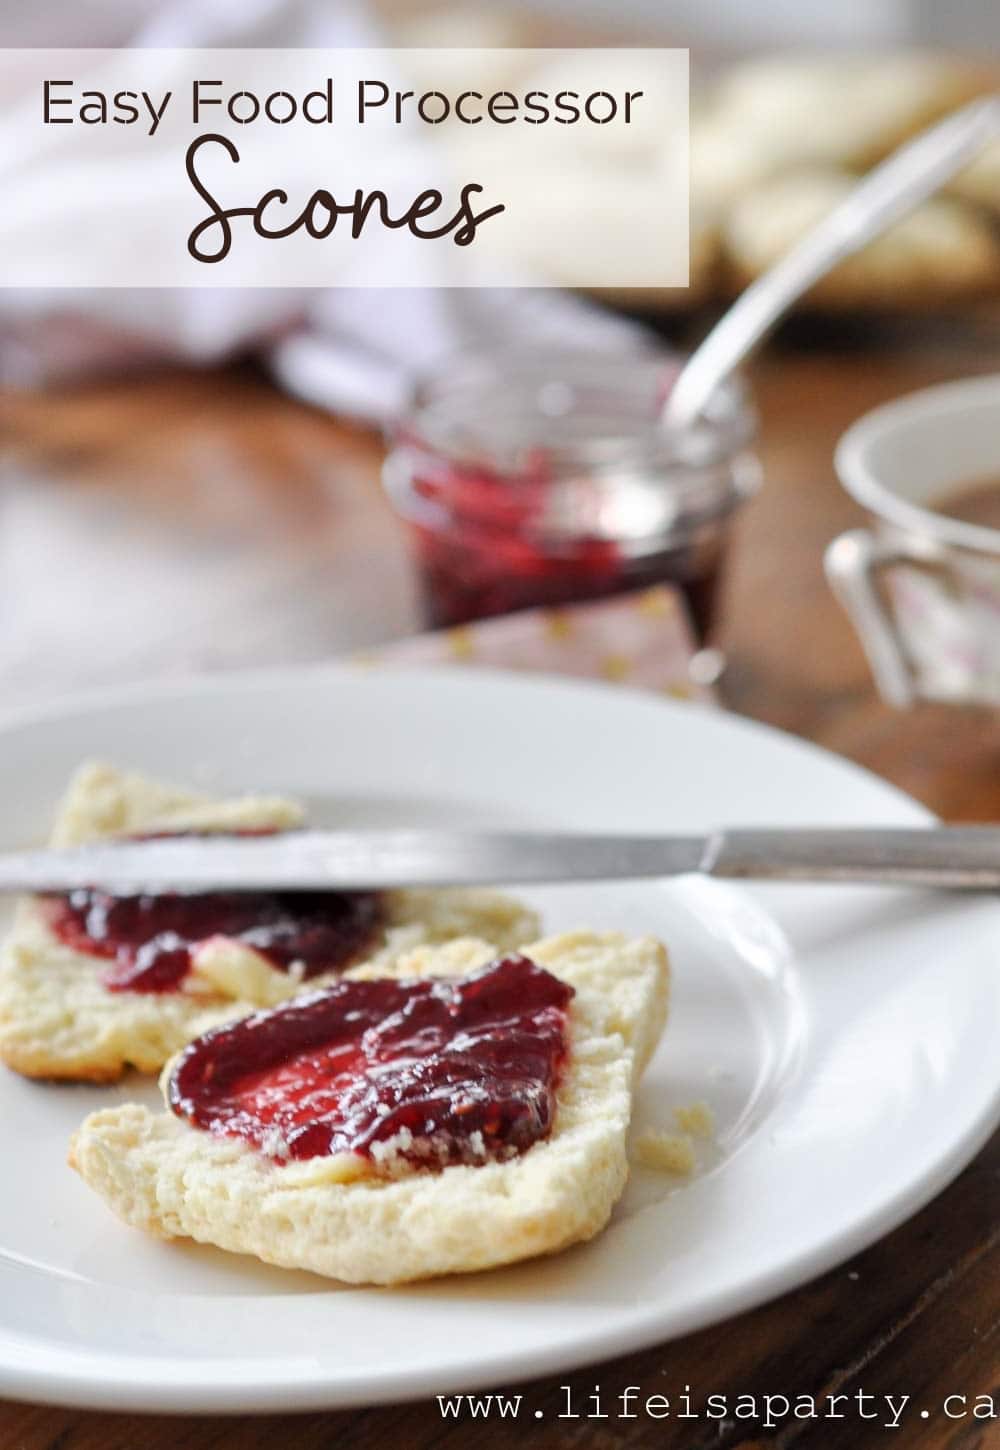
You might also enjoy our Easy Food Processor Scones recipe here.

Easy Food Processor Scones: easy and quick to make in your food processor, these flakey scones are perfect for a tea party, breakfast, or snack.

DIY Glass Christmas Cloche

Nov 20, 2012 · 10 Comments

DIY glass Christmas cloche.

DIY Glass Cloche -Made from a stemless wineglass and glass drawer knob this DIY glass Christmas cloche couldn't be easier or cuter. Fill it with a Christmas scene -or anything else and enjoy.

DIY glass Christmas cloche.
[feast_advanced_jump_to]

I had this idea a little while ago...that I could use a stemless wine glass to create a pretty DIY Glass Cloche with a Christmas scene in it.

Materials:

  • stemless wine glass
  • glass cabinet knob
  • super glue
  • mushroom ornament
  • faux snow
  • fairy print out
  • rhinestone stickers and glitter
  • miniature gift
  • cardboard
  • pipe cleaner

How To Make A DIY Cloche:

While I was cross border shopping on the weekend I picked up a stemless wine glass at Target in the dollar bins. I wanted to create a little knob on the top, and thought a little glass furniture knob from the hardware store would work great, but they were a little expensive -up to $5 each. So, I dropped by my local Habitat for Humanity Reuse Store, and I found one for a buck.

how to make a DIY cloche


I glued it to the bottom of the glass with a little super glue. To create the scene I used a sweet little mushroom ornament from Walmart, and found a cute Christmas fairy image on line, and re-sized it to fit in the cloche.

mushroom Christmas ornaments

After cutting the fairy out, I embellished her with tinsel, stars, rhinestones and glitter.

DIY Cloche snow globe

I glued them all down with a little hot glue (and managed to burn my finger in the process) and added some cotton batting, fake snow and a tiny little Christmas gift.

how to make a DIY Cloche

Then I glued the cloche to the cardboard base I made out of some silver glittered card stock, and added some tinsel to cover and glue marks.

DIY decorative Cloche snow globe

I really do love how it turned out. I think the fairy and mushroom will be so cute with my woodland themed Christmas this year.  Since every winter woodland needs a few Christmas fairies. 😉  I can think of lots more possibilities to create more of these.  How about some with vintage looking paper Santas, little Christmas trees, or plastic reindeer.

DIY Cloche

Hope you like this sweet little ornament.  With a DIY Glass Cloche, life really is a party!

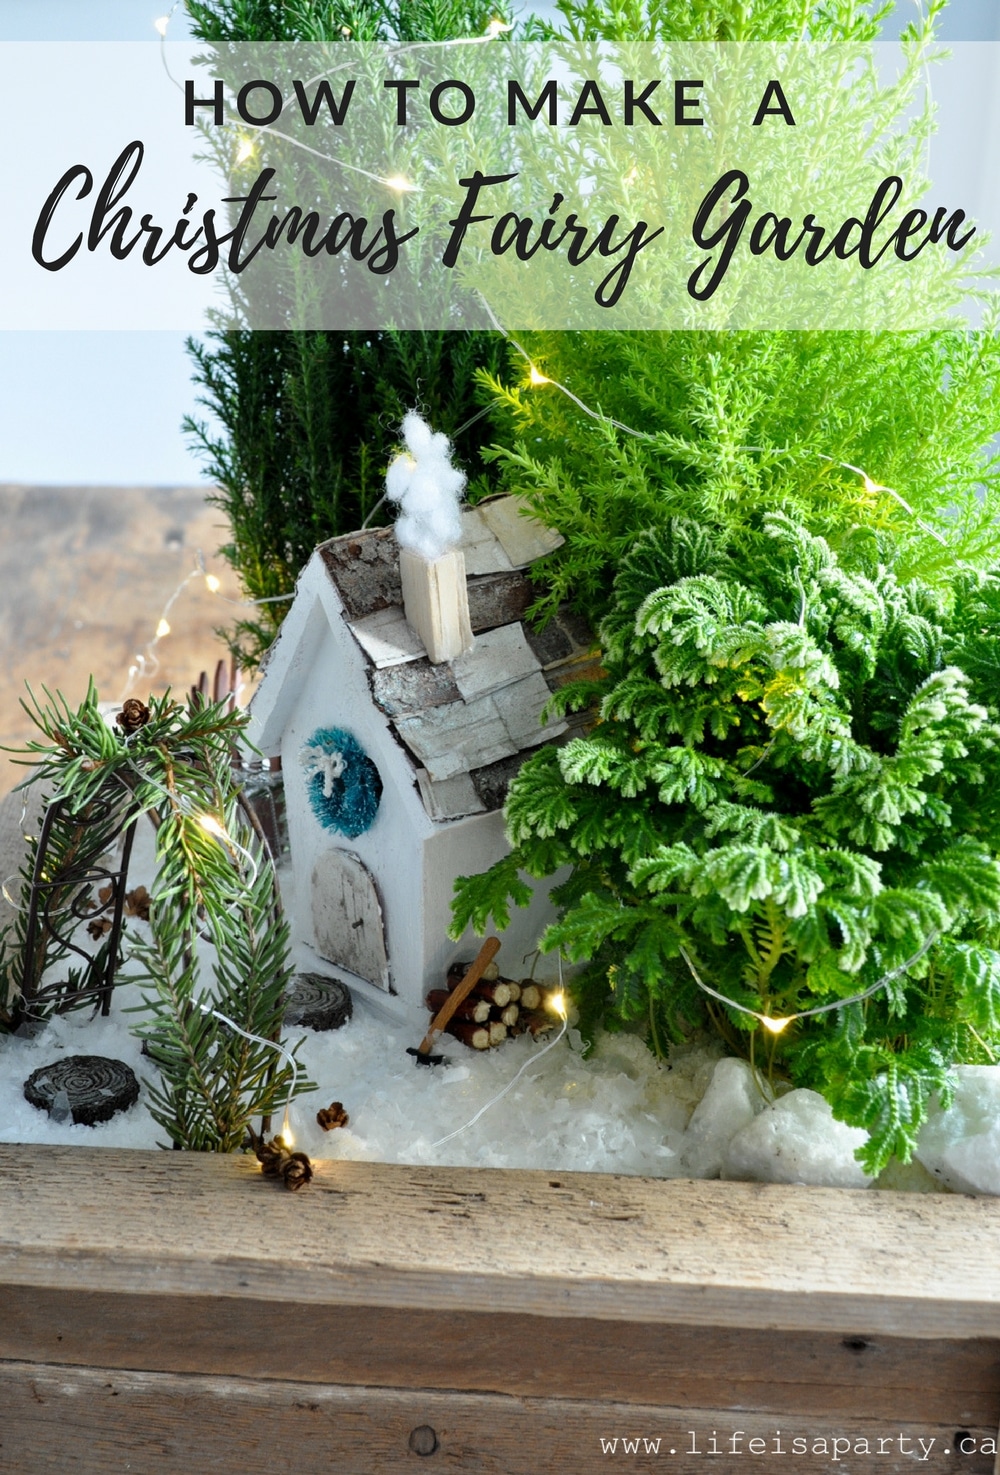
You might also like our Christmas Fairy Garden here.

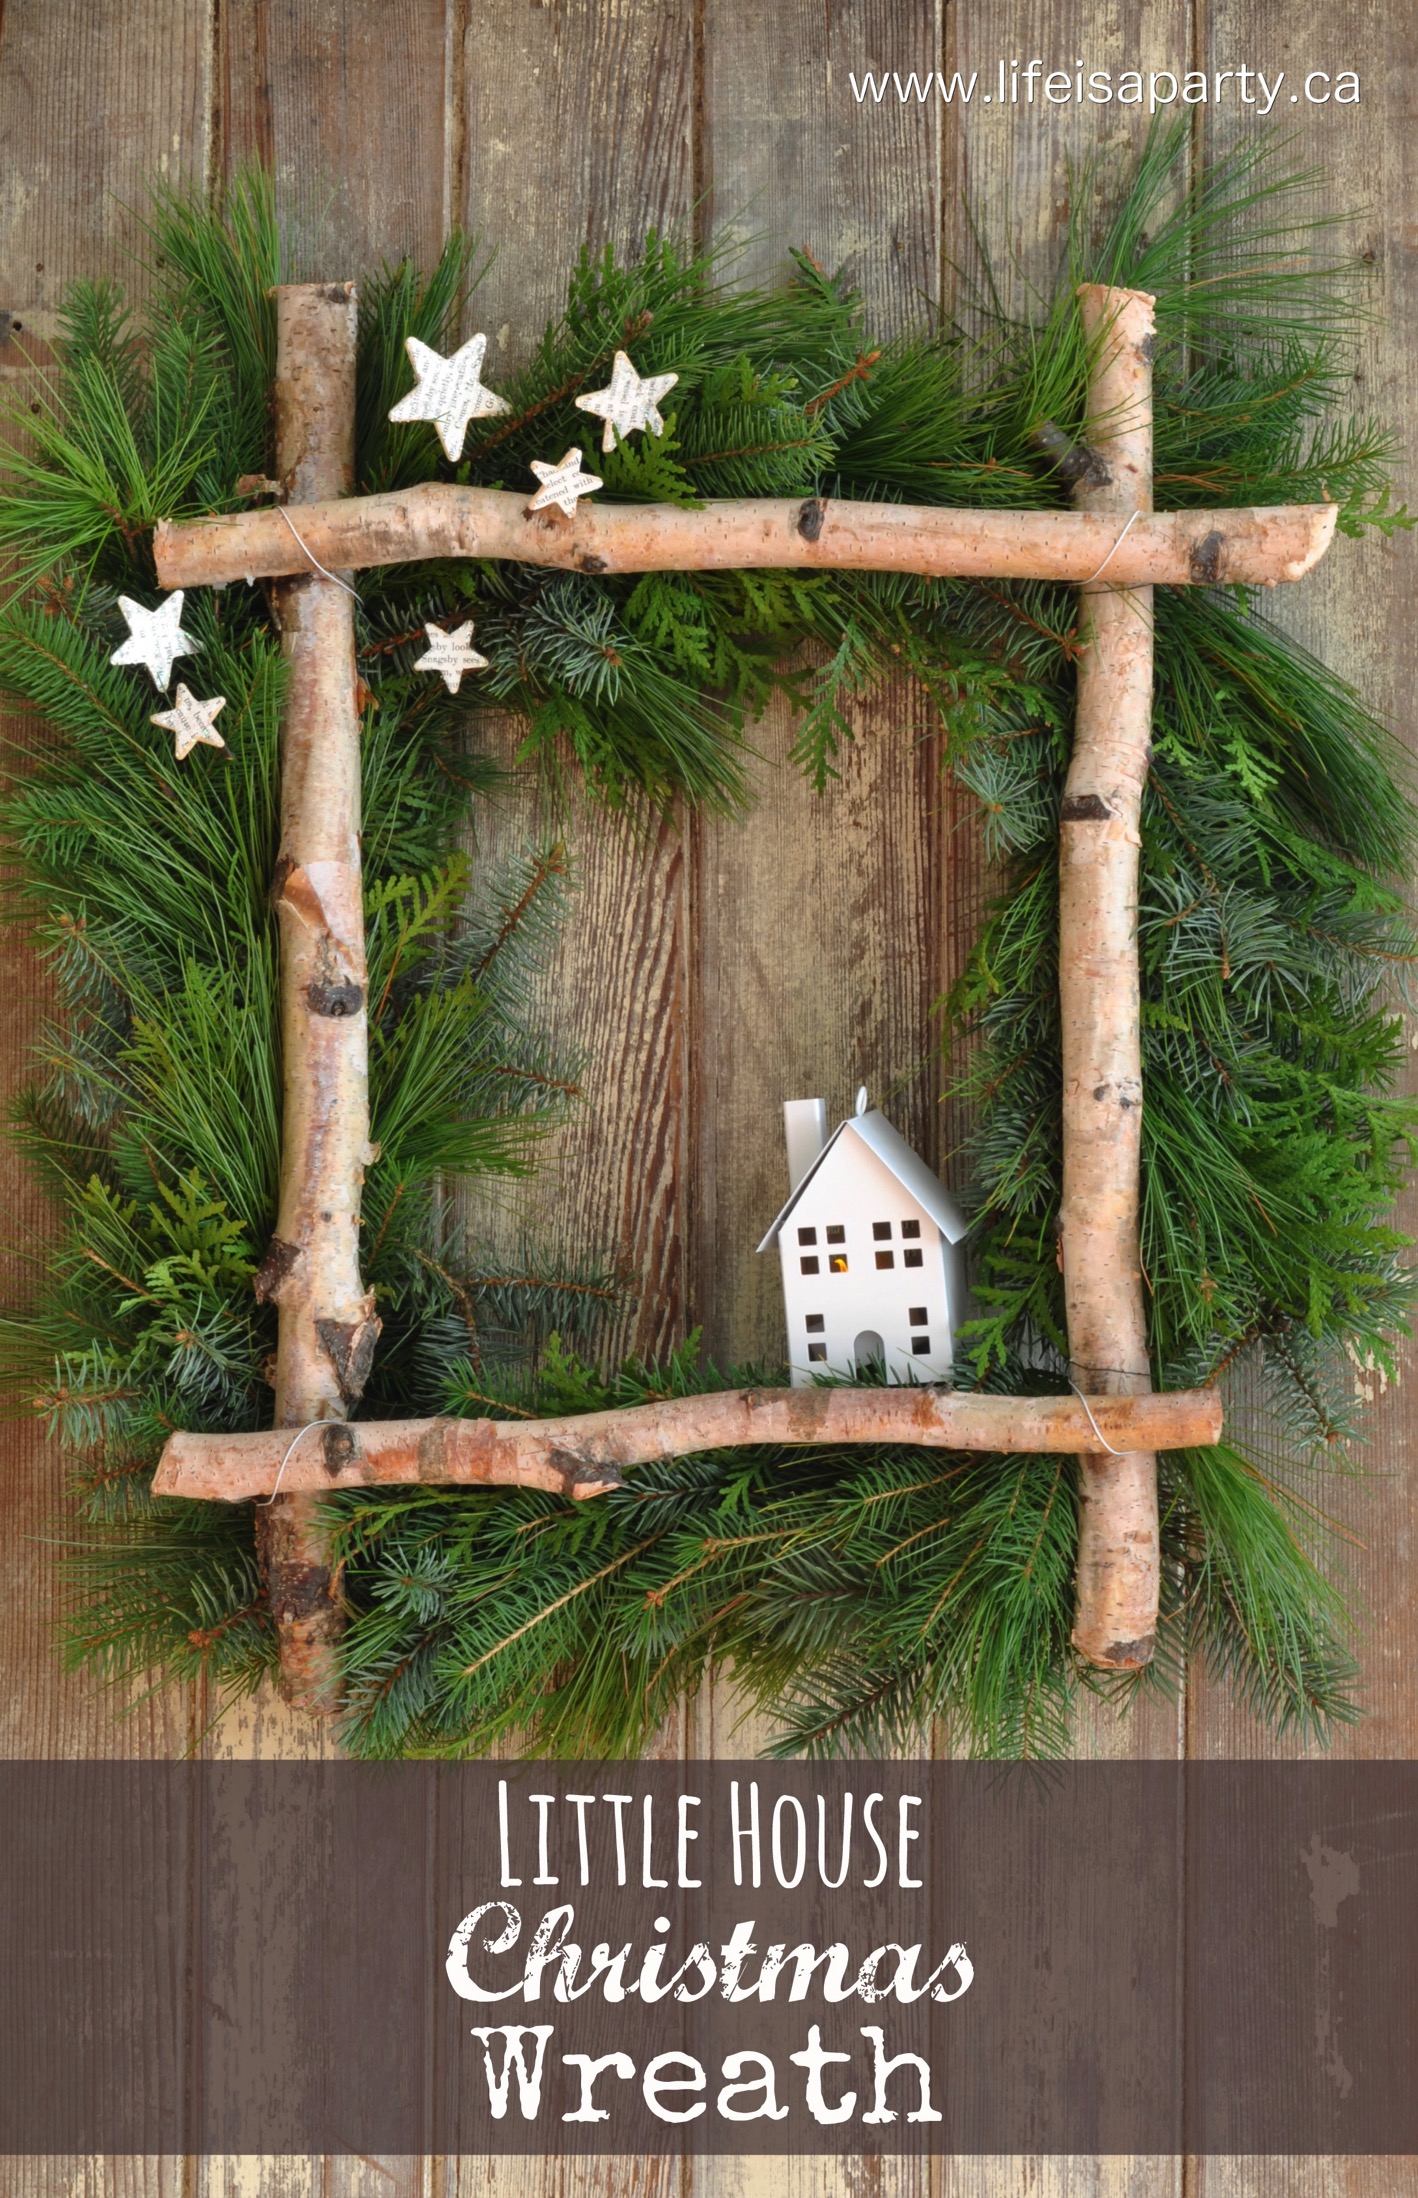
Also check out our Birch Christmas Wreath here.

Birch Christmas Wreath:-full tutorial to make your own square wreath from some gathered greens, birch logs, and a coat hanger. Perfect for Christmas.

White Christmas Wreath, Doormat and Outdoor Planter Arrangements

Nov 16, 2012 · 17 Comments

Christmas front door urn, wreath, doormat.

Christmas Outdoor Planter: see how to create a Christmas arrangement for your front door in two different styles and a matching snowflake doormat.

Christmas front porch decor urn, door mat, wreath.
[feast_advanced_jump_to]

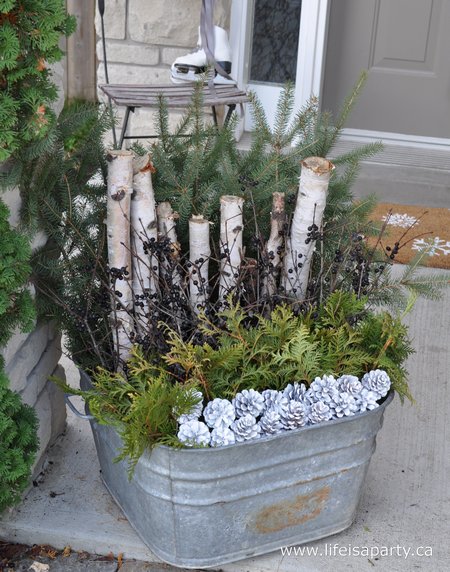
I loved my fall outdoor linear planter so much that I decided to do another version of it for Christmas. It came out great, and I love that it's something a little different from the standard Christmas urn with greens, bobbles and ribbon. My love of white continues with the Christmas decor, and I really love how the white pops against all the Christmas greens.

Christmas Outdoor Planter

Linear Outdoor Christmas Arrangement

Materials:

  • large square galvanized tub
  • greens
  • birch poles
  • hawthorn berries
  • cedar
  • pinecones spray painted white
  • soil in the container

How To

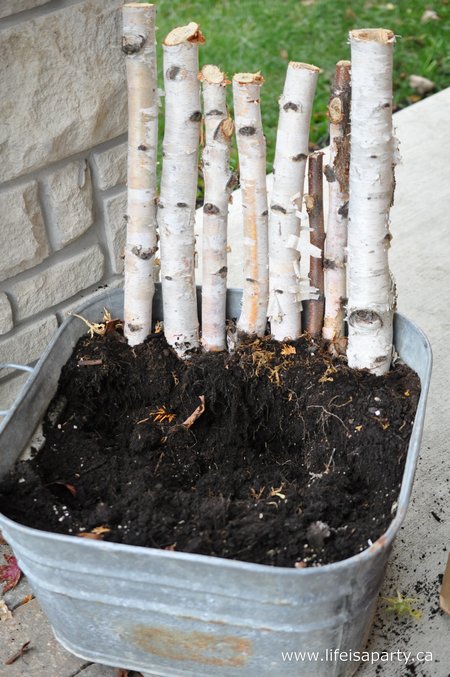
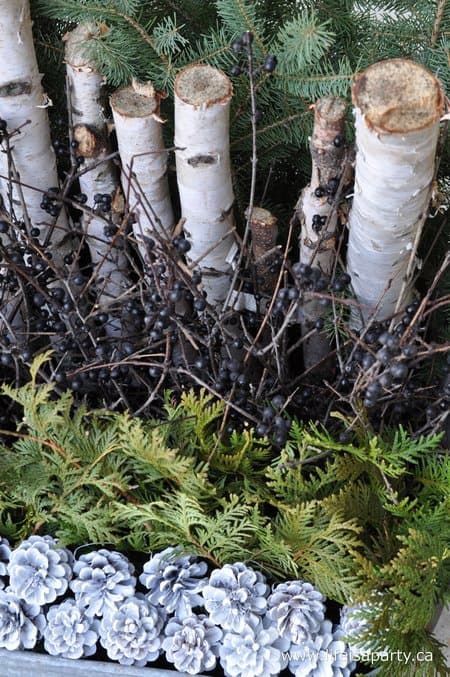
To make this outdoor Christmas arrangement, I started with the fall planter, and removed everything but the birch poles.

how to make your own Christmas Outdoor Planter

I repositioned them as the second row, and tucked a nice row of fir as the back and tallest row. Fir is really one of my favs, since we always had a real fir tree growing up. When I think Christmas tree, I just think fir, maybe that's because we always had a fresh fir tree when I was a little girl. It was a great choice here for the back row, since it has so much structure.

Next were the line of birch poles I cut for the fall planter -must say I'm loving all the birch this year, and using more of it inside for my Winter Woodland Christmas theme this year. 😉

DIY Christmas Outdoor Planter

After the birch I added a row of these black berries, European buckthorn -according to my google research. 😉 They have thorns so be careful, (she said from experience).

After that I added a row of cedar, just common Ontario cedar, not the fancy B.C. kind. Sometimes Ontario cedar is more yellow, but I thought this looked pretty good, and the contrast is also good for this linear arrangement.

My final row is some spray painted pine cones. I liked the way it related to the pine cone wreath I made here.

how to make your own Christmas outdoor planter

I have to admit that I fiddled with this arrangement and may or may not have even sent some pics to my florist sister for some advice. In the end the key was trying to make the lines as full as possible.

DIY Christmas Outdoor Planter

Some other suggestions for rows if you're considering making a linear arrangement like this are moss, the really large pine cones, other coloured berries, painted twigs, large cinnamon sticks like I used in my fall version, and of course other Christmas greens -magnolia leaves would look great.

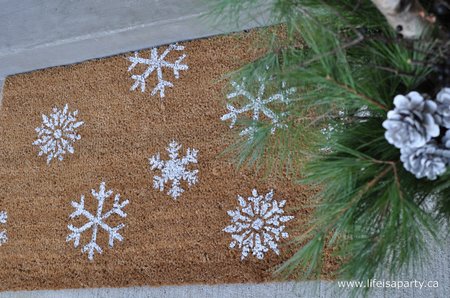
DIY Christmas door mat

DIY Snowflake Doormat

Of course I also needed a new doormat, and yet again the perfect one I had pictured in my mind didn't seem to exist in real life, ever have that problem? So, what's a DIY-ier to do but make it herself.

Materials:

  • Plain Doormat
  • Snowflake image
  • exacto knife
  • white craft paint

How To

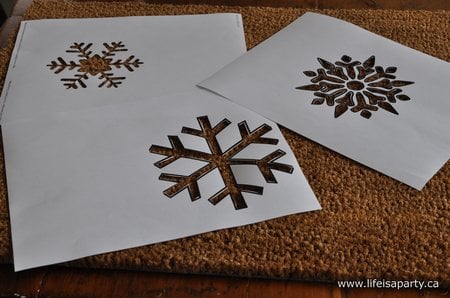
This project started with a plain coir mat. I used the same method I used here to stencil the fall leaf doormat.

The snowflake images were found on the web.  First I printed them out, and cut out the middle with an exacto knife to create a stencil.

DIY snowflake doormat

Then I used craft paint to create a random pattern.

I really like how it turned out, and it should work all through the winter, not just for Christmas, which is always good. It helped tie together the white of the planters, and the wreath, with the snowflake Christmas lights we have along the roof.

DIY Christmas doormat

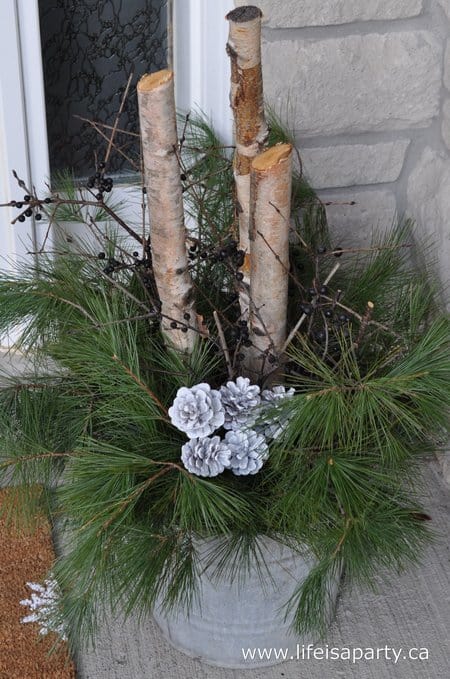
Galvanized Pail Arrangement

I added one final outdoor Christmas arrangement right beside the door. Again I used an old galvanized pail, to match the large square one. This arrangement was really simple. The three shortish birch poles, some more buckthorn berries, some pine cuttings, and more white pinecones help tie this arrangement to the other one. I really liked how it used the pretty much the same materials, but in a really different way from the linear arrangement.

Christmas Outdoor Planter ideas


I hope my front door gives you a few new ideas. I'm just hoping that my use of snowflakes doesn't bring any snow yet. 😉

Christmas Outdoor Planters

With pretty white outdoor Christmas decor, life really is a party.

More Inspiration

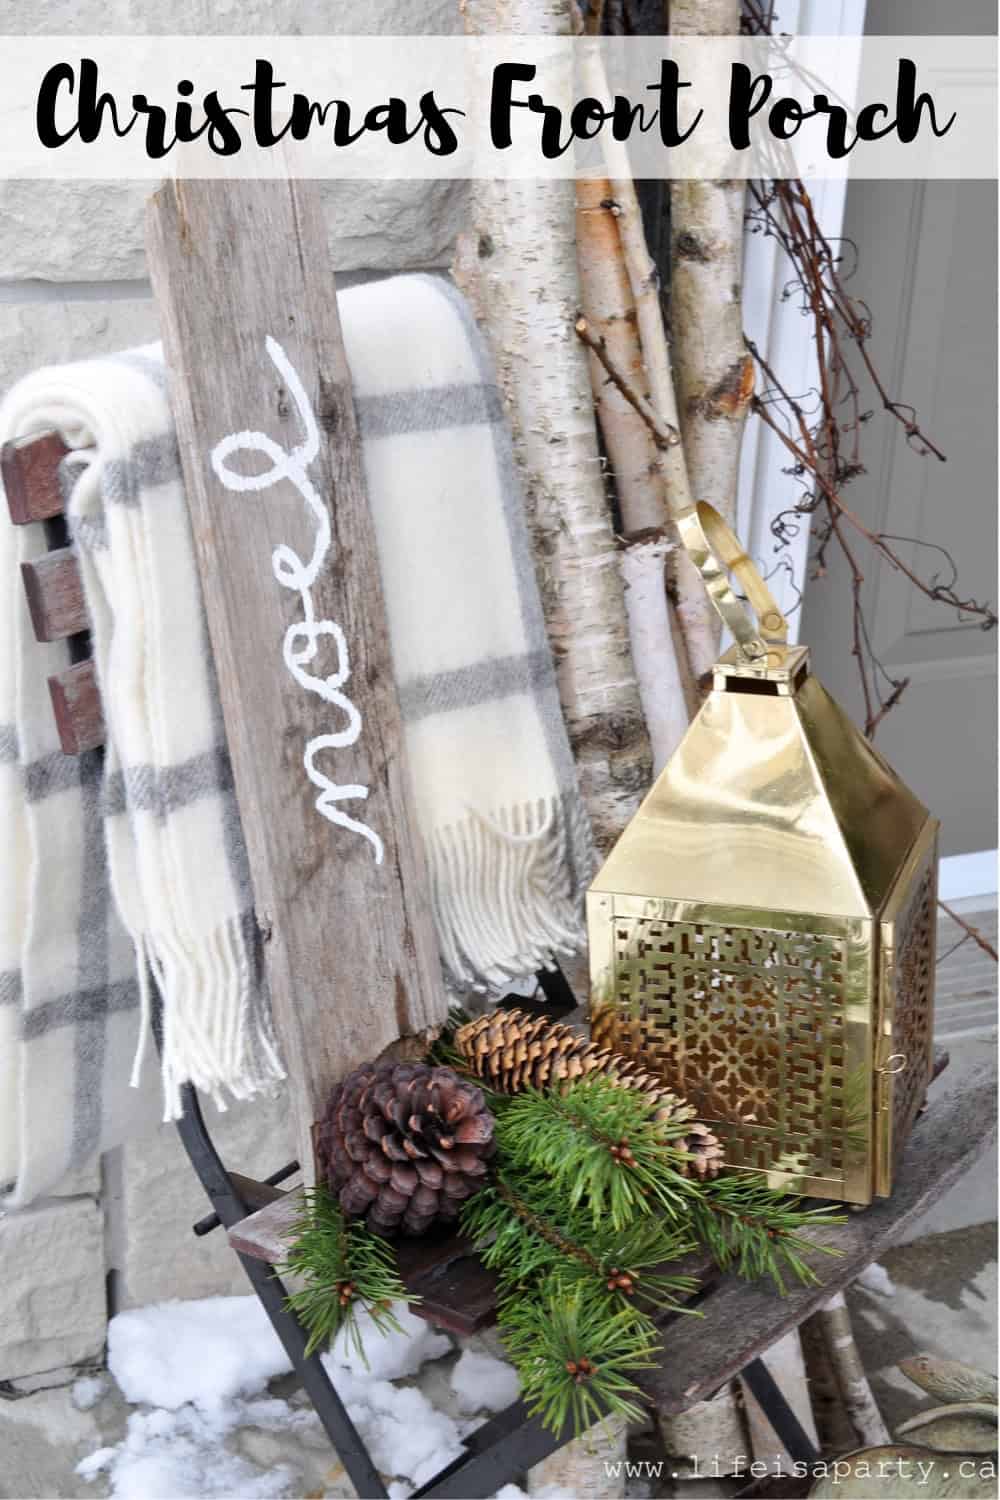
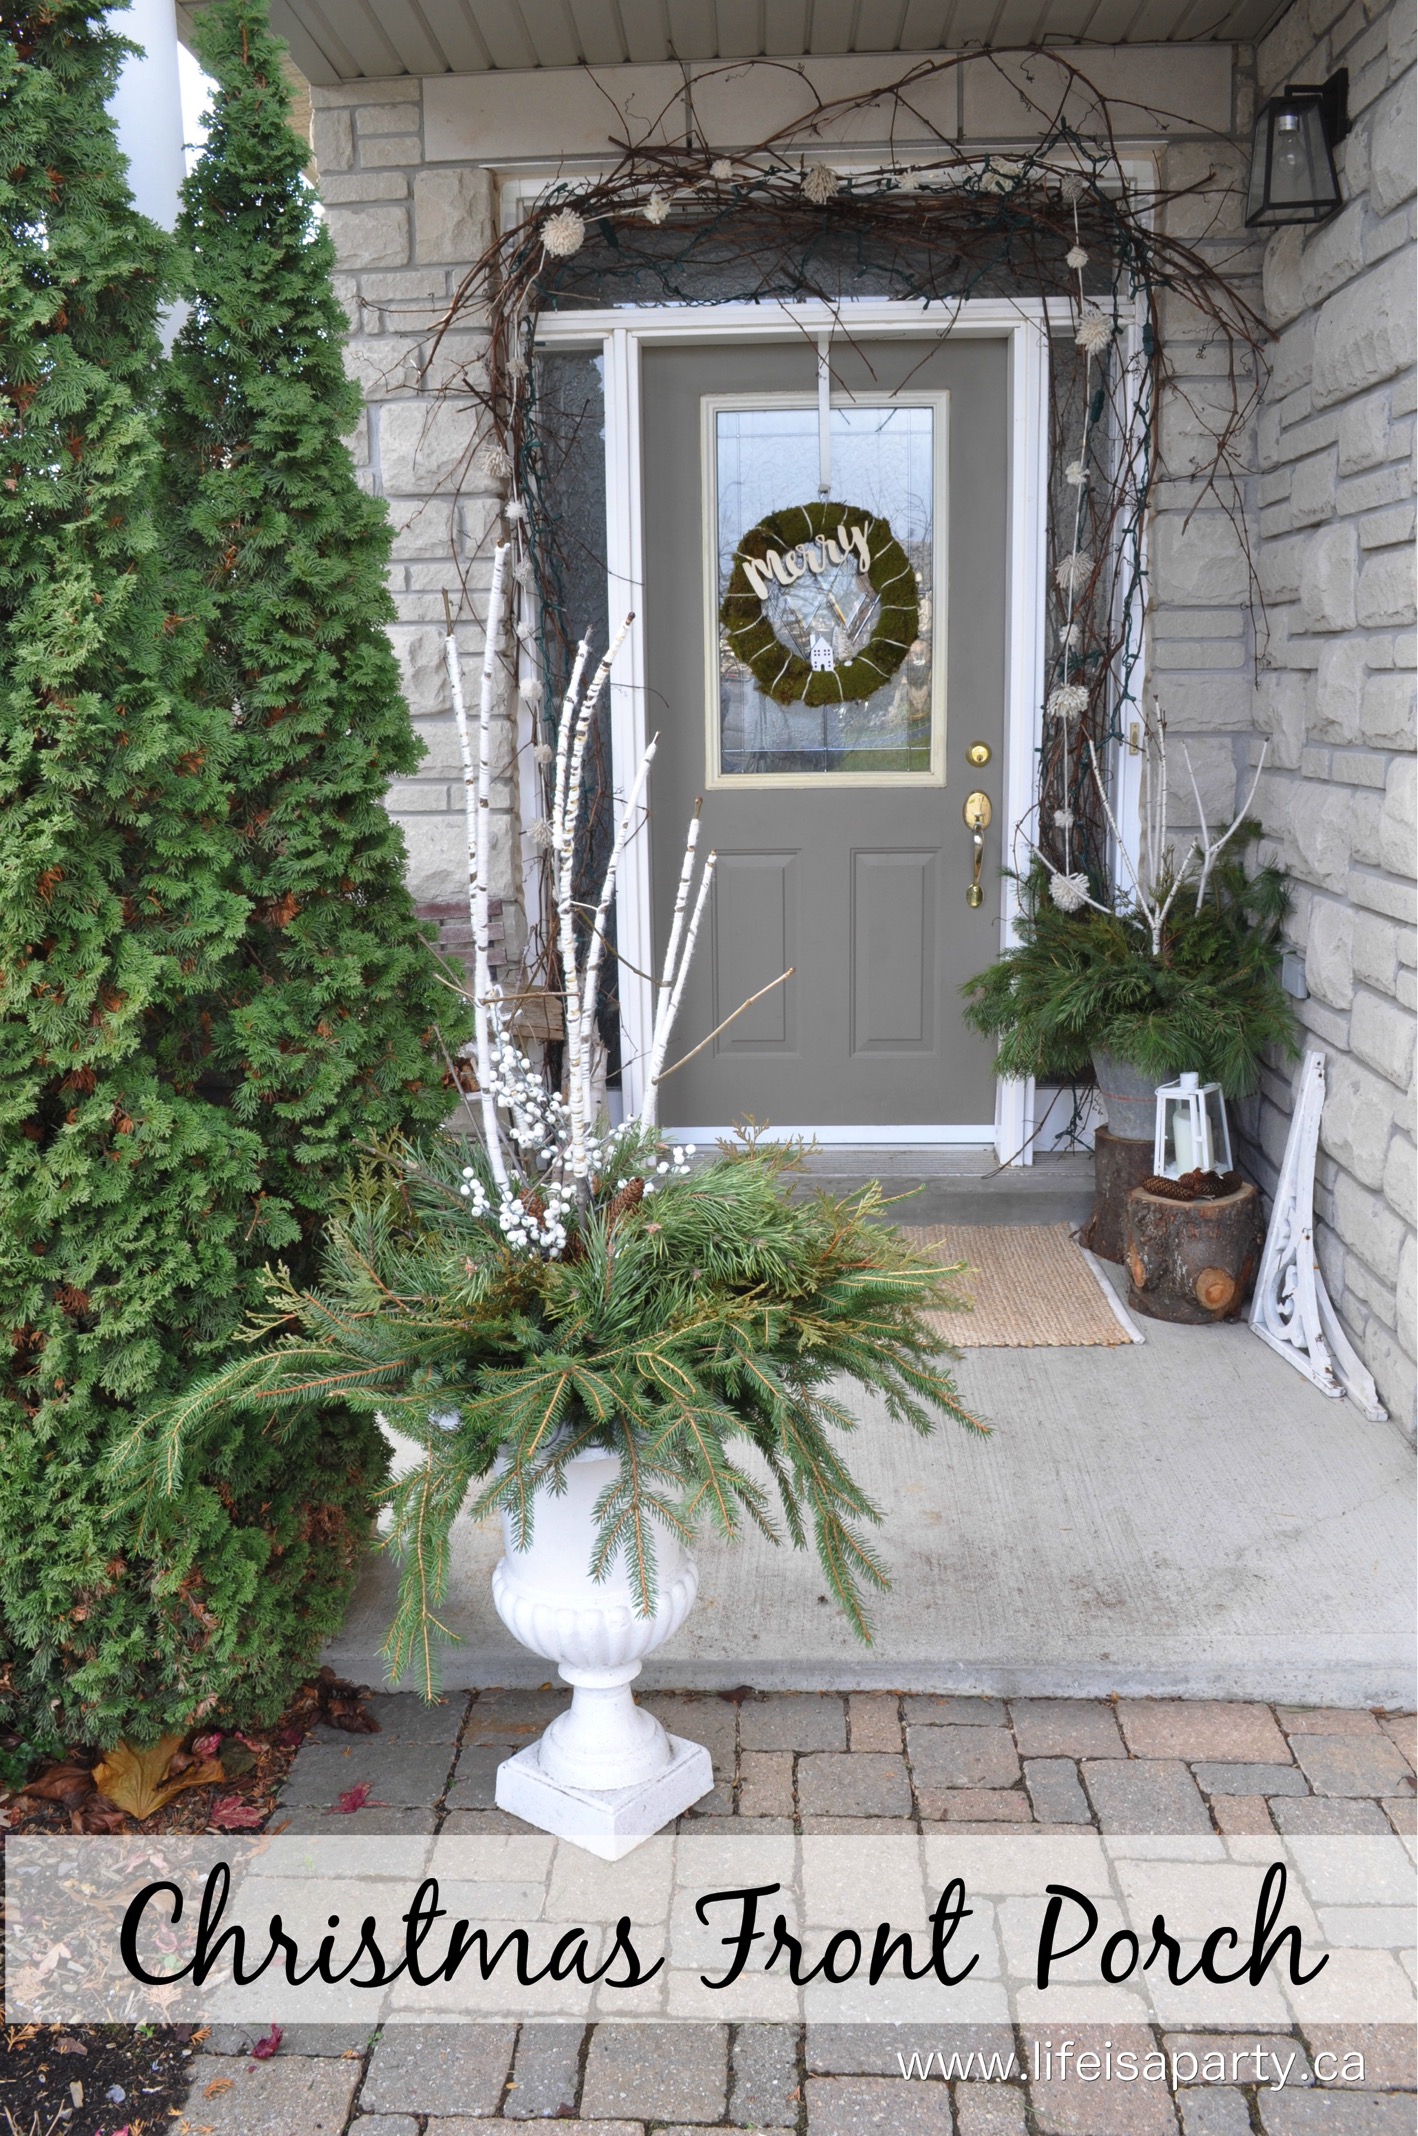
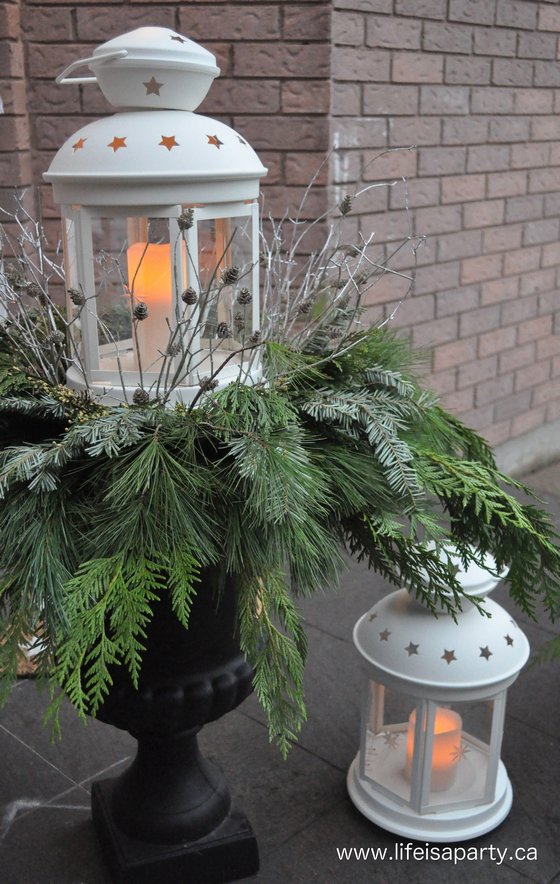
You might also like our Christmas Front Porch here.

Christmas Front Porch: Rustic greens, large pinecones, and lots of birch logs create a rustic Scandinavian feel with brass lanterns for Christmas.

Also check out our Outdoor Decorating Ideas for the Front Porch here.

You might also enjoy our Front Porch Decorating Ideas for Christmas here.

Easy Chocolate Pudding Cake Recipe

Nov 14, 2012 · Leave a Comment

Easy chocolate pudding cake.

Chocolate Pudding Cake Recipe: This is a combination of pudding and cake that's moist, rich and chocolatey. It's delicious served warm with ice cream.

Easy chocolate pudding cake.
[feast_advanced_jump_to]

This chocolate pudding cake recipe is so good. You're going to love it. It's the perfect combination of cake and pudding goodness, and so good served hot with vanilla ice cream. I love to serve it for a dinner party, because guests always love it, and you can do most of it ahead, and then put it in the oven while you're eating dinner and serve it to your guests still warm. Also it's a great recipe for holiday entertaining too, or any special occasions, but also easy enough to make anytime after dinner. 

chopped chocolate squares

Cake and Pudding

The magic of this recipe is that that the cake and pudding form together.  The ingredients are layered but not stirred, and as the dish bakes, it turns into a chocolate cake with a pudding chocolate sauce.  When you assemble a pudding cake you add the simple chocolate cake batter to the pan, followed by a layer of sugar and cocoa powder that's layered over the batter and not stirred.  

chocolate pudding cake before the topping is added

Lastly you add a layer of hot water, and again don't stir.  

how to make chocolate pudding cake
chocolate pudding cake recipe

As the dish bakes the sugar layer and hot water seep down through the cake batter and form a pudding or chocolate sauce beneath the cake -arguably the best part, and the cake rises to the top.  

don't stir chocolate pudding cake

As you scoop out the cake, the hidden layer of chocolate fudge sauce is revealed beneath it.  It feels like a bit of cooking magic.  

The pudding cake is easy to make and made from simple ingredients.  You can make pudding cake in different flavors, but the hot fudge chocolate pudding cake is a big favorite.  

Serve Warm

This pudding cake is best served warm to experience the gooey hot fudge type sauce.  We love it paired with a scoop of vanilla ice cream, which melts slowly into the cake and sauce and is so delicious.

warm chocolate pudding cake with vanilla ice cream

If you're making this for a dinner party, you can prepare the cake mixture and put it in the baking dish,  Also make the sugar and cocoa powder mixture that is the next layer, but don't put it on top of the cake batter yet.  Just before serving dinner sprinkle the sugar and cocoa mixture of the top of the batter, and then add the cold water layer. Put it in the oven to bake while you eat dinner, and it will be ready to serve warm in time for dessert. 

chocolate pudding cake recipe

Leftovers

If you have any hot fudge pudding cake leftover, you can store leftovers in the fridge in an airtight container or wrapped in plastic wrap.  Reheat leftovers in the microwave in a microwave friendly container.

If you are a fan of chocolate dessert you will love this hot fudge cake with creamy chocolate pudding sauce.  What could be better than a layer of moist chocolate cake with rich chocolate fudge sauce?  The flavor of chocolate comes through in every bite.  My chocolate loving daughter considers this her favorite dessert of all time.  And it's really easy with little effort to make.  It has the perfect amount of sweetness.  And don't skip the vanilla ice cream, it offers a little reprieve from the intense chocolate that all the chocolate lovers adore in each bite.  The combination of the hot and cold also adds interest to the dish.  This dessert is pure comfort food, and sure to become a new favorite recipe.

chocolate pudding cake recipe

This dessert looks great served in little dessert dishes.  Guests will love it along with a cup of hot coffee for the perfect impressive but easy to make fudgy dessert.

Recipe

Easy chocolate pudding cake.

Chocolate Pudding Cake Recipe

Warm and gooey chocolate pudding cake.
No ratings yet
Print Pin Rate
Course: Desserts
Cuisine: American
Prep Time: 15 minutes minutes
Cook Time: 30 minutes minutes
Total Time: 45 minutes minutes
Servings: 6 servings
Calories: 312kcal
Author: Dannyelle Nicolle-Ramjist

Ingredients

  • 1 cup all-purpose flour
  • ½ cup white sugar
  • 2 ½ teaspoon baking powder
  • ¼ teaspoon salt
  • ½ cup milk
  • 1 teaspoon vanilla extract
  • 3 tablespoon unsweetened cocoa
  • 3 tablespoon melted butter
  • 3 oz bittersweet chocolate coarsely chopped
  • ⅓ cup white sugar
  • ¼ cup brown sugar
  • 2 tablespoon unsweetened cocoa
  • 1 cup cold water

Instructions

  • Preheat oven to 350F. Lightly butter an 8-cup baking dish.
  • Combine the flour, ½ cup white sugar, baking powder and salt in the bowl of a stand mixer with the paddle attachment.
  • Add the milk and vanilla, and stir until thick and smooth.
    In a small bowl, mix the butter with 3 tablespoon of unsweetened cocoa until blended. Stir the cocoa mixture and chopped chocolate into the four mixture, until just combined.
  • Turn the cake mixture into the buttered baking dish.
  • In a small bowl combine ⅓ cup white sugar, brown sugar and 2 tablespoon of unsweetened cocoa. {If your're making this for a dinner party, stop here and wait unti just before serving dinner to complete these next steps. Put it in the oven to bake while you eat dinner, and it will be ready in time for dessert. }
  • Sprinkle the mixture evenly over the top of the pudding mixture. Do not combine it.
  • Carefully pour the water over the top of the sprinkled dry mixture, being careful not to combine it either. DO NOT STIR.
  • Bake in the centre of 350F oven for 25 to 30 minutes until the top of the cake is slightly glazed on top and the sauce is bubbling around the edges.
  • Serve hot with vanilla ice cream.

Nutrition

Serving: 1g | Calories: 312kcal | Carbohydrates: 57g | Protein: 4g | Fat: 8g | Saturated Fat: 5g | Polyunsaturated Fat: 2g | Cholesterol: 18mg | Sodium: 363mg | Fiber: 2g | Sugar: 38g
Tried this Recipe? Tag me Today!Mention @LifeisaParty or tag #lifeisaparty!
hot fudge chocolate pudding cake

With this hot fudge pudding cake recipe, life really is a party.

More Chocolate Dessert Recipe Inspiration

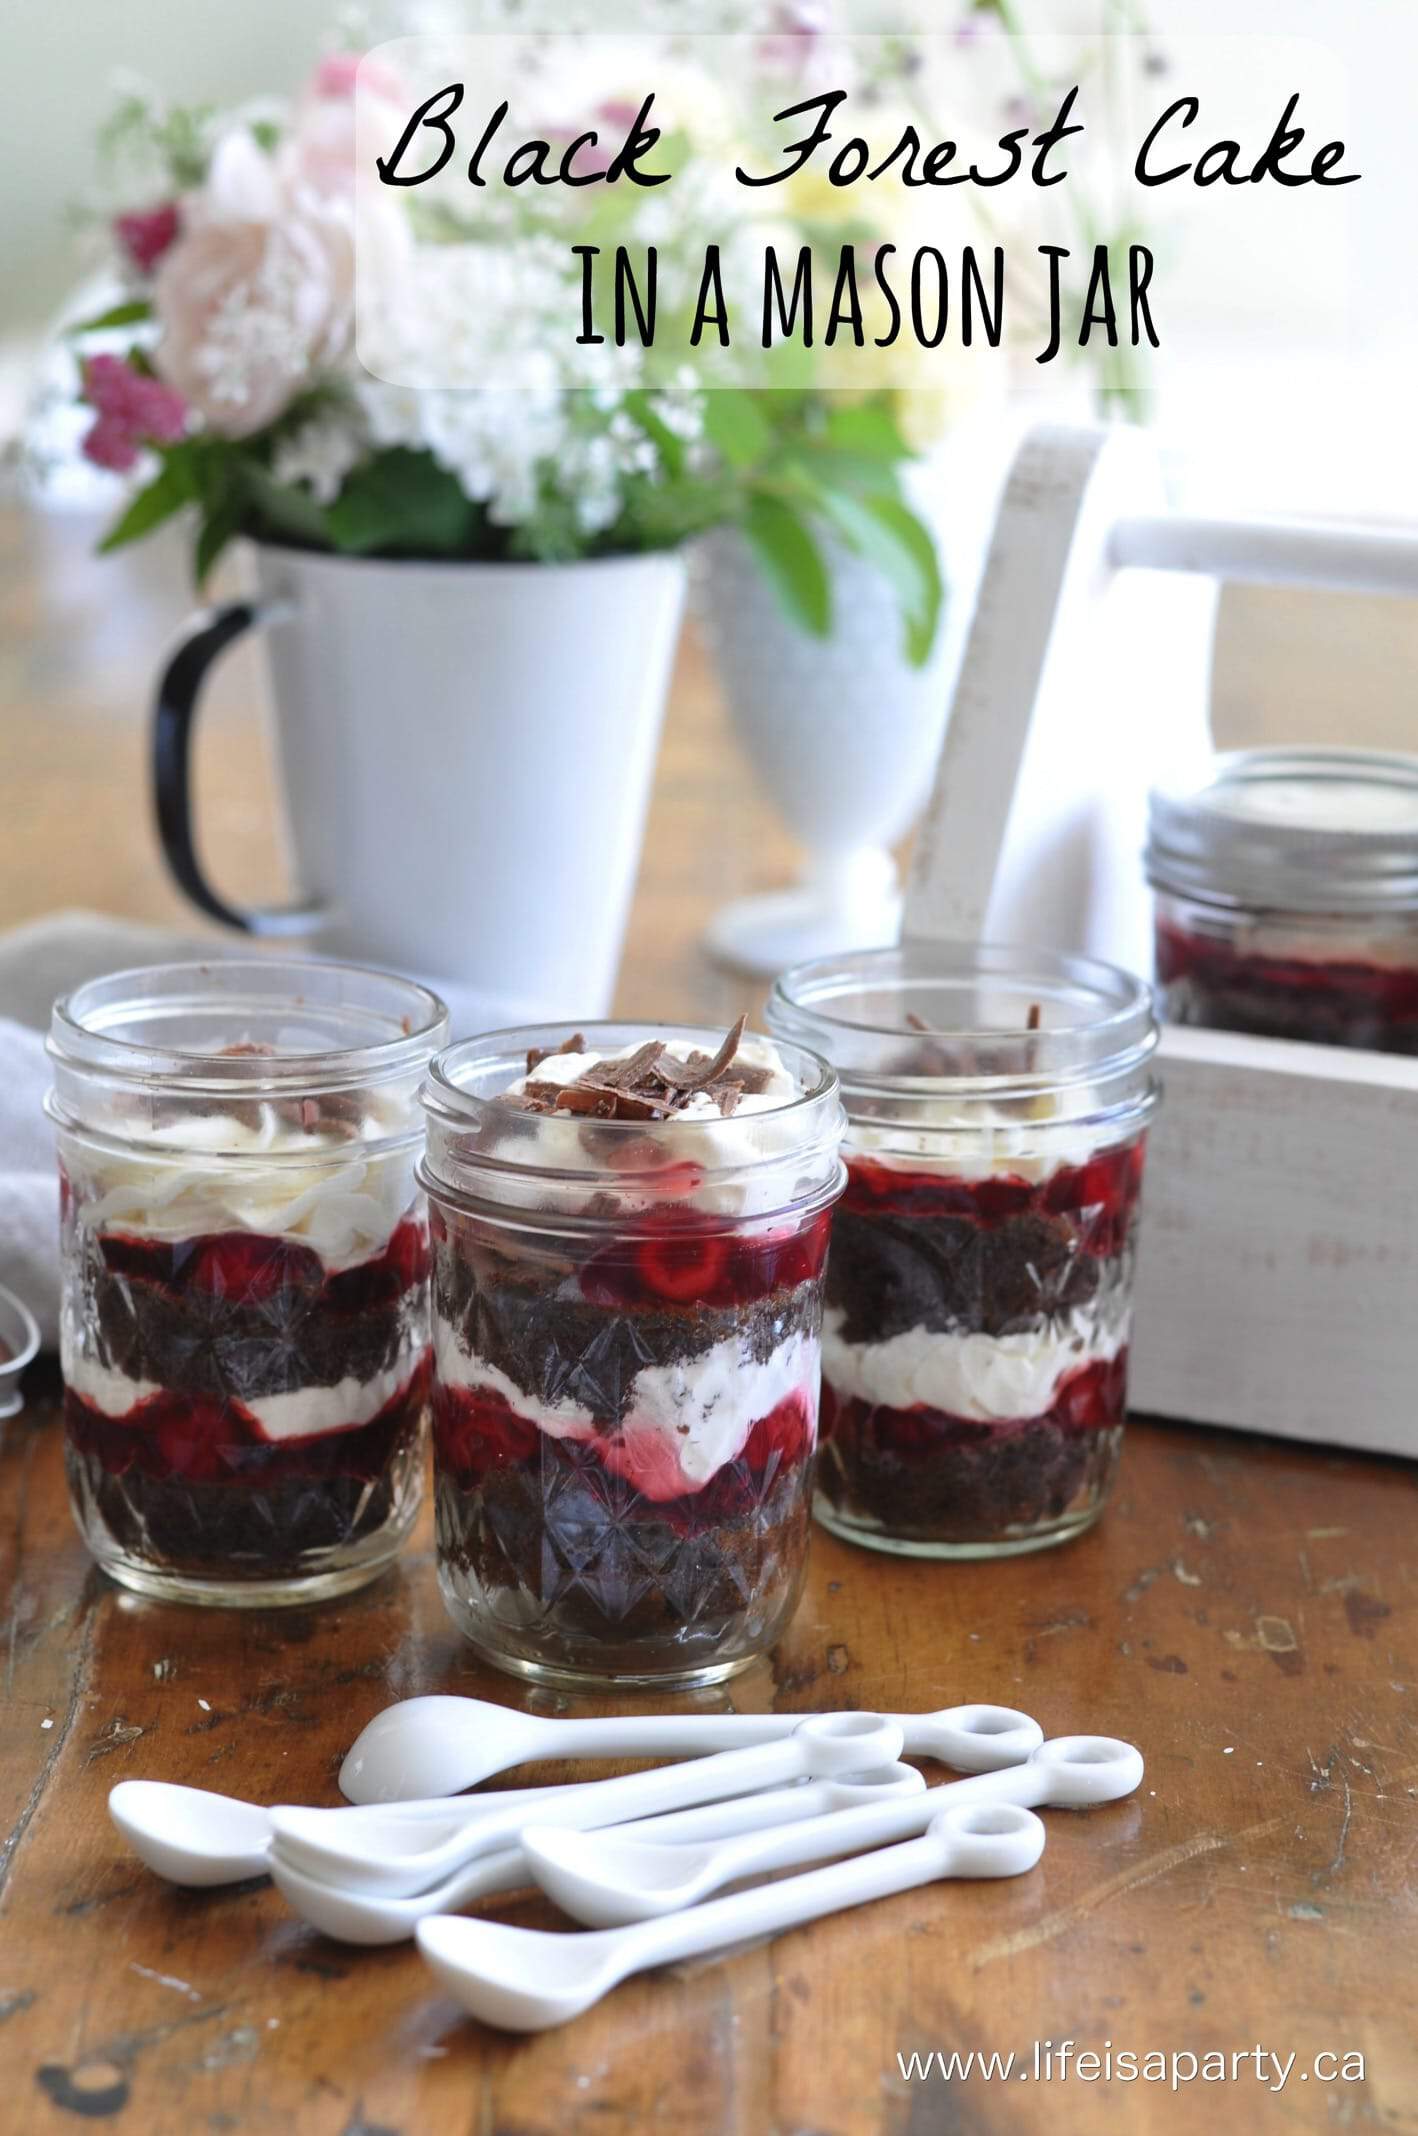
You might also like our Black Forest Cake in a Mason Jar recipe here.

Also check out our Easy One Bowl Brownie recipe here.

Easy One Bowl Brownies: easy to make, simple ingredients you already have in your pantry, and better than a store bought mix. Promise.

You might also enjoy our Mini Brownie Donuts recipe here.

Mini Brownie Donuts: the perfect little mini donut made from a brownie mix, with the perfect homemade glaze -super easy.

"Getting the Christmas Tree" Vignette

Nov 8, 2012 · 11 Comments

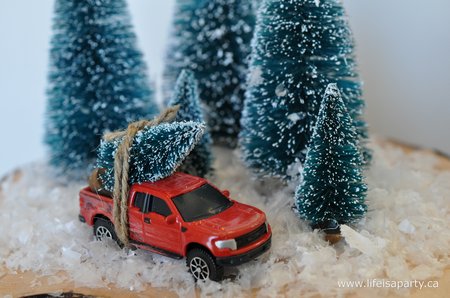
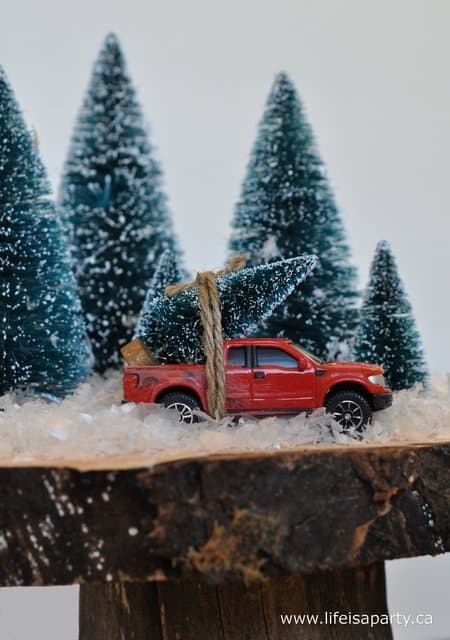
Red Christmas toy truck with bottle brush Christmas tree tied on the back.

Getting the Christmas Tree Vignette: This pretty, nostalgic red toy truck with a Christmas tree vignette couldn't be easier, or cuter.

Red Christmas toy truck with bottle brush Christmas tree tied on the back.
[feast_advanced_jump_to]

The ground and the windows were frosty this morning while I walked the girls to the school bus. The weather is turning here, and it's the Santa Claus parade this weekend. With Santa coming to town, I've started a little Christmas decorating and thought I'd share this sweet little red toy truck with a Christmas tree vignette with you.

When I was a little girl we always went to a forest on my Grandma's large property to cut down the Christmas tree.  There was a meadow, after what felt like a long walk through the woods.  Along edges of the meadow there were always some Christmas trees growing.  They weren't trimmed into the perfect shape like the ones at the store or even at the cut your own Christmas tree farm.  And there was always much debate about the best one, and if it was too tall, or to big for the space.  When I was a kid I looked forward to those outings every year.

red toy truck with Christmas tree

Materials:

  • wood cake stand
  • faux snow
  • red toy truck
  • twine
  • bottle brush Christmas trees

Red Toy Truck with Christmas Tree Vignette

I used my DIY tree slice cake stands as the base for the scene. I found some little trees at the dollar store, and went to the toy store to find a little red toy truck.

To make the truck look a little older I sanded the sides a little bit.  

I tied a tiny tree on top of the toy truck with a little bit of twine.

To make the scene, I set up the cake stand, and added in some trees at the back to make it look like a little forest.  Next I added in the little toy truck with the tree already tied to the back.  Then, it started snowing. 😉  I sprinkled the whole scene with some faux snow.

It was that simple, and I think it's so cute.  Don't you just love an easy DIY.

toy truck with Christmas tree

With this sweet vignette, life is really a party!

You might also like our Thrift Store Christmas Table and Thrift Store Tips here.

Thrift Store Christmas Table and Thrift Store Tips: beautiful Christmas table put together with thrift store finds, and 9 tips for thrifting.

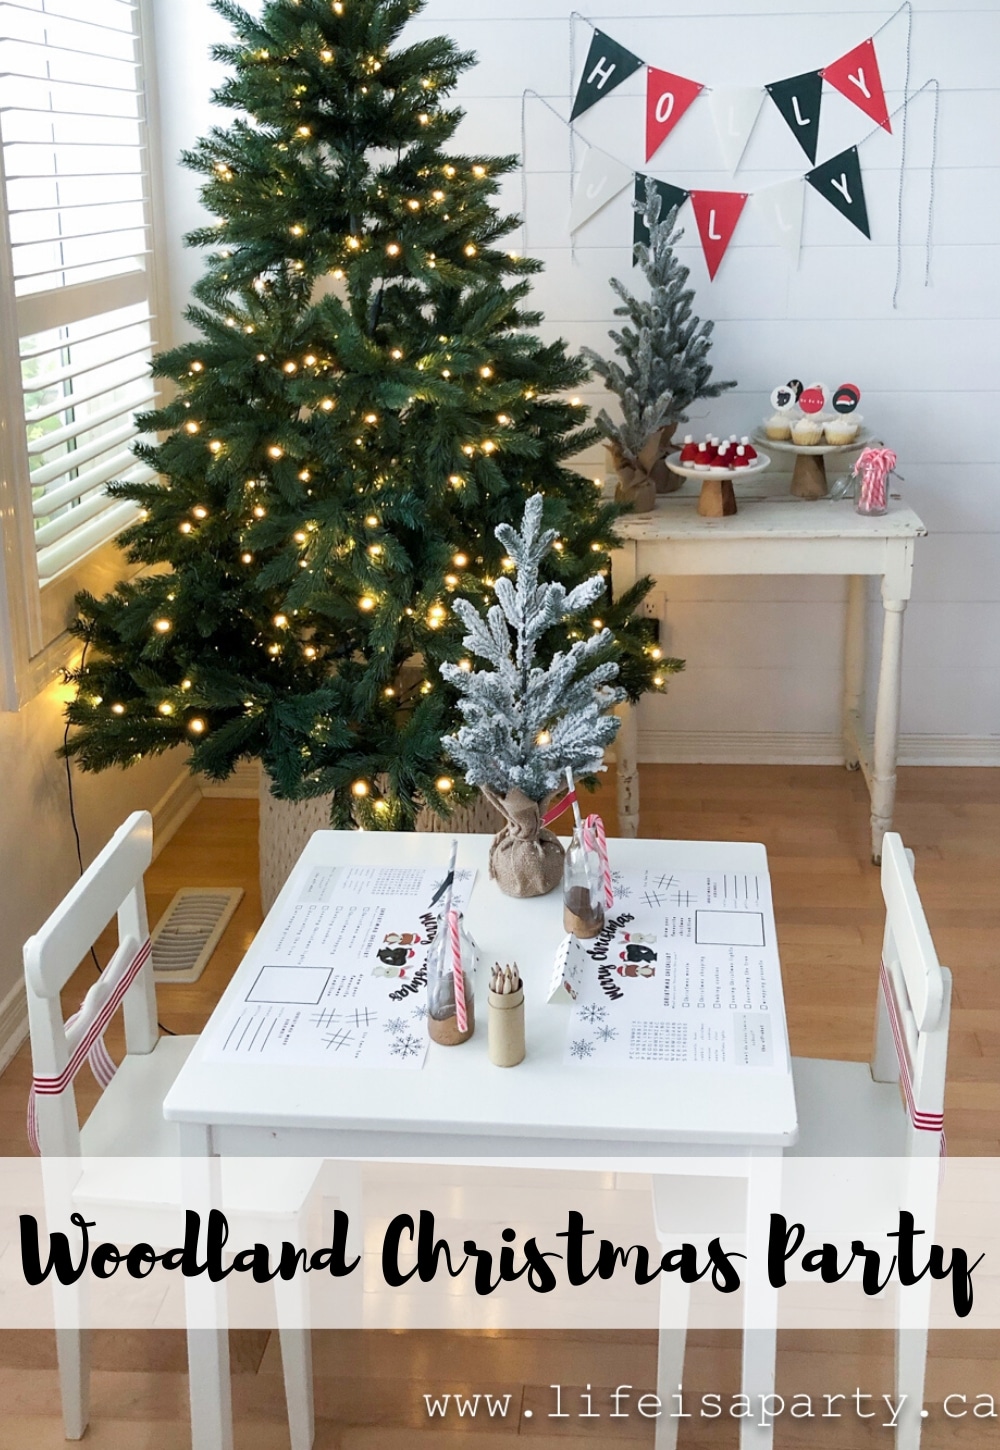
Also check out Holly Jolly Woodland Christmas Party here.

Woodland Christmas Party: This red and green woodland animal printable party package includes kids activity placemats and everything else for your party.

You might also enjoy Birch Christmas Wreath here.

Birch Christmas Wreath:-full tutorial to make your own square wreath from some gathered greens, birch logs, and a coat hanger. Perfect for Christmas.

DIY Teacup Advent Wreath

Nov 7, 2012 · 2 Comments

Teacup advent wreath.

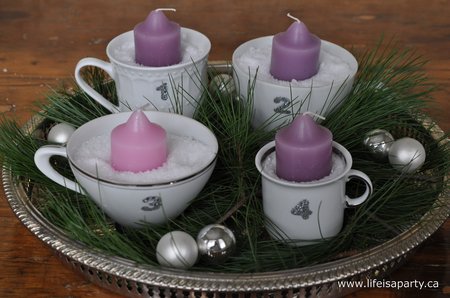
DIY Advent Wreath: made with thrift store tea cups and stickers, our Teacup Advent Wreath is a charming and whimsical addition to your advent.

Teacup advent wreath.
[feast_advanced_jump_to]

Isn't this the sweetest idea?  Use thrift store teacups your own DIY advent wreath this year.  This  vintage inspired teacup advent wreath in inexpensive to make.   I just love how it turned out and it was so simple to put together.

thrift store teacups

Materials:

  • four white teacups
  • 3 purple and 1 pink votive candle
  • epson salts
  • number stickers
  • silver tray
  • Christmas greens

How To Make Your Teacup Advent Wreath:

1. First I started out with picking up some cute little teacups at the thrift store, they were .99 cents each. I knew I wanted to have a little silver accent to the wreath, so I chose a few teacups with a silver rim. At home I washed them up and added a number sticker. The glitter number stickers were perfect.

DIY teacup advent wreath

2. Then I filled the cups with some Epson salts so it would look like snow. I added the traditional advent coloured candles of purple and pink.

3. Lastly I used an old silver tray and added some fresh greens and a few little glass ornaments to arrange my teacups into a wreath shape on the tray.

I just love how it turned out.

DIY advent wreath ideas
how to make a DIY advent wreath
Teacup Advent Wreath

Counting down the weeks until Christmas with this sweet vintage inspired teacup DIY advent wreath, really makes life a party.

You might also like our Children's Story Book Advent Calendar here.

storybook advent calendar

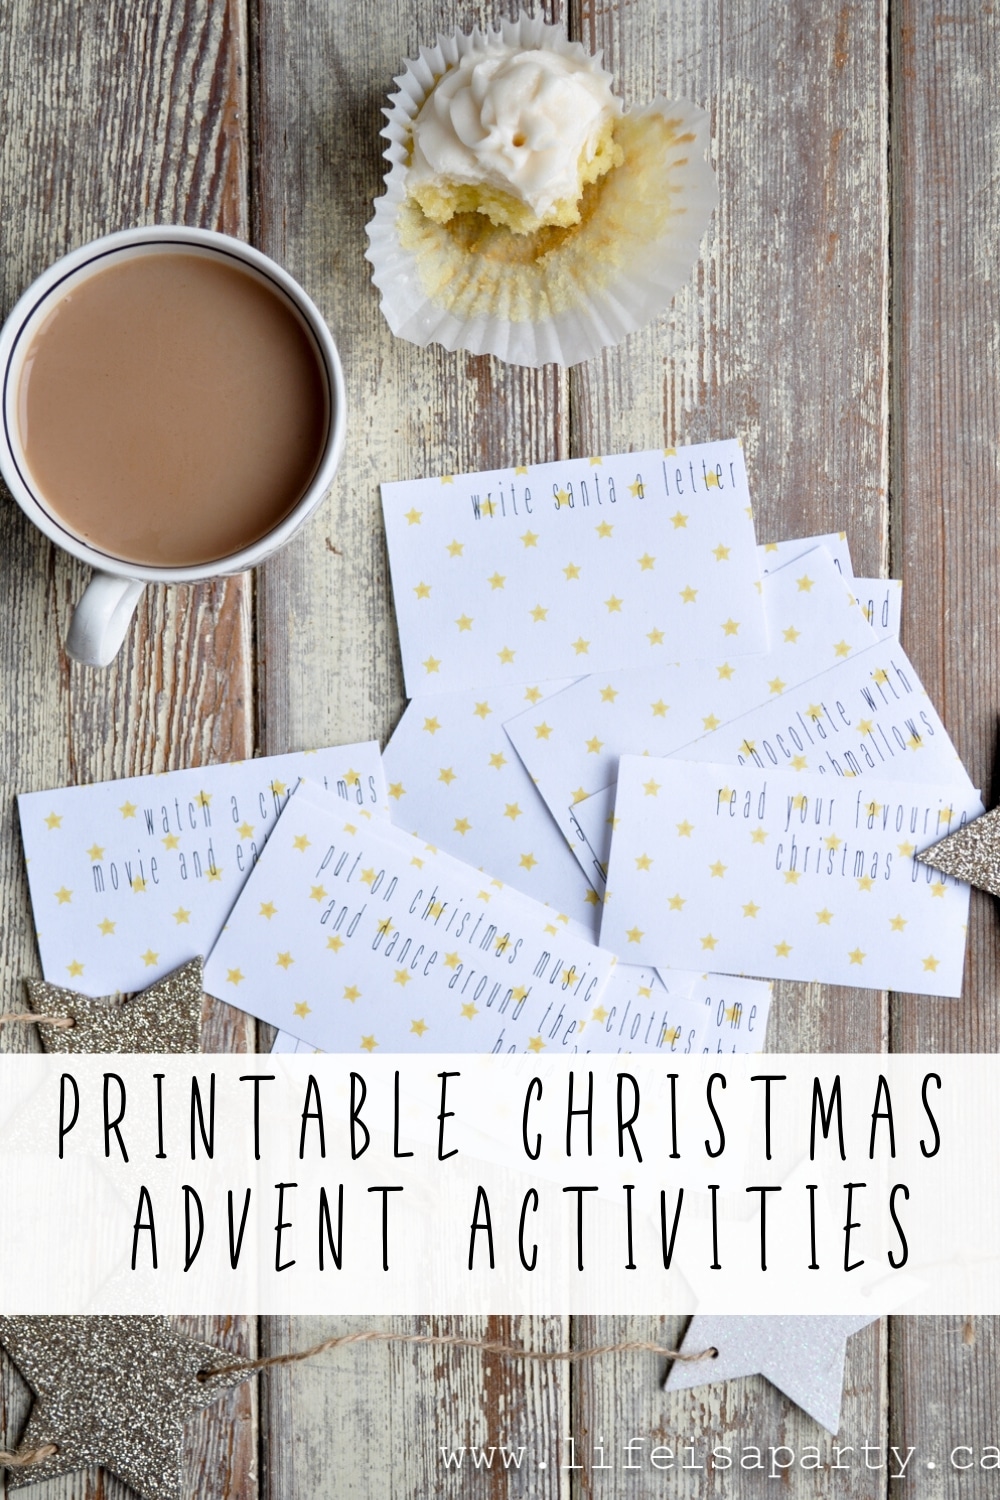
Also check out our Christmas Activity Advent Calendar here.

Printable Christmas Advent Calendar Activities: with over 60 different activities to choose from pick 24 and make some special memories with your family this Christmas.

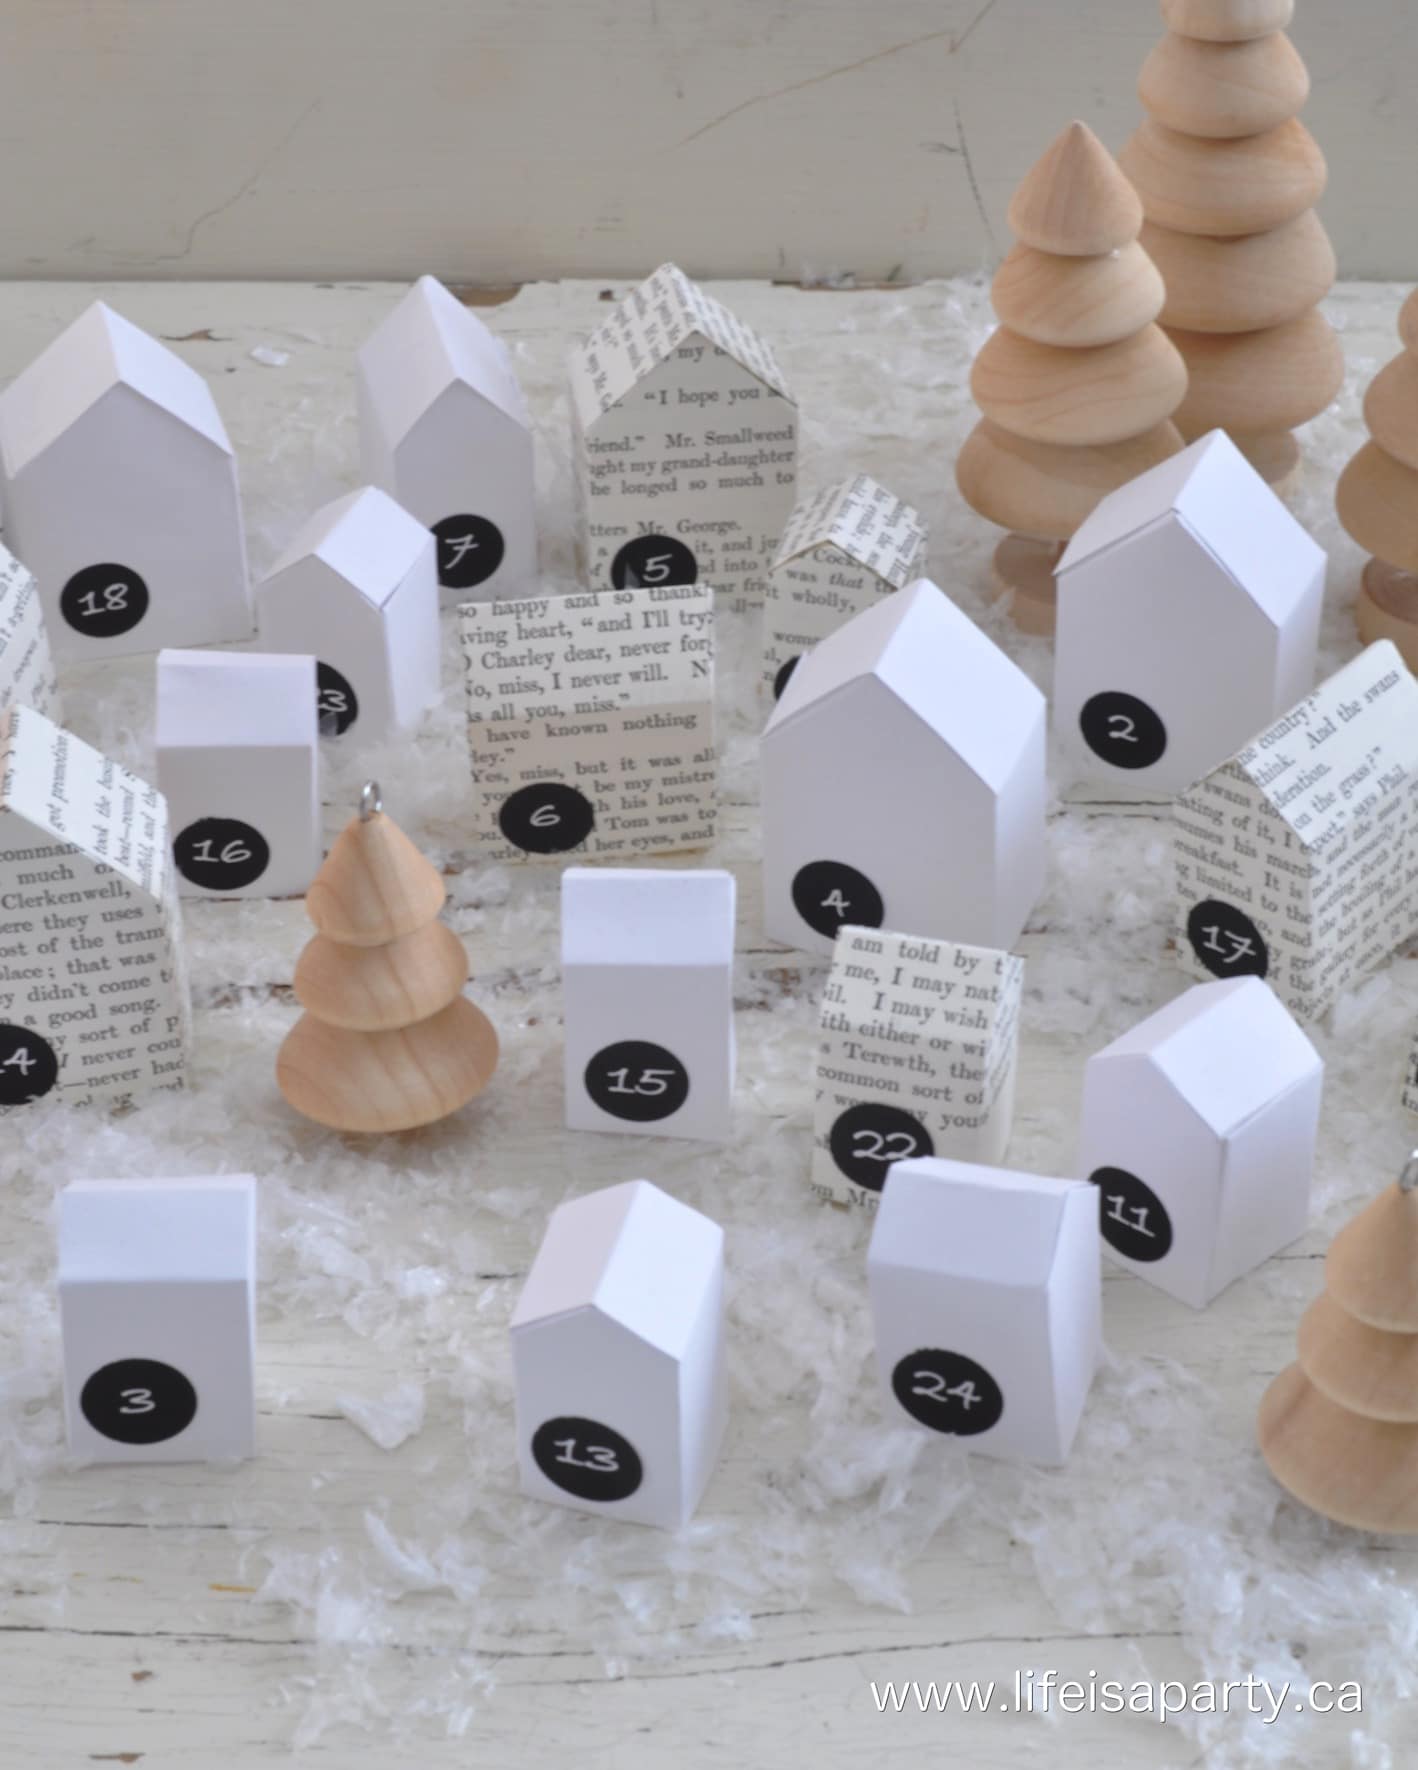
You might also enjoy our House Advent Calendar here.

Fun Fall Party Ideas: Backyard Leaf Raking Party for Kids and Families

Nov 5, 2012 · 5 Comments

Leaf raking fall themed party ideas.

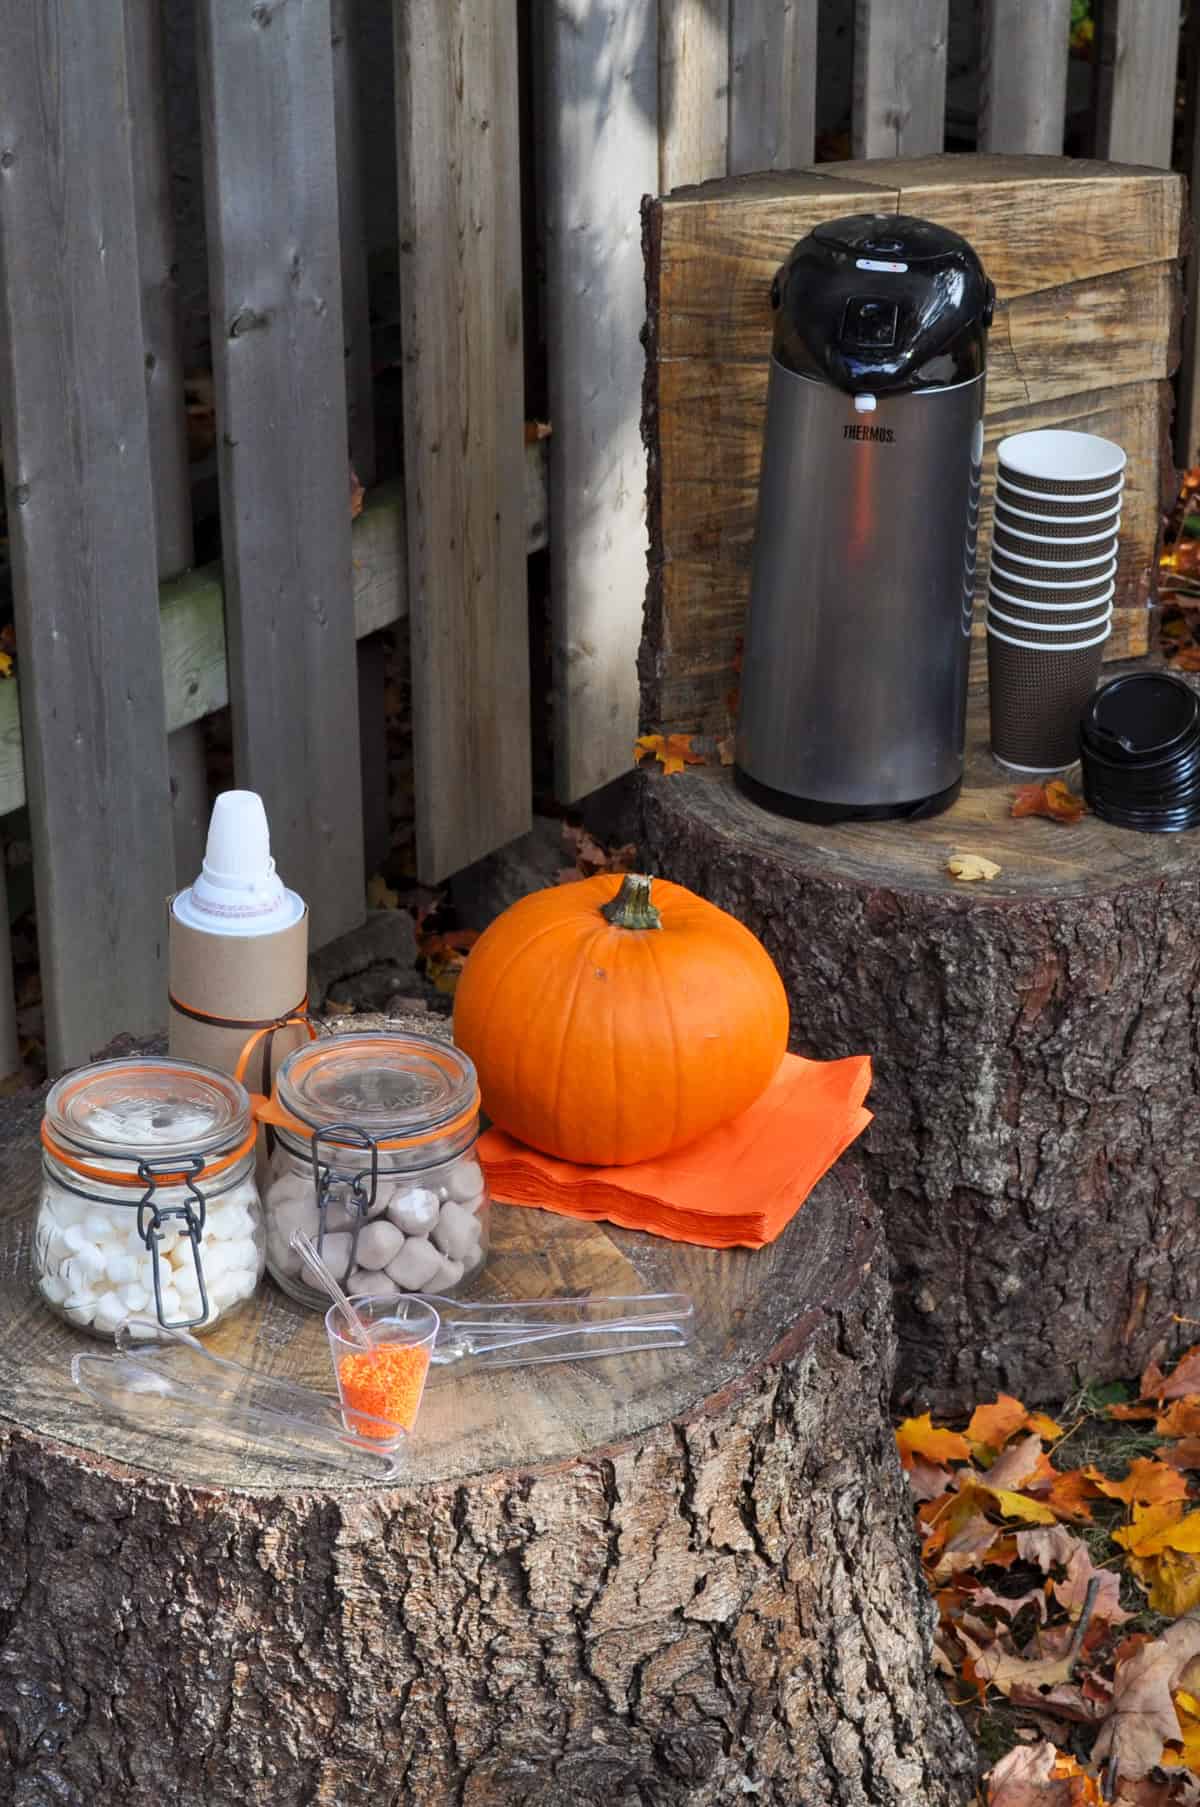
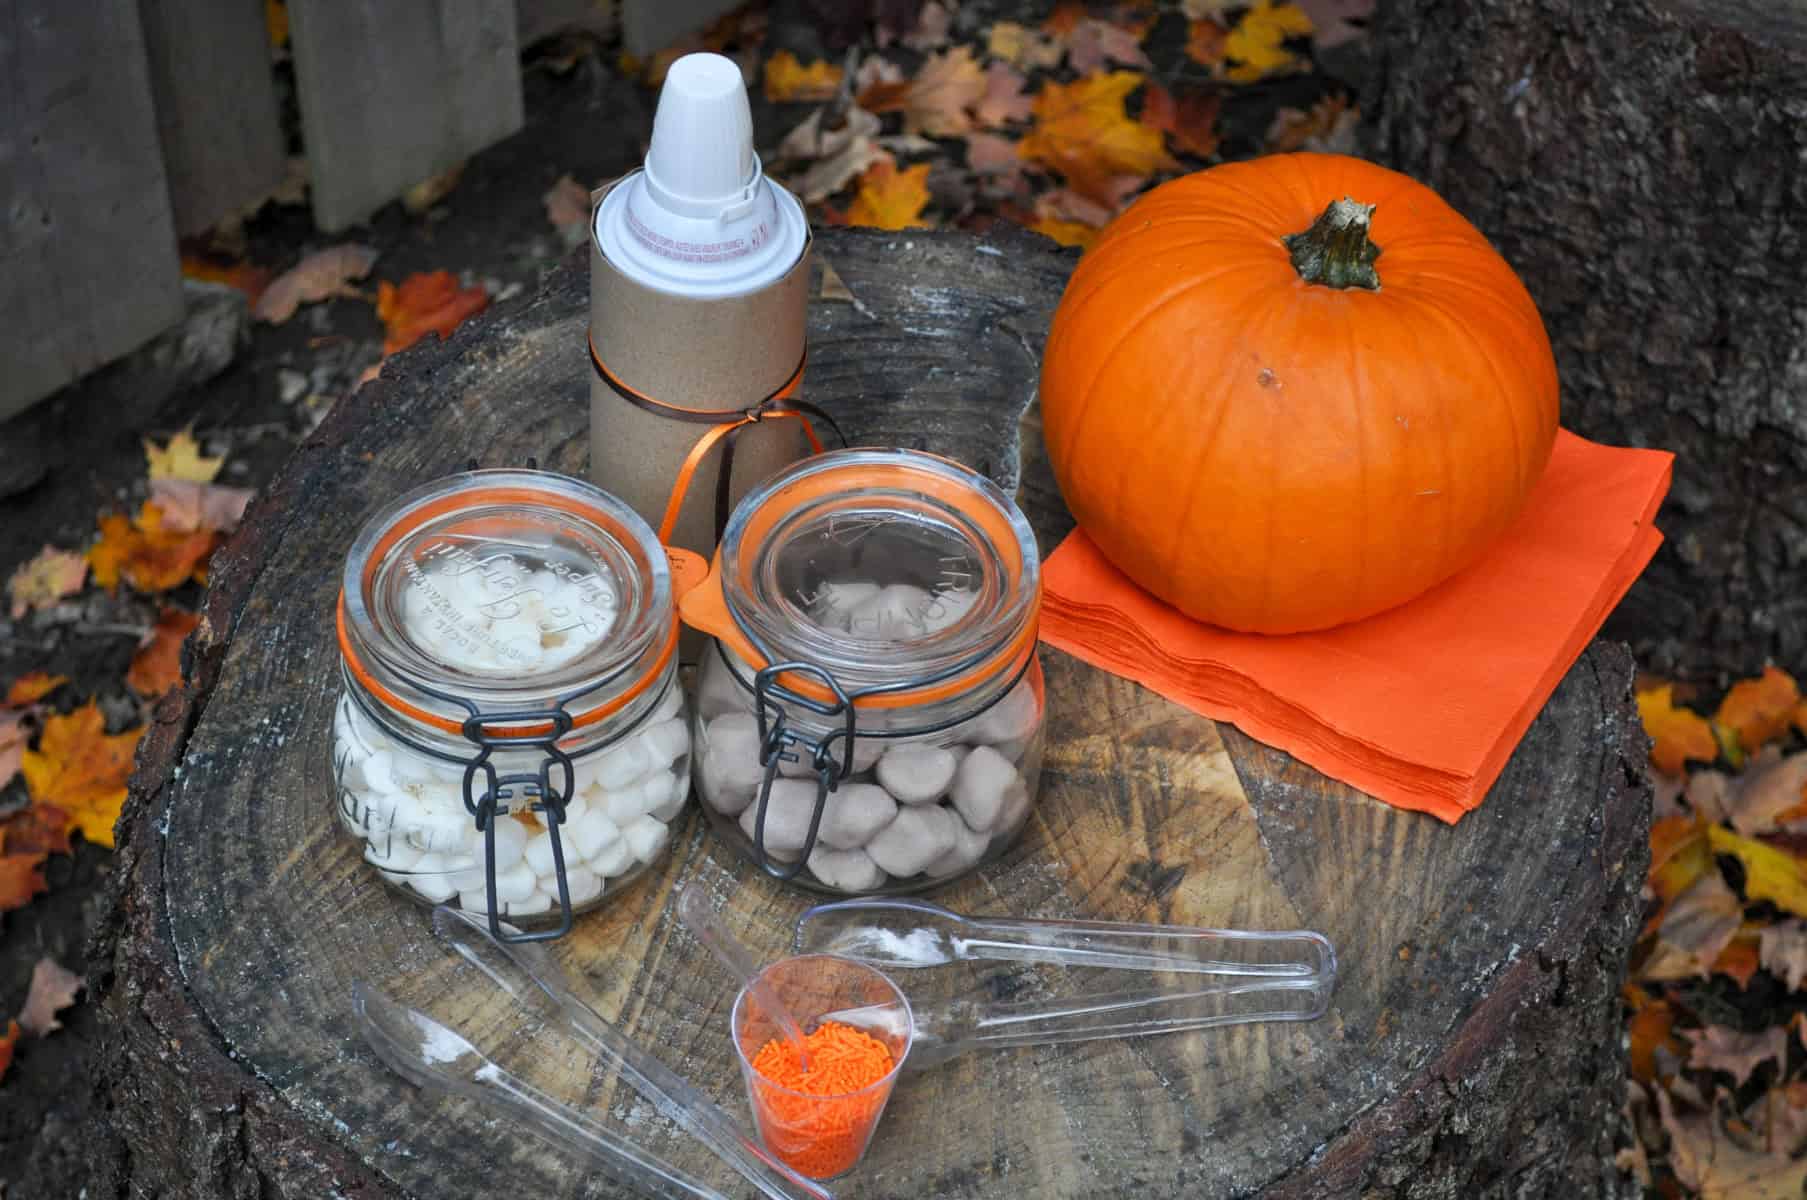
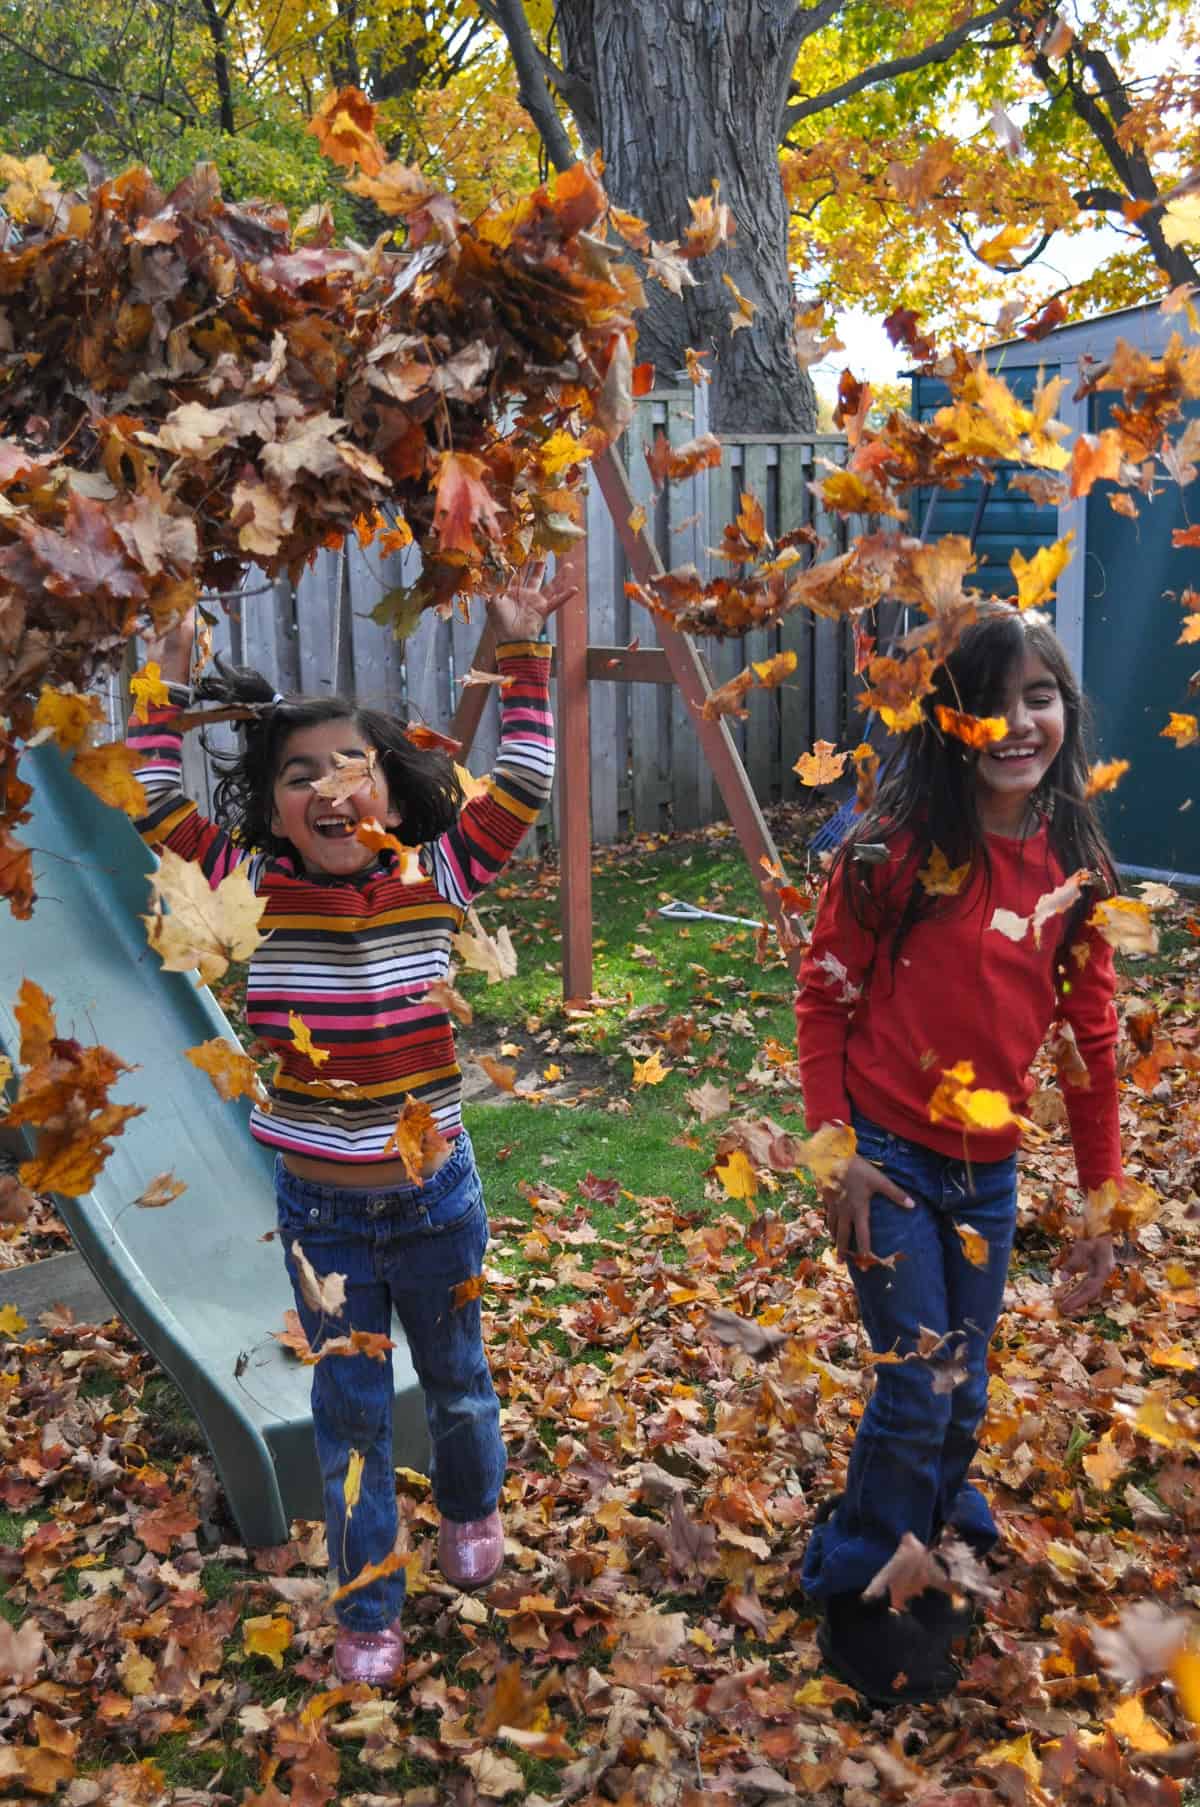
This fun family fall party is perfect for celebrating the season in your own back yard. Invite your famiy and friends over for some good old fashioned jumping in the leaves, leaf themed sweet treats, and a hot chocolate bar!

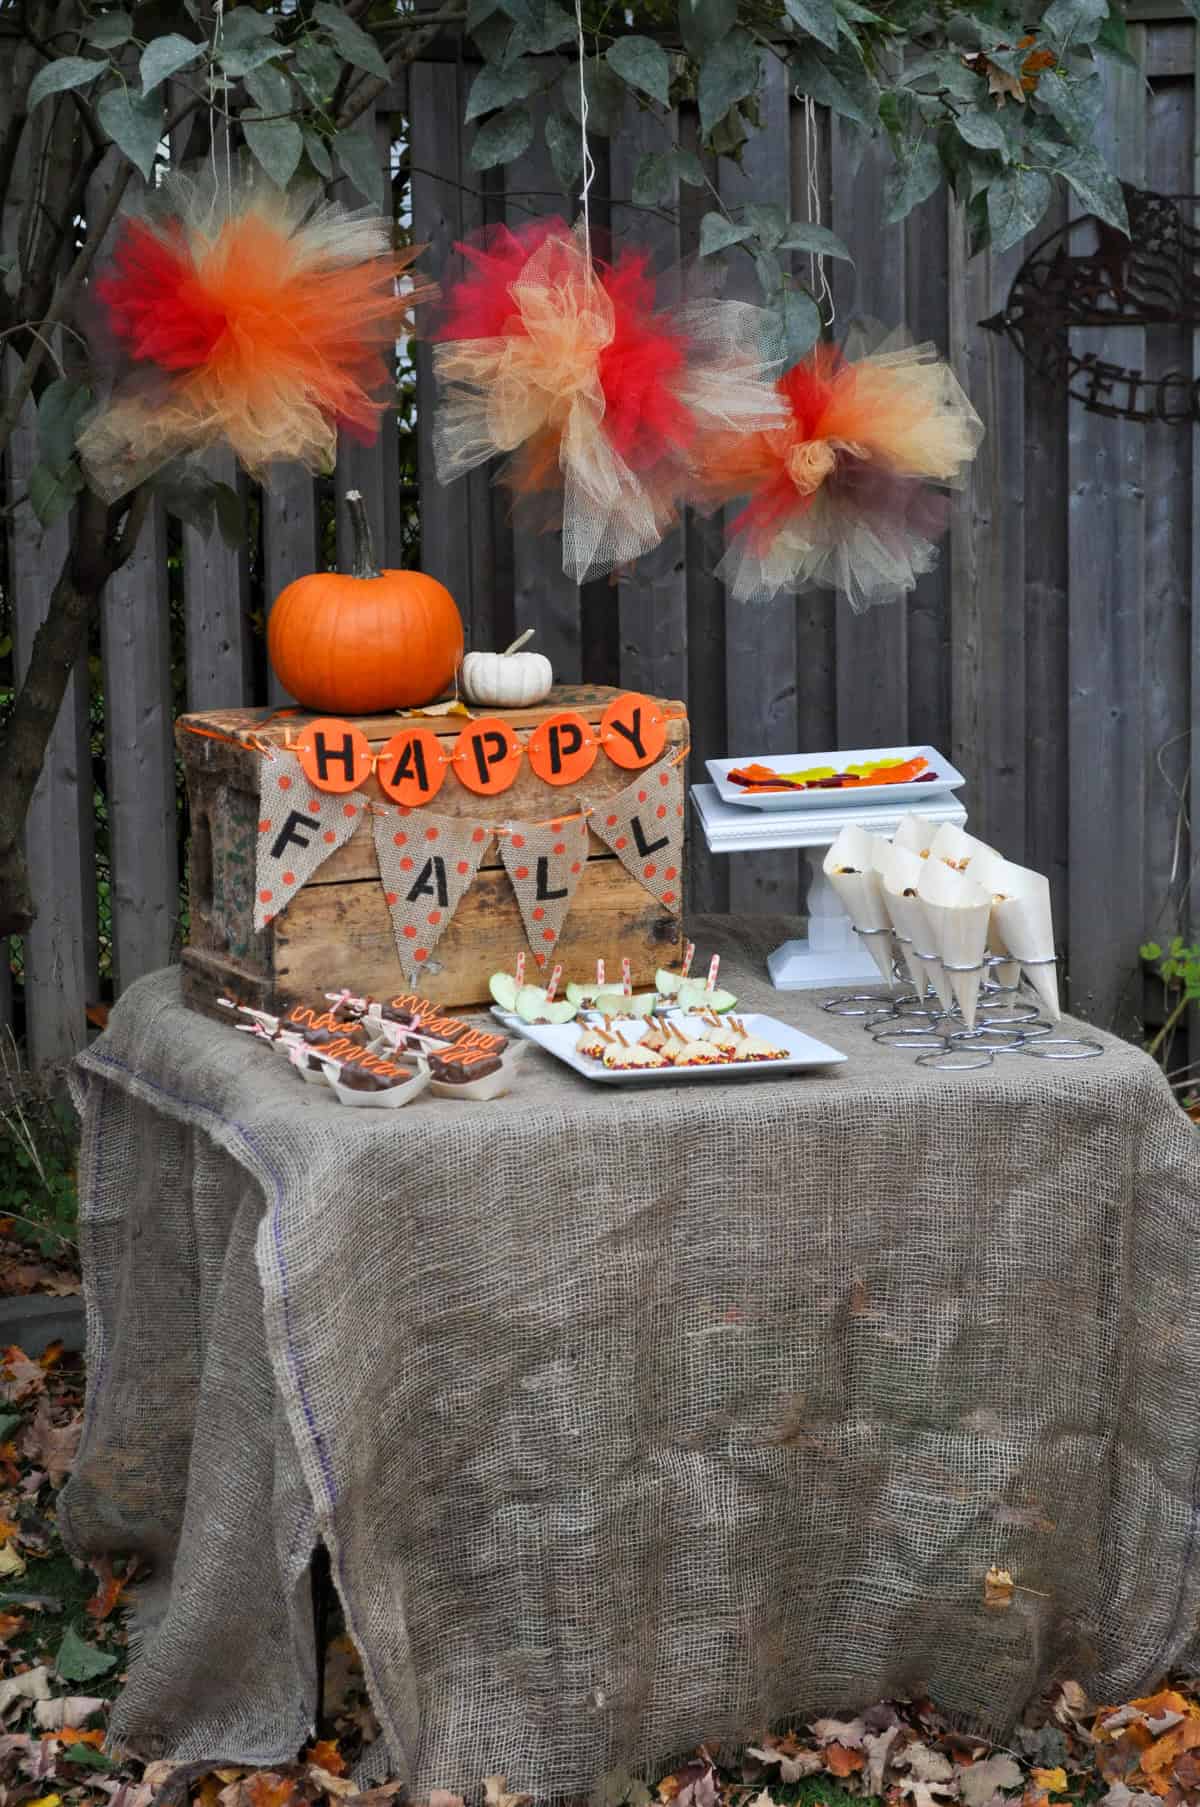
Leaf raking fall themed party ideas and fall dessert table.

Why You'll Love This Backyard Fall Party

  • It's fun! Your family and friends will love the fall leaf theme, playing in the leaves, and the treats!
  • This party is easy to put together. We used easy and store bought food for our themed treats.
  • Fall is such a great time to entertain outside. Not too hot, not too cold.
  • It's budget friendly. Jumping in the leaves is free!
  • Playing with leaves is perfect for all ages, from toddlers to teenagers.
[feast_advanced_jump_to]

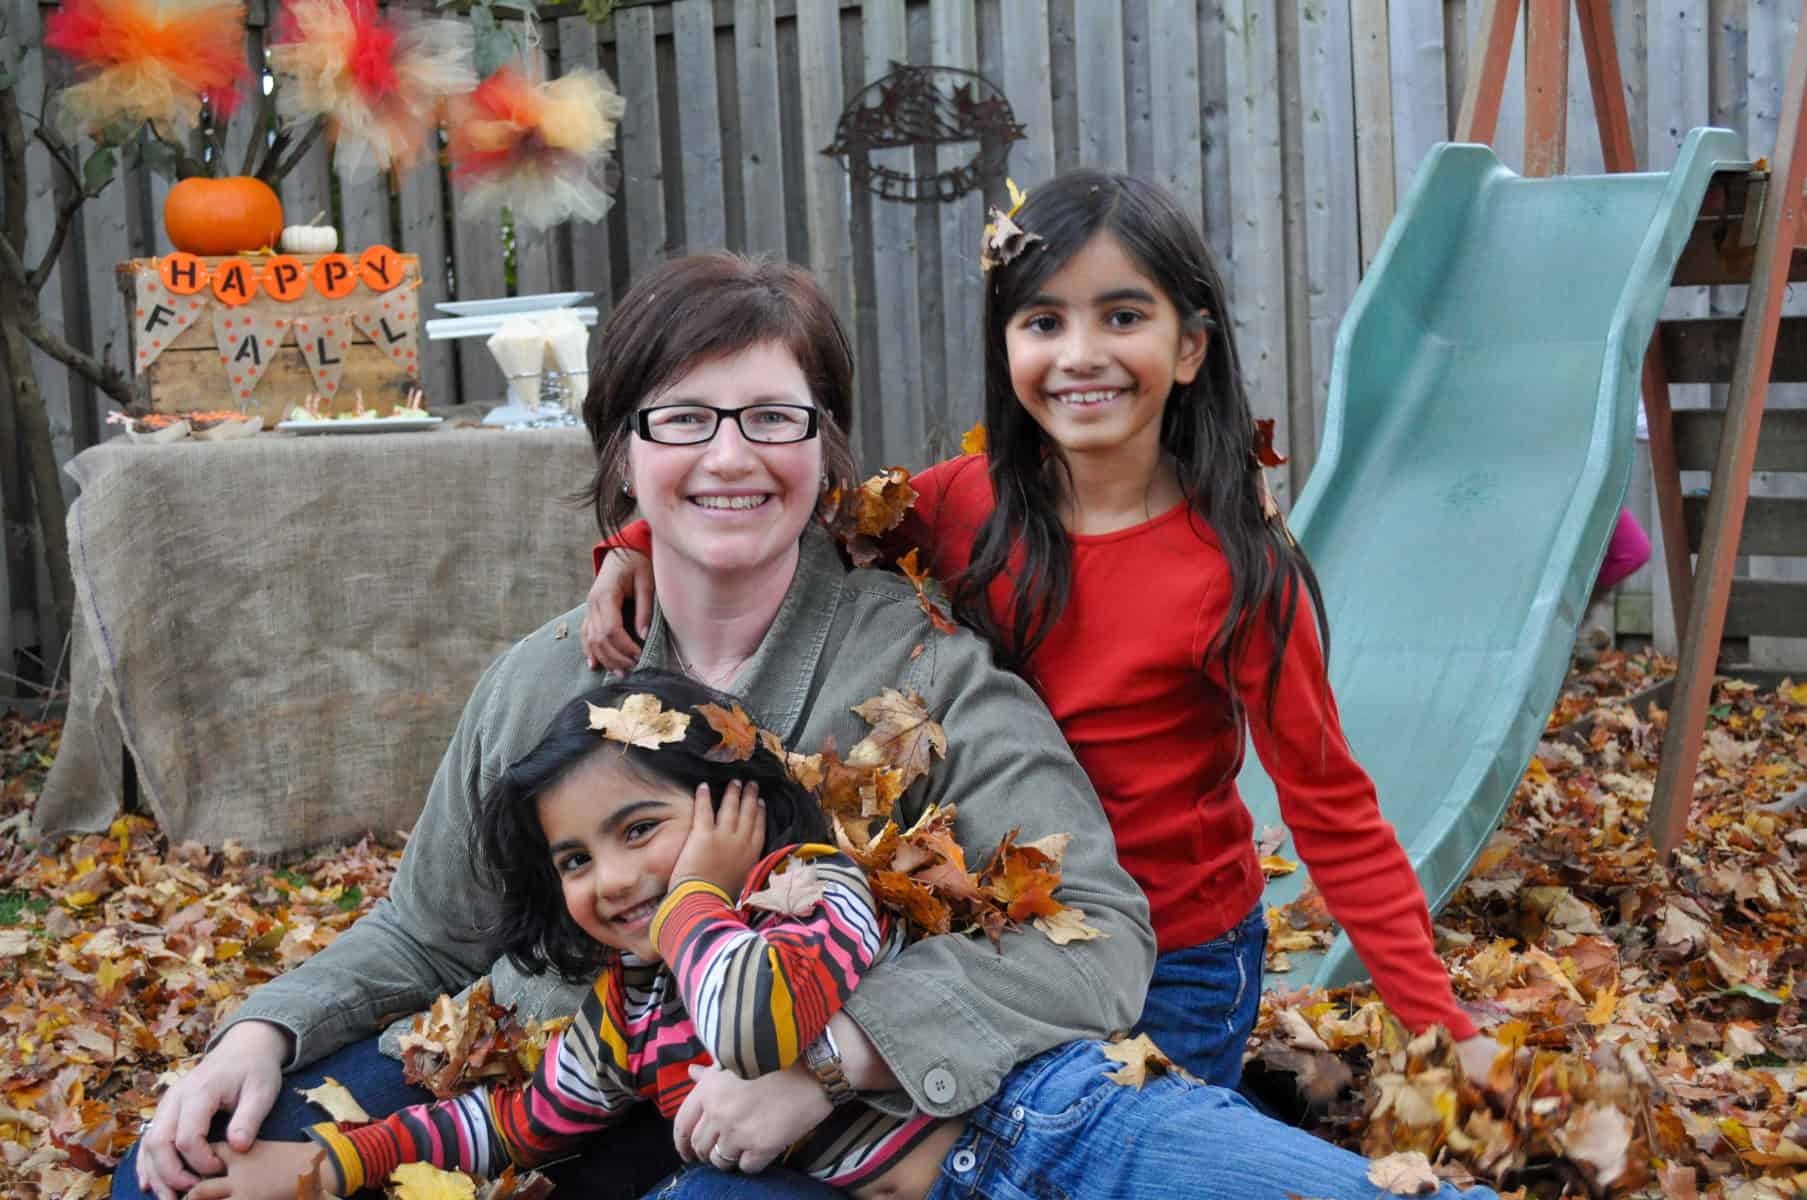
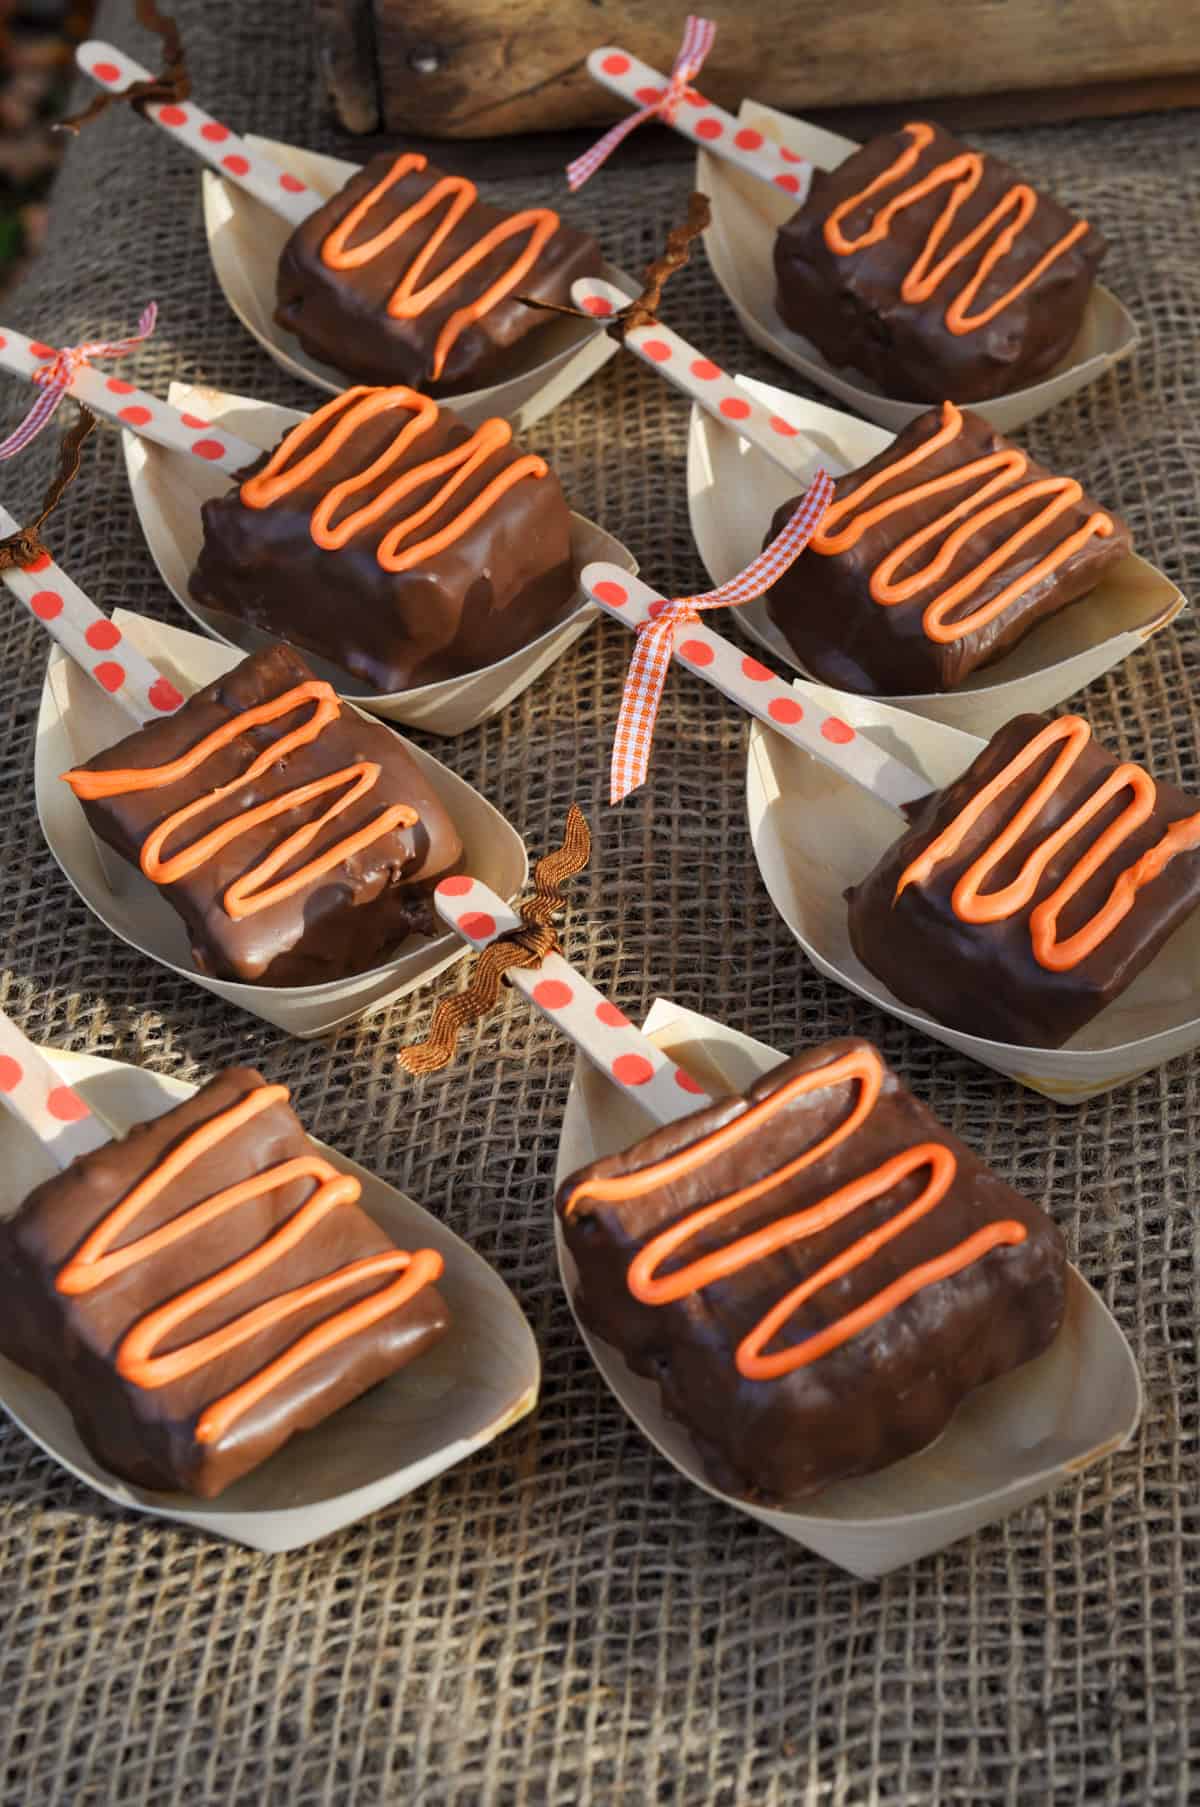
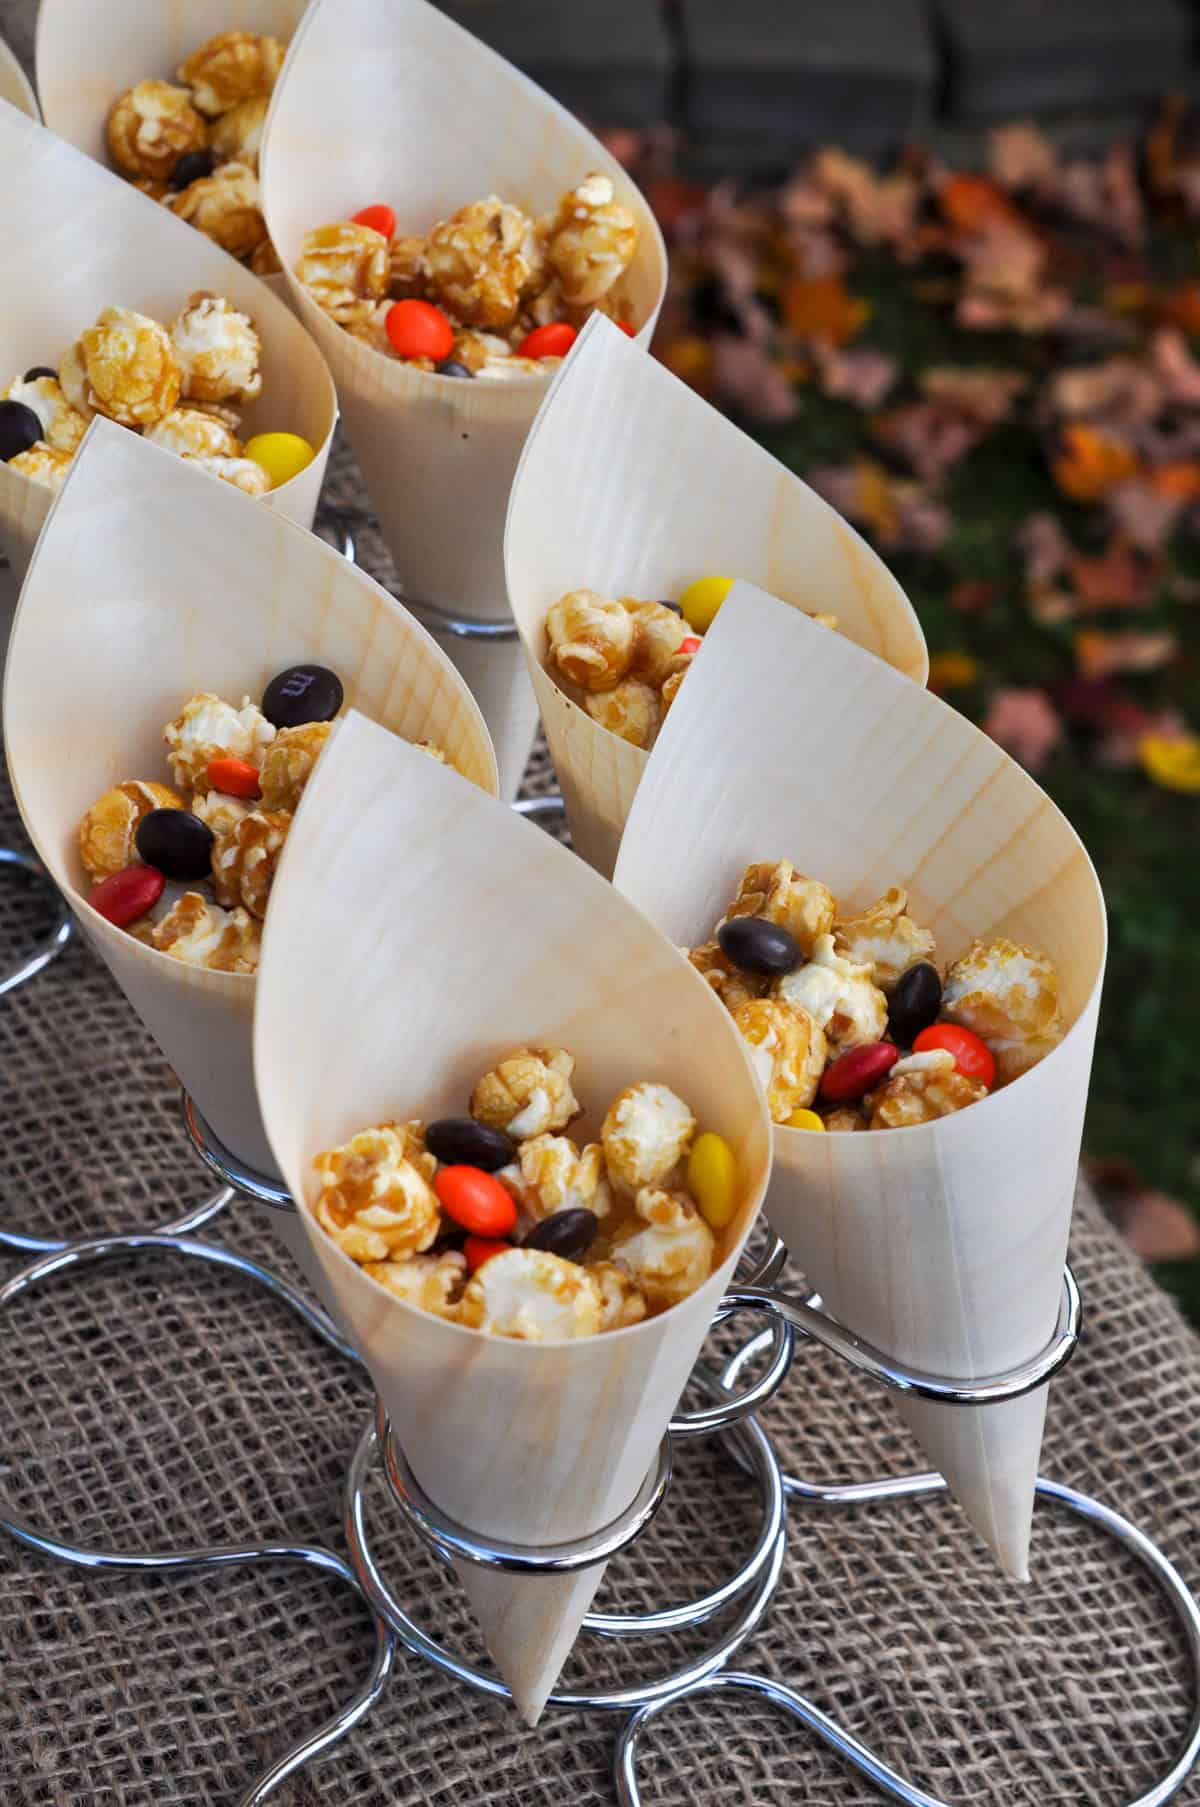
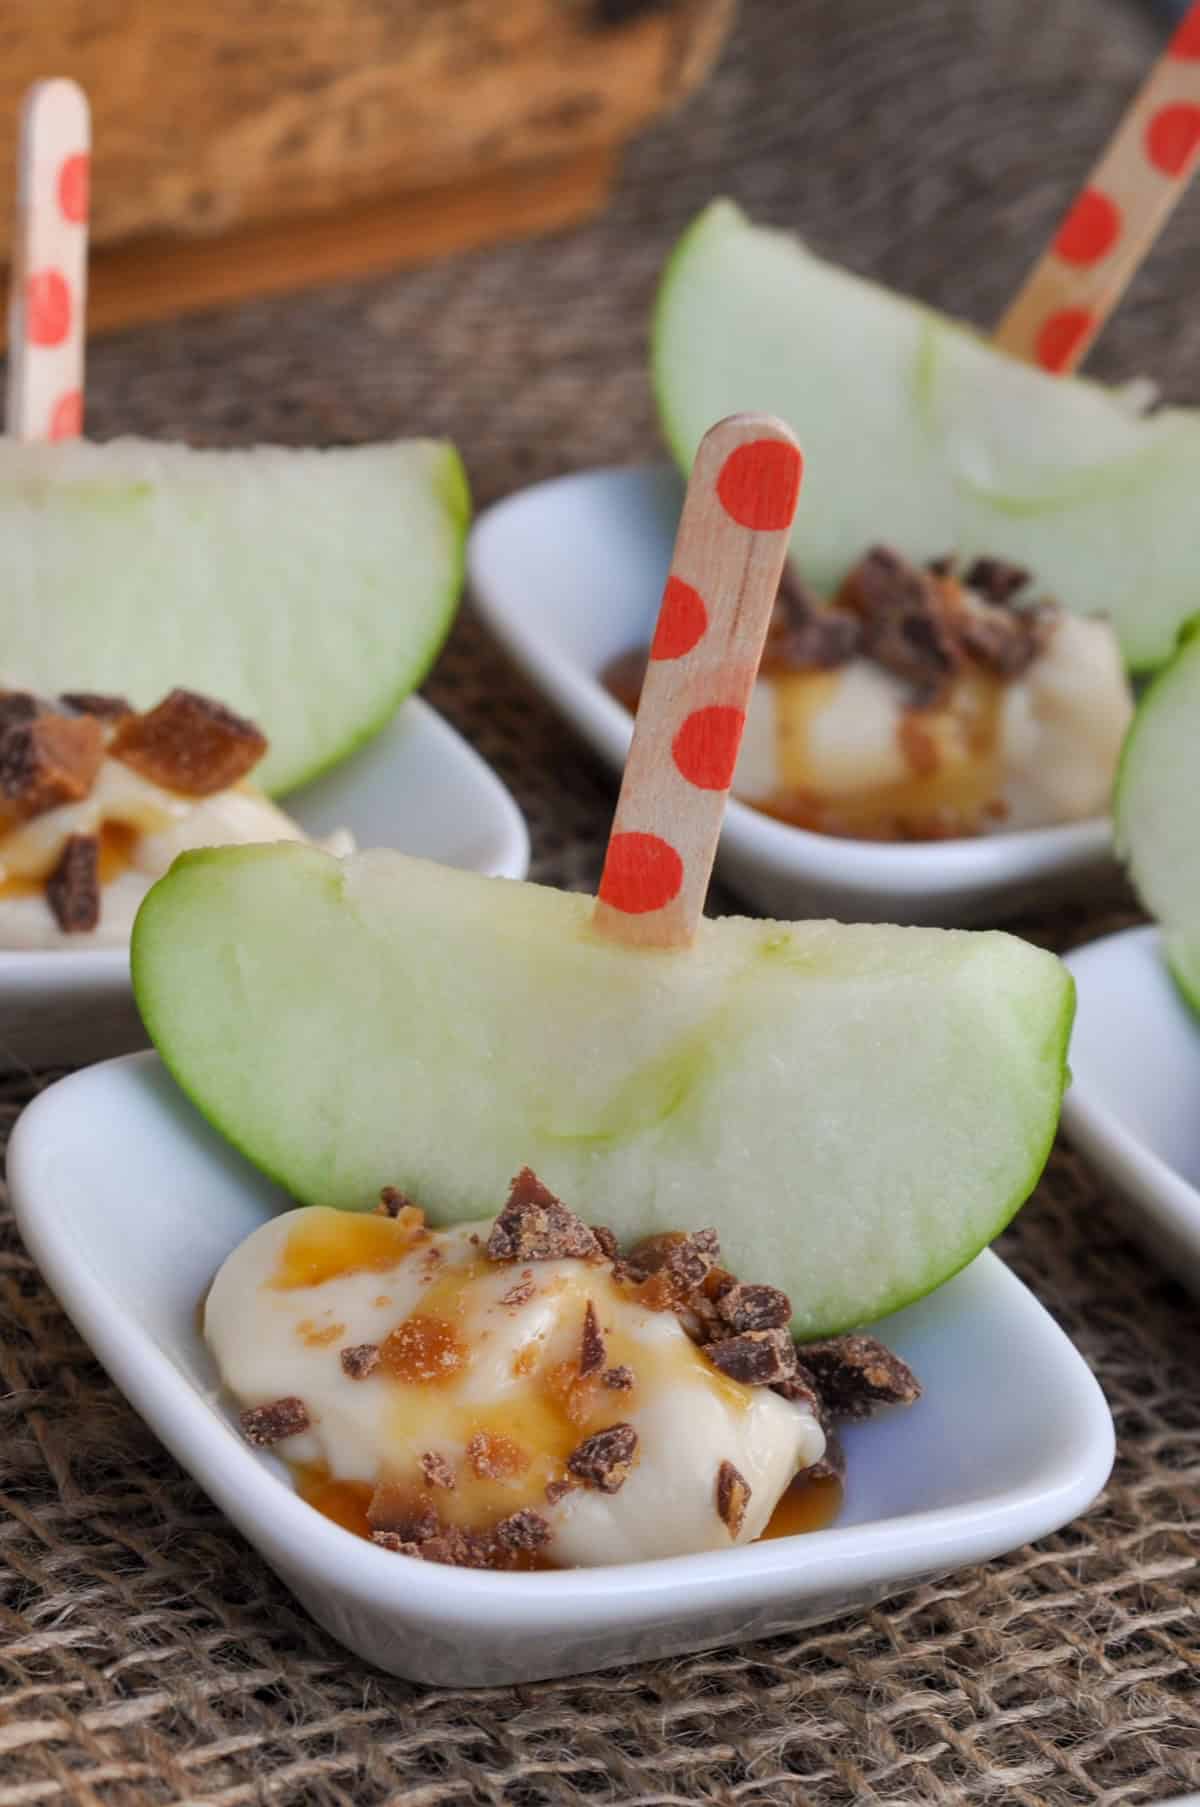
I'm so excited to share this beautiful fall party with you today. One sunny fall afternoon we set up a family leaf raking party at our friends house, and enjoyed good old fashioned leaf raking and jumping in the leaves with the kids and some sweet leaf themed treats to munch on. It was so much fun!

We love celebrating fall. You might also like our Cozy Soup Party, Pink Halloween Party, Halloween S'mores, Halloween Movie Night, Pie Buffet Party and our Fall Tea Party.

People at a fall party raking and playing in the leaves.

Outdoor Fall Party Decorations

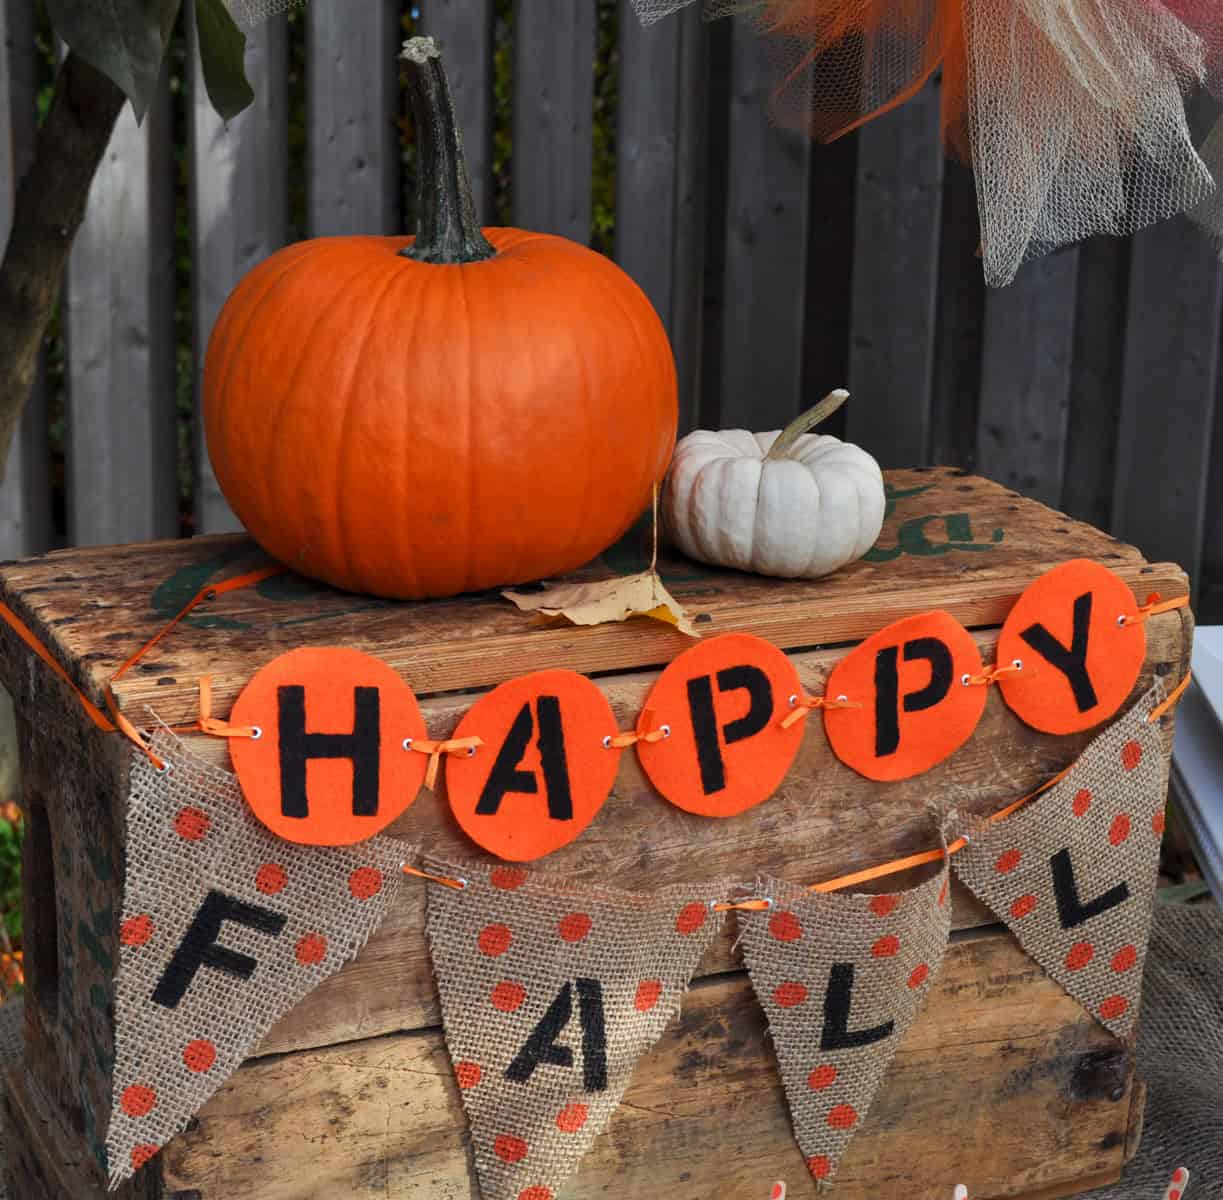
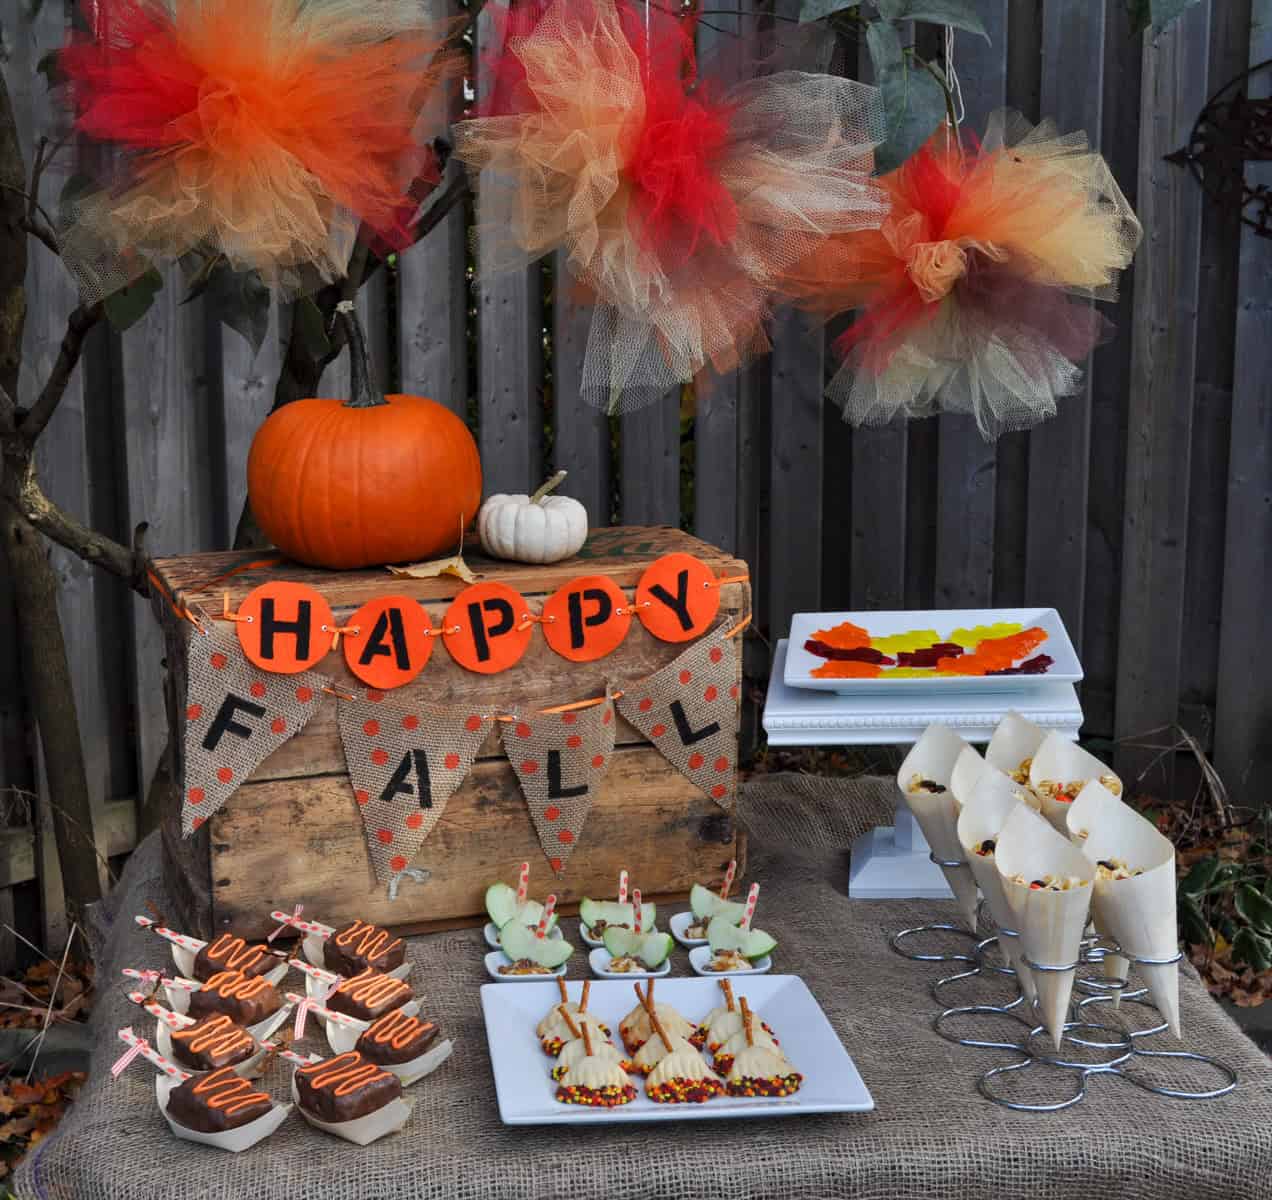
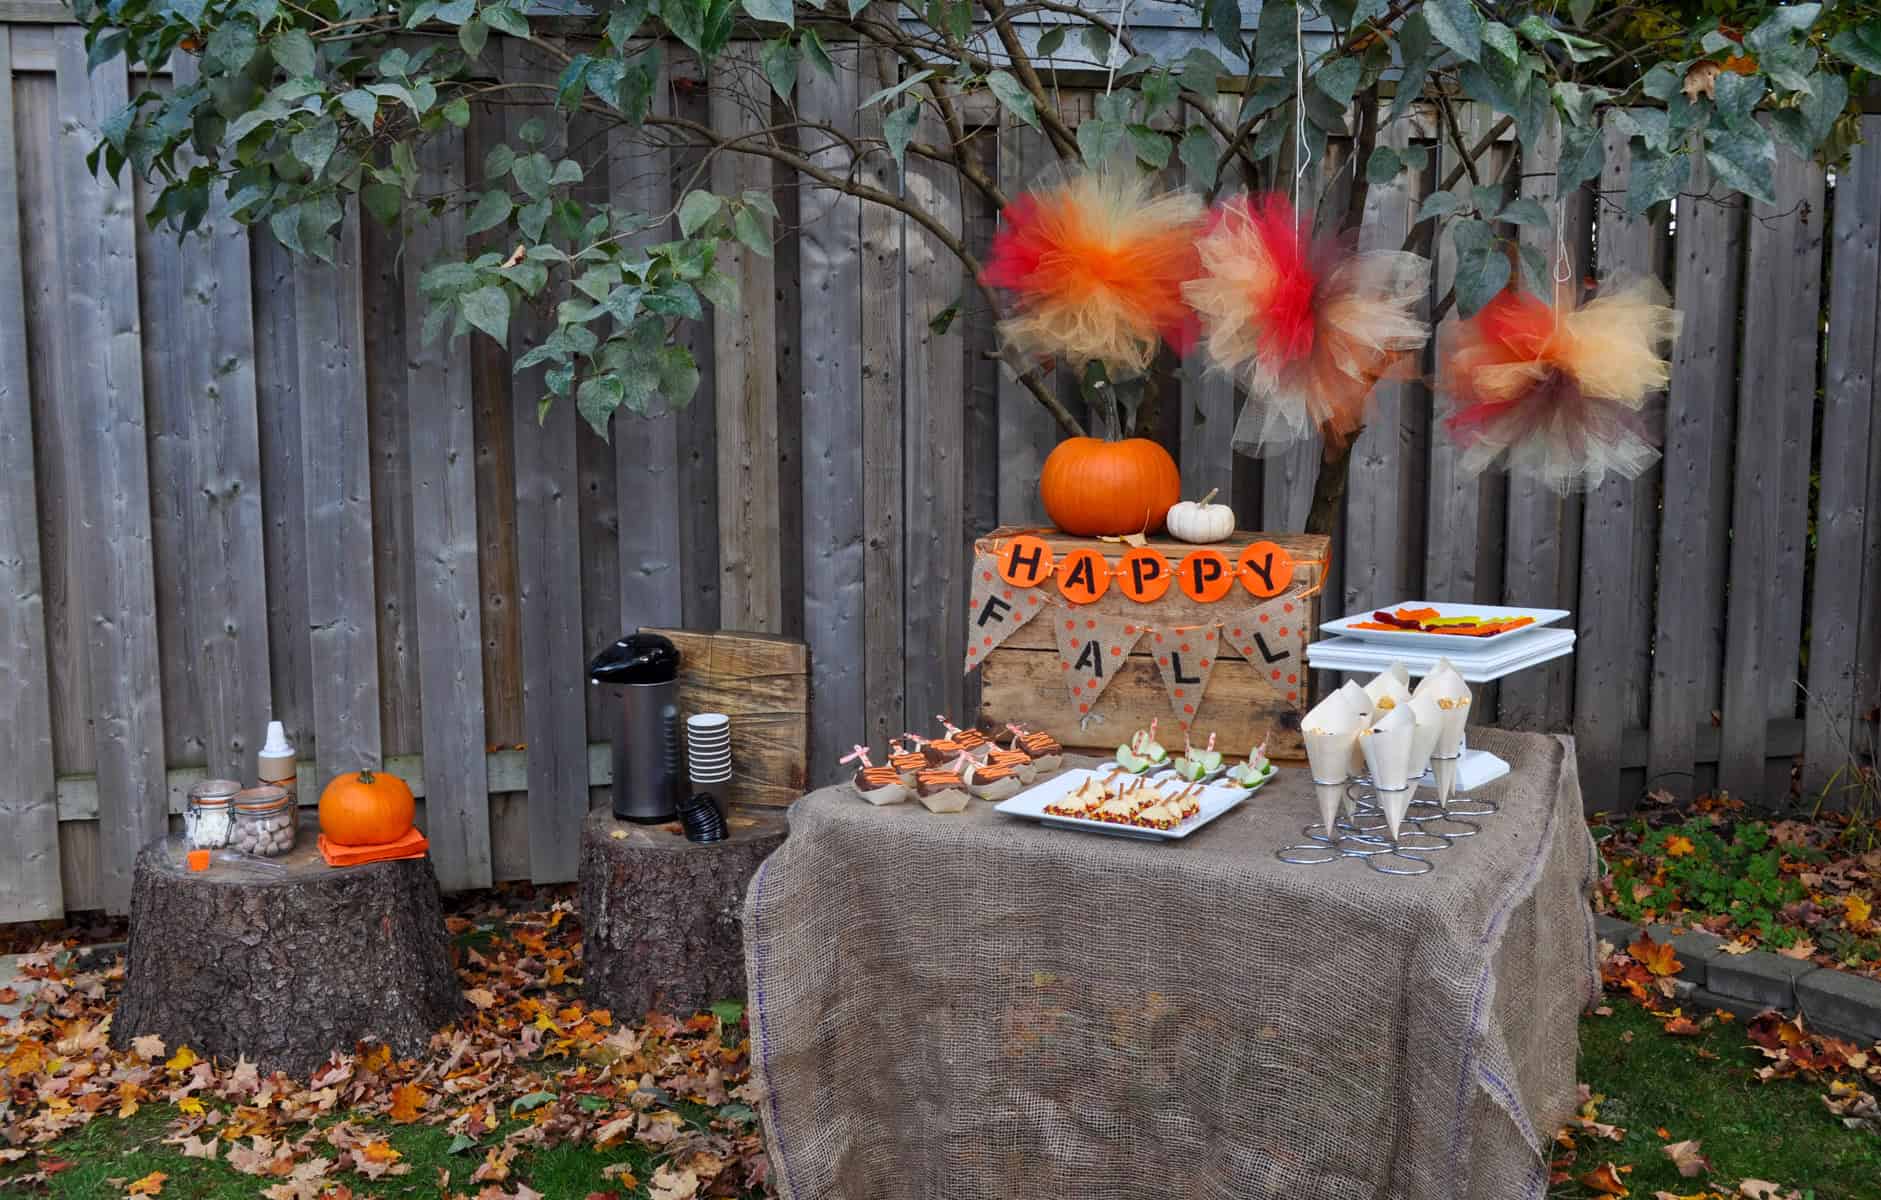
  • "Happy Fall" Banner: I also added a "Happy Fall" banner. I made it out of felt and burlap, and used acrylic paint to add the letters and polka dots.
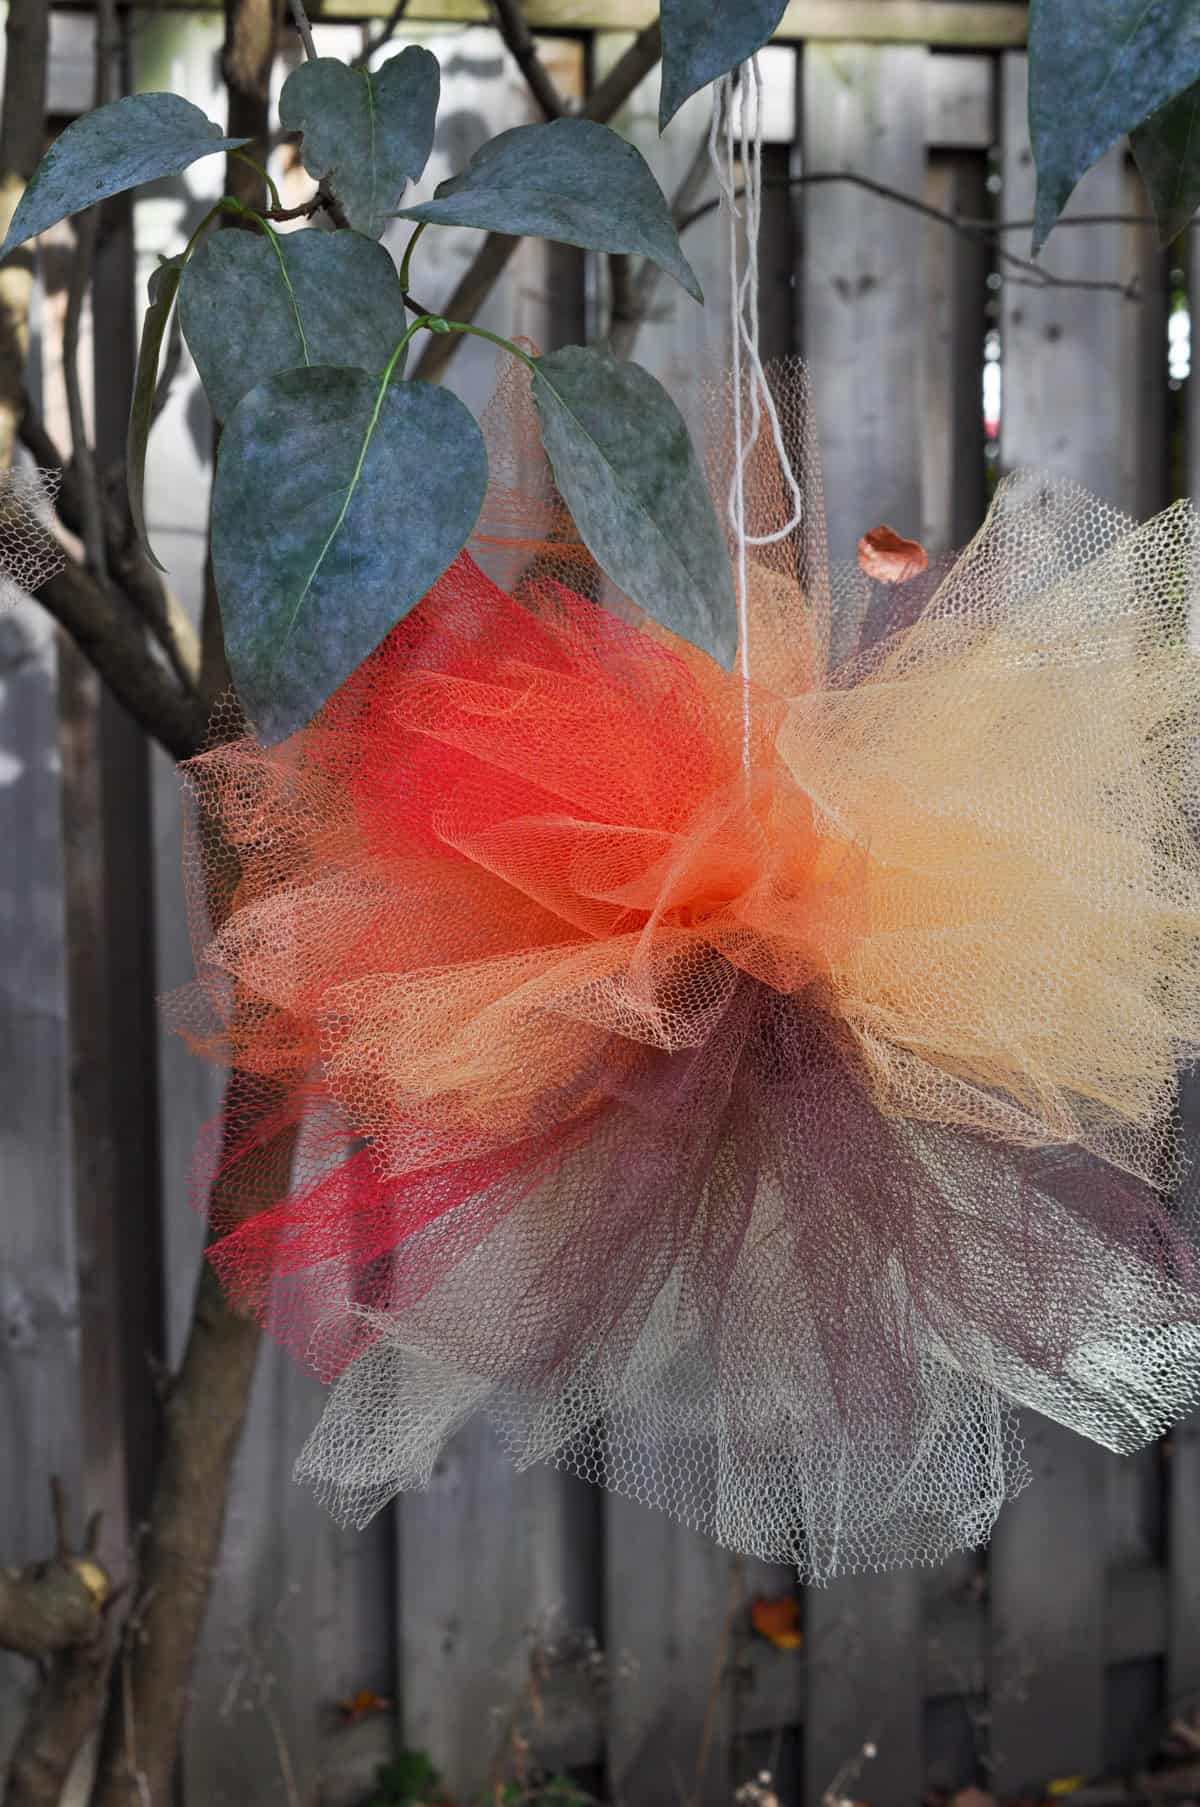
  • Pompoms: Above the snack table I hung these fun pompoms made of autumn coloured tulle. The fall pompoms were really easy to make.  I picked up some inexpensive tulle from the fabric store and tied them.  
  • Table Cloth: To keep things rustic, I covered the table in simple burlap fabric I found at the hardware store. It's very inexpensive and worked perfectly.

Fall and Leaf Themed Party Foods

The table was filled with lots of fall and leaf themed treats that were easy to make and oh so yummy.

For this little party, I used mixes for the baking to give me time to focus on the little details instead of taking the time to make everything from scratch. It worked out great, and I really recommend it as an easier way to do a dessert table for friends and family.

Rake Cookies

I made these amazing rake cookies. They fit our theme perfectly. I found the cute leaf sprinkles at HomeSense. I used a simple sugar cookie mix from the grocery store -told you these treats were easy. Form the cookie into a triangle-type-rake shape -yes that's the technical term. Stick a pretzel in for the rake handle, and use a fork to make look rake-ish on the bottom.

After they're baked, just dip the end in melted chocolate as glue, and then into the sprinkles.

So cute right? Loved them.

Brownie Pops

I also made some chocolate brownie pops.

I used a mix, again really easy treats for a party. Then, I stamped a popsicle stick with an eraser end of a pencil to make the polka dots. Insert the stick in one end, and dip in melted chocolate.  

I decorated with a little orange chocolate swirl. Everyone LOVED these. If I was making them again though, I might make the brownie a little smaller, just to make it easier to dip without it getting too heavy and wanting to fall of the stick.

Fall Leaf Jello Gigglers

I thought it would be fun to make some jello giggler leaves.

We whipped up some jello in red, yellow, and orange, using the giggler recipe, and let them set over night in big, flat trays so they were fairly thin. Then, I used cookie cutters to cut out the leaf shapes.

Pretty simple, and so cute. They fit the leaf theme so well.

Caramel Corn Cones

I also did some simple cones of caramel corn. To up the fall factor, I added some brown, orange, red, and yellow M & M's. They were like little hidden treasures to the kids.

Apples and Dip

I also made some yummy fruit dip. My sister-in-law Heather hooked me up with her easy and oh so yummy recipe.

It's a container of light cream cheese, with a few tablespoons of brown sugar stirred in, I also added a little vanilla. Then just top with caramel sauce, and chopped bits of Skor bar. Serve with granny smith apple slices, the tart apples are so perfect with the sweet dip. And nothing says fall like apples!

Another great addition would be our Pumpkin Spice Rice Krispie Treats.

Hot Chocolate Buffet

I also set up a little hot chocolate bar with whip cream, regular and chocolate marshmallows and some orange sprinkles -which the kids loved!

Fall Party Activites

Jumping In The Leaves

We had so much fun raking leaves and jumping in them, over and over and over again. Including variations of this like going down the side into the leaf pile and having leaf fights. 

Don't forget to have some rakes for making those piles, and some leaf bags for bagging up the leaves at the end of the day. A leaf blower would be a good addition too.

Fall Treasure Hunt

Prep some fall themed treasure ahead of time, by putting some little treasures in a some plastic fall colored plastic Easter eggs. Depending on the age of the kids, look for small toys like boncy balls, yo-yos, stickers, or jewelry. Hide the Easter eggs in the leaves, and let the kids have fun finding them.

Pumpkin Carving and Painting

Another great activity for a fall party is carving and/or painting pumpkins. For pumpkin painting, set up a table lined with brown paper, and arcylic paints, with paper plates as paint pallets, and paint brushes. Glitter is a fun addition too.

Painting pumpkins with paint and glitter at a fall party.

Pumpkin carving is a great activity too. Set up a station with carving tools, including carving knives and scoops. We love making pumpkin fairy houses. For this be sure to also include some dried flowers, leaves, and twigs. And don't forget some glue to apply them with.

DIY pumpkin fairy houses decorated with dried flowers and leaves, in the garden.

Staying On Budget

This party is quite inexpensive to put together. Leaves are the star of the show here and free. We made our own decor, and all of the food which was also very budget friendly. Serving just dessert and drinks helps keep the costs down too.

You could also ask friends to bring food. If you do decide to do pumpkin carving or painting, you can also ask friends to bring their own pumpkins to decorate.

We had a great time raking, jumping, playing and snacking!

With a leaf raking get together like this for a family fall party, life really is a party!

Expert Tips

  • You need a lot of leaves for the leaf raking and jumping in the leaves. Be sure to pick a spot that has lots. We had our party at a friends house who had big trees in the backyard. A park is a great option too.

Frequently Asked Questions

What do we do if our fall party gets rained out?

This party is best outside, and you definatly don't want to jump in wet leaves. So if it rains, it's best to move your party to another day. Watch the weather leading up to the party and you can always reschedule to a rain date.

What could be a food savory food to serve at a fall party?

Want to add a savory option for food, a hotdog roast would be great. If you can build a campfire in your backyard have guests roast their own Winnies, and don't forget to have some marshamallows and smore fixings too. Another great option would be a soup party buffet, or chill.

Any ideas for a more fun outdoor activities to do at a fall party?

Leaf raking and pumpkin carving or painting are great outdoor fall activities. You could also add in pumpkin bowling, bobbing for apples, and large outdoor games like corn-hole, or jenga.

More Fall Party Inspiration

  • Fall dessert table.
    Easy Fall Thanksgiving Dessert Table
  • Fall tea party in a garden with tea and treats set up in front of an outdoor couch.
    Fall Tea Party
  • Fall fondue party ideas and recipes.
    Fall Fondue Party
  • Halloween movie night free printables
    Halloween Movie Night Ideas and Free Printables

If you try any our Fun Fall Party Ideas ideas, or any other ideas on my blog please let me know how it went in the comments below. Thanks for visiting today!

Halloween Paper Bag Lanterns

Oct 31, 2012 · Leave a Comment

Halloween Paper Bag Lanterns: these Halloween luminaries are simple to make and inexpensive. Perfect as Halloween decor or to welcome trick or treaters.

Halloween Paper Bag Lanterns: these Halloween luminaries are simple to make and inexpensive. Perfect as Halloween decor or to welcome trick or treaters.

Happy Halloween! I wanted to share these Halloween paper bag lanterns as a  quick and easy, last min Halloween decoration today.

Materials:

  • orange paper bags
  • marker
  • cutting board
  • exacto knife

Buy yourself a pack of orange paper bags from the party store.

orange paper bags

How To Make Halloween Paper Bag Lanterns

1. First sketch a masterpiece of a pumpkin face, or "BOO", or anything else Halloween-y that you like, onto the paper bag.

halloween paper bag luminaries

2. Then, get your handy, dandy exacto knife out, and find something to put on the inside of the bag so you don't cut through it. I had a small cutting board, a piece of wood or even cardboard would work too.

how to make Halloween paper bag lanterns

And then just cut out your design.

3. When it's done, add a battery powered candle. Simple right? And really cute. And inexpensive, just the bags for a couple bucks, and the candles that I had already.

Halloween paper bag lanterns

If your using them outside, like say lining the path to your door tonight for the trick or treaters, put some sand or small rocks in the bottom of the bag to keep them from blowing away. 

Halloween paper bag luminaries

Happy Trick or Treating, I wish for your children to come home with all your favourite candies and be willing to share with you!

You might also like Cricut Halloween Trick or Treat Bag.

Cricut Halloween DIY Trick or Treat Bag: Less Tricks More Treats free Cricut pattern to create the cutest bag for trick or treating and all fall long.

Also check out Pumpkin Fairy House Jack-o-lanterns here.

Pumpkin Fairy House Jack-O-Lanterns: this Halloween carve your pumpkins into fairy houses, and see the warm glowing light through the windows at night.

You might also enjoy Fall Fairy Garden here.

Fall Fairy Garden: How to make a sweet little Fall themed Fairy Garden with an easy to make fairy house, mushrooms, pumpkins, and miniature fall leaves tutorial.

Pumpkin Hair Clips

Oct 26, 2012 · 2 Comments

Easy DIY kid's pumpkin hair clip.

Pumpkin Hair Clip: DIY Halloween hair clip tutorial, including how to make curled ribbon. Perfect for the little girl in your life.

Easy DIY pumpkin hair clip craft.
[feast_advanced_jump_to]

Today I want to share this DIY pumpkin hair clip that should delight the little girls in your life. This is the kind of project you can do in front of the TV one night.

Materials:

  • orange felt
  • brown felt
  • black embroidery cotton
  • needle
  • hair clip
  • green ribbon
  • dowel
  • hot glue gun and hot glue

How To Make A Pumpkin Hair Clip

I started out by cutting a pumpkin shape out of orange felt. For the stem I used a little brown piece of felt.

I then embroidered on some little details, but if you're not into sewing you could just use little pieces of black felt to create a jack-o-lantern face and glue it on with fabric glue.

how to make a Halloween hair clip

I did a little running stitch around the outside. Then I tied French knots for the eyes, and did a little embroidered mouth. Simple, and so cute.

how to curl satin ribbon

For the pumpkin vine I used a little curled green ribbon.

To make the curls, wrap the ribbon around a dowel -I used a wooden spoon since that's what I had on hand. Secure with cloths pins or anything oven safe, and bake in your oven at 250 degrees for 25 min. Let cool then unravel.

I used a little hot glue to attach the ribbon and the pumpkin to the hair clip.

DIY pumpkin hair clip

All set for a little fall frolicking on a warm day. And, perfect for keeping your hair out of your face while you do important kid stuff, like playing on the monkey bars. 😉

how to make a pumpkin hair clip

Life is a party, and you'll be the best dressed one there with pretty accessories like a pumpkin hair clip. 😉 Happy Fall.

More Fall Craft Ideas

You might also like Fairy House Pumpkin Jack-o-lanterns here.

Pumpkin Fairy House Jack-O-Lanterns: this Halloween carve your pumpkins into fairy houses, and see the warm glowing light through the windows at night.

Also check out our Cricut Halloween Trick or Treat Bag here.

Cricut Halloween DIY Trick or Treat Bag: Less Tricks More Treats free Cricut pattern to create the cutest bag for trick or treating and all fall long.

Mini Pumpkin Donuts with Cinnamon Maple Glaze

Oct 19, 2012 · 7 Comments

Mini baked pumpkin donuts and glaze recipe.

Baked Pumpkin Donuts: these mini donuts are sweet and little and delicious and the cinnamon maple glaze takes them to the next level.

Mini baked pumpkin donuts and glaze recipe.
[feast_advanced_jump_to]

Baked pumpkin donuts in mini size and with the most delicious glaze are the perfect fall treat for pumpkin lovers.

I recently had the good fortune of finding a mini donut pan, and since mini donuts are a family fav -like first stop at any fair or carnival, I knew having our very own pan would be a good thing. 😉 Since it's fall and we can't seem to get enough pumpkin

mini pumpkin donuts
mini pumpkin donuts with maple icing

how to make baked pumpkin mini donuts

See those little flecks of cinnamon in the glaze? These are really, really yummy.

They didn't keep too well over night, the glaze kind of seeped all into the donuts and didn't look nearly as pretty, so you should probably eat them all in one day. Officially #8 of the instructions...

8. Eat them all in one day. 😉

baked pumpkin donut recipe

Such a great fall treat.

Recipe

Mini baked pumpkin donuts and glaze recipe.

Baked Pumpkin Donuts

Baked mini pumpkin donuts with a sweet pumpkin glaze.
No ratings yet
Print Pin Rate
Course: Desserts
Cuisine: American
Prep Time: 20 minutes minutes
Cook Time: 20 minutes minutes
Total Time: 40 minutes minutes
Author: Dannyelle Nicolle-Ramjist

Ingredients

Donuts

  • 2 cups all-purpose flour
  • 1 ½ teaspoons baking powder
  • ½ teaspoon salt
  • ¼ teaspoon baking soda
  • ½ teaspoon nutmeg
  • 1 ½ teaspoons cinnamon
  • ¼ teaspoon ginger
  • ¼ cup softened butter
  • ½ cup brown sugar
  • 1 cup pumpkin puree
  • 2 eggs
  • 2 tablespoons milk
  • 1 teaspoon vanilla extract

Maple-Cinnamon Glaze

  • 1 ½ cups powdered sugar
  • ½ teaspoon maple syrup
  • ½ teaspoon cinnamon
  • 3 tablespoons milk

Instructions

  • Preheat the oven to 350F. Spray mini donut with non-stick cooking spray.
  • In a large bowl, sift together dry ingredients; flour, baking powder, salt, baking soda, nutmeg, cinnamon and ginger. Set aside.
  • In a stand mixer, cream together the butter and brown sugar. Add the pumpkin, eggs, milk and vanilla, and mix well.
  • Add the dry ingredients to the wet ingredients and mix until the batter comes together.
  • Spoon the batter into a large ziplock bag and cut off the corner to pipe the batter into the donut pan. Tip: wet your finger in a little water and use it to pat down the little tip that sticks up where you finish piping the circle.
  • Bake in a preheated 350F oven until a toothpick inserted in the centre comes out clean, about 5-6 minutes for the mini donuts. Allow donuts to cool before dipping in the glaze.
  • To prepare the glaze, stir all the ingredients together in a small bowl. When the donuts are cool, dip them in the glaze.
Tried this Recipe? Tag me Today!Mention @LifeisaParty or tag #lifeisaparty!
Mini baked Pumpkin Donuts with Cinnamon Maple Glaze

With mini pumpkin donuts with cinnamon maple glaze, life really is a party!

You might also like our Pumpkin Bread Pudding recipe here.

Pumpkin Bread Pudding: this recipe is easy and delicious, perfect for Thanksgiving and the holidays.

Also check out our Pumpkin Spice Rice Krispie Treats recipe here. 

You might also enjoy our Pumpkin Blondies recipe here.

Hammered Leaf Print

Oct 17, 2012 · 1 Comment

Hammered leaf print.

Hammered Leaf Print: use real flowers and leaves to create art and cards by hammering them to transfer the colour and pattern to watercolour paper.

Hammered leaf print.
[feast_advanced_jump_to]

To make this hammered leaf print we used real leaves and flowers from our garden and a simple hammer to transfer their image onto watercolour paper.  This easy craft is perfect for kids and adults.

Materials:

  • real leaves and flowers
  • watercolour paper
  • hammer
  • paper towel

How To Make A Hammered Leaf Print

Begin my collecting some leaves and flowers from your garden.  

To start lay the leaf onto the water colour paper, cover with a paper towel to absorb the extra juiciness, and carefully begin to hammer it.

hammered leaf and flower prints

On our first attempt you could really see the marks where the hammer struck the leaf. And, the leaf slid around a lot, not the best results on the first go. But, attempt number two got a little better. We held the leaf more carefully, and tried to hammer more gently. It turned out pretty well.

hammered leaf print

By attempt number three or four we got the results we were looking for, a very pretty little leaf print if I do say so myself.

We did learn to try and choose the "juiciest" leaf we could find. This project is best done in the summer when leaves haven't begun to dry out at all.

kids summer craft idea

I love the final results, and I found the perfect frame. I think it looks really sweet in its little frame, and certainly very fall-ish. It would also make a very pretty card.

how to make a hammered leaf print

With a hammered leaf print, life really is a party!

More Fall Inspiration

You might also like Fall Leaf Backdrop here.

Also check out Fall Leaf Thanksgiving Table here.

Fall Leaf Thanksgiving Table: Hanging pressed fall leaves, and pink heirloom pumpkins, ombre leaf cookies, and cloths pin place cards make a beautiful table.

You might also enjoy Book Page Paper Leaf Garland here.

Book Page Leaf Garland

"Give Thanks" DIY Plates

Oct 10, 2012 · 21 Comments

Give Thanks DIY Plates: These DIY plates are easy and inexpensive to make, use a special pen to add permeant writing to any ceramic piece.

Give Thanks DIY Plates: These DIY plates are easy and inexpensive to make for Thanksgiving or any other holiday. Use a special pen to add permeant writing to any ceramic piece.
Give Thanks DIY Plates: These DIY plates are easy and inexpensive to make, use a special pen to add permeant writing to any ceramic piece.

These DIY plates were inspired by a shopping trip.  A while ago I was walking around Crate and Barrel, drooling over all the pretty things, like you do, when I noticed their cute "give thanks" side plates.  I really liked them and thought they'd be really nice for Thanksgiving, but they were too expensive for me. 

give thanks plates

I had seen on pinerest a few times, how people were using permanent Sharpie markers to write on china, and thought this might work to make my own. After a little more research, it looked to me that this method was hit and miss at best. I decided to use a ceramic marker for a more permanent effect.

Materials:

  • inexpensive white side plates
  • decor art glass paint marker in black
  • oven

how to permanently decorate a ceramic plate


decor art marker for ceramic

How To Make Your Own DIY Plates:

This project is really easy.  Basically you use the marker to write around the edge of the plate.

The hardest part of the project was figuring out the spacing of the words around the plate.  With a little practise and a template to line up the dots between the words, it came together.

You can remove the design if you're not happy with it before it's baked.   You can try the writing and if you're not happy with it just wash it off and begin again.

DIY plates

After the design is finished the plates need to sit 4 hours.  Then the plates get baked for 40 mins -according to the manufacturers instructions.

They need to start out in a cold oven and be left to cool completely in the oven afterward.  All the instructions are on the glass paint marker.

One word of caution: the marker also says that it isn't food safe. All the pictures of it being used show it on plates, glasses and cups.  So, I guess the key is to only place the design on places where food will not come in direct contact. I thought these were fine, because the writing was just on the rim of the plate.

how to make give thanks plates

After the plates have been baked and cooled the writing should be permanent. They recommend hand-washing, so that's what I did.  

UPDATE:  I've had these plates for years and use them for every Thanksgiving.  I always hand wash and never put them in the dishwasher.  The writing still looks perfect.

The Finished Plates

I used the plates for my Silver Thanksgiving table. I love how they turned out.

DIY give thanks plates

At first, I did consider using a silver pen.  In fact the pens come in a whole range of colours, including gold just like the inspiration plates. In the end, I decided that even though silver would have looked great this year, next year if I use oranges and browns for my thanksgiving table, the black writing would make the plates more re-usable.

give thanks DIY plates

I have lots more ideas for Christmas and other holidays.  This idea is great since it's so versatile, turned out great, and was really inexpensive.  The whole project was under 20 bucks.  You can't go wrong for that, even if you only use them once a year!

DIY plates

With Give Thanks DIY Plates, life really is a party!

You might also like our Black and White Modern Farmhouse Thanksgiving Table here.

Black and White Modern Farmhouse Thanksgiving Table: White pumpkins, black cutlery, and DIY macrame napkins rings make the perfect Thanksgiving table.

Also check out our Dark and Moody Thanksgiving Table here.

Dark and Moody Thanksgiving Table: purple leaves, dark dahlias, and plums, red pears, apples, pomegranates, and blackberries create the perfect centrepiece.

You might also enjoy our Vintage Botanical Scientific Thanksgiving Table here.Vintage Botanical Scientific Thanksgiving Table: scientific glass, old books, a microscope, and lots of botanical specimens create a beautiful table.

Silver Thanksgiving Table Decor

Oct 9, 2012 · 19 Comments

Silver Thanksgiving table inspiration.

Silver Thanksgiving Table Decor: silver mercery glass and candle holders, DIY silver pumpkins, and white pumpkins create a beautiful table.

Silver Thanksgiving table inspiration.
[feast_advanced_jump_to]
Silver Thanksgiving Table Setting

This year I decided to do some silver Thanksgiving table  decor -something a little different.  And I just love how it turned out.  It's sophisticated and sparkly and festive.

The Centrepiece

I was inspired first by these cute little silver turkey candle holders. These were bought several years ago on sale after Thanksgiving at HomeSense -gotta love a clearance sale. 😉  A great alternative would be to find any cute turkey decor for Thanksgiving and give it a makeover with some silver spray paint.

silver turkey candle holders

Next I used some beautiful white pumpkins on the table and I thought some silver pumpkins would be a fun addition too.

DIY mercury glass pumpkins

These pretty mercury glass inspired pumpkins are a DIY. They were the perfect addition to our silver Thanksgiving table decor.

silver Thanksgiving table decor

I used lots of silver and mercury glass candle holders and white candles. I also used this pretty silver cake stand at one end, and a white glass pedestal for one little pumpkin at the other end.

Silver Thanksgiving Tablescape

The Place Settings

Next I got out my "good dishes", which I so rarely use for big family dinners since they can't go in the dishwasher. They were layered on a simple silver charger.

how to set a silver Thanksgiving table

I made these sweet "give thanks" plates to layer on top -see the tutorial on how to make DIY give thanks plates here.

DIY Thanksgiving plates

Each place had a special treat, a homemade pumpkin chocolate truffle, see how I made them and get the recipe here. I put them in my favourite little individual domed holders.

homemade pumpkin chocolate truffles

Finally I found these pretty free Thanksgiving printables at Catch My Party and printed and cut them out. Each domed holder got a little ribbon tied around it and the Thanksgiving printable with double sided tape.

Thanksgiving table ideas

The table was really quite simple, and easy to do ahead, since there were no fresh flowers on the table. I often use the silver glasses, chargers and candle holders at Christmas.  It was fun to try something new with a silver theme for Thanksgiving.

Silver Thanksgiving Table

I really liked all the sparkle, balanced with the simplicity of all the white and rustic presence of the pumpkins. 

With silver Thanksgiving table decor, life really is a party!

More Thanksgiving Table Inspiration

You might also like our Black and White Modern Farmhouse Thanksgiving Table here.

Black and White Modern Farmhouse Thanksgiving Table: White pumpkins, black cutlery, and DIY macrame napkins rings make the perfect Thanksgiving table.

Also check out our Fall Leaves Thanksgiving Table here.

Fall Leaf Thanksgiving Table: Hanging pressed fall leaves, and pink heirloom pumpkins, ombre leaf cookies, and cloths pin place cards make a beautiful table.

You might also enjoy Dark and Moody Thanksgiving Table here.

Dark and Moody Thanksgiving Table: purple leaves, dark dahlias, and plums, red pears, apples, pomegranates, and blackberries create the perfect centrepiece.

Paper Leaf Garland

Oct 5, 2012 · 7 Comments

Book page paper leaf garland.

Book Page Paper Leaf Garland -DIY paper leaf garland stitched together on your sewing machine and made from old book pages.

Book page paper leaf garland.
[feast_advanced_jump_to]
Book Page Paper Leaf Garland -DIY paper leaf garland stitched together on your sewing machine and made from old book pages.

I had this idea last year to make a paper leaf garland using an old book to make the paper leaves from.  I finally got around to breaking out the sewing machine today.

Materials:

  • an old book
  • scissors
  • sewing machine 
  • black thread

How To Make A Paper Leaf Garland

To start with, cut out different leaf shapes from an old book.

Then, feed them, one by one, through your sewing machine to create a garland.

how to make a paper garland with your sewing machine

I like a random look, so I didn't use a pattern, and I left random spaces in between, by stitching varying lengths of just thread between feeding the leaves through.

DIY paper leaf garland

The stitch line looks a little like the vein of a real leaf, which I love.

I used black thread so it would really show up.

book page paper leaf garland

The garland is part of my living room mantel this fall (see what I did on the mantel in the basement here).

paper leaf garland

I used mostly white, and mixed in some seeds, keys, wheat and enamelware. The black and white book pages fit in perfectly.

DIY leaf garland

We're gearing up for thanksgiving this weekend here and Canada, and I can't wait. Mr. Turkey is thawing in the fridge, and I'm already dreaming of my mom's amazing pumpkin pie. Wishing you and yours every blessing as you give thanks together this weekend. Happy Thanksgiving.

You might also like DIY Faux Concrete Pumpkins here.

DIY Faux Concrete Pumpkins: easy DIY to transform inexpensive dollar store pumpkins with a concrete faux paint finish.

Also check out Acorn Craft here.

You might also enjoy Book Page Paper Feathers here.

How To Make Book Page Paper Feathers: using old book pages, a glue stick and a wire for a center make beautiful paper feathers.

Pumpkin Chocolate Truffles

Oct 4, 2012 · 6 Comments

Easy homemade pumpkin chocolate truffles.

Pumpkin Chocolate Truffles: easy to make and perfect for a fall dessert or for gift giving. Made with real pumpkin.

Easy homemade pumpkin chocolate truffles.
[feast_advanced_jump_to]

I wanted to make a little sweet for Thanksgiving this weekend, nothing too big, since we all really want to save room for pumpkin pie, but just a little special something. I decided on Pumpkin Chocolate Truffles.

These are really yummy, and the perfect treat for the chocolate lover.  The pumpkin taste is subtle, but lovely.

chopped chocolate
how to make pumpkin truffles
pumpkin flavoured truffles
pumpkin chocolate truffles
easy to make truffles

The final drizzle of orange chocolate is there perfect finishing touch for pumpkin chocolate truffles.

pumpkin truffles recipe

These would be a great addition to any fall celebration.  They'd also be a lovely gift.

Recipe

Easy homemade pumpkin chocolate truffles.

Pumpkin Chocolate Truffles

Chocolate truffles made with pumpkin.
No ratings yet
Print Pin Rate
Course: Desserts
Cuisine: American
Prep Time: 15 minutes minutes
Additional Time: 1 hour hour
Total Time: 1 hour hour 15 minutes minutes
Servings: 15 Truffles
Calories: 147kcal
Author: Dannyelle Nicolle-Ramjist

Ingredients

  • 4 oz. chopped semi-sweet chocolate
  • ¼ cup whipping cream
  • 2 tablespoon pumpkin puree
  • good pinch of salt
  • ⅛ teaspoon cinnamon
  • pinch of nutmeg
  • 1 tablespoon soft butter
  • ½ lb. chocolate candy coating
  • 2 oz. orange chocolate candy coating

Instructions

  • Chop semi-sweet chocolate and set aside in a bowl.
  • Combine cream, pumpkin, salt, cinnamon, and nutmeg in a small pan, and heat over medium-high heat, stirring until smooth. Heat until mixture just starts to boil.
  • Pour the hot cream mixture through a wire strainer, to remove and lumps, and into the chopped chocolate. Stir until chocolate is melted and mixture is smooth.
  • Stir in butter.
  • Put plastic wrap on the surface of the chocolate and refrigerate for a couple hours. When it is firm, but not too hard, scoop and roll into balls. You can dust your hands with coco powder. I used a melon baler as the scoop.
  • Chill again.
  • Melt your chocolate candy coating, and dip the chilled centres.
  • Melt the orange chocolate candy coating and use a ziplock bag with a tiny hole in the corner to add a drizzle to the truffles.

Nutrition

Serving: 1g | Calories: 147kcal | Carbohydrates: 16g | Protein: 2g | Fat: 9g | Saturated Fat: 6g | Polyunsaturated Fat: 3g | Cholesterol: 10mg | Sodium: 29mg | Fiber: 1g | Sugar: 14g
Tried this Recipe? Tag me Today!Mention @LifeisaParty or tag #lifeisaparty!
homemade pumpkin chocolate truffles

With home made Pumpkin Chocolate Truffles, life really is a party!

More Pumpkin Recipe Inspiration

You might also like our Pumpkin Bread Pudding here.

Pumpkin Bread Pudding: this recipe is easy and delicious, perfect for Thanksgiving and the holidays.

Also check out our Pumpkin Spice Rice Krispies here.

Pumpkin Spice Rice Krispie Treats: If you're a fan of all things pumpkin spice then you're sure to love this fall spin on classic rice krispie treats.

You might also enjoy our Pumpkin Blondies here.

DIY Acorn Craft

Sep 28, 2012 · 90 Comments

How to make an acorn out of an Easter egg fall craft.

This DIY Acorn Craft is made from an Easter Egg and perfect for fall decorating. See how we used burlap and pinecones to create this beautiful and inexpensive fall decor piece.

How to make an acorn out of an Easter egg fall craft.
[feast_advanced_jump_to]

Why We Love This Craft

  • It uses simple supplies from around the house.
  • It's inexpensive to make
  • It looks beautiful and adds some charm to your fall decor.

These DIY acorns are so cute and easy to make.  They're an adorable acorn craft that you can use every fall in your decor.  

They're made from inexpensive supplies, and the perfect way to create your own fall decoration when cooler weather arrives.  I used mainly natural materials to create them.  There is one supply though, that you might not have guessed.  

The secret to making the acorn shape is that underneath we used an old plastic Easter egg.  

They turned out so cute, and would be the perfect beautiful things to add to your fall season decor.

You might also like our DIY Crescent Moon Wreath, Fairy Pumpkin House Village, or our Pinecone Wreath.

Inspiration

I saw these cute acorn crafts at one of my favourite gift shops a few weeks ago, and they inspired me to make my own.

You know that moment when you pick them up in the store and really look at them and think, with a twinkle in your eye, I could make these. ;).

I looked at the shape, and realized that I could use an Easter egg to create something similar.  Then I couldn't wait to go home and spend a crafty morning experimenting.  

The best part of this simple fall craft, is that you probably have some Easter eggs somewhere in your house already, that you can use.

Acorn craft inspiration shot of acorn ornaments.

Materials:

  • Plastic Easter Eggs -The regular size ones work great, but smaller ones good too.
  • Brown Acrylic Paint
  • Burlap -Choose one with a closed weave so that it covers well and doesn't fray too much as you work with it.
  • Pine Cones -Larger ones work best for this craft.
  • Hot Glue Gun and Glue
  • Twigs -Use these for the top pieces, so not too big works best.
  • Garden Clippers or Heavy Duty Scissors

Varations

You can experiment with different kinds of fabric on the bottom, like a plaid fabric or cordory in fall colors. I love the tops made from pine cone pieces, but another option is to use a piece of yarn, twine, or rope for the top portion.  Use glue to secure it, and spiral it up to the top of the acorn for a fun look, that's a little easier than the pine cone pieces. You can also us experiment with other items to cover the top of the acorn like birch bark pieces, or moss.

How To Make The Acorns:

1. Paint The Eggs

To create the shape of the acorn, I decided to use Easter eggs. My kids thought it was pretty funny that I was yanking out the Easter egg box in the middle of fall decorating.  Easter eggs are the fun secret to making these acorns.

how to make an acorn from an Easter egg

Since some of them were bright colours for my first step I used a little sandpaper to rough up their smooth surface, and painted with two coats of brown craft paint.  You could also spray paint them if you wanted.  Stay away from white paints, or anything that will show through the burlap.  Or simply use Easter eggs that are already in fall colors that won't show through too badly, like orange, green, or yellow.

how to make an acorn from an Easter egg

2. Add The Fabric

After the paint dried, I added a layer of fabric to create the bottom section of the acorn.  

You want to cover just about ⅔ of the egg with the fabric.  We don't need to cover the whole thing and make fabric acorns, just the bottom ⅔, which makes it a bit easier.

I started out with a very open weave burlap, but it didn't work well for this craft. It was fraying, hard to work with, and showed to much of the base underneath.  So then I picked up some craft burlap at the craft store which is a tighter weave and tried again. 

At the beginning, I started out trying to glue two panels of fabric to the base, like the inspiration acorn, with white craft glue. I found it dried really hard, and the frayed ends stuck up. I ended up hot gluing a circle of burlap around the egg. This worked the best for me.

cutting off pieces of a pinecone

3. Adding The Pine Cone Pieces

Next was gluing on the pine cone pieces to create the top ⅓ of the acorn. I snipped them off with of the pine cones using some heavy scissors. Then, I hot glued them around the top.

Acorn Craft DIY

I did about three layers.  You want to start your bottom layer overlapping the burlap, to create a nice neat edge.  Then glue them on like shingles, overlapping the top of the previous row as you go.   I finished them off at the top with a little twig stem.

how to make a large acorn with pinecone pieces

They were a bit fiddly, and I may or may not have thought a couple times "why didn't I just buy these".  You need some good fine motor skills, because everything is quite small that you're working with.

diy acorns made from Easter eggs

I made five, and grouped mine in a little bowl, but you could probably never have enough acorns when they're this cute.  You could even use on an acorn wreath or hanging as a fall garland.  

They're a fun easy craft to create this fall and use in your fall and Thanksgiving decor.  

Acorn Craft DIY -How to make an acorn out of a plastic Easter Egg, perfect for all your Fall decorating.

Christmas Decorations

These are great as fall crafts, but also a great addition to your Christmas decor our favorite season.  Last year I tied some fishing line to the finished product and hung them on our Christmas tree.  

Make them even more Christmas-y by adding some faux snow or glitter to your faux acorns for the holiday season.  Just add some white glue to the acorn tops, and sprinkle some glitter or faux snow on top, to make these beautiful acorn crafts look a little snowy.  These add a great woodland fairy folk vibe to your Christmas decor.

make a large acorn from an Easter egg

With an Acorn Craft Made From An Easter Eggs, life really is a party!

Frequently Asked Questions

Where can I find an Easter egg in the fall?

If you don't have any in your stash, look for them on-line out of season.

Do you have to paint the eggs first?

If you're using burlap and it will show through then yes, unless your eggs are a suitable color, that you don't mind showing through. You can also use a plastic-friendly spray paint for this step, which is a bit quicker.

Where did you get the pinecones?

I found some near by out on a walk one day. If you don't have access to pinecones look for them online.

More Fall Project Inspiration

  • DIY macrame garland
    Easy DIY Macrame Garland
  • Pampas grass wreath DIY
    Easy DIY Pampas Grass Wreath
  • DIY faux concrete pumpkin.
    DIY Faux Concrete Pumpkins
  • Two decorative driftwood pumpkins with a velvet pumpkin.
    DIY Wood Pumpkins

If you try this Acorn Craft or any other idea on my blog please leave a star rating and let me know how it went in the comments below. Thanks for visiting today!


Recipe

How to make an acorn out of an Easter egg fall craft.

Easter Egg Acorn Craft

Make an acorn from an Easter egg and some pine cones.
5 from 1 vote
Print Pin Rate
Course: General DIY & Crafts
Cook Time: 20 minutes minutes
Total Time: 20 minutes minutes
Author: Dannyelle Nicolle-Ramjist
Cost: $2

Equipment

  • hot glue gun
  • Hot Glue
  • Garden Clippers or Heavy Duty Scissors

Materials

  • Plastic Easter Eggs
  • Brown Acrylic Paint
  • Burlap
  • Pine Cones
  • Twig

Instructions

  • Since some of the Easter eggs were bright colours, paint with two coats of brown craft paint. Or start with colour like orange, or yellow.
  • Add a layer of fabric over the egg to create the bottom section of the acorn. Cover just about ⅔ of the egg with the fabric. Use hot glue to hold the burlap in place.
  • Next snip the tips of a pine cone off, using some heavy scissors. Then hot glue them around the top of the egg, taking care to overlap the fabric and create a neat edge. Layer the pine cone pieces like shingles. I did three layers.
  • Finish off the very top by hot glueing a twig in place.

Notes

Optional: Instead 0f painting your eggs with acrylic craft paint, you could spray paint, which would be faster.

Fall Subway Art

Sep 27, 2012 · 13 Comments

DIY Fall Subway Art -tutorial on how to make your own subway art, make it with custom words and phrases, any size, any colour.

DIY Fall Subway Art -tutorial on how to make your own subway art, make it with custom words and phrases, any size, any colour.


 I love the look of subway art, so today I'm sharing my DIY fall subway art with you.  I've seen them everywhere, and it was finally time to give it a try myself. I wanted a large orange piece of subway art for my family room, with fall words on it.

DIY Fall Subway Art

I researched the steps involved -there's lots of ways to make one of these babies, but I decided to use my Cricut to cut vinyl letters. I was inspired by Shelley's version at House of Smiths, see it here, and did something similar.

Materials:

  • plywood base
  • Cricut
  • Cricut vinyl
  • transfer tape
  • white paint 
  • orange paint

How To Make DIY Fall Subway Art

The Base

First things first. I thought about trying it with pallet wood, but thought the vinyl letters would stick way better to a good old piece of plywood. I went rummaging in my sister-in-law's basement and struck gold. I found a perfect piece, even the right dimensions, and free for the taking! I gave it a couple of coats of white paint, just some I found in the basement.

painting a plywood background

Prepping The Vinyl Words

The next step was the lettering. I used my Cricut machine, and used Design Space to design my words. Because this piece is so large I used my 12 x 24 mat, and did two, to create a 24 x 24 piece of art. 

cutting vinyl with a Cricut machine

I made sure to burnish it all really carefully with a credit card before cutting.  It didn't come out perfectly so I fixed up a few spots with an exacto knife.

cutting out vinyl with a Cricut machine

Next step was weeding the letters -a little time consuming with a piece this large, but pretty easy.

how to make your own subway art

The next step was applying the transfer tape. The purpose of the transfer tape is apply all the letters at once, instead of one by one.  It makes it easier to keep everything lined up and spaced evenly.  It's relatively easy, and I am glad I used it, it did mean all the words were perfectly lined up when I applied them to the plywood. I drew a few straight guidelines with pencil on the painted plywood, and used the transfer tape grid to line things up.

Next I was supposed to burnish the letters to the wood with a credit card, and then peel off the transfer tape. The tape came off with the letters. Fail. It was really fiddly getting them off of the tape and onto the plywood board.  Play around with the angle at which you peel it back.  

how to make fall subway art

Paint Over The Vinyl

Finally the letters were all lined up and on the plywood and it was time to paint! I found some miss-tinted paint in the clearance section at the hardware store for $1.50 -score! I tried to make sure the letters were down on the board really securely before painting over them in the orange. I did three coats of paint.

DIY Subway Art

When the paint was still tacky, and not quite dry I used a little tool to pull off the vinyl letters. 

how to make subway art

When the letters were all off, it was magic time!

It looked amazing, and was worth all the fiddly steps to get there. I heart it.

DIY Subway Art

I did get some seepage under some of the letters, but we'll call it rustic. You could touch these up with a little of the white paint.

DIY Subway Art tutorial

I thought about sanding it a little to make it more rustic, but then went with the old, less is more, leave well enough alone, and decided to leave it.

Fall Subway Art

I put it in my family room. I really love it, especially the personal touch of being able to use words that are special to our family, like the near-by fair I've been going to since I was a kid.

DIY Fall Subway Art

Would I do it again? Not anytime soon, but I have to say I do really like how it turned out, so give me time to forget how many steps were involved and I just might.

orange pumpkin

With personalized fall subway art, life is a party!

You might also like Pampas Grass Wreath here.

Also check out our DIY Copper Wreath here.

Copper Pot Scrubber Wreath: Simple DIY for a beautiful copper wreath made from dollar store pot scrubbers.

You might also enjoy DIY Faux Concrete Pumpkins here.

DIY Faux Concrete Pumpkins: easy DIY to transform inexpensive dollar store pumpkins with a concrete faux paint finish.

DIY Pillow Covers

Sep 26, 2012 · 2 Comments

Easy DIY pillow covers with no zipper.

DIY Pillow Covers: simple to make and store, no zipper, envelope style pillow cover made from inexpensive fabric remnants.

Easy DIY pillow covers with no zipper.
[feast_advanced_jump_to]

I am obsessed with enjoy a little seasonal decorating. But my husband may or may not have banned me from buying anymore decorative pillows. I wanted to add some fall colours to the basement this year, and decided to recover my existing pillows with some inexpensive and easy DIY pillow covers.

Our colour scheme in the basement is brown and turquoise, and I wanted to change it to orange for fall.

how to make over your throw pillows

When I was decorating the basement a few years ago, I made sure that all the biggies in the room were neutral. The only turquoise really were the throw pillows, some candles and other little accent pieces. I love the fact that it really doesn't take too much of an accent colour to really make an impact.

So...I decided to switch it all out for orange this fall. I planned on hitting the thrift stores and grabbing some old wool sweaters to felt and maybe some tweed and corduroy to piece together some cool pillows. At the thrift store though, one orange wool sweater was $10. Too much for me, since I needed several. I decided to check out the fabric store. There I found lots of great options that were really inexpensive.

sale fabric

I headed back to the clearance section, at the back of the store and lots of good options. I think maybe it was because oranges sometimes end up in clearance? There was lots to choose from.

how to find inexpensive fabric
where to find clearance fabric

It was easy too, because oranges and browns don't all have to match exactly, unlike say reds. So I mixed and matched my way to a combination that I liked. It doesn't take much fabric to sew a pillow cover so I bought pieces that were a ½ meter, which made the orange paisley that was regularly $14 a meter, on sale for $3 a meter, only $1.50 for a ½ meter. Perfect.

Materials:

  • remnant and clearance fabric pieces (about ½ meter per pillow)
  • sewing machine
  • thread
  • straight pins
  • existing pillows to recover
DIY pillow covers

How To Make Envelope Style DIY Pillow Covers

I used an envelope style to sew the cushion covers. I used the pillows I already owned and wrapped the fabric around them. It's really easy, just sewing straight lines and no need for zippers or even buttons. Here's how I did it.

1. Cut out a strip of fabric long enough to wrap around your pillow with some over lap.

how to make an envelope pillow case
how to make an envelope style cushion cover

2. Sew a hem on the one edge that will be exposed.

3. Then just lay it out inside out and sew up the two edges.  Just three straight lines to sew altogether.  Easy peasy.

4.  Now turn it outside right and put the pillow inside.  You're done.  No zipper neccesary.

how to make a no zipper cushion cover

This is the back of the finished pillow, with the turquoise pillow tucked inside.

no zipper style DIY pillow cover

Leaf Accent Pillow

I had one other little accent pillow, and decided I should do something a little special with it. Here it is before.

pillow makeover

And here it is after.

DIY fall pillow

I used the same method, but before I sewed up the edges to make the envelope of fabric, I appliqued on some simple leaves.

DIY fall cushion

The edges were left rough. I like the frayed look, and it made this really easy to do. The tread to sew the veining on the leaves was white for a little contrast.  And made sure to tie off the ends on the back of the fabric so they don't come off.

DIY fall pillow makeover

I really liked how it turned out, and it too was really simple.

DIY pillow covers

In the end I spent $10 -that's it, and covered 6 pillows. And, when fall is over, I can slip off the orange pillow covers and fold them up in a box until next year. I love the price of this project and how easy it is to store. Win, win.

It's starting to feel so cozy down stairs.  Check out my new fall subway art here -which is one of my favourite additions to the room for fall.

With easy and inexpensive new pillow covers, life really is a party!

You might also like our Driftwood Pumpkins here.
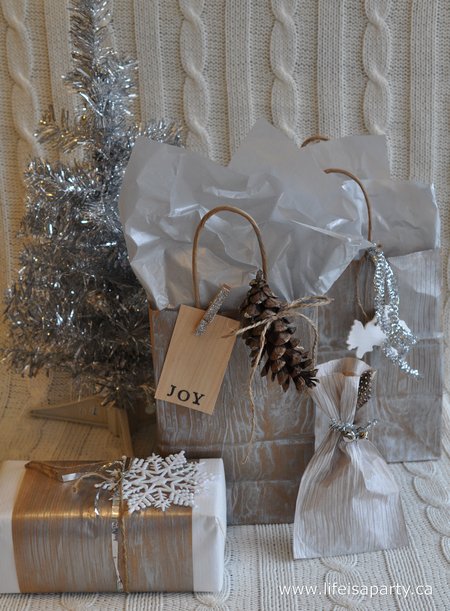
DIY Wood Pumpkins: made from collected driftwood pieces, these easy and beautiful DIY driftwood pumpkins are the perfect addition to your fall decor.

Also check our out DIY Copper Wreath here.
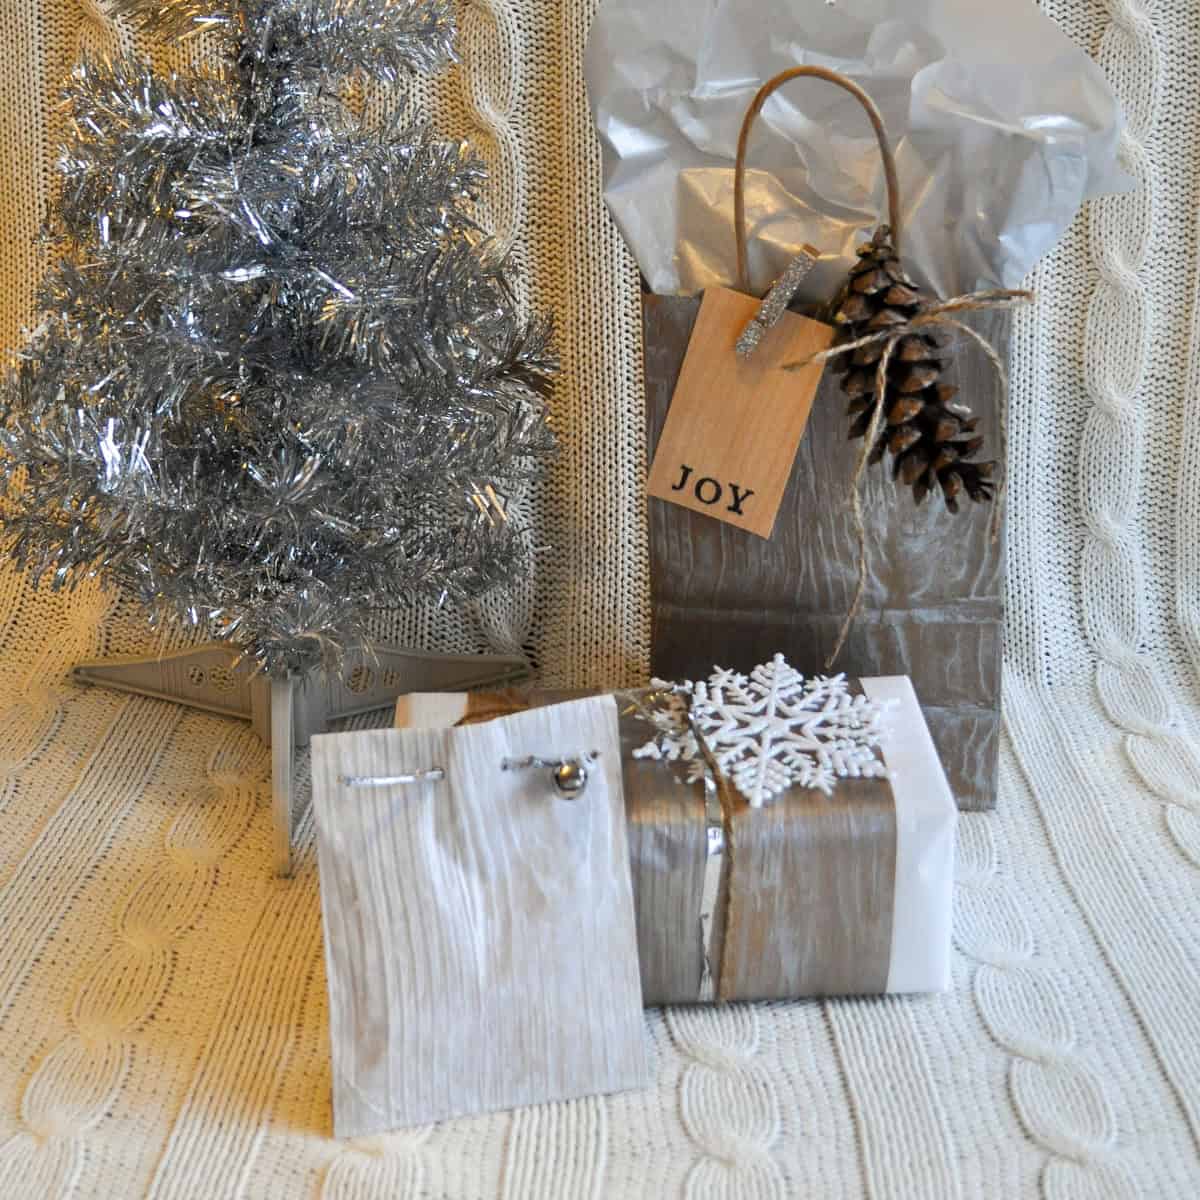
Copper Pot Scrubber Wreath: Simple DIY for a beautiful copper wreath made from dollar store pot scrubbers.

You might also enjoy our Paper Flower Pumpkin here.

How To Make A Pinecone Wreath

Sep 21, 2012 · 19 Comments

Finished DIY pinecone wreath with white spray paint and ribbon for fall or Christmas décor.

If you've been wondering how to make a pinecone wreath, this step-by-step DIY tutorial shows you exactly how to do it. Using real pinecones, a wreath base, and hot glue, you'll learn how to prepare, assemble, and decorate your wreath for fall, Christmas, or winter décor.

Finished DIY pinecone wreath with white spray paint and ribbon for fall or Christmas décor.
[feast_advanced_jump_to]

Why You'll Love This Craft

  • It's easy to make and looks great.
  • We've updated the 90's version of this pinecone wreath your mom had with simple white spray paint.
  • You only need some collected pinecones, wreath from, and hot glue to make this.
  • Make this project in about hour, plus some wait time for drying pinecones and spray paint.

I wanted to make a pinecone wreath for my front door for fall and for Christmas to add a festive touch, and give it a more modern spin -as in not the Christmas version from the 90's. Did your mom have one too?

To make it a little more up-to-date, I spray painted it white, and added a really simple ribbon. This whole project only costs $10-$15 and looks great!

You might also like our DIY Crescent Moon Wreath, How To Make A Birch Wreath, Mini Macrame Christmas Ornaments, or Acorns Made From Easter Eggs Craft.

Materials:

  • Wreath Form: I like the flat wood base kind for this wreath, it's a little easier to work with than the wire forms and gives you a great surface to hot glue the pinecones to.
  • Pine Cones: We used pinecones from a red pine tree. Collect some small pine cones and medium pine cones, to fill in the wreath well.
  • Hot Glue Gun and Glue Sticks
  • White Spray Paint: We love how the white spray paint gave this wreath a more modern look, but you can also leave it natural if you prefer.
  • White Ribbon: We kept it monochromatic with a simple, long white ribbon.
DIY pinecone wreath spray painted white, with a white ribbon.

Variations

  • Natural Pinecone Wreath: If you prefer a natural pinecone wreath, you can skip the spray painting step. Instead, spray your finished wreath with a matte varnish to preserve it.
  • Different Color: We love the look of our wreath in white, but you could make this wreath in any color that suited your taste or decor, including something more festive for the holidays.
  • Festive Bow: You could add a festive bow to your wreath instead of a neural ribbon, especially during the holidays.
  • Square Wreath: This pinecone wreath would also look great as a square or rectangle. Look for a square or rectangular shaped base to use if you prefer.
  • Different Varieties of Pinecones: We really liked the look of using all one type of pinecones, but if you prefer, you could try using different varieties together to give you a mix of shapes and sizes, or use all one of a different variety than we chose.

How To Make A Pinecone Wreath

Step 1: Gather Your PInecones and Dry Them

Baking pinecones in oven to prepare them for wreath making.

Look for pinecones in small and medium sizes. A variety of sizes makes it easier to fill in gaps and holes. Parks and forests are a great place to search for them.

We used pinecones from a red pine tree for our wreath. They're perfect if you can find them because they're nice and round and not too elongated. Pinecones usually fall around the end of September if you're looking for them. You can also shop for pinecones online if you don't have any available for you to collect.

Once you've collected them, you can lay them out to dry and fully open if they're closed up at all.

Expert Tip: To speed up the drying process, put the pinecones on a parchment paper or foil-lined cookie sheet to protect it from the pine sap. Put the baking sheet in the oven at 200F for about 30 minutes, or until the pinecones fully open.

Bugs: This oven treatment should also kill any bugs that might be hiding in the pinecones. Alternatively, some people like to put their pinecones in a bucket of water with some bleach to kill anything that might be living in them. Fill a large bucket with water, add about ½ cup of household bleach, add pinecones and put a small plate on top to keep them submerged. Drain and rinse them after about an hour soak, and then dry them in the oven.

Step 2: Prepare Your Wreath Form

For the next step find a 12 inch wood wreath base. The wood is perfect for using with hot glue and easier than using a wire frame, and wiring each individual pinecone.

A foam wreath isn't sturdy enough for this project. Pinecones are heavy en masse.

12 inch round wood wreath form.

Don't forget to add a piece of twine or wire to one of the holes to make a wreath hanger on the back before you start glue on the pinecones.

I wish I had spray painted the wreath base before I started adding the pinecones, but you can benefit from my mistake, and spray your base first. Spray painting the base would have been a better way to make sure it was entirely covered. Although you will spray paint the whole wreath later, it's a bit tricky to get into the deep nooks and crannies after the pinecones are all added on.

Step 3: Add The Pinecones

DIY tutorial showing how to make a pinecone wreath by hot gluing pinecones to a wooden base.

I went with two rows of pine cones as a base for my diy pine cone wreath, creating an inner ring and an outer ring out of medium pinecones.

The next easy step was to fill in a row of smaller pinecones on top.

To attach the pine cones to the wreath form, use a lot of hot glue at the base of the pine cone. Don't worry too much about it showing, since you're going to spray paint it all afterward.

Can of white spray paint in a round DIY pinecone wreath.

Step 4: Spray Painting The Wreath

Then it's time to spray paint the pinecone wreath. I am slightly obsessed with spray paint. Spray painting anything all one color seems to immediately make it look more modern, and it's a great way to give traditional Christmas crafts like this one a new spin.

DIY pinecone wreath with one coat of light spray paint on it.

Here it is after one coat of white paint.

Spray paint with many, many light coats for best coverage and to avoid drips, although pinecones are very forgiving.

You will definitely want to use spray paint for this job and not acrylic paint, so that it can get into all the nooks and crannies of the pinecones.

White DIY pinecone wreath with long white ribbon.

Step 5: Add A Ribbon

And then the best part, I tied on a long, white grosgrain ribbon.

I think it's less fussy than a bow and again makes it feel more up-to-date and modern.

Perfect Wreath for Fall or Christmas

This would is perfect as part of your fall, Christmas, or winter decor.

We used our wreath outside. Our front door is protected from extreme weather conditions. Also, the spray paint helps preserve outdoor wreaths, and keeps the pinecones from closing up if they become wet.

With a new wreath made of pinecones to enjoy, life really is a party!

Storing Your Wreath

We recommend storing your wreath when it's not in use in a wreath container or plastic bin. These are great for protecting your wreath from being squished and from dust. Over time, your wreath might need some minor repairs. Check it over at the beginning of a new season, and reglue any pinecones that have become loose.

Frequently Asked Questions

How many pinecones does it take to make a pinecone wreath?

We used about 60 pinecones from a red pine tree, that were medium and small sizes to cover a 12 inch wreath form. It will vary depending on the size of your wreath form and the size and variety of your pinecones.

How do you prepare pinecones to make a wreath?

You will want to make sure your pinecones are completely dry and open to make a wreath. Place pinecones in a warm, dry place to have them open. To dry pinecones faster you can place them on a foil or parchment paper linned baking tray in a 200F oven for about 30 min.

How do I keep the pinecones on my wreath from closing if they get wet outside?

To keep your pinecones preserved and open, you can spray paint them, or if you prefer a natural finish, spray them with a matte varnish spray.

How do you keep a pinecone wreath from falling apart?

Over time, the hot glue on the pinecone wreath may dry and let go. Each season, before putting your pinecone wreath out check it over, and reglue any areas that have become loose. If necessary touch up the paint as well to keep your wreath looking fresh for a long time.

More Wreath Inspiration

  • Pink crescent moon shaped Christmas wreath.
    DIY Moon Shaped Christmas Wreath
  • DIY Crescent Moon Wreath with homemade grapevine base, and decorations.
    DIY Cresent Moon Wreath
  • DIY mushroom wreath
    Mushroom Spring Wreath
  • DIY butterfly wreath with book page butterflies and moss wreath.
    BookPage Butterfly Spring Wreath

If you try our tutorial on How To Make A PInecone Wreath or any other ideas on the blog please let me know how it went in the comments below and give us a star rating. Thanks for visiting today!

Recipe

Finished DIY pinecone wreath with white spray paint and ribbon for fall or Christmas décor.

PInecone Wreath

Make your own easy pinecone wreath with a wreath form, hot glue, and spray paint.
5 from 1 vote
Print Pin Rate
Cook Time: 30 minutes minutes
Wait Time: 30 minutes minutes
Total Time: 1 hour hour
Servings: 1 wreath
Author: Dannyelle Nicolle-Ramjist
Cost: $10 -$15

Equipment

  • hot glue gun
  • Hot Glue

Materials

  • 1 Wood Wreath Form
  • 60-75 Small and Medium Pinecones
  • 1 can White Spray Paint
  • 1 piece White Ribbon

Instructions

  • First step, go and your pinecones.  We used red pine for ours. They're perfect if you can find them because they're nice and round and not too elongated. Once you've collected them you can lay them out to dry and fully open if they're closed up all. To speed up the drying process, put the pinecones on a parchment paper or foil-lined cookie sheet to protect it from the pine sap. Put the baking sheet in the oven at 200F for about 30 minutes, or until the pinecones fully open.
  • Add a piece of twine or wire to the back of your wood wreath form to make a hanger. Then spray paint your wreath form white and let it dry.
  • Add an inner and outer row of medium pinecones to the wreath base using hot glue. Next, fill in a row of smaller pinecones on top.
  • Spray paint your wreath. Many light coats gives you the best coverage, and avoids drips.
  • Once your wreath is dry, tie on your ribbon, hang, and enjoy.

Notes

A wood wreath form works best for this project as it's sturdy enough for the weight of the pinecones, and gives a good solid base to glue onto.
We used red pine pinecones for this project.  They have a great round shape that works well for this project.
If you're worried about bugs, soak your pinecones in a bucket of water with about ½ cup of household bleach for about an hour.  Use a plate on top to weigh down the pinecones.  Then rinse them with water, and dry on a parchment or foil-lined baking sheet in  200F oven for 30 minutes, or until the pinecones have fully opened.
We love the look of the wreath spray painted, but you could leave it natural if you prefer.  If the wreath will be outdoors, you can spray it with a matte sealer to help prevent the pinecones from closing if they get damp.

DIY Fall Doormat

Sep 20, 2012 · 29 Comments

DIY Fall Doormat with Leaves.

DIY Fall Doormat: turn a plain doormat into a fall doormat with this simple DIY using craft paint and a DIY stencil to add leaves.

DIY fall doormat with leaves.
[feast_advanced_jump_to]

Every fall season I love to decorate my front door.  It's always nice to add a wreath and fall door mat to welcome guests.  I wanted to add something quite simple this year, but it was hard to find something that was relatively simple and neutral, so I ended up making my own DIY doormat to get exactly what I was looking for.  It was really simple and inexpensive to put together, and turned out great.  If you're someone who loves home decor,  you can create with your own cute designs on a custom doormat.  And it's really easy too.  This project is a great way to create added character on a plain doormat.  DIY projects  are the easiest way to personalize your front door.

DIY Fall Doormat Materials

  • plain doormat
  • white craft paint
  • small brush
  • paper
  • scissors

We used a woven mat made from natural materials for our cute doormat, but coir mats work really well for this too.  For the paint, our neutral loving hearts choose white, but you could use black paint instead.  Or, if you're feeling the fall spirit and want to use different colors, like traditional fall colors and get your pumpkin spice and fall leaves vibe on, you can do whatever you like for your own DIY fall doormat.  We made ours to match our front door decor, and went with white flowers, pum

pkins, and fall wreath.  If you prefer more colorful pumpkins, or something a little darker for spooky season you can customize your colors and stylish doormat to suit your look.

Making a Stencil

I wanted to add a white leaf pattern to tie in with my all white fall outdoor planter and wreath this year. To get started I sketched out an oak leaf on to some paper, and cut it out.  The background piece become the simple stencil.

I did an oak leaf, but you could do any leaf that you like, or a combination.  If you're not great at drawing you could just use clipart for a pattern.

If you're a Cricut owner you could go into Cricut Design Space and find a simple leaf pattern and cut it out on card stock to make a very simple stencil.  You can also use your Cricut to make iron-on vinyl stencil.  This works great with a coir doormat and a more complicated design.  I've experimented with the freezer paper method, and vinyl stencil methods too, and found the iron-on stencil the best for very intricate designs to ensure no bleed.  If you want to learn more about this method -check out this blog post about how to make an iron-on vinyl doormat stencil with your Cricut machine.

The method I used here is v

ery simple.  We cut out our design by hand with scissors, and used white paper.  This is the easy way to make a outdoor mat.  No complicated Cricut cutting machine required.

DIY leaf stencil

Painting

Once you have the paper stencil created, use some white acrylic paint and dab it on with a paint brush.  I used a random pattern for my leaves, and I stencilled a few leaves coming off the side as well to create a really cute fall doormat.  The fun part is placing the leaves in creative ways and making your own pattern, my turning the turning the stencil different ways.  I love a random pattern, but you can making it more uniformed if you prefer.  You also might want to use different leaf stencils, or different sizes.  It's so much fun designing your own, and creating something you love that you could never find at a store.

You want to take your time and be careful to hold down the paper and not get it underneath.  I didn't use masking tape or spray adhesive or glue dots for this project, I just worked carefully.  This method worked really well, and was so simple and non-complicated.  You could use stencil brushes for this part, but again I found a regular brush was fine, and I just worked carefully.  You don't need much paint on your brush when you're stencilling, because you don't want any excess to bleed under the paper.  As much as possible you want nice crisp edges.

You could different kinds of paints.  Some people use outdoor paint, if they want their stenciled doormat to last longer.  I had great success with craft paint from the local craft store.  I don't rec

ommend spray paint for this project, because it's harder to control, and more likely to bleed under the paper stencil and not give crisp lines.

how to make your own simple stencil

I wanted the paint to not be totally uninformed -kind of rustic looking. So I didn't worry about the paint being completely even.  If you want a more even look, just do several coats of paint until you're happy with the look.

DIY Fall Doormat

Recipe

DIY Fall Doormat with Leaves.

DIY Fall Doormat

Easy Stenciled Door Mat
4.50 from 2 votes
Print Pin Rate
Cook Time: 15 minutes minutes
Total Time: 15 minutes minutes
Author: Dannyelle Nicolle-Ramjist

Equipment

  • scissors

Materials

  • plain doormat
  • white craft paint
  • small brush
  • paper

Instructions

  • Draw or trace a clipart leaf pattern onto some paper or card stock and cut it out with scissors.
  • Place your paper stencil on your doormat and use a paint brush and white paint to stipple the paint on. Work up and down, with a small amount of paint at a time to avoid overloading the paint and having it seep under the stencil.
  • Move the leaf stencil around to create a random pattern of leaves on your mat, including some coming off of the edge of the mat. Allow the paint to dry fully before using.

I really like how our new welcome mat turned out. It's so simple and pretty for fall.  I love the neutral, and think it looks great with white faux and fresh pumpkins.   You could, of course, do this in fall colors if you prefer for your own doormat.  This would look great as a layering rug too.  Stack your first mat on top of a larger checked or polka dots outdoor rug for a great layered look to your front porch decor.

Also this easy DIY method of transforming a blank doormat would work for any seasonal decor, or theme at any time of year -think snowflakes for Christmas or winter, flowers for summer, and a pattern pumpkin doormat as a cute halloween doormat.  After you make your first doormat you'll have so many fall doormat ideas, and for other seasons and occasions too.

make your own neutral fall doormat

This DIY fall doormat was easy and inexpensive to make, and it looks really great with all the other white fall decor. 

DIY Fall Doormat: an easy to make fall doormat, with simple make it yourself stencil and craft paint. Perfect way to personalize your fall decor.

See how I made the all white fall outdoor planter here, and the DIY white pinecone wreath here. 

With a DIY Fall Doormat, life really is a party!

More Inspiration

You might also like our DIY Pampas Grass Wreath here.

Also check out our Fall Home Tour here.

Fall Home Tour: Vintage Botanical Scientific Decor with Boho Maximalist Influence means lots of plants, insects, and pumpkins.

You might also enjoy our Rustic Fall Mantel with apples here.

White Fall Outdoor Planter

Sep 19, 2012 · 13 Comments

White Fall Outdoor Planter -easy to put together, and something different in neutral fall colours. Discover how to make this linear style planter for fall.

White Fall Outdoor Planter -easy to put together, and something different in neutral fall colours. Discover how to make this linear style planter for fall.

White Fall Outdoor Planter -easy to put together, and something different in neutral fall colours. Discover how to make this linear style planter for fall.

I have fallen in love with white, and thought it would be fun to do an all white neutral fall outdoor planter for my front door. I love how it turned it, and that it's a bit different and really simple to do.

Fall Outdoor Planter

Linear Style Planting

I wanted to use the linear style and arrange the plants in rows. The first thing I needed was a square container. I would have liked an antique crate, but didn't have one that I wanted to use for dirt and plants. A square galvanized wash tub worked great. I thought it might be too large, but the proportions turned out well.  You need it to be big enough to really give the effect of rows.

Birch Logs

My first row was my birch logs.

birch poles in an outdoor planter

I went to the forest and cut down a little tree and sawed it to the right lengths. I realize that not everyone has a forest at their disposal, so here's a few other options.

You could buy birch poles to another good option  would be to use twigs.  Dark brown twigs would look great and give you the height you're looking for in the back. Another good option would be fountain grass.

I stuck my branches into the dirt, since they weren't too tall. If you're worried about them falling over, you can cement them into an insert container, like I did for my Christmas urn here.

ornamental kale

Kale

For my next row I used kale, I liked it's texture, and the height was good. I found a large pot of 3 at the garden centre for $10 and split it to make a row. You do feel a little like your killing the plant, but just go ahead and pull it apart it will be fine, really.

separating kale plants

I stuck with the white here, but was tempted to use the purple -which would be great with the purple mums, oh the possibilities!

peacock white flowering kale Gigi Snow White mum

Fall Mums

Next I planted a row of the quintessential fall mums. I went for the white again (catching the theme?), 3 for $10 can't go wrong, and I wanted small ones that I could plant in a row rather than a large one anyway.

neutral Fall Outdoor Planter

Cinnamon Sticks and Mini Pumpkins

After I planted the mums I added in the cinnamon sticks and the pumpkins. I was able to get these great long cinnamon sticks from my florist sister, but you can also find them at a bulk food store. They smell AMAZING, and while I was photographing them this morning I started thinking about cinnamon buns and then realized it must be the smell of the cinnamon sticks. Also, you can save them and use them in other floral arrangements or pots afterward.  

Another good option if you didn't have these would be small twigs, or maybe a row of large pinecones -you get the idea.

Fall Outdoor Planter with cinnamon sticks

I finished up with a row of mini white pumpkins. Love them. Nothing says "I'm the fall arrangement" like sticking a pumpkin in it. I think it helps it read as fall and not winter wonderland white.

Fall Outdoor Planter

I love it, I know I'm biased but I love it. The rows just make it more modern. And, it was inexpensive and easy -my two other favourite things. I already have visions of something similar for Christmas.

With a fall outdoor planter like this, life really is a party!

Fall Outdoor Planter in neutral colours

See how I made the fall doormat here.

DIY Fall Doormat: turn a plain doormat into a fall doormat with this simple DIY using craft paint and a DIY stencil to add leaves.

You might also like the pinecone wreath tutorial here. 

How to make a Pinecone Wreath

You might also like my Christmas version of this liner outdoor planter here.

Camp S'more Camping Birthday Party

Sep 11, 2012 · 6 Comments

Camp S'more birthday party s'mores buffet table with bunting banners and a marshmallow tree centerpiece.

Camping birthday party planning doesn't get more authentic than this one. Over the weekend we celebrated my daughter Paige's eighth birthday at a local campground, complete with a genuine campfire, roasted hot dogs, and s'mores under the trees. We called it "Camp S'more," and it's still one of my favorite party themes we've ever done, since it works beautifully for boys or girls.

Camp S'more birthday party s'mores buffet table with bunting banners and a marshmallow tree centerpiece.

A Quick Look At This Party

  • 🏕️ Party: Camp S'more Camping Themed Birthday Party
  • 👪 Great For: Kids' birthdays, boys or girls, ages 5 and up
  • 📍 Location: A local campground (or easily adapted for backyard or indoor camping)
  • 🎨 Color Palette: Aqua, natural wood, and forest tones
  • 💭 Top Tip: Booking an actual campground solves the campfire by law problem many backyards face, and gives you a built in forest backdrop for free.

Why You'll Love This Party

  • It's a real campfire party, not a backyard approximation, though the ideas easily adapt to a backyard or indoor camp out too.
  • It works for both boys and girls without needing to change the theme.
  • The food alone, a full s'mores buffet with six kinds of marshmallows, is worth the whole party.
  • Every detail, from the custom roasting sticks to the polymer clay party favors, is genuinely doable, not just Pinterest inspiration.
  • It comes with free printables in our Free Resource Library to make your own Camp S'more party even easier.

The idea came from my daughter simply wanting a campfire to roast hot dogs and marshmallows, so that's exactly what we did. No summer birthday or campground nearby? These same ideas work beautifully as an indoor party at home or a backyard camp out too.

If you love this camping birthday party, you'll probably also love our s'mores charcuterie board for an easy campfire dessert spread, or our s'mores trail mix if you want an easy, giftable party favor with a free printable tag. You should also check out our camp themed party for adults here.

Camping Birthday Party Location

Book a Local Campground:  We found one close to home -like 10 minutes, that most of our guests had never visited, and several said they'd always wanted to see what it was like. This solved two problems at once: it gave us a legal place for a real campfire, and it provided a gorgeous forest backdrop with plenty of room to play.

Two picnic tables set for a camping birthday party with aqua bunting strung between the trees.

No Campground Nearby? A Few Easy Alternatives:

  • Backyard camping party: works great depending on your local fire bylaws.
  • Indoor camping party: perfect if your birthday falls outside summer, or if outdoor space isn't an option.

We didn't sleep over for this party, just a great campfire lunch, games, crafts, and then home. These same ideas work just as well for an actual overnight camping trip if that fits your family better.

Camping Themed Birthday Party Decorations

Paige's favorite color is aqua, so that became our accent color throughout the decor, layered over natural, woodsy elements. I had a lot of fun pulling things together with our color scheme, and getting crafty with a little spray paint.

Welcome Table Details:

  • Bunting Flags: sewn from aqua fabric, and perfect for reusing for many birthdays to come.
  • Wrapped Letter: ("P" for Paige) made by ripping fabric strips and wrapping them around the letter for a rustic look.
  • Rustic Twig Picture Frame: made by hot gluing twigs around a photo of the birthday girl.
  • Camp S'more Sign: made from an old board spray painted aqua with twig letters glued on -this totally set the scene.
  • Camp Hats: party hats just got a makeover for camp with a Camp S'more logo sticker, doubling as both decor and a wearable party favor. Stickers meant they could be removed after the party, and reused. The bucket hats were from the dollar store. Get this printable in our Free Resource Library.
  • Bug Spray and Sunblock: in a pretty basket on the welcome table, since campgrounds can get buggy and sunny.
Camp S'more welcome table with a twig lettered sign, wrapped letter P, camp hats, and a bug spray basket.
Aqua and white fabric bunting flags strung between trees at a camping birthday party.
Fabric wrapped letter P decoration next to white dahlias in a mason jar.
Twig picture frame with a photo of the birthday girl next to pinecones and a Camp S'more sign.
White bucket hat with a Camp S'more logo sticker used as a party favor.
Wicker basket filled with bug spray and sunblock for camping birthday party guests.

Camping Themed Party Table:

  • White tablecloths layered with burlap for texture and a rustic look.
  • Reusable dollar store plastic plates, layered with polka dot napkins and aqua water bottles.
  • Personalized Water Bottles: made with card stock, stamps, and aqua baker's twine, and using the same free printable logo stickers as the camp hats, making everything matching and reusable.
Camping birthday party table set with aqua water bottles, polka dot plates, and white lanterns.
Personalized aqua water bottle with a Camp S'more label and a name tag for a party guest.

Centerpiece and Natural Styling:

  • White lanterns paired with fern and white flower arrangements in glass mason jars.
  • A natural table runner made from twig and moss balls, pine cones, birch bark covered Styrofoam balls, and aqua butterflies.
  • Spray painted acorns and pine cones for pops of aqua without overdoing the color.
  • A second picnic table for crafts and adult seating, styled to match.
  • A vintage lantern displayed on an upside down vintage wood crate, alongside spray painted dollar store squirrels (for a little whimsy). Look for these in the garden ornaments section of the dollar store.
  • A "Don't Feed the Bears" Sign, made from an old board and a white paint pen, plus a teddy bear or two for a laugh -which the kids loved.
White lanterns with checkered candles flanking a paper gnome party hat and white dahlias.
Natural table runner made of moss balls, pinecones, and birch bark for a camping party centerpiece.
Vintage lantern displayed with aqua spray painted squirrel figurines on a wood crate.
Don't Feed the Bears sign propped against a tree with two stuffed teddy bears.

Camping Birthday Party Games and Activities

Polymer Clay S'more Charms: Each guest made their own miniature s'more out of polymer clay, turned into a key ring or backpack clip. We did this activity at the beginning of the party, while the kids were still calm, and so the clay had time to bake and cool, then added them to everyones loot bag to take home.

How To Make:

  1. Shape the marshmallow first. The tan and brown clay leave residue that the white clay picks up if you make it last.
  2. Roll and cut the graham cracker piece using a dowel rod and a small square cutter, then use a toothpick for the classic dotted line detail.
  3. Roll and cut the chocolate piece the same way, using a toothpick for the chocolate bar lines.
  4. Stack the pieces, add a jewelry eye pin, and bake in a toaster oven for 30 minutes according to your clay's package instructions.
  5. Once cooled, add a jump ring and key chain hook.
DIY s'more charm made from polymer clay at a camping themed birthday party.
Children decorating placemats at a craft table during a camping birthday party.
Close up of a handmade polymer clay s'more charm with a jump ring and name label.

Nature Scavenger Hunt: We printed a scavenger hunt list directly onto paper sandwich bags (get the free printable in our Free Resource Library), including a paper gnome hidden throughout the woods for kids to find.

Tips for Printing on Paper Bags:

  • Tape shut the bag and bottom flap so your printer doesn't jam.
  • Set your printer to thick paper.
  • Feed the bags in one at a time, removing tape once printed.
  • Painter's tape works but can be reused a few times if it's too sticky at first.
Craft supplies for printing scavenger hunt lists onto paper lunch bags.
Kraft paper bag taped and fed through a printer to print a scavenger hunt list.
Camp S'more scavenger hunt list printed on a kraft paper bag.
Four children in white Camp S'more bucket hats posing together on a fallen log.

Outdoor Games: Badminton, kids' horseshoes, and croquet were all available, though honestly the kids had just as much fun running around, balancing on logs, and roasting hot dogs and marshmallows.

Camping Birthday Party Favors

Camping Themed Books were the main party favor, and easily my favorite part of the loot bags. "Cara the Camping Fairy" went to the older girls, since Paige and her friends love the Rainbow Magic Fairy series, and "Curious George Goes Camping" and "Caillou Goes Camping" went to our younger guests. Giving one meaningful thing kids will actually read and use felt so much better than a bag of little trinkets, that often end up in the garbage.

Guests also went home with a few other favors from throughout the day: their camp hats, their personalized water bottles, their handmade polymer clay s'more charm, and their own custom roasting stick.

Camping Themed Birthday Party Food Ideas

This is where the party really shined. We had so much fun with the camping themed food, and it really acted as one of the party activities.

Hot Dog Buffet:

  • Hot dogs and buns roasted right over the campfire.
  • Toppings included ketchup (the kids' favorite), fresh chopped tomatoes, relish, sauerkraut, pickles, onions, and cheese.
  • Simple veggies and dip in individual containers to avoid double dipping -always a great idea for a kids' party. 😉
  • Kettle cooked chips served in cute take out french fry boxes for easy individual servings.

If you love campfire cooking you might also love our savory smores, made with cheese and crackers.

Hot dog buffet with buns, chopped vegetables, ketchup, and mustard on a burlap covered table.
Children roasting hot dogs on sticks over a campfire at a birthday party.

Custom Roasting Sticks: One of my favorite little details from the whole party, was this easy idea. We collected birch bark from the woods, cut it into labels with a paper punch, stamped each guest's name or "Camp S'more" on it, hot glued it to a real stick, and tied on a little aqua ribbon. These were such a fun and inexpensive customized detail.

Bundle of custom birch bark labeled roasting sticks tied with aqua ribbon.
Birch bark tag stamped with Camp S'more tied to a roasting stick with aqua ribbon.

Drinks:

  • Spring water and pink lemonade.
  • Hot chocolate, made ahead and served from thermoses since the day was a little cool, topped with mini marshmallows (store bought and homemade) and whipped cream.
Camping party drink station with pink lemonade, paper straws, and coffee thermoses.

S'mores Buffet: The most anticipated part of the whole party. A marshmallow tree centerpiece, made from sticks and mini marshmallows, anchored the table.

  • Cookies: homemade graham crackers, chocolate chip cookies, and peanut butter cookies, displayed on rustic DIY tree slice cake stands.
  • Marshmallows: six varieties, including chocolate, chocolate mint, cinnamon bun, coconut, giant strawberry, and homemade vanilla, the homemade vanilla being the clear favorite.
  • Chocolate: six varieties, including milk, dark, chocolate with almonds, mint chocolate, caramel chocolate, and cookies and cream.

Guests mixed and matched to build their own s'mores creations, and there were so many options that most kids didn't even have room left for cupcakes.

Camp S'more birthday party s'mores buffet table with bunting banners and a marshmallow tree centerpiece.
Tin of chocolate bars including Caramilk and Hershey's for a build your own s'mores bar.
Bowls of cinnamon bun and chocolate mint marshmallows labeled for a camping party s'mores bar.
Homemade graham crackers stacked on a tree slice stand labeled for a s'mores bar.
Girl in a white bucket hat smiling with a marshmallow smeared s'more.

Birthday Cupcakes in a Jar: Served in small mason jars tied with baker's twine and wooden spoons hand stamped with aqua polka dots. Each jar held a vanilla cupcake layered with raspberry jam and aqua icing, easy to serve without slicing a cake, and perfect for easy transport to the campsite.

Cupcakes in mason jars tied with baker's twine and polka dot wooden spoons.
Birthday girl blowing out a candle on her cupcake in a jar at a camping party.

This party was so much fun, I highly recommend this theme. It works great for boys and girls, and lots of different ages, even the grandparents had a great time and we made so many great memories together celebrating our birthday girl.

Free Printables

This party comes with three free printables to make your own Camp S'more celebration even easier: the Camp S'more logo used on the hats and water bottles, the scavenger hunt list ready to print onto paper bags, and the food labels. Find them all in our Free Resource Library, free for subscribers with instant access.

Frequently Asked Questions

Can this camping birthday party theme work without a real campground? 

Yes, these same ideas adapt easily to a backyard camp out or an indoor camping party at home, depending on your space and local fire bylaws. You can always prepare your hotdogs in the oven or grill and make oven smores if you're indoors.

Is this theme better for a specific age group? 

It works well for a wide age range, we found it suited both younger and older kids, and it's easy to adjust activities like the scavenger hunt or loot bag books by age. Some of the younger children needed an adults help for roasting hotdogs and s'mores on the fire.

What if I can't have a real campfire?

A backyard fire pit or an indoor faux campfire made from cardboard and tissue paper both work well as substitutes, and you can still do all the food and decor ideas either way.

Where can I find the printables used in this party? 

All the printables mentioned, including the camp hat logo, water bottle tags, and scavenger hunt bags, are available for subscribers in our Free Resource Library.

More Party Ideas to Try

  • Easy s'more trail mix in a glass jar, with a gift giving bag and white flowers.
    S'mores Trail Mix
  • Golden pizza crust topped with Nutella and toasted marshmallows.
    Easy S'mores Pizza Recipe
  • S'mores charcuterie board with graham crackers, marshmallows and chocolate for summer entertaining.
    S'mores Charcuterie Board
  • Halloween smores board with Halloween cookies, marshmallows, chocolate and more!
    Halloween Smores

If you try anything from this Camping Birthday Party or any other ideas on my blog please let me know how it went in the comments below. Thanks for visiting today!

Gourmet S'mores

Sep 7, 2012 · 4 Comments

Gourmet S'mores: homemade marshmallows, and homemade graham crackers come together to make the best s'mores you've ever had in your life!

Gourmet S'mores: homemade marshmallows, and homemade graham crackers come together to make the best s'mores you've ever had in your life!

[feast_advanced_jump_to]

Since we're having a camping themed party on the weekend, it seemed like the perfect occasion to try making homemade vanilla marshmallows and homemade graham crackers. I wasn't too sure if homemade would really taste that different from store bought, but I have to tell you they are amazing!

gourmet s'mores

Homemade Marshmallows

I started out making the homemade vanilla marshmallows. I've made them before here, and I used the same recipe this time, from Alton Brown. They took a little longer cooking than the recipe said, but just use a candy thermometer and you'll be fine. They are a little time consuming but pretty easy to make, the thermometer and the stand mixer do all the hard work for you.

how to make homemade marshmallows

Let them sit overnight, and in the morning cut them into squares. They are like little white and fluffy clouds of yumminess! -is that a word?

Homemade Marshmallows

homemade graham crackers

I also tried making homemade graham crackers for the first time. I have to say that I'm not a huge graham cracker fan in the first place, they're just not a favourite, and I had read really mixed reviews on-line with most of the recipes I looked at. I ended up using the Brown Eyed Baker's recipe, she had me at the mention of the difference using butter makes to the taste and how it really makes them so much better than the boxed version. After making them and trying them myself, I'd have to agree with her.

how to make homemade graham crackers

To make these little crackers of goodness, you'll need to get your hands on some Graham Flour. I couldn't find any at my local grocery stores, but they did have it at the health food store. Look for the Bob's Red Mill brand.

homemade graham crackers

The graham flour really does give them that characteristic graham cracker texture. I used light brown sugar, since it's what I had on hand, and I think it worked out great. They also have some honey in them, also adding to that honey graham taste you remember from childhood.

gourmet s'mores homemade graham crackers

I did find the dough quite crumbly and hard to work with when I was rolling it out. I switched from a floured surface to rolling the dough out between two sheets of plastic wrap, and it helped a little.

how to make gourmet s'mores

Homemade Really Is Better!

I have to say, I think it was really worth the extra effort to make homemade marshmallows and homemade graham crackers -they're that good.

gourmet s'mores

With gourmet s'mores, life really is a party!

Check out all the other amazing parties details, if you missed any, by clicking on the links:

  • Rustic DIY Tree Branch Dessert Stand
  • Camp S'more -Camping Themed Birthday Party
  • Camp S'more Free Printables

You might also like our Homemade Coffee Marshmallow recipe here.

Also check out our Homemade Flavoured Marshmallows -Baileys, Chocolate, and Vanilla.

Rustic DIY Wood Slice Cake Stands

Sep 6, 2012 · 2 Comments

DIY wood slice cake stands.

DIY Wood Slice Cake Stand: tutorial to make your own wood slice cake stands perfect for rustic entertaining, parties, or weddings.

We're having a camping themed birthday party this weekend, and as soon as we finalized the theme I knew I wanted some rustic a DIY wood slice cake stand for the dessert table.

Luckily, I just happen to know a guy with a chain saw and a forest at his disposal.

cutting wood slices

My friend Dan did me the amazing favour of finding the wood and cutting it for me. In fact, when I described what I wanted to do, he knew more about it than I did.

He explained to me that we would need to find some wood that had been down for a while and had had some time to dry out. Other wise, when you cut your tree rounds, they split as they dry. This is some important info -thanks Dan.

cutting wood slices

After a fun walk in the forest with the kids, harvesting our materials, and a wonderful mini vacation with our friends in Haliburton who not only own their own chainsaw, but know how to use it 😉 it was time to head back to home to the "city" and put them together

Materials:

  • wood slice for the top
  • smaller wood piece for the base
  • sand paper
  • wood glue
  • clamps or something to use for a weight, like books
  • spray varathane

How To Make A Wood Slice Cake Stand

The first job was securing our wood slices for the tops and the smaller wood pieces for the bases.  Once home I started sanding the tops of the tree rounds.

how to make a wood slice cake stand

I used my palm sander to smooth out the tops. I don't mind things a little rustic, so I wasn't too bothered that they weren't completely level. If you're bothered by these things you should relax you could use a level and an electric plane to make sure everything lines up.

DIY wood slice cake stands

After they were all sanded on top I used wood glue to attach the top to the bottom.

making tree slice cake stands

You could use clamps to hold the wood while the glue dries...or if you have no clamps you could use cook books - see those fancy cookbooks you rarely open are useful. 😉

DIY wood cake stand

After the glue was dry I sprayed the tops with a little varathane to seal the wood. I love how they turned out.

DIY wood slice cake stand

Can't wait for the party on Saturday, and praying it won't get rained out!

how to make a wood slice cake stand

With beautiful a DIY Wood Slice Cake Stand, life really is a party!

Check out all the other amazing party details, if you missed any, by clicking on the links:

Gourmet S'mores

  • The Camp S'more Party here
  • Free Printables for Camp S'more

Easy Stuffed Zucchini with Ground Beef and Rice

Aug 30, 2012 · Leave a Comment

Stuffed zucchini with ground beef and rice.

Easy Stuffed Zucchini: this easy recipe is made with ground beef, rice, and tomato sauce, and topped with cheese.  The perfect hearty meal.

Stuffed zucchini with ground beef and rice.
[feast_advanced_jump_to]

Stuffed zucchini is a hearty, and delicious favorite.  Any zucchini lover will love this delicious casserole version, filled with ground beef, rice, tomato sauce, and veggies and topped off with a layer of cheese.

Fall is coming and it makes everyone feel like eating a nice hearty casserole and these easy stuffed zucchini are perfect for the whole family. If you are a gardener, you've got a lot of zucchini this time of year, and if not they're at the farmers market and supermarket and the price is right.  This recipe is perfect for zucchini season, or any time of year.

I saw some lovely ones this week and couldn't pass them by. I have a funny memory of my Dad making dinner one night (which was a bit of a rarity when I was a little girl) and making stuffed zucchini. He was so excited about it.  I think he got the recipe from a friend at work and they were delicious.  It's always been a favorite of mine.  

stuffed zucchini casserole

One Dish Meal

We love that this is a complete meal in one dish.  It's full of delicious veggies, and also contains rice and meat, so it's everything you need all in one dish.  We often serve this with a salad and crusty bread, but all on it's own a great complete meal.

Individual Stuffed Zucchini Boats or Casserole?

Many times when people make stuffed zucchini they create a stuffed zucchini boat by scraping the inside of the zucchini out and discarding the insides to create a hollow area in the middle of the zucchini half for stuffing.  You can certainly do that with this recipe.  If you want to hollow out your zucchini to make zucchini shells, you can use a melon baller to scrape them, and then discard cores. This recipe will make more than enough stuffing if you want to stuff the zucchini without overflowing contents.  You will have enough extra filling with this recipe for 6 whole zucchinis, cut in half to make 12 stuffed zucchini boats if you want to stuff them without over filling each individual zucchini boat half.  Or, cut the filling part of the recipe in half to not have extra filing leftover if you're not making the casserole version of this recipe.

stuffed zucchini recipe

I've chosen not to scrape out the zucchini pulp insides of the zucchini halves.  I don't see the reason to waste the inside of the zucchini, since it's so delicious, and more veggies are always a great idea.  My version of the stuffed zucchini is more of a zucchini casserole, overflowing with delicious toppings and all bathed in tomato sauce, and covered in cheese.  This more hearty version is a little less delicate, and deliciously hearty.

how to make easy stuffed zucchini

Other Options

If you prefer not to eat ground beef, you can substitute ground chicken or ground turkey in this stuffed zucchini recipe.

This beef mixture is also a delicious filling for stuffed peppers also.  Make them in the same way substituting hollowed out bell peppers cut in half for the zucchini, fill them with the meat mixture, and top with cheese and bake in a casserole dish the same way you would with the stuffed zucchini recipe.

easy stuffed zucchini with ground beef and rice

Vegetarian Version

If you want to make this into a vegetarian version of stuffed zucchini you can substitute the ground meat in the recipe for a vegetarian meat substitute, or leave it out and add in some extra peppers and mushrooms.  To make the recipe vegan, substitute a vegan cheese for the topping of the stuffed zucchini.

Low Carb Version

If you are on a low carb diet, you can leave the rice out of this dish.  Or substitute the regular rice with a cauliflower rice option.

easy stuffed zucchini

The leftovers from this dish are delicious the next day too.  If you have leftovers, store leftovers in the refrigerator in an airtight container, and reheat in the microwave.

stuffed zucchini

I like to serve this dish with a green salad and fresh bread or rolls.  This is one of my favorite dinner recipes.  It's perfect whenever you're craving a hearty dish.

how to make stuffed zucchini

I am a zucchini fan, I love zucchini cake, zucchini fritters, ratatouille, sautéd zucchini...what can I say, I like it. My five year old daughter...not so much. So, I'll say if you're a zucchini fan, your going to love this, if you're not a zucchini fan, if you eat your dinner you can have a cookie. ;).  

easy stuffed zucchini recipe

Recipe

Stuffed zucchini with ground beef and rice.

Easy Stuffed Zucchini with Ground Beef and Rice

Zucchini stuffed with ground beef and rice in a tomato sauce.
No ratings yet
Print Pin Rate
Course: Main
Cuisine: American
Prep Time: 20 minutes minutes
Cook Time: 40 minutes minutes
Total Time: 1 hour hour
Servings: 6 Stuffed Zucchinis
Calories: 548kcal
Author: Dannyelle Nicolle-Ramjist

Ingredients

  • 3 medium zucchini
  • 1.5 lb ground beef
  • 1 onion diced
  • ½ cup yellow bell pepper diced
  • ½ cup red bell pepper diced
  • 8 oz mushrooms sliced
  • 2 cloves garlic minced
  • ½ teaspoon salt
  • ¼ teaspoon ground pepper
  • 1 teaspoon Italian seasoning
  • 650 mL jar tomato sauce
  • ½ cup uncooked rice or 1 ½ cup leftover cooked rice
  • 2 cups mozzarella cheese grated

Instructions

  • Cook rice according to package directions.
  • Brown ground beef with onions, peppers, mushrooms and garlic in a large skillet over medium-high heat. Season with Italian seasoning, and salt and pepper.
  • Add in cooked rice and half of the jar of tomato sauce to the meat mixture, and stir to fully combine.
  • Meanwhile, trim off the stem end of the zucchini and cut them in half lengthwise to make the boats. Pour the remaining half of the jar of tomato sauce into a 9 x 13 large baking dish and put the zucchini halves on top. Next, pour the topping beef and rice mixture over the sliced zucchini pieces. Sprinkle the grated mozzarella on top of the zucchini and stuffing mixture.
  • Cook at 350, for about 40 mins, or until the zucchini is soft when poked with the tip of a sharp knife.

Nutrition

Serving: 1g | Calories: 548kcal | Carbohydrates: 28g | Protein: 44g | Fat: 29g | Saturated Fat: 12g | Polyunsaturated Fat: 13g | Trans Fat: 1g | Cholesterol: 130mg | Sodium: 1068mg | Fiber: 4g | Sugar: 8g
Tried this Recipe? Tag me Today!Mention @LifeisaParty or tag #lifeisaparty!

Looking forward to the leftovers for lunch 😉 -Hope you enjoy!

With easy stuffed zucchini, life really is a party!

More Recipe Inspiration

You might also like our Unstuffed Zucchini here.

Unstuffed Zucchini: the perfect quick and easy, one pot weeknight meal. We made cooking time quicker using zucchini zoodles.Also check out Mom's Easy Lasagna here.

Easy Lasagna with cottage cheese: this is a great make-ahead, and it freezes well. Easy to put together, and sure to be a family favourite.

You might also enjoy our Butter Chicken Pizza here.

Butter Chicken Pizza: use frozen naan bread and jarred butter chicken sauce from the grocery store, for this quick and easy butter chicken pizza recipe.

How To Make Inexpensive DIY Pergola Shade Cover

Aug 1, 2012 · 21 Comments

DiY pergola shade covers.
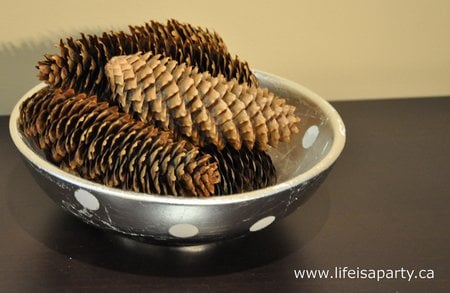
DIY Pergola Shade Cover: create shade under your pergola with these DIY fabric covers. These inexpensive covers are made from drop cloths and brass grommets and woven through the top of the pergola.

DIY pergola shade cover.
[feast_advanced_jump_to]

We Needed Some Shade

These DIY pergola shade covers were a necessity in our backyard seating area.  A few years ago we had this beautiful pergola built in our backyard. I love it. It adds so much character and drama to our outdoor space.  Because our house is a new build, we desperately needed a spot with some shade to be able to sit out and enjoy our outdoor area in the summer.  We have a beautiful seating area under the pergola, but it was so hot and sunny that we weren't even able to sit out and enjoy it without getting sunburns.

We had always planned on growing vines over the pergola for shade.  I planted vines on it, and have been patiently waiting for them to grow up and provide some much needed shade in our backyard. It's year three, we've had one casualty and re-plant, and I'm getting a little less patient for my vines to grow. It's a really lovely place to sit, but it's just too hot and sunny to really enjoy.

DIY Pergola Shade Cover: create shade under your pergola with these DIY fabric covers. These inexpensive covers are made from drop cloths and brass grommets and woven through the top of the pergola.

I had an idea that I could make some shade, by weaving some fabric through the wood, with some DIY pergola shade covers.  It worked so, so well.  If you're looking for an inexpensive and non permanent solution to create some shade with your own pergola, then this might be a great idea for you also.  

Inexpensive Solution

I wanted a temporary shade cover on our pergola.  We really wanted the plants to climb the pergola and provide shade eventually.  But until they grow, we needed a non-permanent solution to provide the perfect shade and protect us from excessive heat.  

We considered a few options for the space out of the wide range of styles and types of shade covers.  A shade sail didn't seem like the right choice for this space, because it would take away from the Victorian architecture of the beautiful pergola.  A mechanical retractable canopy wasn't the right solution for this space, because again it won't go with the style of the space at all, we would need custom sizes at great expense and it would be permanent.  Our goal was only to block out direct sunlight and create a spot to sit that was more comfortable with a little extra shade, while we wait for the grape vines and other climbers to grow and provide a covered pergola with their leaves.  We weren't trying to create a solid roof, waterproof pergola covers or rain protection for our space.  

We wanted the type of canopy to extend our outdoor use of the space in the summer months and give the space some shade, while not taking away from the beauty of the structure and the ornate Victorian style wood work.  Our perfect solution was to create our own pergola sun shade using different pieces of fabric, that we could easily remove once the vines grow in.  

DIY Pergola Shade Cover: create shade under your pergola with these DIY fabric covers. These inexpensive covers are made from drop cloths and brass grommets and woven through the top of the pergola.

Choosing The Fabric

When we decided to use fabric to create our shade covers the next question was what kind of fabric to use.  I considered using some outdoor fabric to create our outdoor pergola shades.  The biggest reason to not use a special outdoor fabric that is designed to withstand bright sunlight and the harmful uv rays, as well as hold up against strong winds and heavy or light rain getting it wet regularly was the price.  The specialty outdoor weatherproof fabrics probably last much longer, but they're so expensive.  Since this was meant to be a temporary solution anyway, we didn't feel it was worth the big investment of special fabric.

What we decided to go with instead was regular inexpensive drop cloth material.  This was really a great option.  We bought large heavy duty fabric painter's drop cloths at the hardware store.  These are made of a heavy and thick hard wearing cotton material.  The fabric is easy to work with, and has actually held up very well for the price.  This fabric is thick enough to easily block the light.  Because it's fabric, when it rains it does get wet, but it dries out quickly in the sun afterward.  With gusty winds, the fabric allows the wind to blow right thru it.  I also liked the natural color of the fabric and that there was no pattern on the fabric, that might take away from the space, or draw too much attention to itself.

I did have some concerns about using this inexpensive solution.  We were worried about how the fabric would hold up to the sun, to heavy rain, and how it would look.  One way we tried to address any problems with staining was to make sure that the fabric panels were installed in a way that made them removable so that we could wash them in the washing machine if and when we need to.  This also made them easy to remove and store during the winter months and reinstall in the spring.

DIY Pergola Shade Cover: create shade under your pergola with these DIY fabric covers. These inexpensive covers are made from drop cloths and brass grommets and woven through the top of the pergola.

Brass Grommets

I thought it would be a beautiful and useful detail to add grommets to the corners of the fabric strips so that we could tie them onto the pergola.  Grommets were a perfect solution.  They make the project look a little more professional, and work great in a practical way.  The grommets reinforce the holes in the ends, giving them strength so they don't rip the fabric if there's high winds.  They're easy to instal in the fabric also.  You can buy an inexpensive grommet kit at the hardware store that contains the grommets as well as the special tool to instal them.  In addition to the kit all you need is a hammer and scissors to instal them.  

DIY Pergola Shade Cover: create shade under your pergola with these DIY fabric covers. These inexpensive covers are made from drop cloths and brass grommets and woven through the top of the pergola.

Brass is also the perfect metal for this outdoor job, because it doesn't rust.  They are also very strong and won't easily break.  Without rust forming it won't stain the fabric.  The brass will develop a pretty patina over time.

DIY Pergola Shade Cover: create shade under your pergola with these DIY fabric covers. These inexpensive covers are made from drop cloths and brass grommets and woven through the top of the pergola.

It turned out really great, and best of all, it's not so burning hot out there anymore.

Pergola Shade Cover Cost Breakdown

These prices are all in Canadian dollars.  If you're in the US, it would probably be a bit cheaper.  At the time of writing this $77 Can is equal to $57 US dollars.  These prices also include sales tax.

  • 8 x 12 heavy duty cloth drop cloth from Home Depot -$44 with tax
  • brass grommets kit from Home Depot  -$19 with tax
  • cable ties from Home Depot -$14 with tax

Total: $77

I already had the thread to sew with, and a sewing machine.  I also already had the staples we used to install it. There were some grommets and zip ties left over after this project.

DIY Pergola Shade Cover: create shade under your pergola with these DIY fabric covers. These inexpensive covers are made from drop cloths and brass grommets and woven through the top of the pergola.

Pergola Shade Cover Maintenance

Because we live near Toronto, Canada and have harsh winters with lots of snow, we take these down every year in the fall.  We wash them in the washing machine with hot water and bleach.  Some years we've done a double wash, putting them through the washing machine twice, and then dry them in the dryer.  They're easy to store, folded up in our basement storage room.  In the spring we re-install them for the season.  Because it's a bit of an effort to take them down, we haven't washed them during the season.  But if you choose to, you could wash them more frequently.  

They have held up well to the rain and the sun.  The fabric is still strong, and hasn't broken down at all after one full season.  The fabric has become a little discoloured overall with some black marks, but overall it still looks fine.  The discolouration isn't very noticeable at all while they're installed, it's just on close inspection that you notice them.  There are no holes in the fabric at all.  The gromets have held up perfectly and not ripped out at all.  To remove them just snip off the zipties and use a flat screw driver to pop out any staples you may have added for stability.

DIY Pergola Shade Cover: create shade under your pergola with these DIY fabric covers. These inexpensive covers are made from drop cloths and brass grommets and woven through the top of the pergola.

Pergola Shade Cover Update:

I made this cover 5+ years ago and it's held up really well.  I get asked sometimes about if it would be better to use a special weather proof fabric, and if this has held up.  It does have a few stains and black marks on it.  Every year we put it up in the spring and then take it down in the fall and wash it with bleach at the end of the season.  The fabric has help up really well.  It hasn't broken down from the sun or rain or wind.  It still has no holes in it anywhere.  The grommets are still all attached and in good condition.  None of them have ripped out or torn the fabric.  

For the low cost, I'd say it was well worth it and highly recommend.  

We're still trying to get those vines to grow. ;). As the vine have grown we have been able to remove just one or two panels of the cover where the vine is grown out.  This was an added bonus we hadn't thought of when we made the design, but just worked out really well.

Recipe

DiY pergola shade covers.

DIY Pergola Shade Cover

Make your own fabric pergola shade cover with inexpensive drop sheets to provide protection from the sun.
5 from 1 vote
Print Pin Rate
Cook Time: 3 hours hours
Total Time: 3 hours hours
Author: Dannyelle Nicolle-Ramjist
Cost: $50

Equipment

  • Hammer
  • Sewing Machine
  • scissors

Materials

  • Drop Cloths
  • Thread
  • Brass Grommet Kit
  • Zip Ties

Instructions

  • I started out with a good old home depot drop sheet (blogger's linen). I pre washed and dried the covers in the washing machine and dryer. The spaces in the pergolas top pieces were measured and I used the measurement to cut the fabric in strips, adding on a seam allowance. For the size of the strips, we were guided by the pergola and the arrangement of the top wood pieces. For our pergola we fit 4 equal size pieces width wise. You want the length to be fairly taught when the panels are installed so that the fabric isn't dropping too much. If it's taught it won't have room to twist in the wind either, and should lay nice and flat and tight. I stitched up the hem all four of the sides on the sewing machine to create the fabric strips.
  • Then I added grommets to the four corners of each strip of fabric. The very helpful man at Home Depot said they wouldn't rust, since they're brass. I just followed the instructions on the package, and they turned out looking great.

    Update: The Home Depot guys was completely right, 5 years later and the brass didn't rust one bit.
  • Next we wove the fabric strips through the top of the pergola, and tied them on the ends with small clean zip-ties. Lastly we added a few small staples for stability. When you're installing them weave one over and under in a pattern, and then weave the next under and over for a pretty effect.

With a DIY pergola shade cover, life really is a party.

More Inspiration

You might also like to see our Black and White Garden here.

Black and White Garden -an old garden is refreshed with a new pea gravel seating area, and lots of black and white accessories and plants, including a garden of all white plants.

And also check out Teacup Fairy Village Gardens here.

Teacup Fairy Villiage Gardens -use teacups and teapots to create these whimiscal miniature fairy gardens with polymere clay houses and mushrooms.

You might also enjoy our Portager Garden here.

How To Make A Potager Garden: create a beautiful French kitchen garden with flowers, herbs, and vegetables in raised beds, and garden she shed.


Purple Dessert Table

Jul 25, 2012 · 5 Comments

Purple dessert table.

Purple Dessert Table: cookies, cake pops, donuts, blueberry trifle and a candy buffet create the most beautiful dessert table.

Purple dessert table.
[feast_advanced_jump_to]


Purple Dessert Table:  cookies, cakepops, donuts, blueberry trifle and a candy buffet create the most beautiful dessert table.

My dear friend Connie celebrated her 30th birthday on the weekend. We had a lovely 30th birthday dinner party -which you can read all about here, and finished off with this beautiful purple dessert table with lots of ideas inspired by our Purple Party.

purple dessert table

Purple Dessert Table

The backdrop of the table was made by stringing up some ruffles. I love command hooks, they make it so easy to add party decor, and remove it latter without marking the walls.

I also cut out the "30" from some foam board and decoupaged it with paper doilies, and a little glitter.

30th birthday dessert table backdrop

Blueberry Trifles

I made sweet little blueberry trifles, see the recipe here.

blueberry trifles

I love serving individual portions.

purple dessert table

Donuts

I had these sweet little tea cups, with pretty purplish flowers, and thought they'd be lovely to hold simple donut holes.

purple party desert table

I also served some jelly donut holes on these cute Asian spoons, with a sweet toothpick and ribbon flag added.

purple dessert table
purple party purple dessert table
purple party decorations cupcake picks

Cake Pops

I made vanilla cake pops, and added a  ribbon detail for a little more purple.

purple cake pops
purple cake pops

Shortbread Cookies with Purple Sugar Sprinkles

We also made shortbread cookies, and tied them into little bundles with purple baker's twine.

purple dessert table
purple party cookies

Candy Buffet

I also served some candy, in my pretty vintage milk glass candy bowls.

purple dessert table ideas
purple party

With a dessert table like this one, life really is a party!

purple dessert table

Happy Birthday Connie!

With a purple dessert table to enjoy, life really is a party!

You might also like The Purple Party here.

Also check out our Homemade Purple Marshmallows here.
30th Birthday Dinner

Jul 24, 2012 · 1 Comment

30th birthday dinner party ideas.

30th Birthday Dinner: we decorated with white and purple, had a beautiful dinner party and money tree to celebrate our birthday girl.

30th Birthday dinner party menu and decor.
[feast_advanced_jump_to]


30th birthday 058

This weekend a dear best friend turned 30 and we threw a pretty 30th Birthday Dinner party to celebrate an new decade and a new chapter. Milestone birthdays are special and it's always great to celebrate with an intimate dinner party. It was such a fun way to surprise our guest of honor.

Celebrating At Home

I love celebrating a special 30th birthday celebration like this in my own home, where you can decorate ahead of time, and linger into the night. The best 30th birthday venues are somewhere everyone feels comfortable, but that also have a sense of occasion for an important milestone. The important things for us were to gather the birthday girls group of close friends and have a great time together. We made things a little fancy with decor and a dress code. A surprise party in the comfort of home with closest friends around the dinner table was a really lovely way to celebrate.

30th birthday 037

Party Decorations

We used lots of white, ruffles, doilies and a little purple for our 30th birthday party theme for the party decor. We were inspired by the birthday girl's favorite color palette. On the front table, I added a picture of our guest of honor Connie, along with some candy and a beautiful bouquet of Queen Anne's Lace.

30th birthday 040

I also used my chalk board and added some paper doily bunting and a birthday greeting, as a great way to set the tone as guests arrived.

30th birthday 121

The dining room was all dressed up for the party. We hung beautiful paper lanterns and a few DIY paper doily balls. They looked so pretty with the chandelier.

30th birthday 129

The Table

The table was set for 10, with a simple white table cloth. I used my pretty purple wine glasses to add a little colour.

30th birthday 139

I love how these pretty lacy metal candle holders looked with all the other lacy details, and how their round shape echoed the paper lanterns hanging above.

The focal point white flowers were more of the Queen Anne's Lace, in three containers down the centre of the table.

30th birthday 120

I used simple white cloth napkins, and white plates made for perfect pairings at the place settings. The cutest detail for this special occasion were these pretty individual domed dessert holders.

30th birthday 136

We served homemade shortbread cookies in them. I loved how the cookies, stacked and tied into little bundles with baker's twine, added another small pop of purple to the table. It was all so pretty, and the best part was that they were delicious.

30th birthday 123

Birthday Girl Chair Decoration

Another fun detail, was decorating the birthday girls chair. I made a simple rosette with paper doilies and tied on some ruffles and ribbon.

30th birthday 016

Appetizers In The Garden

We started the evening outside with some delicious appetizers. It's always nice to build a little movement into your evening and starting out in the garden before heading inside is always a good choice.

30th birthday 117

We tried this yummy corn dip recipe from Inspired by Charm. Everyone loved it.

30th birthday 104

I served a simple purple punch of grape juice and ginger ale with vodka on the side for those who wanted to make it a little special. 😉

30th birthday 141

30th Birthday Dinner Ideas

Dinner was delicious we served a dinner salad with roasted potatoes, along with grilled flank steak and flattened chicken. Get the recipe for the flattened chicken here.  It's the perfect summer dinner menu.

Dinner Menu:

  • Salad with Roasted Potatoes
  • Grilled Flank Steak
  • Flattened Chicken
30th birthday 107

Money Tree

Since our birthday girl was travelling for the next year, we had the good idea to make a money tree in lieu of gifts. Guests brought $10 bills (they're kind of purple here in Canada so they fit our colour scheme perfectly), and tied them on with these little ribbons and paper clips. It was a real blessing to Connie, and just one of the creative ideas that she really loved.

30th birthday 109

Dessert

You can't have a birthday party without birthday cake. And what's better than only serving cake? Creating an entire dessert table! I had so much fun putting together a purple themed dessert table,inspired by this purple party. See all the details of the beautiful 30th birthday white and purple dessert table here.

More Fun 30th Birthday Party Ideas

Our intimate dinner party was so fun, but another great option would be to book a room at your favorite restaurant, you might even look for somewhere with live music and a dance floor, or a rooftop bar with a happy hour to get the party started.

If you're looking for more at-home party ideas try a board game night, online cooking classes with friends, or an online mixology classes. If you're into a themed birthday party how about a murder mystery party, great gatsby, wine tasting party. Escape rooms also make a fun theme. Another idea for a good time would be to book a spa day. And a unique way to celebrate, not for the faint of heart, is a big group camping trip. Turning 30 is a big deal so how ever you choose to celebrate the birthday boy or girl, I hope you have a wonderful time and make lots of memories together.

More Party Inspiration

You might also like our Toast Party here.

toast party

Also check out our Beer and Rootbeer Tasting Party here.
You might also enjoy our Favourite Things Birthday Party here.

Favourite Things Party: the perfect 50th birthday party ideas for your husband. Favourite food, favourite dessert, favourite book as a party favour.

Stuffed Puppy Dog Adoption Birthday Party

Jul 17, 2012 · 14 Comments

Stuffed toy puppy dog adoption party.

At this Puppy Dog Adoption Birthday Party children choose a stuffed dog, fill out adoption papers, named it, dressed it, take it to the vet, groom it, walk it, and play with it. Amazing inspiration for a puppy dog themed birthday party including a hot dog buffet, dessert table, and DIY decorations.

Stuffed toy puppy dog adoption party.
[feast_advanced_jump_to]

Why We Love This Party

  • Puppy love is to mild of a term to discribe how much we love dogs!
  • The adoption center had the cutest dogs and such fun activites for the kids the enjoy.
  • Who doesn't love a hot diggy dog for lunch?
  • Is there anything sweeter than dog themed desserts?

My little friend Allie LOVES puppy dogs. So for her birthday her Mom Heather set up the most amazing stuffed puppy dog adoption center for her and all her friends. There was also sweet DIY decor, and a amazing hot dog buffet and dog inspired dessesrt table.

Love dogs too -you might love this party for my dog's birthday too. Or check out our Magical Animal Adoption Agency party, or Teddy Bear Party. And if you're looking for ideas on how to decorate for an at home birthday party, there's lots of inspo here.
The Invitations

The sweet invitations, which Heather ordered from a seller on Etsy, set the tone right from the beginning. These and other pintables for the party were so cute, and added a vintage feel.

I also loved how Heather made a little paper doily envelope and tied it with bakers twine.

DIY Decorations

When we arrived at the party we were greeted by this pretty garland made it out of scrapbook paper, bakers twine, scrapbook letters and more doilies.

Heather found these fun ceramic dogs and spray painted them yellow and added cute little paper flowers to embellish them. They really brought the puppy theme to the tables. It's amazing what yo can do with a little spray paint!

As guests arrived they were welcomed to the first centre, The Puppy Adoption Centre, where they choose a stuffed puppy to adopt.

Stuffed Puppy Adoption Centre

  • Decorate a box for the puppy.
  • Fill out pet adoption papers.
  • Write the dog's name on his collar

Each centre had one of these sweet signs with instructions.

At this centre as well as choosing their stuffed dog, the kids could decorate a box with the puppy's name, fill out the adorable adoption papers, and pick out a collar and add the puppy's new name.
There were lots of fun supplies to decorate the puppy boxes.

After decorating there were adoption certificates to fill out.

The cute pet adoption party free printables can be found here, at the Chickabug Blog.

Heather made the cute collars out of ribbon, velcro, and gift tags. The kids loved being able to write the puppy's new name on them.

Puppies 'R Us Centre

  • outfits
  • leashes
  • ball
  • puppy treats

The next centre was The "Puppies R' Us" centre, where they picked out outfits, leashes, a ball, and puppy treats.
The little puppy outfits were from IKEA.

I love the puppy treats, with their paper doily details, which contained a little snack of chocolate cereal -for hungry puppies, or their little owners. 😉

Here are the leashes. The were stiff, so the kids could really "walk" their puppies. And, they had a little button on the end that made a barking sound -so cute!

Grooming Station

  • brush and mirror
  • mini towel
  • spray bottles with sponges

The next centre was the Grooming Station.

At this centre there as a brush and mirror for everyone, and a little towel made out of felt. The kids could spray their puppies with a little water, and wash them with a sponge, then dry them and brush them.

Vet Clinic

  • puppy checkup with vet toys
  • puppy vitamins

The final centre was a Vet Clinic.

Puppy owners were invited to give their puppy's a check-up and pick up a container of puppy vitamins.

Here's the vitamins, filled with gummy bears.

Puppy Dog Party -Stuffed Puppy Adoption puppy vitamins

And here is the birthday girl, giving one to her puppy.

Looks like this little puppy needed a band aid on his leg.

It was so much fun going around to all the little activity centres, and gathering up the puppy supplies. And it was great to have the little boxes to put it all in.

We went home with two new puppies, "Sophie" and "Lilly", and I have to say they've been very quiet and good little puppies. 😉

The Drinks

The drinks table was so pretty. Heather, set up lemonade and mason jars with daisy tops and paper straws. They were so pretty!

Heather and I were out shopping one day and we spotted this fire hydrant drink dispenser on sale! So perfect for a dog themed party, she couldn't resist.
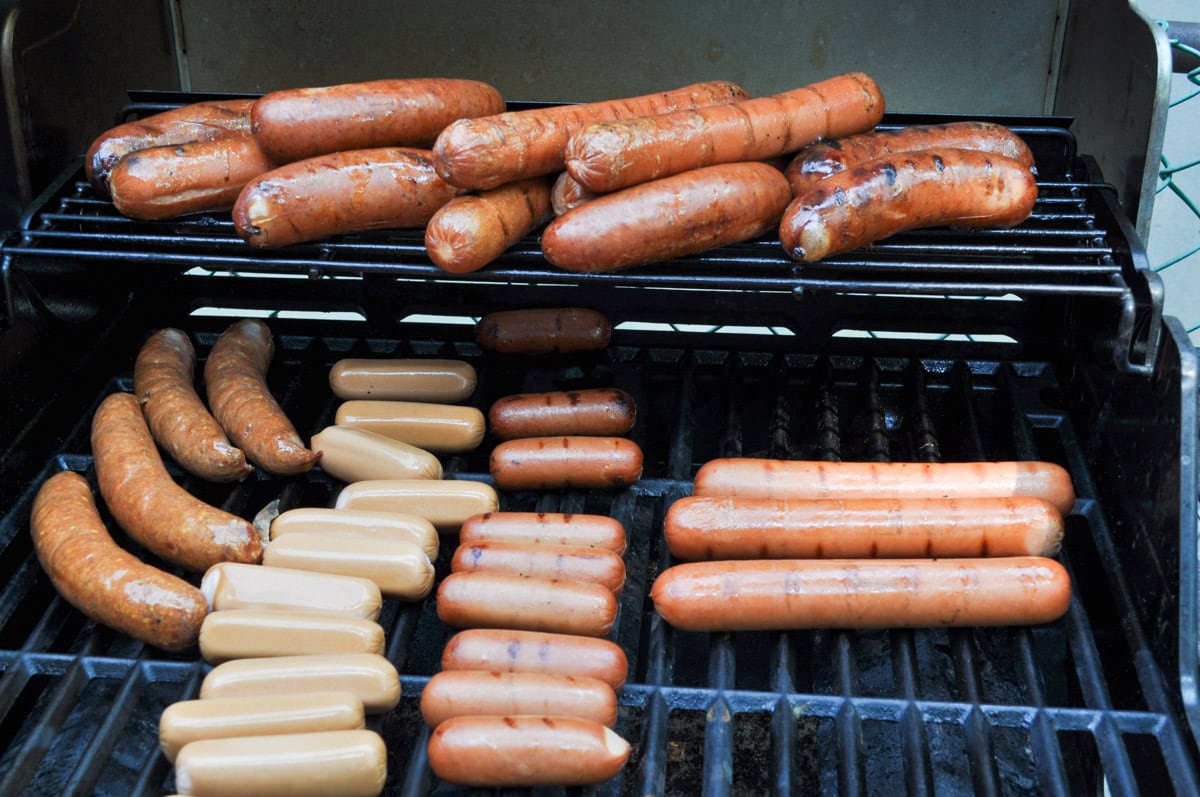
There was also a cute yellow dog dish with chips for munching on.

The two little puppy dog sippy cups are from IKEA and were for some of the toddler guests at the party.

The Hotdog Buffet

For lunch there was a hotdog bar -get it, hotdogs, dog party!

Heather has all kids of hotdogs, veggie dogs, mini hotdogs and sausages, and every topping imaginable too. It was delicious.

The cutlery was in these cute IKEA plant pots, that echoed the paper doily details.

Heather also made the sweetest food labels out of scrapbook paper and more paper doilies.
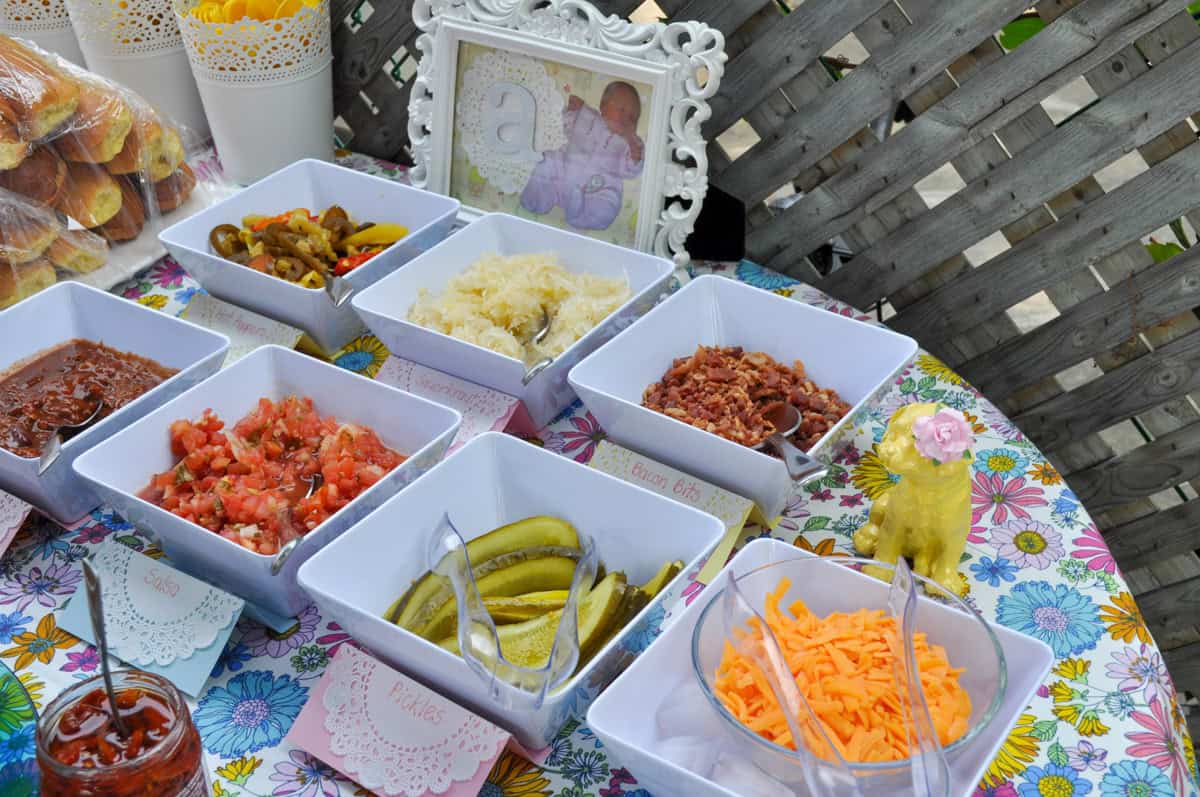
Side Dishes

Along with the hotdogs, there was a table of beautiful side dishes.

There were chips, in these cute cardboard containers.

Heather also served little mac and cheese cupcakes -perfect hand-held party food.

There was also a yummy pasta salad, served in mason jars. I love how she used a cupcake liner on top of the lid -such a pretty detail.

Puppy Dog Dessert Table

And saving the best til last, the puppy dog desert table was amazing.

Heather made these beautiful vanilla cupcakes with butter cream frosting -they were so good. She used the party printables to create the cupcake picks.

There was also fruit salad served in a mason jar.

Another fun addition were these "puppy water bowls" made with blue jello. There were so cute and the kids loved them.

I made these cute little puppy dog cake pops.  To make them I made regular cake pops and then added a mini M&M nose, candy eyes and little chocolate ears.  To make the ear shape I put some melted chocolate in a mini plastic spoon as a mold and let it set.  Once it's set these make the perfect ear shapes.
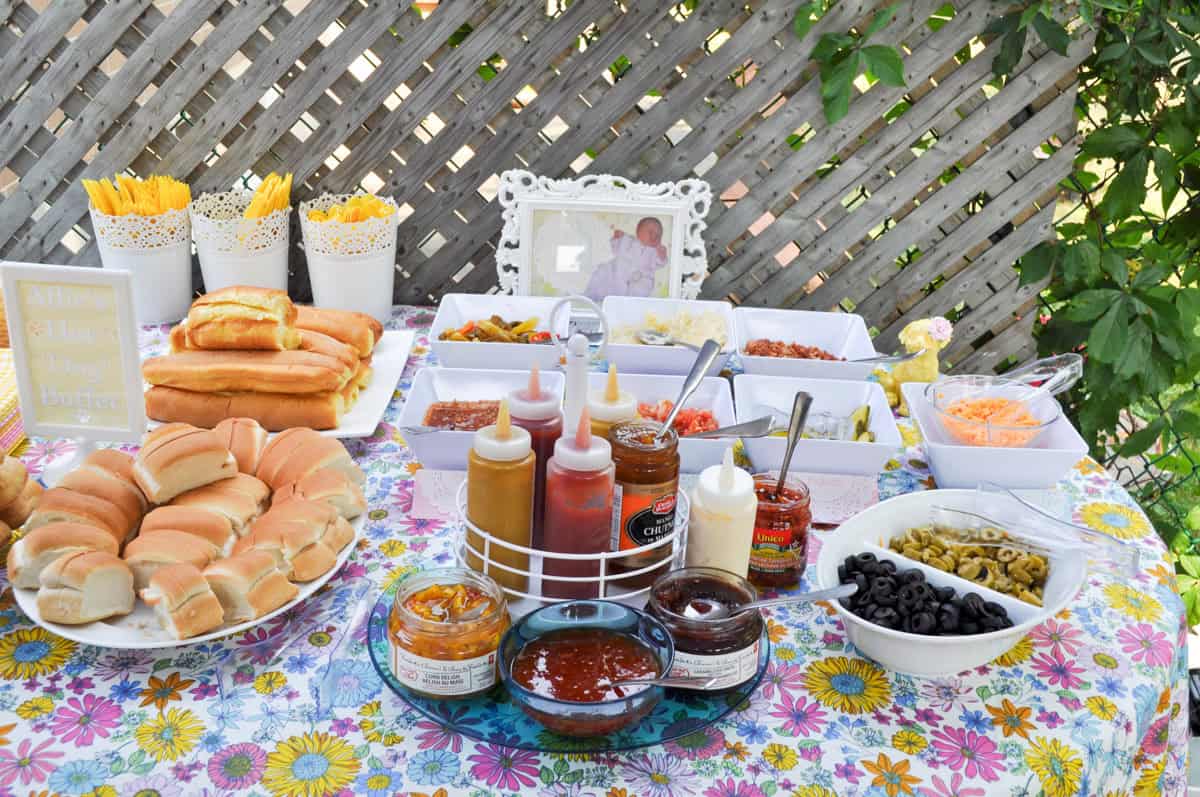
There were also some cute paw print lollipops that fit the theme perfectly.

Heather also made her famous sugar cookies. She packaged them in these lovely paper bags in the party colours, and sealed them with stickers she made from the party printables.

Inside were the beautiful cookies; puppy dogs, with pretty pearl collars, dog bones, and paw prints. They were so delicious, and easy for guests to take home in their little bags.

Happy Birthday Allie! It was truly one of the sweetest parties I've ever been to. With the best puppy dog party ever, life really is a party!

With a Puppy Dog Adoption Party, and new puppies to love, life really is a party!

Frequently Asked Questions

Where are the stuffed dogs from? The dog clothes? The dog leashes?

The stuffed dogs are from Amazon. The dog clothes were from Ikea, but they no longer carry them. Look for something similar on Amazon. The stiff walkable leashes were from Amazon, but they don't seem to be avaiable any longer.

Where are the adoption printables from?

Find the free animal adoption printables at the Chickabug Blog.

Where were the party invite and other matching printables from?

They were purchased from LoveCreationGirl on Etsy. They don't seem to be available any longer, but you could reach out to the seller.

More Party Inspiration

  • Princess and the frog party table with food and decorations.
    The Best Birthday Party Home Decoration Ideas
  • Teddy bear breakfast party with teddy bear themed food.
    Teddy Bear Breakfast Party Ideas
  • Beauty and the Beast party table with food and decorations.
    Beauty and the Beast Party -Themed Dinner and Movie Night
  • Cinderella Party table with Cinderella inspired food and DIY party decor.
    Cinderella Party -Dinner and Movie Night

If you try any ides from this Puppy Dog Adoption Party or any other ideas on my blog please let me know how it went in the comments below. Thanks for visiting today!

  • « Go to Previous Page
  • Page 1
  • Interim pages omitted …
  • Page 17
  • Page 18
  • Page 19
  • Page 20
  • Page 21
  • Go to Next Page »

Primary Sidebar

Welcome!

Life is a Party is all about helping you celebrate everyday with great food, entertaining and party inspiration, and seasonal crafts and home decor inspired by the holidays.

More About Dannyelle

Trending Recipes

  • Mac and cheese with panko breadcrumb topping.
    Best Homemade Mac and Cheese with Panko Breadcrumb Topping
  • Homemade iced capps in glasses on a wood table.
    Tim Hortons Copycat Iced Capp Recipe
  • Dirt Pudding no cream cheese in glasses with candy rocks, and fresh mint that looks like a little plant.
    Easy Dirt Pudding Recipe without Cream Cheese
  • Easy 3 ingredient coconut milkshake recipe.
    Easy Coconut Milkshake Recipe
  • Easy food processor scones on a plate with jam.
    Easy Food Processor Scones
  • Fluffy small batch pancakes for two ready to serve on a plate with syrup.
    Easy Small Batch Pancakes For Two Recipe

Fall Ideas

  • Pumpkin shaped dinner roll recipe, with a herb stem.
    Pumpkin Shaped Dinner Rolls
  • Fall breakfast board
    Fall Breakfast Charcuterie Board
  • Halloween witch decorations
    Witch Halloween Decor
  • fall home decor
    Fall Decorating Ideas -Home Tour
  • Modern Boho fall mantel ideas.
    Modern Boho Fall Mantel Ideas
  • Homemade pink candy apples on a cutting board.
    How To Make Pink Candy Apples

Entertaining Ideas

  • Adult mermaid party table set on the beach with cake and shells.
    Adult Mermaid Party Ideas: A Beach Picnic Goodbye to Summer
  • Overhead view of tomato party table with pizza and appetizers.
    The Ultimate Tomato Party: A Tomato Girl Summer Garden Gathering
  • Camp themed party table with green gingham tablecloth, wildflowers, and Welcome to Camp banner.
    The Ultimate Camp Themed Party for Adults
  • Garden party table set under white pergola with vintage floral tablecloth, pink peony centerpiece in wooden tool caddy, white wicker chairs, and climbing white roses in background.
    Garden Themed Party
  • Complete mimosa bar setup on white console table with vintage silver ice bucket, labeled colorful juice bottles, small glass garnish bowls, and ribbon-tied champagne flutes on white lace tablecloth with flower wall backdrop.
    How to Set Up a Beautiful Mimosa Bar
  • Breakfast for dinner party table styled like a bed with star quilt tablecloth, gingham pillows, and cloud installation above.
    Breakfast for Dinner Party: Brinner Under the Stars
  • Recipe Index
  • Parties & Entertaining
  • Fall
  • Subscribe
  • Free Resource Library

Footer

back to top

as seen in:

Better Homes and Garden Logo
American Farmhouse Style logo.
Apartment Therapy logo.

About

  • Privacy Policy
  • About

Subscribe

  • Sign Up! for emails and updates

Contact

  • Contact

As an Amazon Associate I earn from qualifying purchases.

Copyright © 2025 Life is a Party

Share
Pin
Post
Share
Pin
Post

Rate This Recipe

Your vote:


A rating is required
A name is required
An email is required