• Skip to primary navigation
  • Skip to main content
  • Skip to primary sidebar
Life is a Party
  • Recipe Index
  • Parties & Entertaining
  • Fall
  • Subscribe
  • Free Resource Library
menu icon
go to homepage
  • Recipe Index
  • Parties & Entertaining
  • Fall
  • Subscribe
  • Free Resource Library
subscribe
search icon
Homepage link
  • Recipe Index
  • Parties & Entertaining
  • Fall
  • Subscribe
  • Free Resource Library
×
Home

How To Make Campfire Muffins In An Orange Peel

How To Make Campfire Muffins In An Orange Peel

Jul 13, 2012 · Leave a Comment

Campfire muffin in an orange peel.

Campfire Muffins: make muffins over the campfire in orange peels, such a fun campfire recipe idea for breakfast or a snack.

Campfire muffin in an orange peel.
[feast_advanced_jump_to]

We love cooking special camping food recipes.  These campfire muffins are so fun and delicious to make.  The muffins are baked inside of an orange peel, in the hot coals of a campfire.  This delicious treat is so much fun to make on a camping trip.

When I first made these we'd been away camping for a few nights at the beach. We had a great time at the beach, going for long swims and making sand creatures.  Another highlight was making these campfire muffins using muffin mix in an orange peel!  These are a really fun idea for a campfire recipe that are really delicious.

We had 5 moms and 9 kids between us all on our camping trip, and decided to divide up the cooking so we all only had to do one meal for everyone, and lunches for ourselves. Since all of us are the main cooks at home, and cooking while camping is even more work, it was a real treat to have a little "time off".

I made one of the dinners and for dessert decided to try these campfire muffins. The muffins are baked in a hollowed out orange peel used as a muffin cup. It makes the muffin have a delicious orange flavor and smell, and insulates the muffin from burning in the campfire.

I highly recommend trying this on your next camping trip.  These orange muffins are such a fun outdoor cooking idea, and a really fun camping activity.

Love campfire cooking? You might also like our savory smores, made with cheese and crackers.
how to make campfire muffins

Ingredients:

  • muffin mix, egg and oil according to the package directions
  • 3 oranges
  • tin foil

I bought a blueberry muffin mix, and brought a ziplock bag to mix it in, and the oil and egg that it called for, along with some oranges.  You could make muffin batter from scratch if you prefer, but I thought that using a store bought muffin mix was a great way to make this easy while camping.  Be sure to read the ingredients you will need for your particular muffin mix.  The blueberry muffin mix we used called for egg, and oil to be added to make the batter.

how to make muffins over a campfire

Orange Peel Muffin Cups

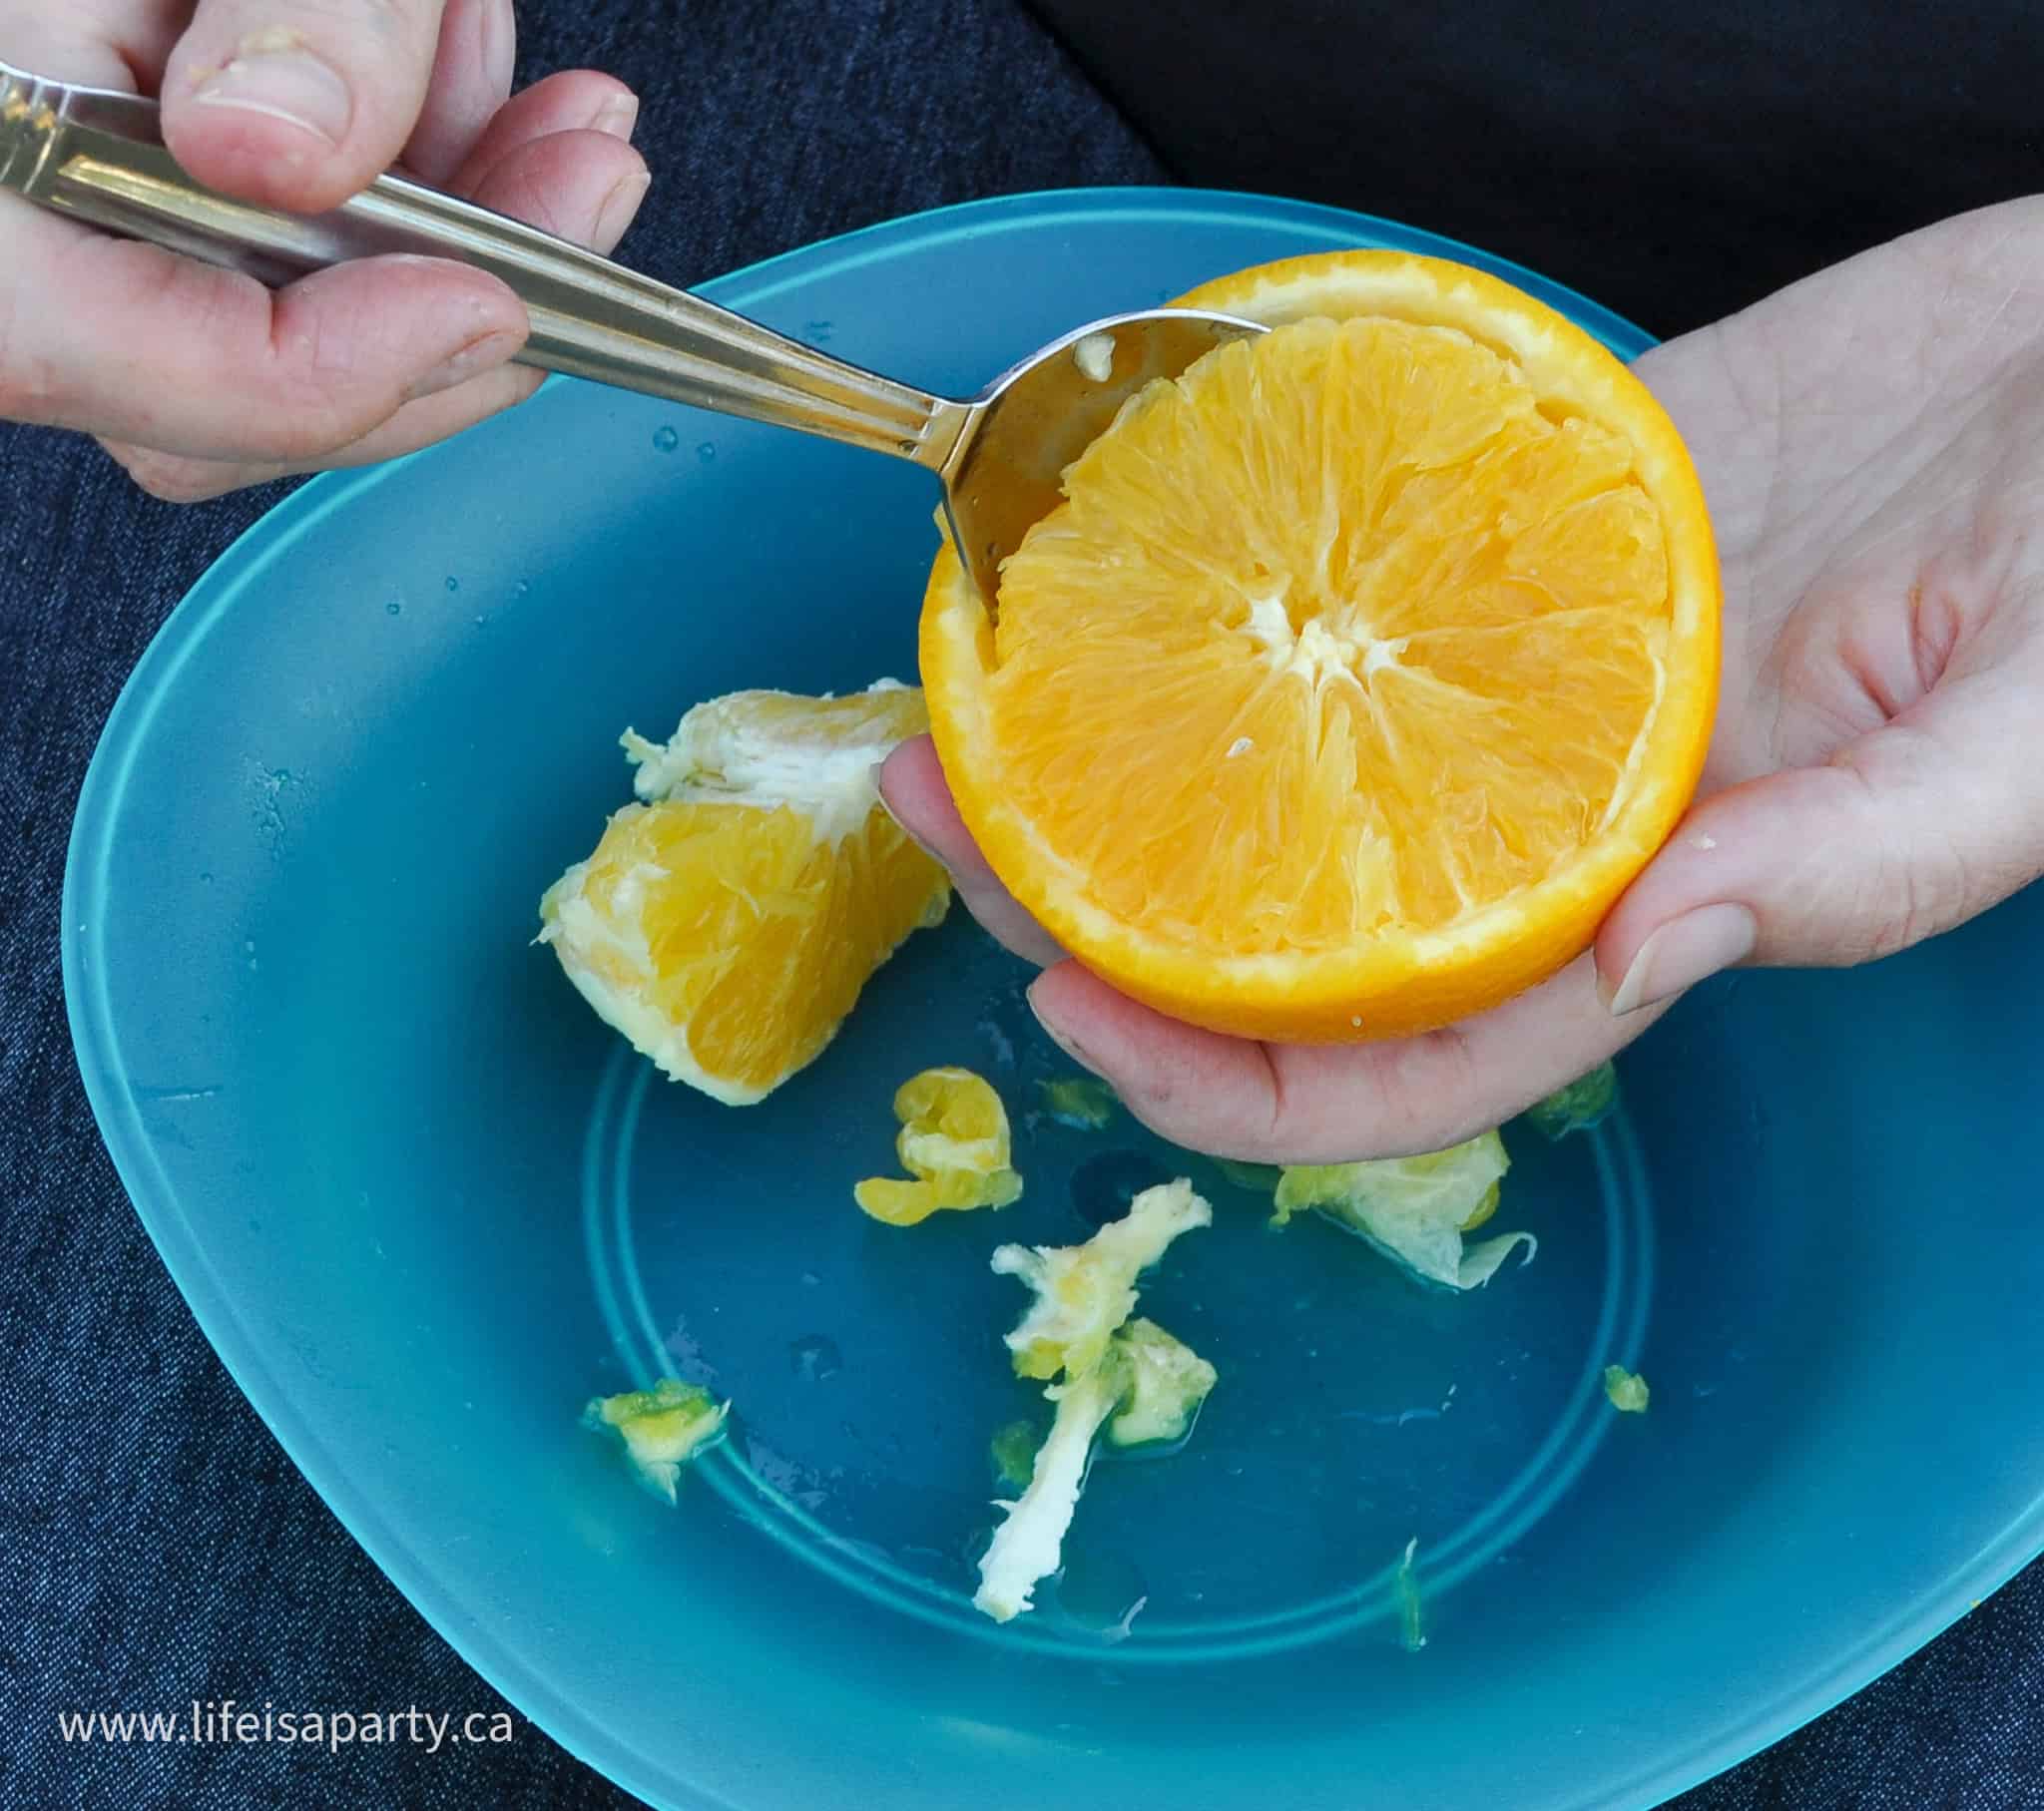
We started with the oranges, cutting them in half and scooping out the fruit without puncturing the peel.  Use a spoon to help you scoop out the orange segments, and take care not to damage the orange peel cups.
muffin in an orange peel
how to make muffins when camping

Next, mix muffin mix together in the ziplock bag, by adding the other ingredients and squishing it together in the sealed bag. Next, cut off the corner of the ziplock bag and pour batter into the inside of the orange halves.
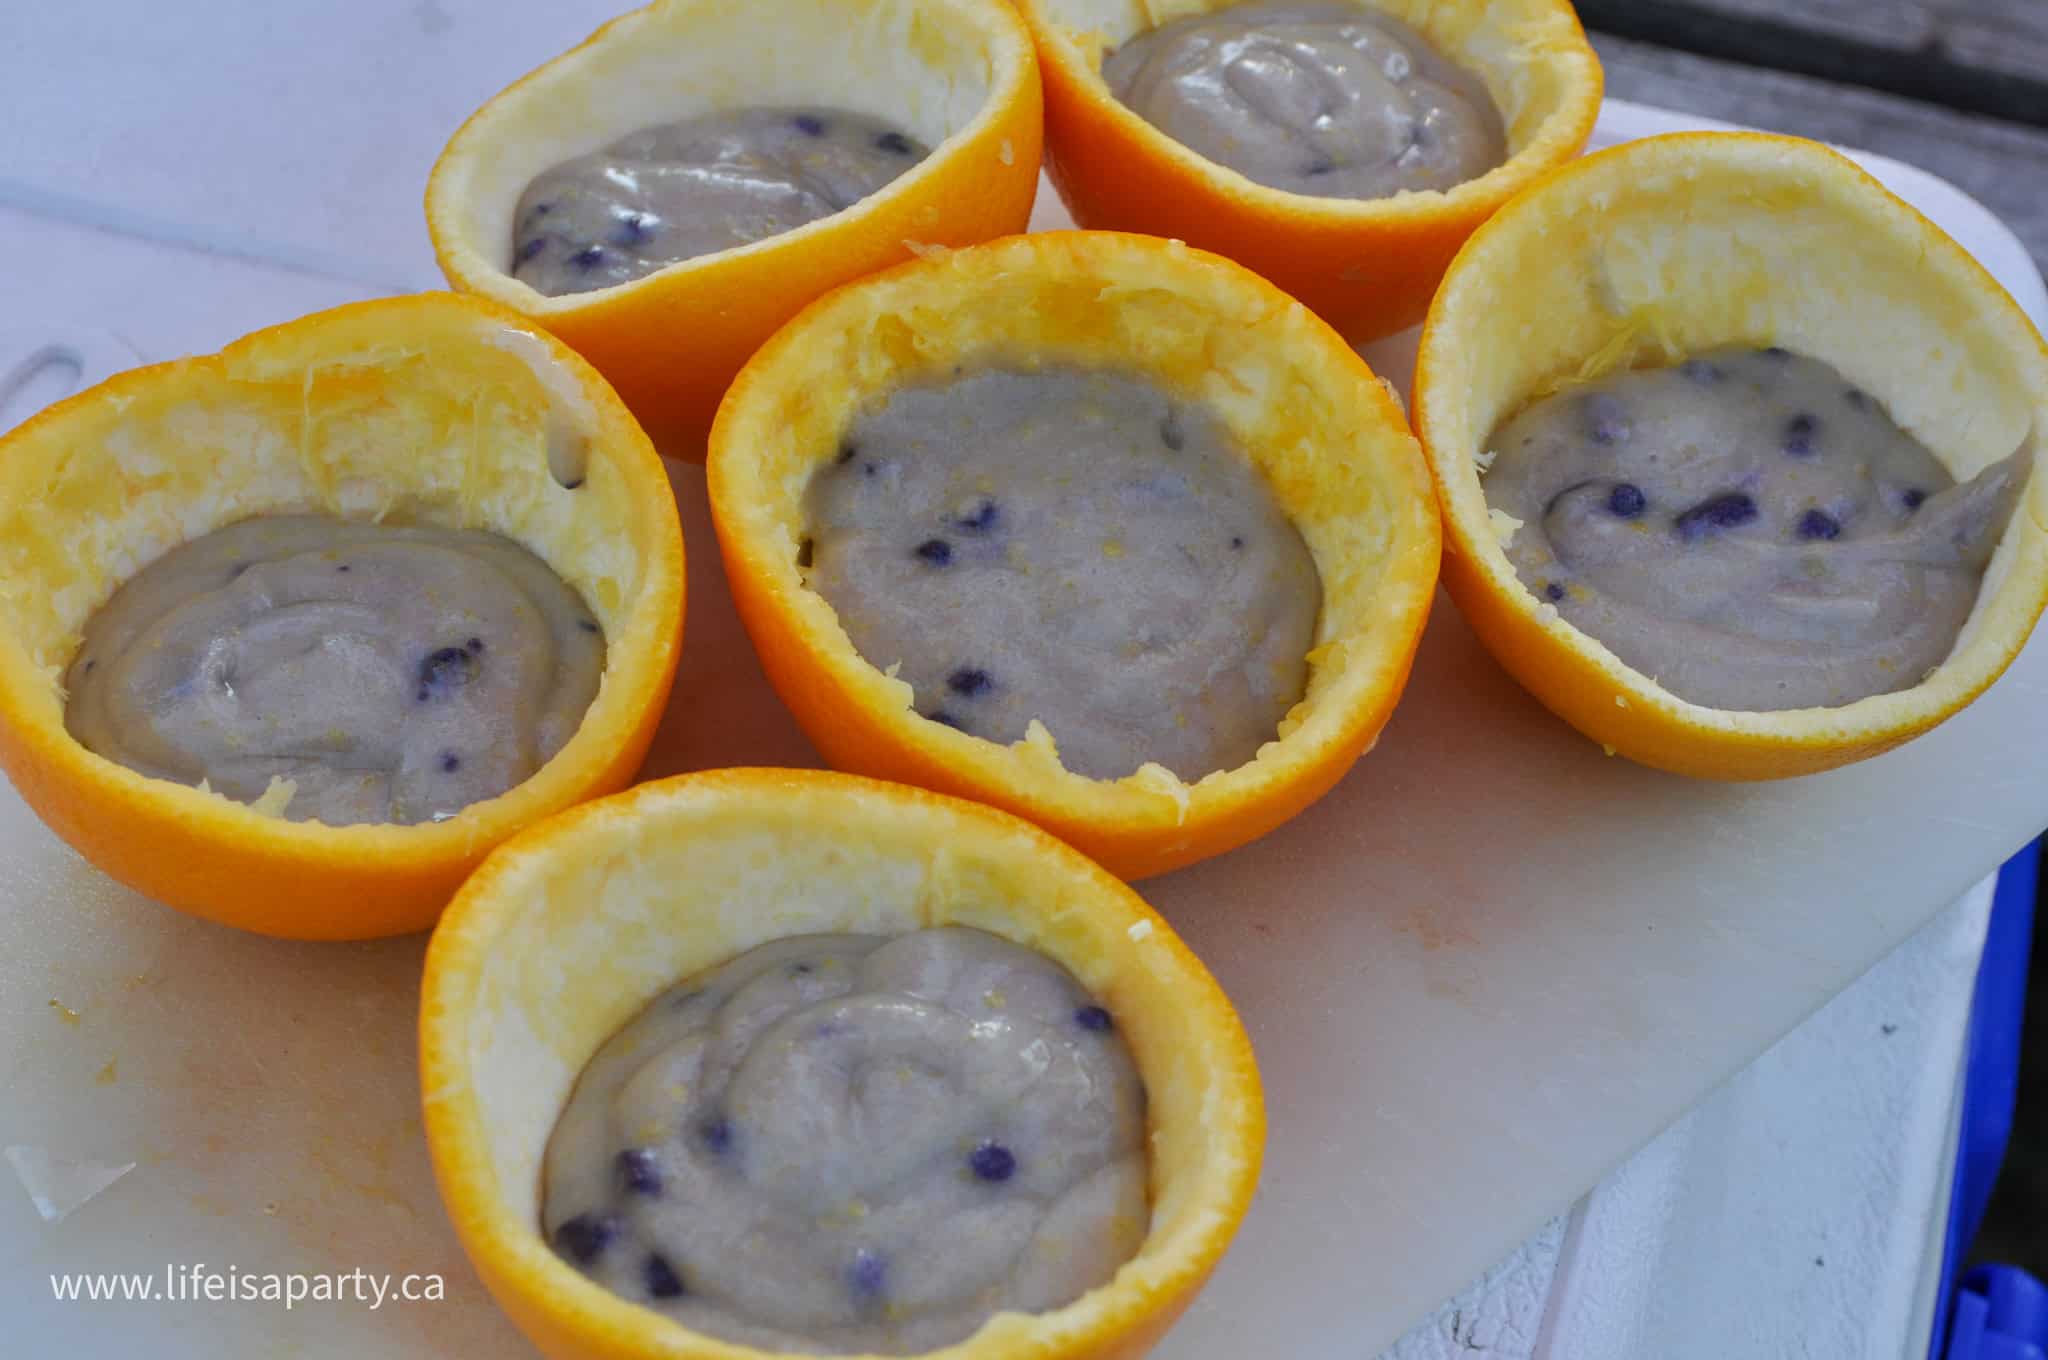
campfire muffins

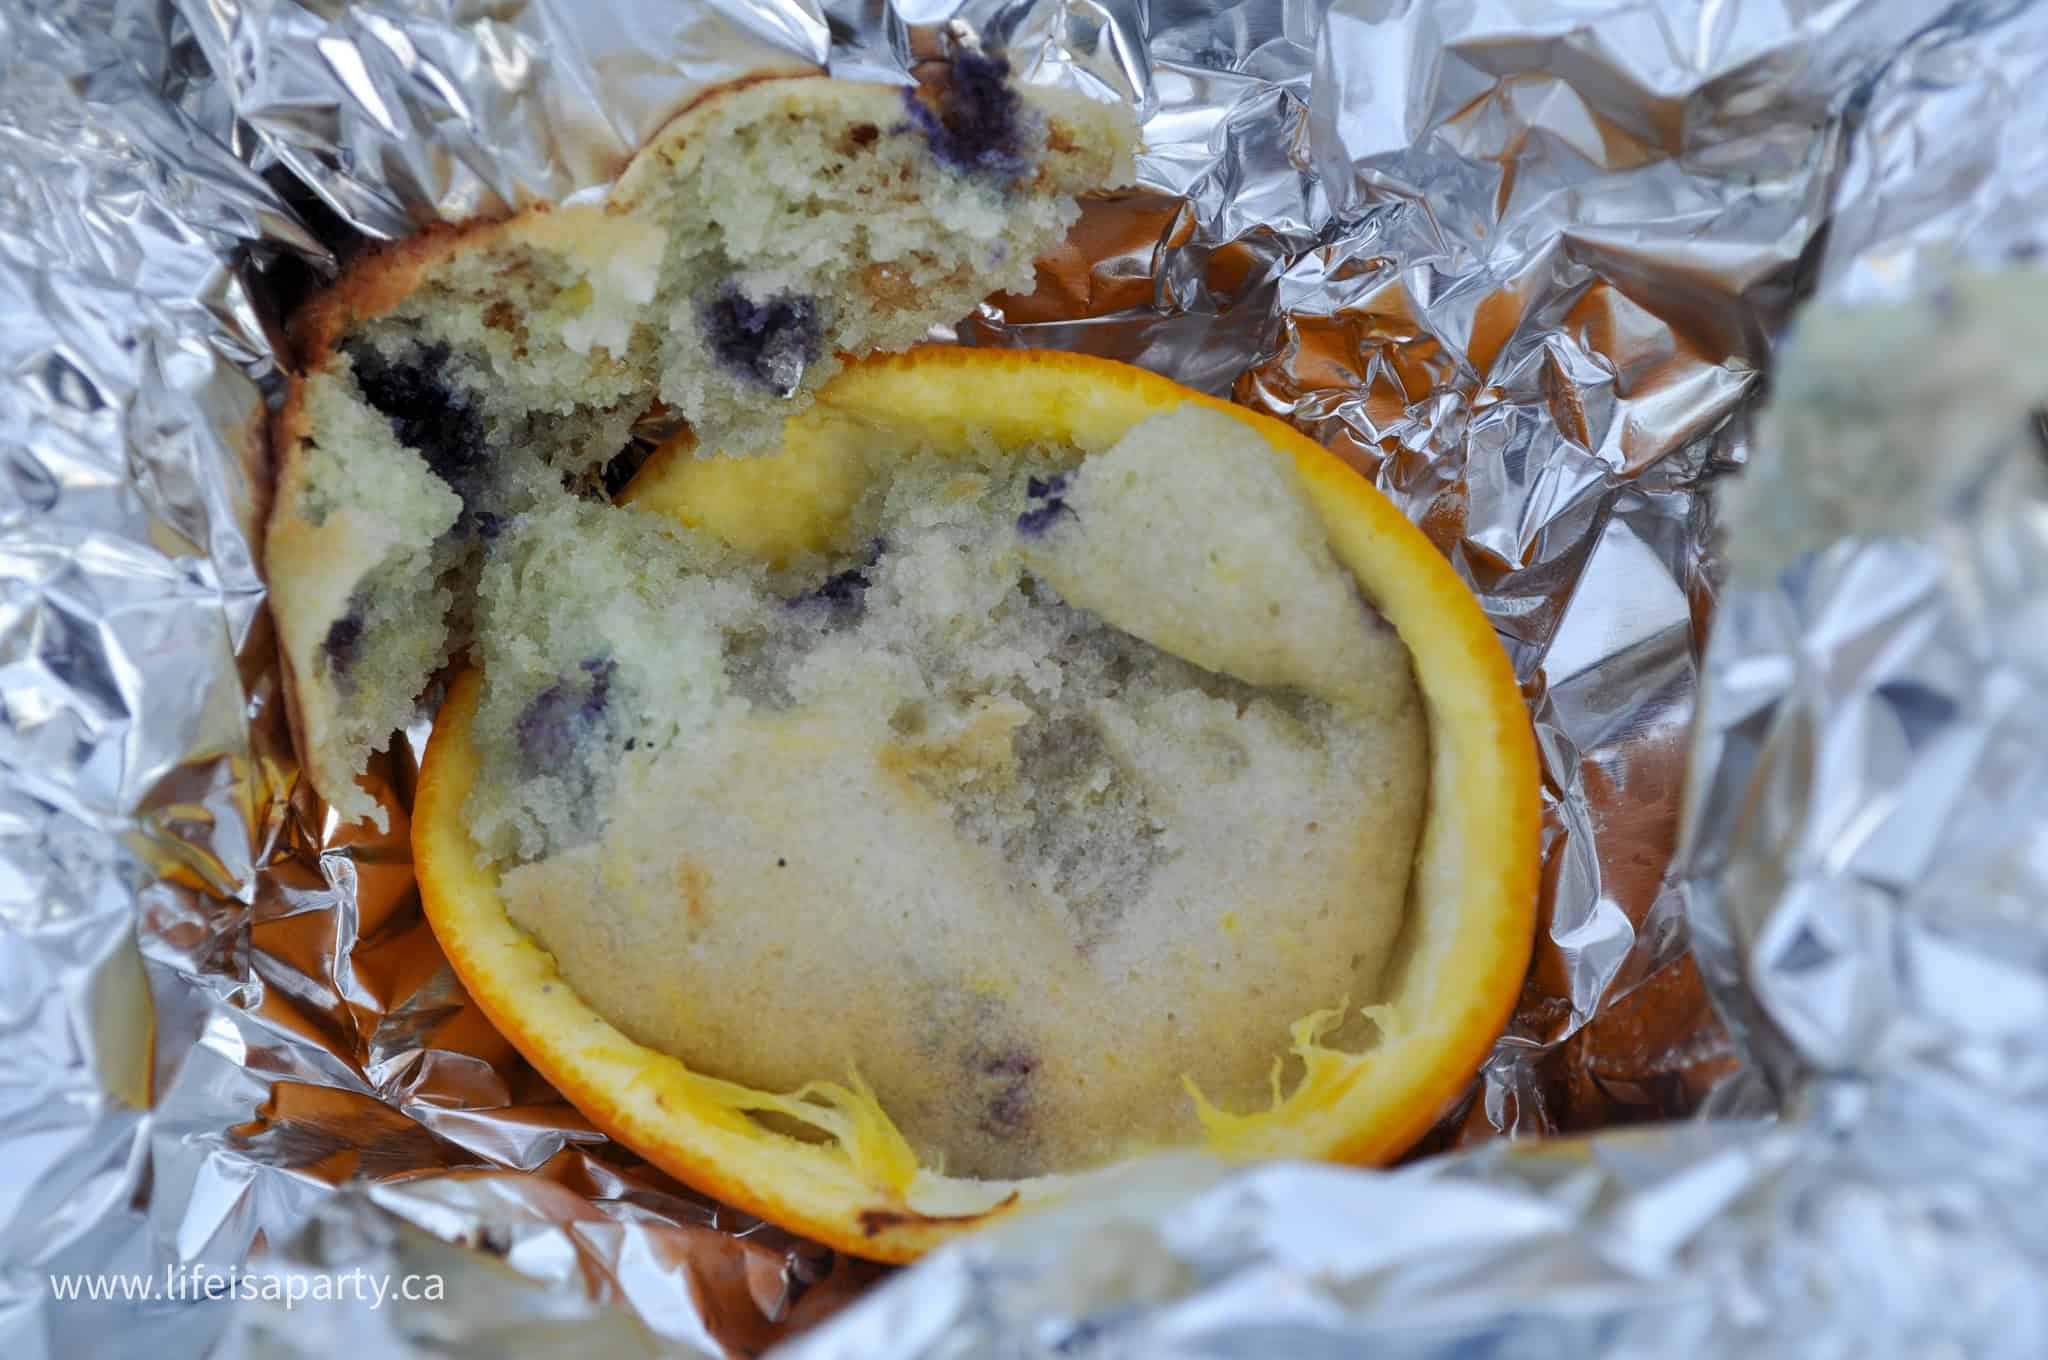
To bake the muffins, you wrap the little cups in heavy duty aluminum foil.  Set the orange peel in the center of a piece of aluminum foil, and pull the corners up over the top of the orange and squeeze it together to seal it.
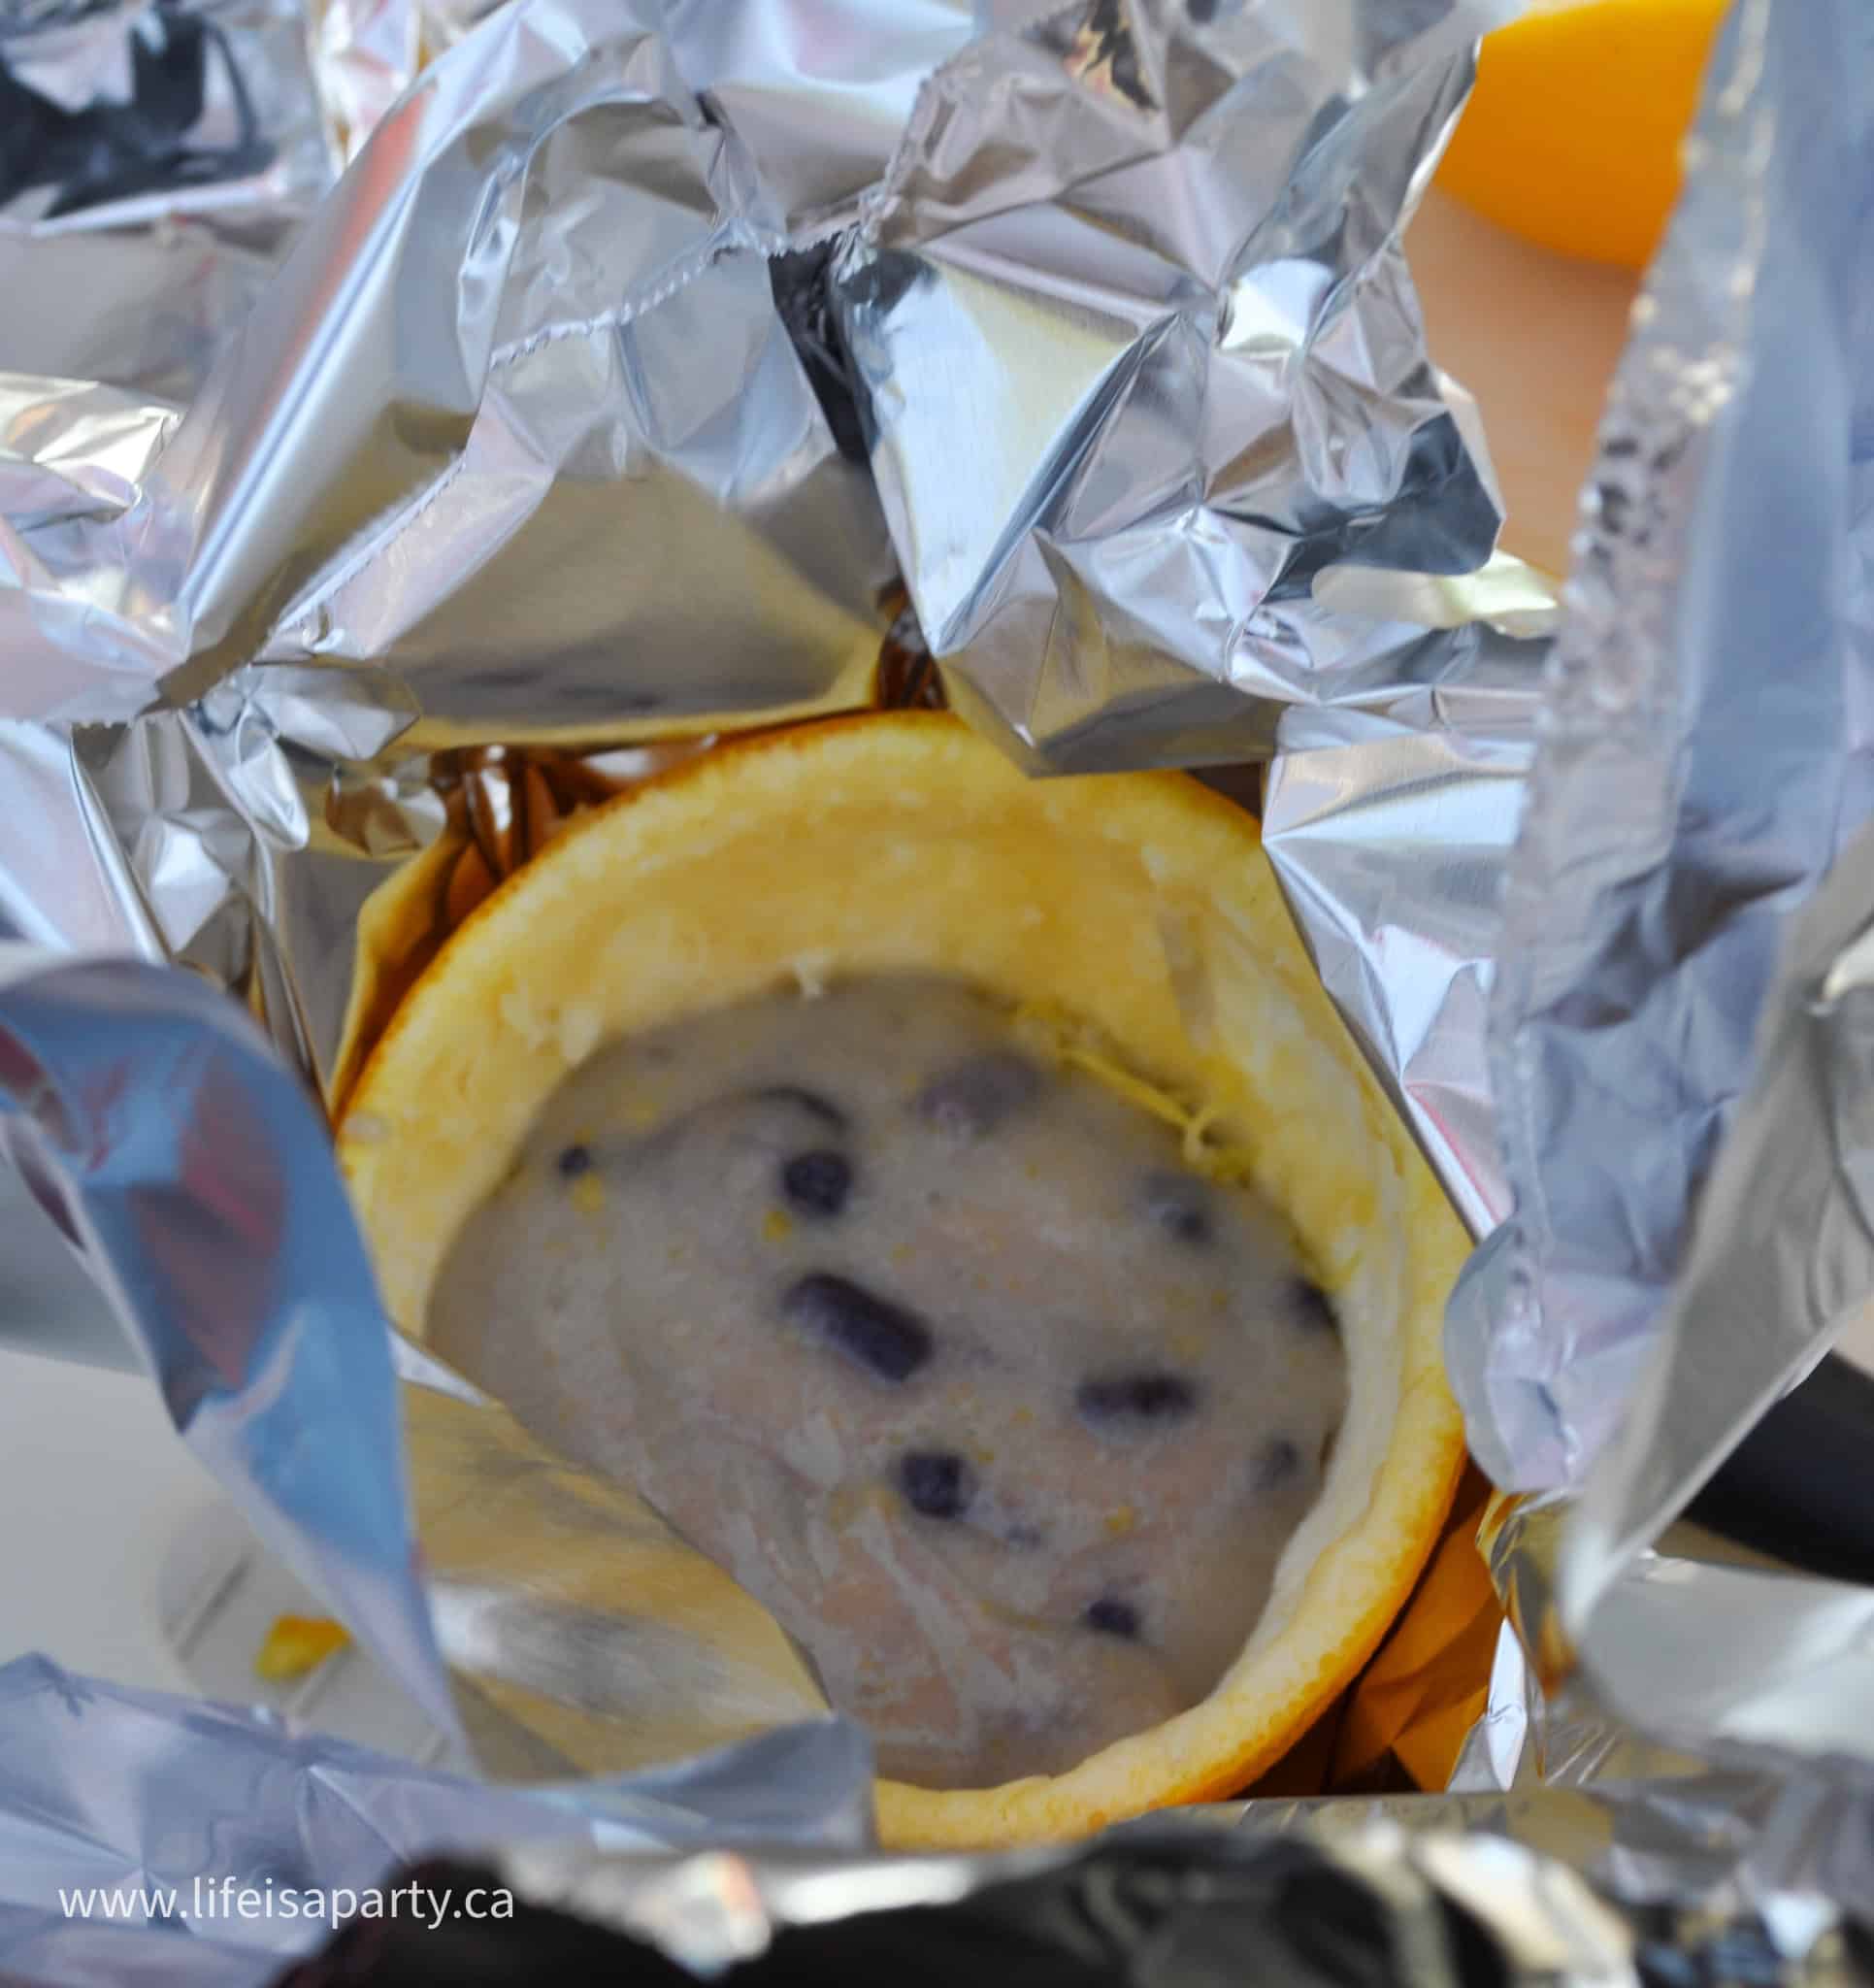
campfire muffins

Then you place the foil-wrapped oranges into the coals of the fire.  Don't place the campfire muffins directly in the flames.

orange peel campfire muffins

I cooked them about 20 min., turning them after 10. I checked them with a toothpick to see if they were done. 

Remove the finished campfire muffins from the coals, and then unwrap them and enjoy the best part -eating them.

The smell was amazing, fresh blueberry muffins, mixed with the scent of oranges.
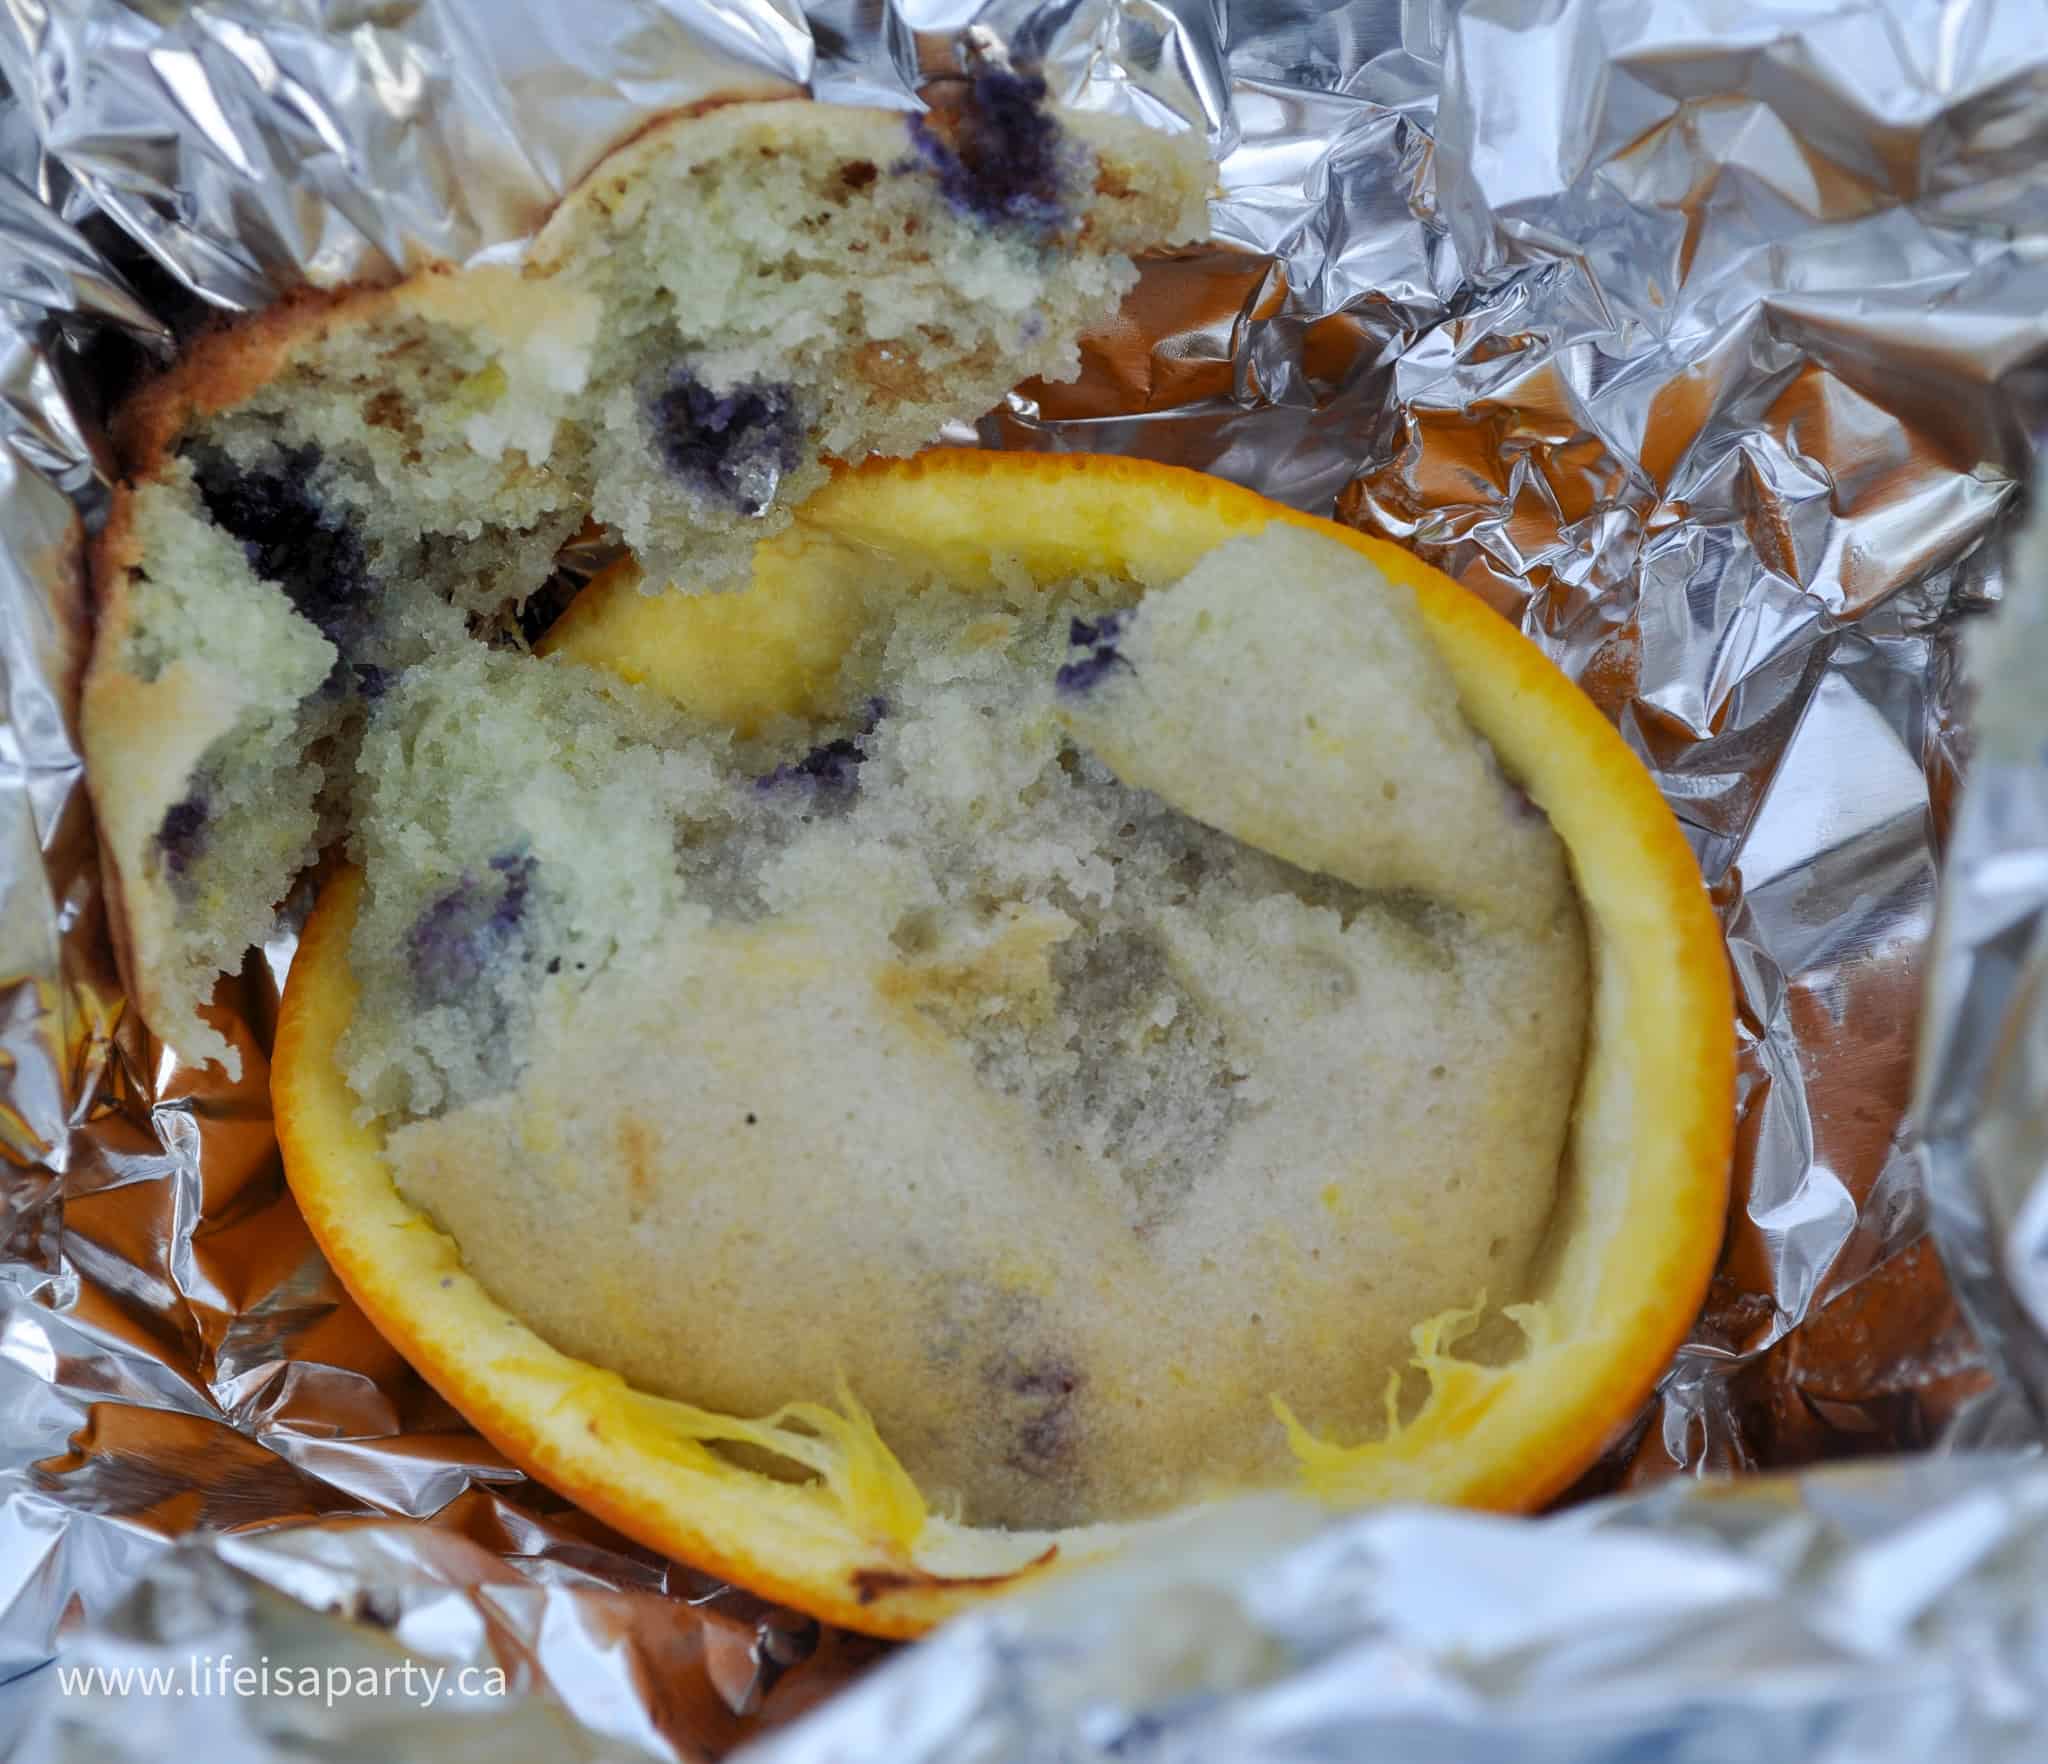
campfire muffins

I thought they were really good, and so did Paige, who ate two. The other kids were more interested in campfire popcorn, and s'mores, but they were fun to make and enjoyed by the adults. ;). The blueberry flavor pairs so well with the hint of orange flavor that comes from baking in the orange peel.

We love this idea for any camping trip or even a backyard cookout.  It's such a fun and easy activity to do with your kids around a good fire.

camping food ideas

With fresh baked campfire muffins, life is a party.

More Camping Recipe Inspiration

You might also like our Campfire Paninis here.
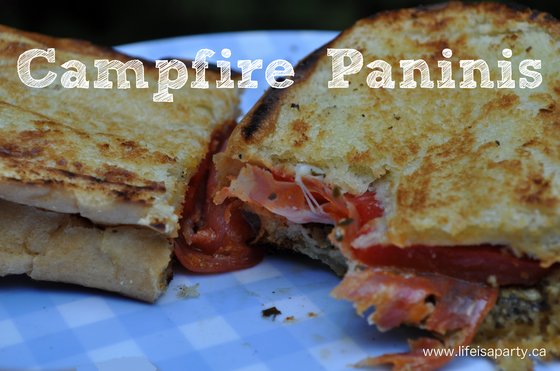
Campfire Paninis: make your own DIY campfire paninis press with a foil covered flat rock and enjoy a campfire panini in the woods.

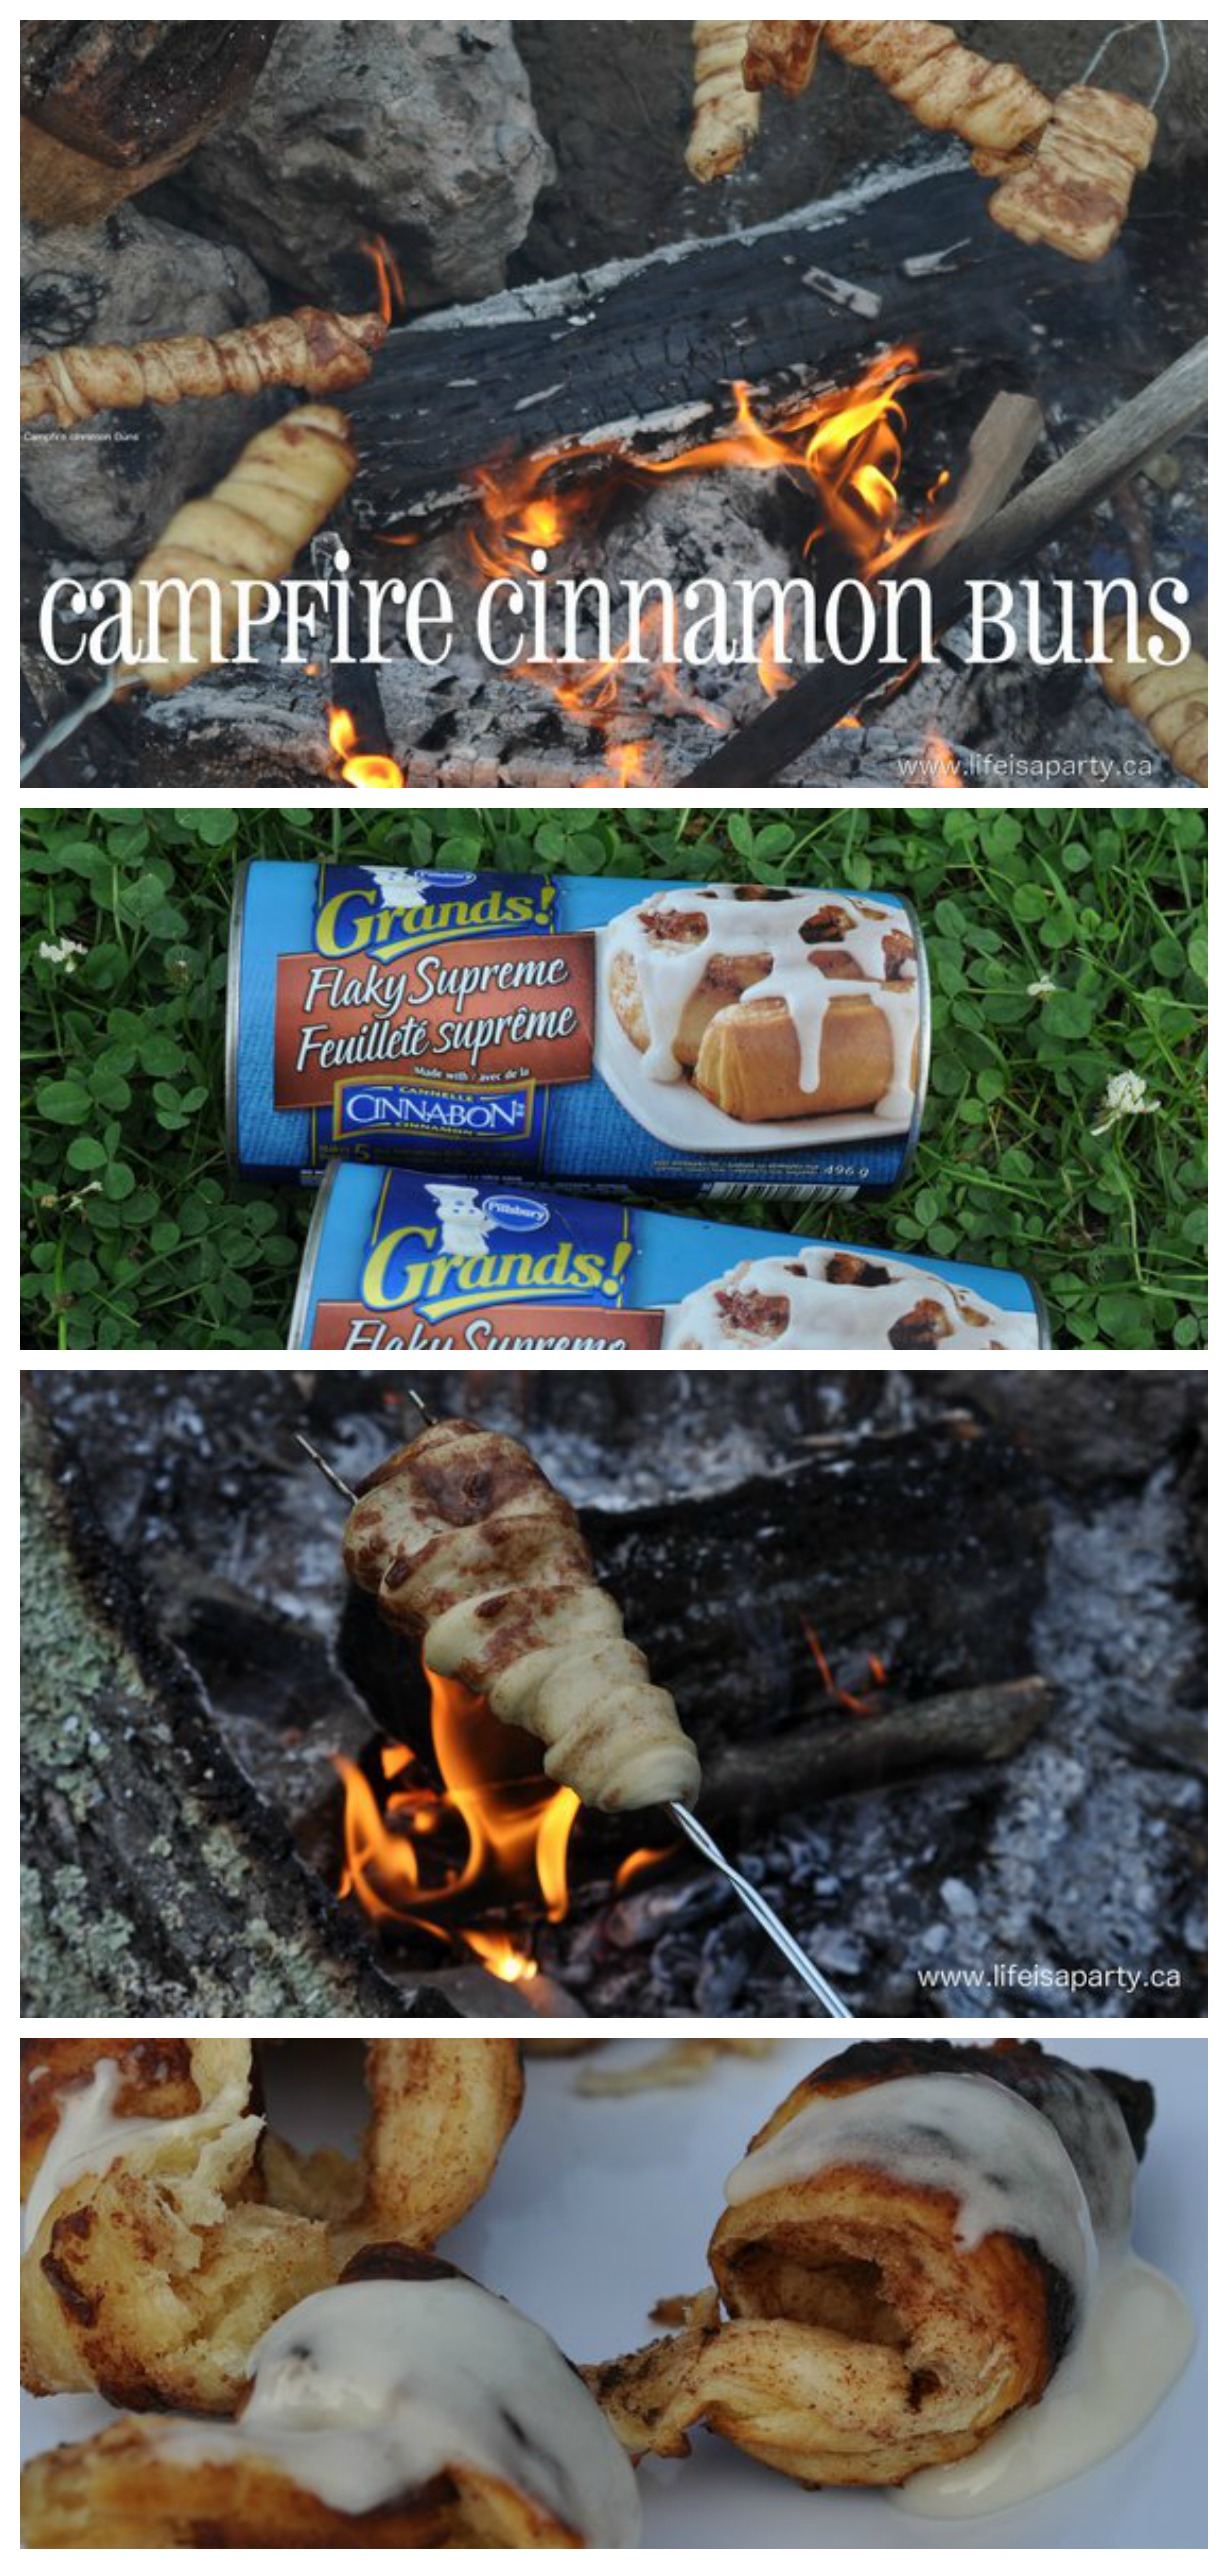
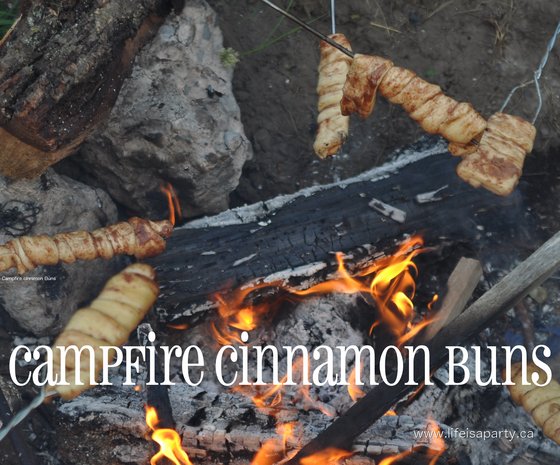
Also check out Campfire Cinnamon Rolls here.
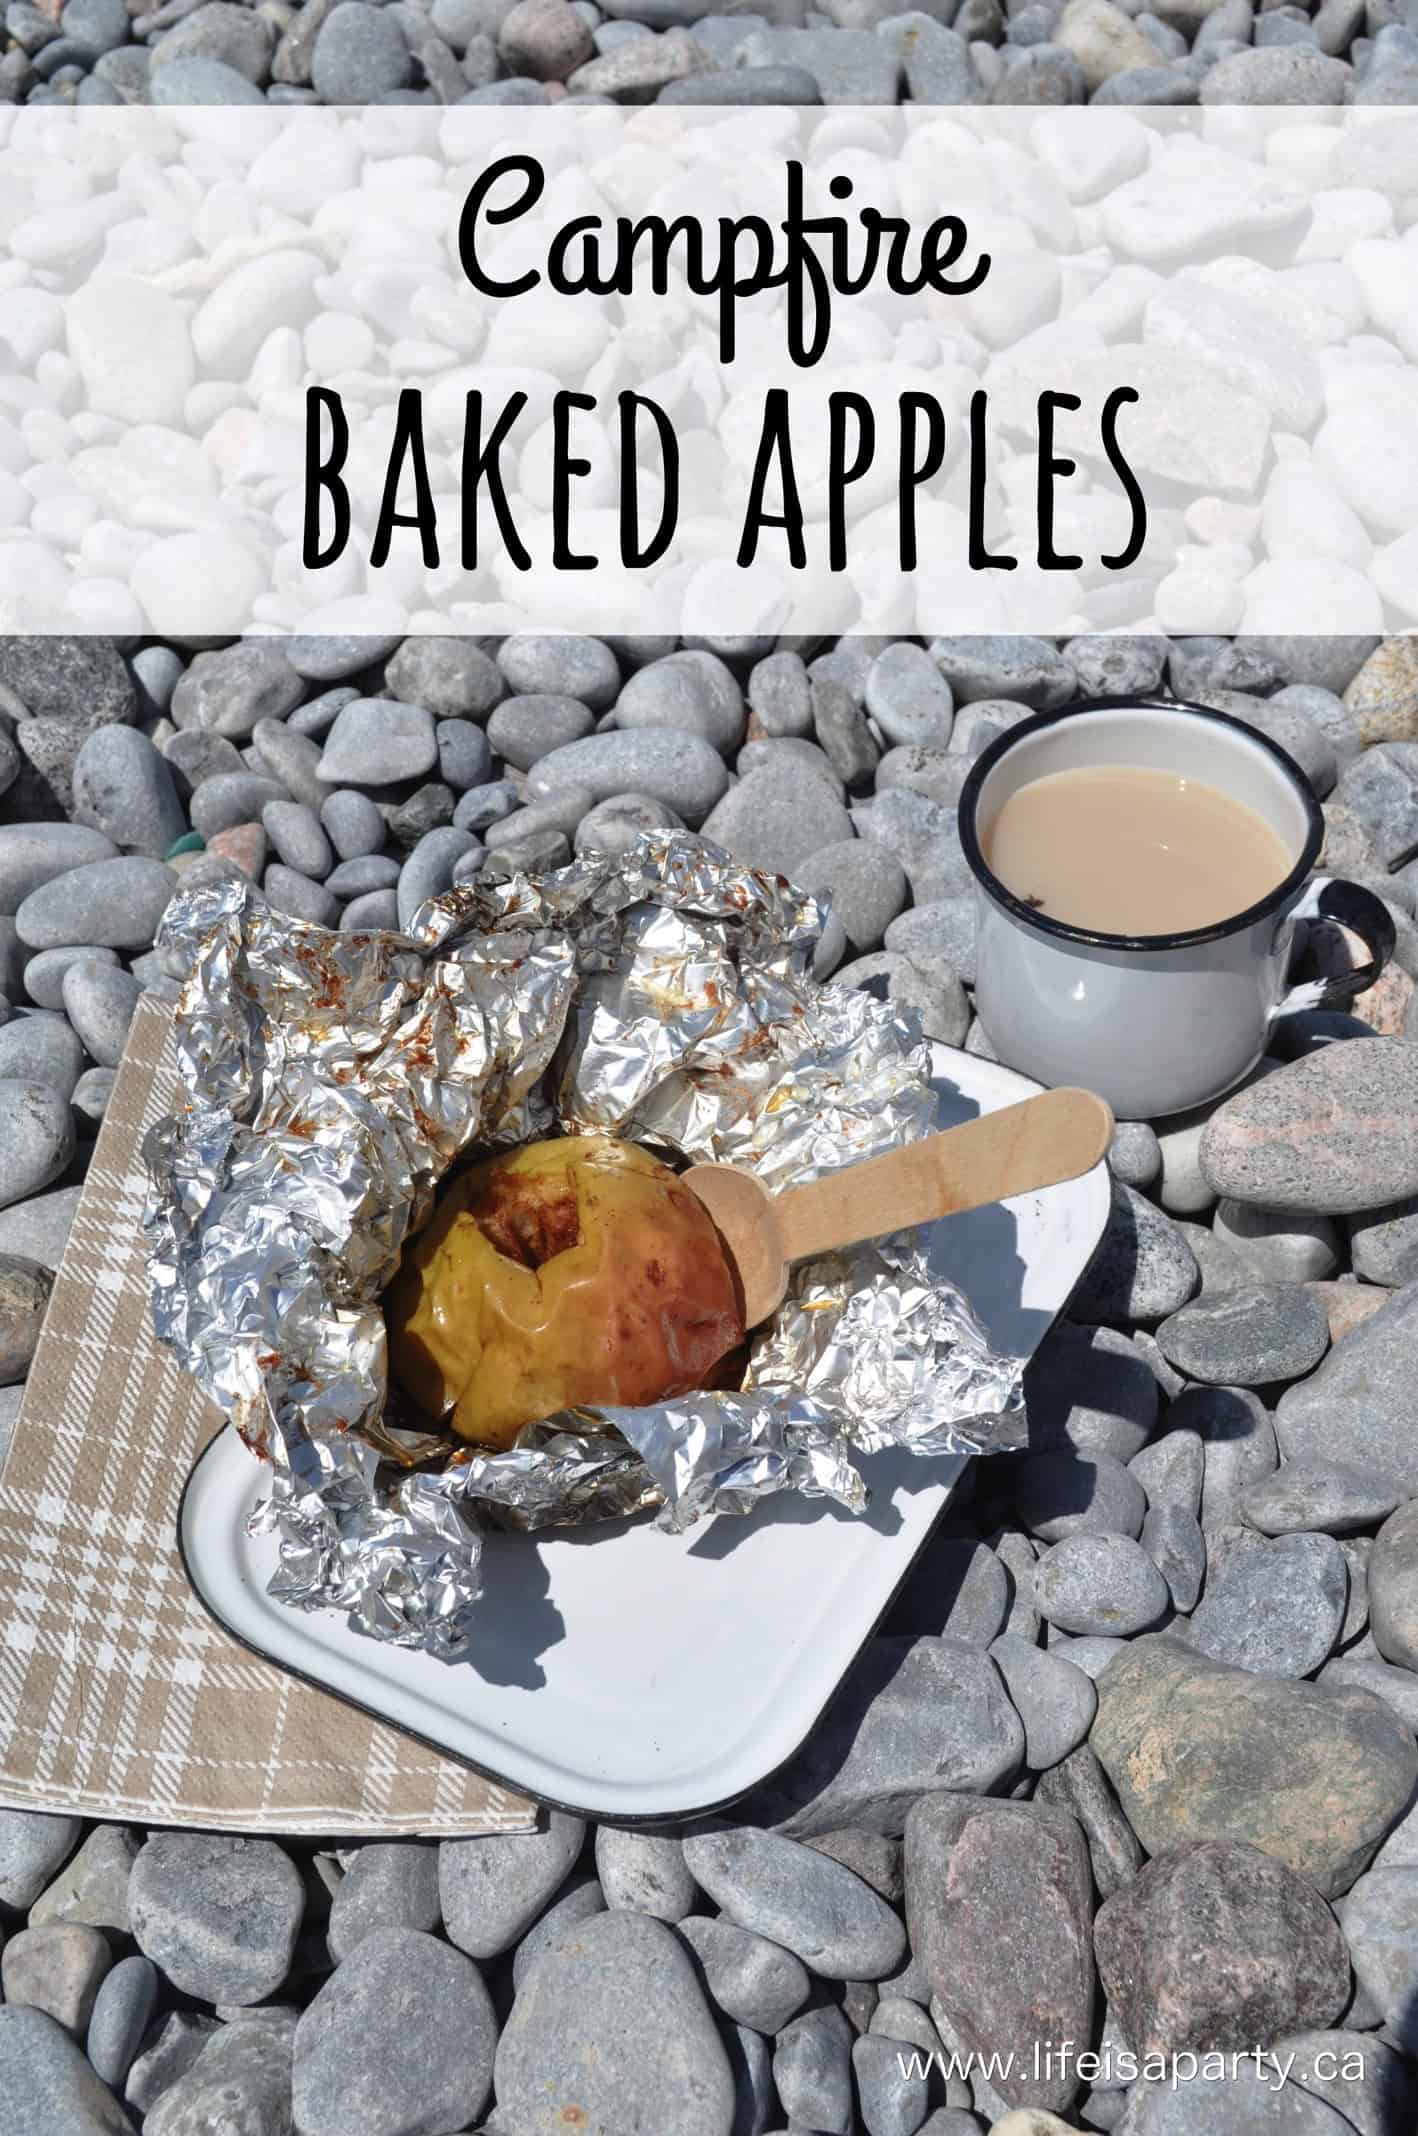
You might also like Campfire Baked Apples here.
Easy Sweet Crepe Recipe

Jul 4, 2012 · 2 Comments

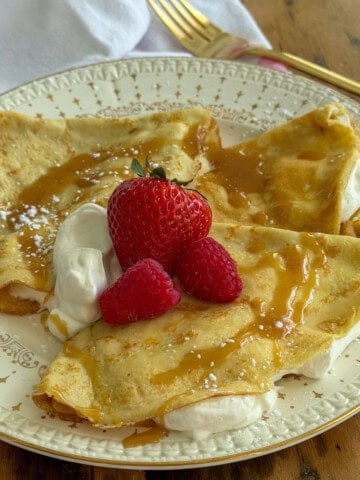
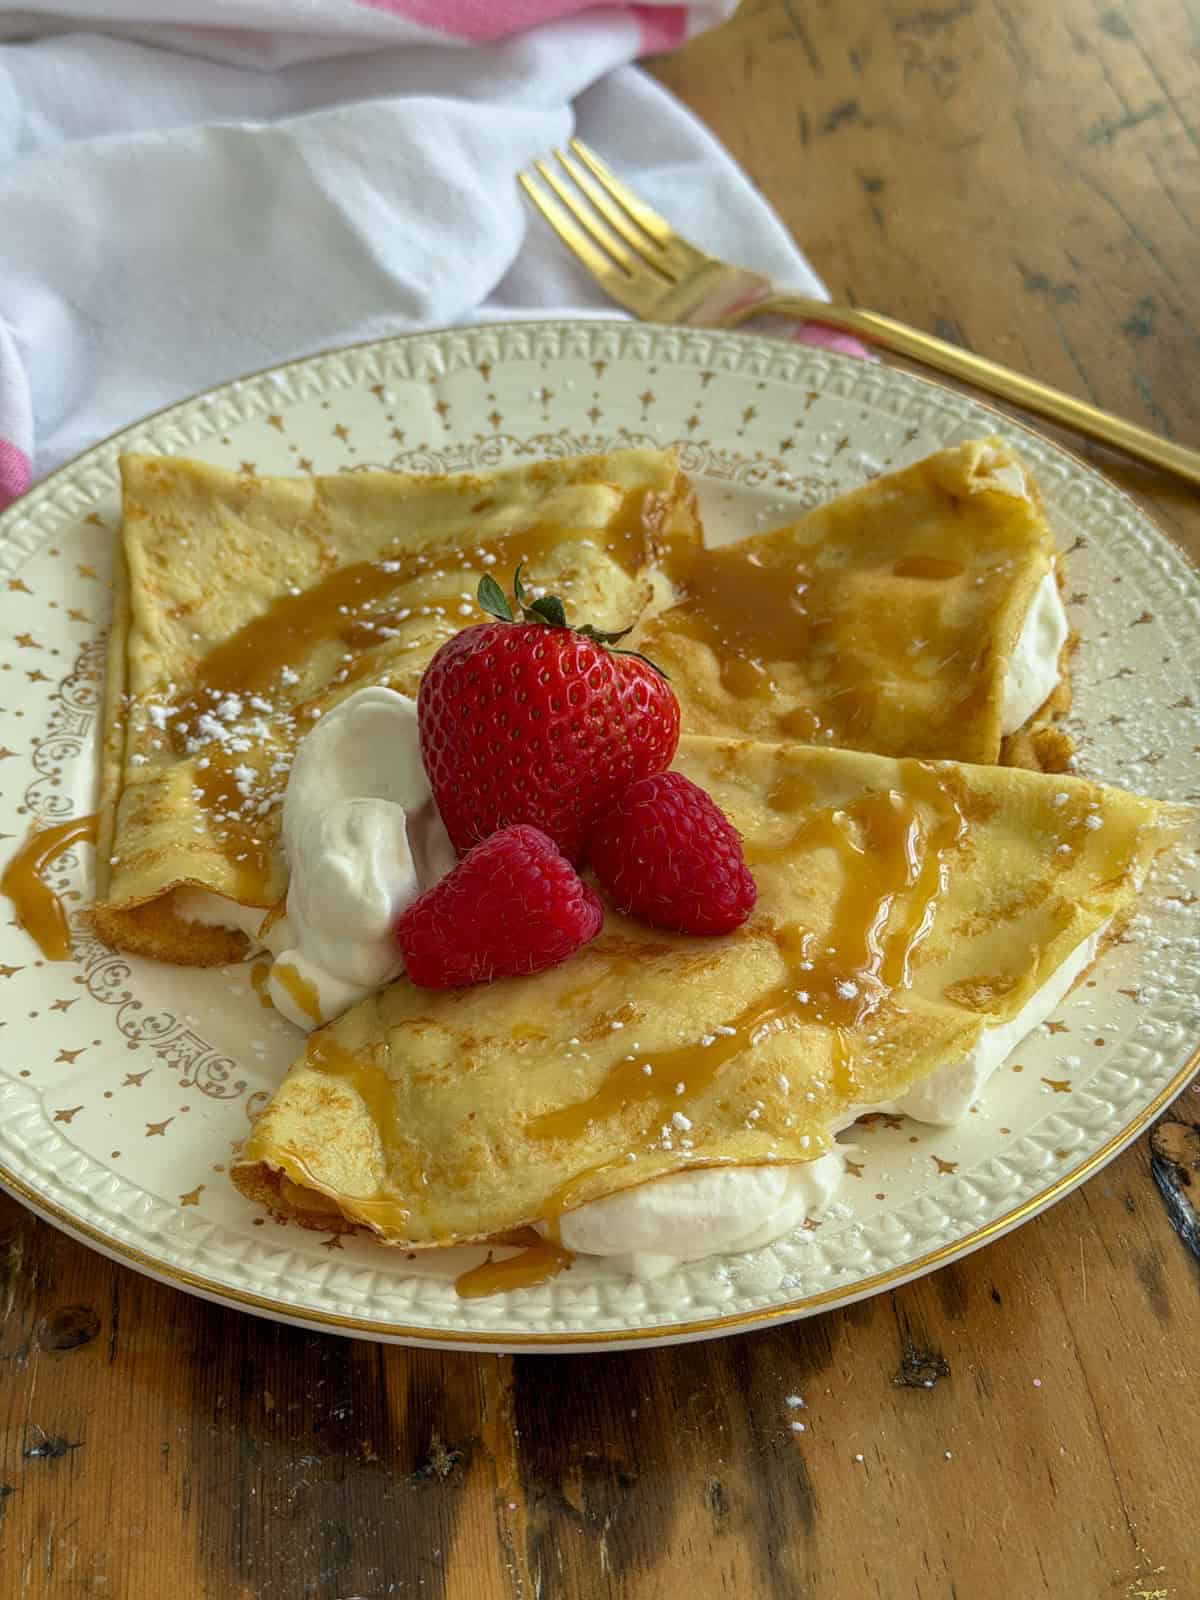
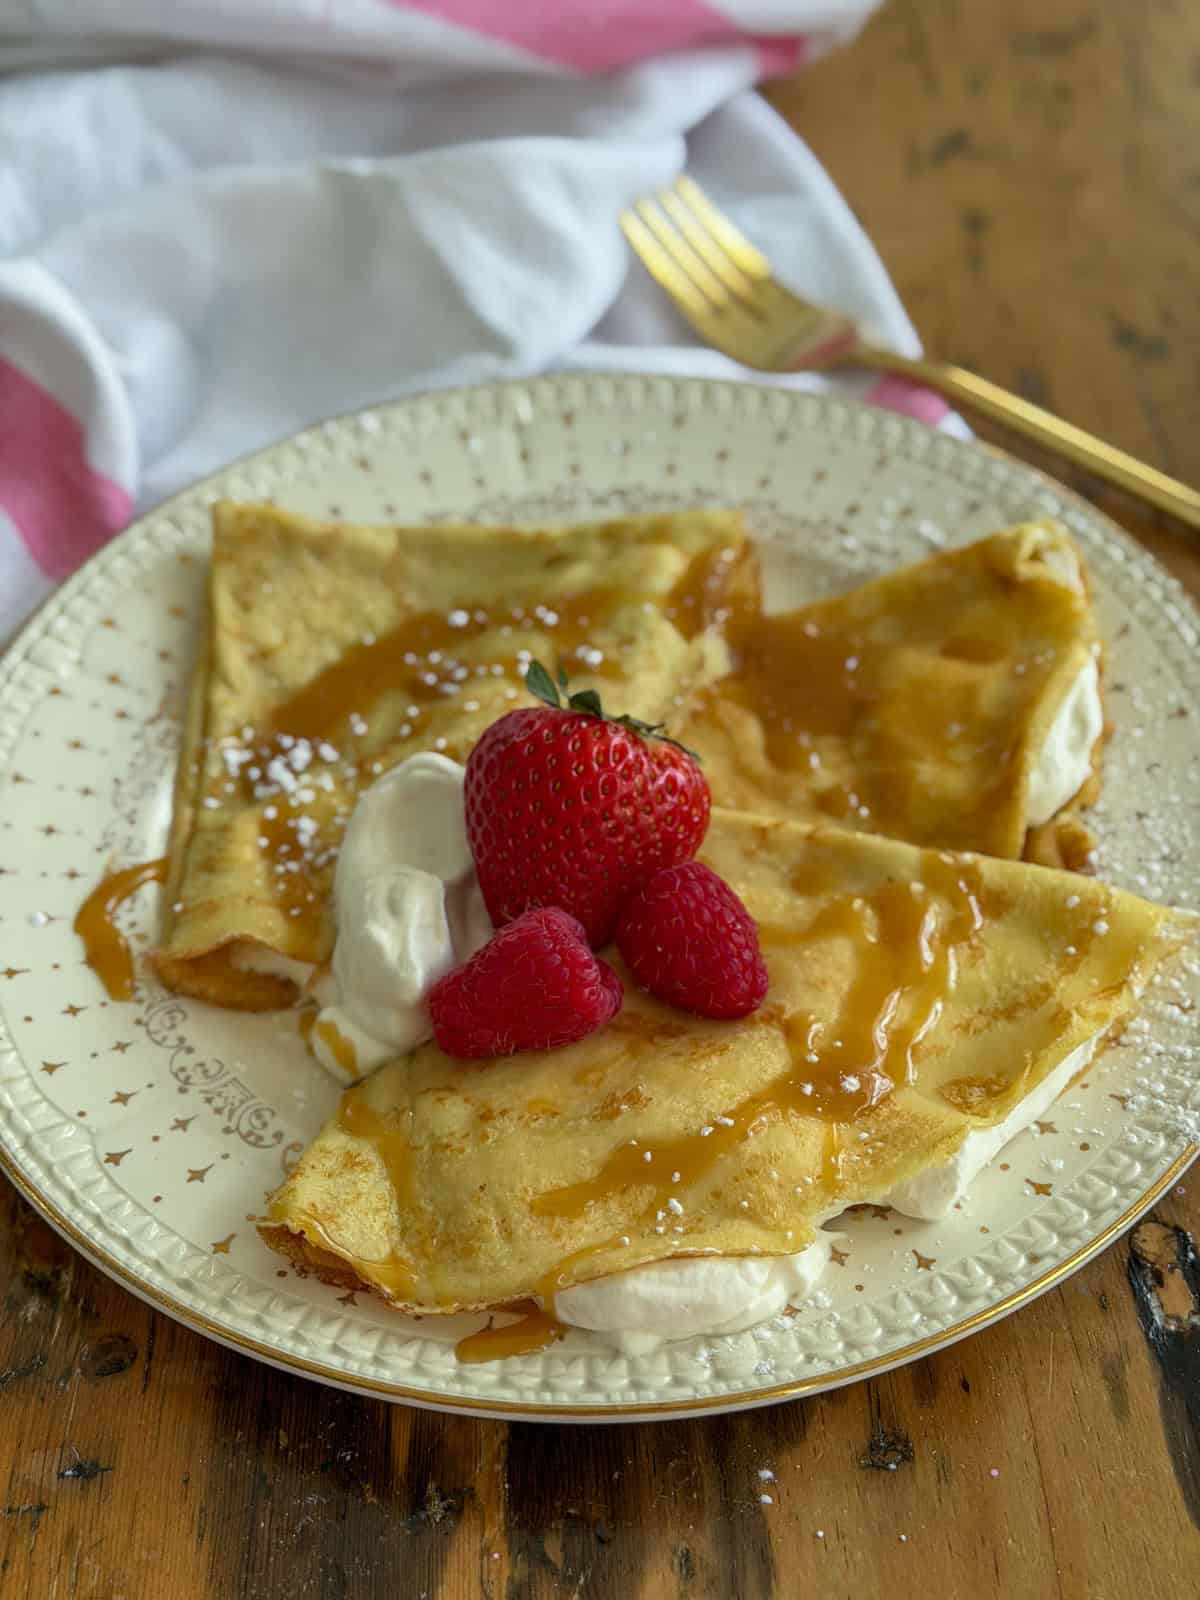
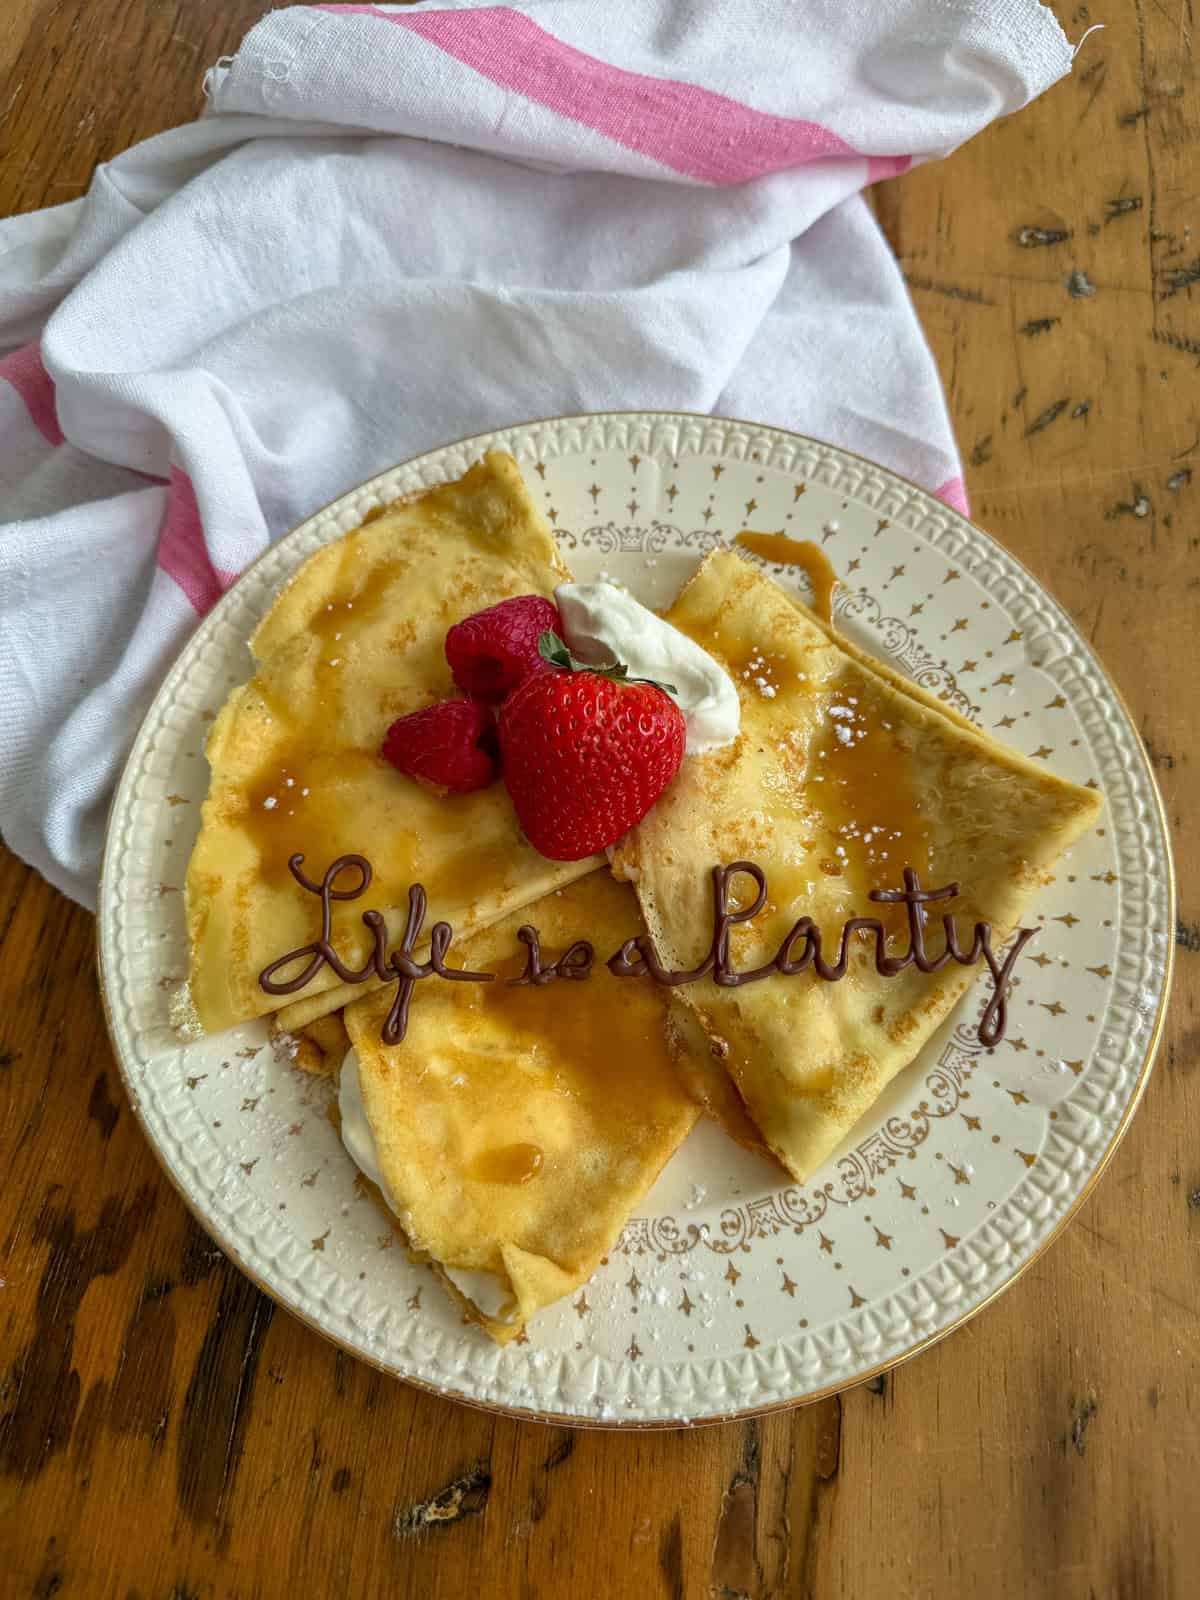
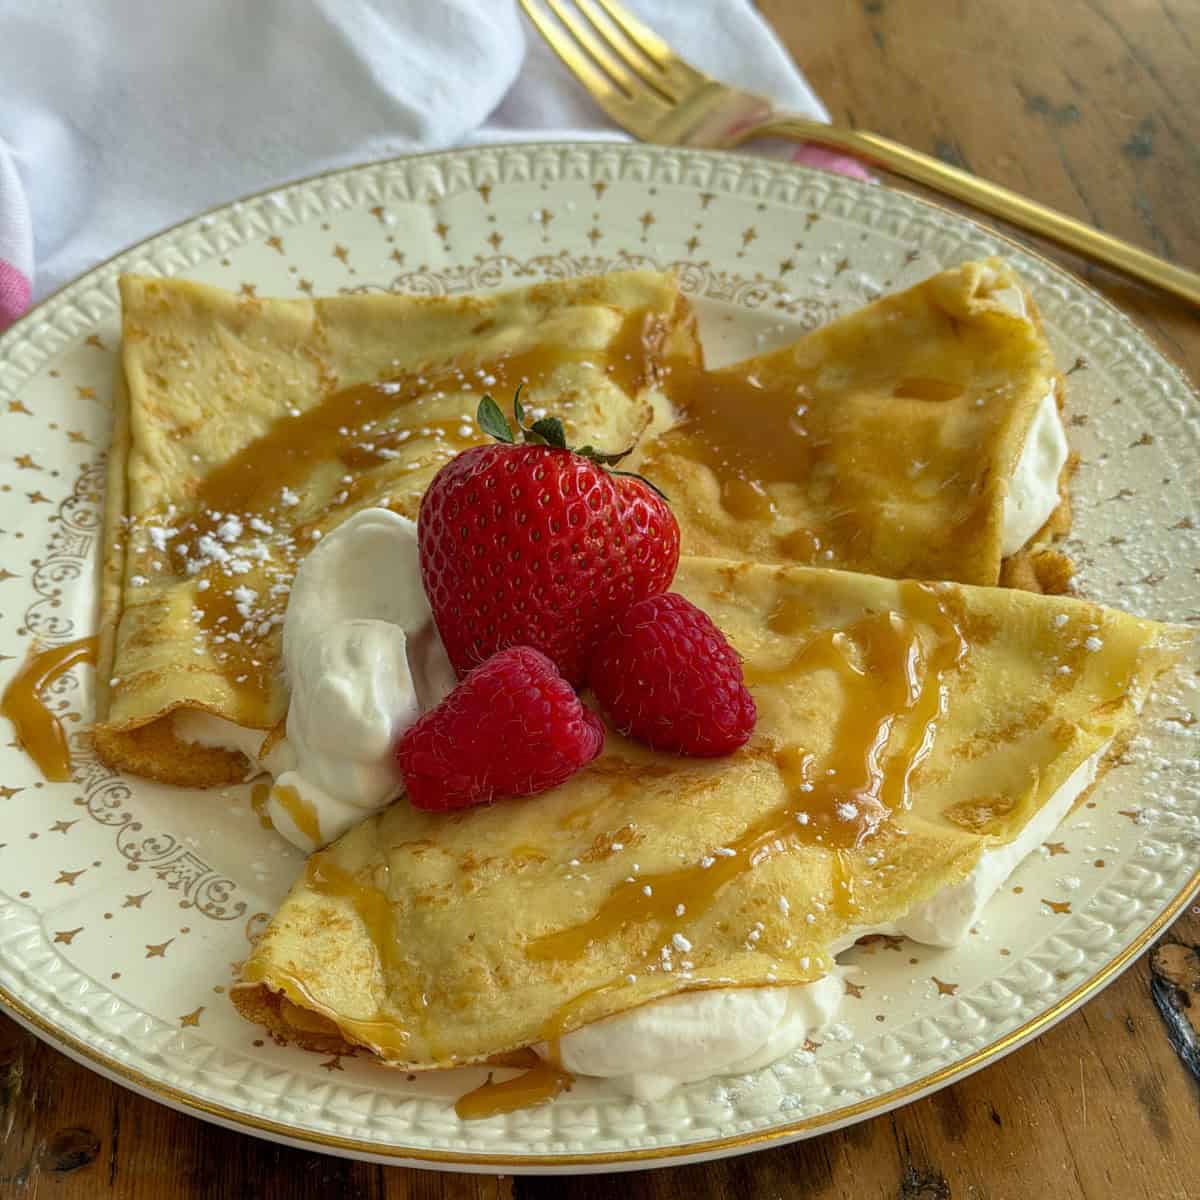
Two sweet crepes filled with whipped cream and folded in triangles on a vintage star-patterned plate, topped with fresh strawberries, raspberries, and caramel sauce.

Light, tender, and made in the blender, this sweet crepe recipe comes together in minutes and works beautifully for everything from a simple breakfast to an elegant dessert crepe bar.

Two sweet crepes filled with whipped cream and folded in triangles on a vintage star-patterned plate, topped with fresh strawberries, raspberries, and caramel sauce.


Quick Look

  • 🥞 Recipe: Easy Sweet Crepe Recipe
  • ⏲️ Ready In: 45 minutes including resting time
  • 👪 Makes: 8-10 crepes
  • 🔪 Difficulty: Easy
  • 💭 Top Tip: Let the batter rest for at least 30 minutes before cooking. This makes the crepes more tender and delicate and is worth every minute of the wait.

Why You'll Love This Recipe:

  • Both vanilla and chocolate variations included.
  • Made in the blender in just minutes with simple everyday ingredients.
  • Light and tender with beautifully golden edges
  • Works for breakfast, dessert, or a full crepe bar setup.
  • Make the batter up to two days ahead, perfect for entertaining.
[feast_advanced_jump_to]

After picking fresh raspberries and strawberries one summer years ago, I was looking for a nice dessert to make for company and decided on sweet crepes. They've been a favourite ever since. Sweet crepes are always a crowd pleaser, they're surprisingly simple to make, and it's always fun to set up a selection of toppings so everyone can build their own favourite combination.

This recipe uses a blender which makes the whole process even easier and guarantees a perfectly smooth lump free batter every time. The most important step is letting the batter rest before you cook for at least 30 minutes, or even overnight in the fridge. It makes a real difference to the texture.

We recently made both vanilla and chocolate crepes for our Breakfast For Dinner Brinner party and set them up as a full Crepe Bar for guests to help themselves. If you're planning a party or brunch gathering that post has everything you need to set up a beautiful crepe bar from start to finish.

You might also like our Strawberry Rhubarb Compote and Hot Fudge Sauce which both pair beautifully spooned over these crepes.

Sweet Crepe Ingredients

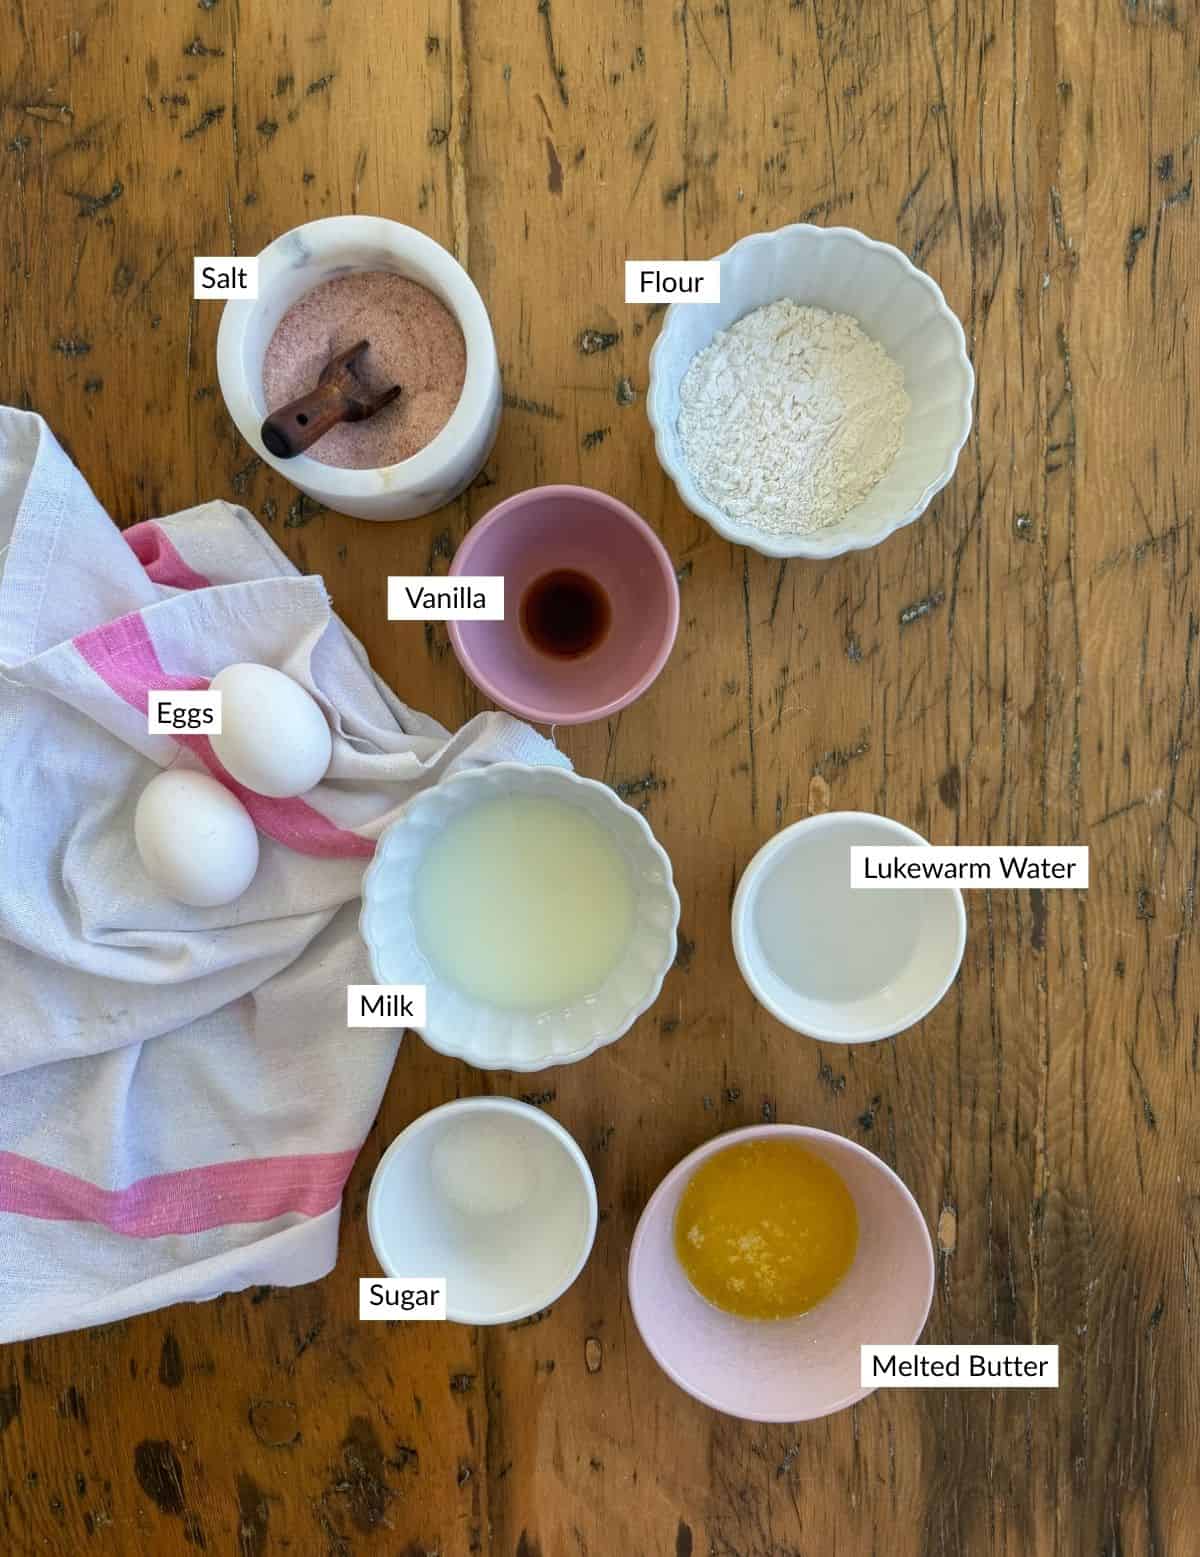
Sweet crepe recipe ingredients arranged on a wooden surface including eggs, flour, vanilla extract, sugar, melted butter, salt, and milk.

This recipe uses simple everyday ingredients you likely already have on hand. Here's what you need:

  • Flour: All purpose flour works perfectly here. No special flour required.
  • Water: A small amount of lukewarm water thins the batter slightly for that perfectly delicate crepe texture.
  • Butter: Melted butter adds flavor and helps the crepes release easily from the pan. Have a little extra on hand for cooking.
  • Sugar: Just one and a half tablespoons. These crepes are lightly sweetened which makes them perfect for dessert.

Chocolate Crepe Variation

To make chocolate crepes simply add 2 tablespoons of unsweetened cocoa powder and an extra 1 tablespoon of sugar to the batter before blending. Everything else stays exactly the same.

The cocoa adds a lovely richness and the extra sugar balances the bitterness. The finished chocolate crepes are slightly deeper in flavour and pair beautifully with strawberries, raspberries, Nutella, and caramel sauce.

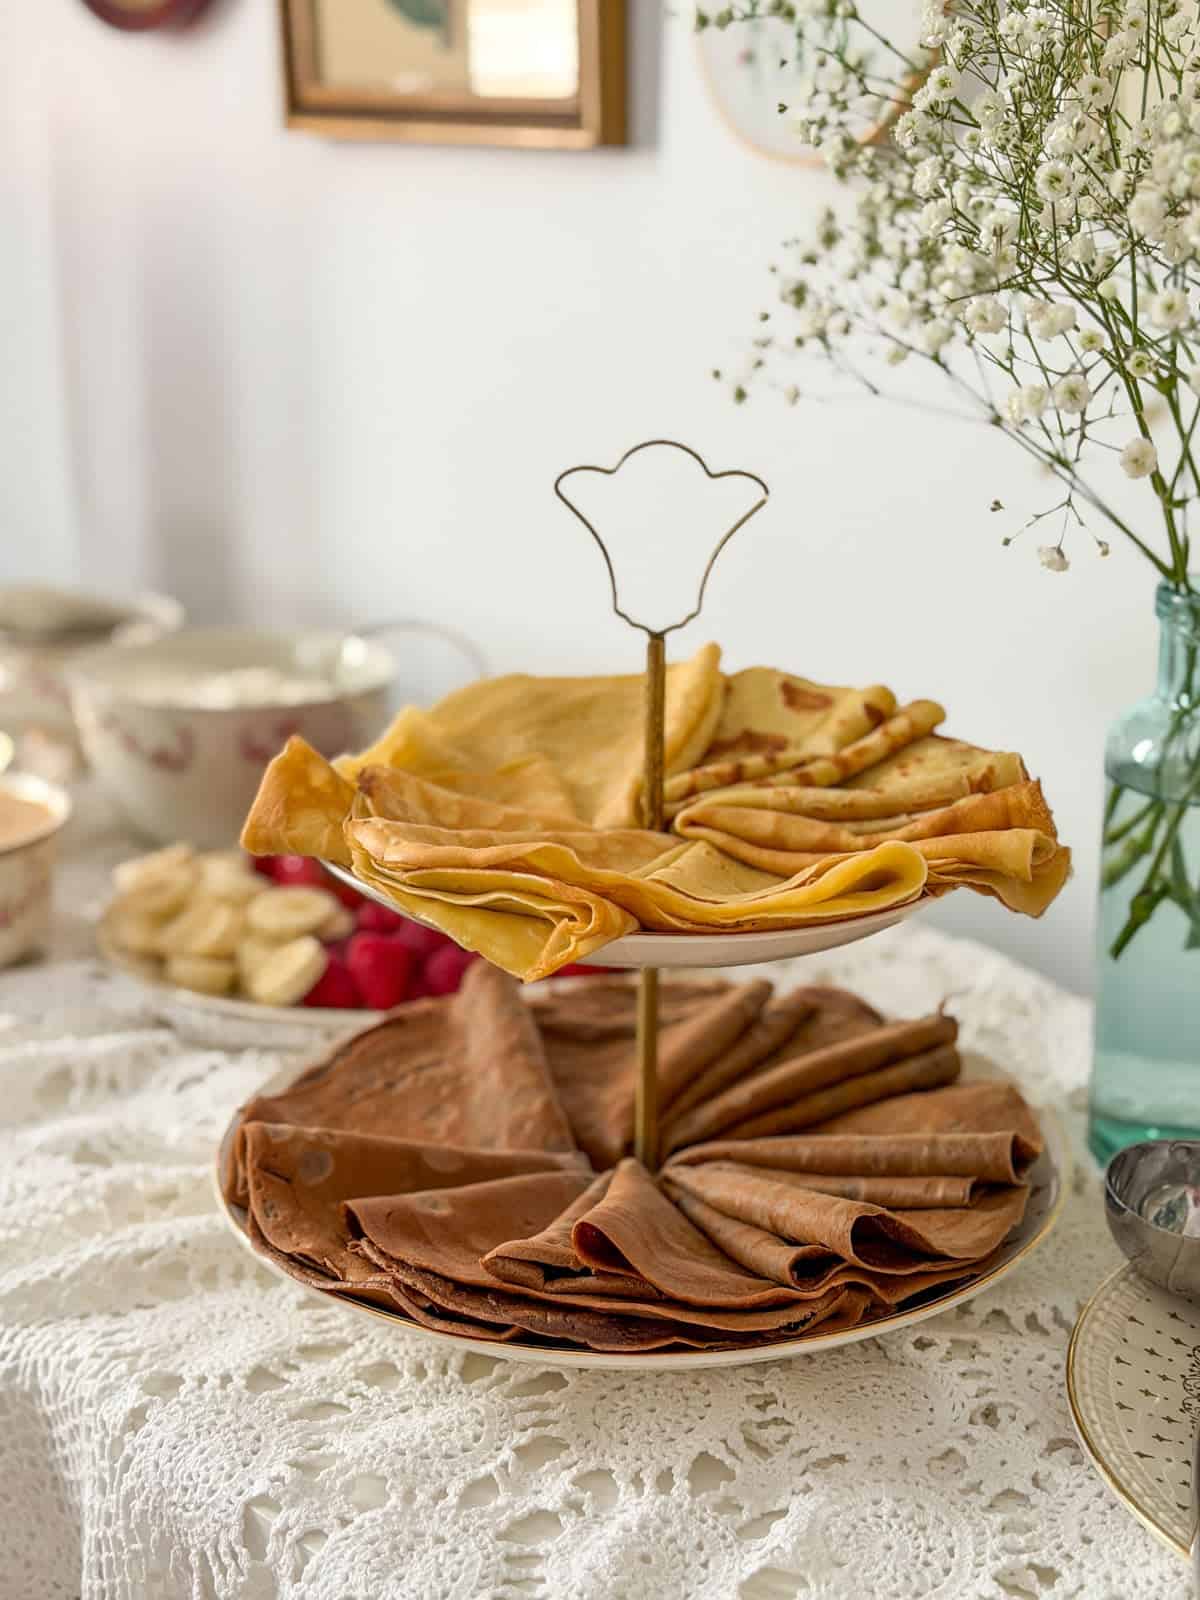
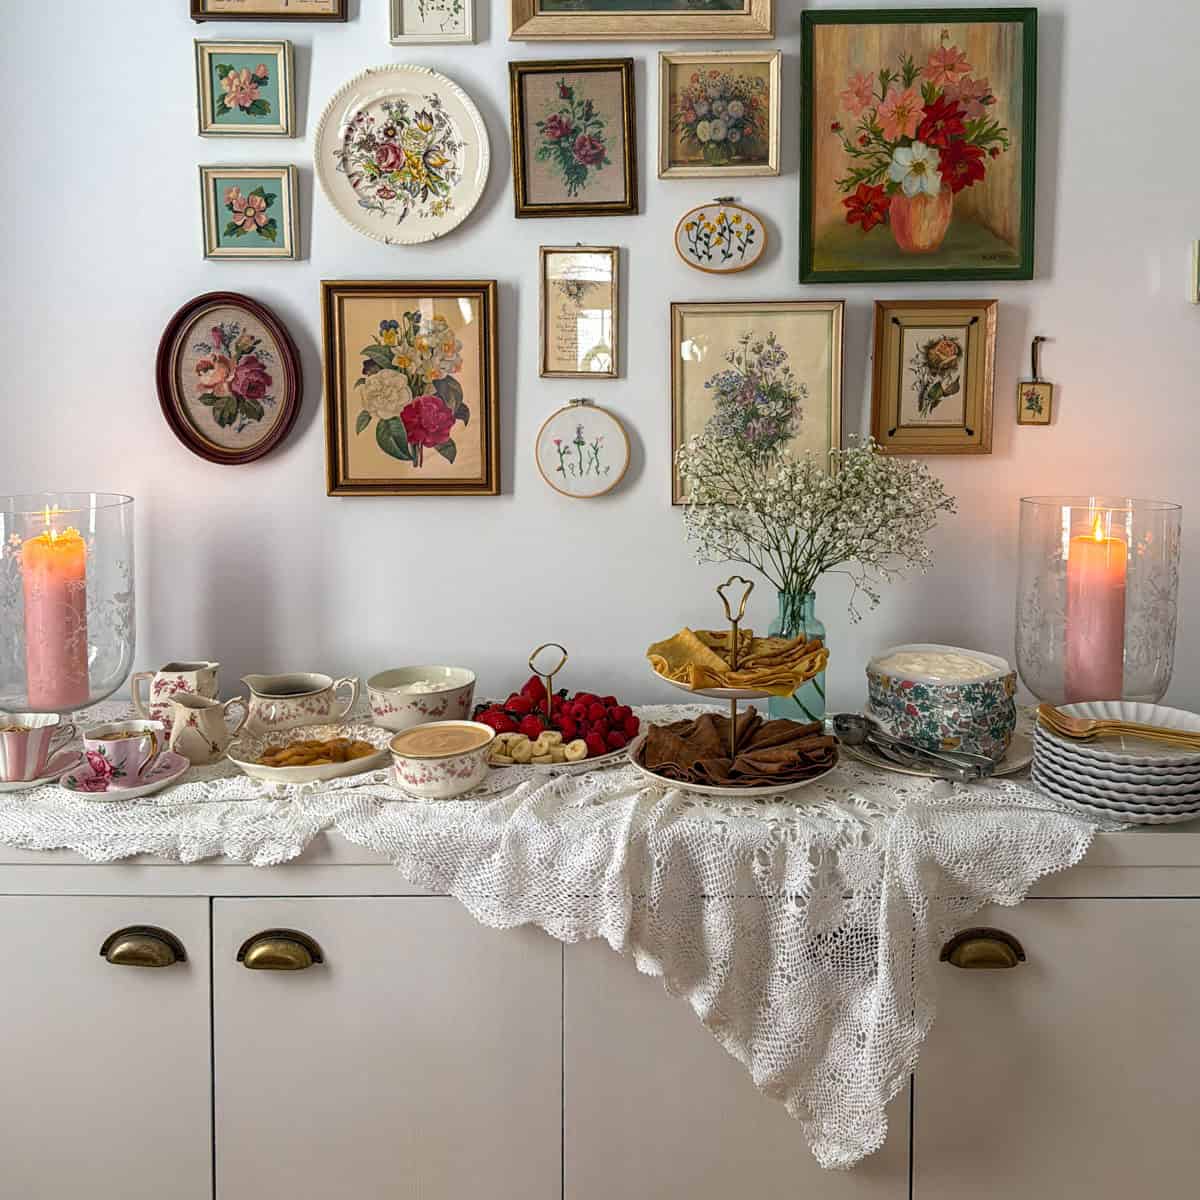
Two-tiered brass stand with golden vanilla crepes on top and chocolate crepes on the bottom tier displayed on a lace-covered buffet.

We love making both vanilla and chocolate crepes together for a Crepe Bar. The two stacks sitting side by side look absolutely beautiful and give guests twice the options.

Equipment

  • Crepe Pan: The ideal pan for cooking crepes is a crepe pan. It has a flat bottomed, and low edges designed to cook crepes evenly and release them easily. Crepe pans are often sold with a small wooden crepe scraper to help spread the batter thinly and evenly. That said you absolutely do not need a crepe pan to make great crepes at home. Any good non-stick frying pan works perfectly well.
  • Blender: A blender is our strongly preferred method for making crepe batter. The blades cut through the flour and blend everything together smoothly and lump free in seconds. A food processor works too if you don't have a blender.

How To Make Sweet Crepes

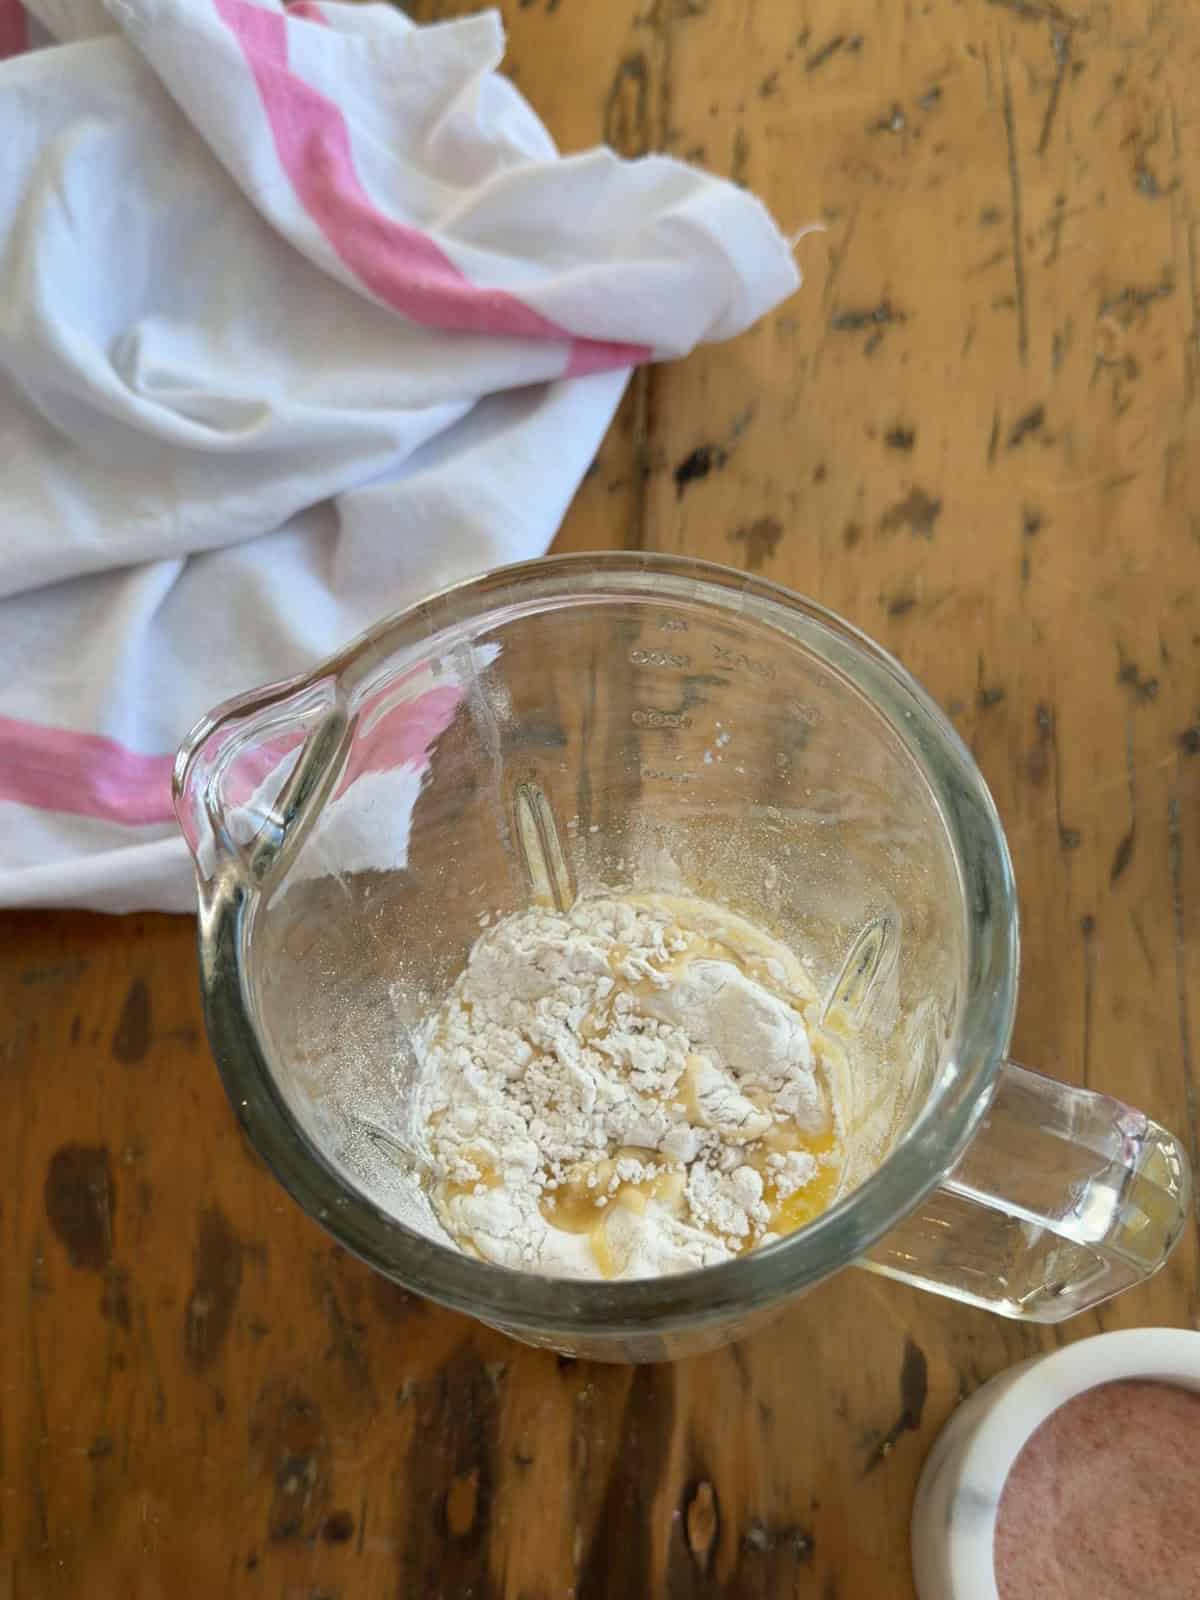
Sweet crepe ingredients including flour, eggs, and melted butter added to a glass blender jar before blending.
  1. Step 1: Combine all the ingredients in a blender and process until completely smooth. The blender is the key to a perfectly lump free batter, it cuts through the flour and blends everything together far more effectively than whisking by hand.
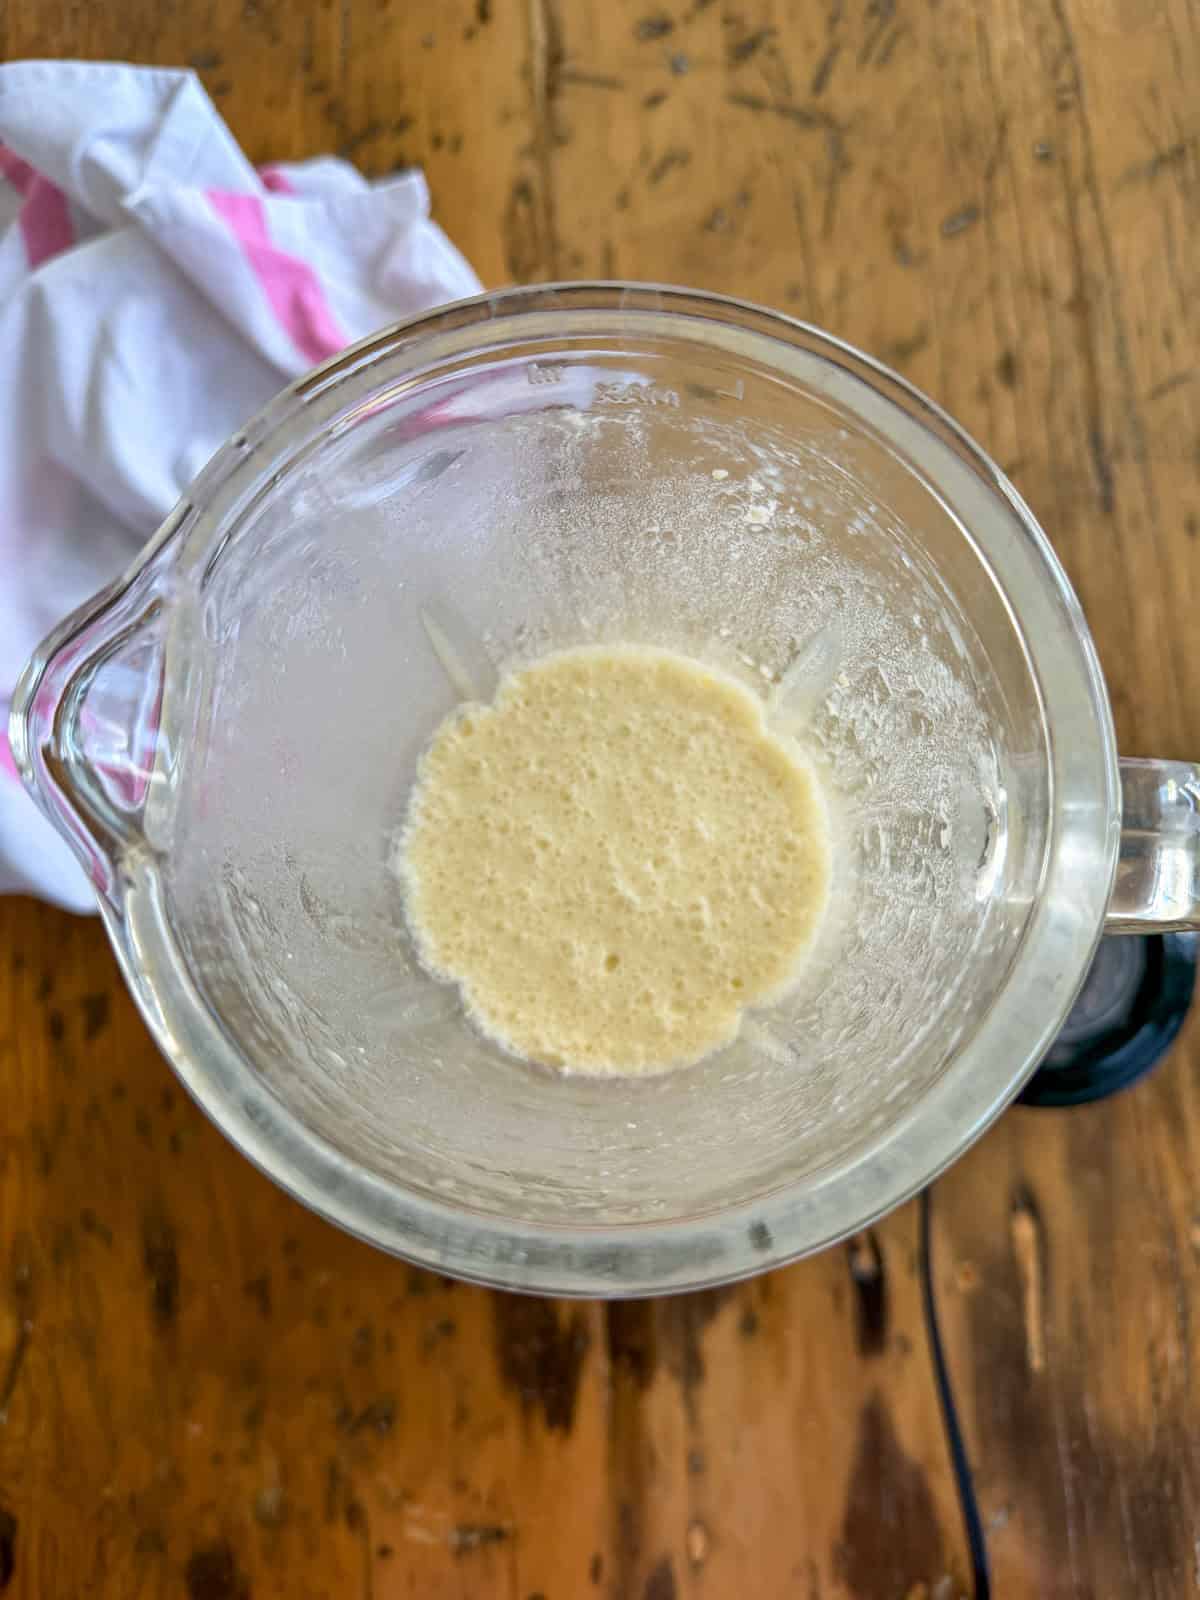
Freshly blended sweet crepe batter in a glass blender jar with a smooth, frothy surface.
  1. Step 2: Let the batter stand for at least 30 minutes before cooking, or cover and refrigerate for up to two days. Resting allows the flour to fully absorb the liquid and lets the gluten relax, giving you a more tender and delicate crepe. It's worth every minute of the wait.
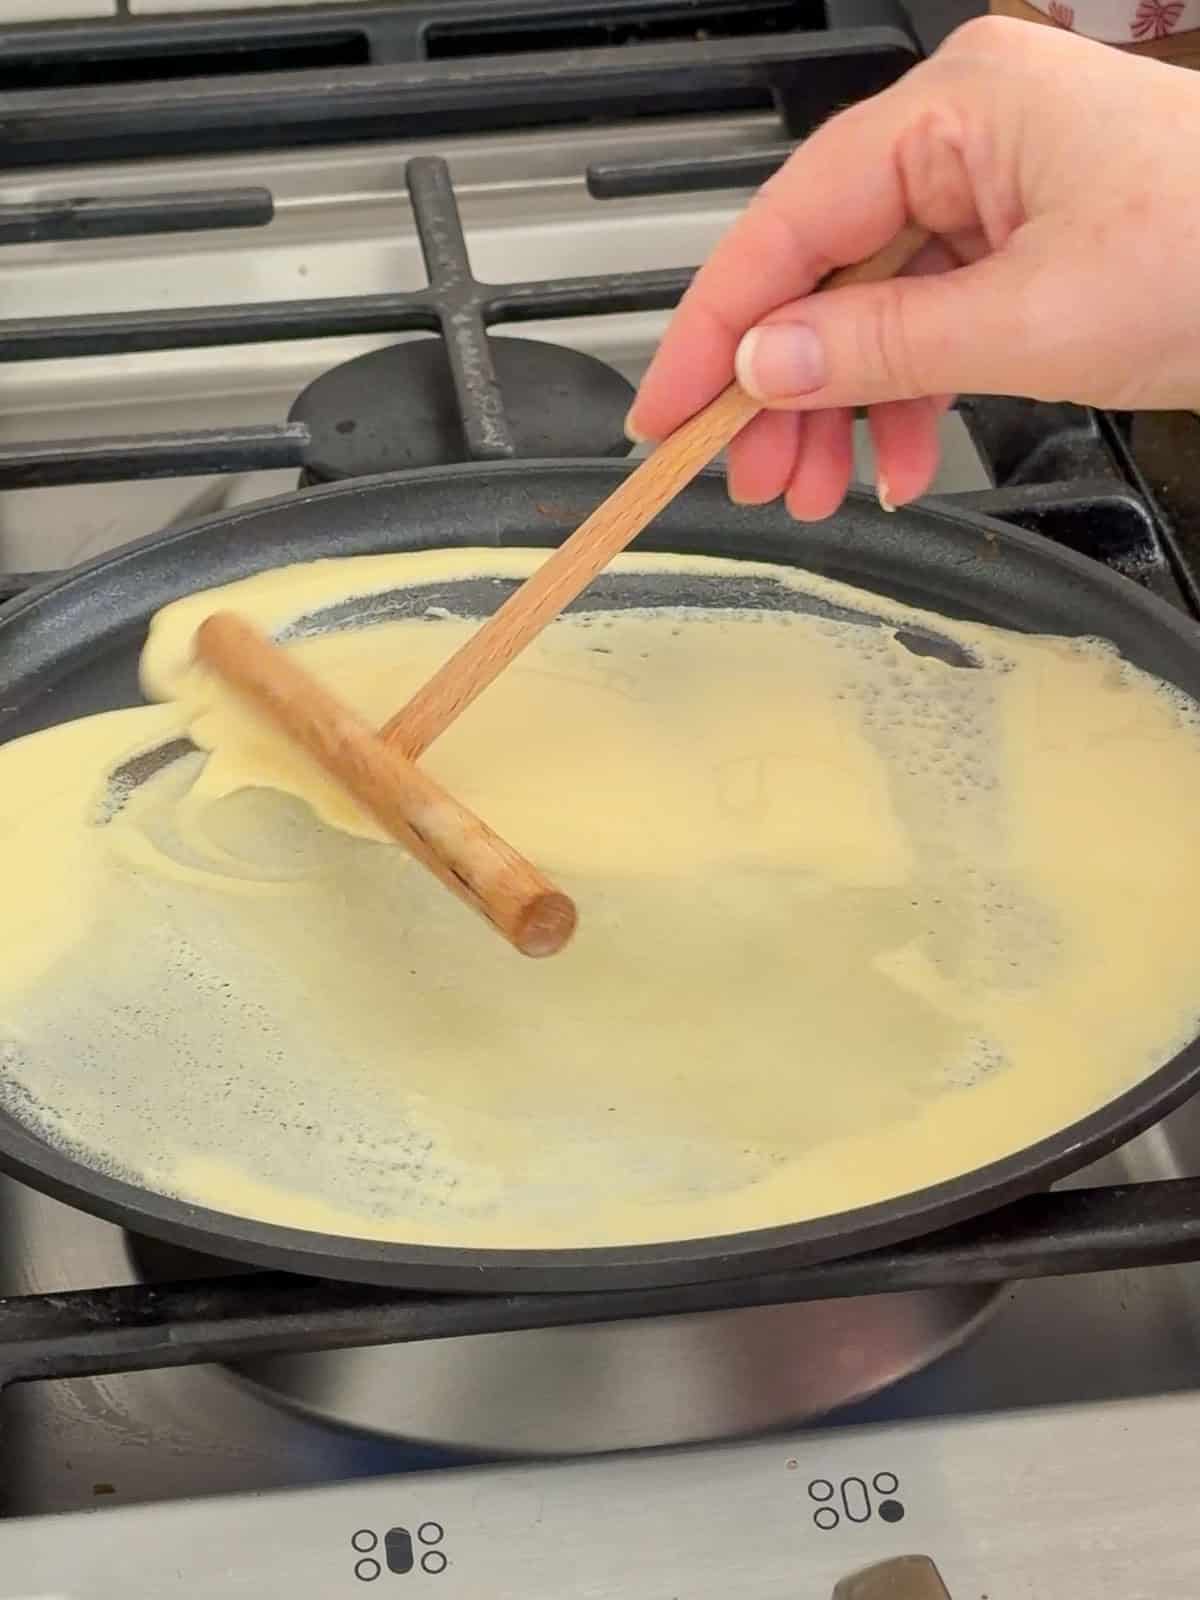
Sweet crepe batter being spread in a circular motion with a wooden T-spreader in a large nonstick pan on a gas stovetop.
  1. Step 3: In a small non-stick pan melt a little butter over medium heat. Pour a small amount of batter into the pan and quickly swirl to coat the bottom in a thin even layer.
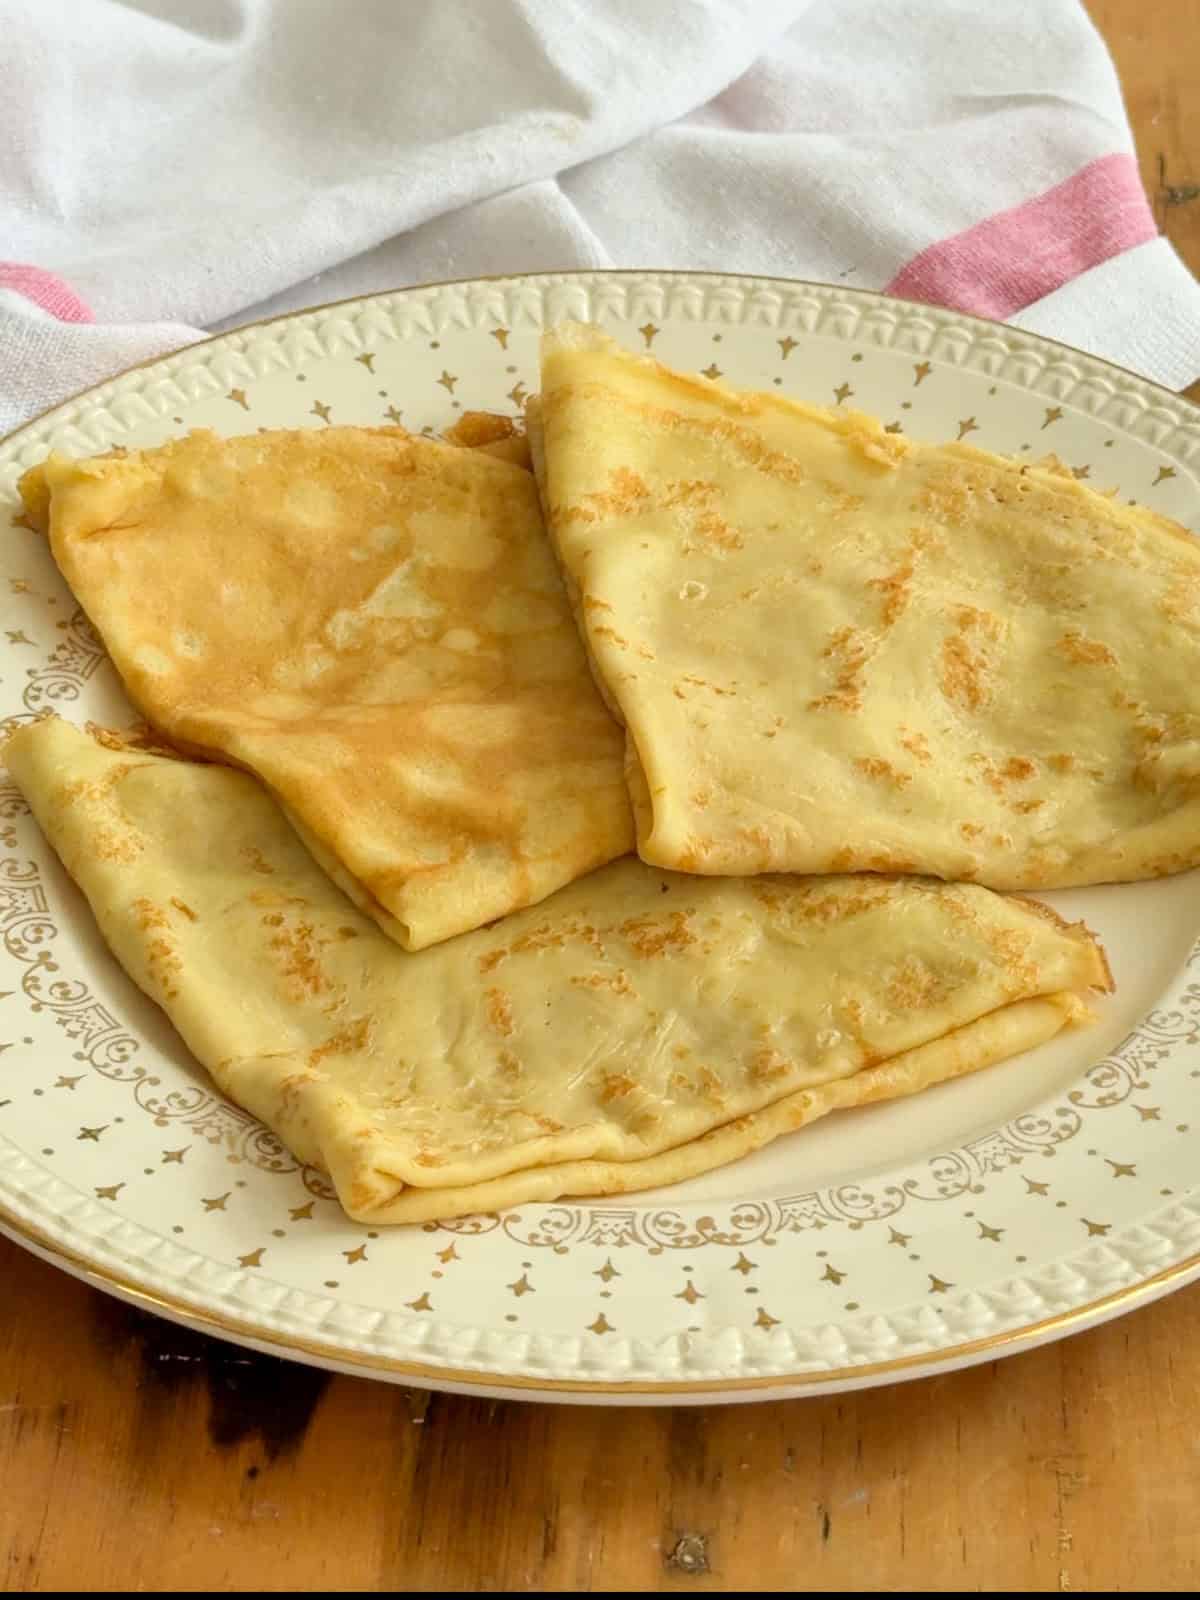
A golden sweet crepe cooked through and ready to fold, shown on a vintage star-patterned plate.
  1. Step 4: Cook for a few minutes until the crepe is set and the bottom is golden. Flip using the corner of an offset spatula and cook the other side until lightly golden. Makes about 8-10 and the recipe can be doubled for a bigger crowd.

Sweet Crepe Toppings

One of the best things about sweet crepes is how versatile they are. Here are some of our favourite topping combinations:

  • Creamy fillings: Vanilla custard, whipped cream, Nutella or hazelnut cream. Vanilla custard spooned warm inside a folded crepe is absolutely delicious and always the surprise favourite.
  • Sauces: Caramel sauce, chocolate sauce, and maple syrup. We love our own Hot Fudge Sauce Recipe drizzled generously over the top.
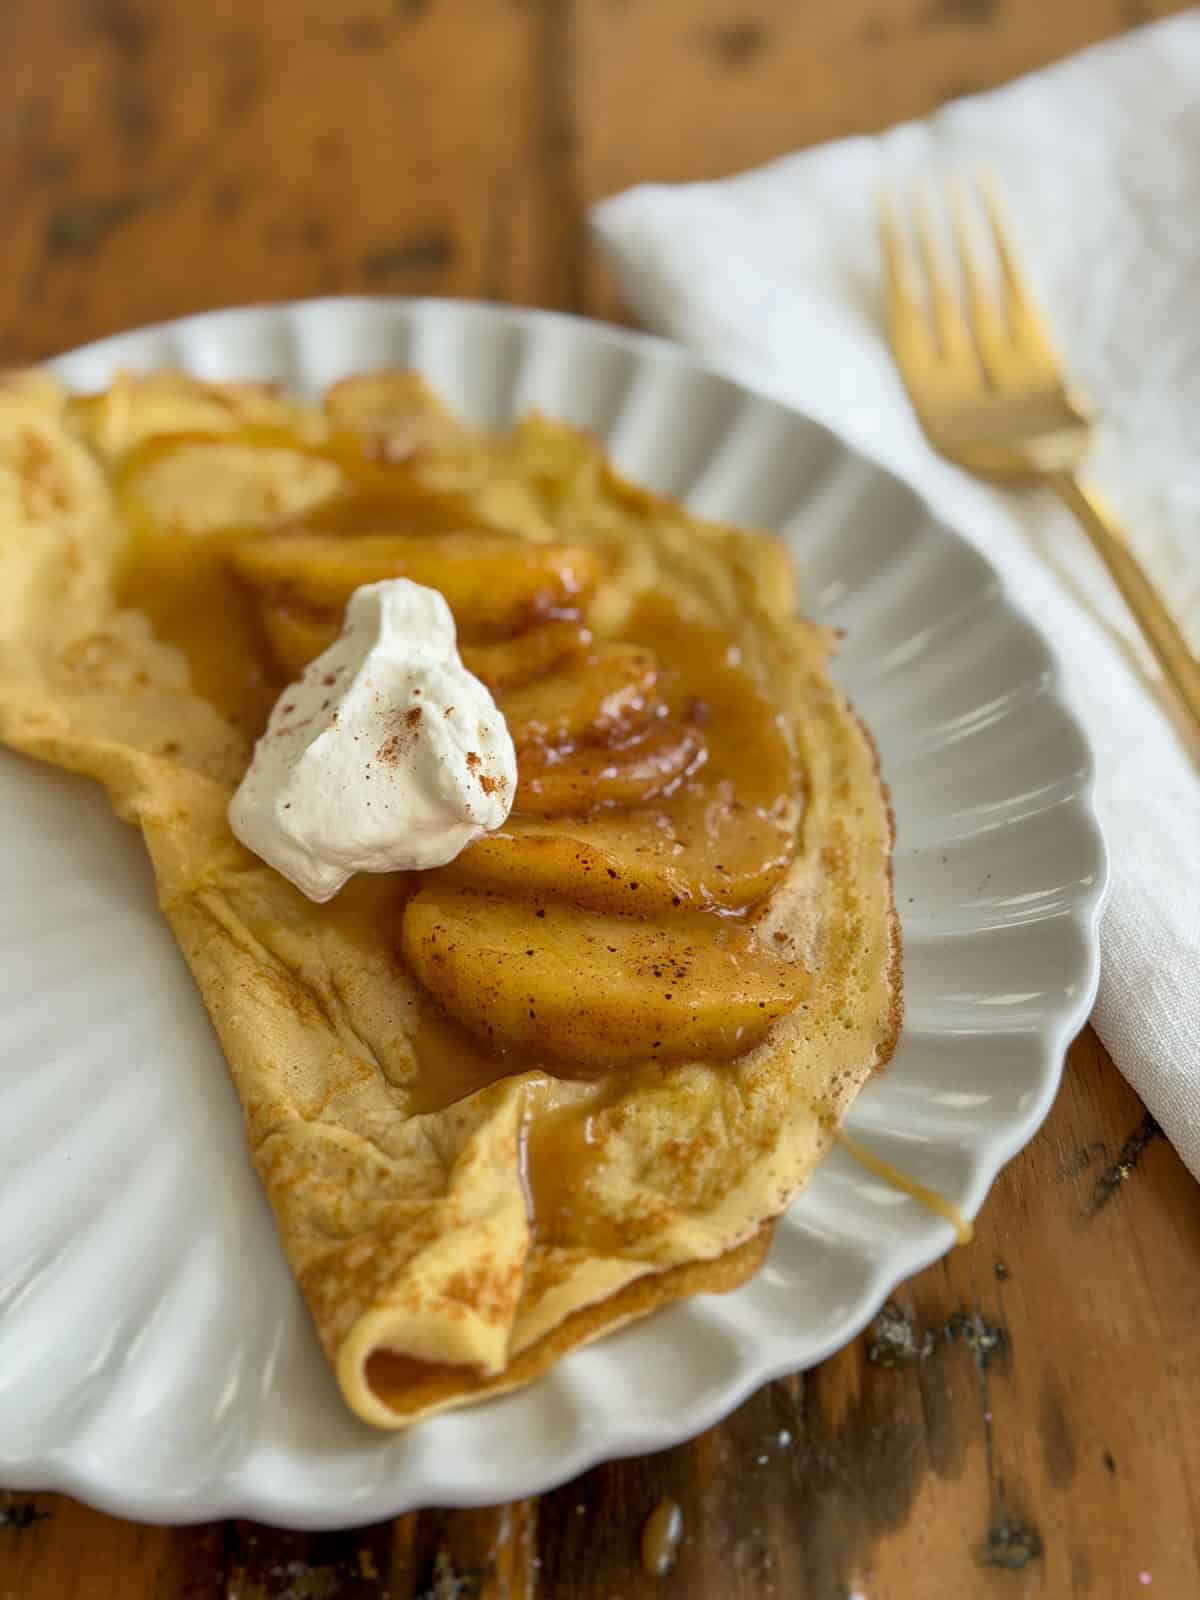
  • Fresh fruit: Strawberries, raspberries, and bananas are classic. Sauteed apples with caramel sauce is the combination that had everyone going back for seconds at our last crepe bar.
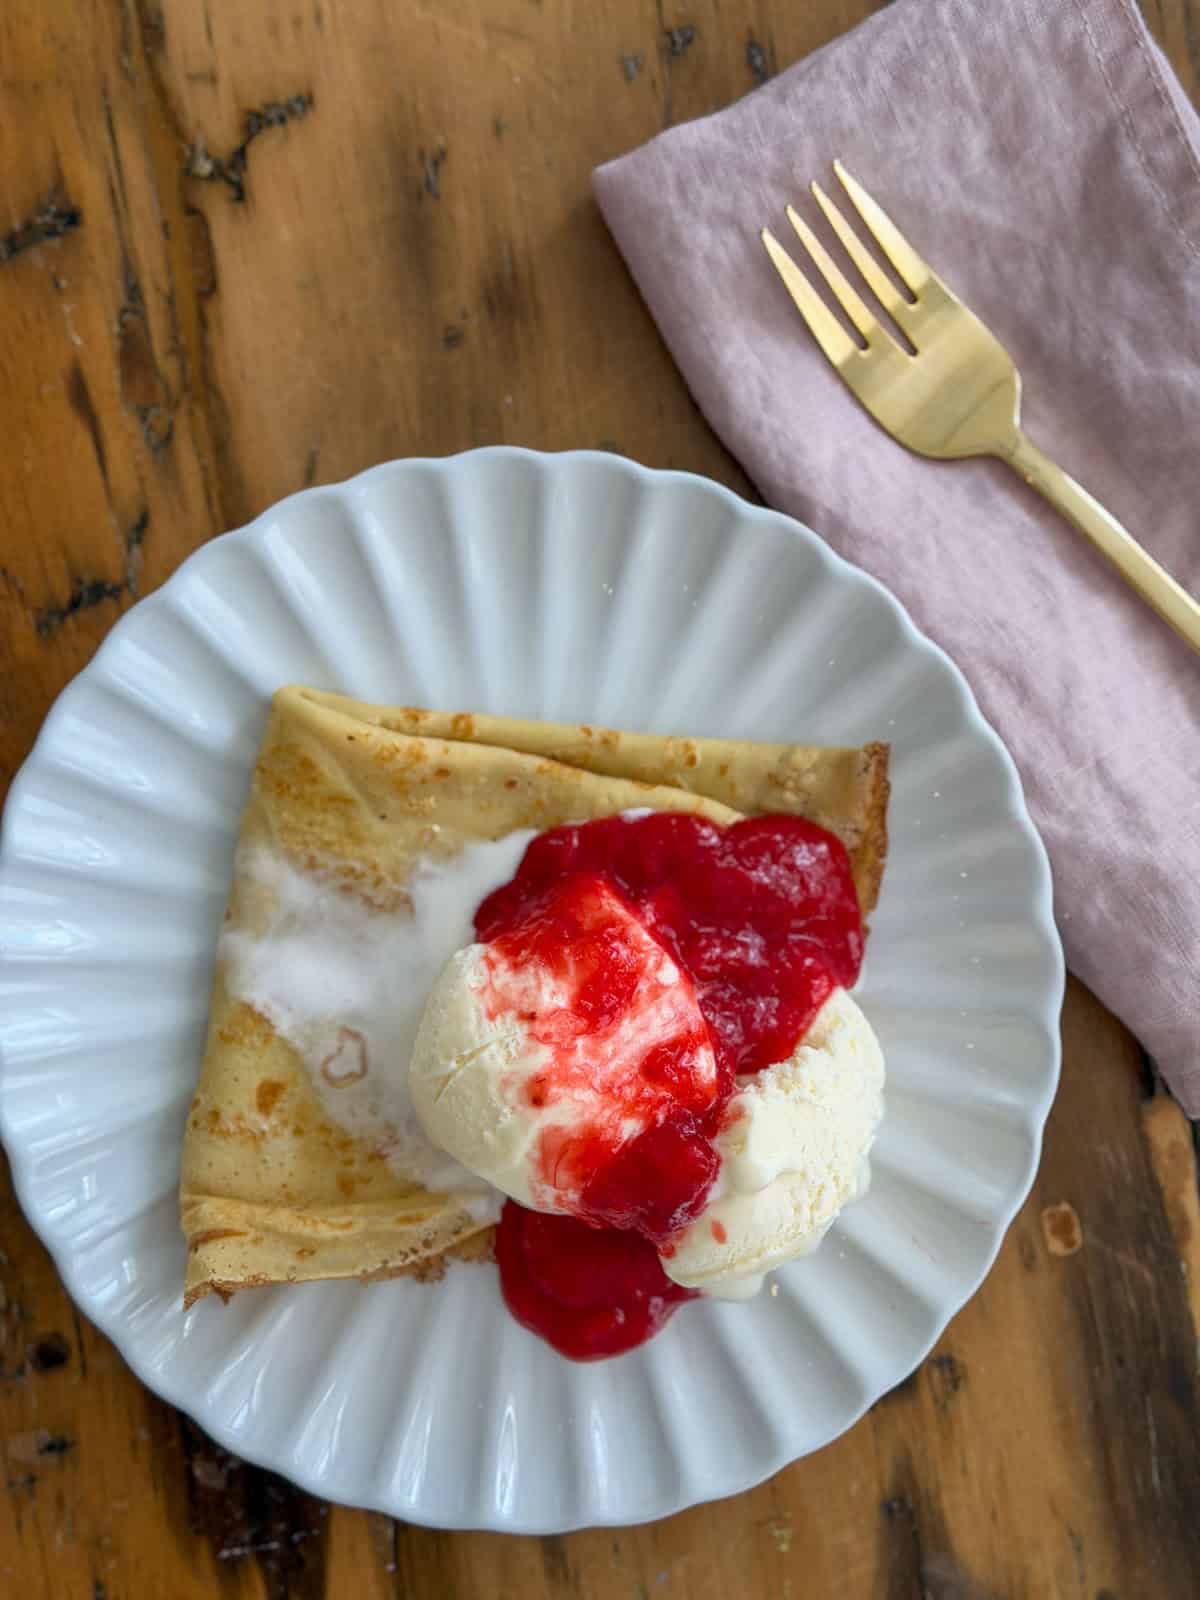
  • Ice cream: Vanilla or chocolate ice cream inside a warm crepe with caramel sauce is one of life's great pleasures.
  • Crunch: Add some toasted nuts, like almond slices, pistachios or try some toasted coconut for texture and taste.
  • Simple and classic: Sometimes a dusting of powdered sugar and a squeeze of lemon is all you need. Very French, very delicious.
Sweet crepes filled with whipped cream and folded in triangles on a vintage plate, topped with fresh strawberries, raspberries, powdered sugar, and a caramel sauce drizzle.
Sweet crepe filled with cinnamon sautéed apple slices and topped with a dollop of whipped cream on a white scalloped plate.

If you're setting up a full crepe bar for a party check out our Crepe Bar Ideas post for everything you need including toppings, styling tips, and make ahead advice.

Crepe bar on white sideboard with vintage floral gallery wall, lace tablecloth, tiered stand with vanilla and chocolate crepes, fresh fruit, and assorted toppings in mismatched vintage china.

Make Ahead and Storage

  • Batter: Make the batter up to two days ahead and store covered in the fridge. Give it a quick stir before cooking as it may settle slightly.
  • Cooked crepes: Stack cooled crepes directly on top of each other, no parchment needed. Wrap tightly or put in an airtight container and refrigerate for up to two days.
  • Reheating: Reheat the whole stack in the microwave for a few seconds. They taste great and it takes all the pressure off party day.
  • Freezing: Crepes freeze beautifully for up to two months. Wrap the stack tightly in plastic wrap and place in a freezer safe bag. Thaw overnight in the fridge before reheating.
Sweet crepe folded in quarters on a white scalloped plate, topped with two scoops of vanilla ice cream and a vivid red strawberry rhubarb compote.

Frequently Asked Questions

Do I need a crepe pan?

No, any good non-stick pan works perfectly. A crepe pan makes it slightly easier but is absolutely not essential.

Why does my crepe batter need to rest?

Resting allows the flour to fully absorb the liquid and the gluten to relax. This results in a more tender and delicate crepe. At least 30 minutes is ideal but overnight in the fridge is even better.

Can I make crepe batter ahead of time?

Yes, up to two days in the fridge. This makes it perfect for entertaining.

Can I freeze cooked crepes?

Yes, stack, wrap tightly and freeze for up to two months. Thaw overnight in the fridge before reheating in the microwave.

How do I fold a crepe?

The classic quarter fold is our favourite, fold in half then in half again to make a triangle. You can also roll them or simply fold in half with toppings piled on the open side.

Can I make savory crepes with this recipe? 

Yes. Simply omit the sugar and vanilla and fill with savory fillings like cheese, ham, mushrooms or spinach.

More Recipe Inspiration

  • Fluffy small batch pancakes for two ready to serve on a plate with syrup.
    Easy Small Batch Pancakes For Two Recipe
  • How to make jelly donut jam filled pancakes.
    Jelly Donut Pancakes with Jam Inside
  • Bailey's French toast on a plate with maple syrup and Baileys whipped cream.
    Easy Baileys French Toast Recipe
  • Easy overnight French toast casserole recipe.
    Easy Overnight French Toast Casserole

If you try this Sweet Crepe Recipe or any other recipe on my blog please leave a star rating and let me know how it went in the comments below. Thanks for visiting today!

Sweet crepes on a vintage plate with whipped cream, fresh strawberries, raspberries, caramel sauce drizzle, and "Life is a Party" written in chocolate.

Recipe

Two sweet crepes filled with whipped cream and folded in triangles on a vintage star-patterned plate, topped with fresh strawberries, raspberries, and caramel sauce.

Easy Sweet Crepe Recipe

Video

Light and tender sweet crepes made in the blender. Perfect for breakfast, dessert, or setting up a beautiful crepe bar for guests
No ratings yet
Print Pin Rate
Course: Desserts
Cuisine: French
Prep Time: 5 minutes minutes
Cook Time: 10 minutes minutes
Additional Time: 30 minutes minutes
Total Time: 45 minutes minutes
Servings: 8
Calories: 88kcal
Author: Dannyelle Nicolle-Ramjist

Ingredients

  • ½ cup all-purpose flour
  • ½ cup milk
  • ¼ cup lukewarm water
  • 2 large eggs
  • 2 tablespoons butter melted
  • 1 ½ tablespoons sugar
  • ½ teaspoon vanilla extract
  • 1 pinch of salt

Instructions

  • Combine all the ingredients of flour, milk, water, eggs, melted butter, sugar, vanilla, and salt in a blender or food processor, and process until smooth.
    ½ cup all-purpose flour, ½ cup milk, ¼ cup lukewarm water, 2 large eggs, 2 tablespoons butter, 1 ½ tablespoons sugar, ½ tsp vanilla extract, 1 pinch of salt
  • Let stand for 30 minutes before cooking, or cover and refrigerate for up to 2 days.
  • In a small non-stick pan, melt a little butter over medium heat. Pour a little crepe batter into the pan and then quickly swirl the pan to coat the bottom in a thin layer of batter.
  • Cook a few minutes until crepe bubbles and bottom is lightly browned. Flip crepe with the corner of a offset spatula or fingers. Cook on the other side until browned slightly. Makes about 8-10, and the recipe can be doubled for a bigger crowd.

Notes

  • Batter can be made up to two days ahead and refrigerated. Stir before using.
  • Cooked crepes stack directly without parchment.
  • Reheat the whole stack in the microwave for a few seconds.
  • Chocolate Crepe Variation: Add 2 tablespoons unsweetened cocoa powder and approximately 1 tablespoon extra sugar before blending. 

Nutrition

Serving: 1g | Calories: 88kcal | Carbohydrates: 9g | Protein: 3g | Fat: 4g | Saturated Fat: 2g | Polyunsaturated Fat: 0.4g | Monounsaturated Fat: 1g | Trans Fat: 0.1g | Cholesterol: 50mg | Sodium: 49mg | Potassium: 48mg | Fiber: 0.2g | Sugar: 3g | Vitamin A: 172IU | Calcium: 27mg | Iron: 1mg
Tried this Recipe? Tag me Today!Mention @LifeisaParty or tag #lifeisaparty!

The Pie Stand Dessert Table

Jun 19, 2012 · 16 Comments

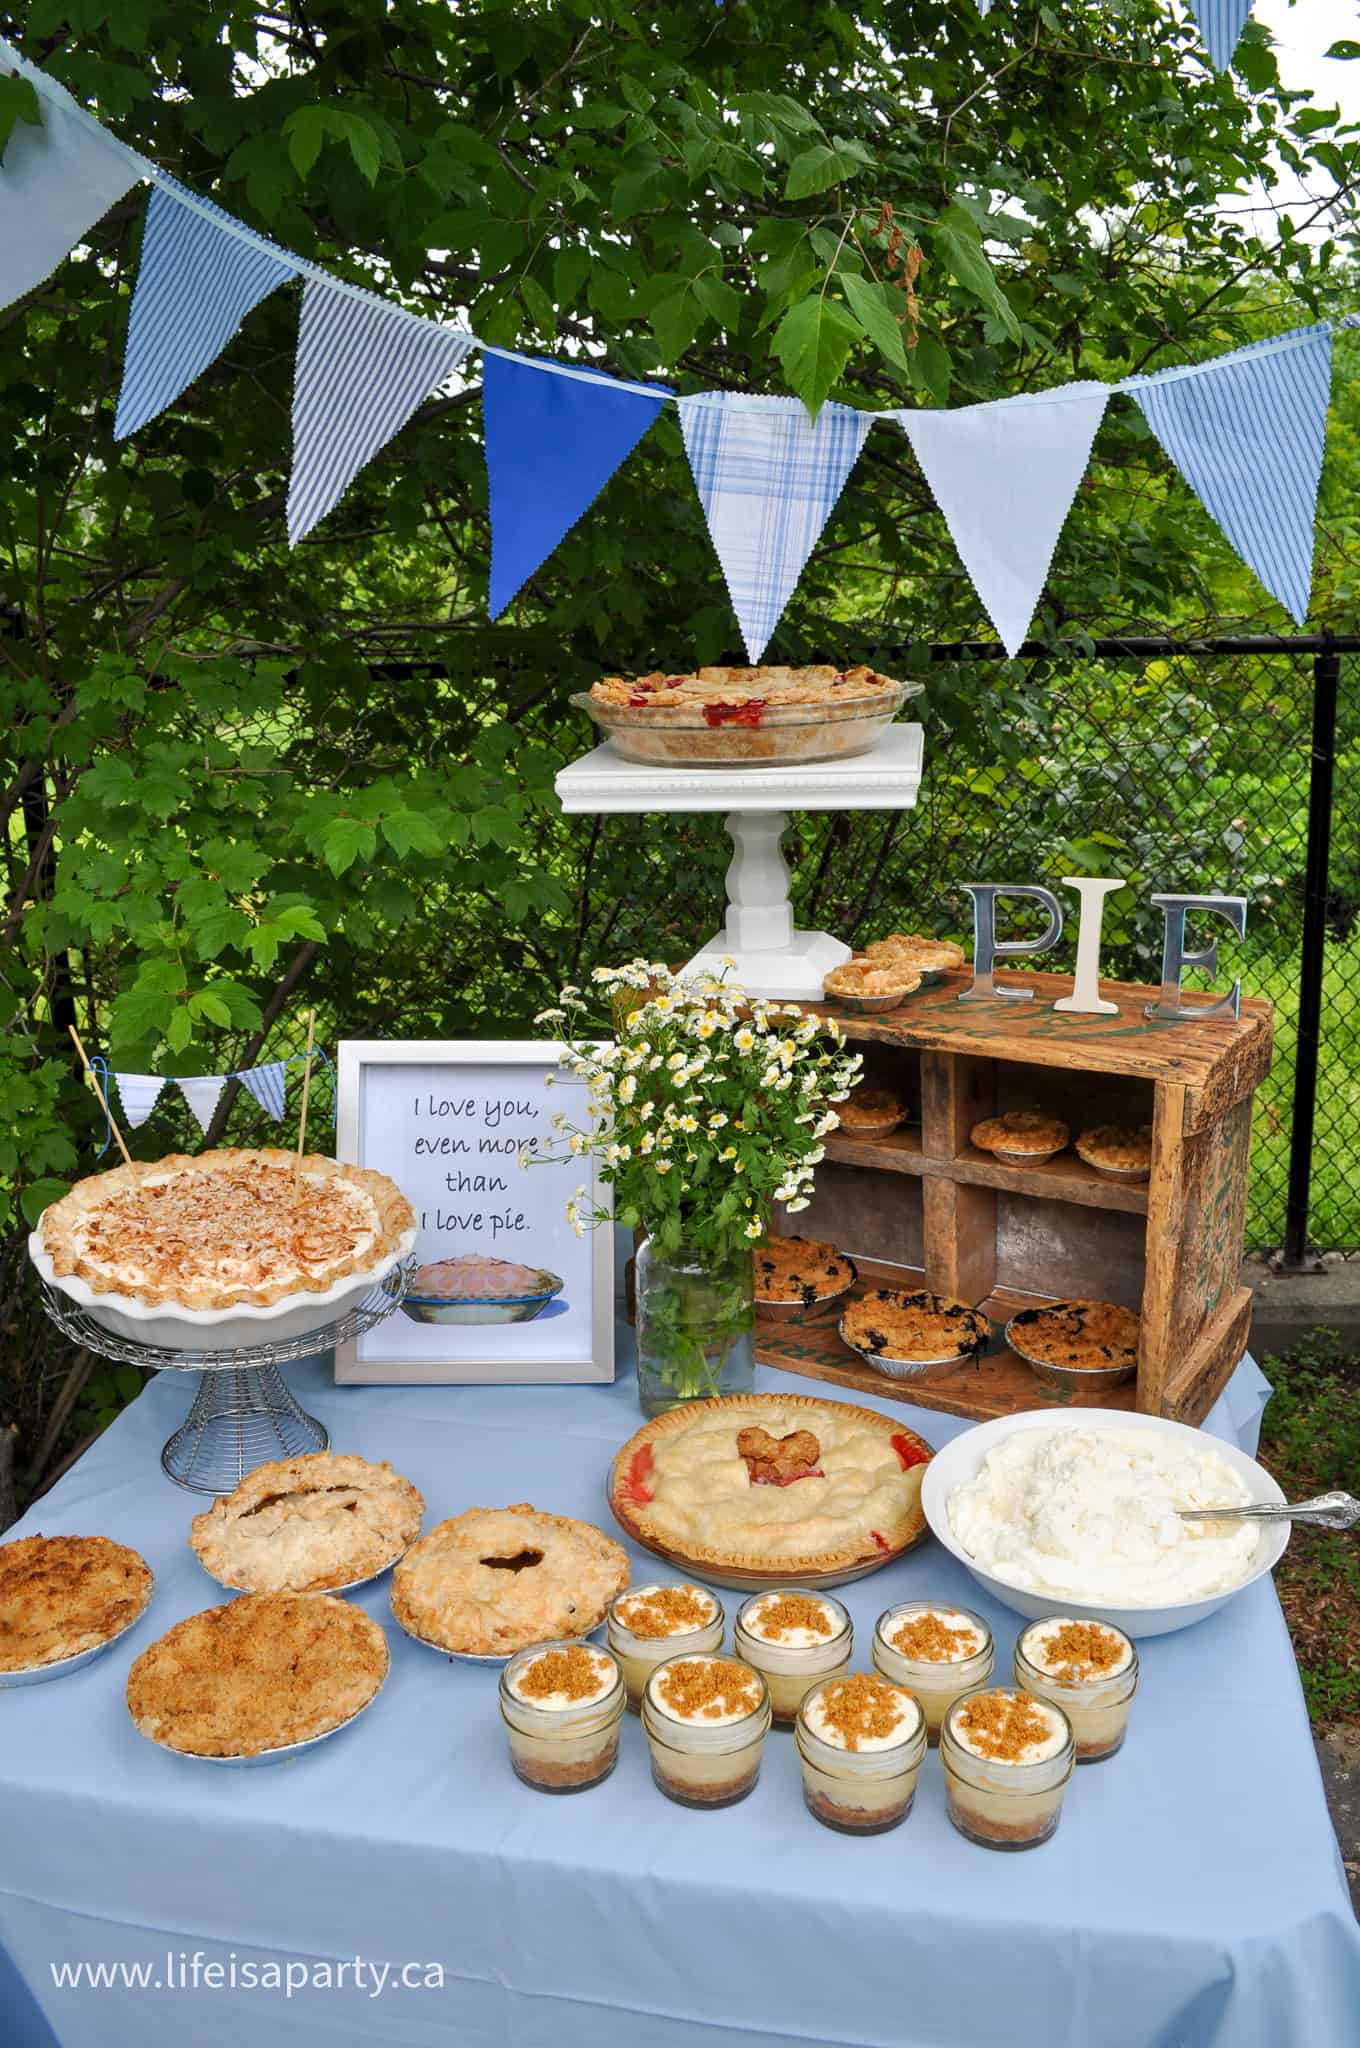
Pie stand pie buffet desset table.

Pie Stand: Perfect for your next party, a pie stand your guests will LOVE. Includes a free printable, and lots of great pie recipes.

Pie stand pie buffet desset table.
[feast_advanced_jump_to]


Pie Stand: Perfect for your next party, a pie stand your guests will LOVE. Includes a free printable, and lots of great pie recipes.

This weekend for Father's Day we made pie, lots and lots of pie, and set up a fun Pie Stand dessert table for our family celebration. I think it just might have been one of our best ideas ever. 😉 It was a labor of love and all our family members loved it.  This pie dessert table is perfect for celebrating any special occasion.  It would also be amazing at as a wedding dessesrt table, or for a birthday. It was inspired by my sweet husbands love of pie.  Dessert bars are such a sweet treat for a special event.  Guests can help themselves and enjoy a little bit of everything.  It's such a fun way to serve a special dessert for a crowd any time of year.

The Pie Stand

I set up the pie stand under some nice trees in the backyard. I used the blue bunting I made last Father's Day out of old men's shirts over the stand. I used the different shades of blue as the colour scheme, which seemed really fitting for Father's Day.  If the pie dessert table were for a rustic wedding pie buffet or a baby shower, white bunting would be a great choice too.  A pie buffet is a great alternative to a traditional wedding cake.  It's also a great option for a thanksgiving pie table.

pie party

Another fun addition to the table was this cute "I love you even more than I love pie" sign.

free pie printable

I spelled out the word "pie" from some letters I had around the house as another fun decorative detail for the dessert table sign.

how to throw a pie party

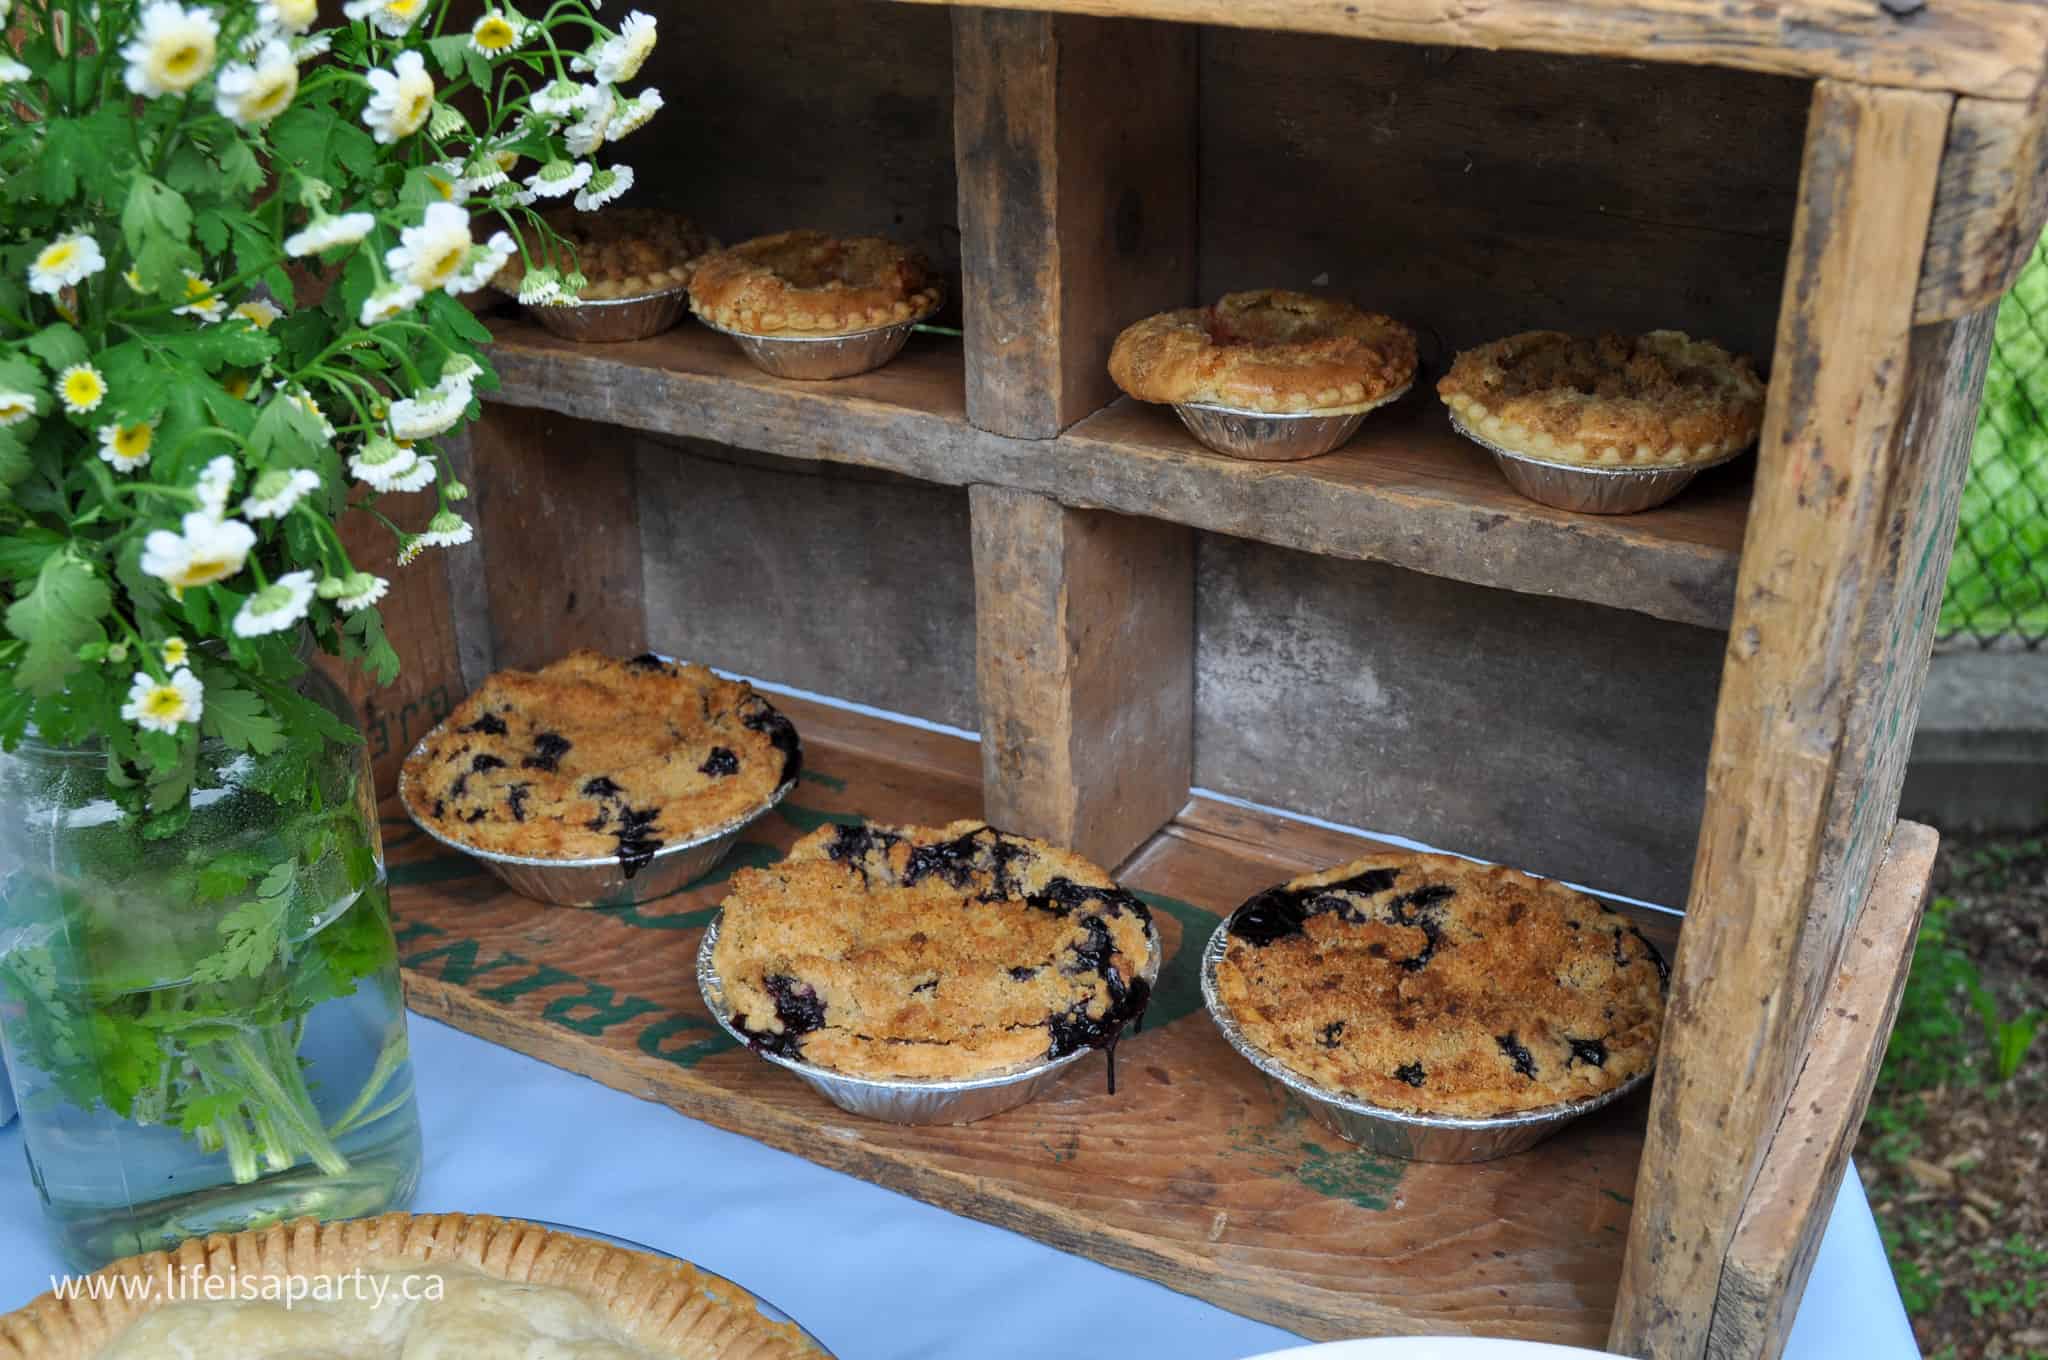
An old crate worked really well to create height and add different levels to the dessert table and hold some mini pies and tarts.  Also be sure to include a knife and a few pie servers so that everyone can cut a slice of pie that's just the right size for them.

The Pies

The star of the show was of course the pie!  We had so many great traditional pie flavors for our pie dessert bar.  There was:

  • blueberry crumble mini pies
  • rhubarb custard tarts
  • mini apple pies
  • banana cream pies in a mason jar
  • cherry pie
  • coconut cream pie
  • strawberry rhubarb pie

It was great to have a variety of sizes from full pies all the way down to tarts, and so many different flavors to choose from.  Since our pie stand was set up in the summer, we had lots of seasonal favorites.  If you were doing something similar in the fall or for the holiday season you might want to also include pecan pie or pumpkin pie.  Another great summer addition would be lemon meringue pie or key lime pie.

how to set up a pie stand

We made the banana cream pie in a mason jar and it was so cute. They were quite easy to make with a simple graham cracker crust.   These cutie pie jars looked so good as part of our pie stand, and were the perfect single serving.  

banana crem pie in a mason jar

My favorite pie was the cherry pie, displayed on a wood cake stand.

how to host a pie party
cherry pie

And, my husband's favorite, coconut cream, with a sweet little mini bunting made with a little embroidery thread to match the other larger bunting over the pie stand.

coconut cream pie

My daughters made the mini apple pies, some with double crust, and some with crumble. The middle pie is strawberry rhubarb. This one and the rhubarb custard tarts were made by my sweet sister-in-law Heather -thanks for catching the vision Heather!  Heather is a fellow pie lover.

Pie Stand

We had vanilla whipped cream and vanilla ice cream to top off the pies in the perfect way.

pie buffet

The Pie Recipes

pie pastry.

 I am not an experienced pie maker; experienced pie eater, yes. My mom is amazing at making pie dough, but I've always been a little afraid of it. We decided to conquer our pie crust making fears and just go for, I mean after all, not great pie crust is still pie, which is still pretty great. 😉

I'm not going to lie and say it was easy. Whoever first said "easy as pie", well let's just say they may have been a liar.

pie stand.

The Pie Crust

pie pastry.

We started out with making a whole lot of pie crust. I used this recipe from the crisco website for "Easy as Pie" Pastry Dough.

I made one batch with one daughter, while my husband made another batch with the other daughter -since we knew we needed a whole-lot-a-crust for the variety of flavors of pie we wanted to make.  If you're not up for making your own pie crust, you can use pre-made crusts to make this process a little quicker and easier.

baked pies.

Apple Pie

For the apple we used an old family recipe, and it turned out great.

blueberries for pie.

Blueberry Crumble Pie

For the blueberry filling and crumble we used good old Martha's recipes -blueberry filling here, and crumble (which we also used for some of the apple) here.

crumble topping.

These were really, really good, and I would definitely use this recipe again.

mini blueberry pies.

Coconut Pie

For the coconut I used a packaged coconut pudding that you cook on the stove top. After cooking and cooling an empty pie shell, we added the pudding.

pie recipe progress.

After it cooled we topped with whipped cream and toasted coconut. It was quite easy to make, but did involve a lot of steps and a lot of waiting in between. This is my husbands favorite flavor and he would say it was worth it.

coconut cream pie.

Mini Banana Cream Pies

The final pies I made were these cute little mini banana cream pies as individual pies in mason jars.

finished banana cream in a jar.

I added some graham crackers to make the bottom crust and baked for 10 min. (just follow the directions on the package for making pie crust).  Then I added banana pudding, over some slices of banana.

banana cream in a jar base.

After they cooled I topped with whipped cream, and sprinkled with some remaining graham cracker crumbs. This one, with no pastry was by far the easiest, and really yummy too.

banana cream progress.

The pie stand was a huge hit, and making pies together as a family was really fun, and will be a great memory for years to come. A pie dessert table is such a great way to serve dessert to a large group.  Whether you're celebrating for Father's day like us, as part of your special day with a wedding dessert table, for a special birthday, or any other special event a pie stand is sure to be a great hit. 

Pie Stand

With this much wonderful pie, life truly is a party!

More Pie Inspiration

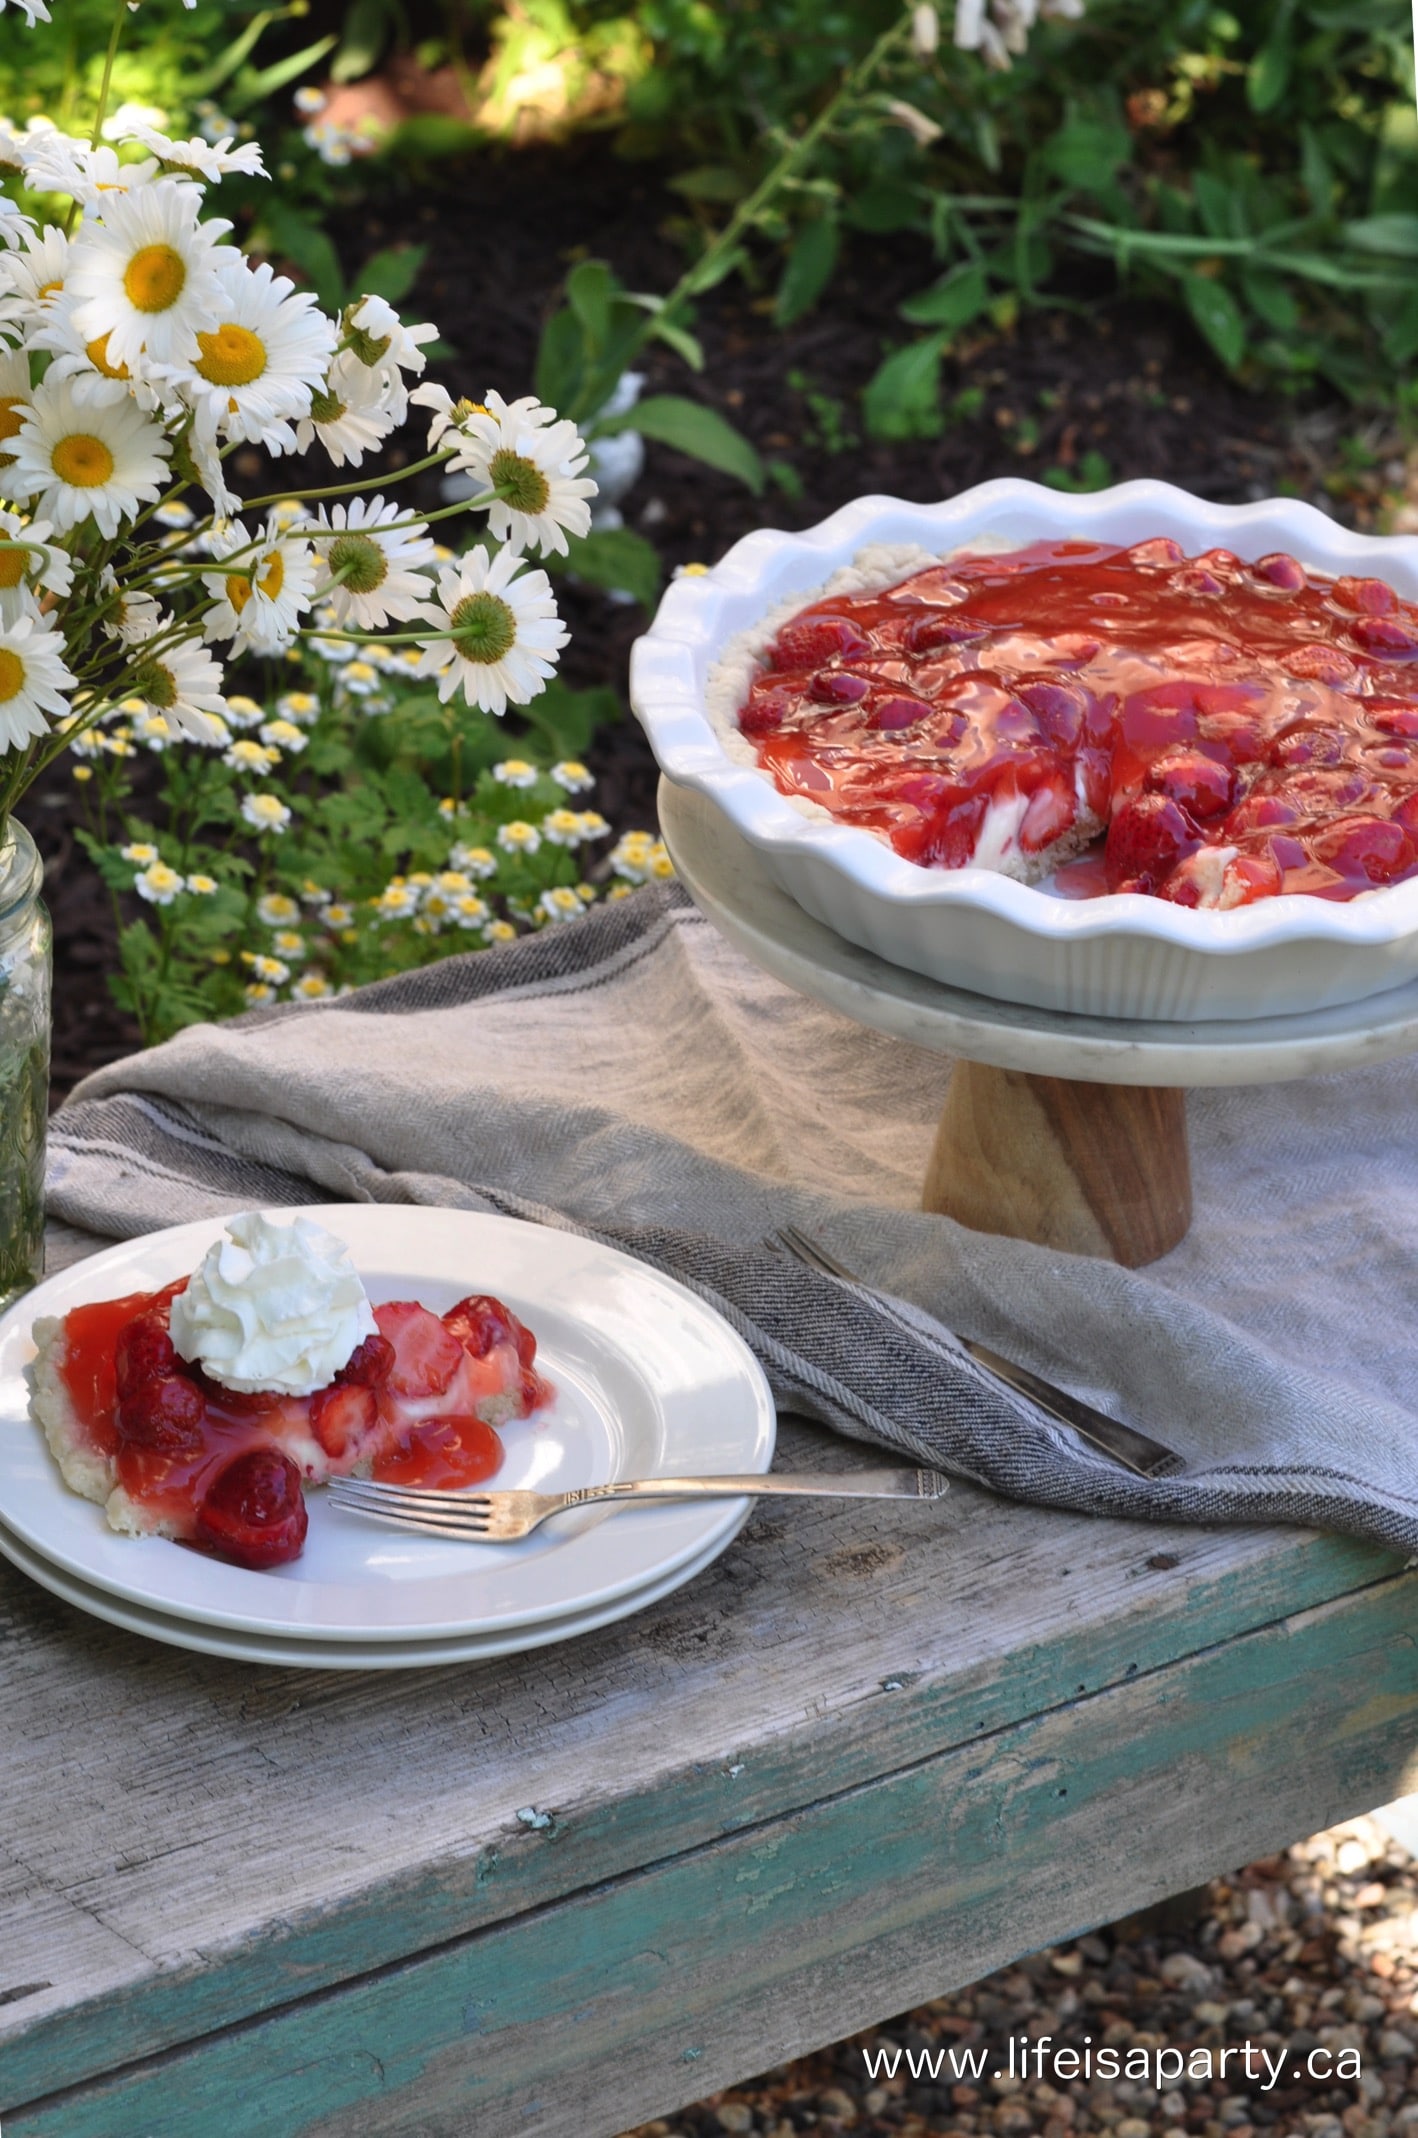
You might also like Strawberry Cheesecake Pie here.

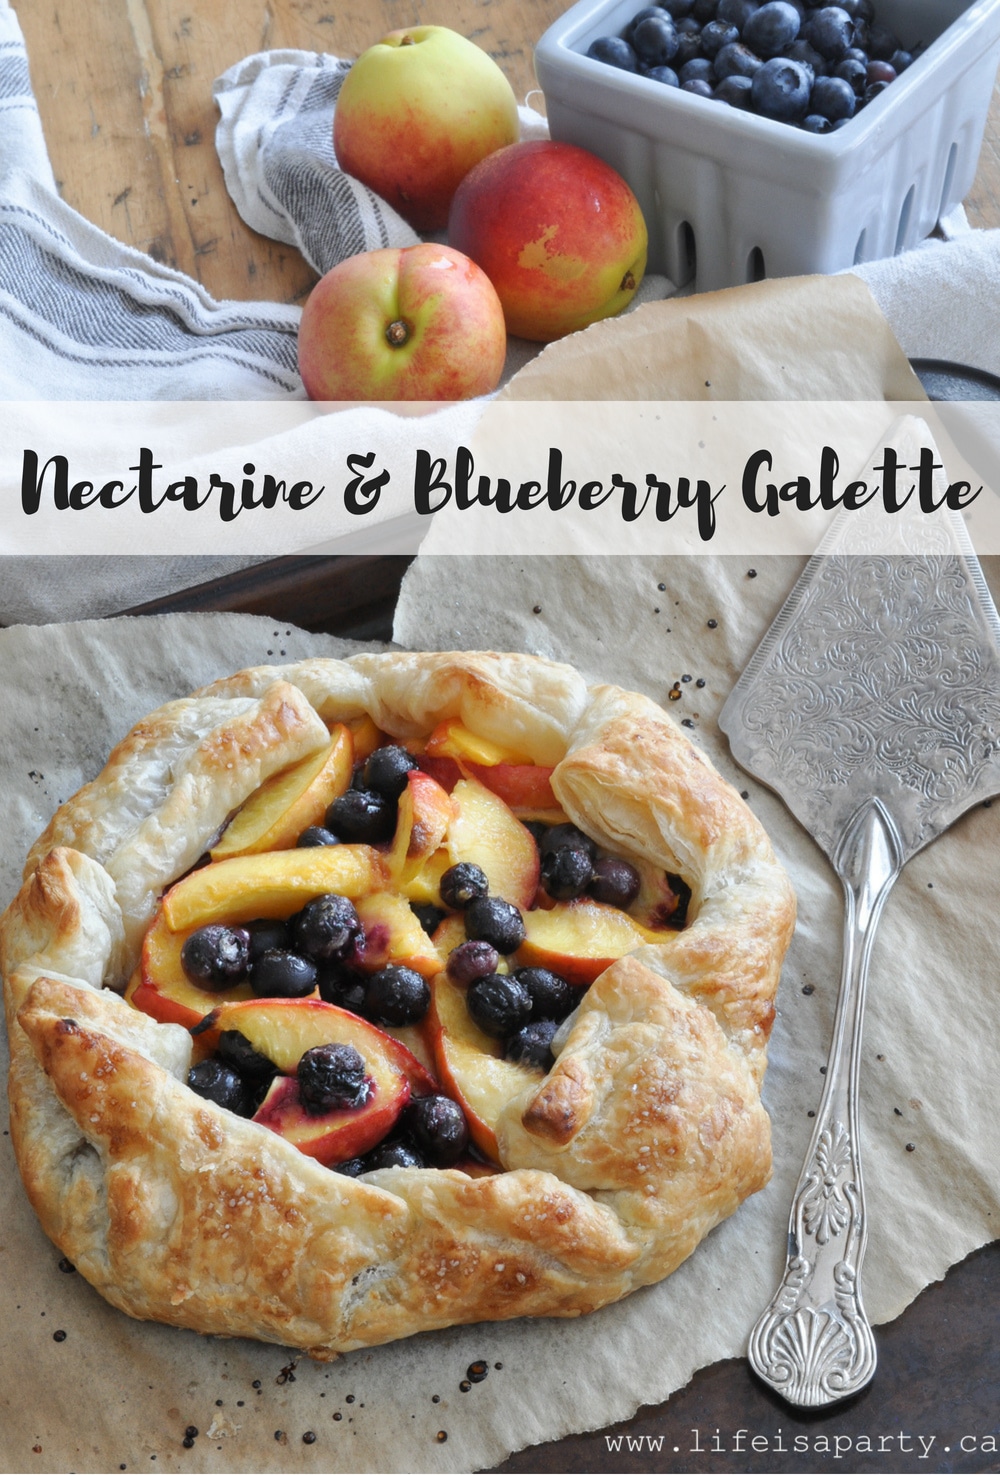
Also check out Nectarine and Blueberry Galette here.

Nectarine and Blueberry Galette: literally make in minutes with frozen puff pastry, so easy and the perfect way to enjoy fresh nectarines and blueberries.

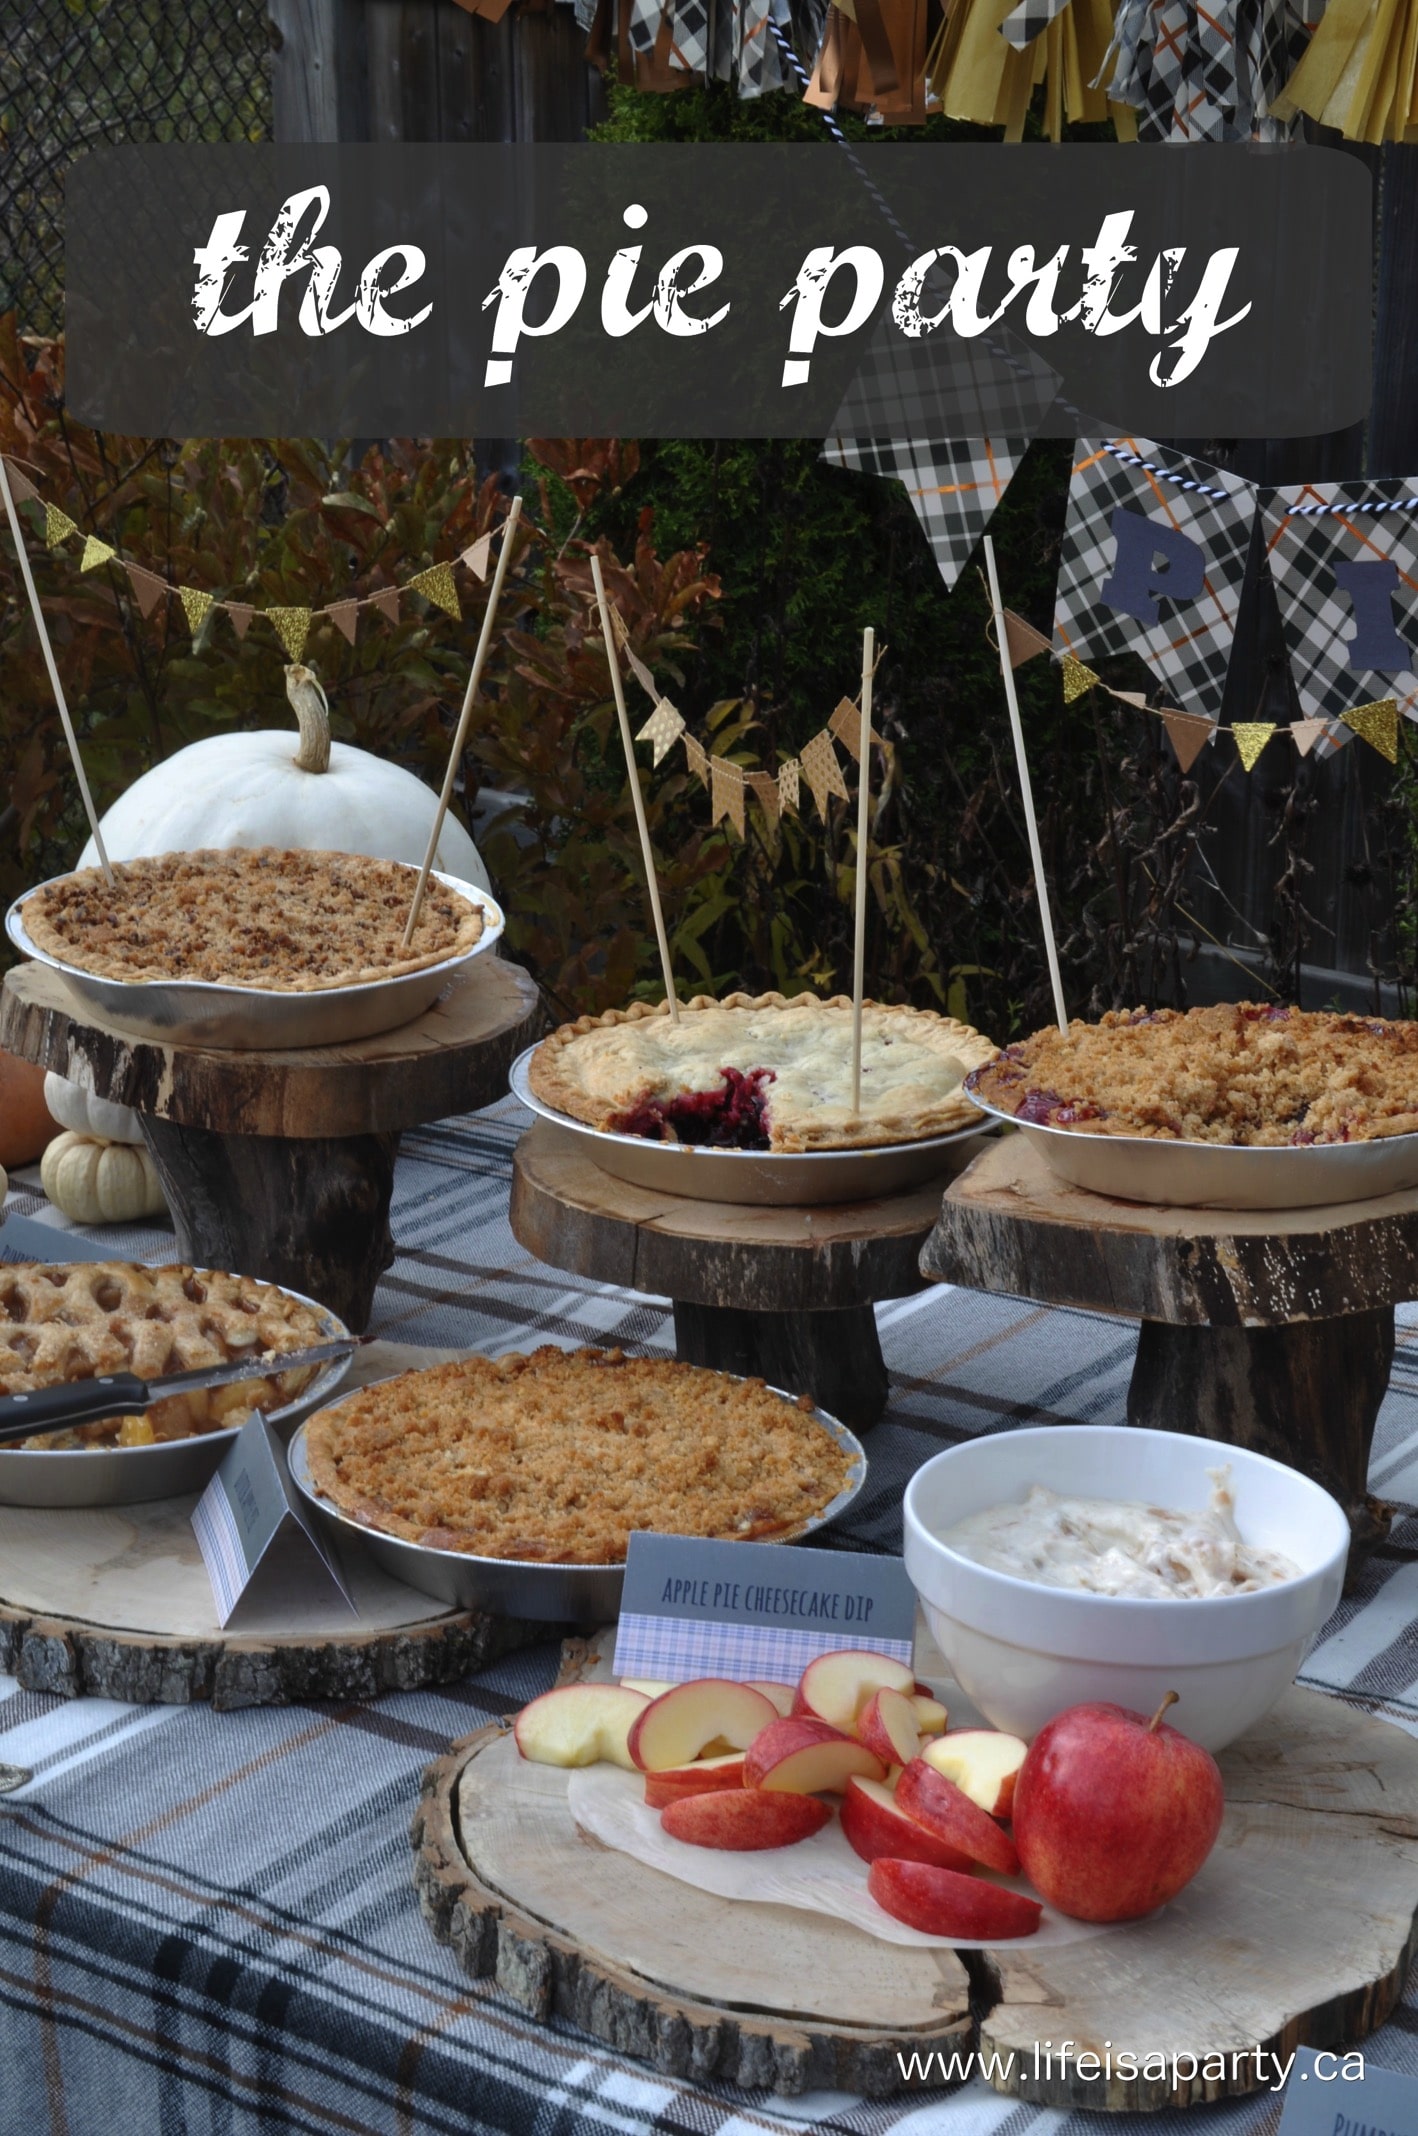
You might also enjoy The Pie Party here.

The Pie Party: pies, pie pops, pie fruit dip, pie toppings and beautiful decor make the perfect outdoor fall pie party for family and friends.

Bug Themed Food

Jun 8, 2012 · 1 Comment

Bug themed food ideas.

Bug Themed Party Food: pizza butterflies, dirt pudding, strawberry ladybugs, and grape caterpillars create the most fun insect inspired dinner.

Bug themed food ideas.
[feast_advanced_jump_to]


Bug Themed Party Food: pizza butterflies, dirt pudding, strawberry ladybugs, and grape caterpillars create an insect inspired dinner.

It's Friday night, and Maddie, my youngest daughter who's 5, and I were inspired by "Scientist in the School" bug day to create a bug themed dinner!  This bug themed party food would be perfect for any insect related celebrations.

We learned all about insect body parts, how they eat, and camouflage today at school through this great program, so at the grocery store we got to thinking it would be fun to make some bug food for dinner, and keep the fun going.  Here's what we came up with.

Butterfly Pizza

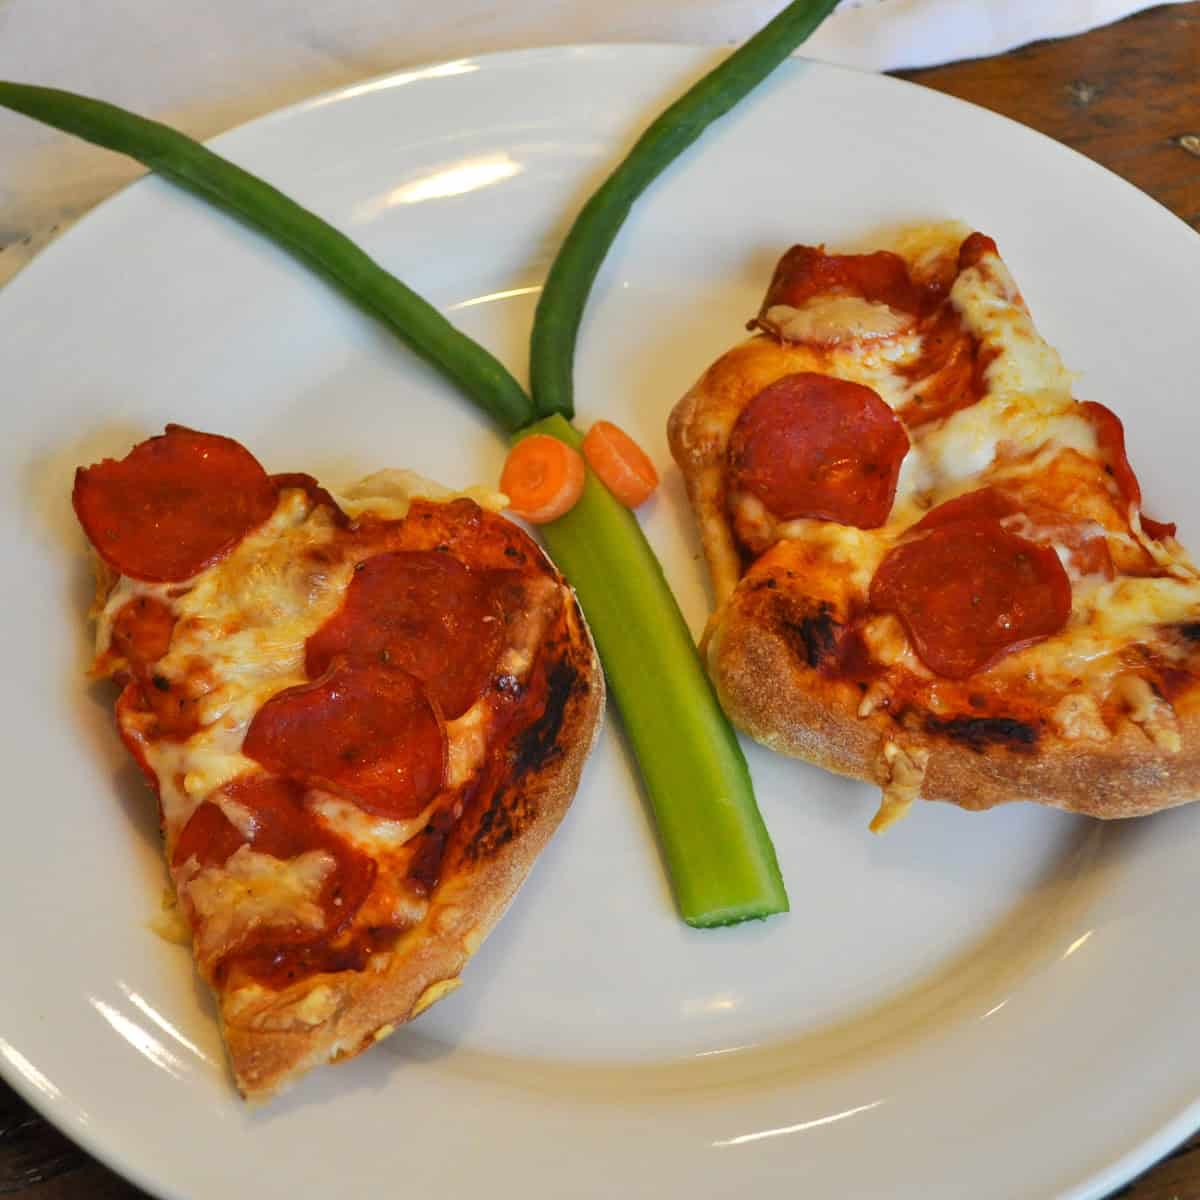
pizza butterfly bug themed party food

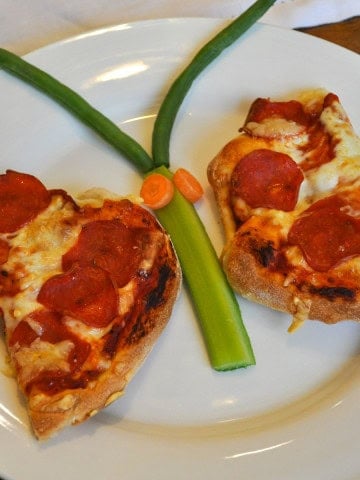
We made butterfly pizza, with a home made little pizza cut in half for wings, a piece of celery, carrot eyes, and green bean antenna.

Dirt Pudding

how to make dirt pudding

For dessert, we started out with dirt pudding. We used a chocolate pudding cup, mixed in some whip cream and some crushed Oreos. It was so yummy, I just might be "going to the garden to eat dirt" in the future!

Strawberry and Cherry LadyBugs

strawberry ladybugs

We also made some lady bugs. Their bodies -or thorax and abdomen (I was listening!) were strawberries, with chocolate chip spots. Their heads were cherries with candy eyes, and chocolate sprinkle antenna.

Grape and Marshmallow Caterpillars

grape and marshmallow caterpillars

We also made some caterpillars out of grapes and mini marshmallows on a tooth pick, with the same candy eyes and sprinkle antenna.

bug themed party food

It was so much fun, and the kids really enjoyed it. Life is what we make it, so we may as well make it a party...especially on a Friday night. 😉 Hope you have a great weekend.

With bug themed party food for dinner, life really is party!

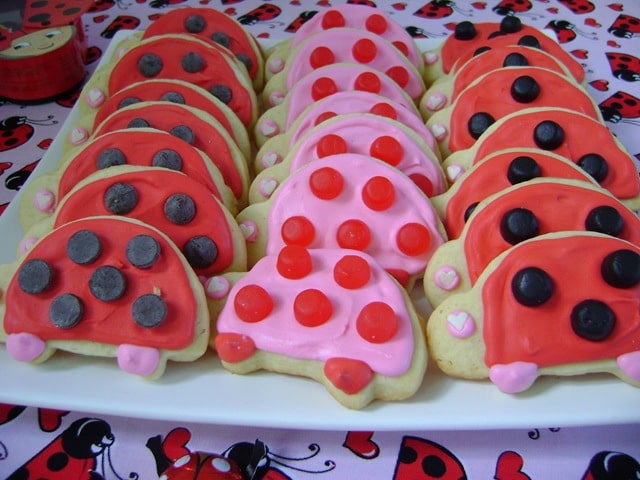
You might also like our Ladybug Birthday Party here.

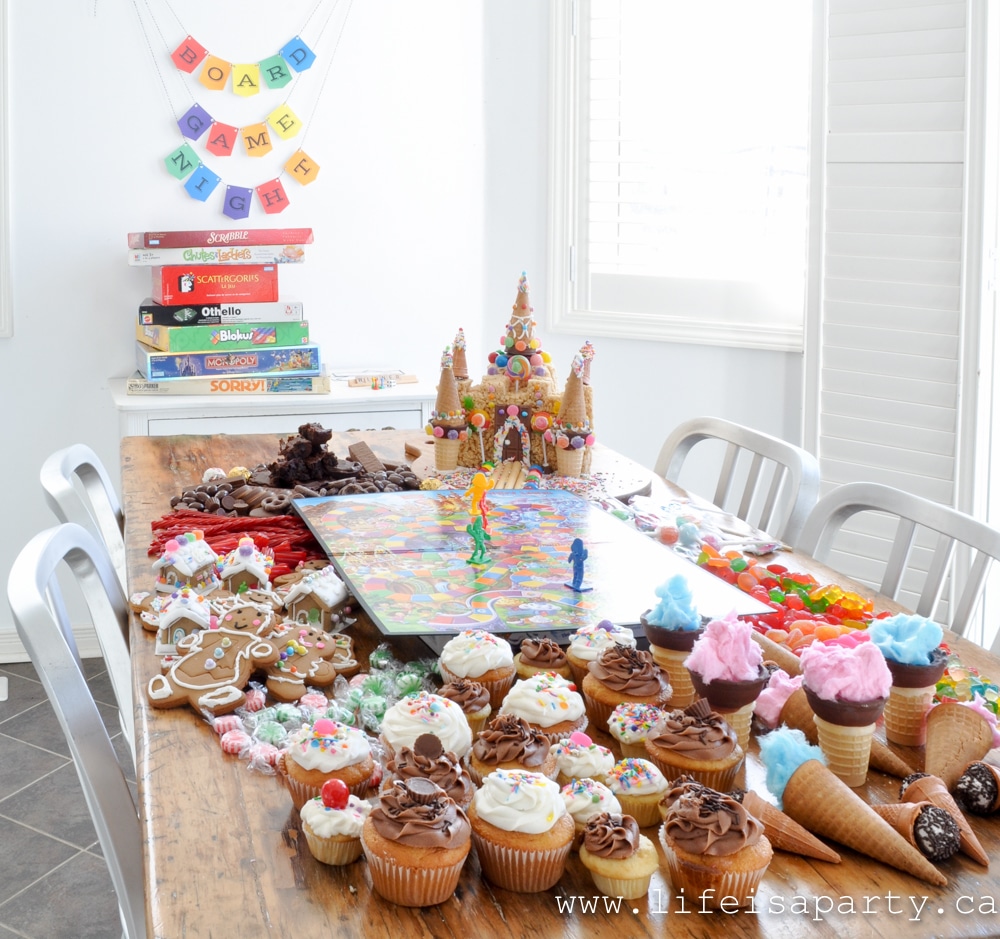
Also check out Board Game Night here.

You might also like our Pillow Fort.

How To Build A Pillow Fort -make a magical pillow fort with fairy lights and starry decorations, and star themed snacks for family night or date night.

Yellow Brunch

May 14, 2012 · 2 Comments

Yellow brunch for Mother's Day.

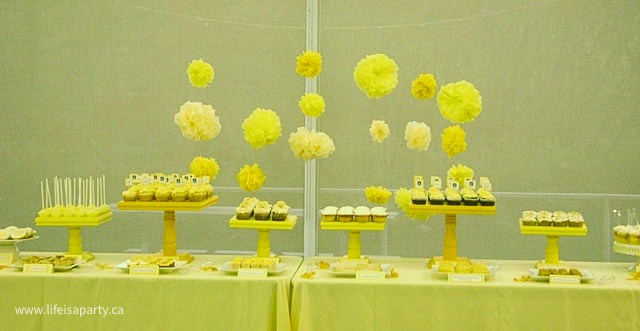
Yellow Brunch: easy sunny yellow decor helps create a beautiful brunch, including a great menu and links to all the recipes.

Yellow brunch for Mother's Day.
[feast_advanced_jump_to]

This year for Mother's Day I decided to put together a little brunch, and invite my Mom and my BFF. We had a lovely time, and my husband did most of the cooking so I could enjoy it too.

yellow mother's day brunch

Yellow For Spring

I was inspired by the beautiful spring weather to use yellow as the colour scheme for the party. I don't own a lot of yellow, but since I used yellow with white, I didn't really need too much. A few strategic hits of yellow had a big impact.

The Table

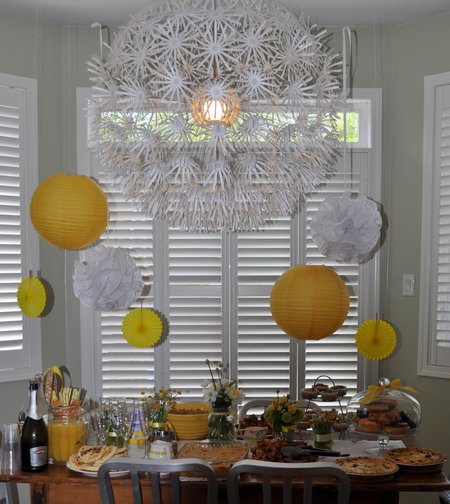
I started out wanting to do a grouping of pom poms and paper lanterns over my kitchen table, that incorporated my fun light. I made paper doily pom poms, and used some yellow paper lanterns for big impact.

yellow mother's day brunch table

For the table I used a simple white linen runner, and layered on some simple sweet yellow candles with some garden bouquets in mason jars. I don't have a lot of yellow flowers in my garden, so I used white, added some yellow spray roses that I bought.   Tying the jars with different yellow ribbons helped add a little more yellow. I love how it turned out.

yellow mother's day brunch flowers

I wanted to eat outside in the sun, so we set up the table buffet style. We used pretty polka dot paper napkins, and these sweet yellow striped paper straws.

yellow  brunch

Brunch Drink Ideas

For drinks we served Irish tea, along with lemonade for the little girls, and mimosas for the grown ups. I found this bottle with the fun stopper at the dollar store. The colour didn't match our decor, so I wrapped it in a paper doily and ribbon. I love how it turned out.

easy brunch ideas
brunch drink ideas

The Brunch Menu

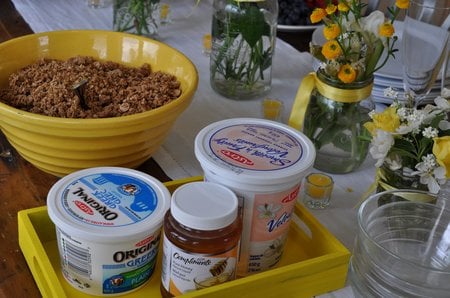
I decided to serve granola with yogurt, honey and berries, so we could make our own parfaits. I made homemade granola, you can find our favourite recipe here.  My guests loved it so much that I sent them all home with a little for their breakfast the next day!

yellow  brunch ideas
yellow brunch

We also served a hash brown casserole, bacon, sausage, and quiche. I used this recipe for the quiche, and made one with broccoli and cheddar and the other with Swiss cheese and spinach. I made them the day before and just re-heated for the brunch. Worked like a charm.

easy yellow brunch ideas

The whole brunch idea came about because my husband makes the best buttermilk pancakes. He made plain, blueberry and chocolate chip.

homemade pancakes

We served them with vanilla whipped cream, warm maple syrup, and blueberry syrup, which I made by cooking blueberries in maple syrup. Yum.

what to serve at a brunch

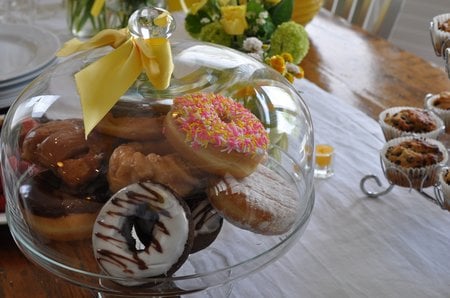
For dessert we had some donuts, and I made the chocolate chip oatmeal muffins again, see the recipe here -one of my new favs.

easy brunch menu ideas
yellow brunch
Mother's Day brunch

Some little people really enjoyed the donuts. 😉

Simple Outdoor Table

I wanted us all to enjoy the warm weather so I set up the outside table with our yellow theme too. We hung our regular white candle lanterns with some pretty yellow ribbon and I made a yellow and white planter for the table.

yellow brunch

I wanted to add a little more yellow, and thought the garden gnomes were a really fun addition.

garden gnome makeover

At the dollar store I found some $2 garden gnomes, and a ceramic mushroom and gave them a few coats of glossy yellow paint. I love the bit of whimsy they add to the table. 

yellow brunch decor

The brunch was so yummy, we all enjoyed the sun, eating and drinking and making our way back to the buffet for seconds and thirds, while the kids played tag and enjoyed the swing and sandbox together. It was a very happy Mother's Day!

yellow mother's day brunch

With a fun yellow brunch like this to celebrate Mother's Day, life really is a party!

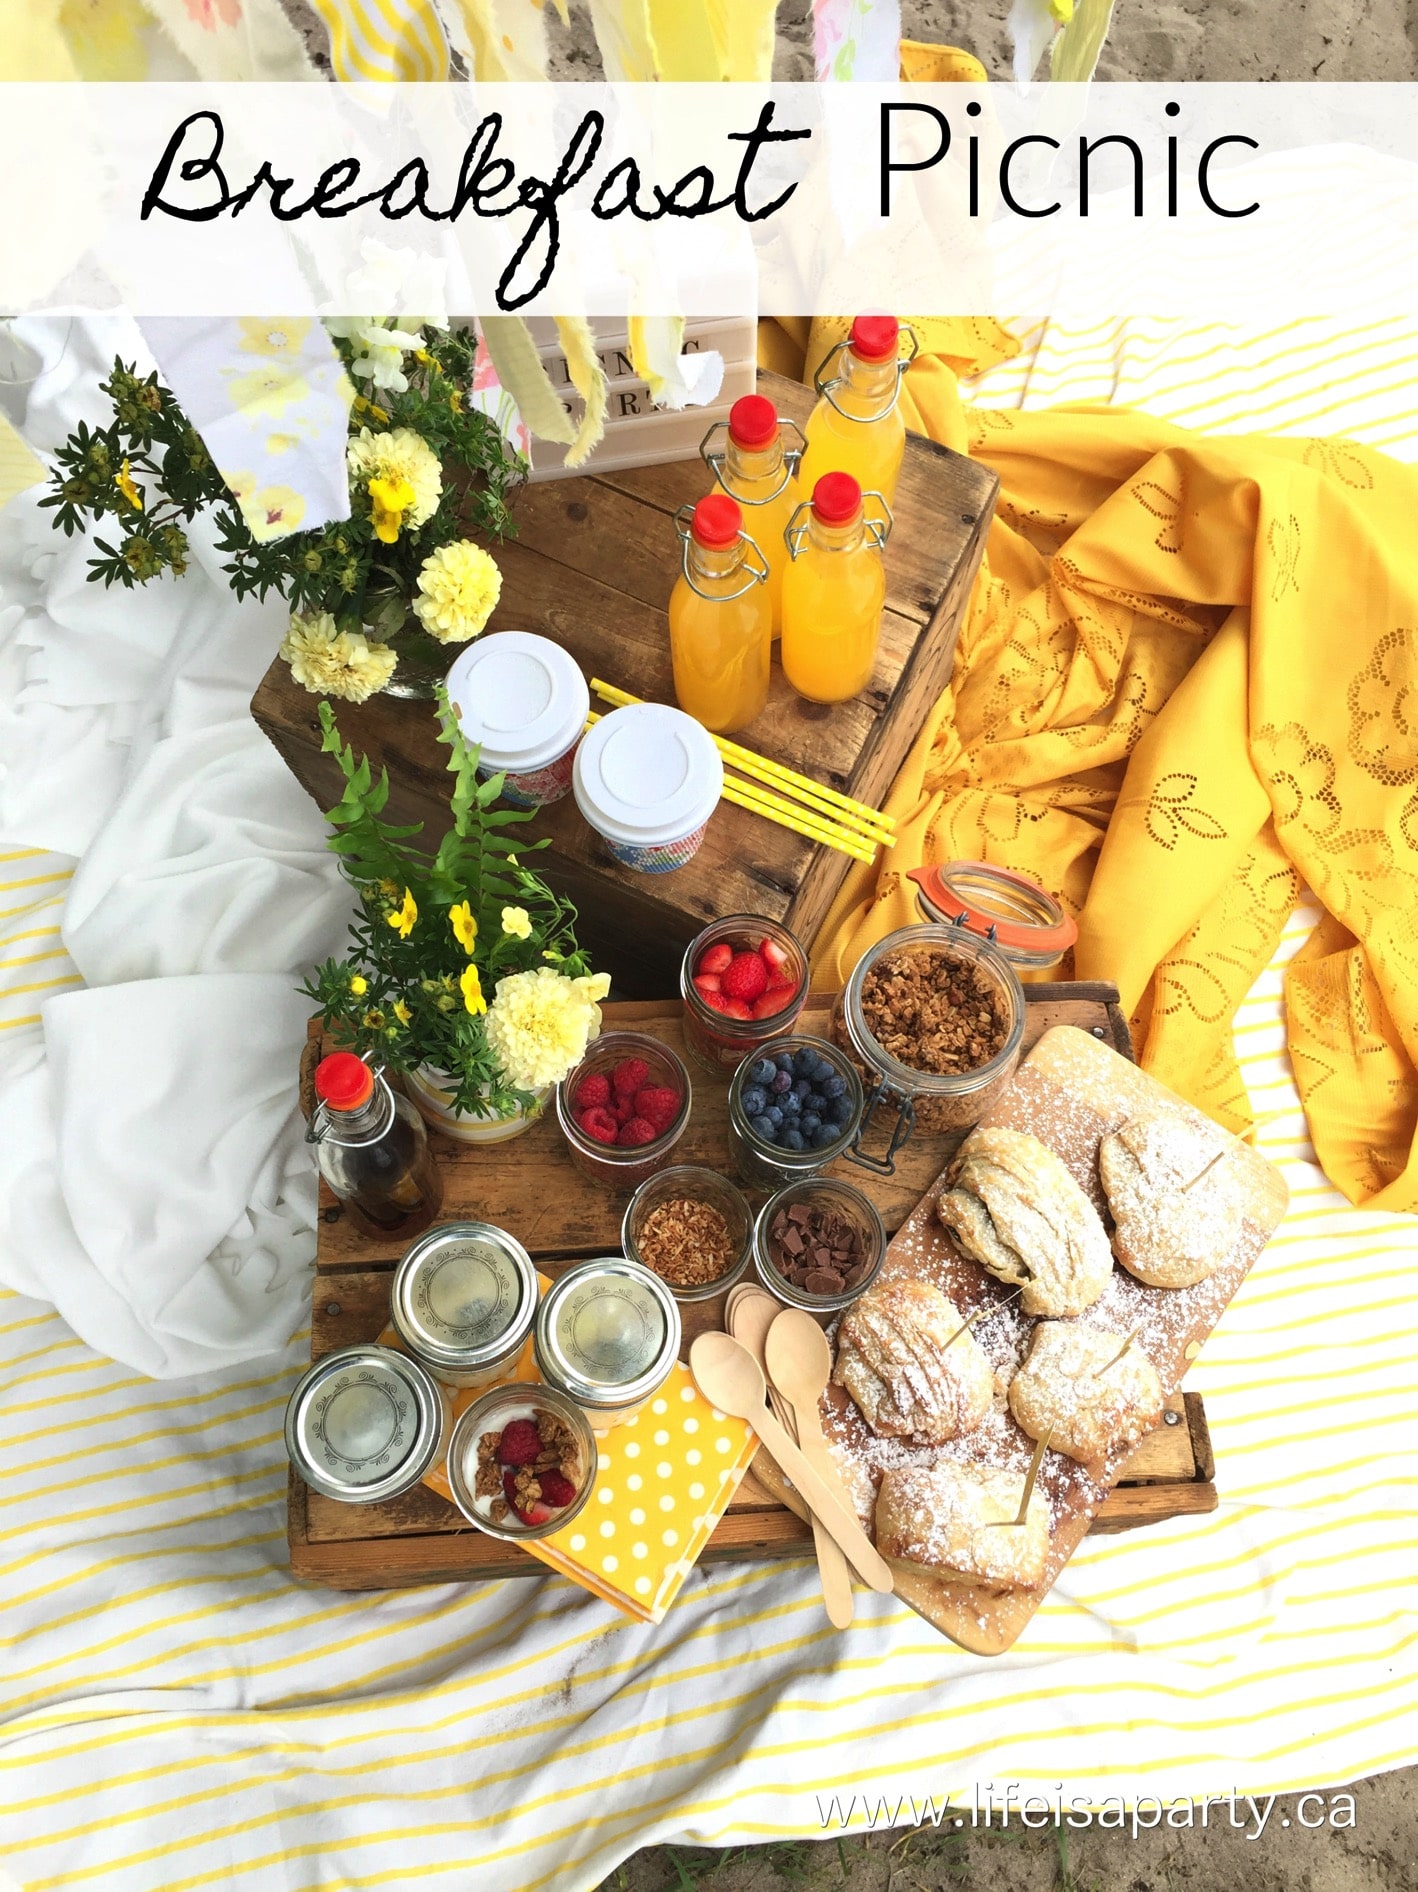
You might also like our Breakfast Picnic here.

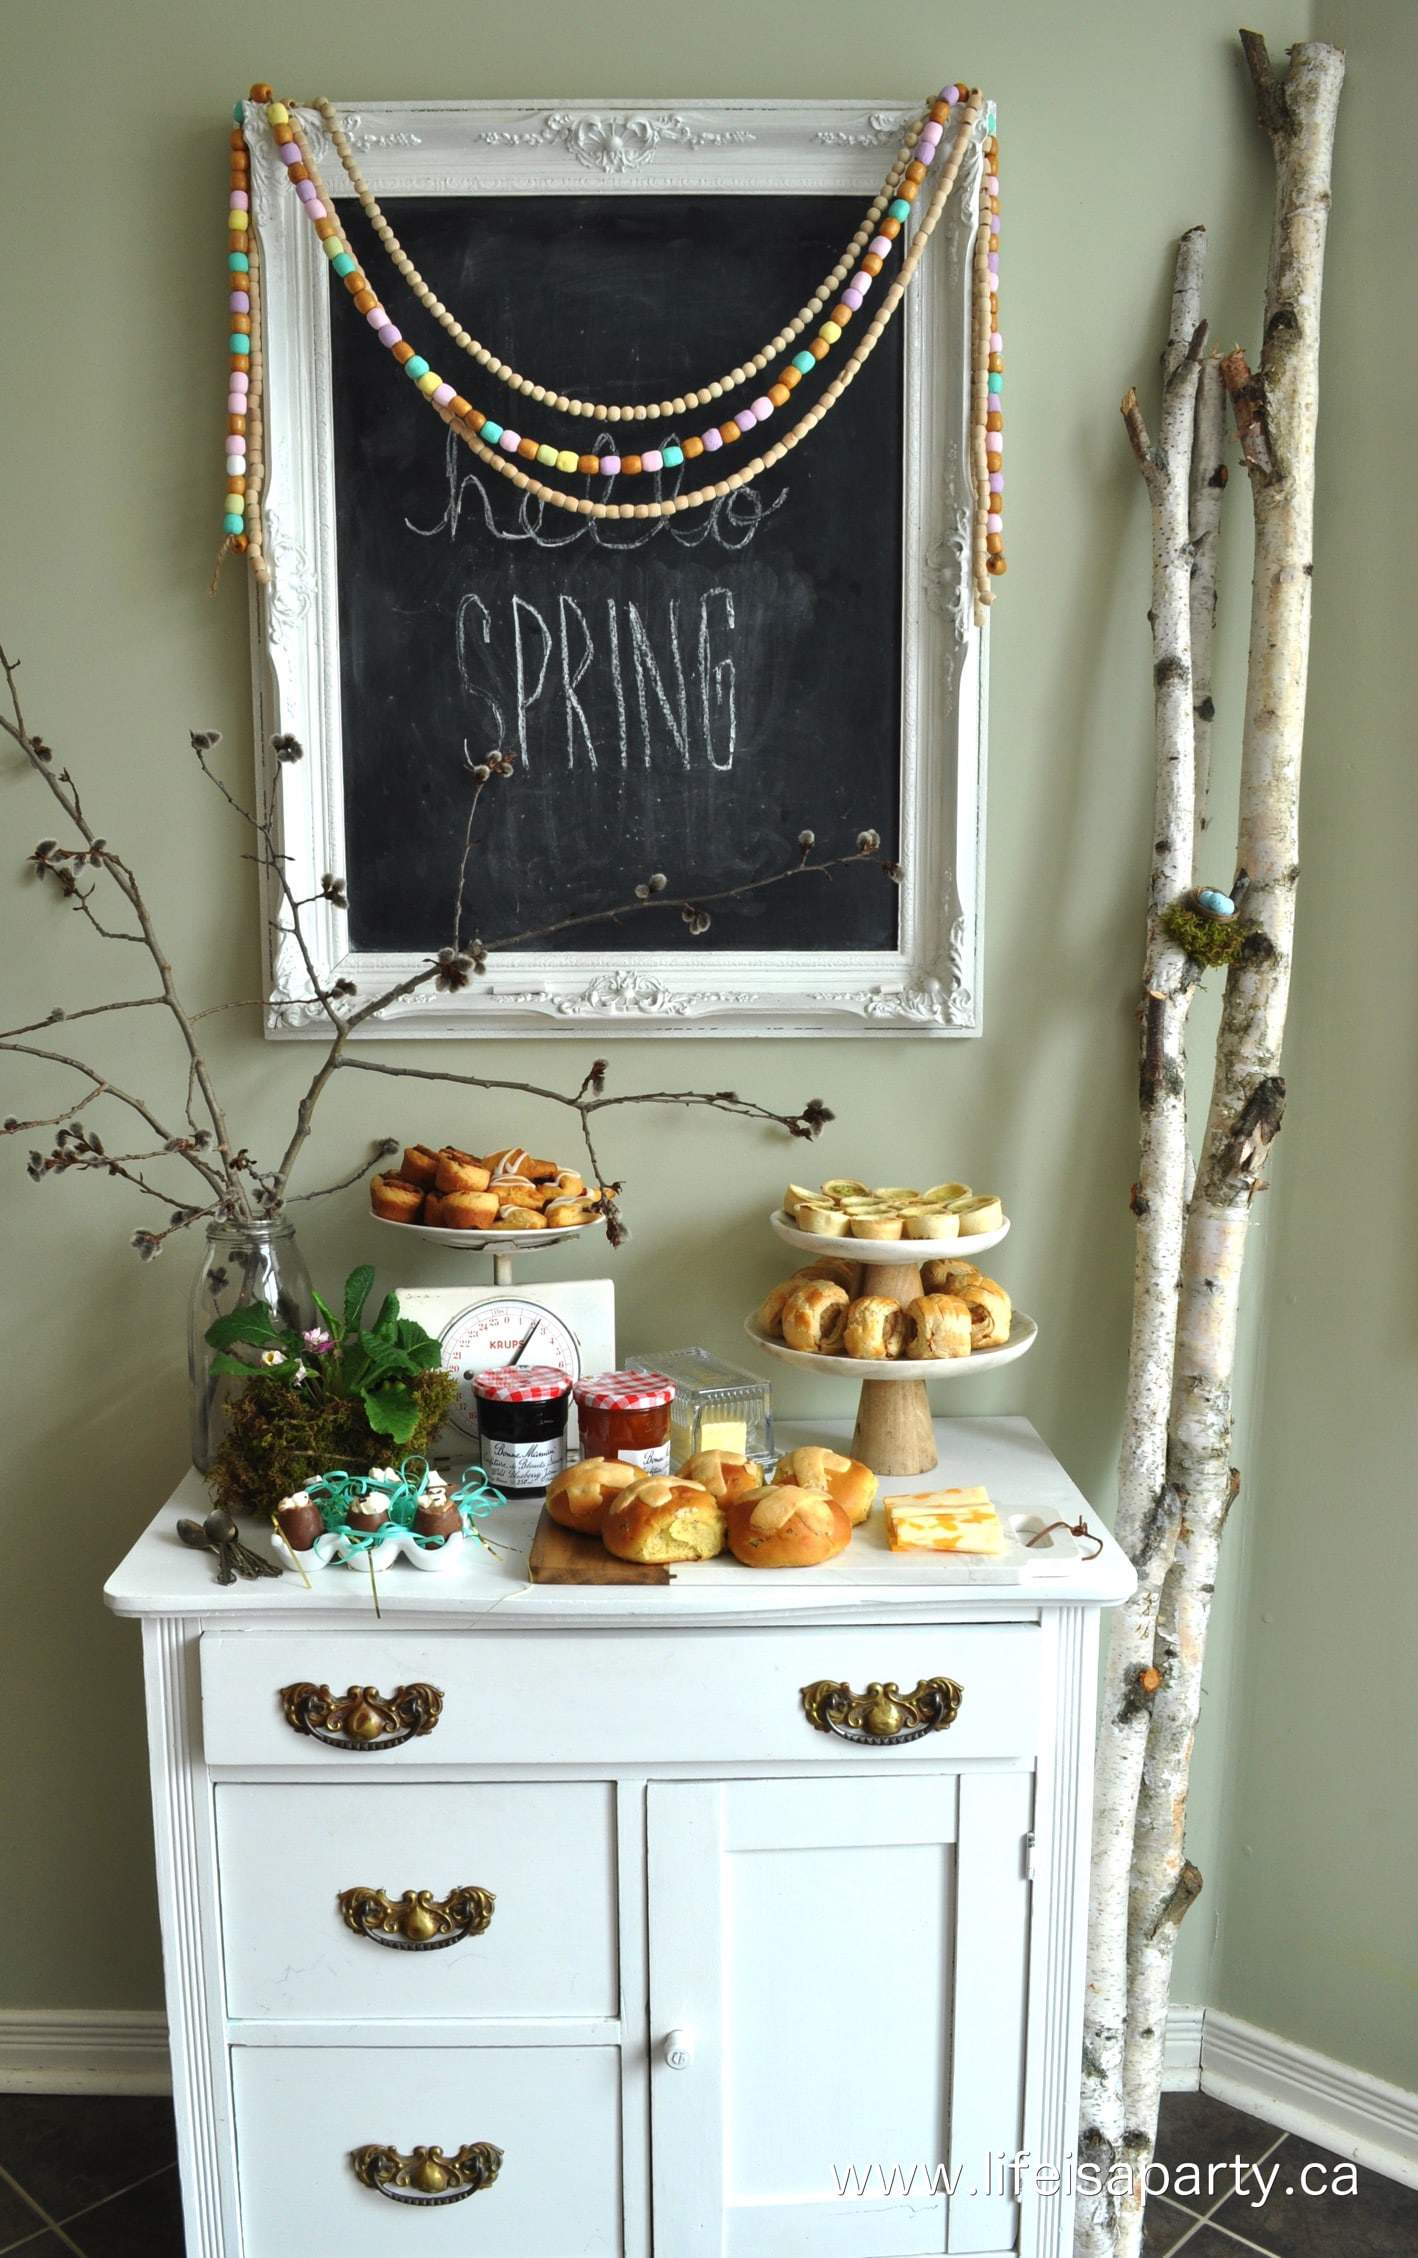
Also check out our Easter Finger Foods Brunch here.

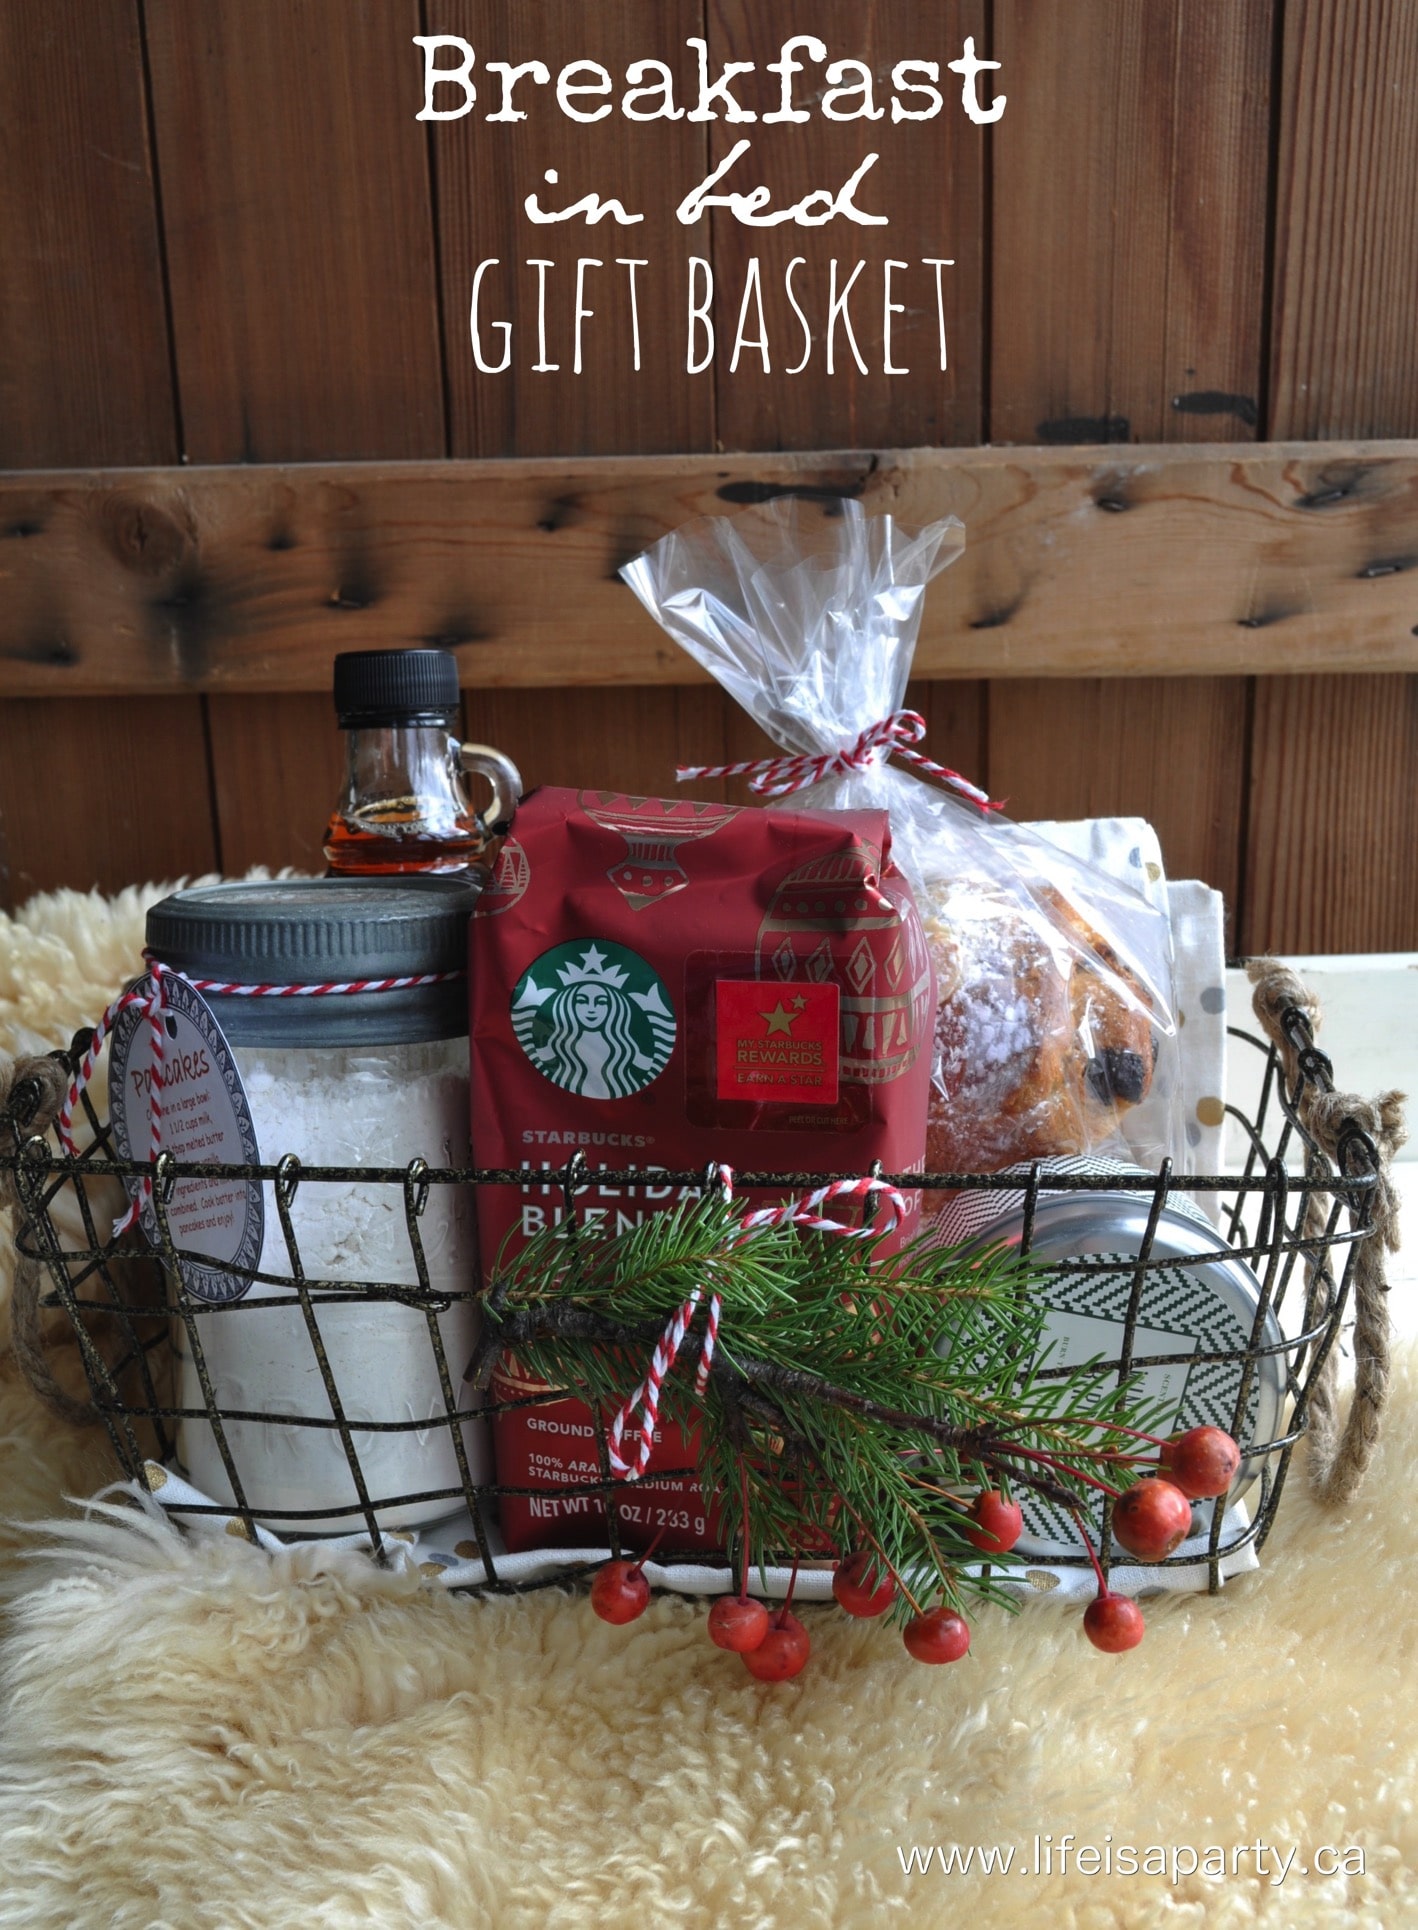
You might also like our Breakfast In Bed Gift Basket here.

Easy Oatmeal Chocolate Chip Muffins

May 8, 2012 · 3 Comments

Oatmeal chocolate chip muffin recipe.

Oatmeal Chocolate Chip Muffins: these easy muffins with oatmeal and chocolate chips are the perfect combination for breakfast or a snack.

Easy oatmeal chocolate chip muffins.
[feast_advanced_jump_to]

Chocolate chip oatmeal muffins are the perfect combination of home-y nutty oatmeal and delicious chocolate chips.  They have a chewy texture from the quick-cooking oats, and then a nice  bit of chocolate too.  This is a real favorite for a perfect breakfast.  It's the perfect way to start your day with your morning coffee.  These delicious homemade muffins is also make a perfect snack.  

You might also like our Easy Banana Snack Cake.

oatmeal chocolate chip muffin recipe

I got together with some girl friends this morning for a cup of coffee, and thought I would make these yummy oatmeal chocolate chip muffins.  They are really delicious and easy to make.  And they're filled with simple ingredients that you probably have in your pantry already.

oatmeal chocolate chip muffins

Like any typical muffin recipe, or quick breads these muffins rely on baking soda for their rise.  For best results make sure to use fresh baking soda that is within date.  This moist muffin is quite dense and hearty because of the oatmeal.  The oatmeal adds such a wonderful nutty flavor, and chewy texture.  

chocolate chip and oatmeal muffin recipe

This recipe starts out by soaking the oatmeal in milk.  This adds a dense richness to the muffins and makes them very moist.  Other than that, this recipe is very quick to mix together.  There's no need for your stand mixer you can quickly mix these together by hand.  There' a perfect quick recipe to mix together in the morning for fresh baked muffins for breakfast.  It's also a great easy recipe to make with kids.

oats soaking in milk

Chocolate

These muffins are filled with chocolate chips.  We like to use regular semi sweet chocolate chips.  They are nice and sweet and chocolatey.  If you are making mini muffins, you might substitute mini chocolate chips instead of regular.  You can also change out the chocolate chips to use milk chocolate chips, or dark chocolate chips if you prefer.

how to make oatmeal chocolate chip muffins

Store any leftover muffins in an airtight container at room temperature.

This oatmeal chocolate chip muffin recipe is a small batch.  It only makes 12 muffins.  You can double it if you need more a second batch of these.  If you're making these for little ones, you can also make them into mini muffins, perfect for school lunches.  Just be sure to adjust the baking time to less for the mini muffins.

oatmeal and chocolate chip muffins

These hearty muffins are delicious for a quick and easy breakfast or a snack anytime of day. The kids loved them since they include chocolate chips, and I liked that they had oatmeal in them too. The oatmeal adds a lovely nutty flavor and great texture to these moist muffins.  This is sure to become one of your favorite muffin recipes.  Next time you want a great muffin with a little bit of chocolate, give this recipe a try.

Recipe

Oatmeal chocolate chip muffin recipe.

Oatmeal Chocolate Chip Muffins

Tender oatmeal muffins with chocolate chips.
5 from 2 votes
Print Pin Rate
Course: Breakfast
Cuisine: American
Prep Time: 10 minutes minutes
Cook Time: 20 minutes minutes
Additional Time: 10 minutes minutes
Total Time: 40 minutes minutes
Servings: 12
Calories: 228kcal
Author: Dannyelle Nicolle-Ramjist

Ingredients

  • 1 ¼ cup quick oats
  • 1 ¼ cup milk
  • 1 egg
  • ⅓ cup vegetable oil
  • ½ cup brown sugar
  • ¾ cup semi-sweet chocolate chips
  • 1 teaspoon vanilla extract
  • 1 ¼ cup all purpose flour
  • 1 teaspoon baking powder
  • ½ teaspoon baking soda
  • 1 teaspoon salt

Instructions

  • In a large bowl combine oats and milk and let stand for 15 minutes.
  • Stir egg, oil, brown sugar, vanilla and chocolate chips into oat mixture.
  • In a separate bowl combine the dry ingredients of flour, baking powder, baking soda, and salt and add it to the wet ingredients. Stir until moistened and combined.
  • Use paper liners or cooking spray in a 12-cup muffin pan. Fill muffin cups ⅔ full with muffin batter. Bake in a 4oo degree oven for 15-20 minutes or until lightly browned. Remove the muffins from the muffin tin when they're finished and cool muffins on a wire rack.

Nutrition

Serving: 1g | Calories: 228kcal | Carbohydrates: 30g | Protein: 4g | Fat: 11g | Saturated Fat: 3g | Polyunsaturated Fat: 7g | Cholesterol: 18mg | Sodium: 327mg | Fiber: 2g | Sugar: 15g
Tried this Recipe? Tag me Today!Mention @LifeisaParty or tag #lifeisaparty!
how to make oatmeal and chocolate chip muffins

With homemade oatmeal chocolate chip muffins, life really is a party!

More Recipe Inspiration

  • Easy food processor scones on a plate with jam.
    Easy Food Processor Scones
  • Easy blueberry scones piled in white enamel tray with butter on the side.
    Starbucks Copycat Blueberry Scones But Better
  • Campfire muffin in an orange peel.
    How To Make Campfire Muffins In An Orange Peel
  • Homemade peach muffins.
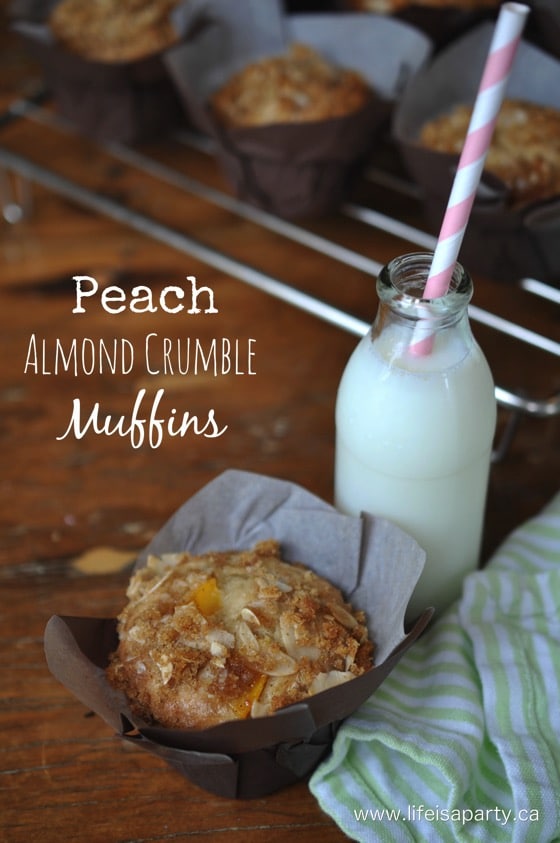
    Peach Muffins with Almond Crumble Topping Recipe

Cupcake Themed Birthday Party Ideas

Apr 30, 2012 · 6 Comments

Cupcake themed birthday party ideas.

From cupcake party decorations, cupcake party games and activities, to a cupcake dessert table!

Cupcake themed birthday party ideas.
[feast_advanced_jump_to]
birthday cupcake candle.

We had the best time celebrating Maddie's 5th birthday with a cupcake themed birthday party. For weeks we've been planning and decorating and I'm so excited to share all the fun details.

Bakers and Cupcake Decorators Wanted

We greeted our party guests with our "Help Wanted" sign on the front door -cute and easy.

bakers and cupcake decorator needed sign.

The Cupcake Party Decorations

The dining room was set up for cupcake decorating -more on that to come, and the living room was our pretend play bakeshop and cafe.

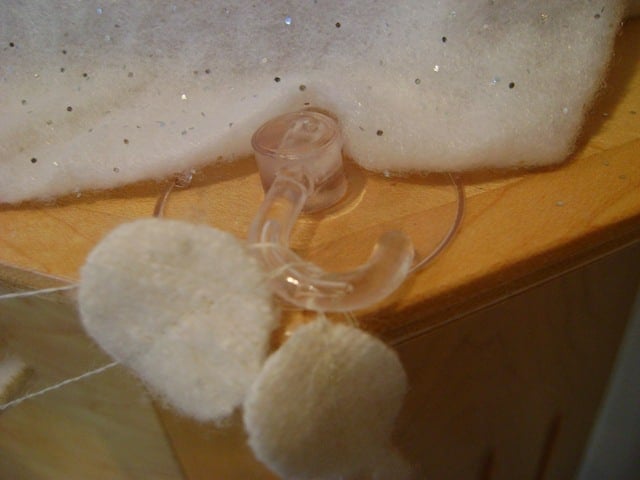
We used 3M hooks that come off with no damage to the paint, to string up a combination of tissue paper pom poms and paper lanterns.

cupcake decorations.

I made this sweet little "Hello Cupcake" banner on my Cricut machine with some cupcake scrapbook paper, and added in the felted sweater heart garland I made for Valentine's day.

hello cupcake sign.

The entrance way got dressed up with pink, and sweet little cupcake candles that I bought years ago for another cupcake event and went with our cupcake theme perfectly.

cupcake candles.

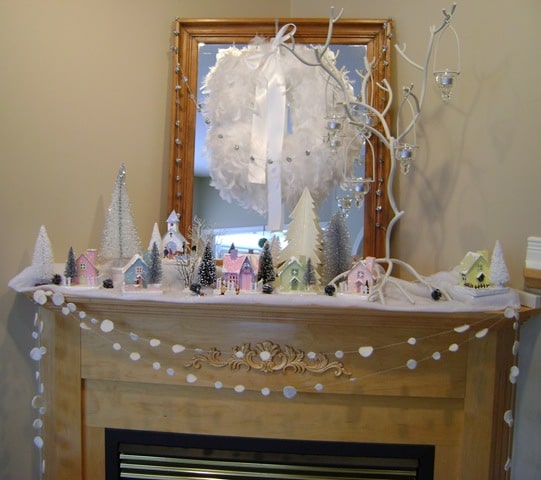
I decorated the fireplace mantel for the party too. I love putting out some baby pictures of the birthday girl -my how she's grown! The cupcakes are more candles. I also used this reusable cupcake banner. We made the cupcake banners with simple felt flags stitched to some seam binding. I made it several years ago, and add different felt pictures depending on the birthday theme. Love these sweet cupcakes with sprinkles and cherries on top to match our party theme!

cupcake banner.

There was also a Happy Birthday banner, with the same cupcakes.

happy birthday cupcake banner.

And, another banner decorated the front of the pretend bakeshop.

cupcake bakery banner.

Cupcake Flower Arrangements

One of my very favourite details were the sweet little cupcake flower arrangements. I was inspired by How Does She, but wasn't able to get the containers here in Canada. One day, while in my favourite store (Dollarama) I came across cupcake liner shaped little ice cream bowls and spoons -angels sang.

cupcake flower arrangement.

They came in bright summer colours, but me and my BBF -spray paint, we fixed them right up! We left the one bright pink, and painted the yellow, green, and blue ones light pink. I sent them to my sister, and she filled them with a little floral foam and white mums -thanks Auntie Heather! I had some candles in just the right size, which were the finishing touch. Aren't they the sweetest? I heart them -a lot.

cupcake flower arrangement.

In the kitchen, I also used one of Maddie's sweet, and tiny bakery toys and arranged it on this beautiful cake plate.

cupcake decorations.

It looked so cute, and was a great way to share it with little friends, without losing any of the teeny, tiny little pieces in a house full of people.  I always love incorporating some of my kids toys into their birthday party decor.

cupcake bakery decorations.

Cupcake Soap and Towel

It's always fun to put a little unexpected themed decor in the powder room for a party. 

For her cupcake bakery themed birthday party, I decided to make a cupcake towel for Maddie that she could use after the party. It was really simple, and inexpensive. I started with a nice white towel, and appliqued a cupcake I cut out of felt, and a little pink ric rac trim.

cupcake towel.

Before sewing on the bottom, I used the sewing machine to create the signature cupcake paper lines. 

cupcake soap.

I found this sweet cupcake soap. The special towel and soap looked really "sweet" in the powder room on the day of the cupcake bakery birthday party.

Cupcake Party Dress

cupcake party dress.

I really am not great at sewing, but I can handle a few straight seams. We found some cute cupcake fabric at Walmart, but they only had small squares of it available. I decided to try a simple pillowcase dress, and went searching for instructions on-line. This tutorial from The Mother Huddle, including a great sizing chart was great.  Her instructions are really good and easy to follow. If I can do it, you can do it. I had to cheat the sizing slightly, since the pieces of cupcake fabric weren't quite wide enough, but it still turned out really well, and just wasn't as full as the pattern called for.

cupcake pillow case.

I used a sweet polka dot fabric at the bottom, and a polka dot ribbon to match. The dress isn't perfect, but Maddie loved it, and that was what was important. 😉 It was a cool day so we paired it with white capri leggings and a white t-shirt underneath. What a cutie, and sweet as a cupcake too. 

cupcake Maddie.

Cupcake Themed Party Games and Activities

I always like to start a party with a little craft that everyone can join in with as they arrive.  

Cupcake Painting Craft

We started out with the kids decorating some cute little paper mache cupcakes, I found at Walmart. I put out pink and white paint, and an assortment of jewel, and pearl stickers, along with red pom poms and glitter glue.  The kids had a great time decorating the top of a cupcake and they all took them home at the end of the party.

cupcake painting craft.
cupcake painting.
decorated cupcake
decorated cupcake.

Real Cupcake Decorating

After the craft it was time to decorate the real cupcakes.

cupcake decorating table.

I set up the dining room table for the best cupcake decorating ever. Everyone had a cute little cupcake apron waiting for them on their chair, see how I made the cupcake aprons out of tea towels.  These were a really cute addition to the party, and everyone took theirs home as part of their party favor.

cupcake bakery boxes.

I bought cupcake bakery boxes for everyone to be able to bring their own cupcakes home in and feel like they worked in a real bake shop.  The cupcake boxes worked really well, so everyone knew exactly which cupcakes were their.  They all took their boxes of cupcakes home with them at the end of the party.

cupcake decorating supplies.

The Cupcakes and Decorations

  • vanilla cupcakes
  • chocolate cupcakes
  • chocolate chip cupcakes
  • coconut cupcakes
  • vanilla frosting
  • dark pink frosting
  • light pink frosting
  • chocolate frosting
  • sugar roses
  • chocolate 5s
  • pink smarties
  • chocolate sprinkles
  • white sprinkles
  • pink sprinkles
  • white sanding sugar
  • pink sanding sugar
  • mini marshmallows
  • maraschino cherries
  • silver dragees balls
  • gold dragees balls
  • chocolate chips
  • mini heart cookies

I baked four different flavors of cupcakes before the party for decorating.  We had chocolate chip, coconut, vanilla and chocolate.  Mini cupcakes would be a great option too.

cupcake decorating supplies.

Cupcake Frosting

I made vanilla frosting, and tinted it dark and light pink. We also made chocolate frosting. I had grand visions of putting each of the icings in a piping bag for all the kids, but forgot to take the icing out of the fridge on the morning of the party in all the rush, so...we stirred it into submission and set out bowls and knives. Of course the highlight to the decorating was all the fun sprinkles and toppings. I was collecting for weeks finding every pink decoration I could.

cupcake frosting.

Decorating

The sugar roses from the bulk barn were a real hit with the little girls. They all had a good time adding them to their cupcakes.  I also used some pink chocolate to make some 5's. I just melted it and put it in a ziplock with the corner snipped off to pipe them onto wax paper.

cupcake baker.

The kids loved their decorating with their own birthday cupcake ideas, and took it very seriously.  They worked on paper plates, and when they were done we transferred the finished cupcake designs to the bakery boxes.  This was a good idea, and the easiest way because the plates gave them room to work on each delicious cupcake, but also caught any stray rainbow sprinkles.  Cupcake decorating was an obvious choice for a cupcake themed birthday, but I think it's a great option at any birthday parties.

cupcake decorator

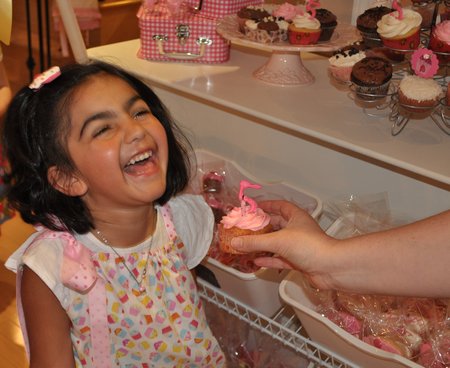
Here's a few of the finished products...someone likes cherries. ;). They loved decorating their cupcakes with all the different colors, and toppings, and options.  The birthday child was truly living her best life.

decorated cupcakes.

The cupcake decorating was a real hit, everyone enjoyed it, and loved taking their little aprons, and finished cupcake masterpieces home in their "real" bakery boxes.

The Pretend Bake Shop Pretend Play Centre

cupcake bakery banner.


We thought it would be really fun for the kids to turn our living room into a pretend bakeshop for the kids to play in for our cupcake themed birthday party.  So we moved out some of our living room furniture in brought in the toys!

Play Kitchen and Pretend Bakery Food

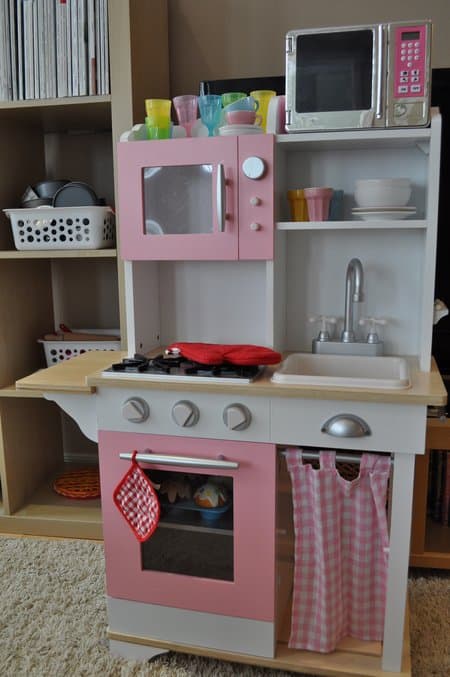
We started out with Maddie's sweet pink kitchen, bought at Target a few years ago.

pretend kitchen.

I cleared off some of the book shelves, and we stocked them with bakery supplies. I used an old egg carton and some plastic Easter eggs, as well as some empty packages from sugar, flour and cream. Kids love using the "real" stuff, just like Mom and Dad, so save those empty containers.

baking supplies.
cupcake baking supplies.

I also found these cute little fabric bags and used stamps to add the words "flour" and "sugar", and then filled the bags with some white cotton balls for the kids to bake with.

cupcake baking supplies.

Along with these I shopped the house for all the baking and cooking toys I could find, and made a little work area for the bakers. I also added a few of my real cookbooks.

cupcake baking cookbooks.

The Pretend Store

We used the toy box as the store counter, complete with cash register, phone, little bakery boxes and brown paper bags decorated with cupcake stickers, and paper and pencils to write down orders.

cupcake shop.

My sister even made little business cards.

cupcake business cards.

We used the chalk board as a menu for customers.

cupcake menu.
cupcake shoppe.

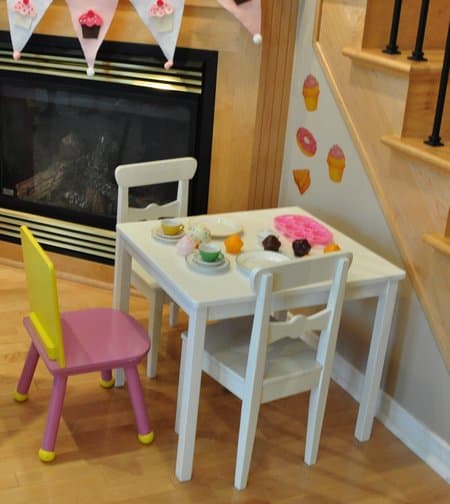
On the other side of the counter we set up some tables and chairs for the customers. We bought Maddie the IKEA dish sets for her birthday and used them in the cafe.

cupcake play.
cupcake play table.
cupcake decals.

I found the little wall decals at Dollarama, and they added a fun touch to our little cafe. Maddie added a little dandelion bouquet, to "make it look like a real cafe". 😉

cupcake play table.

The kids really enjoyed playing in our little pretend bakery and cafe and had such a fun time.  It was really pretty easy to put together. Almost everything we used were things we already had.  Of course they loved decorating real cupcakes and eating them!  But the next best thing was being able to play as long as they wanted at the pretend bake shop.  For a younger age group like our guests, this was the perfect activity.

cupcake shop.

The Cupcake Party Drinks

The drinks for the party were pink lemonade and bottled water, I found the mini bottles which were the perfect kid size and wrapped them in cupcake scrapbook paper.  Love is in the details.

cupcake birthday party food ideas
cupcake bakery birthday party

Cupcake Party Lunch

Our kid friendly fare was hotdogs wrapped in crescent rolls, veggies and dip, a fruit tray and a favourite around here -this crock pot Mac and cheese. I tripled the batch and put it in the crock pot in the morning, by lunch it was ready and delicious, and left-overs were great too. 

cupcake bakery birthday party food
cupcake bakery birthday party

Adults Panini Bar

For the adults (and any kids who wanted one) we made a nice salad and created a panini bar, with lots of different meats and cheeses, grilled veggies, and fun condiments like pesto, tapenade and sun dried tomatoes, along with all kinds of fresh breads from the bakery. Guests were invited to create their own sandwiches and then grill them on one of three panini grills we had set up. They were a great success.

panini buffet
cupcake bakery birthday party food

The Cupcake Dessert Table

Lunch was lovely, but it was the sweets table that we were all waiting for!

cupcake birthday party dessert table

I think I set a new all-time record preparing for this party I used 3 dozen eggs and 5 lbs of butter! That's a lot of baking!

The Sweet Stand

The sweet stand inspired the whole party. My sister and brother-in-law made this great stand for my girls for Christmas. They had their eye on a toy lemonade stand in a catalogue, but Uncle Shaun decided to create his own version. My sister had the "Sweet Shop" banner created just for Maddie, and printed at a sign shop.

cupcake bakery stand dessert table

I wanted to fill all the fun baskets with treats so I baked three kinds of cookies, and marshmallow pops, and wrapped them individually so it would look like a real bakery.  It was a lot of work, but everyone absolutely loved it.  And since everything was individually wrapped it was really easy for guests to take some of the extras home with them.

Cupcake Marshmallow Pops

cupcake marshmallow pop

These cupcake marshmallow are easy to make. I put the marshmallow on a stick and dipped the whole thing in melted milk chocolate. After it dried, I dipped the top in melted pink chocolate, and while it was wet added sprinkles and red smartie cherry-on-top. We wrapped them in little cello bags and tied them with simple ribbon.

Chocolate Chip Cookies

I also baked chocolate chip cookies -see our favourite recipe here and just leave out the toffee for plain chocolate chip cookies.  These are one of the birthday girl's favourites, and we tied the bags with pretty pink bakers twine.

cupcake bakery birthday party food

I also made a family favourite homemade jam jams -recipe here. Don't they look delicious with their raspberry jam filling?!

cupcake bakery birthday party dessert table

Cupcake Sugar Cookies

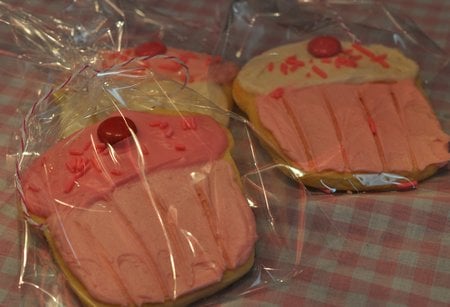
The prettiest cookies were the cupcake sugar cookies. I iced them all in dark pink, light pink and white icing, with white and pink sprinkles. I love how they turned out and they were so delicious.

cupcake sugar cookies

The Cupcakes

Up on top of our sweet stand were birthday cupcakes, and few other sweet treats.  Of course we had to had cupcakes instead of a birthday cake.

cupcake party dessert table

I made the Barefoot Contessa's Coconut with Cream Cheese Frosting, always a big hit with the coconut fans. Also I made chocolate cupcakes with chocolate frosting. I tried a new recipe from Martha Stewart's Cupcake book for chocolate chip cupcakes. I frosted some with vanilla and some with chocolate chips and sprinkled with white or chocolate chips. For the vanilla cupcakes I also used the Barefoot Contessa Coconut cupcake recipe, just leave out the coconut, and they are my very favourite vanilla cupcakes. These are the best cupcakes, and have become my go-to vanilla cupcake recipe.

cupcake themed birthday party

Cupcake Picks

I made some sweet little cupcake picks for the party, using scrapbook paper, cupcake wrappers and some scrapbook embellishments. I love how they turned out and thought they were so much fun for our theme.

cupcake picks
cupcake themed party

More Treats

Along with all the cupcakes I served some pink cotton candy in plastic shot glasses, served on sweet pink gingham paper boxes.

cupcake bakery birthday party dessert table

Also made homemade chocolate pudding with vanilla whipped cream. I saw the recipe at Whipperberry a few weeks ago, and knew the party was the perfect occasion to try it out. I served it in sweet little mason jars, and it was delicious and very, very chocolaty!

cupcake dessert table

After hours and hours of baking for the party, it was great fun to enjoy all the sweets with friends and family! On Friday morning, feeling a little overwhelmed with all the baking I had to do, I asked Maddie if she thought I was making too many sweets for the party. And her response, "there's no such thing as too many sweets"! And that is why this was the perfect party for our little sweetie!  

Admittedly I want a little overboard on the sweets.  I wanted to fill the whole sweet stand and put a different sweet treat in each section, but it really was so beautiful, and everyone loved all the great homemade options.

cupcake themed birthday party

This was such a fun party, and worth all the effort .  Happy Birthday Miss Maddie, you make our lives so much sweeter!

With a cupcake themed birthday party, life really is a party.

More Inspiration

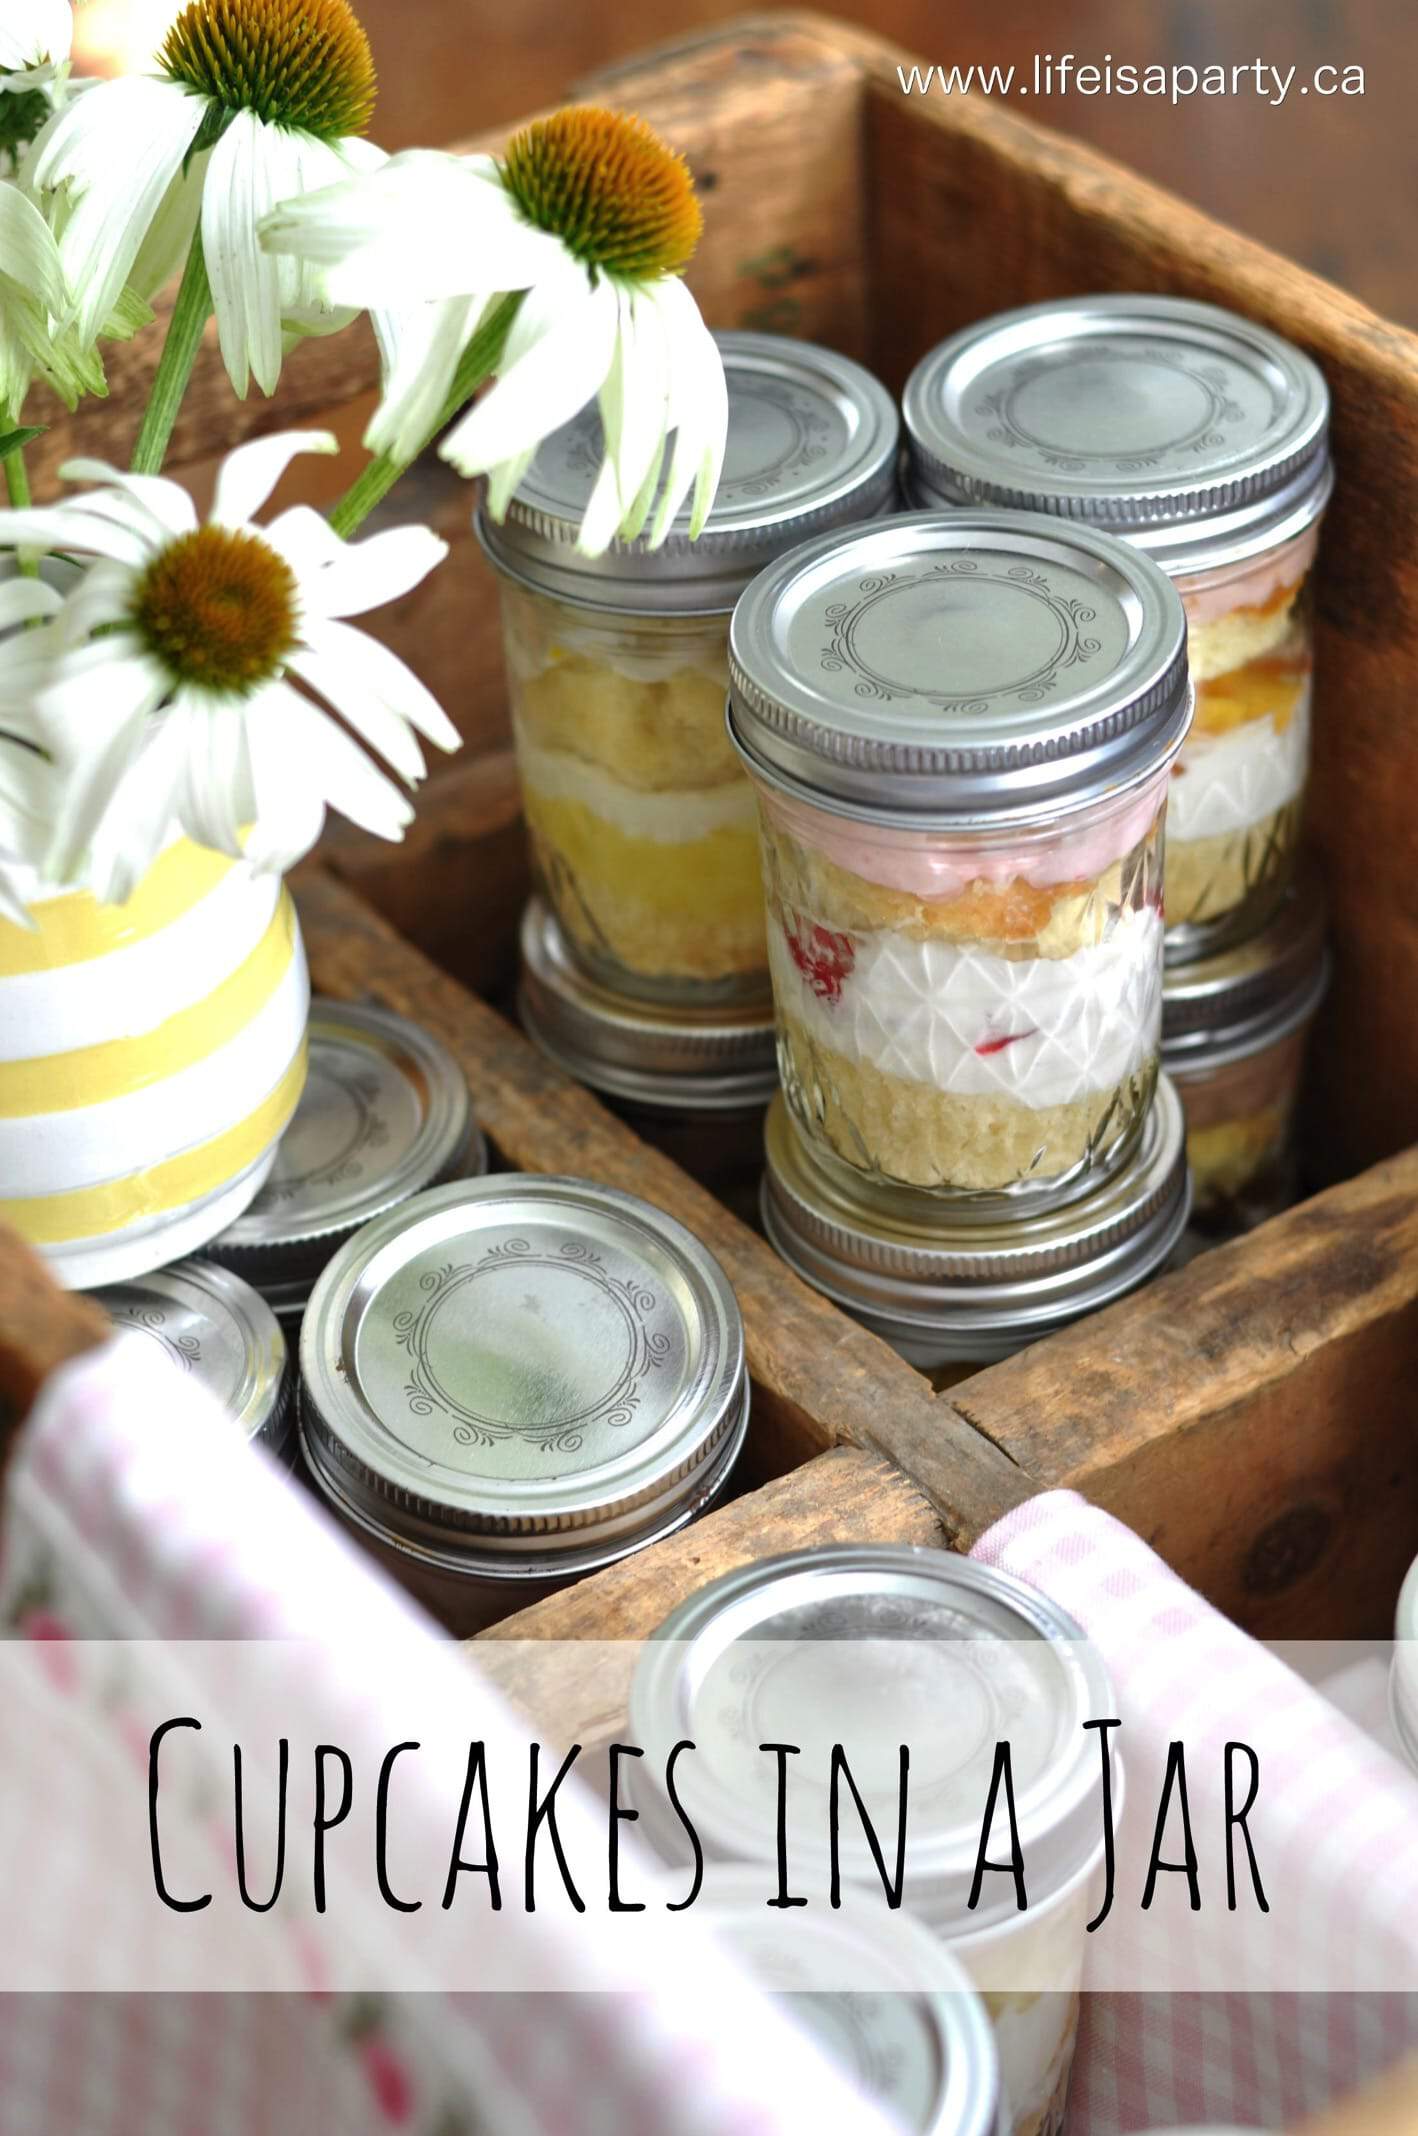
You might also like our Cupcakes In A Jar Recipe here.

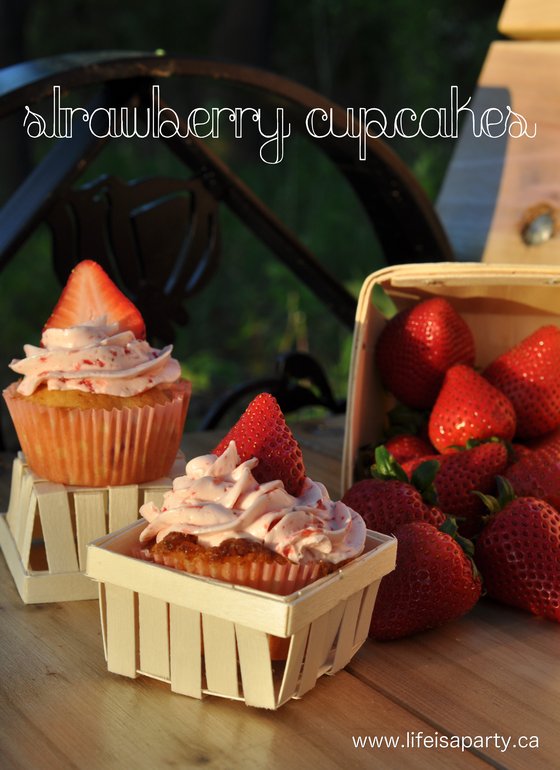
You might also like our Strawberry Cupcake Recipe here.

Homemade Strawberry Cupcakes Recipe: made with fresh strawberries these cupcakes are beautiful, moist and delicious. Perfect for entertaining.

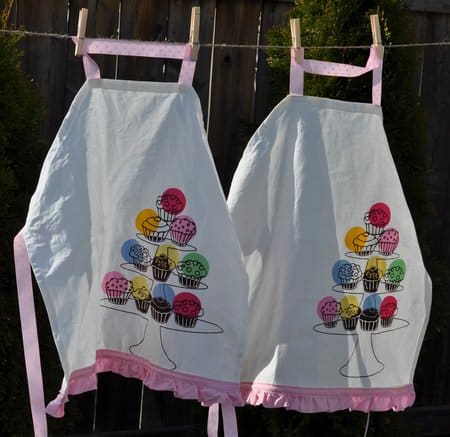
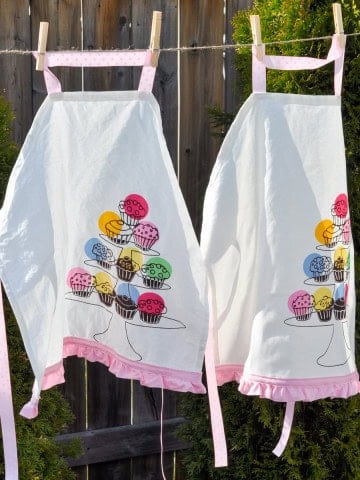
Also check out our Cupcake Aprons from Tea Towels Tutorial here.

How To Make Aprons From Tea Towels

Apr 28, 2012 · 3 Comments

How to make an apron from of a tea towel.

Tea Towel Apron: easy step by step instructions on how to make an apron out of a tea towel and ribbon for kids or adults.

How to make an apron from of a tea towel.
[feast_advanced_jump_to]

Tea towel aprons or dish towel aprons are inexpensive to make and easy to sew.  A tea towel apron is perfect for a baking birthday party, or just for any baking and cooking at home.

This past weekend we celebrated our baby turning 5! She loves all things sweet so we went with a cupcake and bakery theme for the party. Weeks and weeks before the party I started hunting for cupcake fabric to make aprons for all our little guests.


cupcake tea towels

I stumbled upon some cupcake tea towels. These were perfect! They weren't expensive, and already had some of the sewing done for me. I am not a great seamstress by any means, but with my Grandma's old sewing machine, and a few straight seams I managed to make ten sweet little aprons for all the party guests.  I would say that if you can sew a straight line with a sewing machine, then this easy apron should be no problem for you.  It's a great beginner sewing project.  If you're looking for quick projects that you can personalize, this is a great one.

how to make an apron out of a tea towel

Materials:

  • tea towel
  • ribbon
  • ruffle
  • frey stop
  • pins
  • sewing machine
  • thread

How To Make A Tea Towel Apron

Cutting The Tea Towel Apron Shape

1. I started out cutting off the top of the kitchen towel to make the aprons short enough for little ones, and create the apron shape. If you were making this for an adult, then you don't need to trim down the top of the towel.  You want to create the classic apron shape at the top, by cutting about a 45 degree angle at each side to create the arm holes.  You want to have a straight top to the apron, which is approximately ⅓ of the towel, and the angle the sides down to the waist.  Mark your pattern with a disappearing maker and cut off the sides.

Sewing The Edges

Next use an iron and the ironing board to fold over the raw edges a ¼ inch seam allowance, and then another ¼ inch to create a nice folded edge.  Use straight pins to hold the edge of the towel in place, and sew the edges with a straight stitch using the sewing machine and white thread, or whatever matches your apron.

DIY tea towel apron

Tea Towel Apron Neck Straps and Back Ties

2.After the basic apron shaped was sewn, I added on a neck strap, ties for the back, and a little ruffle at the bottom.  

To make the neck strap and apron ties I used some pink polka dot ribbon.  I sewed it on to the apron and finished the ends with a little fray-stop to ensure the length of ribbon doesn't unravel.  Using a pretty ribbon for this part is a cute little apron detail.  

We also found ready made pink ruffles at the fabric store.  This made adding this detail really easy.  I just turned in the raw edges and used a top stitch to add it to the bottom seam.

For the little boys I used cream coloured twill tape for the fabric ties and didn't add the ruffles to the front.

tea towel children's apron

Recipe

How to make an apron from of a tea towel.

Aprons made from Tea Towels

No ratings yet
Print Pin Rate
Cook Time: 30 minutes minutes
Total Time: 30 minutes minutes
Author: Dannyelle Nicolle-Ramjist

Equipment

  • pins
  • Sewing Machine
  • iron
  • scissors

Materials

  • tea towel
  • ribbon
  • ruffle
  • frey stop
  • thread

Instructions

  • I started out cutting off the top of the kitchen towel to make the aprons short enough for little ones, and create the apron shape. If you were making this for an adult, then you don't need to trim down the top of the towel. You want to create the classic apron shape at the top, by cutting about a 45 degree angle at each side to create the arm holes. You want to have a straight top to the apron, which is approximately ⅓ of the towel, and the angle the sides down to the waist. Mark your pattern with a disappearing maker and cut off the sides.
  • Next use an iron and the ironing board to fold over the raw edges a ¼ inch seam allowance, and then another ¼ inch to create a nice folded edge. Use straight pins to hold the edge of the towel in place, and sew the edges with a straight stitch using the sewing machine and white thread, or whatever matches your apron.
  • After the basic apron shaped was sewn, I added on a neck strap, ties for the back, and a little ruffle at the bottom.
    To make the neck strap and apron ties I used some pink polka dot ribbon. I sewed it on to the apron and finished the ends with a little fray-stop to ensure the length of ribbon doesn't unravel. Using a pretty ribbon for this part is a cute little apron detail.
    We also found ready made pink ruffles at the fabric store. This made adding this detail really easy. I just turned in the raw edges and used a top stitch to add it to the bottom seam.
    For the little boys I used cream coloured twill tape for the fabric ties and didn't add the ruffles to the front

The Perfect Gift

I just love how our diy apron turned out, and the kids seemed to really like them too. There were three different patterns to choose from. The aprons were also part of their party favour at the end of the party.  These are a great idea for handmade gifts.  You could personalize them for any family member with a color and pattern they'd love, and add neck and waist ties in a ribbon or fabric that they'd love.

When the kids arrived for our party the aprons were hung over the backs of the chairs, ready for the little bakers to decorate their cupcakes and cookies with.

quick and easy children's apron

This simple sewing project was a labour of love.  It was fairly time consuming to make this many aprons. but pretty simple, and worth the effort in the end.  Making them was much cheaper than buying them, and they turned out so cute and matched our cupcake theme perfectly.  It took a little bit of planning to find the tea towels and get the matching ribbon and other supplies, but it was a lot of fun to add the creative side to the party prep.  I also loved how they played double duty as part of our party activity and then part of the take home goodie bags afterward.  It was really such a cute look when all the kids were in their matching aprons to decorate their cupcakes.  It really was a great way to made them feel like little bakers.

tea towel apron

Our two have all the chocolate frosting washed off now, and they're ready for future baking adventures!

With a  tea towel apron this cute, life really is a party!

More Sewing Project Inspiration

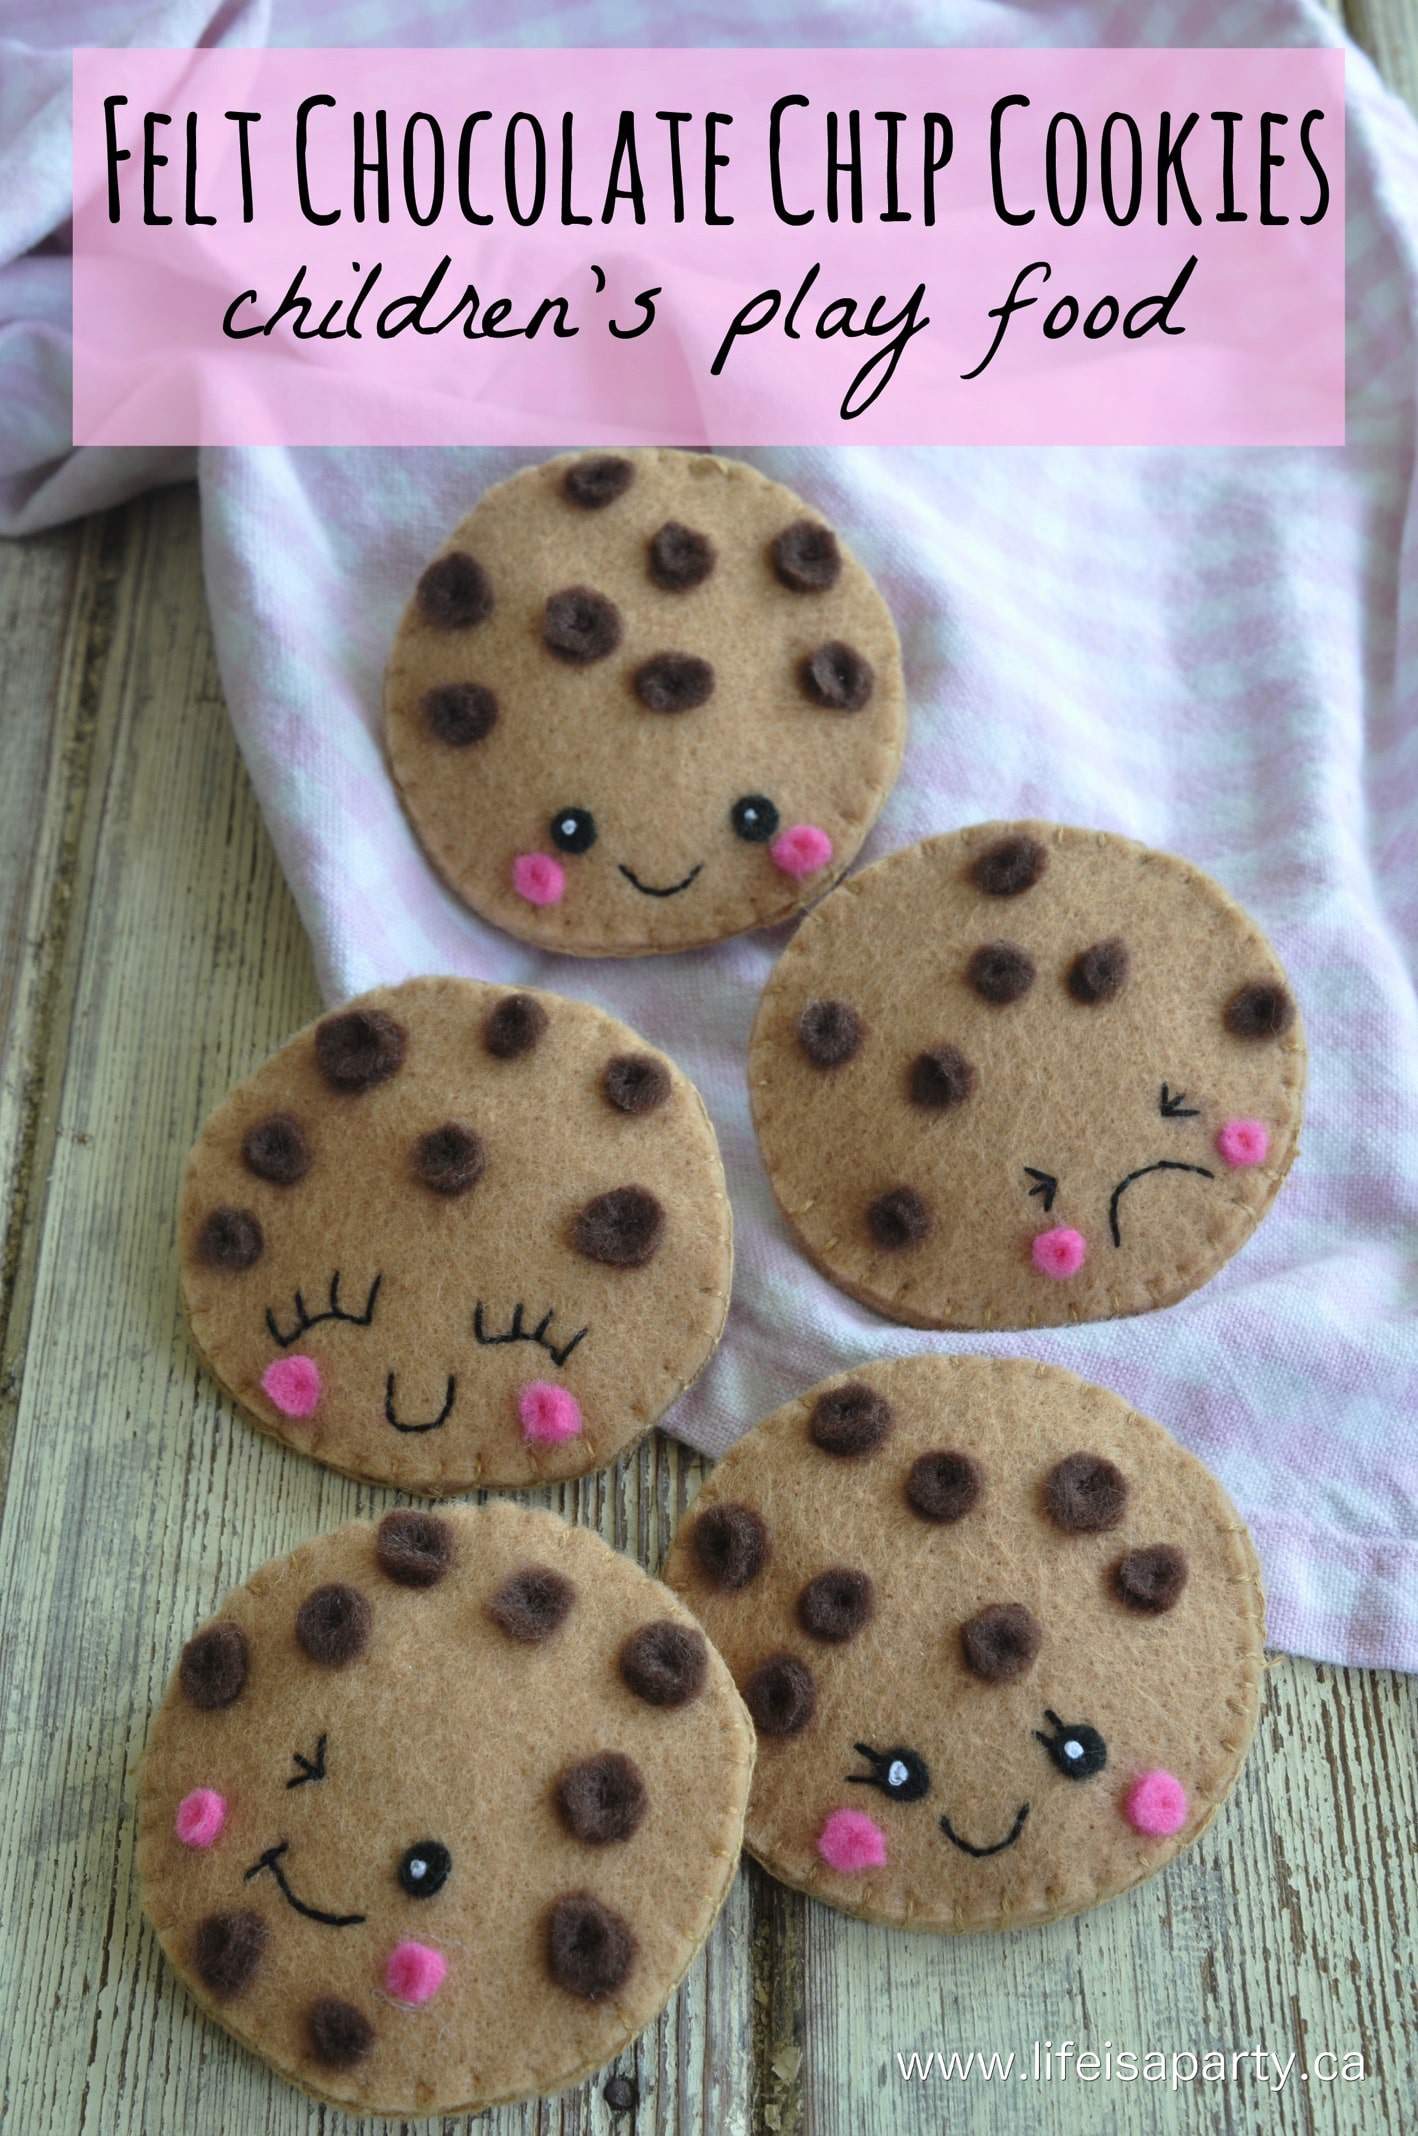
You might like our Felt Cookie Play Food here.

Felt Chocolate Chip Cookies -easy to sew, and the perfect play food for kids to enjoy. The little faces with their different expressions are adorable.

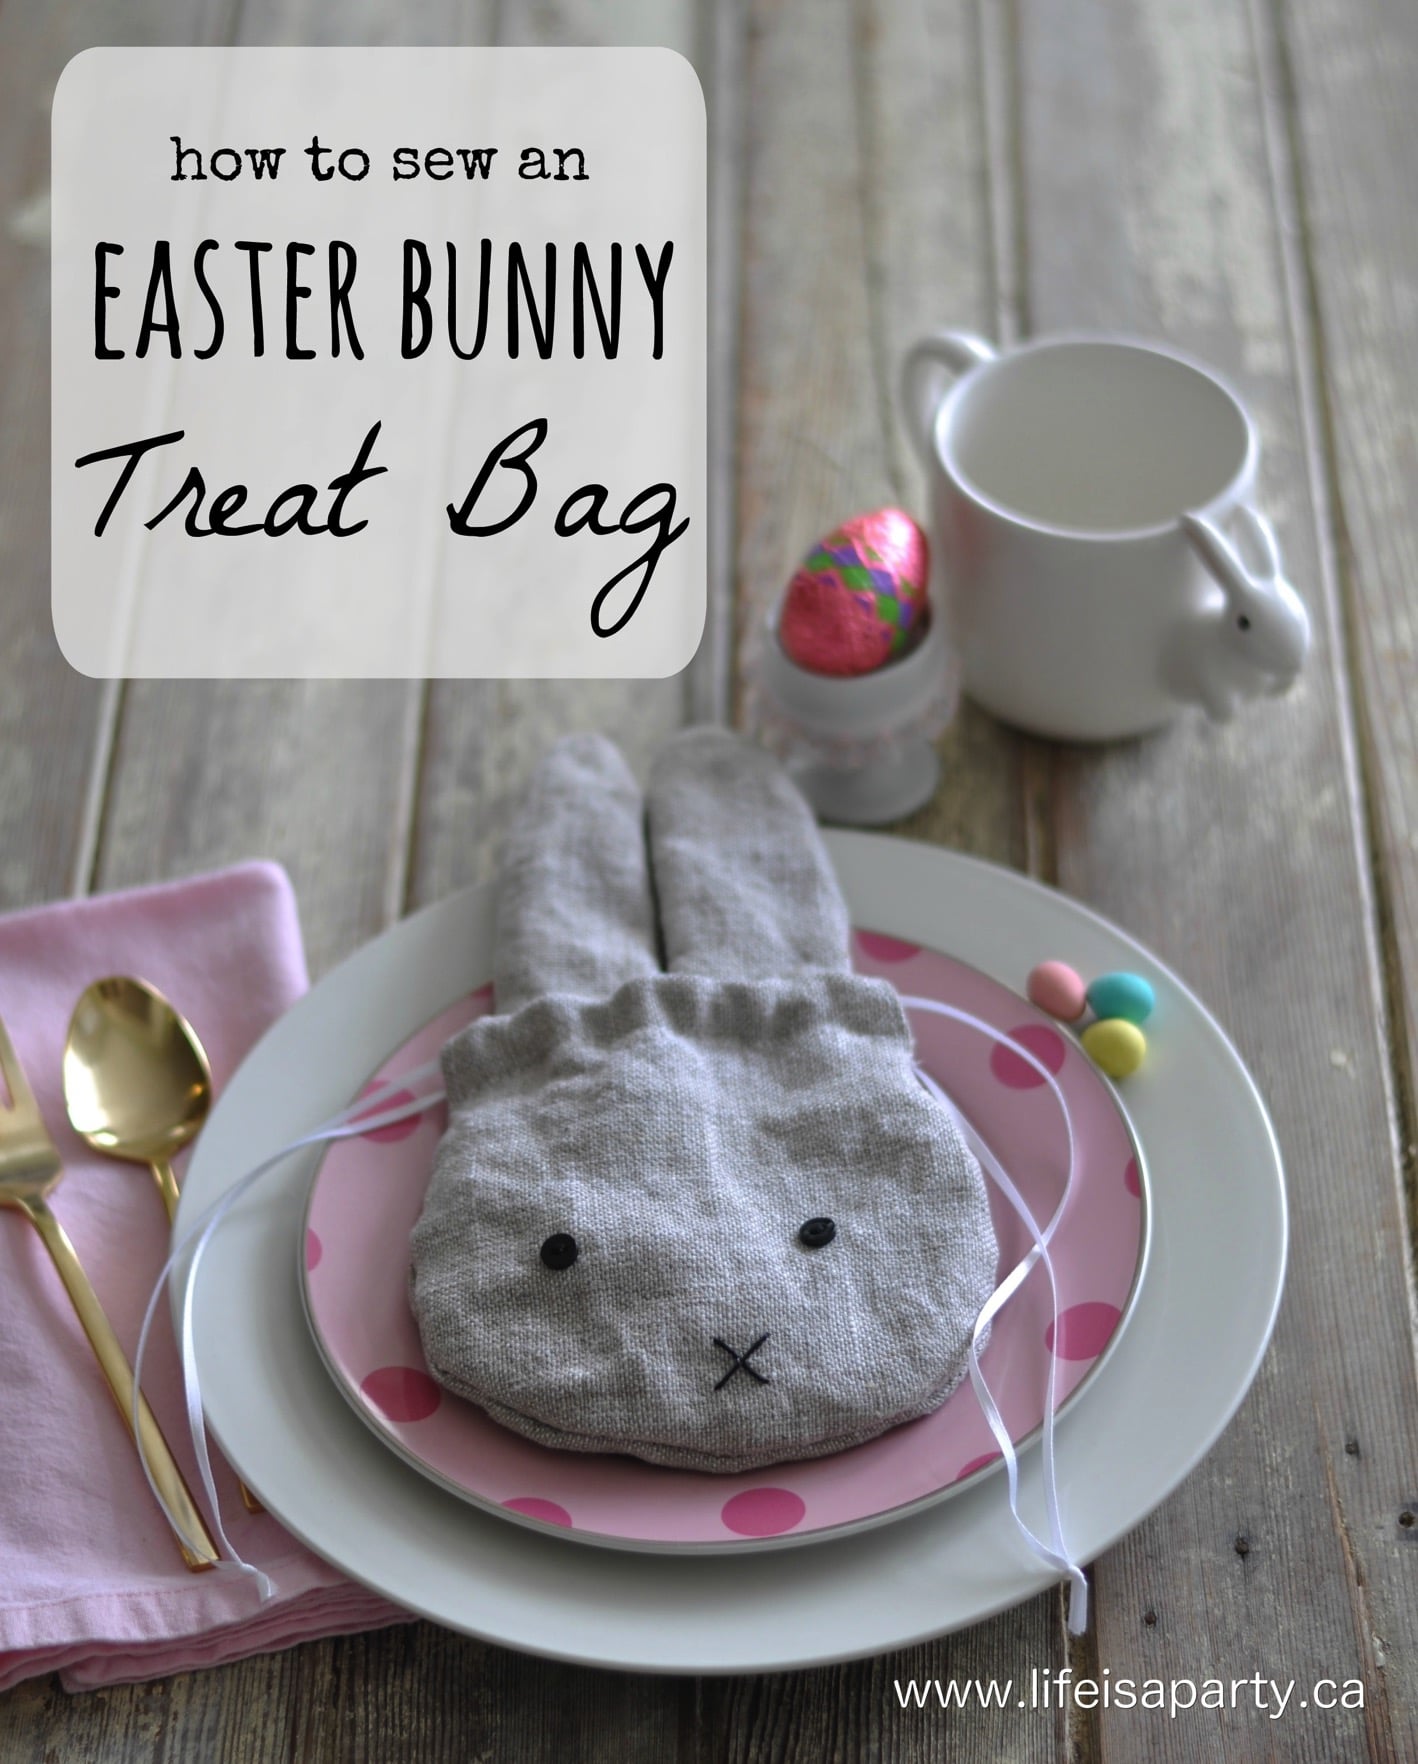
Also check out our Bunny Treat Bag here.

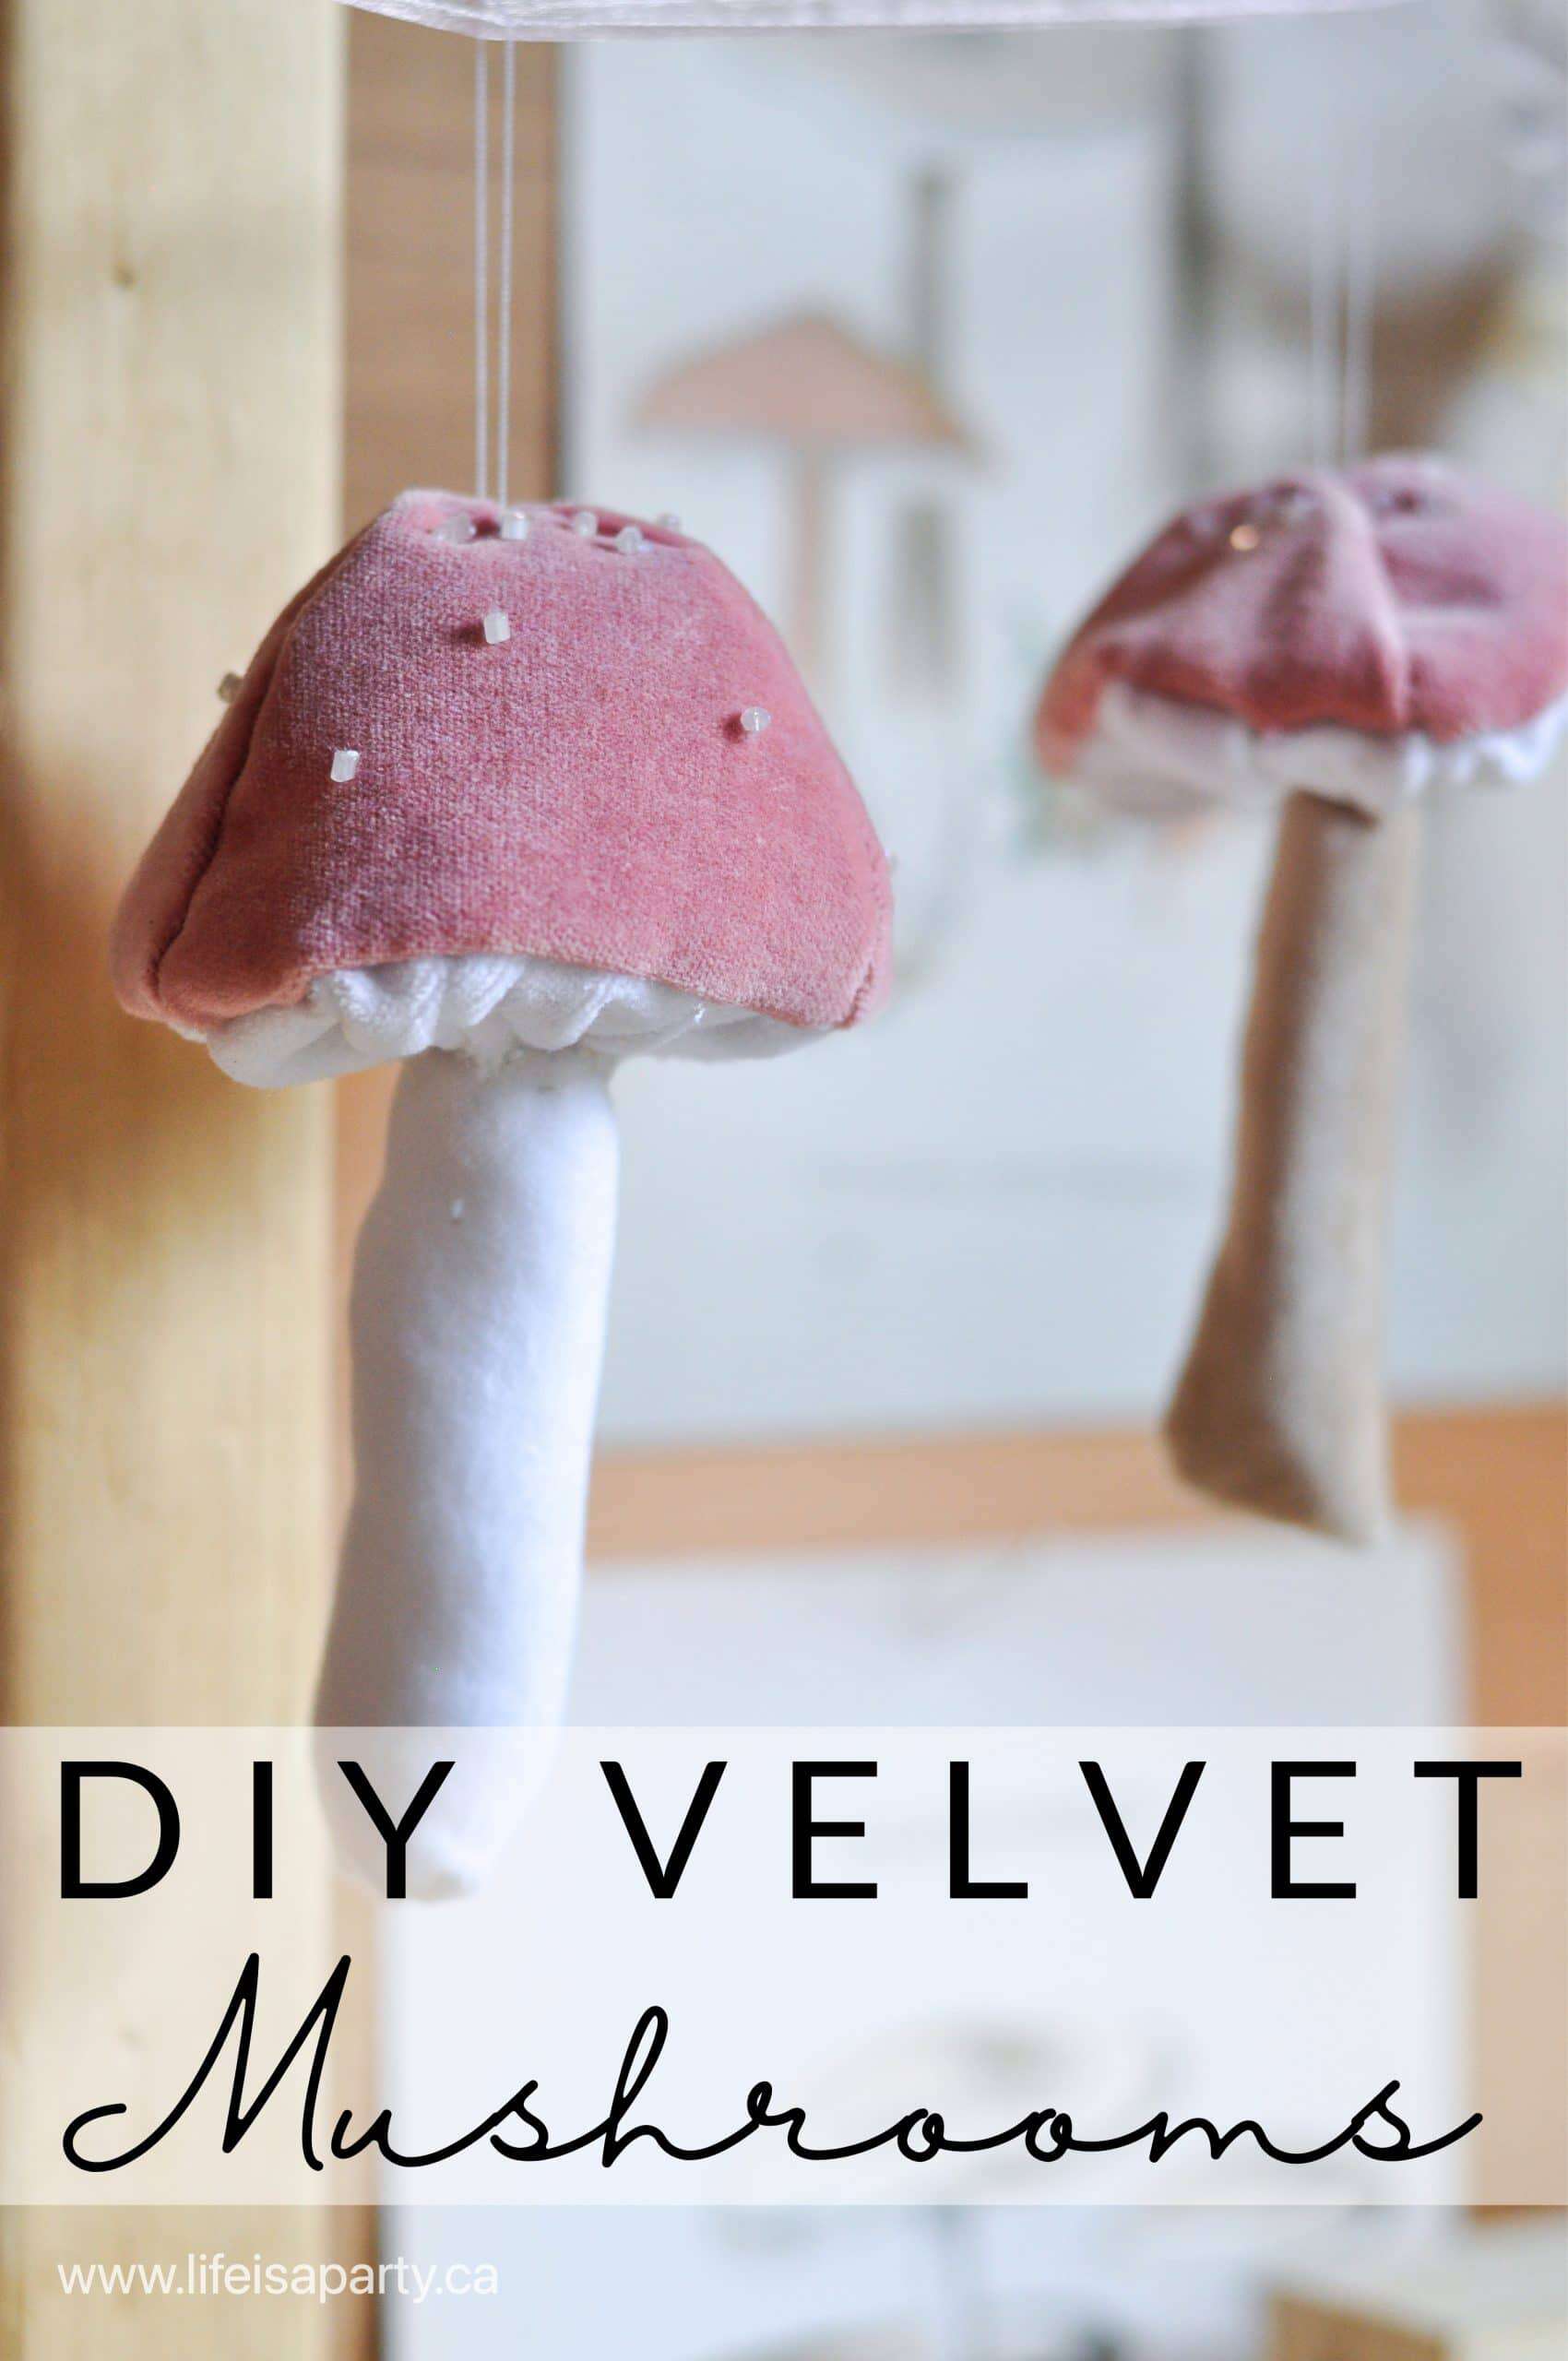
You might also like our DIY Velvet Mushroom Craft here.

DIY Velvet Mushroom Craft: make your own Anthropologie inspired velvet mushrooms perfect as decor, or as an ornament.

Beer and Root Beer Tasting Party

Apr 11, 2012 · 5 Comments

Beer and root beer tasting party.

Beer Tasting Party: mini sample size tastings of beer or root beer, complete with scoring cards for a fun party for drinkers and non-drinkers of all ages.

Beer and root beer tasting party.
[feast_advanced_jump_to]

This weekend we celebrated by husband's birthday. Since I'm always planning parties for other people, I wanted to make his celebration special too. It was a really small get together with mostly family, so we decided to do a beer tasting party, and for the non-drinkers among us, a root beer tasting. It was so much fun!

root beer tasting party

Rootbeer

I went root beer shopping early and was able to find 8 varieties at my local grocery store, a few were from the health food section. I was really surprised at how many there were.

beer tasting party

Beer

For the beer we had 12 varieties, including some light lager, dark lager and ale.

For both tasting we bought a couple of each type, and served the tastes in 3 oz disposable shot glasses. This was enough for everyone to try everything, and return to their favourites.

beer tarting score cards

Scoring

While we tasted, we gave each drink a score from 1 to 5, ranging from a number 1 being "I'd almost choose water over this, but at least it's still beer" to number 5 being "I'd give up watching F1 (by guy's fav.) or golfing, or riding my motorbike...(choose the appropriate answer), to have this beer again. My husband made up these great score cards, using the logo from each beer or root beer, so everyone could remember their favs.

beer tasting party decor

Beer Tasting Party Table

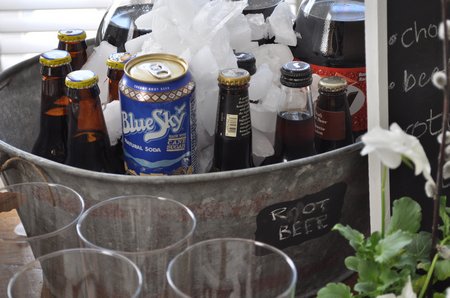
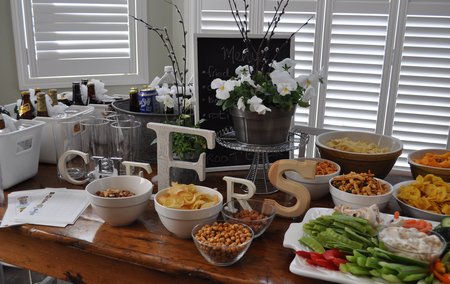
I used simple white tubs filled with ice for the beers, and added chalkboard labels. In addition I also embellished with "cheers" which became our party theme!

root beer tasting party

I used this great old wash tub with ice for the root beer.

spring flower centrepiece

The simple centre piece was some spring flowers, and a menu board.

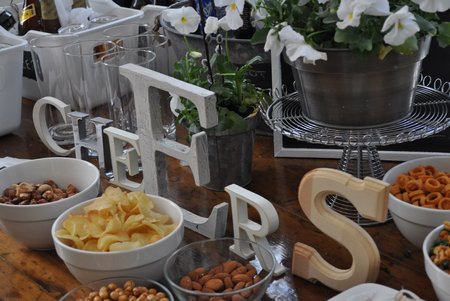
DIY cheers sign

Cheers Sign

The "cheers" sign was put together from various letters from different collections. I really love the different sizes and finishes together. Top Tip: I used a little blue tac to help hold them all up on the table.

beer tasting party decor

Easy Beer Tasting Party Munchies

We started off the party with some really easy munches. I made veggies and dip, and then had a great time at the bulk store and West Indian grocery finding all kinds of fun nuts, chips and snack mixes. These were a real hit with everyone, who seemed to enjoy all the different varieties and they were the perfect accompaniment to beer and root beer.

beer tasting party snacks and food ideas

Lunch

For lunch my father-in-law made curry (thanks Bob!) we also had fried rice, chow mein with roasted chicken and roti -a favourite menu of my Guyanese family and super easy for me, since it was mostly take-out!

beer tasting party tablescape

Rustic Table Setting

For the table I went with my new fav. brown kraft paper. I used white dishes, and bundled up cutlery and napkins in mini paper bags tied with twine. We stamped "Cheers" on to wooden veneer business cards, punched a hole and tied them on to the bags.

Beer Tasting Party Table

I love the rustic feel of all the brown paper, and twine, and felt like it went with the beer theme really well.

Dessert

Next it was dessert time!

beer tasting party cupcakes

For dessert I made cupcakes. Keeping with our beer theme, I made Guinness Cupcakes with cream cheese frosting.

beer tasting cupcakes

I made these sweet "cheers" cupcake picks from brown paper, rubber stamps and twine. Love how rustic they turned out.  There were also vanilla cupcakes, cookies and a fruit platter.

It was such a lovely afternoon. We started the party at noon, and enjoyed eating and drinking the day way together.

Roland's Birthday Beer Tasting 094

Happy Birthday Roland, we love you even more than Beer!

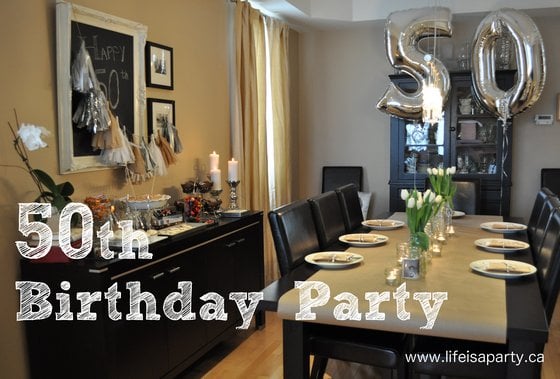
You might also like our Favourite Things 50th Birthday Party here.

Favourite Things Party: the perfect 50th birthday party ideas for your husband. Favourite food, favourite dessert, favourite book as a party favour.

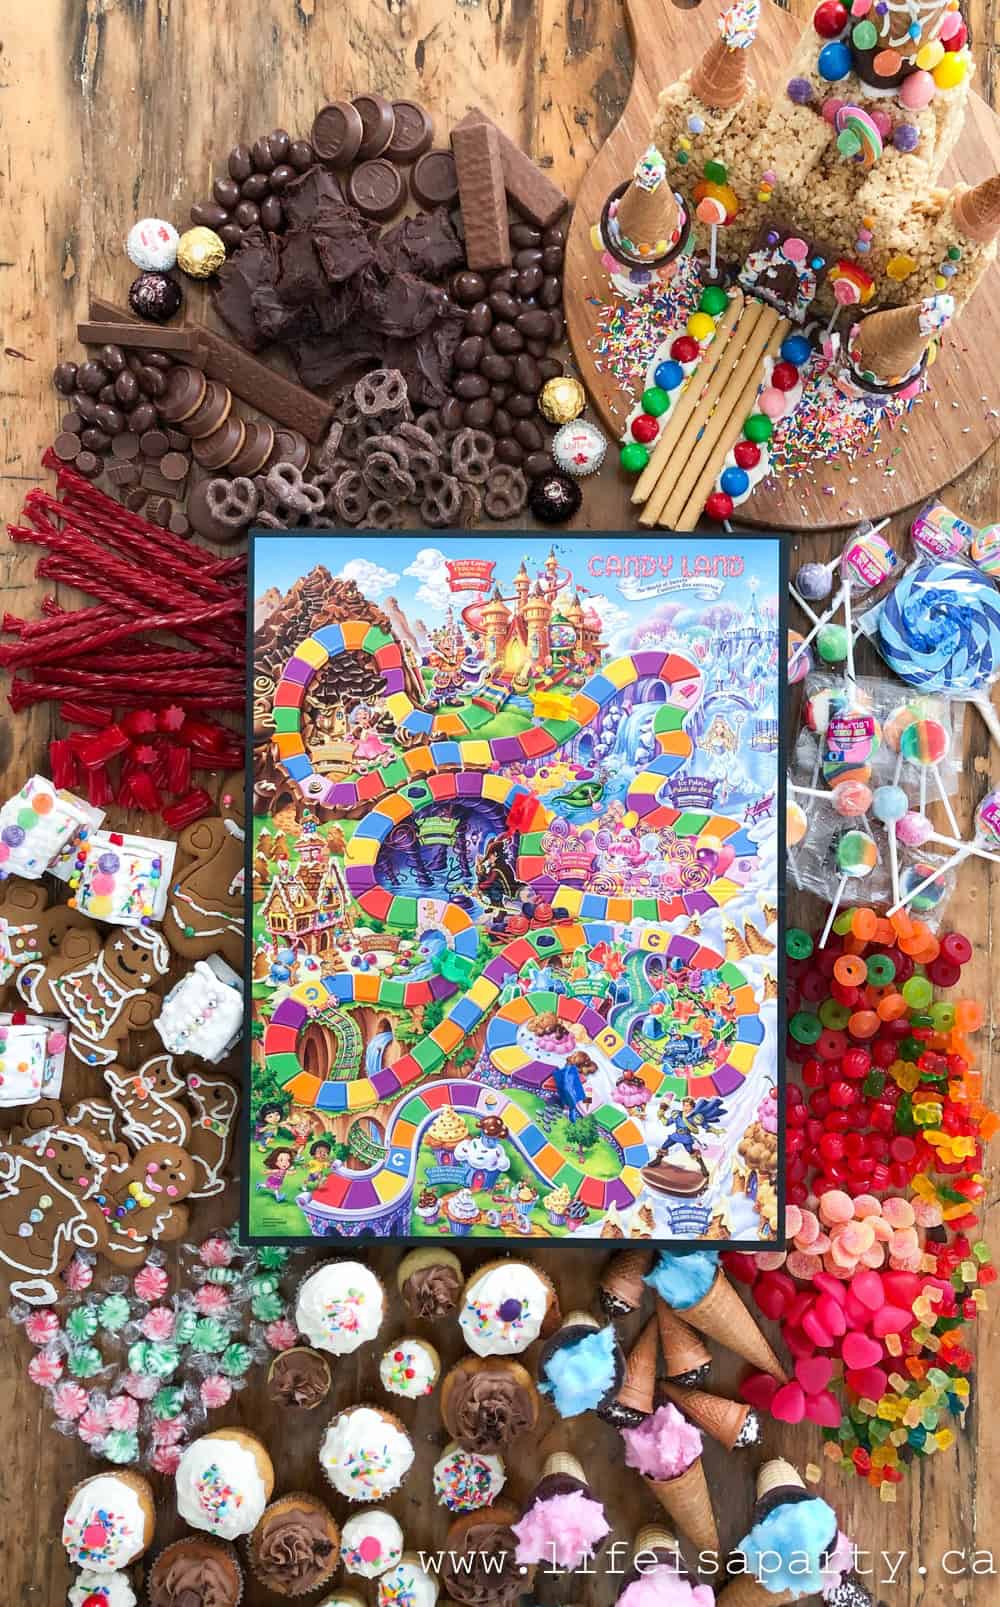
Also check out our Board Game Party here.

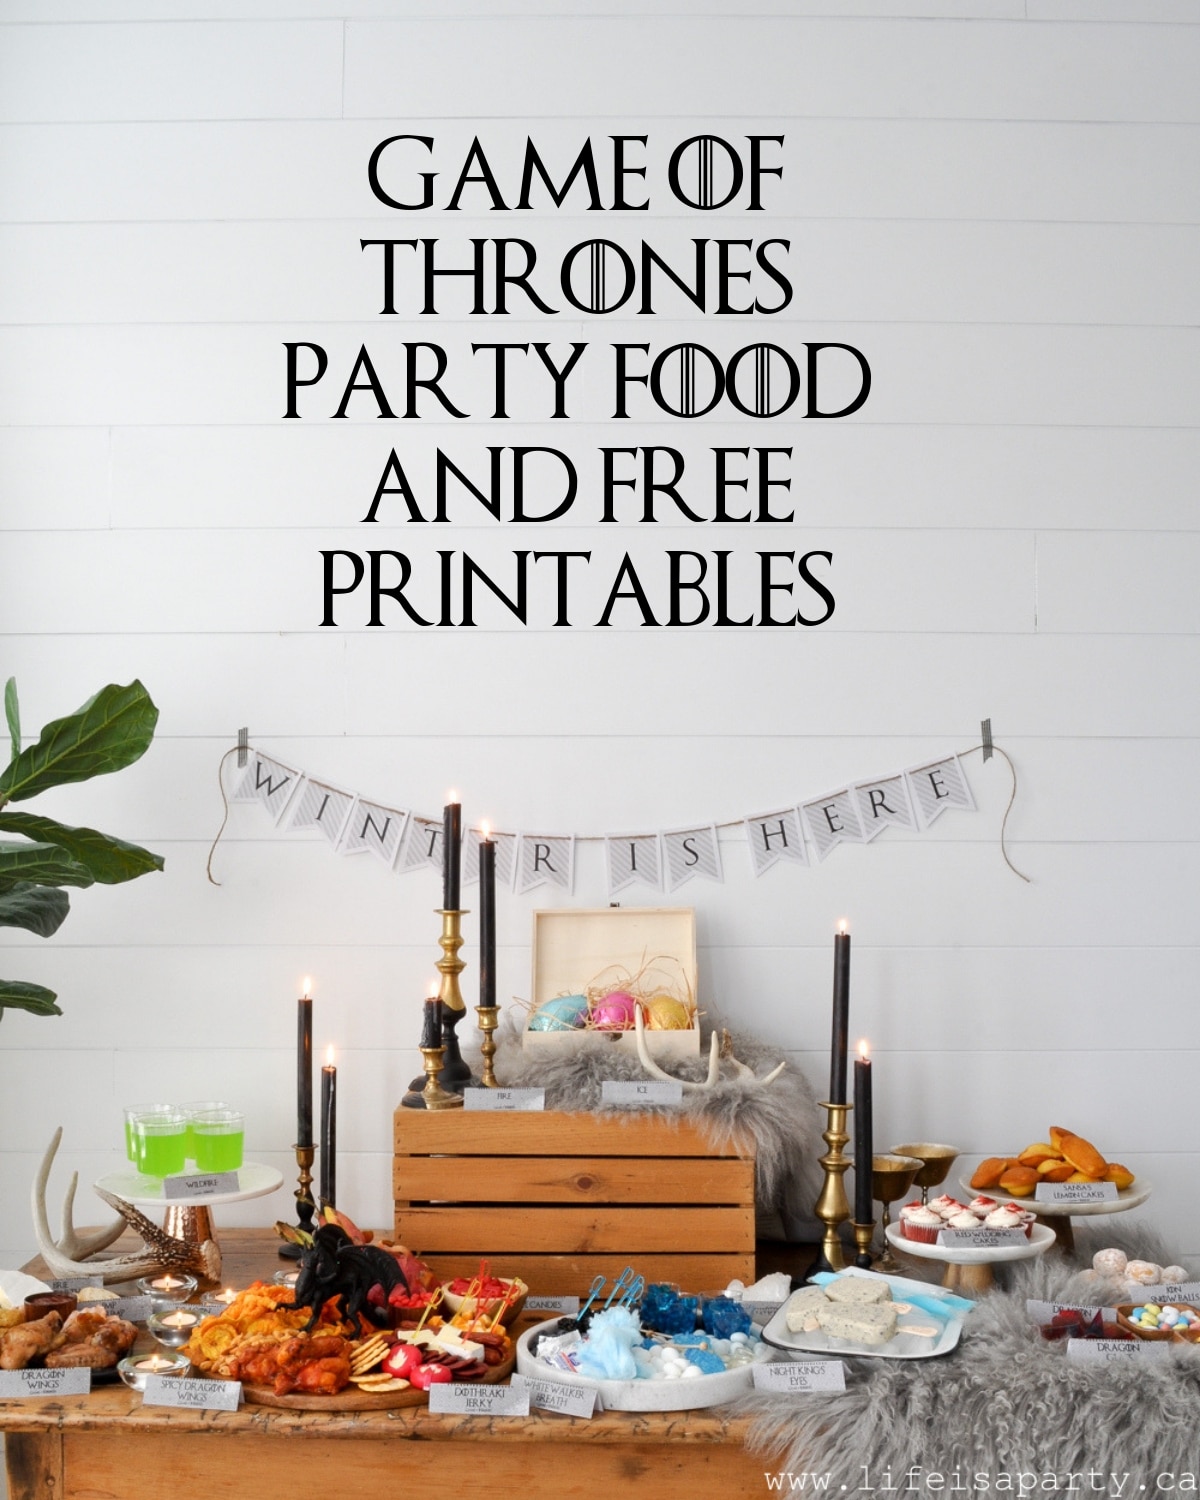
You might also like our Game of Thrones Party here.

Game of Thrones Party Food and Free Printables: Fire and Ice Snack Board, themed food with printable labels and "Winter Is Here" Banner.

When I'm 64! 64th Birthday Party Ideas

Mar 5, 2012 · 4 Comments

When I'm 64 themed birthday party.

When I'm 64 Themed Birthday Party: What better theme for someone turning 64 than the Beatles classic song? Decor ideas and menu ideas with a bistro feel.

When I'm 64 themed birthday party.
[feast_advanced_jump_to]

Last night we got together with "some random person off the street" -who doesn't want everyone to know she's 64 😉 It seemed an obvious theme considering her age, to go with the Beatles fun song "When I'm 64!"  It's such a timeless classic and the perfect way to celebrate this milestone birthday.

The Song

The song "When I'm 64" was the perfect theme to the night.

When I get older losing my hair
Many years from now
Will you still be sending me a Valentine
Birthday greetings bottle of wine

If I'd been out till quarter to three
Would you lock the door
Will you still need me, will you still feed me
When I'm sixty-four

You'll be older too
And if you say the word
I could stay with you

I could be handy, mending a fuse
When your lights have gone
You can knit a sweater by the fireside
Sunday mornings go for a ride
Doing the garden, digging the weeds
Who could ask for more

Will you still need me, will you still feed me
When I'm sixty-four

Every summer we can rent a cottage
In the Isle of Wight, if it's not too dear
We shall scrimp and save
Grandchildren on your knee
Vera, Chuck and Dave

Send me a postcard, drop me a line
Stating point of view
Indicate precisely what you mean to say
Yours sincerely, wasting away

Give me your answer, fill in a form
Mine for evermore
Will you still need me, will you still feed me
When I'm sixty-four

When I'm 64 Themed Birthday Party table

The Party Decor

To celebrate this special day we wanted to do a rustic and casual feel for the party decor.  I decided to use a table runner of brown craft paper, and that set the tone for the rest of the table and food. This is such an easy option for entertaining and gives a real bisto vibe.  After the party, no worry about washing linens, you just put it in the recycling bin.

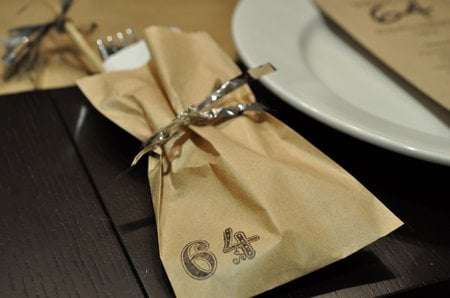
I used cute little mini brown paper bags to hold everyone's knife, fork and napkin, and made a little silver pom pom, and tied them to the end of skewers with twine for fun.  The paper bags went with the runner and were a fun detail to add to the table.

silver sparkle and twine pom poms party decor

The bags were stamped with the number 64.  I used a set of stamps I already had.  Look for them at the craft store.

When I'm 64 Themed Birthday Party cutlery bags

I saw these fun number balloons at new years, and tucked them away in my mind for the future. I thought they'd be great for the party. Unfortunately when I went to pick them up, they told me they had to order them in 🙁 so no number balloons for me, but if you were doing something similar they'd be great addition to the party decor.  I love how large these ones are.  They're a real statement pieces.  They were also the inspiration for bringing silver into the table.

When I'm 64 Themed Birthday Party balloons

At each place setting, I printed the song lyrics out for everyone, with the menu on the back.This was a great place to include the song, so everyone could read the lyrics.

When I'm 64 Themed Birthday Party table

The Menu

I liked how the kraft paper created a bistro feel, and it inspired my menu for the night.

Birthday Celebration Menu

-Dinner-
French Dip Roast Beef
Sandwiches
Fresh Cut Fries
Homemade Onion Rings
Grandma's Coleslaw

-Dessert-
Coconut Cupcakes
Vanilla Cupcake

bistro themed dinner menu at home

French Dip Roast Beef Sandwiches

The French Dip Roast Beef sandwiches were a new recipe, and boy were they a hit. Like everyone oohing and aahing and over eating kind of a hit. I found the recipe over at Our Best Bites.

They were really easy. Like roast, beef stock and a couple envelopes of onion soup mix in the slow cooker all day, kind of easy. I love a recipe where the slow cooker does all the hard work for you.  You should try this recipe, it will improve the quality of your life.

I sautéd some onions and mushrooms to go on the sandwiches, along with a little Swiss cheese. I cut open some fresh buns, piled on the beef, onions, mushrooms and topped them off with the swiss cheese.  Then they went under the broiler for a few minutes to melt the cheese.  The dip was on the side in the ramekins.  They were so delicious.  And the perfect item for a casual dinner party.

homemade beef dip sandwiches with cheese

Homemade Onion Rings and French Fries

I also made homemade crispy panko onion rings. These are also so, so good.

And, while the deep fryer was out, I decided to make fresh cut fries.  

I used the double fry method, and they were crispy and delicious. The first frying is at 325 and is only about 3 min. They come out like this, not browned yet.

homemade French fries

Then you turn the fryer up to 375 and finish them, frying until golden brown. They were delish.

Along with all the yummy fried up food, I also did a sweet-ish coleslaw, my Grandma's recipe. It was perfect to balance everything out.  Sandwiches with fries and salad could seem like a pretty regular menu for a celebration, but by making our food all homemade including the fries and rings it felt like such a special menu and it was all so good!

homemade bristro style dinner

Dessert

After dinner we had the best part -dessert, made from scratch cupcakes. They were so yummy, and the perfect size little treat after a big meal.

When I'm 64 Themed Birthday Party cupcakes

Coconut Cupcakes

The birthday girl's favourite is The Barefoot Contessa's Coconut Cupcakes. If you like coconut, you will love this recipe.  In recent years, it's become a real family favorite for us.

coconut cupcakes

I don't really like coconut. 🙁

Vanilla Cupcakes

One day, while making these for the coconut lovers, I had a lick of the batter before adding in the coconut. I was thinking this is the best cupcake batter I ever tasted. And then the light bulb, what if I leave out the coconut.

The Barefoot Contessa's Coconut Cupcakes (without coconut) are the best Vanilla cupcakes I ever had!

cupcakes on a cake stand

What I usually do is make half vanilla and half coconut. Just before adding the coconut, scoop out half the batter and fill about 15 cupcake tins. Half the original coconut and add to the rest of the batter to make the rest coconut.

I use the cream cheese frosting on the recipe for the coconut cupcakes, but only make a quarter of the original recipe, and I find it's the perfect amount.

For the vanilla ones, I make a simple butter cream.

vanilla cupcake

To coordinate the cupcakes with the rest of the party decor, I put the cupcakes in the same little paper bags that I used for the cutlery, just cut down a little. I made a fun little food pick with a toothpick and some more twine and silver ribbon.

I also used "64" sparkle candles.

When I'm 64 Themed Birthday Party cupcakes

Gifts

After dinner it was time to give her her amazing gift.  Her 64th birthday gift was something off of her wish list.  You can't give any old gift for a milestone year like this.  Of course though, the best gifts are always spending a special night together with the people you love over great food!  The perfect gift is love.

We all had a great time, and the "random person of the street" seemed to enjoy herself as well! I guess it's for sure then, we will still need you and we definitely will still feed you, when you're 64! If you have someone special or a family member turning 64 this is the perfect party theme to kick off a new year. I really can't think of a better way.  I hope all these great ideas for celebrating have inspired you.  Happy 64th birthday mom!

With a When I'm 64 Themed Birthday, life is really a party!

More Birthday Party Inspiration

You might also our Beer/Rootbeer Tasting Birthday Party here.

Also check out our Make Your Own Pasta Bar party here.

pasta bar ideas.

You might also enjoy our Toast Party here.

toast party ideas.

Valentine's Day Tea Party

Jan 31, 2012 · 6 Comments

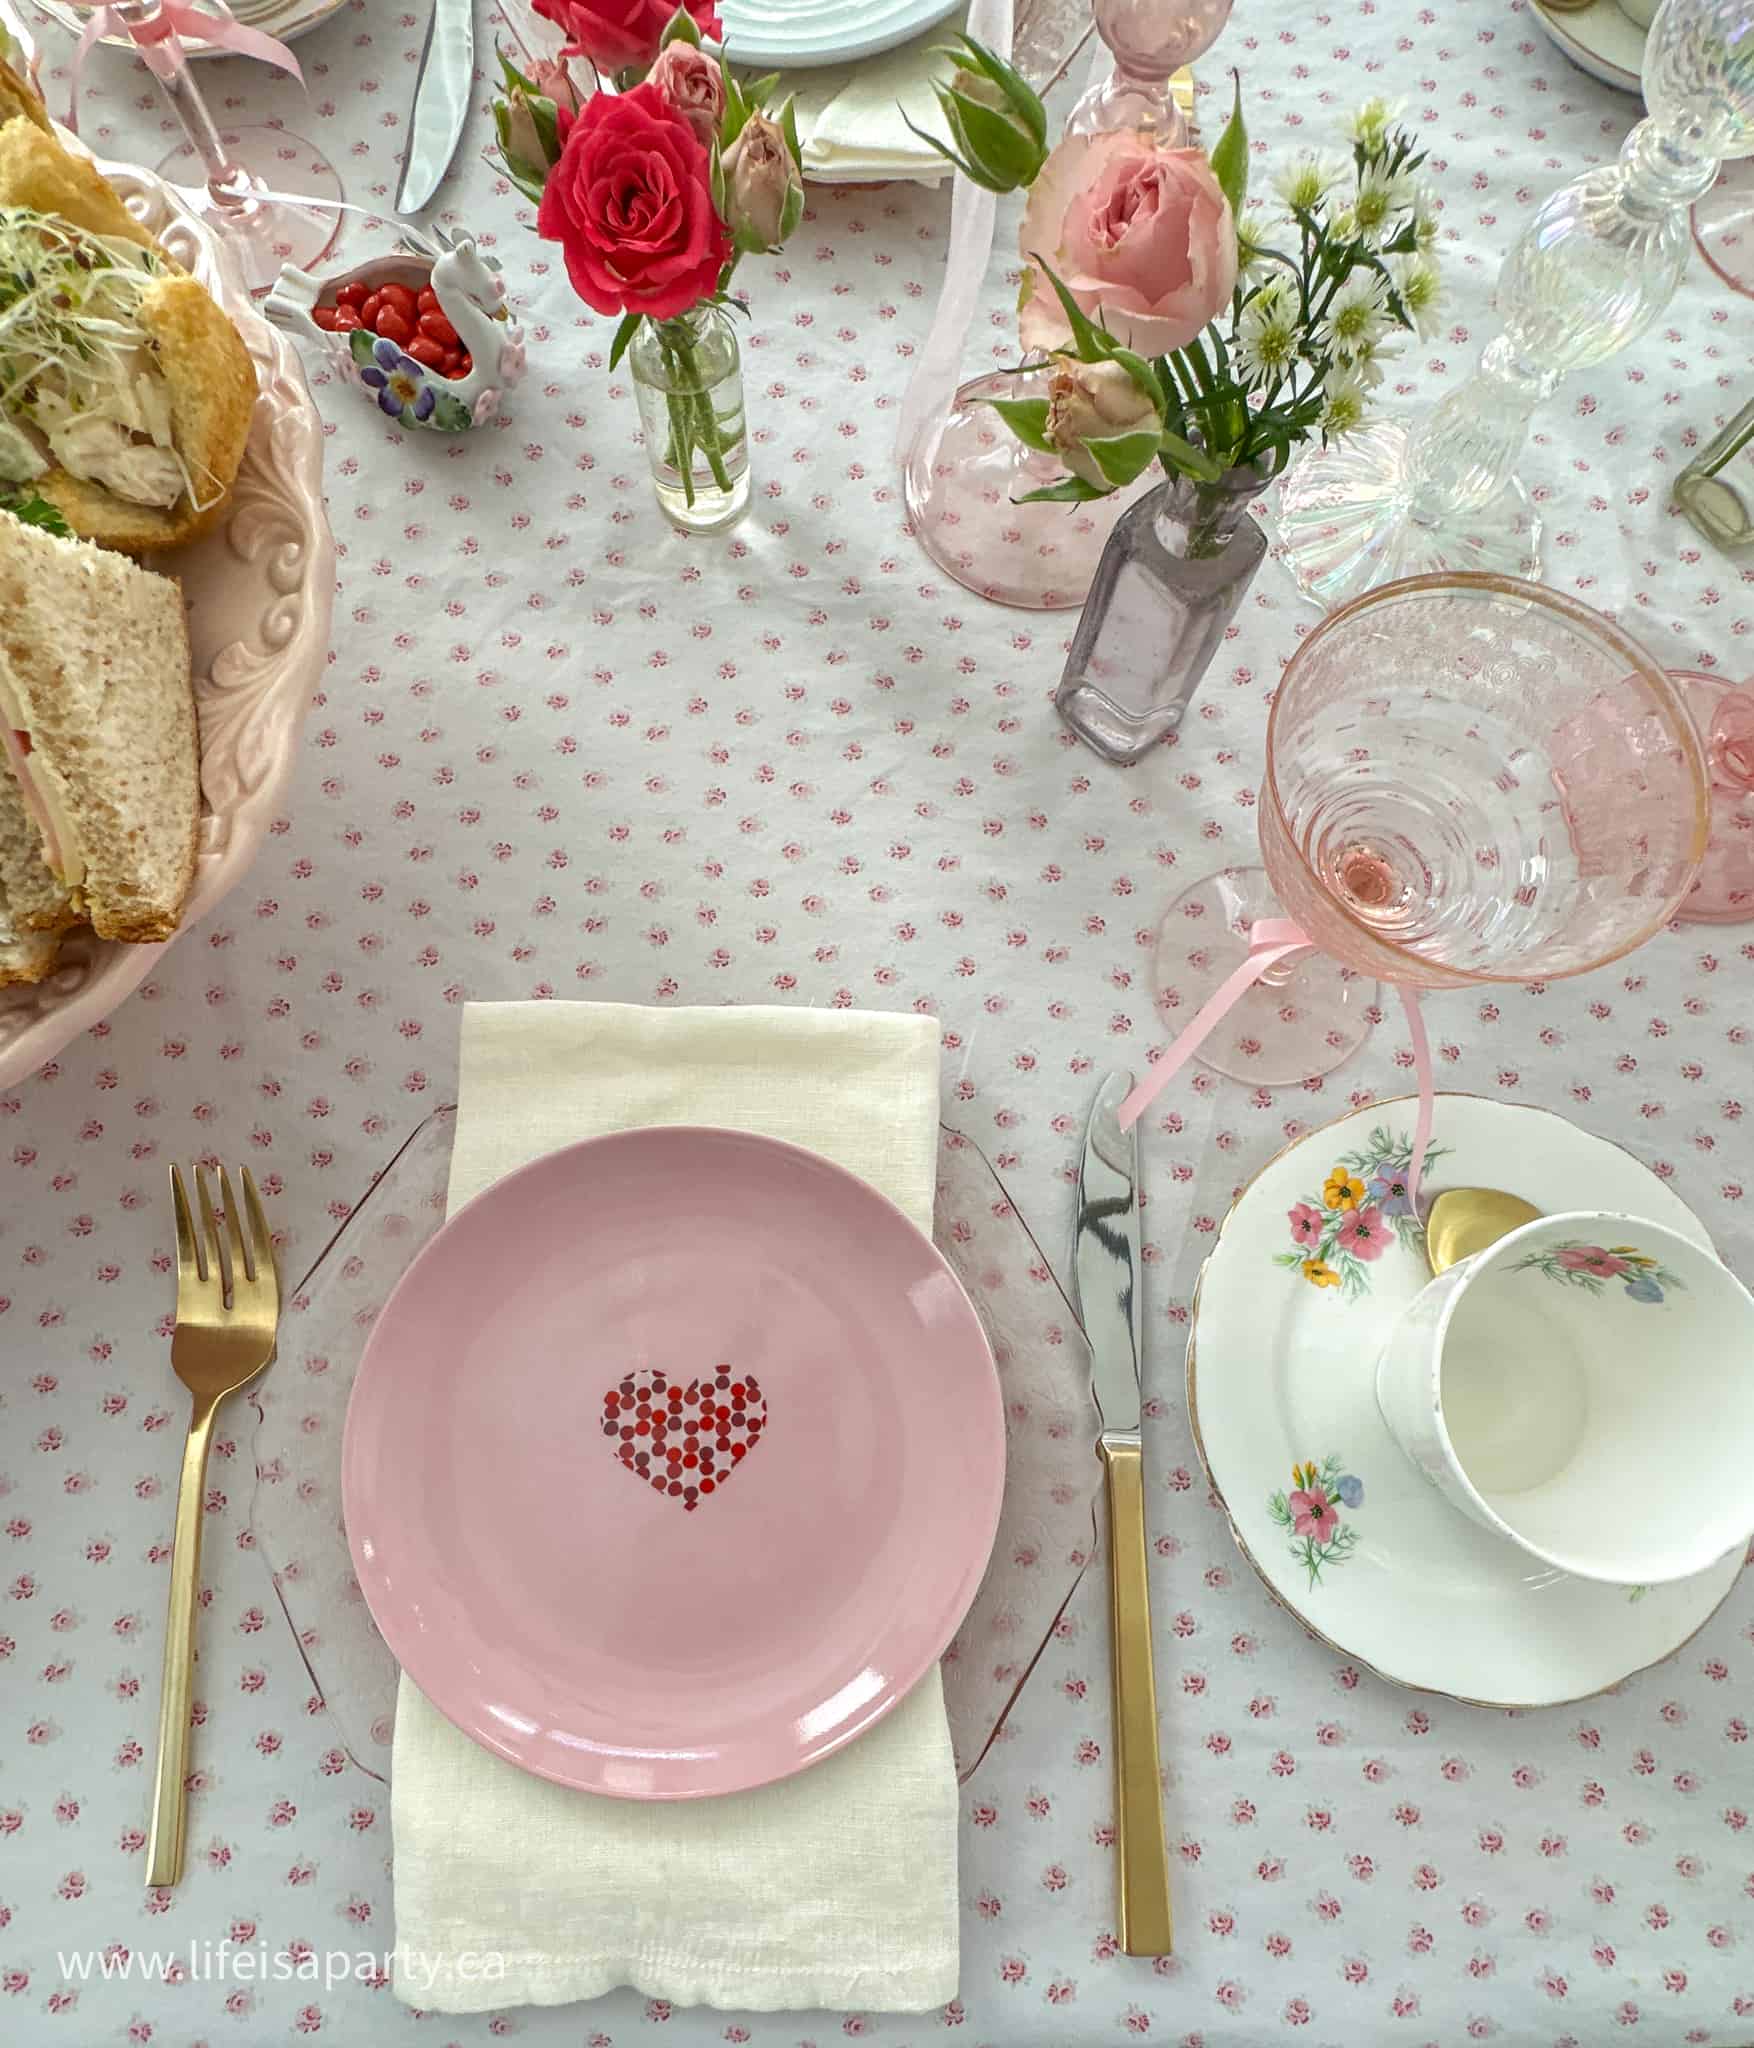
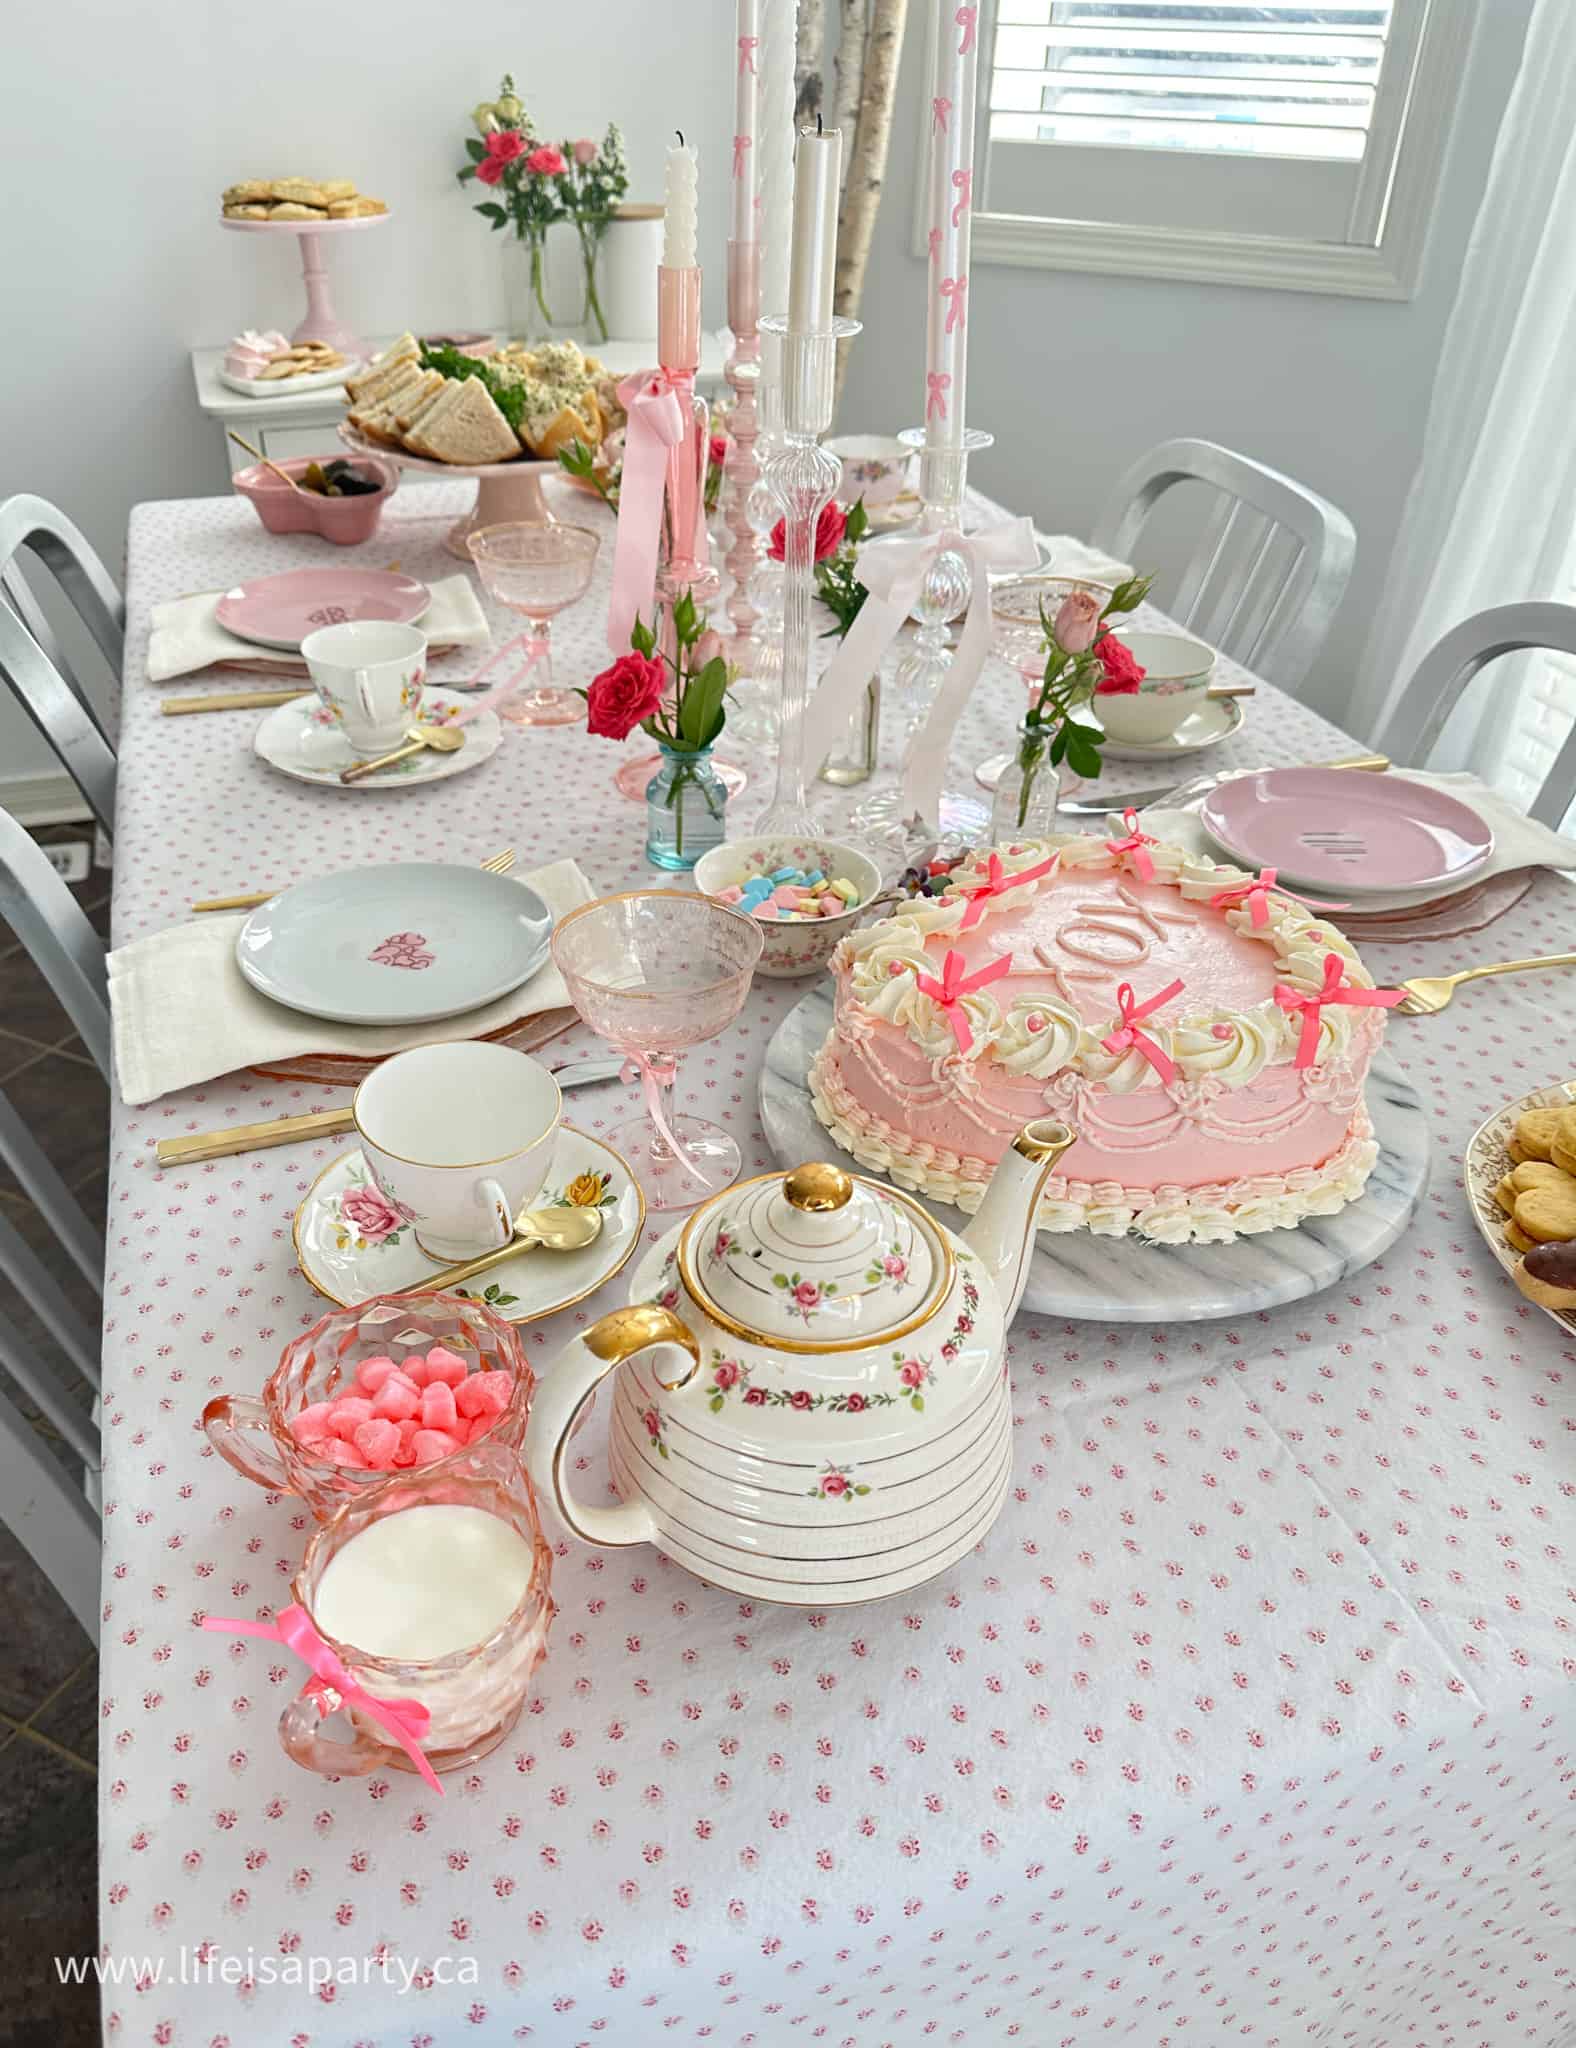
Galentine's Day tea party setup with coquette aesthetic decor and pink roses.

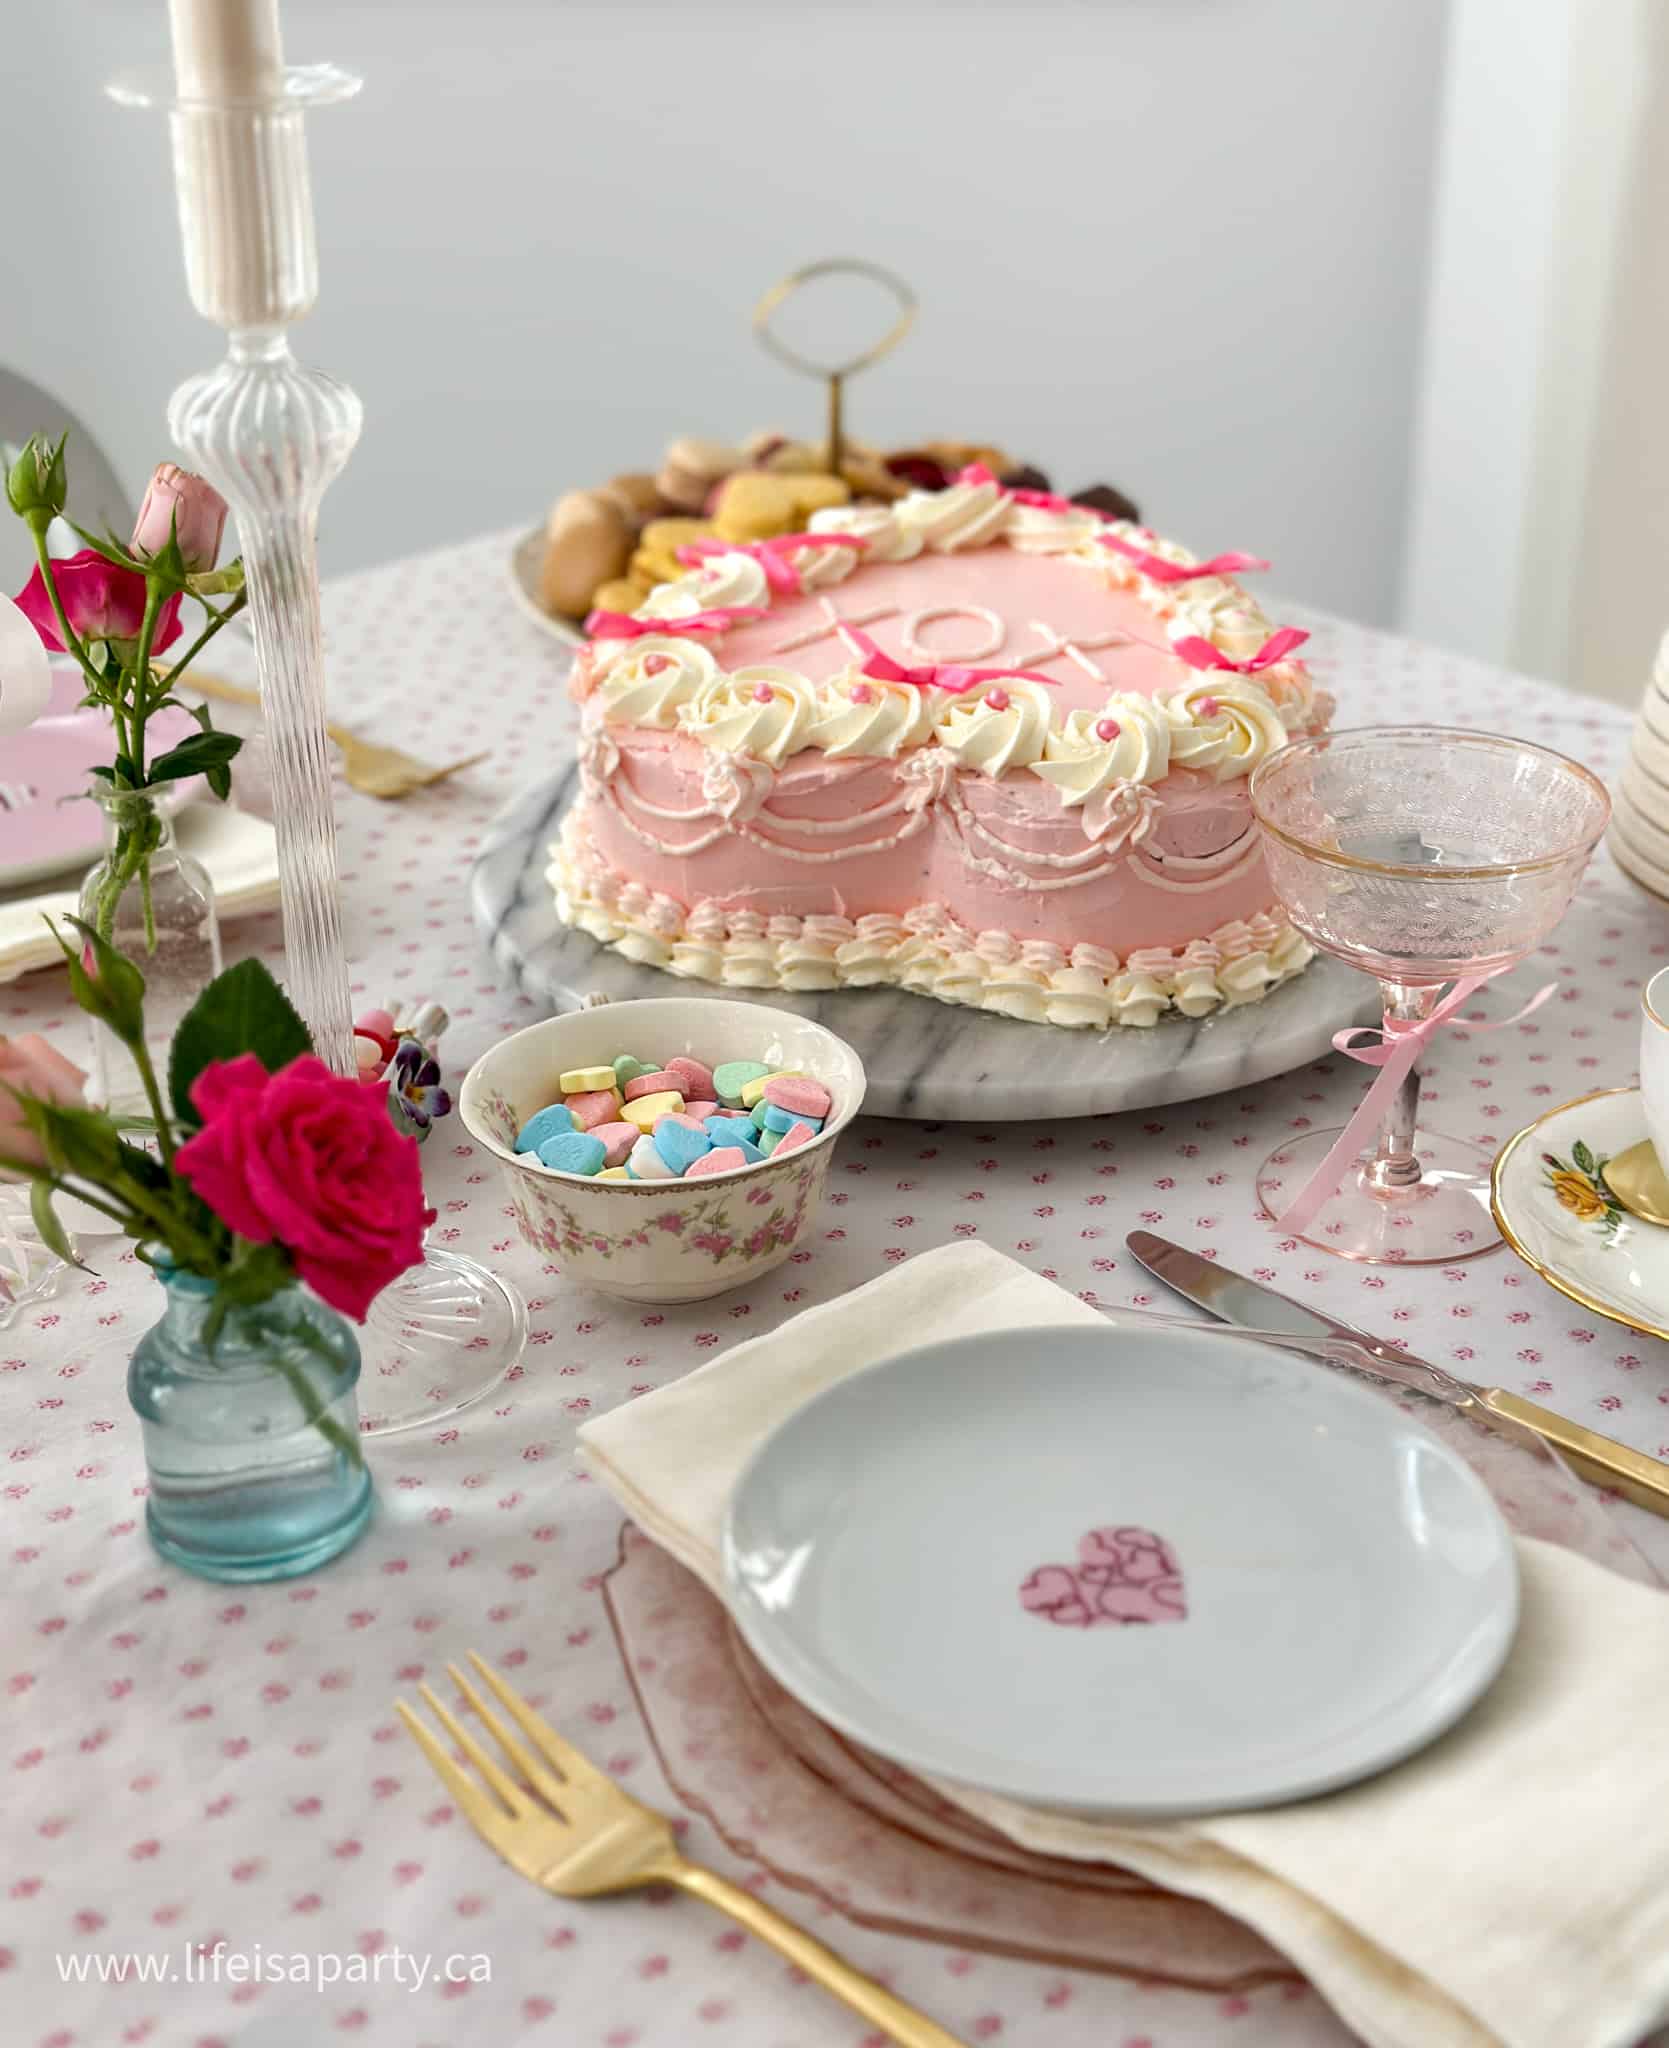
Host a Valentine's Day tea party for Galentine's Day, family time, or celebrating with your favorite people. This afternoon tea features heart-shaped treats, vintage and coquette-style decor, and everything you need for a memorable Valentine's celebration.

Valentine's Day tea party

Valentine's Day Tea Party Quick Look

  • 🎉 Best For: Galentine's Day, family gatherings, friendship celebrations  
  • 👥 Serves: 4-8 guests
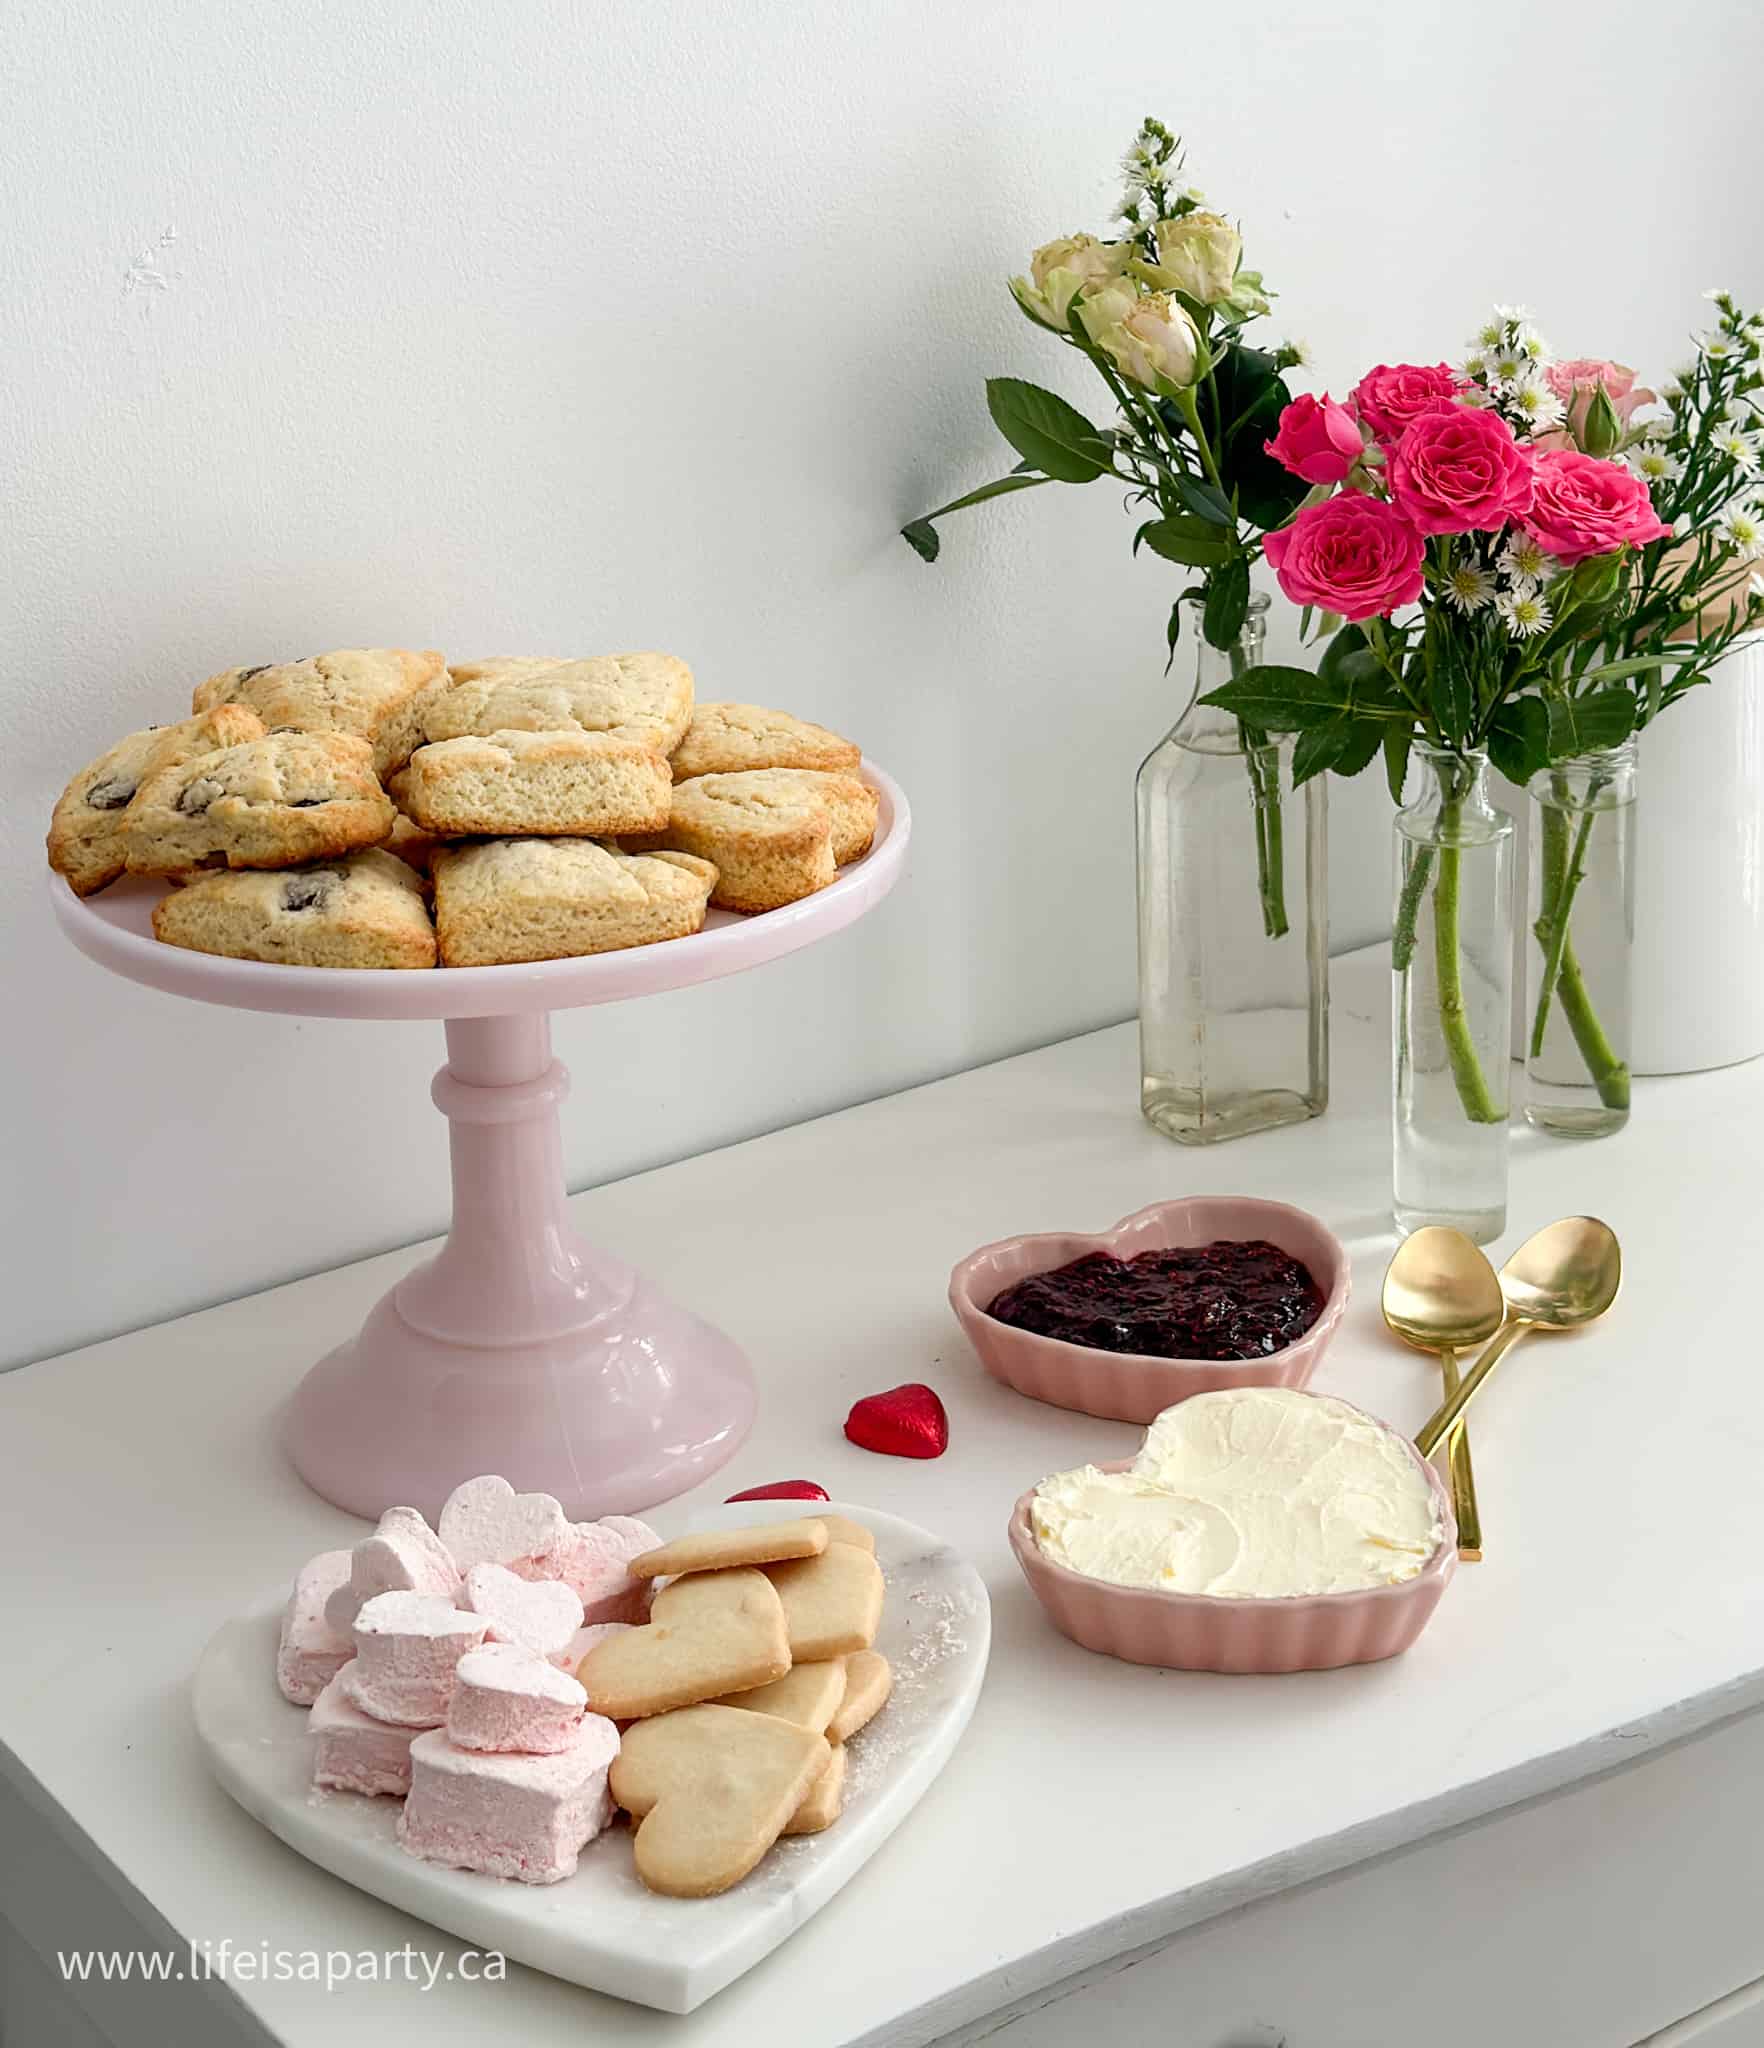
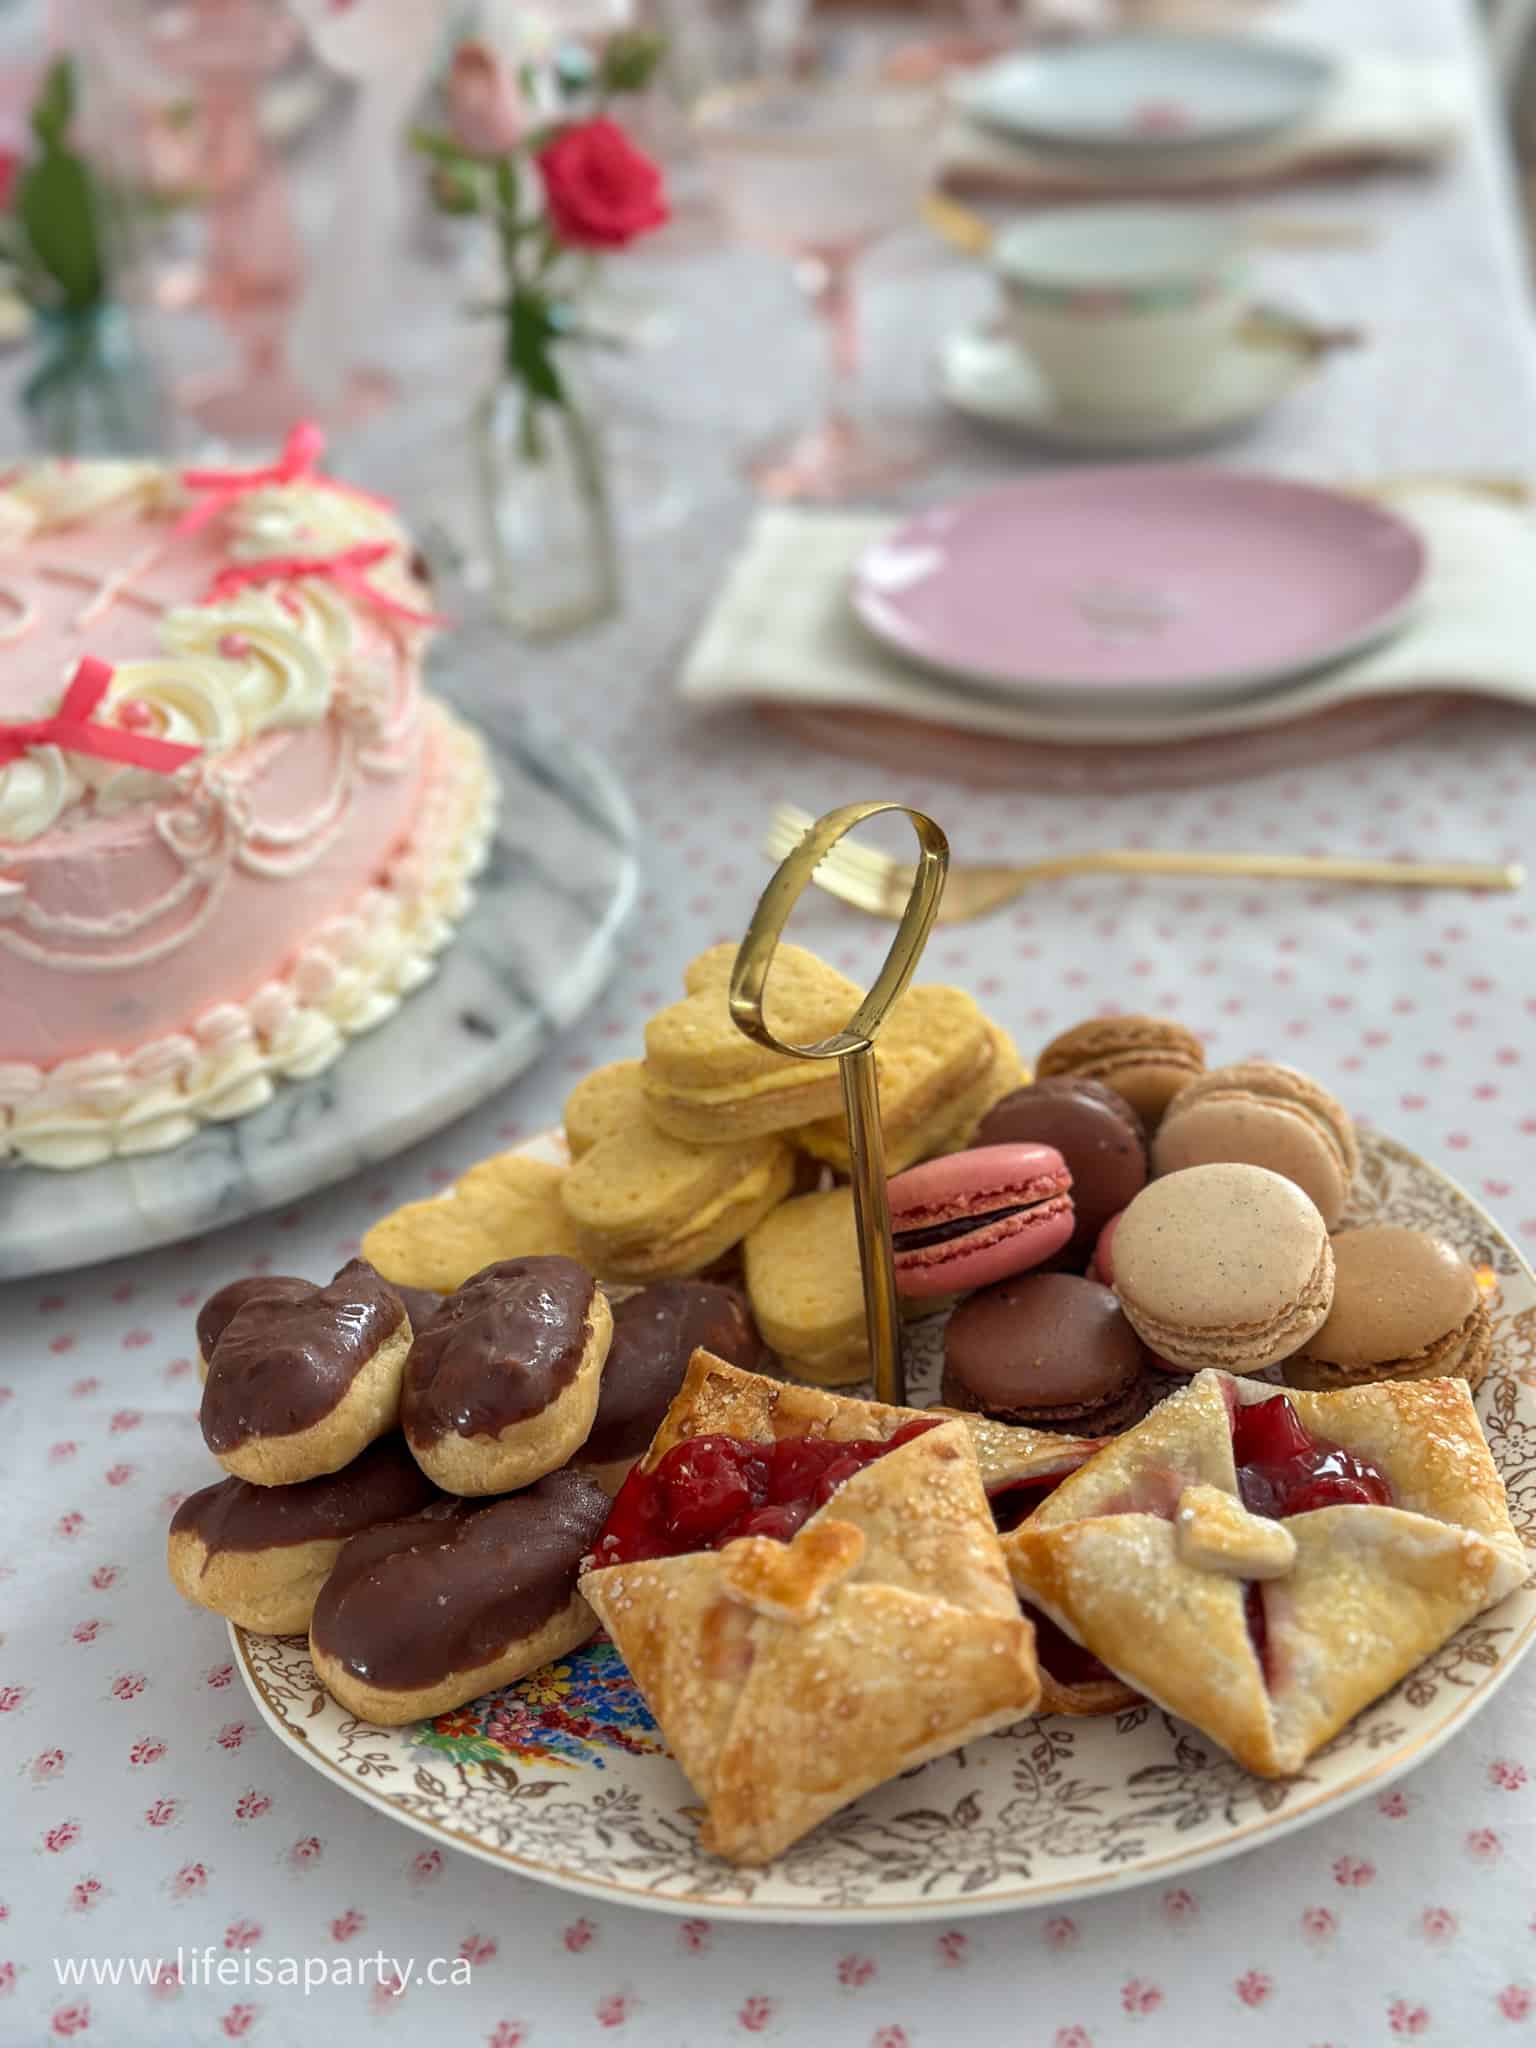
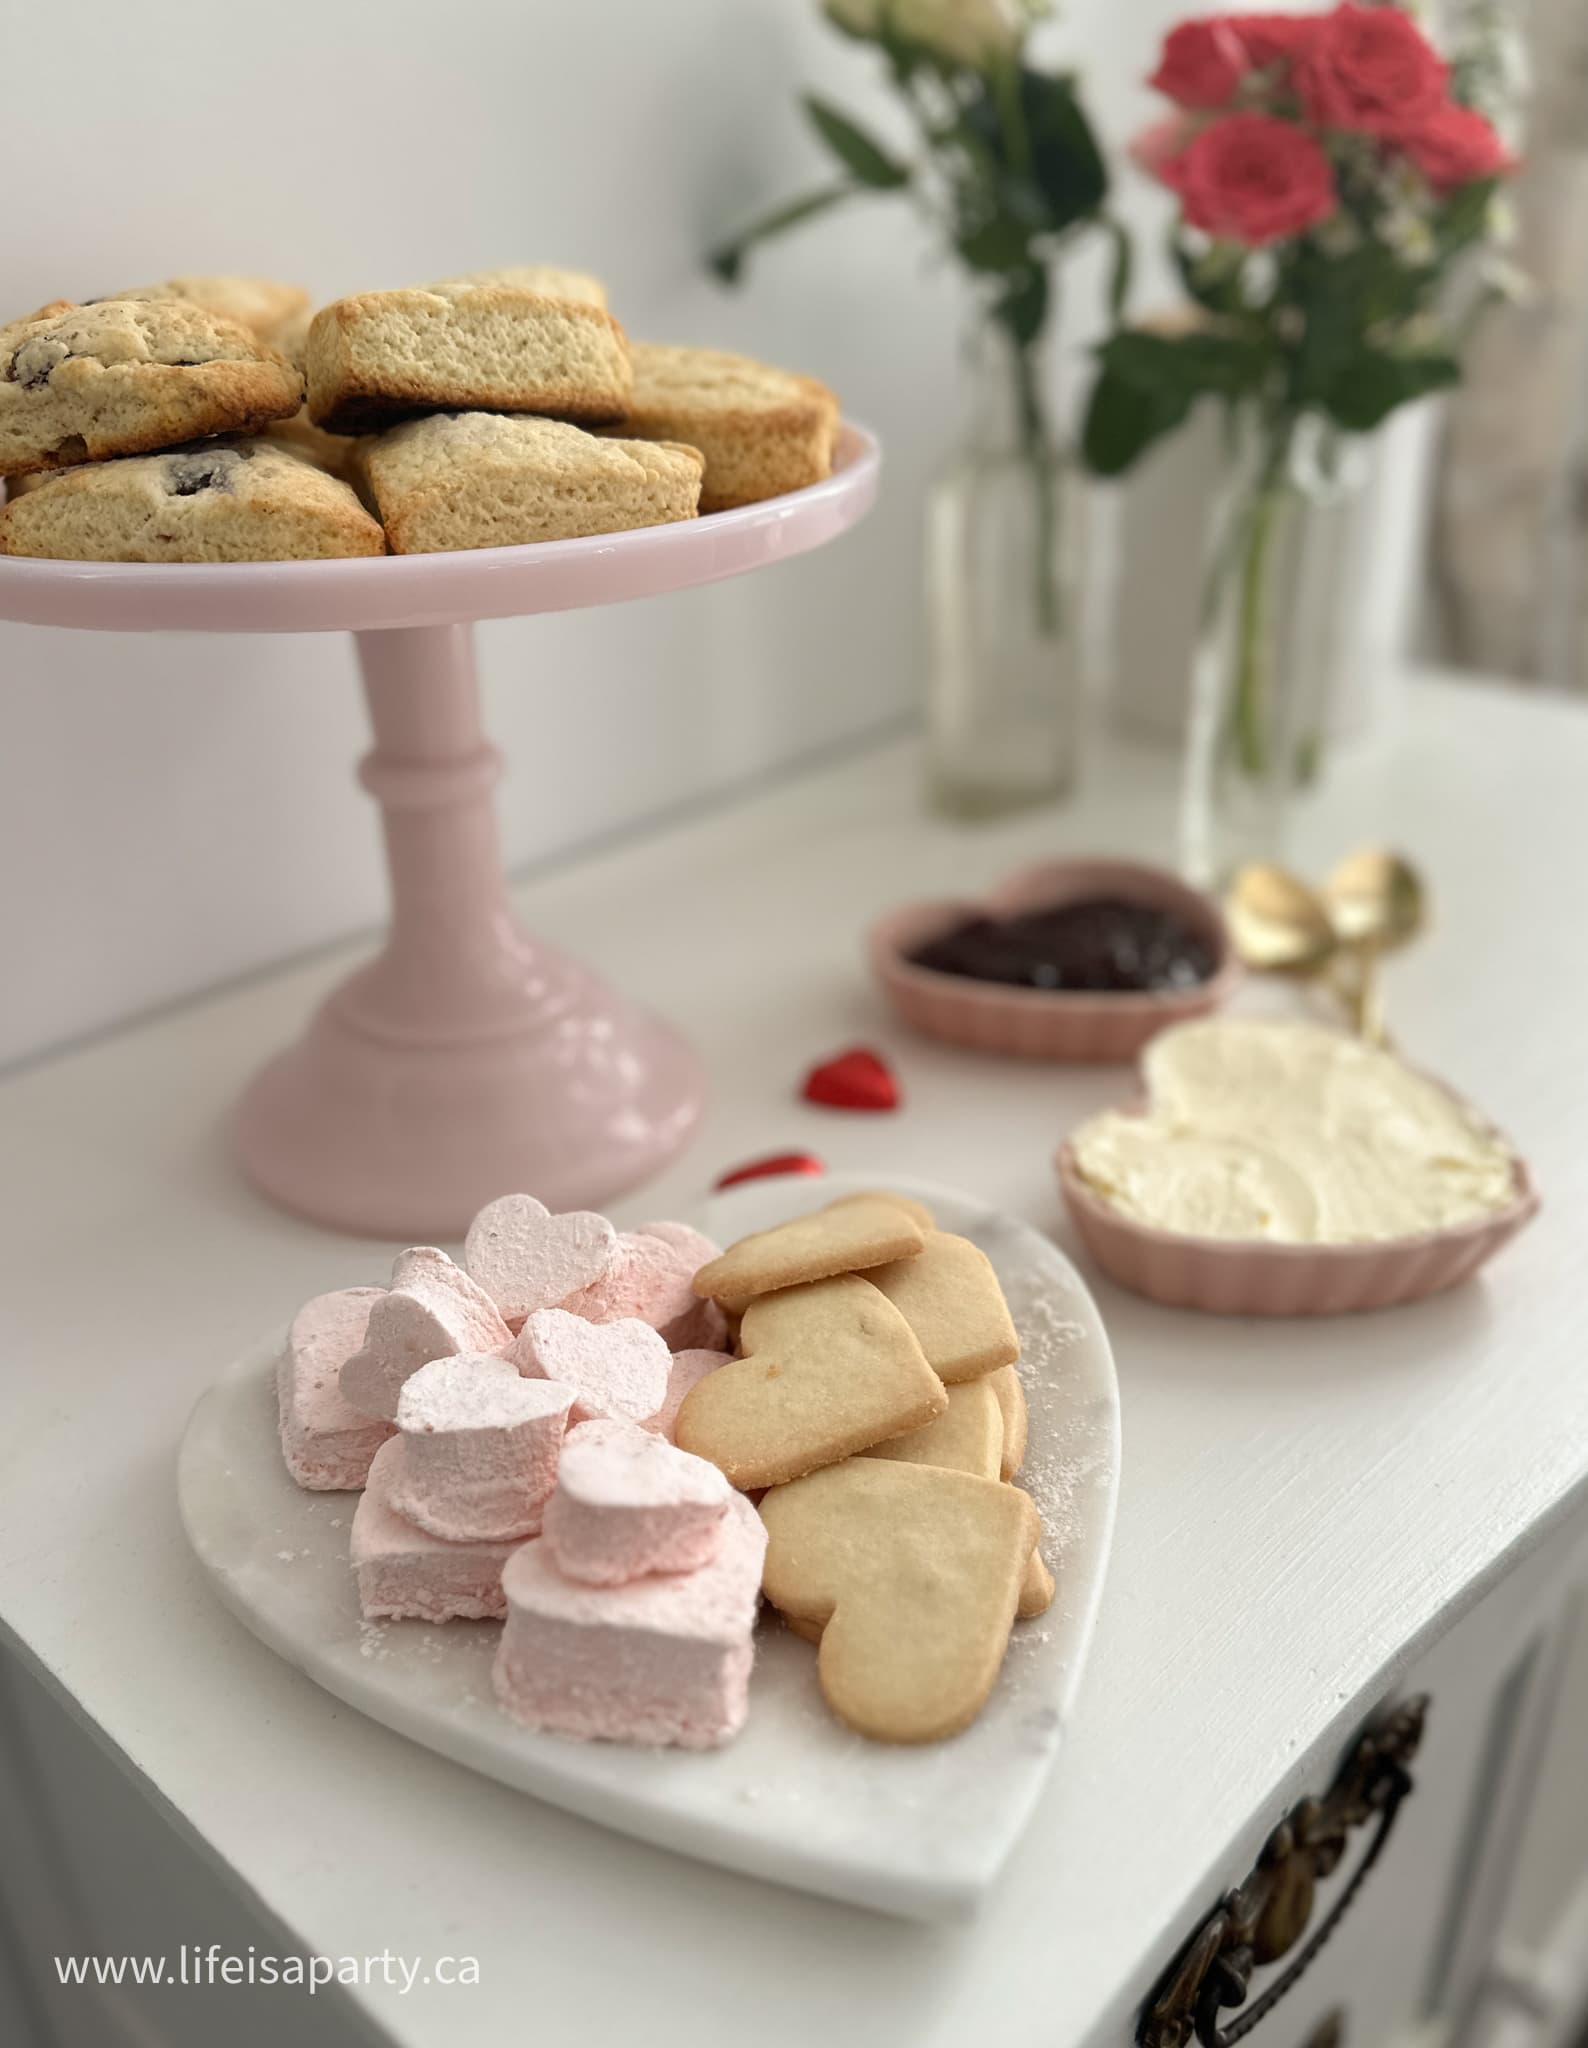
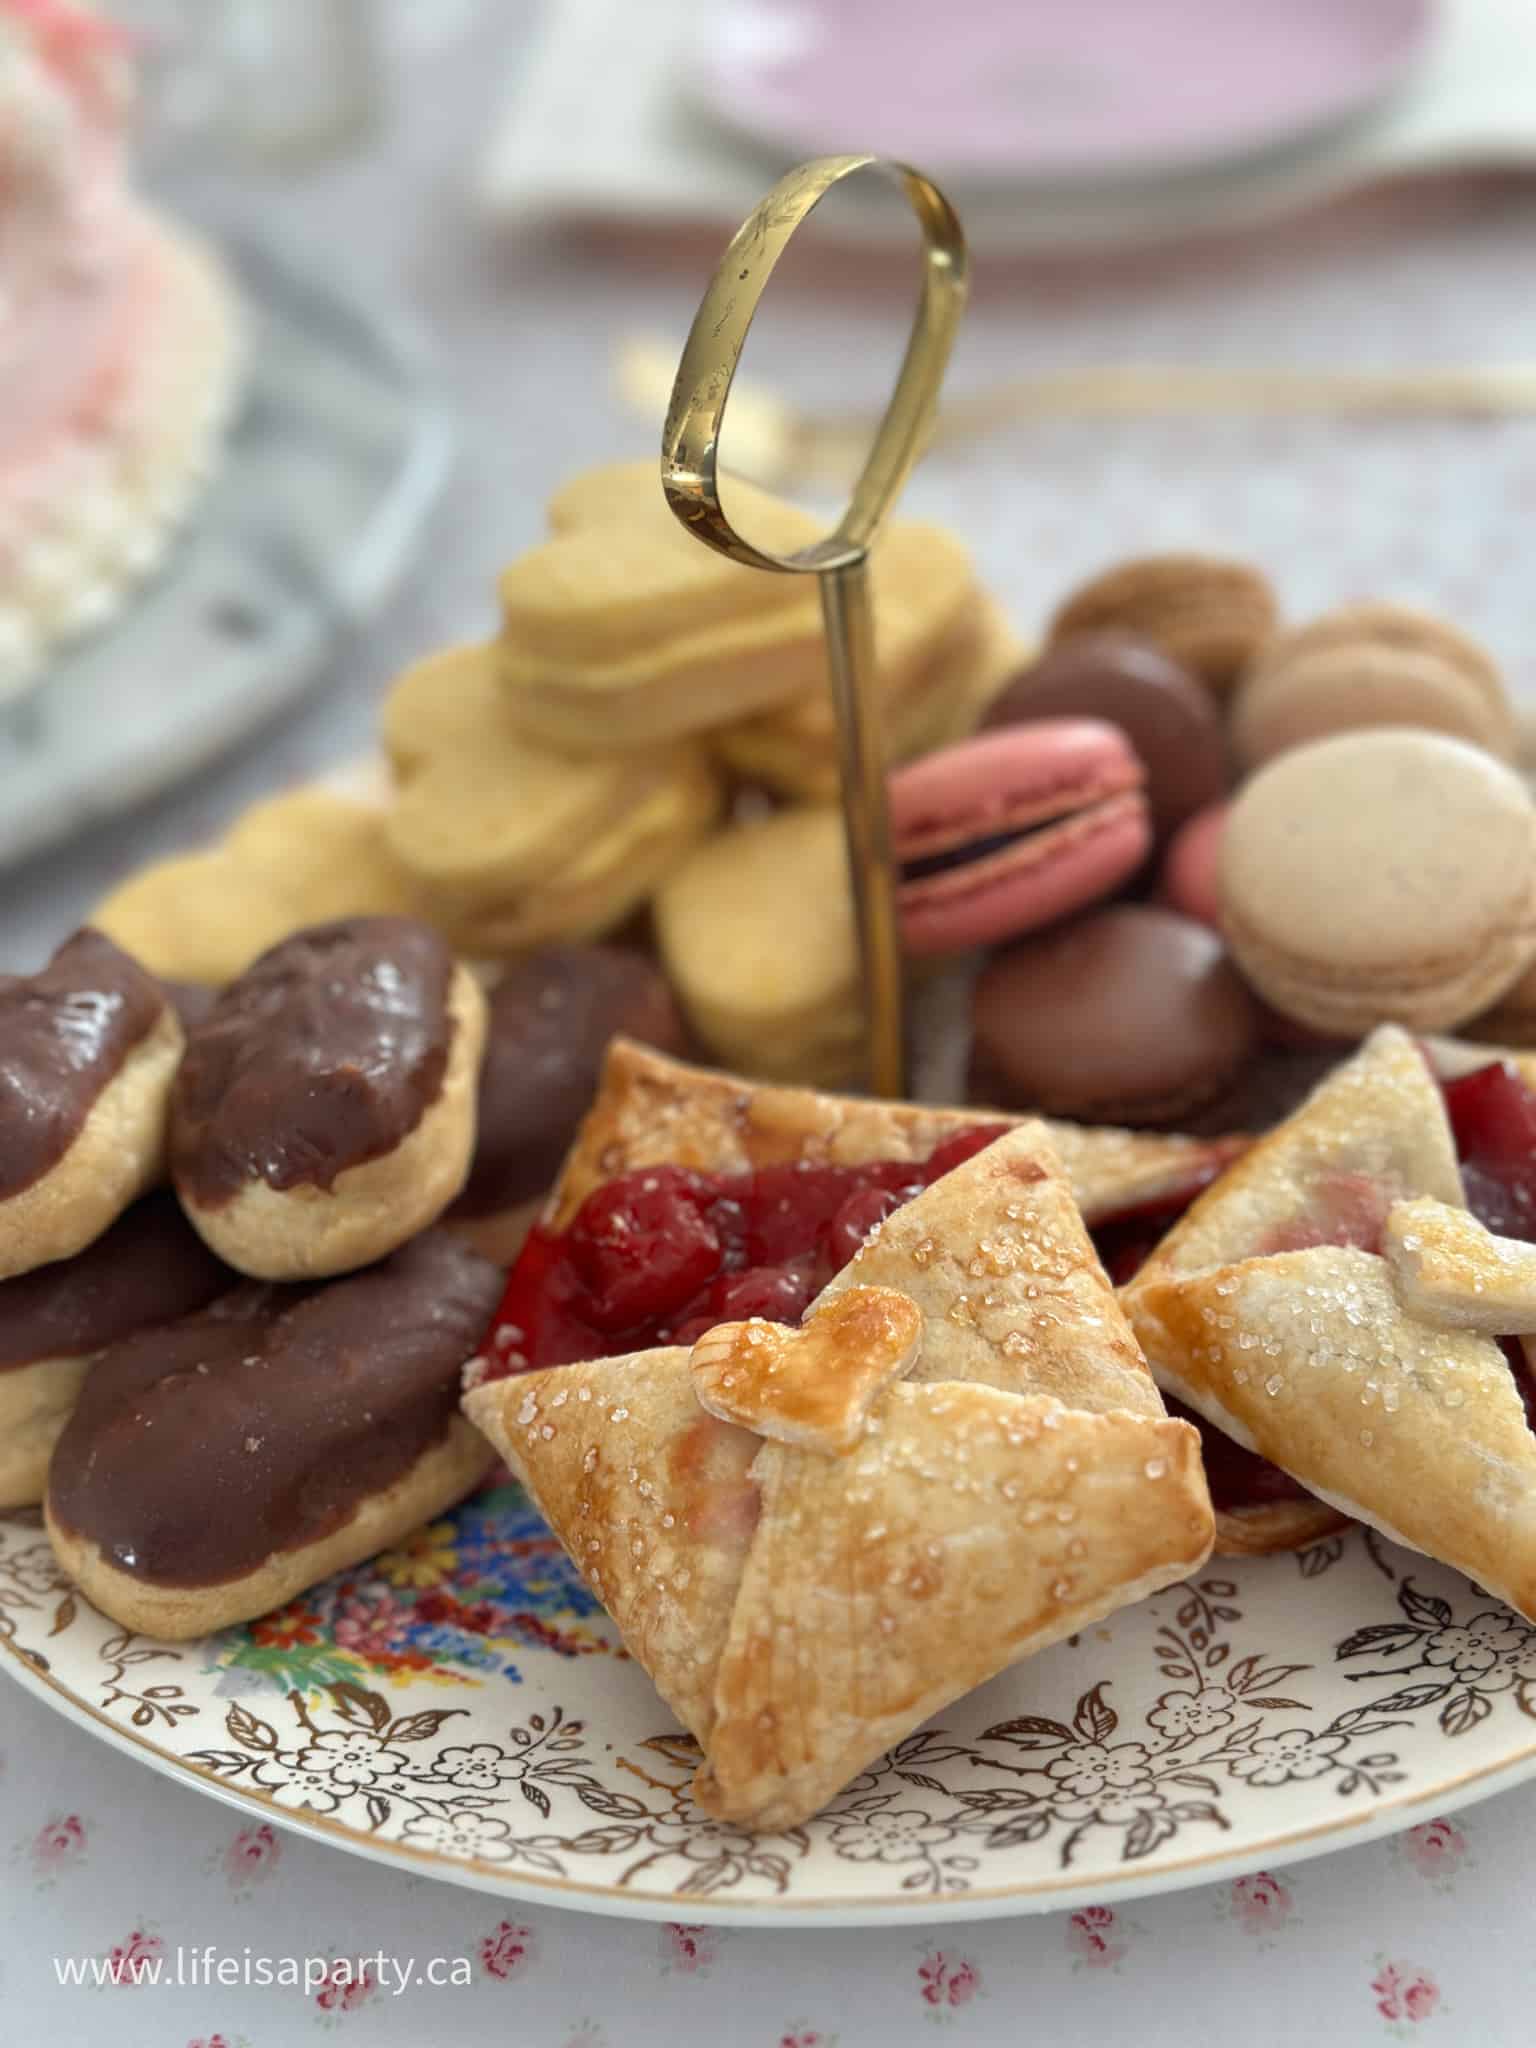
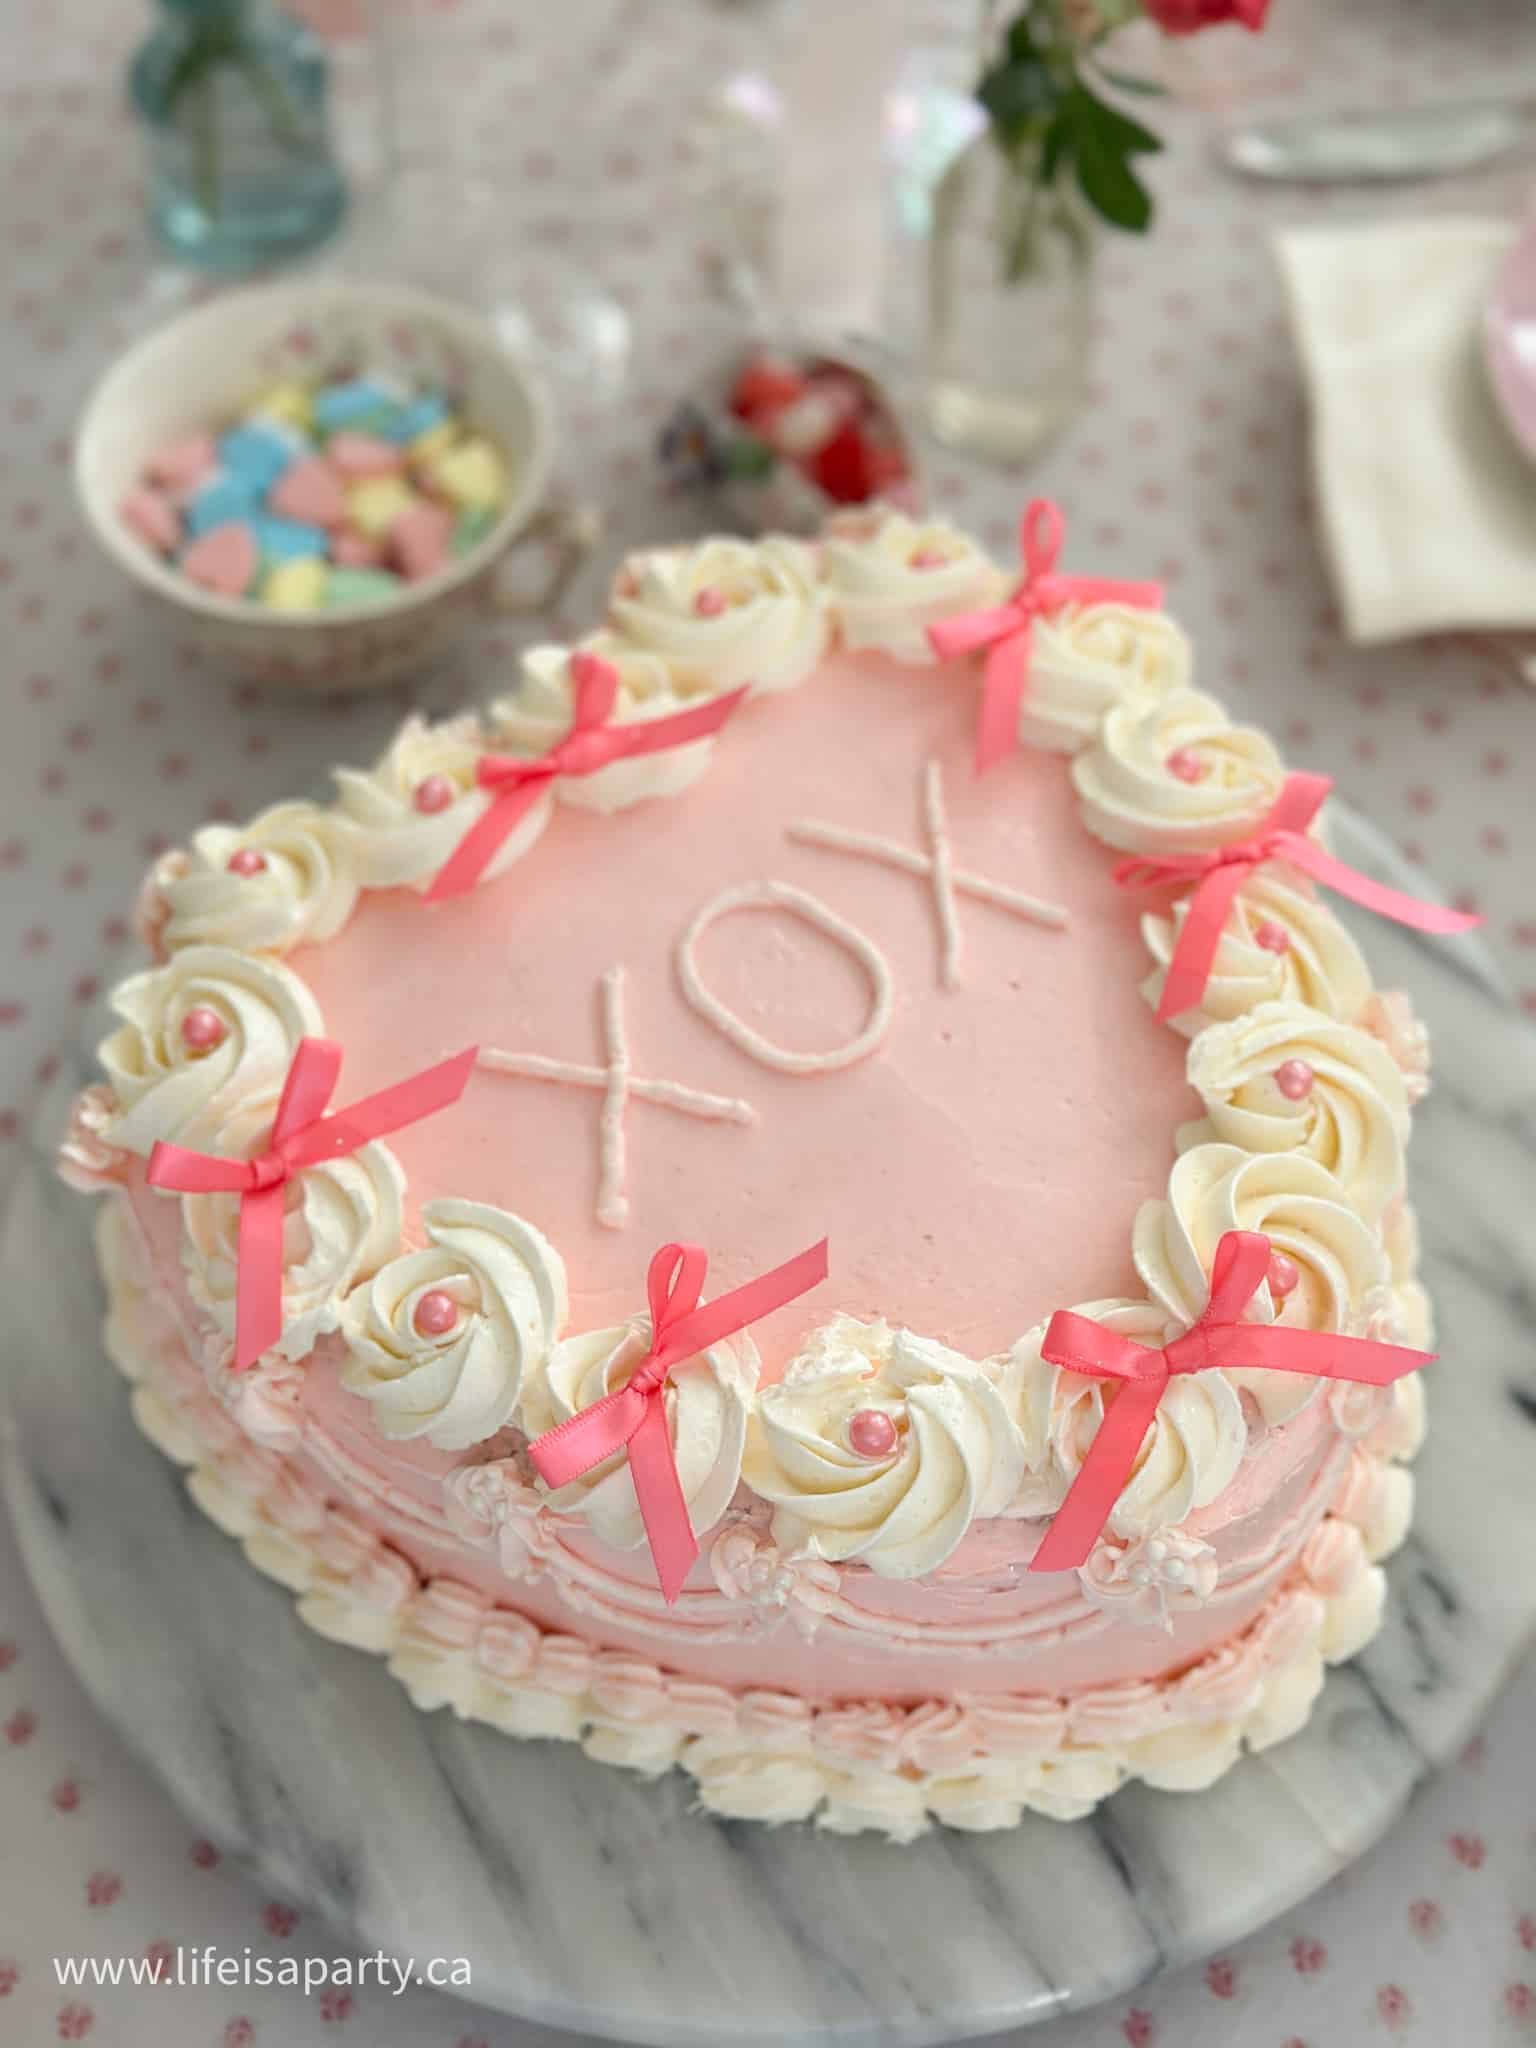
  • 🍽️ Menu: Tea sandwiches, Scones with clotted cream and jam, and Sweets
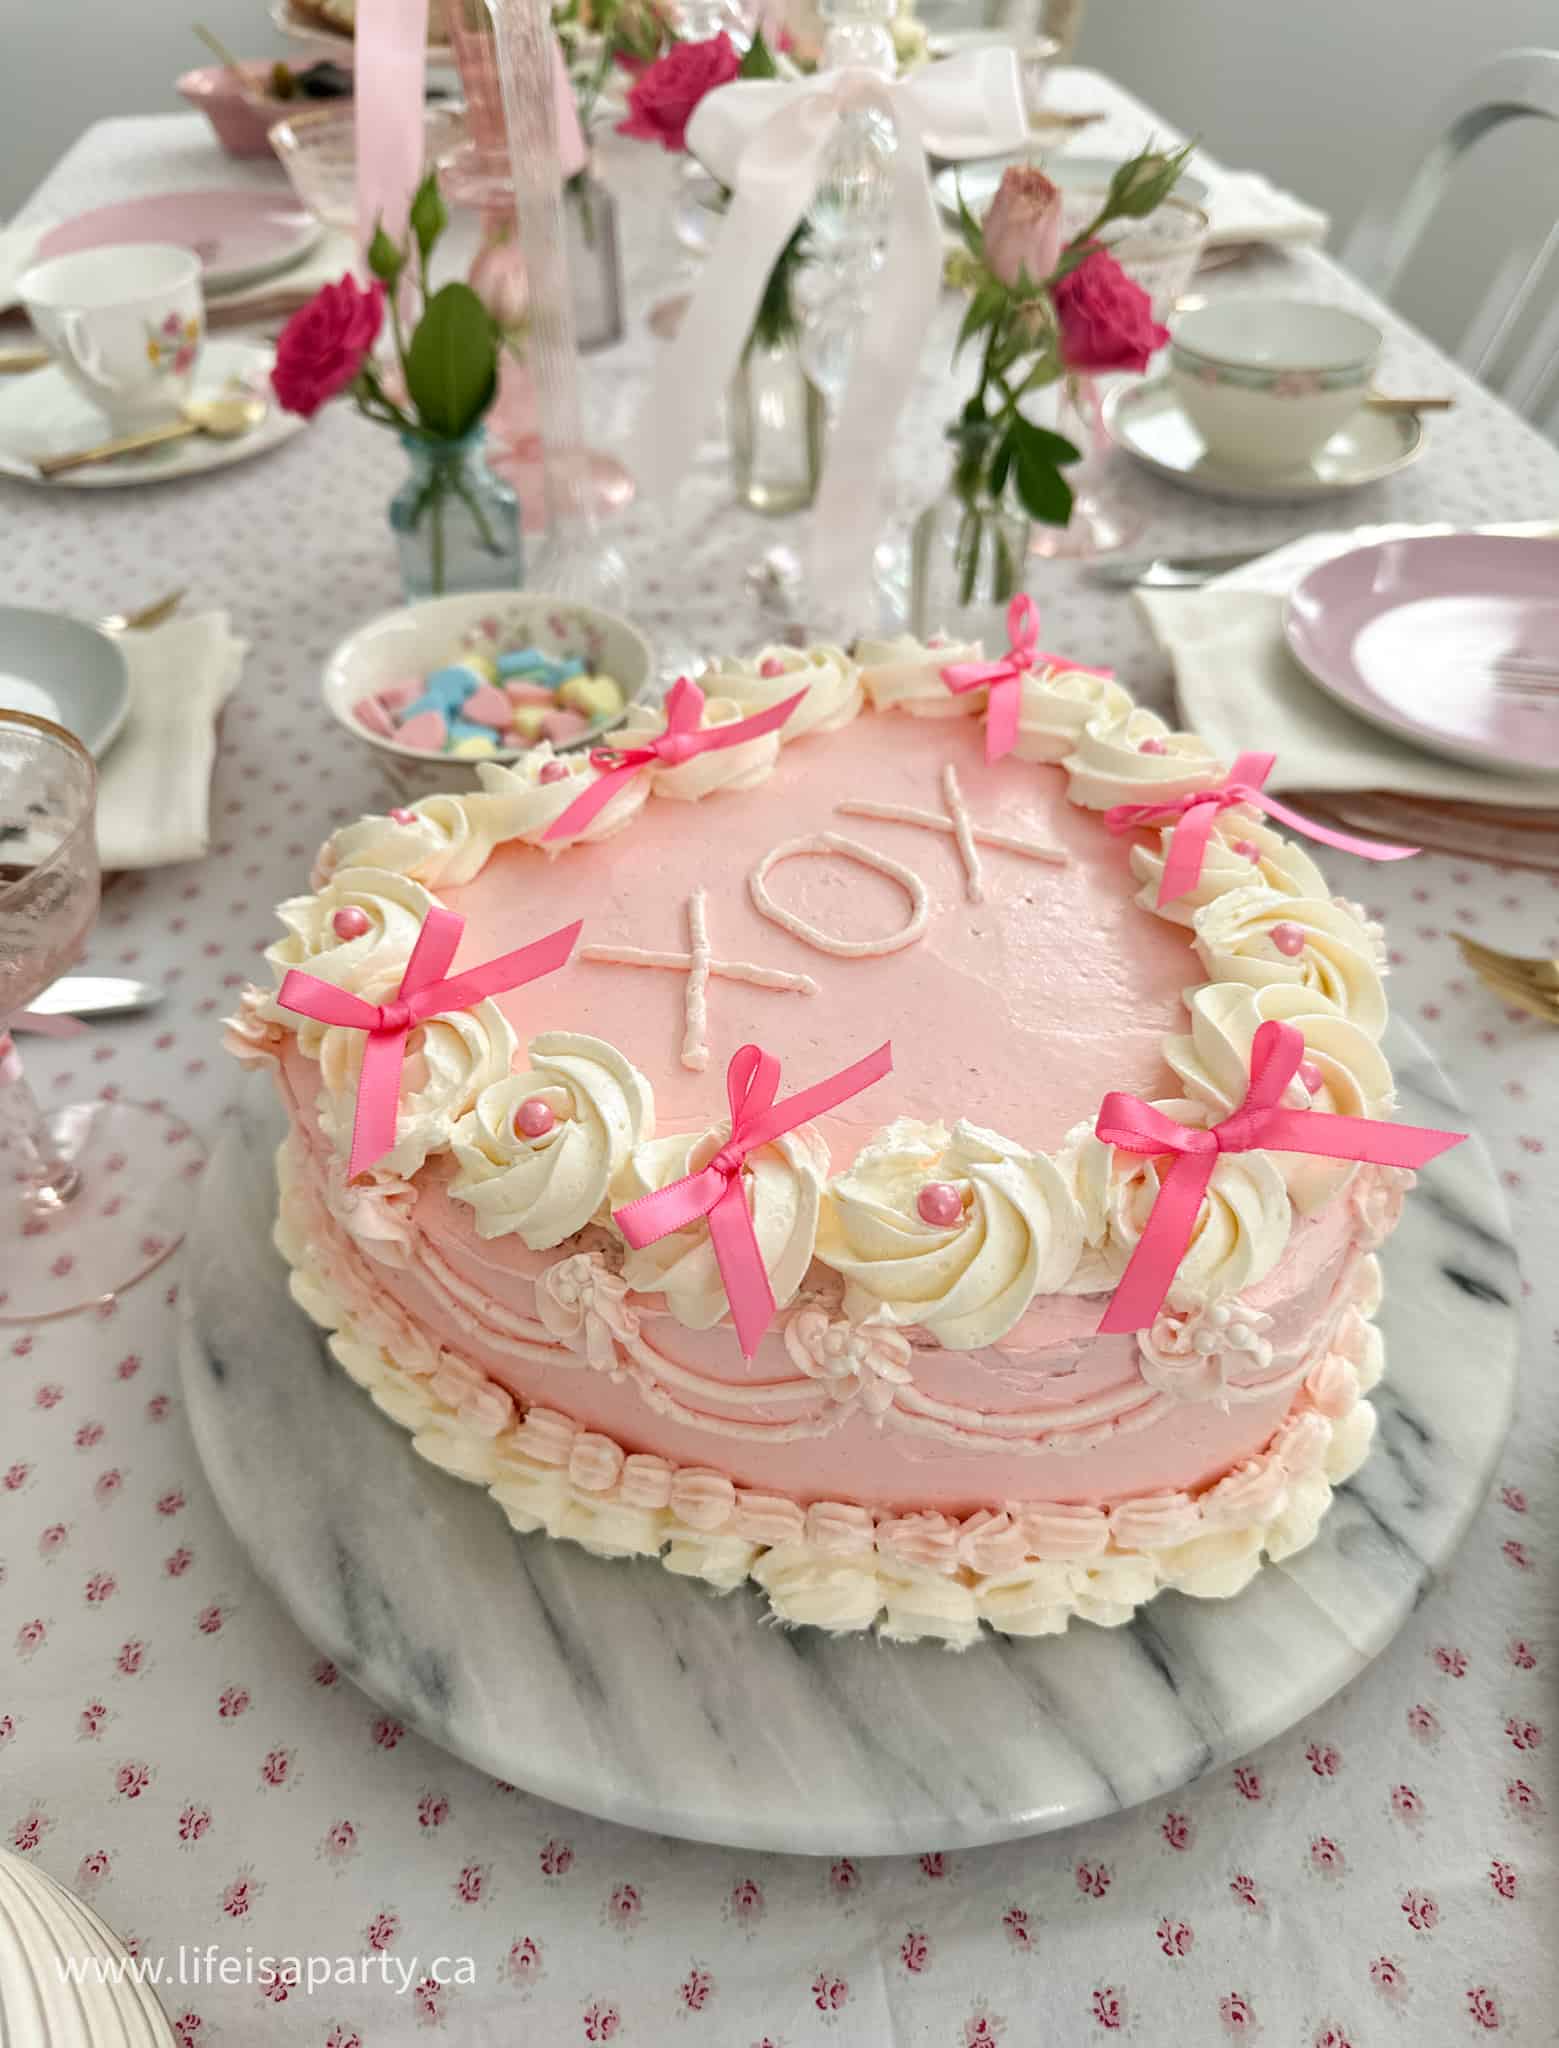
  • 🎀 Style: Pink and red, coquette aesthetic, bows and hearts  
  • 💕 Top Tip: Set the table and make sweets and sandwich fillings the day before.

Why You'll Love This Party

  • Lots of items can be made ahead.
  • Simple ingredients from your grocery store.
  • Perfect for Galentine's Day celebrations with friends, or mother-daughter bonding.
  • Coquette aesthetic with bows and vintage details is beautiful and on trend.
  • Works for small intimate gatherings or larger groups.
[feast_advanced_jump_to]

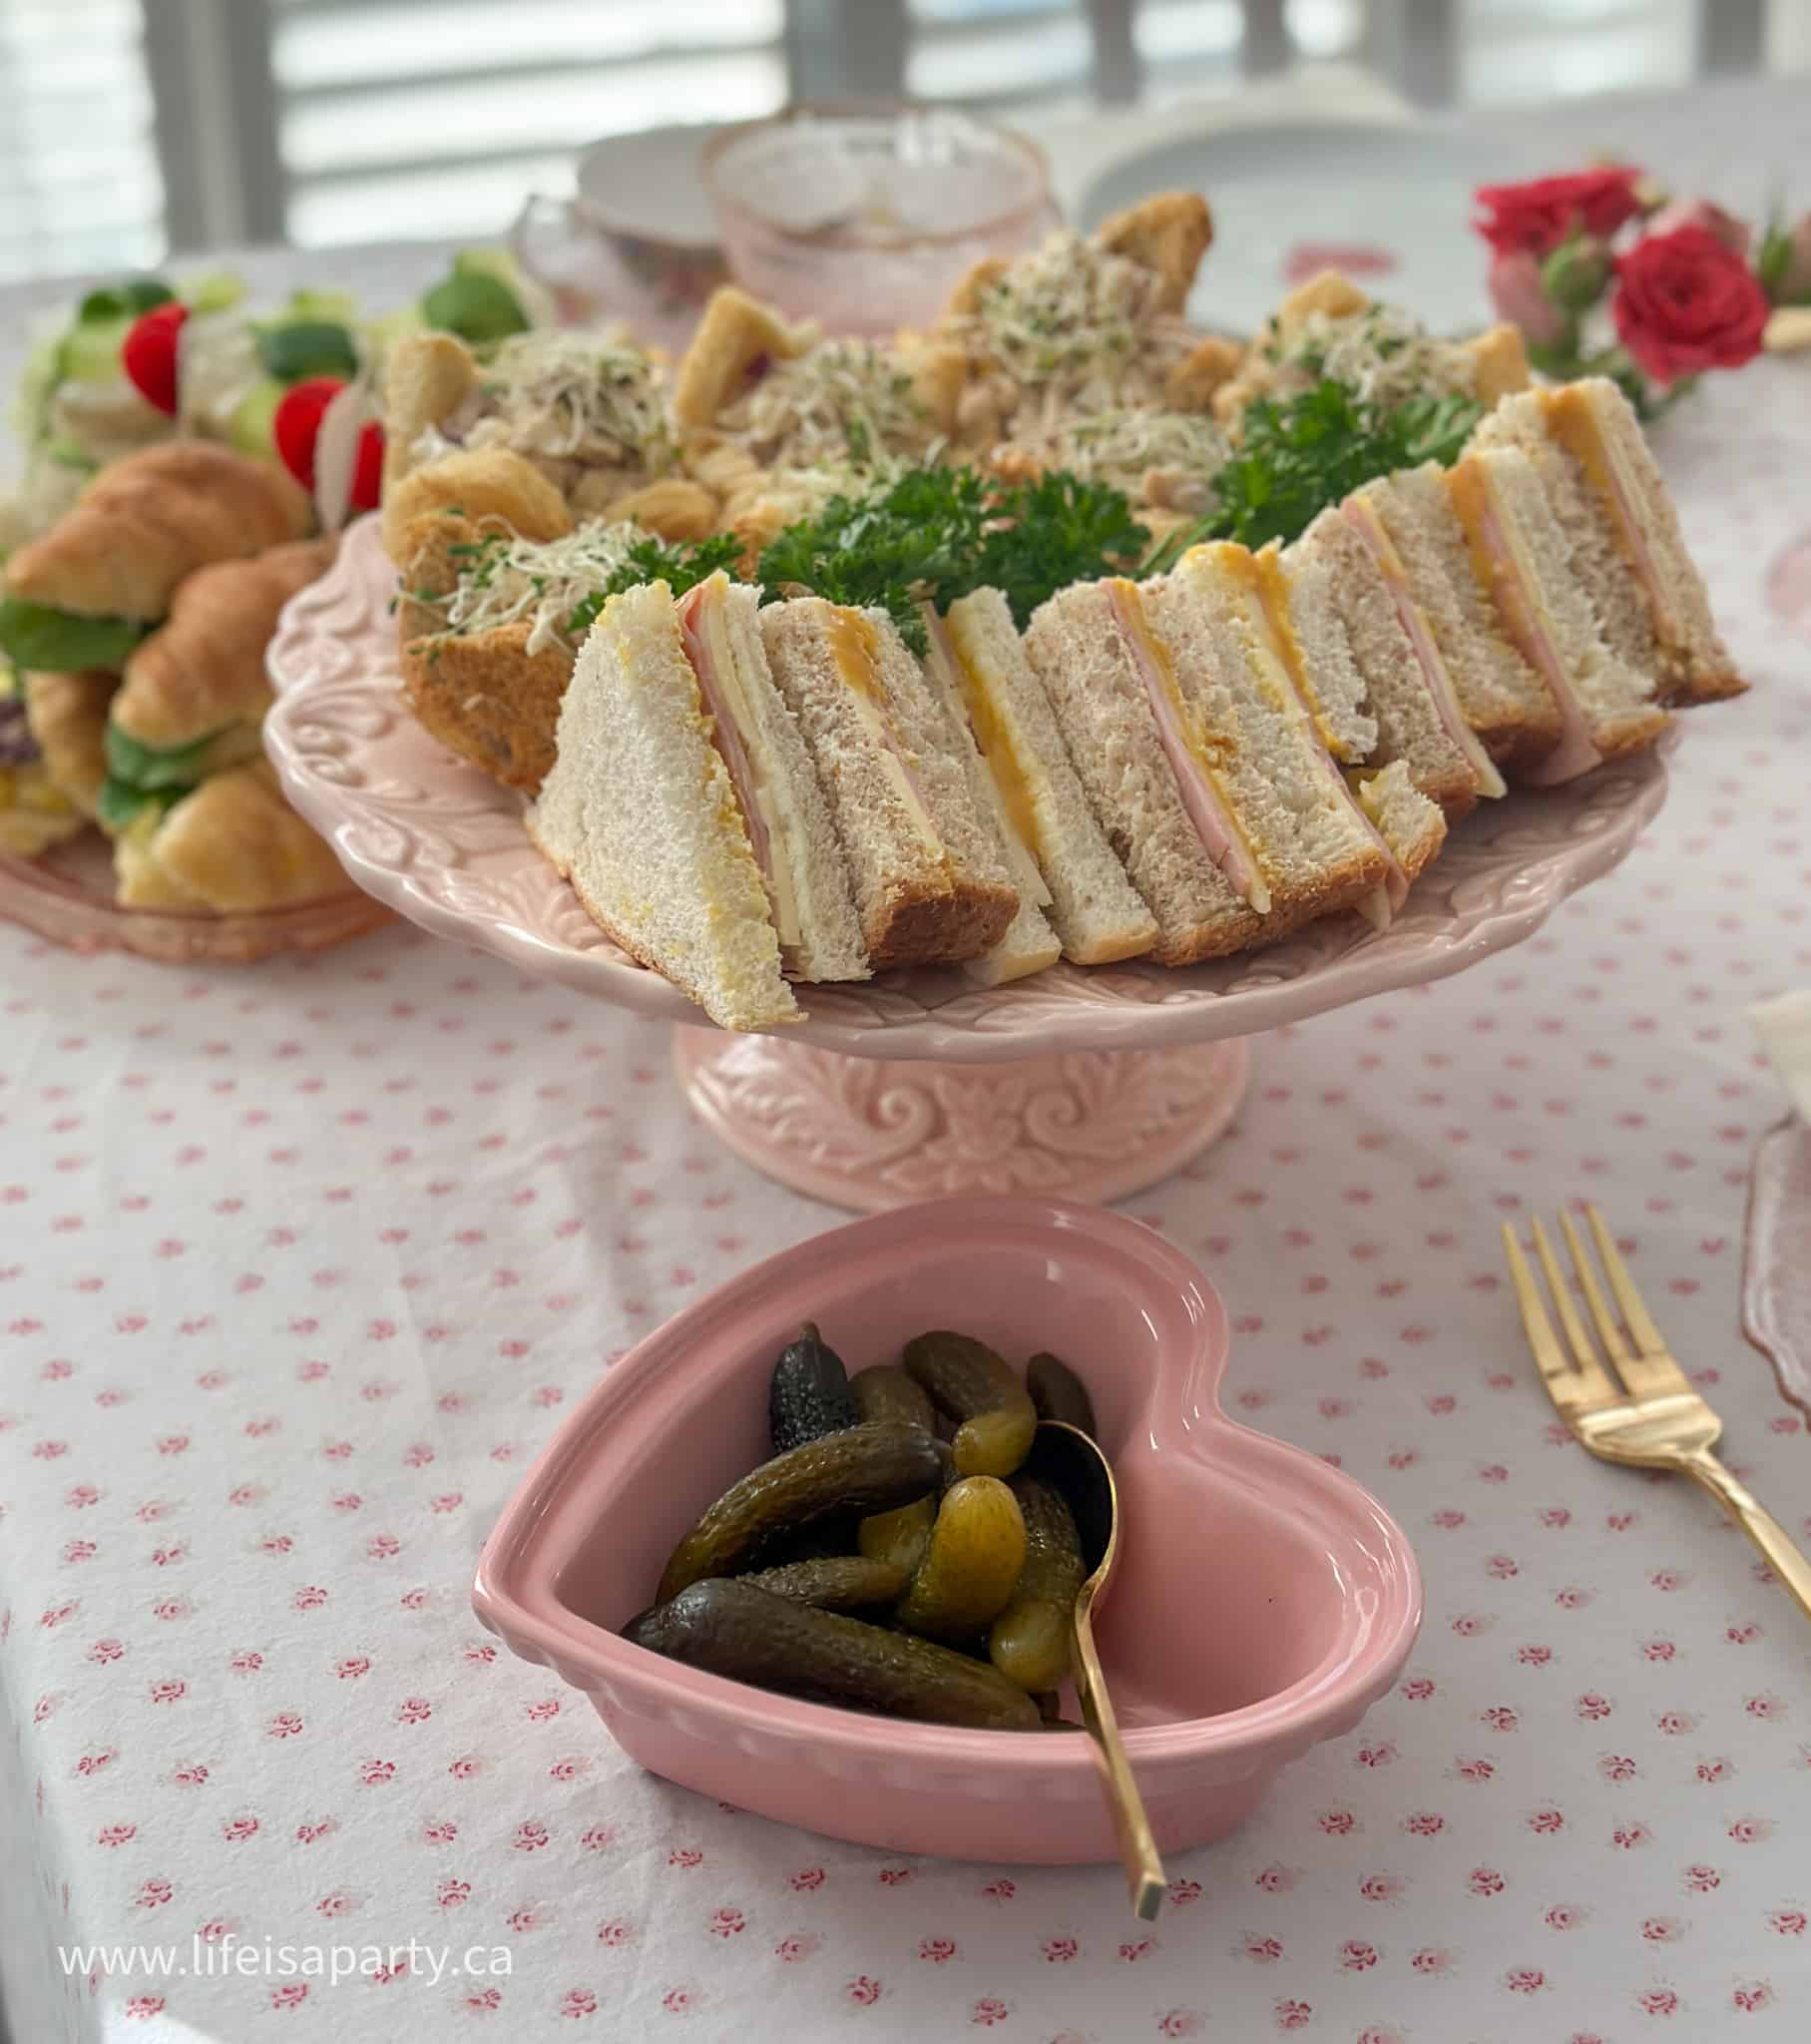
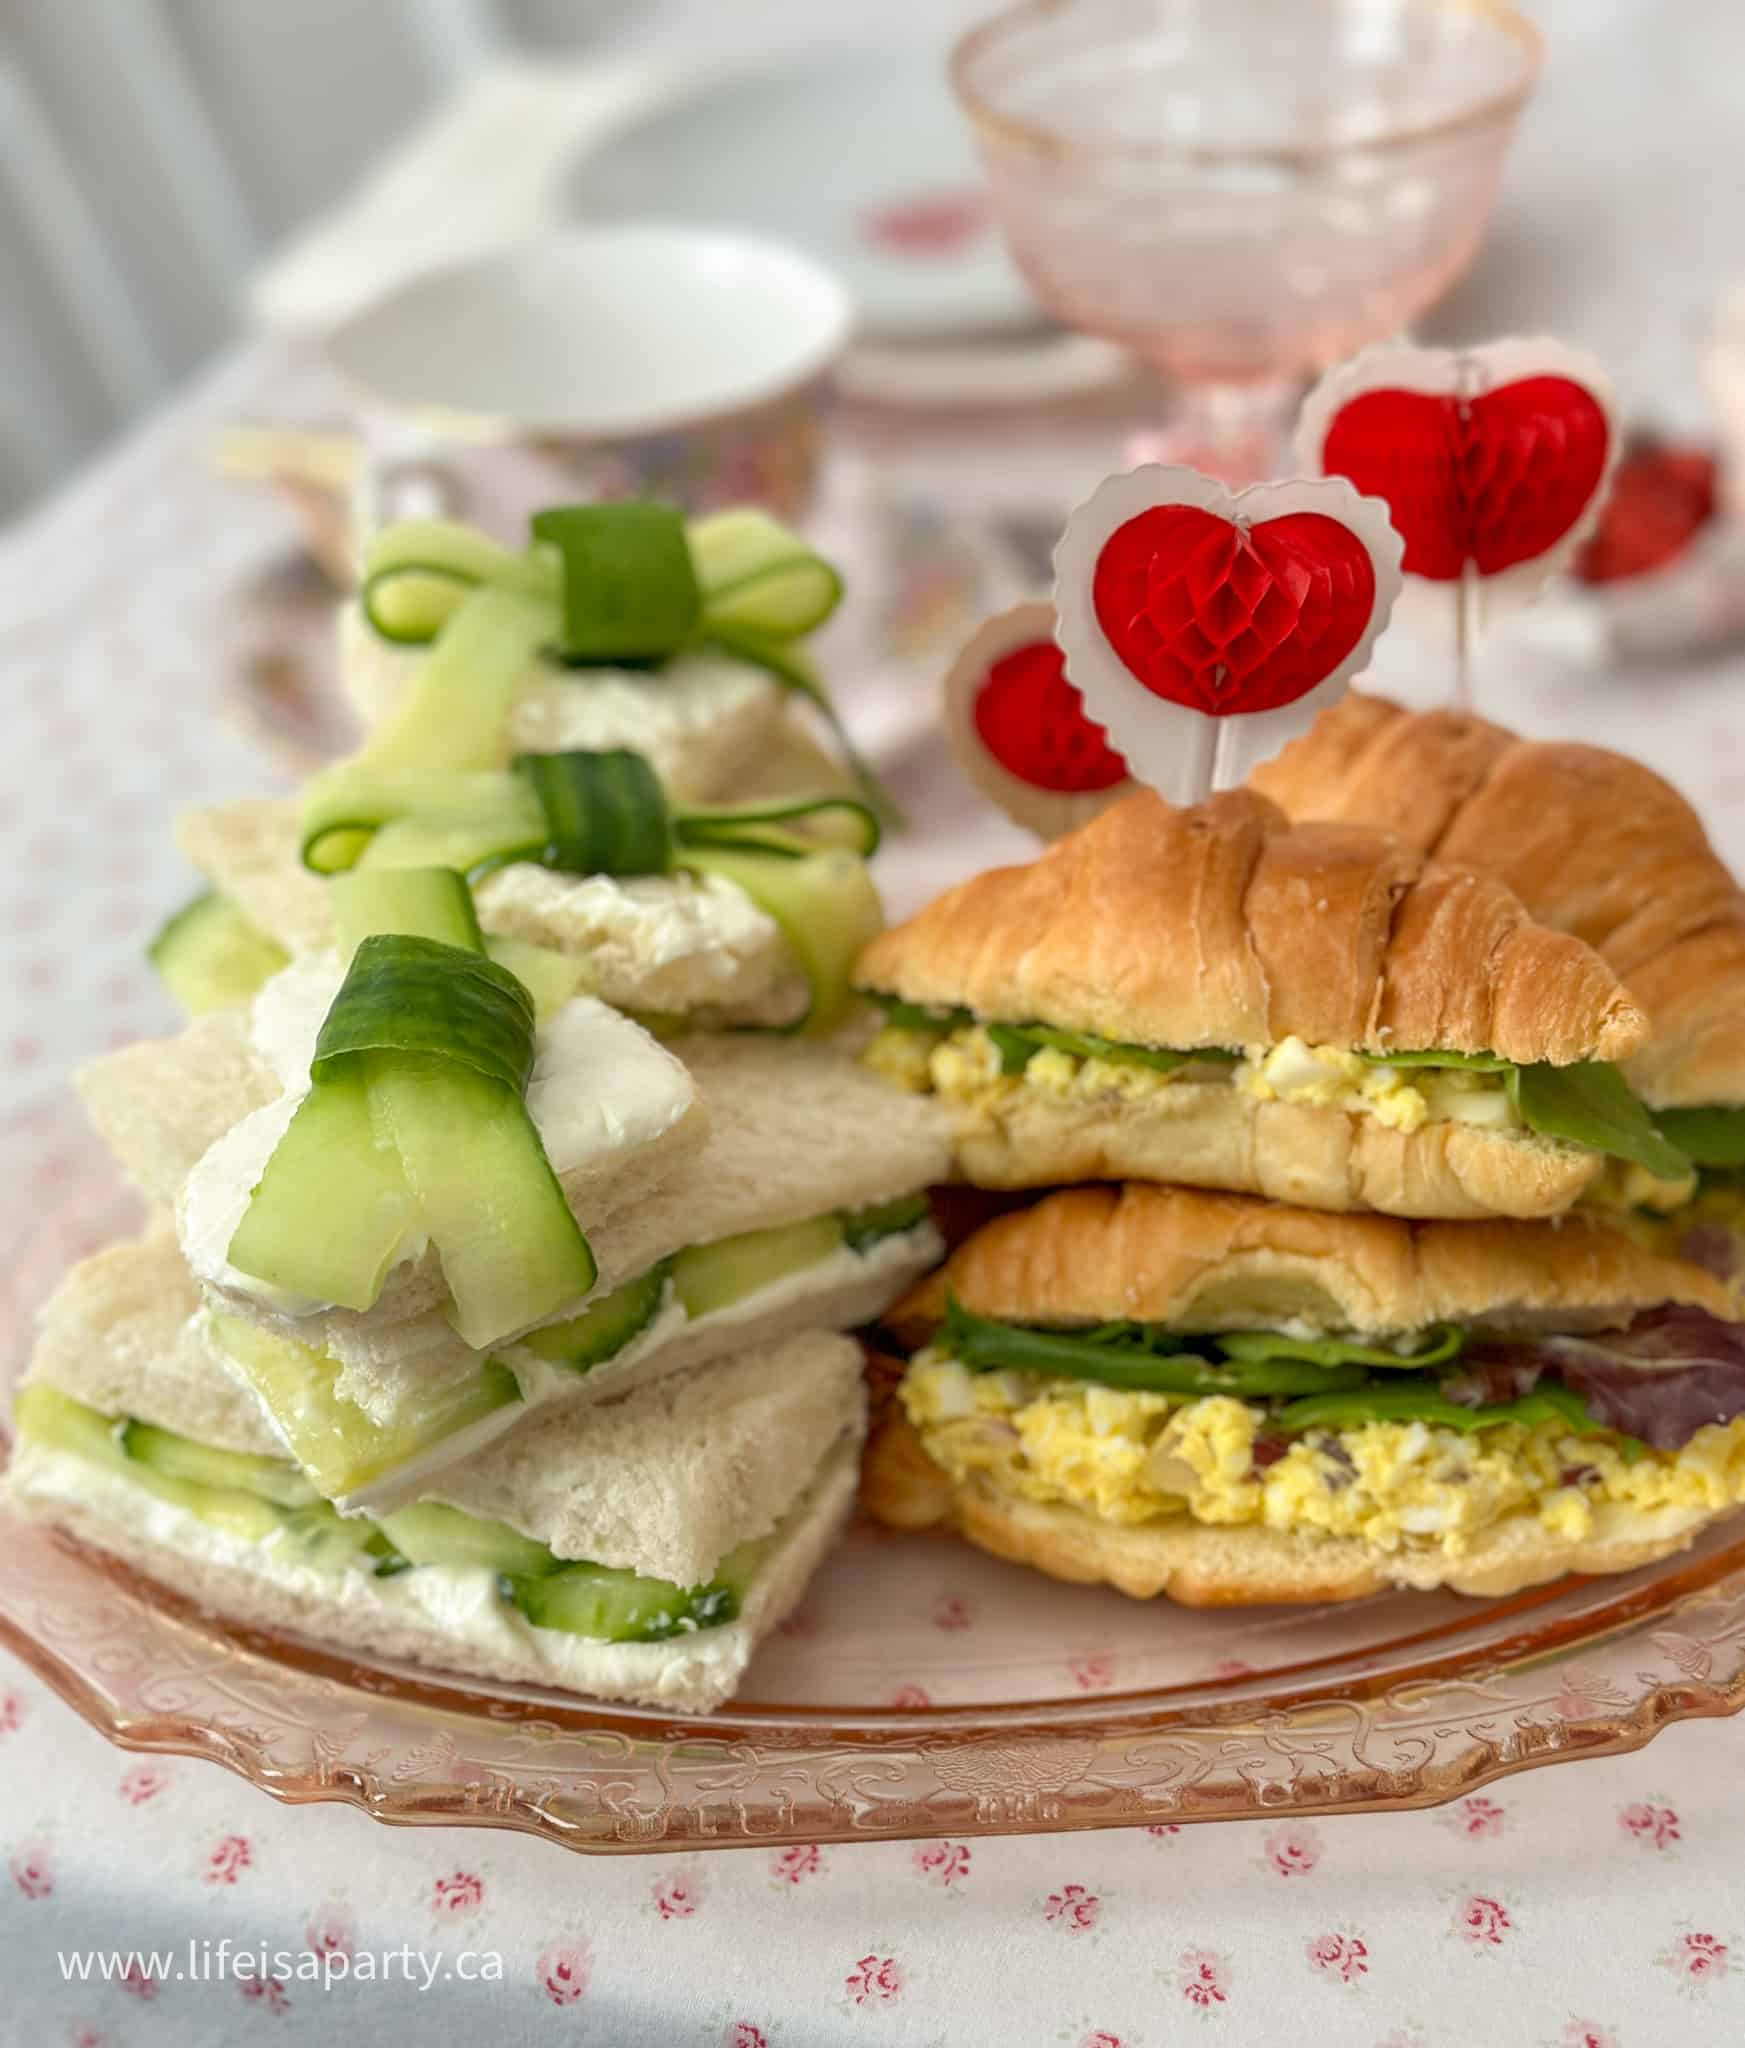
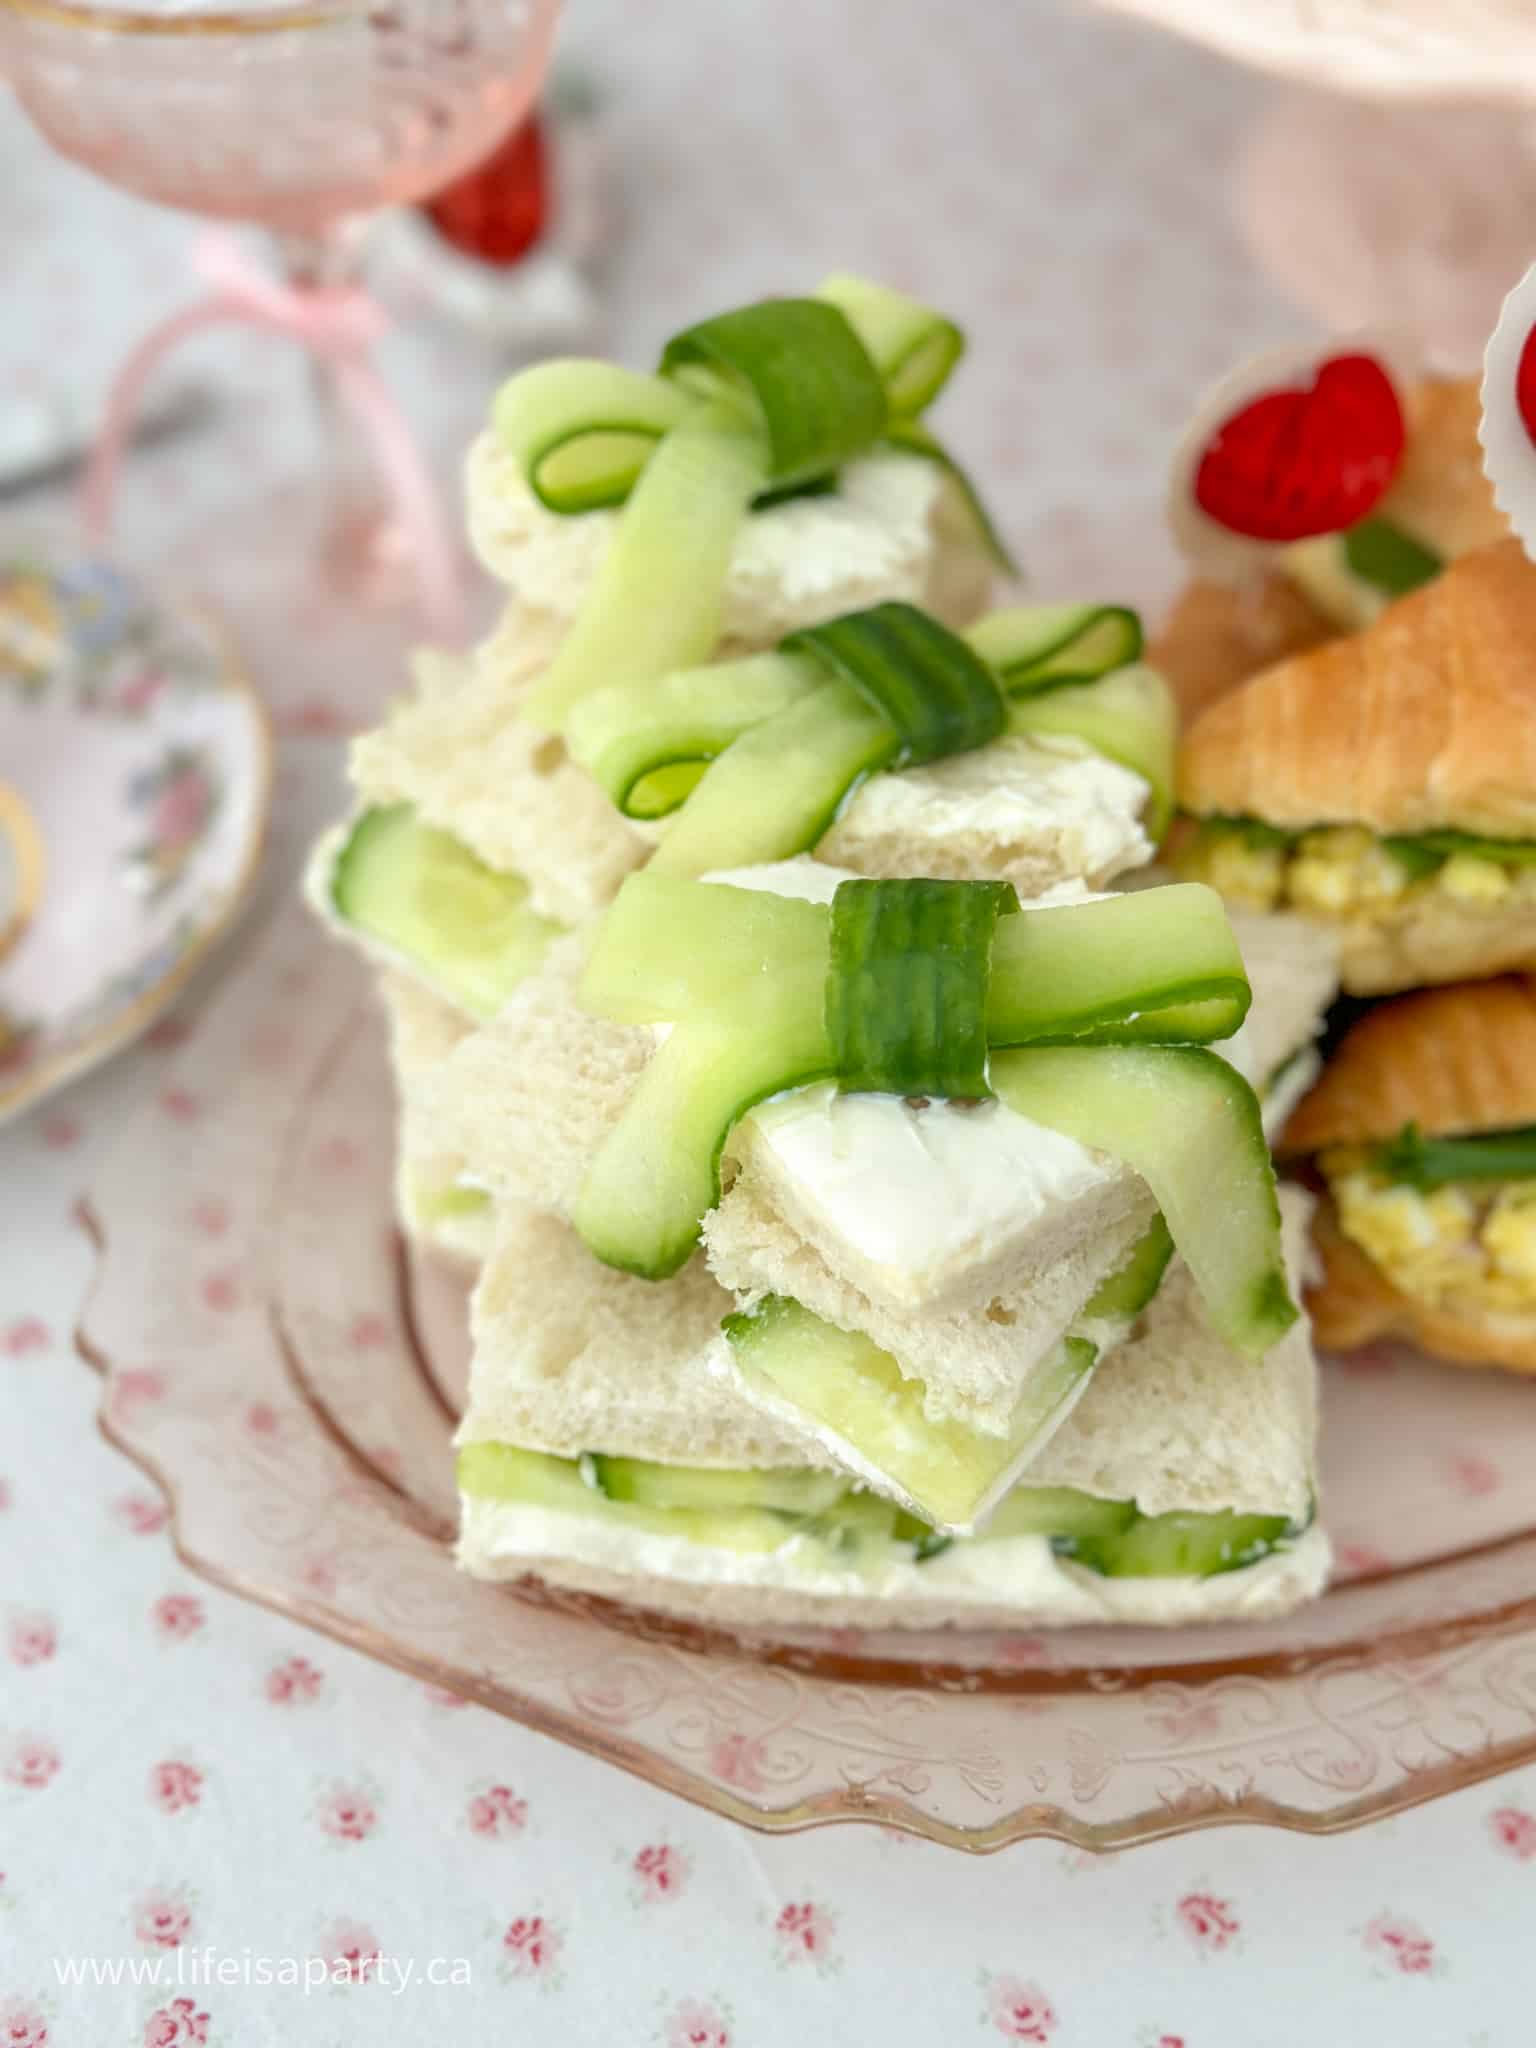
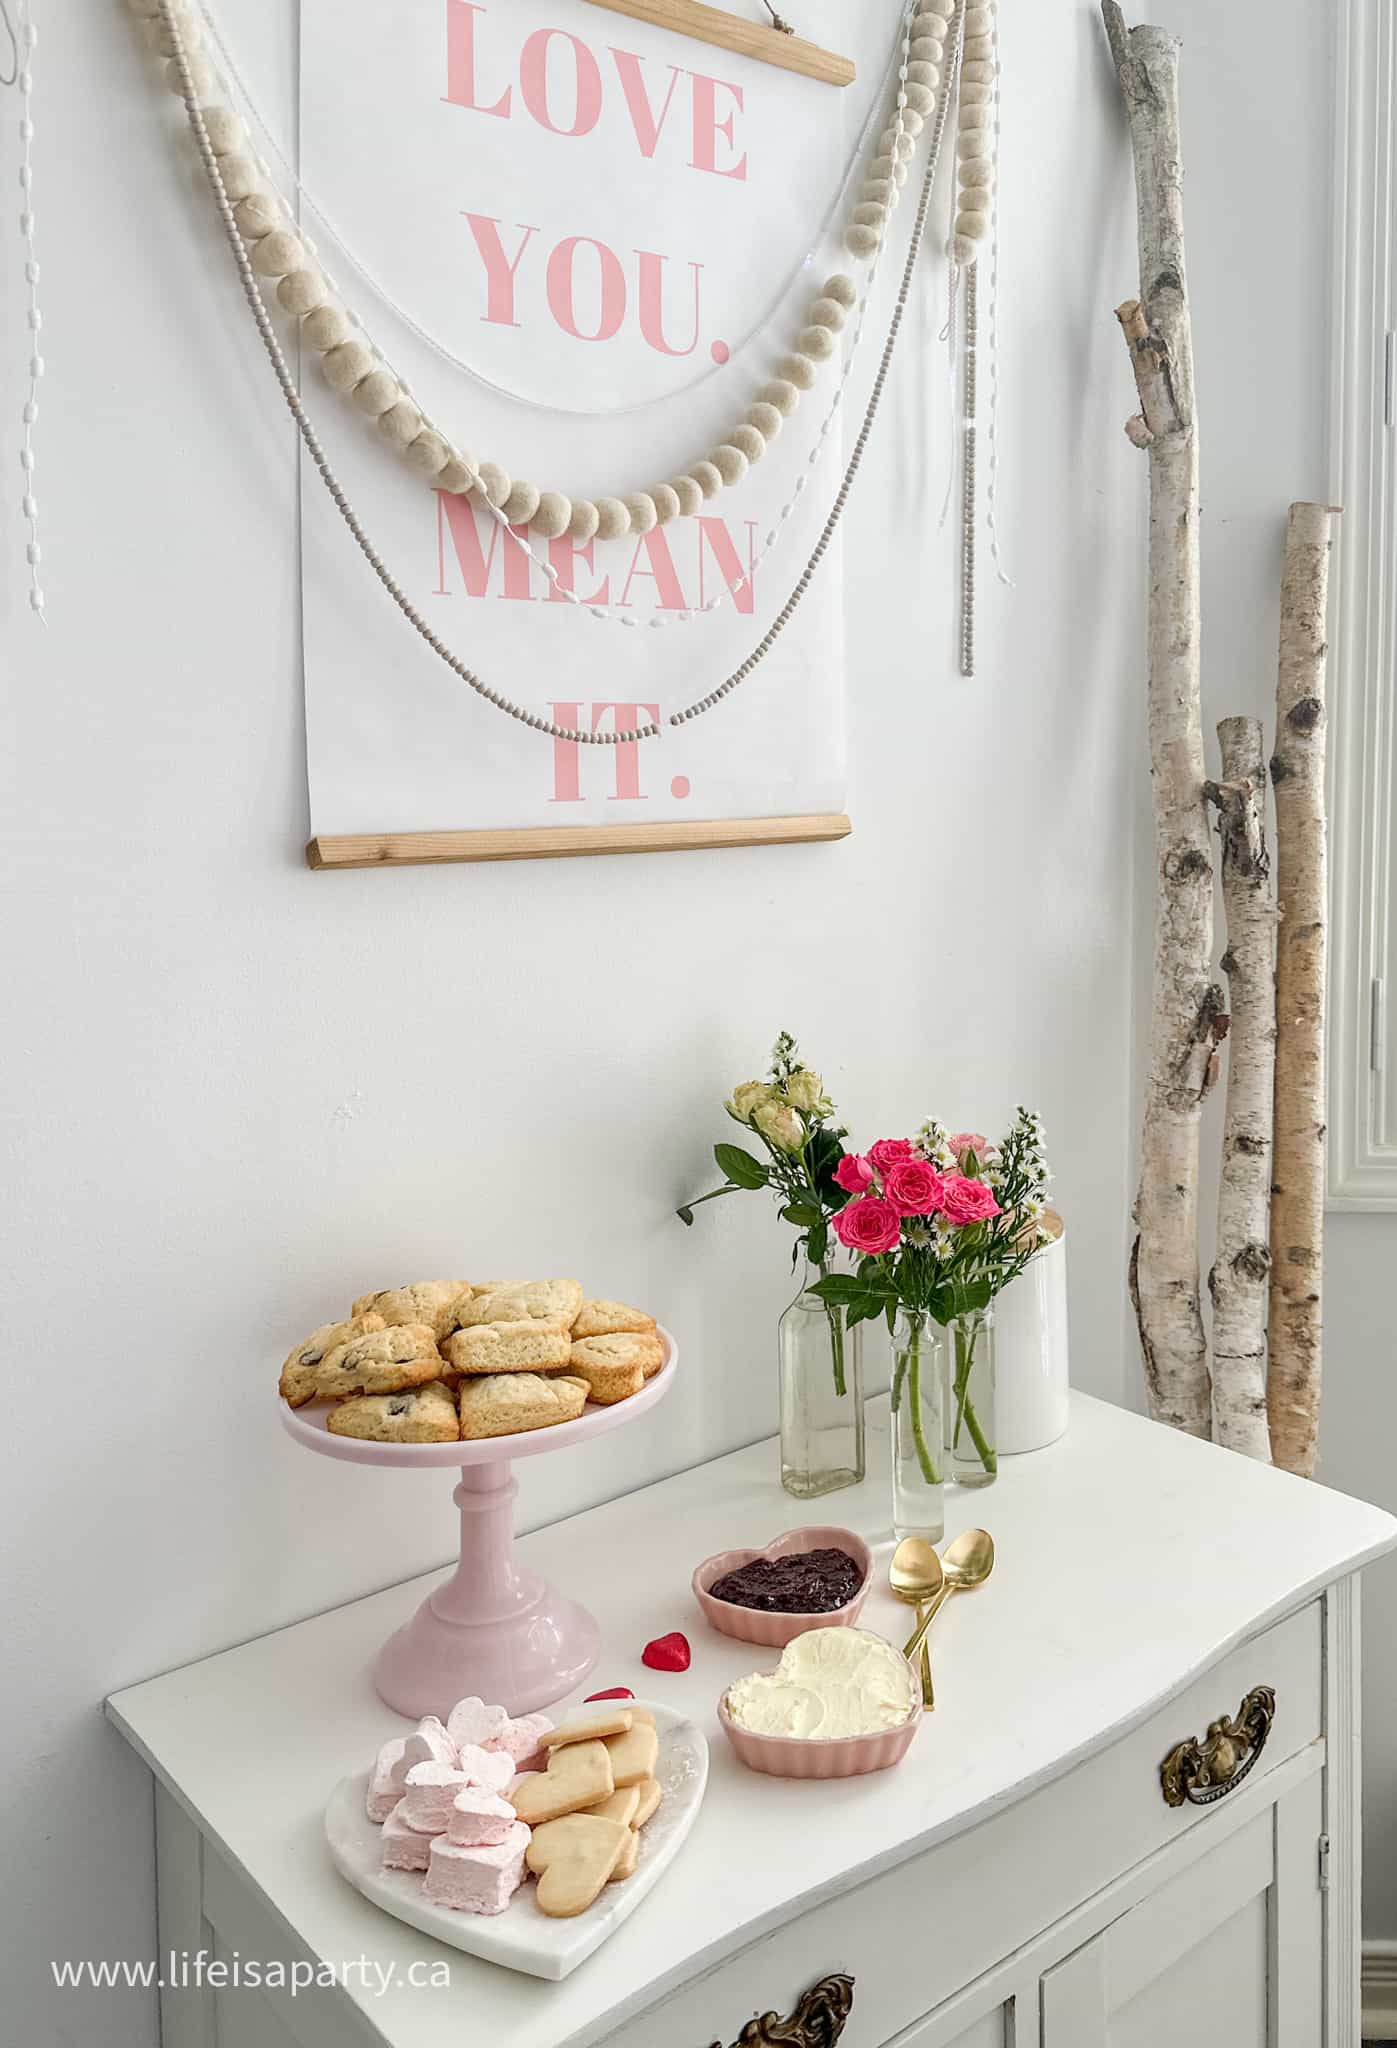
What could be more fun than a Valentine's Day tea party?  

I invited some of my besties over for an afternoon of sipping tea, and eating treats and we had the best time.  This is such a great girlie idea to do with your gal pals for celebrating love day this Feburary.  But tea parties are also fun for the whole family, and grandparents particularly love them.  It would also be a great way to surprise your partner.  

If you're looking for more Valentine's Day entertaining ideas, check out our Valentine's Day Breakfast Ideas and Valentine Breakfast Board for a morning celebration, Heart Shaped Hamburgers for a fun dinner, or our Valentine's Day Pizza Party for kid-friendly festivities. And our 20 At Home Valentine's Day Ideas. And if you love tea parties as much as I do, don't miss our How to Throw an Afternoon Tea Party for Adults for more hosting tips, and our Winter Tea Party.

how to host a Valentine's Day tea party

The Tea Party Decor

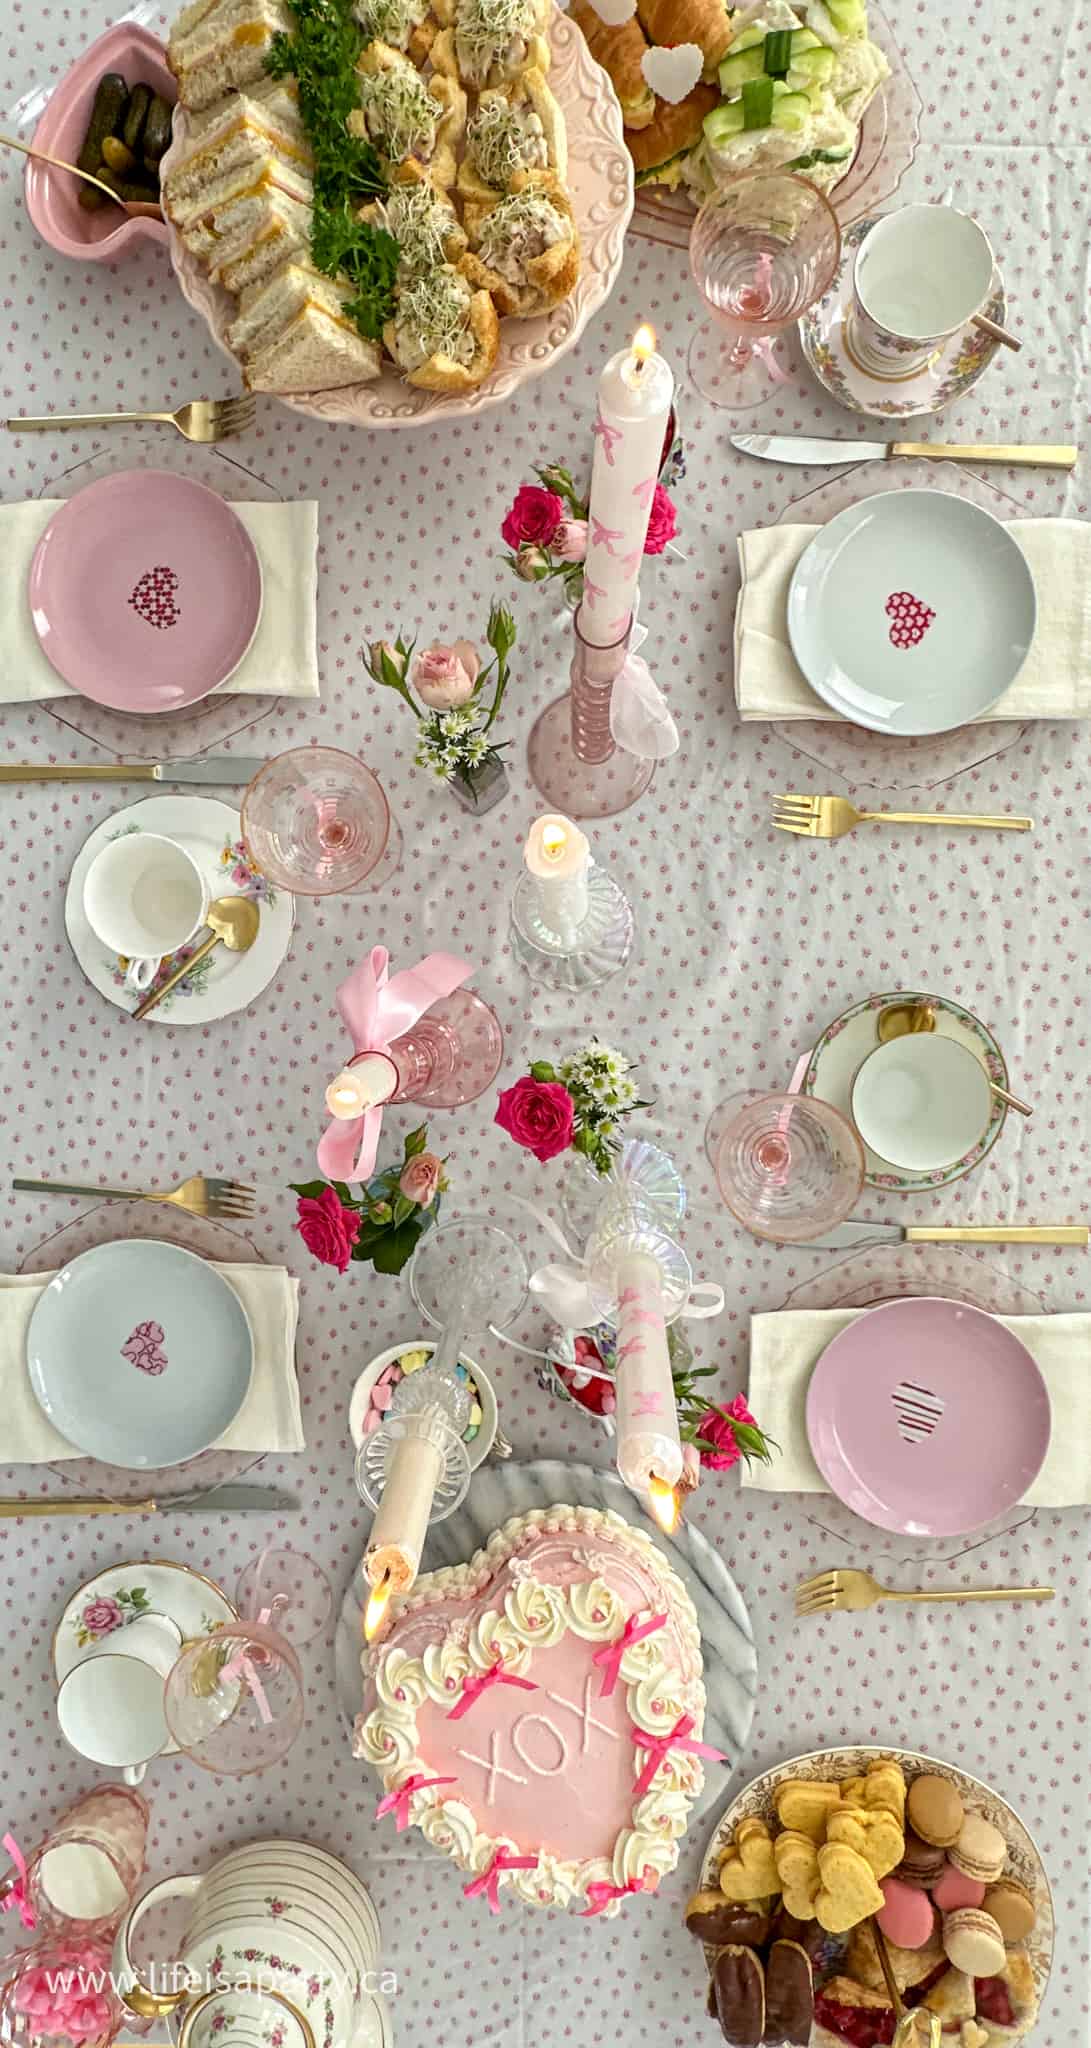
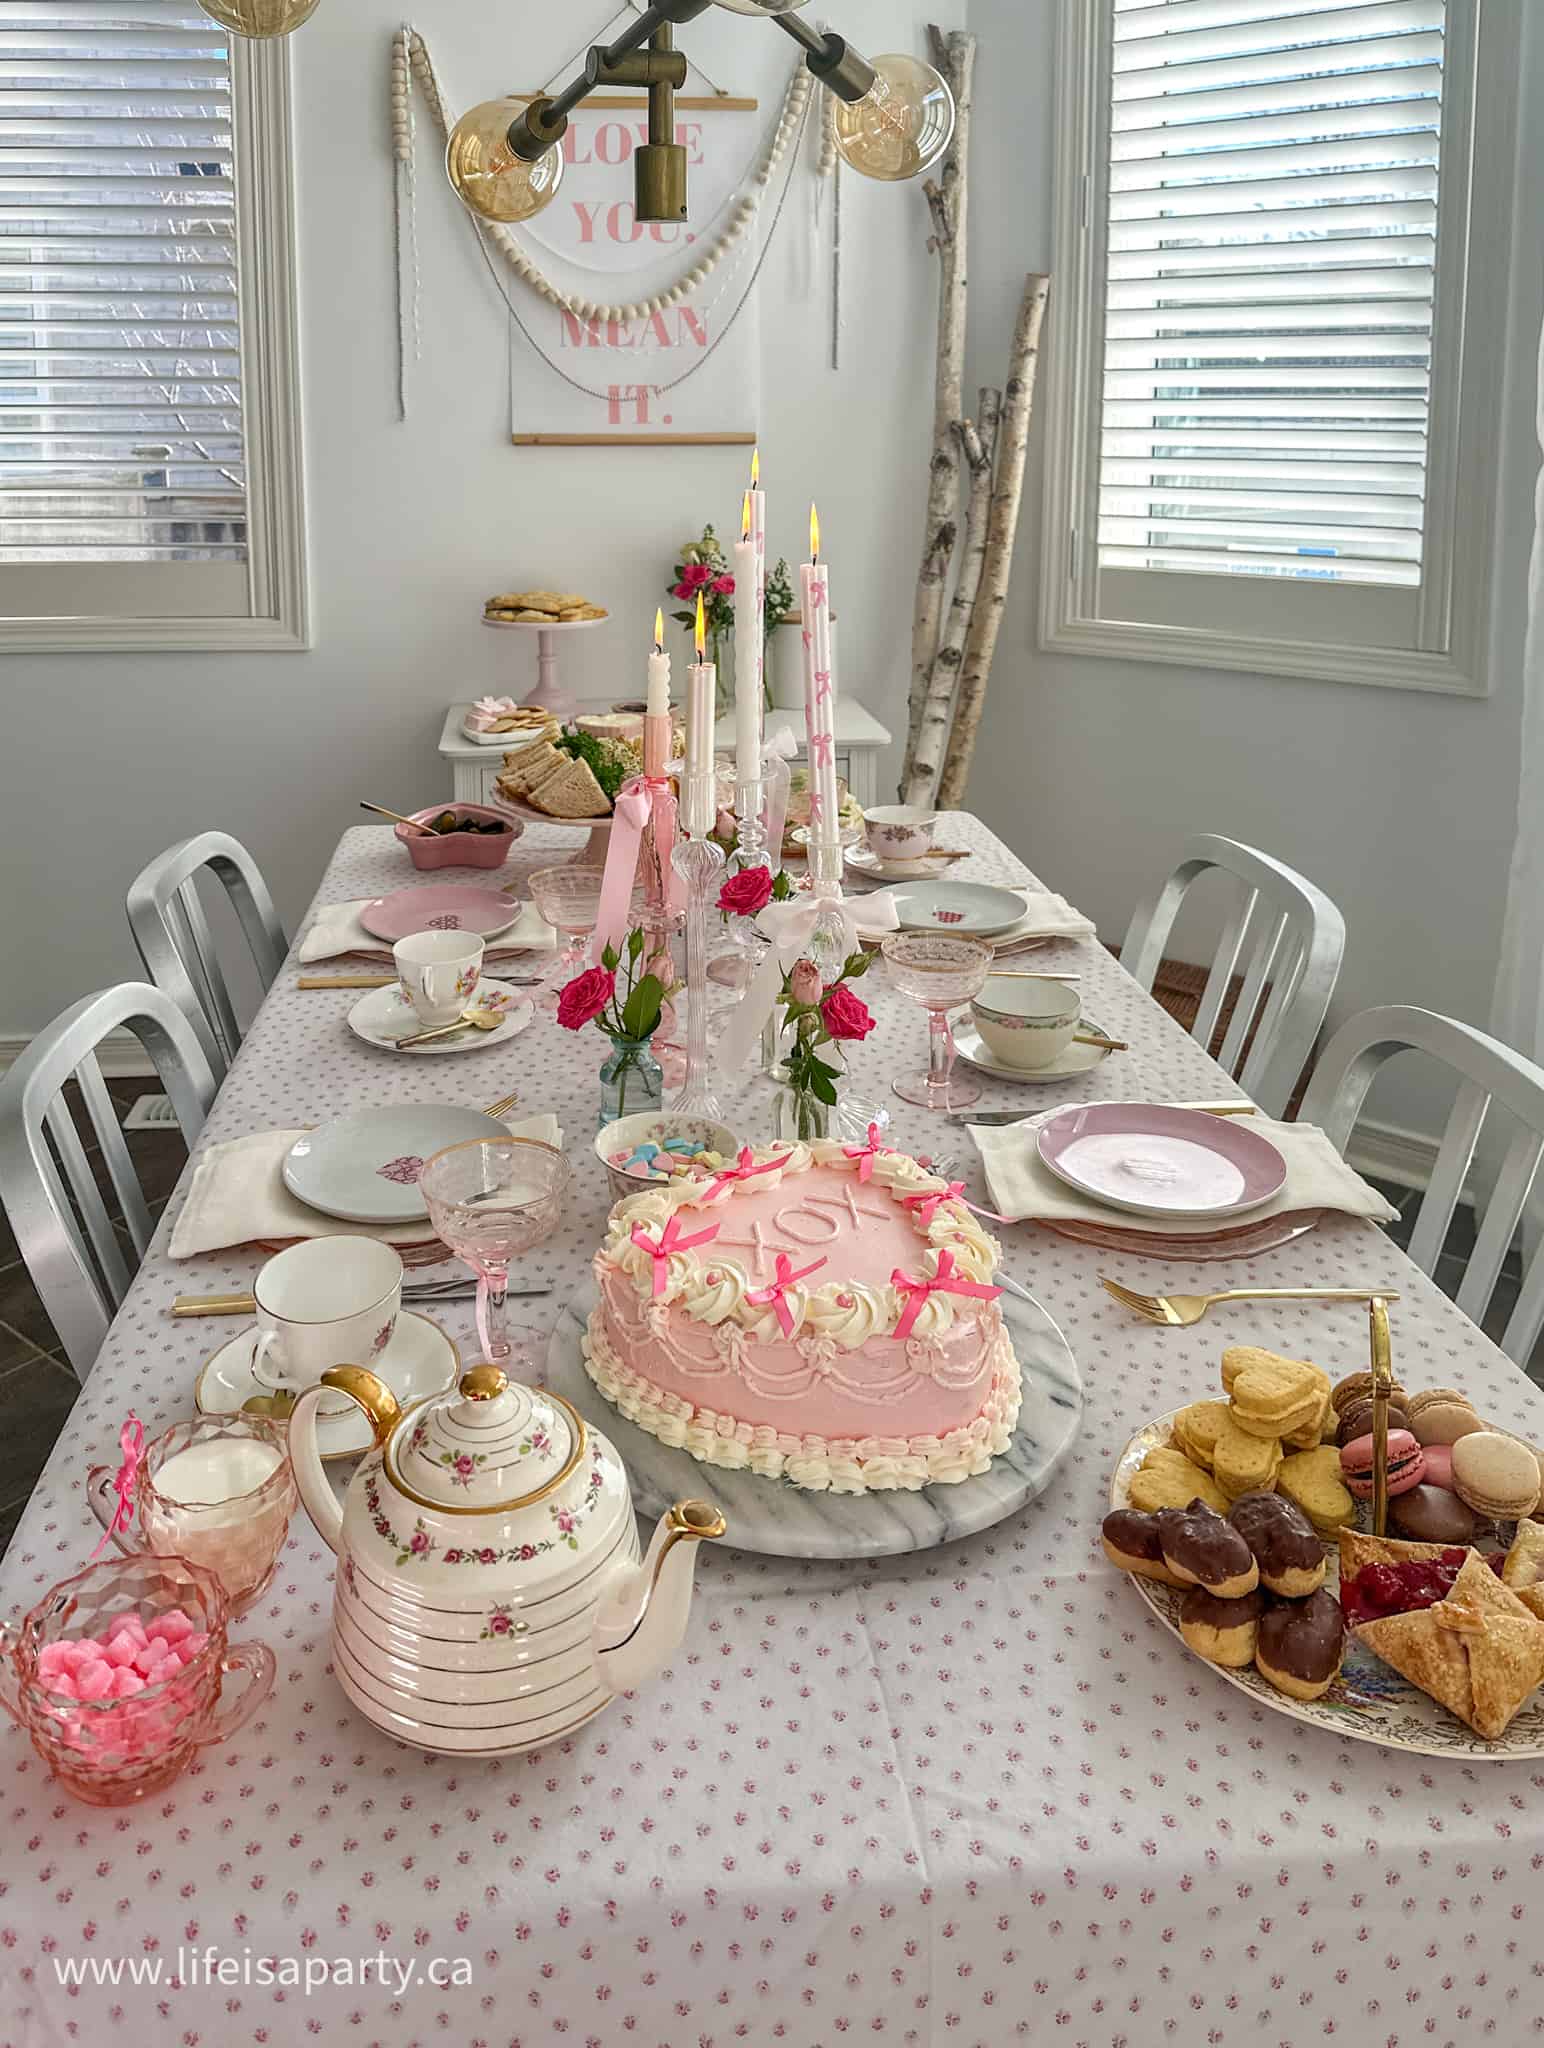
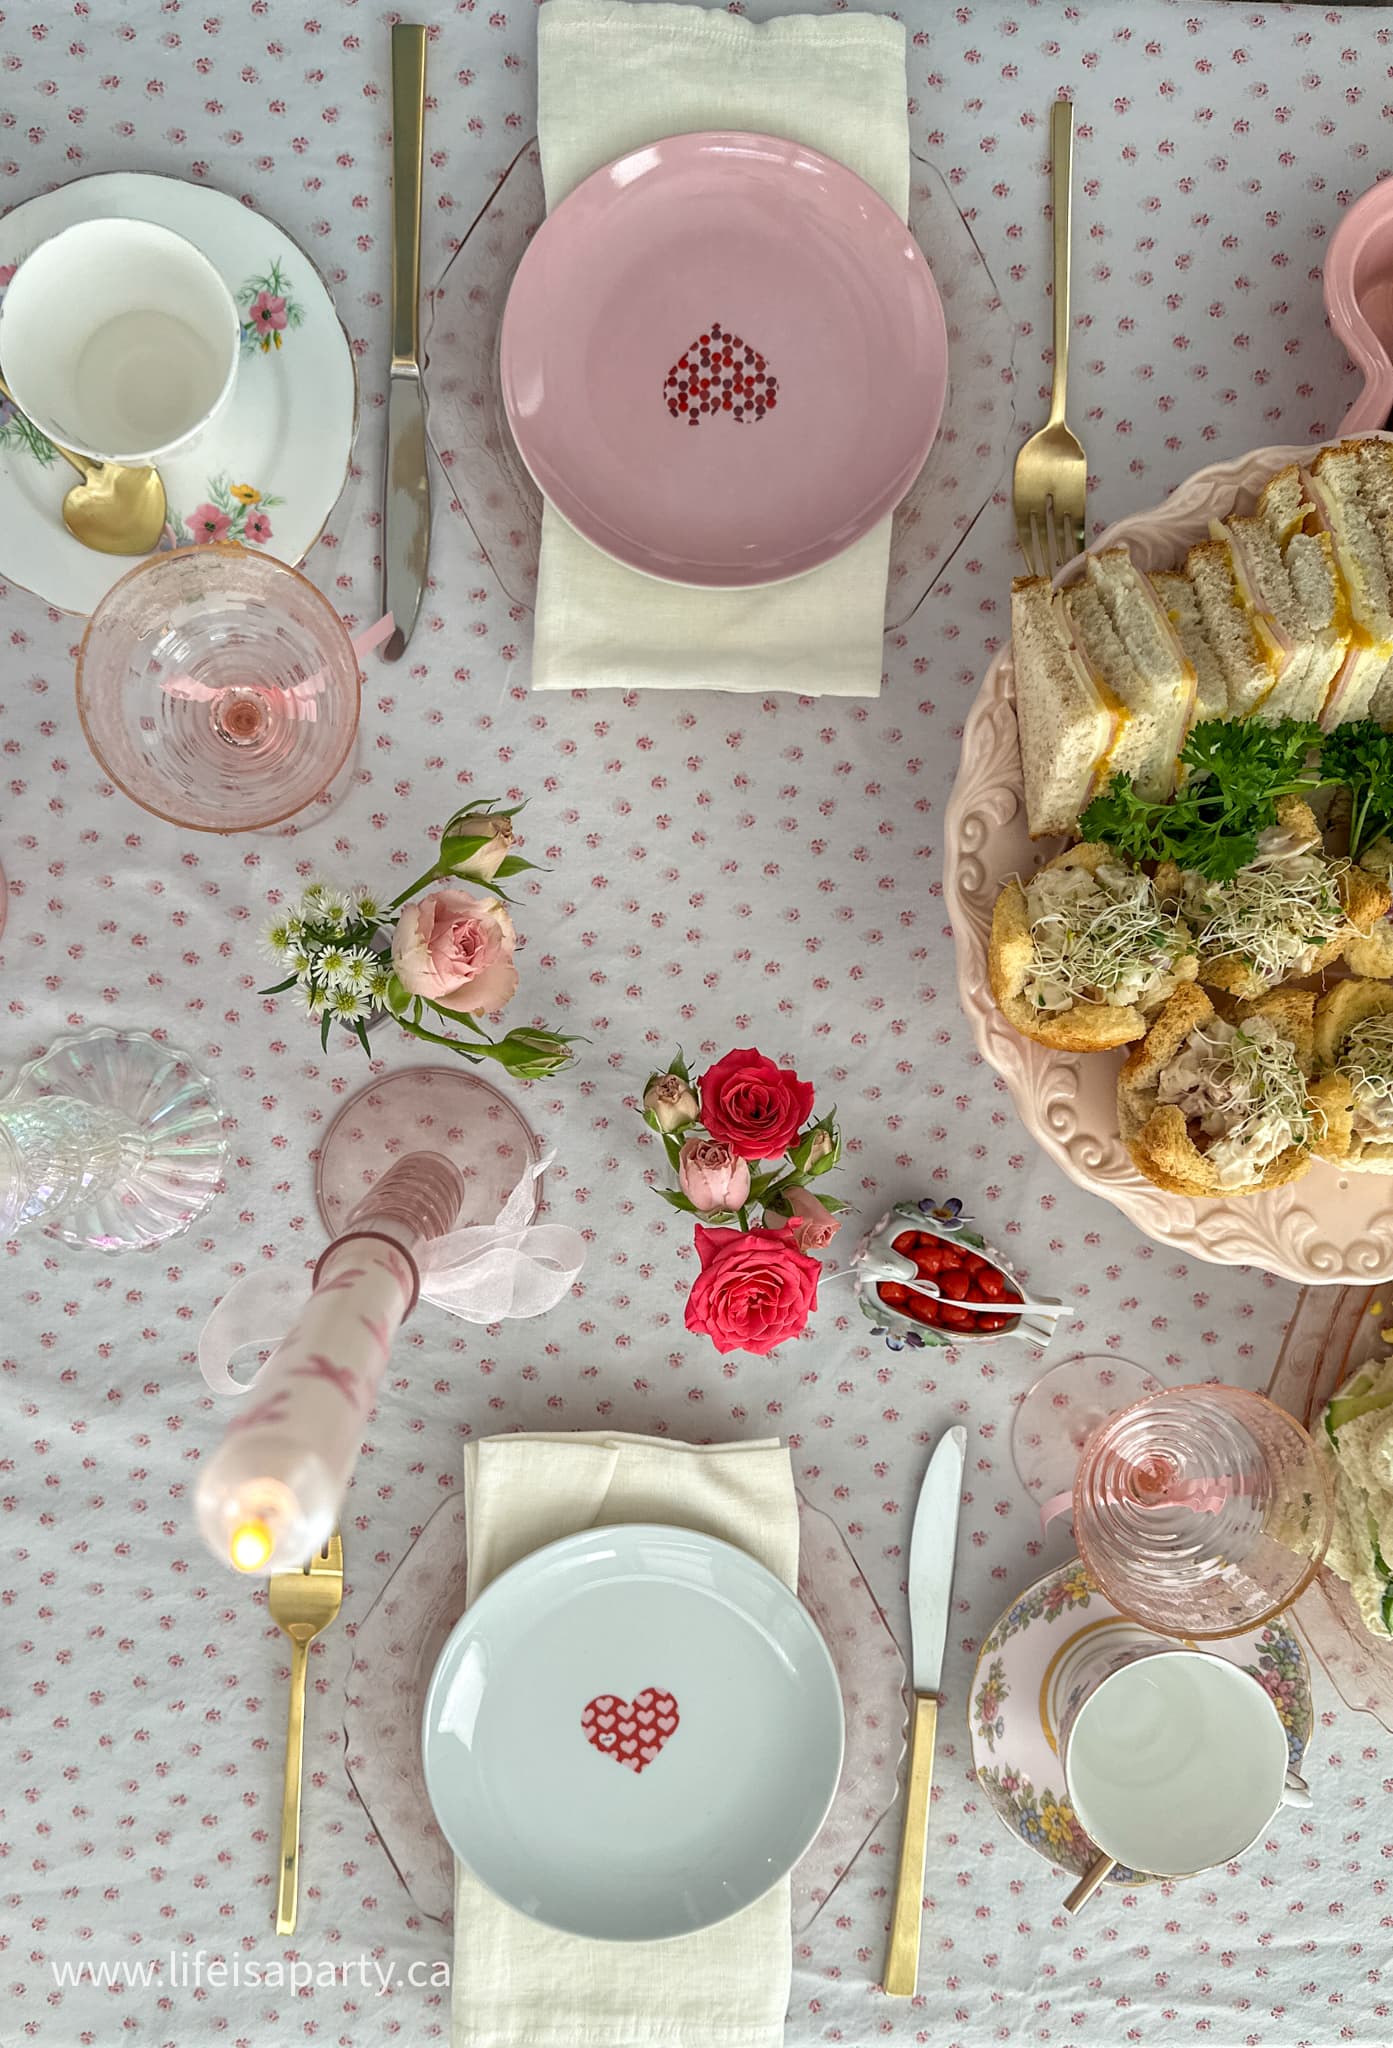
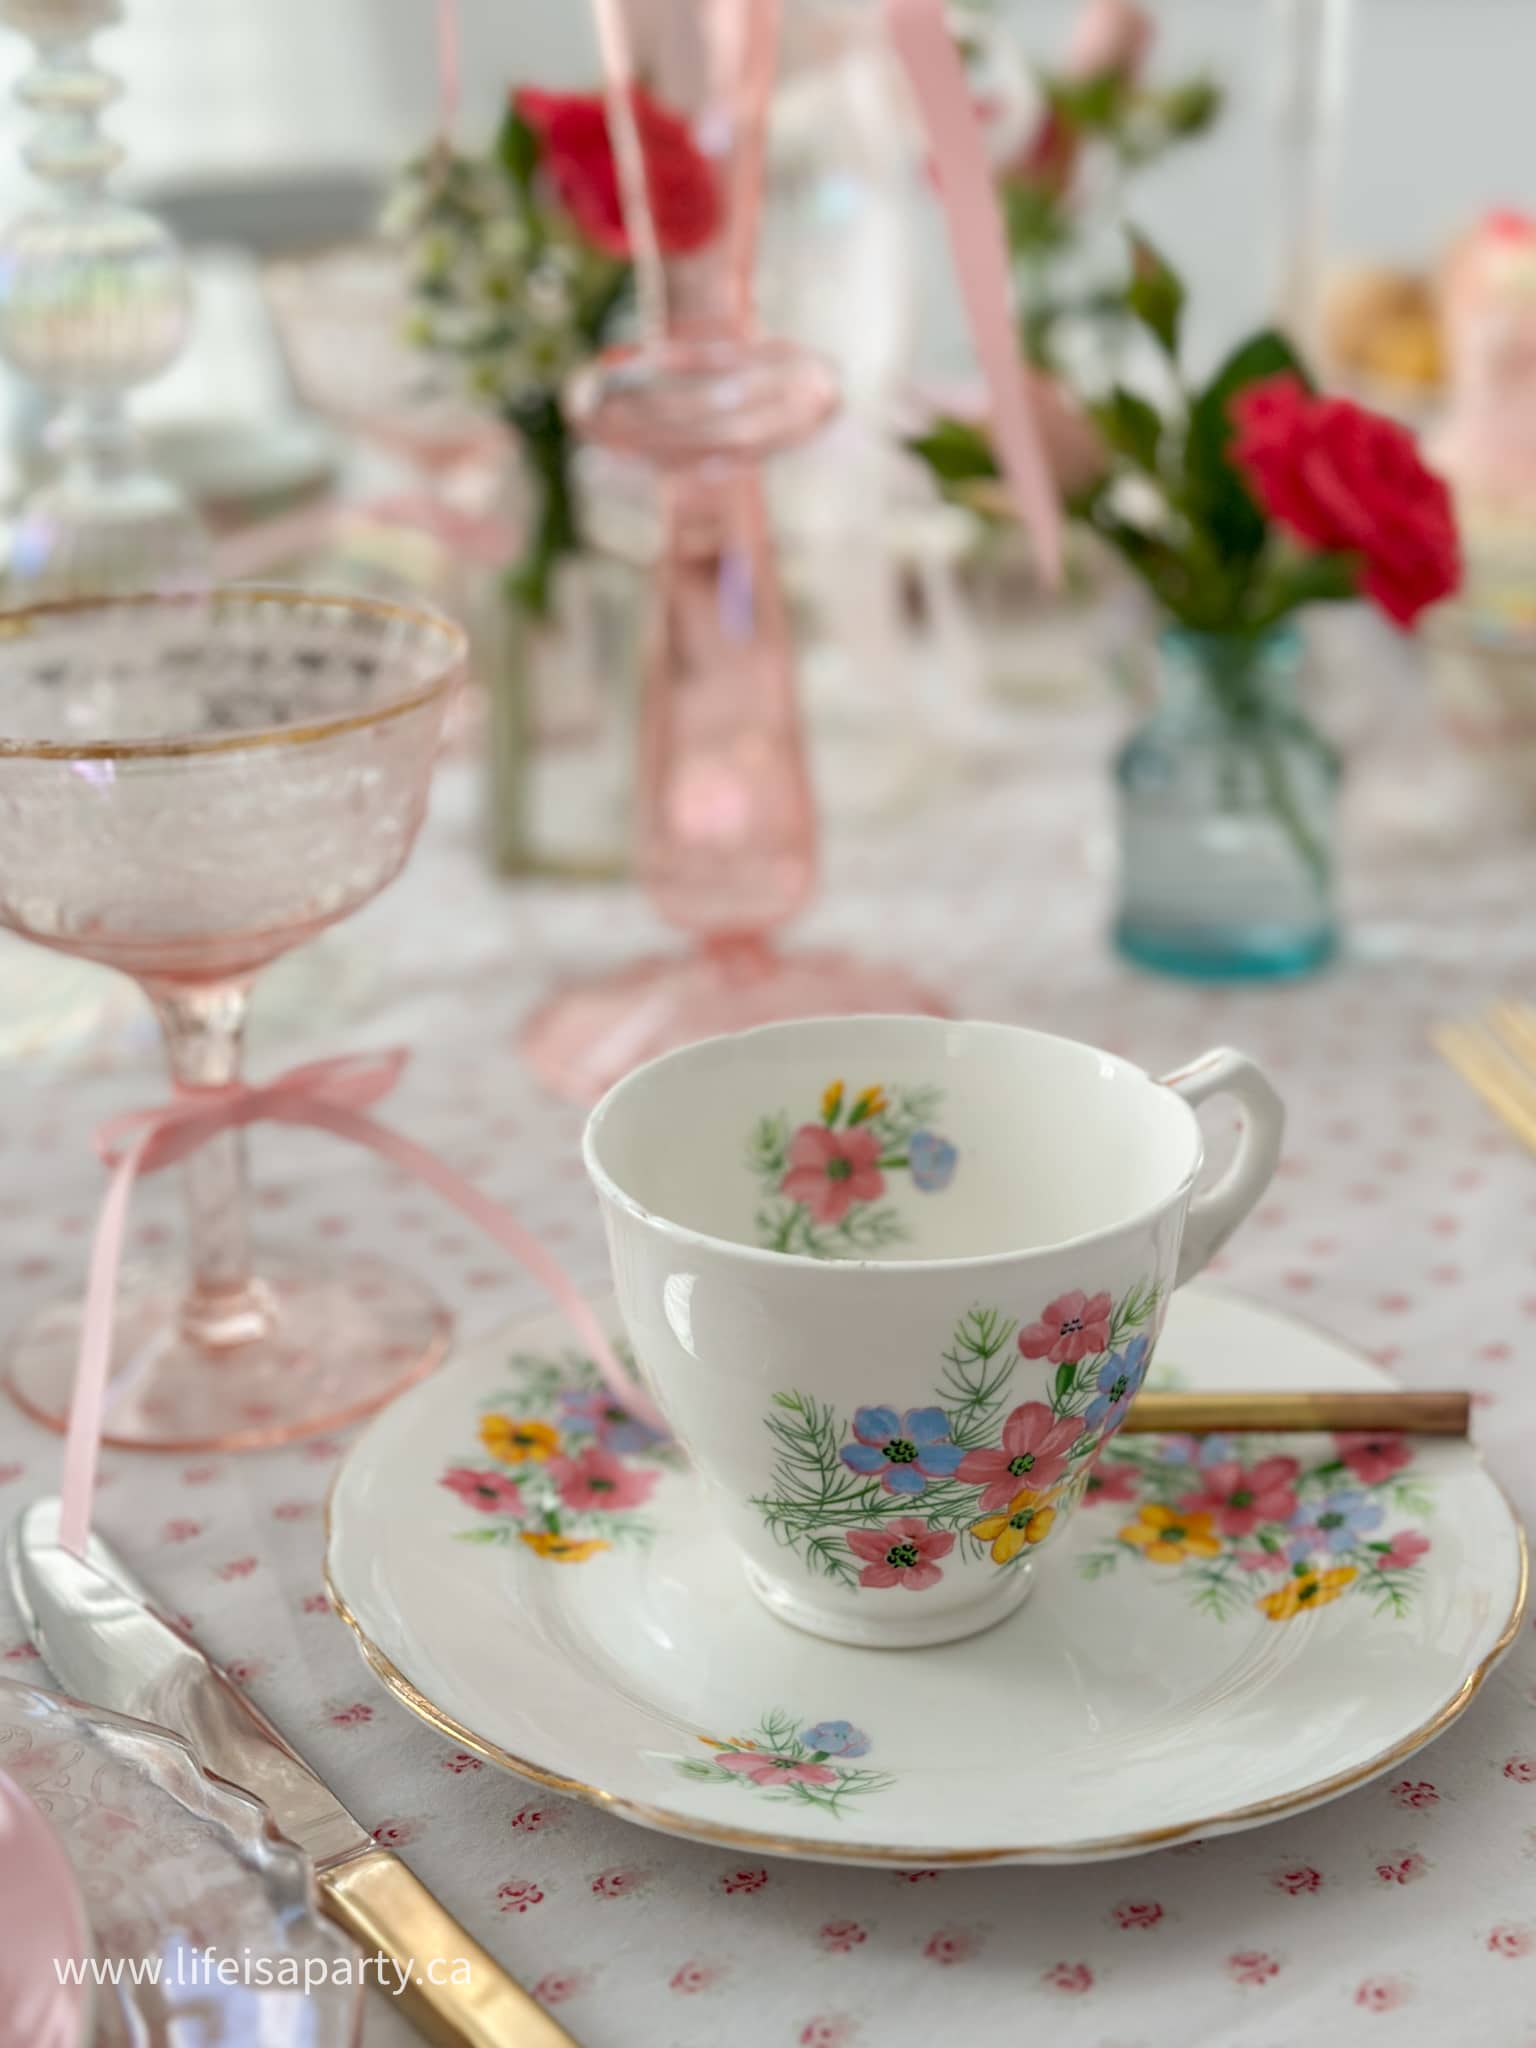
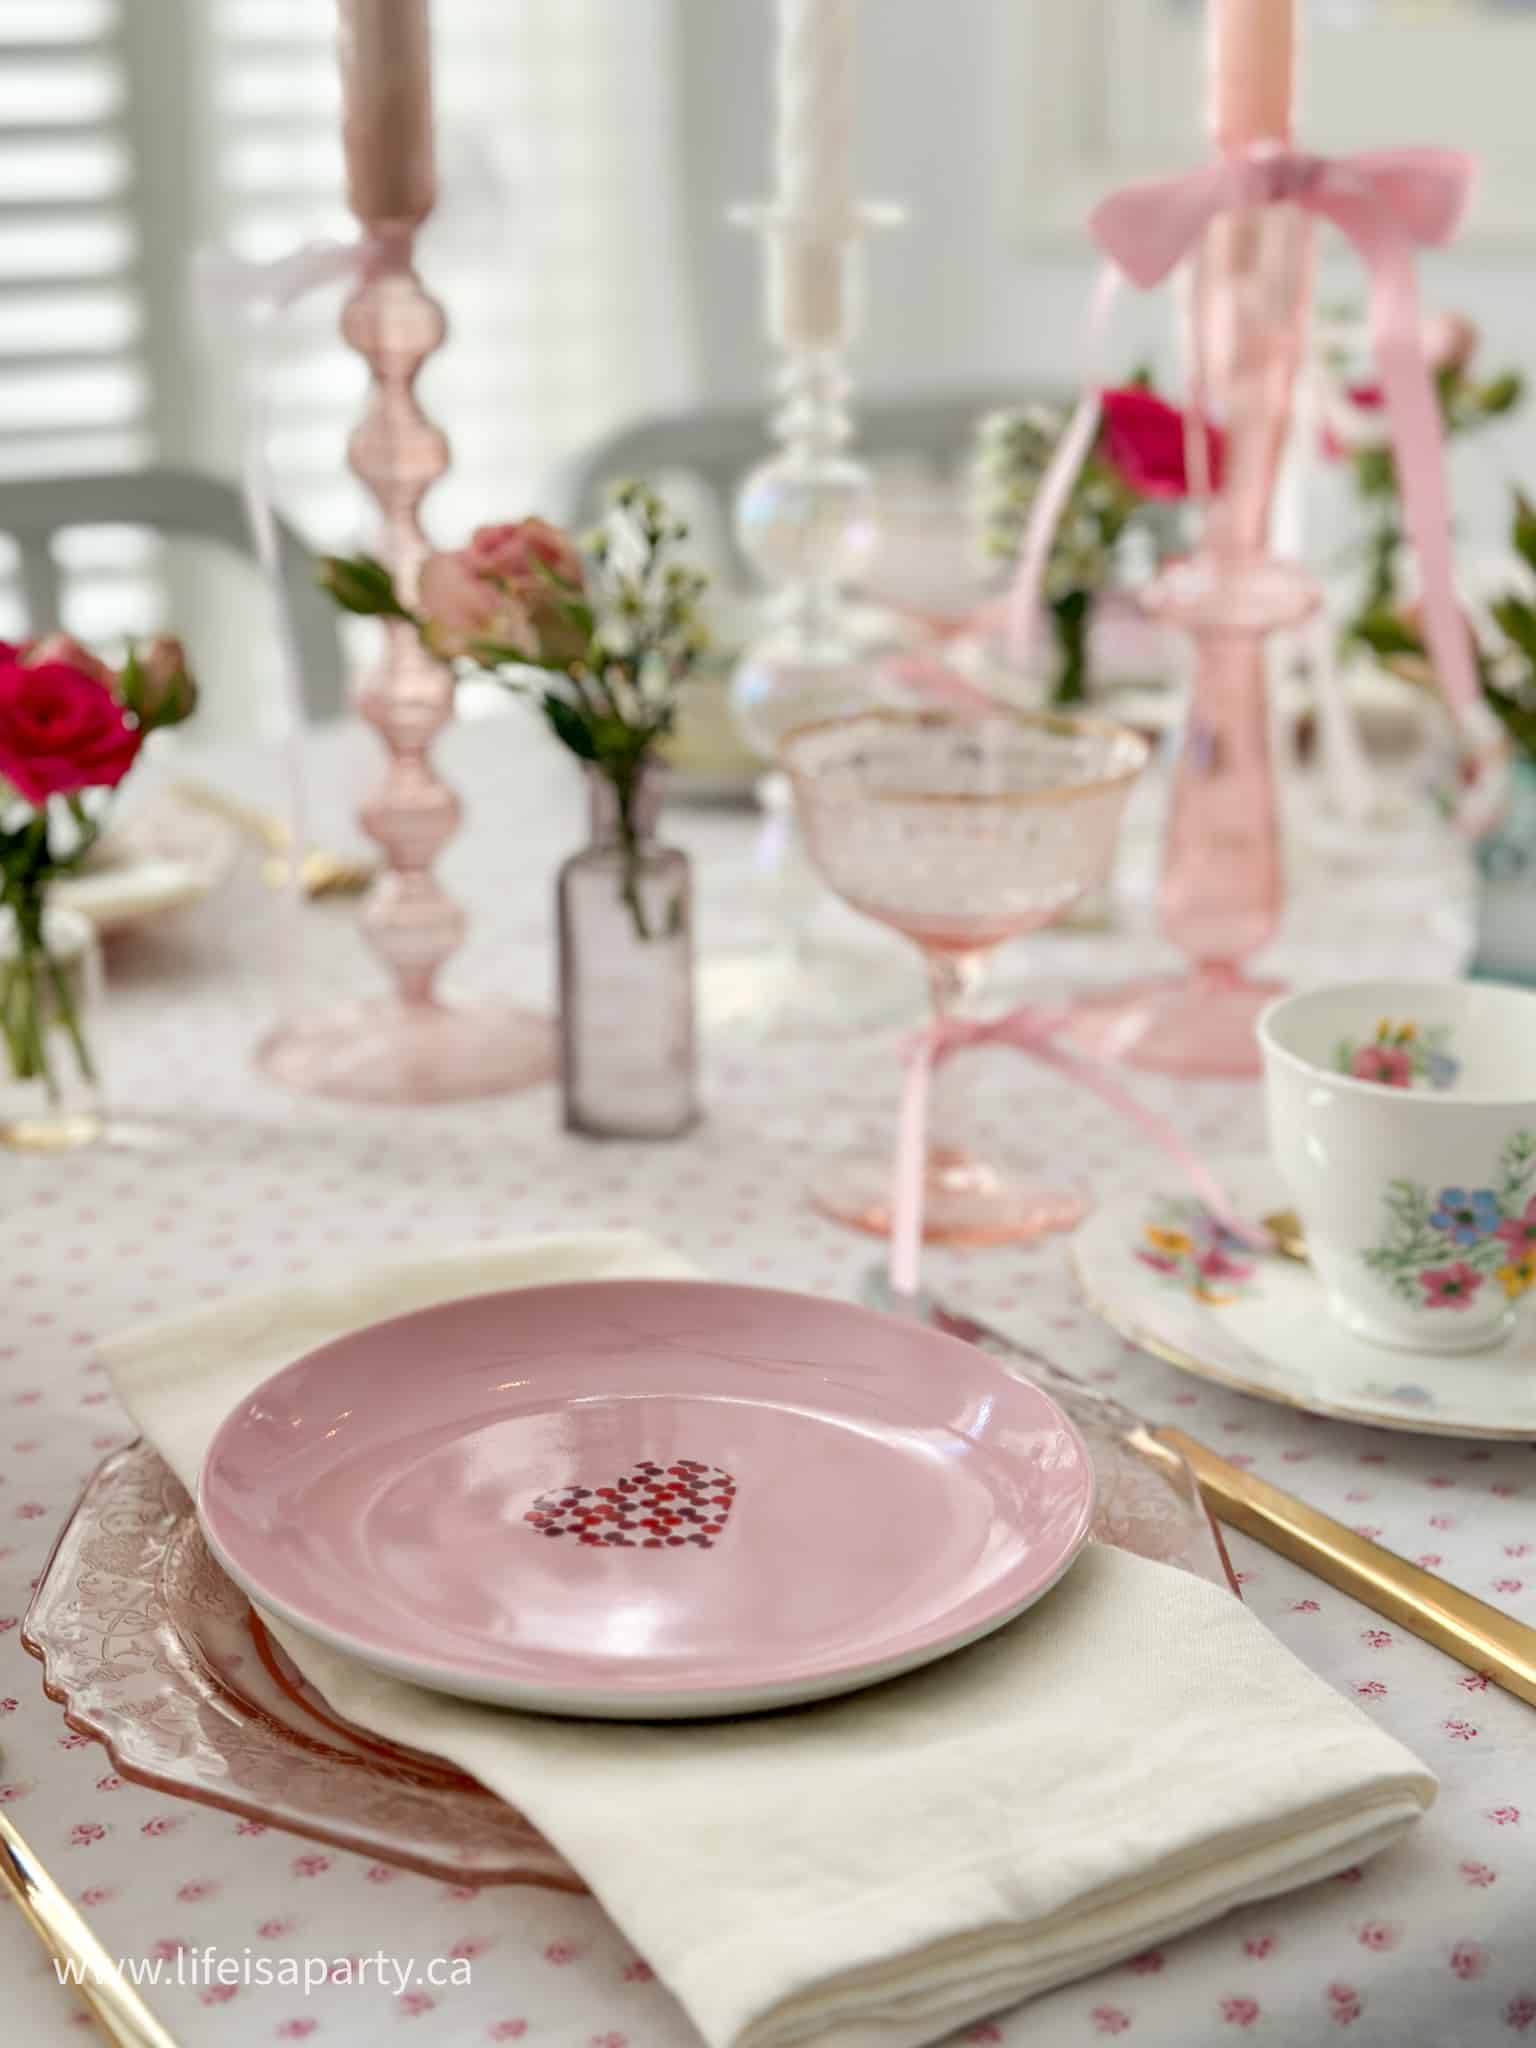
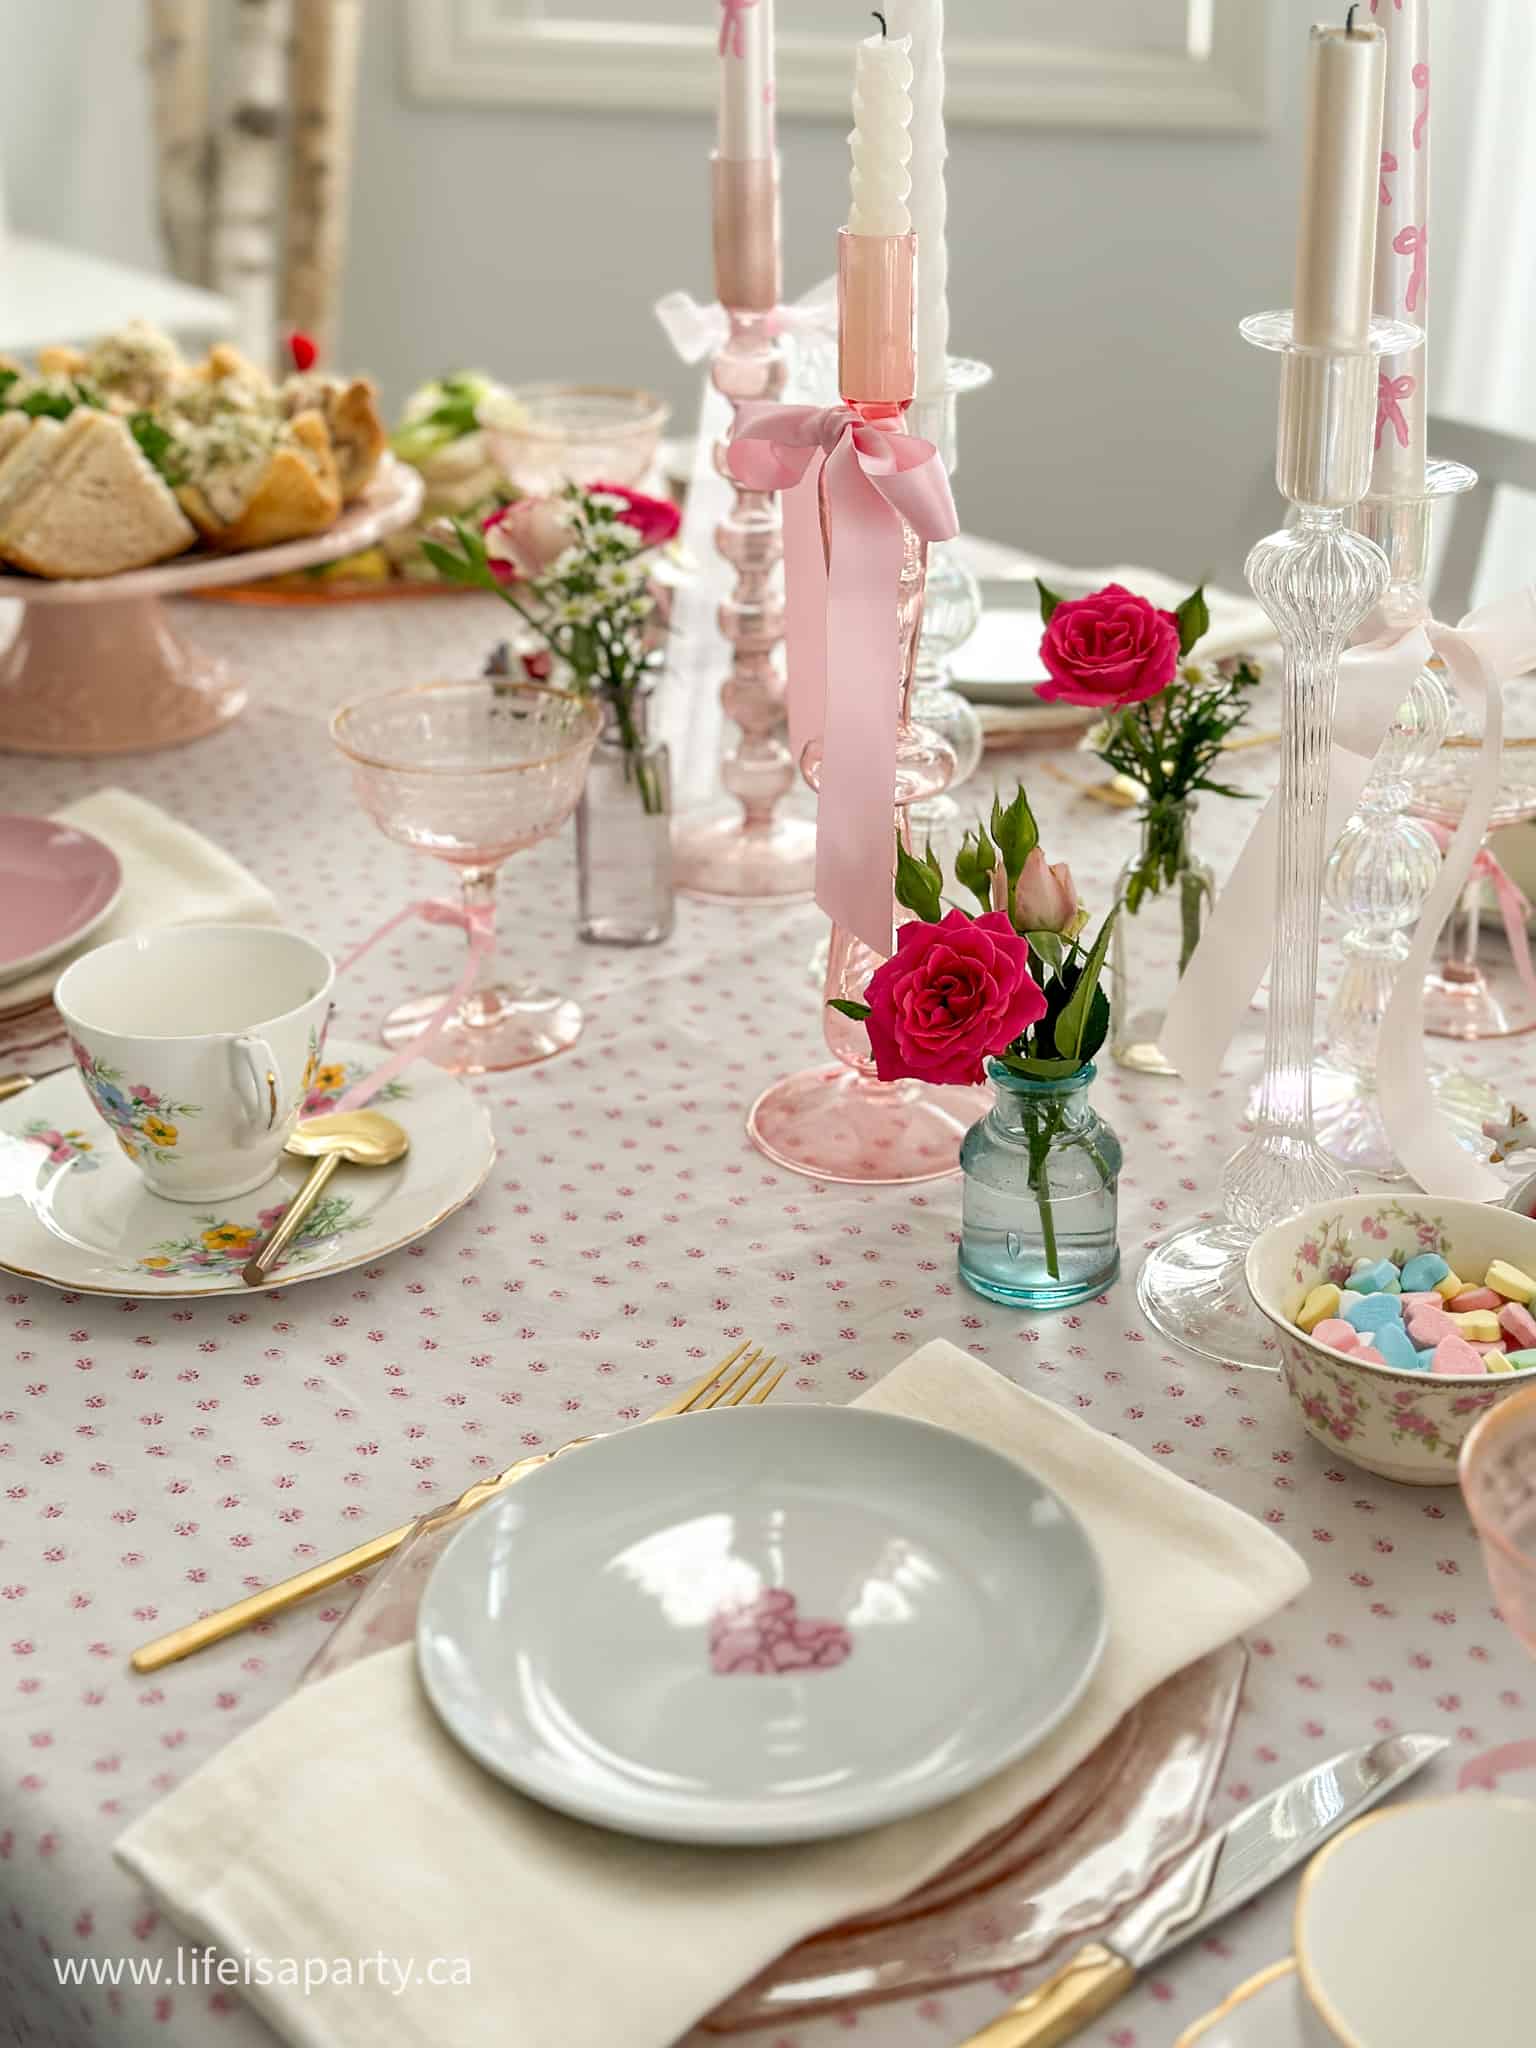
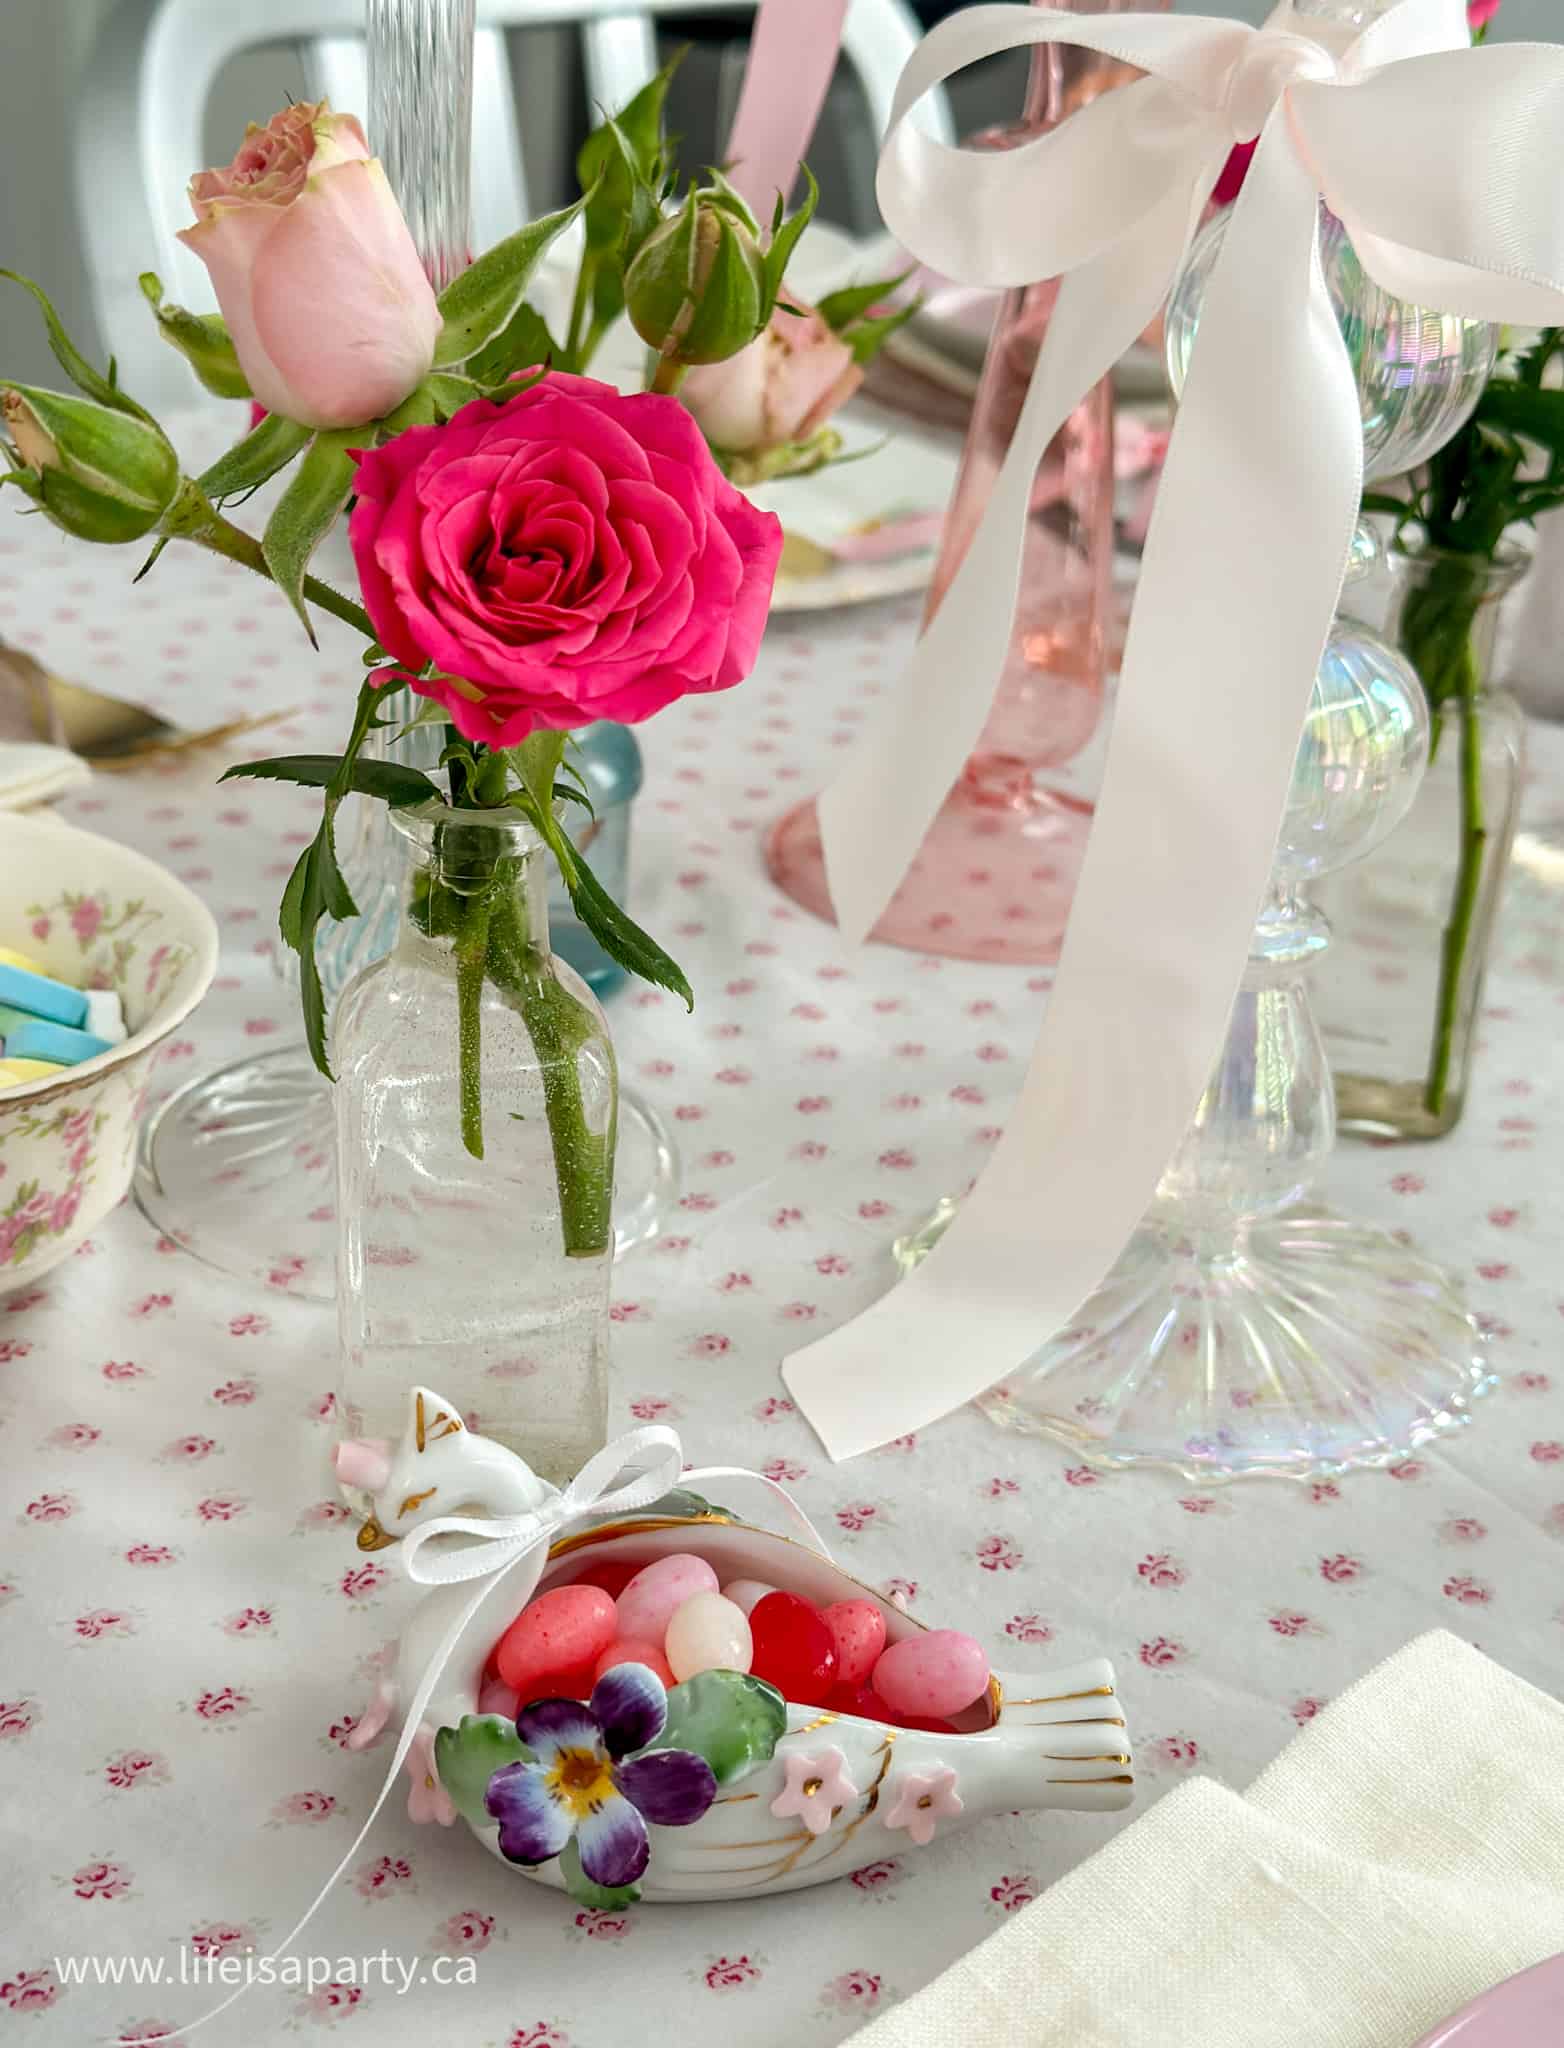
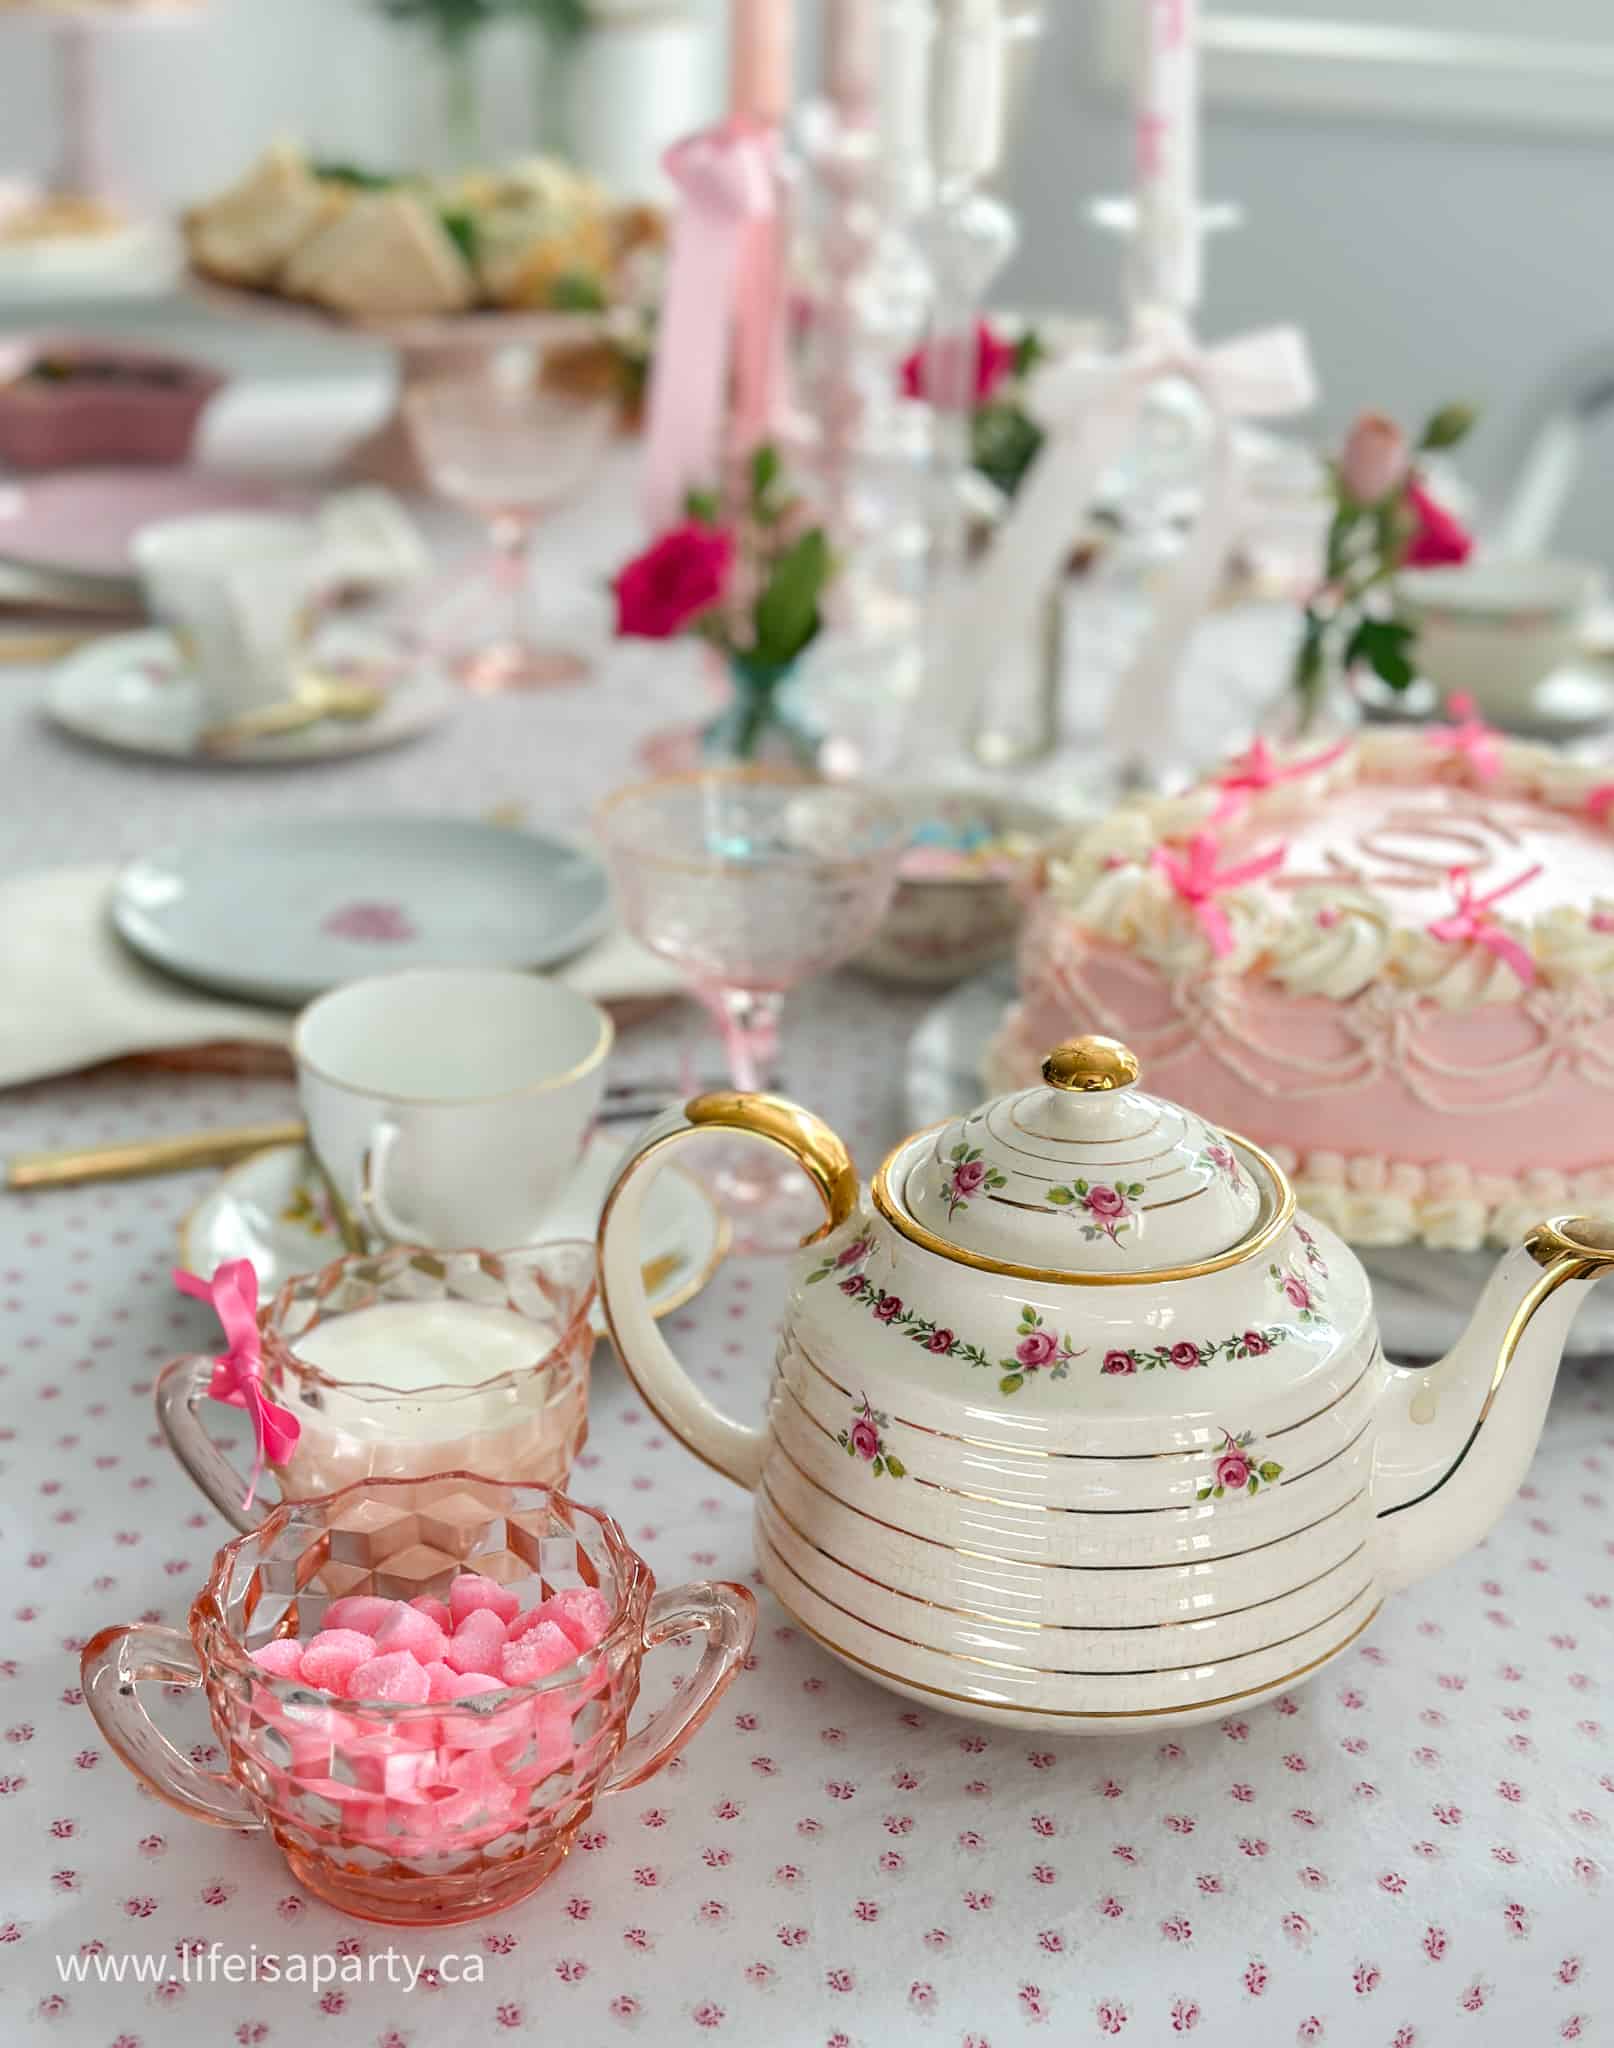
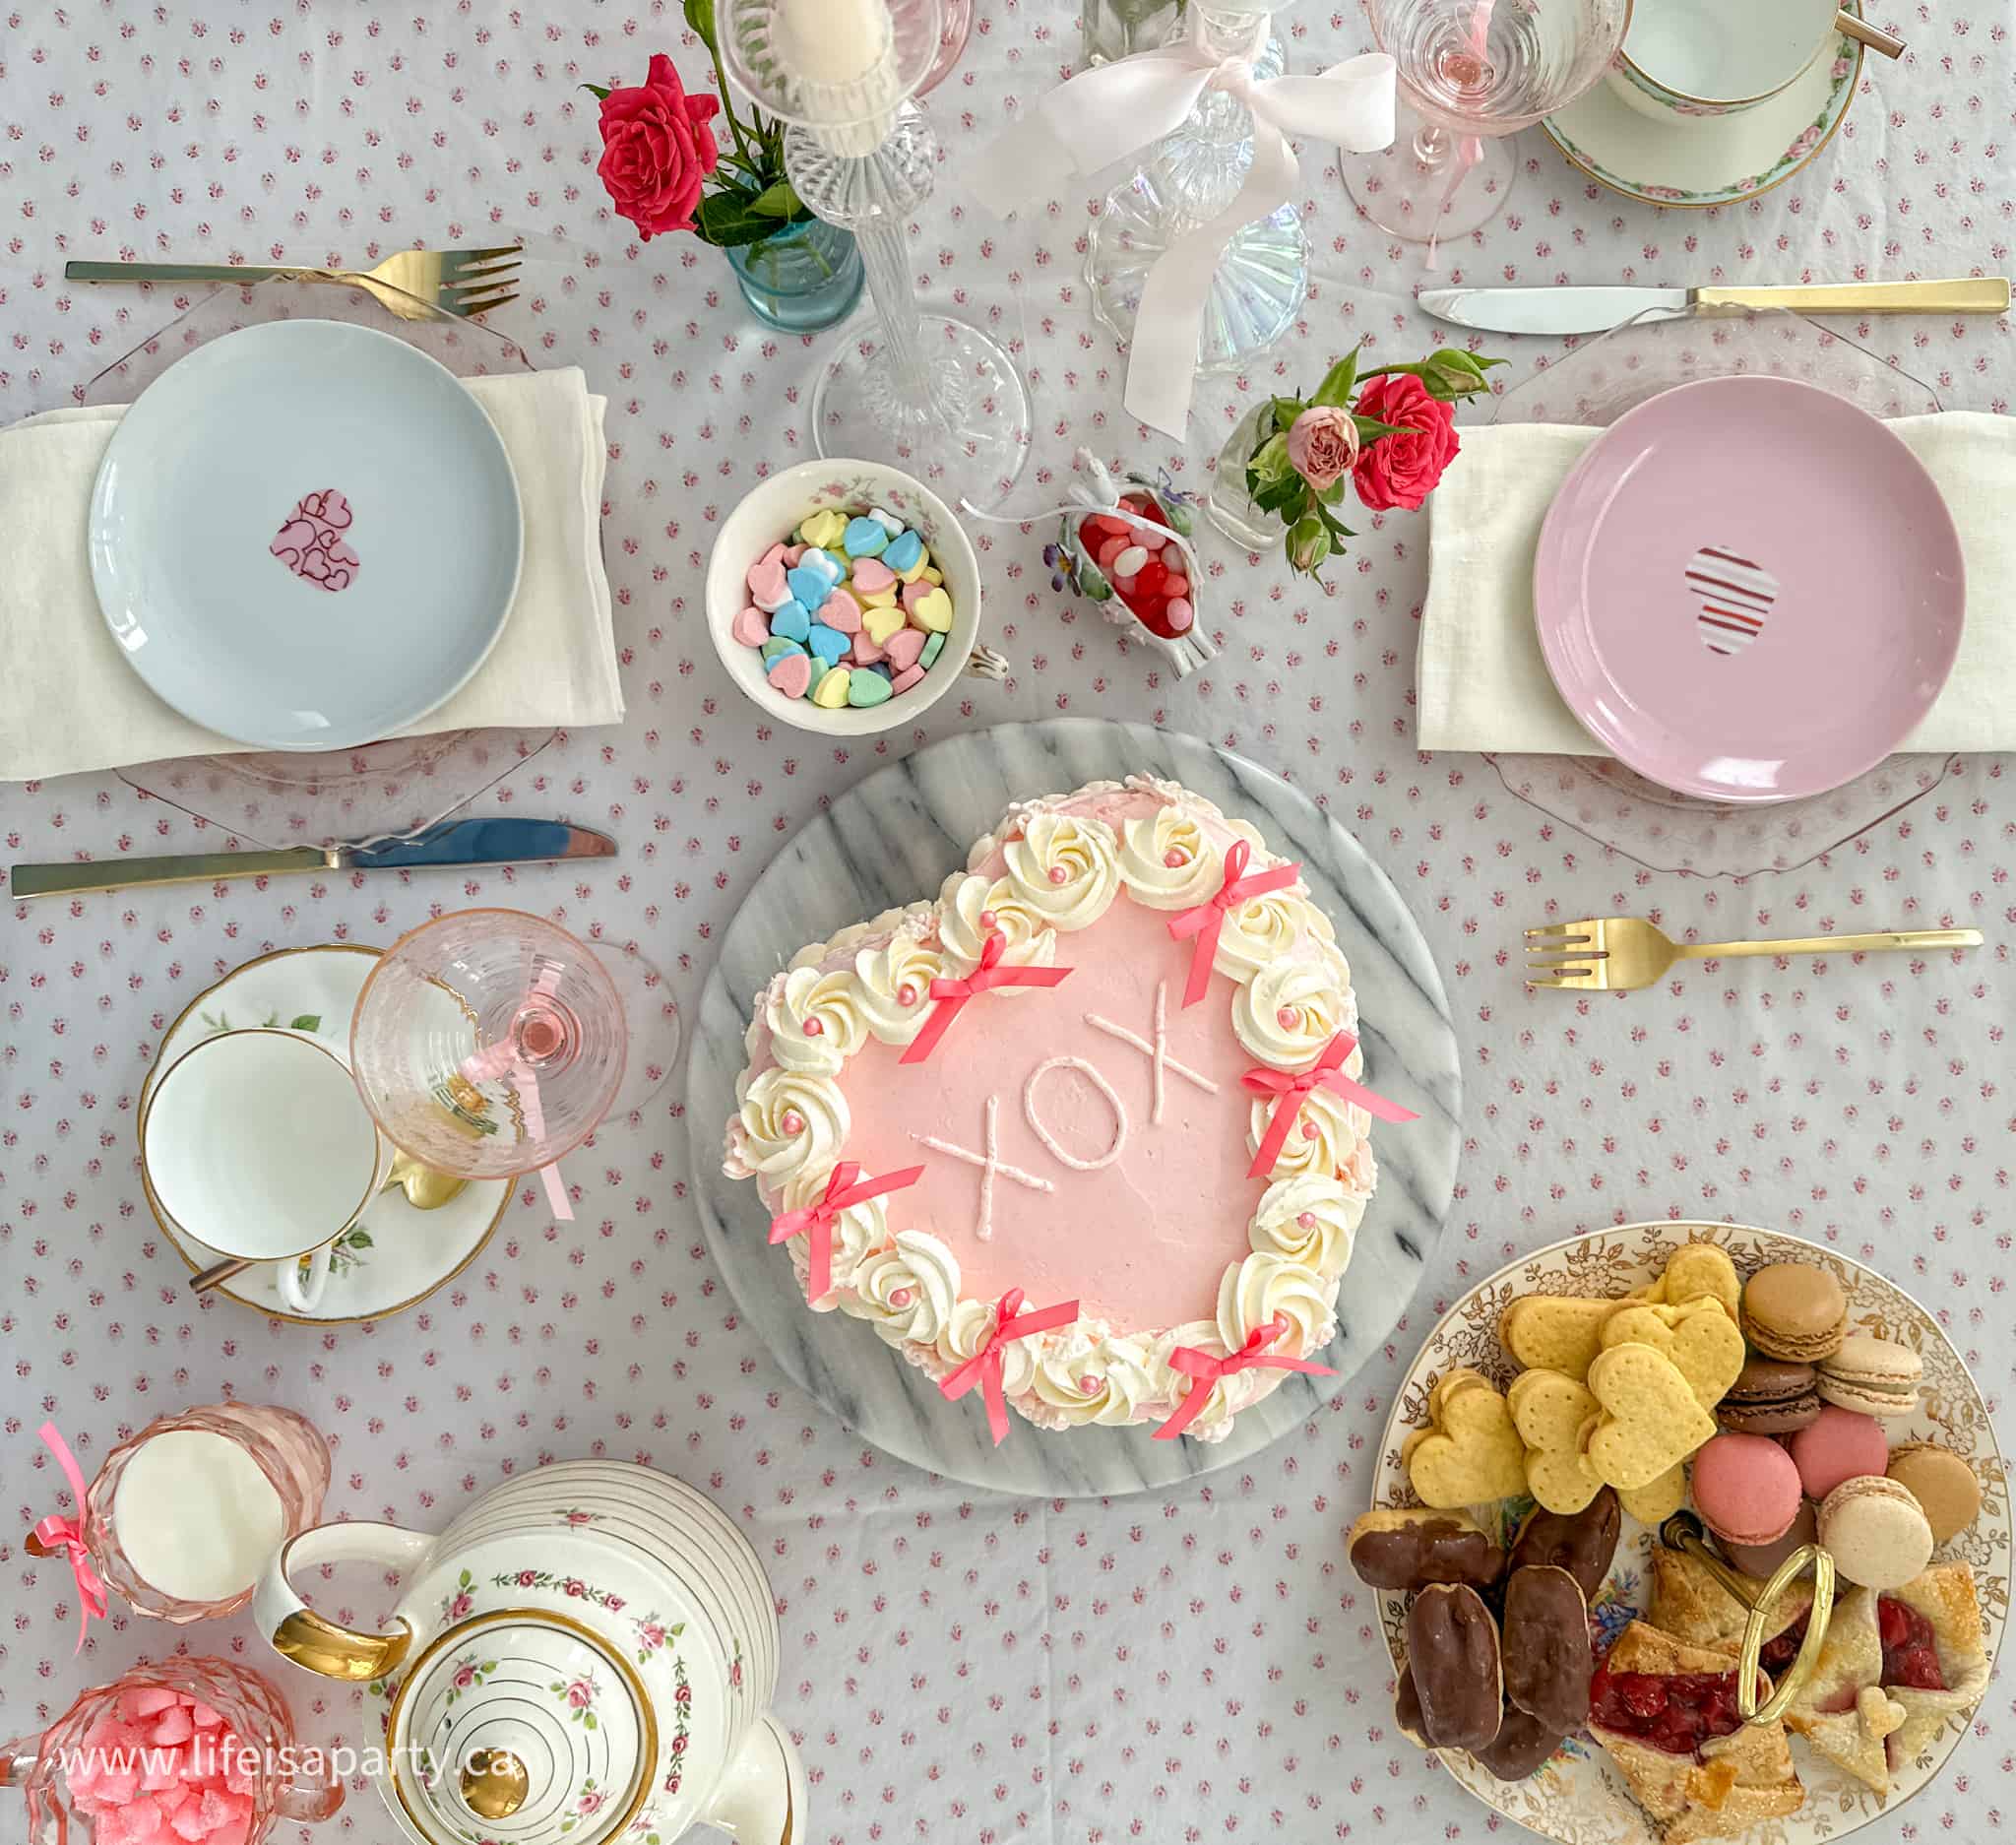
For our Galentine's Day celebration, I wanted the decor to embrace the coquette aesthetic that's so popular right now. Think pink, bows, vintage teacups, and feminine details everywhere. It's the perfect style for a Valentine's Day tea party with your girlfriends.

Valentine's Day tablescape
  • Floral Tablecloth: I started out with the prettiest pink floral tablecloth.  If you can't find what you're after you can always look at the fabric store.  Ours was light pink with tiny rosebuds and the perfect backdrop for our table. 
  • Plates: I used lots of vintage pieces for this party, including the pink depression glass luncheon plates.  I layered these with some cute heart plates for Valentine's Day.  It's always nice to offer guests one plate for savoury and a fresh plate for sweet for a high tea.  
  • Vintage Tea Cups: The tea cups were also vintage.  Look for them at thrift stores or antique stores.  They're all different, but all have touches of pink floral designs to tie them together.  
  • Pink Champagne Coups: My favourite part of the table settings were the pink champagne coupe glasses, with bows tied on the stems.  These were a very lucky antique store find one day.  
  • Gold Cutlery: Each place setting was finished off with some gold cutlery.  Be sure to include a knife so guests can fix their scones.  We also included gold heart spoons perfect for stirring a cup of tea, and off-white linen napkins.
  • Serving PIeces: We also used lots of vintage serving pieces, like pretty china serving plates, vintage tea pots, cake plates.  Look for these pieces at antique stores or thrift stores too.
coquette table setting ideas
vintage tea cup
valentine's day tea party

Valentine's Day Centerpiece

  • Candles with Bows: For the Valentine centerpiece in the middle of the table I used some gorgeous glass candlestick holders, and added ribbon bows to some.  Candles are fun even in the afternoon for special occasions.  
  • Painted Candlesticks: And to add another fun bow detail to our Valentine party, a few of the actual candles have bows painted onto them.  I used a regular craft paint and they still burned perfectly.  This is such a fun way to add an extra detail.  
galentine party
valentine tea party
  • Fresh Flowers: We also added some really simple floral arrangements of pink spray roses.  I love spray roses, and thought they were perfect to go with our rosebud tablecloth.  We used my collection of vintage bottles for the fresh flowers and they looked so pretty.  
  • Valentine's Day Candy: I finished off the centrepiece of the table decorations with some small bowls of Valentine's Day candy.  It is a fun detail for the occasion.  I had two matching small swan vessels that I found at the thrift store and added a bow around their necks.  We filled them with candy cinnamon hearts, and Valentine jelly beans.  I used another vintage tea cup as a candy bowl for some conversation hearts, because they're so quintessentially Valentines.
valentine tablescape

The Drinks

  • Hot Tea: You can't have a traditional afternoon tea party without tea of course. I like a traditional orange pekoe, earl grey is always a good choice too. It's a good idea to have a few options for your guests, including something that's decaf, and herbal tea. Brew your tea in a teapot, and be sure to have extra hot water for making more tea as the party continues. We used tea bags, but loose leaf tea feels extra special for a tea party.
  • Milk and Sugar: Black tea is traditionally served with milk not cream, so be sure to have some. I also made some adorable pink heart shaped sugar cubes using a small mould. They're very easy to make -see exactly how I made the homemade sugar cubes here.
  • Sparkling Wine: Since it was a Galentine's party, we also had some sparkling wine. A glass of champagne is a very fun addition to the afternoon. And the perfect way to make it feel like a real special occasion.
  • Non-Alcoholic Options: I always recommend having a non-alcoholic cold option for guests too, for any non-drinkers. Sparkling juice is perfect for this.
  • Hot Chocolate: If you're having little girls at a tea party, hot chocolate is a great option, and pink hot chocolate for Valentine's Day is even better.  
valentine tea party ideas
how to host a tea party

The Food

We took lots of ideas from our complete tea party food guide.

Tea Sandwiches

Top Tip: Make your mini sandwiches a couple of hours ahead of time and cover well with plastic wrap so that they don't dry out.  You want these sandwiches to be delicate and easy to eat.  Offer a variety of fillings and breads, remove the crusts and cut the sandwiches into small pieces.  

high tea sandwiches
tea sandwiches
  • Cucumber Sandwiches: Cucumber sandwiches are an afternoon tea favourite. We made finger sandwiches with white bread, butter, mayo, cream cheese and thinly sliced cucumbers. Cut off the crusts and slice them into long rectangle fingers. We also made a few extra special by cutting them into heart shapes with a cookie cutter and topping with a cucumber bow.
  • Egg Salad Tea Sandwiches: I like to serve egg salad on a mini croissant, and top them with some mixed greens.
  • Ham and Cheese: We made simple ham and Swiss cheese sandwiches with honey mustard.
  • Chicken Salad Toast Cups: These are really easy to make and always a hit with guests. See the chicken salad in toast cups.
cucumber tea sandwiches

Scones

Top Tip: Scones are best when they are served the day they are made. They have a nice crust on top, and it softens when they're stored in an airtight container. If you don't have time to make the scones the morning of the party, you can make the scones ahead of time and freeze the dough to bake the morning of the party. Prepare the dough and freeze on a cookie sheet until frozen through, then store in a freezer bag. Find our favorite easy food processor scone recipe here.

  • Heart Shaped Scones: The next traditional course is scones with jam and cream. We made our Easy Food Processor Scones - see the recipe here. Instead of cutting them into wedges, I rolled them out and cut them with a cookie cutter to make them heart shaped.
  • Jam Options: We served ours with raspberry jam, another great option is strawberry jam, or lemon curd.
  • Clotted Cream: Scones are traditionally served with clotted cream. It's sometimes hard to find here, look for it in British shops or some grocery stores in the dairy section. You can also substitute whipped cream if you cannot find clotted cream.
scones for high tea
Valentine's Day heart shaped scones with cream and jam

Sweets

Top Tip: I try to have a few different options and always include at least one option that is vanilla, chocolate and berry, so that there's something for everyone's different tastes.

  • Heart Shaped Vintage Cake: This pretty heart shape vintage cake was so beautiful. We made it from a white cake, and it had raspberry jam filling and Swiss meringue buttercream. It was the star of the show.
  • Shortbread Hearts: Shortbread is always a great addtion to a tea party, and a favorite of mine. Get my favorite shortbread recipe.
  • Strawberry Marshmallows: Homemade strawberry marshmallows, cut out with a heart cookie cutter.
  • Cherry Pie Love Letters: Little cherry pie love letters -see how I made them here.
  • Custard Cream Cookies: Custard creams are a tradional British cookie and perfect for a tea party. We made these heart shaped for Valentine's day and they're so tender and delicious. Find the recipe for the Heart shaped custard cream cookies.
  • Mini Chocolate Eclairs and Macaroons: We also had an assortment of mini chocolate eclairs and macaroons. I picked up these treats at the bakery and grocery store. I love to mix some store bought treats in with the homemade, especially when they're speciality items like these that are a bit challenging to make at home.

Admittedly we had too many sweet treats and lots of leftovers, but they all looked so beautiful.

tea party desserts sweets ideas
heart shaped vintage style cake
Valentine tea party
tea party sweets

Coquette Aesthetic for Your Valentine's Tea Party

The coquette aesthetic is having a major moment right now, and it's the perfect style for a Valentine's Day tea party. This ultra-feminine trend embraces everything soft, pink, and romantic with lots of bows, vintage touches, and delicate details. Think balletcore meets cottagecore with a romantic Valentine twist.

Why Coquette Style Works for Tea Parties:

  • Naturally Feminine: Tea parties are already inherently girly and elegant, so the coquette aesthetic feels like a natural fit. The vintage teacups, delicate treats, and pretty table settings all align perfectly with this trend.
  • Instagram-Worthy: If you or your guests love taking photos, the coquette aesthetic creates a cohesive, beautiful look that photographs incredibly well. Everything is pretty and coordinated without feeling overly formal.
  • Easy to Achieve: You don't need to buy all new decor. Shop your home for vintage pieces, add bows to everything, work with a pink color palette, and incorporate florals. Thrift stores and antique shops are goldmines for coquette-style pieces.

Key Coquette Elements:

  • Bows on everything (candles, glassware, candy dishes, napkins)
  • Pink as your main color with touches of white and red
  • Vintage or vintage-inspired pieces (especially depression glass and floral china)
  • Delicate florals (roses, especially)
  • Lace, ribbons, and feminine details
  • Heart shapes for Valentine's Day
Valentine party ideas

We had so much fun spending hours at the tea table with delicious food, sparkling wine and tea, and great conversation. I can't think of a better way to spend an afternoon, or a better type of party for Valentine's Day with your girlfriends.

Valentine tea party

More Tea Party Inspiration

  • Tea party table set for an adult tea party.
    Tea Party Food: The Complete Guide to Sandwiches, Scones and Sweets
  • Green gingham tablecloth with vintage teacups, candelabra, tulips and daffodils set for a Little Women party.
    Little Women Party: A March Sisters Vintage Tea Party
  • Winter tea party with snowflake decor and menu.
    Winter Tea Party: Snowflake Theme Decor and Menu
  • Tea party table set for an adult tea party.
    How To Throw An Afternoon Tea Party For Adults

Frequently Asked Questions

How many tea sandwiches do you need per person?

At most hotel teas there are usually 4 tea sandwiches per person. If you are serving your afternoon tea more as a lunch you might want to have up to 6 per person. Remember a tea sandwich is quite small.

How far in advance can I make the tea sandwiches?

You don't want your tea sandwiches to be dry, or soggy. The best way to ensure this is to make them right before serving. If you need to make them ahead of time, prepare your fillings like chicken salad, egg salad, or tunna salad the day before. Be sure to spread your bread with butter to help keep the sandwich filling from making the bread soggy. After assembling your sandwiches the day of the party keep them in an airtight container in the refrigerator. Be sure to keep them covered with plastic wrap righ until serving to ensure they don't dry out.

How can I make my tea party seem special for Valentine's Day?

Decorate your table with Valentine's Day colors like pink and red. Make some of the food heart shaped like sandwiches cut with a cookie cutter, scones, cake and cookies. Offer rose sparking wine for an extra special touch.

What time is afternoon tea?

Afternoon tea is usually served in the late afternoon. It was originally a way to fill the gap between lunch and much later dinner times than most of us have today. I usually serve afternoon tea as a late lunch, that way guests have room for all the courses and can really enjoy the whole menu.

What is Galentine's Day and when is it?

Galentine's Day is traditionally celebrated on February 13th, the day before Valentine's Day. It's a day to celebrate female friendships and spend time with your girlfriends. The holiday was popularized by the TV show Parks and Recreation and has become a real celebration for women to get together and honor their friendships. Galentine's Day has come to mean any Valentine celebration that celebrates women's friendships and can be celebrated anytime during the season.

What should I serve at a Valentine's Day tea party?

A traditional afternoon tea menu includes three courses: tea sandwiches (like cucumber, egg salad, and chicken salad), scones with jam and cream, and an assortment of sweets and desserts. For Valentine's Day, make items heart shaped when possible, use pink and red colors, and include Valentine themed treats. Don't forget to serve both hot tea and sparkling wine or champagne for a festive touch.

What is coquette aesthetic?

Coquette aesthetic is an ultra-feminine style trend that embraces everything soft, pink, and romantic. Key elements include lots of bows, vintage touches, delicate florals (especially roses), lace and ribbons, and a pink color palette. It's perfect for Valentine's Day celebrations because it naturally incorporates all the romantic, pretty details that make the day special.

What's the difference between afternoon tea and high tea?

Traditionally, afternoon tea was a light meal served in the late afternoon with tea, finger sandwiches, scones, and sweets. High tea was actually a heartier early evening meal. These days, most people use the terms interchangeably to mean the same thing - a fancy tea party with all the pretty treats and teacups. What we're hosting here is what would traditionally be called afternoon tea, but call it whatever feels right to you.

What should I wear to a Valentine's Day tea party?

Embrace the coquette aesthetic with something feminine and pretty. Think flowy dresses, skirts with blouses, or anything with bows, lace, or floral details. Pink, red, or white are perfect color choices for Valentine's Day. The key is to dress up a bit since tea parties feel special and fancy, but you don't need to be overly formal. Comfortable and pretty is the sweet spot -you'll be sitting and eating for a few hours, so choose something you feel good in.

With a Valentine's Day tea party with your girlfriends, life really is a party!

If you have tried any of these Valentine's Day Tea Party Ideas or any other ideas on my blog please let me know how it went in the comments below. Thanks for visiting today!

New Years Party Decor

Jan 2, 2012 · 6 Comments

New Years Party Decor: candles, clocks, noise makers, party hats, and mirrored balls create the perfect party atmosphere for New Year's Eve!

New Years Party Decor: candles, clocks, noise makers, party hats, and mirrored balls create the perfect party atmosphere for New Year's Eve!

We had a wonderful time ringing in the New Year with some old friends, and thought you might like to see some of the New Years party decor and shiny details, before all the holiday decorations get packed away until next Christmas.

Clocks To Mark Midnight

New Years party decor

On the fireplace, I did a grouping of clocks. Some were ones I had, and a couple I found at thrift stores. It was fun to hear the loud ticking of all the clocks combined.  I love this idea for a New Year's Eve party.

New Years Party Decor and Banners

In the living room I made a fun Happy New Year banner with my cricut, and hung it with some mirrored garland, and fun twinkle lights.

New Years party decor
New Year's Eve party decorations

Party Horns and More

I had fun at the party store buying silver and black noise makers, hats, glow sticks, and beads. New Year's eve seems to bring out the kid in all of us. 😉 I grouped them all on a nice silver tray on the coffee table, ready for the big count down.

New Year's Eve Party ideas

Disco Balls

My favourite of the decorations was the dinning room table. I used a silver runner for the base and grouped a collection of mirrored balls and candles. The mirrors made the candle light dance around the room, and it was so pretty.

New Years party decor ideas

New Year's Eve Party decor

how to decorate for New Year's Eve

Drinks Table

We had a fun evening of eating, drinking, and laughing together! I set up the drinks in the kitchen, with a centrepiece of three different orchid pieces. A mini potted orchird, in a beautiful pot, some floating candles, with a few orchid blooms, and an arrangement of orchids and roses my sister brought me at Christmas.

New Year's Eve Party ideas

New Year's Eve Bar

New Years Dessert Buffet

We started out with lovely appetizers, and around 11 I put out a dessert buffet in the kitchen. There were lots of Christmas cookies, including these almond biscotti, a family favourite.

New Year's Eve dessert table

Along with the cookies, I made mini pavolas, and individual portions of Christmas pudding, my grandma's old recipe. We also did mini ice cream cones with candy cane ice cream.

New Year's Eve dessert buffet

I made fun dessert picks out these great clocks from PS Make It Your Own. I cut them out and backed them with some fun glittery card stock. And, I also made some cute straws for drinks with these free drink flags from Bloom.

New Year's Eve Party decorations

We had a great evening ringing in the New Year.  With New Years party decor ideas like these, life really is a party!

More Inspiration

You might also like our New Year's Eve Table Decorations here.

Also check out our Vintage New Years Cards Free Printables here.

You might also like our Black Berry Sparklers here.

Blackberry Sparklers: fresh blackberries are pureed for this cocktail, make it with alcoholic, or without for a non alcoholic mocktail version.

Christmas Women's Ministry Party

Dec 12, 2011 · 2 Comments

Women's Ministry Christmas Event: inexpensive DIY snowflake themed decorations, take out dinner ideas, and a snowflake dessert table.

Christmas Women's Ministry Party: inexpensive DIY snowflake themed decorations, take out dinner ideas, and a snowflake dessert table.
Women's Ministry Christmas Event: inexpensive DIY snowflake themed decorations, take out dinner ideas, and a snowflake dessert table.

[feast_advanced_jump_to]

Our Christmas women's ministry party was this weekend and we had a wonderful time of celebrating. We ordered in take-out for dinner, did an ornament craft together, and enjoyed some sweet Christmas desserts.

Snowflake Christmas Decor

We went with a snowflake theme this year.

Christmas Women's Ministry Event

The main tables were decorated with simple twig centre pieces. I spray painted some sticks with silver spray paint -I do love a little spray paint! Then we put them into vases with some faux snow and decorated the branches with some snowflake and silver ornaments.

inexpensive Christmas party ideas for a crowd

I also decorated the tables with lots of candles, and these sweet mason jar snow globes.

Christmas Women's Ministry table
Christmas Women's Ministry party ideas
cheap Christmas Women's Ministry Event
Christmas Women's Ministry Event ideas

We had fun making a simple Christmas ornament together before dinner

Drinks

We had a simple white cranberry juice punch, along with bottled water, coffee and tea.

Women's Ministry Christmas drinks table
drinks table

I really liked how the snowflake lights looked on the drink table, such a simple way to add a little Christmas sparkle.

Christmas Women's Ministry party

Christmas Women's Ministry Party Dinner

To make things simple we had a take out Swiss Chalet dinner.  We had everyone pre-order when they signed up.  This table was waiting for the chicken to arrive.

how to host a women's ministry Christmas party

Christmas Women's Ministry Party Dessert Table

After dinner there was a beautiful dessert table, with some traditional Christmas treats, and snowflake themed treats too.

Christmas Women's Ministry dessert table

I made these vanilla cupcakes, decorated with some simple snowflake sprinkles.

women's ministry dessert table

I used these sweet little snowflake place card holders to hold our dessert labels. We also had tiramisu in individual cups, and several kinds of delicious Christmas squares.

Christmas Women's Ministry dessert
Christmas Women's Ministry dessert table

My friend Heather made these gorgeous snowflake sugar cookies.

Christmas Women's Ministry dessert ideas

And, she also made these cute little mini cheesecakes. She made the decorations with melted chocolate wafers piped into designs, and then placed on the cheesecakes after they hardened. I love the "w" and "m" for "Women's Ministries" -love is in the details.

Christmas Women's Ministry dessert table

We had a wonderful evening together, celebrating the true meaning of Christmas, light shining in the darkness. I hope you have the blessing of amazing, encouraging, fun women in your life, and an opportunity to get together this Christmas and celebrate. 

With a Christmas Women's Ministry Party, life really is a party!

You might also like our Women's Ministry Christmas Event here.

Christmas party ideas

Also check out Women's Ministry Chocolate Spa Night here.

You might also enjoy our Merry and Bright Christmas party here.

Merry and Bright Christmas Party Set: these party printables include menus, place cards, straw flags, conversations starters, cupcake picks, and a banner.

DIY Silver Christmas Wreath

Nov 25, 2011 · 18 Comments

DIY Silver Christmas Wreath: This beautiful and easy Christmas wreath is made from a inexpensive dollar store pot scrubbers.

DIY Silver Christmas Wreath: This beautiful and easy Christmas wreath is made from a inexpensive dollar store pot scrubbers.

DIY Silver Christmas Wreath: This beautiful and easy Christmas wreath is made from a inexpensive dollar store pot scrubbers.
[feast_advanced_jump_to]

I love, love, love how this DIY Silver Christmas Wreath turned out, and wanted to share with you how easy and inexpensive it is to make with supplies from the dollar store.

DIY Silver wreath

Materials:

  • 12 - 20 Pot Scrubbers
  • Foam Wreath Form
  • Hot Glue
  • Ribbon
  • Christmas Balls

How To Make A DIY Silver Christmas Wreath

The wreath is  made out of dollar store silver pot scrubbers!

To begin this project, I used 4 packs of 3 for my foam wreath form. First open up the circle of the pot scrubber and then cut in half.  Finally,  you break out the old glue gun, and hot glue it to the wreath.  It's really very simple to put together.

DIY Christmas wreath dollar store

Also, here's the view from the back.

Pot Scrubber DIY Christmas Wreath

After it was all glued together, I next embellished it with some simple white and silver Christmas balls. I love all the sparkle!

DIY Christmas Wreath dollar store

Lastly, a silver satin ribbon was the perfect finishing touch.

how to make your own dollar store Christmas wreath

I love how it looks on the front door, with my Christmas urn decked out in silver this year too, and these sweet glittered skates.

DIY Silver Christmas wreath

Merry Christmas, hope you're having fun decking the halls too!

With a DIY Silver Christmas Wreath, life really is a party!

You might also like our Vintage Ornament Christmas Wreath here.

Vintage Christmas Ornament Wreath: How to make a beautiful Christmas wreath out of vintage ornaments.

Also check out our DIY Pinecone Wreath here.

How to make a Pinecone Wreath

You might also enjoy Birch Wreath here.

Birch Christmas Wreath:-full tutorial to make your own square wreath from some gathered greens, birch logs, and a coat hanger. Perfect for Christmas.

DIY Burlap Table Runner

Oct 20, 2011 · 5 Comments

DIY Burlap Table Runner -Easy how-to, using very inexpensive garden burlap, and no sew. It's perfect for fall or thanksgiving tables.

DIY Burlap Table Runner -Easy how-to, using very inexpensive garden burlap, and no sew. It's perfect for fall or thanksgiving tables.DIY Burlap Table Runner -Easy how-to, using very inexpensive garden burlap, perfect for fall or thanksgiving

[feast_advanced_jump_to]

Like so many other bloggers, I seem to have developed a bit of a crush on burlap. It seems like such a great fit with rustic, cool, fall days.  This easy burlap runner is really inexpensive to make.

Materials:

  • burlap from the garden centre

This year I decided to make a runner for my dinning room table out of burlap. I did check out the fabric store, but all they had was "fancy" tightly woven burlap, not exactly the sack bag image I'd been picturing. So, I headed to the hardware store -success! Not only did they have the authentic stuff there, but it was way cheaper -and you know me and a bargin are BFF's. So I purchased some burlap, intended for winterizing shrubs, from the garden centre.

garden burlap wrap

How To Make A Burlap Table Runner

To make my runner I cut a strip about 22 inches wide, and long enough for some overhang on my table, remembering that the table would have all its extra boards in making it extra long for Thanksgiving dinner. 😉 Just follow the line of the fabric as you cut.

how to make a burlap table runner

I considered different methods of finishing the edges, but in the end decided I really liked the slightly frayed look of leaving it as is. It was a little lumpy, bumpy so I gave it a quick iron. The smell of ironing it reminded me of days as a little girl playing in my Grandma's barn at her farm, happy memories.

DIY Burlap Table Runner

I am using it for fall on top of my dark wooden dinning room table, but I also used it for Thanksgiving over a white table cloth, and loved the way it added texture to the table.

DIY Burlap Table Runner

This was a simple, quick, inexpensive little project, and I love how it turned out.

With a DIY Burlap Table Runner, life really is a party!

You might also like our How To Paint A Buffalo Check Feature Wall here.

You might also enjoy our DIY Deer Book Art here.

Twine Pumpkins

Oct 12, 2011 · 14 Comments

Twine Pumpkins made from kitchen string, twine, and balloons to craft beautiful decorative pumpkins for fall.

Twine Pumpkins: tutorial on how to ordinary kitchen string, twine, and balloons to craft these beautiful decorative pumpkins for fall.

[feast_advanced_jump_to]

This fall, I'm loving the look of burlap, white pumpkins, and all things neutral. These twine pumpkins are the perfect addition to my table with battery operated tea lights.  

I love decorating with pumpkins this time of year, and my favorite are the ones I can use year after year, like these DIY Wood Pumpkins.

how to make a twine pumpkin

Materials:

  • cotton string, jute, and twine
  • balloons
  • white glue
  • tree branch
  • hot glue

How To Make Twine Pumpkins

I blew up several small balloons, all in slightly different sizes.

Next, I dipped the strings in white glue, and got my hands dirty wrapping the balloons.

string pumpkins

After the string was dry, I popped the balloons, and made sure there was a big enough space in the bottom to insert a battery operated candle.

Then, I went for a little walk to the forest, and found a stick large enough to resemble a pumpkin stem. I cut the stick to length, and glued it to the top of the string ball with a little hot glue.

sting pumpkin craft idea

I grouped the five little pumpkins on a cream coloured runner on my kitchen table. They look great flickering away in the evening.

how to make a string pumpkin

This was a fun, and simple project, and I got lots of compliments on them at Thanksgiving. 😉

With twine pumpkins, life really is a party!

You might also like our DIY Faux Concrete Pumpkins here.

DIY Faux Concrete Pumpkins: easy DIY to transform inexpensive dollar store pumpkins with a concrete faux paint finish.

Also check out our Driftwood Pumpkins here.

DIY Wood Pumpkins: made from collected driftwood pieces, these easy and beautiful DIY driftwood pumpkins are the perfect addition to your fall decor.

You might also enjoy our Paper Flower Pumpkin here.

Paper Flower Pumpkin: Use a faux pumpkin and an old book to create this pretty paper flower pumpkin craft, the perfect additon to your fall decor.

The Picnic Party

Sep 9, 2011 · 4 Comments

Picnic Party: a picnic birthday in red and pink planned for the beach with individual picnic lunches, activities, decor, and party invitations.

Picnic Party: a picnic birthday in red and pink planned for the beach with individual picnic lunches, activities, decor, and party invitations.

bunting flag invitation
[feast_advanced_jump_to]

This weekend my little Paige turned 7! She wanted to have a picnic party at the beach. We were picturing lots of red and white gingham, and cause every thing's better when it's pink, we went with red and pink as our colour scheme.

DIY Bunting Invitations

bunting flag invitation

We made these sweet bunting flag invitations. We started with these brown kraft paper cards and envelops, and cut out triangles from craft paper to be the bunting flags. We used our glue stick to attach them, and then sewed along the top with our sewing machine. We used our home printer to print all the party information directly on the cards before we added the bunting.

DIY bunting flag invitation

Unfortunately, the weather was cold and windy, so we had to move the party from the beach to indoors. No one seemed to mind though, and we all had a great time!

Picnic Party Decorations

I had planned all the food, decor and activities for the beach, but when we felt the cold wind, we quickly shifted things around to work at home.

DIY Party Bunting

Just like our invitations we wanted to add bunting to the space.  I made some simple bunting flag before with with pinking sheers and ribbon, but this time I made them double sided, ironed them and used seam binding along the top. They look much more professional, and I'm really pleased with how they turned out. They were a lot more work, but turned out great.

picnic party

We also had some fun red and pink balloon bouquets.

picnic party balloons

The Table

We set the picnic food up in the dining room. I found this great vintage table cloth at an antique store this summer, and fell in love with it. I used these sweet miniature picnic baskets for decoration on the food table too.

picnic party decor

For the centre piece of the table I used these sweet mason jars filled with flowers from my mom's garden. I always like to have a picture of the birthday girl as part of the centrepiece for a birthday party.

picnic party decorations
picnic party flowers

Each guest had an individual picnic bag, the adults were on the left, and the kids were on right.

Picnic Drinks

Around the back of the table I set up the drinks.

picnic party drinks
picnic party drinks

I had fun finding old fashioned pop bottles of cream soda, black cherry, root beer and coke.

For the kids there were Kool-Aid Jammers, and lots of water for everyone. I used a mason jar to hold some striped straws.

picnic party straws

I had also planned a coffee and tea station for the grown-ups, since the party started at 11. We planned on using thermos flasks for the beach, but since it was at home I just set this basket I'd prepared next to the coffee maker.

picnic party supplies

Picnic Blankets

We also had a picnic basket filled with red picnic blankets, that I picked up at IKEA.

picnic party blankets

The Beach Picnic Activities and Games

picnic party loot bags

Loot Bags

Our loot bags were sand pails. We couldn't find any pink metal sand pails, but we did find these pink plant pots at IKEA. We drilled holes in the side, and sanded them with a metal file. Then we added thick sisal rope and tied it to create the handle.

diy beach pail

I found some pink shovels, and filled the pail with other beach treats.

picnic party beach pails

We were planning on a sand castle building contest, so we included these fun flags, made with bamboo skewers, fabric and my trusty glue gun! The birthday girl's favourite candy is Carmel squares, so we added some in these sweet organza bags. I tried to co-ordinate all the labels, including this one for bubbles.

Bubble Blowing

picnic party favours

Sea Shell Tic-Tac-Toe

My favourite part of the loot bags, were these sea shell tic-tac-toe games that we made. I spray painted sea shells in pink and red, and then packaged them in cello bags, with a label instructing the guests to create their grid in the sand and have fun!

sea shell tic tac toe
picnic party loot bags

I set up the loot bags on the kitchen table with a cute picnic table cloth. My mom brought the beautiful roses from her garden, and we added some of the cute flags, to the mason jar vase.

picnic party roses

My mother-in-law found some fun pink beach balls that fit with our theme, and mermaid dolls for the little girls to play with in their sand castles. Thanks Grandma!

picnic party loot bags

Sand Castle Building Contest

We were planning on having a sand castle building contest at the beach. I found some fun trophies at the dollar store, and added some pink and red ribbon, and some labels for the winning sand castles. We divided the guests up into family teams and awarded each family a trophy for the Sandiest Sand Castle, the Cutest Sand Castle, the Biggest Sand Caste, and the Most Beautiful Sand Castle.

sand castle trophies
sand castle building supplies

We had to change our plans a little since we were inside due to the cold, windy weather at the beach, so we drew pictures of the the sand castles instead, which everyone was a really good sport about.

The Food

individual picnic lunches

Well, the highlight of a picnic is certainly the food! I love how all the details turned out. The individual picnic lunches were packed in red paper bags, with some sweet red gingham tissue paper, and tied with a little twine. I customized the bags with these labels I created.

individual picnic lunches

Individual Picnic Party Lunches

It was so fun watching everyone excitedly unpack their picnic bags to see what was in them -including the grown-ups!

individual picnic basket lunch

So here's the menu:

  • Fried Chicken
  • Potato Chips
  • Veggies and Dip or Bean Salad
  • An Apple
  • Chocolate Chip Cookies
  • Cupcake-in-a-Jar

Let's start with the chicken, I purchased chicken the night before, and wrapped in up with waxed tissue paper, tied with twine, and marked with labels I made to fit our theme.

picnic party menu

The kettle cooked potato chips were re-packaged in cello bags, with a custom label.

individual picnic lunch bags

I made veggies and dip for the kids, packaged in cello bags, with a small container of dip, and tied with twine. The grown-ups had three bean salad, served in mini-mason jars.

individual picnic lunches

Picnic Party Desserts

For something sweet, we made chocolate chip cookies, and packaged them in little brown paper bags, closed with the custom labels.

picnic basket desserts
picnic party individual picnic lunches

Our best treat was the cupcake-in-a-jar, and a great portable way to celebrate a birthday!

We made vanilla cupcakes, and cut them in half, then we spread the bottom half with a little raspberry jam, and layered it in the bottom of the mason jar.

cupcakes in a jar

Then we piped in some pink frosting, and added the top of the cupcake. It was also iced, and we added some pink sanding sugar on top.

cupcake in a jar
cupcake in a jar

They were delicious, and the kids loved digging into all that icing!

Our friends and family weren't bothered by having to move our beach picnic indoors due to cold windy weather, and laid out the picnic blankets in our dinning room and living room!

indoor picnic lunch
indoor picnic party

Before the birthday girl dug into her cupcake we all sang "Happy Birthday" to her.

picnic party

With a picnic -inside or out -life really is a party!

You might also like our French Inspired Picnic here.

Also check out our Breakfast Picnic here.

You might also enjoy our Picnic Lunch here.

Pretty Picnic Lunch: Individual picnic boxes, wild flowers, tissue paper tassels, and a delicious menu make this the perfect picnic lunch.

Individual Mini Peach Cobbler in a Mason Jar

Sep 1, 2011 · 6 Comments

Individual peach cobbler in a mason jar.

Mini Peach Cobbler in a Mason Jar: Easy and delicious recipe for individual peach cobblers in a mason jar made with fresh peaches.

Mini Peach Cobbler in a Mason Jar: Easy and delicious recipe for individual peach cobblers in a mason jar made with fresh peaches.
[feast_advanced_jump_to]

Aren't these Mini Peach Cobbler in a Mason Jar treats the cutest ever? I recently discovered peach cobbler, and since it's peach season, this easy peach cobbler recipe was perfect.

You might also like our Easy Banana Snack Cake with Frosting.

Individual Serving Size

I made my individual mini peach cobblers in a mason jar, but you could also use a ramekin to bake them in.  The individual mini cobbler is the perfect serving size for one, and the best part is that you don't have to worry about dishing it up.  Serve this easy individual peach cobbler recipe with a scoop of vanilla ice cream on top, or some whipped cream as a great way to finish a meal.  Mini cobblers in a masons jars are really easy to transport and bring to an event too.  Just screw on the tops of the jars to cover them.  You can also use individual ramekins for making individual servings.  Another option is to bake your mini cobblers in a muffin pan.  Just use a regular size muffin tin for baking your individual serving size cobbler.

Cobbler

This homemade mini peach cobbler recipe is the perfect dessert for anyone who loves a fruit dessert but doesn't love making pie pastry.  It's so much easy than baking a peach pie, because you don't have to roll out the pie crust, you just add the cobbler topping to the top.  Homemade peach cobbler is made with simple ingredients, that you probably have on hand anyway.  You can make cobbler with lots of different fruit or combinations of fruit.  Fruit cobbler is a great way to use up extra fruit in the fruit basket when it's in season. See our strawberry cobbler recipe here.  Try making berry cobbler, or apple cobbler,  or your favorite fruit,  But peach cobbler is a classic for a reason, and I think it just might be one of my favorite desserts.  Anyone who has a sweet tooth and loves peaches will love this easy summer dessert.

Peaches

We used fresh in season peaches for this easy recipe.  We used fresh fruit for our cobbler, but you can also make it with frozen fruit.  If you're using very sweet peaches you can use a little bit less sugar.  If your peaches are out of season, you may need to add a little more sugar for your peach filling. 

I made my mini peach cobblers in small 4oz mason jars. The jars are filled them about half way with peaches, and then added the cobbler dough on top.  These are perfect for easy transportation with the lid screwed on.  And also make it very easy for serving.

Mini Peach Cobbler in a Mason Jar

Serving Suggestion

When the mini peach cobblers are golden brown on top they're ready.  You can have this room temperature or as warm peach cobbler, whichever you prefer.  Serve individual peach cobbler with whipped cream, or a scoop of  ice cream on top.  The peach flavors are perfect combined with whipped cream or scoops of vanilla ice cream.  This sure to become a favorite recipe for baking juicy peaches when they're in season.

how to make mini peach cobbler

Today I was making this fresh peach cobbler for a sweet family going through a sad time so I added a little twine for decoration, and slipped the lids on for transport, along with a little bowl of freshly whipped cream.

Peach Cobbler in a Mason Jar

I absolutely LOVE how they turned out. Thi is the best peach cobbler.  And it always gets rave reviews from my friends and family.  Life can't always be perfect, but even sad days are better with a sweet little treat like this and this great recipe. 😉

Recipe

Individual peach cobbler in a mini mason jar.

Mini Peach Cobbler in a Mason Jar!

Baked peaches with a sweet cake like topping.
4.46 from 24 votes
Print Pin Rate
Course: Desserts
Cuisine: American
Prep Time: 15 minutes minutes
Cook Time: 20 minutes minutes
Total Time: 35 minutes minutes
Servings: 6 Individual Servings
Calories: 439kcal
Author: Dannyelle Nicolle-Ramjist

Ingredients

  • 2 cups fresh peaches peeled and sliced
  • ½ cups white sugar
  • ½ cup softened butter
  • 1 cup all-purpose flour
  • 1 ¼ teaspoon baking powder
  • ⅛ teaspoon salt
  • 1 cup white sugar
  • 1 egg
  • 1 teaspoon vanilla extract

Instructions

  • Preheat oven to 350°.
  • Peel and slice your peaches into a large mixing bowl and sprinkle ½ cup of sugar over peach slices and divide them between 6 -4oz. mason jars. Filling each jar about half way. Or instead of mini mason jars use small ramekins to make individual serving size.
  • Cream room temperature butter and 1 cup of sugar together. Stir in the dry ingredients of flour, baking powder and salt. Add egg and vanilla. Mix well.
  • Spoon crumble topping over peach mixture in each mason jar. Bake for about 20 minutes or until golden brown. Serve with whipped cream or vanilla ice cream.

Notes

To make one large peach cobbler use a 2 quart baking dish, and bake for 35-45 minutes.

Nutrition

Serving: 1g | Calories: 439kcal | Carbohydrates: 71g | Protein: 4g | Fat: 16g | Saturated Fat: 10g | Polyunsaturated Fat: 5g | Trans Fat: 1g | Cholesterol: 72mg | Sodium: 283mg | Fiber: 1g | Sugar: 54g
Tried this Recipe? Tag me Today!Mention @LifeisaParty or tag #lifeisaparty!

With Mini Peach Cobbler in a Mason Jar, life really is a party!

More Inspiration

You might also like Peach Almond Crumble Muffins here.

Peach Almond Crumble Muffins: Delicious recipe, can be made with fresh or canned peaches, with the perfect crunchy sweet almond crumble on top.

Also check out Peach Sangria here.

Peach Sangria: The perfect peach sangria, sweet, fruity, easy to make and delicious. Made with fresh peaches and raspberries.

You might also enjoy Nectarine and Blueberry Galette here.

Nectarine and Blueberry Galette: literally make in minutes with frozen puff pastry, so easy and the perfect way to enjoy fresh nectarines and blueberries.

Farm Birthday Party Food Ideas

Jul 26, 2011 · 18 Comments

Farm themed party dessert table with themed food ideas and farm backdrop.

Farm themed birthday party food ideas savory snacks, main course and a dessesrt table full of things like rice krispie hay bales and tractor wheel oreos!

Farm Themed Birthday Party Food: All the best ideas for the food at your farm themed birthday party, from rice krispie hay bales to tractor wheel oreos!
[feast_advanced_jump_to]

A farm themed birthday is so much fun, and the perfect gender neutral party theme for little ones.  Today we're sharing all the farm themed birthday party food ideas.

We love a good party around here. Kids birthday parties are such a favourite like this Ice Cream Themed Birthday Party, Construction Themed Birthday Party, Ladybug Themed Birthday Party, and Oscar The Grouch Themed Party.

Yesterday I shared some of the Farm Themed Party Activities, and Decor at my little friend Allie's Farm Themed Birthday Party. Today I want to share with you some of the delicious food we enjoyed.

Farm Drinks and Snacks

It was a warm day, but we enjoyed the shade of their large silver maple tree, and some nice cool drinks.

There was a great drinks and nibbles area set up for us all to enjoy before lunch.

  • Iced Tea
  • Lemonade
  • Ice Wate
  • "Chicken Feed" Snack Mix
  • Cow Tails Candy
  • Fuzzy Peaches Candy
  • Sour Strawberry Candy
  • Mixed Fruit Jube Jubes
Farm Themed Birthday Party Food drinks station

I love the detail of the mini hay bale, used under the apple juice. Another great idea, "chicken feed" snack mix and cow tails, which are caramel candies!

chicken feed Farm Themed Birthday Party Food idea
farm birthday party 016

Farm Themed Birthday Party Food Lunch


Farm Themed Birthday Party Food lunch buffet

We enjoyed a great bbq lunch with homemade salads and corn on the cob for lunch.
I love the veggie patch! See the toy animals lined up for a taste?

  • Hotdogs
  • Hamburgers
  • Veggie Patch Veggies and Dip
  • Corn on the Cob
  • Potato Salad
  • Pasta Salad
Farm Themed Birthday Party Food vegetable patch veggie tray

I also thought this way of presenting the cutlery was a great idea, hooked up to the fence in these cute buckets.

cutlery for a party buffet

Farm Themed Dessert

After lunch it was time for dessert! Heather, Allie's mom, created an amazing farm themed dessert table. She started with this sweet backdrop.

She made it out of red project cardboard, and added the details with white duct tape! I love the details of her name, the bunting and the hay -shredded paper! It made the perfect background for all the desserts.

Farm Themed Birthday Party  backdrop


There were so many delicious treats!

  • Apples from the Orchad
  • Fresh Cherries, Strawberries, and Blueberries with Yogurt Dip
  • Hay Bale Rice Krispie Treats
  • Tractor Wheel Oreos
  • Chocolate Covered Marshmallows
  • Pie Fries with Cherry and Blueberry Dip
  • Farm Animal Sugar Cookies
  • Cakepops
  • Birthday Cake
Farm Themed Birthday Party Food dessert table

There were some healthy choices, including apples from the orchard, fresh cherries, and other berries with yogurt dip.

farm birthday party dessert ideas
Farm Themed Birthday Party Food dessert ideas
farm birthday party dessert table

I love the hay bale cookies -rice crispy squares, and the tractor wheels -Oreos!

Farm Themed Birthday Party  dessert Rice Krispie square hay bales
Farm Themed Birthday Party food Oreo cookie tractor wheels

There were also fun marshmallows -in the party colours.

Farm Themed Birthday Party Food: All the best ideas for the food at your farm themed birthday party, from rice krispie hay bales to tractor wheel oreos!

One of my favourite ideas were these "pie fries".

Heather made french fry like strips of pastry dough, sprinkled with cinnamon sugar and packaged in these cute mini paper bags, and served them with blueberry and cherry pie filling as dip!

Farm Themed Birthday dessert pie fries

Of course Heather made her famous sugar cookies, that she makes for all her fabulous parties. I love the barnyard animals, they're so cute.

Farm Themed sugar cookies


And, what's a party with cake pops these days!

Farm Themed Birthday Party Food: All the best ideas for the food at your farm themed birthday party, from rice krispie hay bales to tractor wheel oreos!

They were enjoyed by all.

Heather also made two birthday cakes, a sweet looking piggy, and a cow!

Farm Themed Birthday Party birthday cakes
Farm Themed Birthday cake pig
Farm Themed Birthday Cake Cow


What a feast we had, it was so much fun.

Farm Themed Birthday Party Food: All the best ideas for the food at your farm themed birthday party, from rice krispie hay bales to tractor wheel oreos!

Happy Birthday Allie, hope you had as much as we did.

With a farm themed party, life really is a party!

More Birthday Inspiration

  • Princess and the frog party table with food and decorations.
    The Best Birthday Party Home Decoration Ideas
  • Teddy bear breakfast party with teddy bear themed food.
    Teddy Bear Breakfast Party Ideas
  • Beauty and the Beast party table with food and decorations.
    Beauty and the Beast Party -Themed Dinner and Movie Night
  • Cinderella Party table with Cinderella inspired food and DIY party decor.
    Cinderella Party -Dinner and Movie Night

Frequently Asked Questions

Where is the cow table cloth from?

It was made from a piece of fabric from the fabric store. The edges are finished with some iron-on hemming tape.

Where is the barn backdrop from?

It is made from a piece of red project board, and white duct tape was used for the details.

Where are the food labels from?

They were made from some red gingam card stock, with the food names printed out separately and glued on.

If you try any ideas from this Farm Themed Birthday Party Food or any other ideas on my blog please let me know how it went in the comments below. Thanks for visiting today!

Farm Birthday Party Games and Activities

Jul 25, 2011 · 9 Comments

DIY duck pond made with toys at a farm themed party.

Sharing ideas for a farm birthday party, including games and activities like finding the hidden eggs, a duck pond, a pony stable, and stuffed animal petting. As well as some cute DIY decoration ideas.

Farm Birthday Party Games and Activities: hidden eggs, toy duck pond, toy pony stable, a stuffed animal petting area and more!
[feast_advanced_jump_to]

Farmer ALLIE had a farm, e, i, e, i, o! And on that farm she had a party....and what a party it was! One of my dearest little friends celebrated her second birthday on the weekend, and her parents created a farm in the backyard for her and all her playmates.  

You will also want to check out the Farm Party Food Ideas from the party. You might also like this Stuffed Dog Adoption Party, or this Ladybug Themed Party.

DIY Farm Party Decorations

When we arrived, we were greeted by the cutest "farm gate" and a sweet little straw wreath created for the occasion.

Farm Birthday Party ideas

There was also a basket of bandanas, for all the guests to grab and wear at the party.

how to do at a farm themed birthday party

Games and Activities

There were different activities for the kids to enjoy set up all over the backyard. The kids were all quite little, mostly toddlers and up to 7 year olds, so these little centers were perfect for them.

The centers also acted as decorations set up all around the backyard.

  • Find An Egg

There was tons of preschool fun to be had. One of the first activities was helping Rosie the Hen find her eggs. The eggs were kinder eggs that had been hidden around the garden. The kids loved finding them, and eating them!

Farm Birthday Party games
  • Pony Stable

There was a pony stable, for riding.  Aren't the stick horses a cute idea?

Farm Birthday Party Activities
  • Duck Pond

There was also a duck pond to play in. They used a little tiny pool filled with water and rubber ducks. The little kids loved using the nets to scoop them up.

Farm Birthday Party games and activities
  • Fruit Orchard

They turned a playhouse into a little fruit orchard with a basket full of fruit balls to play with.

Farm Birthday Party ideas for toddlers
  • Cow Ball Pit

All the little kids loved the cow ball pit, to bounce in.

Farm Birthday Party game and Activities
  • Farm Themed Water Table

This water table fit the farm theme perfectly.

Farm Birthday Party game ideas
  • Petting Zoo

My favourite was the "petting zoo", created with stuffed toys and garden fencing! I love the mini hay bale detail too!

Farm Birthday Party petting zoo with stuffed animals
Farm Birthday Party for toddlers
  • Farm Crafts

There was also a wonderful craft area on the deck.

Farm Birthday Party crafts

How cute are these containers holding the craft supplies!

farm birthday party ideas
Farm Birthday Party craft ideas

There were a variety of fun farm themed crafts to choose from.

Farm Birthday Party craft ideas

It was a wonderful afternoon of playing, eating, and celebrating together.

Be sure to check out all the amazing farm themed party food here.

Farm Birthday Party ideas

With a farm party games and activities, life really is a party!

More Birthday Party Inspiration

  • Snow White Party with themed food and party decor.
    Snow White Party -Dinner and A Movie
  • The Princess and the Frog party food table set up with food from the mvoie and DIY decor.
    The Princess and The Frog Party -Dinner and A Movie
  • Free movie night printables including a free ticket, popcorn banner, food labels, and signs.
    Free Movie Night Printables
  • space themed party star moon
    Pink Outer Space Themed Party

Frequently Asked Questions

Did the Kinder eggs melt?

No, it wasn't a hot day. But if you were planning something similar in the summer, you could use plastic Easter eggs instead and put something non-meltable inside for the kids, like a small toy instead.

Where is the cow jumping pit from?

This is quite old and no longer available, but you could look for something similar on-line.

Where are the crafts from?

These were from the dollar store. Look for farm themed animal crafts there, or online.

If you try any of these ideas for farm birthday party or any other ideas on my blog please let me know how it went in the comments below. Thanks for visiting today!

Easy Sour Cream Donut Holes Recipe

Jun 20, 2011 · 4 Comments

Sour Cream donut holes in cinnamon sugar on a pate.

Easy Sour Cream Donut Holes Recipe: These easy fried donuts are moist and delicious, and rolled in cinnamon sugar.  They're the perfect treat for breakfast or dessert.

Sour Cream Donut Holes: these donuts are moist and delicious, and rolled in cinnamon sugar. They're the perfect treat for breakfast or dessert.

[feast_advanced_jump_to]

Old fashioned sour cream donuts are such a favorite of ours.  These easy sour cream donut holes are crisp on the outside and moist on the inside, and they're the perfect treat for any donut lover.  

For Father's Day, I wanted to make my husband a special breakfast. He LOVES those tiny tim donuts you get at fairs, so I thought I'd make him some sour cream donut holes.  He loved them.  We all loved them -like we always do.  They are delicious and easy to make, and the perfect treat.

You might also like our homemade Honey Crullers recipe, or these Homemade Fair Funnel Cakes Recipe.

Cake Donuts vs. Yeast Donuts

These sour cream donuts are a cake donut instead of a yeast donut, These donuts use baking powder and baking soda for their rise instead of yeast.  This tends to make for a much more moist donut, that doesn't dry out as quickly as yeast donuts sometimes do.  The texture of these old-fashioned sour cream donuts is a little more dense than yeast donuts and cake like, thus the name.  Cake donuts are also quicker to make than yeast donuts, since you don't have to wait for the yeast to rise.

how to make sour cream donuts
homemade sour cream donuts

Make Ahead

Freshly fried donuts don't keep very well.  They are best eaten the day that you make them.  But for these sour cream cake donuts you can make the donut dough the day or two before and keep it in the fridge overnight.  They work out really well for a breakfast because you can make the dough the night before, and all you have to do in the morning is fry them.

These sour cream old-fashioned donuts, like most fried food, are best if served while still warm or within a few hours of frying.

sour cream donut holes

Frying Your Donuts

You can fry these donuts in a large pot on the stove or use a deep fryer.  If you fry these donuts in a large pot of oil, the challenge is to keep the oil at the right temperature.  For this method, a deep-fry thermometer or candy thermometer clipped onto the side of the pot will make it easier.  If the frying oil is too hot, the donuts may cook too quickly on the outside and be raw still in the middle.  If the oil is too cold, the donuts will absorb too much oil and be greasy.  

You need at least two inches of hot oil in the bottom of the pot to fry the donuts.  The temperature of the oil should be at 365 degrees F for frying.  If you are using a pot of oil, keep your eye on the thermometer and adjust your burner up and down as needed.

It's much easier to use a small at home deep fryer for frying, since they have a built-in thermometer and will keep your oil at the right temperature for frying.

You can use canola oil, vegetable oil or peanut oil for frying.  You want an oil that doesn't transfer flavors and has a high smoke point.  I usually use peanut oil for frying.

After frying your donuts remove them from the hot oil using metal tongs or a metal slotted spoon and let any excess oil drip off.  Place the fried donuts on some paper towels to absorb oil, before rolling them in the cinnamon sugar coating.

Can I Bake These Donuts?

The short answer to can I bake these donuts is no.  This recipe is designed to be fried.  It gives the donuts their distinct texture of crispy on the outside and soft and moist on the inside.  Without frying there is no crispy outside, and the donuts become more like cake... in which case, better to make a really good cake than a bad cake donut.  The same goes for making them in the air fryer.  They're just better fried in oil.  If you're going to make homemade donuts, you need to fry them.

Sour Cream

The sour cream in this recipe helps keep the donuts moist and gives them the perfect cake like texture with a tender crumb.  This contracts perfectly with the crispy outside of the donut.  For this recipe you want to use full fat sour cream.  There's no butter or oil in this batter and the sour cream and egg yolks add fat to the dough which is needed.  For the best results, don't substitute low fat or no fat sour cream in this recipe.

Cinnamon Sugar

We love these donuts made as little donut holes and then rolled in cinnamon sugar while they are hot.  You can use this recipe to make full size donuts, just increase the cooking time for the larger donuts.  Make your cinnamon sugar before frying your donuts.  Combine ½ cup of white sugar with 2 tablespoon of ground cinnamon and stir together.

The cinnamon sugar will stick best to the donuts while they are hot.  It's important to roll them in the cinnamon sugar as soon as you've drained off the excess oil.  Place your cinnamon sugar on a large plate and roll the hot donut holes in it, or place them in a paper bag with the cinnamon sugar and shake it until they're fully coated.

Some people prefer a simple glaze for their sour cream donuts, which is also delicious.  Apply the glaze while the donuts are still warm for the most even coating.  Dip the whole donut, not just the top and let the excess glaze drip off by resting the dipped donuts on a wire rack.  Let the glaze set before serving.

sour cream donut holes

Recipe

Sour cream donut holes rolled in cinnamon sugar.

Sour Cream Donut Holes

Tender sour cream mini donut holes with cinnamon sugar.
5 from 1 vote
Print Pin Rate
Course: Desserts
Cuisine: American
Prep Time: 15 minutes minutes
Cook Time: 15 minutes minutes
Additional Time: 2 hours hours
Total Time: 2 hours hours 30 minutes minutes
Servings: 48 Donut Holes
Calories: 44kcal
Author: Dannyelle Nicolle-Ramjist

Ingredients

  • 2 cups all-purpose flour
  • 2 ½ teaspoon baking powder
  • ½ teaspoon baking soda
  • ½ teaspoon salt
  • ½ teaspoon ground cinnamon
  • 2 large eggs
  • ½ cup white sugar
  • ½ cup sour cream
  • 1 teaspoon vanilla extract

Cinnamon Sugar

  • ½ cup white sugar
  • 2 tablespoon ground cinnamon

Instructions

  • In a medium bowl whisk together the flour, baking powder, baking soda, salt and ½ teaspoon cinnamon.
  • In another large bowl beat eggs together until foamy. Gradually add in ½ cup of sugar and fully combine. Next add sour cream and vanilla and stir to combine.
  • Add the dry ingredients into the wet ingredients and stir until just combined. The dough will be very soft. Pat the dough into a disk, wrap it in plastic wrap, and refrigerate for at least 2 hours or up to 2 days. The dough will never become firm but it will be workable when cold.
  • Working on a lightly floured surface, pat or roll the dough out ½ inch thick. Cut out your donuts with a well floured donut cutter into donut holes or circles.
  • Heat your oil in a large pot or in a deep fryer to 365 F Fry and fry a several donut holes or full donuts at a time until they are a deep golden brown on one side, and then flipping them over until the other side is cooked. Use tongs to remove them from the hot oil and drain them on a paper towel lined plate.
  • To make the cinnamon sugar, combine ½ cup of white sugar and 2 tablespoon of cinnamon, and mix together on a plate. Roll the warm donut holes in cinnamon sugar. These are best if served while still warm or within a few hours of frying.

Notes

Note if the donuts are brown on the outside, but raw still in the middle your oil is too hot.

Nutrition

Serving: 1g | Calories: 44kcal | Carbohydrates: 9g | Protein: 1g | Fat: 1g | Cholesterol: 9mg | Sodium: 67mg | Sugar: 4g
Tried this Recipe? Tag me Today!Mention @LifeisaParty or tag #lifeisaparty!
how to make sour cream donut holes

Storing Donuts

You can store the donut dough in the refrigerator for up to two days.  After frying, these donuts are best eaten the day that they are made.  If you do have leftover donuts, they are best left out at room temperature.  If you put them in an airtight container they tend to go soft and lose any crispness, and if they are glazed the icing goes soft and runs off.  Best to keep them container slightly open and not airtight.

homemade sour cream donuts

We had a great breakfast of homemade sour cream donut holes, and cafe au laits. Sounds more like dessert doesn't it?  These are such an easy donut recipe, and perfect for enjoying with a cup of coffee in the morning or for dessert.  If you're a fan of old fashioned donuts, I know you'll love these.  These warm donuts are such a delicious treat.  The best way to enjoy these homemade sour cream donuts is as soon as they're made.

With sour cream donut holes, life really is a party!

More Great Donut Recipes

You might also like our Honey Cruller Donuts here.

Also check out Nutella Mini Donuts here.

Nutella Filled Donuts: This easy donut dough is made in the brad machine, mini sized, covered in powdered sugar and filled with nutella.

You might also enjoy our Jelly Donuts here.

Bread Machine Jelly Donuts: mini heart shaped jelly donuts, with an easy to make bread machine dough. Perfect for Valentine's Day dessert, or anytime.

Easy Moroccan Chicken Tagine Recipe

Jun 15, 2011 · 1 Comment

Easy Moroccan Chicken Tagine: easy to make without a tagine, loaded with green olives, apricots, and bacon. Sure to become a favourite.

Easy Moroccan Chicken Tagine: easy to make without a tagine, loaded with green olives, apricots, and bacon. Sure to become a favourite.

[feast_advanced_jump_to]

This easy Moroccan chicken tagine has become one of my very favourite recipes. It's easy to make and brings back memories of Morocco at Epcot centre, the closest I've come to the real Morocco -haha! It is even better the next day, and I think it might have to inspire a Moroccan themed dinner party in the near future. It's also great for a potluck, and always receives ohs and ahs from everybody.  It's a great one pot dish.  We like to serve it over plain couscous for a great dinner.  If you're a fan of Moroccan food, you will love this easy chicken tagine.

What Is A Tagine?

A tagine is traditional cooking pot and the stew inside from North Africa.  The tagine pot is a ceramic or clay cooking vessel with a large base, and a conical lid.  The tagine's unique cone-shaped lid allows for steam and condensation as part of the cooking method.  The steam and condensation rise to top of the cone shaped lid, and the condensation drips down the walls of the vessel and back onto the food creating a moist dish.  The food inside, also called a tagine, is a stew-like dish, that often includes both savory and sweet elements, and rich Moroccan spices.  It is traditionally cooked at a low heat for a long cooking time to create a tender and flavorful stew.

Do I Need A Tagine Cooking Vessel To Make This Dish?

No, you don't need to use a tagine cooking vessel to make this delicious dish.  The tagine cooking method is very similar to a dutch oven. You can make this dish in a regular casserole dish with a tight fitting lid or a dutch oven.  It won't be as authentic looking as a real tagine, but it will still be very delicious.

Chicken

Tagines are traditionally made with any meats or fish, or just vegetables.  Ours is a chicken version.  We are using skinless chicken thighs.  Because the meat is braised during a slow cooking, you will want to remove the skin.  The chicken skin won't have a chance to crisp up with this cooking method, and is best removed.  We like to use bone-in chicken thighs, because it adds more flavor to the dish.  We choose chicken thighs because of their flavor, and how moist they are with this cooking method.  You could use different chicken parts in your Moroccan tagine, if you prefer, or even a whole chicken cut up up and skin removed.

Fruit 

It's tradition to have a mix of sweet and savory in your tagine.  Meat is often paired with a dried or preserved fruit.  Our recipes uses dried apricots.  These add a wonderful sweetness to the dish.  And after a long cooking time the dried fruit becomes rehydrated and plum and juicy.  They offer a wonderful contrast to the savoury chicken and salty olives and bacon bits.

Moroccan chicken tagine
frying bacon
chopped apricots
spices
sliced olives
easy Moroccan chicken tagine

This recipe makes great leftovers, since all the flavours just meld together better overnight.  Store any leftovers in an airtight container in the refrigerator.

Serving Suggestions

I like to serve this Moroccan chicken recipe over simple couscous. The cooking liquid soaks into the couscous making it so delicious.  It's also great served with Moroccan bread to soak up all the chicken stew juices.  If you can not find it, try using pita bread as an easy substitution.

This easy moroccan chicken tagine has tons of flavor.  And the unique combination of sweet from the apricots, and salty from the bacon and olives, combined with the juicy chicken thighs and aromatic spices make this traditional slow-cooked moroccan dish a real winner.  Your taste buds will thank you for trying this dish.  This is one of our favorite chicken tagine recipes because of the wonderful blend of ingredients and the moroccan spice blend.  The tagine seasonings add so much to the dish.  It's a good idea to add this middle east inspired dish to your dinner table.  If you've never tried Moroccan cooking, this is a great recipe to try.  

how to make Moroccan chicken

Recipe

Easy Moroccan Chicken Tagine

Moroccan style chicken with bacon, green olives, and apricots.
No ratings yet
Print Pin Rate
Course: Main
Cuisine: Moroccan
Prep Time: 15 minutes minutes
Cook Time: 1 hour hour 30 minutes minutes
Total Time: 1 hour hour 45 minutes minutes
Servings: 8
Calories: 517kcal
Author: Dannyelle Nicolle-Ramjist

Ingredients

  • 6 slices bacon
  • 10 oz. chicken broth
  • 16 skinless chicken thighs
  • ½ cup dried apricots cut in half
  • 6 garlic cloves minced
  • 2 tablespoon ground cumin
  • 2 teaspoon paprika
  • 1 teaspoon hot chilli flakes
  • 1 teaspoon dried oregano
  • 3 bay leaves
  • 2 large onions chopped
  • 1 ½ cups sliced green olives

Instructions

  • Preheat oven to 300F. Chop bacon and fry in a large ovenproof dutch oven, or large pot until golden brown and crispy. Drain off excess oil, and add chicken broth. Using a wooden spoon, scrape up and stir in any brown bits from the pan bottom.
  • Stir in chicken, apricots, garlic and seasonings. (There is a lot of cumin in this recipe, 2 tbsp. is not a typo.) Bring to a boil over a high heat, stirring often.
  • Add olives and sliced onions to the mixture. At this stage if you don't have a dutch oven, simply turn chicken mixture into a casserole dish. Tightly cover.
  • Bake for 1 ½ hours, stirring halfway through. Serve over cousous.

Nutrition

Serving: 1g | Calories: 517kcal | Carbohydrates: 12g | Protein: 59g | Fat: 28g | Saturated Fat: 7g | Polyunsaturated Fat: 20g | Cholesterol: 283mg | Sodium: 1355mg | Fiber: 3g | Sugar: 6g
Tried this Recipe? Tag me Today!Mention @LifeisaParty or tag #lifeisaparty!
Moroccan chicken tagine recipe

With this easy Moroccan chicken tagine, life really is a party!

More Recipe Inspiration

You might also like Butter Chicken Pizza recipe here.

Butter Chicken Pizza: use frozen naan bread and jarred butter chicken sauce from the grocery store, for this quick and easy butter chicken pizza recipe.

Also check out our Unstuffed Zucchini recipe here.

Unstuffed Zucchini: the perfect quick and easy, one pot weeknight meal. We made cooking time quicker using zucchini zoodles.

You might also enjoy Mom's Easy Lasagna recipe here.

Easy Lasagna with cottage cheese: this is a great make-ahead, and it freezes well. Easy to put together, and sure to be a family favourite.

Camping Ideas

May 27, 2011 · 13 Comments

Camping Ideas: fun ideas to try on your next camping trip like DIY firestarters, tie foil dinners, and bacon and eggs in a paper bag.

Camping Ideas: fun ideas to try on your next camping trip like DIY firestarters, tie foil dinners, and bacon and eggs in a paper bag.

I love camping and but together some fun camping ideas that you might like to use for your next camping trip.

Last weekend, for the long weekend, our family joined a bunch of friends for a group camping trip to Sandbanks. My husband is not a camper, so I had to reach way back to my girl guide days, and pull out a few tricks!

DIY Fire Starters

Before we went I made these fun fire starters.

Materials:

  • cardboard egg carton
  • dryer lint
  • wax

How To Make DIY Fire Starters

You begin with an empty cardboard egg carton (not styrofoam, they'd be toxic to burn), add old dryer lint, and cover in wax. They worked great.

DIY campfire starters

You just let the wax dry, break them into 12 individual cups, and light the cardboard corner to start your fire.

Sandbanks Provincial Park

We went to Sandbanks Provincial park. I had never been there before, and it was beautiful. Despite the cold water, the kids had a great time the first day playing at the very sandy beach.

camping ideas

And the second day we all went to the sand dunes together, they were awesome. There was a hard core bocce ball tournament, and some pretty serious swimming, and playing in the sand too.

camping ideas

All that play made everyone hungry! A highlight of the trip for me was some of the fun outdoor cooking we did. Our friends made tin foil dinners.

Tin Foil Dinners

tinfoil dinners

They were filled with various versions of potatoes, veg, and meat to make a complete meal. The very first version of t.v. dinners? sans the t.v.

camping tinfoil dinners

Chicken with tomato, and potatoes, mushrooms and carrots -yum!

camping tinfoil dinners

One family used a tin pie plate as the base of their dinner, clever!

Over at my site, we were making baked potatoes, and corn-on-the-cob over the fire. Well, actually the potatoes are all wrapped up in foil and in the fire, amongst the coals. They didn't burn at all and were delicious!

camping ideas

Dinner was delicious, supplemented with a few roasted hotdogs for some of the 11 kids that we had between the 6 families.

Bacon and Eggs in a Paper Bags

The coolest meal -by far was the bacon and eggs in a paper bag. The last time I did this I was about 12 years old camping with the girl guides, but it was just as much fun at 30 something!

how to make bacon and eggs in a paper bag

You start out with a regular old brown paper lunch bag. Using thick slice bacon, you rub down your bag a little, and line the bottom of the bag -takes about 3-4 slices. Then you crack your egg on top, add a little s & p, and fold down the top of the bag.

camping bacon and eggs in a paper bag

Then you put a stick through the top and hold it over some hot coals for about 10 min. until it's cooked!

camping ideas

Mine turned out great!

how to make bacon and eggs in a paper bag

There were a few, shall we say, "mishaps". Don't get it near a flame or the top will catch on fire!

bacon and eggs in a paper bag

But he still ate it! Such a good sport!

camping bacon and eggs in a paper bag

Try it on your next camping trip. Hope you had a good long weekend too. Long weekend + great friends + lots of fun + great food = life is a party!  I hope these camping ideas inspire you.

You might also like our Campfire Cinnamon Rolls here.

Also check out our Campfire Muffins here.


Fairy Gardens

May 20, 2011 · 29 Comments

How To Make Fairy Gardens: See how to make fairy houses and decorate with small plants, and accessories to create the perfect container fairy gardens.

Fairy Gardens: See how to make fairy houses and decorate with small plants, and accessories to create the perfect container fairy gardens.

[feast_advanced_jump_to]

These Fairy Gardens are one of the sweetest projects I've ever made, and I was so excited about doing them. We made one for each of my little girls.  I also made one just for me so I won't turn into the bossy mom who controls the craft project by making very strong suggestions to her kids about colour and placement choices...I'm sure you can't relate. 😉 They were so cute, that I even made one for my own mom and her garden!

miniature fairy garden

Use A Container

I have heard of and even seen fairy gardens in the past and thought they were cute.  I  didn't like though that they were hard to see in a flower boarder garden, and often became grown over. Then I saw one made in a container. Perfect for the deck, where it can be easily played with and admired. (Just don't touch Mommy's, lol)

miniature fairy gardens

How To Make Fairy Houses

  • dollar store bird house
  • paint stick
  • saw
  • hammer
  • finishing nail
  • fine sandpaper
  • paint
  • glitter
  • lacquer
  • wood skewer
  • ribbon

I decided to use dollar store bird houses for the fairy houses themselves. We wanted them to look more like fairy houses, so the first thing we did was saw off the bird perch and replace it with a fairy door.  The doors are made out of a small sawed off piece of a paint stir stick.

hot to make a fairy house from a bird house


After sawing and sanding them smooth, I nailed the little paint stick door on with a small finishing nail, and left the nail protruding slightly to look like a little door knob. We also removed the eye hook from the top, and I replaced them with small flags made out of a wooden skewer and a piece of ribbon sewn on.

how to make a fairy house out of a bird house

I was also inspired by my Christmas Glitter Houses to add a little glitter to the the fairy houses. After they were painted, next I glittered the roofs and doors, and then applied several coats of clear Lacquer to make them more weather proof. I love them in all their happy pastel colours.

how to make your own fairy house

The Gardens

I used vintage galvanized steel wash basins for the gardens, as well as some enamel ware. The one for my Mom is done in a large Terracotta pot, to fit in with her other pots.

Basically use any large garden pot that you love.  Make sure there are holes in the bottom for drainage.

Fairy Garden in a terra cotta pot

Choose some small plants that won't get too big for your fairy garden.

After planting several small plants around the pot, we covered the rest of the "yard" with moss, and created a small pathway to the front door with pebbles.

simple fairy garden

Fairy Garden Accessories

Next we made the fairy clothes line so the fairies could hang out their washing.  The clotheslines are made from two wooden skewers, some kitchen string, and mini-clothes pins from the dollar store.

fairy garden clothes line

I got so excited about the fairy gardens that I wanted to include a few more little details.  I thought that a miniatures doll house store would be a great source of mini-garden pieces. At the miniature store I found this pretty little watering can, in addition to some baskets, and shovels.

fairy garden miniature watering can

miniature fairy garden

How cute are these little rubber boots!

fairy garden miniature rubber boots
miniature fairy garden in a galvanized bucket

This fairy must have left them outside of her door after a long, hard day of work out in the garden. 😉

Another fun detail was to use the stamped spoons I made here, as a welcome sign.

stamped spoon
miniature fairy garden scene

Ceramic Mushroom Makeover

This pot has a fun toadstool mushroom in it. I found these brown ones at the dollar store.

dollar store birdhouse and mushroom for a fairy garden

Next I spray painted it bright pink.

fairy garden mushroom

After the mushroom was painted pink, I added glitter dots. Then when I lacquered it, the finish crackled slightly, but I thought it added a little realistic mushroom texture.

fairy garden mushroom

I love how it looks like a shady spot for a garden fairy to rest on this cute little metal chair after her hard work.   The chair is also from the miniature store. Isn't the mini shovel propped up against it the sweetest?

fairy garden containers

Groups Of Pots To Make A Fairy Village

My little girls each made one large garden in the galvanized wash tubs.  I did mine in several other little pots. I love the way the pots look all clustered together, like there is a new fairy sub-division that just was built in town. Time to put up the "For Rent" sign and see if any fairies move in!

fairy garden pots grouped together

With our own Fairy Gardens, life really is a party!

More Fairy Garden Posts

You might also enjoy How To Make a Fairy Garden House with old Seed Packages

Also check out  How To Make A Fairy Garden

Another fairy garden post you might enjoy is Teacup Fairy Gardens


40th Wedding Anniversary Party Ideas

May 15, 2011 · 12 Comments

40th Wedding Anniversary Party Ideas: celebrate the ruby anniversary with red and pink cherry bloosom decor, and a tea party reception.

40th Wedding Anniversary Party Ideas: celebrate the ruby anniversary with red and pink cherry blossom decor, and a tea party reception.
40th Wedding Anniversary Party Ideas: celebrate the ruby anniversary with red and pink cherry bloosom decor, and a tea party reception.

[feast_advanced_jump_to]

Yesterday some friends celebrated their 40th wedding anniversary party, and I helped out with the decor and food for a tea party inspired get together to celebrate.  I thought you might like some 40th wedding anniversary ideas too.

The anniversary couple wanted to celebrate with an open house style party, where guests could drop in over several hours.  They wanted to offer some foods for their guests, and tables to sit at in their church hall.  We decided that a tea party menu would be perfect for the afternoon with an assortment of finger sandwiches and nibbles along with some bite sized sweets.  The married couple don't drink, so tea and punch were perfect for an afternoon of visiting with family and friends.  They didn't want any dancing or speeches, just a chance to see long time friends and celebrate this special day having a good time together.

The Ruby Anniversary

A 40th wedding anniversary is traditionally the ruby anniversary, so we tried to incorporate some red into the party and went with a red and pink colour scheme, one of my very favourite colour combinations.  You'll also notice lots of little red gem accents here and there.  Since it was spring we went with a cherry blossom theme to the decor for this 40th anniversary party.

cherry blossom party centre piece

40th Wedding Anniversary Centerpieces

Cherry Blossoms

We used their church hall for the party area, and tried to give it some character with our decor for the anniversary celebration. Because a lot of their guests were elderly it was important to them to have tables that everyone could sit at to visit and enjoy the food.  The round tables had simple white cloths, and beautiful organza pink table runners.  We used silk cherry blossoms as the flowers, and put them in real water to weight the vases, and make them look more authentic.  The silk flowers worked out really well.  They were very good quality.  After the party the family was able to take them home afterwards and have them as a keepsake of the party. 

Roses and Candles

I wanted a grouping of three items on the table so we used a tea light in a simple glass tea light holder, and some roses.  I originally thought of roses in silver julep cups, but they were a little over budget, so I had the great idea of using silver creams and sugars which we were able to rent.  We were renting some other dishes and serving pieces so this worked out well.  Another options was that we also could have looked at thrift stores for silver cream and sugar sets to use. It was eclectic, and vintage feeling and went great with our tea party theme.  

We filled them with pink and red roses to go with our color scheme and they looked beautiful.  It was a great way to add some red flowers to go with our ruby theme.  We picked up all the fresh roses the day before the party from Costco for a great price.  Because the cherry blossoms were faux, it was nice to have some fresh flowers on the table too.  We also used lots of roses on the main food tables.  We arranged them very simply in large glass vases, but they linked in very well with the roses on the tables.

40th wedding anniversary party ideas

Photographs

Another fun detail, to tie in the ruby anniversary was that we hung some black and white family pictures on the cherry blossoms.  This was a really lovely way to mark this major milestone.  And family and friends loved seeing all the old pictures of the couple through the years, including some old wedding pictures.  After so many years of marriage together there were lots of wedding photos and happy memories to choose from, including their kids growing up up and grandkids, and this was a really fun way to display them, and include each family member in the celebration.  

We photocopied the original photos all in black and white and printed them on cardstock, then we added some beautiful red gem stickers to tie in the ruby anniversary theme, and glued red ribbons on the back to hang them from.  This was such a fantastic way to add to our ruby theme.  We had three different photos at each centerpiece, and the guests tended to walk around and admire them all.  It was a great talking point as well, and sparked many "remember when" stories of the couple and family and friends.  Afterwards the family used these pictures, along with photos taken at the anniversary party to make a beautiful scrapbook to remember the day.  This will become a family treasure.

40th wedding anniversary party

40th Anniversary Banner

One little item we had to work around with the hall was the large bulletin boards in the hall.  We didn't want them to distract from the big celebration.  So, we covered the room's bulletin boards with some simple white table cloths held with push pins to create a neutral background. At the front of the room I wanted to create a focal point behind the food tables so we hung a beautiful banner to mark the occasion.  We made the 40th anniversary banner with red and pink scrapbook papers, and letters, and beautiful red and pink ribbons so it tied in with our color scheme.

40th wedding anniversary banner

Above the banner we hung a gorgeous bouquet of paper lanterns. This was my favourite detail of the entire day - I love how the Japanese cherry blossom lanterns tied into our theme.  I shopped for lanterns in a variety of sizes and colors, including pink and red and our cherry blossom ones which I found at an Asian mall.  I tied them all together and added in some long pieces of red and pink ribbons.  This was a really nice more elegant alternative to using balloons.  They were a perfect festive touch for a joyous occasion.  And after the party we were able to collapse them and re-use them later.

cherry blossom party decor

These were the background for the two food tables one was savoury and the other was full of sweets.

40th wedding anniversary party decor

More Cherry Blossom Details

It's always fun to add more party details to go with your party theme, we came up with a few more fun cherry blossom touches.  We added some red and pink roses to the washroom, along with Bath and Body Works cherry blossom foaming hand soap and hand cream. Love is in the details!

cherry blossom party ideas

We used lots of red and pink roses on the food, and drink tables, and various red and pink candles in silver and mercury glass candle holders.  The fresh flowers were gorgeous.

40th anniversary party ideas

A fun detail on the coffee and tea table, which the couple added and I will definitely use again in the future was to add a tiny amount of coloured sugar to the regular sugar. Isn't it pretty?!

40th anniversary party ideas

40th Anniversary Tea Party Menu

The food for the party turned out really well. For the savoury table we served a variety of tea sandwiches.  We served:

  • veggies and dip
  • cheese and crackers
  • chicken salad toast cups
  • cream cheese pinwheels
  • ham and cheese sandwiches
  • egg salad on a mini croissant
  • salmon salad sandwiches
  • cucumber sandwiches
40th wedding anniversary

We served the veggies and dip in a small plastic cup, which the guests loved the ease of.  There was no double dipping, and these were so easy to serve and for guests to enjoy.

individual veggies and dip

There was also a large cheese tray. I lined up the cheese and crackers in rows, and thought it made for a really pretty presentation.

cheese tray

We made a variety of tea sandwiches.  I made them the fillings the night before and then assembled the sandwiches the morning of the party, wrapping them well in plastic wrap.  Just before the party I sliced them, and arranged them on the serving trays, replenishing as needed.  They held up really well.

tea party reception

There were toast cups with chicken salad and onion sprouts -find my recipe here, cream cheese pinwheels, ham and Swiss cheese with honey mustard, egg salad on mini croissants, salmon, and cucumber fingers.

tea party finger sandwiches
tea party 40th wedding anniversary

I made some cute picks and used them in some of the sandwiches.

40th wedding anniversary tea party

The Desert Table

There was also a sweet table.  We served

  • cupcakes
  • fruit tray
  • lemon tarts
  • shortbread cookies
  • chocolate spritz cookies
  • mini chocolate eclairs
  • pink meringue kisses
40th wedding anniversary dessert table

The highlight of the dessert table was the cupcakes, looking so beautiful on their pink and white stands. 

cupcakes

I made the cupcake labels, and the pics for the sandwiches with a cherry blossom graphic I found on-line to tie back into our theme.

strawberry cupcakes on a pink cake stand

Along with the cupcakes, I made a large fruit tray. I placed the fruit in rows, like the cheese and crackers, for a pretty presentation. I was lucky enough to find toothpicks for the fruit with tiny hearts on theme. How fitting for a wedding anniversary.

large fruit tray
wedding anniversary tea party

The rest of the delicious sweets were made by the family and friends, and included lemon tarts, shortbread and chocolate spritz cookies. We also included mini chocolate eclairs, and some pink meringue kisses.

wedding anniversary dessert table
tea party desserts
tea party dessert table

It was a beautiful day for a beautiful happy couple.  They had a wonderful time remembering their wedding day, and celebrating with old and new friends.  I loved all the cherry blossom and red and pink details for celebrating a 40 year anniversary. I think they'd be a beautiful themed party for a shower, birthday, wedding or any spring special occasion party.

40th wedding anniversary party ideas

Congratulations Ian and Lois, 40 years married and still very much in love, sometimes life is a party!

More Party Inspiration

You might also enjoy our 5 Inexpensive DIY Party Decor Ideas.

5 Inexpensive DIY Party Decor Ideas: Use wrapping paper, washi tape, scrapbook paper, and vintage bottles to create your own party decor.

Also check out 5 Tips To Create A Pinterest Worthy Party On A Budget.

Chocolate Spa Party

May 9, 2011 · 6 Comments

Chocolate Spa Party: ideas for chocolate themed decor, a chocolate dessert buffet, chocolate manicures and a homemade chocolate sugar scrub.

Chocolate Spa Party: ideas for chocolate themed decor, a chocolate dessert buffet, chocolate manicures and a homemade chocolate sugar scrub.

Chocolate Spa Party: ideas for chocolate themed decor, a chocolate dessert buffet, chocolate manicures and a homemade chocolate sugar scrub.

[feast_advanced_jump_to]

This weekend our Women's ministry group at church hosted a Chocolate Spa party. It was a great night and I'd highly recommend this theme for a shower, girls night out, or birthday party idea.  It was just a lot of fun.

Every chocolate party needs first of all chocolate and lots of it! We had chocolate decor, chocolate scented candles, and of course lots of actual chocolate too!

Chocolate Party Decorations

The decor was simple brown and white, and turned out really well. We used white table cloths and layered brown tulle on top.  I also had lots of chocolate scented candles, which made the room smell wonderful when you walked in.

chocolate scented candles

We always have to do these events on a very limited budget, but it's great what you can find at the dollar store these days! Neutral pieces, like these clear glass candle holders work great that we can dress for any theme with a little ribbon and different coloured candles, and our plain white table cloths dressed up with the inexpensive brown tulle.

I also used some pussy willows, I love their natural brown and white colour, in a milk glass vase.

chocolate scented candle

Chocolate Buffet

I used my milk glass collection for the chocolate buffet also, along with lots of chocolate treats, to create a fun candy buffet.

chocolate dessert buffet
chocolate themed dessert table

To add a fun detail we created a simple banner and hung it over the food table that said "A day without chocolate is like a day without sunshine.

chocolate party banner
chocolate themed party decorations

We also created some really fun pics to put in the food with some other funny chocolate says on them, and embellished them with a few brown sequins.

chocolate themed party

We served up lots of chocolate desserts. There was a delicious chocolate cake.

chocolate dessert table buffet

The highlight might have been the chocolate fountain, a must for any chocolate party. 😉

chocolate fountain

There were also chocolate chip cookies, brownies and home made fudge!

chocolate dessert table
chocolate spa food ideas

I made my chocolate trifle, get the recipe here, and there was also this amazing chocolate tart.

chocolate trifle
chocolate spa dessert table

Chocolate Spa Activities

Along with lots of eating, there were some chocolate spa activities.

Chocolate Manicure

We started out with giving a partner a hand massage with chocolate scented hand lotion. Then we did each others nails with chocolate inspired nail polish.

chocolate manicure
chocolate spa manicure

Chocolate Sugar Scrub

The final chocolate activity was making a take-home chocolate sugar scrub. I set up all the ingredients, and everyone made their own.

chocolate sugar scrub recipe
how to make a chocolate sugar scrub
chocolate spa sugar scrub recipe

Chocolate Sugar Scrub Recipe

  • Demerara Sugar ¼ cup 
  • Cocoa Powder 1 tbsp 
  • Oatmeal Powder 1 tablespoon (which is oatmeal ground into a powder in your food processor)
  • Honey 1 tbsp 
  • Olive Oil 1 tbsp

Mix all the ingredients together and store in an airtight jar. To use, wet skin, use scrub to exfoliate, and rinse with warm water.

chocolate spa sugar scrub recipe

It was a wonderful, chocolate filled night. With a chocolate spa party, life really is a party!

You might also like our Chocolate Charcuterie Board here.

Chocolate Charcuterie Snack Board: perfect for the chocolate lover, tips on building your board, and ingredient suggestions.

Also check out our Chocolate Pavlova recipe here.

Individual Heart Shaped Chocolate Pavlova: Easy recipe, perfect light, sweet dessert.

Easy Individual Mini Trifle Cups Recipe

Apr 8, 2011 · 8 Comments

Group of individual trifles in glass dessert bowls.

These easy mini trifle cups are easy to make with store bought ingredients and are always a hit with guests. You can make them ahead of time, and don't have to worry about serving as they're individual sized already. They only take about 10 minutes to put together.

Easy individual trifles with whipped cream and a fresh raspberry on top.
[feast_advanced_jump_to]

Why We Love This Recipe

  • Store bought ingredients mean they are very easy to make.
  • They only take 10 minutes to put together.
  • Invidual serving size means no messy dishing up, and everyone can help themselves.
  • What could be more delicious than cream, custard, fruit and cake?

I love these mini trifles. I have served them many, many times and they are always a huge hit with guests.  These individual trifles are great for a tea party, dessert table, or as your main dessert.

You might also like our mini chocolate brownie trifles, Easter trifle with mini eggs, our mini caramel apple trifles, or individual black forest trifles.

Individual Serving Size

I like to make these mini trifles in a small glass, or mini parfait dessert bowl, half pint-sized mason jars, or mini trifle bowls, or even in a clear plastic disposable cup.  

A clear cup works well, as you can see all the layers through the glass, and they're the perfect individual serving size.  These individual desserts making serving so much easier.  And there's also the cuteness factor, because these mini trifle cups make such a beautiful presentation.

Ingredients

Easy individual trifle cup ingredients.

These are super easy to put together because I used all store bought ingredients.  You can put these together quickly and easily and they're so good.

This recipe is more of an assembly kind of a recipe, you could of course make the custard and pound cake from scratch, but this version is quick, easy and really, really yummy.

This no bake dessert is quick to make and so delicious.

  • Cake

I like to use pound cake as the cake layer in my mini trifles.  

If you can't find pound cake you could also use a sponge cake, or small jelly rolls, or even angel food cake.  

If you can find a raspberry pound cake it works perfectly for the raspberry trifles, but plain pound cake or lemon pound cake works really well for these mini berry trifles.

  • Custard

Trifle is traditionally made with custard.  You can make it from scratch, or use a mix to make it.  Or, like I did, you can look for the canned version.  

Using canned custard makes this whole recipe so easy to put together.  If you can not find custard you would also use vanilla pudding instead.

  • Jam

Traditional English trifle usually has a jelly layer.  But making jello and allowing it to set takes quite a while, so I have substituted it with jam.  It works really well to add some sweetness to the dish.  

You can change the fruit in this dish, and if you do then change the jam flavor to match it.  For individual strawberry trifles, you could use strawberry jam instead of raspberry.

  • Fruit
How to make easy individual trifles with raspberries.

Our raspberry trifles have a layer of fresh raspberries in them.  The fresh berries add a tangy freshness to the dish.  And be sure to keep a perfect fresh raspberry to garnish the top of the trifles.

  • Whipped Cream

We made homemade fresh whipped cream using heavy cream for this dish.  Despite using some other shortcuts, I would not use a shortcut for this step.  Spray whip cream from a can won't hold, and turns into a watery mess if it isn't served immediately.  A dessert topping like Cool Whip just doesn't have the same great flavor of real whipped cream.  

Whipped cream is easy to make, and worth the few minutes that it takes to make it from scratch, especially when you're saving time on the other steps by using a store bought pound cake and canned custard.

Substitutions and Variations

I love these in raspberry flavour, but you could really use any jam and fresh fruit in them.  Strawberry would be great, and blueberry is a favourite too.

You can also use this mini trifle recipe to make one large one instead.  Instead of using individual small bowls, layer the ingredients in a large trifle bowl instead.

Instructions

Making mini trifles with pound cake cut into cubes.

1. Assemble each mini trifle in a small juice glass, or mini parfait, or small mason jar. First, cut the pound cake into small cubes, and layer into the bottom of the glass.

2. Next take some raspberry jam, and warm it up in the microwave to make it more runny. You can also add a tsp. or so of water to the warm jam to make it more runny. Pour about a tablespoon of jam or 2 over the pound cake in each glass.

Step by step pictures of making mini trifles, adding the pound cake and adding the jam.

3. Add some fresh raspberries as the next layer, but remember to save a few for the top.

4. The next layer is the custard, just spoon some over the raspberries. If you do make it yourself, let it cool before you add it.

Step by step mini trifle recipe, adding raspberries and custard.

5. Then, whip the cream in a stand mixer fitted with the whisk attachment until stiff peaks form. Next, add 1 teaspoon vanilla and 2 tbsps of sugar and whip to combine. Add a layer of whipped cream to the mini trifles as the final layer. Garnish with another raspberry and a little grated chocolate.

 Individual mini trifles recipe in glass dessert cups.

Storage

These delicious treats are a great make ahead.  Make them the night before and wrap the top of each one with plastic wrap and store them in the refrigerator until it's time to serve them.

Store any leftovers in the refrigerator wrapped in plastic wrap.

Tip: Make these individual trifles ahead of time for a party. Assemble the day before and wrap each one in plastic wrap, and store in the refrigerator until it's time to serve.

Frequently Asked Questions

Can I use different berries?

Yes, substitute your favorite berry, and change the jam flavor to match. Strawberry, blueberry, or mixed berries are all great options.

What if I can't find canned custard?

You can make your own custard, look for a custard mix like Bird's custard powder at the grocery store and follow the instructions on the package. Or, make it from scratch.

What if I can't find pound cake?

You can substitute jelly rolls for the pound cake if you can't find any.

Can I make these ahead of time?

Yes, make these the day before wrap each one in plastic wrap, and store in the refrigerator until serving.

More Individual Dessesrt Ideas

  • Individual chocolate brownie trifle in a glass with gold spoons.
    Mini Chocolate Brownie Trifles
  • Caramel apple trifles made in mason jars.
    Caramel Apple Trifle
  • Dirt Pudding no cream cheese in glasses with candy rocks, and fresh mint that looks like a little plant.
    Easy Dirt Pudding Recipe without Cream Cheese
  • Mini no bake cheesecake with blackberries.
    Easy Mini No Bake Philadelphia Cheesecake in a Mason Jar

If you tried this Easy Mini Trifle Cups Recipe or any other recipe on my blog please leave a star rating and let me know how it went in the comments below. Thanks for visiting today!

With easy mini trifles, life really is a party!

Recipe

Group of individual trifles in glass dessert bowls.

Easy Mini Trifles

Video

Individual trifle cups made with pound cake, raspberry jam, fresh raspberries, custard, and whipped cream.
5 from 1 vote
Print Pin Rate
Course: Desserts
Cuisine: British
Prep Time: 15 minutes minutes
Total Time: 15 minutes minutes
Servings: 8
Calories: 283kcal
Author: Dannyelle Nicolle-Ramjist

Ingredients

  • 1 raspberry or plain pound cake
  • 1 pint fresh raspberries
  • 8 tbsp. raspberry jam
  • 400 g can of Devon custard
  • 236 mL whipping cream
  • 1 teaspoon vanilla
  • 2 tablespoon sugar
  • grated chocolate

Instructions

  • Assemble each mini trifle in a small juice glass, plastic cup, mini parfait, or small mason jar. First, cut the pound cake into small cubes, and layer into the bottom of the glass.
  • Next take some raspberry jam, and warm it up in the microwave to make it more runny. You can also add a teaspoon or so of water to the warm jam to make it more runny. Pour about a tablespoon or 2 over the pound cake in each glass.
  • Add some fresh raspberries as the next layer, but remember to save a few for the top.
  • The next layer is the custard, just spoon some over the raspberries. If you do make it yourself, let it cool before you add it
  • Then, whip the cream in a stand mixer fitted with the whisk attachment until stiff peaks form. Next add 1 teaspoon vanilla and 2 tablespoons of sugar and whip to combine. Add a layer of whipped cream to the mini trifles as the final layer. Garnish with another raspberry and a little grated chocolate.

Notes

You can change out the berries and jam for any kind you prefer, or make these from mixed berries.
This recipe uses lots of time saving store bought ingredients. Do not substitute the homemade whipped cream for spray can whipped cream, because it will not hold it's shape well.  If you are using it, add it just before serving so that it doesn't go runny.
You can make these ahead of time and wrap each one in plastic wrap.  Store in the refrigerator until serving time.
 

Nutrition

Serving: 1g | Calories: 283kcal | Carbohydrates: 36g | Protein: 4g | Fat: 14g | Saturated Fat: 8g | Polyunsaturated Fat: 5g | Cholesterol: 64mg | Sodium: 86mg | Fiber: 3g | Sugar: 21g
Tried this Recipe? Tag me Today!Mention @LifeisaParty or tag #lifeisaparty!

Easy Mushroom and Feta Mini Pita Pizza Recipe

Apr 6, 2011 · Leave a Comment

Pita pizza with mushrooms and feta cheese.

Portobello Mushroom and Feta Mini Pita Pizzas: an easy recipe great for a party or as an appetizer, perfect for a mushroom lover.

Pita pizza with mushrooms and feta cheese.
[feast_advanced_jump_to]

These portobello mushroom and feta mini pita pizzas are an old favourite of mine.  They're the perfect easy appetizer and I love serving them for a party.  They're super easy to make using a pita as the pizza base, but they're elevated with our toppings of portobello mushrooms, feta and mozzarella cheese, and fresh basil.

mini pita bread pizza recipe

Mini Pita Pizza Crust

These little pizzas are simple to make, and really delicious. We use a pita bread as the pizza crust for these mini pizzas.  No fussing with pizza dough is necessary, which makes them very quick to make, and even quicker to bake.  A regular pita bread is the perfect size for these little pizzas, and makes great personal pizzas.  And if you want to make very small pizzas, you can use mini pita bread for even smaller pizzas.  We've used greek pitas from the grocery store for our pita bread pizza.  Look for them in the bread aisle.  When the pita bread is in the oven, the edges crisp up nicely and add a slight crunch.

mini pita bread pizzas

Mini Pita Pizza Toppings

You can really top your greek pita pizzas with any of your favorite toppings that you like.  Any regular pizza toppings would be delicious.  We love this special portobello mushroom and feta version with fresh basil leaves though.  It's the perfect combination of meaty mushrooms, salty feta, and fresh basil taste, and we're sure you'll love it too.  

Because pita pizzas don't take very long to bake, since the pizza bases are already baked, and all you're really doing is melting the cheese, we will pre-cook the mushrooms and onions for this pizza.  Wash and slice the mushrooms and onions, and sautee them in oil with garlic.  Then start by building your pizza by layering tomato sauce on your pizza base.  And then on top of the pizza sauce lay down 5-6 whole fresh basil leaves.  This simple step is so important because it adds so much to the dish.  Portobello mushrooms work really well here because they're more meaty and have a great earthy taste.  Add the sauteed mushroom mixture on top of the pizza sauce,   Lastly add the cheese.  We use a combination of mozzarella cheese, because it melts so well, and feta cheese for it's great taste.  Lastly, place pita bread on baking sheet and grill until the cheese is melted.  

These easy pita pizzas are so simple to make, but always a crowd favorite when I serve them as appetizers at a party. 

Store any leftover pizzas in an airtight container in the refrigerator, and reheat in an oven or toaster oven.

easy portobello mushroom and feta pizza recipe

These are the perfect recipe to serve with drinks at cocktail parties, or as an appetizer at a dinner party. You could even make them for a quick dinner with a salad that the whole family would love. They're faster to make than delivery pizza for your next pizza night. Try this easy pita pizza recipe next time you have a busy night and I'm sure you'll love them too.

Recipe

Pita pizza with mushrooms and feta cheese.

Portobello Mushroom and Feta Mini Pita Pizza

Easy pita pizza topped with portobello mushrooms and feta cheese.
No ratings yet
Print Pin Rate
Course: Appetizers
Cuisine: American
Prep Time: 10 minutes minutes
Cook Time: 10 minutes minutes
Total Time: 20 minutes minutes
Servings: 4
Calories: 288kcal
Author: Dannyelle Nicolle-Ramjist

Ingredients

  • 4 pitas
  • 2 portobello mushrooms
  • ½ red onion
  • 1 bunch fresh basil
  • 1 clove garlic
  • ½ cup pizza sauce
  • 1 cup shredded mozzarella cheese
  • ¼ cup feta cheese

Instructions

  • Slice the portobello mushrooms, and chop the onion. Saute in olive oil, with a clove of minced garlic, and salt and pepper to taste, until the onion is transparent.
  • Lay out pitas on a cookie sheet, as the base of the pizzas. Top with pizza sauce. Lay 5-6 fresh basil leaves on top of the sauce.
  • Top with the sauteed onion and mushroom mixture.
  • Sprinkle with shredded mozzarella cheese, and crumbled feta.
  • Broil, until the pizza is heated through, the top is lightly browned and the cheese melts. Cut into quarters with a pizza cutter and serve.

Nutrition

Serving: 1g | Calories: 288kcal | Carbohydrates: 41g | Protein: 14g | Fat: 8g | Saturated Fat: 4g | Polyunsaturated Fat: 2g | Cholesterol: 22mg | Sodium: 667mg | Fiber: 3g | Sugar: 4g
Tried this Recipe? Tag me Today!Mention @LifeisaParty or tag #lifeisaparty!
portobello mushroom and feta pizza

With Portobello Mushroom and Feta Mini Pita Pizzas, life really is a party!

More Pizza Recipe Inspiration

You might also like our Butter Chicken Pizza here.

Butter Chicken Pizza: use frozen naan bread and jarred butter chicken sauce from the grocery store, for this quick and easy butter chicken pizza recipe.

Also check out our S'mores Pizza here.

S'mores Pizza: For this smores pizza recipe use nutella, marshmallows and graham crackers on your pizza for a perfect summer treat.

You might also enjoy our Backyard Pizza Party here.

Backyard Pizza Party: A gas outdoor pizza oven and a pizza charcuterie board for nibbling and to make-your-own-pizza is perfect for summer entertaining.

Valentine's Day Play Dough with Glitter!

Feb 3, 2011 · 8 Comments

Almond Scented Glitter Play Dough: make your own almond scented and glittery play dough for Valentine's Day, your kids will LOVE!

Yesterday was a snow day here, and my little girls needed an activity to keep them busy for awhile. We decide to make some Valentine's Day play dough together.  I remember my mom making us play dough as a kid, but I had never made it before. It was super easy, and has already provided hours of fun! And to make it extra special, we added glitter for Valentine's Day, and almond extract for a great smell!

play dough secret ingredients
how to make homemade play dough
how to make scented play dough

The finished play dough turned out to be really pretty with all the glitter, and smelt great too. I dug out all my Valentine's Day cookie cutters and the girls had a great time creating, while I got on with another project. 😉

how to make glitter play dough

Valentine's Day play dough

I think this would be great for a Valentine's Day party activity also, and you could make cute containers of it for everyone to take home as a favour. The possibilities are endless!

Recipe

Almond Scented Glitter Play Dough: make your own almond scented and glittery play dough for Valentine's Day, your kids will LOVE!

Almond Scented Glitter Playdough

No ratings yet
Print Pin Rate
Author: Dannyelle Nicolle-Ramjist

Ingredients

  • ½ cup salt
  • 1 cup flour
  • 1 tablespoon cream of tartar
  • 1 tablespoon oil
  • 1 cup water
  • food colouring

Instructions

  • Combine ingredients in a saucepan. Heat gently, stirring all the time. When the dough has a good consistency, take it off the heat and allow to cool.
  • I added about a tablespoon of almond extract to the ingredients to make it smell extra special too. My girls loved it. I didn't add the food colouring at the beginning because I wanted to make two colours out of one batch. So, when it was done cooking, rather than leave it to cool I divided it into two balls and added food colouring and sprinkles to them and kneading it until it was well mixed.

Nutrition

Serving: 1Servings
Tried this Recipe? Tag me Today!Mention @LifeisaParty or tag #lifeisaparty!

With Valentine's Day  play dough, life really is a party!

You might also like our Valentine's Day Family Pizza Party here.

Valentine's Day Pizza Party -DIY decorations, heart shaped pizza, mocktails, and a dessert pizza recipe make this the perfect family celebration.

Also check out Valentine's Day Breakfast here.

Valentine's Day Breakfast: the perfect inspiration with decor and menu for celebrating Valentine's Day with family and friends.

You might also enjoy our Valentine's Day at Home Spa here.

Valentine's Day At Home Spa: surprise your tween or teen daughters with face masks, manicures, fancy refreshments, candles, and a bubble bath.


Heart Shaped Cinnamon Rolls and Pink Hot Chocolate

Jan 28, 2011 · 25 Comments

Heart Shaped Cinnamon Rolls and Pink Hot Chocolate: use easy store bought ingredients to make this Valentine's Day sweet treat.

Heart Shaped Cinnamon Rolls and Pink Hot Chocolate: use easy store bought ingredients to make this Valentine's Day sweet treat.

[feast_advanced_jump_to]

Valentine's day is getting closer, and with two pink loving little girls in the house, it's time to start celebrating. What better way to celebrate than with easy heart shaped cinnamon rolls and pink hot chocolate?  The perfect Valentine's Day snack.

Today was a wonderful, lazy, don't need to be anywhere Saturday at our house. We did crafts, watched Valentine's Day cartoons, and played all day. I had an idea for a really sweet snack. 

Heart Shaped Cinnamon Rolls Ingredients:

  • store bought refrigerated cinnamon rolls
  • heart sprinkles

How To Make Heart Shaped Cinnamon Rolls

I started out with Pillsbury ready to bake Cinnamon Rolls with icing.

easy heart shaped cinnamon rolls

I tried to half un-roll them.

how to make heart shaped cinnamon rolls

Then I re-rolled them, and pinched the bottom to form a heart shape.

how to make heart shaped cinnamon rolls

Then I baked them in rows on a small baking tray, according to the package instructions.

With a little icing and heart shaped sprinkles, I think they turned out pretty well, and the kids loved our "love buns".

heart shaped cinnamon rolls for Valentine's Day

Pink Hot Chocolate

I thought it would be fun to have them with some pink hot chocolate. I had some white hot chocolate mix, that I bought very inexpensively from the bulk barn.  If you couldn't find white hot chocolate mix, you could heat some milk and add some melted white chocolate to make the white hot chocolate.

how to make pink hot chocolate
pink hot chocolate

I added a couple of drops of red food colouring, and voila, PINK HOT CHOCOLATE! And it seemed like the right occasion to pull out my little heart shaped tea cups.

how to make pink hot chocolate

Easy Heart Shaped Marshmallows

One final little sweet detail...heart shaped marshmallows. I cut a regular marshmallow in half, and then used a mini cookie cutter to cut out the heart shape.

how to make heart shaped marshmallows

We all enjoyed our Valentine's day heart shaped cinnamon rolls and pink hot chocolate with heart shaped marshmallows.

heart shaped cinnamon buns
heart shaped cinnamon rolls and pink hot chocolate
pink hot chocolate

Life is a party, a pink party!

You might also like our Valentine's Day Pizza Party here.

Valentine's Day Pizza Party -DIY decorations, heart shaped pizza, mocktails, and a dessert pizza recipe make this the perfect family celebration.

Also check out Homemade Valentine's Day Lollipops here.

Homemade Lollipops -recipe for the perfect sweet treat for Valentine's Day or any day. Including a free printable Valentine to go with it.

You m might also enjoy Hot Chocolate Valentines here.

Hot Chocolate Valentine: use our free printable valentine card and hot chocolate label to create beautiful classroom Valentines.

Construction Themed Birthday Party Ideas

Jan 8, 2011 · 9 Comments

Construction themed birthday party with tool kits clock out table with party favors.

Construction Birthday Party: from a rice bin construction centre, to working on a cardboard play house, to building your own cupcake, this construction party is full of fun ideas your little one will love.

Construction Birthday Party: from a rice bin construction centre, to working on a cardboard play house, to building your own cupcake, this construction party is full of fun ideas your little one will love.
[feast_advanced_jump_to]

Today was my Goddaughter Tara's third birthday, and she wanted a construction theme birthday party. This is such a fun theme for and little girl or little boy who loves all things construction zone.  I'm excited to share all the construction themed party ideas with you.

We might usually think of a construction themed party as a "boy" theme, but the birthday girl and lots of her guests who were girls loved it, proving this is really a gender neutral party theme if you want it to be.  

You might also like our Oscar the Grouch Themed Party.

Tara was wearing the sweetest custom made shirt from etsy, and beautiful blue tulle tutu skirt to match! She looked so cute.

Clocking Into The Party

Guests were greeted into the party space by a welcome table by the door with a "Clock In" Station, where they received personalized yellow hard hats, and a tool belt.

clocking in to a Construction Birthday Party
Construction Birthday Party

Construction Birthday Party Activities

After the kids got their equipment on, it was off to enjoy the construction party themed activities and party games!  The party room was set up with lots of different activity centers.  The kids were welcome to rotate around to the different centers as they wanted too.  There was no time limit or rotation.  Some kids gravitate to certain areas and played longer in some areas than others.  

I love this idea for kid's birthday parties, especially with younger kids.  They could explore all the centers, or find their favorite and stay there, or revisit different areas.  This was a family party, so the parents stayed and were able to guide their kids through the different centers and help them if they needed any assistance.  And there was a real age range of kids, from babies to toddlers to about 7 years old.  Everyone seemed to find activities that they enjoyed and held their interest

Rice Bin Construction Site

There was a rice bin full of toy bulldozers and dump trucks for all the little construction workers to play in.  This was such a fun sensory activity for the kids and they loved it.  

So easy to put together too.  Use a large and low plastic container or a kiddie pool and fill it with rice, then add in lots of construction vehicles.  Scoops or a plastic shovel work great for loading the trucks and construction toys with the rice.

rice bin construction centre

Cardboard House Building

There was also a great cardboard house set up for the kids to enjoy.  The house is made of printed cardboard, and the kids could color it with markers during the party.  There was also a workbench set up beside it full of fun toy tools for the kids to pretend to build the house.  The kids all loved working on the little dream house, coloring, pretending to build it, and playing inside of it together for a long time.  After the party, the birthday girl was able to enjoy it in her playroom at home.

Construction Birthday Party
cardboard play house
Construction toy bench

Road Building and Construction Site

There was also a play area with a toy garage, vehicles, road rug, and wooden blocks for any kids to play with if they wanted to.  The kids loved driving the cars around the little roads, parking at the toy garage, and building a town with the blocks along the roads.

Construction Birthday Party play centre
Play Dough

Another station at the party was a play dough station.  It was set up with homemade play dough, and some really cute tool themed cookie cutters, and rolling pins.  The kids could play with the play dough, rolling it out, and cutting out different tool shapes to play with.  They also loved just playing with it and sculpting their own shapes as well.

Construction Birthday Party play dough centre

Construction Birthday Party Decorations

Tara's mom made her a really fun happy birthday banner, with an amazing tool font for the letters.  The construction-themed birthday party color scheme was inspired by traffic cones and caution tape.  The yellow and orange were perfect for the theme.  The banner was made with poster boards as the orange background and the letters were printed on yellow paper.  These DIY construction party supplies looked so great at the party.

Construction Birthday Party birthday banner

Throughout the party, there were all kinds of fun construction signs, like this one on the front door.  It's made from poster board and sticker letters.

Construction Birthday Party diy signs
Construction Birthday Party decorations

Construction Themed Birthday Party Food

The party colours were yellow, orange and blue. Even the punch was colour coordinated.

Construction Birthday Party themed food

There was also a fun popcorn station, complete with orange popcorn!  And everyone one could scoop up their popcorn into a paper bag in the party colors.

Construction Birthday Party popcorn

The dessert table was beautiful, and full of construction themed sweet treats.  Everything was so delicious.

Construction Birthday Party themed food

Heather made the cute themed table cloths herself.  She found some construction themed fabric at the fabric store, and then used some iron-on hemming tape for the edges.  This is such a great idea if you're party planning and looking for a tablecloth to fit your theme, and and you can't find one.  She also made the "dig in" signs which are so much fun. My favorite construction birthday party idea from the party was using a few toy construction trucks to hold goodies like snack mix and some candy rocks on the food table.

Construction party food
construction party food

The sugar cookies were so cute! (Won't these be cute for Father's Day too!)

tool sugar cookies

She also made cake pops, a party favourite, co-ordinated in orange and yellow.

orange and yellow cake pops

There were also lots of sweet candies, like rock candy lollipops, candy lego, color coordinated jelly beans, and M&Ms.  There were also goodie bags to pack some up to take home.

Construction Birthday Party candy buffet
rock candy

The birthday cake was a cupcake pull apart cake, made with the Wilton Transportation Puzzle Cakes Silicone Build-a-Cake set.  Cupcakes are such a great way to making serving dessert easier at a birthday party.  This was my favorite of all the construction food ideas.

It turned out to be so cute. I especially liked the cookie crumb "dirt" it was driving through -no detail too small! The candles were mini-tools, from Bulk Barn.

Construction Birthday Party cake

Build A Cupcake

After lunch, it was time for what might have been our favorite thing at the party, the "Build A Cupcake" work zone.

Construction Birthday Party cupcake building centre

Heather made homemade vanilla cupcakes, and yellow, orange, and blue icing.  There lots of different sprinkles, and candy lego in small bowls.  The builders worked to build the perfect cupcake!  This was the perfect construction-themed party activity to finish the kids' party off.

make your own cupcake

Clocking Out

After all the fun, it was time "Clock Out", and head home with your very own tool box loot bag in a plastic bag backpack!  These were the perfect construction party favors and the little guests loved them.  Each little builder at the party had such a good time, especially our little birthday girl.

Construction Birthday Party take home favour loot bag
construction themed party loot bag

I hope all these cool construction party ideas help you if you're planning your own construction birthday party theme.  It was such a fun way to celebrate, and any little birthday boy or girl who loves construction would truly love it.  These ideas are all perfect for any younger kids.  I think they'd work best for kids under about 7 years old.  They were all quite simple to put together and the kids had so much fun.

With a Construction Birthday Party to enjoy, life really is a party!

More Birthday Party Inspiration

  • Farm themed party dessert table with themed food ideas and farm backdrop.
    Farm Birthday Party Food Ideas
  • Ice cream party sundae bar with colorful toppings in mason jars and DIY cone backdrop.
    Ice Cream Party Ideas: Sundae Bar, Activities & Decor
  • Rainbow art party ideas.
    The Rainbow Art Party
  • Paris themed birthday party French food ideas.
    Paris Birthday Party -The Food


Christmas Glitter Houses

Dec 16, 2010 · 37 Comments

Christmas Glitter Houses: make your own DIY putz houses from old cereal boxes, paper, paint, glitter and glue to create a your own Christmas villiage.

Christmas Glitter Houses: make your own DIY glitter houses or putz houses from old cereal boxes, paper, paint, glitter and glue.

Christmas Glitter Houses: make your own DIY putz houses from old cereal boxes, paper, paint, glitter and glue to create a your own Christmas villiage.

[feast_advanced_jump_to]

Today I want to share with you my village of DIY Christmas glitter houses, or Putz houses, as they're sometimes known. I made them last year, and couldn't wait to get them out of the box this year 😉

DIY putz house

They're all made out of old cereal boxes. I found a great site with step by step instructions and free patterns! If you'd like to make your own village, check out Big Indoor Trains for the patterns and lots of inspiration.

The houses were originally set up around nativities, train sets, or Christmas trees and sold between 1910-1960 as inexpensive Christmas decor.  The original houses are still available at antique stores, or on ebay, but you can also create your own version.

how to make your own glitter house

I have to say, this was a very time consuming project. I made several smaller sets for my family and friends last Christmas. They are simple and inexpensive to make, but involve many, many steps, and lots of time waiting for glue, paint or glitter to dry between steps. I just love how they turned out though, and hope to add one more house each year.

glitter house

Materials:

  • old cereal boxes
  • exacto knife 
  • cutting mat
  • scissors
  • white paper
  • white glue
  • paint
  • glitter
  • faux snow
  • cellophane

How To Make A Glitter House

First you will need the glitter house pattern.  All of the houses I made are based on Howard's "Cottage" plans, which you can get here.

The only variations are with the colours, fences, and door designs. He also includes a pattern to turn the cottage into a church.

glitter house church

I found these little people at Dollarama this year, they're the first I've found that seem the right scale for the houses.

DIY putz house

Cutting

Use the pattern to cut out the houses from old cereal boxes, these are the perfect weight of cardboard. I found this great, inexpensive set of exacto-knives at Dollarama, which really helped with the cutting stage.  Use a cutting mat underneath your work.

exacto knife set

Gluing

After they're all cut out follow the pattern to glue them together.

A tip I can pass on is to use clothes pins to hold the seams of the houses together at various stages, while the glue dries.

Painting

After they are all dry, and the bases have been made and covered in white paper, it's time to paint them. I used various craft paints, again just from the dollar store. I wanted mine to all be quite light, so I lightened the colours by mixing the paint with some plain white.  Traditionally the antique putz houses were made in brighter colours usually, but I really liked the idea of using pastels.  You can customize them to your taste.

craft paints

The houses take several coats, and when it's all done, it's time to add glitter!

Glitter

I used Martha Stewart's "crystal coarse glitter" in brillo. It is quite transparent, and doesn't really alter the colour of the paint. I would like to try using some different glitters. Perhaps silver on the roof, or a more coarse glitter on the roof, and maybe a coloured glitter on the house itself. Maybe next time...

what glitter to use for a DIY glitter house

Windows

After the houses were glittered I added cellophane to all the windows. For the church, I used red cellophane, reminiscent of stained glass.

Snow

Next, I added the snow. Howard uses white paint, but I went with a textured snow called Snow-Tex. I was pleased to see that the houses hadn't yellowed at all in one year, and I really liked the raised effect the Snow-Tex adds. Try to add it to the places you think snow would actually accumulate on houses. You spread it on with a small knife.

snow-tex faux snow

Finishing Touches

After all that, it was time to add a few little finishing touches. I made wreaths for several of the doors with pipe cleaners and fine satin ribbon.

glitter house Christmas wreath

Howard has several suggestions for different fences. I found them quite hard to cut out, so I came up with this variation, using a hole punch.

glitter house fence

I also used the cute little picket fence, which I found at the dollar store. My tip to you is, if you're considering this project for next year, get to the dollar store as soon as the Christmas stuff comes out to get the best selection of trees, fences, and people.

After I finished making 21 of these little beauties last year, I made one more, and I have to say it might be my favorite. It's the "Little Charmer" and the pattern can be found here.  It lives up to it's name!

how to make your own Christmas village

I've added various bottle brush trees, and a few bushes that light up at night.

DIY Putz house village
putz house village

Here it is at night, with the lights on and the candles lit.

DIY glitter house Christmas village

Merry Christmas from my village to yours!

Also check out our Glitter House Christmas Tree here.

You might also enjoy How To Make A Fairy Garden House here.

Coffee Filter Christmas Trees

Dec 13, 2010 · 12 Comments

Coffee Filter Chrismas Tree

Coffee Filter Christmas Tree: Made with some cardboard and coffee filters, these DIY Christmas trees are the perfect addition to your rustic Christmas decor.

Coffee Filter Christmas Tree: Made with some cardboard and coffee filters, these DIY Christmas trees are the perfect addition to your rustic Christmas decor.

I saw these great coffee filter Christmas trees at Crafts by Amanda and knew I had to try them out. Check out her version, where she uses foam tree foams and stick pins. I decided to make mine with a simple DIY cardboard cone, the same way I did the DIY Christmas candy trees here.

Materials:

  • cardstock
  • coffee filters -white or natural
  • sequins (optional)
  • hot glue

How To Make Coffee Filter Christmas Trees

First make your cardboard cone out of cardstock -see how I made mine here.

After you have your cone made, prepare the coffee filters. I decided to use white for mine, and found them at the dollar store. To make the ruffles, you simply cut out the middle of the coffee filters.

Coffee Filter Christmas Tree: Made with some cardboard and coffee filters, these DIY Christmas trees are the perfect addition to your rustic Christmas decor.

Next, glue the filters on to the cone using hot glue, starting at the bottom and working my way up to the top.

Coffee Filter Christmas Tree: Made with some cardboard and coffee filters, these DIY Christmas trees are the perfect addition to your rustic Christmas decor.

After it was all done, I decided to add a little sparkle with these great assorted sequins.

Coffee Filter Christmas Tree: Made with some cardboard and coffee filters, these DIY Christmas trees are the perfect addition to your rustic Christmas decor.


Here it is all finished. I really like the subtle effect of using the white sequins on the white paper.

Coffee Filter Christmas Tree: Made with some cardboard and coffee filters, these DIY Christmas trees are the perfect addition to your rustic Christmas decor.

I added it to all the white milk glass on my living room bookcases. In the past I've always put my milk glass collection away at Christmas to make room for holiday items, but this year I am really enjoying white as the accent colour, so I incorporated it. You might also recognize the marshmallow tree from the candy tree collection, instructions for it are here.

Coffee Filter Christmas Tree: Made with some cardboard and coffee filters, these DIY Christmas trees are the perfect addition to your rustic Christmas decor.

After I finished making one for myself, I wanted to make one for my sister as well. She wanted something really different in her home this year. So, she's doing an orange Christmas, with some copper and brown thrown in. When I saw Amanda's original brown coffee filter tree, I thought it would be great with her orange scheme this year. Here it is grouped with some of my green trees. I love the copper sequins on it.

Coffee Filter Christmas Tree: Made with some cardboard and coffee filters, these DIY Christmas trees are the perfect addition to your rustic Christmas decor.

Thanks for the inspiration Amanda, I love the coffee filter Christmas trees!

Merry Christmas!

DIY Felt Garland

Dec 12, 2010 · 9 Comments

DIY Felt Garland: use old wool sweaters to make your own felt in any colour, and then cut out, and sew into a garland with your sewing machine.

DIY Felt Garland: use old wool sweaters to make your own felt in any colour, and then cut out, and sew into a garland with your sewing machine.felt circle garland

I love this amazing DIY felt garland I created out of old wool sweaters.  It's really fun to make and you could make it any colour you like to match your decor or occasion.

Materials:

  • all wool sweaters from the thrift store
  • golf balls
  • pillow case
  • scissors
  • sewing machine 
  • thread

How To Make A DIY Felt Garland

I picked up some wool sweaters at the thrift store to make my garland.  They were all in creams and whites, but you can use any colour you like.  I started out by felting the sweaters, which means you can leave a raw edge and it won't fray, just like regular felt.

Making Felt

To create felt you need to find wool sweaters, and for these which are a little extra special, I also used some with other animal fibres, including a blend of cashmere and angora. Here they are before.

how to felt a wool sweater

To turn the sweaters into felt, you wash them in your washing machine with hot water, and dry them in your dryer on high heat. I read a few on-line tutorials which suggested you wash them in a pillow case to collect the fuzz that is created and can clog up your washer, and also throw in a few golf balls. 

how to felt a wool sweater

After the wash, I was amazed by the amount of fuzz in the pillowcase. I was also amazed at how felted they were, they shrunk a great deal, and the felt that was created is far thicker than any I've had in the past with just a simple hot wash without the pillowcase and golf balls.

how to make felt out of a sweater
how to felt a wool sweater

I love the cream fuzzy felt so much, and thought that cut into circles and sewed into garland it would make a delicate garland reminiscent of snowballs. 

Cutting Circles

To begin with, first I traced several small sizes of circles on my three different sweaters, which all made slightly different felt, some thicker, some fuzzier. I used a small container, a spool, and a penny as my patterns. The penny looks cute, but was difficult to sew because it is so small.  You will need really sharp scissors to make felt cutting a little easier.

DIY felt garland
DIY felt circle garland

After a lot of cutting!

how to make a felt garland on your sewing machine

Sewing The DIY Felt Garland

It was time to sew. You start stitching the first circle and continue stitching after it feeds through the machine for a few seconds, then you stop the machine and lift the foot to feed in the next circle. You stitch it, and continue on again, and just repeat that over and over to your desired length.

I love the look of a random pattern, so I choose the size of the circle at random, and varied the length of space between circles, but you could follow a pattern, and or, count how many seconds of space you stitch to create a pattern.

how to make a felt garland on your sewing machine

I love how it turned out, especially the way it actually looks soft. It does kind of look like snowballs.

DIY felt garland
DIY felt garland

I added it to the fireplace mantel in my living room.  A little tip for attaching a garland to your fireplace without having to leave nail holes in the wood is to use suction cup hooks.

DIY felt garland

This fireplace holds my Christmas glitter house village. I made the DIY Christmas glitter houses or putz houses, entirely out of old cereal boxes.

DIY felt garland

This project really was simple, and I'd love to try it for a party with coloured felt circles or in a shape that matched the party theme. The possibilities are endless.

With a DIY felt garland, life really is a party!

You might also like DIY Mushroom Christmas Ornaments here.

Also check out Cricut Wood Feather Ornaments here.

Cricut Wood Feather Ornament: see how to cut wood using your Cricut machine. Includes a free cut file for this wood feather Christmas ornament.

You might also enjoy our Book Page Paper Feathers here.

How To Make Book Page Paper Feathers: using old book pages, a glue stick and a wire for a center make beautiful paper feathers.

Life Size Cardboard Gingerbread House!

Dec 2, 2010 · 4 Comments

Life sized gingerbread house made out of cardboard boxes for kid's play house.

Life Sized Cardboard Gingerbread House: use old cardboard boxes to make a lifesize gingerbread kids playhouse for indoor fun.

Life-sized gingerbread house made out of a cardboard box and decorated with Christmas lights.

What could be fun than to make a life size cardboard gingerbread house for the kids to play in?  I thought it would be great as a playhouse in the basement over the holidays, and my kids loved it! It was really inexpensive to put together.

We invited some friends from out of town to join us for a gingerbread day, and the fun began.

Cardboard Gingerbread House Materials:

  • at least 2 big cardboard boxes
  • paint
  • packing tape
  • hot glue
  • Christmas lights

How To Make A Cardboard Gingerbread House

Old Boxes

To start with we did do a little prep before our friends arrived.  The first challenge was finding great big boxes.  I actually found mine on Craig's List, someone had got some new furniture, and couldn't bear to throw out the great boxes, but had no use for them himself.  Well I had a great use for them, so my husband picked them up one night after work. 

Then we set to work cutting the boxes.  We used two boxes per house, one for the house, one for the roof.  We made two houses, so our friends could take one home with them.  They fold flat for easy transport and storage 😉 

Paint Time

After they were cut out, we painted them gingerbread brown, and left them out in the garage to dry.

Decorations

When our friends arrived we put the kids to work cutting and painting gingerbread men, candy canes and gumdrops to decorate the houses with.  And of course, they needed a little glitter too.

We also added some "icing" detail with white paint to the houses.

make a cardboard gingerbread house
how to make a cardboard gingerbread house

While the paint dried, we had fun making real gingerbread houses.  We bought the pre-made kits, where all you have to do is put them together and decorate.  I have to say they sure are easy!  The kids loved making them, and it helped them wait for the big ones.

After the paint was dry, we attached the candy cut outs with a glue gun, and the real fun began; play time! 

Fold Up To Store

This is the one our friends took home, a little smaller and easier to fold up and put in the back of their mini-van.

Here is the one we made, set up in our basement this year.  When we were done with it last year and putting all the Christmas decorations away, I just folded it up and stuck it up against the wall in our storage room, to dig out again this year. 

The girls were so excited the night we put it up this year, I've never seen them clean up their play room so fast to make room!  This year we also added some Christmas lights.

gingerbread play house

 Each side is a little different, with lots of windows, and doors on each end.

cardboard ginger house play house tutorial

Inside we put a small table and two chairs, a little Christmas tree, and got it all set up for a Christmas tea party.

This was a time consuming, but really easy project, and I have to say that my little girls just love it. 

We finished the day off with a pretty little gingerbread boy tree ornament for our friends and us, so that every year as we put it on our trees we'd remember our gingerbread day together and how much fun it was.

Merry Christmas!

You might also enjoy our Nutcracker Tea Party here.

Also check out our Christmas Family Movie Night here.
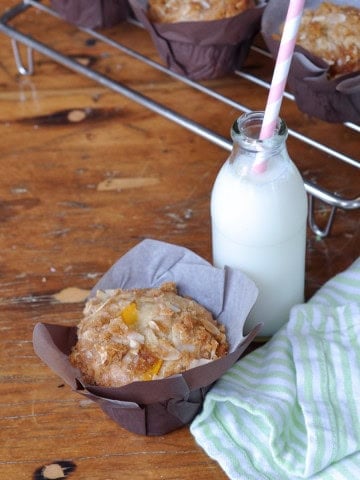
You might also enjoy our Gingerbread Cookies Recipe here.

Gingerbread House Cookies: a classic gingerbread cookie recipe perfect for Christmas cookie ornaments or mini houses.


DIY Christmas Urn and Wreath

Nov 19, 2010 · 7 Comments

DIY Christmas Urn and Wreath: easy and inexpensive Christmas urn and wreath. Use our tips so save money and make it yourself.

DIY Christmas Urn and Wreath: easy and inexpensive Christmas urn and wreath. Use our tips so save money and make it yourself.

DIY Christmas wreath and urn

Making your own DIY Christmas urn and wreath is a great way to save money and add personality to your front door.

The weather's really nice today, and it seemed like a great time to do some outdoor decorating.  Here are my money saving tips to help you do your outdoor Christmas decorations on a budget.

Find A Basic Wreath On Sale

I spotted in a flyer last night  fresh wreaths for $9.99 and after making one in the past, I think the 10 bucks is worth it.  So I picked up a plain Jane Balsam wreath, and decided to spruce it up a little by adding some other greens.

Collect Greens For Free Around Your House

I have lots of free greens available to me around my house.  To save money I always choose a warm day and go out and clip my own.  If you don't have a source for greens, then they too are readily available at grocery and flower stores.  

how to make your own Christmas outdoor arrangement urn

Christmas Urn Birch Poles in Cement

Birch poles are a great way to add some height to your urn.  The birch poles are heavy and you don't want them tipping your whole urn over in a breeze, so you need to anchor them in cement. 

Just use a little cement mix and water and mix it up in a large ice-cream container (make sure the container fits in your urn first 😉 ).  Then stick in the birch and let it set overnight, this way you can remove the birch in the summer or next Christmas for a different look. 

Another tip, I used my step ladder set up over the urn and little string to hold the birch in place overnight while the cement set.  I love how it turned out.

cement
ice cream container

After it's all set, you can add a little soil on top to push the greens into.

birch poles in an urn

Adding Greens To The Christmas Urn

I had a variety of greens that I collected, including a little cedar, juniper, pine, and balsam.  I like a mix of greens, but all one kind is also really beautiful.  Use what ever you have. 

Some of the branches needed a little trim to make them shorter, or create a place at the bottom to push into the soil.  I just started working, and continued stuffing in more until I liked the look.  Here is the beginning.

how to create a Christmas urn
make your own Christmas urn

Adding Some Accessories To The Christmas Urn

After I had it to a fullness I liked, it was time to add some accessories.  First I added in some branches I found with some purplish-black berries.  Just a few of these near the centre was the perfect touch.  Lastly I added in some glittering snowflakes that I picked up at the dollar store.

DIY Christmas urn
DIY Christmas urn

I have a snowflake theme this year, but at this point you could take it in any direction;  red bow and berries, silver Christmas balls, and glittered pics, or a more natural look with birch bark star ornaments and rustic twig balls.  The sky is the limit.

Save money on the finishing touches my using foraged branches, adding dollar store finds, or using saved decorations from previous years.

how to make your own Christmas urn

The Wreath

I also added a little sparkle to the wreath. 

Add Extra Greens To Your Wreath

I started with inserting a little pine into the existing wreath.  I liked the mixed ones at the store but they were over double the price, so since I had other greens on hand, I just stuck a few small pieces in.  I like how it turned out.

Christmas wreath ideas
DIY Christmas wreath

Add Accessories To Your Christmas Wreath

I found some smaller sparkly snow flakes to add to the wreath that matched the larger ones in the urn.   I added a little fine wire to attach them to the wreath.

white seaters and christmas urn and weath 032
white seaters and christmas urn and weath 033

I also added a snowflake bow, that I made from some ribbon I had.

DIY Christmas wreath

I'm really pleased with how it all turned up, and hopefully after this weekend, we'll have some Christmas lights up to.  The snowflakes are really pretty and festive, but I won't mind that it hasn't snowed yet in real life.

DIY Christmas Urn and Wreath: easy and inexpensive Christmas urn and wreath. Use our tips so save money and make it yourself.

With a DIY Christmas Urn and Wreath, life really is a party!

You might also like our DIY Birch Christmas Wreath here.

Birch Christmas Wreath:-full tutorial to make your own square wreath from some gathered greens, birch logs, and a coat hanger. Perfect for Christmas.

Also check out our Modern Boho Christmas Wreath here.

You might also enjoy our Christmas Front Porch here.

Christmas Front Porch: Rustic greens, large pinecones, and lots of birch logs create a rustic Scandinavian feel with brass lanterns for Christmas.

Women's Ministry Christmas Party Ideas

Nov 7, 2010 · 2 Comments

Women's Ministry church Christmas party hot chocolate buffet.

Great Women's Ministry Christmas Party Ideas. We're sharing how to throw a large event with Christmas decor, fun activities, and great food for your Women's Ministry group.

[feast_advanced_jump_to]

We have a women's ministry group at our church that gets together for a fun evening every month or two.  Today I'm sharing our recent Christmas event and lots of Women's Ministry Christmas Party Ideas that might inspire you if you're planning something similar.

I love Christmas entertaining. You might also like our Christmas Tea Party here, this Christmas Cookie Baking Party with free printables, or our Christmas Fondue Party.

The Theme

Our theme this year was Christmas Preparations and we used traditional red and green for the decor, with lots of Christmas candy, and candy canes.  It was a really fun one to work with.

The Food

large Christmas party ideas.

The food for the evening was a hot chocolate buffet and donuts!  Lots of fun, and a special treat for the ladies. 

Hot Chocolate Buffet

The hot chocolate buffet was a lot of fun to put together.  I was really pleased to find four different kinds of hot chocolate powder at the bulk barn.  We used regular hot chocolate, white hot chocolate, mint hot chocolate, and candy cane hot chocolate.  I bought some simple glass canisters from the dollar store, and decorated them with candy can striped ribbon and some simple labels.

Another great idea for a set up like this would be to make a large batch of hot chocolate and have it available in a crock pot.

large Christmas party ideas.

We served the hot chocolate in the church's white mugs, but tied on a little red satin ribbon on the handle to make them a little more festive.

large christmas party ideas.

There was also several fun add-ons for the hot chocolate.  We had milk, served in an old milk bottle, and also some steamed and frothed warm milk available.  There were also different sprinkles, caramel sauce, and whipped cream for toppings.  I covered the whip cream container in a piece of wrapping paper, to tie it into the decor.  And of course there were marshmallows, large and small, served in beautiful candy cane bowls.

large Christmas party ideas.
Bowls of marshmallows at a Christmas hot chocolate bar.

Chocolate Spoons

Another fun detail, was the chocolate dipped spoons.  I used plastic spoons and dipped them in three different kinds of chocolate;  white mint chocolate, dark chocolate and milk chocolate.

They were very easy to make.  I melted the white mint chocolate, added a little Crisco to make the consistency more runny, and coated the spoons.  While the chocolate was still wet, I sprinkled the tips with broken candy cane pieces.  After the chocolate was set, I wrapped the spoons in a piece of clear cellophane and tied with a little red satin ribbon.  These would also make a great little gift at Christmas.

chocolate teaspoons.

The milk chocolate and dark chocolate spoons were made in the same way, but I didn't use any candy cane sprinkles.  I did add a little coarse sugar to some of them, in red and white, and it added a nice sparkle.  I served them in small tin buckets from Michaels.  There were also cinnamon sticks to use as a fragrant stir stick.

large Christmas party ideas.

Bottled Water

In addition to the hot chocolate, we also offered bottled water, and I covered the labels with a little wrapping paper to add a festive touch.

large christmas party ideas.

Donut Buffet

The food was really simple;  donuts.  Let's face it we all love them and they really are a treat for most of us.

large Christmas party ideas.

We had 8 kinds, and lined them up on simple white plates, with a little label identifying the kind. This was so easy and who doens't love a donut?

large Christmas party ideas.

To tie in with the candy trees, which you can learn to make here.

We also made a donut tree.  It was made by inserting toothpicks into a stryofoam cone, and sticking a donut on. 

We also had some festive Christmas candy, served in some of my milk glass candy bowls.

large Christmas party ideas.

Candy Cane Themed Christmas Tree

The tree looked great all dressed up in candy cane red and white.

large Christmas party ideas.

The Activities

We had a great time together, and in addition to a word of encouragement and great food, we also had some great activities.  We broke our ladies into small groups, and rotated them through different stations;  Cookies in a Jar, Handmade Gift Tags, and Sugar Cookie Decorating.

Cookies in a Jar

Christmas cookies in a jar

The first station was making cookies in a jar.  The station was wonderfully organized with all the ingredients lined up in order, with the amounts printed up on large easy to read labels, with the correct measurement.  There were homemade rolled paper funnels to help get the ingredients into the jars neatly.

women's ministry Christmas party ideas
how to make cookies in a jar
Christmas cookies in a jar

After the jars were all layered up, there was a decoration area, with beautifully printed cooking instructions, ribbons, and wrapping paper.  If you want to do something similar, look for a recipe and printable labels on line.

Christmas women's ministry party

What a wonderful gift they will make!

Handmade Gift Tags

The next station was a gift tag making one.  We had all sorts of Christmas paper, paper punches and paper cutters, special scissors, markers, and embellishments.  There was also lots of rubber stamps with Christmas images, and the alphabet, and different colours of inks.

homemade gift tags
making gift tags

The ladies were like kids in a candy store, creating gift tags to go with the two gifts that they were creating that night.

Sugar Cookie Decorating

The final station was cookie decorating. There was a little lesson on some techniques to begin with.   Then they were invited to use all the colors, and embellishments they needed to decorate several cookies.

sugar cookies
how to run a women's ministry Christmas event

Everyone was given a sheet of wax paper to leave their cookies to dry on, and when they were set, they could be packed into a beautiful little bag for gift giving.

how to run a Christmas women's ministry event
Christmas women's ministry event ideas

Describing these activities, it sounds a little like a birthday party for grown-ups, and that's about how much fun we all had!  It was a great evening and we all went home with two beautiful handmade Christmas gifts, although I did hear from several friends that their cookies were already gone by the next day. 

I think any of these activities would make a great ladies night for a group of girlfriends, you could pick one of the activities and have everyone bring some of the supplies.  The only thing more fun then creating Christmas goodies, is doing it with friends and turning it into a party!

With all these women's ministry Christmas party ideas, life really is a party!

More Inspiration

  • Elf on the shelf arrival letter and breakfast.
    Elf on the Shelf Arrival Letter + Welcome Breakfast Ideas (2026)
  • Ice skating party ideas with decorations and food.
    Winter Ice Skating Party Ideas
  • Christmas tea party with table decor, menu, and recipes.
    Christmas Tea Party
  • Christmas baking party with free printables.
    Christmas Cookie Party

Frequently Asked Questions

Where did you find all the different kinds of hot chocolate mix?

We got them at the bulk barn, if you're in Canada, look for them there. Otherwise you should be able to find different ones at the grocery store around the holidays.

What station was the most popular?

Most people loved the cookie decorating station. It was fun working with all the different colors of icing and sprinkles.

How did you cover the costs of the evening?

We had an entrance fee for the evening to cover the costs. We have found that everyone is fine with paying $10-20 for an evening like this, cheaper than most evenings out, and enough to cover our expenses. We have a team of women that do the prep, and if they are making food like the sugar cookies, we reimburse them for their expenses.

If you try any of the ideas from this Women's Ministry Christmas Party or any other ideas on my blog please let me know how it went in the comments below. Thanks for visiting today!

Christmas Candy Trees

Nov 4, 2010 · 34 Comments

Christmas Candy Trees: Easy to make, great tutorial to make out of a piece of rolled cardboard, with candy and a glue gun.

Christmas Candy Trees: Easy to make, great tutorial to make out of a piece of rolled cardboard, with candy and a glue gun.

Christmas Candy Trees: Easy to make, great tutorial to make out of a piece of rolled cardboard, with candy and a glue gun.

One of the crafts I've been working on for our women's ministry event tomorrow are these Christmas candy trees.  I love how they turned out, and I keep thinking about "visions of sugar plums danced in their heads" every time I look at them.  Not only am I pleased with how they came out, I'm also really pleased with their low cost.

Materials:

  • bristol board
  • staples
  • piece of string
  • pencil
  • hot glue
  • candy

How To Make a Christmas Candy Tree:

After pricing styrofoam cones at the craft store, and seeing it would cost over $20 just for the cones for this project, plus the cost of candy, I knew I was going to have to get a little creative.  A friend suggested plain old white bristol board.

I bought a sheet for .50 at the dollar store.  I rolled the bristol board into a narrow cone and stapled it.  In order to get a nice even bottom, I used a little trick to trim them.  I made a make-shift compass like contraption with a piece of string and a pencil.  I held it at the top and drew around the bottom to ensure an even base.  After it was trimmed I used a little masking tape to cover up the seam.

how to make a cardboard cone

A little tip:  it's easier to attach the candy with the cone laying down on the table, especially with the heavier candies.

how to make a candy Christmas tree

I love all their different textures together.

candy Christmas tree

I think they look great grouped together, and can't wait to see them with everything else on Friday night.

DIY candy Christmas tree

Here's to a "sweet" beginning to the holiday season!

With Christmas Candy Trees, life really is a party!

More Inspiration

You might also like our Christmas Candy Garland here.

Also check out our Printable Christmas Gift Tags here.

Printable Christmas Gift Tags: these funny Christmas tags come in blue, black and white, red and green, or a colourful muliti-color set.

You might also enjoy our Marshmallow Snow Globe Christmas Table here.

Dollar Store DIY Christmas Candy Garland

Nov 1, 2010 · 14 Comments

Christmas Candy Garland: Use real candy and create this simple and inexpensive  garland for your holiday decor.

Christmas Candy Garland: Use real candy and create this simple and inexpensive  garland for your holiday decor.

Christmas Candy Garland: Use real candy and create this simple and inexpensive  garland for your holiday decor.

The perfect addition to your holiday decor this year is this Christmas Candy Garland.

It's November 1st, Halloween is finally over, and now we can get onto my favourite time of year, Christmas!  I love everything about it, the food, the decorations, the music, the sparkles, the movies, the shopping, the gifts, the true meaning, -everything! 

I am helping to host a women's event this Friday night at my church, on Christmas preparations.  The decor is red, white, and green, with a Christmas candy theme.  A  fun project I wanted to make  for the Christmas tree is this candy garland.

Materials:

  • individually wrapped peppermint candies in red and green
  • hot glue gun

How To Make A Candy Garland:

1. I found round, individually wrapped peppermint candies at the dollar store, and bought 3 bags.

bags of peppermint candies
red and green peppermint candies

2. I used my glue gun to glue the wrappers end to end, alternating green and red, to make a long candy garland.  Just be careful not to bun your fingers as you work.

how to make a candy garland
gluing peppermint candies together to make a Christmas Garland

I think the final result is really "sweet", and can't wait to see it on the candy themed Christmas tree!

easy real candy garland

Cost:  I already had the glue gun and glue, I used 3 bags of $1 candy, so total cost = $3

With DIY Christmas Candy Garland, life really is a party.

You might also enjoy these Christmas Candy Trees.

Also check out our Nutcracker Tea Party here.

You might also like our Game Night Party here.

Yellow Desserts for a Yellow Dessert Table

Oct 17, 2010 · 8 Comments

Yellow dessert table ideas.

Yellow Dessert Table: Yellow desserts from cupcakes, cookies, lemon tarts, and yellow candy to create the perfect yellow themed dessert table.

Yellow dessert table ideas.
[feast_advanced_jump_to]

Yellow Desserts

If you love yellow, then our yellow themed dessert table should inspire you for your next party and give you lots of yellow desserts ideas.

It's been a very busy week working on our church's 10th Anniversary Weekend.  What a wonderful time it has been!  Saturday night we had a celebratory banquet, and I was in charge of the dessert table.  The church's logo colours are yellow and blue, so we went with yellow as the theme colour of the banquet and the dessert table.  We had over 20 different sweet choices, and everything was so tasty!

Yellow DIY Cake Stands 

One of the show stoppers of this dessert table, that really helped bring everything together were the large wooden cake stands.  I was inspired on-line by a few clever brides who had handmade their cake plates, in order to achieve a custom look.  Check out our inspiration here.   They were made out of wood supplies from the hardware store.  The bases are a combination of fence post tops, and wood furniture legs.  Once they were all put together we spray painted two shades of yellow, and they looked amazing.  

Yellow can be a tricky colour to find, so custom making our cake plates was a great solution, and our delicious desserts looked amazing on them.  They also added height to the back of the dessert table and helped to unify the whole look.  They really gave the dessert table some presence, and were a great statement piece to bring the whole yellow dessert buffet together.  After this party, they can easily be painted something more neutral, and used over and over.  

For the rest of the desserts we used white plates and cake stands, along with some large clear glass vases for the candy.  We also made sure to have serving pieces for every item on the buffet like tongs, or a small lifter, and scoops for candies.  We covered the dessert tables in yellow table cloths that we rented and decorated with some simple balloons at each end, and some tissue paper pom poms hanging behind it.  The table also had a sprinkling of yellow fresh flower blooms, that matched the centrepieces.  

Mini Sized Desserts

We made labels for all of the desserts with yellow scrapbook paper.  These looked great, and made it easy for guests to see exactly what everything was and help themselves.  Our dessert table was for about 200 people.  The main dinner was catered and we put the dessert table together ourselves with some store bought items like the candy, and lots and lots of homemade desserts.  

We made everything on our dessert table into individual or mini sizes.  We thought that with so many great choices that guests would want to try more than one or two items, so mini sized was perfect for most items.  It also made the dessert table easy for guests to serve themselves.  We avoided items that would have to be cut into slices and served.  This made the process of guests helping themselves go much more quickly, and the line to get desserts didn't take too long, which was good.  Everyone was very excited by the fact that all the baked goods were homemade.  

The Bakers

There were seven of us who volunteered to bake desserts, and we had a great time coming up with all the yellow options we could think of to tempt everyone's sweet tooth.  We had a meeting before the party with all the volunteer bakers and brainstormed all the yellow desserts we could think of.  Then we worked out who had a recipe for what, and what everyone was comfortable making for the night.  Everyone brought such delicious and beautiful items.  

The kitchen was full of tupperware containers holding each kind of sweet.  But, that did make it easy for us to replenish the trays as they became empty.  This dessert table was a labor of love and such a hit with all the guests.  

If you didn't have a small army of bakers like we did you could absolutely buy some of the items.  Many grocery stores will take orders for the things like the cupcakes and make them in whatever color you like.  This would be a great way to save a little time on this project

Yellow Cupcakes

Featured on the yellow cake plates, were five different varieties of cupcakes, and cake pops.  We had vanilla and chocolate cupcakes, with yellow frosting and topped with our custom cupcake picks.  We also had coconut, with cream cheese frosting, banana with caramel buttercream, and "24 carrot" gold cupcakes with cream cheese frosting, and garnished with real gold flakes!

  • vanilla cupcakes with yellow frosting
  • chocolate cupcakes with yellow frosting
  • coconut cupcakes with cream cheese frosting
  • banana cupcakes with caramel buttercream
  • carrot cupcakes with cream cheese frosting and gold flakes
  • yellow cake pops

The cake pops were a favourite, especially with the children.  They were made with a yellow cake mix and decorated with yellow and white chocolate and sprinkles.

Yellow Cookies

Along with all the cupcakes there were several kinds of cookies.  We were inspired by Made in Brooklyn, who featured some similar cookies on her blog.  We decided to use round rather than square.  The sugar cookies felt like a really elegant addition with this simple design.

There were a few other kinds of cookies too, including shortbread and rice crispy squares drizzled with yellow chocolate. Cookies are a great, easy dessert to include in buffet like this.  They're relatively easy to make, easy to transfer, and be kept at room temperature.  Sometimes the easiest things are the most popular.  The kids loved the simple rice crispy squares.

  • sugar cookies
  • shortbread cookies
  • rice crispy squares with yellow chocolate drizzle

Lemon Desserts

You can't have a yellow dessert buffet without having some lemon desserts.  Also on the buffet were lemon squares and mini lemon meringue tarts.  People were puckered up for these citrus fruits!

  • lemon squares
  • mini lemon meringue tarts

More Yellow Dessert Ideas

Another favourite with everyone was the individual banana parfaits.  We used plastic shot glasses, and the sweetest little spoons, we layered banana pudding, banana, caramel sauce and whip cream, yum!  They were such a yummy and creamy dessert.  These easy desserts where one of the first to go.

  • individual banana parfaits

We also had homemade fudge, mini pineapple upside down cakes, butterscotch bars, mini cheesecakes, and butter tarts.  The fudge is made with brown sugar and a very popular dessert.  The mini pineapple upside down cakes were a real hit and people loved the tropical fruits in it.  The mini cheesecakes were a delicious cream dessert and dressed with whipped cream and pineapple or lemon curd to fit in with our yellow-colored dessert theme.   It was an amazing feast, for the eyes, as well as the tummy with so many delicious treats.  And there were all homemade.

  • fudge
  • mini pineapple upside down cakes
  • butterscotch bars
  • mini cheesecakes
  • butter tarts

Yellow Candy

Along with all these home baked goods, we also included some candy.  In keeping with our yellow theme, we had jelly beans, caramels, rock candy, and caramel corn.  We served the 

  • yellow jelly beans
  • caramel squares
  • yellow rock candy
  • cones of caramel corn

We also included some treat cones, made out of yellow scrapbook and wrapping paper, and filled with a mixture of caramel corn and vanilla clop hoppers.

Yellow Centrepieces and Party Favours

To carry on the yellow theme, I made simple orchid centerpieces for all the tables, they looked beautiful with the candle light.  Another fun detail was small bags of yellow cotton candy which we placed in the souvenir mugs as a party favour.  Someone owned their own cotton candy machine and were able to make the yellow for us, which tied into our theme perfectly!

It was a beautiful evening of celebrating with friends that feel like family.  I had an army of bakers to help me pull this one off, special thanks to Heather, Bev, Lucia, Maureen, Miya and Renate.  I am so pleased with the results.  Sometimes life truly is a party!

More Yellow Inspiration

Love the colour yellow?  Check out our Yellow theme brunch party post here.

  • « Go to Previous Page
  • Page 1
  • Interim pages omitted …
  • Page 18
  • Page 19
  • Page 20
  • Page 21
  • Go to Next Page »

Primary Sidebar

Welcome!

Life is a Party is all about helping you celebrate everyday with great food, entertaining and party inspiration, and seasonal crafts and home decor inspired by the holidays.

More About Dannyelle

Trending Recipes

  • Mac and cheese with panko breadcrumb topping.
    Best Homemade Mac and Cheese with Panko Breadcrumb Topping
  • Homemade iced capps in glasses on a wood table.
    Tim Hortons Copycat Iced Capp Recipe
  • Dirt Pudding no cream cheese in glasses with candy rocks, and fresh mint that looks like a little plant.
    Easy Dirt Pudding Recipe without Cream Cheese
  • Easy 3 ingredient coconut milkshake recipe.
    Easy Coconut Milkshake Recipe
  • Easy food processor scones on a plate with jam.
    Easy Food Processor Scones
  • Fluffy small batch pancakes for two ready to serve on a plate with syrup.
    Easy Small Batch Pancakes For Two Recipe

Fall Ideas

  • Pumpkin shaped dinner roll recipe, with a herb stem.
    Pumpkin Shaped Dinner Rolls
  • Fall breakfast board
    Fall Breakfast Charcuterie Board
  • Halloween witch decorations
    Witch Halloween Decor
  • fall home decor
    Fall Decorating Ideas -Home Tour
  • Modern Boho fall mantel ideas.
    Modern Boho Fall Mantel Ideas
  • Homemade pink candy apples on a cutting board.
    How To Make Pink Candy Apples

Entertaining Ideas

  • Adult mermaid party table set on the beach with cake and shells.
    Adult Mermaid Party Ideas: A Beach Picnic Goodbye to Summer
  • Overhead view of tomato party table with pizza and appetizers.
    The Ultimate Tomato Party: A Tomato Girl Summer Garden Gathering
  • Camp themed party table with green gingham tablecloth, wildflowers, and Welcome to Camp banner.
    The Ultimate Camp Themed Party for Adults
  • Garden party table set under white pergola with vintage floral tablecloth, pink peony centerpiece in wooden tool caddy, white wicker chairs, and climbing white roses in background.
    Garden Themed Party
  • Complete mimosa bar setup on white console table with vintage silver ice bucket, labeled colorful juice bottles, small glass garnish bowls, and ribbon-tied champagne flutes on white lace tablecloth with flower wall backdrop.
    How to Set Up a Beautiful Mimosa Bar
  • Breakfast for dinner party table styled like a bed with star quilt tablecloth, gingham pillows, and cloud installation above.
    Breakfast for Dinner Party: Brinner Under the Stars
  • Recipe Index
  • Parties & Entertaining
  • Fall
  • Subscribe
  • Free Resource Library

Footer

back to top

as seen in:

Better Homes and Garden Logo
American Farmhouse Style logo.
Apartment Therapy logo.

About

  • Privacy Policy
  • About

Subscribe

  • Sign Up! for emails and updates

Contact

  • Contact

As an Amazon Associate I earn from qualifying purchases.

Copyright © 2025 Life is a Party

Share
Pin
Post
Share
Pin
Post

Rate This Recipe

Your vote:


A rating is required
A name is required
An email is required