• Skip to primary navigation
  • Skip to main content
  • Skip to primary sidebar
Life is a Party
  • Recipe Index
  • Parties & Entertaining
  • Fall
  • Subscribe
  • Free Resource Library
menu icon
go to homepage
  • Recipe Index
  • Parties & Entertaining
  • Fall
  • Subscribe
  • Free Resource Library
subscribe
search icon
Homepage link
  • Recipe Index
  • Parties & Entertaining
  • Fall
  • Subscribe
  • Free Resource Library
×
Home

Easy Winter Snowman Themed Party Dinner

Easy Winter Snowman Themed Party Dinner

Jan 15, 2014 · 24 Comments

Snowman themed dinner with decor and menu ideas.

Snowman Dinner -easy snowman themed party with snowman tablescape, and menu, kids will LOVE, perfect for a family dinner.

Snowman themed dinner with decor and menu ideas.
[feast_advanced_jump_to]

It's January and there's lots of snow around here. So in the spirit of "love the one you're with"  and since we're with snow, lots of snow, we had some friends over for a little snowman theme party for dinner the other day. It was a Friday night affair that was pretty simple to put together and a lot of fun.

This would also be a really fun themed for a holiday party, or just a winter party.  I hope these snowman party ideas inspire you for your own get together.

You might also like our Winter Ice Skating Party Ideas.
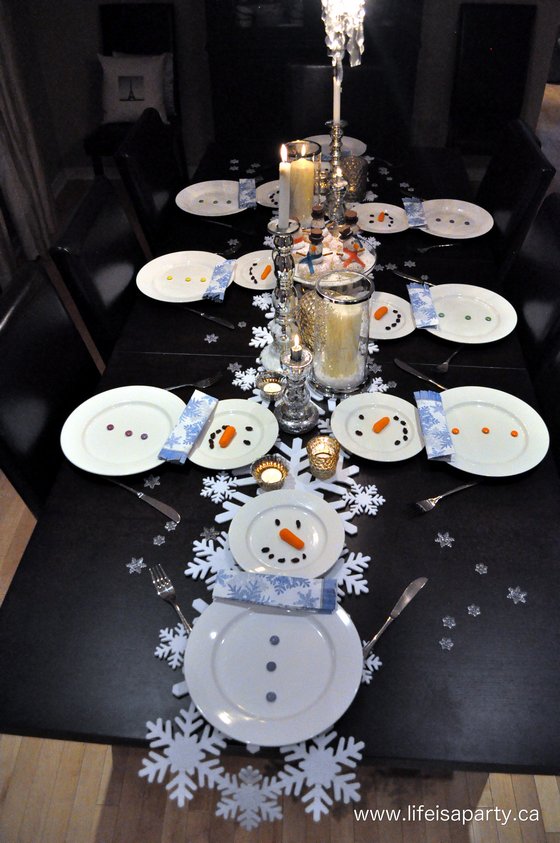
snowman plates

The Snowman Themed Party Table

The best snowman decorations for our party were our place settings.  My little girl and I made them with some simple supplies.  It's a quick idea that is really easy to put together.  We made snowmen for the table with our regular white dinner plates and side plates. The scarves were made out of paper napkins. We used some snowflake napkins, but you can use different colors.  A red napkin would work great too.  The face was a baby carrot nose, and raisin eyes and mouth. Chocolate chips would be a great option for the face as well.  We used smarties for buttons, and positioned the fork and knife as snowman arms.  You could add more snowman accessories, like a snowman hat.  

You can use black paper napkins to add top hats.  We didn't really have room for them, but they're a fun addition.  Our party guests thought our table was extra fun and got so excited as soon as they saw it.  It's a great way to welcome guests and get them excited about a winter theme for this time of the year.  I always love how little things like this get kids so excited!  The table was a huge hit.
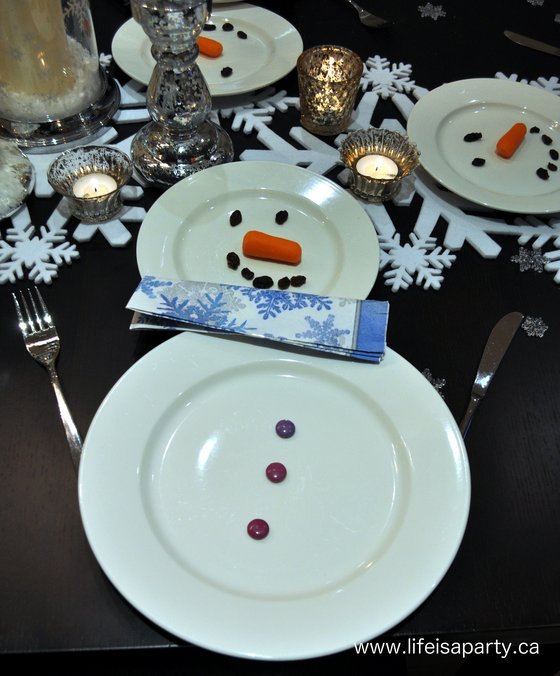
how to make a snowman place setting

I used a pretty snowflake runner, and some snowflake confetti on the the table. I also used lots of candles for a warm glow on this cold winter night. The centre piece was our donut snowmen, that we shared here.
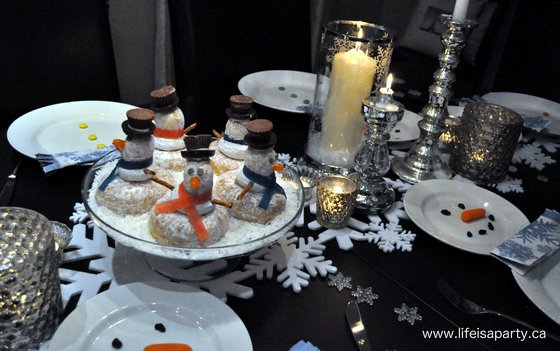
snowman themed party tablescape

Snowman Themed Party Menu

We added a few other snowman themed elements to the night for fun.  This is such a great theme to get creative with your own ideas.

Snowman Noses and Dip

We started the evening off with some dip and "snowman noses" which were carrots.  There just might have been some chips available to go with the dip too.  This was such a simple and easy snowman themed party food.

Snowman Themed Party Pizza

It was "make your own pizza" night.  I find this is so much fun for kids.  They can add whatever they like, and everyone is happy.  Of course for our theme, we encourage our guests to make a snowman pizza.  We had store bought dough.  Everyone made a circle and added pizza sauce and then covered it with "snow" aka mozzarella cheese.  Then it was time to add their snowman faces.  We had things like olives, mushrooms, zucchini and pepperoni for everyone to make their fun snowman face pizza.  This was a really fun activity, and the parents helped the kids to make them.
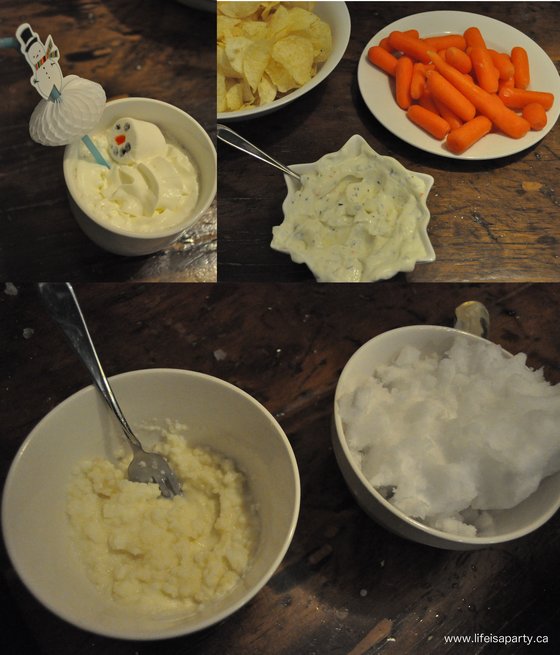
snowman themed party food ideas

Snowman Themed Hot Chocolate

I made the kids some snowman hot chocolate to drink. We started out with white hot chocolate.  I found the packet of hot cocoa made with white chocolate at the grocery store and thought it was so perfect for our snowman themed.  We also added whipped cream, and marshmallows that the kids made snowman faces on with edible markers, and a some mini marshmallows for good measure.  They had a lot of fun drawing the snowman faces themselves with the edible markers on a large marshmallow.  

Snowmen Donuts

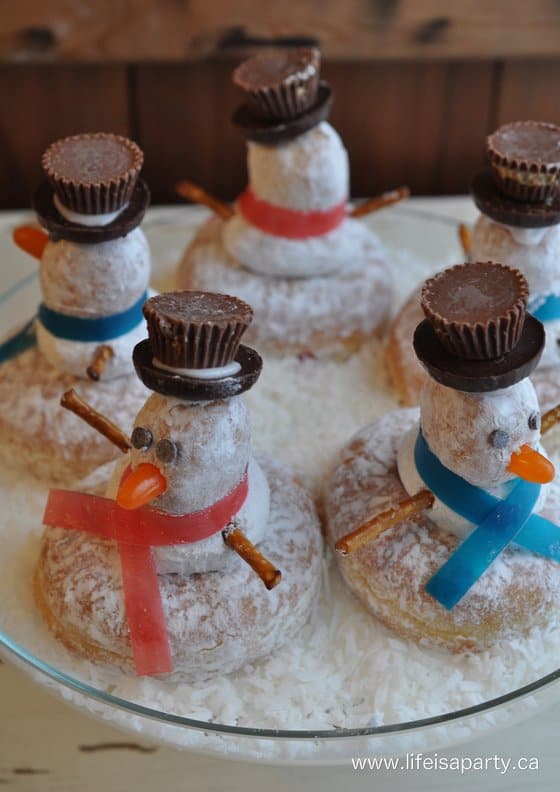
For dessert we had our donut snowmen -you can find the full tutorial for how I made them here.  They were really easy to put together and real hit with the party guests.  I used three different powdered sugar donuts to make them.  I started out with a jelly donut fo the base of our snowman.  Next came a traditional mini powdered donut and we topped off our snowman with doughnut holes.  Our snowmen got decorated with pretzel sticks for arms, and little noses made of orange mike and ike candies, candy corn would be a great choice here too.  Our snowman donuts also had little chocolate chips eyes, and hats made from a peppermint pattie and a mini peanut butter cup.  These made a great centrepiece on the table, and they were so yummy.
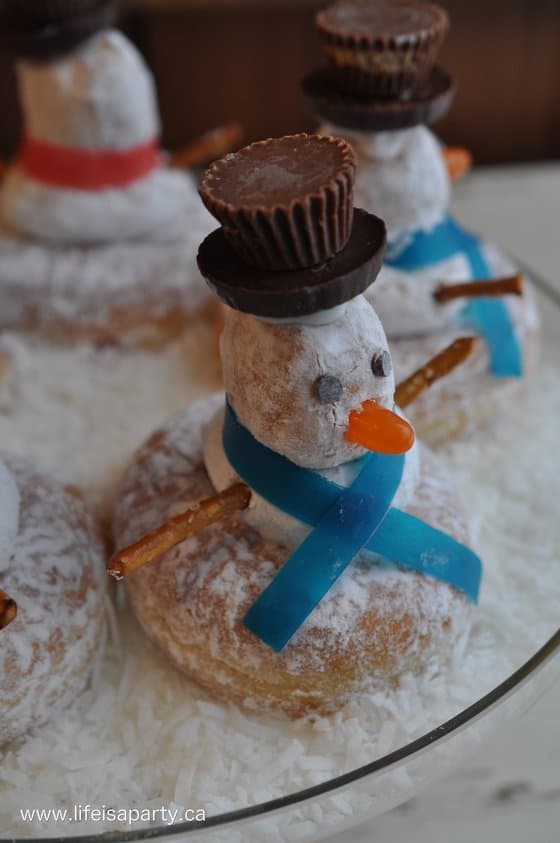
snowman themed party food

Snow Ice Cream

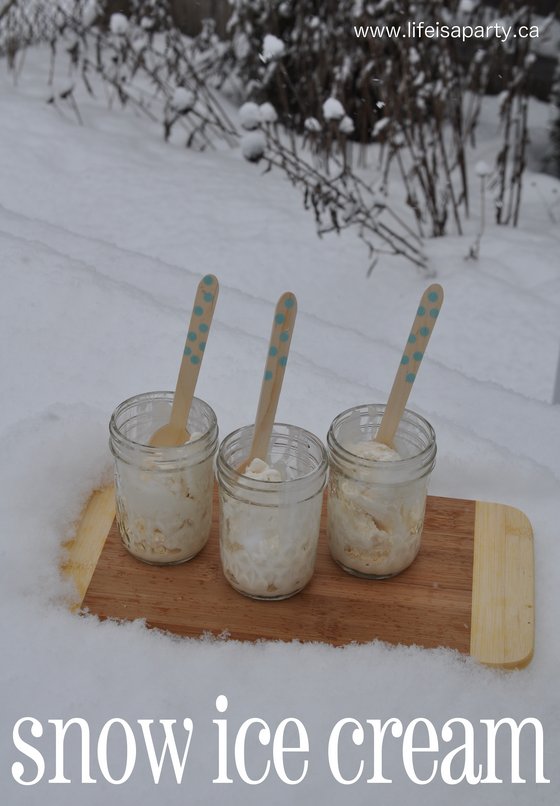
We also made snow ice cream.  If you're looking for an outdoor activity you can get everyone dressed up for the snow and go out and collect it together.  And while you're out there you might throw a few snow balls, and build an actual snowman, or turn it into a sledding party.  We made our ice cream at the end of the party, so we just grabbed some fresh snow from the deck and made our ice cream inside.  See how we usually make homemade snow ice cream here, but this time we used an even easier method.  Just combine snow with sweetened condensed milk.  We made individual bowls.  A  few tablespoons to a cereal bowl and add a few cups of snow.  Each person stirs to combine, until it looks like ice cream.  You can add more condensed milk to make it sweeter.   You can also add on some toppings if you like.  Our chocolate fans liked a little chocolate syrup to turn it into chocolate ice cream.  It was fun and very yummy, and the kids really loved making their own. 

We had a really fun night, and it was easy and very do-able even at the end of a long week, since a lot of the food was "make your own".  This simple celebration was easy to put together.   I always find this works so well with small children, since they can customize it, and the food making becomes the activity for the evening. I hope it inspires you.  This would be a really fun get together over winter break, or even as a family Christmas party if you live somewhere where you have a white Christmas.

With a snowman themed party for dinner with friends, life really is a party!
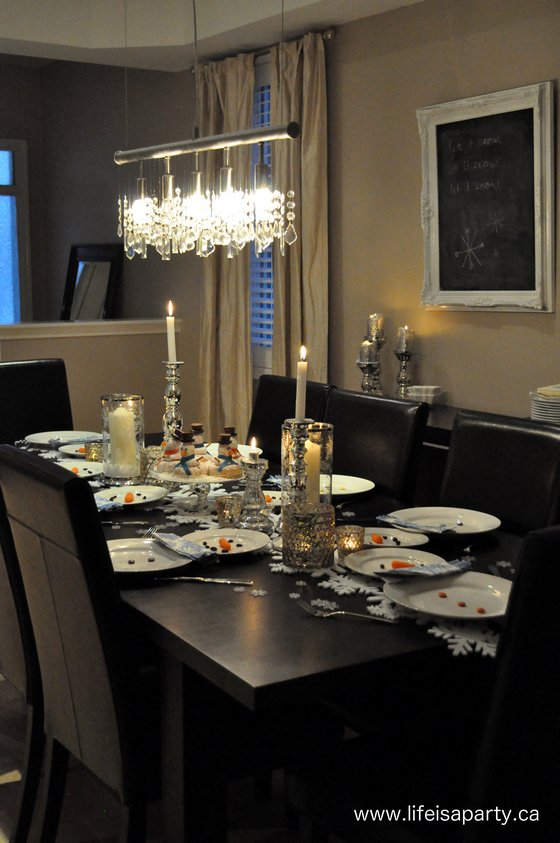
snowman themed party table

More Inspiration

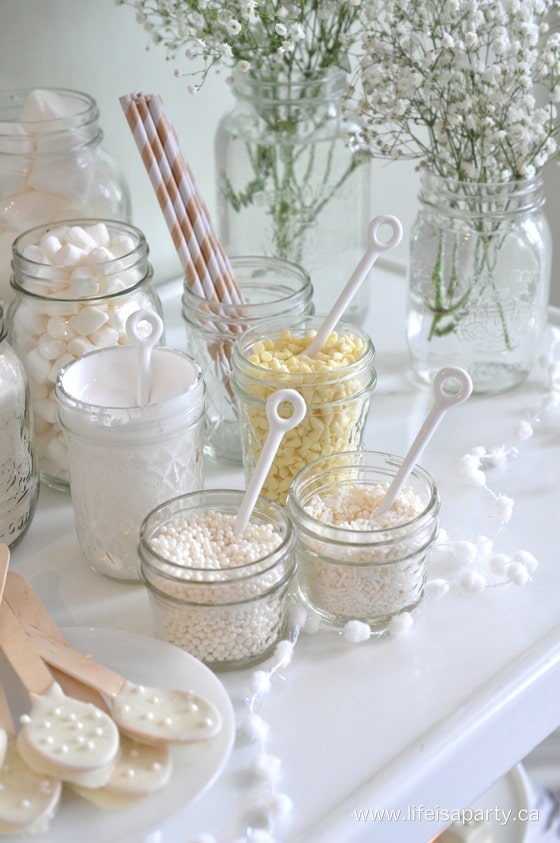
You might also like White Hot Chocolate Buffet here.
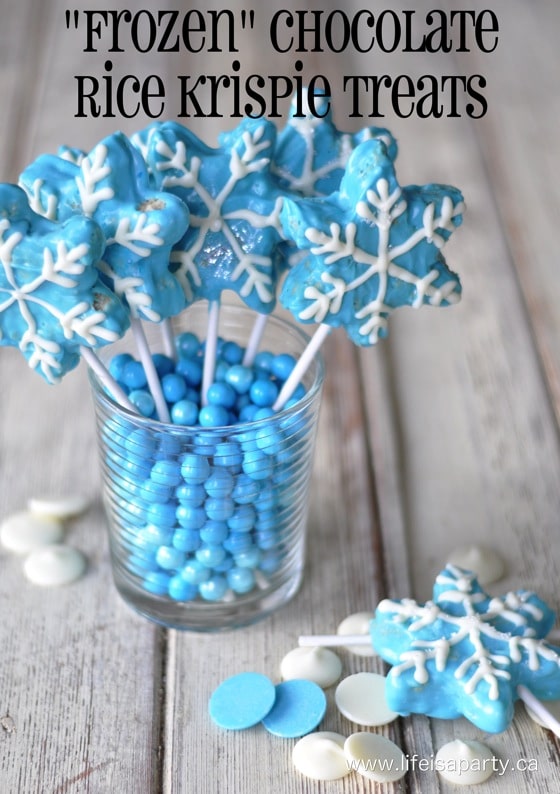
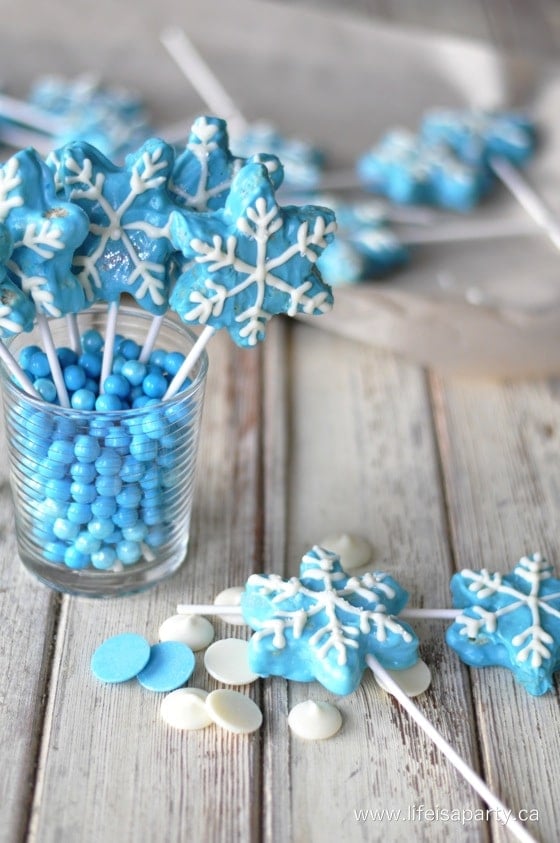
Also check out "Frozen" Inspired Chocolate Rice Krispie Treats here.
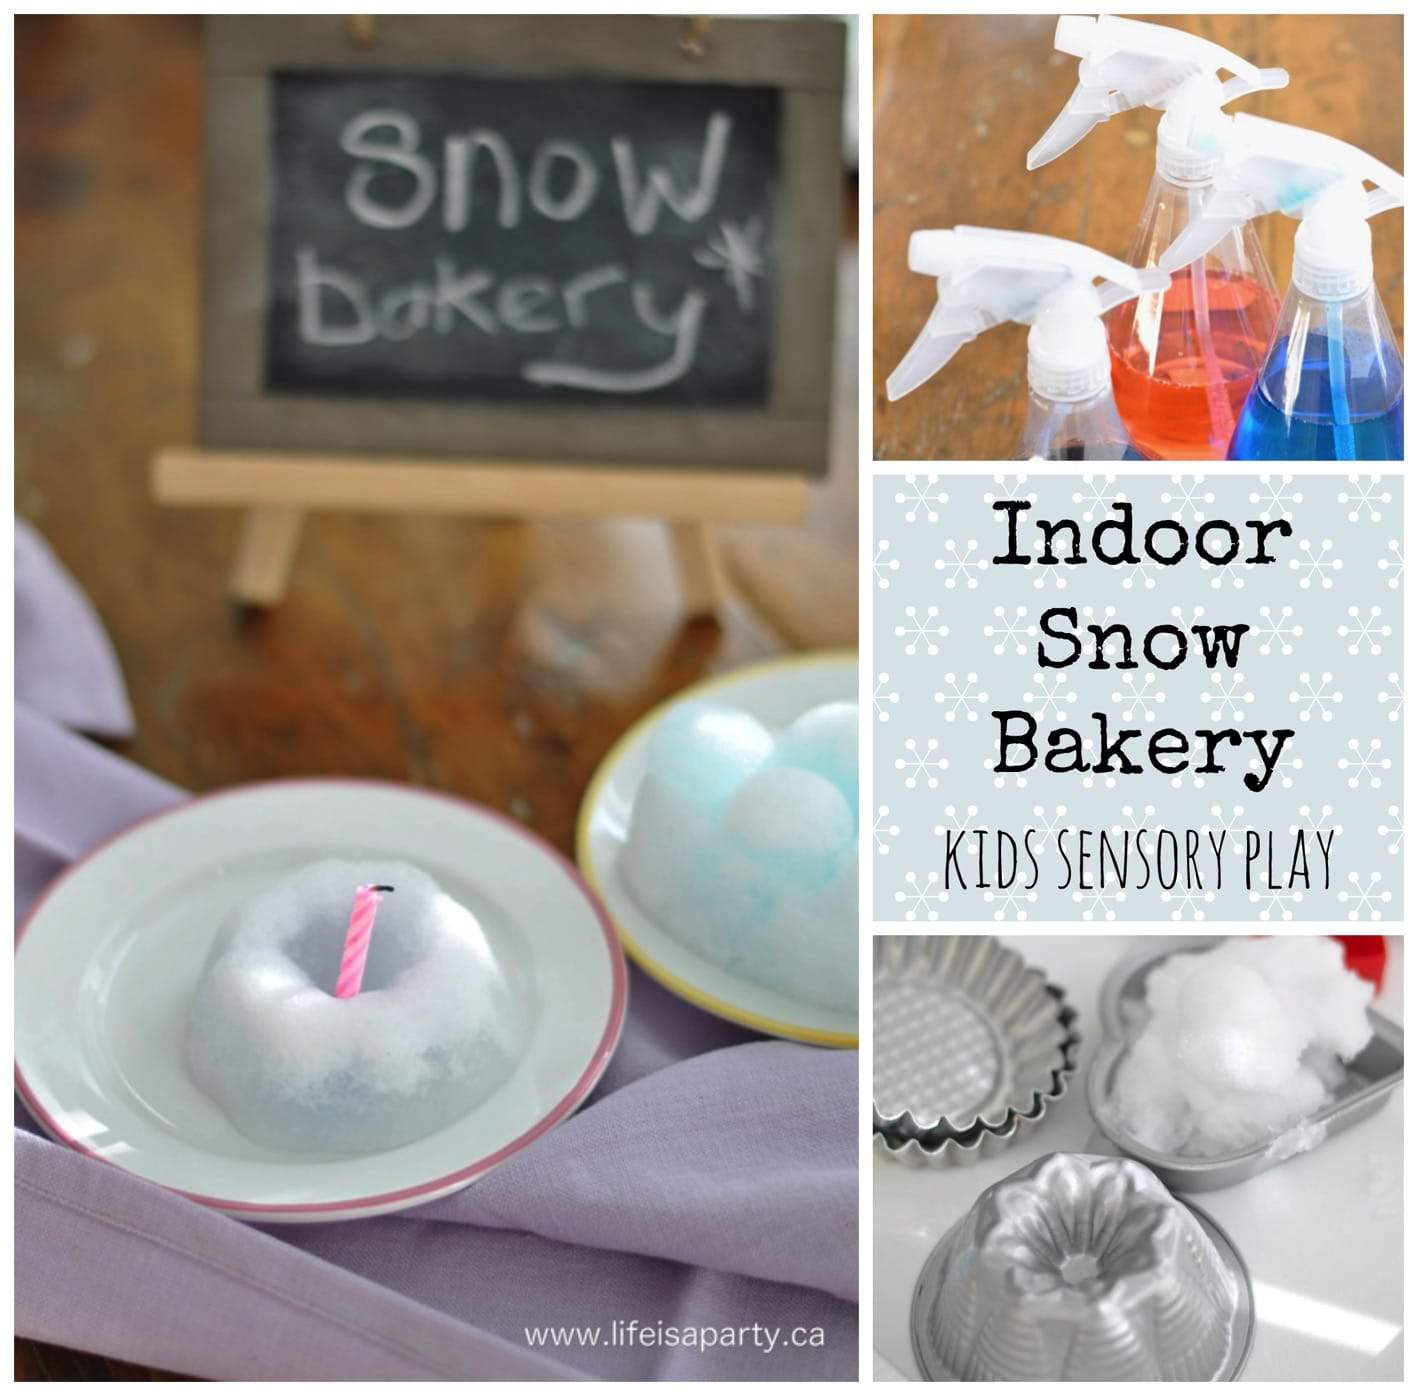
You might also enjoy Snow Bakery -Indoor Snow Play here.
How To Make Easy Donut Snowmen

Jan 13, 2014 · 1 Comment

Snowman donuts.

Donut Snowmen: these easy to put together snowmen use jelly donuts, donut holes, and candy for a perfect winter treat kids will love.

How to make easy snowman donuts.
[feast_advanced_jump_to]

All this snowy, January weather has us thinking snowmen, and trying to embrace the season, rather than just waiting for it to pass. You know we love nothing more than a themed party around here, so we turned a simple dinner with friends on the weekend into a snowman party -you can read all about here. It's the perfect theme idea for the winter months and a great way of embracing this time of year.

I wanted to make a simple, fun snowman dessert and came up with this tasty idea that I thought you and any kids in your life might enjoy.  It's perfect for holiday parties and would be a fun Christmas treat. 

I put my donut snowmen together using all store-bought ingredients, so it's very easy to put these together.  The key to making these little donut snowmen really delicious and not just cute is to get really fresh donuts.  Be sure to pick them up the day of the party.  

You could also have the kids make them for themselves, and choose their own candies to add to their little snowmen.  How fun would it be to set up a little snowman donut making station at your next holiday party.  Just place all the ingredients to make the cute snowman donuts and watch the kids having so much fun making their own version of this perfect treat.

how to make a donut snowman

Donut Snowmen Ingredients:

  • jelly donuts
  • powdered mini donuts
  • jelly timbit donut holes
  • chocolate chips
  • orange Mike and Ike candy
  • fruit by the foot
  • pretzels
  • mini peanut butter cup
  • peppermint pattie
  • white icing
  • shredded coconut

How To Build A Donut Snowman

I started out with some regular size jelly donuts, and some of the timbit donut hole version too. We also picked up some mini powdered sugar donuts at the grocery store. I stacked them together to make the snowman's body. You could use a toothpick to make it even more secure, but the small middle donut with the hole in the middle worked really well to balance the timbit head.

Then, I just embellished the snowman. To make the snowman face, I used chocolate chips for eyes, and made a nose out of a Mike and Ike orange candy. The scarf is a piece of fruit roll-ups, and the arms are made from pretzel sticks. The top hat is one mini peanut butter cup, and a peppermint pattie, held together and on the snowman's head with a little icing "glue", but melted chocolate would work well to put the hat together too. I rested my snowmen on a little coconut "snow".

Donut Snowmen building

These little snowmen donut desserts were a real hit with the kids and adults.  They were the perfect addition to our snow themed dinner party.  I hope you enjoy this really simple and really fun idea. 

Recipe

Snowman donuts.

Easy Donut Snowmen

Powdered donuts and candy make a cute snowman themed dessert.
No ratings yet
Print Pin Rate
Course: Dessert
Cuisine: American
Prep Time: 5 minutes minutes
Total Time: 5 minutes minutes
Servings: 1
Calories: 1937kcal
Author: Dannyelle Nicolle-Ramjist

Ingredients

  • 1 jelly donuts
  • 1 powdered mini donuts
  • 1 jelly donut holes
  • 2 chocolate chips
  • 1 orange Mike and Ike candy
  • 4 inches fruit by the foot
  • 2 pretzel sticks
  • 1 mini peanut butter cup
  • 1 peppermint pattie
  • 1 teaspoon white icing
  • ¼ cup shredded coconut

Instructions

  • Arrange the regular size jelly donuts as the base of the snowman, with the powdered donut on top, and the donut hole on top as the head.
  • To make the snowman face, use 2 chocolate chips for eyes, and the Mike and Ike orange candy as the nose. For the scarf use a piece of fruit roll-ups around the snowman's neck. Make the arms from 2 pretzel sticks.
  • For the top hat use icing to hold together one mini peanut butter cup, and a peppermint pattie and then secure it to the dout snowman's head with more icing. Serve your snowmen on a little snow made from shredded coconut.

Nutrition

Serving: 1g | Calories: 1937kcal | Carbohydrates: 322g | Protein: 28g | Fat: 74g | Saturated Fat: 32g | Polyunsaturated Fat: 37g | Cholesterol: 46mg | Sodium: 1661mg | Fiber: 27g | Sugar: 189g
Tried this Recipe? Tag me Today!Mention @LifeisaParty or tag #lifeisaparty!

With donut snowmen, life really is a party!

More Recipe Inspiration

You might also enjoy our Snow Ice Cream here.

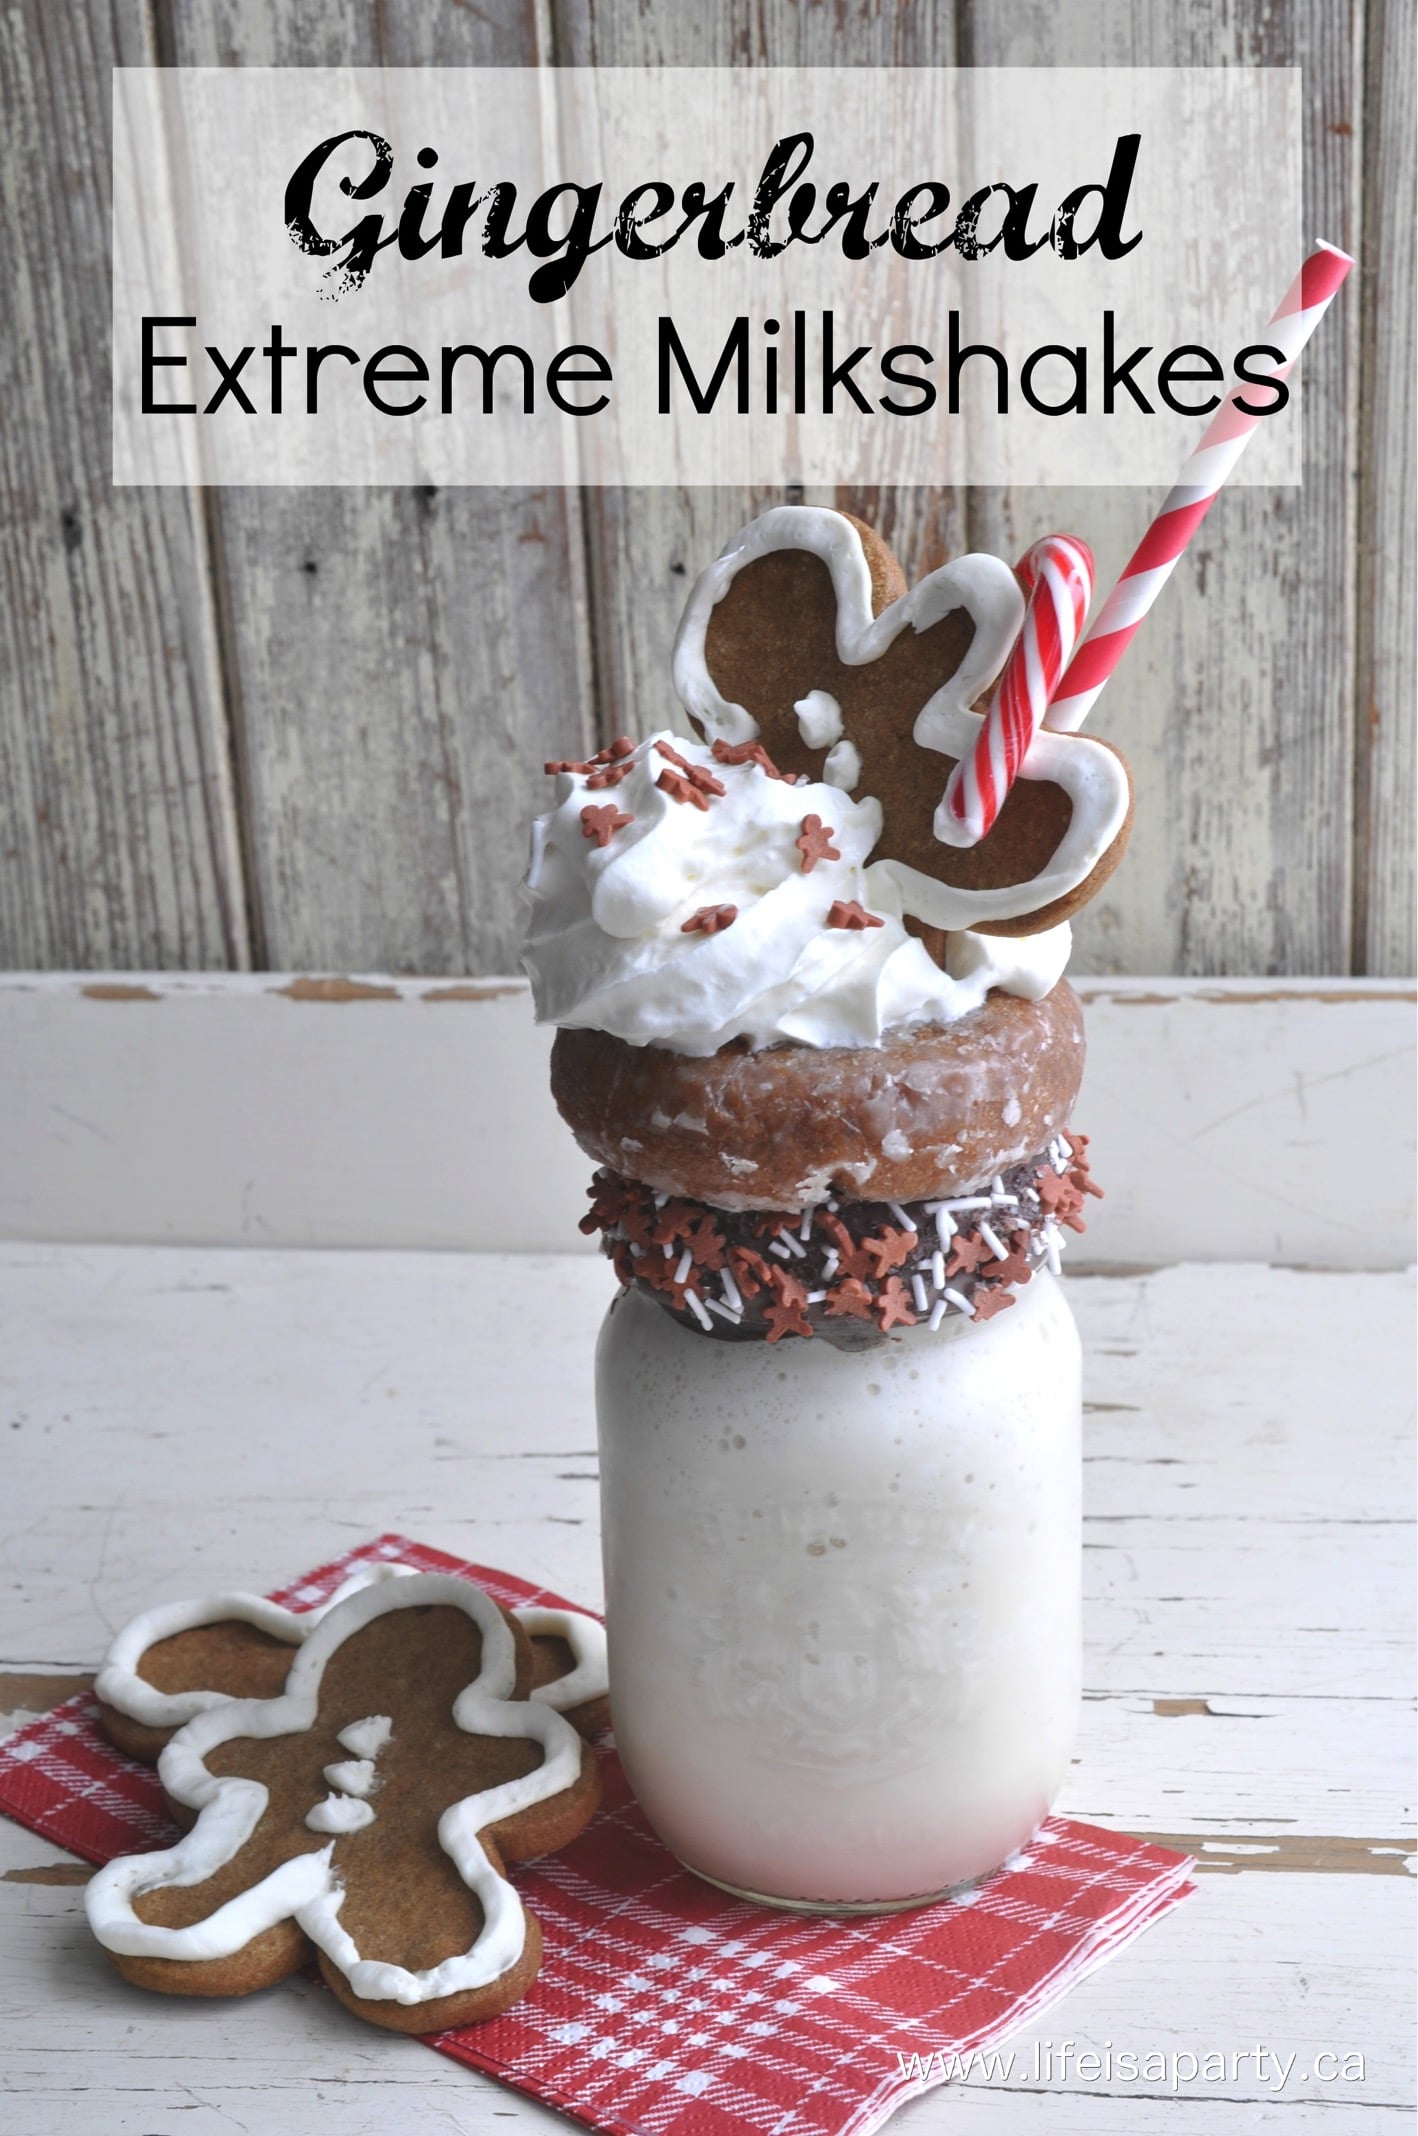
Also check out our Gingerbread Extreme Milkshake here.

Gingerbread Extreme Milkshake Freakshake: Recipe for gingerbread syrup and gingerbread extreme milkshakes. Perfect treat for the holidays.

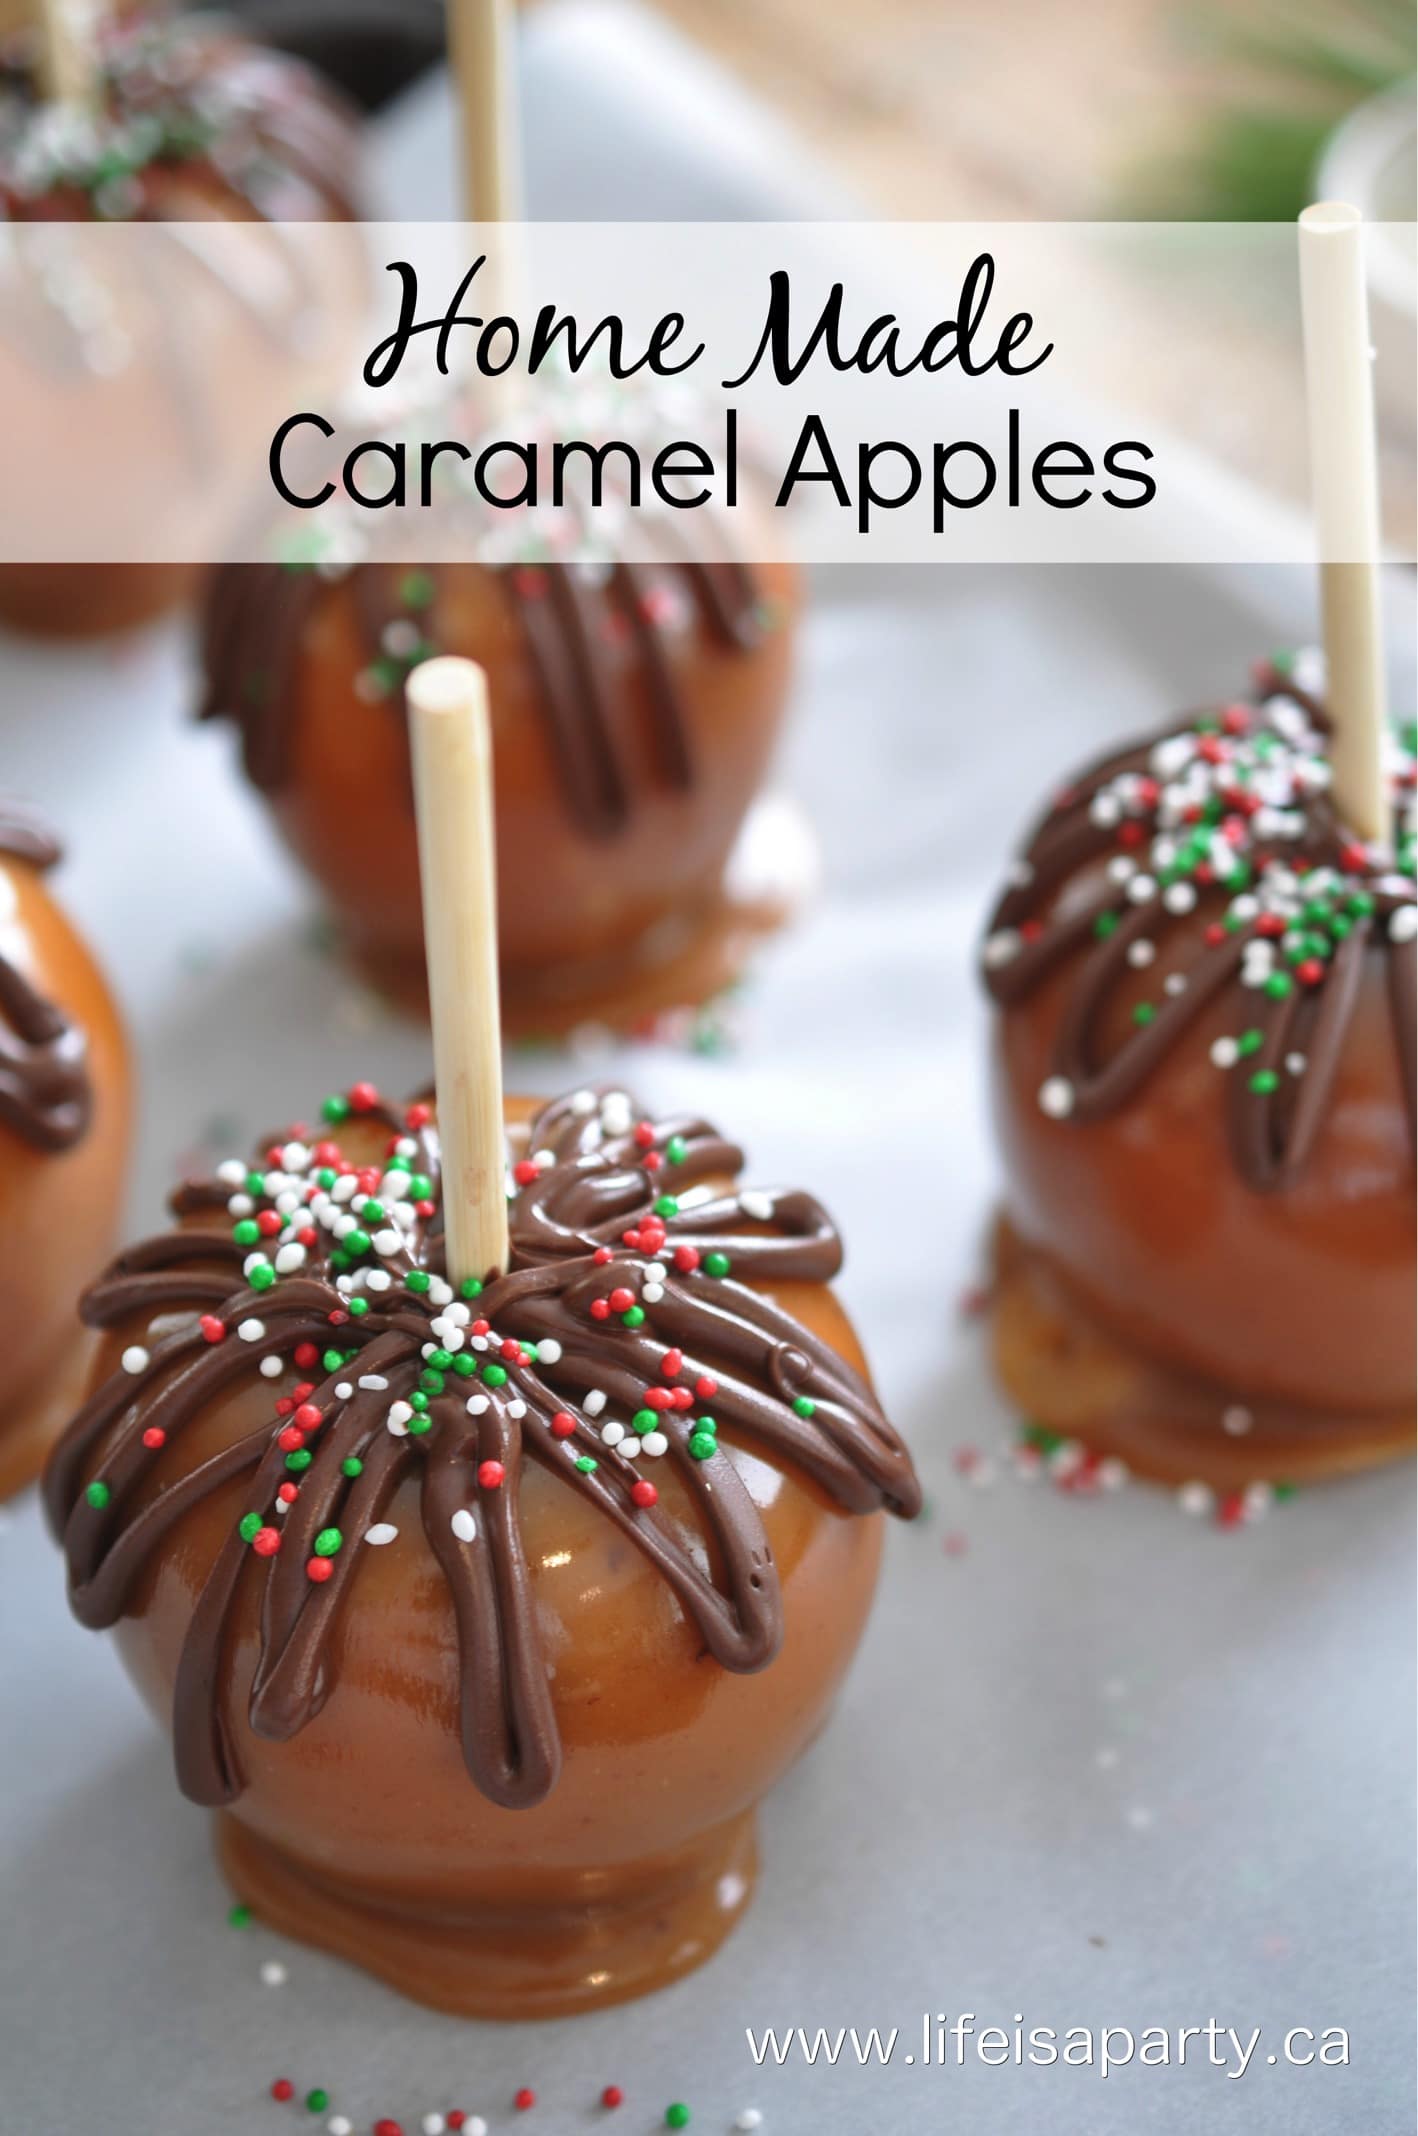
You might also like our Homemade Caramel Apples recipe here.

Caramel Apple Recipe: Easy, homemade Caramel Apples, perfect for Christmas gift giving, or anytime of year. Add your favourite toppings.

Vintage Inspired Homemade DIY Christmas Crackers

Dec 20, 2013 · 16 Comments

Homemade Christmas crackers.

Vintage Inspired Christmas Crackers: Simple tutorial for making your own DIY Christmas crackers out of inexpensive vintage Little Golden books -so adorable!

Homemade Christmas crackers made with vintage storybooks.
[feast_advanced_jump_to]

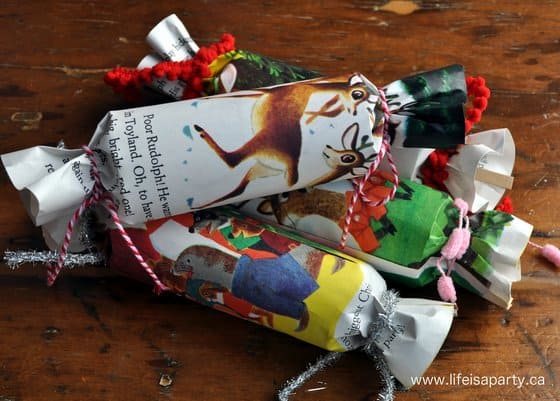
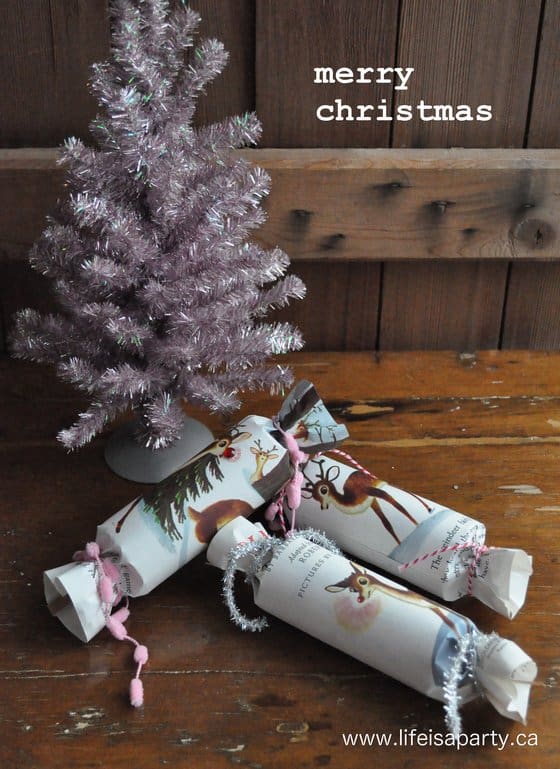
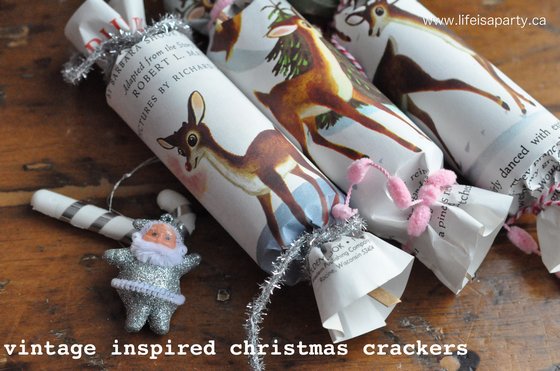
If you've ever wanted to make your own DIY Christmas crackers, complete with the signature pop, these are a great addition to your festive season.  These are fun to make and fill with whatever you like.  Since our Christmas crackers are vintage inspired, I used some vintage Christmas storybook pages as the paper.  They turned out so cute.  I don't think I can ever go back to store bought Christmas crackers again.

You might also like our Salt Dough Gingerbread Recipe.

Christmas Cracker Tradition

Christmas crackers are a Christmas tradition, first created in London.  They're traditionally used for table decorations during the holidays.  Everyone holds the ends of the cracker and pops them open.  They have a special cracker snap inside, so they pop with a real crack.  Inside the shop-bought Christmas crackers there's always a few different treats.  These always add a little wow factor to your table settings, and a tradition that many people look forward to.  An easy way to make sure the party crackers fit your own personal color scheme and Christmas decor is to make your own.  They're not hard to make and so much fun to personalize your own crackers.

It's that time of year when we're all running out of steam. Christmas is almost here, and most of us are ready to start celebrating, instead of finishing last minute projects. When I decided to do a vintage inspired Christmas theme this year, I came up with the idea of using old Christmas Little Golden Books to make some DIY Christmas crackers for the table this year. Today I put them together and I really love how they turned out. Luckily they are pretty simple to make -so even if you're getting tired like me, this one is pretty doable. 😉

DIY Christmas Cracker Materials:

  • Little Golden Christmas Books
  • Christmas cracker snaps
  • toilet paper rolls
  • paper hats
  • jokes
  • chocolates
  • confetti
  • ribbon or yarn

Little Golden Christmas Books

You need a few supplies to make your homemade Christmas crackers, the most important for ours being some Christmas Little Golden Books. We upcycled these books, by using the book pages to wrap our handmade Christmas crackers.  I have to admit I did feel a little guilty tearing the pages out of the books to make these. Must be the teacher in me. 😉 But, since I found them for .99 at a second hand store, they were probably even cheaper than buying pretty scrapbook paper, or wrapping paper. If you were really opposed to ruining a book, you could colour photocopy them, which would also work for someone who couldn't find them second hand. You could also use colour photocopies of any favourite holiday book, or even a library book as your decorative paper.

The little golden books are really common at the thrift store.  They're easy to identify too, because they all have the distinct gold book spines.

Vintage little golden Christmas books

Crackers

Along with the books, you'll also need the cracker part of the Christmas cracker. Good news, they're available at craft stores around the holidays.  These craft supplies are usually sold in a pack of 12, perfect for holiday entertaining.  The craft store also sometimes offers some treats for inside the crackers, like the signature paper crown hats, jokes, and prizes.  Look for those, or make your own.  You can also look for the crackers on-line.  The party poppers are inexpensive, and make these homemade crackers feel so authentic, so I strongly suggest that you don't skip this party.

Other Supplies

If you want to make homemade Christmas crackers, then get saving your TP rolls.  You can use toilet roll tubes, but you can also use paper towel rolls, or wrapping paper cardboard tube, cut to the right length.

DIY Christmas Cracker materials

DIY Christmas Cracker Fillings

Paper Hats

The cracker fillings are an important part of Christmas crackers.  The contents of the cracker usually include fun paper party hats, a joke and a treat in them. I made some simple hats out of tissue paper (let's hope my head size is average) for my own version of the traditional tissue paper crowns. You can also sometimes buy the traditional paper crown insert, where ever you buy the cracker insert pieces.

Christmas Jokes

For the cheesy Christmas jokes, print our free Christmas jokes here.  They're available free to subscribers, in our Free Resource Library.  Subscribe for instant access, download, print on your home printer, and tuck them into your own homemade Christmas crackers. 

Little Gifts or Treats

The little gifts were a little trickier for me. I always love the weird stuff you get in store bought crackers, but I have to admit, when was the last time I used a mini screwdriver, magnifying glass, or tape measure? I love a small gift, so what's as good as a mini gadget? Booze and chocolate.

Christmas Cracker fillers

I know you want to come to my house for Christmas dinner. 😉 I picked up some boozy chocolate, cause what would be better to start off a Christmas dinner with your whole fam damily than a shot and some chocolate?

For the kiddos I used some mini chocolate bars.  Any kind of candy is a great addition.  Candy canes feel very festive.  Any kind of wrapped candy would work well.

Any small gift would be a great addition.  Get as fancy as you would like.  You could even personalize the gifts for the whole family.  Just be sure to add a name onto the crackers.  If you go to the trouble of adding personalized small trinkets for everyone you want to make sure they get the right one.  This is such a fun personal touch.  Your guests would love thoughtful gifts.

For small children, small toys would be a great little prize inside.  Anything small enough to fit in would work well.  Things like a mini car, toy jewelry, a small ball, or marbles are just a few fun ideas.

Lastly, I also threw in a bit of sparkle with some glittery confetti...cause I love a little glitz, and I'll have to vacuum after anyway.

how to make your own Christmas crackers

How To Make DIY Christmas Crackers:

To make the cracker, just tear out a piece of the book, wrap it around your cardboard tube and glue it to secure it.  We used a glue stick.  Double-sided tape would work well for this step too.

Next, tape the cracker inside of the cardboard tube.  You need to use tape to hold the cracker in place.  Position the cracker strip so that the ends are sticking out, and they'll be easy to hang onto when it comes time to pop them open.  The cracker strips that I used were a little long, or my book pages were a little short, so I just trimmed them at the ends.

Now, tie one end of the cracker, by gently gathering in the paper at one end.  You'll want to do this step gently so that you don't accidentally tear the book page as you gather it together at the end of the tube.  I used pom pom yarn and trim and tinsel to add more of the vintage vibe.  You could also use a piece of ribbon for this step.  Choose some that isn't too thick, in a color that compliments your paper.

Then, at the open end of the cracker, load in your paper hat, joke, and treats.  You can also include a little fancy Christmas confetti for added fun.  The next step once your goodies are all inside your homemade Christmas crackers, tie up the other end.

how to make DIY Christmas crackers

Recipe

Homemade Christmas crackers.

Vintage Inspired Homemade DIY Christmas Crackers

No ratings yet
Print Pin Rate
Cook Time: 20 minutes minutes
Total Time: 20 minutes minutes
Author: Dannyelle Nicolle-Ramjist

Equipment

  • scissors

Materials

  • Little Golden Christmas Books
  • Christmas cracker snaps
  • toilet paper rolls
  • paper hats
  • jokes
  • chocolates
  • confetti
  • ribbon or yarn
  • glue stick
  • tape

Instructions

  • To make the cracker, just tear out a piece of the book, wrap it around your cardboard roll and glue it to secure it.
  • Next, tape the snap cracker strip into your cracker, with the ends sticking out at the ends.
  • Tie the paper at one end closed with some ribbon, yarn, twine, or tinsel. Be careful as you gather the paper together not to tear it.
  • Then, load in your treats, hat, and joke and tie up the other end.

These turned out so well.  They're such a great addition to our Christmas table on Christmas day, and a great way to personalize things with your color scheme, or theme.  They turned out almost too pretty to use. They'd be to make for your Christmas dinner table, or any Christmas party you're hosting this holiday season.

homemade Christmas crackers

With pretty Vintage Inspired DIY Christmas Crackers, life really is a party.

vintage inspired Christmas crackers

More Christmas Inspiration

You might also like our Christmas Diorama here.

Also check out Vintage Christmas Ornament Wreath here.

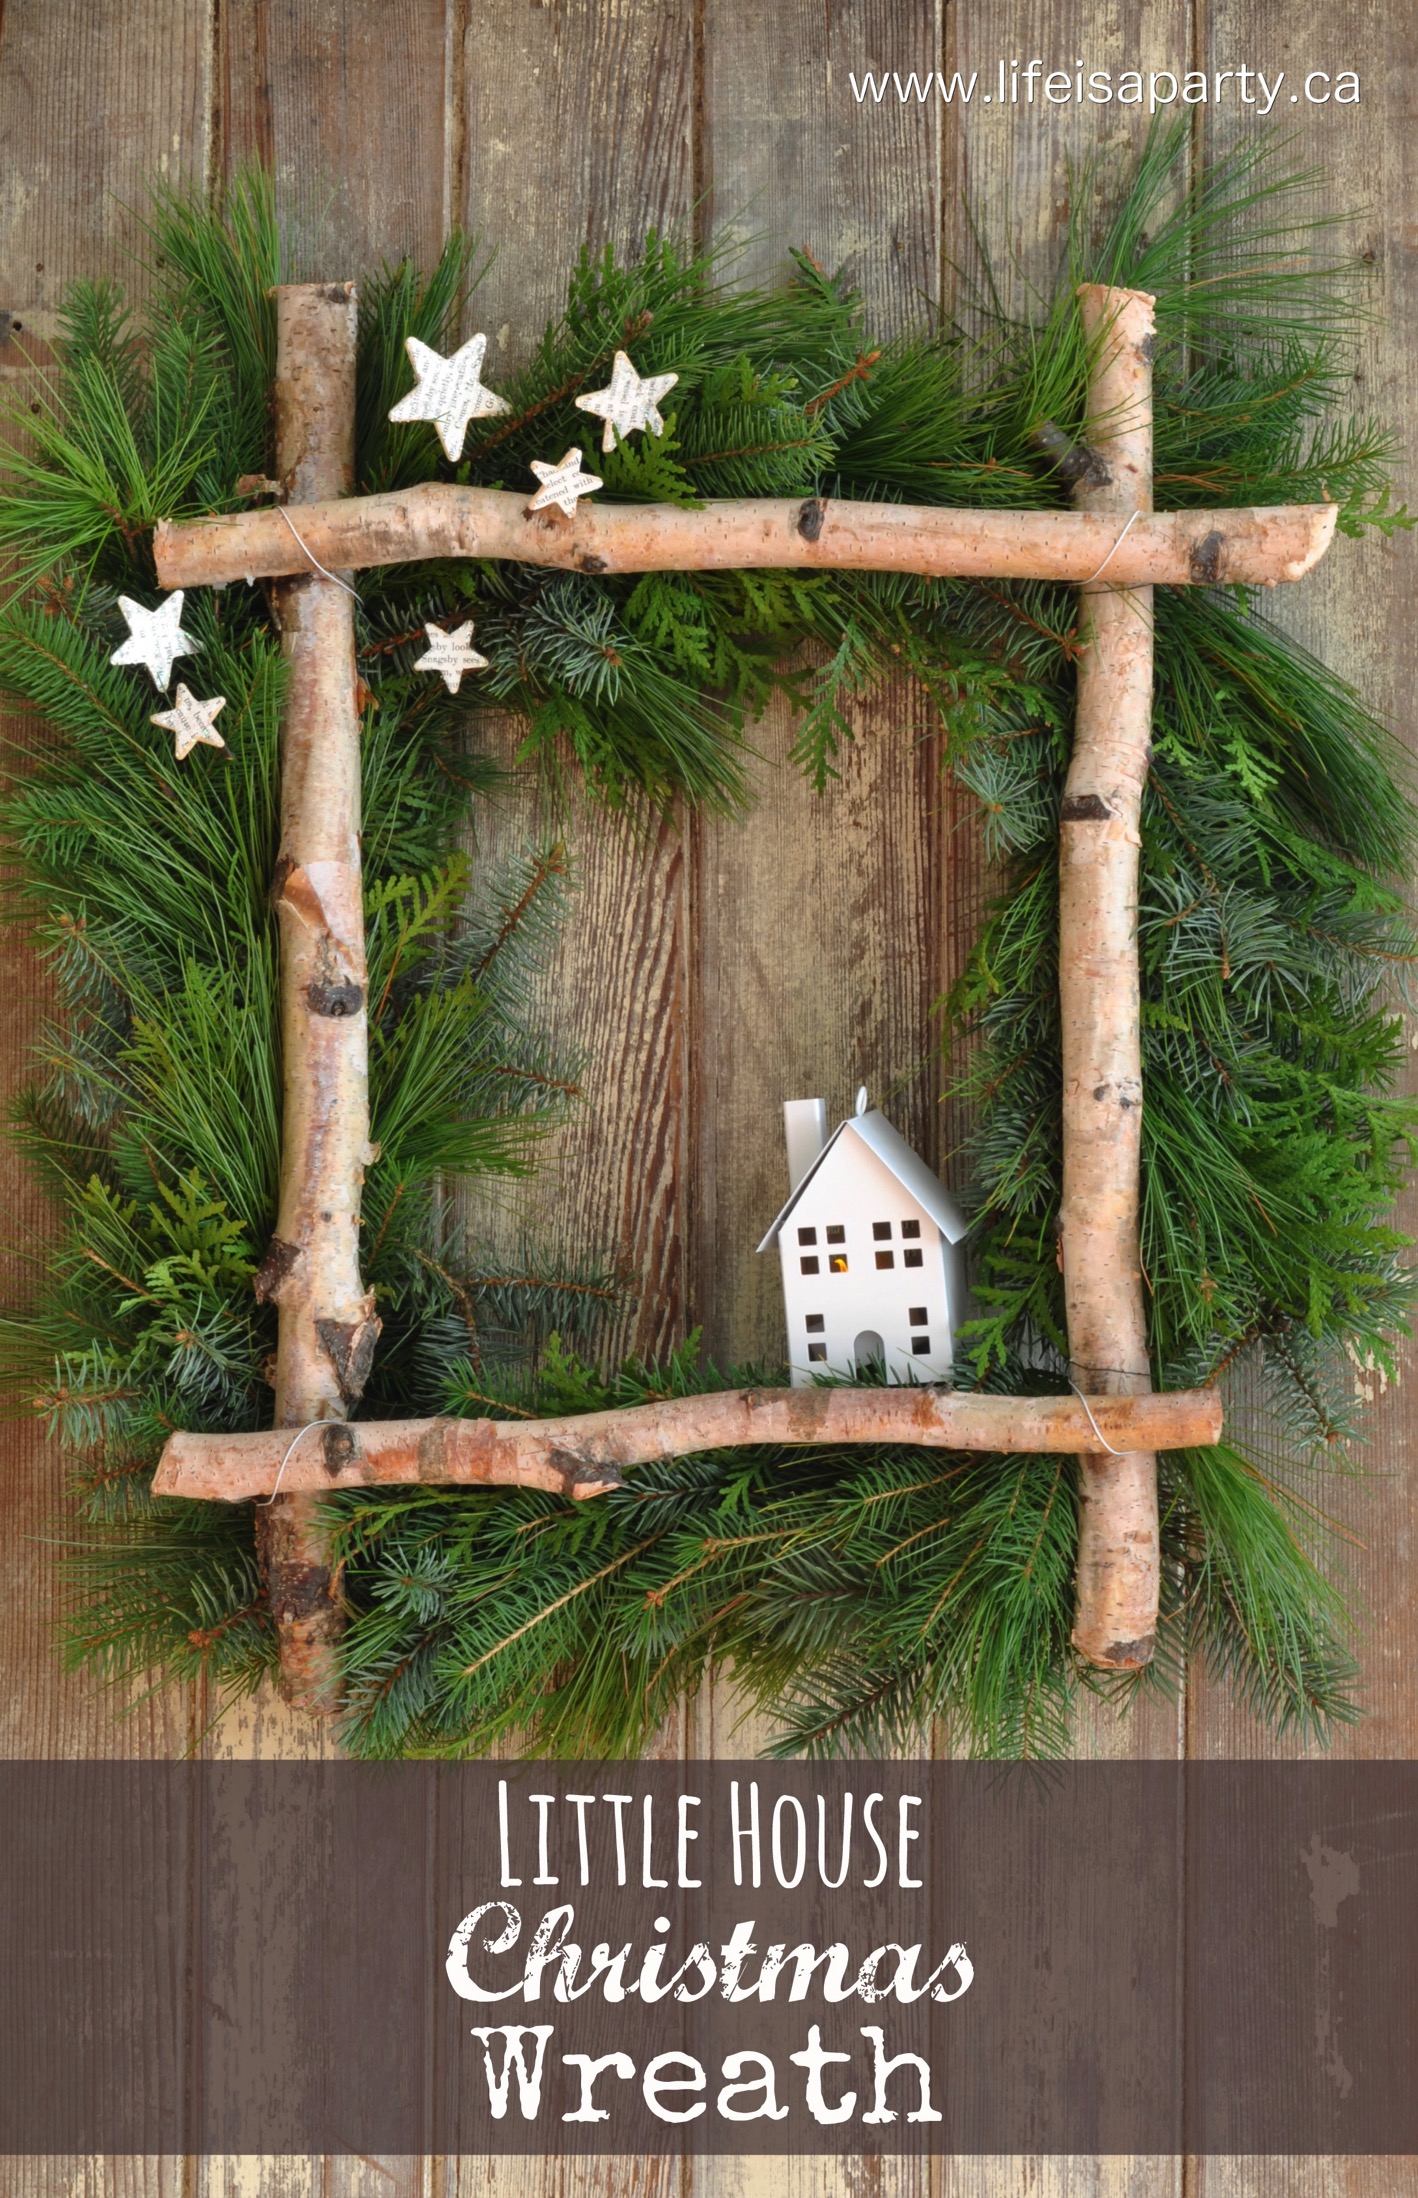
You might also enjoy our Birch Christmas Wreath here.

Birch Christmas Wreath:-full tutorial to make your own square wreath from some gathered greens, birch logs, and a coat hanger. Perfect for Christmas.

Vintage Christmas Decor Ideas Christmas Home Tour

Dec 16, 2013 · 5 Comments

Vintage Christmas decor ideas.

Vintage Christmas Decor Ideas Home Tour: lots of vintage ornaments, and Christmas decorations, a handmade Christmas village and more!

Vintage Christmas decor ideas.
[feast_advanced_jump_to]

Welcome to my Christmas Home Tour. Today I want to invite you in to see my vintage inspired Christmas decor ideas. So, grab yourself a cup of coffee or tea, and come on in.

Vintage Christmas Decor Ideas Home Tour: lots of vintage ornaments, and Christmas decorations, a handmade Christmas village and more!

Front Porch

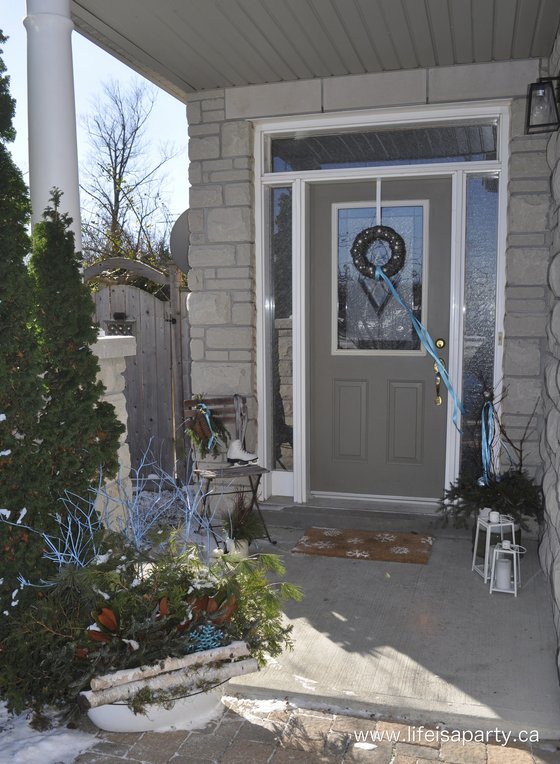
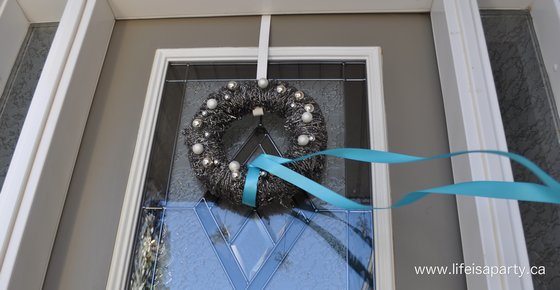
The front door got a little colour this year, inspired by my turquoise Christmas lights. I usually lean towards white, but I must say this hit of colour is making me smile this year. The old skates, and vintage enamelware pots are setting the tone for my vintage inspired Christmas decor theme this year. And on the front door, one of my fav. little projects ever -the pot scrubber wreath -see how I made it here, made from dollar store pot scrubbers and adding a little sparkle.

silver Christmas wreath

Entrance

Well, come in out of the cold. At the entrance of our home we have a console table, and here it is all decorated for Christmas.

vintage Christmas decorations

I found a few vintage decorations at a second hand store. As soon as Halloween was over I started hunting. I think this little guy might have originally been a cake topper?

vintage santa decoration

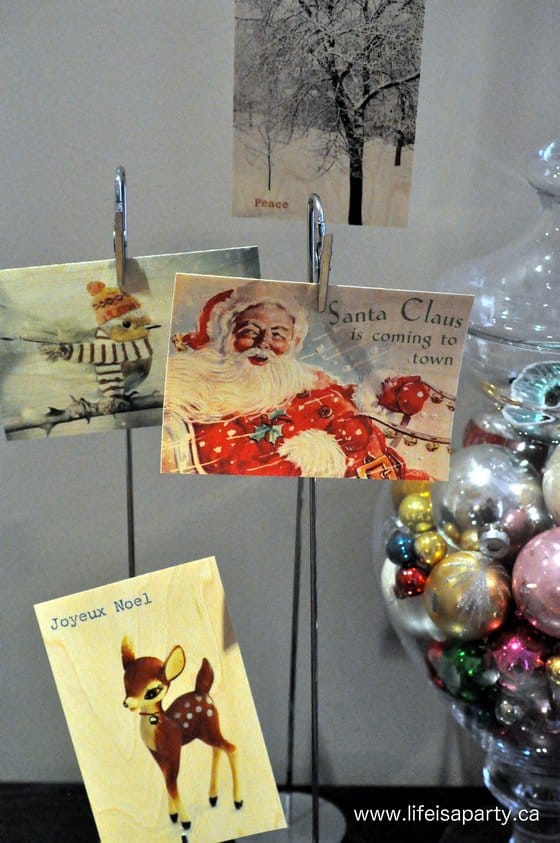
These pretty postcards are from a craft sale.  They're vintage Christmas images printed on wood veneer. So pretty.

vintage christmas cards

Vintage Christmas Decor Ideas in the Dinning Room

This is the entrance of the dining room, and it's all dressed up for Christmas too. Here's the view of the dining room table, looking into the living room.

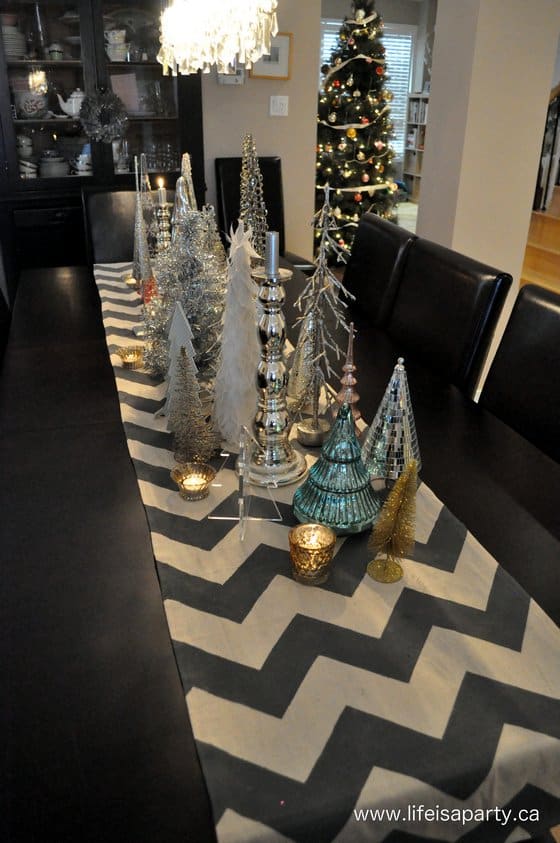
Christmas dinningroom table centre piece

I love getting out all my little table top trees each year, and adding a few new ones -although I certainly don't need any more. This year I wanted to add a little gold into the mix.

Christmas dinningroom table centre piece

I have so many silver trees, it's been a real favourite, but I'm loving the tread of mixing in gold. The addition of a little pink and turquoise help add the vintage feel. I love the sparkle of the mercy glass tea light holders too.

Christmas dinningroom table centre piece

On Christmas day, I'll move all the trees to the buffet to make room for dinner. We're hosting this year!

table top Christmas trees

Buffet

Right now the buffet has a few candles, with the pretty chalkboard above it along with a couple of vintage Christmas cards in simple white frames.

vintage Christmas decor ideas

I found this pretty metal snowflake garland years and years ago at a boxing week sale. I thought it looked old and vintage-y too.

vintage Christmas decor ideas

This little Santa was another fun find at the second hand store.

vintage santa decoration

The Stairway

The dining room leads into the living room, and the stairs -up to the bedrooms or down to the basement.

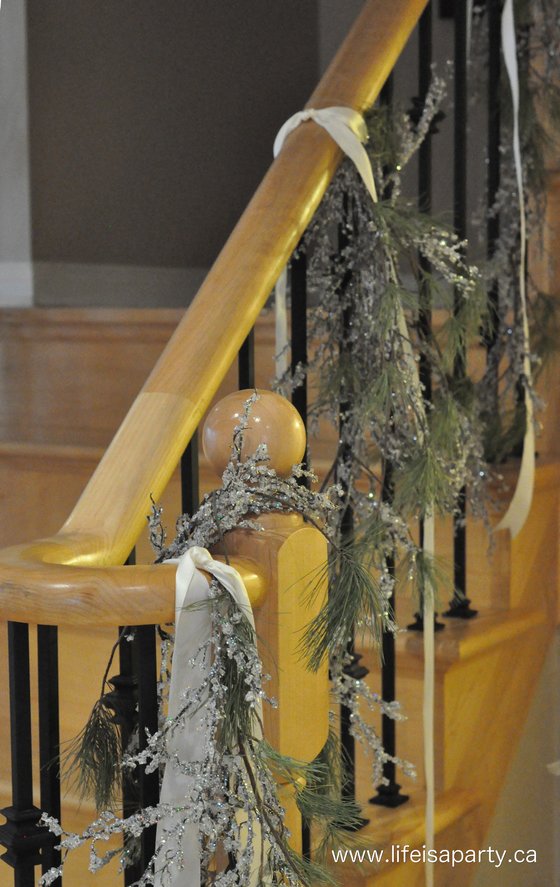
Christmas stairway garland

I love how the stairs turned out this year. I usually use just the glitter garland, but this year my sister did it for me, and added in the real pieces of pine -thanks Heather. 😉 Then we added in some simple, long satin ribbon ties. Here's the view, looking back at the dining room.

vintage Christmas decor ideas home tour

Vintage Christmas Decor Ideas for the Tree

And the tree, has the perfect little spot at the bottom of the stairs. I like it here, since you can see it from the living room, and also when you're eating Christmas dinner in the dining room.

vintage inspired Christmas tree

The tree turned out great this year...even if it did take a few tries to get right. I decided on a vintage theme fairly early, and started shopping for decorations. As I accumulated them, I thought they'd really look better on a white tree. I found one at a good price and brought it home and set it up. It was 6 ft. but with the tall ceilings, and since we need a skinny tree for this little spot at the bottom of the stairs it just wasn't big enough, and didn't have enough presence to hold the space. After staring at it a few days, I reluctantly took it all apart and returned it. I went with my old tree and I'm so glad I did. It really is perfect for this space.

vintage Christmas ornaments

I had some vintage decorations, but I didn't think I had enough for a whole tree. So I started checking second hand stores as often as I could. My greatest find was this Shiny and Bright tree topper -it's perfectly pink. Love it.

vintage Christmas ornaments

Using Reproduction Ornaments

It was hard to find vintage ornaments. I found some that were old, but not antique, but I just mixed them in with the rest, and even dabbed a few with nail polish remover to age them a little more. The pretty silver ball garland with bells is a reproduction. And a few were from an antique store, but they can get really expensive. The easy way to tell the vintage decorations from reproductions is to look at the top, if it's old looking it probably is old.

vintage Christmas ornament pink

These vintage foil balls were a fun find -love the bright pink one!

vintage foil Christmas ornament

I did notice that Target has some really pretty reproduction vintage ornaments this year, and at The Bay you can buy brand new shiny and brights, inspired by the vintage ones. I wanted a vintage "inspired" Christmas look this year, but I'm not a stickler for everything being authentically vintage. I'm not trying to re-create a Christmas scene from the 1950's -I'm just using old things mixed with the new for an updated look. I love mixing vintage with contemporary for a fun look, with a nod to the past.

vintage inspired Christmas tree

Red Wagon and Vintage Little Golden Books

Under the tree, we used a little red wagon that has a bit of a vintage look to it. Love it filled with little Christmas packages. In my visits to second hand stores I was also keeping my eyes open for some Christmas Little Golden Books.

vintage Little Golden Christmas books

Living Room

From the tree, into the living room -where it's snowing!

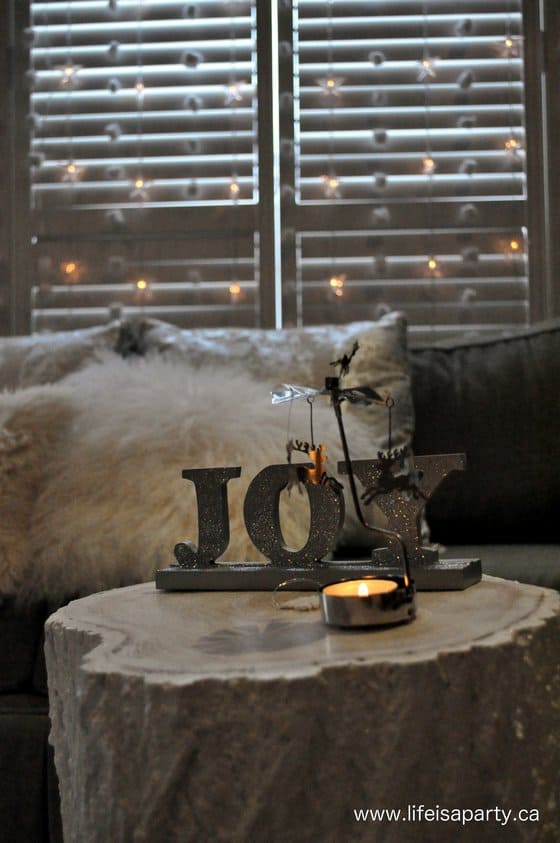
cotton ball snow christmas decorations

I thought it would be fun to make it snow in the living room by stringing cotton balls behind the couch.

cotton ball snow curtain

To make the hanging snow I used fishing line, and around 500 cotton balls, but the effect is magical. I thought they looked so old fashioned and fun.

cotton ball snow Christmas decorations

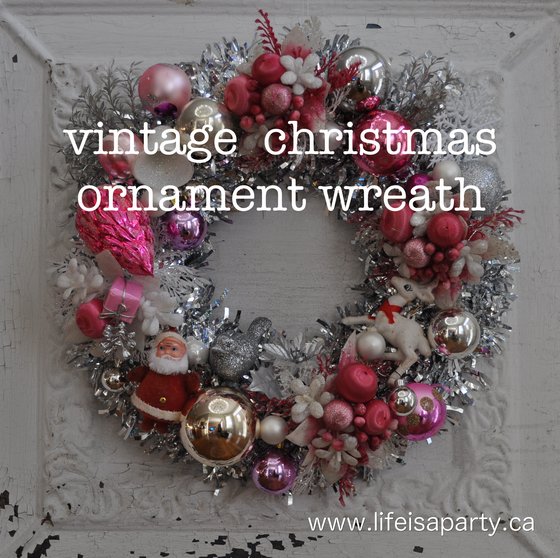
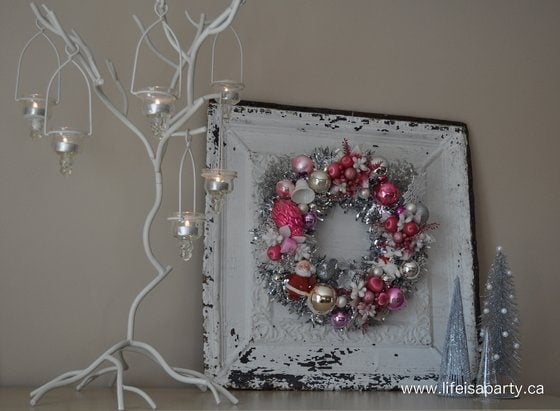
Above the shelf is the pretty vintage ornament wreath I made this year.

christmas home tour

I love the pink, and the glitz -with more little trees.

vintage ornament wreath

Vintage Christmas Decor Ideas for the Mantel

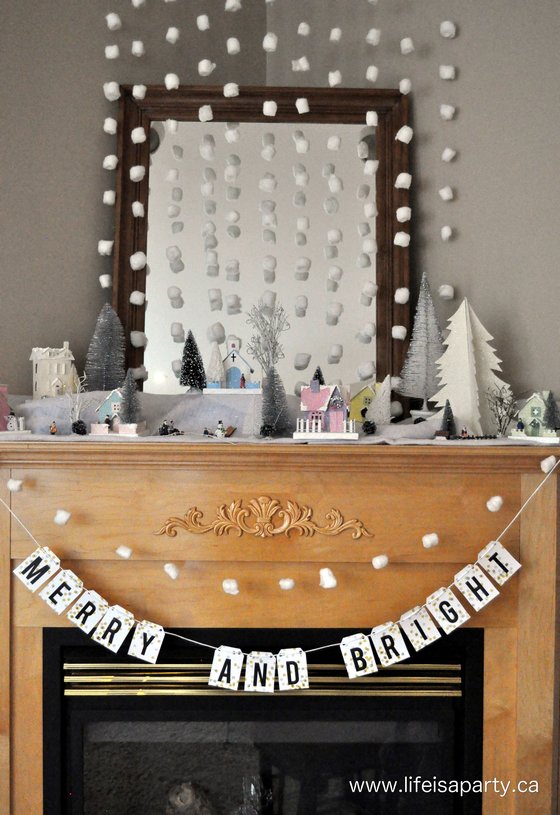
Over at the fireplace, more snow is falling.

Christmas Fireplace Mantel Christmas Villiage Putz Houses

I put this village up every year, but this year it was certainly perfect with our vintage theme. You can see how I made these DIY Christmas glitter houses or putz houses here -all made out of old cereal boxes!

Christmas Fireplace Mantel Christmas Villiage Putz Houses 2
Christmas Fireplace Mantel Christmas Villiage

It's a little wonderland.

Putz glitter Houses village

And the pretty banner is a free printable from here, with a little silver and gold glitter -the perfect finishing touch.

merry and bright banner

Kitchen

And now into the kitchen.

vintage Christmas decor ideas home tour

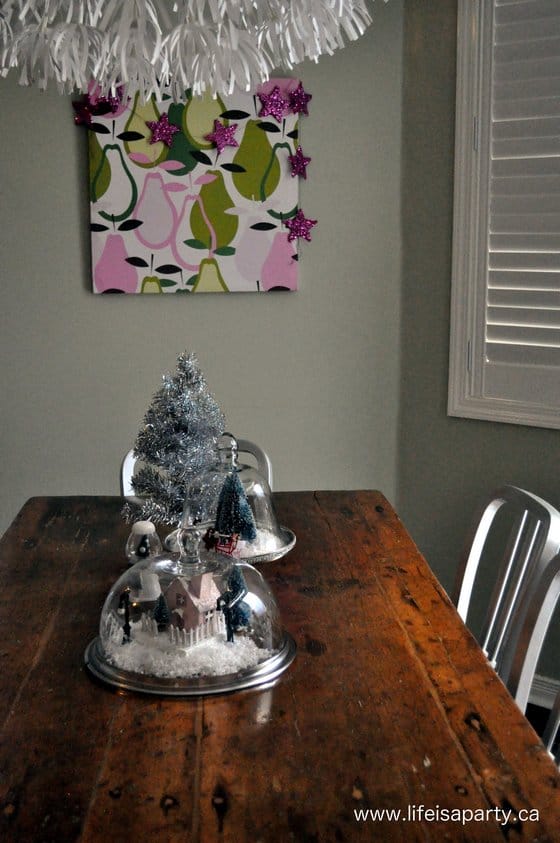
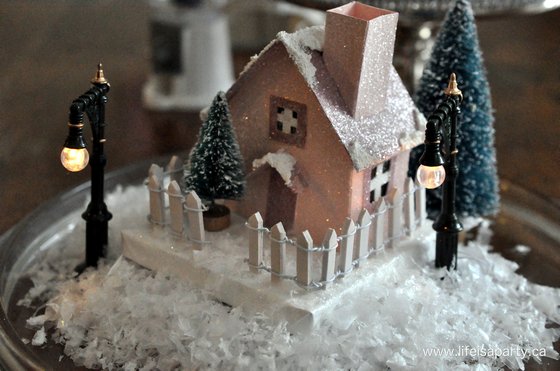
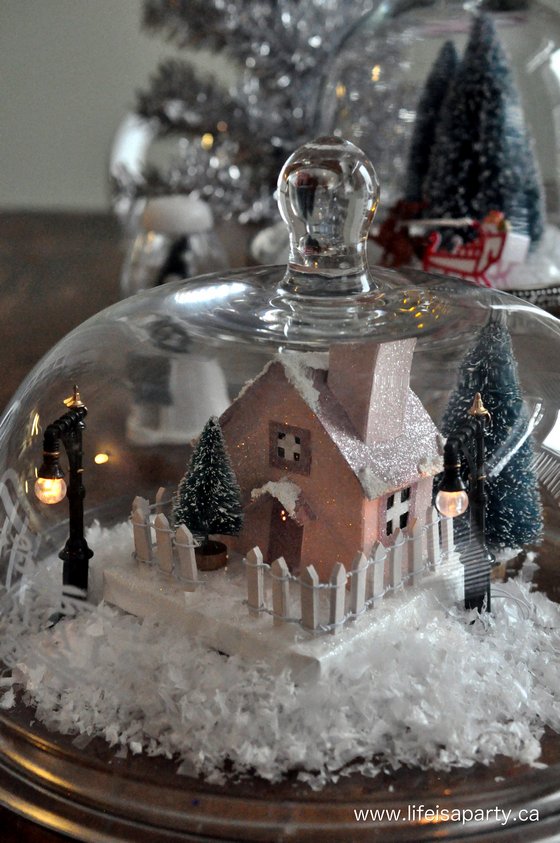
On the table, another little glitter house. This one with simple battery powered street lights, just hide the battery pack in the snow. 😉

Glitter house putz house

Add a cloche, for the perfect little centre piece.

vintage Christmas decor ideas home tour

And one more.

vintage Christmas decor ideas

Look it's snowing outside.

Christmas home tour

This might be the longest post I've ever written. Hope you enjoyed the tour and Merry Christmas! With you stopping by for a Vintage Christmas decor house tour, life really is a party!

More Inspiration

You might also like our Pastel Christmas Living Room here.

Colourful Pastel Christmas Family Room: Inspired by Anthropologie, with bottle brush Christmas trees, mercury glass, vintage ornaments, macrame, & pastel colours.

Also check our Green Christmas Decor Home Tour 2019 here.

Christmas Home Tour: Rustic Scandinavian Christmas Home Tour, with bit of modern boho.

You might also enjoy Christmas Table here.

The Twelve Days of Christmas Love Notes

Dec 11, 2013 · 4 Comments

12 Days of Christmas love notes for your partner at Christmas.

12 Days of Christmas Love Notes: write your partner a love note for them to read each day as a Christmas countdown.

12 Days of Christmas love notes for your partner at Christmas.
[feast_advanced_jump_to]

Create a display of Christmas Ornaments that hold 12 Days of Christmas love notes, as the perfect countdown to Christmas for your partner.  

This year my husband only asked for one present. I love giving presents. I did find more than one thing to buy for him, but nothing too major this year, so I thought it might be fun to add something else this year, something special.

12 Days Of Christmas

I pondered different versions of the twelve days of Christmas. Strictly speaking, the twelve days start with Christmas day and follow on from there, not before. But I'm taking a little creative license and beginning on the 14th, with one each day until Christmas day. One what you're wondering? I thought about a naughty little count down, then contemplated gifts that followed the required numbers -one of something the first day, two of something the next, and so on up until 12 -both just seemed like too much.

12 Days of Christmas Love Notes

Then I decided on twelve days of love letters. And the letters consist of thanking my sweet husband for twelve gifts he's given me over the years. They're things like the gift of love, steadfastness, and fun, to name a few. Each little note identifies one of the gifts, and the ways in which he's given it to me over the years. They're just tiny little notes, jotted down and rolled up into little scrolls, and held with a little gold washi tape.

12 Days of Christmas Love Notes

12 Ornaments

I decided to put the notes in little glass ornaments, and hang them over our bed. Each night he can read one.

12 Days of Christmas Love Notes

I decorated each ornament in gold, with different fillers in the balls.

12 Days of Christmas Love Notes

Some were filled with sequins, others with gold bells, others with gold glitter, and some with a little gold paint.

12 Days of Christmas Love Notes

Each ornament has a little tag with the day, from one to twelve.

12 Days of Christmas Love Notes

I hope he loves it. With a sweet husband like mine, life really is a party.

More Ideas

You might also like our Printable Advent Calendar Activities here.

Printable Christmas Advent Calendar Activities: with over 60 different activities to choose from pick 24 and make some special memories with your family this Christmas.

Also check out our Little House Advent Calendar here.

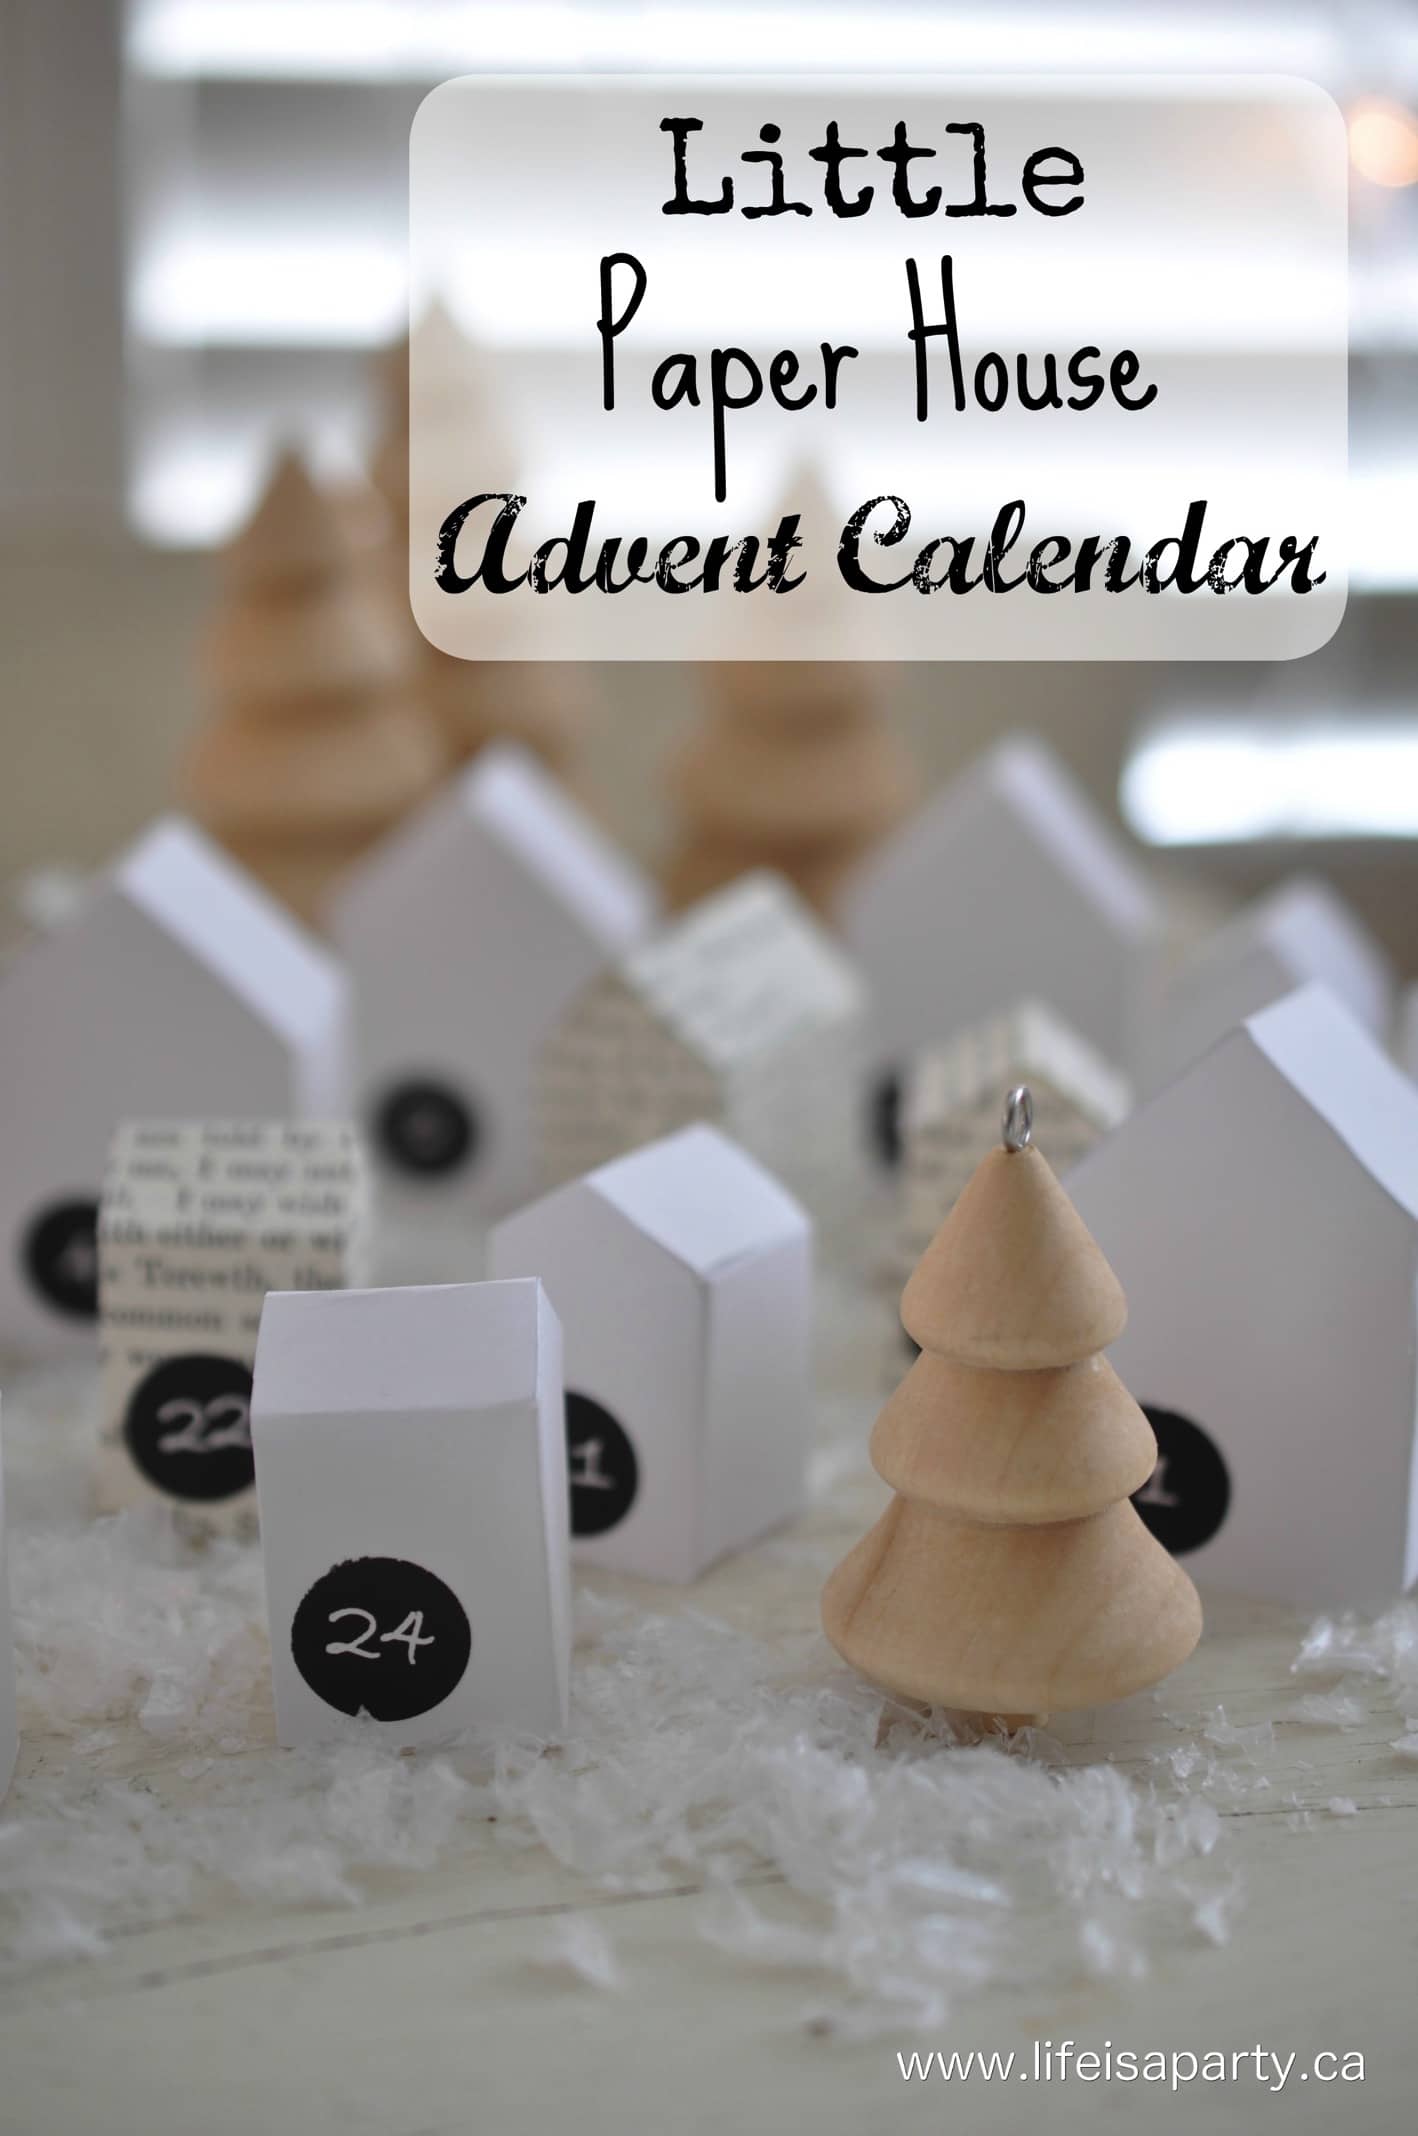
DIY House Advent Calendar: A pattern for 3 sizes of paper houses, and printable number labels to make your own advent village.

How To Make A Christmas Diorama

Dec 9, 2013 · 5 Comments

DIY Christmas diorama.

Christmas Diorama: rustic Christmas decoration made from an up-cycled old drawer, simple and fun to make.

DIY Christmas diorama made in a wooden drawer.
[feast_advanced_jump_to]

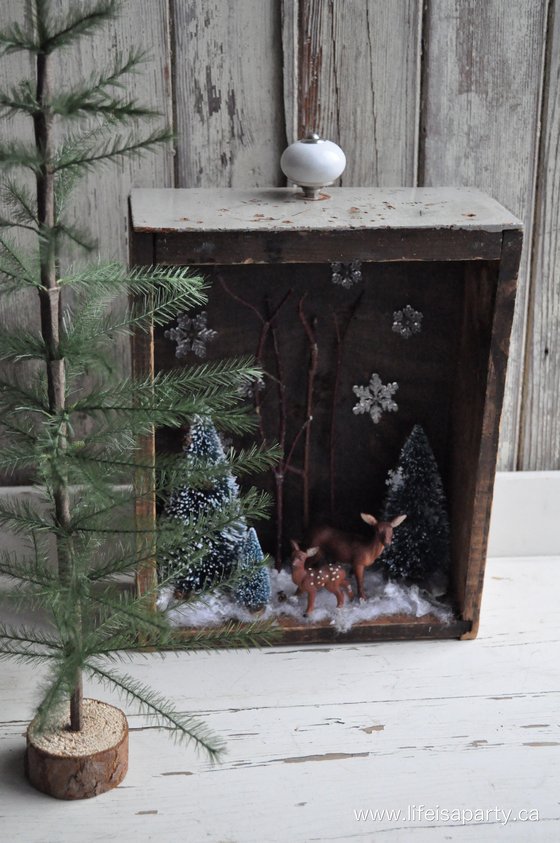
Christmas dioramas are such a fun and beautiful Christmas decoration.  You can make a diorama of any scene, ours is a woodland scene, and it's a perfect as a rustic Christmas decoration during the holiday season.

You might also like our Salt Dough Gingerbread Recipe.

What's A Diorama?

A diorama is a 3-D model or miniature scene.  It's often detailed. like a miniature world or replica.  You could make a diorama depicting any scene.  For our Christmas diorama scene, we created a snowy woodland scene.

Supplies:

  • old drawer
  • drawer handle
  • red wood twigs
  • bottle brush trees
  • toy plastic deer -mother and baby
  • cedar pine cones
  • cotton snow
  • faux snow
  • snowflake plastic ornaments
  • hot glue

The Diorama Frame

I've been wanting to make a little Christmas diorama for a while now. I remember making a shoebox diorama as a kid.  For this diorama I thought it would be cute to make it in an old drawer. 

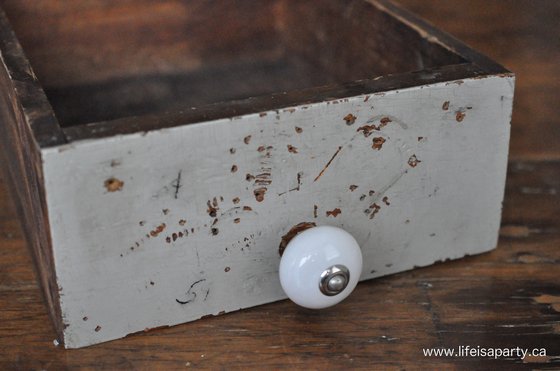
Turns out old draws can be hard to come by, they're little vintage treasures. They are usually part of a dresser or desk, as in 'not sold separately'. So, I'm giving you the heads up to put one on your mental list for the next time you're at an antique store.  You might also find one at a yard sale or a thrift store. I managed to find one in the fall at an antique fair -this project's been in the works for a while. It was maybe 5 dollars, but was missing the handle.

old wooden drawer

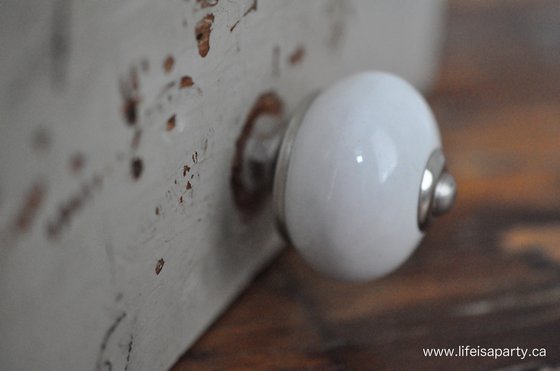
I found a handle that seemed suitable at a craft store and attached it to my little drawer, or the outside of the box.

ceramic drawer handle

I love how banged up and old this vintage treasure is.  It's the perfect size Great colour too, kind of a greenish-cream.

If you didn't have a drawer to use for your diorama base you could use a shadow box frame, or a small shallow wood box, like a tea box.  You could even make something similar in the small box from your old Christmas cards.

how to make a Christmas diorama

The Forest Scene

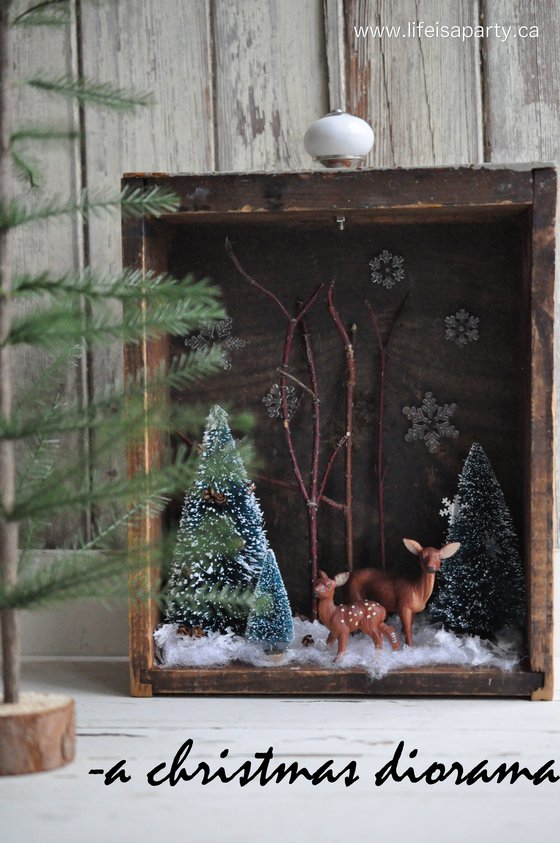
I filled my diorama with a little forest scene. I used my diorama for the Christmas season as part of my holiday decor, but since it's a snowy forest scene you could really enjoy it all winter long.  Since a diorama is a miniature scene, you need small items.

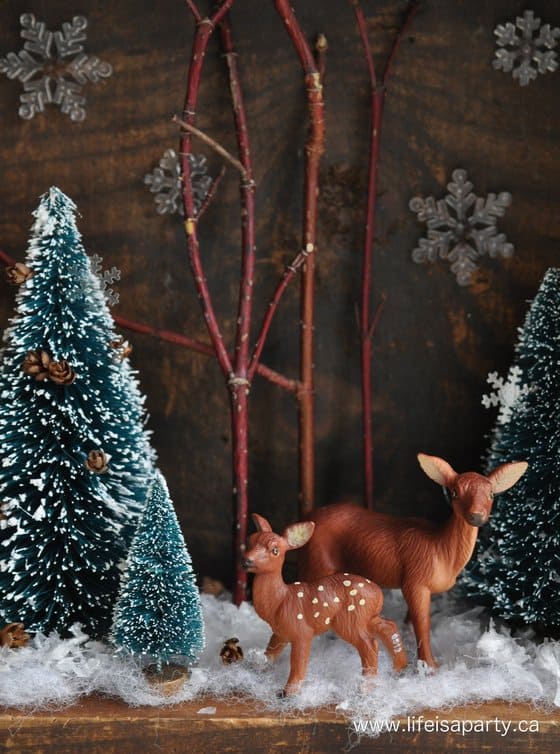
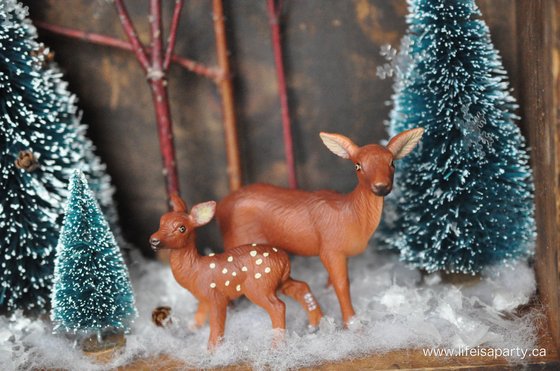
To create the forest I started out by adding in some real dogwood branch clippings.  I placed them at the back of the scene and used a little hot glue at the base to attach them.  We also used three different bottle brush trees, in different sizes.  I tried to create a little depth, by staggering the placement of the trees.  These are attached to the drawer with a little hot glue on the bottom also. You don't need a lot of hot glue, just enough to hold it in place.

In the center of the scene I placed two plastic toy deer, and a mama and baby facing in different directions.

I also added in some tiny pinecones from a cedar shrub.  These were perfect tiny size for our scene, and glued some into one of the bottle brush trees.

Christmas Diorama

I used some cotton for snow, along with some fake snow sprinkled on top, and added a few of the cedar pinecones on top of the snow also.  The last detail I added was gluing some and plastic snowflakes to the back of the diorama.

DIY Christmas Diorama

Recipe

DIY Christmas diorama.

Christmas Diorama

No ratings yet
Print Pin Rate
Cook Time: 15 minutes minutes
Total Time: 15 minutes minutes
Author: Dannyelle Nicolle-Ramjist

Equipment

  • hot glue gun

Materials

  • old drawer
  • drawer handle
  • red wood twigs
  • bottle brush trees
  • toy plastic deer -mother and baby
  • cedar pine cones
  • cotton snow
  • faux snow
  • plastic snowflakes
  • hot glue

Instructions

  • ?Start with your diorama box base. We used an old vintage drawer, and added a new vintage looking handle to it. You could use any box, or shadow box for your base.
  • Next build your scene. Start by hot gluing some twigs in the background. Add in some small bottle brush trees.
  • Then add the deer toys to the center with some hot glue on their feet.
  • Add some cotton snow on the bottom, and sprinkle some faux snow on top.
  • Glue a few mini cedar pine cones in one tree, and add some on top of the faux snow also.
  • Glue the plastic snowflakes to the back of the diorama box.

The drawer makes the perfect frame. It looks great on a little table, but I might hang it up on the wall. I don't think I'll manage to take it down after Christmas -we'll change it's name to -a winter diorama. 😉

Diorama Variations

There are so many different variations you could make on this craft.  If you want to change the forest scene, you could choose different animals to include.  Or you could create different subject areas all together. A great idea would be an indoor Christmas eve scene around the Christmas tree with lights, and gifts, and milk and cookies for Santa.  The possibilities really are endless.  Just be on the lookout for miniature items you could use to create your scene, and try to make sure that the scale of all your pieces works together so that the scene looks realistic.  That's the only real guideline when it come so to creating your own handmade Christmas diorama.

Ornament Variations

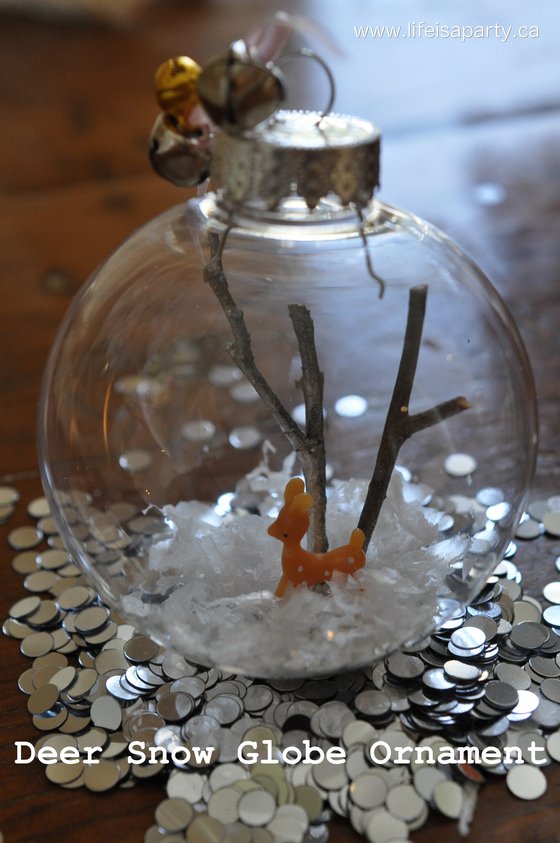
A variation on a Christmas diorama is to make diorama ornaments.  To create a Christmas diorama ornament version of this scene, you would need a very tiny deer and bottle brush tree that is small enough to fit inside of the ornament.  Look for clear plastic ball ornaments that open by splitting if half so that you can more easily add the diorama items inside.  Glue the twig and or tree and tiny deer to the bottom of the ornament on one side and then add in your faux snow, before adding the other side back on.  These make adorable homemade ornaments for gift giving or adding onto your Christmas tree. 

Deer Snow Globe Christmas Ornament -DIY your own cute deer snow globe, with a glass or plastic ornament, and a few other inexpensive supplies.

This Christmas diorama project was so much fun to create.  Mine was really simple with just a few items, but you could make it more elaborate if you wanted to.

With a Christmas diorama, life really is a party.  Happy Crafting!

More Christmas Inspiration

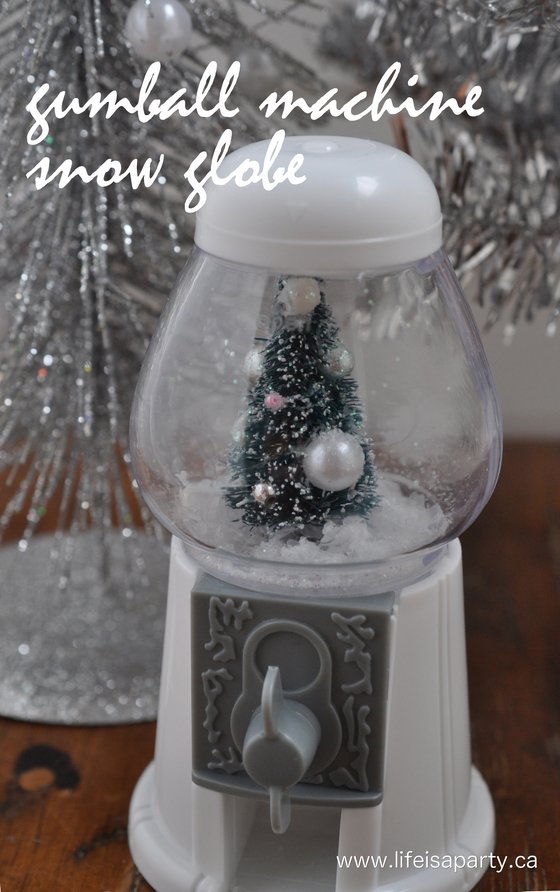
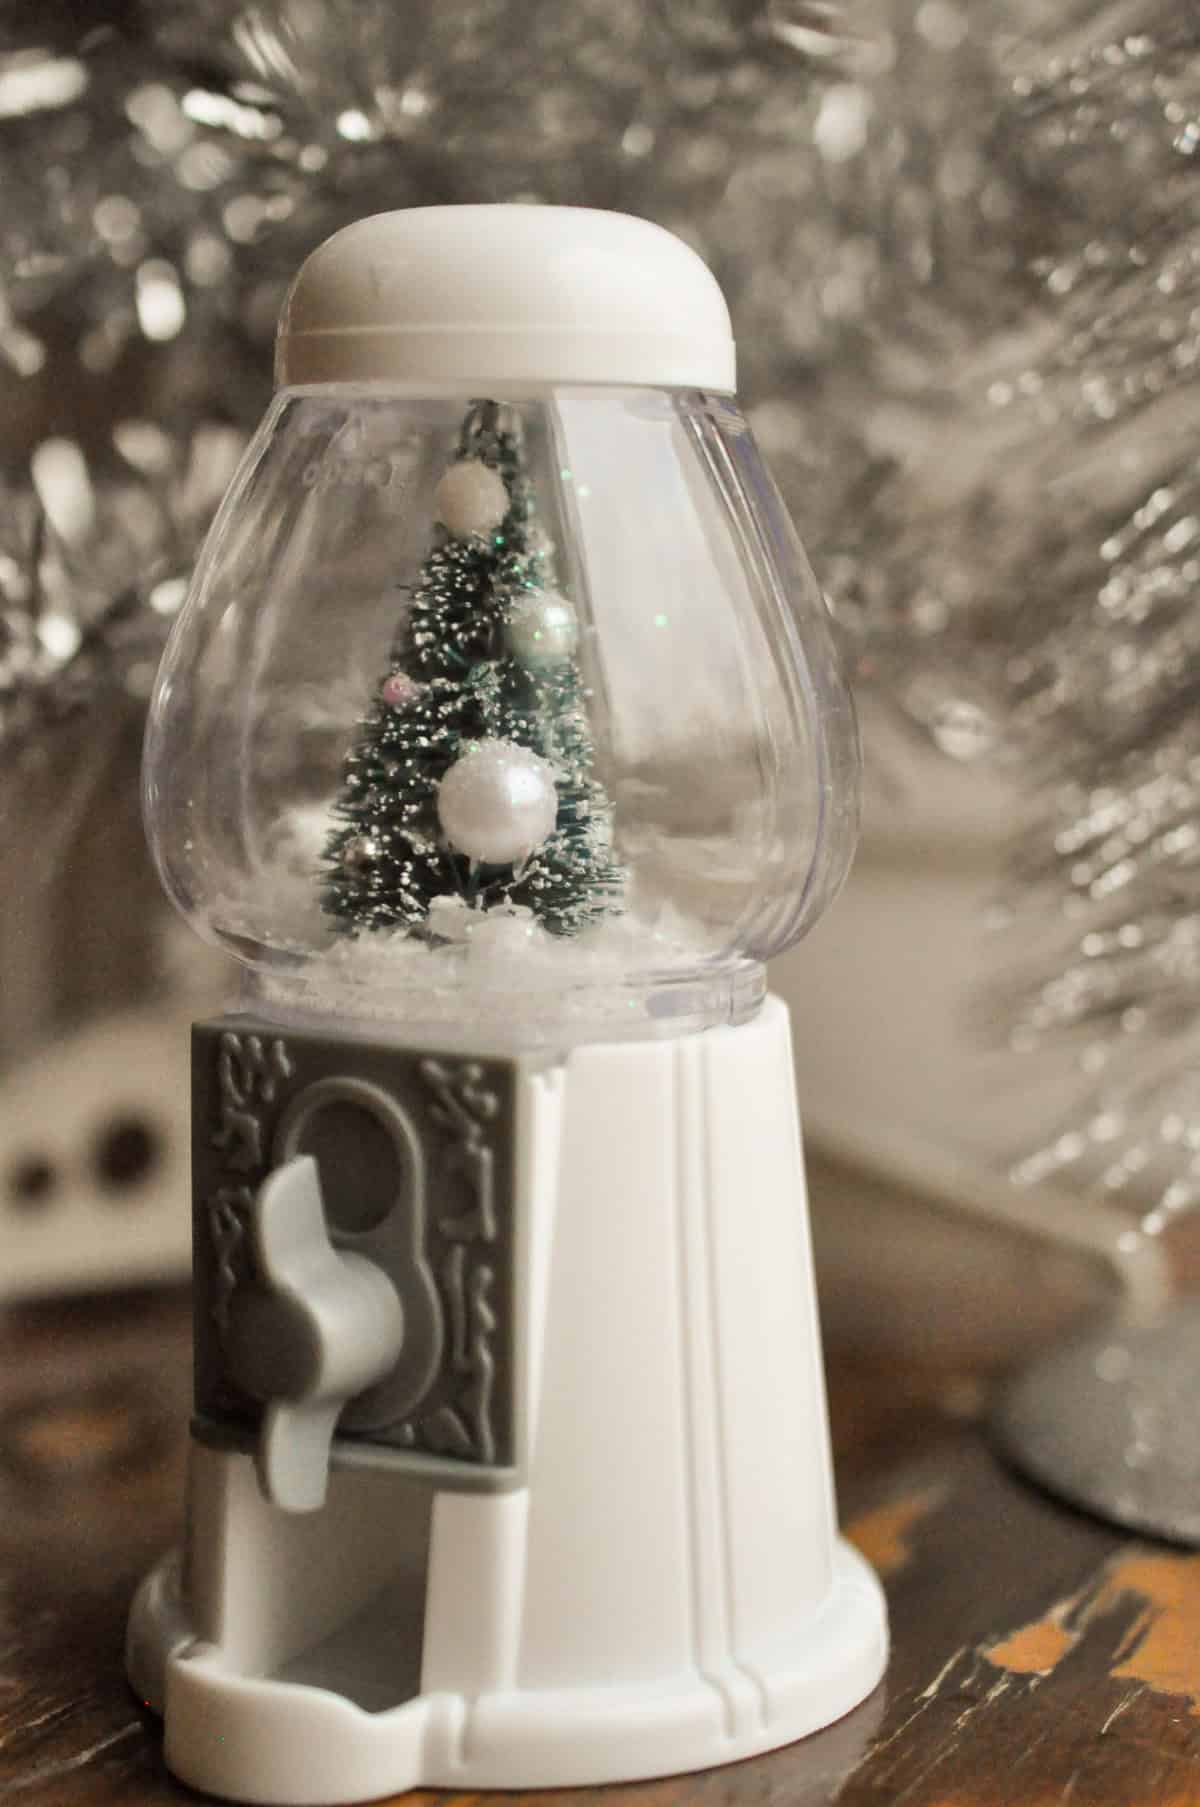
You might also like Gumball Machine Snow Globe here.

Also check out our Snow Globe Christmas Ornament here.

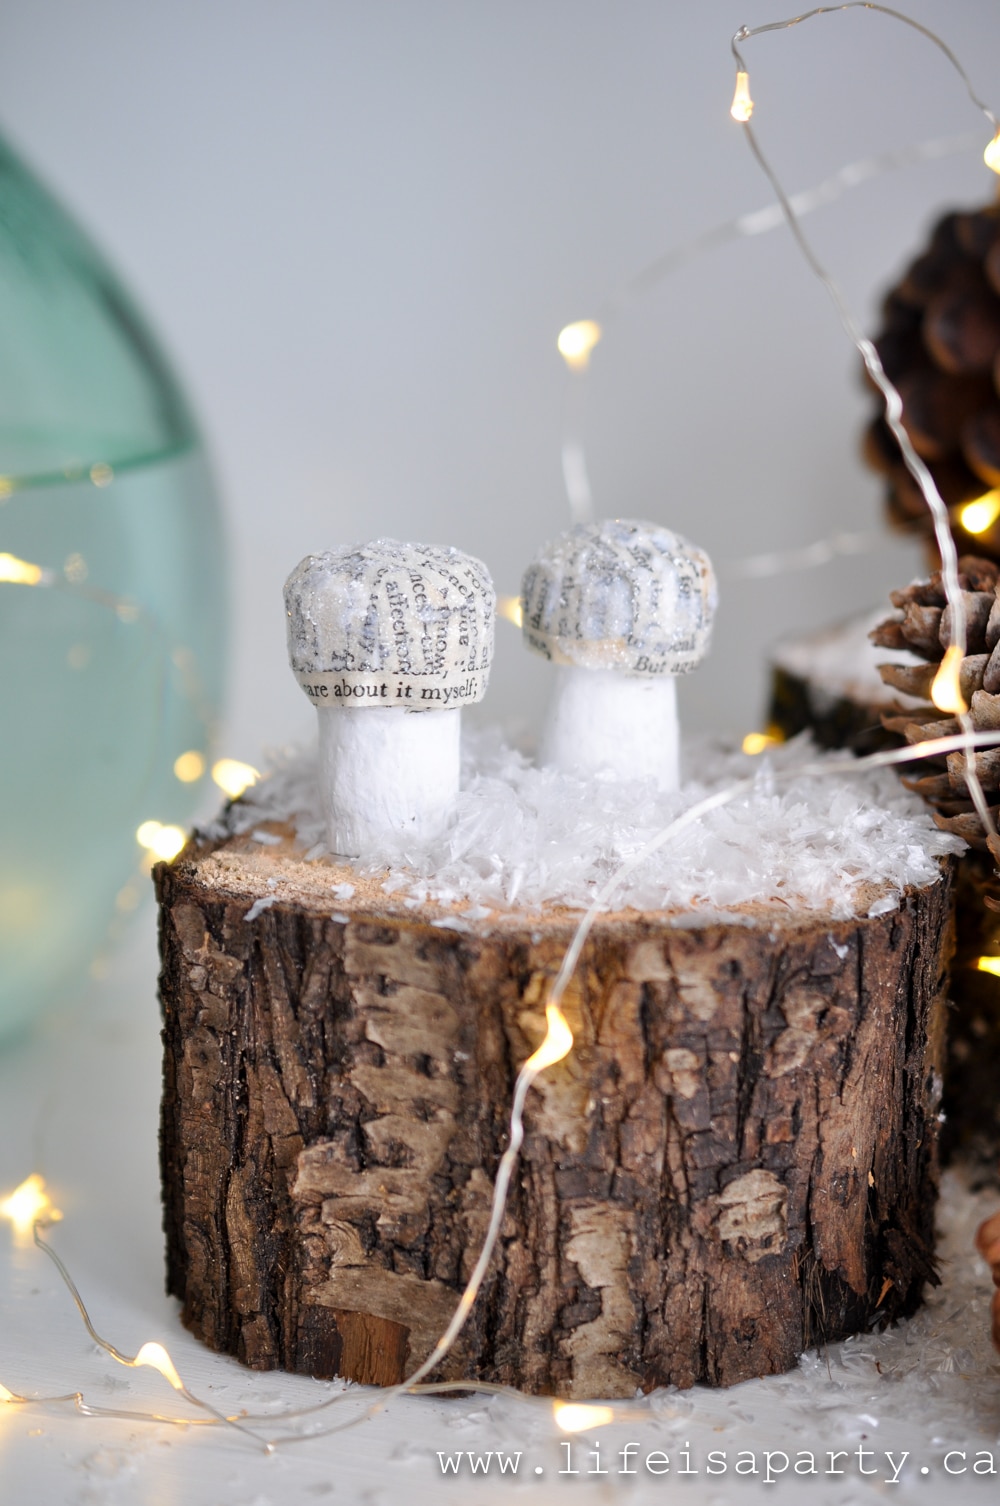
You might also enjoy Mushroom Christmas Ornament here.

Front Porch Decorating Ideas for Christmas

Dec 6, 2013 · Leave a Comment

Christmas front porch with stars, birch logs, and lanterns.

Front Porch Decorating Ideas for Christmas: make your own Christmas outdoor arrangements, Christmas wreath, and door mat with a star theme.

Christmas front door and porch decor.
[feast_advanced_jump_to]

Decorating with white for Christmas is a favourite of mine, and I love how this outdoor Christmas urn, planter, wreath and mat with a star themed turned out.  I hope it inspires you with some front porch decorating ideas for Christmas.

Front Porch Decorating Ideas for Christmas

I offered to put this look together for my friend Heather. My secret weapon was my sister (also a Heather -I know it's a little confusing around here) helped me out, and she's a florist. But, I'll give you all her simple tips so you can make one too. 😉

front porch decorating ideas for Christmas

Lantern Christmas Urn

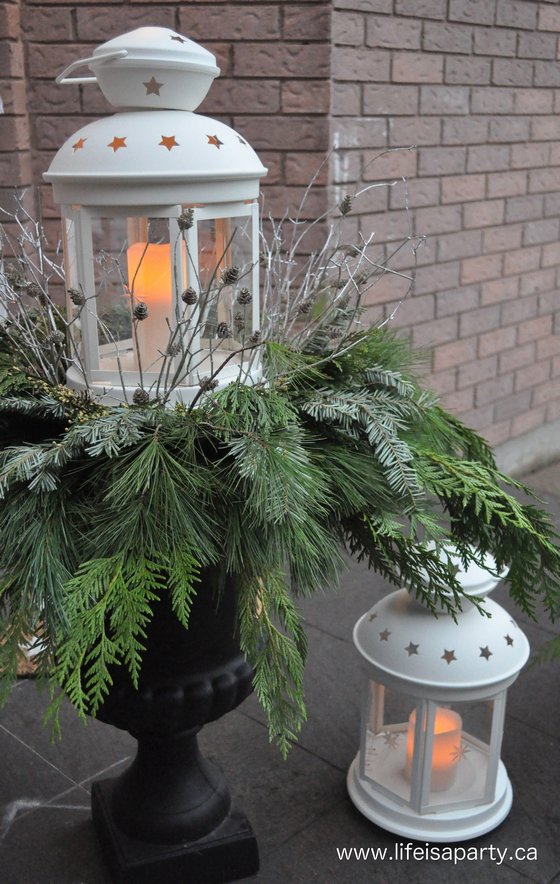
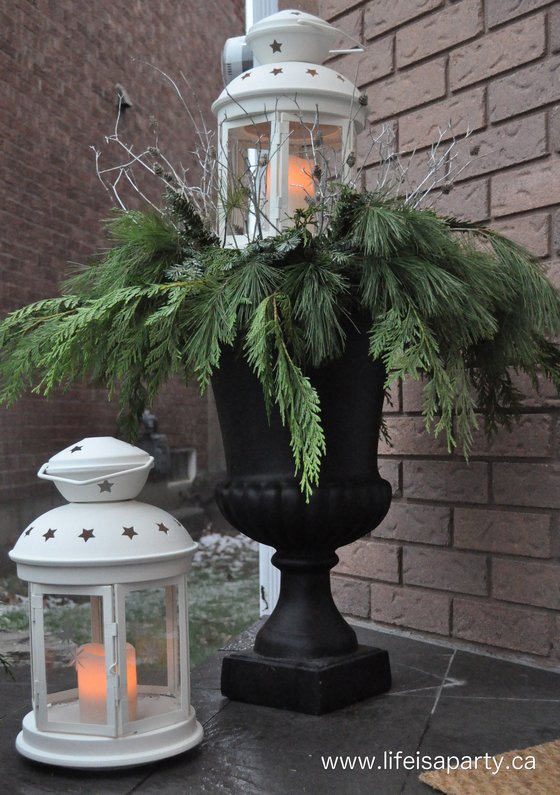
The inspiration for the starry theme came from these pretty Ikea lanterns. I loved the colour, size, and little star cut outs. They're under $10, so I loved the price too. 😉   These were jumping off point for our front porch decorating ideas for Christmas. My sister had the great idea of making the lantern the centre of the urn arrangement.

We stared the urn by filling the container with soil, and then adding two pieces of floral foam on top. We used some sticks to drive through the foam and into the soil to anchor them. Then we anchored the lantern, with three more sticks pushed into the floral foam, tightly around the base of the lantern.  Next we tied wire to the sticks and around the lantern to hold it firmly in place.

The next step was to add a layer of cedar, then pine, and finally fir, with each layer using slightly shorter pieces, and angled slightly downward.

outdoor Christmas Urn ideas

Then, around the base of the candle we did a layer of silver sticks angled upward, and finally some pretty pinecone picks.

Front Porch Decorating Ideas for Christmas

I found some remote control flameless candles, so Heather can turn them on and off each night with the touch of a button -how great is that!

Star Christmas Lantern

Birch Stick Outdoor Christmas Arrangement

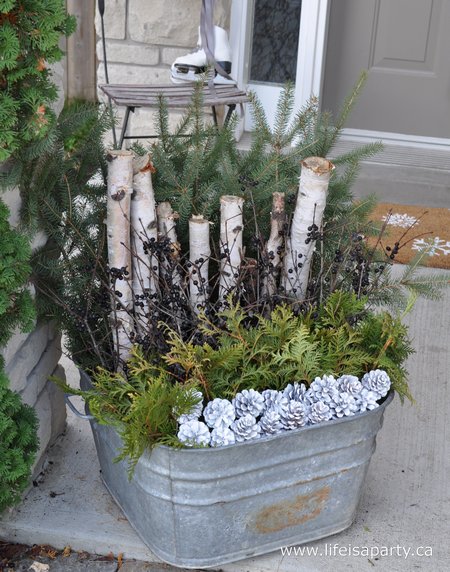
Beside the urn, Heather had another container -a long, wire basket, about the size of a window box found at an antique fair a few years ago. And, I did this one on my own since my sis had to head home, so you really don't have to be a florist to pull these off. If I can do it, you can do it.

birch log outdoor Christmas arrangement

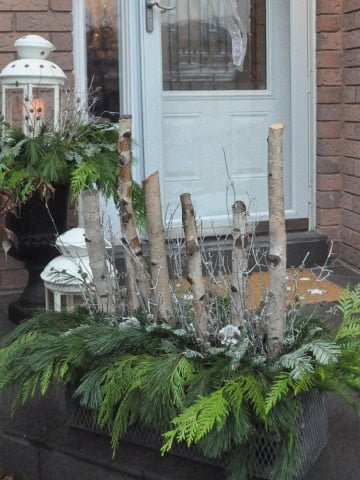
Since I knew the arrangement would be visible from both sides, I did a line of white birch logs down the centre, and did greenery all the way around. I used the same greens as we did for the urn -cedar, pine, and fir. I also added the silver sticks, and little silver pinecone picks again. This arrangement also has some larger painted white pinecones.

A little trick my sister uses is to flip the fir over and use the back which is kind of silver-blue, and adds another dimension.

Front Porch Decorating Ideas for Christmas

DIY Star Doormat

Another fun front porch decorating ideas for Christmas is to personalize an inexpensive doormat.  The pretty stars in the lantern inspired our matching simple doormat. I bought a plain mat for around $7 while I was at Ikea.  Next I made a simple stencil to make it match our star theme.

DIY Christmas door mat

I used a cookie cutter to make stencils out of some old cardboard and some white craft paint to add the stars.

DIY Christmas doormat

So simple and so pretty with everything else.

Front Porch Decorating Ideas for Christmas

Christmas Wreath

For the front door, I picked up a wreath at the store, and added in a few extra sprigs of greens, and a pretty metal star garland. Then we added a very simple starry ribbon.

DIY Christmas wreath

I love how the stars, white and silver tied everything together.

Front Porch Decorating Ideas for Christmas

It turned out so pretty, I think I might need to do this next year at my house. 😉

Front Porch Decorating Ideas for Christmas

Hope you're enjoying this season of light. With front porch decorating ideas for Christmas, life is really a party!

More Front Porch Decorating Ideas For Christmas

You might also like our Christmas Front Porch here.

Christmas Front Porch: Rustic greens, large pinecones, and lots of birch logs create a rustic Scandinavian feel with brass lanterns for Christmas.

Also check out our Outdoor Decorating Ideas for the Front Porch here.

You might also enjoy our Christmas Outdoor Planter here.

Homemade Bailey's Irish Cream Marshmallows Recipe

Nov 29, 2013 · 17 Comments

Homemade Bailey's marshmallows recipe.

These homemade Bailey's Irish cream marshmallows are fluffy, sweet, and full of real Bailey's Irish Cream flavor. They're perfect for melting into hot chocolate, gifting in mason jars, or toasting over a fire pit. With just a stand mixer and candy thermometer, you can make these impressive treats that look and taste way more complicated than they actually are.

Homemade Bailey's marshmallows recipe.

A Quick Look

📋 Recipe: Homemade Bailey's Irish Cream Marshmallows
⏲️ Ready In: 4 hours 30 minutes (30 minutes active, 4 hours setting)
👪 Servings: 24 (2-inch) marshmallows
🔪 Difficulty: Moderate
⚠️ Note: Adults only, contains 1 cup Bailey's Irish Cream, not for kids or anyone avoiding alcohol
💭 Top Tip: Cut them with a pizza wheel instead of a knife for cleaner edges!

Why You'll Love This Recipe

  • Real Bailey's flavor. With a full cup of Bailey's Irish Cream, these taste genuinely boozy, not like artificial extract.
  • Easier than you think. Your stand mixer does all the work during the 12 minute whipping time.
  • Perfect for gifting. Package in mason jars with ribbons for teacher gifts or holiday treat boxes that actually impress.
  • Multiple uses. Melt into hot chocolate, toast over a fire, dip in chocolate, or eat them straight.
[feast_advanced_jump_to]

IIf you're a Bailey's fan, you're going to love these marshmallows. I made several different flavors when I created a hot chocolate buffet a few years back, and these Bailey's ones were such a hit they needed their own post.

These aren't your basic marshmallows with a splash of flavoring. With a full cup of Bailey's Irish Cream whipped right in, the boozy flavor really comes through. They melt beautifully into a mug of hot chocolate and make stunning gifts packaged in mason jars. I sent some to school with my kids for a teacher treat and let's just say they were very well received.

The best part? They're way easier than you'd think. If you have a stand mixer and a candy thermometer (which only costs about $10 to $20), you're already set up for success. The mixer does all the hard work.

You might also like our Homemade Coffee Marshmallows Recipe, Oreo Marshmallows, Chocolate Marshmallows, and our Marshmallow Mug Toppers. They'd be a great gift with this Homemade Hot Chocolate Mix, or a great addition to this Hot Chocolate Charcuterie Board.

Ingredients

The ingredient list is surprisingly simple for how impressive these turn out.

  • Unflavored gelatin: Three packages (usually found in the baking aisle). This is what gives marshmallows their signature texture.
  • Bailey's Irish Cream: One full cup. Since this isn't cooked, the flavor really comes through. Don't skimp or substitute here.
  • White sugar and light corn syrup: These create the sugar base that gets cooked to exactly 240°F. Temperature is critical for proper setting.
  • Powdered sugar and cornstarch: Mixed together for coating the pan and finished marshmallows. This prevents sticking.
  • Vanilla extract: Added at the very end with the Bailey's for extra flavor.

Equipment

  • Stand mixer with whisk attachment. This is really important for getting the right texture. A hand mixer can work but be prepared for an arm workout during that 12 to 15 minute whipping time. This isn't a good recipe to whip by hand.
  • Candy thermometer. Essential for getting the sugar mixture to exactly 240°F. These only cost about $10 to $20 at any kitchen store, or online, and they're worth having.
  • 9x13 inch baking pan. This is the perfect size for getting 24 marshmallows at 2 inches each. But you can use a 9 x 9 for thicker marshmallows, or even a cookie sheet for thinner marshmallows that you can cut out with a cookie cutter.
  • Sharp knife or pizza wheel. For cutting your finished marshmallows into squares.
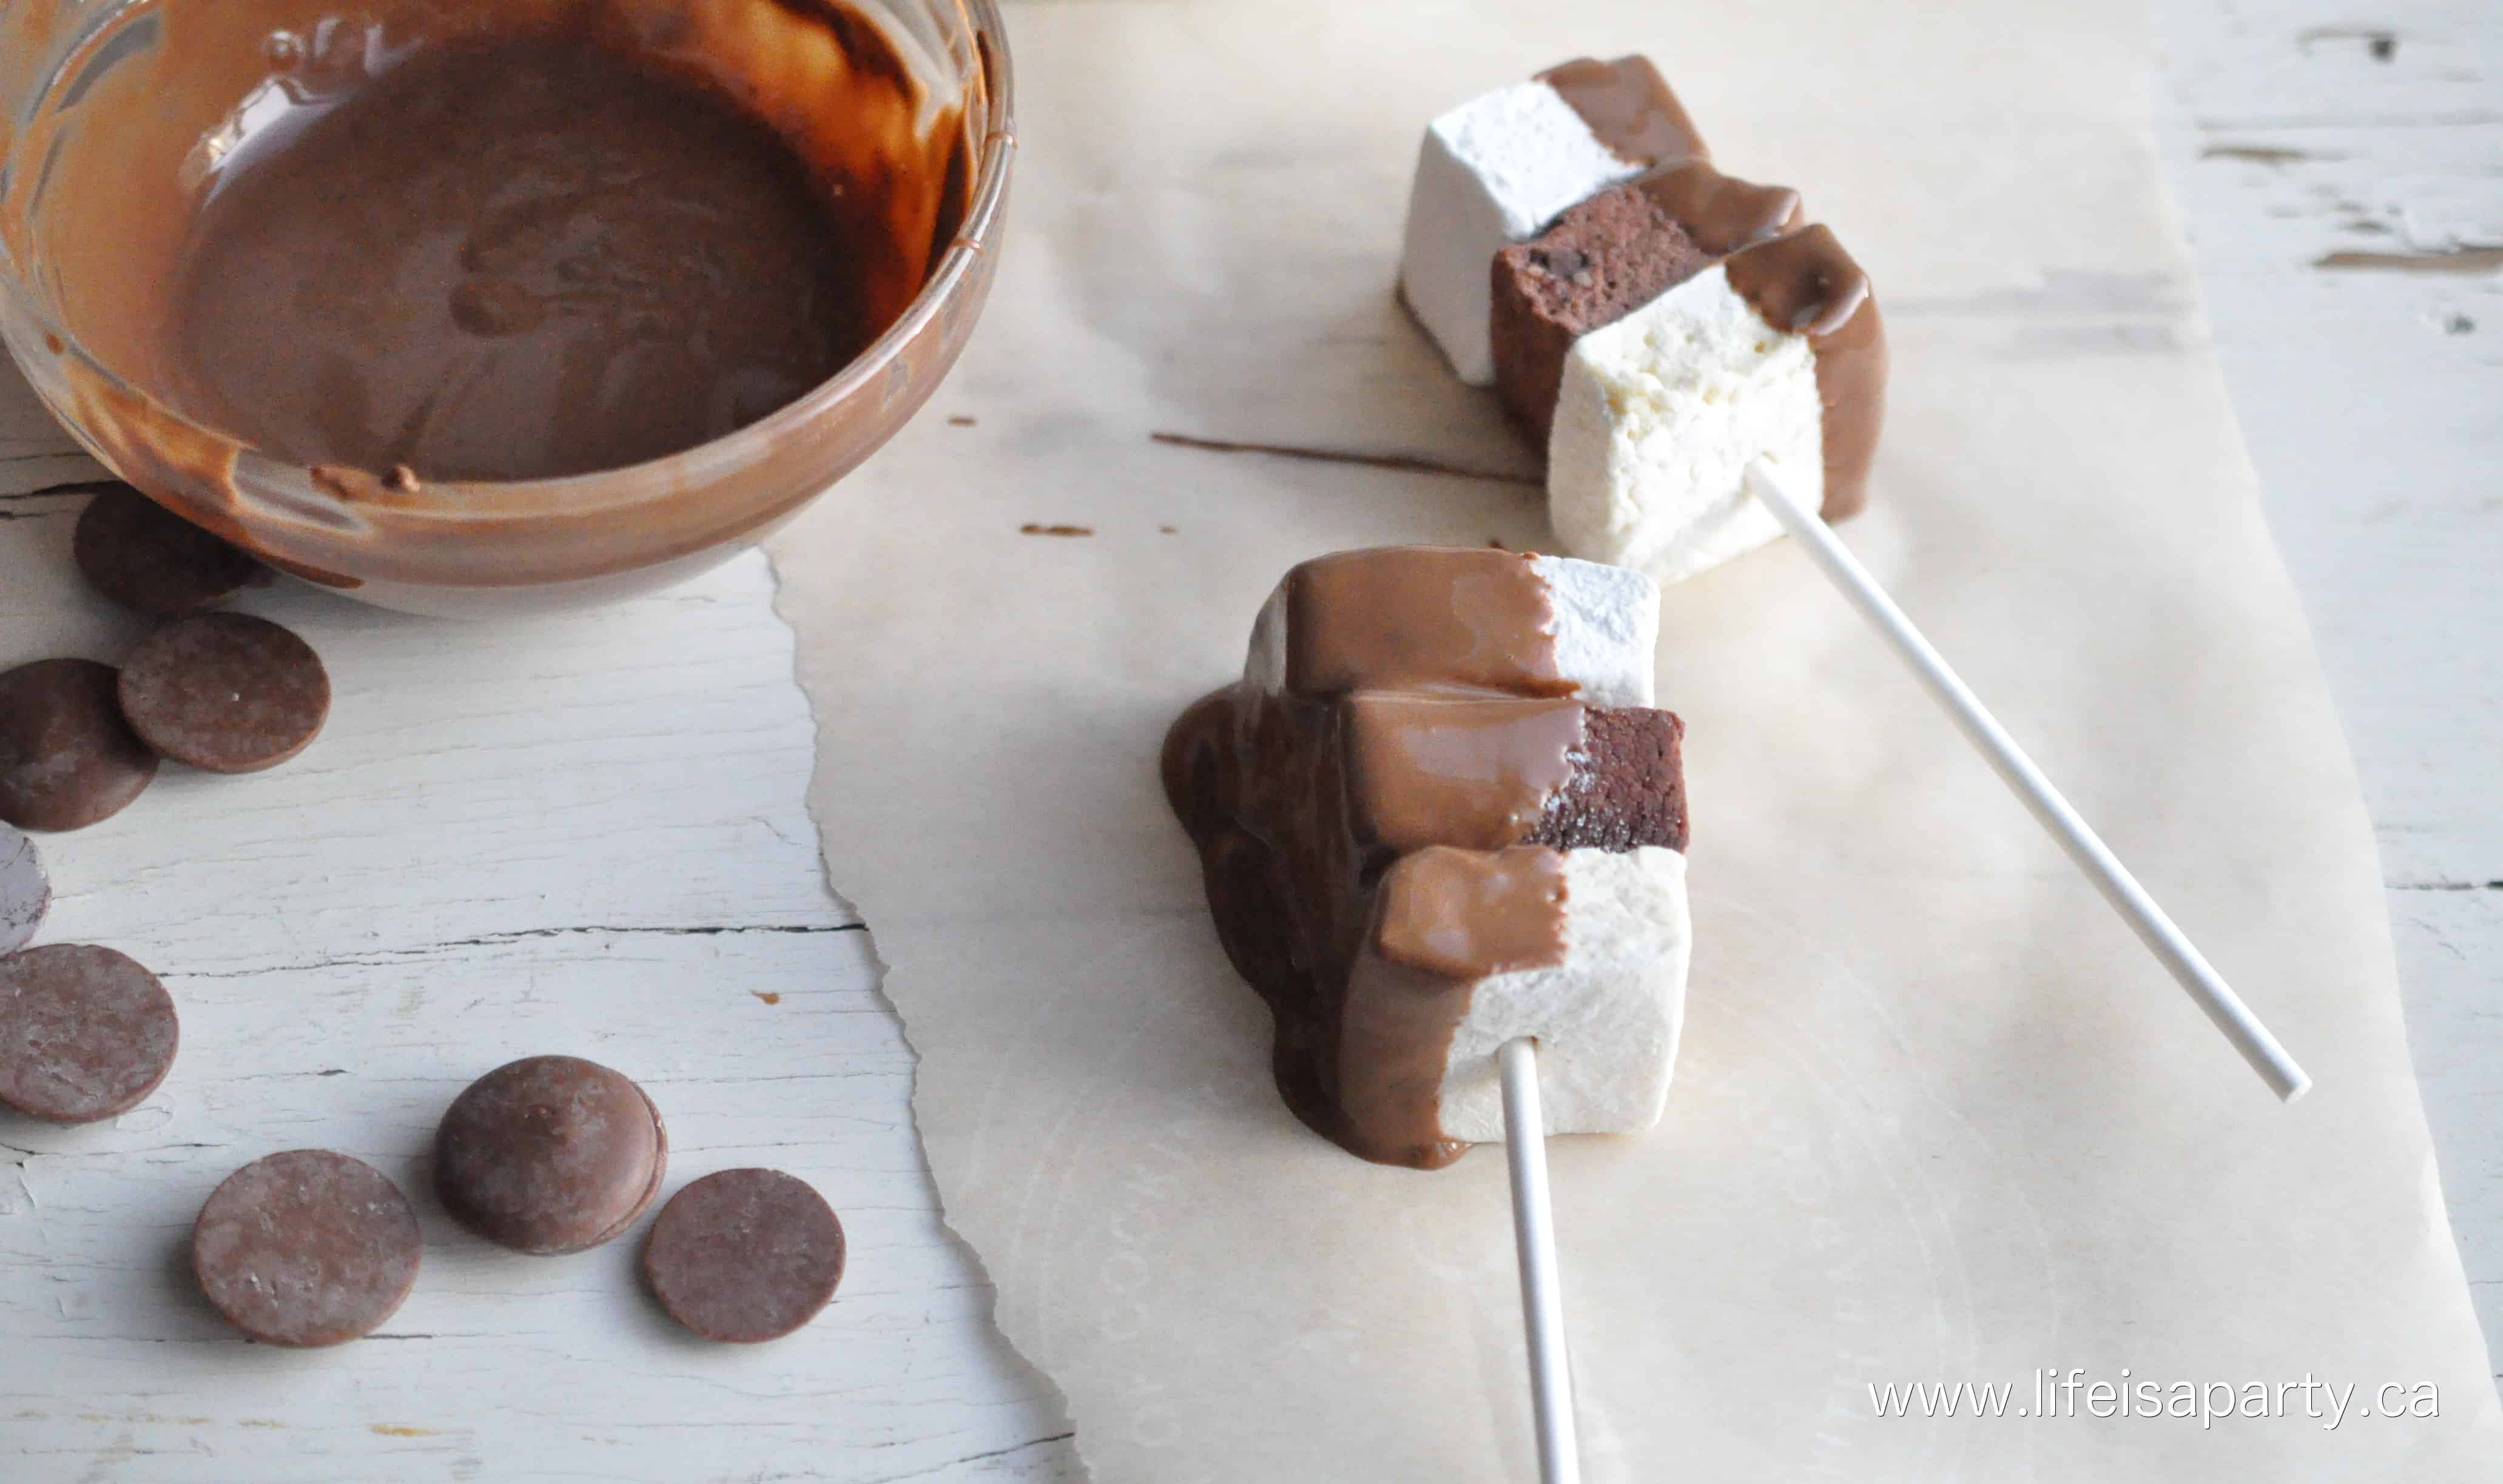
chocolate dipped Homemade Flavoured Marshmallows

How to Make Bailey's Marshmallows

Step 1: Put the gelatin and ½ cup of ice cold water into the bowl of a stand mixer fitted with the whisk attachment. Let it sit while you prepare the sugar syrup.

Step 2: Combine the other ½ cup water, white sugar, corn syrup, and salt in a small saucepan. Cover and cook over medium high heat for 3 to 4 minutes.

Step 3: Remove the lid and clip your candy thermometer onto the side of the pan. Make sure the tip touches the mixture but doesn't touch the bottom of the pan. Continue cooking until the mixture reaches 240°F (about 5 to 10 more minutes).

This temperature is critical. If it doesn't get hot enough, your marshmallows won't set properly. Watch that thermometer carefully as it approaches 240°F and take it off the heat right away once it hits that mark.

Step 4: With the mixer running on low speed, slowly pour the sugar syrup mixture down the side of the bowl into the gelatin mixture. Then increase the speed to high. Continue to whip until the mixture becomes very thick and is lukewarm, about 12 to 15 minutes. Add the vanilla and the Bailey's during the last minute of whipping.

Step 5: While the mixture is whipping, prepare the pan. Combine the powdered sugar and cornstarch in a small bowl. Lightly spray a 9x13 inch baking pan with nonstick cooking spray. Add the powdered sugar and cornstarch mixture and move it around to completely coat the bottom and sides of the pan. Return the remaining mixture to the bowl for later use.

Step 6: When ready, pour the marshmallow mixture into the prepared pan, using a lightly oiled spatula for spreading evenly into the pan.

Step 7: Dust the top with enough of the remaining sugar and cornstarch mixture to lightly cover. Let set overnight, and then slice into marshmallow pieces, and use the leftover powdered sugar and cornstarch mixture to coat the cut sides.

how to make your own Flavoured Marshmallows

Cutting and Storing Your Marshmallows

Once your marshmallows have set overnight, it's time to cut them. I cut mine fairly large at 2-inch squares, but you can make any size you want from giant marshmallows down to minis.

Use a sharp knife or a pizza wheel to cut them into squares. If your knife gets sticky, wash it off between cuts. Roll the cut edges in more of the powdered sugar and cornstarch mixture to keep them from sticking together.

You can also try using a cookie cutter for different shapes like hearts, or stars. This works best with thinner marshmallows. For this method, you might want to use a cookie sheet instead of a 9 x 13 pan.

Store your cut marshmallows in an airtight container so they don't dry out. They'll keep for about 1 to 3 weeks.

Expert Tips

  • Chocolate Dipped Marshmallows: After your marshmallows are set and cut, melt some chocolate and dip them for an extra special treat. This works great with milk, dark, or white chocolate.
  • For Gifting: Package these in mason jars or clear bags tied with ribbon. Include a card noting they're for adults only.
Homemade Flavoured Marshmallows lollipops with chocolate

Frequently Asked Questions

Do these contain alcohol? Are they safe for children?

Yes, these contain alcohol and are not safe for children, or anyone avoiding alcohol. The recipe uses a full cup of Bailey's Irish Cream, and since it's not cooked, the alcohol doesn't burn off. These are adults only treats. Keep them away from children.

How do I know when the sugar syrup is ready?

Your candy thermometer needs to read exactly 240°F. This is called the soft ball stage and it's critical for marshmallows that set properly. If the temperature is too low, your marshmallows will be too soft and won't hold their shape. Watch the thermometer carefully as it gets close and remove from heat as soon as it hits 240°F.

Why didn't my marshmallows get fluffy?

Adding the Bailey's does make these a little less fluffy and more dense than regular homemade marshmallows, so that's normal. Make sure your sugar syrup reaches exactly 240°F. If it's not hot enough, the marshmallows won't set or fluff properly. The mixture should whip for about 12 to 15 minutes until it's thick, glossy, and lukewarm.

Can I toast these like regular marshmallows?

Yes, you can toast them over hot coals like regular marshmallows. They're softer and more delicate than store bought ones though, so they'll slide off a toasting stick pretty easily if you're not careful. Do don't over do it.

How should I cut them without them sticking?

Use a sharp knife,pizza wheel, or cookie cutter that's been greased with a bit of oil or cooking spray. If it gets sticky, wash it off between cuts. Immediately coat the cut edges with the powdered sugar and cornstarch mixture to prevent them from sticking together.

Can I freeze Bailey's marshmallows?

Yes! I've frozen these and they thaw beautifully. Store them in an airtight container or freezer bag and they'll keep for several months in the freezer. Let them thaw at room temperature.

Do these really taste like Bailey's?

Yes! Since the Bailey's isn't cooked, the flavor really comes through. With a full cup of Bailey's Irish Cream in the recipe, you get genuine boozy Bailey's flavor, not just a hint. That's why these are definitely adults only treats.

More Marshmallow Recipe Inspiration

  • Homemade marshmallow mug toppers with chocolate drizzle.
    Homemade Marshmallow Mug Toppers
  • Stack of homemade coffee marshmallows showing mocha color and fluffy texture.
    Homemade Coffee Marshmallows Recipe
  • Homemade purple marshmallows on a plate.
    Homemade Purple Marshmallows Recipe
  • Easy hot chocolate charcuterie board filled with hot chocolate mix, whipped cream, chocolate, marshmallows, and cookies.
    Hot Chocolate Charcuterie Board

If you try these Bailey's Irish Cream Marshmallows or any other recipe on my blog leave a rating and let me know how it went in the comments below. Thanks for visiting Life is a Party today!

DIY Chocolate Marshmallows lollipops

Recipe

Homemade Bailey's marshmallows recipe.

Bailey's Irish Cream Marshmallow Recipe

Sweet and fluffy homemade marshmallows with the flavor of Baileys Irish cream.
5 from 1 vote
Print Pin Rate
Course: Desserts
Cuisine: American
Prep Time: 30 minutes minutes
Cook Time: 10 minutes minutes
Additional Time: 4 hours hours
Total Time: 4 hours hours 40 minutes minutes
Servings: 24
Calories: 131kcal
Author: Dannyelle Nicolle-Ramjist

Ingredients

  • 3 packages unflavored gelatin 3 x 7 grams = 21 grams total
  • 1 cup ice cold water -divided
  • 1 ½ cups white sugar
  • 1 cup light corn syrup
  • ¼ teaspoon salt
  • 1 teaspoon vanilla
  • ¼ cup powdered sugar
  • ¼ cup cornstarch
  • 1 cup Bailey's Irish Cream
  • non-stick cooking spray

Instructions

  • Put the gelatin and ½ cup of water into the bowl of a stand mixer, with the whisk attachment.
    3 packages unflavored gelatin, 1 cup ice cold water
  • Combine the other ½ cup water, white sugar, corn syrup and salt in a small pan, and cook, covered over medium high heat for 3-4 minutes. Remove the lid and clip a candy thermometer onto the side of the pan and continue cooking until the mixture reaches 240 degrees F, approximately. Once the mixture reaches this temperature, take it off the heat.
    1 cup ice cold water, 1 ½ cups white sugar, 1 cup light corn syrup, ¼ tsp salt
  • With the mixer running on low speed, slowly pour the sugar syrup mixture down the side of the bowl into the gelatin mixture. Then increase the speed to high. Continue to whip until the mixture becomes very thick and is lukewarm, about 12 to 15 minutes. Add the vanilla and the Baileys during the last minute of whipping.
    1 tsp vanilla, 1 cup Bailey's Irish Cream
  • While the mixture is whipping prepare the pans as follows: Combine the powdered sugar and cornstarch in a small bowl. Lightly spray a 9 by 13-inch baking pan with nonstick cooking spray. Add the powdered sugar and cornstarch mixture and move around to completely coat the bottom and sides of the pan. Return the remaining mixture to the bowl for later use.
    ¼ cup powdered sugar, ¼ cup cornstarch, non-stick cooking spray
  • When ready, pour the marshmallow mixture into the prepared pan, using a lightly oiled spatula for spreading evenly into the pan. Dust the top with enough of the remaining sugar and cornstarch mixture to lightly cover. Let set overnight, and then slice into marshmallow pieces, and use the leftover powdered sugar and cornstarch mixture to coat the cut sizes

Notes

  • Candy thermometer is essential. Getting the sugar syrup to exactly 240°F is the most important step for marshmallows that set properly. If you don't have a candy thermometer, they only cost about $10 to $20 and are worth having for candy making.
  • Adults only. These contain a full cup of Bailey's Irish Cream and the alcohol doesn't cook off. Keep these away from children or anyone avoiding alcohol.
  • Stand mixer recommended. A hand mixer can work, but the 12 to 15 minute whipping time will give you quite an arm workout. The stand mixer makes this so much easier.
  • Storage. Store cut marshmallows in an airtight container. They'll keep at room temperature for 1 to 3 weeks, or freeze for several months.
  • Cutting tips. A pizza wheel works even better than a knife for clean cuts. Grease it with oil or cooking spray and wash between cuts if it gets sticky.
  • Size options. I cut mine into 2 inch squares for 24 marshmallows, but you can make them any size you want from giant to mini depending on how you plan to use them.
  • Chocolate dipping. These are delicious dipped in melted chocolate.

Nutrition

Serving: 1g | Calories: 131kcal | Carbohydrates: 28g | Protein: 0.4g | Fat: 1g | Saturated Fat: 1g | Cholesterol: 0.004mg | Sodium: 34mg | Potassium: 1mg | Fiber: 0.01g | Sugar: 27g | Calcium: 2mg | Iron: 0.01mg
Tried this Recipe? Tag me Today!Mention @LifeisaParty or tag #lifeisaparty!

DIY Advent Calendar

Nov 27, 2013 · 6 Comments

Ikea advent calendar makeover.

Tree Advent Calendar: IKEA hack, inexpensive cardboard advent calendar that's been silver leafed, and filled with printable activities.

Ikea advent calendar makeover.
[feast_advanced_jump_to]

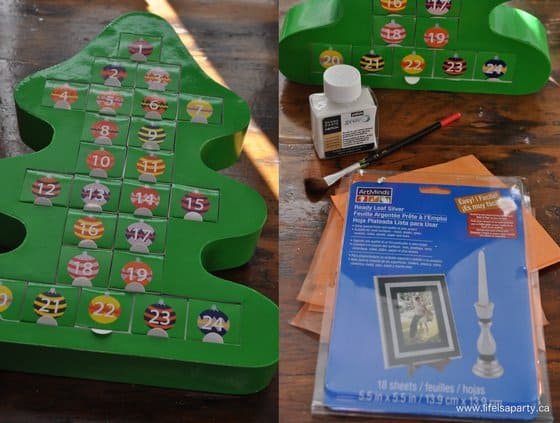
This tree advent wreath is a fun project to take an inexpensive paper advent calendar up a notch with beautiful silver leaf. 

I really liked a mirrored advent calendar I saw out shopping on day, with all the cute little doors, and the sparkly, shiny mirror. I didn't really like the price.  So, when I saw this cardboard version at IKEA this Christmas for only $10 I had an idea.

silver leaf advent calendar DIY

Silver Leaf

I had some left over from another project so I broke it out again. And again I fell in love with it...this might be the beginning of a silver leafed Christmas.  And of course you could use gold leaf if you're more of a gold person. 

Materials:

  • cardboard advent calendar
  • silver leaf
  • adhesive for silver leaf
  • number stickers
how to silver leaf an advent calendar

How To Make A Tree Advent Calendar

1.The silver leaf is really easy to apply. Just follow the directions.  For mine, I applied the adhesive with a paint brush, working in sections.  It has to sit for 15 minutes, then you apply the silver leaf.

I removed the individual boxes and did the front section of each one.

2. After the silver leaf added everywhere, I used scrapbook stickers from the dollar store for the numbers.

You can see a little bit of the green base in some sections, if I had to do it again, I might spray the whole thing gold before I started so that it was in the little spots showing through.

DIY Advent calendar

It only took about an hour or so to do all the silver leaf. 

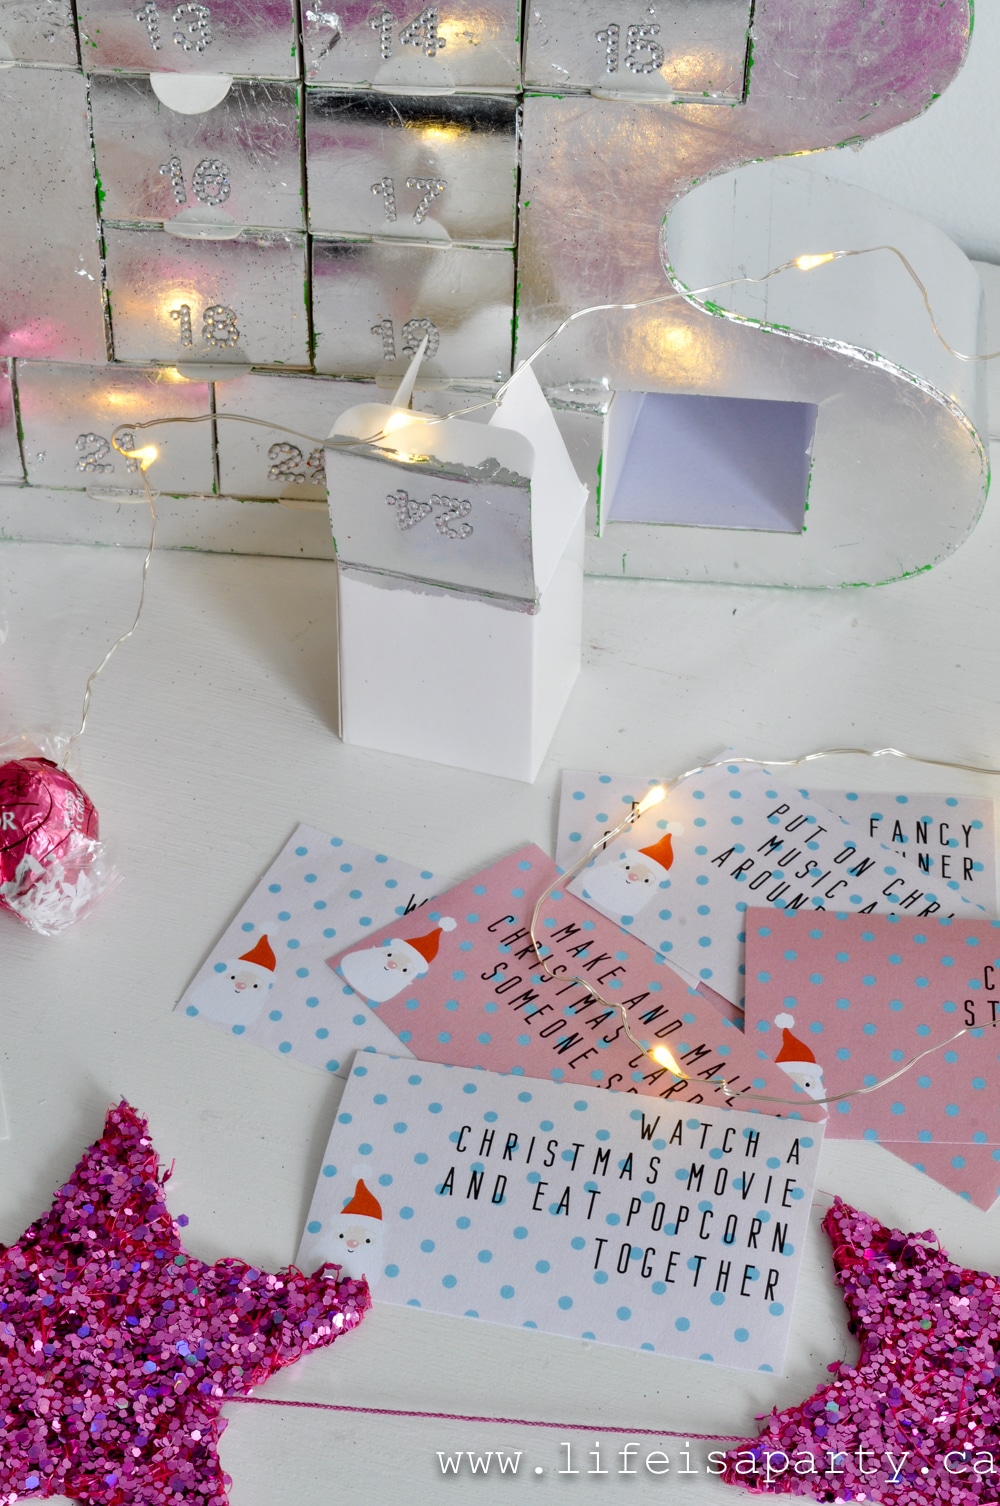
advent calendar activities

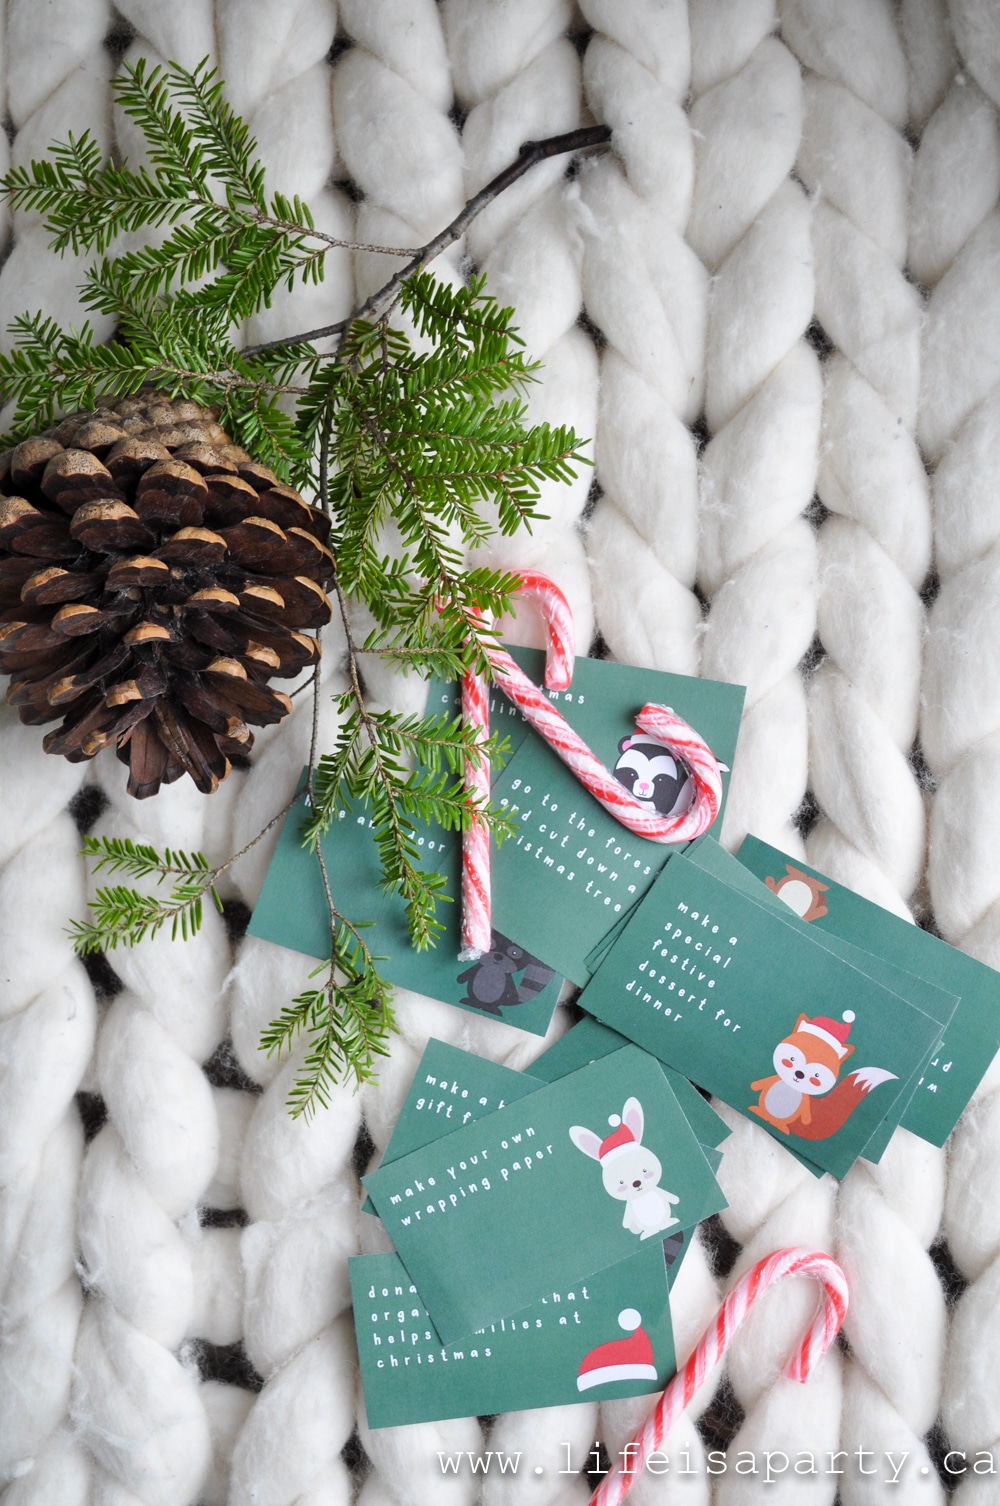
We started the tradition a few years ago of doing an activity advent calendar together as a family. It's a great way to make sure that the busyness of the holiday season doesn't take over and prevent us from doing all those fun memory making activities we all want to do, but might not get around to without a plan.

activity advent calendar cards

It's also a way to emphasise that doing things together is more important than just buying more and more stuff.

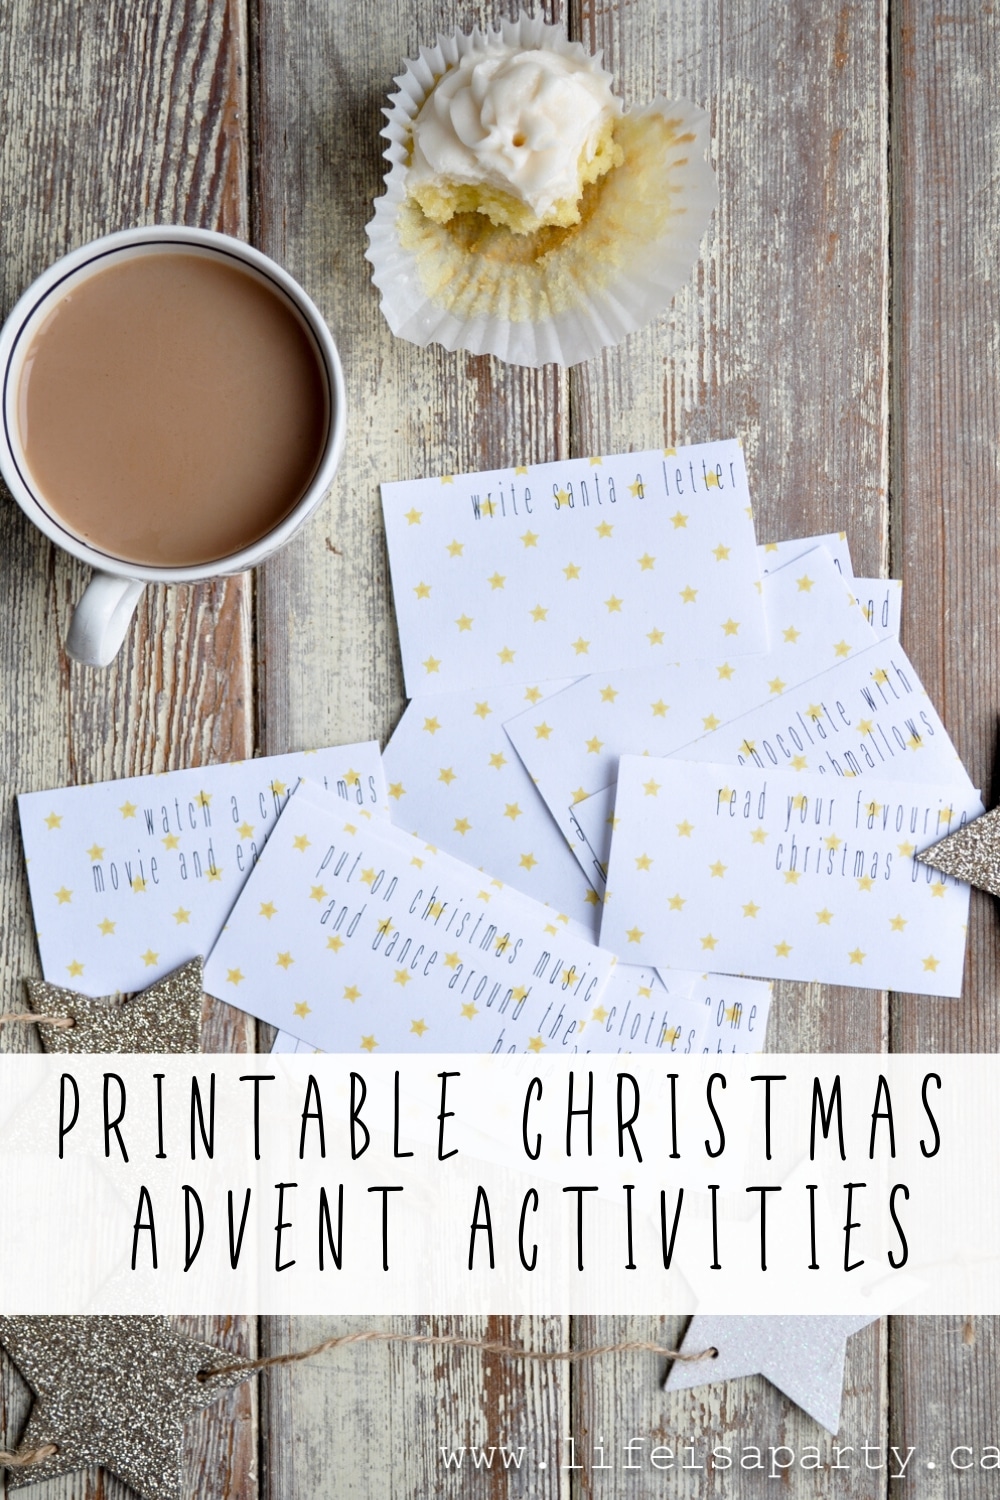
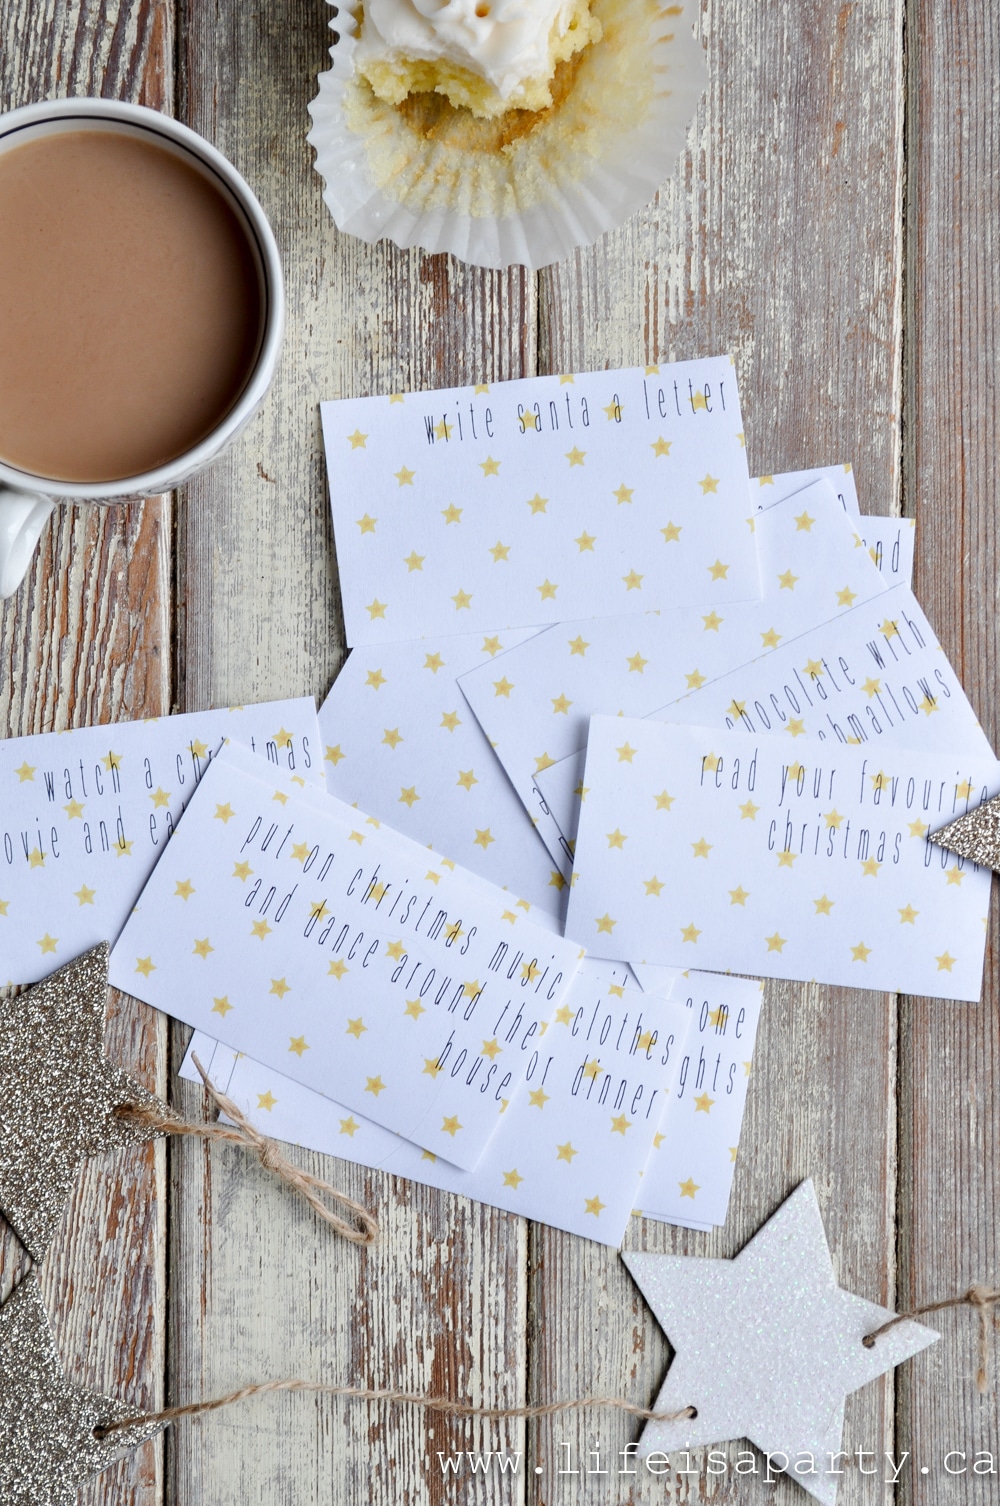
Free printable advent activity cards for an advent calendar, with gold stars on them.
Free printable advent activity cards with activities printed on them and a star pattern.

I've made over 60 suggested activity cards available in three different patterns.  You can purchase and download them here  and then print them at home and add them to your calendar.

advent calendar makeover

Some of them are simple, and others are more elaborate.

My big tip if you're putting one of these calendars together for your family is to do it with a little calendar print out beside you. Because the holidays are so busy, we don't need to make more work for ourselves, so I try to include lots of things we'd be doing already. You're likely going to decorate a tree this year, and give your kids a bath whether you do an activity calendar or not. Schedule a bubble bath with holiday music for their regular bath night, and schedule tree decorating for when you're doing it anyway.

Then, fill in with some of the other activities that catch your eye, and might help you be a little more intentional about making some memories this year, like a picnic under the Christmas tree.

Make sure that busy nights have easy activities and save the big projects for when you have more time, like on the weekend.

advent calendar makeover craft

Along with the activities you might choose a few little treats for some days. Or, if the activities don't fit your family, you could simplify it with just treats. What ever works best for you.

advent calendar ideas

This year, I tied up the activities as little scrolls and added some treats for certain days.

DIY silver leaf advent calendar

With a pretty DIY advent calendar like this, life really is a party!

You might also like our Children's Story Book Advent Calendar here.

storybook advent calendar

Also check out our Activity Advent Calendar here.

Printable Christmas Advent Calendar Activities: with over 60 different activities to choose from pick 24 and make some special memories with your family this Christmas.

You might also enjoy our House Advent Calendar here.

DIY House Advent Calendar: A pattern for 3 sizes of paper houses, and printable number labels to make your own advent village.

Christmas Party Food On A Budget

Nov 25, 2013 · 9 Comments

I've been sharing all the details of the Christmas Craft Party here with you and today I want to share the Christmas party food on a budget with you.

Christmas party food.

$100 Budget

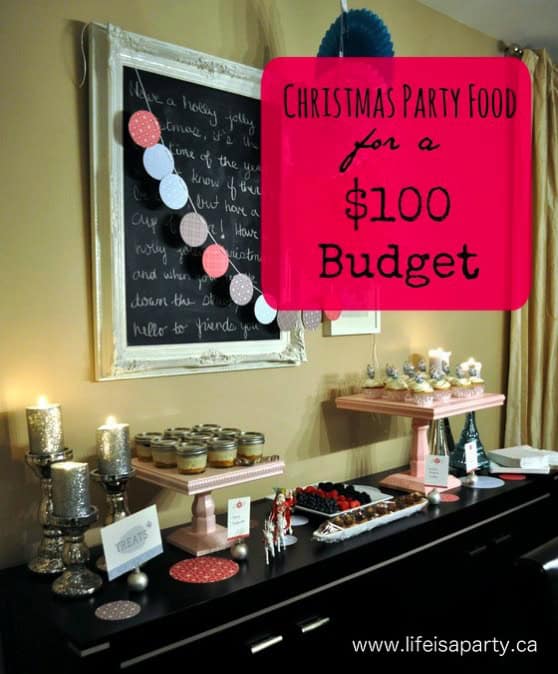
I love to entertain, but especially around the holidays, things can really start to add up. I wanted to share with you the great food I made for the party, and how I did it on a budget -all for about $100. Admittedly $100 isn't cheap. But, I made two hot appetizers, plus other cold nibbles, a dessert table, and drinks. For this quality of food, I think it was a great price.

Party Food on a Budget


Plan Your Menu With What's On Sale

I know that some people just don't have time to look for sales, and stop by multiple stores for a party, but if you have a little time, here's how I did it on a budget.  Start out by browsing the grocery store flyers the week before the party. I found a few things on sale, and thought about some budget conscious items that would still be great.

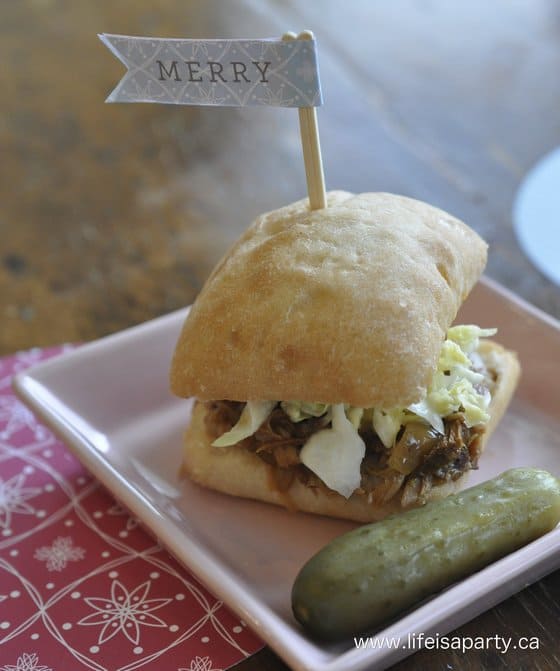
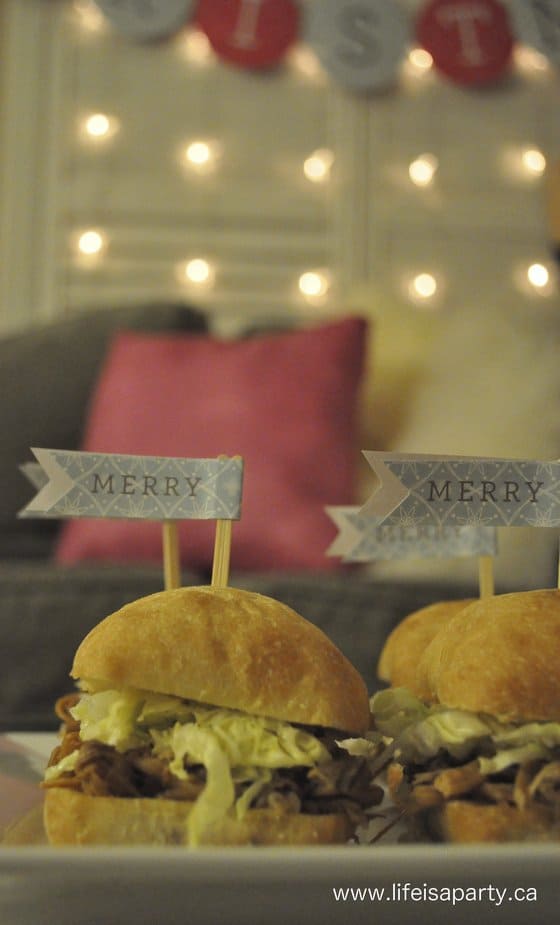
A cheese tray seems like a stable for a Christmas party, but cheese is expensive, so right away I tried to think out side of the box little.  I found pork shoulder on sale for a $1 a pound, so I decided on mini pulled pork sliders for the main appetizer. I went ahead and shopped the week before for some of the things I needed that I knew would keep. The next week, I hunted the flyers again, and what I couldn't find on sale I bought at a cheaper grocery store.

I used what I had in my fridge and pantry, and didn't include it in the cost breakdown, since you would probably have things like vinegar, onion soup mix, and sugar too. Where I did need something -like eggs and onions, I included it. I did over buy, so in this break down, I only put down the one bag of chips we ate, rather than the 2 we bought, for example. There is a big lesson here when you're trying to save money -don't buy too much food. I never want to run out of food and always seem to err on the side of too much, but at least the food gets eaten as leftovers -we had pulled pork for days. 😉

Party Food on a Budget

The Savoury Appetizers

I started out with the pulled pork since I found the pork on sale. This was my main hot item for the party. I found a good crock pot recipe here, which also meant it could be made ahead.

pulled pork sliders

I served the pork with a homemade coleslaw on slider buns, that were the perfect size.

Christmas Party Food on a Budget

For a vegetarian hot option I served perogies. They were simple frozen ones, garnished with a little sour cream and some fresh chives. They looked great, and were super easy. Simple food dressed up with a garnish and served individually is always a hit.

Christmas Party Food on a Budget

Make Dips From Scratch

I also made some homemade humus and served it with some chips I made from pita bread, and rice crackers for my gluten free guest. Humus is really inexpensive when you make it yourself and always a hit. I also made a veggies and dip platter, and offered some kettle chips to go with the dip. Both were good vegetarian and gluten free options.

Christmas Party Food on a Budget

The Sweet Table

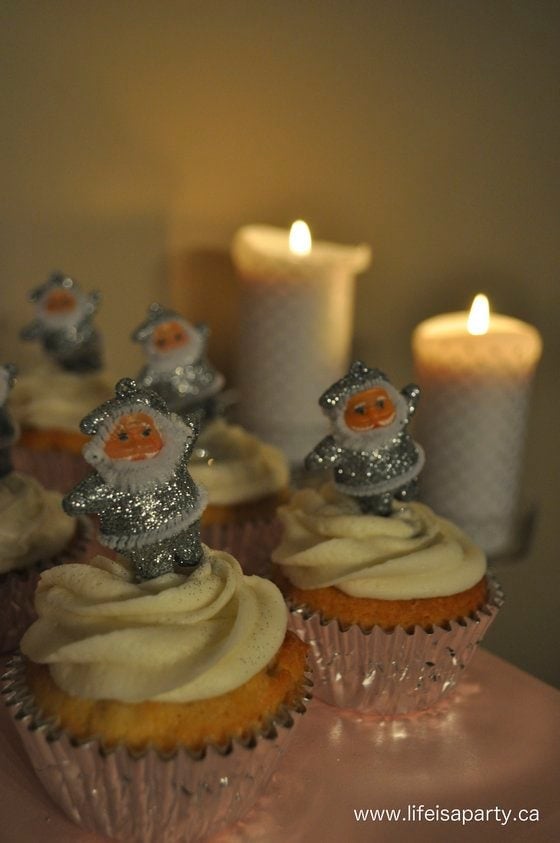
I wanted to offer my guests a few nice sweets too. Vanilla cupcakes are a fav. of mine. My go-to recipe for vanilla cupcakes has become the Barefoot Contessa's coconut cupcakes, with the coconut left out, and with a plain vanilla icing.

Christmas Party Food on a Budget

They were delicious. I loved how retro they looked with the cute little Santas on top. I found the Santa ornaments at the dollar store, and added a toothpick to the bottom to make them into cupcake pics. Then I added a sprinkle of edible glitter.

inexpensive party food

Since the theme of the party was retro Christmas, I thought it would be fun to do some no-bake cheesecakes, since they're a little retro too. I used this recipe. I served them in little mason jars, with some antique little spoons and they were really cute.

Some Heathy Options

Party Food on a Budget

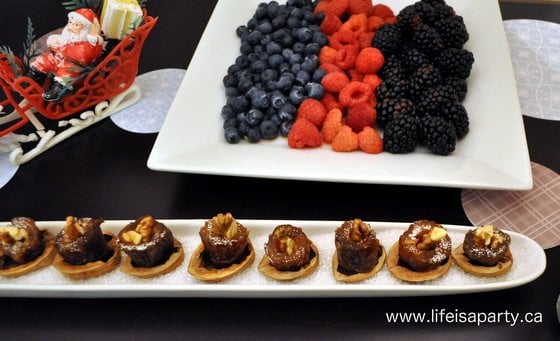
For a healthier but still sweet option I wanted to offer some fruit. I bought some berries -which everyone always seems to feel are a treat. By shopping the sales they weren't too expensive and they looked great too.

date stuffed with a walnut

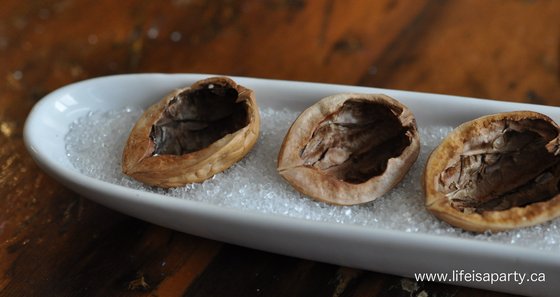
One of my favourite additions to the dessert table were these walnut stuffed dates. I wanted to do at least one gluten free dessert and this was what I came up with. It was also a great option for anyone watching their weight. They were really simple...except for slitting the shell exactly in half. I found a tutorial on-line here, that suggests baking the shells first. I bought about 20 walnuts and ended up with about 16 good halves -which is less than 50% so...plan ahead and buy some extras.

Christmas Party Food on a Budget

At first I wasn't sure how to serve the dates and make them look pretty.  I ended up used an olive tray to serve them, and filled it with coarse sugar to keep the empty walnut shells from tipping over. To make them I stuffed a walnut piece into half of a date, and placed it in the shell and added a little edible glitter (I promise I don't have any shares in an edible glitter company, it's just my new fav. Don't worry I have enough room in my heart for it and spray paint.) 😉


Party Food on a Budget

The Drinks

The last expense was the drinks. The homemade hot chocolate was expensive to make, but I think you could really taste that it was homemade from real milk -get the recipe here. A bunch of the items for the hot chocolate buffet were from the dollar store. I didn't include the cost off the marshmallows in the breakdown, since I made them earlier in the week and didn't keep the bill. Find my flavoured marshmallow recipe here.  All I had to buy was the gelatin -so probably a couple of bucks. I already had the Bailey's and Kahlua, which helped. I picked up a couple of bottles of wine. The punch was a just juice and ginger ale, both found on sale. I already had some bottled water. I probably didn't need this many drinks, but some of everything was used.

Party Food on a Budget

Budget Breakdown

Here's a break down of roughly what I spent, if you're interested. As I mentioned, I used items from my pantry and fridge as well, but this is basically what I bought for the party.

pork $5 + onions $2 + eggs $3.25 + $3 slider buns = $13.25

perogies $2 + sour cream $2 + chives $1.50 = $5.50

chips $1.50

rice crackers $3.25

carrots $1 + tomatoes $1 + cucumber $2 + peppers $2.50 + radishes $1 = $7.50

chick peas $1.25 + lemon $.50 + pitas $1 = $2.75

raspberries $3 + blueberries $2 + blackberries $2 = $7

dates + walnuts = $4

cream cheese $3 + lemon $.50 + cherry pie filling $2.50 +condensed milk $2.50 = $8.50

foil cupcake liners $2.50 + butter milk $3.50 + icing sugar $2 = $8

milk $4 + cream $3 + choc. chips $2.50 + condensed milk $2.50 + candy canes $1.50 + cinnamon sticks $2 + caramels $1 + choc. spoons $1 = $17.50

cranberry juice $2.50 + ginger ale $1 = $3.50

wine = $20

In Total:

13.25 + 5.50 + 1.50 + 3.25 + 7.50 + 2.75 + 7 + 4 + 8.50 + 8 + 17.50 + + 3.50 + 20 = 104.75

Basically $100 -Not bad for two hot apps, dessert table, and drinks!

Christmas Party Food on a Budget

With Christmas party food on a budget, life really is a party!

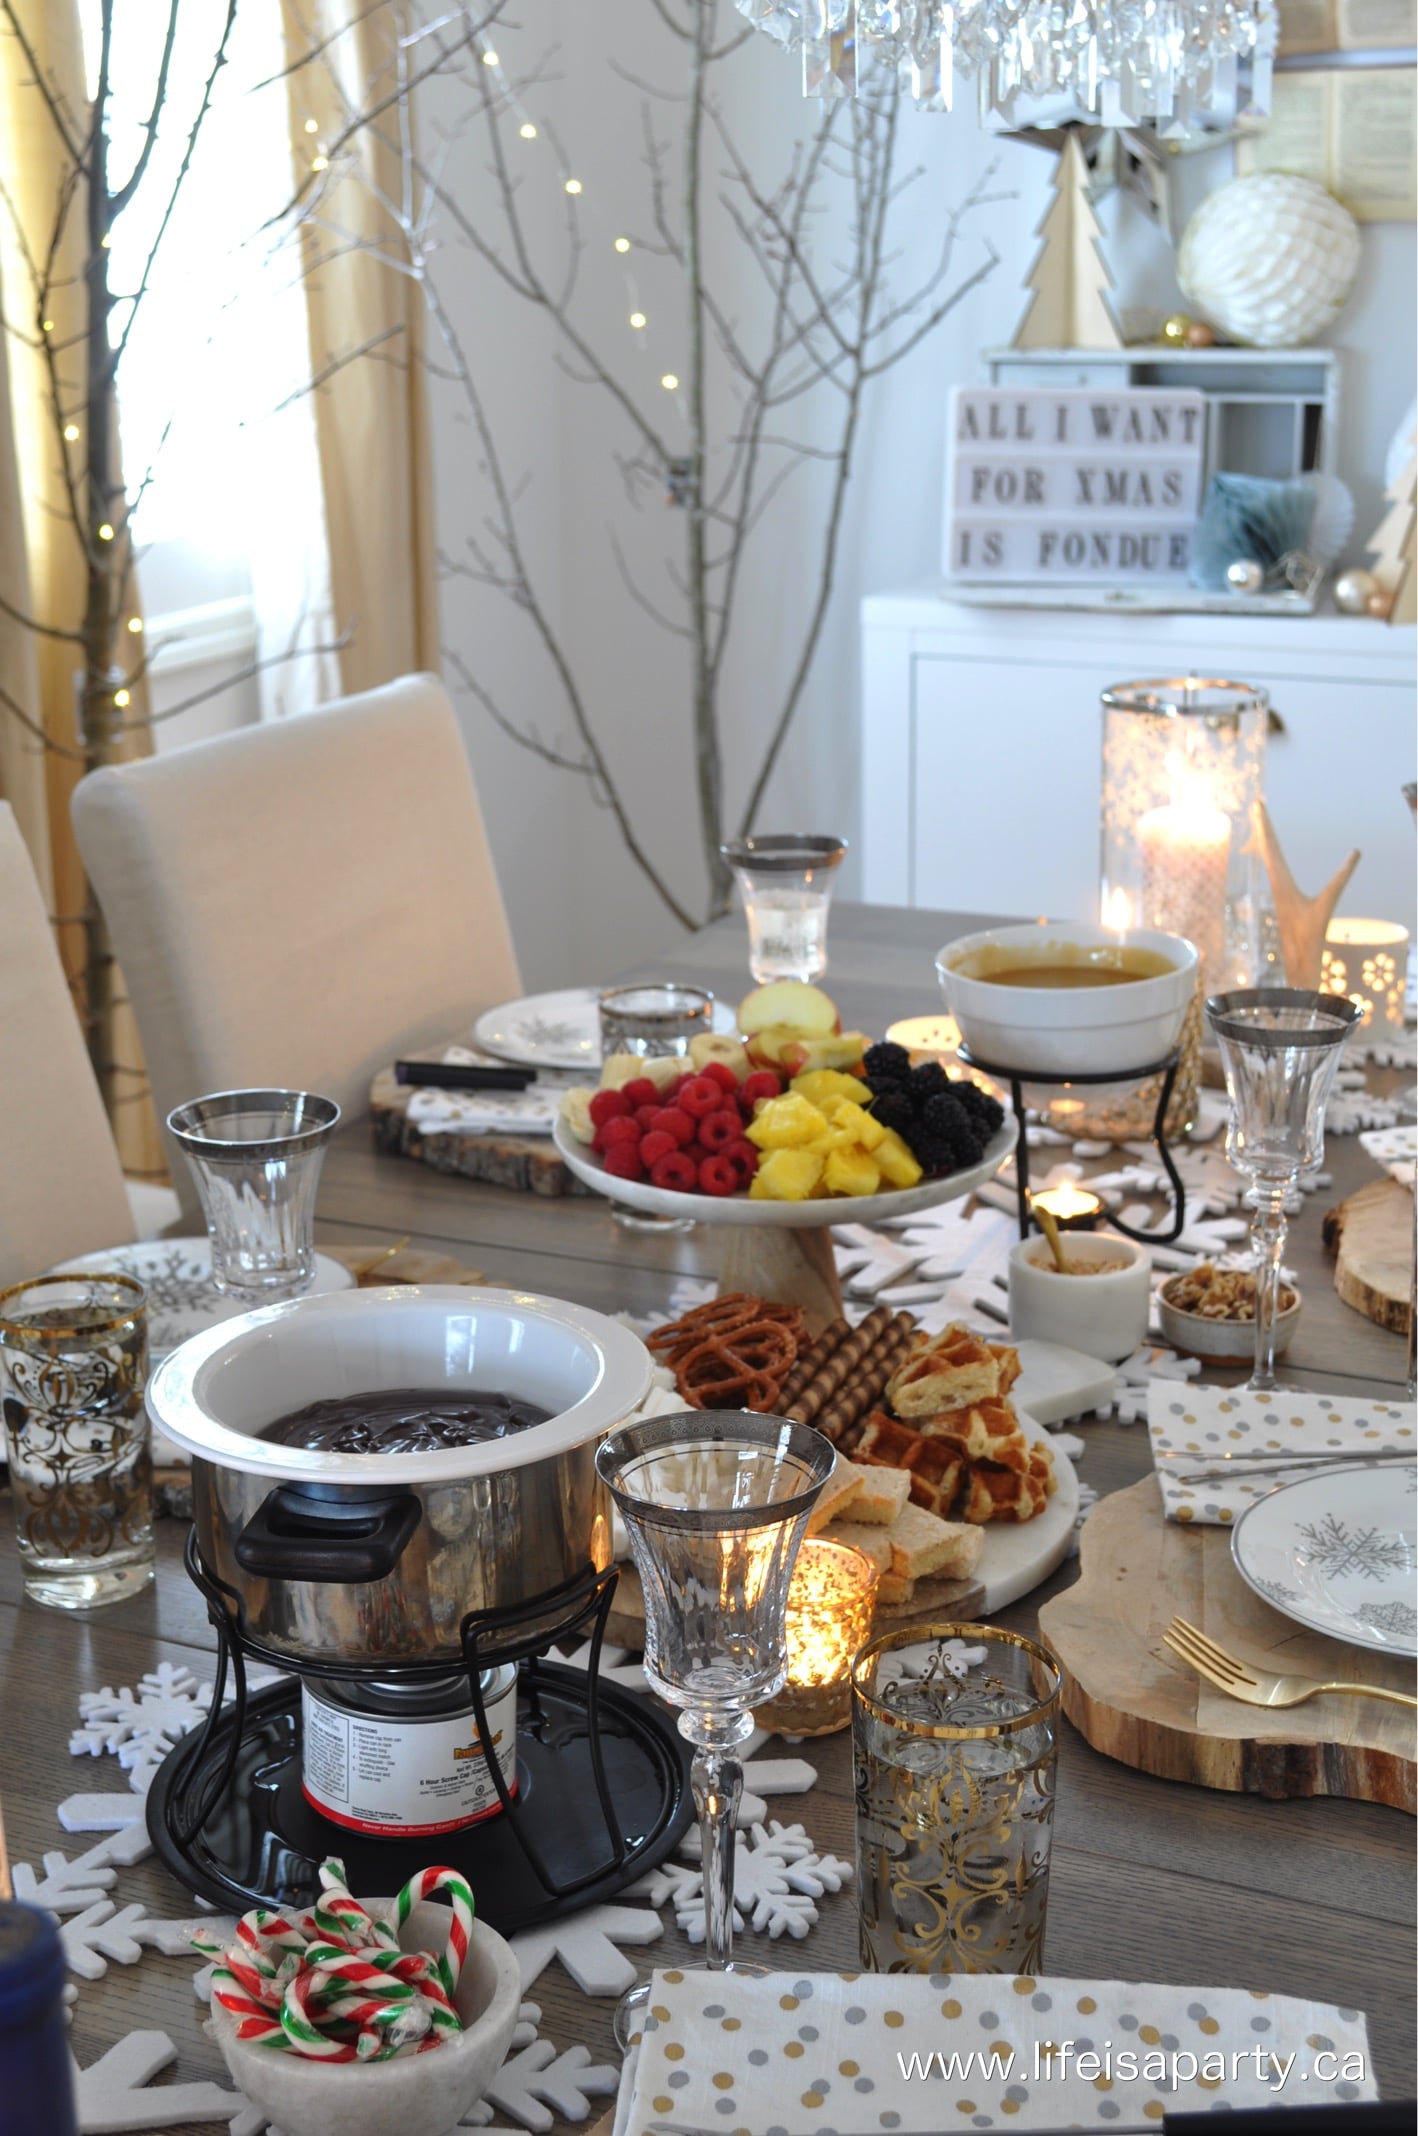
You might also like our Christmas Fondue Party here.

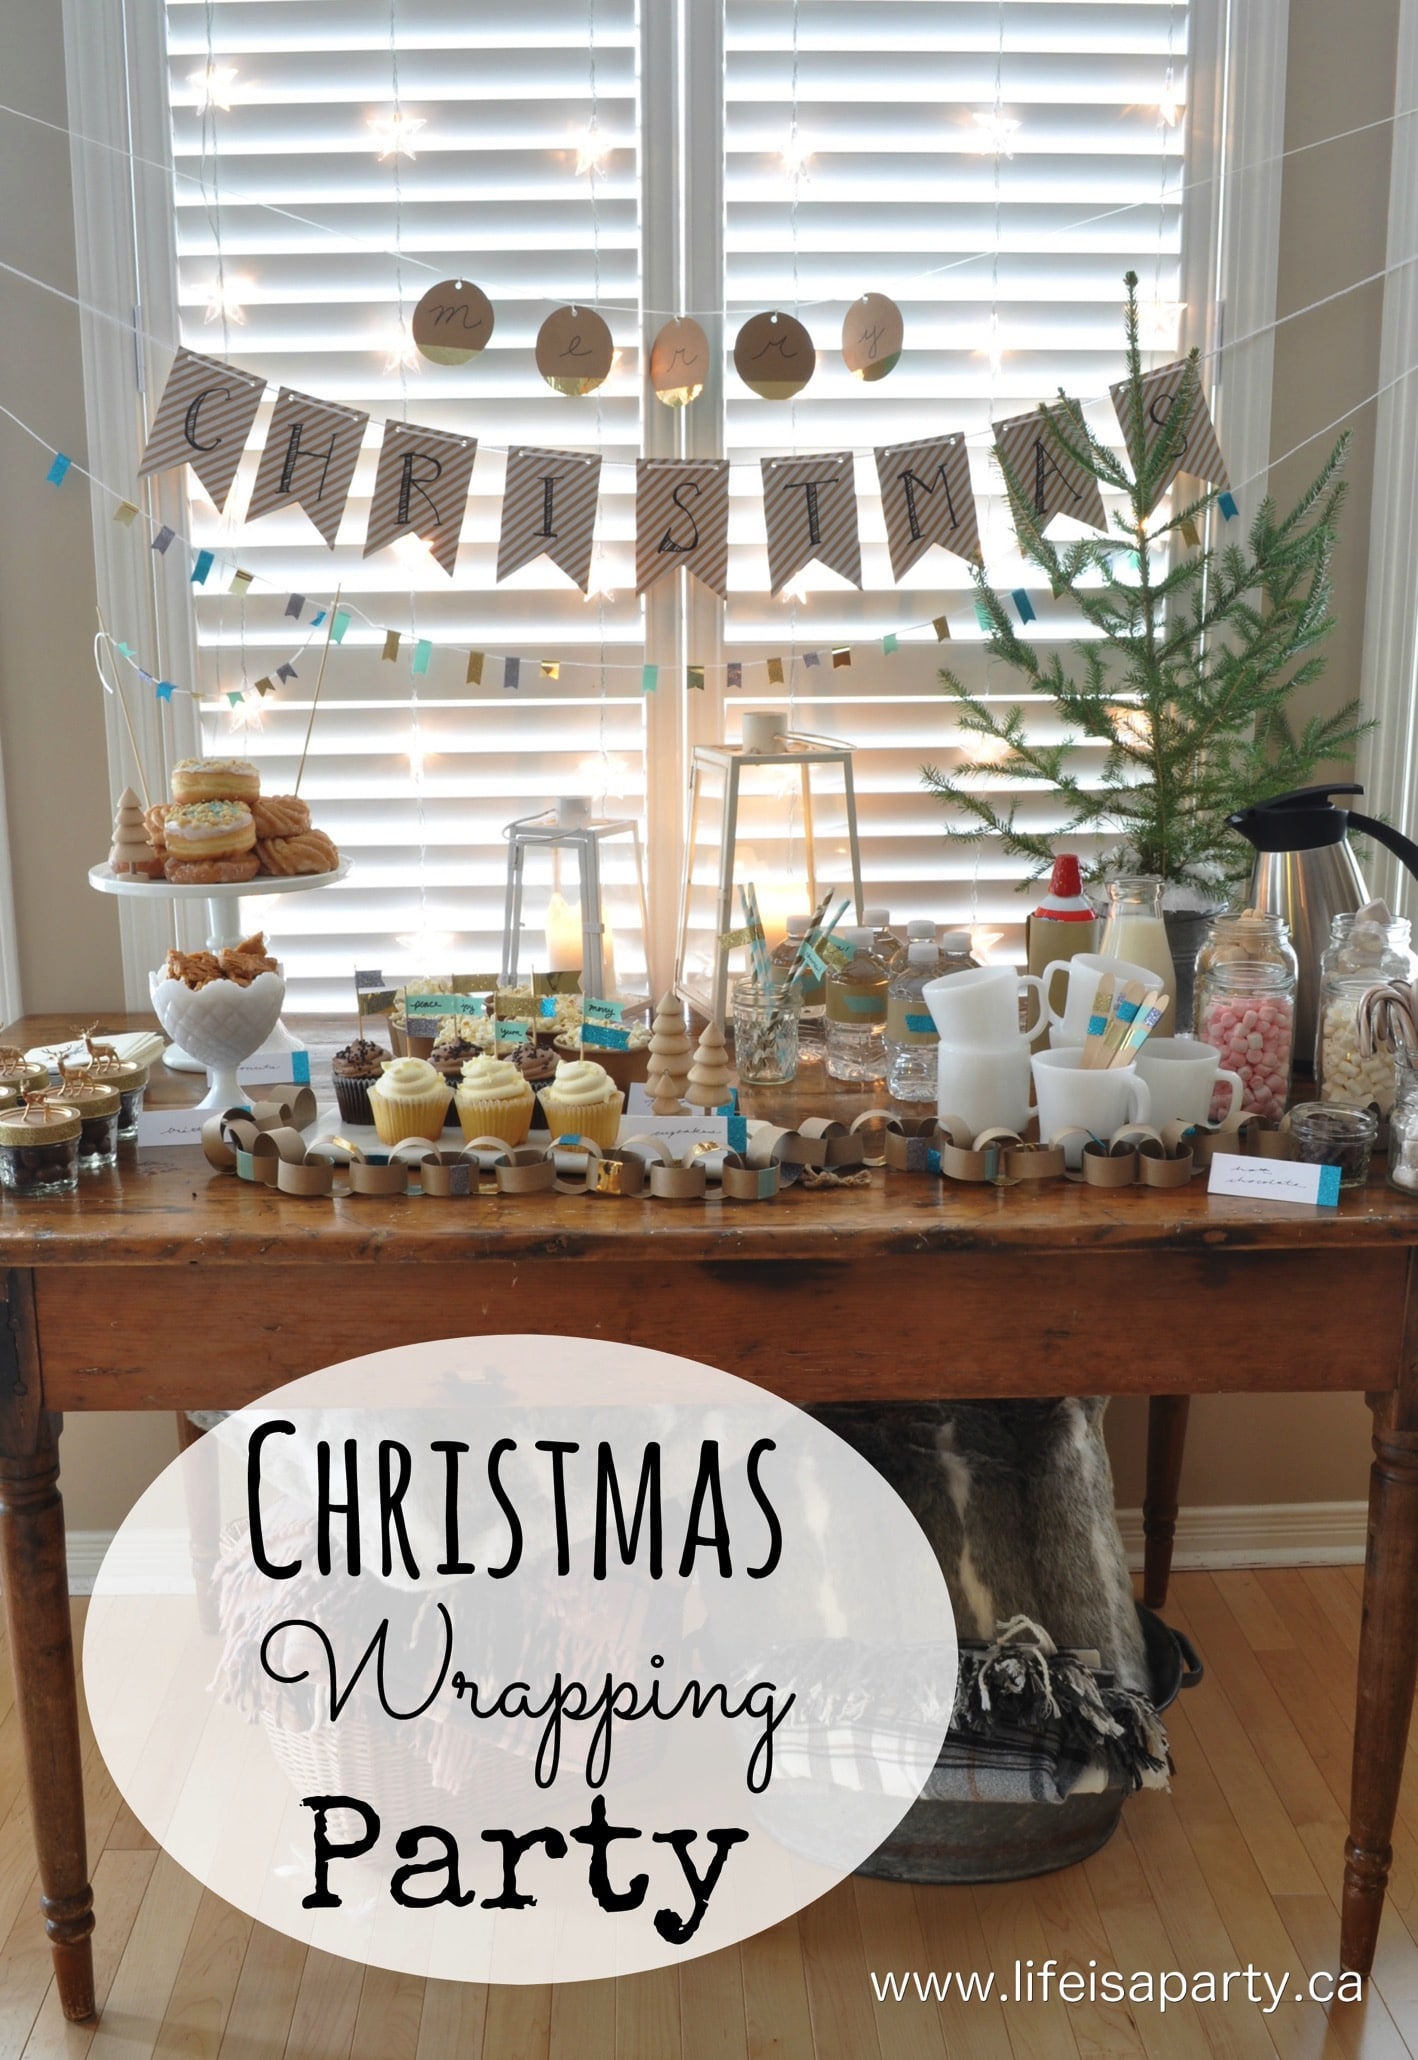
Also check out our Christmas Gift Wrapping Party here.
Christmas Gift Wrapping Party: DIY personalized party decorations, dessert table, party drinks and DIY gift tags and gift wrapping ideas.

You might also like our Berry and Bright Christmas Party 

Christmas Craft Party

Nov 18, 2013 · 1 Comment

Christmas Craft Party: ideas for a girl friend get together with decorations, drinks, appetizers, sweet table, and ornament making craft.

Christmas Craft Party: ideas for a girl friend get together with decorations, drinks, appetizers, sweet table, and ornament making craft.

I had a little Christmas craft party on the weekend....I know you're thinking it's a little early. I'm not even going to try and deny it. But, I heard someone say years ago that November should be for getting ready for Christmas and December for celebrating it. I like that. So this was a getting ready for the Christmas season kind of a party.

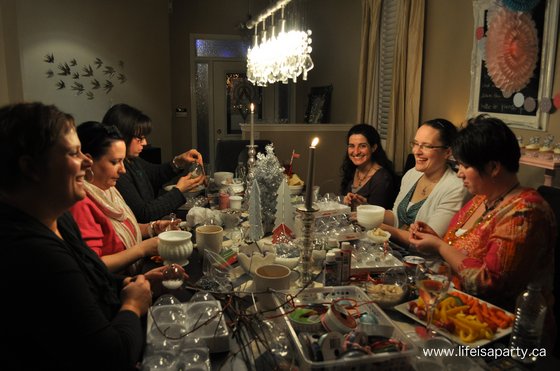
I got together with some girl friends for some great food, conversation and Christmas ornament making.  It was a really lovely evening and I'm excited to share all the pretty details with you.  It's such a great idea to get together with some girlfriends and do a fun activity together.  You want to choose simple Christmas crafts, that aren't too difficult, so everyone has fun doing their Christmas project. We made DIY Christmas ornaments together and it was such a fun project.

ornament making party

Christmas Craft Party Decorations

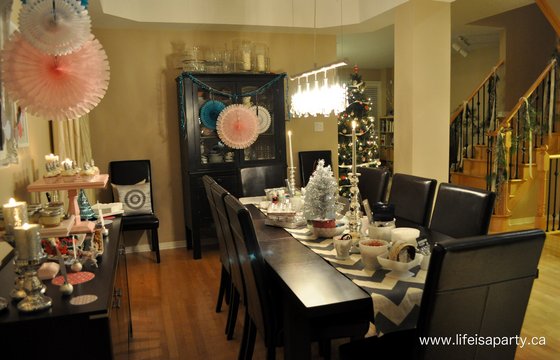
Let's start out with all the pretty holiday decorations and party decor. I worked all week on getting my Christmas decorations up on the main floor of our house for Christmas celebrations.  This year I decided to go with a vintage theme for my Christmas decor.  I  found the perfect party decor from Minted. The different colors of pink, blue and grey color scheme looked great with all my own vintage inspired Christmas decor.

Christmas craft party

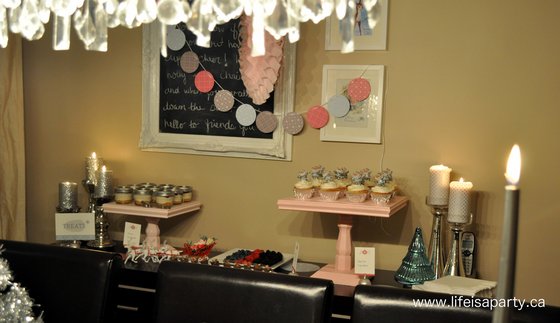
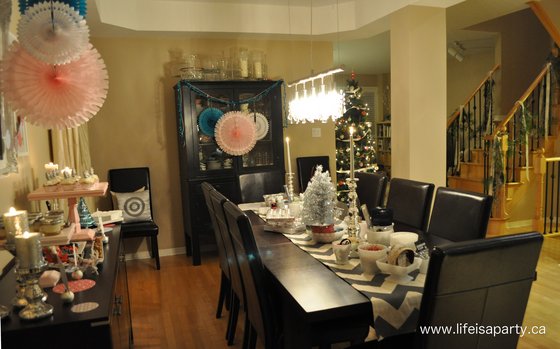
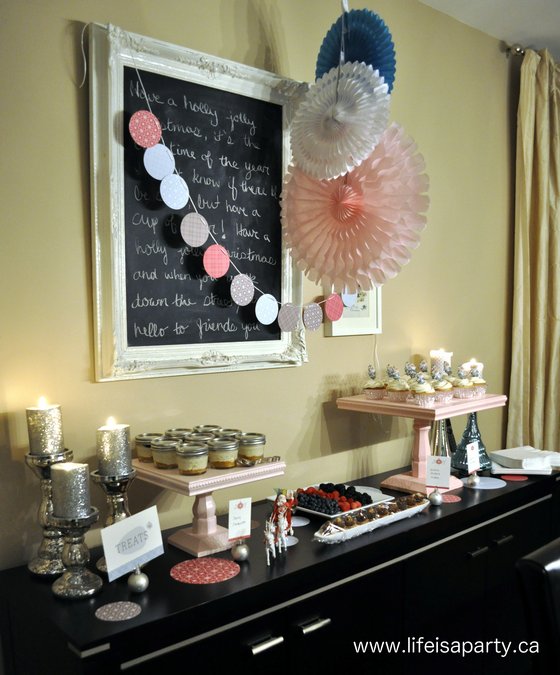
When guests arrived at the front door the dining room was all set up for our easy Christmas crafts and with a pretty dessert buffet for snacking.

Christmas craft party

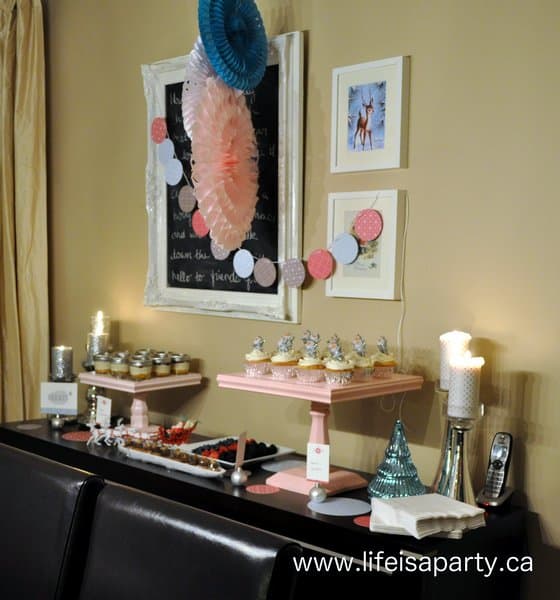
The pretty paper fans, paper confetti for the table, and fun circle bunting were really great additions and added lots of holiday spirit.

Christmas dessert table

The Buffet Decorations

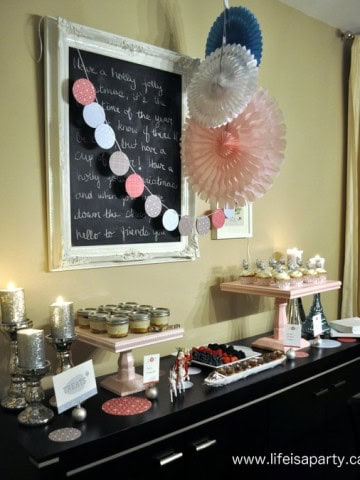
I dressed up the buffet area with a few fun touches. I wrote out the lyrics of "Have a Holly, Jolly, Christmas" on the chalkboard. My favourite easy addition for this Christmas was printing a few vintage Christmas cards I found for free online and putting them in these simple white frames.  This is a really great way to add some vintage Christmas elements even if you can't find the real thing.

vintage Christmas decor

Craft Party Drink Station

Christmas craft party food

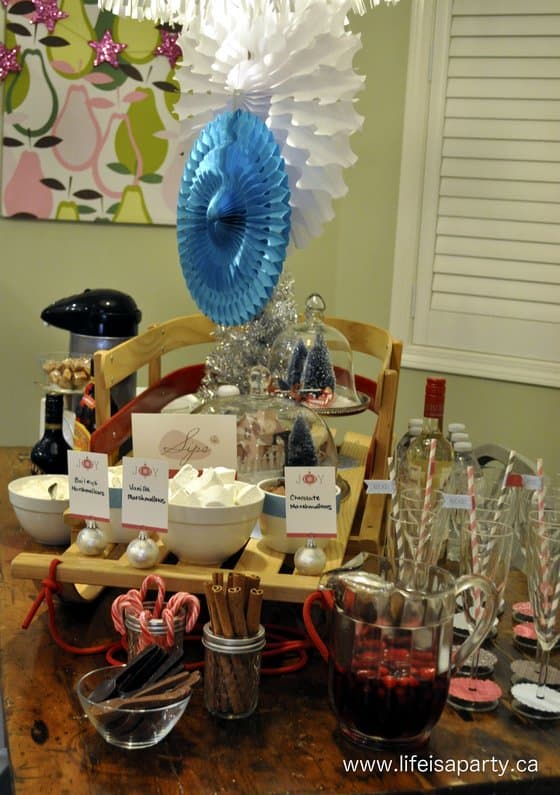
Every fun party needs some fun drinks, and especially for Christmas you need a little holiday cheer!  I set up the drinks station in the kitchen, on my kitchen table. Not the greatest for photos on the blog, but really practical in real life, since you can set up so guests can serve themselves from all sides, depending on what they're having.

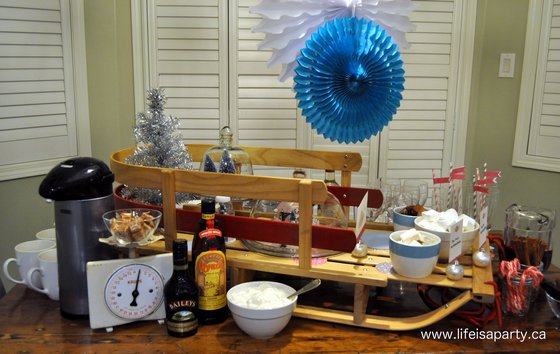
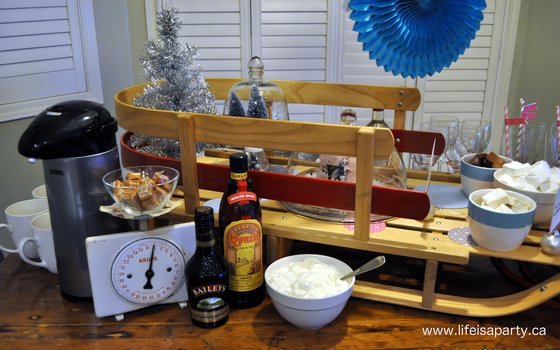
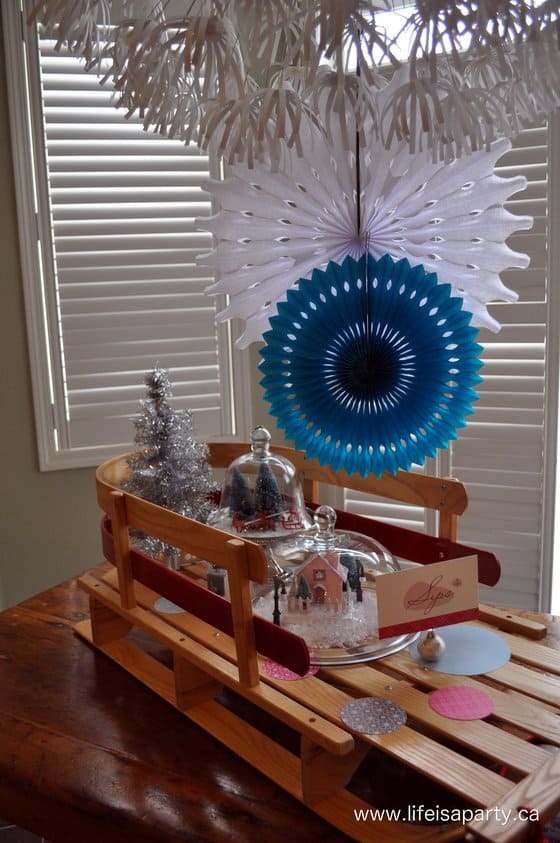
I started out by placing a pretty wooden sleigh on the table. I thought it would be a fun Christmas-y piece to use, a bit different, and since it's nice and flat, it worked great as an elevated serving piece -different heights always add interest to a buffet. 😉

Christmas craft party food

Christmas Craft Party Centre Piece

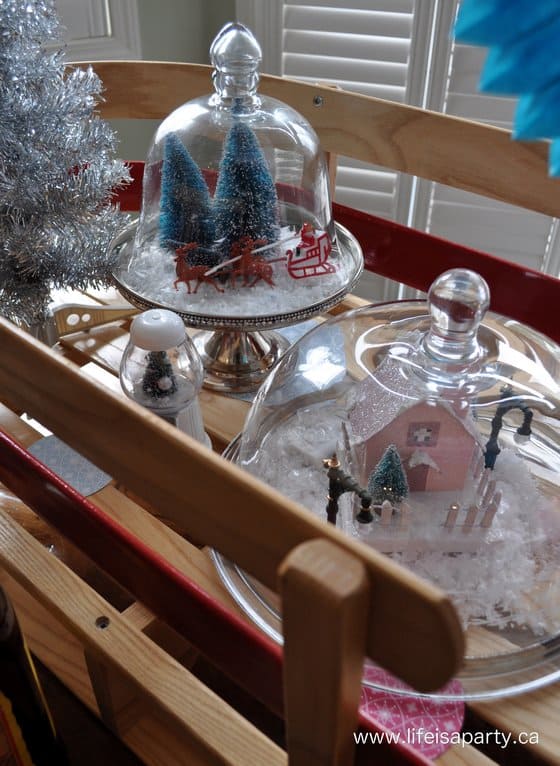
On the sleigh, I set up several cloches as a centerpiece, and the gumball machine snow globe that I made here.  The cloches looked like snow globes with little glitter houses and faux snow inside.  They looked great along with a mini silver Christmas tree.

Christmas party food

Cold Drinks

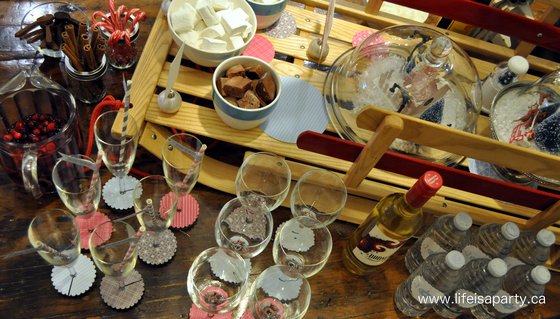
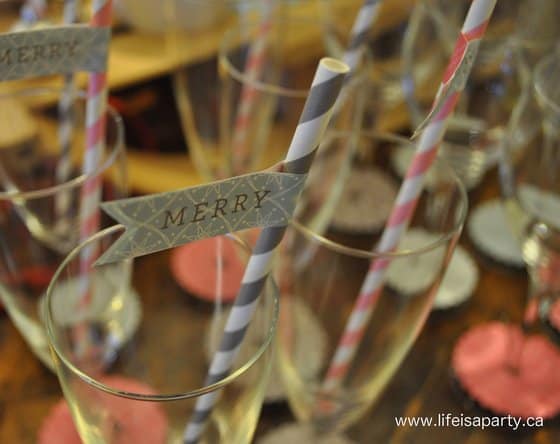
I wanted to offer my guests a few cold drink options. The cranberry-raspberry punch is made from juice and ginger ale.  Cranberry always seems perfect for the holiday season.  I set-up some champagne glasses with pretty striped paper straws and straw labels.

Christmas craft party food

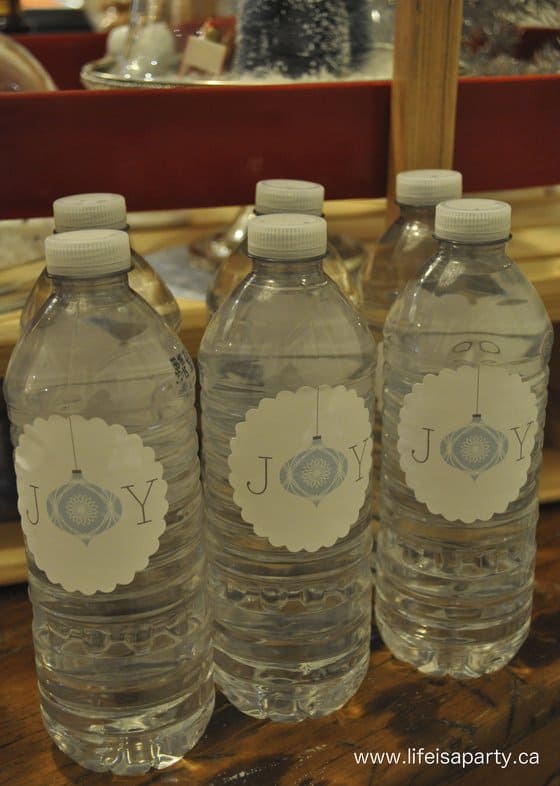
I also offered some wine, and water to guests.

Christmas craft party food

Hot Chocolate Bar

The star of the show was the hot chocolate bar. I made homemade hot chocolate, using this crock pot recipe. It was very chocolaty, maybe even a little too chocolaty for me -although admittedly I'm not the biggest chocolate fan, and you could certainly just increase the milk.

Christmas craft party food

Since my crock pot was busy making pulled pork -more details on the food to come, I made the hot chocolate on the stove, and when it was ready put it into a large thermos for serving. This worked great, since it stayed really hot, and I didn't have to even think about it all night. Along with the hot chocolate, I put out some Irish Cream, and some Kahlua -in case any of my guests wanted to make their hot chocolate a bit special. 😉 There was also some caramels that could be added in, and some whipped cream. Yum.

Christmas craft party food

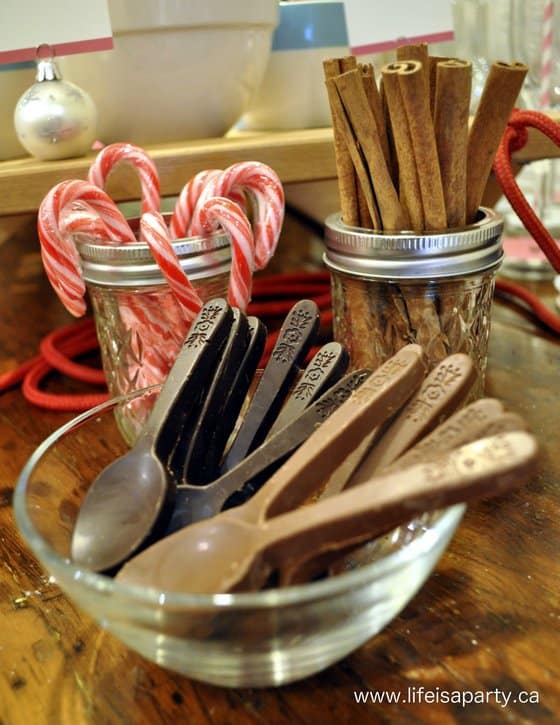
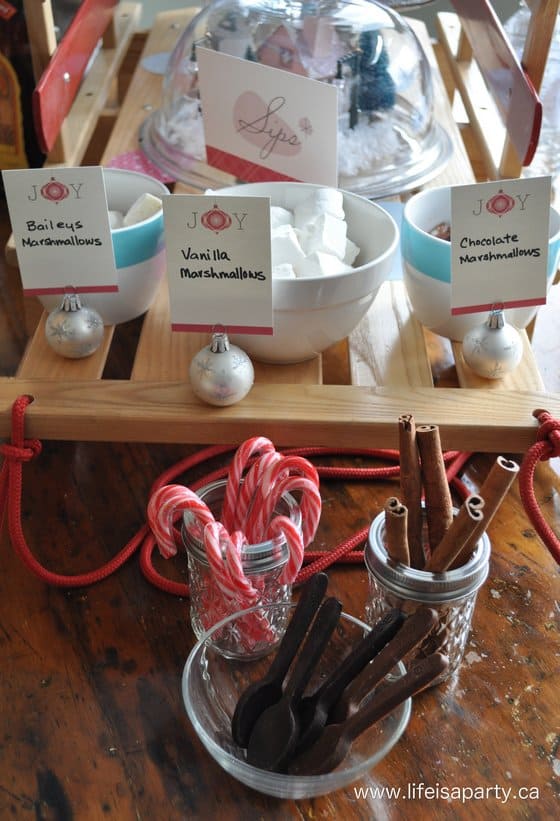
I also offered some cinnamon sticks for stirring, or for those who can't get enough chocolate -chocolate spoons! I picked them up at the dollar store, each package had a few milk and a few dark chocolate spoons. These were a big hit. I also put out some candy canes for stirring, in pretty mason jars.

Christmas craft party food

Flavored Homemade Marshmallows

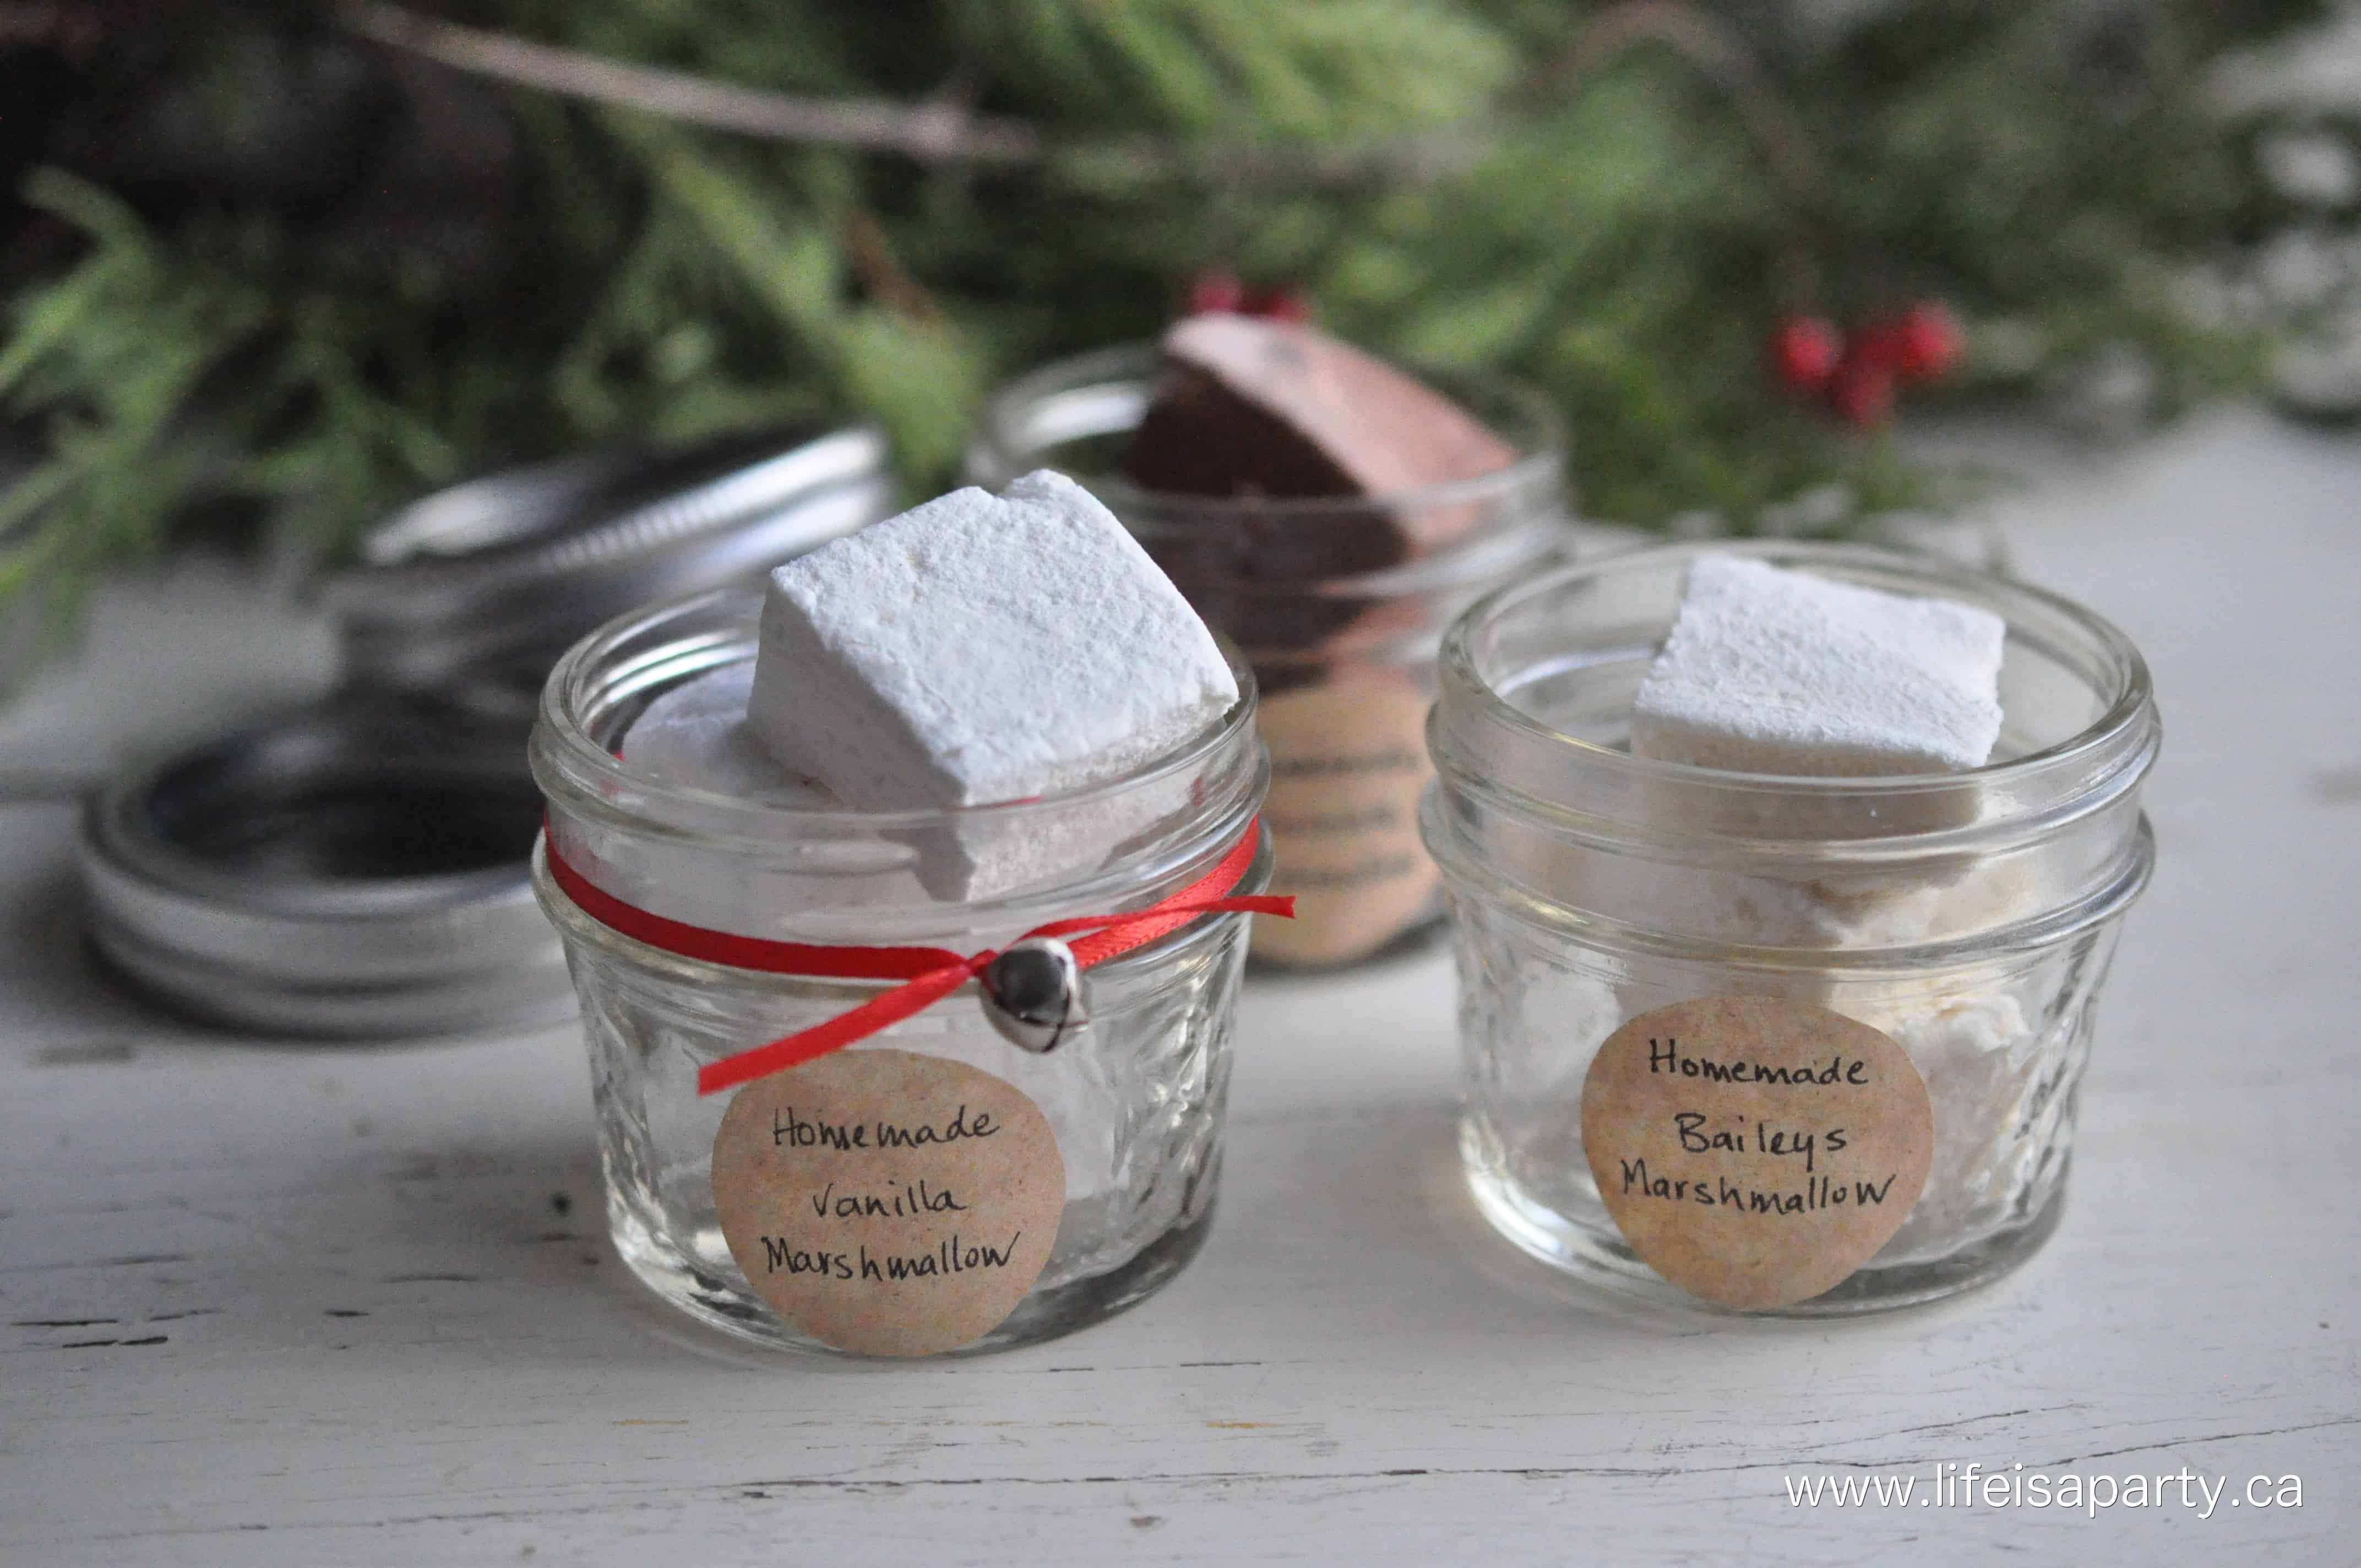
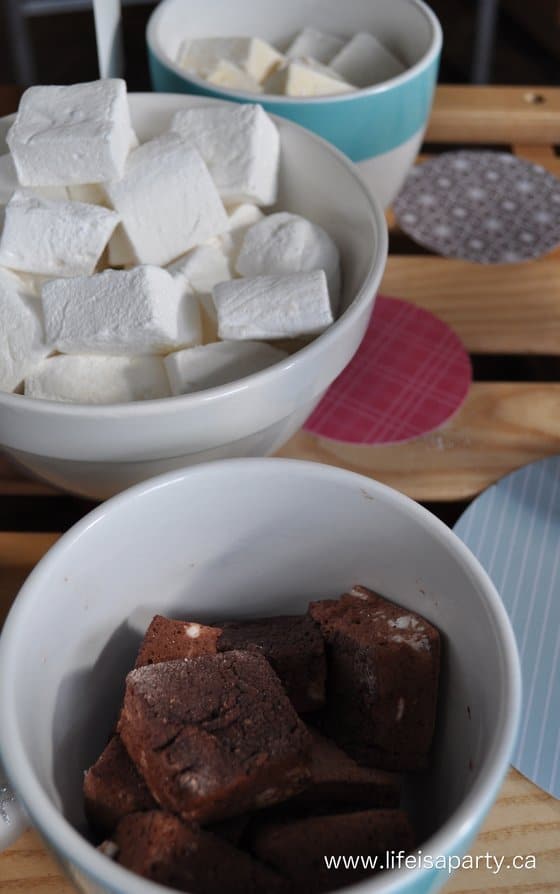
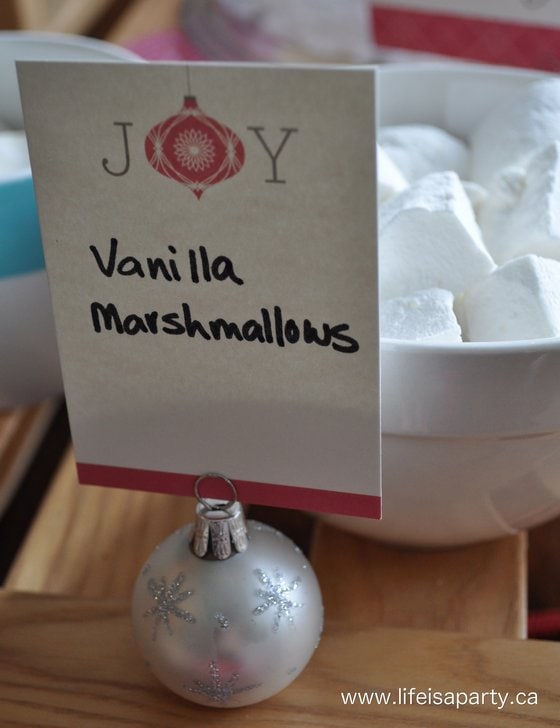
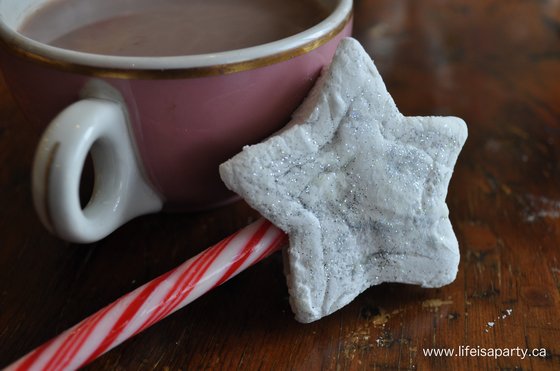
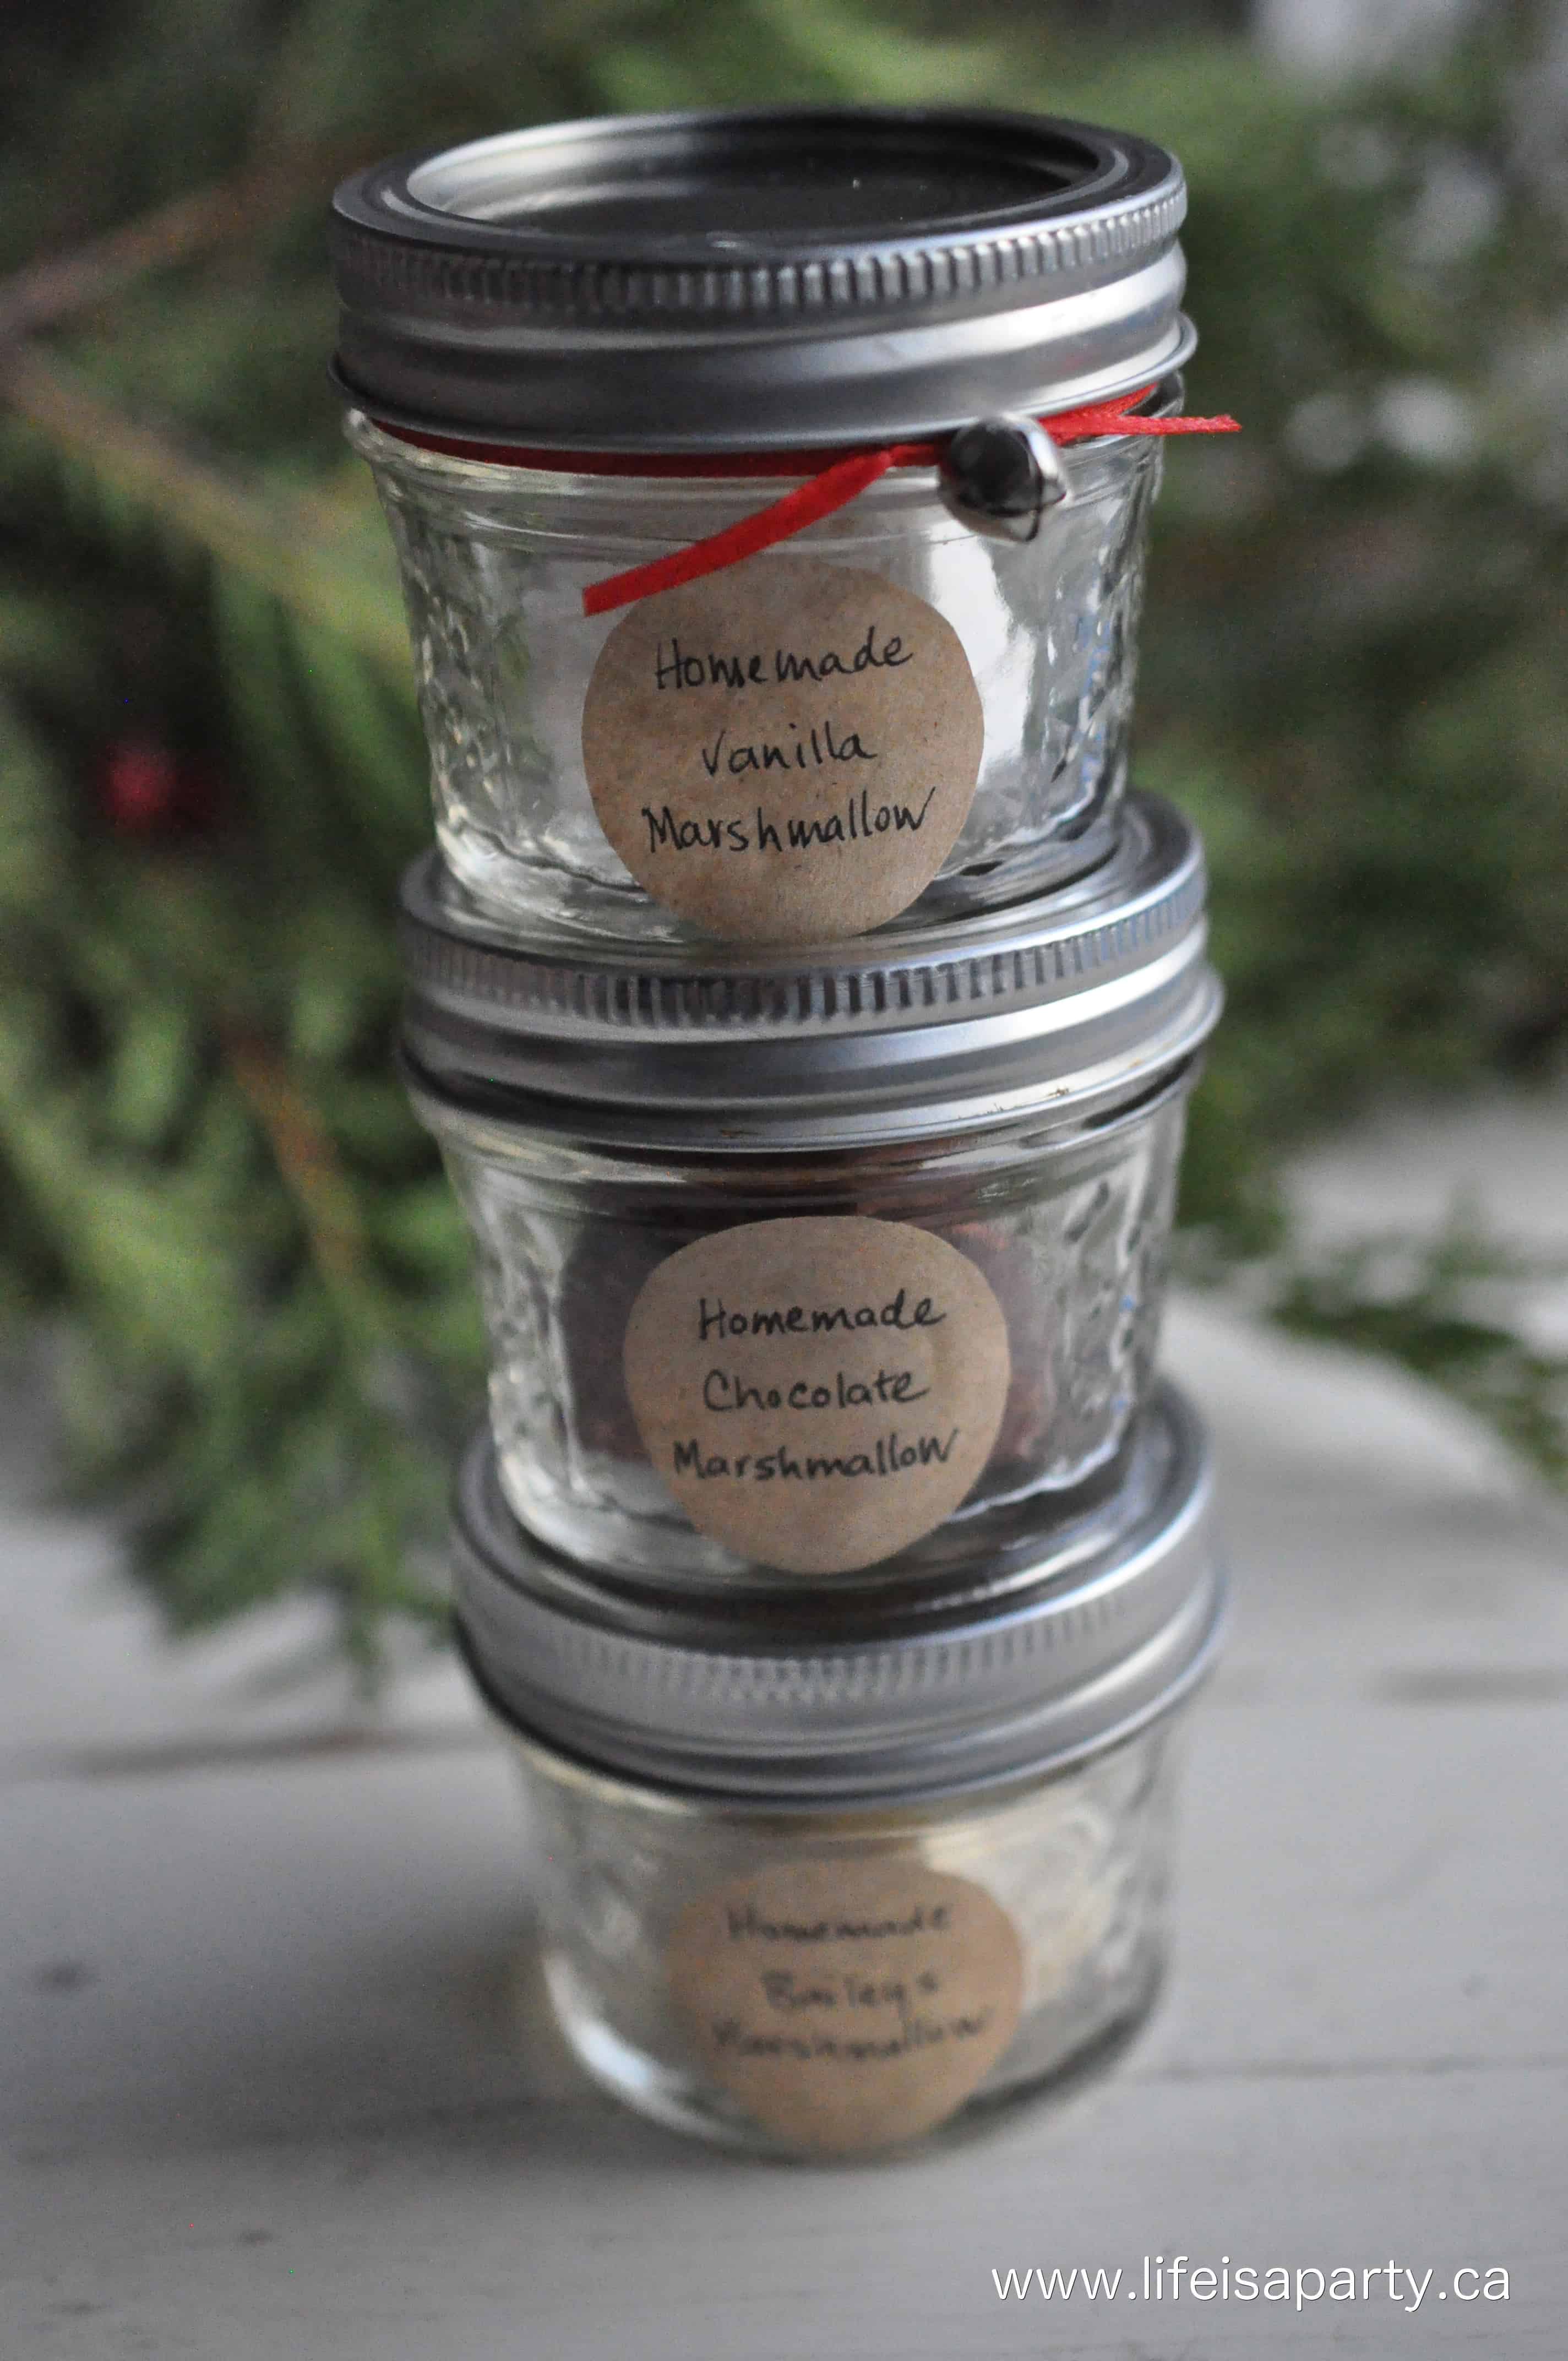
The highlight of the hot chocolate bar was the homemade marshmallows. I made three kinds -vanilla, chocolate, and Baileys. I have to say they were so yummy. You can find my flavoured marshmallow recipe here.
Christmas craft party food

The Crafts

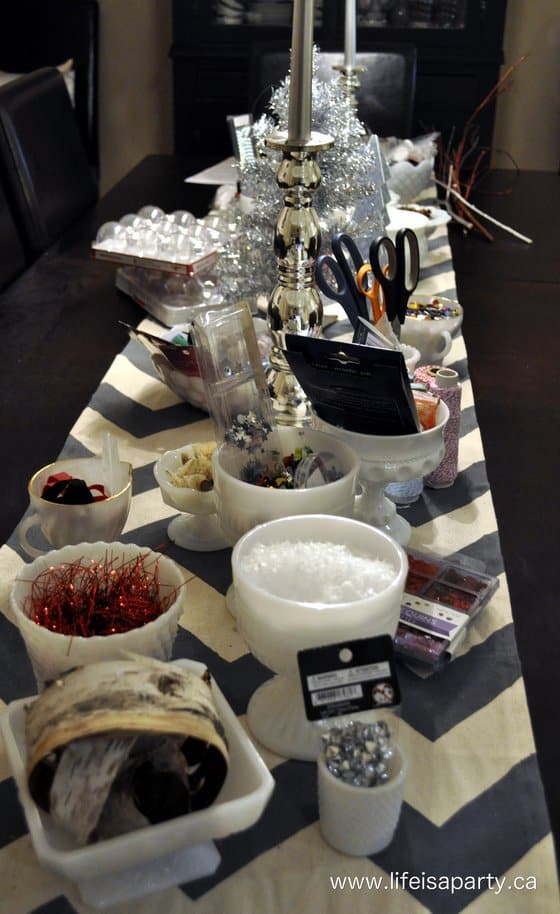
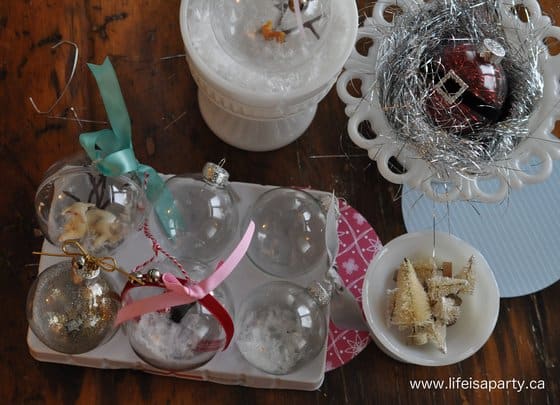
The highlight of the Christmas craft party was of course the crafts!  We all made DIY Christmas decorations together.  I set up the dining table with all kinds of great craft supplies and invited my friends to each bring some clear glass, or plastic ornaments that we could fill together as the craft for our Christmas craft party.

Ornament making party

Ornament Making Supplies

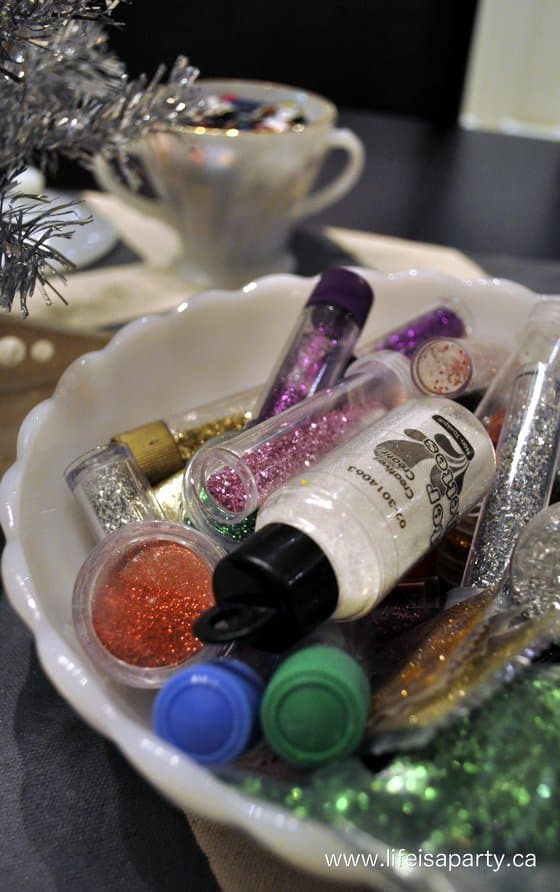
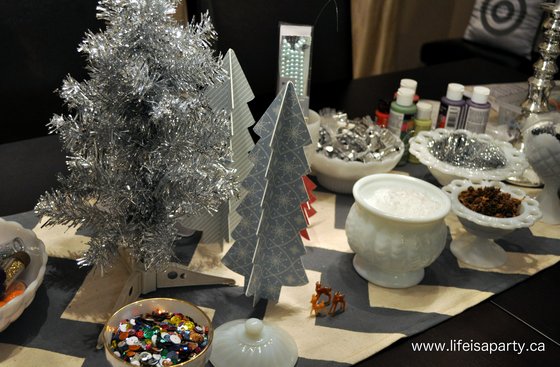
I used my milk glass collection to house all the little craft supplies for the evening. This worked great to keep all the different materials organized and still make it look pretty. 😉 The milk glass worked great with our vintage Christmas theme too.

Ornament making party

Ornament Fillers

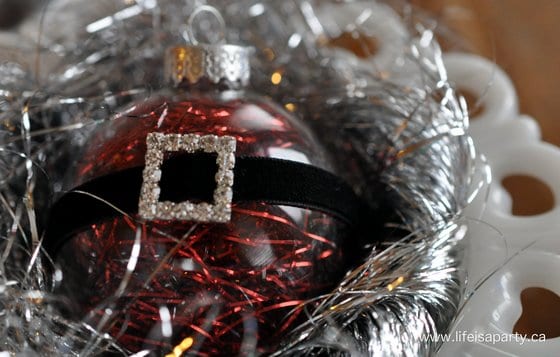
I had a few ideas of what the fillers could be, and as a personal touch I even checked in with my peeps to hear what some of their Christmas colour schemes were this year, so we could have some options that would work for everyone.  We had some neutral tones, some bright colors, traditional red and green, and some pink options.

Ornament making party

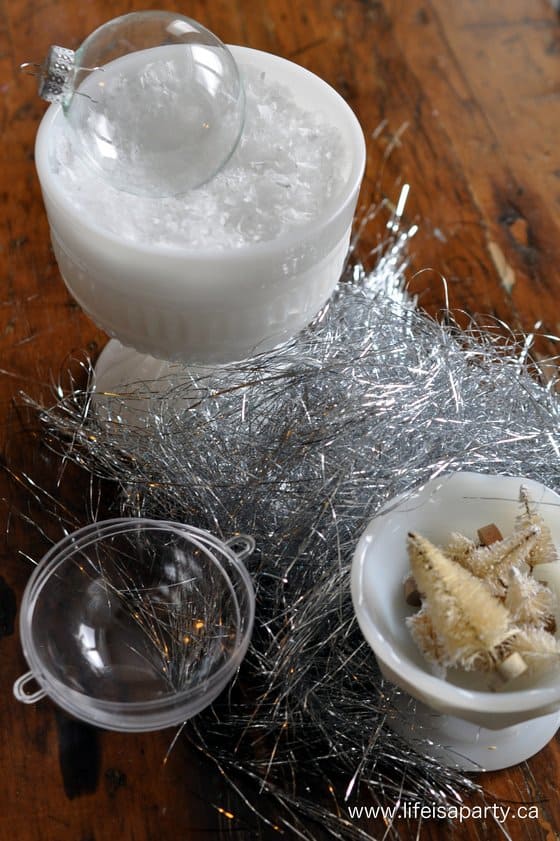
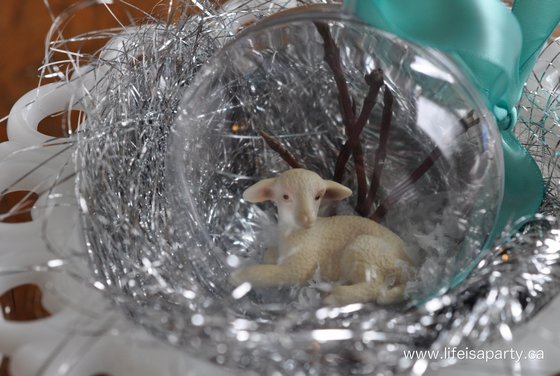
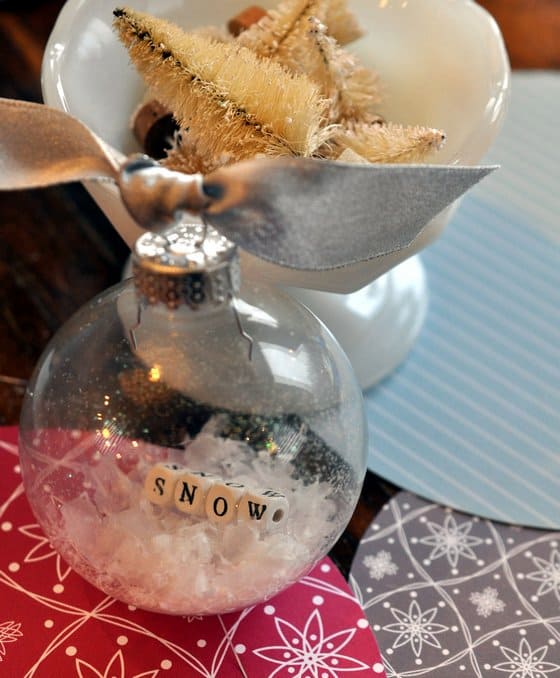
If you're thinking of setting up an evening like this, here's a few ideas of what you might want to include as filler a plastic or glass ornament. One friend was working on a woodland, and nature theme, so I found some simple birch bark, tiny cedar pine cones, and white feathers. Everyone liked the idea of snow globes, so I put out some faux snow and a few fun options for fillers. There were twigs to decorate, little mini white Christmas trees, and few tiny plastic deer too.

Ornament making party

My sister picked up some plastic balls that split in half to fill. These worked the best for the snow globes and allowed her to make some snow globes with some little toy animals. They turned out so cute. Another friend is planning to pick some up and put some lego men in for her little boys this year, which is such a great idea to personalize your DIY ornaments.

Ornament making party

I also had some letter beads. Some people used them to spell out someone's name. I glued the letters together to write the word "snow" and added some faux snow. So cute and so simple.  These make such great DIY Christmas gifts too.

I had also picked up some rhinestone buckles, and a little black velvet ribbon. We used these to make a cute Santa ornament, with some simple red tinsel inside.

Ornament making party

We also used lots of glitter, sequins, beads, paint, music sheets, and ribbons. The possibilities are really endless.  

Ornament Making Craft Supplies

Here are the supplies we used for our craft projects, plus a few glue guns and hot glue.  Of course you will also need some plastic or glass ornaments to fill.  We used:

  • birch bark
  • feathers
  • tiny pinecones
  • faux snow
  • mini trees
  • twigs
  • mini deer
  • letter beads
  • rhinestone buckles
  • black velvet ribbon
  • glitter 
  • sequins
  • paint
  • music sheets 
  • ribbons
  • tinsel
  • pom poms
  • wooden beads
Ornament making party

You can see from the smiles on the faces of my friends that we had a great time together -eating, drinking, crafting, laughing, and connecting.  This was a really easy craft and perfect for a night like this.  Everyone had so much fun making their own ornaments for their Christmas trees or to use as great gifts for the whole family.  This was the perfect way to enjoy a crafting day or night together.

Christmas Craft Party Food

For this party I made a few hot and cold appetizers as well as a fun dessert table. You can read all about how I did all the food and drinks for the party for around $100 here if you're interested in party food on a budget.

Christmas dessert table

Crockpot Pulled Pork Sliders

pulled pork sliders

I started out with the pulled pork sliders. This was my main hot item for the party. I found a good crock pot pulled pork recipe here, which also meant it could be made ahead.

pulled pork sliders

I served the pork with a homemade coleslaw on slider buns, that were the perfect size.  These were a real hit, and everyone loved them and the small size was perfect.

pulled pork sliders

Perogies

For a vegetarian hot option I served perogies. They were simple frozen ones, garnished with a little sour cream and some fresh chives. They looked great, and were super easy. Simple food dressed up with a garnish and served individually is always a hit.

perogies

We also had some homemade hummus and pita chips, veggies and dip, and potato chips for nibbling and snacking while we crafted.

Christmas craft party desserts

The Sweet Table

I made really simple vanilla cupcakes and they looked so cute.  The cupcake toppers were ornaments from the dollar store that I added a tooth pick to, and they we adorable for our vintage Christmas theme.

Christmas cupcakes
mini cheesecake in a mason jar

I also made some mini cheesecakes -see my recipe here.  These were easy to serve and perfect for our retro theme.

stuffed dates

For some healthy options we served some dates stuffed with walnuts and a fresh berry tray.
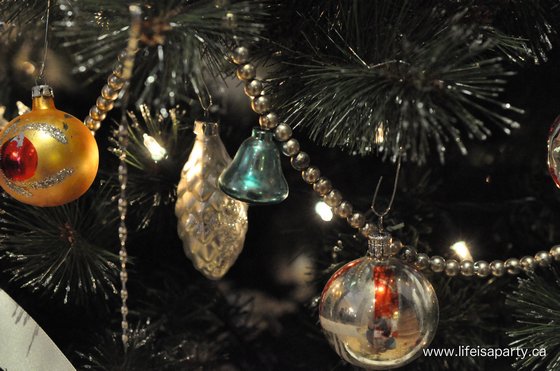
stuffed dates
dates stuffed with walnuts
Christmas dessert table

This holiday party craft night making handmade ornaments was so much fun.  It was great to spend the evening making simple crafts and eating great food with girlfriends and get us all into the Christmas spirit.  It was so fun, I think it might become one of our new favourite Christmas traditions.  

With a Christmas craft party to enjoy with friends, life really is a party!

More Christmas Party Inspiration

You might also like our Christmas Gift Wrapping Party here.

Christmas Gift Wrapping Party: DIY personalized party decorations, dessert table, party drinks and DIY gift tags and gift wrapping ideas.

Also check out our Christmas Fondue Party here.

You might also enjoy our Merry and Bright Christmas Party here.

Marshmallow Fairy Wands

Nov 15, 2013 · 5 Comments

Homemade marshmallow fairy wands.

Marshmallow Fairy Edible Wands: homemade marshmallows and a candy cane make the perfect fairy wand stirring stick for hot chocolate.

Homemade marshmallow fairy wands.
[feast_advanced_jump_to]

If you have any little fairy princesses around this Christmas, this might be the sweetest little edible wands treat ever. I know I'm going to be the "best Mom in the world" after school, when mine get home and discover this.

how to make a Marshmallow Fairy Edible Wand

I made some marshmallows yesterday. I've made them before.  They're really not that hard if you have a stand mixer, a candy thermometer, and a little time. My sister has been wanting to learn how to make them, so last night we made some. I used what's become my go-to recipe for marshmallows -Alton Browns find it here. This morning the marshmallows were ready to cut.  I made a few of these marshmallow fairy edible wands for my little girls.  I thought you might like them too.

Marshmallow Fairy edible Wands

Making Your Edible Wands

I cut them out with a little star cookie cutter, and coated the sides with more of the powdered sugar.

I also got out my edible glitter. If you don't own any, you need to add it to your Christmas list. It is the perfect socking stuffer for anyone who loves to bake. You can find it at cake decorating suppliers or on-line.

Add a little sprinkling of glitter to the marshmallows, and if they're too dry for the glitter to stick, just dap with a drop or two of water on them to make them sticky again.

princess fairy edible wands party food

Then, I used a candy cane, that I broke the curve off of, to make it straight for the wand part, and inserted it into the marshmallow. If your fairy princesses' aren't big fans of peppermint there are all kinds of other flavours of candy canes now, or a stripy straw would be really sweet too.  Another great option would be a candy stick, and they come in all kinds of fun flavours too.

Marshmallow edible wand stir stick

Then, make some hot chocolate, and use the fairy wand for stirring, dipping, and making magic!

With marshmallow fairy edible wands, life really is a party!

You might also like our Flavoured Marshmallows recipe here.

Homemade Flavoured Marshmallows Recipe -Bailey's, Chocolate, and Vanilla -how to make your own flavoured marshmallows, perfect for gift giving!

Also check out our Frozen Chocolate Rice Krispie Treats.

Frozen Themed Chocolate Rice Krispie Treats: inspired by Disney's Frozen these snowflake rice krispie cookies are perfect for your Frozen themed party.

You might also like our Homemade Lollipops recipe here.
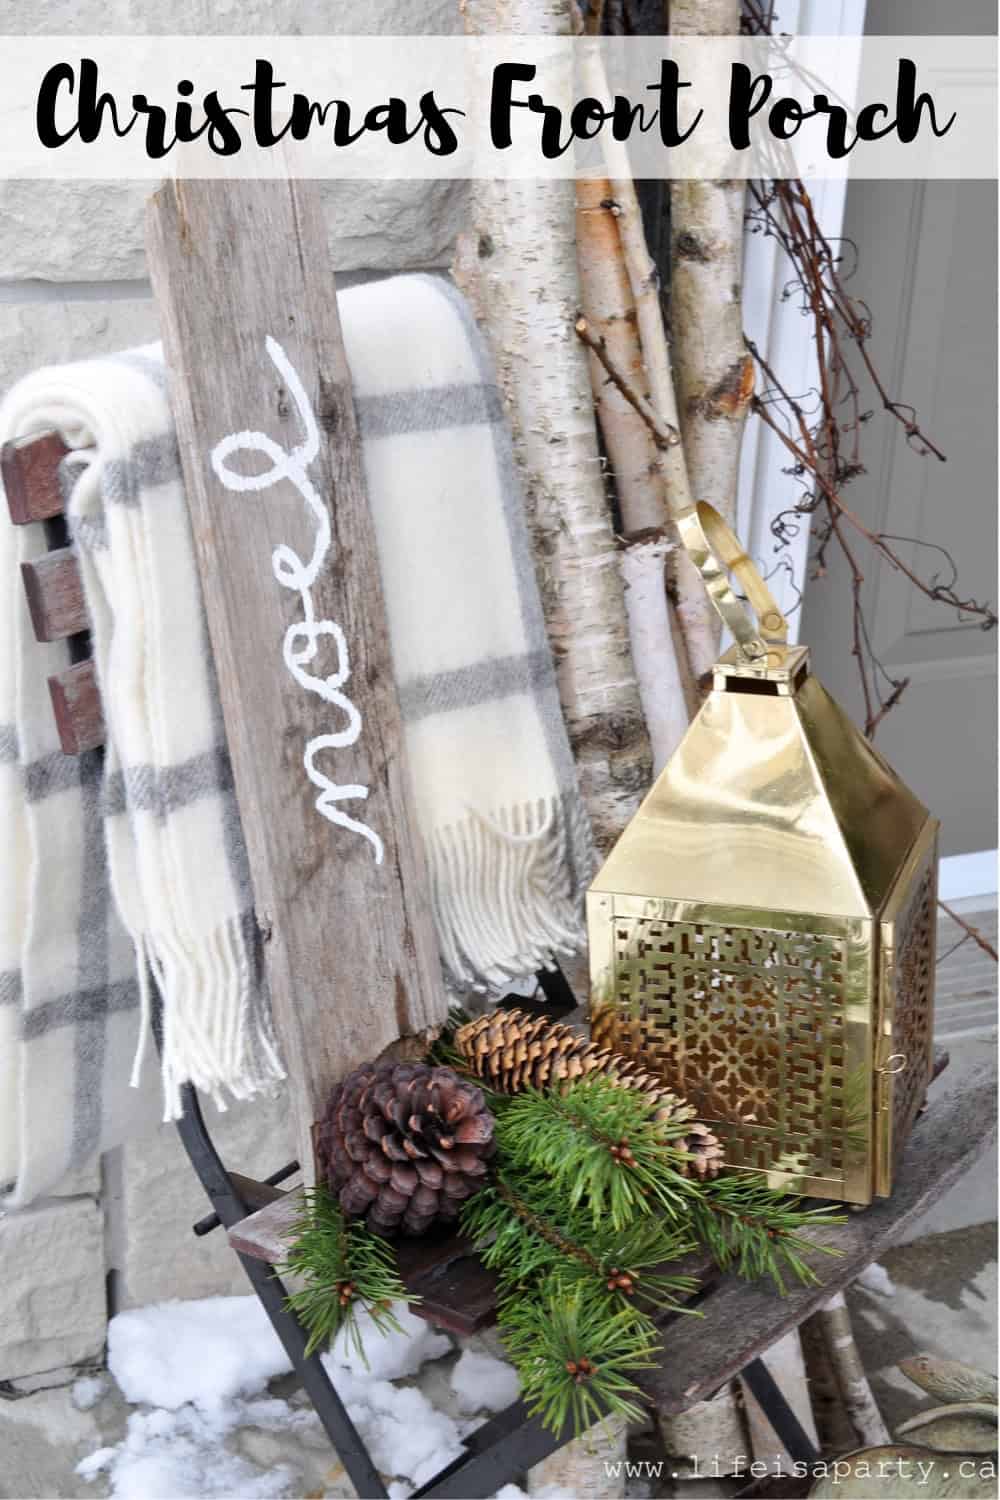
Homemade Valentine Lollipops -the perfect sweet treat for Valentine's Day. Including a free printable Valentine to go with it.
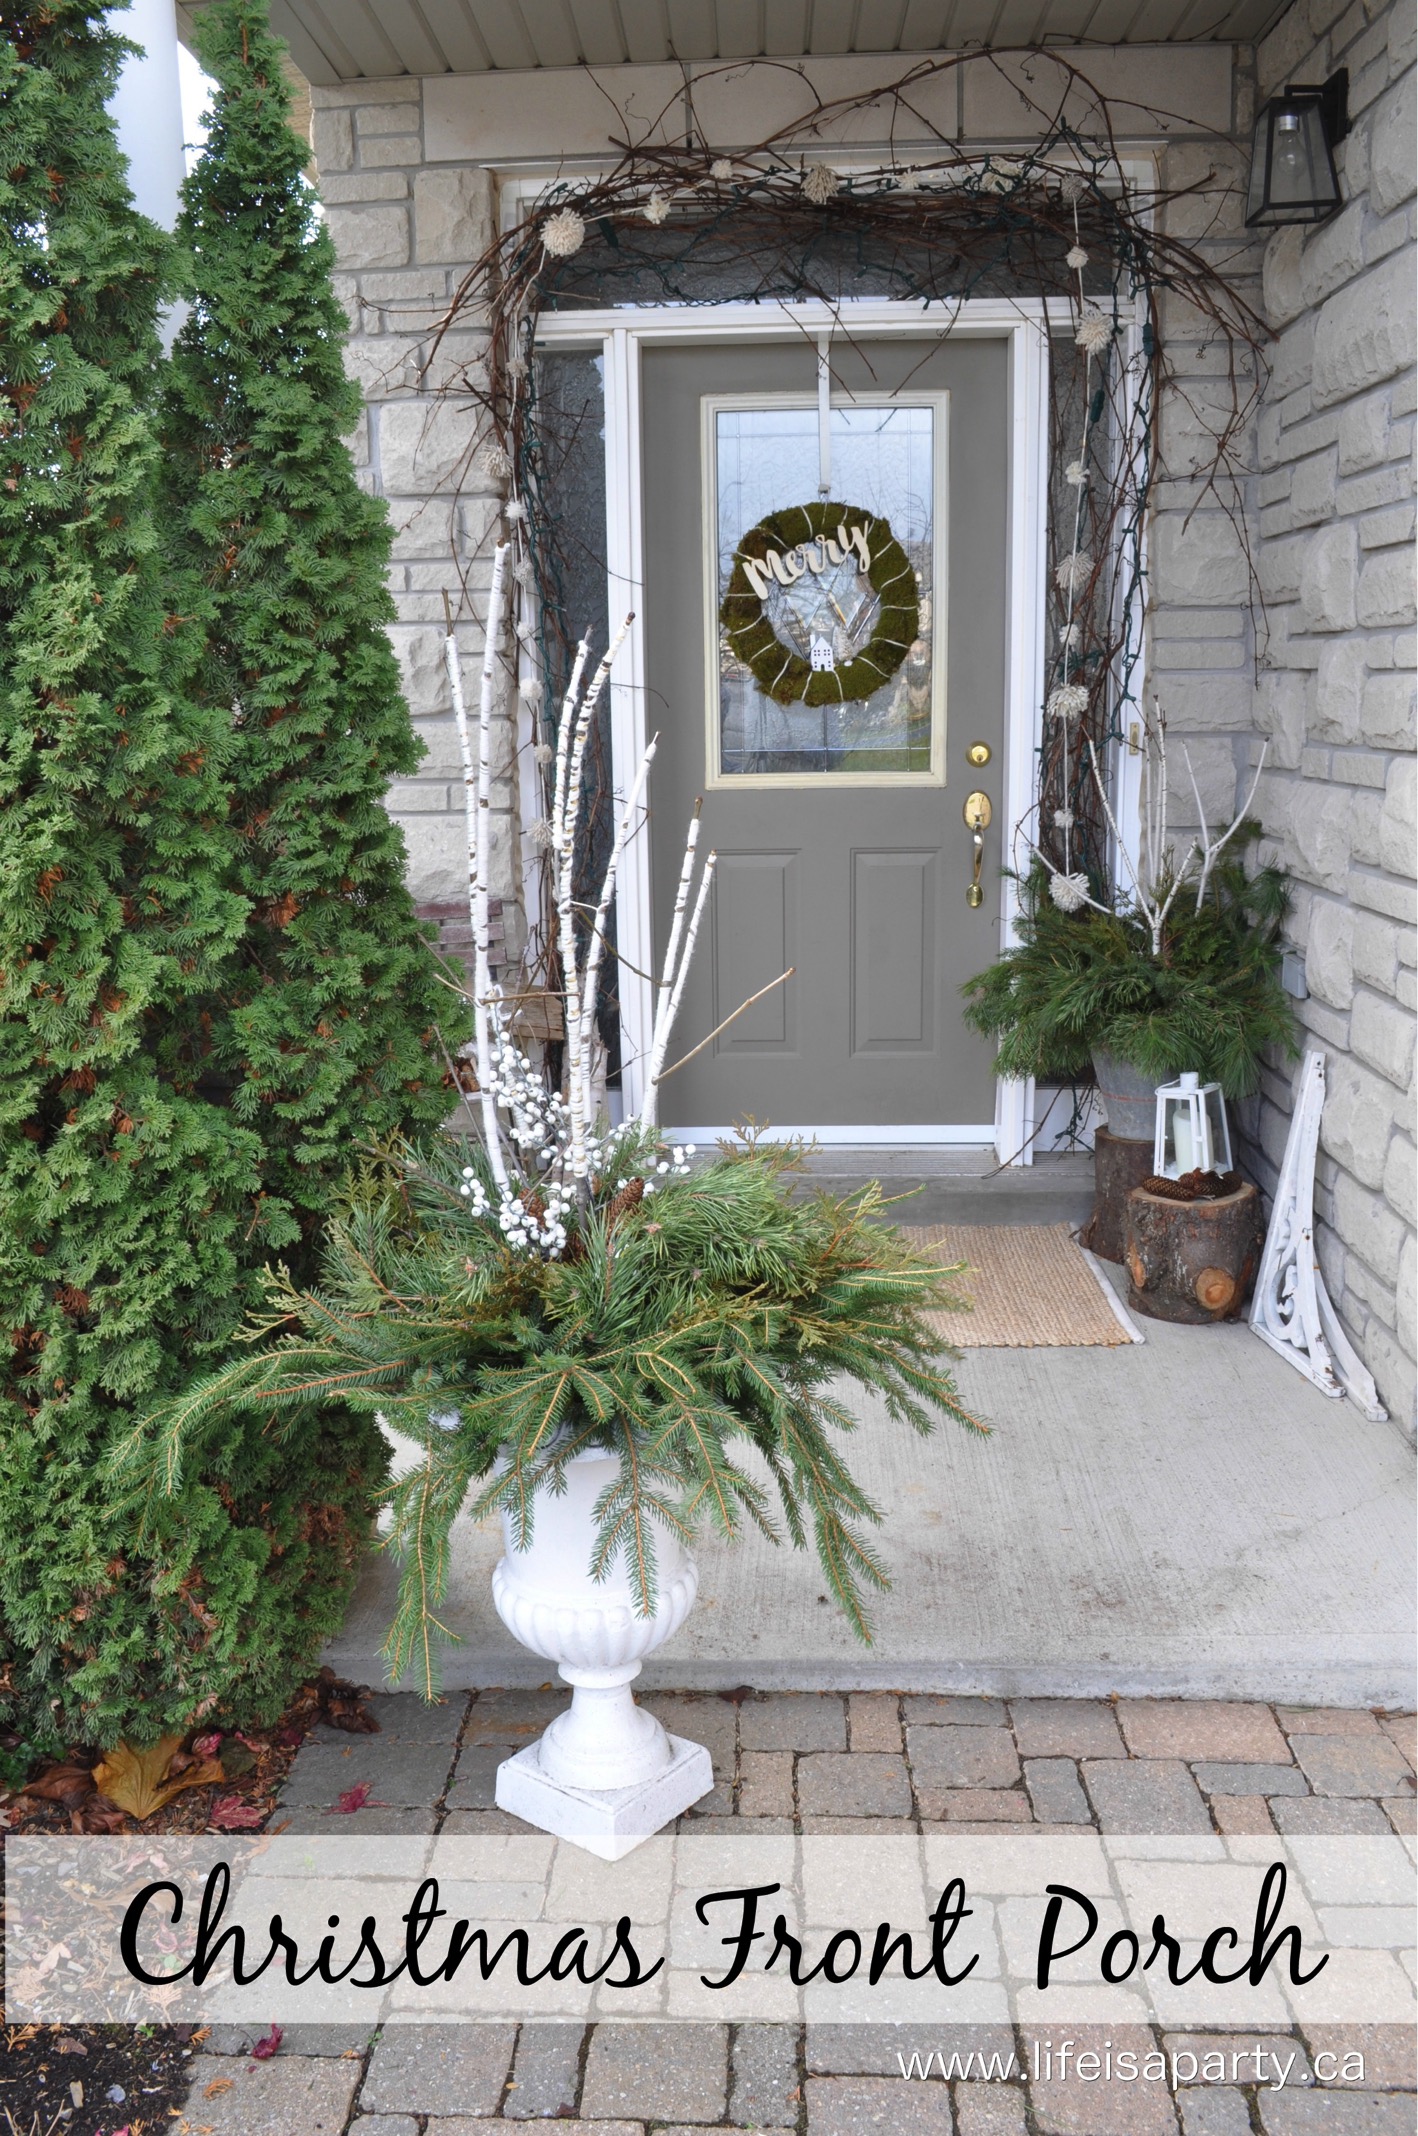
How To Make A Gum ball Machine Snow Globe

Nov 13, 2013 · 19 Comments

Gum ball machine turned into a snow globe.

How To Make A DIY Snow Globe out of a Gum ball Machine: Easy Christmas decoration using a mini gum ball machine and turning it into a waterless snow globe.

Turn a gum ball machine into a DIY snow globe.
[feast_advanced_jump_to]

It's Christmas time, and time to decorate.  I'm loving all things white, vintage and cute this year, and this little project ticks all three boxes.  This might one of my cutest ideas ever. Let me show how to make a DIY snow globe using a gumball machine.

how to make a snow globe out of a gumball machine

Materials:

  • gumball machine
  • cardboard
  • mini Christmas tree
  • beads
  • hot glue and hot glue gun
  • faux snow 
  • glitter

How To Make A DIY Snow Globe

1. I started out with a little plastic gum ball machine. I've seen them at second hand stores, and traditional red would be cute for Christmas too. I wanted a little white one. I found this one, recommended as a wedding favour, in white for $2.88 I like the mini size -this one is about 12 cm tall.

DIY snow globe

The plastic top comes off, so it's easy to make a little snow globe scene inside. Since it's a real gum ball machine, I used a little white paper to make a base for the tree.

Gumball Machine Snow Globe

2. I decorated a little bottle brush tree with a few pretty beads, just glued on with some hot glue. Then I glued the tree onto the paper base.  It's great to be able to create that vintage feel, with the bottle brush tree.  It would be cute in other colours too.

DIY snow globe ideas

3. Next I added the clear plastic piece back in place, over the tree.  Then I removed the white top to add in some faux snow and some glitter (because Christmas needs a little sparkle).

Then, just twist the white lid back on. So simple. So sweet.

how to make a DIY snow globe

I love how the beads I used look a little gumball-ish too. We've had a light dusting of snow here, yesterday afternoon, and there's still some on the ground this morning. This little snow globe seems perfect for today.

gumball machine snow globe DIY

With a pretty DIY snow globe like this for Christmas, life really is a party.

Have you started your Christmas decorating yet?

More Christmas Craft Inspiration

You might also like our Christmas Diorama here.

Christmas Diorama: rustic Christmas decoration made from an up-cycled old drawer, and some woodland animal figures.

Also check out Snow Globe Christmas Ornament here.

You might also enjoy DIY Christmas Crackers here.

Vintage Inspired Christmas Crackers: Simple tutorial for making your own DIY Christmas crackers out of inexpensive vintage Little Golden books -so adorable!

Button Christmas Wreath Pillow

Nov 11, 2013 · 4 Comments

DIY Christmas wreath button pillow.

Button Christmas Wreath Pillow: Easy tutorial to make your own button wreath pillow for Christmas, inexpensive DIY Christmas decor, or a great gift.

DIY Christmas wreath button pillow.
[feast_advanced_jump_to]

I was at my favourite store -the dollar store, the other day, and I spotted a bag of green buttons. I picked them up, with the idea of making a little Christmas pillow with a button wreath on it.

green buttons

Materials:

  • green buttons
  • cream fabric or a pillow cover
  • pillow insert
  • needle and thread
  • pink ribbon

How To Make A Button Wreath Pillow

1. I used a little left over drop cloth material to make the pillow cover. The first step was to cut out a rectangle to make an easy envelope style cover. Find the easy instructions for how to make envelope style pillow covers that don't need a zipper in my easy fall pillows tutorial here. Or start with a ready made pillow cover.

2. Next, work out where the centre of the front of the pillow will be, and use something round to draw a template to follow as you sew on the buttons with a very light pencil mark or disappearing ink marker. I used a side plate to make my circle.

how to make a button wreath pillow

3. Then, sew on the buttons randomly.  This is a great tv watching project and it actually didn't take as long as I thought it would, or maybe I'm just a speedy button sew-er on-er. 😉 When the buttons were all sewn on, I added a little bow to the top of the wreath.  Lastly I stitched up the sides of the fabric on my sewing machine to make an envelope pillowcase, and added a pillow insert.

button Christmas wreath

It was a really inexpensive project, since I used a pillow and fabric I already had. I think it's really sweet for Christmas and looks cute on my green couch.

how to make a button wreath Christmas pillow

With a pretty little button wreath life really is a party!

More Christmas Craft Inspiration

You might also like Vintage Ornament Wreath here.

Also check out DIY Christmas Crackers here.

Vintage Inspired Christmas Crackers: Simple tutorial for making your own DIY Christmas crackers out of inexpensive vintage Little Golden books -so adorable!

You might also enjoy Christmas Diorama here.

Christmas Diorama: rustic Christmas decoration made from an up-cycled old drawer, and some woodland animal figures.

The Best Homemade Copycat Campbell's Tomato Soup

Nov 6, 2013 · 9 Comments

Homemade copycat Campbell's Tomato soup recipe.

Easy Homemade Copycat Campbell's Tomato Soup: quick and easy recipe for homemade tomato soup, better than the original.

Homemade copycat Campbell's tomato soup recipe.
[feast_advanced_jump_to]

The weather is turning colder now. There's definitely a chill in the air, and on a cold night this is the perfect cozy dinner. I have have such pleasant memories of the red and white can of Campbell's tomato soup when I was growing up. It was a classic lunch or easy dinner and so often served with grilled cheese sandwiches.  It's the ultimate comfort food.

And you can make your own version from scratch, and it's really easy.  This copycat Campbell's tomato soup recipe is not difficult to make or time consuming.  It's actually so simple, that you'll be making the homemade version whenever you want it.  This creamy tomato soup recipe is about to remind you loved it so much as a kid.  It uses simple ingredients, and the whole family will love it.   Comfort foods like this always have the best flavor.  Make this great recipe for dinner tonight.

Not only is this soup easy to make, but it's filled with healthy ingredients that you can pronounce.  Our healthier homemade version comes together really quickly and easily too, with items you probably already have in your pantry and fridge right now.

home made tomato soup and grilled cheese

Tomatoes

If you're craving soup in the summer, you could make this with juicy, red, ripe fresh tomatoes from your garden. But any time of year other than tomato season, it's best just to use to canned. The canned tomatoes were picked at their peak and all that yummy goodness of perfectly ripe tomatoes is preserved for you. And, it also makes this homemade tomato soup super easy to put together. 

Baking Soda

When baking soda is added to tomato soup it reduces the pH level of the mixture and helps break down the tomatoes resulting in a creamier and silkier soup.  It not only affects the texture of the soup, the the baking soda also reduces the acidity of the soup and makes the overall taste a little less tangy and more mild.  The baking soda in this recipe also helps to keep the milk from curdling.  It reduces the pH level of the milk, and prevents the proteins in the milk from clumping together and creating that curdled effect.  Just adding a small amount of baking soda to the tomato soup gives all these great benefits.  Don't add too much baking soda to your tomato soup though, because it can make the soup taste bitter or too salty.

Immersion Blender 

The easiest way to make this soup is with an immersion blender.  It works perfectly for blending the hot soup and making it perfectly smooth.  It can be very difficult, messy, and even dangerous to add hot liquids to a regular blender or food processor.  The immersion blender is used right in your cooking pot.  Do make sure it's fully immersed before you turn it on, and take care as you move it around the pot not to raise it above the liquid and cause it to splash.

how to make tomato soup

Serving Suggestion

What is the perfect accompaniment to a hot bowl of homemade tomato soup? It has to be a  grilled cheese. 

To make this grilled cheese I used fresh, crusty white bread, soft butter, marble and Havarti cheese. It didn't disappoint.  Slice your bread quite thickly and generously butter the outside of the bread.  Fill the inside with your slices of cheese.  Grill the sandwich in a dry frying pan over medium hight heat, until the outside is golden bread.  A quick tip, use a lid on the frying pan while your cooking to keep the heat in and help melt the cheese. The best way to enjoy a grilled cheese with our bowl of tomato soup is by dipping it into the soup. 

You can also serve this soup with homemade croutons, or with crackers.

easy tomato soup recipe

Store any leftover soup in an airtight container in the refrigerator, and reheat to serve leftovers.

grilled cheese with tomato soup

This is such a favorite recipe anytime your craving comfort food and want something quick and easy to make.  And it tastes just like Campbell's condensed tomato soup, only better.  Next time your crazing Campbell's tomato soup, give this simple recipe made with pantry ingredients a try.  

Recipe

Homemade copycat Campbell's Tomato soup recipe.

The Best Homemade Copycat Campbell's Tomato Soup

Creamy tomato soup just like your favourite canned version.
4.50 from 2 votes
Print Pin Rate
Course: Main
Cuisine: American
Prep Time: 10 minutes minutes
Cook Time: 15 minutes minutes
Total Time: 25 minutes minutes
Servings: 4 servings
Calories: 292kcal
Author: Dannyelle Nicolle-Ramjist

Ingredients

  • 1 ½ tablespoon olive oil
  • 1 ½ tablespoon butter
  • 1 small onion diced
  • 2 tablespoon flour
  • 2 cups milk
  • ¼ teaspoon baking soda
  • 100 fl oz can tomatoes
  • 3 ½ teaspoon sugar
  • salt to taste

Instructions

  • Cook the diced onions in the oil and butter in a large pot over medium heat, until they are softened and translucent.
  • Add the flour to the pot and stir and cook for a minute or two.
  • Add in the milk slowly, and whisk until smooth.
  • Add in the baking soda, tomatoes and sugar.
  • Simmer the tomato mixture for 10 minutes, and then blend with an immersion blender. Add salt to taste, and enjoy!

Nutrition

Serving: 1g | Calories: 292kcal | Carbohydrates: 39g | Protein: 10g | Fat: 14g | Saturated Fat: 5g | Polyunsaturated Fat: 7g | Cholesterol: 21mg | Sodium: 1131mg | Fiber: 14g | Sugar: 29g
Tried this Recipe? Tag me Today!Mention @LifeisaParty or tag #lifeisaparty!

With Easy Homemade Tomato Soup and Grilled Cheese, life really is a party!

More Soup Recipe Inspiration

You might also like our Tortellini and Italian Sausage Soup recipe here.

Tortellini and Italian Sausage Soup: this hearty soup is a real crowd pleaser with tender pasta, loads of veggies, and delicious Italian sausage.

Also check out our Cream of Mushroom Soup recipe here.

You might also enjoy our Broccoli Cheddar Soup recipe here.

Vintage Christmas Ornament Wreath

Nov 4, 2013 · 10 Comments

How to make a Christmas wreath with vintage Christmas ornaments.

Vintage Christmas Ornament Wreath: How to make a beautiful Christmas wreath out of vintage ornaments.

Christmas wreath with vintage Christmas ornaments.
[feast_advanced_jump_to]

I've decided to go with a vintage inspired Christmas theme this year, and I just love how this vintage Christmas ornament wreath turned out.

After shopping for vintage ornaments this weekend, I was feeling a little worried. They're tricky to find, to put it mildly. I did have some already. And over the next few weeks, I'm planning to visit my local thrift stores on a very regular basis. As luck would have it, I did manage to find some on Friday. I visited a fairly new thrift store nearby, and since this is their first Christmas to be open, it seems they were saving up Christmas items until the day after Halloween. I didn't find the beautiful glass balls I was hoping for, but I did pick up a few vintage plastic ornaments. They weren't in mint conditions, but grouped with other things on the wreath is the perfect way to hide their flaws.

how to make a vintage inspired Christmas wreath

Materials:

  • tinsel wreath as the base
  • vintage plastic ornaments and floral picks
  • vintage Christmas glass balls
  • some new pink and silver Christmas glass balls
  • white floral wire

How to Make a Vintage Christmas Ornament Wreath

I was inspired an old  Christmas centre piece with pink satin balls. It was .49 cents...and I could see the potential. I remembered that there were tinsel wreaths at the dollar store for 2 bucks.

pink vintage Christmas ornaments

I started out removing the vintage picks from the old centrepiece and adding them to the tinsel wreath. Then I added the vintage plastic ornaments.

I wanted to add some vintage pink glass ornaments, but they're so hard to find, and expensive that I didn't want to use too many. I ended up adding some plain pink and silver balls -some old and some not so old.

Then I added in only about four of my super special vintage glass ornaments. With the picks, the vintage plastic ornaments, some plainer balls, and a few vintage ornaments, it looked nice and full and all shiny and pretty. 😉

Vintage Christmas Ornament Wreath

One other little trick, I used white floral wire to attach everything, so it isn't permanent, if I want to remove the vintage pieces later I can.

how to make a Vintage Christmas Ornament Wreath

I love how it turned out. After feeling earlier this weekend that maybe I should have gone another direction for my Christmas decorations this year, I am now fully sold on the vintage direction.

Vintage Christmas Ornament Wreath

I'm also convinced that it doesn't need to be all vintage. I can take my few old pieces and showcase them, and mix them in with some new vintage inspired pieces, and some other plainer pieces.

Vintage Christmas Ornament Wreath

With a pretty, pink, shiny Christmas wreath like this, life really is a party!

silver tabletop Christmas trees

You might also like our DIY Christmas Crackers.

Vintage Inspired Christmas Crackers: Simple tutorial for making your own DIY Christmas crackers out of inexpensive vintage Little Golden books -so adorable!

Also check out our DIY Snow Globe in a Gumball Machine here.

How To Make A DIY Snow Globe out of a Gumball Machine: Easy Christmas decoration using a mini gumball machine and turning it into a waterless snow globe.

You might also enjoy our Christmas Diorama here.

Christmas Diorama: rustic Christmas decoration made from an up-cycled old drawer, and some woodland animal figures.

Caramel Apple Cider Martini

Nov 1, 2013 · Leave a Comment

How to make a caramel apple martini.

Apple Cider Martini: The perfect fall cocktail, a caramel apple in a glass, but better. Use caramel vodka, or make your own.

How to make a caramel apple martini.
[feast_advanced_jump_to]

We have some really big fresh apple cider fans in our house.  This time of year we always have some apple cider  around. I got thinking the other day about using it to create different apple cider drinks and cocktail recipes that capture the flavors of fall.   If you're looking for some fall cocktails to try, you will love this caramel apple martini.  It's the perfect cocktail for enjoying the fall flavors.

Apple Cider

The first thing you need for a delicious apple cider cocktail is fresh apple cider.  We used regular non alcoholic apple cider for this recipe, not hard cider.  Look for fresh cider it in the refrigerated section of the grocery store or look for local cider at the farmer's market in the fall.  What's the difference between apple cider and apple juice?  Apple cider is considered a seasonal drink, it has a dark caramel color, and it's unfiltered and perishable if not refrigerated.  Apple juice is lighter and more transparent in color, it's filtered and pasteurized to give it a longer shelf life.  It's also sweeter and has a smoother taste.  Use apple cider in this drink.  It's full of apple flavor, and it pairs perfectly with the caramel vodka, and makes a perfect caramel apple cider martini that isn't overly sweet.

You could also use homemade apple cider in this recipe, as long as it isn't too sweet, since the caramel vodka is also sweet

how to make an Apple Cider Martini

Caramel Vodka

I was in the liquor store the other day and saw some caramel vodka, and starting thinking caramel apple. I thought that apple cider and caramel vodka would be a match made in heaven.  Unfortunately the caramel vodka was only available in a very large bottle, so I came home and made my own version with regular vodka. 

I found several variations of recipes, but the general gist of it is caramel candies, and vodka.

how to make your own caramel vodka

Some people add the candies to the vodka and shake for days, others add them and then put the sealed mixture through a dishwasher cycle to heat it all just enough to help the candies melt. Other methods combine caramel sauce with vodka.  I decided to chop the candies up in a blender and add try the add and shake method for our apple cider martini recipe.

caramel vodka recipe

I used 6 oz. of vodka and nine candies. After only an hour or so, with a few shakes when I thought of it, my caramel vodka was ready.

How To Make Caramel Vodka

  • 6 oz vodka
  • 9 Werther's Original hard caramels

To make the caramel vodka, chop them in a blender or food processor and then add them to a mason jar with the vodka, and put the lid on.  Let the jar sit, and give it a shake every 10 minutes or so until the candies are completely dissolved.

The finished caramel flavored vodka is sweet and scented.  It has the taste of vanilla, and the deep burnt sugar flavors of caramel, which give it depth.  It's perfect for using in any fall cocktails for fun drink.

You can make your own caramel vodka in this recipe, or buy your caramel vodka and skip this step all together.

Sparkling Water

We've finished our fall drink with sparkling water to make a sparkling apple cider martini.  I love the fizz it adds to the martini, and it's the perfect amount to lighten up the other ingredients too.

how to make caramel vodka

Garnish

Serve your caramel apple martini in a martini glass.  We garnished ours with a few slices of fresh apple.  You could also add a cinnamon stick to your serving glass, or a pinch of cinnamon to garnish.  Because the drink itself is sweet we didn't choose to rim our glass with cinnamon sugar, caramel syrup, because we didn't want to add any sweetness.

My husband and I had an enjoyable evening of working on the recipe together, and I think it's just the thing for a Friday night if your looking for a seasonal flavor to enjoy this time of year.  It's a sweet drink, and makes a perfect dessert drink after dinner.  If you're a fan of caramel apples I think you will love this drink recipe made with simple ingredients.  This new favorite might become our signature cocktail this autumn season.  It's the perfect drink for enjoying during a fall party or for the holiday season.

Apple Cider Martin recipe

Recipe

How to make a caramel apple martini.

Apple Cider Martini

Apple cider and caramel vodka make the perfect cocktail.
No ratings yet
Print Pin Rate
Course: Drinks
Cuisine: American
Prep Time: 5 minutes minutes
Additional Time: 1 hour hour
Total Time: 1 hour hour 5 minutes minutes
Servings: 1 Martini
Calories: 272kcal
Author: Dannyelle Nicolle-Ramjist

Ingredients

  • 1 ½ oz non-alcoholic apple cider
  • 1 oz caramel vodka
  • 1 oz sparkling water
  • 1 slice fresh apple

Instructions

  • Combine the apple cider and caramel vodka in a cocktail shaker with ice and shake.
  • Pour the strained mixture into a martini glass and top up with sparkling water.
  • Garnish with a fresh apple slice.

Nutrition

Serving: 1g | Calories: 272kcal | Carbohydrates: 54g | Protein: 1g | Fat: 1g | Sodium: 12mg | Fiber: 5g | Sugar: 44g
Tried this Recipe? Tag me Today!Mention @LifeisaParty or tag #lifeisaparty!
Caramel Apple Martini

Hope you enjoy! With a sweet fall cocktail like this, life really is a party!

Apple Cider Martini

More Drink Recipe Inspiration

You might also like our Peach Sangria recipe here.

Also check out our Blackberry Sparklers recipe here.

Blackberry Sparklers: fresh blackberries are pureed for this cocktail, make it with alcoholic, or without for a non alcoholic mocktail version.

You might also enjoy our Grown Up Lemonade Stand here.

Putting the Garden to Bed and a Tin Can Herb Garden

Oct 24, 2013 · 9 Comments

Tin can herb garden.

Getting the Garden Ready For Winter and A Tin Can Herb Garden: dig up some herbs at the end of the garden season and bring them in to enjoy indoors.

Tin can herb garden.
[feast_advanced_jump_to]

It's time. I saw snowflakes today. The warm weather is finished, and it's time to put the garden to bed for another year and make a little tin can herb garden for indoors.

Last weekend we took advantage of the not freezing weather and did most of the fall jobs. There's still some to be done. It's so hard to pack things up, when there's even a hint of nice afternoons left, but the cold air today makes me glad it's mostly done.

Getting the Garden Ready For Winter

We had to put all the fairy gardens from the deck away, and drain the new deck irrigation system. I usually just pull out the spent annuals, and use the soil from the pots to bank up my roses and other plants that need a little extra tlc.

Putting the Garden to Bed for the Winter, and bringing in a few herbs to make A Tin Can Herb Garden

We pulled the drip sprouts off of the irrigation system, and then used a borrowed air compressor to blow any of the water out of the lines so that they don't freeze and burst.

Putting the Garden to Bed for the Winter, and bringing in a few herbs to make A Tin Can Herb Garden

It worked perfectly to get all the water out of the lines so they don't freeze and split in the winter.

draining garden irrigation lines for winter

Rabbit Proofing

One of the most important jobs at our house is rabbit proofing the yard. Last year we were less than successful and the little critters did a whole lot of damage in just a few weeks before we noticed. So, we broke out our chicken wire for the Japanese maples.

using chicken wire to protect plants from rabbits during the winter

We also tried to block up any little holes or spots where the rabbits might slip in under the fence. We planted a new apple tree. It really is a great time of year to plant. The tree was half price, and the kids were inspired by a lesson at school about Johnny Appleseed. Here's hoping for some apples next year! We made sure there was bark protector on this tree at rabbit height too.

Getting the Garden Ready For Winter and A Tin Can Herb Garden:  dig up some herbs at the end of the garden season and bring them in to enjoy indoors.

Packing Everything Away

All our empty pots, and decorations, and the pretty little fountain found their way back to the garage for another winter. It's like a giant puzzle putting everything away so we can park in the garage again for the winter. We're getting there, still a bit to do, and the snow tires to get on the car again. Our garden furniture just doesn't fit in the garage, so my husband manoeuvres some of it under the deck and tarps it, and piles other pieces on the patio and deck and covers tightly with tarps, and bungee cords. Not the prettiest, but it does really make it last longer when you don't have a place indoors to store it.

covering up garden furniture with tarps to protect them in the winter

I'm not one of those gardeners who cuts everything back in the fall. The long stems add a little winter interest when you peek outside.  Also there's something about cutting away the old in the spring as the new green just starts to appear that appeals to me.

Tin Can Herb Garden

I did manage to bring in a few herbs. The rosemary would have died in the cold, and the thyme and oregano are so prolific that a little piece to bring inside won't be missed.

How to Make a Tin Can Herb Garden

I saved a few tin cans from cooking this week, and used them to hold the herbs. Also I made some simple tags with wood veneer, some twine and a sharpie. I may not be able to keep the herbs alive in the house too long, but I figured anything was a bonus. So, we'll enjoy them while they last.

How to Make a Tin Can Herb Garden

Winter Ready Checklist

  • empty flower pots and put pots in garage
  • wire around trees to protect from rabbits
  • block any holes in the fence that could let rabbits in
  • drain irrigation system
  • put garden furniture in the garage or under tarps for the winter
  • make a tin can herb garden for the winter
  • clean up the veggie garden

With a pretty little tin can herb garden to enjoy this winter, life really is a party!

You might also enjoy our Teacup Fairy Village Gardens post here.

Teacup Fairy Villiage Gardens -use teacups and teapots to create these whimiscal miniature fairy gardens with polymere clay houses and mushrooms.

Also be sure to check out our Black and White Garden post here.

Black and White Garden -an old garden is refreshed with a new pea gravel seating area, and lots of black and white accessories and plants, including a garden of all white plants.

You might also like our How To Make A Fairy Garden House post here.

Deer Snow Globe Christmas Ornament

Oct 23, 2013 · 4 Comments

Deer Snow Globe Christmas Ornament -DIY your own cute deer snow globe, with a glass or plastic ornament, and a few other inexpensive supplies.

Deer Snow Globe Christmas Ornament -DIY your own cute deer snow globe, with a glass or plastic ornament, and a few other inexpensive supplies.

This morning my girls wore their winter coats to school. It's getting cold here. I don't love winter...but I do love Christmas.  This sweet DIY snow globe Christmas ornament is the perfect craft to kick off the season.

I was inspired by these sweetest little deer I saw at the craft store. I spotted them a few weeks ago, and fell in love immediately. I started thinking about what I could do with them...add them to the glitter house village, use them to decorate cupcakes, or make a little snow globe ornament. All of the above will probably occur between now and Christmas, but I started with the ornament (it's a little early for Christmas baking -even for me). 😉

Materials:

  • plastic deer
  • clear ornament with large opening
  • blue tac
  • faux snow
  • small branch
  • tweezers
  • bells 
  • ribbon
miniature plastic deer

How To Make A Snow Globe Ornament

1. I bought a plastic ornament, with the removable top. I picked up a fairly big one, but the larger deer still didn't fit. I may try a bigger one for them, or one of the ones that splits down the middle. I really like the glass ornaments, but the plastic ones seemed to have larger openings. I have seen other people slice off the bottom, to add bigger items, then glue it back on, or there are some other plastic balls that come apart down the middle, any of these options would work depending on what you find.

I started by adding some blue tack to the bottom, but I found it in white at the dollar store. It worked great for this, since it held everything firm and was easily covered by the snow I added at the end.

how to make a snow globe Christmas ornament

2. Since my deer was tiny, I added in a few branches. These were just a few I had that were already spray painted silver. Just use your tweezers and fingers to push them into the blue tack at the bottom. It was a little tricky adding the deer. My tweezers weren't long enough to actually manoeuvre very well, once they were in the ball. After much fiddling I managed to get the deer positioned and pushed into the blue tack. Longer tweezers would work great if you had some.

Deer Snow Globe Christmas Ornament

3. Then I  added some faux snow, and tied a few jingle bells to the top. So simple, so sweet.

DIY Christmas Ornament

Snow Globe Christmas Ornament

With a pretty little decoration like this just waiting to come out this Christmas, life really is a party.

You might also like our Gumball Machine Snow Globe here.

How To Make A DIY Snow Globe out of a Gumball Machine: Easy Christmas decoration using a mini gumball machine and turning it into a waterless snow globe.

Also check out our Vintage Christmas Ornament Wreath here.

Vintage Christmas Ornament Wreath: How to make a beautiful Christmas wreath out of vintage ornaments.

You might also like our DIY Christmas Crackers here.

Vintage Inspired Christmas Crackers: Simple tutorial for making your own DIY Christmas crackers out of inexpensive vintage Little Golden books -so adorable!

Buttermilk Potato Soup with Roasted Garlic

Oct 21, 2013 · 2 Comments

Potato soup with buttermilk and roasted garlic.

Buttermilk Potato Soup with Roasted Garlic Potato Soup -this hearty, creamy, and tangy soup is easy to make and delicious.

Potato soup with buttermilk and roasted garlic.
[feast_advanced_jump_to]

This buttermilk potato soup with roasted garlic is a family favourite.  It's the perfect creamy and hearty soup on a cold day.  The buttermilk adds a tangy taste, and the roasted garlic is mellow and adds a depth of flavor.

Last week for our family Thanksgiving dinner at my Mom's house, everyone brought something to help out with the big meal. I was on appetizers. We wanted to serve something hot, but we knew the oven would be tied up with the turkey. I suggested a little soup, and paired it with cheese and crackers.

It was a real hit, and it did work out very well logistically. I made the soup and crackers the day before, and at the party all I had to do was reheat the soup on the stove and serve. The portion size was great too. It was just enough to warm you up, and still leave room for turkey. 😉

appetizer board with potato soup

Potatoes

We used baking potatoes for our soup.  Russet potatoes or any all purpose baking potatoes are high in starch and low in moisture.  This makes them ideal for making thick and creamy soups.   There's no thickener added to this soup, these potatoes are all you need to make it wonderfully thick, and creamy texture along with the buttermilk.

Buttermilk

This soup gets a wonderful bit of tang from the buttermilk.  It adds some brightness to the potatoes which could be too heavy otherwise.  It also adds a creaminess to the soup without being to thick, like heavy cream would be.  Because buttermilk is low in fat and high in protein, it can curdle when it's heated.  To avoid this add the buttermilk as the final step in the soup making process, after everything has been pureed, which will help the soup cool down slightly.  Add the buttermilk slowly, and if necessary heat the whole soup more after adding, but do not boil the soup after adding the buttermilk.

Roasted Garlic

Roasting the garlic before adding it to this soup gives it a wonderful mellow flavor, that's slightly sweet.  Although an entire bulb of garlic sounds like a lot for one pot of soup, roasting the garlic makes it so much less pungent that the whole head of garlic is the perfect amount.  It's very easy to roast garlic, but it does take a little time.  If you are in a rush, you can roast the garlic the night before and store it in the fridge to make preparing this soup faster.  

Blending The Soup

Use an immersion blender, sometimes called a hand blender or stick blender to puree the soup to a smooth texture.  Fully submerged the blender right into the soup pot, and blend until the soup is completely smooth.  If you do like a little texture in your soup, you can remove about 1 cup of potato pieces before blending and then add them back in afterward to add a little bit of texture to finished soup.

We don't recommend using a food processor or blender to puree the soup because they're not meant for not liquids like this.

Roasted Garlic Potato Soup

Storage

Store any leftover soup in airtight sealed container in the refrigerator.

how to make Potato Soup with Roasted Garlic

 Appetizer

We served this creamy soup in plastic shot glasses, just ladled in right before serving. This was a great way to serve a small portion.  Each little soup is topped with small pieces of cheese straw.  The cheese straws are a little spicy and worked really well with the soup.  These are our favorite toppings because they pair so perfectly.  Find the cheese straw recipe here.  You could also pair with a cracker, or breadstick, or even a sliver of hot garlic bread would also work great..

Potato Soup with Roasted Garlic recipe

For the cheese board, I made a batch of the salt and pepper homemade flat bread crackers -click here for the recipe. Along with the crackers we also added a few of our favourite cheeses -Swiss, spicy jalapeno havarti, brie, and some marble cheddar for the kids.  I also included some fruit with grapes, and a nice honey crisp apple. There was also some dried apricots, and figs, and some cashews -a family favourite. I also added a jar of red pepper honey, so great with the cheese.  Over all, it was fairly simple to put together, make the soup and homemade crackers the night before and then just heat up and serve for your party.

cheese and cracker board
cheese and cracker board with potato soup

Main Dish

We love to also serve this easy soup recipe as a meal also along with some crusty bread.  It's the perfect comfort food, and the best soup on a cold night.  If you're serving a bowl of this it's great topped with some grated cheddar cheese, sliced green onions and crispy bacon bits.  Try and it and it will be love at first bite.

appetizer board with cheese crackers fruit and soup

Recipe

Potato soup with buttermilk and roasted garlic.

Buttermilk Potato Soup with Roasted Garlic

Tangy buttermilk and potato soup flavoured with roasted garlic.
No ratings yet
Print Pin Rate
Course: Soup
Cuisine: American
Prep Time: 15 minutes minutes
Cook Time: 1 hour hour 10 minutes minutes
Total Time: 1 hour hour 25 minutes minutes
Servings: 12 cups
Calories: 178kcal
Author: Dannyelle Nicolle-Ramjist

Ingredients

  • 1 garlic bulb
  • 4 teaspoon olive oil
  • 1 onion chopped
  • 4 baking potatoes peeled and cubed
  • 1 bay leaf
  • 4 cups chicken stock
  • 2 cups buttermilk
  • ½ teaspoon salt
  • ¼ teaspoon ground black pepper

Instructions

  • Roast your garlic by cutting off the top to expose the tops of the bulbs, and pouring a little olive oil over top. Wrap up in tinfoil and bake at 350 for 30-45 min. until bulbs are soft. Set aside to cool. Once cool, squeeze the roasted bulbs out of their papery skins. Set aside.
  • In a large dutch oven or pot, heat oil and sauté the chopped onion until softened.
  • Add the cubed potatoes, bay leaf, chicken stock, and roasted garlic to the onions and bring to a boil.
  • Reduce heat and simmer at a medium heat for 15-20 min. until the potatoes are soft and fully cooked.
  • Remove the bay leaf and puree the soup with an immersion blender.
  • Add buttermilk, and season with salt and pepper, heat to serving temperature over a low heat to avoid the buttermilk curdling.

Nutrition

Serving: 1g | Calories: 178kcal | Carbohydrates: 27g | Protein: 8g | Fat: 4g | Saturated Fat: 1g | Polyunsaturated Fat: 3g | Cholesterol: 6mg | Sodium: 446mg | Fiber: 2g | Sugar: 6g
Tried this Recipe? Tag me Today!Mention @LifeisaParty or tag #lifeisaparty!
Roasted Garlic Potato Soup appetizer

With homemade buttermilk soup with roasted garlic to enjoy,  life really is a party!

More Soup Recipe Inspiration

You might also like our Tortellini and Italian Sausage Soup recipe here.

Also check out our Beef and Vegetable Soup here.

Beef and Vegetable Soup Recipe: this homemade version of your favourite think and chunky soup is delicious and easy to make.

You might also enjoy Easy Homemade Tomato Soup recipe here.

How To Make The Perfect Club Sandwich

Oct 18, 2013 · 4 Comments

How to make the perfect clubhouse sandwich.

How To Make A Club Sandwich: The perfect club with roasted turkey, baked ham, mayo,  bacon, lettuce and tomato ....worth the effort!

How to make the perfect clubhouse sandwich.
[feast_advanced_jump_to]

I love a good club sandwich.  It's one of those things in life that is quite simple, and so good.  A simple pleasure in life.  Made with simple ingredients, this sandwich is a classic for a reason.

This club sandwich is what dreams are made.  If you've ever wondered how to make a club sandwich, look no further!

I have long been a fan of the club sandwich. It's a lunchtime restaurant go-to for me. I've had them in many different places, and never really met one I didn't like. It's kind of an old faithful. Some are better than others though, and I have to say that this one ranks up there among the best.

how to make a club sandwich

Like so many things in life, this sandwich is really pretty simple, but it is made great by using great ingredients. The occasion for making this great club sandwich at home, was the perfect storm of Thanksgiving leftovers.  We had some delicious roasted turkey leftovers and slow roasted ham leftovers also. Usually we just have turkey at Thanksgiving. We love turkey on my side of the family, like have one for Christmas and another a week later for New Years, kind of love.

Leftovers Never Looked So Good

We're not traditionally ham people. But this year my Mom bought the turkey before she finished inviting people to dinner, and we feared there won't be enough. I was elected to bring a ham. I actually did it in the crock pot.  Our car has a power outlet, so I started it around noon, and when we headed up to my mom's later in the afternoon, I just plugged the crock pot in in the car and it kept on cooking as we drove up. Great solution to the only one oven problem (you might want to remember this for Christmas) 😉

The Perfect Club Sandwich

Leftover turkey and ham, are the perfect reason to make a club sandwich at home. And since it seemed ordained we took it all the way, by making homemade garlic mayonnaise....I know. And, it was kind of amazing.

Clubhouse Sandwich

The history of one of the most iconic sandwiches dates back to the end of the 1800's when it was supposedly served at a gambling club in New York city.  It became popular on different country clubs menus, and the recipe to make one was in a Good Housekeeping cookbook in 1904.  It was a favourite of former King Edward VIII of England and his wife, Wallis Simpson, and they helped it to gain popularity.  Today it's served all over the world.

Bread

One of the unique characteristics of a club sandwich is that it is served not just between two slices of bread like a regular sandwich, but with a third piece of bread.  Some people theorize that it was originally served on double decker trains, and that the double decker sandwich was because of that.  Others suggest that the three layers of bread help create stability and give the sandwich structure.  The three pieces of bread also help keep the sandwich from becoming soggy and deliver crunchy toast.

Whatever the reason, we love the three layers.  Club sandwiches are traditionally made with white bread, although you can have them on sourdough, whole wheat bread, or even rye bread.  The bread is always served toasted to a golden brown,  The toasted bread slices are then buttered, and spread with mayonnaise.

Turkey or Chicken

There is some debate about whether the best clubs are made with chicken or turkey.  A traditional club sandwich is made with roasted chicken or turkey.  Although it's often common and more convenient to use deli turkey or chicken.  Any of these options will work well in this sandwich.  Use what you have, or whichever you prefer.

Ham and Bacon

We included ham on our club sandwich.  Many people make club sandwiches without ham, since it has to include bacon.  It's up to you whether to include it or not.  The layers of ham add another great element to the sandwich.  We used our leftover ham, but deli ham is a great option too.

Bacon is an essential element for your club sandwich.  The slices of bacon are traditionally served as crispy bacon, and they add amazing flavor and a crunch to the sandwich.

Tomato and Lettuce

A clubhouse sandwich also contains slices of juicy tomatoes and crisp lettuce.  This is best made with ripe tomatoes.  Use some iceberg lettuce.  Be sure to wash it and thoroughly dry it before adding it so that it doesn't make the toast soggy.  The crispy lettuce and delicious slice of tomato add a lot of freshness to the sandwich.

Cheese Or No Cheese?

Is cheese one of the typical ingredients in a clubhouse sandwich?  No.  Cheese isn't part of a classic club sandwich recipe.  Of course you can add cheese to your sandwich if you would like to, and many people do.  Cheddar cheese is a great choice if you do want to add a slice of cheese.

Serving Suggestions

This triple-decker sandwich is stacked and held together with cocktail sticks.  Place four fancy toothpicks, one in the middle of each side of the sandwich ,going through all the pieces of toast and layers of meat, and fresh ingredients.  The use a sharp knife and from corner to corner to create four pieces.

A clubhouse sandwich is usually served with a side of french fries.  Other great side dishes to have with your clue would be potato chips, potato salad, or a side salad.  If you love dill pickles , a pickle spear on the side is a great idea too.

how to make a perfect club sandwich

This is my idea of the perfect sandwich.  Make this restaurant-worthy lunch at home and enjoy one anytime you want.  This hearty sandwich is sure to delight your taste buds.  It's especially delicious if you have leftover roasted turkey and ham to make it with, but even  regular deli meat makes a great club sandwich.

Recipe

How to make the perfect clubhouse sandwich.

The Perfect Club Sandwich

Toasted sandwich with turkey, ham, bacon, lettuce, and tomato.
5 from 1 vote
Print Pin Rate
Course: Sandwich
Cuisine: American
Prep Time: 5 minutes minutes
Cook Time: 10 minutes minutes
Total Time: 15 minutes minutes
Servings: 1 Sandwich
Calories: 1186kcal
Author: Dannyelle Nicolle-Ramjist

Ingredients

  • 3 slices white bread
  • 2 roasted turkey slices
  • 2 roasted ham slices
  • 2 pieces of lettuce
  • 2 large tomato slices
  • 3 slices bacon
  • 1 tablespoon mayonaise
  • 1 tablespoon butter softened

Instructions

  • Toast bread, and spread each slice with butter and mayonnaise.
  • Cook bacon slices until they are crispy.
  • To make the sandwich, on the first slice of bread layer ham, lettuce, and tomato. On another slice layer turkey, and bacon, and then stack the two layers together, with the third slice as the lid.
  • Secure each piece with a long toothpick, and slice into triangles. Enjoy!

Nutrition

Serving: 1g | Calories: 1186kcal | Carbohydrates: 76g | Protein: 99g | Fat: 55g | Saturated Fat: 17g | Polyunsaturated Fat: 30g | Trans Fat: 1g | Cholesterol: 304mg | Sodium: 5221mg | Fiber: 9g | Sugar: 23g
Tried this Recipe? Tag me Today!Mention @LifeisaParty or tag #lifeisaparty!

With The Perfect Club Sandwich, life really is a party!

club sandwich made from leftovers

More Recipe Inspiration

You might also like our Easy Turkey Sandwiches with Cranberry Mayo here.

Turkey Sandwich with Cranberry Mayo

Also check out our Vietnamese Sandwich Recipe here.

You might also enjoy our Chicken Salad Toast Cups recipe here.

Chicken Salad Toast Cups: use store bought rotisserie chicken and regular old white bread to make these easy and delicious tea sandwiches.

Ombre Pumpkin Tower

Oct 2, 2013 · 2 Comments

Ombre Pumpkin Tower: beautiful and easy ombre pumpkin tower, with pretty leaf layers in-between, and gorgeous front porch decor.

Ombre Pumpkin Tower: beautiful and easy ombre pumpkin tower, with pretty leaf layers in-between, and gorgeous front porch decor.

On the weekend I helped out with a little fall front door decorating and I'm excited to share the details of how to make a pumpkin tower with you today.  

Materials:

  • urn planter
  • large orange pumpkin
  • medium light orange/pink pumpkin
  • small white pumpkin
  • glycerine treated fall leaves
  • wooden skewers

I started out with the idea of doing a pumpkin tower in a garden urn. I found the urn at Lowe's, in the garden section. It was kind of a happy accident to come up with the ombre effect with the pumpkins, and I love how it came out.

how to make a pumpkin tower

How To Make A Pumpkin Tower

1. We started with a standard big orange jack-o-lantern pumpkin on the bottom of our urn.

To stack the pumpkins, make sure the stem isn't sticking up and use simple wooden skewers to help hold the second and third pumpkins on top.

I didn't want to use too large of a stake or dowel in the middle because we used real pumpkins, it's unseasonable warm here right now, and I was afraid they might start to rot and go bad too quickly.

how to stack pumpkins

On top of the large orange pumpkin I stacked on the "pink" pumpkin -it's a pink rose variety, and I found it at the grocery store.

Finally we used a smaller white pumpkin on top.

I love the ombre effect from dark orange, lighter orange, to white that it creates.

We used some glycerine treated fall leaves for the next step, they have nice vibrant colours and stay soft and flexible. I just tucked them in between each layer.  You could also use some pressed leaves.

fall front door

For the rest of the doorstop, we also added some other pumpkins and some pretty fall mums.

fall white mums

fall wreath

On Heather's door I made a simple wreath. I started out with a cardboard letter from the craft store, for their last name. It's covered in the same glycerine treated leaves. I glue gunned them in place, wrapping them around the edges, and then coated the letter in modgepodge to seal it. We used a simple grapevine wreath,and added the monogram with some simple ribbon. Sometimes less is more.

Ombre Pumpkin Tower

I love how the doorway all worked together. It was fun to work with traditional colours like orange, and then add in some white, and the ombre effect to keep it really fresh. (See my all white fall planter here, white fall doormat here and white fall wreath here, or my lime green and white scheme from this year)

Ombre Pumpkin Tower

With an ombre pumpkin tower, life really is a party!

You might also like Fall Fairy Garden here.

Fall Fairy Garden: How to make a sweet little Fall themed Fairy Garden with an easy to make fairy house, mushrooms, pumpkins, and miniature fall leaves tutorial.

Also check out Pampas Grass Wreath here.

You might also enjoy Fall Back Deck here.

Fall Outdoor Decor Ideas -the back deck is styled for fall with pumpkins, mums, straw bales, pinecones, lanterns for a cozy fall.

Fall Picnic

Sep 30, 2013 · 6 Comments

Fall Picnic: Homemade scotch eggs, veggies and dip, fresh honey crisp apples, apple cider, and butter tarts make the perfect fall picinc.

Fall Picnic: Homemade scotch eggs, veggies and dip, fresh honey crisp apples, apple cider, and butter tarts make the perfect fall picinc.

Fall Picnic: Homemade scotch eggs, veggies and dip, fresh honey crisp apples, apple cider, and butter tarts make the perfect fall picinc.

This weekend was beautiful. It was warm, and sunny, and the leaves were turning colours, and it was perfect for a fall picnic.

fall picnic

Fall Hike and Picnic

We wanted some acorns for some fall decorating, so it was the perfect excuse for a little hike in the woods, and a picnic lunch.

fall picnic ideas

Easy Fall Picnic Menu

  • scotch eggs
  • veggies and dip
  • apple cider
  • honey crisp apples
  • butter tarts

Scotch Eggs

In the morning, before we went I made some Scotch Eggs -see my recipe here. I first had them many years ago, when I lived in England for a year, and a friend made them and packed them for a picnic there. If you've never had one, it's a hard boiled egg, covered in sausage meat, and bread crumbs, and fried to a lovely golden brown. You can serve them hot, cold, or room temperature.

Veggies and Dip

We packed them up along with some veggies and a some dip in a mason jar.

what to serve at a fall picnic

Apples, Cider, and Butter Tarts

The day before our picnic we were out looking for some pumpkins and we stopped at a farm stand and bought some honey crisp apples, fresh apple and pear cider, and some homemade butter tarts. So, I packed them up for our picnic too. I poured the cider into pretty individual glass bottles, and brought along some pretty stripped paper straws.

easy fall picnic menu

We had a wonderful time enjoying the warm weather, and finding acorns, and fall leaves -even if we did get the different trails a little mixed up. 😉

fall picnic
fall picnic ideas

With beautiful fall weather, excited little girls, and a fall picnic to enjoy, life really is a party.

More Fall Inspiration

  • Fall tea party in a garden with tea and treats set up in front of an outdoor couch.
    Fall Tea Party
  • Easy Fall Party: easy fall party decor, pizza and donuts, a fun family game, and pumpking painting ideas for a wonderful fall get together.
    Fall Party
  • Fall fondue party ideas and recipes.
    Fall Fondue Party
  • Leaf raking fall themed party ideas.
    Fun Fall Party Ideas: Backyard Leaf Raking Party for Kids and Families

Pumpkin Pie Ice Cream

Sep 27, 2013 · 2 Comments

Pumpkin pie ice cream recipe.

Pumpkin Pie Ice Cream: Amazing ice cream, perfect for fall entertaining. All the yummy tastes of pumpkin pie, but something different, your guest will love!

Pumpkin pie ice cream.
[feast_advanced_jump_to]

With warm fall afternoons upon us, Pumpkin Pie Ice Cream is the perfect treat for this time of year.  It combines the sweet fall flavours of Pumpkin Pie with the refreshing summer treat of ice cream.  If pumpkin spice lattes, warm spices,  and the perfect fall dessert is your thing, you'll love this pumpkin spice ice cream recipes.  It's sure to meet all your pumpkin cravings.  It's like a slice of pumpkin pie -but better! 

I've made pumpkin ice cream before, and remember thinking it was just okay, and I'd rather have pie. This time I added candied pecans, for the perfect sweet crunch, and a pastry cinnamon stick for the perfect pie-like addition. I'm in love with this homemade pumpkin pie ice cream!

No-Cook Recipe

This easy pumpkin ice cream recipe is a no-cook one.  All the pumpkin ice cream ingredients just gets mixed together and then it goes into an ice cream maker.  Serve this ice cream at soft serve consistency right out of the ice cream maker, or a firmer consistency by putting it in a freezer-safe container in the freezer for a few hours or overnight.  Either way, it's delicious and elevated by the little crunch of the candied pecans, and cinnamon pastry twists.  

If you're a fan of pumpkin pie, this is the perfect fall day treat to try.  Or if you live somewhere hotter, this could be a great addition to your  Thanksgiving treats lineup. There are several steps, but it can all be made ahead by making it the night before and serving this delicious dessert the next day.   This is the perfect early fall dinner party dessert! I really think your going to like this one.

Pumpkin Puree

Be sure to use pure pumpkin puree and not pumpkin pie filling for this recipe.  Canned pumpkin puree is fine, but don't mix it up with the canned pumpkin pie filling that includes pumpkin pie spice in it already,  You can also make homemade pumpkin puree for this recipe in pumpkin season, using real pumpkin.  Look for the small pie pumpkins or sugar pumpkins for the best pumpkin flavor.  

how to make Pumpkin Pie Ice Cream

Ice Cream Maker

You will need an ice cream maker for this ice cream.  It is a traditional homemade ice cream that does require a churn for the best results.  If you're a fan of ice cream though, this is some special equipment that's worth investing in.  Look for one second hand if it's something you'd like to try.  This churn recipe is worth the trouble, because it's churning that gives that delicious creamy pumpkin ice cream texture.

Pumpkin Pie Ice Cream recipe

Other Options:

Another fun idea for this pumpkin spice ice cream recipe would be to turn it into a pumpkin ice cream pie.  Use graham crackers to make a pie crust, and add in the ice cream right out of the ice cream maker.  Top with cool whip and sprinkle on the candied pecans, then put it in the freezer to set.  Serve it with a drizzle of caramel sauce for one of the best ice cream treats ever, perfect for the fall season. 

This homemade pumpkin ice cream recipe is one of those dangerous recipes, that you keep thinking about and wondering if it's dessert time again yet.  It's the perfect dessert for a warm fall day.

Pumpkin Ice Cream

Recipe

Pumpkin pie ice cream recipe.

Pumpkin Pie Ice Cream

Creamy ice cream with the flavour of pumpkin pie.
No ratings yet
Print Pin Rate
Course: Desserts
Cuisine: American
Prep Time: 30 minutes minutes
Cook Time: 1 hour hour 15 minutes minutes
Additional Time: 30 minutes minutes
Total Time: 2 hours hours 15 minutes minutes
Servings: 8 servings
Calories: 580kcal
Author: Dannyelle Nicolle-Ramjist

Ingredients

Pumpkin Ice Cream

  • 1 ½ cups milk
  • 1 cup packed brown sugar
  • 1 ¾ cups pumpkin purée
  • 1 ½ tsp. cinnamon
  • 1 tsp. ground ginger
  • ¼ tsp. ground nutmeg
  • 2 ½ cups heavy cream
  • 1 tsp. vanilla

Candied Pecans

  • 100 g chopped pecans
  • 1 egg white
  • ¼ white sugar
  • ¼ teaspoon cinnamon

Cinnamon Pastry Twists

  • your favourite pastry recipe or frozen pastry
  • 2 tablespoon butter
  • 1 tablespoon sugar
  • ½ teaspoon cinnamon

Instructions

  • For The Ice Cream
  • In a large bowl or in a stand mixer on low speed combine the milk, and brown sugar, until the sugar is dissolved, about 1 to 2 minutes. Stir in the pumpkin purée, cinnamon, ginger, and nutmeg. Add heavy cream and vanilla, and mix until combined -making sure not to over mix the heavy cream so it doesn't begin to whip.
  • Turn the ice cream machine on; pour the pumpkin mixture into the freezer bowl, and let mix until thickened, about 20 to 25 minutes. Add the candied pecans during the last 5 minutes of mixing, reserving some to sprinkle over the ice cream when serving. The ice cream will have a soft, creamy texture. If a firmer consistency is desired, transfer the ice cream to an airtight container and place in the freezer for about 2 hours.
    Remove from freezer about 15 minutes before serving to soften slightly, for easier scoping.
  • For The Pecans
  • Preheat oven to 200 degrees.
  • Whip egg white slightly until frothy. Stir in pecans to coat. Sprinkle with sugar and cinnamon. Stir to combine.
  • Spread out pecans in a single layer on a cookie sheet, and place in oven, stirring every 15 min. for 1 hour, until pecans are dried and toasted. Let cool before adding to ice cream mixture. Reserve some to sprinkle over each at serving time, if you wish.
  • For the Cinnamon Pastry Twists
  • Make your favourite pastry -enough for one double crust pie, or use frozen pastry. Roll out and spread with a thin layer of softened butter. Sprinkle the dough with white sugar and cinnamon. Cut into long strips, about ½ inch wide. Twist several times, and cook on a cookie sheet for around 15 min. at 400, or according to the pastry recipe.

    To serve, scoop into an individual ice cream bowl, and sprinkle each serving of ice cream with candied pecans, and add a cinnamon pastry twist..

Nutrition

Serving: 1g | Calories: 580kcal | Carbohydrates: 44g | Protein: 7g | Fat: 44g | Saturated Fat: 23g | Polyunsaturated Fat: 18g | Trans Fat: 1g | Cholesterol: 106mg | Sodium: 153mg | Fiber: 4g | Sugar: 34g
Tried this Recipe? Tag me Today!Mention @LifeisaParty or tag #lifeisaparty!

With pumpkin pie ice cream in your freezer, life really is a party! Enjoy!

More Pumpkin Recipes 

You might also enjoy our Pumpkin Bread Pudding recipe here.

Pumpkin Bread Pudding: this recipe is easy and delicious, perfect for Thanksgiving and the holidays.

Also check out our Pumpkin Blondies recipe here.

You might also enjoy our Pumpkin Cream Puffs recipe here.

Pumpkin Cream Puffs: A cream puff filled with pumpkin pastry cream, whipped cream, and topped with warm caramel sauce for the perfect fall dessert.

Paper Flower Pumpkin

Sep 23, 2013 · 16 Comments

Book page paper flower covered pumpkin.

Paper Flower Pumpkin: Use a faux pumpkin and an old book to create this pretty paper flower pumpkin craft, the perfect addition to your fall decor.

Book page paper flower covered pumpkin.
[feast_advanced_jump_to]

This flower pumpkin DIY combines the best of the season -pumpkins and the ever popular book page, to make a pretty paper flower pumpkin. It's very simple to make, just a little time consuming. 

On Sunday I woke up to some cool fall weather, and a pretty bad head cold. 🙁 Sunday afternoon was the perfect occasion to take it a little easy and enjoy some time crafting and drinking tea.

Paper Flower Pumpkin

Materials:

  • old book
  • faux pumpkin
  • scissors
  • hot glue and glue gun
  • wood branch

How To Make A Paper Flower Pumpkin

1. I started out by making the paper flowers. To begin cut out a circle of an old book, and then cut the circle into a spiral.

how to make a book page flower

2. Then you roll up the spiral to form the flower. Cut another small circle out of the book page also, to use as the base of the flower. Using hot glue, glue the spiral onto the base. It takes a little getting used to, but after a few you'll get your technique worked out. I liked mine a little open, but you could make them tighter if you prefer.

how to make a flower out of paper

3. I used a foam pumpkin from a craft store for my base, in white so that any spaces between the flowers won't be noticeable, and hot glued on the paper flowers.

how to make a flower pumpkin

I have to say that as I worked I didn't love it, but the more flowers I put on the better it looked and in the end I really, really liked it. It did take a lot of flowers -over 75 on mine. Might be best done in a few sessions. 😉

flower pumpkin paper craft

4. Once I had the whole pumpkin covered, I realized the stem looked too small with all the flowers attached. So, I used a small knife and cut off the original stem, and sawed a small piece of a branch to use as a new stem. I attached it with more hot glue -yeah buy a new package of hot glue for this project. 😉

flower pumpkin

I think it turned out so nicely, and it's a great addition to all my white and neutral fall decor. If you prefer the traditional oranges, reds and browns you could make your flowers out of pretty scrap book paper, or brown kraft paper.

DIY paper flower pumpkin

With a pretty little paper flower pumpkin like this to welcome fall, life really is a party.

You might also like DIY Faux Concrete Pumpkins.

DIY Faux Concrete Pumpkins: easy DIY to transform inexpensive dollar store pumpkins with a concrete faux paint finish.

Also check out Driftwood Pumpkins.DIY Wood Pumpkins: made from collected driftwood pieces, these easy and beautiful DIY driftwood pumpkins are the perfect addition to your fall decor.

You might also enjoy our Fall Mantel.

Pumpkin Blondies with Pumpkin Frosting

Sep 20, 2013 · 11 Comments

Pumpkin blondies with pumpkin frosting.

These Pumpkin Blondies with Pumpkin Frosting are chewy, sweet, pumpkin-y, and the perfect fall treat for pumpkin lovers. They're quick to make, and additcitive for snacking.

Pumpkin blondies with pumpkin frosting.

A Quick Look At This Recipe

  • 📋 Recipe: Pumpkin Blondies with Frosting
  • ⏲️ Prep Time: only 15 minutes
  • 👪 Servings: 9 x 12 Baking Pan
  • 🔪 Difficulty: Easy
  • 💭Top Tips: Don't overbake these or they're loose that chewy texture. Don't skip the frosting, it really elevates these bars.

"So yummy!" -Melanie, via Pinterest

Why You'll Love This Recipe

  • These are all the flavors of fall, any pumpkin spice lovers will adore these.
  • These blondies have a great dense and chewy texture.
  • The fluffy sweet pumpkin frosting is the perfect finsihing touch.
  • These are quick to make, they only take about 15 minutes to but together, plus baking time.
[feast_advanced_jump_to]

These are the best pumpkin blondies. They're dense, moist and chewy like a regular blondie, but also full of pumpkin flavor, and warm spices. These pumpkin bars are perfect for someone who doesn't love chocolate.

They are one of my very favorite pumpkin recipes.

These moist pumpkin blondies are usually the first recipe I make when I'm looking for some fall flavor, and they're on repeat all pumpkin season. I developed this recipe way back in a 2013. It's been tested and tried, and remade every fall since. I made them yesterday afternoon for a church event tonight. My family has already eaten 6 of them...safe to say we love them around here. 😉 This is easily my favorite blondie recipe.

As easy to make as your regular brownie recipes, but full of pumpkin goodness instead. They're made with simple ingredients from your pantry, that you usually have on hand, as well as the pumpkin puree, which you may have this time of year.

Also a pumpkin lover? You might like our Pumpkin Bread with Walnuts, Pumpkin Spice Milkshake, Pumpkin Spice Rice Krispie Treats, or our Pumpkin Bread Pudding.

Pumpkin blondies with frosting cut in squares and stacked beside a pumpkin.

Ingredients

Pumpkin blondie ingredients in bowls on a wood table.
  • Pumpkin Puree: Be sure to use pure pumpkin puree in this recipe and not pumpkin pie filling, as it already has pumpkin pie spice and sugar added, and is not what you want for this recipe. We also recommend using canned pumpkin puree and not homemade pumpkin puree in this recipe because the homemade version tends be more wet, and it will affect the chewy, dense texture we want in the is recipe.
  • Brown Sugar: The addition of brown sugar to this recipe helps create the dense, chewy texture because of its molasses content. Also, always remember that when measuring brown sugar you need to pack it firmly into the mesuring cup.
  • Cinnamon, Cloves, and Nutmeg: These spices are bringing the pumpkins spice. You could use 2 teaspoon of pumpkin spice, instead of the individual spices if you wish. We like to use freshly ground nutmeg for extra flavor, but ground nutmeg is fine as well.

Recipe Alterations

  • Half This Recipe: You can also half this recipe for blondie bars, and make it in a 8 x 8 baking dish, and reduce the bake time to around 20 minutes.
  • Chocolate Chip Pumpkin Blondies: Add 1 cup of chocolate chips, or chocolate chunks, if you are a chocolate lover.
  • White Chocolate Pumpkin Blondies: Add in 1 cup of white chocolate chips for another chocolate chip pumpkin blondies option.
  • Caramel Pumpkin Blondies: Or try adding 1 cup of butterscotch chips for a caramel pumpkin blondies option.
  • Brown Butter Pumpkin Blondies: Brown the butter for the pumpkin blondie batter first to add a nutty, deep flavor that pairs beautifully with the pumpkin and spices.
  • Nutty Pumpkin Blondies: Fold in 1 cup chopped pecans or walnuts to the blondie batter for added crunch and extra fall flavor.

How To Make Pumpkin Blondies with Pumpkin Frosting

A 9 x 13 glass baking dish sprayed with non-stick cooking spray for pumpkin blondies.
  1. Step 1: Preheat oven to 350 degrees, and coat the bottom and sides of a 9-by-13-inch baking pan with butter, or spray with nonstick cooking spray.
Melted butter and sugar in a metal mixing bowl, making pumpkin blondies.
  1. Step 2: Melt 1 cup of butter in a microwave safe small bowl. Add the melted butter to the brown and white sugar and stir to dissolve in stand mixer with the paddle attachment, in a large mixing bowl with an electric mixer, or by hand with a wooden spoon.
Wet ingredients for pumpkin blondies in a metal mixing bowl.
  1. Step 3: Add the eggs, vanilla, and pumpkin, and combine well.
Dry ingredients for pumpkin blondies whisked together in a metal mixing bowl.
  1. Step 4: In another medium bowl, combine the dry ingredients; flour, salt, cinnamon, ground cloves, and, ground nutmeg.
Pumpkin blondie batter in a metal mixing bowl.
  1. Step 5: Add the wet ingredients to the dry ingredients in a large bowl, and stir well to combine, but don't over stir.
Baked pumpkin blondies in a glass 9 x 13 baking dish.
  1. Step 6: Bake for 30 min., until the blondies are golden brown and a toothpick inserted in the middle 
    comes out clean.
Pumpkin frosting for pumpkin blondies in a metal mixing bowl.

7. Step 7: Cream the butter in a mixing bowl of a stand mixer. Add the vanilla, 2 tablespoon pumpkin puree, milk or cream, and icing sugar. Mix at a low speed to combine, and then for min. or two at a high speed, until frosting looks creamy and well combined.

Frosted pumpkin blondies in a glass 9 x 13 baking dish.

8. Step 8: Spread over cooled blondies, sprinkle with cinnamon if you wish, and slice into approx. 24 pieces. Enjoy!

Expert Tips

  • Don't over mix your blondie batter after you add in the flour. Overmixing creates too much gluten and leads to tough blondies intead of tender, chewy ones.
  • Don't over bake these blondies. They will lose some of their chewiness and become dry if over baked. Bake until they're set in middle and pulling away from the sides, and a toothpick stuck in the middle comes our clean.
  • Make sure to add the frosting, it really adds a lot of flavor and texture to this dish.

Storage

Store these pumpkin blondies with frosting in an airtight container at room temperature. They should keep for about 1 week. Store in the fridge for longer.

You can freeze these for up to 3 months in an airtight container. Consider not slicing them before freezing to prevent them from drying out.

Pumpkin blondies with pumpkin frosting.
Delicious pumpkin spice bars with cream cheese frosting, ideal for autumn gatherings.

Next time you're craving a pumpkin spice recipe, try these. With Pumpkin Spice Blondies with Pumpkin Frosting , life really is a party.

Frequently Asked Questions

Can I half this pumpkin blondie recipe?

Yes, if you half this recipe bake it in an 8 x 8 baking dish, and reduce the cooking time to 20 minutes.

Why are my pumpkin blondies dry?

Your blondies will be dry if you over mix the batter, and if you over bake the them. They are done as soon as they start to pull away from the edges of the pan, the center is set and a toothpick stuck in them middle comes out clean. Better to slightly under bake than over bake this recipe.

Why is my pumpkin frosting too thin and runny?

Make sure your blondies are fully cooled before frosting. If you find your frosting is too thin and runny instead of fluffy, just add a little more powdered sugar to it. Start with a few tablespoons and add until you reach the desired consistency.

Can I use pumpkin pie filling instead of pumpkin puree in pumpkin blondies?

The short answer is no, not in this recipe. The long answer is yes, but you would have to adjust the recipe, since pumpkin pie filling already contains sugar, spices and other ingredients. You would want to adjust the spices and the sugar content to acomadate the differences. Thisp pumpkin blondie recipe has been created to use pumpkin puree, not pumpkin pie filling.

Can I use homemade pumpkin puree in these pumpkin blondies?

We recommend using canned pumpkin puree in this recipe, because homemade pumpkin puree tends to be wettier and affect the the overall chewy, dense texture of the finished blondies.

More Pumpkin Recipe Inspiration

  • A loaf of moist pumpkin bread with walnuts on a cutting board.
    Moist Pumpkin Bread With Walnuts
  • Easy caramel pumpkin butter recipe.
    Easy Caramel Pumpkin Butter Recipe
  • Pumpkin spice Rice Krispie treats recipe.
    How To Make Pumpkin Spice Rice Krispie Treats
  • How to make pumpkin cream puffs with pumpkin filling and caramel sauce.
    Pumpkin Cream Puffs

If you try these Pumpkin Blondies with Pumpkin Frosting or any other recipe on my blog please leave a star rating and let me know how it went in the comments below. Thanks for visiting today!

Recipe

Pumpkin blondies with pumpkin frosting.

Pumpkin Blondies with Pumpkin Frosting

Video

Moist pumpkin blondies with sweet frosting topping.
5 from 1 vote
Print Pin Rate
Course: Desserts
Cuisine: American
Prep Time: 15 minutes minutes
Cook Time: 30 minutes minutes
Total Time: 45 minutes minutes
Servings: 24
Calories: 243kcal
Author: Dannyelle Nicolle-Ramjist

Ingredients

For the Blondies

  • 1 cup butter
  • 1 cup packed brown sugar
  • ⅔ cup white sugar
  • 2 eggs
  • 2 teaspoon vanilla
  • 1 cup pumpkin puree
  • 2 cups flour
  • ½ teaspoon salt
  • 1 ½ teaspoon ground cinnamon
  • ¼ teaspoon ground cloves
  • ¼ teaspoon ground nutmeg

For the Frosting

  • ½ cup room temperature butter
  • 1 teaspoon vanilla
  • 2 tablespoon pumpkin purée
  • 2 tablespoon milk or cream
  • 2 cups powdered sugar

Instructions

To Make The Blondies:

  • Preheat oven to 350 degrees F, and coat the bottom and sides of a 9-by-13-inch baking pan with butter, or spray with nonstick cooking spray.
  • Melt 1 cup of butter in a microwave safe small bowl. Add the melted butter to the brown and white sugar and stir to dissolve in a stand mixer with the paddle attachment, in a large mixing bowl with an electric mixer, or by hand with a wooden spoon.
  • Add the eggs, vanilla, and pumpkin, and combine well.
  • In another medium bowl, combine the dry ingredients; flour, salt, cinnamon, ground cloves, and, ground nutmeg.
  • Add the wet ingredients to the dry ingredients in a large bowl, and stir well to combine, but don't over stir.
  • Bake for 30 min., until the blondies are golden brown and a toothpick inserted in the middle comes out clean.

Allow the blondies to cool before frosting them.To make the frosting:

  • Cream the butter in a mixing bowl of a stand mixer. Add the vanilla, 2 tablespoon pumpkin puree, milk or cream, and powdered sugar. Mix at a low speed to combine, and then for min. or two at a high speed, until frosting looks creamy and well combined.
  • Spread over cooled blondies, sprinkle with cinnamon if you wish, and slice into approx. 24 pieces. Enjoy!

Notes

Store the pumpkin blondies in an airtight container.
Don't over mix your blondie batter after you add in the flour. Overmixing creates too much gluten and leads to tough blondies intead of tender, chewy ones.
Don't over bake these blondies. They will lose some of their chewiness and become dry if over baked. Bake until they're set in middle and pulling away from the sides, and a toothpick stuck in the middle comes our clean.
Make sure to add the frosting, it really adds a lot of flavor and texture to this dish.
 

Nutrition

Serving: 1g | Calories: 243kcal | Carbohydrates: 31g | Protein: 2g | Fat: 13g | Saturated Fat: 8g | Polyunsaturated Fat: 4g | Cholesterol: 48mg | Sodium: 150mg | Fiber: 1g | Sugar: 23g
Tried this Recipe? Tag me Today!Mention @LifeisaParty or tag #lifeisaparty!

The Rainbow Art Party

Sep 9, 2013 · 8 Comments

Rainbow art party ideas.

Rainbow Art Party: DIY rainbow decorations, art activity stations, and rainbow art themed party food ideas.

Rainbow art party ideas.
[feast_advanced_jump_to]

Last week my oldest daughter, Paige, turned nine. Nine, as in almost ten...where does the time go? She wanted a Rainbow Art Party, and today we're sharing all the fun details of the decorations, the art activities, and the rainbow art themed food.  This is such a fun party theme, full of bright colors, really fun art activities that our party guests loved.  It's the perfect theme if your birthday child is a little artist.

The Invitations

I did a little photo shoot with our birthday girl one day to make our cute party invitations. Then I just added some text to them on the computer,and printed them at home. She really loved them, and they were the perfect way to invite her friends her craft party.

Rainbow Art Party invitations

I thought I'd start out by sharing all the pretty decorations with you.  

You can find all the Rainbow Art Party Activities here.  And all the Rainbow Art Party themed foods here.

My very, very, very favourite decorations ro4 my child's art party were the rainbow paper lanterns and rainbow flowers.

Outdoor Rainbow Art Party Decorations

rainbow paper lanterns

We love decorating of birthdays. Check out our best at home birthday party decorations here.

I collected paper lanterns from all over in all shapes, sizes, and rainbow colors for weeks and weeks. We hung them all in a line, in traditional rainbow order. They looked so, so pretty hanging on our pergola.  Paper lanterns are such a great alternative to helium balloons.  They're reusable, inexpensive, and you don't have to worry about picking them up at the last minute, so I think they're perfect party decor.

Rainbow paper lanterns

I always love to do special flowers for a party, and came up with the idea of doing one pretty mason jar for each colour of the rainbow for our art-themed party and lining up the different colors in the same rainbow order as the paper lanterns.

Rainbow flower arrangement

All the flowers are pretty much from my mom's garden, with the exception of the green mums that I picked up at the store. I love how it turned out.  It was just a simple design, but had so much impact.

Rainbow flower arrangement

Using different sized mason jars as vases was the perfect way to accommodate flowers of all different sizes.

diy Rainbow bunting

We planned to have the art activities outside in the yard when guests first arrived at the party, and then move into the house where it was cooler for the food. I wanted to add a little rainbow to the play structure so we made a simple rainbow bunting.

To make the rainbow bunting I used some twine and hot glued on some scrap fabric flags in our rainbow colours.  This was such a fun decor piece for an art birthday party.

Rainbow Art Party Decorations

We planned to welcome guests through the side gate, and into the yard.

Rainbow Art Party Decorations streamer rainbow

I decorated the rose arbour with simple rainbow streamers. They looked so pretty blowing in the wind.

Art Party Decorations welcome chalkboard

Guests were welcomed by the chalkboard, and a basket of art smocks for our little guests.

Rainbow pinwheels

I added these giant rainbow pinwheels to the garden edge.

Indoor Rainbow Party Decorations

Inside, there was a pretty rainbow decorated mantel. During the photo shoot for the invitation we got lots of fun shots of the birthday girl with a bouquet of rainbow balloons. For the mantel I printed a few and put them in simple dollar store frames.

We made more rainbow bunting and added in some pretty rainbow candles.

Rainbow Art Party Decorations

In the kitchen, we didn't have too much room for decorations. We decorated the chalkboard and I made a fun art birthday cake (think diaper cake but way better) as an art theme centerpiece. I used mini hat boxes as the base, and held craft supplies in place with elastics, ribbon and a little tape. We layered crayons, pom poms, feathers, markers, and glue sticks, with a paintbrush flag. It made for a fun addition.

art supplies cake decorations

In the dining room, I made this great birthday banner. I used free paint chips from the paint store, a letter stencil, and a black sharpie. It was so easy and turned out so cute.

art party paint chip banner decoration

On the dining room table was my second favourite decoration, a rainbow of candles.

Rainbow candle centre piece

I came up with the idea and wanted to start shopping but forced myself to check my candle stash before I bought anything.

Rainbow Art Party Decorations

I had them all, with the exception of two pairs of tamper candles. Guess I should do a candle inventory more often. I love how pretty they looked all together. I tried to keep it somewhat uniform by only using glass and a few metal candle holders.  If you wanted to create something similar, you could look for any colors you didn't have a the thrift store, as a great way to find inexpensive candles and candle holders.

Rainbow Art Party Decorations candles

Rainbow Guests Photo

One of the other best decorations -our guests! We asked the guests to all wear denim on the bottom and a certain coloured shirt on top for a special art project, all with the plan of taking a fun group shot. I love how it turned out. And you can see the birthday girl in her party outfit, white with a rainbow tutu -so much fun!  This was a fun easy group project, since everyone has jeans, and I worked out with the guests what color shirt they had, to coordinate it so that we had some of each color for our rainbow.  The best part of this, is that you have a special keepsake photo at the end.

Rainbow Art Party guests

The Rain (It was a Rainbow Party After all)

It was a great party...despite the rain. That's right it poured. The party started at 11, and by 10:30 we were pretty much set up for me to take pictures and add just a few more details. At 10:50 it started to rain -hard. We scrambled to get everything inside, including all the pretty paper lanterns before they were ruined. We forgot the paint smocks, but my mom quickly threw them in the dryer for a few minutes. 😉 As our guests were coming through the door, we were drying off the things from all of the 7 art centres we had originally set up in the backyard.  Everything was thrown in the patio doors dripping wet while running around like chickens with our heads cut off when it started to pour.

But parties aren't about everything being perfect, they're about having fun together.  So our guests pitched in and we set everything up inside and had a great time.  I love our friends and family. I was most sad about the lanterns that had nowhere to go inside and ended up in my bedroom.  They were slightly damp but out of the way to be dealt with later. We all joked that everyone could see how pretty they were on the blog!  So there we have it, at least we had some pictures before the rain came!

And I must say that the birthday girl didn't seemed that bothered by the rain (that interrupted her party for the third year in a row -next year an indoor party) and just had a great time enjoying her favourite pastime, art, with all her favourite people! Proving that life is what we make it, so we may as well make it a party -even in the rain!

rainbow party activities.

Rainbow Art Party Activity Centres

The birthday girl chose the entire theme because she loves art, so we decided to set up seven different simple art activity stations for our little guests to enjoy.  We used kids tables, covered in plastic table cloths for easy clean up as our little work tables.

My daughter Paige made the sweetest little signs for each station. We used simple IKEA frames, and she drew pictures to go with each activity.  Each table had the sign, and the art supplies for the activity.

We didn't set up a timer or schedule for visiting all the art stations.  The party had a relatively small group of kids, and all the parents stayed as well.  We let the kids follow their inner artist and visit as many craft activities as they liked, and revisit them for a second round if they wished.  

Grab An Art Smock

We started out with giving everyone a paint smock to protect their party clothes.

rainbow art party
rainbow party welcome.
rainbow art party ideas

Rainbow Play Dough

The first centre was Rainbow Play Dough.  I found this great "One Metre of Play Dough" in rainbow colors and the kids (and some of the grown-ups too) loved it.

play dough station.

Spiral Art

The second centre was Spiral Art. I remembered doing spiral art when I was a little girl. I picked up two kits at the dollar store for this station and all the pretty gel pens we could find.

spiral art station.

Watercolour Painting

The third Centre was Watercolour Painting. My girls really enjoyed this station. I picked up some watercolour paper, we added a few pencils for sketching and the watercolor paint set.

Rainbow Art Party water colour station
artists at work.

Marble and Tire Track Painting

The forth centre was Marble and Tire Track Painting. I picked up a few shallow boxes at the grocery store, and we put some paint on a plate for our artists to roll their tires and marbles in. Then, they used the box to rotate the cars and/or marbles over a piece of paper to make some great prints.  This art activity was a bit different and lots of our guests really enjoyed it.

marble and tire painting.
art from marble painting.

Bubble Art

The fifth centre was Bubble Art. To create pretty bubble printed paper, we made a mixture of paint, water, and dish soap. Then you create bubbles by blowing into the mixture with a straw, and then placing the paper on top to create the print. (A tip if you have very young artists, is to put a few pin pricks in the top half of the straws so that they can't accidentally suck it in by mistake.)

bubble art station.

Acrylic Painting

The sixth centre was Acrylic Painting with a Canvas and Easel. For this station we set up acrylic paints in the colours of the rainbow, with an art palette for mixing, and a sweet little blank canvas for everyone with mini easels and paint brushes from the local dollar store.  These were just the right size for our little artists.  And they all liked taking home the mini easels as well.

acrylic painting station.

Water Gun Painting

The seventh and final centre was Water Gun Painting. We filled water guns with very watered down paint. Before the party, I used painters tape to mark each canvas with the guests initial, after the paint was squirted on and it dried the tape was removed to reveal the initial.  You could also use a spray bottle for this activity.

water gun art.

Drying Art Gallery

I set up a little art gallery for the paintings to dry and be viewed at. I made the banner from paint chips and a stencil -love how it turned out.

drying art gallery.

To attach the art to the wire fence, I found some pretty rainbow striped washi tape, and added it to simple wooden clothespins. It worked out great -after the rain stopped. 😉

art drying clips.

Art Party Favor Bags with Paint Chip Thank You's

We also set up loot bags for our guests, so that throughout the party any art that didn't need to dry could be tucked inside, along with their paint smocks once the painting was done. We also included a fun watercolor set for some more creating at home.  It was fun using the paint chips for some creative ideas for the party.

loot bags to go.

I found pretty paper bags in every colour we needed to fit our rainbow themed birthday party. Then, we made thank you tags with more paint chips, and attached them to the bags with the rainbow washi tape.

loot bags.
art party food.

Rainbow Art Party Food

We had so much fun at our Rainbow Art Party, and I had a great time coming up with the food, and I can't wait to share all the yummy details with you.

Paint Chips

While we were doing the art activities I had a chip buffet set up for munching on. This was one of my very favourite ideas of the party. I set up a Rainbow Chip Buffet, and we made a fun label that said "Paint Chips". Get it, I know I have a gift.

assorted edible paint chips.

I bought unused empty paint cans at the paint store, and painted a paint stir stick for each colour we used and placed it in the paint pails.  Then we filled each can with chips in the colors of the rainbow.

edible paint chips.

We had ketchup chips for red, cheesies for orange, regular chips for yellow, guacamole chips (I found at the bulk store) for green, and blue tortilla chips for blue. Everyone loved it, and nibbled away between activities until lunch. I envisioned it set up outside, and then had to quickly set it up on the toy box when everything was moved inside because of the rain, but you get the idea. 😉

The Rainbow Veggie Tray

rainbow vegetable tray.

For lunch we kept things simple and ordered pizza and wings, along with this Rainbow Veggie Tray of radishes, cherry tomatoes, carrots, yellow pepper, broccoli, cucumber, black olives and "black cherry" tomatoes. We couldn't come up with a blue veggie, but we're pretty close to a full rainbow. 

dessert table.

Rainbow Art Party Dessert Table

The main food event of the party was the Rainbow Dessert Table.

Picture Frame Art Party Backdrop

I had a lot of fun putting the rainbow dessert table together. We started out with the pretty backdrop of rainbow coloured frames. I found them all at the second hand stores for a couple of dollars each. To start with I removed the backs and glass, and then painted them  with spray paint in different colours. The empty frames were attached to the wall with 3M hooks, they really work great and when you remove them, there really is no mark on the wall.

Paint Chip Food Labels

To make the food labels, I used some more paint chips.

rainbow party paint chip labels.

Rainbow Cake

The centerpiece of the table was the rainbow cake. I made it out of two cake mixes, and used food colouring to tint the layers. My one little tip: this time I bought disposable cake pans at the grocery store, it was so much easier than using my regular two pans, three times to bake the six layers.  With some extra disposable cake pans I could bake it all at once.

rainbow birthday cake with candles.

I bought the special birthday candles that have a coloured flame. They were a hit.

rainbow birthday cake.

The first slice was met by the appropriate oohs and aahs from the guests -as hoped for.

rainbow cake slice.

Along with the Rainbow Birthday Cake there were lots of other sweet treats.

Rainbow Paint Brush Rice Krispies

rainbow rice crispy paint brushes.

We made Rainbow Paint Brush Rice Krispies. These were also a big hit -delicious and pretty easy too.  We made regular rice krispie treats, cut them into rectangles and put a craft stick in one end to look like a paint brush handle.  Then we did the other end in melted colored.  We used chocolate melts in all the colors of the rainbow.

rainbow rice crispy paint brushes.

Rainbow Jello

We also made Rainbow Jello. It looked so pretty layered in rainbow order in plastic cups.  This process is a little time consuming, but creates such a beautiful effect.

rainbow jello.

Rainbow Fruit Tray

We did a Rainbow Fruit Tray for good measure, although I have to say it didn't see too much action. 😉

rainbow fruit tray

Paint Your Own Masterpiece Cookies

Lastly, my friend Heather made the amazing "Make Your Own Masterpiece" Sugar Cookies.

blank canvas cookie.

She made sugar cookies, and flooded them with white royal icing to make the perfect cookie canvas, and outlined it all in a sweet little icing gold frame.

decorator at work.

Guests used edible markers to draw their own picture.

finished decorated cookie.

These were also a huge hit -they were just so cool...and delicious.  Our guests loved using the markers in creative ways to make their own little edible masterpieces.

rainbow candy buffet overview.

Rainbow Paint Can Candy Bar

As another treat for the loot bags we set up a Rainbow Candy Bar. I found the fun little paint buckets at the dollar store, and then we found candy in every colour at the bulk store. It looked so pretty.  We had little plastic bags and tongs so that guests could help themselves, fill up their bag and then add it to their party favor.

rainbow candy buffet close up.

The party was a great success, and the birthday girl was all smiles.  This was one of the best birthday parties we ever had.  The kids of all ages loved getting their creative juices flowing, and making all kinds of art at the party.  This theme appealed to both boys and girls, and kids of different ages, from 4 year olds to 10 year olds.  Everyone could create as much or as little as they wanted and visit all or just favourite art centres.  I highly recommend this theme for your child's next birthday party.

birthday girl at dessert table.

With a rainbow art party to celebrate someone special, life really is a party!

More Inspiration

You might also like our Ice Cream Themed Birthday Party here.

Also check out our Board Game Night here.

You might also enjoy our DIY Rainbow Book Art here.

DIY Rainbow Book Art: Using old books as a canvas this DIY rainbow art in mustard yellow and pink is fun to make and inexpensive.

Back To School Dinner

Sep 4, 2013 · 5 Comments

Back to school party.

First Day of School Dinner Ideas -start a new tradition with your kids, surprise them with a back to school dinner on the first day of school.

Back to school party.
[feast_advanced_jump_to]

I'm so excited to share our first day of school dinner ideas with you.  It's become a tradition at our house to surprise my girls with a special dinner when they get home from school on their first day and hear all about their new class.

Miniature School

Weeks ago when I was out shopping I noticed a few miniature school supplies at a party store, and thought how much my girls would love them. My youngest daughter loves playing school with her stuffed animals. I started collecting little mini paint sets, tape, crayons and markers over the last few weeks.

miniature toy school supplies

This gave me the idea to make our first day of school dinner into a back to "stuffy" school with a few of the girls stuffed animal "students". Once I got started, I couldn't help myself, it just got cuter and cuter. 😉

first day of school dinner ideas

Free Back To School Printables

I found some great back to school free printables at Tatertots and Jello and used them to make a pretty place setting.

Back to School Dinner

Then I had the idea to shrink the printables by 50% and make the a miniature stuffed animal version too.

Back to School Dinner

I cut down a matching paper napkin to make the stuffy napkins, and used a little crab apple to match the big ones. The cutlery and plates are from IKEA and made for dolls. The little cups are actually plastic shot glasses, and I cut down the straws to match ours.

first day of school dinner ideas

Perfect for our little stuffy friends.

Back to School party

First Day of School Dinner and Mini Dinner Ideas

Then I thought it would be fun to make a mini version of dinner too.

I made a salad with cucumbers and tomatoes. For the mini version, I bought baby cucumbers, and used cherry tomatoes. I love how it turned out, next to our regular sized salad.

salad and mini salad miniature dinner

We had pizza, so I just used some bagel bites as a mini version for the stuffys.

Back to School Dinner

The girls even filled the stuffy's glasses with water, and crushed ice for stuffy sized ice cubes.

Back to School party

Dessert and Mini Dessert

For dessert, since we had a bit of an apple theme happening, we made apple pie -regular size and mini too.

Back to School Dinner

I used store bought pastry to make it really easy and even made a large and mini little back to school pick with the printables.

first day of school dinner ideas

The girls were so excited about it all. And the stuffed animals said it was the best dinner they'd had in ages. 😉

Back to School party

Playing School

After dinner we took all the new mini school supplies down to the toy room and set up a little classroom.

playing school

Maddie was so excited to put up the abc's (found at the dollar store), set up her desk and chalk board, and get her stuffed animals seated on the carpet for story time!

playing school

I always say life is what we make it, so we may as well make it a party! I hope my girls always remember this one. Hoping your first day of school was great too.

With first day of school dinner ideas like this one, life really is a party!

More First Day Of School Dinner Ideas

You might also like our Back to School Dinner 2019 here.

Back To School Printables and Family Dinner: decor ideas, dinner and free printable Back To School printables, and "All About Me" sheet.

Also check out our Back To School Dinner 2018 here.

Back To School Party Ideas: start a family tradition of a back to school dinner on the first day of schoo. Lots of party decor ideas.

You might also enjoy our Back To School Dinner 2017 here.

Easy Peach Sangria Recipe With White Wine

Aug 26, 2013 · 2 Comments

Peach sangria recipe.

Peach Sangria Recipe: The perfect peach sangria, sweet, fruity, easy to make and delicious. Made with fresh peaches and raspberries.

Peach sangria recipe.
[feast_advanced_jump_to]

This peach sangria recipe is the perfect, sweet, peachy, end of summer drink. While the peaches are in season, you must try it.

I made a batch and enjoyed it with friends on a Sunday afternoon.  They dropped by and I put together a batch.  We sat out in the garden sipping this lovely drink , and it couldn't have been more perfect summer drink.

This is my very favourite cocktail ever.

Sangria

Sangria is a wine punch made with wine, chopped fruit and other ingredients.  It originated in Spain.  Most sangria recipes are made with red wine and oranges, but our peach version uses white wine.  It is often quite sweet and fruity in flavor.  You can make as sweet as you like.  If you want it less sweet than use a less sweet wine as the base and add less sugar.

White Wine Sangria

We have made a white sangria with a base of white wine.  Sangria is often made with a sweeter wine, but if you prefer you can choose dry wines, or a crisp white wine for your base.  We choose Liebfraumilch as our wine base. It's a blend of Riesling and Sylvaner with fruit aromas, a light body and a slightly sweet finish.  You can also use a Pinot Grigio, Sauvignon Blanc, White Zinfandel, or a dry Riesling or any sweet white wine that you enjoy for your peach sangria. 

Fruit

Sangria always includes fresh fruit that's been chopped in it.  For our peach sangria we had to include some fresh ripe peaches.  You can use yellow peaches or white peaches or a combination of both for this sangria.  We used yellow peaches, since they grow in abundance here this time of year.  Juicy peaches add so much peach flavor to this white wine peach sangria.  Along with our peach slices, we also added some fresh raspberries.  The peaches and raspberries are a great summer fruit combination.

Alcohol

Sangria usually has some alcohol along with the wine.  Our peach sangria has both triple sec and peach schnapps added.  Triple sec is an orange liqueur and it and citrus fruits are traditional ingredients in red wine sangria, and are a lovely addition to our peach sangria.  Peach schnapps is a peach liqueur and help add more peach flavor to our punch.

how to make peach sangria

Sugar

Sangria is traditionally on the sweet side.  You can adjust the sugar depending on your preferences and how sweet your peaches are.  We used instant dissolving sugar.  Look for it in grocery stores with the baking ingredients and regular sugar.  It's sometimes called berry sugar, or superfine  or ultrafine sugar.  It's perfect for using in cold drinks, because the sugar crystals are smaller than normal and dissolve in liquids quickly.  Some people like to use simple syrup in sangria, but the instant dissolving sugar is easier to use.  If you like sweeter sangria you can adjust the amount of sugar for your preferences.

peach sangria with white wine

Ginger Ale

We used ginger ale in our sangria, it adds a nice bit of fizz to the sangria and a little more sweetness.  You can use sparkling water, club soda, or soda water to add some fizz without adding more sweetness if you wish.  Another great option is a lemon-lime soda like 7-up or sprite.  The soda pop or sparkling water help make the drink into a punch and give the characteristic fizz to the sangria.  If you prefer though, you can make your sangria flat.  

Because sangria contains chopped fruit, it's best to prepare the punch ahead of time so that the flavors of the fruit and the fruit juices can infuse into the punch, and the wine and other alcohol can all mix together. Make sure to add your soda pop or sparkling water right before serving, after the rest of the ingredients have had time to sit and marinate,  so the pop doesn't lose the fizz.

how to make Peach Sangria
sangria with fresh peaches and raspberries

If you love peaches, you'll love this drink.  This easy peach sangria is especially perfect to enjoy during peach season when they're so sweet and juicy.  The addition of raspberries is delicious too.  It's sweet, and peachy, and has a little fizz from the ginger ale.   It's so delicious on hot summer days.  It really is the perfect summer cocktail.

This sangria is perfect for entertaining, and great with some friends to help you drink you on a hot summer evening.

Recipe

Peach sangria recipe.

Peach Sangria

Sweet peach sangria made with wine, peach schnapps, ginger ale and fruit.
No ratings yet
Print Pin Rate
Course: Drinks
Cuisine: American
Prep Time: 5 minutes minutes
Total Time: 5 minutes minutes
Servings: 10 cups
Calories: 180kcal
Author: Dannyelle Nicolle-Ramjist

Ingredients

  • 1 bottle of white wine -Liebfraumilch or your preference
  • ½ cup peach schnapps
  • ¼ cup triple sec
  • ¼ cup instant dissolving sugar
  • 2 peaches sliced
  • ½ pint raspberries
  • 3 cans ginger ale

Instructions

  • Mix the white wine, peach schnapps, triple sec, sugar, peaches and raspberries in a punch bowl or large pitcher, and stir to dissolve the sugar. Let this mixture sit for a few hours.
  • Before serving add the ginger ale, and enjoy!

Nutrition

Serving: 1g | Calories: 180kcal | Carbohydrates: 28g | Protein: 1g | Sodium: 13mg | Fiber: 2g | Sugar: 25g
Tried this Recipe? Tag me Today!Mention @LifeisaParty or tag #lifeisaparty!
Peach Sangria recipe

With a delicious batch of peach sangria, life really is a party!

More Drink Recipe Inspiration

You might also like our Apple Cider Martini recipe here.

Apple Cider Martini: The perfect fall cocktail, a caramel apple in a glass, but better. Use caramel vodka, or make your own.

Also check out our Blackberry Cocktails here.

Blackberry Sparklers: fresh blackberries are pureed for this cocktail, make it with alcoholic, or without for a non alcoholic mocktail version.

You might also enjoy our Grown Up Lemonade Stand here.

DIY Backyard Movie Night Under The Stars Ideas

Aug 23, 2013 · 2 Comments

Outdoor movie night.

Outdoor Movie Night: Ideas for movies under the stars an outdoor movie night, with a popcorn buffet for snacks, and a red and white decorations.

Outdoor movie night.
[feast_advanced_jump_to]

We set up our Outdoor Movie Night at the cottage and it was so much fun!  This is pretty much the perfect way to spend a summer evening with family and friends.  I'm excited to share all our DIY backyard movie night ideas with you.  

How To Make An Outdoor Movie Night Screen

My brother-in-law built this great, portable movie screen.  He made this DIY screen with a simple wooden frame and then stretched a really big fabric drop cloth over it, stapled in place with a staple gun.  It was perfect for our outdoor theater.

Other options for an outdoor screen would be use an inflatable movie screen.  What's great about an inflatable screen is it's easy to store when not in use.  You could also use any large flat surface.  So if you have a large white wall outside, that would work perfectly too.  Other diy options are to use a white sheet for your own DIY screen.

You will also need an outdoor projector and an outdoor extension cord.  Make sure you use one that is safe for outdoor use, and with good sound quality, or add some outdoor speakers for the evening.

how to make an Outdoor Movie screen

Seating Area

I thought it would be fun to add a few more fun details to our big screen. 😉 We started out by adding some twinkle lights to the screen.  I wanted it feel like a DIY marquee sign.  String lights over the seating area would be another outdoor lighting great addition to your own outdoor movie theater to create an inviting atmosphere at night.  

For our outdoor movie theater seating area we set up a row of the beautiful red Muskoka chairs in our outdoor space.  Other great seating options around your own outdoor movie screen would be any outdoor chairs, or patio furniture.  For picnic style seating spread out some outdoor rugs and blankets in front and add pillows for comfortable seating.  Family movie night is for the whole family, and the little kids especially love the front row as a great place for the best view.

red Muskoka chairs

Outdoor Movie Night Snack Area

Movies need popcorn, so I set up a fun popcorn buffet for our outdoor cinema.  The popcorn buffet is one of my favorite things about our backyard movie night.

Movie Night popcorn buffet

DIY Chalkboard Bunting

I thought it would be a fun idea to make some chalkboard bunting that we could write things on for an extra special touch. My brother-in-law cut out the triangles from some thin scrape wood, and drilled holes in the corners so we could thread them onto twine. My very sweet niece painted them all for us with chalkboard paint -thanks Jenny and Shaun. 😉 We used the large ones to write "Movie Night", but since they're little chalkboards they could be erased and used for anything.  These were so fun to add to our outdoor areas for movie night.

doy chalkboard bunting

On the bottom of the table we strung smaller ones and wrote popcorn.  This was such an easy way to to add a fun detail to the space.

popcorn buffet

I layered the table with red and white for a classic movie look. For the popcorn, I found great unfinished wooden boxes that I spray painted white and lined with waxed tissue paper.

popcorn bar

We used more chalkboard labels for the popcorn.

movie night popcorn bar

The Popcorn

  • buttered popcorn
  • white cheddar popcorn
  • caramel corn
  • white cheddar popcorn seasoning
  • dill pickle popcorn seasoning
  • jalapeno popcorn seasoning
  • cinnamon sugar popcorn seasoning

I love how the popcorn buffet turned out. Everyone thought that it was the best part of the evening.  We had white cheddar, caramel, and buttered popcorn.  I picked all the popcorn flavors at the grocery store.  If you had a popcorn machine, you could set it up here, and make fresh popcorn too.

movie night snacks

I thought it would be a great idea to add a few popcorn flavourings too. I picked them up at the bulk food store.  We put them in simple salt and pepper shakers, and added a cute chalkboard sticker label.

popcorn toppings

The toppings are on a little tray that matched the other containers.  I  also sprayed painted it white.  It's also holding some napkins and straws.  We used red as our pop of color.  Red and white feels like the perfect color scheme for movie night.

Candy and chocolate would be a great option for the popcorn buffet too.  For your own movie theater you could set up candy popcorn additions in small bowls with scoops for adding them to your popcorn bag mix.  You could also have some chocolate bars as another easy snack option.

movie night popcorn buffet

We used some fun little polka dot, and chevron patterned paper bags for everyone to scoop their popcorn into.  These worked great for serving, and everyone could come back up and refill them and try a different flavor during the evening.

movie night snack ideas

Old Fashioned Drinks

I love the drinks we used, old fashioned pop shoppe bottles, in such fun flavours. These were pretty inviting in a simple galvanized bucket filled with ice, and the perfect touch to our movie night.

popshoppe pop

Cozy Blankets and Other Great Additions

And in case of cooler nights,  when the sun goes down at movie time, I included a bucket of cozy red fleece blankets.  These are a great way to cozy up for the movie.  A fire pit would be fun too.

blankets for outdoor movie night

We set it all down by the lake because we were at the cottage. Could it get any more idyllic?  

Don't forget the bug spray.  Citronella candles would be a good option too. 

And also make sure to check the weather forecast before setting it all up, nothing dampens an evening like this more than rain.

outdoor movie night party

Once you're all set up, it's time to enjoy your favorite film with your family members and friends.  This was such a fun activity for enjoying in the summer season.  We loved munching popcorn and enjoying ourselves under the stars watching one of our favorite movies together.  This was a family movie night, but it would be great as an outdoor activity for a birthday party or even as a movie date night.  We used basic materials and some creative ideas to create an amazing movie experience in our own backyard.  I hope it gives you plenty of inspiration fo your own backyard movie night.

how to host an outdoor movie night

With a night like this enjoying all these DIY backyard movie nights, life really is a party!

how to host an outdoor movie night

More Movie Night Inspiration

You might also enjoy our Summer Movie Night that includes free movie night printables for a snack bar and a movie night ticket.  Find it here.

Summer Movie Night: use our free printable summer movie night ticket, popcorn banner, popcorn labels and cupcake picks to set up the perfect summer night.

Also check out our Caramel Corn recipe here.  Guaranteed to be your new favourite for movie night, or anytime.

You might also like our Free Movie Night Printables.  Red and white free printables including labels for the snack bar, movie night tickets, and movie night decorations.

Free Movie Night Printables: free movie night ticket, popcorn banner, movie night snack and drinks signs, food labels, and cupcake pics.

Also check out our Movie Date Night At Home.  Use your Cricut machine to create a movie night ticket, labels, and even a fun game to help you choose your movie genre.

movie date night at home

Road Trip Busy Bags for Kids

Aug 19, 2013 · 8 Comments

Road Trip Busy Bags for Kids: fight the bordem monster with a bag full of activities to keep your kids entertained, including DIY snack kits.

Road Trip Busy Bags for Kids: fight the bordem monster with a bag full of activities to keep your kids entertained, including DIY snack kits.

Road Trip Busy Bags for Kids: fight the bordem monster with a bag full of activities to keep your kids entertained, including DIY snack kits.
Since my girls were very little, we've always packed a busy bag for things like road trips, restaurant visits, and other trips where the "I'm bored" monster might pay us a visit. If you're lucky enough to have one more summer road trip planned here's all you need to keep your little people happy.

We made our busy bags with these great backpack from Stuck On You. They choose their colour, and cute logo, and we had them personalized with their names. I love how each of my girls picked out a sweet logo that fit their personalities perfectly.

road trip busy bags for kids

I Spy Game

We love to the fill the busy bag with lots of activities to keep them happy and entertained. This time I made them a special new treat, an "I Spy" game. They're big fans of the books, so I thought it would be fun to make this version, perfect for a long road trip.

  • empty water bottle
  • lots of little tiny toys
  • vase filler
  • photo of hidden toys
  • paper protector
  • zipped pouch
  • white markers
  • white board eraser and board cleaner

We started out by hunting around the house for lots of little toys. I found lots of perfect little treasures in the Barbie, playmobile, and lego bins. For the bottle I used an empty water bottle, and some great vase filler I found at the dollar store.

DIY I spy game

You could also use rice, but the vase filler was a great option, and I liked its clear colour.

Before I added the toys to the water bottle, I photographed them on a plain background.

DIY I spy game

I printed the picture, and placed it in a page protector. I picked up some fun coloured dry erase markers, an eraser and white board cleaner at the dollar store, and put everything in a perfect little carry case.

I spy game busy bags

My girls loved playing with it, checking off the items they'd found, then erasing it and starting all over again.

busy bags

Favourite Electronics

I always pack some electronics for a long road trip. We have a booklet of their favourite movies, and a portable dvd player, and some age appropriate electronic games.

road trip busy bags

Drawing Supplies

The other big favourite is lots of fun drawing things. My little artists can spend hours creating their masterpieces. We love our new pencil cases from Stuck On You.

road trip busy bags for kids

road trip activity ideas

Snack Kits

The last great addition to the fun bags for our long trip was some snacks. I found these great little storage boxes at the dollar store.

kids snack kits

After washing them out, I filled them lots of little treats for the trip. I wanted things that would last if they didn't finish them all on the first leg of our trip, and that wouldn't make too big of a mess in the car if they spilled. There's a few sweets, and then a few healthier options like dried fruit and cereal.

DIY kids snack kits

road trip travel snack kits

And for thirsty little snackers, a nice cold drink.

road trip with kids tips and ideas

With all these great little treats and activities and few new books from the library too all packed up in your own little fun bag, life really is a party!

You might also like our Top Family Movies here.

Non Cartoon Family Movies: Best non cartoon family movies that parents will actually enjoy too for family movie night or anytime.

Also check out Game Board Night here.

You might also enjoy our Pillow Fort here.

How To Build A Pillow Fort -make a magical pillow fort with fairy lights and starry decorations, and star themed snacks for family night or date night.

How To Make Homemade Potato Chips

Aug 14, 2013 · Leave a Comment

How to make homemade potato chips.

Homemade Potato Chips Recipe: Simple to make and so, so good. Love the flavour of salt and pepper, sure to wow your guests and quickly disappear.

Homemade potato chips.
[feast_advanced_jump_to]

So I've been wanting to make homemade potato chips for a long time. I love chips...in fact they just might be my favourite food ever.  This homemade potato chips recipe is so good and the perfect treat.

We have a pretty strict rule in our house that we only buy chips for a party. I'm secretly very, very happy when there's leftovers after. 😉 The reason for this rule is that when it comes to potato chips I have zero self control.  They're my very favourite treat.  What could be better than this crispy, salty treat? So, going with the fact that everything's better when it's homemade, I've had chips on my mental to-do list for awhile.

Slicing The Potatoes

I'd been waiting until I had a mandoline, no not to play a tune on while I ate the chips, the kind that you use for cutting very thinly. They come on sale often at my local kitchen store, and I was waiting for a coupon. That day came, I went and picked one up for 5 bucks and was in business.

A mandoline slicer is the best and easiest tools to use to slice the potatoes nice and evenly and thinly.  It's important that the sliced potatoes are all the same thickness so that the cook at the same rate when you're frying them.  The mandoline works really well for making your own homemade potato chips, but do be sure to use the guard and use this sharp tool very carefully to avoid cutting yourself by accident.

how to make Homemade Potato Chips

Simple Ingredients

The ingredients are really simple.  You will need potatoes, oil for frying, and some salt and pepper, that's it.  This recipe isn't complicated at all. 

Potatoes

What type of potatoes work best for making homemade potato chips?  The best potatoes to use for making homemade potato chips are high in starch and low in moisture.  Potatoes like russet potatoes, and Yukon golds work very well.  You can also try using sweet potatoes.

slicing potatoes on a mandoline for potato chips

Soaking The Potato Slices

I used my  mandolin slicer to slice them as thin as it could, right into some cold water. You want your chips to soak for about 30 minutes.  

Why soak the potato chips before frying?

Soaking the potatoes before frying, really makes a better chip because some of the potato starch comes out into the water.  This makes a crisper potato chip.  It also helps prevent the sugars in the potato from browning to quickly on the outside, before the chip is cooked through on the inside.

sliced potatoes for homemade potato chips

The next step is to dry them off, it makes them splatter less in the oil.

Homemade Potato Chips Recipe

Frying

I used peanut oil to fry my potato chips.  I like peanut oil because it has a high smoke point.  It also does not easily absorb the flavors of the foods that are fried in it, meaning you can reuse the oil to fry other items with no taste transfer.  I

If you have a peanut oil you can use vegetable oil, sunflower oil,  or canola oil for frying, depending on your preference.  I don't like using olive oil for deep frying because it doesn't have a high enough smoke point.

I like to use a small at home deep fryer for frying.  It has a built in thermometer, so it regulates the oil temperature for you and is the easiest and safest way to deep fry at home.

Fry the potato chips in small batches in your deep fryer at 350 degrees, until golden brown. I like mine a little on the dark side, make them as dark or as light as you like. Smaller batches cook faster, since they don't cool the oil down as much when you add them.

how to make Potato Chips

After removing from the hot oil with a metal slotted spoon, drain the fried potato chips on a sheet pan lined with paper towels lined baking sheet to remove any excess oil.

Seasoning

Add a little salt and pepper right away to the fried chips.  If you wait too long it won't stick. We did some with just salt, but I really liked the salt and pepper combination the best.  

You could get as creative as you want with the potato chip seasoning, and try some garlic salt, sea salt, old bay seasoning, parmesan cheese, or anything else you like. 

These are also delicious with your favorite dip. I love them with a sour cream dip.

Tip:

The chips may not be completely crispy when you first take them out of the fryer.  Don't worry,  they need a few minutes to crisp up as they cool.

Home Made salted Potato Chips

Serve In Fry Boxes

I found these perfect french fry boxes to serve these crispy chips in.  I just love how they looked. My guests loved them too. Of course, I never really met a chip I didn't like. 😉 And these with a little dip...oh my yumminess.

Storage

If you have any leftover homemade chips store them in an airtight container at room temperature.

Potato Chips from scratch

These really are the perfect snack.  You will love these addictive potato chips.  And your guests will be very impressed when they hear you made your own potato chips.  They are so good and so fresh.  And you can have fun with different toppings like simple salt and pepper or something else.  This simple recipe is easy to put together and so, so good.

Recipe

How to make homemade potato chips.

Homemade Potato Chips Recipe

Crispy and salty homemade potato chips.
No ratings yet
Print Pin Rate
Course: Appetizers
Cuisine: American
Prep Time: 40 minutes minutes
Cook Time: 10 minutes minutes
Total Time: 50 minutes minutes
Servings: 4 Servings
Calories: 176kcal
Author: Dannyelle Nicolle-Ramjist

Ingredients

  • 2 large baking potatoes
  • salt and pepper to taste
  • oil for deep frying

Instructions

  • Wash your potatoes and cut the potatoes into thin slices using a mandoline.
  • Soak the potato slices in a large bowl of ice water for ½ hour to remove excess starch.
  • Dry off the potato slices.
  • Fry the potato slices in small batches in your deep fryer set at 350 degrees, until they are golden brown. Cook in small batches so that the oil doesn't cool down too much.
  • Drain them on a paper towel lined baking sheet, and add the salt and pepper right away, if you wait too long it won't stick. They may not be crispy when you first take them out of the fryer, they need a few minutes to crisp up.

Nutrition

Serving: 1g | Calories: 176kcal | Carbohydrates: 32g | Protein: 4g | Fat: 4g | Polyunsaturated Fat: 3g | Sodium: 95mg | Fiber: 3g | Sugar: 2g
Tried this Recipe? Tag me Today!Mention @LifeisaParty or tag #lifeisaparty!

With homemade potato chips, life really is a party.

More Recipe Inspiration

You might also like our Spicy Cheese Straws recipe here.

Cheese Straws Recipe: spicy and savoury cheese shortbread straws, perfect for gift giving or as part of a charcuterie board.

Also check out our Stuffed Mushrooms here.

You might also enjoy our Homemade Flat Bread Crackers recipe here.

Make Your Own Pizza Party!

Aug 12, 2013 · 6 Comments

Make your own pizza party.

Make Your Own Pizza Party - perfect for entertaining, guests create their own pizza by choosing their toppings and cooking it on the outdoor bbq.

Make your own pizza party.
[feast_advanced_jump_to]

This make your own pizza party is perfect for entertaining.  Guest can choose their toppings and make their own favourite pizza.  It's grilled on the bbq so perfect for outdoors, but you could also do it indoors in the oven, or in a pizza oven.  This make your own pizza party is a crowd pleaser that everyone will enjoy.

If you love pizza you might also enjoy our Butter Chicken Pizza Recipe. Also check out our Circus Themed Dinner Party.

I had a great week visiting friends and family in cottage country last week. Today I want to share a make your own pizza party that we put together. My sister is the manager of a camp, and they offer a few really fun workshops to their guests each week. One of the workshops is a make your own pizza party, where guests make pizza on the bbq -perfect for the cottage. Since I was coming up, I thought I'd pick up a few things to make it even more fun.  Here's how I put it all together.

Make Your Own Pizza Party toppings table

Pizza Party Decorations

We decided to go with a fun orange colour scheme, with some white and kraft paper brown for our make your own-pizza party.  I wanted a fun patterned tablecloth, and this one from Target was perfect. Our other big pop of orange was the fun tissue paper tassels that we strung over the table.  Red and white would a great color scheme for a home pizza party too.

pizza party decorations

The beach and forest background couldn't have been prettier.  We set up a few long tables to create our pizza making bar filled with all our favourite pizza toppings.  One long table made it easy for everyone to access and help themselves.

Make Your Own Pizza Party table with toppings

Centrepiece

I wanted to make a fun and reusable centerpiece for the table for our homemade pizza party, so I collected some different letters to spell "Pizza", and leaned them against a rustic wooden box. I really liked how we added a little orange to a couple letters by adding some orange yarn.

On top of the box, I planted some basil in a little tomato paste tin, and some oregano in a peeled tomatoes tin.  I really liked that it was imported from Italy too.  This was such a fun way to add an easy centerpiece for our pizza party theme.  And guests could help selves to the fresh herbs for their pizzas too.

Make Your Own Pizza Party centre piece

Food Labels

On top of our pretty tablecloth we layered some simple brown kraft paper, it made clean up easy, and worked great for writing our labels for all the individual toppings.  This was one of the best ideas because made it so easy for guests to know exactly what they were adding to their pizza.  We chopped lots of fun toppings, put them in simple glass bowls, and then wrote what they were right on the paper runner.  If you're setting up something similar, it's great to have the pizza toppings in matching bowls, like glass or white to help unify the look.  One of our simple tips is to space things out.  It can get a little congested when everyone is making their pizza, so if you have room space out the toppings a little so it isn't too crowded.

Pizza Party toppings with labels on brown Kraft paper
Make Your Own Pizza Party - perfect for entertaining, guests create their own pizza by choosing their toppings and cooking it on the outdoor bbq.

Chalkboard Instructions

On the table we also placed a fun chalkboard, made from a pretty old picture frame, with some instructions for the guests.  This made it easy for everyone to see exactly what they needed to do to make their pizza, and was a fun addition to the decor too.

Make Your Own Pizza Party instructions on a chalkboard for guests

Flowers

Another of our fun ideas for the table were these little clear bottles, with orange zinnias in them.  It's always nice to add some fresh flowers to the table for a party, and these were the perfect color.  The glass bottles tied in well with the glass bowls we used for our toppings too.

Pizza Party decorations

DIY Pizza Toppings

We had so much fun with all the toppings for the pizza and the party guests loved adding all their favorites to their personal size pizzas.  We did a little prep work ahead of time with all the fresh produce, so we could set out all the toppings in small dishes and have everything ready to go at the beginning of the party.  Here's what we had for toppings:

  • salt and pepper
  • olive oil
  • pizza sauce
  • roasted red peppers
  • green olives
  • hot peppers
  • green peppers
  • onion
  • tomatoes
  • pineapple
  • bacon
  • pepperoni
  • mozzarella cheese

More ideas you could include for the pizzas, or to add to the pizzas after their cooked are:

  • ham
  • feta cheese
  • white sauce
  • pesto sauce
  • bbq chicken
  • sausage
  • fresh basil leaves
  • fig jam
  • prosciutto
  • arugula

Be sure to have spoons and tongs available for all the toppings.  And don't forget a pizza cutter for cutting up the pizza after it's baked.

Also check with your guest for any dietary restrictions.  You may need some gluten free pizza crusts, low carb pizza crusts, or vegan cheese options, depending on your group.

This is the perfect pizza party for kids of all ages and adults because everyone can make their own personal pizzas to their tastes with their favorite pizza toppings.  The best part was watching everyone make their own delicious pizza with a unique flavor they would love.  Plain pepperoni pizzas were a hit with lots of the kids.  While the adults loved mixing and matching all the toppings at the pizza-making station, trying a little bit of everything.  This is the perfect way to make everyone happy.

How To Make Pizza On The BBQ

  1.  Start with the dough.   My sister made the dough earlier in the day, and put individual dough balls in ziplock bags. This makes it easy for everyone to make their pizza with the pre-made dough.  She loves this recipe (just for the dough) and makes it in her stand mixer, if you're looking for a good one. If you don't want to make your own dough, you can pick it up at the grocery store, or most pizza stores will sell just the dough for pizza parties if you ask them.  We used paper plates to flatten our dough on with a little all purpose flour dusted on them, then coated both sides of the dough with oil and salt and pepper. 
  2. Next you're ready to grill the dough on the bbq.
  3. Grill until it's golden brown on both sides.
  4. Next top your pizza with sauce, cheese, and anything else you like on the make your own pizza bar. Then, turn off one side of the bbq, and place the topped pizza on the other side with the burner turned off, put the lid of your bbq down and leave it until the cheese is melted and the pizza looks done.
how to make pizza on a bbq

It's really delicious when it's done, with a nice charred, grilled flavour from the bbq.

Pizza In The Oven

We made our pizza on the bbq for this party.  It was perfect for this outdoor party.  You can easily make your pizza in a regular oven if you're indoors, or in a pizza oven if you're lucky enough to have one.  If you're making it in an oven, you can skip the pre-grill, and go straight to adding your toppings.  For the oven be sure to make your pizza on pizza pans or baking sheets.  We usually make individual pizzas and put two mini pizzas on one baking sheet.  It's a good idea to spray your baking sheet with some cooking spray so your fresh dough doesn't stick.  We bake them at 400 in the oven for about 10-15 minutes until their golden and bubbling on top.

Personal pizzas made on the bbq at a make your own pizza party.

We had a great time enjoying our make your own pizza party, it was so much fun and everyone loved all the different toppings they could use to make their own pizzas. This is really a great way to host a pizza party. We had a great time chatting and cooking together, while we waited for the different steps. I really recommend this as a great option for your next backyard bbq party with friends.  Everyone always loves a pizza night.  This DIY pizza station is perfect for a special occasion like your husband's birthday, a family get together, a dinner party with friends, or kid's DIY pizza party.

Make Your Own Pizza Party

I hope these pizza party ideas inspire you for your next get together. 

With a make your own pizza buffet like this, life really is a party!

More Pizza Inspiration

  • Homemade butter chicken pizza with naan bread, yogurt drizzle, and fresh cilantro.
    Butter Chicken Pizza Recipe
  • backyard pizza party
    Backyard Pizza Party
  • Golden pizza crust topped with Nutella and toasted marshmallows.
    Easy S'mores Pizza Recipe

Cottage Hostess Gift

Aug 7, 2013 · 2 Comments

Cottage hostess gift.

Cottage Hostess Gift: ideas for what to include in the perfect gift basket to bring to the cottage as a hostess gift for friends.

Cottage hostess gift basket.
[feast_advanced_jump_to]

This cottage hostess gift is a little twist on a gift basket.  It's filled with lots of treats to enjoy over the weekend with your friends.

If someone is nice enough to invite you to their cottage for the weekend, you want to be the guest that brings the great hostess gift. And, hopefully when they are inviting again, you'll be on the top of their list.  

Galvanized Pail

I started out mine with a great galvanized bucket from Dollarama, and put in a pretty little tea towel to line it too.  You could of course use a basket, but I thought a pail perfect for the cottage.

Alcohol

Next we added some wine and beer, because it's the cottage! Choose your favourites or the fixings for your favourite cocktail would be a great choice too.  If you prefer non-alcoholic drinks your favourite soft drink or sparkling water would be a great choice too.

how to make a gift basket

Cheese and Crackers

I also added in some of my favourite snacks. I made the homemade flatbread crackers -see the easy recipe here , and they were a real hit ie. how to really impress people and hear things like -you actually made crackers? And, they're easy to make, just make sure you put them in something air tight.  I used some cello bags, and tied it with a little twine.

I also included some cheese, fancy mustard, pate, and some fresh fruit.

Everything you need for an afternoon of happiness on the dock. 😉

cottage hostess gift ideas

More Treats

Last but not least, I picked up some really snacky foods, my favourite kettle cooked chips and some peanuts, and some chocolate.  All my favourite treats.

cottage hostess gift

Wrap It All Up

I wrapped it up in some clear cellophane and tied it with a little raffia to finish it off.

cottage hostess gift basket ideas

With a yummy gift like this to share with friends at the cottage, life really is a party!

You might also like our Holiday Hostess Wine and Cheese Gift Basket here.

Also check out our Breakfast In Bed Gift Basket here.

Easy Brownie Mix Mini Donuts with Chocolate Glaze

Aug 2, 2013 · 6 Comments

Mini brownie donuts.

Mini Brownie Mix Donuts: the perfect little mini donut made from a brownie mix, with a homemade glaze -super easy. So, so yummy you won't be able to stop eating them!

Mini brownie donuts.
[feast_advanced_jump_to]

If you're looking for a quick way to make some delicious brown mini donuts you will love this simple recipe.  We used a store bought brownie mix fo the donuts and then added a homemade chocolate glaze that's so good!  This recipe has the deep chocolate flavor of a brownie with the fun shape and frosting of a mini donut.  Using a mix means these are quick and easy to make and they're such a crowd pleaser.  Any chocolate lover will love this simple recipe.

These mini brownie donuts are a combination of fudgy brownies and donut form or as some people call them bronuts.  These fudgy bronuts are so good.  You'll love our chocolatey bronuts no matter what you call them.

When it comes to new recipe ideas, I've had my failures from time to time. I can usually tweak them a little, and the good news is always that even if they aren't great, the evidence doesn't last too long anyway.

Let me tell you, this baking experiment was a winner right out of the gate. Honestly my very favourite new recipe, and it was met with rave reviews by my extended family and neighbours, who couldn't stop eating them.  If you're having chocolate cravings, we're here to help.

If You Can Dream It Brownie Donuts

It all started weeks and weeks ago, when I was imagining what a brownie donut would be like. This weekend I finally got around to trying it out.  And they were amazing.  They have the chewiness of normal brownies, with crispy edges.  If you're a person who loves to eat a corner brownie because it's a little bit more chewy and crisp around the edges, imagine if every piece was like an edge piece.  Because each individual mini brownie donut has lots of edges, they all have that great chewy, crispy texture on the edges and are still soft in the middle.  Plus, these brownie donuts have the most delicious sweet and thick chocolate glaze on top, that take them to the next level.

I started out with a simple grocery store brownie mix, and my mini donut pan. Mix the brownie mix according to the package directions.  I used a brownie mix because it's quicker and easier than making brownie batter from scratch.  But if you have a homemade brownie recipe that you love, feel free to use your favorite brownie recipe instead of a boxed mix to make your brownie doughnuts. Once you have the brownie mixture made, put the batter into a ziplock bag with the end snipped off so I could pipe the batter into the pan.  I found this was the easiest way to neatly and quickly get the brownie batter into the mini donut pan and it gave me the best results.

Mini Brownie Donuts made from brownie mix

Oil, Oil, Oil The Pan

I made sure to oil my non-stick brownie pan very well. The more oil the better, I even went to the trouble of washing and re-oiling my donut pan with every new batch...5 dozen brownies later, I was wishing I had at least one more pan to cut the time down, but in the end it was worth it.  You could also use a nonstick cooking spray for this step.   I used a non-stick metal pans, but a silicone donut pan would make it even easier to get the finished mini donuts out of the pan.

I baked mine for seven minutes, you'll have to adjust the cooking time according to your pan size, brownie mix, and oven. You want the brownie donut batter to puff up a little, and cook through so it holds it shape well, but still be a little chewy and still have that brownie like fudgy texture on the inside and moist crumbs.

After the brownies cooled they needed the perfect chocolate glaze icing, and this one is truly perfect.  You might not think that brownie donuts really need icing, but trust me this rich fudge icing is what make this a great recipe.

Chocolate Glaze

The finishing touch to these little chocolate donuts is the amazing chocolate glaze. The first step to making it is on the stove, and it's a warm glaze that is applied to the brownie donuts by dipping them it, which is a great quick and easy method.  As the glaze cools it sets.  After dipping you can also sprinkle them with chocolate sprinkles to turn them into triple chocolate brownie donuts.  The sprinkles add a little crunch to the mini donuts.  With or without the sprinkles they're delicious.

Mini Brown Donuts

I really liked the mini size of our brownie donuts.  They were such a delicious little bite.  They also had the best chewy texture.  You could also make these regular donut sized if you wish.  They would take less time to make and decorate.  The mini donuts did take quite a lot of time to bake.  If you do make them regular donut size, just be sure to increase the cooking time to accommodate the change in size.

mini brownie mix donuts with homemade chocolate glaze
mini brownie mix donuts with chocolate sprinkles

Store these delicious homemade brownie donuts in an airtight container at room temperature.

Mini Brownie Donuts: the perfect little mini donut made from a brownie mix, with the perfect homemade glaze -super easy.

I served the mini donuts in an olive tray, which worked great, and gives you an idea how small they were. Everything really is cuter when it's mini!  These delicious treats didn't last too long.  They were a real crowd favorite.

how to make Mini Brownie mix Donuts

Seriously, one of my best recipe ideas EVER. You need to try these delicious bronuts.  These are not your average donut.  They have all the goodness of regular brownies, but with more with the chewy edges from the donut's round shape.  And let's not forget the addition of the delicious chocolate glaze.  The decadent brownies turned donuts are so good.

Recipe

Mini brownie donuts.

Mini Brownie Donuts

Soft and chewy mini brownie donuts with sweet chocolate frosting.
4.78 from 9 votes
Print Pin Rate
Course: Desserts
Cuisine: American
Prep Time: 15 minutes minutes
Cook Time: 20 minutes minutes
Total Time: 35 minutes minutes
Servings: 5 Dozen
Calories: 23kcal
Author: Dannyelle Nicolle-Ramjist

Ingredients

  • 1 boxed brownie mix plus the ingredients to make it
  • ¼ cup butter
  • 2 tablespoon milk
  • 1 ½ teaspoon corn syrup
  • 1 teaspoon vanilla extract
  • 2 ounces bittersweet chocolate chopped
  • 1 cup powdered sugar
  • optional: ¼ chocolate sprinkles

Instructions

  • Mix your brownie mix according to the package directions.
  • Prepare your mini brownie pan by oiling it well with vegetable oil.
  • Place brownie batter in piping bag or a ziplock bag and cut of the corner to pipe it into the mini brownie pan.
  • Bake the brownies according to the box instructions (adjusting for their small size) until they are cooked through, but still chewy. We did about 7 min. And them remove them from the donut molds to cool on a wire rack.
  • For the Chocolate Glaze
  • Combine butter, milk, corn syrup, and vanilla in medium saucepan and heat over medium heat until the butter is melted.
  • Decrease the heat to low, add the chocolate pieces, and whisk until it's completely melted.
  • Turn off the heat, and add the powdered sugar, and whisk until smooth. Dip donuts while the glaze is still warm.
  • Optional: before the glaze sets, sprinkle the top of each donut with chocolate sprinkles.

Notes

If the glaze becames a little too thick after a few mins., thin it with a little more milk, and warm it up again over a low heat.

Nutrition

Serving: 1g | Calories: 23kcal | Carbohydrates: 3g | Fat: 1g | Saturated Fat: 1g | Cholesterol: 2mg | Sodium: 8mg | Sugar: 2g
Tried this Recipe? Tag me Today!Mention @LifeisaParty or tag #lifeisaparty!
how to make Mini Brownie Donuts from a brownie mix

With homemade mini brownie donuts, life really is a party!

More Recipe Inspiration

You might also like our Homemade Honey Cruller Donuts here.

Also check out our Breadmaker Dough Mini Jelly Donuts Recipe here.

Bread Machine Jelly Donuts: mini heart shaped jelly donuts, with an easy to make bread machine dough. Perfect for Valentine's Day dessert, or anytime.

Beach Activities For Kids

Jul 29, 2013 · Leave a Comment

Beach picnic and activities for kids.

Beach Activities For Kids: a day at the beach just got better with shell tic-tac-toe, sand bowling, ring toss and a picnic lunch of beach themed foods!

Beach activities and picnic ideas for kids.
[feast_advanced_jump_to]

A day at the beach is always so much fun, but it's even more fun with a few great beach activities for kids planned. These activities don't need too much prepping ahead, and I promise your kids will be delighted to add them to the regular fun of swimming and sand castle making.

beach activities ring toss game

Beach Ring Toss

We started out with a fun little game of ring toss, that couldn't be simpler to prep. I brought a few mason jar rings from home, 3 gold and 3 silver, and then used a few sticks we found on the beach.

beach activities ring toss game

Each of my girls took turns to toss their rings. They loved it.

beach bowling

Beach Bowling

Our next activity was beach bowling. We used a plastic cup as a mould for our bowling pins.

beach sand bowling

We did three, but you could do as many as you like.

beach sand bowling

After they were ready, we used an old volleyball to bowl. It was so much fun, and the kids really enjoyed it. My little tip to remember is that you need a ball with a little weight to it, to knock down the heavy stand, a sports ball works great.

beach tic tac toe

Beach Tic Tac Toe

We also played beach tic-tac-toe. I spray painted some sea shells with red and pink before hand, to use as our X's and O's.

shell tic tac toe

We drew a grid in the sand, and started playing. If you didn't want to break out the spray paint, you could also use light and dark coloured stones, or just draw the X's and O'x in the sand too.

beach activities tic tac toe with shells

Lots of fun for a lazy beach day together.

beach activities

Swimming

Of course the other great activity for our beach day, was swimming.

beach activities

A little cold at first.

beach activities swimming

Once they were used to the water, they had lots of fun!

stuck on you towels swimming
beach picnic food

Beach Picnic

Out last beach activity that day was a fun picnic with beach themed foods.  While the girls played in the sand, I set up our lunch on a picnic table under a nice tree. The tree was perfect for hanging up our pretty bunting flags.

beach picnic food

I set the table with a pretty vintage table cloth, and brought along some simple mason jars for wild flowers we picked at the beach. 

beach picnic lunch

I wanted to make a real beach inspired lunch for my girls, so here's the not too tricky, but still really special menu I came up with.

beach picnic food

Shell Pasta

My girls are huge fans of any kind of pasta, and their favourite is probably pasta with a little butter and parmesan cheese. I boiled up some shell pasta to go with our theme, and thought the cheese, looked a little like sand. I packed it up for the beach in sweet little mason jars.

beach picnic food

Fish Shaped Hard Boiled Eggs

My girls are also big fans of hard boiled eggs, and I just happen to have a bento fish shaped egg mould. We made fish eggs, that I wrapped in parchment and served in these sweet little boat like dishes.

beach picnic food

Apple Sail Boats

I wanted to add a little fruit to the mix, so I turned apple wedges into sail boats, with a simple sail made from some pretty paper and a tooth pick.

beach picnic lunch

Fish Cookies and Gummy Fish

For dessert, I picked up some chocolate gold fish cookies, and added a few gummy fish for fun.

beach picnic lunch

I set up all the goodies, while the girls played.

beach picnic food
beach picnic lunch

Can you tell they were having a good time? And after we were all done, we packed up our pretty wild flowers, and memories of a lovely afternoon together.

beach picnic food

You might also enjoy our Summer Beach Campfire Picnic here.

summer beach picnic

Also check out our Woodland Forest Party Food Ideas here.

You might also like our Outdoor Summer Movie Night here.

Easy Homemade Pudding Pops

Jul 26, 2013 · 1 Comment

Homemade pudding pops.

Homemade Pudding Pops: recipe for chocolate,  s'more, banana, peaches and cream, and Pina colada jello pudding pops. The perfect easy treats for a hot summer day.

Homemade pudding pops.
[feast_advanced_jump_to]

Remember Jell-o Pudding Pops?  Yes, I'm a child of the 80's. I thought it would be fun to make some homemade pudding pops at home in some really fun flavours like s'more, banana, chocolate, peaches and cream, and pina colada.  Classic pudding pops are basically frozen pudding.  The original jello pudding pops  were sold in the freezer section.  They were a similar to fudge pops, or chocolate popsicles, but made with jello pudding, and they came in a bunch of different flavors.  You can no longer buy pudding pops, so we came up with our own homemade version.  With just a few a few basic ingredients, you can turn your favourite pudding into homemade popsicles.  It's such an easy way to make great frozen treats.  This is sure to become one of your favorite kid friendly recipes.

I served them at the end of a summery dinner, as the perfect sweet ending. They're also the perfect snack on a hot day.  Kids of all ages will love them.  They're a great easy recipe for the whole family to enjoy on warm summer days.

s'more, banana, and chocolate pudding pops

Pudding Pop Molds

We made our pudding pops in the 3 oz. paper dixie cups, and they are the perfect size for a kid size treat, or sampling a few different flavours. ;). For our dinner party dessert we served a sampling of 3 different flavors for each plate.  Fill each of the small paper cups with the pudding mixture and then add wooden popsicle sticks.  The pudding is thick enough to hold the pop sticks upright in the little cups.  I also found it helpful, if you're making more than one flavor at once to write the flavor name on each popsicle stick with a sharpie at the top, before inserting it.  You can also use silicon popsicle molds, or ice pop molds if you have them, or even ice cube trays with small plastic spoons in each one.

homemade pudding pops

Basic Pudding Pop Recipe

The basic recipe for making homemade pudding pops uses just a few simple ingredients.   To make them, combine 1 package of pudding mix made following the directions on the box with 1 small carton of heavy cream that has been whipped.  You fold these into each other and then freeze them into popsicles. You can also use cool whip, but we prefer the version made with real whipped cream.  They're delicious made just this way in a classic vanilla pudding pops or chocolate pudding pops flavour.  But, you can make so many variations to this basic recipe by changing the pudding flavor and adding in some fun add-ins and optional ingredients and making a whole variety of flavors.  Look for pudding in flavors at grocery store, like white chocolate, banana, cheesecake, pistachio, oreo cookies and cream, butterscotch, and coconut.

Favourite Add-Ins

We had so much fun coming up with some fun combinations for our own custom flavors.  Once you've selected a your flavor of instant pudding mix, you can have fun with some add-ins to enhance the flavor.  Fresh fruit is a great choice, you might also like to try different candy, or cookie crumbs.

  • fresh strawberries
  • banana slices
  • peaches
  • pineapple
  • berries
  • M & Ms
  • graham cracker crumbs
  • oreo cookie crumbs
  • mini marshmallows
  • chocolate chips
homemade chocolate pudding pops

Recipe

Homemade pudding pops.

Homemade Chocolate Pudding Pops

Frozen chocolate pudding pops.
5 from 1 vote
Print Pin Rate
Course: Desserts
Cuisine: American
Prep Time: 10 minutes minutes
Additional Time: 6 hours hours
Total Time: 6 hours hours 10 minutes minutes
Servings: 10
Calories: 127kcal
Author: Dannyelle Nicolle-Ramjist

Ingredients

  • 1 package of instant chocolate pudding
  • 2 cups milk
  • ½ pint whipping cream
  • 1 tablespoon sugar
  • 1 teaspoon vanilla

Instructions

  • Whip your cream, adding 1 tablespoon of sugar and 1 teaspoon vanilla near the end.
  • In another bowl, make the chocolate pudding according to the package instructions.
  • Fold the whip cream into the chocolate pudding.
  • To make the pudding pops, fill the dixie cup with the pudding mixture. Makes about 10. Add a popsicle stick, and place in the freezer for at least 6 hours to set. To release the pudding pop from the dixie cup, run it under hot water for a few seconds.

Nutrition

Serving: 1g | Calories: 127kcal | Carbohydrates: 7g | Protein: 3g | Fat: 10g | Saturated Fat: 6g | Polyunsaturated Fat: 3g | Cholesterol: 32mg | Sodium: 72mg | Sugar: 2g
Tried this Recipe? Tag me Today!Mention @LifeisaParty or tag #lifeisaparty!
s'more pudding pop recipe

My girls love s'mores, so that's the first flavour I made. They really loved them.

Recipe

Homemade pudding pops.

Homemade S'more Pudding Pops

Pudding pops with graham crackers, marshmallows and chocoalte.
5 from 1 vote
Print Pin Rate
Course: Desserts
Cuisine: American
Prep Time: 10 minutes minutes
Additional Time: 6 hours hours
Total Time: 6 hours hours 10 minutes minutes
Servings: 12
Calories: 338kcal
Author: Dannyelle Nicolle-Ramjist

Ingredients

  • 1 package of instant chocolate pudding
  • 2 cups milk
  • ½ pint whipping cream
  • 1 tablespoon sugar
  • 1 teaspoon vanilla
  • ¼ cup graham wafer crumbs
  • 1 tablespoon melted butter
  • 1 tablespoon sugar
  • ¼ cup mini marshmallows

Instructions

  • Whip your cream, adding 1 tablespoon of sugar and 1 teaspoon vanilla near the end.
  • In another bowl, make the chocolate pudding according to the package instructions.
  • Fold the whip cream into the chocolate pudding.
  • In another bowl, combine graham crackers with melted butter, and 1 tablespoon of sugar.
  • To make the pudding pops, fill the bottom of a dixie cup with spoonful of the graham cracker mixture, top with a little of the pudding, then add marshmallows. Fill the rest with pudding. Makes about 12. Add a popsicle stick, and place in the freezer for at least 6 hours to set. To release the pudding pop from the dixie cup, run it under hot water for a few seconds.

Nutrition

Serving: 1g | Calories: 338kcal | Carbohydrates: 26g | Protein: 6g | Fat: 23g | Saturated Fat: 14g | Polyunsaturated Fat: 8g | Trans Fat: 1g | Cholesterol: 70mg | Sodium: 208mg | Sugar: 11g
Tried this Recipe? Tag me Today!Mention @LifeisaParty or tag #lifeisaparty!
jello banana pudding pops

Recipe

Homemade pudding pops.

Homemade Banana Pudding Pops

Banana flavoured pudding pops.
5 from 1 vote
Print Pin Rate
Course: Desserts
Cuisine: American
Prep Time: 10 minutes minutes
Additional Time: 6 hours hours
Total Time: 6 hours hours 10 minutes minutes
Servings: 12
Calories: 158kcal
Author: Dannyelle Nicolle-Ramjist

Ingredients

  • 1 package of instant banana pudding
  • 2 cups milk
  • ½ pint whipping cream
  • 1 tablespoon sugar
  • 1 teaspoon vanilla
  • ¼ cup graham wafer crumbs
  • 1 tablespoon melted butter
  • 1 tablespoon sugar
  • 1 banana sliced

Instructions

  • Whip your cream, adding 1 tablespoon of sugar and 1 teaspoon vanilla near the end. Set aside ½ cup.
  • In another bowl, make the banana pudding according to the package instructions.
  • Fold the whip cream (except for the ½ cup you set aside) into the banana pudding.
  • In another bowl, combine graham crackers with melted butter, and 1 tablespoon of sugar.
  • To make the pudding pops, fill the bottom of a dixie cup with spoonful of the graham cracker mixture, top with a little of the pudding mixture, then add some sliced banana. Fill the rest with pudding. Tope with some of the set aside whipped cream. Makes about 12. Add a popsicle stick, and place in the freezer for at least 6 hours to set. To release the pudding pop from the dixie cup, run it under hot water for a few seconds.

Nutrition

Serving: 1g | Calories: 158kcal | Carbohydrates: 14g | Protein: 3g | Fat: 10g | Saturated Fat: 6g | Polyunsaturated Fat: 3g | Cholesterol: 29mg | Sodium: 86mg | Sugar: 8g
Tried this Recipe? Tag me Today!Mention @LifeisaParty or tag #lifeisaparty!
peaches and cream pudding pops

Recipe

Homemade pudding pops.

Pina Colada Pudding Pops

5 from 1 vote
Print Pin Rate
Course: Desserts
Prep Time: 15 minutes minutes
Additional Time: 6 hours hours
Total Time: 6 hours hours 15 minutes minutes
Servings: 12
Calories: 120kcal
Author: Dannyelle Nicolle-Ramjist

Ingredients

  • 1 package of coconut pudding prepared according to the package instructions
  • 1 small can of pineapple pieces drained
  • 8 fl oz whipping cream
  • 3 teaspoon sugar
  • 1 teaspoon rum extract optional

Instructions

  • Prepare coconut pudding according to the package instructions, and since it's a cooked pudding, allow it to cool completely.
  • Whip cream, and when it's almost fully whipped add in 3 teaspoon of sugar, and if you like, 1 teaspoon of rum extract.
  • Fold whip cream and drained pineapple pieces into the pudding.
  • Fill dixie cups, or popsicle moulds and freeze for at least 6 hours until frozen. Enjoy!

Nutrition

Serving: 1g | Calories: 120kcal | Carbohydrates: 8g | Protein: 1g | Fat: 10g | Saturated Fat: 7g | Polyunsaturated Fat: 2g | Cholesterol: 23mg | Sodium: 39mg | Fiber: 1g | Sugar: 6g
Tried this Recipe? Tag me Today!Mention @LifeisaParty or tag #lifeisaparty!
pina colada pudding pops

Recipe

Homemade pudding pops.

Peaches and Cream Pudding Pops

5 from 1 vote
Print Pin Rate
Course: Desserts
Prep Time: 10 minutes minutes
Additional Time: 6 hours hours
Total Time: 6 hours hours 10 minutes minutes
Servings: 12
Calories: 92kcal
Author: Dannyelle Nicolle-Ramjist

Ingredients

  • one pkg of vanilla instant pudding made according to the package directions
  • 8 fl oz whipping cream
  • 1 tsp. vanilla
  • 3 tsp. sugar
  • can of peaches

Instructions

  • Prepare the pudding according to the package directions.
  • Whip the cream, and when it's almost fully whipped add in vanilla and sugar.
  • Fold the whipped cream into the pudding.
  • Drain the peaches, and chop each peach slice into four, and add to pudding mixture.
  • Fill dixie cups with mixture and freeze.
  • When you're ready to eat them, run the cup under hot water for a min. to loosen it, and enjoy!

Nutrition

Serving: 1g | Calories: 92kcal | Carbohydrates: 5g | Protein: 1g | Fat: 7g | Saturated Fat: 5g | Polyunsaturated Fat: 2g | Cholesterol: 23mg | Sodium: 39mg | Sugar: 3g
Tried this Recipe? Tag me Today!Mention @LifeisaParty or tag #lifeisaparty!
peaches and cream pudding pops

With these homemade treats in your freezer you won't have any need for the ice cream truck to visit.  Your kids will love coming up with different flavor combinations and trying different versions all summer.  Next time you're in the grocery store be sure to pick up the ingredients and give these homemade pudding pops a try.

Homemade Pudding Pops: recipe for s'more, banana, and chocolate jello pudding pops. The perfect easy treat for a hot summer day.

With homemade pudding pops on a warm summer day life really is a party!

More Recipe Inspiration

You might also enjoy our Homemade Strawberry Rhubarb Ice Cream recipe here.

Homemade Rhubarb and Strawberry Ice Cream Recipe: creamy vanilla base, with tangy rhubarb compote and sweet strawberry compote ribbons throughout.

Also check out our Kit Kat Ice Cream Recipe here.

Kit Kat Ice Cream Recipe -delicious homemade vanilla ice cream base, with our favourite chocolate bar mixed in for a little chocoalte and some crunch.

You might also enjoy our Easy Ice Cream Sundae Charcuterie Dessert Board here.

ice cream charcuterie board

Easy Campfire Cinnamon Rolls

Jul 19, 2013 · 6 Comments

Campfire cinnamon rolls being roasted over a campfire.

Easy Campfire Cinnamon Rolls -the perfect easy treat for camping, using store bought cinnamon rolls, your kids will LOVE these!

Campfire cinnamon rolls being roasted over a campfire.
[feast_advanced_jump_to]

f you're a fan of cinnamon rolls you will love this camping version.  Made with store-bought cinnamon rolls from the refrigerated section of the grocery store, they so easy to make.  And baked over an open campfire, they are so perfect for your next camping trip.

I had this idea, that you could make cinnamon rolls over the campfire, and they worked...they really worked. The kids were skeptical, but let me tell you, they were believers after their first bites.

I was on my annual camping trip, with 4 of my girl friends and our 10 kids on a beach/camping trip for a couple nights. We've got a little smarter over the years, and we've settled into a great little system where one of us cooks one meal for everyone over the trip and that's all you have to do. We supplement it with trips to the ice cream shop too. 😉 I picked the first dinner -it's a get it over with so you can enjoy yourself kind-of-a-move.

I wowed them with the campfire paninis, can I just say, they really are awesome. And just when they were all satisfied with their amazing dinner, I brought on dessert.  These were a lovely after dinner dessert treat.  They would also make a great and easy breakfast.

It was a little experimental, but it actually worked a charm. Surveying the kids afterward, I think this might just become part of our annual camping tradition. They aren't exactly like the out of the oven version.  They're a little smoky, and a little charred, but that just makes them more campfire-y.  This is one of my new favorite camping recipes.

Campfire Cooking

Move over marshmallows, we've got a new favorite campfire dessert to make in the great outdoors over an open fire!  Just like roasting marshmallows, these work best over a fire that has some nice hot coals.  You won't want to place your cinnamon rolls over the direct or large flames.  The hottest part of the campfire is the hot coals, and this is the best spot for roasting them in indirect heat rather than in the open flame.  

We roasted our delicious campfire cinnamon roll-ups using marshmallow forks.  These are great because they're extendable.  They also offer a little more space for the cinnamon roll, and are a better choice than roasting stick.  Fair warning though, It does take quite a while to cook the cinnamon roll dough all the way through.  Some of our younger kids got tired of holding their forks and rotating them, so the moms took over, even propping some of the forks over the coals, and rotating them occasionally.  

Cooking time will vary depending on how hot your coals are, are big your fire is, and hot close to the hot coats in your fire pit that you hold your cinnamon roll while it cooks.  Keep in mind these usually take 10 minutes or so in the oven to bake.

use store bought cinnamon rolls and roast over a campfire

In order to put your cinnamon roll onto your campfire fork, you will need to unroll it, and then roll it onto the the fork in a single overlapping layer.  We used half of one cinnamon per fork.  You will know the cinnamon roll is cooked when it's golden brown on the outside and no longer doughy on the inside.  Cook them less for more gooey cinnamon rolls.

unrolling a cinnamon roll

Be sure to let your cinnamon rolls cool slightly before eating.  The best part of these yummy cinnamon rolls is the topping.  We used the cream cheese icing that comes in the premade package with the cinnamon rolls to ice them after they're cooked, or you can roll them in a cinnamon sugar mixture.  Both options make such a tasty treat.

roasting a cinnamon roll over a campfire

So simple, and so, so yummy.   This is the perfect fun treat to make while you're sitting around a campfire. There is no easier camping recipe to make.   I know all the campfire foodie people will love this idea.  There's no prep work, and it's one of our favorite campfire easy recipes.  If you're huge fans of cinnamon buns, then you will love this easy campfire version.  This the best way to make quick and fun camping breakfasts or dessert around the campfire at the end of the day.

Love campfire cooking? Also check out our savory smores, made with cheese and crackers.

Recipe

Campfire cinnamon rolls being roasted over a campfire.

Campfire Cinnamon Rolls

Make easy cinnamon rolls with frosting on the campfire.
5 from 1 vote
Print Pin Rate
Course: Dessert
Cuisine: American
Prep Time: 5 minutes minutes
Cook Time: 15 minutes minutes
Total Time: 20 minutes minutes
Servings: 10
Calories: 63kcal
Author: Dannyelle Nicolle-Ramjist

Ingredients

  • Pillsbury Grands "Flaky Supreme" Cinnamon Rolls with Icing you can use any brand or kind you like, but these unrolled really well

Instructions

  • Unwrap the cinnamon roll dough, and divide the long pieces of dough in half.
  • Wrap half of the dough from the flattened roll around a campfire fork. Do not overlap the dough too much. If it's too thick it will burn on the outside and be doughy still on the inside. Now just roast it over your campfire. As it cooks it will get browned on the outside and puff up a little. The main challenge is getting it done on the inside, so it's not too doughy.
  • Once it's done, let is sit a few minutes because it will be too hot to handle, then take it off the fork and drizzle with a little bit of the prepared icing.

Nutrition

Serving: 1g | Calories: 63kcal | Carbohydrates: 10g | Protein: 1g | Fat: 2g | Saturated Fat: 1g | Polyunsaturated Fat: 1g | Trans Fat: 1g | Sodium: 133mg | Sugar: 5g
Tried this Recipe? Tag me Today!Mention @LifeisaParty or tag #lifeisaparty!
campfire cinnamon rolls

With campfire cinnamon buns, life really is a party!

Easy Campfire Cinnamon Rolls -the perfect easy treat for camping, using store bought cinnamon rolls, your kids will LOVE these!

More Camping Recipes

You might also like our Campfire Baked Apples recipe here.

Also check out our Campfire Paninis recipe here.

You might also like our Campfire Muffins in an Orange Peel here.


Kit Kat Ice Cream Recipe

Jul 17, 2013 · 3 Comments

Homemade kit kat ice cream recipe.

Kit Kat Ice Cream Recipe -delicious homemade vanilla ice cream base, with our favourite chocolate bar mixed in for a little chocolate and some crunch.

Homemade kit kat ice cream in a pink striped container.
[feast_advanced_jump_to]

This Kit Kat Ice Cream Recipe is a favourite and sure to make many appearances at our house over the summer.  If you're a fan of kit kat candy bars, you're sure to love this homemade ice cream recipe full of chopped kit-kat pieces.  Kit kat bars have always been a childhood favorite.  You can buy store-bought ice cream in kit kat flavor at grocery stores, but it really can not compare with this homemade version.  The vanilla custard ice cream base is rich and so creamy, and the crunchy milk chocolate kit kat pieces are the perfect combination.  This time of year, when the weather is hot, it's the perfect summertime treat, made with simple ingredients.

Ice Cream Machine

You will need an ice cream machine to churn this ice cream.  We have an ice cream maker, but we rarely use it. Let me tell you, it's worth getting that baby out for this recipe, it's really, really good. For most ice cream makers, the churning section must be frozen to use it.  It's worth storing this section in the freezer so you're ready to make your own ice cream anytime you want to.  If you don't store this part in the freezer, be sure to pre-chill it the day before you want to make this recipe.

Homemade Kit Kat Ice Cream
Kit Kat chocolate bars

Kit Kats were always a favourite chocolate bar of mine, and adding them to ice cream makes them even better.

chopped Kit Kat bars

Cut the kit kat bars into large chunks before adding them into the churned ice cream during the last few minutes.

I think this might be my new favourite ice cream. I'm really a vanilla girl, and the addition of the kit kat is kind of perfect -not too chocolaty, but a nice little crunch with the delicious little flecks of real vanilla too. My kids also loved it.

Using a thermometer is a great way to take all the guesswork out of the recipe too. Definitely a make-again and again recipe.  This easy recipe has only a few simple steps and make such a delicious treat.  It's perfect for enjoying with your family or serving to friends this summer.

Serve your creamy ice cream in an ice cream cone, bowl, or in waffle cones.

Recipe

Homemade kit kat ice cream recipe.

Kit Kat Ice Cream

Smooth and creamy vanilla ice cream with pieces of Kit Kat chocolate bars.
No ratings yet
Print Pin Rate
Course: Desserts
Cuisine: American
Prep Time: 10 minutes minutes
Cook Time: 15 minutes minutes
Additional Time: 12 hours hours
Total Time: 12 hours hours 25 minutes minutes
Servings: 8 cups
Calories: 523kcal
Author: Dannyelle Nicolle-Ramjist

Ingredients

  • 3 cups half-and-half cream
  • 1 cup heavy whipping cream
  • 8 large egg yolks
  • 1 ¼ cups sugar
  • 1 teaspoon vanilla extract
  • 1 vanilla bean optional
  • 4 Kit Kat bars

Instructions

  • Place half-and-half and the heavy cream into a saucepan, and heat over medium heat. Bring the mixture just to a simmer, stirring occasionally and remove from heat.
  • Next, in a medium bowl whisk the egg yolks until they lighten in colour, then gradually whisk in the sugar. Now temper the cream mixture by gradually adding small amounts of the heated cream, until ⅓ has been added. Finally pour in the remainder and return the entire mixture to the saucepan. Continue to cook over low heat, stirring constantly, until the mixture thickens slightly and coats the back of a spoon, reaching 170 to 175 degrees F.
  • Next pour the cream and egg mixture into a large bowl and cool at room temperature half an hour. Stir in the vanilla, and the inside scraping of the vanilla bean (or omit the vanilla bean and use 2 teaspoon of vanilla extract). Refrigerate the mixture 4-8 hours until the temperature is 40 degrees F or below.
  • Pour the mixture into your ice cream maker and follow the manufacturer's direction to churn ice cream. Meanwhile, chop the kit kat bars into small pieces. Finally during the last 5 min as you churn in the ice cream maker, add in the chopped kit kat pieces. Enjoy from the ice cream maker as soft serve or freeze 3-4 hours in the freezer in an air-tight container for the ice cream to fully harden

Nutrition

Serving: 1g | Calories: 523kcal | Carbohydrates: 50g | Protein: 12g | Fat: 31g | Saturated Fat: 19g | Polyunsaturated Fat: 11g | Trans Fat: 1g | Cholesterol: 277mg | Sodium: 147mg | Sugar: 46g
Tried this Recipe? Tag me Today!Mention @LifeisaParty or tag #lifeisaparty!
how to make Kit Kat Ice Cream

With our kit kat ice cream recipe, life really is a party.

Kit Kat Ice Cream Recipe

More Homemade Ice Cream Recipes

  • Ice cream charcuterie dessert board in the shape of an ice cream cone.
    Easy Ice Cream Sundae Charcuterie Dessert Board
  • Easy 3 ingredient coconut ice cream recipe.
    Easy 3 Ingredient Coconut Ice Cream
  • homemade strawberry rhubarb ice cream
    Strawberry Rhubarb Ice Cream Recipe
  • Pumpkin pie ice cream recipe.
    Pumpkin Pie Ice Cream

Mustache Party

Jul 10, 2013 · 1 Comment

Mustache theme party ideas.

Mustache Party: Ist birthday party Mustache Bash Little Man themed party full of mustache details and ideas for food, decor, and party favours.

moustache themed party ideas
[feast_advanced_jump_to]

I had the great pleasure of attending my friend Alexander's first birthday a little while ago, it was a "Mustache Bash" and I thought you'd love to see all the fun details from this adorable mustache theme party. Nice to see a boy's party around here for a change? Yeah, me too. 😉

Mustache Party Decor

Alex's mom Katie, set up the little man birthday party in the backyard for close friends and family. I loved the Birthday banner, made with Alexander's Grandpa's ties, he just retired and since his business days are done, he was more than happy to contribute these for the birthday celebration. ;). Katie also added in some number 1s and the birthday boy's name "Alexander". I love personalized handmade party decor like this.  She created it out of black and white card stock and used some clothes pins to attach the letters to the banner string.  I also love that the name is reusable, and something she could change to fit any party theme or color scheme in the future.  The name banner would be a great one to use for every birthday and add different accent pieces to for a different theme or type of party each year.

Mustache Bash party decorations tie garland

The party colour scheme was black and white and worked so well with the little man mustache party theme. I loved the main focal point dessert table.

Mustache Bash little man tie garland party decorations

Party guests were invited to grab a mustache to wear for the party as soon as they arrived, and there were a few great options to choice from..

Mustache Bash stick on mustaches

Katie picked up the stick-on mustaches, and finger tattoos at the party store. Here she is with one of the finger tattoos held up to her upper lip -so cute.

Mustache finger tattoo

I kind of loved Alexander's Dad's mustache the best though.  Why did mustaches ever go out of everyday fashion?  I think maybe we should bring them back

Mustache Bash little man 1st birthday party

For those of us who couldn't grow one just for the party there were always stickers. Some people can just make anything look good. ;). The mustaches made great photo props.

Mustache Bash 1st birthday

Mustache Party Food

Katie made a great dinner for everyone, of Little Manwiches. They were delicious, and the easy way to feed a large party crowd.

She made pulled pork in the slow-cooker and offered lots of different bbq sauces, and buns for guests to make their own sandwich at the food table.

Mustache Bash manwiches

There were also bow ties -Pasta Salad made with bow tie pasta, and a veggie tray.

Mustache Bash party food

I loved the tie napkins Katie made -such a cute detail. She just folded regular black napkins and secured with a dab of glue.  There's no need for napkin rings, when your napkin is a tie!  These were so cute with the little men theme .

Mustache Bash party tie napkins

Mustache Party Drink Station

And for the drinks, a cute little "wet your whiskers" sign, and regular cups that Katie added mustaches to with a marker. So clever.  I love this idea to personalize your party supplies for your own mustache party.  There was punch, pop, and juice boxes for kids to enjoy.

Mustache Bash wet your whiskers drink station

Photo Booth

There was also a fun photo booth for guests, with some cute props for photos. I love the sign, "Comb on over to the Photo Booth...we mustache you to grab a prop and smile"! Love it.  What a great way to capture some memories of the day.  And the mustache props were so much fun.

Mustache party photo booth

Here's the birthday boy with a little top hat.  He is the sweetest little boy, and his mustache birthday party was so much fun.

Mustache Bash little man 1st birthday party

Mustache Party Dessert Table

Back to the dessert table, full of oh so sweet little delicious treats.

Mustache party dessert table
Mustache cupcakes

Katie made the cupcakes and decorated them with cute printables.  She also made the birthday cake. I love how striking the simple black and white is and how perfectly it goes with the fun theme.

Mustache birthday cake

Katie found a chocolate mold at Bulk Barn and made the fun mustache chocolate lollipops. So cute here served in mason jars.

Mustache party dessert table

I made some mustache sugar cookies for the party, using a cute moustache cookie cutter, and decorating them with chocolate sprinkles.  I baked them on a lollipop stick, and they were so much fun.  Here's Alex's auntie modelling one for us.

Mustache Bash cookies

Party Favors

As parting gifts, Katie made the cutest little "staches" to head home with.

Mustache Bash party favours

Katie filled the bags with white and black gum balls, mustache bandaids, more tattoos and mustache stickers, and a chocolate lollipop mustache. Katie spotted the little favour bags in the wedding section of the dollar store, and made the labels. I love how they turned out.

One last little detail, Katie found the mustache pacifier at Chapters, tastes best when covered in birthday cake icing. 😉

Mustache Bash 1st birthday

I had such a good time celebrating Alex's first birthday at the Mustache Bash! I love themed parties, and this stash bash was such a great time.  It would also be a great theme to use for Father's day, or for a mustache baby shower for a little boy, or even for a movember party.  I hope you find all these mustache party ideas helpful if you planning any mustache parties.

With mustache's all round, life really is a party! Happy Birthday Alexander!

More Party Inspiration

You might also like Board Game Party here.

Also check The Toast Party here.

toast party ideas.

You might also enjoy our Backyard Pizza Party here.

Backyard Pizza Party: A gas outdoor pizza oven and a pizza charcuterie board for nibbling and to make-your-own-pizza is perfect for summer entertaining.
  • « Go to Previous Page
  • Page 1
  • Interim pages omitted …
  • Page 15
  • Page 16
  • Page 17
  • Page 18
  • Page 19
  • Interim pages omitted …
  • Page 21
  • Go to Next Page »

Primary Sidebar

Welcome!

Life is a Party is all about helping you celebrate everyday with great food, entertaining and party inspiration, and seasonal crafts and home decor inspired by the holidays.

More About Dannyelle

Trending Recipes

  • Mac and cheese with panko breadcrumb topping.
    Best Homemade Mac and Cheese with Panko Breadcrumb Topping
  • Homemade iced capps in glasses on a wood table.
    Tim Hortons Copycat Iced Capp Recipe
  • Dirt Pudding no cream cheese in glasses with candy rocks, and fresh mint that looks like a little plant.
    Easy Dirt Pudding Recipe without Cream Cheese
  • Easy 3 ingredient coconut milkshake recipe.
    Easy Coconut Milkshake Recipe
  • Easy food processor scones on a plate with jam.
    Easy Food Processor Scones
  • Fluffy small batch pancakes for two ready to serve on a plate with syrup.
    Easy Small Batch Pancakes For Two Recipe

Fall Ideas

  • Pumpkin shaped dinner roll recipe, with a herb stem.
    Pumpkin Shaped Dinner Rolls
  • Fall breakfast board
    Fall Breakfast Charcuterie Board
  • Halloween witch decorations
    Witch Halloween Decor
  • fall home decor
    Fall Decorating Ideas -Home Tour
  • Modern Boho fall mantel ideas.
    Modern Boho Fall Mantel Ideas
  • Homemade pink candy apples on a cutting board.
    How To Make Pink Candy Apples

Entertaining Ideas

  • Adult mermaid party table set on the beach with cake and shells.
    Adult Mermaid Party Ideas: A Beach Picnic Goodbye to Summer
  • Overhead view of tomato party table with pizza and appetizers.
    The Ultimate Tomato Party: A Tomato Girl Summer Garden Gathering
  • Camp themed party table with green gingham tablecloth, wildflowers, and Welcome to Camp banner.
    The Ultimate Camp Themed Party for Adults
  • Garden party table set under white pergola with vintage floral tablecloth, pink peony centerpiece in wooden tool caddy, white wicker chairs, and climbing white roses in background.
    Garden Themed Party
  • Complete mimosa bar setup on white console table with vintage silver ice bucket, labeled colorful juice bottles, small glass garnish bowls, and ribbon-tied champagne flutes on white lace tablecloth with flower wall backdrop.
    How to Set Up a Beautiful Mimosa Bar
  • Breakfast for dinner party table styled like a bed with star quilt tablecloth, gingham pillows, and cloud installation above.
    Breakfast for Dinner Party: Brinner Under the Stars
  • Recipe Index
  • Parties & Entertaining
  • Fall
  • Subscribe
  • Free Resource Library

Footer

back to top

as seen in:

Better Homes and Garden Logo
American Farmhouse Style logo.
Apartment Therapy logo.

About

  • Privacy Policy
  • About

Subscribe

  • Sign Up! for emails and updates

Contact

  • Contact

As an Amazon Associate I earn from qualifying purchases.

Copyright © 2025 Life is a Party

Share
Pin
Post
Share
Pin
Post

Rate This Recipe

Your vote:


A rating is required
A name is required
An email is required