• Skip to primary navigation
  • Skip to main content
  • Skip to primary sidebar
Life is a Party
  • Recipe Index
  • Parties & Entertaining
  • Spring and Easter
  • Subscribe
  • Free Resource Library
menu icon
go to homepage
  • Recipe Index
  • Parties & Entertaining
  • Spring and Easter
  • Subscribe
  • Free Resource Library
subscribe
search icon
Homepage link
  • Recipe Index
  • Parties & Entertaining
  • Spring and Easter
  • Subscribe
  • Free Resource Library
×
Home

Snow Ice Cream

Snow Ice Cream

Feb 19, 2013 · 2 Comments

Snow ice cream simple recipe.

Snow Ice Cream Recipe: use fresh snow and whipped cream to make a really easy and fun ice cream from. Perfect family activity on a snowy day.

Snow ice cream simple recipe.
[feast_advanced_jump_to]

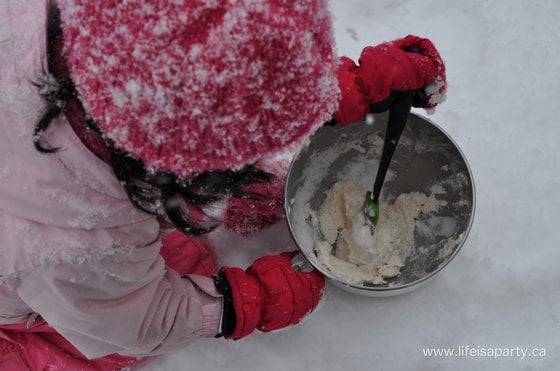
It snowed on the weekend here, and I thought it would be fun to try our snow ice cream recipe.  WE had so much fun making it.  The snow ice cream is really simple to make.  It's the perfect family activity.

how to make Snow Ice Cream
Snow Ice Cream recipe
how to make ice cream out of snow

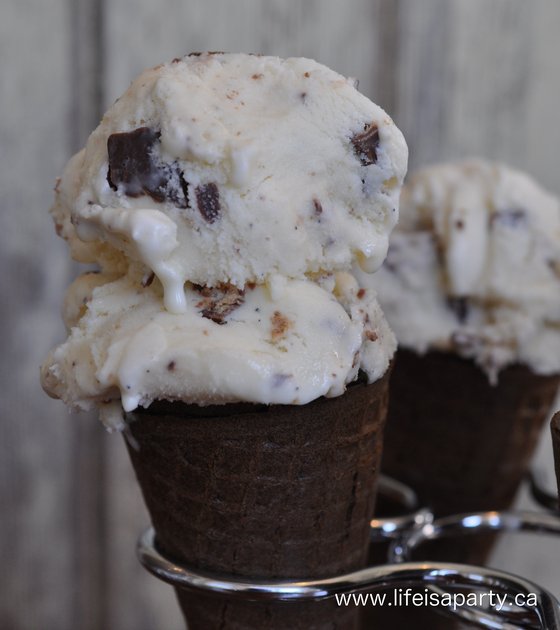
It's that easy. My girls really enjoyed making it. It melts quickly, so you have to eat it quickly -not really a problem. And if you're a chocolate lover, like one of my little helpers, just add a little chocolate syrup.

Recipe

Snow ice cream simple recipe.

Snow Ice Cream Recipe

Easy recipe for snow ice cream to enjoy on a snowy winter day.
No ratings yet
Print Pin Rate
Course: Desserts
Cuisine: American
Prep Time: 10 minutes minutes
Total Time: 10 minutes minutes
Servings: 2 servings
Calories: 262kcal
Author: Dannyelle Nicolle-Ramjist

Ingredients

  • ½ cup whipping cream
  • ¼ cup icing sugar
  • 1 teaspoon vanilla
  • fresh snow

Instructions

  • Lightly whip the cream with sugar and vanilla, to soft peaks, inside.
  • Then head outside and add snow slowly, stirring, until you reach the consistency of ice cream. Enjoy!

Nutrition

Serving: 1g | Calories: 262kcal | Carbohydrates: 16g | Protein: 2g | Fat: 21g | Saturated Fat: 14g | Polyunsaturated Fat: 6g | Trans Fat: 1g | Cholesterol: 67mg | Sodium: 17mg | Sugar: 15g
Tried this Recipe? Tag me Today!Mention @LifeisaParty or tag #lifeisaparty!
Snow Ice Cream

With fresh snow ice cream, life really is a party!

More Ice Cream Inspiration

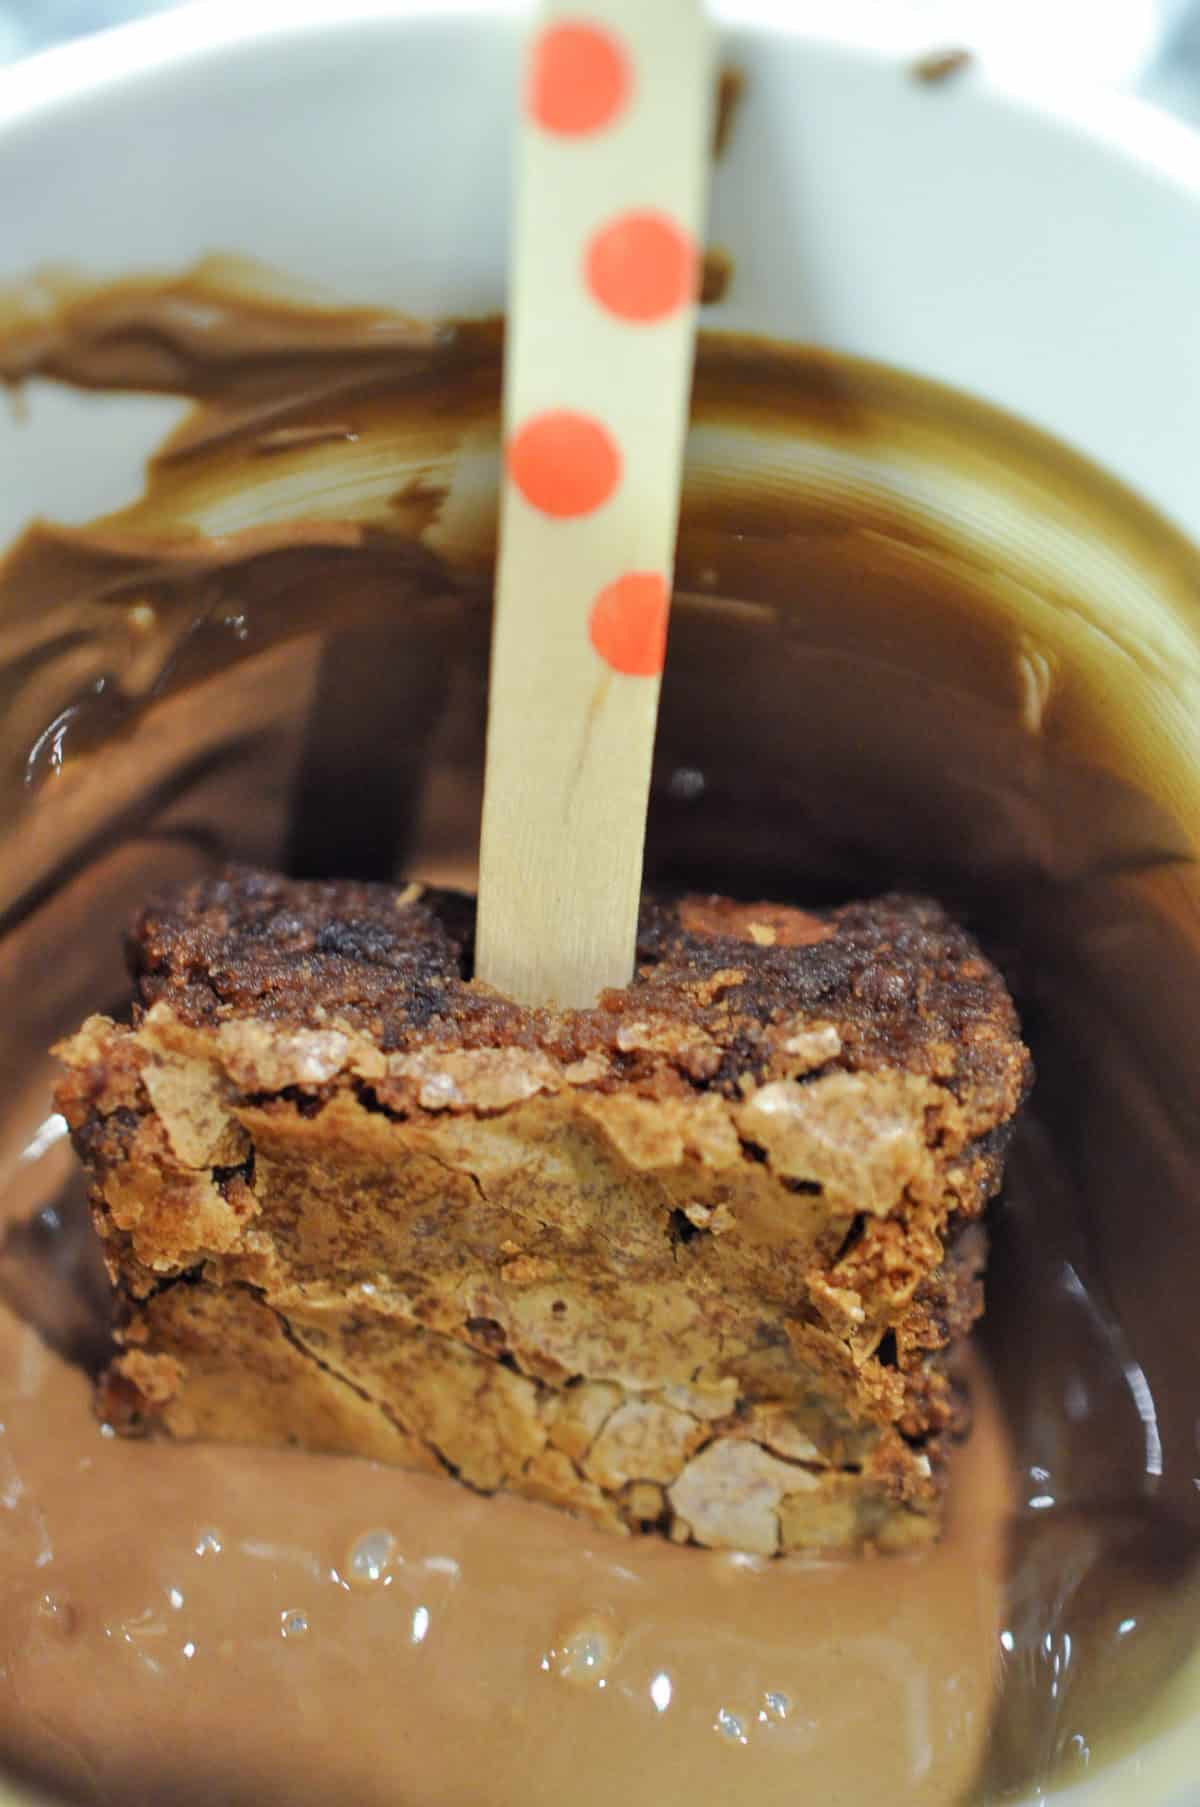
You might also like our Kit Kat Ice Cream recipe here.

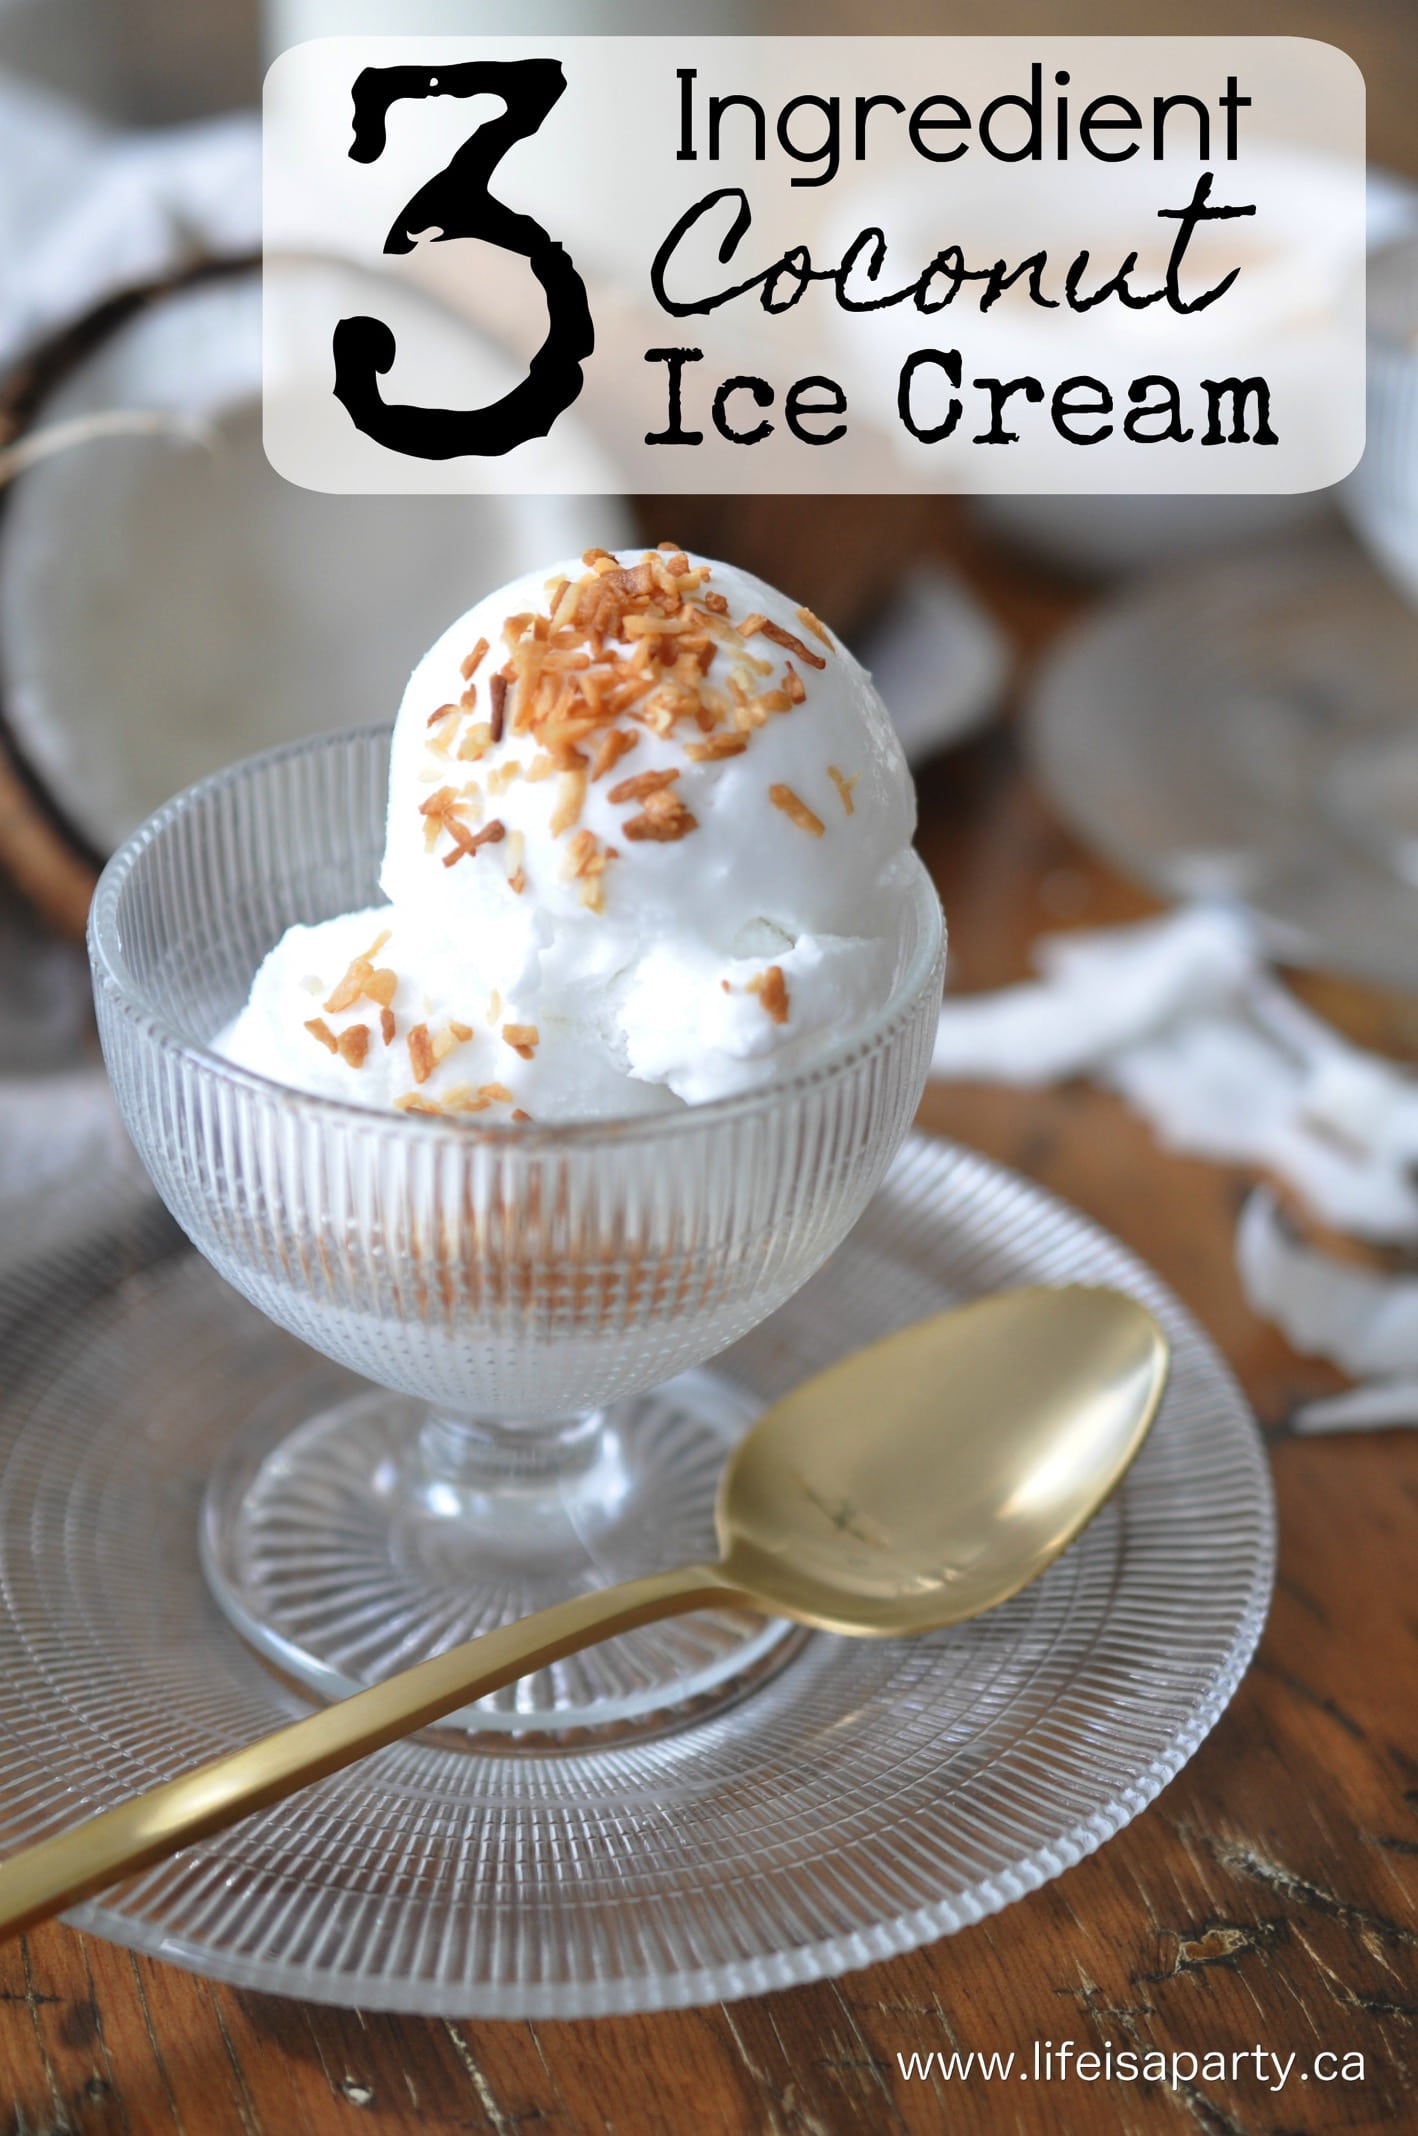
Also check out our Coconut Ice Cream recipe here.

Three Ingredient Coconut Ice Cream Recipe: this easy, no cook home made coconut ice cream is so quick to make an everyone loves it!

You might also enjoy our Strawberry Rhubarb Ice Cream recipe here.

Homemade Rhubarb and Strawberry Ice Cream Recipe: creamy vanilla base, with tangy rhubarb compote and sweet strawberry compote ribbons throughout.


Valentine's Day in Paris French Themed Dinner Party

Feb 14, 2013 · 3 Comments

Paris themed Valentine's Day dinner party.

Valentine's Day in Paris French Themed Dinner Party: French decor, menu, and a fun game to transport you and your friends to Paris for a Valentine's Day dinner to remember.

Paris themed Valentine's Day dinner party.
[feast_advanced_jump_to]

If there's one thing that the French are known for its food.  What could be better than a French themed dinner party?  It's the perfect theme any time of year, but it's especially perfect for celebrating Valentine's Day with friends.  The city of love is our inspiration for our French themed dinner party.

I've collected Eiffel Towers for awhile. And, over the years my friends and family have added to the collection with various Eiffel Tower items. I always thought I should have a French themed dinner party.  This year for Valentine's Day I invited a few couples over for an evening of French music, French wine, and French food. We had a great time and I wanted to share some of the details with you.

French Themed Decor

I used my Eiffel Tower collection on the dining table, along with some sweetheart roses. The French love to group one flower together, so I went with red and pink roses , and love how easy and pretty it turned out.  They look great along with some votive candles.

French dinner party ideas

I set the dinner table in the dining room with a simple white cloth and pink napkins, wine glasses, and these cute Eiffel Tower glasses.  Is there anything more French bistro than a crisp white tablecloth, and simple white plates and glasses.

how to host a Paris themed dinner party
French themed dinner party

We also had some cute Eiffel Tower glasses that were perfect for the occasion.  They were great for water, and I made sure to have Evian and Perrier water on hand to match our theme. I also got to use my Eiffel Tower salt and pepper shakers.

Eiffel Tower salt and pepper shakers

I made French chocolate truffles for everyone, mostly because I wanted to use these beautiful little stemmed cloches that my sister got me for Christmas. 😉 You can see how to make the truffles here.  These would also be really perfect French dinner party take home gift and party favor.

Valentine's Day in Paris themed party
French food ideas dessert

When my friends arrived they were greeted by the beginnings of French love letter in my antique type writer.

Valentine dinner party

I shared the "amour" art I made for the mantel earlier on the blog. It looked really pretty with all the candles lit.

French themed party

Another little detail was this sweet "Amour" banner on the china cabinet.  All these small pieces helped create some French ambience.

French themed party decor

French Cocktail

As guests arrived, we kicked of our French themed dinner party with a Kir Royale, a delicious French cocktail of sparkling wine, and blackcurrant liqueur.  This alcoholic drink really is easy to make and always such a hit.  It's always great idea to have a non-alcoholic option available as well if you're planning your own French dinner party.  Many of my guests were trying a Kir Royale for the first time and they were a big hit.  This drink is slightly sweet and great way to kick off the evening.

French cocktail

French Food -Appetizer

We were seated for the appetizer of pate, with cheese and baguette, along with a few crackers, jerkins, pickled pearl onions and a grainy dijon mustard. I came up with the idea of serving it on an individual cutting board for each person, and I really loved how it turned out. I bought the pate, and all the elements, which made for a little easier first course.  Foie gras would be a great choice too.  As is the French way, we picked up some fresh bread at the local bakery.  

French people love to have a cheese course between the main and dessert.  North Americans tend to love cheese board as an appetizer.  Ours is paired with French pate for a great starter. 

We also offered guests their choice of red wine or white wine with dinner.  What could be more French than a glass of wine?

French themed dinner

The Not-So-Newlywed Game

After our appetizer the men went downstairs to the family room, and the women stayed here to play part one of a little game. I made up some questions for our "Not-So-Newlywed Game", and we had fun answering them together. Click here for the printable.  It's not very French, but it was so much fun, especially because we were all couples and celebrating Valentine's Day together.

the not-so newly wed game

French Food -Main

For the main course we went with a classic French recipe for Chicken with forty cloves of garlic.  I had planned ahead for the main course, and it worked out really well. I made the Barefoot Contessa Chicken with Forty Cloves of Garlic.  We served it with mashed potatoes and green beans.  This is quite a simple dish made with simple ingredients, but is like most French dishes, it's full of flavor.

We started making it around 4pm, and it was finished by the time the guests were arriving at 6pm.  I turned it off, and set it on the back of the stove until dinner.  When I was ready to serve I just brought the sauce backup to the boil before serving.  I also made the mashed potatoes around 4 and kept them warm in a bowl covered in foil, over a pot of water on a low simmer. This worked out so well, and avoided having too large a gap between the appetizer and main course. I also blanched the green beans for 5 mins. in advance and just sauteed them in butter before serving, they were so good, and so easy. Everyone raved about the chicken, and I would definitely make it again. Following the tip in the recipe to blanch the garlic before peeling really worked well too.  This was a great make ahead menu.  If you're looking for a lovely French main dish for a dinner party, this one is perfect.

French themed dinner party

And don't forget to tell all your guests "bon appétit" as you serve them this delicious food.

After dinner we played the second part of the "Not-So-Newly Wed Game". It was pretty funny to compare answers between husbands and wives, and by the end everyone was laughing.

French Food -Dessert

French dessert ideas

We had saved the best until last, a French dessert trio.  We served crème brûlée, profiteroles with vanilla whipped cream and chocolate sauce, and French macarons. It was so good, but we were all so full afterward!

Chocolate Eiffel Towers

One of my favourite little details was the little chocolate Eiffel Towers.   I made them the day before to decorate the plate. I just melted some chocolate candy melts and used a ziplock bag to pipe a little Eiffel Tower onto some wax paper. When it hardened I had these sweet little Eiffel Towers to lean on the dessert plates.

French dessert

Chocolate Sauce

My other favourite were the sweet little individual jugs I used to hold the chocolate sauce. I used the Julia Child profiterole recipe, and bakedbree.com for the recipe for "The Best Chocolate Sauce Ever" -and I have to say it really lived up to its name, this chocolate sauce recipe is definitely a keeper (I doubled it).

Creme Brûlée

The Crème Brûlée was from the Joy of Cooking, my go-to recipe book.  These a French classic and a great make ahead.  Just before serving you add the brulee top.  If you don't have a little kitchen torch for doing the tops, you can just use your own on broil, which is what we did and it worked out fine.

Macarons

I picked up the macarons at a little bakery, but you can even find them at the grocery store. And if you're wondering what all the fuss is about with macarons because you've never tried one, they really are that good!

We probably didn't really need three desserts each, but a trio felt very fancy and there are so many amazing French desserts to choose from, who could pick just one?  They looked so cute arranged all together on the dinner plates, and everyone loved them.

The Perfect Theme For Valentine's Day

It was a wonder evening full of great food and good conversation.  We all had such a good time and so many laughs.  This French inspired dinner party was a wonderful way of celebrating  Valentine's Day. but would work very well for any special occasions.

French dinner party
French themed party

With a Paris themed Valentine's Day dinner, life really is a party! Happy Valentine's Day!

More Valentine's Day Inspiration

You might also like Valentine's Day Romantic Night In here.

Valentine's Day Romantic Night In: skip the expensive and crowded resturant and enjoy a fireside romantic three-course dinner intimate night in.

Also check out our Valentine's Day Breakfast here.

Valentine's Day Breakfast: the perfect inspiration with decor and menu for celebrating Valentine's Day with family and friends.

You might also enjoy our Valentine's Day Pizza Party here.

Valentine's Day Pizza Party -DIY decorations, heart shaped pizza, mocktails, and a dessert pizza recipe make this the perfect family celebration.

Homemade Valentine Lollipops

Feb 13, 2013 · 2 Comments

Homemade lollipop recipe.

Homemade Lollipops -recipe for the perfect sweet treat for Valentine's Day or any day. Including a free printable Valentine to go with it.

Homemade lollipop recipe.
[feast_advanced_jump_to]

What could be sweeter for your Valentine than a homemade lollipop! They're fairly simple to make, if you have a candy thermometer, and sure to impress!

how to make Homemade Lollipops
marshmallow flavouring
Homemade Lollipop recipe

Trouble Shooting

I made a few batches of these. Both times I found they turned slightly yellow and caramel coloured. I liked the flavour of the plain batch, but my girls preferred the batch we added the marshmallow candy favouring too.

On the second batch I also added a few drops of red food colouring. I really liked how these were still clear, but had a pretty hint of pink, rather than the slight yellow of the first batch.

Homemade suckers

School Valentines

My girls decided to take these to school for Valentine's Day, so I made a simple Valentine card printable to go with them.

Homemade Valentine Lollipops

Free Printable

You can download the "You're sweeter than a homemade lollipop" Valentines here.

free printable valentine cards

Recipe

Homemade lollipop recipe.

Homemade Lollipops

Make your own sweet homemade lollipops.
5 from 1 vote
Print Pin Rate
Course: Candy
Cuisine: American
Prep Time: 10 minutes minutes
Cook Time: 15 minutes minutes
Total Time: 25 minutes minutes
Servings: 24
Calories: 93kcal
Author: Dannyelle Nicolle-Ramjist

Ingredients

  • 2 cups white sugar
  • ⅔ cup light corn syrup
  • ¼ cup water
  • Optional: candy flavouring and or food colouring, and holiday sprinkles, and edible glitter

Instructions

  • Line baking sheets with silpat, parchment paper, or lightly grease.
  • Stir sugar, corn syrup, and water in a saucepan over medium-high heat until dissolved. Attach a candy thermometer and boil until it reaches hard-crack stage, 300-310 degrees. To help prevent crystallization, dip a pastry bush in cold water, and wash down the sides of the pan occasionally.
  • Take the pan off the heat. At this point you can leave the candy clear, or add a few drops of food colouring. You can also add candy flavouring or leave it plain.
  • Pour the candy onto the baking pan in small circles with great care, since the mixture is very hot. Before the candy sets, insert lollipop stick, and add sprinkles.

Nutrition

Serving: 1Servings | Calories: 93kcal | Carbohydrates: 24g | Sodium: 6mg | Sugar: 24g
Tried this Recipe? Tag me Today!Mention @LifeisaParty or tag #lifeisaparty!

With homemade lollipop Valentines, life really is a party!

More Valentine's Day Recipes

You might also like our Easy Chocolate Truffle Recipe here.

Also check out our Butter Crunch Toffee Recipe here.

You might also enjoy our Creamy Caramels and Chocolate Salted Caramels Recipes here.


Easiest 3-Ingredient Chocolate Truffle Recipe

Feb 12, 2013 · 3 Comments

Easy three ingredient chocolate truffle recipe.

Easy Chocolate Truffle Recipe: easy homemade chocolate truffles. Perfect for gift giving. Add nuts, cocoa, or sprinkles to make them extra special.

Easy 3 ingredient chocolate truffle recipe.
[feast_advanced_jump_to]

This easy chocolate truffle recipe is an old favourite.  With only three simple ingredients, these truffles are quick to make, delicious, and perfect for a sweet treat.   They also make a lovely gift or for any special occasions.  This is a great recipe for any chocolate lovers.  You will love the creamy texture, and velvety richness of these homemade truffles.

Chocolate Truffles: easy home made chocolate truffles. Perfect for gift giving. Add nuts, cocoa, or sprinkles to make them extra special.
Decorate For Any Holiday

It's almost Valentine's Day and nothing could be more special for your sweetheart than homemade Chocolate Truffles. These were really, really delicious, and pretty easy to make. We've dressed these ones up for Valentine's day with a pink chocolate drizzle, and heart sprinkles, but you could do this for any occasion.  Use orange chocolate and Halloween sprinkles, red and green at Christmas, try red, white, and blue for the 4th of July, or just keep them plain for any time of year.

Chocolate

When it comes to making truffles with only three ingredients, there is nowhere to hide.  Your chocolate must be high quality chocolate to make the best chocolate truffles.  It's worth spending a little extra to get Belgian chocolate, or whatever your personal favourite kind of chocolate is, because you will definitely taste the difference in the first bite of this recipe.  I like to use a Belgian milk chocolate for these.  It gives them a rich, sweet taste.  

If you want to make dark chocolate truffles you can.  Just use dark chocolate instead of milk chocolate in the recipe.

Chocolate Truffles: easy home made chocolate truffles. Perfect for gift giving. Add nuts, cocoa, or sprinkles to make them extra special.

Toppings

When it comes to different toppings for your chocolate truffles there are lots of great possibilities to choose from.  You can keep it simple or have lots of fun with your flavor combinations.

I made these for our special Valentine's Day in Paris dinner party, and they were a hit. I learned that the chocolates are traditionally coated in cocoa powder in France, and that's where they get the name truffle, since the coco was reminiscent of the dirt that actual truffles are found in, and covered in. The cocoa dusting adds a little bitterness to the milk chocolate center and make the chocolate truffles less sweet.  If you're a dark chocolate fan, you may really like the traditional cocoa powder dusting on the finished truffles.  If you find it's too bitter for you, you can mix half and half cocoa powder and icing sugar for a sweeter version of the coated balls.

Chocolate Truffles: easy home made chocolate truffles. Perfect for gift giving. Add nuts, cocoa, or sprinkles to make them extra special.
If you want to create a chocolate shell on the outside of your truffle you can dip the truffle into some melted chocolate to create the outer coating.  Or you can roll them in a variety of different coatings.  Choose from any fun topping to roll the chocolate truffle mixture in, such as 

  • unsweetened cocoa powder
  • shredded coconut
  • chopped nuts
  • oreo cookie crumbs

Troubleshooting

Sometimes while the chocolate is melting with the heavy cream it can separate.  This can occur if the heat is to high, the chocolate melts too quickly, or the cream is too cold when you add it.  If this happens you may be able to save it by using a hand mixer to beat the mixture until it comes back together. 

Chocolate Truffles: easy home made chocolate truffles. Perfect for gift giving. Add nuts, cocoa, or sprinkles to make them extra special.

Sometimes the chocolate coating can bloom.  This occurs when the milk solids come to the surface.  It's fine to eat, but doesn't look as good.  This is because you haven't tempered the chocolate, or you placed the melted chocolate into the fridge to set and it was too cold.  Using chocolate candy melts as your outer coating should help prevent this, because it isn't pure chocolate and doesn't behave the same to different temperature changes.

Chocolate Truffles: easy home made chocolate truffles. Perfect for gift giving. Add nuts, cocoa, or sprinkles to make them extra special.

Store your chocolate truffles at room temperature in an airtight container.

Chocolate Truffles: easy home made chocolate truffles. Perfect for gift giving. Add nuts, cocoa, or sprinkles to make them extra special.
These decadent chocolate truffles are such delicious treats.  They're the perfect special homemade treat for entertaining.  This easy 3 ingredient recipe is sure to become a favorite treat.  We love them is a delicious dessert when entertaining, but they're also so great for gift giving.  Package them up in a small box or cellophane bags as the perfect treat at the end of a party, during the holidays, or anytime you want to give a special homemade gift.

Recipe

Easy three ingredient chocolate truffle recipe.

Easy Chocolate Truffle Recipe

Creamy and sweet chocolate truffles.
4.67 from 3 votes
Print Pin Rate
Course: Desserts
Cuisine: American
Prep Time: 20 minutes minutes
Cook Time: 5 minutes minutes
Additional Time: 1 hour hour
Total Time: 1 hour hour 25 minutes minutes
Servings: 25
Calories: 98kcal
Author: Dannyelle Nicolle-Ramjist

Ingredients

  • 12 oz. Belgian milk chocolate
  • ⅓ cup of heavy whipping cream 35%
  • 1 teaspoon vanilla extract
  • optional toppings: chocolate candy coating in milk chocolate and pink chocolate, cocoa powder, Valentine sprinkles

Instructions

  • Chop the milk chocolate and place the place the chopped chocolate and the cream in a double boiler over medium heat. Stir to melt the chocolate.
  • Once the chocolate is melted, remove from the heat and stir in the vanilla and pour the chocolate mixture into a metal mixing bowl and let it set at room temperature.
  • Once the chocolate mixture has set but is still a malleable texture, scoop out a small balls with a melon baller,small cookie scoop, or teaspoon, and roll them with your hands to create the truffle centre. Set the truffle balls onto a parchment paper lined baking sheet.
  • Coat the truffle centre with cocoa powder, or melt chocolate candy coating and dip the truffle centres in it to coat. Decorate with sprinkles, or drizzle with melted pink candy coating. Let the chocolate set at room temperature and then enjoy.

Nutrition

Serving: 1g | Calories: 98kcal | Carbohydrates: 10g | Protein: 1g | Fat: 6g | Saturated Fat: 4g | Polyunsaturated Fat: 2g | Cholesterol: 7mg | Sodium: 13mg | Fiber: 1g | Sugar: 8g
Tried this Recipe? Tag me Today!Mention @LifeisaParty or tag #lifeisaparty!

With homemade Chocolate Truffles for Valentine's Day, life really is a party!

More Inspiration

You might also like our Chocolate Truffle Pops here.

Chocolate Truffle Pops -An easy and delicious recipe for truffles. Add a lollipop stick to create a truffle pop and all your favourite toppings.

Also check out our Pumpkin Truffles here.

Pumpkin Chocolate Truffles: easy to make and perfect for a fall dessert or for gift giving. Made with real pumpkin.

You might also like our Back To School Truffle Pops here.

Back to School Treats Apple Truffle Pops -chocolate truffle centres, dipped in red chocolate and decorated with liquorice stems and mini M&M leaves.

Mini Valentine's Day Terrarium in a Mason Jar

Feb 11, 2013 · 2 Comments

How to make a terrarium in a mason jar.

Mini Valentine's Day Terrarium in a Mason Jar: how to transform an old mason jar into a beautiful mini terrarium for Valentine's Day.

How to make a terrarium in a mason jar.
[feast_advanced_jump_to]

Valentine's Day Gift Idea

I thought it might be sweet this year to make a little teacher gift for Valentine's Day. I loved how my terrariums that I shared here turned out, and decide to make a mini version.  This terrarium in a mason jar will make a perfect gift.  

Terrarium in a Mason Jar Materials:

  • mason jar
  • spray paint
  • rocks
  • activated carbon charcoal
  • soil
  • plants
  • polymer clay
  • wooden skewer
  • gift tag
  • marker
  • ribbon

How To Make A Terrarium In A Mason Jar

1. My favourite brand of tomato sauce comes in a mason jar. I usually just recycle it, but last week I saved a couple, and spray painted the lids pink -you know how I love spray paint. 😉

how to make a terrarium in a mason jar

Components of a Terrarium

2. We started with some rocks in the bottom for drainage, added a little charcoal (find it in the aquarium section of your local pet store, labelled Active Carbon) to help fight against mold issues, and then some potting soil.

3. I used some little woodland plants, one in a darker green, and the other in a more lime, bright green.

creating a terrarium in a mason jar

Polymer Clay Hearts

4. Because these are for Valentine's Day, I wanted to add some hearts. I needed to use a material that won't become moldy, rusty or break down in the little terrarium eco-system. We used polymer clay and it worked perfectly.

I formed hearts, and inserted bamboo skewers, and baked them according to package directions. They turned out so cute, and I inserted one into each terrarium.

DIY Terrarium in a Mason Jar

5. Once the inside was finished it was time to put the lid on to create the terrariums own little eco-system, where the water re-circulates.

If you notice condensation on the glass, remove the lid for a couple hours to let the excess water evaporate and then replace it again.

Love Grows Here Label

6. I made a simple heart shaped label with the words, "Love Grows Here".  It's perfect for my girl's caring teachers who strive to create a classroom where love grows.  I tied them onto the lid with a little ribbon and baker's twine.

making a valentine

I kind of love them. Hope they bless the teachers in our life.  But they'd be there perfect gift for anyone special in your life.

Mini Valentine's Day Terrarium in a Mason Jar

With mini Valentine's Day Terrariums in a mason jar, life really is a party!

You might also like our How To Make A Terrarium post here.

How To Make A Terrarium: How to make a beautiful terrarium in an apothecary jar, using fish tank charcoal to create a micro-climate without mould.

You might also like How To Make Your Faux Succulents Look Real post here.

You might also like our Teacup Fairy Garden post here.

How To Make A DIY Terrarium In A Jar

Feb 8, 2013 · 3 Comments

How to make a terrarium.

How To Make A Terrarium: How to make a beautiful terrarium in an apothecary jar, using fish tank charcoal to create a micro-climate without mold.

How to make a terrarium in an large jar.
[feast_advanced_jump_to]

Have you noticed that terrariums are back in fashion? I have a vague memory of being a little girl and my mom making one.   Now I'm starting to see them around again so I think they're back.  Today I'm sharing how to make a terrarium in an apothecary jar.

How To Make A Terrarium in a apothecary jar

Creating A Terrarium Micro Climate

Terrariums are traditionally made in a closed container, and the terrarium acts as its own little ecosystem.

After adding a little water when they're first planted, the water stays in the closed terrarium container and re-circulates, creating its own little water cycle and micro-climate in this closed environment.

You can also make a terrarium with an open top, which you'll need to water just like any house plant. I also made one open terrarium.

In a closed terrarium you need to get the balance of things just right.  Too much moisture and mould will grow and cause everything to die.  Try using a spray bottle to mist the plants if you think they need more water. Too little water and it will dry out and also die. 

For the enclosed terrarium, watch for any condensation that forms on the edge of the glass. Condensation is a sign of high humidity inside of the jar.  If you get some excess water, just take off the lid for a few hours so it can evaporate.

How To regulate water in a Terrarium

Also try to plant the plants so that nothing is touching the sides of the glass, it can lead to mold. If you see a leaf dying, remove it because you don't want anything breaking down, or getting moldy in your terrarium.

Charcoal

Charcoal is a great addition to your jar terrariums because it acts as a natural cleansing filter to the water helping to remove any unwanted matter as it circulates within the terrarium.  It also has natural anti-toxin properties that help keep mould and mildew at bay.

I found some charcoal at the pet store with the fish tank equipment. You can buy it loose in large containers, or just look for a little bag designed for fish tank filters.  It will be labeled "Activated Carbon".  You can also look for horticultural charcoal at your garden store.

Best Plants for a Terrarium

We used a mini orchard as the main plant in our terrarium.  It's a perfect focal point.  Mini orchids tend to do well in terrariums because they like a humid environment.  When your choosing the types of plants for your own terrarium you will first of all need small plants that can fit in the space.  Try to choose plants that have similar needs and grow in similar environments.  Tropical plants work well together because they enjoy high humidity.  Woodland plants like moss and ferns work well together because they also like more damp conditions.  Succulents can do really well in a terrarium too, but if you're planting succulents be sure to plant only succulents so you can keep the moisture levels lower.

You will want to choose little plants that don't get to big.  Miniature plants are sometimes a good idea for terrariums and the perfect size for not out growing the space.  You want to make sure that everything has enough space to not be right up against the sides of the glass, which can lead to mould problems.

Choosing Your Jar

We made our terrarium in a beautiful apothecary jar.  You want to choose a clear glass jar that's large enough for your plants.  Since we were using a mini orchard in this terrarium we needed to choose a jar that was tall enough for it.   You can also make a terrarium in a mason jar or even upcycled pickle jars.  A little jar is perfect for smaller plants.  You will want a jar that has a removable lid that closes securely enough to create the closed system and the water from evaporating.  You will also want the opening at the top of the jar to be large enough to give you easy access for planting the terrarium.

How To Make A Terrarium
rocks
Materials to make a Terrarium
using charcoal in a diy Terrarium

I wanted to use a mini orchid in my apothecary jar terrarium.  Also I found some little woodland plants at my local nursery.  Small plants like moss and small ferns work well.

I kept the orchid in it's own little plastic pot that it came in, since orchids like to be in special orchid soil -being that they're so special. 😉

The other small house plants I used were a little too big, so I broke them up into pieces, and took some of the soil off the bottom. Don't worry these type of plants can be broken up like this with no damage to them because they have quite shallow root systems.

small plants for a Terrarium

Terrarium Accessories 

Once the plants were all in, I wanted to add a little spoon sign that said "Love Grows Here".  I thought it would be especially sweet for Valentine's Day -and we're all about sweet around here.

Beginning with a silver spoon I found at an antique fair, I used a hammer to flatten it out.  Next I used metal letter stamps to add the words. Mine are 3mm size.

After the letters are stamped, go over the words with a sharpie, then scour off any excess with a pot scrubber. It leaves a little black in the indentations for the letters and helps them show up better. You can read the step-by-step tutorial to make the stamped garden markers here.

Other fun ideas for terrarium accessories would be any cute fairy garden accessories or miniature figurines.  A larger rock can make a nice decorative rock for the top too as a nice accent element.

love grows here garden spoon

Where To Place Your Terrarium

Terrariums like to be in spot with indirect sunlight.  East or west facing windows tend to be a good option and tend to offer perfect indirect light.  Be careful with south-facing windows as they can be a little too much direct sunlight, and too much heat in the terrarium.

I really love how they turned out. Let's hope I can keep them happy. I did give them a little drink of water after they were all planted.

apothecary jar terrarium orchid
How To Make A Terrarium

Recipe

How to make a terrarium.

How To Make a Terrarium in a Jar

Make a terrarium in a jar with real plants, and soil.
No ratings yet
Print Pin Rate
Cook Time: 15 minutes minutes
Total Time: 15 minutes minutes
Author: Dannyelle Nicolle-Ramjist
Cost: $20

Equipment

  • small garden trowel

Materials

  • glass container with a lid
  • rocks for drainage
  • activated carbon charcoal
  • soil
  • smaller plants

Instructions

  • To make a DIY terrarium, you start with an inch or two of rocks in the bottom of the container as drainage material so your plants roots are sitting in water.
  • Next on top of the rocks add a thin layer of charcoal. This is the best way to absorb any excess moisture, and help keep the little eco-system from becoming moldy. Mold = trouble. We left our charcoal in the bag, or you can open it and add it that way.
  • On top of the layer of rocks and the charcoal bag, add in some potting soil. Not too much to start, since you want room for the plants and you can add more around them after.
  • Then add any small accessories, fairy garden accessories, or decorative rocks.
  • Lastly, give your terrarium a small amount of water and place the lid on. If condensation forms on the glass you can remove the lid for awhile to regulate it.

It's a snow day here, and it's so nice to have something green and living, and a little reminder that although it doesn't look like it outside today, spring is coming.

With a How To Make A Terrarium project to keep us busy, life really is a party!

More Inspiration

You might also enjoy our Terrarium in a Mason Jar here.

Mini Valentine's Day Terrarium in a Mason Jar: how to transform an old mason jar into a beautiful mini terrarium for Valentine's Day.

Also check out our Teacup Fairy Garden here.

You might also enjoy our Teacup Fairy Village Gardens here.

Teacup Fairy Villiage Gardens -use teacups and teapots to create these whimiscal miniature fairy gardens with polymere clay houses and mushrooms.


Baked Rice Pudding Recipe

Feb 4, 2013 · Leave a Comment

Baked rice pudding recipe.

Easy Rice Pudding Recipe: this rich and creamy recipe is quick and easy to make with rice and raisins. Perfect served warm or cold.

Baked rice pudding recipe.
[feast_advanced_jump_to]

This easy rice pudding recipe makes the perfect comfort food.  This rice based pudding is thick and creamy and such a great comfort food.  The texture from oven baking this pudding can't be beat.  This old fashioned rice pudding served with warm spices on the top is the perfect comfort food.

Everyone in my family likes rice pudding; my husband, my two sometimes fussy little girls, and me. Problem is...I didn't know how to make it. I tried to make it once for my husband years and years ago when we were first married. It was an absolute failure. The rice never fully cooked, it was crunchy rather than creamy.  But it's not actually hard to make.  

I decided to give it another try and it was a great success! I've made this easy recipe lots of times since and it's really, really good, and easy too.  It is creamy with a custard-like texture, not too sweet, and the addition of the  plump juicy raisins is so good. 

The day I first tried this recipe my husband happened to be working from home, and it was ready just as my girls got home from school. We had it warm from the oven with cinnamon sprinkled on top -dessert before dinner, but don't tell anyone. 😉  Everyone absolutely loved it.

Baked Vs. Stove Top Rice Pudding

Stove top and baked rice pudding are both delicious, but they are a bit different.  While both versions are usually made of the same ingredients the cooking technique changes the texture of the finished pudding.  An unbaked stovetop rice pudding is looser in texture.  The baked version is a little more solid, and more like a baked custard.  Our old fashioned rice pudding is a baked rice pudding recipe that you're sure to love.  It has a really creamy rice with a lovely creamy texture.  This classic dessert is perfect served warm on a cold night, at room temperature, or cold from the fridge.  It's the ultimate old fashioned comfort food.

Raisins or No Raisins?

You can make this old fashioned baked rice pudding with or without raisins depending on your own personal preference.  I love adding raisins for a little bit of a different texture and the added sweetness.  My little girl loves raisins, so we always include lots of raisins.  You can use regular raisins or golden raisins in this recipe.  If you are not a fan of raisins, feel free to leave them out altogether.

Rice

This pudding is made with a rice base.  A lot of recipes call for leftover rice as the easiest way to use it up.  We prefer to use uncooked rice in this recipe, and cook it on the stovetop with milk.  Since regular rice is cooked with water, using a little milk to cook it in starts building that creaming base to the pudding.  You can skip this step and use leftover rice if you wish too, but this step does add to the overall creaminess of the finished pudding.

What Type Of Rice Is Best For Rice Pudding?  

The best types of pudding rice to use to make rice pudding are any long grain rice like jasmine rice, basmati rice or arborio rice.  Medium-grain rice, short grain rice or brown rice are all not as great choices when making rice pudding from uncooked rice.  These can become mushy in the rice pudding, because different kinds of rice absorb the liquids they are cooked in differently.  If you are making your rice pudding from leftover already cooked rice, it's not as crucial which type of rice you use.

Cinnamon

Our ultimate comfort food rice pudding has a sprinkle of cinnamon on top.  Cinnamon is a classic spice to go with rice pudding, which is in itself rather plain.  I am personally not a big cinnamon fan, so I only add a dash of cinnamon.  If you're a cinnamon lover, add more on top of the pudding when you serve it.

Easy Rice Pudding Recipe
how to make rice pudding

If you have any leftover rice pudding you can store it in an airtight container in your refrigerator for later.

Serving Suggestions

We love the raisins in this rice pudding, and serving it with a little sprinkle of more cinnamon on top for the cinnamon lover.  You can also make it with no raisins for a more plain version.  Try serving it with fresh fruit or a spoonful of jam as the perfect way to add a little more flavor.

Recipe

Baked rice pudding recipe.

Easy Rice Pudding Recipe

Creamy baked rice pudding.
No ratings yet
Print Pin Rate
Course: Desserts
Cuisine: American
Prep Time: 20 minutes minutes
Cook Time: 45 minutes minutes
Total Time: 1 hour hour 5 minutes minutes
Servings: 6 servings
Calories: 181kcal
Author: Dannyelle Nicolle-Ramjist

Ingredients

  • 2 cups milk -divided
  • ¼ cup sugar
  • 2 tbsp. water
  • 1 ⅓ cups long grain white rice
  • 2 eggs
  • ¼ cup raisins
  • 1 teaspoon vanilla extract
  • pinch of cinnamon
  • 3 teaspoons butter

Instructions

  • In a small saucepan, bring 1 cup of milk, sugar and water to a boil. Stir in the rice and reduce to a simmer, stirring occasionally until the rice is cooked and tender, about 20 minutes.
  • Preheat oven to 325, and spray a 1 ½ quart baking dish with nonstick cooking spray.
  • In a medium bowl, combine remaining cup of milk, eggs, raisins, vanilla and cinnamon, and stir in cooked rice. Pour into baking dish. Dot the top with butter. Bake, stirring twice, about 25 minutes.

Nutrition

Serving: 1g | Calories: 181kcal | Carbohydrates: 27g | Protein: 6g | Fat: 5g | Saturated Fat: 3g | Polyunsaturated Fat: 2g | Cholesterol: 74mg | Sodium: 79mg | Sugar: 16g
Tried this Recipe? Tag me Today!Mention @LifeisaParty or tag #lifeisaparty!

This baked old fashioned rice pudding is such a comforting dessert.  It's plainess is part of its charm.  It's a taste of home and perfect on cold nights.  

With easy and delicious rice pudding like this, life really is a party!

More Recipe Inspiration

You might also enjoy our Easy Banana Cake recipe here.

Easy Banana Cake Recipe: This one bowl, easy banana cake is a great way to use up your leftover bananas. The simple, sweet, fluffy vanilla icing takes this recipe from regular to a real treat.

Also check out our Warm Chocolate Pudding Cake recipe here.

You might also like our Easy One Bowl Brownies recipe here.Easy One Bowl Brownies: easy to make, simple ingredients you already have in your pantry, and better than a store bought mix. Promise.

DIY Valentine's Day Countdown Advent Calendar

Jan 31, 2013 · 1 Comment

Valentine's Day countdown advent calendar.

Valentine's Day Countdown Advent Calendar: easy DIY countdown calendar filled with treats to help your children count down to the big day.

Valentine's Day countdown advent calendar.
[feast_advanced_jump_to]

Making the Celebrations Last a Little Longer

Valentine's day comes and goes too fast for little ones, so here's a way to stretch out the fun, with a really easy countdown Valentine advent calendar. It's similar to the Christmas activity advent calendar I made for my girls at Christmas -see it here, but this one is a little more low key. Each day they get to open a little bag and find a treat inside, and a fun Valentine's day joke. It's simple for mom, and still lots of fun for little ones to help them celebrate the season of love.

valentine countdown advent calendar

Inexpensive Treat Ideas

I started out with a trip to the dollar and party store for some little treats, I also "shopped" the pantry at home and re-used some of the Christmas treats that were leftover. For our treats I alternated each day with something sweet and a little toy treat. Some ideas for the sweets are:

  • truffles
  • peanut butter and chocolate hearts
  • red and pink jelly beans
  • caramel squares
  • valentine chocolates
  • cinnamon candies
  • conversation hearts
  • Valentine lollipops

You could use whatever candy your family member will love.

valentine advent calendar treat ideas

For the toy treats I included some small unique gifts like:

  • bubbles
  • pink bouncy balls
  • stamps
  • stickers
  • erasers
  • pink and red bead kit
  • heart shaped balloons

Here's a little tip, at the party store you can buy things individually for a few cents from the loot bag section, so if you only have one or two kiddos to buy for you won't be stuck with a package of eight.

how to make a valentine advent calendar

Valentine Jokes

I thought about including a little activity, or even a bible verse about love in the little bags.  But in the end I decided on a joke each day. My kids loved the lunch box notes I found on-line and included in their lunch each day for Christmas.  So I thought it would be fun to use some Valentine's Day lunch box jokes for this calendar. I found mine here, and here. Just download, print, cut up and slip one in each bag.  I like to think of us all enjoying a little laugh as the perfect way to start our days starting February 1st.

Ideas for Older Kids, or A Partner

Jokes, treats, and toys are the perfect fun things for my small children to enjoy.  If you were making this for older kids, teens, or your partner, you could change up what's inside the bags.  You could change up the treats everyday like I have or go for a theme.  Any teen girl I know would love a makeup or self care themed beautiful Valentine's day advent calendar.  The chocolate lover might like all different kinds of chocolate treats each day.  If your child loves lego you could break up a set and give them a little each day.   Another great option for a partner is a different love note each day, with a different thing that you love about them each day, or a favourite past memory each day.  The possibilities really are endless, but any of these would make for such a fun Valentine's Day celebration.

DIY valentine countdown advent calendar

Decorate the Bags and Add Numbers

To decorate the little bags, I used a heart punch to cut out hearts.  Then, I used a dollar store number stencil and a marker to add the numbers. Once the treats were in the bags, I used some pink thread on my sewing machine and stitched them up. I love how the stitching looks, and it also helps excited little ones to keep from peaking.  You could also use some tape or glue instead of sewing.

To hang the little bags, I  decorated some wooden clothespins with washi tape.  Love how they turned out. I hung it all up on the fireplace.  I used some some sweet pink pom-pom yarn I had, and little string of heart shaped LED lights.  Ribbon would be a great addition too.

valentine countdown advent calendar

My kids can't wait to get started opening the little bags tomorrow.  

This is such a fun way to countdown to Valentine's Day and brighten up dark winter days..  I'm pretty sure it's about to become a favorite tradition.  With Valentine's day advent calendar, life really is a party!

More Valentine's Day Ideas

You might also like our 3D Origami Hearts here.

3D Origami Hearts -create your own origami hearts out of old book pages. Perfect for Valentine's Day decor, wedding decor, or a baby nursery.

Also check out our Valentine's Day Breakfast here.

Valentine's Day Breakfast: the perfect inspiration with decor and menu for celebrating Valentine's Day with family and friends.

You might also like Valentine's Day Pizza Party here.

Valentine's Day Pizza Party -DIY decorations, heart shaped pizza, mocktails, and a dessert pizza recipe make this the perfect family celebration.

Cupid's Arrows Valentine's Day Craft

Jan 18, 2013 · 5 Comments

Valentine's Day arrow craft made from a chopstick.

Cupids Arrow Craft Made Out Of Chopsticks: simple Valentine's Day DIY using disposable chopsticks.

Valentine's Day arrow craft made with chopsticks.
[feast_advanced_jump_to]

I love a simple DIY and this Valentine's Day cupids arrow craft is perfect.  Made from disposable chopsticks they're great to make with kids.  They actually fly well, but are also really pretty Valentine's Day decor.

We went out for Asian food on the weekend, and the kids loved trying chopsticks. After lunch one of them asked if we could take the disposible chopsticks home and make something out of them. I came up with Cupid's arrows as a Valentine's Day craft, and I love how they turned out -so simple and so cute.

Materials:

  • disposable chopsticks
  • sticky back glitter foam sheets
  • feathers
  • embroidery cotton

How To Make A Cupids Arrow Craft From A Chopstick

Here's how we made them. We used sticky backed glitter foam paper, baker's twine, and embroidery cotton, pink and red feathers, and some tape.

Cupids Arrow Craft Made Out Of Chopsticks

We started out taping four feathers, two red, two pink to the square end of the disposable chopstick.

how to make a Cupids Arrow craft

Then, we wrapped the taped area with the baker's twine and embroidery cotton, and tied it tightly to hide our tape.

To make the arrow we just cut out a pink and red heart from glitter foam paper, peeled off the sticker backing and stuck them together on the pointy end of the chopstick. Easy peasy.

Cupids Arrow Craft Made Out Of Chopsticks: simple Valentine's Day DIY using disposable chopsticks.

They turned out really cute. We discovered by accident how cool they are to throw, since the feathers make them spin as they go through the air, and the foam tip makes for a soft landing. 😉

Cupids Arrow craft Made Out Of Chopsticks

With a sweet Cupids arrow craft like this, life really is a party.

Check out our Valentine's Day Pizza Party here.

Valentine's Day Pizza Party -DIY decorations, heart shaped pizza, mocktails, and a dessert pizza recipe make this the perfect family celebration.

You might also enjoy our Salt Dough Valentines here.

Also check out our Scented Valentine's Day Play Dough With Glitter here.


Orange Themed Party Ideas

Jan 16, 2013 · Leave a Comment

Orange theme party table with orange decor and foods.

Orange Birthday Party: simple ideas for orange decor, table setting, food ideas, and loot bags for a fun orange themed party.

Orange theme party table with orange decor and foods.
[feast_advanced_jump_to]

This weekend we got together with family to celebrate my brother-in-law Bobby's birthday. My mother-in-law asked my daughter Maddie and I to help her out with the table. We're big on a theme so we went with the birthday boy's favourite colour an Orange themed Birthday Party!  Our job was to set a fun and festive table, and we took our job seriously.  The table set the color theme for the whole party!

orange themed birthday party decor ideas

Wear Orange

Once we decided on our simple color scheme, we asked all the guests to wear orange.  It was really fun, and a super simple easy way to get everyone in the mood for our theme.  Everyone had a little orange in their wardrobe, so it was easy for everyone to accommodate our request.

Orange Birthday Party Table

Our main job was to set a pretty and fun table.  We kept things pretty simple, but it had lots of impact, so I thought I'd share a few of the fun ideas in case you're having an orange color theme party too. I'm not a big fan of plastic table cloths, so we found some great orange polka dot gift wrap that we unrolled as a table cloth, it worked great and is a really good inexpensive option for a party.  It was a great way to add some pattern to the table.  Some orange fabric from the fabric store would be a great option too.

For the table settings we bought simple paper orange plates and cups and orange paper napkins to make clean up easy peasy. One of my favourites were the orange striped colorful straws.  Orange balloons would be a great addition to the decor also.  They would look really fun with one tied to the back of each chair, or even every other chair.

orange food ideas for an orange birthday party

Orange Party Snacks

Now onto the fun part. Our centerpieces down the middle of the table was orange treats of all kinds. This was a great way to celebrate the color orange.  It was a wonderful alternative to traditional flower arrangements.  The guests loved it and it looked amazing too.  I used a variety of clear glass serving pieces, including vases (mostly from the dollar store) that I already had, a glass trifle dish, and a glass tiered tray.  This was such a fun way to incorporate our orange theme.  I picked up a lot of the treats at the bulk food store.  It was fun strolling the aisles and looking for anything orange we could find!  We also included some fresh fruit along with all the treats, which was a perfect choice because it looked great and was at least a little effort at something healthy.  And we even had a few savoury snack options too.

  • orange pop
  • cheesies
  • Doritos
  • butterscotch candies
  • orange gummy worms
  • fuzzy peaches
  • sour peach twists
  • marshmallow pops
  • dried apricots
  • clementine oranges
  • orange slices
  • mango slices
  • cantaloupe
  • papaya

Orange Drinks

We had orange pop as a drink at our party.  Orange juice would be another great option, or even better a punch made with orange juice and pop like ginger ale for a little fizz, with some sliced oranges floating on top.

Savoury Orange Snacks

We started things off with some salty savoury snacks.  We used some cheesies, and orange doritos.  Cheese puffs would be a good addition.  Also goldfish or any cheese flavored crackers would a great option too.

orange marshmallow pops

Sweet Orange Food Treats

We also had lots of  sweet treats.  We had butterscotch candies, gummy worms, fuzzy peaches, and sour peach twists, and orange lollipops. And, my daughters helped me make some simple marshmallow pops.  To make these we started out by adding lollipop sticks to regular white marshmallows.  Then we dipped marshmallows dipped in melted orange chocolate candy melts that I also picked up at the bulk food store.  Then, before the chocolate set we dipped some of them into white sprinkles and some into orange coarse sugar.  These were a real hit with the kids.  Orange rock candy would be another great option.

orange fruit tray

Healthy Orange Snacks

We wanted a few healthy choices and it was pretty easy because there are a lot of orange fruits. We put some clementine oranges in vases, some dried apricots, and then made a fruit platter of mango, orange sections, cantaloupe and papaya.  I cut these up and served them on a glass tiered platter and they looked great.  Everyone especially loved the tropical fruits.

Toy Animals in Orange Party Hats

orange birthday party ideas

I wanted to add a little whimsy to the table so I found some plastic animals at the dollar store and dressed them up in little orange party hats. These guys were my favourite, and would be cute dressed up for any party.  I used a few different patterns of orange scrapbook paper to make the tiny hats and glued them together with hot glue.  Then I added an orange pom pom to the top of each one, and some thin orange ribbon to each side so that I could tie the hats onto the animals.  This worked perfectly and meant we could remove the hats easily afterwards and use the animals as toys. This was one of my favorite elements to this party and such a fun and whimsical touch.

orange birthday party

Orange Loot Bag Ideas

For Kids

Grandma loves to give her grandkids little goodie bags, so I found a few fun orange things to include; a little orange notebook and pen, a bouncy ball, a kazoo, and a container of orange playdough. And since everything was so perfectly orange, we packaged them all up in see-through cello bags, tied with a little orange ribbon.  We added them to all the kids spots at the table and they could choose to open them and play with them at the table, and then take their party favors home afterwards, which worked out perfectly.  We kept them all the same so there was no fighting over who got what.  And we had the added bonus of kazoo serenades during dinner, lol.

  • orange playdough
  • orange notepad and orange pen
  • orange bouncy ball
  • orange kazoo

Other great options are bubbles in an orange container, orange tic tacs, Reese's peanut butter cups, an orange highlighter, orange slime, orange balloons, or an orange toy.  

For Adults

For adults something like orange flowers, or a package to of seeds to grow some orange flowers, or an orange shower gel or soap and orange shower loofah puff would be great.  An orange candle or soap would be great too.  

Candy

I also had some extra clear cello bags, so that the left over candy could be packaged up and taken home by the guests too.   Have some orange twine or orange washi tape on hand to close the little bags after they're filled up. This was the perfect way to not end up with whole bunch of leftover candy and sweets.

orange birthday party loot bag ideas

We had a great time celebrating and our orange color theme was such a hit.  Everybody looked great in their orange outfits and had a really fun evening together.  Happy Birthday Bobby! "Orange" you glad you stopped by today? lol

With an orange themed party to celebrate, life really is a party.

More Party Inspiration

You might also enjoy our Rainbow Art Party Decorations here.

Also check out our Backyard Pizza here.

You might also like our Make Your Own Pizza Party.


"Secret of the Wings" Fairy Party

Jan 11, 2013 · 5 Comments

Secret of the wings Tinkerbell fairy themed birthday party.

Secret of the Wings Party: a fairy themed party with fairy sized party food, decorations based on the movie, and a fairy house craft.

Secret of the wings Tinkerbell fairy themed birthday party.
[feast_advanced_jump_to]

I had the pleasure of attending a secret of the wings themed fairy party on the weekend and wanted to share some of the sweet details with you. Our little friend Tara turned 5 and wanted a fairy themed party, so inspired by the recent Disney movie "Secret of the Wings", her Mom created a little winter fairy wonderland!

Secret Of The Wings Party Decorations

Since the movie is about how the fairies from different seasons come together, the entry way of the house was decorated in warm weather decorations, and as you moved into the living room it turned into a winter fairyland.

Tinkerbell Secret of the wings party

Heather used moss for the table cloth, and little fairy toys and toadstools, and flowers. It was so cute.

fairy party decorations

The living room was the beginning of winter land. The Christmas tree was all decorated with snowflakes, icicles and snowy owls, just like in the movie.

Secret of the Wings winter decorations

Fairy Dolls For All The Guests

When they first arrived they were each given a different fairy doll. They looked so cute in mason jars with faux snow in the bottom, each one labelled with their name and a little fairy wand tucked in.

Tinkerbell Secret of the Wings Fairy party
Secret of the Wings party

Paint A Fairy House

The first activity was to paint a fairy house for their new fairies. Heather found bird houses at the dollar store that fit the fairy dolls perfectly.

fairy house party craft

Mini Fairy Party Food

While the paint dried, the kids were invited to choose from treats to enjoy while they watched the movie together. Heather did such a great job on the table.

fairy party food ideas

She hung snowflakes and mushroom decorations from the light, and used mini Christmas trees as a centre piece.

Secret of the Wings party decorations

I loved the little place settings, with large snowflake decorations as a charger, and sweet little snowflake cupcakes at each spot. Aren't the mason jar glasses with striped blue paper straws sweet.

Secret of the Wings party ideas

The food was all small, little, fairy sized treats.

Tinkerbell and the Secret of the Wings party

There were homemade pink donuts with sprinkles.

fairy party food ideas

Aren't these little mushrooms sweet, made of mini marshmallows held with frosting glue to little raspberry tops, all nestled in the green coconut grass.

what to serve at a fairy party

There were sweet little jam sandwiches cut into flower shapes, and "fairy bread". I loved the little nest cookies, with candy eggs.

fairy party food ideas

My very favourite were these little meringue treats. They tasted like a mini pavlova. Heather wanted to make a fairy sized meringue treat so she had the great idea of sandwiching together two little pink meringues, that she baked, with raspberry whipped cream in the middle. They were so, so good. My favourite for sure.

fairy party food ideas

She also made chocolate and vanilla cupcakes, and used a little snowflake kit to decorate them.

Secret of the Wings cupcakes

My other favourite, were the little pink cream puffs. Heather filled them with cream, and topped them with pink frosting and a raspberry. They were delicious.

what to serve at a fairy party

Secret Of The Wings Movie Time

After everyone made their little plate they sat down in the living room to enjoy and watch the movie together. The entertainment unit was draped in snow and all set up for the kids to enjoy the movie together with their picnic snack in front. Heather used this fun forest rug from Ikea.

forest themed rug

The kids sat on little toadstool cushions.

toadstool chair cushions

Movie Snacks

In the living room there was also popcorn with fairy dust (star happed sprinkles), crackers and snowflake happed cheese, and fruit kebab fairy wands.

Secret of the Wings party food

Make A Candy Necklace

After their snack they worked on candy necklaces, in the perfect Tinkerbell green, and periwinkle blue colours.

Secret of the Wings party ideas

Decorating Fairy Houses

After the movie the paint was dry on their fairy houses and it was time to decorate with silk flower petals, snowflakes, paper flowers, gems and glitter glue. They had so much fun creating the perfect little fairy houses.

decorating fairy houses

Secret Of The Wings Party Favours

After Happy Birthday and presents everyone was sent off with their fairies, houses, fairy wings, glow in the dark fairy wands, and the these cute little packages of candies. Heather found the free download for them here.

Secret of the Wings party

With a beautiful Secret of the Wings themed fairy party, life really is a party!

You might also like our Cupcake Themed Birthday Party here.

cupcake bakery birthday party

Also check out our Chocolate Themed Birthday party here.

Chocolate Themed Party: a chocolate dessert table, decoration ideas, and a make-your-own chocolate bar activity everyone will love.

You might also enjoy our Board Game Night here.

Classic Shortbread Cookie Bars Recipe

Dec 21, 2012 · Leave a Comment

Classic shortbread cookie bars.

Easy Shortbread Cookie Recipe: these are pressed into a cake tin and baked making them quick and easy. Cut into squares or fingers.

Classic shortbread cookie bar recipe.
[feast_advanced_jump_to]

This easy shortbread cookie bar recipe is a family favourite.  Quick and easy to make and the perfect not too sweet traditional shortbread taste and texture.

It's day five, the final day of COOKIE WEEK! And what a delicious week it's been! Today I'm sharing one of our favourite shortbreads. This is a really yummy recipe. Great with a nice hot cup of tea.  Check out all the other cookie recipes here:

  • Chocolate Almond Biscotti
  • Cherry Snowball Cookies
  • Eggnog Cookie Recipe
  • Chocolate Chip Shortbread Cookies

Pressed Cookies

These pressed shortbread cookies have that great shortbread-y, kind of crumbly texture that you're looking for.   These are traditional Scottish shortbread cookies.  They're made with just butter, sugar, flour and cornstarch.  They don't contain any leavening agent like baking soda or baking powder like some other traditional shortbread styles of cookie do.  That leavening agent makes a shortbread cookie that is crisp, instead of crumbly like these ones are.

And, it's easy, since you just make the dough and press it into one pan.  That really saves a lot of time.  No fiddly rolling out and cookie cutters or rolling into balls, and cookie sheets. Just put all the shortbread dough into one brownie pan to bake, and then cut into squares or fingers and enjoy.  This also helps you to not overwork the dough, like can sometimes happen with rolled out shortbread cookies.  Overworking the dough can result in a tough cookie.  Be sure when your making the dough to combine the wet ingredients and dry ingredients just until it comes together and not to overwork it at this stage either.  The less you work the shortbread dough for these cookies the more melt-in-your mouth the final cookies will be.

These buttery shortbread cookies are made from simple ingredients.  Just 4 ingredients to worry about in this simple recipe.  You must make sure you use real butter for shortbread recipes though.  This isn't the recipe to substitute margarine in, because it just won't make the buttery sweet shortbread cookies you're looking for.  For the best results, be sure to use real butter in the cookie dough.

easy shortbread cookies recipe

Measurements

This recipe is adapted from an old British cookbook into North American measurements. I think that explains the kind of odd measurements. Scant means not quite. So when you're measuring out a scant cup, it means not quite full.

Cutting The Shortbread Cookies

I love it cut into nice little fingers. Just remember to cut it up when it's still warm, but not hot out of the oven.  It messes up the texture if it's too hot when you cut it, and you can't cut it up without it breaking if you wait until it's too cold.

shortbread fingers recipe
world's best shortbread

This shortbread is so good, and easy, you'll never feel the need to buy a box of store bought shortbread bar cookies again. These are perfect for the holiday season, as a traditional Christmas treat.  But I really love them any time of year.  These buttery cookies are a very good thing to serve for a tea party.

Store these shortbread cookie bars or fingers in an airtight container, or wrap the baking dish firmly with plastic wrap.  Store these cookies at room temperature, not in the refrigerator.

Recipe

Classic shortbread cookie bars.

Easy Shortbread Cookie Recipe

Easy to make shortbread that's pressed into a baking dish and cut into pieces.
No ratings yet
Print Pin Rate
Course: Desserts
Prep Time: 10 minutes minutes
Cook Time: 50 minutes minutes
Total Time: 1 hour hour
Servings: 16 cookies
Calories: 103kcal
Author: Dannyelle Nicolle-Ramjist

Ingredients

  • 1 cup plus 2 tbsps butter at room temperature
  • ½ cup plus 1 tablespoon superfine sugar -plus extra for sprinkling on top
  • 2 scant cups of all-purpose flour
  • 1 scant cup of cornstarch

Instructions

  • Preheat oven to 300 degrees. Butter a 9 inch square baking pan, or spray it with nonstick cooking spray.
  • Cream butter and sugar in the large bowl of a stand mixer with the paddle attachment at medium speed until it's pale, light and fluffy.
  • Add the flour and cornstarch. Combine into a smooth dough, scraping down the sides of the bowl with a rubber spatula at least once.
  • Press dough in an even layer into the prepared pan. Prick all over with a fork, and bake 50 mins. or until golden brown.
  • While it's still warm, sprinkle the whole thing with a generous dusting of white sugar. Allow the shortbread to cool slightly, then cut into fingers or squares.

Nutrition

Serving: 1g | Calories: 103kcal | Carbohydrates: 20g | Protein: 2g | Fat: 2g | Saturated Fat: 1g | Polyunsaturated Fat: 1g | Cholesterol: 4mg | Sodium: 12mg | Sugar: 1g
Tried this Recipe? Tag me Today!Mention @LifeisaParty or tag #lifeisaparty!
how to make shortbread fingers

With an Easy Shortbread Cookie Bar Recipe like this, life really is a party!

More Cookie Recipes

You might also like Chocolate Chip Shortbread recipe here.

Also check out our Toblerone Shortbread with Browned Flour Cookies here.

Toblerone Shortbread with Browned Flour -The "Famous Phipps Shortbread" with roasted flour, and Toblerone chocolate bar chunks.

You might also enjoy our Brown Sugar Shortbread Caramel Thumbprint Cookies here.

Brown Sugar Shortbread Caramel Shortbread Cookies: The brown sugar makes the shortbread cookie rich and the oozy, gooey caramel centres are perfect.

Homemade Double Almond Biscotti Recipe

Dec 20, 2012 · Leave a Comment

Chocolate Almond Biscotti Cookie Recipe.

Chocolate Dipped Almond Biscotti: crunchy and full of almond chunks, coated in Belgium chocolate and perfect dipped in a cup of coffee.

Chocolate Almond Biscotti Cookie Recipe.
[feast_advanced_jump_to]

These chocolate dipped almond biscotti cookies are a family favourite.  We love them, our friends and family love them.  It won't be Christmas without these delicious almond biscotti.  They have almond paste in them, and also chopped almonds for a double almond hit of the flavor of almonds.

It's day four of COOKIE WEEK! Today I'm sharing a real Christmas favourite around here,  it's Almond Biscotti dipped in Belgian Chocolate. If you're like me and like to get a biscotti at a coffee shop to dip in a cafe au lait, then wait until you try homemade.

almond biscotti recipe

These cookies aren't the easiest recipe ever. I've tweaked a few things from the original recipe to make it a little easier. I have to tell you though, they're worth the extra effort, and the double bake.  The original recipe asks you to grate the almond paste and cold butter together with a regular box grater. I have tried to do it this way and it never worked for me. I ended up putting the almond paste and cold butter together in the food processor and combining them that way, and it's way easier, and works great.

how to make chocolate dipped almond biscotti

When you bite into these cookies there is a combination of crunchy cookie (or soft if you dunk in your coffee), along with little nuggets of slightly chewy almond paste, and nice slivers of almonds along with the lovely layer of chocolate. These are my youngest daughters very favorite cookies.  She loves to have one for breakfast with her morning coffee.  She insists it's the perfect way to start your day.  

I love them dunked in a mid afternoon coffee for a little pick me up, but they're also delicious on the side of a affogato (ice cream with espresso over it) as the perfect dessert.  They're also lovely for gift giving during the holidays, or on a classic Christmas cookie tray.  Whatever way or time of day you enjoy them, they're delicious.

Almond Paste vs. Marzipan

What is the difference between marzipan and almond paste and which one should you use to make these cookies?  The difference is that marzipan has more sugar in it generally.  Almond paste has double the amount of ground almonds to marzipan.  The extra sugar makes the texture of marzipan smoother and makes it easier to roll out to cover cakes, or to make things like marzipan fruit.  It can sometimes be difficult to find almond paste or marzipan.  It's usually available around the holiday season at the grocery store in the baking aisle.  I have used both options in the recipe and both work fine.  If you can't find almond paste, feel free to use marzipan in this recipe.

Chocolate

These cookies are so delicious and one of the best parts is the chocolate on top.  I always use real Belgium chocolate for this instead of chocolate chips or chocolate melting wafers.  You can taste the difference, and I feel it's worth it in this recipe.  You can substitute with chocolate chips or chocolate melting wafers if you prefer.  I use milk chocolate, but you can substitute semi sweet chocolate or dark chocolate if you prefer.  Or even try white chocolate if you like.

Melt your chocolate in the microwave, but be careful not to burn it.  I find using half power and short intervals helps.  It's easier to spread the chocolate on the top with a knife than to actually dip these cookies, it also helps give a good light covering that isn't too thick and heavy.

chocolate dipped almond biscotti

Twice Baked Cookies

Biscotti are a twice-baked cookie.  The biscotti dough is first baked in large logs and then sliced with a serrated knife and baked and second time once they are cut.  This makes a very crispy cookie, which is why they are often dipped into coffee while eating them to soften them up a little.  If you are used to store bought biscotti, you will find that the homemade version of these twice-baked cookies, are softer and more tender, even after the second baking.  They are dry and crisp cookies, but not as hard as store bought versions of biscotti are.

butter and almond paste

After combining the cold butter an almond paste in the food processor, you then add in the flour, sugar, baking powder and salt.

making biscotti in a food processor

You then switch over to the stand mixer to froth your eggs, and not break up the slivered almonds.

Next you make two logs and flatten each to about 10" long and  ¾" thick.

biscotti getting it's first bake

Then you put these in the oven for the first bake.

biscotti after it's 1st bake

After the first bake you slice them and lay them out on the cookie for the second bake, flipping them half way through.

biscotti ready for it's second bake

Once they're cooled and baked you can dip them in a little melted Belgium chocolate. 

chocolate dipped almond biscotti recipe

Store your finished homemade almond biscotti in an airtight container at room temperature.

These make a great gift, and people seem to really love to receive them.  These are  great to give with some coffee beans too, since these hard cookies are so good dunked into a cup of fresh coffee.  This classic cookie is always a hit.  If you love almond flavor, you'll love this almond biscotti recipe.

Recipe

Chocolate Almond Biscotti Cookie Recipe.

Chocolate Dipped Almond Biscotti

Crispy twice baked biscotti cookies dipped in chocolate.
No ratings yet
Print Pin Rate
Course: Desserts
Cuisine: Italian
Prep Time: 30 minutes minutes
Cook Time: 1 hour hour
Total Time: 1 hour hour 30 minutes minutes
Servings: 24
Calories: 150kcal
Author: Dannyelle Nicolle-Ramjist

Ingredients

  • 7 oz almond paste
  • ½ cup butter very cold
  • 1 ¾ cups all purpose flour
  • ½ cup white sugar
  • 1 teaspoon baking powder
  • ¼ teaspoon salt
  • 1 cup slivered almonds
  • 4 egg whites
  • ½ teaspoon vanilla extract
  • Belgium chocolate for dipping

Instructions

  • in a food processor, combine the butter and almond paste and pulse to combine.
  • Add the flour, sugar, baking powder and salt, and pulse until fully combined.
  • In the large bowl of your stand mixer with the whisk attachment, whisk eggs and vanilla until frothy. Add in the flour mixture from the food processor, and the slivered almonds and combine in the stand mix until a soft cookie dough forms.
  • On a lightly floured counter, divide the dough in half and roll each piece into long logs 10? long and ¾? thick. If the dough is too sticky, add in some more flour as needed.
  • Bake the two large pieces each on a cookie sheet lined with parchment paper at 350 degrees for 35 min. or until golden brown. Then allow the pan to cool for 5 min.
  • After cooling, cut into ¾? diagonal slices. Return to the cut pieces to the baking sheet, cut side down. Bake 12 min. Flip and bake 12 min. more until the biscotti are golden brown and dry. Cool on a wire rack.
  • Melt Belgium chocolate in a small bowl in the microwave at half power, and use an offset spatula to spread one side of the cookie, and allow to set at room temperature. Enjoy!

Nutrition

Serving: 1g | Calories: 150kcal | Carbohydrates: 16g | Protein: 3g | Fat: 8g | Saturated Fat: 3g | Polyunsaturated Fat: 5g | Cholesterol: 10mg | Sodium: 85mg | Fiber: 1g | Sugar: 8g
Tried this Recipe? Tag me Today!Mention @LifeisaParty or tag #lifeisaparty!
almond biscotti and coffee

With homemade Chocolate Dipped Almond Biscotti, life really is a party!

More Cookie Recipe Inspiration

You might also like our Gingerbread House Cookies recipe here.

Gingerbread House Cookies: a classic gingerbread cookie recipe perfect for Christmas cookie ornaments or mini houses.

Also check out our Toblerone Shortbread with Browned Flour recipe here.

Toblerone Shortbread with Browned Flour -The "Famous Phipps Shortbread" with roasted flour, and Toblerone chocolate bar chunks.

You might also enjoy our Cherry Snowdrops recipe here.

Cherry Snowball Cookies

Dec 19, 2012 · 4 Comments

Cherry snowball cookies.

Cherry Snowball Cookies: A shortbread cookie made with dried cherries, and covered in powdered sugar, perfect for Christmas.

Cherry snowball cookies.
[feast_advanced_jump_to]

Cherry Snowball Cookies are an old favourite of mine. These cookies are lovely. The icing sugar on the outside is so sweet, and then the dried cherries inside are so tart, and the cookie itself is a nice buttery shortbread.

Welcome to Day Three of Cookie Week! Today's cookies are Cherry Snowball Cookies. These cookies are lovely. The icing sugar on the outside is so sweet, and then the dried cherries inside are so tart, and the cookie itself is a nice shortbread.

These cookies were Paige's choice, my oldest daughter. We only have them at Christmas and they are so nice on a cookie platter or with a hot cup of tea, or a tall glass of cold milk, in Paige's case.  These easy cookies are sure to be a hit with your family or guests.

Cherry Snowdrops

This easy recipe is such a yummy sweet treat. They're a favorite cookie for the holiday season, and will be a welcome addition to your cookie trays. They're also a perfect cookie for gift giving. Who wouldn't love a classic shortbread cookie with cherry flavor.

Snowball cookies with dried cherries

These cookies are made with dried cherries, which are sometimes a little tricky to find. Look in the baking aisle of the grocery store. The dried cherries should be with the other dried fruit, like raisins. I usually buy mine at the bulk food store.

Cherry Snowball Cookies

Recipe

Cherry snowball cookies.

Cherry Snowball Cookies

Tender shortbread cookies with dried cherries.
No ratings yet
Print Pin Rate
Course: Desserts
Cuisine: American
Prep Time: 15 minutes minutes
Cook Time: 20 minutes minutes
Total Time: 20 minutes minutes
Servings: 45 cookies
Calories: 73kcal
Author: Dannyelle Nicolle-Ramjist

Ingredients

  • 1 cup of cold butter cut into small pieces
  • 1 cup icing sugar divided
  • ¼ cup cornstarch
  • 2 ½ teaspoons pure vanilla extract
  • 1 ½ cups all-purpose flour
  • ¾ cup dried cherries coarsely chopped

Instructions

  • Combine butter, ½ cup icing sugar, and cornstarch in a stand mixer and mix on medium speed until smooth, or use a large bowl and an electric mixer.
  • Add the vanilla and combine. Mix in the flour and the dried cherries, taking care to coat the coarsely chopped cherries in the flour so they don't all stick together.
  • Let dough rest 5 min.Scoop the cookie dough with a 1-inch cookie scoop and roll into dough balls and bake cookies on a cookie sheet at 325 degrees until bottoms are just golden brown, about 20 mins.
  • Let cool complete on a wire rack, and then roll the cookies in the remaining ½ cup icing sugar in a separate small bowl, to coat them completely. Transfer cookies to an airtight container to store.

Nutrition

Serving: 1g | Calories: 73kcal | Carbohydrates: 8g | Protein: 1g | Fat: 4g | Saturated Fat: 3g | Polyunsaturated Fat: 1g | Cholesterol: 11mg | Sodium: 33mg | Sugar: 4g
Tried this Recipe? Tag me Today!Mention @LifeisaParty or tag #lifeisaparty!
how to make cherry snowball cookies

With Cherry Snowball Cookies this sweet, life really is a party!

Cherry Snowball Cookie Recipe

More Cookie Inspiration

You might also like Easy Shortbread Cookies here.

Easy Shortbread Cookie Recipe: these are pressed into a cake tin and baked making them quick and easy. Cut into squares or fingers.

Also check out our Chocolate Chip Shortbread Cookies here.

You might also enjoy our Jam Jams here.


Best Eggnog Cookie With Frosting Recipe

Dec 18, 2012 · 1 Comment

Eggnog Cookie Recipe.

Eggnog Cookie Recipe: A favourite at Christmas the sweet taste of eggnog and nutmeg in cookie form. Perfect for the holidays.

Eggnog cookies recipe.
[feast_advanced_jump_to]

This Eggnog Cookie Recipe is another family favourite.  If you're an eggnog fan you love these cookies.  They're soft and covered in a sweet frosting, and then they have a sprinkle of nutmeg on top.  These Christmas cookies are the perfect addition to your holiday cookie tray.  These delicious eggnog cookies are sure to become a new favourite for the holiday season.

It's day two of COOKIE WEEK! Today I'm sharing another family favourite -Eggnog Cookies. 

My Grandma first made these from a magazine recipe when I was a little girl, and they were a "make again" right from the start. They were a new favorite holiday cookie from the start.

Grandma used to call them eggnog logs, and roll them into little log shapes, and then ice them and make lines with the tines of a fork to resemble bark. They took a long, long time to make that way.  And it's not like egg nog has anything to do with logs, plus they were white not brown, and I just didn't really get it.  So, I thought why not just make them into regular little circle cookies.  They're so much faster and cuter this way.  I like their little size, but you can make them as large as you'd like to.  

These really are melt in your mouth cookies.  They have the perfect amount of spice and the eggnog frosting is so delicious.  These soft eggnog cookies are so perfect for the Christmas season.  They'd be perfect for a holiday cookie exchange.  They have all the great flavors of eggnog in cookie form.

how to make eggnog cookies

Eggnog

Eggnog is a traditional milk based punch available during the holidays made of milk, egg, sugar, and cream and spiced with nutmeg. It was first made in medieval England.  It's believed that eggnog became a holiday drink because it was full of what was considered at the time to be luxury ingredients like cream and eggs.  It became a symbol of prosperity and was used to usher in a new year and was served during the holidays.  It became known as a Christmas drink, and is usually only available in super markets during the holidays.

This holiday drink is the perfect inspiration for a special holiday cookie.  The flavor of eggnog inspired these soft cookies full of eggnog flavor.  If you're a fan of store bought or homemade eggnog you will love these eggnog cookies.

eggnog flavour cookies

Eggnog Cookies

The cookie form of your favorite drink starts out with a sugar cookie type base, with some added flavors of nutmeg and rum extract to add that traditional eggnog flavor.  On top of these delicious soft cookies is an eggnog flavored frosting.  the frosting is sweet and fluffy, and the perfect addition to the cookie.  The frosting is flavored with rum and vanilla extract.  And the finishing touch is a little sprinkle of nutmeg on top, which is the traditional topping for the eggnog drinks.  The spice and flavor really make you think of eggnog.

eggnog cookie recipe
how to make eggnog cookies

Store the cookies in a sealed airtight container at room temperature.

eggnog cookies

Any eggnog lovers will love these holiday cookies and all their eggnog flavor.   This time of year, they're the best easy eggnog cookies to make.  These sweet treats are always a big hit at holiday get togethers.  The tops of cookies are frosted with eggnog icing and then have a sprinkle of freshly grated nutmeg.  They are such a favorite cookie recipe this time of year and they really taste like real eggnog in cookie form.  They'll be a welcome addition to any of your Christmas cookie trays, or packages of assorted homemade cookies for gift giving.  Who won't love to receive these homemade treats as part of a special Christmas gift.

Recipe

Eggnog Cookie Recipe.

Eggnog Cookies

Tender eggnog flavoured cookies with fluffy eggnog frosting on top.
No ratings yet
Print Pin Rate
Course: Desserts
Cuisine: American
Prep Time: 20 minutes minutes
Cook Time: 20 minutes minutes
Total Time: 40 minutes minutes
Servings: 6 dozen
Calories: 70kcal
Author: Dannyelle Nicolle-Ramjist

Ingredients

Cookies

  • 1 cup butter
  • ¾ cup sugar
  • 1 ¼ teaspoons freshly ground nutmeg
  • 1 egg
  • 2 teaspoons vanilla extract
  • 1 teaspoon rum extract
  • 3 cups all-purpose flour

Frosting

  • ¼ cup soft butter
  • 3 cups powdered sugar divided
  • 1 teaspoon vanilla
  • 1 teaspoon rum extract
  • 2-3 tablespoons cream
  • ground nutmeg

Instructions

  • Add the butter and white sugar to the large bowl of a stand mixer fitted with the paddle attachment, and cream them together.
  • Add the nutmeg, egg, vanilla, and rum extract, and mix thoroughly.
  • Add in the flour and combine, scraping down the sides of the bowl.
  • Use a tablespoon or cookie scoop to make the cookies and roll the cookie dough into balls, and press to flatten on a cookie sheet. Bake at 350 degrees for about 10 min. until golden brown around the edges. Cool completely on a wire rack.
  • To make the icing, cream the butter until light and fluffy.
  • Add in 2 cups of the powdered sugar, and extracts, and mix well.
  • Add in cream and last cup of icing sugar and combine well.
  • Frost the tops of the cookies, and sprinkle with a tiny bit of fresh grated nutmeg.

Nutrition

Serving: 1g | Calories: 70kcal | Carbohydrates: 10g | Protein: 1g | Fat: 3g | Saturated Fat: 2g | Polyunsaturated Fat: 1g | Cholesterol: 11mg | Sodium: 24mg | Sugar: 6g
Tried this Recipe? Tag me Today!Mention @LifeisaParty or tag #lifeisaparty!

With freshly baked eggnog cookies, life really is a party!

how to make eggnog cookies

More Recipe Inspiration

You might also like our Sugar Cookie Recipe here.

Sugar Cookies: Grandma's tested and true recipe will become your go-to recipe for soft and tender cut out sugar cookies you can decorate with icing.

Also check out our Gingerbread House Cookies recipe here.

Gingerbread House Cookies: a classic gingerbread cookie recipe perfect for Christmas cookie ornaments or mini houses.

You might also enjoy our Eggnog Bread Pudding Recipe here.

Chocolate Chip Shortbread Cookies

Dec 17, 2012 · 3 Comments

Chocolate chip shortbread cookie recipe.

Chocolate Chip Shortbread Cookies -an easy, no fail, delicious recipe. Makes a big batch too, perfect for sharing and gift giving.

Chocolate chip shortbread cookie recipe.
[feast_advanced_jump_to]

This easy chocolate chip shortbread recipe is easy to put together and a real crowd pleaser.  Enjoy all the goodness of tender buttery flavor of shortbread cookies with happy addition of chocolate! 

Cookie Week

Welcome to Cookie Week, 'cause it just seemed like the right thing to do the week before Christmas! I'll be sharing some of our family favourites all week -look for more cookie week recipes at the bottom of this post. I come from a long line of cookie makers. My Grandma loved to bake cookies, and when I was a little girl, after a kiss and hug for Grandma, my next stop when I went to her house, was usually the cookie tin.

My mom is a great baker too. But since my mom's become so busy working and gardening in all her spare time -yes even in December, she's still banking roses and making sure she has all the required bird feeders and seed combinations to attract just the right birds -most of the cookie baking seems to fall to me.

I have to say that as I whipped up multiple batches today, I couldn't help but think how much easier and faster it is for me than my poor Grandma. With my stand mixer, food processor, dish washer and convection oven, it really didn't take too long to whip these up, so I hope that this Christmas you'll try a little baking too. 😉

how to make Chocolate Chip Shortbread Cookies

Shortbread Get's Even Better With Chocolate

This year we let everyone in our little family choose one favourite kind of cookie to make.  So today I'm sharing Maddie's choice, Chocolate Chip Shortbread, after I convinced her that a regular chocolate chip cookie wasn't Christmas-y enough. 😉 This recipe is from an old friend, Laurie, and these are truly easy and really delicious. They also make a very big batch, which is perfect for gift giving this time of year.  

If you're a chocolate lover like my Maddie is, these are a great little twist on classic shortbread cookies.  This chocolate chip shortbread cookie recipe has all the melt in your mouth tenderness and buttery texture of traditional shortbread recipes, with a little chocolate added too.   They're one of my favorite cookies to make at Christmas, and year round when you want a sweet treat.  They're also a great addition to your cookie tray during the holidays.  I also love them for gift giving.  They're relatively quick to make since there's no fooling around with a cookie cutters or a rolling pin.  They're absolutely perfect for a cookie exchange because they a little more special than plain shortbread cookies, they make a large batch, and everyone always loves them.

Chocolate Chip Shortbread Cookies Recipe

Butter

You must use real butter for shortbread cookies.  You might be able to get away with something like margarine in other kinds of cookie recipes.  But for shortbread only high quality butter will do.  Some people like to use unsalted butter for baking, and then add salt to the recipe, but just use regular salted good quality butter in all my baking, including this shortbread dough.  Real butter helps create the melt in your mouth cookies, that shortbread is known for.  For best results always use real butter for your this most iconic cookie.

Chocolate Chip Shortbread

Chocolate

A simple recipe that is always very well received, great for a tea party too, or anytime. I sometimes make them with milk chocolate chips and sometimes with regular semi-sweet chocolate chips and they're very good with either.  So use whichever you prefer.  You could use dark chocolate too if it's your favourite.  The milk chocolate is of course the sweetest, and reduces as the chocolate gets darker.  I usually make these cookies with chocolate chips, but you can use mini chocolate chips or chocolate chunks if you prefer.

I usually tend to make these cookies quite small, but if you're opting for the chocolate chunk shortbread cookies you can make the cookies larger and just increase the baking time if necessary.

Storing

Store your chocolate chip shortbread cookies in an airtight container.  Many people that shortbread cookies improve with age.  You can make these cookies in advance of when you when you need them and store for days and even a week or more in a cool dry place in a sealed container.  These cookies also freeze well in a freezer bag or sealed container and keep in the freezer for up to 4 months.

Chocolate Chip Shortbread Recipe

I hope you love this chocolate chip cookies.  What could be better than enjoying one with a warm cup of coffee or tea?

Recipe

Chocolate chip shortbread cookie recipe.

Chocolate Chip Shortbread Cookies

Sweet shortbread cookies with chocolate chips.
5 from 1 vote
Print Pin Rate
Course: Desserts
Cuisine: British
Prep Time: 15 minutes minutes
Cook Time: 1 hour hour
Total Time: 1 hour hour 15 minutes minutes
Servings: 5 dozen
Calories: 112kcal
Author: Dannyelle Nicolle-Ramjist

Ingredients

  • 2 cups butter room temperature
  • 1 cup fruit sugar
  • 1 cup rice flour
  • 2 ½ cups all purpose flour
  • 12 oz chocolate chips

Instructions

  • Cream butter and sugar in the bowl of a stand mixer fitted with the paddle attachment.
  • Mix in rice flour and all purpose flour until combined, being sure to scrape down the sides of the bowl occasionally.
  • Add in the chocolate chips, and fully combine.
  • Drop by teaspoonful on cookie sheets making 1-inch balls. Bake at 300 degrees F, for 20-30 min. until just turning golden brown around the edges. Cook the cookies on a wire rack, and store them in an airtight container.

Notes

Chocolate Chips: I sometimes make these with milk chocolate chips and sometimes semi sweet chocoalte chips. Either is delicous.

Nutrition

Serving: 1g | Calories: 112kcal | Carbohydrates: 10g | Protein: 1g | Fat: 8g | Saturated Fat: 5g | Polyunsaturated Fat: 2g | Cholesterol: 16mg | Sodium: 49mg | Fiber: 1g | Sugar: 3g
Tried this Recipe? Tag me Today!Mention @LifeisaParty or tag #lifeisaparty!

With Chocolate Chip Shortbread Cookies, life really is a party!

More Cookie Recipe Inspiration

You might also like our Cherry Snowball Cookies here.

More Christmas Cookie Inspiration

Also check out our Brown Sugar Shortbread Caramel Thumbprint Cookies here.

Brown Sugar Shortbread Caramel Shortbread Cookies: The brown sugar makes the shortbread cookie rich and the oozy, gooey caramel centres are perfect.

You might also enjoy our Raspberry Almond Thumbprint Cookies here.

Raspberry Almond Thumbprint Cookies: with an almond shortbread base, raspberry jam filling, and a drizzle of almond icing on top these cookies are perfect.

Nutcracker Themed Little Girls Room

Dec 13, 2012 · 2 Comments

Nutcracker Christmas decor ideas.

Nutcracker Themed Christmas Decorations: A little mouse army, and mouse king, paper snowflake ballerinas, and pastel coloured nutcrackers make for the perfect Nutcracker themed children's room.

Nutcracker Christmas decor ideas.

I wanted to decorate my daughter's room for Christmas. The problem is that my kids really play in their rooms, and they're full of toys, books, games, and crafting supplies. So, in Paige's room, I settled for one little area to set up a small Christmas vignette.

Nutcracker Themed Christmas Decorations: A little mouse army, and mouse king, paper snowflake ballerinas, and pastel coloured nutcrackers make for the perfect Nutcracker themed children's room.

She decided she wanted to go with a Nutcracker theme. This was a little challenging, but I love what we eventually came up with.

Nutcracker Themed Christmas Decorations: A little mouse army, and mouse king, paper snowflake ballerinas, and pastel coloured nutcrackers make for the perfect Nutcracker themed children's room.

We started out looking for some nutcrackers. Since her room is pink and aqua, that's the colour scheme we wanted to go with. I found a cute set of six unpainted ones that we could decorate ourselves. Instead of using the paint colours from the set, we did them all in aqua, pink, and white. I love how they turned out, especially the cute little faces and smiles that Paige gave them all.

Nutcracker Themed Christmas Decorations: A little mouse army, and mouse king, paper snowflake ballerinas, and pastel coloured nutcrackers make for the perfect Nutcracker themed children's room.

We also needed some mice and the mouse king. I found the perfect thing at IKEA. These little mice were only .99 cents, and came in white, brown and grey. We got a couple of each.

Nutcracker Themed Christmas Decorations: A little mouse army, and mouse king, paper snowflake ballerinas, and pastel coloured nutcrackers make for the perfect Nutcracker themed children's room.

For our mouse king, I made a cute little crown out of felt and added a few gems. Then, we tucked the mice into and around the little Christmas tree.

Nutcracker Themed Christmas Decorations: A little mouse army, and mouse king, paper snowflake ballerinas, and pastel coloured nutcrackers make for the perfect Nutcracker themed children's room.

For our sugar plum fairy ballerinas, I saw the cutest idea from krokotak.com for these snowflake ballerinas.

Nutcracker Themed Christmas Decorations: A little mouse army, and mouse king, paper snowflake ballerinas, and pastel coloured nutcrackers make for the perfect Nutcracker themed children's room.

With pretty, Nutcracker Themed Christmas Decorations for a little girls room like this, life really is a party!

You might also like The Nutcracker Christmas Tea Party:

Also check out our Little Girls Christmas Bedroom here.

You might also like our Boho Reading Tent here.

Boho Christmas Reading Tent: See how to make an inexpensive reading tent fort for kids with birch poles and an old table cloth.

Hot Chocolate Gift Basket

Dec 12, 2012 · 3 Comments

Easy hot chocolate gift basket.

Hot Chocolate Gift Basket: the perfect inexpensive hostess gift idea, perfect for Christmas gift giving, or a teacher gift idea.

Easy hot chocolate hostess gift basket.
[feast_advanced_jump_to]

Today I'm sharing another gift idea for under $10.  This little hot chocolate gift basket idea is perfect for a host, hostess, neighbour, teacher, coach, or friend.

Image

Hot Chocolate Gift Basket Ideas

One of the keys to an inexpensive, yet impressive gift is the packaging. I love that the bulk food store carries several different flavours of hot chocolate mix. I bought some and then put them into cute little mason jars, because everything looks good in a mason jar. 😉

hot chocolate gift basket ideas

I also added some candy canes, and a few different kinds of marshmallows.

hot chocolate gift basket

Chocolate Spoons

I picked up some chocolate spoons at the dollar store too. Here's a pic of the package so you know what to look for. I used these in a hot chocolate buffet for an event last year and they were a big, big hit, so I thought they'd be fun to add to this gift. I took them out of the box and wrapped them up individually in cello bags and tied them with baker's twine.

chocolate spoons

Adding Label Tags

I made some simple little brown paper tags, and attached them to the mason jars with more aqua baker's twine.

how to make a hot chocolate gift basket

Wood Tray Instead Of A Gift Basket

I put everything together in a little wooden tray, also from the dollar store, that I painted aqua with some craft paint and filled with some silver basket filler.

hot chocolate gift basket

With a hot chocolate gift basket like this for giving, life really is a party!

You might also like Printable Gift Card Holders here.

You might also enjoy Holiday Hostess Wine and Cheese Gift Basket here.

DIY Wood Grain Faux Bois Wrapping Paper

Dec 11, 2012 · 5 Comments

DIY woodgrain wrapping paper craft.

DIY Wood Grain Faux Bois Wrapping Paper: make your own wrapping paper and gift bags with a special wood grain painting tool -full tutorial.

DIY wood grain wrapping paper craft.
[feast_advanced_jump_to]

What better to go with our woodland Christmas theme than wood grain faux bois wrapping paper?  This DIY faux bois wrapping paper is easy to make, and looks so good!  Great for Christmas or anytime of year.

We love making pretty packages for Christmas. Check out our Christmas wrapping party here. You might also like our DIY Paper Feathers.

Materials:

how to make your own wood grain wrapping paper
  • brown kraft paper on a roll and brown brown paper bags -We wanted used brown paper for our base, but what paper is a great option too. This method worked great on paper gift bags too.
  • wood graining tool -This is essential for this project. I found mine at the local hardware store -Home Hardware if you're in Canada. Look for them on-line. They come in different sizes and designs.
  • craft paint -We used metalics for Christmas, but this would look great with brown or black paint oo.
  • acrylic glazing medium -This product helps keep your paint from drying too quickly and makes it easier to work with for a project like this.
wood graining tool

How To Make DIY Faux Bois Wrapping Paper

1. Start with some kraft paper, craft paint -I used silver and white, and acrylic glazing medium. Mix the craft paint with the glazing medium, 1 part paint to about 2 parts glazing medium.

2. Paint this mixture all over the paper in a thick-ish coat.

3. Using the graining tool, slide it through the glaze, and rock it slightly to create the grain effect as you move down the paper in lines.

It takes a little getting used to, there is definitely a little learning curve! But keep experimenting until you get a look you're happy with, and once you get the hang of it, it's pretty easy, honest. 😉

The glaze in the paint extends its drying time, so you have a while to play around with it. If you don't like it, paint over it again and keep trying.

how to use a wood grain painting tool on paper

You can do it on wrapping paper sheets, paper bags, or kraft paper gift bags.

Top Tips: Truth in blogging, I did find it a little difficult to do a big sheet of wrapping paper, but with practice it gets easier. I found it was drying before I finished the whole sheet, but I just had to add the glaze-paint mixture a bit more thickly and work in sections. The little gift bags are much easier to work with. I did one side of the bags, let it dry completely, and then did the other side.

DIY Wood Grain Faux Bois Wrapping Paper: make your own wrapping paper and gift bags with a special wood grain painting tool -full tutorial.

Once the paint dried, I gathered up some simple woodland embellishments, like twine, snowflakes, feathers, pine cones, tinsel, some twigs painted silver, and some great wood grain ribbon from Walmart.

DIY Wood Grain Faux Bois Wrapping Paper: make your own wrapping paper and gift bags with a special wood grain painting tool -full tutorial.

I really like the mix of the rustic with the silver sheen and sparkle for Christmas. I also used some wood veneer business cards that I stamped and wrote on for gift tags.

diy faux bois wood grain wrapping paper

Jingle bells were a fun addition too.

wood grain wrapping paper tutorial

This package is wrapped in white paper, and then just has a band of the wood grain paper -great way to add the wood grain detail, and not use up too much of the precious paper. 😉

diy wood grain wrapping paper
DIY Wood Grain Faux Bois Wrapping Paper: make your own wrapping paper and gift bags with a special wood grain painting tool -full tutorial.

With packages this pretty, life really is a party!

Frequently Asked Questions

Where did you find the wood graining tool?

I got mine at Home Hardware. Look for them on-line.

Do I have to add the glazing medium?

Yes, it really does make a difference. It makes the paint eaiser to work with, and slows down the drying time so you can create the wood grain effect.

Where can I buy the glazing medium?

I got mine at an art supply store. Look for it on-line also.

Recipe

DIY woodgrain wrapping paper craft.

Wood Grain Faux Bois Wrapping Paper

Give paper and gift bags a wood grain effect, perfect gift giving.
No ratings yet
Print Pin Rate
Prep Time: 5 minutes minutes
Cook Time: 10 minutes minutes
Total Time: 15 minutes minutes
Author: Dannyelle Nicolle-Ramjist
Cost: $20

Equipment

  • wood grain tool
  • paint brush

Materials

  • brown kraft paper
  • paper gift bags
  • craft paint
  • acrylic glazing medium

Instructions

  • Mix the craft paint with the glazing medium, 1 part paint to about 2 parts glazing medium.
  • Paint this mixture all over the paper in a thick-ish coat.
  • Using the graining tool, slide it through the glaze, and rock it slightly to create the grain effect.

Notes

The glaze in the paint extends its drying time, so you have more time to work with it.  If you're not happy with your results, paint over it and try again.
Working in larger areas is more difficult.  Add the paint and work in sections to make it easier.
When working with gift bags, do one side, allow to fully dry, and then turn over and do the other side.

More Inspiration

  • Everlasting gingerbread houses made from gingerbread salt dough.
    Easy Salt Dough Gingerbread Recipe for Houses and Ornaments
  • Cricut gingerbread decor felt gingerbread house banner and gingerbread canister with vinyl gingerbread houses
    DIY Gingerbread Decor Ideas To Make With Your Cricut
  • DIY paper Christmas cloche cricut
    DIY Paper Christmas Cloche Lantern with Free Cricut Pattern
  • DIY velvet acorn
    How To Make DIY Velvet Acorns

DIY Tree Stump End Tables

Dec 10, 2012 · 8 Comments

DiY tree stump end table.

DIY Tree Stump End Table: what wood to choose for tree stump end tables that will keep its bark, and not fall off as it dries, and how to paint them.

DiY tree stump end table.
[feast_advanced_jump_to]

I've been wanting some a DIY tree stump table for ages. This is a really easy project, that only requires a few steps. This tree stump side table project is sure to add lots of natural beauty to your home.

My problem has been that I live near the city, and don't have access to things like trees and chainsaws anymore. There is a little place near my house though that sells firewood. One day I stopped in to see if they had any good stumps, and how much they'd be. I struck gold.

DIY Tree Stump Table Materials:

  • honey locust hardwood tree stumps
  • sandpaper
  • primer that blocks heavy stains
  • gloss white paint
  • white felt 
  • wood glue

How To Make Tree Stump End Tables

1.Choosing Your Wood

The guy who ran the place where I bought the wood was interested in my project, and when I told him I wanted the bark to stay on to add texture, he suggested some honey locust hard wood he had. He said that honey locust was the only wood he knew of that kept its bark even after it's dry. Update: after eight years the bark is still attached and looks great!

I went in for one stump, but the only thing better than one great stump is, of course, two. So I went for it and got two. He cut one to make it a little shorter for me, so I'd have two heights.

With other types of trees, the bark will usually fall off as it drys. You can still use other types of trees, and remove the bark before painting or staining. For the bark removal process, use a wood chisel or a flat tip screwdriver to get underneath the back of the back and pry it off the stump. Take care not to gouge the wood underneath. Having to use wood filler for this project would take away from the natural beauty of these unique pieces.

how to make wood stump end tables

2.Drying The Wood

The next step is to let the DIY tree stump table dry. It's important to let the wood dry out a little before bringing it into your house for this project. If the wood isn't dry enough, it may split as it drys too quickly with the high temperatures of indoors and you'll be left with large cracks down your stump, it might even slit in half. The only way to avoid this is to let it dry slowly for quite a long time, from a couple of months, up to a year, in a dry place like a garage or barn. This requires a lot of patience. We let ours dry for a couple of weeks in the garage, it did eventually crack when it was in the house.

I also found that the first and second spring that these large stump tables were in my home, they sprouted leaves. Several times I had to break off green leaves shooting out from the entire tree stump. I'm sure that this is because I was impatient and didn't let my own tree stump coffee table dry out enough before bringing it inside.

3.Primer

Next I headed to the hardware store and picked up a primer designed to cover the natural wood tannins, and some gloss white paint. Primer is an important step in this project. Without the top coat of white paint may appear yellow in some areas.

tree stump end tables

4.Sanding The DIY Wood Stump Table

For our DIY project, the next step was to sand the tops of the tree trunks. I sanded the tops of the them smooth, with some sandpaper. You can do it by hand or make it quicker with any electric sander, like a belt sander, or a palm hand sander. This will give the top of your stump a smooth finish. Be sure to clean the dust off of your wood stump side table well before painting.

We only sanded the top of the DIY tree stump table, as ours had bark on the sides, but if you were using wood from a different type of tree that won't keep it's back and removing it to, you could also sand the sides and rough edges of the stump and remove any rough spots.

5.Painting

Next I primed and painted the entire stump with the glossy white paint. I used several coats. Because I choose a glossy finish I didn't add a sealer. I love the look of the glossy white for a modern mix with the natural elements. You could instead do a color of your choice that matched your decor.

If you choose to leave the tree trunk tables with a more natural look, you could leave them un-primed or painted and finish the wood with just a few coats of polyurethane. Look for a non yellowing one.

6.The Bottom Of The Log

I also covered the bottom of the stump tables with some white felt to help protect the floors from any scratches. The felt is glued with some wood glue.

painted tree stump end tables

I love, love, love how they turned out. They're even cooler than the West Elm version.

DIY tree stump end tables
how to make a tree stump end table

I set them up as little tables in my dining room, and love how they look with our woodland theme for Christmas. Perhaps after Christmas I'll move them into the living room, or family room as a coffee table.

tree stump end tables
silver walnuts

With my DIY tree stump end tables, life is really a party!

how to make wood stump end tables

More Inspiration

You might also like How To Paint A Buffalo Check Feature Wall.

Also check out DIY Boho Driftwood Sticks here.

DIY Boho Painted Driftwood Sticks: Easy tutorial using found driftwood sticks and paint to add a little boho to any room.

You might also enjoy our How To Make Wood Bead Garland.

How to make Wood Bead Garland with Yarn Tassels: easy DIY for tassels and garland. Great way to add texture to home decor.

Bakers Gift Basket Ideas

Dec 7, 2012 · 7 Comments

Christmas sprinkles gift basket.

Bakers Gift Basket Ideas: DIY Christmas sprinkle gift set and a Christmas cookie themed holiday ornament make the perfect inexpensive gift.

Christmas sprinkles gift basket.
[feast_advanced_jump_to]

I wanted to share these sweet little bakers gift basket ideas that would be great for the baker in your life. I put this together for less than $10.

Image

Christmas Sprinkles

I found these little jars for .79 cents each. They're the tiny size, sometimes used for little individual servings of jam.

cheap hostess gift ideas

I went to the bulk food store and found all the Christmas sprinkles. I love how pretty they are in their little jars, and it's just the right amount for your holiday baking.

bakers gift basket ideas

Packaging Them Up

I found the little metal tray thrifting, but what would also work great is the bottom of the little box from your Christmas cards, wrapped up in some pretty holiday paper. I put some shredded book pages in the bottom of the tray.

bakers gift basket ideas

A Cookie Ornament

I added this sweet gingerbread cookie Christmas ornament. Doesn't get much more cute than this sweet little gift.

With bakers gift basket ideas like these, life really is a party!

You might also like Printable Christmas Gift Card Holders here.

You might also enjoy Holiday Hostess Wine and Cheese Gift Basket here.

A Woodland Christmas Tree

Dec 6, 2012 · 2 Comments

Woodland Christmas tree ornaments.

Woodland Christmas Tree: decorated with lots of easy DIY ornaments you'll be inspired to create your own woodland Christmas tree.

Woodland Christmas tree ornaments.
[feast_advanced_jump_to]

I'm so excited to share my Woodland Themed Christmas Tree with you this year.  I've had so much fun making and collecting all the woodland Christmas ornaments.  I just love how it turned out.  This rustic Christmas tree is perfect for celebrating the holiday season with a woodland theme.

The Tree

When we finally finished renovating our basement a few years ago, I was able to move the family tree, with all our homemade and vacation ornaments downstairs, and have a themed tree upstairs. The kids call it "Mom's Tree".

This faux tree was found on Kijiji for a great deal. I wanted a skinny tree so I could fit it at the bottom of our stairway. It's very nice here since you can enjoy it from the living room, and the dining room. The first year I decorated it all in snowflakes, silver and white. When I decided to do a woodland theme this year, I knew I could use a lot of the ornaments I already had and just add a few new ones for a woodland feel. All the glass, silver and glitter help my woodland theme take on a snowy, glitzy feel, which I really like, with just a little rustic added in.  The silver adds a little sparkle and woodland glam.

Woodland Christmas Tree

DIY Woodland Animal Ornaments

My first idea for ornaments for my woodland themed tree was to buy a tube of cute woodland creatures plastic toy animals from the craft store and spray paint them white and hang them on the tree. I used little screw-in eye hooks on their backs, which worked great. They're my new favourite. I love how these adorable woodland creatures turned out.  The white color scheme really helps them to stand out against the green tree.  These white ornaments are an easy DIY and not expensive to make.

DIY woodland Christmas ornaments

Birch Bark Ornaments

I wanted to include lots of natural elements in our Christmas tree decorations.  We also made some birch bark Christmas ball ornaments. I bought some empty glass balls at craft store, and removed the tops from them.

DIY birch bark Christmas ornaments

Then I used small strips of birch bark, peeled off some birch wood, and curled them with scissors like you would ribbon. I just slipped them into the balls and put the tops back on.

how to make birch bark Christmas ornaments

They look so sweet on the beautiful tree. I really like how they turned out.  They were simple to make, and their rustic style is perfect for our woodland-themed Christmas tree.

DIY birch bark Christmas ornaments

Feather Ornaments

Another idea for some natural decorations was to incorporate some feathers.   I made another set of glass ornaments with feathers inside.  I picked up the feathers at the craft store too.  They have lots of different colors and kinds, but I thought these dotted speckled ones were the perfect fun addition.

DIY feather Christmas ornament

Pinecones

I also wanted to use some pinecones, as more natural materials on the the woodland themed tree. I made two types of pinecone ornaments. For the first one I used some pine cones leftover from making my white pine cone wreath, that had been spray painted white. I just added little round screw-in eye hooks to the tops, and then used a hook to hang them on the tree.  This was a great way to turn them into ornaments and easily hang them on the tree.  Adding ribbon would be a nice option too.

pinecone Christmas tree ornament

I also had these fun, large spruce cones. To decorate them I just added a little white paint to just the tips to make them look snow covered, since I wanted the tree to be a combination of silver, white, glass and glitter, but also mix in some natural brown for a natural look on our woodland-themed tree.

pinecone Christmas ornament

Acorn Ornaments

Another natural element I added were the acorns made from Easter eggs that I made this fall, see the whole tutorial here. I just added some clear fishing line to the stem to hang them from.  They're a perfect addition.

DIY acorn Christmas ornament

Rustic Decorative Balls

I also added a few different decorative balls. These birch balls where made by hot gluing strips of birch bark to styrofoam balls. I also used some twig balls, and fun moss balls. To add a little pop of color and texture to the moss balls, I wrapped them in some white, fuzzy yarn. Love how they turned out.

a-Woodland Christmas Tree Ornaments 131

They look great tucked into the tree as holiday decorations.

a-Woodland Christmas Tree Ornaments 107

Store Bought Woodland Ornaments

When I decided to do a woodland theme, I started seeing so many cute decorations in stores. A lot of them are more of the red, felt, rustic lodge style that won't work with my silver, and glitter winter woodland look. But here's some that I found that really fit my look and that I couldn't resist.

collage1
collage2 woodland christmas tree ornaments

1. White Owl  2. Book Page Nest  3. Glitter Acorn  4. Silver Mushroom 

Silver, White, and Glass Balls

I mixed all these new ornaments, bought and handmade, in with the white, glass, and silver ones I already had for our woodland tree. Like these pretty little bird figurines, and lots of glass balls.  The mix of different styles of rustic natural decorations and sparkly, silver, glass, and snowflake ornaments adds so much interest to this tree.  We used a beautiful snowflake tree topper for the tree and it finishes it off perfectly.

a-Woodland Christmas Tree Ornaments 109

Tree Skirt

And as a tree skirt at the base of the tree, I used beautiful, warm,and fuzzy sheepskin rugs. The creamy one is real, from IKEA, and the white one is faux, a fun find at HomeSense. I love how they connect with the beautiful pillows on the couch.

a-Woodland Christmas Tree Ornaments 150

With a fun woodland winter wonderland tree like this, life really is a party!

More Christmas Inspiration

You might also like our Christmas Home Tour 2018 here.

Christmas Home Tour 2018 -Black and White Scandinavian design with a little boho. Lots of natural elements, cozy texture and Christmas twinkle lights.

Also check out our Christmas Home Tour 2016 here.

You might also enjoy DIY Woodland Mugs here.

DIY Mugs: Woodland Mugs using carbon paper to transfer an image and a ceramic marker. So much better than sharpie marker mugs the don't last.

Woodland Christmas Decor

Dec 5, 2012 · 15 Comments

Woodland Christmas decor ideas.

Woodland Christmas Decor: forest creatures, natural elements like pinecones and acorns and DIY ornaments create a magical Christmas.

Woodland Christmas decor ideas.
[feast_advanced_jump_to]

This year I'm bringing the outdoors in with lots of woodland Christmas decor.  This theme is perfect for the holidays and adds a little magic to the season.

You might also like our Boho Christmas Decor Ideas.

A Table Top Forrest with Woodland Animals

I have collected lots of table top Christmas trees over the past few years, and love the way they look all mixed together on my dining room table. This year, to go with our Woodland Christmas decor theme, I thought I'd add a few little woodland creature friends to the forest.

Woodland Christmas decor

I originally planned on painting all the little woodland animals white -you know how I love a little spray painting. 😉 But after seeing it all together, I kind of liked how they looked. Not to mention the kids pleading in the background. What do you think, should I paint them?

woodland themed Christmas decorations

I found most of them at the craft store. I started out with one of those tubes of North American animals, but I didn't like how the animals weren't to scale. (Maybe you didn't know I was quite that particular about things -well I am, and just the thought of the raccoon being the same size as the deer was bugging me.) So, I found these other, larger animals. At first I thought it might be a little expensive to get enough of them but...about nine or so 50% off coupons later and it worked out great. 😉 Most of them worked out to be a dollar or two.

forest themed Christmas decor

I have to say I kind of love them. At first glance it's just a regular, shiny, silvery Christmas tree display.

Woodland Christmas Decorations

But then, you see them, hiding in the trees, and you can't help but smile, even at the skunk.

Woodland Christmas ideas

It's going to be hard to put them away after Christmas.

Woodland Christmas Decor

Deer Head

deer head

Sometime in October I got the idea that I wanted to add a deer head to my dinning room for our Christmas and build a whole woodland Christmas decor theme around him. I thought of a few options, and was buying supplies for another version when I laid eyes on this guy. A plain, brown paper, paper mache deer head. I decided I should bring him home, and abandoned my other plans. I gave him a few good coats of white gloss spray paint, and loved him even more. 😉

deer head decoration

Homemade Picture Frame

I knew I wanted to surround him with an old picture frame, painted silver. Of course when you need something you can't find it. I looked at all my local thrift stores and couldn't find exactly what I was looking for.  When I was driving by the Habitat for Humanity Re-Store and had an idea. What if I bought some old trim and made my own frame? I found this piece of trim for a $1 -sold!

wood frame

Once I got it home, I had a little help cutting it to size, with all the right angles. I glued it together, stapled it, clamped it, and then filled the little gaps and sanded them smooth.

deer head decoration

After a few coats of silver spray paint, I think my $1 frame turned out pretty well.

deer head

Boxwood Wreath

I needed one more finishing touch for the deer head, a little wreath around his neck. The box wood wreath came from trimming up my box wood and I made a little wreath. I just bent a coat hanger into a circle to make the form, and then wired little bunches of box wood around the form.

deer head decoration

It's the perfect natural element for this spot.

deer head

More Woodland Christmas Decor

To finish off the display I used this gorgeous little black wrought iron tree my sister gave me a few Christmas' ago. I love the little pompom garland, reminds me of little snow balls.

deer head

I usually have some Black and White photos of Paris hanging here, but decided to change them out to go with our woodland theme too. These sweet little prints are printed onto wood veneer and I thought the snowshoes and feather were perfect with everything else. I framed them in some in-expensive IKEA frames, and I like the way the white frames match my dear, deer head -affectionately referred to by all my family, friends, and visitors as the moose.

pine cones

I didn't do too much else on the table, just some candles, and the silver bowl, filled with some pinecones.

deer head
deer head

Woodland Entry Table

Woodland Christmas decor

I thought it would be fun to add a woodland touch to the entry area too.  The deer look so sweet in the fresh pine boughs on the table.

DIY pinecone balls

These easy DIY pinecone balls were a great little Christmas project.

Woodland Christmas Tree

One of my favourite woodland touches this Christmas is my woodland themed Christmas tree.  

woodland Christmas tree

With lots of DIY woodland animals it's the perfect touch for our theme.

Woodland Christmas tree

You can read all about all the details of the woodland Christmas tree here.

DIY Woodland Christmas ornaments

All the woodland Christmas decor details came together so beautiful.  This might be one my favourite Christmas themes ever.

With Woodland Christmas decor, life really is party!

Easy Puff Pastry Desserts with Jam, Cream, and Fresh Berries

Dec 3, 2012 · 1 Comment

Easy puff pastry dessert.

Easy Puff Pastry Dessert: this dessert will remind you of a homemade version of a Flakie. The perfect combination of pastry, jam, cream, and fresh fruit. It's quick, easy and perfect for guests.

Easy puff pastry dessert.

Remember Flakies? My favourite lunch box Vachon treat, I think maybe they're just a Canadian thing? For my American friends, let me explain. When I was kid we often got these these little packaged treats in our lunch boxes There were lots of different varieties, like moon cakes, and caramel filled cakes, but my favourite was a Flakie. It consisted of puff pastry, some kind of icing/whip cream -ish layer, and then jam, followed by a puff pastry lid, coated in a light sugar topping. Yum! .

Easy Puff Pastry Dessert: this dessert will remind you of a homemade version of a flakie, quick, easy and perfect for guests.
Image

Here's my homemade and more grown up version -an easy puff pastry dessert with jam, pastry cream and fresh berries.  It's a really quick and easy dessert made with store bought ingredients but guaranteed to impress your guests.

homemade vachon flake

This weekend I made my version for guests and it was a total hit. Not exactly like the flaky version, but really good.  It is so easy -like a little bit of a cheaters version easy, so I thought you might want to put it into your own rotation over the holidays if you're looking for a little wow factor, without too much work. 😉

easy puff pastry dessert

Cheater's Pastry Cream

I made a bit of a cheater's version of pastry cream.  Pastry cream is a custard filling used in French pastries.  It's a little lighter and thicker than an English custard or custard sauce.  We made our cheater's version by combining whipped cream and canned custard.  I made homemade whipped cream with sugar and vanilla, and then folded in the canned custard.  This makes a beautiful velvety cream more substantial than just whipped cream, but lighter than custard.  It's easy to make and really delicious.  It's a great addition to lots of different pastries and deserts, and worked wonderfully with our puff pastry desserts.

easy puff pastry dessert

Different Flavors

I thought it would be fun to create different flavors of our cream and jam pastries.  I was guided by what fresh berries were easily available.  Strawberry jam with fresh strawberries would be a great one to try too.  You could make a version of this dessert with almost any fruit and sweet jam or pie fillings.  The combination of the sweet and concentrated jam flavor with the freshness and tartness of the fresh berries works really well together.  The fresh fruit really elevates this dessert, and makes it look and taste so wonderful.

easy puff pastry dessert flakie
puff pastry with jam and whip cream dessert

You can make these puff pastry part of this dessert a day ahead of time and store in an airtight container at room temperature.  Assemble the dessert up to a few hours ahead of serving.

Variations

You could also make this dessert with a hazelnut chocolate spread like Nutella.  Add some cocoa powder to the whipped cream and pastry cream filling for a chocolate version.  Top with strawberries for a great combination, or just sprinkle the top with some powdered sugar.

easy puff pastry and jam desserts

For a Valentine's Day verison try cutting out your puff pastry with a heart cookie cutter before you bake it.  The heart shape is such a cute twist on these delicious desserts for Valentine's Day.

puff pastry with jam and whip cream dessert 046

This is such an impressive dessert, with just a few simple ingredients.  These berry and jam puff pastries are the perfect sweet treats for a quick last minute dessert, because they don't take a lot of time or energy to put together and taste so great.  They're great with a cup of coffee and the perfect size for afternoon tea.  We love the different flaky layers and the creamy sweet filling combined with the tart fresh berries on top.  It's a wonderful combination and one of my favourite jam desserts.

puff pastry and jam dessert ideas

Recipe

Easy puff pastry dessert.

Easy Puff Pastry Dessert

Flaky puff pastry with custard and fruit.
5 from 1 vote
Print Pin Rate
Course: Desserts
Cuisine: American
Prep Time: 10 minutes minutes
Cook Time: 20 minutes minutes
Total Time: 30 minutes minutes
Servings: 6
Calories: 441kcal
Author: Dannyelle Nicolle-Ramjist

Ingredients

  • 2 sheets of frozen puff pastry
  • 1 teaspoon milk
  • 1 tablespoon coarse sugar
  • 473 mL container whipping cream
  • 1 teaspoon vanilla
  • 3 teaspoon sugar
  • 1 cup custard
  • 6 tablespoon jam -I used blackberry raspberry, and blueberry
  • ½ pint of berries -I used blackberries raspberries, and blueberries

Instructions

  • First, defrost your store-bought puff pastry, then roll out each puff pastry sheet. There are two, and cut each sheet of puff pastry into six equal squares with a sharp knife, giving you 12 pieces in total. Brush six with a little milk and sprinkle with coarse sugar. Bake on a baking sheet until golden brown, according to the package directions and then let cool completely on a cooling rack.
  • Meanwhile, make the cheaters pastry cream. First whip your cream and near the end of whipping add 1 teaspoon of vanilla and 3 teaspoons of sugar. In a small bowl combine about half a can of custard with equal parts whipped cream, save the other whipped cream for the top.
  • Now to assemble the desserts, lay down a square of puff pastry, and then top with your pastry cream. Spoon 2 tablespoon of jam filling over the cream and then put the lid on. Top that with more whipped cream and the same fruit as the jam you used inside.

Nutrition

Serving: 1g | Calories: 441kcal | Carbohydrates: 34g | Protein: 5g | Fat: 33g | Saturated Fat: 20g | Polyunsaturated Fat: 11g | Trans Fat: 1g | Cholesterol: 114mg | Sodium: 80mg | Fiber: 1g | Sugar: 20g
Tried this Recipe? Tag me Today!Mention @LifeisaParty or tag #lifeisaparty!

With an easy, and impressive puff pastry dessert like this, life really is a party!

More Dessert Inspiration

You might also like our Easy Pavlova Recipe here.

Easy Pavlova Recipe: a favourite, easy to make, no-fail pavlova recipe. Make with summer berries, or any other favourite fruit.

Also check our Classic Cheese Cake here.

You might also enjoy Mini No-Bake Cheesecake in a Mason Jar here.

Mini No-Bake Berry Cheesecake In A Mason Jar -the perfect cute, portable, easy treat! Top with any fruit you like best. Indiviual serving size.

Giving to Charity and a Christmas Ornament Keepsake -Hostess Gift

Nov 30, 2012 · 4 Comments

Giving to charity hostess gift idea.

Christmas Hostess Gift: give a thoughtful and world changing gift this year with a donation to charity and DIY keepsake ornament.

Giving to charity hostess gift idea.
[feast_advanced_jump_to]

I wanted to share this great gift idea as part of the Christmas Gifts for under $10 series -perfect for a host/hostess, bus driver, neighbour, or friend.

Image

Let's face it none of us really needs another candle, box of chocolates or bottle of wine this Christmas...okay you might make an argument for the wine, but still. Here's an idea to give something with a little more meaning.

Charity Gifts That Do Some Good

I'm always inspired by the World Vision catalogue that comes around each year filled with charity gifts for people in developing countries, and I love the idea of giving things like animals, and education because they're the gifts that keep giving and provide a brighter future.

So, I was wondering how to make these meaningful gifts a little less expensive and suitable for a hostess gift, and also give something to the recipient as a keepsake as well. Here's what I came up with.

Christmas Hostess Gift

The Gift of Fruit Trees

World Vision offers 5 fruit trees for $30. The trees could do a lot for a family. They offer fruit which helps provide nutritious food and vitamins for a family, given enough to create an orchard they could provide an opportunity for a family to create a small business, and they offer natural beauty, shade, and oxygen to the area. Win, win, win. At only $30 for five here's how I turned this into a fun under $10 gift.

Christmas hostess gift under $10

A Keepsake Ornament

You can make three or four of these sweet keepsake ornaments, with a glittered covered pear, and then divide up the fruit trees, to make gifts for under $10. I already had the fruit ornament, but you could find any plastic fruit and even glitter it yourself. Then I made a little tag that says HOPE. I used rubber stamps on card stock, glittered the edges, and mounted it on a little piece of book page paper cut with special scissors, then I tied it to the pear with some silver ribbon.

charity Christmas gift idea

I purchased the fruit trees, and printed out the description, you can purchase and print it here, and packaged it up with one of the keepsake ornaments in a fun little Chinese take-out box, with shredded book pages. Now, when you are invited somewhere for dinner or a party over Christmas you can let the host know that you bought a fruit tree in a developing country in their name, and that each year they put the ornament on their Christmas tree they'll remember the gift of the fruit tree.

Christmas hostess gift idea

With a thoughtful, and meaningful Christmas hostess gift like this, life really is a party!

Also check out our Holiday Hostess Wine and Cheese Gift Basket here.

Also you might enjoy our Printable Christmas Gift Card Holders here.

DIY Pine Cone Christmas Balls

Nov 29, 2012 · 5 Comments

DIY pinecone ball Christmas ornaments.

DIY Pinecone Christmas Balls: Easy to make and beautiful. Made with simple pinecones glued to styrofoam balls. Perfect for Christmas.

DIY pinecone ball Christmas ornaments.
[feast_advanced_jump_to]

I was recently visiting a Christmas tour of homes, and one of the houses had some pretty pine cone balls. I thought they'd work really well with our winter woodland theme this Christmas and decided to make some.

Materials:

  • small spruce cones
  • styrofoam balls
  • hot glue gun and hot glue
  • silver spray paint (optional)
  • glitter and glue (optional)

The hardest part was finding small pine cones -actually they're spruce cones. After driving around a few neighbourhoods, I managed to find and collect some. I didn't even have to wear all black. 😉 Along with lots and lots of little spruce cones, I used three different sized large styrofoam balls from the dollar store, and lots and lots and lots of hot glue.

DIY Pinecone Christmas Balls

How To Make Pine Cone Balls

1. When you first collect the cones from outside they will be closed up.  They need a little heat to open up.  After I collected my pinecones I left them near the heat vent in my home for a few days and they opened up quite a bit. (You could also so place them on a cookie sheet in a very low oven for a few hours.)

2. Then I just glued them onto the styrofoam ball, as close together as possible, and varying the directions they went in to try and make it look random.

3. You could leave the balls just like this or add a little spray paint to them.  I sprayed them very, very lightly with a little silver spray paint, to just add a little sheen. Then I added some glue and glitter in just a few small spots to add a little Christmas sparkle.

DIY Pinecone Balls

I love all their rustic texture, and the little hit of silver and glitter to add a little Christmas magic.

how to make a pinecone ball

I added the balls and some greens to my console table. They're nested beside my vintage typewriter.

rustic Christmas decor vintage typewriter

They type writer has a special letter started.

dear Santa, I can explain...

On the table there's also some candle lanterns and two sweet little woodland deer.

DIY Pinecone Christmas Balls

It makes a happy greeting when Christmas visitors arrive, and the pine smells so good.

how to make a pine cone ball

With DIY Pine Cone Christmas balls to decorate this Christmas, life really is a party!

More Christmas Craft Ideas

You might also like How To Make A Pine Cone Wreath here.

How to make a Pinecone Wreath

Also check out our Scented Bleached Pine Cones here.

Scented Bleached Pinecones -use simple household bleach to whiten and brighten natural pinecones, and then add any scent to them you like.

You might also enjoy our Paper Feather Garland here.

Easy Pancake Mix In A Jar With Free Printable

Nov 23, 2012 · 3 Comments

Pancake mix in a jar gift.

Pancake Mix In A Jar: perfect for gift giving this homemade pancake mix in jar is a delicious, easy to make, and inexpensive gift idea.

Pancake mix in a jar gift.
[feast_advanced_jump_to]

This pancake mix in a jar is a favourite of mine.  It's easy to put this gift together and it makes the most delicious homemade pancakes.  Stir together the dry ingredients, and add the dry mix to a jar and canister, and print the free printable recipe tag for the gift recipient.  The recipe tag tells the gift recipient exactly what to add, and what measurements to make a delicious homemade pancake batter.  Give this along with some maple syrup for the perfect homemade thoughtful gift of fluffy pancakes.

Today I'm sharing my very favourite pancakes with you. I grew up on Aunt Jemima and thought that was what pancakes tasted like. When I got married my husband started making us pancakes from scratch -what a difference, and the real maple syrup didn't hurt either. This batch of pancakes is so light, and fluffy, and yummy. If you've never tried them before consider it Christmas holiday homework. 😉

Pancake Dry Ingredients:

To make these into an in-a-jar recipe, combine these dry ingredients in a mixing bowl and whisk together:

  • 1 ½ cups all-purpose flour
  • 3 tablespoons sugar
  • 1 ½ teaspoons baking powder
  • ½ teaspoon baking soda
  • ½ teaspoon salt

Variation

Want to make these into chocolate chip pancake mix?  Just add a ½ cup of chocolate chips to the dry pancake mix when your mixing it together.  

Jar or Canister

All together the dry ingredients are just under 2 cups.  This will fit in a pint mason jar or canister that can hold 16 oz.  

I used a cute canister from the dollar store to put the homemade pancake mix into.  A canning jar or any glass jar that can hold 2 cups works great too.  For the holidays, you can decorate the glass mason jar or canister with some fresh pine and ribbon and tie on the recipe tag.

DIY pancake mix in a jar

Pancake Mix Instructions Printable Gift Tag

This cute free printable label gives the recipient the list of wet ingredients to add.  You can download the free printable labels from our Free Resource Library.  It's free and gives you instant access to this printable and lots of others.  Subscribe below for access.

I printed the recipe tag on card stock, cut it out, and added a little glitter to the printable tags -cause everything is better with glitter. Then just punch a hole in the top, and tie it onto the canister with a little Christmas ribbon for the holidays, or regular ribbon anytime of year.  For another option, you could print the recipe onto sticker paper, and then stick it to the side of the glass jar.  This would work best on a canister with straight sides.

On the free printable gift tags are the instructions for what to add to the mason jar pancake mix.  

Combine in a large bowl:

  • 1 ½ cups milk or buttermilk
  • 3 tablespoon melted butter
  • ½ teaspoon vanilla
  • 2 eggs

Add dry ingredients and mix until just combined.  Cook batter into pancakes on a hot griddle or frying pan.  Once small bubbles form on the top, flip over until the other side is golden brown.  Serve with maple syrup and enjoy!

Pancake Mix in a Jar

Syrup

Along with the pancake mix-in-a-jar, I thought it would be nice to include some syrup. I found this delicious looking raspberry syrup, but real maple syrup would be great too.

raspberry syrup

Gift Giving

My syrup was around $5, the canister $1, and I had the other ingredients, making this a great under $10 Christmas gift or hostess gift anytime of year.  I think this would be really fun to bring as a hostess gift for a dinner party, and mention something like "you made us this beautiful dinner so here's something to help with breakfast tomorrow".  Want some more ideas about a breakfast gift basket?   Check out this post where I used this DIY pancake mix in a jar, along with other breakfast items for the perfect breakfast gift basket.

Breakfast in Bed Gift Basket: perfect, thoughtful gift, includes a recipe and homemade mix for pancakes, and free printable.

Not only is this pancake mix in a jar a great hostess gift, it's so easy that it would be a great project to make with kids who want to make homemade items for gift giving.  You could easily make this pancake mix with kids at girl guides, in a classroom, or as part of a youth group, or any other club.  They could mix it together and package it for gift giving and give it to someone special this holiday season, or for Mother's Day or Father's Day.

Pancake Mix in a Jar

With pancake mix in jar, life really is a party!

More Breakfast Recipe Inspiration

You might also like our Pumpkin Waffle recipe here.

Homemade Pumpkin Waffles -easy recipe for pumpkin waffles, perfect morning treat, and easy to freeze extras for a quick weekday breakfast later.

Also check out our Jelly Donut Pancake recipe here.

Jelly Donut Pancakes: Your two favourite treats combined! Cut into a delicious pancake with a surprise inside -your favourite jam!

You might also enjoy our Easy Food Processor Scones recipe here.

Easy Food Processor Scones: easy and quick to make in your food processor, these flakey scones are perfect for a tea party, breakfast, or snack.

DIY Glass Christmas Cloche

Nov 20, 2012 · 10 Comments

DIY glass Christmas cloche.

DIY Glass Cloche -Made from a stemless wineglass and glass drawer knob this DIY glass Christmas cloche couldn't be easier or cuter. Fill it with a Christmas scene -or anything else and enjoy.

DIY glass Christmas cloche.
[feast_advanced_jump_to]

I had this idea a little while ago...that I could use a stemless wine glass to create a pretty DIY Glass Cloche with a Christmas scene in it.

Materials:

  • stemless wine glass
  • glass cabinet knob
  • super glue
  • mushroom ornament
  • faux snow
  • fairy print out
  • rhinestone stickers and glitter
  • miniature gift
  • cardboard
  • pipe cleaner

How To Make A DIY Cloche:

While I was cross border shopping on the weekend I picked up a stemless wine glass at Target in the dollar bins. I wanted to create a little knob on the top, and thought a little glass furniture knob from the hardware store would work great, but they were a little expensive -up to $5 each. So, I dropped by my local Habitat for Humanity Reuse Store, and I found one for a buck.

how to make a DIY cloche


I glued it to the bottom of the glass with a little super glue. To create the scene I used a sweet little mushroom ornament from Walmart, and found a cute Christmas fairy image on line, and re-sized it to fit in the cloche.

mushroom Christmas ornaments

After cutting the fairy out, I embellished her with tinsel, stars, rhinestones and glitter.

DIY Cloche snow globe

I glued them all down with a little hot glue (and managed to burn my finger in the process) and added some cotton batting, fake snow and a tiny little Christmas gift.

how to make a DIY Cloche

Then I glued the cloche to the cardboard base I made out of some silver glittered card stock, and added some tinsel to cover and glue marks.

DIY decorative Cloche snow globe

I really do love how it turned out. I think the fairy and mushroom will be so cute with my woodland themed Christmas this year.  Since every winter woodland needs a few Christmas fairies. 😉  I can think of lots more possibilities to create more of these.  How about some with vintage looking paper Santas, little Christmas trees, or plastic reindeer.

DIY Cloche

Hope you like this sweet little ornament.  With a DIY Glass Cloche, life really is a party!

You might also like our Christmas Fairy Garden here.

Also check out our Birch Christmas Wreath here.

Birch Christmas Wreath:-full tutorial to make your own square wreath from some gathered greens, birch logs, and a coat hanger. Perfect for Christmas.

White Christmas Wreath, Doormat and Outdoor Planter Arrangements

Nov 16, 2012 · 17 Comments

Christmas front door urn, wreath, doormat.

Christmas Outdoor Planter: see how to create a Christmas arrangement for your front door in two different styles and a matching snowflake doormat.

Christmas front porch decor urn, door mat, wreath.
[feast_advanced_jump_to]

I loved my fall outdoor linear planter so much that I decided to do another version of it for Christmas. It came out great, and I love that it's something a little different from the standard Christmas urn with greens, bobbles and ribbon. My love of white continues with the Christmas decor, and I really love how the white pops against all the Christmas greens.

Christmas Outdoor Planter

Linear Outdoor Christmas Arrangement

Materials:

  • large square galvanized tub
  • greens
  • birch poles
  • hawthorn berries
  • cedar
  • pinecones spray painted white
  • soil in the container

How To

To make this outdoor Christmas arrangement, I started with the fall planter, and removed everything but the birch poles.

how to make your own Christmas Outdoor Planter

I repositioned them as the second row, and tucked a nice row of fir as the back and tallest row. Fir is really one of my favs, since we always had a real fir tree growing up. When I think Christmas tree, I just think fir, maybe that's because we always had a fresh fir tree when I was a little girl. It was a great choice here for the back row, since it has so much structure.

Next were the line of birch poles I cut for the fall planter -must say I'm loving all the birch this year, and using more of it inside for my Winter Woodland Christmas theme this year. 😉

DIY Christmas Outdoor Planter

After the birch I added a row of these black berries, European buckthorn -according to my google research. 😉 They have thorns so be careful, (she said from experience).

After that I added a row of cedar, just common Ontario cedar, not the fancy B.C. kind. Sometimes Ontario cedar is more yellow, but I thought this looked pretty good, and the contrast is also good for this linear arrangement.

My final row is some spray painted pine cones. I liked the way it related to the pine cone wreath I made here.

how to make your own Christmas outdoor planter

I have to admit that I fiddled with this arrangement and may or may not have even sent some pics to my florist sister for some advice. In the end the key was trying to make the lines as full as possible.

DIY Christmas Outdoor Planter

Some other suggestions for rows if you're considering making a linear arrangement like this are moss, the really large pine cones, other coloured berries, painted twigs, large cinnamon sticks like I used in my fall version, and of course other Christmas greens -magnolia leaves would look great.

DIY Christmas door mat

DIY Snowflake Doormat

Of course I also needed a new doormat, and yet again the perfect one I had pictured in my mind didn't seem to exist in real life, ever have that problem? So, what's a DIY-ier to do but make it herself.

Materials:

  • Plain Doormat
  • Snowflake image
  • exacto knife
  • white craft paint

How To

This project started with a plain coir mat. I used the same method I used here to stencil the fall leaf doormat.

The snowflake images were found on the web.  First I printed them out, and cut out the middle with an exacto knife to create a stencil.

DIY snowflake doormat

Then I used craft paint to create a random pattern.

I really like how it turned out, and it should work all through the winter, not just for Christmas, which is always good. It helped tie together the white of the planters, and the wreath, with the snowflake Christmas lights we have along the roof.

DIY Christmas doormat

Galvanized Pail Arrangement

I added one final outdoor Christmas arrangement right beside the door. Again I used an old galvanized pail, to match the large square one. This arrangement was really simple. The three shortish birch poles, some more buckthorn berries, some pine cuttings, and more white pinecones help tie this arrangement to the other one. I really liked how it used the pretty much the same materials, but in a really different way from the linear arrangement.

Christmas Outdoor Planter ideas


I hope my front door gives you a few new ideas. I'm just hoping that my use of snowflakes doesn't bring any snow yet. 😉

Christmas Outdoor Planters

With pretty white outdoor Christmas decor, life really is a party.

More Inspiration

You might also like our Christmas Front Porch here.

Christmas Front Porch: Rustic greens, large pinecones, and lots of birch logs create a rustic Scandinavian feel with brass lanterns for Christmas.

Also check out our Outdoor Decorating Ideas for the Front Porch here.

You might also enjoy our Front Porch Decorating Ideas for Christmas here.

Easy Chocolate Pudding Cake Recipe

Nov 14, 2012 · Leave a Comment

Easy chocolate pudding cake.

Chocolate Pudding Cake Recipe: This is a combination of pudding and cake that's moist, rich and chocolatey. It's delicious served warm with ice cream.

Easy chocolate pudding cake.
[feast_advanced_jump_to]

This chocolate pudding cake recipe is so good. You're going to love it. It's the perfect combination of cake and pudding goodness, and so good served hot with vanilla ice cream. I love to serve it for a dinner party, because guests always love it, and you can do most of it ahead, and then put it in the oven while you're eating dinner and serve it to your guests still warm. Also it's a great recipe for holiday entertaining too, or any special occasions, but also easy enough to make anytime after dinner. 

chopped chocolate squares

Cake and Pudding

The magic of this recipe is that that the cake and pudding form together.  The ingredients are layered but not stirred, and as the dish bakes, it turns into a chocolate cake with a pudding chocolate sauce.  When you assemble a pudding cake you add the simple chocolate cake batter to the pan, followed by a layer of sugar and cocoa powder that's layered over the batter and not stirred.  

chocolate pudding cake before the topping is added

Lastly you add a layer of hot water, and again don't stir.  

how to make chocolate pudding cake
chocolate pudding cake recipe

As the dish bakes the sugar layer and hot water seep down through the cake batter and form a pudding or chocolate sauce beneath the cake -arguably the best part, and the cake rises to the top.  

don't stir chocolate pudding cake

As you scoop out the cake, the hidden layer of chocolate fudge sauce is revealed beneath it.  It feels like a bit of cooking magic.  

The pudding cake is easy to make and made from simple ingredients.  You can make pudding cake in different flavors, but the hot fudge chocolate pudding cake is a big favorite.  

Serve Warm

This pudding cake is best served warm to experience the gooey hot fudge type sauce.  We love it paired with a scoop of vanilla ice cream, which melts slowly into the cake and sauce and is so delicious.

warm chocolate pudding cake with vanilla ice cream

If you're making this for a dinner party, you can prepare the cake mixture and put it in the baking dish,  Also make the sugar and cocoa powder mixture that is the next layer, but don't put it on top of the cake batter yet.  Just before serving dinner sprinkle the sugar and cocoa mixture of the top of the batter, and then add the cold water layer. Put it in the oven to bake while you eat dinner, and it will be ready to serve warm in time for dessert. 

chocolate pudding cake recipe

Leftovers

If you have any hot fudge pudding cake leftover, you can store leftovers in the fridge in an airtight container or wrapped in plastic wrap.  Reheat leftovers in the microwave in a microwave friendly container.

If you are a fan of chocolate dessert you will love this hot fudge cake with creamy chocolate pudding sauce.  What could be better than a layer of moist chocolate cake with rich chocolate fudge sauce?  The flavor of chocolate comes through in every bite.  My chocolate loving daughter considers this her favorite dessert of all time.  And it's really easy with little effort to make.  It has the perfect amount of sweetness.  And don't skip the vanilla ice cream, it offers a little reprieve from the intense chocolate that all the chocolate lovers adore in each bite.  The combination of the hot and cold also adds interest to the dish.  This dessert is pure comfort food, and sure to become a new favorite recipe.

chocolate pudding cake recipe

This dessert looks great served in little dessert dishes.  Guests will love it along with a cup of hot coffee for the perfect impressive but easy to make fudgy dessert.

Recipe

Easy chocolate pudding cake.

Chocolate Pudding Cake Recipe

Warm and gooey chocolate pudding cake.
No ratings yet
Print Pin Rate
Course: Desserts
Cuisine: American
Prep Time: 15 minutes minutes
Cook Time: 30 minutes minutes
Total Time: 45 minutes minutes
Servings: 6 servings
Calories: 312kcal
Author: Dannyelle Nicolle-Ramjist

Ingredients

  • 1 cup all-purpose flour
  • ½ cup white sugar
  • 2 ½ teaspoon baking powder
  • ¼ teaspoon salt
  • ½ cup milk
  • 1 teaspoon vanilla extract
  • 3 tablespoon unsweetened cocoa
  • 3 tablespoon melted butter
  • 3 oz bittersweet chocolate coarsely chopped
  • ⅓ cup white sugar
  • ¼ cup brown sugar
  • 2 tablespoon unsweetened cocoa
  • 1 cup cold water

Instructions

  • Preheat oven to 350F. Lightly butter an 8-cup baking dish.
  • Combine the flour, ½ cup white sugar, baking powder and salt in the bowl of a stand mixer with the paddle attachment.
  • Add the milk and vanilla, and stir until thick and smooth.
    In a small bowl, mix the butter with 3 tablespoon of unsweetened cocoa until blended. Stir the cocoa mixture and chopped chocolate into the four mixture, until just combined.
  • Turn the cake mixture into the buttered baking dish.
  • In a small bowl combine ⅓ cup white sugar, brown sugar and 2 tablespoon of unsweetened cocoa. {If your're making this for a dinner party, stop here and wait unti just before serving dinner to complete these next steps. Put it in the oven to bake while you eat dinner, and it will be ready in time for dessert. }
  • Sprinkle the mixture evenly over the top of the pudding mixture. Do not combine it.
  • Carefully pour the water over the top of the sprinkled dry mixture, being careful not to combine it either. DO NOT STIR.
  • Bake in the centre of 350F oven for 25 to 30 minutes until the top of the cake is slightly glazed on top and the sauce is bubbling around the edges.
  • Serve hot with vanilla ice cream.

Nutrition

Serving: 1g | Calories: 312kcal | Carbohydrates: 57g | Protein: 4g | Fat: 8g | Saturated Fat: 5g | Polyunsaturated Fat: 2g | Cholesterol: 18mg | Sodium: 363mg | Fiber: 2g | Sugar: 38g
Tried this Recipe? Tag me Today!Mention @LifeisaParty or tag #lifeisaparty!
hot fudge chocolate pudding cake

With this hot fudge pudding cake recipe, life really is a party.

More Chocolate Dessert Recipe Inspiration

You might also like our Black Forest Cake in a Mason Jar recipe here.

Also check out our Easy One Bowl Brownie recipe here.

Easy One Bowl Brownies: easy to make, simple ingredients you already have in your pantry, and better than a store bought mix. Promise.

You might also enjoy our Mini Brownie Donuts recipe here.

Mini Brownie Donuts: the perfect little mini donut made from a brownie mix, with the perfect homemade glaze -super easy.

"Getting the Christmas Tree" Vignette

Nov 8, 2012 · 11 Comments

Red Christmas toy truck with bottle brush Christmas tree tied on the back.

Getting the Christmas Tree Vignette: This pretty, nostalgic red toy truck with a Christmas tree vignette couldn't be easier, or cuter.

Red Christmas toy truck with bottle brush Christmas tree tied on the back.
[feast_advanced_jump_to]

The ground and the windows were frosty this morning while I walked the girls to the school bus. The weather is turning here, and it's the Santa Claus parade this weekend. With Santa coming to town, I've started a little Christmas decorating and thought I'd share this sweet little red toy truck with a Christmas tree vignette with you.

When I was a little girl we always went to a forest on my Grandma's large property to cut down the Christmas tree.  There was a meadow, after what felt like a long walk through the woods.  Along edges of the meadow there were always some Christmas trees growing.  They weren't trimmed into the perfect shape like the ones at the store or even at the cut your own Christmas tree farm.  And there was always much debate about the best one, and if it was too tall, or to big for the space.  When I was a kid I looked forward to those outings every year.

red toy truck with Christmas tree

Materials:

  • wood cake stand
  • faux snow
  • red toy truck
  • twine
  • bottle brush Christmas trees

Red Toy Truck with Christmas Tree Vignette

I used my DIY tree slice cake stands as the base for the scene. I found some little trees at the dollar store, and went to the toy store to find a little red toy truck.

To make the truck look a little older I sanded the sides a little bit.  

I tied a tiny tree on top of the toy truck with a little bit of twine.

To make the scene, I set up the cake stand, and added in some trees at the back to make it look like a little forest.  Next I added in the little toy truck with the tree already tied to the back.  Then, it started snowing. 😉  I sprinkled the whole scene with some faux snow.

It was that simple, and I think it's so cute.  Don't you just love an easy DIY.

toy truck with Christmas tree

With this sweet vignette, life is really a party!

You might also like our Thrift Store Christmas Table and Thrift Store Tips here.

Thrift Store Christmas Table and Thrift Store Tips: beautiful Christmas table put together with thrift store finds, and 9 tips for thrifting.

Also check out Holly Jolly Woodland Christmas Party here.

Woodland Christmas Party: This red and green woodland animal printable party package includes kids activity placemats and everything else for your party.

You might also enjoy Birch Christmas Wreath here.

Birch Christmas Wreath:-full tutorial to make your own square wreath from some gathered greens, birch logs, and a coat hanger. Perfect for Christmas.

DIY Teacup Advent Wreath

Nov 7, 2012 · 2 Comments

Teacup advent wreath.

DIY Advent Wreath: made with thrift store tea cups and stickers, our Teacup Advent Wreath is a charming and whimsical addition to your advent.

Teacup advent wreath.
[feast_advanced_jump_to]

Isn't this the sweetest idea?  Use thrift store teacups your own DIY advent wreath this year.  This  vintage inspired teacup advent wreath in inexpensive to make.   I just love how it turned out and it was so simple to put together.

thrift store teacups

Materials:

  • four white teacups
  • 3 purple and 1 pink votive candle
  • epson salts
  • number stickers
  • silver tray
  • Christmas greens

How To Make Your Teacup Advent Wreath:

1. First I started out with picking up some cute little teacups at the thrift store, they were .99 cents each. I knew I wanted to have a little silver accent to the wreath, so I chose a few teacups with a silver rim. At home I washed them up and added a number sticker. The glitter number stickers were perfect.

DIY teacup advent wreath

2. Then I filled the cups with some Epson salts so it would look like snow. I added the traditional advent coloured candles of purple and pink.

3. Lastly I used an old silver tray and added some fresh greens and a few little glass ornaments to arrange my teacups into a wreath shape on the tray.

I just love how it turned out.

DIY advent wreath ideas
how to make a DIY advent wreath
Teacup Advent Wreath

Counting down the weeks until Christmas with this sweet vintage inspired teacup DIY advent wreath, really makes life a party.

You might also like our Children's Story Book Advent Calendar here.

storybook advent calendar

Also check out our Christmas Activity Advent Calendar here.

Printable Christmas Advent Calendar Activities: with over 60 different activities to choose from pick 24 and make some special memories with your family this Christmas.

You might also enjoy our House Advent Calendar here.

Fun Fall Party Ideas: Backyard Leaf Raking Party for Kids and Families

Nov 5, 2012 · 5 Comments

Leaf raking fall themed party ideas.

This fun family fall party is perfect for celebrating the season in your own back yard. Invite your famiy and friends over for some good old fashioned jumping in the leaves, leaf themed sweet treats, and a hot chocolate bar!

Leaf raking fall themed party ideas and fall dessert table.

Why You'll Love This Backyard Fall Party

  • It's fun! Your family and friends will love the fall leaf theme, playing in the leaves, and the treats!
  • This party is easy to put together. We used easy and store bought food for our themed treats.
  • Fall is such a great time to entertain outside. Not too hot, not too cold.
  • It's budget friendly. Jumping in the leaves is free!
  • Playing with leaves is perfect for all ages, from toddlers to teenagers.
[feast_advanced_jump_to]

I'm so excited to share this beautiful fall party with you today. One sunny fall afternoon we set up a family leaf raking party at our friends house, and enjoyed good old fashioned leaf raking and jumping in the leaves with the kids and some sweet leaf themed treats to munch on. It was so much fun!

We love celebrating fall. You might also like our Cozy Soup Party, Pink Halloween Party, Halloween S'mores, Halloween Movie Night, Pie Buffet Party and our Fall Tea Party.

People at a fall party raking and playing in the leaves.

Outdoor Fall Party Decorations

  • "Happy Fall" Banner: I also added a "Happy Fall" banner. I made it out of felt and burlap, and used acrylic paint to add the letters and polka dots.
  • Pompoms: Above the snack table I hung these fun pompoms made of autumn coloured tulle. The fall pompoms were really easy to make.  I picked up some inexpensive tulle from the fabric store and tied them.  
  • Table Cloth: To keep things rustic, I covered the table in simple burlap fabric I found at the hardware store. It's very inexpensive and worked perfectly.

Fall and Leaf Themed Party Foods

The table was filled with lots of fall and leaf themed treats that were easy to make and oh so yummy.

For this little party, I used mixes for the baking to give me time to focus on the little details instead of taking the time to make everything from scratch. It worked out great, and I really recommend it as an easier way to do a dessert table for friends and family.

Rake Cookies

I made these amazing rake cookies. They fit our theme perfectly. I found the cute leaf sprinkles at HomeSense. I used a simple sugar cookie mix from the grocery store -told you these treats were easy. Form the cookie into a triangle-type-rake shape -yes that's the technical term. Stick a pretzel in for the rake handle, and use a fork to make look rake-ish on the bottom.

After they're baked, just dip the end in melted chocolate as glue, and then into the sprinkles.

So cute right? Loved them.

Brownie Pops

I also made some chocolate brownie pops.

I used a mix, again really easy treats for a party. Then, I stamped a popsicle stick with an eraser end of a pencil to make the polka dots. Insert the stick in one end, and dip in melted chocolate.  

I decorated with a little orange chocolate swirl. Everyone LOVED these. If I was making them again though, I might make the brownie a little smaller, just to make it easier to dip without it getting too heavy and wanting to fall of the stick.

Fall Leaf Jello Gigglers

I thought it would be fun to make some jello giggler leaves.

We whipped up some jello in red, yellow, and orange, using the giggler recipe, and let them set over night in big, flat trays so they were fairly thin. Then, I used cookie cutters to cut out the leaf shapes.

Pretty simple, and so cute. They fit the leaf theme so well.

Caramel Corn Cones

I also did some simple cones of caramel corn. To up the fall factor, I added some brown, orange, red, and yellow M & M's. They were like little hidden treasures to the kids.

Apples and Dip

I also made some yummy fruit dip. My sister-in-law Heather hooked me up with her easy and oh so yummy recipe.

It's a container of light cream cheese, with a few tablespoons of brown sugar stirred in, I also added a little vanilla. Then just top with caramel sauce, and chopped bits of Skor bar. Serve with granny smith apple slices, the tart apples are so perfect with the sweet dip. And nothing says fall like apples!

Another great addition would be our Pumpkin Spice Rice Krispie Treats.

Hot Chocolate Buffet

I also set up a little hot chocolate bar with whip cream, regular and chocolate marshmallows and some orange sprinkles -which the kids loved!

Fall Party Activites

Jumping In The Leaves

We had so much fun raking leaves and jumping in them, over and over and over again. Including variations of this like going down the side into the leaf pile and having leaf fights. 

Don't forget to have some rakes for making those piles, and some leaf bags for bagging up the leaves at the end of the day. A leaf blower would be a good addition too.

Fall Treasure Hunt

Prep some fall themed treasure ahead of time, by putting some little treasures in a some plastic fall colored plastic Easter eggs. Depending on the age of the kids, look for small toys like boncy balls, yo-yos, stickers, or jewelry. Hide the Easter eggs in the leaves, and let the kids have fun finding them.

Pumpkin Carving and Painting

Another great activity for a fall party is carving and/or painting pumpkins. For pumpkin painting, set up a table lined with brown paper, and arcylic paints, with paper plates as paint pallets, and paint brushes. Glitter is a fun addition too.

Painting pumpkins with paint and glitter at a fall party.

Pumpkin carving is a great activity too. Set up a station with carving tools, including carving knives and scoops. We love making pumpkin fairy houses. For this be sure to also include some dried flowers, leaves, and twigs. And don't forget some glue to apply them with.

DIY pumpkin fairy houses decorated with dried flowers and leaves, in the garden.

Staying On Budget

This party is quite inexpensive to put together. Leaves are the star of the show here and free. We made our own decor, and all of the food which was also very budget friendly. Serving just dessert and drinks helps keep the costs down too.

You could also ask friends to bring food. If you do decide to do pumpkin carving or painting, you can also ask friends to bring their own pumpkins to decorate.

We had a great time raking, jumping, playing and snacking!

With a leaf raking get together like this for a family fall party, life really is a party!

Expert Tips

  • You need a lot of leaves for the leaf raking and jumping in the leaves. Be sure to pick a spot that has lots. We had our party at a friends house who had big trees in the backyard. A park is a great option too.

Frequently Asked Questions

What do we do if our fall party gets rained out?

This party is best outside, and you definatly don't want to jump in wet leaves. So if it rains, it's best to move your party to another day. Watch the weather leading up to the party and you can always reschedule to a rain date.

What could be a food savory food to serve at a fall party?

Want to add a savory option for food, a hotdog roast would be great. If you can build a campfire in your backyard have guests roast their own Winnies, and don't forget to have some marshamallows and smore fixings too. Another great option would be a soup party buffet, or chill.

Any ideas for a more fun outdoor activities to do at a fall party?

Leaf raking and pumpkin carving or painting are great outdoor fall activities. You could also add in pumpkin bowling, bobbing for apples, and large outdoor games like corn-hole, or jenga.

More Fall Party Inspiration

  • Fall dessert table.
    Easy Fall Thanksgiving Dessert Table
  • Fall tea party in a garden with tea and treats set up in front of an outdoor couch.
    Fall Tea Party
  • Fall fondue party ideas and recipes.
    Fall Fondue Party
  • Halloween movie night free printables
    Halloween Movie Night Ideas and Free Printables

If you try any our Fun Fall Party Ideas ideas, or any other ideas on my blog please let me know how it went in the comments below. Thanks for visiting today!

Halloween Paper Bag Lanterns

Oct 31, 2012 · Leave a Comment

Halloween Paper Bag Lanterns: these Halloween luminaries are simple to make and inexpensive. Perfect as Halloween decor or to welcome trick or treaters.

Halloween Paper Bag Lanterns: these Halloween luminaries are simple to make and inexpensive. Perfect as Halloween decor or to welcome trick or treaters.

Happy Halloween! I wanted to share these Halloween paper bag lanterns as a  quick and easy, last min Halloween decoration today.

Materials:

  • orange paper bags
  • marker
  • cutting board
  • exacto knife

Buy yourself a pack of orange paper bags from the party store.

orange paper bags

How To Make Halloween Paper Bag Lanterns

1. First sketch a masterpiece of a pumpkin face, or "BOO", or anything else Halloween-y that you like, onto the paper bag.

halloween paper bag luminaries

2. Then, get your handy, dandy exacto knife out, and find something to put on the inside of the bag so you don't cut through it. I had a small cutting board, a piece of wood or even cardboard would work too.

how to make Halloween paper bag lanterns

And then just cut out your design.

3. When it's done, add a battery powered candle. Simple right? And really cute. And inexpensive, just the bags for a couple bucks, and the candles that I had already.

Halloween paper bag lanterns

If your using them outside, like say lining the path to your door tonight for the trick or treaters, put some sand or small rocks in the bottom of the bag to keep them from blowing away. 

Halloween paper bag luminaries

Happy Trick or Treating, I wish for your children to come home with all your favourite candies and be willing to share with you!

You might also like Cricut Halloween Trick or Treat Bag.

Cricut Halloween DIY Trick or Treat Bag: Less Tricks More Treats free Cricut pattern to create the cutest bag for trick or treating and all fall long.

Also check out Pumpkin Fairy House Jack-o-lanterns here.

Pumpkin Fairy House Jack-O-Lanterns: this Halloween carve your pumpkins into fairy houses, and see the warm glowing light through the windows at night.

You might also enjoy Fall Fairy Garden here.

Fall Fairy Garden: How to make a sweet little Fall themed Fairy Garden with an easy to make fairy house, mushrooms, pumpkins, and miniature fall leaves tutorial.

Pumpkin Hair Clips

Oct 26, 2012 · 2 Comments

Easy DIY kid's pumpkin hair clip.

Pumpkin Hair Clip: DIY Halloween hair clip tutorial, including how to make curled ribbon. Perfect for the little girl in your life.

Easy DIY pumpkin hair clip craft.
[feast_advanced_jump_to]

Today I want to share this DIY pumpkin hair clip that should delight the little girls in your life. This is the kind of project you can do in front of the TV one night.

Materials:

  • orange felt
  • brown felt
  • black embroidery cotton
  • needle
  • hair clip
  • green ribbon
  • dowel
  • hot glue gun and hot glue

How To Make A Pumpkin Hair Clip

I started out by cutting a pumpkin shape out of orange felt. For the stem I used a little brown piece of felt.

I then embroidered on some little details, but if you're not into sewing you could just use little pieces of black felt to create a jack-o-lantern face and glue it on with fabric glue.

how to make a Halloween hair clip

I did a little running stitch around the outside. Then I tied French knots for the eyes, and did a little embroidered mouth. Simple, and so cute.

how to curl satin ribbon

For the pumpkin vine I used a little curled green ribbon.

To make the curls, wrap the ribbon around a dowel -I used a wooden spoon since that's what I had on hand. Secure with cloths pins or anything oven safe, and bake in your oven at 250 degrees for 25 min. Let cool then unravel.

I used a little hot glue to attach the ribbon and the pumpkin to the hair clip.

DIY pumpkin hair clip

All set for a little fall frolicking on a warm day. And, perfect for keeping your hair out of your face while you do important kid stuff, like playing on the monkey bars. 😉

how to make a pumpkin hair clip

Life is a party, and you'll be the best dressed one there with pretty accessories like a pumpkin hair clip. 😉 Happy Fall.

More Fall Craft Ideas

You might also like Fairy House Pumpkin Jack-o-lanterns here.

Pumpkin Fairy House Jack-O-Lanterns: this Halloween carve your pumpkins into fairy houses, and see the warm glowing light through the windows at night.

Also check out our Cricut Halloween Trick or Treat Bag here.

Cricut Halloween DIY Trick or Treat Bag: Less Tricks More Treats free Cricut pattern to create the cutest bag for trick or treating and all fall long.

Mini Pumpkin Donuts with Cinnamon Maple Glaze

Oct 19, 2012 · 7 Comments

Mini baked pumpkin donuts and glaze recipe.

Baked Pumpkin Donuts: these mini donuts are sweet and little and delicious and the cinnamon maple glaze takes them to the next level.

Mini baked pumpkin donuts and glaze recipe.
[feast_advanced_jump_to]

Baked pumpkin donuts in mini size and with the most delicious glaze are the perfect fall treat for pumpkin lovers.

I recently had the good fortune of finding a mini donut pan, and since mini donuts are a family fav -like first stop at any fair or carnival, I knew having our very own pan would be a good thing. 😉 Since it's fall and we can't seem to get enough pumpkin

mini pumpkin donuts
mini pumpkin donuts with maple icing

how to make baked pumpkin mini donuts

See those little flecks of cinnamon in the glaze? These are really, really yummy.

They didn't keep too well over night, the glaze kind of seeped all into the donuts and didn't look nearly as pretty, so you should probably eat them all in one day. Officially #8 of the instructions...

8. Eat them all in one day. 😉

baked pumpkin donut recipe

Such a great fall treat.

Recipe

Mini baked pumpkin donuts and glaze recipe.

Baked Pumpkin Donuts

Baked mini pumpkin donuts with a sweet pumpkin glaze.
No ratings yet
Print Pin Rate
Course: Desserts
Cuisine: American
Prep Time: 20 minutes minutes
Cook Time: 20 minutes minutes
Total Time: 40 minutes minutes
Author: Dannyelle Nicolle-Ramjist

Ingredients

Donuts

  • 2 cups all-purpose flour
  • 1 ½ teaspoons baking powder
  • ½ teaspoon salt
  • ¼ teaspoon baking soda
  • ½ teaspoon nutmeg
  • 1 ½ teaspoons cinnamon
  • ¼ teaspoon ginger
  • ¼ cup softened butter
  • ½ cup brown sugar
  • 1 cup pumpkin puree
  • 2 eggs
  • 2 tablespoons milk
  • 1 teaspoon vanilla extract

Maple-Cinnamon Glaze

  • 1 ½ cups powdered sugar
  • ½ teaspoon maple syrup
  • ½ teaspoon cinnamon
  • 3 tablespoons milk

Instructions

  • Preheat the oven to 350F. Spray mini donut with non-stick cooking spray.
  • In a large bowl, sift together dry ingredients; flour, baking powder, salt, baking soda, nutmeg, cinnamon and ginger. Set aside.
  • In a stand mixer, cream together the butter and brown sugar. Add the pumpkin, eggs, milk and vanilla, and mix well.
  • Add the dry ingredients to the wet ingredients and mix until the batter comes together.
  • Spoon the batter into a large ziplock bag and cut off the corner to pipe the batter into the donut pan. Tip: wet your finger in a little water and use it to pat down the little tip that sticks up where you finish piping the circle.
  • Bake in a preheated 350F oven until a toothpick inserted in the centre comes out clean, about 5-6 minutes for the mini donuts. Allow donuts to cool before dipping in the glaze.
  • To prepare the glaze, stir all the ingredients together in a small bowl. When the donuts are cool, dip them in the glaze.
Tried this Recipe? Tag me Today!Mention @LifeisaParty or tag #lifeisaparty!
Mini baked Pumpkin Donuts with Cinnamon Maple Glaze

With mini pumpkin donuts with cinnamon maple glaze, life really is a party!

You might also like our Pumpkin Bread Pudding recipe here.

Pumpkin Bread Pudding: this recipe is easy and delicious, perfect for Thanksgiving and the holidays.

Also check out our Pumpkin Spice Rice Krispie Treats recipe here. 

You might also enjoy our Pumpkin Blondies recipe here.

Hammered Leaf Print

Oct 17, 2012 · 1 Comment

Hammered leaf print.

Hammered Leaf Print: use real flowers and leaves to create art and cards by hammering them to transfer the colour and pattern to watercolour paper.

Hammered leaf print.
[feast_advanced_jump_to]

To make this hammered leaf print we used real leaves and flowers from our garden and a simple hammer to transfer their image onto watercolour paper.  This easy craft is perfect for kids and adults.

Materials:

  • real leaves and flowers
  • watercolour paper
  • hammer
  • paper towel

How To Make A Hammered Leaf Print

Begin my collecting some leaves and flowers from your garden.  

To start lay the leaf onto the water colour paper, cover with a paper towel to absorb the extra juiciness, and carefully begin to hammer it.

hammered leaf and flower prints

On our first attempt you could really see the marks where the hammer struck the leaf. And, the leaf slid around a lot, not the best results on the first go. But, attempt number two got a little better. We held the leaf more carefully, and tried to hammer more gently. It turned out pretty well.

hammered leaf print

By attempt number three or four we got the results we were looking for, a very pretty little leaf print if I do say so myself.

We did learn to try and choose the "juiciest" leaf we could find. This project is best done in the summer when leaves haven't begun to dry out at all.

kids summer craft idea

I love the final results, and I found the perfect frame. I think it looks really sweet in its little frame, and certainly very fall-ish. It would also make a very pretty card.

how to make a hammered leaf print

With a hammered leaf print, life really is a party!

More Fall Inspiration

You might also like Fall Leaf Backdrop here.

Also check out Fall Leaf Thanksgiving Table here.

Fall Leaf Thanksgiving Table: Hanging pressed fall leaves, and pink heirloom pumpkins, ombre leaf cookies, and cloths pin place cards make a beautiful table.

You might also enjoy Book Page Paper Leaf Garland here.

Book Page Leaf Garland

"Give Thanks" DIY Plates

Oct 10, 2012 · 21 Comments

Give Thanks DIY Plates: These DIY plates are easy and inexpensive to make, use a special pen to add permeant writing to any ceramic piece.

Give Thanks DIY Plates: These DIY plates are easy and inexpensive to make for Thanksgiving or any other holiday. Use a special pen to add permeant writing to any ceramic piece.
Give Thanks DIY Plates: These DIY plates are easy and inexpensive to make, use a special pen to add permeant writing to any ceramic piece.

These DIY plates were inspired by a shopping trip.  A while ago I was walking around Crate and Barrel, drooling over all the pretty things, like you do, when I noticed their cute "give thanks" side plates.  I really liked them and thought they'd be really nice for Thanksgiving, but they were too expensive for me. 

give thanks plates

I had seen on pinerest a few times, how people were using permanent Sharpie markers to write on china, and thought this might work to make my own. After a little more research, it looked to me that this method was hit and miss at best. I decided to use a ceramic marker for a more permanent effect.

Materials:

  • inexpensive white side plates
  • decor art glass paint marker in black
  • oven

how to permanently decorate a ceramic plate


decor art marker for ceramic

How To Make Your Own DIY Plates:

This project is really easy.  Basically you use the marker to write around the edge of the plate.

The hardest part of the project was figuring out the spacing of the words around the plate.  With a little practise and a template to line up the dots between the words, it came together.

You can remove the design if you're not happy with it before it's baked.   You can try the writing and if you're not happy with it just wash it off and begin again.

DIY plates

After the design is finished the plates need to sit 4 hours.  Then the plates get baked for 40 mins -according to the manufacturers instructions.

They need to start out in a cold oven and be left to cool completely in the oven afterward.  All the instructions are on the glass paint marker.

One word of caution: the marker also says that it isn't food safe. All the pictures of it being used show it on plates, glasses and cups.  So, I guess the key is to only place the design on places where food will not come in direct contact. I thought these were fine, because the writing was just on the rim of the plate.

how to make give thanks plates

After the plates have been baked and cooled the writing should be permanent. They recommend hand-washing, so that's what I did.  

UPDATE:  I've had these plates for years and use them for every Thanksgiving.  I always hand wash and never put them in the dishwasher.  The writing still looks perfect.

The Finished Plates

I used the plates for my Silver Thanksgiving table. I love how they turned out.

DIY give thanks plates

At first, I did consider using a silver pen.  In fact the pens come in a whole range of colours, including gold just like the inspiration plates. In the end, I decided that even though silver would have looked great this year, next year if I use oranges and browns for my thanksgiving table, the black writing would make the plates more re-usable.

give thanks DIY plates

I have lots more ideas for Christmas and other holidays.  This idea is great since it's so versatile, turned out great, and was really inexpensive.  The whole project was under 20 bucks.  You can't go wrong for that, even if you only use them once a year!

DIY plates

With Give Thanks DIY Plates, life really is a party!

You might also like our Black and White Modern Farmhouse Thanksgiving Table here.

Black and White Modern Farmhouse Thanksgiving Table: White pumpkins, black cutlery, and DIY macrame napkins rings make the perfect Thanksgiving table.

Also check out our Dark and Moody Thanksgiving Table here.

Dark and Moody Thanksgiving Table: purple leaves, dark dahlias, and plums, red pears, apples, pomegranates, and blackberries create the perfect centrepiece.

You might also enjoy our Vintage Botanical Scientific Thanksgiving Table here.Vintage Botanical Scientific Thanksgiving Table: scientific glass, old books, a microscope, and lots of botanical specimens create a beautiful table.

Silver Thanksgiving Table Decor

Oct 9, 2012 · 19 Comments

Silver Thanksgiving table inspiration.

Silver Thanksgiving Table Decor: silver mercery glass and candle holders, DIY silver pumpkins, and white pumpkins create a beautiful table.

Silver Thanksgiving table inspiration.
[feast_advanced_jump_to]
Silver Thanksgiving Table Setting

This year I decided to do some silver Thanksgiving table  decor -something a little different.  And I just love how it turned out.  It's sophisticated and sparkly and festive.

The Centrepiece

I was inspired first by these cute little silver turkey candle holders. These were bought several years ago on sale after Thanksgiving at HomeSense -gotta love a clearance sale. 😉  A great alternative would be to find any cute turkey decor for Thanksgiving and give it a makeover with some silver spray paint.

silver turkey candle holders

Next I used some beautiful white pumpkins on the table and I thought some silver pumpkins would be a fun addition too.

DIY mercury glass pumpkins

These pretty mercury glass inspired pumpkins are a DIY. They were the perfect addition to our silver Thanksgiving table decor.

silver Thanksgiving table decor

I used lots of silver and mercury glass candle holders and white candles. I also used this pretty silver cake stand at one end, and a white glass pedestal for one little pumpkin at the other end.

Silver Thanksgiving Tablescape

The Place Settings

Next I got out my "good dishes", which I so rarely use for big family dinners since they can't go in the dishwasher. They were layered on a simple silver charger.

how to set a silver Thanksgiving table

I made these sweet "give thanks" plates to layer on top -see the tutorial on how to make DIY give thanks plates here.

DIY Thanksgiving plates

Each place had a special treat, a homemade pumpkin chocolate truffle, see how I made them and get the recipe here. I put them in my favourite little individual domed holders.

homemade pumpkin chocolate truffles

Finally I found these pretty free Thanksgiving printables at Catch My Party and printed and cut them out. Each domed holder got a little ribbon tied around it and the Thanksgiving printable with double sided tape.

Thanksgiving table ideas

The table was really quite simple, and easy to do ahead, since there were no fresh flowers on the table. I often use the silver glasses, chargers and candle holders at Christmas.  It was fun to try something new with a silver theme for Thanksgiving.

Silver Thanksgiving Table

I really liked all the sparkle, balanced with the simplicity of all the white and rustic presence of the pumpkins. 

With silver Thanksgiving table decor, life really is a party!

More Thanksgiving Table Inspiration

You might also like our Black and White Modern Farmhouse Thanksgiving Table here.

Black and White Modern Farmhouse Thanksgiving Table: White pumpkins, black cutlery, and DIY macrame napkins rings make the perfect Thanksgiving table.

Also check out our Fall Leaves Thanksgiving Table here.

Fall Leaf Thanksgiving Table: Hanging pressed fall leaves, and pink heirloom pumpkins, ombre leaf cookies, and cloths pin place cards make a beautiful table.

You might also enjoy Dark and Moody Thanksgiving Table here.

Dark and Moody Thanksgiving Table: purple leaves, dark dahlias, and plums, red pears, apples, pomegranates, and blackberries create the perfect centrepiece.

Paper Leaf Garland

Oct 5, 2012 · 7 Comments

Book page paper leaf garland.

Book Page Paper Leaf Garland -DIY paper leaf garland stitched together on your sewing machine and made from old book pages.

Book page paper leaf garland.
[feast_advanced_jump_to]
Book Page Paper Leaf Garland -DIY paper leaf garland stitched together on your sewing machine and made from old book pages.

I had this idea last year to make a paper leaf garland using an old book to make the paper leaves from.  I finally got around to breaking out the sewing machine today.

Materials:

  • an old book
  • scissors
  • sewing machine 
  • black thread

How To Make A Paper Leaf Garland

To start with, cut out different leaf shapes from an old book.

Then, feed them, one by one, through your sewing machine to create a garland.

how to make a paper garland with your sewing machine

I like a random look, so I didn't use a pattern, and I left random spaces in between, by stitching varying lengths of just thread between feeding the leaves through.

DIY paper leaf garland

The stitch line looks a little like the vein of a real leaf, which I love.

I used black thread so it would really show up.

book page paper leaf garland

The garland is part of my living room mantel this fall (see what I did on the mantel in the basement here).

paper leaf garland

I used mostly white, and mixed in some seeds, keys, wheat and enamelware. The black and white book pages fit in perfectly.

DIY leaf garland

We're gearing up for thanksgiving this weekend here and Canada, and I can't wait. Mr. Turkey is thawing in the fridge, and I'm already dreaming of my mom's amazing pumpkin pie. Wishing you and yours every blessing as you give thanks together this weekend. Happy Thanksgiving.

You might also like DIY Faux Concrete Pumpkins here.

DIY Faux Concrete Pumpkins: easy DIY to transform inexpensive dollar store pumpkins with a concrete faux paint finish.

Also check out Acorn Craft here.

You might also enjoy Book Page Paper Feathers here.

How To Make Book Page Paper Feathers: using old book pages, a glue stick and a wire for a center make beautiful paper feathers.
  • « Go to Previous Page
  • Page 1
  • Interim pages omitted …
  • Page 16
  • Page 17
  • Page 18
  • Page 19
  • Page 20
  • Go to Next Page »

Primary Sidebar

Welcome!

Life is a Party is all about helping you celebrate everyday with great food, entertaining and party inspiration, and seasonal crafts and home decor inspired by the holidays.

More About Dannyelle

Trending Recipes

  • Mac and cheese with panko breadcrumb topping.
    Best Homemade Mac and Cheese with Panko Breadcrumb Topping
  • Homemade iced capps in glasses on a wood table.
    Tim Hortons Copycat Iced Capp Recipe
  • Dirt Pudding no cream cheese in glasses with candy rocks, and fresh mint that looks like a little plant.
    Easy Dirt Pudding Recipe without Cream Cheese
  • Easy 3 ingredient coconut milkshake recipe.
    Easy Coconut Milkshake Recipe
  • Easy food processor scones on a plate with jam.
    Easy Food Processor Scones
  • Fluffy small batch pancakes for two ready to serve on a plate with syrup.
    Easy Small Batch Pancakes For Two Recipe

St. Patrick's Day Ideas

  • Soft, fluffy homemade rainbow marshmallows with beautiful pastel layers.
    Rainbow Marshmallows
  • A rainbow grilled cheese sandwich cut in half on a cutting board.
    Rainbow Grilled Cheese Recipe
  • Bailey's French toast on a plate with maple syrup and Baileys whipped cream.
    Easy Baileys French Toast Recipe
  • How to make rainbow pop tarts.
    Rainbow Pop Tart Recipe
  • St. Patrick's Day free printables set.
    St. Patrick's Day Free Printables
  • Homemade Rainbow Rice Krispies recipe.
    Rainbow Rice Krispies

Easter and Spring Ideas

  • rainbow Easter table
    Rainbow Easter Table
  • easter bunny banner Cricut free cut file
    Free DIY Cricut Easter Bunny Banner
  • bunny treat box Cricut free cut file
    Cricut Bunny Treat Box Free Cut File
  • free printable Easter jokes
    Free Printable Easter Jokes
  • vintage Easter card free printables
    Free Vintage Easter Printables
  • Easter table ideas
    Easter Table Ideas
  • Recipe Index
  • Parties & Entertaining
  • Spring and Easter
  • Subscribe
  • Free Resource Library

Footer

back to top

as seen in:

Better Homes and Garden Logo
American Farmhouse Style logo.
Apartment Therapy logo.

About

  • Privacy Policy
  • About

Subscribe

  • Sign Up! for emails and updates

Contact

  • Contact

As an Amazon Associate I earn from qualifying purchases.

Copyright © 2025 Life is a Party

Share
Pin
Post
Share
Pin
Post

Rate This Recipe

Your vote:


A rating is required
A name is required
An email is required