• Skip to primary navigation
  • Skip to main content
  • Skip to primary sidebar
Life is a Party
  • Recipe Index
  • Parties & Entertaining
  • Fall
  • Subscribe
  • Free Resource Library
menu icon
go to homepage
  • Recipe Index
  • Parties & Entertaining
  • Fall
  • Subscribe
  • Free Resource Library
subscribe
search icon
Homepage link
  • Recipe Index
  • Parties & Entertaining
  • Fall
  • Subscribe
  • Free Resource Library
×
Home

Beauty and the Beast Party Ideas

Beauty and the Beast Party Ideas

Jul 15, 2015 · 16 Comments

Beauty and the beast party.

This Beauty and the Beast Party is full of great ideas for decorations, food, and fun themed games and activities that any Beauty and the Beast lover will adore! It's perfect to help you plan your birthday party or celebration.

Beauty and the Beast party decor and food ideas.
[feast_advanced_jump_to]

Why We Love This Party

  • We love Belle and the Beast so much.
  • All the cute decor ideas are DIY projects.
  • The food is kid friendly and fits the theme perfectly.
  • This party is full of a amazing activities your kids will love.

Once upon a time there was a little six year old girl who loved yellow. Allie loved yellow so much that Belle was her favourite princess.  After coming to the Sleeping Beauty party as a guest, she decided that she should have a Beauty and the Beast Party for her next birthday, so she did.

Want more ideas? Check out our Beauty and Beast themed foods for our dinner and movie night, with free printables.

Beauty and the Beast Party Decorations
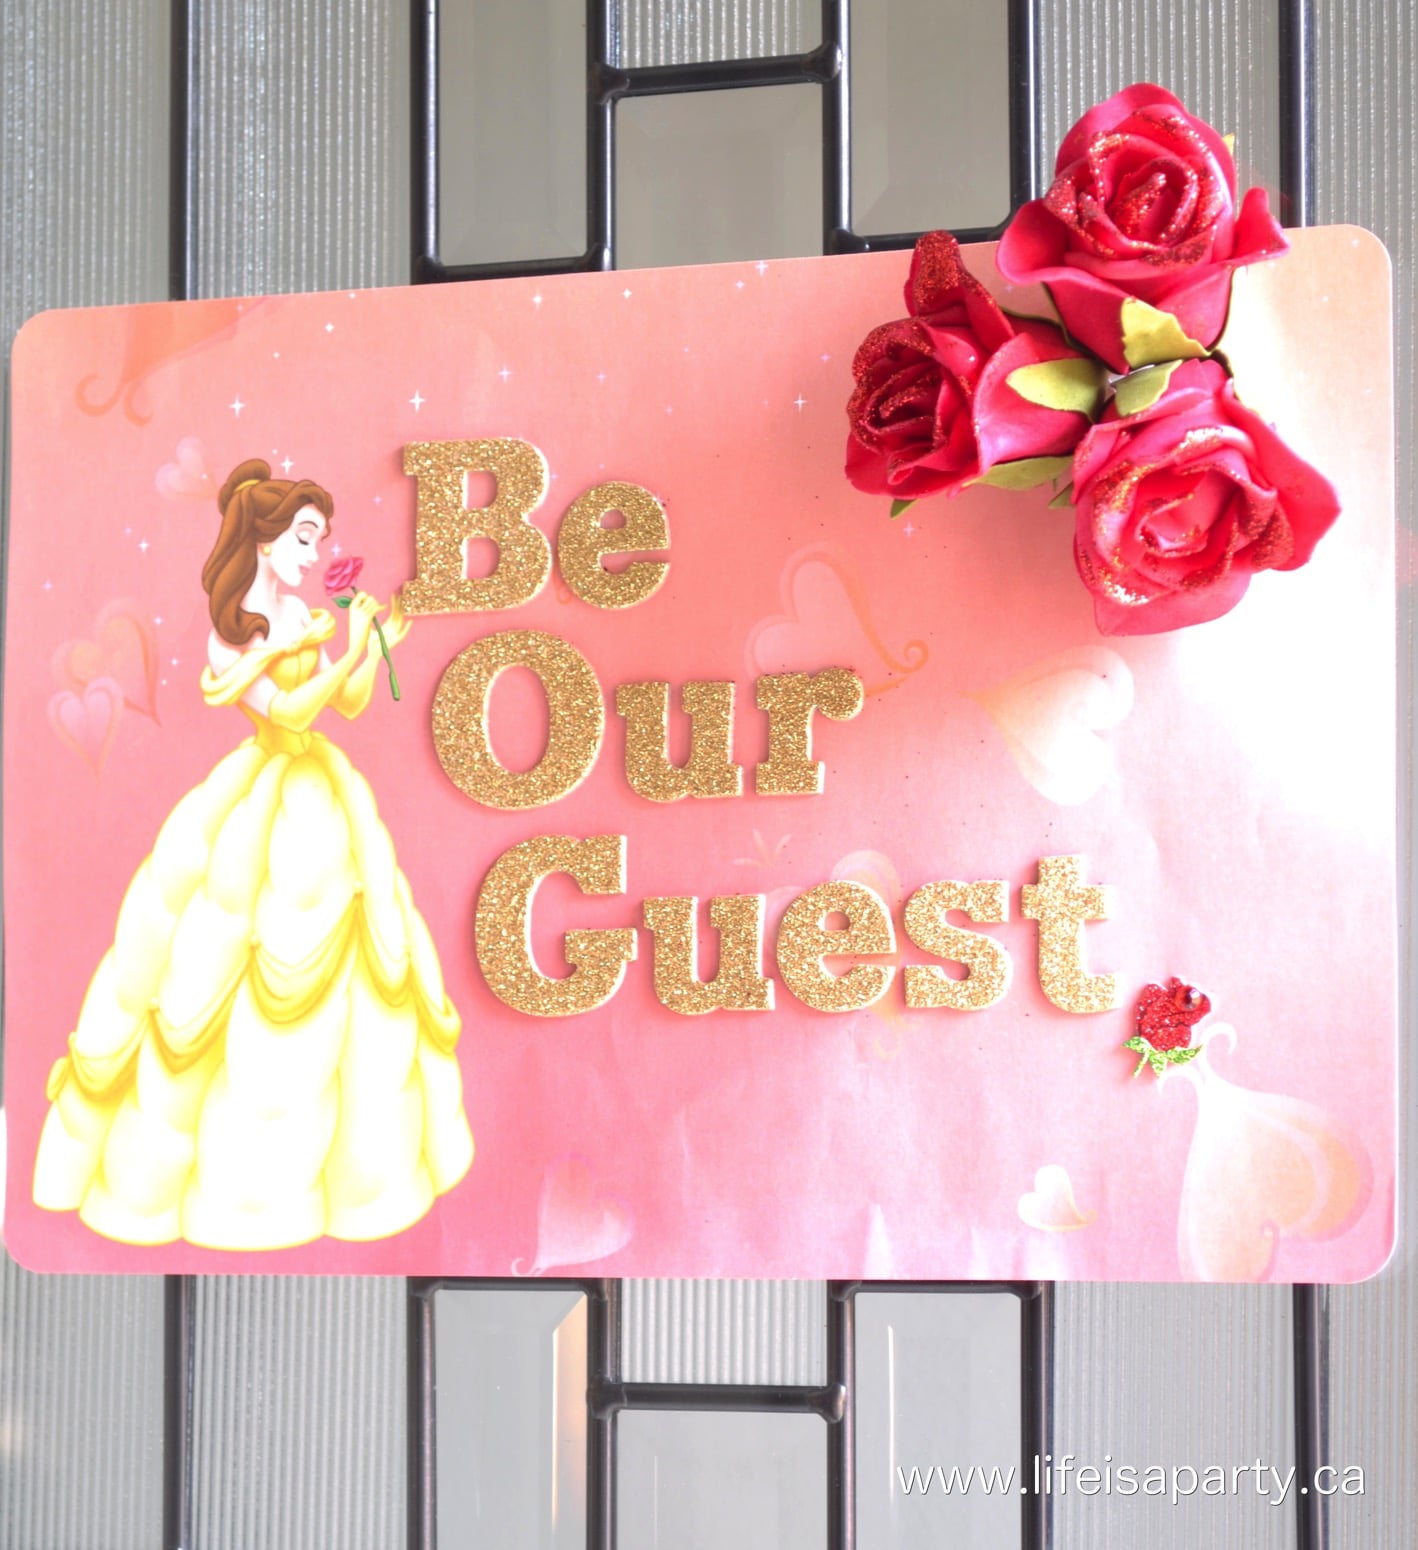
Beauty and the Beast Party Decorations and Food -An amazing Beauty and the Beast themed birthday party, with amazing decorations, and home made party food that all fit the theme. Lots of amazing ideas here and lots of them made out of simple dollar store items.

We were greeted by this sweet sign on the front door that set the tone for the day. It's made with scrap book paper letters, and fabric roses added with a glue gun. It's was the perfect entry to the party.
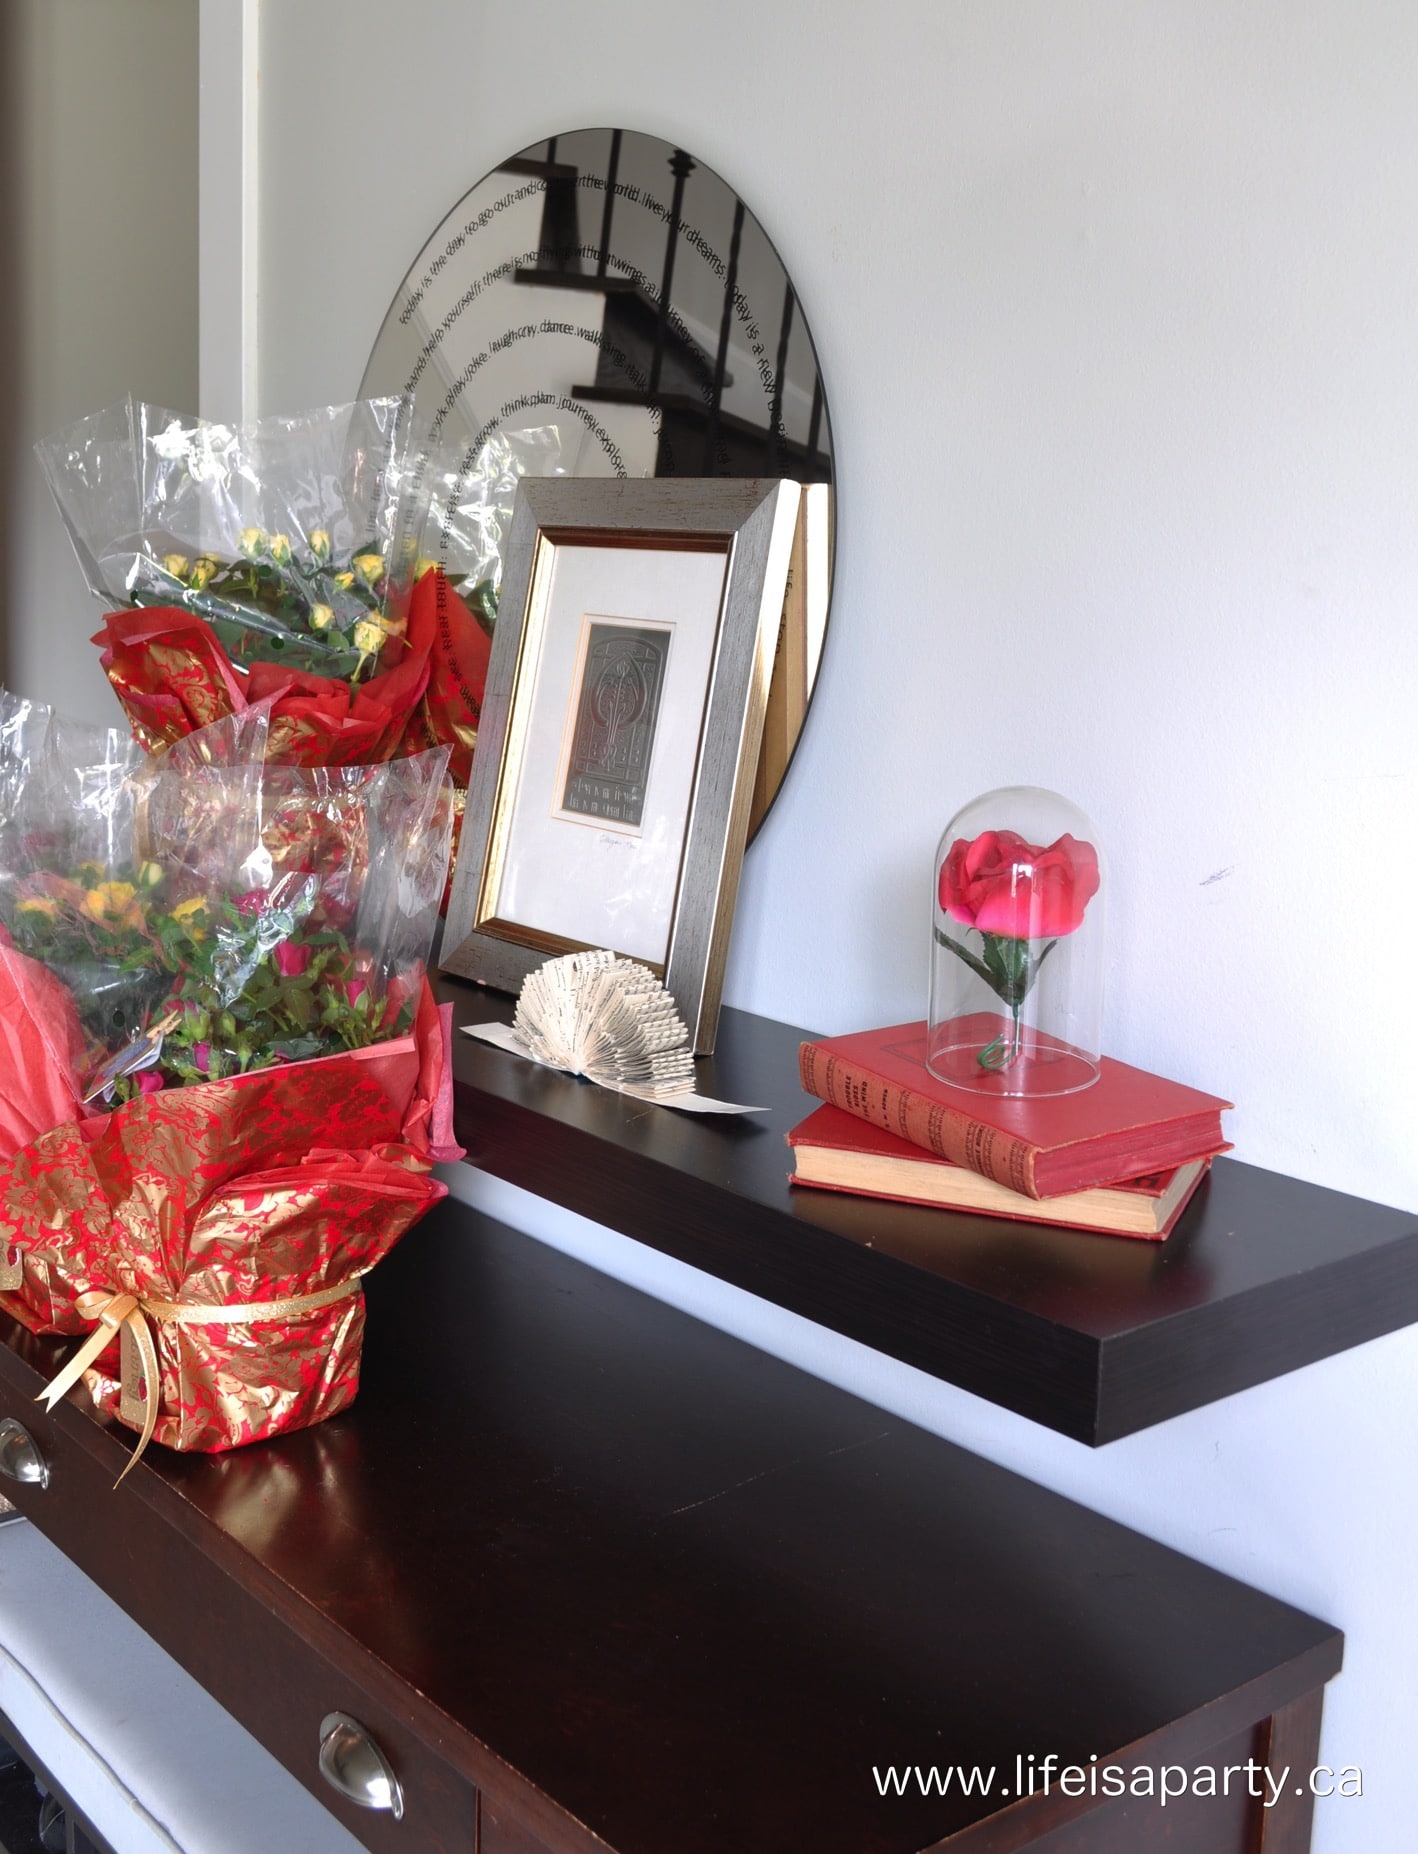
Beauty and the Beast Party Decorations and Food -An amazing Beauty and the Beast themed birthday party, with amazing decorations, and home made party food that all fit the theme. Lots of amazing ideas here and lots of them made out of simple dollar store items.


Most of the decorations for the party were gold and red, and there were lots of roses, and books -since Belle loves to read, and the enchanted rose is such an important part of the story.

The potted roses by the front door were pretty decor, but also take home favors, along with a bookstore gift card -the perfect themed favor idea for a Beauty and the Beast party.
Beauty and the Beast Party Decorations and Food -An amazing Beauty and the Beast themed birthday party, with amazing decorations, and home made party food that all fit the theme. Lots of amazing ideas here and lots of them made out of simple dollar store items.

Beauty and the Beast Party Table

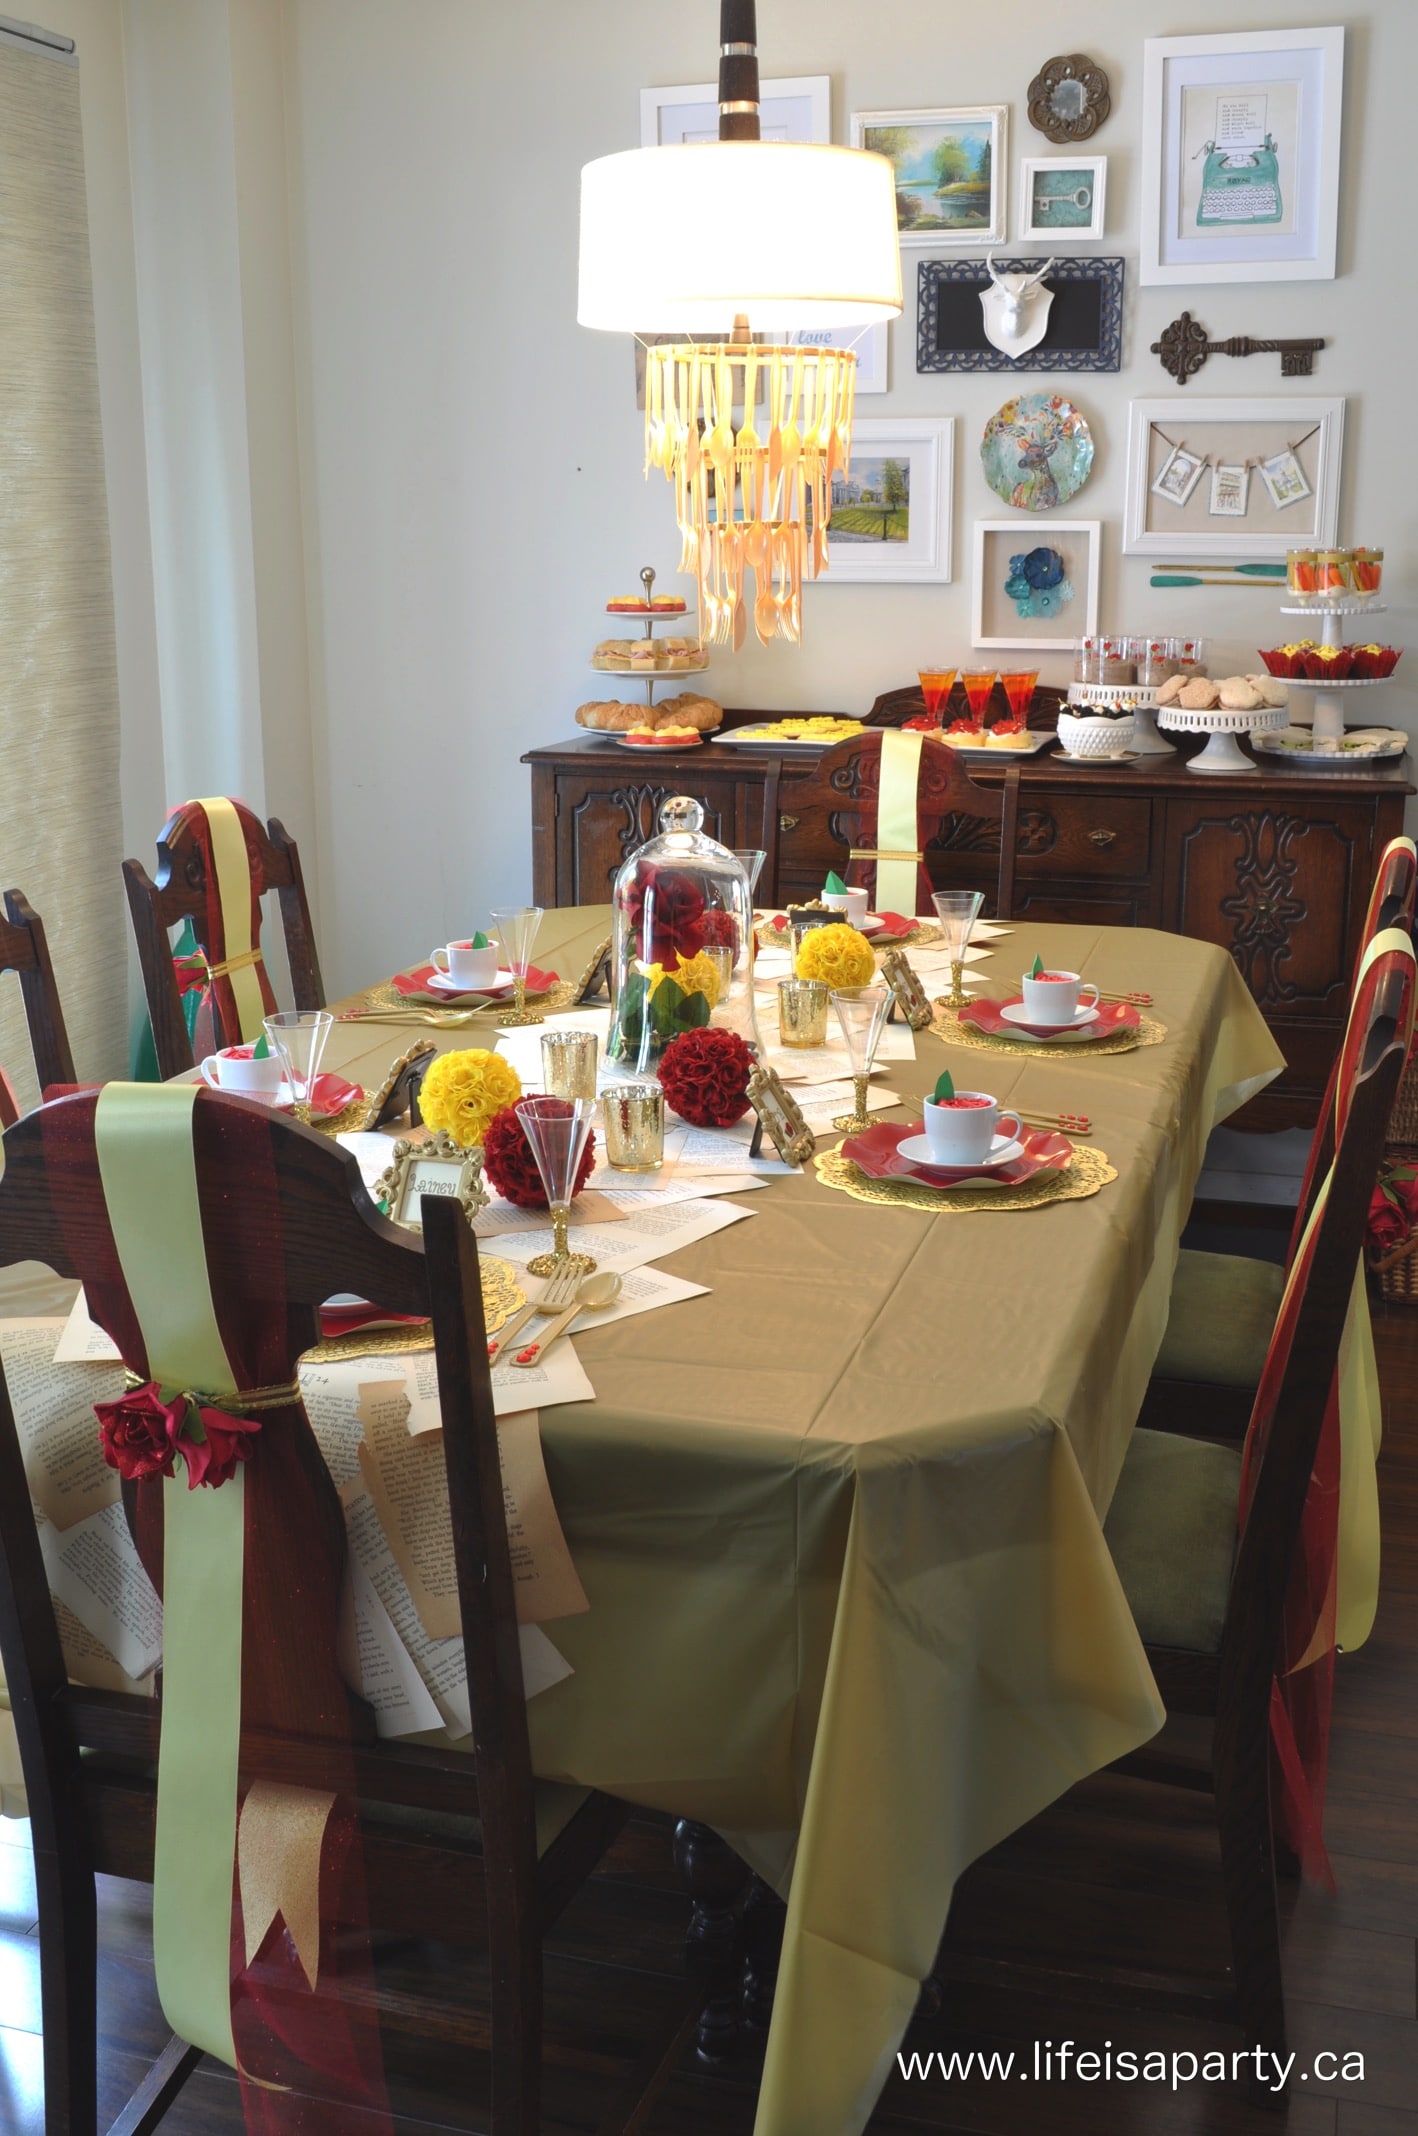
Inside the table was set for the party, and it looked amazing.  There were lots and lots of fun and easy little details, that created a big wow factor for the little guests.  One of my favourites was the cutlery chandelier, inspired by the movie.
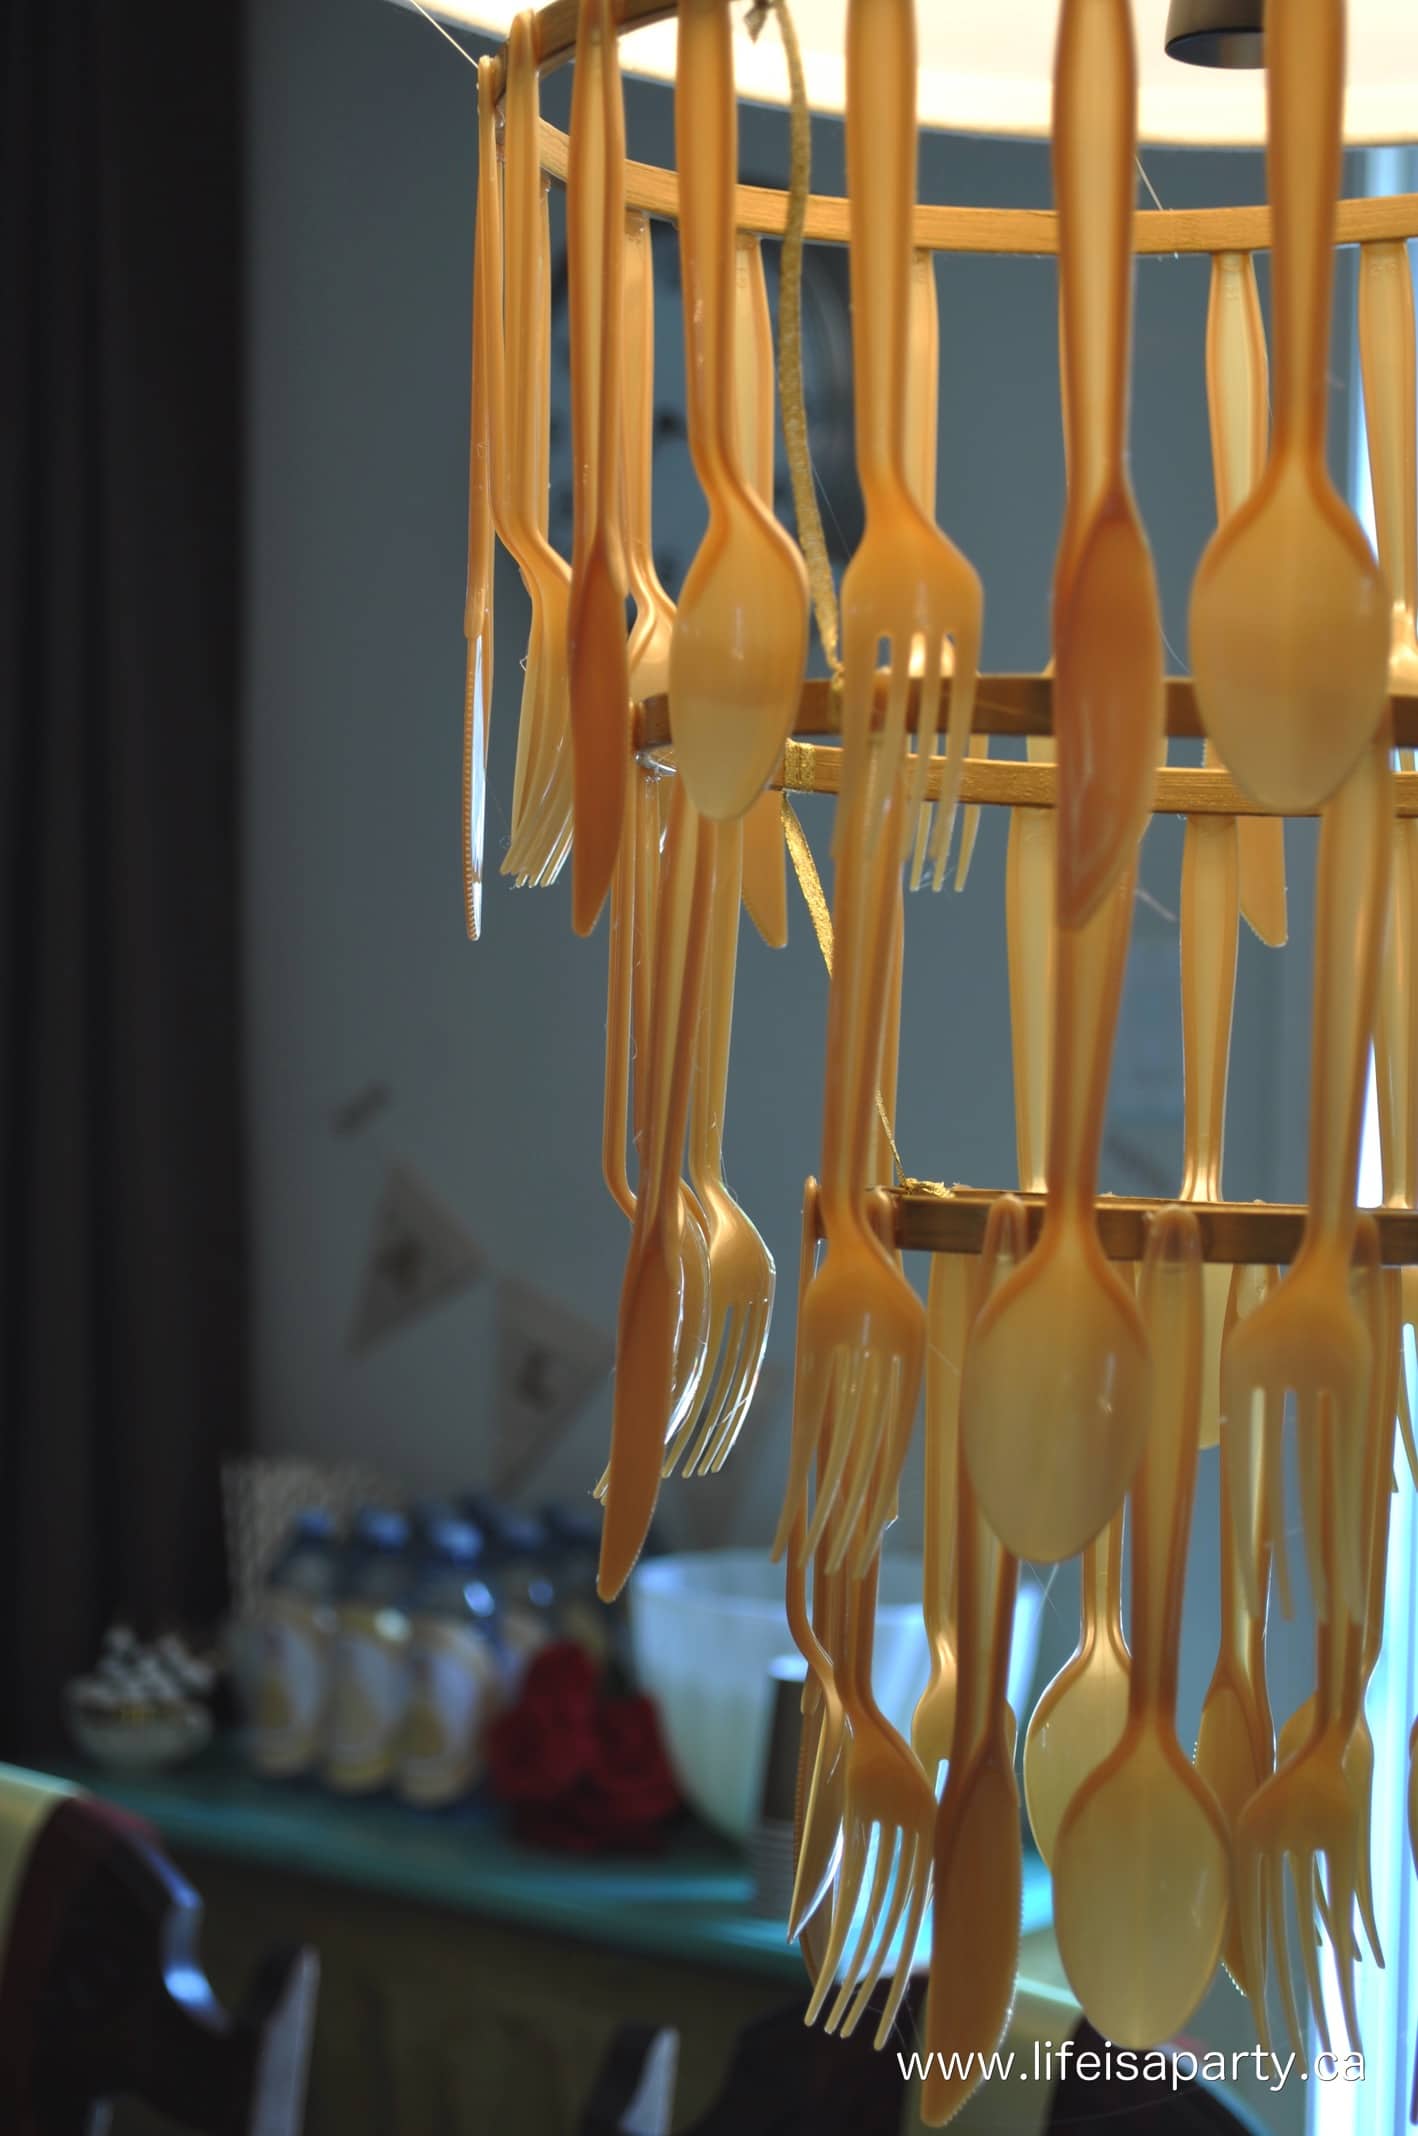
Beauty and the Beast Party Decorations and Food-An amazing Beauty and the Beast themed birthday party, with amazing decorations, and home made party food that all fit the theme. Lots of amazing ideas here and lots of them made out of simple dollar store items.


It was made by hot gluing plastic gold plastic cutlery to three different sizes of embroidery hoops and then attaching them to the light fixture.  It looked great and really set the tone for the table.
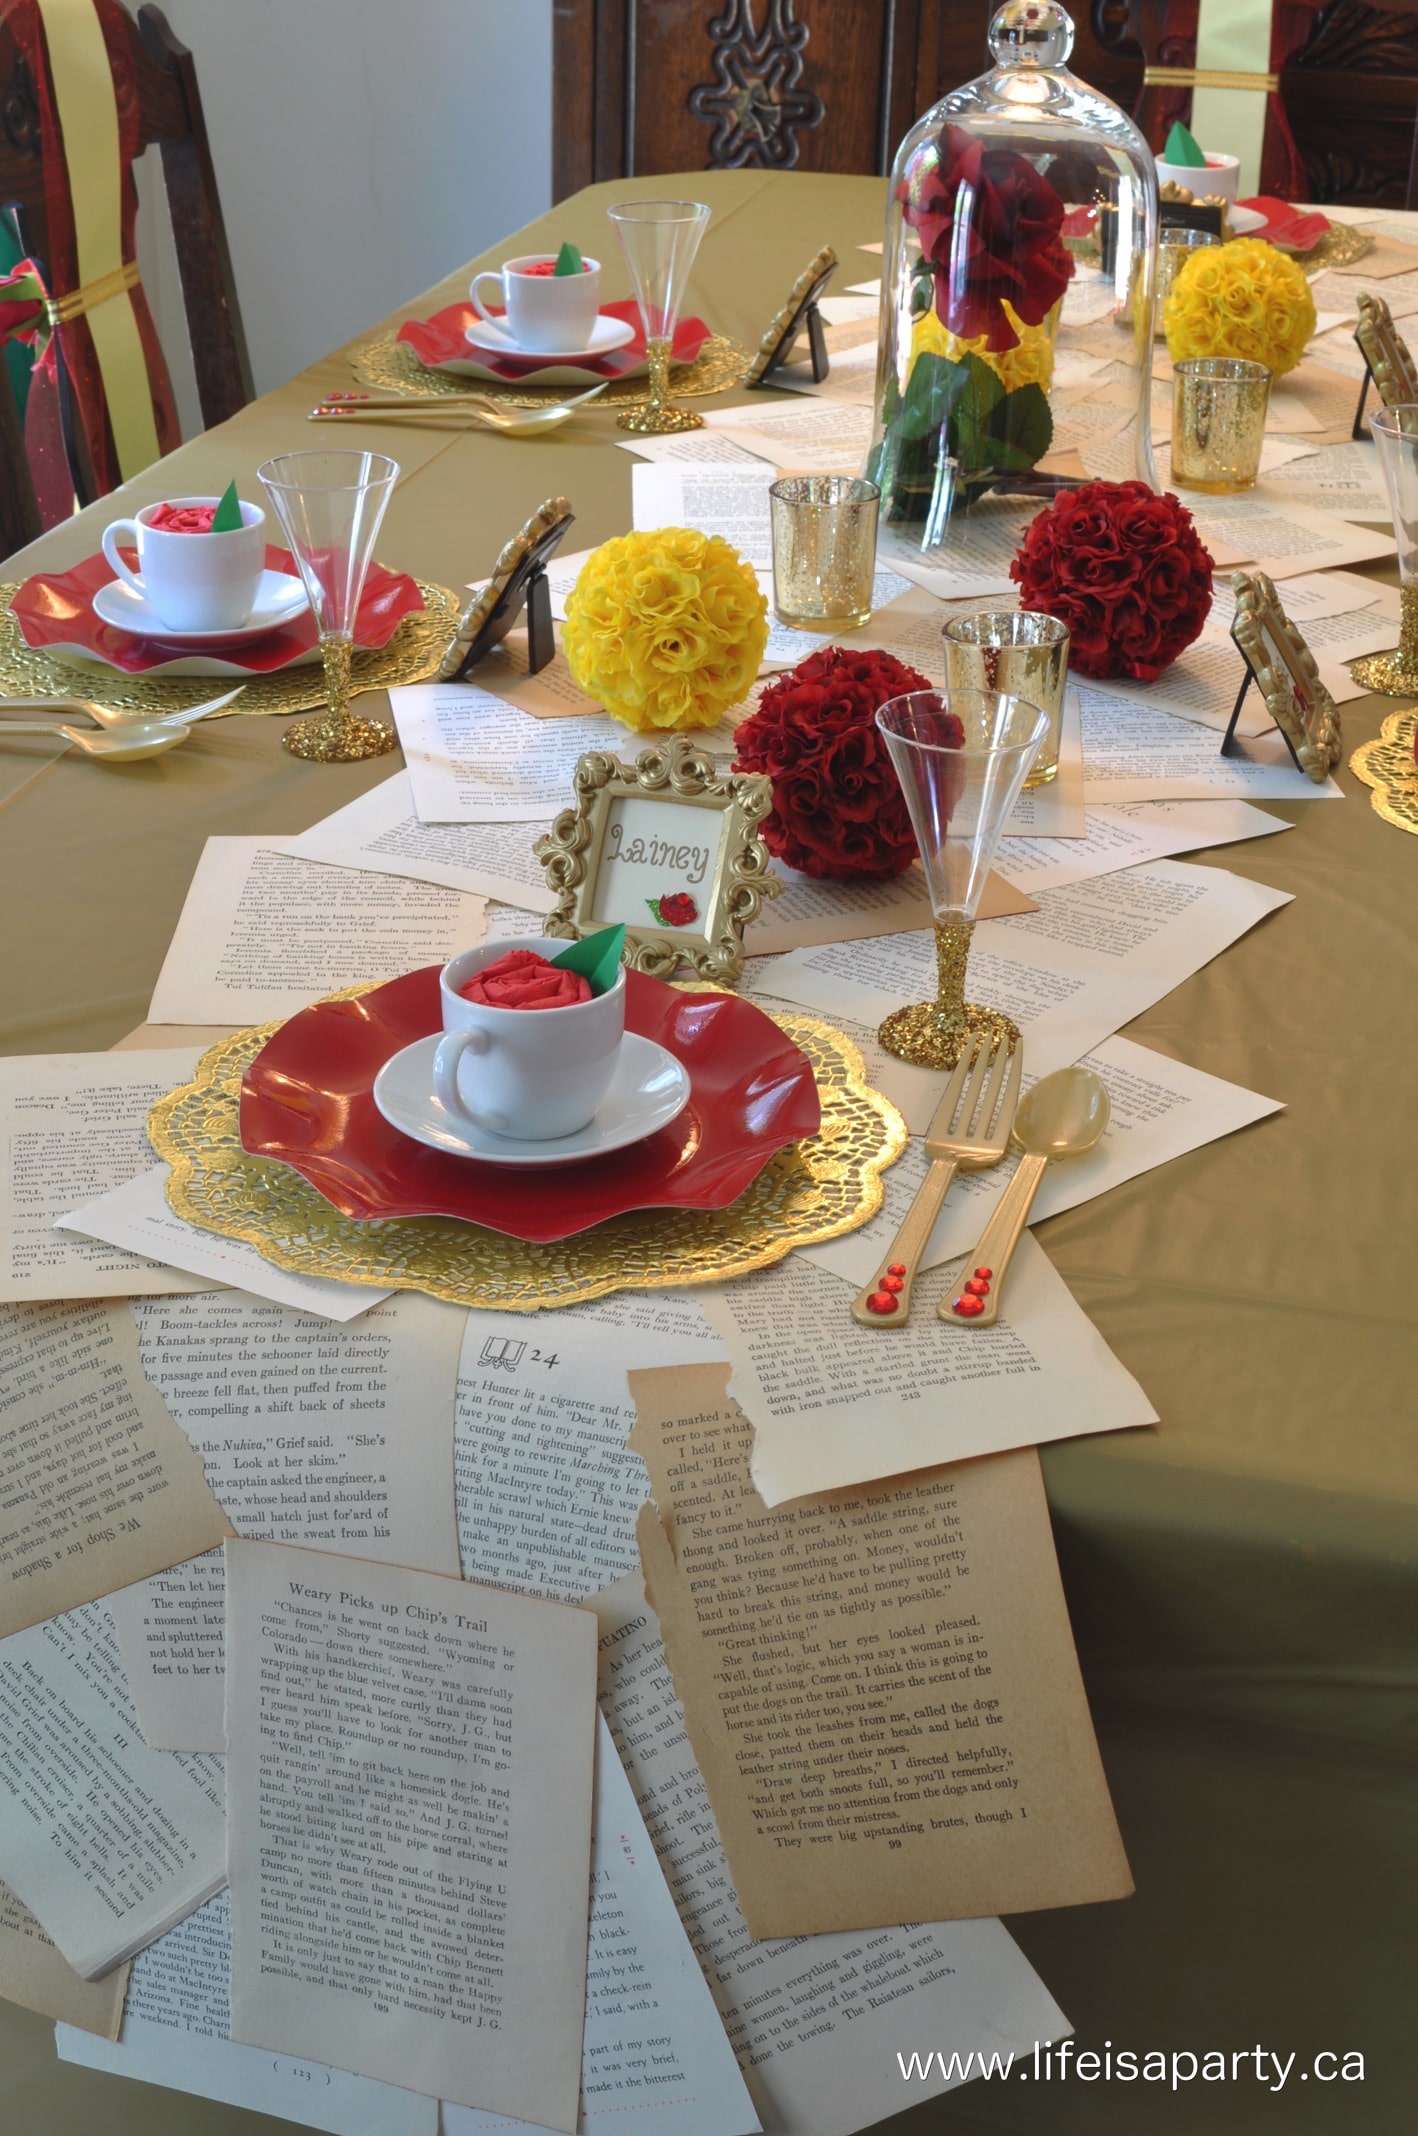
Beauty and the Beast Party Decorations and Food -An amazing Beauty and the Beast themed birthday party, with amazing decorations, and home made party food that all fit the theme. Lots of amazing ideas here and lots of them made out of simple dollar store items.

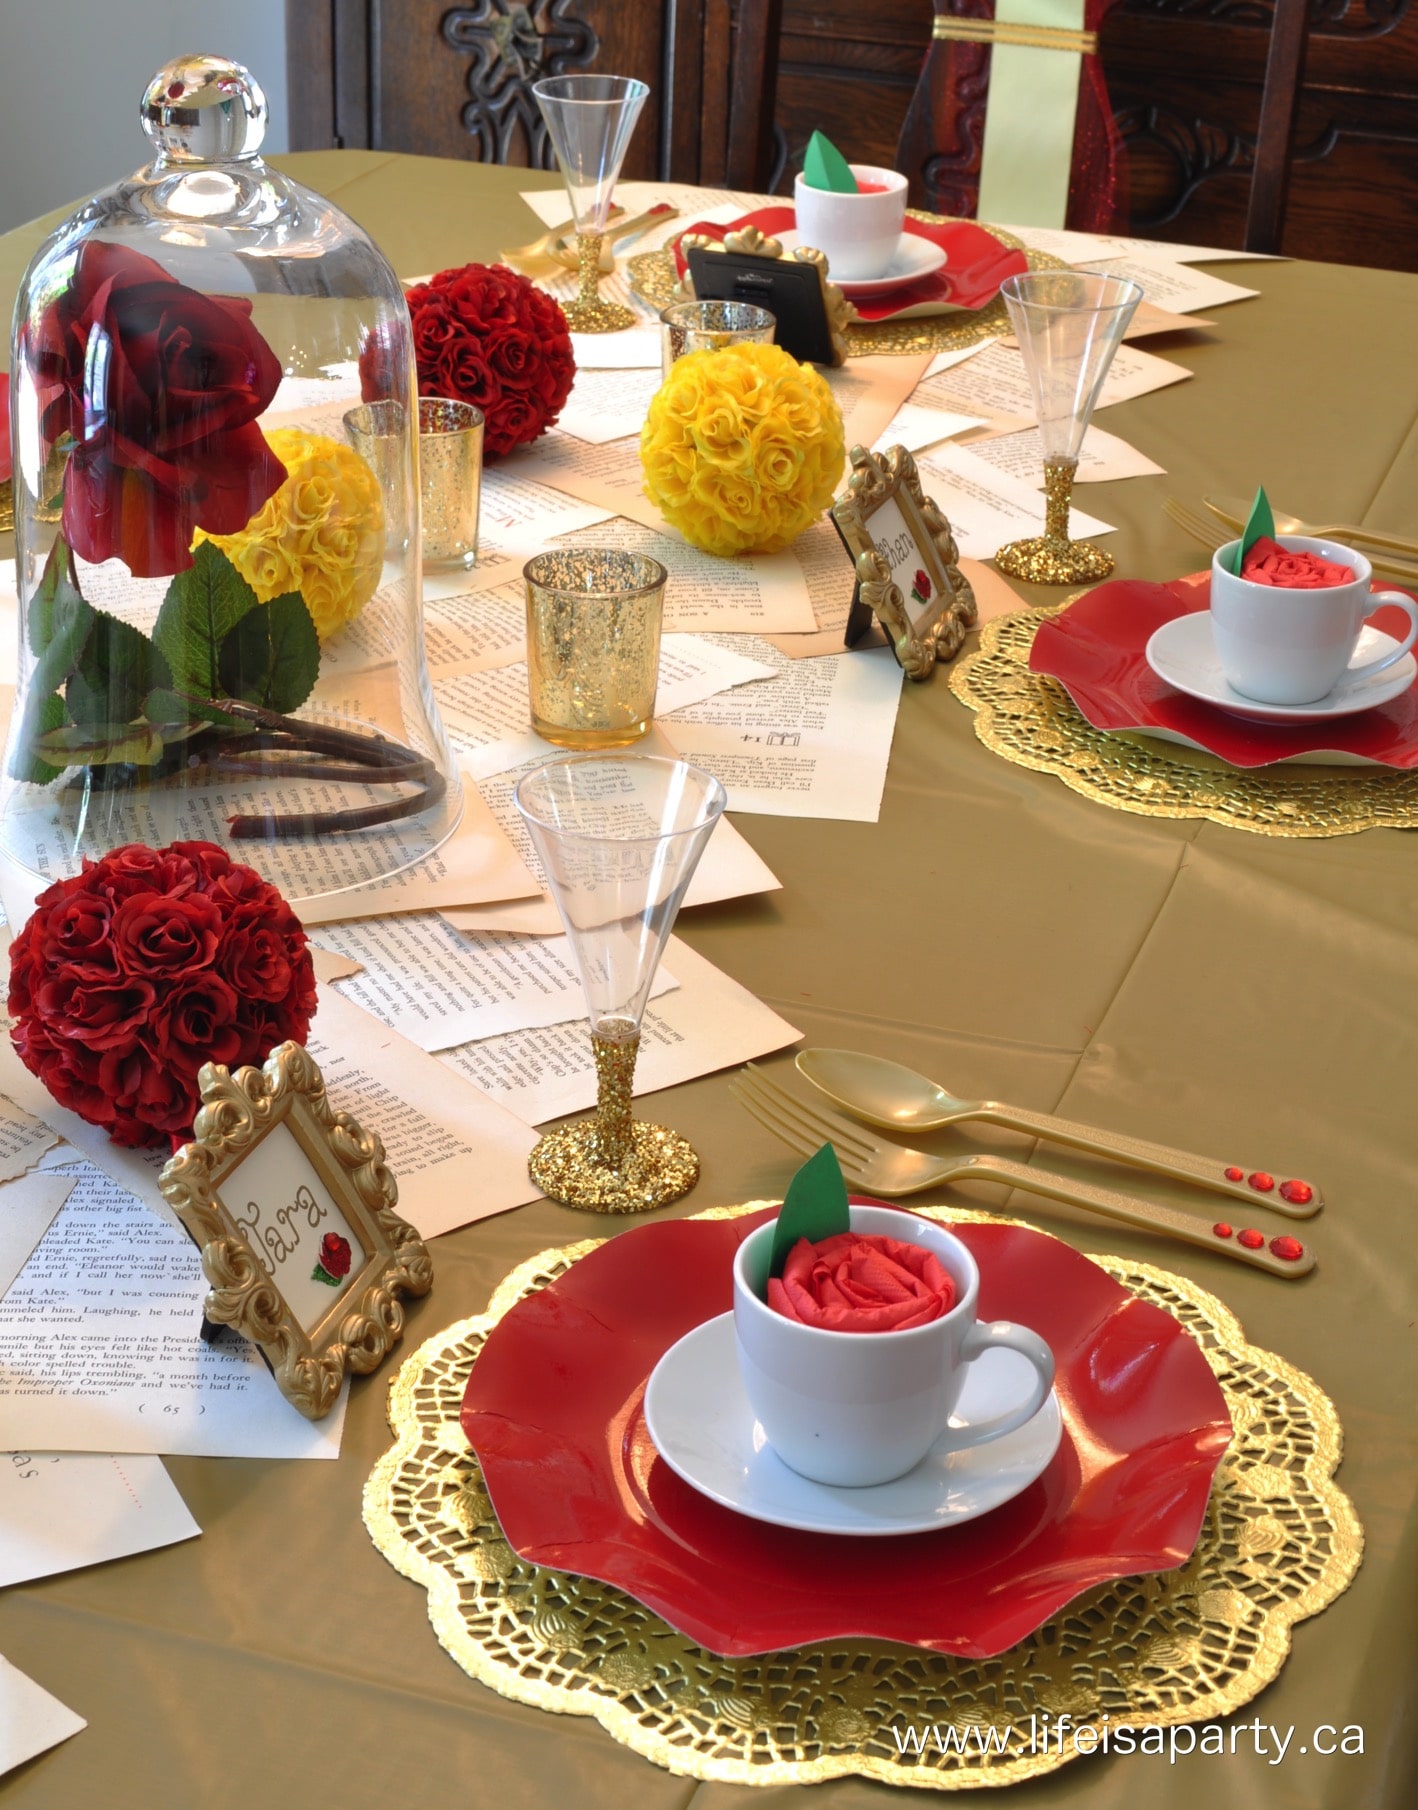
Allie's mom, Heather, started the table with a gold tablecloth, and then made the neatest table runner out of old book pages from the thrift store, just glued together.  It looked amazing.
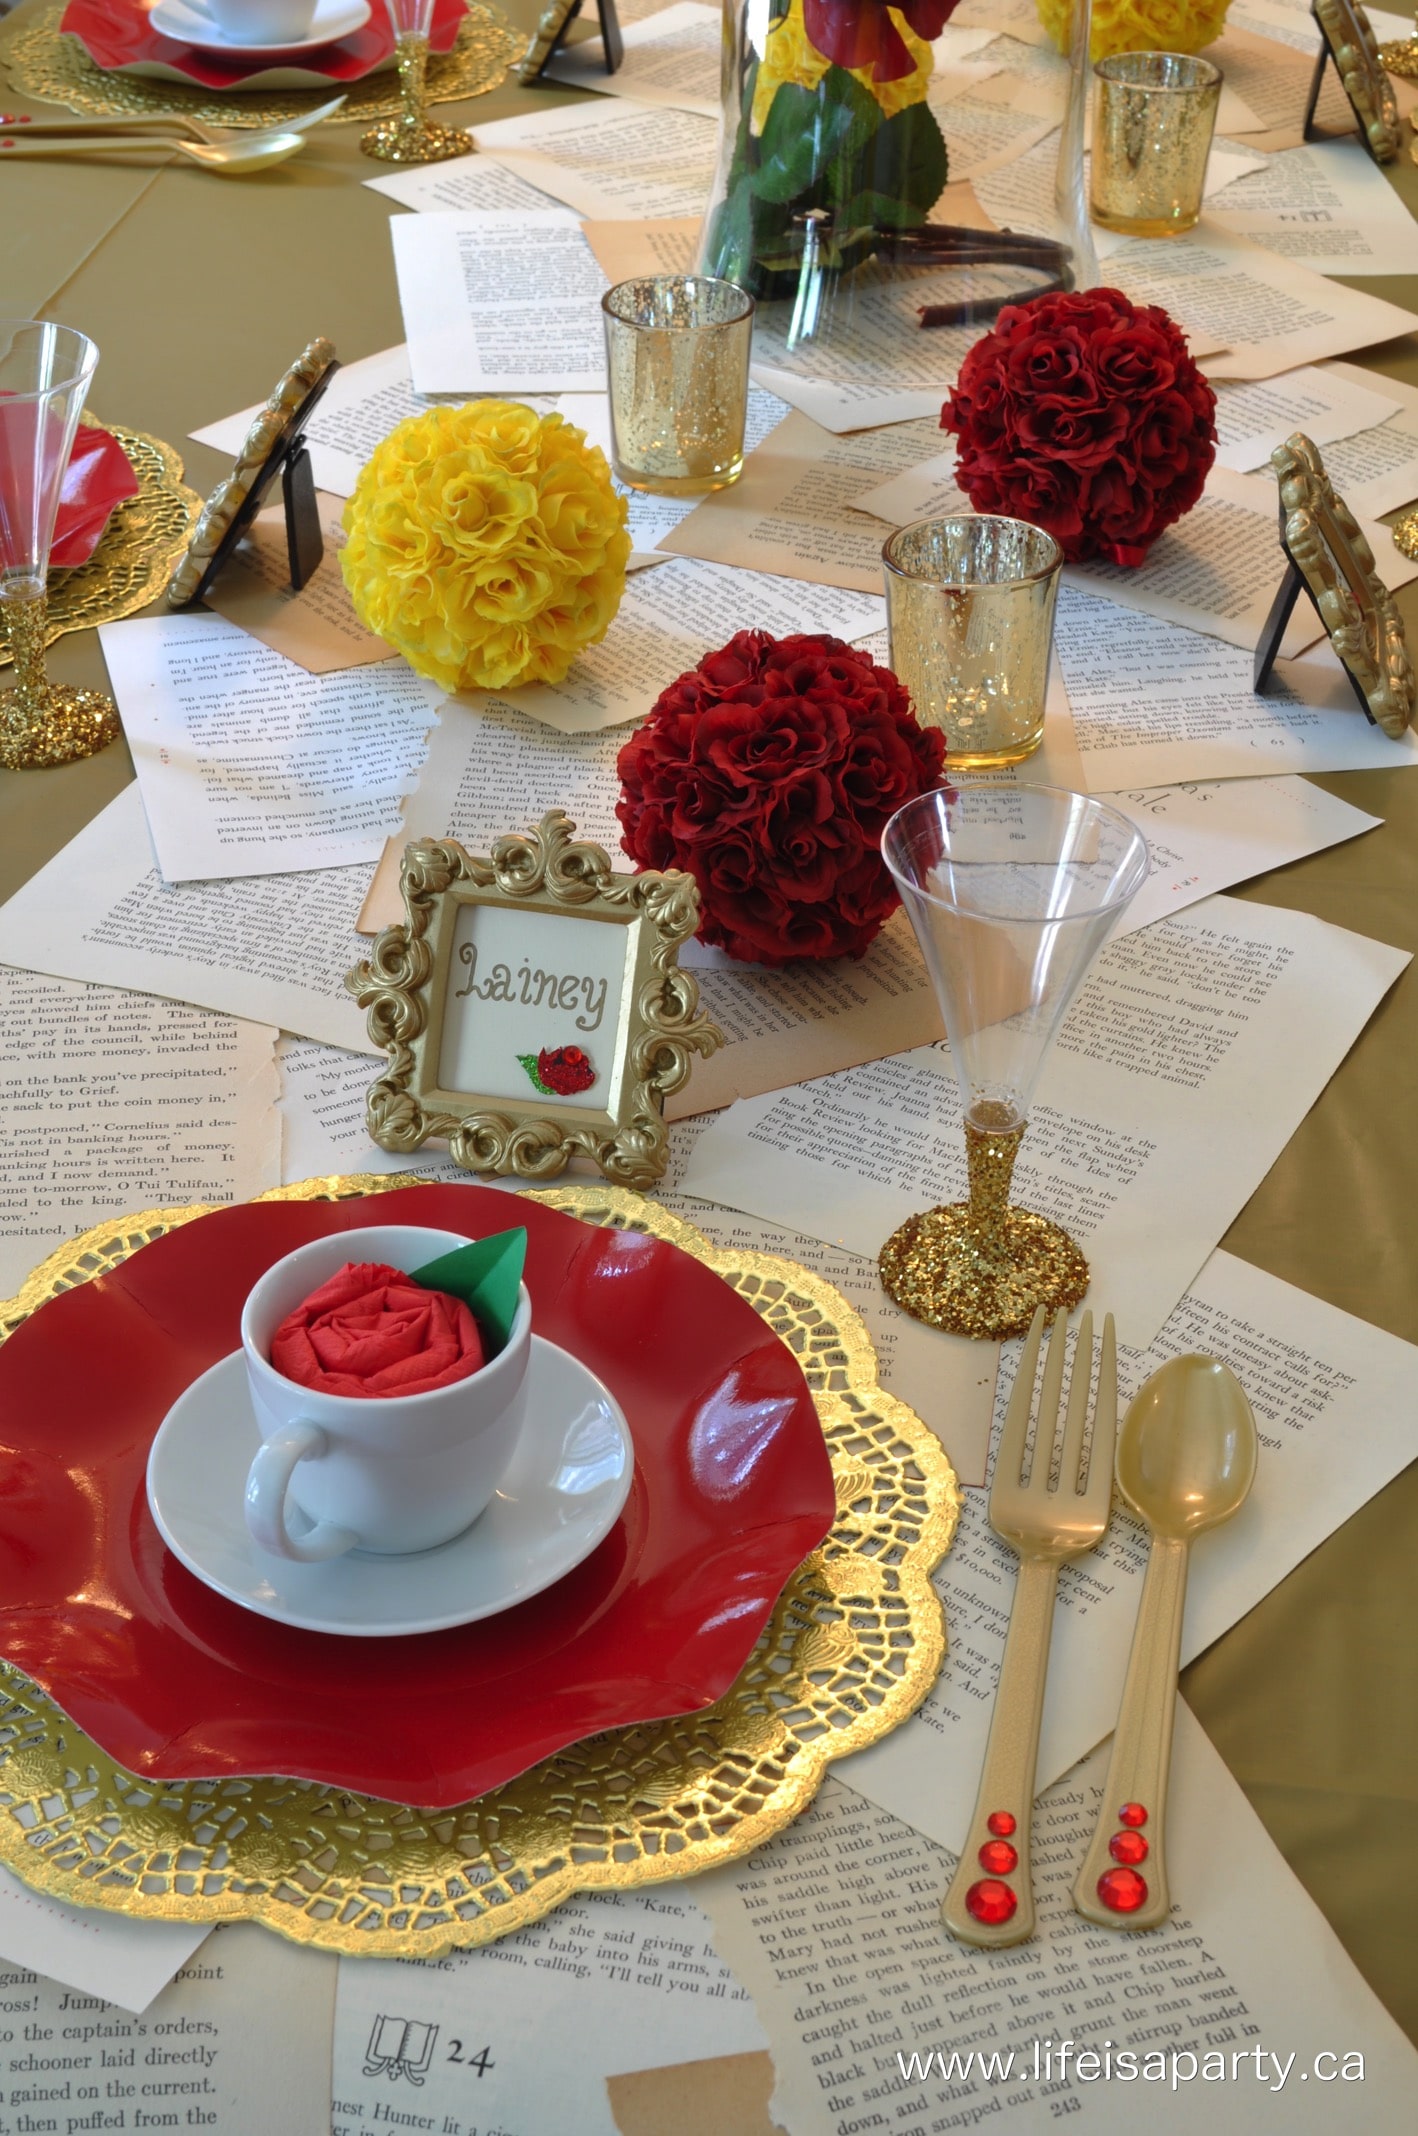
Beauty and the Beast Party Decorations and Food -An amazing Beauty and the Beast themed birthday party, with amazing decorations, and home made party food that all fit the theme. Lots of amazing ideas here and lots of them made out of simple dollar store items.


The plastic glasses got the glitter treatment on their bases, and the cutlery had some red stick-on gems to dress them up.
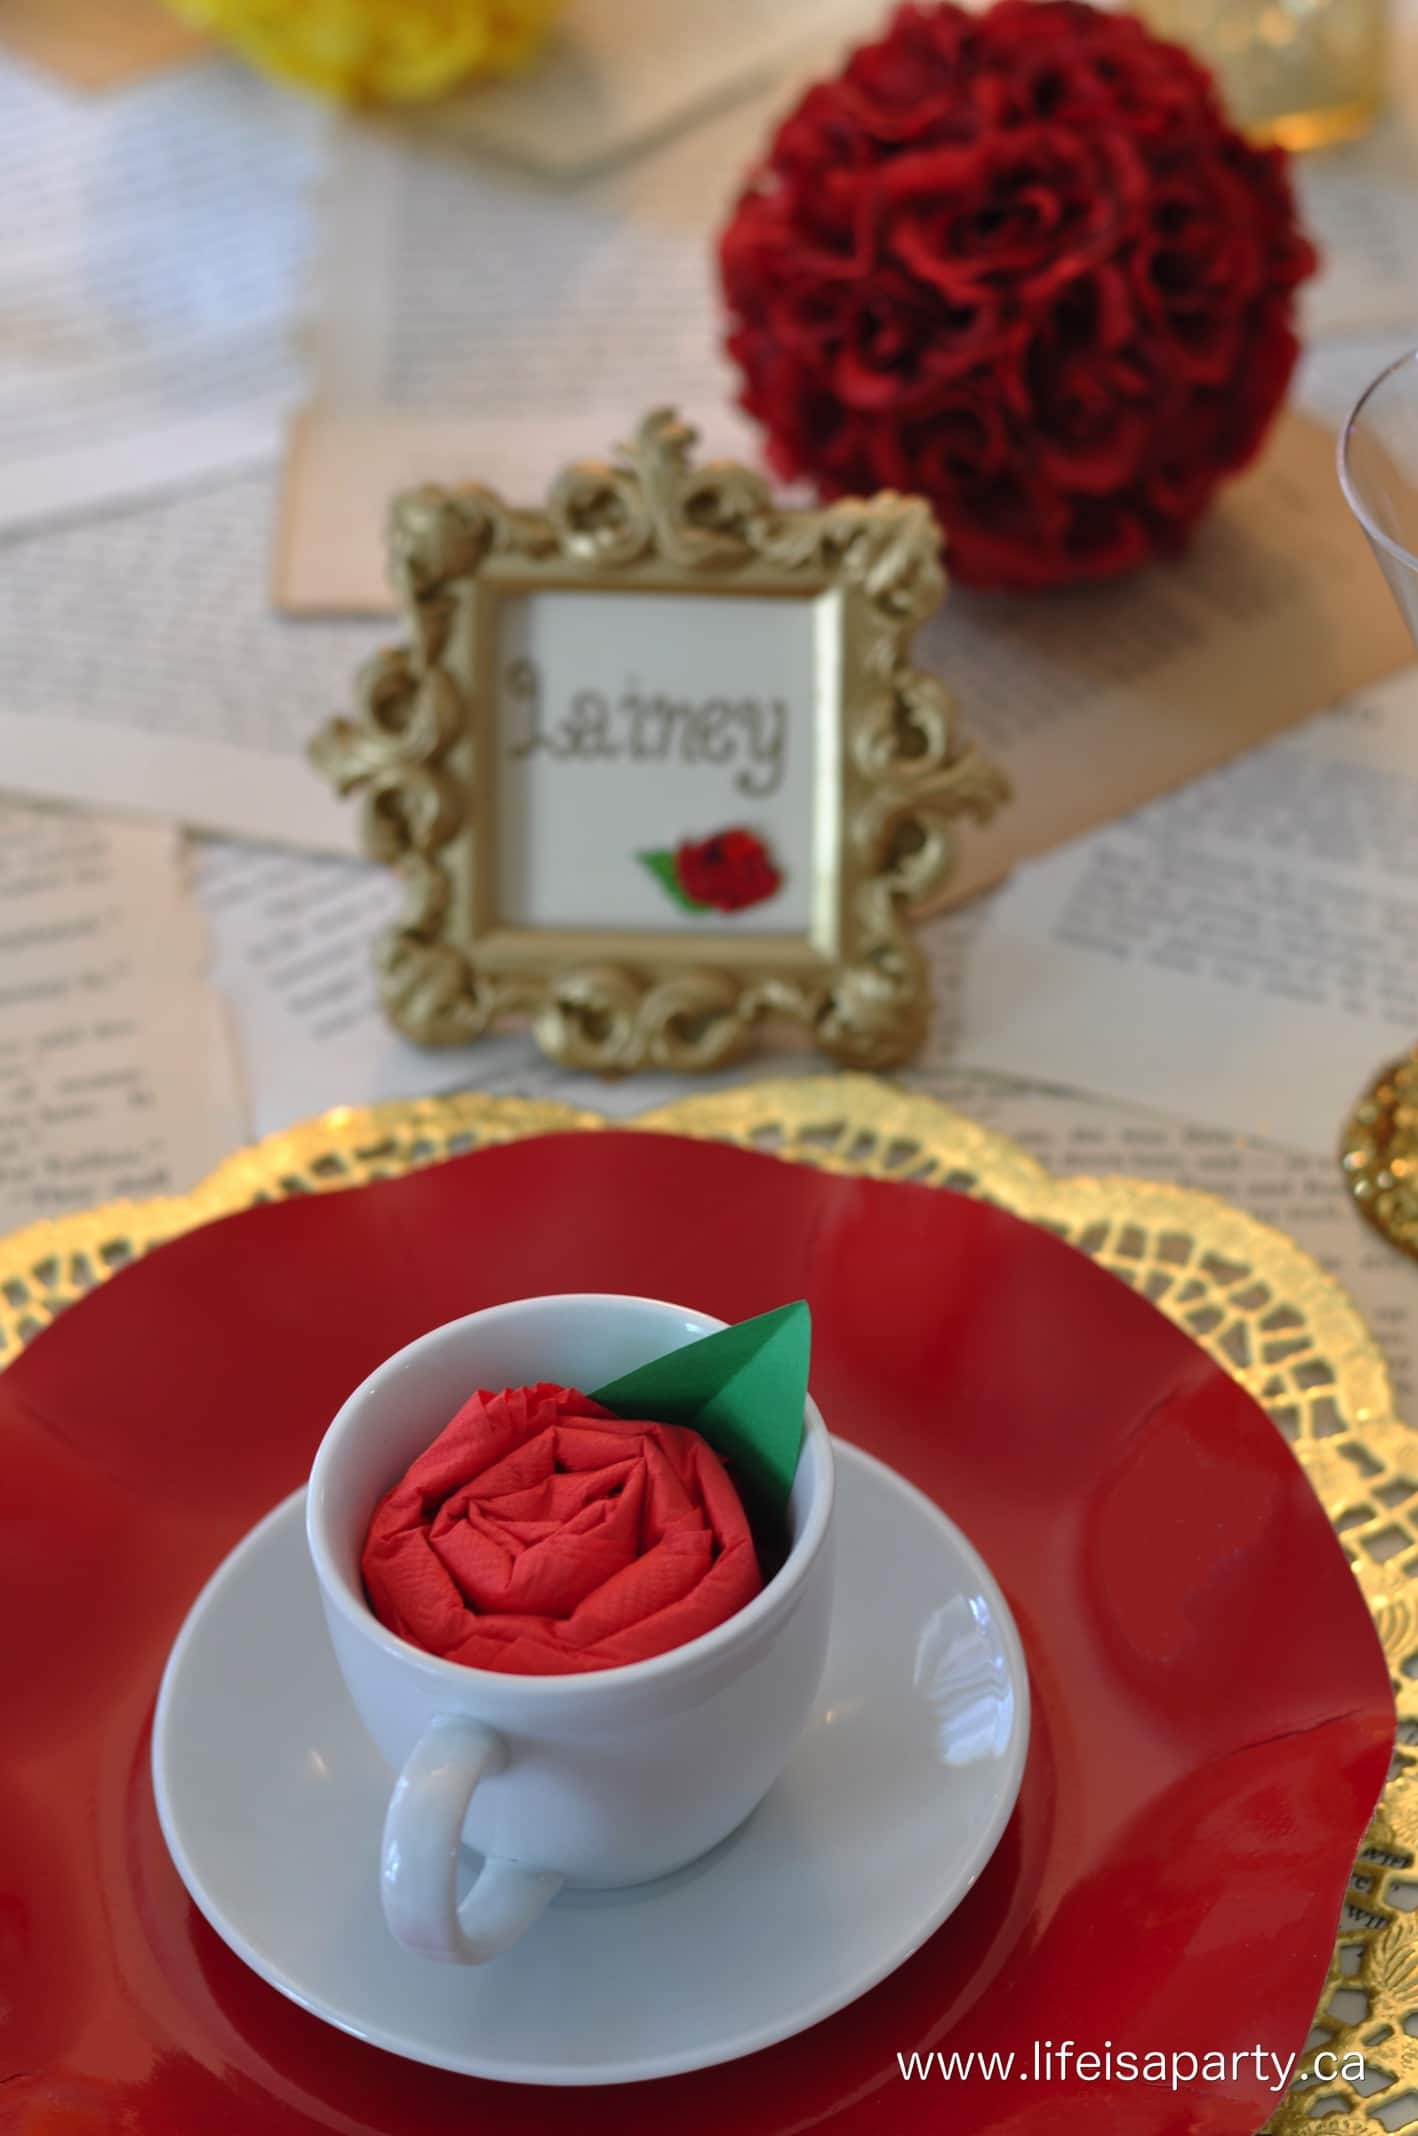
Beauty and the Beast Party Decorations and Food -An amazing Beauty and the Beast themed birthday party, with amazing decorations, and home made party food that all fit the theme. Lots of amazing ideas here and lots of them made out of simple dollar store items.

I loved the little detail of the simple red paper napkins folded into roses and tucked in to little tea cups that reminded us of Chip.
Beauty and the Beast Party Decorations and Food -An amazing Beauty and the Beast themed birthday party, with amazing decorations, and home made party food that all fit the theme. Lots of amazing ideas here and lots of them made out of simple dollar store items.


Each little guest had the prettiest placard too, a gold frame from the party store decorated with their name and a rose sticker.
Beauty and the Beast Party Decorations and Food -An amazing Beauty and the Beast themed birthday party, with amazing decorations, and home made party food that all fit the theme. Lots of amazing ideas here and lots of them made out of simple dollar store items.

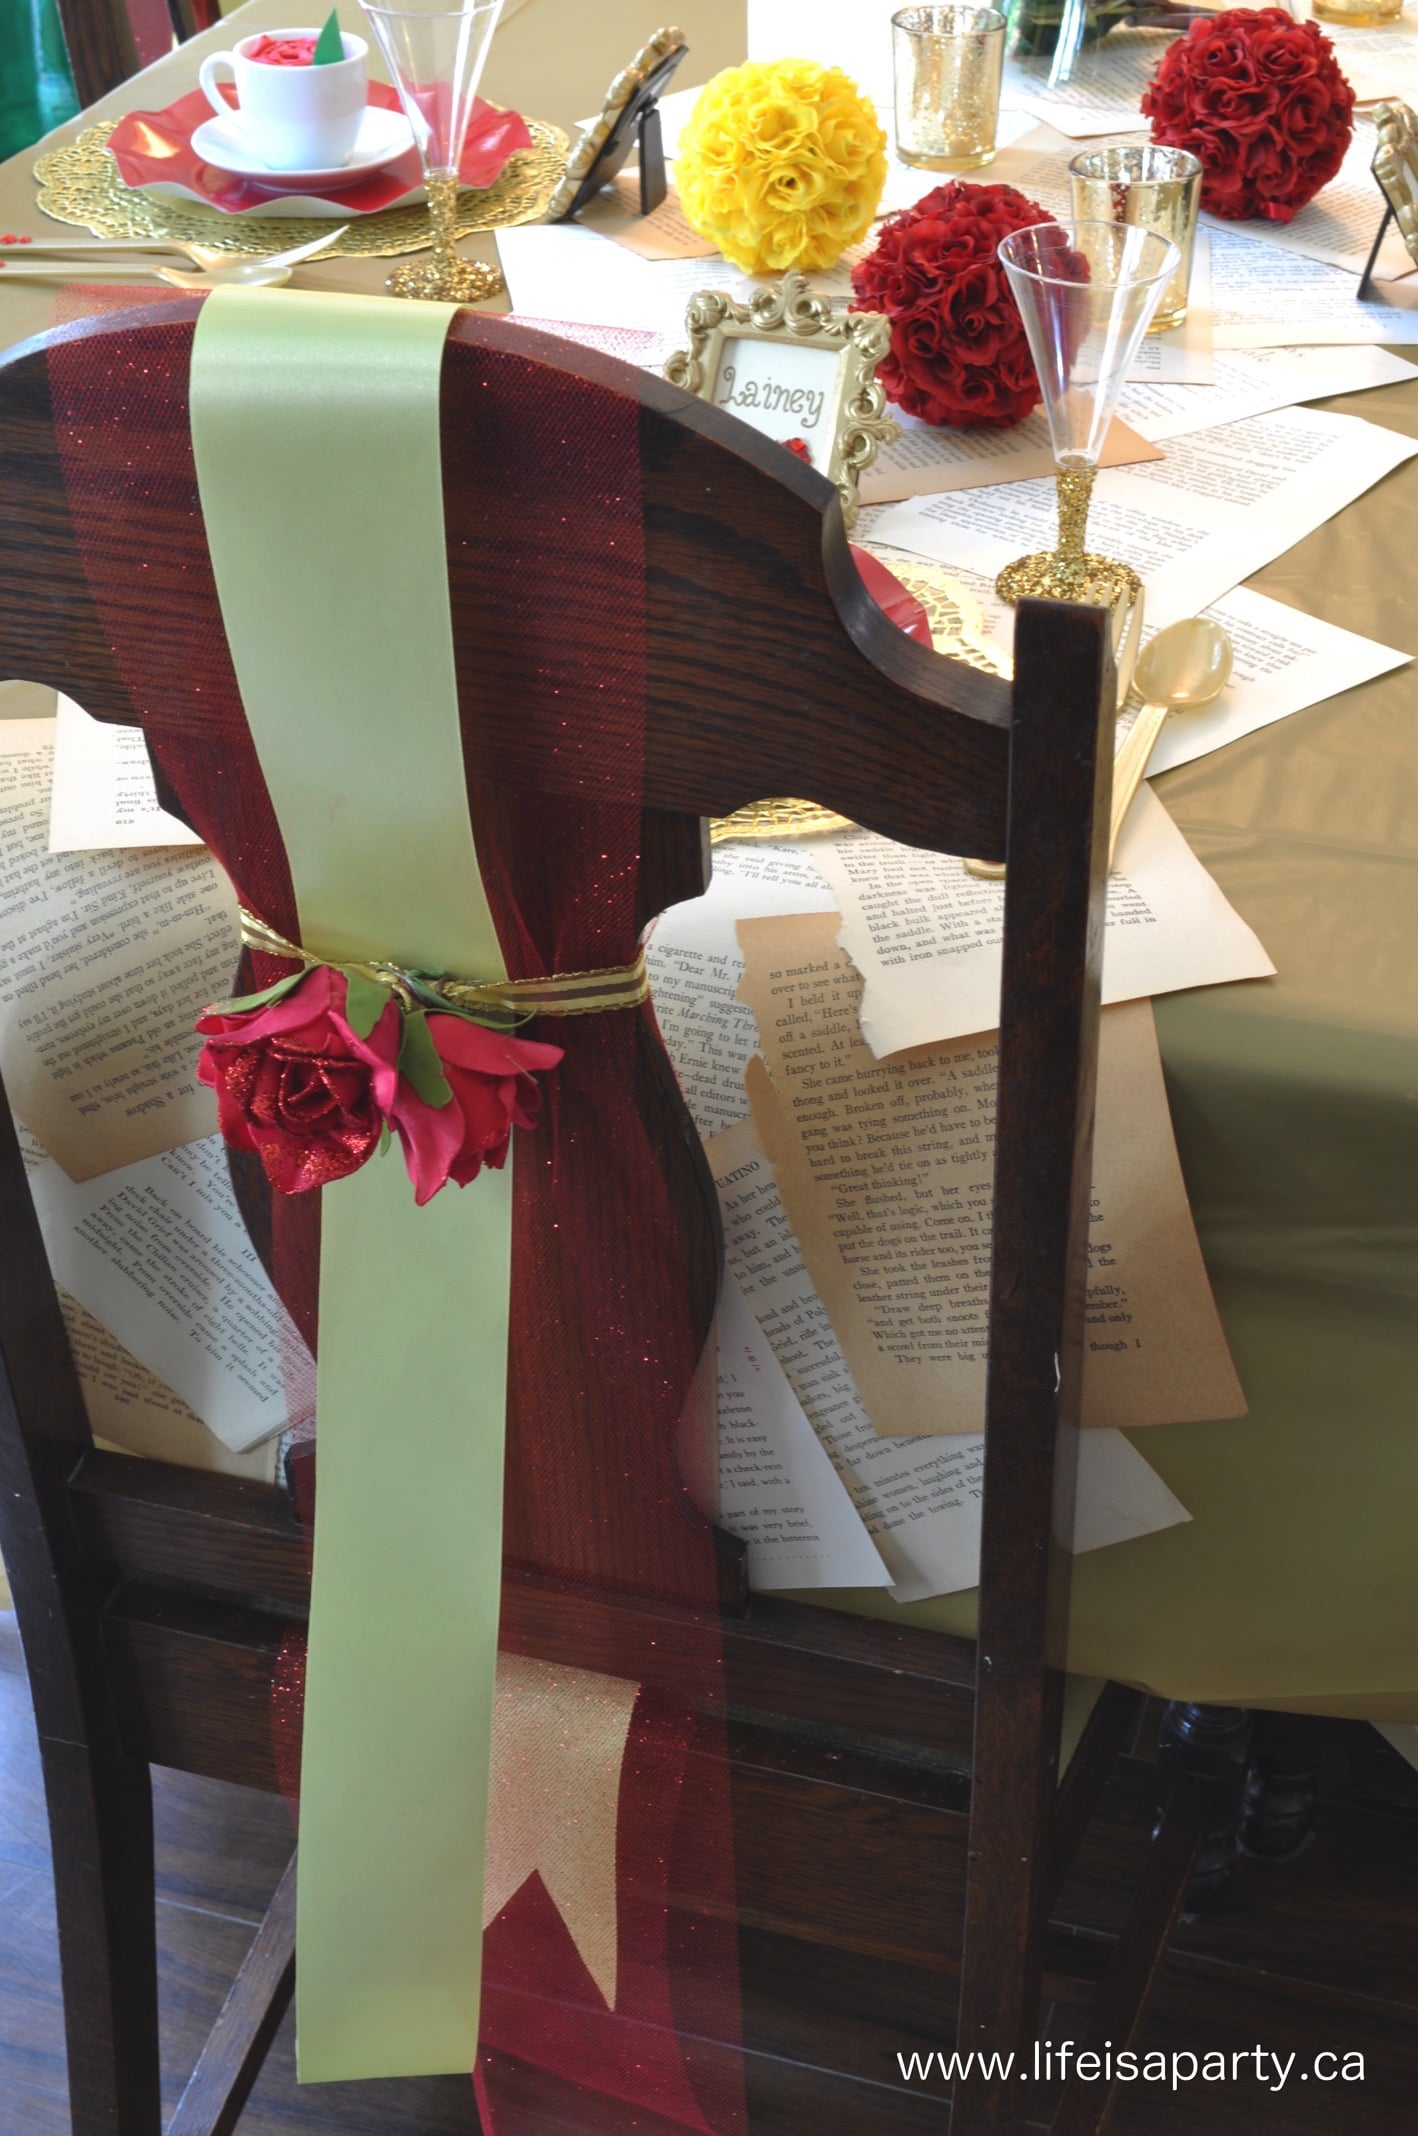
The back of the chairs were decorated with some ribbon and tulle and some faux roses.  Amazing what a little ribbon in the right spot can do!

Most of the decor came from the party store and dollar store. It's amazing how these inexpensive items look amazing with a few added touches, like glitter, and gem stickers.

Drink Station
Beauty and the Beast Party Decorations and Food -An amazing Beauty and the Beast themed birthday party, with amazing decorations, and home made party food that all fit the theme. Lots of amazing ideas here and lots of them made out of simple dollar store items.

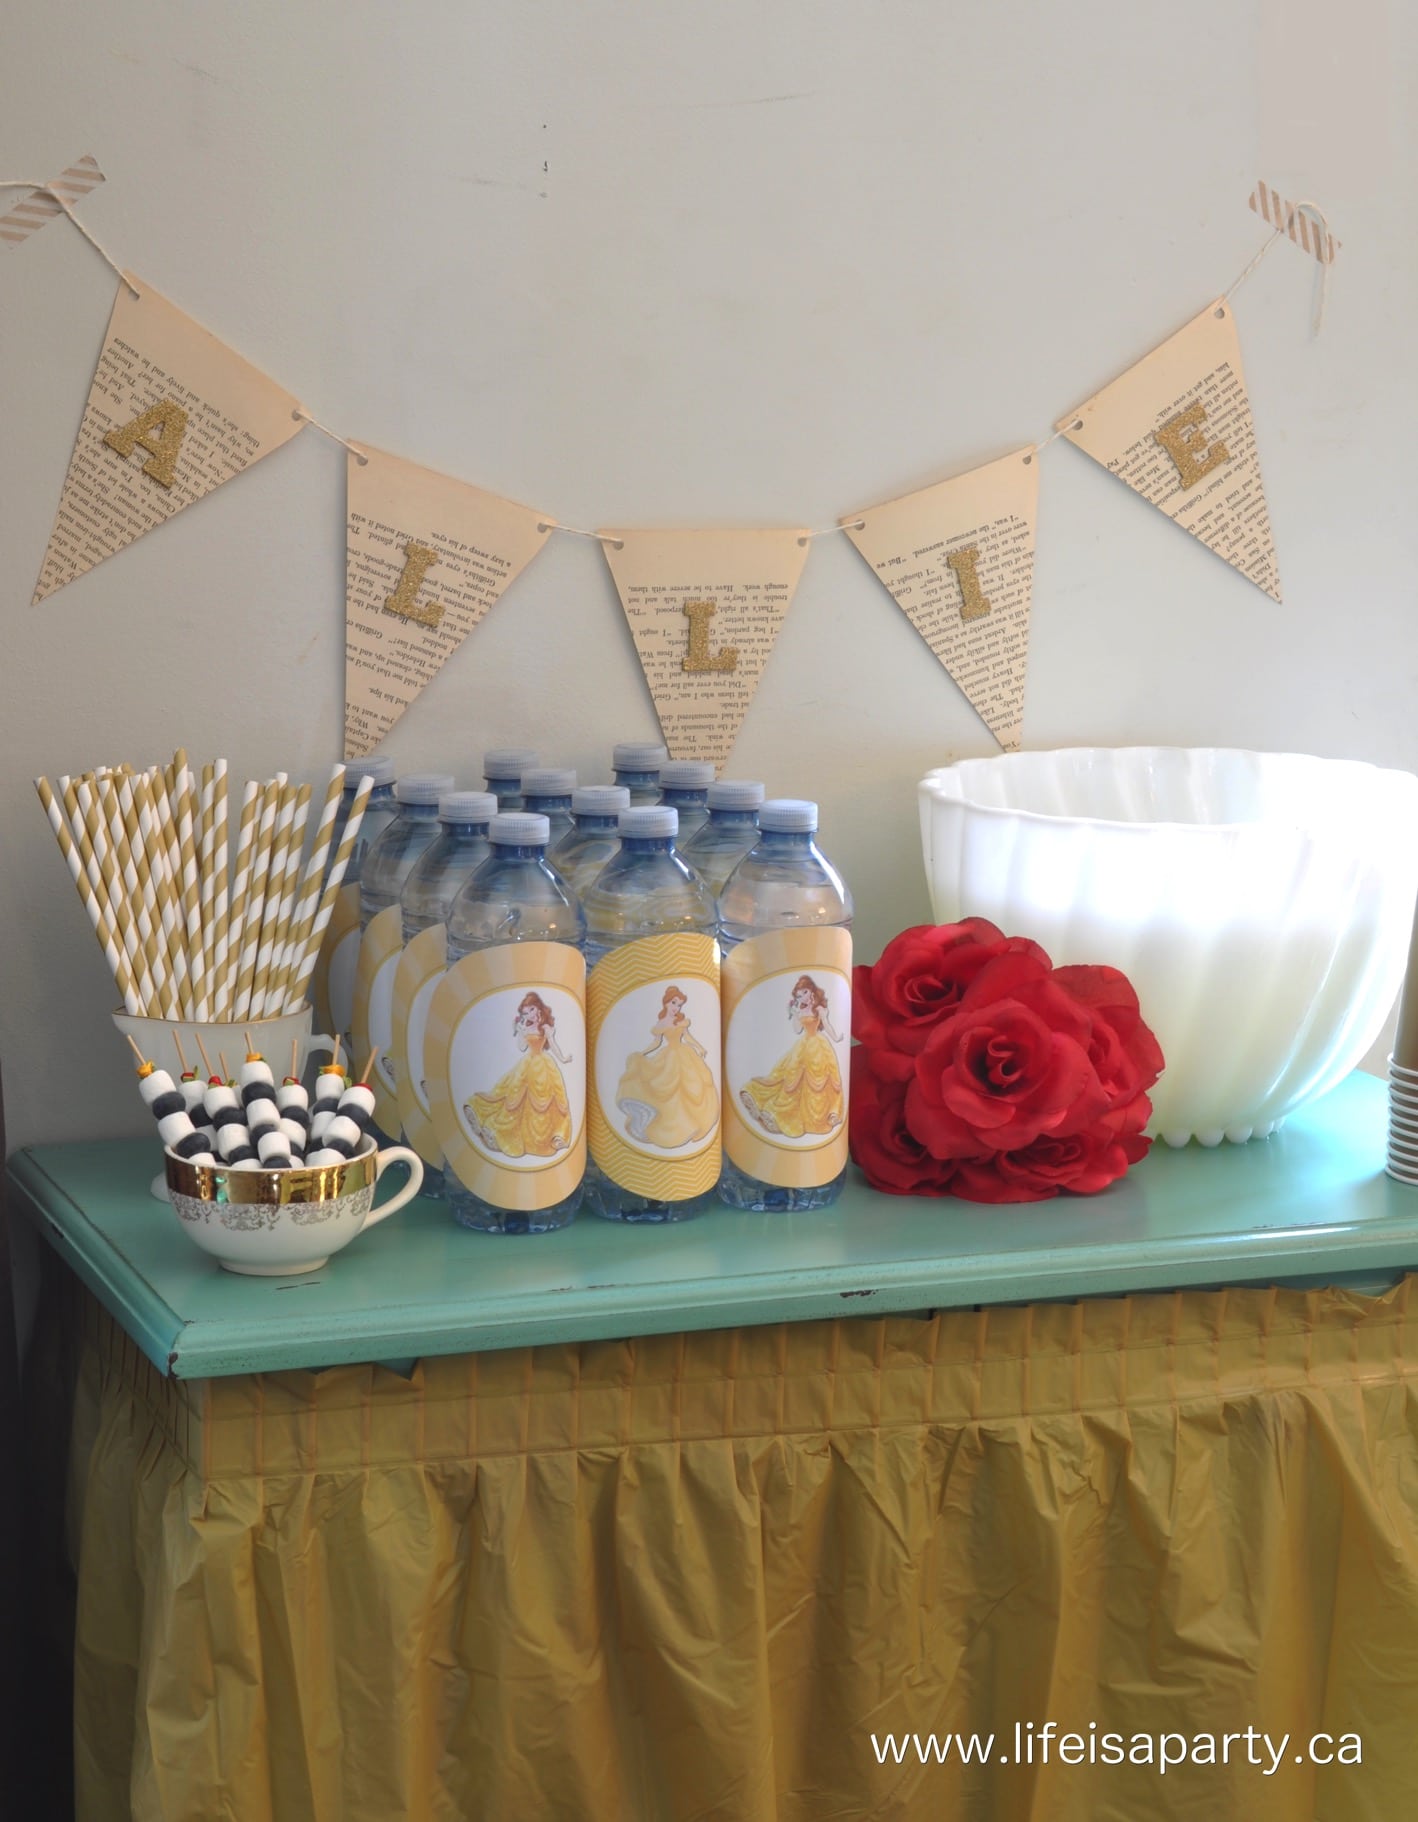
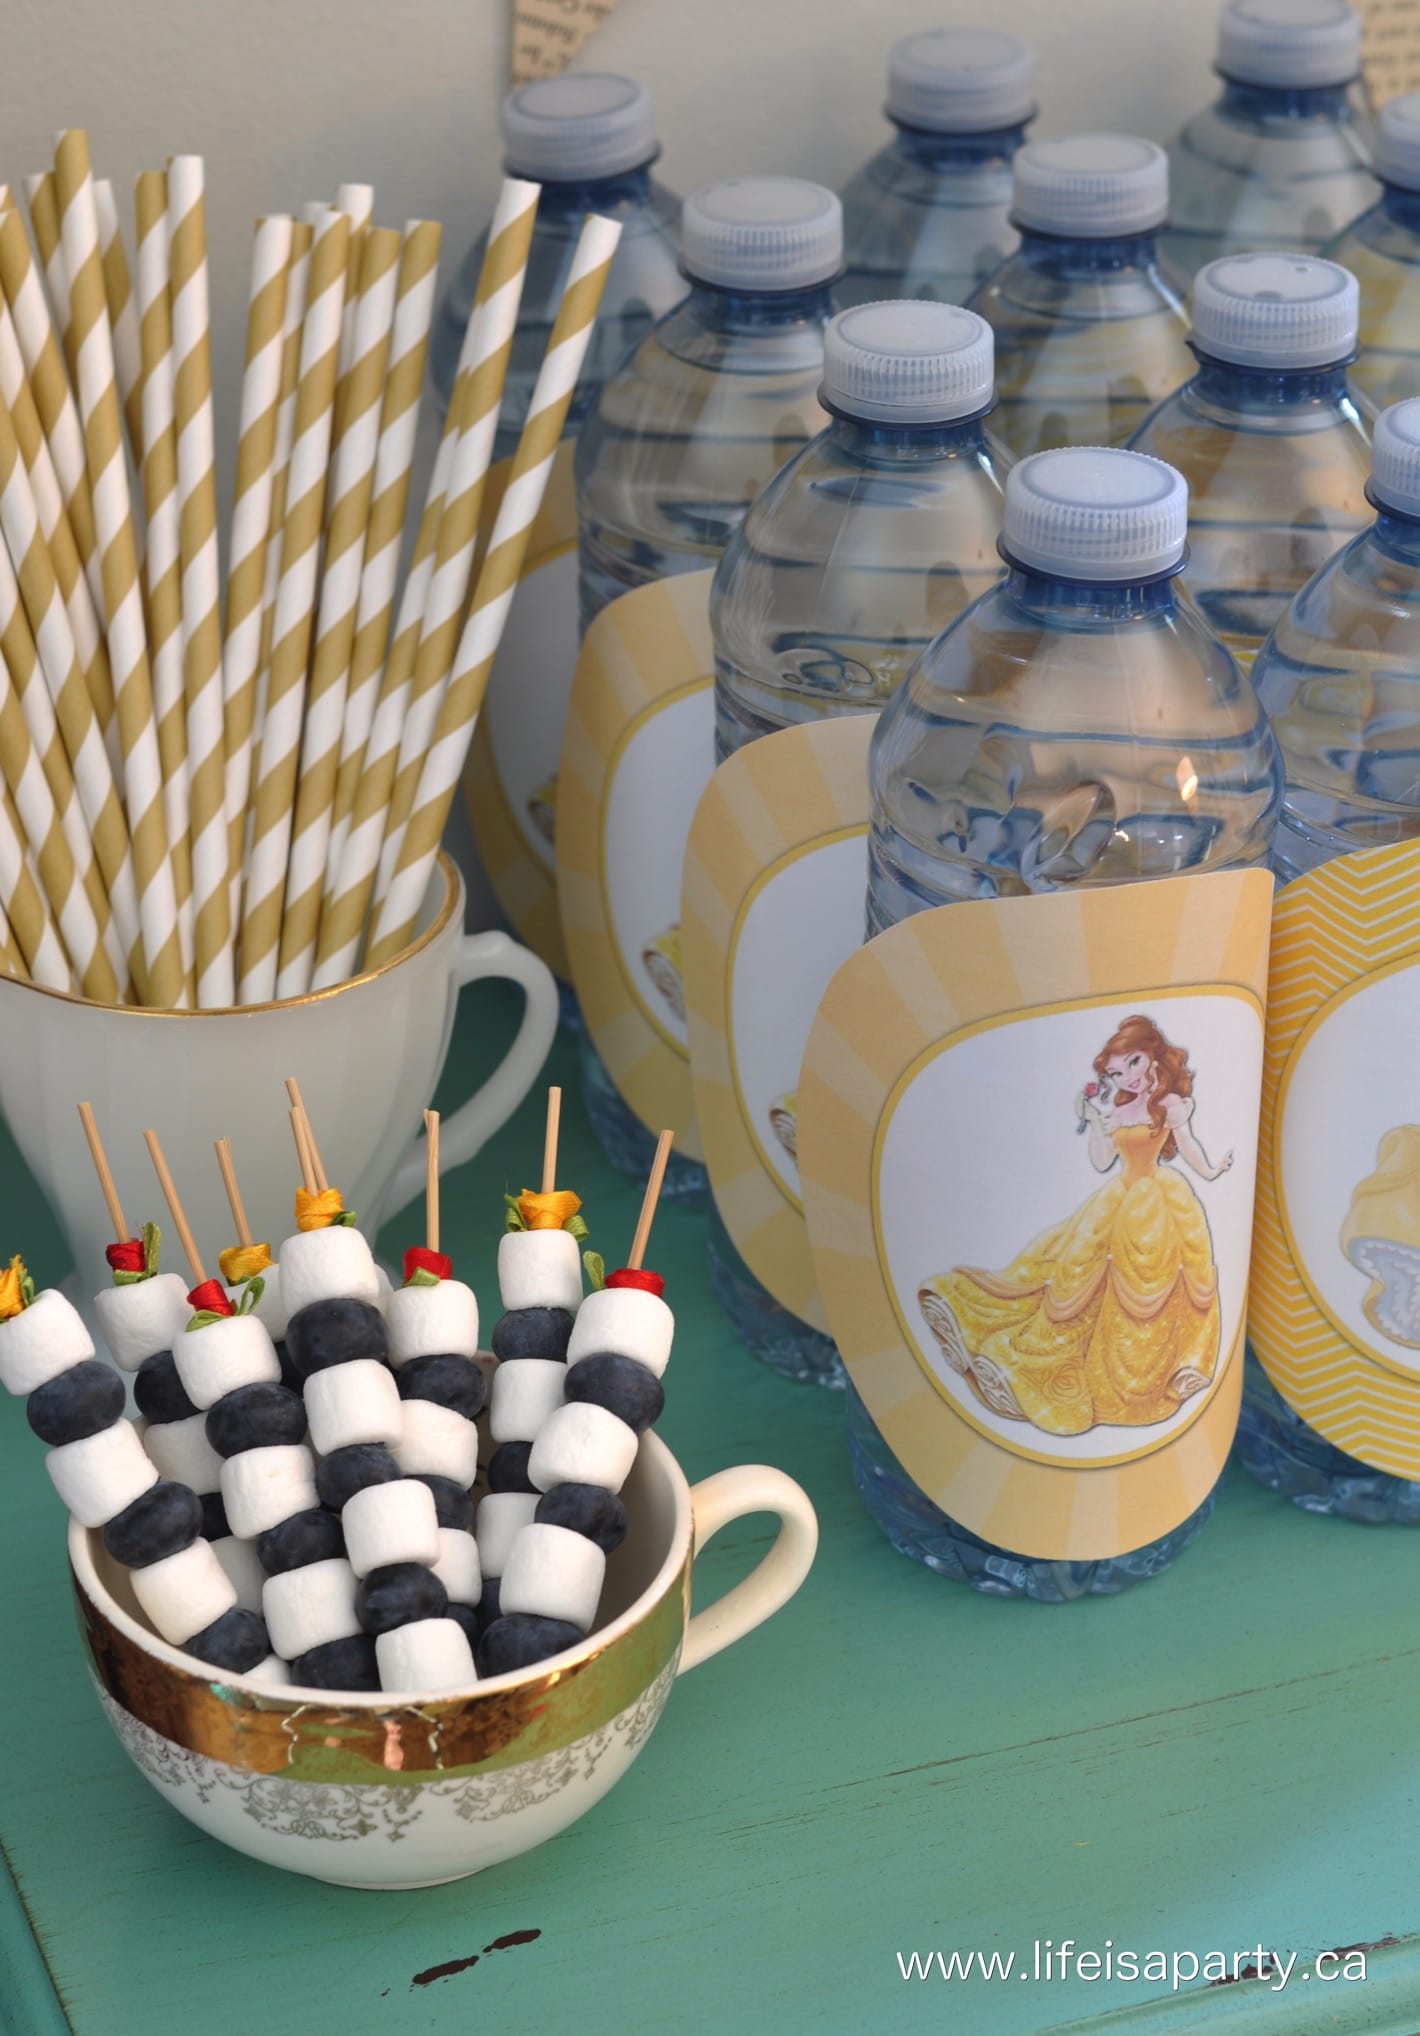
There was a little drink table to the side with pretty decorated water bottles and lemonade.  All the kids loved the gold straws.
Beauty and the Beast Party Decorations and Food -An amazing Beauty and the Beast themed birthday party, with amazing decorations, and home made party food that all fit the theme. Lots of amazing ideas here and lots of them made out of simple dollar store items.

Heather found the pretty toothpicks with the roses on the end at the party store and made skewers with blueberries and marshmallows.  I love the detail of using the gold teacup to put them in.  Everything was just so cute.

The Food
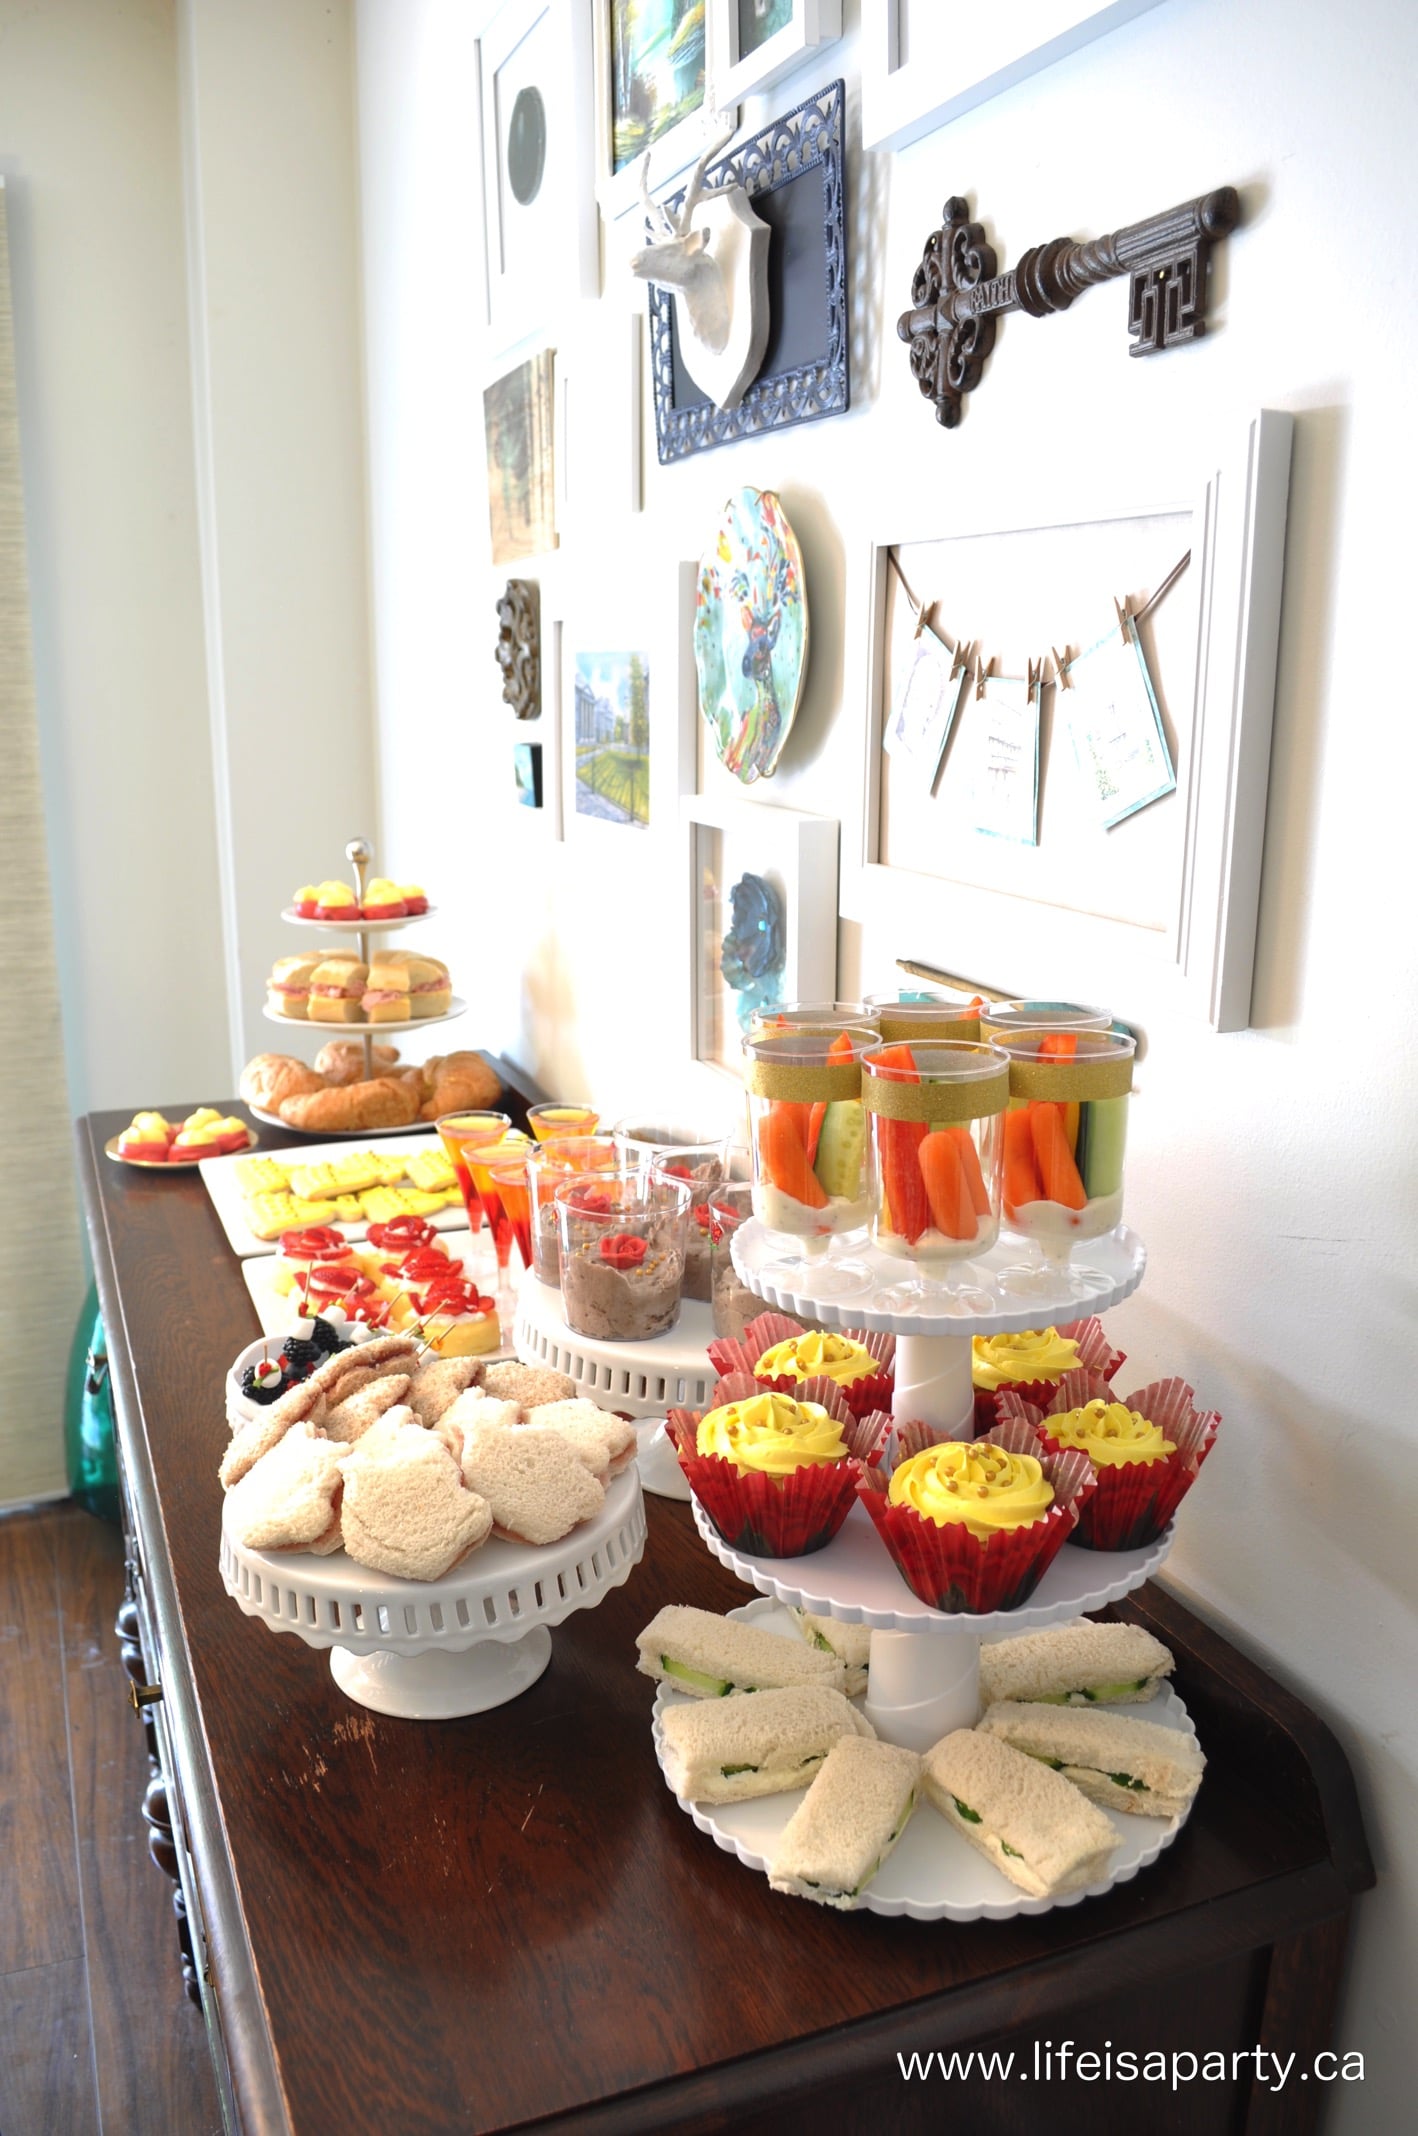
Beauty and the Beast Party Decorations and Food -An amazing Beauty and the Beast themed birthday party, with amazing decorations, and home made party food that all fit the theme. Lots of amazing ideas here and lots of them made out of simple dollar store items.

On the buffet was a feast of Beauty and the Beast themed treats, and they were as yummy as they look!

Everything was bite sized and kid friendly, and so adorable.

  • Assorted tea sandwiches, including Mrs. Pots teapot shaped sandwiches
  • Crossiants
  • Individual Veggies and Dip
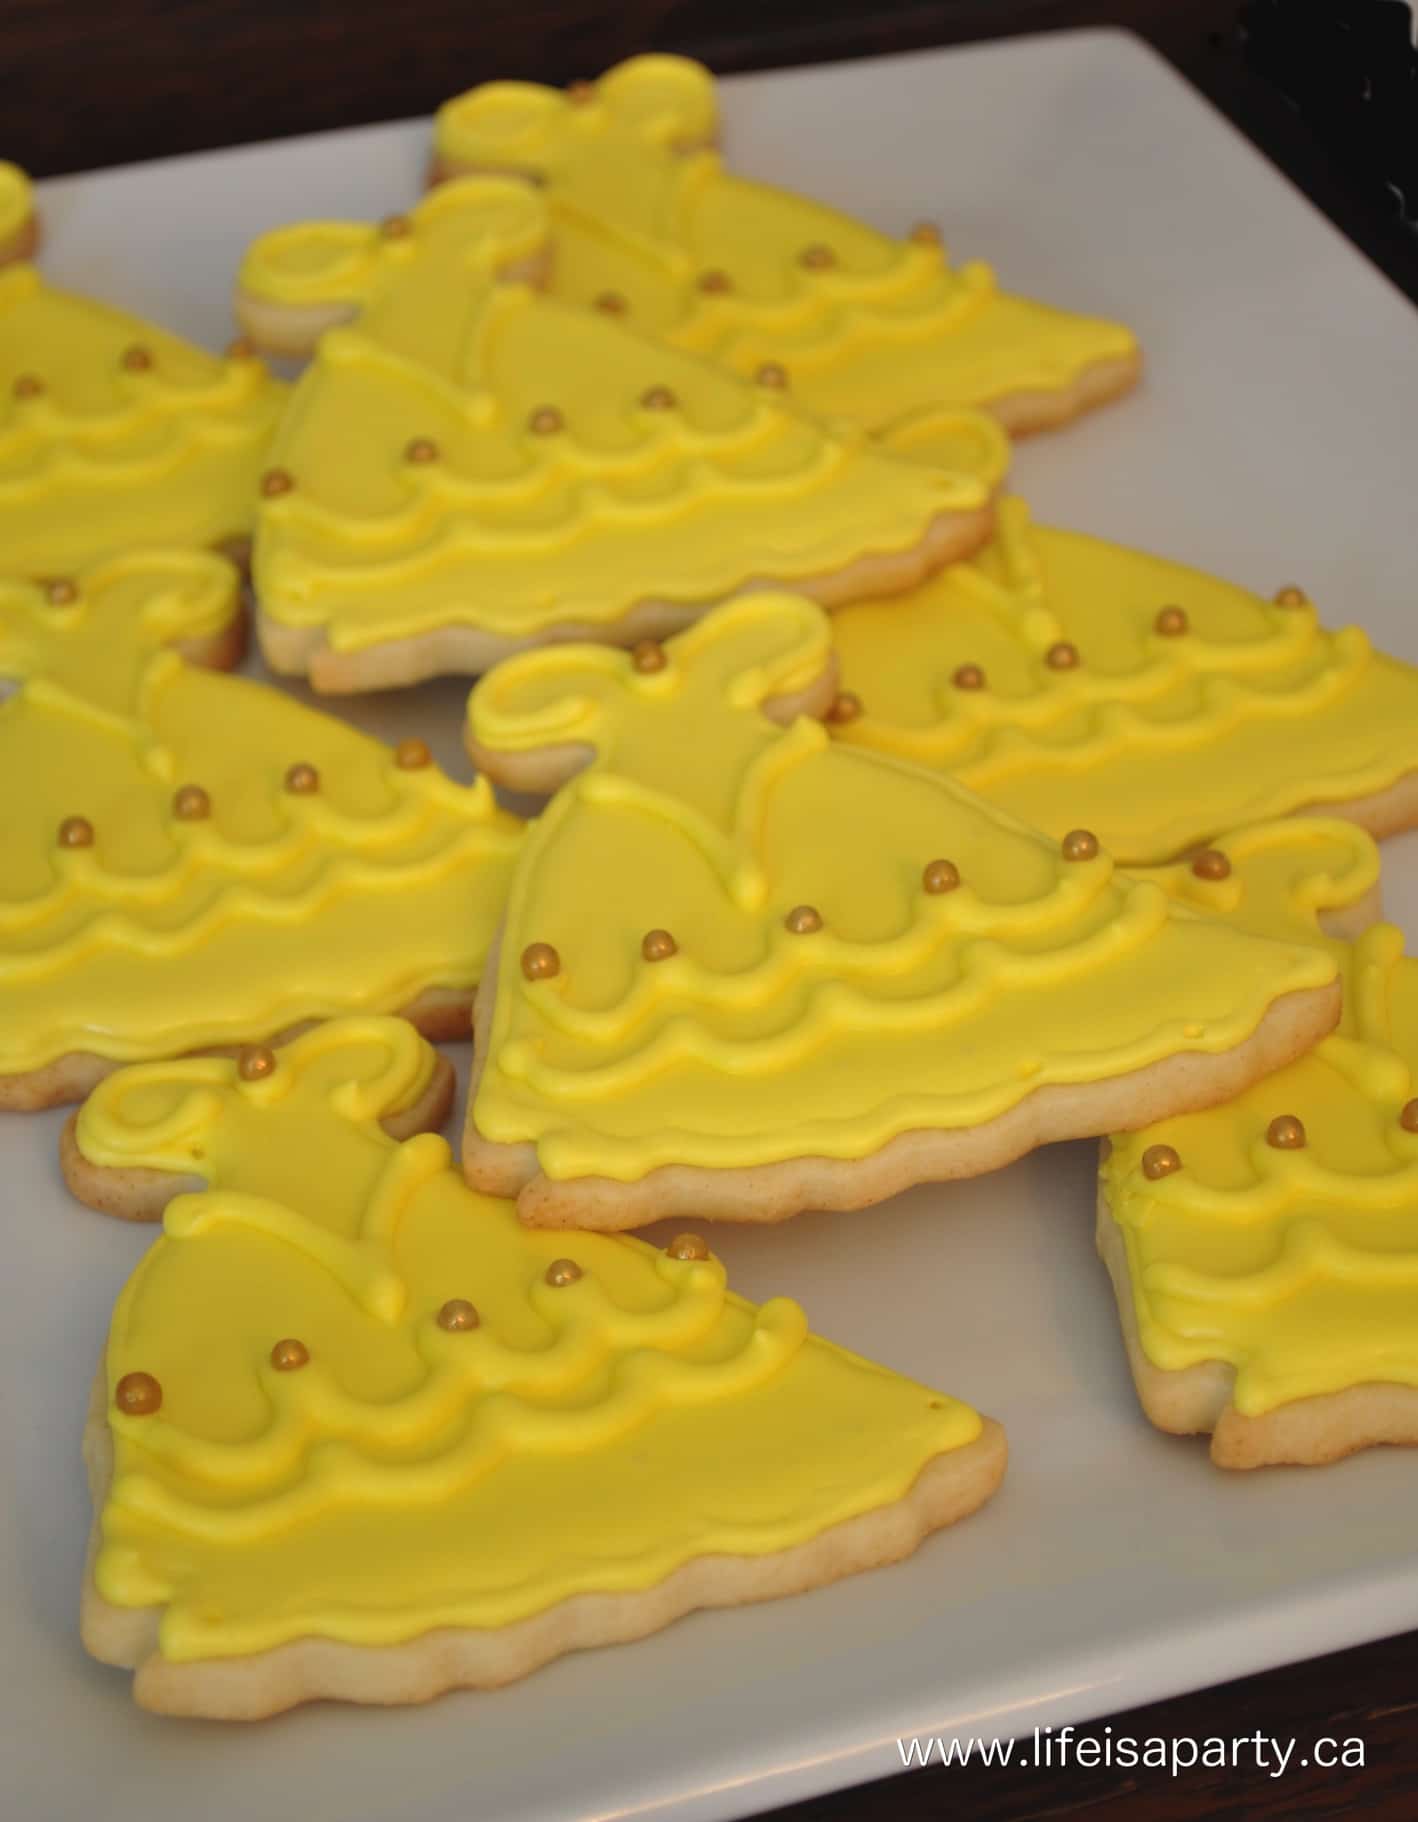
  • Belle Sugar Cookies
  • Grey Stuff
  • Jello
  • Rose Strawberry Shortcakes
  • Cupcakes
Beauty and the Beast Party Decorations and Food -An amazing Beauty and the Beast themed birthday party, with amazing decorations, and home made party food that all fit the theme. Lots of amazing ideas here and lots of them made out of simple dollar store items.


Heather always makes the most amazing sugar cookies, and for the Beauty and the Beast party she made Belle's dress sugar cookies.
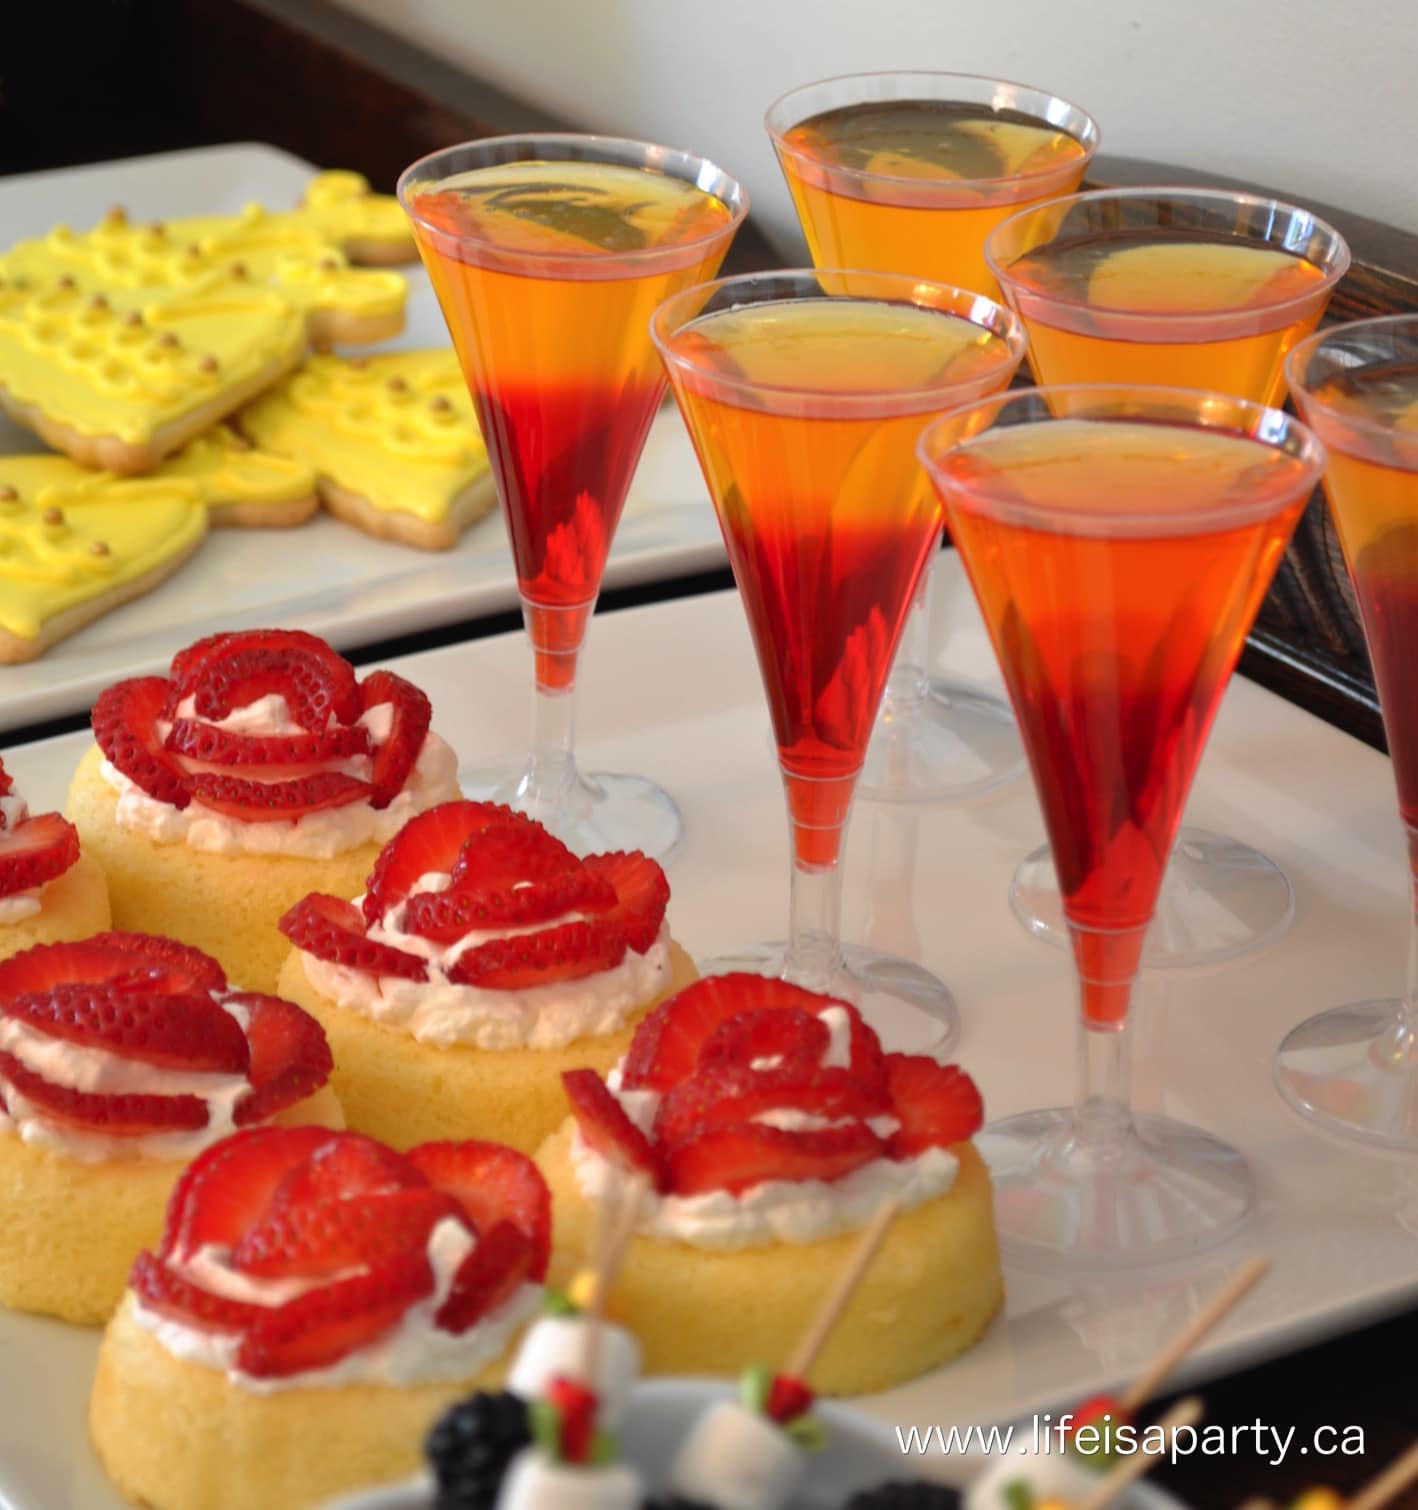
Beauty and the Beast Party Decorations and Food -An amazing Beauty and the Beast themed birthday party, with amazing decorations, and home made party food that all fit the theme. Lots of amazing ideas here and lots of them made out of simple dollar store items.


There was also jello, served in pretty plastic cups, and layered red and yellow to match the party colours.  Heather also put together rose strawberry shortcakes.  She used store-bought bases, whipped cream, and then arranged the strawberries on top like a rose -so clever.
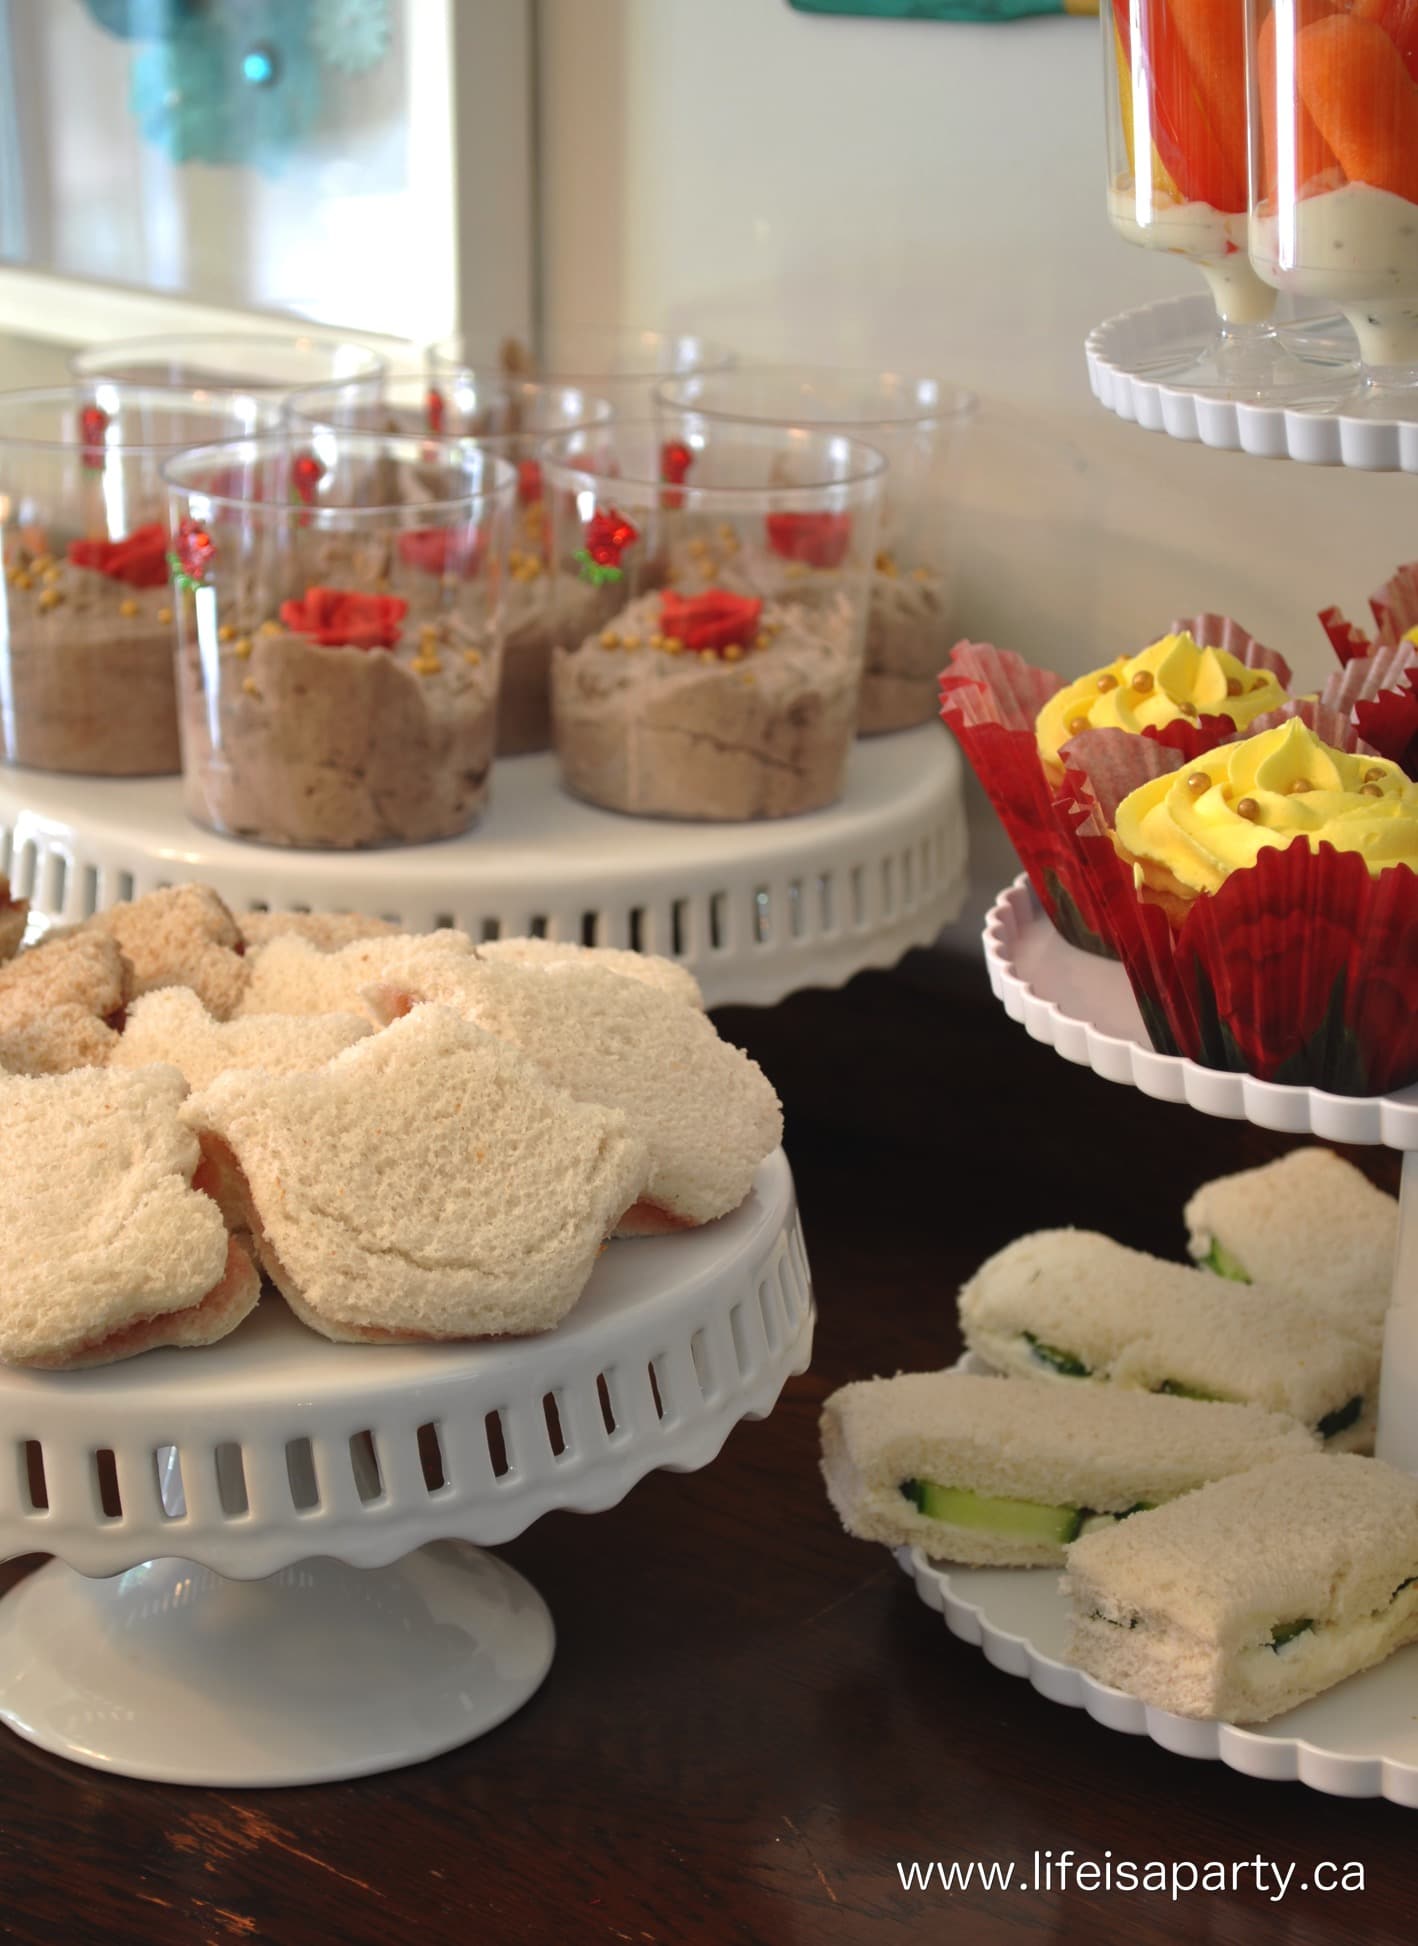
Beauty and the Beast Party Decorations and Food -An amazing Beauty and the Beast themed birthday party, with amazing decorations, and home made party food that all fit the theme. Lots of amazing ideas here and lots of them made out of simple dollar store items.

There were also little sandwiches.  There were "Mrs. Pots" teapot snapped jam sandwiches, and little mini ham and cheese baguettes.  And since it's France of course, some croissants, and some cucumber sandwiches.
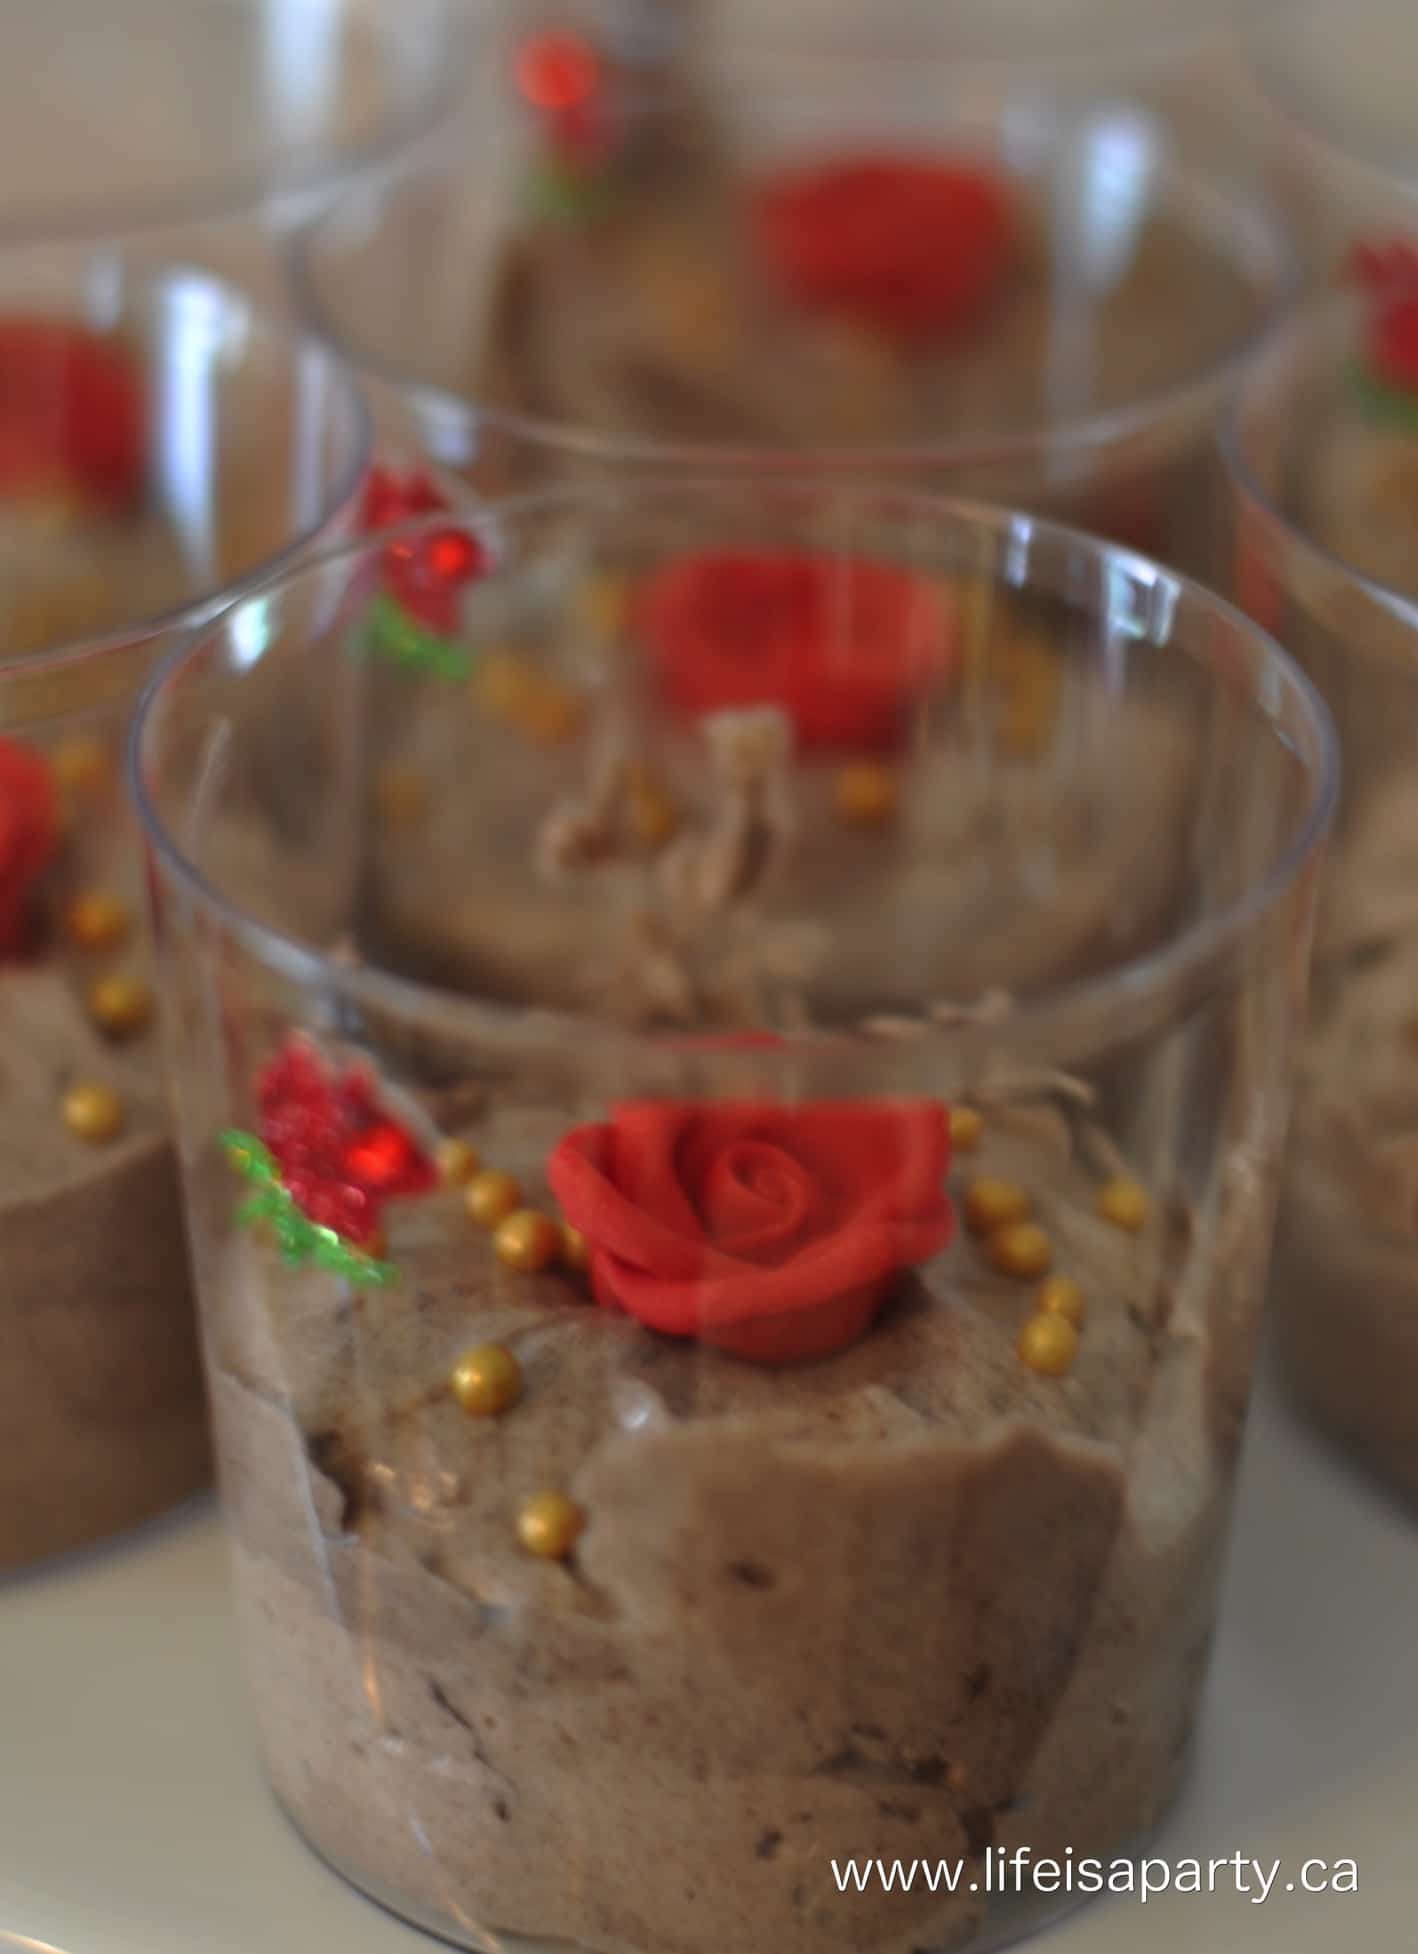
Beauty and the Beast Party Decorations and Food -An amazing Beauty and the Beast themed birthday party, with amazing decorations, and home made party food that all fit the theme. Lots of amazing ideas here and lots of them made out of simple dollar store items.


There was also "the grey stuff"…remember the song "try the grey stuff it's delicious, don't believe us, ask the dishes".  It was delicious, a sweet cookie moose topped off with a sugar rose. Get our Grey Stuff Recipe here.
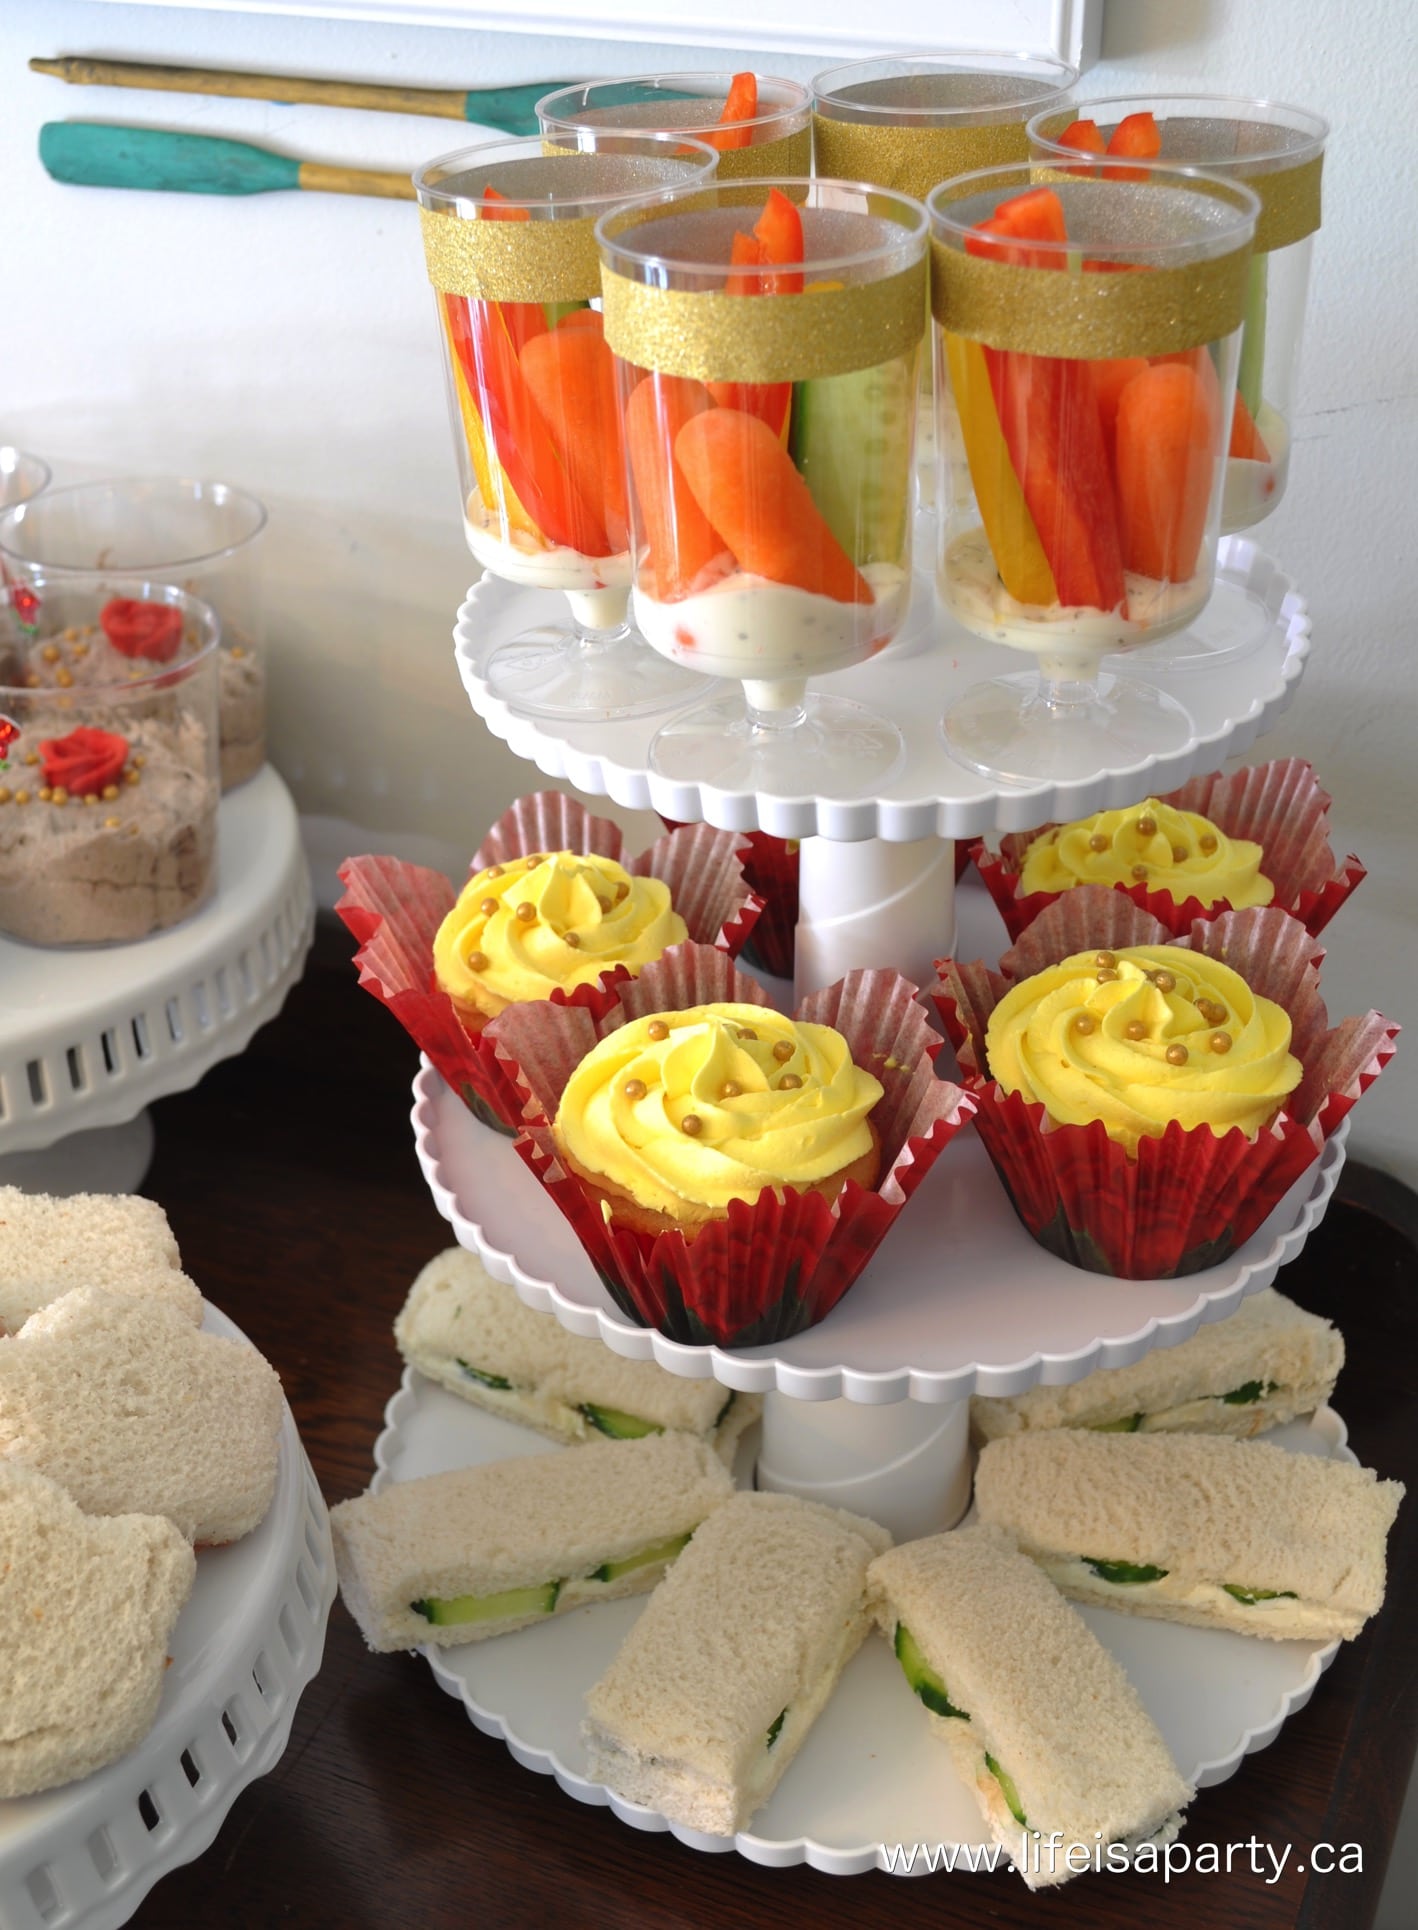
Beauty and the Beast Party Decorations and Food -An amazing Beauty and the Beast themed birthday party, with amazing decorations, and home made party food that all fit the theme. Lots of amazing ideas here and lots of them made out of simple dollar store items.

Heather found the perfect rose cupcake liners for the pretty cupcakes.  There was also veggies and dip cups.  This is the perfect way to serve them for little guests -no double dipping issues when you have your own.

The Beauty and the Beast themed food was amazing, delicious and so fun.

Beauty and the Beast Party Decorations and Food -An amazing Beauty and the Beast themed birthday party, with amazing decorations, and home made party food that all fit the theme. Lots of amazing ideas here and lots of them made out of simple dollar store items.

Beauty and the Beast Party Games and Activities

There were five great Beauty and Beast themed party activities with simple ideas that tied into the movie really well.  

It's not a really obvious theme when it comes to activities so she really had to put her thinking cap on and get creative.  I think she did a great job. These activities also appealed to both boys and girls, and different age ranges, which was great.

Decorate An Enchanted Mirror

decorate a enchanted beauty and the beast mirror craft

The first activity station was to "Decorate An Enchanted Mirror".  Remember the enchanted mirror in the movie that Belle uses to see her Father?  

Heather found some clear plastic mirrors at the dollar store, and then had some glitter glue, stick on gems, ribbons, and letter stickers.  

  • dollar store mirrors
  • glitter glue
  • gem stickers
  • ribbon
  • letter stickers

The kids all had great fun personalizing their mirrors.

beauty and the beast enchanted mirror craft

Chip's Bubbling Tea

The next activity was "Chip's Bubbling Tea".  Remember the part in the movie where Chip, the little teacup shows Belle his trick of blowing bubbles in his tea?  

beauty and beast bubble blowing activity

Heather used a drink-dispenser jar with a pouring spout, and filled it with bubbles.  Such a great idea to cut down on the mess!  The kids filled up plastic disposable plates, and then blew bubbles until their hearts were content.

  • drink dispenser filled with bubble formula
  • small paper plates
  • bubble wands


child blowing bubbles

Gaston's Target Practise

The next activity was "Gaston's Target Practise", again from a scene in the movie where Gaston is practising with his bow and arrow.

Gaston's Target Practice sign

Heather picked up a few toy nerf bow and arrow sets, and set up a picture of the Beast for target practise.  The kids loves this game.

  • nerf bow and arrow sets
  • beast target
Beauty and the Beast Party Game

Make A Teacup Bird Feeder

The next activity was to "Make a Teacup Bird Feeder", based on the scene in the movie where Belle and the Beast feed the birds in the garden.

Make a teacup bird feeder poster

The teacups were all hung in the tree, and everyone picked one out that they liked -it looked so pretty!

tea cup bird feeders hanging in a tree

To make the bird feeder, Heather super-glued the cup to the saucer.  The glued cup and saucer could be filled with bird seed for the birds.  

These were sent  home in the favour bag, along with a little container of bird seed.

  • tea cups
  • ribbon
  • super glue
  • small containers of bird seed
teacup bird feeders hanging in a tree

Maurice's Inventions

The final activity was "Maurice's Inventions" centre.  Belle's father Maurice was an inventor, and always working on his inventions in the movie.  

Beauty and the Beast party games and activities for kids.

Heather set up the table with lots of fun things, and open ended materials.  There was construction paper, egg cartons, felt, tin foil, wire, tape, glue, markers, pencil crayons, and pipe cleaners.

  • construction paper
  • egg cartons
  • felt
  • tin foil
  • wire
  • tape
  • glue
  • markers
  • pencil crayons
  • pipe cleaners
  • scissors
  • note books and pencils
  • styrofoam balls
  • coloured string
  • old bottle caps
  • wood cubes
  • toothpicks
  • skewers
  • popsicle sticks


There was also a tray of fun bits and bobs, like styrofoam balls, coloured string, old caps, wooden cubes, wooden buttons, toothpicks, skewers, and different sizes of popsicle sticks.
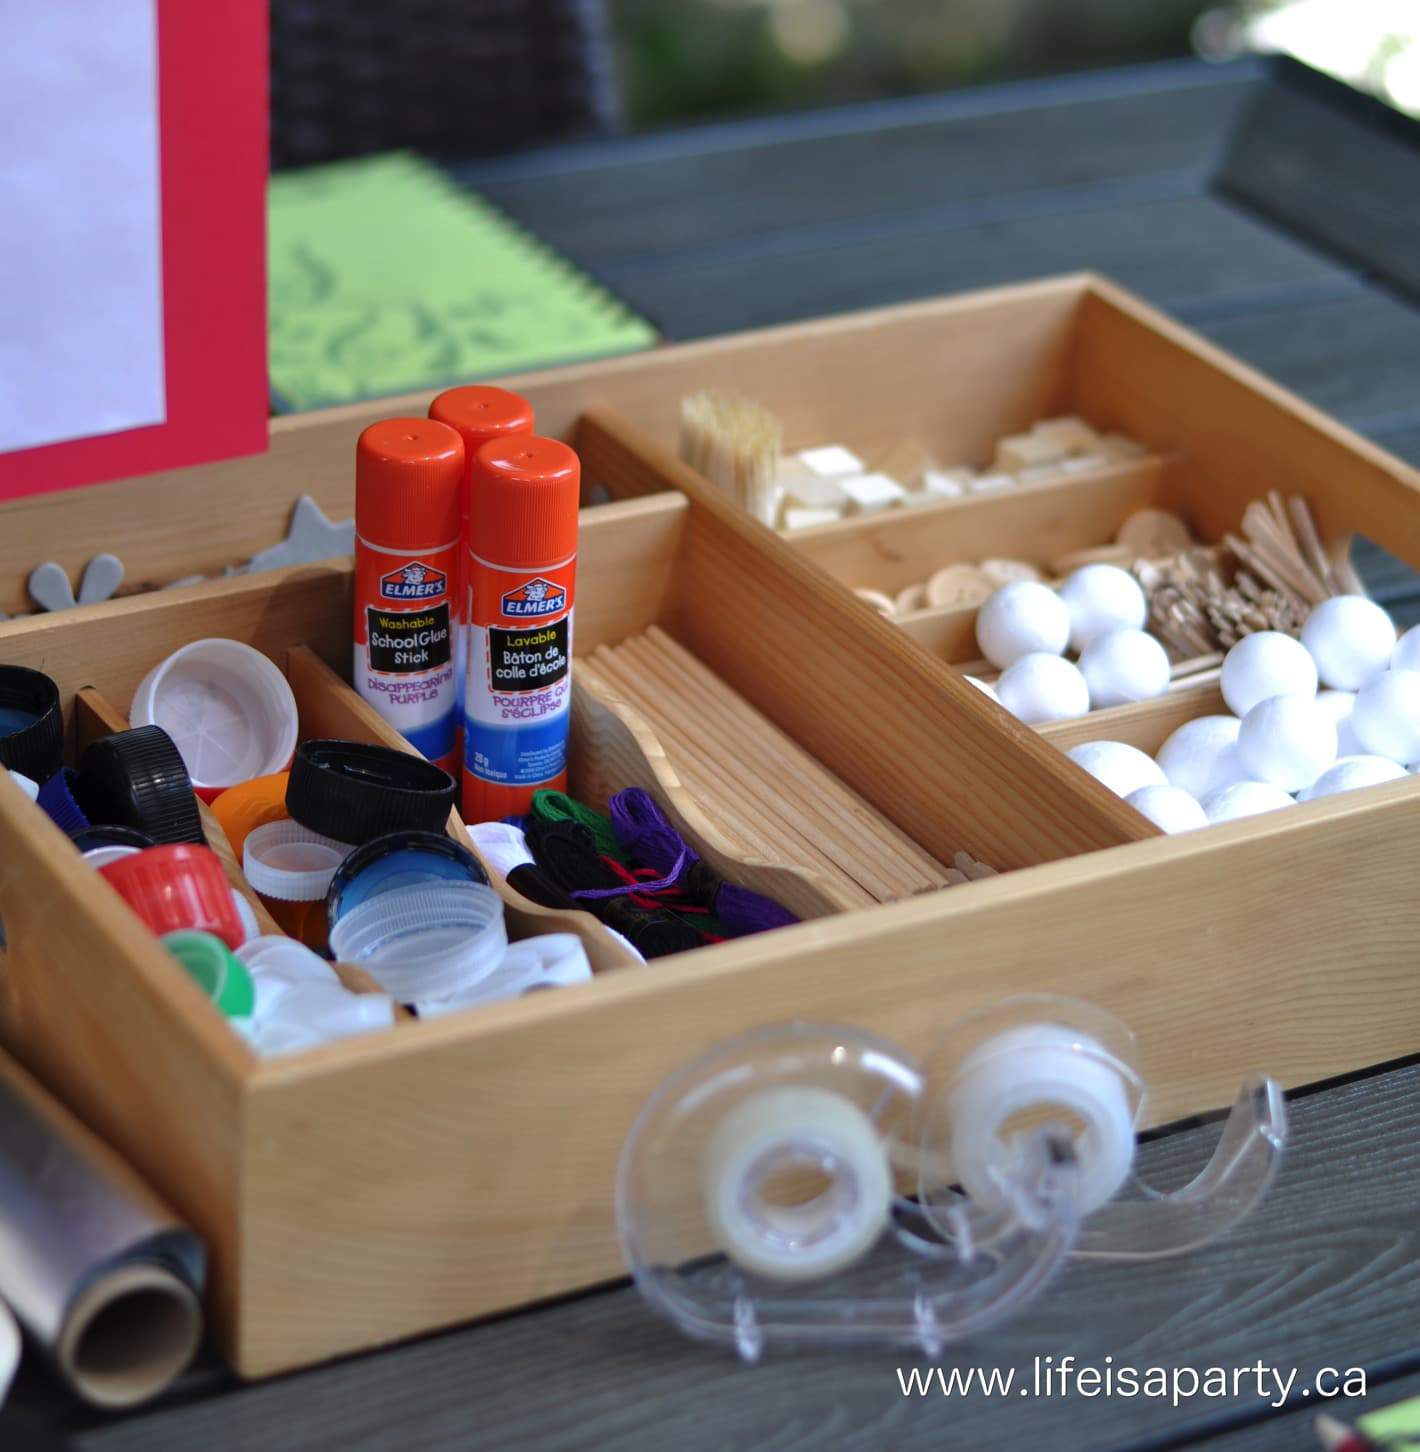
invention children's play station with craft materials
All the children had a little notebook, to work out their invention ideas, and then they could make whatever they liked.  Some of the kids made a quick invention and then went off to play.  Others, lingered at the table for a long time, and kept thinking of new things to make.  It was the perfect last station, so the kids who loved it could say there as long as they liked.

Open Activity Stations

All the stations stayed open throughout the party, so at the end, the kids could return and play where ever they wanted.  The bubbles, target practise, and inventions were re-visited over and over, and this come and go as you please approach was perfect, especially for kids of different ages that enjoyed different activites more than others.  

It was a wonderful party, enjoyed by all.  The birthday girl was well celebrated, with a joyful afternoon.  Happy Birthday Miss. Allie!

With an afternoon of creative and fun Beauty and the Beast Party Games and Activities, life is really a party!

More Disney Princess Party Inspiration

  • Cinderella Party table with Cinderella inspired food and DIY party decor.
    Cinderella Party -Dinner and Movie Night
  • Frozen themed menu, party decor and printables.
    Frozen Themed Party -Dinner and Movie Night
  • The Princess and the Frog party food table set up with food from the mvoie and DIY decor.
    The Princess and The Frog Party -Dinner and A Movie
  • Beauty and the Beast party table with food and decorations.
    Beauty and the Beast Party -Themed Dinner and Movie Night

If you try any of the Beauty and the Beast Party Ideas or any other ideas on my blog please let me know how it went in the comments below. Thanks for visiting today!

Frequently Asked Questions

Can you make the food ahead of time?

Yes, all the desserts were made ahead of time the day before and stored in the fridge, or sealed airtight containers. The sandwiches were made the morning of the party.

Do you have the signs available?

No, unfortunately we don't have the signs available. You can make something similar in Canva using clipart from the movie.

Where did all the table decorations come from?

Most items were from the dollar store or party store. You could also look for similar items online.
Top Family Movies

Jul 10, 2015 · 6 Comments

Family movie night movies that parents will enjoy too.

Non Cartoon Family Movies: Best non cartoon family movies that parents will actually enjoy too for family movie night or anytime.

Family movie night movies that parents will enjoy too.
[feast_advanced_jump_to]

Friday night is movie night, along with any rainy days this summer with the girls.  I like a good Disney cartoon as much as the next guy, but they're not my fav.  I much prefer a non cartoon family movie with real people, and now that my girls are a little older, I try to find a family night movie that we will all enjoy.  So, I've put together a list of my favourite family movies, that adults will actually enjoy as well.  

A few are good old classics, some I even fondly remember from my childhood, and watching the "Wonderful World of Disney" on Sunday nights with my own parents.  
They might have a slight girly bent, since I have two girls, but hopefully there are a few here  that you and your peeps will enjoy too.

Best Non Cartoon Family Movies
Pollyanna
1.  Pollyanna

This was a surprise favourite with my girls.  We went on a bit of Disney movie spree last year before our big trip to Disney World, and this was one of their very favourites.  It's certainly a sweet story, and a great life lesson finding the good in life.
Alexander and the Terrible, Horrible, No Good, Very Bad Day

2. Alexander and the Terrible, Horrible, No Good, Very Bad Day

I remember this book from my childhood.  The movie is the perfect funny, sweet family movie.  A few good laughs, and a feel good ending -perfect.

Jumanji

3.  Jumanji

At first we thought this one might be a little too scary, but once my girls were into it, they loved the suspense, and the all the jungle animals and stuff are so outrageous it's wonderful!  A great family flick.
Swiss Family Robinson

4.  Swiss Family Robinson

This was a fav for me as a kid, still love the race scene with the ostrich and the zebra -a classic for sure.  Just be prepared for your kids to ask you for a tree-house afterward.
The Secret Garden

5.  The Secret Garden

Such a sweet story, and what kid wouldn't love the idea of discovering their own private special little place.
The Sound of Music.  Best non cartoon family movies.

6.  The Sound of Music

Another classic, that everyone should see at least once.  The kids won't really get the war part of the story, but they'll still love it, and be singing Doe a deer… for ages.
A Little Princess.  Great non cartoon family movies

7.  A Little Princess

Such a sweet story, full of the stuff of fairy tales, a rich girl reduced to servanthood, and then rescued in the end.  I have to say this is one I love too.
Mary Poppins. Best non cartoon family movies

8.  Mary Poppins

Such a classic, and for good reason.  My girls loved this movie, and loved realizing that Maria from Sound of Music was Mary Poppins too.
Little Women.  Non Cartoon Family Movies: Best non cartoon family movies that parents will actually enjoy too for family movie night or anytime.

9.  Little Women

I didn't know if my girls would really like this one, I never thought of it as a family movie before, probably because I liked it so much as an adult.  My girls did too, and it's totally family appropriate.  The Christmas scene make it a great holiday movie too.
Akeelah and the Bee. Non cartoon family movies

10.  Akeelah and the Bee

This is a great movie about a girl and a spelling bee. I love role model girls who are smart!
Secondhand Lions

11. Second Hand Lions

This is a great adventure tale, a real coming of age story about a boy and his eccentric uncles…even includes a second hand lion.
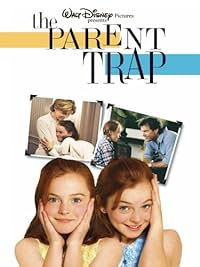
The Parent Trap

12. The Parent Trap

I went looking for the old one that I remembered from my childhood and found the new one.  Still delightful.
Babe

13. Babe

"That'll do pig, that'll do." What more can you say?
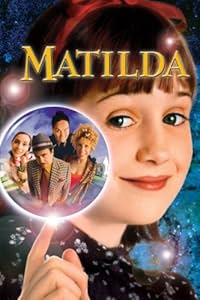
Matilda

14. Matilda

A great modern fairy tale, complete with good guys, bad guys, and a little magic!
Bears.Non Cartoon Family Movies: Best non cartoon family movies that parents will actually enjoy too for family movie night or anytime.

15.  Bears

This one is a documentary…not everyone's cup of tea, and there are few moments were everyone's a little worried about the safety of the cubs, but it's a happy ending and the cinematography is amazing.
Charlotte's WebNon Cartoon Family Movies: Best non cartoon family movies that parents will actually enjoy too for family movie night or anytime.

17. Charlotte's Web

Another classic, every one should probably read, or at least watch.  It's cute, funny, and a tear-jerker, but in a good way.
Anne of Green Gables

18. Anne of Green Gables

This was definitely a favourite of mine, I remember when it first aired on tv.  We started watching it one rainy day, and my girls really liked it.  Once you get started there is a whole set in the series to enjoy.
Nanny McPhee.Non Cartoon Family Movies: Best non cartoon family movies that parents will actually enjoy too for family movie night or anytime.

19. Nanny McPhee and Nanny McPhee Returns

Both are sweet movies about naughty children and the caring Nanny who teaches them to behave.
Fairy Tale A True Story.Non Cartoon Family Movies: Best non cartoon family movies that parents will actually enjoy too for family movie night or anytime.

20. Fairy Tale: A True Story

Two little girls take a photo of a fairy in their garden in 1917, and everyone becomes very interested.  It's even based on a true story.
These are some of my favourites, what did I miss?  What are some of your family favourites?

More Ideas

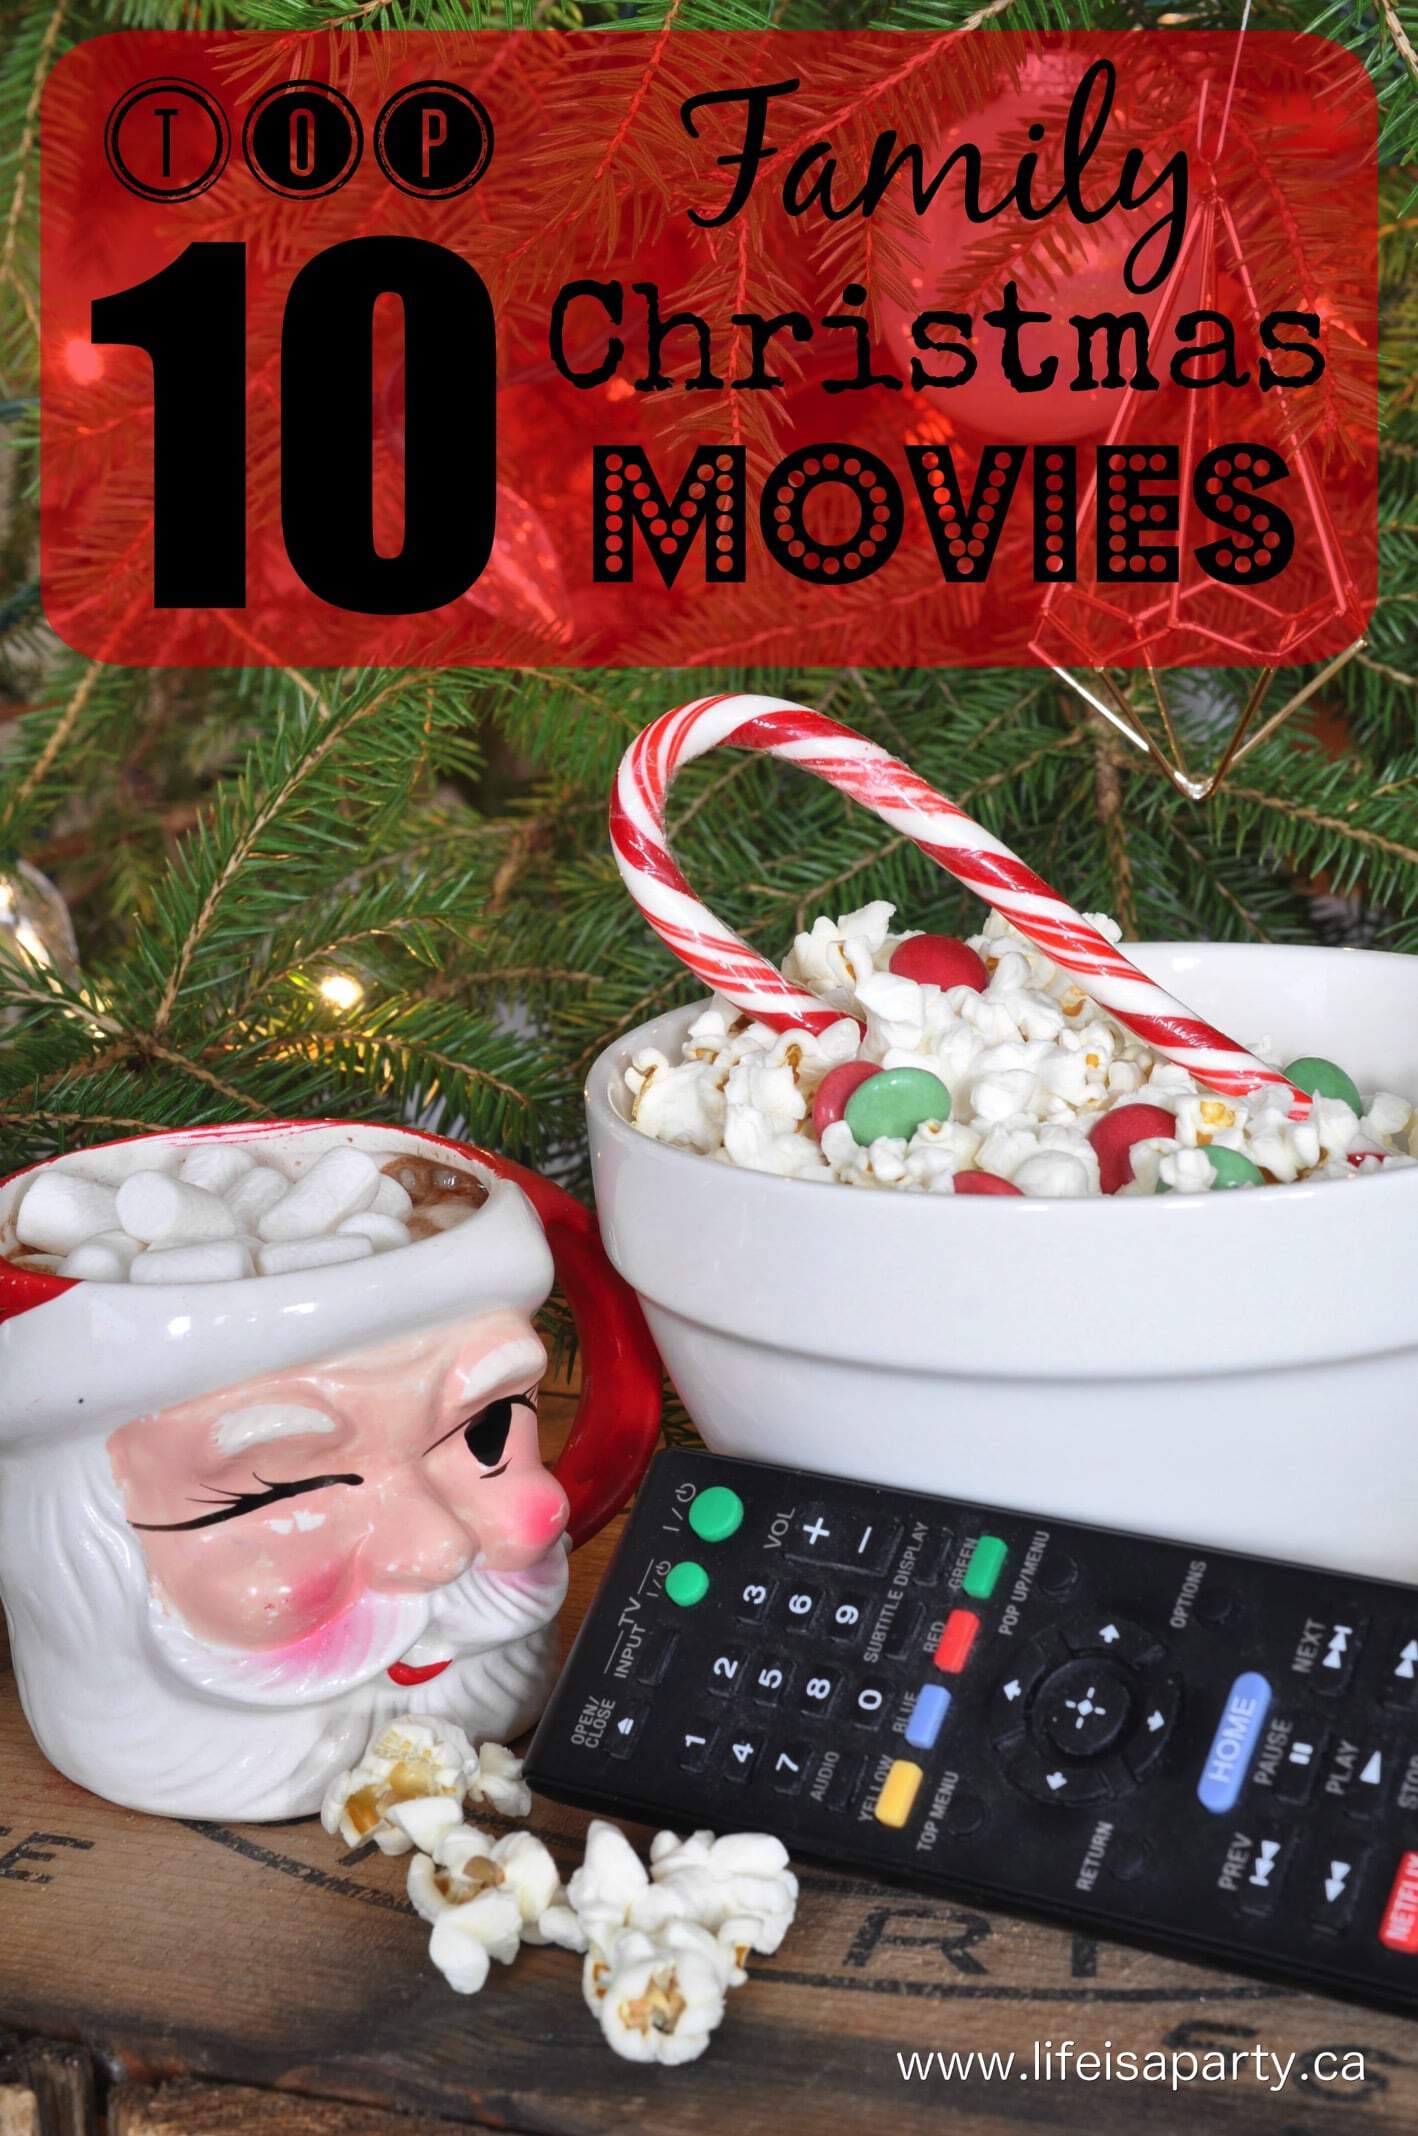
You might also like Top 10 Family Christmas Movies here.

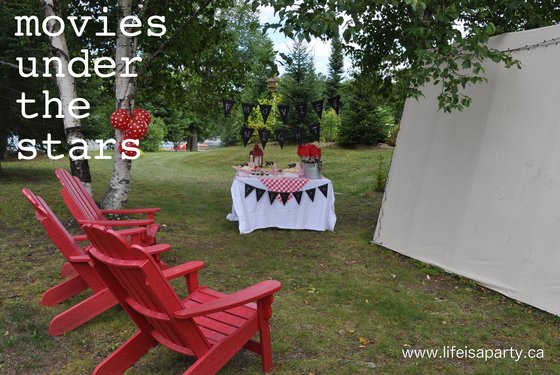
You might also like our post on Movies Under the Stars here.

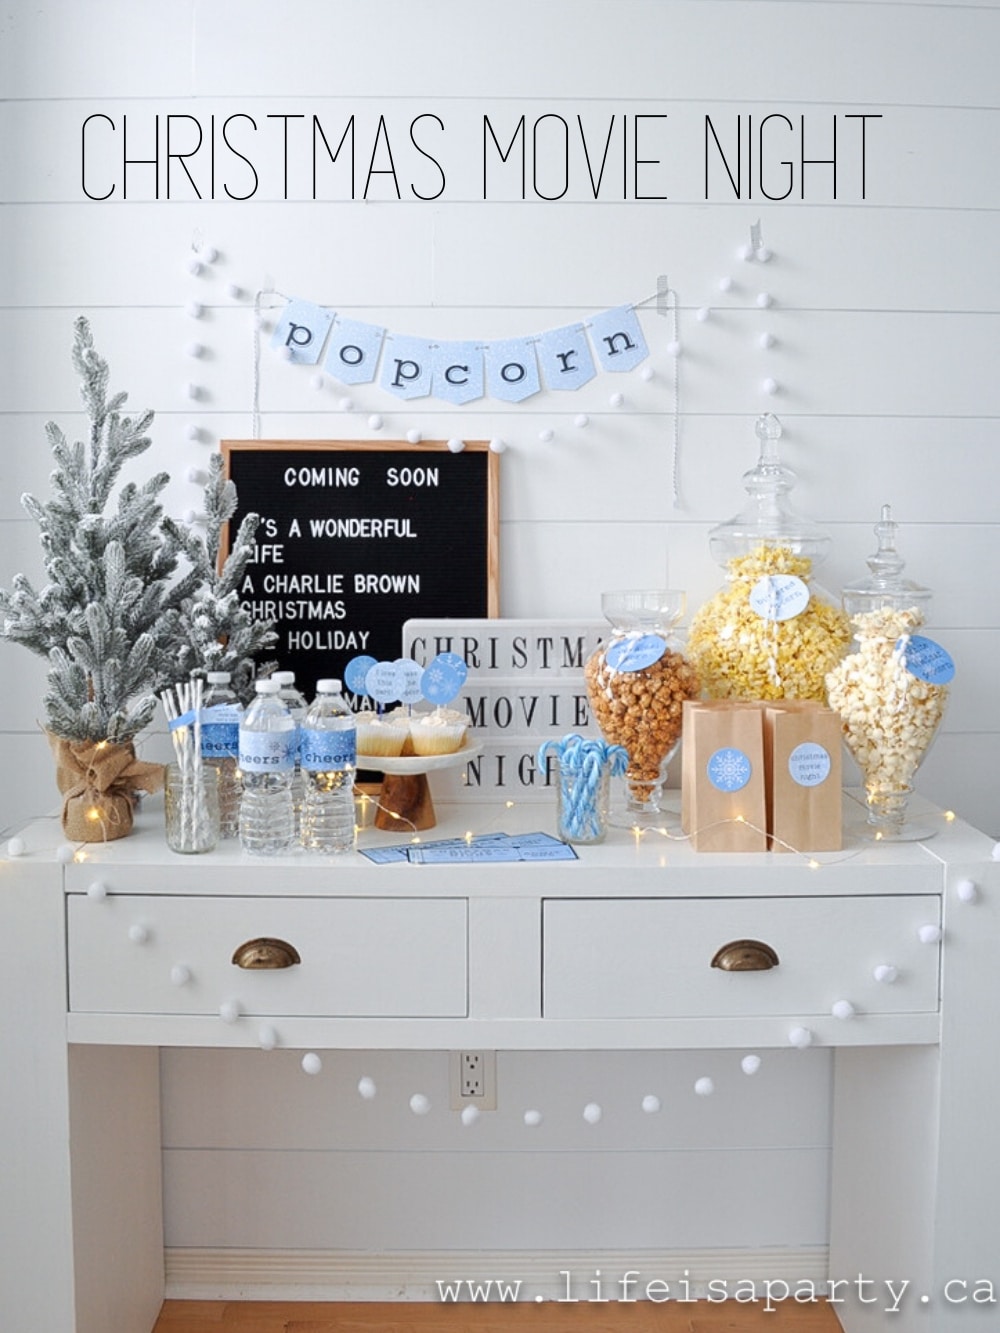
Also check out our Christmas Movie Night post here.

Easy Chocolate Truffle Pops

Jul 7, 2015 · 3 Comments

Easy chocolate truffle pops recipe.

Chocolate Truffle Pops -An easy and delicious recipe for truffles. Add a lollipop stick to create a truffle pop and all your favourite toppings.

Easy chocolate truffle pop recipe.
[feast_advanced_jump_to]

Where are my chocolate lovers at?  These truffles are really easy to make and so delicious.  Since truffles are a little messy to eat, we turned them into truffle pops.  We added all kinds of different toppings.  These are so perfect for serving at a party or special occasion.

Chocolate Truffle toppings

Topping Ideas

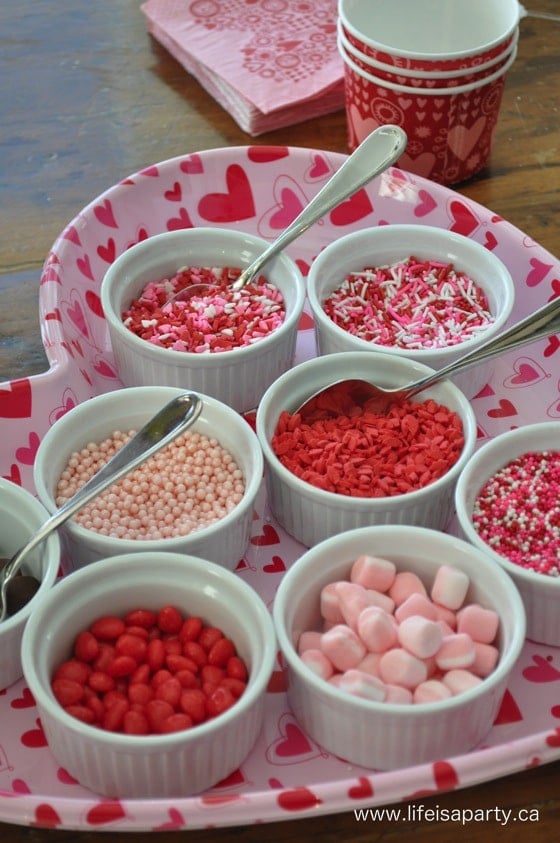
After we made our truffle base, we got out all our yummy toppings and made lots of different truffle flavors. This was the fun part.  You can customize your truffle pops with any fun toppings that you like.  We decided to use: 

  • mini white chocolate chips
  • chopped almonds
  • toffee pieces
  • white sprinkles
  • chocolate sprinkles
  • colorful sprinkles
  • coconut
  • cookie crumbs
  • cocoa powder mixed with icing sugar
  • dehydrated marshmallows
  • graham cracker crumbs

You could also melt some chocolate coating in a heatproof bowl and dip your truffles in it for a melted chocolate coating.  Use dark chocolate, white chocolate, or milk chocolate for your coating depending your preferences.  If your melted chocolate is too thick, use a little coconut oil to make it thinner for dipping.

Once the truffle base was set, we rolled them into balls, and then in the toppings.  This process is a little messy but lots of fun.  This is a really great recipe to make with kids.  They'll love making the truffle balls and then choosing which toppings to roll them in.  Lastly insert a lollipop stick or popsicle stick into each one.

Chocolate Truffle Pops recipe
how to make Truffle Pops

We had so much fun mixing and matching the different toppings for our truffle pops.  Try lots of different kinds, or just choose your favorite.  The s'more truffle pops rolled in a combination of dehydrated mallow bits and graham cracker crumbs were a big hit.  Another favorite were the oreo truffle pops rolled in cookie crumbs.

Store your finished truffle pops in an airtight container or wrapped in plastic wrap in a cool place.

These make the perfect easy dessert.  They're also a really fun addition to a dessert table for a party.  Truffle pops are great for gifft giving too.  Wrap them up in a cellophane bag tied with ribbon and give as perfect homemade gifts or party favors.

Recipe

Easy chocolate truffle pops recipe.

Chocolate Truffle Pops

Creamy truffles on a stick with various toppings.
No ratings yet
Print Pin Rate
Course: Candy, Dessert
Cuisine: American
Prep Time: 15 minutes minutes
Additional Time: 1 hour hour 30 minutes minutes
Total Time: 1 hour hour 45 minutes minutes
Servings: 15
Calories: 228kcal
Author: Dannyelle Nicolle-Ramjist

Ingredients

  • 8 oz milk chocolate
  • 4 fl oz heavy cream
  • ½ oz butter
  • ¼ teaspoon vanilla
  • lollipop sticks
  • toppings such as mini chocolate chips, skor bits, sprinkles, mix of cooca powder and icing sugar, chopped nuts, coconut, cookie bits, marshmallow bites, graham cracker crumbs

Instructions

  • In a small saucepan, combine cream and butter and bring to a boil.
  • Break up the milk chocolate into a large bowl, and pour the hot cream and butter mixture over top. Stir until the chocolate is completely melted and mixture is fully combined. Add in vanilla and stir.
  • Allow mixture to cool for 30 min. at room temperature, then place in the fridge for 2 hours to set.
  • To make the truffle pops, use a teaspoon to scoop out a bite-size piece of the truffle mixture, and roll in your hands to form a truffle ball and place on to some parchment paper.
  • Roll the chocolate truffles in a topping of your choice, and insert a lollipop stick. Place finished truffle pops back in the fridge to fully set.

Nutrition

Serving: 1g | Calories: 228kcal | Carbohydrates: 28g | Protein: 2g | Fat: 13g | Saturated Fat: 8g | Polyunsaturated Fat: 5g | Cholesterol: 16mg | Sodium: 37mg | Fiber: 1g | Sugar: 24g
Tried this Recipe? Tag me Today!Mention @LifeisaParty or tag #lifeisaparty!

With these easy and delicious truffle pops, life really is a party.

More Dessert Recipe Inspiration

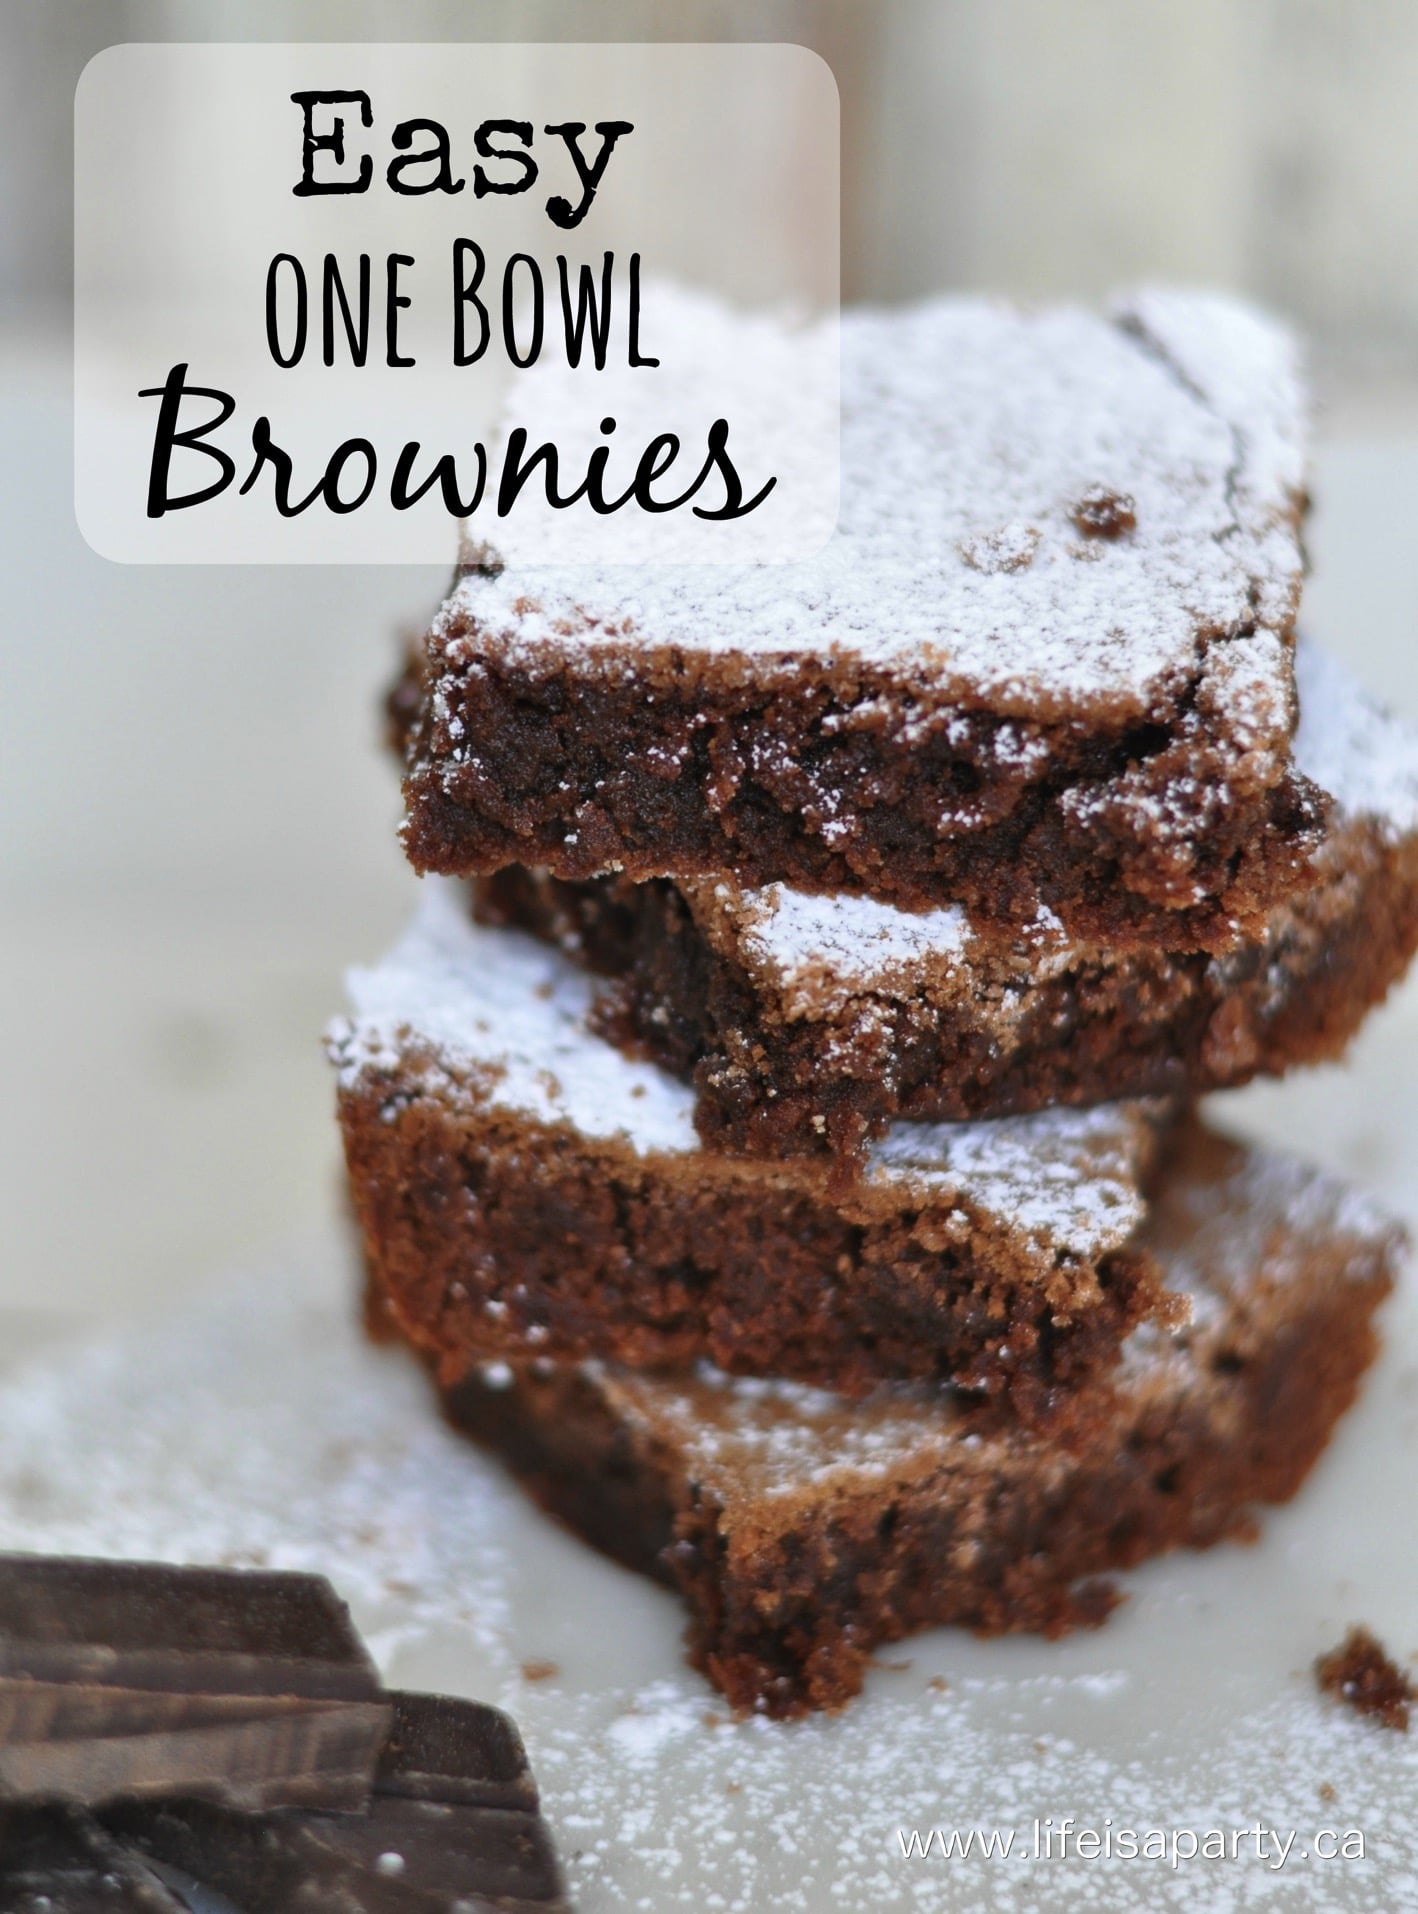
Also check out our One Bowl Brownie recipe here.

Easy One Bowl Brownies: easy to make, simple ingredients you already have in your pantry, and better than a store bought mix. Promise.

You might also enjoy our Chocolate Charcuterie Board.

Chocolate Charcuterie Snack Board: perfect for the chocolate lover, tips on building your board, and ingredient suggestions.

Easy Homemade Fair Funnel Cakes Recipe

Jul 2, 2015 · 5 Comments

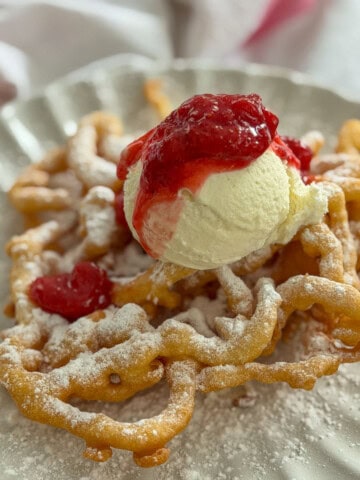
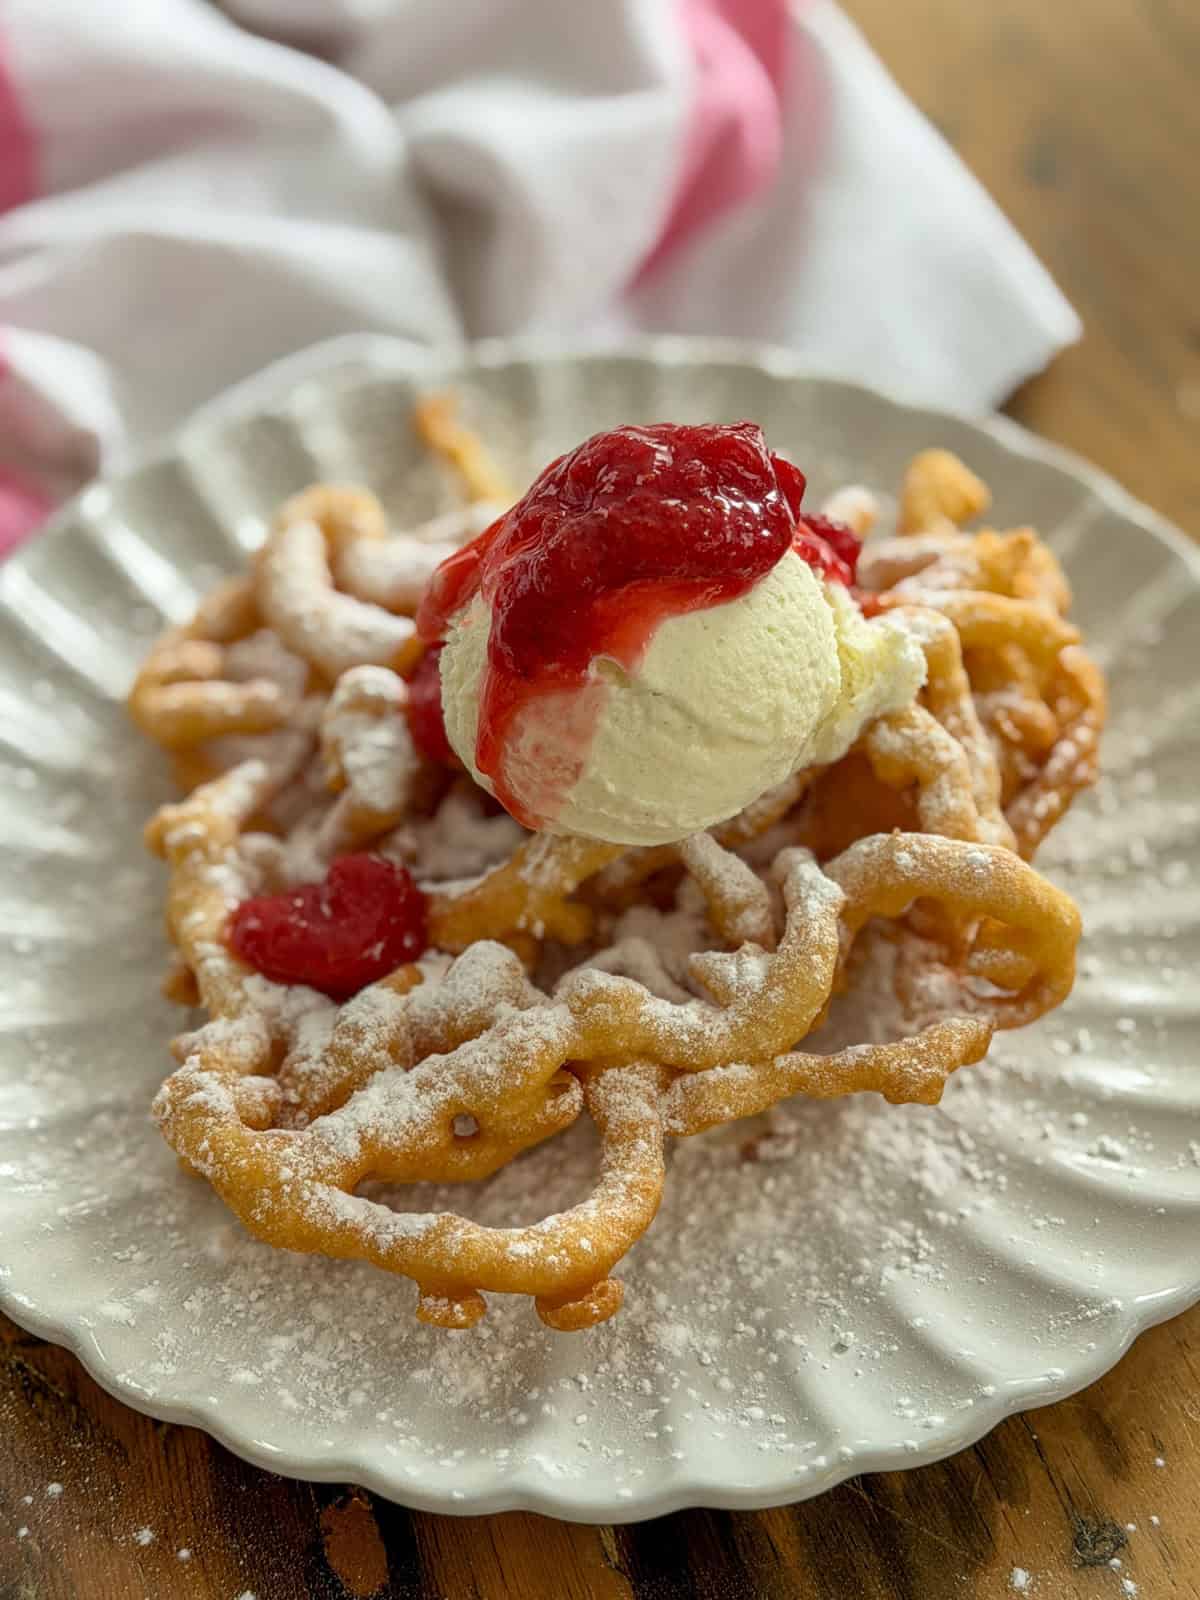
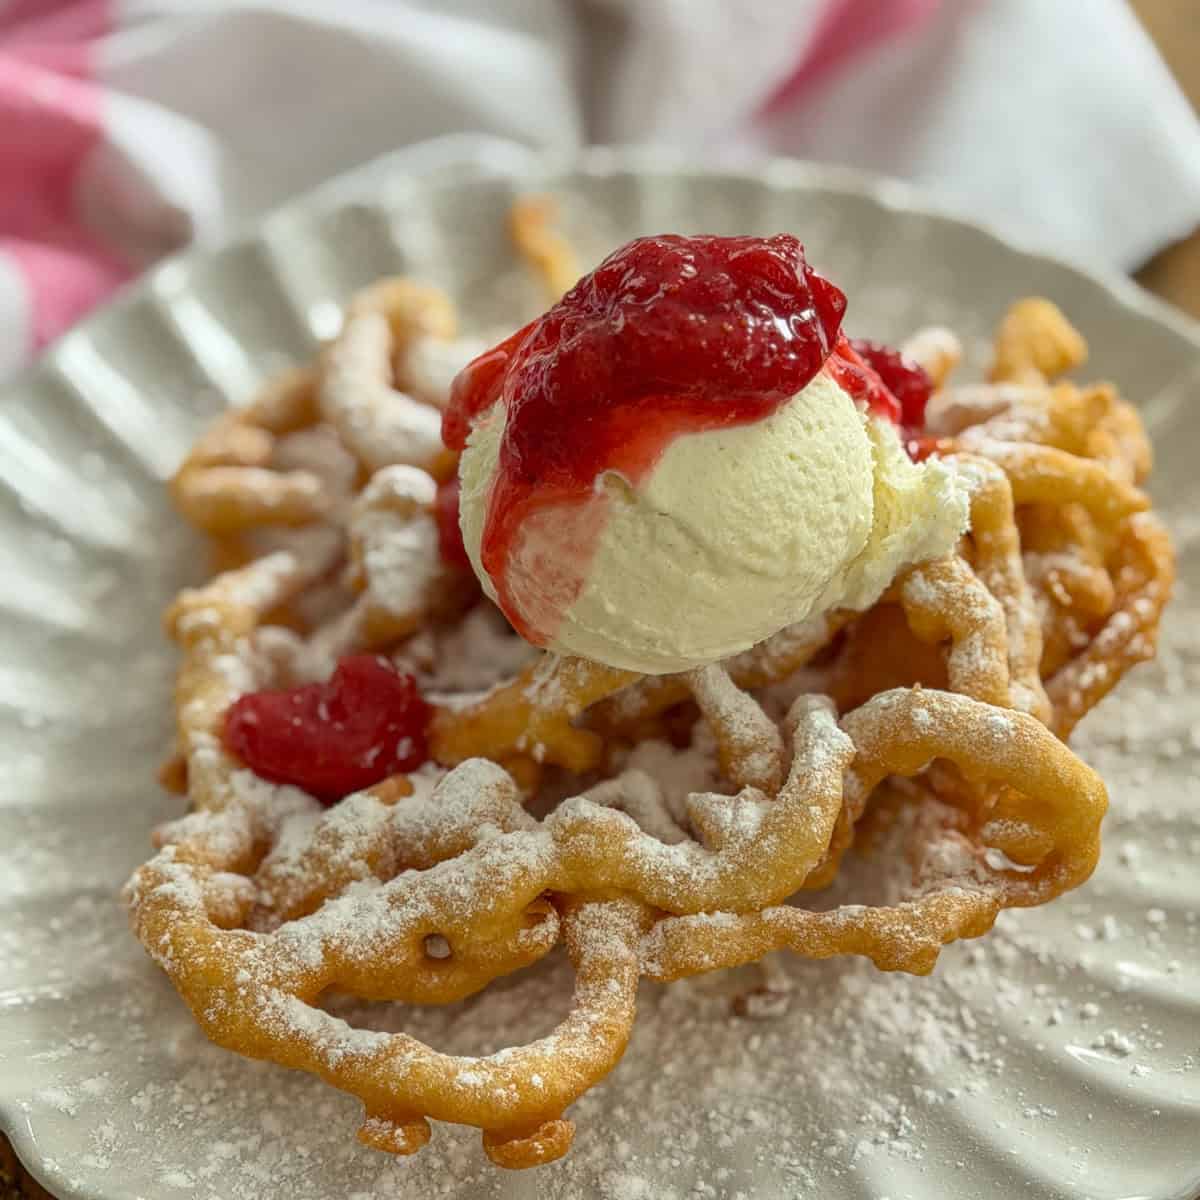
Fair funnel cake with strawberry compote and vanilla ice cream dusted with powdered sugar on a white scalloped plate.

These fair funnel cakes are crispy on the outside, tender in the middle, and taste just like the ones from your favorite summer fair or amusement park. No funnel required. All you need is the simple batter, hot oil, and a ziplock bag.

Homemade funnel cake recipe.

Quick Look

  • 📋 Recipe: Fair Funnel Cakes with Strawberry Compote
  • ⏲️ Ready In: 45 minutes (about 30 minutes active)
  • 👪 Servings: 6 funnel cakes
  • 🔪 Difficulty: Easy
  • 🫙 Batter Tool: Ziplock bag with corner snipped off (the best method!)
  • 🍓 Top Tip: The strawberry compote can be made days ahead and stored in the fridge.

Why You'll Love This Recipe

  • Totally customizable. Classic powdered sugar, cinnamon sugar, ice cream, fresh fruit. You choose.
  • Tastes just like the fair. The batter is light, crispy, and dusted with powdered sugar exactly like you remember.
  • No funnel needed. A ziplock bag gives you total control over the pour with zero mess.
  • Easy enough for a party. Plug in a small deep fryer and cook these fresh for guests. Everyone gathers around.
  • The strawberry compote takes it to the next level. Warm, jammy, and so easy to make ahead.
[feast_advanced_jump_to]

There's something about a warm funnel cake that brings out pure joy. Just the sight of one covered in powdered sugar takes you straight back to a summer fair, a carnival midway, or a theme park lineup worth every minute of waiting. We served these at a recent circus party and they were the hit of the whole evening. Honestly, they might have stolen the show from the actual circus activities.

The good news is that you don't have to wait for fair season to enjoy them. This easy homemade funnel cake recipe comes together with pantry staples, fries up in minutes, and works beautifully for entertaining. They're perfect for a party. Make the batter ahead of time. Then set up your small deep fryer in the kitchen, or right outside beside the barbecue, cook the funnel cakes fresh, and serve them warm. Prepare for your guests to be wowed.

If you love easy fried treats, you might also enjoy our homemade sour cream donut recipe, honey cruller donut recipe, or our take on Canadian fried dough, another fairground classic.

how to make funnel cakes at home

Ingredients

Fair funnel cake ingredients including flour, eggs, milk, vanilla, and baking powder on a kitchen table.

The funnel cake batter uses simple pantry staples. Measurements below in the recipe card.

  • All-purpose flour: Regular flour works perfectly here. Do not use self-rising flour as it will affect the rise and texture.
  • Baking powder: This is what gives the batter its slight lift and keeps the inside tender rather than dense.
  • Milk: Whole milk gives you the best flavour and texture. 2% works too. Plant-based milks can be substituted but may slightly affect the result.
  • Eggs: Two large eggs add structure and richness to the batter.
  • Vanilla extract: A full teaspoon. This is what makes the batter taste like fair funnel cake and not just fried dough.
  • Salt: Just a teaspoon. It balances the sweetness of the powdered sugar topping.
  • Powdered sugar: For dusting. Generous is always the right amount.
  • Frying oil: Use a neutral oil with a high smoke point: canola, vegetable, or peanut oil all work well.

For the Strawberry Compote (optional but recommended):

  • Frozen strawberries: Frozen works beautifully here and is available year-round, but when in season you could use fresh instead.
  • White sugar: Sweetens the fruit and helps it break down into a jammy sauce.
  • Vanilla extract: Adds warmth and rounds out the strawberry flavor.
  • Lemon juice: Brightens the whole compote and balances the sweetness.

Equipment

You don't need much, but a couple of things are worth knowing before you start.

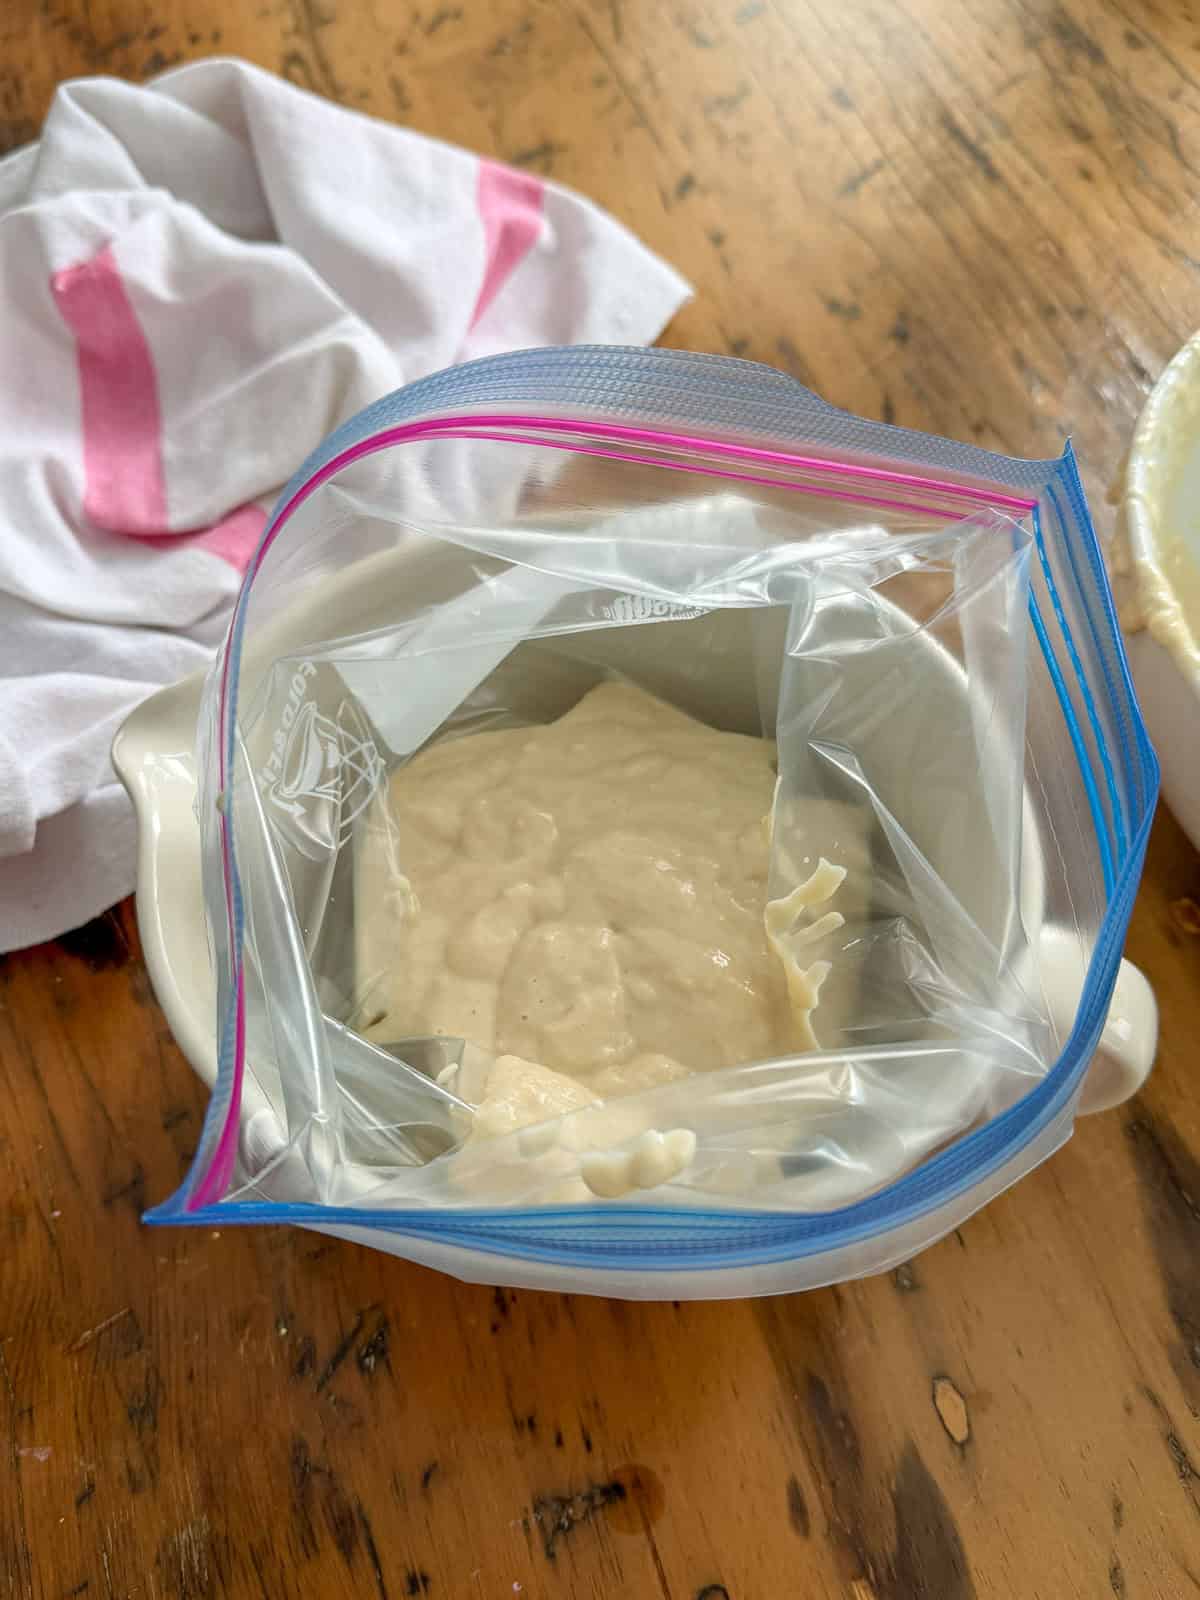
  • For pouring the batter: You have three options: a real funnel, a squeeze bottle, or a ziplock bag with the corner snipped off. We've tried all three. The ziplock bag is the clear winner for me. It gives you the most control over the flow, it's easy to squeeze steadily, and cleanup is just throwing the bag away. A specialty funnel with a stopper works but is a little awkward. A squeeze bottle is fine but sometimes the hole is too big or too small. With the ziplock bag, just snip a hole about ½ inch wide in the corner of your ziplock bag and you're set. Any leftover batter stores right in the bag resting in a mixing bowl, in the fridge for up to 2 days.
  • For frying: A small countertop deep fryer is ideal. It regulates the oil temperature automatically, which takes the guesswork out of the hardest part of deep frying. It's also much safer than a pot of oil on the stove, especially if you have kids nearby. That said, a deep, heavy-bottomed pot works perfectly well. You need enough oil to come about 2 to 3 inches up the sides and an oil thermometer to regulate the temperature of the oil.
  • A slotted spoon, spider strainer, or metal tongs: For flipping and lifting the funnel cakes out of the oil safely.

Funnel Cake Topping Ideas

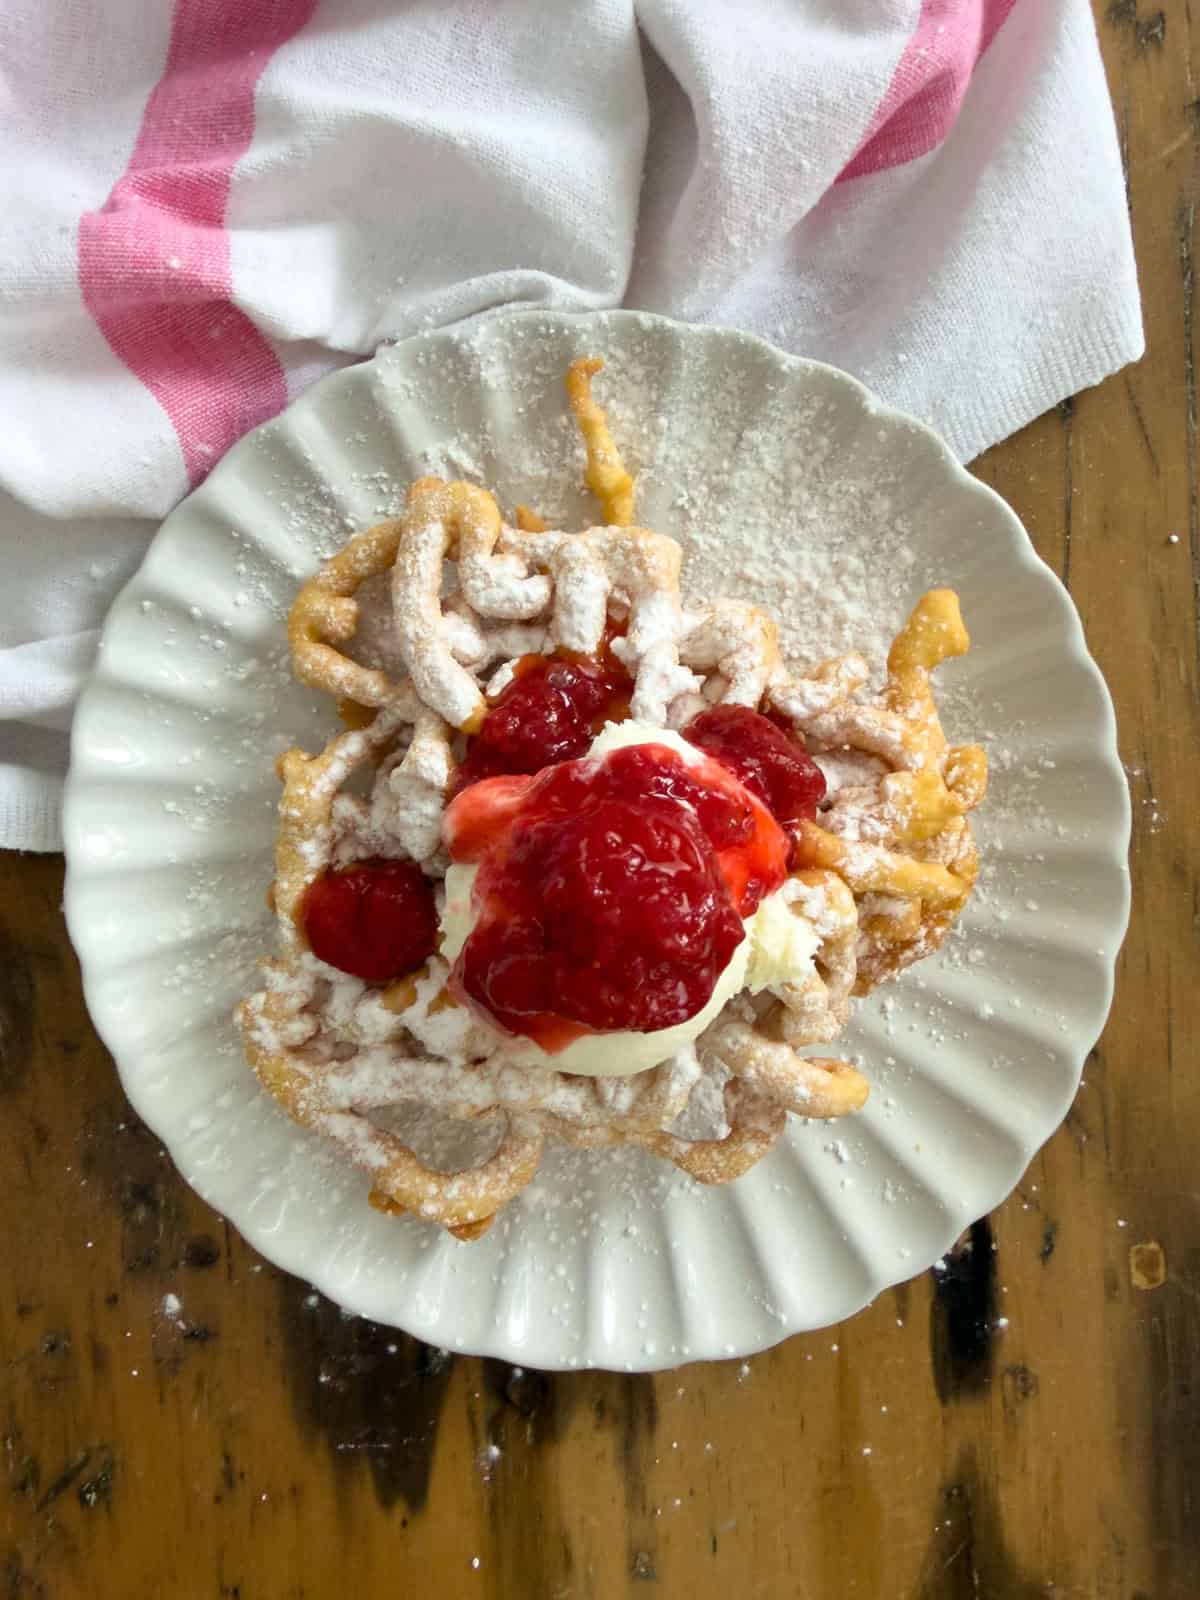
Fair funnel cakes topped with vanilla ice cream and strawberry compote, dusted with powdered sugar on a white scalloped plate.

The classic funnel cake topping is powdered sugar, and it's a classic for a reason. But once you start adding toppings, it's hard to stop. If you're making the strawberry compote, start it before you begin the batter since it takes about 12 minutes. Serve it warm or at room temperature.

Here are our favorite toppings:

  • Warm strawberry compote with vanilla ice cream (shown in the photos above)
  • Cinnamon sugar instead of powdered sugar
  • Whipped cream with fresh berries
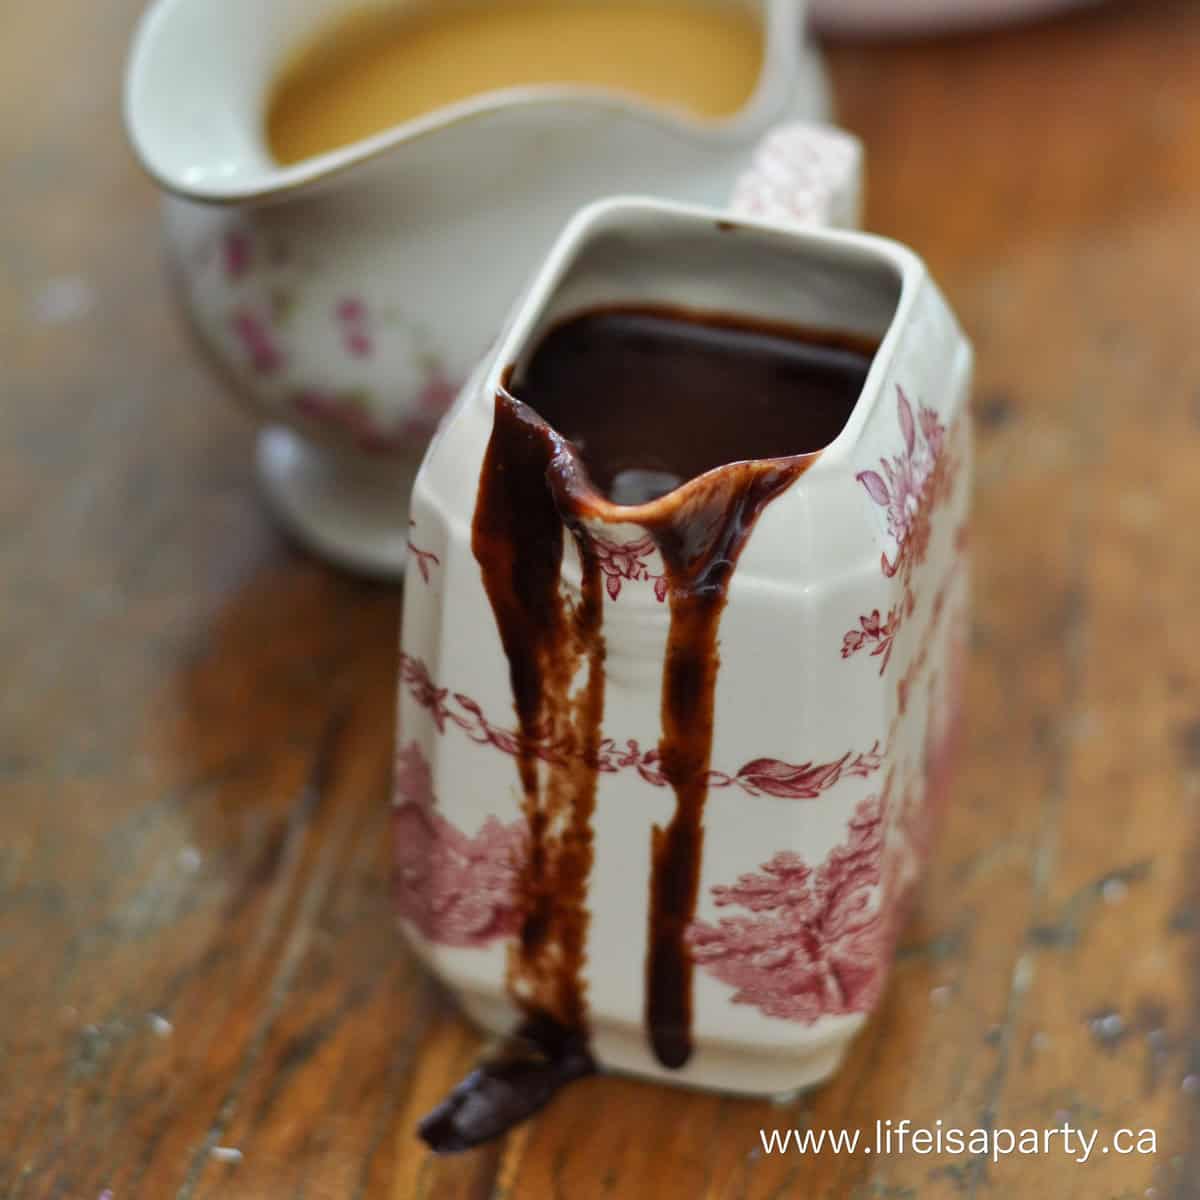
  • Chocolate sauce (our hot fudge recipe would be perfect as a funnel cake topping)
  • Caramel sauce with a pinch of flaky salt
  • Fresh sliced peaches in summer, or any fresh fruit that's in season
  • Whipped cream and ice cream -any flavor
  • Chopped Oreos and ice cream for cookies and cream

If you're serving these at a party, set up a little topping station with small bowls. Guests love customizing their own.

canada's wonderland style homemade funnel cakes

How to Make Fair Funnel Cakes

Sifted flour, baking powder, and salt combined in a white mixing bowl with a copper-handled whisk on a wooden surface.
  1. Step 1: Mix the dry ingredients. Sift the flour, baking powder, and salt together into a large mixing bowl and whisk to combine.
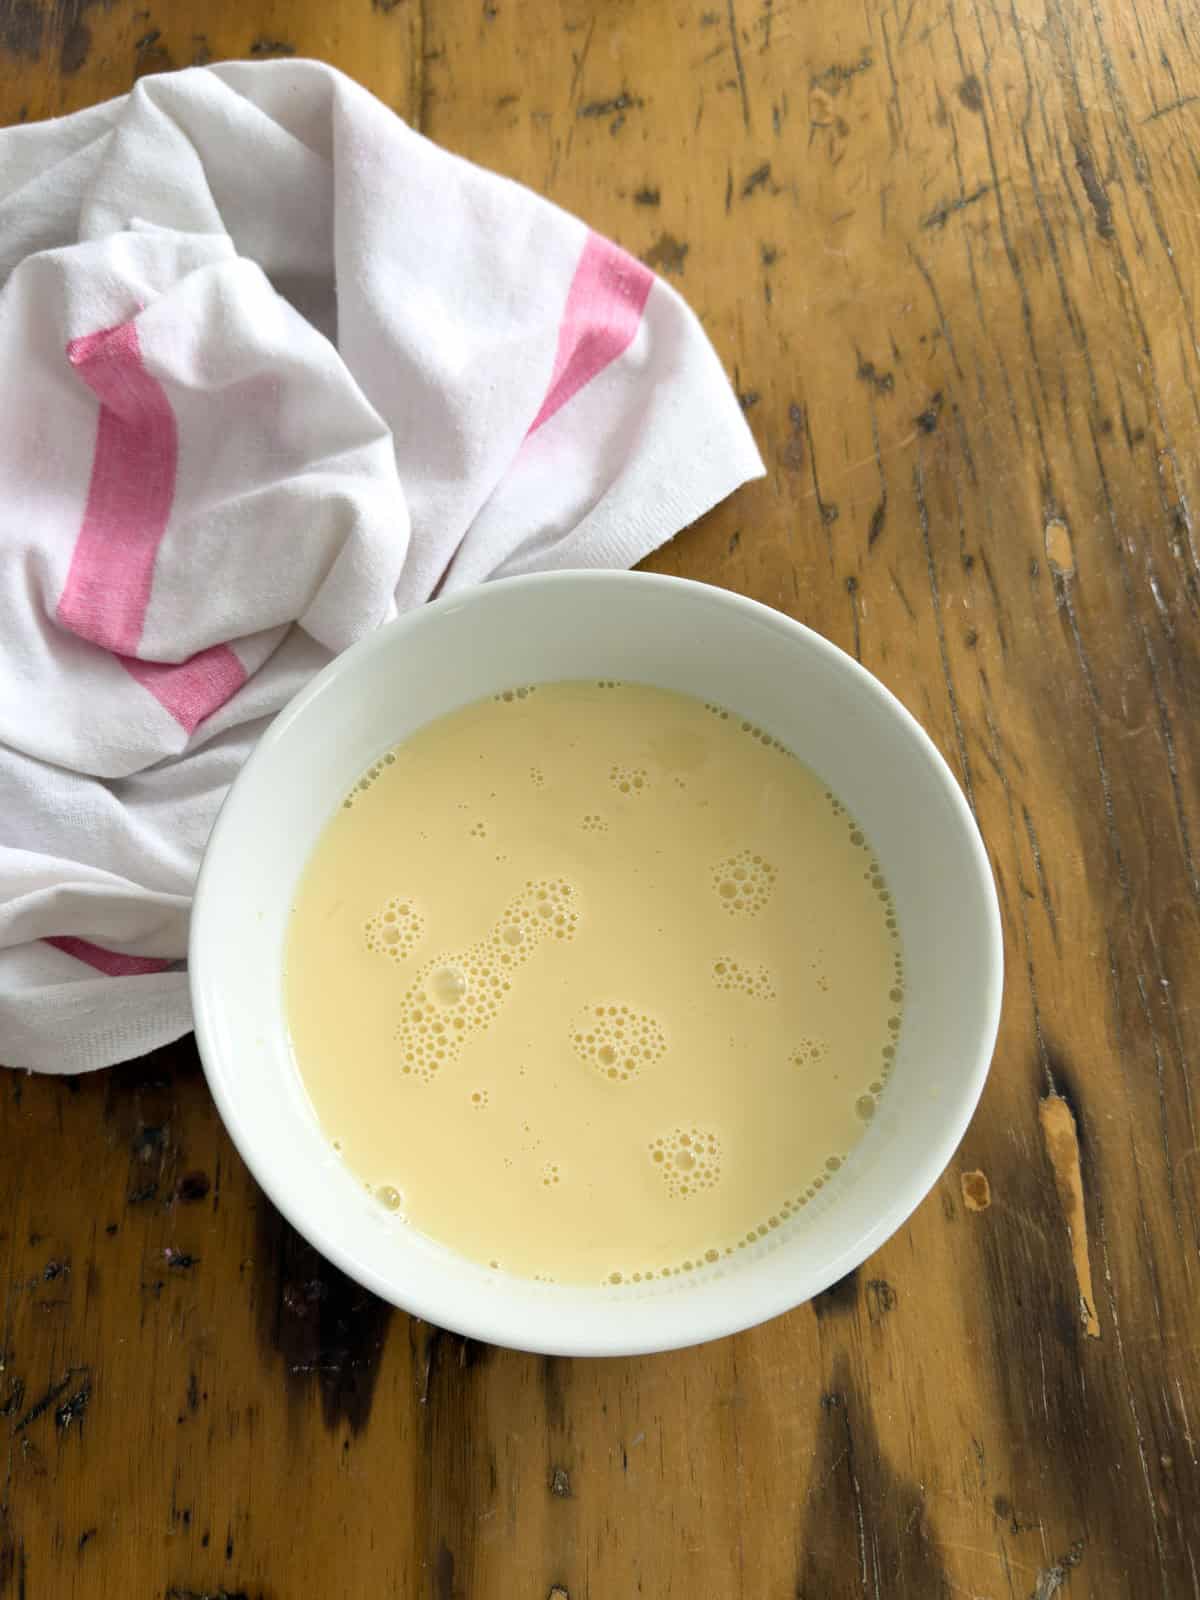
Eggs, milk, and vanilla whisked together in a white bowl on a wooden table.
  1. Step 2: Mix the wet ingredients. In a separate bowl, whisk together the eggs, milk, and vanilla extract until combined.
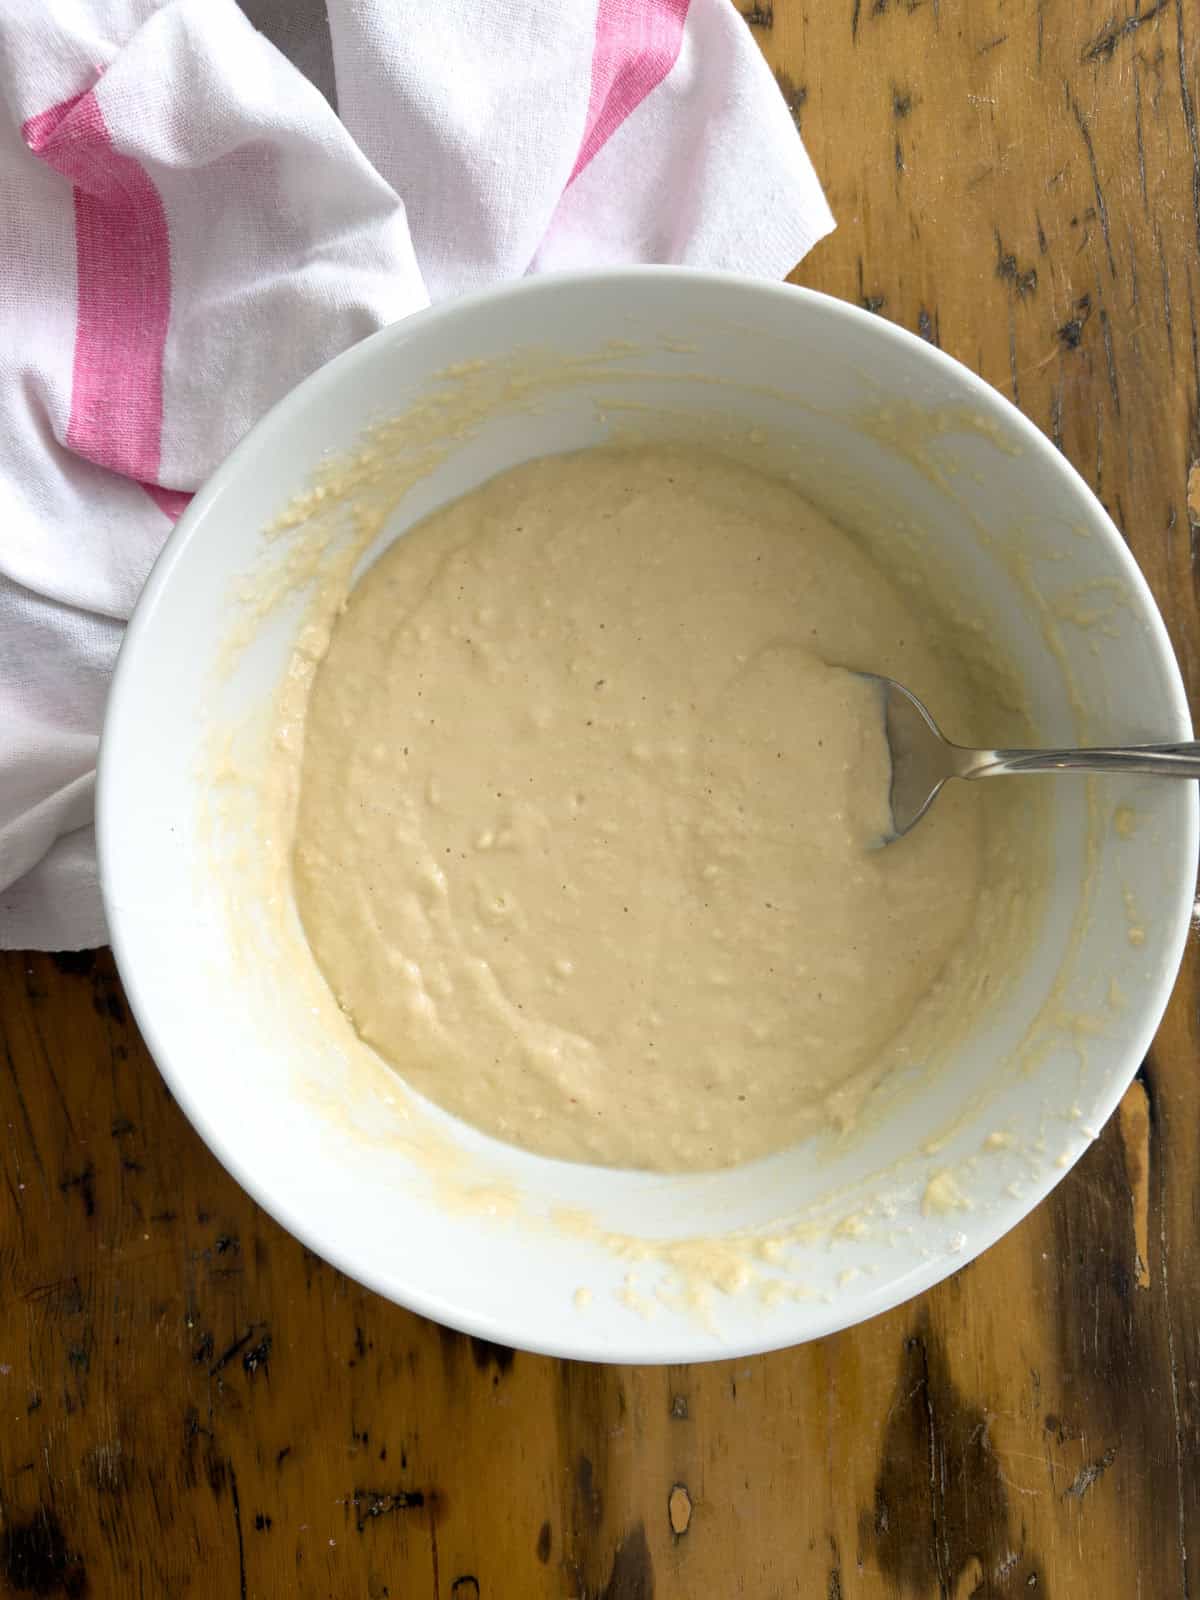
Smooth funnel cake batter combined in a white bowl ready for frying.
  1. Step 3: Make the batter. Pour the wet ingredients into the dry ingredients and stir until the batter is smooth.
Funnel cake batter being poured into a ziplock freezer bag set inside a white bowl.
  1. Step 4: Fill your ziplock bag. Spoon or pour the batter into a large ziplock freezer bag, seal it, and snip a small hole (about ¼ inch) from one corner.
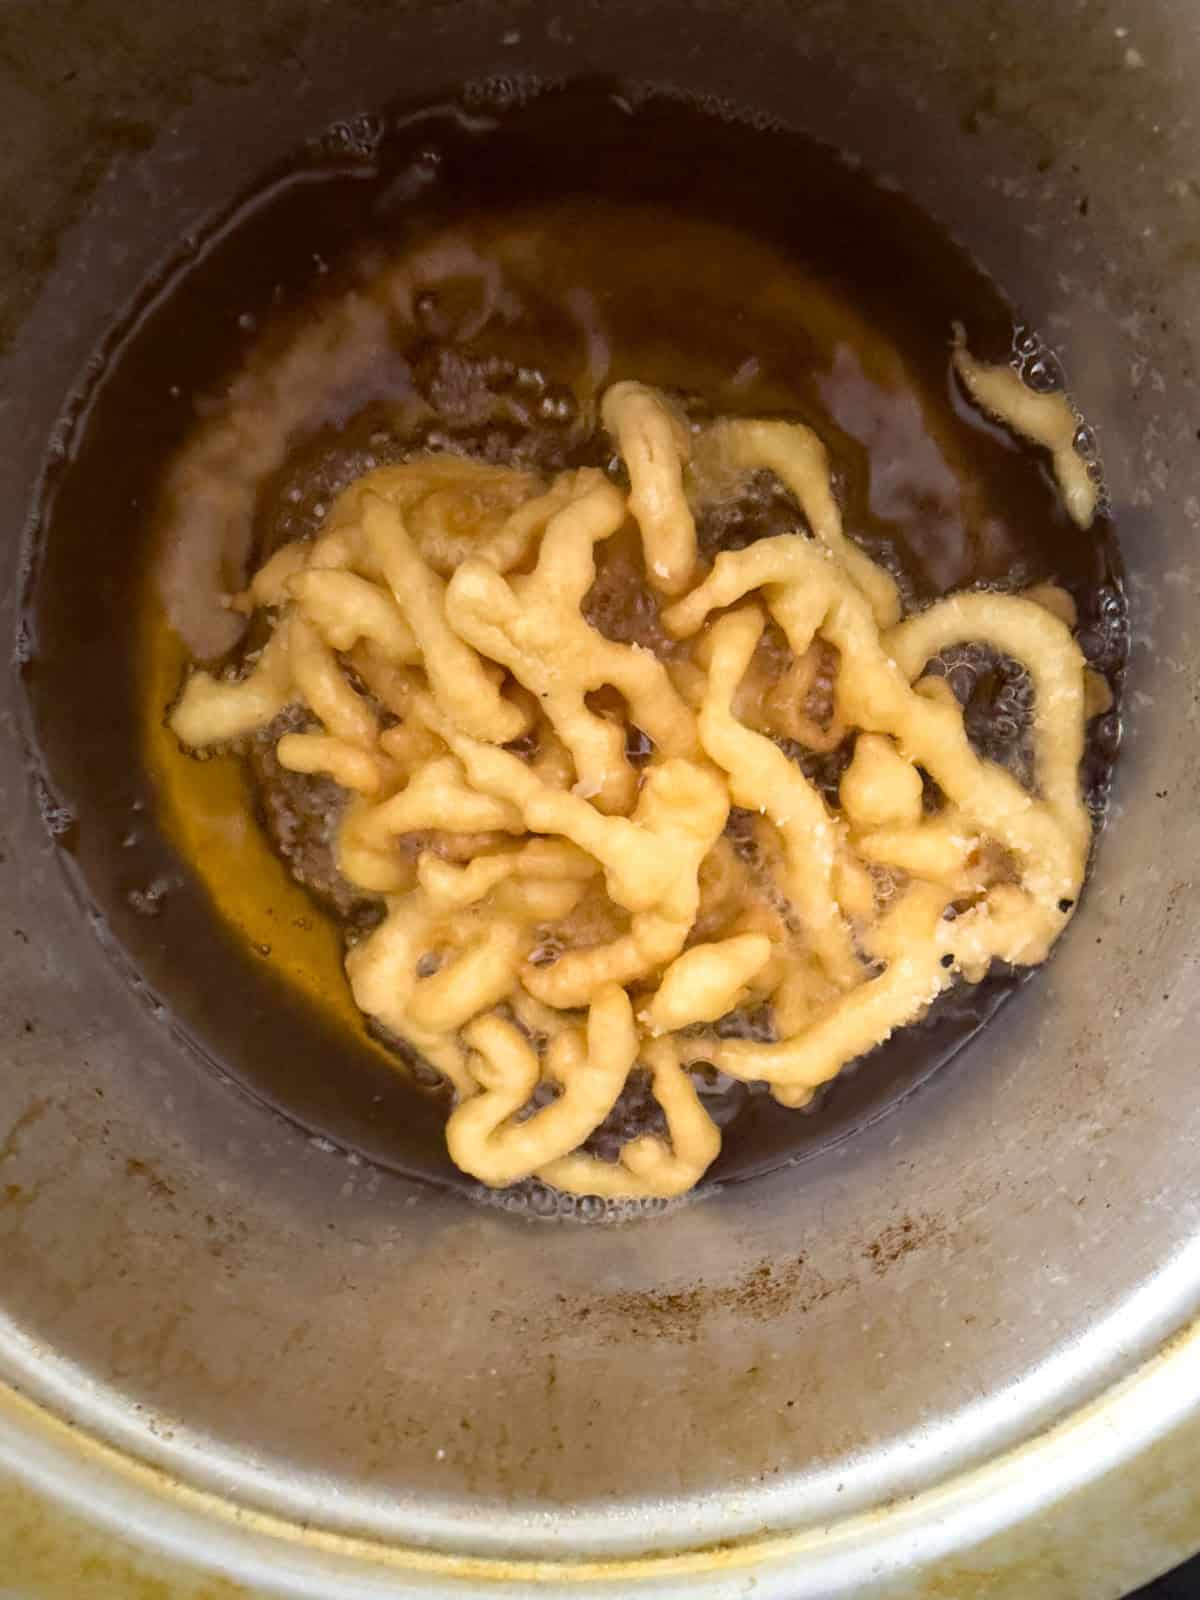
Fair funnel cake frying to golden brown in hot oil in a deep fryer.
  1. Step 5: Fry the funnel cakes. Heat your oil to 350°F. Hold the bag a few inches above the oil. Squeeze the batter in a circular, criss-cross pattern, aiming for a connected swirl shape. Don't worry about making a perfect circle. Fry until golden brown then carefully flip with a slotted spoon or tongs. Cook the second side until also golden brown. Fry in batches. Drain on a paper towel and serve with powdered sugar and toppings.
Homemade funnel cake with strawberry compote, vanilla ice cream, and powdered sugar, on a white plate.
  1. Step 6: Optional strawberry compote: Combine the frozen strawberries, sugar, lemon juice, and vanilla in a medium saucepan. Bring to a boil over medium-high heat, then reduce to medium and cook uncovered for about 12 minutes, stirring occasionally, until the strawberries are completely soft and the sauce has thickened slightly. Serve warm or room temperature.

Expert Tips: The batter should be thick enough to hold a ribbon when you lift the spoon, but thin enough to flow easily. Add milk one tablespoon at a time if it's too thick, or flour one tablespoon at a time if it's too thin. The key to making funnel cakes is not to stress about making them perfect. They're supposed to be a little wild and swirly. That's the whole point.

Serving Funnel Cakes at a Party

This is one of our favorite entertaining moves. Plug in a small countertop deep fryer and cook funnel cakes fresh while guests are mingling. The sizzle gets everyone's attention, and there's something so fun about watching them come straight out of the fryer. It also works great for a backyard party. Setup outside, and serve guests as they're ready, and let them help themselves to the toppings.

If you love casual summer entertaining like this, our ice cream sundae dessert board is another easy crowd-pleaser you can set up and let guests build themselves.

Make Ahead and Storage

  • Batter: The funnel cake batter can be made up to 2 days ahead and stored in a sealed ziplock bag in the fridge. Give it a gentle stir or squeeze before using.
  • Strawberry compote: Make up to 5 days ahead. Store in a jar or airtight container in the fridge. Reheat gently in a small saucepan before serving, or serve at room temperature.
  • Leftover funnel cakes: Funnel cakes are best fresh. Fry what you need and store leftover batter in the fridge, then fry more when needed
  • Freezing: Not recommended. The texture doesn't hold up after freezing.
fair ground homemade funnel cake recipe

Gluten-Free Note

Several readers have had great success making these gluten-free using Bob's Red Mill 1:1 Gluten-Free Flour as a direct substitution. This blend already contains xanthan gum, so no need to add any. One tip: spoon the flour into your measuring cup rather than scooping directly from the bag. Scooping packs it too densely and can make the batter too thick.

Frequently Asked Questions

What oil is best for frying funnel cakes?

Use a neutral oil with a high smoke point. Canola, vegetable, and peanut oil all work well. Avoid olive oil or butter as they burn at frying temperatures and will affect the flavor.

Do I need a real funnel to make funnel cakes?

No. A ziplock bag with a small hole snipped in one corner works better than a funnel. It gives you more control over the flow of batter, is easier to squeeze, and cleanup is simply tossing the bag. A squeeze bottle also works if the hole in the top is the right size.

Why did my funnel cake fall apart in the oil?

This usually comes down to one of two things: the batter is too thin, or the oil is not hot enough. If the batter is too runny it won't hold its shape. If the oil is below 350°F the batter spreads and breaks apart before it sets. Check your oil temperature before each batch and adjust your batter consistency as needed.

What is the right consistency for funnel cake batter?

The batter should be similar to a thick pancake batter. When you lift a spoon it should hold a ribbon for a moment before falling. It needs to be thin enough to flow through the bag but thick enough to hold its swirly shape in the oil. Add milk one tablespoon at a time if it's too thick, or flour one tablespoon at a time if it's too thin.

Can I make funnel cake batter ahead of time?

Yes. The batter keeps well in a sealed ziplock bag in the fridge for up to 2 days. Give it a gentle squeeze to recombine before using as it may settle slightly.

How do I reheat funnel cakes?

Funnel cakes are best fresh. You can try doing it in an air fryer. Reheat at 350°F for 3 to 4 minutes until crispy again. Avoid the microwave as it makes them soft and soggy. Better yet, save leftover batter in the fridge, and fry fresh when you want more.

Can I make these gluten-free?

Yes. Bob's Red Mill 1:1 Gluten-Free Flour works as a direct substitution. This blend already contains xanthan gum so there's nothing extra to add. Spoon the flour into your measuring cup rather than scooping directly from the bag to avoid packing it too densely.

More Recipe Inspiration

  • Tiana's beignets from The Princess and the Frog covered in powdered sugar on a cake plate.
    Tiana's Beignet Recipe from The Princess and The Frog
  • Mini jelly donuts easy recipe.
    Easy Bread Machine Jelly Donuts
  • Bread machine donut holes with Nutella.
    Bread Machine Mini Nutella Filled Donut Recipe
  • Homemade honey cruller donuts on a serving board.
    Homemade Honey Cruller Donuts

If you try these fair funnel cakes or any other recipe on my blog, leave a rating and let me know how it went in the comments below. Thanks for visiting today!

Fair funnel cake with strawberry compote and vanilla ice cream dusted with powdered sugar on a white scalloped plate.

Recipe

Fair funnel cake with strawberry compote and vanilla ice cream dusted with powdered sugar on a white scalloped plate.

Easy Homemade Fair Funnel Cakes

Video

Crispy, golden homemade funnel cakes that taste just like the fair, with an easy strawberry compote topping.
4.60 from 5 votes
Print Pin Rate
Course: Desserts
Cuisine: American
Prep Time: 15 minutes minutes
Cook Time: 30 minutes minutes
Total Time: 45 minutes minutes
Servings: 6
Calories: 283kcal
Author: Dannyelle Nicolle-Ramjist

Equipment

  • Deep Fryer You can use a deep pot, with a thermomter, but the deep fryer regulates the oil temperature for you, and is safer and easier to use.
  • ziplock bag This is the easiest way to add the batter to the oil, you can also use a special funnel with stopper, or squeeze bottle.

Ingredients

Funnel Cakes

  • 2 eggs
  • 1 ½ cups milk
  • 1 teaspoon vanilla extract
  • 2 cups all-purpose flour
  • 1 teaspoon baking powder
  • 1 teaspoon salt
  • frying oil
  • powdered sugar

Strawberry Compote (Optional)

  • 700 grams frozen strawberries -or use fresh
  • ¼ cup white sugar
  • 1 teaspoon vanilla
  • 1 tablespoon lemon juice

Instructions

  • Sift the flour, baking powder, and salt together into a large mixing bowl and whisk to combine.
    2 cups all-purpose flour, 1 tsp baking powder, 1 tsp salt
  • In a separate bowl, whisk together the eggs, milk, and vanilla extract until combined.
    2 eggs, 1 ½ cups milk, 1 tsp vanilla extract
  • Pour the wet ingredients into the dry ingredients and stir until the batter is smooth. It should be thick enough to hold a ribbon when you lift the spoon but thin enough to flow easily. Add milk one tablespoon at a time if too thick, or flour one tablespoon at a time if too thin.
  • Spoon or pour the batter into a large ziplock bag, seal it, and snip a small hole (about ¼ inch) from one corner. Remember, you can always make the hole larger if needed, but you can't make it smaller, so snip and try, then adjust if needed.
  • Heat oil in a deep fryer or deep, heavy-bottomed pot to 350°F. Hold the bag a few inches above the oil and squeeze the batter in a circular, criss-cross pattern, aiming for a connected swirl shape. Fry until golden brown on the bottom, about 2 minutes, then carefully flip with a slotted spoon or tongs. Cook the second side until golden brown. Fry in batches. Drain on a paper towel-lined plate and serve with powdered sugar and your favorite toppings.
    frying oil, powdered sugar
  • For the strawberry compote: Combine the frozen strawberries, sugar, lemon juice, and vanilla in a medium saucepan. Bring to a boil over medium-high heat, then reduce to medium and cook uncovered for about 12 minutes, stirring occasionally, until the strawberries are completely soft and the sauce has thickened slightly. Serve warm or at room temperature.
    700 grams frozen strawberries, ¼ cup white sugar, 1 tsp vanilla, 1 tbsp lemon juice

Notes

  • Batter Thickness: Adjust the batter with a tablespoon of milk if too thick, or a tablespoon of flour if too thin.
  • Batter storage: Seal leftover batter in the ziplock bag and refrigerate for up to 2 days.
  • Compote storage: Store in an airtight container in the fridge for up to 5 days.
  • Gluten-free: Bob's Red Mill 1:1 Gluten-Free Flour works as a direct substitution.
  • Mini funnel cakes: Reduce batter per cake. Cook about 1 minute per side, or until golden brown.

Nutrition

Serving: 1g | Calories: 283kcal | Carbohydrates: 53g | Protein: 9g | Fat: 4g | Saturated Fat: 2g | Polyunsaturated Fat: 1g | Monounsaturated Fat: 1g | Trans Fat: 0.01g | Cholesterol: 62mg | Sodium: 504mg | Potassium: 340mg | Fiber: 3g | Sugar: 17g | Vitamin A: 192IU | Vitamin C: 70mg | Calcium: 148mg | Iron: 3mg
Tried this Recipe? Tag me Today!Mention @LifeisaParty or tag #lifeisaparty!


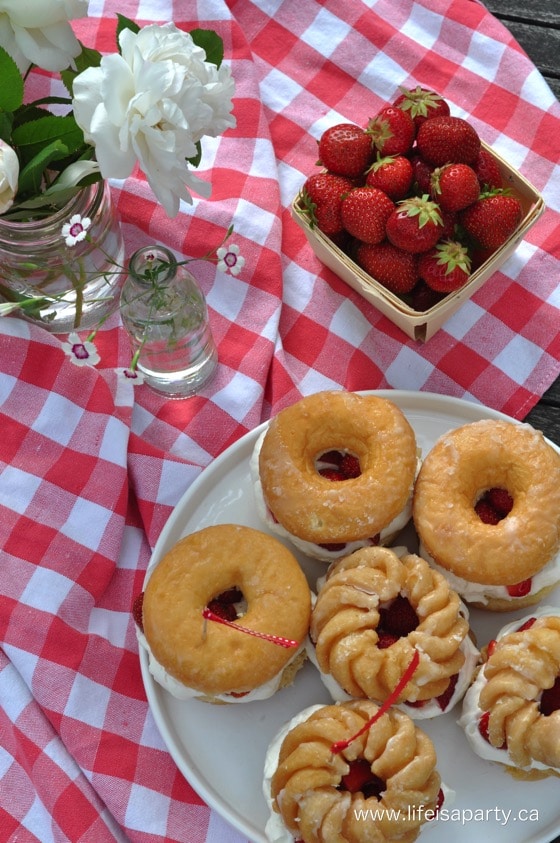
Easy Donut Strawberry Shortcake

Jun 25, 2015 · 13 Comments

Easy donut strawberry shortcake.

Donut Strawberry Shortcake -the easiest, best Strawberry Shortcake ever! You'll never go back to your old version after trying this one.

Donut strawberry shortcake.
[feast_advanced_jump_to]

This Donut Strawberry Shortcake just might be the greatest, easiest summer recipe EVER.  EVER.

fresh strawberries

It all started when I drove by a little strawberry stand the other day, and realized it was the beginning of strawberry season here.  I stopped by to pick some up, and was informed that it was pick-your-own so I headed out to the patch for a few minutes and came back with a yummy basket full…and a few samples in my tummy(quality control).

how to make Donut Strawberry Shortcake

The Donuts

I saw this great idea here originally, and wanted to try it with some Honey Crullers -I know genius idea. This is such a fun idea for strawberry shortcake.  Strawberry shortcake traditionally has a cake like base.  Sometimes it's made with pound cake, angel food cake, or sometimes a sweet biscuit base.  Using a donut is such a fun twist on the classic dessert.  And it makes it so quick and easy to make this for any special occasion, or just because. 😉

I'm a huge fan of honey crullers.  You could even make homemade donuts from scratch if you want to.  You can find my homemade honey cruller recipe here.  But, the donut shop makes them so well and they're so fresh, that for this recipe it's a great time saver ot pick them up bakery donuts.

Whipped Cream

I think homemade fresh whipped cream is best for this recipe -in fact it's just best in general.  It's actually so easy to make.  You just whip heavy whipping cream in the bowl of a stand mixer, and add some sugar and vanilla.  That's it.  So easy.  You can make ahead of time, and store it in an airtight container in the fridge, but it sometimes becomes a little watery, so it's best used fresh.

You can use cool whip instead if you prefer.  Or even the spray kind of whip cream, but remember it's has a much lighter and more airy texture than homemade whipped cream, and it won't hold so if you're using this option, make sure to eat them as soon as you make them.

Strawberries

I picked my strawberries during our local season and they were nice and sweet.  I choose not to macerate my strawberries.  The donut is already quite sweet, and I found the tart berries were the perfect combination.  If it's not the time of year to pick berries in your location and your strawberries are out of season and not quite so sweet you could sprinkle with a couple teaspoons of sugar and let them sit to make macerated strawberries.  As they maserate the juices come out and they become sweet and juicy strawberries.  If you use this method, be sure to use a slotted spoon to add them to the strawberry shortcake donuts so that they're not too wet.

how to make Strawberry Shortcake with a donut

Making these little donut strawberry shortcakes couldn't be easier.  They're the perfect way to make a quick strawberry shortcake.

Donut Strawberry Shortcake recipe

As I was making these I did wonder if they might be a bit too sweet, so I didn't add any sugar to the strawberries, and it was the PERFECT mix of sweet, creamy, and tangy.  

Variations

Whether you make the glazed donut version or the honey cruller version they're both totally delicious.  You could even use other donut varieties.  

Chocolate Covered Strawberry Shortcake

If you're a chocolate donut fan, how decadent would a chocolate dipped donut be as the base?  Like your own chocolate dipped strawberry turned shortcake.  You could even add a tablespoon of cocoa powder to the whipped cream when you're making it for chocolate whipped cream.

Sour cream glazed would make a much denser version of this dessert, but would also be delicious.  I mean really, what donut with fresh cream and sweet strawberries won't be delicious?

One more idea is to replace some of the whipped cream with ice cream for another great variation on this easy dessert.

I think these would be a great addition to any Canada Day celebrations you're planning …and as I always say to my American peeps, throw in a few blueberries, and you've got 4th of July covered too with strawberry and blueberry shortcake.

easy Donut Strawberry Shortcake

These donut strawberry shortcakes are the ultimate treat.  They're a real crowd pleaser.  And since they're so easy to make, they're great for entertaining.  If you don't have a lot of time, and still want to wow your guests with an impressive recipe that looks and tastes great than these are the perfect dessert.

Recipe

Easy donut strawberry shortcake.

Donut Strawberry Shortcake

Fresh strawberry shortcake with whipped cream and donuts.
5 from 1 vote
Print Pin Rate
Course: Desserts
Cuisine: American
Prep Time: 10 minutes minutes
Total Time: 10 minutes minutes
Servings: 4
Calories: 440kcal
Author: Dannyelle Nicolle-Ramjist

Ingredients

  • 4 of your favourite donuts like Honey Crullers or Honey Dip
  • 1 pint fresh strawberries sliced
  • 250 mL heavy whipping cream
  • 3 teaspoons sugar
  • 1 teaspoon vanilla extract

Instructions

  • Slice your donut in half.
  • Add your heavy whipping cream to a large mixing bowl and use your hand mixer, or stand mixer to whip the cream to soft peaks. Add the sugar and vanilla and whip until stiff peaks form. Add a layer of whipped cream to the cut donuts.
  • Slice your strawberries, and add a layer on top of the whipped cream.
  • Add the top half of the donut to the top and enjoy.

Nutrition

Serving: 1g | Calories: 440kcal | Carbohydrates: 37g | Protein: 4g | Fat: 32g | Saturated Fat: 18g | Polyunsaturated Fat: 12g | Trans Fat: 1g | Cholesterol: 81mg | Sodium: 206mg | Fiber: 2g | Sugar: 27g
Tried this Recipe? Tag me Today!Mention @LifeisaParty or tag #lifeisaparty!

With this easy and so, so yummy Strawberry Shortcake Donuts, life really is a party!

More Strawberry Inspiration

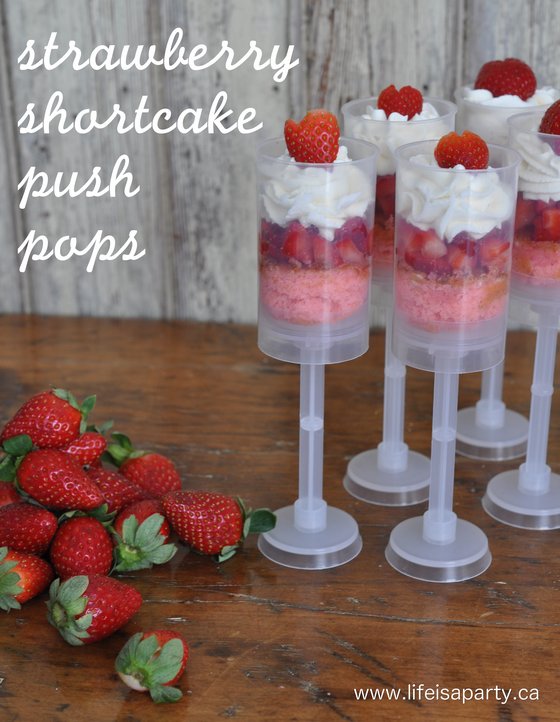
You might also enjoy our Strawberry Shortcake Push Pops recipe here.

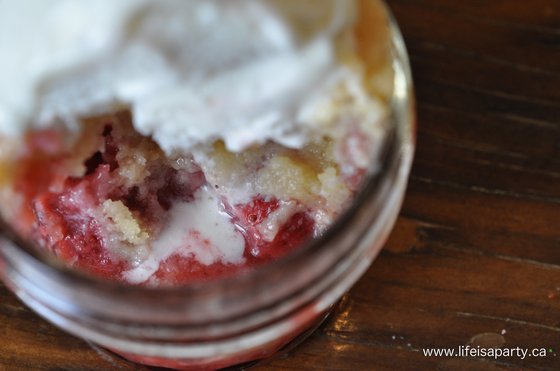
Also be sure to check out our Strawberry Cobbler recipe here.

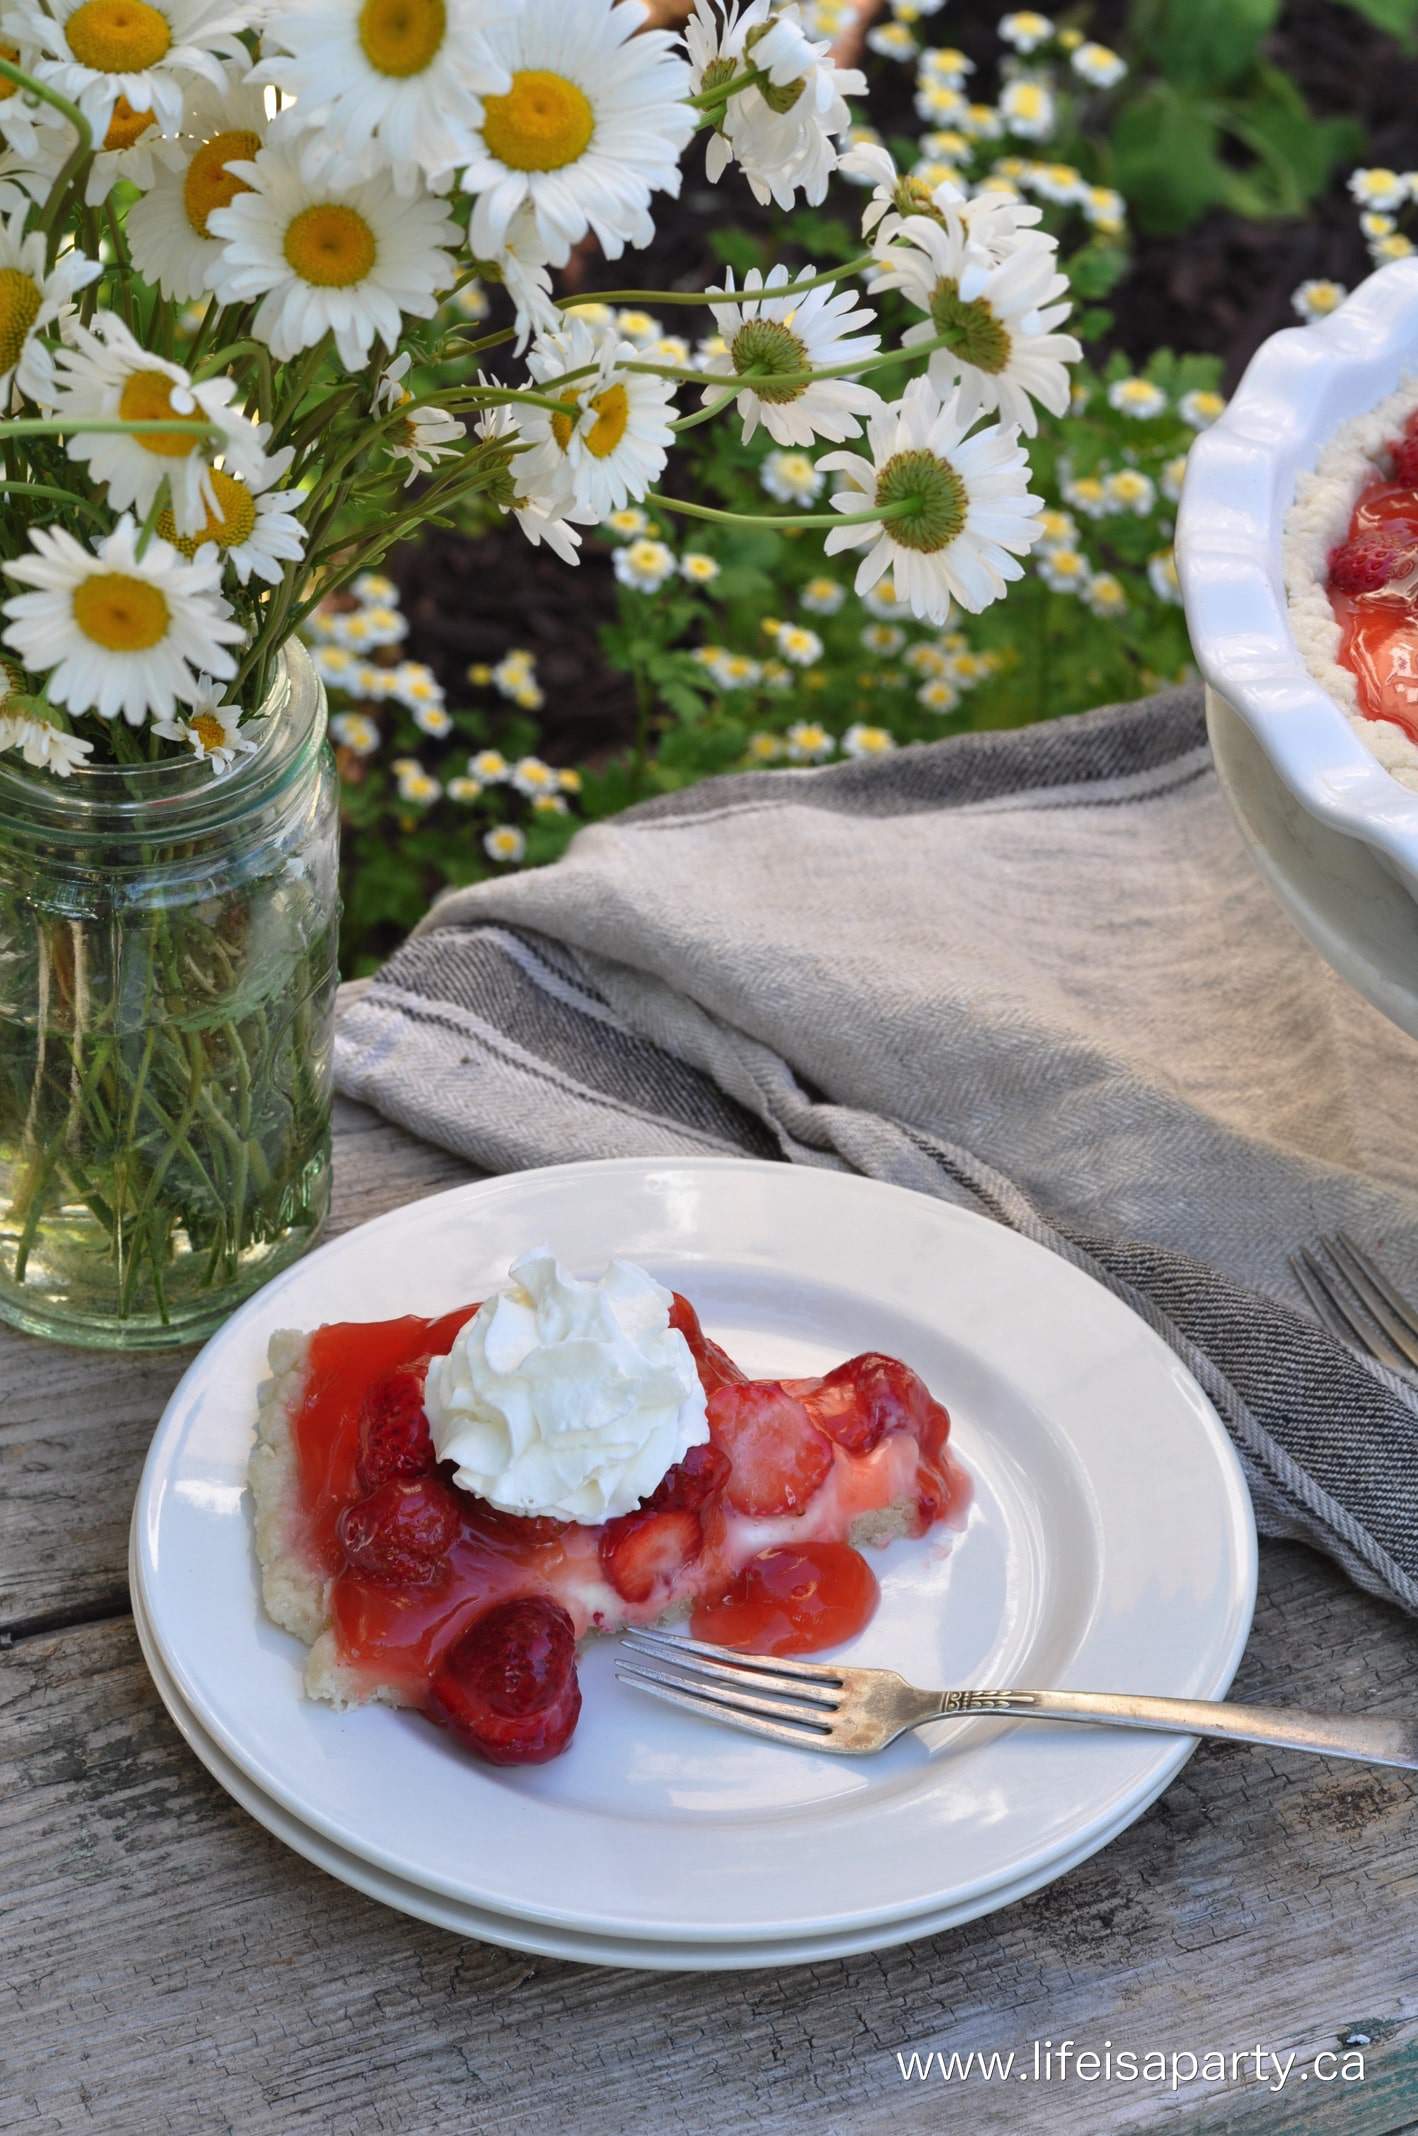
You might also like our Strawberry Cheesecake Pie recipe here.

S'mores Trail Mix

Jun 23, 2015 · Leave a Comment

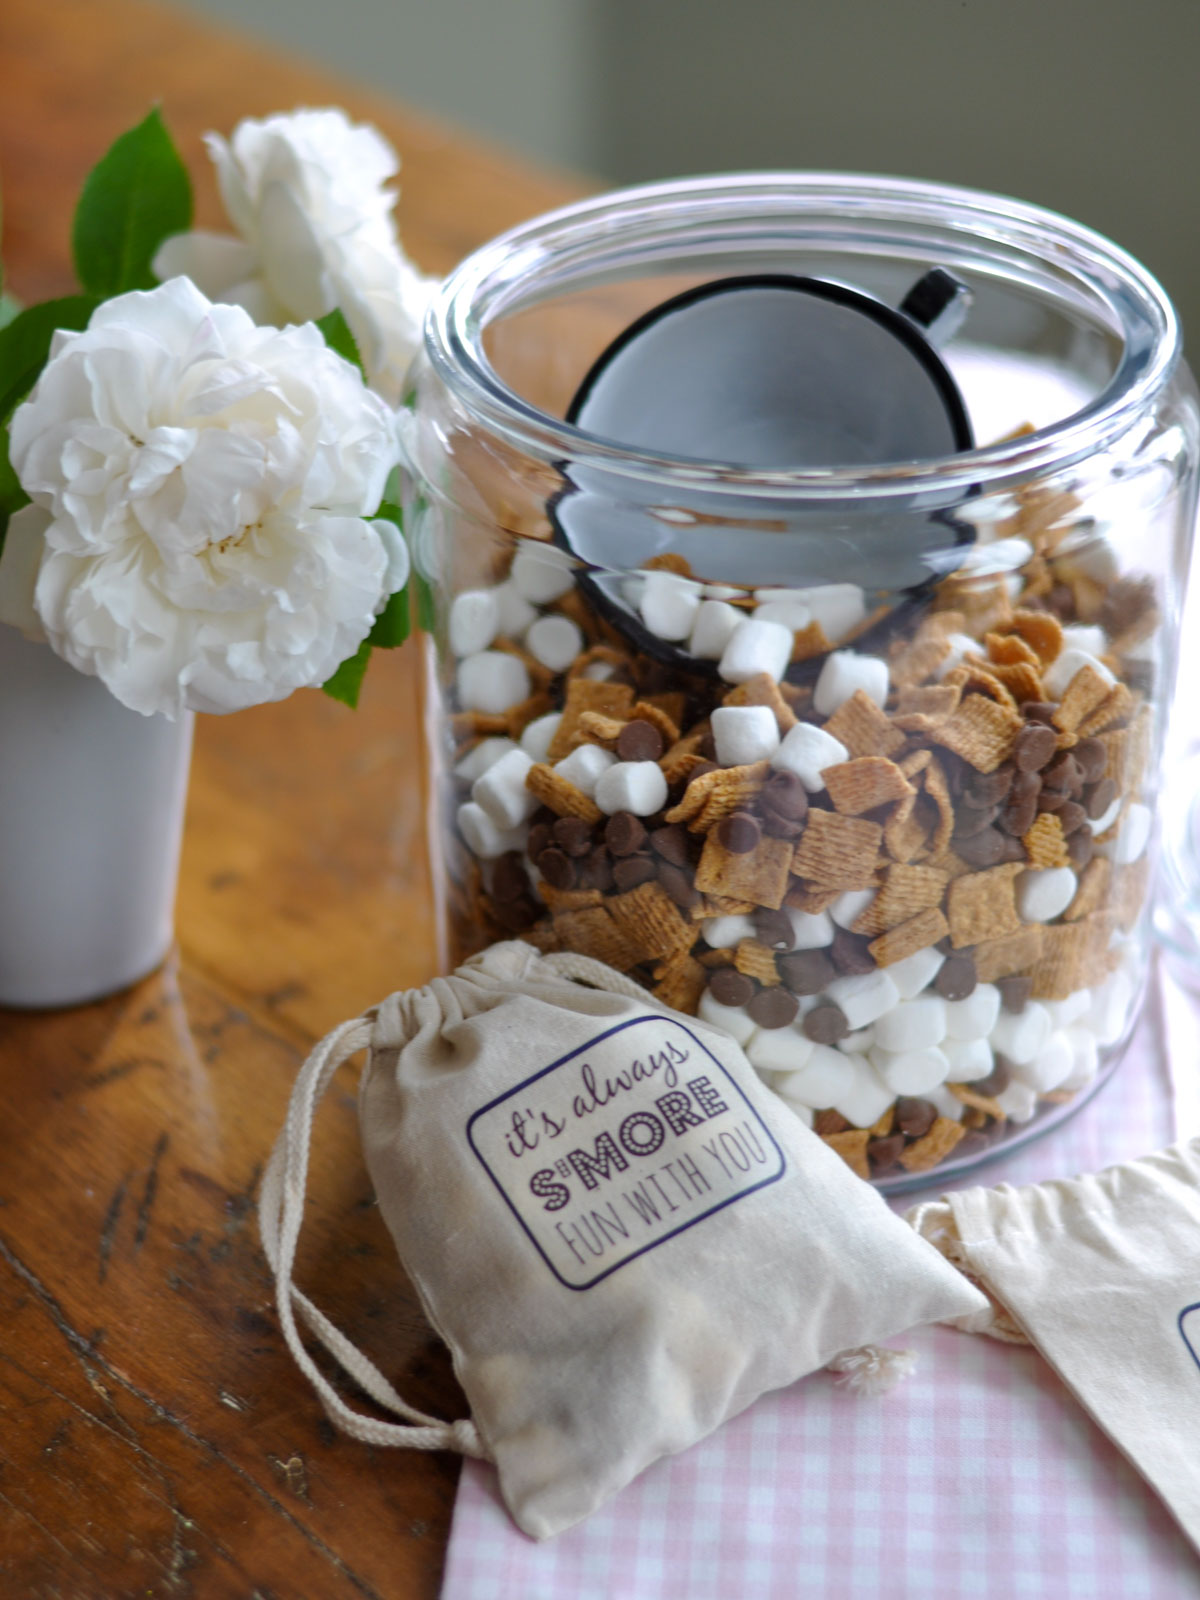
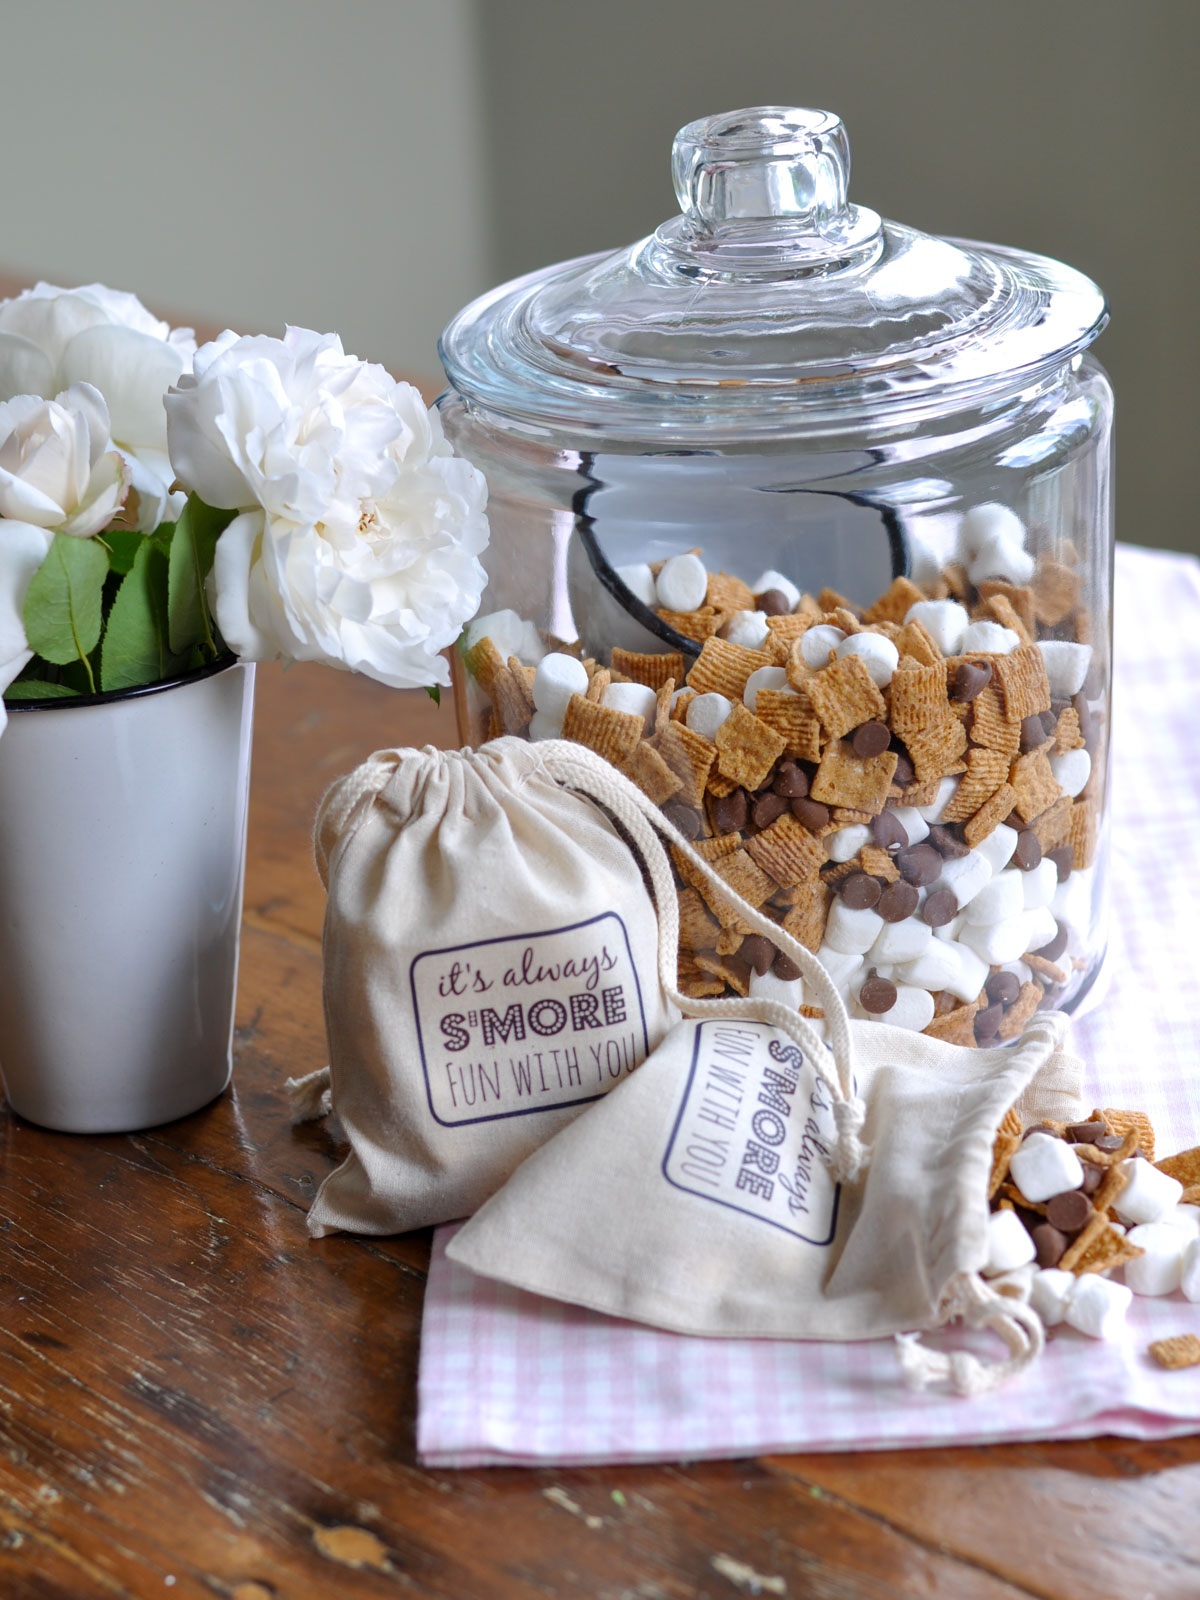
Easy s'more trail mix in a glass jar, with a gift giving bag and white flowers.

S'mores Trail Mix is the easy, no bake way to get all the flavor of s'mores without the campfire, and the only version that comes ready to gift. Just 3 ingredients, 10 minutes, and a free printable tag turn this into a treat bag for road trips, a party favor, or a teacher gift, not just an after school snack.

Glass jar of s'mores trail mix with a canvas gift bag and white flowers nearby.
[feast_advanced_jump_to]

Quick Look

  • 📋 Recipe: Easy S'mores Trail Mix
  • ⏲️ Ready In: 10 minutes
  • 👪 Servings: 12
  • 🔪 Difficulty: Easy
  • 💭 Top Tip: This recipe makes a big batch, so it's just as perfect for gift giving as it is for snacking. Grab our free printable gift tag below to turn it into a favor or hostess gift in minutes.

Why You'll Love This Recipe

  • It's a 3 ingredient, no bake snack mix that comes together in about 10 minutes.
  • It has all the classic s'mores flavor without the smoky campfire, the bugs, or the sticky mess.
  • It's perfect for road trips, movie nights, or an after school snack for hungry kids.
  • It doubles as an easy gift, with a free printable tag included to make it party favor or hostess gift ready.
  • Kids can make it all by themselves, since it's just a bowl and a spoon.

We love this s'mores trail mix as the perfect snack. Try it for road trips, movie night, or as a great after school snack for hungry kids. This easy snack is the perfect treat for the whole family to enjoy, and I'm sharing it along with a sweet free printable you can use for a DIY treat bag, perfect for gift giving or as a gift tag.

If you love this s'mores trail mix, you'll probably also love our s'mores pizza for an easy dessert twist, or our s'mores charcuterie board if you're hosting a bigger group and want a whole spread to graze on.

Ingredients

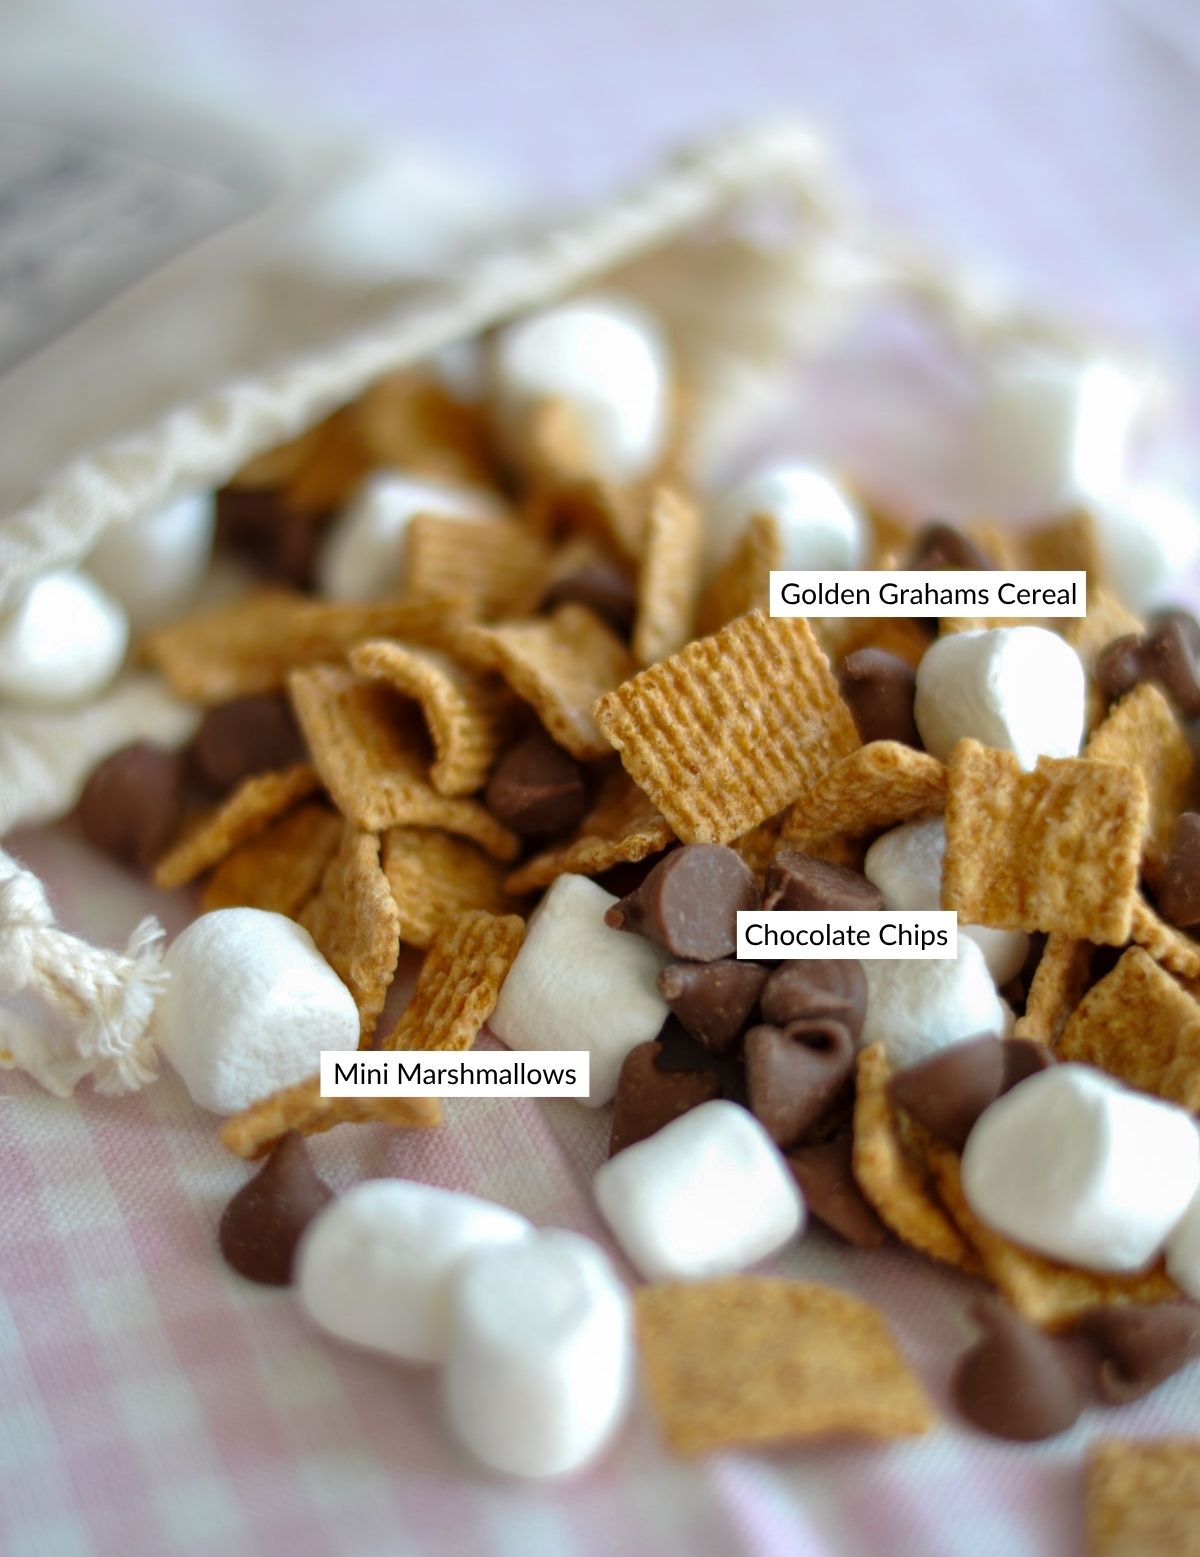
S'mores trail mix ingredients labeled with graham cereal, mini marshmallows, and chocolate chips.
  • Mini marshmallows
  • Golden Grahams cereal (or Teddy Grahams, see variations below)
  • Milk chocolate chips

Variations

We love this s'mores snack mix with the classic three traditional ingredients, but you can change things up a bit if you like.

  • Graham Crackers: Try using Teddy Grahams in addition to, or instead of, the golden graham cereal.
  • Marshmallows: We make this s'mores trail mix with classic miniature marshmallows. Another fun idea is to use dehydrated marshmallows as a great addition or instead of the regular fluffy marshmallows. Another option is to use miniature tutti frutti marshmallows to add a tropical vibe.
  • Chocolate: Milk chocolate is our chocolate of choice for s'mores trail mix, but if you prefer semi-sweet or dark chocolate chips, you can substitute that type instead, or do a combination of chocolate types. You can even try adding in peanut butter chips for a change.
  • More Additions: The classic three above will give you that traditional s'mores flavor, but you can change things up with the addition of pretzels, nuts, or dried fruit for more of a traditional trail mix.

How to Make S'mores Trail Mix

  1. In a large bowl, combine the mini marshmallows, Golden Grahams, and chocolate chips.
  2. Stir gently together until evenly mixed.
  3. Store any leftover snack mix in an airtight container or zip-lock bag to keep everything fresh.
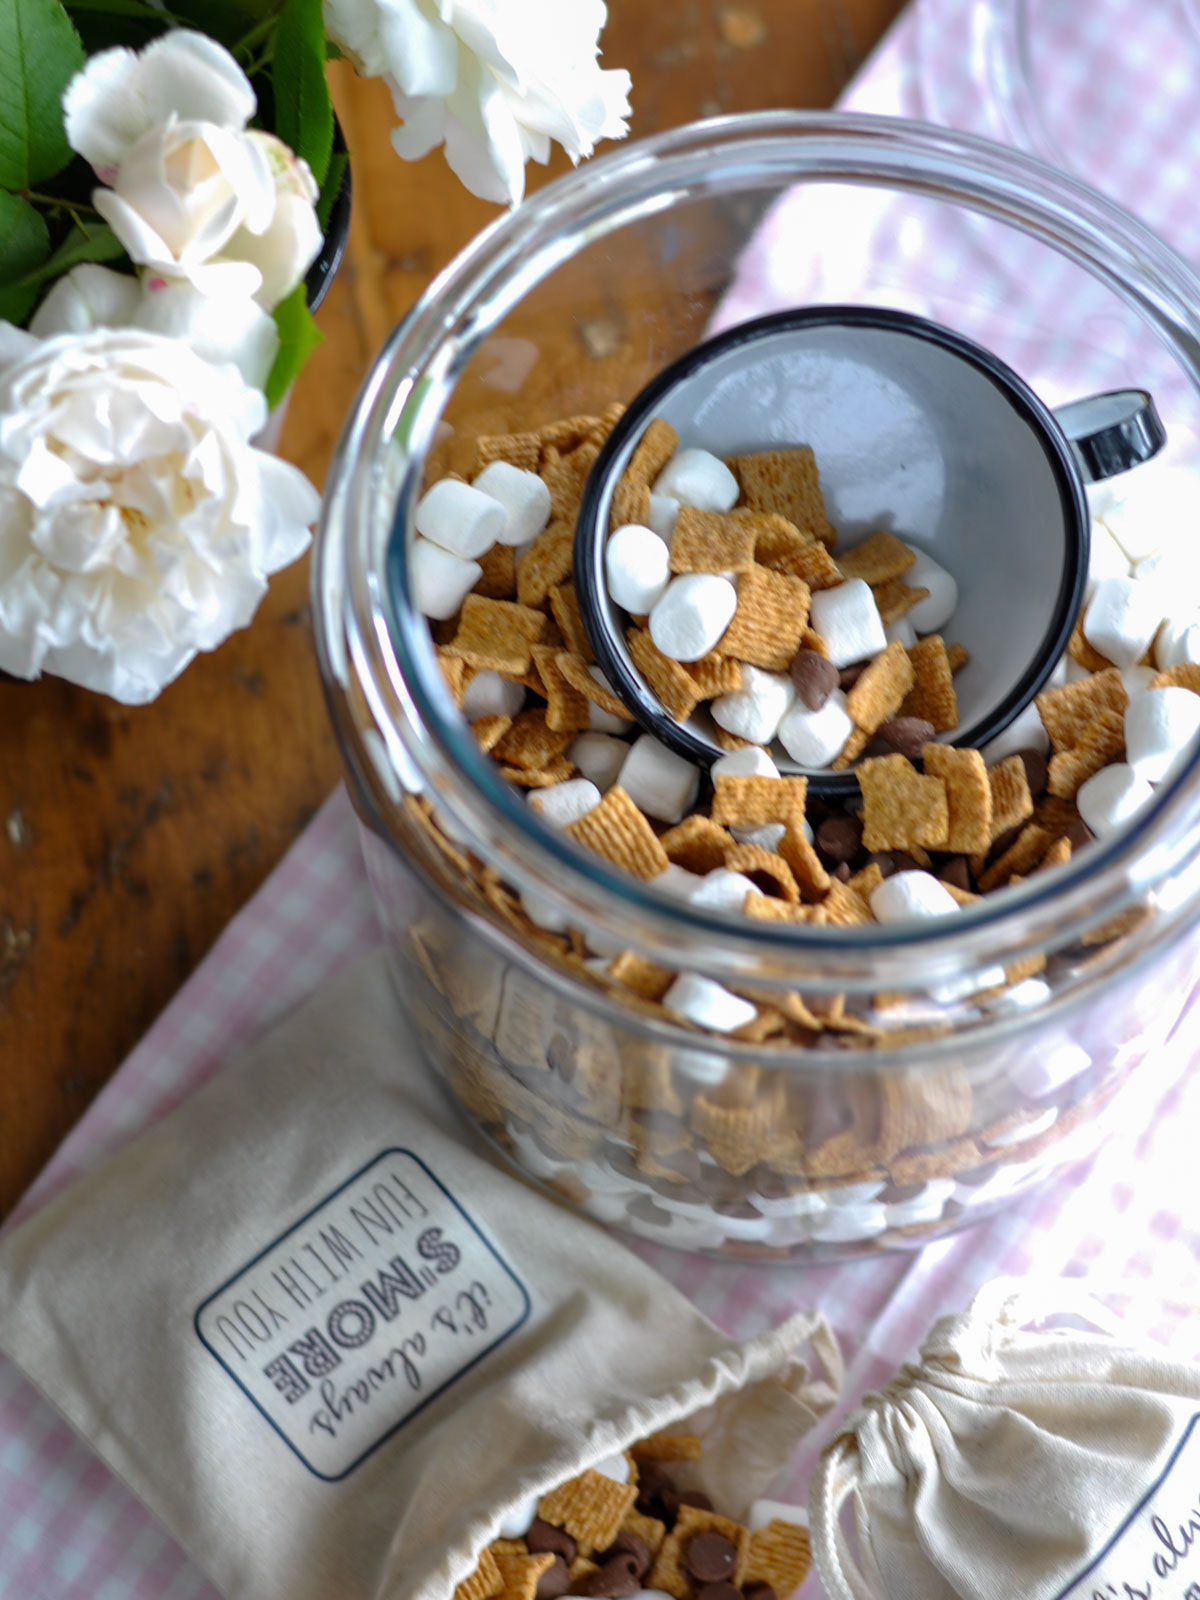
Overhead view of s'mores trail mix in a glass jar with a mug scooping out a serving.

Free Printable Label or Gift Tag

This recipe makes a big bowl, so in addition to being a great snack, it's also perfect for gift giving. You can print the label on simple cardstock and use it as a gift tag. This great treat is so perfect for gift giving, and it makes a great birthday or party favor, lunch box treat, teacher gift heading into summer break, or hostess gift.

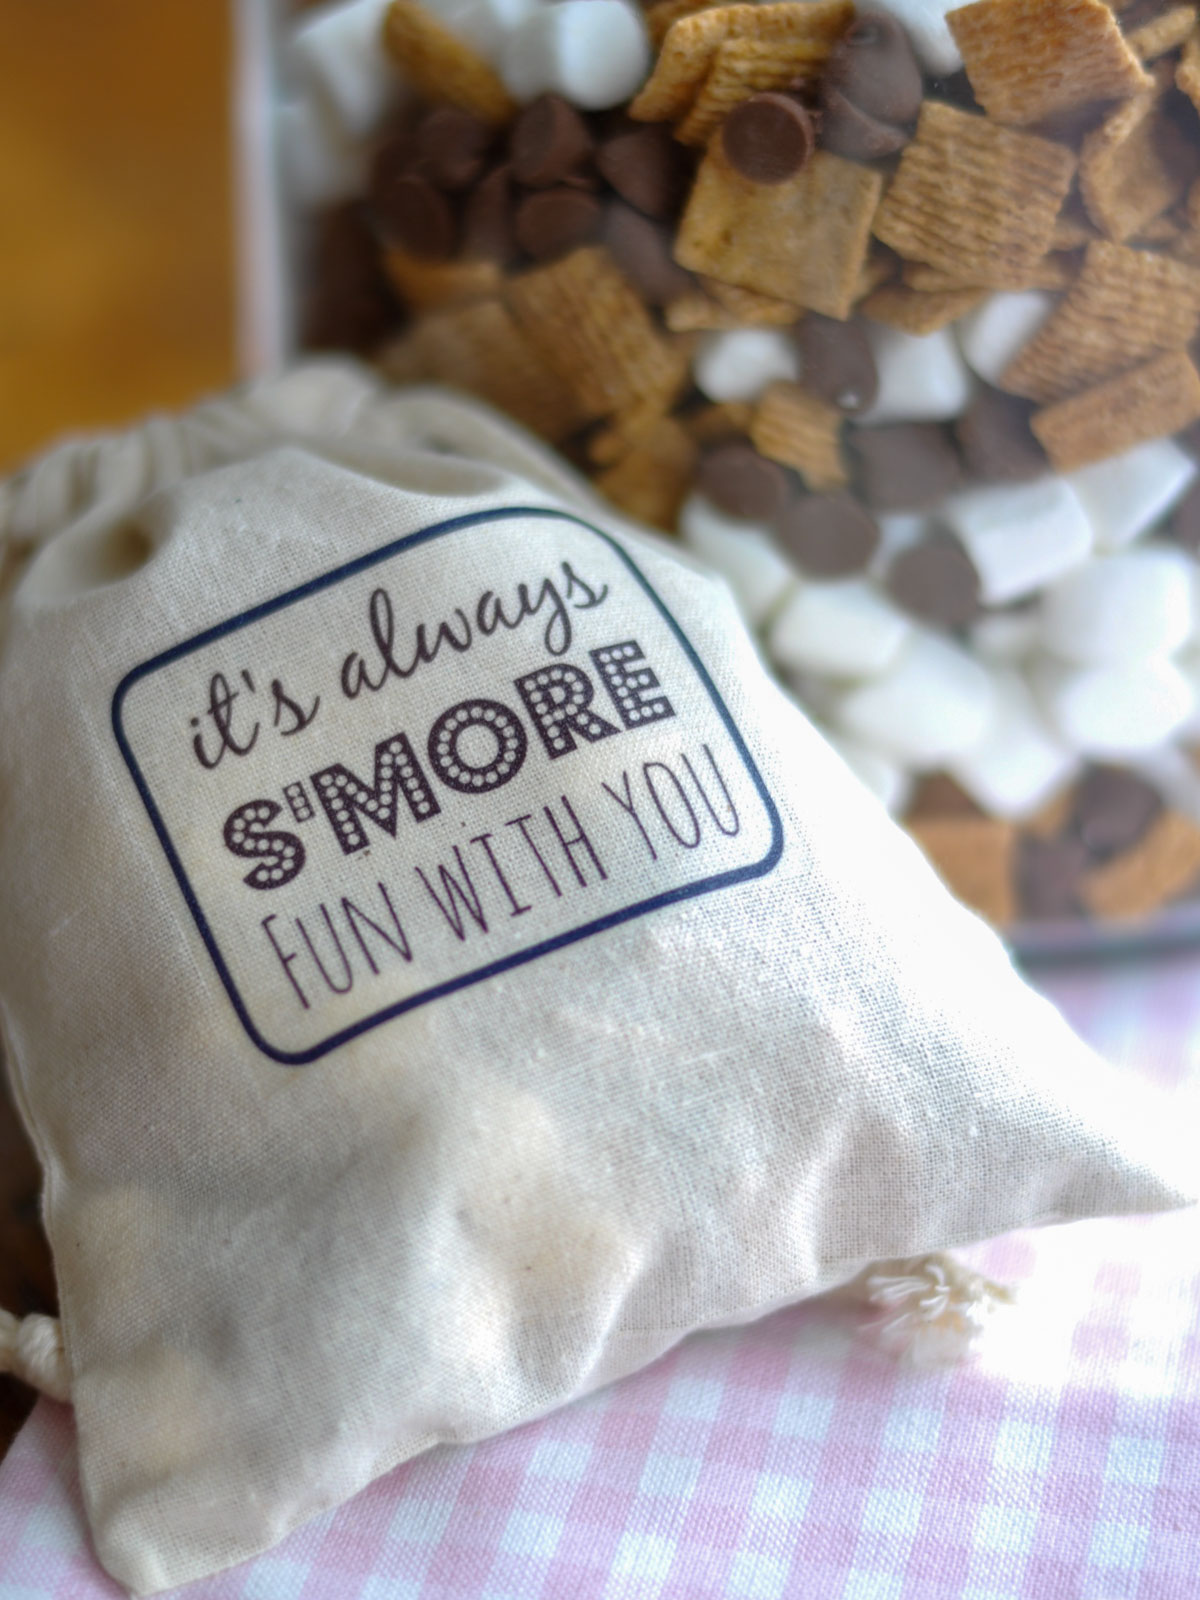
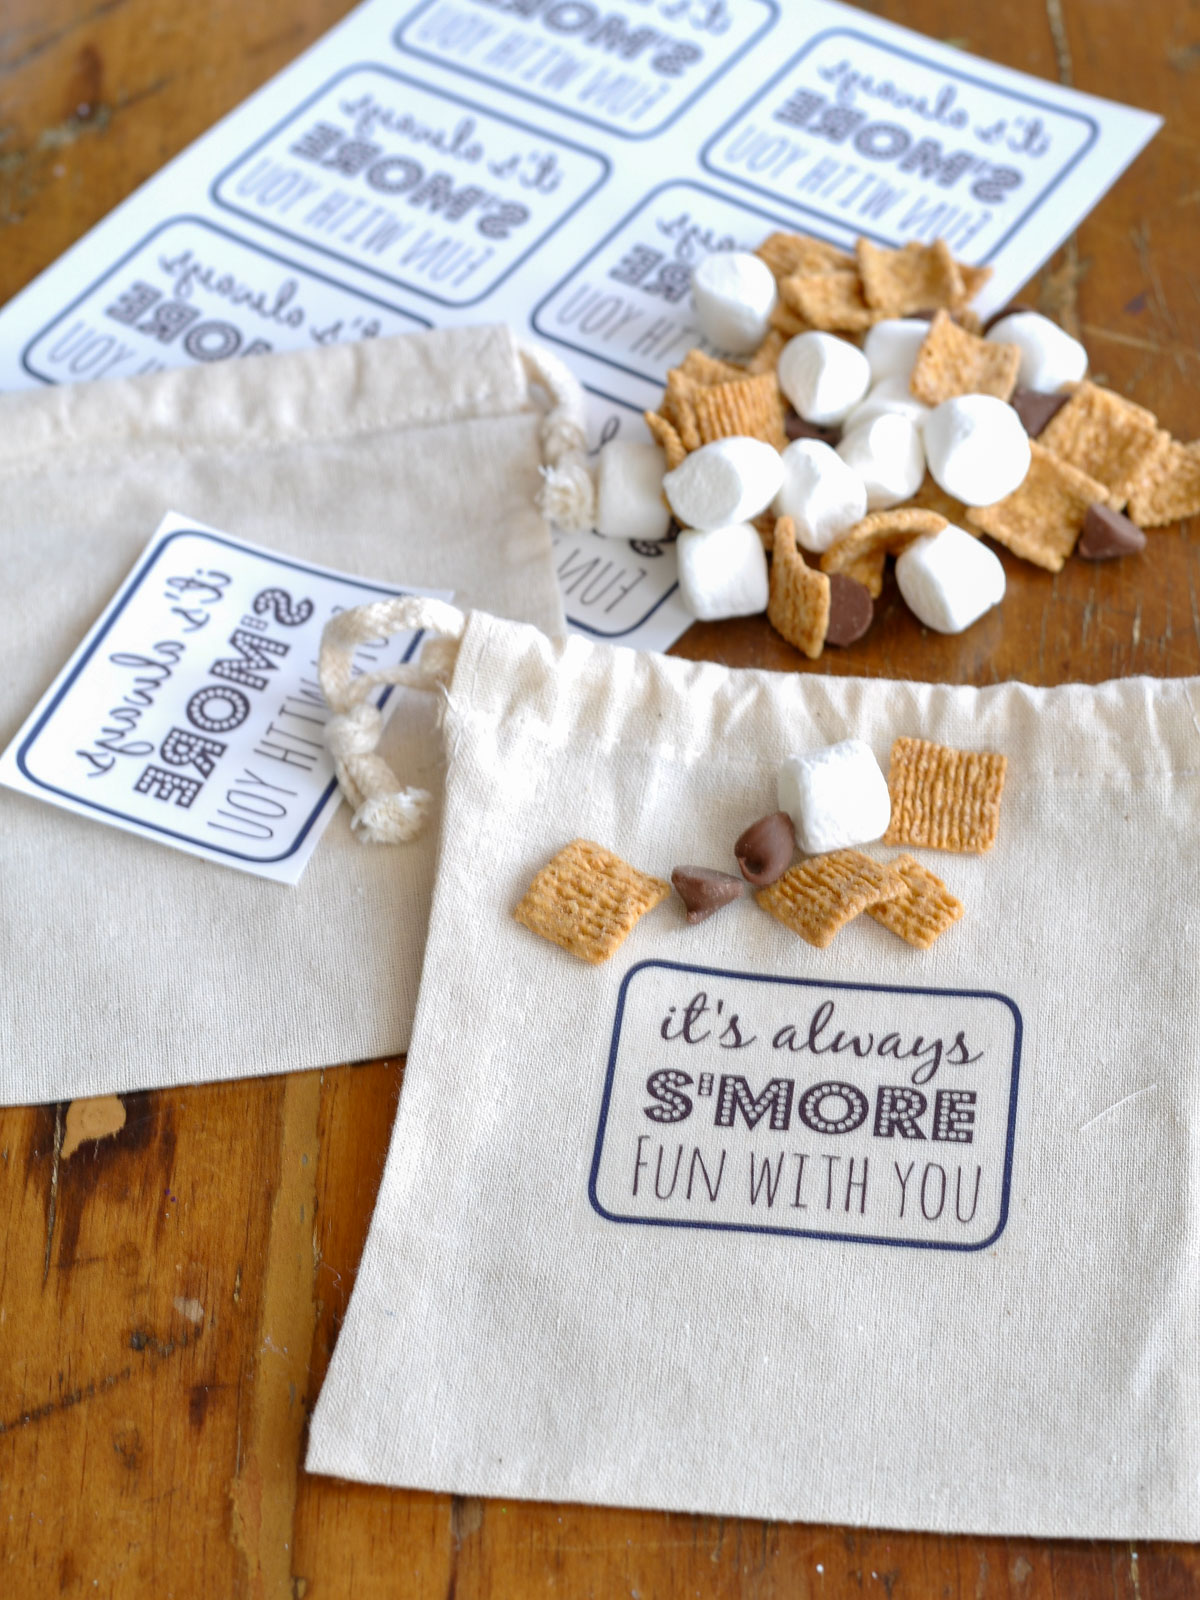
Canvas gift bag printed with a s'mores label filled with trail mix.

To use the printable as a gift tag, put the cereal mixture into cellophane bags and tie with some ribbon or string to keep it airtight, then add the cute tag. This easy treat is sure to be a hit with anyone who has a sweet tooth.

Find the free printable in our Free Resource Library. It's free for subscribers, who receive instant access.

Gift Giving Bags

I also used the free printable to make fun little canvas bags, adding the printable to the front of the treat bags for gift giving. This would be a perfect summer hostess gift, or imagine finding this delicious treat on your pillow if you were staying at someone's cottage for the weekend.

Free printable s'mores gift tag sheet next to filled canvas treat bags.

Materials for the gift bags:

  • Canvas bags
  • Photo transfer paper
  • Printer
  • Free printable label
  • Iron

How to make your bags: Print the graphic onto the photo transfer paper, making sure to flip your image in your printer setup so the font isn't backwards. Then cut out the graphic for each bag and iron it onto the fabric, following the instructions for the photo transfer paper. Once it's ironed on, just peel off the backing and you're finished.

My girls have been loving filling up their little bags and taking their individual portions of s'mores trail mix into the clubhouse in the backyard. How I love the long lazy days of summer.

S'mores trail mix in a glass jar with two labeled canvas gift bags nearby.

Frequently Asked Questions

Can I make this ahead of time?

Yes, just be sure to store it in an airtight container or zip lock bag so everything stays fresh until you're ready to serve or gift it.

Can I use graham crackers instead of cereal?

Yes, broken up graham crackers work well in place of the cereal if that's what you have on hand.

What's the best way to package this as a gift?

Cellophane bags tied with ribbon or string work great, paired with our free printable gift tag for a finished, giftable look.

Can kids help make this recipe?

Definitely, it's just a matter of combining everything in a bowl, so it's an easy one for little hands to help with.

More S'mores Recipes

  • S'mores charcuterie board with graham crackers, marshmallows and chocolate for summer entertaining.
    S'mores Charcuterie Board
  • Golden pizza crust topped with Nutella and toasted marshmallows.
    Easy S'mores Pizza Recipe
  • Halloween smores board with Halloween cookies, marshmallows, chocolate and more!
    Halloween Smores
  • Stack of homemade coffee marshmallows showing mocha color and fluffy texture.
    Homemade Coffee Marshmallows Recipe

If you try this S'mores Trail Mix or any other recipe on my blog please leave a star rating and let me know how it went in the comments below. Thanks for visiting today!

Recipe

Easy s'more trail mix in a glass jar, with a gift giving bag and white flowers.

S'mores Trail Mix

Mini marshmallows, chocolate chips, and graham cracker cereal make the perfect easy trail mix.
5 from 1 vote
Print Pin Rate
Course: Desserts
Cuisine: American
Prep Time: 5 minutes minutes
Cook Time: 5 minutes minutes
Total Time: 10 minutes minutes
Servings: 12
Calories: 20kcal
Author: Dannyelle Nicolle-Ramjist

Ingredients

  • 10 oz bag mini marshmallows
  • 313 g box Golden Grahams cereal
  • 600 g chocolate chips

Instructions

  • In a large bowl, combine the mini marshmallows, Golden Grahams, and chocolate chips.
    10 oz bag mini marshmallows, 313 g box Golden Grahams cereal, 600 g chocolate chips
  • Stir gently together until evenly mixed.
  • Store any leftover snack mix in an airtight container or zip lock bag to keep everything fresh.

Notes

  • Store in an airtight container or zip-lock bag to keep everything fresh.
  • This recipe doubles or triples easily if you're making it for a bigger group or a bigger batch of gift bags.
  • For gifting, portion into cellophane bags and pair with our free printable tag, found in the Free Resource Library.
  • Swap in Teddy Grahams for the cereal, or dark chocolate chips for the milk chocolate, without changing the method.

Nutrition

Serving: 1g | Calories: 20kcal | Carbohydrates: 3g | Fat: 1g | Sodium: 11mg | Sugar: 2g
Tried this Recipe? Tag me Today!Mention @LifeisaParty or tag #lifeisaparty!

Homemade Sweet Beer Bbq Sauce Recipe

Jun 17, 2015 · 1 Comment

Homemade sweet beer bbq sauce.

Easy Homemade BBQ Sauce Recipe: made with Beer and Molasses this sweet BBQ Sauce is a favourite. Perfect with any kind of bbq meat.

Homemade sweet beer bbq sauce recipe.
[feast_advanced_jump_to]

This Homemade BBQ Sauce recipe is worth the effort.  A family favourite we make all the time.  It's a sweet one, so perfect for anyone who likes a bbq sauce a little on the sweeter side.  And it's made with simple ingredients, so pretty easy to make anytime.  It's sure to become your favorite bbq recipe.

I've applied a fair bit of research to this and can say with confidence, homemade is always better.  Think about it…homemade flavoured marshmallows, check.  homemade flatbread crackers, check.  BBQ Sauce….check!

Sweet Bbq Sauce

There's all different kinds of bbq sauce.  Some are spicy, some are smokey, and some like ours are on the sweet side.  I love a slightly sweet delicious sauce.  It has complex flavors and layers of tangy molasses, sweetness, and spice.   The addition of the beer to this bbq sauce adds a depth of flavor to it.   And I think it's a perfect pairing with just about any grilled meat including chicken, beef, or pork tenderloin or pork chops, and of course pork ribs.  

It's made with beer and molasses, and gets it's sweetness from that and the honey, apple cider, and the ketchup in the recipe.  One of the great things about a sweet bbq sauce is that the sugar in the recipe will caramelize a little on the grill.  Don't put it on your meat too earlier or it will also burn.  But added near the end of cooking time, it will just start to caramelize in places and a real depth of flavor and sticky sweetness and tang to whatever you are bbqing.  This flavorful sauce also has the perfect amount of tang and sour, and spice to balance out the sweet and make it our favorite sauce.

I'm not a big fan of smoky bbq sauces and tend to stay away from recipes that add in liquid smoke.  I think grilling outdoors is a great way to add the smokey flavor in a natural way.  If you do love smokey bbq sauce, you could certainly add some in.

Simple Ingredients

One of the things I also love about this beer barbecue sauce recipe is that you can put this together with simple ingredients you probably already have on hand in your pantry.  And if they're not in your pantry you can easily find them at the grocery store.

Lager Style Beer

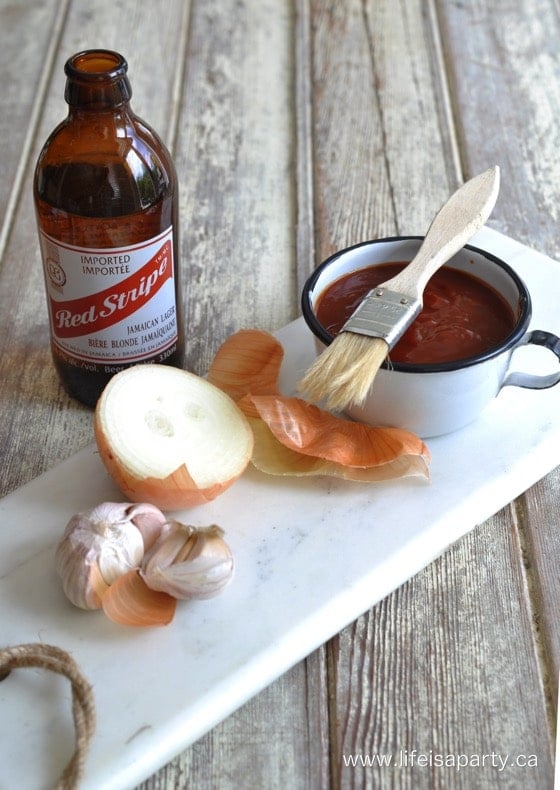
Use your favourite lager style beer as the beer style in this recipe for homemade beer bbq sauce.  The lager beer adds a carmaley, barley based sweetness balanced with the perfect bitterness.  The flavor of the finished sauce is complex and rich and that's why we love this beer bbq sauce recipe.  We made ours with Red Stripe because we had it on hand, and it was delicious.

Can We Use A Different Style Of Beer Or No Beer?

If you don't have a lager style of beer of hand and you want to substitute it in this recipe you can.  A dark beer or malty beer like a Guinness is a good choice too.  A guinness bbq sauce will a have a darker color and taste a little heavier, more bitter, with a real depth of flavor.  If you're not a beer aficionado you can even skip the beer altogether and go for something like wine, apple cider or even soda.  This recipe has a ½ cup of apple cider already in it, so ¾ cup of apple cider and skip the beer if you like.  You might like trying root beer barbecue sauce if you're looking for a non-alcoholic option this bbq season.

how to make BBQ Sauce

Gift Giving

This is my sister-in-laws recipe, and it's worth the effort.  We tasted it for the first time at a family bbq and asked for the recipe because it was so good.  I also thought it would be the perfect Father's Day gift. It's especially perfect  wrapped up with a nice steak.  I can't think of a better way to celebrate the Father in your life.

This sauce is perfect for gift giving.  It would also be a great hostess gift.  Everyone always loves a homemade food present.

Homemade BBQ Sauce with Beer and Molasses

Homemade BBQ Sauce Father's Day gift idea

This homemade sauce will keep for for several weeks in the fridge, stored in an airtight container.  We like to store it in canning jars in the fridge.  You can see exactly how much of this amazing recipe you have left.

Easy Homemade BBQ Sauce Recipe

This good sauce is sweet and tangy.  The beer and molasses make it rich, tangy, delicious. It's such a great bbq sauce to use with any grilled meats, and one of my favorite beer recipes to make in the summer.

Recipe

Homemade sweet beer bbq sauce.

Homemade BBQ Sauce

Tangy and sweet homemade BBQ sauce with beer.
5 from 1 vote
Print Pin Rate
Course: Condiment
Cuisine: American
Prep Time: 10 minutes minutes
Cook Time: 30 minutes minutes
Total Time: 40 minutes minutes
Servings: 2.5 cups
Author: Dannyelle Nicolle-Ramjist

Ingredients

  • 2 teaspoon butter
  • ½ medium onion chopped
  • 2 cloves garlic minced
  • 1 cup ketchup
  • ½ cup molasses
  • ½ cup apple cider
  • ¼ cup lager-style beer
  • 1 tablespoon honey
  • 1 tablespoon hotdog mustard
  • 1 tablespoon lemon juice
  • 1 ½ tablespoon Worcestershire sauce
  • ½ teaspoon cayenne pepper
  • ½ teaspoon paprika

Instructions

  • In a medium saucepan, melt butter, and sauté onion and garlic over medium heat until softened, about 3 min.
  • Add the remaining ingredients, stir well, and bring to a boil.
  • Reduce heat, and simmer for about 30 min. until thickened. Cool sauce when it's done cooking and store in the refrigerator until ready to use.
Tried this Recipe? Tag me Today!Mention @LifeisaParty or tag #lifeisaparty!

With homemade bbq sauce, life really is a party!

More Recipe Inspiration

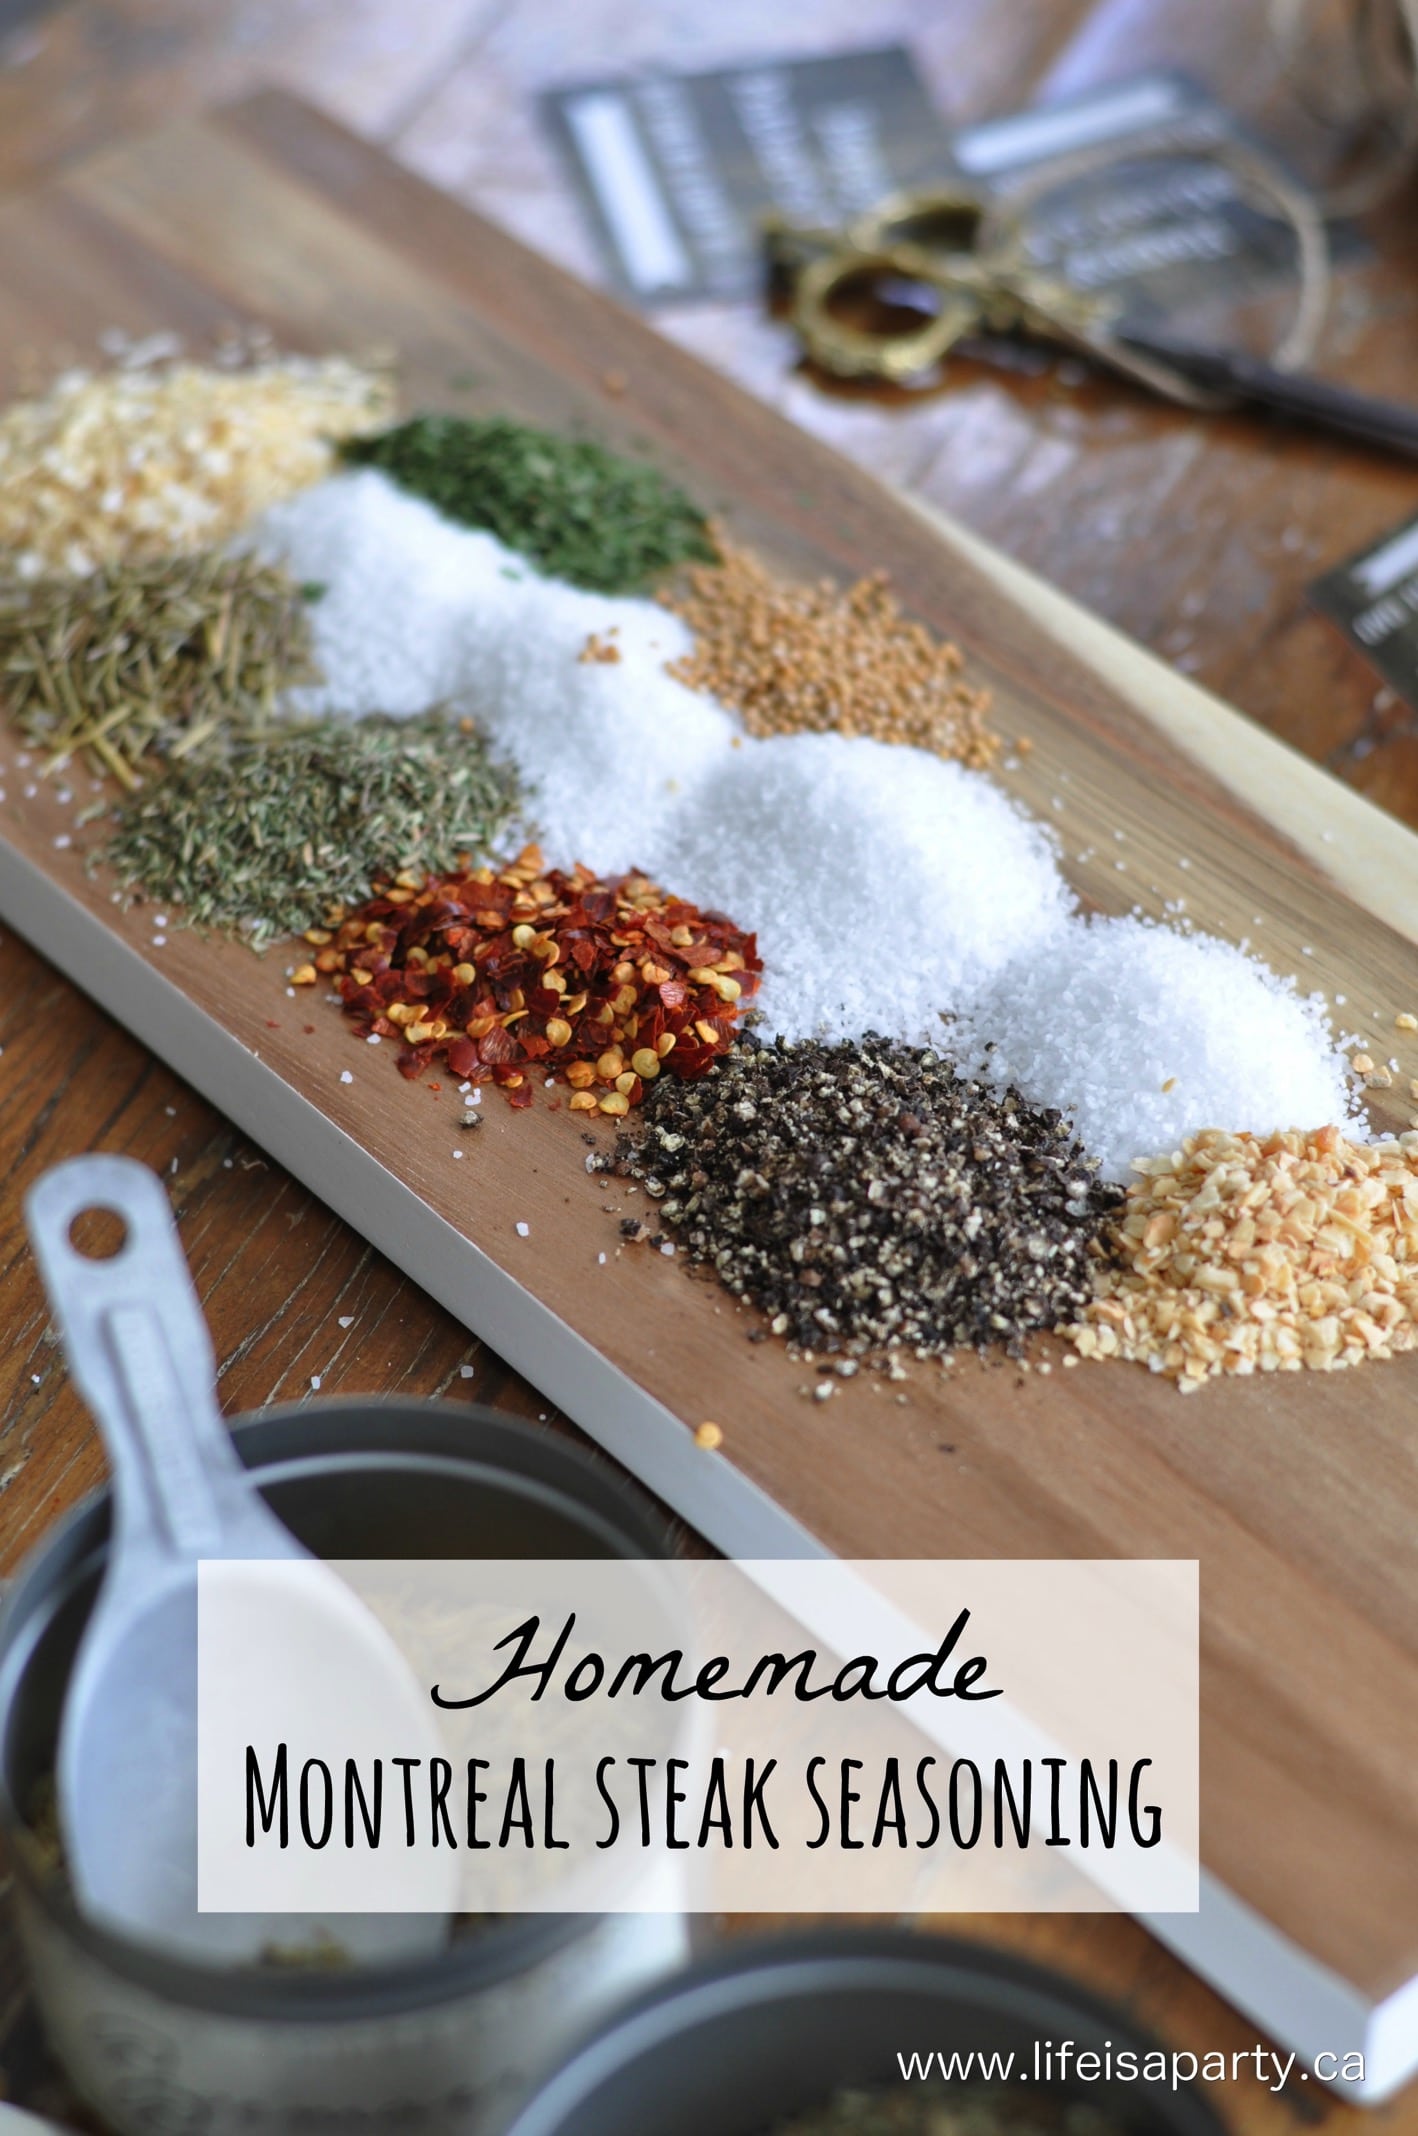
You might also like our Homemade Montreal Steak Seasoning here.

Homemade Montreal Steak Seasoning: Easy to make and delicious recipe, plus free printable Father's Day gift labels.

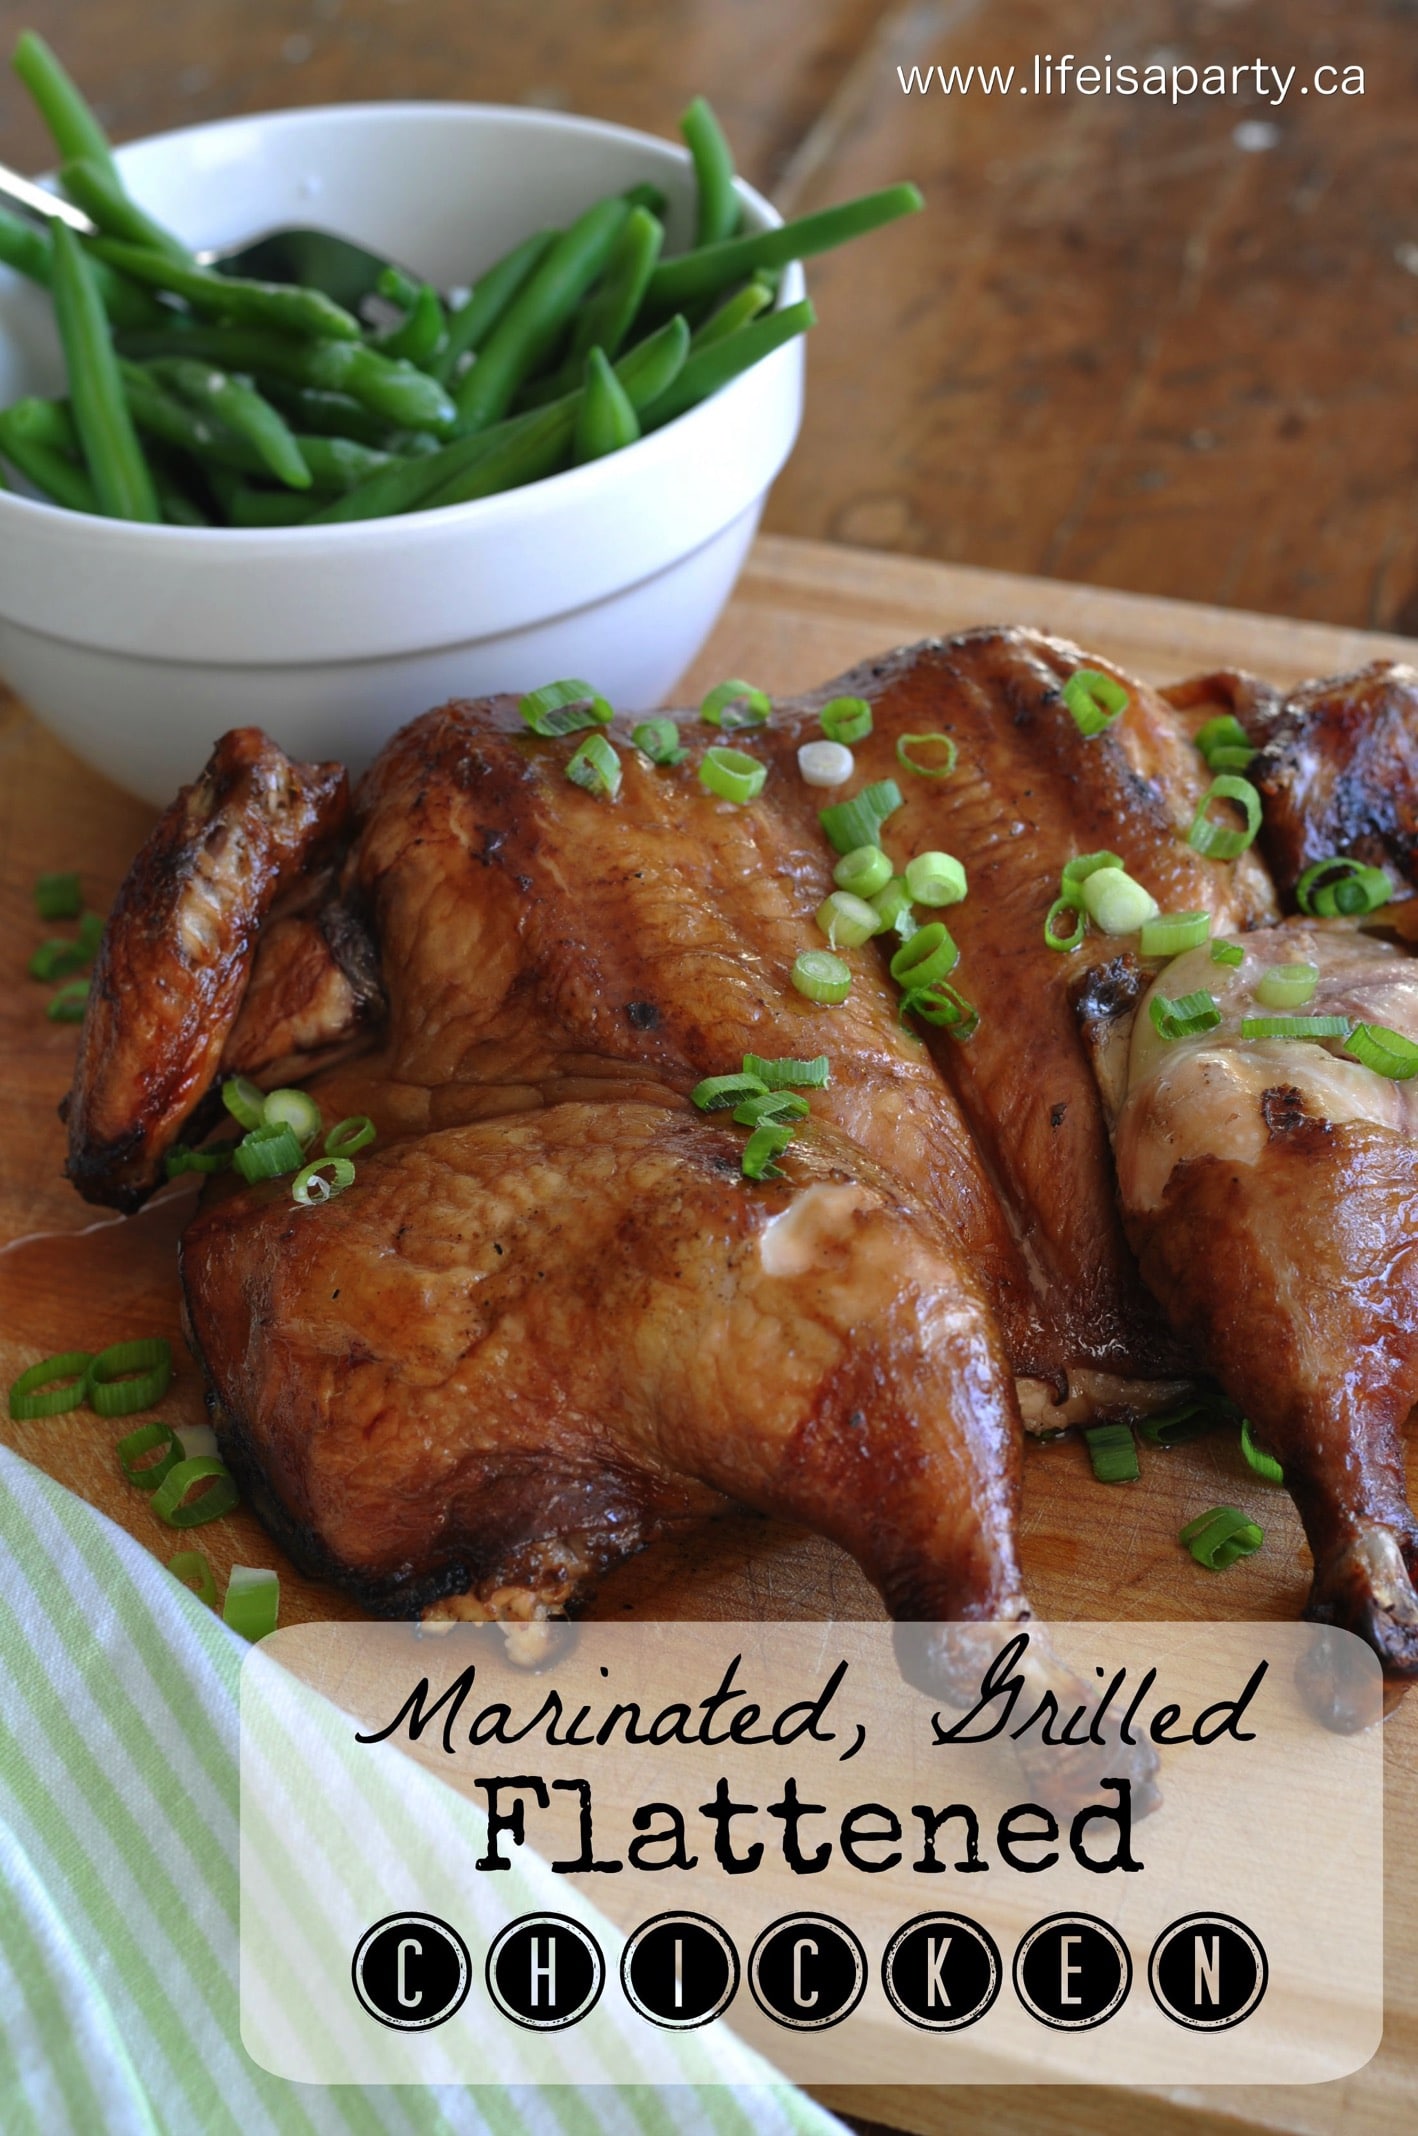
Also check out our Marinated Flattened Chicken recipe here.

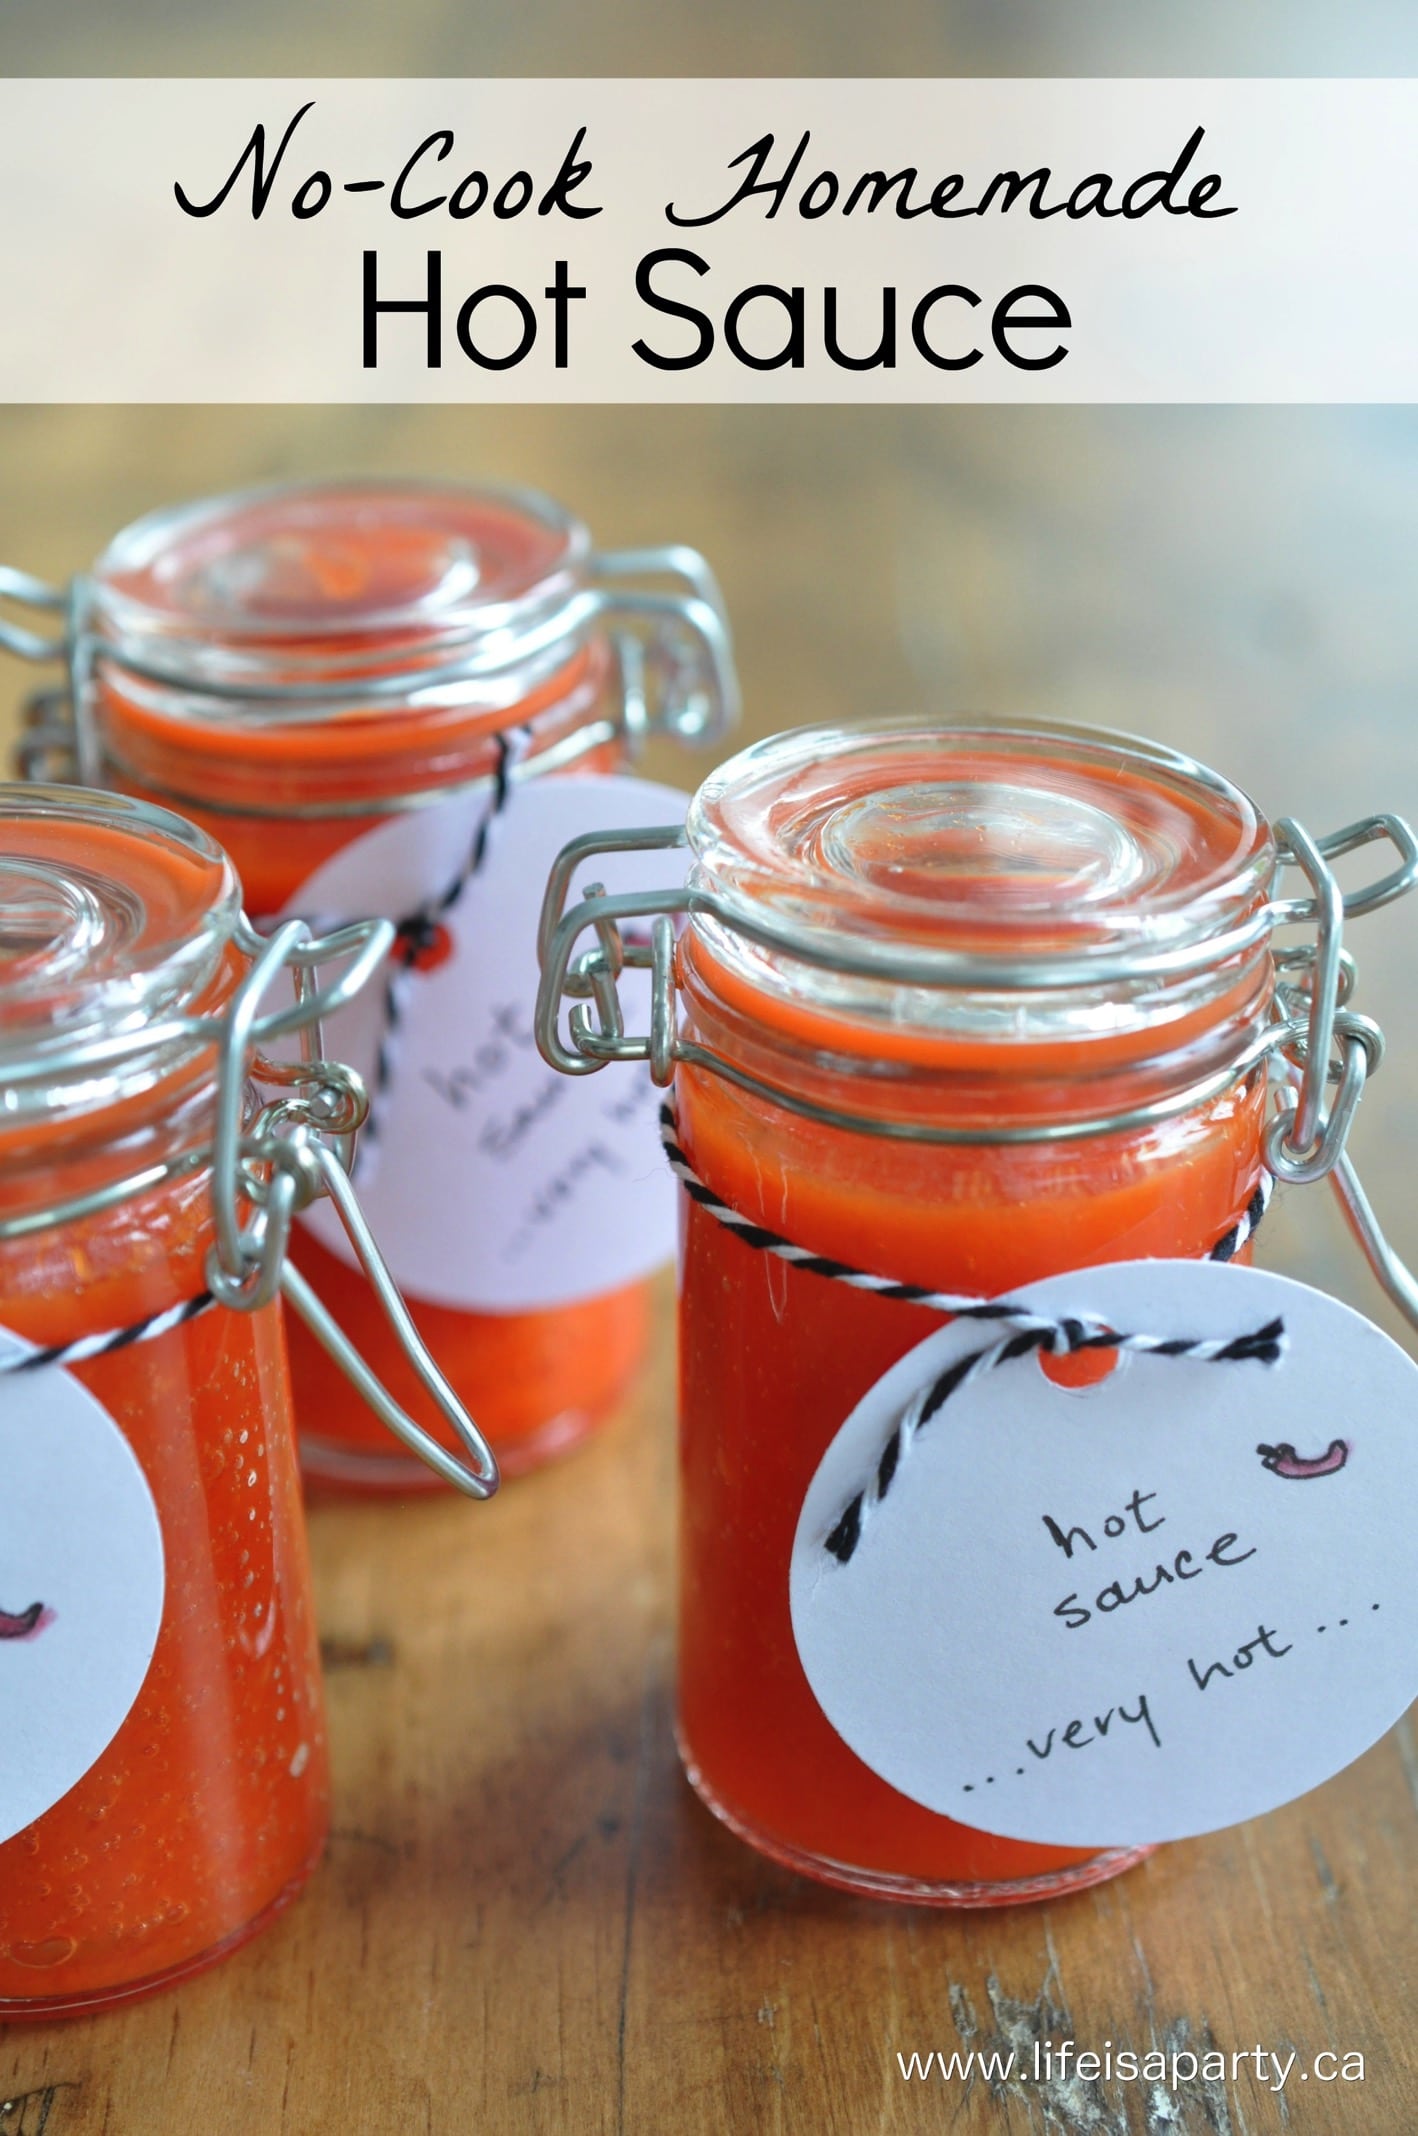
You might also enjoy our No Cook Homemade Hot Sauce Recipe here.

No Cook Homemade Hot Sauce: Make this sauce in minutes in your blender and enjoy the hot tangy homemade hot sauce. The perfect Homemade Father's Day gift.

How To Make A Fairy Garden House

Jun 11, 2015 · 8 Comments

How to make a fairy house for a fairy garden.

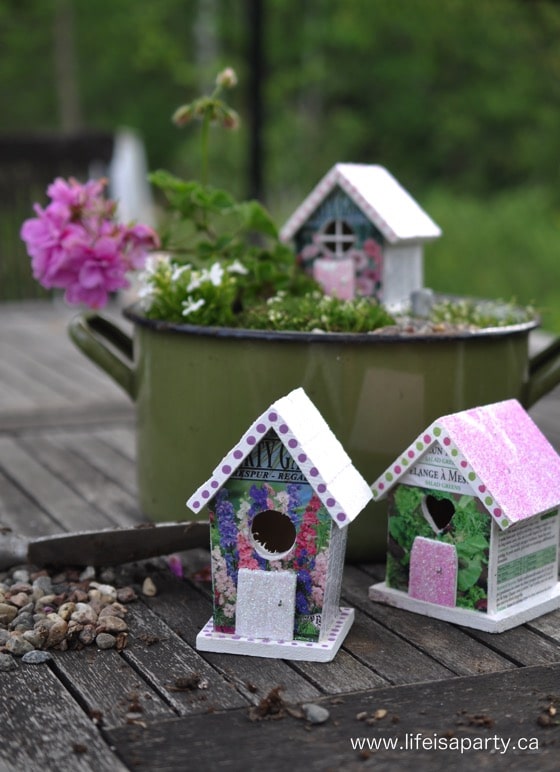
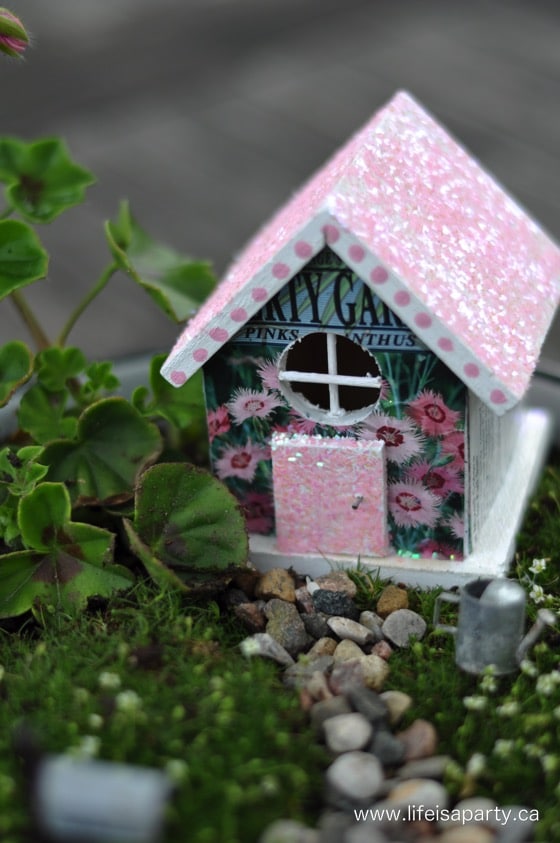
How to make a DIY Fairy House from a dollar store birdhouse and an old seed package. These are perfect for your fairy garden.

How to make a fairy house for a fairy garden.
[feast_advanced_jump_to]

Why We Love This Craft

  • Obviously if you want fairies to live in your garden, you need to bulid them a beautiful house to live in.
  • We used a simple dollarstore bird house for our base and transformed it.
  • It's a great way to up-cyle your seed packages.

We love fairy gardens around here. Check out how to make a fairy garden here, and our teacup fairy garden here, plus our teacup garden here, for some inspiration for getting started. And you will love our fall fairy garden too.

If you haven't had the pleasure of discovering fairy gardens yet, then you're in for a treat.  These little miniature gardens are the cutest.  And I promise if you build one, the fairies and garden sprites will come and move into your garden.

 One thing is for sure when you're making your own fairy garden, you are going to need a little house for the fairies to live in.  

old seed packages

Materials:

How to make a diy fairy garden house
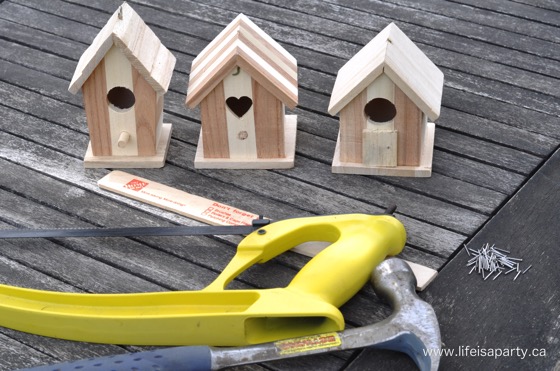
  • Birdhouses: There are lots of different ways to make fairy houses.  Some people like to use a broken terra cotta pot.  Others like to use natural materials, like using pine cones as roof shingles, and rocks to create stone houses.  I like using a simple little dollar store birdhouse as the base for my fairy houses.  The birdhouses are inexpensive and easy to find.  They come in different sizes.  When it comes to fairies though, smaller is usually better.
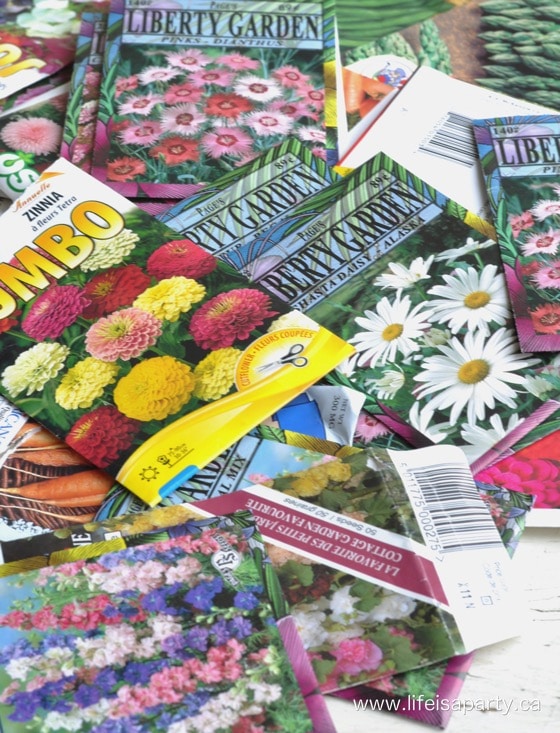
  • Seed Packages: I'm not a hoarder…I just like to keep useful things, in case I need them.  One of those things has been old seed packages.  They're just so pretty, I knew I could use them for something and using them to decorate a DIY fairy garden house was the perfect thing.

If you didn't have any leftover seed packages, you could look for some inexpensive seed packages at the dollar store.  Another option is you could  look for free vintage printable versions online, then just print them and use them.

diy fairy house

DIY Fairy Houses:

Prepping The Birdhouses

1. Start by removing the bird perch from your bird house, with a small saw.  Then cut the end off of a paint stick to make a door for your fairy house.  Some People like to use craft sticks or popsicle sticks to make their fairy door, but I found the paint sticks work really well, since they're the perfect width and a little bit thicker wood.

As soon as the perch is removed from the little birdhouse, it's start looking more like a fairy house immediately.

Paint

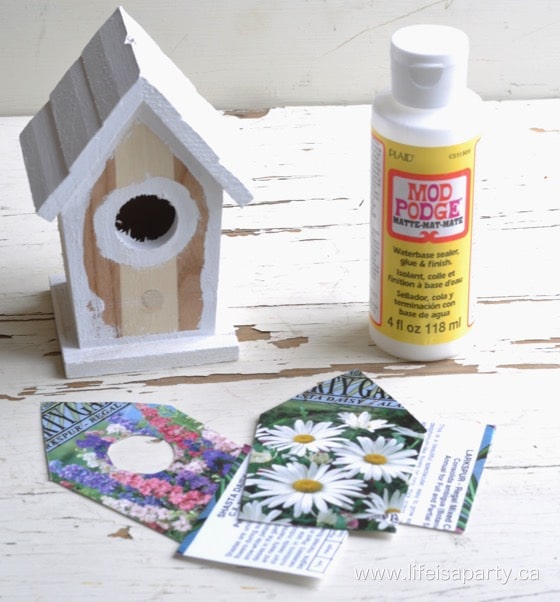
2.  Paint the tiny house roof and edges with craft paint.

I used white paint for my fairy house, but you could use any color you like for yours, or choose something that coordinates with your seed packages.

How to make a DIY Fairy Garden House from a dollar store birdhouse and an old seed package.

Adding The Seed Packages

3.  Cut out and modge podge the seed package onto your own fairy house.

This part might be a little tricky if kids are trying to do it.  I found it helpful to crease the seed package around the edges of the fairy house, and then use those crease lines as a guide to cut it out with scissors.  I found scissors were the best way for me to cut it out, but you could also use a utility or craft knife for this step.

The Fairy Door

4.  Paint the door and add glitter.

Choose any color for your door that you like.  You may want it to contrast with the seed colour package, so that it will stand out more.  It's optional to add glitter, but it's a fun way to add a little sparkle to your fairy house.

Adding Glitter

5.  Coat the roof with mod podge and sprinkle with glitter (after the seed packages have dried).

Mod Podge will help to seal and protect everything, especially for an outdoor fairy garden, where the house will get wet.

6.  Nail the fairy garden door to the house using a tiny finishing nail and leaving it slightly raised to resemble a door knob, or use a hot glue gun to attach it and a thumb tack as the door knob.

The door is such a great finishing touch to the fairy house.

Window Detail

7.  Optional:  Cut toothpicks to create a window, hot glue in place and paint white.

This is a fun little detail to add interest to your fairy house.

making a DIY fairy house from a birdhouse

8.  Create a fairy garden and insert your fairy house, along with small fairy plants, and garden decor like a miniature picket fence, solar-powered garden light, or small stones to create a path to the fairy door.

making diy fairy houses from dollar store bird houses

Making The Fairy Garden

You can add all kinds of fun creative little details in your fairy garden.  Make a fairy pathway out of wood slices, or small stones, add fairy lights, or tiny furniture to your own cute little fairy garden in your own backyard. 

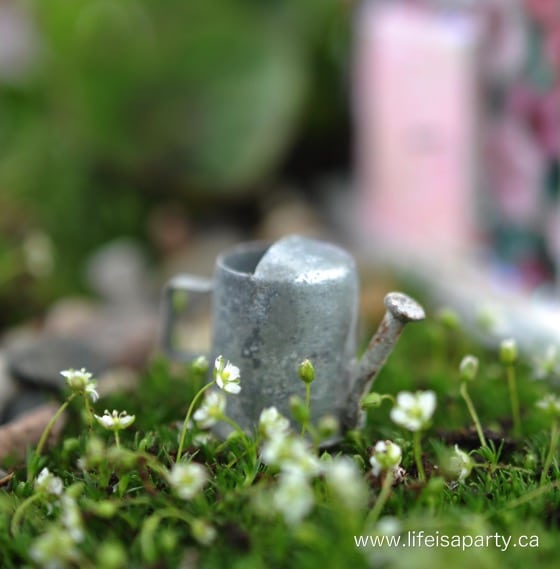
We found a cute fairy sized watering can and added to a little lawn of Irish moss.

miniature watering can for a fairy garden

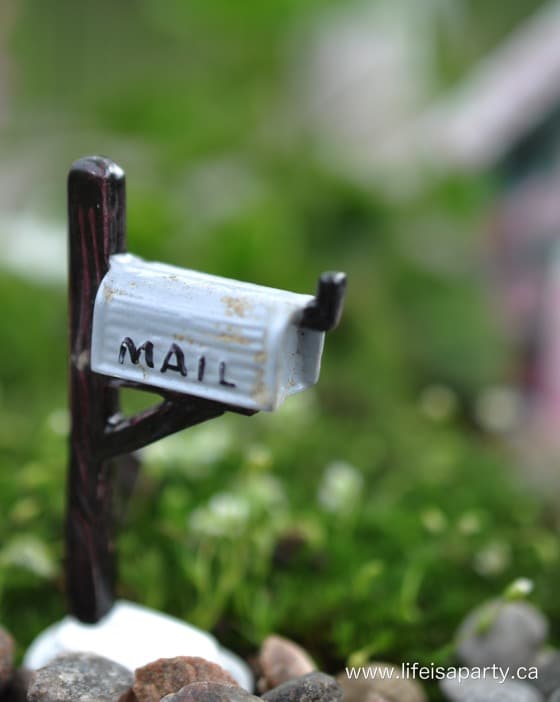
At the end of the little pea gravel path is a sweet little mailbox. I found the watering can at a dollhouse miniature store, and the mailbox is from a craft store.  The best part is that they had so many cute things to add to a mini garden.  You can even look at dollar stores for cute miniature garden accessories. Or make your own out of polymer clay, odd craft materials, or recycled materials.

fairy garden miniature mailbox

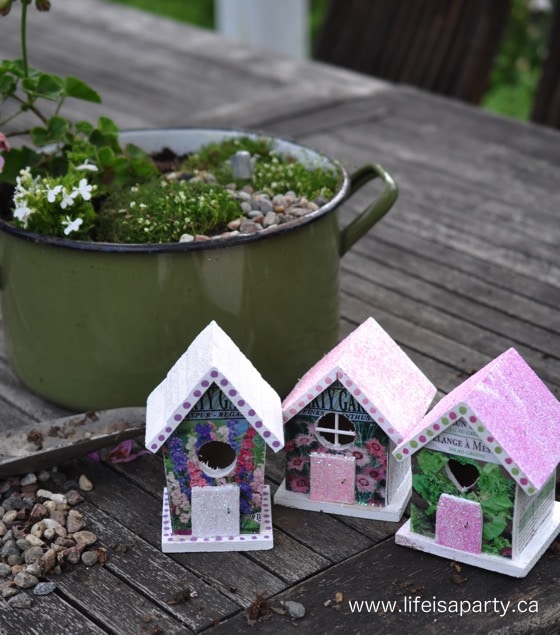
I also love making a few different fairy garden houses and setting them up like a fairy garden village in a grouping of different large terra cotta pots, or garden planters.

How to make a DIY Fairy House for a container fairy garden

I put this simple fairy garden on our deck stairs, along with some other pots for us to enjoy this garden area all summer.  This project was so much fun.  My favorite part was arranging everything together.  This is a great creative project, that kids will enjoy doing too.  Change the colours, seed packages, and glitter colors for lots of variations for your miniature project.  There's so many different ideas that you can incorporate into your own fairy garden house fun craft.

Frequently Asked Questions

Will these fairy houses last outside?

Yes, these should last a season easily. Bring them in the winter. If you want them to last longer, give them a few coats of clear protective spray before adding the to the fairy garden.

Where did you find the mini birdhouse base?

These are from the dollar store. Look for them in early spring.

Where are the fairy garden accessories from?

Look for fairy garden accessories at the dollar store, craft stores -including the miniature doll house accessories section, and plant nurseries.

More Fairy Garden Ideas

  • Teacup garden with small succulent plants and tiny DIY clay fairy houses and mushrooms.
    Teacup Gardens
  • How to make a Christmas fairy garden.
    How To Make A Christmas Fairy Garden
  • How to make a fall fairy garden.
    Fall Fairy Garden
  • Fairy garden miniature picnic.
    Fairy Garden Picnic

If you try making one of these DIY Fairy Garden Houses or any other idea on my blog please leave a star rating and let me know how it went in the comments below. Thanks for visiting today!

Recipe

How to make a fairy house for a fairy garden.

How To Make A Fairy Garden House

No ratings yet
Print Pin Rate
Cook Time: 15 minutes minutes
Total Time: 15 minutes minutes
Author: Dannyelle Nicolle-Ramjist

Equipment

  • small saw
  • hot glue gun

Materials

  • small wooden birdhouse
  • paint stick
  • finishing nail
  • old seed packages
  • mod podge
  • acrylic paint
  • glitter
  • toothpicks
  • hot glue

Instructions

  • Start by removing the bird perch from your bird house, with a small saw. Then cut the end off of a paint stick to make a door for your fairy house. Some People like to use craft sticks or popsicle sticks to make their fairy door, but I found the paint sticks work really well, since they're the perfect width and a little bit thicker wood.
  • Paint the tiny house roof and edges with craft paint.
  • Cut out and modge podge the seed package onto your own fairy house.
  • Paint the door and add glitter.
  • Coat the roof with mod podge and sprinkle with glitter (after the seed packages have dried).
  • Nail the fairy garden door to the house using a tiny finishing nail and leaving it slightly raised to resemble a door knob, or use a hot glue gun to attach it and a thumb tack as the door knob.
  • Optional: Cut toothpicks to create a window, hot glue in place and paint white.
  • Create a fairy garden and insert your fairy house, along with small fairy plants, and garden decor like a miniature picket fence, solar-powered garden light, or small stones to create a path to the fairy door.

Peach Muffins with Almond Crumble Topping Recipe

Jun 9, 2015 · 3 Comments

Homemade peach muffins.

Peach Almond Muffins: Delicious recipe, can be made with fresh or canned peaches, with the perfect crunchy sweet almond crumble on top.

Homemade peach muffins with strudel topping.
[feast_advanced_jump_to]

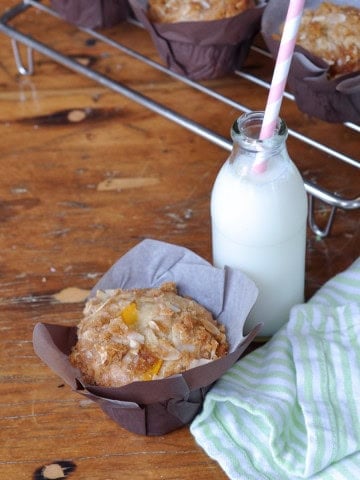
Peach season is almost here, and these Peach Almond Muffins with an almond crumble topping are a great thing to make with fresh peaches.  They're delicious and moist with lots of large pieces of peaches in each bite.  The crumble topping is  full of almonds and sweet and crunchy and the perfect contrast to the delicate crumb of the muffins.  If you love peaches and a peach dessert you will love this peach muffins recipe.  It is an absolute favourite of mine.  These are great for breakfast or an afternoon snack.

One of the first time I made these I brought them to the beach for a meet up with my mom friends and their kids.  My friends absolutely loved them, and all asked for the recipe afterward.  I will always think of this recipe and that morning in the sun at the beach with the kids playing and swimming and us mom perched on the beach chatting and all sharing these delicious muffins together.

Peach Almond Crumble Muffins Recipe

Fresh or Canned Peaches

You can use fresh peaches in this recipe.  These are amazing during peach season, made with fresh juicy peaches.  Just remove the skin and cut the fruit up into a large dice.   In fact, it's a recipe I tried one year when I had too many peaches.  But then one day, it wasn't peach season and I wanted a muffin and I remembered these.  I had the great idea to try making them with canned peaches.  And they were still amazing -hooray (and quicker to make too).  So if you have some juicy delicious fresh peaches to use up….or you don't, you should make these amazing muffins.  For the canned peaches I just drained their juice and cut them up into large diced pieces.

Peach Muffin recipe

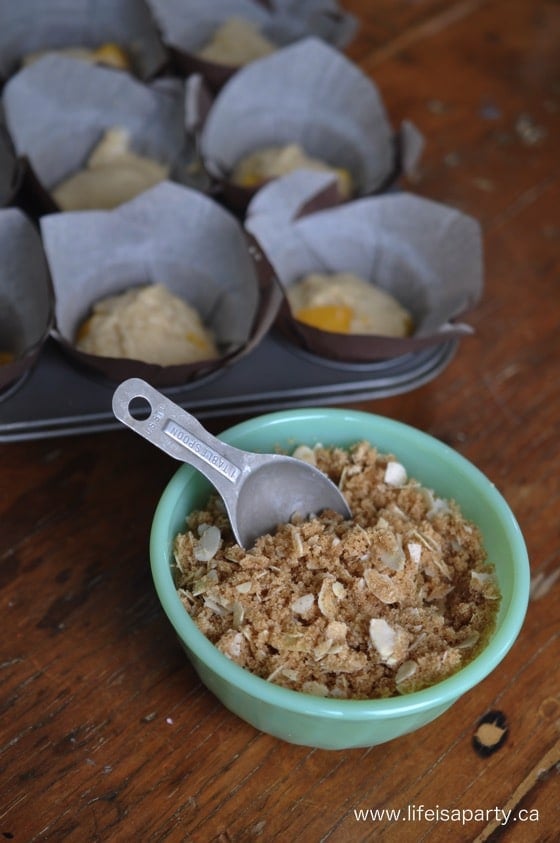
You won't need any fancy equipment to make these flavorful muffins.  No stand mixer or electric mixer is necessary to mix together this easy recipe.  Just stir it together by hand and spoon batter into a muffin pan lined with prepared muffin cups.  Lastly you'll spoon on the amazing almond crumble topping and bake.  This sweet peach muffins are sure to become a new favorite.

Peach Almond Muffins with crumble topping
how to make Peach Almond Crumble Muffins

Storing The Peach Muffins

Because the crumble topping is so nice and crunchy, these peach muffins are best eaten as soon as they're made.  You can store leftovers in an airtight container, but the crumble on the tops of the muffins will lose a bit of it's crispness.

These fresh peach muffins are perfect for summer days with the kids, when you need a little something to pack for a snack at the beach or park.  These delicious peach muffins are the best breakfast too.  Any peach lover will really love these.   They're one of my favorite muffin recipes.  I love having one with a cup of tea or coffee.  These cake-like muffins have a great peach flavor and the almond crumble with cinnamon sugar on the muffin tops adds a nice crunch.

Recipe

Homemade peach muffins.

Peach Almond Muffins

Moist muffins filled with peaches and topped with almond strudel.
No ratings yet
Print Pin Rate
Course: Breakfast
Cuisine: American
Prep Time: 10 minutes minutes
Cook Time: 25 minutes minutes
Total Time: 35 minutes minutes
Servings: 18 muffins
Calories: 225kcal
Author: Dannyelle Nicolle-Ramjist

Ingredients

For the Batter

  • 2 ⅔ cup all-purpose flour
  • 1 teaspoon baking soda
  • pinch of salt
  • 1 cup brown sugar packed
  • 1 cup plain yogurt
  • ½ cup vegetable oil
  • 2 eggs
  • 1 teaspoon vanilla extract
  • 1 cup diced peaches fresh with skin removed or canned

For the Almond Crumb Topping

  • ½ cup brown sugar packed
  • ½ cup sliced almonds
  • ½ teaspoon cinnamon
  • 4 teaspoons vegetable oil

Instructions

  • In a large bowl for the dry ingredients combine flour, baking soda and salt and whisk to remove any lumps.
  • In another large mixing bowl, combine brown sugar, yogurt, oil, eggs, and vanilla and stir to combine.
  • Add the wet ingredients to the dry ingredients and stir to combine. Add in the chopped peaches and continue gently stirring until well combined, making sure not to over mix.
  • To make the Almond Crumble Topping, combine in another medium bowl the brown sugar, almonds, and cinnamon and stir to mix. Add in the oil and stir until crumbly.
  • Line muffin tins with paper liners and fill each about ⅔'s full with peach muffin batter with an ice cream scoop. Add about 1 tbsp. of crumble mixture on the top of each muffin.
  • Bake at 350 degree F for 20-25 mins. until muffins are firm to the touch and golden brown on top. Let cool on a wire rack. Makes 18 muffins

Nutrition

Serving: 1g | Calories: 225kcal | Carbohydrates: 32g | Protein: 4g | Fat: 10g | Saturated Fat: 1g | Polyunsaturated Fat: 8g | Cholesterol: 21mg | Sodium: 99mg | Fiber: 1g | Sugar: 17g
Tried this Recipe? Tag me Today!Mention @LifeisaParty or tag #lifeisaparty!
favourite Peach Muffin recipe

With homemade Peach Almond Muffins, life really is a party!

More Recipe Inspiration

  • Campfire muffin in an orange peel.
    How To Make Campfire Muffins In An Orange Peel
  • Oatmeal chocolate chip muffin recipe.
    Easy Oatmeal Chocolate Chip Muffins
  • Easy food processor scones on a plate with jam.
    Easy Food Processor Scones
  • Easy blueberry scones piled in white enamel tray with butter on the side.
    Starbucks Copycat Blueberry Scones But Better


Summer Dinner Party

Jun 4, 2015 · Leave a Comment

Summer Dinner Party: ideas for inexpensive DIY decor like flowers, bunting, and menu cards with a peach, pink, and lime green colour scheme.

Summer Dinner Party: ideas for inexpensive DIY decor like flowers, paper garland, and menu cards with a peach, pink, and lime green colour scheme.
Summer Dinner Party: ideas for inexpensive DIY decor like flowers, bunting, and menu cards with a peach, pink, and lime green colour scheme.

This pretty summer dinner party was fun to put together with some easy DIY decor ideas for a gorgeous summer table.

Inspiration can come from anywhere.  Last week, after being given some pretty flowers left over after an event, I was inspired by their colour combination of peach, pink, and lime green.  I won't normally think of putting peach and pink together, but seeing it, I thought it was really, really pretty, and a bit different.  The free pretty flowers inspired the rest of the table.

easy diy paper party decorations garland

Since I didn't have anything else with the three colours, I thought I could make something to bring it all together.  There's nothing cheaper than paper when it comes to making party decor.

diy paper garland

DIY Paper Garland

  • scrapbook paper
  • scissors / paper cutter
  • sewing machine

I went to the craft store and picked up a few sheets of pretty scrapbook paper in the three colours.  Then I cut out lots of different sized triangles.  The easiest way is to use a paper cutter to cut strips, then cut the strips into squares, and then cut the squares in half to make triangles.  I liked the look of them in varying sizes.  I cut out larger ones to sew a paper garland together, and small, tiny ones to decorate menu cards.

how to make paper garland with your sewing machine

It's really easy to make a garland on the sewing machine.  Just feed your paper into the machine, and stitch right through it (just like sewing cloth) when you come to the end of it, keep stitching, this will produce a gap.  Without cutting the thread, feed in the next triangle.  

Keep going with the random sizes and colours, at random intervals to create random sized gaps.  Once you have the garland as long as you want it, just snip the thread.  

I used a bright pink thread on the top, and white on the bottom, which created a string almost like baker's twine.

summer dinner party

The paper garlands look great hanging over the china cabinet.

how to make menu cards

DIY Menu Cards

  • white cardstock
  • scrapbook paper 
  • scissors / paper cutter
  • sewing machine
  • marker

I used a similar method on the menu cards.  I cut out smaller triangles, and then stitched them on to card stock menu cards.  You simply stitch the paper just like you would fabric, and feed on the tiny paper triangles as you go.

Sewing on paper menu card

The results were amazing.  My guests liked them so much that they took them home after dinner as a souvenir.

summer dinner party menus

I loved how they were all a little different.  

For the lettering I just used a thicker sharpie to write "menu" and filled it in with a fine sharpie.

Summer dinner party tablescape pink peach lime green

There's a great little lesson here, if you're trying to bring together a colour scheme, find something with all the colours in it.  If you can't find it, make it.

Summer dinner party

Summer Dinner Party Table

I set the table with things I already had, pretty gold cutlery, simple white plates, pink glasses, and pink napkins.  The flowers were in simple mason jars.

This table really came together for about $5.  Even if you had to buy the flowers, there are really inexpensive mums and carnations, easy to find at a grocery store -and super long lasting too.  

For the rest of the table, I just shopped my house.  Simple white plates go with everything.  I hope you feel inspired to try something different, and see what you can create.

Summer dinner party table

With a pretty summer dinner party like this, life really is a party!

You might also like our 3 Steps To An Easy Summer Table here.

Also check out our Summer Table here.

Summer Tablescape -garden flowers in vintage bottles under glass cloches create a simple, easy summer time table for entertaining.

Match Jar

May 19, 2015 · Leave a Comment

Match jar.

Match Jar Camping Hack: perfect for camping, cottage, or home. Simple DIY to keep matches dry and give you some where to strike them.

DIY match jar.
[feast_advanced_jump_to]

Yesterday was Victoria Day here in Canada, the first long weekend of summer and the un-official start to all summer activities, like barbecuing, gardening and camping.  I thought it might be fun to share this match jar with you, it's a  little camping hack idea.  It's super easy, but also super practical.

how to make a match jar

When I was a little girl, we had a trailer in the woods, and almost every weekend of the summer we made the two-hour car ride to sit by the campfire, swim in the lake and hike in the woods at our little family get-away.  There was no electricity, no running water, and no indoor plumbing.  But, we loved it that way.  We had a little gas stove in the trailer, but unless it was raining, my Dad pretty much always had a campfire going.  For those rainy days, or at night when we needed to light the lanterns, we had a match jar.  It sat by the stove in the trailer, and always provided dry matches, and a place to strike them.  It was a little thing, but like most great life hacks, it sure made life easy when you needed to light a match.

I recently accidentally left a box of matches out on our deck over night, and the dew ruined the cardboard box, it got me thinking that I should throw out the old wrecked box, and make myself a match jar.  Here's how I did it.

Match Jar Materials:

  • matches
  • a mason jar
  • sandpaper
  • cardboard
DIY Match Jar

How To Make A Match Jar

All you need to do is use your jar top to trace out a circle on your sandpaper, and then again on the cardboard, and cut them out.

Place your matches in the jar, insert the sandpaper circle into the lid of the mason jar, and then back it with the cardboard to give it a little support.  You might need a drop of glue, if it isn't a snug fit.

how to keep your matches dry when camping

Next time you need to light a match, use the sandpaper lid as your striking surface.  The jar will keep your matches nice and dry, perfect for camping, or even just around the house.

Sometimes the simplest things in life are the best.

match jar

With a DIY Match Jar, life really is a party!

More Inspiration

You might also like our Campfire Cinnamon Rolls here.

Also check out our Orange Peel Candles here.

Orange Peel Candles: the perfect camping activity make a candle out of just 2 items, an orange and some olive oil. 

You might also enjoy our Campfire Paninis here.

Campfire Paninis: make your own DIY campfire paninis press with a foil covered flat rock and enjoy a campfire panini in the woods.

Easy Vanilla Almond Cake Recipe

May 12, 2015 · Leave a Comment

Almond cake with raspberry jam on a white cake stand.

Easy Vanilla Almond Cake -delicious home made moist vanilla almond cake recipe that's quick and easy to make.

Almond cake recipe.
[feast_advanced_jump_to]

This easy vanilla almond cake makes a wonderful layer cake.  It's perfect for birthdays or any celebration or special occasions, or just when you're after a delicious moist white cake with the flavors of almond and vanilla.  I like to add raspberry jam between the layers and top it with a simple icing. It's on of my favorite cake recipes and quite easy to make.  If you love almond flavor you will love this delicious recipe.

I have eaten this cake far more times than I have baked it.

It is a family recipe, on my husband's side.  You don't think much about the food you're marrying into when you choose a spouse.  Inevitably there will be some things around your husband's family favorites that you love and others maybe not so much.  This cake was like a marrying bonus, and everyone in my husband's family loves it too.

Almond layer cake

It's made by my sister-in-law Keers, and it doesn't always appear at family functions.  If it's going to show up, it's probably someone's birthday, but even then you can't be sure of it.  When we see the almond cake my other sister-in-law and I get excited.  It's always a huge hit.  This cake and a cup of tea or coffee is pretty much all you need for at least a moment of happiness in your day.  It's just such a yummy moist almond cake, that always turns out great.

I've added my own little twist to the cake recipe over the years.  I make it a triple layer cake and I like to add raspberry jam.  I feel like the fruit really lifts it.  It would also be really great with fresh berries and icing or whipped cream too.  It would be perfect for afternoon tea. This simple vanilla almond cake is a winner.  Although, it's great with just icing too.  

It's quite moist cake and a bit dense -in all the best ways.  It has a tender crumb.  It's very different from the light fluffy texture of cake mixes.  And it's so much more flavorful.   As cakes go, it's pretty simple to make from scratch.  If you've never made a cake from scratch and usually use a cake mix, it's so worth the tiny bit more effect to make it from scratch.

This recipe is made with simple ingredients.  I usually keep some almond extract on hand for making it.  And if you don't use ground almonds very often, you can store them in the freezer to keep them fresh.  The sour cream helps make this cake moist as well.

Almond Cake with Raspberry Jam

Almond

This delicious cake gets its almond flavor from the key ingredients of almond extract and ground almonds.  Look for pure almond extract rather than almond essence.  Almond extract is made from real whole almonds which are cold pressed to extract the flavor, where as almond essence is made from synthetic materials to mimic the taste.  Starting with excellent ingredients always gives the best results in baking.

This cake also contains ground almonds, sometimes called almond flour or almond meal.  The ground almonds in the cake help to keep the cake moist, and also give the cake a denser more crumbly texture which is so delicious.

Almonds and vanilla pair very well, enhancing each other.  We've used vanilla extract in this recipe to compliment the almond flavor, and it's such a match made in heaven..

how to make an Almond Cake with Raspberry Jam

Ombre Frosting

I used my favourite buttercream frosting recipe, but added a little almond extract to it.  To create the ombre effect I divided the icing into three bowls and added red food colouring to create three shades of pink icing.  I spread each of the cake layers with a thin layer of raspberry jam, and then the icing using an offset spatula.  I iced the cake from the darkest color to lightest color.  It turned out so pretty, and simple.  For the simple ribbon flags to decorate the cake I use used 5 small pieces of different pink ribbons and looped them onto wooden skewers, then positioned them at different heights in the cake for a festive touch.  Remember this idea next time you're celebrating a birthday.  It's easy to do and looks so great.

More Decorating Options

You could also layer this cake with just icing, and frost the sides as well for a more traditional layered cake.  Another option is to add fresh fruit or sliced almonds to the top of the cake.  It would also be delicious served with whipped cream and fruit as another option.

Storing Leftovers

Store any leftovers at room temperature in an airtight container or wrapped tightly in plastic wrap to keep it nice and moist.

homemade Almond Cake with Raspberry Jam

We enjoyed the cake for a joint celebration of Mother's Day and my little sister's birthday over the weekend.  See I'm stealing this perfect recipe for my side of the family now too.  And now, writing this post and seeing all the pictures, I want to eat all the leftovers.  A second slice of this cake and cup of tea are in order.

Almond Cake recipe

Julia Child said "a party without cake is just a meeting".  This cake ensures it's no meeting!  

Recipe

Almond cake with raspberry jam on a white cake stand.

Vanilla Almond Cake

Moist and rich almond cake.
No ratings yet
Print Pin Rate
Course: Desserts
Cuisine: American
Prep Time: 15 minutes minutes
Cook Time: 30 minutes minutes
Total Time: 45 minutes minutes
Servings: 3 Layer 8-inch Cake
Calories: 451kcal
Author: Dannyelle Nicolle-Ramjist

Ingredients

  • 1 cup + 2 tablespoon softened butter
  • 1 ½ cups white sugar
  • 1 cup sour cream
  • 3 eggs
  • 1 ½ teaspoon almond extract
  • ½ teaspoon vanilla extract
  • 2 ½ cups all-purpose flour
  • ½ cup ground almonds
  • ¾ teaspoon baking powder
  • ¾ teaspoon baking soda
  • ¼ teaspoon salt

Instructions

  • Begin by creaming together the butter and sugar in the large mixing bowl of a stand mixer fitted with the paddle attachment.
  • Next, add in the wet ingredients. Add the sour cream, eggs, almond and vanilla extract and mix until well combined.
  • In a separate bowl, combine the dry ingredients. Mix together the flour, ground almonds, baking powder, baking soda, and salt.
  • Add the flour mixture into the wet ingredients, and stir at low speed until just combined, taking care not to over mix.
  • Preheat oven to 350 degrees.
  • Divide the cake batter between three 8-inch cake pans that have been buttered or sprayed with non-stick cooking spray.
  • Bake for about 30 min, until a toothpick inserted in the middle comes out clean. Cool on a wire rack before icing.

Nutrition

Serving: 1g | Calories: 451kcal | Carbohydrates: 71g | Protein: 9g | Fat: 15g | Saturated Fat: 6g | Polyunsaturated Fat: 8g | Cholesterol: 94mg | Sodium: 339mg | Fiber: 2g | Sugar: 39g
Tried this Recipe? Tag me Today!Mention @LifeisaParty or tag #lifeisaparty!

With a vanilla almond cake life this, life really is a party!

More Recipe Inspiration

You might also like our Homemade Funnel Cake recipe here.

Also check out our Cupcakes in a Mason Jar here.

You might also enjoy our Strawberry Cupcakes recipe here.

Teacup Fairy Garden

May 5, 2015 · 19 Comments

How to make a fairy garden in a teacup.

How to make the sweetest teacup fairy garden with succulents, including how to make a mini fairy-sized cupcake and book out of polymer clay.

Teacup fairy garden with succulents and fairy garden accessories.
[feast_advanced_jump_to]

Why We Love This Craft

  • It's the perfect way to use a vintage teacup.
  • The succulents are low maintenance.
  • The little fairy sized book and cupcake are easy to make from polymer clay and hold up perfectly in outdoor conditions.
  • They're so cute!
  • Great for gift giving.
  • They're easy to make with kids.

I love making any miniature fairy garden. See how to make a fairy garden here, how to make a fairy garden house, our teacup garden with tiny clay fairy houses, and how to make a fall fairy garden here.

But this teacup fairy garden might be the sweetest ever.

I wanted to make my mom a sweet little gift for Mother's Day this weekend, and my mom loves to garden and has a green thumb. She loves gardening so much that she has just about every plant at the garden centre, so giving her a gardening gift requires a little bit of creativity.

Teacup fairy garden with succulent plants and fairy garden accessories.

After our recent teddy bear themed tea party, we had quite a few pretty vintage teacups around, and I thought it might be fun to turn one vintage teacup into a fairy garden.

Materials:

Materials for teacup fairy gardens, including soil, plants, small stones, and vintage teacup.
  • Vintage Teacups: Look for these at your local thrift store, or antique store.
  • Small Succulent Plants: Choose draught tolerant succulent plants. Tiny containers like tea cups are so small that they dry out quickly, and aren't the best conditions for most plants. Succulents are drought tolerant plants. Look for really small varieties, so there's room even in a teacup for a few little fairy accessories.
  • Small Stones: since we can't drill holes for drainage in our teacup, we'll put some small stones in the bottom. That way the roots of the plant in the soil won't be sitting in water.
  • Soil: Look for succulent soil for best results.
  • Fairy Garden Chair and Mini Mushrooms: look for cute fairy garden accessories at the craft store, dollar store, or at a garden nursery.
  • Polymer Clay: We made some cute fairy sized accessories out of polymer clay. It is easy to work with, comes in lots of colors and holds up perfectly in outdoor conditions.

How To Make A Teacup Fairy Garden:

1. I started out with adding some stones to the bottom of the teacup. 

Succulents don't like to be wet, and there's no drainage in the bottom of the cup, so rocks are important. 

Using cactus/succulent soil will help too because it's sandy and quick draining.

Vintage teacup and sauce with small stones in the bottom.

2. I picked up a few really sweet sedum plants at the garden centre, and used one I already had. 

In case you're wondering the bright green/yellow one on the left is Stone Orpine "Angelina" and the greyish/purple one at the back on the right is Stonecrop "Cape Blanco".

These are great plants for tiny gardens.

Teacup planted with mini succulent plants for a fairy garden.

3. I positioned them, leaving a little room for a rock path using pea gravel and a miniature chair from the craft store. I also added a few faux mushrooms.

Adding mini faux mushrooms to a teacup fairy garden.

4. To really make it inviting for a fairy I wanted to make a few little fairy treats, and I made them out of polymer clay.

I just placed them on the chair, but you can also use a little super glue to keep them in place if you wish.

Making a fairy garden in a teacup with real plants and DIY fairy accessories.

Making the Clay Objects:

Fairy Sized Book

To make the book, start with some white clay. Use a mini rolling pin to flatten it out, and then cut it with a straight edge. 

After it's cut down to the right size, use a toothpick on the edge to add some grooves to look like book pages. 

Next, make the cover. Roll out another colour, I used blue, quite thin, and then cut it slightly larger than the book pages. Wrap it around the white, making sure there is no gap at the back between the pages and the cover. 

Bake in the oven according to the package directions, I baked mine at 250 degrees for 10 min.

how to make a miniature fairy book out of polymer clay
When you're working with the polymer clay you could really create just about anything. 

Just remember to think about scale. 

I used the chair as my guide. Don't be afraid to redo something if it seems a little off. Part of the beauty of this clay is that you can re-work if you're not happy, up until you bake it. Think play dough, and have fun.

Fairy Sized Cupcake

To make the cupcake, I started out with a tiny cylinder for the cake base. To make the icing, start with a tiny ball of pink, and then flatten it out, and add it to the top of the cylinder cake. The cherry on top is a tiny ball of red clay. 

Put it all together and bake the same way you did for the book.

Making a fairy sized cupcake out of polymer clay for a fairy garden in a teacup.
Teacup fairy garden with real succulent plants and fairy fairy-sized chair.

I'm warning you, making your own fairy gardens is addictive, once you get started you start thinking of all kinds of little possibilities to add to your teacup mini gardens. Enjoy.

Display your teacup fairy garden outside on a side table, shelf, or grouped with larger pots, or indoors in your living room, or anywhere else.

More Fairy Garden Inspiration

  • DIY miniature fairy house in a bottle.
    How To Make A Miniature Fairy Garden In A Bottle
  • DIY miniature chandelier for a fairy garden.
    Fairy Garden Fish Hook Miniature Chandelier
  • DIY miniature fairy garden pergola.
    Fairy Pergola
  • DIY felt mushrooms.
    Felt Mushrooms

Frequently Asked Questions

Do I have to put stones in the bottom of the teacup?

Yes. Small stones or gravel will help with drainage. Since there's no holes in the bottom of a teacup for excess water to run out the stones will hold the soil and plant roots out of any excess water until it evaporates. Succulents don't like sitting in water.

Where can I find fairy garden accessories like the chair and the mushrooms?

Look for fairy garden accessories in craft stores, sometimes in the miniature doll house section. They are also sometimes sold at dollar stores, or at a plant nursery.

Will the polymer clay accessories get ruined in the rain and sun outside?

No, they hold up really well. I've had some homemade fairy garden accessories made from polymer clay for 5 years and they still look great.

If you try making one of these Teacup Fairy Gardens or any other idea on my blog please leave a star rating and let me know how it went in the comments below. Thanks for visiting today!

Recipe

How to make a fairy garden in a teacup.

Teacup Fairy Garden

Make a fairy garden in a teacup with plant suggestions and DIY fairy garden accessories.
No ratings yet
Print Pin Rate
Cook Time: 30 minutes minutes
Total Time: 30 minutes minutes
Servings: 1 garden
Author: Dannyelle Nicolle-Ramjist
Cost: $20

Equipment

  • small garden trowel

Materials

  • teacup
  • small succulent plants
  • succulent soil
  • small stones or gravel
  • fairy garden chair
  • fairy garden mushrooms
  • polymer clay

Instructions

  • Start by adding some stones to the bottom of the teacup. And then add a layer of succulent soil.
  • Plant your mini succulents, leaving some room in the center of the teacup for creating your fairy scene.
  • Add some stones to cover the soil around the plants, and then position your chair and mushrooms.
  • Add the tiny polymer clay book and cupcake to the chair for a fairy to enjoy. You can also add a little super glue to hold it in place if you like.

Fairy Sized Book

  • To make the book, start with some white clay. Use a mini rolling pin to flatten it out, and then cut it with a straight edge. 
    After it’s cut down to the right size, use a toothpick on the edge to add some grooves to look like book pages. 
    Next, make the cover. Roll out another colour, I used blue, quite thin, and then cut it slightly larger than the book pages. Wrap it around the white, making sure there is no gap at the back between the pages and the cover. 
    Bake in the oven according to the package directions, I baked mine at 250 degrees for 10 min.

Fairy Sized Cupcake

  • To make the cupcake, start out with a tiny cylinder for the cake base. To make the icing, start with a tiny ball of pink, and then flatten it out, and add it to the top of the cylinder cake. The cherry on top is a tiny ball of red clay. Put it all together.
    Bake in the oven according to the package directions, I baked mine at 250 degrees for 10 min.

Notes

Succulents don't like to be wet, and there's no drainage in the bottom of the cup, so rocks are important. 
Using cactus/succulent soil will help too because it's sandy and quick draining.
Optional: use some super glue to hold your tiny book and cupcake in place.
Don't want to make your cupcake or book?  Look for ready made small fairy garden accessories at the store instead.

Fairy Garden Campground

Apr 30, 2015 · 4 Comments

Camping themed fairy garden ideas.

This Camping Themed Fairy Garden has a DIY tent, hammock, an outhouse, and a campfire. We've even made teeny, tiny fairy fairy-sized polymer clay marshmallows, chocolate and s'mores so the fairies can make s'mores! So many fun and easy DIY details.

How to make a camping themed fairy garden.
[feast_advanced_jump_to]

I've been making fairy gardens for years now. See how to make a fairy garden, our teacup fairy garden, our teacup garden, fairy garden campground, and how to make a fairy house. Every year I try to change them up a bit.  This time I've created a camping fairy garden, and it's so, so cute.

fairy garden containers

Every year I end up saying it's my favourite project ever, and this year is no exception.  It's so much fun thinking up all the little details to re-create in miniature.

Fairy Garden Container and Plants

I always start with a big galvanized bucket filled with soil and grouped with other reclaimed plant pots on my deck.  I love making the fairy gardens in containers because it really allows you to see all the little details up-close.  

After you have a container, pick out some small plants.  Because I was going for a woodland feel for the camping fairies I used some little tiny trees and shrubs, a fern, and a few flowers for colour.  

Plant them around the perimeter, leaving room to create your little scene, and then it's time to get creative.

camping fairy garden tent and fairy garden accessories

Camping Fairy Garden Tent

I made the tent out of some twigs, bound together with twine, and pushed into the soil.  

The tent has a little doily base inside, and the fabric is sewn at the top and gathered together to make the little tent.  Easy and sweet.

Fairy Garden Campground

I named our site "Pixie Hollow Campgrounds" and made the sign out of some wood and twigs, held together with a little hot glue.

Miniature Camping Accessories

I picked up a few of the fun accessories at a craft store, like the red bucket and the little camping dishes.

camping diy fairy garden tent

I remember a rule from my girl guide camping days, you always have to have a bucket of water beside your tent, in case of fire.

how to make a camping fairy garden campfire

Fairy Campfire and S'mores

The sweetest little fairy campfire is made with some stones, twigs and wool.  And what would a campfire be without s'mores?  

I made the little marshmallows for roasting out of toothpicks and polymer clay.

camping fairy garden miniature smores from polymer clay

Of course for s'mores you also need chocolate and graham crackers, so I made a few of those too.  I formed them out of polymer clay and baked them in the oven according to the package directions.  

I know from past experience that the baked clay stands up really well, the cupcakes I made for the fairy birthday party garden, are still looking great after a few seasons outside.

how to make miniature polymer clay smores

To give you a sense of scale, and how tiny these little s'mores are, they're pictured here with a dime.  

Use a serrated edge plastic knife to create the edge of the graham cracker and a toothpick to add the signature holes in the top.  

For the chocolate, use a toothpick to create the details of the individual chocolate pieces.

Camping Fairy Garden Campground

The little table is one I found at a garden store last year, and the seats are little thimbles.

Camping Fairy Garden miniature woodpile and axe

Beside the fire, more wood for later, and the axe in case we need more.

How To Make A Fairy Sized Hammock

Off to the side of the campground, there's a little hammock for relaxing.

how to make a fairy garden hammock

The hammock is made out of a few twigs, some twine, and an old garlic bag that I saved.

Just cut the twigs and push them into the soil.  Use the bag that garlics come in, and cut a rectangle out of it.  Tie it with some twine to the twigs.  Now it's all set for a tired fairy to enjoy.

Making A Fairy Outhouse

And, in case nature calls, I had to include a little fairy outhouse.

how to make a fairy garden miniature outhouse

I made it out of very thin Balsa wood.  

You can find it at the craft store.  It's so thin you can cut it with an exacto knife.  

Cut out your pieces, and don't forget that typical slanting roof.  

Add the characteristic moon cut out to the door too.  

Hot glue a stick to the inside and push it into the soil in the pot to hold the outhouse in place.

I used hot glue to put it together.  It won't last forever in the wind, rain, and sunshine.  But, there's something that seems right about fairy gardens made of natural materials and breaking down after a season or so of service.

how to make a fairy garden miniature outhouse

I tucked the little out house in the back for a little privacy, and made a little pathway leading up to it.

how to make a camping fairy garden

It was so much fun creating this little fairy garden campsite and thinking up all the fun little details to include.  Heading into the beginning of garden season, I hope you'll try a fun fairy garden this year.  With a little make-believe in your day, life really is a party!

Frequently Asked Questions

How did you make the fairy sized s'mores?

Look for polymer clay at the craft store. Form it into graham crackers, chocolate and marshmallows. Use toothpicks to make holes, and a disposable knife for the serated edge on the graham crackers. Bake according to the package directions.

Where do you find miniature trees?

Look for them in your garden centre. You can use baby seedlings or look for bonsai varieties.

Did the tent in the camping fairy garden get all wet?

It did get wet in the rain, but it quickly dried and held up all season long.

More Fairy Garden Inspiration

  • How to make a spring diorama.
    Easy DIY Spring Easter Diorama Ideas
  • DIY Fairy pumpkin house village lit up with candles at night.
    Pumpkin Fairy House Jack-O-Lanterns
  • How to make a fairy house for a fairy garden.
    How To Make A Fairy Garden House
  • How to make a fairy garden in a teacup.
    Teacup Fairy Garden

If you use any of these Camping Themed Fairy Garden Ideas or any other ideas on my blog please leave a star rating and let me know how it went in the comments below. Thanks for visiting today!

Easy Banana Snack Cake

Apr 28, 2015 · 25 Comments

Moist banana snack cake with fluffy vanilla frosting on a plate.

This Banana Snack Cake is an easy one bowl recipe, perfect for using up over ripe bananas. The simple fluffy vanilla icing elevates it and makes it feel extra special, with some added sweetness too. This recipe is a classic that's quick to make and that you will come back to again and again for its moist texture and buttery flavor.

A piece of banana snack cake with fluffy icing on a vintage plate with a fork.
[feast_advanced_jump_to]

Why You'll Love This Recipe

  • It's a great way to use up over ripe bananas.
  • It's quick and easy to make in just one bowl.
  • It always turns out great -every time.
  • The icing makes it so much more speical than boring old banana bread.
  • The texture is moist and the flavor is buttery.

This easy banana cake recipe is one of my favourite go-to banana recipes. It always makes a delicious moist cake, and is the perfect way to use up your over ripe bananas.

Really easy, moist and delicious..this is definitely the best banana cake I have ever tasted. -Deb, Via Pinterest

You might also enjoy our Moist Pumpkin Bread with Walnuts, Homemade Honey Crullers, Sweet Cake Like Cornbread, or Easy Oatmeal Chocolate Chip Muffins.

My mother-law uses this recipe to make an easy banana bread…because that's what good, using up the leftover spotty bananas, responsible people do. 

But people who want life to be a party, they want to turn banana bread into CAKE! They want cake, covered in icing.  And they shall have it.

Slice of banana snack cake with vanilla frosting on a small plate, beside cake in glass baking dish.

Ingredients

Banana snack cake ingredients in small bowls on a wood table.
  • Over ripe bananas: This is one of my favourite easy recipes for using up very ripe bananas.
  • Banana Cake Recipe Without Buttermilk: If you're looking for an easy banana cake recipe to make that does not include buttermilk, than this recipe is perfect. There's no need to worry about having buttermilk, or even a buttermilk substitute. In fact you probably have all the ingredients to make it in your pantry, as long as you have some overripe bananas.

Expert Tip: If you find that you have extra over ripe bananas you can freeze them and use them later to make this cake. Just peel them and put them in a ziplock bag and store them in the freezer. The next time you want to make banana cake, just thaw and use this recipe.

Variations

  • Cake, Bread or Muffins: You could easily make this recipe into a loaf for an easy banana bread recipe. You could also make this recipe into banana muffins, just adjust the cooking time down so that they don't over bake.
  • Chocolate Chips, Nuts, or Raisins: This recipe is a favorite of my readers on Pinterest and lots of people have made it and added chocolate chips, nuts, and raisins. Feel free to experiment and see what you like.
  • Cream Cheese Frosting: If you prefer a cream cheese frosting, you can substitute it for the vanilla frosting.

How To Make Banana Snack Cake

  1. Step 1: In the bowl of a stand mixer fitted with the paddle attachment, start by combining the wet ingredients. Mix the bananas, sugar, egg and melted butter until well combined. Or use an electric mixer and a medium bowl to combine.
Banana snack cake batter in a stand mixer bowl.
  1. Step 2: Add the flour, salt and baking soda, to the banana mixture and stir until the dry ingredients are well combined at a medium speed, but be careful not to over-mix.
Banana snack cake batter in a 8 x 8 glass baking dish.
  1. Step 3: Pour the batter into an 8 x 8 baking dish that's been sprayed with non-stick cooking spray. Bake at 350, for around 40 min, until a toothpick inserted in the middle comes out clean.
Banana snack cake with vanilla frosting.
  1. Step 4: After the cake is cool, combine the icing ingredients in a mixer and mix slowly until well combined, and then at maximum speed until light and fluffy. Spread the icing over the top of the cooled cake, and enjoy. Store in an airtight container or cover in plastic wrap.
Easy bananana snack cake with vanilla frosting on a plate in front of some flowers in a vase.

Frequently Asked Questions

Why did my banana snack cake sink in the middle?

Your cake was probably underbaked. Next time, let bake until a toothpick inserted in the center of the cake comes out dry, and the center of the cake has some give if pressed down on gently with your finger.

Can I make this banana snack cake in a loaf pan?

Yes, use this recipe to make banana bread. Bake in a loaf pan, and leave the icing off.

Why does my banana cake look so dark?

Sometimes, if your bananas are really sweet, the extra sugar will carmalize and cause the cake to be darker. Baking in a dark pan can also cause the cake to be darker, and of course over over-baking or burning can also cause the cake to be dark.

How do I store banana snack cake and keep it moist?

Store banana snack cake in an airtight container at room temperature for up to 3 days.

More Sweet Snack Inspiration

  • Old fashioned bear claw pastries with almonds on a cake plate.
    Old Fashioned Almond Bear Claw Pastries Recipe
  • Ice cream charcuterie dessert board in the shape of an ice cream cone.
    Easy Ice Cream Sundae Charcuterie Dessert Board
  • Dirt Pudding no cream cheese in glasses with candy rocks, and fresh mint that looks like a little plant.
    Easy Dirt Pudding Recipe without Cream Cheese
  • How to make rainbow pop tarts.
    Rainbow Pop Tart Recipe

 If you try this Banana Snack Cake or any other recipe on my blog please leave a star rating and let me know how it went in the comments below. Thanks for visiting today!


Recipe

Moist banana snack cake with fluffy vanilla frosting on a plate.

Easy Banana Snack Cake

Video

This banana snack cake recipe is moist, fluffy, and topped with creamy vanilla frosting. A quick one-bowl cake perfect for overripe bananas.
4.40 from 38 votes
Print Pin Rate
Course: Desserts
Cuisine: American
Prep Time: 15 minutes minutes
Cook Time: 40 minutes minutes
Total Time: 55 minutes minutes
Servings: 12
Calories: 300kcal
Author: Dannyelle Nicolle-Ramjist

Ingredients

  • 3 large ripe bananas
  • 1 cup white sugar
  • 1 egg
  • ¼ cup melted butter
  • 1 ½ cups all-purpose flour
  • 1 teaspoon salt
  • 1 teaspoon baking soda

For the Icing

  • ¼ cup softened butter
  • 2 cups powdered sugar
  • 3 tablespoon milk
  • 1 teaspoon vanilla extract

Instructions

  • In the bowl of a stand mixer fitted with the paddle attachment, start by combining the wet ingredients. Mix the bananas, sugar, egg and melted butter until well combined. Or use an electric mixer and a medium bowl to combine.
  • Add the flour, salt and baking soda, to the banana mixture and stir until the dry ingredients are well combined at a medium speed, but being careful not to over-mix.
  • Pour batter into an 8 x 8 baking dish that's been sprayed with non-stick cooking spray. Bake at 350, for around 40 min, until a toothpick inserted in the middle comes out clean.
  • After the cake is cool, combine the icing ingredients in a mixer and mix slowly until well combined, and then at maximum speed until light and fluffy. Spread the icing over the top of the cooled cake, and enjoy. Store in an airtight container, or cover in plastic wrap.

Notes

You can use frozen bananas in the recipe.  Freeze peeled ripe bananas in a ziplock bag, and thaw before using in this cake.
This banana snack cake can be baked in a loaf pan or as muffins.
Store your banana snack cake in an airtight container for up to 3 days.
 

Nutrition

Serving: 1g | Calories: 300kcal | Carbohydrates: 55g | Protein: 3g | Fat: 8g | Saturated Fat: 5g | Polyunsaturated Fat: 3g | Cholesterol: 36mg | Sodium: 369mg | Fiber: 1g | Sugar: 39g
Tried this Recipe? Tag me Today!Mention @LifeisaParty or tag #lifeisaparty!

Teddy Bear Tea Party

Apr 21, 2015 · 2 Comments

Teddy Bear tea party ideas.

Teddy Bear Tea Party: teddy bear party activity ideas, tea party decor, and a tea party menu with links to recipes.

Teddy Bear tea party ides.

On the weekend my youngest daughter Maddie celebrated her eighth birthday.  Maddie loves few things more than her teddy bear "Cookie".  He sleeps with her every night, goes on vacation with us, and plays with her everyday.  When it was time for us to decide on a theme for her birthday party this year she enthusiastically requested a Teddy Bear Tea Party!  And it was perfect.  We had such a great time and I'm excited to share all the details with you. If you love tea parties besure to check out our complete tea party food guide.

Teddy bear tea party

Teddy Bear Tea Party Activities

We had lots of fun teddy bear themed activities that we did with the girls before we got down to the actual tea drinking…well lemonade for the girls.

Guess How Many Gummy Bears

Teddy bear party games

When our little guests arrived we asked them all to guess how many gummy bears were in the jar, a teddy bear twist on a classic party game.  The winner went home with the whole jar and big smile on her face.

Sew Your Own Teddy Bear Ears

DIY teddy bear ears

Once everyone arrived we got started on a little sewing project, making Teddy Bear Ears.  We did consider making the teddy bear ears out of paper at first, and then we thought maybe the glue gun would be easier.  But since little ones can't use a hot glue gun, we actually went with sewing them together.  We had lots of adults to help out, and although some of the girls had never sewn before, I think they all enjoyed it.  

We bought brown elastic hairbands, and then each girl cut-out her felt teddy bear ears, inside and out, and stitched them together.  There was lots of needle re-threading, but it went really well.  And they were so, so adorable when they were finished.  Most of the girls wore them for the rest of the party and loved matching their furry friends.

Love Tree

Teddy bear tea party

Throughout the party, guests were invited to write down something they loved about Maddie and add it to our Love Tree.  We used some branches, and made the teddy bears out of scrapbook paper and used a cookie cutter for the bear pattern.

Teddy bear party games

Her guests wrote the sweetest things about her, and this tree will be a special keepsake from the party -her grandparents wrote the sweetest things about her too.  Afterwards we put all the little bear notecard into a special box, as a special keepsake from the party.

Watercolour Teddy Bear Portraits

Teddy bear watercolour painting

Our next activity was to create a watercolour portrait of your favorite teddy bear.  Maddie took a drawing and watercolour class in the fall, and really enjoyed it so we thought it'd be fun to incorporate into the party.  

We did this activity near the beginning so that the paintings would be dry enough to pop into the little frames and we could send them home in the loot-bags at the end of the party.

Teddy bear tea party

Everyone sketched a picture of their bears first, and then added colour in watercolours.  They turned out really sweet.  I picked up the cute little frames at the dollar store, and made sure to pre-cut the watercolour paper to fit before the party.

Teddy Bear Cookie Decorating

Teddy bear tea party activities

After the watercolour paintings we moved on to sugar cookie decorating.  My mom made the sugar cookies the day before, and used a teddy bear cookie cutter to cut them out.  I made some icing -chocolate, pink, white, and aqua and we put out lots of fun sprinkles, jimmies, and coloured sugar.  This activity is always a big hit -at any party, and the girls seemed to love doing it…and licking their fingers.

Teddy bear tea party activities

When they were done, we packaged up these little sweet treats into little cello bags and put them into their favor bags.

Teddy Bear Paper Dolls

Teddy bear paper doll chain

The last activity, which we didn't end up doing because we ran out of time, was to make Teddy Bear Paper Doll Chains.  I'd rather have too many, than not enough things to do at a party, and it might be an idea that you'd like to incorporate into your own annual teddy bear tea parties, so I'm including it here.  I pre-cut and folded the paper, but left them blank so the girls could draw their own bears, with the reminder to make sure that the hands and feet ran off the page, so they'd be connected when they unfolded them.

Teddy bear paper doll chain

On the tray were lots of fun things to decorate with, like gem stickers, cupcake liners to make frilly dresses with, googly eyes, and stick-on bows.  We also had scrapbook paper and magazines to cut out of for collage inspired clothing.

Since we used the kitchen table for most of the activities, ahead of the party I put everything we needed for each activity onto its own tray.  This made it easy to put out and then clean-up each activity, and I highly recommend it.

We had a small party of just five little girls, but that meant we could do fun, and more detailed activities like the sewing and painting and it was certainly reflective of Maddie and what she loves to do -she has an artist's heart and loves to create.  

Tea Party Decorations

Teddy Bear Tea Party

Maddie wanted the party to have a vintage tea party feel -perfect.  I felt like I had most of the things we needed for the party already.  Last year for a church event I made this pretty rag curtain from vintage sheets, and it set the tone for a pastel colour scheme.

teddy bear tea party.

 I just shopped for the sheets at thrift stores, and then ripped them into strips and tied them onto a another piece, along with some pretty ribbons and pieces of lace.  I love how it turned out and it was the perfect backdrop for our dessert table.

The other great decorations for the party were the marquee lights that spelled "tea".  We picked them up, and thought that after the party we could use them in the kitchen or the dining room to spell "eat".  Such a fun little detail.

teddy bear tea party.

We used the prettiest paper lanterns in the kitchen to bring a little of the pastel vintage feel in there too.  I just loved the pretty floral paper lanterns and we mixed them in with plain ones, doily ones.  They looked wonderful tied to our kitchen light fixture.  Paige helped me hang them for you the party for her little sister.

teddy bear tea party.

Tea Pot Vase

On the table in the kitchen, a simple tea party centrepiece -pretty tulips in an old teapot.

teddy bear party.

Vintage Tea Cups

Maddie decided that she wanted to use vintage teacups for everyone, so we found someone selling off their collection on-line and picked up ten for the party.  We let all our little guests choose one to take home as a party favor.  The girls really loved this detail.  And we heard reports of her friends using their special tea cups at home afterward.

teddy bear party.

On the food table, we used pretty roses in mason jars for centrepieces.  Pretty and easy.

teddy bear tea party.

Tea Party Lunch

Our food for the tea party started with classic tea party fare, little sandwiches.  

Tea Sandwiches

We had egg salad tea sandwiches on mini croissants, with lettuce.  Another favourite of ours is chicken salad toast cups.

teddy bear tea party.

Despite choosing to have a tea party, our Maddie isn't really a big fan of sandwiches….so we added a few other things into the savoury mix for her.  I made scotch eggs -see our recipe here and we picked up some sausage rolls at the bakery.  We also had a simple veggies and dip tray.

teddy bear party.

Scones with Jam and Clotted Cream

You can't have a tea party without scones, so we made a batch of my easy food processor scones and served them up with butter, jam, and clotted cream.

teddy bear tea party

Teddy Bear Bread Rolls

Maddie's Grandma occasionally makes bread, so we asked her to make us some teddy bear buns.  They were so, so sweet.  Her Grandma made them, and Maddie added the face details with edible markers.  We served them as part of the tea party.  

We also packed up one for everyone in a cello bag, and included it along  with a bear shaped honey in everyone's loot bags.  They were so, so adorable, and the kids loved them.

teddy bear party.
teddy bear buns.

Tea Party Dessert

For dessert, we of course had to have cupcakes, and since it was our chocolate loving Maddie (remember her Chocolate themed Party here) they were of course chocolate.  I found the sweet little silicone cupcake holders a few years ago, and they were perfect for the occasion.

teddy bear party.

We also made some yummy cookies.  These raspberry almond thumbprint cookies are a favourite around here.  We also make our favourite chocolate chip cookies with shortening.

teddy bear party.

I wanted to include a little fruit so we served some grapes in mini tea cups.

teddy bear tea party.

Of course we had to include some gummy bears at this teddy bear party.

teddy bear tea party.

Tea Party Drinks

For drinks we had tea for the grown-ups and bottles of pink lemonade for the kids.

teddy bear tea party.

It was a yummy, yummy lunch.  And everyone seemed to love all the tiny, fancy things to try.

teddy bear tea party.

With a Teddy Bear Tea Party that's this sweet, life really is a party.

More Party Inspiration

  • Cupcake themed birthday party ideas.
    Cupcake Themed Birthday Party Ideas
  • Woodland forest party food ideas.
    Woodland Forest Party Food Ideas
  • Teddy bear breakfast party with teddy bear themed food.
    Teddy Bear Breakfast Party Ideas
  • Chocolate themed birthday party with chocolate dessert table.
    Chocolate Themed Party

Table Decorations for Men's Birthday

Apr 16, 2015 · 4 Comments

Men's birthday party decor ideas.

Sharing ideas for birthday decorations for men using a brown paper runner, simple centre piece, DIY men's shirt blue bunting, and snacks for the birthday boy.

Men's birthday party decor ideas.
[feast_advanced_jump_to]

Why We Love These Ideas

  • These birthday decorations are simple and masculine, perfect for a men's birthday.
  • We used a classic blue and white color scheme.
  • Some of the decor is DIY and easy to make at home and personalize.
  • The bunting is reusable year after year.

A few days ago we celebrated my sweet husband's birthday, and I put together a pretty handsome table for our family celebration.  Today I'm sharing some table decoration ideas for a men's birthday.  

We love a good party around here. He had so much fun with his 50th birthday celebration here. There was also that year we threw him an Oscar the Grouch party here. And if you're looking for more ideas for how to decorate for an at home birthday party, check out this post.

Living in a house of all girls, he's always out numbered and always a good sport when it comes to being surrounded by pink and pretty.  Since this was his special day though, I wanted it to feel like him.  His favorite color is blue, and I was going for a casual, masculine vibe.

Men s birthday tablescape

Table Decorations for a Men's Birthday

Since it was casual (he requested take-out fish and chips for dinner), I started out with butcher paper, and then added in some easy blue accents.  We used a chalkboard to write "Happy Birthday".

Here's my tips for a masucline feeling tablescape:

  • Choose a color scheme, we used blue with some neutrals.
  • Keep things quite simple and un-fussy.
  • Let food be part of the decor.
  • Use elements like metal and paper or wood, that feel masculine.
  • Keep flowers simple with just one or two elements.

DIY Men's Shirt Bunting

The bunting flags are some that I made ages ago, but usually make an appearance for Father's Day.  They're made out of old thrifted men's shirts, and I love all the blue stripes, and checks together.

table decorations for men's birthday

I even made a mini-version for his birthday pie.

How To Make It: To make the bunting find some old men's shirts at the thrift store, garage sales, or use old ones you have.  Use pinking shears to cut the large triangle bunting pieces and then stitch or even hot glue the tops to some ribbon or string.  

Men s birthday tablescape

Masculine Centrepiece

The centrepiece was simple, a beautiful bucket of white hydrangeas with a few pussy willow sticks tucked in. The pussy willows add a nice touch of brown, and some more texture to the simple arrangement.

table decorations for men's birthday

Birthday Number Favour Bags

For a personal touch, I made these sweet little bags of peanuts, one of his favourites. You could fill them with any yummy snack that your guy enjoys.  Or even use these as cutlery bags for napkins, forks, and knives.

I decorated the bags with every version of "52" I could think of…writing, printing, numbers, roman numerals, even "two score and twelve".  I just used a blue sharpie to add them to the bags.

You could do this for any number depending on how old your birthday boy is.

Table Decorations For Men's Birthday

The peanut bags looked really great with the simple paper blue plaid napkins.

Table Decorations For Men's Birthday

I kept the place settings really simple too, with our everyday white dishes, paper napkins, and stemless wine glasses, which also work great for juice for the kids. Not too fussy, which helps add to the masculine vibe.

Our simple tablescape turned out great.

With table decorations for a men's birthday, life really is a party!

Frequently Asked Questions

How can I decorate for a birthday party at home without balloons?

Instead of balloons, make some bunting out of old men's shirts. Just cut into triangles and sew or glue onto ribbon. This decoration is beautiful and festive and reusable over and over again.

How do I keep the flowers for a men's birthday looking masculine?

Use flowers in just one or two varieties. Choose colors that are more masculine, like white, or blue. Keep the arrangement quite simple. Choose a container that is more masculine feeling like galvanized metal, or wood.

More Inspiration

  • Favourite things themed birthday party.
    A "Favourite Things" 50th Birthday
  • Game of thrones themed party food ideas and free printables.
    Game of Thrones Party Food and Free Party Printables
  • Father's Day party ideas and tablescape.
    Easy Father's Day Table Setting Ideas
  • Stranger things party ideas and menu.
    Stranger Things Party Ideas

How to Set Up a Crepe Bar

Apr 14, 2015 · 5 Comments

Crepe bar on white sideboard with vintage floral gallery wall, lace tablecloth, tiered stand with vanilla and chocolate crepes, fresh fruit, and assorted toppings in mismatched vintage china.

Set up a stunning crepe bar and let your guests build their own perfect crepe. This crepe bar guide covers everything you need including the best toppings, styling tips, make ahead advice, and how to create a beautiful setup your guests will never forget.

Crepe bar toppings including whipped cream, fresh strawberries, raspberries, banana slices, sauteed apples, and custard displayed in vintage china on a lace tablecloth.

Quick Look

  • 🥞 Perfect for: brunch, dinner party, bridal shower, baby shower, birthday
  • 🍓 Toppings: 13 delicious options
  • 🍫 Crepes: vanilla and chocolate
  • ⏰ Make ahead: Yes
  • ✅ Difficulty: Easy
  • 💭 Top Tip: Make your crepes before and reheat in the microwave.

Why You'll Love This Crepe Bar

  • Both vanilla and chocolate crepes give guests twice the options and the two stacks together look absolutely beautiful.
  • Everything can be prepped ahead so you can actually enjoy your own gathering.
  • It works beautifully for a brunch, dinner party, bridal shower, baby shower or birthday celebration
  • Guests love building their own, and everyone can make exactly what they want.
  • The make ahead and reheat method is genuinely tested and works perfectly.
[feast_advanced_jump_to]

I love crepes and I love to serve them at a party. They're special, they're surprisingly simple to make, they can be done in advance, and there are so many delicious things you can serve with them that they work beautifully as a self serve bar. And everyone loves the chance to customize their own.

This crepe bar goes a step further with both vanilla and chocolate crepes, a full lineup of homemade sauces, sauteed apples, custard, fresh fruit and more, all served in beautiful vintage china on a lace covered buffet. Most of it can be made the day before which means by the time your guests arrive you are relaxed and ready to enjoy the party alongside them. That is always the goal.

We set up this crepe bar for our Breakfast Under the Stars brinner party and it was one of the most loved parts of the whole evening. But a crepe bar works beautifully for any occasion. A weekend brunch, a bridal shower, a birthday dinner, or really any gathering where you want to serve something genuinely special.

If you love this idea you might also enjoy our full Breakfast for Dinner Party where this crepe bar made its debut, and our Mimosa Bar as another great addition to any party.

The Crepes

Two-tiered brass stand with golden vanilla crepes on top and chocolate crepes on the bottom tier displayed on a lace-covered buffet.

The foundation of any crepe bar is of course the crepes themselves. We make both vanilla and chocolate crepes which gives guests options and looks absolutely stunning on the crepe bar.

For our vanilla crepe recipe we use a simple blender batter that comes together in minutes. You can find the Sweet Crepe Recipe here. For chocolate crepes simply add 2 tablespoons of unsweetened cocoa powder and an extra half tablespoon of sugar to the same batter. Everything else stays exactly the same.

How Many Crepes Do You Need? 

Plan for 2 to 3 crepes per guest. For a party of 8 we made two double batches which gave us plenty for the buffet with a few extra.

Make Ahead

Crepes can be made completely the day before. Stack them with a piece of parchment between each one, wrap tightly and refrigerate overnight. Reheat the whole stack in the microwave just before serving. They taste just as fresh and it takes all the pressure off party day.

Vanilla crepes folded into triangles and fanned on a round plate with fresh raspberries and baby's breath flowers alongside.

Crepe Bar Toppings

This is where the magic happens. Lots of toppings is what takes a crepe bar from ordinary to genuinely memorable. We set out thirteen options and not a single one went untouched.

repe bar toppings including whipped cream, fresh strawberries, raspberries, banana slices, sauteed apples, and custard displayed in vintage china on a lace tablecloth.

The Creamy Fillings

  • Vanilla Custard is the filling that surprises people every time. It sounds simple but spooned warm inside a folded crepe it is absolutely delicious. We used store bought custard and it worked beautifully. No one needs to know. 😄
  • Whipped Cream is non-negotiable. Light, cloud-like, and the perfect contrast to the richer sauces.
  • Hazelnut cream or Nutella is a real crowd pleaser. If you put it out someone will use it on everything.
Hazelnut cream served in a pink rose vintage teacup and saucer on a lace tablecloth with china sauce pitchers in the background.

The Sauces

  • Caramel Sauce is our favourite. We use The Pioneer Woman's Easy Caramel Sauce Recipe and it lives up to its name. Make it the day before and it reheats beautifully.
  • Chocolate Sauce adds richness and pairs perfectly with the chocolate crepes. And we didn't use just any old store bought chocolate (although if you're short on time you can). We made our Hot Fudge Sauce Recipe, which is the smoothest, most delicious chocolate sauce I've ever had. I'm not even a huge chocolate fan and I love this sauce!
  • Maple Syrup is our Canadian addition and honestly one of the most used toppings of the whole evening. Don't skip it.
Three mismatched vintage china pitchers holding caramel sauce, hot fudge sauce, and maple syrup on a lace tablecloth.

The Fruit

  • Fresh Strawberries are a non-negotiable, and a real crowd pleaser.
  • Fresh Raspberries or Any Berries are a great addtion, classic, and colorful.
  • Fresh Banana Slices are easy and inexpensive and pair so well with Nutella, chocolate sauce, or caramel sauce.
  • Sauteed Apples were the first thing to disappear from the crepe bar. Warm, soft, spiced apples inside a crepe with a drizzle of caramel is just unbeatable. We peeled and sliced our apples, cooked them with a little butter, sugar and cinnamon, and then thickened the juices with some cornstarch. I made this ahead and reheated it before serving.
Fresh strawberries, raspberries, and sliced banana arranged on a gold-trimmed vintage china plate.
Warm cinnamon sauteed apple slices in a gold-trimmed vintage china plate with a chocolate sauce pitcher and whipped cream bowl in the background.

The Crunch

  • Toasted Slivered Almonds. Just a small bowl but they add the most wonderful texture contrast to all those soft creamy fillings.

The Cold

  • Vanilla Ice Cream. We kept ours in the freezer and brought it out when the crepe bar opened. A scoop of ice cream inside a warm crepe with caramel sauce is one of life's great pleasures.
  • Chocolate Ice Cream. We didn't offer this, but if you have real chocolate lovers, then this is a great addition, think triple chocolate crepe with chocolate crepe, chocolate ice cream, and hot fudge sauce.
Vanilla ice cream in a Liberty floral print bowl with an ice cream scoop alongside and baby's breath flowers in the background.

How to Style a Beautiful Crepe Bar

This is where your crepe bar goes from a food station to something genuinely beautiful and this is the section nobody else is writing about.

Crepe bar showing two-tiered brass stand with vanilla and chocolate crepes, baby's breath in a teal vase, ice cream in a floral bowl, and stacked white dessert plates.
  • The Vessels: Mismatched vintage china is our favourite way to serve crepe bar toppings and it makes such a difference. Teacups for smaller portions like almonds and custard, small jugs for the sauces, pretty bowls in varying sizes for the fruit and whipped cream. The mix of patterns, colours, and shapes looks curated and charming rather than generic. Check your own china cabinet first and then head to the thrift store or antique store for anything you're missing.
  • The Backdrop: We set our crepe bar up on a white buffet against a floral vintage gallery wall and it made the whole setup look like a styled shoot. The gallery wall provides so much visual interest behind the bar that you don't need to over-style the surface itself.
  • The Linens: A lace tablecloth draped over the buffet adds softness and texture and photographs beautifully. It immediately signals that this is a special occasion rather than a casual setup.
  • The Height: Varying the heights of your vessels and adding a tiered stand for the crepe stacks creates visual interest and makes the whole bar look more abundant. We placed our vanilla and chocolate crepe stacks on a two tiered brass stand which became the centrepiece of the whole setup.
  • The Flowers: A small vase of baby's breath tucked alongside the bar adds softness and life without competing with the food. Simple, inexpensive, and completely beautiful.
  • The Crepes

How to Set Up a Crepe Bar

Full crepe bar setup on white sideboard with vintage floral gallery wall, lace tablecloth, tiered crepe stand, and toppings in mismatched china with pink pillar candles.
  • Choose your dishes ahead of time. With so many options, it's helpful to plan out your dishes. Before party day go through your china cabinet and gather everything you want to use. Lay it all out on the buffet and use sticky notes to label each vessel with what it will hold. This sounds like a small thing but it makes the day of setup so much faster and less stressful. You just fill and go. And don't forget spoons and tongs for serving too!
  • We love mismatched vintage china for a crepe bar. Teacups for smaller portions like almonds and custard, small jugs for the sauces, pretty bowls in varying sizes for the fruit and whipped cream. Head to the thrift store for anything you're missing.
  • One important note if you're using vintage china with gold edges. These cannot go in the microwave. Reheat your food in a plain container first then transfer to your pretty serving pieces. Worth knowing before party day!
  • When you're setting up the bar, lay your tablecloth first before anything goes on the surface. Place your tiered crepe stand and taller pieces towards the back, and smaller vessels in front. Add your flowers and candles last as finishing touches. Don't forget plates and forks.

Make Ahead Tips

The day before: 

  • Cook all your crepes. Some people recommend a piece of parchment between each one, but I didn't find it was necessary and had no problems with them sticking to one another when stacked directly on top of each other. Wrap the stack or place in an airtight container and refrigerate overnight.
  • Make the caramel sauce and chocolate sauce and store in jars.
  • Cook your sauteed apples and refrigerate.
  • Make your custard if you're making homemade.
  • Prep your bar vessels with sticky note labels so setup is easy.

The morning of: 

  • Wash the fresh fruit.
  • Whip the cream.
  • Toast the nuts.

Just before serving: 

  • Reheat the crepe stack in the microwave. Fold crepes into quarters for serving.
  • Warm sauces and apples in plain microwave safe containers then transfer to your vintage serving pieces.
  • Slice the fruit.
  • Bring out the ice cream last.

How to Fold a Crepe

Vanilla crepe folded on a white scalloped plate and topped with sauteed cinnamon apples, caramel sauce, and whipped cream with a gold fork alongside.

There are a few different ways to fold a crepe and part of the fun of a crepe bar is letting guests experiment and find their favourite. Here are the most popular options:

  • Quarter fold This is the classic and our personal favourite for a crepe bar. Fold the crepe in half and then in half again to make a triangle. Spoon your toppings into the open pocket or pile them on top. Easy to hold, easy to eat, and it looks beautiful on the plate.
  • Roll Spread your filling down the centre of the crepe then roll it up like a thin wrap. Great for fillings that might spill out of a folded crepe.
  • Half fold Simply fold the crepe in half and add toppings to the open side. Quick and casual and perfect for generous portions of fruit and whipped cream.
Two vanilla crepes folded into quarters on a cream and gold plate, filled with whipped cream and topped with caramel sauce, a strawberry, and raspberries with a gold fork alongside.

There are no rules here. Part of the joy of a self serve crepe bar is watching guests get creative with their combinations and their folds.

Frequently Asked Questions

Can I make crepes ahead of time?

Yes and we highly recommend it. Make your crepes the day before, stack them directly without parchment and refrigerate overnight. Reheat the whole stack in the microwave just before serving. They taste just as fresh.

How many crepes do I need per person?

Plan for 2 to 3 crepes per guest depending on how many other dishes you are serving alongside, what the party menu is.

Do I need a crepe pan?

A crepe pan is helpful but not essential. Any good non-stick pan works perfectly well.

Can I freeze crepes?

Yes crepes freeze beautifully. Stack them, wrap tightly and freeze for up to two months. Thaw overnight in the fridge before reheating.

Can I buy crepes instead of making them?

Store bought crepes are available at many grocery stores and work perfectly well for a crepe bar if you are short on time. Homemade will always taste better but the toppings are the star of the show either way.

What is the best way to reheat crepes? 

Reheat in the microwave in just about 30 seconds, depending on your microwave.

More Sweet Inspiration

  • Cadbury mini egg cookies with flaky sea salt cooling on a wire rack with a bowl of pastel mini eggs alongside.
    Cadbury Mini Egg Cookies (Brown Butter, No Chill)
  • Fudgy Cadbury mini egg brownie square with pastel mini eggs on top and chocolate egg pieces visible throughout the interior.
    Mini Egg Brownies with Chocolate Frosting
  • Easter trifle with Cadbury mini eggs on a wooden dining table with a floral napkin and gold spoons.
    Easter Trifle with Cadbury Mini Eggs
  • Homemade pink and white coconut ice recipe, cut into squares on parchment paper.
    Coconut Ice Recipe (Pink & White Coconut Candy)

 If you try this crepe bar or any other ideas on my blog please let me know how it went in the comments below and leave a star rating. Thanks for visiting today!


Recipe

Crepe bar on white sideboard with vintage floral gallery wall, lace tablecloth, tiered stand with vanilla and chocolate crepes, fresh fruit, and assorted toppings in mismatched vintage china.

How to Set Up a Crepe Bar

A beautiful self serve crepe bar with vanilla and chocolate crepes and a generous selection of sweet toppings. Perfect for brunch, dinner parties, bridal showers and birthday celebrations.
No ratings yet
Print Pin Rate
Course: Breakfast, Desserts
Cuisine: French
Prep Time: 30 minutes minutes
Cook Time: 45 minutes minutes
Total Time: 1 hour hour 15 minutes minutes
Servings: 8
Author: Dannyelle Nicolle-Ramjist

Ingredients

  • Vanilla Crepes -see our Sweet Crepe Recipe
  • Chocolate Crepes -see our Sweet Crepe Recipe Chocolate Variation with 2 tablespoon cocoa and an extra ½ tablespoon sugar
  • Vanilla Custard -store bought works fine
  • Hazelnut Creme or Nutella
  • Caramel Sauce
  • Chocolate Sauce -see our Hot Fudge Sauce Recipe
  • Maple Syrup
  • Fresh Strawberries
  • Fresh Raspberries
  • Bananas -sliced
  • Sauteed Apples
  • Slivered Almonds -toasted
  • Vanilla Ice Cream and/or chocolate ice cream
  • Whipped Cream

Instructions

  • Make crepes the day before and refrigerate in airtight container.
    Vanilla Crepes, Chocolate Crepes
  • Prepare caramel sauce, chocolate sauce , and sauteed apples the day before.
    Caramel Sauce, Chocolate Sauce , Sauteed Apples
  • Label vessels with sticky notes and set up bar before guests arrive.
  • Just before serving reheat crepes in microwave one to two minutes, as well as sauces, and sauteed apples.
  • Whip the cream and toast the almonds, and wash and slice the fruit, and place in serving bowls.
    Fresh Strawberries, Fresh Raspberries, Bananas , Slivered Almonds, Whipped Cream
  • Set out the rest of the ingredients. Bring out ice cream as crepe bar opens. Let guests serve themselves.
    Vanilla Custard, Hazelnut Creme or Nutella, Maple Syrup, Vanilla Ice Cream

Notes

  • Vintage china with gold edges cannot go in the microwave.
  • Reheat food in plain containers first then transfer to pretty serving pieces.
  • Crepes freeze beautifully for up to two months.
  • Plan for 2 to 3 crepes per guest.
Tried this Recipe? Tag me Today!Mention @LifeisaParty or tag #lifeisaparty!

Kids Baking Themed Easter Gift Basket

Apr 2, 2015 · Leave a Comment

Kid's baking themed Easter basket.

Baking Themed Easter Gift Basket Kit: the perfect gift for the little baker with mug cake mixes, icing and decorations.

Kids Easter gift basket baking themed.
[feast_advanced_jump_to]

Here's a sweet idea for a kids baking themed Easter gift basket.  This is perfect for the little person in your life who loves to bake.  It's a Mug Cake Kit!  

We put our kids cooking gift basket together for Easter but you could easily customize this for any special occasion like a birthday, or for the holiday season for the little chef in your life.  No matter what their culinary talents are this is a gift that anyone young baker love, including kids or tweens.  No need to be at the level where you can make homemade breads or items from scratch for this easy kit.  This easy kit idea is a great way to get kids of all ages more interested baking.

Mug Cake Mixes

My daughter got a few mug cake mixes as a stocking stuffer and my little foodie loved them.  They're so easy to make, she could basically do it all on her own, which she loved.  The mug cake mixes have pre-measured dry ingredients.  To make them all you need is a little milk.  They get stirred up right in the mug, so there's no big clean up to worry about afterwards either.  You bake them in the microwaved for about a minute.  Easy cleanup, quick cooking time, and great taste make these the perfect gift items.  They're such a great option for kids.  These are also the perfect size for made-to-order items, and with no leftovers to worry about.  They inspired me to put together this baking kit with everything needed all together in one place.

If your kids love making baked goods, good news, this is a super simple way for them to do it almost on their own (they need a little help getting the hot cake out of the microwave).  You know how much little ones love to feel like big kids, and this method is so much easier than getting out the old easy bake oven, which in my opinion, never works very well anyway.  

Fostering Independence

I also love giving a gift that I know kids will love and won't be too much extra work, or need extra ingredients for parents to have to worry about.  We've included everything young cooks need to bake their own cakes here, so they're set as soon as they receive this special gift.  We also love how this cooking set makes kids feel accomplished and proud of themselves for doing it almost independently, especially heading into the teen years.  Not only is this fun, but it will help give kids confidence in the kitchen with a fool proof project, that tastes great.

Flavors

The mug cake mixes come in lots of different flavors.  Look for them in grocery stores in the baking aisle with all the other full sized cake mixes.  We included chocolate and chocolate chip flavors because we have a chocolate lover.  Look for more cake batter flavors like vanilla, funfetti, strawberry, s'mores, cookies and cream, and brownie flavors as well.

Another Option

If you didn't want to include the mug cake mixes, another option would be to put a mug cake recipe book in and include the dry ingredients that are needed to make them.  There are entire cookbooks dedicated to mug cake recipes and they're the latest trend in baking.   Mug cakes aer such a great place for young bakers to start, since the skill level required for success is quite low.  Before you know it your budding chef will be whipping up these kid-friendly recipes for the entire family to enjoy.

Baking Themed Easter Basket Kit

Fun Additions

I thought my young gift recipient would love a whole kit, where she could bake up her own little creations.  So we had to add in some gift ideas for the gift basket so that she could make these mug cakes extra special and personalized.

Icing

I started with several mug cake mixes, and then added in a container of vanilla, and chocolate icing.  It's kind of fun to include two options.  You could also go for any other flavor of icing that you think they might like, like rainbow chip, cream cheese or strawberry.

Mug

You can't make a mug cake without a cute mug.  This is the cute bunny mug we used for our Bunny Breakfast, perfect for this project too, but any Easter themed mug would make a cute addition to the basket.  And if you're giving this for a birthday just look for a mug that the recipient would love in a special color, or with a favourite character like Harry Potter on it.  For Christmas look for a holiday mug, for Valentine's Day a special Valentine's Day mug, you get the idea.  You could even include handmade pieces like a custom mug with their name on it.

Baking Themed Easter Basket Kit

Sprinkles

I wanted to make it extra fun, so I found lots of sweet little sprinkles and decorations.  For our Easter basket kids baking gift basket we found sprinkles in pastel Easter colors and cute peeps icing decorations. 

Easter sprinkles

I picked up a few spice bottles at the dollar store and filled them with some pretty Easter quins and spring sprinkles in different colors from the bulk store for easy storage. 

If you were giving these for another occasion or a birthday you could use regular sprinkles, or holiday sprinkles in a variety of colors and shapes.  You could dress up these bottles with some handmade labels, or fun stickers to match the occasion.  Or buy your sprinkles in small jars already.  Little ones with tiny hands can work on their fine motor skills sprinkling on these toppings.

Baking Themed Easter Basket Kit

I think my favorite are these teeny tiny Easter bunny minis, and I also found some teeny tiny marshmallow filled ones too.  For other occasions look for fun sprinkles and candy in the baking aisle of the grocery store, or in speciality shops with special holiday baking ingredients.

Baking Themed Easter Basket Kit

Mug Cake Kit

  • mug cake mixes
  • mug
  • chocolate frosting
  • vanilla frosting
  • colored sprinkles
  • cake decorations
  • mini chocolate candies

Assembling Your Basket

Find a large basket, or we used a galvanized pail, a large mixing bowl would be a good choice too.  Make sure it's the right size to hold all your items.   Fill the bottom of the container with some crinkle paper, or tissue paper.  Next add in all your baking gift basket items at different heights and secure them with some clear tape if necessary.  Wrap everything up with some cellophane wrap and tie with a bow that matches the occasion from your craft supplies.

I"m pretty sure my little baker will love this Easter basket and think it's a great gift.  And any young chefs are sure to really enjoy this kids cooking kit too.  This is the perfect kids gift for anyone who loves to bake, or is just starting out on their baking journey.

More Baking Gift Basket Ideas

I love the idea of this kit because it's all in one and super easy for kids to use.  But if you're budding baker is more advanced you could try adding in some other elements like some special goods for baking.  I like the idea of adding a kid's cookbook, blank recipe cards, cookie cutters, a chef's hat or apron, and oven mitts for small hands, or any necessary tools like a spatula, wooden spoons, a whisk or a stylish measuring set in fun colors.  You could even include other great quality mixes like chocolate chip cookies, full size cakes, or pancake mix for them to try. Or at Christmas time try adding in a  mini gingerbread houses.  The whole family will love eating and enjoying their creations.

mug cake kit

This is one of the best gifts ever.  This baking gift set is inexpensive and easy to put together, and it's a cooking kit any child would love.  In fact I think a tween, or even teen would love it.  I think it could be a great care package to send to a young university student too, since they usually have a microwave in college dorm common rooms.  I made this for my little daughters and our friends little girls last year and they all absolutely loved it and thought it was so much fun.  Whether you're giving cooking kits as a kids gift for an Easter basket like us, or as a birthday gift, or Christmas gift, or even as a Halloween Boo basket, or Valentine's Day love basket you can personalize it for any holiday or occasion.

With a kids baking Easter gift basket like this one, life really is a party!  Happy baking!

More Easter Ideas

You might also like Bunny Bait Easter Trail Mix here.

Bunny Bait Easter Trail Mix -trail mix, with some fun Easter additions like graham cracker bunnies, and Easter eggs, also a free printable Bunny Bait label.

Also check out our Bunny Breakfast here.

Carrot Patch Dirt Pudding Cups

Mar 30, 2015 · 1 Comment

Dirt pudding with carrot candy and sugar cookie spoon.

Carrot Patch Dirt Pudding Cups with Sugar Cookie Shovel Spoons: a cute and easy Easter or spring snack with candy carrots and dirt pudding.

Dirt pudding with carrot candy and sugar cookie spoon.
[feast_advanced_jump_to]

Today I'm sharing the perfect fun, and easy Easter treat for you and your family this weekend. We made an adorable carrot patch dessert with easy dirt pudding, candy carrots, and sugar cookie shovels.  This dessert is perfect for any spring gathering, or Easter.  This sweet treat would also be so cute for a bunny or Peter Rabbit themed baby shower, or birthday party.  It's quick and easy to make with simple ingredients.

Sugar Cookie Shovels

To make the Carrot Patch Pudding Cups and Sugar Cookie Shovels, I started out by making the sweet little shovels.  I bought a sugar cookie mix, and prepared it according to the package directions as a little short cut to make this dessert quick and easy.  Look for sugar cookie mix in the baking aisle at the grocery store.  Or use prepared sugar cookie dough from the refrigerated section.  If you want to make your sugar cookie dough from scratch, find our favourite sugar recipe here.  

I rolled the sugar cookie dough out and baked it it on a large baking sheet, and then cut out the shovel shapes while the dough was still warm from the oven.  I made a simple template out of cardboard, since I didn't have a shovel cookie cutter, and used a small knife to cut out the shapes, and worked perfectly.  Do make sure you cut out your shovel shapes while the cookie dough is still hot and pliable.

Sugar Cookie Shovel Spoons garden cookies

Chocolate Pudding Dirt

While the cookies were cooling, my little girls and I worked on the pudding.  We used chocolate pudding cups, but you could also use some instant chocolate pudding if you prefer.  We made the cookie "dirt" from Oreo cookies and Honey Maid Chocolate Grahams.  Just put a few of the oreos and the chocolate cookies into a mortar and pestle, and crushed them into crumbs.  Or you could put the cookies into a ziplock bag and crush them into cookie crumbs with a rolling pin.

dirt pudding

Then sprinkle the crushed cookies over the chocolate pudding.  Easy peasy, and so, so yummy.

making chocolate pudding dirt

Candy Carrots

Next, we made the fun little candy carrots.  We used orange coloured candies for the carrots, and cut off a small piece of the very top to make a sticky base to put our candy carrot tops, strips of green candy.  Make sure to put the cut sides of both the orange and green candies together for the best stick.

candy Carrots

Once your candy carrots are all assembled, just tuck them into your pudding "dirt" to create your own little carrot patch just in time for Easter.

The cooled cookie shovels are a great addition to your little garden, and a great way to enjoy your pudding.

Store the cookies in an airtight container at room temperature and add them to the pudding cups right before serving.  Store the dirt pudding cups in the refrigerator.

Carrot Patch Pudding cups with Sugar Cookie Shovel Spoons

These little Easter treats are such a great addition to an Easter dessert table.  The candy carrots and cookie shovels are such cute ideas for elevating this dirt pudding and turning them into fancy desserts.  These carrot patch dirt cups are such a fun treat and easy to make.  They're perfect for wishing your guests a happy spring now that warmer weather is upon us.  This simple Easter dessert is sure to become a favorite recipe, that you'll want to make very spring.

Recipe

Dirt pudding with carrot candy and sugar cookie spoon.

Carrot Patch Dirt Pudding Cups

Chocolate dirt pudding with carrot candies and a sugar cookie "shovel" spoon.
5 from 1 vote
Print Pin Rate
Course: Desserts
Cuisine: American
Prep Time: 20 minutes minutes
Cook Time: 10 minutes minutes
Total Time: 30 minutes minutes
Servings: 4 Pudding Cups
Calories: 790kcal
Author: Dannyelle Nicolle-Ramjist

Ingredients

  • 4 chocolate pudding cups or 1 pkg instant chocolate pudding
  • 4 oreo cookies
  • 4 chocolate graham crackers
  • 12 orange candies
  • 4 pieces of green candy strips
  • I cup sugar cookie dough

Instructions

  • Make chocolate pudding according to package instructions, and place in 4 individual dessert serving cups, or open 4 pudding cups.
  • Crush the oreo cookies and chocolate graham crackers into cookie crumbs with a mortar and pestle or in a ziplock bag with a rolling pin.
  • Sprinkle the pudding mixture with the cookie and oreo crumbs.
  • To make the sugar cookie shovels use a sugar cookie mix, refrigerated sugar cookie dough, or your favourite recipe. Roll out the sugar cookie dough to ¼ inch thick, and bake one large sugar cookie on a parchment paper lined cookie sheet, according to the recipe or package instructions.
  • As soon as the cookie is removed from the oven and still hot, use a sharp knife to cut out a small shovel shaped cookie. Let cool on a wire rack.
  • To make the candy carrots, cut off the top of an orange candy, and cut the green strips into small pieces. Stick the two cut sticky sides of the candies together to create candy carrots. Add two or three candy carrots to each oreo dirt pudding cup, and add a cookie shovel.

Nutrition

Serving: 1g | Calories: 790kcal | Carbohydrates: 145g | Protein: 11g | Fat: 22g | Saturated Fat: 6g | Polyunsaturated Fat: 14g | Cholesterol: 10mg | Sodium: 594mg | Fiber: 11g | Sugar: 89g
Tried this Recipe? Tag me Today!Mention @LifeisaParty or tag #lifeisaparty!
Carrot Patch Pudding cups

With a yummy Easter treat like this, life really is a party!

More Easter and Spring Recipe Inspiration

You might also like our Chocolate Mousse Easter Eggs here.

Chocolate Mousse Easter Eggs -Easy Chocolate Mousse Recipe: the perfect Easter dessert, chocolate mousse piped into hollow chocolate Easter eggs.

Also check out our Chocolate Nest Cookies here.

No Bake Chocolate Coconut Oatmeal Nest Cookies: An easy no-bake cookie, perfect for Easter, made to resemble little nests and full of Easter eggs.

You might also enjoy our Bunny Bait Easter Trail Mix here.

Bunny Bait Easter Trail Mix -trail mix, with some fun Easter additions like graham cracker bunnies, and Easter eggs, also a free printable Bunny Bait label.

Sequin Easter Eggs

Mar 26, 2015 · 6 Comments

How to make sequin Easter eggs.

Sequin Easter Eggs: Easy DIY sequin Easter eggs made from styrofoam Easter eggs. Make them with any pattern and in any colours, and use year after year.

DIY sequin Easter eggs.
[feast_advanced_jump_to]

Aren't these sequin Easter eggs beautiful, and they're super simple to make too.  They look gorgeous in an Easter basket as part of your Easter decorations this year.

how to make sequin Easter eggs

My daughter Maddie, who's in grade two learned to make sequin Christmas ornaments at school this year, and really loved making them.  In fact, we bought the materials and made a few at home too.  One day in the dollar store, I noticed they had styrofoam Easter eggs, and thought she might like to use her skills to make us an Easter version with sequin eggs.  You need styrofoam eggs for this project.  Plastic Easter eggs won't work for this project.

These beautiful eggs are really very simple to make.  You can make them in any colors or different patterns.  Sequins come in so many beautiful colors.  We went with a combination of pink sequins, purple, white and gold.  I love the iridescent sequins best of all.  They're perfect for making glitter Easter eggs.  You can also choose the size of sequins you use.  A small sequin is great for a really detailed pattern.  These handmade pieces are a really fun Easter craft, and they're very easy to make with just a few craft supplies.  Working away on these, choosing your colors and patterns, is sure to get you into the Easter spirit.

Sequin PIns

You will need sequin pins for this project.  They're shorter than regular straight pins, so you will be able to push them into the Easter eggs without them poking through the other side.  They have a flat head on them, which holds the sequin in place.  I did have a little trouble finding the pins, when I originally did this project a few years ago, but now I see they're available at the craft store.  You can also order them online.  They come in different colors, so you can choose nickel, or gold, or antique depending on your preferences.
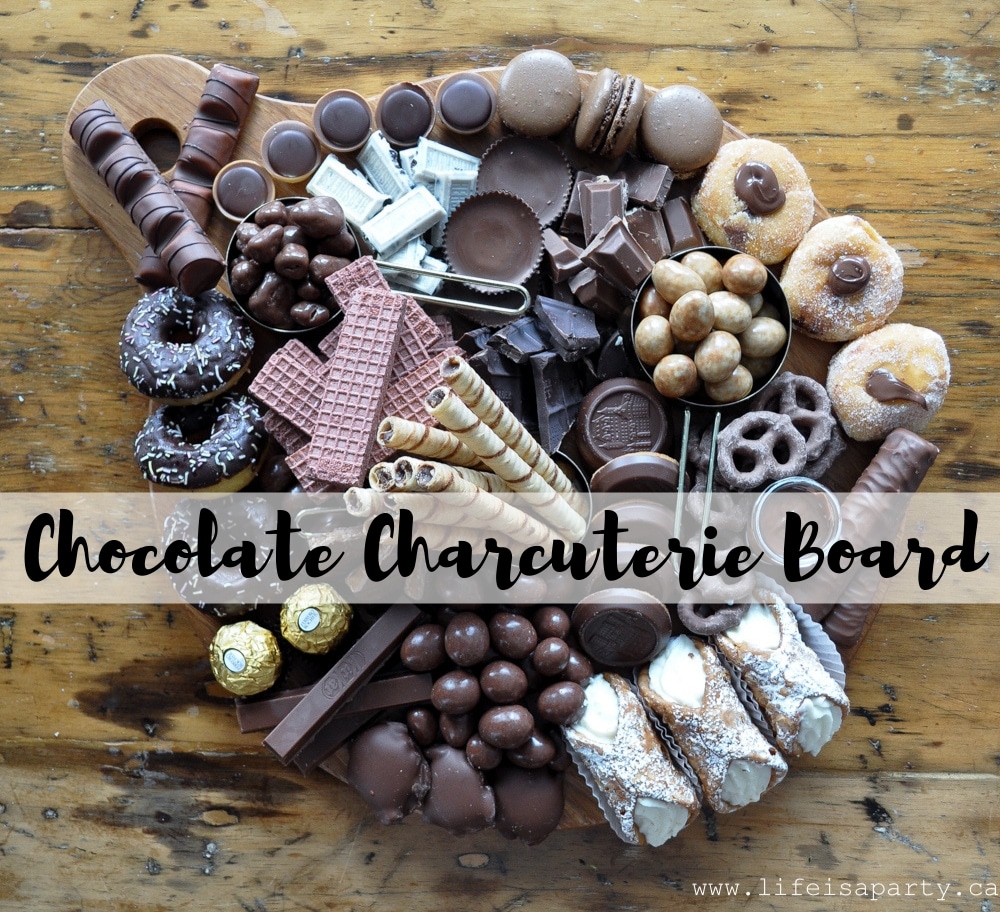
DIY Sequin Easter Eggs

Recipe

How to make sequin Easter eggs.

Sequin Easter Eggs

No ratings yet
Print Pin Rate
Cook Time: 30 minutes minutes
Total Time: 30 minutes minutes
Author: Dannyelle Nicolle-Ramjist

Materials

  • sequin pins
  • assorted sequins
  • styrofoam Easter eggs

Instructions

  • To make your sequin Easter egg, put a pin through the hole in a sequin, and then into the styrofoam Easter egg, pusing it all the way in. It is best to start at one end of the egg, and work your way around in rows, with a very slight overlap of each sequin.
  • Continue doing this until the whole egg is covered.
Easy DIY Easter Egg craft

Once you have your materials you simply fasten the sequins to the styrofoam egg using the pin, and creating any pattern you like.  It's really simple to do, just a little time consuming.

Sequin Easter Eggs

Patterns

Maddie and I tried a few different patterns on our sequin glitter eggs.  Simple stripes turned out great.

Easter Egg craft idea

Since they are Easter eggs we tried the classic zig-zag too.

Easter Egg ideas

My favourite though, were the random ones which we did in purples and one in different pinks.

DIY Sequin Easter Eggs

Variation

A variation on just putting the pin through each sequin is to layer a seed bead on top.  This will create a raised layered pattern.  Just be sure that the holes in your beads are large enough for the sequin pins to fit through.  Using beads gives you the option of even more colors, and patterns.

We displayed our Easter eggs in a pretty glass bowl, with some spring tulips.  I love how they look.  They almost look like vintage treasures.  These would also be so gorgeous for Easter egg hunts.  And for creative entrepreneurs these would be great creative goods items to sell at craft fairs or bazaars in the spring, or as made-to-order items online as Etsy sellers.

how to make Sequin Easter Eggs

With pretty, sparkly and handmade Sequin Easter Eggs, life really is a party.

More Easter Egg Inspiration

You might  also like our Gold Leaf Easter Eggs here.

Also check out our Faux Concrete Finish Bunnies here.

Faux Concrete Finish Bunnies: These dollar store bunnies get a concrete look easy makeover and now look like expensive garden concrete bunnies.

You might also enjoy our Jelly Bean Tree here.


Easter Bunny Breakfast Party

Mar 24, 2015 · 4 Comments

Easter bunny themed Easter breakfast ideas with bunny pancakes and decor.

This Easter Bunny Breakfast Party was so much fun. We had bunny themed children's Easter breakfast foods and the cutest easy bunny decor. Everything was so cute, and yummy.

Bunny themed Easter breakfast ideas with bunny pancakes.
[feast_advanced_jump_to]

What's cuter than a Bunny Breakfast for Easter?  There's nothing cuter.

Bunny Rabbit Breakfast ideas

Why We Love This Party

  • The decor was so, so cute, and all from around the house or DIY -so inexpensive.
  • The food was delicious and very kid friendly.
  • Everything on the menu was quick and easy to prepare.

I thought it would be sweet to make a little bunny themed breakfast for Easter for my little girls, and here's what I came up with.  This would be a really fun idea for enjoying Easter weekend right before or after your Easter egg hunt on Easter Sunday.

You might also like our Teddy Bear Breakfast, Breakfast Picnic, or Daisy Themed Party.

Easter Bunny Breakfast Table

bunny themed kids table

Let's start with the bunny themed dining table.  

  • Bunny Chairs -First I decorated their little chairs, and turned them into bunny chairs, with a pom pom tail and little bunny ears made of white paper, and watercolours.  

This was easy and so, so cute.  I love that you can set this up for Easter morning and then remove it afterward, with no damage to the chairs.  We did ours at a small kids table, but you could set it up at a large table for the whole family too.

Adding bunny ears made of paper and a bunny tail made from a pom pom to kids chairs for Easter.
  • Placesettings -I set the table with some pink plates and adorable bunny cups, that I saw at the store and couldn't forget -they actually inspired the whole breakfast, and were perfect for hot chocolate.
bunny folded napkins
  • Bunny Tail Flowers -I've kind of developed a bit of a crush on plain old baby's breath, and thought it went perfectly for my bunny Easter brunch as little bunny tail inspired flowers.
Easter bunny breakfast
  • Bunny Napkins -And one other sweet idea, bunny ear napkins.  I just used white paper napkins folded to look like bunny ears.
Easter Bunny Breakfast
  • "Hoppy Easter" and Bunny Tail Garland -Above the table I used a little chalkboard bunting wishing everyone a "Hoppy Easter", and a bunny tail pom pom garland -which might be my very favourite little detail.
bunny breakfast decorations

This was the perfect little spot for my littles to enjoy some special bunny treats.  Now on to the treats!

Easter Bunny Breakfast Foods

kids Easter breakfast

I wanted to use lots of pretty things, pink, white, and a few vintage treasures in the decor for our little breakfast buffet table.

vintage bunny picture

I had so much fun thinking up a bunny inspired menu.

Easter bunny themed breakfast

For our bunny breakfast we had:

  • Bunny Pancakes
  • Bunny Munch Granola in Carrot Cups
  • Vanilla Yogurt
  • Mini Chocolate Bunny Sprinkles
  • Hard Boiled Easter eggs
  • Bunny Tail Donuts

Bunny Pancakes

I used my small batch pancake recipe for the bunny pancakes. You can double or triple it for more. made the pancake "bunny cakes" with a squeeze bottle to help form the ears.  After they were done, I used some melted chocolate chips to create the precious little faces.

We served them with maple syrup.  This Easter bunny breakfast idea might have been my very favorite.

bunny pancakes

Granola

I also made some yummy homemade granola with this recipe, and served it in little carrot cones.  

I made the cones out of orange scrapbook paper and a little green ribbon and they're such a cute addition and fun way to continue our bunny theme.

Bunny Easter breakfast ideas

We served our "bunny munch granola" with some vanilla yogurt.  It's a real favourite combo around here.

Easter brunch ideas

The yogurt was in a small bowl, and just for fun we also had the cutest little bunny chocolate sprinkles.  Seriously, does it get any cuter?  chocolate chips would work great too, or Easter candy sprinkles, and berries would also be a nice addition. These were such a fun addition to our bunny brunch.

Easter brunch ideas
mini chocolate bunny sprinkles

You might have noticed a certain little teddy bear who wanted in on the action and secured his spot by disguising himself as a bunny for the morning with the help of my youngest daughter.

Easter bunny brunch

Eggs

You can't really have an Easter breakfast without including some eggs.  I made hard boiled Easter eggs, you could also add a little food coloring to the water to make them pretty pastel colors and still edible.  Scrambled eggs would be a great option for kids too, and you could also add in some bacon or sausage if you wanted to.

And, there were lots of special candy treats too, because it is Easter after all. The treats look so cute tucked into vintage teacups.

Easter bunny breakfast ideas for kids
Easter brunch ideas

Donuts

I also picked up some jelly donut holes and served them as "bunny tails".  Such a cute and easy little idea that my kids loved.

bunny tails donuts

Donuts should probably be standard breakfast fare for special occasions, don't you think?

Easter brunch ideas donuts

Tip: Prepare your granola and scrapbook paper cones a few days before. Pick up your donuts the day before or the morning of. To prepare the breakfast, just prepare the eggs and pancakes in the morning.

This was really the sweetest breakfast; in terms of cuteness and actual sweetness thanks to all those sugary treats.

kids Easter breakfast

Frequently Asked Questions

Can I make this breakfast ahead?

You can prep your granola ahead of time, and pick up your donuts. On the morning of you just have to boil the eggs and make the pancakes.

What are some bunny themed breakfast foods?

Granola served in carrot shaped paper cones with yogurt and Easter sprinkles, bunny shaped pancakes with chocolate faces, hard boiled Easter eggs, and donut hole "bunny tails".

How can I decorate for an Easter breakfast?

Add fresh tulips to the table, and baby's breath that look like bunny tails. Make a white pom pom garland that looks like bunny tails. Add Easter eggs and chocolate bunnies to the table in pretty tea cups with Easter grass. Make chairs look like bunnies by adding paper bunny ears, and pom pom bunny tails.

More Easter Inspiration

  • Easter finger foods brunch with decor and menu.
    Easter Finger Foods Brunch
  • how to make bunny bait Easter trail mix.
    Bunny Bait Easter Trail Mix With Free Printable Gift Tag
  • Chocolate mousse filled Easter egg dessert.
    Chocolate Mousse Easter Eggs
  • rainbow Easter table
    Rainbow Easter Table

If you use some ideas from our Easter Bunny Breakfast Party or any other ideas on my blog please let me know how it goes in the comments below. Thanks for visiting today!

DIY Easter Jelly Bean Tree

Mar 20, 2015 · 5 Comments

How to make a jelly bean tree Easter decor.

Jelly Bean Tree: make a colourful Easter DIY jelly bean tree to use in your Easter decor or as a centrepiece.

Jelly been tree DIY Easter decor idea.
[feast_advanced_jump_to]

This pretty Jelly Bean Tree Easter decoration is quick and easy, and so sweet.  It makes the perfect Easter centerpiece on your table, or as Easter decor.  

We used hot glue for our jellybean tree, so this is a craft best left to the adults. Young children will love the kind of magic it brings to your Easter decor.  It's the perfect project for adding a little color to your space for spring.  We used jelly beans in pretty pastel colors for Easter.  Primary colors would be a great choice too.  This probably isn't the time to use a black jelly bean though.  You may have made tissue paper art in a similar way before, adding bits of tissue paper to a branch to look like spring blossoms and this is a variation on that idea.

Branches

To make your tree, you'll want to use some branches.  Look for fallen branches of a tree, or clip some.  The perfect tree branches for this project have lots of little tiny twigs, so there's lots of spots to attach the jelly beans.  You could even use a pre-made little tree from the craft store for this craft.  You might also want to hang some Easter egg ornaments on to the tree, which would be a great idea too.

Container

To make your marvellous jelly bean tree place the branches into a sturdy container.  If your container is too light, you may want to add some rocks inside to help weigh it down and keep it from tipping over.

Jelly Bean Tree: how to make a jelly bean tree for Easter with sticks, a glue gun, and some jelly beans!

Recipe

How to make a jelly bean tree Easter decor.

DIY Easter Jelly Bean Tree

No ratings yet
Print Pin Rate
Cook Time: 10 minutes minutes
Total Time: 10 minutes minutes
Author: Dannyelle Nicolle-Ramjist

Equipment

  • hot glue gun

Materials

  • jelly beans
  • tree branches
  • container
  • hot glue

Instructions

  • Find some branches in the woods. Look for branches with lots of twigs. Arrange the branches in a heavy container or vase, or add some rocks to help weight it if needed.
  • Use hot glue to carefully glue the jelly beans onto the branches. The jelly beans are very small to work with, so take extra care not to burn your fingers with the hot glue. Glue the jelly beans all over and to the top of the jelly bean tree.
Jelly Bean Tree: how to make a jelly bean tree for Easter with sticks, a glue gun, and some jelly beans!

Pop Of Colour

The pop of spring colour is so nice this time of year, especially while spring flowers still seem quite a ways off.  This colorful artwork piece can give us a little help to get into the spring spirit.  Looking after plants and fresh flowers can feel like a big responsibility, but you won't have to worry about forgetting to water your jelly bean tree, and it adds such visual appeal to a space.  This would be a really fun craft to do with a good friend for a crafting night because it's easy and inexpensive to make.  Any colorful friends who love a bit of whimsy would love it.

Jelly Bean Tree: how to make a jelly bean tree for Easter with sticks, a glue gun, and some jelly beans!

I used the jelly bean tree for a simple Easter mantel, along with my little feather chick animal friends, and a hopeful chalkboard message.  The mantel is the perfect place for this if you're worried about children trying to eat them, since they do have hot glue on and are no longer edible.   This little tree would also be a really beautiful Easter table centerpiece.  And you could always place a bowl of jelly beans beside it for any snackers.  ;). I love the whimsy that a jelly bean tree adds.  Can't you just imagine the magic of finding a jelly bean tree growing on the forest floor?

Can You Use Icing?

I've been asked if you can use something to make this craft edible.  You might be able to use royal icing.  But, since jelly beans are so inexpensive, I think hot glue probaby is the best because it holds so well and sets so quickly.  Jelly beans are quite heavy and I think it maybe difficult to secure them with just icing.  It might only work if your jelly beans rests flat on a table while it sets.  It would be far easier to buy an extra bag of inexpensive jelly beans and just have a bowl beside it for eating.

Jelly Bean Tree: how to make a jelly bean tree for Easter with sticks, a glue gun, and some jelly beans!

With this DIY Easter jelly bean tree, life really is a party!

More Easter Inspiration

Looking for some more simple Easter ideas?

Nail Polish Marbled Easter Eggs

Nail Polished Marbled Easter Eggs: easy water marbling with nail polish is the perfect modern touch to your Easter eggs.


How To Make Your Fake Plants Look Real

Mar 17, 2015 · 4 Comments

How to make your fake faux succulents look real.

How make your fake plants look real with simple tricks like adding real soil and stones and potting in a glass vase. These low maintenance fakes will have people guessing, without you having to worry about watering and fertilizing. And they're a great budget option for using as a centerpiece.

How to make your fake faux succulent plants look realistic.
[feast_advanced_jump_to]

When I was getting ready for our Valentine's Day Fiesta, I knew I wanted to have a centre piece of cactus and succulents in glass vases.  It's simple, elegant, and on trend.  So I started searching for the plants at a good price.  

We love plants. Check out How to Make a Terrarium, Easy DIY Eggshell Planters, How To Make Rainbow Baby's Breath, or How to Mount a Staghorn Fern here.

I knew I wanted to have at least nine vases running down the centre of the long table, but most of the cactus and succulents I found were around $5 each, which equals way too much for a party.  

But, I kept looking.  When a new dollar store opened in my area I found some faux succulents for one dollar each -perfect!

faux succulents, pulled out of their pots and styrofoam

They came in little plastic pots, so here's how I transformed them into a something that looked real, and fooled my guests.

You could use these ideas with any faux plants to make them look more realistic.

Faux Succulents potted in real soil to look real

Materials

I bought some real soil at the nursery, and some pretty rocks at the dollar store.  The glasses vases were some I already had, but if you needed them they're from the dollar store.

  • real soil
  • real rocks
  • glass vases or pots

1. Get Good Fakes

The best way to make your fake plants look more realistic is to start off with some good fakes. They're so many available today. Even if you have budget ones that look a bit plastic, the other tips will help, but starting off with realistic faux plants will certainly help.

Here are my tips for finding great ones.

  • Make sure there's some color variation. Real plants have different shades of green and varation. Good fakes have this too.
  • Look for faux plants that feel real. Hard plastic leaves are a give away that they're fake.
  • Not too perfect. Real plants don't always look perfect. Great fakes have some varation in leaf size, and how open the buds might be.

2. Use Real Soil

I removed the faux plant from the plastic pots, and then pulled the styrofoam base it was glued into.  Then I filled up the bottom of the vase with soil, and submerged the the plant, making sure the bottom was completely hidden by the soil.

How To Make Your Faux Succulents Look Real by using real soil to pot them

You could do this in regluar pots for faux plants that you don't want in vases as well. Put them into beautiful pots and top the pots up with real soil.

Faux Succulents centrepiece diy

3. Use Real Rocks

Next, I inserted the plant back into the styrofoam, and added a layer of the rocks over the soil.  So easy.

How To Make a faux cactus centrepiece inexpensively


Using real soil and rocks really made the faux plant look much more realistic.  

4. Mix In Some Real Pants With the Faux Ones

I also included some real cactus.  I found some small ones at a local nursery for around two dollars each so I bought several to add to the mix.

This step really makes a difference. Your guests will see the real plants and just assume that the fake ones are also real. Top tip: make sure the real ones you mix in are low maintenance so that they keep looking great.

glass vase cactus centre piece for a party

It is a bit difficult to maneuver the real, and very prickly cactus into the tall, narrow vases.  

Here are my tips.  Add some soil to the vase first.  Then dig a small hole, so that it's coming up the sides a bit.  This way there is room in the middle for the plant.  

Hold the plant with some kitchen tongs and lower it into place.  Carefully add soil to the sides.  Use the end of a wooden spoon to compact the soil into place around the plant.  

And, if you do get some soil on the plant and it's stuck in the thorns, use a straw to blow it out.

cactus centrepiece close up

Best part about this little project is that the finished project is very low maintenace, even the real ones.  

I just need to make sure I tell my husband not to accidentally water the faux ones.

With real looking faux succulents, life really is a party!

More Inspiration

  • Garden party table set under white pergola with vintage floral tablecloth, pink peony centerpiece in wooden tool caddy, white wicker chairs, and climbing white roses in background.
    Garden Themed Party
  • summer garden party
    Summer Garden Party
  • DIY garden ideas on a budget.
    DIY Garden Ideas On A Budget
  • DIY eggshell planter with spring bulbs arranged in a ceramic egg holder.
    Easy DIY Eggshell Planters

Frequently Asked Questions

Where did you find the faux plants?

These faux plants were from the dollar store. The price was right, but they weren't the best quality. Look for better quality faux plants at the craft store.

What if I forget and accidentally water them?

If you water them frequently they might develop rust from the wire stem, or markes from the water dehydrating on the glass, or even grow mold. But if it's an infrequent mistake, the water should evaporate and cause no harm.

If you try any of our ideas on How To Make Your Faux Plants Look Real or any other ideas on the blog please let me know how it went in the comments below. Thanks for visiting today!

Nautical Party

Mar 5, 2015 · 2 Comments

Cruise themed nautical planning dinner.

This Nautical Themed Dinner Party was the perfect way to get together with friends and plan our next cruise. The nautical themed tablescape and decorations and nautical themed foods were so much fun..

Pre-cruise nautical planning dinner party ideas.
[feast_advanced_jump_to]

Why We Love This Party

  • We're so excited about cruising and this was a great way to extend the fun.
  • All the nautical party decorations were easy to create and so cute.
  • The nautical themed food ideas really added to our theme.

This year for vacation we're headed on a cruise and I thought it would be fun to put together a nautical themed dinner party before we go so we could plan out what to do in each port with our family. We're sailing with my sister and brother-in-law, and also my husbands parents.  Our party of eight got together to talk about our up coming cruise.

We love cruising! One year after a family cruise my daughter decided she wanted a cruise themed birthday party, check it out for more nautical ideas inspired by the cruise.

Cruise themed party

Nautical Party Tablescape

bon voyage cruise themed nautical party

 For dinner, I thought it'd be fun to decorate with a nautical theme. I used all these different elements as part of the decor to set the mood.

  • rope
  • lanterns
  • sea shells
  • binoculars
  • striped napkins
  • life saver napkin rings
  • anchor drink charms
  • striped straws
Easy nautical centerpiece

I used rope, sea shells, and pretty white lanterns on the table.  You can find the tutorial for my DIY chevron table runner here. For each place setting, I made simple napkin rings out of twine and lifesavers. It was such an easy idea, and so cute!

Nautical party napkins

My favourite little detail though, was a little anchor on the glasses.

Cruise themed nautical place setting

I found them at a jewellery making store, and tied them onto mason jars with a little baker's twine.  They were very inexpensive. Of course I had to include a pretty stripy straw.

cruise themed party ideas

Nautical Food Table

  • paper sailing flag bunting
  • paper sea gulls
  • vintage globe
  • lantern 
  • binoculars

For dinner, we ordered Chinese food, so easy and so good.  I set up the food in the kitchen, and added a little nautical feel in there too.

nautical party ideas

The nautical flags created a really fun boat feel to the table.  I just printed some from on-line on my printer, cut them out, and then strung them up to the light and the edge of the table.

Cruise nautical party decorations

And over head, some fun seagulls.  I found the adorable free printables at The Golden Adventures of a Dark Horse.  Love them.  How fun, and we all know that food attracts seagulls, lol.

Nautical party decoration ideas

On the table a few more nautical inspired items for an easy centre piece.

cruise themed party ideas

Nautical Themed Party Deserts and Drinks

  • nautical cupcakes
  • blue jello
  • cracker jacks
  • life savers
  • Caribbean beer

After dinner we enjoyed a few nautical inspired desserts, on our desserts and drinks cart.

Nautical dessert table

I set up the cart with the sweets, along with a bucket of Red Stripe Beer, another vacation favorite.

Bucket of beer galvanized metal pail

The idea for the nautical party was actually inspired by seeing these cute little cupcake papers and picks at the dollar store.  Easy and sweet.

Nautical party dessert ideas

I also made some blue jello, since it reminds us of the sea.

cruise themed desserts

And last but not least, some Cracker Jacks, since they have the cutest little sailor on the box, and are so yummy.

nautical cruise party dessert ideas

We're counting down the days until we get away. 

With vacation on the horizon and a nautical party, life really is a party!

More Party Inspiration

  • Cruise themed nautical party.
    Cruise Themed Nautical Birthday Party
  • Butter themed toast party dining table set with yellow striped tablecloth, compound butter grazing runner down the center, baguette candle holders, and toasters at each end, white hutch and crystal chandelier in background.
    The Ultimate Butter Themed Party -A Toast Dinner
  • Pasta bar for a party with different pastas, sauces, and toppings.
    Pasta Bar Ideas
  • Make your own pizza party.
    Make Your Own Pizza Party!

If you tried any of our Nautical Party Ideas or any other ideas on my blog please let me know how it went in the comments below. Thanks for visiting today!

Freqently Asked Questions

Where are the anchor charms from?

I found them at a local jewelry making store as inexpensive charms. Look for something similar on-line.
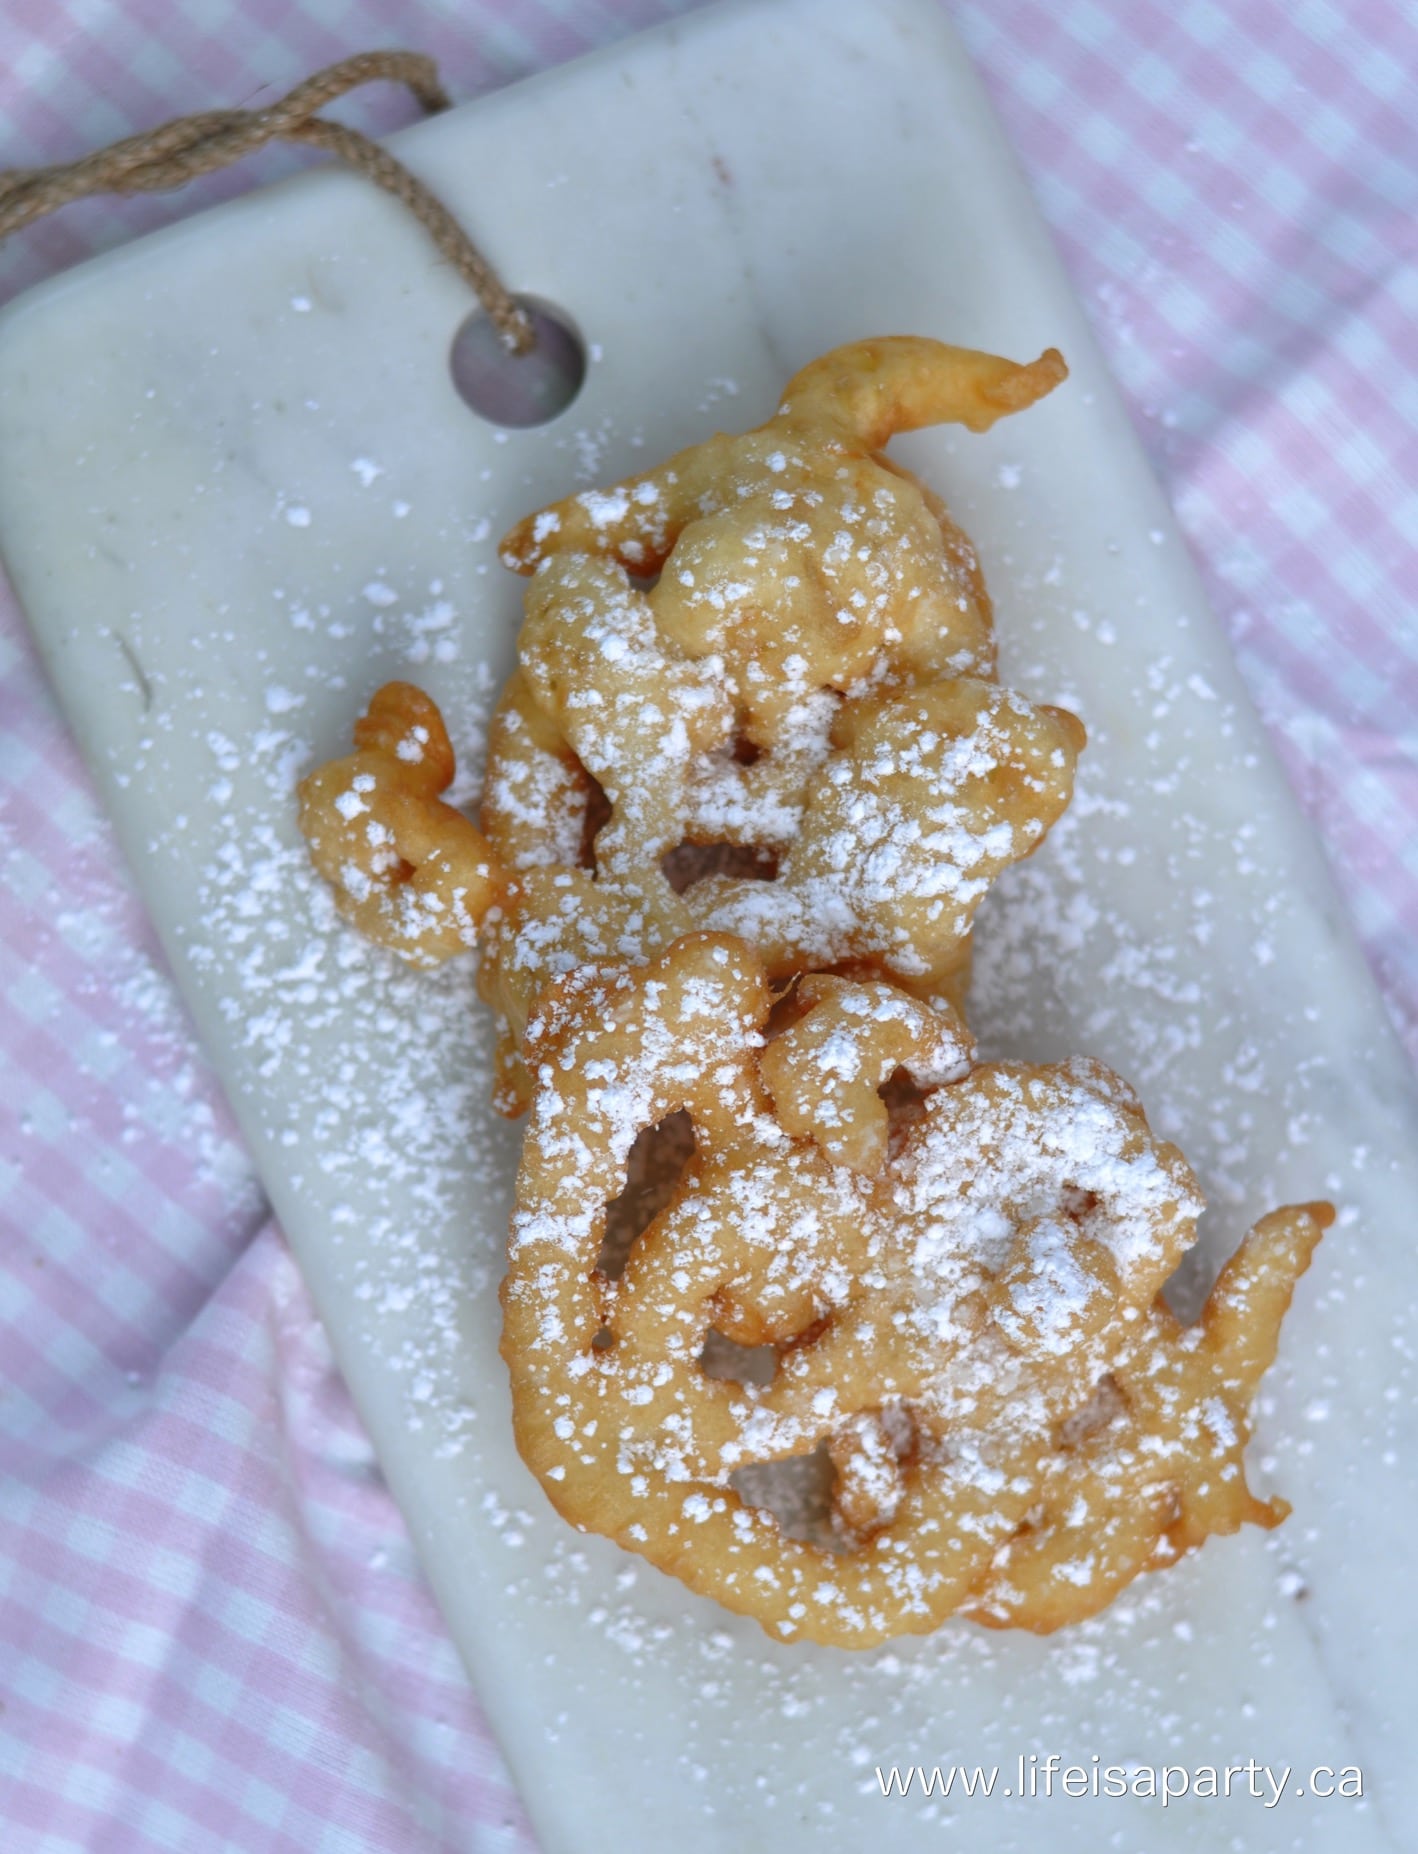
Where were the napkins from?

I grabbed the nautical themed napkins at the party store.

Where an you buy old fashioned cracker jacks?

Look on-line to see if you can find them in your area. I found mine at a candy store that stocks old fashioned candy. You can also find order them on-line.
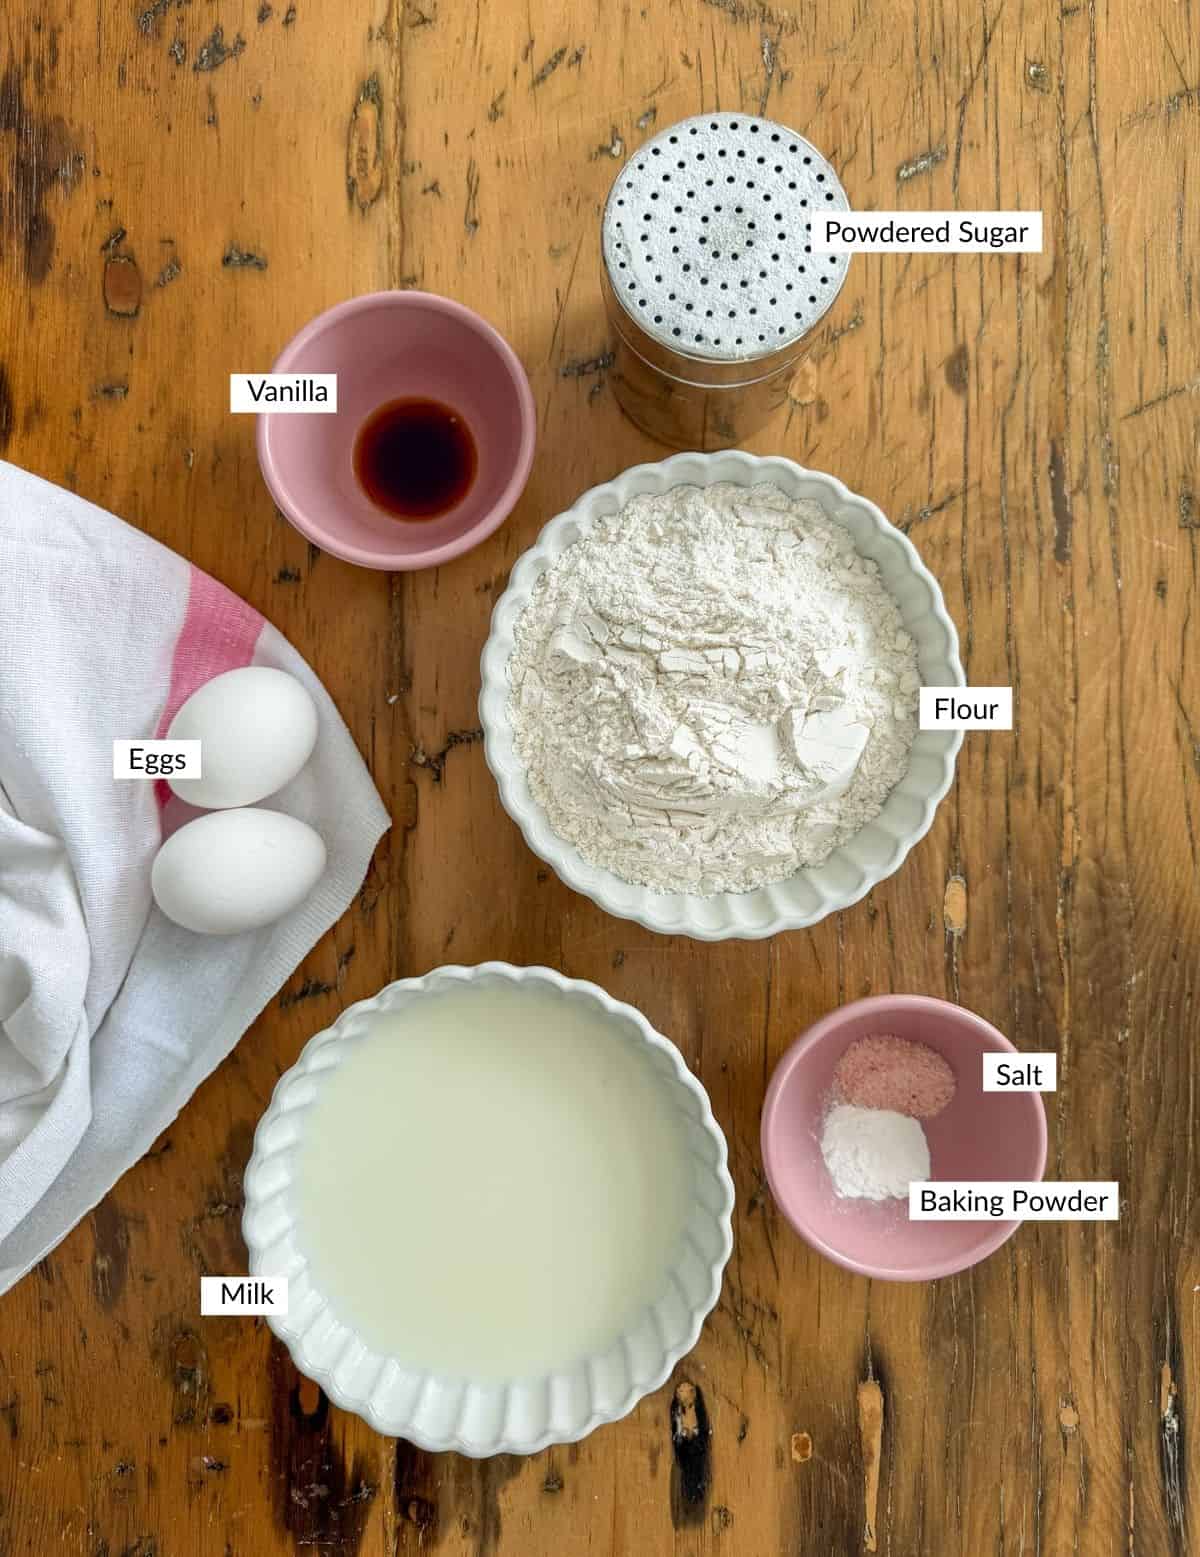
Bag of Sunshine Yellow Care Package Ideas

Mar 3, 2015 · Leave a Comment

Bag of sunshine yellow gift basket ideas.

Little Bag Of Sunshine -the perfect gift for someone who could use a little sunshine, all kinds of thoughtful yellow gifts sure to brighten anyone's day.

Bag of sunshine yellow themed gift basket.
[feast_advanced_jump_to]

When someone is ill or feeling down and needs a little sunshine to help them recover, this care package is the perfect idea.  A sunshine basket is full of thoughtful little gifts that would hopefully help anyone feel better.  It can be tailored for the recipient.  If they're ill, or recovering you can add items to your sunshine box that will help with the recovery.  If they're sad, you can make this thoughtful gift to cheer them up.  It isn't just for for someone going through a hard time though, it makes a great gift for sunny days too like any special occasion, Mother's day, a birthday gift, as a housewarming gift, or if you like sending college care packages.

You might also like our Wine and Cheese Basket Ideas, or our DIY Breakfast Gift Basket.

Shopping For Yellow Items

I had a lot of fun putting this package together full of meaningful gifts.  We went to several stores to find all the goodies.  I looked at the dollar tree, the grocery store, the drug store, and some of my favourite home stores for all my yellow gifts.  It's actually so fun looking for all the yellow items to make this cheerful gift.  Be on the lookout for yellow items to include in this bag of sunshine, but also look at look for items that are packaged using yellow.  May of our fun gift ideas are things that come in yellow packaging, and they work really well for a gift basket like this one.
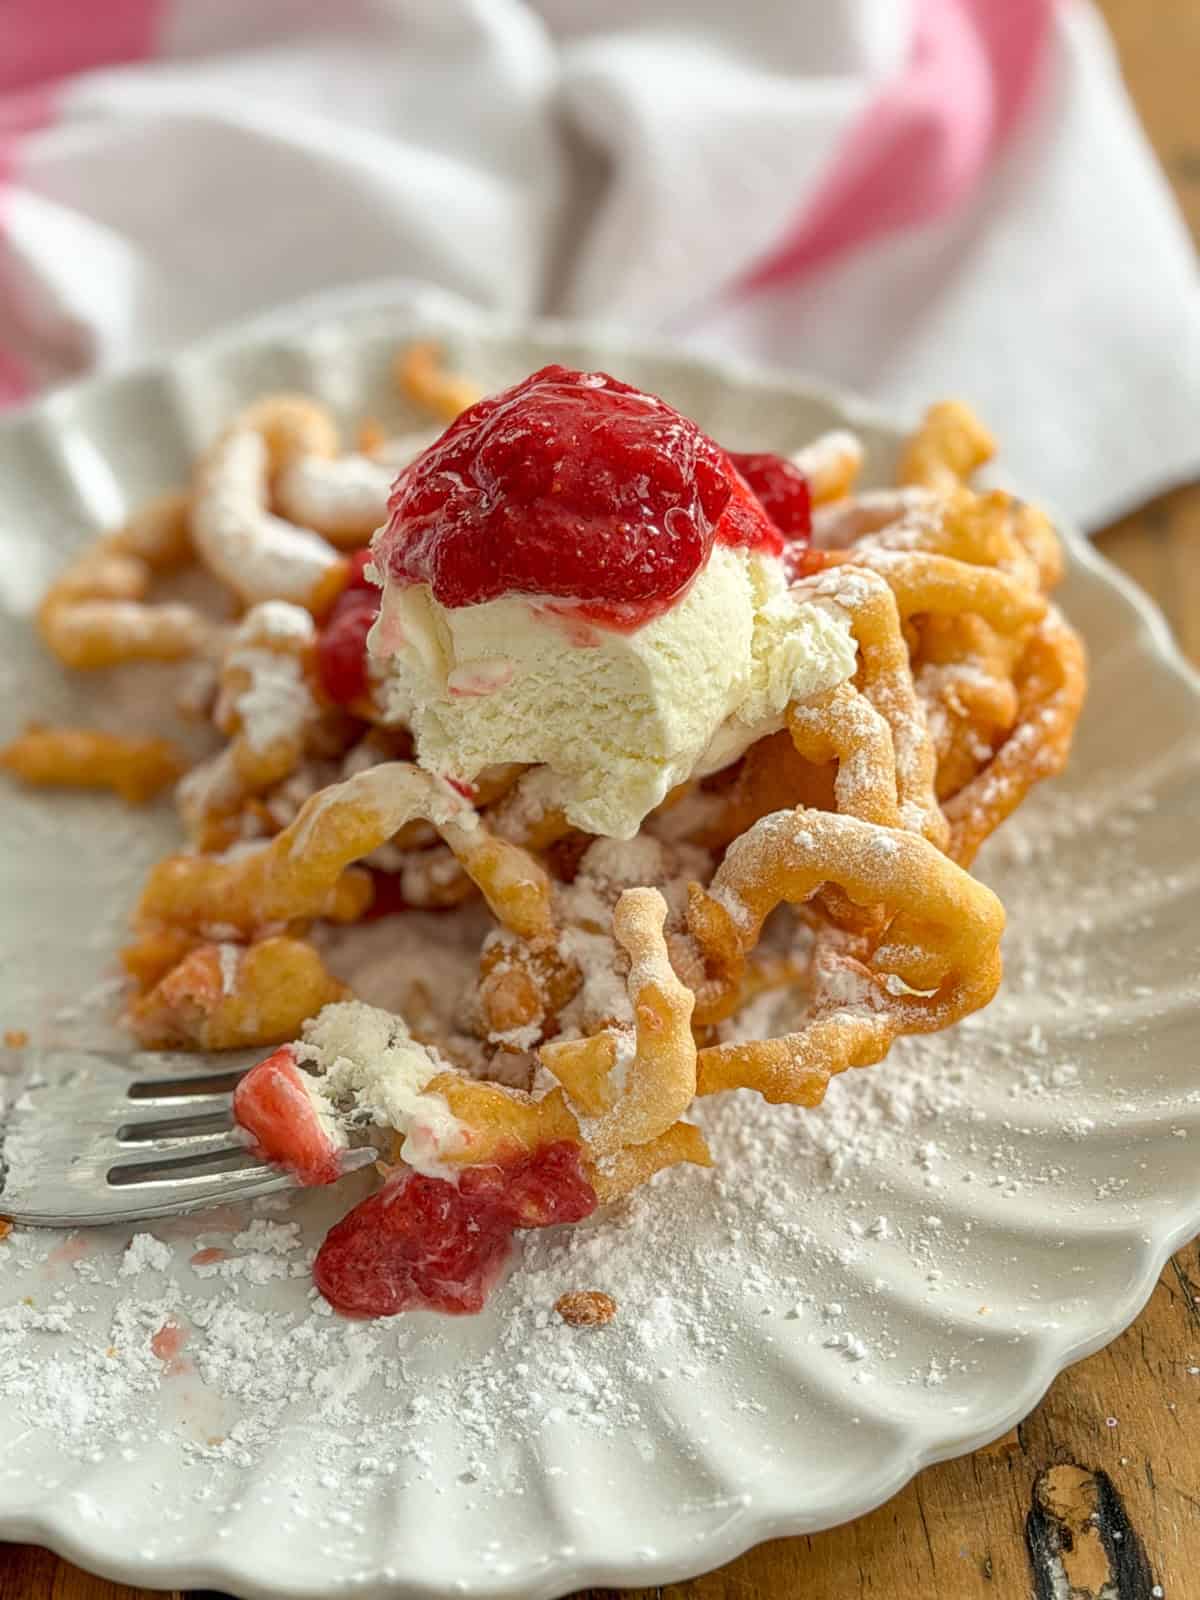
Bag Of Sunshine yellow gift ideas

This little yellow box of sunshine gift was for an ill friend who needed some brightening up.  Our gift was full of yellow things.  If your friend isn't ill just leave out the chicken soup and cough drops and add some other fun yellow goodies to your sunshine gift box.

Special Touches For The Sick

Sick people need chicken noodle soup, cough drops, honey for their throats, some nice hand cream and warm socks, definitely warm socks.  But then again, who won't love some hone, hand cream and warm socks?

  • chicken noodle soup
  • cough drops
  • honey
  • hand cream
  • warm yellow fuzzy socks
what to put in a bag of sunshine gift

Yellow Treats

I also wanted to include a few treats, of the "wouldn't buy this for myself" variety.  So I picked a few of my favs. that are yellow:  chips, coffee crisps, and Werther's originals (and then I had to fight to keep my kids from eating them all).  I also included a Toblerone (strictly for medicinal purposes), and some good ol' juicy fruit.  I'm pretty sure every sunshine gift basket needs a little chocolate in it, and maybe even a lot of chocolate.

  • potato chips
  • mini Coffee Crisp chocolate bars
  • Werther's original candies
  • Toblerone chocolate bar
  • Juicy Fruit gum
Little Bag Of Sunshine gift ideas

Special Gifts

Last but not least a few special things: Earl grey tea, and homemade shortbread (find the recipe here, it's easy and so, so good).  I also included a pretty little lemon scented candle, and a sweet pot of mini daffodils.
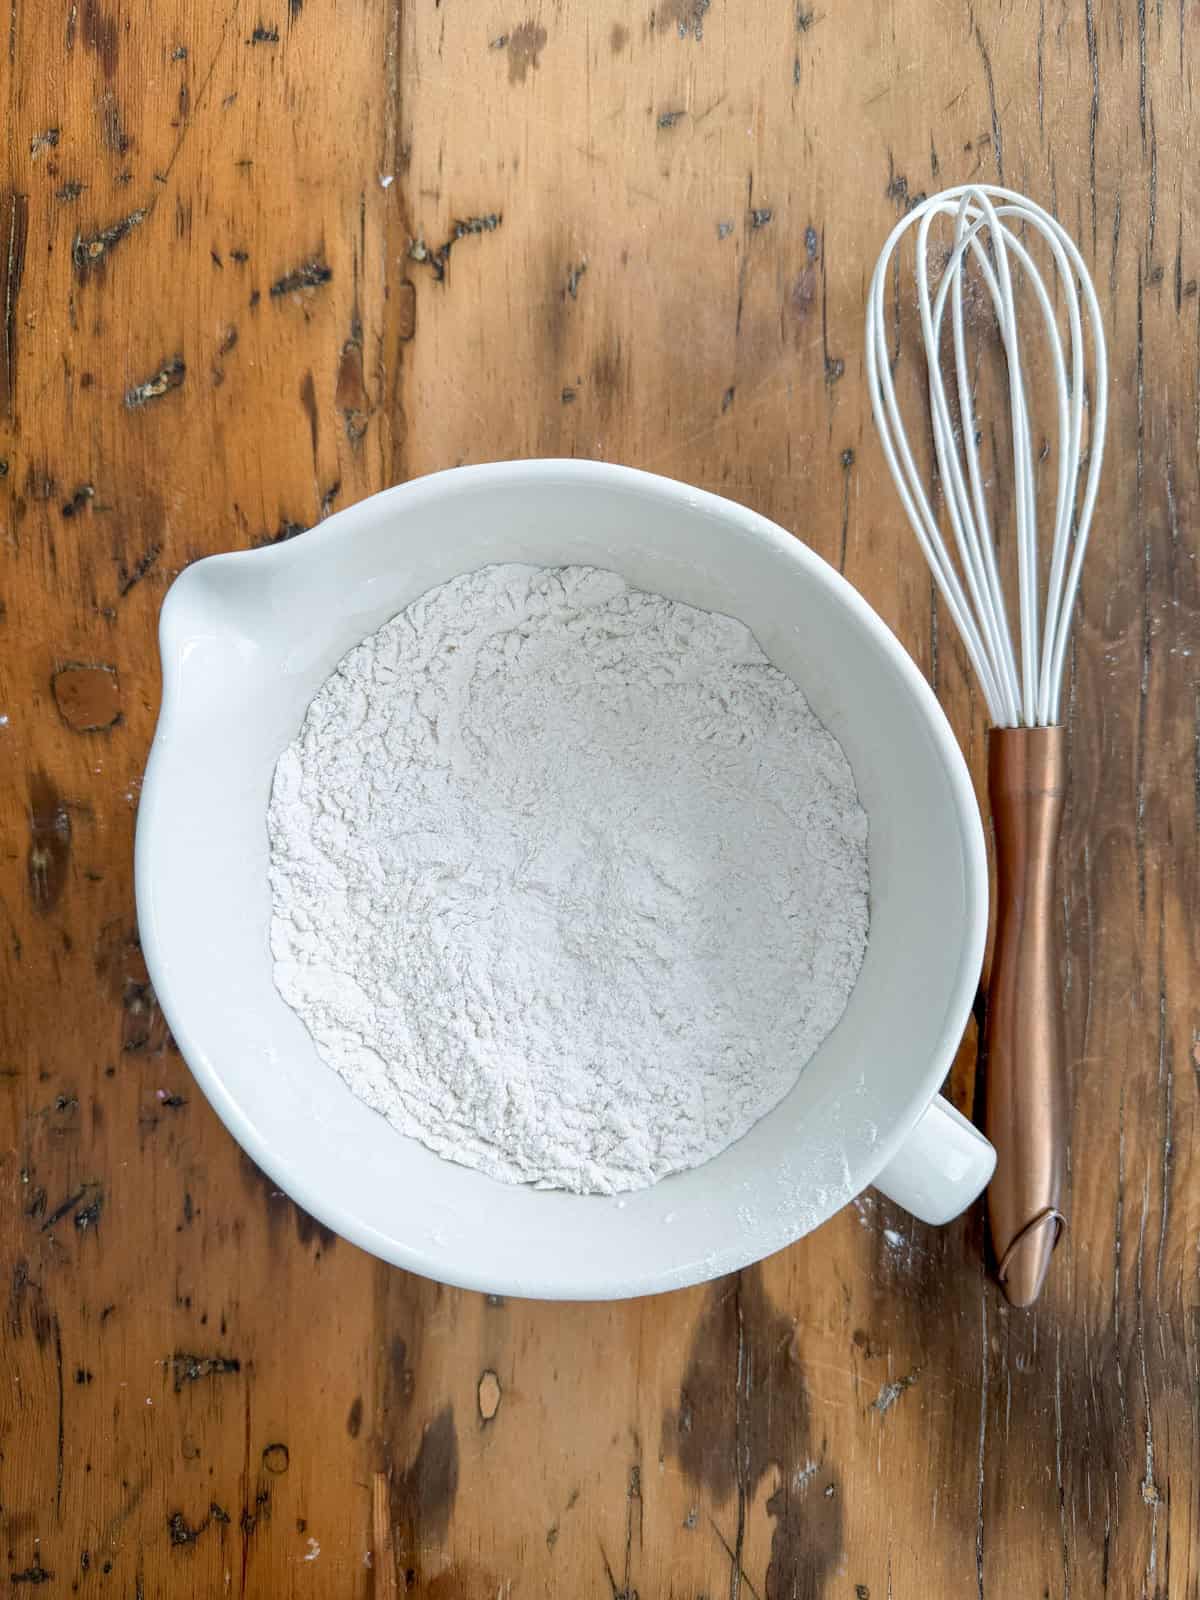
  • tea
  • homemade shortbread
  • lemon candle
  • pot of mini daffodils

More Gift Items

I also made another little version for my girls teachers with post-it notes, yellow highlighters, yellow nail polish, the candle, a cute little 6-pack of sweet yellow earrings, cough drops, gum, coffee crisps, and the Werther's originals.

  • yellow post-it notes
  • yellow highlighters
  • yellow nail polish
  • candle
  • yellow earrings

Some other great yellow items you might want to include in your 

  • lip balm
  • a gift card for coffee or to a favourite restaurant
  • stationary
  • banana chips
  • coffee
  • fancy soap
  • bath bomb
  • fresh lemons, bananas, or pineapple
  • yellow flowers
  • cozy yellow throw blanket
  • lemon curd
  • herbal tea

Yellow Packaging

Gift Bag, Basket, Or Box

Once I had everything together I packaged it all up in a simple yellow gift bag, with some yellow tissue paper, and made a gift tag that said "A Little Bag of Sunshine".  You could also wrap a box in some yellow wrapping paper, or use a basket and wrap the whole thing in cellophane and tie with a yellow ribbon.  A basket also makes a nice gift to keep afterwards too. If you're mailing a package like this as a college care package you could use some yellow crinkle paper inside a cardboard box that you could tape shut.  Why not decorate the inside flaps of the box with some hand drawn sunshines or some stickers.  

Removing Packaging

I also had a few yellow items from the dollar store that I wanted to remove the packaging from.  For the fuzzy socks I removed the packaging because it wasn't pretty and just wrapped the yellow socks with some pretty yellow ribbon.  This is a great idea if you want to remove a dollar store price tag that's printed right onto the label.  

Homemade Items and Fresh Flowers

For my homemade cookies, I wrapped them in a cellophane bag and tied the top with yellow ribbon.  A yellow container or tin would be great for giving baked goods also.  Because I also gave a real plant in my bag of sunshine, I made sure to position it so that the top could come out of the top of the bag  and made sure that the plant won't tip over or spill in the bag.

Our sick friend loved it.  These were inexpensive and fun to put together, and a very much appreciated surprise gift for the teachers too.  If you're looking for a little treat for friends, this one is perfect.  Just start looking for all things yellow, and you'll be surprised how many little treats you can find.

Little Bag Of Sunshine gift

Whether you're making this basket of sunshine as a get-well gift, or for someone going through a difficult time who could use a little cheering up, or as a simple gesture for a friend or family member, I hope the lucky recipient loves it and that it really makes someones day.  It's a really wonderful way to brighten up the day and send a little extra love to someone you care about.  

With a little bag of sunshine, life really is a party!

More Gift Basket Ideas

You might also like our Breakfast In Bed Gift Basket here.

Breakfast in Bed Gift Basket: perfect, thoughtful gift, includes a recipe and homemade mix for pancakes, and free printable.

Also check out our Wine and Cheese Gift Basket here.

You might also enjoy our Homemade Caramel Corn perfect for gift giving, here.

White Hot Chocolate Buffet

Feb 24, 2015 · Leave a Comment

White hot chocolate buffet with white hot chocolate toppings, white flowers, and twinkle lights.

Winter White Hot Chocolate Buffet/Bar: perfect for any winter or snow themed get together, with lots of ideas for hot chocolate toppings.
Winter White Hot Chocolate Buffet/Bar -all white ideas for winter entertaining.

It's so, so cold outside but inside we're getting warm and cozy with a yummy white hot chocolate buffet!  It's certainly very white outside with lots and lots of snow, which inspired this white hot chocolate buffet.  I love how pretty it turned it.

Winter White Hot Chocolate Buffet/Bar -all white ideas for winter entertaining.

The Bar Cart

I used my little bar cart, and set it all up under the chalk board message, "hot chocolate on a cold day" -which is certainly the case around here these days!  I also used this string of pretty snowflake lights.

Winter White Hot Chocolate Buffet/Bar -all white ideas for winter entertaining.

White Hot Chocolate

I used some white hot chocolate powder for the hot chocolate itself; quick, easy and delicious.  You could also make it yourself by heating up some milk with white chocolate chips.

Winter White Hot Chocolate Buffet/Bar -all white ideas for winter entertaining.

Hot Chocolate Buffet Topping Ideas

Once I decided on the theme, I had lots of fun coming up with lots of yummy white things to add to our hot chocolate.

Winter White Hot Chocolate Buffet/Bar -all white ideas for winter entertaining.
  • large marshmallows
  • mini marshmallows
  • white cotton candy
  • marshmallow fluff
  • whipped cream
  • white chocolate chips
  • white sprinkles
  • snowflake sprinkles
  • white chocolate spoons
  • chocolate dipped vanilla wafer cookies
  • white chocolate coconut truffles

We had large and small marshmallows, and white cotton candy.

Winter White Hot Chocolate Buffet/Bar -all white ideas for winter entertaining.

We also had marshmallow fluff, and whipped cream, along with a few kinds of white sprinkles, and white chocolate chips.

Winter White Hot Chocolate Buffet/Bar -all white ideas for winter entertaining.

I also dipped a few spoons in melted chocolate and added some sprinkles to make the perfect stirrer.

Winter White Hot Chocolate Buffet/Bar -all white ideas for winter entertaining.

Snowy Flowers

Baby's Breath in simple mason jars were the perfect flowers, since they always remind me of snow.

Winter White Hot Chocolate Buffet/Bar -all white ideas for winter entertaining.

More White Chocolate Treats

While I was dipping the spoons, I also did a few vanilla wafer cookies.  The kids loved these, and they were so easy.

Winter White Hot Chocolate Buffet/Bar -all white ideas for winter entertaining.
White hot chocolate buffet bar cart 10

I also picked up some coconut truffles, also a hit.

Winter White Hot Chocolate Buffet/Bar -all white ideas for winter entertaining.

This was the perfect little winter warm up, and would be so, so pretty for a wedding or shower.

Winter White Hot Chocolate Buffet/Bar -all white ideas for winter entertaining.

With a pretty winter white hot chocolate on a cold winter's day, life really is a party.

Winter White Hot Chocolate Buffet/Bar -all white ideas for winter entertaining.

Also check out our Ho Ho Ho Hot Chocolate Bar here.

Ho Ho Ho Hot Chocolate Bar: set up the perfect Christmas hot chocolate bar with our printable package that includes labels, poster, bunting, and more.

You might also like our Coconut Milk Hot Chocolate Recipe here.

Valentine's Day Fiesta

Feb 18, 2015 · Leave a Comment

Mexican Fiesta themed Valentine's Day party ideas.

Valentine's Day Fiesta Party: Decorations, great make-ahead menu and fun family games for a family friendly Valentine's Day Mexican Fiesta.

Mexican themed fiesta Valentine's Day party ideas.
[feast_advanced_jump_to]

We had so much fun escaping to Mexico (at least in our minds) last Saturday for our Valentine's Day Fiesta!  

Valentine's Day Fiesta Family Party

There is a point in your life, when your kids are old enough to be fun, and young enough to still want to hang out with you, where family parties are where it's at.  

A romantic Valentine's Day at a fancy restaurant is fun, and there's nothing wrong with getting a sitter and having a night out, but when Valentine's Day fell on a Saturday this year it seemed like the perfect occasion for a fun family friendly party.  

And since it's feeling like such a long, and cold winter we thought a trip to Mexico for the night would be just the thing, so this year for we had a fun family friendly Valentine's Day Fiesta!

red and pink decor.

Valentine's Day Fiesta Decoration Ideas

Guests were greeted at the front door with a few fun details.  The airline tags for Mexico were found on-line and I attached them to my vintage suitcases.  I also printed out a bunch of vintage Mexican Valentines, that I found on-line. They were so cute, and I displayed them all around the party.
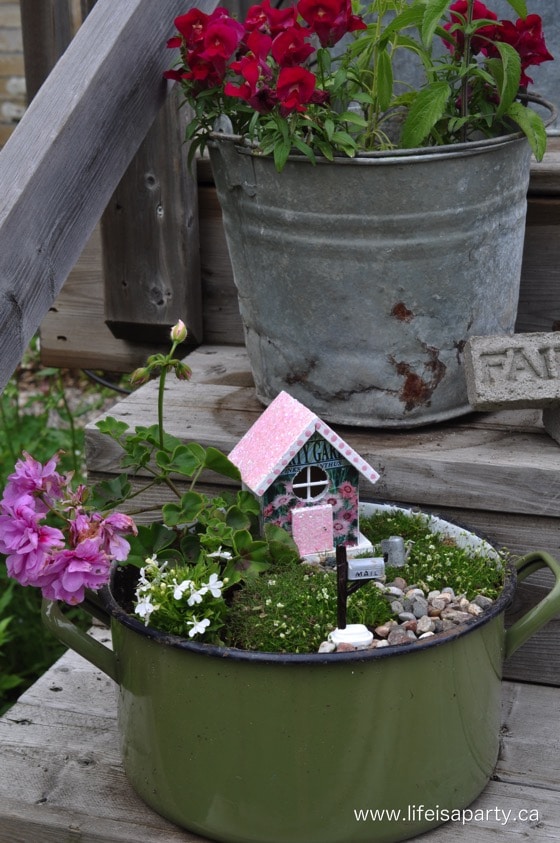
vintage Mexican valentines

For Seniors and Senoritas

We also offered Seniores and Senoritas a fun stick-on mustache for the evening, or a flower for their hair -such a fun and in-expensive way to set the mood for the night.

roses and moustaches.

Decorating the Dining Room for a Valentine's Day Fiesta

We set up the dining room for everyone to have dinner, and I had a lot of fun decorating it for a real fiesta feel.

red and pink fiesta decor.

DIY Paper Picados

One of my favourite details of the party were the pretty Mexican paper flags, called papel picado.  After looking on-line and in party stores for them, I ended up making a simple version of them myself.  I used tissue paper, and cut out simple patterns in red, light pink, and dark pink.

Mexican themed paper flags.

The patterns I came up with used a lot of hearts, diamonds, circles, and petal shapes.  By folding the tissue paper, you're able to create the patterns over the whole paper, and repeat the patterns.  I just used trial and error to find ones that worked.  I also used a few paper punches, and a simple hole punch to make my designs.

Mexican themed paper flags.
mexican themed paper flags.

Part of their charm is in their imperfections and hand-made look.  I made sure they all had some holes along the top, and hung them by threading them randomly onto string, and using sticky hooks to attach the strings to the ceiling.  I also used some large rectangular white paper doilies, but in half, and thought they looked really really pretty too.

red and pink fiesta decor.

On the table I used my metal lanterns from the garden, I love the rustic metal for a Mexican feel.  I also used some succulents and cactus in tall glass vases. See exactly how I made the cactus centre pieces here.

red and pink fiesta decor.

The cauctus definitely added the fiesta feel!  The smaller tea light holders are from the dollar store.  They didn't come in my party colours, so I had to break-out the old spray paint, despite the cold-cold winter temperatures.  

I was so pleased with how they turned out in bright pink and red, and added the bright hit of colour I needed to the table.

red and pink valentine decor.

DIY Mini Pinatas

We also made some simple mini heart pinatas.  I made them by cutting out two matching hearts from some thin cardboard cereal boxes, and some long straight pieces for the sides.  

To make the boxes, I just used masking tape to tape the side pieces to one of the hearts.  Then, I filled up the hearts with a few treats, and then taped the second heart on top.

valentine mini heart piñata.

Once the boxes were made, I decorated them with streamers.  I wrapped the edge of the hearts first, then cut fringes into streamers folded in half,  glued them on to the boxes, front and back, and finally trimmed around the outside.

valentine mini hear piñata

These were such a hit with the kids.  They kept shaking them and asking if they could open them.  I sent one home with each of my little guests as a party favour, along with a special balloon from the kids table.

red and pink decor.

Fiesta Kid's Table

Because we had 18 guests, we sat the kids at their own little table, right beside the grown ups.

red and pink decor
Mexican themed paper flags.

For their table, I gathered up all the little tables and chairs I could find, and used a pretty cloth, and more mini heart pinatas to decorate.  But my favourite detail of the kid's table was the pretty centrepieces.

children's table decorations.

I found the balloons at the dollar store.  They aren't helium, they're just air filled on a stick, which helped with being able to get them early and not having to wait until the last-minute.

red and pink fiesta decor.

I decorated the balloons by adding streamers, ribbons, gold foil ribbon, and silver tinsel yarn.  I cut them to random sizes and tucked them into the top of the balloon sticks. My girls loved them and said they looked like magical Valentine wands!

welcome sign.

Fiesta Chalkboard

One last fun decor detail, in the kitchen where the food was set up.  I usually have this chalkboard there anyway, so I added this fun message…"taco bout a party".

Valentine's Day Fiesta drinks station

Family Friendly Drinks Cart

I set up my favourite little bar cart for the party with some non-alcoholic family friendly drinks.  I loved including the little donkey as a decoration too, I picked him up at the dollar store in a pack of farm animals, in case you're looking for some too.  

On top we had a punch -not yet made when I took the pictures before our guests arrived.  It was Strawberry-Lemonade, made with pink lemonade, strawberry drink, ginger ale, and some frozen strawberries as ice-cubes.  It was a huge hit with kids and grown-ups.

Valentine's Day Fiesta Party drink station

Sometimes when I set up the bar cart, I make a little "cheers" banner to go over it, so this time I made one in Spanish, "Salud!".

Valentine's Day Fiesta Mexican soda pop

We also served an assortment of Jarritos Mexican soda pop.  I went to a few ethnic grocery stores to find them, and these also were a real hit with the guests.  They liked trying all the exotic flavours.

Valentine's Day Fiesta alcoholic drink ideas

Grown-up Fiesta Drinks

In the kitchen there were a few Fiesta drinks for the grown-ups, including Corona beer and limes, and some tropical coolers.  I thought about making a Sangria, but decided coolers were easier, and they were so yummy too.

Family Friendly Games

After everyone arrived and had a drink, we played a few easy games.  I set up a couple in the living room on the ottoman.

Valentine's Day party game ideas

Chopstick Candy Challenge

The fist game we played was with chopsticks.  Players had 30 seconds to move as many pieces of candy from one bowl to the other using the chopsticks.

minute to win it Valentine's Day party game

It's always fun to see who the real competitors and strategists are at a party!

minute to win it Valentine's Day party games

Conversation Heart Stack

For the second easy game, you had 30 seconds to see how many conversation hearts you could stack up like a tower, if they fell you could start over until your time was up.  The great thing about these little games was has that both kids and adults could join in, and they were easy.

Valentine's Day Fiesta party game

Pin The Tail On The Donkey

I also picked up a classic, old school, pin the tail on the donkey game.  It was fun too; easy and certainly fit our theme.

Valentine's Day Fiesta Party Food

Easy Valentines Day Fiesta Centre Piece

I set up all the food on the kitchen table, just to make things easier.  I used some more of the succulents in glass containers for a centre piece, as well as another donkey, a vintage valentine, and the roses my sweet husband got me for Valentine's Day.

Valentine's Day Fiesta buffet

Mexican Buffet

For dinner we had:

  • home made baked beans in the slow cooker (see my great recipe here)
  • spanish rice
  • tortilla chips
  • tortillas  (ordered from a local Tex-Mex restaurant)
  • taco shells

Our meat options were:

  • pork carnitas (Mexican pulled pork, also made in the slow cooker, I got the great recipe here)
  • chicken with peppers, onions, and mushrooms
  • ground beef with taco seasoning

As toppings we had:

  • monterey jack cheese
  • cheddar cheese
  • shredded lettuce
  • diced tomatoes
  • green onions
  • cilantro
  • homemade guacamole
  • fresh salsa
  • hot sauce
  • sour cream

It was so, so yummy, and even some of the kids went back for seconds!

Mexican ice cream sundaes

Mexican Ice Cream Sundaes

After dinner, it was time for dessert!  I did struggle with this one a little. We wanted something Mexican, but relatively easy.  I know myself.  And after decorating and cooking  and hosting all day, I know that by the time I get to dessert I'm starting to run out of steam.  

I originally wanted to fry some churros, but I'm so glad I went with Mexican Sundaes.  They were delicious and fun.  I made some home made spicy Mexican chocolate sauce for the ice cream, as well as some dolce de leche and they were both amazing!

Valentine's Day Fiesta Party Food Mexican sundae sauces

Dulce de Leche Sauce

For the Dulce de Leche sauce, start with a can of sweetened condensed milk.  Remove the paper label, but leave the can completely sealed.  You submerge the can in a large pot of water, making sure the can is completely covered, and then boil it.  

There is a warning that if the pot boils dry, the can could explode, so make sure to check it periodically and top it up with water if needed.  Don't let that warning scare you, if you make sure it's covered in water you will be fine.

I've made this lots of times and never had a problem.  I usually make it for Banoffee Pie, and boil it for 3 hours for a really thick sauce.  For the ice cream sauce, I wanted it more runny so I boiled it about an hour.  It came out perfectly.  I may have even had trouble stopping myself from tasting it before the party.

Spicy Mexican Chocolate Sauce

The second sauce was the spicy Mexican Chocolate sauce.  I'm not even a real chocolate fan, but there was something about the spice of the cinnamon, and the heat of the cayenne pepper that kept me coming back for more and more.  And it was perfect to combine the heat with the cold ice cream.  Serve both sauces warm.

Recipe

Mexican spicy chocolate sauce.

Spicy Mexican Chocolate Sauce

No ratings yet
Print Pin Rate
Author: Dannyelle Nicolle-Ramjist

Ingredients

  • 2 cups whipping cream
  • 340 g bag of semi-sweet chocolate chips
  • 3 tablespoon sugar
  • ½ - ¾ teaspoon cinnamon to taste
  • ½ - ¾ teaspoon cayenne pepper to taste

Instructions

  • Heat whipping cream in a pot over medium heat.
  • Add the chocolate chips and sugar to the cream, and stir until completely dissolved.
  • Add the cinnamon, and cayenne pepper to taste, depending on how spicy and hot you like it.
  • Serve warm over ice cream.
Tried this Recipe? Tag me Today!Mention @LifeisaParty or tag #lifeisaparty!
Valentine's Day Fiesta Party dessert

We served chocolate and vanilla ice cream, the dolce de leche sauce, spicy Mexican chocolate sauce, and Valentine sprinkles and candies along with whip cream, and cherries.  

I also picked up an easy all ready prepared plain chocolate sauce in case the kids didn't want anything spicy.  This dessert was the perfect sweet ending to the night.  With great friends, great food, and a quick trip to Mexico for the night in the middle of a cold winter, life really is a party!

More Inspiration

You might also like our Backyard Fiesta here.

Also check out How To Make Your Faux Succulents Look Real post here.

You might also enjoy our Valentine's Day Pizza Party here.

Valentine's Day Pizza Party -DIY decorations, heart shaped pizza, mocktails, and a dessert pizza recipe make this the perfect family celebration.

Love Pillow

Feb 12, 2015 · 2 Comments

DIY Love Pillow: this easy sewing project uses pink buttons to create a love pillow perfect for your Valentine's Day decor.

Simple Valentine's Day Pillow -

Since Valentine's Day is this weekend, it seemed like the right thing to do to make a little love pillow.  I love to add a few pink touches for Valentine's Day.  A few Valentine's Day decorations seem to help get through the long, dark winter days of February.

diy love Valentine's Day pillow

I found a bag of all pink buttons at the dollar store a few weeks ago, and they inspired this fun and and simple DIY Heart Pillow for Valentine's Day.

Materials

  • assorted pink buttons
  • drop cloth fabric
  • pillow form
  • pink thread
  • needle
  • disappearing ink marker

How To Make A Love Pillow

1. To make the pillow I used some cloth I had, actually a piece of a drop cloth from the hardware store.  I cut it to fit the pillow form with an envelope style close a the back.  I you didn't want to make your own pillow case you could use a store bought one.

2. Use a fading marker (you can find them at the fabric store and they work really great for sewing projects of all starts) and write the word love on the fabric to use as a guide line for sewing the buttons on.
Simple Valentine's Day Pillow -

3. Using pink thread, sew on the buttons following the marker lines.

Simple Valentine's Day Pillow -

It certainly helps make for a cozy and pretty spot to read on a winter's day.

Simple Valentine's Day Pillow -

It would make a lovely, inexpensive little Valentine's Day present too.

With a pretty little love pillow, life really is a party!

You might also like our Birch Bark and Gold Leaf Hearts here.

Also check out our Simple Valentine's Day Decor Home Tour here for even more ideas.

You might also enjoy our DIY Yarn hearts here.

Also check out our DIY Marble Hearts here.

Nail Polish Marble Hearts Valentine's Day Craft: use nail polish to water marble wooden hearts for Valentine's Day in any colour combination you like!

You might also enjoy our 3D Origami Hearts here.

3d origami hearts

Valentine's Day Love Potion Hot Chocolate Bar

Jan 23, 2015 · 6 Comments

Love potion Valentine's Day hot chocolate buffet.

Valentine's Day Love Potion Hot Chocolate Bar: kid's will love hot chocolate love potion with all kinds of fun toppings to add.

Love potion Valentine's Day hot chocolate buffet.
[feast_advanced_jump_to]

How fun is this Valentine's Day Hot Chocolate Bar all set up to make your own fabulous "love potion"?  This would be great for Valentine's Day get together, and kids love it.  It's perfect for celebrating during the month of February with your little Valentines.

On a recent trip to the craft store, I noticed the cute glass test tubes, and my creative wheels started turning.  Test tubes made me think of science, and science made me think of love potions for Valentine's Day.  I thought it would be fun to create a hot chocolate bar with lots of add-ins and toppings.  Instead of using glass jars to hold them, we've put everything into test tubes.  Your guests will love creating their own concoctions, and adding all of their favorite toppings to make their own perfect cup of hot cocoa, or should I say love potion. 😉 Mad scientists old and young will love this science experiment.

Test Tube Hot Chocolate Add-ins

I decided to fill my test tubes with all different kinds of fun hot chocolate add-ins.  We picked up all the fun treats at the bulk store, and then made up fun names for everything, so they sounded like good ingredients for a love potion.  This was such a fun way to label everything.

The labels are made from some pink cardstock for Valentines day and a stamp, and tied them on with a little pink baker's twine.  They came out looking so cute.

Valentine's Day Love Potion Hot Chocolate

I wasn't too sure how I was going to stand the test tubes up, but came up with the idea of a simple wood stand.

Valentine's Day hot chocolate station buffet

My sweet brother-in-law Shaun helped me out by drilling 1 inch holes in some 2 x 4's, and was the perfect way to display the test tubes.

Valentine's Day Love Potion Hot Chocolate

Love Potion Ingredient Names

I used ten different candy add-ins and here's what I called them, in case you need some ideas for your own love potion.

Valentine's Day Hot Chocolate
  • Heart Sprinkles -"Sprinkles of Love"
  • Hershey's Kisses -"Kisses"
  • Valentine Jimmies -"Happiness Confetti"
  • Cinnamon Hearts -"Red Hot Passion"
  • Mini Valentine Nonpareils -"Pearls of Joy"
  • Rolo Minis -"Chocolate Caramel Sweetness"
  • Pink Cotton Candy -"Cupid's Pillow"
  • Lip Sprinkles -"Cupid's Kisses"
  • Pink and White Mini marshmallows -"Puffs of Affection"
  • Caramel Squares -"Building Blocks of Love"

Other options of fun things in your own hot cocoa bar are chocolate chips, candy hearts, or peppermint candies.  You might also include some coffee syrups like caramel, vanilla, or peppermint.  Have fun coming up with your own fun names for everything.

Valentine's Day party ideas

Science Beakers

I was also able to find some brand new science beakers on-line and filled them with the hot chocolate and a few other treats.  This was such a fun addition to our theme.  I labeled the hot chocolate "Base Formula No.1", and made some pink hot chocolate with some white hot chocolate powder and a little red food colouring, and labeled it "Base Formula No. 2".

Valentine's Day Love Potion Hot Chocolate

I  also added some whipped cream, labeled "Sweet Dream Clouds" and some caramel syrup that we labeled "Devotion Juice",

Valentine's Day Hot Chocolate buffet

Specimen Cups

On the bottom of the bar cart were some paper disposable cups and straws.

Valentine's Day Hot Chocolate ideas

I picked up some pink paper cups and customized them with a "Specimen No. ___" label.  The labels are attached with a glue stick.  I made a free printable of the cup labels, you can access the free printables in our Free Resource Library.  Just subscribe below for instant access.

Valentine's Day Love Potion Hot Chocolate

Love Potion Books

You know I love a theme, so I thought it would also be fun to include a few love potion books.  Using some old books, I  covered them with brown paper and scrapbook paper, and added some fun labels to the fronts of the books with a glue stick.  You can get the free printables for the love potion books in our Free Resource Library.  Subscribe for instant access to the free printables.

Valentine's Day drink ideas

I put the pretty heart paper straws in a tall science beaker, and filled another large one with some heart lights.  The lights are a fun little nod to the mad scientist.

Valentine's Day party

I had so much fun putting my little love potion making hot chocolate bar together.  This is one of those fun DIY projects that the kids will really enjoy.  It's perfect for a party.

Valentine's Day party drink ideas

If you're looking for an activity that your kids are guaranteed to love, this one's a winner!  It's one of my favourite Valentine's Day ideas.

Valentine's Day Hot Chocolate

With a Valentine's Day love potion hot chocolate bar, life really is a party!

More Valentine Inspiration

You might like our Hot Chocolate Valentine here.

Hot Chocolate Valentine: use our free printable valentine card and hot chocolate label to create beautiful classroom Valentines.

Also check out our Valentine's Day Pizza Party here.

Valentine's Day Pizza Party -DIY decorations, heart shaped pizza, mocktails, and a dessert pizza recipe make this the perfect family celebration.

You might also enjoy our Valentine's Day Fiesta here.

Valentine's Day Fiesta


Frozen Themed Birthday Party Food

Jan 15, 2015 · 3 Comments

Build a snowman out of powdered donuts and candy.

Frozen Themed Party Food ideas, including Kristoff's ice jello, Olaf's nose carrots, snowflake sandwiches, Anna's frozen heart chocolate dipped strawberries, and make your own snowman donuts. These easy, and cute ideas are the perfect Frozen party foods that kids will actually eat!

Frozen themed food ideas for a kid's party.
[feast_advanced_jump_to]

Why We Love This Party Food

  • Frozen is just a graet movie and theme!
  • These simple foods are easy to make and so perfectly on theme.
  • All these ideas are so kid friendly, and will actually be eaten.

Yesterday I shared some of the Frozen themed activities and party games my friend Heather planned for her daughter Tara's Frozen themed birthday party.  Today, it's the Frozen party food!  

If you love Frozen you should also check out our Frozen themed dinner and movie with a Frozen themed dinner and recipes.

You know how we love a good theme around here, and the theme food for this party was so, so adorable.  

You're going to want to use these ideas if you have a Frozen party in the works, not just because they are so sweet, but also they're pretty do-able, and the kids will actually eat them. 😉

Frozen party table with trays of themed food.

Frozen Party Food Themed Snacks

  • Kristoff's Ice -blue jello cut into cubes and served in a plastic cup with a snowflake sprinkles and a snowflake pick.
Frozen party food snacks on a three tiered tray.
  • Sven's Treats -mini carrots and dip served in individual small plastic cups. Remember how Sven kept trying to eat Olaf's nose at the beginning of the movie?  Individual dips are always a great idea for a party, especially with little ones, no double dipping.
Frozen party "Sven's Treats" carrots and dip
  • Mixed berries -served in Frozen cupcake liners.
mixed berries in frozen themed paper cups
  • Snowflake Crackers and Cheese -cheese cut with a snowflake cookie cutter.
Snowflake crackers, with cheese cut out in snowflake shapes with a cookie cutter.
  • Elsa's Snowflakes -ham and cheese and peanut butter and jam sandwiches cut with a snowflake cookie cutter.
Snowflake shaped sandwiches for a frozen party.

Frozen Themed Desserts

  • Wanna Build A Snowman Donuts

I loved the "Wanna Build A Snowman?" donuts.  They were just regular powdered donuts, with some chocolate chips and orange candies to design your own little edible snowman.

Wanna Build a Snowman donuts with chocolate chips and orange candies to build your own Olaf
  • Snowflake Rice Krispie Treat Lollipops -get the recipe for the Frozen rice krispie treats here.
Snowflake shaped Rice Krispie treats dipped in chocolate and on a lollipop stick.
  • Anna's Frozen Heart -strawberries dipped in white chocolate. Such a sweet detail from the movie.
Anna's Frozen Heart strawberries dipped in white chocolate.
  • Snowflake Sugar Cookies
Snowflake sugar cookies.

My favourite treat at the party were these pretty and oh so yummy snowflake sugar cookies.

Frozen Themed Drinks

Water bottles with a "some people are worth melting for" Olaf quote label.
  • "Some people are worth melting for" Water -bottled water with a Olaf wrap.
Water bottle with a "Some people are worth melting for" Olaf label.
  • Blue Punch with Vanilla Ice Cream -There was a punch of blue lemonade, with the option of a scoop of vanilla ice cream, to make it very snowy!
Dining table set for a Frozen themed birthday party.

Everything was so sweet, and perfectly child sized and kid friendly.

Frozen Cake
Frozen Themed Party Food: from Kristoff's ice jello, to Olaff's nose carrots, and snowflake sandwiches, to Anna's frozen heart chocolate dipped strawberries, and make your own snowman donuts. Do-able, adorable, Frozen themed food kids will actually eat.

And for the birthday cake, what could be more perfect for the Frozen theme than ice cream cake! It was ordered from the ice cream shop, and the kids loved it.

Frozen themed birthday cake

Frozen Themed Loot Bags

After the party we were sent home with the sweetest loot bags. When we got home we saw our $5 Menchie's gift cards "For A Frozen Treat", and our snowman building kits.

Frozen birthday party loot bags
  • Ice Cream Gift Card
  • "Do you wanna build a snowman?" Marshmallow Kits

Inside the snowman kits were large marshmallows, small marshmallows, pretzel sticks, M&M's, candy eyes, orange Mike and Ike's, and two sizes of chocolate chips. In the container is some icing "glue".  So much fun!

Frozen themed "Do you want to build a snowman?" marshmallow kit

We had so much fun playing, eating and celebrating with our friends.

With Frozen Themed Party Food, life really is a party!

More Birthday Party Inspiration

  • Princess and the frog party table with food and decorations.
    The Best Birthday Party Home Decoration Ideas
  • Snow White Party with themed food and party decor.
    Snow White Party -Dinner and A Movie
  • Free movie night printables including a free ticket, popcorn banner, food labels, and signs.
    Free Movie Night Printables
  • space themed party star moon
    Pink Outer Space Themed Party

Frequently Asked Questions

Where are the printable food labels, water bottle labels, and treat bag toppers from?

Look for something similar on Etsy.

Where is the cake from?

It was ordered from a local ice cream shop. Most ice cream shops have something similar available. Be sure to preorder.

Where is the Frozen tablecloth from?

Look for something similar at the party supply store.

 If you try any of the ideas from this Frozen Themed Party Food or any other ideas on my blog please let me know how it went in the comments below. Thanks for visiting today!

Frozen Themed Birthday Party -Part I

Jan 13, 2015 · 2 Comments

Frozen themed party activity and game ideas.

Frozen Themed Birthday Party: ideas for lots of fun frozen inspired kids games and activities and frozen themed party decor.

Frozen themed party activity and game ideas.
[feast_advanced_jump_to]

On the weekend we had the great pleasure of celebrating the birthday of one very special little girl, my God-daughter Tara.  This year it was a Disney's frozen themed birthday party.  There were so many great ideas that I can't wait to share them with you.  The birthday girl loves the frozen movies, so this was the perfect theme for her.

Love Is An Open Door Wreath

The party guests were first greeted by the most PERFECT decoration on the door as the first thing they saw.  Tara's mom Heather made a simple wreath by covering a wreath form with white yarn.  Heather purchased the sweet "love is an open door" printable from Etsy.  The saying is a line from the movie and was the perfect way to greet guests. Open door…get it?.  The finishing touch was a little Anna doll -the birthday girl's favourite character!  Tara can play with the toy after the party.  It was the perfect welcome to a frozen birthday party.

Frozen love is an open door wreath

Frozen Themed Birthday Party Decor

The party scene was set in the front entryway with some DIY frozen party decorations.  On the entry table was a sweet little wintery forest inspired by the movie frozen and made of tabletop Christmas trees and some Frozen toys.  The fun Disney movie poster was hung in the entry and moved to the birthday girl's bedroom after the party.  It's decorated with a banner of the birthday girl's name.

frozen party decorations

The stapler on the table allowed party goers to make their own party hat.  They could choose from an Elsa crown shape, or Sven antlers, (Anna was reserved for the Birthday girl on her special day).  This was the perfect way to get ready to head into the frozen-themed party.

DIY Faux Snowballs

I also loved the bowl of faux snowballs, and snowflake lights that greeted us.  The faux snow balls were an easy DIY craft project made out of styrofoam balls, white glue, faux snow and epsom salts.  These were such a fun way to bring in the snow theme, and they'll be a perfect addition to the Christmas decor after the party.

Frozen themed birthday party

There were lots and lots of other snowflakes hung throughout the house for the party and creating a perfect winter wonderland.  Each paper snowflake was hung with clear fishing line, creating such a beautiful effect.

Frozen Themed Birthday Party Games and Activities

Frozen themed birthday party

Puffy Paint Snow Picture

Inside, the first activity for everyone to enjoy was some puffy paint snow picture making.  Heather made puffy paint with shaving foam, white glue, and white paint ahead of time.  For the party it was set out in containers with paint brushes and blue card stock so that it would show up well.  Along with the paint there were all kinds of sparkly and icy toned jewels, snowflakes, sequins, cotton balls, and glitter paper.  Kids could design anything, including Elsa's ice castle.

Frozen themed birthday party

The puffy paint was so much fun, because it's fluffy, and thick since it's made with shaving cream.  The little kids loved creating their own snow picture. This was also a great activity to do at the beginning of the party, since it gave it some time to dry before the kids took them home.

puffy paint snow picture

Decorate Your Own Snowflake Cookies

The next activity was decorating snowflake sugar cookies.  What a yummy activity that was!

Frozen themed birthday party

Heather made the snowflake shaped cookies in advance and gave everyone four to decorate.  She made white, purple, and blue icing and there was an assortment of white and blue candy sprinkles, jimmies, white chocolate chips, and candy to decorate them with.  The icing was in sealed squirt bottles which made it so much easier than piping bags for little hands.  The little guests had so much fun making their designs.

Frozen theme birthday party activity

My youngest, Maddie, was concentrating hard on her very detailed designs.  If anyone knows of any local bakeries that need decorators, I might know a few little girls who'd be interested.

snowflake cookie decorating

Before they started decorating the cookies, Heather had everyone write their name on a little tag, which stayed on their plate of cookies.  This was the best way to make sure we didn't mix up who's cookies were who's.  After they were decorated we left them out on the counter to dry a little and then packaged them into cello bags, and attached their tags to take home.  It worked perfectly and was such a big hit with the kids.  These were a great addition to the party favors.

waterless snow globe

"Do You Want To Build A Snowman" Waterless Snow Globe

The next activity on the list was a really cute one, make your own snowman DIY snow globes.  Everyone worked on the lid of a mason jar, and used air dry clay to create their own snowman.  There were ribbons to use as scarves, branches for arms, orange clay for noses inspired by a olaf's nose, and buttons.  

We also came up with the idea of making little winter toques.  Heather snipped off the tips of the fingers of some dollar store gloves in different colours and had small pompoms to glue to the tops to create a winter hat.  Then we hot glued the hats onto the snowmen when they were done.  This was such a clever idea.

Frozen themed birthday party activity

One of the great things about all these party activities is that they were fun for kids of different ages.  The four year olds could do them all, and the ten year olds could do the same activity but just with more detail.  Therefore all ten kids at the party with varying ages enjoyed every activity.

what to do at a frozen themed birthday party

Next we sprinkled the finished snowmen with some fake snow.  Finally we screwed the top of the mason jar on to make a pretty waterless snow globe for the kids to take home with them.

Frozen themed birthday party ideas

Elsa Ice Castle Game

One of the last, but certainly not least little frozen party ideas was building queen Elsa's ice castle.  We used plastic cups as our ice blocks. 

The plastic cups resembled ice cubes and they had so much fun creating lots of different versions of ice castles, and then unbuilding them and building them again.  Such a simple game, but they loved it.  And when the clear cups were all stacked together into a castle, they really did have a frozen look.

Frozen themed birthday party ideas

Heather found three different sizes of clear cups.  They used regular ones, short stubby ones, and mini shot glass all from the dollar and party store.  The kids had a lot of fun building.  And I love that this activity had very little prep time required, and was also easy to clean up afterward. 

While they were building, Heather set up a beautiful party table of Frozen themed snacks, and a dessert table which you can read all about here where I share all the frozen themed food ideas.

frozen themed birthday party

frozen themed birthday party

If you're planning a Frozen party anytime soon, I hope some of these fun frozen-themed birthday party activity and decoration ideas inspire you.  The kids absolutely LOVED them.

Happy birthday Tara, and thanks for having us at your amazing birthday celebration.

With a frozen themed birthday party to enjoy, life really is a party!

More Inspiration Here

You might also like our Frozen Inspired Chocolate Rice Krispie Treats here.

Frozen Themed Chocolate Rice Krispie Treats: inspired by Disney's Frozen these snowflake rice krispie cookies are perfect for your Frozen themed party.

Also check out our Snow Ice Cream here.

Snow Ice Cream Recipe: use fresh snow and whipped cream to make a really easy and fun ice cream from. Perfect family activity on a snowy day.

You might also like our Sleeping Beauty Slumber Party here.

"Frozen" Inspired Chocolate Rice Krispie Treats

Jan 8, 2015 · 2 Comments

Frozen themed snowflake Rice Krispie treats.

Frozen Themed Rice Krispie Treats: inspired by Disney's Frozen these snowflake rice Krispie cookies are perfect for your Frozen themed party.

Frozen themed snowflake  Rice Krispie treats.
[feast_advanced_jump_to]

Do you want to build a snowman?  How about Frozen themed rice krispies treats?  These are perfect for any Elsa lovers in your life.  They're easy to make and a really delicious fun dessert, and guaranteed to be a hit with anyone who's obsessed with the Disney Frozen movie.

My sweet God-daughter Tara was turning 7, and having a Frozen themed party to celebrate.  You can read all about all the details of the fun Frozen themed birthday party here.   I thought it might be fun to make something Frozen inspired for the party.  I came up with these sweet Frozen themed Rice Krispie Treats.  They've got everything going for them: chocolate, and rice krispie squares.  They're a really great homemade treat for a party, or to make any day feel like a party!

how to make frozen themed Rice Krispie treats

How To Make Frozen Themed Rice Krispie Treats

1. Make Rice Krispie Squares

I started out making regular old rice krispie squares, the classic treat, but made them a little thinner than usual, so they'd be easier to cut out with a cookie cutter.  I sprayed a cookie sheet with baking spray first.  Then I spread the cereal mixture out so it was about ¾ of an inch thick.  It didn't fill the entire pan.  Once they were set I used a snowflake cookie cutter and cut them up.  And, forced myself not to eat every last piece of scrap  from in-between.  Then again, chef's treat. 😉

Frozen Rice Krispies

2. Dip In Melted Chocolate

Next comes dipping the Frozen rice krispie treats in melted chocolate.  I have a great tip for you: put the snowflake shaped rice krispies, with a lollipop stick inserted into them in your freezer for a while before you dip them.  If not, the hot melted chocolate makes the marshmallow in the cookies start to melt…and then you'll finally see what frozen things do in summer….  So learn from my mishaps and pop them in the freezer first, or if it's -19 degrees outside, put them out on your deck for a little while like I did yesterday.

chocolate snowflake Rice Krispies

Melt your chocolate in a double boiler, and dip them in.  Use a spoon to help you get all the tricky spots. Once they're dipped, let them set on some parchment paper.  You could just dip the top in, if you wanted.   I wanted the chocolate to coat the whole square and keep it nice and fresh, since I made these a few days before the party.

3. Pipe A White Chocolate Snowflake

Next, I melted some white chocolate in a mini-ziplock bag and piped on the snowflake detail.  Some of them got sprinkles, edible glitter, or coarse sugar too for a little sparkle.

Frozen themed Rice Krispie treats

The chocolate covering on these frozen rice krispy treats really seals them, and makes them stay fresh longer than regular rice krispy treats.  You can make them a day or two ahead of time.  These would be great take home treats in a favor bag too.  Just package them in individual cellophane bags tied with some ribbon for a really cute gift.

We had so much fun at the Frozen birthday party and the Frozen theme rice krispie treats were a real hit with everyone.  These delicious treats really looked like something we could have purchased on a trip to Walt Disney World.  These homemade rice krispie treats would be a great addition to a Frozen party dessert table as one of the themed treats.  This easy recipe is such a favorite and sure to be a crowd pleaser.

Recipe

Frozen themed snowflake Rice Krispie treats.

"Frozen" Inspired Chocolate Rice Krispie Treats

Snowflake shaped classic rice Krispie treats that are dipped in chocolate.
No ratings yet
Print Pin Rate
Course: Desserts
Cuisine: American
Cook Time: 15 minutes minutes
Additional Time: 2 hours hours
Total Time: 2 hours hours 15 minutes minutes
Servings: 12
Calories: 185kcal
Author: Dannyelle Nicolle-Ramjist

Ingredients

  • ¼ cup butter
  • 10 oz. package of large or mini marshmallows
  • 1 teaspoon vanilla extract
  • 5 ½ cups rice krispies cereal
  • 1 cup blue chocolate candy melts
  • ¼ cup white chocolate candy melts
  • lollipop sticks
  • sprinkles

Instructions

  • Melt butter and marshmallows over medium heat in a large saucepan, stirring occasionally until fully melted.
  • Remove from the heat and add vanilla extract to the melted marshmallows and butter mixture.
  • Stir in the rice krispie cereal and work quickly to combine.
  • Spray a large cookie sheet with cooking spray, and pour rice crispy treats mixture onto the cookie sheet. Make a layer about ¾ inch thick. Use a spoon dipped in cold water or sprayed with cooking spray to spread the melted marshmallow mixture so it doesn't stick. Let them set at room temperature.
  • After the cereal treats are set, use a cookie cutter to cut out the snowflake shapes. If you are having trouble pressing the cookie cutter through the rice krispies, spray the cutter with baking spray, and use a small cutting board on top of the cookie cutter to push it through. Then add a lollipop stick to each snowflake. Now, put the rice krispies in the freezer for about 30-60 minutes.
  • Melt your blue chocolate in a double boiler or in a microwave-safe bowl. Dip the chilled snowflake rice krispie treats into the chocolate and use a spoon to help cover the entire treat in chocolate. Set the treat on a parchment paper lined baking sheet to set. If the melted candy melts are too thick for easy dipping add a little melted vegetable shortening to make it runnier and easier to work with.
  • After the blue chocolate is set, melt the white candy melts, and place in a ziploc bag. Snip the corner off to make a piping bag, and add a snowflake detail in white chocolate to each of the rice krispie treats. While the white chocolate is still wet and not set, sprinkle it with coarse sugar, sprinkles, or edible glitter. Let set, and store in an airtight container or individual cello bags.

Nutrition

Serving: 1g | Calories: 185kcal | Carbohydrates: 23g | Protein: 2g | Fat: 9g | Saturated Fat: 6g | Polyunsaturated Fat: 3g | Cholesterol: 14mg | Sodium: 112mg | Fiber: 1g | Sugar: 12g
Tried this Recipe? Tag me Today!Mention @LifeisaParty or tag #lifeisaparty!
Frozen Rice Krispies

With special Frozen theme rice krispy treats for a special girl, life really is a party!

More Frozen Inspiration

You might also enjoy our Frozen Themed Dinner and Movie Night here.

Frozen Themed Party -Dinner and Movie Night: Swedish meatballs, Sven's roasted carrots, and Frozen Ice Cream Sundaes with plenty of chocolate.

Also check out the Frozen Themed Birthday Party Activities post here.

Also be sure to check out the Frozen Themed Birthday Party Food Ideas here.


Winter Tablescape

Dec 30, 2014 · 2 Comments

Winter Tablescape: beautiful Christmas or winter table with DIY mini house candle holders and place card holders.

Winter Tablescape: beautiful Christmas or winter table with DIY mini house candle holders and place card holders.Winter Tablescape: beautiful Christmas or winter table with DIY mini house candle holders and place card holders.

I'm excited to share my winter tablescape with you today.  This scheme would be pretty for any winter table.  We used it as our Christmas table this year, and I just love how it turned out.

Mini Wooden House with copper pipe Candle Holders

Wood House Candle Holders

I saw a version of these cute little houses, and really wanted to try and make some.  I mentioned it to my awesome brother-in-law, who just happens to work in a place that has a workshop (I’m just slightly jealous) and I was able to meet him there on the Saturday afternoon before Christmas and he whipped these up for me.  The bases are scraps of wood, and the chimneys are made of small pieces of copper pipes.  So simple, and so beautiful.

Mini Wooden House with birthday candle chimney

We thought it might be fun to make some different sizes, and these very mini versions have a birthday candle for their little chimneys.  Won’t they be fun on a cake for a birthday?

Wood House Place Card Holders

winter tablescape with Mini Wooden House place card holders

We also made some little place card holders.  I bent a piece of copper wire around a round dowel to make a clip to hold the place card, and then we drilled a tiny hole in the little houses and inserted the wire.

winter tablescape ideas

Cement Houses

Along with the wooden houses, my brother-in-law Shaun also made these wonderful little cement ones, and I added some gold, copper, or silver leaf to the roofs.

winter tablescape

Placesettings

For each pacesetting I set the table with the rustic wooden chargers that we made for Thanksgiving.

winter tablescape ideas

I love the contrast of the rustic wood, along with the fine china, and all the gold, silver, and copper that went with our theme this Christmas.

Winter Tablescape with Mini Wooden House Candle Holders

I picked up the pretty napkins with cold and silver dots, and the Christmas crackers are just from the dollar store.

Mini Wooden House Candle Holders

Aren't the little salt and pepper shakers cute?  I couldn’t resist them when I decided on the little house theme for the table.

mini wood house tablescape

I just love how my little village of houses, snow and Christmas trees looked for our cozy, rustic winter tablescape.  With a winter tablescape this pretty, and family and friends to gather round it to celebrate, life really is a party!

You might also like our Rustic Christmas Tablescape here.

Also check out our Merry and Bright Christmas Party here.

You might also enjoy Thrift Store Christmas Table here.

Thrift Store Christmas Table and Thrift Store Tips: beautiful Christmas table put together with thrift store finds, and 9 tips for thrifting.

Easy Homemade Eggnog Frosting Recipe

Dec 19, 2014 · Leave a Comment

Easy homemade eggnog frosting recipe.

Eggnog Frosting: regular vanilla cupcakes are taken up a notch for Christmas our eggnog icing recipe. Perfect for holiday get togethers.

Easy homemade eggnog frosting recipe.
[feast_advanced_jump_to]

I enjoy a little eggnog.  And I was thinking that eggnog cupcakes would pretty much be Christmas perfection.  If you love eggnog flavor than this eggnog frosting is the perfect addition to cupcakes, cookies, or cake.

I was inspired by fancy eggnog lattes and starting thinking of other favourites that could be improved upon with the addition of some eggnog.  If you're working on some holiday baking this weekend, these would be a nice addition, especially if you're an eggnog fan.  I made up a batch of my favourite vanilla cupcakes, and then added a delicious and easy eggnog icing.  This eggnog icing is great for adding a festive taste to things your baking for the holiday season.  Try this homemade frosting with your favorite cupcake recipes as the perfect topping, sure to be an absolute favorite.  

Eggnog

Historically eggnog used to be known as milk punch.  Eggnog recipes traditionally are made from whole milk, cream, eggs, and sugar and served around the holidays and new years.  It's ingredients are very similar to ice cream, or a very runny custard.  Most homemade real eggnog has traditionally contained raw eggs.  But a carton of eggnog from the grocery store contains only pasteurized eggs in the eggnog mixture, so it is safe to consume.  Eggnog also is often served with some alcohol added.  If you love rum in your eggnog, you can substitute the vanilla flavoring in our eggnog frosting recipe for a teaspoon rum extract.  It's traditionally served during Christmas season.  A glass of eggnog is often offered at a holiday party, or around the Christmas tree.  And sharing some eggnog is a favorite way entertain friends.

Nutmeg

Eggnog traditionally contains nutmeg, and sometimes cinnamon too.  Our eggnog frosting recipe includes some freshly grated nutmeg.  Grating the nutmeg fresh really increases the flavor and freshness.  Look for whole nutmegs in your spice section, and use a small mini grater to grate it into your baking.  Freshly grated nutmeg is a little stronger tasting than ground nutmeg, so don't be tempted to add more than the recipe calls for, since it can become too much of a good thing and over power the recipe. You can also use regular ground nutmeg if you don't have whole nutmegs to grate yourself.   Also, you can also add ½ teaspoon of ground cinnamon to the recipe if you're a big cinnamon lover.

Eggnog icing

Perfect Holiday Desserts

Since it's the holidays and we're all getting a little dressed up to celebrate, I baked these cupcakes in a shiny gold cupcake liner and added some glitz to the top.  I love the little stars in gold, and you know how I feel about the edible glitter!  These cupcakes are the perfect way to wish someone a merry Christmas.  They would also be great for ringing in the New Year.

This eggnog frosting recipe is the perfect topping to these cupcakes, it would be amazing on gingerbread cupcakes too.  It would also be delicious on sugar cookies, gingerbread cookies, in sandwich cookies, or any holiday cookies.  Any eggnog lovers would adore this on top of spice cake, or gingerbread cake.  The combination of the warm spice from these cakes with the creamy eggnog frosting  is sure to win over even the non-eggnog drinkers.  You could also keep things simple and use a simple cake mix for spice cake or vanilla cake to make a quick and easy holiday dessert that's sure to impress.

gold food glitter and gold star sprinkles on eggnog cupcakes with homemade eggnog frosting

Hoping your holiday prep goes well this weekend, and if you're doing some baking give these yummy treats with homemade eggnog frosting a try.  Any huge eggnog fan will love it.  This time of year, it's great to add your favorite holiday beverage to your baking too with these Christmas cupcakes with the best eggnog buttercream frosting on top.

Recipe

Easy homemade eggnog frosting recipe.

Eggnog Frosting

Smooth frosting with the flavour of eggnog.
No ratings yet
Print Pin Rate
Course: Desserts
Cuisine: American
Prep Time: 15 minutes minutes
Total Time: 15 minutes minutes
Servings: 5 cups
Calories: 111kcal
Author: Dannyelle Nicolle-Ramjist

Ingredients

  • ½ cup butter room temperature
  • 4 cups powdered sugar
  • ½ cup eggnog
  • 1 teaspoon vanilla extract
  • ½ teaspoon grated nutmeg

Instructions

  • In the bowl of a stand mixer fitted with the paddle attachment, or in a large bowl with an electric mixer, beat your butter at a medium speed, and then slowly incorporate your powdered sugar, eggnog, vanilla, and freshly grated nutmeg. Be sure to scrape down the sides of the bowl part way through.
  • Whip until smooth and fluffy.
  • Pipe onto your vanilla cupcakes, cookies, or cakes and enjoy. Store any unused eggnog frosting in an airtight container in the refrigerator.

Nutrition

Serving: 1g | Calories: 111kcal | Carbohydrates: 19g | Fat: 4g | Saturated Fat: 3g | Polyunsaturated Fat: 1g | Cholesterol: 13mg | Sodium: 34mg | Sugar: 18g
Tried this Recipe? Tag me Today!Mention @LifeisaParty or tag #lifeisaparty!
eggnog icing recipe

With beautiful Eggnog Cupcakes to celebrate the holidays, life really is a party!

More Recipe Inspiration

You might also enjoy our Eggnog Bread Pudding recipe here.

Also check out our Eggnog Cookies here.

You might also like our Gingerbread House Cookies recipe here.

Gingerbread House Cookies: a classic gingerbread cookie recipe perfect for Christmas cookie ornaments or mini houses.

Winter White Christmas Decor Ideas in the Family Room

Dec 10, 2014 · Leave a Comment

Winter white Christmas family room decor.

Winter White Christmas Decor Ideas in the Family Room: faux snow balls, birch logs, white poinsettias and fur pillows all in winter white.

Winter white Christmas family room decor.
[feast_advanced_jump_to]

Welcome and I hope you enjoy our Winter White Christmas Decor Ideas in the Family Room!  I hope you enjoyed the tour of our main floor all dressed up for Christmas with Rustic Mixed Metals, and today we're down stairs in our cozy basement family room.

Winter White Christmas Decor Ideas in the Family Room:  faux snow balls, birch logs, white poseittas and fur pillows all in winter white.

Family Christmas Tree

The main floor Christmas tree is all mine, I change the theme each year, and really enjoy it, but that means that the basement Christmas tree is our family tree.  My daughter calls it "the memory tree" because it's filled with keepsake ornaments, and one from our vacation each year.  That makes it a little tricky to put together a theme for the basement decor.  I actually started out this year trying to do a fun multi-colour theme….but it just wasn't working so after a few days of thought I went with a winter white theme, and I LOVE it.  Moral of the story, don't be afraid to change things up and try new ideas.  I made the tree fit in with the simple addition of some white garland and ribbon and a few white Christmas balls.

white Christmas decor ideas

You saw my Sharpie Reindeer Pillow, and here is the other version I made.  I used a simple dollar store stencil and a grey sharpie to transform this inexpensive Ikea pillow cover.  it cost around $5 to make and it will be a fun addition all winter.

Winter White Christmas decor ideas

I'm in love with all the white fur right now, and this sweet polar bear pillow fits right in.

Winter white Christmas  mantel

Fireplace Mantel

I used my deer head over the fireplace, and simple greens.  I love the addition of these  huge pine cones this year.

Winter Christmas decor ideas
Winter white Christmas decor ideas

White Christmas Decor Ideas for the Coffee Table

On the coffee table, I added a few more simple white details.

Winter white Christmas decor ideas

I used a tutorial from Lucy at Craftberry Bush (one of my fav. blogs) to make the snowballs -so fun, and easy to make.

Winter White Christmas living room

I also added a few Christmas treats in some pretty mason jars.  These will be enjoyed while watching Christmas movies over the next weeks.

Winter white Christmas decor ideas

A Bucket of Snowballs

On the other side of the room a few more snowballs.

faux snow balls
DIY faux snowballs

It's so cozy and welcoming down here, and lots of the decor can stay out all winter.  I look forward to lots of family time here over the holidays, and present time on Christmas morning.

Winter white Christmas decor ideas

Hope you enjoyed the tour, we'll continue on Friday with upstairs.  With my own little cozy Winter White Christmas decor ideas, life really is a party!

More Inspiration

You might also like our Cozy Christmas Bedroom here.

Cozy Christmas Bedroom: Linen and chunky knits, a Christmas tree, candles, and a Christmas gallery wall help create a cozy space for Christmas.

Also check out our Christmas Home Tour with Green Decor here.

Christmas Home Tour: Rustic Scandinavian Christmas Home Tour, with bit of modern boho.

You might also enjoy our Black and White Christmas Decor Home Tour here.

Black and White Christmas Decor Home Tour -Rustic Scandinavian Black and White Christmas decor with fresh greens and natural elements.

Christmas Home Tour Mixed Metals -Gold, Silver, and Copper Christmas Decor

Dec 8, 2014 · 18 Comments

Copper Christmas Decor Christmas Home Tour: Tour a house all dressed with beautiful gold, silver, brass and copper Christmas decor.

Copper Christmas Decor Christmas Home Tour: Tour a house all dressed with beautiful gold, silver, brass and copper Christmas decor.

Copper Christmas Decor Christmas Home Tour: Tour a house all dressed with beautiful gold, silver, brass and copper Christmas decor.

Welcome, I'm so glad you're here today.  I've been working away, crafting and creating and can't wait to show you all our copper Christmas decor and mixed metals for our Christmas Home Tour.

Front Door

Let's start at the front door, with my mixed metals Christmas front porch -see more of the porch decor here.  I'm loving the combo of silver, gold, and copper, and there's lots more to see inside.

Copper Christmas Decor Christmas Home Tour


Come on in where it's warmer.  At the front door, on the console table, I've set up a pretty metal tree, and added some ornaments, in fact they're over flowing!

Copper Christmas Decor in the Dining Room

copper Christmas decor

Along the half wall at the front door, a few pretty candles.

Rustic Mixed Metals Christmas Home Tour

Here is the hot chocolate bar (see more detials arount it and how to make the DIY mugs here, all set up for guests to enjoy when they arrive on a cold day.

hot chocolate bar cart station


hot chocolate station

And this leads into the dining room.

gold silver and copper Christmas decor Home Tour

My theme this year, is mixed metals so you'll see gold, copper, and silver used over and over to tie everything together.  I've also used lots of natural materials like wood, and pinecones to create a rustic feel.  On the dining room table I added gold, copper, and silver leaf to some rustic wood log candle holders.

Gold Silver and Copper Christmas decor
Diy wood log candles with gold leaf

Gallery Wall

Behind the dining room table, is one of my favourite projects of late, a Christmas Gallery Wall.

Christmas gallery wall

I found some great printables on-line, and gathered up lots of other fun pieces to include.  

Christmas gallery wall
table top Christmas trees

I'm in love.  Now onto the living room.

Gold, Silver, and Copper Christmas decor

StairWay

There's a little surprise in the stairway.  I thought it'd be fun to do something a little different from the traditional garland on the stair railing this year, and fill this fun little space between the stairs with a Christmas star mobile.

Gold Silver and Copper Christmas decor
DIY Star and ribbon mobile

It's a long way down.  I used a two gold hoops to create an inner ring and an outer ring.  On the inner ring I attached long ribbons in gold, silver, and copper.  On the outer ring I attached long strands of paper stars.  The stars are made out of old book pages and scrapbook paper in gold, silver and copper patterns, including some vellum.  I used two sizes of star shaped paper punches to create the stars and then sewed them into long strands on my sewing machine and attached them not to the outer ring.  Hanging from the top of the upstairs hallway, all the way down to the main floor they look really magical.

star and ribbon Christmas mobile

Living Room

On to the living room, and our beautiful Christmas tree.  I'm really liking the combo of all the metals.

copper Christmas decor

I used lots of gold, silver, and copper ornaments, and then added ribbon in all those colours too.  Another fun copper element is using magnolia leaves in bunches, since they're copper coloured on the back.  One detail I really like this year, are the mini chalkboards with inspirational words on them.

copper Christmas decor tree

Copper Christmas Ornaments

I already had lots of gold and silver decorations, but the copper is new.  I DIY'd a few copper ornaments, these ones are clear glass balls filled with some copper wire scrub brushes, that I pulled apart.   So easy, inexpensive, and pretty.

Diy copper christmas decor ornament

I also used the DIY cement star Christmas ornaments decorated with gold, silver, and copper leaf.

Cement star diy copper christmas ornament

In the living room, there's a cozy spot to curl-up by the fire.

Rustic Mixed Metals Christmas mantel

One of my favourite copper details this year, is the pretty copper kettle and mugs on the ottoman.  Makes me hum, "Raindrops on roses and whiskers on kittens,Bright copper kettles and warm woollen mittens….these are a few of my favourite things".

copper Christmas decor

This year our living room shelves are filled with some of my mini Christmas tree collection.

Christmas book case styling
Christmas bookcase styling

And on the other side of the room, our cozy couch, piled high with pretty pillows.

gold, silver, and copper Christmas decor

Kitchen

We have a pass through from our living room into the kitchen, and this year I added a branch, and hung a few pretty decorations on it.  Underneath is a collection of candles in different metals.  So simple and so pretty.

gold, silver, and copper Christmas decor

In the kitchen, I added a little greenery and ribbon to the two end chairs.

copper Christmas decor

The chalk board has a sweet little Christmas message.

Christmas chalk board art

And on the table a simple centre piece, with my Christmas tree in a teapot, and some candles.

gold silver and copper Christmas decor

The kitchen got a few Christmas touches too, like a few ornaments on the counter.

Mixed Metals Christmas Home Tour

And on the other counter, my famous Christmas butter crunch candy, get the recipe here.  When this candy gets made at our house, it's a sure sign that Christmas is coming!

Christmas Home Tour

And if you have to do dishes…and I'm afraid we do…this is at least a sweet spot.

Christmas kitchen decor

Thanks so much for coming by for my little Christmas House Tour.  I hope you enjoyed my rustic mixed metals, and got inspired to make your place as cozy and welcoming as you can.  On Wednesday, I'll be sharing our basement family room all decorated in winter whites, and Friday we're upstairs.  Hope to see you soon.

With a house all decorated for Christmas, life really is a party!

You might also like last years Vintage Inspired Christmas Tour.

Christmas Fireplace Mantel Christmas Villiage Putz Houses

Also check out our Green Christmas Decor Home Tour 2019 here.

Christmas Home Tour: Rustic Scandinavian Christmas Home Tour, with bit of modern boho.

You might also like Pastel Christmas Living Room here.

Colourful Pastel Christmas Family Room: Inspired by Anthropologie, with bottle brush Christmas trees, mercury glass, vintage ornaments, macrame, & pastel colours.

Sharpie Reindeer Pillow

Dec 4, 2014 · 2 Comments

DIY Sharpie Reindeer Pillow: No-sew project, using an inexpensive pillow and a sharpie marker to make your own custom Christmas pillow.

DIY Sharpie Reindeer Pillow: No-sew project, using an inexpensive pillow and a sharpie marker to make your own custom Christmas pillow.

DIY Sharpie Reindeer Pillow: No-sew project, using an inexpensive pillow and a sharpie marker to make your own custom Christmas pillow.

I wanted to add a deer pillow to my Christmas decor but couldn’t find the perfect one, or one that fit my budget.  What’s a girl to do, make her own!  

Materials:

  • plain pillow case
  • sharpie marker
  • reindeer cut out
  • tiny red Pom Pom
  • red thread and needle
  • cardboard inside the pillow

To start with I was planning to stitch up a quick cushion cover with some muslin fabric, but then I found a plain off-white pillow cover at IKEA for $4.99 (it’s the Gurli incase you’re looking too).  Sold.  I had a pillow insert already that I could use.  I also picked up a brown permanent Sharpie marker.

how to make a sharpie pillow


How To Make A Sharpie Pillow:

1. I found an image of a simple reindeer that I liked on-line, and printed it out in the size I needed to fit 3 rows of 3 reindeer.  After I printed the image, I cut it out and used it as a pattern.

2. Next I CAREFULLY traced the deer pattern, onto the cushion fabric with the Sharpie marker.  

Be sure to use some cardboard inside the cushion to ensure the marker doesn’t bleed through the fabric and leave a mark on the back.  

Once the reindeer was outlined, I removed the pattern and filled in the image with some rough crosshatching.  

I used a ruler to help space out the other 8 reindeer -with each row changing direction.

DIY Sharpie cushion cover


3. When I was done, I chose one reindeer and stitched a tiny, sparkly red pom-pom nose on (I could remove it after Christmas if I wanted).  

I have to say I was a little nervous using a permanent marker on fabric, and kept worrying thoughout the whole project that I”d make a mistake and ruin it, but it turned out great.  It did bleed a little, but I like how it doesn’t look too perfect.

Sharpie Christmas pillow

Christmas wrapping


Love how it turned out, and love the price too.  There are endless possiblities too, any pattern could work.  I was thinking a cookie cutter or stencil would work too.  

With a DIY Sharpie Pillow, life really is a party.

PS.  I made another one with letter stencils that you'll get to see on my Christmas home tour here.

You might also like DIY Christmas Wall Art here.

DIY Christmas Wall Art: a great tutorial, and with free printables to create your own inexpensive wood Christmas wall art signs.

Also check out Birch Christmas Wreath here.

Birch Christmas Wreath:-full tutorial to make your own square wreath from some gathered greens, birch logs, and a coat hanger. Perfect for Christmas.

You might also enjoy Mini Macrame Christmas Ornaments here.

Mini Macrame Christmas Ornaments: Easy DIY Macrame Ornament tutorial, perfect for the beginner. No macrame experience required.

Christmas Tree for the Front Porch

Dec 2, 2014 · 2 Comments

Christmas Tree for the Front Porch: real trees, grapevine garland, lights, and a Christmas wreath with lots of gold, silver and copper.

Christmas Tree for the Front Porch: real trees, grapevine garland, lights, and a Christmas wreath with lots of gold, silver and copper create a Christmas welcome.
Christmas Tree for the Front Porch: real trees, grapevine garland, lights, and a Christmas wreath with lots of gold, silver and copper.

This year I’m going with a mixed metals theme for my Christmas decor, so lots of gold, silver, and copper.  I wanted to use this theme outside too, and do something a little different from the traditional urn with greens, birch logs and ribbon.  So I've added a Christmas tree for the front porch this year and I love it!

Christmas front door grapevine garland

Garland Around The Front Door

The first thing we did was do the grapevine around the door.  I wanted to do copper colour around the door so my sister and I found some grapevine up north, and I also got some hawthorn, since it’s very spiky.  

I spray painted some of the grapevine with copper spray paint before I hung it up, and left some of it natural.  My sister really did all the installation for me, she’s a florist and makes it look so easy.  But, she assures me it actually is easy to do.  

She started out my sticking about five 3M hooks around the door.  They work great, since the large ones can hold a lot of weight, and leave no holes or residue behind when you remove them.  She layered on the grapevine, and used wire to attach it to the hooks.  She added each vine, one at a time, and slowly built it up.  We saved the copper grapevine for the top.  After the grapevine, we added in the spiky hawthorn branches, that we also spray painted copper.

how to add garland around your front door for Christmas

Christmas Tree for the Front Porch

I wanted to use the same copper grapevine and hawthorn branches to make a kind of spiky nest for the Christmas tree in my urn.  We used wire to secure the grapevine, and pushed the branches into the dirt in the urn.

Christmas tree for front porch

We decorated the mini tree with lights and shatterproof ornaments secured to the tree with wire.  I love my little tree.

Christmas tree for the front porch

Christmas Wreath

For the wreath, I picked up an inexpensive fresh one at the grocery store.  My sister twisted some more grapevine around the wreath, to give it some dimension.  We added more of our mixed metal ornaments.

Silver gold and copper christmas wreath

We also added some ornaments to an old lantern and used a few more small trees beside the door in galvanized pots.

Christmas trees for the front porch

Repeating the different elements in a few places helps to bring the whole look together.

Mixed metal copper Christmas decor

I love how it turned out, and I can’t wait to show you more inside later this week.

Christmas tree for the front porch

More Inspiration

You might also like our Christmas Front Porch here.

Christmas Front Porch: Rustic greens, large pinecones, and lots of birch logs create a rustic Scandinavian feel with brass lanterns for Christmas.

Also check out our Outdoor Decorating Ideas for the Front Porch here.

You might also enjoy our Front Porch Decorating Ideas for Christmas here.

DIY Christmas Story Book Advent Calendar

Nov 27, 2014 · 8 Comments

Story book advent calendar countdown to Christmas.

Storybook Advent Calendar: Wrap up 24 Christmas story books, and let your children pick a new one each to read together at bedtime.

Kid's story book advent calendar Christmas countdown.
[feast_advanced_jump_to]

This Christmas I made my girls a storybook advent calendar.  My youngest is 7, but since her older sister is 10, it feels like we're quickly getting past the little kid stage.  In fact, there's already very few toys on their Christmas lists this year.  

Since they're both reading chapter books now, and usually read on their own at bedtime I thought it might be nice to do a special "Read me a Story Christmas Countdown" this year.

 I've wrapped up 24 books, so that each night between Dec. 1 and Christmas eve we can read a Christmas storybook together.

Any book lover will adore their own book advent calendar.  With older kids, it's an opportunity for a special bedtime story again, at least for the month heading up to Christmas.  It's such a fun way to spend time together during the holiday season.  

I'm also a big fan of family activity advent calendars -find our printable advent activity cards here.  But, those kind of advent calendars can end up being a lot of work for parents.  This  idea is the easiest way to create a special advent activity together.  

This is such a great alternative to chocolate advent calendar, since we really don't need to start each day with more sugar.  I also think it's a better option than making your own advent calendar filled with small gifts.  They tend to be inexpensive little toys and trinkets that your child doesn't need, and end up being donated, or worse still in landfill.  This Christmas season a DIY book advent calendar is sure to become one of your favorite Christmas traditions!

Storybook Advent Calendar

Christmas Books

The first task in making your own Christmas book advent calendar is to secure enough books.  You will need 24, since you don't need for Christmas day.  When I was a young mom, I wasn't too keen on buying Christmas books, since I thought something general had much more reading potential throughout the year.  Ten years later, I see the value in Christmas books, it does come around every year, and reading them together brings back memories of earlier days and much younger little ones.  

Mix of Old and New

For our countdown I used about half old Christmas books we already had, and bought about 12 new ones.  It was actually a really great idea to use a mix of old and new books.  The girls loved discovering the new books, but there was also a happy nostalgia in reading the old ones together, that we've read together so many times for past Christmases.

Thrift Store Books

For the new books, I picked them up over about a month at thrift stores, the dollar store, and a warehouse outlet, and didn't pay more than a couple of dollars each for most of them.  It's great if you can to plan ahead for this activity, since it might take a little while to collect enough Christmas books.  Most thrift stores put out their Christmas themed books right after Halloween, so that's a great time to start shopping.  Finding the picture books at thrift stores is a great way to not spend too much for your story book Christmas advent calendar.

New Books

I also had good luck at the dollar store, and that's a great option to find an inexpensive new Christmas book.

If you're kids are younger, a board book level will be perfect.  If you're kids are older you can use picture books.  And if you have a mix of ages then you can put together a collection of children's books with something for everyone.  

If this becomes a new Christmas tradition for you and your family, be sure to take any old Christmas books that your kids have outgrown and no longer enjoy back to the thrift store and donate them so someone else can enjoy them.  If you do this year after year, I think it's a nice idea to keep your favourites, and donate the others, and replace them with new-to-you second hand books for the new calendar.

Wrapping The Books

Part of the fun of this kind of advent calendar is not knowing which book you will get each night.  So be sure to wrap all the books up in wrapping paper, so that it can be a surprise each night.  It's fun to use a few different kinds of wrapping paper for interest, but making sure they all coordinate together.

Number Tags or No Number Tags?

I really like the idea of reading them in no particular order.  So I just wrap them up, and let my girls take turns picking a different one each night to read.  If you prefer, you can number the books, so that you read a particular one each of the days of Christmas.  You can use number stickers to mark your order, or use a marker or acrylic paint to add the numbers to the wrapping paper.  Another options is numbered gift tags tied around each book.  You could even wrap them into large paper bags with a number on each one.  

Starting on December 1st, you let your family member find the wrapped book marked as number one, and enjoy it for your bedtime stories.  And if you're letting them be picked randomly, you just let your little boy or girl pick out whatever one they want, unwrap it and enjoy it together.

Library Books

If you decide to use some library books, it would be a good idea to use the number tags, and make sure that they are read right at the beginning of the calendar so they can be returned to the local library on time for the other book lovers to enjoy as well.

Displaying The Books

I like to collect all the books together in one spot.  We placed ours under the Christmas tree in our living room, but in the kids bedroom can be a nice idea too.

We used a vintage suitcase for our books this year.  It's the perfect way to collect them all together.  It's so much fun to add some little Christmas decorations too, like candy canes, a banner, or pom pom garland, and twinkle Christmas lights, for a little Christmas magic.

Other great options are to stack the books on top of each other from biggest to smallest and make the stack in the shape of a Christmas tree.  We've also used a vintage crate, or special basket to hold them all in the past.

Storybook Advent Calendar

Recipe

Story book advent calendar countdown to Christmas.

DIY Book Advent Calendar

No ratings yet
Print Pin Rate
Cook Time: 1 hour hour
Total Time: 1 hour hour
Servings: 1 Calendar
Author: Dannyelle Nicolle-Ramjist

Materials

  • 24 Christmas Books
  • Wrapping Paper
  • Suitcase basket, or box

Instructions

  • Collect 24 Christmas books from your home, at second hand stores, or the bookstore.
  • Wrap them all up with wrapping paper. I wrapped them all in brown paper; it made me think of "brown paper packages tied up with strings…these are a few of my favourite things..".
  • To add to the magic factor, I used an old vintage suitcase, that looks like it could have been sent straight from the North Pole. A basket, or box would work too.
vintage suitcase

Vintage Suitcase

We used an old suitcase for our books.  It felt a little like we were taking a magical journey each night.   Our books transported us to lots of wonderful places.  I wrapped the books in brown paper, thinking of "brown paper packages tied up with strings, these are a few of my favourite things". I filled the suitcase up with some cotton and faux snow.  It helped add a little more magic.  

children's advent calendar idea

We had so much fun doing this together.  Picture us all snuggled up together in our big bed in our Christmas jammies with a bedtime story each night. They absolutely loved it.  It's such a great way to spend some quality family time together, especially when the holidays seem to get more and more busy.  Being intentional about slowing down and spending some time together without rushing seems more and more important.  I love too that this an end of the day activity.  We can settle down together with our children's Christmas books and do something we will all enjoy.  I think this might be a new holiday tradition for us.

With a "Read me a Story Christmas Countdown" DIY book advent calendar to enjoy,  life really is a party!

More Advent Inspiration

You might also like our House Advent Calendar here.

DIY House Advent Calendar: A pattern for 3 sizes of paper houses, and printable number labels to make your own advent village.

Also check out Activity Advent Calendar here.

Printable Christmas Advent Calendar Activities: with over 60 different activities to choose from pick 24 and make some special memories with your family this Christmas.

You might also like our DIY Advent Calendar here.

Tree Advent Calendar: IKEA hack, inexpensive cardboard advent calendar that's been silver leafed, and filled with printable activities.
  • « Go to Previous Page
  • Page 1
  • Interim pages omitted …
  • Page 13
  • Page 14
  • Page 15
  • Page 16
  • Page 17
  • Interim pages omitted …
  • Page 21
  • Go to Next Page »

Primary Sidebar

Welcome!

Life is a Party is all about helping you celebrate everyday with great food, entertaining and party inspiration, and seasonal crafts and home decor inspired by the holidays.

More About Dannyelle

Trending Recipes

  • Mac and cheese with panko breadcrumb topping.
    Best Homemade Mac and Cheese with Panko Breadcrumb Topping
  • Homemade iced capps in glasses on a wood table.
    Tim Hortons Copycat Iced Capp Recipe
  • Dirt Pudding no cream cheese in glasses with candy rocks, and fresh mint that looks like a little plant.
    Easy Dirt Pudding Recipe without Cream Cheese
  • Easy 3 ingredient coconut milkshake recipe.
    Easy Coconut Milkshake Recipe
  • Easy food processor scones on a plate with jam.
    Easy Food Processor Scones
  • Fluffy small batch pancakes for two ready to serve on a plate with syrup.
    Easy Small Batch Pancakes For Two Recipe

Fall Ideas

  • Pumpkin shaped dinner roll recipe, with a herb stem.
    Pumpkin Shaped Dinner Rolls
  • Fall breakfast board
    Fall Breakfast Charcuterie Board
  • Halloween witch decorations
    Witch Halloween Decor
  • fall home decor
    Fall Decorating Ideas -Home Tour
  • Modern Boho fall mantel ideas.
    Modern Boho Fall Mantel Ideas
  • Homemade pink candy apples on a cutting board.
    How To Make Pink Candy Apples

Entertaining Ideas

  • Adult mermaid party table set on the beach with cake and shells.
    Adult Mermaid Party Ideas: A Beach Picnic Goodbye to Summer
  • Overhead view of tomato party table with pizza and appetizers.
    The Ultimate Tomato Party: A Tomato Girl Summer Garden Gathering
  • Camp themed party table with green gingham tablecloth, wildflowers, and Welcome to Camp banner.
    The Ultimate Camp Themed Party for Adults
  • Complete mimosa bar setup on white console table with vintage silver ice bucket, labeled colorful juice bottles, small glass garnish bowls, and ribbon-tied champagne flutes on white lace tablecloth with flower wall backdrop.
    How to Set Up a Beautiful Mimosa Bar
  • Breakfast for dinner party table styled like a bed with star quilt tablecloth, gingham pillows, and cloud installation above.
    Breakfast for Dinner Party: Brinner Under the Stars
  • Tea party table set for an adult tea party.
    Tea Party Food: The Complete Guide to Sandwiches, Scones and Sweets
  • Recipe Index
  • Parties & Entertaining
  • Fall
  • Subscribe
  • Free Resource Library

Footer

back to top

as seen in:

Better Homes and Garden Logo
American Farmhouse Style logo.
Apartment Therapy logo.

About

  • Privacy Policy
  • About

Subscribe

  • Sign Up! for emails and updates

Contact

  • Contact

As an Amazon Associate I earn from qualifying purchases.

Copyright © 2025 Life is a Party

Share
Pin
Post
Share
Pin
Post

Rate This Recipe

Your vote:


A rating is required
A name is required
An email is required