• Skip to primary navigation
  • Skip to main content
  • Skip to primary sidebar
Life is a Party
  • Recipe Index
  • Parties & Entertaining
  • Fall
  • Subscribe
  • Free Resource Library
menu icon
go to homepage
  • Recipe Index
  • Parties & Entertaining
  • Fall
  • Subscribe
  • Free Resource Library
subscribe
search icon
Homepage link
  • Recipe Index
  • Parties & Entertaining
  • Fall
  • Subscribe
  • Free Resource Library
×
Home

Homemade Recycled Sweater Mittens

Homemade Recycled Sweater Mittens

Nov 24, 2014 · 14 Comments

Homemade mittens from old felted sweaters.

Handmade Recycled Sweater Mittens: make mittens from old sweaters, no knitting or pattern required, and the perfect gift.

Homemade sweater mittens.
[feast_advanced_jump_to]

If you've ever wondered how to make handmade recylced sweater mittens you will love this easy tutorial. They're warm and pretty, and easy project even for beginnings.

Tis the season to start thinking about homemade gifts for the special people on your list. Today I'm joining a bunch of great Canadian Bloggers for the Canadian Handmade Holiday Event, just look for the hashtag #CNDHandmadeHoliday and enjoy all their beautiful Handmade Holiday ideas!

This weekend I used some old wool sweaters to make some nice cozy handmade recycled sweater mittens for my daughter and husband. I love how they turned out, so soft and warm and easy to make too. It's a great way to upcycle your old favorite sweater or give some new life to ones from the thrift stores. Look for an old one at the back of your closet, even if it's damaged, moth eaten, or stained you can work around those spots and make some recycled sweater mittens.
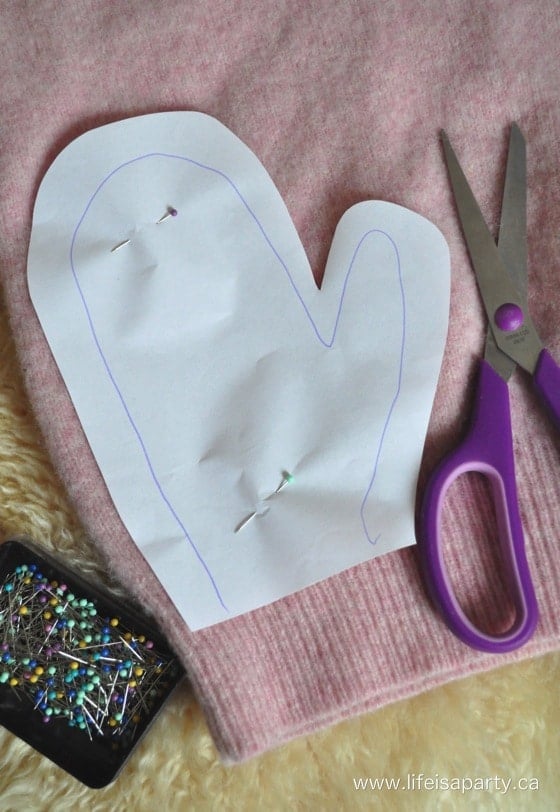
how to make sweater mittens

Handmade Recycled Sweater Mittens Materials:

  • old wool sweaters
  • pins
  • scissors
  • paper for a pattern
  • sewing machine
  • thread

How To Make Sweater Mittens:

1. Felting Your Sweater Fabric

I started out with felting my wool sweaters. To turn the sweater knit into felt it's important that you use 100% wool sweaters for the best result. If you've ever accidentally shrunk a wool sweater when washing it, then you'll know how to it. To felt them first wash them in hot water in the washing machine. Then put the sweaters into a hot dryer, some people recommend adding in dryer balls or even tennis balls.

The wool will felt, and they'll be nice and thick and won't fray when cut. The can wash and dry them multiple times to achieve an even thicker felt, depending on the result you're looking for.

2. Make A Mitten Pattern

I made a simple pattern by tracing generously around the hands of my husband and daughter. Then I adding a seam allowance of about a half inch around the outside of each one. 

If you wanted them to be a surprise, you could also use an old pair of mittens as a pattern -or your own hand for adult size. 

3. Cut Out The Pieces

Lay out your paper pattern onto the old sweater and cut it out. Don't forget you need four pieces in total, two for the left hand, two for the right -so flip over the pattern for a left mitten and a right mitten, and the back of your mitten and the front.

We lined up the pattern with the rib section on the bottom of the sweater and used it as the cuff of the mitten. It's a cute detail you might like not use too. You can lay your pattern pieces to take advantage of a pattern on the sweater too if your sweater has a pattern detail.

mittens made from old sweaters

4. Add Embellishments and Sew The Mittens Together

Before you sew your pieces together you can add any embellishments you like. I cut out simple hearts and added to my daughters, and sewed a few buttons on the outside of the mitten pair for my husband. 

Next step is to pin them together with the wrong sides facing out and right sides facing in, and then sew them together with your sewing machine with a simple straight stitch with a coordinating coloured thread.. Before turning them right-side-out, the last step is to trim the seam quite close in the thumb, so there isn't too much bulk in the thumb when you turn them right-side-out. Then you're finished and ready to turn to them right side out.

how to make sweater mittens

These are so warm and cozy, and perfect for some extra warmth in the winter. And they're quite quick and easy to make. It only took me about an hour to make one pair.

no knit mittens

These wool mittens are perfect for hand holding on a cold day. Make these into memory mittens by using an old sweater that holds some special memories for you.
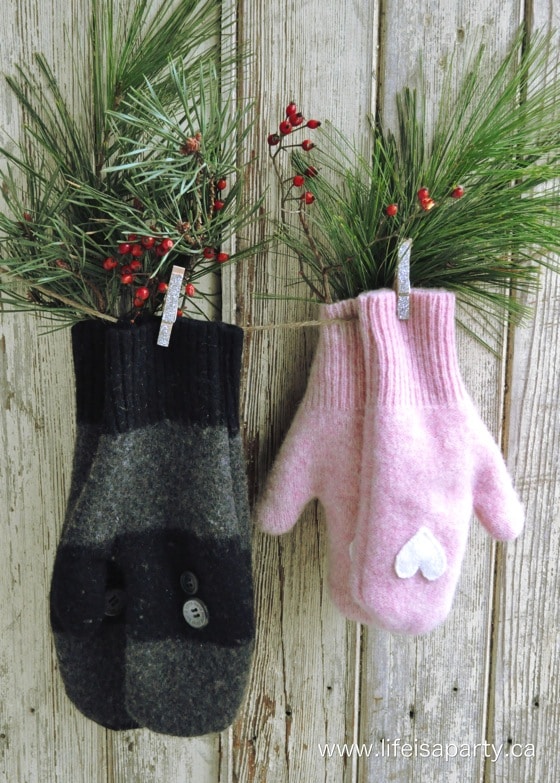
diy sweater mittens

These are perfect for gift giving to someone special on your list this year. With Handmade Recycled Sweater Mittens, life really is a party!

More Inspiration

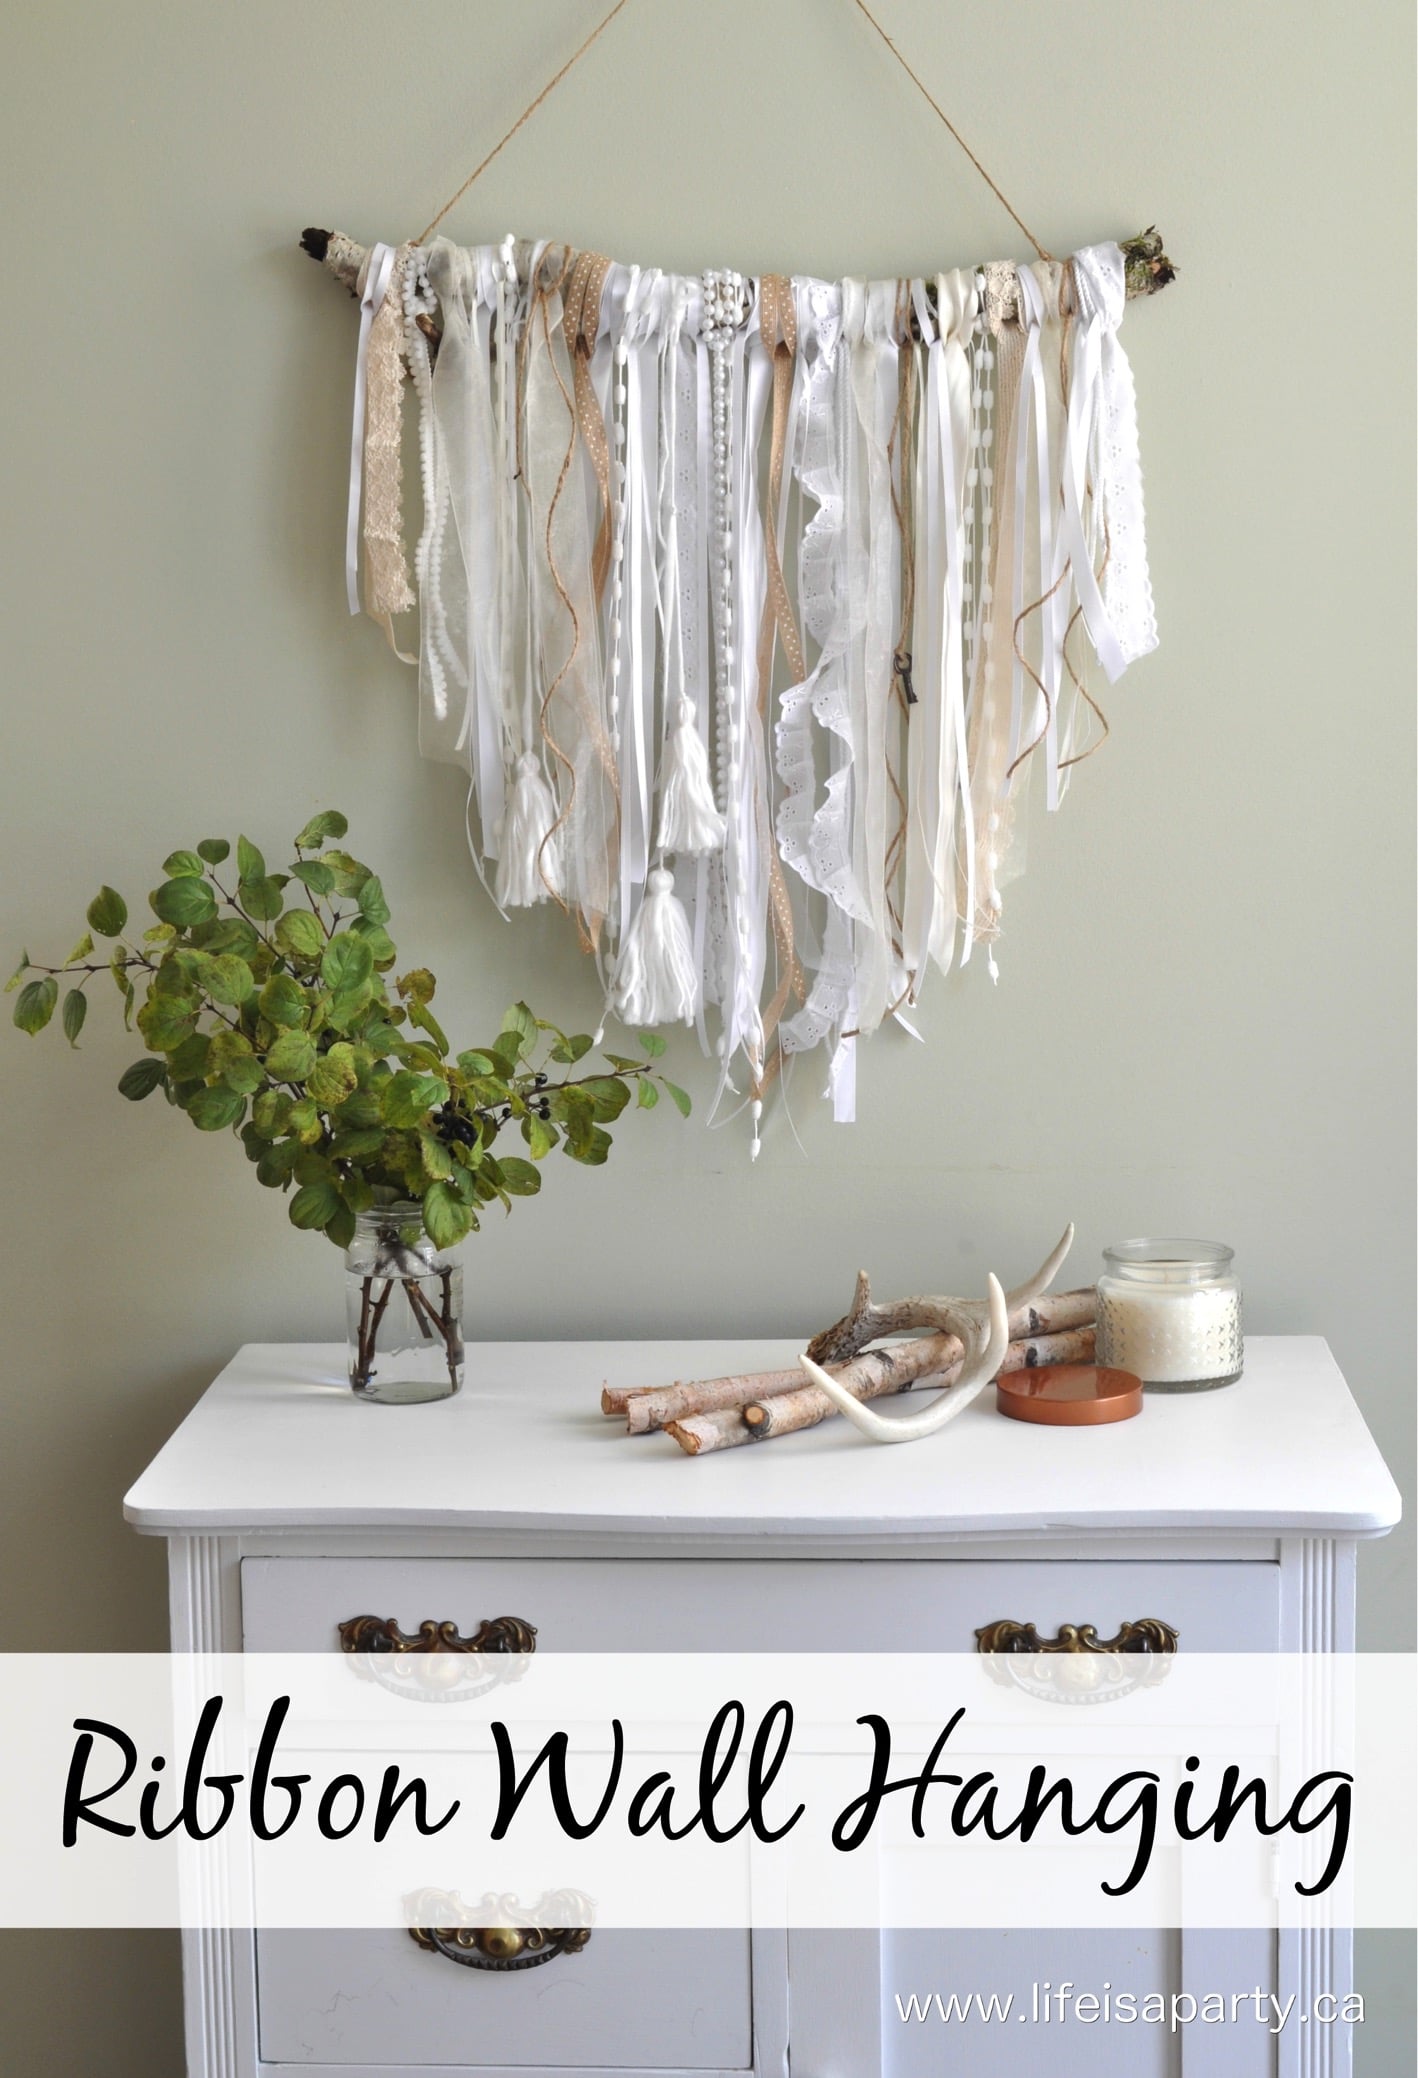
You might also like our Ribbon Wall Hanging here.
Also check out our Mason Jar Oil Lamps tutorial here.

DIY Mason Jar Oil Lamps: Simple to make and so beautiful. Perfect for a party, wedding centerpiece, or just in your home.

You might also enjoy our Rainbow Wall Art here.
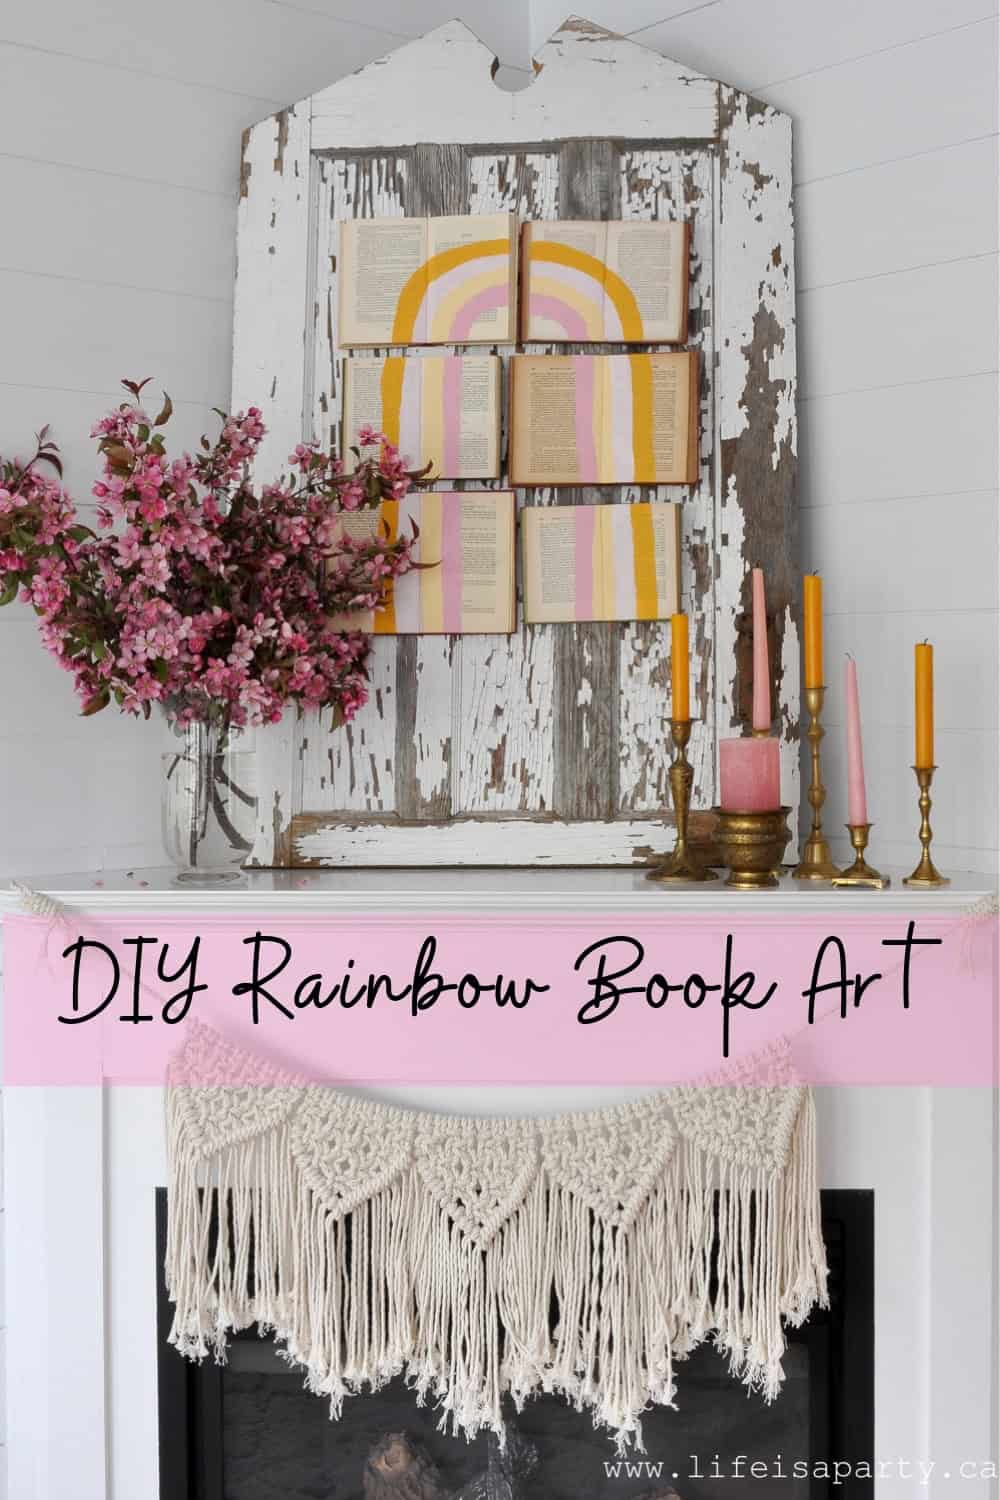
DIY Rainbow Book Art: Using old books as a canvas this DIY rainbow art in mustard yellow and pink is fun to make and inexpensive.

DIY Woodland Mugs

Nov 18, 2014 · 6 Comments

DIY Mugs: Woodland Mugs using carbon paper to transfer an image and a ceramic marker. So much better than sharpie marker mugs the don't last.

DIY Mugs: Woodland Mugs using carbon paper to transfer an image and a ceramic marker. So much better than sharpie marker mugs the don't last.

DIY Mugs: Woodland Mugs using carbon paper to transfer an image and a ceramic marker. So much better than sharpie marker mugs the don't last.

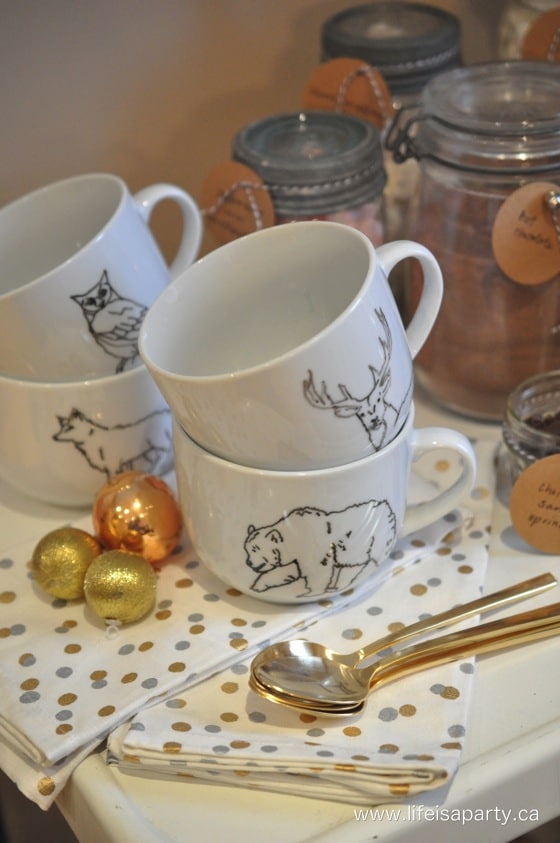
These DIY mugs are perfect for the a hot chocolate bar.  Use a ceramic marker and get much better long lasting results than a sharpie.

The Mugs

It snowed here yesterday.  That means time for hot chocolate.  I put together a sweet little hot chocolate bar on the bar cart.  It all started when I saw these oh so pretty mugs in the Christmas Chapters/Indigo catalogue.  Of course I had that moment that DIYer's often have…I think I could make something like that.

woodland mugs

Chapters has a deer, bear, fox, and owl in their collection, and here's my version.

Easy DIY Woodland Mugs

Materials:

  • plain white mugs
  • carbon paper
  • woodland images
  • pencil
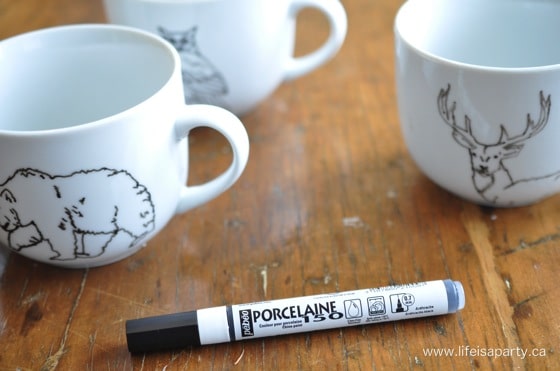
  • ceramic marker

How To Make  DIY Woodland Mugs

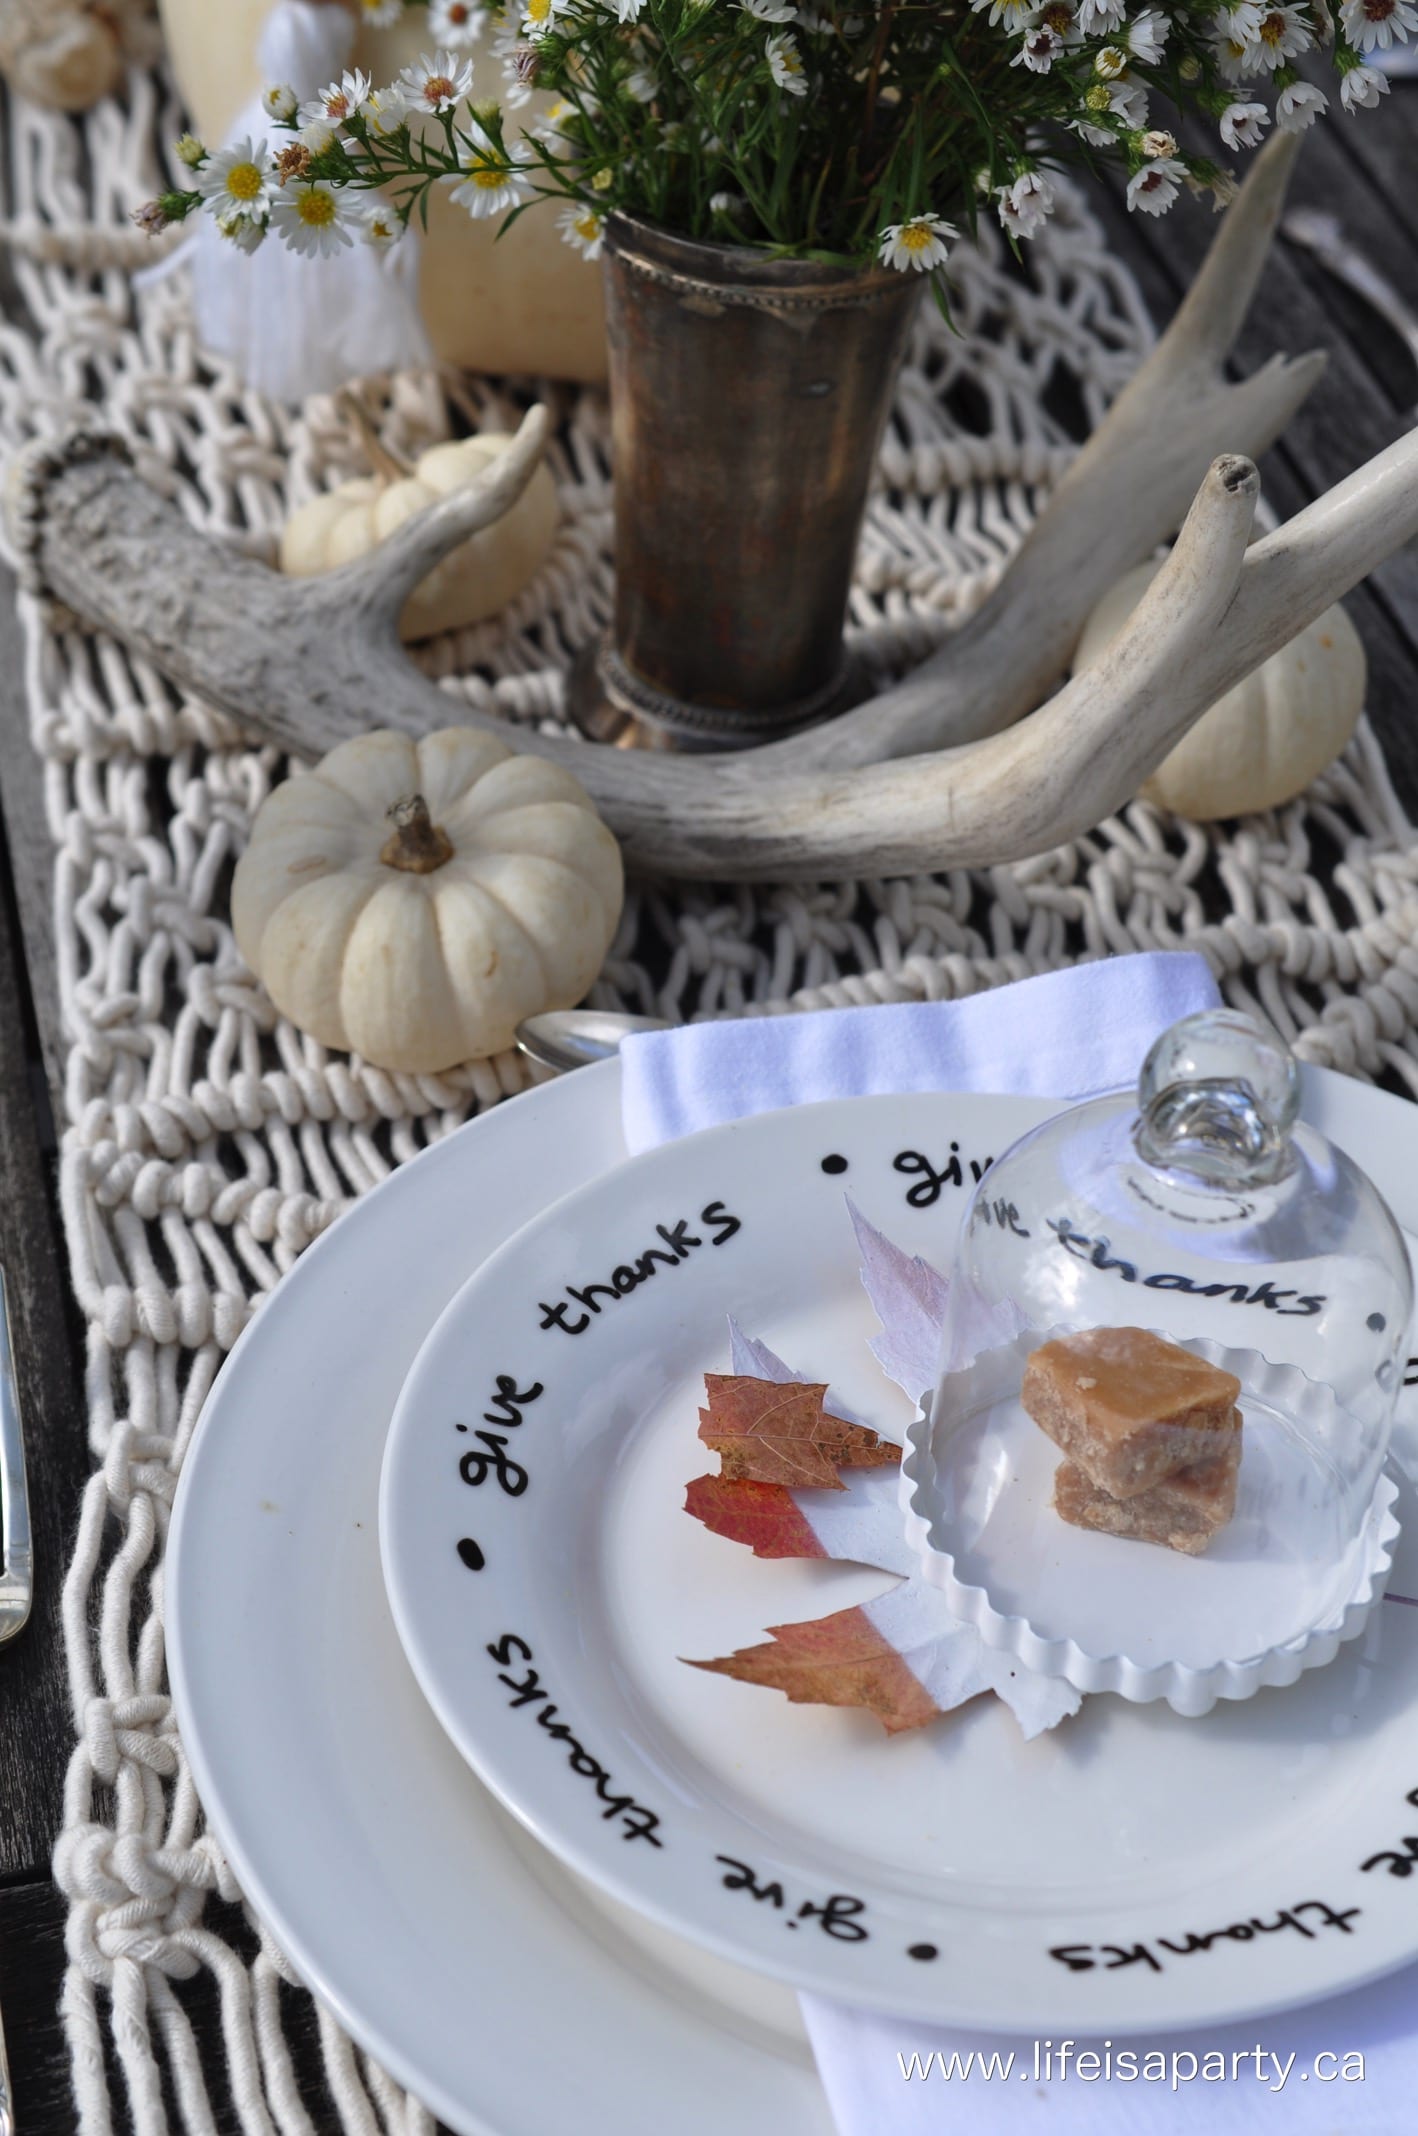
I started with inexpensive dollar store mugs, and a ceramic marker.  The internet is flooded with sharpie mugs, but from what I've read  they're very hit and miss.  I used the ceramic pen for my "give thanks" plates and they've been great, so I went with the ceramic pen again this time.

Since I'm not really an artist, and perhaps you're not either, here's my cheater way of doing the sketches.  Find an image on-line that you like.  I did an image search on "simple deer sketch" and then just found one I liked, right clicked to open image in a new tab, then selected print and adjusted my printing size so it would fit on my mug.

using carbon paper to transfer the outline of an image to the mug

Once you have a picture that you're happy with and it is the right size, break out the good old fashioned carbon copy paper -memories of teachers using these magical sheets to make worksheets in grade one fill my mind.  Use a small piece and tape it, along with your picture on top of the mug.  Make sure you have the carbon paper on the right side so that when you write on it, a line goes through to your mug.  Then, use a pencil to outline your image, which should transfer it to the mug.

Trouble Shooting

I'm not going to lie to you and say this process was simple.  It was a little tricky.  I started out with much more detailed images, similar to the Chapter's version, but they were too complicated for me.  I also started out just holding the papers onto the mug, but if the papers slip, the carbon copy lines rub off the mugs, since its a slippery ceramic surface.

When I used a simpler image, and taped the papers really carefully, and also removed them carefully so I didn't rub any off or erase it, it worked.  Patience, patience.

using a ceramic marker on mugs

Once the carbon copy is on the mug, use your ceramic marker to go over it.  Again I made a few mistakes.  The great thing about the markers is that when you're working with them, you can wash them off with a little hot water and a scrub, and then start over again.  The bad part, you have to start over from the beginning again.  Once you're happy with the image, my marker said to wait 24 hours, then bake in the oven (all the exact instructions will be on your marker).  Once they come out of the oven, the image is permanent.

baking diy mugs in the oven to set the marker

I really do like how they turned out and the Chapter's version would have been around $50 for 4, and mine were $1.25 each for the mugs, and around $5 for the marker -so a fraction of the price at around $10.

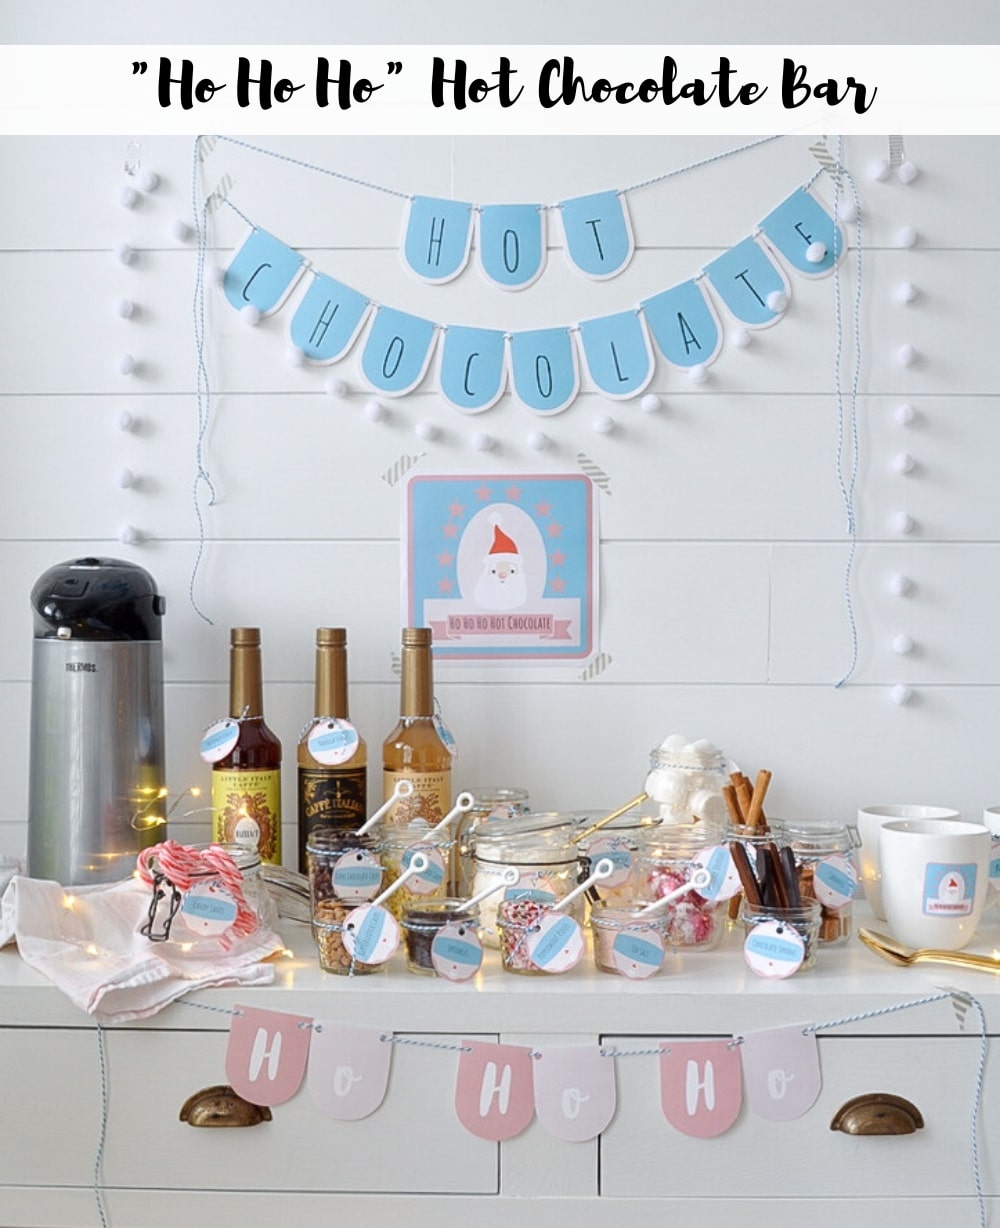
hot chocolate bar

The Hot Chocolate Bar

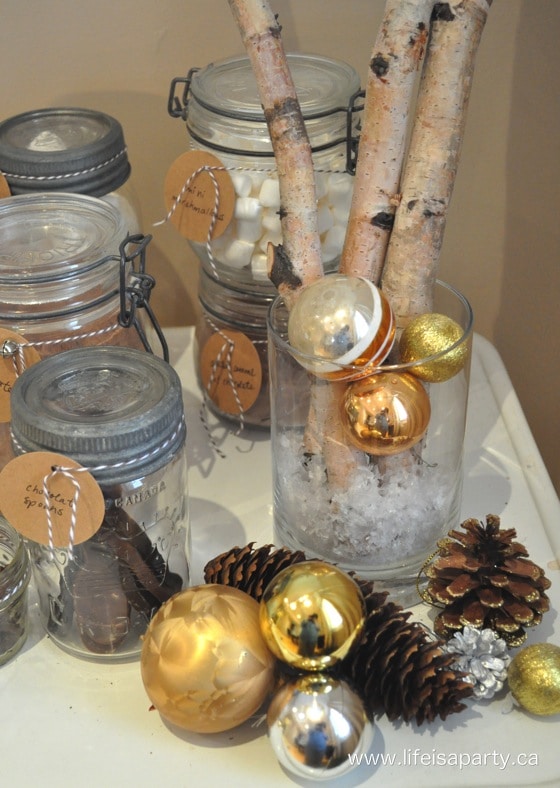
I used my mugs in this fun hot chocolate buffet with some different flavours of hot chocolate mix, chocolate spoons, sprinkles, and marshmallows.

how to set up a hot chocolate bar cart

Yum.  My girls tried out the hot chocolate bar cart tonight, and I'm happy to say it got their seal of approval.

Christmas hot chocolate bar

I love how this little cart looks for the holidays, and that the hot chocolate and the woodland mugs will look good all winter long.

hot chocolate buffet ideas

DIY marker mug

With a DIY Woodland Mugs, life really is a party!

You might also like our DIY "Give Thanks" plates here.

Also check out our Ho Ho Ho Hot Chocolate Bar here.

Ho Ho Ho Hot Chocolate Bar: set up the perfect Christmas hot chocolate bar with our printable package that includes labels, poster, bunting, and more.

Felted Wool Sweater Woven Pillow

Nov 13, 2014 · 10 Comments

How to make a woven pillow with felted wool sweaters.

Felted Wool Sweater Woven Pillow: felted wool sweater craft idea, make this woven pillow out of old thrift store sweaters turned into felt.

DIY felted wool sweater.
[feast_advanced_jump_to]

Today I'm sharing this pretty and cozy felted wool sweater woven pillow. We made this pillow from old felted wool sweaters.  Ever have the bad experience of washing a wool sweater in hot water, and putting it in the dryer and then discovering it's shrunk?  That's exactly what you want to happen here.

how to felt wool sweaters

Materials:

  • old wool sweaters
  • washing machine
  • thread
  • sewing machine
  • pillow insert
  • coordinating fabric
  • pins

How To Make a Felted Wool Sweater Woven Pillow:

1. I found some old sweaters at the thrift store.  They have to be made out of animal fibers in order to felt.  Wool, or cashmere, or angora all work well.  To felt the sweaters wash them in your washing machine with soap and hot water.  Then dry them in the dryer on hot heat.  If the fibres haven't felted after one wash and dry, do the whole process a second time.

2.Once they've been felted, cut them into strips.  Since they are felt, they won't fray when they're cut.  

3.Then, weave your pillow top, to the size of the pillow insert you're using.  Once the top is woven and pinned together for stability, sew a plain piece of fabric on the wrong side.  This piece will ensure that the felt doesn't get pulled or stretched out of shape.  Make sure it's a coordinating colour, since it will show through between some of the pieces.  

4. After the top is all ready, use some more plain fabric to make an envelope style back -just like I did when I made these pillows.

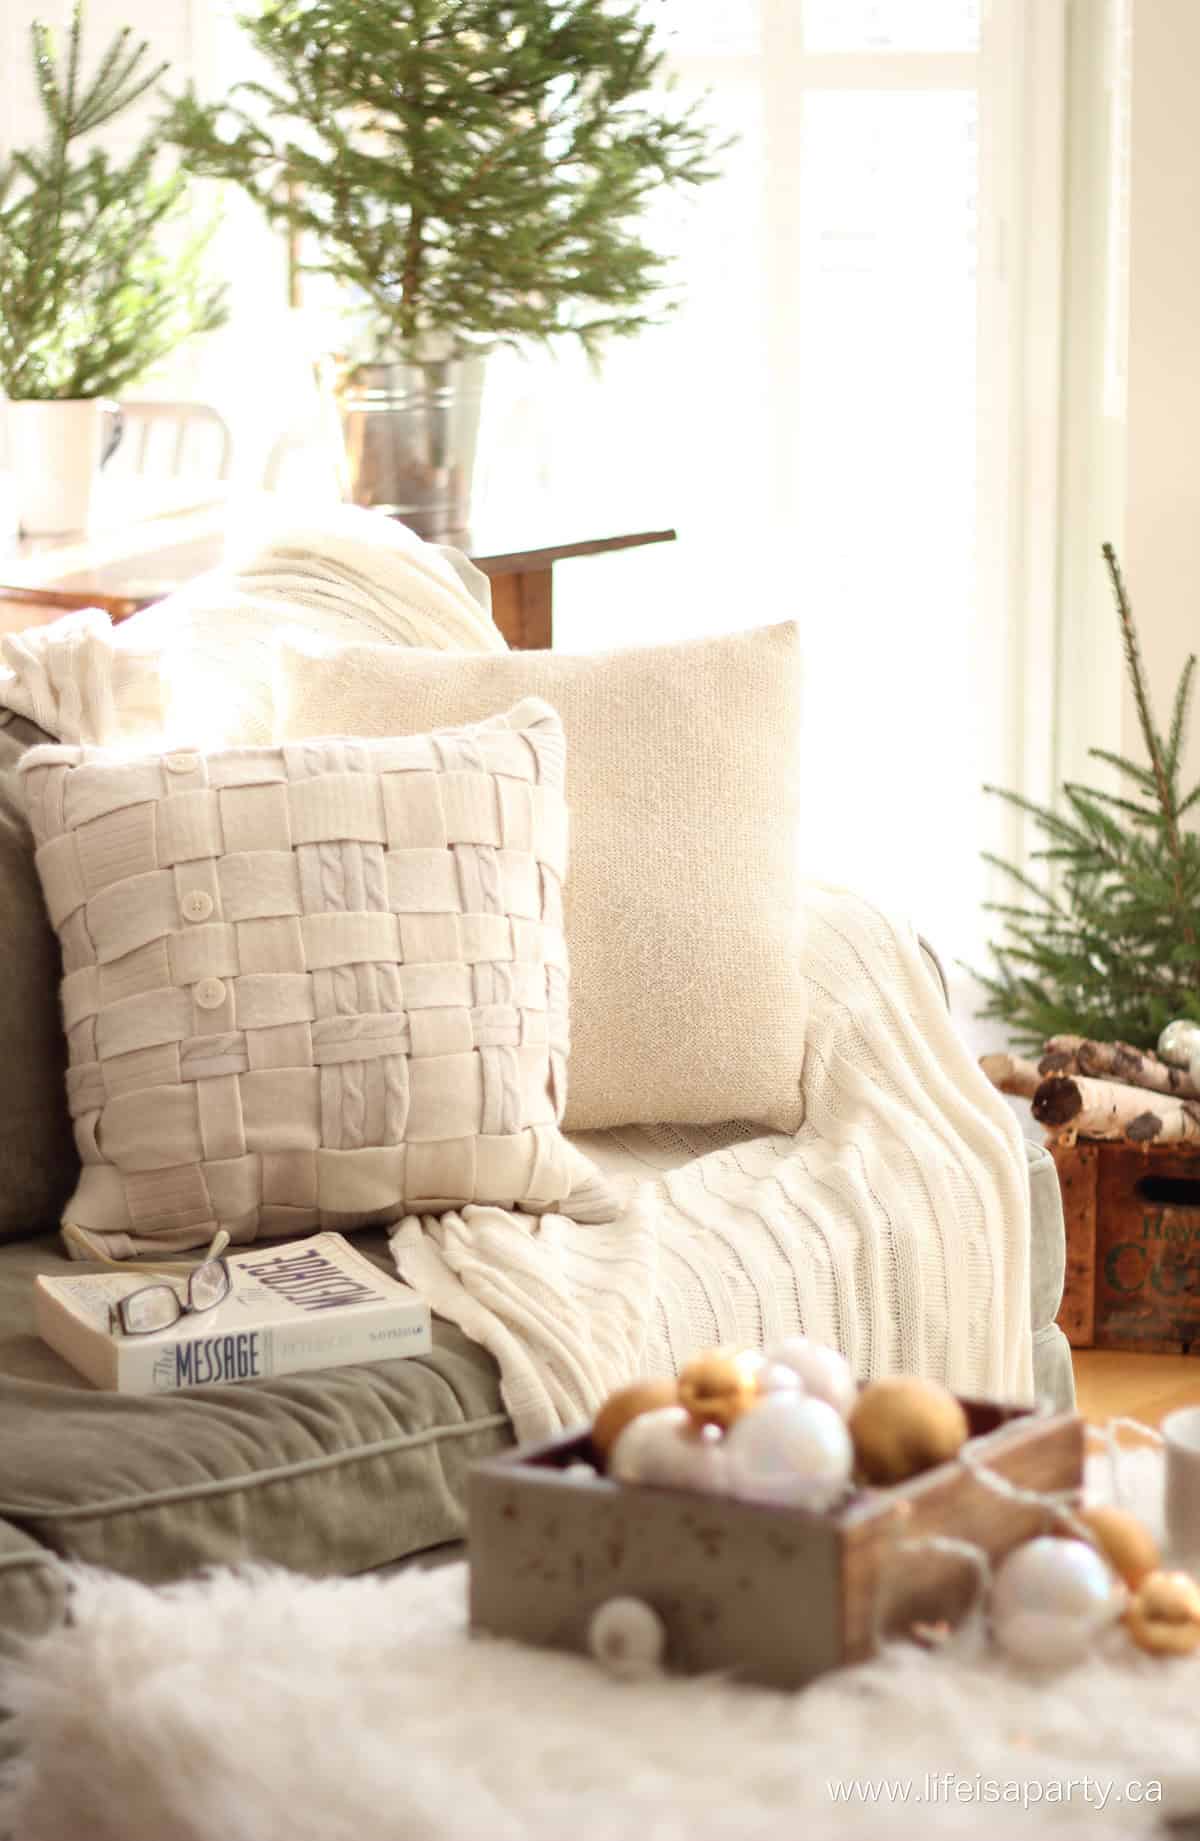
felted wool sweater crafts

Once it's all stitched up, turn it right side out again and enjoy.

felted wool sweater craft ideas
rustic Christmas decor vintage crate and tree

It makes for the perfect cozy spot to curl up in.

DIY Sharpie mug

Here's a little sneak peek of my DIY woodland mugs that you can find the tutorial for here.

rustic Christmas decor

I love all the different textures and slightly different shades of the various sweaters together.

felted wool sweater pillow

With a cozy felted sweater woven pillow to curl up with on a cold day, life really is a party!

More Inspiration

You might also like our Homemade Sweater Mittens here.

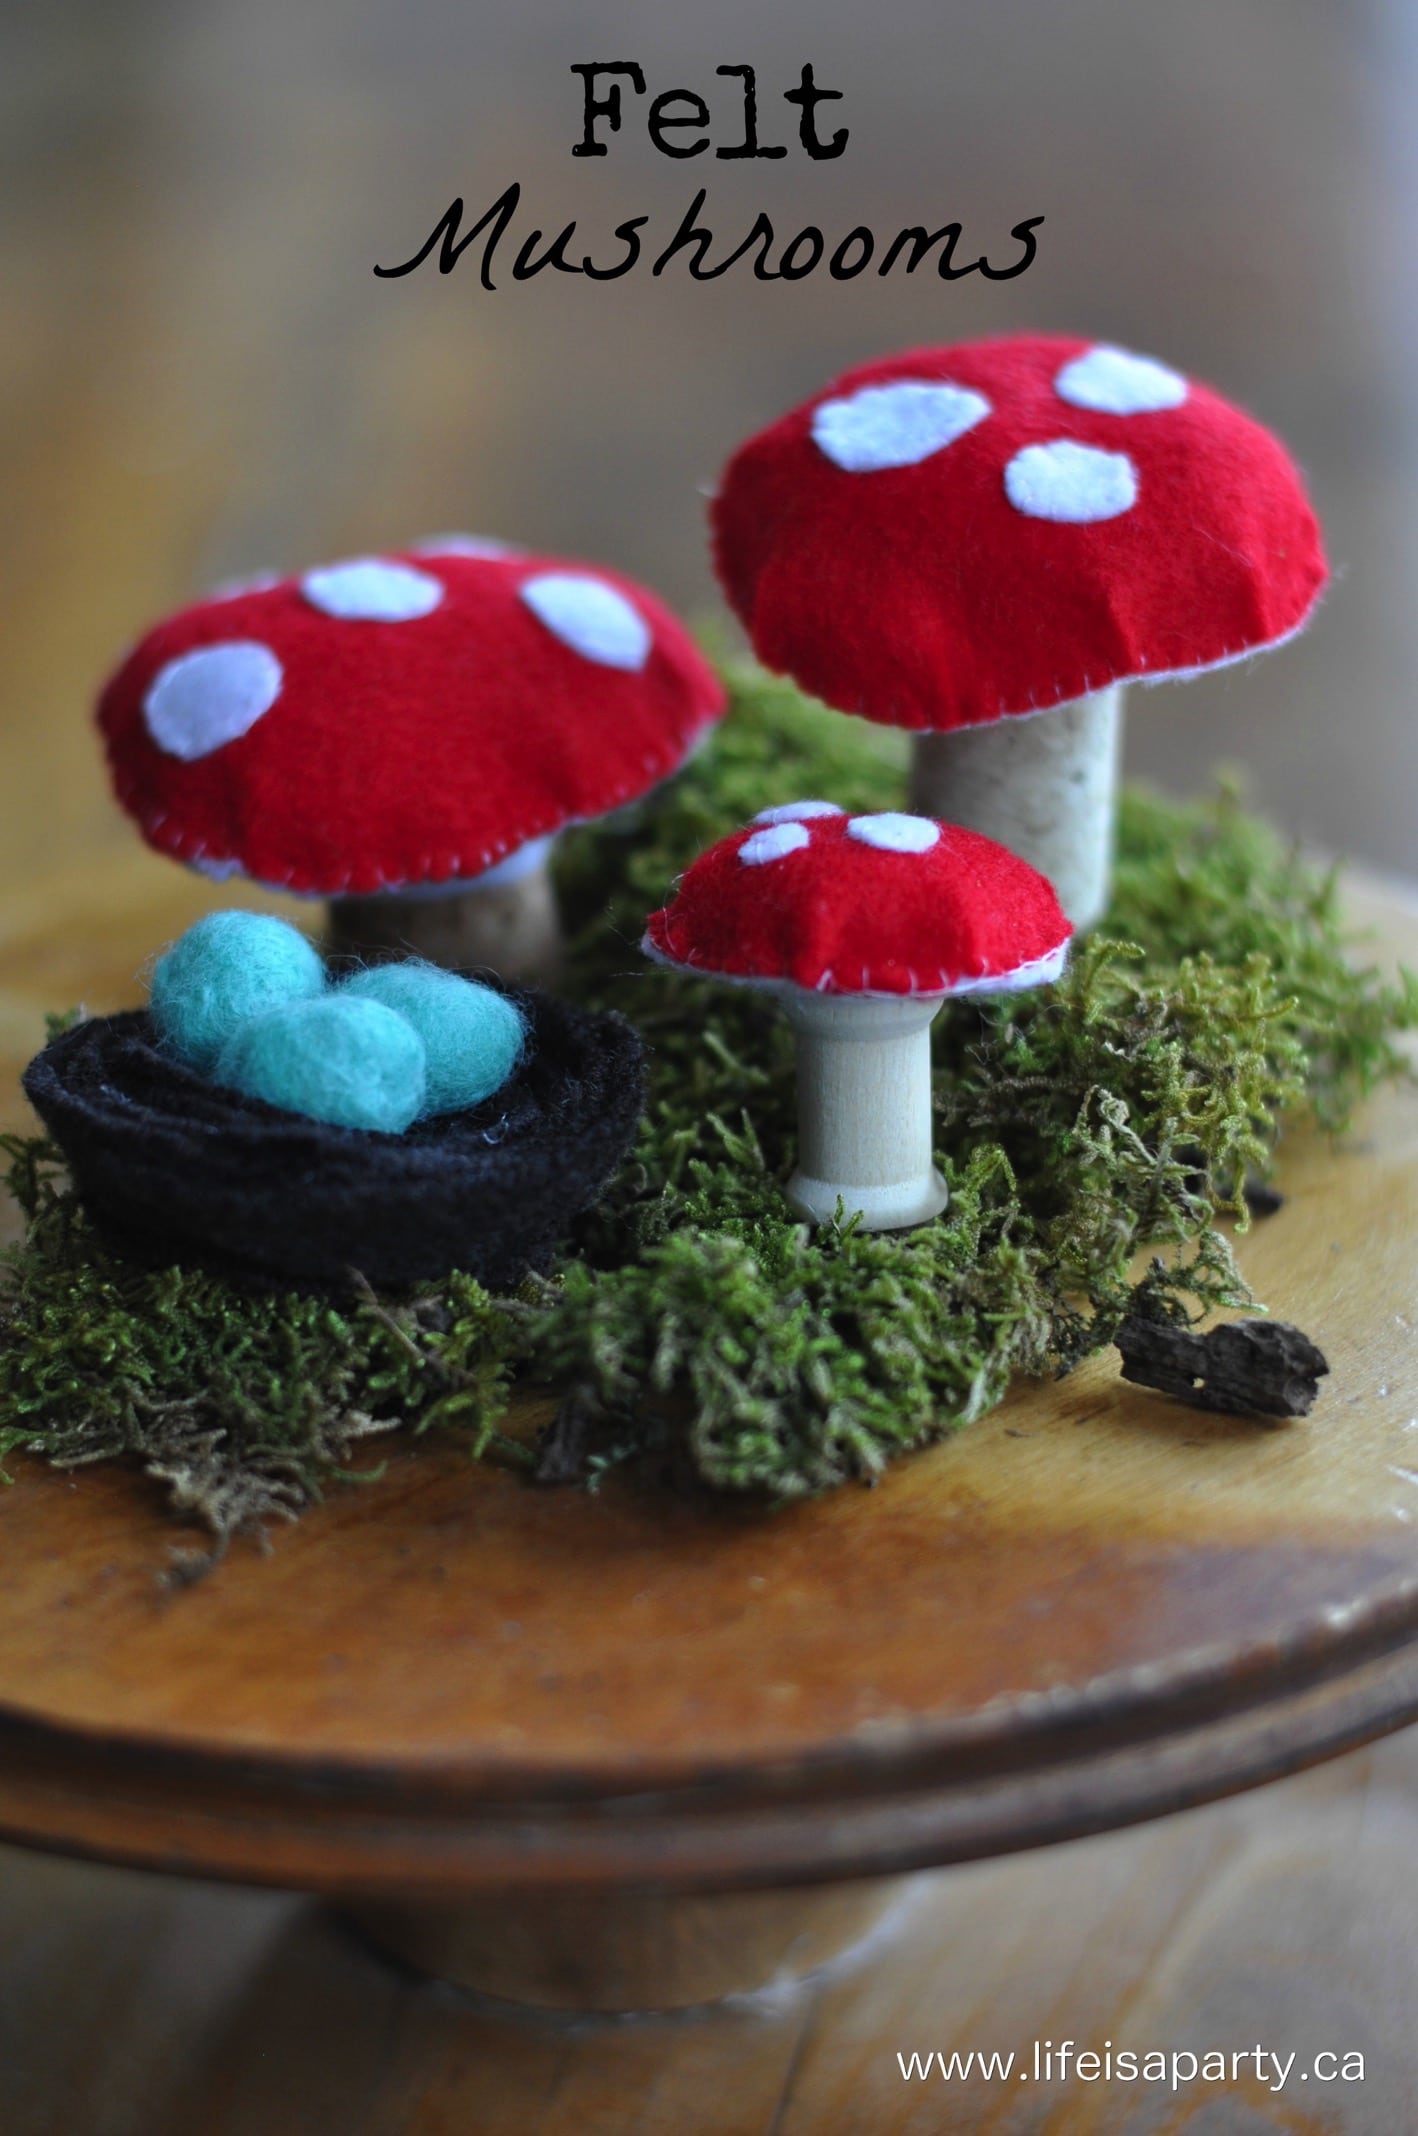
Also check out our DIY Felt Mushrooms here.

DIY Felt Mushrooms: easy to sew red and white polka dot mushrooms with felt, and cork and wooden spool stems. Perfect for your spring decor.

Concrete Star Christmas Ornaments

Nov 11, 2014 · 1 Comment

DIY cement star ornaments.

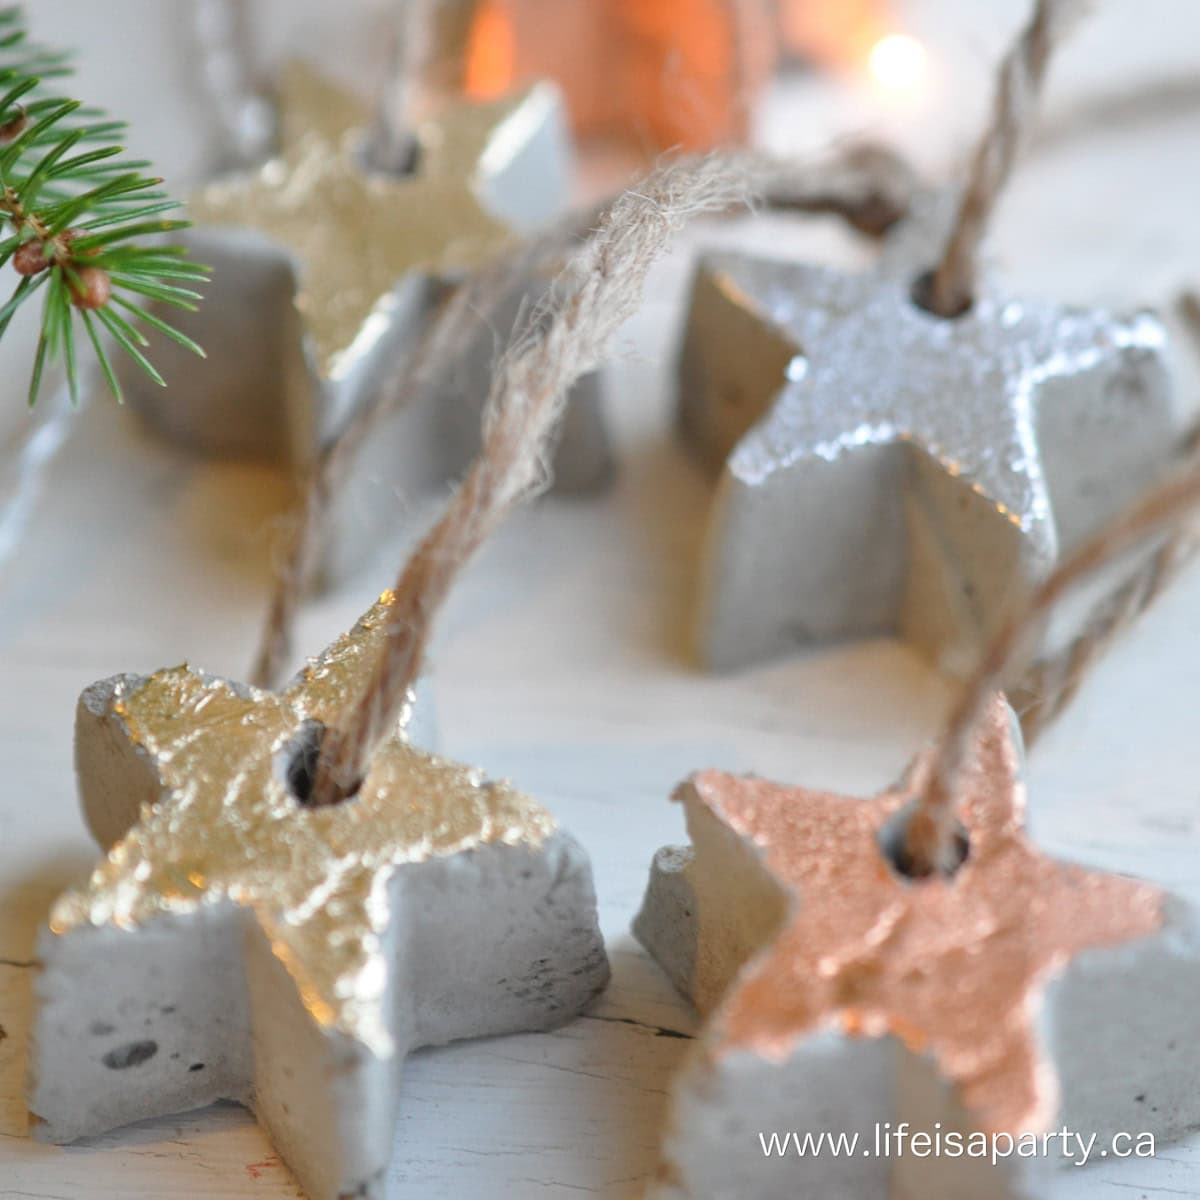
DIY Concrete Star Christmas Ornaments: discover how to make beautiful decorations from some concrete, an ice cube tray, and some gold leaf.

DIY cement star ornaments.
[feast_advanced_jump_to]

I'm loving mixed metals this year, and incorporating lots of gold, silver, and copper into my Christmas decor.  Instead of straight up glam though, I'm going for a rustic look.  I love the juxtaposition of the concrete in these star ornaments and the little bit of gold, silver and copper leaf.

DIY Cement Star ornaments

Materials:

  • concrete mix
  • cooking spray
  • star ice cube tray
  • straws
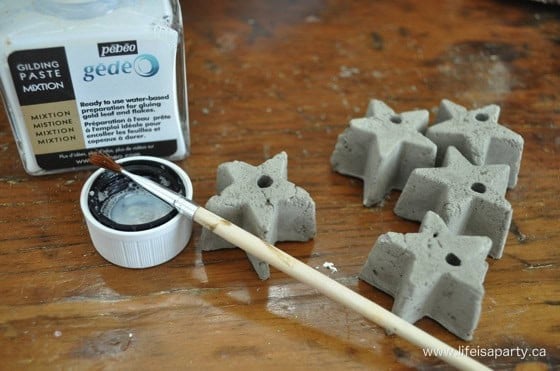
  • gold leaf adhesive
  • silver, copper, and gold leaf
  • twine

To make them, I used some concrete, cooking spray, straws, and a star ice cube tray.

how to make concrete stars

How To Make Concrete Stars

1. Just mix up the concrete, spray your mould and straws with a little cooking spray oil.

2. Next fill up the oiled mould.  

Be careful to push the cement all the way into the corners and tap your mould to try and get everything all nice and even.  

3. Lastly, just push the straws into the wet cement, and all the way down to the bottom of the mould.  Let it set over night.

how to make concrete Christmas ornaments

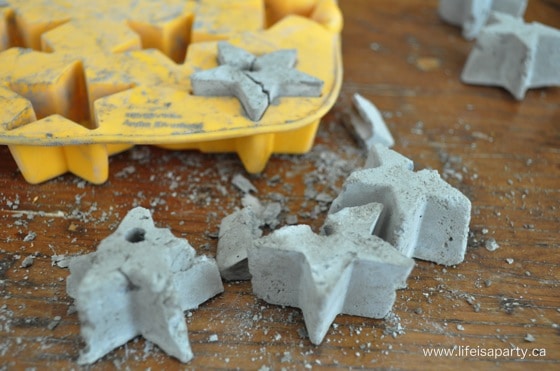
The next day remove the straws -carefully.  And then, let the stars dry the rest of the day in the moulds.  Patience, patience.

concrete stars

Trouble Shooting

I'm not going to lie to you.  I had a little trouble.  Maybe I should have done a few things a little differently.  I might not have mixed my concrete long enough, or carefully enough.  Next time, a bigger container for mixing and a little more vim and vigour might be in order.  I also maybe should have pushed the concrete into the corners more carefully, I'm thinking a wooden skewer next time to take no chances.  Lastly, I would make sure to leave a little larger border for my straw holes next time, and maybe even remove them a little sooner…but then again not too soon.  I did have a few causalities…and I have to admit my first reaction was that this was a project fail.

adding gold leaf to concrete

I persevered, and had some successes.  I used the best ones -about seven out of twelve worked.

Adding Metal Leaf

4.Next I added some gold leaf glue.  After it set, I added some different metallic leaf to them.

concrete star Christmas ornaments

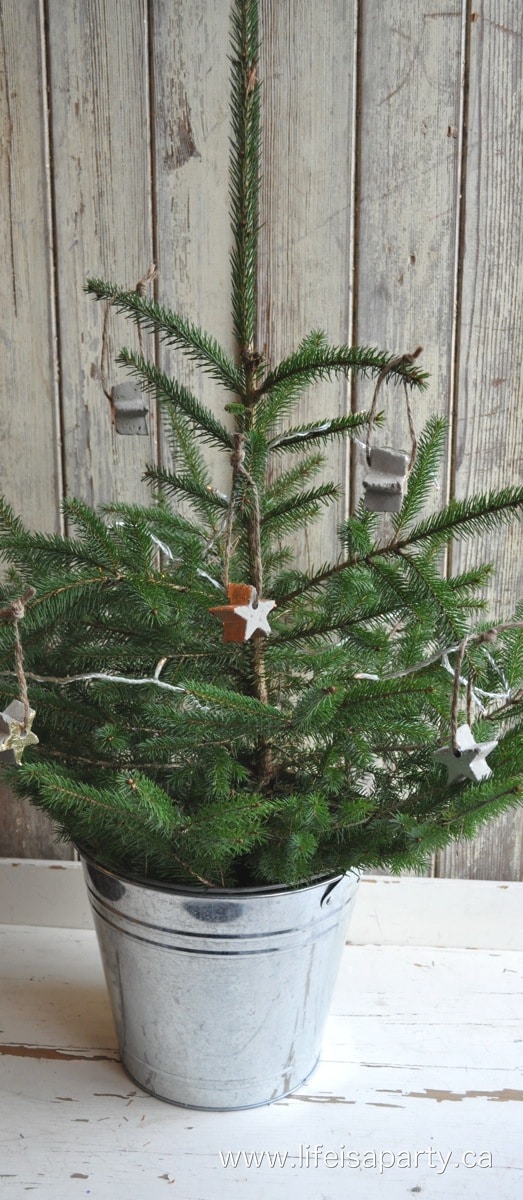
5. Then I used a little twine to make them into Christmas tree ornaments.  And then…I kind of fell in love with them.

concrete stars
cement stars
concrete stars craft

With concrete star Christmas ornaments with metallic leaf, life really is a party!

More Inspiration

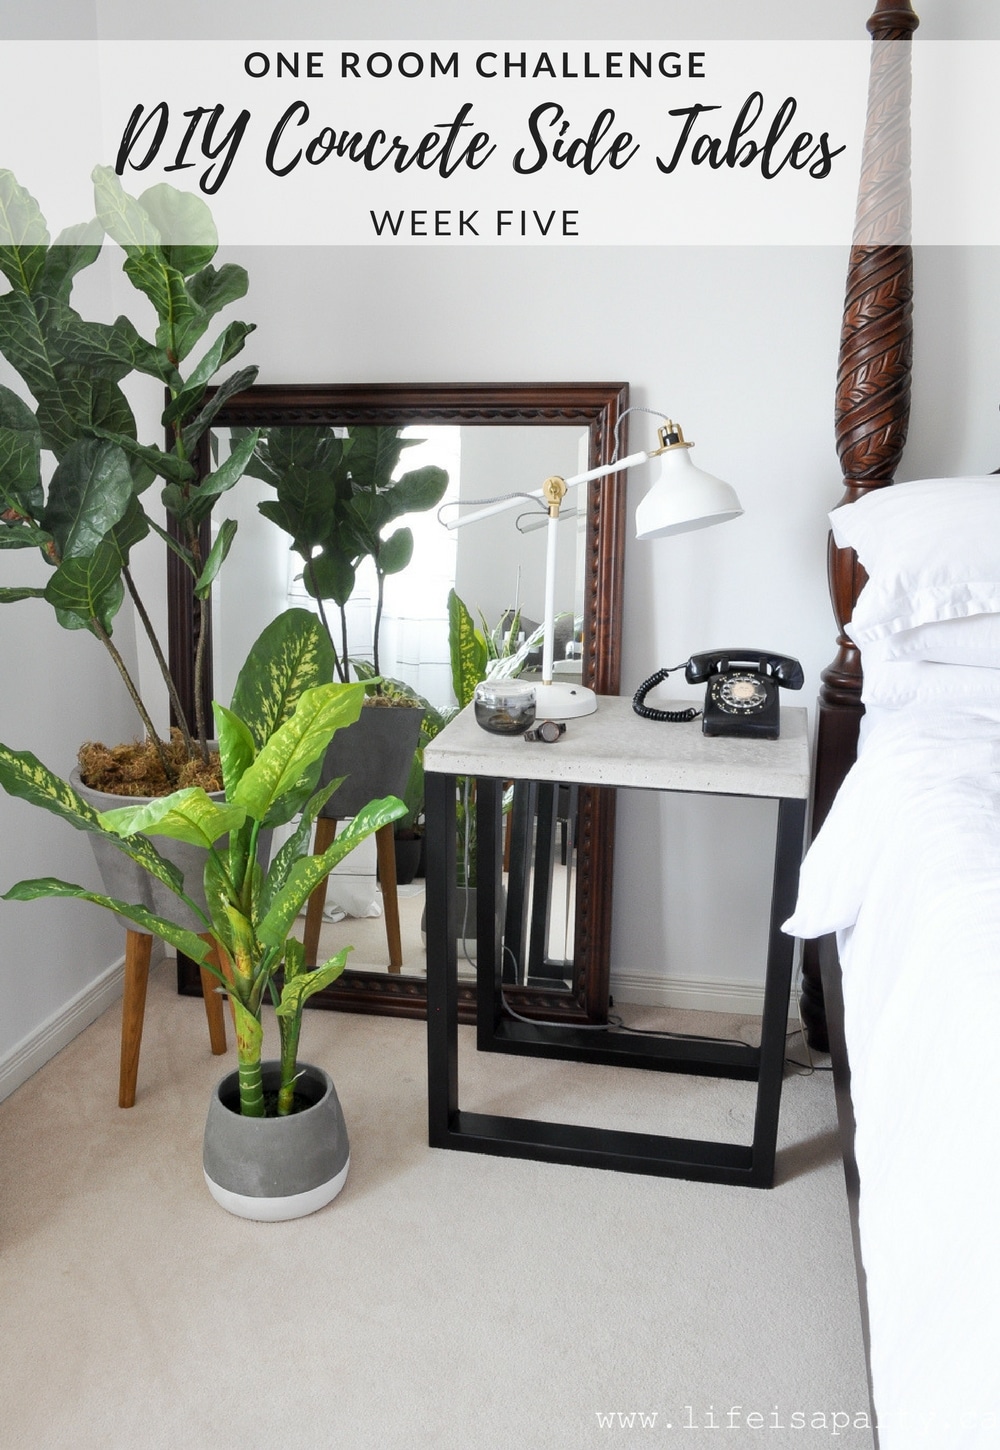
You might also like our DIY Concrete Side Tables here.

DIY Concrete Side Table: this sleek, modern concrete side table is an easy DIY project. Store bought legs and a poured concrete top create a custom look.

Also check out our DIY Faux Concrete Pumpkins here.

DIY Faux Concrete Pumpkins: easy DIY to transform inexpensive dollar store pumpkins with a concrete faux paint finish.

You might also enjoy Cement Garden Markers here.

DIY Garden Markers: these cement garden markers are long wearing and beautiful, perfect for marking any plants or herbs in your garden.

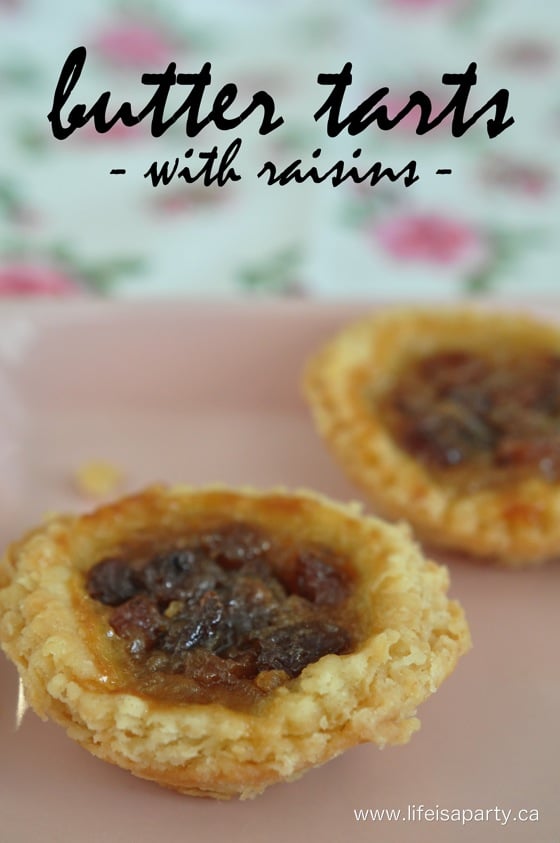
Classic Butter Tarts with Raisins Recipe

Nov 5, 2014 · Leave a Comment

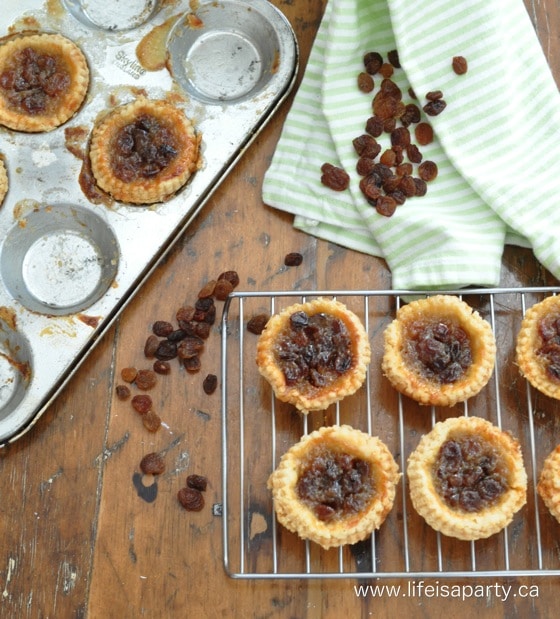
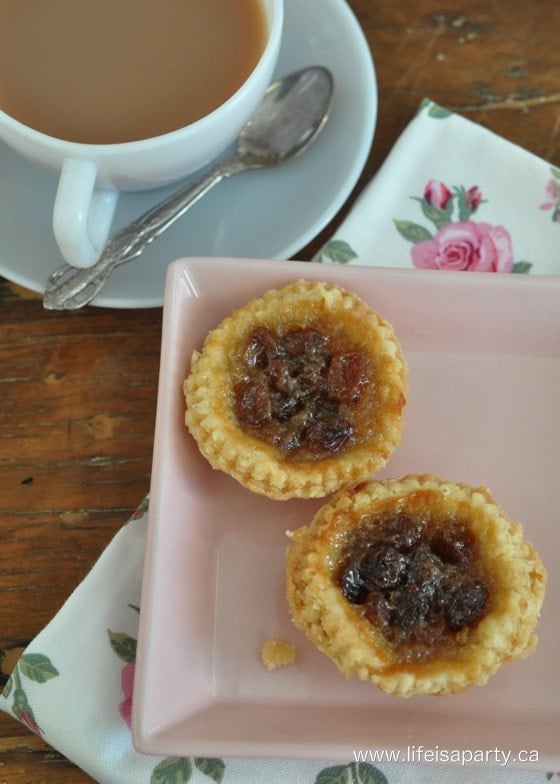
Butter tarts with raisins recipe.

Classic Butter Tarts with Raisins Recipe: My grandma's famous recipe, a Canadian classic.

Butter tarts with raisins recipe.
[feast_advanced_jump_to]

I recently learned that Butter Tarts are a Canadian thing.  All I can say to my American readers is you've been missing out.  I appreciate some of your specialties…the Olive Garden, Target, Hobby Lobby, Disney World.  But, right up there with some of the great Canadian contributions to the world, like maple syrup and back bacon, are butter tarts!

What Are Butter Tarts?

Butter tarts are a little bit hard to describe if you've never had the pleasure of having one.  The filling is made from butter, syrup, egg, and sugar.  It's typically a bit runny.  Butter tart filling is similar but not quite the same as a pecan pie filling, but with less or no nuts, and no cornstarch or flour used to thicken it.  Butter tarts truly a Canadian fare.  The earliest published recipe dates to 1900.  It was published from Barrie, Ont. in a Women's Auxiliary cookbook.  It may have been an adaptation of sugar pie, influenced by French immigrants in Quebec, American pecan pie from the southern states, treacle pie from the UK, or shoofly pie made with molasses from the Pennsylvania Dutch.  Perhaps early settlers were influenced by the ingredients available to them and developed the recipe for the gooey filling with maple syrup.   Today it's often made with dark corn syrup. Butter tarts have become a Canadian tradition, and one of my favorite quintessential Canadian dessert recipes.

 Canadian butter tarts are very sweet, but the flaky tart pastry provides some contrast and relief to the runny sugary filling.  They come as plain tarts, with raisins, or with nuts.  Which kind is best is a great debate.

Butter Tarts with Raisins Recipe

This is the butter tart recipe that my mom makes and my grandma used to make.  At every family holiday or special occasion her famous butter tarts are always on the menu! When I was a little girl my mom often baked pies, secretly I always hoped she would use the leftover pastry dough and make us a dozen or two of these little beauties.  Which she often did.

how to make Butter Tarts with Raisins

I'd have to say they are one of my absolute favourites, and a real Canadian treat.

Pie Pastry 

I had tried to make them a few times in the past, but I've usually been a little disappointed in them because of the pie crusts.  The filling is a winner, winner, but the pastry shells, are a bit tricky to get tender and flaky.  My mom is AMAZING at making flaky crust…me, not so much.  She has tried to encourage me, eating my attempts and praising me.  Last time I made my own pastry and it didn't turn out great, she promised I was just not using her pie crust recipe.  So I went back to her tested and true favourite pie pastry recipe, it's the Crisco No-Fail Pie Crust.  And it didn't fail me.  You can use this pastry recipe for the tarts shells, use frozen ones, or use your own favourite pastry recipe

rolling out pastry for tarts

Now that I've secured the perfect pastry recipe; on to the filling....  My mom learned to make them with her grandmother, she even still uses my great grandma's old tart tins.  And the tart tins that I use, were actually my grandmas, so it's a little sentimental for me.  

Tart Pans or Muffin Pans

We always make these in tart pans.  Lots of people like to use muffin tin pans for butter tarts.  You do get more runny filling with a muffin cups, but you also get more pastry, because the sides typically have to kind of fold over.  Tart pans are more shallow, but along with less filling they also use less dough as the crust.  In my opinion making these in a tart pan makes a much for delicate, tender butter tart.  And again in my opinion they're superior.  I was raised with them made this way, so that might account for some of my preference, but I do think they're just better proportions.  Some people even make these as tart squares, similar to pecan pie bard, but again it's a question of proportions of filling to crust, that make the tarts the best option.

Raisins or No Raisins

In our family, we always make butter tarts with raisins.  You can make them without raisins if you prefer.  Others make them plain or sometimes use nuts.  I like them best with raisins -but I have to say -I've never really met a butter tart I didn't like.  I think the raisins add a little bit of texture and tiny bit of tartness to this very sweet little tart.  Raisins or no raisins, nuts or plain is hotly debated by many Canadians.

filling pastry with butter tart mixture
fresh Butter Tarts with Raisins

Take care when you're filling your tart shells with the butter tart filling not to overfill the tart shells.  If you do they may overflow and then cause the tart to stick the tart tin, and break when trying to remove them.

Store these butter tarts in an airtight container or covered with plastic wrap at room temperature.

Butter Tarts

The tart filling for these butter tarts is not typically that runny.  Again it's a matter of opinion how runny the filling should be.  I prefer these more firm tarts.

This classic Canadian dessert is such a favorite.  It is so nostalgic for me and always reminds me of my childhood and happy memories of family when I eat them.  I hope you love this new recipe as much as I do.

Recipe

Butter tarts with raisins recipe.

Butter Tarts with Raisins

Flaky pastry with a runny and sweet filling filled with raisins.
No ratings yet
Print Pin Rate
Course: Dessert
Cuisine: Canadian
Prep Time: 20 minutes minutes
Cook Time: 25 minutes minutes
Total Time: 45 minutes minutes
Servings: 24
Calories: 95kcal
Author: Dannyelle Nicolle-Ramjist

Ingredients

  • 1 batch of double crust pie pastry
  • 1 egg
  • ½ cup brown sugar
  • 6 tablespoon corn syrup
  • 4 tablespoon soft butter
  • ½ teaspoon vanilla extract
  • pinch of salt
  • 1 cup raisins
  • 3 tablespoon milk

Instructions

  • To make the filling, combine the egg, brown sugar, corn syrup, butter, vanilla, salt, raisins, and milk in a large bowl, and stir to combine well.
  • Prepare 2 dozen tart shells from pie dough, and fill with about 1 tablespoon of filling, depending on their size.
  • Bake at 350 degrees for about 20-25 minutes, until crust is golden brown and filling is bubbling.
  • Remove from the pan while they are still hot as the filling becomes sticky as they cool.

Nutrition

Serving: 1g | Calories: 95kcal | Carbohydrates: 16g | Protein: 1g | Fat: 3g | Saturated Fat: 2g | Polyunsaturated Fat: 1g | Cholesterol: 15mg | Sodium: 52mg | Sugar: 13g
Tried this Recipe? Tag me Today!Mention @LifeisaParty or tag #lifeisaparty!

With homemade butter tarts, life really is a party.

More Recipe Inspiration

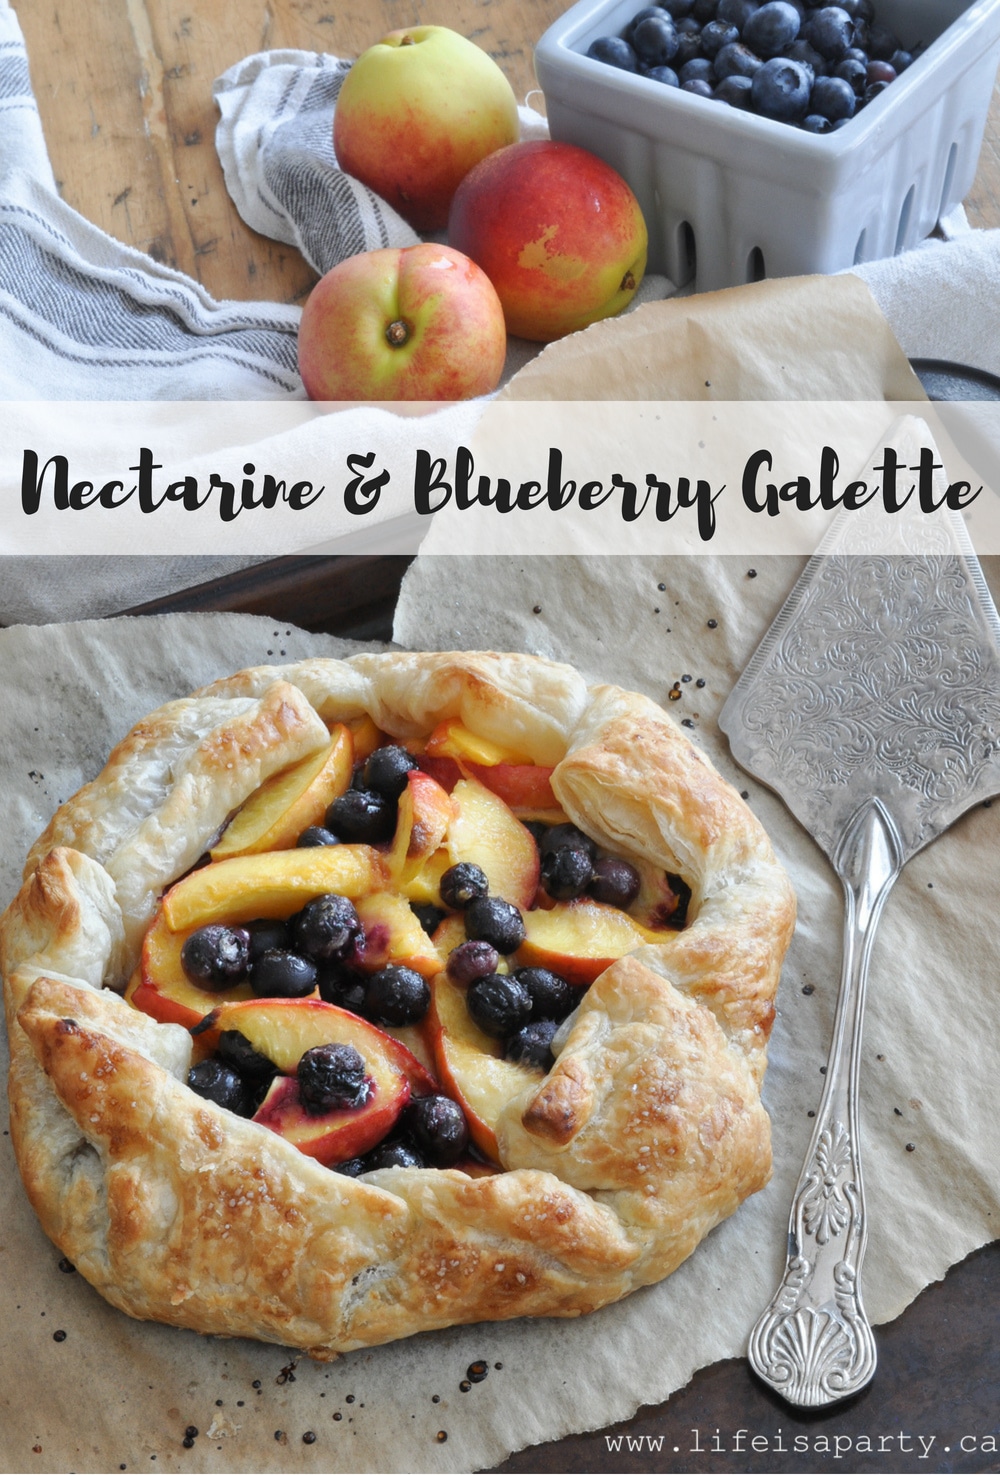
You might also enjoy our Nectarine and Blueberry Galette recipe here.

Nectarine and Blueberry Galette: literally make in minutes with frozen puff pastry, so easy and the perfect way to enjoy fresh nectarines and blueberries.

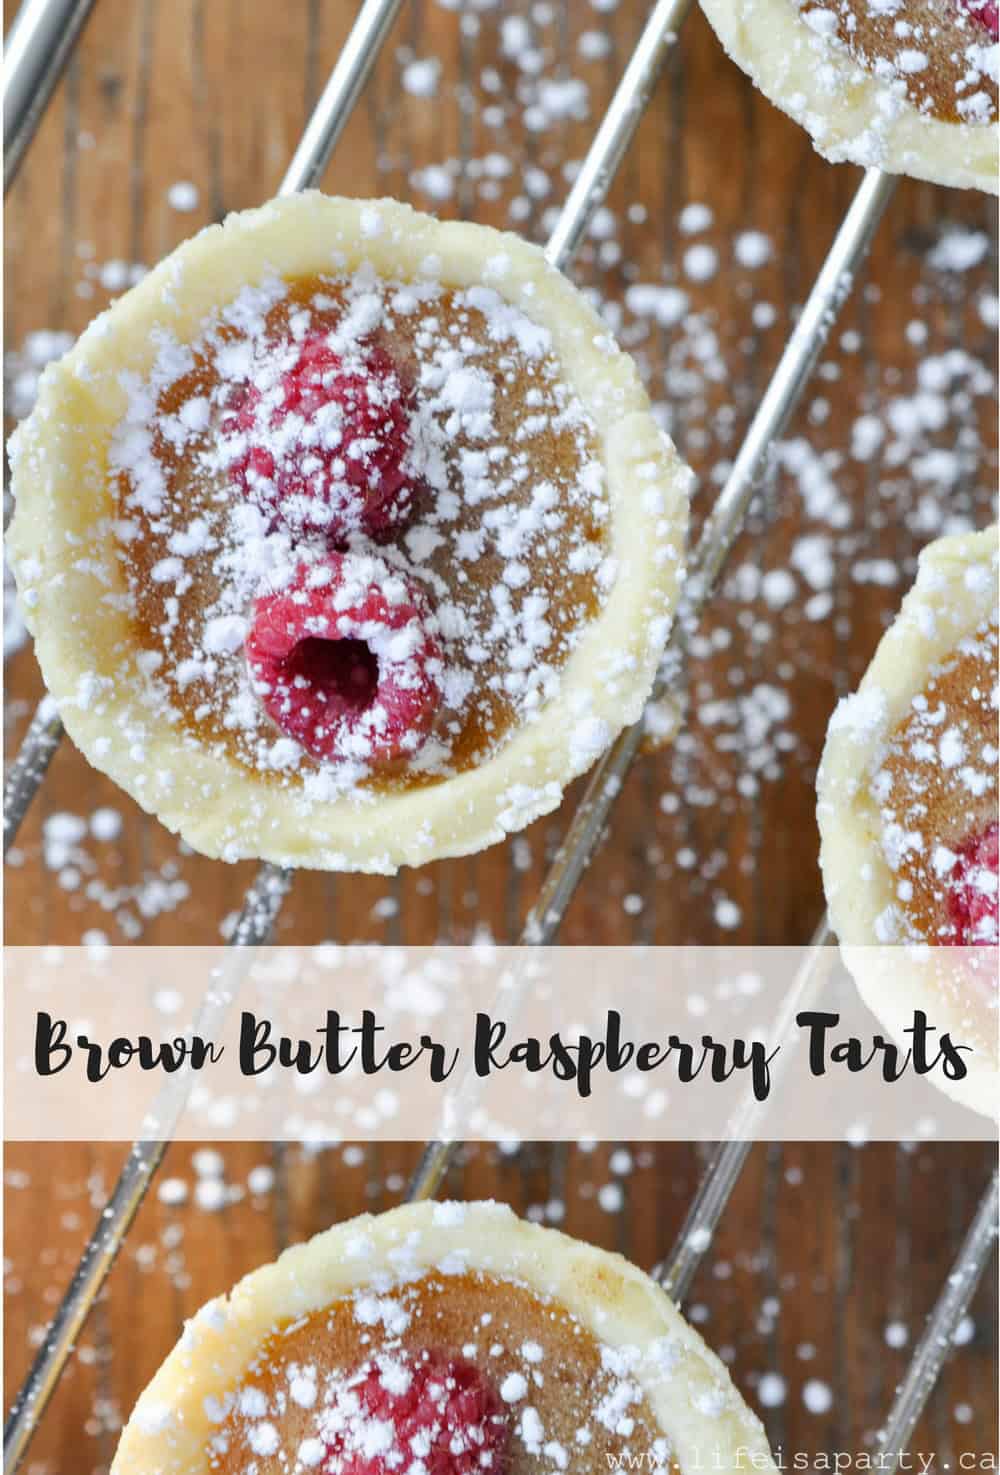
Also check out our Brown Butter Raspberry Tarts recipe here.

Brown Butter Raspberry Tarts: the perfect combination of gooey sweet filling, and tart fresh raspberries, with a really easy pastry.  Great for a beginner.

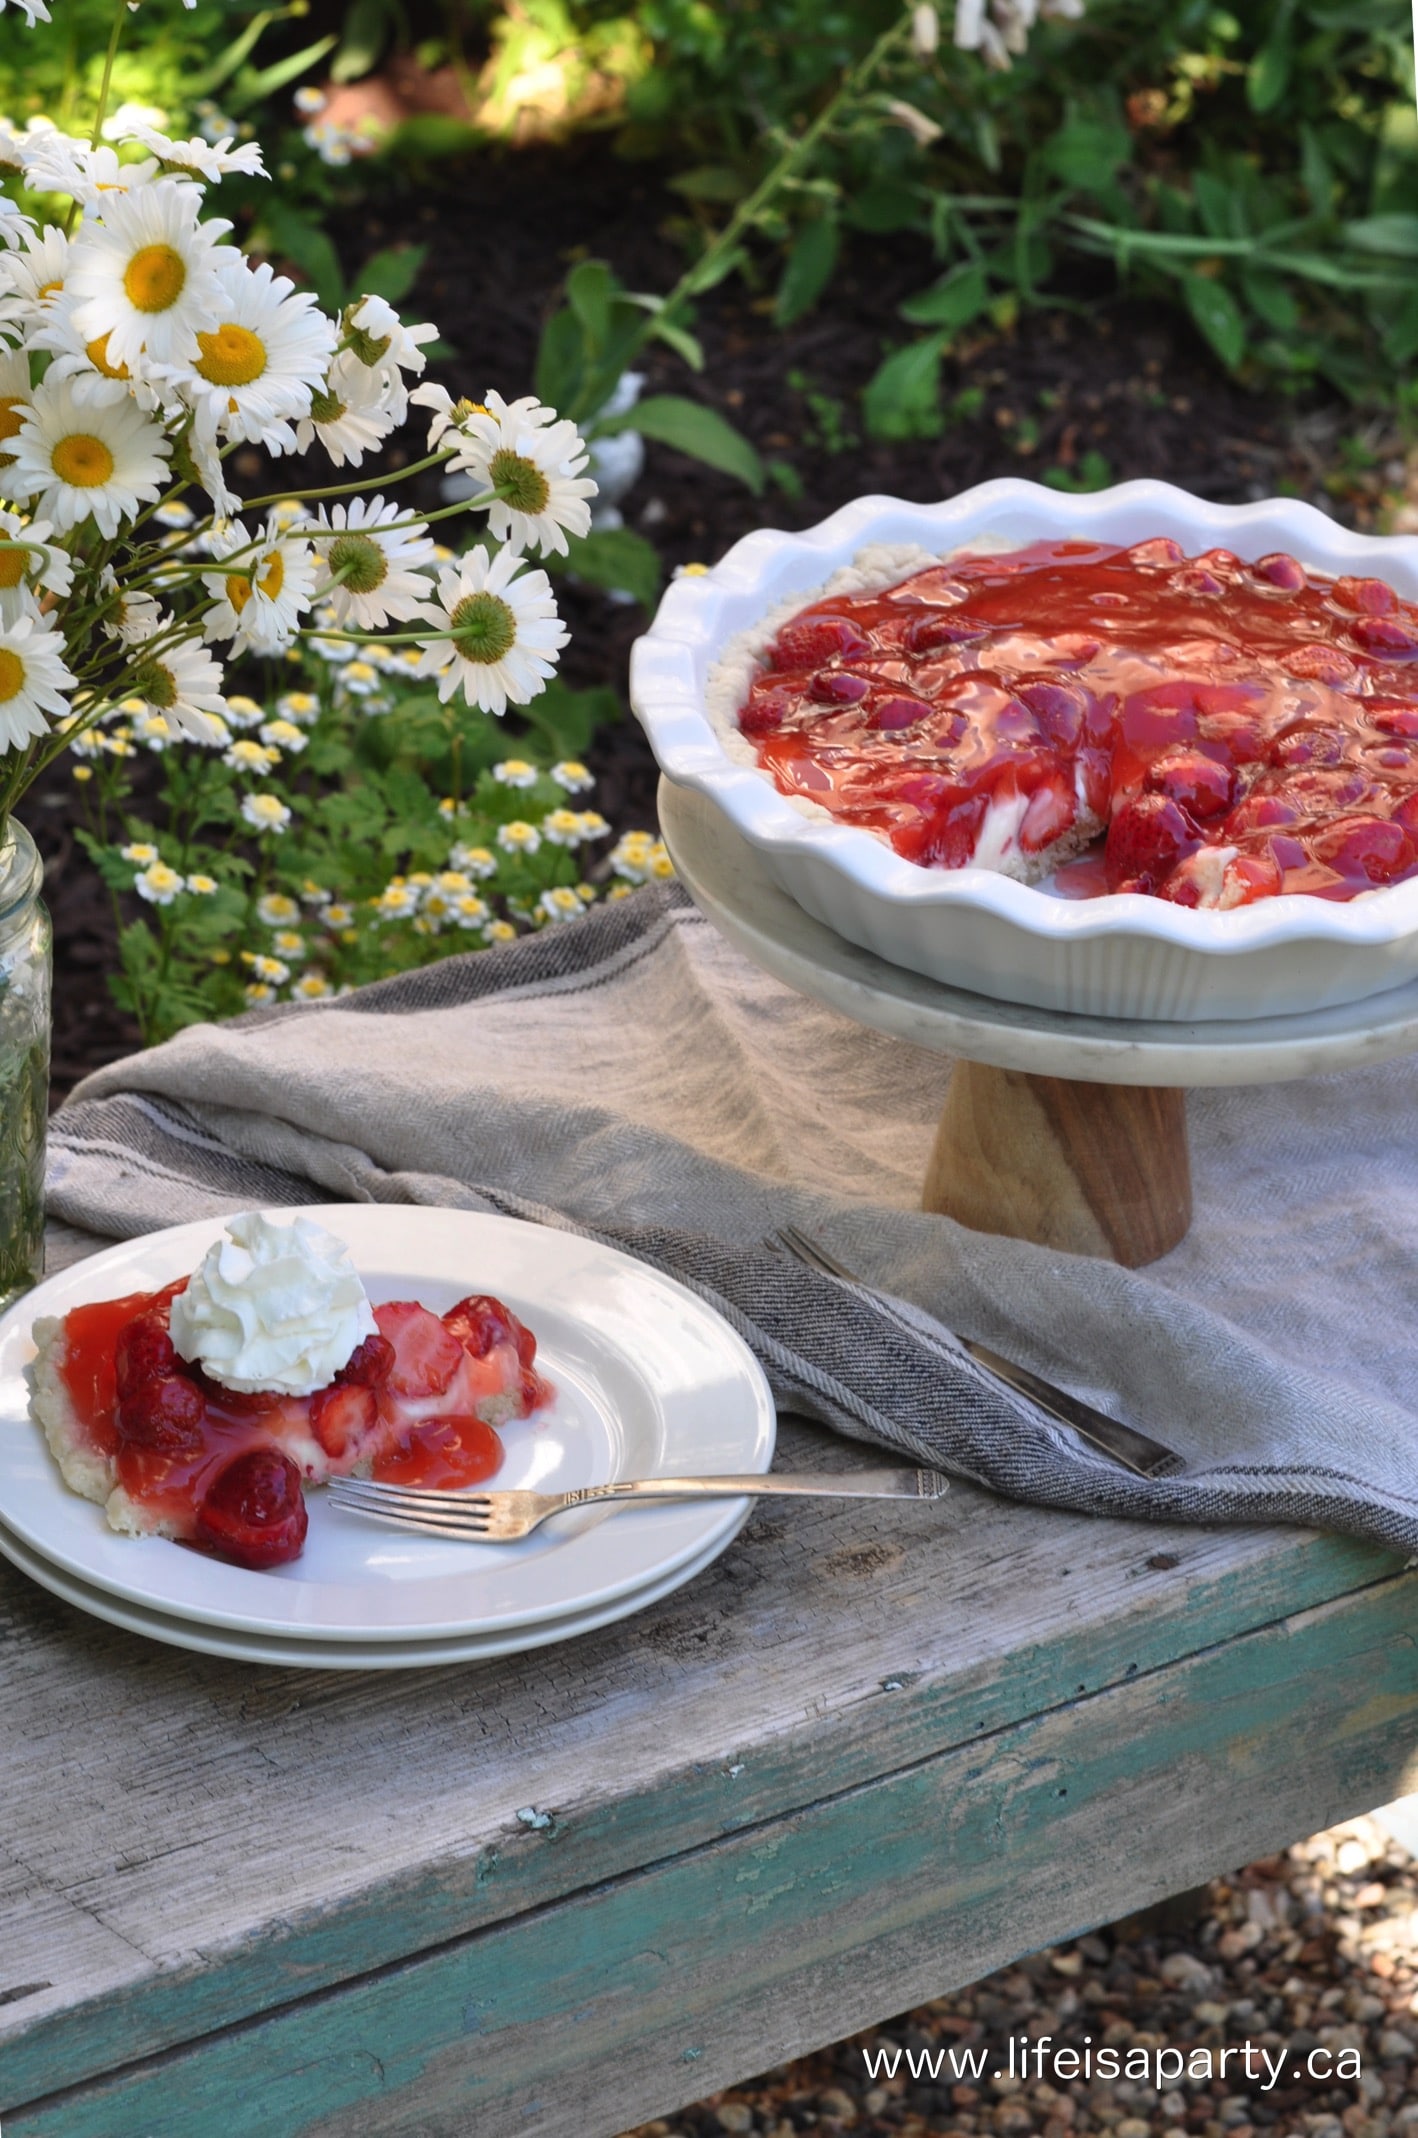
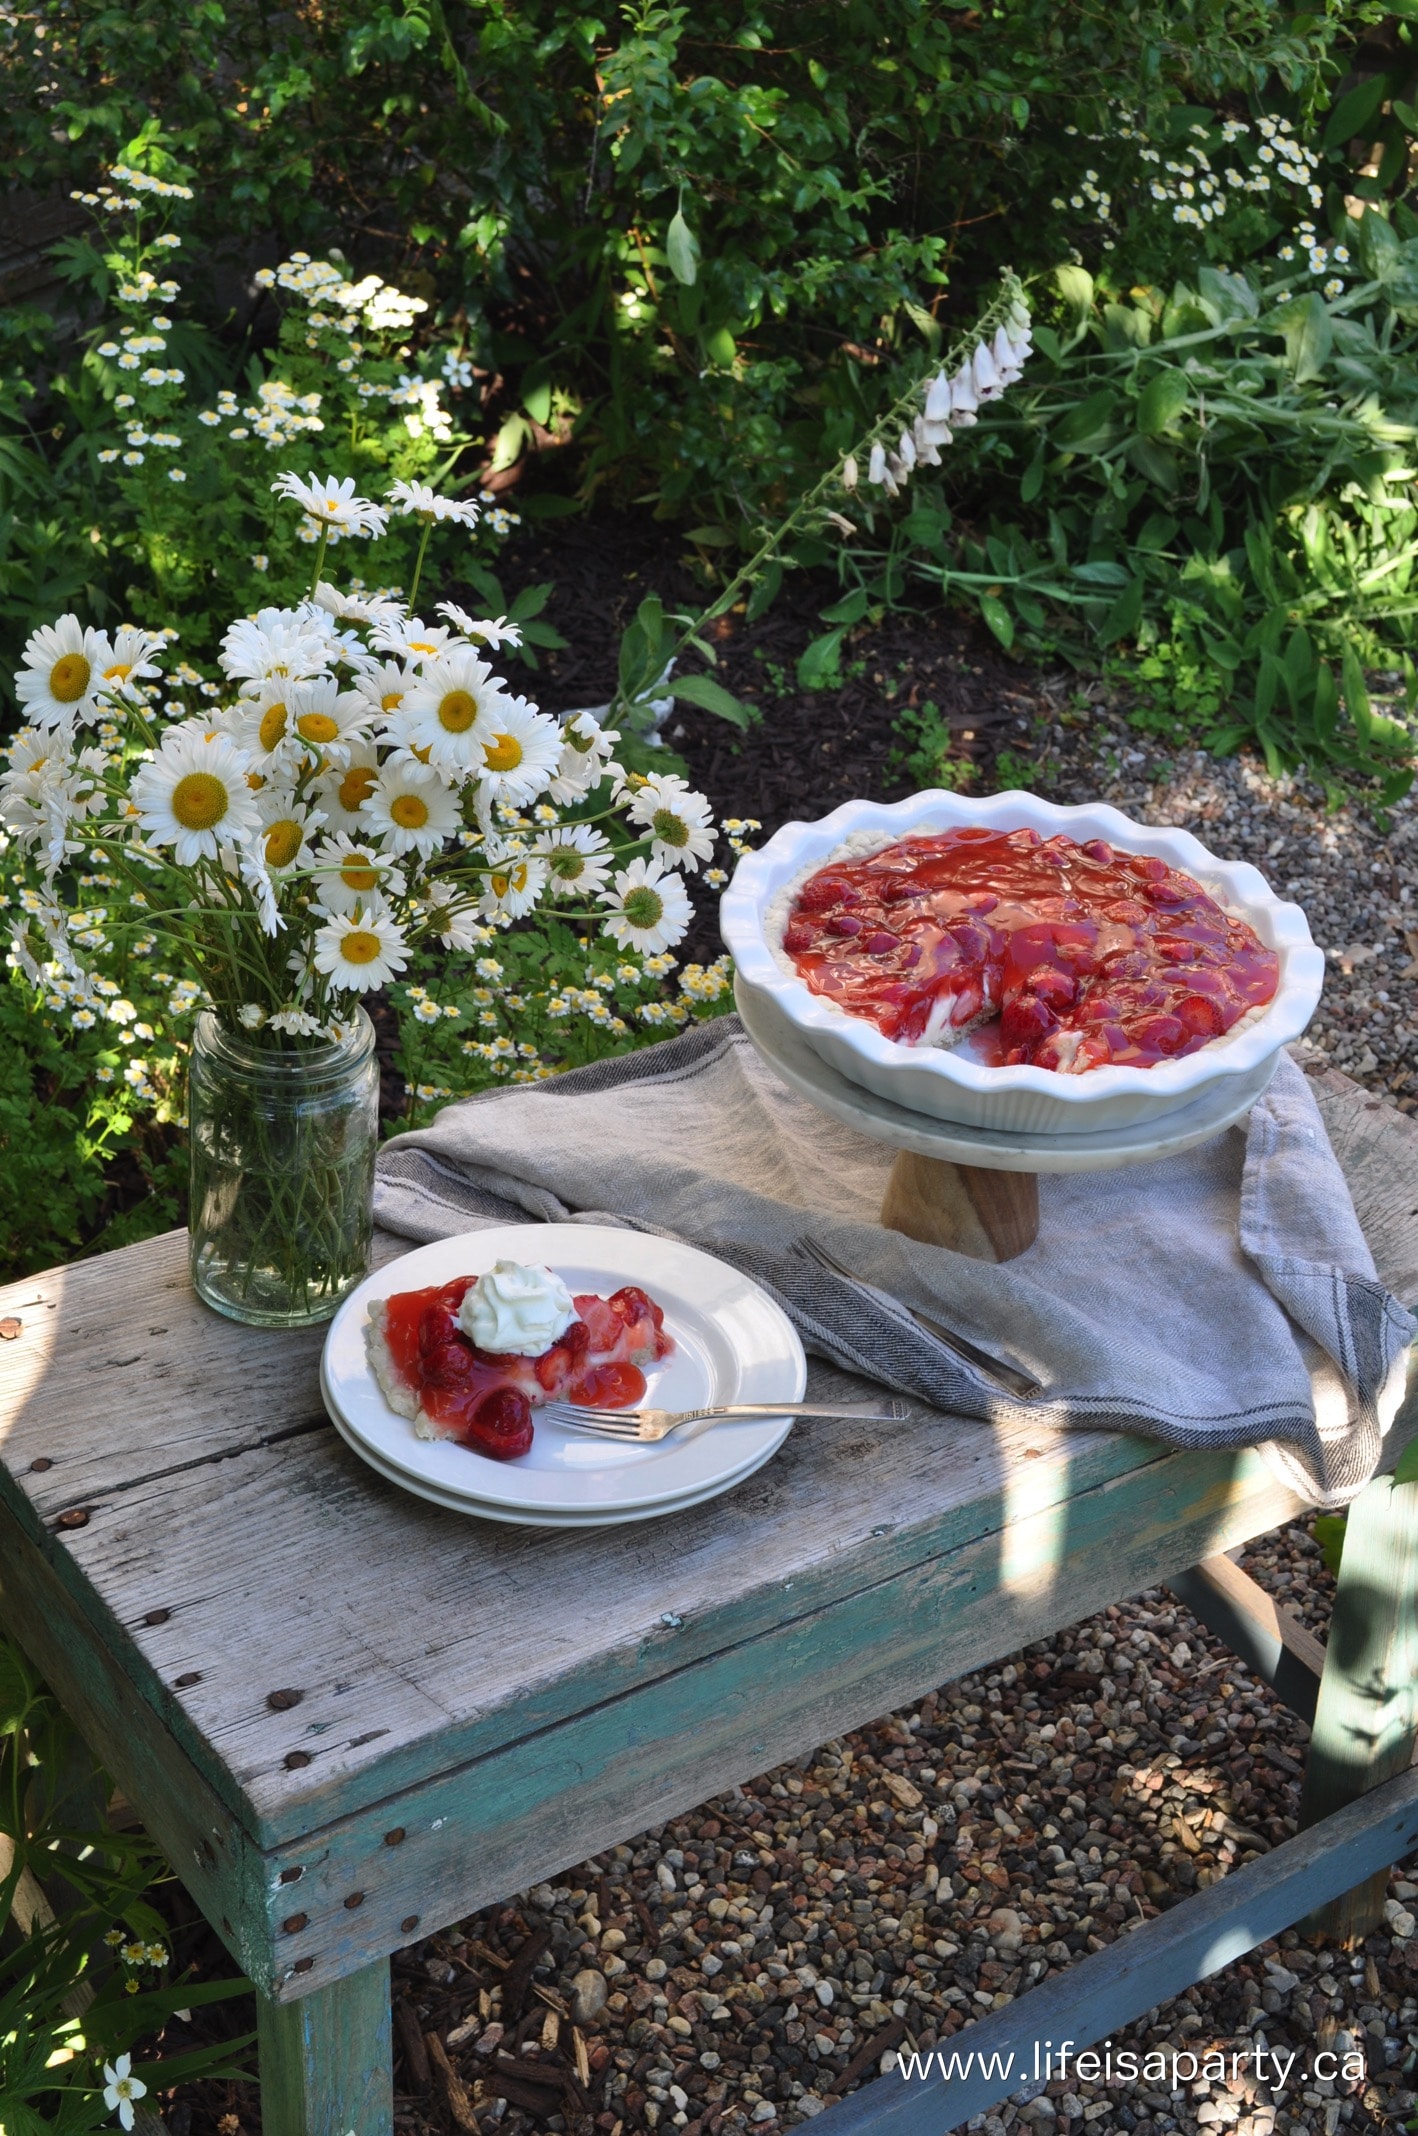
You might also enjoy our Strawberry Cheesecake Pie recipe here.

Rustic Thanksgiving Table

Oct 23, 2014 · 6 Comments

Rustic fall outdoor thanksgiving table ideas.

Rustic Thanksgiving Table: set with diy wood chargers, candles, bittersweet, pumpkins, vintage pieces, and a pinecone garland.

Rustic fall outdoor thanksgiving table ideas.
[feast_advanced_jump_to]

This beautiful rustic Thanksgiving table is one I put together with my sister.  We visited their cottage for Thanksgiving and were inspired by all the beautiful scenery to put together this pretty Thanksgiving tablescape.

rustic thanksgiving table

My sister and her family spend the summers in beautiful cottage country, and having Thanksgiving there this year was so beautiful with all the changing leaves, that we decided to set the table outside.

outdoor thanksgiving tablescape

We began our table with some wood slice chargers.  

DIY Wood Chargers

My sweet brother-in-law went out into the woods for us, and cut some slices, than sanded them smooth.  They came out beautifully.  I love them, and they were the perfect foundation for our rustic Thanksgiving table -thanks Shaun.

wood chargers

My sister found some old antique silverware, and we left it tarnished for the perfect rustic look -I kind of wanted to sneak it into my suitcase when I left.

rustic thanksgiving tablescape

DIY Place Cards

For an easy, fun place card we used a white paint pen to write everyone's names on fall leaves.

DIY thanksgiving place cards

My sister had some gold napkins, that worked great with the tarnished silverware.

vintage amber glass goblets

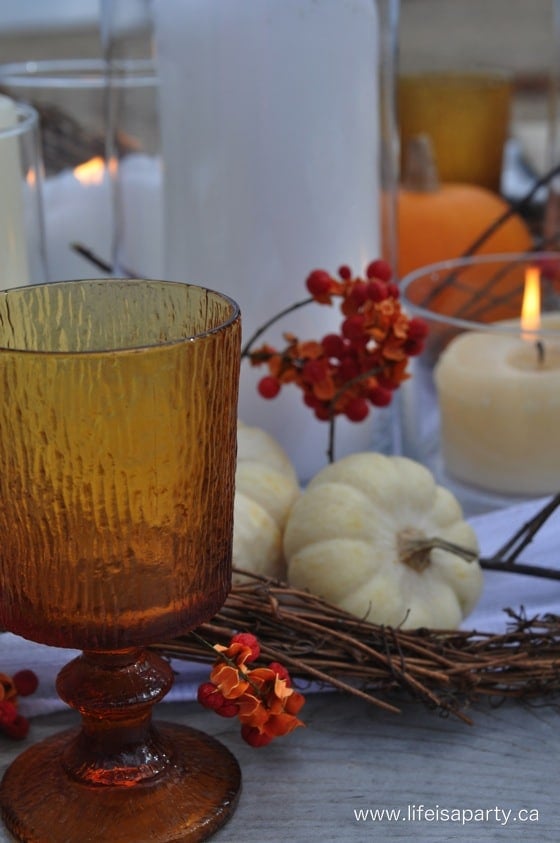
We also used some pretty vintage amber goblets, love how they looked with the bittersweet.

rustic thanksgiving tablescape centrepiece

Rustic Thanksgiving Table Centrepiece

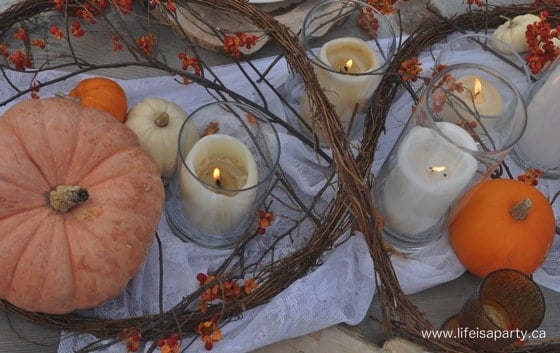
For the centrepiece, we layered pumpkins, and candles on a piece of vintage lace.  The candles were in clear glass vases, which was perfect for outside, so they didn't blow out in the breeze.

how to set a rustic thanksgiving table

My sister wound in some grapevine, and bittersweet.  It was simple and so pretty.

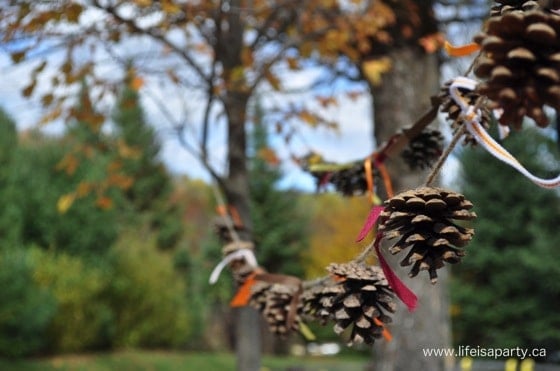
DIY pinecone garland

Pinecone Garland

Over the table, and between two trees, we strung up a pretty pine cone garland. To make it I hot clued some pinecones to some jute twine, and then tied some fall coloured ribbons in-between each one.  It was really simple to make and a nice detail for over the table.

DIY fall garland

With a beautiful rustic, outdoor Thanksgiving table like this, life really is a party!

outdoor rustic thanksgiving tablescape

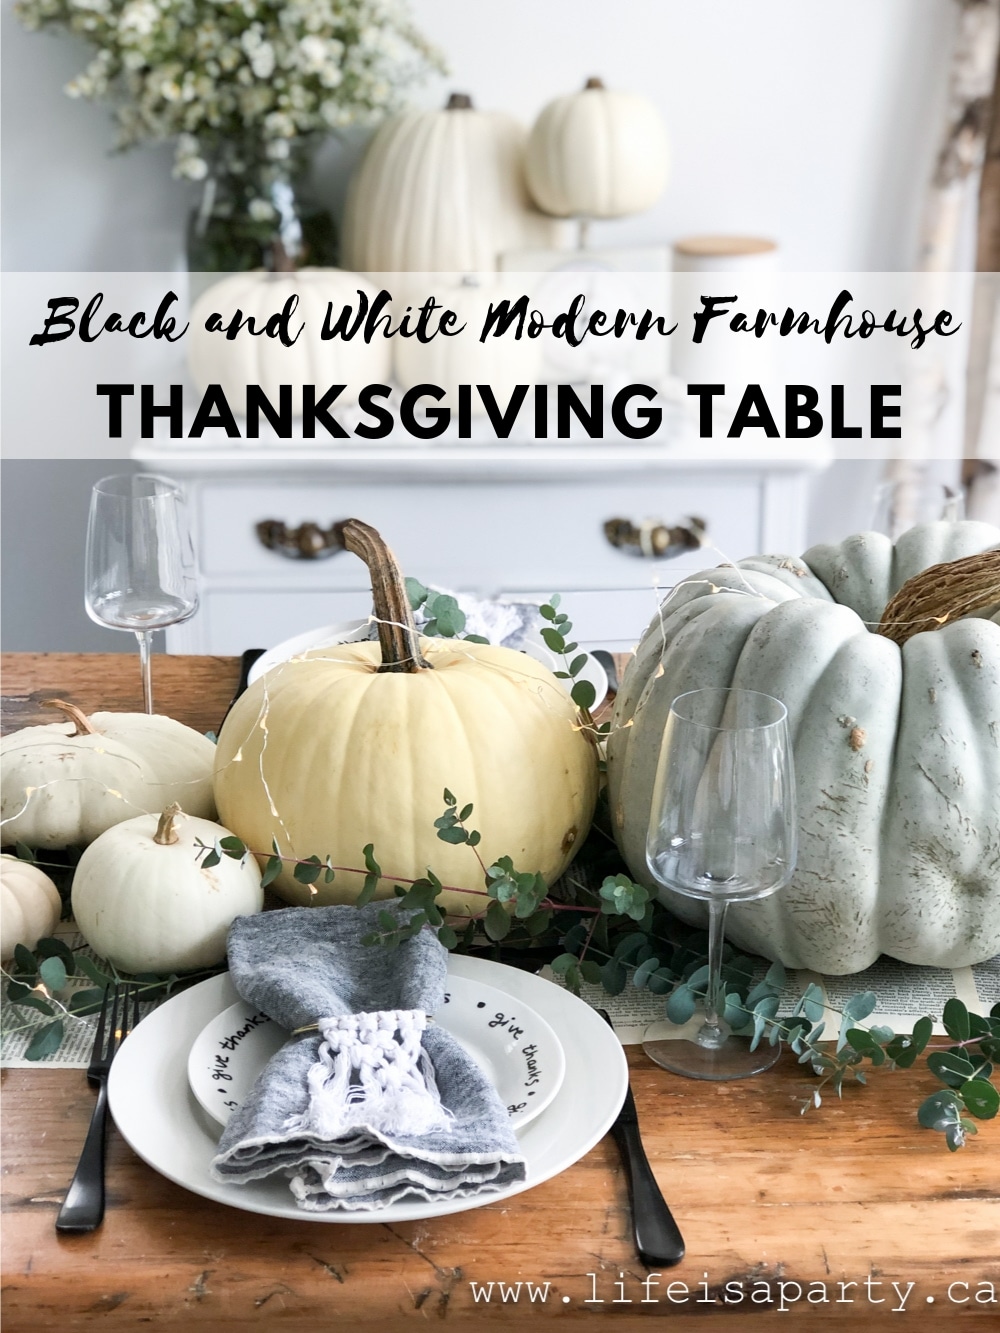
You might also like our Black and White Farmhouse Thanksgiving Table here.

Black and White Modern Farmhouse Thanksgiving Table: White pumpkins, black cutlery, and DIY macrame napkins rings make the perfect Thanksgiving table.

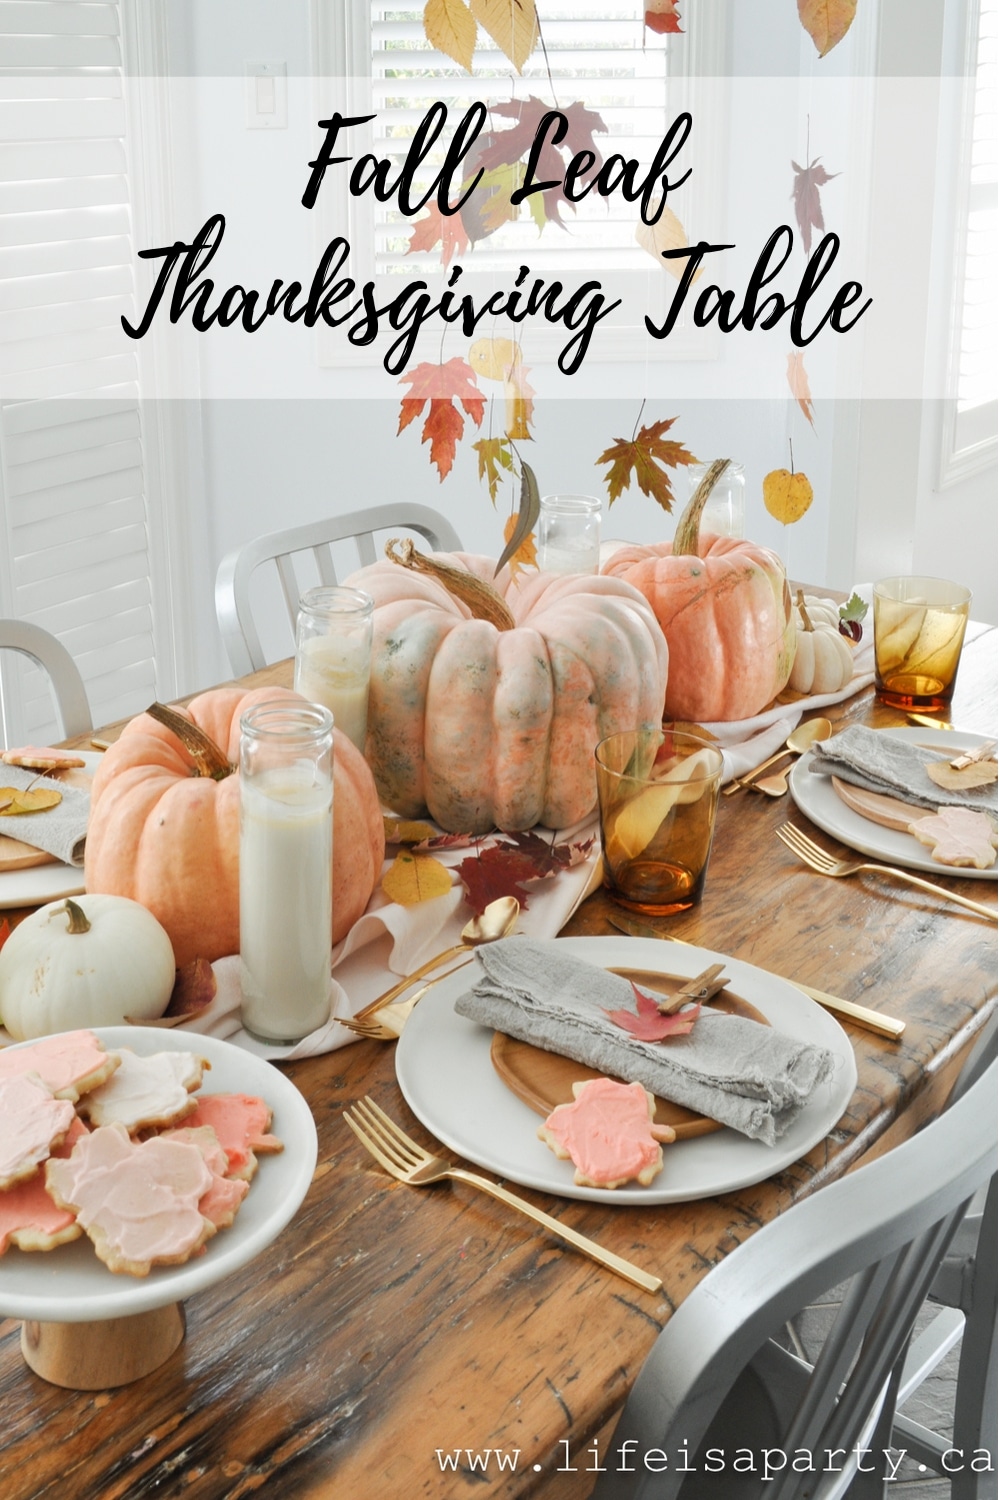
Also check out Fall Leaf Thanksgiving Table here.

Fall Leaf Thanksgiving Table: Hanging pressed fall leaves, and pink heirloom pumpkins, ombre leaf cookies, and cloths pin place cards make a beautiful table.

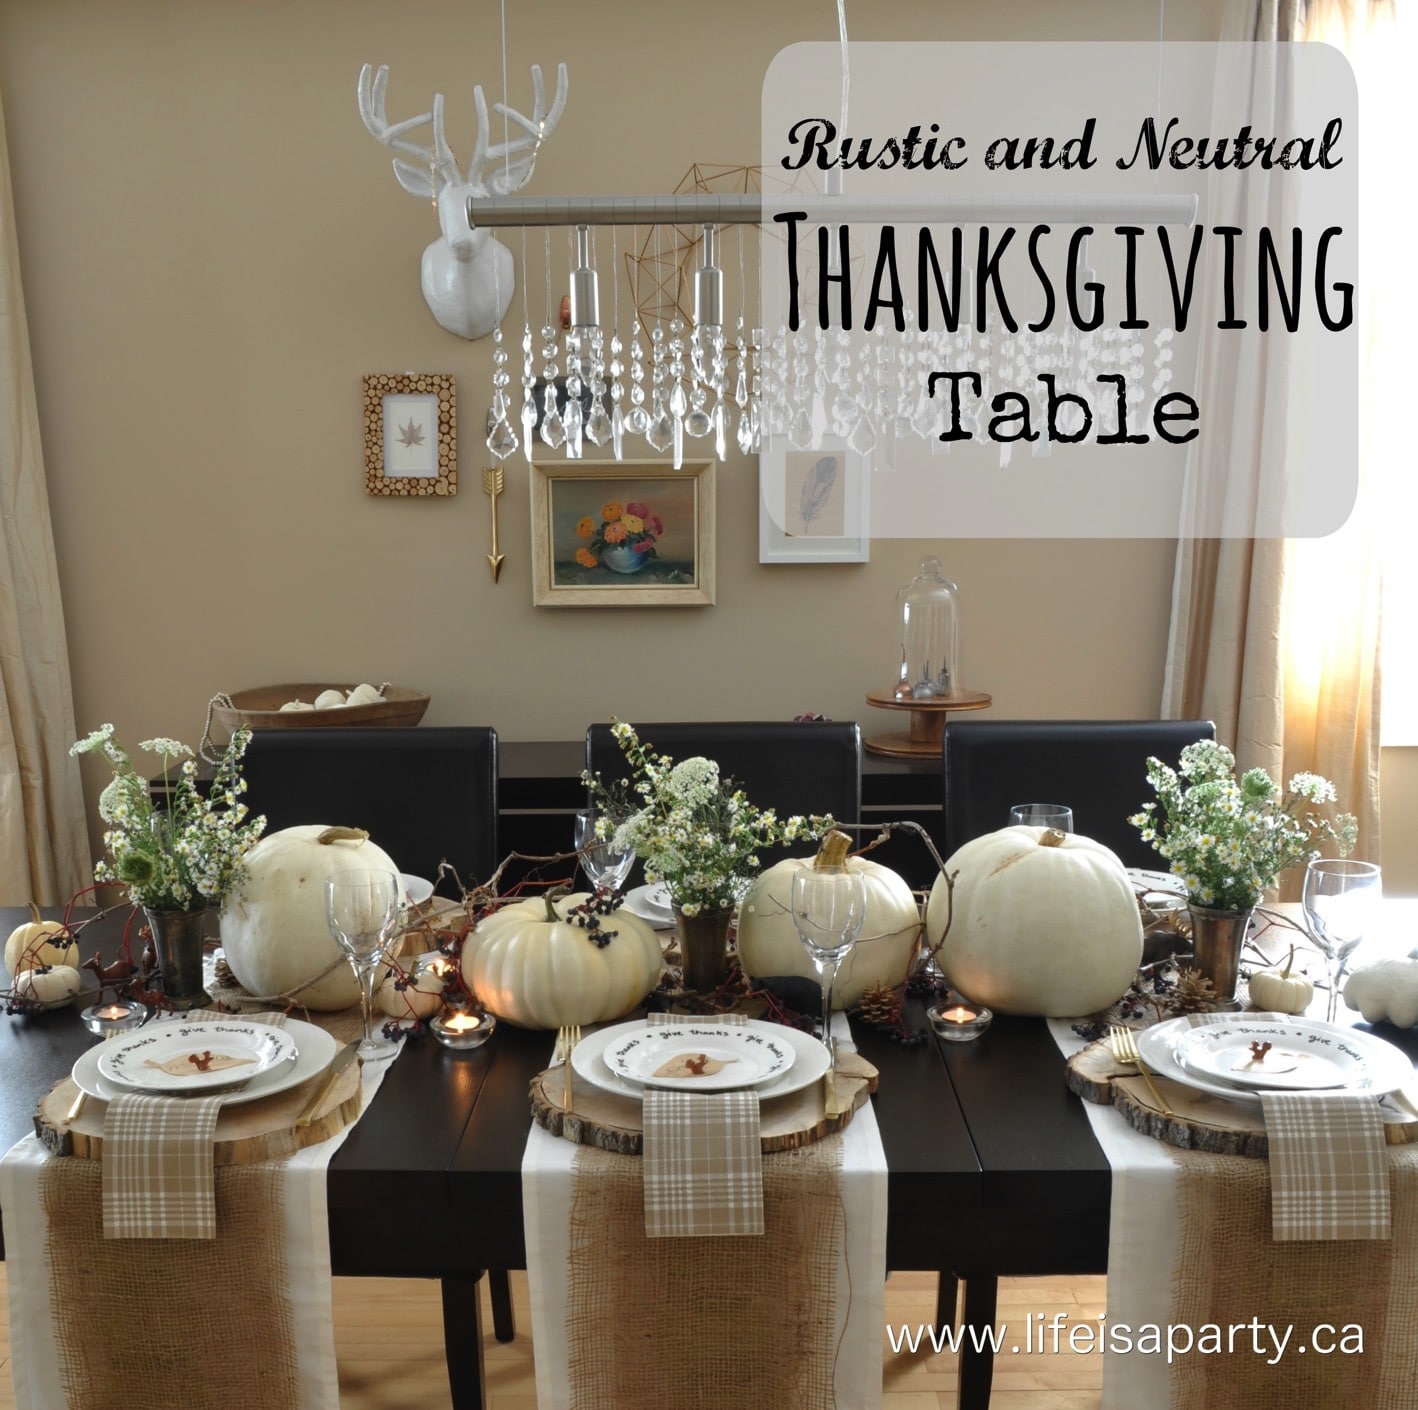
You might also enjoy our Rustic and Neutral Thanksgiving Table here.


Sleeping Beauty Princess Party

Oct 21, 2014 · 7 Comments

Sleeping beauty themed party with pink and blue popcorn bar, photo both, Princess breakfast and more.

Sleeping Beauty Party: an almost sleepover with matching pjs, popcorn buffet, take home breakfast, and free Sleeping Beauty printables.

Sleeping beauty themed party with pink and blue popcorn bar, photo both, Princess breakfast and more.
[feast_advanced_jump_to]

On the weekend we had so much fun hosting an "almost" slumber party. The party was a Sleeping Beauty party and was so much fun, and I'm so excited to share all of our Sleeping Beauty party ideas with you. I say "almost" slumber party, since we had all the fun of a Princess slumber party - with new pj's, watching Sleeping Beauty, an amazing popcorn snack bar, and a photo booth, but we sent our little friends home to sleep. We also sent them along with a Princess breakfast all packed up "to-go" for them to enjoy in the morning. It was so much fun. This would be a great as a Sleeping Beauty birthday party too.

Princess Party Planning Checklist

If you're planning your own party use can use our Princess Party Planning Checklist to help you get organized for the special event, with reminders for things like sending the princess invitations, and planning the menu. Don't forget birthday cake if it's for your daughter's birthday

-click here for your own free printable Party checklist.

free printable Princess Party Planning Checklist

Matching Princess Pajamas

We picked our date - a Friday night, and invited a few special friends. Since it was an almost slumber party we started out with all matching Princess little girl pajamas for all the girls. These were so much fun and a great take-home party favors for the party guests. I love giving something useful.

Disney princess party photo booth

Princess Photo Booth

I picked up a few Sleeping Beauty party supplies, including this Princess photo backdrop that came with great props, such a fun and simple way to do a photo booth at the party. As soon as the girls arrived they changed into their matching pj's. A princess dress is always fun, but this was more of a pj kind of party. ;). The girls had such a great time posing. This would be really fun to do with a birthday girl too, and take a picture of the guest of honor with everyone for a keepsake of the special day.

Sleeping Beauty Theatre

Then we invited them into our "theatre". We transformed our living room, by removing most of the furniture. This set the scene for a whole lot of fun to be had.

Sleeping beauty party

Sleeping Beauty Party Decorations

Bunting

I strung up curtains to hide the kitchen, and decked out the couch with lots of gold and fur - the perfect Princess decor.

The wall behind the TV was decorated with fun bunting, in our pink and gold color scheme. I made it out of scrapbook paper and created a few Princess bunting flags from paper plates. This is such a fun way to add some more princess details

.diy princess party bunting

DIY Sleeping beauty party decorations

Now Playing

And the fireplace got the Sleeping Beauty treatment too. I made a curtain of pink tulle, and added a chalkboard with flashing Christmas lights. I found the pictures of the fairy godmothers on-line, and added them for a little fairy magic. 

A little rose bush seemed like a fun detail, since Aurora was re-named Briar Rose by the fairies. I also made a simple "Once Upon A Dream" banner, and added a little gold glitter for fun.

Sleeping beauty party decor

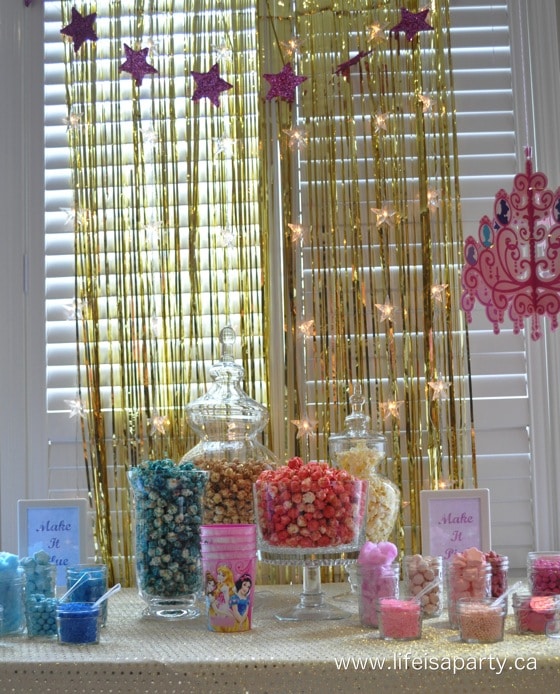
Sleeping Beauty "Make It Pink, Make It Blue" Popcorn Buffet

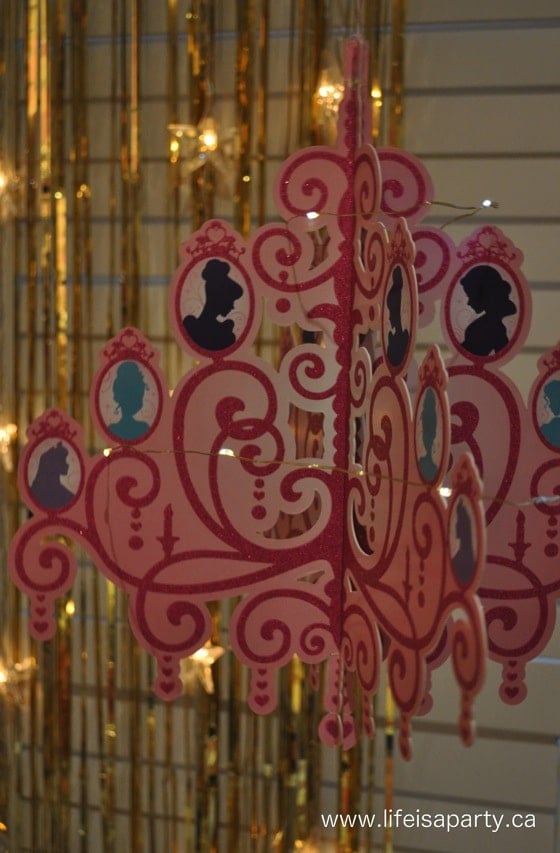
The star attraction was the Movie Popcorn Buffet, which was really a dessert table, given all the sweet treats included. Over the buffet I hung a pretty Princess chandelier, and for added sparkle I wound a string of tiny lights around it -it was so pretty.

Princess party decor

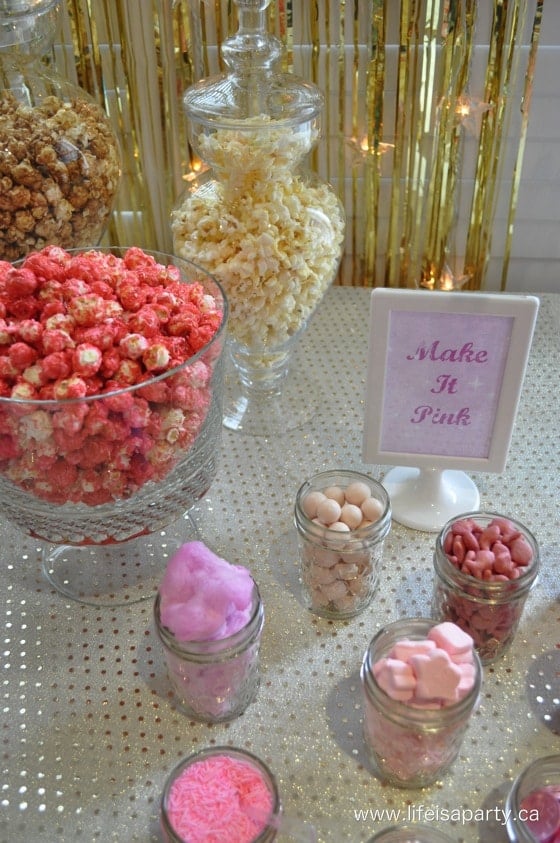
My favorite scene from the movie has to be the fairies arguing over whether Princess Aurora should have a pink dress or blue dress, so I used this idea for the popcorn buffet. One side was "Make it Blue" and the other was "Make it Pink".

Sleeping beauty party popcorn buffet

Free Sleeping Beauty Printables

I made these fun free printables, get them here -Make it Pink -Make it Blue, and set up lots of fun treats. 

We started out with popcorn - pink and blue of course, as well as caramel corn and regular popcorn.

Sleeping beauty make it pink make it blue snack popcorn buffet

Along with the popcorn, I added lots of fun candy add-ins, so everyone could personalize their snacks.

Sleeping beauty popcorn buffet

Popcorn Add-ins:

  • pink popcorn
  • blue popcorn
  • caramel popcorn
  • regular popcorn
  • blue candies: Hersey's kisses, chocolate coins, cotton candy, sprinkles, and chocolate balls
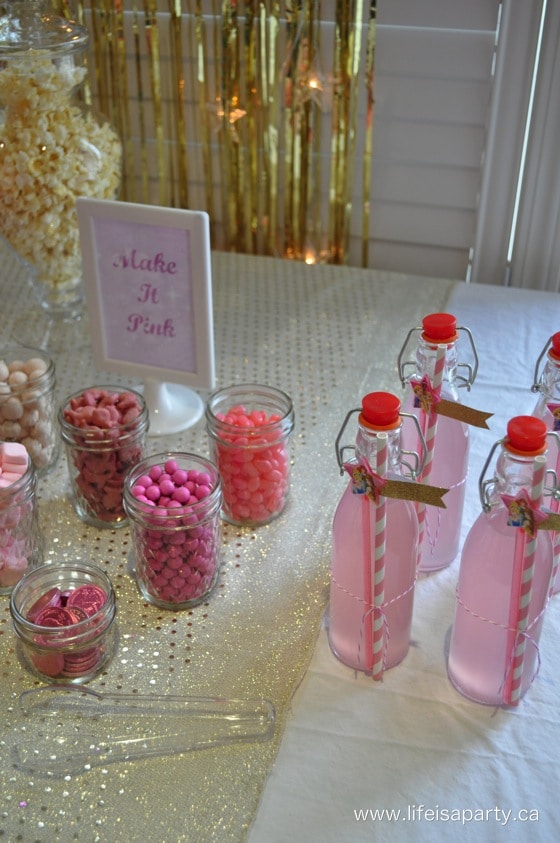
  • pink candies:  cotton candy, goldfish crackers, star marshmallows, sprinkles, jellybeans, chocolate coins, and chocolate balls

The girls used the pretty Princess cups to make their personalized popcorn mixes.

Sleeping beauty themed party food

Sleeping Beauty Drinks

For drinks there was blue sports drink, or pink lemonade, in pretty bottles with paper straws, and Princess fairy wands.

Sleeping beauty make it pink, make it blue popcorn buffet

Once we had our snacks, it was time to enjoy the movie!

Sleeping beauty party

Princess Take Home Breakfast

One of my favorite details of our "almost" sleepover was to send the girls home with a special Princess breakfast to enjoy in the morning.

almost slumber party take home take out breakfast

Click here for the free printable "wishing you sweet dreams and an even sweeter breakfast" sign.

Sleeping beauty slumber party breakfast to go

I used some gable boxes to hold all their goodies, and decorated them with some princess washi tape. On the top of the boxes and tied with a bow was a thank-you card - since Princesses always remember a thank-you card, that had directions on the back for the breakfast. Inside the each box was a breakfast fit for a queen - or a Princess, lol.

Sleeping beauty slumber party breakfast princess waffles 1

I made regular waffles and cut the tops to make them into crowns! We also included an individual maple syrup, and "Briar Rose's Berries" and some edible fairy dust to have on top of their waffles!

edible fairy dust.

I used little glass jars and combined pink sprinkles and some edible gold glitter. The little princesses loved them.

Sleeping beauty almost slumber party take home take out breakfast

Along with the waffles, I bought fun mini cereal boxes and added a pink spoon with some more washi tape, and a package of hot chocolate. So much fun!

Princess Breakfast Menu

  • crown waffles
  • Briar Rose's Berries
  • edible glitter pink sprinkles
  • individual maple syrup
  • cereal box
  • hot chocolate

I hope you love all these great ideas for decor, activites, and snacks. With a Sleeping Beauty "almost" slumber party, life really is a party!

More Princess Party Inspiration

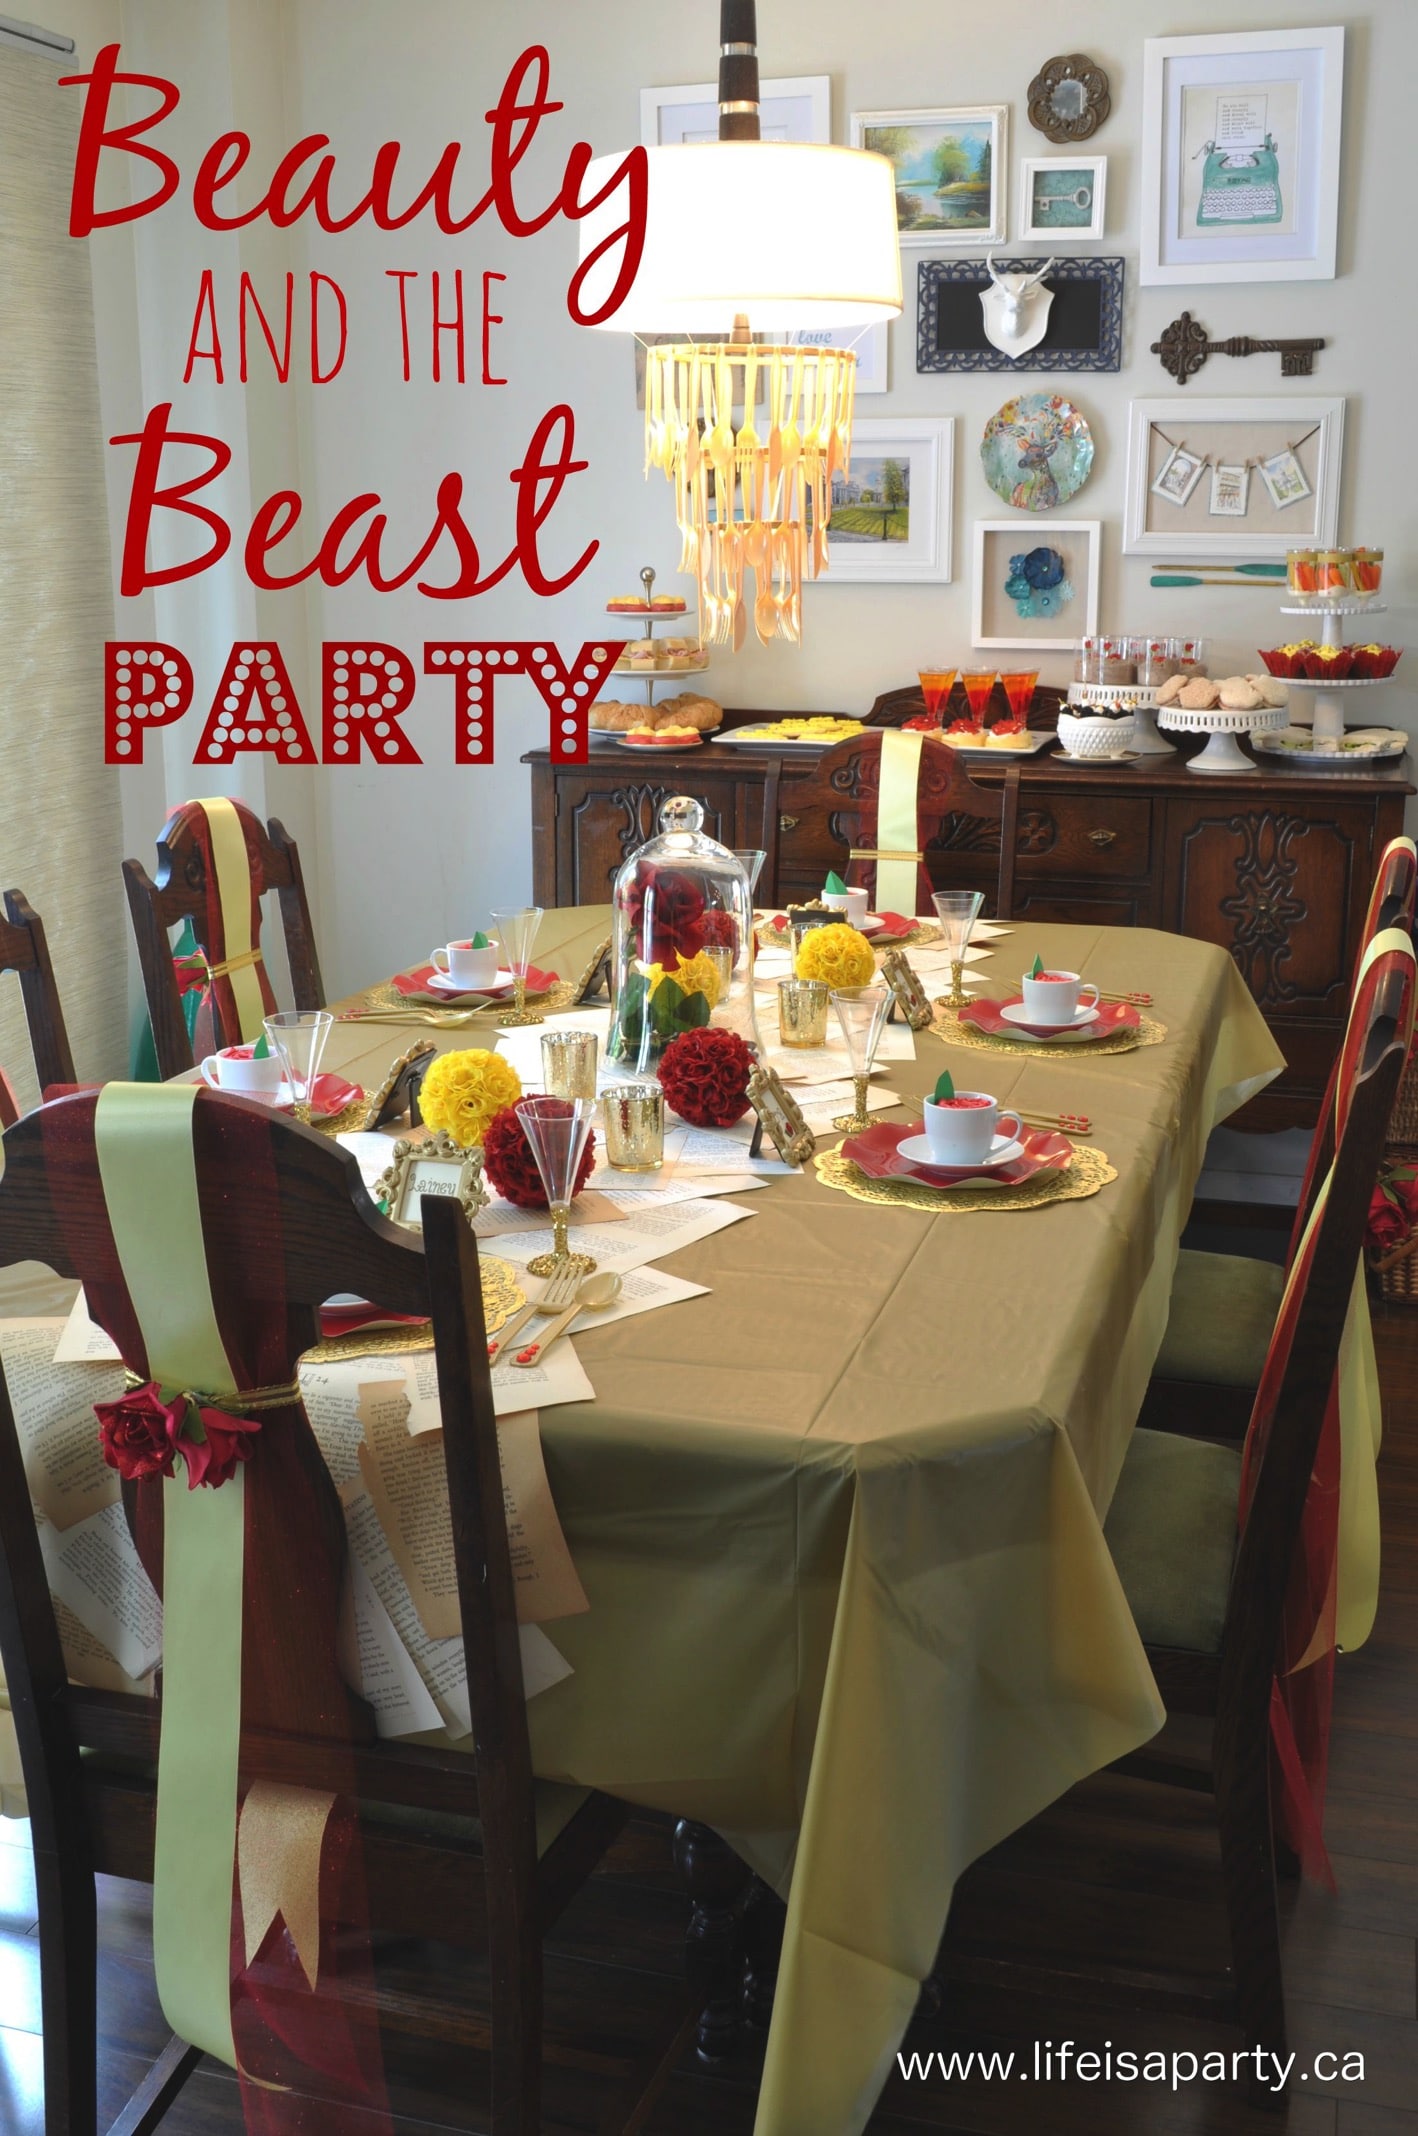
You might also like our Beauty and Beast Birthday Party here.

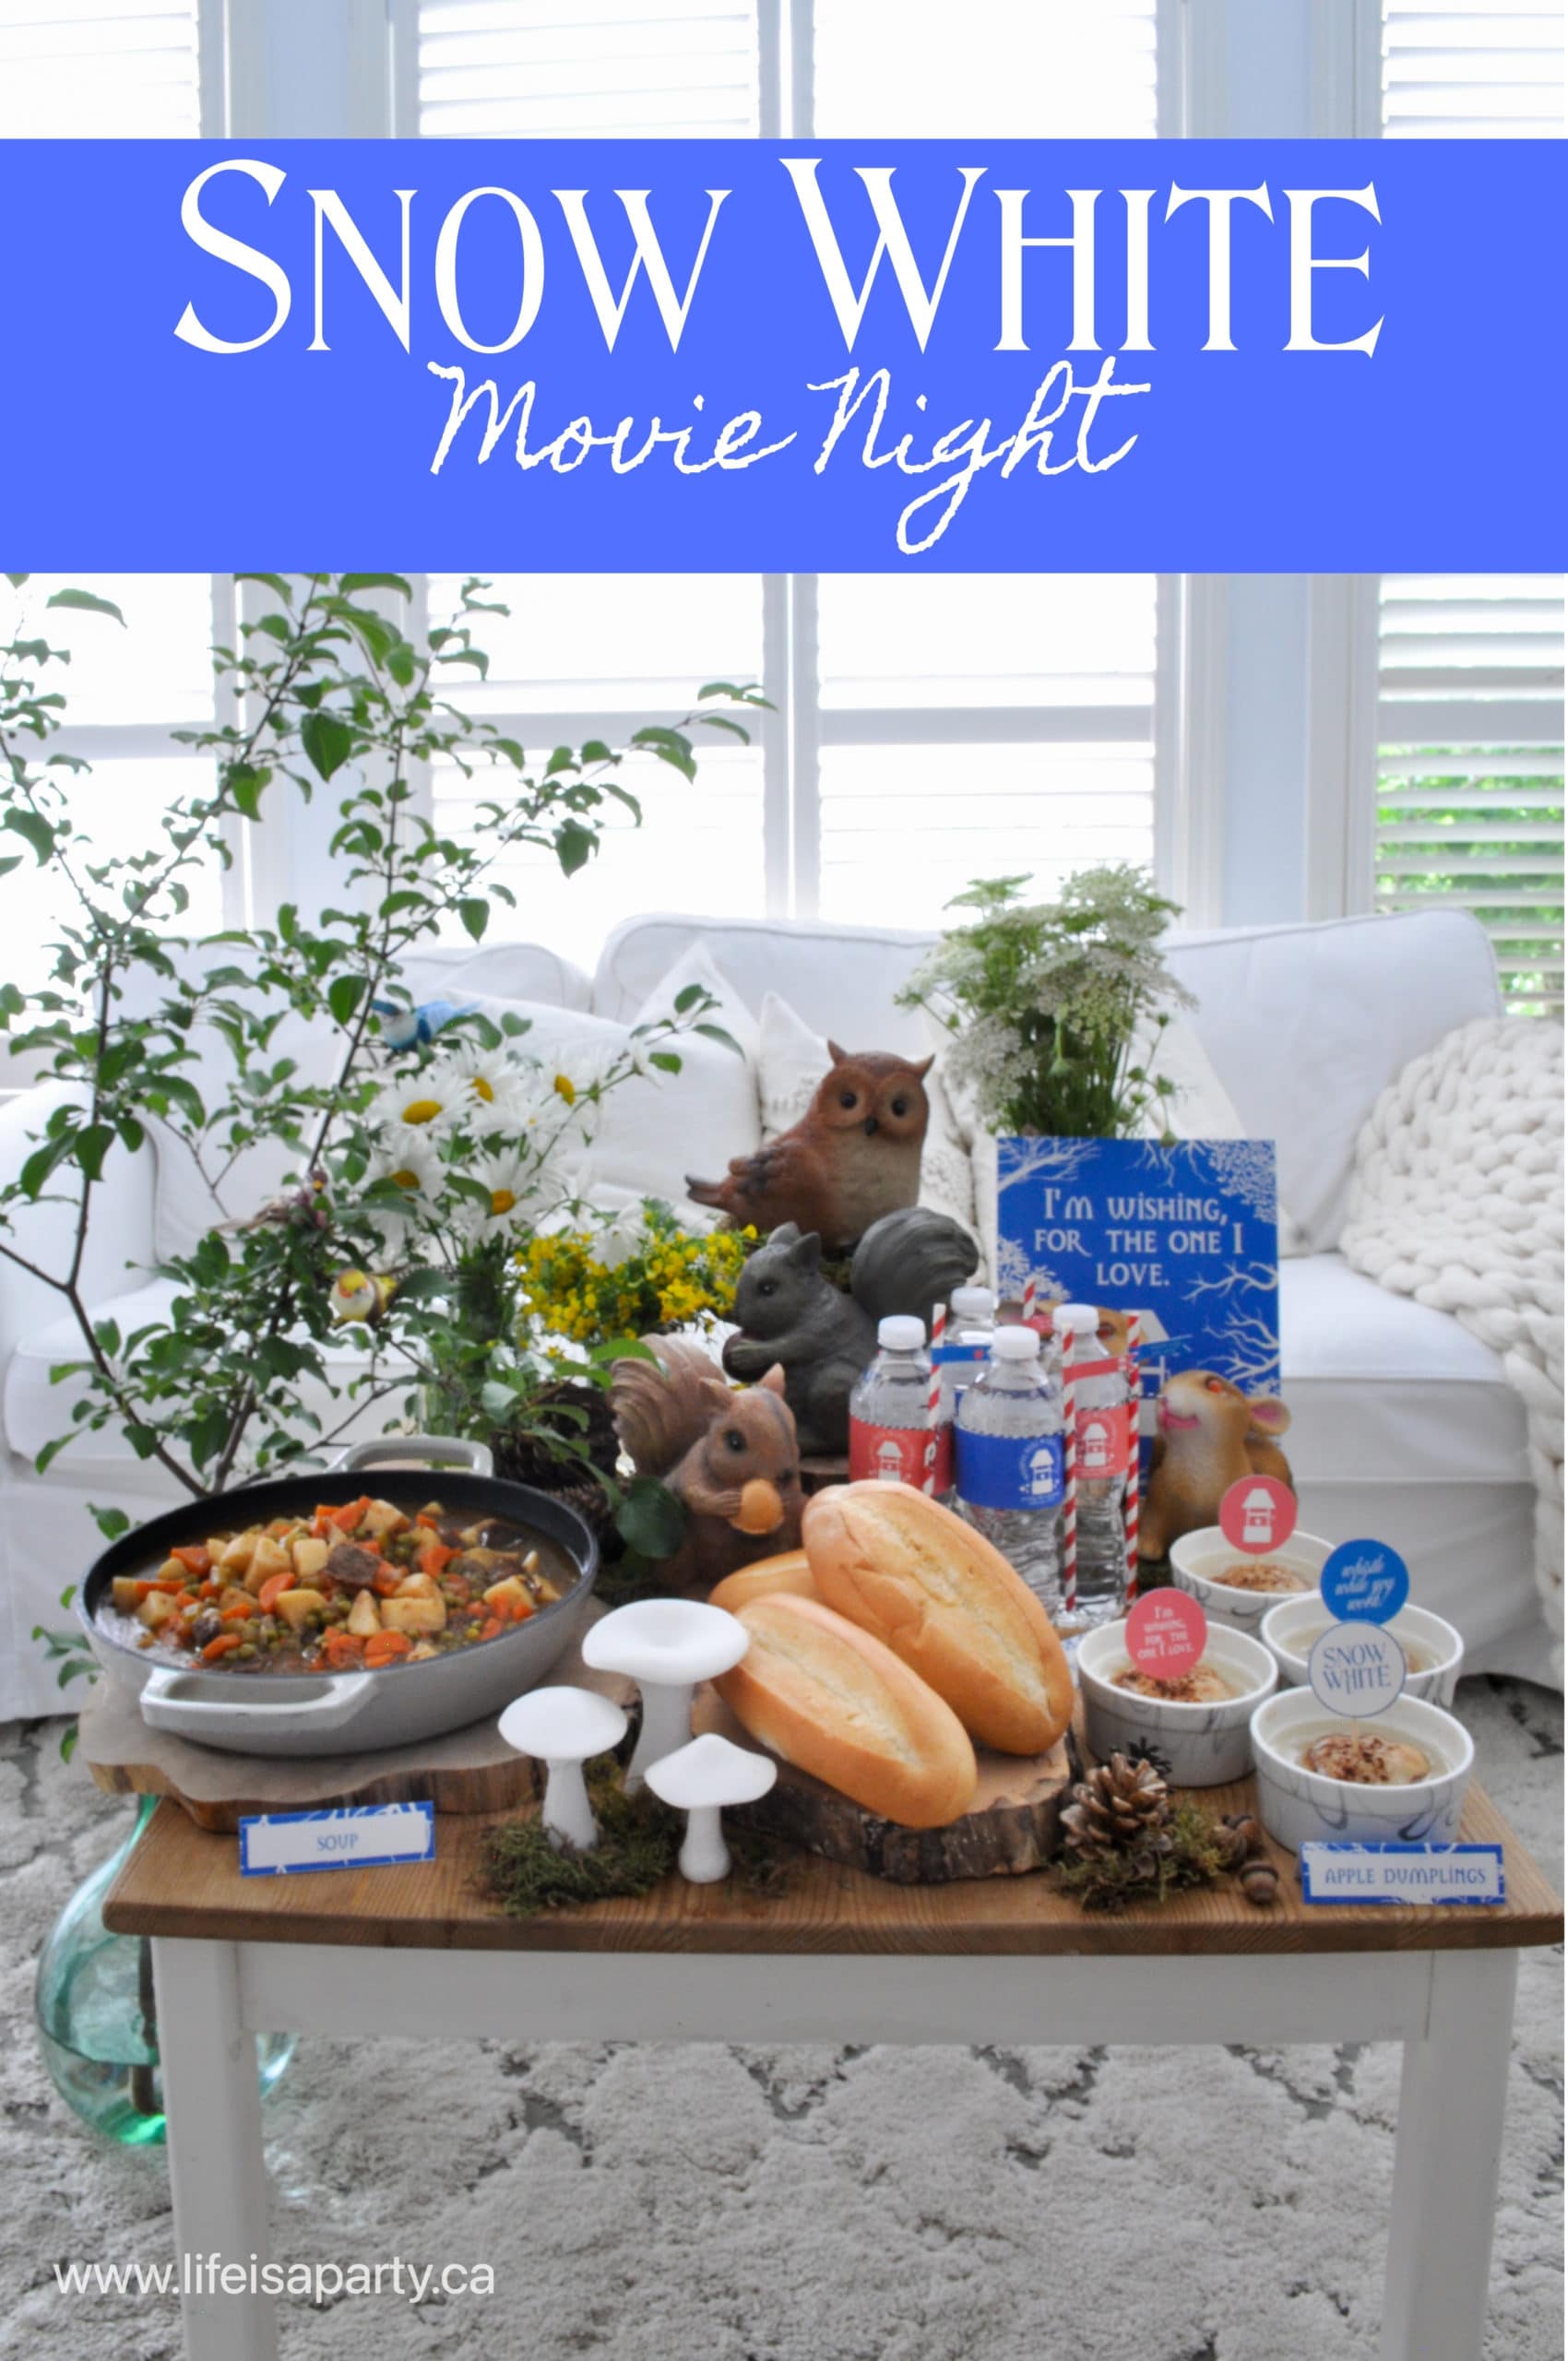
Also check out our Snow White party here:

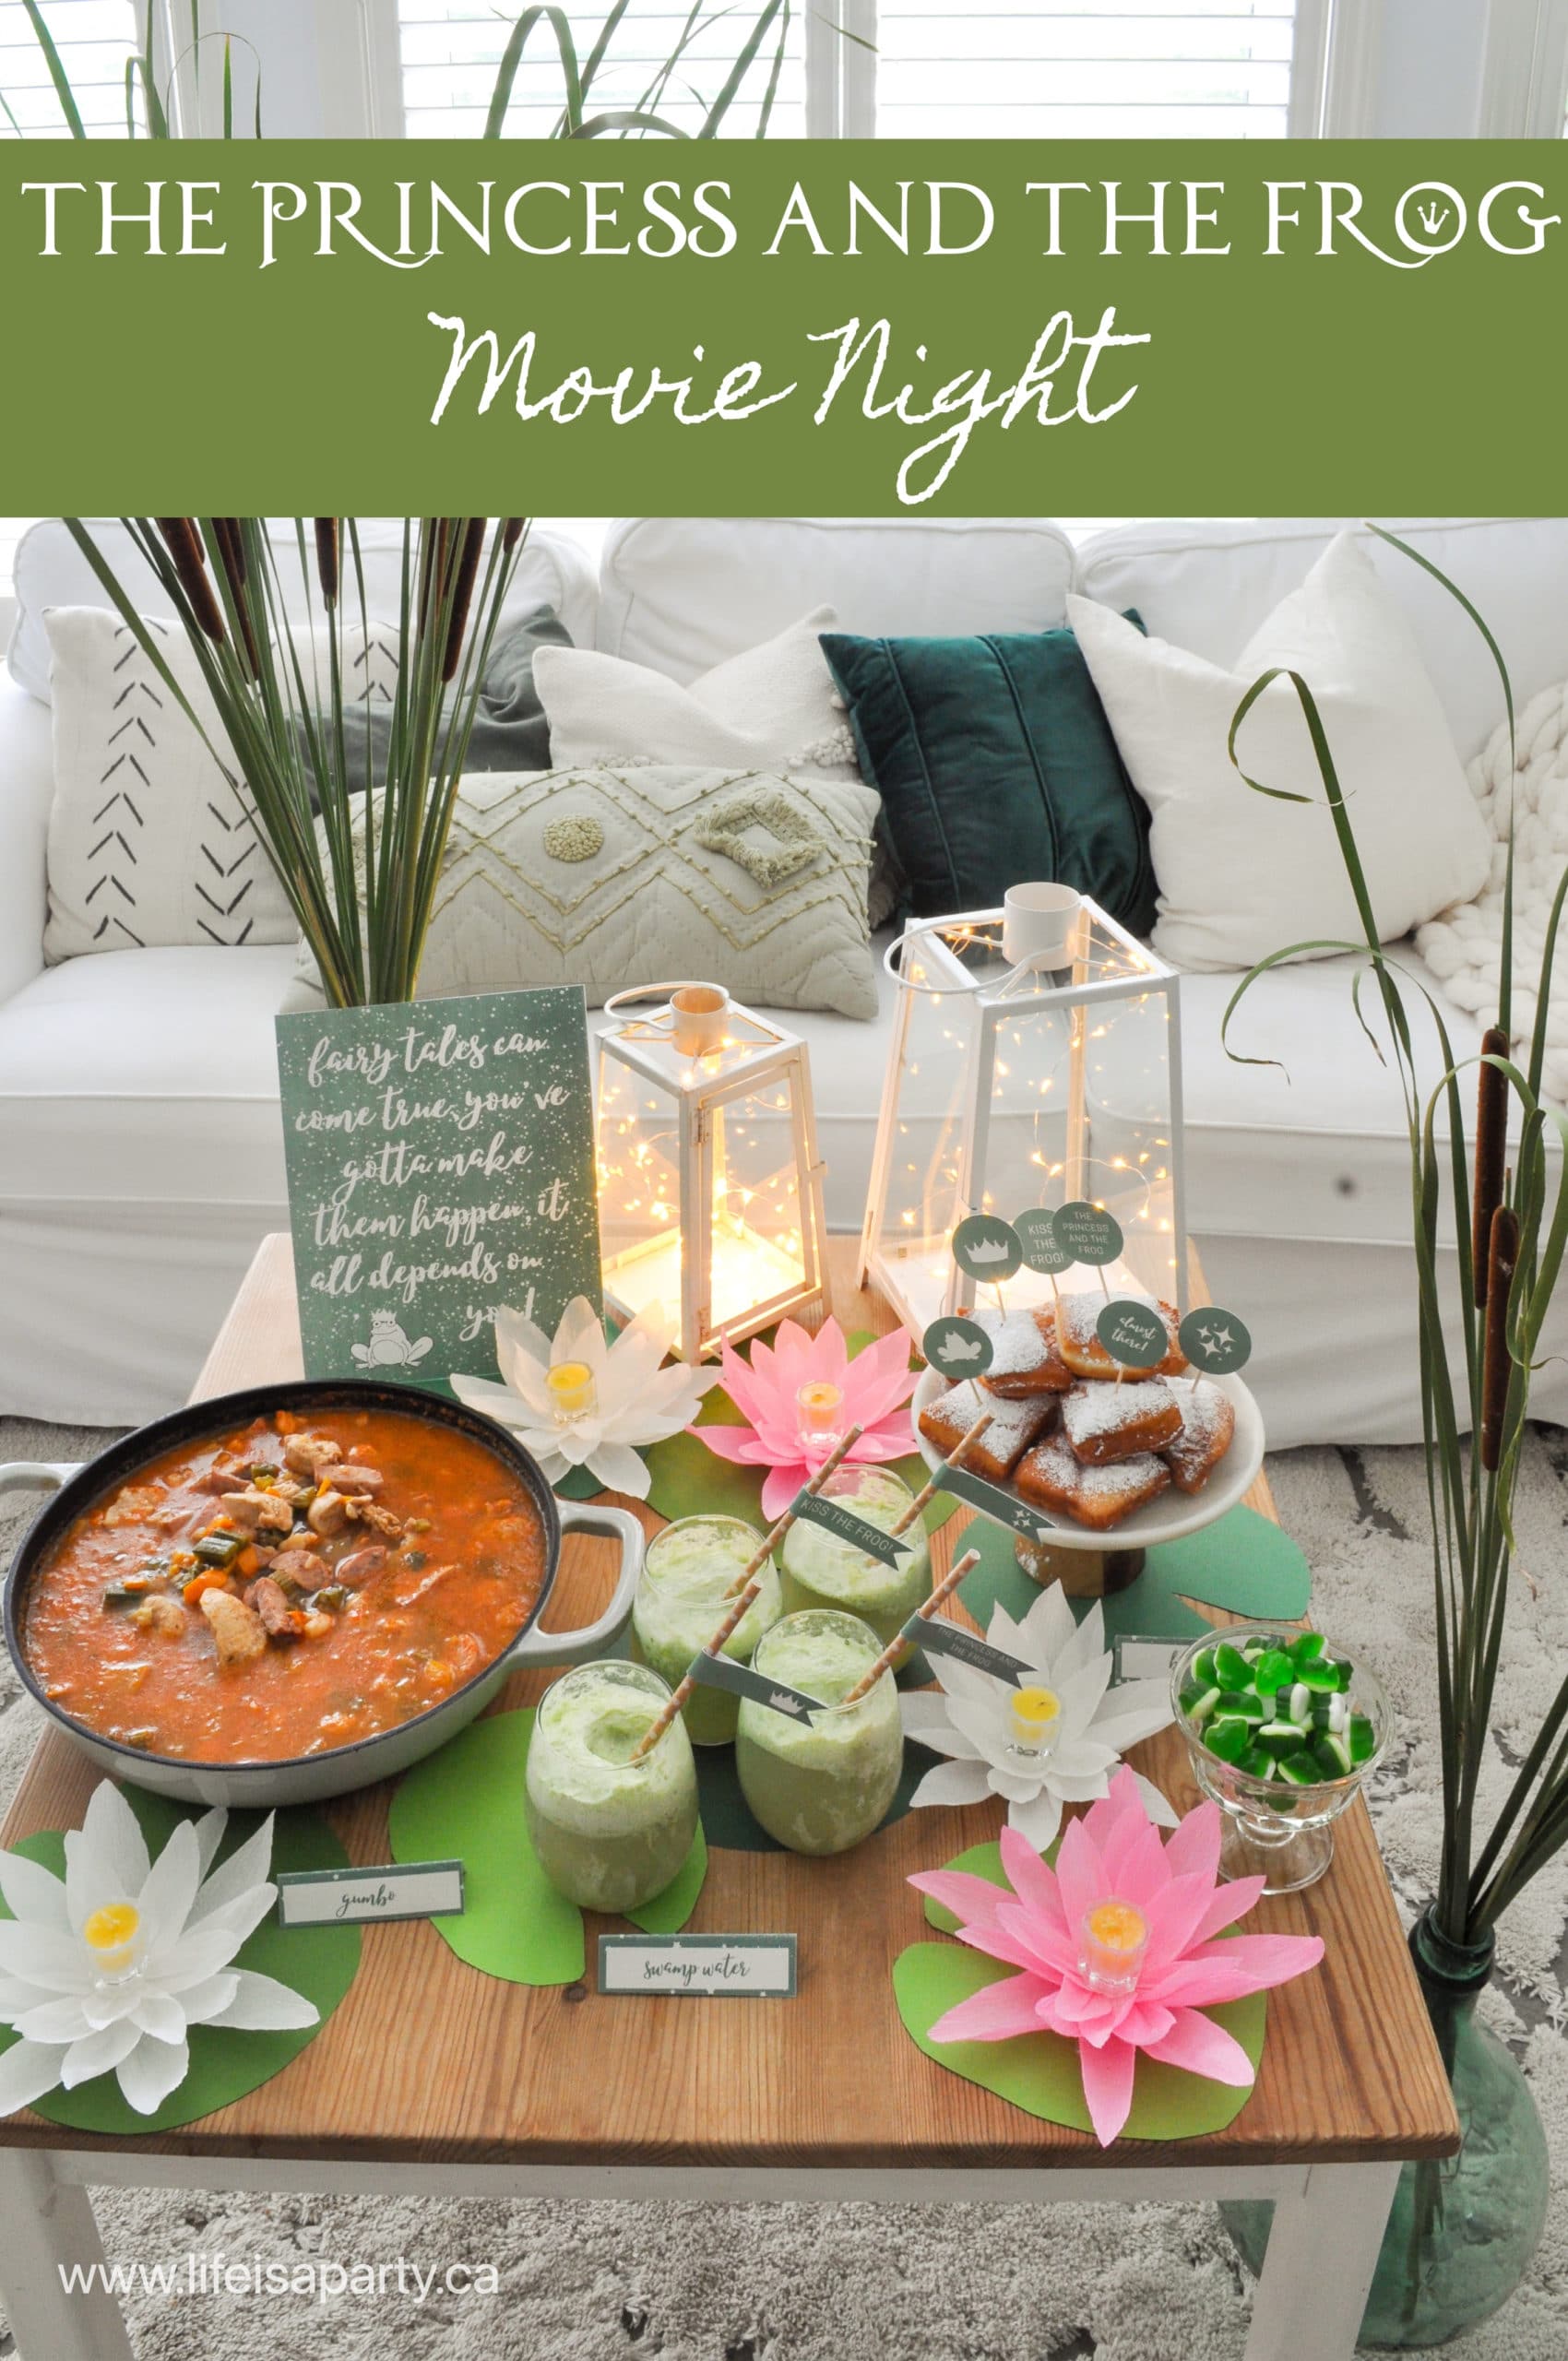
You might also like our Princess and The Frog party here:

The Princess and the Frog Party -Dinner and Movie: all the party ideas, decor, recipes and printables for a themed family movie night or party.


Easy Homemade Caramel Apple Fondue

Oct 16, 2014 · 3 Comments

Caramel apple fondue recipe and topping ideas.

This Easy Homemade Caramel Apple Fondue is the perfect solution for anyone who loves caramel apples but hates the mess and hassle of eating them. This warm caramel dip takes just 15 minutes to make with simple ingredients, and it's so much easier than traditional caramel apples -especially for kids.

Caramel apple fondue recipe and topping ideas.
[feast_advanced_jump_to]

A Quick Look At This Recipe

  • 📋 Recipe: Easy Homemade Caramel Apple Fondue
  • ⏲️ Ready In: 15 minutes
  • 👪 Servings: 2¼ cups (serves 8-10)
  • 🔪 Difficulty: Easy
  • 💭 Top Tip: Choose all your favorite toppings like chocolate, nuts, coconut and sprinkles to take this fondue to the next level!

Why You'll Love This Caramel Apple Fondue

  • No candy thermometer needed - Simple double boiler method means foolproof caramel every time.
  • Ready in 15 minutes - Quick enough for weeknight treats, impressive enough for parties.
  • Won't burn or crystallize - Condensed milk creates stable, smooth caramel with no fussing.
  • So much easier than traditional caramel apples - Perfect for kids and way less messy.
  • Everyone customizes their own - Endless topping combinations keep it fun and interactive.

Traditional caramel apples can be tricky to make and even trickier to eat. The caramel slides off, it gets stuck in your teeth, and little hands struggle to manage the big sticky apples.

This fondue version gives you all the delicious caramel apple flavor without any of the frustration. You get to dip apple slices in warm, rich caramel and then roll them in your favorite toppings. Every bite is a new combination, and everyone gets exactly what they want.

The best part? This recipe uses a simple double boiler method with condensed milk, brown sugar, and maple syrup. There's no candy thermometer needed, and you don't have to worry about burning the caramel.

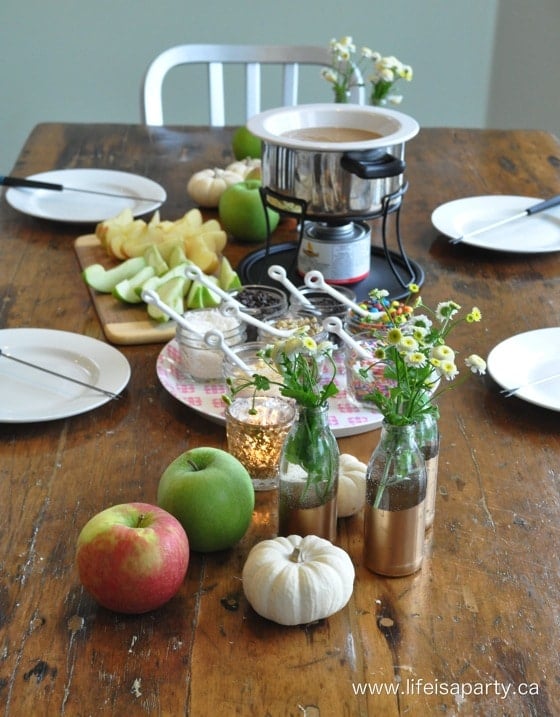
It's perfect for fall gatherings, Halloween parties, or Thanksgiving dessert tables. We served it at our fall fondue party here. You might also enjoy our Mini Apple Crisp in a Jar, Christmas Fondue Party, or our Pumpkin Blondie Recipe.

My husband and kids are huge caramel apple fans, but I always found traditional caramel apples frustrating to make and messy to eat. This fondue version gives us all the flavor we love in a format that's actually enjoyable for everyone. It's become one of those recipes that gets requested at every fall gathering. As my kids have gotten older they're become more adventurous with their toppings. Salted caramel is everyone's new favorite. It's great for kids and adults.

Ingredients

  • Sweetened condensed milk is what makes this recipe foolproof. Unlike heavy cream, it's already sweetened and thickened, which prevents crystallization and creates stable, smooth caramel every time. Don't substitute with evaporated milk, they're completely different products.
  • Real maple syrup adds incredible depth and warmth that pancake syrup can't match.
  • Brown sugar brings more than sweetness, the molasses content adds moisture and rich, complex flavor.
  • Fresh apples - Granny Smith are my top choice because their tartness balances the sweet caramel beautifully. Honeycrisp, Pink Lady, and Fuji also work great. Any crisp, fresh apple variety will be delicious. To prevent your apples from browning, cut apples just before serving when possible. If prepping ahead, dip slices in lemon juice or soak in lemon-lime soda for 30 minutes, then pat completely dry with paper towels before serving so the caramel fondue will stick to each slice.
  • Toppings of your choice - See topping ideas below.

Topping Ideas

One of the great pleasures of creating a caramel apple fondue is including different toppings to sprinkle on after dipping. This gives you endless taste variations and turns a simple dessert into an interactive experience. Every apple slice becomes a new adventure.

  • Shredded Coconut: Adds tropical sweetness and great texture.
  • Chocolate Sprinkles: Classic choice that never disappoints.
  • Rainbow Sprinkles: Makes everything more festive and fun for kids.
  • Chopped Walnuts or Pecans: The nutty crunch is perfect with caramel.
  • Mini Chocolate Chips: These stick to the caramel beautifully.
  • Chopped M&M's: Colorful and crunchy with a candy shell.
  • Popping Candy: This is so fun for kids and adds an unexpected element.
  • Crushed Graham Crackers: Creates a cheesecake-like flavor combination.
  • Toffee Bits: Adds extra caramel crunch.
  • Crushed Pretzels: The salty-sweet combination is incredible.
  • Mini Marshmallows: Creates a s'mores-inspired combination.
  • Crushed Cookies: Oreos, vanilla wafers, or gingersnaps all work great.
Caramel apple fondue toppings

Dippers:

We love this caramel fondue served with apples, but you can also serve it like a traditional chocolate fondue with bite-sized pieces of various dippers. For a special party, serve both caramel fondue and chocolate fondue so guests can enjoy both together.

Other great dippers include:

  • Angel Food Cake or pound cake cubes.
  • Pretzels: The salty-sweet combination is incredible.
  • Nuts: Whole almonds, pecans, or walnuts.
  • Fresh Fruit: Strawberries, pineapple chunks, banana slices are all great addtions to the apple slices.
  • Marshmallows: Regular or jumbo size.
  • Rice Krispies Treats: Cut into bite-sized squares.
  • Belgium Waffles: Cut into strips or squares.
  • Graham Crackers: Broken into dippable pieces.
  • Cookies: Shortbread, vanilla wafers, or gingersnaps.

Variations

Salted Caramel Fondue

If you're a fan of salted caramel (and who isn't?), add some flaky sea salt over the top of the finished caramel sauce. Just sprinkle the finished fondue with about ½ teaspoon of flaky sea salt like Maldon or fleur de sel.

This caramel has a very rich flavor, and the salt is a great way to cut through the sweetness and create that popular salty-sweet taste combination. Don't use regular table salt. The large flakes of sea salt give you little bursts of saltiness that work much better than fine salt distributed throughout.

Other Flavor Additions

While this caramel is delicious as written, you can customize it:

  • Bourbon or Rum: Add 1 tablespoon for an adult version.
  • Espresso Powder: Add ½ teaspoon for a subtle coffee flavor that enhances the caramel.
  • Pumpkin Pie Spice: Use 1 teaspoon instead of plain cinnamon for a more fall-spiced version.
  • Nutmeg: Add a pinch of freshly grated nutmeg along with the cinnamon.

Equipment -Fondue Pot

Serve your fondue in a warm fondue pot.  I highly recommend a fondue pot that has a ceramic bowl, inside the metal pot, where you can add water and create a double boiler to keep your fondue warm, without letting it burn on the bottom.  You can also use a regular fondue pot, just keep your eye on it and stir it occasionally.  Another option is a mini crock pot or slow cooker, or an electric heated fondue pot that you can control the temperature of, and keep it on low so it doesn't burn.

How To Make Caramel Apple Fondue

1. Step 1: Put the butter in a heatproof bowl. Set the bowl over a small saucepan filled with about 1-2 inches of simmering water. This creates a double boiler that heats the caramel gently and prevents burning.

2. Step 2: After the butter has melted completely, then add the brown sugar, corn syrup, maple syrup, water, condensed milk, and cinnamon. Stir the mixture constantly and cook until completely smooth with all sugar dissolved. You'll know it's ready when the mixture is uniform in color with no grains of sugar.

3. Step 3: Remove from heat and stir in the vanilla extract.

4. Step 4: Pour the warm caramel into your fondue pot to keep warm. Serve with apple slices cut into wedges for easy dipping, along with your choice of toppings.

Expert Tips & Tricks

  1. Use real maple syrup, not pancake syrup for the best depth of flavor.
  2. Pack brown sugar firmly into the measuring cup for accurate measurements.
  3. Stir constantly while cooking to ensure even heating and complete sugar dissolution.
  4. Pat apples completely dry after treating for browning - any moisture makes caramel slide off.
  5. If caramel gets too thick, stir in a tablespoon of condensed milk or cream to thin it.
apples and caramel dessert fondue

Serving Ideas

Use small bowls or mason jars to hold each topping. This makes it easy for guests to sprinkle their choices over their dipped apples. For larger parties, consider using a muffin tin lined with cupcake liners - each cup holds a different topping, and it creates a fun, organized display.

Slow Cooker: A mini slow cooker set on warm is perfect for keeping the fondue at serving temperature for parties. You can also use a traditional fondue pot with a tea light, or an electric fondue pot on the lowest setting. For young children at parties, consider pouring individual portions into small bowls to prevent double-dipping.

Individual Fondue: Especially if you're entertaining children, giving everyone their own small individual bowl of fondue can help prevent the dreaded double dip. Add a small ladle to your fondue and let everyone help themselves to a small bowl. Mini mason jars work great for this, or use small bowls, or even cups or mugs. Serve these on a small plate so everyone can add apple slices and fun topping to their own plate.

Storage & Make-Ahead Instructions

Storing Leftovers

Store any leftover caramel fondue in an airtight container in the refrigerator for up to 1 week. The caramel will harden when cold, which is normal.

Reheating

Microwave method: Transfer cold caramel to a microwave safe bowl. Heat in 30 second intervals, stirring between each, until smooth and warm. If it's too thick after reheating, stir in a tablespoon or two of milk or cream.

Stovetop method: Reheat gently in a double boiler setup, stirring frequently until warm and smooth. This is the gentlest method and best preserves the texture.

Slow cooker method: Place cold caramel in your slow cooker on low and let it warm slowly, stirring occasionally. This takes about 30 minutes but is very forgiving.

Make-Ahead Instructions

Yes, you can make this caramel fondue ahead of time. Prepare the fondue as directed, let it cool completely, then store it in the refrigerator. On the day you want to serve it, reheat using one of the methods above and transfer to your fondue pot.

For parties, you can make the caramel up to 3 days ahead. Just reheat it before adding it to the fondue pot. I recommend reheating on the stovetop or in a double boiler before transferring to your serving vessel, rather than trying to reheat it in the fondue pot itself.

Frequently Asked Questions

Can I make caramel apple fondue without a double boiler?

Yes, but watch it carefully. You can make this directly in a heavy-bottomed saucepan over low heat, stirring constantly. The risk is burning, which happens quickly with caramel. The double boiler method is more forgiving and foolproof, which is why I recommend it.

Why is my caramel grainy?

Graininess happens when sugar crystallizes. This usually means either the sugar didn't dissolve completely during cooking, or sugar crystals from the sides of the bowl fell back into the mixture. Make sure you cook the caramel long enough, stirring constantly, until completely smooth. You can also brush down any crystals that form on the bowl sides with a wet pastry brush.

Can I use evaporated milk instead of condensed milk?

No, these are very different products. Condensed milk is sweetened and has a much thicker consistency. Evaporated milk is simply milk with some water removed and it's not sweetened. Using evaporated milk won't give you the same stable, sweet caramel. Stick with sweetened condensed milk for this recipe.

My caramel is too thick. How do I fix it?

Stir in a tablespoon of condensed milk, heavy cream, or whole milk until you reach the desired consistency. Do this while the caramel is warm. If needed, you can return it to the double boiler to help thin it out while stirring.

Can I double this recipe?

Yes! This recipe doubles easily. You may need to cook it a few minutes longer to ensure all the sugar dissolves completely in the larger quantity. Use a bigger bowl or pot for your double boiler setup.

More Recipe Inspiration

  • Apple crisp in a mason jar.
    Mini Apple Crisp In A Jar
  • Smooth cottage cheese apple dip with fresh apple slices.
    Smooth Cottage Cheese Apple Dip
  • Caramel apple trifles made in mason jars.
    Caramel Apple Trifle
  • How to make homemade caramel apples.
    How To Make Homemade Caramel Apples

If you try this Easy Homemade Caramel Apple Fondue or any other recipe on my blog please leave a star rating and let me know how it went in the comments below. Thanks for visiting today!

Recipe

Caramel apple fondue recipe and topping ideas.

Caramel Apple Fondue

Dip apples slices in warm caramel and then add toppings.
5 from 1 vote
Print Pin Rate
Course: Desserts
Cuisine: American
Prep Time: 5 minutes minutes
Cook Time: 10 minutes minutes
Total Time: 15 minutes minutes
Servings: 2 ¼ cups
Calories: 268kcal
Author: Dannyelle Nicolle-Ramjist

Ingredients

  • ¼ cup butter
  • 1 cup brown sugar
  • ¼ cup corn syrup
  • 1 tablespoon maple syrup
  • 1 tablespoon water
  • ¾ cup condensed milk
  • 1 teaspoon vanilla extract
  • ¼ teaspoon cinnamon

Instructions

  • Put the butter in a heatproof bowl, set over a small saucepan of simmering water to create a double boiler and melt it.
  • Add in the brown sugar, corn syrup, maple syrup, water, condensed milk, and cinnamon. Stir the sugar mixture and cook until the fondue is smooth, and all the sugar is completely dissolved.
  • Remove the fondue from the heat and add the vanilla. Stir to combine.
  • Pour into fondue pot, and enjoy with your choice of dippers.

Notes

Make-ahead: Can be made up to 3 days ahead and reheated before serving
Storage: Store leftover caramel in an airtight container in the refrigerator for up to 1 week
Reheating: Reheat gently in microwave (15-second intervals) or double boiler until smooth
If too thick: Stir in 1-2 tablespoons of milk or cream
Apple tip: Pat apple slices dry before dipping so caramel sticks properly

Nutrition

Serving: 1g | Calories: 268kcal | Carbohydrates: 48g | Protein: 2g | Fat: 8g | Saturated Fat: 5g | Polyunsaturated Fat: 3g | Cholesterol: 25mg | Sodium: 95mg | Sugar: 48g
Tried this Recipe? Tag me Today!Mention @LifeisaParty or tag #lifeisaparty!

Fall Fondue Party

Oct 14, 2014 · 5 Comments

Fall fondue party ideas and recipes.

Fall Fondue Party: Easy and relaxed fall entertaining with cheese fondue, oil fondue, and for dessert caramel apple fondue. The perfect fall dinner party.

Fall fondue party ideas and recipes.
[feast_advanced_jump_to]

I love fall; I love the colours of the leaves, I love the cooler days, I love the food, I love the pace -the return to school days, and lessons, and schedule.  Fall is also the perfect time to slip in some casual entertaining before all the fuss and pressure of the holidays begin.

Today I'm sharing with you a fun, and no-fuss, easy fall entertaining idea -a Fall Fondue Party.  I used frozen chicken strips to make this into truly easy entertaining, and so delicious.

The Fall Table

For the party, I put together a simple fall table, and brought out the fondue pots.

Fall Fondue Party: Easy and relaxed fall entertaining with cheese fondue, oil fondue, and for dessert caramel apple fondue. The perfect fall dinner party.

Cheese Fondue

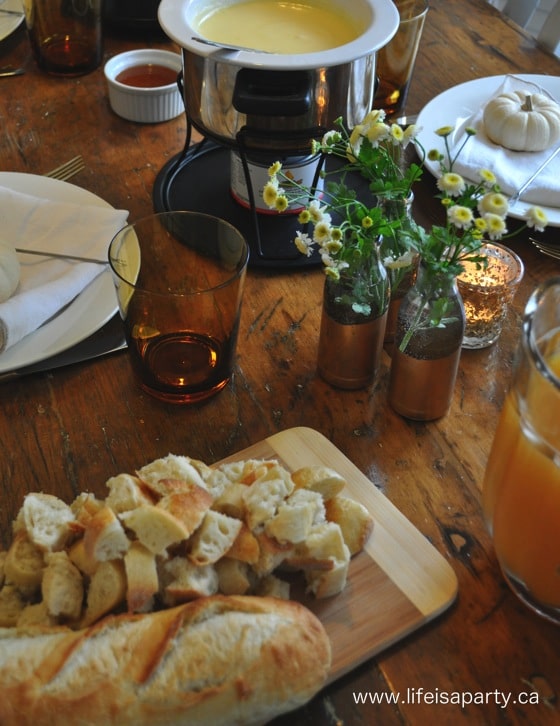
I picked up a ready made cheese fondue at the grocery store, and cut up a fresh baguette for dipping. Yum.

We served apple cider as the perfect fall drink.  I made a dish of scalloped potatoes as an easy side dish.

Fall Fondue Party: Easy and relaxed fall entertaining with cheese fondue, oil fondue, and for dessert caramel apple fondue. The perfect fall dinner party.

Oil Fondues

For the Oil Fondue, I heated peanut oil on the stove to 375 F (190 C), and then kept it hot on the fondue stand, with the fuel.

Chicken Fondue

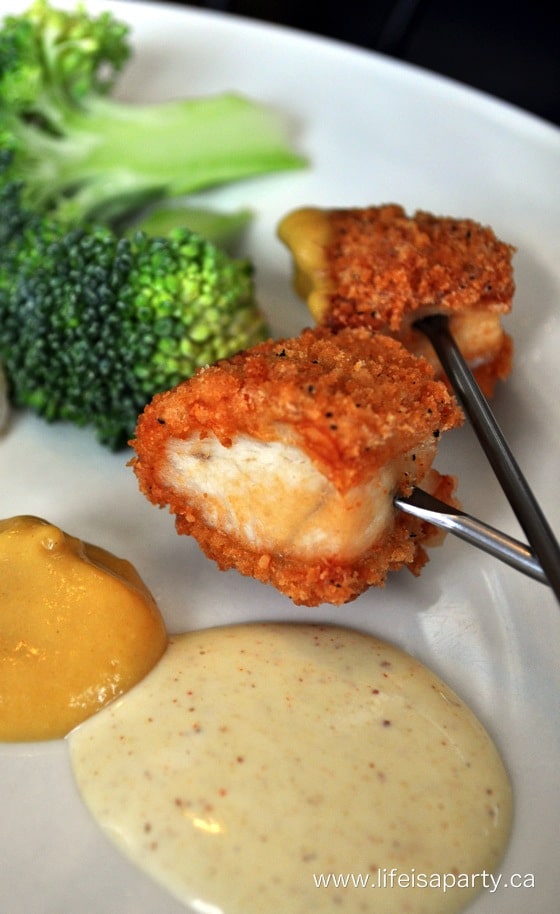
I used Maple Leaf Prime Chicken Strips. To prepare the chicken, let them come to room temperature and cut them into bite size pieces.

Fall Fondue Party: Easy and relaxed fall entertaining with cheese fondue, oil fondue, and for dessert caramel apple fondue. The perfect fall dinner party.

When it was time to cook the chicken, guests skewered a piece and cooked it in the hot oil until it was golden brown on the outside, and white in the middle. (Chicken is fully cooked when it reaches an internal temperature of 165 F or 74 C).

Fall Fondue Party: Easy and relaxed fall entertaining with cheese fondue, oil fondue, and for dessert caramel apple fondue. The perfect fall dinner party.

Tempura Vegetable Fondue

Fall Fondue Party: Easy and relaxed fall entertaining with cheese fondue, oil fondue, and for dessert caramel apple fondue. The perfect fall dinner party.

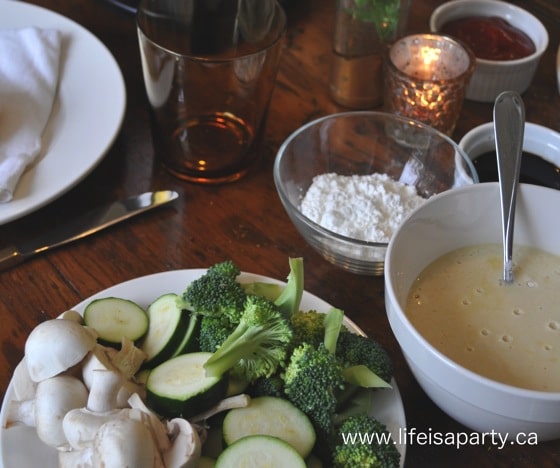
I also made Tempura Vegetables -such a yummy way to eat veggies.

Recipe

Tempura vegetables and oil fondue.

Tempura Vegetable Fondue

Crispy fried battered vegetables.
No ratings yet
Print Pin Rate
Course: Side Dish
Cuisine: Asian
Prep Time: 10 minutes minutes
Cook Time: 10 minutes minutes
Total Time: 20 minutes minutes
Servings: 8
Author: Dannyelle Nicolle-Ramjist

Ingredients

  • 6 tablespoon Cornstarch
  • 1 egg
  • 1 cup ice water
  • 1 cup flour
  • 1 head broccoli cut into flowerets
  • 227 g white mushrooms cut large mushrooms in half
  • 2 small zucchini sliced into bite size pieces

Instructions

  • To make the batter, beat egg and water together in a bowl. Add in flour, and stir briefly being careful not to over work -it should still be lumpy.
  • Place the cornstarch in another separate small bowl.
  • To serve, invite guests to skewer veggies, dip in cornstarch to lightly coat, then dip in batter, and fry in peanut oil until golden brown.
Tried this Recipe? Tag me Today!Mention @LifeisaParty or tag #lifeisaparty!

Fondue Sauces

We had several fun dipping sauces to enjoy with the fondue; there was:

  • ketchup
  • soya sauce
  • plum sauce
  • French's Honey Mustard
  • Honey Mustard Mayo (mix honey mustard with mayonnaise)

Fondue is perfect for relaxed fall entertaining. It takes a while to cook your food, and that leads to fun, laid back conversation, while everyone takes their time and lingers at the table.

Caramel Apple Fondue

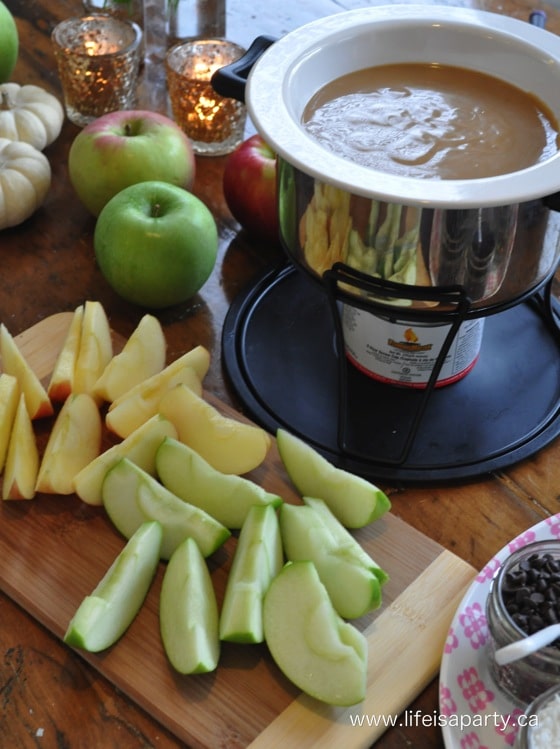
For dessert, I made a caramel apple fondue with lots of fun sprinkles and add-ons. We had nuts, coconut, mini chocolate chips, sprinkles and popping candy. It was a sweet end to the meal.

Caramel apple fondue recipe and topping ideas.

With a fun fall fondue party, life really is a party!

More Inspiration

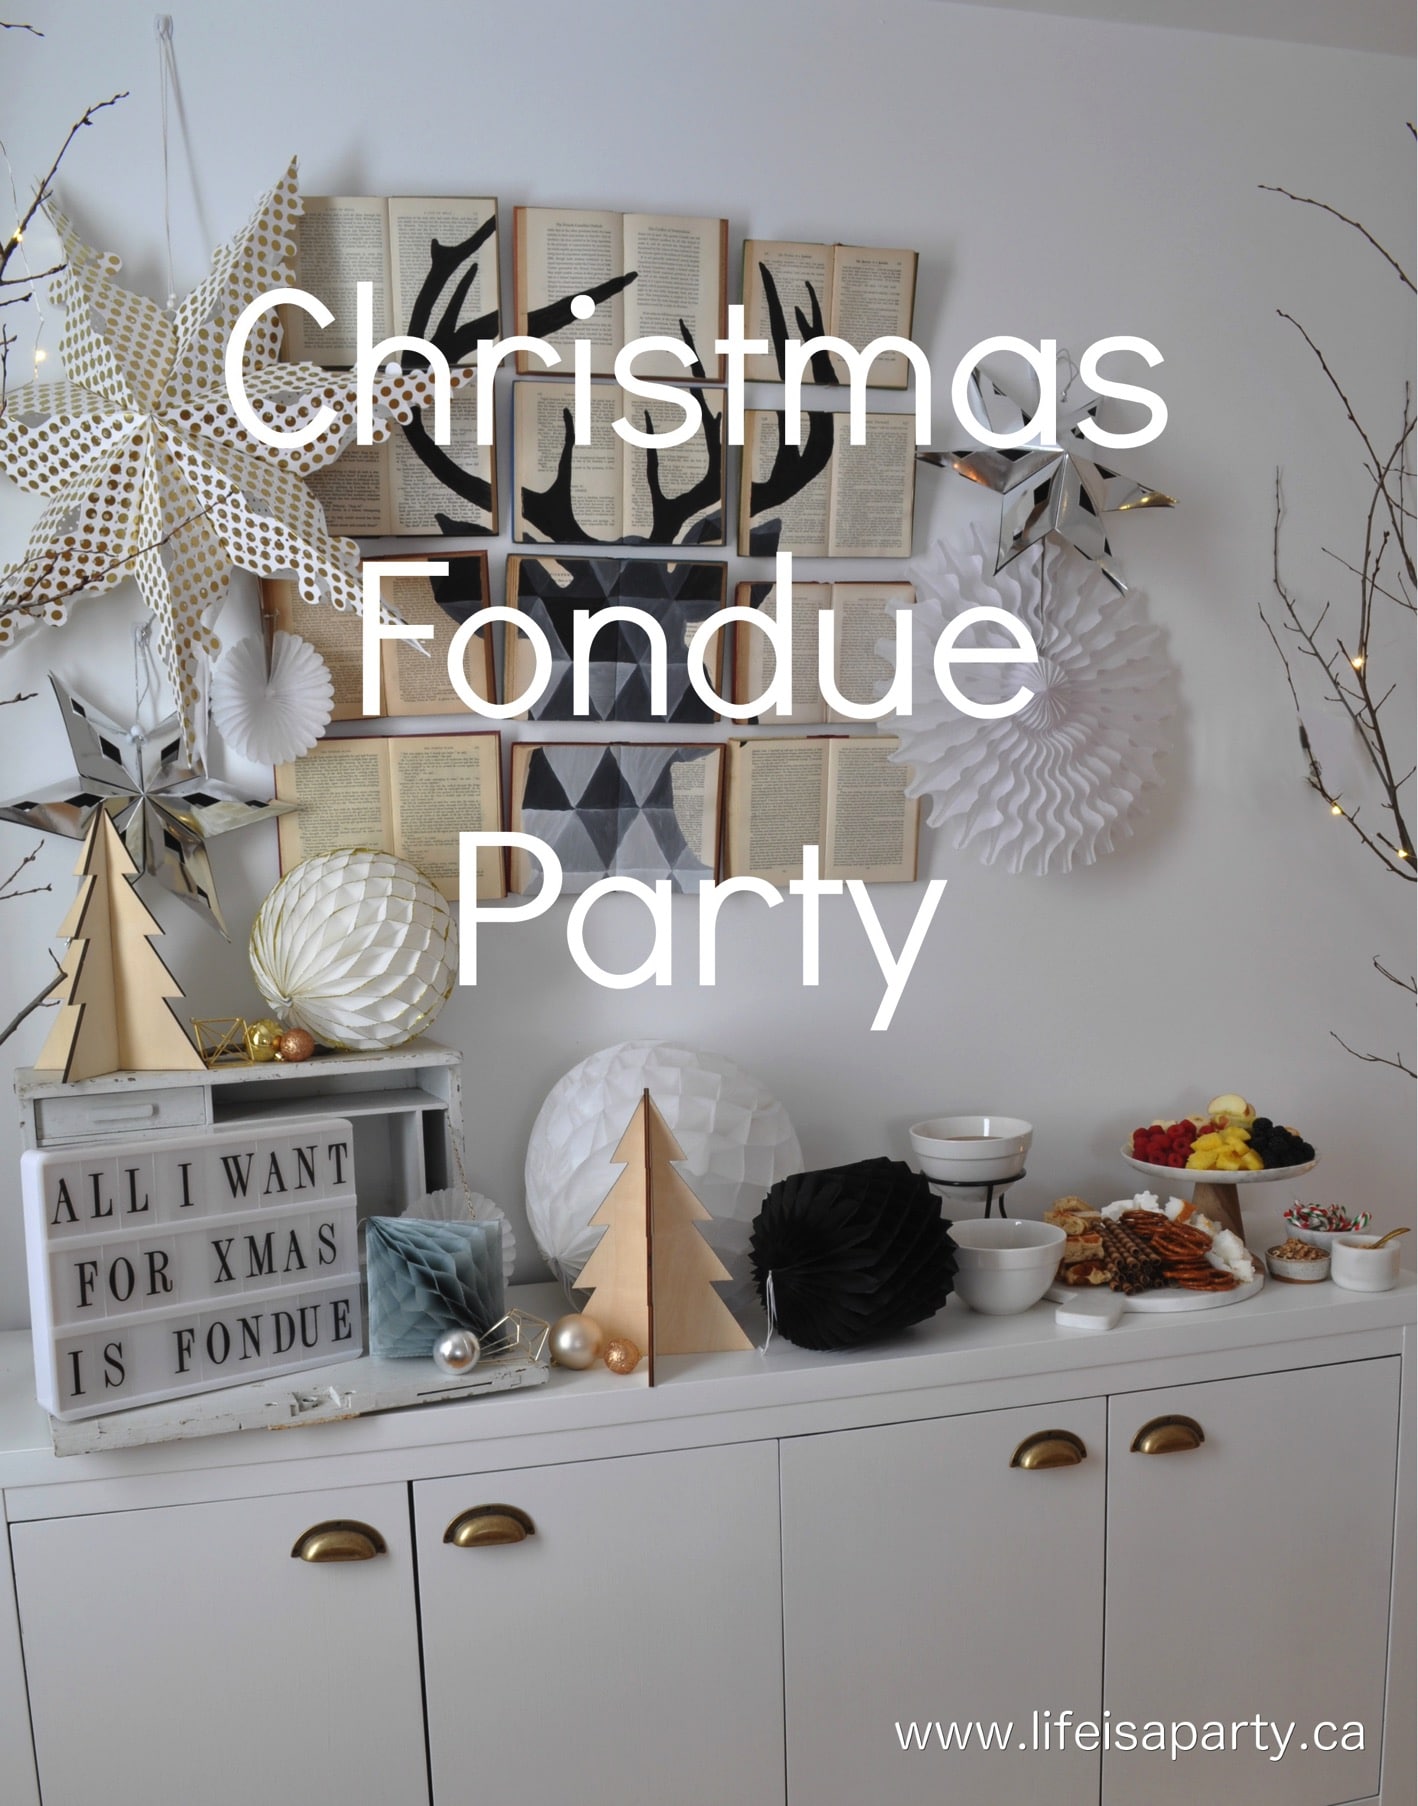
You might also like our Christmas Fondue party here.

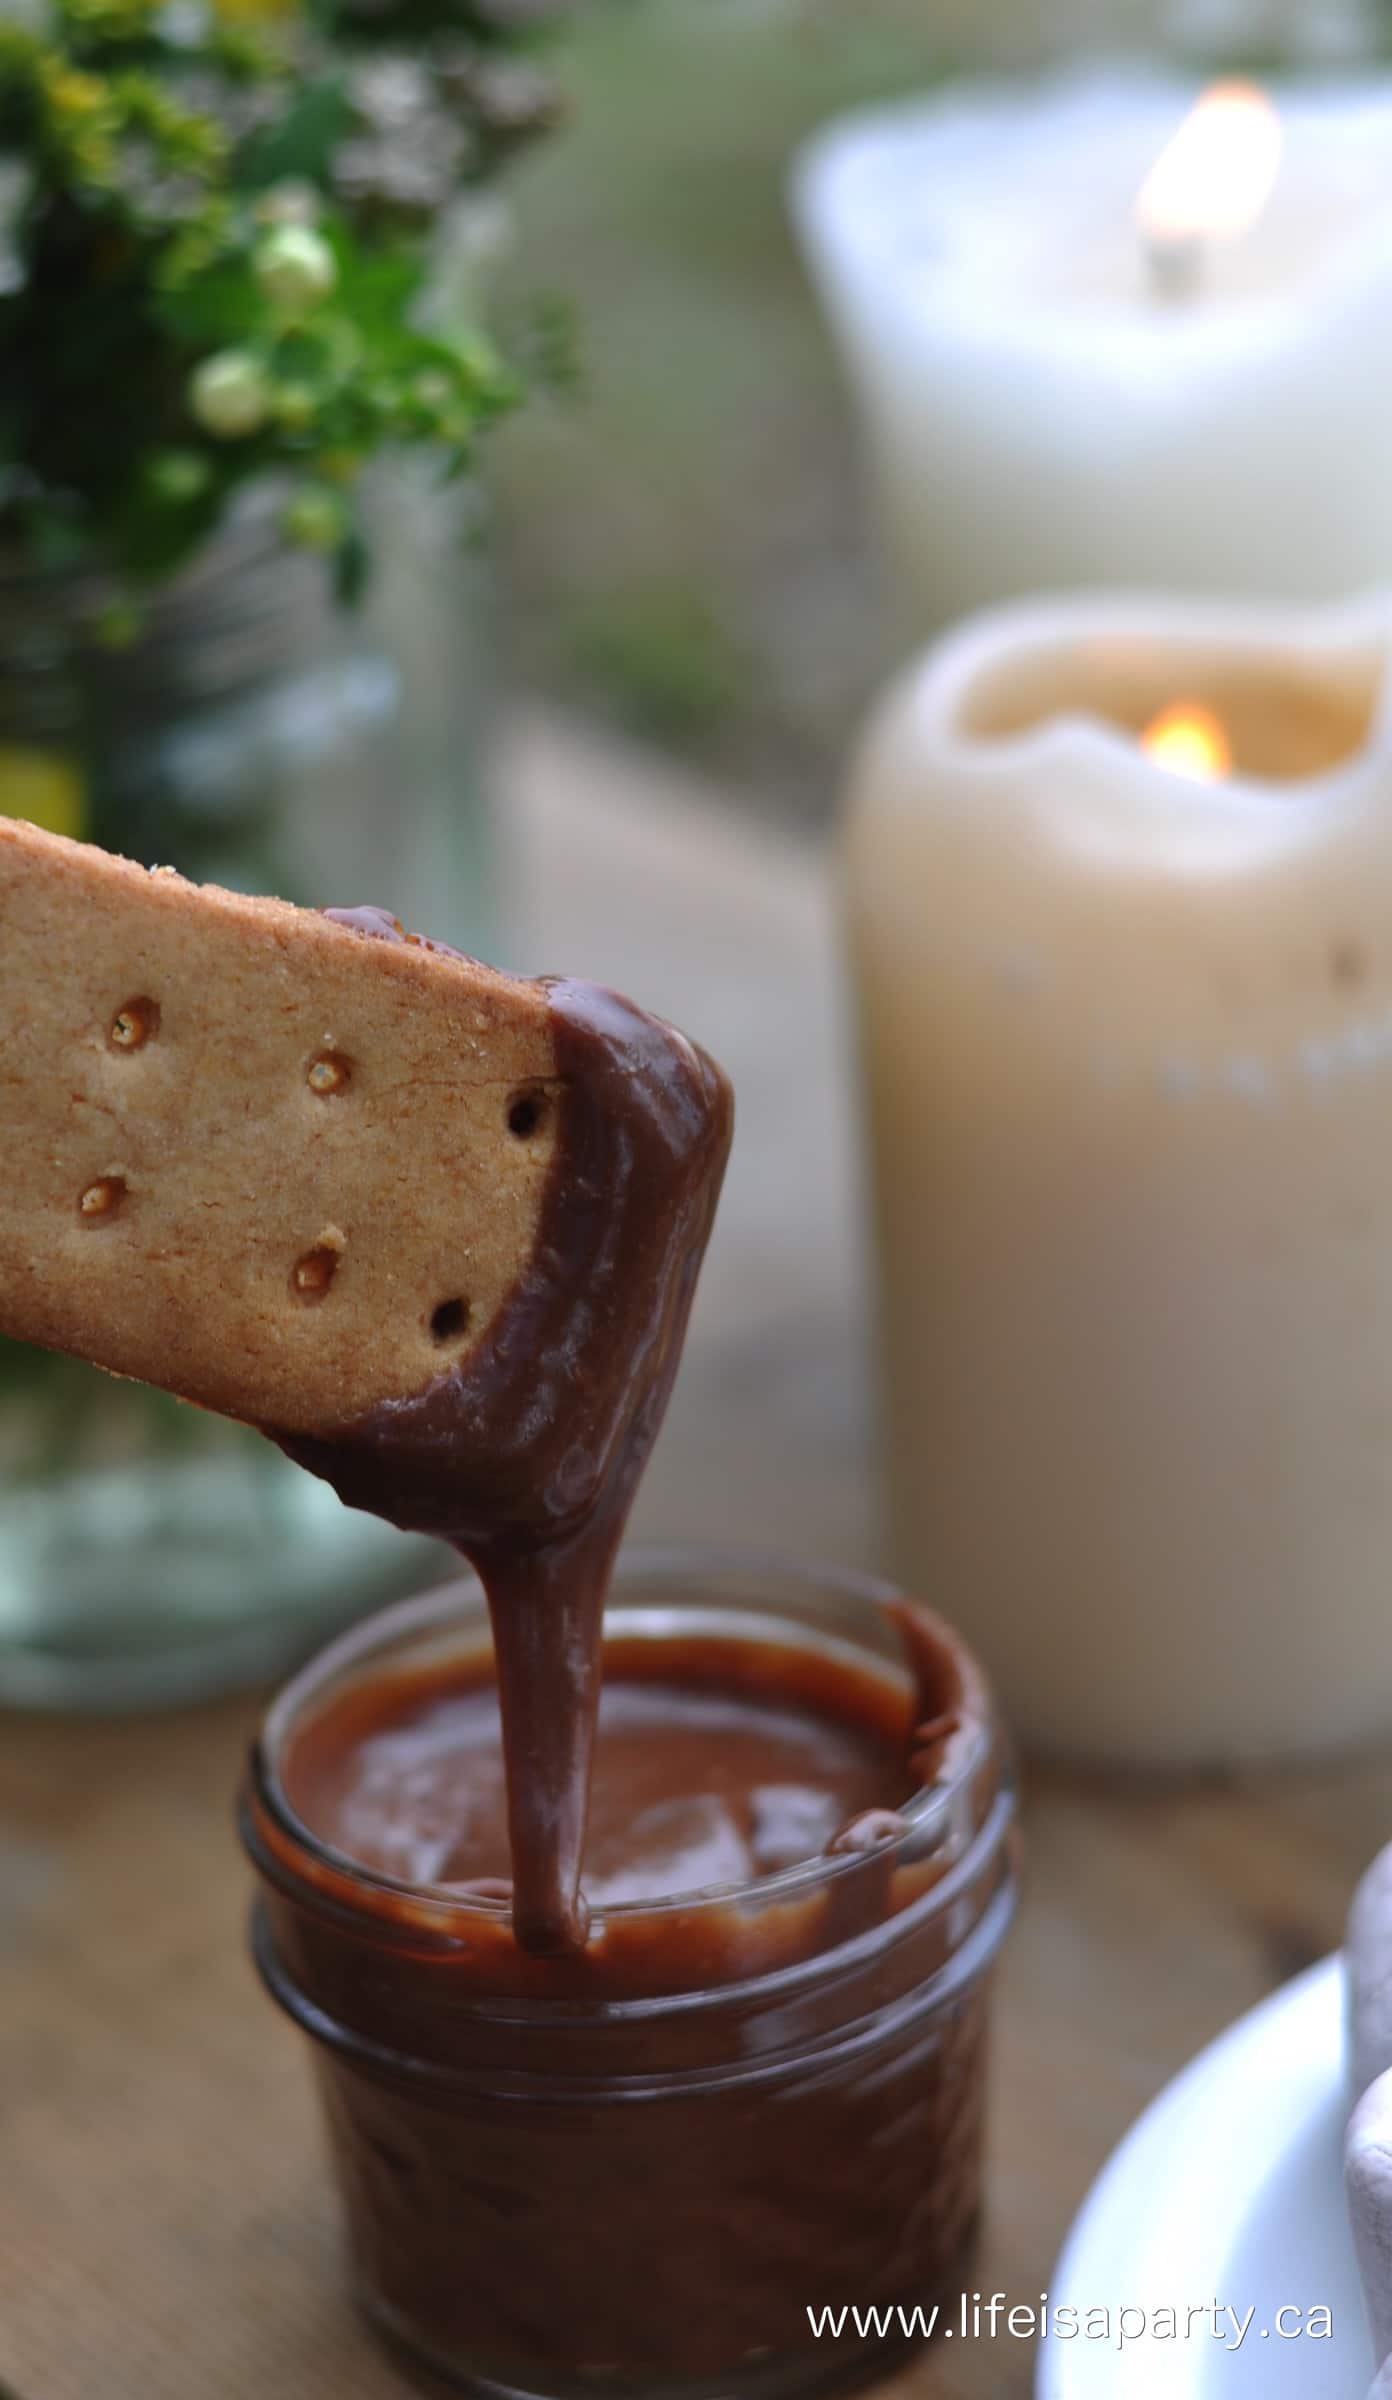
Also check out our S'mores Milk Chocolate Fondue recipe here.

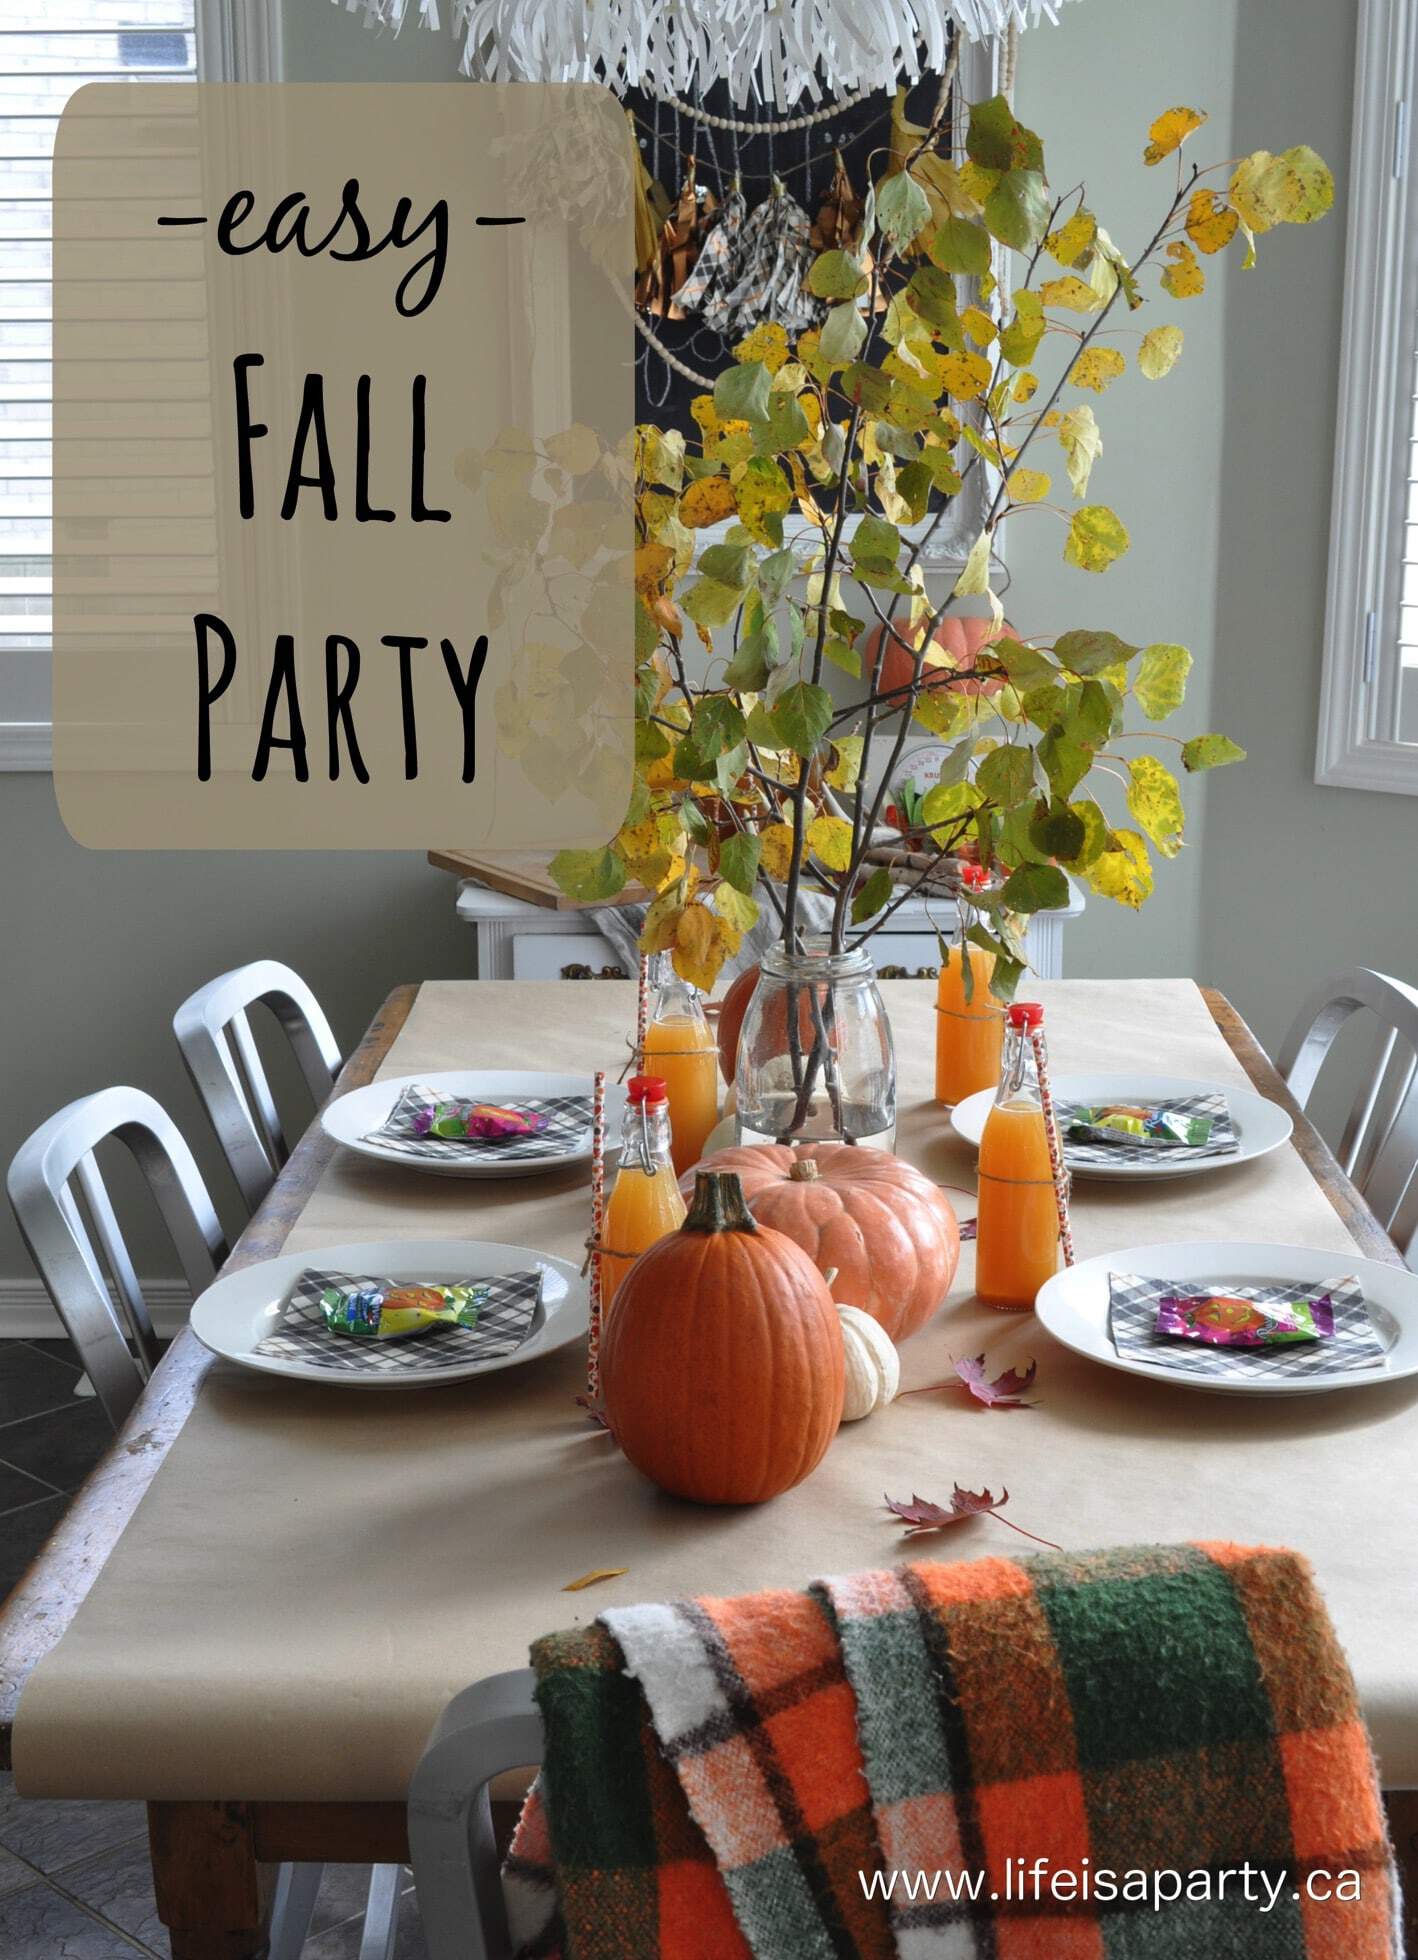
You might also like our easy Fall party here.

Easy Fall Party: easy fall party decor, pizza and donuts, a fun family game, and pumpking painting ideas for a wonderful fall get together.

How To Throw A Cozy Soup Party

Oct 6, 2014 · 15 Comments

Soup party menu and recipes.

A soup party is the perfect idea for entertaining in colder weather. Our party was a huge hit with friends and we're sharing the easy menu and recipes, our top tips, and decor ideas for the perfect family party.

Soup party menu and recipes.
[feast_advanced_jump_to]

Why We Love This Party

  • Just about everyone loves soup, and it's the perfect food for cooler weather for cozy vibes.
  • Soup is easy to make ahead of time.
  • It's relatively inexpensive to feed a large crowd.
  • You pretty easy to make vegan, vegetarian, or dairy free options for any guests with dietary restrictions.

Where are my soup lovers at? Fall is the perfect time to host a soup party.  You can do all the prep ahead of time, it's warm and hearty on these cooler days, and it can feed a crowd.  

On the weekend, we had about 25 friends over for a simple lunch of soup and bread.  

We made all the soups from scratch.  Homemade soup will feel like a treat to your guests.  Nice fresh bread with butter is also such a crowd pleaser.  This simple lunch was such a hit with all our guests and the whole afternoon was so much fun.

Want more party ideas that guests will love? Check out our Pie Buffet Party, and Fall Themed Party with Leaf Raking, perfect for fall, or our Toast Themed Party, where the whole menu was toast, or our Pasta Bar Party.

The Soups

I wanted to offer a variety of soups, so our guests could try a few.  We wanted to offer a variety of different ones, so hopefully everyone could find something they liked.  We did two creamy soups, and two broth based soups.  Two of our soups also had meat in them and were more hearty.  

We didn't have any dietary restrictions to worry about, but if you did you could make a vegan, vegetarian, or dairy free option.

We made:

  • Cream of Mushroom Soup
  • Roasted Garlic Potato Soup
  • Chicken Noodle Soup
  • Italian Sausage and Tortellini Soup

On Saturday afternoon, my husband and I made four different homemade soups.  For several of them we made a double batch.  

First we made Cream of Mushroom.  This was my favourite. This creamy soup has a fairly mild taste.  Making it homemade makes it extra special.

Bowl of mushroom soup with bread.

Next we made a Tangy Roasted Garlic and Potato Soup, it gets its tang from the buttermilk, can also easily be made veggie.  This is another creamy soup, but a little different from usual with it's tangy taste from the buttermilk.

Next, I made a classic chicken noodle, always a hit with the kids.  It was nice to have something kind of basic for those who are a little less adventurous.

Lastly we made Italian Sausage and Tortellini, and it was probably the most popular soup.  It's nice and hearty with the tortellini in it, and has a great mix of meat and veggies with a tomato broth base.  

Top Tip: don't add the tortellini until you reheat it to serve.  The pasta can get a little overdone and mushy if it's added the night before.

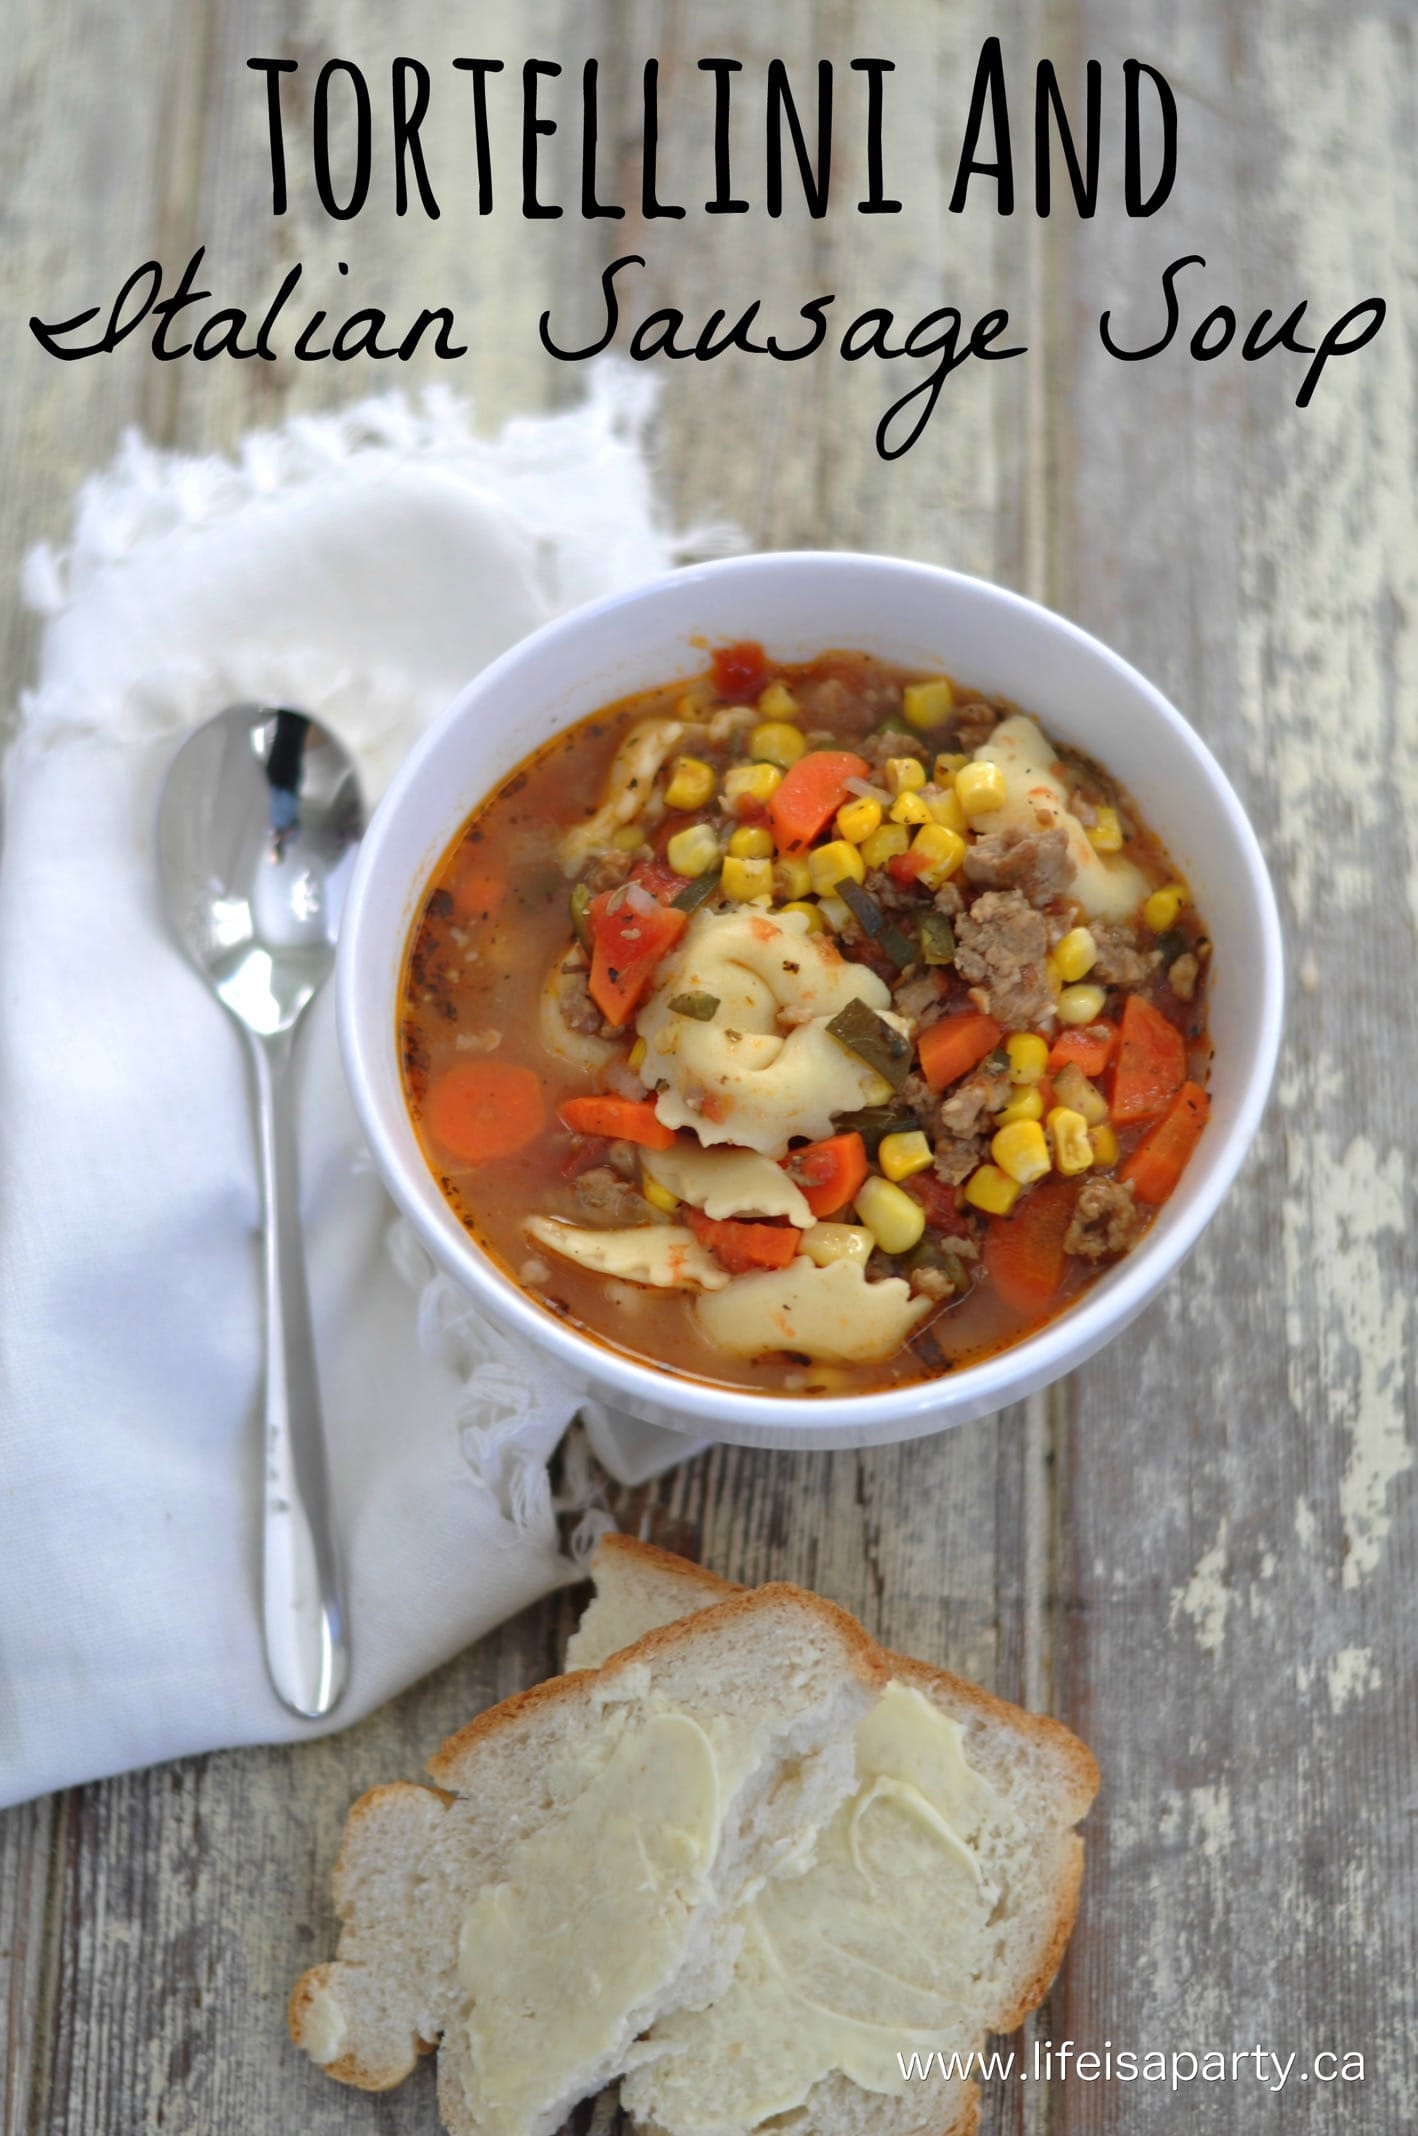
Tortellini and Italian sausage soup.

Bread

In the morning we stopped at the bakery and picked up lots of fresh bread, then came home to re-heat the soup before our guests arrived.  We served the soup in the large pots we made it in.  A slow cooker for each soup would have worked really well too.

The store-bought fresh bread was the perfect, easy accompaniment.  We bought four different kinds of bread plus different buns.  It's nice to have a mix of things like sourdough, whole wheat, white, cheddar and herb.  

Bread table at a soup party with different bread and buns and butter.

Again lots of our guests went back and tried lots of different kinds of the bread too.  We left the loaves whole, and put out a cutting board and bread knife for guests to help themselves, but it might have been easier for serving if we had asked the bakery to slice them.

Drinks

Soup party drink cart with iced bottled water and punch with glasses and straws.

We set up a little drink cart for guests to help themselves.  We had a bucket of ice water, and another of drinking boxes for the kids.  

Punch bowl with plastic glasses and fall leaf straws.

I also made a simple fall punch of peach juice, white cranberry, and ginger ale.  Apple cider would be a great choice too.

I love these sweet fall leaf paper straws and flowers in mason jars.  Love is in the details.

Dessert

Large apple crisp at a soup party.

For dessert, my husband made two big pans of apple crisp -see our recipe here, and we served it with vanilla ice cream. Yum!  It was the perfect way to finish a fall meal since apples are so perfect this time of year.

Buffet Style Soup Bar

We set everything up in the backyard, starting with the soup table.  Love these chalkboard buntings, they're so handy since they can be changed for any party.  I also used one on the drink stand.

"Soup's On" chalkboard bunting banner at a soup party.

I used little chalkboards to label all the soups, which worked really well so our guests could see exactly what kind of soups they were.

Soup buffet at a soup party with large pots of soup and chalkboard signs.

We had so much delicious soup, and we needed a separate table for all the bread!  It worked out well this way for traffic flow too, so I recommend this if you're hosting your own soup party.  We used soup bowls from our regular set.  If you don't have enough though, feel free to mix and match small bowls from the thrift store, pick up some inexpensive white ones from the dollar store, or use disposable dishes.  

Soup party with soup buffet table and a table for bread and butter.

We served the soup in each large saucepan or dutch ovens we made them in.  It was casual comfort food, and our serving style was casual too.  A crock pot would work well for this too, and have the added bonus that you could leave it plugged in on a low heat to keep the soup nice and warm throughout the party.  And don't forget you'll need a large ladle for serving each soup too.  If you don't have enough be sure to pick up some extras so serving is easy.  It might be nice to have some salt and a black pepper on the table too, for guests who might want to add a little more to their soup.

Easy Fall Decor

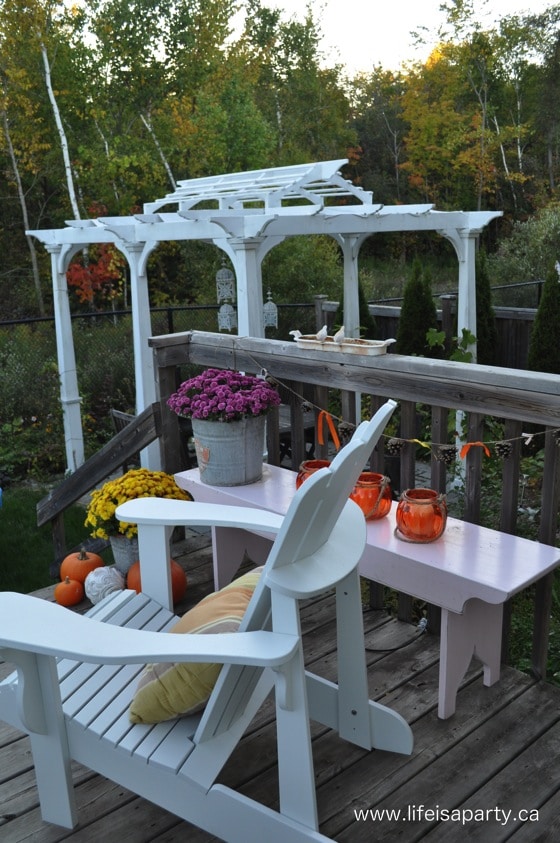
Our party was on a very warm fall day and we set everything up outside. Most of us sat under the pergola. I added some fall mums, pumpkins, and fall garland.

Outdoor pergola with table and chairs.
Back deck decorated for fall with pumpkins and mums.

This menu worked out really well too.  Lots of people tried a bit of everything, and everyone could help themselves to as much as they wanted.  

I was able to freeze the leftovers the next day too.

I was tempted to add a veggie tray and salad and cheese and crackers as side dish options, but really there were lots of veggies in the soup main course, and everyone loved that all the different soups were homemade, so I'm glad we spent our energy on them and resisted the temptation to add other options.  

Soup Party Tips

  • Do offer different options, having some creamy, some with meat, and some with broth so that guests try a variety.
  • Do space things out enough so that the line isn't too congested and slow.  Have one area for soup, another for bread, and another for drinks.
  • Do think through options for kids who might not be soup fans, maybe check with their parents before the party, and have some pb and j on stand by.
  • Do give yourself enough time to re-heat the soup.  This took a little longer than we expected because the soups were quite cold from being in the fridge overnight and were in such big pots.
  • Do make sure you have enough serving ladles to have one per pot of soup.
  • Do use your crock pots for serving, if you have enough, or consider borrowing some for the party, to keep the soup warm the whole time.
  • Do have extra containers to send leftovers home with guests, or to put in the freezer after the party.
  • Don't worry about having side dishes or appetizers, the simplicity of soup and bread is perfect.
  • Do keep dessert simple after making all those homemade soups.

It was a great menu for a get-together of this size, since it could all be made ahead of time, and was easy to have guests help themselves too.  A fun buffet is one of my favorite ways to host a crowd, and soup parties are so perfect for the fall and winter especially.  Lots of guests thought the best part was getting to try all the different soups and breads.

This would also be great as a potluck party.  Have guests each bring their different types of soup.  You could even have a friendly competition and have everyone vote for their favorite soup recipes at the end of the night.  A simple soup buffet is such a great idea for your next party.  Try it for a ladies luncheons, football games, souper bowl, a fun dinner party, soup club, or potluck luncheon.

With a fun fall soup party like this, life really is a party!

Frequently Asked Questions

How far ahead can you make the soup for a soup party?

We made our soup the day ahead, you can make it up to a few days ahead of time. Top tip, don't add your pasta until you're ready to serve so that it doesn't go soggy and become overcooked.

Did your soup buffet get cold without slow cookers?

No, we didn't have a problem with the soup staying warm. It was a warm day outside. If it was cooler you could use slow cookers. Or if you're party is indoors, serve the soups from the stove and turn them on if they start to get cold.

How many soups do you need for a soup party?

It's really nice to offer some variety and our guests really enjoyed trying all the different soups. We recommend at least 3 options to make it feel special. Try to include some broth, some creamy, some with meat and some without for variety.

Do I have to make all the soups from scratch?

Certainly not. Look for prepared soups in the deli section for a great store bought option. Also if you are short on time and making homemade versions look for time saving options like already chopped veggies or garlic.

More Soup Inspiration

  • homemade beef and vegetable soup
    Homemade Beef and Vegetable Soup Recipe
  • Tortellini and Italian sausage soup recipe.
    Tortellini and Italian Sausage Soup
  • Potato soup with buttermilk and roasted garlic.
    Buttermilk Potato Soup with Roasted Garlic
  • Homemade copycat Campbell's Tomato soup recipe.
    The Best Homemade Copycat Campbell's Tomato Soup

If you try having a Soup Party or any other ideas on my blog please let me know how it went in the comments below. Thanks for visiting today!

Fall Back Deck

Oct 3, 2014 · 2 Comments

Fall Outdoor Decor Ideas -the back deck is styled for fall with pumpkins, mums, straw bales, pinecones, lanterns for a cozy fall.

Fall Outdoor Decor Ideas -the back deck is styled for fall with pumpkins, mums, straw bales, pinecones, lanterns for a cozy fall.

We added traditional fall colours and lots of fall outdoor decor ideas to add warmth and interest to the back deck for fall.

Mums, Pumpkins, and Straw

This year, for the first time, I decided to add some fall decoration to our back deck.  It usually goes right from summer planters to everything put away for the winter, but I'm so glad that we added a little fall back here this year -it's so lovely to sit here and look at the forest behind our house, with all of it's changing colours for fall.  Of course I didn't want to spend a lot of money on it, but for under $30 I love how it turned out.

Fall Outdoor Decor Ideas pumpkins mums and straw bale

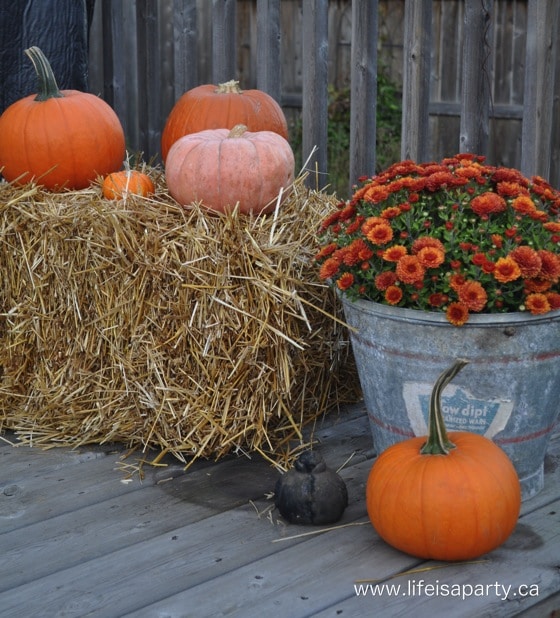
I picked up a mini bale of straw? hay? -I never know the difference? at a local farm stand.  I like that it's mini, adds texture, and height, but not too big of a commitment.

orange pumpkins and a mum

I found the more unusual "pink" pumpkin at a farm stand, for $5.  Here's my tip, buy a few interesting ones, like this one, and the minis, but for the rest just pick up pie pumpkins at the grocery store and mix them together.  

I've found the pie pumpkins for just 50 cents each after a little looking around.  And if you're on a budget, buy your mums at a discount grocery store too, these were $3.66, and they're a good size.

Fall Outdoor Decor Ideas bee ornament

I had this cute little gold bee, love how it looks in the orange mum.

Fall Back Deck

Cozy Spot To Sit

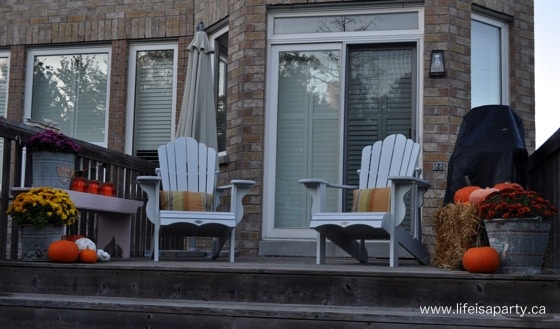
The two white Muskoka chairs are new replacements this year.  We had a wooden set, but after many years, and many times of re-staining them, we switched to these no maintenance composite ones in the spring and they've been great .

Fall Outdoor Decor Ideas

On the other side,  more mums and pumpkins.

Fall Outdoor Decor Ideas mum and pumpkins
fall mum and lanterns

I love how the mums look in the vintage galvanized pails.  They couldn't have been simpler to do, I just emptied out the summer plants and dirt that were already in them, and inserted the mums, still in the plastic pots from the nursery.  Easy peasy and will make putting things away for winter in some weeks, that much easier too.

Pinecone Garland

outdoor candle lanterns for fall and mums

I made the pine cone garland with some pinecones, hot glue, twine and ribbon.  Such a fun little detail.

fall pinecone garland

Lanterns

And in front of the garland, my dollar store candle find.  These pretty pumpkins lanterns were only $2 each -love the rope handles.

Fall Outdoor Decor Ideas

And, they add a warm glow as the sun goes down.

fall candle lanterns

It's calling for rain, rain and more rain this weekend, but hopefully there are still some warm fall afternoons and in our future to enjoy the back deck.  

With fall outdoor decor ideas like these, life really is a party!

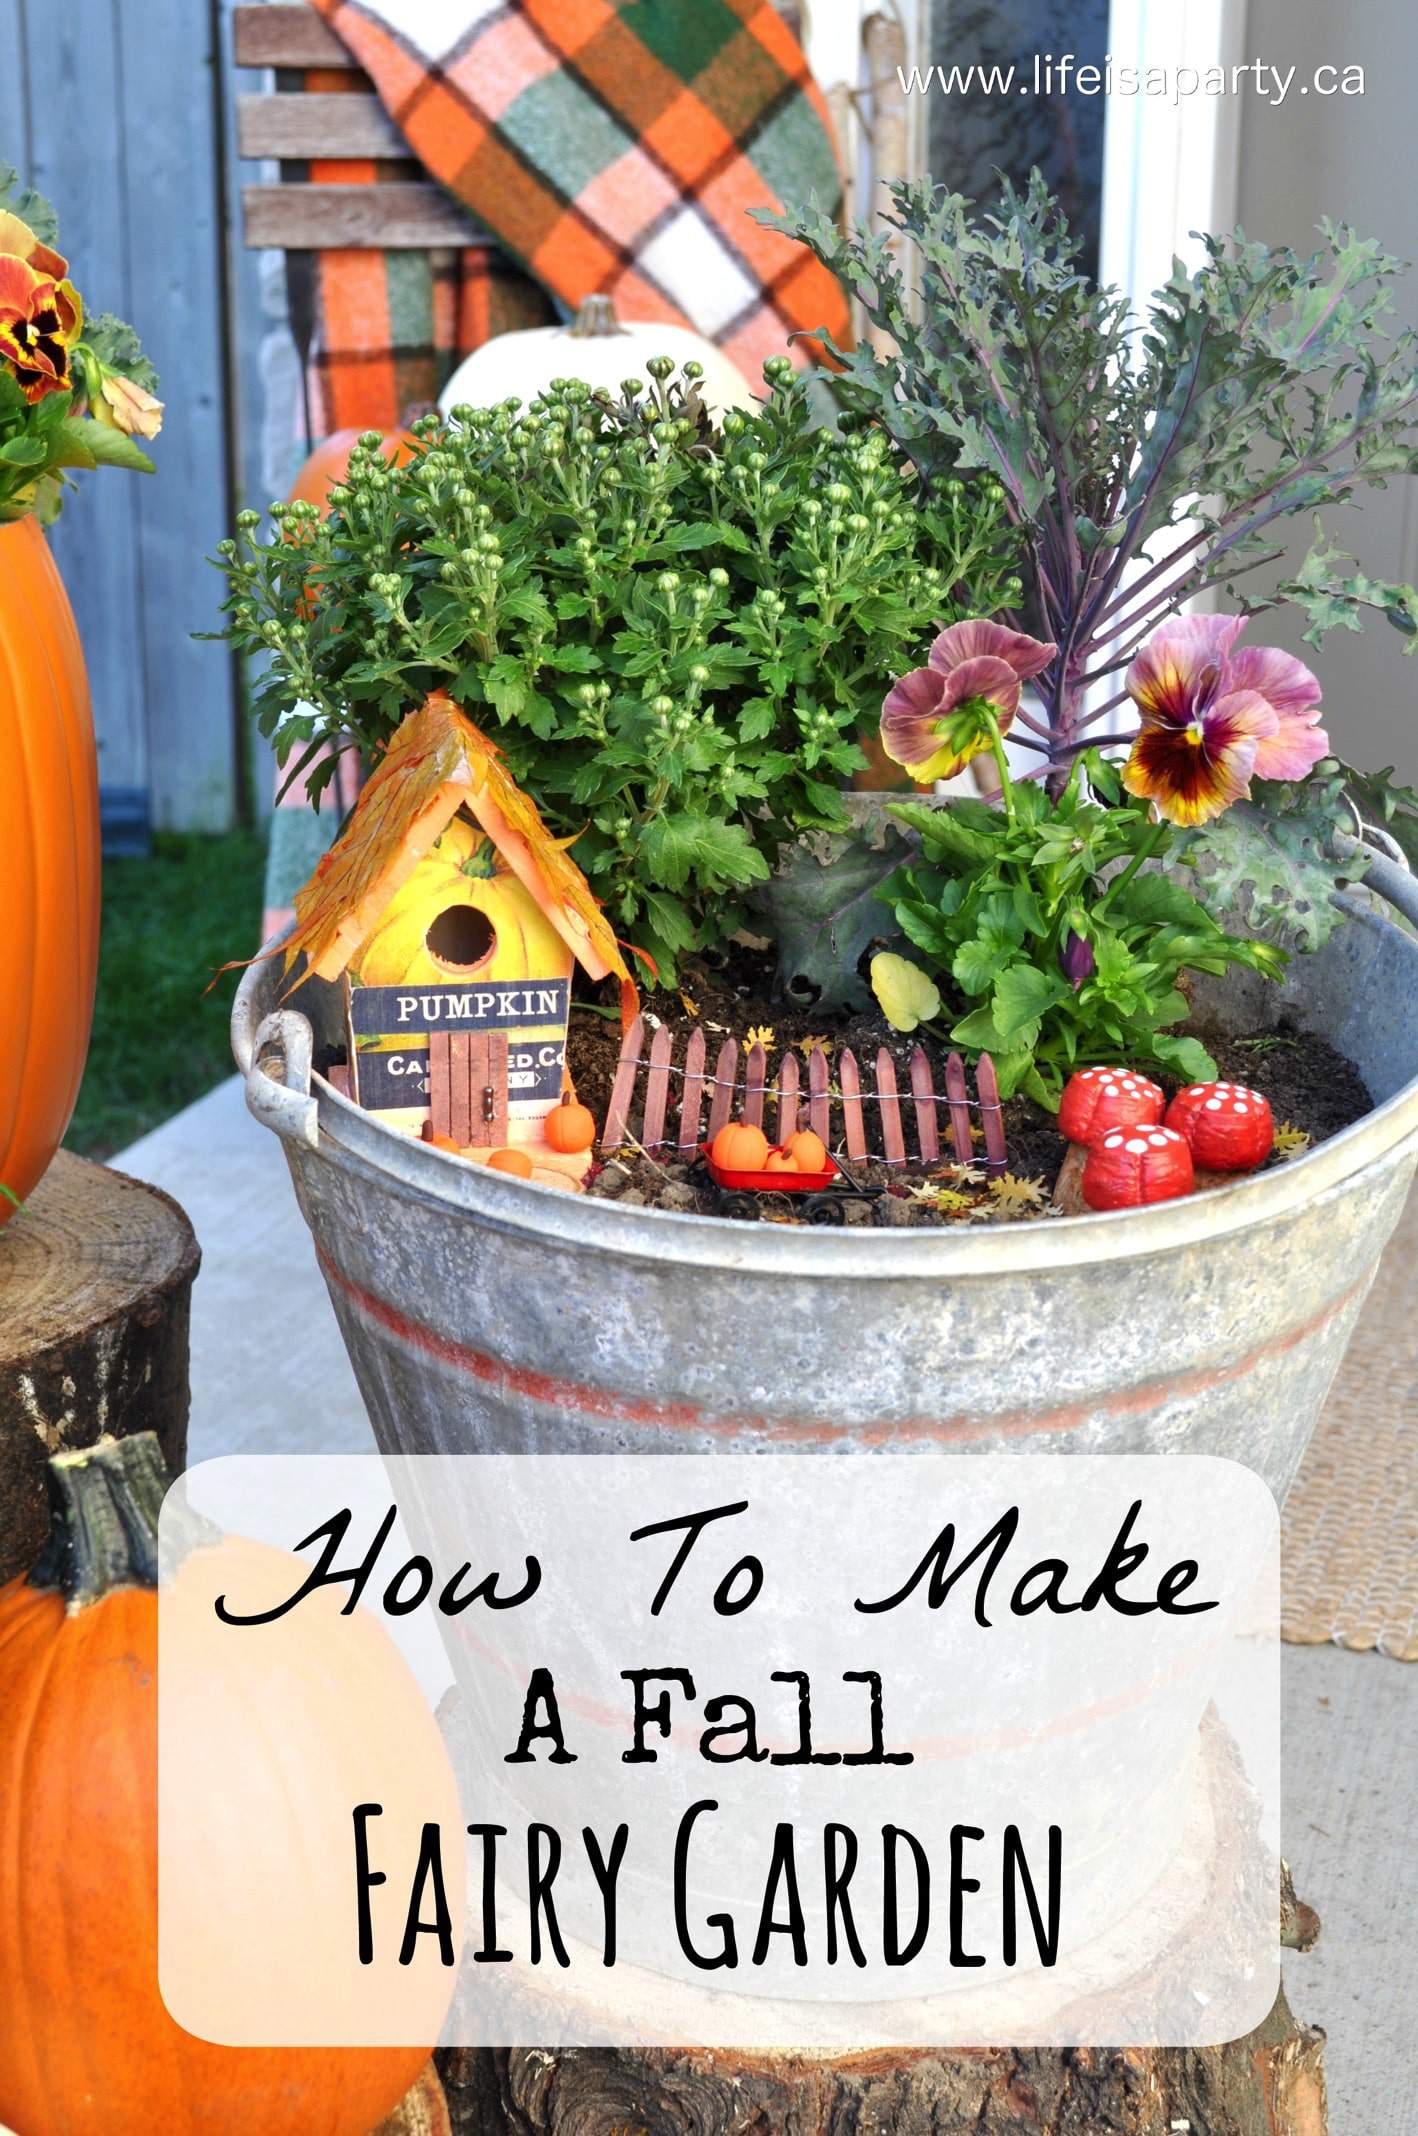
You might also like our Fall Fairy Garden here.

Fall Fairy Garden: How to make a sweet little Fall themed Fairy Garden with an easy to make fairy house, mushrooms, pumpkins, and miniature fall leaves tutorial.

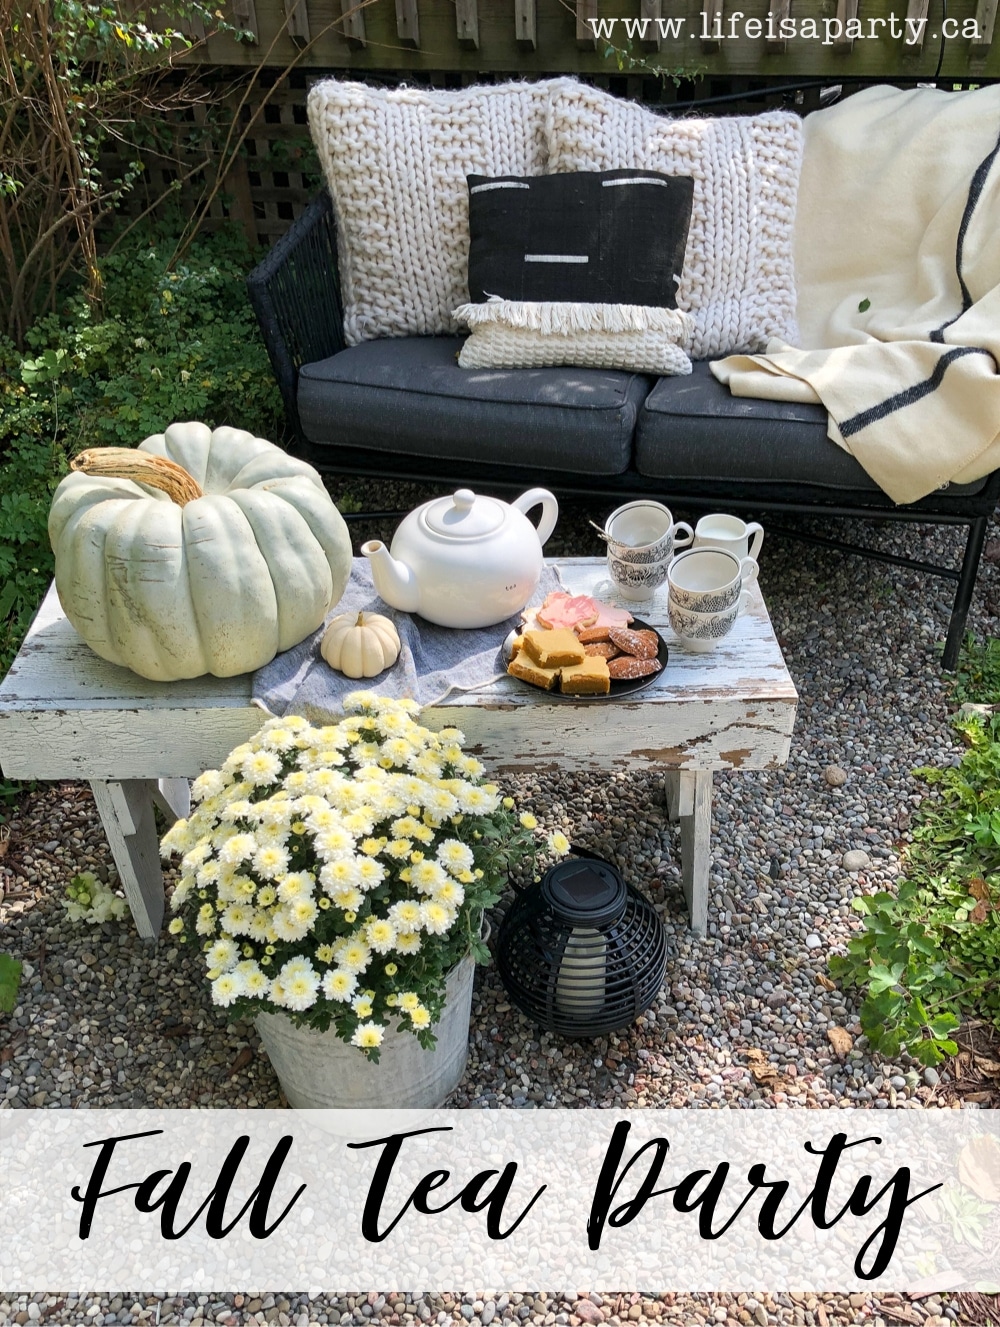
Also check out our Fall Tea Party in the Garden here.

You might also enjoy our White Fall Outdoor Planter here.


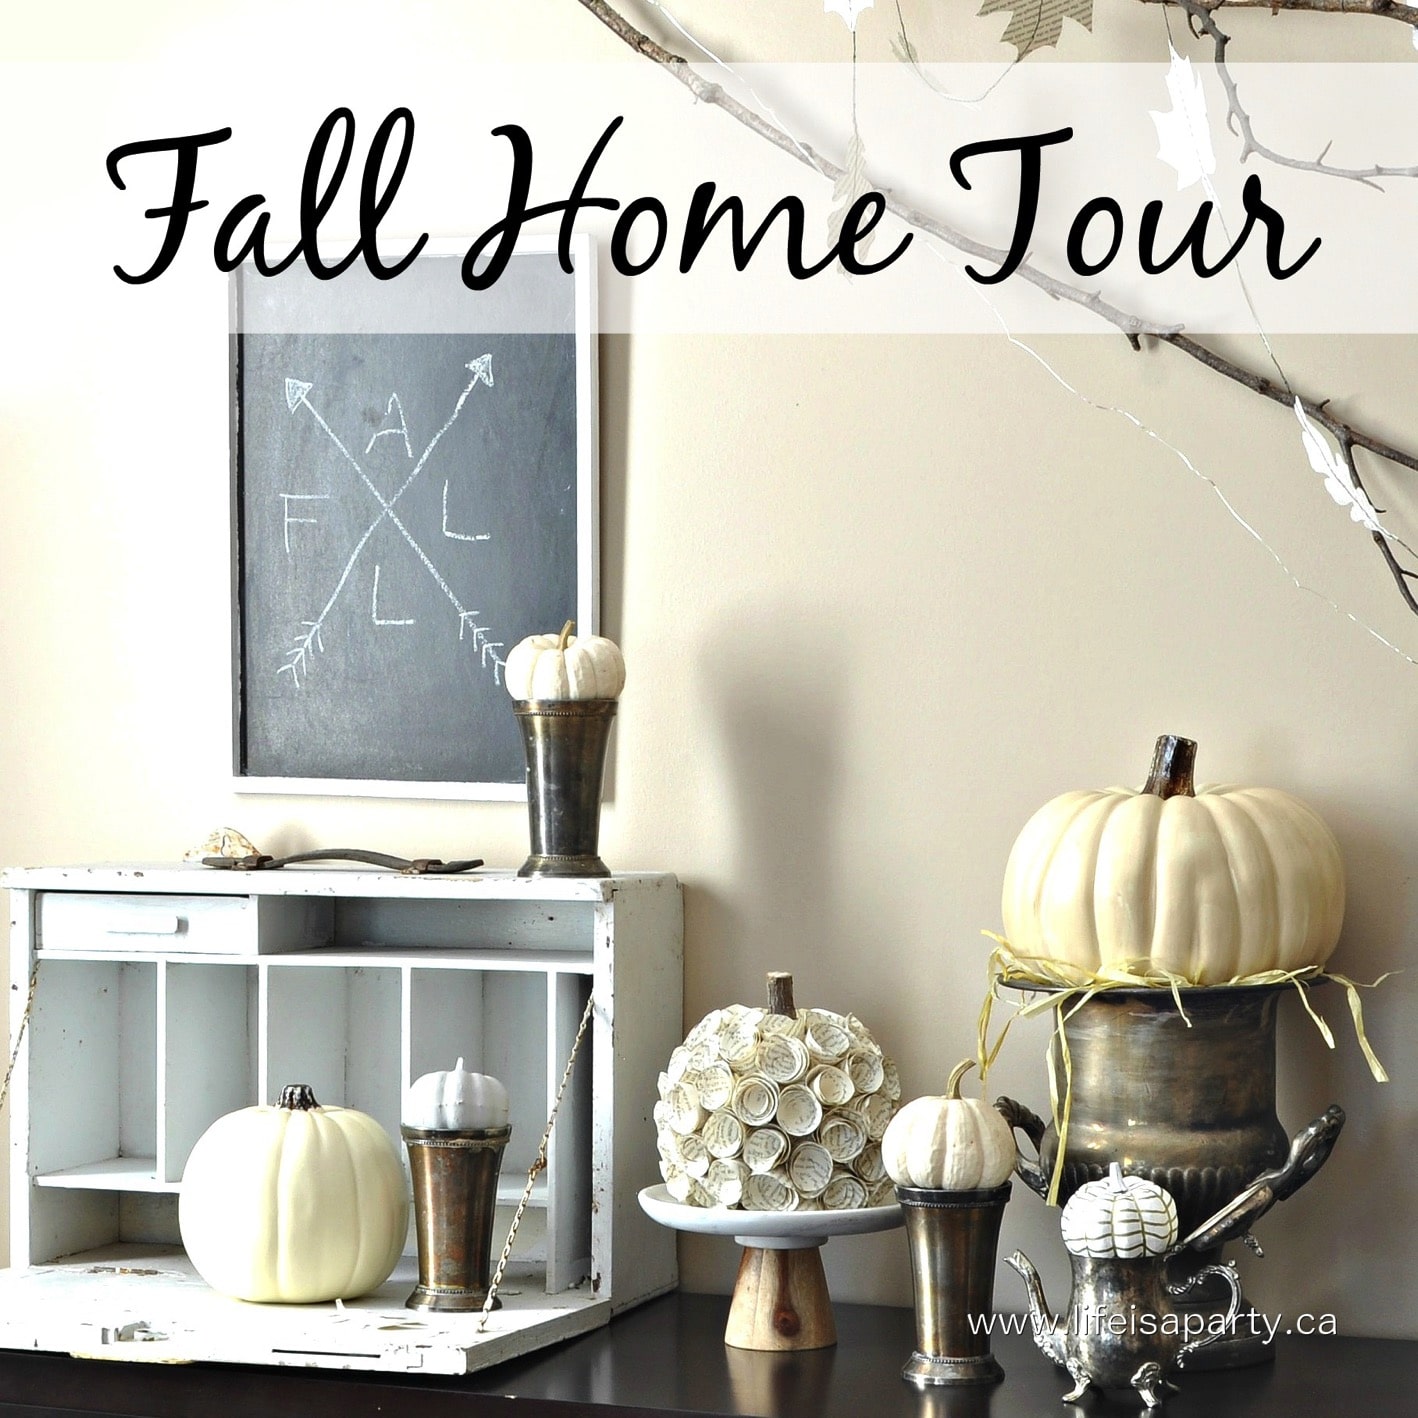
Fall Home Tour -Easy Fall Decor

Oct 2, 2014 · 6 Comments

Fall Home Tour: easy fall decor and ideas, vintage milk glass collection dressed up for fall, and black and white enamelware collection too.

I'm excited to share a little fall home tour with you today filled with lots of easy fall decor ideas.  Welcome!  Grab a cup of coffee or tea, and come on in.

fall front door.

I've been enjoying my succulent planters so much, I didn't want to change them, so I just added a bunch of white pumpkins to the front door to add a little fall.

succulent planter

Easy Fall Decor in the Dining Room

At our front door,  we have this little console table.  The suitcases were found at antique fairs and garage sales this summer.  Love the touch of vintage they add.

fall leaves fall decor

I've kept most of the fall decor on the main floor quite neutral, but I couldn't help myself from adding just a few fall colours, like these gorgeous maple leaves.  Such a simple touch, but so much impact.

Fall leaves

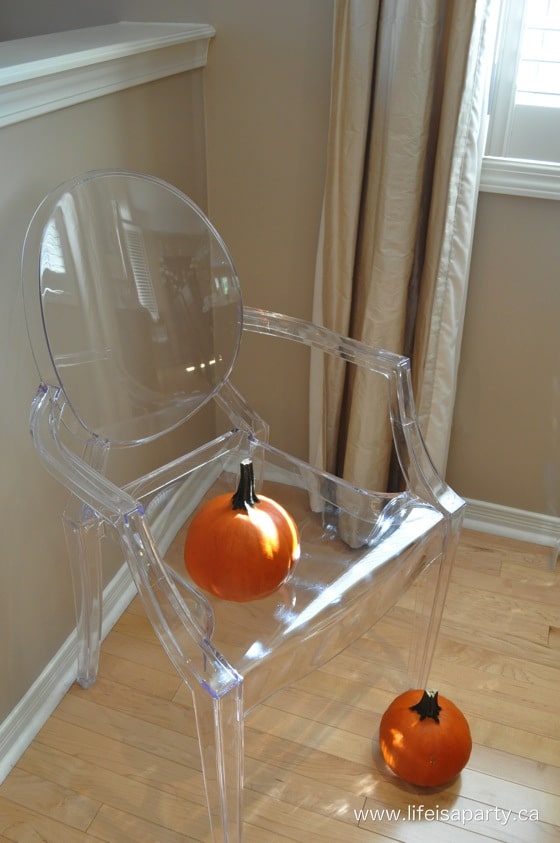
Just inside the door there's a little spot that changes from time to time.  Recently I got this beautiful chair from Stuctube, and set it here when I came in the door.  I didn't plan on leaving it there, but thought it looked great, so it got a few pumpkins added to it for fall and has stayed.

pumpkins on a clear ghost chair

Our house is very open concept on the main floor, and you walk into the dinning room.

fall dining room decor

Milk Glass Collection

I've used my milk glass collection in here this fall, and I love it.  I've been trying to stop myself from buying more, but I came across a few great pieces this summer while thrifting and so the collection continues to grow.

milk glass collection
milk glass

To make the milk glass work for fall, I've added lots of natural bits and pieces, all in neutrals and whites.

milk glass collection

On the dining room table I used this chevron table runner -it's become a favourite, and layered on lots more milk glass and candles.

milk glass display

There's also a few book page leaves added in.

milk glass collection

So simple, but so pretty.

what to do with your milk glass collection

With just a few acorns, leaves, and pine cones added in.

milk glass display for fall

Easy Fall Decor in the Living Room

The dining room then leads into the living room.  I've kept it neutral and cozy in here this year.

easy fall decor in the living room

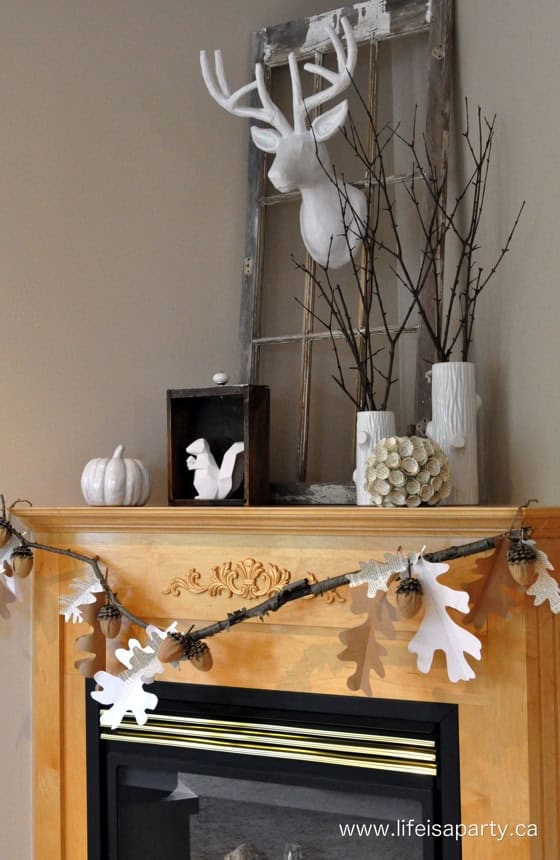
In the corner, is the fireplace.

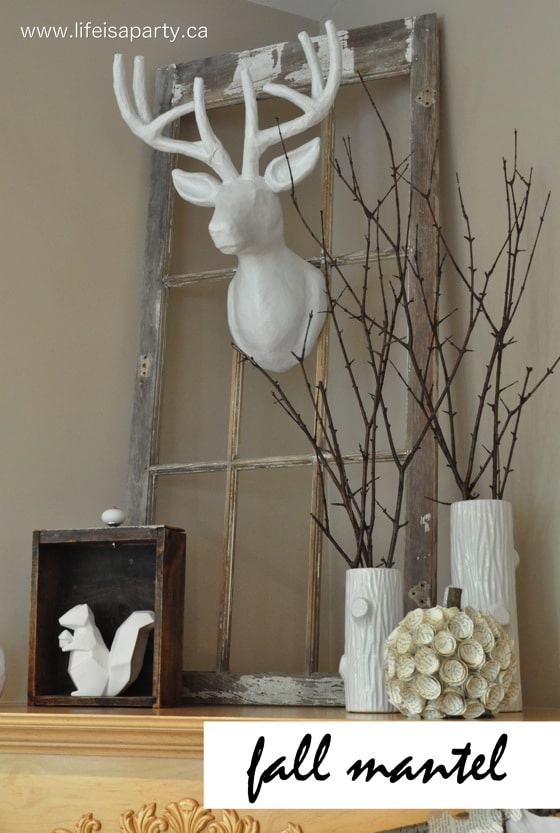
neutral fall mantel ideas

I love how the mantel turned out this year, you can read more about it here.

neutral easy fall decor

White and Black Enamelware Collection

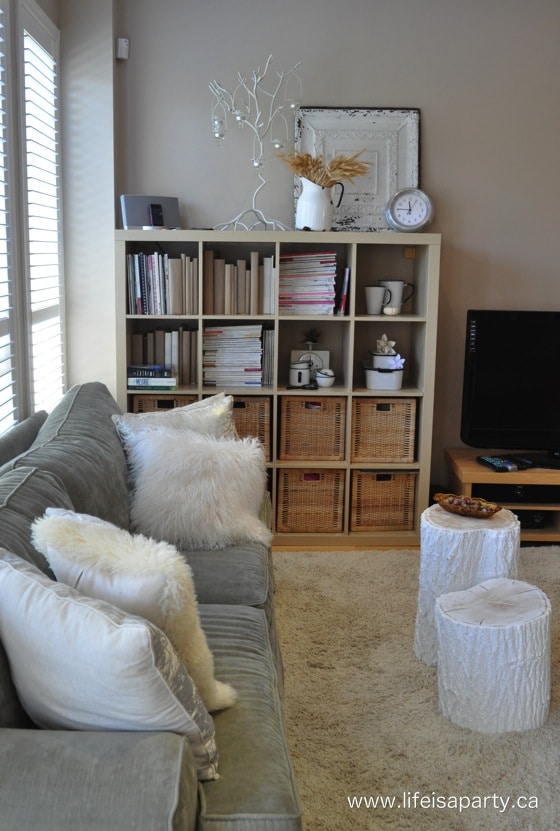
On the other side of the room is the couch and a shelf that I've decorated for fall with white and black enamelware.

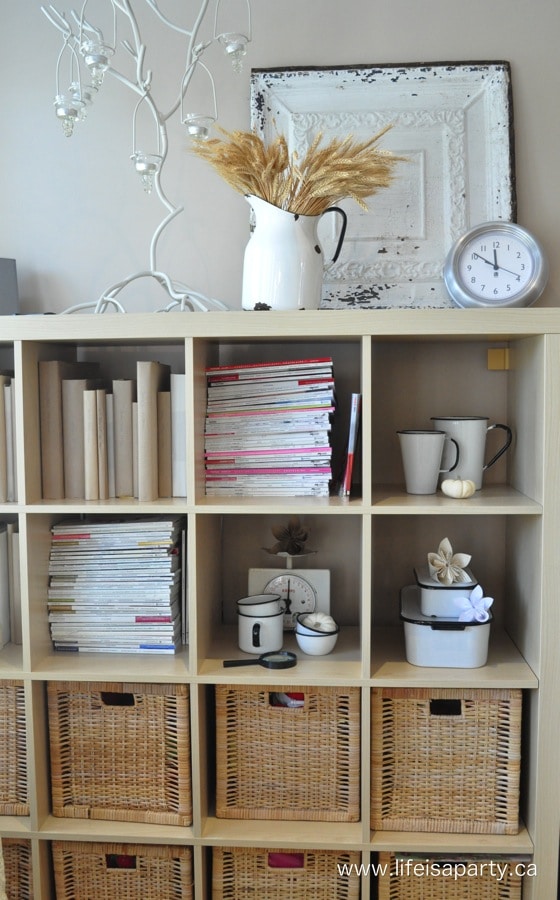
black and white enamelware display

The shelf holds toys in the baskets, and lots of cookbooks and magazines, but I always try and leave a few shelves clear for some decor.

black and white enamelware display

This summer I've kept my eye open for white and black enamelware, and the more I find, the more I love it.

black and white enamelware display
black and white enamelware

So simple and so pretty.  The more I buy white, of anything, the more I love it.

black and white enamelware

Easy Fall Decor in the Kitchen

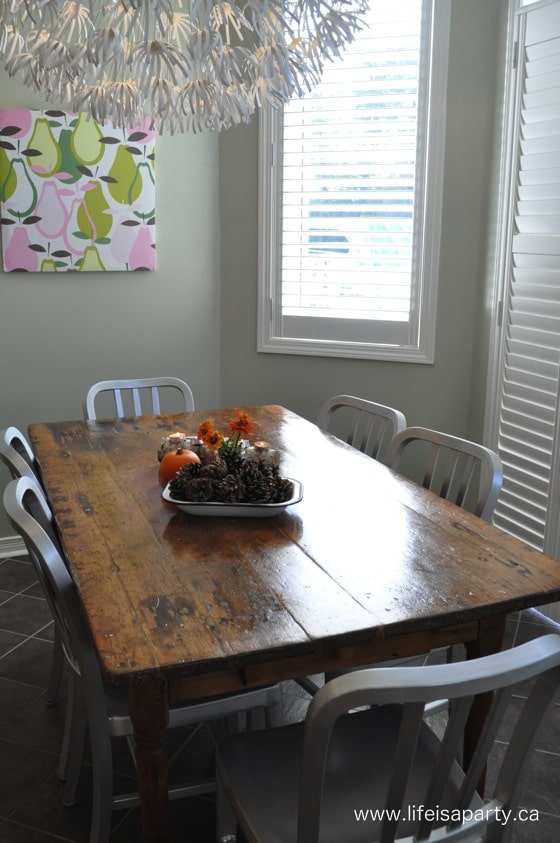
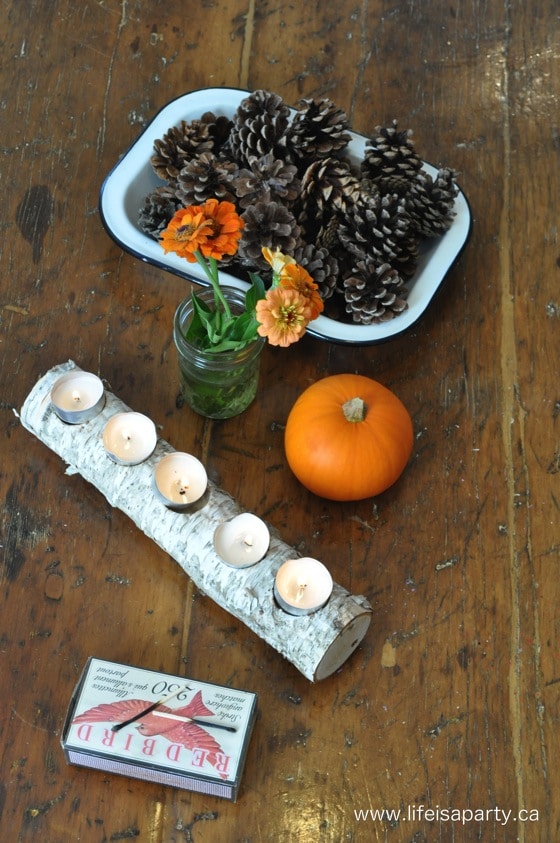
Finally, in the kitchen, the table is sporting a few little fall touches too.

easy fall decor

My girls love lighting the candles when we're having dinner.

easy fall decor

Just outside our kitchen, through the sliding doors, we have a back deck.  This year I decided to decorate it for fall, and I'm loving looking out on it each day.  Here's a little sneak peek of the back deck you can read all about the Fall Back Deck here.

easy fall decor

Thanks for joining me for my little fall home tour.  With easy fall decor like this, life really is a party!

You might also Fall Home Tour 2019 here.

Fall Home Tour: Full of autumn decor ideas for Vintage Botanical Scientific Decor with Boho Maximalist Influence with lots of plants, insects, and pumpkins.

Also check out our Fall Home Tour 2018 here.

Fall Home Tour: With a nod to science this botanical scientific vintage decor brings the outdoors in, with lots of neutrals and mustard yellow.

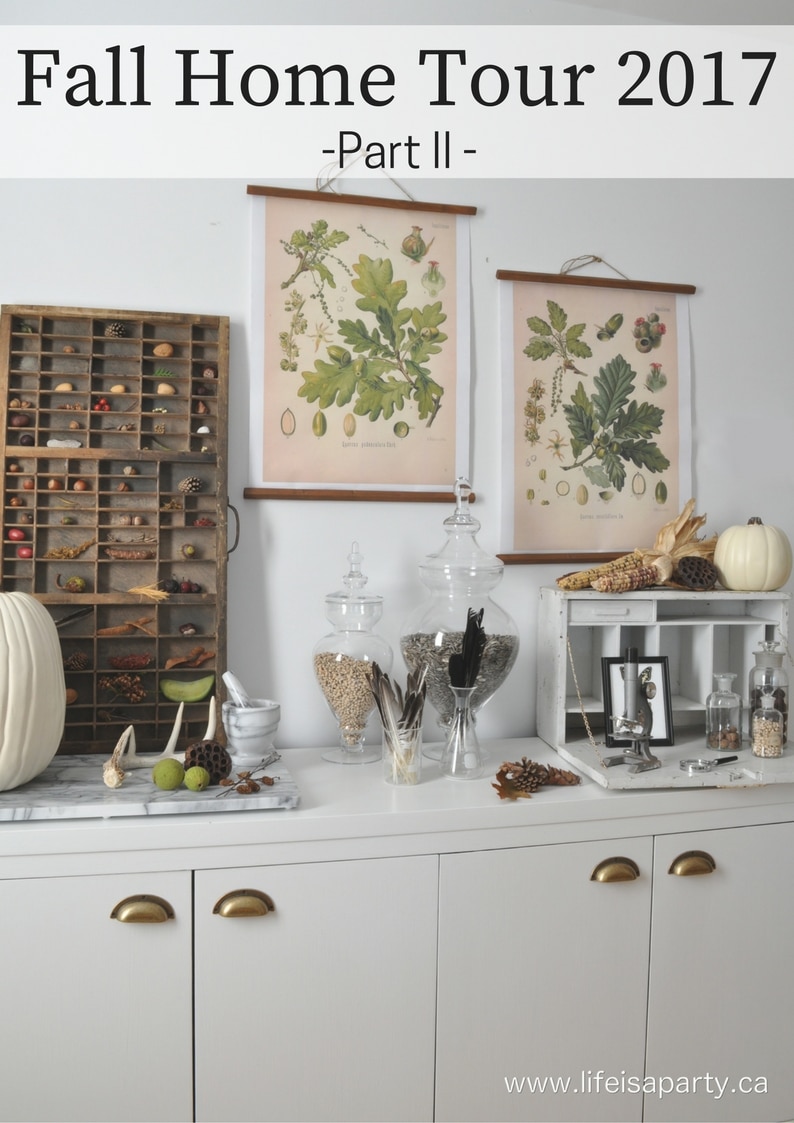
You might also enjoy our Fall Home Tour 2017 here.

Fall Home Tour -Vintage fall decor, botanicals, scientific decor and lots of natural elements to bring the outdoors in and celebrate the changing season.

Moist Pumpkin Bread With Walnuts

Sep 27, 2014 · 1 Comment

A loaf of moist pumpkin bread with walnuts on a cutting board.

Looking for the best pumpkin bread with walnuts? This moist and tender loaf combines pumpkin puree, warm spices, and crunchy walnuts for the ultimate fall treat. What makes this recipe extra special is the addition of red lentils, which keep the bread incredibly moist while adding a boost of protein. Topped with cinnamon honey butter, this pumpkin walnut bread is a cozy snack, breakfast, or gift during pumpkin season.

Ginger pumpkin loaf with walnuts on a cutting board with a cup of tea.
[feast_advanced_jump_to]

Why You'll Love This Recipe

  • This pumpkin bread stays extra moist with the addition of red lentils.
  • The combination of fresh and dried ginger in this recipe give a depth of warm flavor.
  • Walnuts add the perfect crunch.
  • This recipe makes two loaves, enjoy one and gift or freeze the other.
  • The cinnamon honey butter is the perfect accompaniment.

This pumpkin bread with walnuts makes the best afternoon snack, or breakfast.  It's really pretty great anytime with a cup of coffee or add it to your kids lunch boxes.  If you are a lover of pumpkin recipes, you will love this one.

We love pumpkin recipes this time of year. These Pumpkin Blondies are the first recipe I make every fall. If you need a pumpkin dessert, check out our Cream Puffs with Pumpkin Custard and Caramel Sauce, Pumpkin Spice Rice Krispie Treats, Pumpkin Shaped Dinner Rolls, or this Pumpkin Bread Pudding recipe.

"What makes this pumpkin bread with walnuts different? A secret ingredient - red lentils - makes it extra moist and adds protein, without changing the flavor."

Ingredients

Ginger pumpkin loaf with walnuts ingredients on a table in small bowls.
  • Pumpkin -The star of the show here is the pumpkin. We used canned pumpkin puree for our pumpkin bread. Be sure to look for canned pumpkin puree and not pumpkin pie filling, which has sugar and spices added. You could also make your own pumpkin puree by cooking pumpkin and pureeing it in your food process.
  • Lentils -This pumpkin bread has a secret ingredient that makes it extra moist.  You really can't taste the lentils in this dish, but they keep the loaf from being too dry and give the bread a nice texture and tender crumb, and they add 11g of protein to the recipe.   Lentils are easy to prep for the pumpkin bread.  Just cover them in water and boil them for 15-20 minutes until they are softened, then drain and add to your pumpkin mixture.
  • Fresh Ginger -The fresh ginger combined with the ground dry ginger adds a richer more intense ginger flavor to the dish, but isn't overpowering.  Look for fresh ginger root in the grocery store in the fresh produce aisle.  To prepare the ginger, first peel off the outer skin, and then finely grate the ginger, being sure to preserve the juices which are so rich in flavor.
  • Walnuts Or Other Nuts or Seeds -My favourite add-in for this homemade pumpkin bread is crunchy walnuts.  They add the perfect crunch and nutty flavor to the loaf.  
  • Honey Cinnamon Butter -Lastly you have to make the honey cinnamon butter -have to.  The sweet honey butter adds the perfect buttery sweetness to the pumpkin loaf.

Substitutions

  • Ginger: If you don't have any fresh ginger you can substitute more ground ginger for the fresh ginger.  Use an extra ¼ teaspoon of ground ginger in place of the fresh ginger if necessary.
  • Walnuts: You could substitute the walnuts for another nut or seed, like pecans or pumpkin seeds if you prefer.  
  • Chocolate: If you are a chocolate lover you can do half walnuts and half chocolate chips, or just chocolate chips.
Two loaves of ginger pumpkin loaf, one on a cutting board and one on a cooling rack beside a bowl of cinnamon honey butter.

Storage

Store your cooled ginger pumpkin bread with walnuts in an airtight container at room temperature for up to 3-4 days.  Store the cinnamon honey butter in a small sealed container like a small mason jar at room temperature on the counter or for longer in the refrigerator.

You can also freeze the pumpkin bread, especially the second loaf if you would like to save it for later.  After it's cooled completely, just wrap the bread in plastic wrap, or place in an airtight container and store in the freezer for up to 3 months.

How To Make Pumpkin Bread With Walnuts

Cooking red lentils in a white pot.

Step 1 and 2: In a small pan, cover lentils with about 2 inches of water.

Step 3: Bring the lentils to a boil and simmer 15 -20 minutes until they are soft.

Step 4: Drain the lentils with a wire sieve and discard the cooking water.

Dry ingredients for pumpkin loaf in a bowl and wet ingredients in a. food processor.

Step 5: In a large mixing bowl, combine flour, brown sugar, cinnamon, ground ginger, baking powder, baking soda, and salt and stir to combine the dry ingredients.

Step 6 and 7: In a food processor, combine the lentils, pumpkin, oil, buttermilk, eggs, fresh ginger, and vanilla, and process until well blended and smooth.

Step 8: Add the wet ingredients to the bowl of dry ingredients.

Making the pumpkin loaf batter and pouring into the loaf pan to bake.

Step 9: Stir to combine the ingredients fully, but don't over mix.

Step 10: Add the walnuts to the batter and stir to combine.

Step 11: Spray two loaf pans with non-stick cooking spray and divide the pumpkin loaf mixture evenly between the two pans. Bake the pumpkin bread until a toothpick inserted in the center comes out dry.

Honey cinnamon butter in a small pink bowl.

Step 12: To make the cinnamon butter, combine the softened butter, honey and cinnamon in the bowl of a stand mixer fitted with the paddle attachment and mix to fully combine, or mix vigorously by hand in a large bowl. Serve a slice of ginger pumpkin bread spread with cinnamon honey butter.

Pumpkin bread with walnuts, spread with cinnamon honey butter and a cup of tea.

Expert Tips: Make a gift of the extra loaf of ginger pumpkin bread with walnuts. Wrap it in some parchment paper, tie it with a bow and add a small mason jar of the cinnamon honey butter with it.

Frequently Asked Questions

How many days is pumpkin bread good for?

This loaf is best eaten as soon as it's made. It will last at room temperature in a sealed container for 3-4 days. If you need to keep it longer consider freezing it.

Can I substitute dried ginger for the fresh ginger in this pumpkin bread?

If you don't have any fresh ginger you can substitute more ground ginger for the fresh ginger.  Use an extra ¼ teaspoon of ground ginger in place of the fresh ginger if necessary.

Can you make pumpkin bread from an actual pumpkin?

Yes. Look for a pie pumpkin, because they're sweeter and more flavourful than larger decorative pumpkins. Cut your pumpkin in half and remove the seeds, then roast in a hot oven, until the center is soft. Then scoop the cooked pumpkin from the skin and puree the flesh until smooth. Or peel the pumpkin, remove seeds, and cut into small cubes. Cover the pumpkin cubes with water in a pot and boil until soft, then drain and puree.

More Pumpkin Recipes

  • Pumpkin spice Rice Krispie treats recipe.
    How To Make Pumpkin Spice Rice Krispie Treats
  • How to make a pumpkin spice milkshake.
    Pumpkin Spice Milkshake Recipe
  • Easy caramel pumpkin butter recipe.
    Easy Caramel Pumpkin Butter Recipe
  • Pumpkin waffles.
    Easy Pumpkin Spice Waffle Recipe

If you tried this Pumpkin Bread With Walnuts Recipe or any other recipe on my blog please leave a star rating and let me know how it went in the comments below. Thanks for visiting today!

Recipe

A loaf of moist pumpkin bread with walnuts on a cutting board.

Pumpkin Bread With Walnuts

Video

Moist pumpkin bread with walnuts is an easy fall recipe made with pumpkin puree, warm spices, crunchy walnuts, and cinnamon honey butter.
5 from 1 vote
Print Pin Rate
Course: Breakfast
Cuisine: American
Prep Time: 30 minutes minutes
Cook Time: 45 minutes minutes
Total Time: 1 hour hour 15 minutes minutes
Servings: 2 loaves
Calories: 343kcal
Author: Dannyelle Nicolle-Ramjist

Ingredients

  • ¼ cup split red lentils
  • 2 ½ cups all-purpose flour
  • 1 cup brown sugar
  • 1 teaspoon ground cinnamon
  • 1 teaspoon ground ginger
  • 2 teaspoon baking powder
  • 1 teaspoon baking soda
  • ¼ teaspoon salt
  • 14 oz. pumpkin puree
  • ½ cup canola oil
  • ½ buttermilk
  • 3 eggs
  • 2 teaspoon freshly grated ginger
  • 1 teaspoon vanilla
  • ½ cup chopped walnuts or pecans or green pumpkin seeds

For the Cinnamon Honey Butter

  • ½ lb soft butter
  • ½ teaspoon cinnamon
  • 3 tablespoon honey

Instructions

  • In a small pan, cover lentils with about 2 inches of water, and bring to a boil. Simmer 15 -20 minutes until they are soft. Drain the lentils with a wire sieve and discard the cooking water.
  • In a large mixing bowl, combine the flour, brown sugar, cinnamon, ground ginger, baking powder, baking soda, and salt and stir to combine the dry ingredients.
  • In a food processor, combine the lentils, pumpkin, oil, buttermilk, eggs, fresh ginger, and vanilla, and process until well blended and smooth.
  • Add the wet ingredients from the food processor to the bowl of dry ingredients, and stir to combine. Add the walnuts and combine. Spray two standard loaf pans with non-stick cooking spray. Divide the batter evenly between the two greased loaf pans.
  • Bake in a preheated oven at 350 degrees, for about 45 minutes, or until a toothpick inserted into the middle comes out dry.

For the Cinnamon Honey Butter

  • Combine soft butter, cinnamon, and honey in a stand mixer and beat on high until well combined, and light and fluffy.

Notes

Take care not to over stir your batter, as it can make for a tough pumpkin bread.
Substitute different nuts or seeds like pecans or pumpkin seeds in place of the walnuts if you wish.  If you're a chocolate lover, try substituting half of the walnuts for chocolate chips, or use all chocolate chips.
Store your pumpkin bread with walnuts in an airtight container at room temperature, or freeze for up to 3 months.

Nutrition

Serving: 1g | Calories: 343kcal | Carbohydrates: 33g | Protein: 5g | Fat: 22g | Saturated Fat: 8g | Polyunsaturated Fat: 12g | Trans Fat: 1g | Cholesterol: 66mg | Sodium: 307mg | Fiber: 2g | Sugar: 16g
Tried this Recipe? Tag me Today!Mention @LifeisaParty or tag #lifeisaparty!

Neutral Fall Mantel

Sep 23, 2014 · 3 Comments

Neutral Fall Mantel: For all who love to decorate with whites and neutrals, no matter what season it is, here's a neutral fall mantel.

Neutral Fall Mantel: For all who love to decorate with whites and neutrals, no matter what season it is, here's how to bring a fall feel to your mantel with out any orange, yellow, or red. So pretty, simple, and calming.Neutral Fall Mantel: For all who love to decorate with whites and neutrals, no matter what season it is, here's a neutral fall mantel.

Happy first day of Fall!  It’s been a busy day around here, but I wanted to share my Neutral Fall Mantel with you before the first day of Fall drew to a close.  

Deer Head

I found this great deer head last Christmas, and he’s hung out a few different places in my house since then.  I decided to use him in the living room this fall, for a bit of woodland feel.  He’s made of paper mache, and I spray painted him in a glossy white.  He’s light enough to hang easy on my vintage window pane, which makes a great backdrop for my corner fireplace.

Neutral Fall Mantel

More Neutral Fall Mantel Decor

I used these pretty log inspired white vases to hold some dark sticks, and love how it came out.

Neutral Fall Mantel

I thought this book page pumpkin tied in well with the neutral colours too.  It’s made from a faux pumpkin with simple book page flowers hot glued on, click here to see all the instructions.

Neutral Fall Mantel

On the other side of the mantel I used this fun white ceramic squirrel and put him in my vintage drawer.  I love how it acts kind of like a frame, and then another white pumpkin, this one ceramic.

Neutral Fall Mantel

Oak and Acorn Garland

Along the front of the mantel, I made an oak and acorn inspired garland, with an old stick.

Neutral Fall Mantel garland

I just cut out some simple, oversized leaves from brown kraft paper, white paper, and old book pages, and tied them on with some twine.

Neutral Fall Mantel

The acorns are my favourite.  I made them a few years ago, and they would have to be my most popular project ever.  They are made out of a plastic Easter egg, with burlap and pinecones -click here for all the instructions to make your own.   I love how they look here as part of the mantel.

Neutral Fall Mantel

I really like how it turned out, and how simple it is -neutral colours, lots of texture, and nature inspired.  With a fall mantel like this one, life really is a party!

More Inspiration

You might also like this Fall Mantel.

Also check out our Fall Home Tour here.

Fall Home Tour: Full of autumn decor ideas for Vintage Botanical Scientific Decor with Boho Maximalist Influence with lots of plants, insects, and pumpkins.

You might also like our Neutral Fall Home Tour here.

20 Fall Project Ideas

Sep 15, 2014 · Leave a Comment

Fall Pumpkin Crafts and Recipes

20 Fall Project Ideas: great diy's, projects, and recipes for fall.

20 Fall Project Ideas: great diy's, projects, and recipes for fall.

I love fall.  Today I'm sharing a round-up  of 20 Fall Projects to inspire you -and they are some of my very favourites!  To see all the instructions on how to make any of them, just click on the title or the picture.  I hope these past Life is a Party projects inspire you to take on some new projects for fall!

20 Fall Project Ideas:

Pumpkin Blondies with Pumpkin Frosting

20 Fall Project Ideas: great diy's, projects, and recipes for fall.

Paper Flower Pumpkin

20 Fall Project Ideas: great diy's, projects, and recipes for fall.

Ombre Pumpkin Tower

20 Fall Project Ideas: great diy's, projects, and recipes for fall.

Pumpkin Pie Ice Cream

pumpkin pie ice cream

String Pumpkins

i20 Fall Project Ideas: great diy's, projects, and recipes for fall.

Pumpkin Chocolate Truffles

20 Fall Project Ideas: great diy's, projects, and recipes for fall.

Fall Leaf Book Page Garland

20 Fall Project Ideas: great diy's, projects, and recipes for fall.

Fall Front Door -in Lime Green and White

20 Fall Project Ideas: great diy's, projects, and recipes for fall.

Mini Pumpkin Donuts with Cinnamon Maple Glaze 

20 Fall Project Ideas: great diy's, projects, and recipes for fall.

DIY "Give Thanks" Plates

20 Fall Project Ideas: great diy's, projects, and recipes for fall.

Simple Inexpensive DIY Fall Pillows

20 Fall Project Ideas: great diy's, projects, and recipes for fall.

Pumpkin Filled Cream Puffs with Carmel Sauce 

20 Fall Project Ideas: great diy's, projects, and recipes for fall.

Fall DIY Subway Art

20 Fall Project Ideas: great diy's, projects, and recipes for fall.

DIY Fall Doormat

diy fall doormat

Fall Pinecone Wreath

20 Fall Project Ideas: great diy's, projects, and recipes for fall.

White Fall Planter

20 Fall Project Ideas: great diy's, projects, and recipes for fall.

Burlap Acorns made from Easter Eggs

20 Fall Project Ideas: great diy's, projects, and recipes for fall.

I hope these ideas get your creative juices flowing.  Can't wait to share more great projects and recipes for fall with you.

With 20 Fall Project Ideas, life really is a party!

Aqua Themed Pool Party Birthday Ideas

Sep 5, 2014 · 1 Comment

Pool party aqua colour dessert table.

Pool Party Birthday Ideas: aqua themed pool party with ideas for DIY decor, party games and activities, and an aqua dessert table.

Pool party dessert table, favours, and activity ideas.
[feast_advanced_jump_to]

Today my daughter's turning 10! Happy Birthday Paige! I can't believe we've hit the double digits! This year Paige requested a pool party, so last weekend we got together with friends and family to celebrate. Today I'm sharing all my pool party birthday ideas with you.

We were so blessed to be able to borrow a party venue and have the party at my sister-in-law and brother-in-laws house, since they have a lovely pool and live only a few minutes away -thanks Keers and Steve. I did worry about rain -since it's rained on Paige's parties for about the last 3 years, but the forecast was for sunny skies. Despite the forecast about 15 minutes before we were set to begin, guess what? It started to rain. Picture me holding an umbrella over the desert table and praying. The prayers were answered, and it only rained a few minutes. By the time the guests arrived it stopped and it was time for the fun to begin.

Weather is one factor that you can't control for a pool parties, but other than that it's the perfect summer birthday theme. But, a summer pool party is a great idea even if you aren't celebrating a birthday.

Pool Party Birthday Invitations

pool party birthday ideas invite

Paige's favourite colour is aqua, and it went great with the pool party theme, so it became our color scheme for all the party details. For the invitations, since Paige loves art, we came up with the idea of ombre watercolours. I designed the invites, and then printed them onto watercolour paper with our home computer. Paige then painted with watercolours to create the aqua ombre effect. These were really simple to make and perfect pool party invitations.

Pool Party Activities

Pool party birthday ideas

Water Table

The main event at the party was, of course swimming. But I had a couple other little activities set up, just in case. One was this fun water table. We've had it for years, and every spring I bring it out and it's like a new toy. This worked great between lunch and dessert, when the kids were done but the adults were still eating. We set it up near the pool area and especially the youngest party guests really enjoyed it.

Pool party birthday ideas

DIY Paper Boats

We also set up some origami to make paper boats. The paper boat idea became part of the decor and went well with our water theme. I just cut up some pretty aqua scrapbook paper and printed the instructions. Paige had fun teaching her friends how to make them and it was one of the unique ideas that everyone loved.

pool party birthday ideas

Pool Party Centerpieces

I wanted to add some centerpieces to the tables for part of our pool party decorations. We used the paper boats and some water -coloured with a few drops of blue and green food colouring to make aqua, to make easy centerpieces for the tables. Luckily we'd tried it at home first, and discovered that paper boats actually absorb the water and sink fairly quickly. We used parchment paper, and some basket liners that had a waxy finish to make the boats for the centerpieces and they worked great and lasted the whole party. These would be a fun addition to a beach party as centerpieces too.

pool party birthday ideas

We continued the origami boats into a bouquet of paper lanterns and pom-poms. I made lots in different aqua paper, and sizes, and strung them into a few fun garlands. I love how this turned out and gave a real wow factor to the party area, and was a nice reusable alternative to balloon garlands.  We hung them from the deck and over the lunch table. 

We also picked up some pool floats that matched our aqua color scheme. It was fun to scatter beach balls in the pool for the party.

One more tip, when your setting up your next pool party is to buy some extra swim goggles and beach towels, and have them available in a basket in case any guests at your kid's pool party needs to barrow them. It's also a good idea to have some extra sunscreen on hand and remind guests about constant sunscreen reapplication throughout the party.

Pool Party Lunch

For lunch, we had hamburgers, hotdogs, and salads around the pool. It's always good to stick to the classics that are kid friendly for birthday parties. And an easy way to make it adult friendly too was with a variety of really yummy salads as side dishes.

Pool party birthday ideas

Pool Party Games

We also played a few typical swimming pool games at the party, like Marco Polo, and colours. These are such fun games, that most kids are familiar with. It's always nice to add some age-appropriate games to your child's birthday party, as well as some free pool time.

Paige also wanted to have a "diving contest". It was such a fun idea. The kids had to name their dive and then jump in -with marks for creativity.

Pool party games

Before the party, we printed out a few number signs and designated some judges. There were a couple younger kids who didn't want to jump in the deep end so they helped judge. It was hilarious, and I highly recommend it for a birthday pool party.

Pool Party Dessert Table

Aqua blue dessert table

After lunch it was time for dessert! We had a lot of fun putting together the aqua/blue dessert table. Weeks and weeks before the party, I happened to see at One Krieger Chick, an adorable ombre "Make a Splash" sign, so Paige and I gave it our own twist and used it as the pretty backdrop for the dessert table (and now it's in her bedroom). 

To add some height to the table I used my vintage suitcases. I was reminded again how great it is to have serving pieces in white and glass -it doesn't really take too much of your colour, here mainly just the actual food, to really create a great effect.

pool party birthday ideas

I also made a little drink table on the side, with cold drinks.

Aqua pool party dessert table

Now, for the desserts! -our favorite part.  

Cupcakes

I made vanilla cupcakes and decorated them with different shades of aqua blue icing. I just started out with the lightest shade, and then kept adding more gel food colouring as I went along. The little flags are made out of toothpicks and washi tape. I always like cupcakes instead of birthday cake because you don't have to worry about cutting it up to serve it. Finger foods are always easier with kids or with a crowd.

Aqua blue dessert table desserts

Blueberries

I found fun mini Chinese takeout containers and used them for blueberries. It's always nice to include some fresh fruit on a dessert table, and the blueberries fit our color scheme.

blue dessert table desserts

Rice Krispie Treats

When it comes to blue food, you have to get a little creative, so just think of your favourites and add a little blue chocolate. We made Rice Krispies and dipped them in blue candy melts. They were the first thing gone, and a fun way to include a blue treat.

Aqua blue dessert table dessert

Sugar Cookie Bars

I also made sugar cookie bars -they were a first and so, so much easier than sugar cookies, but with all the same great taste. I used the same icing as the cupcakes to make them ombre too. And the pom-pom pics are just pom poms from the craft store hot glued to a toothpick -love is in the details, and little touches like these help take your dessert table to a whole new level.

Aqua blue dessert table

Candy

I also wanted to include some candy, and there were little bags so our friends could take some home too as party favors. We served:

  • rock candy
  • gummy sharks
  • homemade lollipops. 

For the lollipops I used the same recipe and technique I used for our homemade lollipops here, except we used aqua food coloring, and added lemonade flavoring this time. They looked so, so pretty. And this a really great make ahead treat for a special event. You can make them in any color or flavor to match your party theme.

Aqua blue dessert table candy buffet

Homemade Macarons

I also tried my hand at making homemade macarons for the party. They were my second attempt and still not perfect, but they were still really good. We made them blue and filled them with a raspberry butter cream. What I do love about these special little cookies is that you make them a couple of days before you need them and let them mature in the fridge, so it's great for a party since it isn't last minute.

Aqua blue dessert table desserts

Jello

Last, and almost forgotten in the fridge, which is why they aren't in all the photos, classic blue jello, with a squirt of whip cream.  All the kids loved them and they were certainly easy peasy.

Aqua blue dessert table

Pool Party Favors

One last detail, I used another vintage suitcase to hold the little goodie bags with the origami boats, bookstore gift cards, and candy from the sweets table.

Pool party birthday ideas

Miniature Boat In A Bottle

The tiny little bottle, beside Paige's picture, is a little origami boat in a bottle.  We used Pudding Fish Cakes  AMAZING video to make them and they turned out great.

miniature boat in a bottle

One little issue, cause nothing is ever quite as easy as you hope it will be, was some of my boats started to sink. I followed the instructions on the video, but maybe because I had a different kind of resin or because of the heat and humidity when I was making them, after waiting the two hours for the resin to harden to a certain consistency I added my boats and noticed about 15 minutes later that they were sinking into the resin. After all the work of finding mini bottles, finding resin and chalk pastel, and then folding all those tiny, tiny boats I was feeling beyond sad to see the shipwreck. 

I put on my timer and used tweezers every 15 min. for about two hours to pull them up and reposition them, since they weren't totally submerged, and I thought I could still rescue them. Some did sink too far, so I pulled them out and waited to add in new ones. At the end of the day it all worked out, but if I were doing it again, I'd do a test one to make sure before making 10 of them! Here's a shot of the one beside my camera lens cover, just to show you the scale of how tiny they actually are. We put them into tiny organza bags and included them in the loot bags for our guests. These are not your standard goodie bag fair, but I thought they were a really special addition.

DIY miniature origami boat in a bottle

We really had a wonderful afternoon and successful bash celebrating Miss Paige turning 10 with an outdoor pool party.  With warm weather it really was the perfect to celebrate our girl. Happy Birthday Paige.

pool party birthday ideas

With all these great pool party birthday ideas, life really is a party!

More Birthday Party Inspiration

You might also like our Rainbow Art Party here.

Also check out our Rock Climbing Gem Party here.

Rock Climbing Gem/Jewel/Geometric Birthday Party -rock climbing party with DIY gem decor, rock themed dessert table, and favour ideas.

You might also enjoy our Ice Cream Themed Birthday Party here.

Back to School Family Dinner

Sep 3, 2014 · 4 Comments

Back to school family dinner with book page table runner, place settings, vintage globes, containers of pencils and crayons, and a lunch box full of apples.

Back to School Dinner -start a new tradition with a Back to School themed dinner after the first day of school. Lots of easy decor ideas here to help create some special family memories.

Back to School Family Dinner -start a new tradition with a Back to School themed dinner after the first day of school. Lots of easy decor ideas here to help create some special family memories.
It's become a bit of tradition around here, to have a special dinner on the first day of school to celebrate -see last year's here, and the year before that here.

Vintage Back To School Decor

This year I wanted to set the table with a bit of a vintage vibe.  I started out with the fun table runner.  Using an old dictionary I found at a second hand store for a dollar, I sewed the pages together to make the table runner.  I love how it turned out.  I think it might stick around and work it's way into my fall decor.

Back to School Family Dinner -start a new tradition with a Back to School themed dinner after the first day of school. Lots of easy decor ideas here to help create some special family memories.


The centre of the table is decorated with different vintage inspired pieces -a few old books, some old fashioned wooden rulers, and some crayons, and pencils, and chalk.

Back to School Family Dinner -start a new tradition with a Back to School themed dinner after the first day of school. Lots of easy decor ideas here to help create some special family memories.

The vintage globes were the perfect finishing touch, that I borrowed from my friend's collection.  I love them, and I think they might be on my garage sale list for next year. 😉

Back to School Family Dinner -start a new tradition with a Back to School themed dinner after the first day of school. Lots of easy decor ideas here to help create some special family memories.

I found the sweet little chalkboards at Michaels.  Love how the metal edge looks with the gold cutlery.  The little milk bottles and paper straws were a sweet detail too.

Back to School Family Dinner -start a new tradition with a Back to School themed dinner after the first day of school. Lots of easy decor ideas here to help create some special family memories.

Along with new school supplies, back to school always makes me think of "an apple for the teacher".  So I added apples around the table, and piled some into a tin lunch box.

Back to School Family Dinner -start a new tradition with a Back to School themed dinner after the first day of school. Lots of easy decor ideas here to help create some special family memories.

One other little detail, and a sweet one, was this adorable vintage inspired alphabet card banner.  I found the free printable at Rook No. 17, and

Back to school family dinner 2
Back to School Family Dinner -start a new tradition with a Back to School themed dinner after the first day of school. Lots of easy decor ideas here to help create some special family memories.

Vintage Menu

We had old fashioned meatloaf and apple pie for dinner.  As we ate we also heard about everyone's highs and lows of the day, and the details of the first day of school.

Back to School Family Dinner -start a new tradition with a Back to School themed dinner after the first day of school. Lots of easy decor ideas here to help create some special family memories.

Family Tradtions

I wasn't sure on the weekend that I'd have time to put a back to school dinner together for them this year, since we were super busy on the weekend celebrating Paige's 10th birthday -see all the details of her pool party here, and then we were busy getting back packs sorted and laundry done for school.  My daughter Maddie's face literally lit up when she saw the table after school.  It reminds me of how we're making memories these days, and little family traditions are to be treasured.  As I always say, but am feeling more than ever, life is what we make it, so we may as well make it a party.

If you love this Back To School Dinner, click here to check out this one from last year:

Here's another great idea -click here for Easy Back To School Marshmallow Treats:

Here's a another great idea -click here for Note Book Sugar Cookies:

Flamingo Party Ideas

Aug 28, 2014 · Leave a Comment

Flamingo themed dinner party.

A fun Pink Flamingo themed dinner party with ideas for a signature cocktail, menu and recipes, and fun flamingo party decor.

Flamingo themed dinner party.
[feast_advanced_jump_to]

Why We Love This Party

  • Flamingos are such a fun summer party theme, and make everyone smile.
  • Pink!
  • Simple decor ideas that really fit the theme.
  • Great menu ideas and recipe links.

I've always had a thing for Pink Flamingos.  It seemed the perfect whimsical theme for a fun, end of summer dinner party!

We are a part of a super club, you might remember me sharing our last "fiesta night" at our friends house, and this time it was our turn to host.  We love a themed dinner party, like our toast themed dinner party, and fondue themed dinner party.

The Strawberry Flamingo Signature Cocktail

We started off the night with a signature cocktail, which I named "the strawberry flamingo", which consisted of a half and half mix of cranberry strawberry juice, and ginger ale with a shot of vodka, and a garnish of fresh strawberries.  They were a sweet start to the evening.  

I love setting up a little drink station, and my daughter did the fun feather art with pink chalk on a small chalkboard, to go with our theme.  

I picked up the flamingo straws at the Dollar Store, and just swapped out the plastic straws for pretty striped paper ones.

Pink punch flamingo party drink station.

Party Appetizers

We set up appetizers in the kitchen, and asked guests to help themselves, while we finished cooking the main course.

Cheese, cracker, and charcuterie appetizers for a flamingo themed party on a wood table with flowers and napkins.

I made a batch of my easy homemade crackers, which I have to say, never fail to impress.  We also picked up some nice bread.  At the farmer's market I found some lovely cured meat, in spicy and mild options.  We served this along with some nice cheese, chutney, cashews, cherry tomatoes, grapes and a fresh, sweet melon, also from the farmer's market.  

This is one of my favourite ways to entertain, and it felt casual and summery.

  • homemade crackers
  • cheese sticks
  • crusty bread
  • Swiss cheese
  • marble cheese
  • havarti cheese
  • spicy cured salami
  • farmer's market tomatoes
  • cashews
  • grapes
  • cantaloup
  • caramelized onion and balsamic jam
  • red pepper jelly

Flamingo Decoration Ideas

I wanted to incorporate some fun flamingos, so I used some flamingo confetti on the table, flamingo toothpicks for the melon, and some funny flamingo napkins.

One of my fav little details from the party was this sweet little flamingo jug.  

I found him at a nearby antique mall, and couldn't resist bringing him home.  I filled him with a few pink zinnias and coriander flowers from the garden.  Love the pink feather too.

In the dining room, I used more pink feathers.  On the chalk board "Birds of a feather flock together", seemed like a fitting saying.  

I picked up the feathers at the craft store and made the simple garland.  I also used these fun free printables, to add a little flamingo art.  

It was all inexpensive, and turned out so cute.

Flamingo Party Tablescape

For the dining room table, I started with fun glittered pink flamingos, found at the dollar store.  I spray painted their legs gold, and inserted them into a vase filled with floral foam, and lined with hosta leaves -which worked great to hold my little friends in place, and covered the top of the floral foam with a few flower blossoms.

These guys are big and bold and really make a statement, so I felt like I need some flowers that fit that bill too. I found the fun gladiolus flowers at the farmers market, and thought they were the perfect accompaniment to my flamingo friends -and they had every shade of pink to choose from.

Ribbon Table Runner

On the table I made a fun and easy runner out of different pink ribbon, just laid out across the table.  

Look for ribbons at the craft store, dollar store, and fabric store. I just laid them along the table and they turned out looking great, and are reusable. Look for different materials like satin, sequins, glitter, and velvet.

I found just laying the ribbon on the table was fine for the evening, but another option would be to attach to a simple plain white or light pink runner using an iron-on tape, or liquid stitch product.

Everyone also had their own flamingo wine glass, picked up at the party store, and sent home as a fun little favour at the end of the evening.

Dinner Menu

  • salad with roasted potatoes and green beans
  • flattened chicken
  • marinated flank steak
  • butter garlic shrimp skewers

For dinner we served a big salad with roasted potatoes and green beans -a real favourite of ours.  We also served a bit of a mixed grill, with marinated flattened chicken -recipe here. cooked and low and slow on the bbq, marinated flank steak -recipe here, and butter garlic shrimp skewers -how could you have a flamingo inspired evening without some shrimp, right?  

Dessert

After dinner, it was time for a light, and summery desert.  I made Pavlova -recipe here with whip cream and summer berries. And just for tonight, I made it pink to match by adding a little pink food coloring to the mix before baking -so easy and another fun detail.

We had such a fun time, with our whimsical and fun flamingo supper club night, the perfect way to celebrate the end of summer together.  

With pink flamingo party ideas, life really is a party!

More Dinner Party Inspiration

  • Breakfast for dinner party table styled like a bed with star quilt tablecloth, gingham pillows, and cloud installation above.
    Breakfast for Dinner Party: Brinner Under the Stars
  • Circus themed dinner party dining room transformed into a big top, with a dramatic DIY pink and red tulle tent ceiling draping from floor to ceiling, fully set dinner table with red and pink striped tablecloth, lit brass candlesticks, and the hot dog buffet backdrop visible in the background.
    Circus Party Ideas: Elevated Dinner Party
  • backyard pizza party
    Backyard Pizza Party
  • Summer backyard bbq ideas.
    Summer Backyard Picnic

If you try any of the ideas from this Flamingo Themed Party or any other ideas on my blog please let me know how it went in the comments below. Thanks for visiting today!

Frequently Asked Questions

Can you make the food ahead of time?

Yes, prep your homemade crackers, salad, marinade for the meats, and dessert ahead of time. Right before the party set your appetizer table for guests to enjoy while you grill the chicken, steak, and shrimp.

Where did you find the pink feathers?

I found the pink feathers at the craft store (or look online), and they had the pink glitter embellishments, but you could add the yourself to plain pink feathers.

Where did you find the flowers?

The flowers were all from the farmer's market. If you are looking for gladiolus, check with your local florists. They may be able to order them in for you.

How To Train Your Dragon Party Ideas

Aug 19, 2014 · 14 Comments

How to train your dragon themed party food ideas.

How To Train Your Dragon Party with ideas for themed food like dragon poop, dragon claws, viking cupcakes, fire breathing dragon cake and more! Plus cute DIY decorations, and really fun kids games and activities.

How to train your dragon themed party food ideas.
[feast_advanced_jump_to]

Why We Love This Party

  • Most of the food ideas are simple to make, or store bought.
  • The DIY decor was so cute.
  • The themed activities and game ideas were so fun for the kids.

Today I'm sharing my little friend Allie's "How To Train Your Dragon Party", and all the great How To Train Your Dragon themed food her Mom made for the party.  Plus there's DIY party decorations. And the kid's favourite part were the themed party activities and games.

You might also like our Oscar The Grouch Themed Party.

How To Train Your Dragon Themed Food: perfect dragon themed food for a party -dragon poop, dragon claws, viking cupcakes, fire breathing dragon cake and more!

Drinks

Let's start with the drinks.  The Dragon Drool was delicious -also known as lemonade, and the perfect Viking thirst quencher.

  • Dragon Drool -Lemonade
How To Train Your Dragon Themed Food: perfect dragon themed food for a party -dragon poop, dragon claws, viking cupcakes, fire breathing dragon cake and more!

How To Train My Dragon Themed Snacks

And for anyone working up a bit of an appetite while training their dragon, there were some lovely snacks.  

  • Dragon Scales -Doritos: Like these delicious Dragon Scales -also sometimes know as Doritos.
How To Train Your Dragon Themed Food: perfect dragon themed food for a party -dragon poop, dragon claws, viking cupcakes, fire breathing dragon cake and more!
  • Viking Shield -Fruit Tray: All Vikings enjoy their fruit more when arranged to resemble a Viking shield.
How To Train Your Dragon Themed Food: perfect dragon themed food for a party -dragon poop, dragon claws, viking cupcakes, fire breathing dragon cake and more!
  • Dragon Veggies and Dip Tray: And veggies and dip are so much better when they look like a dragon.
How To Train Your Dragon Themed Food: perfect dragon themed food for a party -dragon poop, dragon claws, viking cupcakes, fire breathing dragon cake and more!
  • Dragon Food -Fish Crackers: And since Dragons always enjoy fish -even fishy crackers, it's always good to have some on hand.  
  • Dragon Claw -Bugles: Vikings also enjoy Dragon Claws, you might know them as Bugles.
How To Train Your Dragon Themed Food: perfect dragon themed food for a party -dragon poop, dragon claws, viking cupcakes, fire breathing dragon cake and more!

Desserts

We all enjoyed the snacks while we were training our dragons, but when that hard work was done it was time for some sweets.  Every Dragon party needs some Dragon inspired desserts.

How To Train Your Dragon Themed Food: perfect dragon themed food for a party -dragon poop, dragon claws, viking cupcakes, fire breathing dragon cake and more!


How to train your dragon 29

  • Viking Hats -Chocolate Cupcakes: The Viking Hats were made from chocolate cupcakes and icing toped with a two-bite brownie, and viking hat horns were made from white chocolate.  They were adorable and they were delicious.
How To Train Your Dragon Themed Food: perfect dragon themed food for a party -dragon poop, dragon claws, viking cupcakes, fire breathing dragon cake and more!
How to train your dragon 32
  • Dragon Eggs -Pudding Cups with Chocolate Eggs: There were also Dragon Eggs.  They were made with chocolate pudding, that was topped with chocolate rocks (that were actually really delicious) and some Cadbury eggs.  

I love the detail on the cups and the spoons wrapped with leather, plus the food labels with the "dragon scale" tape (found at Walmart one day).  Everything was so very Viking-ish.
How To Train Your Dragon Themed Food: perfect dragon themed food for a party -dragon poop, dragon claws, viking cupcakes, fire breathing dragon cake and more!

  • Dragon Poop -Marshmallows and Chocolate: A big hit with the kids was the "Dragon Poop" made out of mini-marshmallows, green chocolate and green sugar sprinkles.  Yum.
How To Train Your Dragon Themed Food: perfect dragon themed food for a party -dragon poop, dragon claws, viking cupcakes, fire breathing dragon cake and more!

Dragon Cake

My fav. had to be the amazing Dragon cake that my friend Heather made.  

She used a round cake, cut in half and on it's side to create the main body, and than cut up another cake for the head, arms, legs and tail.

How To Train Your Dragon Themed Food: perfect dragon themed food for a party -dragon poop, dragon claws, viking cupcakes, fire breathing dragon cake and more!

All the details were amazing.  Loved the wings made from some tissue paper and chopsticks!  Also loved the Toblerone triangles used to decorate the Dragon's back.

How To Train Your Dragon Themed Food: perfect dragon themed food for a party -dragon poop, dragon claws, viking cupcakes, fire breathing dragon cake and more!


Best of all, had to be that this Dragon actually breathed fire!  The orange and yellow birthday candles were inserted where his mouth was and looked amazing when lit.

How To Train Your Dragon Themed Food: perfect dragon themed food for a party -dragon poop, dragon claws, viking cupcakes, fire breathing dragon cake and more!

How To Train Your Dragon Birthday Party: Make your own shield, train your dragon stations, sensory table, and dragon training survival loot bags!

How To Train Your Dragon Party Decorations

The theme was set as soon as we arrived with this fun wreath.  It was decorated with dragon scale ribbon, moss, and a fun little toy dragon making a nest on top of the "A" for Allie.  

And after the party the wreath moved to decorate the birthday girl's bedroom door.

How To Train Your Dragon Birthday Party: Make your own shield, train your dragon stations, sensory table, and dragon training survival loot bags!

Around the party space there were lots of plants and ferns with dragon toys tucked inside.

How To Train Your Dragon Birthday Party: Make your own shield, train your dragon stations, sensory table, and dragon training survival loot bags!

How To Train Your Dragon Book of Dragons

At the front door first we received our official "book of dragons".  

It was a little blank notebook for us to take notes in.  The front was decorated with some clipart and everyone's name was added in Viking Font. A leather cord and a "dragon tooth" charm wrapped the dragon notebooks.  After we unwrapped our books, everyone used their dragon's tooth as a necklace.

How to train your dragon party games and activity ideas.
How To Train Your Dragon Birthday Party: Make your own shield, train your dragon stations, sensory table, and dragon training survival loot bags!

Make Your Own Viking Shield Activity

Our first activity was to design our viking shields.

How To Train Your Dragon Birthday Party: Make your own shield, train your dragon stations, sensory table, and dragon training survival loot bags!

The handles were made out of duct tape on the back. And the front was made with a round cardboard piece used for cakes.

The kids decorated their shields with paper plates, black HTTYD cutouts, washi tape and jewel stickers.

How To Train Your Dragon Birthday Party: Make your own shield, train your dragon stations, sensory table, and dragon training survival loot bags!

Everyone received a foam sword once the Viking Shields were finished.  We were all ready to start actually training the dragons in the backyard.

How To Train Your Dragon Birthday Party: Make your own shield, train your dragon stations, sensory table, and dragon training survival loot bags!

Dragon Training

The backyard was full of fun activities for the kids to visit as they wanted to.

How To Train Your Dragon Birthday Party: Make your own shield, train your dragon stations, sensory table, and dragon training survival loot bags!

Feed Your Dragon Bean Bag Toss

One was a dragon feeding game.  Heather used a bean bag toss game she already had, and decorated it with some dragon cutouts from the movie.  The kids could throw the fish bean bags in to the holes to feed them.

How To Train Your Dragon Birthday Party: Make your own shield, train your dragon stations, sensory table, and dragon training survival loot bags!

Catch a Dragon

Next there was also a game to catch the dragons with a small net.  The dragon toys hide in the rocks.  There was a small net to use for catching.

How To Train Your Dragon Birthday Party: Make your own shield, train your dragon stations, sensory table, and dragon training survival loot bags!

Dragon Flying Practise

The favourite activity might have been the flying practice.  Heather found a flying Toothless toy, and set up a ring of fire for flying practise.  A hoola-hoop with streamers attached  created the ring of fire for the kids to fly the dragons through.

How To Train Your Dragon Birthday Party: Make your own shield, train your dragon stations, sensory table, and dragon training survival loot bags!

How To Train Your Dragon Sensory Table

Meanwhile there were also some little ones at the party, so Heather set-up a great sensory play table for them.  The kids loved the sensory table, including the bigger kids.

She filled the table with sand, rocks, moss, moss balls, paper shred, blue glass pebbles, faux plants, and dragon toys.

How To Train Your Dragon Birthday Party: Make your own shield, train your dragon stations, sensory table, and dragon training survival loot bags!

Find A Dragon

The backyard had lots of little dragon toys tucked all around.  One of the final games was for everyone to find their own to bring home with them in their loot bag.

How To Train Your Dragon Birthday Party: Make your own shield, train your dragon stations, sensory table, and dragon training survival loot bags!

Dragon Training Survival Kit Loot Bag

There was also a piñata, and one of my favourite little treats was the Dragon Training Survival Kit.

How To Train Your Dragon Birthday Party: Make your own shield, train your dragon stations, sensory table, and dragon training survival loot bags!

The kit contained a cookie shield, chocolate rocks, a licorice lasso, a lollipop war hammer, and gummy eels.

More Party Inspiration

  • Game of thrones themed party food ideas and free printables.
    Game of Thrones Party Food and Free Party Printables
  • Harry Potter snacks and treats board.
    Harry Potter Inspired Snacks and Treat Ideas
  • Harry Potter DIY Decor & Free Printables used to create this Potions Classroom.
    Harry Potter DIY Decor and Free Printables
  • Harry Potter family movie night ideas.
    Harry Potter Family Movie Night

Frequently Asked Questions

Where are the candles from that you used in the dragon cake mouth?

We live in Canada and found them at the Bulk Barn. Look for something similar on-line.

How do you make the dragon poop?

Melt some green colored chocolate and stir in some mini marshmallows. Scoop it out onto some parchment paper and sprinkle with green sugar or sprinkles before it sets.

How did you make the viking hat cupcakes?

Start with regular chocolate cupcakes with chocolate icing, add a two-bite brownie on top, upside down. Make some chocolate horns with melted white chocolate on parchment paper. When they are set, push them into the sides of the brownie.

Is the loot bag printable available?

Unfortunately, we don't have the loot bag printable, but you can make your own using the Viking font and some HTTYD printart.

If you try any of the How To Train Your Dragon Party Ideas, or any other ideas on my blog please let me know how it went in the comments below. Thanks for visiting today!

Forest Tea Party

Jul 31, 2014 · 8 Comments

Forest Tea Party: tea and scones all set up in the woods with fun glamping camping accessories, and a camping inspired menu.

Forest Tea Party: tea and scones all set up in the woods with fun glamping camping accessories, and a camping inspired menu.

Forest Tea Party: tea and scones all set up in the woods with fun glamping camping accessories, and a camping inspired menu.

A highlight of my recent camping trip was putting together this forest tea party. I'm excited to share the oh so pretty pictures with you.

woodland tea party

The Forest Tea Party Table

I started with layering some pretty vintage tablecloths.  They are old ones vintage ones and they're prefect for glamping.

Glamping camping tea party

I found the pretty old aqua mason jars at a garage sale for 50 cents, bargain of the summer, and filled them with some wild flowers.  The cute little lantern was another great garage sale find and the perfect camping piece.

forest tea party

I used some simple white plates, along with some pretty vintage enamel mugs, I've been collecting at antique sales since the spring.  Still need one more.  

camping tea party

The large napkins are cotton tea towels, from the dollar store.  I bought the acrylic stemless wine glasses, because I thought they were perfect for camping, or just out on the patio this summer.  The pretty pink candle holders from Ikea have citronella candles in them to help keep the bugs away.  

Cutlery and Tray Makeover

I really loved Poppytalk's pretty cutlery for Target, and it inspired me to make my own re-usable version.  I shopped some second hand stores, and collected some mis-matched cutlery.  I tried to choose some that all had a similar swirly patterned handle.

Painted cutlery spray paint makeover

I found the perfect hot pink spray paint for metal at Home Depot, and taped the cutlery to just paint the handles so that there's no risk of the paint coming into contact with food.

spray painted cutlery

I also did a cute little silver tray, also picked up at the second hand store.

spray painted cutlery

I love how it turned out.  It's so, so pretty.  Just make sure to hand wash.

spray Painted cutlery

And, the silver tray turned out great too.  I used it here to hold some pretty paper napkins.

spray painted silver vintage tray

One of my other favourite details of the table was the pretty chandelier.  My brother made this one for me years ago, and it's never looked prettier than hanging in the woods.

glamping camping
forest tea party
Glamping ideas

The pretty bunting in the background was made from some vintage sheets, and hung in the trees.

woodland tea party

Forest Tea Party Menu

  • tea
  • scones with jam and clotted cream
  • shortbread
  • gourmet s'mores

On the menu for the tea party, scones with jam and clotted cream, and the left overs were great for breakfast the next day.  Find our scone recipe here.  We also had some yummy shortbread -find the recipe here.  One of my favourite tips for a great camping trip is do some baking the day before you go.

how to throw a forest tea party

I also made some yummy homemade marshmallows and graham crackers -find the recipes here.

forest tea party s'mores

And what's better for a gourmet s'more in the woods, than assorted chocolate bars in yummy flavours like oreo, cookie dough, caramel corn and peanut?

gourmet s'mores

I really, really loved how this table came out.  I bought a few new pieces, but most were thrifted, or found at garage sales.  It's all perfect camping gear, non-breakage, durable,  up-cycled, and pretty.  It really made me think about how it doesn't really take too much more effort or money to make everyday beautiful.

woodland tea party ideas

With a pretty forest tea party in the woods, life really is a party!

You might also like S'more Charcuterie Board here.

S'more Charcuterie Board: this s'more themed dessert board is perfect as a summer treat around a campfire, or for your camping themed party.

Also check out our S'more Kit here.

Smore Making Kit -use a picnic basket to store everything for s'more making. Add different flavours of chocolate, marshmallows and graham crackers.

You might also enjoy our Woodland Forest Party here.

Woodland Forest Party Food Ideas: Easy to put together woodland forested themed party food ideas with store bought ingredients that are cute and delicious.


Camping With Kids

Jul 28, 2014 · 1 Comment

Camping With Kids Ideas: ideas for activities for children to enjoy on a camping trip, including around the campsite ideas, and rainy day ideas.

Camping With Kids Ideas: ideas for activities for children to enjoy on a camping trip, including around the campsite ideas, and rainy day ideas.

Camping With Kids Ideas: ideas for activities for children to enjoy on a camping trip, including around the campsite ideas, and rainy day ideas.

Today I'm sharing all my fun camping with kids ideas.  

Last week was a week of oozy, gooey homemade marshmallows roasted over the campfire, bug spray and after bite, and lots of lots of giggles, laughs and memories.  We went camping with friends and had a great time, and I wanted to share some of the simple things we planned for the kids to do around the campsite.  With a little planning ahead, you’ll hopefully keep everyone happy and out of trouble for hours. 😉

Camping With Kids Activity Ideas

The majority of our time was spent at the beach, bike riding, hiking, or enjoying the campsites activities, but for those times when you’re hanging around the campsite or cooking meals here are some great, and really simple ideas to keep the kids busy and happy.  Before we left, my friend Heather and I planned out a few things and packed them all up into a big bag to be pulled out when ever we needed them.

Nature Scavenger Hunt

nature scavenger hunt

One fun and simple idea was a little scavenger hunt, my friend Heather printed them from here, and attached them to some little paper bags.  The girls had a great time finding their items and checking them off.

Watercolours

Camping with kids watercolour kit

I made a simple watercolour bag with some watercolour paper, paint brushes, and a couple sets of watercolour paints.  Our girls had a great time painting, and were inspired by an artist painting the water and horizon at the nature centre.  When we came back to the campsite, they went down to the lake and tried their own versions.

water colour painting at the beach

Then, they discovered feathers on the shore and started painting with those.

watercolour painting with feathers

Then, they decided to paint some rocks.  I loved their creativity!

painting rocks on the beach

Cup Stacking

Heather also packed some simple small plastic cups from the dollar store, for stacking and building.  She pulled them out one night as we were cooking dinner and the girls played with them for ages.

cup stacking game

Journals and Colouring

We also packed some journals from Stuck On You.  The girls loved their personalized journals, and fun pencils and pencil crayons all personalized for our trip.

camping journals

camp journal

They had fun writing about the trip.

colouring on a camping trip

Adventure Backpacks

Another fun treat from Stuck On You were the sweet little personalized key chains.  We put them on the girls backpacks, which they filled with treasures like flashlights, binoculars, and their new journals, and walked around the campground together playing a little game of adventure explorers.

adventure backpacks

Beading

Another fun activity for around the site was a bag of beads, for make your own necklace or bracelet -this one would have also worked inside the tent if it had rained.

beading kits

New Magazines and Lego

The other rainy day activities that my friend Heather brought along and my girls LOVED, was a new favourite magazine for everyone, and a few new lego toys to build together.  Luckily, we didn’t get the rain that they were calling for, and the girls enjoyed the activities outside.

children's magazines

lego kits

Campfire Ideas

We planned a few fun night time activities too.  We had amazing gourmet s’mores, with homemade marshmallows and graham crackers -see the recipes here.

Camping with kids s'mores

But there were a few other little treats too.  I picked up some glow bracelets, and Heather brought jiffy pop popcorn that we made over the campfire.

glow sticks and jiffy pop for campfires

Matching PJs

The best treat of all though, were their matching personalized pj’s.

Camping with kids

It was so much fun for the girls to have matching woodland themed pj’s, they looked so, so cute.    I love the little deer and bunny on them, perfect for a camping trip, and lots of fun memories for them at home later when they wear them.  They are very well made, from soft cotton, and speaking from experience, they wash very well too….and of course, they’re adorable.

Camping with kids

With best friends, and so many fun camping with kids ideas, life really is a party!

Stuck On You generously supplied the pi's, journals, pencils, and key chains but all the opinions are my own -I really love their stuff!

You might also like our Orange Peel Candles here.

Also check out our Campfire Cinnamon Rolls here.

You might also like our Forest Tea Party here.

Forest Tea Party: tea and scones all set up in the woods with fun glamping camping accessories, and a camping inspired menu.

How To Make Orange Peel and Olive Oil Candles

Jul 25, 2014 · 1 Comment

How to make an orange peel candle.

Orange Peel Candles: the perfect camping activity.  Make a candle out of just 2 items, an orange and some olive oil. 

How to make a candle with an orange peel.
[feast_advanced_jump_to]

This fun camping hack is sure to impress.  Make an orange peel candle with only 2 ingredients:  an orange peel and some olive oil.  Yes it really works.  It looks great at night, and the smell of the orange is great too.  It only takes a few easy steps to create.  We made our candles on a camping trip and used the candles around the campfire at night.  This would be a really fun craft during the holiday season too.  It uses all natural elements, and look really beautiful as it burns.

This craft only needs two materials.  No need for paraffin wax, or natural soy wax, or a double boiler, or cotton wick for this easy craft.  These natural candles are made with just regular zesty mandarin orange peels and olive oil.  With these all natural ingredients they are naturally lead-free wicks, and even cleaner than soy candles, soy wax blend or beeswax candles.

Olive Oil

This is a wonderful all natural craft.  Olive oil was used in ancient oil lamps.  It is a clean burning fuel, and it doesn't spread toxins into the air as it burns.  It is odourless and smokeless and makes a great fuel for our orange peel candles.  Each orange peel candle should give you a burn time of about 3-4 hours, depending on the oranges size.

Oranges

We used oranges as the container for our candles.  One trick is you must cut the orange in half in the right direction.  The orange stem in the center of the orange becomes the natural wick for the candle.  You must slice your candle so that the orange stem wick is in the center.  Notice  a small round circle on the outside of the orange where it attached to the orange tree, this is where the orange stem that we used for the candle wick is, so let it guide in which direction to slice the orange.

You can use any oranges for your orange candle.  An orange with good thick orange rinds works well.  You can also experiment with different kinds of citrus peel like grapefruit, lemons, or limes.  Different citrus fruits will give you slightly different scents from the natural essential oils in their peels.  And when you're all done with them, they can go into the compost bin.

Orange peel candle

Recipe

How to make an orange peel candle.

Orange Peel Candles

Make your own candles using orange peels as the base.
No ratings yet
Print Pin Rate
Cook Time: 15 minutes minutes
Total Time: 15 minutes minutes
Author: Dannyelle Nicolle-Ramjist
Cost: $5

Equipment

  • knife
  • lighter

Materials

  • orange
  • olive oil

Instructions

  • Cut your orange in half and scoop out the flesh, being careful not to damage the white middle stem. This is really important, because the stem will become your candle wick.
  • Pour olive oil into the half of the orange, letting it flow over the white stem. Try to get the stem as saturated as possible, maybe even let it sit for awhile.
  • Light the stem and enjoy your candle.
how to make a candle out of an orange peel

Troubleshooting

I found it kind of hard to light the wick for the first burn.  

We tried different oil, but the olive oil seemed to work best.  

I had a good bbq lighter, and just kept it on hoping it would light…it would light and then go out.  I tried to trim wicks but that didn't help.  So, I kept re-lighting it with my lighter, until my lighter run out of lighter fluid.  

My friend poured a small amount, like a spoonful, of lamp oil from a lantern over the wick and it lit very easily.  So if you have lamp oil it might work great.

My sweet friend drove to the camp store for a new lighter.  The orange had been sitting with the oil at this point for about 20 min.  I tried again and after a min. or two it lit and stayed lit the rest of the night.  Sweet success.  

If you're having trouble you may need to let your olive oil sit a little longer so that the stem wick can soak up the oil through capillary action.  It's best to make these a few hours before you want to make them.  

Orange peel candles

The orange candles are super cool looking as they burn.  Activities like this are such good things to do on a camping trip.  It was totally a fun hanging out around the campfire kind of an activity.  These would also be gorgeous inside as beloved year-round candles.  They make a lovely orange-spiced fall candle.  They're especially nice as a winter favorite at Christmas time.  Arranged them with some dried orange slices for the holidays and enjoy the natural fragrances of the orange zest.  No need for a tea light, wax melts, or orange essential oil when you have an olive oil and orange candle to enjoy.

how to make Orange peel candles

With a homemade orange peel candle lighting up the night, life really is a party!

More Camping Inspiration

You might also like our Campfire Cinnamon Rolls here.

Also check out our Campfire Paninis here.

Campfire Paninis: make your own DIY campfire paninis press with a foil covered flat rock and enjoy a campfire panini in the woods.

You might also enjoy our Campfire Muffins here.

Homemade Slow Cooker Baked Beans

Jul 17, 2014 · 4 Comments

How to make homemade baked beans in a slow cooker.

Slow Cooker Boston Baked Beans Recipe: once you've tried homemade baked beans you'll never want to go back to the canned version again.

Slow cooker baked beans.
[feast_advanced_jump_to]

This Slow Cooker Baked Beans Recipe is a favourite of mine.  These beans are sweet, and a little spicy, and definitely worth making from scratch.  

A few years ago, we were at ribfest, and my husband ordered ribs that came with a side of baked beans. I didn't dislike baked beans, but they weren't on my fav. list either. Until, I tried homemade ones. They were sweet and spicy and awesome.Since ribfest is only once a year, it seemed like a good idea to try and make some at home. I've made these so many times since then, and tweaked them a little to perfect them. 

Sweet and Spicy

I like them sweet, but if you don't like them too sweet, you can reduce the sugar alittle. I also like a little spice so there's a teaspoon of chili flakes in these, but you can adjust it up or down depending on your taste. They'd be great with fresh hot peppers in them too.

slow cooker baked beans

Soaking Beans

If you've never cooked navy beans from scratch, the first thing you need to do is soak them.  I also like to give them a pre-cook to soften them up.  If you don't pre soak and boil your beans as part of the cooking process, the beans can come out hard instead of soft and tender.  Soaking and pre-cooking the beans ensures perfectly cooked, soft beans every time. Soaking your beans is easy.  Just put them in a bowl and cover them with cold water, and let them sit overnight.  In the morning drain off your soaking water and you're ready for the next step. 

Pre-boil

Some people don't take the extra step to pre-boil their beans before cooking, but I've found that it ensures soft tender beans.  There's nothing worse than going to the trouble of cooking beans in your slow cooker all day, and then finding out when you're ready to serve them that they're still hard.  Pre-boiling the beans eliminates this problem.  It's an easy step to include and ensures success.  Transfer the pre soaked beans to a large pot and add water.  You want enough liquid to cover them plus a few inches.  You can check the water levels as they boil, to ensure they remained covered.  We boil our soaked beans in a large saucepan for one hour before adding them to the slow cooker.  They should be soft beans after an hour of boiling, and they'll continue to cook in the slow cooker as well.  Drain off your cooking liquid, and add them to the slow cooker after boiling them.  

Can you skip the pre-boil? The short answer is yes, especially if you did soak your beans overnight already.  If you forgot to soak your beans overnight, then I would be sure to pre-boil them before cooking in the slow cooker.

One other factor that can contribute to your beans not getting nice and soft and tender is if they're old beans.  Be sure to use new beans.  Buy them from somewhere that you're confident they haven't been sitting on a shelf for too long.  If you only make this recipe very occasionally, make sure you're using fresh beans to start off with each time.

how to make baked beans in a slow cooker

Slow Cooker

This bean recipe is made in a crock pot so, once you add the beans and all the other ingredients in the crock pot, you can forget about them for awhile.  This is perfect for entertaining or focusing on other foods at the last minute.  This is one of my favorite slow cooker recipes.  I love serving this dish in the summer as a side dish at summer bbqs.  So many times, my guests have never had homemade beans before, they've only ever tried canned beans and not enjoyed them very much.  After trying this recipe, they usually ask for the recipe because they're so good.

If you don't have a slow cooker, you an make this recipe on the stove top in a large pot or baked in the oven in a dutch oven.  You will have to adjust your cooking times.  

Pork

I'm not a big fan of pork in my beans.  The pork braises in the beans and the fatty bits don't have a chance to render or get crispy.  The texture of the pork is soft and it's often very fatty.  If you love the flavor it adds to the beans though, you can add it in.  You can use thick-cut bacon, or regular bacon.  Just cut your raw bacon into small pieces and add to the slow cooker at the beginning of the cooking time.

Vegan

If you want to serve this recipe to a vegan, be sure to not add pork.  Everything else in the recipe is suitable for a vegan.

slow cooker Boston baked beans

Boston Baked Beans

What makes Boston baked beans difference from regular baked beans?  The use of molasses.  Traditional baked beans are often sweetened with brown sugar and corn syrup.  Boston baked beans use molasses to add sweetness, but also a depth of flavor.  They also often contain pork, although we don't add it to our recipe, but you could if you like it.  And since I'm a Canadian, I've also added maple syrup to bring some more sweetness to our baked beans.  I think it's a great addition to these.  You could substitute brown sugar if you prefer.

Homemade Baked Beans

Give the slow cooker boston baked beans a good stir after adding them and the rest of the ingredients to the slow cooker.  Then stir them occasionally during the cooking if you're around.  As they cook you'll see the thick sauce develop.  When they're done they're a perfect meal on their own, or serve them as a great side dish.

Store any leftovers in a airtight container in the refrigerator.  These are delicious as leftovers.  The flavors continue to infuse into the beans the next day, and the they are the most flavorful beans.

The first time I had homemade baked beans, I couldn't believe the difference between homemade and the canned stuff I'd had before.  These are the best baked beans I ever had.  If you're a fan of baked beans and never tried a homemade version you are going to love these and they're really easy to make in the  slow cooker. We make these often to go with ribs, and this week I made them for fajita night. They're also a great make ahead for a camping trip, just make them at home and re-heat on the camp stove.  Or make these for your next potluck.  They're pretty much awesome any time really.  You're going to want to add this to your favorite bean recipes.

Recipe

How to make homemade baked beans in a slow cooker.

Slow Cooker Baked Beans Recipe

Video

Homemade baked beans with a sweet sauce.
No ratings yet
Print Pin Rate
Course: Side Dish
Cuisine: American
Prep Time: 15 minutes minutes
Cook Time: 11 hours hours
Total Time: 11 hours hours 15 minutes minutes
Servings: 8 cups
Calories: 300kcal
Author: Dannyelle Nicolle-Ramjist

Ingredients

  • 3 cups dry navy beans
  • 1 ½ cups ketchup
  • 1 ½ cups water
  • ¼ cup molasses
  • 1 large onion chopped
  • 1 tablespoon dry mustard
  • 1 tablespoon salt
  • 1 teaspoon chilli flakes
  • ½ cup brown sugar
  • ½ cup maple syrup
  • 1 green or red pepper chopped

Instructions

  • Soak your beans overnight in water.
  • Rinse beans, and boil in fresh water for an hour. Then drain the beans.
  • In the slow cooker, combine ketchup, water, molasses, onion, dry mustard, salt, chilli flakes, brown sugar, maple syrup, and pepper with the drained cooked beans.
  • Cover and cook on the low setting for 8 to 10 hours, stirring occasionally if possible, but not necessary.

Nutrition

Serving: 1g | Calories: 300kcal | Carbohydrates: 63g | Protein: 12g | Fat: 1g | Polyunsaturated Fat: 1g | Sodium: 866mg | Fiber: 8g | Sugar: 30g
Tried this Recipe? Tag me Today!Mention @LifeisaParty or tag #lifeisaparty!
How to make Baked Beans in a slow cooker

With this slow cooker Boston baked beans recipe, life really is a party.

baked beans in a slow cooker recipe

More Recipe Inspiration

You might also like our Homemade BBQ Sauce recipe here.

Also check out our  Homemade Montreal Steak Seasoning recipe here.

You might also enjoy our No-Cook Homemade Hot Sauce recipe here.

No Cook Homemade Hot Sauce: Make this sauce in minutes in your blender and enjoy the hot tangy homemade hot sauce. The perfect Homemade Father's Day gift.

Homemade Canadian Fried Dough -Beaver Tails Recipe

Jul 1, 2014 · 2 Comments

Beaver tail fried pastry.

Canadian Fried Dough: Beaver Tails recipe for a Canadian classic, fried donut like flat pastries with cinnamon sugar sprinkled on top.

Homemade Canadian fried dough beaver tails.
[feast_advanced_jump_to]

Happy Canada Day! What better way to celebrate than with a beaver tails recipe. Beaver Tails are a Canadian classic!  They are a favourite around here, so we thought we'd give our own version of Canadian Fried Dough a try -and they were a big hit!

Canadian Fried Dough: Beaver Tails

This Canadian fried dough has few different names.  It's something called beaver tails, and something called elephant ears. They are a large flat pastry that resembles a beaver's tail, thus the name.  They're the kind of special treat that you get at county fairs.  They're similar to funnel cakes -get our recipe for homemade fair funnel cakes recipe here.  

The dough for these donut-like friend dough pieces is traditionally made from whole wheat flour, and adds a delicious flavour to them. They are made with a yeast dough, which makes a wonderful soft dough and tender treat.  Baking with yeast can be a little bit intimidating, but for best results just follow the recipe closely.

how to make beaver tails

The dough rises, to a lovely soft, and smooth consistency. Then the dough is formed into the beaver tail, or canoe paddle shape.  Next it's fried to a lovely light brown and then topped with a delicious topping.

beaver tail recipe

Toppings

After frying, there are all different ways to top these off, but we kept to the traditional and my favorite topping of cinnamon and sugar, and they were so, so yummy!  This is my personal first choice when it comes favorite toppings.  But there are lots of other fun possibilities.  You might like to try one or a combination of any of these ideas:

  • chocolate hazelnut spread
  • powdered sugar
  • banana slices
  • caramel sauce
  • cream cheese
  • vanilla icing
  • mini m and m's
  • sprinkles
  • apple pie filling
  • maple butter
  • maple syrup
  • jam
  • chocolate bar pieces
  • chocolate chips
  • brownie pieces
  • cookie pieces
Canadian Fried Dough beaver tails recipe

Recipe

Canadian fried dough pastry.

Canadian Fried Dough -Beaver Tails

A sweet fried pastry covered in cinnamon sugar.
5 from 1 vote
Print Pin Rate
Course: Desserts
Cuisine: American
Prep Time: 20 minutes minutes
Cook Time: 20 minutes minutes
Additional Time: 1 hour hour
Total Time: 1 hour hour 40 minutes minutes
Servings: 20
Calories: 1567kcal
Author: Dannyelle Nicolle-Ramjist

Ingredients

  • ½ cup warm water 45 degrees C
  • 5 teaspoon active dry yeast
  • pinch white sugar
  • 1 cup warm milk 45 degrees C
  • ⅓ cup white sugar
  • 1 ½ teaspoon salt
  • 1 teaspoon vanilla
  • 3 eggs beaten
  • ⅓ cup vegetable oil
  • 5 - 6 cups whole wheat flour
  • 1-2 Liters vegetable oil for frying
  • 2 cups white sugar
  • 2 teaspoon cinnamon

Instructions

  • Combine warm water, yeast, and a pinch of sugar in the large bowl of stand mixer and let sit around 5 min. until the yeast begins to foam.
  • Stir in warm milk, sugar, salt, vanilla, eggs, and oil. Add in flour, mixing, until dough is no longer sticky, using around 5 - 6 cups of flour. Mix with dough hook in stand mixer until the dough is smooth, and elastic and a sticky dough forms. Remove the dough from the bowl, and form it into a large ball. Oil a large mixing bowl and put the ball of dough inside the large greased bowl to rise, covered with greased plastic wrap, in a warm area, until the dough has doubled in size. This usually takes about an hour.
  • Punch down the dough mixture and knead the dough back into shape. Divide the dough into small pieces, about egg sized portions and roll out with a rolling pin on a lightly floured surface or stretch with your hands into an oval dough disk shape. The dough should be about ¼ inch thick. Cover so the dough doesn't dry out while you finish shaping the rest.
  • Heat the oil in a deep fryer to 375 degrees F (190 degrees C).
  • In a shallow dish or plate, combine 2 cups of white sugar with cinnamon to make the cinnamon sugar topping.
  • Fry the dough pieces in the hot oil, one at a time, for a few minutes per side, until golden brown. As soon as the fried dough pieces are removed from the fryer drain excess oil on a paper towel-lined plate. While still warm, coat the deep-fried bread dough in cinnamon sugar mixture, pressing it in and shaking to remove excess. These are best enjoyed fresh the day you make them.

Nutrition

Serving: 1g | Calories: 1567kcal | Carbohydrates: 154g | Protein: 26g | Fat: 101g | Saturated Fat: 8g | Polyunsaturated Fat: 87g | Trans Fat: 2g | Cholesterol: 29mg | Sodium: 195mg | Fiber: 20g | Sugar: 25g
Tried this Recipe? Tag me Today!Mention @LifeisaParty or tag #lifeisaparty!

how to make beaver tails

This treat is best enjoyed the day that you make it.  If you have more dough than you need you can store the un-fried dough in the refrigerator in an airtight container for a few days and fry it anytime you want it.

This is such a wonderful sweet treat.  Weather you add lots of fun toppings or just use the traditional cinnamon sugar the best part is sharing it with family and friends.  This is sure to become one of your favorite recipes.  You might even want to set up a topping buffet so that your guests can top their own fried dough with their favorite thing each time.

With a wonderful homemade fried dough recipe like this, life really is a party!

More Recipe Inspiration

You might also like our Homemade Honey Cruller recipe here.

home made honey crullers

Also check our our Butter Tarts with Raisins recipe here.

Butter Tarts with Raisins Recipe: My grandma's famous recipe, a Canadian classic. We love our butter tarts with raisins added to them.

You might also enjoy our Donut Strawberry Shortcake recipe here.

Donut Strawberry Shortcake -the easiest, best Strawberry Shortcake ever! You'll never go back to your old version after trying this one.

Vietnamese Baguette Sandwiches -Banh Mi Recipe

Jun 25, 2014 · Leave a Comment

Vietnamese Baguette Sandwich Banh-Mi Recipe.

Vietnamese Sandwich Recipe: the Vietnamese baguette Banh Mi combines grilled pork, tangy pickles, cucumbers, pate, spicy lime mayo and cilantro for the perfect sandwich.

Vietnamese Baguette Sandwich Banh-Mi Recipe.
[feast_advanced_jump_to]

I love this Vietnamese sandwich recipe. Love it. And I hope you will too. Every time I've made it,  it's always a crowd pleaser.

Vietnamese sandwich recipe

I first heard of this sandwich on a cooking show quite a few years ago, but never had a chance to try it.  Just from the list of all of the ingredients, I knew that it would be yummy. I really like Vietnamese food,  so I experimented with a few different recipes and versions, to come up with all the elements of these amazing Vietnamese sandwiches.  It turned out so great.  I love this sandwich.  It is hearty enough to be a meal in itself.  The best part about this sandwich is that it has an amazing combination of textures and flavors.  It's spicy and sweet and sour and savory and fresh.  It's also crispy and smooth and chewy all at the same time.  This version is not the quickest sandwich to throw together.  But it's well worth the time it takes to marinate and grill the pork, and to pickle the fresh vegetables for this bahn mi sandwich recipe.  If you're lucky enough to be in a Vietnamese neighbourhood you can pick on up.  But you can also make it at home with this recipe and have it whenever you want.

French and Vietnamese Fusion

There's a lot of French influence in Vietnamese cooking, and you can see it in this sandwich with the baguette and the pate.  This comes from the time when Vietnam was under French colonial rule beginning in 1858.  French colonialism impacted the vietnamese people in many ways including their food.  Some French cuisine was introduced  including French bread.  The crispy baguette become a stable.  Over the years, there was a fusion between the French influence and the Vietnamese cuisine.  The traditional banh mi sandwich is made with a French-style baguette, and  bahn mi is actually the vietnamese word for the baguette bread this perfect sandwich is made in.  Along with the crusty baguettes, it also usually has French influenced pate in it.  A Vietnamese banh mi is also filled with asian style pickled veggies, spicy mayo, some kind of Vietnamese pork, and fresh herbs. This delicious sandwich is the perfect fusion of French and Asian influence.  This Vietnamese street food is perfect for on the go eating.  It usually contains some kind of pork meat.  We've used lemongrass pork for ours, but it's also served sometime with pork meatballs, pork loaf, or roast pork.

Pork

We used pork shoulder for our lemongrass pork for the sandwich.  It has a good bit of fat in it, which makes the grilled pork nice and moist.  You can also use pork butt, pork belly, or pork tenderloin for this.  Don't skip the lemongrass in this recipe.  Look for it at any asian or Vietnamese grocery stores with the fresh veggies and herbs.  Be sure to marinate your pork for at least a few hours, and up to overnight.  If you're making this sandwich for a party or company, you can do this step the night before so that all you have to do is grill it the day of.  You can also freeze the pork in the marinade.  Do yourself a favor if you're making a batch of this and do an extra one at the same time, place the marinade and pork in a ziplock bag and freeze it.  The next time you want to enjoy this yummy sandwich, all you have to do is take the pork and marinade out of the freezer, let it thaw and grill, and then assemble the rest of your sandwich and enjoy.

Pickles

The pickled carrots and daikon radish don't take long to make.  Use a mandoline chopper to make slicing them much quicker.  Let them sit in the pickling liquid at least a few hours before serving.  Store in an airtight container in the fridge for a few days.  Enjoy this pickled crunchy vegetables on the sandwich, with more on the side for pickle lovers.

vietnamese baguette with grilled Vietnamese pork and homemade pickles
Vietnamese picked radish and carrots
Vietnamese baguette -banh mi sandwich

I served this sandwich on the weekend at a summer get-together with some old friends in the backyard.  This sandwich really is perfect for summer entertaining.The pork is done on the bbq and the pickle can be made the day before so all you need to do the day of is assemble.

These pork banh mi sandwiches are something different and really fresh.  They have a great balance of textures and taste.  The crusty Vietnamese baguettes is contrasted with the velvety smooth texture of the pate.  The pickled carrots and daikon have the perfect sweet and sour taste,  Along with the taste, the pickled vegetables add more of the great crunch. The cilantro leaves add some freshness.  And the spicy element is covered with the spicy mayo.  The pork is perfectly seasoned and also sweet, and a little bit fatty in the best sense and wonderfully unctuous.  This really is one of the best sandwiches.  I hope you love it too!

Recipe

Vietnamese Baguette Sandwich Banh-Mi Recipe.

Vietnamese Sandwich -Banh Mi

Grilled pork sandwich with pate, served on a baguette with picked vegetables and herbs.
No ratings yet
Print Pin Rate
Course: Sandwich
Cuisine: Vietnamese
Prep Time: 30 minutes minutes
Cook Time: 15 minutes minutes
Additional Time: 2 hours hours
Total Time: 2 hours hours 45 minutes minutes
Calories: 683kcal
Author: Dannyelle Nicolle-Ramjist

Ingredients

Vietnamese Grilled Pork

  • 500 g pork shoulder thinly sliced
  • 2 tablespoon sugar
  • 1 tablespoon honey
  • 4 tablespoon fish sauce
  • 3 cloves garlic minced
  • 2 tablespoon lemongrass finely chopped
  • 1 teaspoon ground pepper
  • 2 tablespoon sesame oil

Pickled Daikon and Carrot

  • ¾ cup white sugar
  • ¾ cup white vinegar
  • 2 cups daikon Chinese radish cut into matchstick size pieces
  • 2 cups carrot -cut into matchstick size pieces

Spicy Lime Mayonnaise

  • ¼ cup favorite mayo
  • 1 lime juice squeeze the lime for the juice
  • 1-2 teaspoon Sriracha hot sauce -to taste

To Make the Sandwich

  • 2 French baguettes
  • 150 g chicken liver pate
  • 1 English cucumber sliced
  • ½ bunch fresh cilantro
  • picked daikon and carrot
  • grilled Vietnamese pork

Instructions

Vietnamese Grilled Pork

  • Combine al the ingredients to make a marinade for the pork, and let sit several hours in the fridge, or over night.
  • To cook, remove from the marinade, and grill on the bbq until done.

Pickled Daikon and Carrot

  • Combine sugar and vinegar and stir until the sugar is completely dissolved. Add carrots and daikon and let sit for several hours or overnight.

Spicy Lime Mayonnaise

  • To make the mayo, combine the mayo, lime juice and hot sauce.

To Make the Sandwich

  • Slice baguette in half and spread one side with pate, and the other with spicy lime mayo. Add the grilled pork, cucumber slices, cilantro and picked daikon and carrots. Enjoy!

Nutrition

Serving: 1/4 Baguette | Calories: 683kcal | Carbohydrates: 77g | Protein: 30g | Fat: 28g | Saturated Fat: 8g | Polyunsaturated Fat: 18g | Cholesterol: 142mg | Sodium: 1418mg | Fiber: 5g | Sugar: 32g
Tried this Recipe? Tag me Today!Mention @LifeisaParty or tag #lifeisaparty!
How to make a Vietnamese sandwich -banh mi

With this yummy Vietnamese pork sandwich recipe, life really is a party!

More Recipe Inspiration

You might also this recipe for Marinated Flattened Grilled Chicken.

Also check out our recipe for Scotch Eggs here.


How To Make A Fairy Garden

May 23, 2014 · 14 Comments

How to make a fairy garden.

How To Make A Fairy Garden with ideas for small plants to use, and how to make your own DIY fairy houses out of bird houses. Plus a DIY fairy arbour, mailbox and fairy garden accessories.

How to make a fairy garden.
[feast_advanced_jump_to]

Why We Love Fairy Gardens

  • They're so cute and adorable.
  • They attract fairies to come live in your garden.
  • They're like a hidden treasure among the plants.
  • These are really fun to make with kids and for them to play with.
  • For adults they awaken your inner child.
  • There's lots of easy DIY things you can make for your fairy garden if you're crafty.

It's that time of the year again, where my mind starts thinking about fairies and building little fairy miniature gardens. It's becoming a bit of a tradition for my girls and I to make them each spring -see this fall fairy garden, teacup garden, fairy garden camp ground, and our teacup fairy garden here.  

DIY fairy garden in a large container with flowers, fairy house, moss, and pathway.

DIY Fairy Garden Houses

I usually start out making a fairy house with little dollar store or craft store bird houses, and make a few minor adjustments to make them into the perfect little fairy homes.

Start by using a little saw to cut off the bird perch.  Then use your saw to cut off the end of a regular old paint stick to make little fairy doors for your houses.  

how to make a fairy garden house

Attach the doors to the tiny houses with a little finishing nail.  When you hammer the door onto the house, leave the nail sticking out a little for the perfect tiny door knob.  You could also use a bit of wood glue as well.

how to make a fairy garden house from a birdhouse

Then we usually paint the houses in pretty colours of acrylic paints and add a little glitter here and there for a the perfect fairy touch. You can use ordinary acrylic paint for an indoor fairy garden.  

To make the houses work in your outdoor space, you can seal the houses with some spray on sealer.  

It's also a great idea to get kids involved in in the painting.  I often let my kids each make their own, with their own colors and their own fairy garden design.  

This is a great way to let kids add a little imagination and create a really magical garden. You might even choose different themes for your fairy houses, and make an entire village.

Pinecone Roof Fairy House

This year I wanted to change it up a little and I've added a few more fun details to the house construction. I may or may not have watched a few too many Tinker Bell movies over the last few years since they're a favourite with my little girls.

I found myself thinking "what would the fairies use"?

They seem to use anything they can find -at least in the movies, so I incorporated a few things these magical creatures might have on hand too.

diy fairy house for a fairy garden with pinecone shingles

The first house I made this year has a shingle roof made with pine cones. I just bent little pieces of pine cone off with my fingers, and hot glued them in an overlapping shingle style to create the roof. Afterward I gave it a coat of glitter paint for a little fairy sparkle in our whimsical fairy garden.

The finishing touch was a front door made of twigs with a tiny little rock handle glued on.  It is so much fun letting your imagination run wild with these cute fairy garden houses.

diy fairy house for a fairy garden
how to make a fairy garden

Birch Bark Fairy House

For the second DIY fairy house, I made some sweet little shingles out of some birch bark, trying to alternate colours and textures for a little variation.

The birch was just. a few pieces that were coming off of some birch trees in the woods that I found on a walk.  

The door of this one is another piece of birch bark.

Birch bark is really easy to work with, and cuts really easily with regular scissors.  All the birch bark is attached with hot glue, and finished with some glitter paint.  

I found the hot glue held up well for the whole growing season.  If you were worried though you could use a stronger glue like E6000 or Gorilla Glue.  

This was such a fun project.  It's a great idea to go for a little walk in the woods and find natural materials like this, and let them inspire you for your own fairy garden craft.

fairy garden diy fairy house with birch bark roof

Seed Package Fairy House

The third DIY fairy house might be my very favourite, with three sides of it covered in seed packages. I saved my empty seed packages this year after planting some seeds in my garden.  They were just too pretty to throw away.  I thought they'd be really sweet on some fairy houses.  See more on how to make a fairy garden house with seed packages here.

I just trimmed the empty seed packages to size and mod-podged them onto the tiny fairy houses.

This one has a full glitter roof too.  

Seed packages are so beautiful, and this is the perfect way to upcycle them.  If you don't have any, look for free printable versions on line that you can print on your home color printer and use.

diy fairy house for a fairy garden
diy fairy garden house from a bird house
fairy garden pink

Fairy Garden Containers

After the houses were made it was time to place them into the container fairy garden. I like using old galvanized steel, and enamelware containers like a galvanized tub. I've picked them up mostly at antique shows.   They make a great flower pot. Just make sure to add some drainage holes with a nail and hammer or a drill before planting in them.  

Clay pots or terra cotta pots are a great option too.  

You can also make your fairy gardens in your flower beds if you prefer.

I love using containers for my fairy gardens, because you can really get up close and see all the fairy garden details.  Other great container ideas are to use an old wheelbarrow, or an old hollowed out tree stump.

I usually add one house to each pot and group them together like a little fairy neighbourhood.  They make a great focal point on your deck or patio.  This is a perfect location for plants that love sun.  

I like them arranged on the stairs, so that you can really appreciate each one.  Together they make entire villages of fairy homes.  

Making your fairy gardens in pots means they're perfect even for a small space.  You can even add fairy lights, and enjoy your fairy gardens at night.

Fairy Garden Plants

I've used some small annals in my gardens this year.  

Try and pick flowers with smallish blooms, and remember they'll grow, so give them some room, and be sure to leave space for the houses and accessories too.  

Small plants work best so look for miniature plants of your favourite varieties.  We used some English daisies, miniature rose bushes and lots of filler container plants like bacopas, sweet alyssums, and lobelia.

You can also include tiny trees or bonsai trees like we did for our camping themed fairy garden here.  Look for these at your local garden store.  

Another option is to make a succulent garden.  Succulent gardens are also a great choice for fairy gardens.  Succulents are small and slow growing, so they work well in a fairy landscape. See how we used them for our teacup fairy garden here.

After the plants are in, I like to add moss to mine to make the fairies yard. I just dug up some from a shady spot in our side yard where it was growing.  

Another great option if you want create a green fairy lawn is to plant something like creeping thyme.  It looks great and stays nice and low and green. Irish moss or Scotch moss are also great options. Look for them at the garden center.

how to make a fairy garden

DIY Fairy Garden Decor

Next, it's time to add your houses, and pathways, and fun little fairy garden accessories. I used some that I already had from other years -you can save them and use them year after year. We also added a few new ones too.  It's a good idea to invest in or make a few new tiny accessories each year and add to your collection.

Stepping Stones and Pathways

It's fun to add some stepping stones and pathways to your small garden.  We've used different items in different gardens here.  One path is made out of buttons.  Another path is made of smooth stones.  Glass gems work well too.  Another path is small wood slices from the fairy accessory section of the store, but you can also of course use real wood rounds too.  Tiny pea gravel is a good option too, or aquarium gravel if you want bright colors.  Try to think outside of the box when it come to decorating your cute garden.  Old toys can make great additions to your DIY fairy garden too.

fairy garden accessories

Where To Find Fairy Garden Accessories

When I first started making fairy gardens it was quite difficult to find cute accessories. The best place to look was a speciality doll house miniature store, or in the doll house miniature section of the craft store. It's much easiy to find them now. Look in craft stores, plant nurseries, and dollar stores. And if you can't find what you want in the store be sure to look on-line for even more options.

fairy garden fairy mail box

DIY Fairy Garden Accessories

It's always fun to make a few of your own DIY fairy garden accessories too, and get a bit creative with things you might have around the hosue.

Every busy fairy household needs a clothesline for the washing.  

We made this one for our fairy friends with some string and miniature clothespins, it's a great place for fairies to hang out their fresh laundry.

fairy garden clothes line

DIY Fairy Garden Arbour

I made this sweet little arbour by hot gluing a few twigs together, I think it makes a sweet garden entrance.  And it was really simple to make. Find out how to make your own arbour or DIY fairy garden pergola here.

fairy garden twig fairy arbour diy

Tea Party for the Fairies

The arbour made the perfect entrance to a little fairy tea party in the garden.

fairy garden tea party

I made the fairy cupcakes last year out of some polymer clay -see a tutorial on how to make miniature polymer clay cupcakes here.  The polymer clay really held up great...makes me think about what else I could make using polymer clay for my DIY fairy garden next year.

The china tea set is from a miniature dollhouse store, I've had it outside in a fairy garden during the summers for three years now and it still looks great.

The table is a new addition from a local nursery selling some fairy furniture this year, and what better seats than a couple of thimbles, which I just picked up in the sewing section of a big box store.

fairy garden diy shell mail box

DIY Fairy Garden Mailbox

The shell mailbox is new too. I used a seashell, and added the flag with a little piece of birch bark, coloured red with a sharpie and hammered in place with a little finishing nail. If the flags up -you've got mail!  

Little ideas like this really make this into a magical fairy garden.

fairy garden diy mail box

Fairy Garden House Number

And, every house needs a little house number so your friends can find you when they drop by.  We just used a small wood round and a sharpie to make this and it's so cute.

fairy garden house number

I love making these little gardens and using them in pots along with some other flowers on my deck.

fairy garden containers
fairy gardens

You might have noticed the black cords too, it's an irrigation system -read how we installed it here, that is on a timer, and will hopefully mean that it's impossible for me to forget to water these fairy gardens.

I hope these easy fairy garden ideas inspire you.  Traditional fairy gardens like these are so much fun to make.  Kids of all ages will love doing fairy garden crafts like these with you and creating their own beautiful fairy garden, and then waiting for the little fairies to move in.

how to make a simple fairy garden
fairy garden accessories

With DIY fairy garden ideas like these, life really is a party!

Frequently Asked Questions

How do I attract fairies to my fairy garden?

Make sure to include a beautiful house, you might even want to add a vacant or for rent sign so they know it's available. Fairies love seeing wonderful up-cycles so be sure to include some household items worked in like buttons and thimbles for example. They are also know to have a sweet tooth. 😉

How often do I need to water my fairy garden?

If you make your fairy garden on a sunny deck or patio in a container like we did you will have to remember to water it everyday so that it doesn't dry out.

Is it expensive to build a fairy garden?

You will need a container with soil and plants. You can use small filler container plants, which are not expensive. Fairy garden houses and accessories can be expensive. Save money and get creative by making your own.

More Fairy Garden Inspiration

  • Teacup garden with small succulent plants and tiny DIY clay fairy houses and mushrooms.
    Teacup Gardens
  • How to make a Christmas fairy garden.
    How To Make A Christmas Fairy Garden
  • How to make a fall fairy garden.
    Fall Fairy Garden
  • Fairy garden miniature picnic.
    Fairy Garden Picnic

If you try making a Fairy Garden or any other idea on my blog please leave a star rating and let me know how it went in the comments below. Thanks for visiting today!

Gold Easter Tablescape with Paper Flowers

Apr 17, 2014 · 1 Comment

Gold Easter Tablescape: DIY giant paper flowers, diy gold bunnies, and lots of pretty spring pastels create the perfect Easter table.

Gold Easter Tablescape: DIY giant paper flowers, diy gold bunnies, and lots of pretty spring pastels create the perfect Easter table.Gold Easter Tablescape: DIY giant paper flowers, diy gold bunnies, and lots of pretty spring pastels create the perfect Easter table.

I'm excited to share my gold and pastel Easter table with you, and hope you find it as pretty as I do.

Gold Cutlery

I shared last time with you how I've fallen hard for gold. I'd been admiring this cutlery for ages, but wasn't sure I should take the plunge. My very sweet husband surprised me with it for Christmas. Unfortunately it was out of stock, but he again surprised me on Valentine's Day by arranging to have someone pick it up while they were travelling in the US, and bring it home to for me. He joked that he was getting very good mileage out of this one gift. I love it, and it inspired the gold themed Easter table.

pastel Easter tablescape

Giant Paper Flowers

I also wanted to include the gorgeous paper flowers, like the ones I made for my mantel.  Find our full tutorial with a video on how to make giant paper flowers here.

giant paper flowers

So I made more for the dining table and created a runner out of them. I love how they turned out.

gold and pastel Easter tablescape

Gold and pastel Easter Tablescape

I used all the same shapes, but this time I sprayed some of the brown paper ones with a little gold spray paint. I also painted some with water colours again.

DIY giant paper flowers

I tucked in a few gold candles, and layered it all on a pretty pink runner.

Easter tablescape ideas

DIY Gold Bunnies

One of my very favourite little details are the golden bunnies.

DIY gold bunnies

I found inexpensive toy bunnies at the dollar store, and spray painted them gold. I just love how they turned out. They look so cute on each plate and tucked amongst the flowers on the table.

Gold and Pastel Easter Tablescape

I hope your Easter is golden too. gold leaf Easter egg

With a beautiful gold and pastel Easter tablescape, life really is a party!

You might also like our Black and White Easter Table here.

Also check out our Easter Table ideas here.

Green, Black and White Easter Table: 8 different place settings to give you lots of inspiration for setting an extra special Easter Table.

You might also like How To Make Giant Paper Flowers here.

How To Make Giant Paper Flowers: see how to turn regular paper into beautiful and inexpensive flowers, from large to small in a video tutorial. This diy is perfect for a wedding, shower, or home decor.

Gold Leaf Easter Eggs

Apr 9, 2014 · 4 Comments

DIY gold leaf Easter eggs.

Gold Leaf Easter Eggs: how to make easy DIY Easter eggs.  Perfect for your Easter decorating.

DIY gold leaf Easter eggs.
[feast_advanced_jump_to]

These gold leaf Easter eggs are an easy and fun DIY project.  They'll look great as part of your Easter decorating this year.  And since they are made with craft eggs, they're long lasting so you can use them year after year.

how to make gold leaf Easter eggs

Choosing Your Eggs

We choose to use light weight craft eggs from the dollar store or craft store for this craft.  They're inexpensive and easy to work with.  These ones have hanging strings on them, but they're also come without them if you prefer.  These white eggs have a matte texture similar to real eggs, and take paint very well.  These eggs are also durable and last from year to year, since they are plastic eggs.  You'll be able to enjoy your gold leaf easter eggs for years to come.

You could do this craft with other eggs instead.  I would not choose hard-boiled eggs, since they're not long lasting.  If you choose to use real eggs, be sure to blow them out first.  Use a long pin to create a hole on each end of the egg.  Make sure the hole at one end is large enough to blow the contents of the egg out through.  Then use the long pin to try and break up the yolk inside the egg by poking it.  Next blow on one end until the eggs flows out the hole in the other end.  Be sure to the egg inside and out before using for this craft.  You'll want to also store this egg very carefully from year to year, since it's very fragile.  One advantage of using real eggs, would be if you had eggs in beautiful colors like blues and greens.  If you're using regular white eggs, you could dye them.

Wooden eggs would also be a great option for this craft.  The only disadvantage of them is that they're more expensive than craft eggs and heavier for hanging if you wanted to display them that way.  The wood would be beautiful showing through some sections of the gold leaf, but you could also paint the wood eggs.  Paper mache eggs would also be a good option for this craft..

pastel and gold Easter eggs

Gold Leaf

You will need some gold leaf for this project.  Look for gold leaf online or at a craft store.  You can use gold leaf sheets or gold leaf pieces for this project.  Since we want to have some of the pastel paint showing through on our gold leaf eggs, using the gold leaf pieces which are sometimes less expensive works fine.  I used imitation gold leaf for this project.  Look for a gold leaf kit that includes the special adhesive, or buy it separately.  We wanted to make a golden egg effect, but you could also try this craft with silver leaf, or rose gold leaf, or copper leaf for a different effect.

There's also liquid gold leaf available, but I don't think it's the best choice for this project, since you don't want full coverage, and the gold leafing makes a better pattern with cracks and edges than the liquid would.  

DIY gold leaf Easter eggs

Recipe

DIY gold leaf Easter eggs.

Gold Leaf Easter Eggs

No ratings yet
Print Pin Rate
Cook Time: 15 minutes minutes
Additional Time: 2 hours hours
Total Time: 2 hours hours 15 minutes minutes
Servings: 12 Gold Leaf Eggs
Author: Dannyelle Nicolle-Ramjist

Equipment

  • paint brush
  • soft brush

Materials

  • plastic craft eggs
  • acrylic paint in pastel colors
  • gold leaf
  • gold leaf adhesive

Instructions

  • Start by giving your eggs a coat or two of paint in any pretty Easter colour. And let them fully dry before step two.
  • The next step is apply the gold leaf adhesive to some parts of the surface of the egg, and let it set for 10-15 minutes, according to the package instructions. The key to remember is not to entirely coat the egg with the adhesive, so that some of the paint colour still shows through.
  • When the adhesive is set, it's time to apply the gold leaf. Use a dry paint brush to help maneuver the sheet of gold leaf onto the egg, wrapping it around the entire egg. Then using a dry brush or a paper towel, go over the top of the gold foil to smooth it onto the egg, and brush off the excess gold leaf pieces.
Easter egg craft idea

I hung my DIY gold leaf Easter eggs on some branches in a pretty milk glass vase. I'm smitten with this easy project, and I think it might be one of my favorite Easter crafts.  You could also place eggs an Easter basket, or in a pretty bowl as part of your Easter decor or even attach your own eggs to an Easter wreath.  I love easy fun projects that are such a great addition to your seasonal home decor.

how to make a golden egg

With pretty DIY gold leaf Easter eggs, life really is a party!

More Easter Inspiration

You might also like our Marble Easter Eggs here.

Nail Polished Marbled Easter Eggs: easy water marbling with nail polish is the perfect modern touch to your Easter eggs.

Also check out our Cement Easter Eggs here.

Paper Flower Spring Mantel

Apr 3, 2014 · 10 Comments

Giant paper flower fireplace mantel decorations.

Giant Paper Flower Spring Mantel: Very inexpensive project, just paper and a glue gun to make your own paper flower decorations.

Giant paper flower fireplace mantel decoration.
[feast_advanced_jump_to]

These giant paper flowers are easy to make and you'll love using paper flower decorations around your home.

I'm so excited to share this project with you. It's my absolute favourite of late, and I hope you love it too. I worked on it for weeks, but at a leisurely pace, usually while watching tv in the evening. It was fun to do something creative and think of spring while the snow was still falling outside.

how to make giant paper flowers

My sister gave me this rustic window frame for Christmas, and I love how it looks here on the mantel, adding height and displaying flowers.

Materials:

  • white paper
  • brown Kraft paper
  • book pages
  • glue gun
  • watercolours

I made all the flowers out of regular white paper, brown paper from the dollarstore, and an old book. And I glued them together with my trusty glue gun.

DIY giant paper flower decorations

Once I started working on the flowers, I thought it might be fun to add a little colour to some. I used some watercolour paints to add a little spring colour to just a few.

DIY large paper flowers

Making Giant Paper Flowers:

You can find my tutorial for making giant paper flowers here, including a video.  I used this tutorial to make some of them too.

They're quite simple to make, just time consuming. I had my little girls working on them too. One thing to remember when you're making this many flowers is they don't have to be perfect. Little imperfections won't be noticeable when they're all grouped together.

origami paper flowers
easy paper flower decorations

Adding Them To The Mantel

Along the front of the mantel, I mounted more flowers onto a cardboard backing to create a swag. I love, love how it turned out. I think the mix of colours, textures, and scale is really pretty.

Paper Flower Spring Mantel
giant paper flower decorations

Every time I look at it, I think spring. Won't this be beautiful for a wedding?

paper flower spring mantel
large paper flower mantel

With a paper flower decorations, life really is a party!

spring flower decorations

You might also like Giant Paper Flower Tutorial here.

How To Make Giant Paper Flowers: see how to turn regular paper into beautiful and inexpensive flowers, from large to small in a video tutorial. This diy is perfect for a wedding, shower, or home decor.

Also check out Fresh Flower Chandelier here.

DIY Flower Chandelier: Easy to make,perfect for special occasions, the fresh flowers dry beautifully too. Perfect for Valentine's Day, weddings, or showers.

You might also enjoy DIY Rainbow Book Art here.

DIY Rainbow Book Art: Using old books as a canvas this DIY rainbow art in mustard yellow and pink is fun to make and inexpensive.

Easy Banana Cream Pie

Mar 24, 2014 · Leave a Comment

Easy banana cream pie.

Easy Banana Cream Pie: so quick and easy, graham cracker crust, banana pudding, sliced bananas and whipped cream make this family favourite.

Easy banana cream pie recipe.
[feast_advanced_jump_to]

Banana Cream Pie is an old family favourite.  My mom used to make this pie when I was growing up.  I know why she loved to make it, because it's super quick and easy.  And it really tastes amazing too.

If you love bananas, and creamy desserts, you will love this easy banana cream pie recipe.

Pie Crust

The secret to it being so easy is that it uses a graham cracker pie crust.  So if making pie pastry crust out of homemade pie dough is not your favourite, then you will love how quickly this graham cracker pie shell comes together.  I've included the recipe to make the homemade graham cracker crust, but if you want to save even more time, you could buy the pie crust already made.  The graham crackers make a wonderful buttery graham cracker crust, and it's very quick to put together.  Of course, if you love traditional regular pie crust, you could use it instead.  Just blind bake your favourite pie pastry in a pie dish.  This pie is really delicious with a traditional pie crust too.

Pudding

The other big time saver is using a pudding mix for the pudding layer in this pie.  You can use instant banana pudding, or a cooked banana pudding.  Where I live, you can't find banana instant pudding mix easily, so I always use the cooked one.  Some people like to substitute vanilla pudding, but I really thing the banana pudding adds a lot more banana goodness to this no bake banana cream pie.  If you can't get banana pudding mix though, you can certainly try the vanilla pudding mix instead.

Bananas

There's a delicious layer of fresh banana slices in this pie.  Bananas do oxidixe and turn brown after they're sliced, but sandwiching them between the cream and the pudding layer keep them from being too exposed to the air.  Be sure to wait until the pudding is cooled if you're using a cooked pudding, and then add your banana slices and whipped cream at the same time.  This is a great way to use up ripe bananas.

Whipped Cream

The whipped cream on top of the pie puts the cream in our homemade banana cream pie.  I always use real homemade whipped cream.  It really doesn't take very long to make it from scratch, and it adds so much flavor to the finished pie.  Yes you can substitute whipped topping in place of fresh whipped cream, if you prefer cool whip.  Do not use canned whipped cream for this pie, as it will deflate and turn liquidy soon after it's sprayed out of the can.  I like to whip my heavy cream with sugar and vanilla to stiff peaks.  And make sure to refrigerate the pie, especially in warmer months, so that your whipped cream doesn't start to melt and go watery on your pie.

Some People like to combine their banana pudding and whipped cream together into one single layer, but I like to layer it separately into the pie, and keep the two distinct flavors and textures.

Easy Banana Cream Pie recipe
how to make Banana Cream Pie

[mv_video jsonLd="true" key="y0nhjfbo482gv5sitxbk" ratio="9:16" title="Banana Cream Pie"]Make this dessert in the morning on a weekend and put it in the fridge to set. Then, impress your friends with homemade pie for dessert. How easy it is to make will be our little secret. 😉

Store any unused portions of the pie in the refrigerator, in an airtight container or covered in a piece of plastic wrap.

Garnish

You can garnish this pie with a few fresh banana slices to garnish, but be sure to do this step right before serving as fresh bananas will oxidize and turn brown when exposed to the air.  You can also try dipping the banana slices for garnishing the banana pie into lemon juice to keep them from turning brown.  Some people like to drizzle the pie slice with a caramel sauce for garnish.

Chocolate Lovers

If you're a chocolate lover, you can garnish this pie with chocolate syrup or chocolate shavings.  As another option, you can even try making this pie with chocolate pudding for a chocolate banana cream pie.

Easy Banana Cream Pie recipe

This classic banana cream pie such a great recipe.  Made from simple ingredients and so quick and easy to make, it's sure to become one of your favorite desserts to make.  It's perfect for family gatherings or entertaining and a wonderful recipe for anyone who loves delicious banana pudding pie.  The fresh slices of banana, creamy texture, and buttery crust make this delicious dessert one of our favorite cream pies.  If your look for a no bake dessert that's a really easy recipe, this one is perfect.

Recipe

Easy banana cream pie.

Easy Banana Cream Pie

Video

Graham cracker base, banana pudding, banana slices and whipped cream.
No ratings yet
Print Pin Rate
Course: Desserts
Cuisine: American
Prep Time: 15 minutes minutes
Cook Time: 20 minutes minutes
Additional Time: 4 hours hours
Total Time: 4 hours hours 35 minutes minutes
Servings: 1 pie
Calories: 213kcal
Author: Dannyelle Nicolle-Ramjist

Ingredients

  • 1 ¼ cups graham cracker crumbs
  • 3 tablespoon sugar
  • ¼ cup melted butter
  • 1 pkg. banana pudding -instant or cooked prepared according to the package directions
  • 2 bananas
  • 250 mL whip cream
  • 3 teaspoon sugar
  • 1 teaspoon vanilla extract

Instructions

  • Combine the graham cracker crumbs and 3 tablespoon of sugar in a pie plate.
  • Stir in the melted butter, and then smooth the mixture in the bottom of the pie pan and up the sides to form a pie crust. Bake at 350 for about 8 min. Let cool.
  • Prepare the banana pudding according to the package instructions and pour into the cooled pie crust.
  • Slice the bananas and layer slices on top of the pudding mixture.
  • Place the heavy cream in the large bowl of a stand mixer and whip at high speed using the whisk attachment. Whip the cream to soft peaks, then and add 3 teaspoon sugar, and vanilla. Then continue whipping the cream until stiff peaks form. Top the pie with whipped cream. Let set in the fridge for several hours before slicing.

Nutrition

Serving: 1g | Calories: 213kcal | Carbohydrates: 30g | Protein: 2g | Fat: 10g | Saturated Fat: 6g | Polyunsaturated Fat: 4g | Cholesterol: 21mg | Sodium: 157mg | Fiber: 1g | Sugar: 18g
Tried this Recipe? Tag me Today!Mention @LifeisaParty or tag #lifeisaparty!

With an easy sweet treat like this homemade banana cream pie with graham cracker crust, life really is a party!

More Recipe Inspiration

You might also like our Easy Banana Cake recipe here.

Easy Banana Cake Recipe: This one bowl, easy banana cake is a great way to use up your leftover bananas. The simple, sweet, fluffy vanilla icing takes this recipe from regular to a real treat.

Also check out our Banoffee Pie recipe here.

You might also enjoy our Mini Brownie Donuts recipe here.

Mini Brownie Donuts: the perfect little mini donut made from a brownie mix, with the perfect homemade glaze -super easy.

Easy Cinnamon Raisin Biscuits Recipe

Mar 17, 2014 · 1 Comment

Cinnamon Raisin Weight Watcher Biscuits Recipe: these are quick to make and the perfect sweet, low point breakfast or snack.

Cinnamon Raisin Weight Watcher Biscuits Recipe: these are quick to make and the perfect sweet, low calorie breakfast or snack.
cinnamon raisin weight watchers biscuits

[feast_advanced_jump_to]

This recipe is a real family favourite. These cinnamon raisin biscuits are actually an old Weight Watcher's recipe.  Whether you're looking of a low calorie treat or not, these quick and easy biscuits are so delicious you will love them.

We often make this cinnamon raisin biscuits recipe on a weekend morning for breakfast. My girls love the sweet taste, especially warm biscuits from the oven, but my husband and I love them because they're an old Weight Watchers recipe only 3 ww.pts+ per biscuit. I love something so yummy, that doesn't leave you feeling too naughty.  These are the perfect biscuits to enjoy over a second cup of coffee.  The flaky layers and plump raisins and warm cinnamon make these sweet biscuits such a favorite.

These biscuits are very quick and easy to make.  No stand mixer necessary.  These easy cinnamon raisin biscuits come together in just a few minutes.  Use a pastry cutter or your fingertips to cut in the butter.  This process helps make these into delicious flaky biscuits.  Stir them into until a soft dough forms, but don't over mix.  

Another tip for making tender flaky biscuits, is to divide the dough into two, and then pat or roll out into two disks.  Instead of using a round biscuit cutter to make the biscuits, just use a sharp knife to cut the disks into 4.  This process means you don't have to reroll the biscuit dough to cut more biscuits, and makes more tender biscuits with no wasted biscuit dough.

Raisins

For juicy raisins, a little trick it to soak the raisins in some warm water for about 30 min. before using them in baking.  This process rehydrates the raisins making them plump and juicy.  If you are in a rush, you can speed up the process by placing the raisins in a microwave safe bowl and adding the raisins and water to cover plus an inch.  Microwave on high for 1 minute, and then let sit 5 minutes in the hot water before draining.    

Sweet Glaze

These cinnamon raisin biscuits are covered with a simple glaze.  The glaze adds a sweetness to the biscuits. and is the perfect finishing touch.  The glaze is very light, but easy to drizzle over the biscuits.  Be sure to drizzle the glaze over the biscuits on plate, or piece of parchment paper, as the glaze will drip off of the sides of the warm baked biscuits.

cinnamon raisin weight watchers biscuit recipe
cinnamon raisin weight watchers biscuits

Storage

If you have any leftover cinnamon raisin biscuits, store them in an airtight container at room temperature.

Options

Instead of the glaze drizzled over the top of the cinnamon raisins biscuits, you could use cinnamon sugar.  Mix together ½ teaspoon cinnamon with 2 teaspoon of white sugar.  Before baking the biscuits, brush the biscuits with a little milk using a pastry brush and then sprinkle the cinnamon sugar of the top of them.  The cinnamon sugar will add a nice little crunch to the top of the baked biscuits.

how to make cinnamon raisin biscuits

I love the specks of cinnamon and juicy raisins, and the sweet glaze is the perfect finishing touch for these cinnamon raisin biscuits.

These are the best cinnamon raisin biscuits and they're the perfect guiltless treat with and a hot cup of tea.  They're are one of my favorite easy recipes to make on a weekend morning.  This easy biscuit recipe is sure to become a favorite of yours too.  

Recipe

Cinnamon Raisin Weight Watcher Biscuits Recipe: these are quick to make and the perfect sweet, low point breakfast or snack.

Cinnamon Raisin Biscuits

1 Biscuit = 3 Weight Watchers Points Plus
No ratings yet
Print Pin Rate
Course: Breakfast
Cuisine: American
Prep Time: 10 minutes minutes
Cook Time: 12 minutes minutes
Total Time: 22 minutes minutes
Servings: 8
Calories: 131kcal
Author: Dannyelle Nicolle-Ramjist

Ingredients

  • 1 cup all purpose flour
  • 2 tablespoon white sugar
  • 1 ½ teaspoon baking powder
  • ½ teaspoon ground cinnamon
  • ¼ teaspoon salt
  • 2 tablespoon cold butter
  • ¼ cup raisins
  • ½ cup skim milk
  • 4 tablespoon powdered sugar
  • 2 teaspoon skim milk

Instructions

  • Combine flour, sugar, baking powder, cinnamon, and salt in a large bowl and use a whisk to fully combine the dry ingredients.
  • Cut in the butter into the flour mixture, until the mixture resembles coarse meal using a pastry blender, or your fingertips.
  • Stir in the raisins.
  • Stir in the milk and form the mixture into a dough.
  • Divide the biscuit dough in half to form two balls. On a lightly floured surface, flatten each ball into a disk that's about 1 inch thick using your hand or a rolling pin. Use a sharp knife to cut each disk into 4 triangles, for a total of 8 biscuits. Place the cut biscuits on a baking sheet.
  • Bake at 400 for 12 min. until golden brown. Cool baked biscuits on a wire rack.
  • To make the glaze, combine powdered sugar with 2 teaspoons of skim milk in a small bowl. Once the biscuits are slightly cool, drizzle the glaze over the tops of the biscuits and enjoy.

Nutrition

Serving: 1g | Calories: 131kcal | Carbohydrates: 24g | Protein: 2g | Fat: 3g | Saturated Fat: 2g | Polyunsaturated Fat: 1g | Cholesterol: 8mg | Sodium: 195mg | Fiber: 1g | Sugar: 11g
Tried this Recipe? Tag me Today!Mention @LifeisaParty or tag #lifeisaparty!

With these easy cinnamon raisin biscuit recipe, life really is a party!

More Recipe Inspiration

You might also enjoy our Easy Food Processor Scones recipe here.

Easy Food Processor Scones: easy and quick to make in your food processor, these flakey scones are perfect for a tea party, breakfast, or snack.

You might also enjoy our Starbucks Copycat Blueberry Scones recipe here.

Also check out our Old Fashioned Almond Bear Claw recipe here.

old fashioned almond bear claw pastries

Beef Steak, Guinness, and Mushroom Pie Recipe

Mar 14, 2014 · 1 Comment

Steak Guinness and mushroom pie with golden puff pastry and rich gravy on white plate.

This Steak Guinness and Mushroom Pie is comfort food at its absolute finest. Rich Guinness gravy simmers with tender beef and mushrooms, all crowned with golden puff pastry. It's the kind of hearty, impressive meal that makes dinner parties feel effortless because you can prep everything ahead and just pop it in the oven when guests arrive.

Quick Look

  • 📋 Recipe: Steak Guinness and Mushroom Pie
  • ⏲️ Ready In: 3 hours 30 minutes (mostly hands-off braising time)
  • 👪 Servings: 4-6
  • 🔪 Difficulty: Moderate
  • 💭 Top Tip: Make the filling up to 2 days ahead and refrigerate. Just top with pastry and bake when you're ready to serve for the easiest dinner party main ever!

Why You'll Love This Recipe

  • Perfect for entertaining. Make the filling ahead and just top with pastry before guests arrive. No last minute stress.
  • Rich, deep flavor. The Guinness adds incredible depth to the gravy while tenderizing the beef as it simmers.
  • Impressive but approachable. Looks like you spent all day cooking, but it's mostly hands off braising time.
  • Budget friendly. Uses affordable chuck beef that becomes melt in your mouth tender with slow cooking.
  • Golden, flaky topping. Store bought puff pastry makes this so much easier while still delivering that gorgeous presentation.
  • Crowd pleaser. The savory combination of tender beef, earthy mushrooms, and rich gravy appeals to everyone.
[feast_advanced_jump_to]

There's something special about a proper meat pie. This steak, Guinness and mushroom pie brings together everything I love about cozy, impressive dinners. In this traditional Irish recipe, the beef simmers low and slow in Guinness until it's fall apart tender, the mushrooms add that earthy richness, and the golden puff pastry top makes it look like something from a countryside pub.

I've made this for dinner parties more times than I can count over the last 10 years, because it lets me actually enjoy my guests instead of being stuck in the kitchen. The filling comes together early in the day (or even the day before), and then it's just a quick pastry top and into the oven.

I like to serve this dish with some nice bread, and something green like a fresh salad, or a bowl of buttered peas. If you love hearty comfort food like this steak Guinness and mushroom pie, you might also enjoy our Swedish Meatball Sauce, Mac and Cheese with Panko Breadcrumb Topping, or Braised Beef Ragu. This dish is also perfect for celebrating St. Patrick's Day!

Steak Guinness and mushroom pie in white ceramic baking dish with golden puff pastry crust and decorative toothpick flags.

What Makes This Steak Guinness and Mushroom Pie Special

I've been making this pie for years, and it's become one of my favorite dishes to serve when hosting. The Guinness does something magical to the beef as it braises low and slow. It tenderizes the meat while adding this rich, slightly malty depth and sweetness that you just can't get from regular beef stew. The gravy becomes thick and glossy, coating every piece of tender beef and mushroom.

What I love most is how make ahead friendly this is. The filling actually tastes even better the next day after all those flavors have had time to meld together. I'll often make it on a Saturday afternoon, let it cool, and then refrigerate it. When guests arrive on Sunday, I just top it with the puff pastry and pop it in the oven. The house fills with the most amazing smell, and I get to actually enjoy time with my friends instead of being stuck in the kitchen.

The golden puff pastry on top makes it look like something from a cozy countryside pub. It's impressive enough for a dinner party but comforting enough for a regular family meal. Using store bought puff pastry keeps it doable without sacrificing that beautiful presentation.

Ingredients

Full ingredient list with measurements in the recipe card below.

  • Stewing Beef or Roast: Cut into bite size pieces. The marbling breaks down during slow cooking, making the meat incredibly tender. Chuck roast or stewing beef work perfectly here.
  • Flour: Used to coat the beef before searing. This helps create a nice crust and also thickens the gravy as it cooks.
  • Mushrooms: A full 16 ounces add that earthy richness and soak up all the delicious Guinness gravy. Cut larger mushrooms in half so they cook evenly.
  • Guinness: One cup adds incredible depth to the gravy while helping tenderize the beef. The rich, slightly bitter flavor is what makes this pie special. Save the rest of the bottle to enjoy while you cook.
  • Beef broth: Two cups combine with the Guinness to create that rich, flavorful gravy base.
  • Brown sugar: Helps cut the slight bitterness of the Guinness with a hint of sweetness.
  • Puff pastry. Store bought makes this so much easier. Look for one that says "all butter" on the package. Just thaw it and drape it over your filling for that impressive golden top.

How to Make Steak,Guinness, and Mushroom Pie

  1. Step 1: Coat the cubed steak in flour.
  1. Step 2: Heat 2 teaspoon oil in large pan or dutch oven, and sear the beef on all sides, in small batches. Don't overcrowd the pan or the beef will steam instead of getting that nice brown crust. Remove the beef from the pan and set aside.
  1. Step 3: Dice the onion and mince the garlic cloves, and cut large mushrooms in half. Add a little more oil to coat the pot, and sauté the diced onion, garlic, and mushrooms until the water comes out of the mushrooms and reduces. This takes about 15 minutes.
  1. Step 4: Add in the brown sugar, Worcestershire sauce, thyme, salt and pepper. Pour in the beef broth and Guinness, and add back the browned beef cubes. Bring to a boil, and use a wooden spoon to scrape all the cooked bits off of the bottom of the pan, and incorporate in the dish. Simmer on low for about an hour to an hour and half on the stove top, until beef is tender.
  1. Step 5: At this point you can put it in the fridge overnight, or top with pastry and bake. To make the pie, put the stew mixture into a pie plate, baking dish, or individual ramekins, and add the thawed puff pastry lid to the top of the filling.
  1. Step 6: Bake at 400°F for about 25 to 30 minutes, until the pastry is golden brown.

Expert Tips

  • Brown the beef in batches. This is really important. If you overcrowd the pan, the beef will steam instead of sear, and you'll miss out on all that flavor from the caramelized crust.
  • Don't skip the simmering time. The beef needs that full hour to hour and a half to become tender. You'll know it's ready when it easily falls apart with a fork.
  • Let the mushrooms release their water. When you sauté the mushrooms, give them time to release their moisture and let it cook off. This concentrates their flavor and keeps the gravy from getting watery.
  • Use only one cup of Guinness. I know it's tempting to add the whole bottle, but trust me on this. Too much Guinness can make the filling bitter. Save the rest to enjoy while you cook.
  • Make sure your puff pastry is thawed. Take it out of the freezer and let it thaw in the fridge before you need it. Trying to work with frozen puff pastry will just leave you frustrated.
  • Cut vents in the pastry. This lets steam escape so your pastry stays crisp and doesn't get soggy from all that delicious gravy underneath.
Plated steak Guinness and mushroom pie with golden brown puff pastry revealing hearty beef and mushroom filling in rich gravy.

Storage & Make Ahead Instructions

  • Refrigerator: Store leftover steak Guinness and mushroom pie in an airtight container in the fridge for up to 3 days. The pastry will soften as it sits, but the filling stays delicious.
  • Freezer: Freeze the filling (without the pastry) in a freezer safe container or ziplock bag for up to 3 months. Thaw overnight in the refrigerator, then top with fresh puff pastry and bake.
  • Reheating: For best results and crispy pastry reheat in the oven.
  • Make Ahead Timeline: This is perfect for entertaining. Make the stew filling 1 to 2 days ahead and refrigerate. On the day you're serving, just bring it to room temperature, top with puff pastry, and bake. Your guests will think you've been cooking all day when you've actually been relaxing with them.
  • Double Batch Tip: Make a double batch of the filling and freeze half for another night. You'll thank yourself later when you can pull it from the freezer, top with pastry, and have an impressive dinner ready with minimal effort.

Frequently Asked Questions

Can I make this steak Guinness and mushroom pie ahead of time?

Yes! This is one of the best make ahead dinners. Make the stew portion up to 2 days ahead, let it cool completely, and refrigerate. When you're ready to serve, just top with the puff pastry and bake. The flavors actually get even better after sitting overnight.

Can I freeze steak and Guinness pie?

You can freeze the filling (without the pastry) for up to 3 months. Put it in a ziplock bag, freeze it flat, and thaw in the fridge overnight when you're ready to use it. Add to a baking dish, top with fresh puff pastry and bake as directed.

What cut of beef is best for this recipe?

Stewing beef or chuck roast work best. These cuts have enough marbling to stay tender during the long simmer time. Avoid lean cuts as they'll dry out.

Can I substitute the Guinness?

You can use another stout or dark beer, or even apple juice or non-alcoholic cider, but Guinness really does give the best flavor. The richness and slight bitterness balance perfectly with the brown sugar. Regular beer won't give you the same depth. Skip the brown sugar if you use apple juice/cider.

Why is my gravy too thin?

If your gravy seems thin after simmering, let it cook uncovered for another 15 to 20 minutes to reduce. The flour coating on the beef should thicken it naturally, but sometimes it needs a bit more time. Leave the lid off so the water can evaporate.

Can I use a different pastry or potatoes?

Puff pastry is traditional and gives you that beautiful golden, flaky top, but you could use shortcrust pastry if you prefer. You could also skip the pastry altogether and top with mashed potatoes instead, which would make this a cottage pie. Just adjust the baking time as needed.

What should I serve with steak Guinness and mushroom pie?

A green salad, buttery peas, or green beans are perfect sides. The pie is rich and hearty, so lighter vegetables balance it nicely. And bread for soaking up the gravy.

More Main Dish Inspiration

  • Two cucumber tea sandwich fingers on a white scalloped plate with a vintage floral teapot and a pink floral teacup of tea, pink tulips and bud vases on a green gingham tablecloth in the background.
    Tea Cucumber Sandwiches
  • Three ham and cheddar tea sandwich fingers on a white scalloped plate with a rose teacup and stacked vintage plates in the background.
    Ham Tea Sandwiches
  • Egg salad finger sandwiches on a white scalloped plate with a rose teacup and saucer on a white eyelet tablecloth.
    Egg Salad Tea Sandwiches
  • Chicken salad finger sandwiches on a white ruffle plate with a rose teapot and bud vases on a green gingham tablecloth.
    Chicken Salad Finger Sandwiches

If you try this Steak Guinness and Mushroom Pie or any other ideas on my blog leave a rating and let me know how it went in the comments below. Thanks for visiting today!

Steak, Guinness, and Mushroom Pie Recipe

Recipe

Steak Guinness and mushroom pie served on a white plate with golden puff pastry, tender beef, mushrooms in rich gravy, and fresh salad.

Steak, Guinness, and Mushroom Pie

Steak, and mushrooms with Guinness and flaky pastry topping.
5 from 1 vote
Print Pin Rate
Course: Main
Cuisine: Irish
Prep Time: 20 minutes minutes
Cook Time: 2 hours hours 30 minutes minutes
Total Time: 2 hours hours 50 minutes minutes
Servings: 6
Calories: 815kcal
Author: Dannyelle Nicolle-Ramjist

Ingredients

  • 1 kg stewing beef steak or roast cut into bite size pieces
  • ¼ cup flour
  • 4 tablespoon olive oil
  • 2 medium onions
  • 2 cloves of garlic
  • 16 oz. mushrooms
  • 1 ½ tablespoon brown sugar
  • 1 tablespoon Worcestershire sauce
  • salt and pepper to taste
  • ½ teaspoon dried thyme
  • 2 cups beef broth
  • 1 cup Guinness
  • 1 sheet of puff pastry

Instructions

  • Coat cubed steak in flour and sear on all sides in the oil, in small batches.
    1 kg stewing beef, ¼ cup flour
  • Heat two tablespoons of olive oil in a large pot or large Dutch oven, and sear the beef on all sides. Sear the beef in small batches, making sure not to over crowd the pan and steam the meat. Remove the beef from the pan and set aside.
    4 tbsp olive oil
  • Dice onion and mince garlic cloves, and cut large mushrooms in half. Add a little more oil to coat the pot, and sauté diced onion, garlic, and mushrooms until the water comes out of the mushrooms and reduces; about 15 min.
    2 medium onions, 2 cloves of garlic, 16 oz. mushrooms
  • Add in the brown sugar, Worcestershire sauce, thyme and salt and pepper. Pour in the beef broth and Guinness, and add back the browned beef cubes. Bring to a boil, and use a wooden spoon to scrape all the bits off of the bottom of the pan and incorporate. Simmer on low for about an hour to an hour and half on the stove top, until the beef is tender.
    1 ½ tbsp brown sugar, 1 tbsp Worcestershire sauce, salt and pepper to taste, ½ tsp dried thyme, 2 cups beef broth, 1 cup Guinness
  • At this point you can put it in the fridge overnight, or top with pastry and bake. To make the pie, put the stew mixture into a pie plate, baking dish, or individual ramekins, and the thawed puff pastry lid to the top of the filling.
    1 sheet of puff pastry
  • Bake at 400 for about 25-30 minutes, until the pastry is golden brown.

Notes

  • Serves 4-6, depending on appetite.
  • Don't overcrowd the pan when browning the beef or it will steam instead of searing. Work in small batches for the best results.
  • The beef needs the full hour to hour and a half simmering time to become tender. You'll know it's ready when it falls apart easily with a fork.
  • Guinness foams when you pour it. Measure carefully and don't be tempted to add the whole bottle. Too much Guinness can make the filling bitter. Save the rest to enjoy while you cook.
  • The filling can be made 1 to 2 days ahead. Let it cool completely before refrigerating, then top with pastry and bake when ready to serve.
  • Make sure your puff pastry is fully thawed before using. Take it out of the freezer and let it thaw in the fridge for best results.
  • Cut a few small vents in the pastry top before baking to let steam escape and keep the pastry crisp.

Nutrition

Serving: 1g | Calories: 815kcal | Carbohydrates: 33g | Protein: 36g | Fat: 59g | Saturated Fat: 18g | Polyunsaturated Fat: 4g | Monounsaturated Fat: 30g | Trans Fat: 2g | Cholesterol: 118mg | Sodium: 554mg | Potassium: 849mg | Fiber: 2g | Sugar: 7g | Vitamin A: 7IU | Vitamin C: 5mg | Calcium: 59mg | Iron: 5mg
Tried this Recipe? Tag me Today!Mention @LifeisaParty or tag #lifeisaparty!

About Dannyelle

Dannyelle is a trained celebrant with over 15 years of experience helping people celebrate life's special moments. At Life is a Party, she shares recipes, party planning tips, and home decor ideas that make everyday celebrations accessible and beautiful. Her expertise in creating memorable gatherings without breaking the bank has been featured in Better Homes & Gardens, American Farmhouse Style, and Apartment Therapy.

Starbucks Copycat Blueberry Scones But Better

Mar 7, 2014 · 4 Comments

Easy blueberry scones piled in white enamel tray with butter on the side.

Easy Blueberry Scones: delicious recipe using fresh blueberries, with the perfect sugar topping. Perfect for breakfast or with a cup of tea.

Easy Blueberry Scones: delicious recipe using fresh blueberries, with the perfect sugar topping. Perfect for breakfast or with a cup of tea.
[feast_advanced_jump_to]

These blueberry scones are the perfect easy recipe.  Made with fresh blueberries, they're a perfect tea time afternoon snack or breakfast treat.  If you're a fan of Starbucks blueberry scones, now you can make them yourself at home for a fraction of the price and they're even better!  These are moist and flakey and full of blueberries.  We like to top them with a sprinkle of course sugar on top, adding that perfect sweet crunch to each bit.

You migh also like our Sweet Cake Like Cornbread, or Food Processor Scones.

Copycat Starbucks Scones

I love the Starbucks blueberry scones.  They're one of my favorite treats to get on a visit and my kids love them too.  The cost of this favorite treat can really add up, so I decided to come up with my own copycat Starbucks blueberry scone recipe.  These are even better than the Starbucks version.  And they are so much cheaper to make for yourself at home.  The cost alone is worth the effort, but the fact that they taste so good is the best.  These delicious scones are easy to make, from simple ingredients.  I love their flaky centers, and they're bursting with blueberry flavor.  If you're a fan of blueberry Starbucks scones too, now you can have the best blueberry scones at home anytime I want them.  And my kids love it when I make a batch of these copycat blueberry scones for us all to enjoy.

Blueberry Scones recipe with fresh blueberries

Fresh or Frozen Blueberries?

It's best to use fresh blueberries for these scones if you can.  

If you can't get fresh blueberries or they're out of season or too expensive you can make these with frozen blueberries.  There's a few trick to using frozen blueberries in baking.  Number one, you don't want to thaw the berries before you use them.  As berries are frozen the water inside the plant cells expands and bursts the plant cell walls.  As the fruit defrosts, you'll see alot of liquid with them.  That liquid will turn your scone dough blue, and change the consistency a little.  When you bake with frozen blueberries you want to use them frozen.  

Keep them in the freezer until you're ready to add them, and then work quickly to combine them with the dough.  

You will inevitably see a little bit of blue streaks as you form the scone dough, but it should still work well, and make great scones.

how to make Blueberry Scones

Storing

These homemade scones are best eaten fresh the day they are made.  When they're fresh baked they have the perfect texture of slight crunch on the outside, and soft and flakey on the inside.  If you have any leftover scones you can store them in an airtight container at room temperature for up to three days.  

You can also freeze them.  Freeze them before baking by placing them on a parchment lined baking sheet directly in the freezer.  Once they are frozen through, remove the tray and put the frozen scones in a ziplock bag.  Store frozen up to three months.  To bake them, remove one or more from the freezer and bake according to the recipe, adding a few extra minutes to the cooking time to compensate for them being frozen.

You can also freeze them once they're baked in an airtight container for up to two months.

Recipe

Freshly baked blueberry scones made with fresh blueberries and topped with coarse sugar on a baking tray.

Copycat Starbucks Blueberry Scones

Tender scones filled with blueberries.
5 from 1 vote
Print Pin Rate
Course: Breakfast
Cuisine: American
Prep Time: 15 minutes minutes
Cook Time: 18 minutes minutes
Total Time: 33 minutes minutes
Servings: 12
Calories: 219kcal
Author: Dannyelle Nicolle-Ramjist

Ingredients

  • 2 cups all purpose flour
  • ½ cup white sugar
  • 1 tablespoon baking powder
  • ½ teaspoon salt
  • ½ cup butter
  • 1 ½ cups fresh blueberries
  • ½ cup half and half cream
  • 1 large egg
  • 1 teaspoon vanilla extract
  • 3 tablespoon coarse sugar

Instructions

  • Combine the dry ingredients of flour, sugar, baking powder, and salt in a large bowl.
  • Cut butter into small pieces and cut into the dry ingredients with a pastry cutter, or the tips of your fingers until the mixture resembles oatmeal.
  • Wash blueberries, and stir into flour mixture.
  • In a separate bowl, stir together the wet ingredients of cream, egg and vanilla.
  • Add the wet ingredients to the dry ingredients and combine into a dough.
  • On a lightly floured surface, split the scone dough in half and form each into a round shape, patting it to about ¾ inch thick. Using a sharp knife, cut each circle into 6 pieces, for a total of 12 triangular pieces all together.
  • Brush the top of the scones with a little extra cream, and then sprinkle with coarse sugar.
  • Spread the scones out and bake scones on a cookie sheet at 375 degrees for about 18 min. until golden brown. Let cool on a wire rack.

Nutrition

Serving: 1g | Calories: 219kcal | Carbohydrates: 31g | Protein: 3g | Fat: 9g | Saturated Fat: 6g | Polyunsaturated Fat: 3g | Cholesterol: 39mg | Sodium: 292mg | Fiber: 1g | Sugar: 14g
Tried this Recipe? Tag me Today!Mention @LifeisaParty or tag #lifeisaparty!
Blueberry Scones recipe

A perfect treat with a cup of tea, and a little butter. So, so yummy.

These tender scones have a wonderful flaky texture on the inside, and that delicious sugar crunch on the top, and buttery golden crisp edges, combined with the natural flavors of the juicy blueberries.  You will love this copycat Starbucks blueberry scone recipe.  They're much better made at home because they're cheaper and fresher.

easy Blueberry Scones

With easy blueberry scones, life really is a party.

More Recipe Inspiration

You might also like our Nectarine and Blueberry Galette recipe here.

Nectarine and Blueberry Galette: literally make in minutes with frozen puff pastry, so easy and the perfect way to enjoy fresh nectarines and blueberries.

Also check out our Easy Food Processor Scones recipe here.

Easy Food Processor Scones: easy and quick to make in your food processor, these flakey scones are perfect for a tea party, breakfast, or snack.

You might also enjoy our Sweet Cornbread Recipe here.

How to make sweet cake like cornbread from scratch.

Pancake Bean Bags

Mar 4, 2014 · 1 Comment

Pancake Bean Bag: easy DIY pancake bean bags, perfect for Pancake Tuesday celebrations, or Pancakes and Pjamas parties. Fun toy food for kids too.

Pancake Bean Bag: easy DIY pancake bean bags, perfect for Pancake Tuesday celebrations, or Pancakes and Pjamas parties. Fun toy food for kids too.

Happy Pancake Day! We're having a few friends over for pancakes tonight, and I thought it might be fun to make a little pancake flipping game for us to play. I made this simple pancake bean bag with some felt and some left over dry beans.

homemade bean bags

Materials:

  • light brown felt
  • darker brow felt
  • yellow felt
  • dry beans
  • needle and thread

How To Make Pancake Bean Bags

I cut out two matching ovals to make the pancakes -a front and a back, from light brown felt. I made mine big enough to fit in a small, real frying pan for our flipping game, but if you were playing it with really little ones, you might make them a little smaller, so they'd fit in a toy frying pan.

Next, I cut out a piece to be the syrup from a yellowish-brown piece of felt, and then a small rectangle of butter from some yellow felt.

I stitched them together by hand with a blanket stitch.  Make sure to start with stitching the butter to the syrup piece, then the syrup to the top pancake piece, before finally stitching the two pancake pieces together.

Just before your done, add a few handfuls of dry beans, and then close the hole. Easy peasy.

how to make a pancake bean bag

As soon as they were done, the flipping practise began. The beans give the pancakes a nice weight, and the sound of the beans moving sounds like the perfect sizzle, according to one of my little ones.

I'm planning on giving everyone one min. to flip the pancake as many times as they can. The winners get some maple syrup lollipops -cause it really seemed the perfect little prize for this game.

felt bean bag pancakes

I just finished the pancakes a day or two ago, and they've already been used for teddy bear breakfasts, and in a little pancake restaurant that just opened in my basement...homemade toys are such a treat, and these really are quick and easy to make too. I hope your days includes some pancakes too!

With a pancake bean bag, life really is a party!

You might also like Felt S'mores Play Food here.

Felt Smores Play Food: these easy homemade toy DIY felt smores for children to use as play food are simple to put together and adorable for dramatic play.

Also check out Felt Chocolate Chip Cookies here.

Felt Chocolate Chip Cookies -easy to sew, and the perfect play food for kids to enjoy. The little faces with their different expressions are adorable.

You might also enjoy How To Make A Kid's Apron From Tea Towel.

Easy Almond Danish Recipe -Three Ways

Feb 26, 2014 · Leave a Comment

Assorted puff pastry danishes served on a large platter.

Almond Danish: make almond danish or chocolate almond danish or cherry almond danish all with this one easy master recipe. The perfect breakfast treat.

almond danishes 1
[feast_advanced_jump_to]

I wanted to share this easy recipe for Almond Danish three different ways -Almond Danish, Chocolate Almond Danish, and Cherry Almond Danish.  If you're a fan of almond danish pastries you will love any or all three of these versions.  This is a quick and easy version made with store-bought puff pastry to save time.  This recipe may be low on time but it's high on taste.  It's easy to make and so delicious.  These danishes are perfect for a special breakfast or brunch, or delicious enough to be a great dessert too.  We love them for a special occasion and they'd be a great item to include on Christmas morning. With their flaky crust and sweet almond filling you will love this decadent treat.

almond danishes 6

Puff Pastry

They're made with store bought puff pastry, so they're really simple to make, but oh so yummy. I like a quick, but impressive recipe like this. No need to make your own danish pastry from scratch.  Skip all that hard work with store bought puff pastry.  Frozen puff pastry is easy to find in the freezer section of your grocery store and perfect for this recipe.  Look for an all butter puff pastry, for the best flavor for your almond danish puff pastry treats.  Puff pastry is very difficult and time consuming to make yourself, and the frozen version is so delicious.  I highly recommend this great time saving way to make almond danishes at home, that cuts out a lot of work in making them with no sacrifice in flavor.

almond danishes 7

Almond Paste

I started with a master almond paste recipe, that I used for all three versions of my almond danishes.  The simple almond paste is made from ground almonds, butter, confectioners' sugar, egg white, and ½ teaspoon of almond extract to enhance the almond flavor.  This luscious almond paste is very easy to put together and it's so delicious.  Work with room temperature butter to make it easy to mix together.  

If you're making these first thing in the morning and short on time you can make your almond paste the day before, and store in the refrigerator overnight for the next day.  The next morning, just take it out of the fridge in the morning and let it come to room temperature before assembling the danishes.

To make the almond danish we used the almond paste filling and then sprinkled some sliced almonds over the unbaked danish to add a little crunch.

Chocolate Almond Danish

For all my chocolate lovers we also made a chocolate almond version of our pastry with the addition of chocolate chips.  We used semi sweet chocolate chips for ours.  If you love dark chocolate, feel free to substitute  dark chocolate chips instead.  You could also make these with milk chocolate chips for a sweeter version.

Cherry Almond Danish

Cherry and almond are a match made in heaven.  We made a very simple cherry almond verison of the pastries by using cherry pie filling.  This make this recipe so quick and simple to put together.  If you have leftover cherry pie filling after making this recipe, you can freeze the extra until you make it again or make some cherry tarts, or other cherry baked goods.

Almond Glaze

We choose to make a simple sweet icing to add to our cherry almond danishes.  It's easy to put together, and the addition of the almond extract adds a little more almond flavor.  It's a great compliment to the cherry danish.  

We sprinkled our plain almond and chocolate chip danishes with a little confectioner's sugar.  If you prefer, you could make some extra, and use the almond icing on the plain almond and chocolate almond danishes also.

almond danishes 3
almond danishes 5

These almond danishes are best eaten the day you make them.  The fresh sweet danishes have the perfect crunchy and flaky pastry.  If you do have leftovers, store them in an airtight container at room temperature, or wrapped in plastic wrap.

This simple recipe is so easy to make and so delicious.  Make all three versions of this sweet pastry like we did and give your guests some options, or choose your favourite and make one larger batch of your favorite kind.  This easy danish recipe is sure to be a hit with family and friends. 

Recipe

almond danish

Almond Danish -Three Ways

Flaky danishes with three different almond fillings.
No ratings yet
Print Pin Rate
Course: Breakfast
Cuisine: American
Prep Time: 15 minutes minutes
Cook Time: 12 minutes minutes
Total Time: 27 minutes minutes
Servings: 12
Calories: 124kcal
Author: Dannyelle Nicolle-Ramjist

Ingredients

  • 2 sheets all-butter puff pastry
  • ½ cup ground almonds
  • ½ cup icing sugar
  • 2 tablespoon softened butter
  • ½ teaspoon almond extract
  • 1 egg divided
  • 1 teaspoon almond slices
  • 4 tablespoon cherry pie filling
  • 4 teaspoon chocolate chips
  • 2 tablespoon icing sugar
  • ½ teaspoon almond extract
  • 1 teaspoon milk

Instructions

  • Unroll the puff pastry sheets on a lightly floured work surface (or roll out into a square if you have the version that isn't rolled out yet), and cut each sheet into 6 squares for a total of 12.
  • Separate the egg, and set the egg yolk aside for later.
  • To make the almond filling, combine the ground almonds, icing sugar, butter, ½ teaspoon almond extract and egg white in a medium bowl.
    Divide the almond filling equally among the 12 squares, placing it in the middle of the pastry.
  • To make 4 almond danishes, on each square fold two of the corners over, using the egg yolk applied with a pastry brush as the glue, and also as a wash over the top. Sprinkle with some sliced almonds.
  • To make 4 chocolate almond danishes, sprinkle 1 tsp. of chocolate chips each, over top of the almond filling on 4 squares, and then fold the corners using the egg wash as glue and over the top again as an egg glaze.
  • To make the 4 cherry almond danishes, add 1 tablespoon of cherry pie filling over top of the almond filling, and fold the same way as the others.
  • Bake the danishes on parchment-lined baking sheet at 400, for about 12 min. until golden brown.
  • Let the danishes cool on a wire rack, then sprinkle the almond and chocolate almond with a little confectioner's sugar.
  • To make an almond glaze for the cherry almond danishes, combine 2 tablespoon of icing sugar with ½ teaspoon of almond extract, and 1 teaspoon of milk and stir to fully combine. Drizzle the confectioner's sugar glaze over the cooled cherry almond danishes.

Nutrition

Serving: 1g | Calories: 124kcal | Carbohydrates: 10g | Protein: 2g | Fat: 9g | Saturated Fat: 3g | Polyunsaturated Fat: 5g | Cholesterol: 26mg | Sodium: 74mg | Fiber: 1g | Sugar: 7g
Tried this Recipe? Tag me Today!Mention @LifeisaParty or tag #lifeisaparty!
almond danishes 2

With fresh, homemade almond danishes, chocolate almond danishes, and cherry almond danishes, life really is a party.

More Recipe Inspiration

You might also like our Easy Food Processor Scones recipe here.

Easy Food Processor Scones: easy and quick to make in your food processor, these flakey scones are perfect for a tea party, breakfast, or snack.

Also check out our Blueberry Scone recipe here.

You might also enjoy our Peach Almond Muffins recipe here.

Peach Almond Crumble Muffins: Delicious recipe, can be made with fresh or canned peaches, with the perfect crunchy sweet almond crumble on top.

Mexican Fiesta Dinner Party

Feb 21, 2014 · 1 Comment

Mexican Dinner Party: be transported to Mexico for dinner with this Mexican inspired menu, drink ideas and party decorations.

Mexican Dinner Party: be transported to Mexico for dinner with this Mexican inspired menu, drink ideas and party decorations.

What every cold, snowy winter needs, is a Mexican Dinner Party to brighten things up! We recently joined a supper club -where 4 couples take turns hosting a dinner party. We meet about once a month, and this month our friends Dan and Heather hosted this fun fiesta.

Fiesta Decor

We were greeted by this sweet wreath on the door, that set the tone for a fun filled night! It's made out of a foam wreath, with cocktail umbrellas stuck into it. So easy, and so colourful! Loved it.

Mexican fiesta party decor

Mexican Drinks 

We were welcomed in with a drink -some fun Mexican beer, and tropical coolers.

Mexican drink ideas

Appetizers

Our hosts also made some lovely fruit salad, and served it in fruit bowls, before and during dinner.

Mexican dinner party

I loved the festive setting they created for the night, with a few fun, colourful decorations.

Mexican dinner party

On the side buffet, there were some bottles of water and straws for guests.

water bottles

They also bought some delicious, fresh chips from a local favourite restaurant and served them in simple paper bags -love the presentation.

Mexican dinner party fiesta

You can also see the amazing layered Mexican salad they made for the night -it was so good!

Mexican Dinner Party Table

I also loved the table setting.

Mexican dinner party table

Heather used a rustic burlap runner, and potted succulents for the perfect starting point. She added some colour with fun napkins and ribbons.

Mexican dinner party table

I loved the individual condiments and fixings at every ones place setting. Heather served salt and pepper in tiny wooden serving pieces, salsa in mini margarita glasses from the party store -could it get any cuter? and cheese, sour cream and guacamole in a side plate. It looked amazing.

Mexican dinner party

Mexican Dinner Party Menu

The menu for the night was really perfect for a fun dinner party, since it was mostly all make-ahead. They started with the fruit salad, then served a Mexican casserole of soft tacos, beef, rice, veggies and cheese, along with corn on the cob, a Mexican salad, chips with all the fixings, a warm caso cheese dip, and corn bread. It was so yummy.

Mexican dinner party ideas

Mexican Dessert

For dessert, our friends served great cupcakes from a local cupcake shop, and all dressed up for the fiesta with some fun piñata inspired cupcake pics.

Mexican dinner party

Heather also made some baked Churo Bites -recipe from here.

Mexican dessert ideas

I really had such a great time. It was the perfect fun, colourful evening to take your mind off of all this snow. If you can't get away for spring break, perhaps a one night escape like this is the perfect idea -it was an amazing adult night out, but would be a wonderful family night in theme too. With a Mexican Fiesta dinner party with friends, life really is a party!

More Ideas

You might also like our Backyard Fiesta here.

backyard fiesta table.

Also check out our Valentine's Day Fiesta here.

Valentine's Day Fiesta

You might also like our How To Make Your Faux Succulents Look Real here.

Salt Dough Valentines

Feb 12, 2014 · 1 Comment

Salt dough Valentine's Day hearts

Valentine Salt Dough Hearts: make this easy salt dough in heart shapes for Valentine's Day. Bake, paint and then give as Valentines or decorate with them.

Salt dough hearts Valentine's Day craft
[feast_advanced_jump_to]

My little girls and I decided to make some Valentines salt dough hearts this year.  A batch of salt dough was a simple and fun craft to do together, and I love how the cute salt dough hearts turned out. I hadn't made salt dough for years, and actually forgot how easy it was. 

There's lots of different things you can do with this salt dough craft.  We used our salt dough heart ornaments to decorate for Valentine's Day and make necklaces for classroom Valentine sharing.  Another fun idea would be to make a handprint heart as a keepsake.  You could add your salt dough ornaments ornaments to a Valentine's day tree.  Salt dough handprint ornaments also make a perfect gift as Christmas ornaments for a Christmas tree, or as a great keepsake from small children for Mother's day.

Recipe

Salt dough Valentine's Day hearts

Salt Dough Valentines

Salt dough for crafting.
No ratings yet
Print Pin Rate
Course: General DIY & Crafts
Cuisine: Craft
Prep Time: 10 minutes minutes
Cook Time: 2 hours hours
Additional Time: 20 minutes minutes
Total Time: 2 hours hours 30 minutes minutes
Servings: 24 small hearts
Calories: 38kcal
Author: Dannyelle Nicolle-Ramjist

Ingredients

  • 2 cups flour
  • 1 cup salt
  • 1 cup warm water

Instructions

  • Combine 2 cups of flour and 1 cup of salt in a large bowl or stand mixer, and then add in 1 cup of water to the flour mixture and mix to combine into a dough. If the dough is too crumbly, add more slowly add more water.
  • Roll out the dough to about ¼ inch thick on a lightly floured surface with a rolling pin, and use cookie cutters to cut them into shapes. Decorate with alphabet letter rubber stamps to add words or initials. Use a straw to cut out a small hole in the top of the heart before baking.
  • Bake on a baking sheet lined with parchment paper at 200, for 2 hours until they are dry.
  • Once cool, paint desired colour.

Nutrition

Serving: 1g | Calories: 38kcal | Carbohydrates: 8g | Protein: 1g | Sodium: 4716mg
Tried this Recipe? Tag me Today!Mention @LifeisaParty or tag #lifeisaparty!
salt dough hearts rubber stamped with the word love

Painting Your Baked Salt Dough Valentines

After we made our salt dough recipe and they'd been baked it was time to start painting the different shapes.

The next step after painting the hearts with a base coat of pink or gold acrylic paints, we used a marker to outline our letters and words, then we did a top coat of the glitter. It gave the hearts a great even coat of glitter, and also a nice sheen. I love how they turned out.  You could also do a top coat of mod podge to seal them.

Another fun idea would be to make them into salt dough conversation hearts by painting them conversation heart colours and adding messages to the little hearts.

salt dough hearts and paint

Valentine Necklaces

I was planning all along to use some of the hearts as place card napkin rings for a Valentine's Day table, but once we got started Maddie, my youngest daughter, decided to make Valentine necklaces for everyone in her class. She was so pleased about how they turned out. So sweet.  We made a hole with straw in the top of each heart before baking and used a stamp to add their initial to each heart.  After they were baked she painted each one and added some baker's twine to turn it into a necklace.

three salt dough valentine necklaces in pink and gold with a letter stamped on them

And then she packaged them up for her classmates in little brown paper bags.  She had so much fun making these homemade salt dough hearts for all of her friends.  She was so proud to hand out her simple crafts on Valentines Day.

salt dough valentine necklaces packed in paper bags for school valentine exchange

Valentine Decor

For our little Valentine's Day table for two, I strung up some of our hearts to create a little bunting and taped it with pretty washi tape.  You can string the hearts with a piece of twine, ribbon, or baker's twine.

salt dough valentine bunting in pink and gold
salt dough hearts in pink and gold made into to a banner

I wanted to do the table in golds and pinks, so that inspired my choices at the paint colours for my Valentine's decor.

kids table for two decorated with gold table cloth, and flowers and a salt dough heart decorations

Some of the salt dough Valentine hearts were tied to the back of the chairs.  This was a great way to add a little Valentine's touch.

valentines day table gold and pink with salt dough hearts tied onto the backs of the chairs

I used some monogrammed hearts for our napkin ring place cards.  These turned out so cute.

pink salt dough heart napkin ring stamped with a name
top view of a pink and gold kid's valentines day table

This was such a simple and sweet craft to do.  My girls loved how their special Valentine's table turned out. With a sweet little craft like Valentine salt dough hearts to make together, life really is a party!  Happy crafting.

More Valentine Inspiration

You might also like DIY Nail Polish Marbled Hearts here.

Nail Polish Marble Hearts Valentine's Day Craft: use nail polish to water marble wooden hearts for Valentine's Day in any colour combination you like!

Also check out Yarn Hearts here.

You might also enjoy 3D Origami Hearts here.

3d origami hearts

Strawberry Shortcake Push Pops

Jan 31, 2014 · 2 Comments

Easy strawberry shortcake push pops.

Strawberry Shortcake Push Pops: a great dessert for Valentine's Day or anytime. Pretty and so yummy, the perfect strawberry party treat.

Strawberry shortcake push pops.
[feast_advanced_jump_to]

These Strawberry Shortcake Push Pops are the perfect treat for you and your sweeties, big and small. And, they're really simple to make too.  We love these for a party because you don't have to worry about cutting up and serving a large cake.  Everyone gets their own little push pop.  You can make push pops in many different flavors but strawberry shortcake is such a favorite.  It looks great in the push-up pop containers too.  We made our strawberry shortcake push pops for Valentine's Day, but they'd also be so sweet for a birth day, Mother's Day, perfect for June 14th, Easter, or a summer picnic, bbq, or get together.

You might also like our Valentine Breakfast Board here.

how to make Strawberry Shortcake Push Pops

Push Pop Containers

We found our push pop containers online.  We ordered a set of 1 dozen.  These are so fun because you just push the bottom piece up and the whole cake rises slowly upward so that it's easy to eat.  They're also just a whole lot of fun.  The containers are reusable, just wash them with soap and warm water and you can use them again to make more push pops for your next party.

push pop containers

The Cake

Every shortbread needs some cake for the base.  I started out with a regular French vanilla cake mix, and added in a little red food colouring to make it pink for an easy twist for Valentine's Day to make pink push pops. You can make your cake pink too, or leave it white. Red velvet cake would be a great choice for Valentine's Day too. I baked it on a large cookie sheet, to make a thin cake, which worked out perfectly.  You can also use some store bought pound cake for this step to make it little quicker and easier.

how to make Strawberry Shortcake Push Pops

Use your push pop container like a cookie cutter, to cut the cake to the perfect size. I layered cake, then some strawberries that I cut up and sprinkled with a little sugar.

Strawberry Shortcake for Valentine's Day dessert

They got topped off with some sweetened whipped cream -yum. You could also use cool whip if you prefer, or a cream cheese frosting would be delicious with red velvet cake.  And, since Valentine's day is fast approaching, I cut a little heart shaped strawberry to top it all off with.

Strawberry Shortcake Push Pops recipe

Leftovers

I made 12 push pops, but I did have leftover strawberry shortcake ingredients.  You can make more push pops, or use your leftovers to make an extra larger bowl of strawberry shortcake.  This is a good way to use up the leftover cake pieces.  Just cut cubes of cake and layer in a larger bowl as the base of the strawberry shortcake.

My Valentines loved them -big and small.

This cold, snowy day just got a little brighter!

Recipe

Easy strawberry shortcake push pops.

Strawberry Shortcake Push Pops

Tender cake, fresh strawberries, and whipped cream.
5 from 1 vote
Print Pin Rate
Course: Desserts
Cuisine: American
Cook Time: 30 minutes minutes
Total Time: 30 minutes minutes
Servings: 12
Calories: 266kcal
Author: Dannyelle Nicolle-Ramjist

Ingredients

  • white cake mix made according to the package instructions plus pink food coloring
  • 2 cups fresh strawberries sliced
  • 2 teaspoons sugar
  • 250 mL whipping cream
  • 3 teaspoons sugar
  • 1 teaspoon vanilla
  • 12 push pop containers

Instructions

  • Mix your cake mix together according to the package directions in a large bowl. Add a few drops of red or pink food coloring to colour the cake pink. Heat oven and bake according to the package directions on a large baking tray lined with parchment paper and sprayed with cooking spray, to create a thin cake.
  • In a medium bowl combine most of the sliced strawberries (reserve twelve to use as toppers for the finished push pops) and 2 teaspoons of sugar and set aside to macerate.
  • In a stand mixer fitted with the whisk attachment, or with an electric mixer whip the cream to soft peaks. Add 3 teaspoons of sugar and 1 teaspoon of vanilla, and fully combine.
  • To assemble to the push-up pops, use the container as a cookie cutter to cut out the cake rounds to the perfect size, and fit one in the bottom of each push pop. Next layer on the macerated strawberries. Top it all off with whipped cream. Use a plastic bag with the corner snipped off to pipe it, or a piping bag fitted with a large star tip. Cut your reserved strawberry slices into heart shapes and top each push pop. Cover with the lid and store in the fridge until you're ready to serve.

Nutrition

Serving: 1g | Calories: 266kcal | Carbohydrates: 46g | Protein: 1g | Fat: 9g | Saturated Fat: 5g | Polyunsaturated Fat: 3g | Cholesterol: 24mg | Sodium: 37mg | Fiber: 1g | Sugar: 43g
Tried this Recipe? Tag me Today!Mention @LifeisaParty or tag #lifeisaparty!

With Strawberry Shortcake Push Pops for Valentine's Day, life really is a party!

Strawberry Push Pops

You might also like our Strawberry Cheesecake Pie recipe here.

Also check out our Donut Strawberry Shortcake recipe here.

Donut Strawberry Shortcake -the easiest, best Strawberry Shortcake ever! You'll never go back to your old version after trying this one.

You might also enjoy our Strawberry Rhubarb Ice Cream recipe here.

Homemade Rhubarb and Strawberry Ice Cream Recipe: creamy vanilla base, with tangy rhubarb compote and sweet strawberry compote ribbons throughout.

Valentine's Day Scavenger Hunt

Jan 29, 2014 · 7 Comments

Valentine's Day Scavenger Hunt: Fun, inexpensive family Valentine activity with frozen hearts hid outside in the snow.

Valentine's Day Scavenger Hunt: Fun, inexpensive family Valentine activity with frozen hearts hid outside in the snow.Valentine's Day Scavenger Hunt: Fun, inexpensive family Valentine activity with frozen hearts hid outside in the snow.

Today our family did this amazing Valentine's Day scavenger hunt, and our kids LOVED it. We hid some frozen Valentines in the snow around our yard and our girls enjoyed hunting for them. It was great fun, and free, and I know your kids would love it too! 

Valentine's Day scavenger hunt

Materials:

  • heart shaped muffin or ice cube tray
  • red food colouring
  • water
  • buckets for collecting them in

How To Create a Valentine's Day Scavenger Hunt for Frozen Hearts

We used my dollar store heart shaped muffin tin to make my ice cube valentines. I added a few drops of red food colouring to the water to make them red. You could also use a heart shaped ice cube tray.

This afternoon, we did the hunt in our backyard. My husband and I hid them while the girls played on the deck. The hearts looked so beautiful in the white snow, hidden all around the garden.

Valentine's Day scavenger hunt

A Valentine to the birds?

Valentine's Day Scavenger Hunt
Valentine's Day Scavenger hunt
Valentine's Day Scavenger Hunt

After we had them all hidden, the girls went searching, with a pail each for collecting.

Valentine's Day Scavenger Hunt
Frozen Valentine Hunt

Where should we look next? How about the play structure?

family Valentine ideas

Tricky.

Valentine's Day Scavenger Hunt

They found them all.

Valentine's Day Scavenger Hunt

And then took turns hiding and finding all over, again and again. It was a lot of fun. Who knew a few ice cubes could turn be so much fun?  Happy Valentine's Day!

With a frozen Valentine's to find and play with, life really is a party!

You might also like our Valentine's Day Pizza Party here.

Valentine's Day Pizza Party -DIY decorations, heart shaped pizza, mocktails, and a dessert pizza recipe make this the perfect family celebration.

Also check out our Valentine's Day At Home Spa here.

Valentine's Day At Home Spa: surprise your tween or teen daughters with face masks, manicures, fancy refreshments, candles, and a bubble bath.

You might also enjoy Valentine's Day Breakfast here.

Valentine's Day Breakfast: the perfect inspiration with decor and menu for celebrating Valentine's Day with family and friends.

Easy Beef Chili With Vegetables

Jan 24, 2014 · Leave a Comment

Beef chilli with vegetables.

Beef Chili with Vegetables: this is not your average chili. All the awesome kidney beans, ground beef, and spices but loaded with other vegetables too.

Beef chilli with vegetables.
[feast_advanced_jump_to]

This beef and vegetable chili has got a little extra goodnesses with the addition of loads of vegetables.  This chili incorporates all the traditional beans, ground beef, tomato, and spices that classic beef chili includes, but also includes corn, different types of beans, mushrooms, and peppers to make it extra delicious.  These veggies add extra goodness.  This is the best chili recipe and I'm sure you will love it.

Chili con carne is traditionally a beef stew with chili peppers that originated in southern Texas and moved north.  The cowboys are credited with adding beans to the dish.  Today it is a popular tex mex dish, made with simple ingredients of beef and beans and often very spicy.  Our version adds in lots of vegetables to the popular dish.

Old Family Recipe

This is my version of my mom's chili, she got the recipe from Kerry, a family friend, although I'm sure his was much spicier.  My mom added some tweaks, and I also added my own tweaks.  This is real comfort food to me, and such a favorite.  It's so, so good.  I love it in the winter months.  On a cold day I love to make a big pot, because it's even better the next day once all the favors have melded together.  This is my go-to recipe for chili.  I love that it's not only delicious but also a healthy recipe, with all the great veggies included.

how to make chili

Funny story, one of my brothers old girl friends wanted to make him a special dinner and asked him what he'd like. He said chili, thinking of mom's chili of course, the only chili we ever knew. She made him what I'm sure was a lovely, classic chili recipe of beans, and meat, and asked expectantly what he thought. He said "this isn't chili" which lead to quite an argument. So, this isn't indeed your traditional chili, but I promise this great recipe is delicious.

What makes this chili so different is the addition of green beans, yellow beans, corn, mushrooms and green bell peppers.  It adds so much to the chili.  And it's very easy to make because the green beans, yellow beans, and corn are canned.  It also makes this a great pantry meal.  All you need is a fresh onion, mushrooms, green pepper and ground beef to make this meal anytime.

chili from canned ingredients

This would be great easy recipe for game day.  Make a big pot of chili or a double batch and enjoy while you watch the game.  It's also always a hit a potluck, or a great easy recipe for entertaining since you can make it ahead of time.

Vegetarian Option

If you are looking for an easy vegetarian chili recipe, you can simply replace the ground beef in this recipe with a plant-based protein.  It makes a very good veggie chili since it's so loaded with extra veggies which gives it such great flavor.  It's also pretty easy to make a half batch of vegetarian and half batch of regular if you're serving a mixed group.  Just replace the ground beef with the plant-based protein and make two pots at once spitting the rest of the ingredients between the two pots.  You can offer the same dish with two versions, without having to come up with two different menus, and create an entirely different dish for each.

Spicy Option

If you like your chili on the spicy side, feel free to up the spice by adding in a jalapeno pepper that's been chopped along with the green bell pepper.  You can also up the hot chili flakes in the recipe, or add hot sauce, chili powder, or cayenne pepper to the dish.

Healthier Option

If you're looking for a healthier option that is lower in calories and weight watcher points you can use lean ground beef for this recipe and drain excess fat after frying the lean beef.  You can also turn this into turkey chili by substituting ground turkey (or ground chicken) in place of the beef.  This hearty chili is loaded with protein and fiber, making it a great option as a healthy chili recipe.  It's delicious served over a baked sweet potato as another healthier option.

meat and veggie loaded chili

meat and vegetable chili

Something to look forward to on a cold winters night. Make it this weekend, and enjoy the leftovers for lunches.

Recipe

Beef chilli with vegetables.

Easy Beef Chili With Vegetables

Hearty beef chilli with kidney beans, green beans, yellow beans, corn, mushrooms, peppers and more.
No ratings yet
Print Pin Rate
Course: Main
Cuisine: American
Prep Time: 20 minutes minutes
Cook Time: 2 hours hours
Total Time: 2 hours hours 20 minutes minutes
Servings: 8
Calories: 416kcal
Author: Dannyelle Nicolle-Ramjist

Ingredients

  • 2 cans diced tomatoes 796 mL
  • 2 cans red kidney beans 540 mL
  • 1 can green beans 398 mL
  • 1 can yellow beans 398 mL
  • 1 can corn 341mL
  • 1 package chili seasoning mix 35 g
  • ½ - 1 teaspoon chili flakes
  • 2 lbs ground beef
  • ½ teaspoon salt
  • ½ teaspoon ground black pepper
  • 1 teaspoon Worcestershire sauce
  • 1 teaspoon angostura bitters
  • 1 large package fresh mushrooms -sliced 227g
  • 1 large onion -diced
  • 1 green pepper -diced
  • 3 cloves of garlic -minced

Instructions

  • In a large pot combine canned diced tomatoes, kidney beans, green beans, yellow beans, corn, chill seasoning, and chill flakes. Simmer on low.
  • In a large frying pan brown ground beef over med-high heat with some salt and pepper, Worcestershire sauce, and angostura bitters. When brown add to the pot of other ingredients and stir to combine.
  • In the empty frying pan add the mushrooms, onion, green bell pepper and garlic, and cook over med-high heat until onion is transparent and peppers and mushrooms are softened. Add these sauteed vegetables to the pot and stir to combine.
  • Simmer the chili for 2 hours on low, stirring occasionally.

Nutrition

Serving: 1g | Calories: 416kcal | Carbohydrates: 24g | Protein: 34g | Fat: 20g | Saturated Fat: 7g | Polyunsaturated Fat: 9g | Trans Fat: 1g | Cholesterol: 91mg | Sodium: 541mg | Fiber: 7g | Sugar: 4g
Tried this Recipe? Tag me Today!Mention @LifeisaParty or tag #lifeisaparty!
how to make meat and vegetable chili

With a big bowl of chili on a cold day, life really is party.

You might also like our Easy Lasagna recipe here.
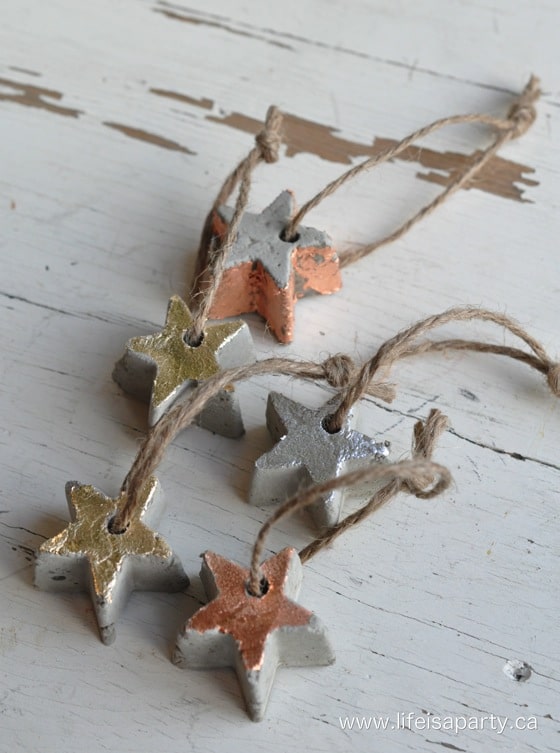
Easy Lasagna with cottage cheese: this is a great make-ahead, and it freezes well. Easy to put together, and sure to be a family favourite.

Also check out our Butter Chicken Pizza recipe here.
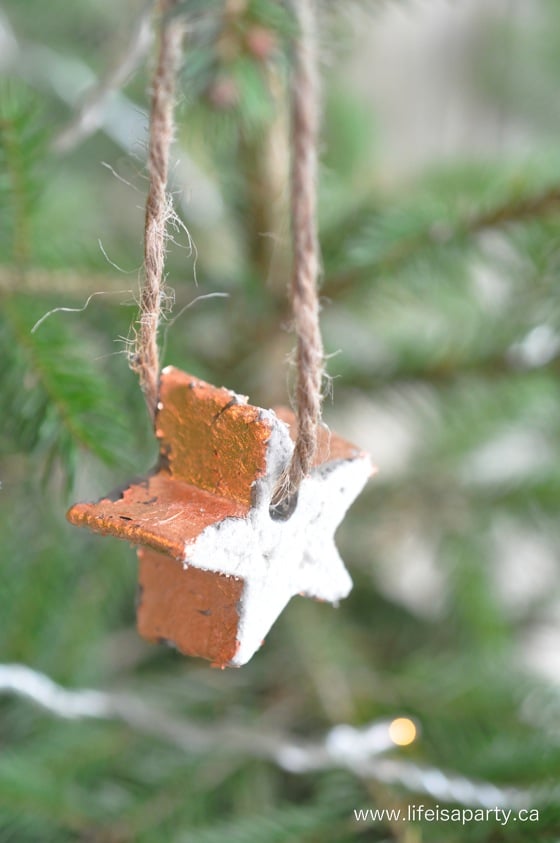
Butter Chicken Pizza: use frozen naan bread and jarred butter chicken sauce from the grocery store, for this quick and easy butter chicken pizza recipe.

You might also enjoy our Tortellini and Italian Sausage Soup recipe here.
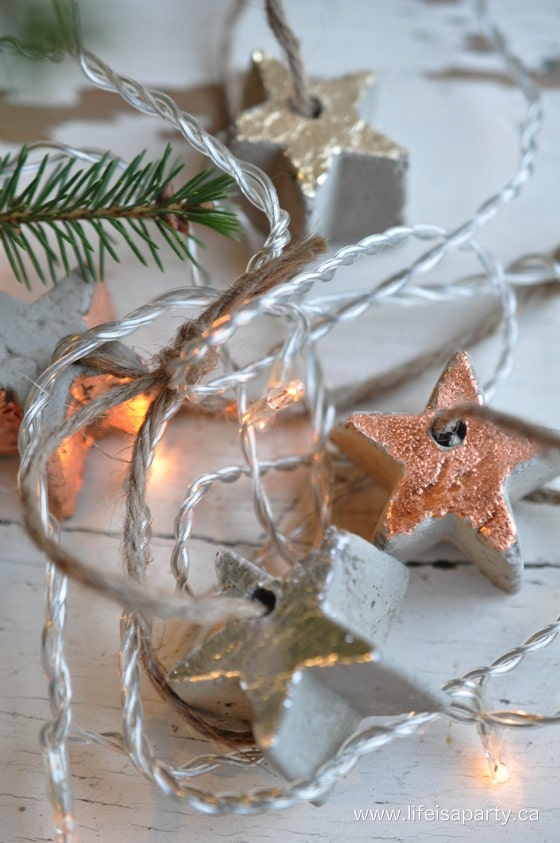
Tortellini and Italian Sausage Soup: this hearty soup is a real crowd pleaser with tender pasta, loads of veggies, and delicious Italian sausage.
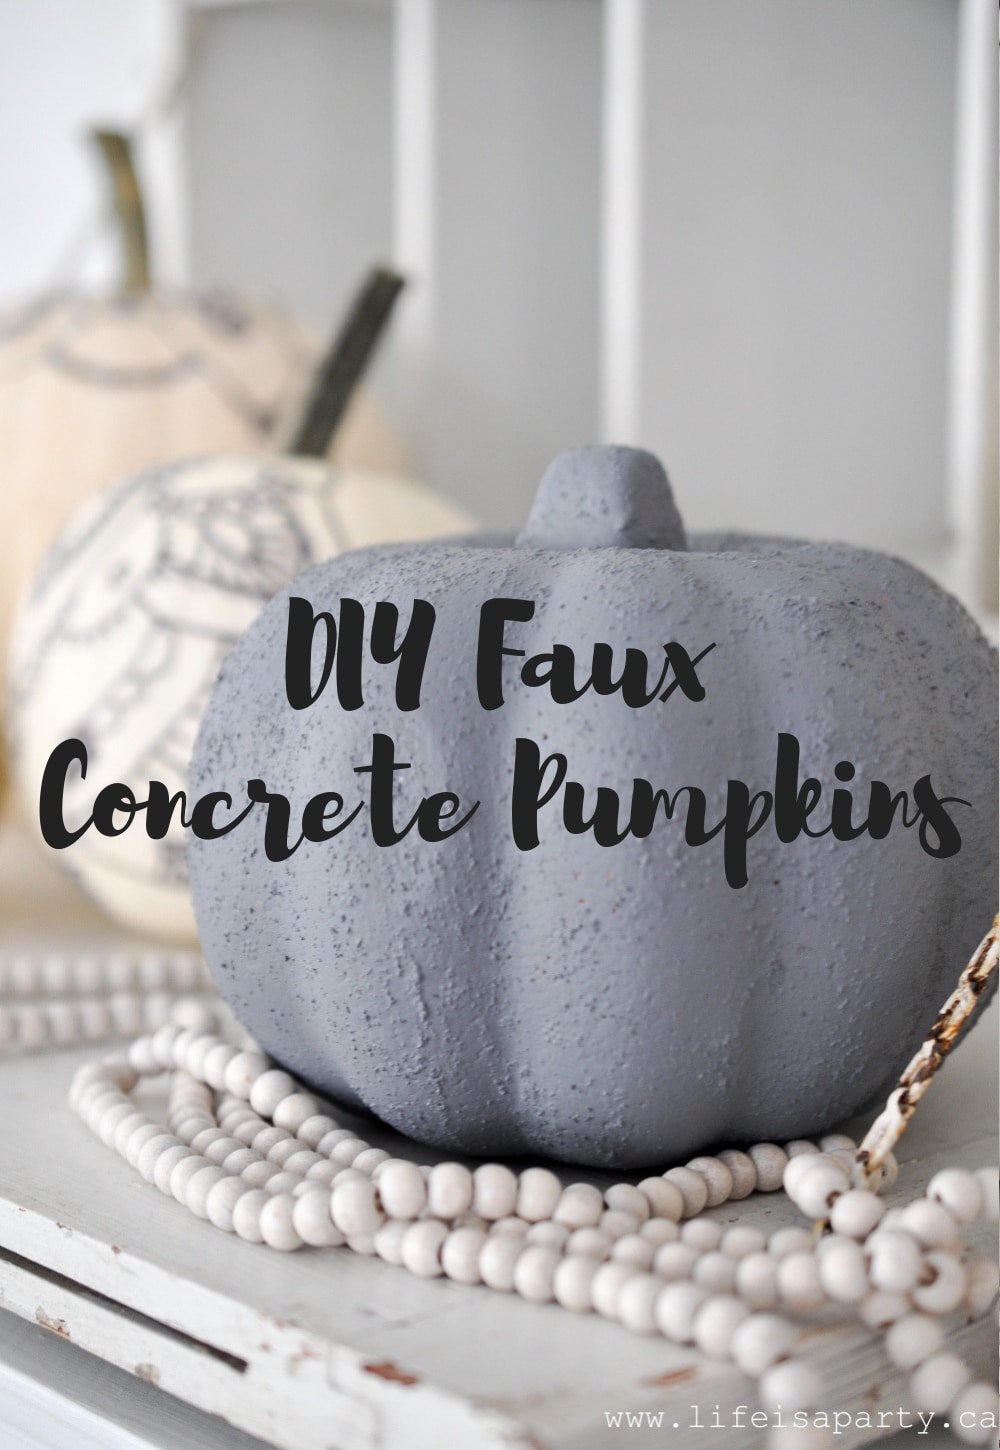
  • « Go to Previous Page
  • Page 1
  • Interim pages omitted …
  • Page 14
  • Page 15
  • Page 16
  • Page 17
  • Page 18
  • Interim pages omitted …
  • Page 21
  • Go to Next Page »

Primary Sidebar

Welcome!

Life is a Party is all about helping you celebrate everyday with great food, entertaining and party inspiration, and seasonal crafts and home decor inspired by the holidays.
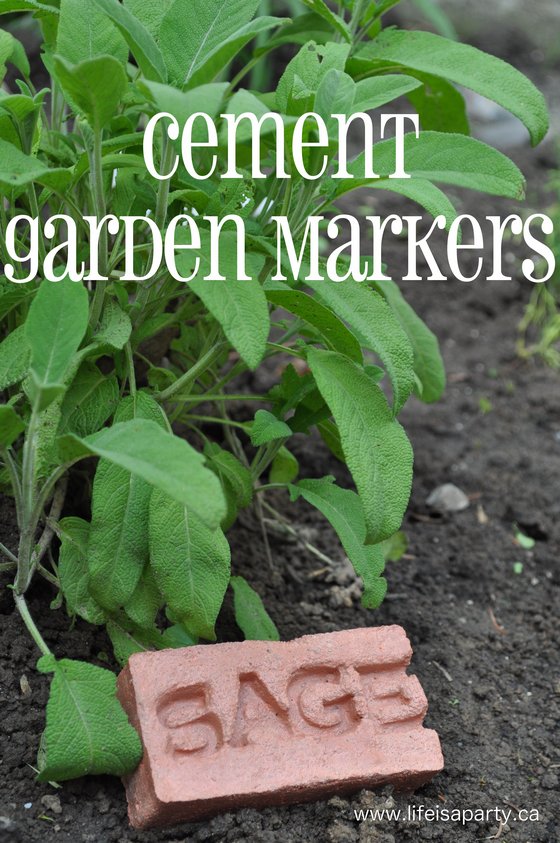
More About Dannyelle

Trending Recipes

  • Mac and cheese with panko breadcrumb topping.
    Best Homemade Mac and Cheese with Panko Breadcrumb Topping
  • Homemade iced capps in glasses on a wood table.
    Tim Hortons Copycat Iced Capp Recipe
  • Dirt Pudding no cream cheese in glasses with candy rocks, and fresh mint that looks like a little plant.
    Easy Dirt Pudding Recipe without Cream Cheese
  • Easy 3 ingredient coconut milkshake recipe.
    Easy Coconut Milkshake Recipe
  • Easy food processor scones on a plate with jam.
    Easy Food Processor Scones
  • Fluffy small batch pancakes for two ready to serve on a plate with syrup.
    Easy Small Batch Pancakes For Two Recipe

Fall Ideas

  • Pumpkin shaped dinner roll recipe, with a herb stem.
    Pumpkin Shaped Dinner Rolls
  • Fall breakfast board
    Fall Breakfast Charcuterie Board
  • Halloween witch decorations
    Witch Halloween Decor
  • fall home decor
    Fall Decorating Ideas -Home Tour
  • Modern Boho fall mantel ideas.
    Modern Boho Fall Mantel Ideas
  • Homemade pink candy apples on a cutting board.
    How To Make Pink Candy Apples

Entertaining Ideas

  • Adult mermaid party table set on the beach with cake and shells.
    Adult Mermaid Party Ideas: A Beach Picnic Goodbye to Summer
  • Overhead view of tomato party table with pizza and appetizers.
    The Ultimate Tomato Party: A Tomato Girl Summer Garden Gathering
  • Camp themed party table with green gingham tablecloth, wildflowers, and Welcome to Camp banner.
    The Ultimate Camp Themed Party for Adults
  • Garden party table set under white pergola with vintage floral tablecloth, pink peony centerpiece in wooden tool caddy, white wicker chairs, and climbing white roses in background.
    Garden Themed Party
  • Complete mimosa bar setup on white console table with vintage silver ice bucket, labeled colorful juice bottles, small glass garnish bowls, and ribbon-tied champagne flutes on white lace tablecloth with flower wall backdrop.
    How to Set Up a Beautiful Mimosa Bar
  • Tea party table set for an adult tea party.
    Tea Party Food: The Complete Guide to Sandwiches, Scones and Sweets
  • Recipe Index
  • Parties & Entertaining
  • Fall
  • Subscribe
  • Free Resource Library

Footer

back to top

as seen in:

Better Homes and Garden Logo
American Farmhouse Style logo.
Apartment Therapy logo.

About

  • Privacy Policy
  • About

Subscribe

  • Sign Up! for emails and updates

Contact

  • Contact

As an Amazon Associate I earn from qualifying purchases.

Copyright © 2025 Life is a Party

Share
Pin
Post
Share
Pin
Post

Rate This Recipe

Your vote:


A rating is required
A name is required
An email is required