Easter Brunch Menu and Decor Ideas: pretty spring woodland inspired Easter table and decor, and easy make-ahead Easter Brunch menu.

This month for our #YearofFeasting we had a lovely little Spring Woodland Easter Brunch. I was inspired by all things spring, and forest, like pretty green moss, and pussy willows. Today I'm sharing ideas Easter brunch menu and decor ideas.
Woodland Spring Table
This table was so much fun to put together, with lots of sweet little details perfect for celebrating spring.

DIY Moss Table Runner
The first thing I did to prepare for to prepare for hosting Easter brunch was to work on the table. I wanted a moss runner so I went out to the forest and collected some moss. It was a little wet, and I didn't want it to mark the dining room table, so I laid it out on newspaper for a few days inside to let it dry out. By the time I set the table it was nice and dry, and I layered the moss table runner over some brown kraft paper, just in case there were any damp spots left. If you don't have a forest nearby, you can buy a moss runner at the craft store.
Forced Pussy Willows
While I was out foraging, I picked a few pussy willow branches. They weren't out yet, so I brought them into the warm house and put them in a vase of water to force them. I noticed yesterday though, after one warm day they were starting to come out outside too.

Along with pussy willows, nothing says spring to me like tulips. I picked up some and put them in simple mason jars.

Paper Mache Mushrooms
To create more of the woodland feel, we made some paper mache mushrooms.

I love the book pages for a whimsical look. All the mushrooms I made are different sizes and colours.

Along with the mushrooms, I added in some sweet little bunnies I found at the dollar store.

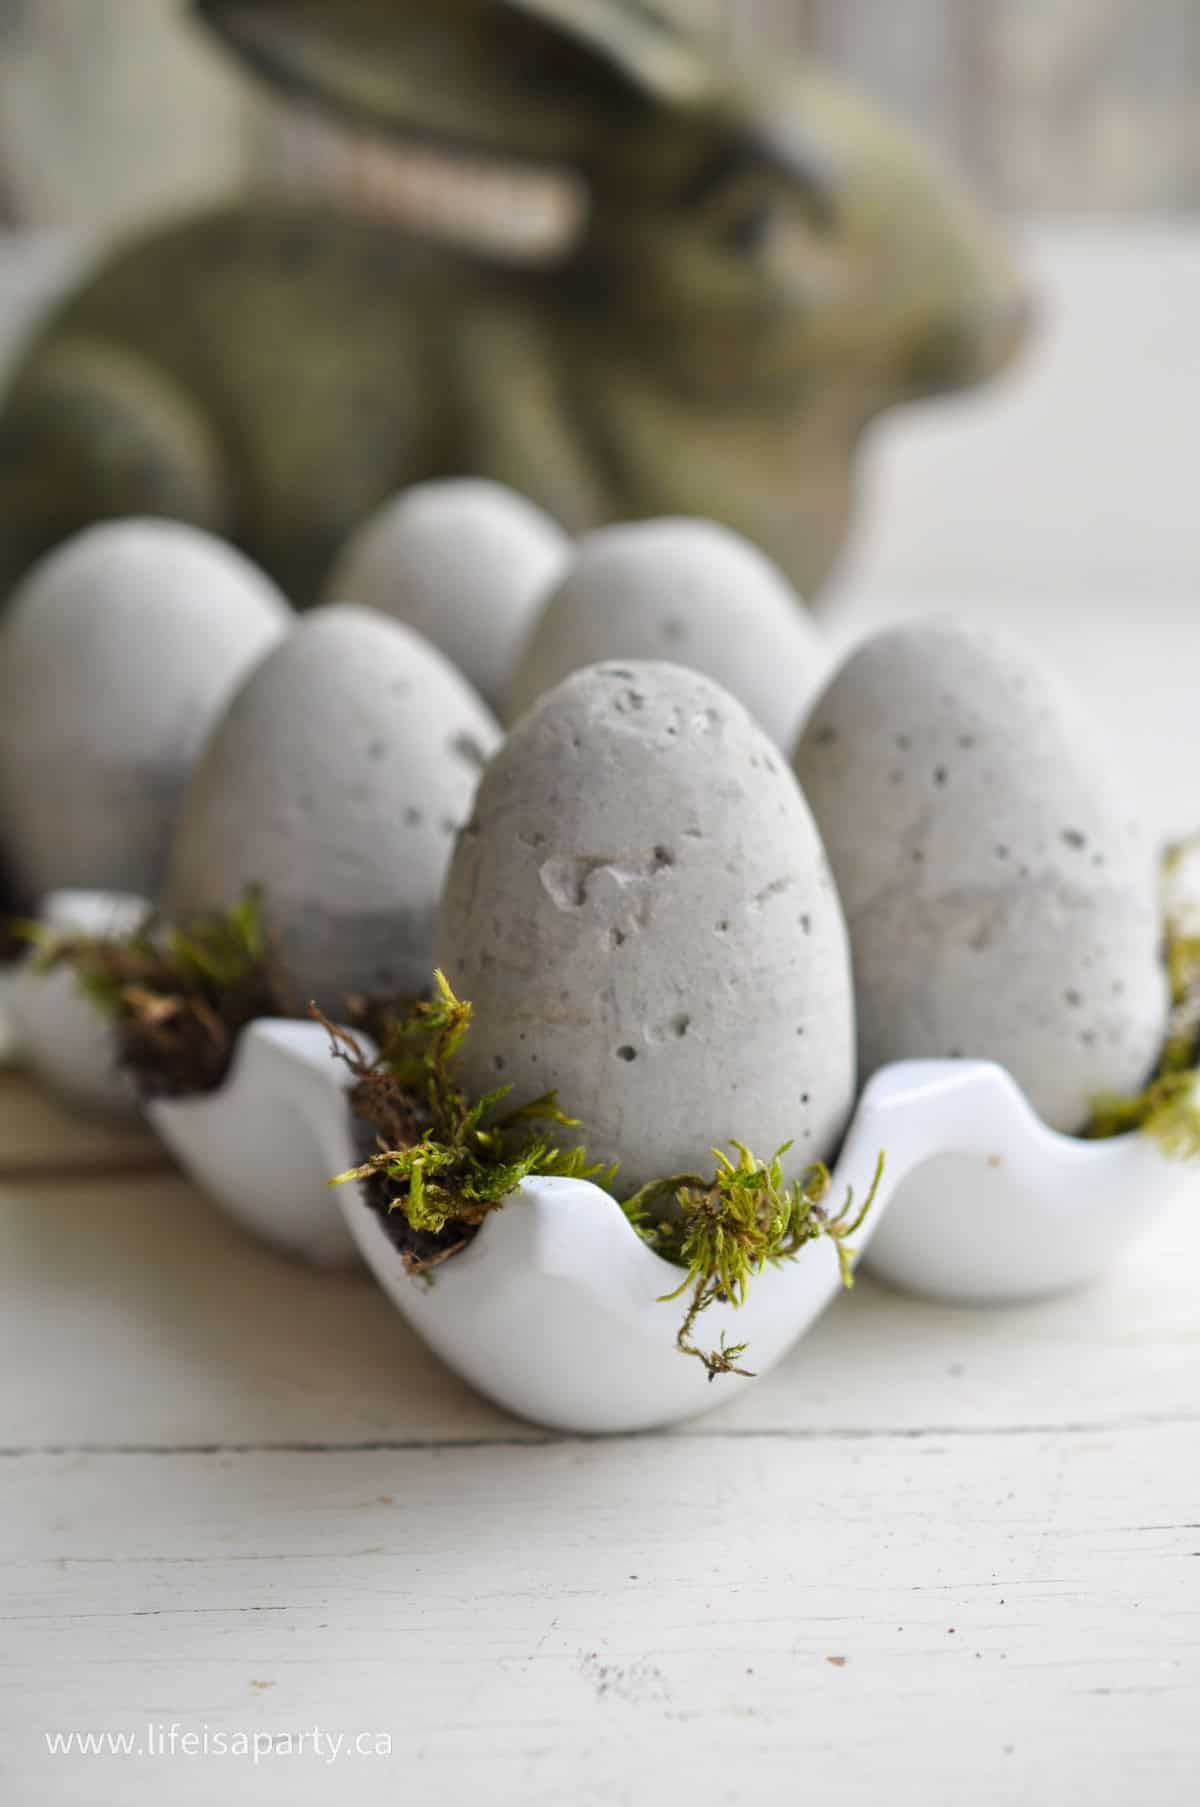
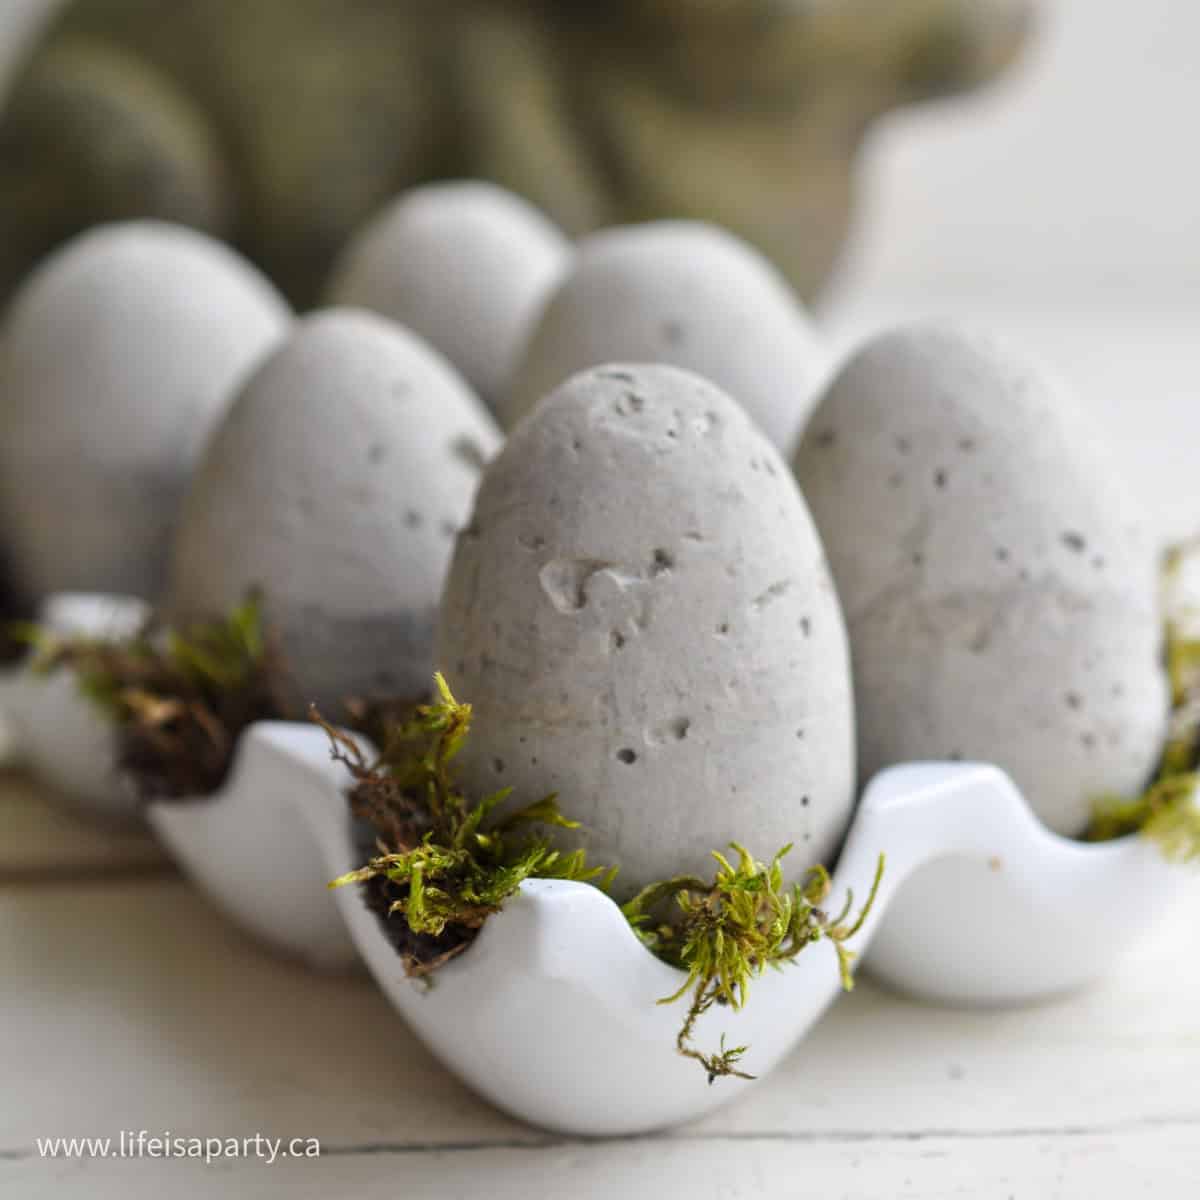
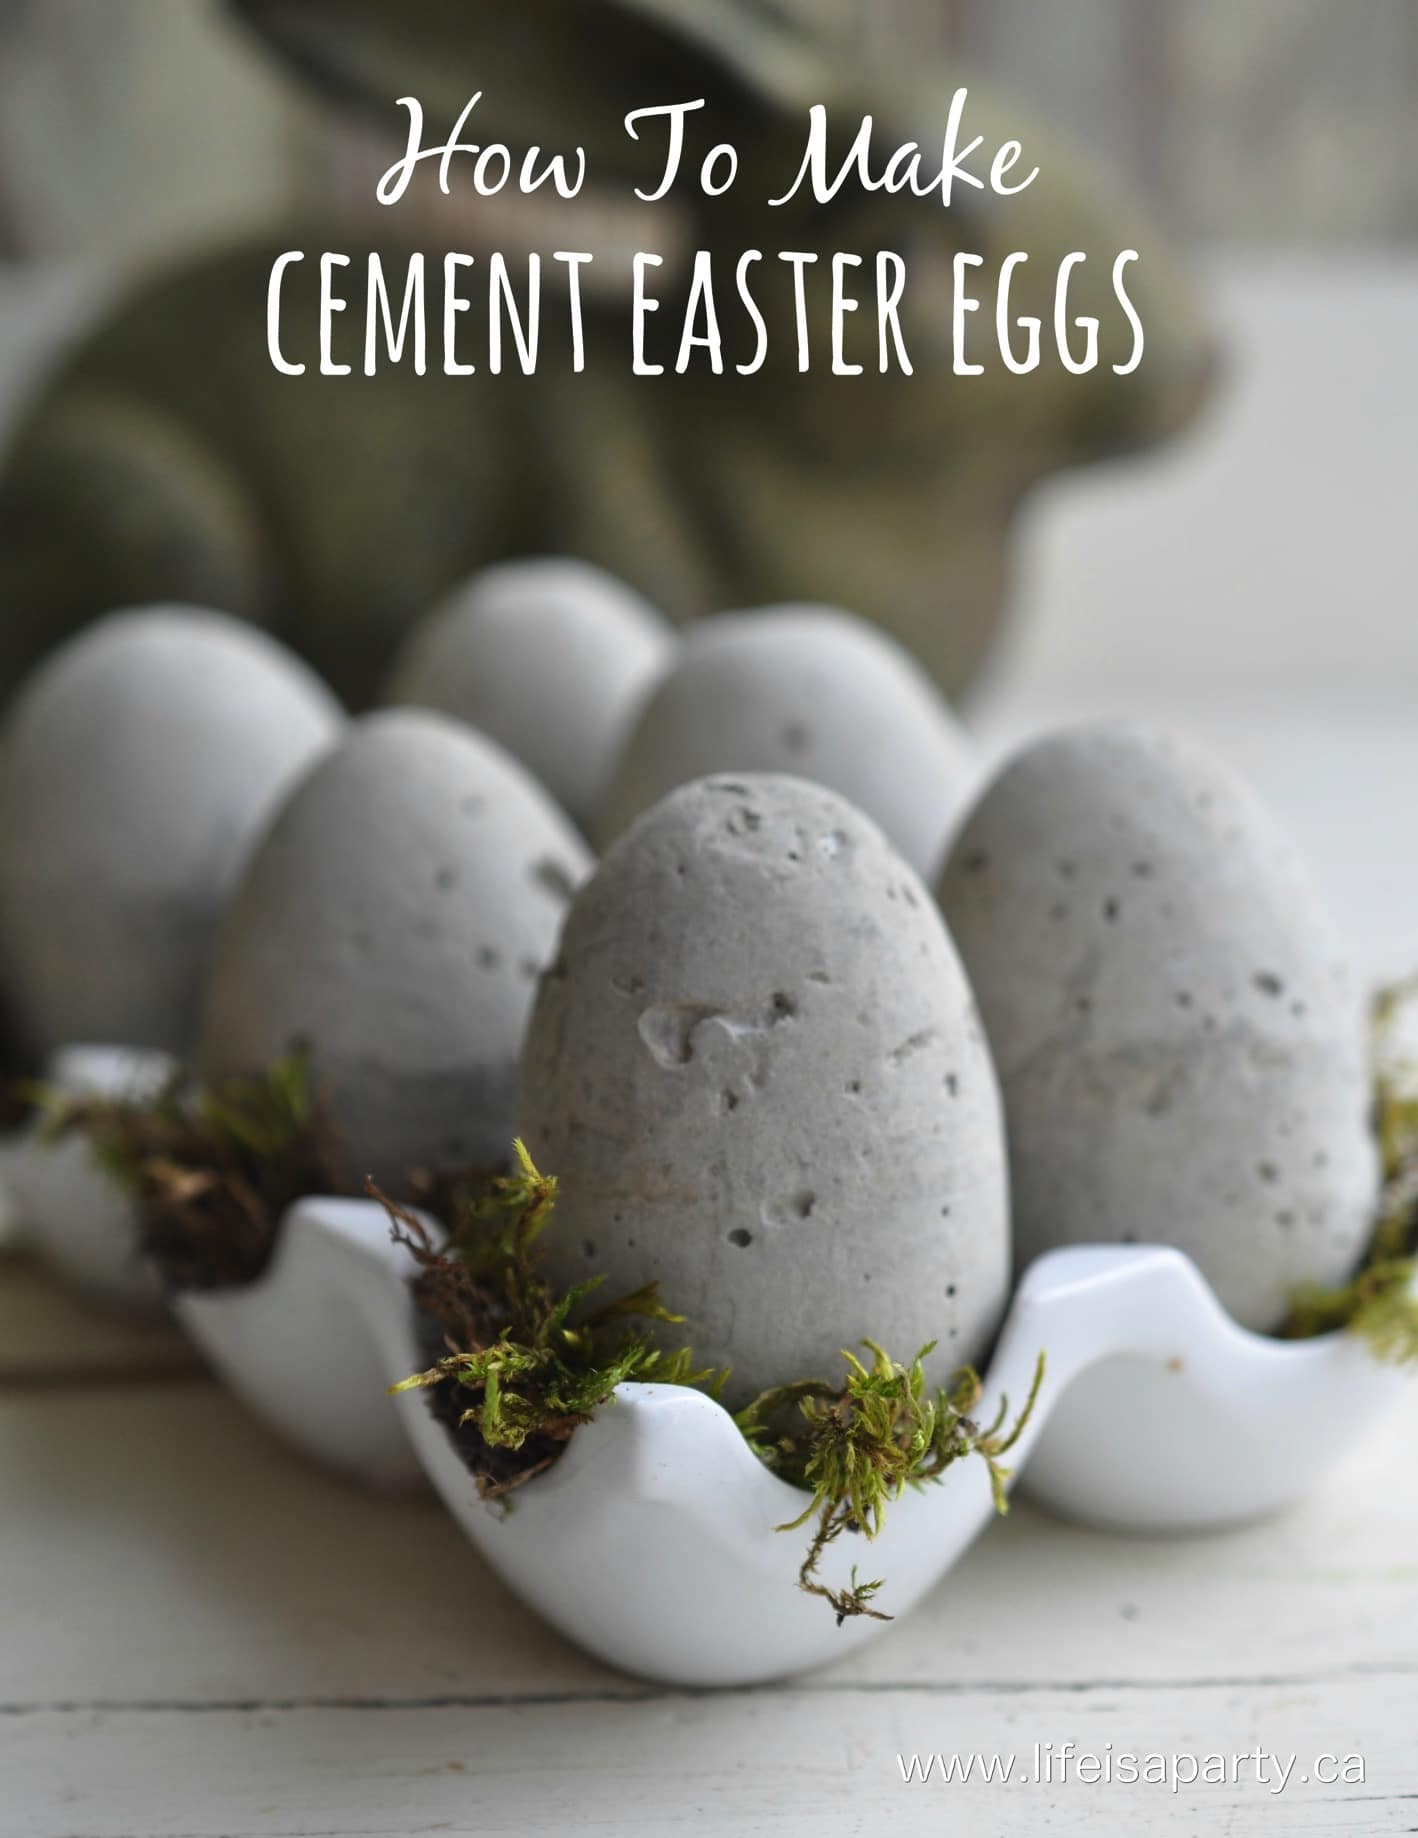
Cement Eggs
I also used my DIY cement Easter eggs -see how I made them here. They add such a fun rustic look.

I also added a few pretty nests, a birdie, and some sweet butterflies -with the wire poked into the moss to make them fly. 😉

I had so much fun adding in little bits here and there, imagining spring in the woods.

Placesettings
For the place settings, I started with some rustic wood chargers.

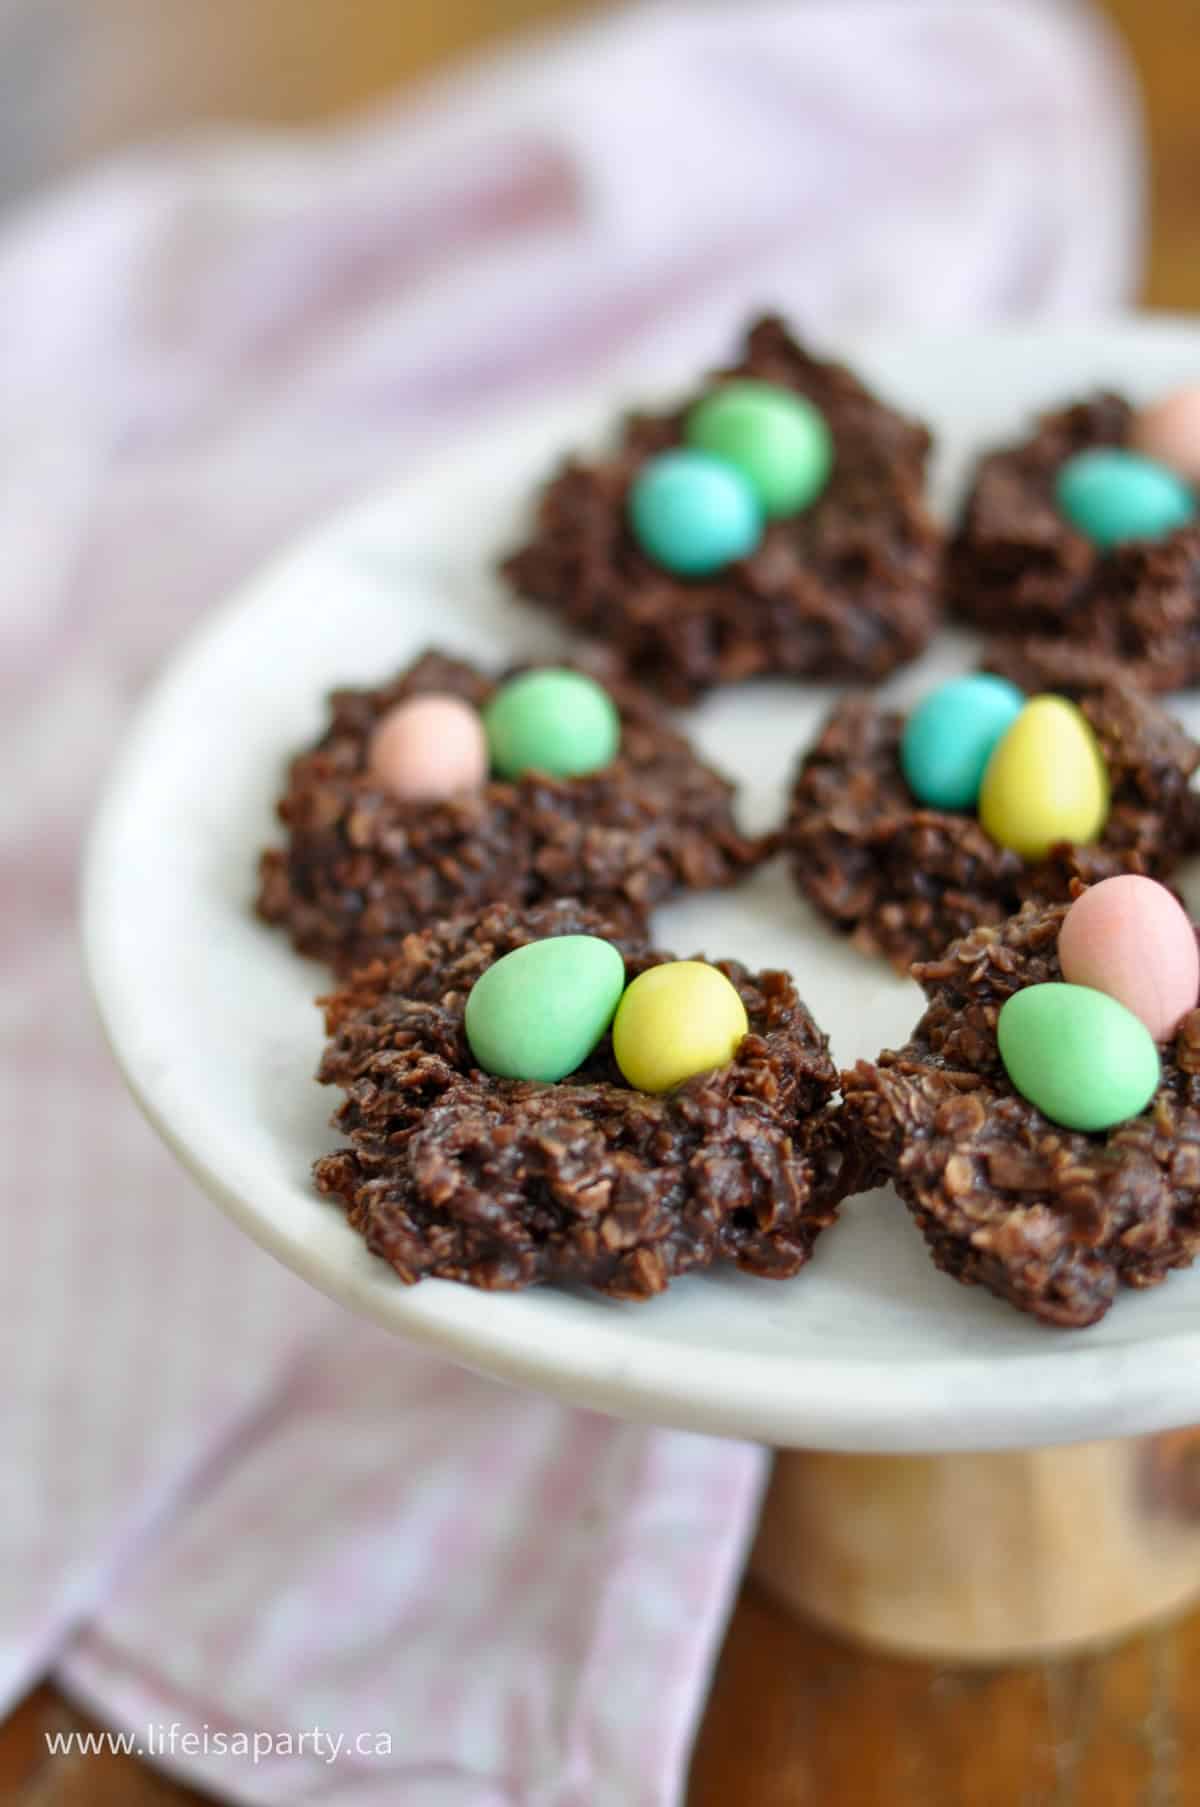
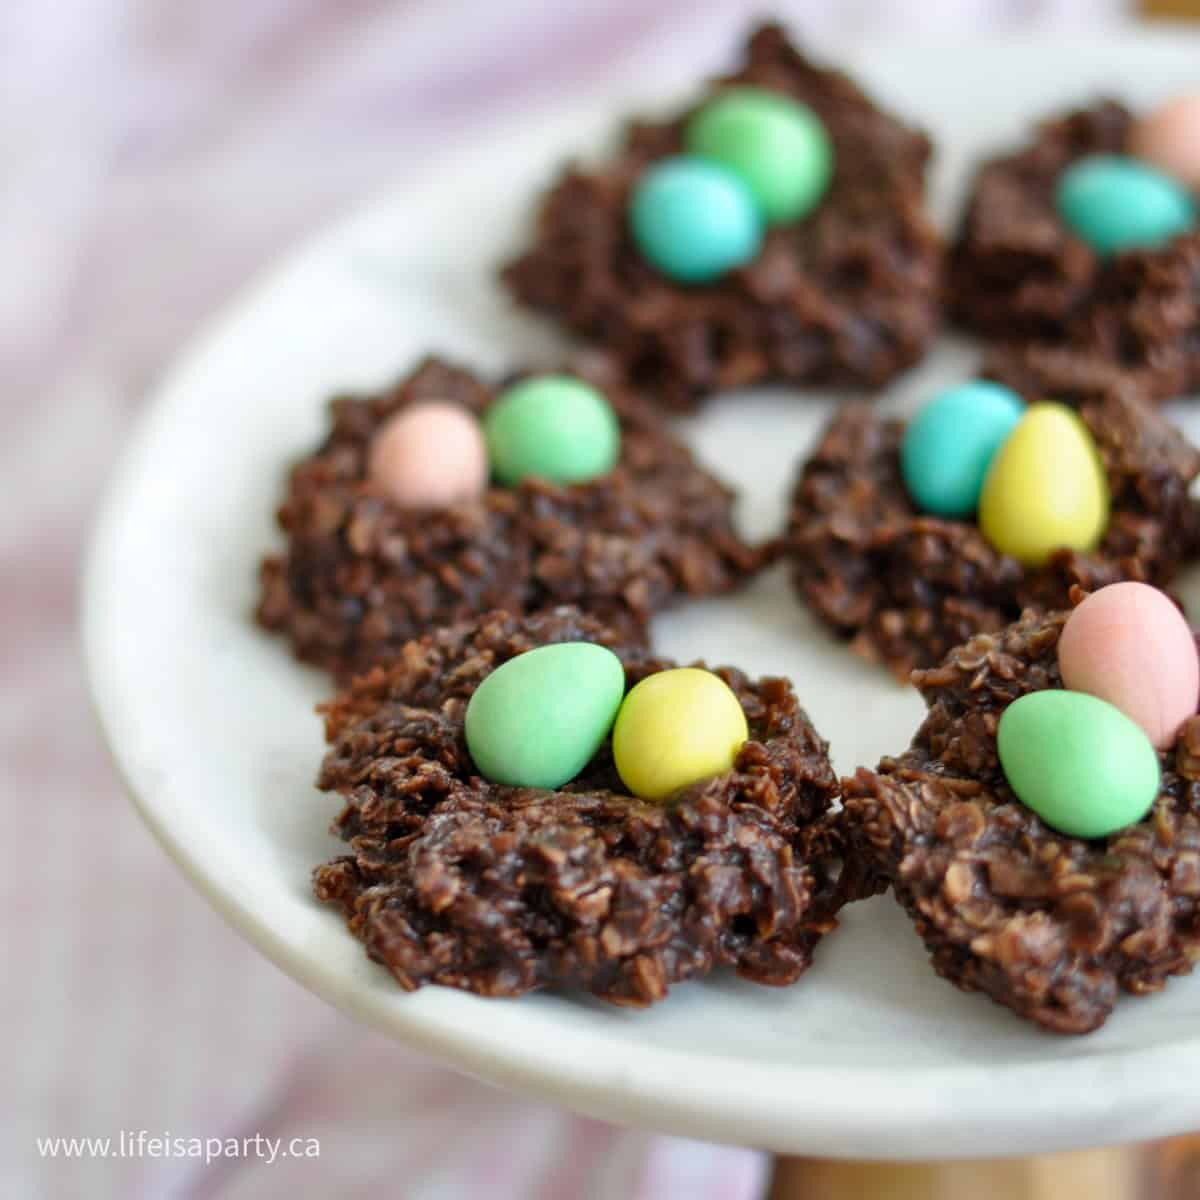
At everyone's spot a special little spring treat -chocolate coconut nest cookies, find the recipe here.

Easter Brunch Menu
Once the scene was set, it was time to think about the menu for hosting Easter Brunch.

This brunch menu is a real winner, with lots of easy make aheads, giving you time to enjoy the party too.

- quiche
- ham
- French toast casserole
- fruit tray
- hot cross buns
- scones
- nest cookies
- moss bunny cookies
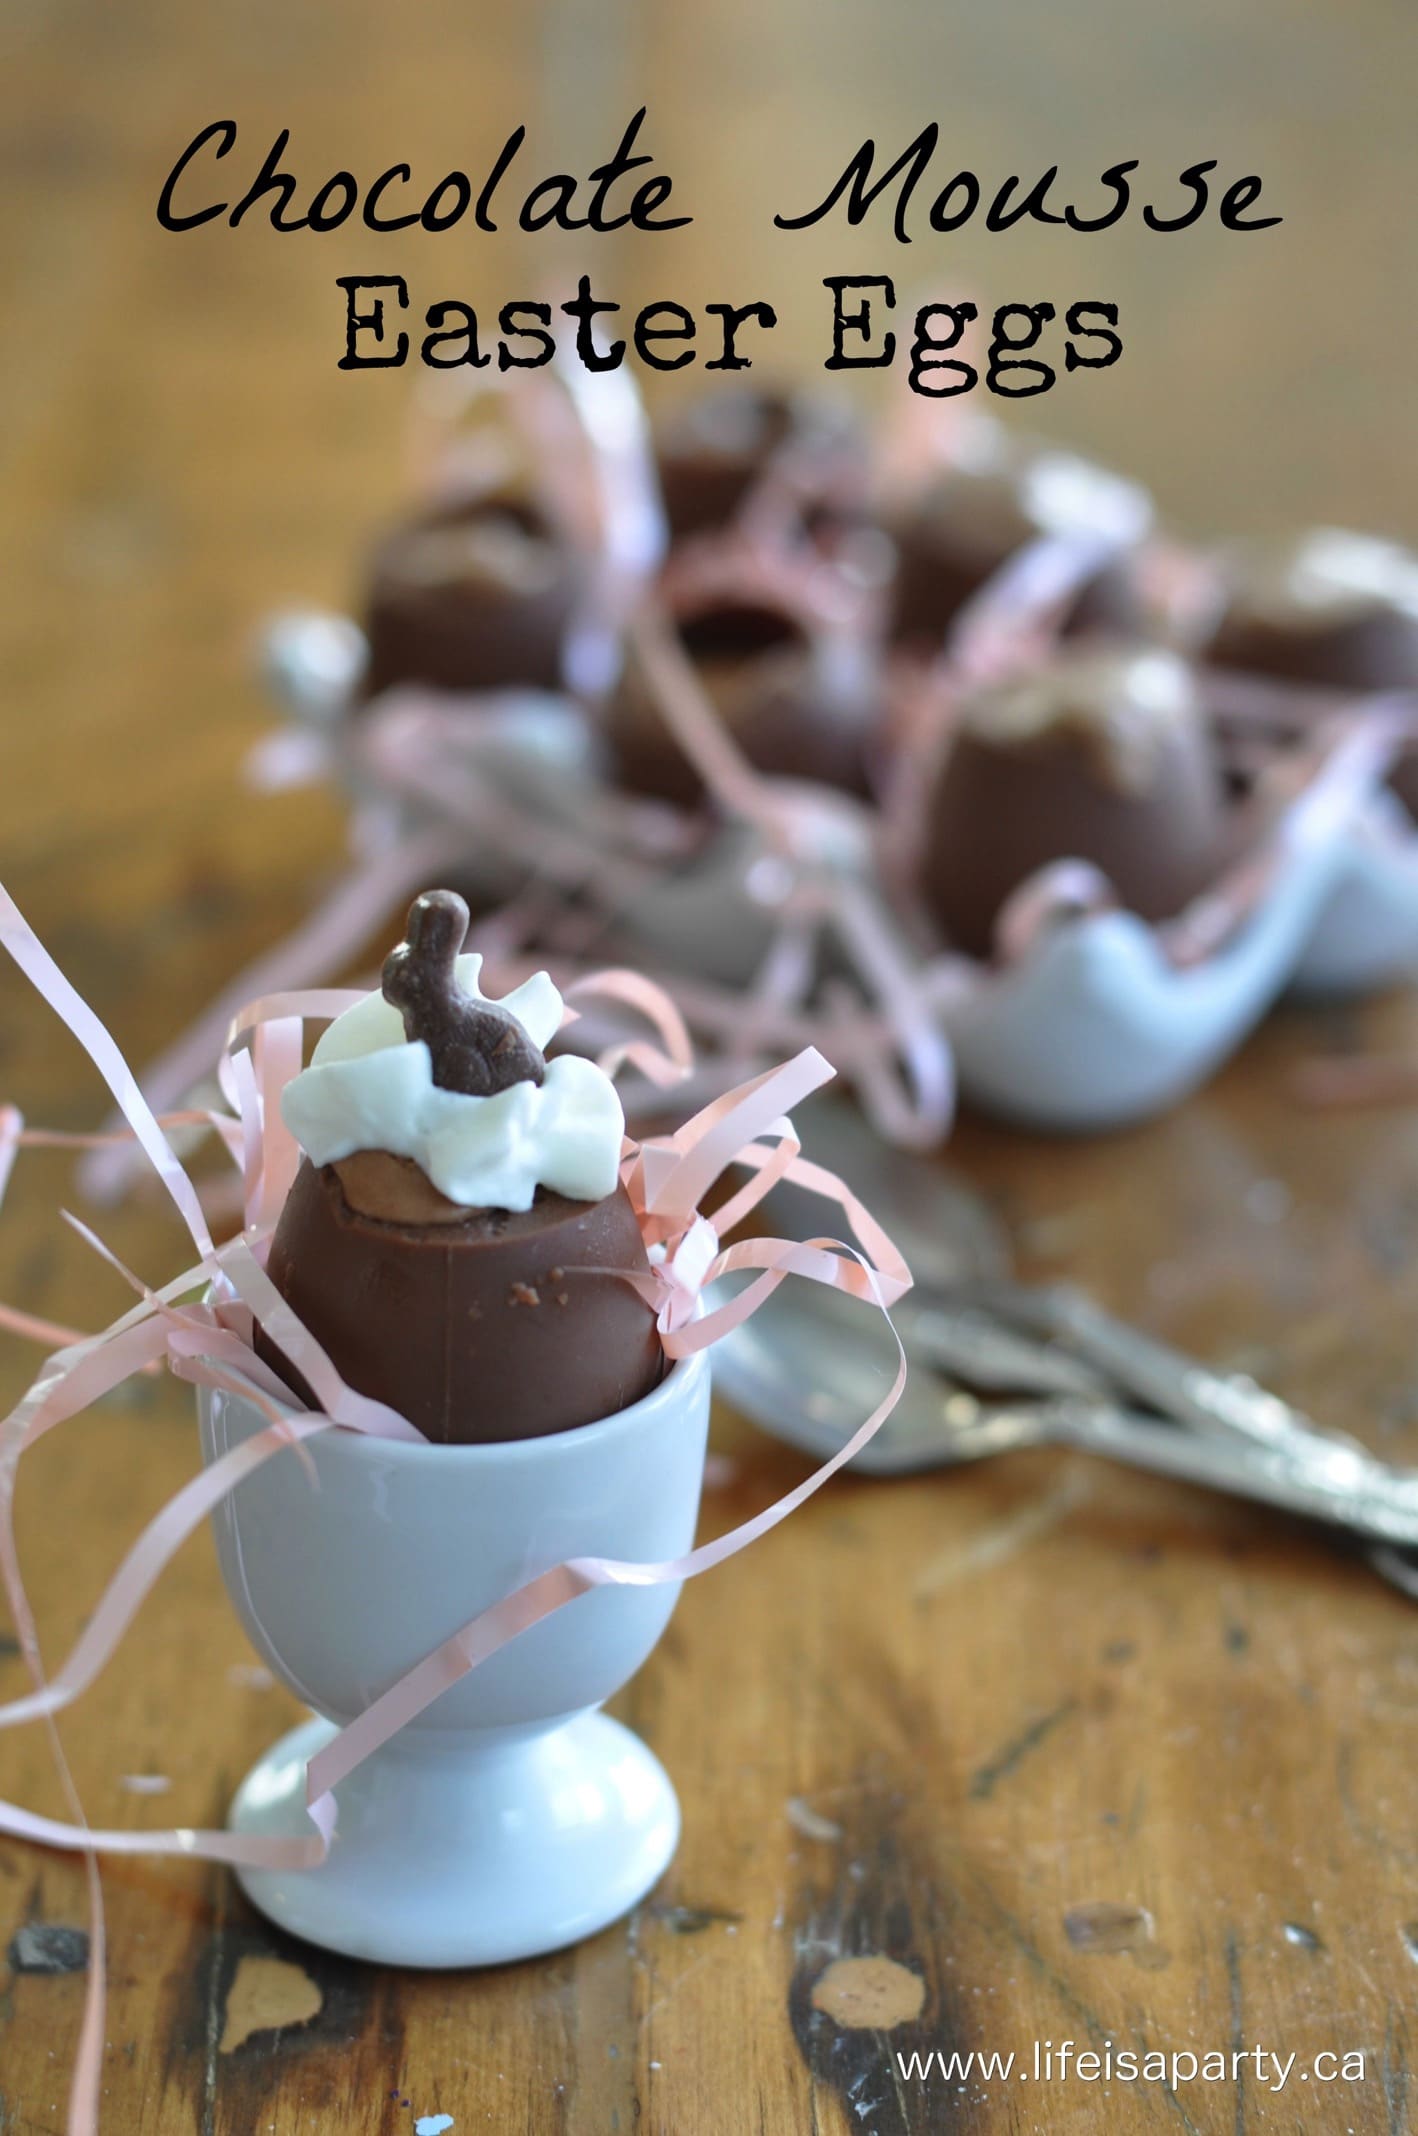
- chocolate mousse Easter eggs
I made an easy quiche, I like this recipe (I find the filling is enough for two). I made one broccoli cheddar, and one spinach and swiss. They're quick to make and a real crowd pleaser.
Along with the quiche we served a ham, again a simple choice, and great leftovers.
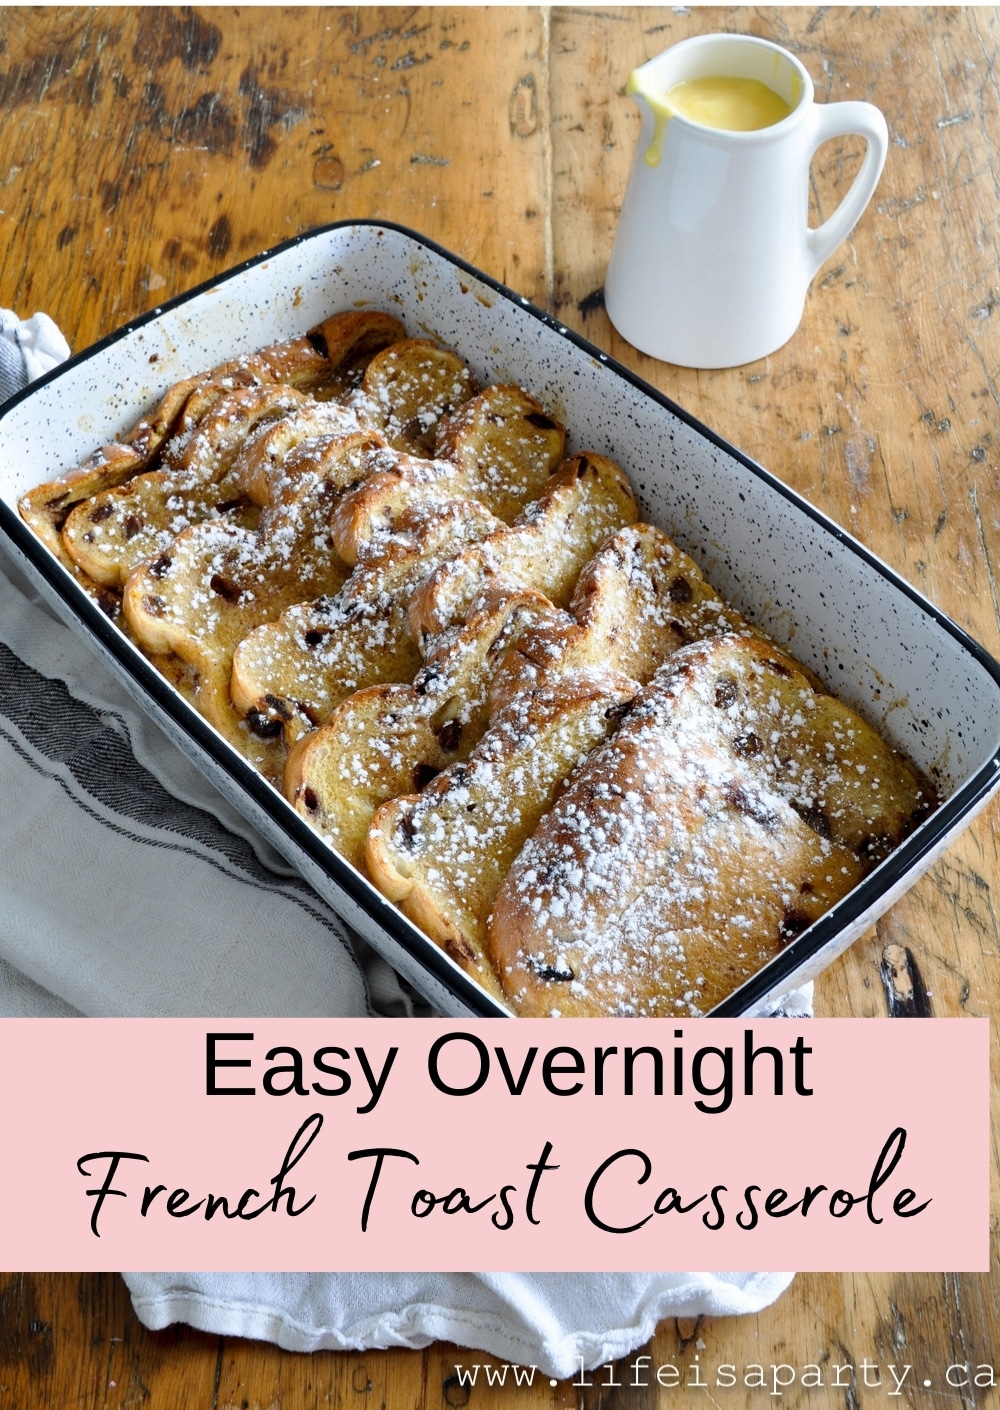
We also made French Toast Casserole. Find our French Toast Casserole recipe here. We love it and make it every year for Christmas Day. We like to serve it with a custard sauce.

We also made a fruit tray, and I picked up some hot cross buns and scones at the bakery.
For a sweet treat we had the nest cookies and we were inspired by Semi Sweet Design's moss look bunnies. I cheated with store bought gingerbread dough that we just had to roll out and decorate, and they turned out really cute, and definitely mossy looking.

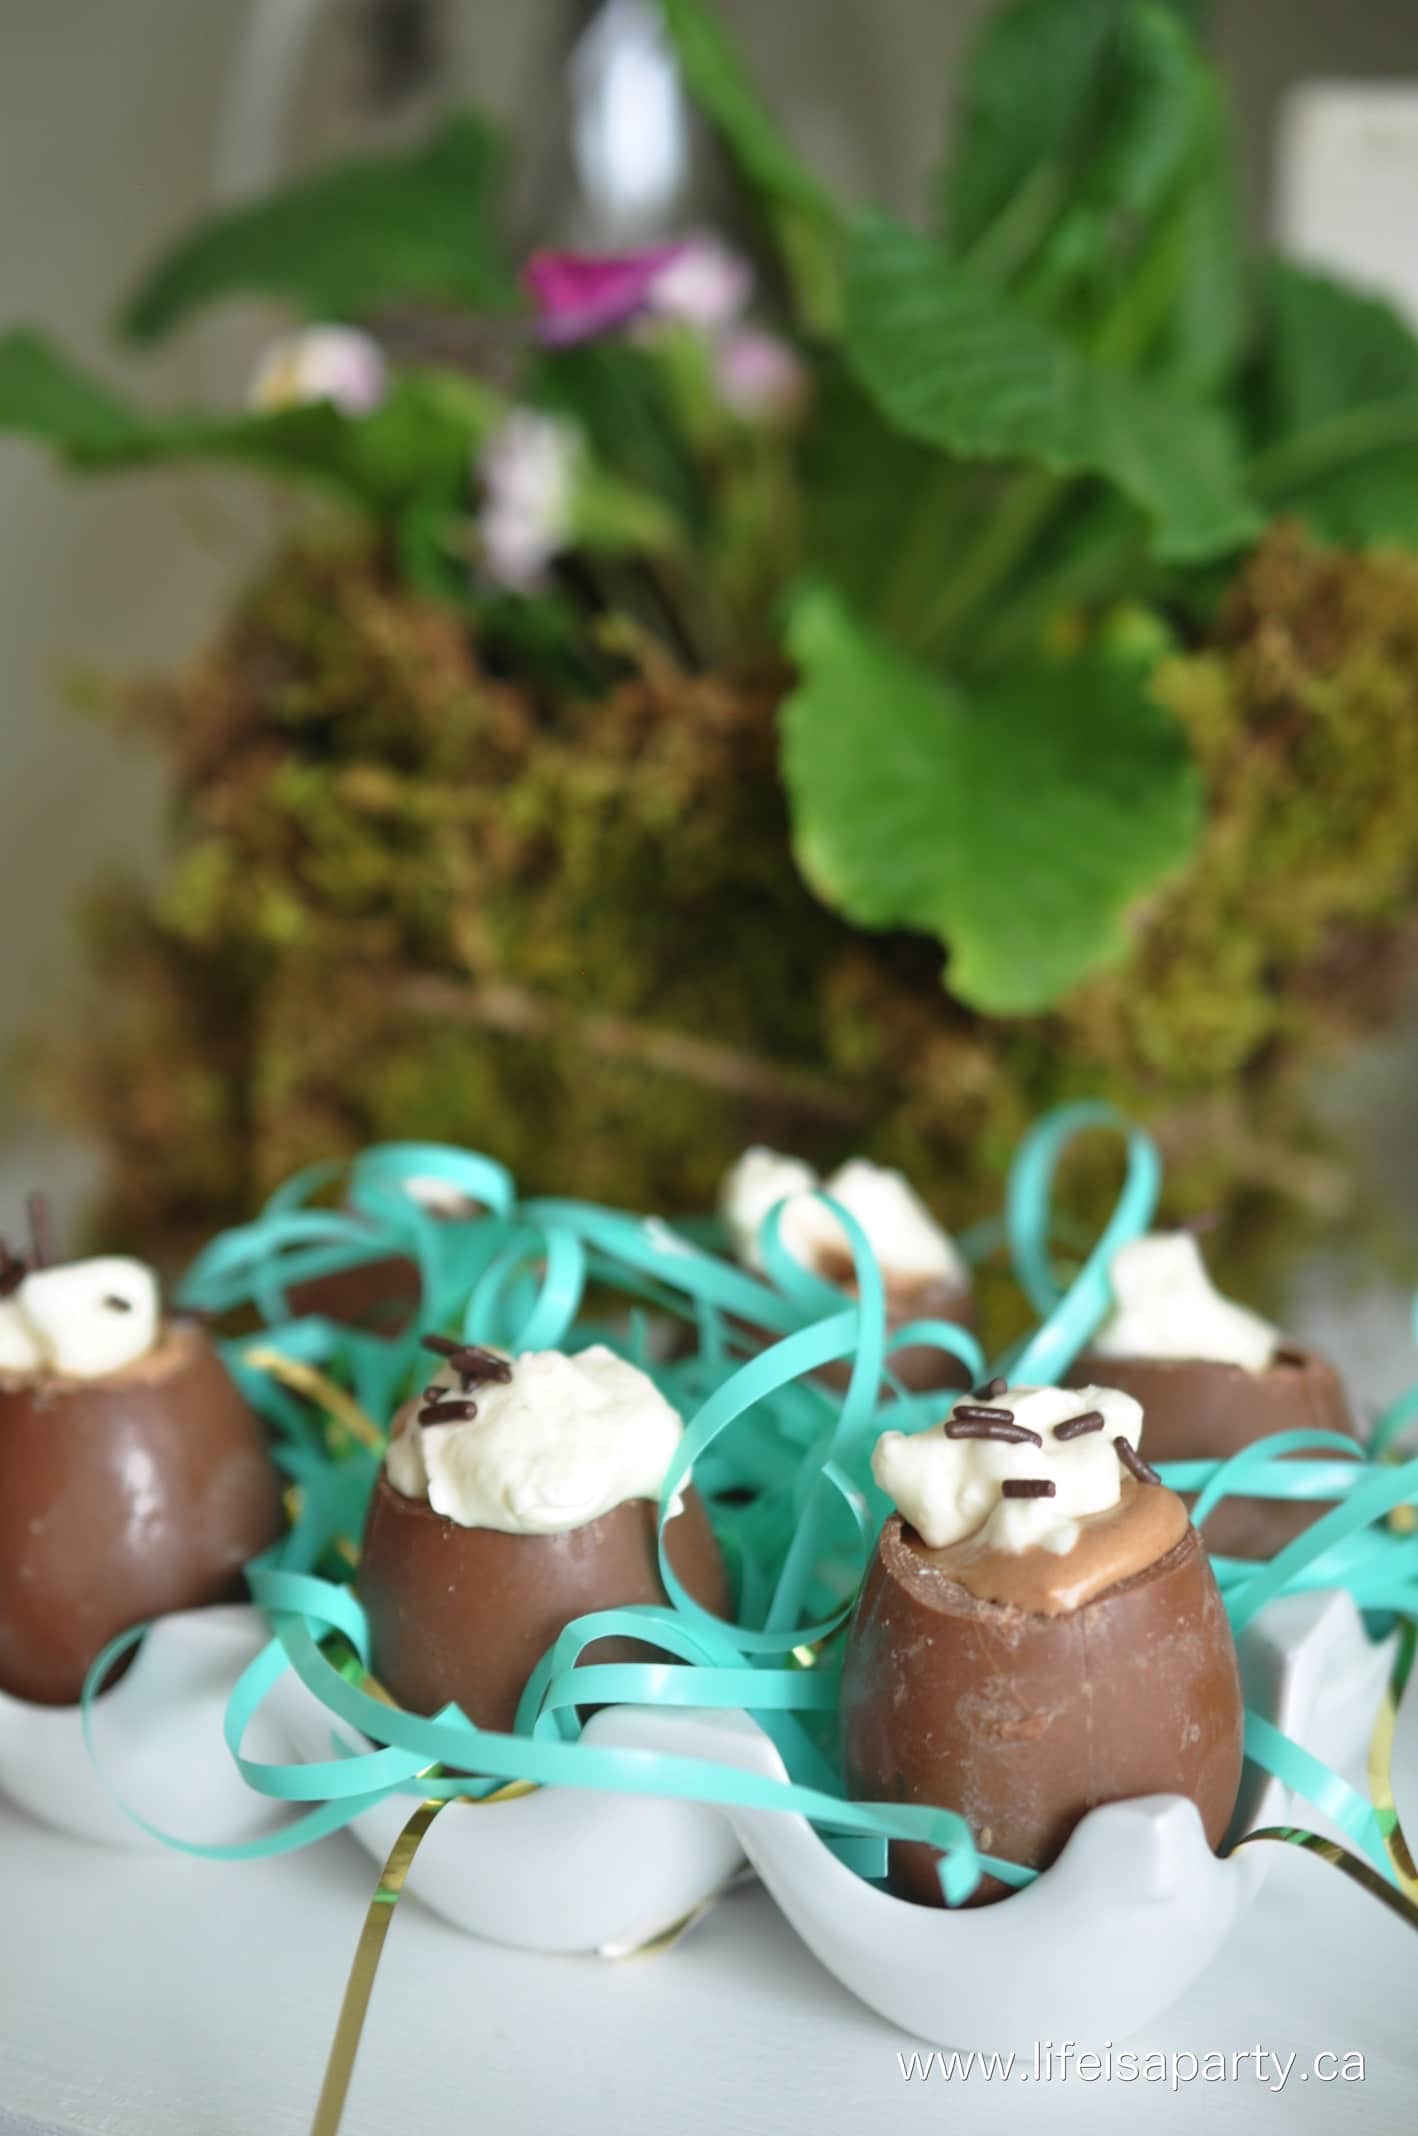
For our final special treat we made chocolate mousse Easter eggs, and they were so, so good.
It was a feast indeed, and we had such a nice time connecting with some dear old friends, and lingering at the table.

With hosting Easter Brunch, life really is a party!


 Also check out our