• Skip to primary navigation
  • Skip to main content
  • Skip to primary sidebar
Life is a Party
  • Recipe Index
  • Parties & Entertaining
  • Fall
  • Subscribe
  • Free Resource Library
menu icon
go to homepage
  • Recipe Index
  • Parties & Entertaining
  • Fall
  • Subscribe
  • Free Resource Library
subscribe
search icon
Homepage link
  • Recipe Index
  • Parties & Entertaining
  • Fall
  • Subscribe
  • Free Resource Library
×
Home

Felt Play Food Christmas Cookies

Felt Play Food Christmas Cookies

Dec 20, 2016 · 2 Comments

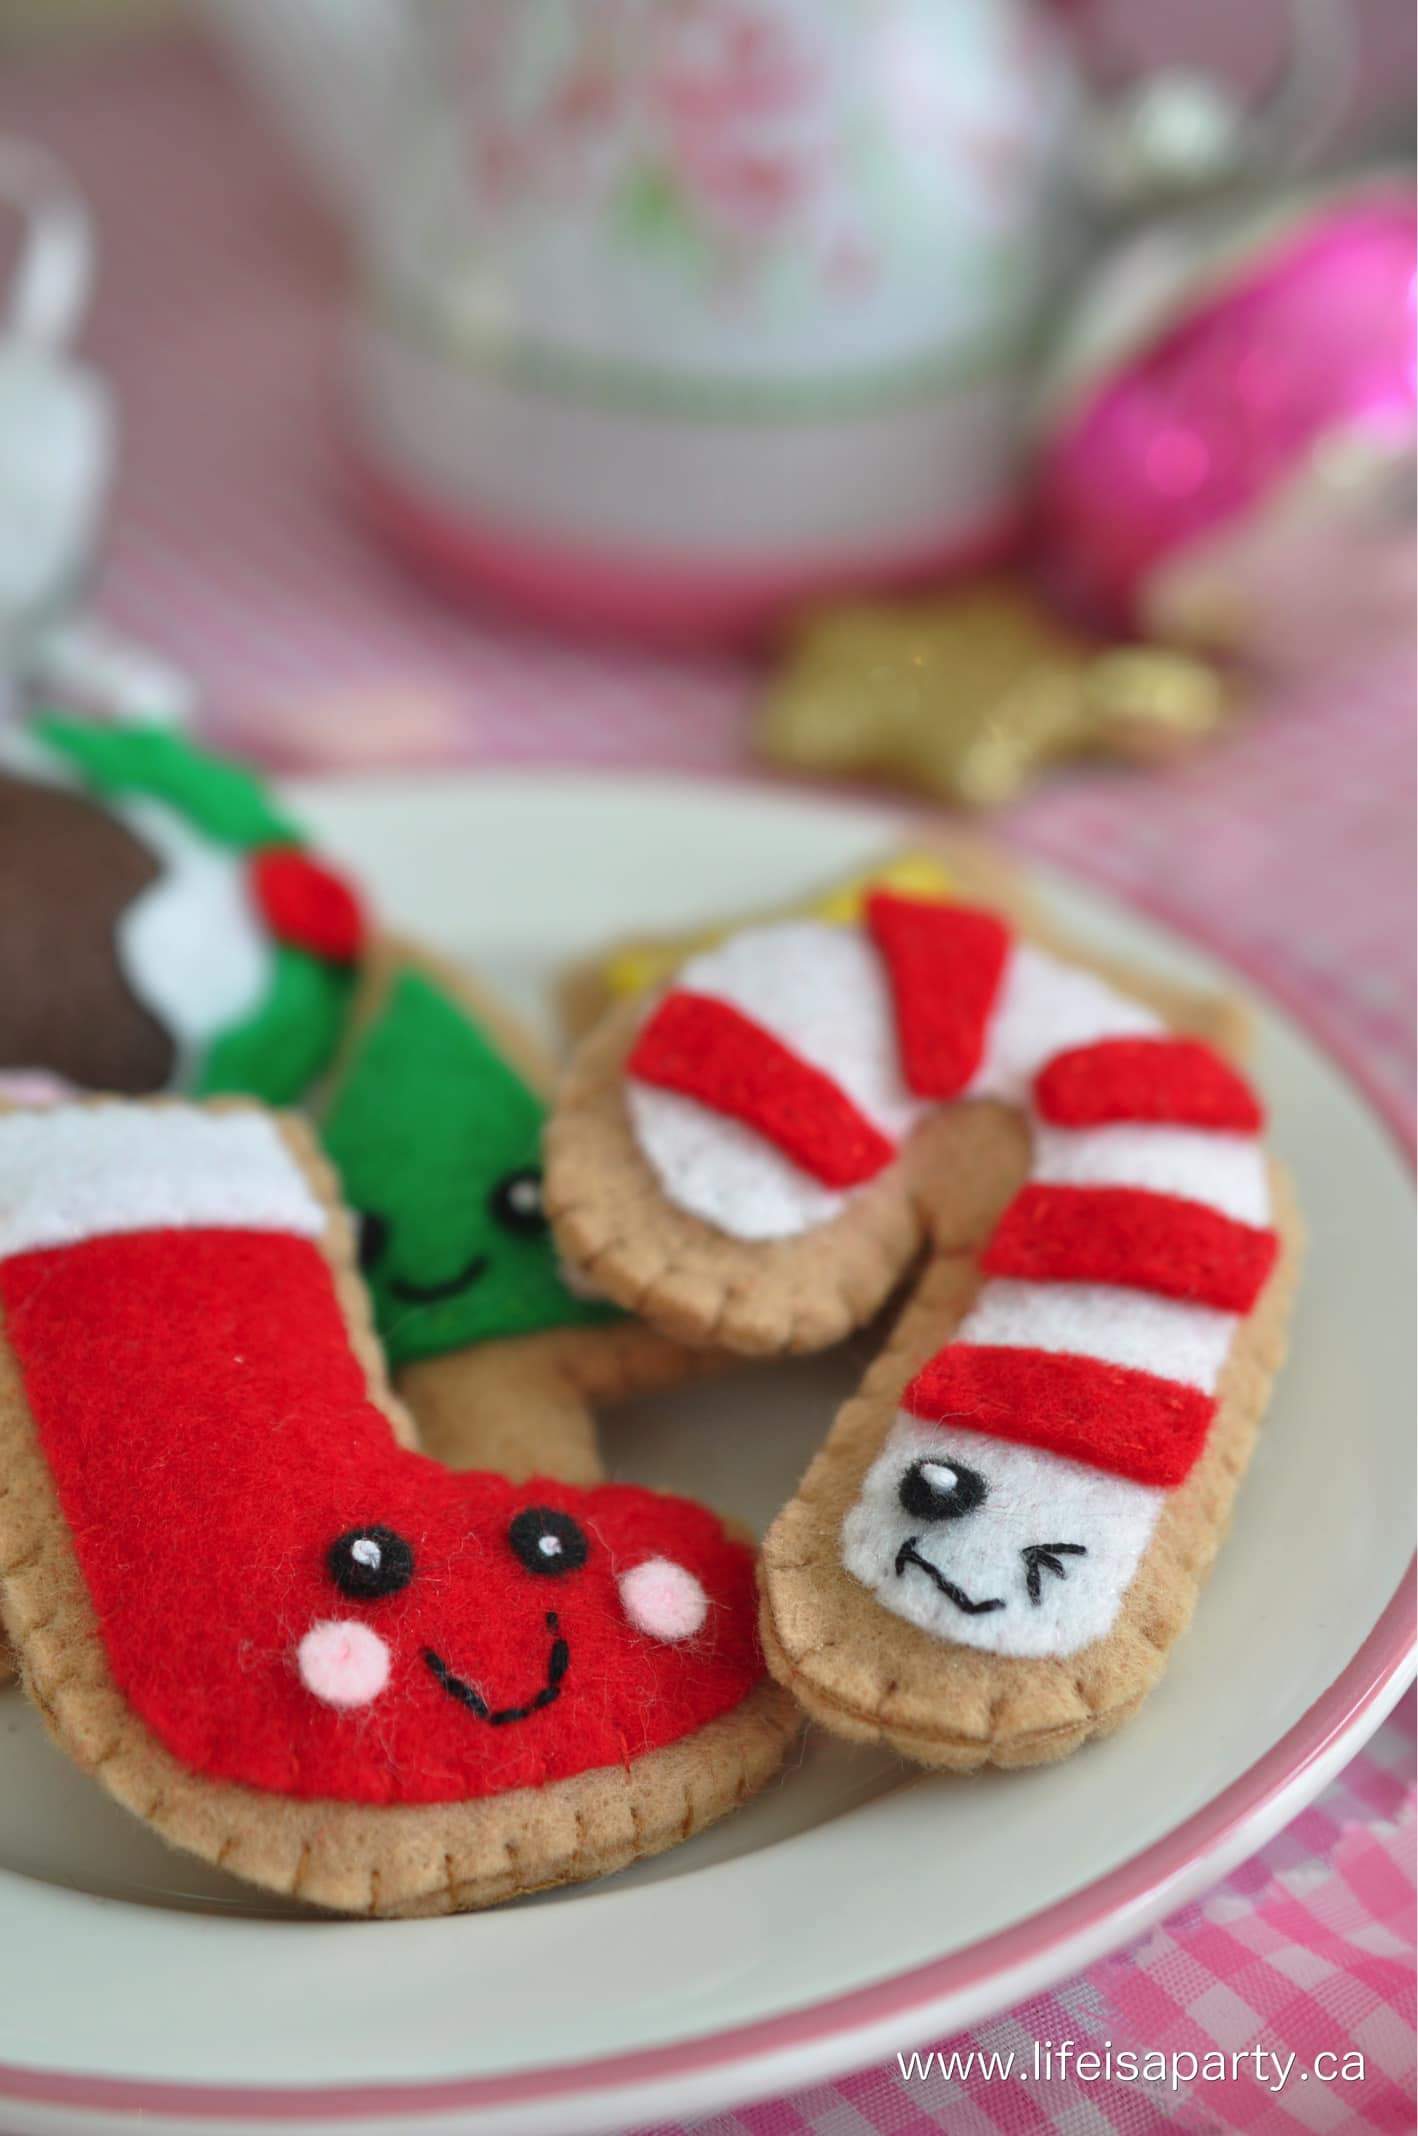
Felt Christmas cookie play food toys.

Felt Play Food Christmas Cookies: use cookie cutters to make patterns and embellish with beads and faces to make the cutest felt play food.

Felt Christmas cookie play food toys.
[feast_advanced_jump_to]

It's so fun to make handmade beautiful things, especially for Christmas.  These Felt Play Food Christmas Cookies will delight any children on your Christmas list this year.  

When my girls were little they loved playing with felt food, and now these are the perfect holiday gift for the little ones in my life.  They're very easy to make, and their little faces are sure to make them a hit with any shopkins fans in your life.

How to make felt Christmas cookies

Felt Play Food Christmas Cookie Materials:

  • assorted colors of felt
  • Christmas cookie cutters to use as patterns
  • thread
  • stuffing
  • beads to use as sprinkles
  • white and black embroidery cotton
diy felt food

How To Make Felt Play Food Christmas Cookies:

1.  Use Christmas cookie cutters to make a pattern for your felt cookies.

2.  Cut out two light brown felt shapes as the cookie front and back, and then colored "icing" pieces, slightly smaller than the cookie pieces.

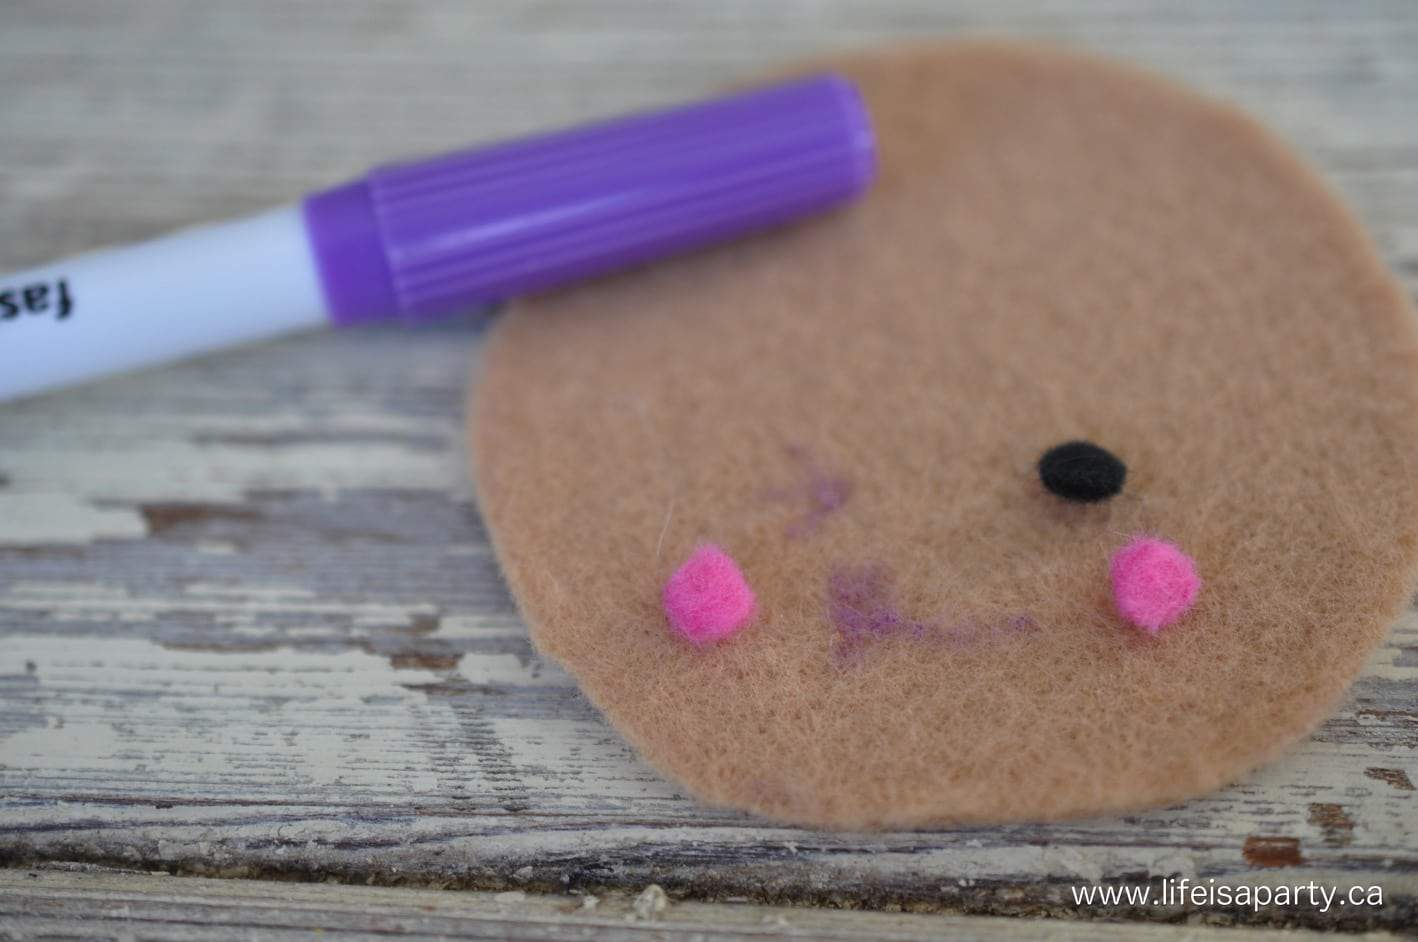
3.  Start the sewing with adding the face.  Cut two small black felt eyes, and pink felt cheeks.  Use the white embroidery cotton and stitch one french knot as the center for each eye.  Next is the mouth stitched with black embroidery cotton using the backstitch.  I found it really helpful to use a disappearing marker (you can find at the fabric store) to mark the mouth and get just the right expression before stitching.

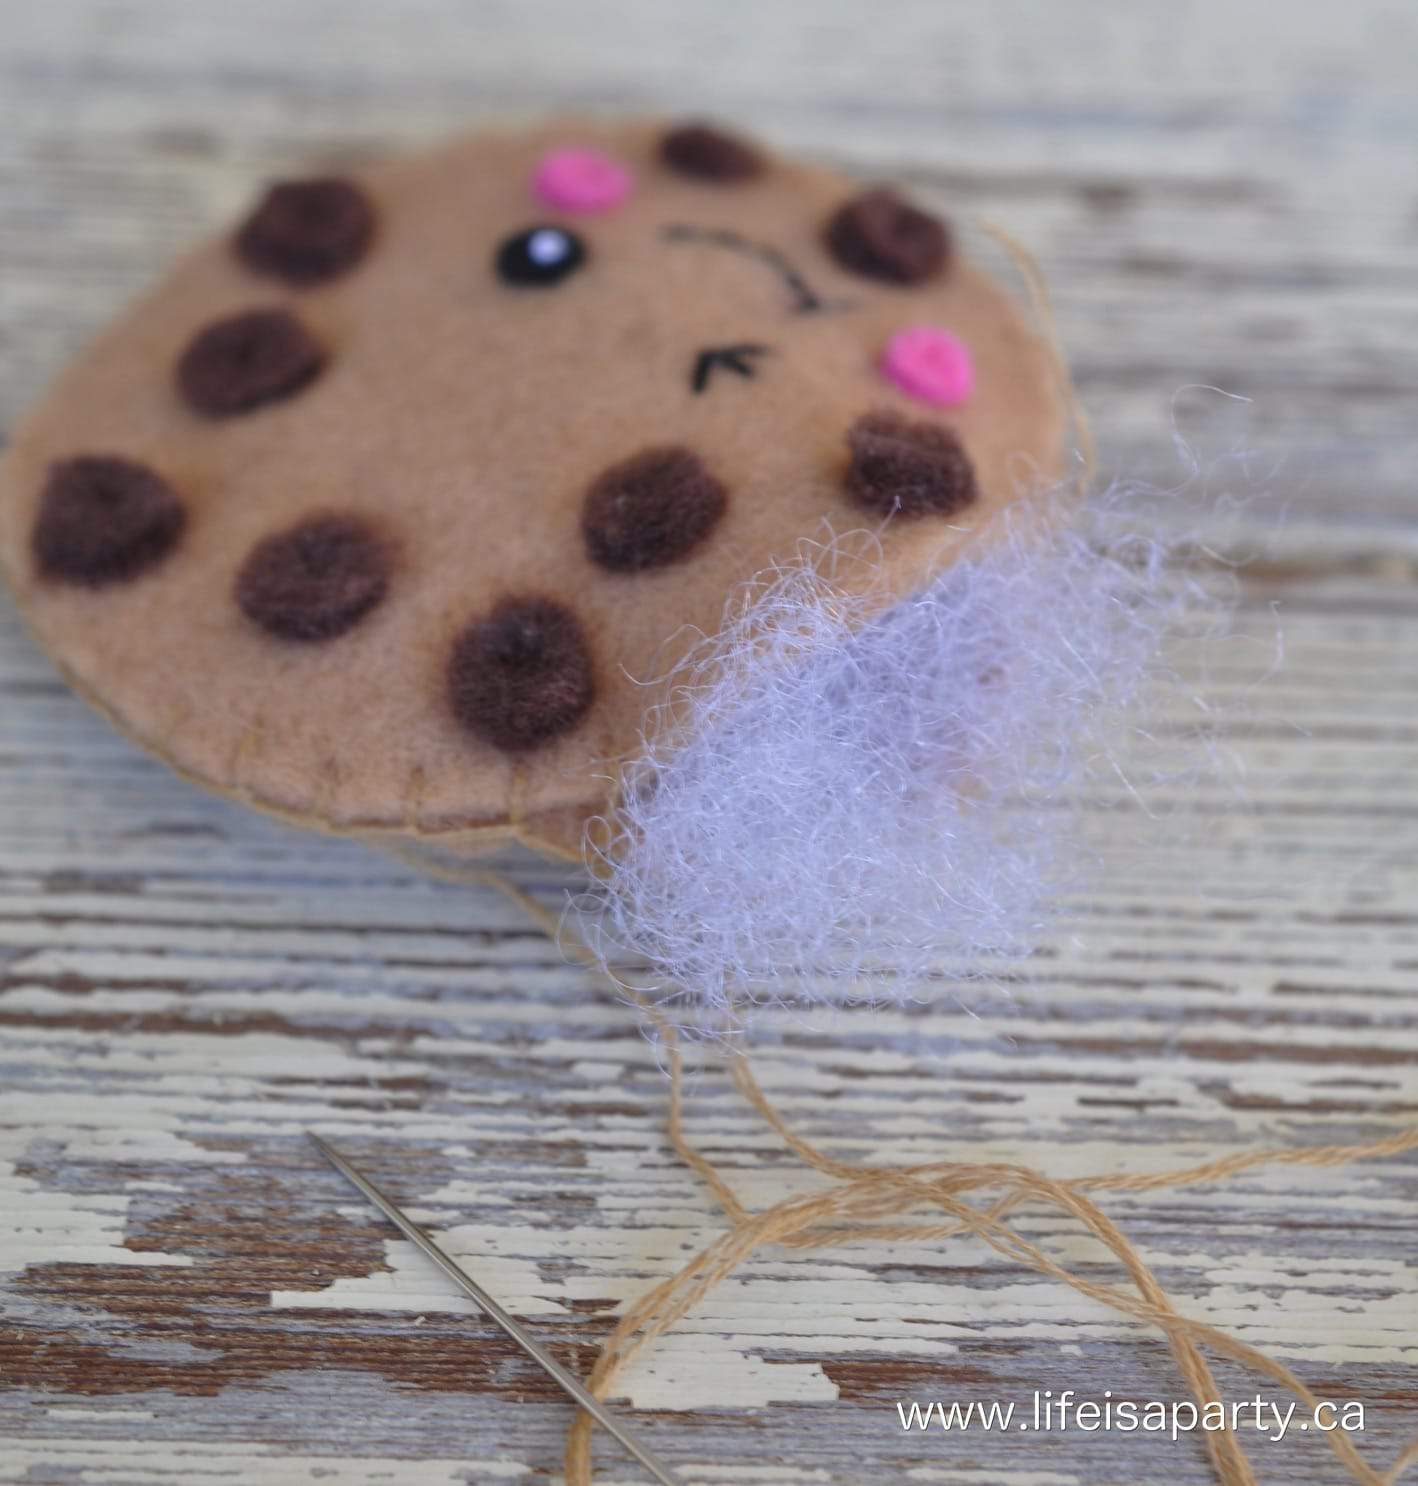
4.  Add any other embellishments, like bead "sprinkles".  Next, sew the "icing" to the cookie piece.  Then, sew the the cookie pieces together using the blanket stitch.  Leave a small hole for the stuffing.  Once it's lightly stuffed, stitch up the hole and your cookie is finished.

How to make felt play food

These are perfect for little ones to enjoy their own Christmas tea parties over the holidays.
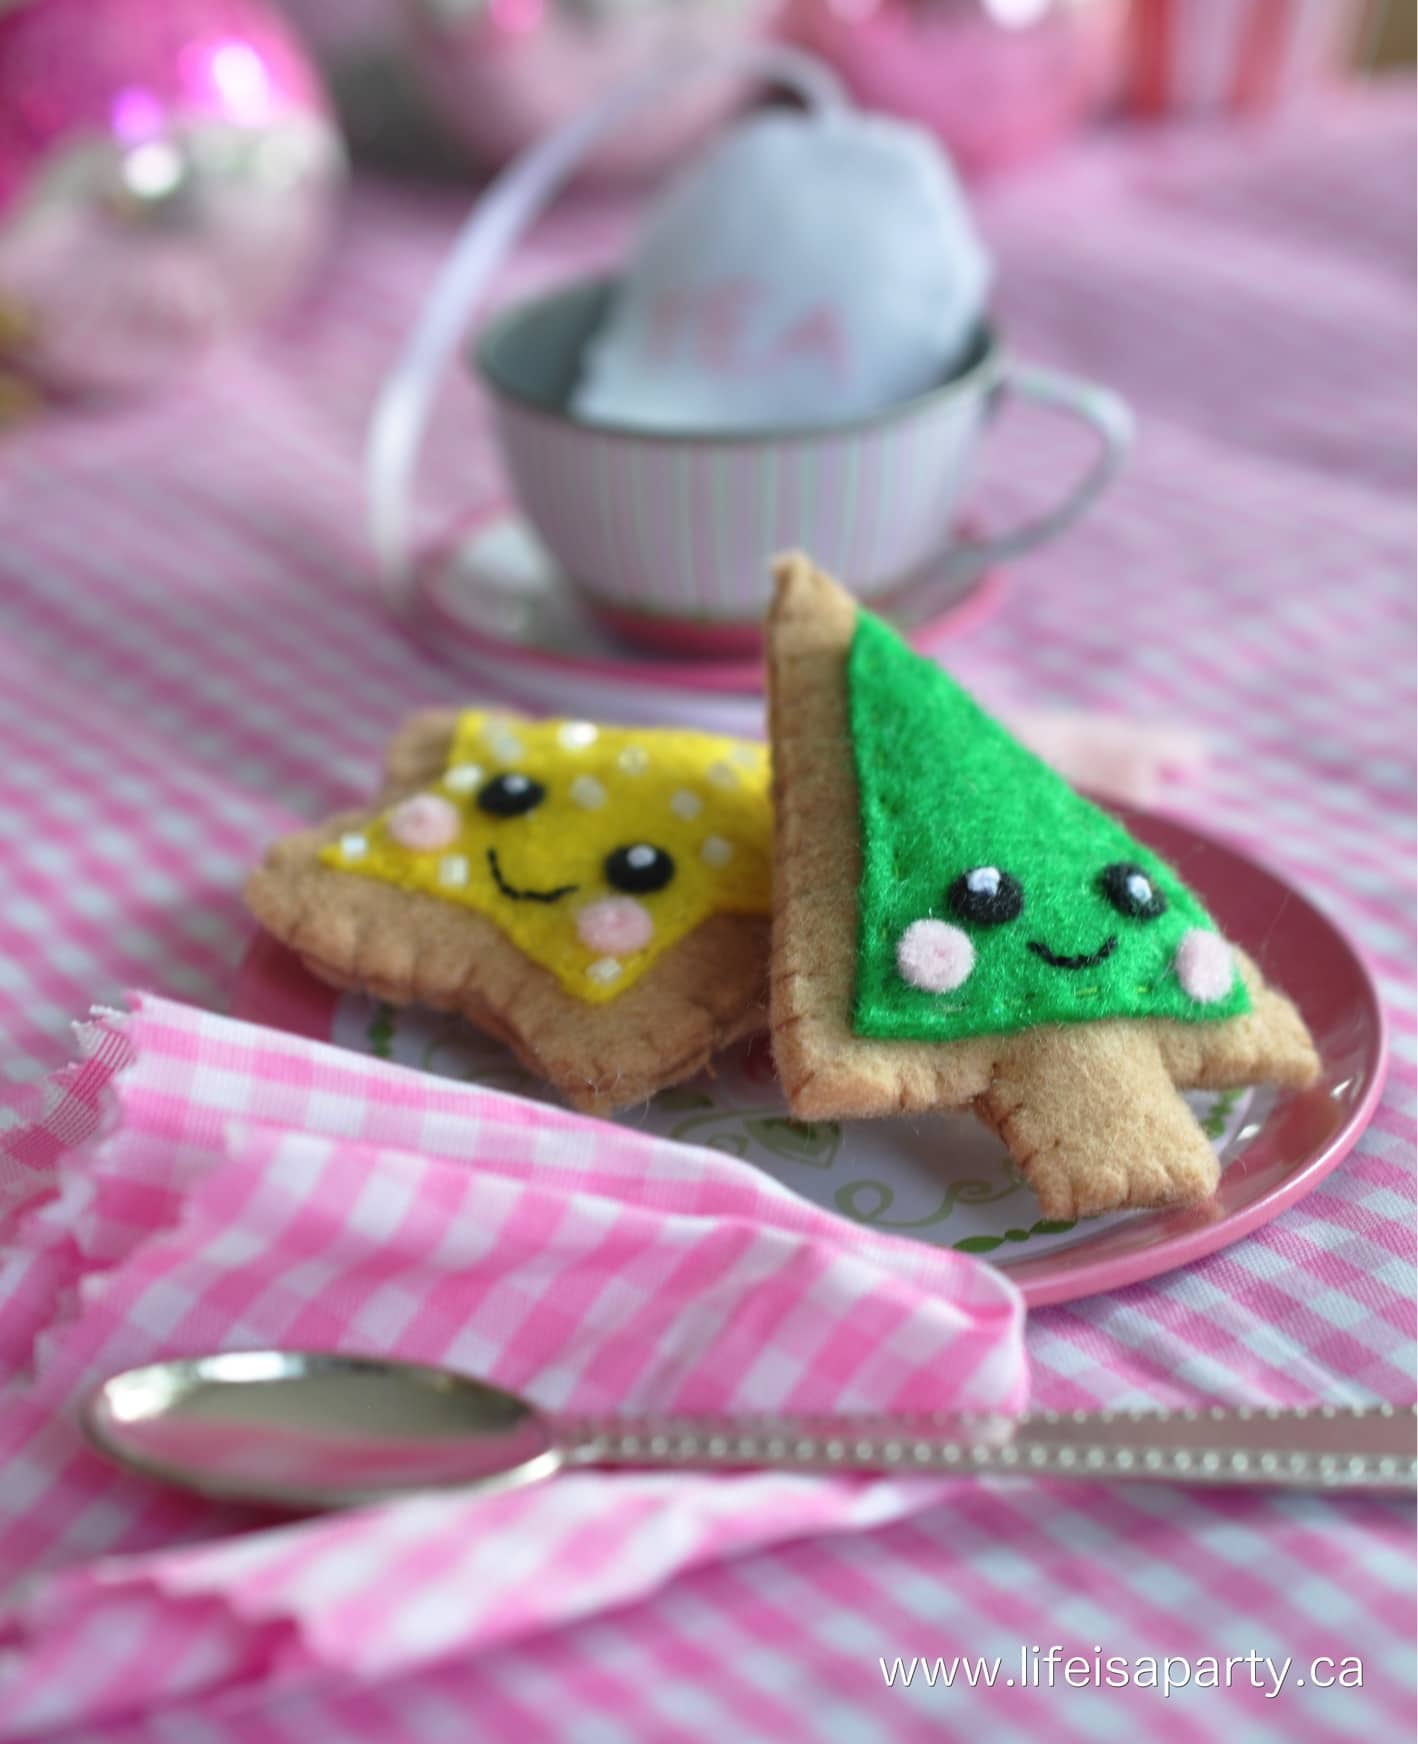
felt play food Christmas cookies

I made a few different cookies: a bell, a star, a Christmas tree, a candy cane, a stocking, and a little Christmas pudding.

felt play food pattern

The most fun is choosing all the different expressions on their cute little faces.

how to make diy felt food

These would make the perfect handmade gift for the holidays.

Happy sewing!  With homemade Felt Play Food Christmas Cookies, life really is a party!

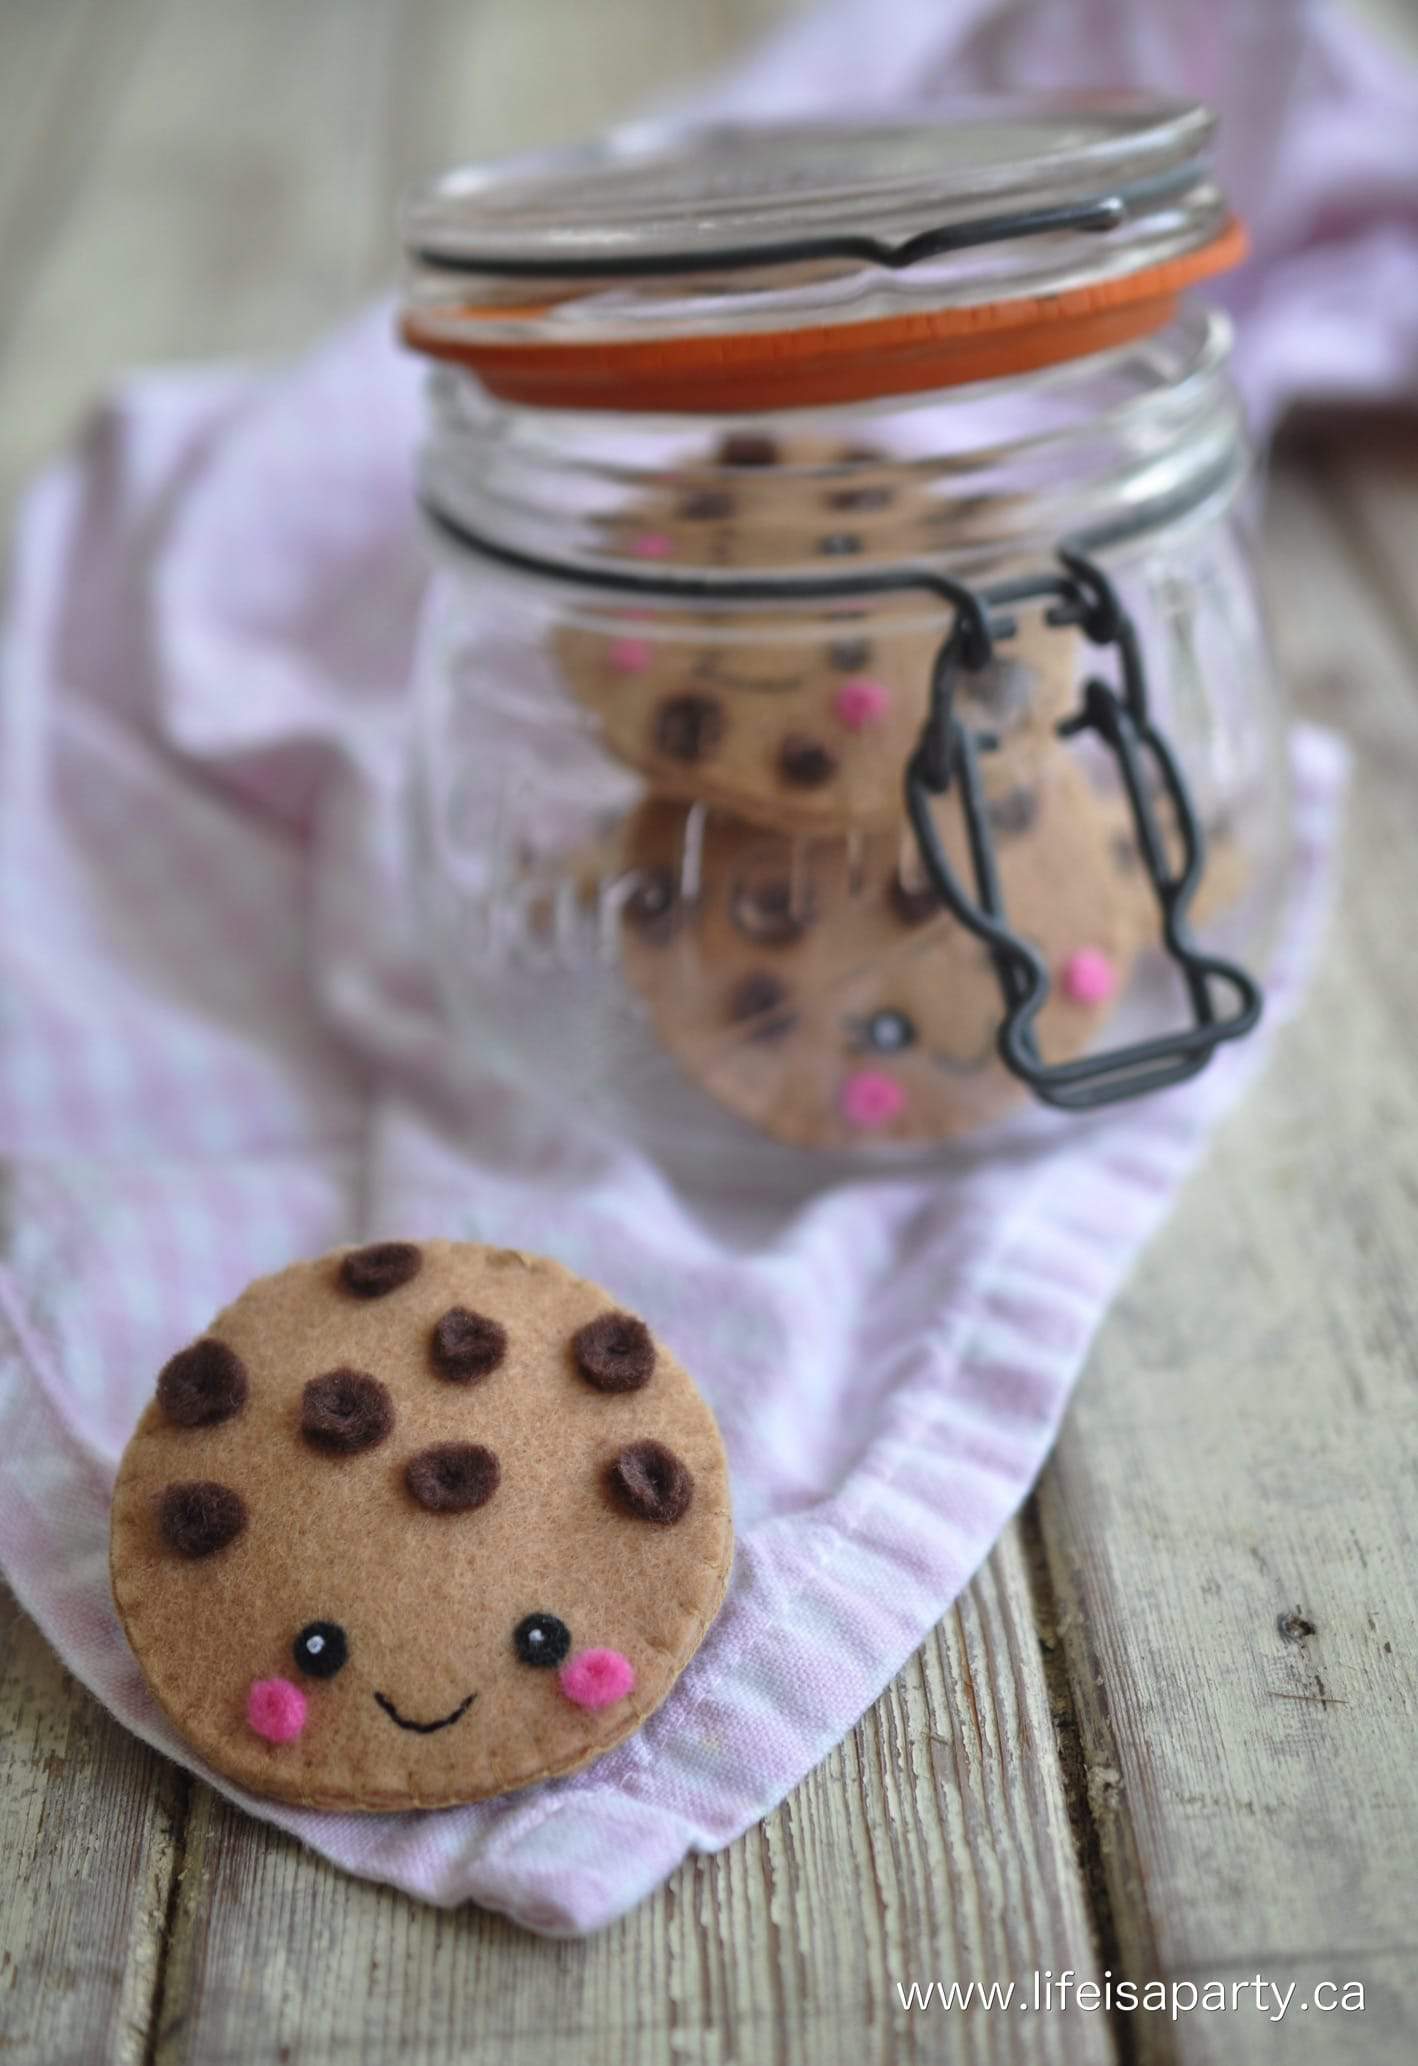
You might also like our Felt Chocolate Chip Cookies tutorial here.

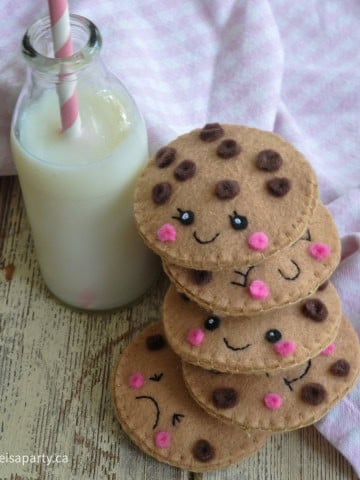
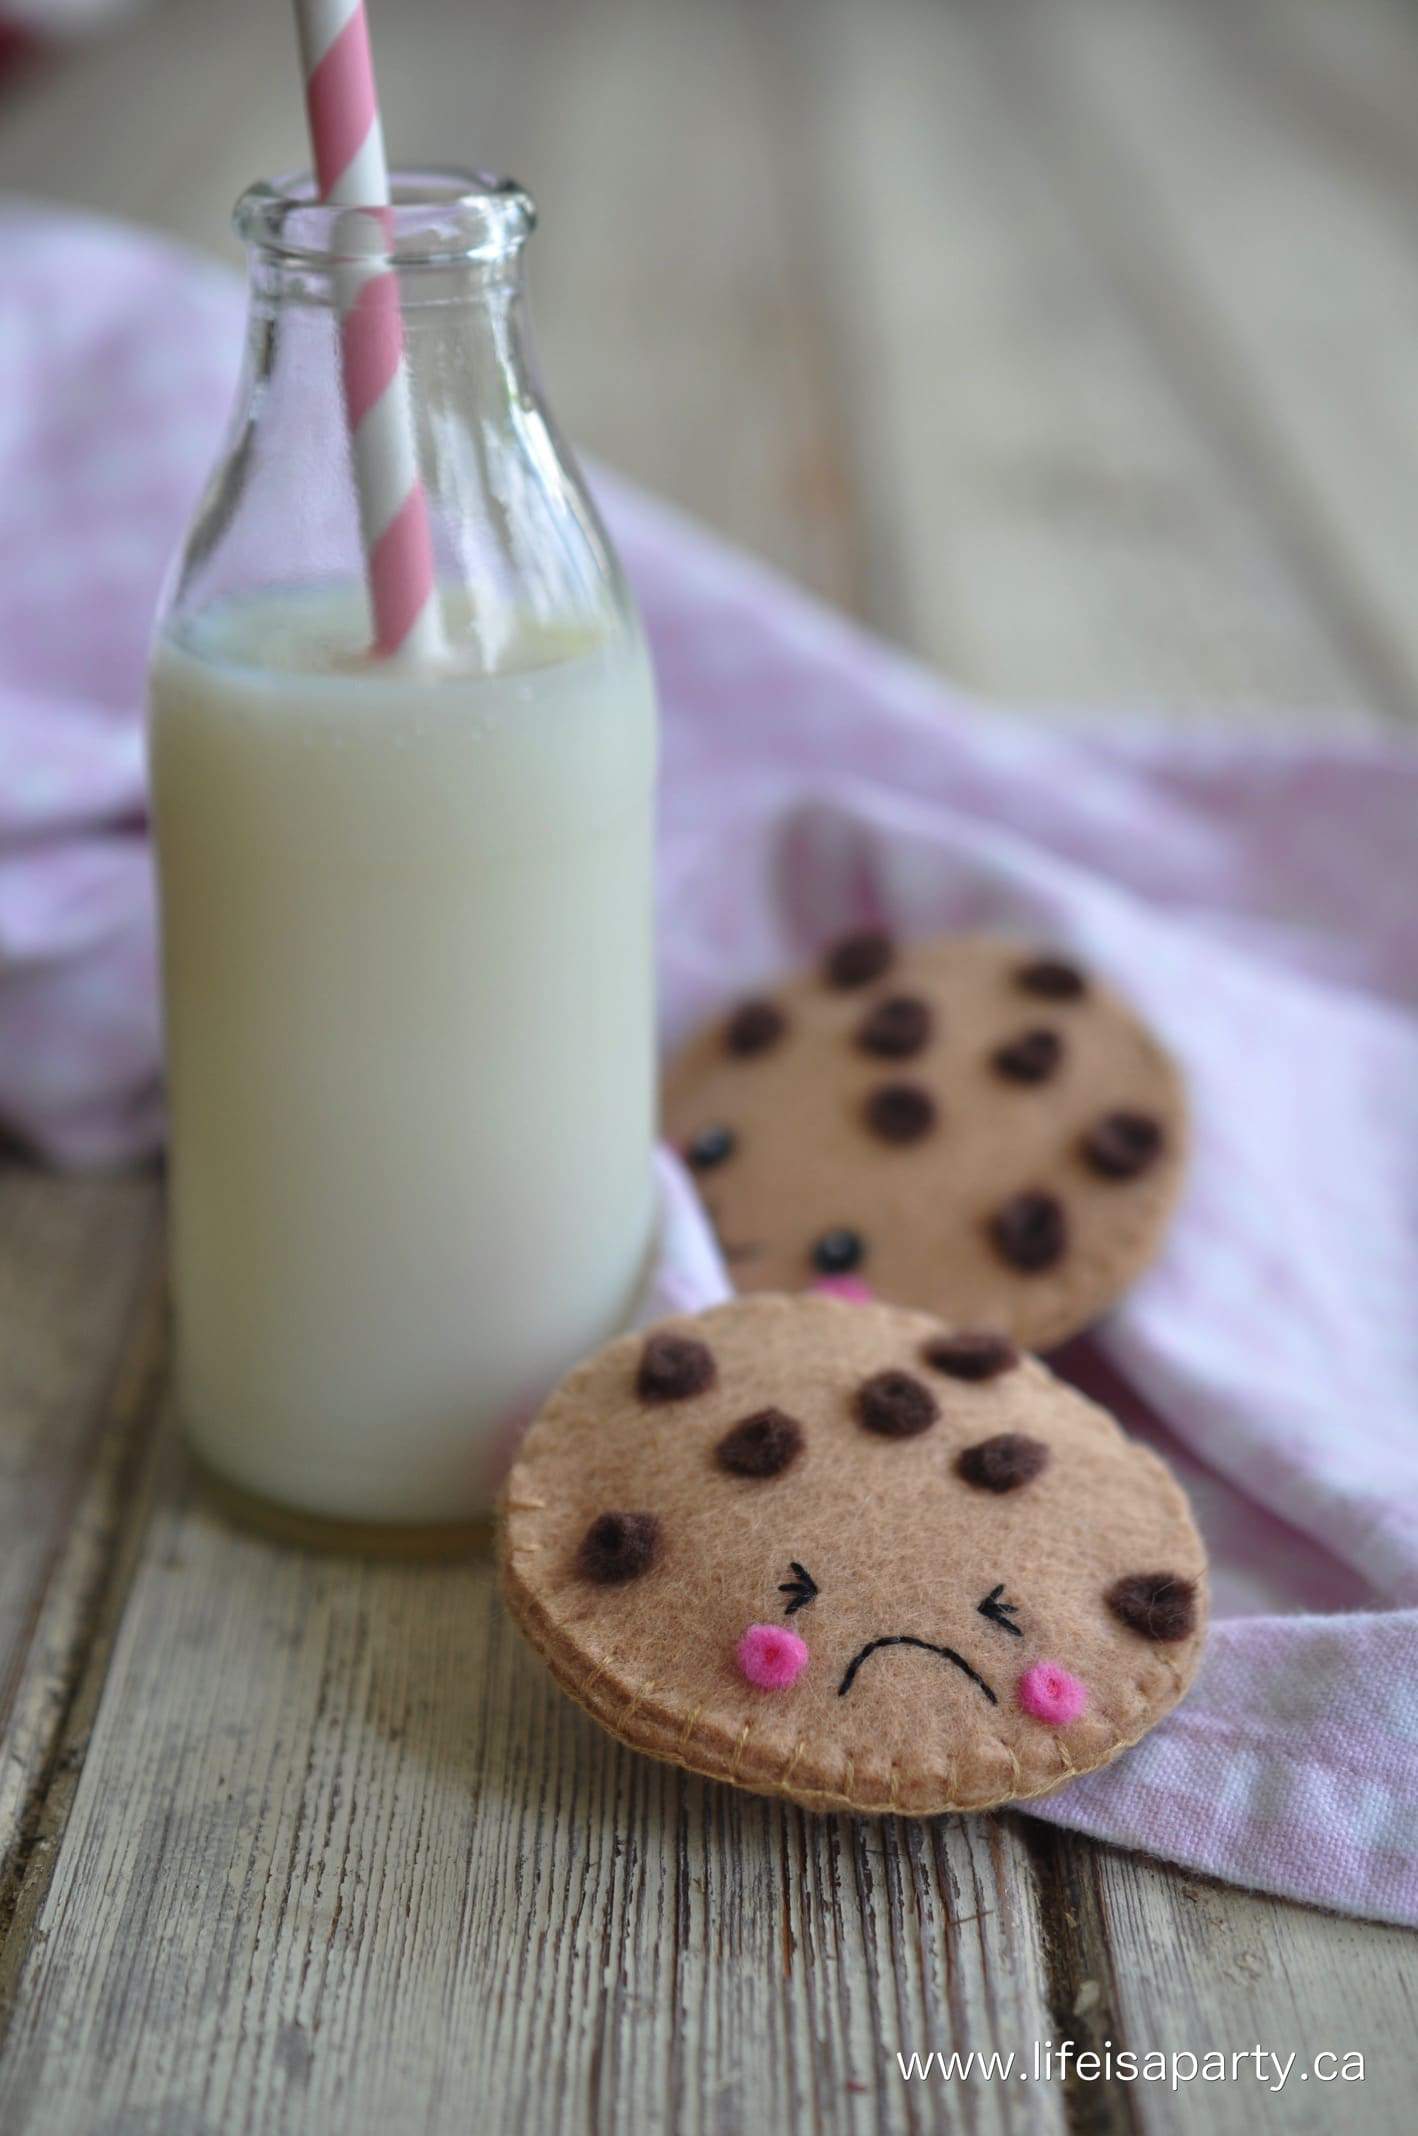
felt food cookies.

Also check out our Felt S'mores tutorial here.
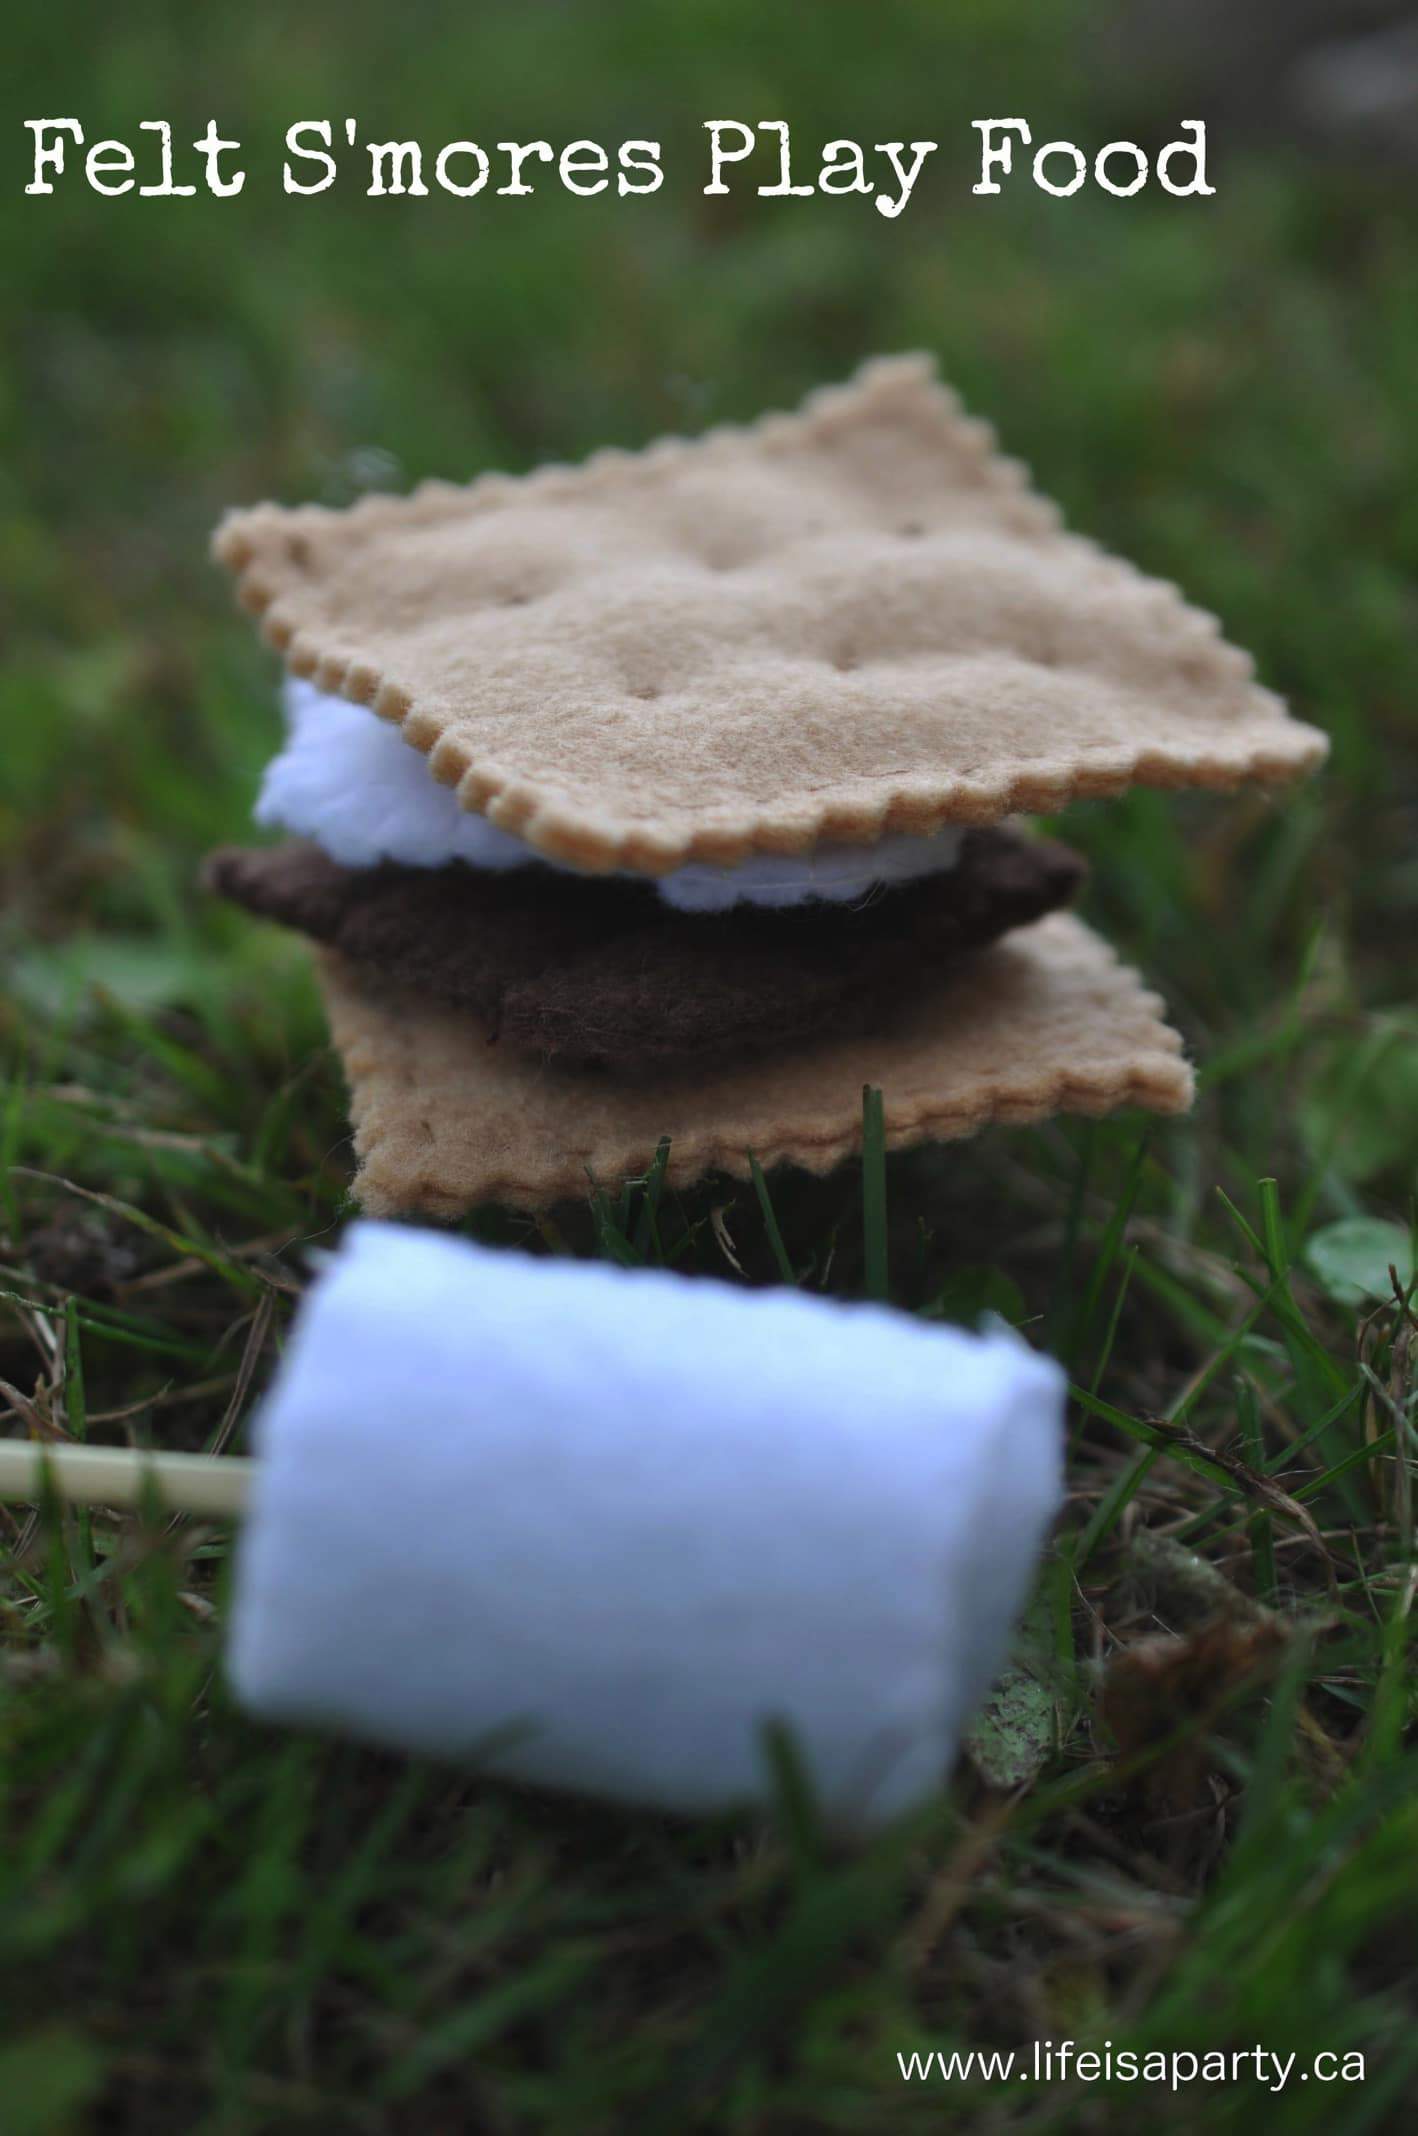
Felt Smores Play Food: these easy homemade toy DIY felt smores for children to use as play food are simple to put together and adorable for dramatic play.

You might also enjoy our Felt Mushrooms here.
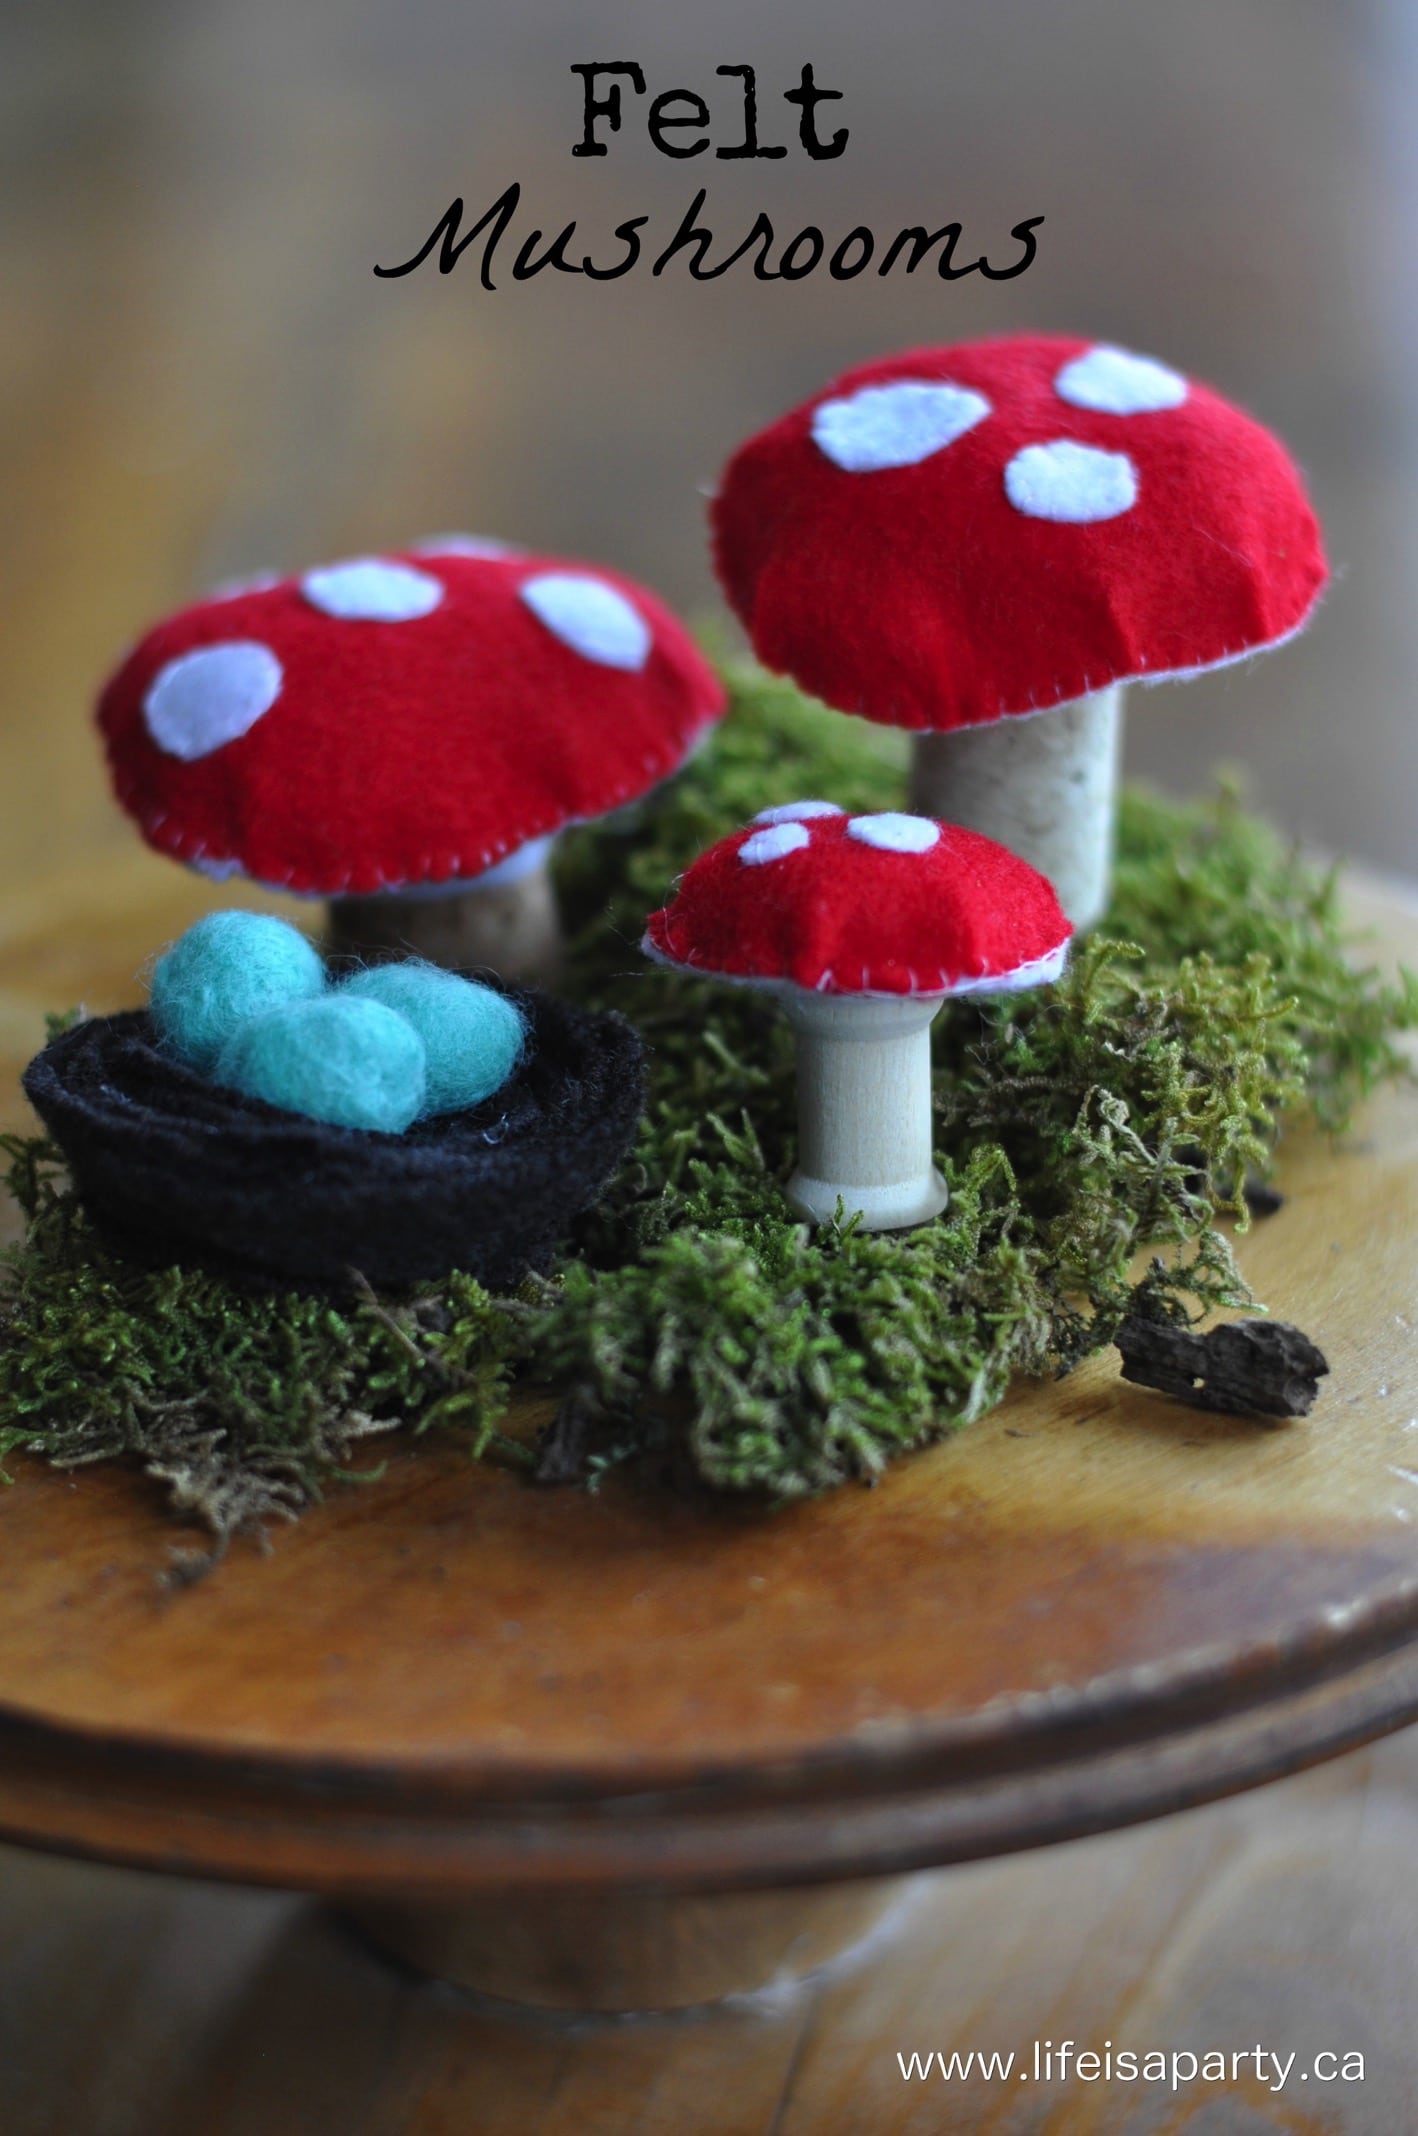
DIY Felt Mushrooms: easy to sew red and white polka dot mushrooms with felt, and cork and wooden spool stems. Perfect for your spring decor.

Homemade Caramel Corn Recipe

Dec 16, 2016 · Leave a Comment

Homemade caramel corn recipe.

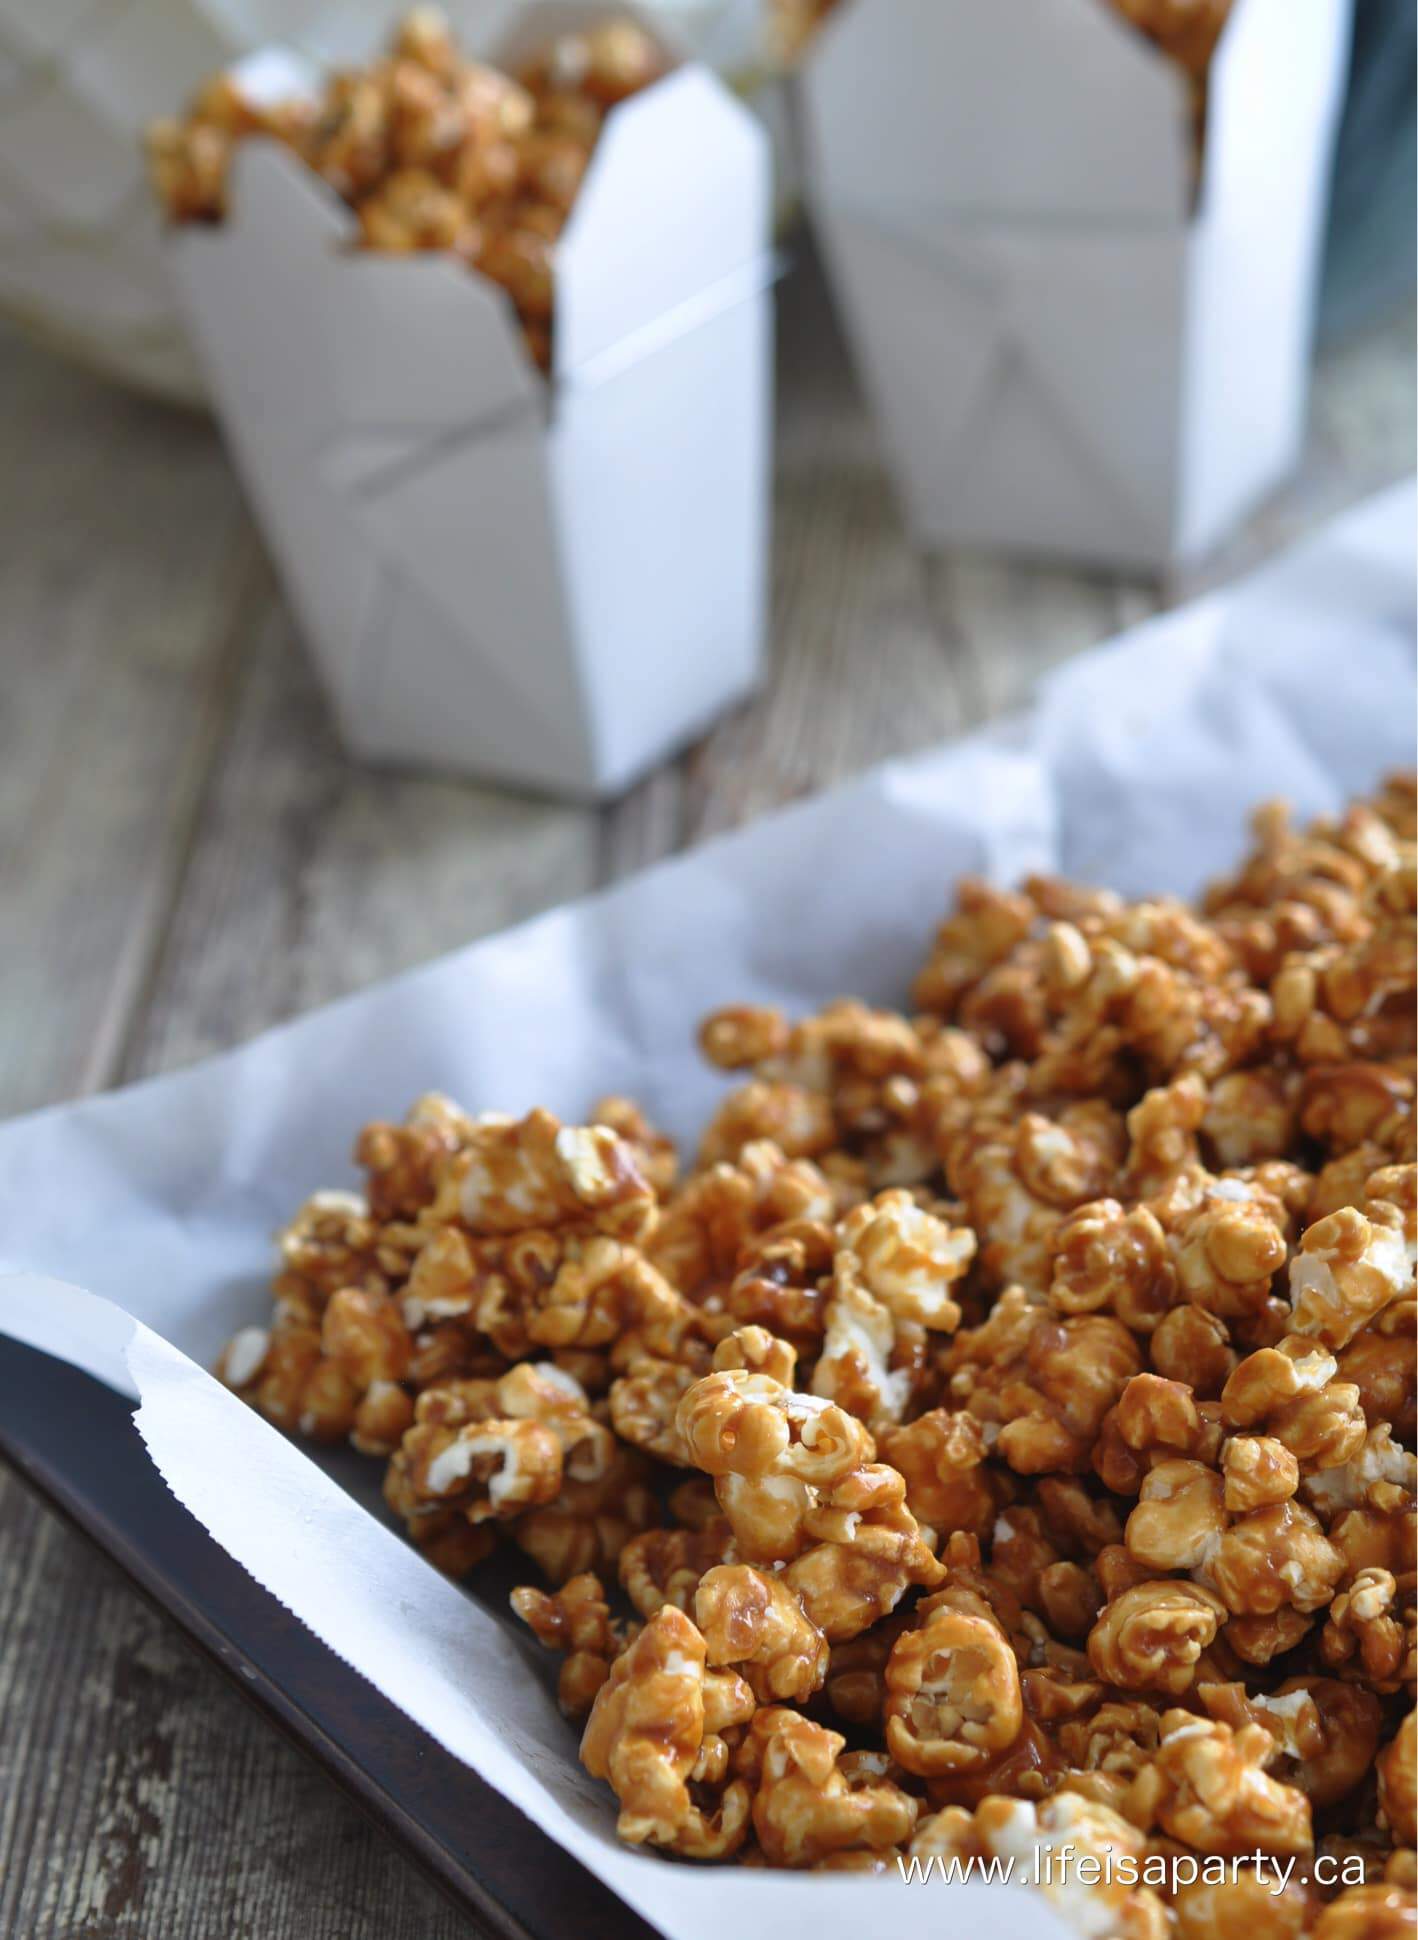
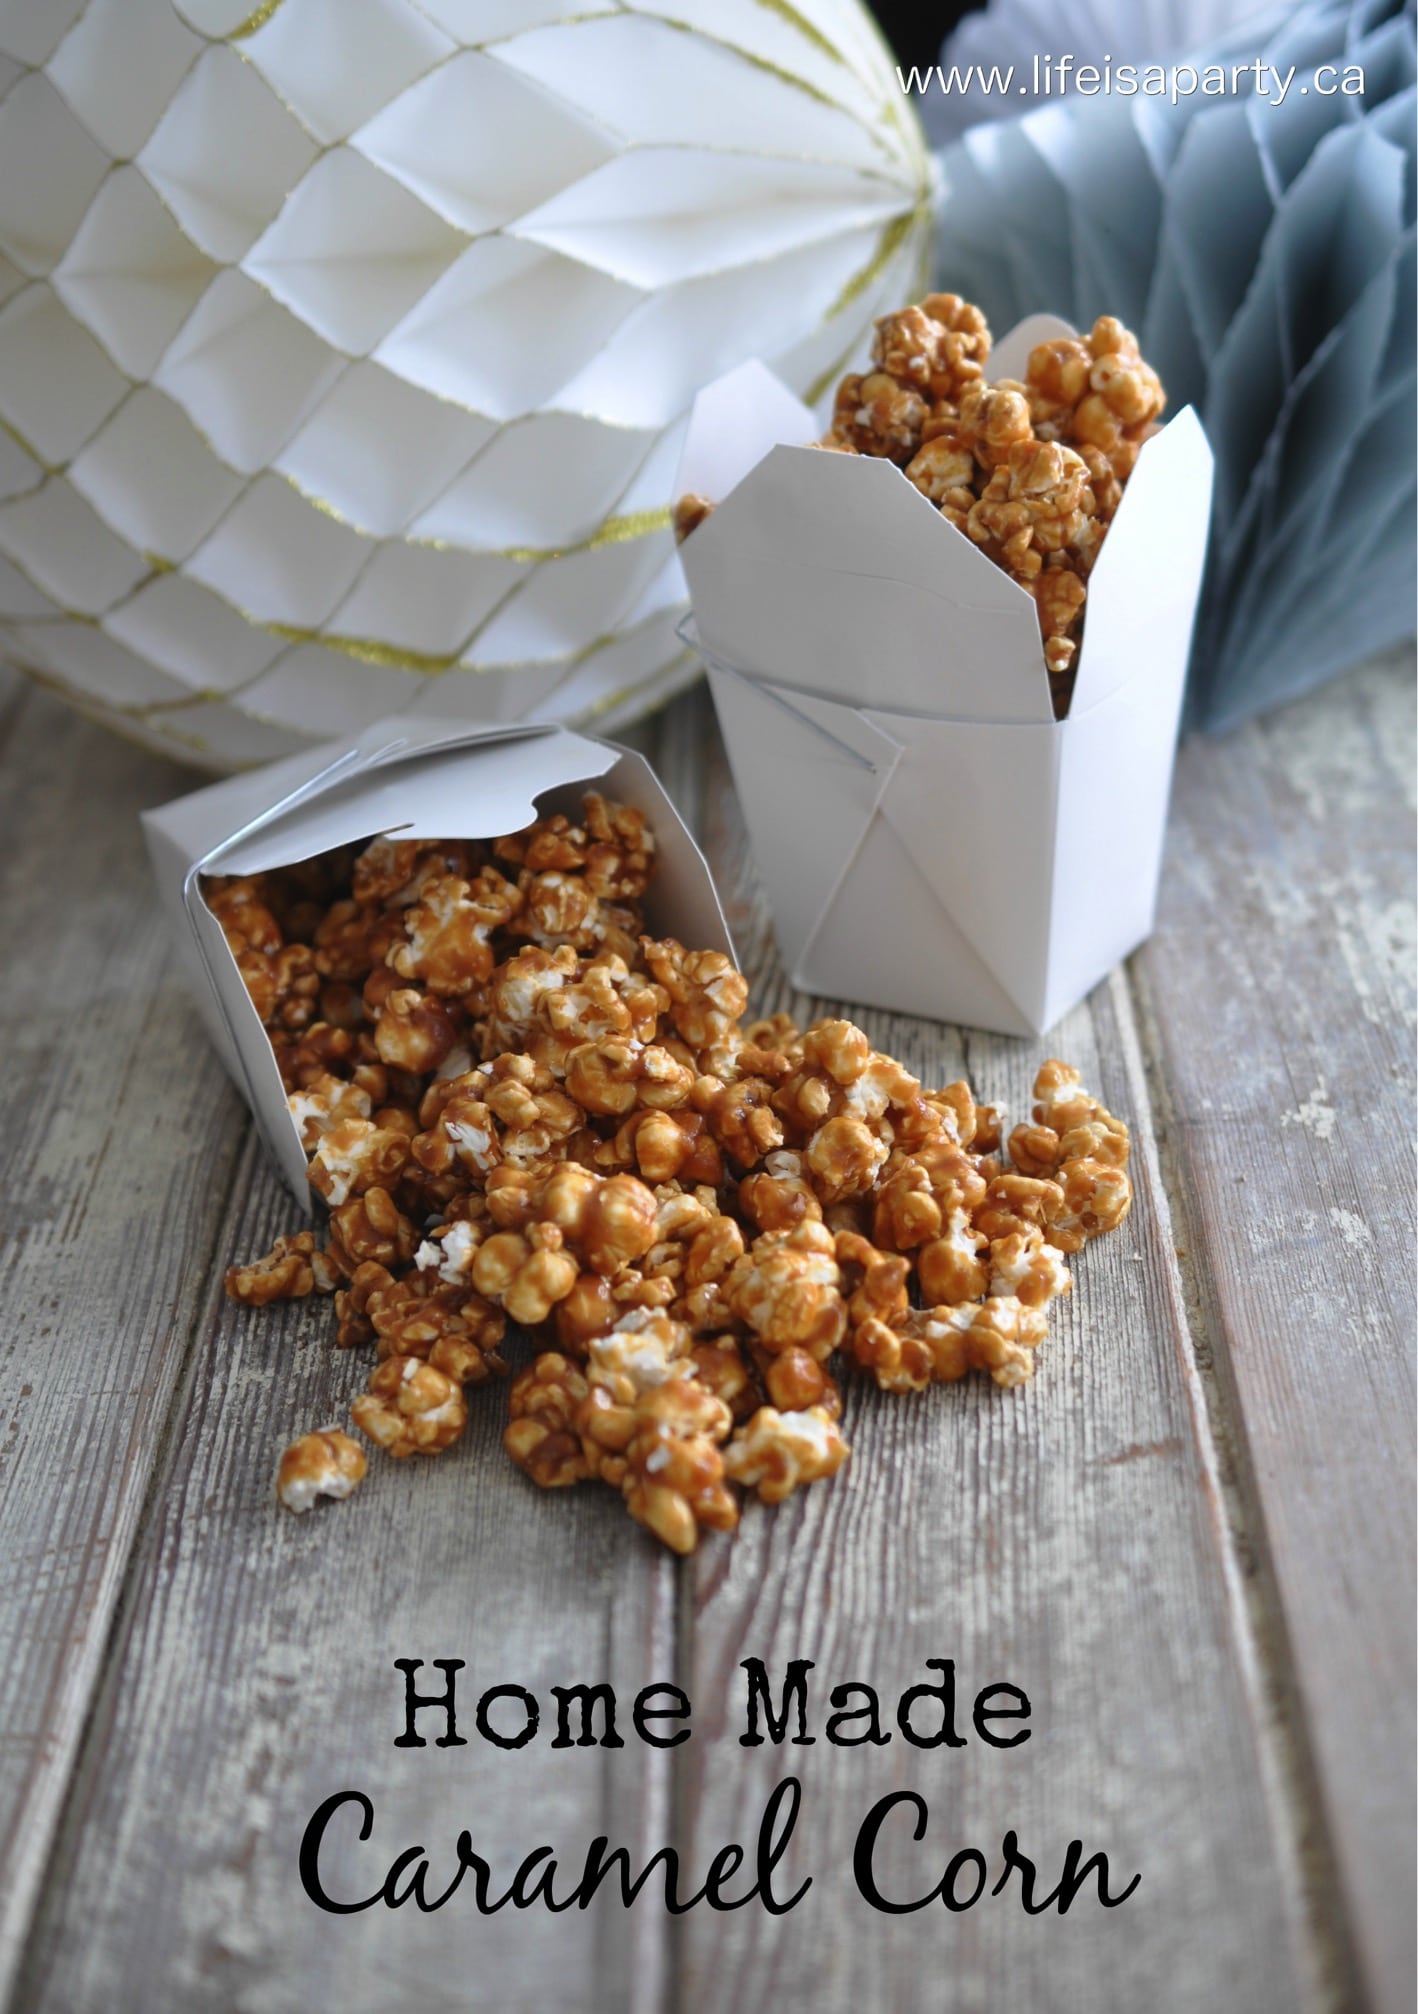
Homemade Caramel Corn Recipe: Easy make at home caramel corn, so good, better than store bought, perfect for gift giving.

Homemade caramel corn recipe.
[feast_advanced_jump_to]

It's the final day, Day Five of Christmas Treats Week.  And today we're making Homemade Caramel Corn. It's been so much fun making lots of sweet treats for the holidays.  And, my family and friends sure are enjoying eating them all. Check them all out at the bottom of this post.

Home Made Caramel Corn Recipe: Easy make at home caramel corn, so good, better than store bought, perfect for gift giving.

This caramel corn recipe is amazing.  Like I can't stop eating it amazing.  I mention to my friend Leanne long ago that I was looking for a caramel corn recipe.  She said she had one, and that people she'd given the caramel corn to in the past keep asking her and asking her to make it for them again.  Always a good sign.  And after making it myself I knew why they keep asking for it, it's so good.  This is sometimes called Amish caramel corn, and comes from an old Amish family recipe.  This Amish recipe uses simple ingredients.

Homemade Caramel Corn Recipe

One of my very favourite things to get at Disney World is the amazing Caramel Corn at Epcot, from the Werthers Bake Shop.  After I first made this caramel corn, I told my husband we don't have to go to Disney World anymore.   Then he looked sad, so I revised it to, we can satisfy our Disney World Caramel Corn cravings in between trips.  ;). If you're a fan of the Disney Werthers caramel corn, I know you'll love this recipe too.

How to make Disney World Caramel Corn at home.

This caramel corn is quite easy to make, it just takes a little time.  I promise it's worth it though.

Popcorn

We used our air popper to make our popcorn.  The measurement in the recipe is for unpopped kernels.  All of the popcorn kernels will not pop, but make sure to remove them.  You don't want to bite into a caramel covered unpopped kernel, as it would be very hard on your teeth.  I don't recommend using microwave popcorn for this, as it usually included salt and butter which we don't want for our caramel corn recipe.

how to make Caramel Corn
Disney World Epcot Caramel Corn

Optional:

This caramel corn is also be great with some nuts stirred in with the popcorn.  Add a cup of peanuts to the popcorn and caramel mixture before baking if you wish.  We like using roasted peanuts, but you can alter the nuts, or try mixed nuts if you wish, or slivered almonds, or pecans.  Salted nuts add that great salty sweet combo, that many people love and is something a little different.

Caramel Corn Recipe

Gift Giving

This sweet treat is perfect for gift giving.  I've packaged it up into cute little take-out boxes, it would also be great in cello bags.  It's a great recipe with no artificial flavors, made with simple ingredients you probably have in your pantry and fridge.  It has a great depth of flavor and is buttery and rich. We love to make this around the holiday season.  It's become one of our family traditions to bring it to holiday parties and family gatherings.  Anyone with a sweet tooth will love it.  It's a perfect hostess gift.  It's also great around Halloween.  It makes a great little party favor packaged in cute containers.  Really, this is a lovely homemade gift anytime of year.

Easy Caramel Corn Recipe

Be sure to store it in an airtight container.  But, it probably won't last too long.  It tends to be a little bit addictive once you start eating it.

Recipe

Homemade caramel corn recipe.

Homemade Caramel Corn Recipe

Sweet and crispy caramel corn.
No ratings yet
Print Pin Rate
Course: Candy, Desserts
Cuisine: American
Prep Time: 15 minutes minutes
Cook Time: 1 hour hour 15 minutes minutes
Total Time: 1 hour hour 30 minutes minutes
Servings: 24
Calories: 148kcal
Author: Dannyelle Nicolle-Ramjist

Ingredients

  • 1 cup butter
  • 2 cups brown sugar
  • ½ cup corn syrup
  • 1 teaspoon salt
  • ½ teaspoon baking soda
  • 1 teaspoon vanilla extract
  • 1 cup unpopped popcorn kernels -popped

Instructions

  • Start by popping your popcorn, and removing any unpopped kernels. Set the popped popcorn aside.
  • In a large pot, melt your butter over a high heat and stir in the sugar, corn syrup and salt.
  • Bring the mixture to a boil, stirring constantly, and boil for 5 min. without stirring.
  • Take off the heat and stir in the vanilla and baking soda. Take care, it will foam up when the baking soda is added.
  • Add the popcorn to the caramel sauce and stir until the popcorn is completely covered.
  • Pour mixture onto a baking sheet lined with parchment paper, and sprayed with non-stick cooking spray.
  • Bake at 250 for 75 min. stirring every 15 min.
  • Continue to stir and break up the caramel popcorn clusters as it cools after baking for the best results, so that it doesn't stick together as it cools.
  • Store in an airtight container at room temperature.

Nutrition

Serving: 1g | Calories: 148kcal | Carbohydrates: 21g | Fat: 8g | Saturated Fat: 5g | Polyunsaturated Fat: 2g | Cholesterol: 20mg | Sodium: 195mg | Sugar: 20g
Tried this Recipe? Tag me Today!Mention @LifeisaParty or tag #lifeisaparty!
Home Made Caramel Corn Recipe gift idea

With this Homemade Caramel Corn, life really is a party!

More Homemade Candy Inspiration

Check out all these other posts from our Christmas Treat Week:

Pecan Butter Crunch recipe here.

Creamy Caramels and Chocolate Salted Caramels recipe here.

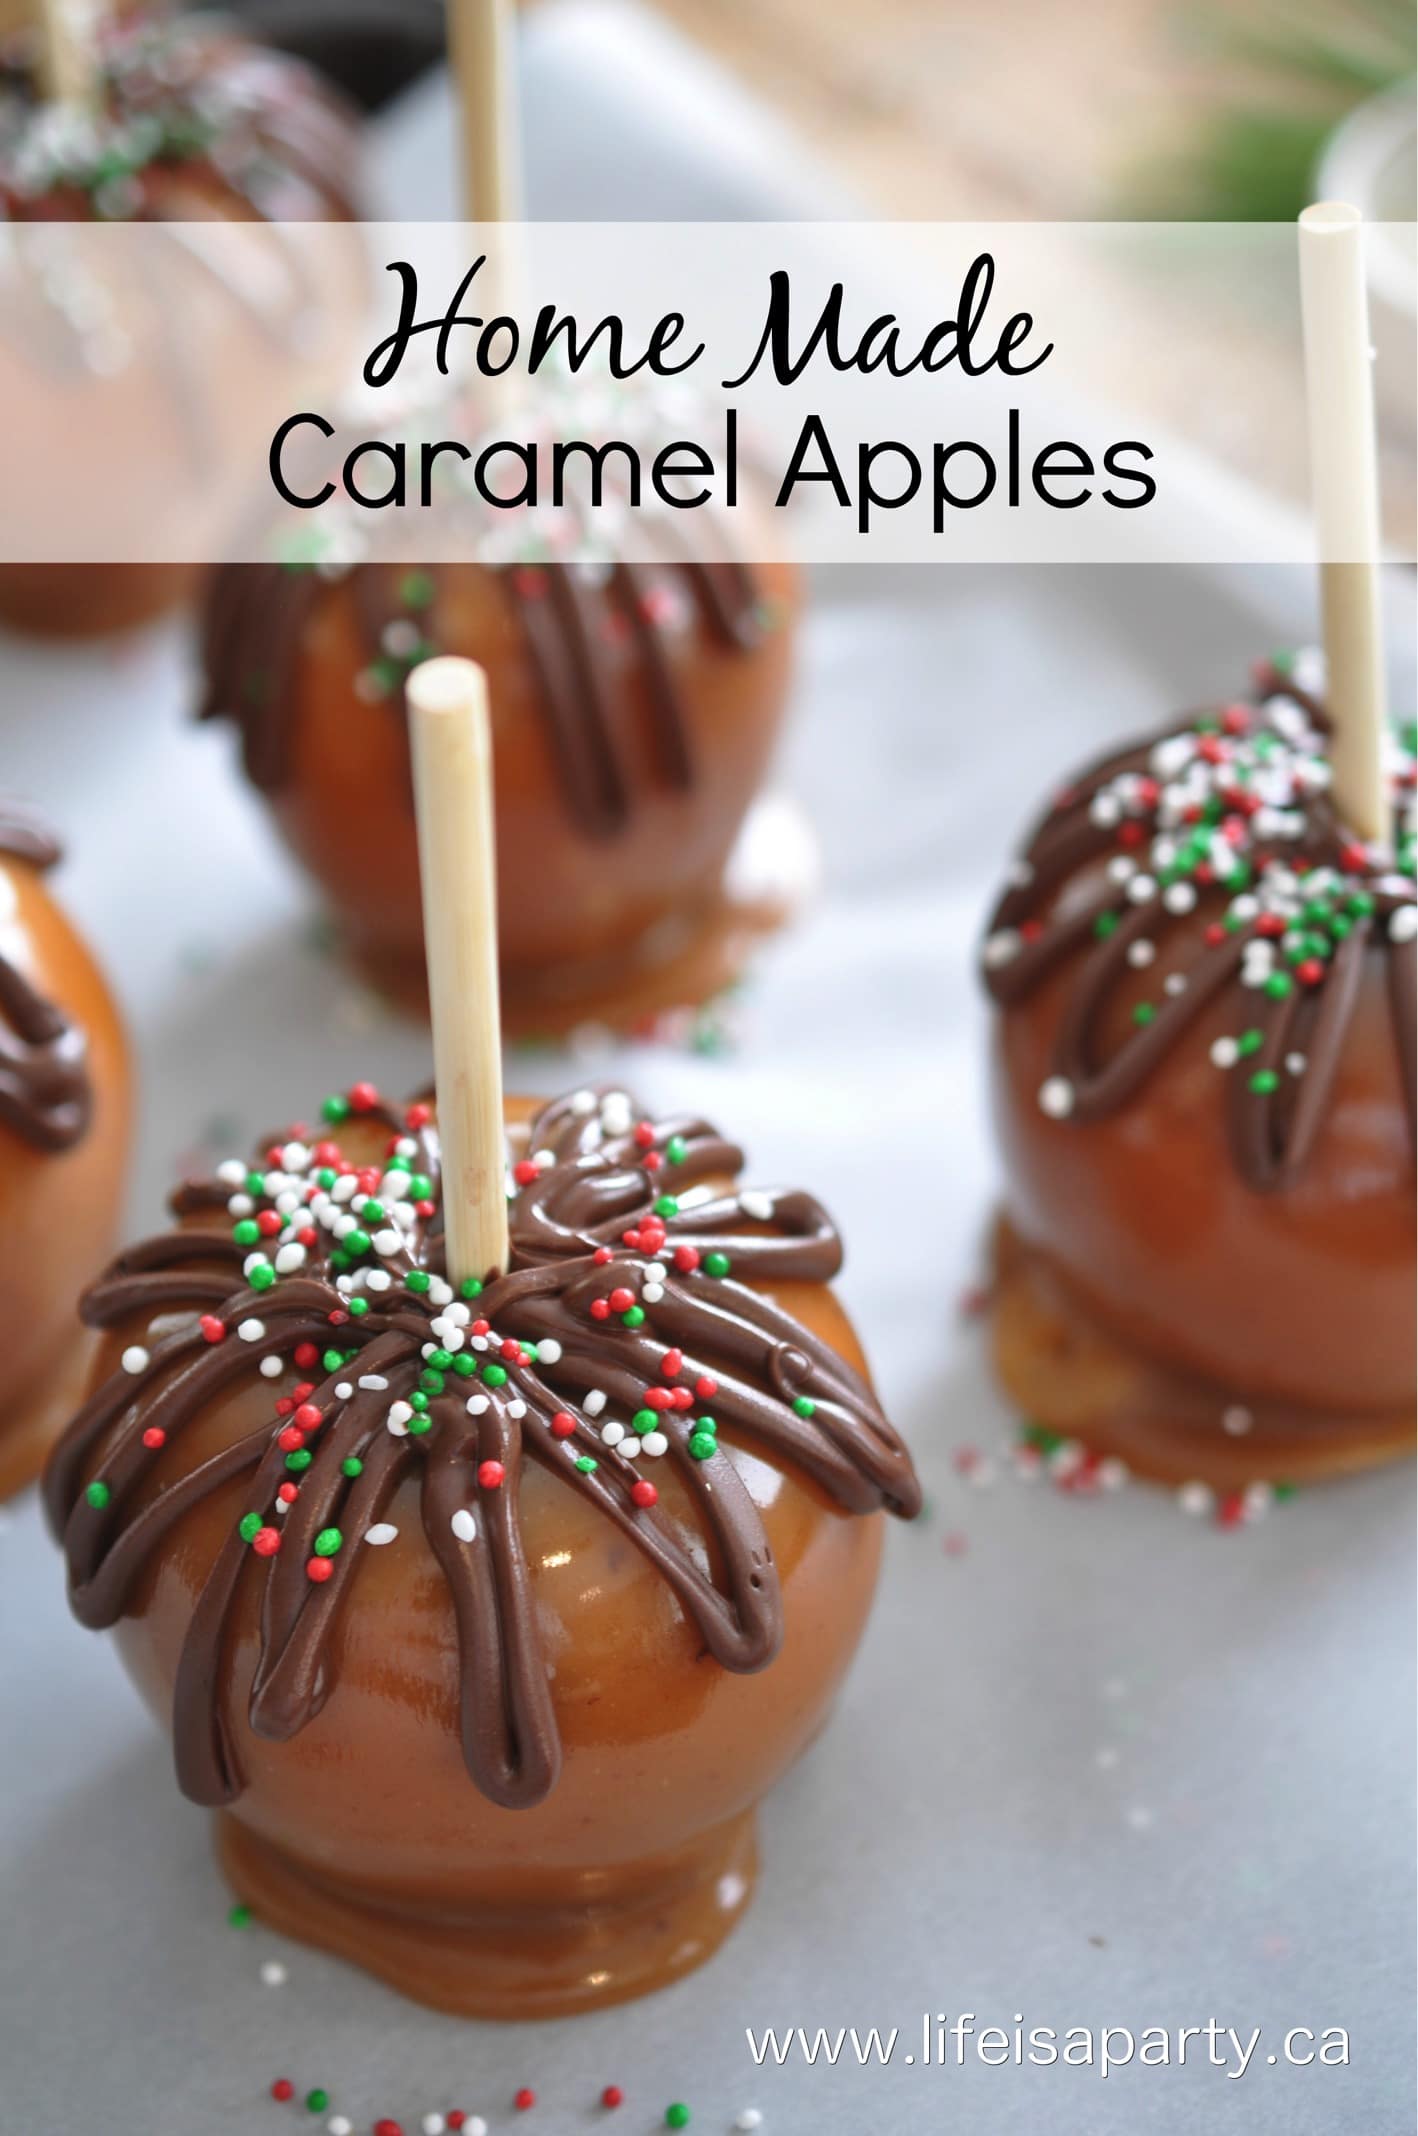
Homemade Caramel Apples recipe here.

Caramel Apple Recipe: Easy, homemade Caramel Apples, perfect for Christmas gift giving, or anytime of year. Add your favourite toppings.

Homemade Coffee Marshmallows recipe here.


Pecan Butter Crunch Toffee Recipe

Dec 15, 2016 · Leave a Comment

How to make homemade pecan butter crunch candy.

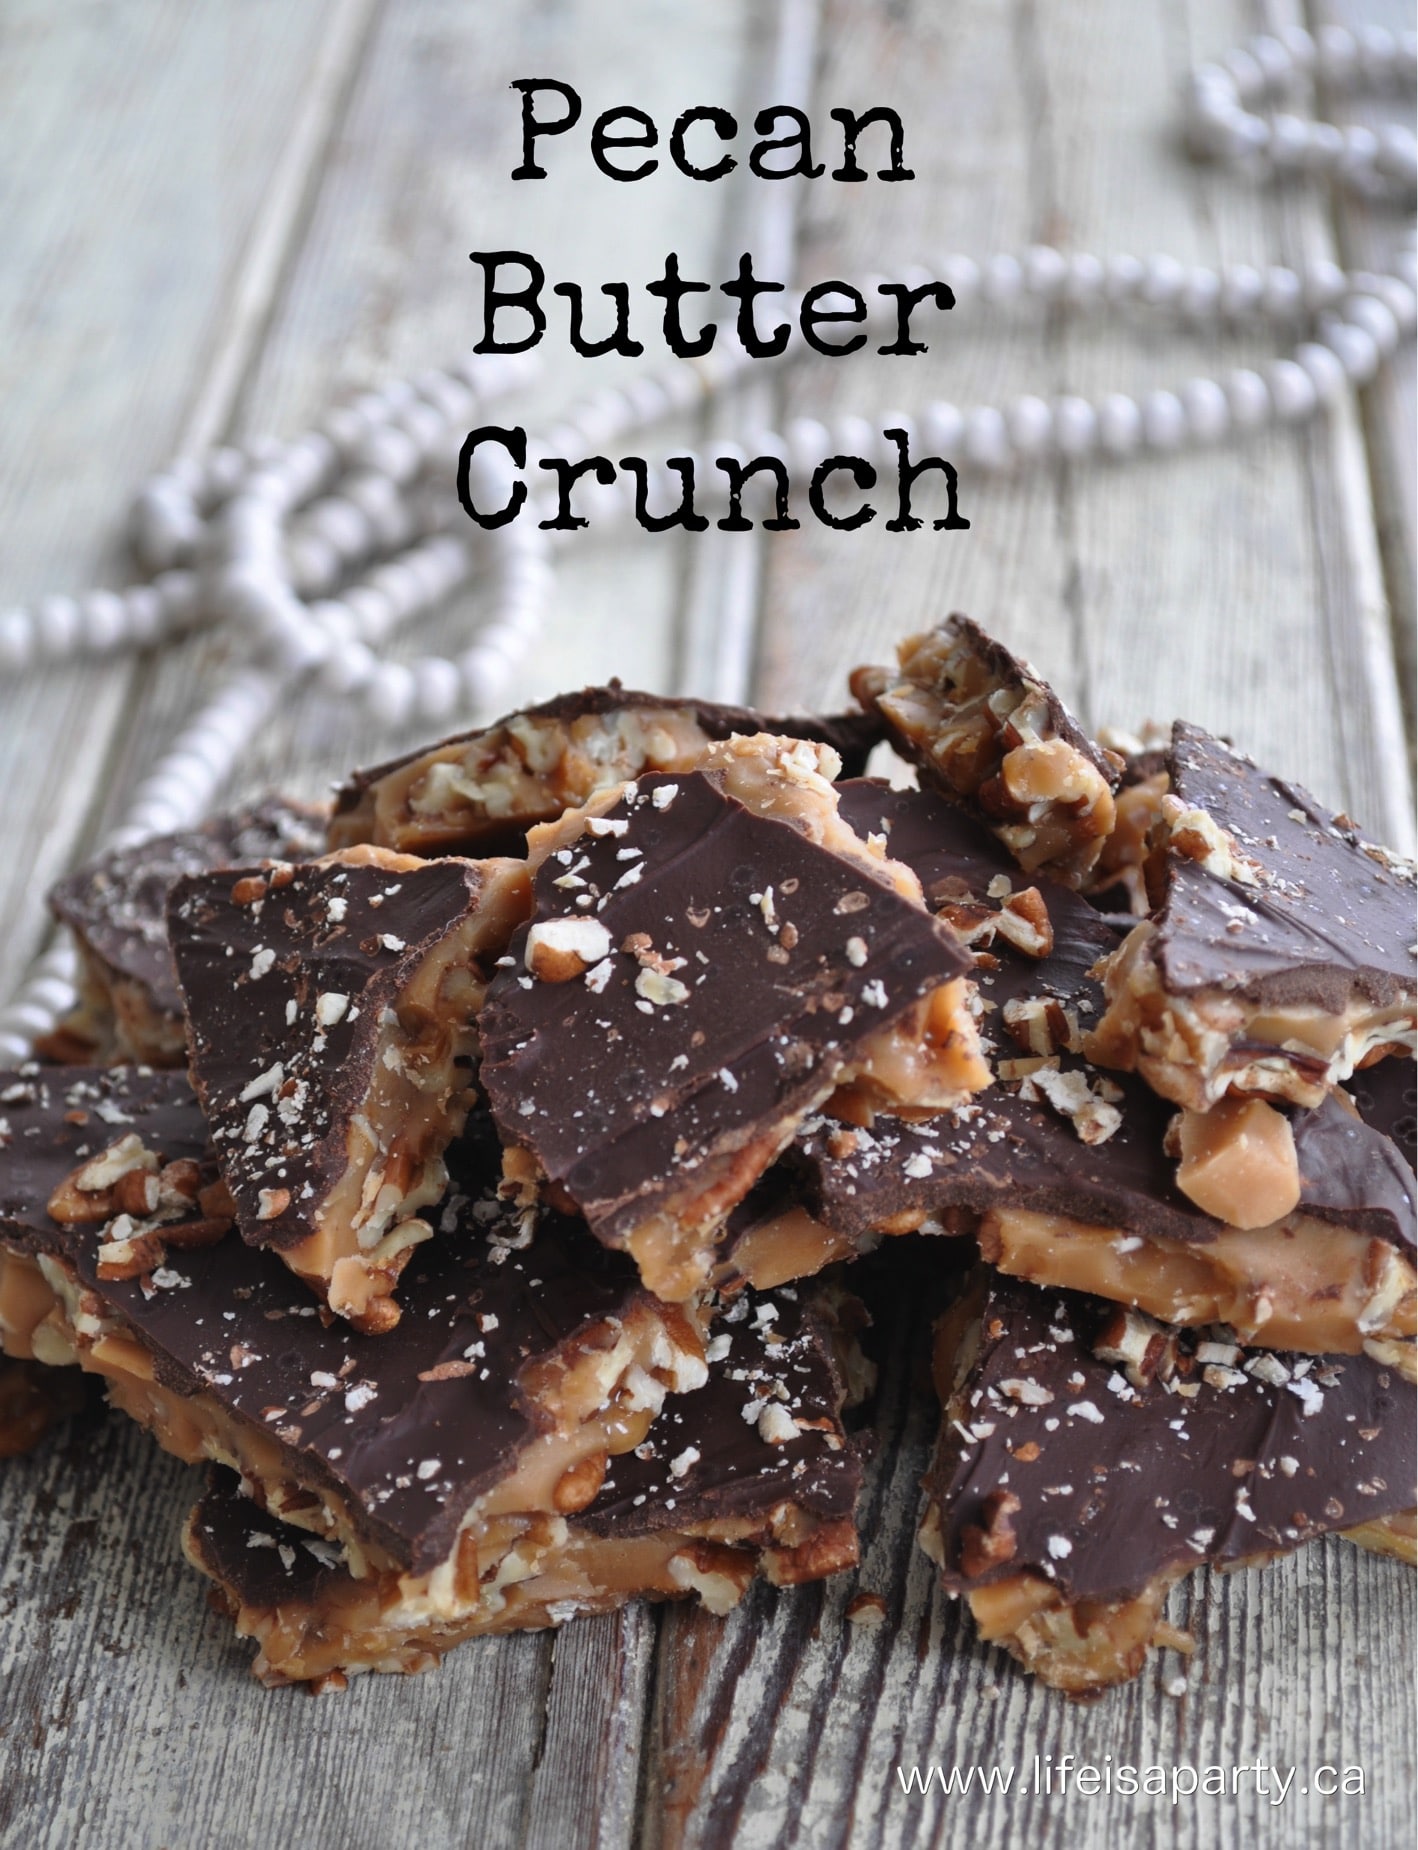
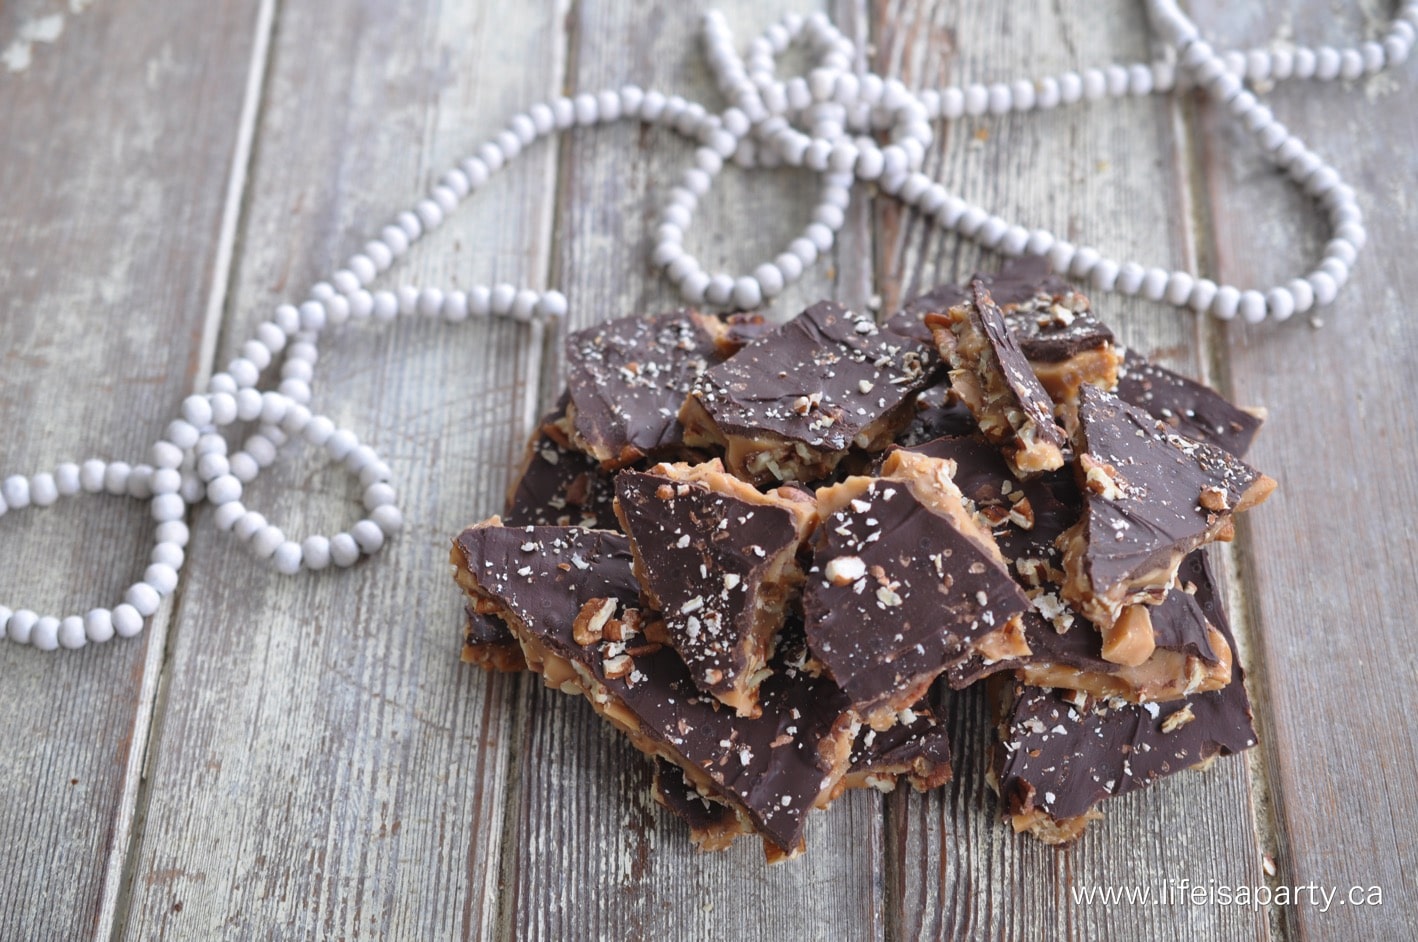
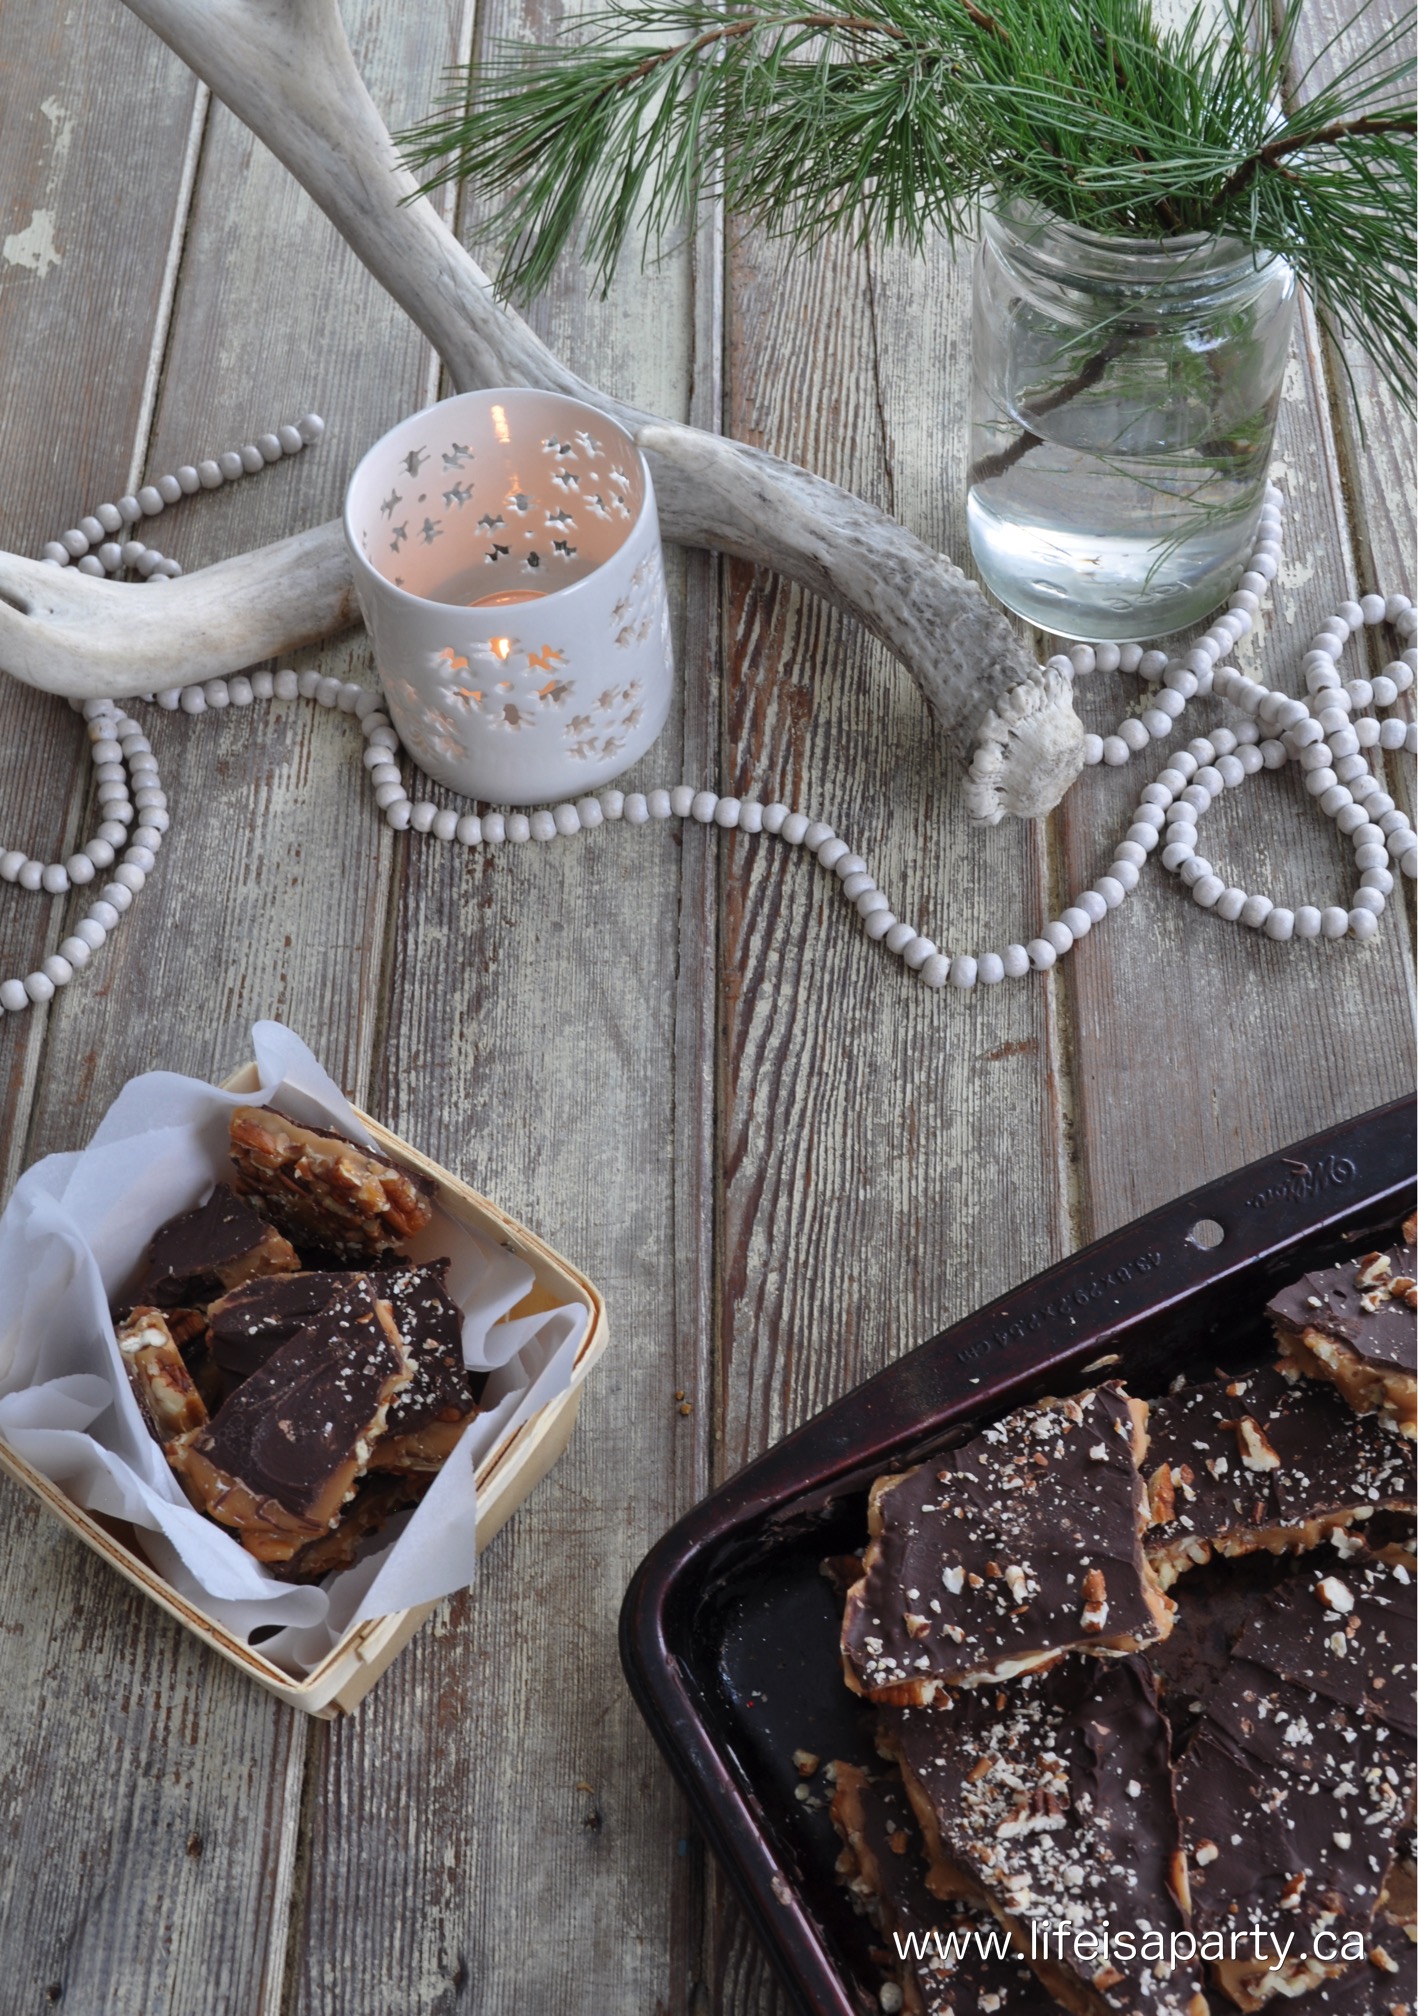
Butter Crunch Toffee -this homemade candy recipe is loaded with pecans, sometimes called English toffee, perfect for gift giving.

How to make homemade pecan butter crunch candy.
[feast_advanced_jump_to]

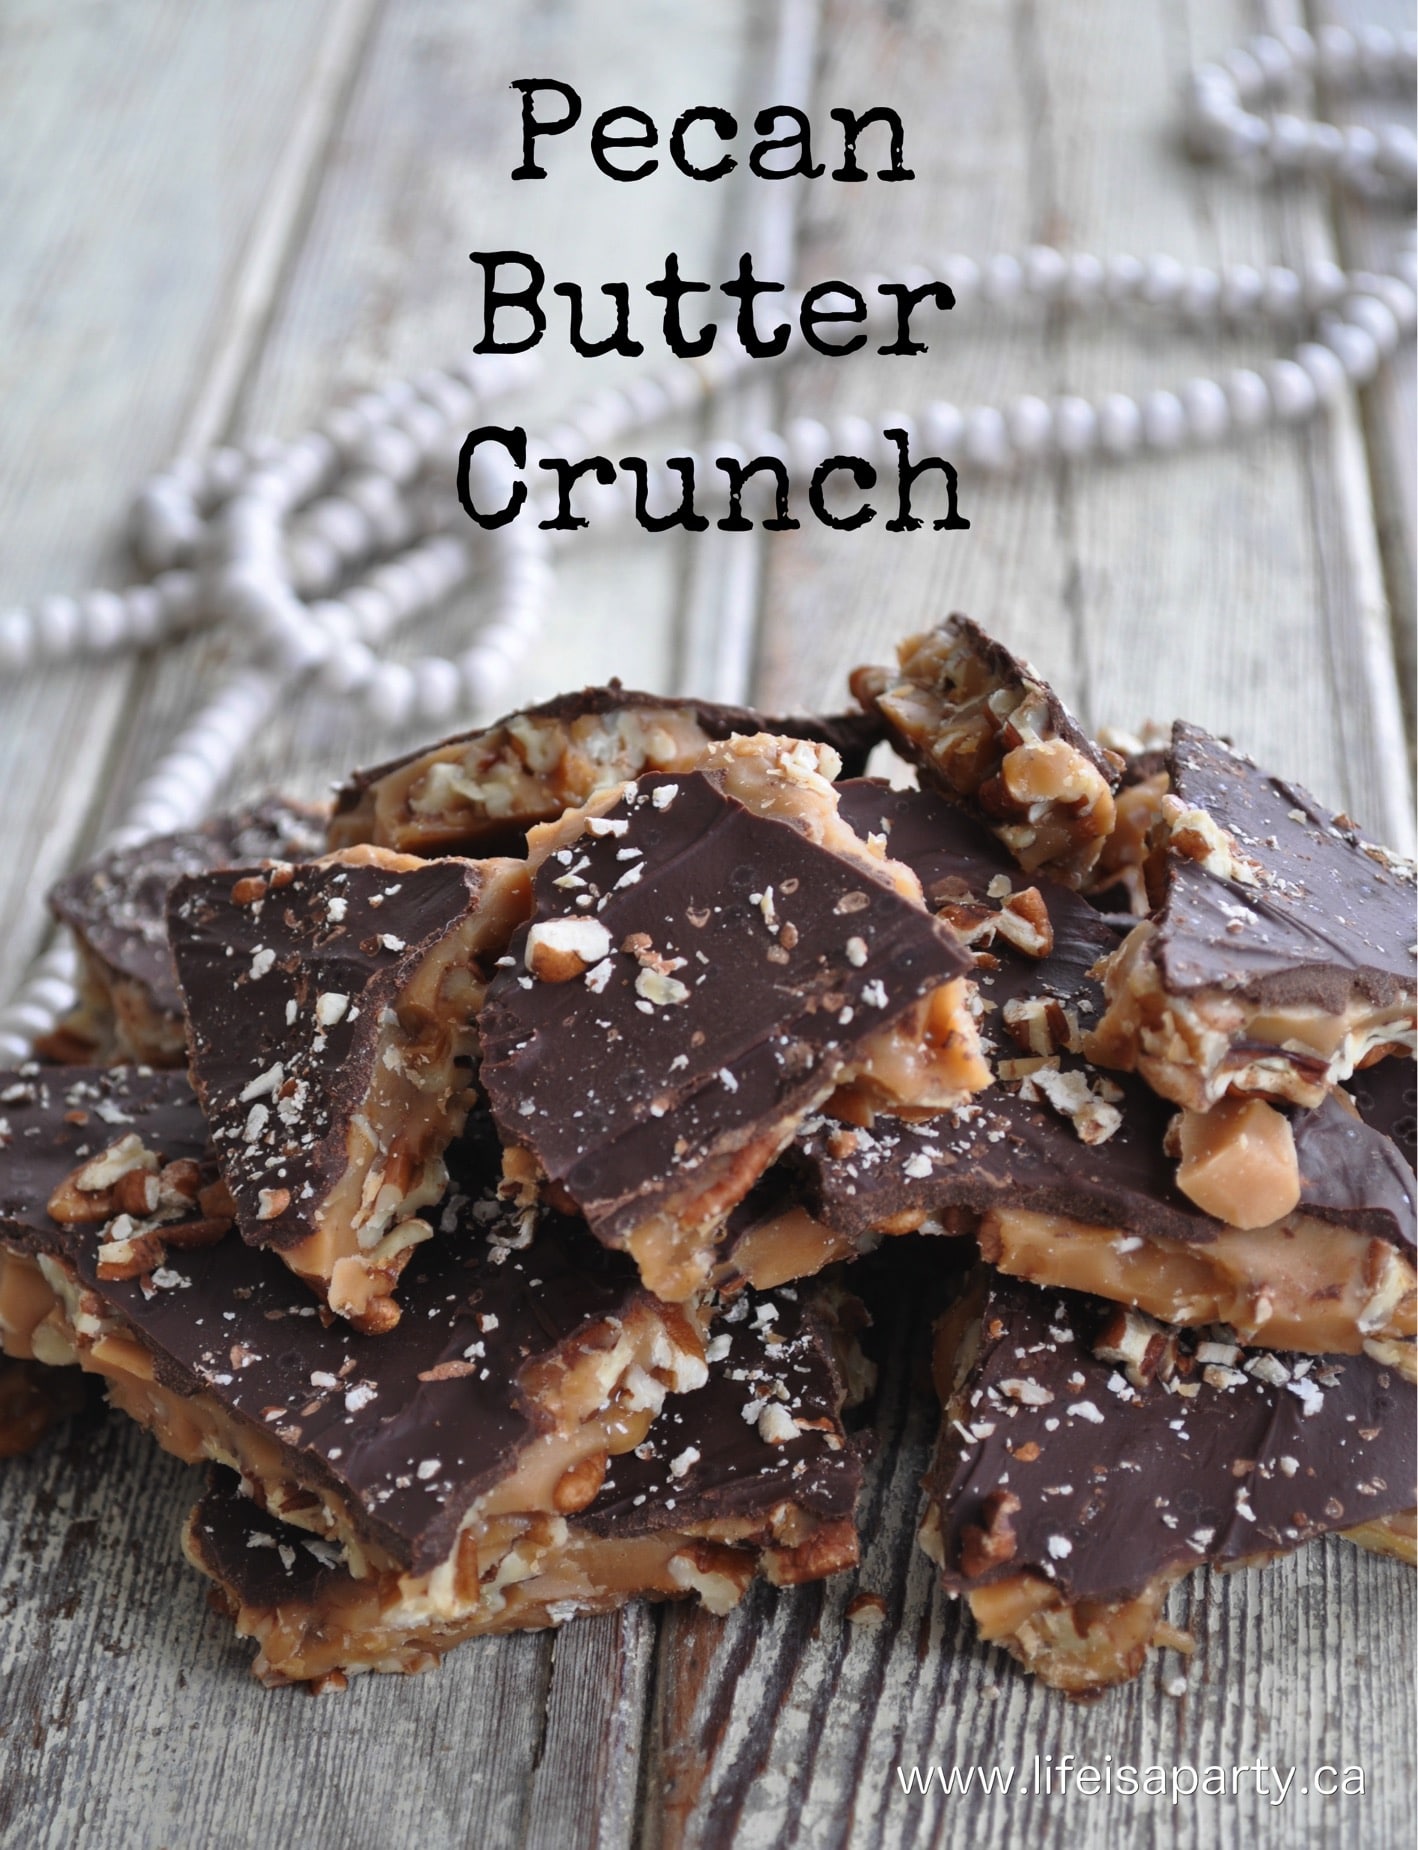
Today I'm sharing my recipe for Butter Crunch Toffee, affectionately known around here as Christmas Candy, also often called English Toffee, or Pecan Butter Crunch.  By any of its names though, it's totally delicious.  It's Day Four of Christmas Treats Week!

Pecan Butter Crunch English Toffee Recipe: Home made candy recipe, perfect for gift giving.

I'm a little late posting today, because I spent the morning volunteering at my daughter's school teaching them a little Christmas craft -tis the season.  Her teacher said the sweetest thing to me as I was leaving, she thanked me for using my gifts to bless them.  It really made me smile.  It made me think about Life is a Party, and oh how I hope I'm using this little space to be a blessing to you.

Pecan Butter Crunch English Toffee Recipe: Home made candy recipe, perfect for gift giving.

The spirit behind a week of Christmas Treats, is really gift giving.  It's special to take the time to make something homemade for family and friends, and I hope that these trusted and true recipes make it easier for you to show your love to the ones around you this holiday season with some edible gifts. Check the treats from the whole week at the bottom of this post.

Pecan Butter Crunch English Toffee Recipe: Home made candy recipe, perfect for gift giving.

This is a recipe I've been making many, many years.  I first started making it when I was in high school, and it has become a real Christmas tradition for us.  In fact, my mom makes (well has me make) a batch for all our customers every year.  Making this homemade toffee has become an annual event.  Once people have tried this buttery toffee with pecans and chocolate, they tend to ask for year after year.

Pecan Butter Crunch English Toffee Recipe: Home made candy recipe, perfect for gift giving.

Troubleshooting

It can be a little tricky to make, I have had a few fails over the years, but the failures have taught me a few tricks too.  The main issue that can sometimes happen is that the sugar can recrystalize.  During the cooking process the sugar crystals can reform and make a grainy toffee that doesn't set properly.  The best way to prevent this from happening just brush down the sides of the pan with cold water and pastry brush several times during the cooking process.

I also did once burn the toffee.  I have found that the easiest way to make this toffee is by eye.  I don't tend to use a candy thermometer for this recipe.  I cook the toffee until it's a dark amber.  But once... I took it too far and it burnt and the whole batch tasted burnt and I had to throw it out.  Once it starts to turn brown and toffee colour and it can burn quite quickly so be sure to stay with it, and have your tray prepared so you can pour it out as soon as it's ready.

Chocolate Topping

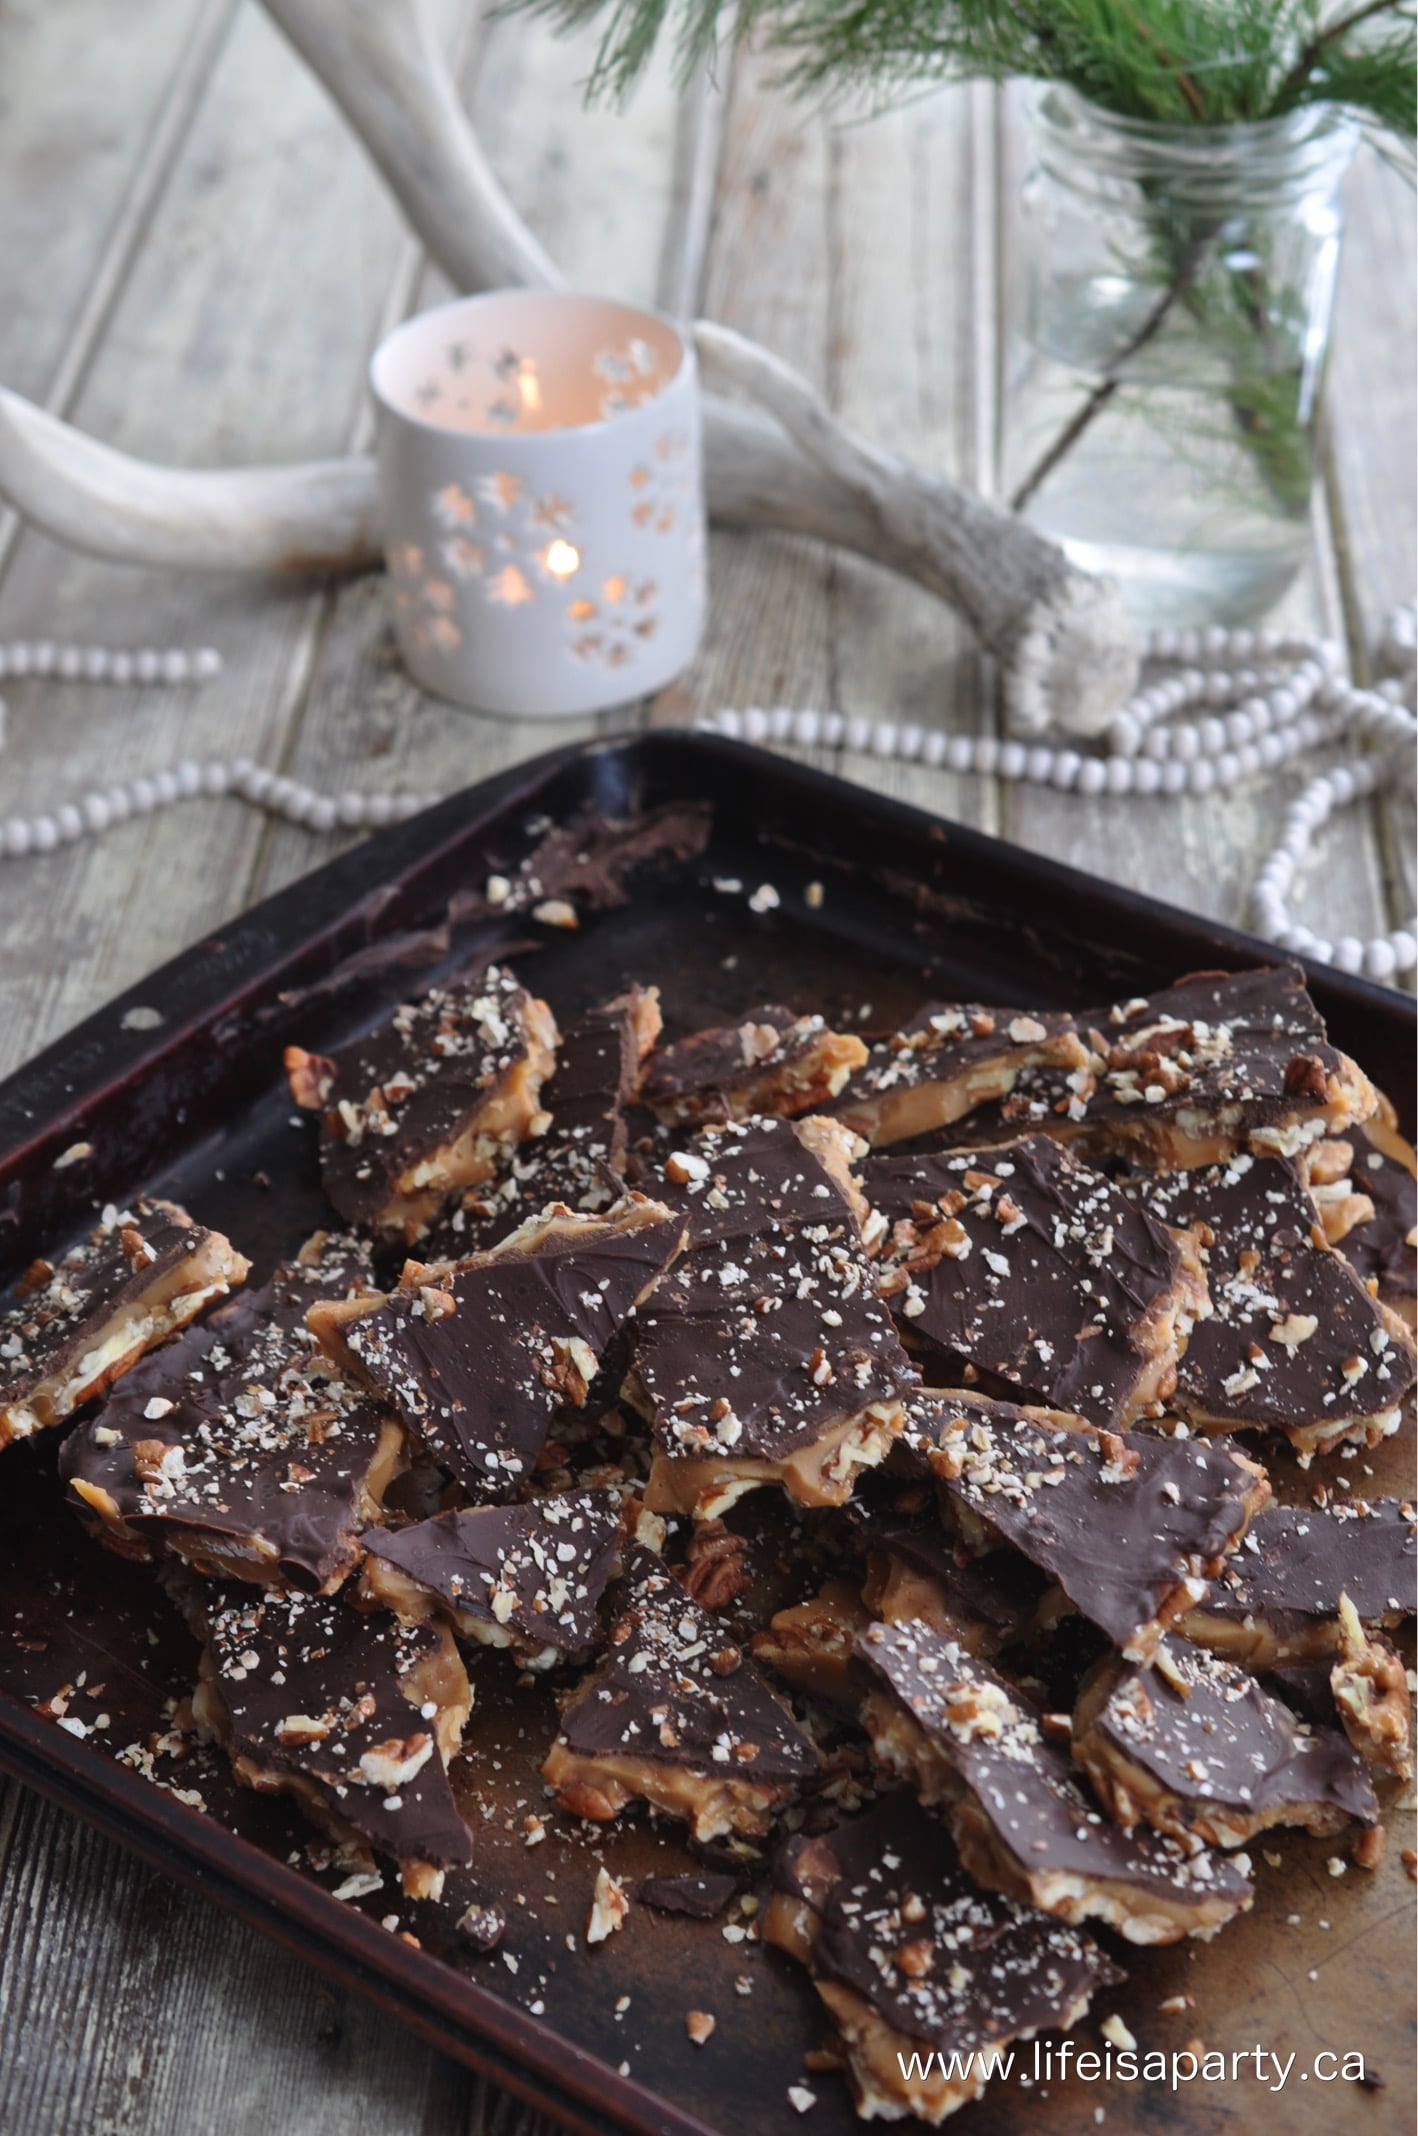
I live to pour the toffee over chopped pecans, and then top it with chocolate.  I usually use semi sweet chocolate chips.  You can use milk chocolate, or dark chocolate if you prefer.  The chocolate chips make the process very easy.  There's no need to melt the chocolate, just sprinkle it over in an even layer while the buttercrunch toffee is still very hot, and the heat from the toffee will melt the chocolate chips,  Use an offset spatula to spread it all evenly, and then sprinkle it with some very finely chopped pecans to finish it off.

Other Options

We love the pecan, toffee, and chocolate combination, but you can change up the combination if you'd life to with different great options.  Use any nuts that you like.  Whole almonds are a great choice too for almond butter crunch or homemade almond roca. We usually go for unsalted, but if you like the salty sweet combination, you can try salty nuts, or even add a little salt to the top of the chocolate.  Or you can leave the nuts all together and make a homemade Heath candy bar.  When it comes to the chocolate coating on top you can use semisweet chocolate like we did, or try milk chocolate, dark chocolate, white chocolate or a combination of them.  And if you just love toffee, you could even make a batch of just the crunchy toffee.

Pecan Butter Crunch English Toffee Recipe: Home made candy recipe, perfect for gift giving.

We like to chop the nuts by hand, instead of in a food processor.  It just gives you better control, and helps to not over chop the nuts.  We want nice chunky pieces for the bottom and not over processed nut dust.

Pecan Butter Crunch English Toffee Recipe: Home made candy recipe, perfect for gift giving.

This candy is perfect for gift giving.  I love to package it up in a little tin, a mason jar, or a cello bag.  Your friends and family will love it.  It's also a great addition to holiday cookie trays.  It would also be a lovely gift for Valentine's Day.  I also like to make a batch sometimes as a party favor.  I just put the candy mixture into small cellophane bags, and tie it with some ribbon to coordinate with my party color scheme.  Everyone always loves this little gift.

Pecan Butter Crunch English Toffee Recipe: Home made candy recipe, perfect for gift giving.

Recipe

How to make homemade pecan butter crunch candy.

Butter Crunch Toffee

Rich toffee with pecans and chocolate.
No ratings yet
Print Pin Rate
Course: Candy, Desserts
Cuisine: American
Cook Time: 30 minutes minutes
Additional Time: 6 hours hours
Total Time: 6 hours hours 30 minutes minutes
Servings: 16
Calories: 527kcal
Author: Dannyelle Nicolle-Ramjist

Ingredients

  • 2 cups butter
  • ⅔ cups water
  • 2 cups white sugar
  • 4 cups chopped pecans
  • 2 cups chocolate chips

Instructions

  • Spray a baking sheet with non-stick spray, and spread out the chopped pecans, reserving about ½ cup of chopped pecans which are really finely chopped to use on the top at the end.
  • Melt butter and water in a large heavy saucepan. Add the sugar to the melted butter and water, and stir constantly with a wooden spoon until the sugar is fully dissolved. Occasionally brush the inside of the pot down with cold water, using a pastry brush, to help prevent the candy from recrystallization. Continue cooking and stirring occasionally until the candy turns a dark amber. Be careful not to burn it though.
  • Pour the candy evenly over the nuts in the prepared pan. Use an offset spatula dipped in cold water so it doesn't stick to smooth the toffee mixture out and completely cover the nuts. Be careful as you work, as it's very hot.
  • While the candy is still hot, cover completely with chocolate chips. As they melt, use an offset spatula to spread the chocolate layer evenly. Sprinkle the top of the layer of chocolate with the reserved finely chopped pecans. Let it harden, and then break into small pieces. Let set at room temperature. Store in an airtight container.

Nutrition

Serving: 1g | Calories: 527kcal | Carbohydrates: 38g | Protein: 3g | Fat: 44g | Saturated Fat: 18g | Polyunsaturated Fat: 23g | Trans Fat: 1g | Cholesterol: 54mg | Sodium: 165mg | Fiber: 3g | Sugar: 34g
Tried this Recipe? Tag me Today!Mention @LifeisaParty or tag #lifeisaparty!

With Butter Crunch Toffee Candy, life really is a party!

More Homemade Candy Inspiration

Check out all these other posts from our Christmas Treat Week:

Homemade Caramel Corn recipe here. 

Creamy Caramels and Chocolate Salted Caramels recipe here.

Homemade Caramel Apples recipe here.

Caramel Apple Recipe: Easy, homemade Caramel Apples, perfect for Christmas gift giving, or anytime of year. Add your favourite toppings.

Homemade Coffee Marshmallows recipe here.

The Best Homemade Caramel Candies Recipe

Dec 14, 2016 · Leave a Comment

how to make homemade caramels.

How To Make Easy Creamy Caramel Candies: these caramels are delicious, and easy to make, and the perfect gift.  Serve plain, with salt for salted caramels, or dipped in chocolate.

how to make homemade caramels.
[feast_advanced_jump_to]

This easy homemade caramel candy is such a favorite.  It's perfect for a special homemade treat.  It's sweet and chewy, and soft and the perfect treat for any caramel lover.  Wrap these soft caramels up for gift giving, sprinkle them with salt for salted caramel, or dip them in chocolate for caramel chocolates.  Anyway you serve them, these homemade caramels are so delicious.

It's Day Three of Christmas Treats Weeks, and today I'm sharing a recipe for Creamy Caramels and Chocolate Salted Caramels.  You can check out all the other recipes for Christmas Treat Week at the bottom of this post.

How To Make Creamy Caramels and Chocolate Salted Caramels: Salty or not salty these caramels are delicious, and easy to make. Sure to be a hit for gift giving.

If you are making these chewy caramels for the holidays be warned that these are so good, you might have a little trouble not eating them between now and Christmas.  My family finished an entire batch in days, but this caramel recipe is so easy you can make another batch.  I love this homemade candy for gift giving around the holidays, or serving guests.  It's also really nice as a Valentine's Day treat too.  But really any time of year, who won't love some homemade caramel?  

It's a lovely party favor too.  It's one of the easiest candy recipes too. So if you're a beginner at making homemade, which can be a little tricky if you're not used to using a candy thermometer, this is a great recipe to start with.

Candy Thermometer

You will need a candy thermometer for this recipe.  They're inexpensive to buy, and great to have on hand.  Look for them at any good kitchen store.  The candy thermometer attaches to the side of your pan.  Just make sure that the thermometer is not touching the bottom of the pan, which will not give you an accurate reading of your candy temperature.  It's important to get the candy to the right temperature for it to set property.  If it's undercooked it can be runny and if it's over cooked it will become hard.

Some people like to use the cold water test and get the caramel to the firm ball stage.  To test this way you take a spoonful of the hot caramel and drop it into a cup of ice water, and then mold it into a ball with your fingers.  You're looking for it to be fairly firm and make a ball.

I prefer to use a candy thermometer because I find it easier.  The temperature is exact, so it takes the guesswork out of the cooking process, and is the easy way to make perfect caramel candies each time.

How To Make Creamy Caramel candy

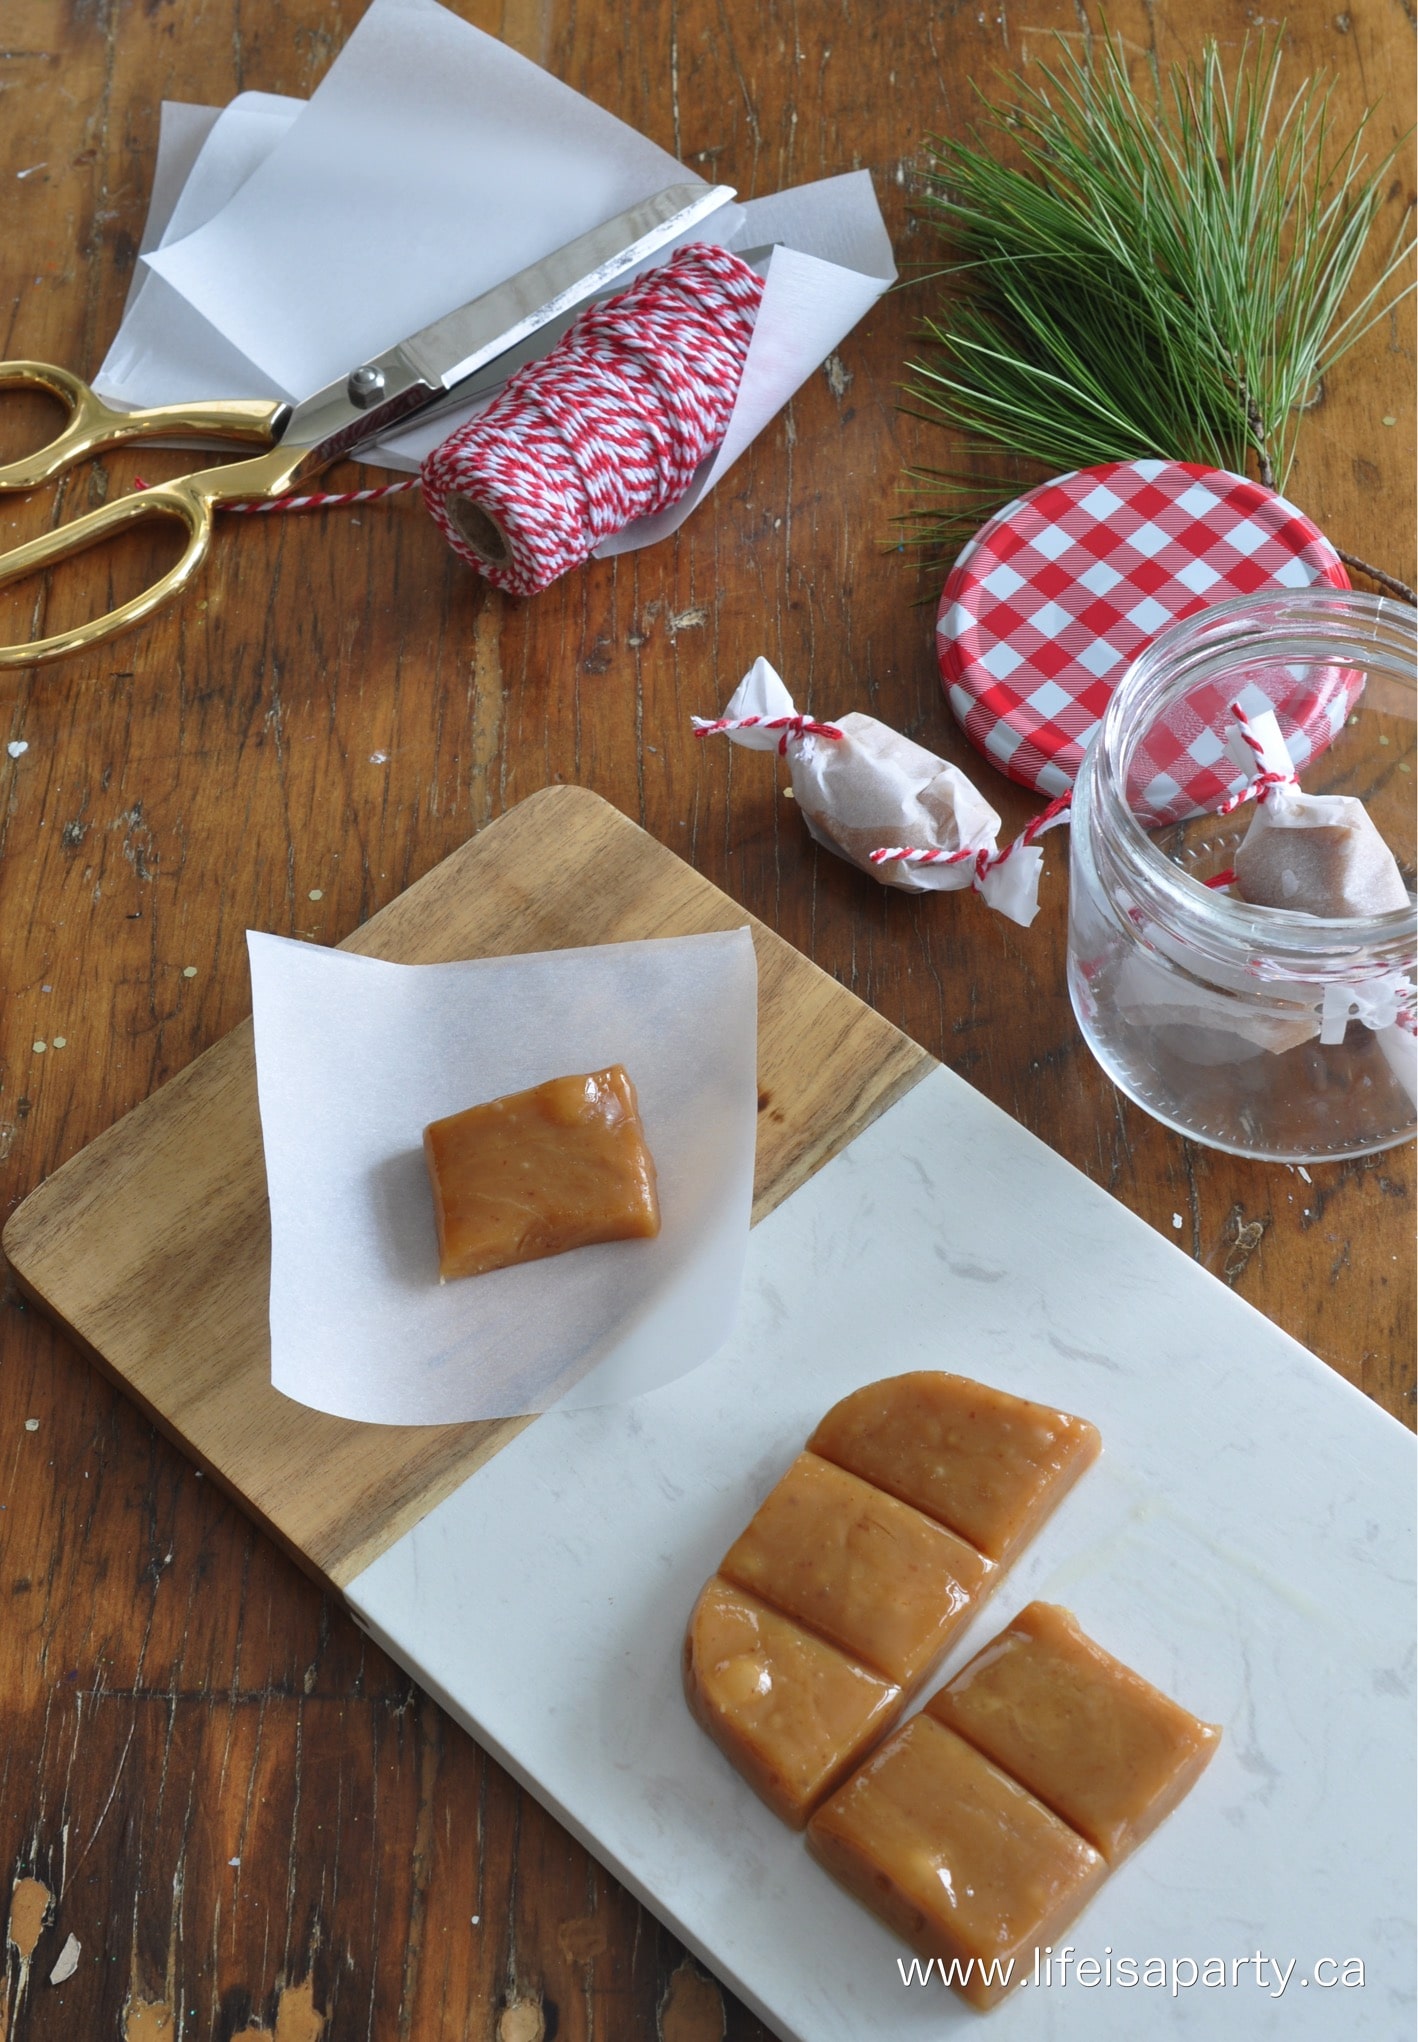
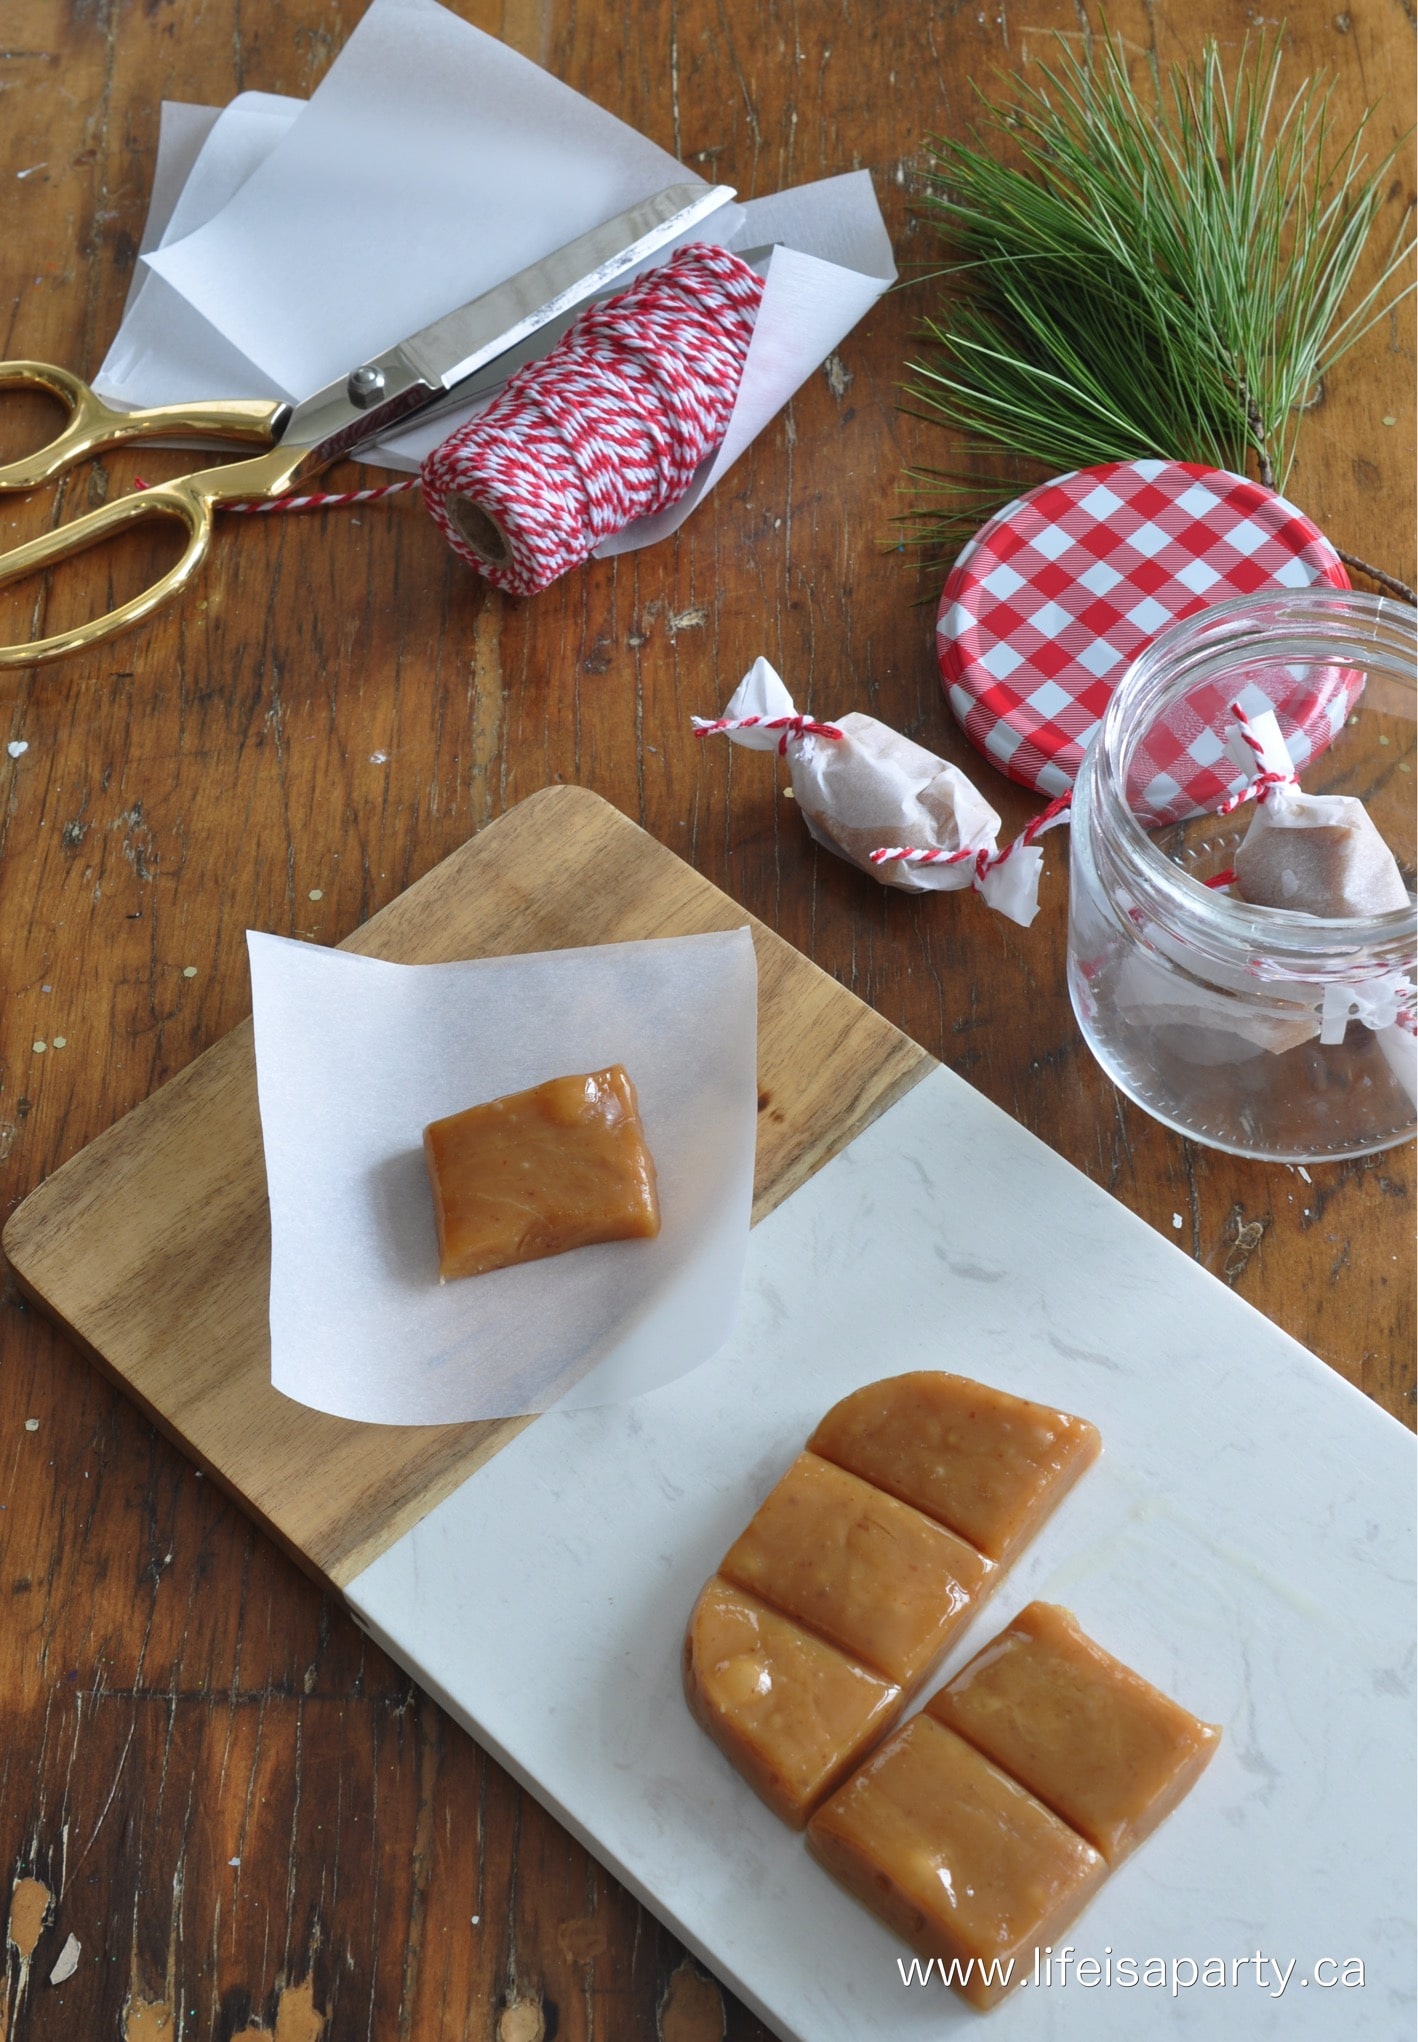
Both the creamy caramels and the chocolate salted caramels have the same caramel base.  In fact, it's the same caramel I made for the caramel apples yesterday.  I made two batches of the apples, and each time I poured the leftover caramel into a well greased small rectangle container after I was done dipping apples.  I let the caramel mixture harden overnight, and then removed it from the container and sliced into small cubes.

Creamy Caramel candies Recipe

To wrap the creamy caramels, just cut small pieces of parchment paper or wax paper and wrap each square.  You might like to tie the ends with a little twine too.

How To Make Creamy Caramels for homemade gift giving

You could, of course sprinkle these with a little sea salt to make salted caramel candy too.  I left these ones plain.

Homemade Creamy Caramels Recipe

Packed in a little jar, these are perfect for gift giving.

Chocolate dipped Salted Caramels
chocolate dipped Creamy Caramels with salt

Store your caramels in an airtight container, or wrapped airtight with some waxed or parchment paper, at room temperature.

Chocolate Covered Caramels

To make the Chocolate Salted Caramels dip your creamy caramels in some melted chocolate.  I used semi-sweet chocolate melting wafers, that I melted in the microwave.  You could also use milk chocolate or dark chocolate, whatever you like best.  You can also add a little salt before they set for salted caramel chocolates.

How To Make Chocolate Salted Caramels

Salted Caramel Candies

If you have some fans of sweet and salty together on your Christmas list, these are sure to be a big hit. I used Pink Salt, sea salt or Himalayan Salt would be nice too.  Just sprinkle it over the caramels as they set, or sprinkle some over the chocolate before it sets.

How To Make Creamy Caramels and Chocolate Salted Caramels

Troubleshooting

The main problem that can occur when making your homemade caramels is around not getting the caramel mixture to the right temperature when your cooking it.  Be sure that the candy thermometer is not touching the bottom of the pan.  If necessary adjust the clip on the side of the thermometer so that it fits tightly and can hold the thermometer up off of the bottom of the pan.

Too Soft:  If your caramel is too soft you likely didn't cook it long enough.  If it doesn't reach 240 degrees F, it will not set properly and instead of being chewy, it will be too soft and not hold it's shape.

Too Hard:  You also might overcook your caramel candies so that they are too hard and not soft and chewy.  To fix this problem be sure to remove the caramel mixture from the heat as soon as it reaches 240 degrees F.

Gift Giving

If you have some fans of sweet and salty together on your Christmas list, these delicious caramels are sure to be a big hit.  Place the caramel candies in gift boxes, or a cellophane bag, or glass jar for gift giving.  Last year, these were a big hit with all my friends and family.  Everyone loved their chewy texture.  If you're having candy cravings this holiday season, this is the perfect caramel candy to make.  

These caramel candies also make a lovely small party favor.  Wrap them up in a some packaging that matches your party theme and send them home with guests for the sweetest goodie bags.

Recipe

how to make homemade caramels.

Creamy Caramel Candy

Soft caramel candy with chocolate and sea salt.
No ratings yet
Print Pin Rate
Course: Candy, Desserts
Cuisine: American
Prep Time: 10 minutes minutes
Cook Time: 15 minutes minutes
Total Time: 25 minutes minutes
Servings: 24
Calories: 85kcal
Author: Dannyelle Nicolle-Ramjist

Ingredients

  • ½ cup butter
  • 8 oz. brown sugar
  • 7 oz. half of a 14 oz. can condensed milk
  • ½ cup corn syrup
  • pinch of salt
  • 1 teaspoon vanilla extract
  • Optional: salt and melted chocolate for dipping

Instructions

  • To make the caramel, combine butter, brown sugar, condensed milk, corn syrup and salt in a heavy saucepan.
  • Bring it to a boil over a high heat, stirring constantly until the mixture reaches 240 degrees F on a candy thermometer.
    Remove from the heat and stir in the vanilla.
  • Pour into a well greased 8 x 8 pan, and let set overnight at room temperature or for a few hours in the fridge.
  • Remove caramel from the pan and cut into small cubes with a sharp knife. Wrap in parchment paper squares. Or, add salt first for salted caramels. Or, dip in chocolate and then sprinkle with salt for chocolate salted caramels.

Nutrition

Serving: 1g | Calories: 85kcal | Carbohydrates: 12g | Protein: 2g | Fat: 4g | Saturated Fat: 2g | Polyunsaturated Fat: 1g | Cholesterol: 11mg | Sodium: 67mg | Sugar: 12g
Tried this Recipe? Tag me Today!Mention @LifeisaParty or tag #lifeisaparty!

With homemade caramel candies, life really is a party!

More Homemade Candy Recipes

Check out all these other posts from our Christmas Treat Week:

Pecan Butter Crunch recipe here.

Homemade Caramel Corn recipe here. 

Our Homemade Caramel Apples recipe here.

Caramel Apple Recipe: Easy, homemade Caramel Apples, perfect for Christmas gift giving, or anytime of year. Add your favourite toppings.

Homemade Coffee Marshmallows recipe here.

How To Make Homemade Caramel Apples

Dec 13, 2016 · Leave a Comment

How to make homemade caramel apples.

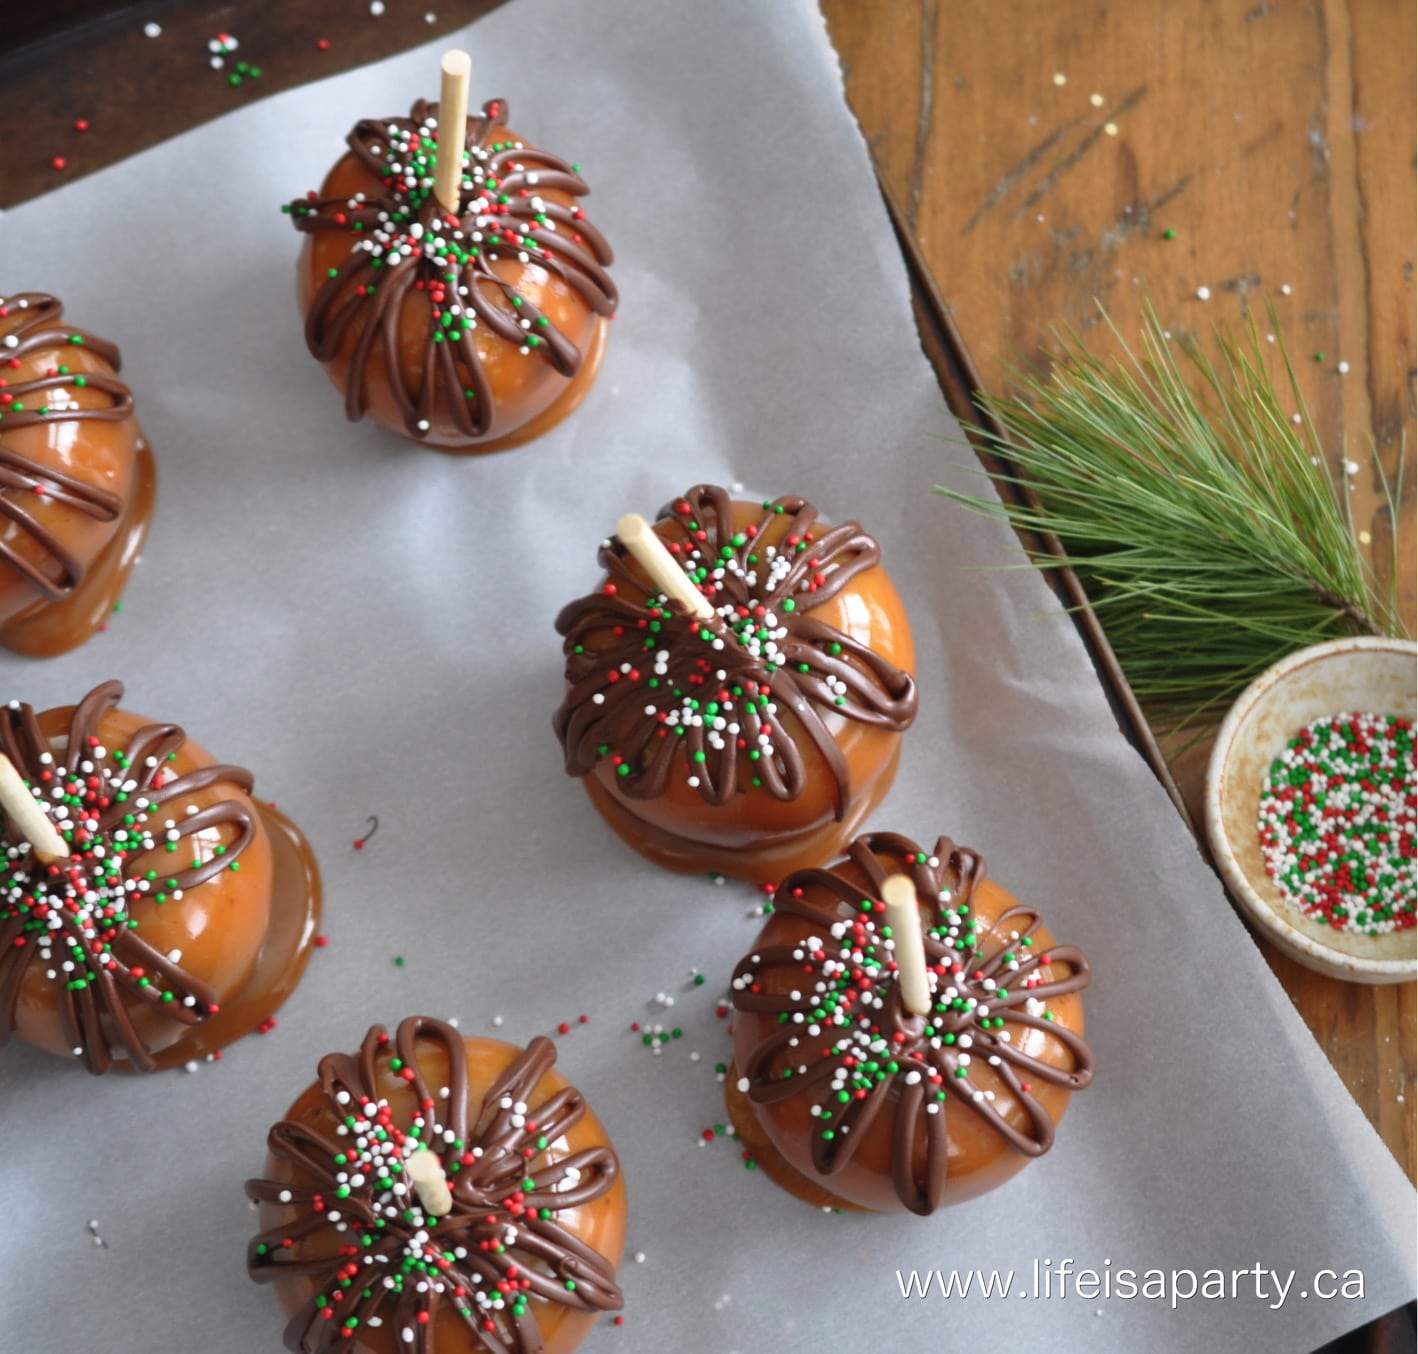
Homemade Caramel Apples: Easy, made from scratch Caramel Apples, perfect for gift giving.

How to make homemade caramel apples.
[feast_advanced_jump_to]

Caramel apples are such a great treat.  The combination of tart crispy apple with the smooth creamy sweet caramel is a match made in heaven.  Perfect homemade caramel apples are the perfect handheld treat.  They're especially during the fall when it's apple season.  I love making them for special parties, and these easy caramel apples make great gifts or party favors too.

It's Day Two of Christmas Treat Week.  Today I'm sharing my Homemade Caramel Apples. You can find all about the rest of the recipes from Christmas Treat Week at the end of this post.

Home Made Caramel Apple Recipe: Easy, made from scratch Caramel Apples, perfect for Christmas gift giving.

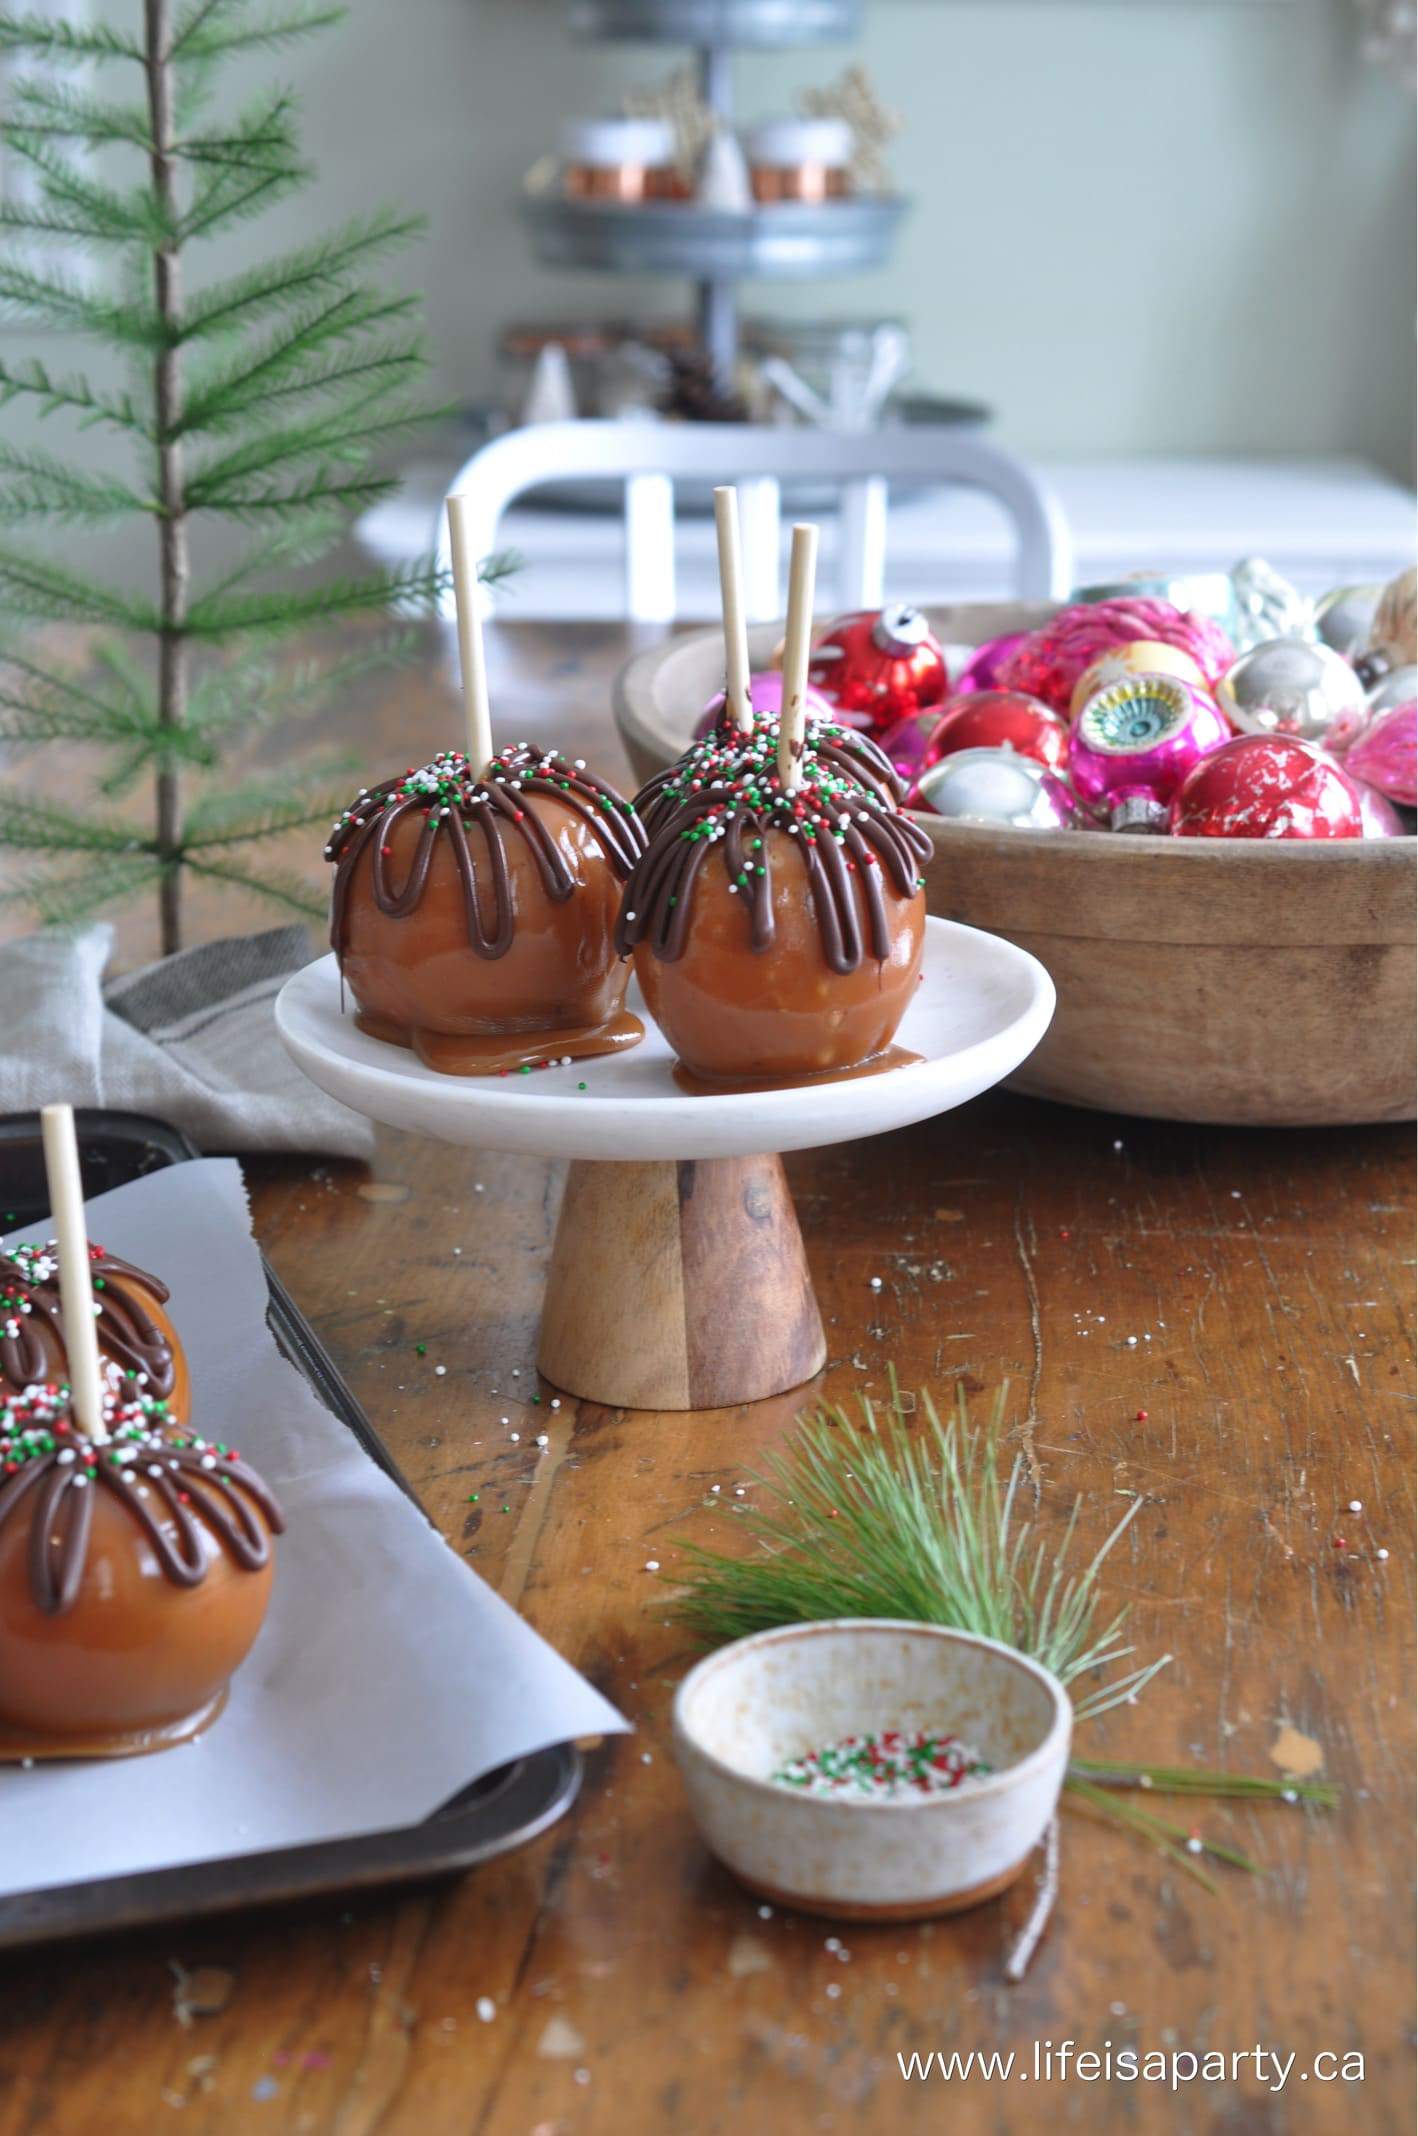
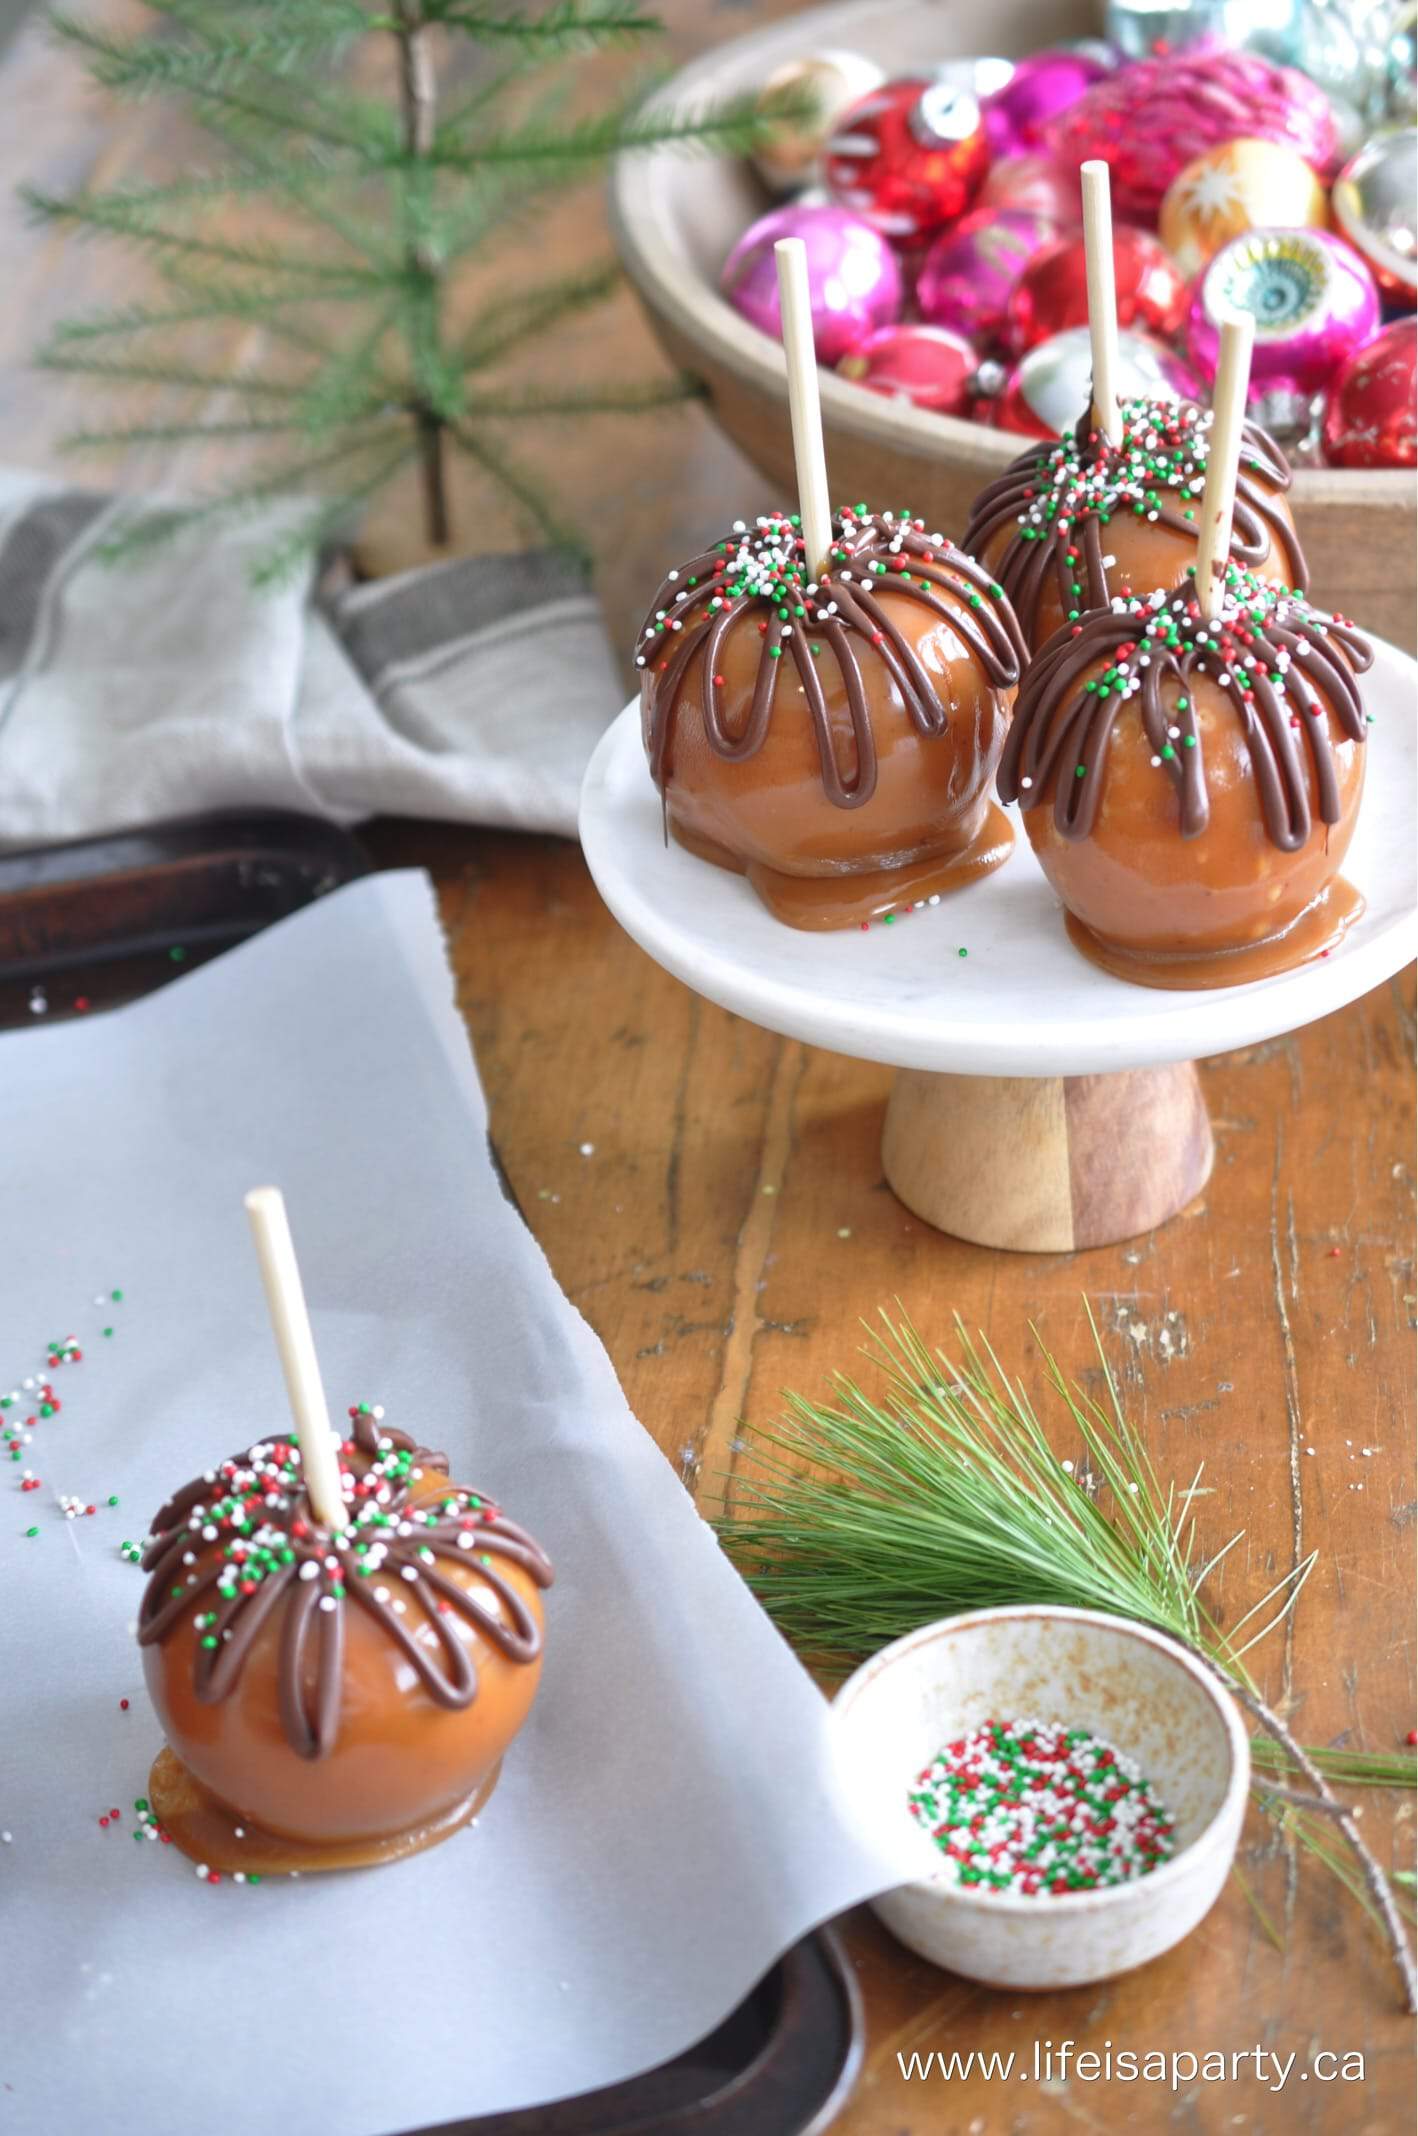
These are so good, and perfect for holiday gift giving.  Your family and friends are sure to love them.  And we've dressed these ones up for Christmas with some pretty festive sprinkles.  You can change out your sprinkles to suit whatever season or holiday your in.  We've made our caramel from scratch with a simple recipe.  No need to unwrap pre-bought caramel candies for ages.  This homemade caramel is cheaper, fresher, and more delicious and makes the best caramel apples.

Caramel Apples vs. Candy Apples

Caramel apples are fresh apples that have been dipped into a soft caramel coating.  When the set the caramel coating will still remain quite soft and sticky and it's relatively easy to bite through.  If you struggle with the sticky caramel, you can cut your homemade gourmet caramel apples into wedges so that they're easier to eat.  

Caramel apples are different than candy apples.  Candy apples have a hard candy coating on the outside.  They are traditionally red, and it can be quite difficult to bite through the hard candy coating on the outside of the apple.  If you're looking for a candy apple recipe please check out our traditional red candy apple recipe here.  And click here if you want to see how to pink or any other color candy apples here. You might also like our Caramel Apple Fondue Recipe.

how to make Caramel Apples from scratch

Apples

You can use a variety of different apples for making your caramel apple.  Lots of people like to use tart granny smith apples to contrast the flavor of the tart apples with the sweetness of the caramel.  Some people like pink lady, fuji, or honeycrisp.  You can use whatever types of apples that you prefer for this recipe.  My preference is a crisp eating apple, and not a baking apple.

Wax and Apples

No matter what variety of apple you decide to use for your caramel apple, the most important thing is that you either choose one that has not been waxed or that you remove the outer waxy coating and properly prep apples before dipping them.  Most apples from the grocery store have a waxy coating on the outside to make them look more shiny.  The wax can prevent the caramel coating from sticking properly to the dipped apples.  

The best way to avoid this problem is to purchase your apples directly from a farmer's market, or orchard where the apples haven't been coated.  If you can't do that and need to get your apples at the grocery store you can remove the waxy coating.  

To clean the wax off boil a large pot of water and then turn the heat off.  Next, quickly dip your apples in the boiling the water for a few seconds, then use a kitchen towel to rub the melted wax off of the apples.  You don't want to keep the apples in the boiling water too long because you don't want to start the cooking process, or discolor your apples.  A quick dip in the hot water is all that's needed to make the wax melt and allow you to clean it off with a kitchen towel.  Be sure to dry your apples before dipping, and chill them for the best results.

How To Stop Puddling

One problem that can sometimes occur when making homemade caramel apples is that caramel coating can run off the apple and puddle around the bottom.  One cause of this problem is that the apples have not had their waxy coating removed and the caramel is sliding down off of the apple and pooling at the bottom of the apple.  

To avoid this problem follow the directions above to clean off the waxy coating using hot water.  An even better solution is to purchase apples from a farmer's market or orchard that don't have the waxy coating added to them.  

Caramel puddling at the bottom of the apple can also be because of the temperature of your caramel when you dipped the apple.  It can be helpful to chill the apples before dipping.  If the caramel is too hot, it may run off of the apple.  It may also become too cold to dip the apple, so you want to find that sweet spot as best as you can where the caramel is not to hot to avoid excess caramel drip, but still warm enough to dip the apple into easily.

You also may have to work on your dipping technique.  You want to hold your dipped apple over the caramel pot long enough for some to drip off before placing it on the parchment paper to set.  Some people like to spin their apple slightly and some people like to dip apples and then scrape a little caramel off the bottom of the apple on the side of the pan before setting it down.  You will have to experiment a little and find what works best for you and gives you the best dip without having too much of your buttery caramel dip down around the bottom of your freshly dipped caramel apple.

Home Made Caramel Apple Recipe

Caramel Apple Topping Ideas

You can top these caramel apples with anything you like, or even just leave them plain. For these ones I used some drizzled melted chocolate and Christmas sprinkles for a real festive feel for the holidays.  Adding your favorite things to these apples as toppings takes them to the next level.  You might want to think about what the caramel apples are coated with at your favorite gourmet place like rocky mountain chocolate factory to give you some ideas for favorite toppings, like s'mores apples, or turtle apples.  

You can use just about anything small and sweet to add to these caramel apples such as:

  • milk chocolate
  • dark chocolate
  • white chocolate
  • graham crackers
  • mini marshmallows
  • M&Ms
  • mini chocolate chips
  • toffee bits
  • peanuts, almonds, cashews, or pecan pieces
  • cut up chocolate bar pieces
  • shredded coconut
Home Made Caramel Apple Recipes with chocolate and sprinkles
easy to make Caramel Apples

These would be beautiful on a holiday dessert tray, you can cut them into apple slices for easier eating.  Or, wrap the caramel apples for gift giving.  You will love making this easy recipe for family and friends.  Feel free to experiment with different toppings and try different combinations.

easy Caramel Apple Recipe

Gift Wrapping Your Caramel Apples

Cello bags work perfectly for wrapping, a little tip -push the edges of the bag down and open it up so that you can set the caramel apple inside, without it sticking to the sides of the bag on you.

from scratch Caramel Apple Recipe

Add a little bow and some pine for a holiday touch.  Or for a birthday or different celebration try adding coordinating ribbon to match your party colors.  This recipe makes perfect caramel apples that your family and friends will love.  These are best enjoyed when they are freshly made, but you can store a few days in the refrigerator.

Recipe

How to make homemade caramel apples.

Homemade Caramel Apples

Crisp apples coated in soft and creamy caramel coating.
No ratings yet
Print Pin Rate
Course: Candy, Desserts
Cuisine: American
Prep Time: 20 minutes minutes
Cook Time: 10 minutes minutes
Total Time: 30 minutes minutes
Servings: 8 apples
Calories: 483kcal
Author: Dannyelle Nicolle-Ramjist

Ingredients

  • 8 apples
  • 8 lollipop sticks
  • ½ cup butter
  • 1 cup brown sugar
  • 7 oz. condensed milk half of a 14 oz. can
  • ½ cup corn syrup
  • pinch of salt
  • 1 teaspoon vanilla extract
  • optional: chocolate and sprinkles

Instructions

  • Prepare your apples by putting a lollipop stick in the middle. If your apples are from an apple orchard, you might be lucky enough to have ones that aren't coated in wax. Most grocery store apples are coated in wax, and you need to remove it so that the caramel sticks. To remove the wax, place the apples in boiling hot water for about 10 seconds, and then wipe with a paper towel. Make sure they're thoroughly dry and chilled before dipping in caramel.
  • To make the caramel, combine butter, brown sugar, condensed milk, corn syrup and salt in a heavy saucepan. Bring it to a boil over a high heat, stirring constantly until the mixture reaches 240 degrees on a candy thermometer.
  • Remove from the heat and stir in the vanilla.
    Dip prepared cold apples, and place on a parchment paper or wax paper lined baking sheet to harden.
  • Optional: Melt some chocolate in a ziplock bag in the microwave, and snip the corner, and pipe onto the caramel apples. Add sprinkles to the chocolate before the chocolate sets.
  • Let harden and package in cello bags. Store in the refrigerator.

Nutrition

Serving: 1g | Calories: 483kcal | Carbohydrates: 81g | Protein: 8g | Fat: 17g | Saturated Fat: 10g | Polyunsaturated Fat: 5g | Trans Fat: 1g | Cholesterol: 48mg | Sodium: 233mg | Fiber: 4g | Sugar: 73g
Tried this Recipe? Tag me Today!Mention @LifeisaParty or tag #lifeisaparty!
Home Made Caramel Apple Recipes for christmas gift giving

With this Homemade Caramel Apples Recipe for, life really is a party!

More Recipe Inspiration

You might also enjoy Homemade Coffee Marshmallows Recipe here.
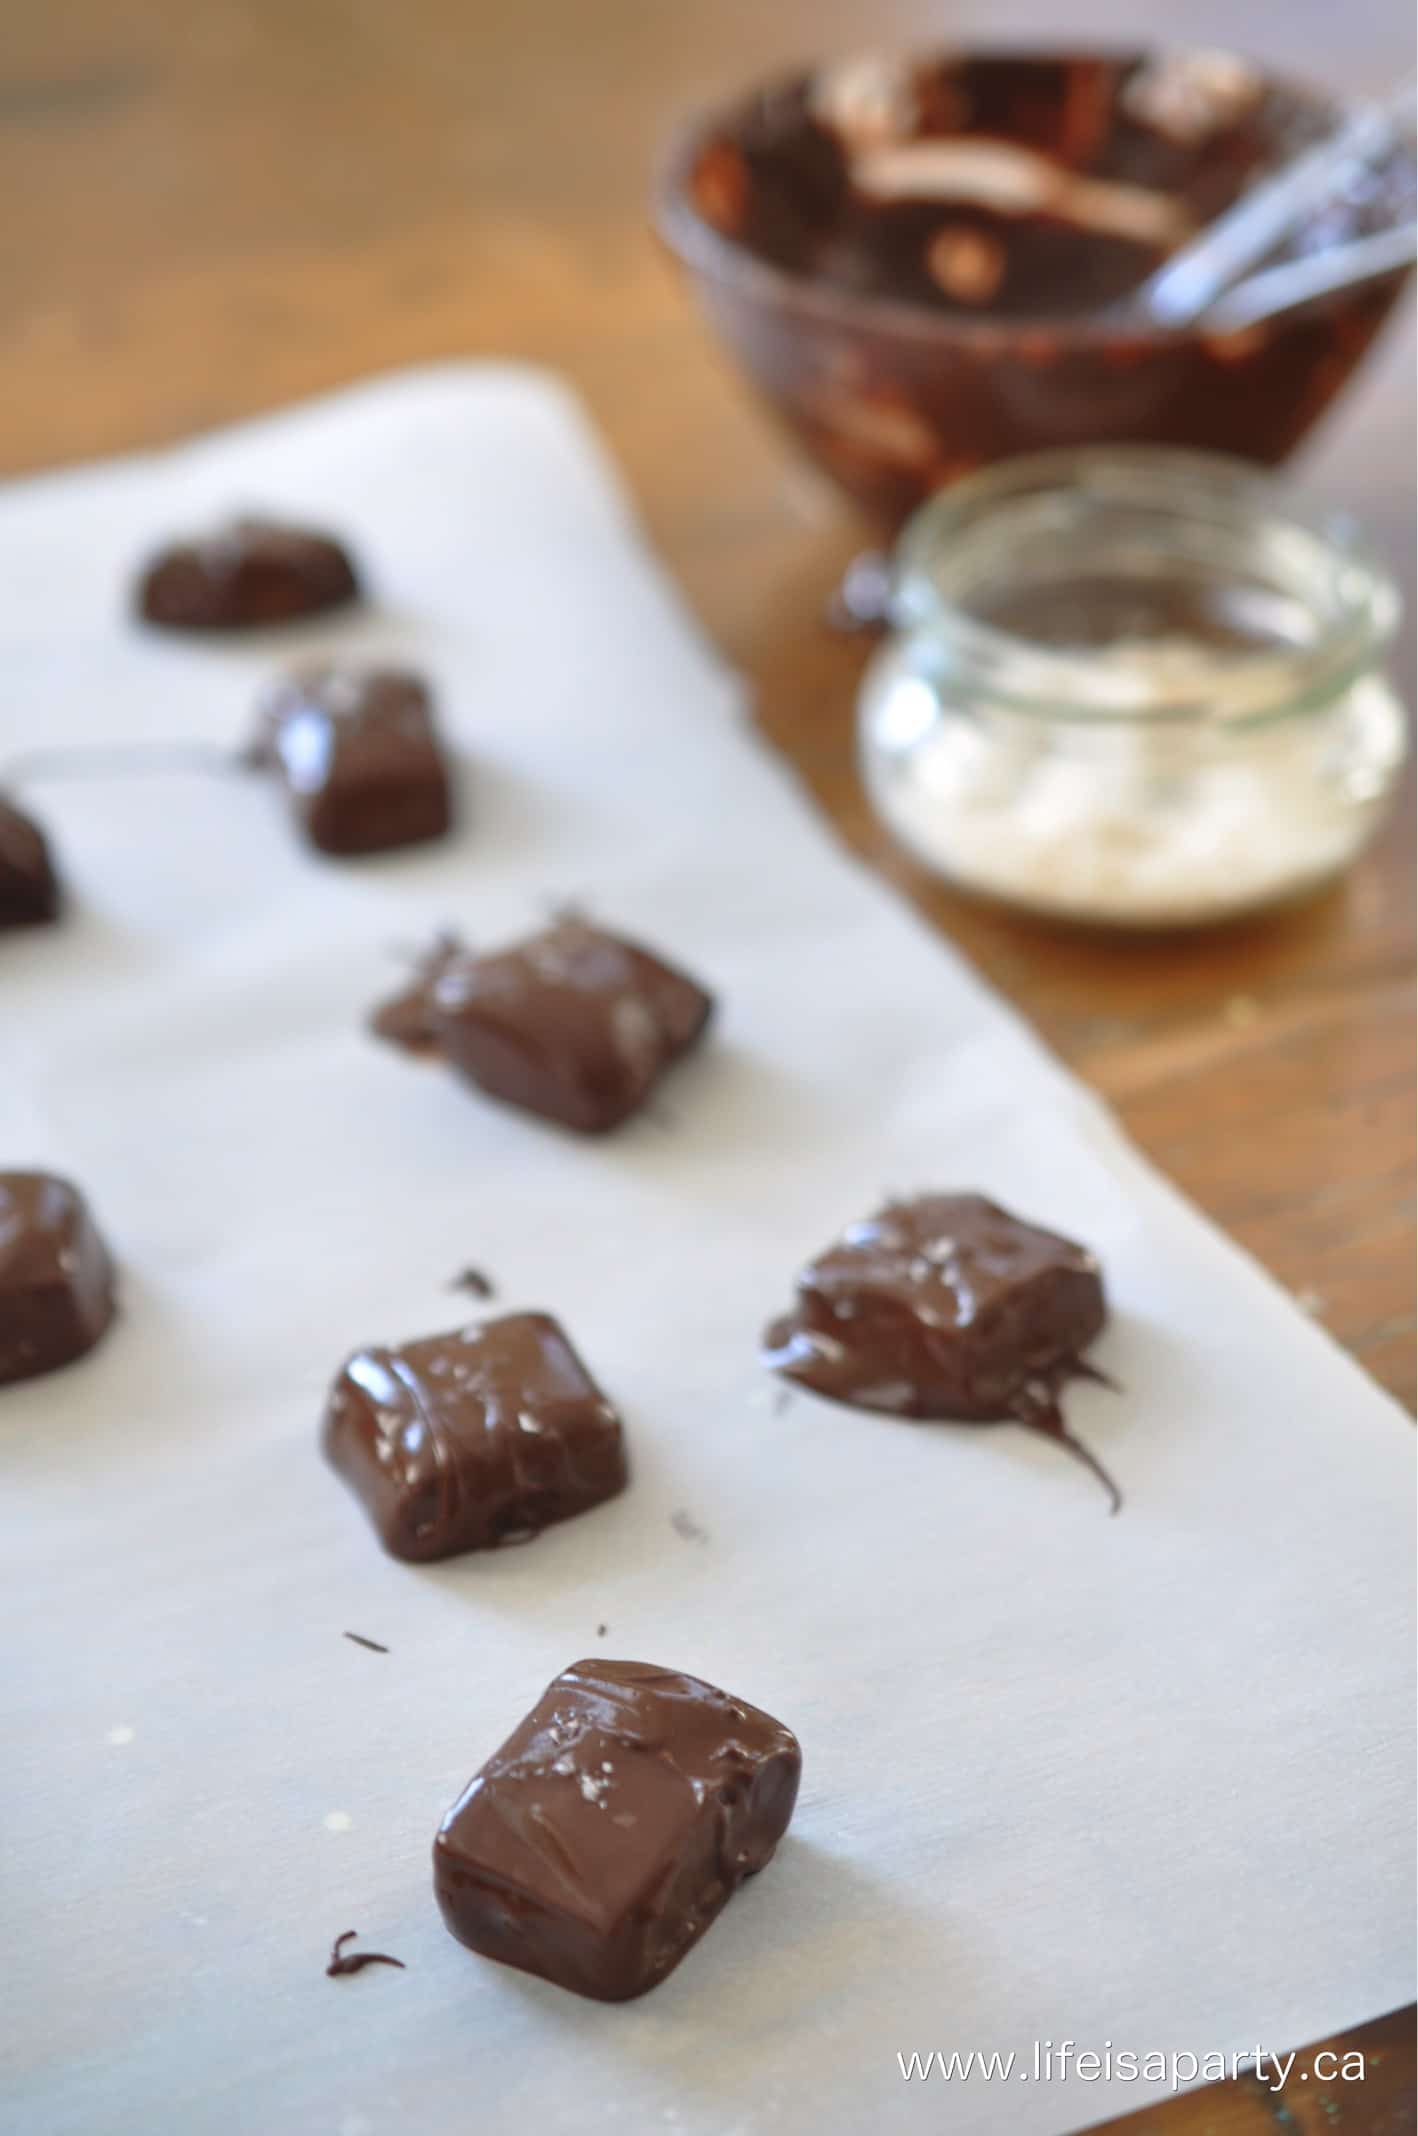
 

How To Make Homemade Creamy Caramels and Salted Chocolate Caramels

You might also like our Pecan Butter Crunch Recipe here.

Or, Homemade Caramel Corn Recipe here.
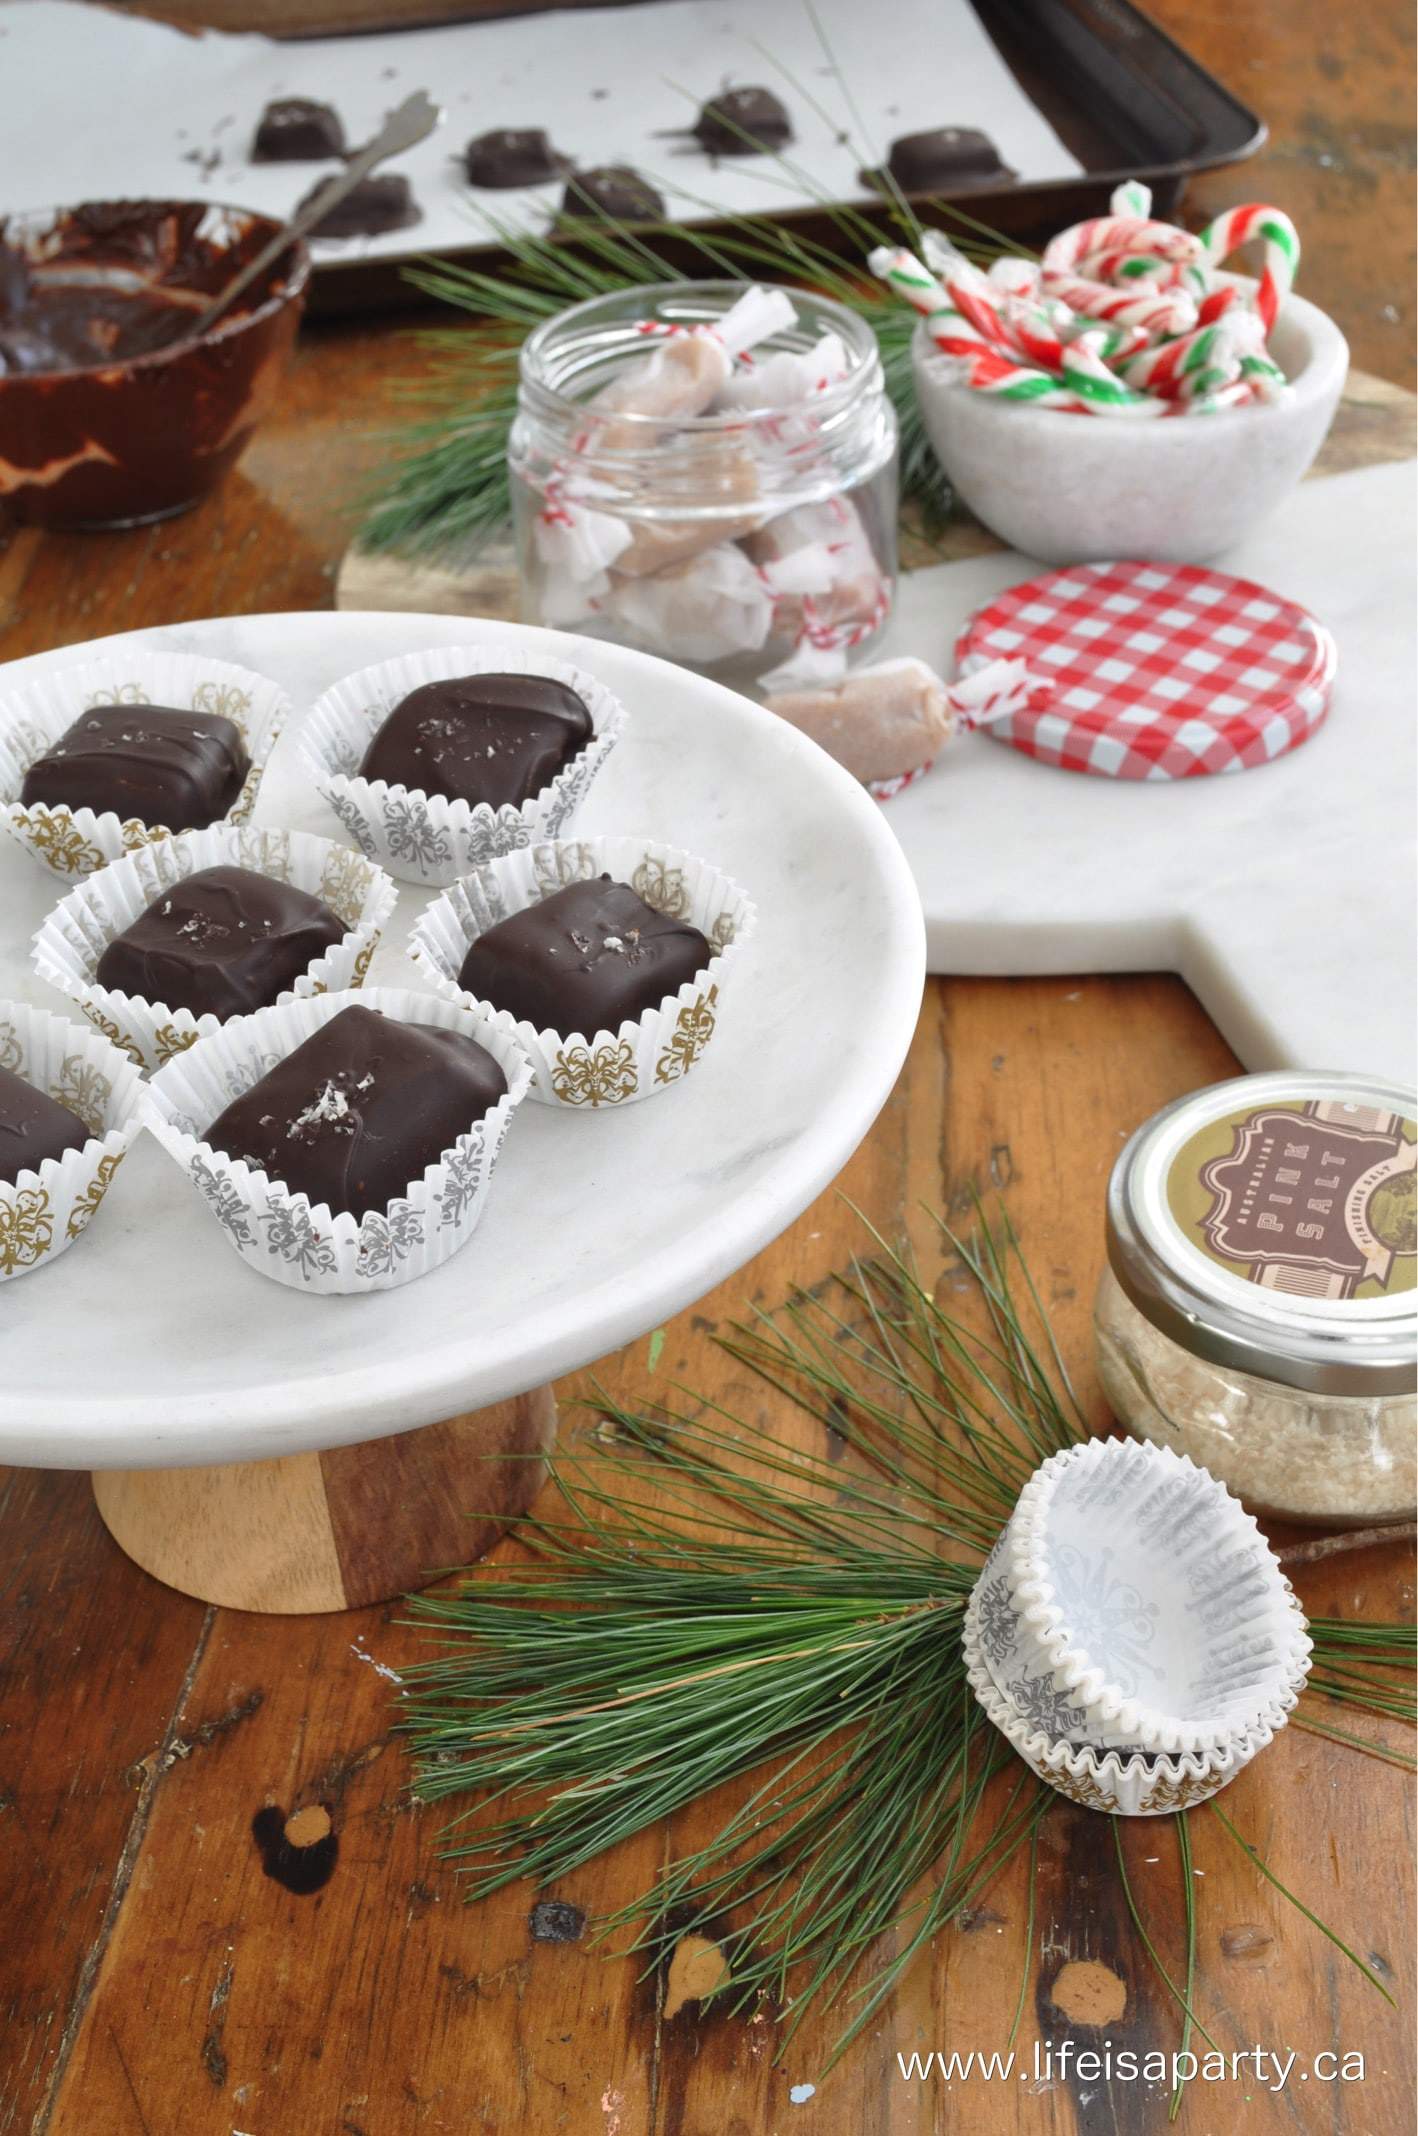
Homemade Coffee Marshmallows Recipe

Dec 12, 2016 · 1 Comment

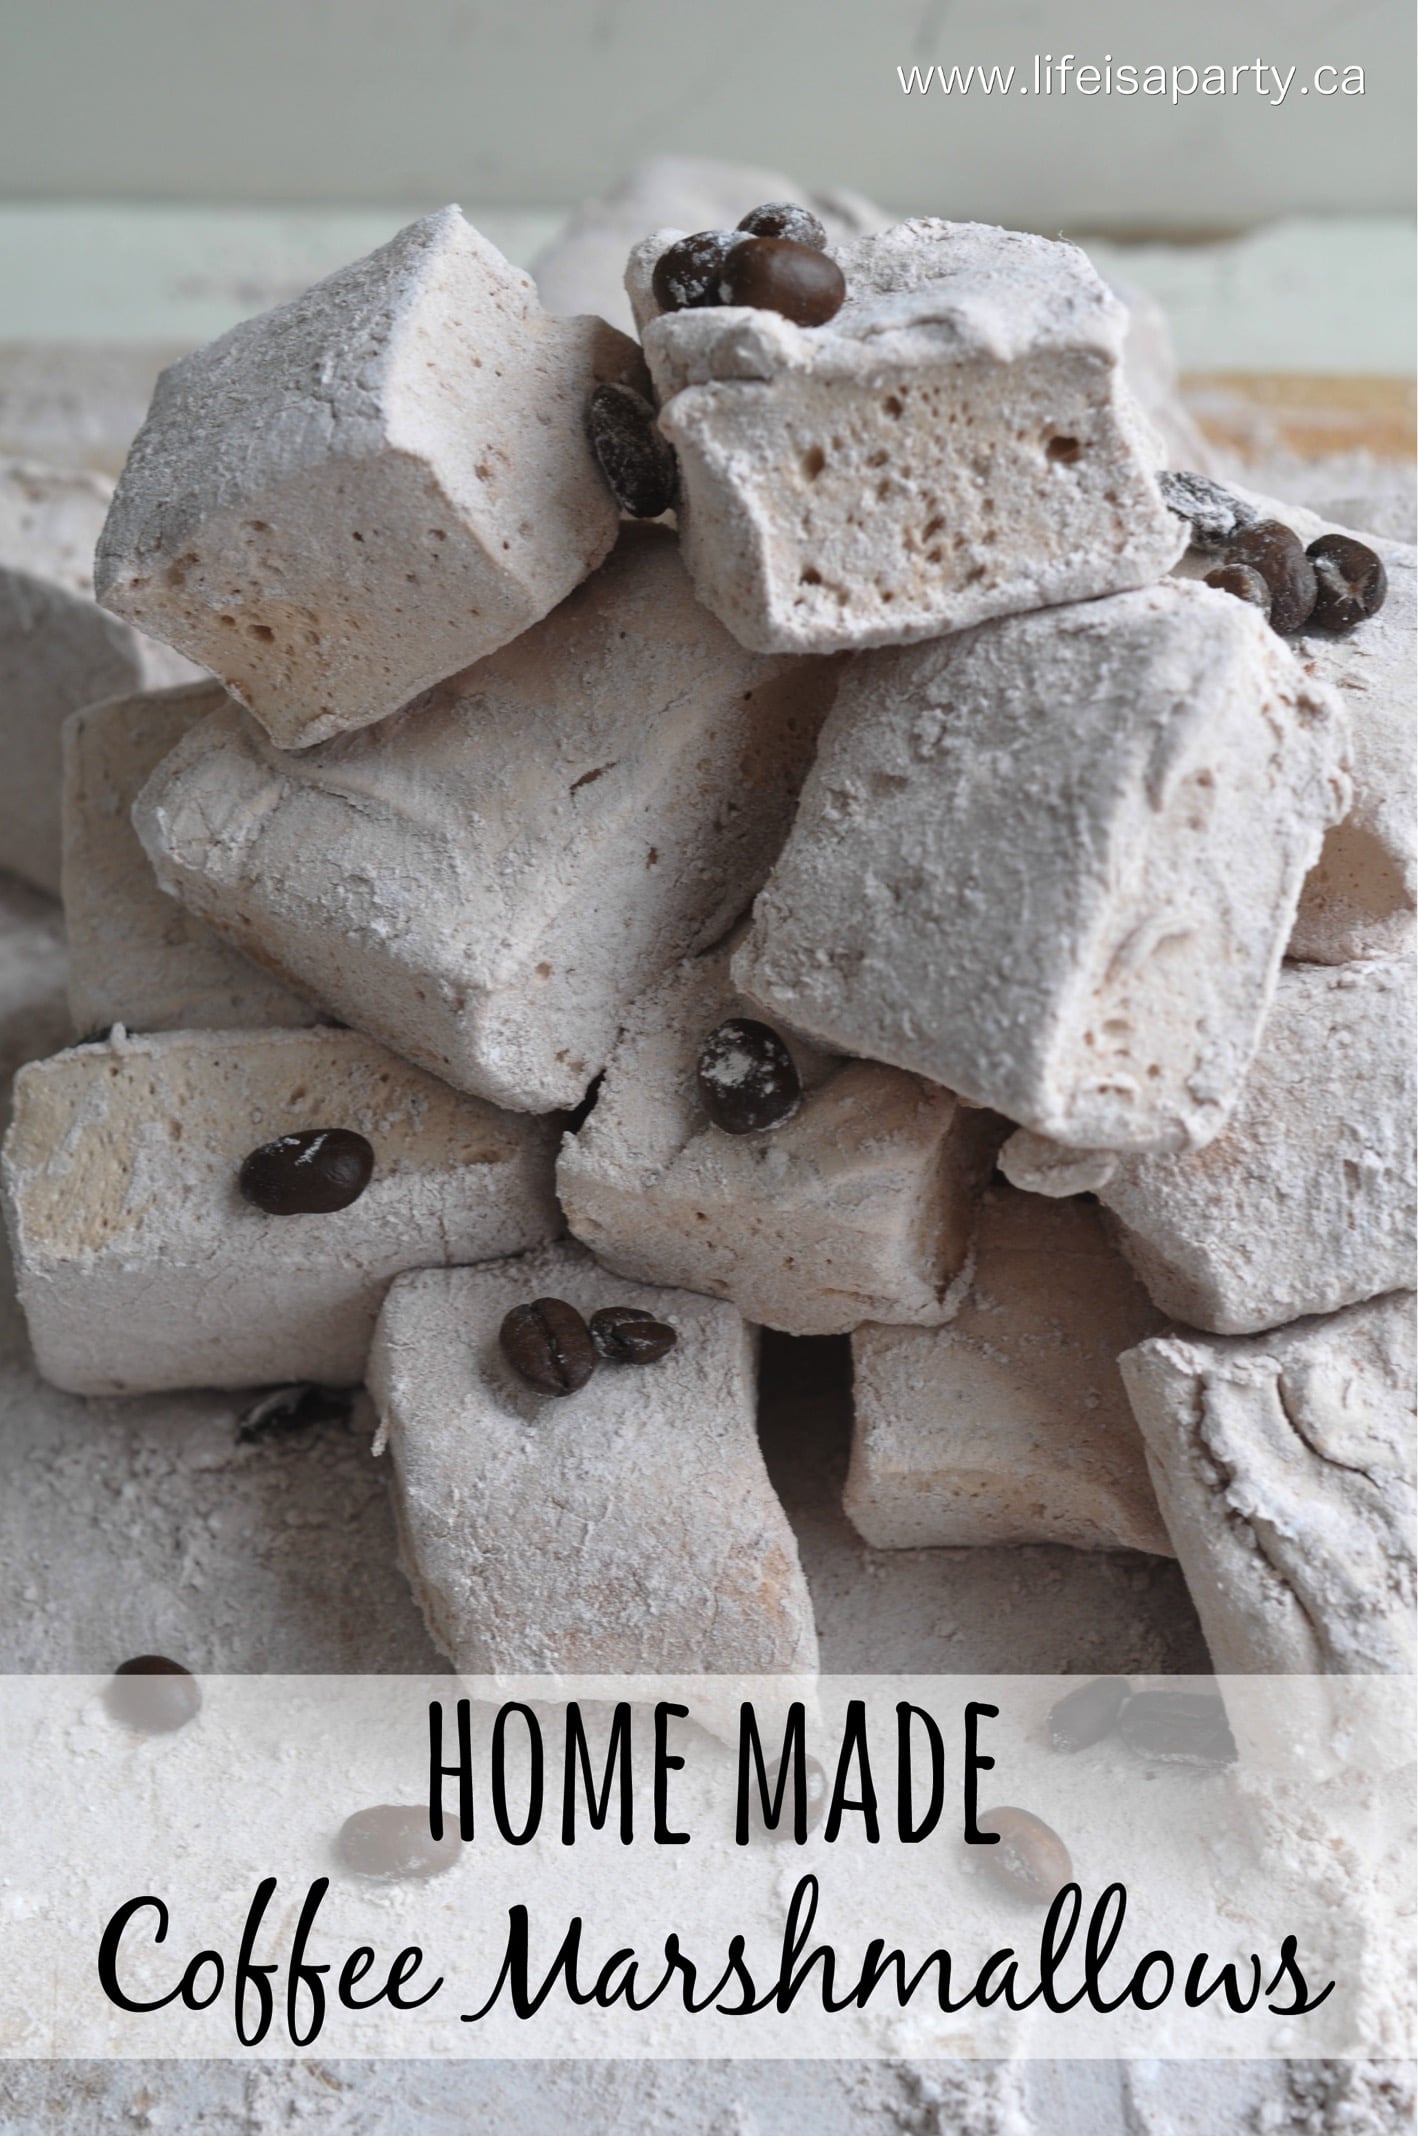
Stack of homemade coffee marshmallows showing mocha color and fluffy texture.

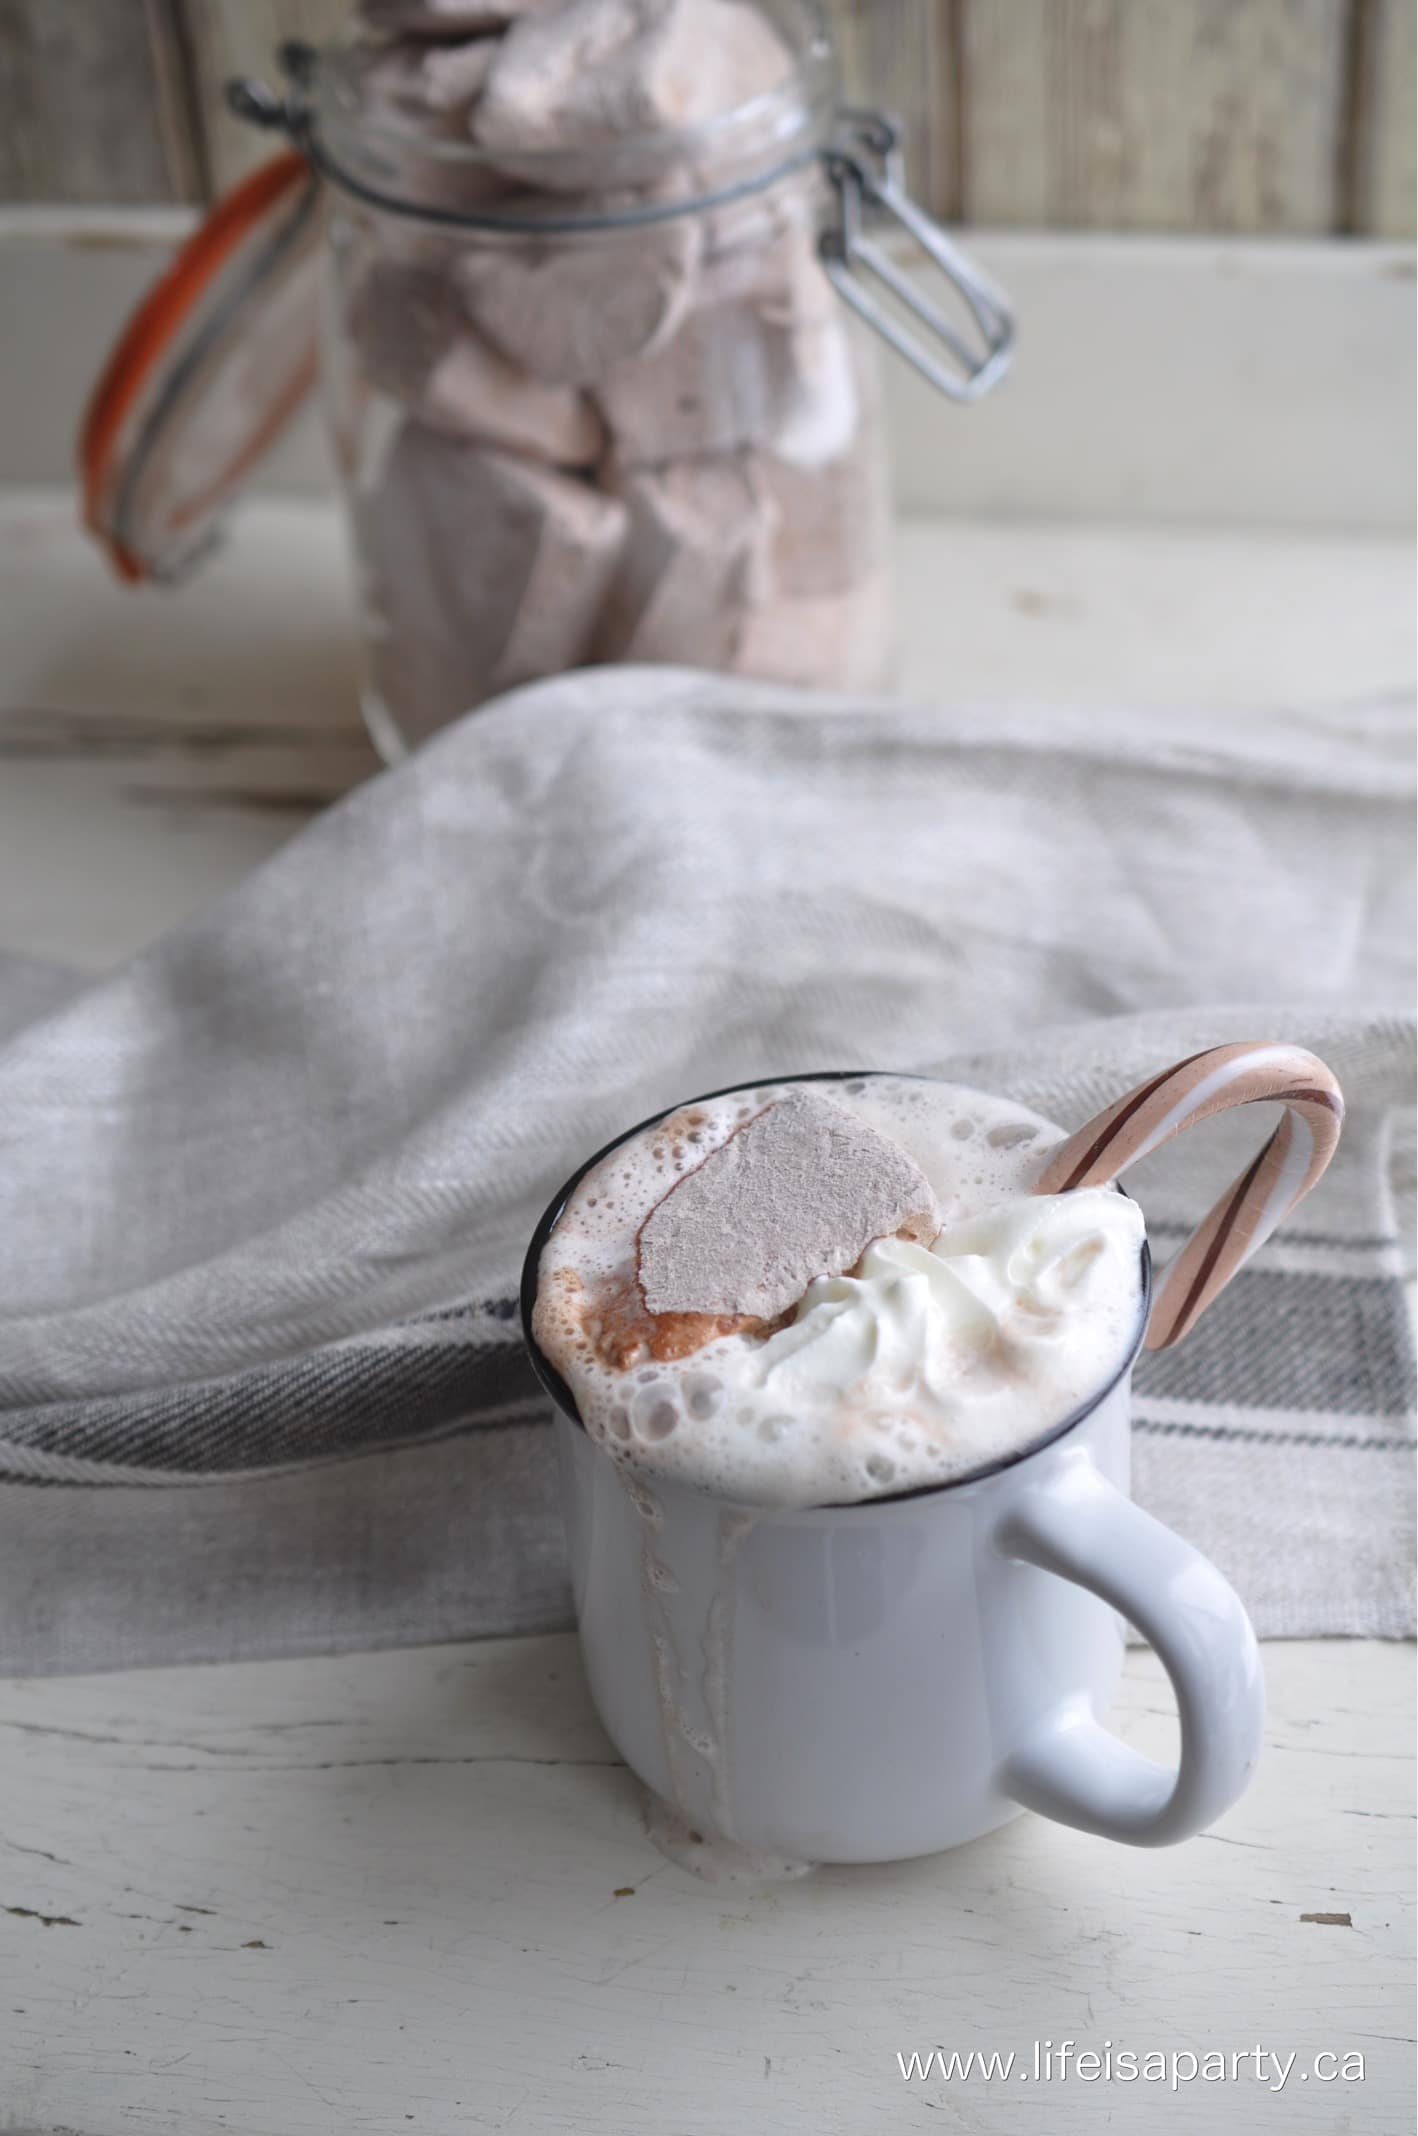
Fluffy, coffee flavored marshmallows that taste gourmet but use simple ingredients you already have. This recipe uses real brewed coffee for authentic flavor without hunting for specialty espresso powder. Perfect for enjoying in hot chocolate, coffee drinks, s'mores or giving as gifts with budget-friendly presentation ideas.

Homemade coffee flavor marshmallows.

Quick Look

  • 🍬 Homemade Coffee Marshmallows made with real brewed coffee (no specialty espresso powder needed)
  • ⏱️ Time: 35 minutes prep and cooking, then let sit overnight before slicing and enjoying
  • 🍽️ Yield: About 24 large marshmallows (2 inch squares)
  • 📊 Difficulty: Intermediate (requires candy thermometer)
  • 🎁 Perfect For: Holiday gifts, teacher gifts, hosting gifts, hot chocolate bars
  • 💡 Top Tip: Brew your coffee the night before and refrigerate it so it's completely cold when you start making marshmallows

Why You'll Love These Coffee Marshmallows

  • Real brewed coffee flavor. No hunting for instant espresso powder or settling for artificial-tasting coffee extract. This recipe uses strong coffee in place of water for authentic taste.
  • Simpler method. Coffee replaces the water that's already in the recipe (same moisture, fewer steps). No extra ingredients to dissolve separately.
  • Use any coffee you love. French press, drip, cold brew, or regular coffee maker all work great. Even works with decaf.
  • Perfect for gift-giving. Beautiful homemade quality with budget-friendly packaging ideas that look premium.
  • Make-ahead friendly. Ideal 2-day timeline means you can prepare in advance for any occasion.
[feast_advanced_jump_to]

Homemade marshmallows are lighter and fluffier than anything you'll find at the store. They're more delicate and taste fresher. If you've never tasted a homemade marshmallow, you're in for a little marshmallow magic.

I've made marshmallows probably 10 or 20 times and never had a fail, so these would be a great candy recipe to start with if you're nervous about using a candy thermometer. The coffee flavor is just right. Not overpowering or bitter, but not too subtle either. Because we're using real brewed coffee and not some chemical concentrated syrup, they have a lovely natural flavor.

These make perfect gifts for the piano teacher, girl guide leader, or that neighbour who's always so thoughtful. They're also wonderful as a hostess gift this time of year. For the person on your list who already has everything they need, but you still want something special for them (like an elderly relative), these are perfect. There's something so special about giving homemade treats.

Looking for more marshmallow flavors? Check out our Homemade Marshmallow Mug Toppers. You might also like our Oreo Marshmallows, Chocolate Marshmallows, Bailey's Marshmallows, Strawberry Marshmallows, and Purple Marshmallows.

Ingredients

Measurements in the recipe card below.

If you've never made homemade marshmallows, this is the year to give them a try. They're not hard to make, and they're so fluffy, and springy, and yummy you won't regret it.

About Using Real Brewed Coffee

Most coffee marshmallow recipes call for instant espresso powder or coffee extract. This recipe is different. We use real brewed coffee in place of the water that's already in the recipe.

Why this works better:

  • Instant espresso powder requires specialty shopping and dissolving separately
  • Coffee extract often has an artificial, chemical taste that comes through in the finished marshmallows
  • Real brewed coffee gives authentic, natural coffee flavor

Same moisture content, better flavor, simpler method. You can use French press, drip, cold brew, or your regular coffee maker. Even decaf works perfectly.

  • Strong brewed coffee: Replaces water in this recipe. Brew at 2 times your normal strength (about 2 tablespoons ground coffee per 1 cup water). French press, drip, cold brew, or regular coffee maker all work. Must be completely cold before starting. I brew mine the night before and refrigerate it.
  • Unflavored gelatin: Blooms in the cold coffee to create that signature marshmallow texture. Use three standard packets (about 21g total).
  • Corn syrup: Prevents sugar crystallization and keeps marshmallows soft and chewy. You can substitute honey, but the flavor will come through.
  • Cocoa powder: Creates mocha flavor and rich color. Without it, coffee marshmallows look pale and gray. Optional but highly recommended.
  • Vanilla extract: Rounds out the coffee and cocoa flavors. Don't skip this.
  • Dusting powder: Confectioners' sugar and cornstarch mixture prevents marshmallows from sticking. Add cocoa powder to the dusting mix for darker coating.

Equipment

  • Candy thermometer: Essential for success. The sugar syrup must reach exactly 240°F for marshmallows to set properly. You can find one at a kitchen store or order on line, they're under $20
  • Stand Mixer: This recipe requires a lot of whipping and is best made with a stand mixer. You can use a hand mixer, but requires patience. Avoid whipping by hand.
  • Pizza Cutter: A pizza cutter works really well for slicing the finished marshmallows and giving a good clean cut.
  • Cookie Cutters: You can also use cookie cutters to cut out the marshmallows into shapes if you wish.
Homemade Coffee Marshmallows

How To Make Coffee Marshmallows

Step 1: Bloom the gelatin. Put the gelatin and ½ cup of the cold coffee into the bowl of a stand mixer with the whisk attachment. Set aside while you make the syrup.

Step 2: Make the sugar syrup. Combine the other ½ cup of coffee, white sugar, corn syrup, and salt in a medium saucepan. Cook covered over medium high heat for 3 to 4 minutes. Remove the lid and clip a candy thermometer onto the side of the pan. Continue cooking until the mixture reaches 240 degrees F. Once the mixture reaches this temperature, take it off the heat.

Step 3: Whip the marshmallow mixture. With the mixer running on low speed, slowly pour the hot sugar syrup mixture down the side of the stand mixer bowl into the gelatin mixture. Then increase the speed to high. Continue to whip until the mixture becomes very thick and is lukewarm, about 12 to 15 minutes. Add the vanilla and 2 tablespoons of cocoa powder during the last minute of whipping.

Step 4: Prepare the pan. While the mixture is whipping, combine the powdered sugar, corn starch, and 2 tablespoons of cocoa in a small bowl. Lightly spray a 9 by 13 inch baking pan with nonstick cooking spray. Add ¼ cup of the powdered sugar mixture and move around to completely coat the bottom and sides of the pan. Return the remaining mixture to the bowl for later use.

Step 5: Pour and set. When ready, pour the marshmallow mixture into the prepared pan, using a lightly oiled spatula for spreading evenly into the pan. Dust the top of the marshmallows with more of the powdered sugar mixture to lightly cover. Save the rest for later. Allow the marshmallows to sit uncovered for at least 4 hours and up to overnight at room temperature.

how to make Homemade Marshmallows

Step 6: Cut and finish. Turn the marshmallows out onto a cutting board and cut into 2 inch squares using a pizza cutter dusted with the icing sugar mixture, or a sharp knife. Once cut, lightly dust all sides of each marshmallow with the remaining powdered sugar mixture. You can also use a cookie cutter to cut shapes like hearts or stars.

How To Make Homemade Coffee Marshmallows

Expert Tips for Perfect Coffee Marshmallows

  • Temperature is critical. Your candy thermometer must reach exactly 240°F for the marshmallows to set properly.
  • Coffee must be cold. Warm coffee won't bloom the gelatin properly. Refrigerator cold is best. I always brew mine the night before.
  • Don't skip the whipping time. That 12 to 15 minutes is essential. The marshmallows triple in volume and develop their signature texture during this stage.
  • Grease your cutting tools frequently. Wipe off marshmallow residue between cuts if necessary for neater squares. A pizza cutter works great for this step.
  • The dusting powder prevents sticking. Don't skip coating all sides of the cut marshmallows. It keeps them from becoming one giant sticky blob in storage.
  • Use a stand mixer if possible. Hand mixers work but require patience. The mixture needs sustained high speed whipping to reach proper volume.
How to make Coffee Marshmallows

How to Package Coffee Marshmallows for Gifts

This is where my experience as a party planner really shines. You can create premium looking gifts from dollar store finds.

  • Clear cellophane bags: Buy in bulk from dollar stores. Tie with coordinated ribbon. Add a simple tag that says Homemade Coffee Marshmallows.
  • Mason jar presentation: Layer marshmallows in small mason jars. Add a fabric circle under the lid (cut with pinking shears). Tie twine around jar neck with a tag. Pairs beautifully with hot cocoa mix.
  • Coffee themed gift sets: Package marshmallows with a small bag of coffee beans. Include in a mug with ribbon. Add a recipe card for coffee hot chocolate. Perfect complete gift for coffee lovers.
  • Pro repackaging tips: Choose 2 to 3 coordinated colors for cohesive look. Dollar store ribbon looks premium when colors match. Print simple labels at home on kraft paper. Group several small packages in a basket for impressive presentation.
  • Shelf life for gifting: These keep well for 1 to 2 weeks in an airtight container. Always include a best by date on your gift tag (2 weeks from when you made them).
Coffee Flavoured Marshmallows

Creative Ways to Use Coffee Marshmallows

These are perfect for Christmas, but also a great treat anytime of year. Beyond adding them to hot chocolate, these coffee marshmallows are incredibly versatile.

  • In drinks: Float in morning coffee instead of cream. Top Irish coffee or spiked hot chocolate. Melt into lattes for extra flavor. Add to cold brew for a sweet treat.
  • For desserts: Make coffee marshmallow rice crispy treats. Use in s'mores with dark chocolate and graham crackers, or on a s'mores charcuterie board. Top brownies before baking for a mocha finish. Fold into ice cream. Add to rocky road candy. Use as a dipper for chocolate fondue.
  • For entertaining: Create a hot chocolate charcuterie board, with coffee and vanilla marshmallow options. Serve alongside espresso at dinner parties. Package as party favors for coffee themed showers. Include in dessert charcuterie boards.
  • Gift pairing ideas: Bundle with homemade hot chocolate mix. Pair with a bag of specialty coffee. Include with a new mug. Add to a coffee lover's basket.
Coffee Marshmallows Recipe

Frequently Asked Questions

Can I use instant espresso powder instead of brewed coffee?

Yes. If you prefer instant espresso, dissolve about 2 tablespoons in 1 cup of water instead.

Can I make decaf coffee marshmallows?

Yes, absolutely. Just brew strong decaf coffee and use it the same way. The process is identical.

Why are my marshmallows too soft and sticky?

The sugar syrup probably didn't reach 240°F. Make sure your thermometer tip is fully submerged in the syrup, but resting on the bottom of the pot for an accurate reading.

Can I use cold brew coffee?

Yes! Cold brew is already concentrated, making it perfect for this recipe. Use it as is without diluting.

How do I store coffee marshmallows?

Store in an airtight container at room temperature. Keep away from heat and direct sunlight. Add a little extra dusting powder to the container to prevent sticking. They last up to 3 weeks but are best in the first 2 weeks.

Can I freeze marshmallows?

Yes, you can freeze them for up to 3 months. Store in an airtight container or freezer bag with parchment paper between layers. Thaw at room temperature before using. The texture may be slightly different but they're still delicious.

What if I don't have a candy thermometer?

A candy thermometer is really essential for consistent results. I don't recommend making this recipe without a candy thermometer.

Do I have to use cocoa powder?

It's optional but recommended. Without it, the marshmallows will be pale beige. The cocoa adds color and creates a more complex mocha flavor.

More Candy and Coffee Recipe Inspiration

  • Homemade iced capps in glasses on a wood table.
    Tim Hortons Copycat Iced Capp Recipe
  • Easy chocolate walnut fudge made in the microwave with sweetened condensed milk, cut into squares.
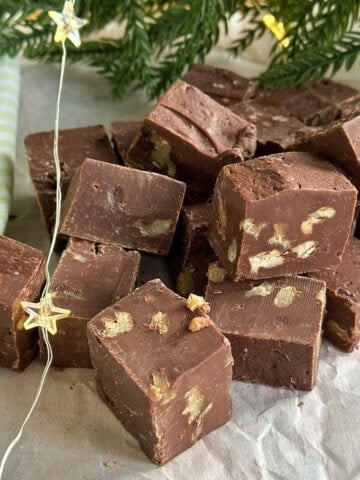
    Easy Chocolate Walnut Fudge -Mrs. Weasley's Recipe
  • Homemade marshmallow mug toppers with chocolate drizzle.
    Homemade Marshmallow Mug Toppers
  • DIY hot chocolate mix recipe in a mason jar.
    DIY Hot Chocolate Mix Gift Idea

If you make these Homemade Coffee Marshmallows, please leave a rating and comment below. Thanks for visiting Life is a Party today!

Coffee Flavoured Marshmallows Recipe

Recipe

Stack of homemade coffee marshmallows showing mocha color and fluffy texture.

Homemade Coffee Marshmallows

Soft and fluffy coffee flavoured marshmallows.
5 from 1 vote
Print Pin Rate
Course: Desserts
Cuisine: American
Prep Time: 15 minutes minutes
Cook Time: 20 minutes minutes
Additional Time: 12 hours hours
Total Time: 12 hours hours 35 minutes minutes
Servings: 24
Calories: 112kcal
Author: Dannyelle Nicolle-Ramjist

Ingredients

  • 3 packages unflavored gelatin 7 grams x 3 = 21 grams total
  • 1 cup cold strong coffee -divided
  • 1 ½ cups white sugar
  • 1 cup light corn syrup
  • ¼ teaspoon salt
  • 1 teaspoon vanilla
  • ¼ cup powdered sugar
  • ¼ cup cornstarch
  • 4 tablespoon cocoa -divided
  • Nonstick spray

Instructions

  • Put the gelatin and ½ cup of the cold coffee into the bowl of a stand mixer, with the whisk attachment. Set aside.
    3 packages unflavored gelatin, 1 cup cold strong coffee
  • Combine the other ½ cup of coffee, white sugar, corn syrup and salt in a medium saucepan, and cook, covered over medium-high heat for 3-4 minutes. Remove the lid and clip a candy thermometer onto the side of the pan and continue cooking until the mixture reaches 240 degrees F, approximately. Once the mixture reaches this temperature, take it off the heat.
    1 ½ cups white sugar, 1 cup light corn syrup, ¼ tsp salt, 1 cup cold strong coffee
  • With the mixer running on low speed, slowly pour the hot sugar syrup mixture down the side of the stand mixer bowl into the gelatin mixture. Then increase the speed to high. Continue to whip until the mixture becomes very thick and is lukewarm, about 12 to 15 minutes. Add the vanilla, and 2 tablespoon of cocoa powder during the last minute of whipping.
    1 tsp vanilla, 4 tbsp cocoa
  • While the mixture is whipping prepare the pans as follows: Combine the powdered sugar, corn starch, and 2 tablespoon of cocoa in a small bowl. Lightly spray a 9 by 13 inch baking pan with nonstick cooking spray. Add ¼ cup the powdered sugar mixture and move around to completely coat the bottom and sides of the pan. Return the remaining mixture to the bowl for later use. When ready, pour the marshmallow mixture into the prepared pan, using a lightly oiled spatula for spreading evenly into the pan. Dust the top of the marshmallows with more of the powdered sugar mixture to lightly cover, save the rest for later.A
    1 tsp vanilla, ¼ cup powdered sugar, ¼ cup cornstarch, 4 tbsp cocoa , Nonstick spray
  • Allow the marshmallows to sit uncovered for at least 4 hours and up to overnight at room temperature.
  • Turn the marshmallows out onto a cutting board and cut into 2-inch squares using a pizza cutter dusted with the powdered sugar mixture, or a sharp knife. Once cut, lightly dust all sides of each marshmallow with the remaining powdered sugar mixture. Store in an airtight container for up to 3 weeks.

Notes

About the coffee: Brew at 2 times your normal strength for best flavor. Any brewing method works (French press, drip, cold brew, regular coffee maker). The coffee must be completely cold before starting. Decaf works perfectly if you want to avoid caffeine.
About the cocoa powder: Optional but highly recommended. Without it, coffee marshmallows look pale. 
Equipment note: A stand mixer makes this much easier, but a hand mixer works if you're patient. Avoid trying to whip by hand as it requires too much sustained effort.
Cutting tip: Grease your pizza cutter or knife frequently. Wipe off marshmallow residue between cuts for neater squares.  You can also use cookie cutters like hearts or stars.
Storage: Store in an airtight container at room temperature for up to 3 weeks. They're best in the first 2 weeks. Do not refrigerate as cold makes marshmallows sticky when they come back to room temperature.

Nutrition

Serving: 1g | Calories: 112kcal | Carbohydrates: 26g | Protein: 3g | Fat: 0.2g | Saturated Fat: 0.1g | Polyunsaturated Fat: 0.005g | Monounsaturated Fat: 0.04g | Sodium: 41mg | Potassium: 19mg | Fiber: 0.3g | Sugar: 25g | Calcium: 5mg | Iron: 0.2mg
Tried this Recipe? Tag me Today!Mention @LifeisaParty or tag #lifeisaparty!


Christmas Fondue Party

Dec 8, 2016 · 8 Comments

Christmas fondue party with menus, recipes, and decor.

You will love this Christmas Fondue Party! Make an entire evening out of fondue, with cheese fondue, oil fondue, chocolate fondue, and caramel fondue. This is perfect easy entertaining for the holidays at it's best.

Christmas fondue party with menus, recipes, and decor.
[feast_advanced_jump_to]

Why We Love This Party

  • A fondue evening is something special and a little different, that your guests will love.
  • You won't have to spend half the night in the kitchen alone, the guests cook their own dinner!
  • Fondue creates a slower, lingering pace to the dinner, so you get to really enjoy the time with friends and family.
  • We've created a delicous menu of savoury and sweet fondue courses.

This Christmas Fondue party was so much fun! I love to entertain and especially around the holidays. But sometimes you spend so much time hosting that it's more tiring than fun…anyone been there? 

Hosting a fondue party is the perfect way to get to be a guest at your own party.

This is a great party for the holidays or for New Year's Eve. But a fondue dinner party is great for any special occasion, or just for getting a group of friends together. One of my favorite things about a fondue meal is that it takes awhile to cook your food, and tends to be an evening where everyone slowly cooks and talks together, and spends a great evening together.

You might also like our Christmas Cookie Party, Christmas Movie Night, Nutcracker Tea Party, Circus Dinner Party, or Fondue Date Night.

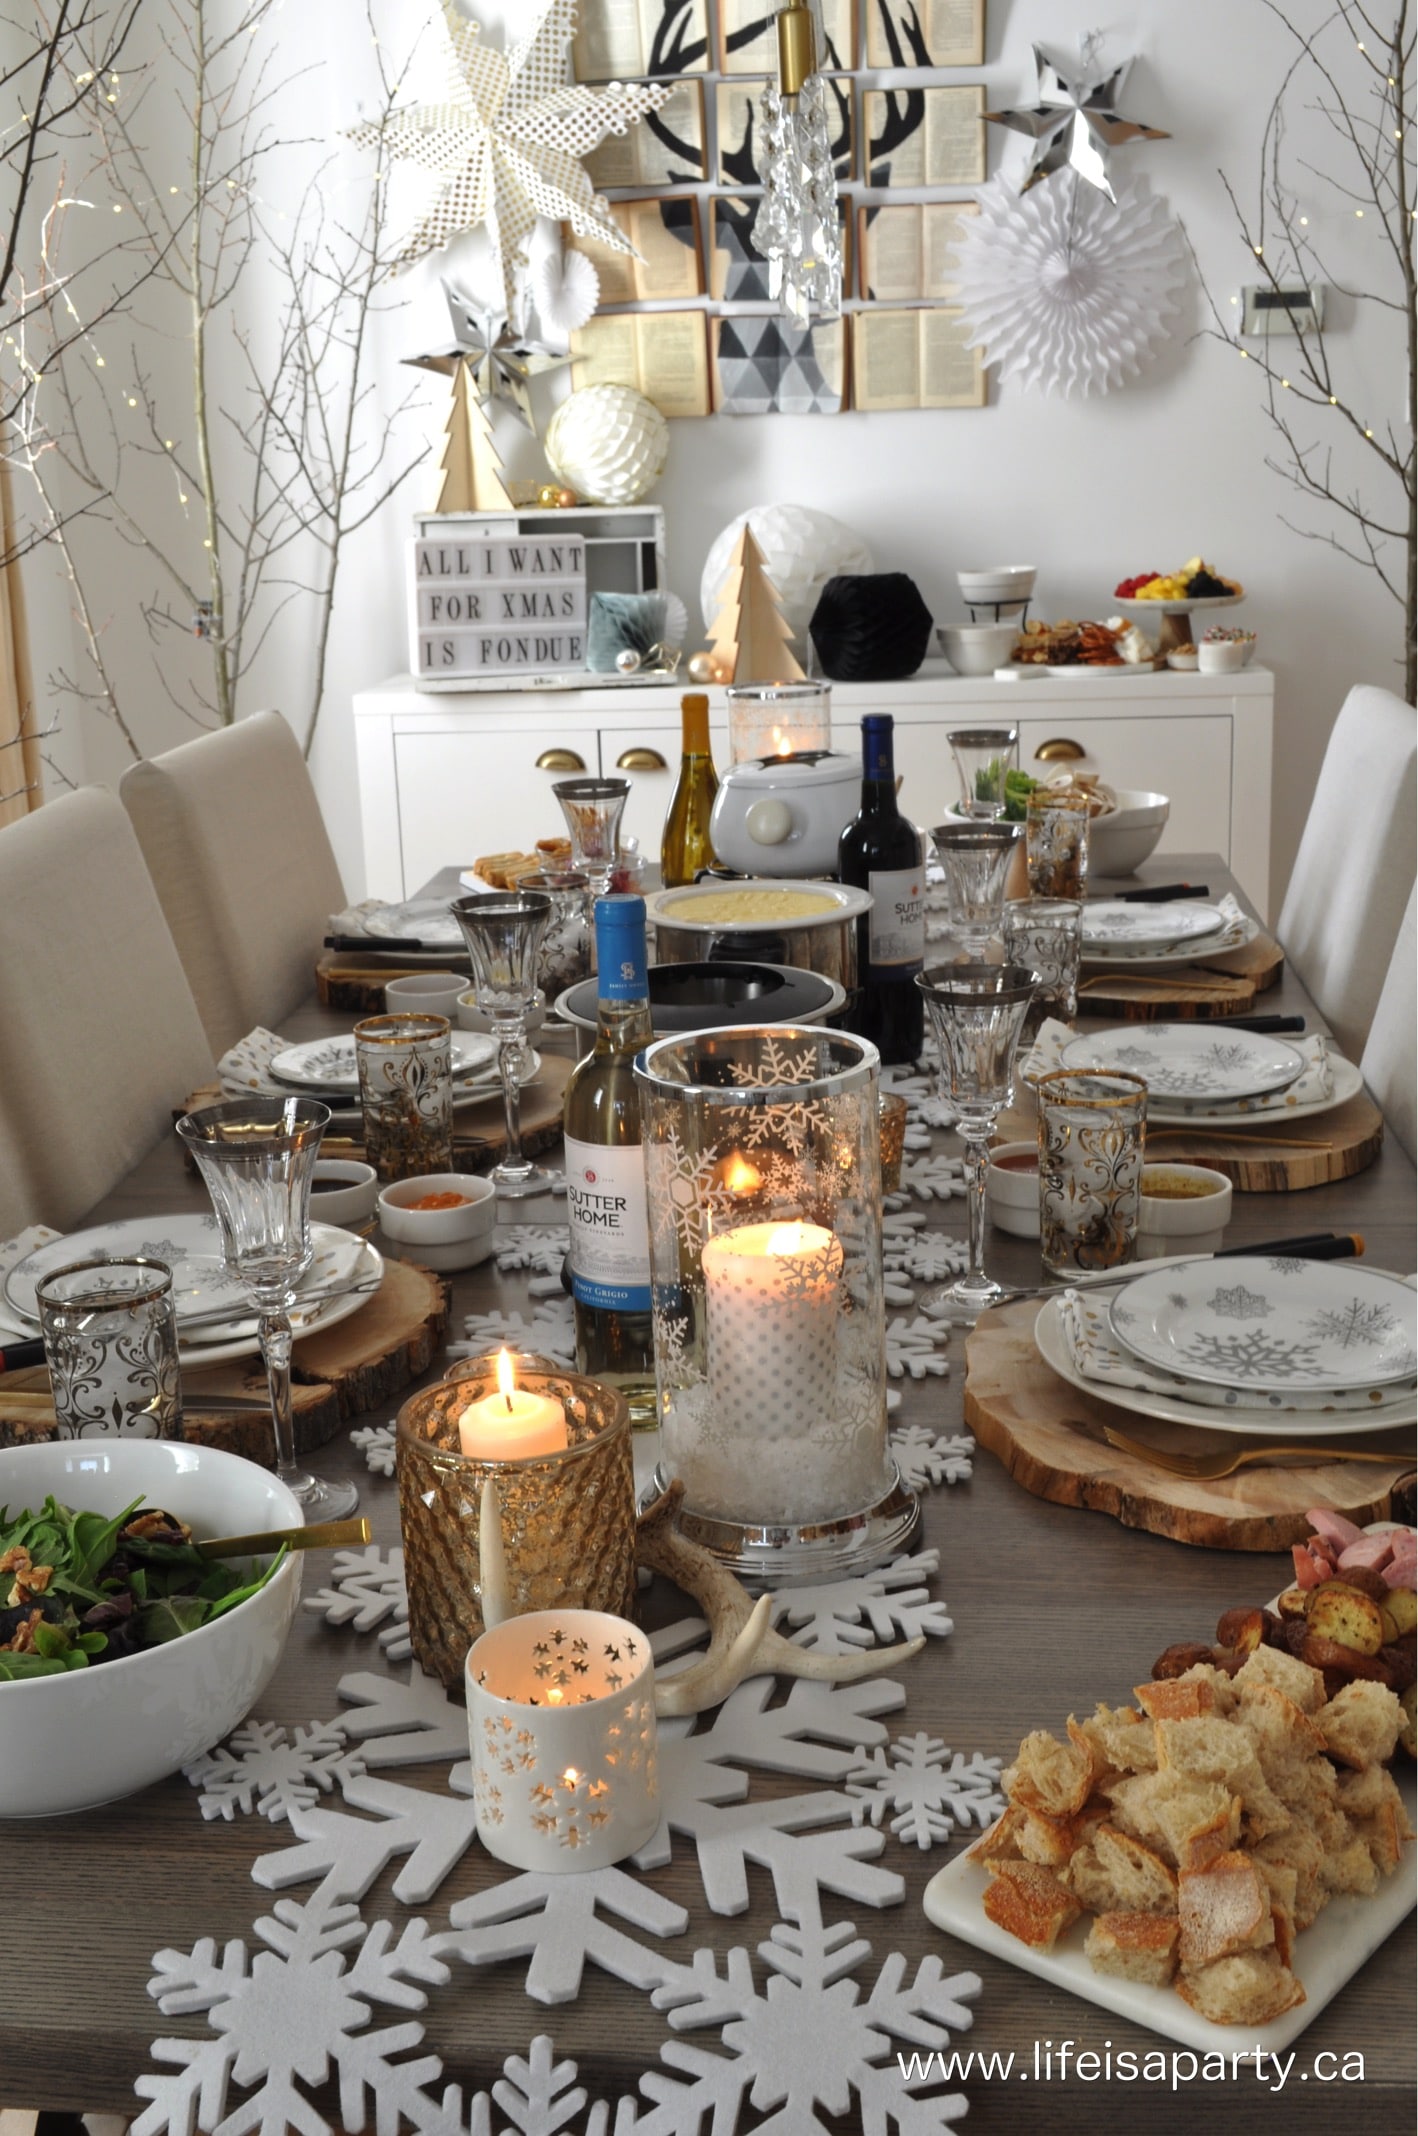
Dining table set for a Christmas fondue party.

How To Host A Fondue Party

This Christmas Fondue party is so much fun, easy to put together, and a fun retro idea for the holidays. We made a complete meal of fondue, by starting with a cheese fondue, and offering an oil fondue with meat and vegetable options. We added a salad as a great accompaniment to round things out. We had a chocolate and a caramel fondue for dessert. Dinner guests loved all the fun choices.

Wine bar cart set up for a party.

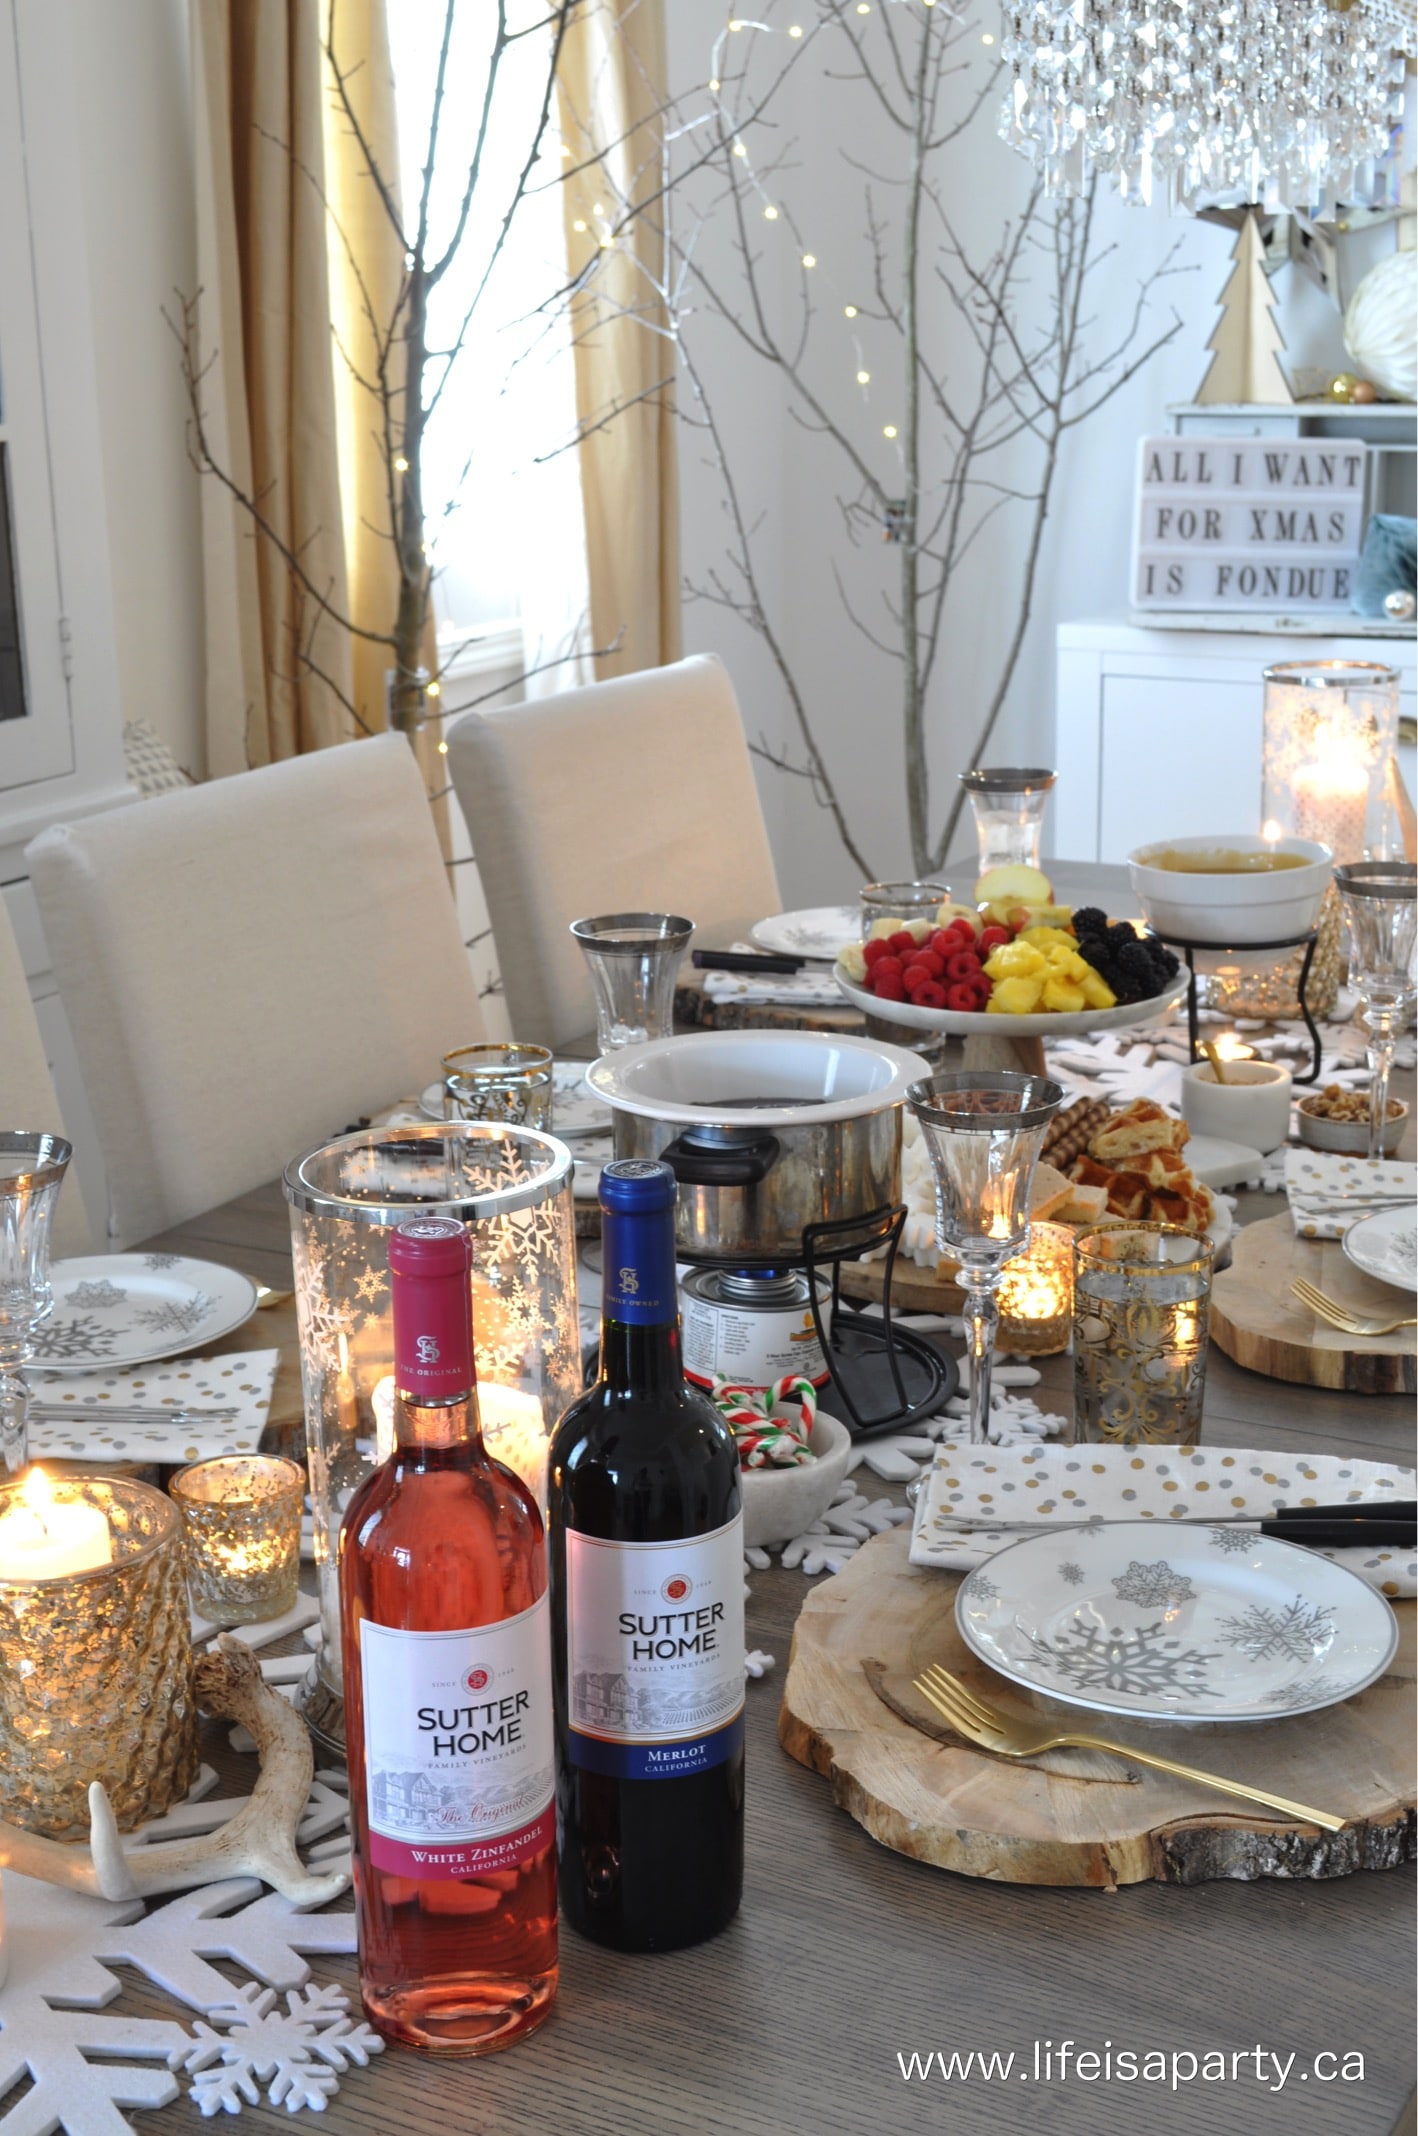
As your guests arrive at the beginning of the party it's lovely to offer them a drink a glass of wine from the bar cart.

I set up a wine bar near the door.  It made it easy for guests to serve themselves through out the evening, and is a great way to welcome them in with a lovely glass of wine.  

Wine and cheese are the perfect pair, and inspired the wine and fondue theme.
Wine glass with a silver rim, and wine bottles on a bar cart.

 Christmas Fondue Party Table Setting

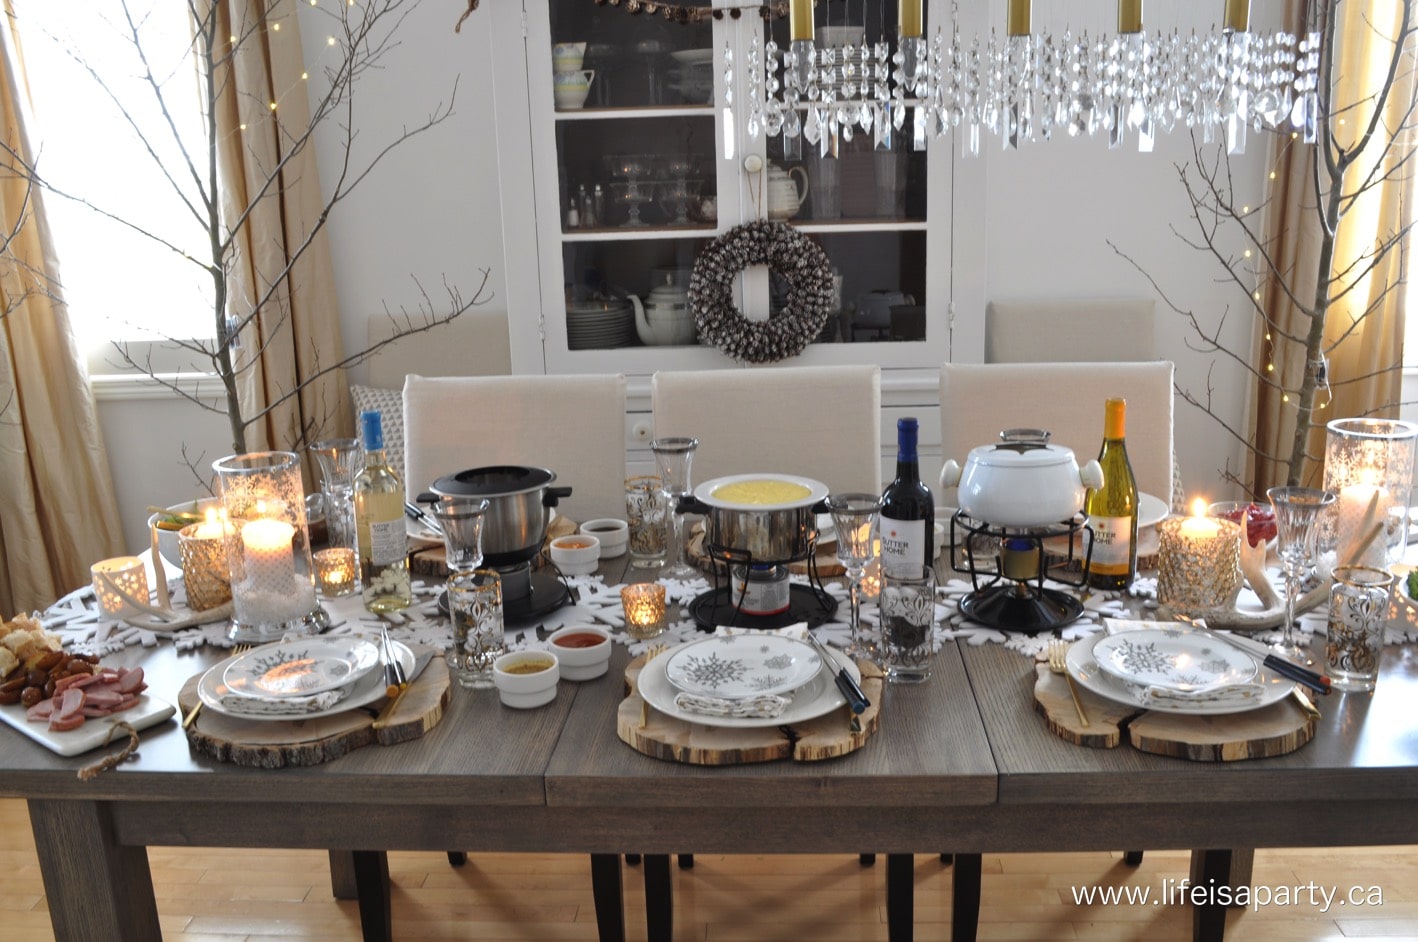
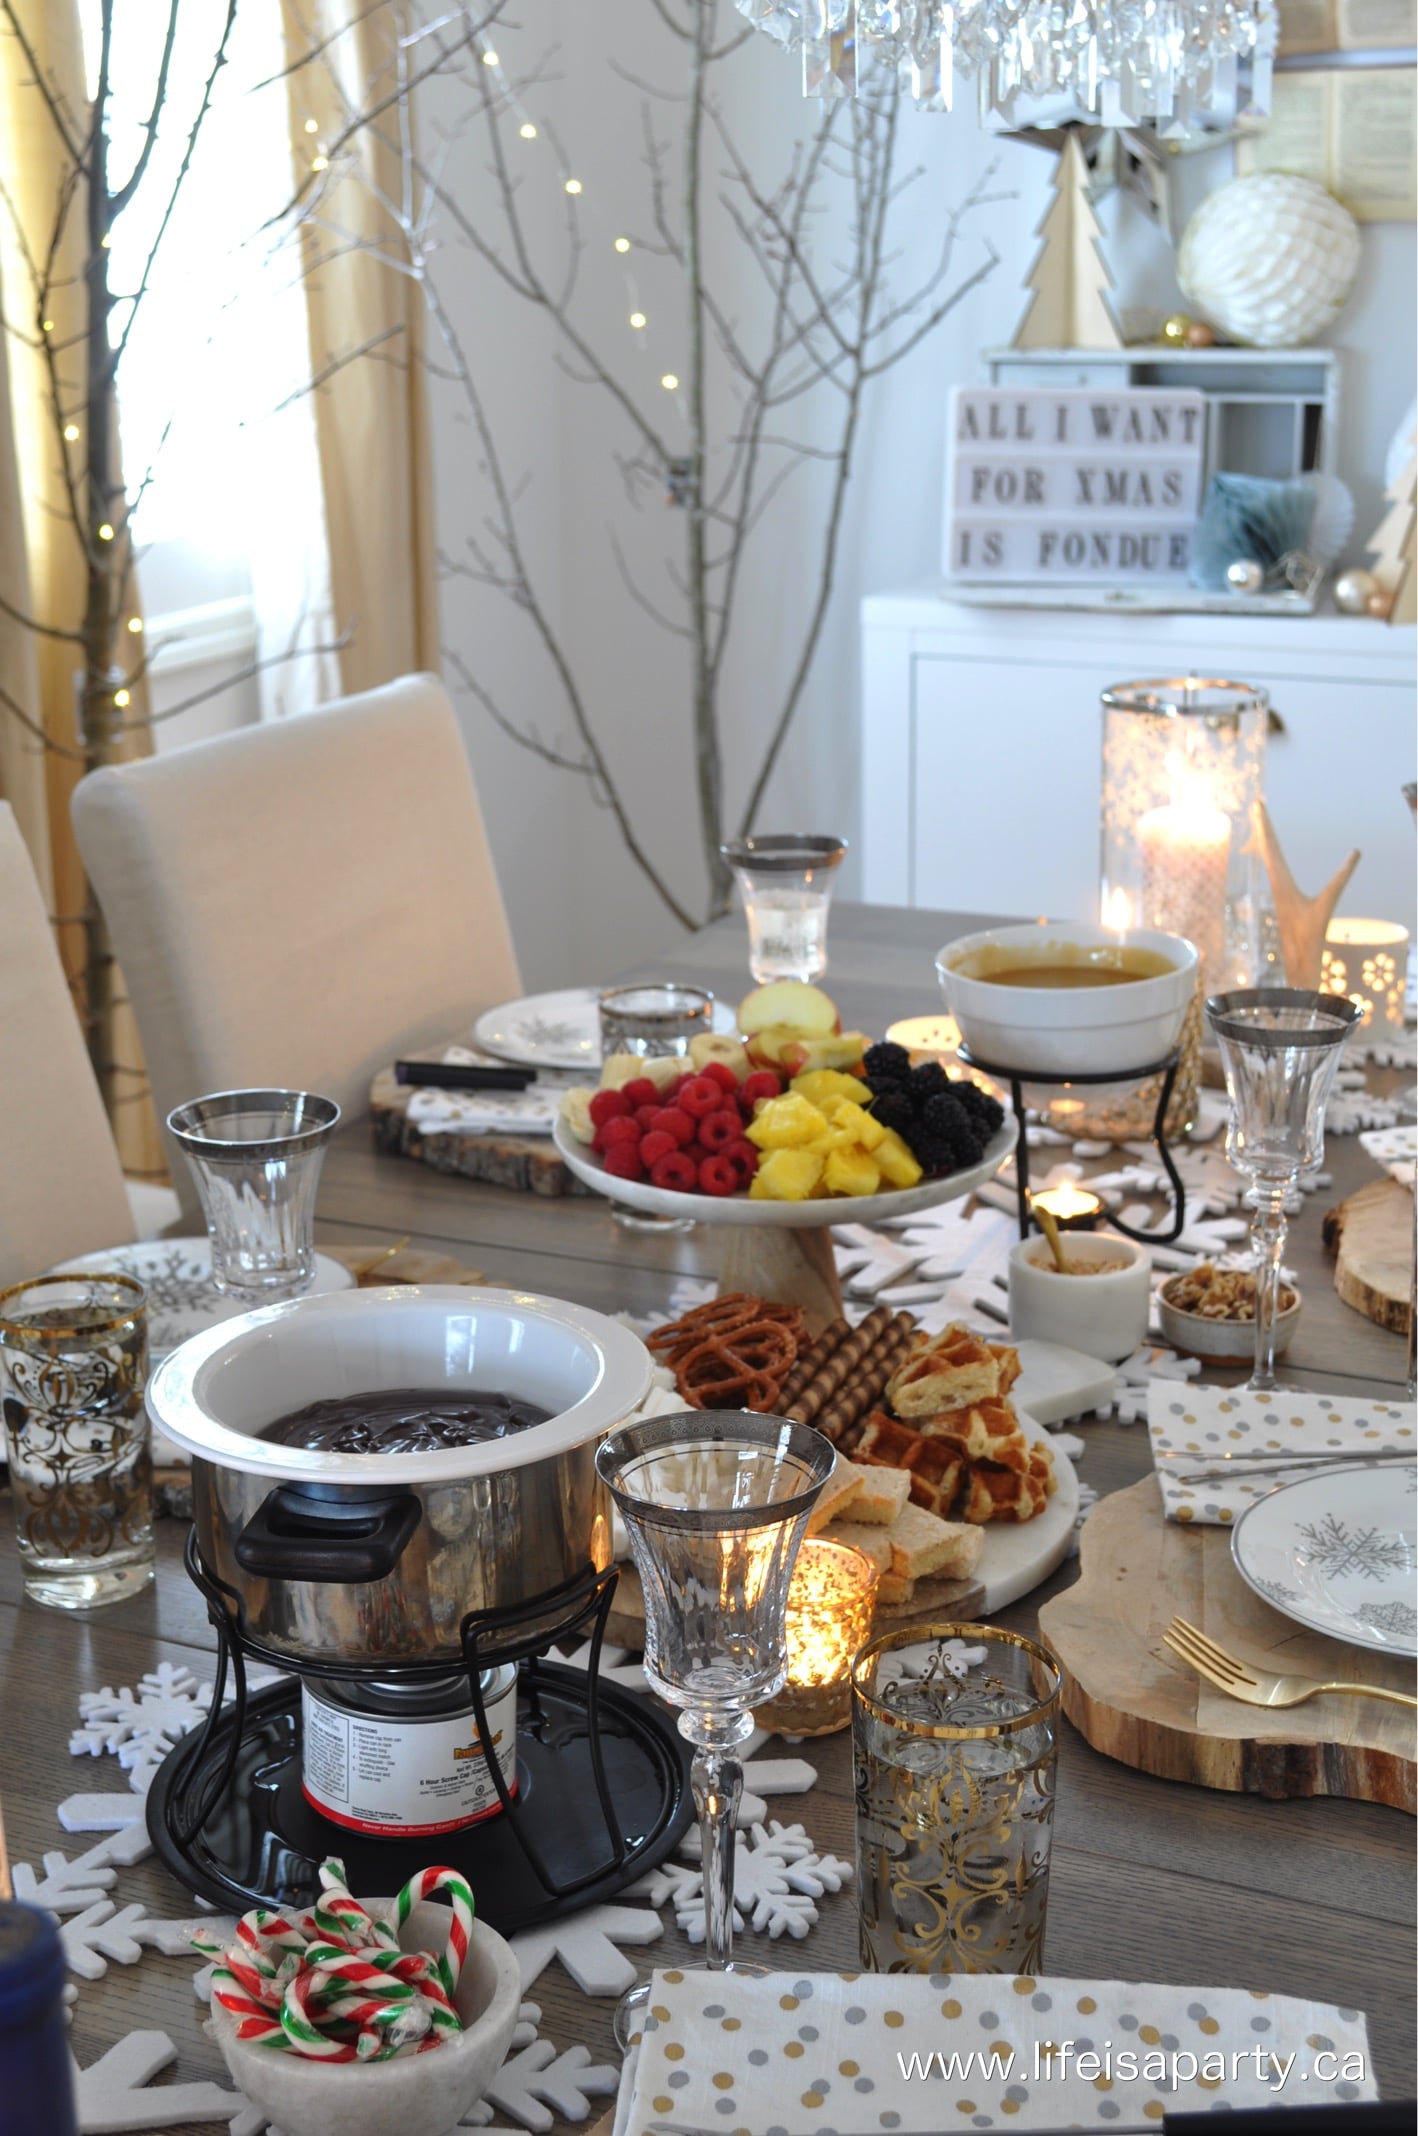
I set the table for the party and tried to make it warm, welcoming and festive.  My dining room already has a Christmas forest theme, so I added in some snowflakes and lots of silver and gold for the party.

How to host a fondue party

We added in some pretty paper stars, and honeycomb balls to really make it feel like a party!  See how all my Christmas decor in our Christmas Home Tour here.

Side table with dessert and neutral Scandinavian Christmas decor.

Christmas Fondue Sign

One of my favourite little party details is this fun sign I came up with.  "All I want for Christmas is fondue", a little spin on the Christmas song "All I want for Christmas is You". 😉

All I Want For Christmas Is Fondue sign.
I had lots of fun setting the table too.

Christmas pacesetting with wood charger, gold cutlery, and snowflake plate.

Place Settings

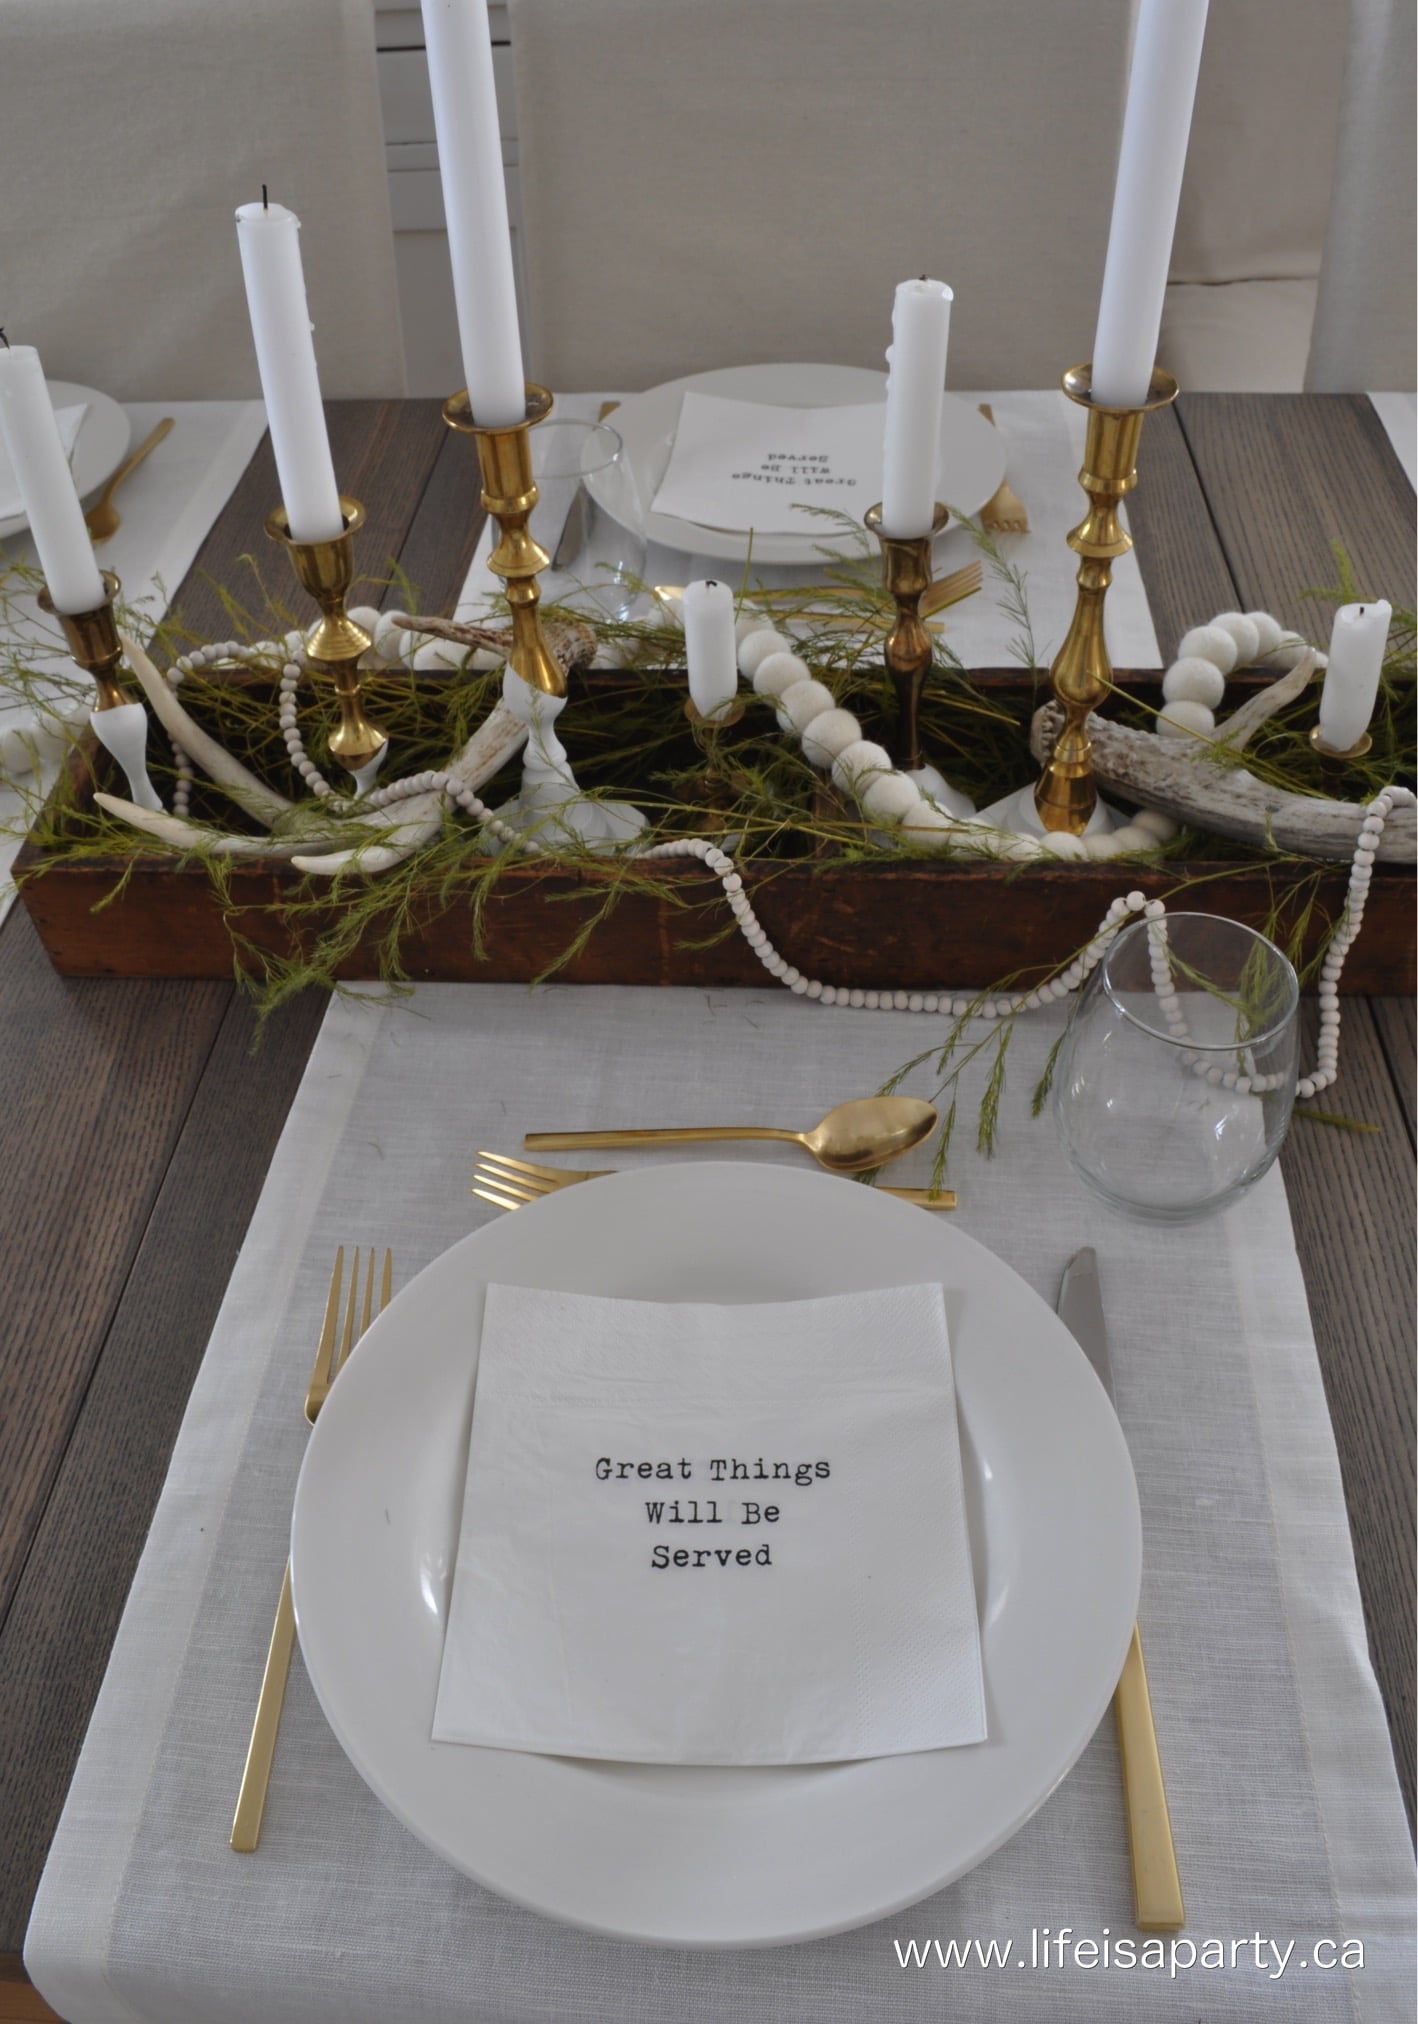
Next we used wood chargers for the table. I love the mix of the gold and silver with the rustic wood and antlers. It helps strike the perfect balance for a holiday table where you want a little bling and sparkle, but love the rustic style too. And the snowflake plates, table runner, and candle holders definitely add to the winter wonderland feel in the room.

And don't forget the fondue forks. It's works well to give everyone a colour for the evening. We had several sets of fondue pots going, so everyone had multiple forks to have more than one going at once, which worked really well.

how to host a fondue party

This is the kind of meal where the guests linger. The fondue takes a while to cook, you tend to chat, and cook, and eat, and sip your wine, and then do it all over again. 

It's absolutely the perfect holiday get together. You're not stuck in the kitchen, and it turns into a long, relaxed evening. Honestly, I'd forgotten how fun a fondue party is, until I went to the basement to find all the fondue pots and start setting up.

I started the evening off with a cheese fondue, and oil fondue.

The Cheese Fondue

The cheese fondue is really easy to make, and I promise it's so, so good. A good cheese fondue recipe is a great thing to have to serve anytime, even as a starter to any good meal. You may want to serve this fondue first, as a starter cheese course, or set it up with the oil options all at once like we did. There are different cheeses you can use for cheese fondue but we went with a classic swiss fondue.

shredded cheese and wine and ingredients for a cheese fondue

Recipe

Cheese fondue in a fondue pot with a bread dipper dripping with cheese.

Cheese Fondue

Creamy and smooth cheese fondue.
4.50 from 8 votes
Print Pin Rate
Course: Appetizers
Cuisine: Swiss
Prep Time: 15 minutes minutes
Cook Time: 10 minutes minutes
Total Time: 25 minutes minutes
Servings: 6 servings
Calories: 341kcal
Author: Dannyelle Nicolle-Ramjist

Ingredients

  • 1 clove garlic
  • 8 oz. Gruyere cheese shredded
  • 2 tablespoon cornstarch
  • 8 oz. Swiss cheese shredded
  • 1 cup Pinot Grigio
  • ½ teaspoon dry mustard
  • 1 tablespoon fresh lemon juice
  • a pinch freshly grated nutmeg
  • 1 tablespoon brandy

Instructions

  • Start by rubbing the inside of your pot with the garlic clove cut in half. Then add the wine and lemon juice to the pot and heat to a simmer over a medium heat.
  • Coat the grated cheese with the cornstarch by shaking in a sealed zip bag.
  • Slowly add the cheese to the wine mixture, handful by handful, stirring in a figure eight pattern to incorporate it each time until it's all mixed, creamy and smooth.
  • Add in the brandy, dry mustard and nutmeg and stir to combine.
  • Serve in a fondue pot with assorted dippers.

Nutrition

Serving: 1g | Calories: 341kcal | Carbohydrates: 7g | Protein: 19g | Fat: 23g | Saturated Fat: 14g | Polyunsaturated Fat: 7g | Cholesterol: 72mg | Sodium: 275mg | Sugar: 1g
Tried this Recipe? Tag me Today!Mention @LifeisaParty or tag #lifeisaparty!
Cheese fondue pot with a piece of bread dipping in and dripping cheese.

Cheese Fondue Dipper Ideas

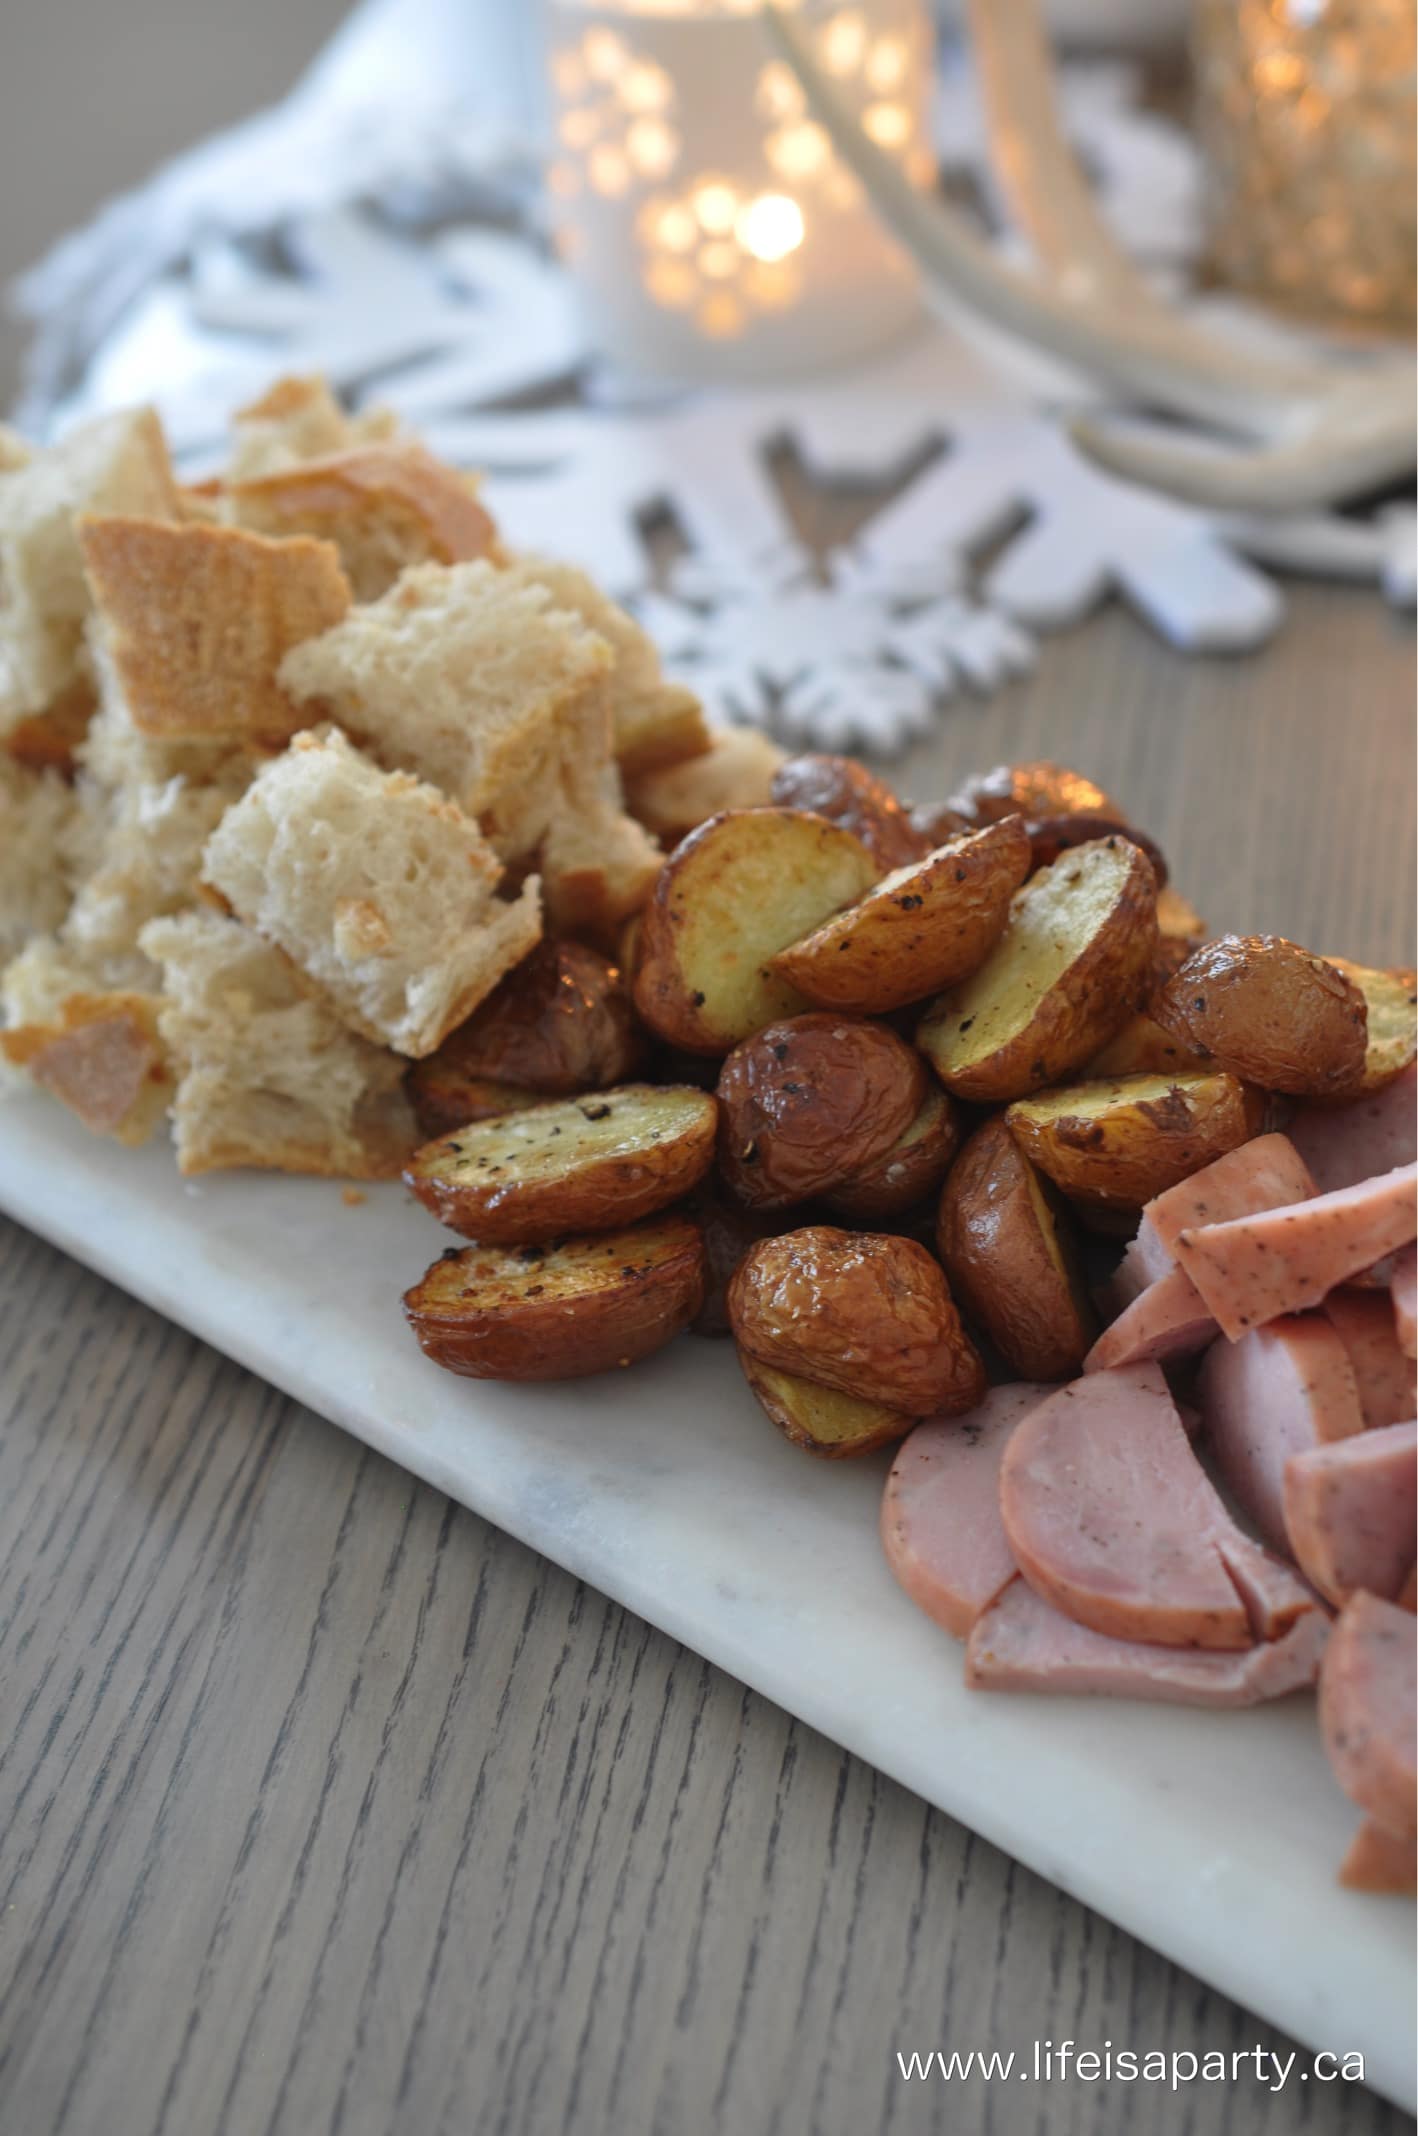
We served the classic cheese fondue with some beautiful fresh cubes of crusty bread from the bakery, roasted baby potatoes, and some kielbasa sausage. This is the perfect simple dish for the cheese lover, with such yummy dippers for melted cheese. Par-cooked vegetables like asparagus, or roasted cauliflower florets, other green vegetables like green beans, or roasted brussels sprouts work really well. You could also try some fresh crunchy vegetables like bell peppers or cherry tomatoes. The best cheese fondue dippers are anything that pairs well with melty cheese. Any breads are an obvious choice, like white bread, whole wheat bread, pumpernickel bread, but things like wheat crackers or tortilla chips are a fun option and good choice too.

  • crusty French bread or sourdough bread
  • roasted potatoes
  • cooked asparagus
  • kielbasa

In fact, most of the dippers were picked up at the store, so other than making the three fondues ahead of time to re-heat before serving, all I had to do was roast a few potatoes and do a little slicing. Another reason this party is so much fun, it's pretty easy to put together, sure to put the host in a good mood.

Cheese fondue dippers of bread pieces, roasted potatoes and kielbasa sausage.

The Oil Fondue

For the oil fondue, I set up two pots of oil. Just bring the oil up to 375 degrees on the stove and then set them on the fondue stand over the heat source. The oil did lose its heat as we lingered around the table a long time. I did reheat it on the stove top a few times. Another option would be to use electric fondue pots for the oil fondue, which is plugged in and will maintain its heat as long as it's turned on.

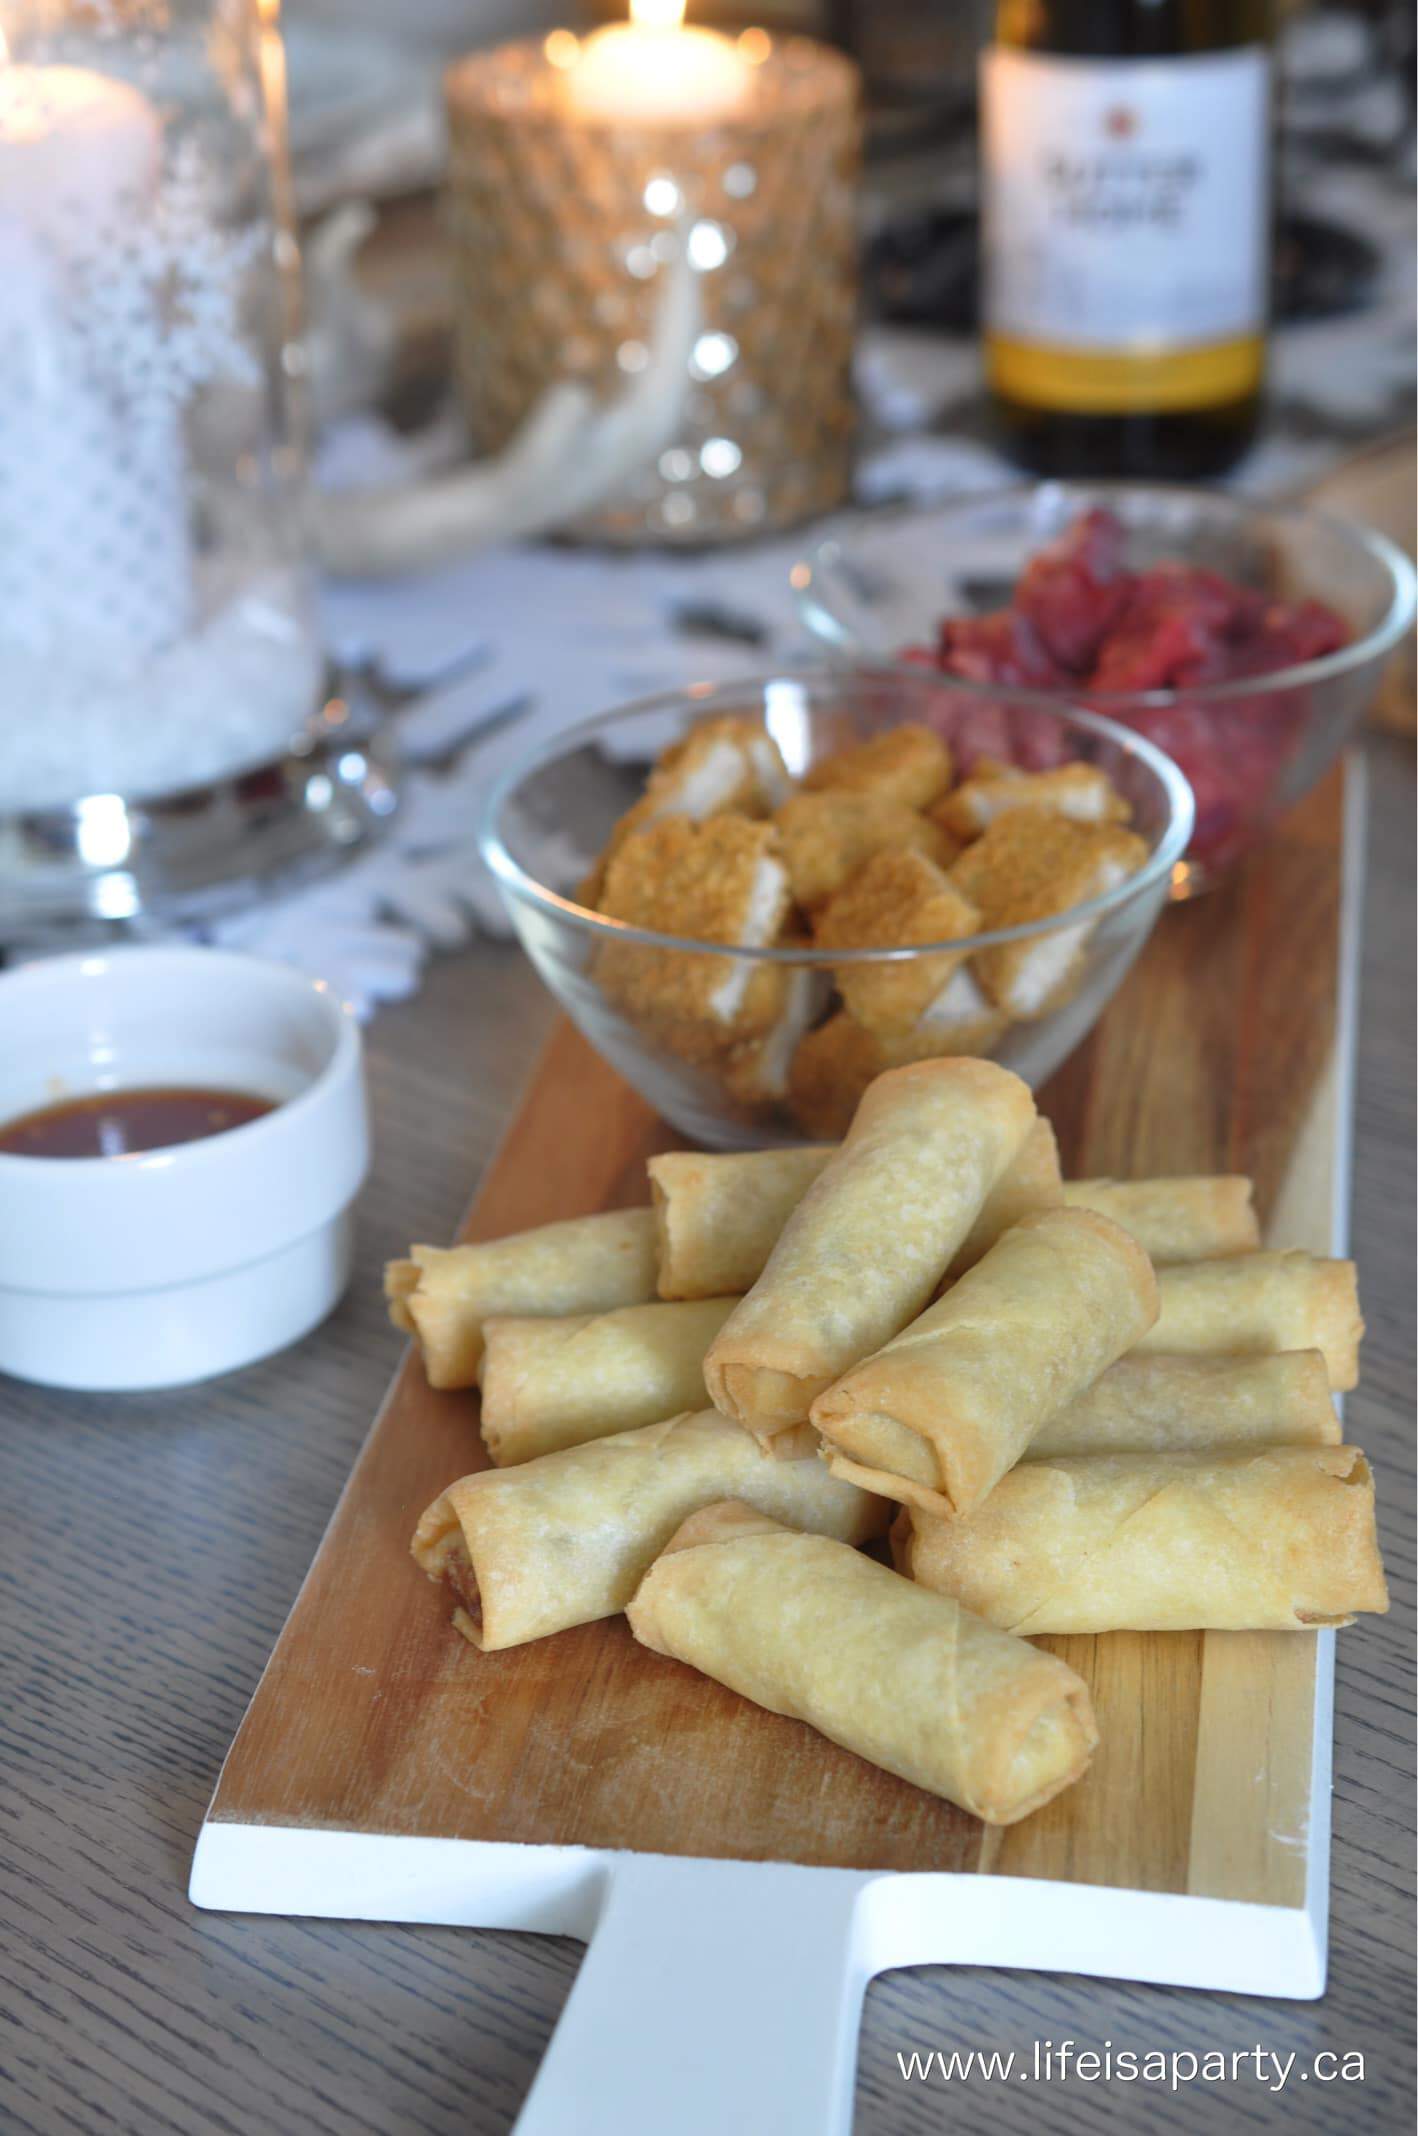
Beef, chicken, and egg rolls ready to cook in an oil fondue.

Oil Fondue Dippers

I served some beef, chicken, and egg rolls. For the chicken, I used frozen chicken fingers that had been thawed and cut into bite-sized pieces. The egg rolls were also frozen -already fully cooked so you're just crisping them up in the oil. It's nice to offer a variety of meats.

  • beef
  • chicken
  • egg rolls

For the raw meat, be sure to keep them separate from the other food, and make sure they're fully cooked before eating. Cook time will vary depending on the meat and how hot the oil is. Make sure chicken is fully cooked before eating. Also make sure Let everything come up to room temperature just before serving to reduce cooking time and help your oil stay hot. Do defrost any frozen items first, so that they will cook faster and cook down the hot oil less.

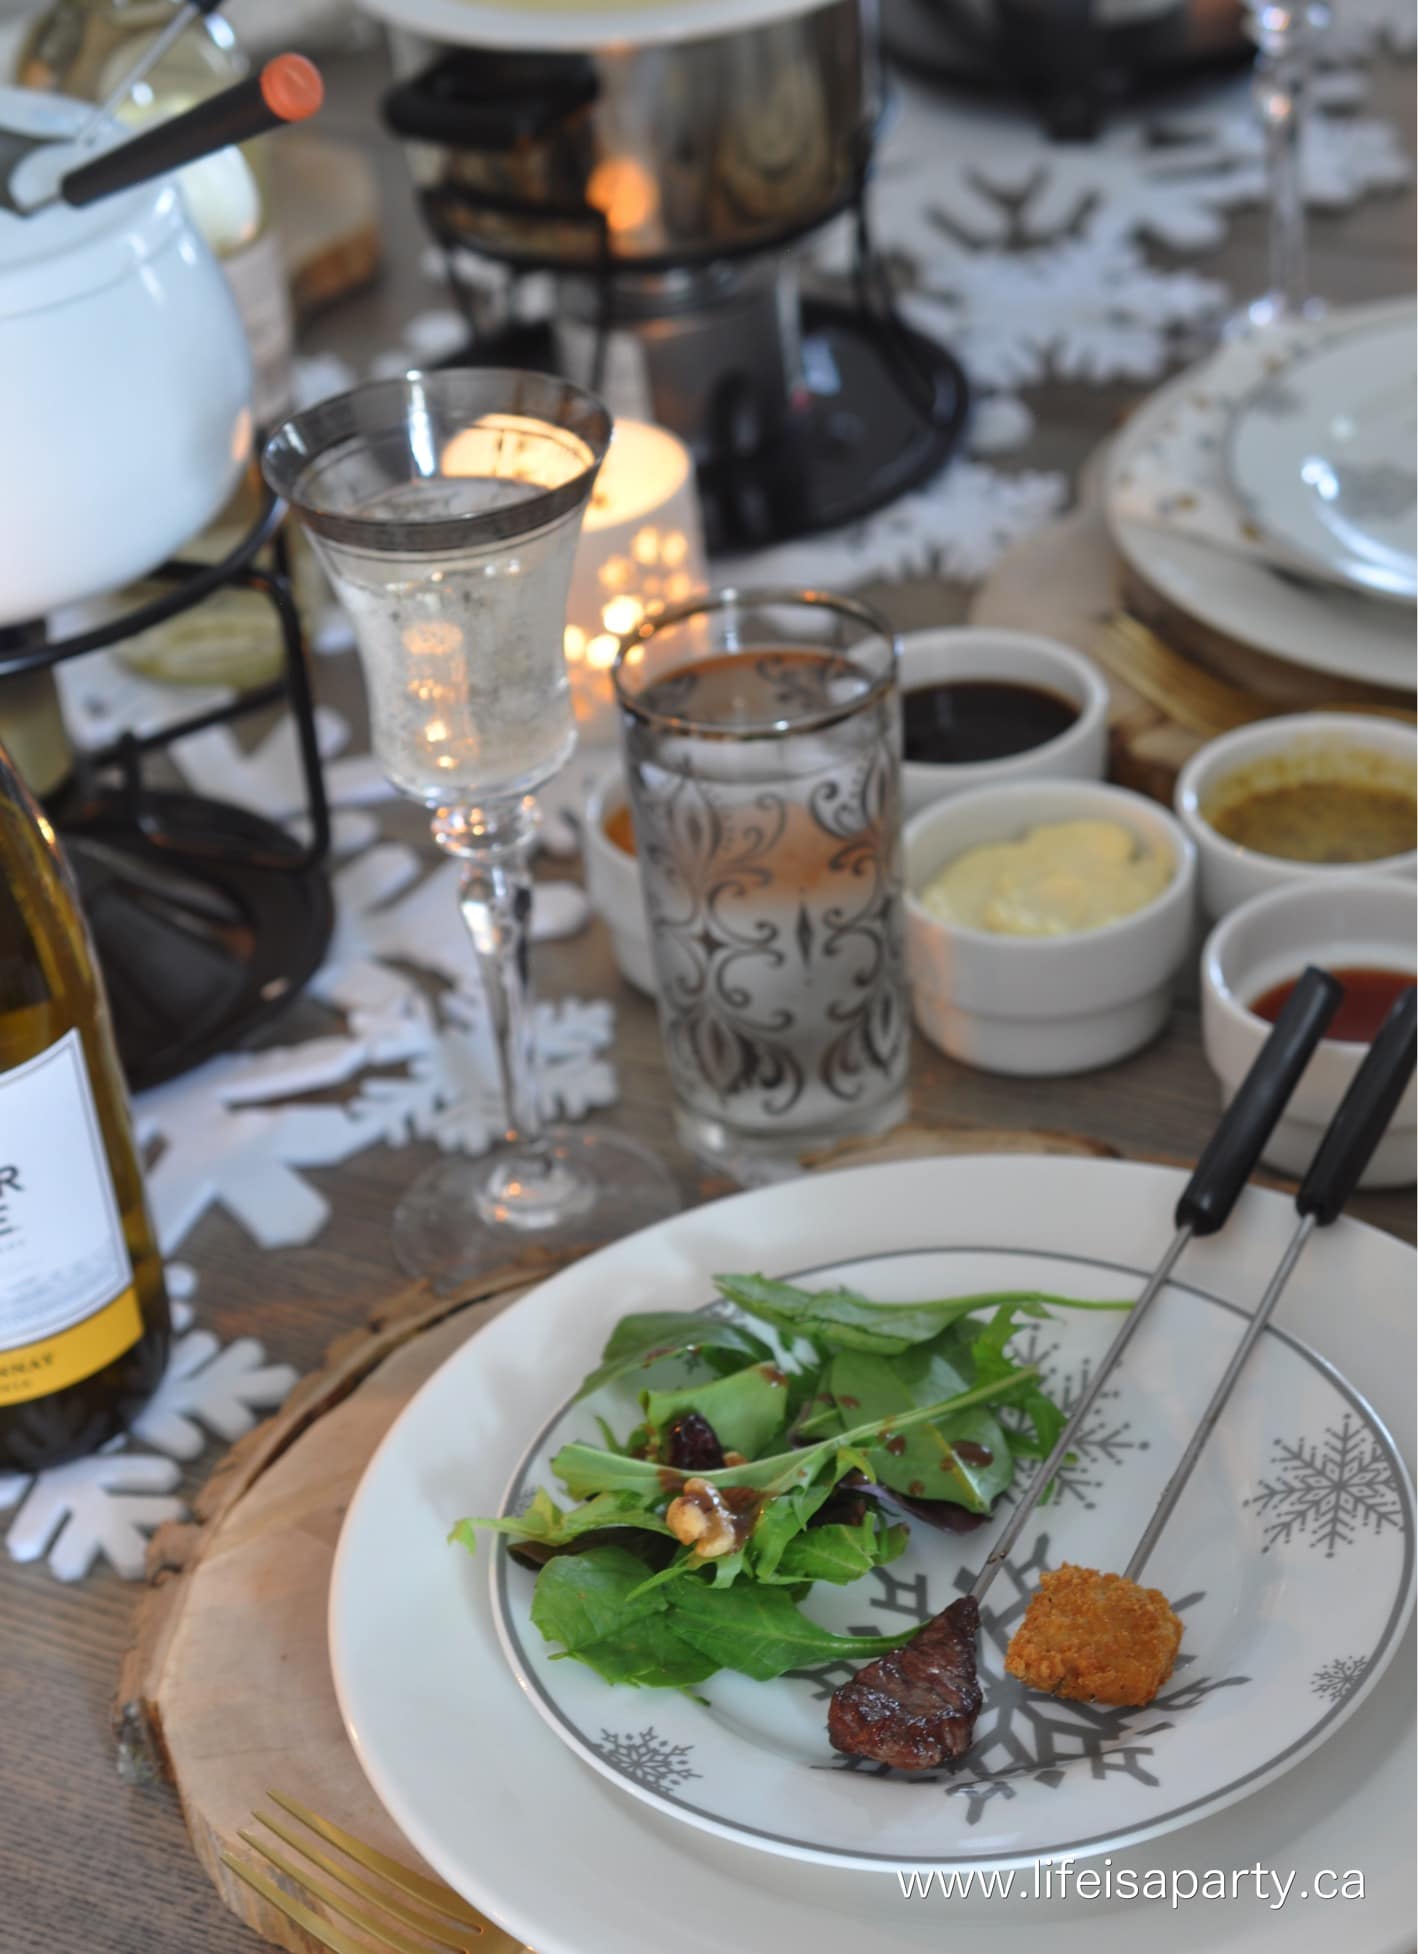
A plate of salad and oil fondue cooked beef and chicken.

Dipping Sauces:

One of the fun parts of oil fondue is offering lots of sauces to go with the meats. This is such a fun part of fondue parties, and there are so many prepared sauces available at the grocery store. This is a change to offer lots of different flavors, so that even just a few meat options have lots of different tastes when combined with the different sauces. Make sure that the sauces are in small bowls, and that plenty of options within reach of your guests around the dinner table.I served:

  • teriyaki sauce
  • peanut sauce
  • plum sauce
  • asian dipping sauce,
  • chipotle mayo
  • truffle aioli
  • honey mustard.
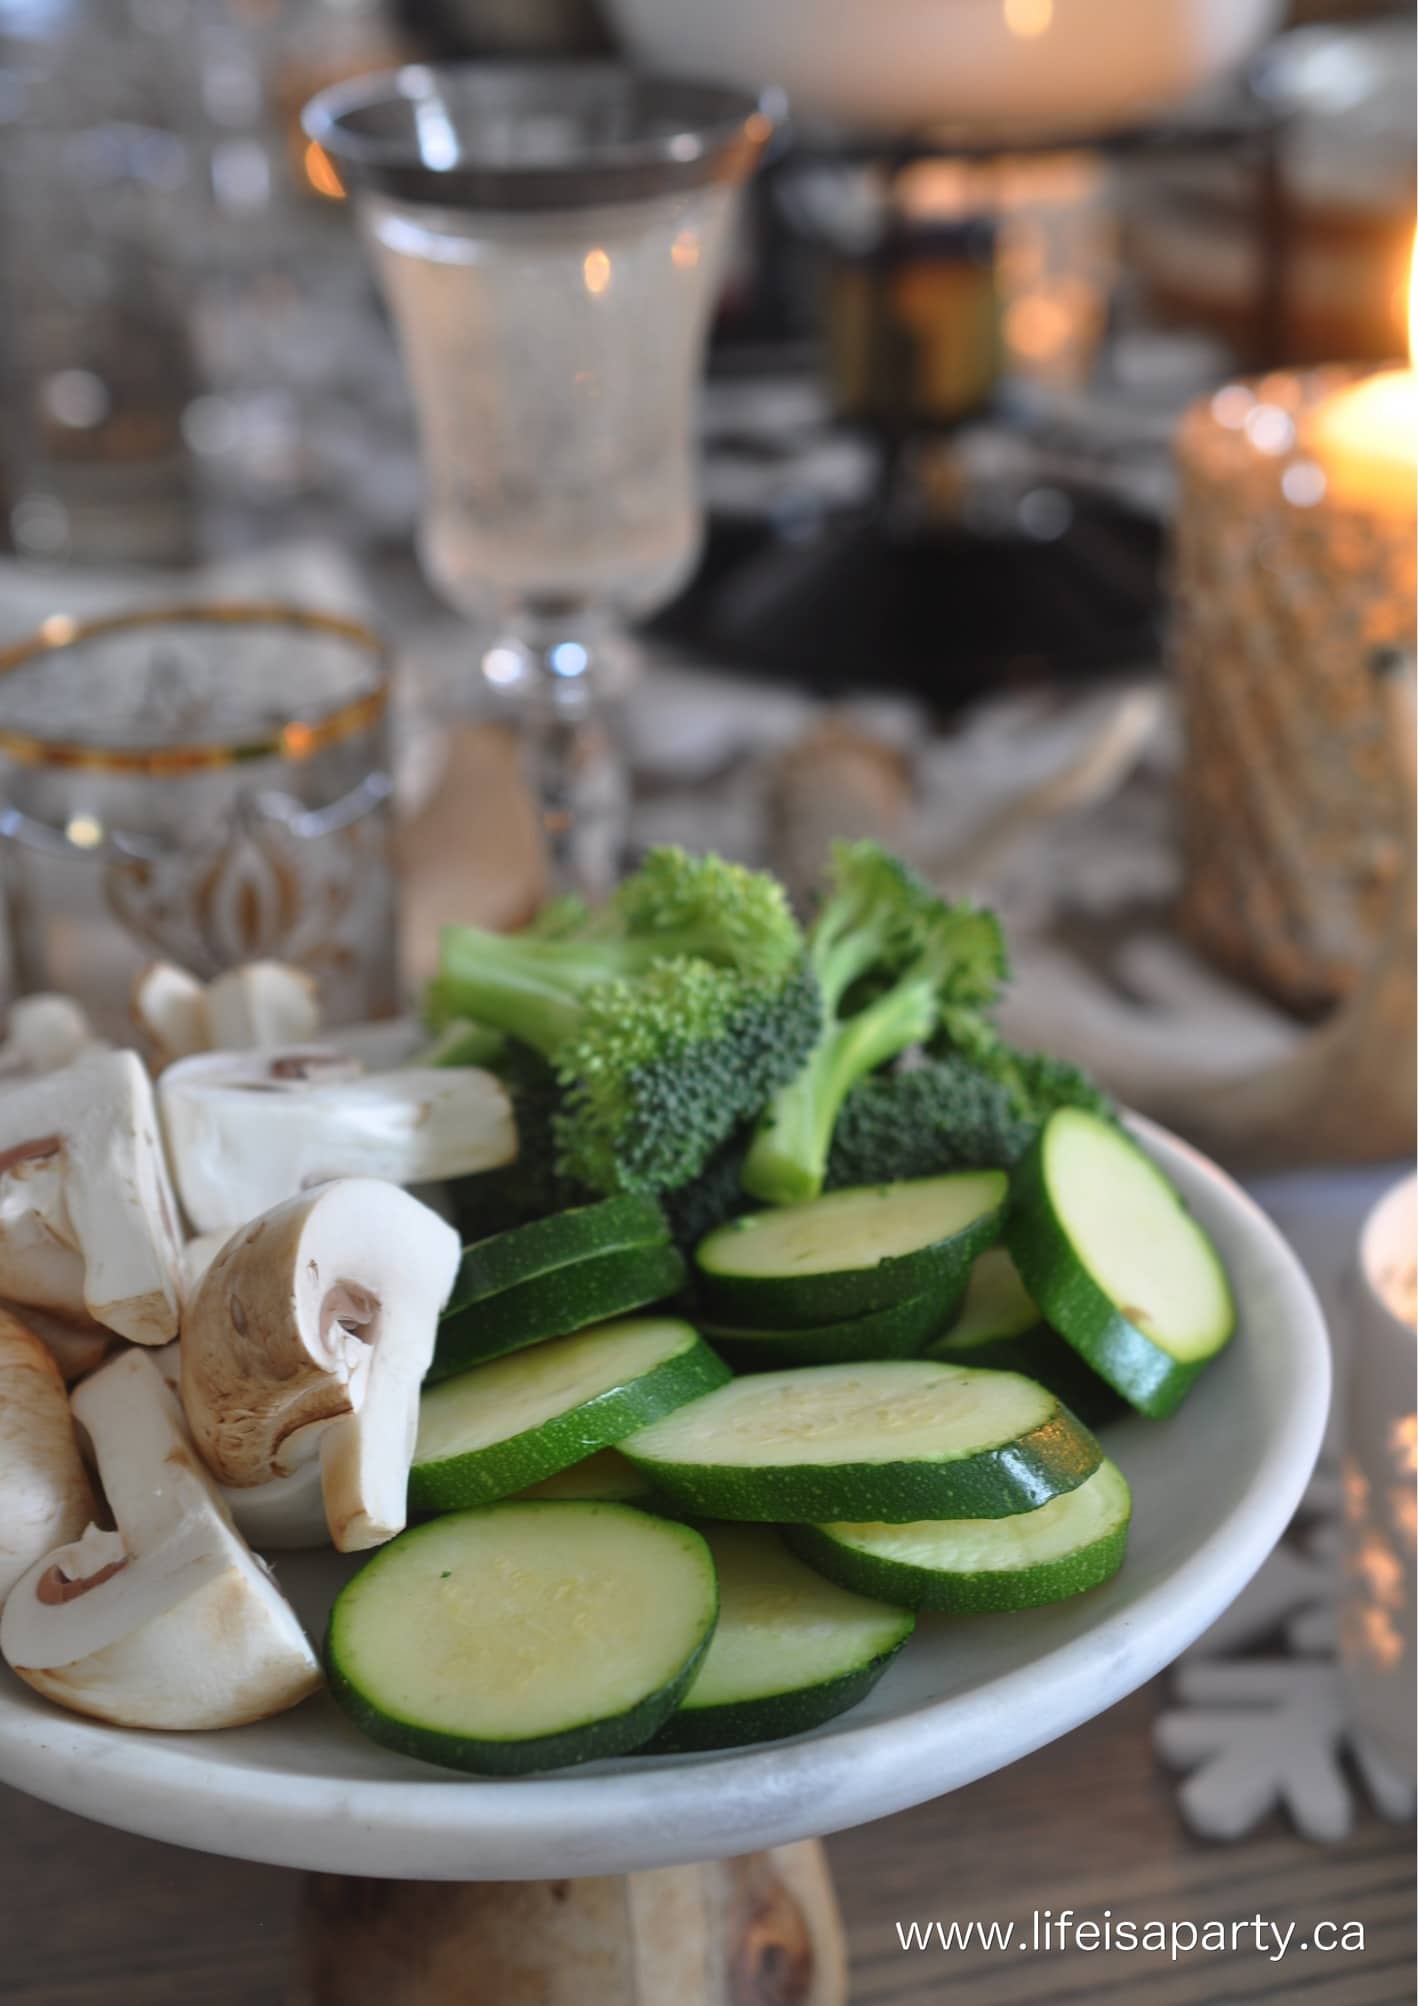
Raw mushrooms, zucchini, and broccoli ready to dip and cook as a tempura fondue.

Tempura Vegtables

I also offered some tempura vegetables. Just slice the veggies to prepare them. I used:

  • zucchini
  • mushrooms
  • broccoli

To make a tempura batter -see tempura fondue recipe here. Guests can choose a veggie, dip into the batter, and fry in the oil. These are so, so yummy and also great with the sauces. This isn't a traditional fondue choice, but I think these tempura vegetables are good options for someone looking for an option other than just meat.

Green salad in a white bowl with gold salad servers.

Since the fondue is so rich, a green salad helps round out the meal, and makes the fondue into a real main course.

Christmas dining room decorated for a party and a table set with rustic Christmas decor and party food.

After dinner, lastly it was time for the dessert fondue.

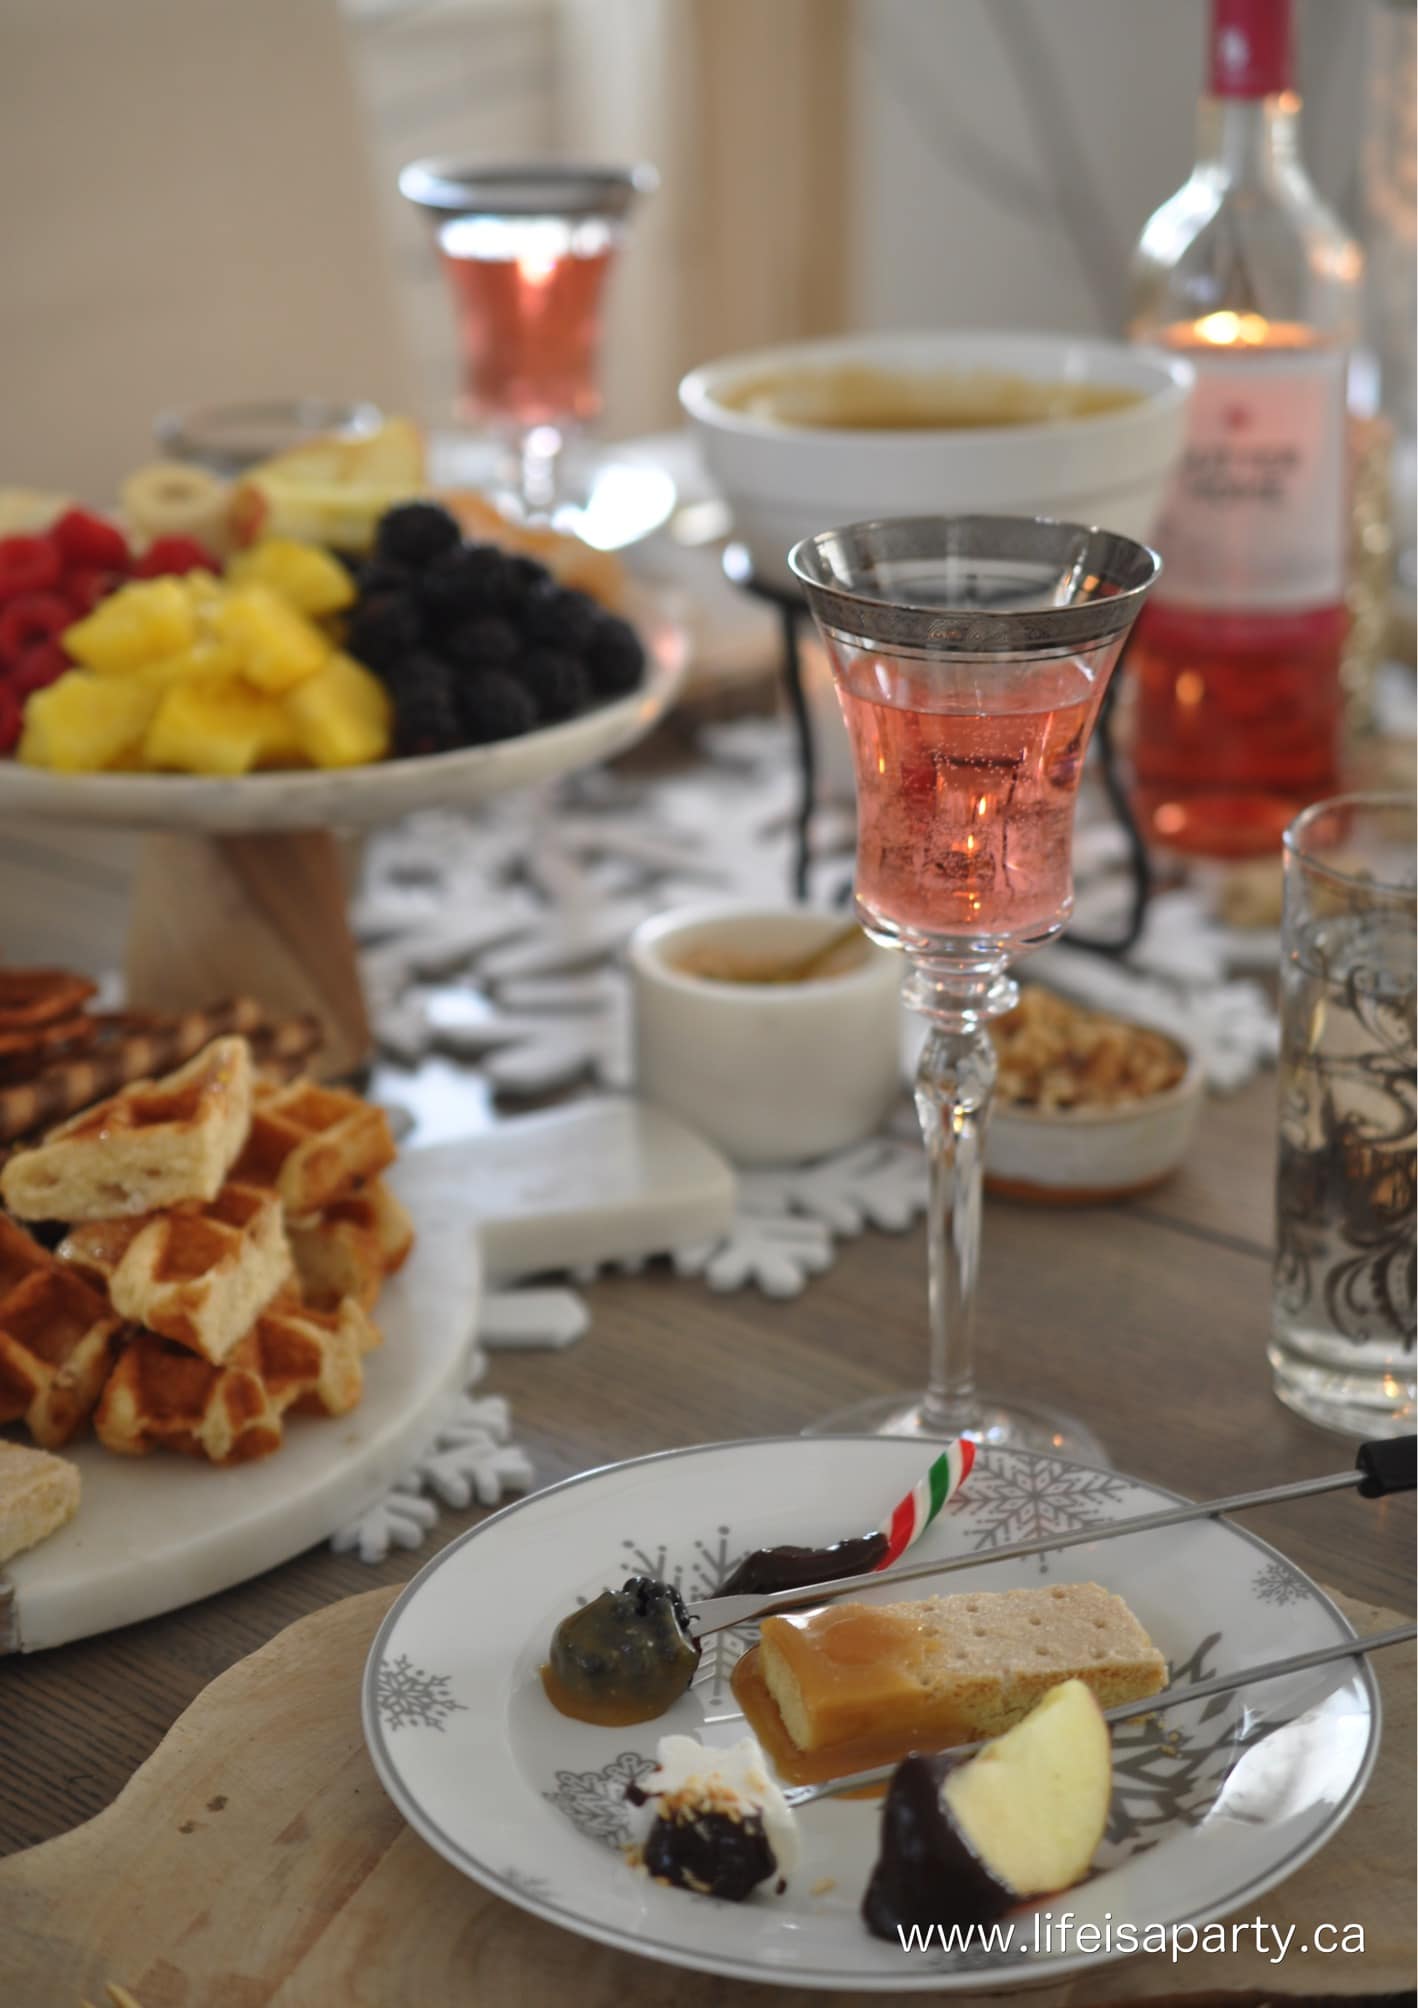
Chocolate and caramel dessert fondue with fruit, candy, and other dippers.

Chocolate Fondue and Caramel Fondue

I prepped all the desert before the party and set it up on the side. This way, I didn't have to head back into the kitchen and get back to work in the middle of the party. I just reheated the chocolate and caramel fondues in the microwave when it was time to serve (this is one of the best ways to reheat any leftovers too).

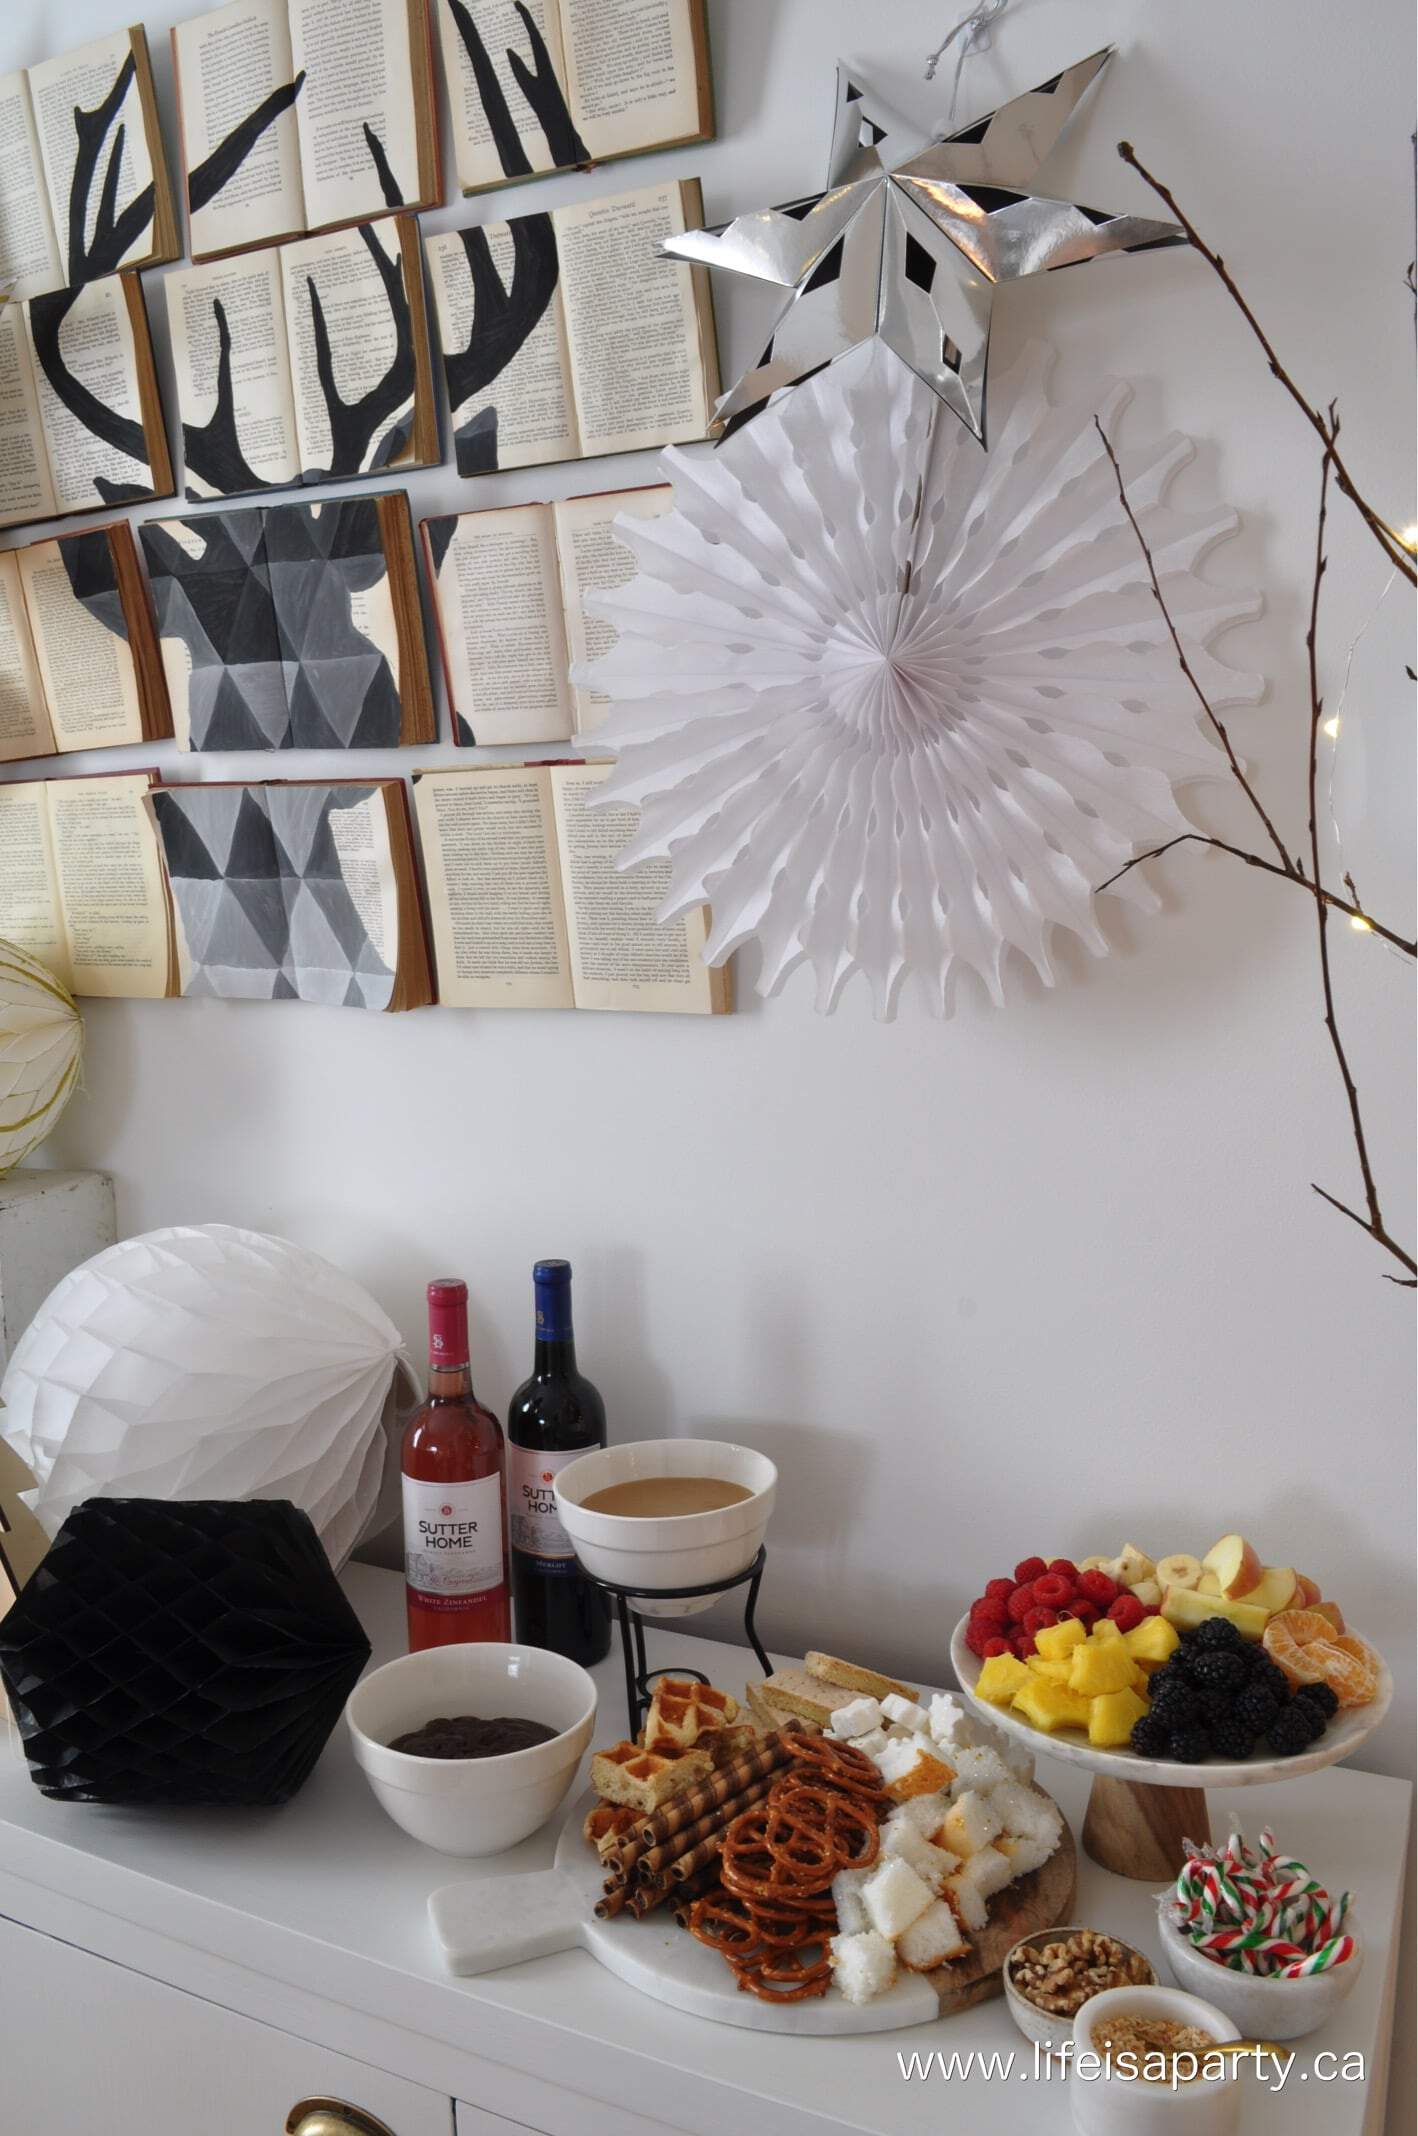
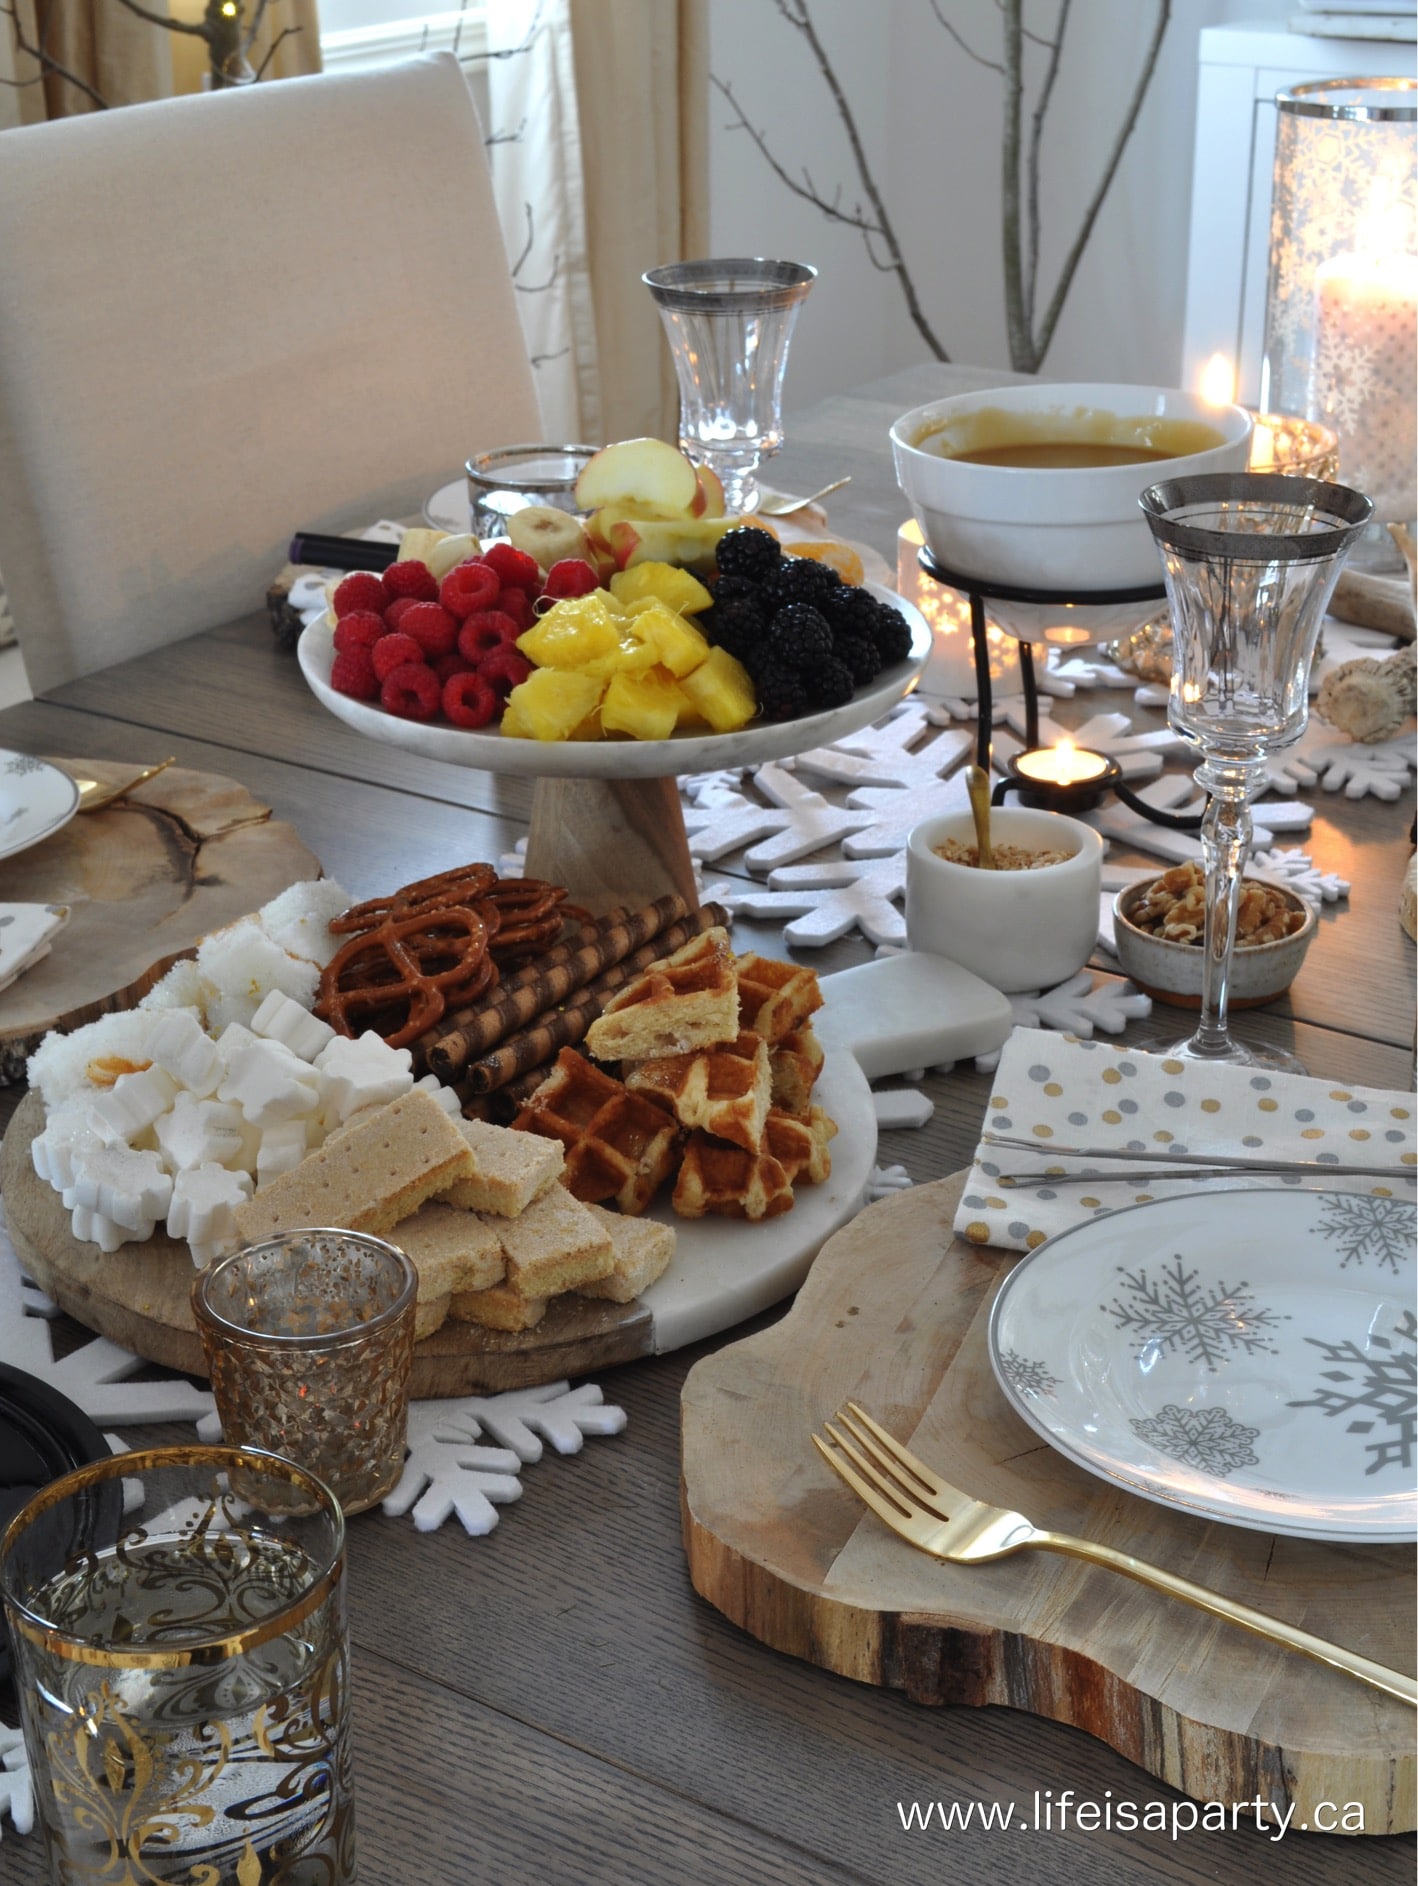
Dessert fondue dippers, included fruit, candy and nuts.

For the chocolate and caramel fondue  -see my chocolate and caramel fondue recipes here.  The sky is the limit for dippers. Fresh fruit is delicious and one of the best things to include. Next I also added some nuts, and toasted coconut to sprinkle over the dipped fruit. Candy canes are a good idea and fun Christmas touch.

Dessert fondue all set up with dippers and Christmas decorations.

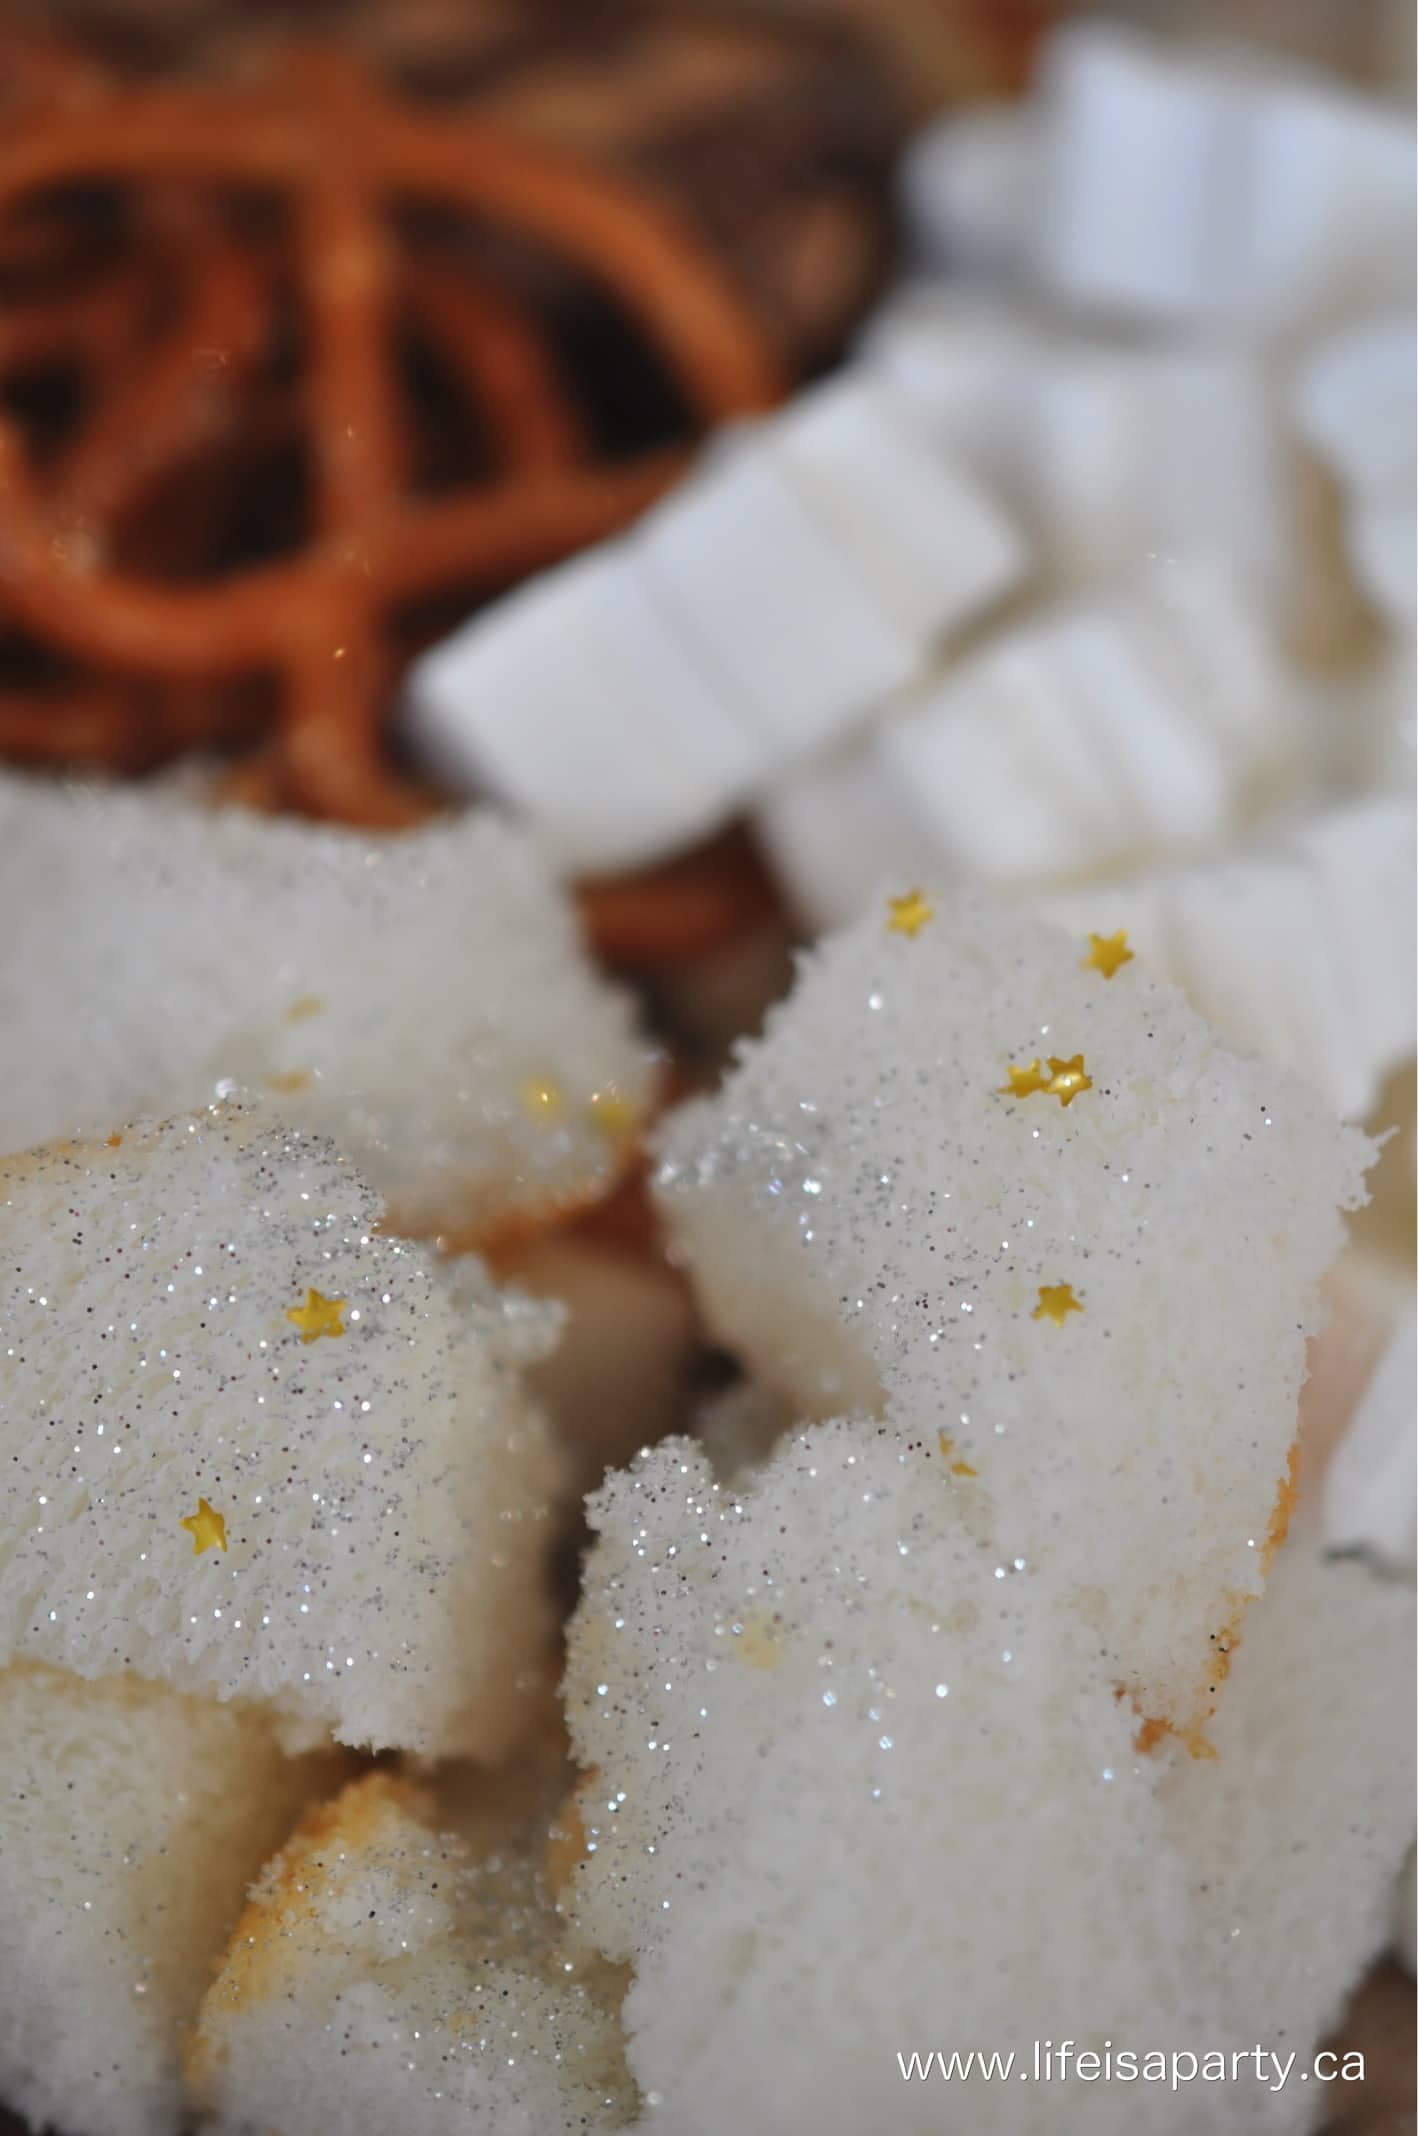
I also included a tray of other sweet dippers; shortbread cookies, marshmallows, angel food cake pieces, belgium waffles, chocolate cookies, and pretzels or try potato chips for those who love sweet and salty.

Lastly, one of my favourite little party details was adding some edible glitter and star sprinkles to this tray. It's the little things. 😉

Dessert Fondue Dippers:

  • pineapple
  • apple slices
  • blackberries
  • raspberries
  • oranges
  • banana slices
  • candy canes
  • shortbread cookies
  • graham crackers
  • marshmallows
  • angel food cake or pound cake pieces
  • Belgium waffles
  • chocolate cookies
  • pretzels
  • toasted coconut sprinkles
  • nuts


Angel food cake with edible glitter and star sprinkles on it.

Finally we moved everything over to the table for dessert.

Dining room table set up for a Christmas fondue party with place settings and food.

And you thought guests lingered at the table for dinner, wait until dessert. No one wanted to leave! What could be better than getting to dip strawberries in melted chocolate?

Christmas Fondue Party food set up at a table.

Fondue Pots

The chocolate fondue is in a double boiler fondue pot.  I think this is one of the best fondue pots. There is water in the pot, and the ceramic bowl with the chocolate is sitting in it so it doesn't burn on the bottom of the pot. With a regular fondue pot, try to regulate the heat so that it's a low heat for the Swiss cheese fondue or chocolate fondue. I also used the double boiler type fondue pot for the cheese, and it really worked well and is an excellent choice. 

If you don't have enough fondue pots to host a fondue party though don't worry. Most of these were picked up at thrift stores. They're easy to find. And also look for an electric fondue maker as a great option for oil fondue.

Dessert fondue dippers and caramel fondue.

In short, this fondue party really was the perfect holiday get together. It would be an amazing idea for New Years Eve too. A family fondue night is a lot of fun too. A word about young children though, the oil fondue could be a little dangerous for burns depending on the children's age. Either partner a child with an adult, or skip the oil fondue with young children. To avoid double dipping with kids, sometimes an individual bowl of chocolate fondue or cheese fondue is a great option.

A plate of dessert fondue with wine and food in the background.

With a Christmas Fondue Party to celebrate with girl friends, life really is a party.

Frequently Asked Questions

How do you keep guests from double dipping at a Fondue party?

Just take a second at the beginning of dinner to go over the "rules" of fondue, and remind everyone not to double-dip. If you have children at your fondue party, consider giving them their own small bowl of fondue so you don't have to worry about them double dipping.

What if you don't have enough fondue pots?

Look for fondue pots at the thrift store. They are very easy to find there, and quite inexpensive.

How do you keep the oil fondue hot enough?

You do need quite hot oil for frying. A candle fondue pot will not do for this fondue. The best option is a fondue pot you can plug in. If you don't have one of those, you may need to reheat your oil on the stove part way through your party.

How do you keep the cheese and chocolate fondue from burning?

The best fondue pot for both these types of fondue is the double boiler type, where the fondue pot sits in a water bath. Otherwise, be sure to keep your eye on them and turn off the heat source if it becomes too hot.

 If you try any of the ideas from this Christmas Fondue Party or any other ideas on my blog please let me know how it went in the comments below. Thanks for visiting today!

More Fondue Inspiration

  • Date night fondue with cheese fondue and dippers at a coffee table.
    Fondue Date Night
  • Caramel apple fondue recipe and topping ideas.
    Easy Homemade Caramel Apple Fondue
  • milk chocolate fondue
    Easy Milk Chocolate Fondue Recipe
  • S'more milk chocolate fondue.
    Easy S'mores Fondue Recipe

Outdoor Decorating Ideas for the Front Porch

Dec 7, 2016 · 10 Comments

How to decorate your front porch for Christmas.

Outdoor Christmas Decorating Ideas for the Front Porch: yarn wrapped sticks, pom pom garland and a Christmas wreath add a festive touch.

How to decorate your front porch for Christmas.
[feast_advanced_jump_to]

This month for our #12MonthsofDIY we're working with yarn.  And, it's not just for knitters!  I used it this year in all my outdoor Christmas decor, and I love how it turned out. Today I'm sharing outdoor Christmas decorating ideas for the front porch.

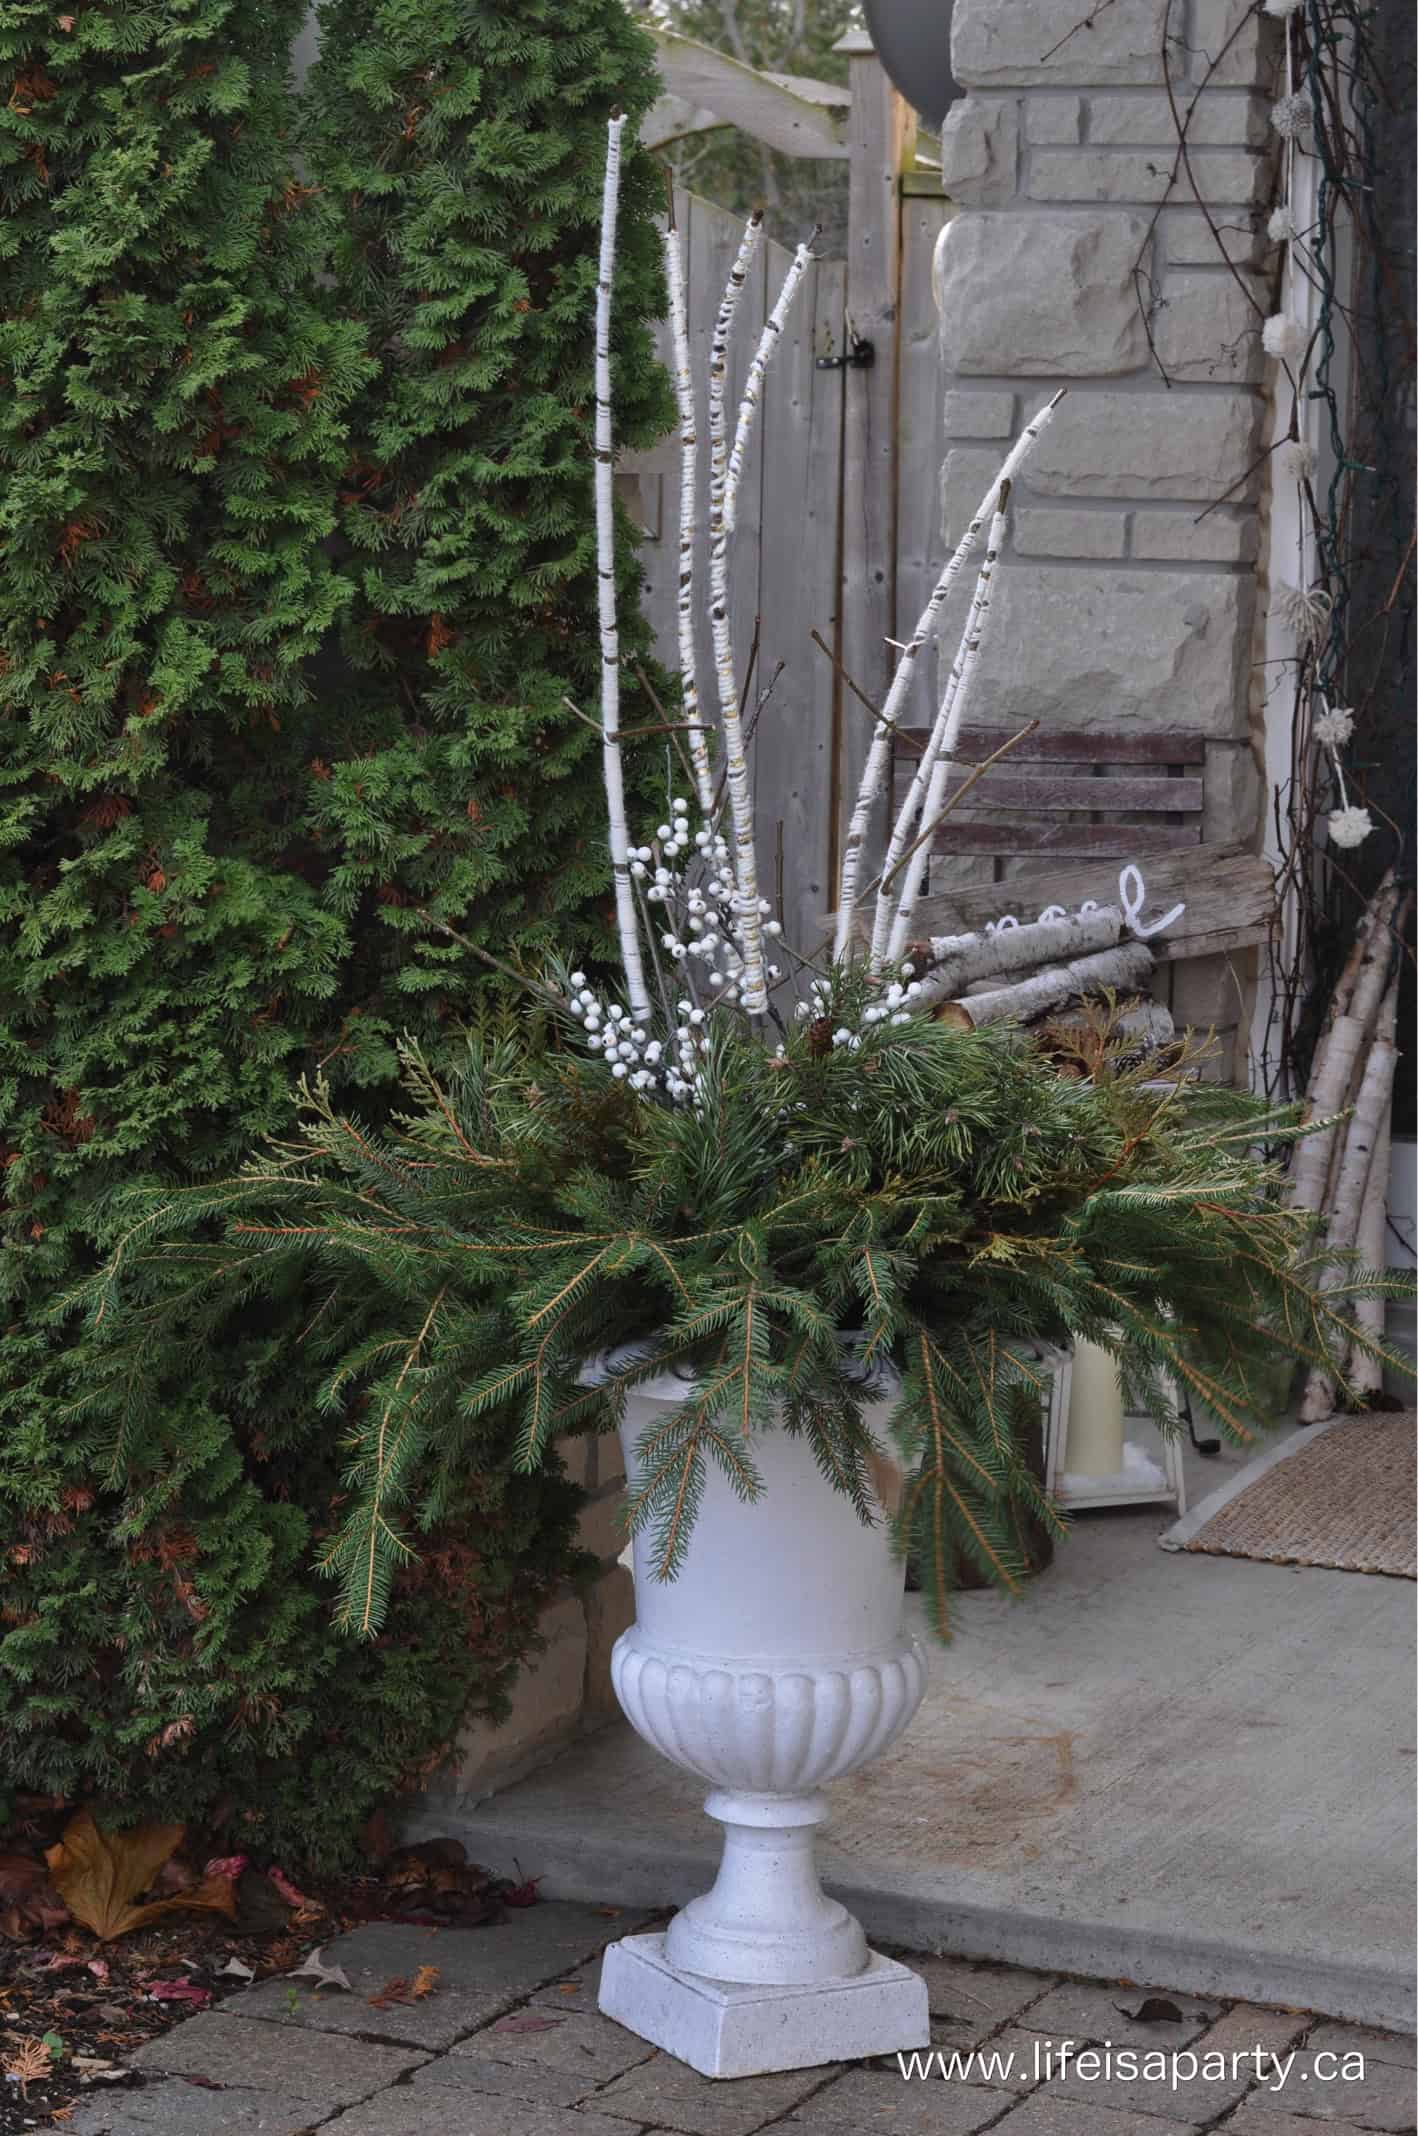
Christmas outdoor urn ideas

Yarn Wrapped Sticks

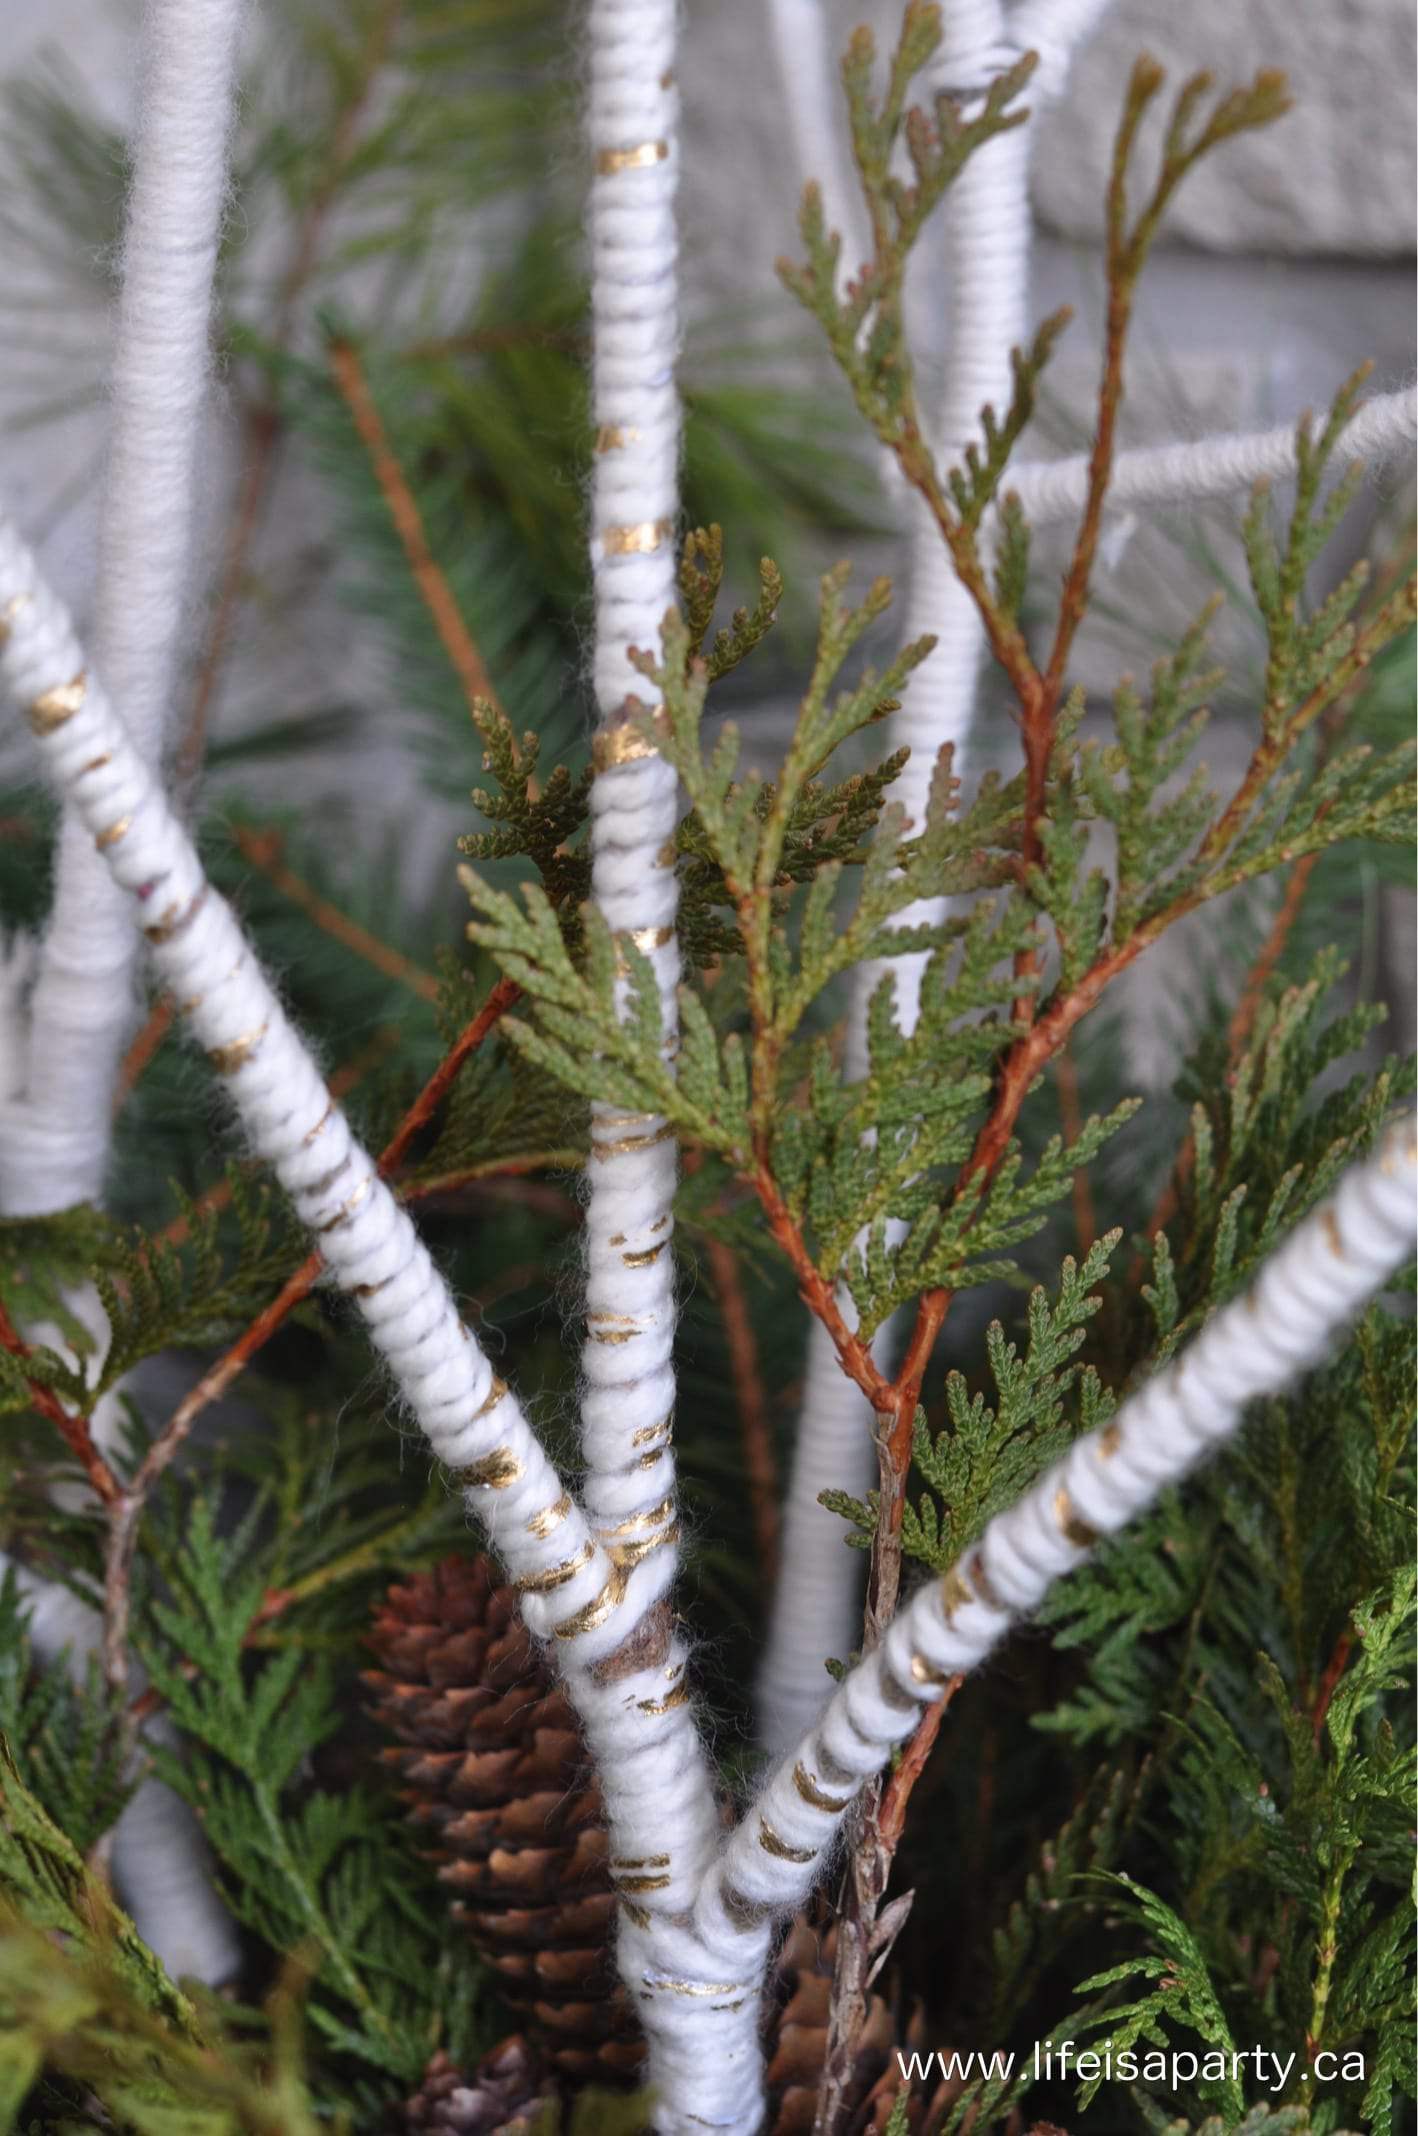
My very favourite is probably the yarn wrapped sticks I used as the centrepiece of my outdoor urns.  My friend thought they were birch at first, so they'd be great for anyone going for the birch look.

yarn wrapped sticks

These sticks are so, so simple to make.  Just find some sticks, straight and without too many small branches is easiest.  Then, just wrap them in yarn.

I used whites and creams for my sticks but they would look amazing in any colour to match your decor for Christmas.

Christmas Front door with Pom Pom garland

Pom Pom Garland

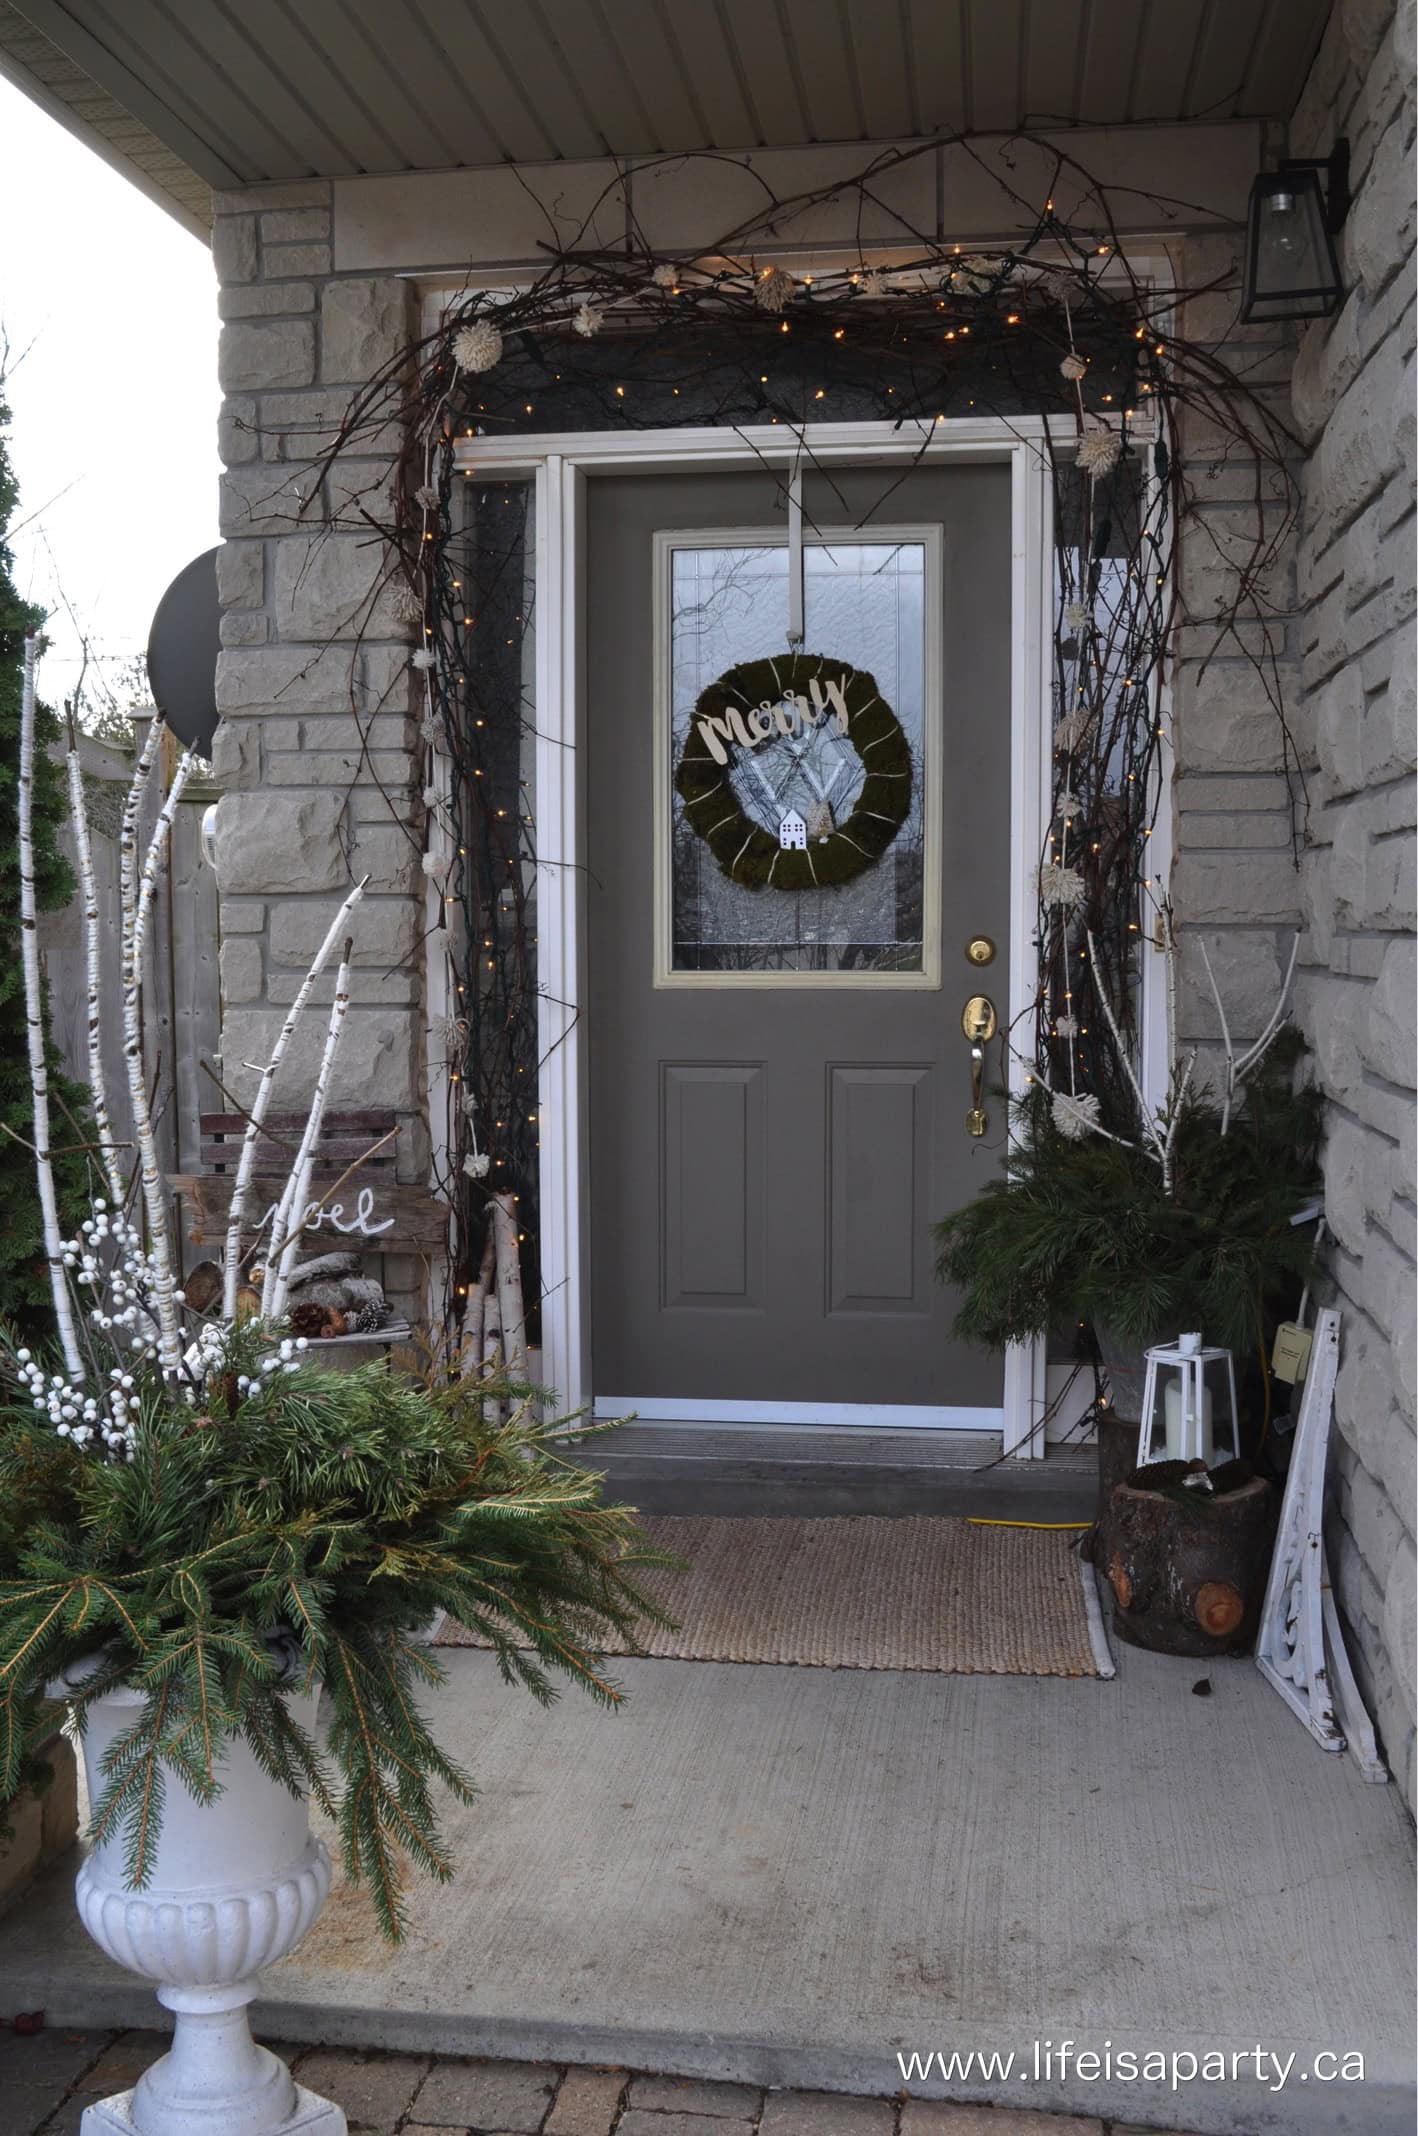
I also used the yarn around the doorway.  I used some grapevine that I gathered while out for a walk one day, and wired it around the doorway. Then I added some clear Christmas lights.  Next, I made a simple pompom garland.

Pom Pom Christmas garland

The different textures really look amazing all together.  And the light garland stands out well against the dark coloured grapevine.

Christmas Wreath

DIY Christmas wreath

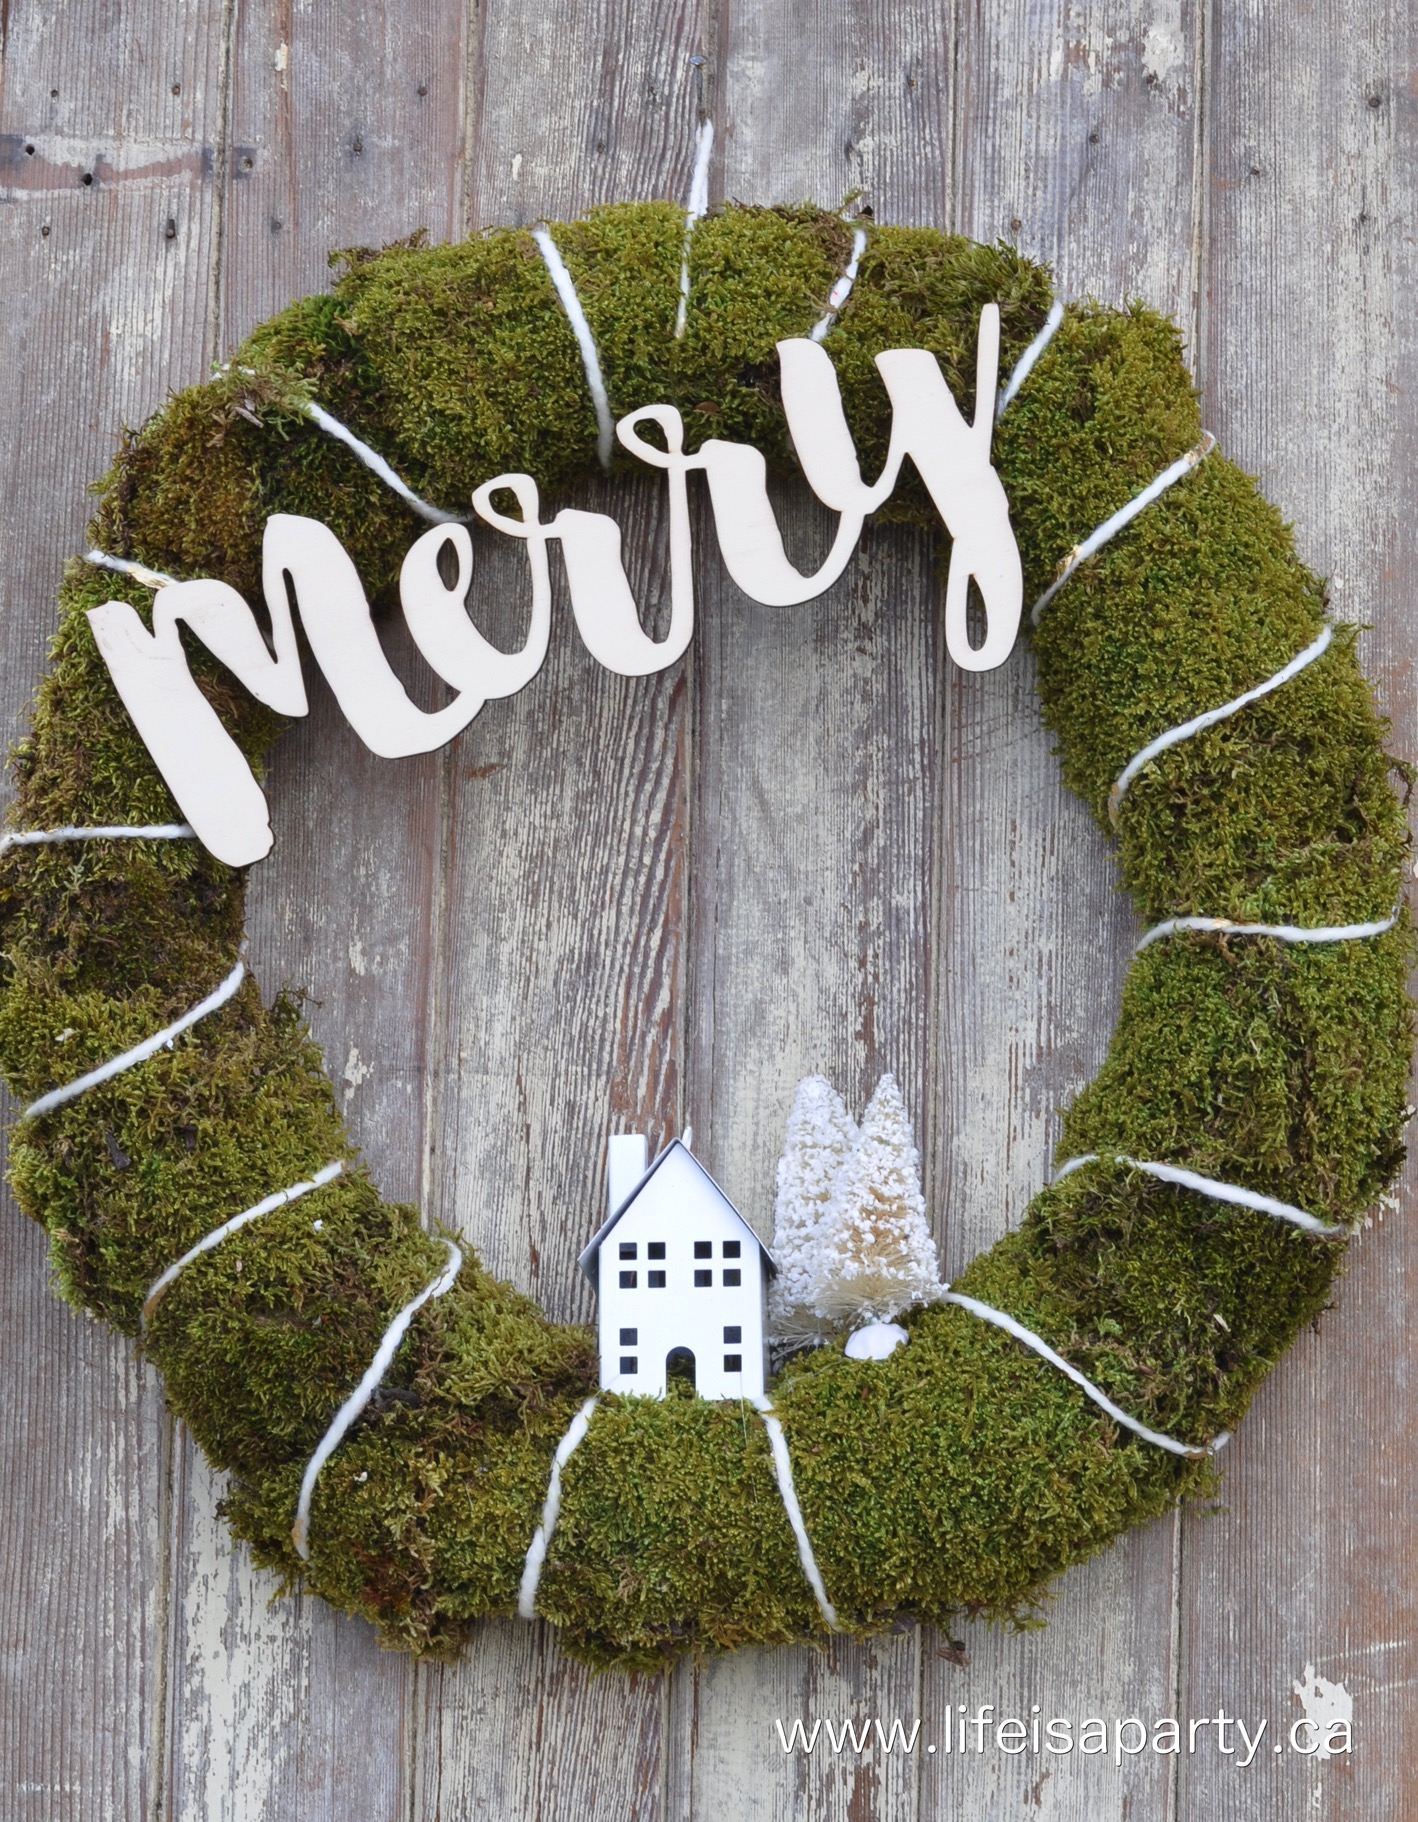
I also used the yarn to make a simple wreath for the front door.

Outdoor Christmas Decorating Ideas for the Front Porch

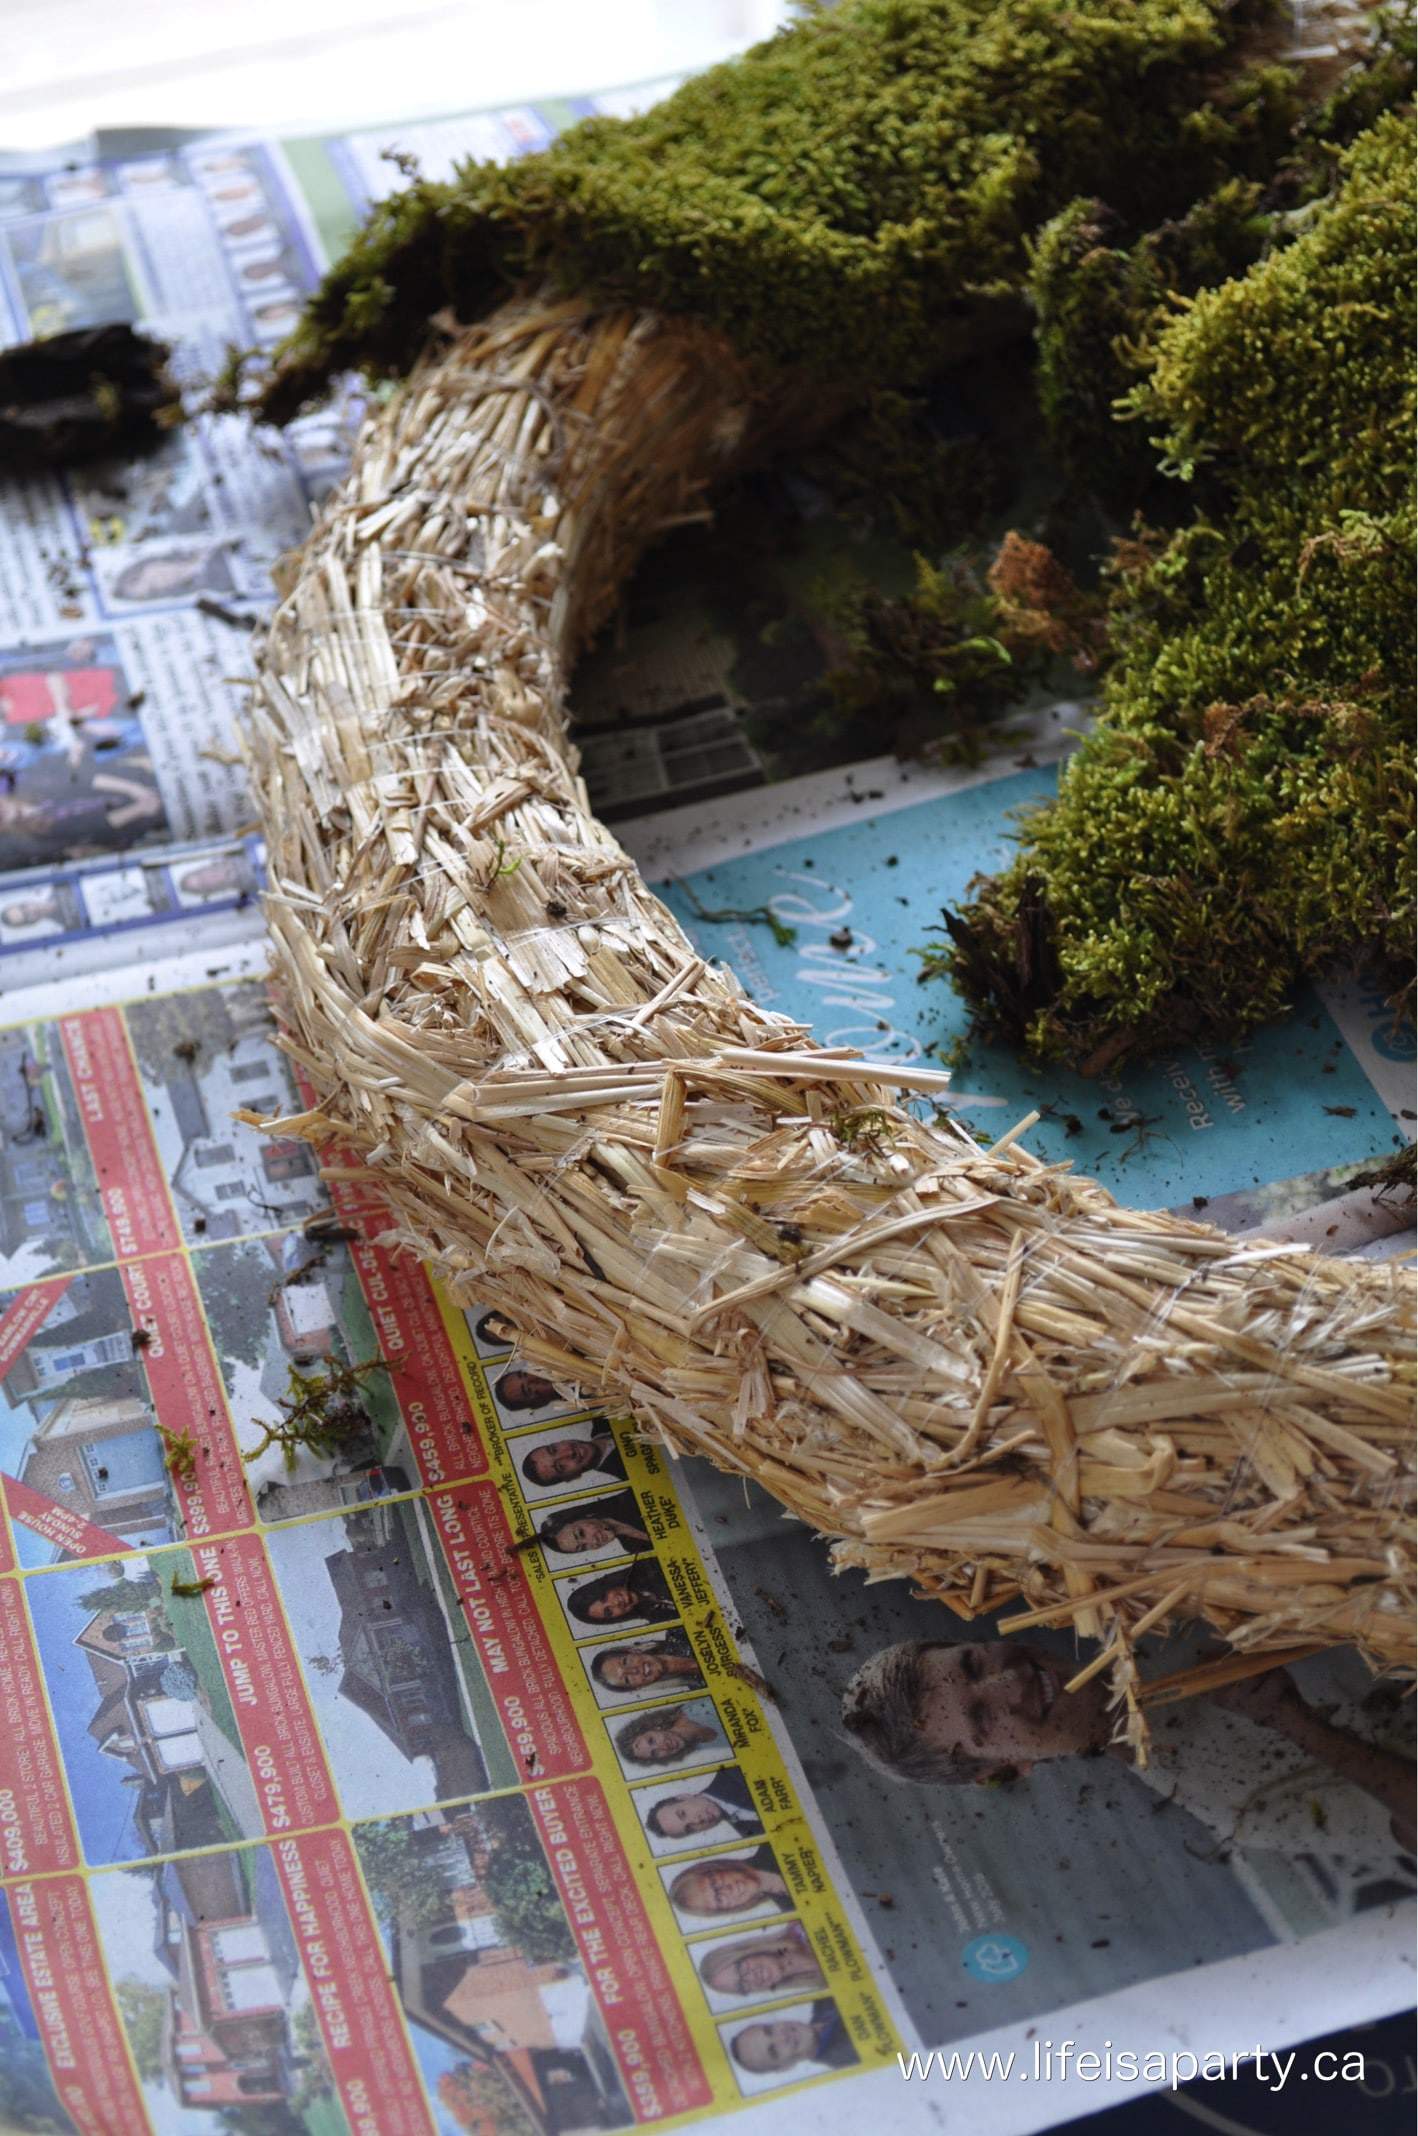
I started out with a straw wreath from the craft store and some moss.  This is some that I collected from the forest, and that had dried out.  I used hot glue to attach it to the wreath.

Christmas wreath Scandinavian

I used more of the Gold Leaf Yarn and wrapped it around the wreath.  The soft, fuzzy white yarn looks great against the vibrant green, it also helps the moss to stay in place.

Outdoor Christmas Decorating Ideas for the Front Porch

I wired on a little metal house from the crafts store, and hot glued a few white bottle brush trees.

DIY Scandinavian Christmas wreath

The "merry" sign is made of wood and hot glued on too.

Outdoor Christmas Decorating Ideas for the Front Porch

More Outdoor Christmas Decorating Ideas for the Front Porch

At the sides, I added a few more treasures.

Outdoor Christmas Decorating Ideas for the Front Porch

The stumps were picked up at the side of the road a few months ago.  Someone had a whole pile of them and a "free" sign so I loaded them up and put them in the garage for the summer.  I thought they'd be perfect out here for Christmas, and now I'm so glad I grabbed them that day.  

The white gingerbread house trim was some I found in a ditch one day when I was out for a little walk with the dog.  You never know what you'll find.  I brought them home banged out a few old nails and added them to my display for a little charm. 😉

Outdoor Christmas Decorating Ideas for the Front Porch

Over on this side, more stumps and pinecones, and some old little skates.

Christmas Front Porch decorating ideas

DIY Noel Sign

This pretty little sign is another one that started from a walk.  I found some old boards and grabbed a few thinking they'd be cute little signs.  To make this I just used chalk to write out "noel" and quickly painted over it with some craft paint.  So easy.

DIY Christmas sign

When you're sticking to a really simple colour scheme like white and neutrals, all these fun little details add interest and texture to your decor.

Outdoor Christmas Decorating Ideas for the Front Porch

I hope you like how I used yarn in an unexpected way.

With a pretty Christmas front porch to welcome visitors, life really is party!

More Inspiration

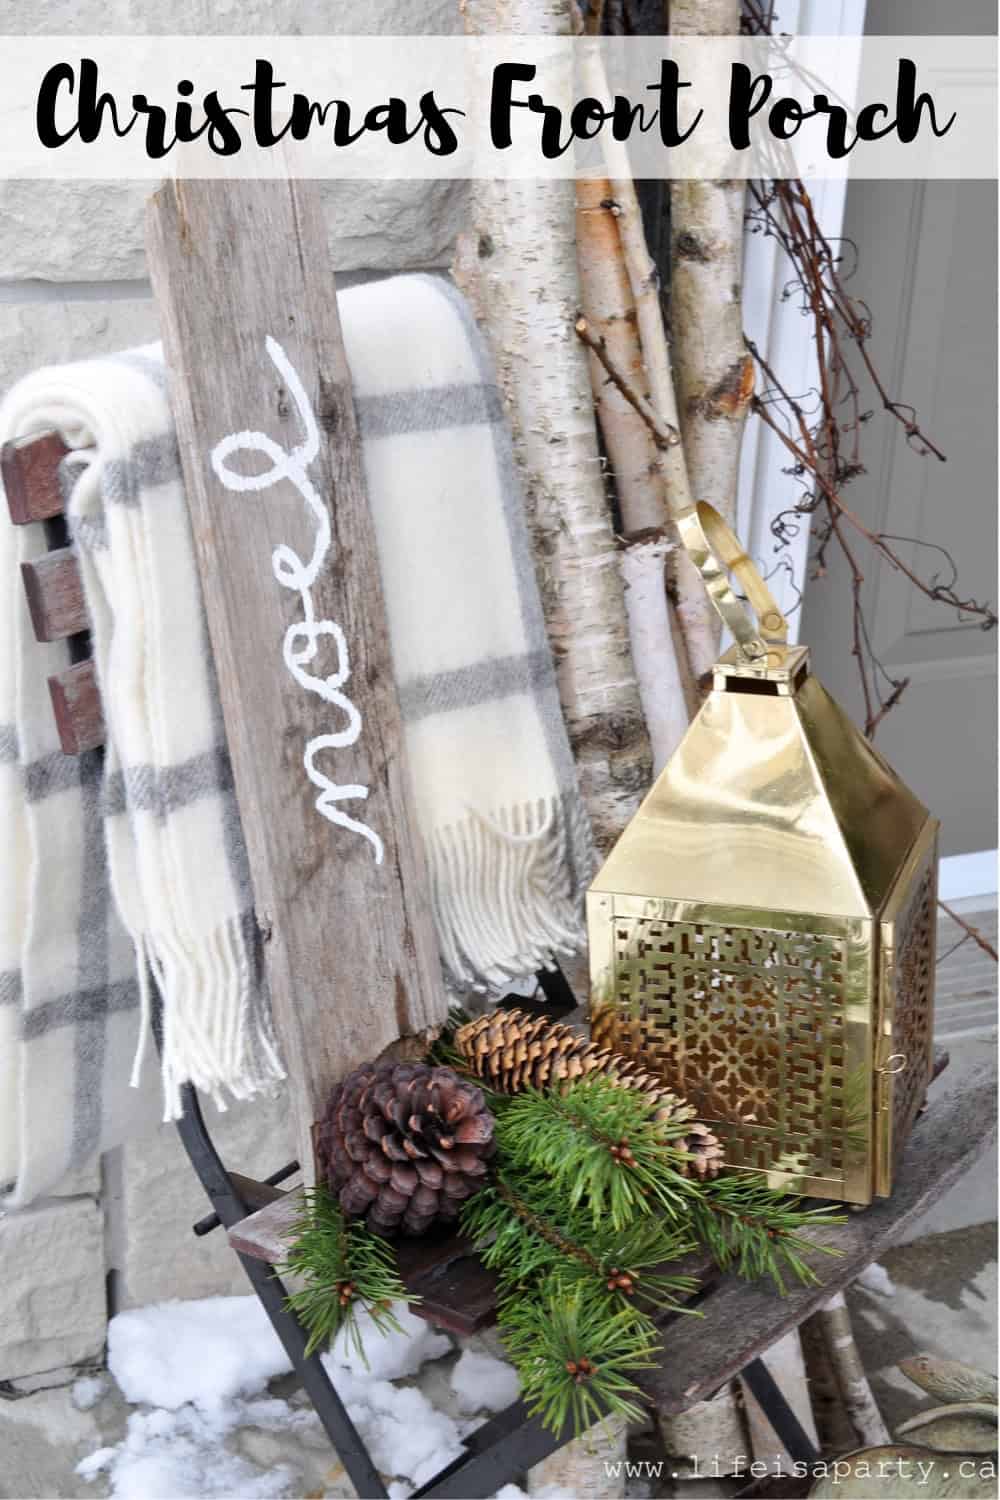
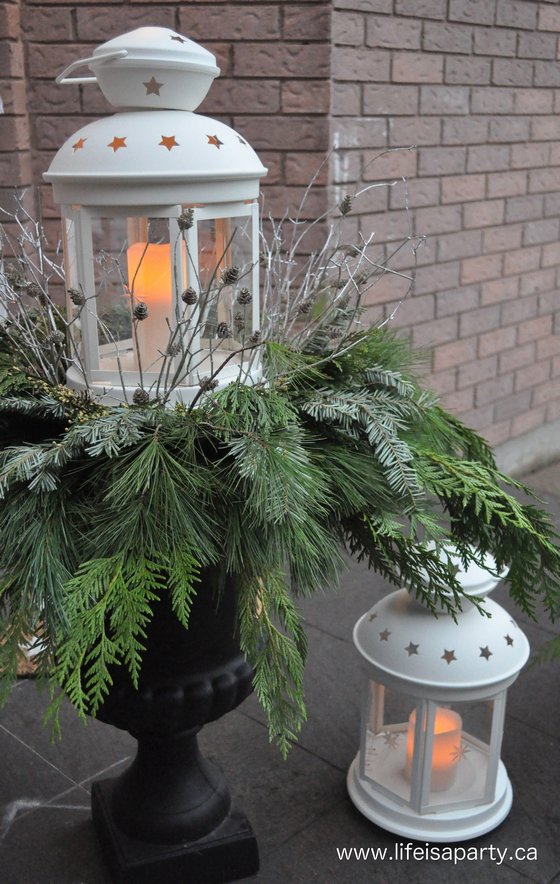
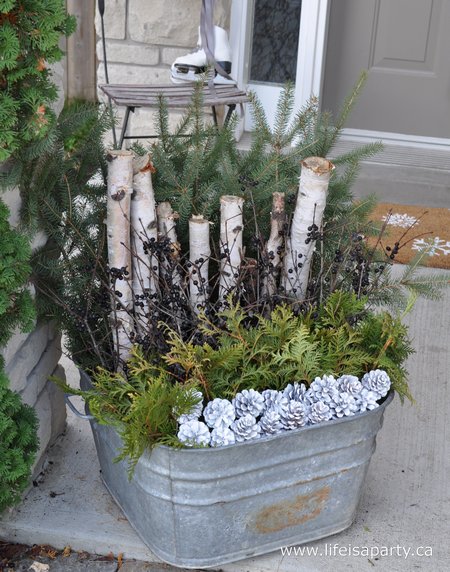
You might also like our Christmas Front Porch here.
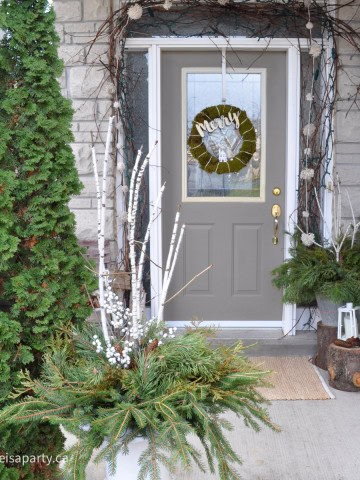
Christmas Front Porch: Rustic greens, large pinecones, and lots of birch logs create a rustic Scandinavian feel with brass lanterns for Christmas.

Also check out our Front Porch Decorating Ideas for Christmas here.

You might also enjoy Christmas Outdoor Planter here.
Scandinavian Christmas Home Tour

Dec 6, 2016 · 48 Comments

Scandinavian inspired Christmas decor.

Scandinavian Christmas Home Tour: Woodland Rustic Scandinavian Christmas decorations with lots of nature inspired decor.

Scandinavian inspired Christmas decor.
[feast_advanced_jump_to]

Welcome!  I'm so excited you're here for my Christmas Home Tour full of Scandinavian Christmas decorations to inspire you.  

neutral front porch Christmas decor

The Front Door

My front door is all dressed up for Christmas.  You can read all about the details of the Front Porch Christmas decor here. 
noel rustic Christmas sign

Now, come on in where it's warm.

Scandinavian Christmas decorating home tour

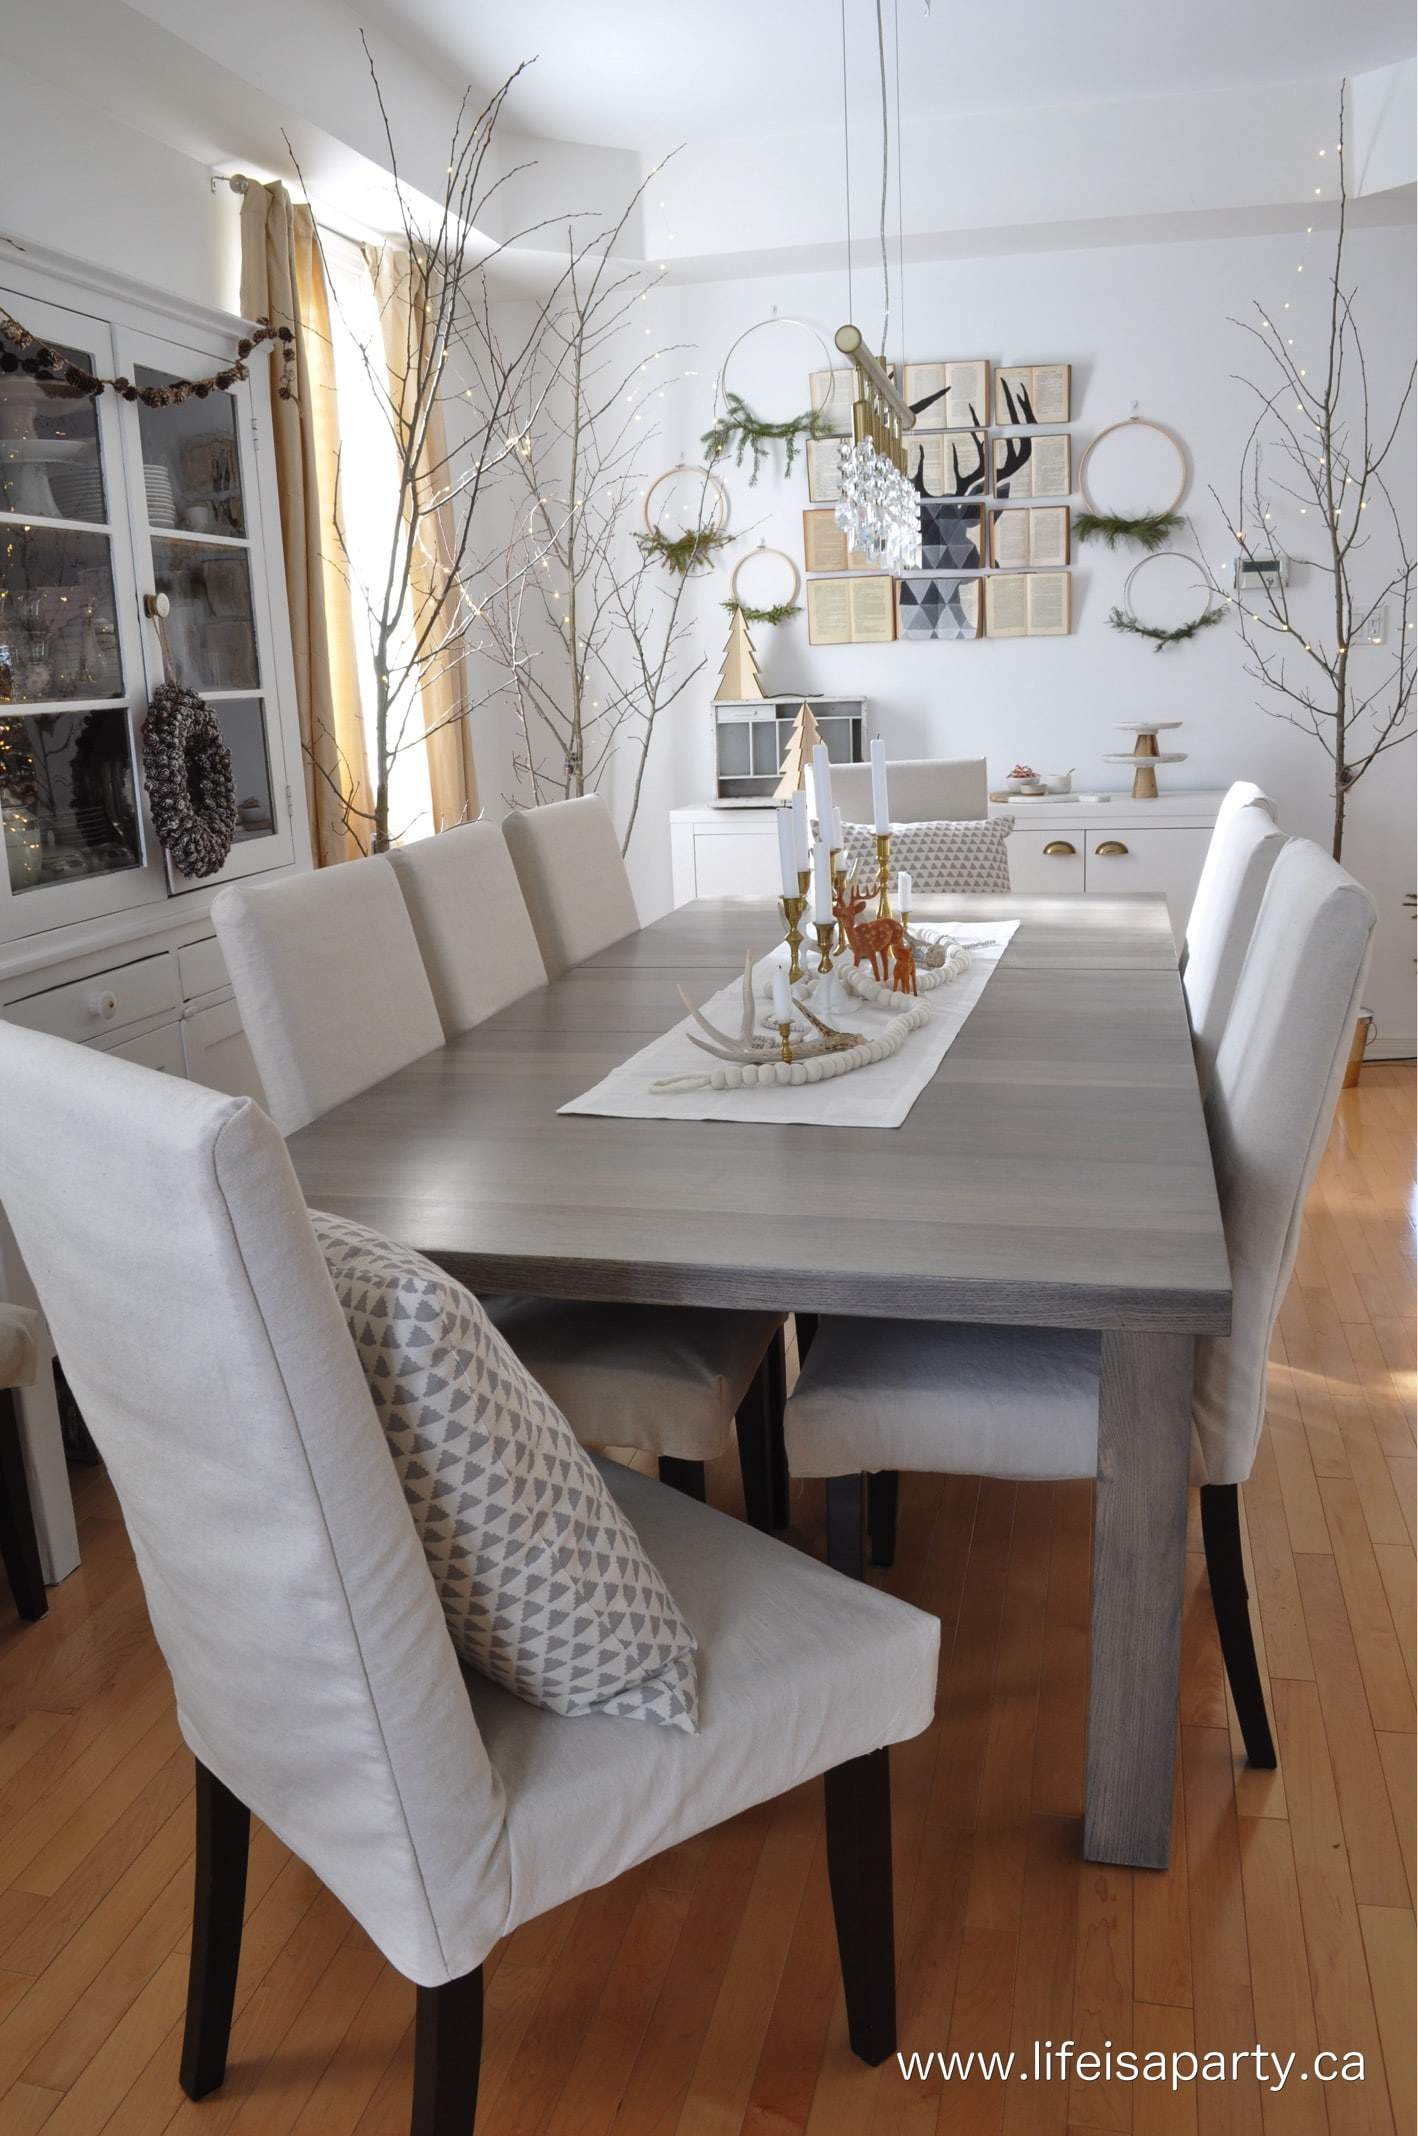
The Dining Room

The first room in our house is the dining room.  I've just finished re-doing it for the One Room challenge -you can read all about our dining room makeover all here.  It was a big job, but I'm so glad I did.  It was so fun to decorate my new white and bright Scandinavian inspired space for Christmas!

Scandinavian Christmas decorations

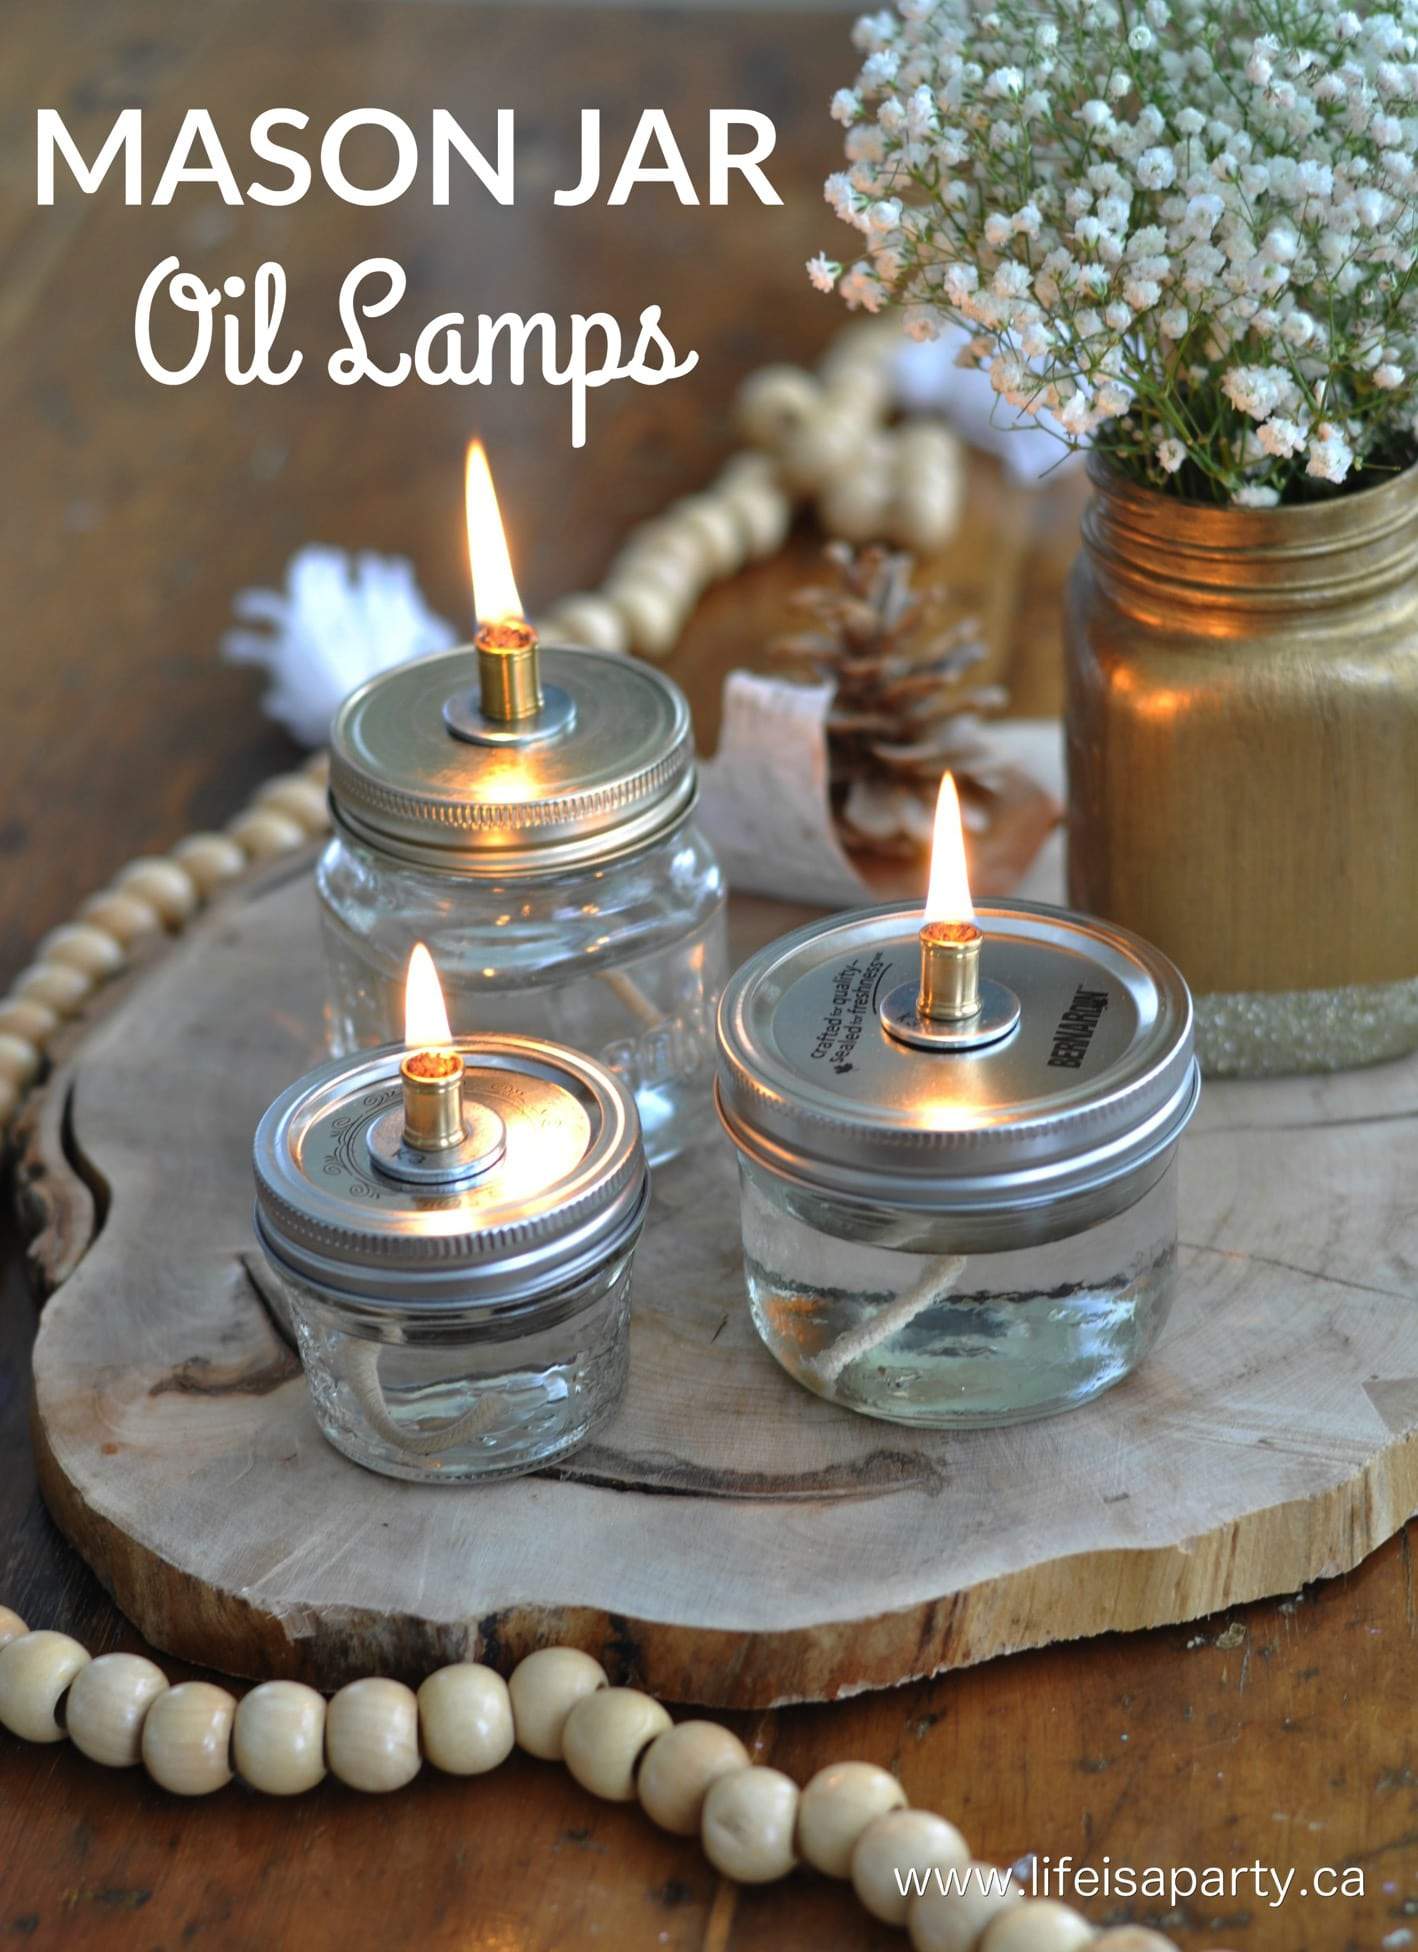
Near the front door I have a little console table, and it's holding my DIY mason jar oil lamps.  There's something about Christmas and lights.

mason jar oil lamps

I've stuck with the Scandinavian feel for Christmas. I love the simplicity of Scandinavian design, the clean lines, the simple colours, and all the natural touches.  This has really been the Christmas of bringing the outdoors in.

Scandinavian Christmas decorations dinning room

Indoor Forest

I wanted to create a forest feel in here, so I cut down five little poplar trees and brought them in for the holidays.

rustic nature inspired Christmas decor

I used some cement in some pretty galvanized buckets to hold them.  It's worked really well.  On top of the cement, I added some faux snow.  It's like a wintry forest in here, and I love the fairy lights, especially at night.
Scandinavian inspired Christmas decor

Bar Cart

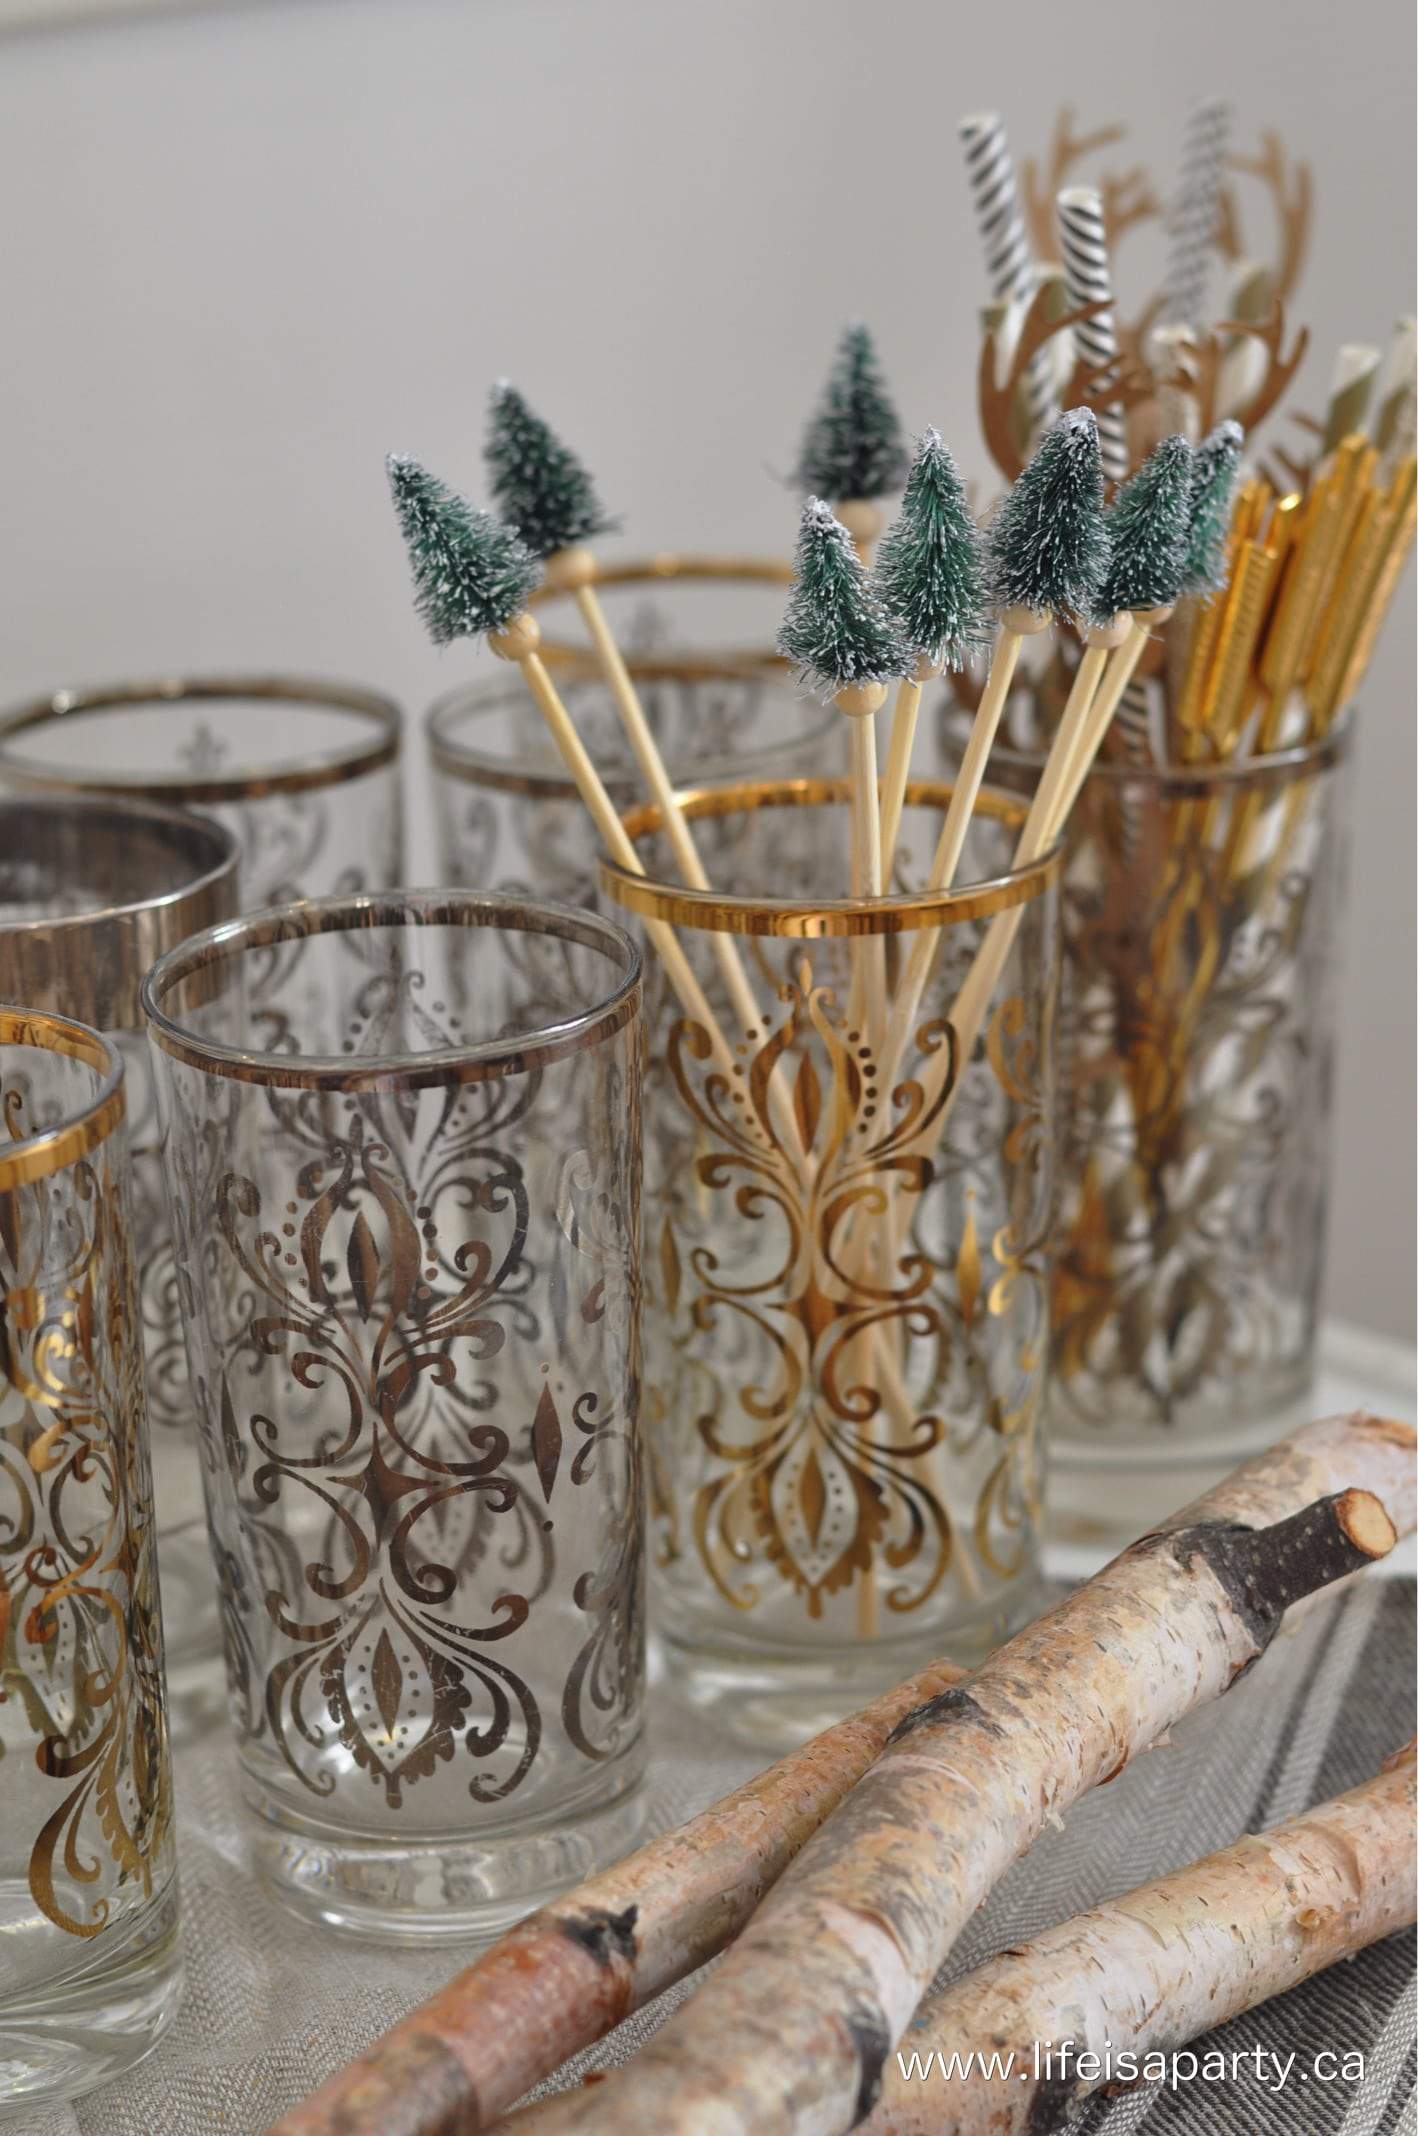
Near the door, our little bar cart is ready for some holiday merry making with pretty vintage glasses.

Scandinavian Christmas decorations

I love the little stir sticks.

Christmas bar cart

My sister gave me this pretty little terrarium for my birthday, and I turned it into a fun snow globe for Christmas.

waterless snow globe Christmas

In the dining room, I  kept things pretty simple.

Scandinavian inspired Christmas decorations

I love using neutrals even for Christmas because it's so calming and serene.

Scandinavian Christmas decorations

I used these pretty DIY paint dipped candle stick holders -see how I made them here.

Christmas dinning room

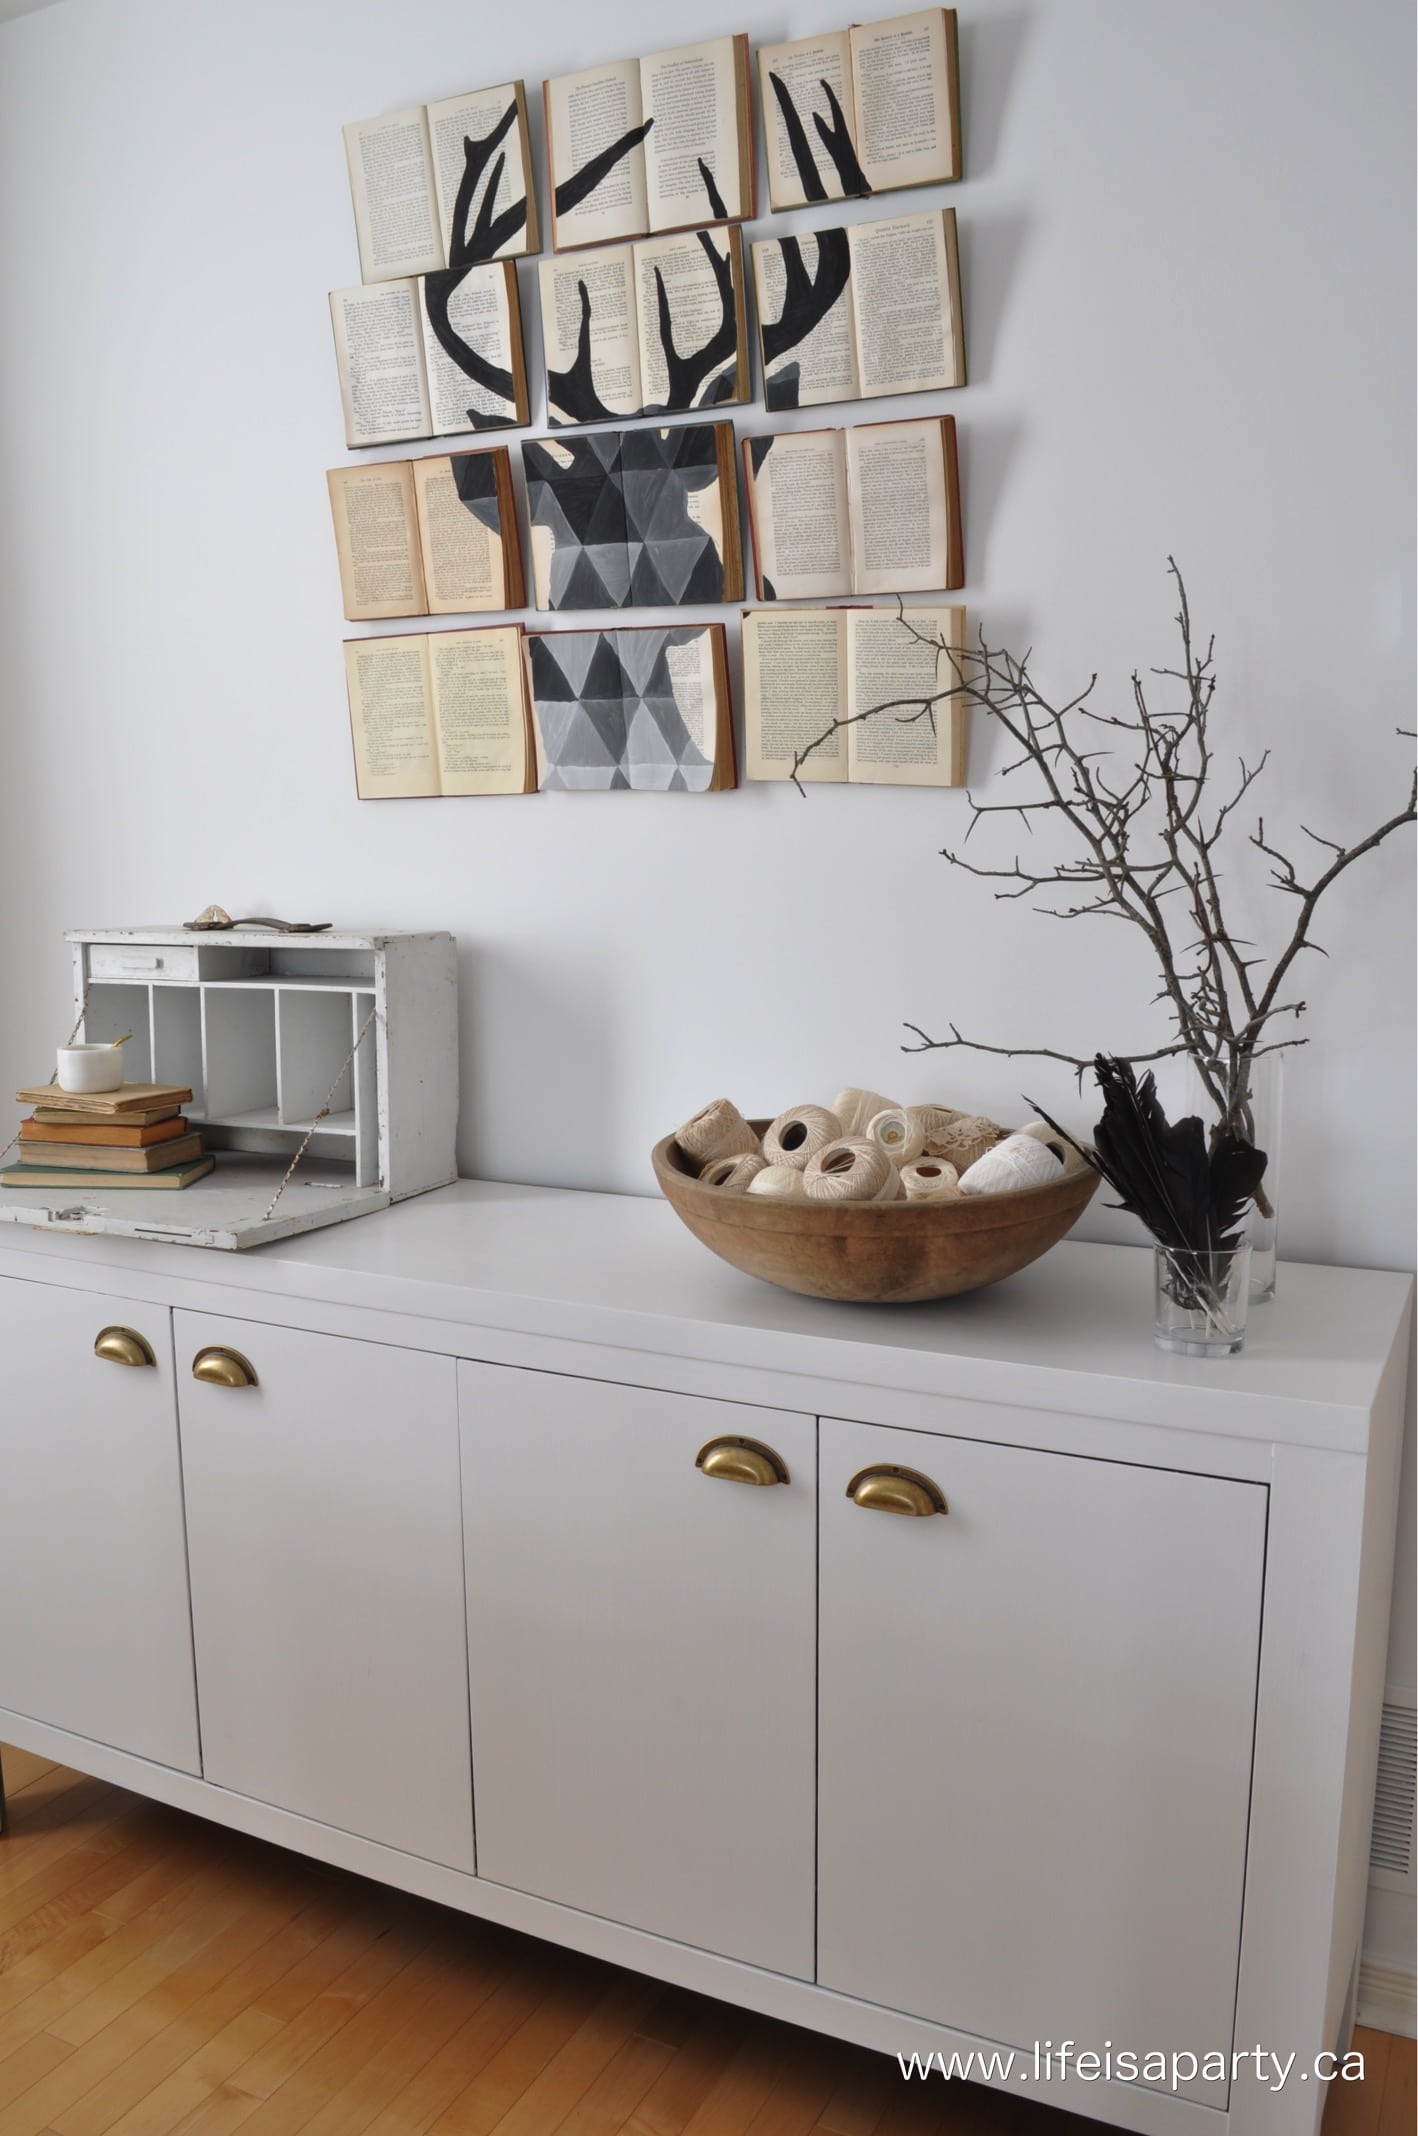
At the other end of the room, is the beautiful vintage book deer art -you can see how I made it here.

Christmas dinning room

I upped the merry factor with the addition of five pretty hoop wreaths.  These are so easy to make, just some hoops and fresh greens wired on.  I love the simplicity of them.

Scandinavian Christmas decorations

These wooden trees make it even more Christmas-y.

Scandinavian Christmas decorations

We got so many candy canes at our local Santa Clause Parade this year, so I added a few for a festive touch in this pretty little marble bowl.

Scandinavian Christmas decorations

I'm really in love with this new white, bright space, and I can't wait to paint the rest of the main floor rooms white.

Christmas dinning room

The dining room leads onto the stairs, and the living room.

Scandinavian Christmas decorations home tour

The Christmas Tree

I like to put the Christmas tree at the bottom of the stairs so we can enjoy it from the living room and dining room.

Scandinavian christmas tree

In keeping with the Scandinavian vibe, I've kept it really simple and natural.  I found my little Charlie Brown tree in the woods, and I love how bare it is.  It's surrounded by a few treasures, and our family's story book advent calendar - where we read a different Christmas storybook together each night leading up to Christmas.

Scandinavian Christmas tree

Scandinavian Christmas Decortations in the Living Room

The stairs are also simple and natural, we layered grapevine and pine boughs that I gathered on a walk one day.

Scandinavian Christmas home tour
Scandinavian Christmas decorations

The little table is a new addition too, and the perfect place for a cup tea, next to the fire.

neutral Christmas mantel ideas

The Fireplace Mantel

This years mantel is a little different and I just love it.

Scandinavian Christmas decorations

Corner fireplaces can be tricky so I used an old vintage window frame to fill up some space and a pretty branch attached to it.

Scandinavian Christmas decorations

The little house lanterns are holding the sweetest little mushrooms.  It's very Scandinavian to include mushrooms on your Christmas tree, usually red, and they inspired my mushroom fireplace mantel.

mushroom Christmas ornaments

I love how they look like snowy little specimens in their glass houses.  They make me wonder if the fairies will visit?

Scandinavian Christmas mantel

On the other side of the room, a cozy chair to curl up in.

Christmas home tour

The side table is just some vintage crates, but works perfectly for a rustic touch.

Christmas home tour

My sweet sister came and rearranged my bookcases for me.

Christmas home tour

Sometimes you just need fresh eyes, and I love what she did.

neutral Christmas book case decor

On the other wall is the couch, and a pass through to the kitchen.

rustic Christmas home tour

On the ottoman, a sweet little tray and some candles.

black and white enamelware

Pass Through

And up on the pass through, a sweet collection of vintage oil cans.

vintage oil can collection

I've been collecting them over the last few years, I love the mix of shapes and metals.

antique oil can collection

Above the oil cans, is another branch, holding some pretty Christmas decorations.

Scandinavian Christmas decorations

The Kitchen

And in the kitchen, we've been working on a few tiny gingerbread houses.

Christmas kitchen

They look so pretty all decorated in white.

neutral all white gingerbread house

Scandinavian Christmas Decorations in the Dining Area

And then over to the kitchen table, with perhaps my favourite decoration this year.

Christmas kitchen tour


I found this old wooden dough bowl at an antique fair last year, and I love it holding some of my vintage Christmas ornaments.

vintage dough wood bowl with Christmas ornaments

Over the years, I've picked them up mostly at second hand stores, and although everything else is neutral this year, I love this pop of vintage colour.

Christmas hot chocolate station

This little cabinet is a new addition this year, and was lots of fun to decorate.  We got the most delightful puppy this summer and I needed some where to store all his bits and bobs.  The cabinet has worked out great.

Christmas hot chocolate bar station

I set up a sweet little hot chocolate stand.

Christmas hot chocolate station

My girls love having all kinds of yummy marshmallows to choose from.

knit Christmas stockings

And last but not least, these pretty knit stockings hung on some birch poles I cut down in the forest.

Thanks so, so much for dropping by to see all my Christmas decorations, lots found on walks in the woods, or old favourites from years past, and a few new treasures thrown in too -the perfect combo.

The house all decorated with Scandinavian Christmas decorations, life really is a party!

More Inspiration

You might also like our Cozy Christmas Bedroom here.

Cozy Christmas Bedroom: Linen and chunky knits, a Christmas tree, candles, and a Christmas gallery wall help create a cozy space for Christmas.

Also check out Green Christmas Decor Home Tour 2019 here.

Christmas Home Tour: Rustic Scandinavian Christmas Home Tour, with bit of modern boho.

You might also enjoy Scandinavian Christmas Home Tour 2018 Part I here.

Christmas Home Tour 2018 -Black and White Scandinavian design with a little boho. Lots of natural elements, cozy texture and Christmas twinkle lights.

Also check out Scandinavian Christmas Home Tour 2018 -Part II here.

Scandinavian Christmas Decor Home Tour 2018 -Part II: Rustic Scandi design, lots of white and natural elements with some vintage Xmas pieces.

Christmas Dessert Party Ideas

Nov 29, 2016 · 2 Comments

Christmas dessert party.

Christmas Dessert Party Ideas: easy holiday entertaining with lots of tricks to turn time saving mixes into extra special treats.

Christmas dessert party.
[feast_advanced_jump_to]

It's beginning to feel a lot like Christmas, and what better way to celebrate the season than with our Christmas Dessert Party Ideas!  I've put together a  really easy, delicious, and extra sweet menu and the best part is it's full of baking tricks that make it quick to put together.

Christmas Dessert Party Ideas

This time of year is so busy for everyone, but it's still so nice to make homemade treats for family and friends.  You don't have to give up homemade taste with these little tricks. 😉  I made all these treats in one fun day in the kitchen with my kids.

Christmas Dessert Party Ideas

I love to start with the basics, like brownies, chocolate chip cookies, and pumpkin loaf and then add a few extra special touches to take them to a new level.

Christmas Dessert Party Ideas

Baking Shortcuts

I used some of my favourite ready made cookie doughs, and mixes to make the baking fast and easy and still deliver homemade taste.  After I made the brownies, cookies, and pumpkin loaf for the party, I added a few extra special touches to take them to the next level.

holiday chocolate chip cookie pops

Holiday Cookie Pops

I used Holiday Chocolate Chip Cookie Dough to make cookie pops.

Christmas cookie pops

To make the cookie pops, I separated and baked the Holiday Chocolate Chip Cookies and after they were cooled I sandwiched two of  them together with some icing, added a lollipop stick, and rolled the edge in holiday sprinkles.

chocolate chip cookie pops

So easy and such a hit with my guests.

chocolate chip cookie pops

Brownie Lollipops

I also made some special brownie lollipops too.  I baked a brownie mix for the brownies, and after they were cooled and cut into rectangles, I put them on a stick, dipped the tops into some melted milk chocolate, and sprinkled with some Christmas sprinkles.

Christmas Dessert Party ideas

Reindeer Brownies Pops

I also made some reindeer brownie pops, as little take home favours at the end of the party.

Christmas Dessert Party ideas

The reindeer pops were really simple to put together.  I used a brownie mix to make the brownies. After they were cool, I cut them into rectangles and added a lollipop stick.  Then I melted some more milk chocolate and dipping the brownies in.  I used more melted chocolate in a  small zip bag, with the corner snipped off to pipe some small antlers onto parchment paper and put them into the fridge to set.

reindeer brownie pops

To make the reindeer faces, I used some candy eyes, and made a nose with a red holiday chocolate chip.  Then I added the chocolate antlers.

Christmas brownies

Once they were set, I put them in little cello bags tied with a ribbon and placed them by the door so my guests could take one as they left as a little party favour.

Christmas Dessert Party ideas

Pumpkin Bread

I used the Pumpkin Bread Kit to make some delicious pumpkin bread.  It's so easy, moist and delicious, and I love that even the icing is included in the kit.  If you had more time you could try our Pumpkin Ginger Loaf recipe here.

pumpkin bread

Pumpkin Trifle

I made two pumpkin loaves and used one to make  little pumpkin trifles.  These were so, so good.

easy pumpkin trifle

Recipe

Individual pumpkin trifle in glass dessert dish.

Pumpkin Trifle

Pumpkin loaf with sweet and creamy pumpkin pudding and crunchy nuts.
No ratings yet
Print Pin Rate
Course: Dessert
Cuisine: American
Servings: 8
Author: Dannyelle Nicolle-Ramjist

Ingredients

  • Libby's® Pumpkin Bread Kit
  • vanilla instant pudding
  • 250 mL whip cream
  • 1 tablespoon sugar
  • 1 teaspoon vanilla
  • 3 tablespoon maple syrup
  • ½ teaspoon pumpkin pie spice
  • 1 cup Libby's® 100% Pure Pumpkin
  • candied nuts

For the Candied Nuts

  • 8 oz pecans chopped
  • 1 egg white
  • ½ cup sugar
  • ¼ teaspoon salt
  • ½ teaspoon cinnamon

Instructions

  • Prepare your pumpkin bread according to the kit instructions and allow to cool.
  • To make the candied nuts, whip the egg white, then stir in pecans. Combine ½ cup sugar, salt, and cinnamon, then add to nut mixture, and stir to evenly coat the nuts. Bake the nuts on a parchment lined baking sheet at 250 degrees for 1 hour, stirring even 15 mins. Allow to cool.
  • Prepare the vanilla instant pudding according to package instructions.
  • Whip the cream and add 1 tablespoon sugar and vanilla -set ½ cup aside to use as topping, the rest is for the mousse.
  • To make the pumpkin mousse, mix the pumpkin puree, pumpkin spice, and maple syrup. Add the pudding mixture and stir to combine. Fold in the whipped cream.
  • To assemble the trifles, cut the pumpkin loaf into cubes and fill the bottom ⅓ of a small dessert dish. Top with the pumpkin moose, to fill the next ⅓ of the dish.
  • Garnish with a spoon of whipped cream, and sprinkle with candied nuts.
Tried this Recipe? Tag me Today!Mention @LifeisaParty or tag #lifeisaparty!
pumpkin trifle

Christmas Dessert Table Ideas

These were a real favourite on the dessert table.

Christmas Dessert Party ideas

I also included some clementines -or Christmas oranges as we love to call them, they were a nice addition to all the sweets.

Christmas Dessert Party ideas

The brownies and holiday chocolate chip cookies were so good!  My whole house smelt like chocolate.

Christmas Dessert Party ideas

Brownie Donuts and Milk

I also made some brownie donuts, just for fun.

milk bottles and brownies

They looked adorable paired with some little milk bottles.  To make them, use some brownie mix and pipe them into a very well greased mini donut pan.  I topped them with a little chocolate icing and chocolate sprinkles.  So cute.

Christmas Dessert Party

My dining room is all decorated for Christmas with a woodland theme, and was the perfect setting for this sweet party -see more of my Christmas Home Tour here.

Christmas Dessert Party ideas

I kept the decor pretty simple with lots of fresh greens, and a few red roses.

what to serve at a Christmas dessert table

Christmas Dessert Party Drink Ideas

For drinks, along with the milk in the sweet little bottles, I put together a little hot chocolate bar on my bar cart.

hot chocolate buffet

I love having lots of little serve yourself stations when entertaining, it helps with the traffic and flow of the get together.

hot chocolate station

I made the most delicious hot chocolate with evaporated milk and the semi-sweet chocolate chips.  Just heat one can of evaporated milk with ½ cup chocolate chips until the chocolate is melted and hot chocolate is well combined.  Using the evaporated milk makes the hot chocolate so rich and creamy.  Here's a little tip for serving hot chocolate at a party, use a teapot!  It worked perfectly.

hot chocolate buffet

I added a few fun toppings like marshmallows, hot chocolate flavoured candy canes and whip cream.

mugs with gingerbread cookies on the side

Gingerbread Mug Cookies

I also made a few gingerbread cookies for the mugs.  I used gingerbread cookie dough sheets.  It's so easy to use and so good, I don't think I'll ever use anything else again.  The sheets come all rolled out and ready to use, you just cut out with your favourite cookie cutter and bake. These are perfect to use with kids, because let's face it all they really want to do is cut out the shapes and decorate them, and with the refrigerated dough that's all there is to it.  The only hard part was keeping the kids from eating all the cookies before the party. 😉

Christmas dessert table

This was a wonderful way to kick of the holiday season.

Christmas Dessert table ideas
how to set up a Christmas dessert table

With these Christmas Dessert Party Ideas, life really is a party!

What are you baking this holiday?

More Christmas Party Inspiration

You might also like our Merry and Bright Christmas Party here.

Also check out our Holly Jolly Woodland Kids Christmas Party here.

You might also enjoy our Christmas Fondue Party here.

How To Refinish A Dark Wood Veneer Dining Room Table

Nov 28, 2016 · 27 Comments

How to refinish a veneer table.

How To Refinish A Veneer Table: Tutorial to refinish a dining room table with a veneer top by removing the finish, staining, and sealing.

How to refinish a veneer table.
[feast_advanced_jump_to]

I took part in the One Room Challenge this year and made over my dining room -you can see the big dining room makeover reveal post here.  

One of the biggest projects in the makeover was figuring out How to Refinishing a Dark Wood Veneer Dining Room Table. I wasn't even sure if I could refinish a dining room table with a veneer top.

dark wood veneer dining room table

At first, I had hopes of replacing my large dark wood veneer dining table with an antique harvest table or something like the beautiful Restoration Hardware ones that I was drooling over. Unfortunately I couldn't find a harvest table in the budget that was long enough. And, I couldn't afford the Restoration Hardware table either. You might be in the same position as me, so I wanted to share how I refinished my old dark wood veneer table, and turned it into my dream table on a budget.

How To Refinish Your Old Dark Wood Veneer Table

Can You Refinish A Dining Room Table Veneer Top?

I actually didn't realize I could refinish dining room table veneer top, because I thought you could only refinish solid wood furniture. After a little research though, I realized I could probably achieve that grey, driftwood finish I'd admired on a solid wood table with my wood veneer surface.

How To Refinish A Dining Room Table Veneer Top

Is It Worth It?

I am so, so pleased with there results. But, I have to say right up front that if you are considering giving this a try, it's a really difficult project. I think it took about 22 hours of work, not counting dry times inbetween. It was one of the hardest projects I've ever done, but the results are amazing. It's not for the faint of heart. 

The reason it's so difficult is that modern factory furniture has a very hard, baked on existing finish that is extremely hard to remove. The majority of the hard work was in striping the table. If you have an older antique piece with a veneered surface it might not be as difficult, if it doesn't have that baked on finish that's so hard to remove.

stripping veneer furniture

Our table was about 10 years old, but still in really good condition with no damaged veneer. It was a fairly expensive piece when we bought it, and had good quality mechanisms for expanding it, it also fit the room and our needs really well, and was in good shape. All this made it worth the effort. It might not be worth it for a lesser quality piece of furniture.

How To strip veneer furniture

Getting Started  To Refinish A Dining Room Table Veneer Top

The first day, a friend who does a lot of antique furniture refinishing -a real expert with lots of experience, came to help me. Because the table is veneer we knew we had to be careful about how we striped it. 

What is Veneer Furniture?

What exactly is a veneer furniture piece? It's furniture that has a thin veneer layer that is just a thin sheet of wood glued on top of a less expensive wood product usually particle board. Lots of modern furniture is made this way because it's cheaper to produce than solid real wood furniture. It was less common, but there are also antique pieces of wood veneer furniture too.

It would be easy to damage the veneer with sanding because it's so thin. So the first rule of refinishing veneer furniture is to not sand it so hard as to remove the veneer and expose the particle wood underneath.

Because of factory finish that's baked on in a large kilm when the piece is finished, we found the stain extremely hard to remove. We couldn't get past the dark, hard like a rock, nearly impossible to remove finish on the entire piece. 

We started out with paint striper. A chemical stripper is a good choice with veneer, so you don't risk sanding to much. We started with thick coat of paint stripper applied with a brush, but even after letting it sit for 10, 15, 20 minutes, we saw very little effect when we tried to remove the old stain with a putty knife. At that point though, there was no going back. I felt a little sick, and talk turned to maybe having to just paint it. 

It seemed like we'd never be able to get the dark finish removed. But I kept trying and trying, and scrubbing and scrubbing with coarse steel wool, until finally a small patch of the light wood underneath was visible.

How To Refinish Your Old Dark Wood Veneer Table

Through a process of trial and error we came up with a method that worked. But it sure did take a fair bit of elbow grease to get it back to bare wood, or as close as possible.

How To Remove the Old Finish

Materials:

  • palm sander
  • course, medium, and fine grit sandpaper
  • scraper
  • paint remover
  • coarse steel wool

We sanded the initial glossy coating off with a palm sander, then applied a generous amount of paint remover on the wood surface and let it sit about 10-15 minutes. You'll want to use a electric sander for this first step with a very coarse grit of sandpaper.

We then VERY CAREFULLY used a scraper to scrape off the finish. You have to go with the direction of the grain of the wood, and be really, really careful to not make any gouges in the wood. We found this to be the best way to remove the old stain.

We then applied another coat of paint remover, let it sit again, and went over it with coarse steel wool for the best result. You will want to work in a well ventilated area for this step especially and wear rubber gloves to protect your hands.

We then carefully sanded the wood in the direction of the wood grain, with a medium and then fine-grit sandpaper on the palm sander. 

It was a really long process, which we divided over two days of work together. In the end, there were still some dark stain marks in the grooves of the grain, but it worked well with our grey finish.

veneer table stripped of dark stain

Staining the Striped Table

Materials:

  • wood stain
  • clean cloth

We used Minwax's Wood Finish Classic Grey Penetrating Stain on our stripped table to stain it. 

Begin by cleaning the entire surface of the whole piece with a tack cloth, or damp rag to remove any sanding dust. It's a good idea to test your stain color on a scrap piece of wood or on the underside of the table or in an inconspicuous spot first. We applied our stain with a clean rag. I choose not to apply wood conditioner to the raw wood first, but you could if you like, it is supposed to help the stain apply more evenly.

We were happy with the color of the stain after the first coat. You may find a second coat of stain is needed to create a color you're happy with.

I love the light grey colour of the stain. After the stain dried overnight, it was time to apply the sealer.

dark wood veneer dining table that's been stripped and restrained grey

Sealing The Table

Materials:

  • polycrylic protective finish
  • fine grit sandpaper
  • clean cloth

I sealed the table with Minwax's Matte Finish Polycrylic Protective Finish. I applied the sealer with a good quality brush. Some people prefer a foam brush to avoid brush strokes. I worked really carefully, taking care to not over work the product. After so much hard work getting to that point I really didn't want to mess things up at the last stage of the game.

There are two coats of the protective finish over the whole thing, and third final coat on the top of the table to make it last a long time. For the best results, in between each coat I very lightly sanded the entire table with a very fine grit sandpaper, and wiped it down with a clean damp cloth to remove the fine dust.

refinished veneer table

After all that hard work, the table came out looking amazing! It was really worth it all in the end. If you have some old furniture with wooden veneer, it's a great way to give it new life.

How To Refinish Your Old Dark Wood Veneer Table: How to strip your old table, and re-stain and seal it to make it better than new.

It was so fun to set my new beautiful table.

refinished veneer furniture dining room table

Friends who saw it actually thought I'd gone out and bought a new table. I'm really glad I did it, now that it's all done, it really was the best option for me even though it was quite time consuming.

How To Refinish Your Old Dark Wood Veneer Table: How to strip your old table, and re-stain and seal it to make it better than new.

With a newly refinish veneer dining room table that looks like new, life really is a party!

Disclosure: Minwax kindly supplied materials for this project, but the opinions -as always, are my own. Thanks for supporting the brands that make Life is a Party possible.

More Inspiration:

Or you might like Expert Tips From A Contractor On How To Install Shiplap. 

Paper Geometric Christmas Ornaments

Nov 21, 2016 · 10 Comments

Paper geometric Christmas ornaments.

3D Paper Geometric Christmas Ornaments -These Cricut paper ornaments are easy to make with a Cricut machine, and a free design. 

Paper geometric Christmas ornaments.
[feast_advanced_jump_to]

Make easy Cricut paper ornaments this Christmas.  These pretty 3D paper geometric Christmas ornaments are really easy to make with a Cricut machine.  These machines make any kind of cutting project super easy.  

3D Paper Geometric Christmas Ornaments in gold, and copper3d Geometric Christmas Ornament Free Cricut Pattern

To make this ornament, find the free Cricut template here.  You can adjust the size of the shapes in the Design Space if you'd like to.  And then follow regular Cricut procedure -use a sticky mat, adhere your card stock to it, load the paper, and make sure your machine is set for card stock.  

For this project you need to make sure to use the scoring tool first, it will then signal you to change to the cutting blade (for the Cricut Explore Model).

3D Paper Geometric Christmas Ornament free Cricut pattern

Once your ornament is all cut out, remove it from the mat.  The Cricut will score and cut the paper for you, and all you have to do is fold it along the scored lines and glue it together.  

Glue The Ornament Together

I found hot glue is the quickest and easiest way to glue them.  For ornaments, while you're gluing it together also hot glue a piece of clear thread in a loop to hang it from when it's all finished.

Cut out 3D Paper Geometric Cricut Christmas Ornaments

Paint And Add Some Sparkle

After that I spray painted some metallic colours, I found it was much cheaper to spray paint the finished ornament made from regular card stock, than buy special card stock, especially if you have some spray paint on hand.  I also added a little glitter, since it's Christmas and you know we love a little glitter around here.

Gold, silver, and copper 3D Paper Geometric Christmas Ornaments

These are really inexpensive to make, and look so great on the Christmas tree.

Christmas tree with 3d geometric paper ornaments
how to make a 3D Paper Geometric Christmas Ornament on your Cricut machine

They'd also be great as gift toppers or table decor for the holidays.  You could make them in any colour to fit your Christmas decor -but this year I'm still loving the mixed metals.

how to make 3d paper Christmas Ornaments

More DIY Christmas Ornament Inspiration

You might also like our Cricut Wood Feather Ornaments here.

Cricut Wood Feather Ornament: see how to cut wood using your Cricut machine. Includes a free cut file for this wood feather Christmas ornament.

Also check out Mini Macrame Christmas Ornaments here.

Mini Macrame Christmas Ornaments: Easy DIY Macrame Ornament tutorial, perfect for the beginner. No macrame experience required.

You might also enjoy our Cement Star Christmas Ornament here.

DIY Paper Feathers

Nov 16, 2016 · 12 Comments

DIY book page feather.

Make these easy and inexpensive paper feathers. We used old book pages, but you can use any paper to make them. You will only need three supplies: paper, a glue stick and a wire for a centre for this quick and simple craft. Use them to decorate, on a Christmas tree, or as a gift topper.

DIY feather decorations made with old book pages.
[feast_advanced_jump_to]

Why You'll Love This Craft

  • You only need 3 supplies for this craft.
  • These are quick and simple to make.
  • They look great as decor, on a Christmas tree, or as a gift topper.
  • Using old books and adding glitter adds lots of pretty texture.

I love this time of year, and decking the halls with lots of pretty Christmas touches.  There's nothing better than a few simple handmade additions each year.  You will love these simple paper feathers with gold glitter.  They're perfect for Christmas as a decoration, or gift topper, or any time of year.

You might also like our 3D Orgami Hearts, Book Page Heart Garland, How To Make A PInecone Wreath, Boho Christmas Decor Ideas, DIY Wood Ball Christmas Ornaments, or DIY Mason Jar Oil Lamps.

How To Make Book Page Paper Feathers

Materials

  • Book Pages: I decided to use paper book pages to make these gorgeous feathers. Unfortunately lots of old books end up in landfill, so finding ways to upcycle old books is a great way to give them a new life. Look for old books at garage sales, and thrift stores.
  • Glue Stick: We chose to use a glue stick for this simple craft.  This works really well.  without the worry of wrinkling the paper like white glue can sometimes because of its high moisture content.  This isn't the time to use hot glue.  It's too thick for this craft. It would add to much bulk, and it would be difficult to cut through when it's time to cut the fringe.
  • Wire: We used a white craft wire, that came in long pieces.  Use wire cutters to trim the wire, so that you don't damage your scissors.  You want a wire that's thick enough to hold the shape of the feather easily, but thin enough that it's easy to work with, bend, and cut through.
use old books to make paper feathers

Variation

Paper: As an alternative to the book pages you could also use regular paper in different colors, or scrapbook paper, old maps, or sheet music.

Paper vs. Cardstock: I think paper works better here than cardstock, because the feathers will be double thick with two pieces of paper and the cardstock paper would be too thick.  We want a light and feathery effect, which paper will work better to create.

How To Make Book Page Paper Feathers

  1. Step 1: We started by ripping a few pages out of an old book.  The size of your book will help determine the size of your feather.  We made the top of our feathers about 3-4 inches long. Next we positioned a wire on the sheet of paper and then glued another piece of paper on top to make a make a wire sandwich.  This wire will be the spine of the feather we're creating.  Our wire was about 6-7 inches long.
  1. Step 2: Using scissors, cut the paper into the shape of a feather, with the wire as the centre of the feather, and the wire coming out at the bottom of the feather.  Some natural variation between each of the individual feathers is great, because it looks more authentic.  You want to roughly create a long leaf shape.  You may want to look at  some real feathers as inspiration for the shape of the feather your cutting out.
  1. Step 3: Next, cut out a few notches in the side of the feather.  Then cut the feather like a fringe with narrow strips, and on a slight angle going upward, like real feathers.  The wire ensures that you can't cut too far, and makes this step much easier than without a wire.
  1. Step 4: Lastly, an optional step is to add glitter to the book page feathers.  Add some glitter to just the tips of the feather.  We used gold glitter in two different sizes, first a regular craft glitter and secondly a slightly larger glitter.  The combination of the two adds lots of interest and Christmas sparkle.

Expert Tip: After the glue on the paper feather craft has dried a little, ruffle up the fringe slightly to give the feather some dimension.  Just very slightly crumbling up the sides of the feather really helps make the look of the feathers be a little more realistic, and interesting. 

DIY Paper Feathers

I love the look of these pretty little feathers, all dressed up for the holidays with a little glitter.  You could use any colors of glitter you like, to match your decor.  A brown glitter would work really well with the book pages too.  If you're using your feathers for something other than Christmas or want a more natural look, feel free to skip the glitter.

I made a pretty little paper feather garland with my book page paper feathers, and also used a few with a little holiday nest.  These would be really cute as a gift topper or gift tag too, or as Christmas tree ornaments.  

You could use them for lots of other occasions other than Christmas.  They'd be a great addition to a woodland or forest themed birthday party, wedding shower, or baby shower, or turned into a baby mobile.

These paper feathers take just a few simple steps.  They're inexpensive and easy to create, and they look so cute.  String them together into a garland or use them individually in your decor.

With Book Page Paper Feathers, life really is a party!

More Craft Project Inspiration

  • Boho Christmas tree and ornament ideas.
    Boho Christmas Tree and DIY Macrame Feathers
  • How to make a leather feather necklace or earrings.
    DIY Leather Feather Necklace or Earrings
  • How to make a wood feather with your Cricut.
    Cricut Wood Feather Ornament
  • DIY Christmas star garland made from polymer clay and gold wire.
    Easy DIY Star Garland

Frequently Asked Questions

Do I have to use wire for my paper feather?

No, you can make them without, but it does allow you to bend the feather slightly, gives the feather a base, and helpd prevent you from snipping the fringe too far through.

What size did you make your paper feathers?

We made the top part of feathers about 3-4 inches, but you can make them anysize you want.

If you try making these DIY Paper Feathers or any other idea on my blog please leave a star rating and let me know how it went in the commentsbelow. Thanks for visiting today!

Recipe

DIY book page feather.

DIY Book Page Paper Feathers

No ratings yet
Print Pin Rate
Cook Time: 10 minutes minutes
Total Time: 10 minutes minutes
Author: Dannyelle Nicolle-Ramjist

Equipment

  • scissors

Materials

  • old books
  • glue stick
  • wire
  • glitter

Instructions

  • Rip a few pages out of an old book, and glue two pages together with a wire down the centre, in-between the two pages.
  • Cut the paper into a feather shape, with the wire as the centre of the feather, and sticking out the end.
  • Next, cut out a few notches in the feather, and then cut the feather like a fringe with narrow strips, and on a slight angle like a real feather.
  • After the glue dries ruffle up the fringe slightly to give the feather some dimension.
  • Optional: Add some glitter to the tips of the feathers.

DIY Deer Book Art

Nov 11, 2016 · 2 Comments

Book canvas deer art.

DIY Large Wall Art: Deer Book Art made with old books as the canvas. Easy, no painting skill required just transfer the pattern and fill in with paint.

Book canvas deer art.
[feast_advanced_jump_to]

Yesterday I revealed my Rustic Scandinavian Dining Room, after taking part in the six week One Room Challenge.  One of the highlights of the reveal was sharing this fun DIY  large wall art piece made from old books.

inexpensive large diy wall art

I was inspired by a photo on LizMaireBlog's instagram account.  She shared this photo from her trip to Magnolia Markets a few weeks ago.  I thought it was so pretty, and immediately stated thinking "I wonder how they made that"?

book canvas art

I thought it would be fun to add something inspired by the photo to my new dining room.  

DIY Large Deer Wall Art Materials:

  • 12 old books
  • paint sticks
  • hot glue
  • string
  • tacks
  • glue stick
  • small nails
  • hammer
  • tape
  • image
  • carbon paper
  • black, grey and white craft paint

Preparing the Old Book Canvas

I started out by collecting the vintage books.  We used 12 in my project.  I tried to choose ones that were relatively the same size and thickness, but a little variation adds interest.  First I lined up my books on my table to work, and tried to find the middle of each book.

how to use old books as an art canvas

In order for the books to hang on the wall, you need to keep the pages from opening.  I started out my trying to glue the pages together, but that was too time consuming, so I had the idea of using tacks.  I pushed thumb tacks through the pages and then glued one page over top to hide the tack.  On a few of the thicker books I used a couple tacks.

large diy wall art

Then on the back of the book, I measured in from the top and side of the book, and used a small tack/nail that I hammered into the book.  I left it sticking out of the back a little so that it didn't go through, and so that I could attach a string to hang it on the wall.

inexpensive large diy wall art

Next I had to reinforce the book, so that it would stay open and not fold in as it hung.  I broke paint sticks in half and hot glued them to the back of the book to reinforce them.

how to make your own wall art

Once the book canvas was all prepared it was time to add my image to the front.

Creating the Deer Image

I used a deer print from PrintAvenue.  The geometric print, and the grey, black, and white colouring are really striking.  I used a website to transform the image into poster size.  Once I had the image printed large enough, I taped the image together, and then cut up the image to match the book sizes.

doy deer wall art

I originally planned to use a fabric photo transfer paper to add the image to the books.  I printed the poster size image (the size of my book canvas) but I had trouble with the iron-on transfers.  They're designed for fabric, not paper, and I had trouble lining them up, and getting the image transferred well.  It didn't really work out as well as I'd planned.  So I needed a plan B.

I ended up using good old carbon paper (like when I made these mugs, and this Christmas art).  I placed it under the poster size image and used it to transfer an outline of the image on to the book canvas.

cheap large wall art

Once I had my outline, I used craft paint to fill it in.

diy large cheap wall art

The next challenge was to mount the books to the wall.  There was a fair bit of fiddling to get it all lined up, but I used command hooks which I love since they're not permanent.

doy deer book art

In the end, it all came together and I really love it.  It was inexpensive to put together, and this DIY large wall art makes a big impact in the room.

With new DIY Deer Book Art, life really is a party!

More Inspiration

You might also like How To Paint A Buffalo Check Feature Wall here.

Also check out our Green Feature Wall here.

Green Feature Wall: the perfect shade of green paint, and the hand drawn chevron stencil create the an amazing feature wall.

You might also like our Black and White Boho Office Makeover here.

Black and White Boho Office Makeover: whimsical wallpaper, a wood bead chandelier, art, drapes, and lots of plants give this office the perfect boho vibe.

Rustic Scandinavian Dining Room Reveal -One Room Challenge

Nov 9, 2016 · 16 Comments

Rustic Scandinavian dining room decor.

Rustic Scandinavian Dining Room Makeover: final reveal of the six week dining room makeover with before and after pictures.

Rustic Scandinavian dining room decor.
[feast_advanced_jump_to]

I'm so excited to finally show you my One Room Challenge final dining room makeover reveal!  It's week six of the challenge, and it's finally all come together -be sure to check out all the other final reveals of all the other guest bloggers this week too.

I was inspired by Rustic Scandinavian Design, and wanted to make my dining room lighter, and brighter with a rustic touch.  Here's what the room looked like six weeks ago.

dining room makeover before

The Dining Room Makeover Journey

If you've missed anything, catch up with us here:

  • How To Sew A Parson Chair Slipcover
  • How To Spray Paint a Light Fixture

Dining Room Makeover Paint

Before the makeover the walls were beige, and the furniture was all dark black.  Over the six weeks, we painted the room white, painted some of the furniture white and changed the hardware, refinished the table to a light grey, made slipcovers for the chairs, spray painted the chandelier gold and made some new art for the room.

Rustic Scandinavian Dining Room

It was a lot to do, but I love the results.  It's certainly lighter and brighter.

Rustic Scandinavian Dining Room makeover reveal

Console Table

At the front door, I painted the black console table to white, and added this new sweet art work.  Isn't it the cutest?  Love his expression, love the black and white, and love the bit of whimsy it adds to the room.

Rustic Scandinavian decor ideas

Bar Cart

I tried to use lots of the colour white, wood, and natural materials to bring the whole room together.

Rustic Scandinavian bar cart

I picked up some more pretty gold vintage bar glasses at a second hand store this week.  I'm all ready for cocktail hour.

vintage glasses and caddy

Don't you just love their little carrying caddy?

The Deer Art

dining room makeover before and after

At the other end of the room the buffet was also painted and got new vintage inspired hardware.  The art was a fun project.  Find the full tutorial on how to make the DIY Deer Art here.  I love the way it came out, and the vintage books as the canvas turned out great.

cotton thread in a wooden dough bowl

One of my favourite little vignettes in the room is this wooden dough bowl filled with fine crochet thread for lace making.

Rustic dining room

With a neutral room, lots of texture is important to add interest, so when I a saw a bag of the thread at the second hand store one day, I picked it up and kept my eye out for a few more bags in the weeks that followed.  I love how they look grouped together in the wooden bowl.

dining room makeover

The old books are a bunch my mom had in an old trunk.  I mentioned to her that I was looking for some, and she offered them too me and they were perfect for what I had in mind. See the tutorial of how I made the deer head book art here.

DIY large art

The Table

This week I finished the biggest project in the room, the dining room table. The refinished veneer dining room table turned out great.  What a job it was.  It was hours and hours of work but my dark black table is now a beautiful weathered grey and I love it!

dining room makeover

After the first few hours of work, I never would have believed it would come out looking this amazing.  I had a friend who does a lot of restoring of antiques helping me.  Without him I don't think I would have been able to do it.  Since this is a newer factory made piece, it was really difficult to remove the baked on finish.  With lots of perseverance and a few tricks of the trade we did it.  I couldn't be happier with the results.  The Minwax classic grey stain looks amazing.

how to makeover your dining room

You can see the beautiful china cabinet in the background too.  I love it white!

Gold Chandelier

And let's not forget the beautiful gold chandelier.  The light got a makeover last week, and went from standard silver, to amazing gold statement light.

dining room makeover before and after

I'm so glad the room is done.  Having the house a little on the upside down side of things for six weeks had its challenges, but I'm so glad I did.

dining room makeover

Week by week and project by project I saw it all come together.

Life Lessons From Decorating

I wasn't sure at first, that what I had envisioned would really come to life.  In the beginning, I felt like I had to be brave and trust my gut, and I'm so glad I did.  I really love it now, and even though it's a small thing in the grand scheme, I'm reminded that if we are brave enough to change things -things that weren't even so bad in the beginning, we might get something amazing, something we love.

one room challenge dining room reveal

It's easier to change things in life and in decorating when they are terrible.  But it's a lot harder when they're ok, but not great, and we're afraid we might wreck them instead of making them better.  I have heard a little whisper in my ear as I've painted, and refinished, and sewn for this room, a little whisper calling me to be brave and try new things, and see what I might be able to create and accomplish.   So I'm listening and trying to learn my lessons, and so glad for the space to try new things.

Rustic Scandinavian Dining Room

I can't wait to tackle the living room in the spring (when my sweet, but very orderly husband has had time to recover from six weeks of not so much order as he's used too -ahhh we're all being stretched).

Thanks so much to my readers who've hung in with me, and given me so much kind and generous encouragement over the process.  I've appreciated it so much.

Dining Room Makeover Sponsors

And a special thank you to my sponsors who've supplied me with some truly amazing products, and made this makeover possible.  

  -  Fusion Mineral Paints    -    Minwax  -   Para Paint    -

As always, all opinions are my own.  Thanks for supporting the brands that make Life is a Party possible.

Rustic Scandinavian Dining Room

With a new Rustic Scandinavian Dining Room makeover to enjoy, life really is a party!

How To Spray Paint A Light Fixture

Nov 2, 2016 · 12 Comments

How to spray paint a light fixture.

How To Spray Paint A Light Fixture: step by step instructions on how to spray paint a chandelier to give it new life.

How to spray paint a light fixture.
[feast_advanced_jump_to]

I decided that I wanted to spray paint my chandelier to give it a makeover this week.  Spray paint has to be one of the cheapest, most effective, and easiest way to update home decor.  A little spray paint can work wonders, and it's a DIY project anyone can do.

When I first bought this chandelier five years ago I loved it, I mean lovvvvvved it!  We had moved into our new house and had a dining room for the first time -this dining room, and I was excited to have a place to hang an amazing chandelier. Today I'm sharing how to spray paint a light fixture with all my tips.

But ten years after buying this light, the spark was gone.  I still really liked the light, but it was the wrong color and didn't feel quite as special.  And then I had this idea of spray painting it gold!  I'm a big fan of Australian design shows, and keep seeing these amazing statement gold light fixtures.  This was my way of creating my own whole new look for my old light.  I still loved the shape of this fixture, and this was the perfect way to change the look of my old chandelier and turn it into something that looked a new light fixture with just a few coats of spray paint.

This week, as part of the One Room Challenge -where I makeover my dining room in six short weeks, I tackled the light fixture.  You can catch up on my other projects for the One Room Challenge here:

  • How To Sew A Parson Chair Slipcover
  • Black Furniture Makeover
  • The One Room Challenge Dining Room Reveal

How To Spray Paint A Light Fixture

I have to say I hummed and ha-ed about it quite a bit.  I had that problem of not hating the light as it was, and the fear of ruining it.

I've done lots of projects with spray painting in my day.  I've had many, many, many success stories.  But I've also had my fair share of not so great spray paint moments.  Are you with me?  

Let's see, there was the time I didn't shake the can long enough and the paint was all gritty.  There have been over sprays where paint got where paint wasn't supposed to be.  I have also had drip marks from spraying too heavy a coat.  There have been weird reactions to spray painting plastics that don't like spray paint.  I have also even created the occasional gloomy messes.

So I knew going in that there were certain spray paint risks to be considered,  and I knew I needed this piece to come out perfectly.

So I did all the things you're supposed to do, and today I want to share them with all with you so that you can have a great spray paint result too and avoid all the common issues.  For this job we're not taking any short cuts, we're doing all the things you're supposed to do.

Prepping to Spray Paint the Chandelier

1.Take Off All The Removable Parts

I began by removing all the crystals, and while I was at it, I gave them a good cleaning by washing them all in hot soapy water.  You can use a damp rag to clean any dust off of the rest of light too. This will help the paint adhere and help to create a nice smooth finish on the entire light fixture.

2. Tape Off Areas

Next, I taped off all the light bulb fixture parts, and the electrical cord, and the hanging wires, using some painter's tape that I could easily remove later.

When we took the light down, I made sure that all the removable parts were removed to spray paint separately so they wouldn't get stuck together.

how to spray paint a light fixture

3.  Hang It For Spraying

When I took the light out to the garage to spray paint it, I made sure it was freely hanging so that there'd be less chance of drips, or missing spots, or the paint pooling on the spots that are touching the ground.  Be sure to cover the background with an old drop cloth like I did to protect your space from over spraying.  This step is really worth the trouble.  It gives a much nicer end result than spraying this on a flat surface and moving it in between coats to get the other side and angles.

How To Spray Paint A Light Fixture gold

4.  Spray Parts Separately

I set the individual pieces on to little plastic caps to lift them off the surface so they would be no marks where they were touching the work surface.  Again, this is a little extra work, but well worth the trouble for a much better result.

5.  Shake Paint Well

And then I shook and shook and shook the can of spray paint.  For three minutes, which is a surprisingly long time when you're shaking.  Lots of time we don't shake the paint long enough, and that means it's not mixed properly and can give a bad result.  Also always spray paint in a well-ventilated area.  We had the garage door open while painting.

6.  Paint Many Thin Coats

I painted about eight really thin coats of paint, forcing myself to stop after a thin coat and not over do it and risk drips.  Eight times I want back after 15-30 minutes of dry time, shook the can for 3 minutes again, and applied another thin coat of paint.  Again, this is something that is hard to make yourself do, but the results are so worth the extra effort.  No drips is the look we're after, and doing many light coats is the way to achieve it.

7.  Use Rub and Buff On Non-Sprayable Parts

In between coats, I used some antique gold rub and buff on the metal parts of the hanging crystals and made them a little more gold too.  This method worked really well and is great way to paint any spots old fixtures where you can't spray paint.

How To Spray Paint A chandelier

After the light was all dry, it was time to reassemble it.  We hung it up and added the crystals back on.  Lastly we screwed in some new light bulbs and we were so happy with the results.  All my careful work and following the simple steps paid off!  The light is gloriously gold, without any drips, brush strokes, or globs at all.

How To Spray Paint A Light Fixture: From boring silver to gold statement light with a little spray paint.

I love the new gold light, it just looks updated and fresh, and on trend.  Painting the light make a huge difference. I'm really glad that I did spray paint the chandelier.  It was an affordable way change the look of the entire fixture.  This is such an easy way to give an old metal light fixture new life.

How To Spray Paint A chandelier

I found it funny that when I was doing a little research on-line and searching for spray painted lights that they were all going from brass to silver, or black.  Now things have shifted back, and gold, antique brass, rose gold, and copper are all on the rise, and only a spray paint can away.  You can update your own old light, or look at thrift stores for one you can give a makeover to.  This would also be great for old bathroom fixtures or powder rooms too.

spray paint chandelier makeover before and after

Things are really coming along with the One Room Challenge.  The last major project to go is to refinishing the dining room table.  I'm a little nervous about this one too, but I'll be starting it tomorrow and sharing it and all the finishing touches next week in the big Week Six Final Reveal.  Wish me luck.

With a new Gold Statement Light, life really is a party!

Fall Party

Oct 25, 2016 · Leave a Comment

Easy Fall Party: easy fall party decor, pizza and donuts, a fun family game, and pumpking painting ideas for a wonderful fall get together.

Easy Fall Party: easy fall party decor, pizza and donuts, a fun family game, and pumpking painting ideas for a wonderful fall get together.

This month for our #AYearOfFeasting we had a very casual little fall party get together with close friends, and it was lovely.  We're in the middle of a big makeover for the One Room Challenge which means the dining room is kind of turned upside down.  If you follow me on Instagram you might have seen me doing some painting, painting, and more painting.  So how do you entertain in the middle of a re-decorate?

easy fall party menu ideas

Keep It Simple

You order pizza, move the party to the kitchen, and have fun right in the middle of the chaos.  The #YearofFeasting is a the challenge we set ourselves up with for the year to host one get together per month, in an effort of opening up our home and our hearts more to our dear ones.  After 9 parties since January, I have to say that the dining room challenge seemed like the perfect reason to skip this month.  But I thought it would be better to host another get together, and take the stress out of it by making it a really simple get together.  We thought about pizza in the park, but it's a little cold here now, so it was a kitchen party for the win.

fall tablescape

Easy Fall Party Menu

The menu was super simple.  I put together a little veggies and dip…store bought dip, and chopping a few veggies.  My friends asked if they could bring anything, and I got them to pick up the pizza on the way over.  Does it get any easier than that?

easy fall party ideas

Fall Party Drinks

For drinks, I served some apple cider in these sweet little bottles with the perfect fall leaf paper straws.

Fall party

Fall Party Dessert

For desert, I picked up some yummy apple fritters -so, so good.

easy fall dessert table

I also picked up some fresh, local apples.

Fall dessert station

And since it's fall, and getting a little chilly, I made some hot chocolate for dessert, and set it up with some whipped cream, and sprinkles.  Yum.

Fall hot chocolate

Game Time

After lunch, I thought it would be fun to play Pie Face Showdown together -and it was!

Fall party game

The girls all loved the game, and the whole kitchen was full of laughs and giggles -from the grown-ups too.  This game is perfect for a party, especially with the holidays approaching.

pie face show down
fall party
easy fall party


Youtube video

Pumpkin Painting

After The Pie Face Showdown, we painted some pumpkins.

pumpkin painting party

We set up some paint, and glitter, and a few different kinds of pumpkins to choose from.

Pumpkin painting party
fall Pumpkin painting party

The girls made some very pretty pumpkins.

Pumpkin painting party fall party ideas

It was the perfect fall afternoon -despite the mess in the dining room; in fact because of the mess in the dining room.  The easy, low prep, low key, fun, and simple, order pizza, and play a fun game, and drink hot chocolate and eat donuts and paint pumpkins was the PERFECT easy fall party!

So this weekend, have some friends over for pizza and doughnuts, and a game and pumpkins and enjoy fall, and friends.  With an easy fall party with your favourite people, life really is a party!

More Fall Party Inspiration

  • Fall tea party in a garden with tea and treats set up in front of an outdoor couch.
    Fall Tea Party
  • Leaf raking fall themed party ideas.
    Fun Fall Party Ideas: Backyard Leaf Raking Party for Kids and Families
  • Fall fondue party ideas and recipes.
    Fall Fondue Party
  • Fall breakfast board
    Fall Breakfast Charcuterie Board

"Disclosure: I am part of the Gay Lea Ambassador Campaign and I receive special perks as part of my affiliation with this group. The opinions on this blog are my own."

Ribbon Wall Hanging

Oct 20, 2016 · 20 Comments

How to make a ribbon wall hanging.

Ribbon Wall Hanging: Easy DIY Project using old ribbons, and branch of a tree. Include lace, tassels and old keys for aded interest.

How to make a ribbon wall hanging.
[feast_advanced_jump_to]

This Ribbon Wall Hanging is a really easy and fast project to make.  It's also a great way to use some old ribbon and lace scraps you might have.

My ribbon project is this easy and beautiful Wall Hanging.

how to make a Wall Hanging our of old ribbon

Ribbon Wall Hanging Materials:

To make the wall hanging all you need is:

  • ribbons in various widths, and materials
  • twine
  • pompom yarn
  • various kinds of lace
  • yarn tassels
  • vintage keys
  • a birch branch
how to tie on ribbon for a wall hanging

How To Make It:

1. To begin making the wall hanging, tie some twine to each end of the branch to form the base of the wall hanging.  

2. Then loop the ribbons, twine, and lace over the branch alternating widths, patterns, and textures.  It's so simple.

Ribbon and yarn tassels

3. For interest add in some tassels and vintage keys.

vintage key as part of a Wall Hanging

I designed mine so it came to a bit of an informal V, but straight across would be pretty too.

Wall Hanging with foliage and candle


The neutral colours are really pretty, but it would also be gorgeous in a little girls room or nursery in pinks or soft pastels.  So many pretty possibilities.

pretty neutral coloured easy Wall Hanging

With a pretty Ribbon Wall Hanging, life really is a party!

More Ideas With Ribbon

You might also like our Macrame and Succulent Wreath tutorial here.

DIY Macrame and Felt Succulent Wreath: Easy Boho Wreath with Felt Succulents made with a Cricut, and simple Macrame hanger.

Also check out our DIY Mason Jar Oil Lamps here.

DIY Mason Jar Oil Lamps: Simple to make and so beautiful. Perfect for a party, wedding centerpiece, or just in your home.

You might also enjoy our Teacup Fairy Garden post here.

DIY Wood Pumpkins

Oct 14, 2016 · 1 Comment

Two decorative driftwood pumpkins with a velvet pumpkin.

We made these DIY Wood Pumpkins using small driftwood pieces we collected from the lake.

These easy and beautiful rustic DIY driftwood pumpkins are the perfect addition to your fall decor. This would be a great craft for a fall craft night with friends.

Two decorative driftwood pumpkins with a velvet pumpkin.
[feast_advanced_jump_to]

I shared these pretty Driftwood Pumpkins in my Fall Home Tour, and promised a tutorial on how to make them.  They're simple to make, and a great addition to any fall decor. We love adding special touches to our fall decor like these DIY Concrete Pumpkins, or this DIY acorn craft idea.

DIY wood pumpkins and fall decor.

DIY Driftwood Pumpkin Materials:

You only need a few materials to put these together. Lots of DIY wooden pumpkins are made from scrap wood. But we used something else for ours. We found our driftwood on a walk along the edge of Lake Ontario. You want to look for smooth, and short pieces for this project.

Expert Crafter Tip: Nowhere in your area to gather driftwood? You can purchase bags of small driftwood pieces on-line.

  • small driftwood pieces -about 2-3 inches long
  • balloon
  • hot glue

How To Make Wood Pumpkins:

1. Start by inflating a balloon, this will be the base for your pumpkin.  You can change the size of your pumpkin by how much you inflate the balloon.

Making DIY wood pumpkins with drift wood, balloons and glue gun.

2. Hot glue the driftwood pieces to each other in overlapping triangles all the way around the balloon base.  Take care not to pop the balloon with a pointy stick or the hot glue.  Fill in the driftwood pieces enough to form a round sphere.

How to make a wood pumpkin from driftwood.

3.  When the glue is cool and dry, pop or cutout the balloon.  Lastly add a stem piece to the sphere to make it look like  a pumpkin.

Driftwood pumpkins on display with velvet pumpkins.

I set my driftwood pumpkins up on my little washstand along with some pretty velvet pumpkins. They make great home decor in the fall.

DIY wood pumpkin made from small driftwood pieces.

I love the subtle neutral colours of the driftwood, and they add a lot of texture too. But for more options, you could add some different shades of orange paint for another look. Or try adding some ribbon tied to the stem.

Store these away carefully and use them year after year.

Expert Crafter Tip: When making your fall wood pumpkin, make sure to glue the wood to itself and not the balloon. The heat from the hot glue will pop the balloon if you it gets on it. You could also use low temp hot glue for this project.

Two DIY wood pumpkins with some velvet pumpkins for a fall display.

Frequently Asked Questions

Can I use regular twigs instead of driftwood?

Yes. Just make sure that you don't get any with a sharp part that accidentally pops your balloon while you're working.

Could I paint these orange?

Yes. We love the look of them neutral, but you could paint them orange in a solid colour, or with a wash so the wood still shows through a little. And paint the stem green or brown if you wish.

  • DIY faux concrete pumpkin.
    DIY Faux Concrete Pumpkins
  • Book page paper flower covered pumpkin.
    Paper Flower Pumpkin
  • DIY Fairy pumpkin house village lit up with candles at night.
    Pumpkin Fairy House Jack-O-Lanterns
  • DIY velvet acorn
    How To Make DIY Velvet Acorns

If you tried making these DIY Wood Pumpkins or any other crafts on my blog please leave a star rating and let me know how it went in the comments below. Thanks for visiting today!

Recipe

Two decorative driftwood pumpkins with a velvet pumpkin.

DIY Wood Pumpkins

Driftwood decorative pumpkins.
5 from 1 vote
Print Pin Rate
Prep Time: 5 minutes minutes
Cook Time: 5 minutes minutes
Total Time: 10 minutes minutes
Servings: 1
Author: Dannyelle Nicolle-Ramjist
Cost: $2

Equipment

  • Glue Gun

Materials

  • 1 Balloon
  • 40-50 2-4 inch pieces of driftwood
  • 1-2 sticks hot glue

Instructions

  • Begin by inflating your balloon. You can make pumpkins of varying sizes by adding more or less air to the balloons.
  • Glue the driftwood pieces in triangle shapes and build them out around the entire balloon, taking care to glue the pieces to one another and not to the balloon so that the hot glue doesn't pop it. Fill in the driftwood pieces enough to form a solid sphere.
  • When the glue is cool and dry, pop the balloon.  Lastly add a stem piece to the sphere to make it look like  a pumpkin.

Notes

You could paint these orange or leave them natural coloured.
Store your DIY wood pumpkins carefully and use them year after year.

How To Make Your Own DIY Parson Chair Slipcovers

Oct 12, 2016 · 8 Comments

How to sew a parson chair cover.

How To Sew Parson Chair Slipcovers: Inexpensive chair makeover with drop cloth slipcovers you can sew yourself without a pattern.

How to sew a parson chair cover without a pattern.
[feast_advanced_jump_to]

Dining chairs are a big part of a dining rooms design.  This week I'm making over my parson chairs by creating my own parsons chair slipcovers for them.

Parson Chair Slipcovers

I started things off with making ten slipcovers for the Parson Chairs in my dining room.  I have loved these black leather Parson Chairs over the last ten years of having them.  They're comfortable, they're still in good shape, and they have been easy care since the leather could just be wiped off if needed.  I wanted to keep the good parts, but give them a makeover to fit our new lighter colour palette.  I decided making a slip cover would do the trick.  With slipcovers they'd still be comfortable, cute, and with removable slipcovers, they'd still be easy care too.  Here's the before shot of the room.

neutral fall home tour

I debated buying slipcovers instead of sewing my own.  But these chairs were bought at a big box store and aren't available any more.  I couldn't find the exact size slipcover I was looking for, since these are a smidge smaller than most.  After debating buying some readymades and adjusting them, I figured if I had to sew anyway I may as well make them myself.

I originally planned to make long slipcovers, but while I was looking for some to buy, I saw the short ones and thought they were a great way to get a little more contemporary look in the dining area.  If you're making your own chair covers, you can easily adjust these to create a longer chair skirt.

Materials:

  • fabric painter's drop cloth
  • thread
  • pins
  • sewing machine
  • scissors
  • large paper to make a pattern
  • velcro

How To Make Parsons Chair Slipcovers 

The Fabric

The fabric I used was actually large fabric drop clothes from the hardware store.  These were used as table cloths for an event, and instead of them getting thrown out at the end, I took them and brought them home.  After a good wash they were ready to go.

I really recommend using these for this project. The drop cloths are a nice and neutral colour, in a natural warm cream colour cotton muslin fabric.  The drop clothes are much cheaper than buying yards of fabric at the fabric store.  After a few washes the fabric pieces are nice an soft.  I also found that the fabric was nice and thick and hard wearing, so a great choice for making a project like slipcovers which will have a lot of wear and tear.  For the look, cost, and durability of the drop cloth material, I think it's a really great option compared to home decor fabric if you're making a new cover.

Also, do make sure to prewash and dry your fabric, to avoid any shrinkage when you wash your slipcovers.

How To Make Your Own Pattern

The hardest part of the project was getting started on the pattern.  I saw lots of examples on-line where people just cut and pin to make slip covers, but needing to make ten of them, I knew I would fare better with a pattern that I could reuse each time.

How To Sew Parson Chair Slipcovers without a pattern

To make my slipcover pattern I spent some time researching and thinking about how to do the least amount of sewing.  I came up with one back piece and one seat piece.  The only drawback to this pattern is that it requires large pieces of fabric, but that's where the drop cloths work out great.  

Start With Newspaper

I started out by taping newspaper to the chair as a cover to fit the shape of the chair.  I then carefully cut it off the chair along the spots where I wanted the seams.  For the back of the chair, I made two seams, one along each side, so that the back piece could be made from one large piece of fabric folded over the top of the chair.  There's also a seam at the base of the back, where the seat piece connects to the back piece.  I also cut seams at the corners at the front of the seat of the seat.  I tried to minimize the seams that I would have to sew, and keep the pattern as simple as possible.  The seat piece is designed to wrap around the bottom of the seat.

Next, I laid out the newspaper on a large flat surface, and folded it exactly in half and straightened out my edges.  

White Paper

For the next step, I placed the newspaper pattern onto thick white paper and traced it.  Then I added a half inch seam allowance, and cut out the pattern in the white paper.  The white paper allowed me to add the seam allowance after, but also to keep the light fabric from getting dirty from the newsprint.  The white paper was also thicker and easier to work with and reuse as a pattern.

The straight edge of each pattern is the fold line, so the fabric is folded in half and the pattern placed on top.  When it's all cut out, you unfold the fabric and have the complete piece, with both sides matching each other.  This makes the whole process of cutting out all the different pattern pieces a little bit quicker and easier.

Once I had created my pattern, I cut out my first cover.  I used pins to pin the fabric into place on the chair, and adjusted the fabric as I went.  For my first attempt I used a disappearing marker to mark along the pin lines so I knew where to sew.  

Trial and Error

After each seam, I tried the slipcover back onto the chair and adjusted if needed, and snipped off any excess fabric.  The first slipcover took a long time, but I knew that after I'd figured out the pattern and my method it would get quicker and it did.

make your own parsons chair slipcover

For the second chair, I made a few adjustments to the pattern, and then cut it out and pinned it to another chair.  This time I used the pin lines as the sewing line.

creating a parsons chair slipcover pattern from paper

After the second one was done, I was confident with my pattern, and was able to cut out more out at a time.  Once I developed my method the pinning and sewing got quicker too for each new slipcover I worked on.

diy parsons chair slipcover

Velcro

To finish the covers, I removed the bottom of the original chairs, which were velcroed in place, and added a long strip of velcro to each side of the chair base and the new covers so they could be wrapped around the sides and back of the seat and give a more tailored look.  This will make it easy to remove and wash the seat cover in the future if it gets dirty.

If you were making long skirts on your chair seat, you can skip the whole velcro step and just make long seams down to the floor, and finish the bottom raw edges with a seam on the bottom edge of the chair cover.

diy parsons chair slipcover tutorial

The covers aren't quite perfect.  There's definitely a few differences between them, there are some  not perfectly straight line seams and some of the slipcovers don't lay perfectly everywhere.  I'm not a professional seamstress by any means.  But, they were so worth doing.  This was such an economical way to give an old chair a makeover.

The whole room is already looking lighter.  I can see that the chairs will be a perfect neutral backdrop for things I'm photographing in the room in the future.

How To Sew Parson Chair Slipcovers: Inexpensive chair makeover with drop cloth slipcovers you can sew yourself without a pattern.

The Rest Of The Room

I am thinking I might refinish the wood legs to something a bit lighter?  But then again a little bit of black in the room might be a good thing.  For now I'll leave them, and see how they look as the room evolves over the next 5 weeks.

how to make your own parsons chair slipcover

I'm so pleased that this project only cost me about $10 for thread and velcro.  Even if you had to buy the fabric, this would be a really inexpensive way to give your old parson chairs some new life.

make your own slipcover for a parsons chair

With handmade Parson Chair Slipcovers, life really is a party!

You can catch up on my other projects for the One Room Challenge here:

  • How To Sew A Parson Chair Slipcover
  • How To Spray Paint a Light Fixture
  • Dining Room Final Reveal

One Room Challenge -Week One

Oct 5, 2016 · 5 Comments

One Room Challenge Dining Room -a six week journey to totally transform the space with paint, furniture painting, furniture refinishing, and DIY art.

I'm so excited…and maybe a little nervous, to be joining in on the One Room Challenge as a guest participant and working on my dining room.

The Dining Room

I've been thinking about re-doing a lot of my main floor living area for quite a while.  We moved in here about ten years ago.  It feels like time for a little update, some repainting, and some lighter colours.  I've loved our cozy, neutral main floor, but lately I've been falling hard for the rustic Scandinavian look.  

I'd like to lighten things up around here and go even more neutral with white walls, white painted furniture, and some rustic wood.  You can check out some of my inspiration over at my Pinterest board.

Before Picture

Since I just shared the dining room as part of the fall home tour, here's a little reminder of what we're starting out with.

One Room Challenge dining room before picture

The Plan

I'm planning to keep a few elements like our raw silk drapes -which were a real investment piece years ago, and the chandelier.

One Room Challenge dining room before picture

Furniture Makeovers

Chair Covers

For our leather parsons chairs, I'm hoping to slipcover them in white, or off-white.  I'm not sure if I'll be able to find something that fits perfectly or if I'll be sewing all ten.  We'll see how I go.

Dining Table

I'm still not 100% sure about the furniture pieces.  The largest decision is the dining room table.  Right now we have a large extension table in a dark wood finish -it's veneer so I'm not too sure about re-finishing it to something lighter.  I have considered painting it white.  I'm still not completely sure.  

It has really clean lines, and I might like something more rustic like an antique harvest table.  I've been watching kijiji on and off for months, but a nine or ten foot long antique table seems to be proving hard to find.  I don't want to settle for something that's too short, and doesn't work for big parties and family gatherings, since that's the main time we use this table.  I'd prefer to get an antique than a new one, since antiques seem to hold their value and if I want to change it again in the future I might be able to re-sell it.  

If I am able to find an antique one that is long enough, this table will probably move down to our basement family room and be used for a homework table/desk.  I have also thought about keeping it as is -since rustic Scandinavian rooms often have a bit of black in them.  We'll see how this unfolds.

China Cabinet

In the room there is also a large pine antique china cabinet that was my Grandmothers.  When we moved to this house ten years ago, I painted it black to match the other new furniture.  I'm thinking about stripping and refinishing it, since I'd definitely like some wood in the room.  Or, if I find my antique harvest table it might be the wood element in the room, and I might paint this piece white.  Either way, it needs a good clearing out, as it's stuffed top and bottom right now and I'd love to use it more for display than storage in the future, and change it seasonally.

Console Table

The other pieces in the room are a black console table by the front door, that I'm planning to paint white and possibly change the hardware.  I'd love to add in some brass, but the light is silver and I'm keeping it so maybe I'm stuck with silver.

dining room makeover before pictures

Buffet

The final piece is the buffet.  I love having this long and low piece at the end of the room.  It works great for entertaining there, and is often a buffet for food, or a pretty dessert table.  It's very contemporary.  I originally thought I should look for an antique piece for there and paint it white.  I'm considering keeping it though, since Scandinavian design is often very clean lined and mixes that with antiques.  Of course it's cheaper to paint it, so perhaps I'll give it a try.

One Room Challenge before pictures

Those are the major changes I have planned.  Perhaps some new art, or a gallery wall too.  I've thought about a rug to add texture, but love the convenience of the plain hardwood, so I think we'll leave it.

Inspiration

dining room makeover mood board

I definitely am nervous going in to this.  I do like the dining room as it is, and have liked it the last ten years, but I think I would like it more in whites.  You can tell from the styling of the home tour that I'm loving this rustic Scandinavian look more and more, it'd be great if the furniture in the room reflected that too.

I don't have a huge budget to do this room, so it's mostly going to be make-overs and second hand purchases.  While I am a little nervous, and thoughts of ruining what's already there have certainly crossed my mind, I am also more and more determined to surround myself with beautiful things that I love.  

I had a major clear out in the basement this summer -with more to go and I tried to let go of everything that I didn't love anymore.  My storage room had more than a few pieces that I was hanging onto for sentimental reasons, or because of how much I'd spent on them.  Re-doing the dining room is partly about being brave enough to let go of the good enough in pursuit of the better.

It's also Canadian Thanksgiving this Monday, so….after the 15 guests leave, we'll get started. 😉

With a major make-over in the works for the next six weeks, life really is a party!

One Room Challenge Dining Room Progress

You can catch up on my other projects for the One Room Challenge here:

    • Before Pictures and Inspiration -Week One
    • How To Sew A Parson Chair Slipcover -Week Two
    • Black Furniture Makeover -Week Three
    • How To Spray Paint a Light Fixture -Week Five
    • The One Room Challenge Dining Room Reveal -Week Six

Easy Caramel Pumpkin Butter Recipe

Oct 4, 2016 · 1 Comment

Easy caramel pumpkin butter recipe.

Caramel Pumpkin Butter: This easy recipe is only 3 ingredients, and you can make it one pan. Perfect for fall.

How to make caramel pumpkin butter.
[feast_advanced_jump_to]

This Caramel Pumpkin Butter only has 3 ingredients.  So it's easy to make and so, so yummy!  It's the perfect taste of fall.  It would be delicious on fresh bread or your morning toast, or a muffin.  It's especially good though to bring the flavours of fall to s'mores!

I was out shopping one day at William-Sonoma and I came across a little jar of caramel pumpkin butter.  I thought that it sounded delicious, and set about coming out with a homemade version.  It's so good and decadent, and perfect for fall. I'm a big fan of fruit butters.  You can find my slow cooker apple butter recipe here.  

Pumpkin

You can use simple store-bought pumpkin puree for this recipe.  A can of pumpkin puree works well for this recipe, just be sure you're not using pumpkin pie filling.  Pumpkin pie filling has spices and sugar added and would be too sweet for this recipe.  

You can also use fresh pumpkin puree for this recipe.  If you're making your own pumpkin puree, be sure to use sugar pie pumpkins, which are the small sweet ones.  The larger kind of pumpkin are best for decor and not as sweet as pie pumpkins.  We roasted our pumpkin for this recipe and when it was cooked and cooled a little we scraped it out and pureed it in my food processor.  This recipe only uses a ¼ of pumpkin puree, so if you make your own you'll have lots leftover.  You can store it in fridge or freezer.

Caramel Pumpkin Butter S'more

Caramel

This homemade pumpkin butter recipe goes a step above just being a butter because it's a combination of pumpkin and caramel.  We used dulce de leche as our caramel component.  It's perfect for this recipe.  It's smooth and creamy and rich in flavor.  Regular caramel is made from water and sugar that is slowly cooked until it caramelizes.  Dulche de leche is made from slowly cooking milk and sugar.  It yields a much creamer caramel.  It still has the flavor of caramelized sugar, but it's not just sweet, it's creamy and rich in flavor.

Look for dulce de leche with the condensed milk in the baking aisle of the grocery store.  If you can't find dulche le leche already prepared, you can buy a tin of condensed milk and make your own.  The usual way of making it is to place the unopened tin of condensed milk in a pot and cover the can with water.  Bring the water to a boil and let it simmer for 2 hours.  Be very sure to check on the water levels every ½ hour.  Do not let the water boil dry, or the can could explode.  Top up the water every ½ hour as needed to keep the can covered.

Pumpkin PIe Spice

The final ingredient in our 3 ingredient simple recipe is pumpkin pie spice.  Pumpkin pie spice is a blend of fall spices made from cinnamon, ginger, nutmeg, cloves, and allspice.  It's full of fall flavors.  It'a great addition to many pumpkin recipes, and a favorite of pumpkin lovers.  It's a perfect addition to our caramel pumpkin butter.

Caramel Pumpkin Butter

This homemade caramel pumpkin butter would also make a lovely gift -think of a little mason jar of this at each place setting for Thanksgiving or a fall dinner party.

how to make Caramel Pumpkin Butter
homemade Caramel Pumpkin Butter

Caramel Pumpkin Butter S'mores

We used our Pumpkin Butter to make fall flavoured s'mores -you might have noticed them set up on the table for our fall home tour.

Caramel Pumpkin Butter fall s'mores

I set up a sweet little s'mores buffet for us, with graham crackers, marshmallows, chocolate, and our caramel pumpkin butter.  We used this sweet spread as a delicious way to add some pumpkin goodness to our smores for the fall season.  These are perfect for autumn campfires, or use a candle inside to roast your marshmallows as a great way to enjoy s'mores anytime.

fall s'more ideas

Serving Suggestions

This easy homemade pumpkin butter is a fall stable.  Use it as the perfect spread on toast, with smores like we did, or even in cinnamon rolls.  My favorite is to enjoy this pumpkin spread is on fresh scones -get our easy food processor scones recipe here.  It's also a great addition for fall to a bowl of vanilla ice cream.  If you love all things pumpkin this time of year, you'll love the sweet creamy caramel, combined with fresh pumpkin and warm spices when you make your own pumpkin butter.  This is one of my favorite fall recipes, and sure to become a fall staple at your house too.  This delicious spread is great idea for enjoying the flavors of fall.

Caramel Pumpkin Butter recipe
how to make Caramel Pumpkin Butter

Yum!  I highly recommend making yourself a little batch of this and enjoying it with s'mores, or another way.

Recipe

Easy caramel pumpkin butter recipe.

Caramel Pumpkin Butter

Rich and creamy caramel butter with real pumpkin and pumpkin spice.
5 from 1 vote
Print Pin Rate
Course: Dessert
Cuisine: American
Prep Time: 5 minutes minutes
Cook Time: 35 minutes minutes
Total Time: 40 minutes minutes
Servings: 1 cup
Calories: 138kcal
Author: Dannyelle Nicolle-Ramjist

Ingredients

  • ½ cup dulce de leche
  • ¼ cup canned pure pumpkin puree or 1 pie pumpkin
  • ½ teaspoon pumpkin pie spice

Instructions

  • Make this caramel pumpkin butter, with canned pumpkin puree or homemade pumpkin puree. To make your own homemade pumpkin puree cut a small pie pumpkin in half, scrape out the seeds, and lay it in a baking dish. Roast the pumpkin in the oven at 350 degrees for about 20-25 min. until it is soft and tender when pierced with the tip of a knife. Let it cool slightly, then scrape the cooked pumpkin out of the skin and pureed it in a food processor or with an immersion blender until it is completely smooth. Or skip this step and used canned pumpkin puree.
  • Combine ¼ cup of the pumpkin puree with the dulce de leche, and the pumpkin pie spice in a small saucepan. Cook the pumpkin mixture over high heat, stirring the whole time until the mixture has thickened to a butter like consistency. Remember it will thicken slightly more as it cools.
  • Store in an airtight container like a mason jar in the fridge, and enjoy.

Nutrition

Serving: 1g | Calories: 138kcal | Carbohydrates: 23g | Protein: 3g | Fat: 4g | Saturated Fat: 2g | Polyunsaturated Fat: 2g | Cholesterol: 13mg | Sodium: 86mg | Fiber: 1g | Sugar: 17g
Tried this Recipe? Tag me Today!Mention @LifeisaParty or tag #lifeisaparty!
Caramel Pumpkin Butter Recipe

With easy homemade Caramel Pumpkin Butter, life really is a party!

More Pumpkin Recipe Inspiration

You might also like our Pumpkin Bread Pudding recipe here.

Pumpkin Bread Pudding: this recipe is easy and delicious, perfect for Thanksgiving and the holidays.

Also check out our Pumpkin Cream Puffs recipe here.

Pumpkin Cream Puffs: A cream puff filled with pumpkin pastry cream, whipped cream, and topped with warm caramel sauce for the perfect fall dessert.

You might also enjoy our Pumpkin Spice Rice Krispie Treats recipe here.

Neutral Fall Home Tour

Sep 30, 2016 · 23 Comments

Neutral fall home decor ideas.

Neutral Fall Home Tour: full of neutral fall decor like white pumpkins, birch logs, cozy knits, and candles bring fall in whites and creams.

Neutral fall home decor ideas.
[feast_advanced_jump_to]

Fall is a real favourite of mine, and I love decorating to celebrate the season.  This year I'm sharing lots of neutral fall decor, but you might find a few traditional fall colours here and there, like on the front porch.

neutral fall home tour.

I had so much fun making these little fall fairy gardens to greet my guests -you can learn all about how I made them here.

fall fairy garden.

It's gotten chilly outside the last day or so, so do come right in.

neutral fall home tour.

Dining Room

At our front door we have this little console table, all decorated for fall.  I used lots of pumpkins every where this year, love this pretty green squash mixed in with some faux ones.

neutral fall home tour.

These  mason jar oil lamps are waiting for a dark night, and there's a little bowl of butterscotch candies.  My grandma always had a bowl of candy by the front door.  Her's were in a covered glass dish and usually chocolates…remember rosebuds?  I'm not a real chocolate girl, but I always like to have a little bowl of candy at the front door and it always makes me think of her.

neutral fall home tour

The dining room is full of neutral fall decor this years, and I'm loving all the white and creams together.

neutral fall home tour.

I picked up this long wooden box at an outdoor antique fair in September and thought it would look great when I got it home filled up with little pumpkins.  It was filled with tools when I found it, and I had to convince the man to sell me just the box. 

neutral fall home tour.

There was a fair bit of haggling, and in the end I told him my plan to fill it with pumpkins and put it on my dining room table and he smiled as he dumped out his tools.

neutral fall home tour.

We have lots of oak trees on our street, so I picked a few branches on my way home from running errands today.  Love the shape of their leaves.

neutral fall home tour.

Buffet

On the buffet at the end of the room a few more great vintage pieces.  I'm loving the look of the tarnished silver with all the white pumpkins.

neutral fall home tour.

This pretty pumpkin with the book page roses is from a few years ago, you find the tutorial for it here.

neutral fall home tour.
paper pumpkins

More book pages up above on the branch -a pretty garland of stitched book paper leaves see how I made them here.

book paper leaves.

Neutral Fall Decor in the Living Room

And into the living room next.

fall living room tour.

I'm so pleased with this new hanging pendant light.

hanging pendant light.

It's the perfect little update for this spot.

I'm loving my squirrels, oak leaves, acorns this fall.

fall house tour.

And here's what's sure to be the last of the pompom marigolds from my garden.

neutral fall tour.

Neutral Fall Mantel

The centre piece of the mantel this year is this white wooden tool box.  I got such a good deal on the wooden tray for the dining room table, that I ended up buying this as well -ha.  I love a little haggling.  And I think it looks great filled up with a pretty vintage wool blanket, birch logs, cotton blossoms and more white pumpkins.

neutral fall fireplace mantel

Down on the ground, more of the same (let's just hope my new puppy doesn't take a bite out of the pumpkins).

white pumpkins.

Neutral Fall Decor in the Kitchen

And last but not least, into the kitchen for a treat.

On the table I've set up some pumpkins smores.

pumpkin s'mores.

Find my recipe for the delicious caramel pumpkin butter here -the perfect addition to fall smores made over a candle.

pumpkin s'mores and hot chocolate.

Today it was the perfect after school snack for my girls on this chilly rainy day.

pumpkin s'mores and hot chocolate.

And behind the table is a great spot for a few more pumpkins.

neutral fall home tour

I'll be sharing a tutorial for these driftwood pumpkins and velvet pumpkins next week.  They're easy to make and so cute.

neutral fall home tour.

With the house all decorated for fall, life really is a party!

I'm so glad you stopped by for my little fall tour, and I'd love for you stop by and visit with all my friends.

More Fall Home Tours

You might also like our Fall Home Tour 2019 here.

Fall Home Tour: Full of autumn decor ideas for Vintage Botanical Scientific Decor with Boho Maximalist Influence with lots of plants, insects, and pumpkins.

Also check out our Fall Home Tour 2018 here.

Fall Home Tour: With a nod to science this botanical scientific vintage decor brings the outdoors in, with lots of neutrals and mustard yellow.

You might also enjoy our Fall Home Tour 2017 here.

Smooth Cottage Cheese Apple Dip

Sep 28, 2016 · 3 Comments

Smooth cottage cheese apple dip with fresh apple slices.

Smooth Cottage Cheese Apple Dip- simple and delicious high protein snack with caramel sauce, toffee bits, and walnuts.

Smooth cottage cheese apple dip with fresh apple slices.
[feast_advanced_jump_to]

If you're looking for a delicious high-protein dip to enjoy with fruit, you will love this sweet smooth cottage cheese apple dip.  It's a great dip to enjoy with any fruit, and the perfect way to get some extra protein in.  Unlike regular cottage cheese, it has a smooth and creamy consistency.  This delicious recipe is quick and easy to make and the perfect dip to enjoy as a great snack with an extra boost of protein.

It's apple season, and back to school.  We're finally getting into a routine again, this week my girls have started after school activities again.  This September has flown by, and I can hardly believe it's the end of the month already. 

Back to school, and after school activities for my kids means quick, healthy and delicious after school snacks are needed, and this is the perfect one.

To make this yummy apple dip, I started out with vanilla smooth cottage cheese, with 10g of protein per serving, and only 110 calories, perfect for fueling after school activities.  Look for the smooth cottage cheese in the dairy section of your grocery store.  If you can't find the vanilla smooth cottage cheese we can make our own.

You might also like our Pumpkin Blondie Recipe, Caramel Apple Fondue, and Mini Apple Crisp in a Mason Jar.

Smooth Cottage Cheese Apple Dip

Cottage Cheese

If you don't have the smooth cottage cheese we can make it from regular cottage cheese.  If you're making the smooth cottage cheese the type of cottage cheese you start with matters.  You will want to start with a cottage cheese that is 4% milk fat, or 2% at the very least.  The small amount of fat helps create that creamy dip and smooth texture we're after, and none fat cottage cheese just doesn't work as well.  To turn our regular cottage cheese into smooth blended cottage cheese we're going to use the food processor.  If you're not a fan of the texture of cottage cheese, you might prefer it when it has a smoother consistency.  

Can I Make This Dip With Yogurt Instead?

Yes, if you prefer try using Greek yogurt for the base.  Buy it in vanilla flavor, or flavor it with honey and vanilla for this recipe.

sweet Smooth Cottage Cheese

Lower Calorie Version

If you want to make lower calorie version of this delicious high protein easy snack, you could use 2% cottage cheese as the base.  Instead of adding in sugar or honey to sweeten the cottage cheese you could use a low calorie sweetener like monk fruit sugar, or stevia.  You could even up the protein even more by adding in a scoop of protein powder in your favorite flavor.   And instead of drizzling the top of the dip with dulce de leche or regular caramel sauce you could use a sugar free caramel sauce. or leave it off entirely.  Add the walnuts if you choose, but leave off the toffee bits for a lower calorie sweet treat that's a great source of protein.  This healthy fruit dip made with simple ingredients is sure to become a new favorite.

Chocolate Smooth Cottage Cheese

Love chocolate and want to try a chocolate version of our sweet cottage cheese dip?  Try adding in 2 tablespoon of cocoa powder when you're blending it in the food processor.  You could also use a chocolate syrup drizzle over the top instead of caramel sauce to turn this into a chocolate fruit dip.

Make It Savory

If you prefer savoury instead of a sweet dip you can use this same process of blending the cottage cheese in the food processor to make it smooth, and then add in some savoury ingredients. Instead of adding sweetness and vanilla you could add in some savory ingredients like ranch seasoning blends, or try adding in some garlic and herbs like fresh basil, oregano, and fresh dill. along with some onion powder, black pepper or red pepper flakes for spice.  Serve the savory cottage cheese dip with fresh veggies and tortilla chips or pita chips as a great healthy dip.

sweet Smooth Cottage Cheese dip
Smooth Cottage Cheese Apple Dip

We served our smooth cottage cheese dip with sliced apples.  We love using honey crisp apples because they're so sweet and crisp.  You could also use this fun fruit dip with other fresh fruit like strawberries, pineapple, or canteloup.  This would also be a delicious dip with graham crackers, or vanilla wafers, or any of your other favorite dippers.

If you have leftover whipped cottage cheese dip you can store it in the refrigerator in an airtight container.

apple dip made with smooth cottage cheese

This dip is a great way to get some high protein content in your diet.  The creamy texture of this cottage cheese dip recipe is so delicious.  The addition of the caramel sauce and walnuts make this apple dip taste like a caramel apple treat.

Recipe

Smooth cottage cheese apple dip with fresh apple slices.

Smooth Cottage Cheese Apple Dip

Sweet and smooth cottage cheese combined with caramel and nuts for the perfect dip with fresh apple slices.
5 from 1 vote
Print Pin Rate
Course: Dessert
Cuisine: American
Prep Time: 10 minutes minutes
Total Time: 10 minutes minutes
Servings: 4
Calories: 452kcal
Author: Dannyelle Nicolle-Ramjist

Ingredients

  • 100 g container vanilla smooth cottage cheese or 1 cup cottage cheese (4% or 2%), 2 tablespoon honey, maple syrup, or sugar, 1 teaspoon vanilla extract
  • 1 tablespoon of dulce de leche or caramel sauce
  • 1 tablespoon walnuts chopped
  • 1 tablespoon toffee bits
  • 1 apple sliced

Instructions

  • Add your vanilla smooth cottage cheese to a small bowl, or make your vanilla smooth cottage cheese.
  • To make the smooth cottage cheese, place the cottage cheese, honey, and vanilla extract into a food processor and blitz until smooth, scrapping the sides of the bowl down once or twice.
  • On top of the smooth cottage cheese add a drizzle of dulche de leche or caramel sauce.
  • Sprinkle the nuts and toffee bits over the top, and enjoy with apple slices or other dippers.

Nutrition

Serving: 1g | Calories: 452kcal | Carbohydrates: 67g | Protein: 20g | Fat: 13g | Saturated Fat: 5g | Polyunsaturated Fat: 5g | Cholesterol: 38mg | Sodium: 689mg | Fiber: 2g | Sugar: 61g
Tried this Recipe? Tag me Today!Mention @LifeisaParty or tag #lifeisaparty!
Cottage Cheese Dip with caramel and walnuts

With Smooth Cottage Cheese Apple Dip, life really is a party!

More Recipe Inspiration

You might also like our Caramel Apple Trifles here.

Caramel Apple Trifle: layers of cake, caramel, cooked apples, custard, and whipped cream create the perfect fall dessert.

Also check out our Caramel Apple recipe here.

Caramel Apple Recipe: Easy, homemade Caramel Apples, perfect for Christmas gift giving, or anytime of year. Add your favourite toppings.

You might also enjoy our Campfire Baked Apples recipe here. 

Outdoor Fall Tablescape

Sep 22, 2016 · 6 Comments

Outdoor fall table.

Outdoor Fall Tablescape: pretty pumpkins, leaves, lanterns, rustic wood, and cozy vintage plaid blankets make the perfect fall tablescape.

Outdoor fall thanksgiving table.
[feast_advanced_jump_to]

Today is the first day of fall, and right on cue the leaves are starting to change colour where I live.  It's the perfect inspiration for a beautiful fall tablescape.

Outdoor Fall Table with hanging leaves

We have a forest behind our house, and every year there are a few maple trees that are the first to change colour from green to beautiful oranges, yellows, and reds.  The changing leaves inspired this table.

fall tablescape ideas

We have a pergola over our back patio and I thought it would be the perfect place to set up our fall tablescape.

how to set a table for fall

Hanging Leaves and Lanterns

One of my favourite details, and the starting place for this tablescape, are the pretty leaves hanging over the table.  I went for a little walk with my puppy in the morning and collected them in the woods.  I strung some fishing line from the pergola and tied the leaves on to it.  Since there was a little breeze, I also tied a few nuts -as in nuts and bolts, onto the end of each piece of fishing line to help weigh it down a little.

fall tablescape ideas

The leaves looked so pretty blowing in the wind.

fall table ideas

Fall Tablescape Centrepiece

For the table, I started with a white runner down the middle and layered a burlap one on top of that.

Next came some small branches and leaves.  Then I layered on some pretty pumpkins, birch poles, and candles.

easy pumpkins centrepiece

I love the different soft colours of pumpkins.

fall tablescape ideas

Place Settings

Next I added in the place settings.  I used my wood round chargers for a real rustic look.

how to set the table for a fall party

I also used simple white plates and gold cutlery, along with some amber glasses I've had for years.

fall table place setting ideas

On everyone's plate, I layered a simple linen napkin, another pretty leaf, and a little white baby boo pumpkin.

fall table setting

With the sun shining, a gentle breeze, and view of the forest this is the perfect spot for a fall dinner.

fall tablescape ideas

Now all I need is a pumpkin pie. 😉

rustic fall table

With a pretty Outdoor Fall Tablescape like this one, life really is a party.

More Inspiration

You might also like Rustic Thanksgiving Table here.

Also check out Black and White Farmhouse Thanksgiving Table here.

Black and White Modern Farmhouse Thanksgiving Table: White pumpkins, black cutlery, and DIY macrame napkins rings make the perfect Thanksgiving table.

You might also enjoy our Outdoor Thanksgiving Table here.


Succulent Naked Cake

Sep 21, 2016 · 14 Comments

Naked cake decorated with succulents.

Succulent Naked Cake: made from cake mixes, and faux succulents this cake is easy, delicious, and sure to impress. Perfect for any special occasion.

Naked cake decorated with succulents.
[feast_advanced_jump_to]

I've loved the look of succulents and naked cakes for a long time.  Today I'm combining them for the most beautiful naked cake with succulents.  This would be perfect for any special celebration.

Succulent Naked Cake: made from cake mixes, and faux succulents; easy and sure to impress.

I used the faux succulents to decorate a naked layer cake for my project this month.

Succulent Naked Cake: made from cake mixes, and faux succulents; easy and sure to impress.

Materials:

  • two 9 inch white cakes
  • two 8 inch white cakes
  • vanilla icing
  • faux succulent flowers
  • wire cutters
  • wood dowel

How To Make A Naked Cake With Succulents

I made the cake from two white cake mixes. I divided the mixes between two nine inch spring form pans for the bottoms layers and two 8 inch round cake pans for the top layers.  

Try to make them all the same depth when you add the batter, so that your layers are as even as possible (I made one mix at a time and baked one large and one small each time so it would be divided as evenly as possible).

Succulent Naked Cake: made from cake mixes, and faux succulents; easy and sure to impress.

Once the cakes are completely cooled it's time to stack them and ice them.  Naked cakes just have icing between the layers and on the top, sort of like a crumb coat.  Use your favourite icing recipe or store bought frosting for the icing.  If you're worried about the cake being stable, push two wooden dowels down through all the layers, and trim the tops so that they don't show.

Succulent Naked Cake: made from cake mixes, and faux succulents; easy and sure to impress.

To add the succulents to the cake, I trimmed the ends with some wire cutters and pushed them into the cake.  Easy peasy.

Succulent Naked Cake: made from cake mixes, and faux succulents; easy and sure to impress.

I also added another little faux succulent to a pretty vintage teacup.

Succulent Naked Cake: made from cake mixes, and faux succulents; easy and sure to impress.

These would be perfect for a birthday, shower, or any special occasion.

Succulent Naked Cake: made from cake mixes, and faux succulents; easy and sure to impress.

I love the idea too that after the special occasion you could keep the succulents and use them somewhere else, like perhaps a terrarium -and remember the special day every time you saw them.

Succulent Naked Cake: made from cake mixes, and faux succulents; easy and sure to impress.

I love how this little project turned out, and it was delicious too. 😉

Succulent Naked Cake: made from cake mixes, and faux succulents; easy and sure to impress.

With a Succulent Naked Cake, life really is a party!

More Inspiration:

You might also enjoy our most on How To Make Your Succulents Look Real here.

Also check out our Macrame and Succulent Wreath here.

DIY Macrame and Felt Succulent Wreath: Easy Boho Wreath with Felt Succulents made with a Cricut, and simple Macrame hanger.

Also check out our DIY Ribbon Wall Hanging.

tassel wall hanging.

Fall Fairy Garden

Sep 16, 2016 · 3 Comments

How to make a fall fairy garden.

How to make a fall fairy garden with a DIY fairy house, some easy wine cork mushrooms, mini pumpkins made from polymer clay, and real miniature fall leaves. It's the cutest fall addition to your front porch or garden.

Fall fairy garden with house and accessories.
[feast_advanced_jump_to]

Why We Love This Craft

  • What could be better than combining two of our favourites -fall and fairy gardens?!
  • If you're a crafter, making the miniature fairy house, and accessories with a fall theme was so fun.
  • It's looks so cute, and is the perfect way to greet fall visitors or trick or treaters this fall.

I love this time of year, it's cooler outside, the leaves are turning, and it's time for warm drinks and pumpkin everything.  I also love fairy gardens, like these DIY fairy gardens, and our teacup fairy garden. So I thought it might be fun to make my own fairy garden for the fall season this year. If you love this idea you might also like our Pumpkin Fairy House post here.

1. How To Make A Fall Fairy House

It's so fun to make your own little fairy houses. See how to make a fairy house here, where we used paint and upcycled seed packages to decorate miniature birdhouses from the dollar store.

For our fall fairy garden, we decided to make one that was fall themed. I used a tiny bird house from the dollar store as my base, look for something similar at dollar tree, or craft stores.

how to make a fall fairy house out of a bird house

I removed the bird peg from the bird house, and the screw from the top.  Then I gave the bird house a quick coat of orange/peach paint.  

I printed out a bunch of vintage seed package images -like this free pumpkin seed one, and this sunflower one.  Then I cut the seed packages to fit the house and mod podged them onto the house.  I used images that made me think of the fall that I knew would be perfect for an autumn fairy garden.


DIY fall fairy house
For the door, I used a few little pieces of wood and a bead as a door handle for the fairy door and hot glued them on.

For the roof, I used some preserved oak leaves, and mod podged them onto the roof as a finishing touch.

plants for a fall fairy garden

2. Fairy Mushrooms

I also made the little fairy toadstools.  And they were really easy. To make my fairy mushrooms I started out with some corks from sparkling wine, and their shape inspired me, since they kind of look like a little mushroom.

how to make a mushroom out of a sparkling wine cork


I painted the tops with some reddish-orange craft paint.  When it was dry, I added some white spots.  Then, I sealed it all with a coat of mod podge.  These were such a fun touch to the fall fairy garden display.  But they'd be fun as fall decor too.

miniature polymer pumpkins

Aren't they the cutest?  Fairy gardens are all about the little details and little fairy accessories.  

3. Miniature Pumpkins

So next I made some little pumpkins out of polymer clay.  I have found the polymer clay weathers really well in outdoors, so I knew they'd be perfect for new  fairy garden.

Form orange polymer clay into tiny pumpkin shapes. Don't forget the ridges. Then add a very small brown polymer clay stem. Bake the clay according to the package directions.

miniature fairy garden polymer pumpkins

I added some of the pumpkins to the doorway front porch, and filled up a little miniature wagon I found at the craft store.  Doesn't it look like the fairies have just come home from the pumpkin patch?

miniature polymer pumpkins in a miniature wagon

4. Real Fairy-Sized Fall Leaves

My favourite little detail in this fall-themed fairy garden is the fall leaves.  They're real leaves!

how to make miniature fall leaves

I used a 1.5 cm leaf punch, from the craft store to make them from real fall leaves.

how to make miniature fall leaves


You just punch them out of real leaves.  They will dry, and the edges may curl up a little, but they just look like real fallen leaves in your little fairy garden.  This is one of my favorite things in this fairy fall garden.

miniature fall leaves

If there is a predominant vein in your leaf, you can punch it out so that it's running up and down on the miniature leaf, and it will look even more realistic.

5. Containers

I set my little garden up at my front door on a wood stump so visitors could see it.   These are great in a small space.  Placing them by the front door means they'll be admired by trick-or-treaters on Halloween. You might also like our Halloween real pumpkin fairy house jack-o-lanterns here.

I used an assortment of containers, including some rustic galvanized metal pots.  My favourite container garden though, is a hollowed out faux craft pumpkin turned into a plant container.  

Fairy garden in a faux pumpkin.

Just use a craft knife to cut off the top, and add a few drainage holes, and fill with soil and plants.

6. Plant Ideas

Fill your fall fairy garden with fall plants.  I used mums, ornamental kale, and pansies.  Look for small plants so that there's room for your fairy friends.

I love how it turned out, and my daughters had fun helping me make it.

how to make a fall miniature garden

With a Miniature Fall Fairy Garden, life really is a party!

More Fairy Garden Inspiration

  • Teacup garden with small succulent plants and tiny DIY clay fairy houses and mushrooms.
    Teacup Gardens
  • How to make a Christmas fairy garden.
    How To Make A Christmas Fairy Garden
  • How to make a fall fairy garden.
    Fall Fairy Garden
  • Fairy garden miniature picnic.
    Fairy Garden Picnic

Frequently Asked Questions

Does the fairy house last outside?

Yes. The mod podge coating helps make everything weather proof.

Where did you find the fence and little red wagon fairy sized accessories?

Look for fairy sized garden accessories like these from the dollar store, craft store, or plant nursery. I've also had great luck at a specialized doll house miniature store, you could look for a specialized shop like this on-line.

Where can I find the miniature leaf punch?

We got ours at the craft store. If you have trouble finding it, look online -just be sure to check the size before ordering. Ours was ⅝ inch and was perfect.

If you try making a Fall Fairy Garden or any other idea on my blog please leave a star rating and let me know how it went in the comments below. Thanks for visiting today!

Recipe

How to make a fall fairy garden.

Fall Fairy Garden

Make a fall fairy garden with a DIY fairy house, minature DIY mushrooms, pumpkins and real fairy sized fall leaves.
5 from 1 vote
Print Pin Rate
Prep Time: 1 hour hour
Cook Time: 20 minutes minutes
Total Time: 1 hour hour 20 minutes minutes
Author: Dannyelle Nicolle-Ramjist
Cost: $25

Equipment

  • ⅝ inch leaf punch
  • garden trowel
  • hot glue gun
  • small paint Bruch

Materials

  • miniatue doll house
  • vintage seed packages print out
  • mod lodge
  • orange paint
  • small pieces of wood for door
  • bead for doorhandle
  • hot glue
  • preserved oak leaves
  • sparking wine corks
  • red and white paint
  • orange and brown polymer clay
  • plant pot, galzanized steel pail with drainage, or faux pumpkin with top cut off and drainage holes
  • potting soil
  • small fall plants like pansies, mums, and kale
  • fairy accessories like wagon, and fence
  • real fall leaves

Instructions

  • Remove the bird peg from the miniature birdhouse, and the screw from the top.  
  • Give the bird house a quick coat of orange/peach paint.  
  • Print out a vintage seed package image -like this free sunflower one.  Then I cut the seed packages to fit the house and mod podged them onto the house.
  • For the door, use a few little pieces of wood and a bead as a door handle and hot glue them on.
  • For the roof, use some preserved oak leaves, and mod podge them onto the roof as a finishing touch.
  • For the mushrooms, paint the tops of the sparkling wine corks with some reddish-orange craft paint.  When it is dry, add some white spots.  Then, seal it all with a coat of mod podge.
  • For the miniature pumpkins, form orange polymer clay into tiny pumpkin shapes. Don't forget the ridges. Then add a very small brown polymer clay stem. Bake the clay according to the package directions.
  • To make the real fairy-sized fall leaves, use a ⅝ inch or 1.5 cm fall leaf punch and use it on real leaves. To get the best look, line up a vein of the leaf along the center of the punch.
  • To make the garden, fill your pot of choice with garden soil and plant the small plants near the back, leaving room at the front of the pot to set up your fairy items. Give your garden a drink with some water. Add the house and all the other accessories and enjoy.

Notes

At the end of the fall season, be sure to put your fairy garden accessories away inside to help them last for next fall when you can set it all up again.

Pasta Bar Ideas

Sep 13, 2016 · 6 Comments

Pasta bar for a party with different pastas, sauces, and toppings.

This DIY pasta bar party is perfect for feeding a crowd. We set up different pastas, sauces, and toppings for guests to make-their-own pasta.

Pasta bar for a party with different pastas, sauces, and toppings.
[feast_advanced_jump_to]

Why You'll Love This Party

  • Who doesn't love pasta?
  • It's a great way to feed a crowd, and everyone can help themselves.
  • It's an easy way to accommodate vegetarians, gluten-free, dairy-free guests, and picky eaters, and still have everyone enjoying the same meal.
  • You can make everything ahead of time, and actually enjoy the party instead of spending the whole night serving.

Last week my oldest daughter had a birthday, and we celebrated with a Make Your Own Pasta Bar. This is such a fun way to serve a lot of people.

It's great for a party or even large family meals.  Everyone loved choosing all their own perfect combinations, especially the picky eaters.

We love make your own parties. Check out our make your own pizza party, book themed party, soup party, circus themed dinner party, and our make your own adult lemonade stand here. This is our kind of easy entertaining.

how to make your own pasta bar

Pasta Bar Set Up

A Pasta bar is an easy way for everyone to find something they love, and all you have to do is set it up and let them help themselves, so you get a chance to enjoy your own party too.

Pasta Bar ideas

We set our pasta bar up on our side buffet.  You'll want to keep in mind traffic flow when you're setting up a serve yourself buffet like this.  Think about how guests will move through the space, and the order of assembling their dish.  

If you don't have room in your dining room, consider setting something like this up on your kitchen table.  Or set up a side table in the dining space just for the buffet.

Serving Pieces

When you're setting a buffet it's always a good idea to think about different heights and try to incorporate some with different risers.  Try to use matching serving bowls if you can, and choose a colour scheme.  

To serve our pasta bar I bought some matching simple white bowls of various sizes as serving dishes. We had guests serve themselves at the buffet we created. We were a relatively small party, so we didn't have any issues keeping the food warm. If you had a larger group, you might consider using a slow cooker to serve some of the sauces, or food trays with warmers underneath instead of a serving dish. 

We went with a rustic Italian theme, so some wood crates worked well on our buffet.  Keep in mind that hot dishes may need a trivet under them to protect your table.  

Tip: Remember to include serving utensils.  You'll need different serving pieces for different shapes of pasta.  Tongs work well for long pastas like spaghetti, and large serving spoons are better for something like penne.  You'll also need ladles for the pasta sauces.  

We set the table with plates, and guests brought their plates up to serve themselves.  A pasta bowl would be a good option for guests too, if you have them instead of plates, since a bowl of pasta is a little easier to maneuver and spill anything, especially with a buffet set-up, where guests are walking back to their seats.  You could also set up plates or large bowls at the beginning of the buffet.  

Decor Ideas

We also added in some herbs potted in upcycled tins, some flowers in vases would be a good option too.  Try to tie your buffet decor to your table decor for a cohesive finished look.

We also included a fun chalkboard sign with instructions for our guests.  This is a nice addition for decor, but also helps any confused guests to understand exactly what they're supposed to do, and what their options are.

Pasta Bar set up in a home

Pastas:

We offered three different types of pasta -fettuccine, cheese tortellini, and rotini.

  • fettuccine
  • cheese tortellini
  • rotini

Our trio of pasta options were a hit. You could include any types of pasta that you like.  I wanted to include different pasta shapes. Remember that each different kind of past holds different sauces.  Ridges on the pasta make it hold the sauces better.  So consider your sauces when you choose the type of pasta.

Gluten Free Options

You might also include gluten-free pasta, or zucchini noodles might be a nice touch too when you're thinking about different kinds of pasta options to include.

Pasta Prep

I cooked the pasta right before serving. To help prevent it from sticking, you might stir in a bit of olive oil, or butter before serving. 

Tip: Don't underestimate how many large pots you will need to make this, and remember it takes a while to bring that much water to the boil, so keep that in mind as you're working out your timings for serving.  

We cooked ours and served them immediately.  You can also par-cook the pasta, and then put the cooked pasta into cold water to stop the cooking process.  Then right before serving, reheat it in boiling water.  This will give you a quicker cooking time at the end, and may be a great way to get all the warm pasta served more quickly, depending on how many options you're offering at your pasta party.

different pastas and sauces and toppings for a pasta buffet

Sauces:

There were three pasta sauces we used; tomato, alfredo, and a blush sauce.

  • tomato sauce
  • Alfredo sauce
  • blush sauce

It's always nice to have a white sauce, a red sauce or marinara sauce, and our third sauce was a combination of both to make a blush sauce. Pesto is also a great option for your DIY pasta bar.  A vodka sauce is another great option to include.

pasta bar ideas for pasta, sauces, and toppings

Toppings:

We made lots of fun toppings for our pasta buffet. We had a variety of meats including grilled chicken, Italian sausage, and meatballs. There was also sauteed veggies as a vegetable option. We also included some parmesan cheese and hot chilli flakes for those that like a little spice.

  • grilled chicken
  • Italian sausage
  • meatballs
  • veggies (mushrooms, peppers, onions)
  • Parmesan cheese
  • hot chilli flakes

Topping Prep

The chicken and sausage were grilled on the bbq, and then chopped into bite sized pieces for serving. The meatballs were cooked from frozen in the oven, as per the package directions.

We liked serving meatballs, but cooked ground beef is another option.

We sauteed our veggies in a large frying pan before serving. Prep all your veggies ahead of time, and cook until almost done. Just before serving finish off the cooking over a low heat.

You could also grill the vegetables and chop into bite sized pieces before serving. Serve grilled veggies on large platter with rows of each kind so that everyone can pick their own vegetable options.

Another great addition to your variety of toppings would be artichoke hearts, kalamata olives, fresh cherry tomatoes and sun-dried tomatoes.  

Our guests loved all the different options, and tried all kinds of different combos. It was perfect even for fussy eaters. I would definitely do it again, as it was a huge hit.

how to set up a pasta bar for a party

Keep It Simple -Store Bought Time Savers

There were a lot of different components to the pasta bar, but they were all really simple to put together. I used store bought sauces, and frozen meatballs to cut down the prep time. I cooked the veggies ahead of time and just re-heated them. Before serving my husband grilled the sausage and chicken on the bbq, I cooked the pasta, and heated up the sauces. 

Allergy, Vegan, Dairy-free, Gluten-Free Friendly

One of the great benefits of offering guests a buffet is that it's very friendly for all. If you know you have a guest with a dietary restriction be sure to include some options that work for them, like gluten free pasta, or zucchini zoodle noodles, veggie options, and non-dairy sauces. This is such a great option also to make all your guests feel included, and like you're all eating the same menu.

Side Dishes:

Along with this, we made a Caesar salad and cooked some mozzarella sticks. So it was pretty easy to put together. A green salad would be a great choice too. We also served some rolls. These options were all at the table and passed around.

  • caesar salad
  • mozzarella sticks
  • garlic bread
  • fresh bread rolls
  • butter
  • breadsticks
  • olives
  • salt and black pepper
Italian themed party tablescape and centre piece

The Table

I wanted the table to continue the Italian theme, so we went for a rustic Italian feel.

Italian party centre piece of herbs planted in tomato tin cans

We used some tomato tins as herb planters and had fresh basil, thyme, and Italian parsley as the centrepiece.  I set them up on a raised rustic wooden box. They were a great idea as a nice alternative to flowers.  And I did a few more to add to the buffet to tie the whole look together.

Italian party tablescape with breadsticks and olives, and rolls
We added some breadsticks, olives, and fresh tomatoes to the table for snacking, and they looked great too.

pasta party table settings with individual rolls on each plate

Each guest had their own roll, wrapped in parchment paper, waiting for them at their place setting.  We served these with butter, but offering a little olive oil and balsamic vinegar for bread dipping would be a really great idea too.

Italian party pasta party tablescape

Drinks:

I set up some Italian inspired drinks in the kitchen for our guests.

  • lemon San Pellegrino
  • orange San Pellegrino
  • San Pellegrino sparkling water
  • wine

The sparkling drinks were a big hit with guests.  Another option would be to set up an Italian soda bar, where guests could make their own, and try different flavors.  This would be the perfect addition to our pasta bar ideas.

drinks for an Italian pasta themed dinner party
This was such a fun get-together with great food that everyone enjoyed.  I highly recommend these pasta bar ideas to you for a party.

With a Make Your Own Pasta Bar and all these great pasta bar ideas, life really is a party!

Frequently Asked Questions

How do you keep the pasta from sticking to itself?

After your pasta is cooked and drained, add a teaspoon or two of olive oil or butter to it. This will help keep it from sticking to itself.

How do you keep the food hot for a pasta bar?

We reheated the food right before serving and had no issue with it staying hot. If you are serving a larger crowd, you could use heated trays, either electric or with the burner fuel below the trays to keep the food hot. If you are serving your pasta this way consider saving a cup of the cooking water and adding it to the tray so that the pasta doesn't become dry, and use a slotted spoon or tongs for serving. For the sauces, mini crockpots work well.

What toppings can you put on pasta?

Once you have your pasta, offer a few different sauces and a few different meat options like chicken, Italian sausage, and meatballs. It's also nice to offer some different cooked vegetables as toppings. Lastly, add some fun add-ons like cheese, hot chilli flakes, olives, sun-dried tomatoes, and fresh herbs.

What pasta bar options are there for gluten-free, vegan, or dairy-free guests?

Use gluten-free pasta, zucchini noodles, meatless protein, or dairy-free sauces for guests with dietary restrictions. Be sure to cook these options separately, and serve them with separate serving utensils.

More Party Inspiration

  • Make your own pizza party.
    Make Your Own Pizza Party!
  • Christmas fondue party with menus, recipes, and decor.
    Christmas Fondue Party
  • Adult lemonade stand with lemonade, fruit purees, soda or sparkling water and vodlka.
    Adult Lemonade Stand Ideas
  • Butter themed toast party dining table set with yellow striped tablecloth, compound butter grazing runner down the center, baguette candle holders, and toasters at each end, white hutch and crystal chandelier in background.
    The Ultimate Butter Themed Party -A Toast Dinner

If you tried these Pasta Bar Ideas or any other ideas on my blog please leave a star rating and let me know how it went in the comments below. Thanks for visiting today!

Recipe

Pasta bar for a party with different pastas, sauces, and toppings.

Pasta Bar

Make your own pasta with a variety of pastas, sauces, and toppings to choose from.
5 from 1 vote
Print Pin Rate
Course: Main
Cuisine: Italian
Prep Time: 20 minutes minutes
Cook Time: 1 hour hour
Total Time: 1 hour hour 20 minutes minutes
Servings: 10
Calories: 1268kcal
Author: Dannyelle Nicolle-Ramjist

Ingredients

  • 4 cups fettuccine
  • 4 cups cheese tortellini
  • 4 cups rotini
  • 1 tablespoon olive oil or butter
  • 4 cups tomato sauce
  • 4 cups Alfredo sauce
  • 4 cups blush sauce
  • 4 grilled chicken breasts
  • 6 Italian sausage
  • 16 meatballs
  • 2 cups sautéed mushrooms, peppers, onions
  • ½ cup Parmesan cheese
  • ¼ cup hot chilli flakes

Instructions

  • Grill the chicken and Italian sausage and cut into bite sized pieces. Make your own or heat frozen meatballs in the oven according to the package directions. Cut up mushrooms, peppers and onions and sautéed until tender.
  • Make your own, or reheat store bought sauces.
  • Bring 3 large pots of water to boil and cook your pastas. Add a few teaspoons of olive oil or butter to the drained pasta to help prevent it from sticking together.
  • Place all the pasta bar items into bowls, and arrange them in groups of pastas, sauces, and toppings for guests to help themselves.

Notes

If you are serving a smaller group, prepare the food and serve in bowls.
If you are serving a very large group, consider serving the food in warming trays or crockpots to help keep the food warm through out the party.

Nutrition

Calories: 1268kcal | Carbohydrates: 122g | Protein: 66g | Fat: 57g | Saturated Fat: 22g | Polyunsaturated Fat: 10g | Monounsaturated Fat: 20g | Trans Fat: 0.1g | Cholesterol: 290mg | Sodium: 2534mg | Potassium: 1458mg | Fiber: 11g | Sugar: 13g | Vitamin A: 2716IU | Vitamin C: 16mg | Calcium: 230mg | Iron: 8mg
Tried this Recipe? Tag me Today!Mention @LifeisaParty or tag #lifeisaparty!

Black Forest Trifle in a Mason Jar

Sep 9, 2016 · 1 Comment

Three individual black forest trifle mason jars with chocolate cake, cherry pie filling, whipped cream, and chocolate shavings on a wood table with white spoons and fresh flowers.

This black forest trifle layers rich chocolate cake, sweet cherry pie filling, and fluffy real whipped cream into individual mason jars. Make them ahead, add the lids, and pull them from the fridge at party time looking every bit as beautiful as the moment you assembled them.

Black forest trifle layered in individual mason jars with whipped cream and chocolate shavings.
[feast_advanced_jump_to]

Quick Look

  • 📋 Recipe: Individual Black Forest Trifle in a Mason Jar
  • ⏲️ Ready In: About 1 hour plus 1 to 2 hours chilling time
  • 👪 Servings: 12 individual trifles
  • 🔪 Difficulty: Easy
  • 💭 Top Tip: Beat your whipped cream all the way to stiff peaks. It takes about two extra minutes and means your cream will stay fluffy and beautiful for hours without weeping or deflating.

Why You'll Love This Recipe

  • The classic combination of chocolate, cherries, and cream is one that both kids and adults come back for seconds on every time.
  • Every guest gets their own perfectly layered trifle, so the dessert table stays looking gorgeous all night long.
  • Real whipped cream beaten to stiff peaks tastes so much better than cool whip and holds its shape just as well.
  • The mason jar lids make for easy fridge storage and make the whole batch completely portable for picnics and potlucks.
  • Everything assembles hours ahead of time so there is nothing left to do at dessert time except hand out spoons.

A few years ago we took a trip through Germany and found ourselves at a Christmas market nestled right in the Black Forest, tucked alongside a stream with a little cafe right there among the trees. When in Rome! We ordered the Black Forest cake and it was made completely from scratch. It was one of those bites you remember for a long time.

When we got home I wanted to recreate those flavors in a format that actually worked for a party. The result is this black forest trifle made in individual mason jars.

We use a boxed chocolate cake mix here without any apology at all. The cake is the foundation and the magic is really in those layers of chocolate, cherry, and cream together. What is absolutely worth the extra five minutes is making real whipped cream. Beat it all the way to stiff peaks and it holds up beautifully for hours without weeping or going flat. The flavor difference compared to a tub of whipped topping is genuinely noticeable.

The individual jar format is what makes this version so practical for entertaining. Each guest gets their own beautifully layered trifle. Nothing gets scooped and messed up as the night goes on. You close the lids, slide the whole batch into the fridge, and the dessert is completely done and ready whenever you are.

If you love a trifle, we have a whole collection to explore. Our Easter Trifle with Cadbury Mini Eggs is a showstopper for spring gatherings, and our Chocolate Brownie Trifle takes the classic in a rich, fudgy direction. For individual portions like these, our Mini Trifles are another beautiful option for a party table. Come fall, our Caramel Apple Trifle is always a crowd favorite.

Black Forest Cake in a Mason Jar ready for a picnic

What Makes a Dessert "Black Forest"?

Black Forest desserts take their name from the Schwarzwald region in southwestern Germany, famous for its sour cherries and kirschwasser, a clear cherry brandy distilled from those cherries. A traditional Black Forest cake layers kirsch-soaked chocolate sponge with sour cherry filling and stabilized Chantilly cream.

Our version keeps all those classic flavors in an easy shortcut format using sweet cherry pie filling. If you are serving adults and want to add a little of that authentic note, drizzle a small amount of kirsch over the cake layers while assembling each jar. About a teaspoon per jar is all you need and it adds a lovely depth to the whole thing.

Ingredients

Black forest trifle ingredients, with mason jars in a white wooden carrier on a farmhouse table with stand mixer bowl, chocolate cake, and fresh flowers.
  • Chocolate Cake Mix: Any devil's food or dark chocolate cake mix works well here. Bake it in two round pans, let it cool completely, and then use your mason jar like a cookie cutter to punch out the perfect size circles for layering. You will have extra cake left from around the circles, which I consider a bonus for whoever is in the kitchen.
  • Cherry Pie Filling: One can of sweet cherry pie filling is the right call here. It layers cleanly and has just the right consistency to hold its place without making the cake soggy.
  • Whipping Cream: Use real whipping cream and beat it yourself. Add the vanilla and sugar once you reach soft peaks, then keep going all the way to firm stiff peaks. This is the step that makes the biggest difference in the finished result. Of course, you can use whipped topping instead if you prefer, or you're in a rush.
  • Chocolate Shavings: Run a vegetable peeler along the edge of a chocolate bar and you have beautiful curls in about one minute. It is a small touch that makes each jar look really special.

How to Make Black Forest Trifle in a Mason Jar

Mason jar pressed into chocolate cake as a cookie cutter to cut circles for individual black forest trifle layers.
  1. Step 1: Bake the chocolate cake according to the package directions in two round cake pans. Let the cakes cool completely on a wire rack before assembling. The layers hold much better if the cake is fully cool. Press your half-pint mason jar down into the cooled cake to cut out a circle for each jar. Slice each circle horizontally in half so you have two thin layers per serving. This gives you the classic layered look inside the glass.
Whipped cream beaten to firm stiff peaks on a stand mixer whisk attachment for black forest trifle.
  1. Step 2: Add the whipping cream to a stand mixer fitted with the whisk attachment and begin whipping. Once you reach soft peaks, add the vanilla extract and sugar and continue whipping to firm stiff peaks. The cream should hold its shape when you lift the whisk. Transfer to a piping bag or a zip-lock bag with one corner snipped off for the neatest layers.
how to make Black Forest Cake in a jar
  1. Step 3: Assemble each trifle starting with a bottom layer of cake. Add a layer of cherry pie filling, then pipe on a layer of whipped cream. Repeat with a second layer of cake, cherry pie filling, and whipped cream. Take care to keep the inside walls of the jar clean as you go for the best visual effect.
Black Forest Jar Cake
  1. Step 4: Top each trifle with a sprinkle of chocolate shavings. Seal the lids on the jars and refrigerate for at least one hour before serving to let the flavors come together and the layers settle beautifully.

Expert Tip

The whipped cream is the one step worth slowing down for. Go all the way to firm stiff peaks instead of stopping at soft peaks. The cream will pipe cleanly into layers, hold its shape through chilling, and still look beautiful several hours later. It takes about two extra minutes and makes a real difference to how these look and taste at serving time.

Black Forest Cake in a Mason Jar

Why Individual Trifles Are Such a Good Party Dessert

This is genuinely one of my favorite formats for a crowd dessert and here is why. When you serve a large trifle bowl, the layers start looking messy the moment the first spoonful is taken. With individual jars, every single guest gets a beautiful dessert and the table keeps looking great from first serving to last. The lids mean you can assemble everything the morning of your party, put the lids on the jars and pop them in the fridge, and not think about dessert again until you are ready to serve. They also travel beautifully to a potluck or picnic without anything shifting or spilling.

For a pretty presentation, arrange the jars in a row on your dessert table and set out a jar of extra spoons beside them. Guests love helping themselves.

Perfer one large trifle? You can assemble one large Black Forest trifle instead in a traditional glass trifle bowl if you like that better.

Make Ahead and Storage

These trifles are genuinely better when made ahead because the cake layers have time to soften slightly and absorb some of the cherry juices. Assemble the jars, sprinkle on the chocolate shavings, and add the lids. They keep beautifully in the refrigerator for up to 24 hours.

For a party, the morning of the event is the sweet spot for assembly. If you need to work further ahead, you can bake the cake up to two days in advance, then assemble the jars the day of.

Freezing is not recommended. The layers become very soggy when thawed and the whipped cream does not freeze well.

Frequently Asked Questions

What size mason jars should I use?

Half-pint (8 oz) mason jars are the perfect size for individual servings. They give you enough room for two full layers without being too much dessert for one person.

Can I add alcohol to this recipe?

Absolutely. Traditional Black Forest desserts use kirschwasser, a cherry brandy from the Black Forest region. Drizzle about one teaspoon over each cake layer when assembling for a subtle adult twist that is really lovely.

Can I use Cool Whip instead of real whipped cream?

You can. It is a convenient shortcut and will still taste good. Real whipped cream makes a noticeable difference in flavor and texture, but Cool Whip is a perfectly reasonable option when time is short.

What can I use instead of cherry pie filling?

Fresh or frozen dark cherries cooked down briefly with a little sugar make a wonderful homemade filling. 

More Mason Jar Dessert Recipes You'll Love

  • How to make cupcakes in a jar.
    Cupcakes in a Jar -5 Different Flavor Ideas
  • Individual peach cobbler in a mason jar.
    Individual Mini Peach Cobbler in a Mason Jar
  • Mini no bake cheesecake with blackberries.
    Easy Mini No Bake Philadelphia Cheesecake in a Mason Jar
  • Apple crisp in a mason jar.
    Mini Apple Crisp In A Jar

If you try this Black Forest Trifle or any other recipe on my blog please leave a star rating and let me know how it went in the comments below. Thanks for visiting today!

Black Forest jar cake for a birthday

Recipe

Three individual black forest trifle mason jars with chocolate cake, cherry pie filling, whipped cream, and chocolate shavings on a wood table with white spoons and fresh flowers.

Black Forest Trifle

Rich chocolate cake layered with sweet cherry pie filling, fluffy whipped cream, and chocolate shavings in individual mason jars. A make-ahead dessert that looks beautiful and travels perfectly.
5 from 1 vote
Print Pin Rate
Course: Dessert
Cuisine: American
Prep Time: 15 minutes minutes
Cook Time: 30 minutes minutes
Chill Time: 1 hour hour
Total Time: 1 hour hour 45 minutes minutes
Servings: 12 Mason Jar Cakes
Calories: 311kcal
Author: Dannyelle Nicolle-Ramjist

Ingredients

  • chocolate cake mix prepared according to the package directions
  • 1 can cherry pie filling
  • ½ pint whipping cream 237mL
  • 1 teaspoon vanilla extract
  • 3 teaspoon sugar
  • ¼ cup chocolate shavings

Instructions

  • Make the chocolate cake according to your package instructions and bake the cake batter in two round cake pans. Allow to cool on a wire rack. Press your half-pint mason jar down into the cooled cake to cut out a circle for each jar. Slice each circle horizontally in half to create two thin layers of cake per serving.
    chocolate cake mix
  • Add the whipping cream to a stand mixer fitted with the whisk attachment and whip to soft peaks. Add the vanilla extract and sugar and continue whipping to firm stiff peaks. Transfer to a piping bag or zip-lock bag with one corner snipped off.
    ½ pint whipping cream, 1 tsp vanilla extract, 3 tsp sugar
  • Assemble each trifle beginning with a bottom layer of cake. Add a layer of cherry pie filling, then pipe a layer of whipped cream. Repeat with a second layer of cake, cherry pie filling, and whipped cream. Keep the inside walls of the jar clean as you go for the best visual effect.
    1 can cherry pie filling
  • Top each trifle with a sprinkle of chocolate shavings. Seal the lids and refrigerate for at least 1 hour before serving.
    ¼ cup chocolate shavings

Notes

  • Store jars with lids in the refrigerator for up to 24 hours.
  • For an adult version, drizzle approximately 1 teaspoon of kirschwasser or cherry brandy over each cake layer before assembling.

Nutrition

Serving: 1g | Calories: 311kcal | Carbohydrates: 44g | Protein: 3g | Fat: 15g | Saturated Fat: 7g | Polyunsaturated Fat: 2g | Monounsaturated Fat: 5g | Trans Fat: 0.004g | Cholesterol: 23mg | Sodium: 312mg | Potassium: 218mg | Fiber: 2g | Sugar: 17g | Vitamin A: 394IU | Vitamin C: 2mg | Calcium: 76mg | Iron: 2mg
Tried this Recipe? Tag me Today!Mention @LifeisaParty or tag #lifeisaparty!

Back To School Dinner

Sep 7, 2016 · 2 Comments

Back to school family dinner ideas.

Back to School Dinner Ideas: a special Back to School dinner to celebrate the first day of school and hear all about it.

Back to school family dinner ideas.
[feast_advanced_jump_to]

Yesterday was the first day of school, and share all our fun Back To School dinner ideas with you.

You can find last years Back to School dinner here, and the year before that here, for more inspiration.

how to throw a back to school dinner

The Back To School Table

This year, I went with a bit of a book page theme.  The table runner was made from some old books.  I ripped out some pages, and sewed them together on the sewing machine.  The book pages set the tone for a mainly black and white colour scheme.

Back to School Dinner ideas

The placards were some sweet library card inspired tags.

first day of school dinner

For the bottles of water, I used some cute numbered gift tags I picked up at Ikea.

back to school party

And on the straws, some cute "school days" flags I made.

Back to School party ideas

The table was really very simple.  I always think of apples when I think of back to school, so the simple centrepiece was just a line of fresh apples.  They smell so good!

school themed party ideas

More Back To School Decorations

In the background, I decorated the buffet with a back to school theme too.

back to school dinner ideas

Book Page Tassels

In keeping with the book page theme, I made some pretty book page tassels.

Back to School decorations

The book page tassels were simple to make from some old books, and with some black and white washi tape.  To make them just tear some pages out of an old book, and cut them in strips with about an inch of the top of the page, so that they're all still connected.  Then roll up several of the cut pages together and secure with a bit of hot glue and some washi tape.

book page tassels

It was fun to use my vintage globes and few other school supplies to set the tone.

Back to School dinner party

Food Ideas

We had pasta for dinner -a real favourite around here.  And for dessert, a few school inspired treats.

Back to School party

You can see how I made the Book Page Sugar Cookies and Marshmallow Pencil Treats here.

Back to School themed snacks and desserts

We traditionally have an apple dessert for this special dinner, and I had great plans for one this year.  But I used all the apples on the table and ran out of time, so I picked up some apple fritter donuts and decorated them with some book page pom pom picks.  I haven't had an apple fritter in ages -boy were they yummy and so easy. 😉

Back to School Dinner ideas

We had a great time hearing all about the first day, from choosing a class pet (hermit crabs and fish are in the running) to not being able to find the washroom, to who they sat with on the bus.  It was a great family time, and one of our favourite traditions.

how to have a Back to School Dinner

With a this many Back to School dinner ideas, life really is a party!

More Back To School Ideas

  • Back to school party ideas of table decorations, apple balloons, book garland, and smart cookies with glasses.
    20 Back To School Party Ideas
  • Back to School themed foods snacks and treats.
    Easy and Cute Back To School Themed Foods and Treats
  • Back to school snack mix trail mix recipe.
    Easy Back To School Snack Mix Recipe
  • Back to school free printables including bunting, pencil boxes, party hats and more all set up at a children's tablescape.
    Back To School Free Printables Pack


Rustic Casual Tablescape

Aug 30, 2016 · Leave a Comment

Rustic Casual Tablescape: brown kraft paper, white candles, herbs and antlers come together to make a beautiful rustic and casual table.

Rustic Casual Tablescape: brown kraft paper, white candles, herbs and antlers come together to make a beautiful rustic and casual table.

We decided to have a casual rustic dinner party and serve a feast of ribs.  It's near the end of summer, and the corn is perfect.  There's time for at least one last bbq party, and what could be better than homemade ribs.  So today I'm sharing our rustic tablescape with you.

Rustic tablescape ideas

My sweet husband took the lead on the dinner,  he came up with the menu, shopped, and cooked all the food.  I was working on some other projects, so I really appreciated his taking the lead on this one.  I did put together a really pretty rustic tablescape.  Together we came up with a pretty perfect party for this month.

Brown Paper Table Runner

I knew I wanted something quite rustic and casual to go with the great bbq menu.  We also decided we should eat inside with the air condition since it's still really hot out and we wanted our guests to feel comfortable and linger at the table.  I started out with a simple brown paper runner, perfect for something messy like ribs.  While I was picking up the paper at the dollar store, I picked up a few other goodies that really brought the table together and for a great price too. 😉

inexpensive napkin ideas

Rustic Table Napkins

The napkins were a real find.  They were with the dish cloths and towels.  They're like a denim fabric, with a black hue to it, and edged in white.  They're sold as dish cloths, at 2 for 1.25 they were a great choice for a messy meal -and I really like the colour combo, classic black and white.

easy rustic table centre piece

Church Candles

I also picked up these pretty church candles at the dollar store.  I love their elegant height, and simple glass holders.  And they're a great price too.

how to set a rustic tablescape

Easy Centrepiece

Down the middle of the table I made a really casual and rustic flower arrangement from some clippings from my garden.  I started out with some perennial sweet pea vines, then I layered in some sage and lavender.  The smell was amazing.  My favourite touch though was adding in the antlers.  I picked these up at an antique fair this summer, and I thought they looked amazing added into the table runner.

easy table centre piece

Place Settings

The dishes, cutlery, and glasses were just basic white, gold and glass -pretty and elegant.

rustic tablescape ideas

I actually picked up the glasses for the dinner too.  My basic wine glasses were from about 16 years ago.  My husband and I bought them for our first dinner party when we were just dating.  They have served us well, but over the years many have broken -I think there's six left.  So, it was time to invest in a new basic set.  I picked up 12, plus an extra box for breakage in the future for a total of 14.  I like these basic stemless ones, since we have kids and our tables are usually a mix of kids and adults these are perfect since they can hold juice, pop, water, wine, whatever we need.

how to set a rustic tablescape

Menu Cards

My other favourite part of this little table was the menu cards.

My youngest daughter made the menus, and I added a sprig of lavender to each one.  Easy and perfectly special.  We just made them on the computer and printed them on our home printer.

The Food

And what a menu it was!  My husband out did himself with pork ribs -which he rubbed with our homemade Montreal steak spice recipe, and then added our homemade BBQ sauce here.  He also made our marinated and grilled flattened chicken recipe here, and homemade slow cooker baked beans.  We rounded it out with fresh corn on the cob, a little homemade coleslaw and fresh cornbread.  It was amazing.  One of our sweet guests brought dessert.  And we also made a batch of peach sangria -find the recipe here, since the peaches are perfect this time of year.

rustic dinner party

It was a great party, full of fun, friends and delicious food; truly a feast!

With a rustic tablescape like this and a fun get together, life really is a party!

More Inspiration

You might also like 3 Steps To An Easy Summer Table here.

Three Steps to an Easy Summer Table: learn how to start with the basics, add items for interest, and look in unexpected places to set the perfect table.

Also check out our Geometric Pink and Gold Tablescape here.

Geometric Pink and Gold Tablescape: pretty peonies, DIY candle holders, paper gems, and homemade napkins make a gorgeous and inexpensive tablescape.

You might also enjoy Rustic Christmas Table here.

Notebook Paper Sugar Cookies for Back to School

Aug 27, 2016 · Leave a Comment

Back to school notebook paper sugar cookies.

Notebook Paper Sugar Cookies for Back To School: The perfect treat to celebrate Back To School. Full instructions on how to make them.

Back to school notebook paper sugar cookies.
[feast_advanced_jump_to]

One week and counting until Back To School around here.  What softens the blow for little hearts thinking about school with a little dread, a little worry, and a little excitement all mixed together?  Notebook Paper Back To School Sugar Cookies.

back to school sugar cookies

I love sugar cookies, but I'm far from an expert cookie decorator.  These ones are pretty simple to put together, even for me who was trying this fancy icing flooding for the first time.  They're not perfect, but I think they're perfectly imperfect…and they're delicious and almost too cute to eat, almost. 😉

how to make back to school sugar cookies

Sugar Cookies

Start with making your favourite sugar cookies…or buying a prepared dough and just rolling them out, or using a cookie dough mix.  Your choice, whatever suits.  Cut them into squares, or rectangles -think paper sheet shape.  Bake them and let them cool.

White Icing Background

Now for the tricky bit.  You're going to make icing and flood your cookies so you get a nice, smooth, hard layer of icing.  I used a recipe that called for a cup of icing sugar and 2 tablespoons of milk combined.  I used this as a starting place.

If I were doing this again, I might use a different recipe for the icing, I think one with egg whites or meringue powder instead of milk would have hardened up even more and more quickly too.

My friend who makes beautiful cookies all the time advised that the first batch of icing should have the consistency of toothpaste.  This thicker icing is piped around the edge of the cookie first.  Next you add some more milk to the icing until it's runnier, she said it should disappear when dripped back into the bowl from a spoon within a second or two.  

I used a ziplock bag with the corner snipped off for an easy icing bag.  I made small amounts of icing and made more as I needed it.  The cookies didn't come out perfectly, but I'm pretty happy with them as a first attempt at this method, and here to tell you to be brave and try it, and give yourself permission to not be perfect on your first attempt.

making notepaper sugar cookies

Once they're iced with the white icing, leave the cookies out overnight for the icing to harden.  I left mine two days.  You want the icing to be hard enough to write on with the markers.

decorating sugar cookies with edible markers

Adding the Blue and Red Lines

I used edible markers to make the lines of the paper, you can find them at the craft store.  Use a ruler to make your lines straight and don't press too hard.

back to school sugar cookies

I planned to use some black gel icing to write on the cookies "ACB", or my kid's names.  But, I loved how they looked plain.  I might add this detail for our Back To School Dinner -see last years here.  Or, I might let my girls write on them themselves at the dinner.

Notebook paper sugar cookies

With Notebook Paper Sugar Cookies for Back to School, life really is a party!

 More Back to School Ideas

You might also like Back To School Apple Truffle Pops

back-to-school-apple-truffle-pops-1.2.jpg

Back To School Marshmallow Pencil Snacks

back to school marshmallow pencil snacks 7.2

You might also enjoy our Free Printable Lunch Box Notes here.

Free Printable Lunch Box Notes: perfect for the first week of school to remind your little one how special they are, paired with a little treat.

How to Make the Perfect Cheese Board for Beginners

Aug 24, 2016 · Leave a Comment

How to Make the Perfect Cheese Board -learn how to combine sweet, salty, sour, spicy, crunch, and creamy to create the perfect cheese board!

How to Make the Perfect Cheese Board -learn how to combine sweet, salty, sour, spicy, crunch, and creamy to create the perfect cheese board for beginners!
How to Make the Perfect Cheese Board -learn how to combine sweet, salty, sour, spicy, crunch, and creamy to create the perfect cheese board!

I love a good charcuterie board.  In fact crackers and cheese is pretty much my favourite, especially when I'm entertaining.

How to Make the Perfect Cheese Board

A good charcuterie board though, takes crackers and cheese to a whole new level!  There's certain elements that go into creating the perfect combo, if you have these elements covered, I pretty much guarantee a perfect charcuterie board.  If you're a beginner, these simple charcuterie board instructions will make the whole process really easy for you.  There are certain elements that every great board should have.  Include these and you will have a great charcuterie board, even if you're a beginner.

What is charcuterie?

Charcuterie comes from the French word for cured meats.  Think things like Italian dry salami, summer sausage, and prosciutto ham.  Recently though, people have starting using the term charcuterie boards to refer to more than just a selection of cured meats.  These days a charcuterie platter not only includes different kinds of meats, but also includes a variety of cheeses, crackers, fresh fruit, pickles, and more.

This is the perfect appetizer for your next party.  Or serve it as a summer snack charcuterie board with drinks.  It's the perfect food for book club.  Or even a romantic dinner for two.  We love that guests can help themselves and enjoy.  They look great too.  And they're always, always a hit with guests.

how to make a grazing table

1.  Creamy

The creamy element of the perfect charcuterie board is the cheese.  We used a great selection of smoked aged gouda,  flavoured monterey Jack, aged cheddar,  cheese curds, and swiss.  Yum, yum.

It's good to think about different textures, from hard cheeses to soft cheeses, when choosing your different types of cheeses, and a variety of flavors, from mild to strong.  Choose 4-3 types of cheese, and cut them into different shapes.

2. Salty

I love to add in some salty elements when putting together a charcuterie board.

how to make a cheese board as an appetizer

Think nuts -I added some salted roasted cashews, and I made a batch of spicy candied walnuts.  Mixed nuts are a great choice too.

olives for a cheese board

Another great salty hit could be some olives.  I like to pick up a variety of kinds, including green olives, black olives, and stuffed olives.

I also included some cured meats.  These were picked up at the farmer's local market -a great place to shop for these extra elements.  We picked up a spicy hard salami.

how to make a grazing table

3.  Sweet

When I was younger I didn't get the whole sweet with savoury thing, I'm happy to say I outgrew that, and now I love it.  This time of year, there's so much great seasonal fruit available.  I've included some lovely fresh plums and peaches from the farmer's market.  Small bunches of grapes are a great choice too, and a classic pairing with cheese and a glass of wine.  I also love fresh apples cut into slices.  The best fruits to include are whatever is in season at the time.

adding fruit to a cheese board

Another great addition is figs, these are fresh, but other times of year dried fruit works great too.  Any dried fruit make a great addition.

fresh figs on a cheese board

Another great hit of sweet, with the salty included, are these pieces of beautiful fresh local cantaloupe wrapped with prosciutto -such a delicious appetizer always the first thing to go at a party.

cantaloup wrapped in prosciutto ham

4. Sour

Sour is a great addition to a cheese board.  Think pickles and chutneys.  I've included a favourite of mine -red onion and balsamic chutney.  I just pick it up at the grocery store, it's such a great combo with the cheese platter.

How to Make the Perfect Cheese Board

5.  Crunchy

The crackers are a great crunchy element.  I've made my flatbread salt and pepper crackers -they're pretty simple to make and always a big hit.  I also picked up a few of my favourite crackers from the store.  I like some plain and some more fancy with dried fruit and seeds, also some crusty bread is a great addition.

Homemade crackers flatbread

The nuts are also a great crunchy element.

cheese board grazing table

Fresh veggies can add a great crunch too.  These grape tomatoes add a little, think of the crunch of breaking through the skin of fresh sweet tomatoes.

6.  Spicy

A little spice is a nice addition to a cheese tray.  I love a red pepper honey (that sweet and hot combo is great) and the spicy candied nuts pack a little punch too.  Any spicy jam is so good with savory accompaniments.

spiced nuts on a cheese board

Another little spice comes from the meats, one crusted in peppercorns.

I love to serve a little grainy mustard too, it's got a touch of heat to it that's so nice with cured meats, or great with pate.

grainy dijion mustard on a cheese board

7.  Presentation

Last but not least, make it pretty.  Use a pretty wooden cutting board or serving platter and lay everything out for guests to help themselves.  Overflowing containers look great, and create a feeling of abundance.  

We've made a large board, covering most of the table.  This is great for a party and gives guests lots of options and room to help themselves.  For your own charcuterie boards, you can make something smaller, depending on the size of your party.  Just make sure to include the different elements.  

On the board use small bowls to hold some elements.  Be sure to cut some cheese and meats to get your guests started, and include cheese knives for guests to continue to cut more as needed.

queen annes lace in a vintage glass bottles

I added a few fresh flowers too, just some wild flowers from behind my house, and few sweet peas from the garden.  The flowers are such a pretty way to fill in the remaining space.  Fresh herbs or edible flowers are a great finishing touch too.

By including all these elements, you're sure to create the perfect charcuterie board -or charcuterie table, as my daughter said. 😉 Following these simple rules makes it easy even for a beginner to make the best charcuterie board.

How to Make the Perfect Cheese Board grazing table

With the perfect charcuterie board,  life really is a party!

More Appetizer Recipe Inspiration

You might also like our Caramelized Onion and Goat's Cheese Tarts recipe here.

Caramelized Onion and Goats Cheese Tarts: an easy and delicious appetizer for entertaining.

Also check our Stuffed Mushrooms recipe here.

Stuffed Mushrooms -A simple, go-to, tested and true bread crumb stuffed mushroom recipe perfect a party, and guarentted to be a hit with mushroom lovers.

You might also enjoy our Slow Cooker Spinach and Artichoke Dip recipe here.

Slow Cooker Spinach and Artichoke Dip: Perfect for easy entertaining, just add everything to the slow cooker and forget about it!


Back To School Marshmallow Pencil Snacks

Aug 19, 2016 · 1 Comment

Back to school marshmallow pencil snacks made with marshmallows and chocolate chips.

These little pencil themed snacks are perfect for back to school parties, celebrations, or lunch boxes. They're really quick and easy to make with just fruity mini marshmallows and a chocolate chips. Your kids will love how cute they are and how delicious.

Back to school marshmallow pencil snacks made with marshmallows and chocolate chips.

Why We Love This Recipe

  • They're easy to make, and the kids can help!
  • Only two simple ingredients are needed.
  • They're the perfect way to get everyone excited about back to school.

It's almost that time of year around here… back to school.  This marshmallow pencil snack is the perfect treat to soften the blow.  Who doesn't love sleeping in, beach days, crafting partners, lazy days, and no bed times?

But, we love fall too, and new clothes, and brand new pencil crayons, and cooler days and even back to routine.  And since we're all about making life a party, we can't let this big seasonal change go by without a little celebrating.

We love a back to school treat around here. Check out all our favorites in this post with 14 Back to School Thememd Foods and Treats. Also check out our Back to School Trail Mix Recipe and our very popular Back To School Free Printable Pack.

Ingredients

  • Coloured Mini Marshmallows: look for the fruit flavored mini ones, that come in all different colors.
  • Chocolate Chips: dark, semi sweet, or milk will are work perfectly, so just choose your favorite.
  • Long Toothpicks: or bamboo skewers that you could cut down a little. You could even use an uncooked piece of spaghetti.

How To Make Marshmallow Pencil Snacks

These are super simple, and something your kids might like to help with, like mine did.

how to make a pencil themed back to school snack
  1. Step 1: To make them, thread yellow mini marshmallows onto a toothpick.
Back To School Marshmallow Pencil Snacks

2. Step 2: Next, add a chocolate chip to one end, to resemble the tip of the pencil.

If you have trouble adding the chocolate chips, put them in the microwave for just a few seconds to soften them but not melt them.

Back To School snack for a party

3. Step 3: Lastly, add one pink marshmallow the other end to resemble the eraser on a pencil.

Tip: If you're serving these to younger kids, be sure they are careful not to bite or eat the toothpick, or use the uncooked spaghetti noodle option.

Back To School party

If there's one thing I know about making everyday life a party, it's that little things done with love turn everyday life into a party.

Sometimes making little people feel extra special feels like the hardest job in the world…and then other days all it takes is a bag of marshmallows and few chocolate chips. Happy Back to School!

More Back To School Ideas

  • smart cookie party
    Smart Cookie Party
  • Book themed party with DIY decorations like book page wreath, mini book bunting, and book page table runner.
    Book Themed Party
  • back to school lunch box notes
    Free Printable Lunch Box Notes
  • Caramel apple trifles made in mason jars.
    Caramel Apple Trifle

If you try these Mashmallow Pencil Snacks or any other recipe on my blog please leave a star rating and let me know how it went in the comments below. Thanks for visiting today!

Frequently Asked Questions

Is there something I can use instead of toothpicks?

Yes, try using uncooked spaghetti instead of toothpicks or wooden skewers.

Where can I find the colored mini marshmallows?

Look for them in the baking aisle at the grocery store, or online.

Is there a way to make it easier to add the chocolate chip?

Yes, put the chocolate chips in the microwave for just a few seconds to soften, but not melt them. This will make it easier to add them to the toothpick.

Recipe

Back to school marshmallow pencil snacks made with marshmallows and chocolate chips.

Marshmallow Pencil Snacks

Back to school marshmallow pencil themed treats.
5 from 1 vote
Print Pin Rate
Course: Desserts
Cuisine: American
Prep Time: 10 minutes minutes
Total Time: 10 minutes minutes
Servings: 4
Calories: 8kcal
Author: Dannyelle Nicolle-Ramjist
Cost: $5

Equipment

  • long toothpicks, skewers, or uncooked spaghetti noodles

Ingredients

  • 4 chocolate chips
  • 4 mini pink marshmallows
  • 28 -32 mini yellow marshmallows

Instructions

  • To make them, thread yellow mini marshmallows onto a toothpick.
  • Next, add a chocolate chip to one end, to resemble the tip of the pencil. If you have trouble adding the chocolate chips, put them in the microwave for just a few seconds to soften them but not melt them.
  • Lastly, add one pink marshmallow the other end to resemble the eraser on a pencil.

Notes

If you have difficulty adding the chocolate chips to the toothpick, microwave them for a few seconds to soften but not melt them.
Instead of using a toothpick or skewer, you can use uncooked spaghetti noodles instead.

Nutrition

Calories: 8kcal | Carbohydrates: 1g | Protein: 0.02g | Fat: 0.3g | Saturated Fat: 0.2g | Sodium: 1mg | Potassium: 3mg | Sugar: 1g | Calcium: 1mg | Iron: 0.003mg
Tried this Recipe? Tag me Today!Mention @LifeisaParty or tag #lifeisaparty!

DIY Personalized Napkins

Aug 17, 2016 · 17 Comments

DIY napkins.

DIY Personalized Napkins: Use heat transfer vinyl and a cutting machine to add any phrase, or monogram to napkins for a custom look.

DIY napkins.
[feast_advanced_jump_to]

This month for our #12MonthsOfDIY challenge we're working with vinyl.  I used the heat transfer vinyl from Expressions Vinyl and made some custom napkins.  They were really easy to make and I love how they turned out.

diy Vinyl Napkins

Vinyl is such a versatile material, there are endless things you can do with it.  I thought it would be fun to do something with the iron-on vinyl and add some text to fabric napkins.  I added "life is a party" to mine -I love how fun and festive they are.

doy personalized napkins

This is a really easy, inexpensive way to add a special detail to entertaining.

Materials:

  • heat transfer vinyl
  • Cricut cutting machine
  • napkins
  • iron
cutting vinyl on a cricut

How To Make DIY Personalized Napkins:

I already had a cutting machine -gathering dust in the basement.  I have an old Cricut -I think the last time I really used it might have been for my Fall Subway Art.  They've changed since I got mine about 6 years ago, but I plugged it in and it worked great.  They're actually really easy to use too.

Creating the Design

I used the cartridge that came with the machine -Plantin SchoolBook.  I cut out my letters in ¾" size and used this chart from Expressions Vinyl to figure out my cutting speed, pressure and blade depth (med., med., 3 in my case).

Cutting the Vinyl

On my first attempt, I flipped the text, but didn't realize I also needed to type it backwards.  Second attempt I flip cut and typed the letters backwards and it worked out great. (This is because you're cutting on the flip side of the vinyl).

weeding vinyl

I cut out all four together, and weeded them all together (that's what they call removing all the negative pieces of vinyl in the cut-out).

Next, I used scissors to cut out each phrase individually.

how to make custom napkins with your cricut

Iron On

Then you just iron it onto your napkins.  I used some pieces of linen look fabric I actually picked up at the dollar store.  Their colour and texture are really nice.  When I washed them the edges frayed and I really like it, so I decided against hemming them.  That made this a super simple project.

personalized napkins

I love how they turned out -I made four, but I think I just might need to make this into a set of twelve.

How To Make Heat Transfer Vinyl Napkins: Use heat transfer vinyl and a cutting machine to add any phrase to napkins for a custom look. Add names, manner suggestions, conversation starters, or any word or phrase.

DIY Personalized Napkins

You could customize the napkins with anything…think holidays, weddings, names, manners, conversations starters.  The sky's the limit.

doy personalized napkins

With DIY Personalized Napkins, life really is a party!

You might also like our Dip Dyed Runner and Napkins here.

Dip Dyed Table Runner and Napkins: Easy how-to instructions to make your own napkin and table runner with a beautiful dip dyed ombre effect.

Also check out our Ribbon Wall Hanging here.

You might also enjoy our DIY Burlap Table Runner here.

DIY Burlap Table Runner -Easy how-to, using very inexpensive garden burlap, and no sew. It's perfect for fall or thanksgiving tables.

How To Make A Leather Cuff Bracelet

Aug 11, 2016 · 3 Comments

How to make a leather cuff.

How To Make A Leather Cuff Bracelet: Create an amazing bracelet yourself, tutorial for adding snaps, gold leaf detail, and a tassel.

How to make a leather cuff braclet.
[feast_advanced_jump_to]

Today I'm sharing how to make a DIY Leather Cuff Bracelet.  After a little experimenting, I'm thrilled with how it turned out.  These were really fun to make, and are the perfect project for wearing as a fun accessory.  These also make a great gift for someone special.  These leather cuffs turned out so beautifully that they'd be a great handmade product to sell as well.  

You can create these bracelets in any color, different widths, and use different metal finishes for the snap.  You also have the option of adding gold leaf -or silver, or copper, or rose gold as well as a little tassel. There's so many ways to change and customize these for lots of different leather bracelet options in lots of different variations.

You might also like our Toy Felt Cookies.

leather cuff bracelet with vintage glass bottles and keys

There's different ways of making leather cuff bracelets, and different closure methods you can use.  Our leather cuff is closed with snaps.  The snaps are easy to find at fabric or craft stores, and the kit makes it easy to apply them.  I like this way of making cuffs because it's not difficult to create and easy to put on and remove when you're wearing it.

diy leather cuff bracelet close up of metal snaps and tassel

Leather

We used some colored crafting leather pieces for our cuffs.  I had several different types of leather in many colors and thicknesses to choose from.  Buy leather scraps from the local craft store or on-line.  These packs usually come with lots of different colors, weights, and finishes of leather to choose from.  Our leather was super soft, and the end product is really comfortable to wear.  You could make this from faux leather, but very thin leathers, whether real or faux won't work as well as a medium weight.  

Some people like to use an old belts for this project.  Look for them at the thrift store and give old leather belts new life with this DIY.  The only thing to consider when choosing a belt to upcycle for your own leather cuff bracelets is that the leather isn't too thick and stiff.  The bracelets are more comfortable to wear if the old leather belt is soft.  It's also more difficult to add the snaps to thick leather.

Materials:

We used a variety of materials for this project including:

  • leather
  • sharp scissors
  • disappearing ink marker
  • snaps
  • leather hole punch
  • gold leaf adhesive
  • gold leaf
  • tassel charm

How To Make a Leather Cuff Bracelet:

The leather I used is from Leather Hide Store, they have an amazing leather selection.  The colours of the leather were Sea Glass and Sea Mist for this project.  I learned a few things along the way and ended up making a couple, so here's how I made them, along with a few tricks and tips. 🙂

measuring and cutting leather for a bracelet

Cutting Out The Leather

The first step is deciding on the width of your cuff.  I wanted a fairly wide cuff and cut mine out 4 inch wide, and measured the length to fit my wrist.  You can vary how wide your cuff is.  A width of 2-3 inches is a option too.  You can vary the length of the bracelet depending on your wrist size.  You need some overlap for the snaps, so you'll want to add about an inch or two to accommodate the snaps.  

I used a disappearing marker to mark everything out on my leather.  I highly recommend this method, because it doesn't leave any marks on the finished project.  Just cut out the flat leather with sharp scissors, and try to slightly round the four corners.  You could use a cutting mat and rotary blade or craft knife, but I felt like I had better control with sharp scissors.

Some people recommend using your Cricut machine to cut out your DIY cuff bracelets, but I think that it's more effort for this project than it's worth.  The leather piece is just one rectangular strip, and not difficult to cut out with sharp scissors.  It doesn't take a lot of time to do it by hand.  If you were making these cuffs to sell and had to cut out many many, then it might be worth doing it on your Cricut machine.

making a leather cuff bracelet with a leather hole punch

Punch A Hole In The Leather

The next step is to punch out the holes for your snap closure in the piece of leather you cut out.  I marked mine at 1 cm in from each side, and added two in a row.  I used a leather punch from the craft store, which worked great to punch my holes for the snap closures in the end of the leather cuff.  On my first attempt I tried using the fabric punch that comes with the snaps, but it really didn't work well, so it's worth getting the leather punch.

adding metal snaps to a diy leather cuff bracelet

Snap Closures

I picked up my snaps at the fabric store.  The snap kit comes with all the pieces you need to attach them.  Follow the directions on the back of the package.  You'll need a hammer to install them, but it's pretty easy.  Make sure you have your snap tops on the right side of the fabric, and the back closures on the back of the bracelet.

On my first attempt, I had the metal piece that you use underneath upside down.  The indent on the first snap attempt was a bit too small for the snap, and marked it on the bottom part.  On my second attempt I used the other side and it worked perfectly, so be careful to follow the directions really carefully and use the setting tool properly.

using a leather hole punch to make a leather cuff bracelet

Add A Tassel

I wanted to add a fun tassel to the side of the bracelet, so I picked one up a tassel.  Look for tassels in the jewellery making section of hobby stores.  This part is completely optional , but I thought it was a fun addition.  To attach it, I punched a small hole, close enough to the edge of the leather so that the tassel would still hang nicely.  

Then I used needle nose pillars to attach the tassel with a jump ring.   Then…I removed it to do the gold leaf, so the second time around I did this step after the gold leaf.

adding gold leaf to a diy leather cuff bracelet

Gold Leaf

The gold leaf addition is optional as well.  You could use gold leaf like I did, or try silver, copper, or rose gold.  I added a chevron pattern to mine, but stripes would be so much fun too.  To add the gold leaf chevrons to the end of the bracelet, I used special gold leaf adhesive you can find at the craft store, and imitation gold leaf.  I created my pattern with washi tape -taking care to make them as even as possible.  Then, I applied the adhesive with a small paint brush all the way to the edges of the leather.  I waited 10 min, for the adhesive to get tacky, and applied the gold leaf.  

Lastly, I removed the washi tape.  On my first bracelet, I worked on the tape placement the night before, and the next day finished the bracelet up with the gold leaf.  When I removed the tape, it damaged the leather.  I think it was only because it had been on over night and really stuck.  On my second attempt the next time I had no problems.

gold snap buttons on a diy leather cuff bracelet

Lastly I added the tassel back on.

Recipe

How to make a leather cuff.

How To Make A Leather Cuff Bracelet

No ratings yet
Print Pin Rate
Cook Time: 15 minutes minutes
Additional Time: 10 minutes minutes
Total Time: 25 minutes minutes
Author: Dannyelle Nicolle-Ramjist

Equipment

  • sharp scissors
  • leather hole punch

Materials

  • leather
  • disappearing ink marker
  • snaps
  • gold leaf adhesive
  • gold leaf
  • tassel charm

Instructions

  • Decide on the width of your cuff. We used 4 inches wide. Measure the length of your wrist and add an inch or so for your snap closures. Mark out your rectangle with disappearing ink marker. Cut out your rectangle with sharp scissors.
  • Punch two holes with your leather punch for the snap closures, about 1 cm from the edge on each side of your bracelet.
  • Follow the instructions on the snap kit to install the front and back of 2 snap closures.
  • Optional: Use tape to mark out a pattern for the gold leaf, and apply the gold leaf adhesive. Let set for 10 minutes, according to the package instructions, and then apply gold leaf on top, and buff off with a soft cloth.
  • Optional: Lastly add a small hole for a tassel, and attach to the bracelet with a jewelry jump ring

I really, really like how the final product turned out, and it makes me want to keep experimenting with a different type of leather, different colors, and different widths.  This is such a great simple way to make leather accessories.  If you are a person who sells handmade goods, I think these would be a great item to sell.  They were relatively easy to make, and look so fantastic.

How To Make A Leather Cuff Bracelet
Leather Cuff Bracelet with snaps, gold leaf, and a metal tassel

With a DIY Leather Cuff Bracelet, life really is a party!  Happy crafting

More Ideas

You might like our How To Make Cricut Ear Rings Tutorial here.

Cricut leather earrings

Also check out our Leather and Gold Leaf Feather Necklace Tutorial.

You might also like our How Not To Sew A Zippered Fold Over Clutch Purse.


Fairy Garden Picnic

Aug 2, 2016 · Leave a Comment

Fairy garden miniature picnic.

Fairy Garden Picnic: create a fairy garden scene with miniature DIY dollhouse style polymer clay food for your own miniature fairy garden.

Fairy garden miniature picnic.
[feast_advanced_jump_to]

Today I'm sharing with you how to make a Fairy Garden Picnic.  I love the Fairy Garden trend, and it's been so fun thinking up little miniature fairy garden scenes to create.  Miniature gardening is a chance to be like a kid again, and create a little magical world.

I thought it would be fun to create a miniature picnic for the fairies that live in my garden.  Polymer clay is an excellent medium for fairy gardens.  It's easy to work with, and it stands up great against the elements.  I've used it in the past to create different fairy garden accessories and it isn't effected by the rain, wet, or sun.  

Really the only limit to what you create is your imagination.  Since one of my own favourite treats is a little bread, cheese, meat and wine, I thought the fairies might enjoy it to.

How To Make Fairy Garden Picnic Food: DIY tutorial on how to make miniature picnic food from polymer clay for the perfect fairy garden picnic.

As you know fairies are tiny, so their food has to be too.  This penny will give you an idea of the scale.

How To Make Fairy Garden Picnic Food: DIY tutorial on how to make miniature picnic food from polymer clay for the perfect fairy garden picnic.

Supplies:

  • parchment paper
  • polymer clay -beige, white, brown, red, blue, orange
  • tinfoil or wax paper box
  • gingham fabric
  • super glue
  • miniature plastic wine glasses
  • thin balsa wood

How To Make Polymer Fairy Food:

When working with polymer clay, I find it helpful to work on a piece of parchment paper, since any little specks of dirt, or another colour of clay while mark your project.

how to make polymer miniature doll house food salami

Miniature Polymer Salami

To create the salami, start by mixing some brown clay with a  little red and a little blue to create a deeper brown.  Combine and knead the clay in your fingers until the colour is uniform.

Now use a sharp edge to chop the clay into tiny, tiny pieces.   Also chop a little white clay, you want about half as much white as brown.  Then push the chopped pieces together and roll up into a ball.

Chop the new piece again, and then gather it together again, taking care not to blend the colours.

Roll the new piece into a cylinder shaped salami roll.

Next, use a sharp edge against a piece of chalk to create some chalk dust, and roll the salami in it, so it sticks to the outside.

Use a sharp, straight edge to chop a few slices off of the end of the salami.  Take care to keep the pieces as round as possible.

Bake according to the manufactures directions, I baked mine about 5 min.

polymer miniature doll house food bread baguette

Miniature Polymer Bread

To make the miniature baguette, knead a small piece of beige clay until soft, and then shape into a bread loaf.  Once the loaf is formed, use a mini cutter to make some marks on the top of the loaf, like a real loaf from the bakery.

Bake the clay according to the manufactures directions, according to your thickness.  I baked mine about 8 min.

how to make miniature dollhouse food polymer clay cheese

Miniature Polymer Cheese

To make the marble cheese, start with a small piece of orange polymer clay, and a few small pieces of white.  Roll the white into thin strips, and add to the orange.  Twist and pull the pieces together, taking care to keep the white distinct and not blend the two together into a lighter orange colour.

Form the piece into a rectangular block.  Use a sharp straight edge to cut a few pieces of the marble cheese.

Bake the clay according to the manufactures directions, I baked mine about 5 mins.

how to make a miniature dollhouse food knife

How To Make A Miniature Knife

To make the knife, you will need the sharp edge of a tinfoil or wax paper box, that you use to cut the paper on.

Using sharp scissors cut a small piece of the foil cutting edge off of the box, with its cardboard backing still attached.  Then cut the small piece into the knife shape, including a piece for the knife handle.  After the knife shape is cut out, carefully remove the cardboard backing.  It's easier to cut the knife out of the foil cutter when it's attached to the cardboard backing.

Next, soften some brown polymer clay, and shape it around the foil to create the knife handle.

Bake the knife for about 5 min, or according to the polymer clay manufactures directions based on the clays thickness.

Setting Up Your Fairy Picnic

Once the pieces are all made, baked and cooled it's time to put the scene together.

Cut a piece of gingham fabric into a tablecloth, using pinking shears to create the zigzag edge.

I picked up the little plastic wine glasses at the craft store.

The cutting board is made from a piece of very thin balsa wood, you can find at the craft store, and cut with scissors or an exacto knife.

miniature dollhouse food fairy garden picnic

Since I've made many fairy gardens over the years, I know that the tiny little cute pieces can get blown around and lost, so this time I glued things together before I put them in the garden and it's worked great.  

I set my table cloth on some parchment paper, and then used super glue to attach the salami and cheese to the cutting board, and then the board to the tablecloth, along with the knife, bread and tiny wine glasses.  

Be sure to shift the table cloth a few times so that any glue that seeps through doesn't permanently glue the table cloth to the parchment paper.

miniature garden fairy sized picnic

Since I might want something else next year, I used double-sided tape to attach the picnic table cloth onto my little fairy table.  I set the picnic up under a tiny pergola -see how I made it here.  The tiny fairy sized chandelier is made from a fish hook -see how I made it here.

miniature garden pergola fairy sized picnic

With a perfect fairy picnic in my back garden, life really is a party!

More Inspiration

If you liked this post, you might also enjoy:

How To Make A Tea Cup Fairy Garden

teacup-fairy-garden-1.1.jpg

Also check out How To Make A Fairy House here.

You might also enjoy our Fairy Garden Campground here.


Campfire Baked Apples Recipe

Jul 26, 2016 · Leave a Comment

Baked apples.

Campfire Baked Apples: The perfect camping recipe, just a few ingredients, and a sweet, delicious treat everyone is sure to love!

Baked apples.
[feast_advanced_jump_to]

Tis the season for camping, and campfire recipes!  These Campfire Baked Apples are the perfect treat for campfire cookouts this time of year.  They're easy to make, and so good.  They're a simple treat, with just a few simple ingredients, and easy to put together at home before you go, or at a campsite.

beach campfire picnic

I made them for our Summer Beach Campfire Picnic, and they were the perfect sweet ending to our cookout meal on the beach.

Once our campfire burned down a little I tossed the prepared apples into the hot coals.  Ours were done in about 10 -15 min. but cooking times will vary depending on how hot your coals are your fire pit.

apples baking in a campfire

These campfire baked apples were standard camping fare for many girl guides, and boy scouts.  And with good reason!  They're so easy to make and so delicious.  What could be better than enjoying your soft apples in the great outdoors around an open campfire?  They're a really great camping recipe because they only have a few simple ingredients in them.  All you will need are some apples, butter, sugar and cinnamon.  

Apples

You can really use any kind of apple you like for these baked apples.  Macintosh apples are a classic baking apple because they break down easily.  Granny Smith are a classic apple for pies and baked apples too.  They're a little more tart, and less sweet than other apples.  One apple variety to probably avoid for making baked apples is red delicious.  Although an excellent snacking apples, these apples tend to be a bit watery and don't have the best flavour when used in baking.

Variations

If you want to add some different flavors to your baked apples you can add some simple ingredients to them.  For the chocolate lover, add some chocolate chips to the insides of your apples.  The chocolate will melt in the warm apple and be the perfect treat for the chocolate lover.

If you love caramel apples you can add a few caramel squares to the center fo the apple for a caramel baked apple.

We love serving these with a scoop of ice cream.  Vanilla ice cream is the classic combo, but if you're making the chocolate or caramel version you can experiment with chocolate ice cream, or a butterscotch ice cream.

Campfire Baked Apple recipe
how to make Baked Apples on a campfire

When the apples are ready, they're soft and sweet and a little bit like warm, delicious apple sauce.

Make At Home Version

If you're not camping, you can enjoy the yummy apples at home by roasting them on your bbq, or in your oven.  

Recipe

Baked apples.

Campfire Baked Apples

The perfect sweet warm apple campfire treat.
No ratings yet
Print Pin Rate
Course: Desserts
Cuisine: American
Prep Time: 5 minutes minutes
Cook Time: 15 minutes minutes
Total Time: 20 minutes minutes
Servings: 1 Apple
Calories: 206kcal
Author: Dannyelle Nicolle-Ramjist

Ingredients

  • 1 apple
  • 1 tablespoon packed brown sugar
  • ¼ teaspoon cinnamon
  • 2 teaspoons butter

Instructions

  • Core an apple with a sharp knife, removing all the core.
  • Tear a square of aluminum foil, and spread with about a 1 teaspoon of butter.
  • Place apple in the middle of the buttered aluminum foil.
  • Combine brown sugar and cinnamon in a small bowl. Place about ½ teaspoon butter in the center of each cored apple, and then add the cinnamon sugar mixture on top. Top with ½ teaspoon more butter.
  • Wrap the apple up tightly making a foil packets.
  • Roast in the hot coals of a campfire for about 10 - 15 min, until the apple is baked, soft and tender. Try to avoid the open flame of the fire. Or, roast in a bbq or oven at 350 for about 20 min. Take care when opening the campfire apple packets, as it will be very hot, and juicy. Enjoy!

Nutrition

Serving: 1g | Calories: 206kcal | Carbohydrates: 36g | Protein: 1g | Fat: 8g | Saturated Fat: 5g | Polyunsaturated Fat: 2g | Cholesterol: 20mg | Sodium: 66mg | Fiber: 5g | Sugar: 30g
Tried this Recipe? Tag me Today!Mention @LifeisaParty or tag #lifeisaparty!
Campfire Baked Apples on the beach

With Campfire Baked Apples, life really is a party!

More Camping Recipe Inspiration

You might also like our Campfire Muffin recipe here.

Also check out our Campfire Cinnamon Rolls here.

You might also enjoy our Campfire Paninis here.

Campfire Paninis: make your own DIY campfire paninis press with a foil covered flat rock and enjoy a campfire panini in the woods.

Felt Chocolate Chip Cookies

Jul 22, 2016 · 28 Comments

DIY felt chocolate chip cookie play food.

These Felt Cookies are an easy sewing project, that you can easily make by hand without a sewing machine. They're the perfect play food for kids to enjoy. And we love most of all their little individual faces that make them extra special!

DIY felt chocolate chip cookie play food
[feast_advanced_jump_to]

Why We Love This Craft

  • These felt cookies are an easy sewing project, even for a beginner.
  • Your kids will love playing with these homemade toys.
  • The little individual faces add so much extra cuteness to this project.

Felt play food is such a fun and easy DIY project that your kids will love.  These felt cookies are a great addition to your play kitchen and lead to some wonderful pretend play.  The sewing aspect is quite easy, and you don't need a sewing machine to make these.

Could these Felt Chocolate Chip Cookies be any cuter?  And they're really fun to make too.

You might also like our DIY Velvet Mushroom Craft, How To Make a Leather Cuff Braclet, or How to Make a LIght Bulb Flower Vase.

Felt Chocolate Chip Cookies

Materials:

  • Felt: Candy Pink, Sandstone Beige,  Dark Brown Walnut and Black
  • Stuffing
  • Disappearing Marker
  • Embroidery Cotton:  pink, white, black, dark brown and beige
how to make felt cookies

How To Make Felt Cookies

1. Start by tracing a circle shape on to the beige felt.  I used a circle that was about 6.5 cm in diameter and traced around it.  I used a disappearing marker for this project, it worked really well, without having to worry about any pen markings on the final project.

2. Next cut out two circles for each cookie, along with tiny circle cheeks in pink, eyes in black, and varying sized chocolate chips in the dark brown.  Sharp scissors are a must when working with fabric, especially when making the little detail pieces.

how to make felt cookies

3. Now use the disappearing marker to mark your face.  Be sure to mix and match different eye and mouth styles to make lots of unique little faces.  This is the really fun part as their little cookie personalities come to life. 😉

diy felt play food cookies

Making the Faces

To create the mouth, use 2 strands of embroidery thread, and back stitch the mouth.  For the eyes, stitch closed, winking, or sleeping eyes, or use black felt dots.  You can also add stitched eye lashes.  For the centre of the eye, use white embroidery cotton to make a french knot.  Add the pink felt checks with one stitch.

4. Next the chocolate chips are cut in varying sizes and shapes -to imitate real cookies.  Stitch them to the cookie with a small x.

5. Once the face and chips are attached, it's time to sew the cookie together.  I used 2 strands of beige embroidery cotton, and sewed with a blanket stitch. I like the way it finishes the edges.

diy felt food cookies

Next leave a little gap near the end, and then lastly add in a little stuffing before closing.

how to make felt play food

They're a little time consuming, but simple and so, so cute.

felt cookies

I started out making three, but it was so much fun coming up with their little facial expressions, that I made more.

how to make felt cookies

Who stole the cookie from the cookie jar?

Felt Chocolate Chip Cookies

I think this little cry-baby cookie is my favourite.

Felt Chocolate Chip Cookies

With handmade Felt Chocolate Chip Cookies, life really is a party!

Frequently Asked Questions

How long did these take to make?

Making the faces probably takes the longest. It's a great watching tv activity. It too me about 15-20 minutes to make each cookie.

Can I make these without the faces?

Yes, make regular felt chocolate chip toy felt cookies by leaving the faces off and distributing the chocolate chips evenly over the cookie.

Do these last well?

Yes my children were quite gentle, but they played with them their whole childhood in their toy kitchen and they still look great.

More Craft Ideas

  • DIY felt food s'more kit toy.
    Felt S'mores Play Food
  • How to make a woven pillow with felted wool sweaters.
    Felted Wool Sweater Woven Pillow
  • DIY felt mushrooms.
    Felt Mushrooms
  • Everlasting gingerbread houses made from gingerbread salt dough.
    Easy Salt Dough Gingerbread Recipe for Houses and Ornaments

 If you try these Felt Cookies or any other idea on my blog please leave a star rating and let me know how it went in the comments below. Thanks for visiting today!

Recipe

DIY felt chocolate chip cookie play food.

Felt Chocolate Chip Cookies

5 from 1 vote
Print Pin Rate
Cook Time: 2 hours hours
Total Time: 2 hours hours
Author: Dannyelle Nicolle-Ramjist

Equipment

  • sewing needle
  • scissors

Materials

  • Felt -Pink, Beige, Dark Brown, Black
  • Stuffing
  • Disappearing Marker
  • Embroidery Cotton -Pink, White, Black, Dark Brown, Beige

Instructions

  • Start by tracing a 6.5 cm circle shape on to the beige felt with disappearing marker.
  • Next use sharp fabric scissors to cut out two circles for each cookie, along with tiny circle cheeks in pink, small circle eyes in black, and varying sized chocolate chips in the dark brown.
  • Use the disappearing marker to mark your face. Be sure to mix and match different eye and mouth styles to make lots of unique little faces. To create the mouth, use 2 strands of embroidery cotton, and back stitch the mouth. For the eyes, stitch closed, winking, or sleeping eyes, or use black felt dots. You can also add stitched eyelashes. For the centre of the eye, use white embroidery cotton to make a French knot. Add the pink felt checks with one stitch.
  • Next, the chocolate chips are cut in varying sizes and shapes -to imitate real cookies. Stitch them around the face on the tan piece with a small x.
  • Once the face and chips are attached, it's time to sew the cookie together. Use 2 strands of beige embroidery cotton, and sew with a blanket stitch. Leave a little gap near the end, and add in a little stuffing before closing.

Beach Campfire

Jul 20, 2016 · Leave a Comment

Summer Beach Campfire Picnic: A fun menu of hotdogs, smores, and campfire baked apples, along with some simple decor make the perfect beach campfire picnic.

Summer Beach Campfire Picnic: A fun menu of hotdogs, smores, and campfire baked apples, along with some simple decor make the perfect beach campfire picnic.

This month for our #ayearoffeasting we had a great Summer Beach Campfire Picnic with friends, and it was so much fun.

Summer Beach Campfire Picnic

Location

We visited some friends and were introduced to one of their favourite spots, a little out of the way tucked in section of the lake where we were allowed to light a fire.  

I brought lunch, and we had a great time roasting hotdogs, marshmallows and apples on the campfire.

beach cookout

This was such a fun way to get together, with everyone entertained by the lake, enjoying cooking their own yummy lunch and chatting and playing away the afternoon.

how to host a beach picnic for friends

If you're not able to have a campfire on the beach, a picnic would be really great too.  This is the perfect way to host friends if your house is too small for big groups, or you struggle with all the cleaning and prep of having people at your house, or you just want to get out and enjoy the summer weather.  

Worth The Effort

I have to say, after hosting 6 parties for the A Year of Feasting Challenge, I wasn't as enthusiastic about another party as I have been in past months.  Let's face it, it's a lot of work to entertain…But, but, but when I was sitting on the beach enjoying the sound of the waves, and kids laughing and screaming over the cold water, and munching on all the yummy foods I was so glad that we'd gone to the effort.  We forget so often that it's worth it.  Just about every time, it's worth it.  And, it doesn't have to be fancy to be fun, it could involve cute bunting, but it certainly could also not, and be just as much fun.

s'mores on the beach

Beach Campfire Menu

  • roasted hotdogs
  • chips
  • s'mores
  • campfire baked apples

Our menu was simple and delicious.  We started out roasting hotdogs.  I love this cute little condiment caddy and it was super convenient.  I used a wood caddy I had, and added the condiments in pretty mason jars.  Perfect for the cottage or even just the backyard too.

winner roast ideas

Along with our hotdogs, we had some chips.  I served them up in little paper bags, which meant no plates necessary and super easy cleanup.

Beach Campfire Picnic menu

After the hotdog roasting, it was time for some sweets -in between visiting, sand play, swimming and exploring that is.

Summer Beach Campfire Picnic

I brought some smore fixings, because campfires require smores.

s'mores and tea picnic on the beach

I also set up a little tea station for the grownups.  It was so nice to have a nice hot cup of tea on the beach.  The big thermos container kept the tea nice and hot, what a treat.  

Along with our s'mores I also brought along some apples to bake.  You can find the recipe for the baked apples by clicking here.  They were  a great addition to the campfire feast.

campfire baked apples

What a fun day, we came home with sun kissed faces, sand in our shoes, and full and happy hearts.

beach campfire picnic
Summer Beach Campfire Picnic

This year of feasting on food and friends really is turning out amazing!

Summer Beach Campfire Picnic

With a Summer Beach Campfire Picnic, life really is a party!

You might also like our Breakfast Picnic here.

Also check out our French Inspired Picnic here.

You might also enjoy our British Picnic here.

  • « Go to Previous Page
  • Page 1
  • Interim pages omitted …
  • Page 10
  • Page 11
  • Page 12
  • Page 13
  • Page 14
  • Interim pages omitted …
  • Page 21
  • Go to Next Page »

Primary Sidebar

Welcome!

Life is a Party is all about helping you celebrate everyday with great food, entertaining and party inspiration, and seasonal crafts and home decor inspired by the holidays.

More About Dannyelle

Trending Recipes

  • Mac and cheese with panko breadcrumb topping.
    Best Homemade Mac and Cheese with Panko Breadcrumb Topping
  • Homemade iced capps in glasses on a wood table.
    Tim Hortons Copycat Iced Capp Recipe
  • Dirt Pudding no cream cheese in glasses with candy rocks, and fresh mint that looks like a little plant.
    Easy Dirt Pudding Recipe without Cream Cheese
  • Easy 3 ingredient coconut milkshake recipe.
    Easy Coconut Milkshake Recipe
  • Easy food processor scones on a plate with jam.
    Easy Food Processor Scones
  • Fluffy small batch pancakes for two ready to serve on a plate with syrup.
    Easy Small Batch Pancakes For Two Recipe

Fall Ideas

  • Pumpkin shaped dinner roll recipe, with a herb stem.
    Pumpkin Shaped Dinner Rolls
  • Halloween witch decorations
    Witch Halloween Decor
  • fall home decor
    Fall Decorating Ideas -Home Tour
  • Modern Boho fall mantel ideas.
    Modern Boho Fall Mantel Ideas
  • Homemade pink candy apples on a cutting board.
    How To Make Pink Candy Apples
  • Pink Halloween party and decorations with pink treats snack table.
    Pink Halloween Party

Entertaining Ideas

  • Adult mermaid party table set on the beach with cake and shells.
    Adult Mermaid Party Ideas: A Beach Picnic Goodbye to Summer
  • Overhead view of tomato party table with pizza and appetizers.
    The Ultimate Tomato Party: A Tomato Girl Summer Garden Gathering
  • Camp themed party table with green gingham tablecloth, wildflowers, and Welcome to Camp banner.
    The Ultimate Camp Themed Party for Adults
  • Garden party table set under white pergola with vintage floral tablecloth, pink peony centerpiece in wooden tool caddy, white wicker chairs, and climbing white roses in background.
    Garden Themed Party
  • Complete mimosa bar setup on white console table with vintage silver ice bucket, labeled colorful juice bottles, small glass garnish bowls, and ribbon-tied champagne flutes on white lace tablecloth with flower wall backdrop.
    How to Set Up a Beautiful Mimosa Bar
  • Breakfast for dinner party table styled like a bed with star quilt tablecloth, gingham pillows, and cloud installation above.
    Breakfast for Dinner Party: Brinner Under the Stars
  • Recipe Index
  • Parties & Entertaining
  • Fall
  • Subscribe
  • Free Resource Library

Footer

back to top

as seen in:

Better Homes and Garden Logo
American Farmhouse Style logo.
Apartment Therapy logo.

About

  • Privacy Policy
  • About

Subscribe

  • Sign Up! for emails and updates

Contact

  • Contact

As an Amazon Associate I earn from qualifying purchases.

Copyright © 2025 Life is a Party

Share
Pin
Post
Share
Pin
Post

Rate This Recipe

Your vote:


A rating is required
A name is required
An email is required