• Skip to primary navigation
  • Skip to main content
  • Skip to primary sidebar
Life is a Party
  • Recipe Index
  • Parties & Entertaining
  • Fall
  • Subscribe
  • Free Resource Library
menu icon
go to homepage
  • Recipe Index
  • Parties & Entertaining
  • Fall
  • Subscribe
  • Free Resource Library
subscribe
search icon
Homepage link
  • Recipe Index
  • Parties & Entertaining
  • Fall
  • Subscribe
  • Free Resource Library
×
Home

How To Make A Miniature Fairy Garden In A Bottle

How To Make A Miniature Fairy Garden In A Bottle

Jul 15, 2016 · 2 Comments

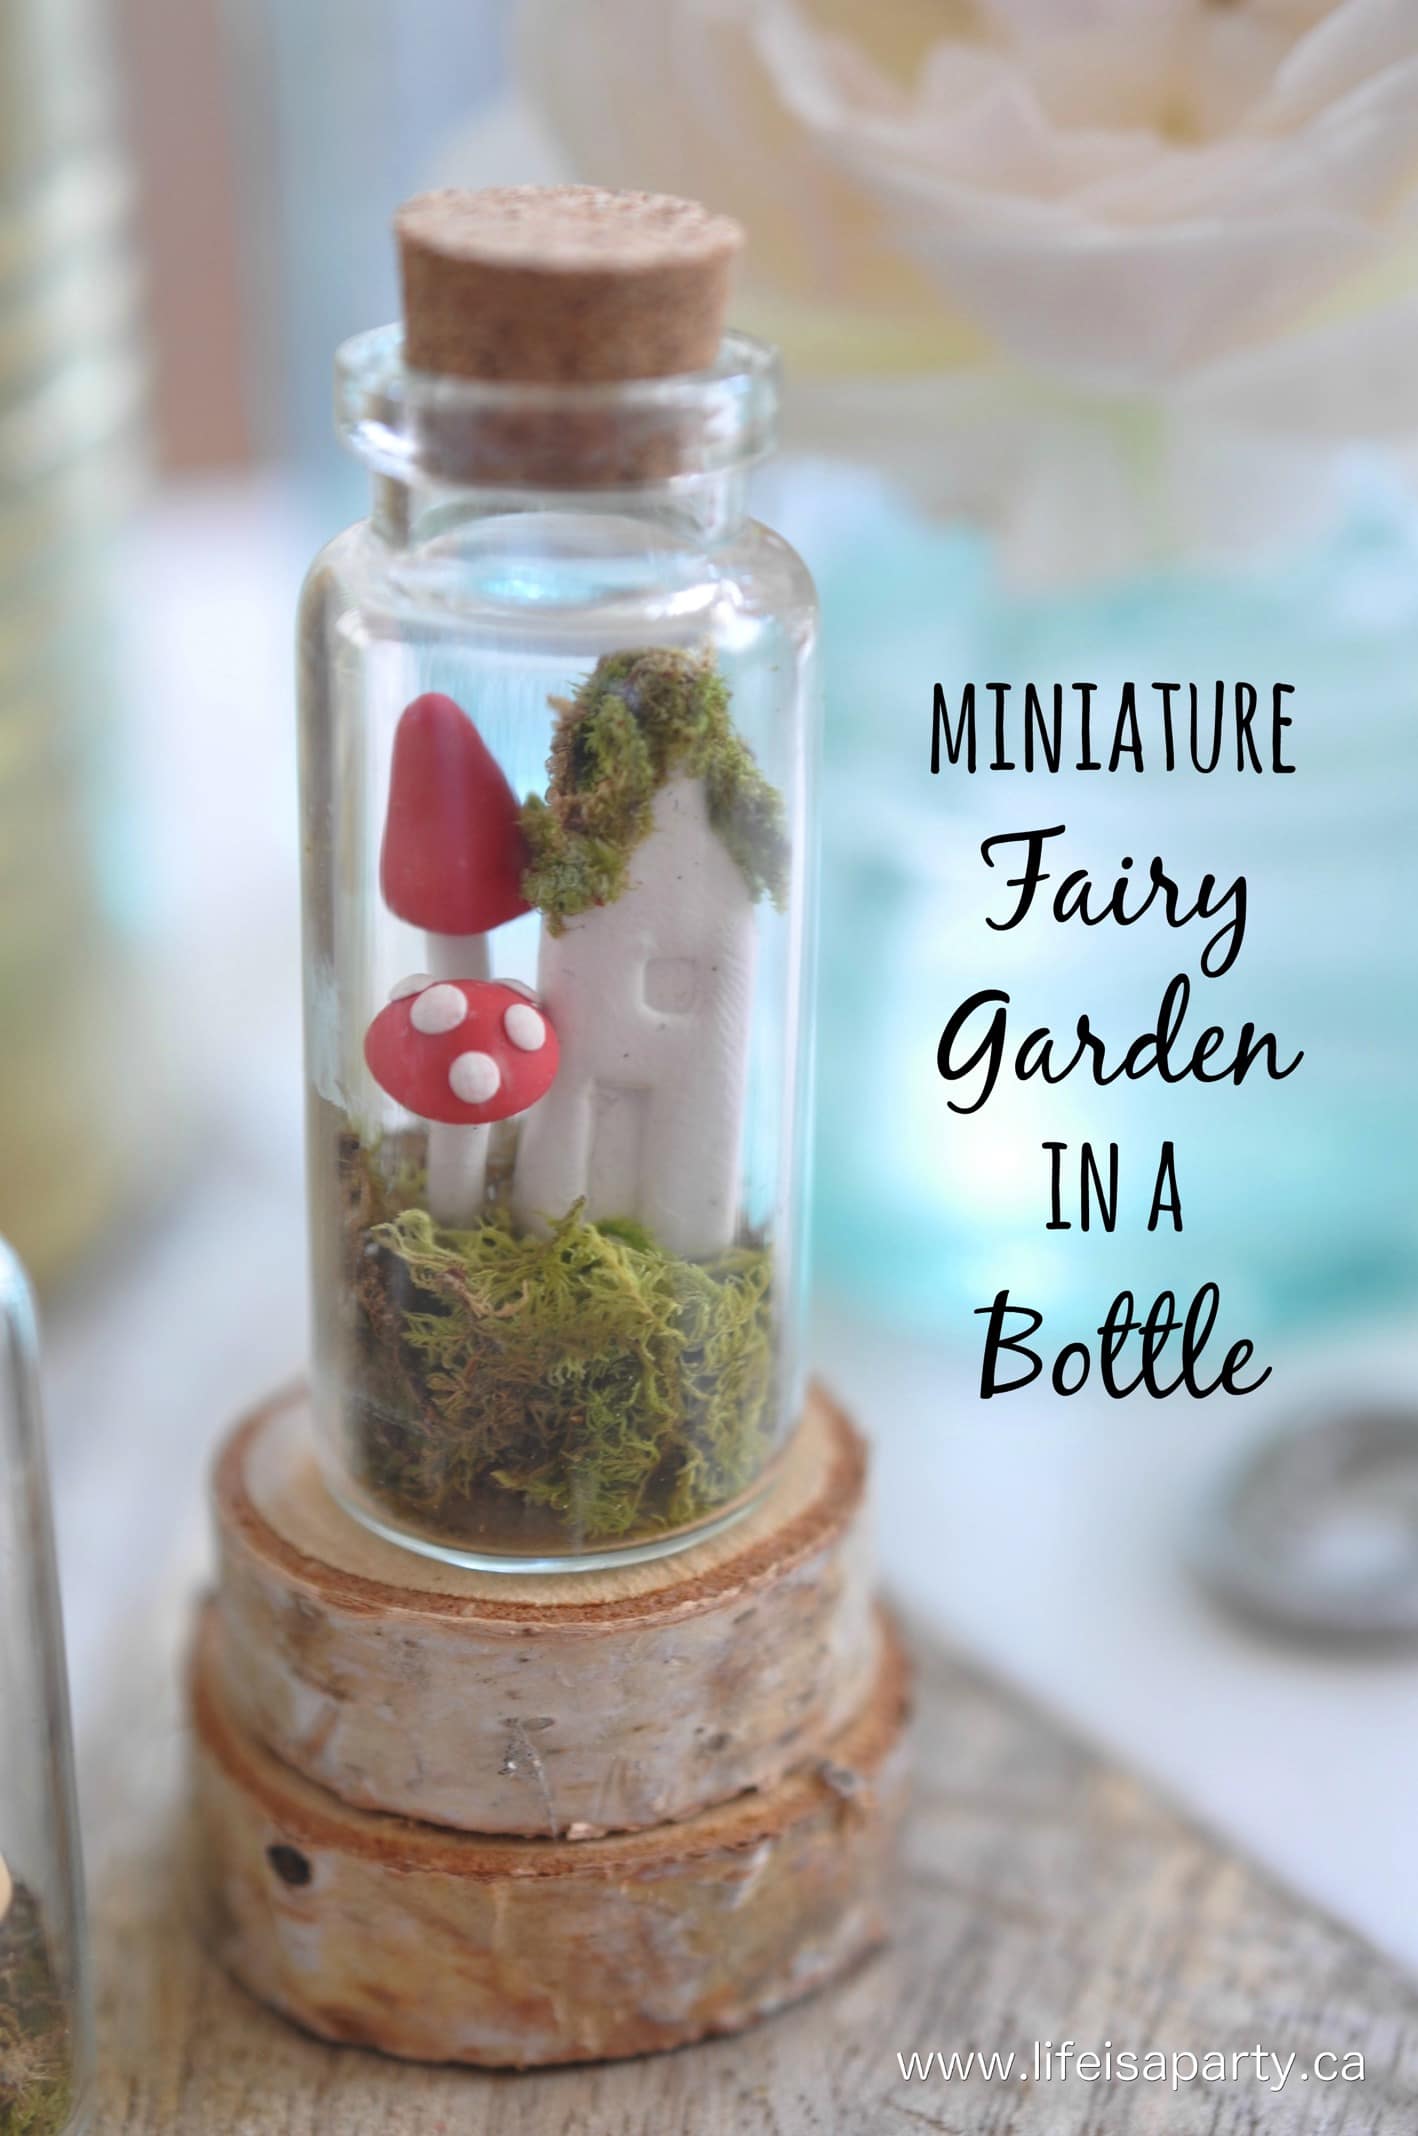
DIY miniature fairy house in a bottle.

How To Make A Miniature Fairy Garden In A Jar: Tutorial using polymer clay to make adorable mushrooms and a fairy house, and then arrange in a teeny, tiny glass bottle.

DIY miniature fairy house in a bottle.
[feast_advanced_jump_to]

I saw these little jars or bottles at the dollar store one day, and thought they'd be perfect for a little, teeny, tiny Miniature Fairy Garden in a Jar.  I love how they turned out, and they were a lot of fun to do one afternoon with my little girls.
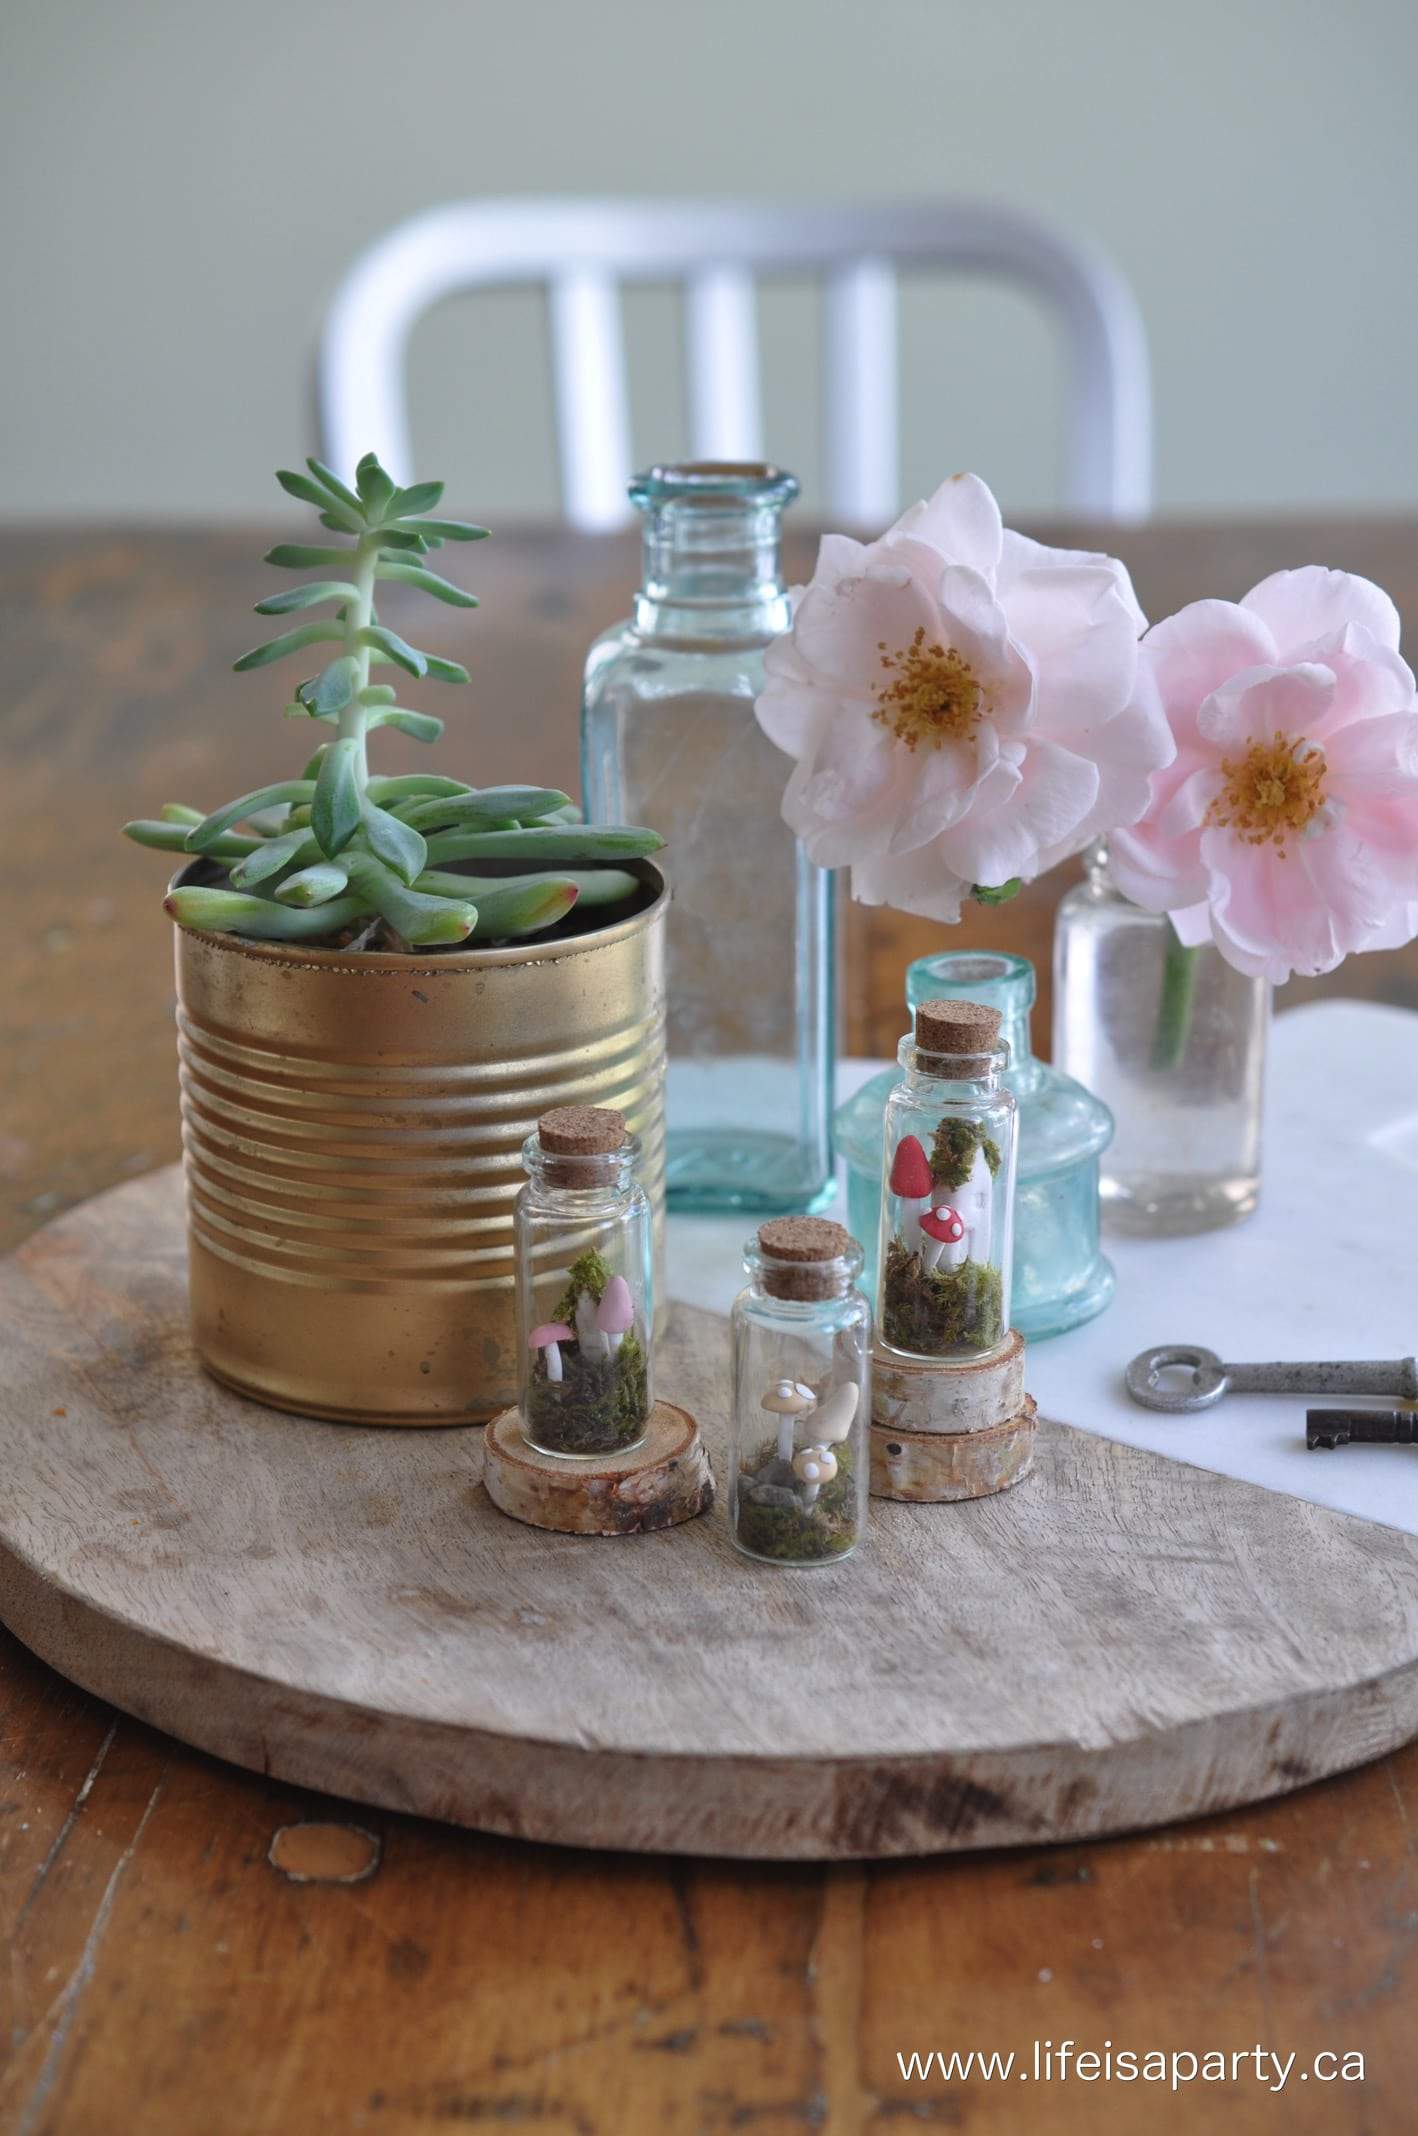
Miniature Fairy Garden In A Bottle

We each made one, making a sweet little trio.  They look great as a centre piece on the table, someplace where someone might notice them as they sit, since they're so teeny, weeny.

fairy garden in a jar

I was inspired by Pixie Hills mushrooms and miniature houses, if you don't know this blog then you're in for a treat!  I made mine out of polymer clay, and it worked great.

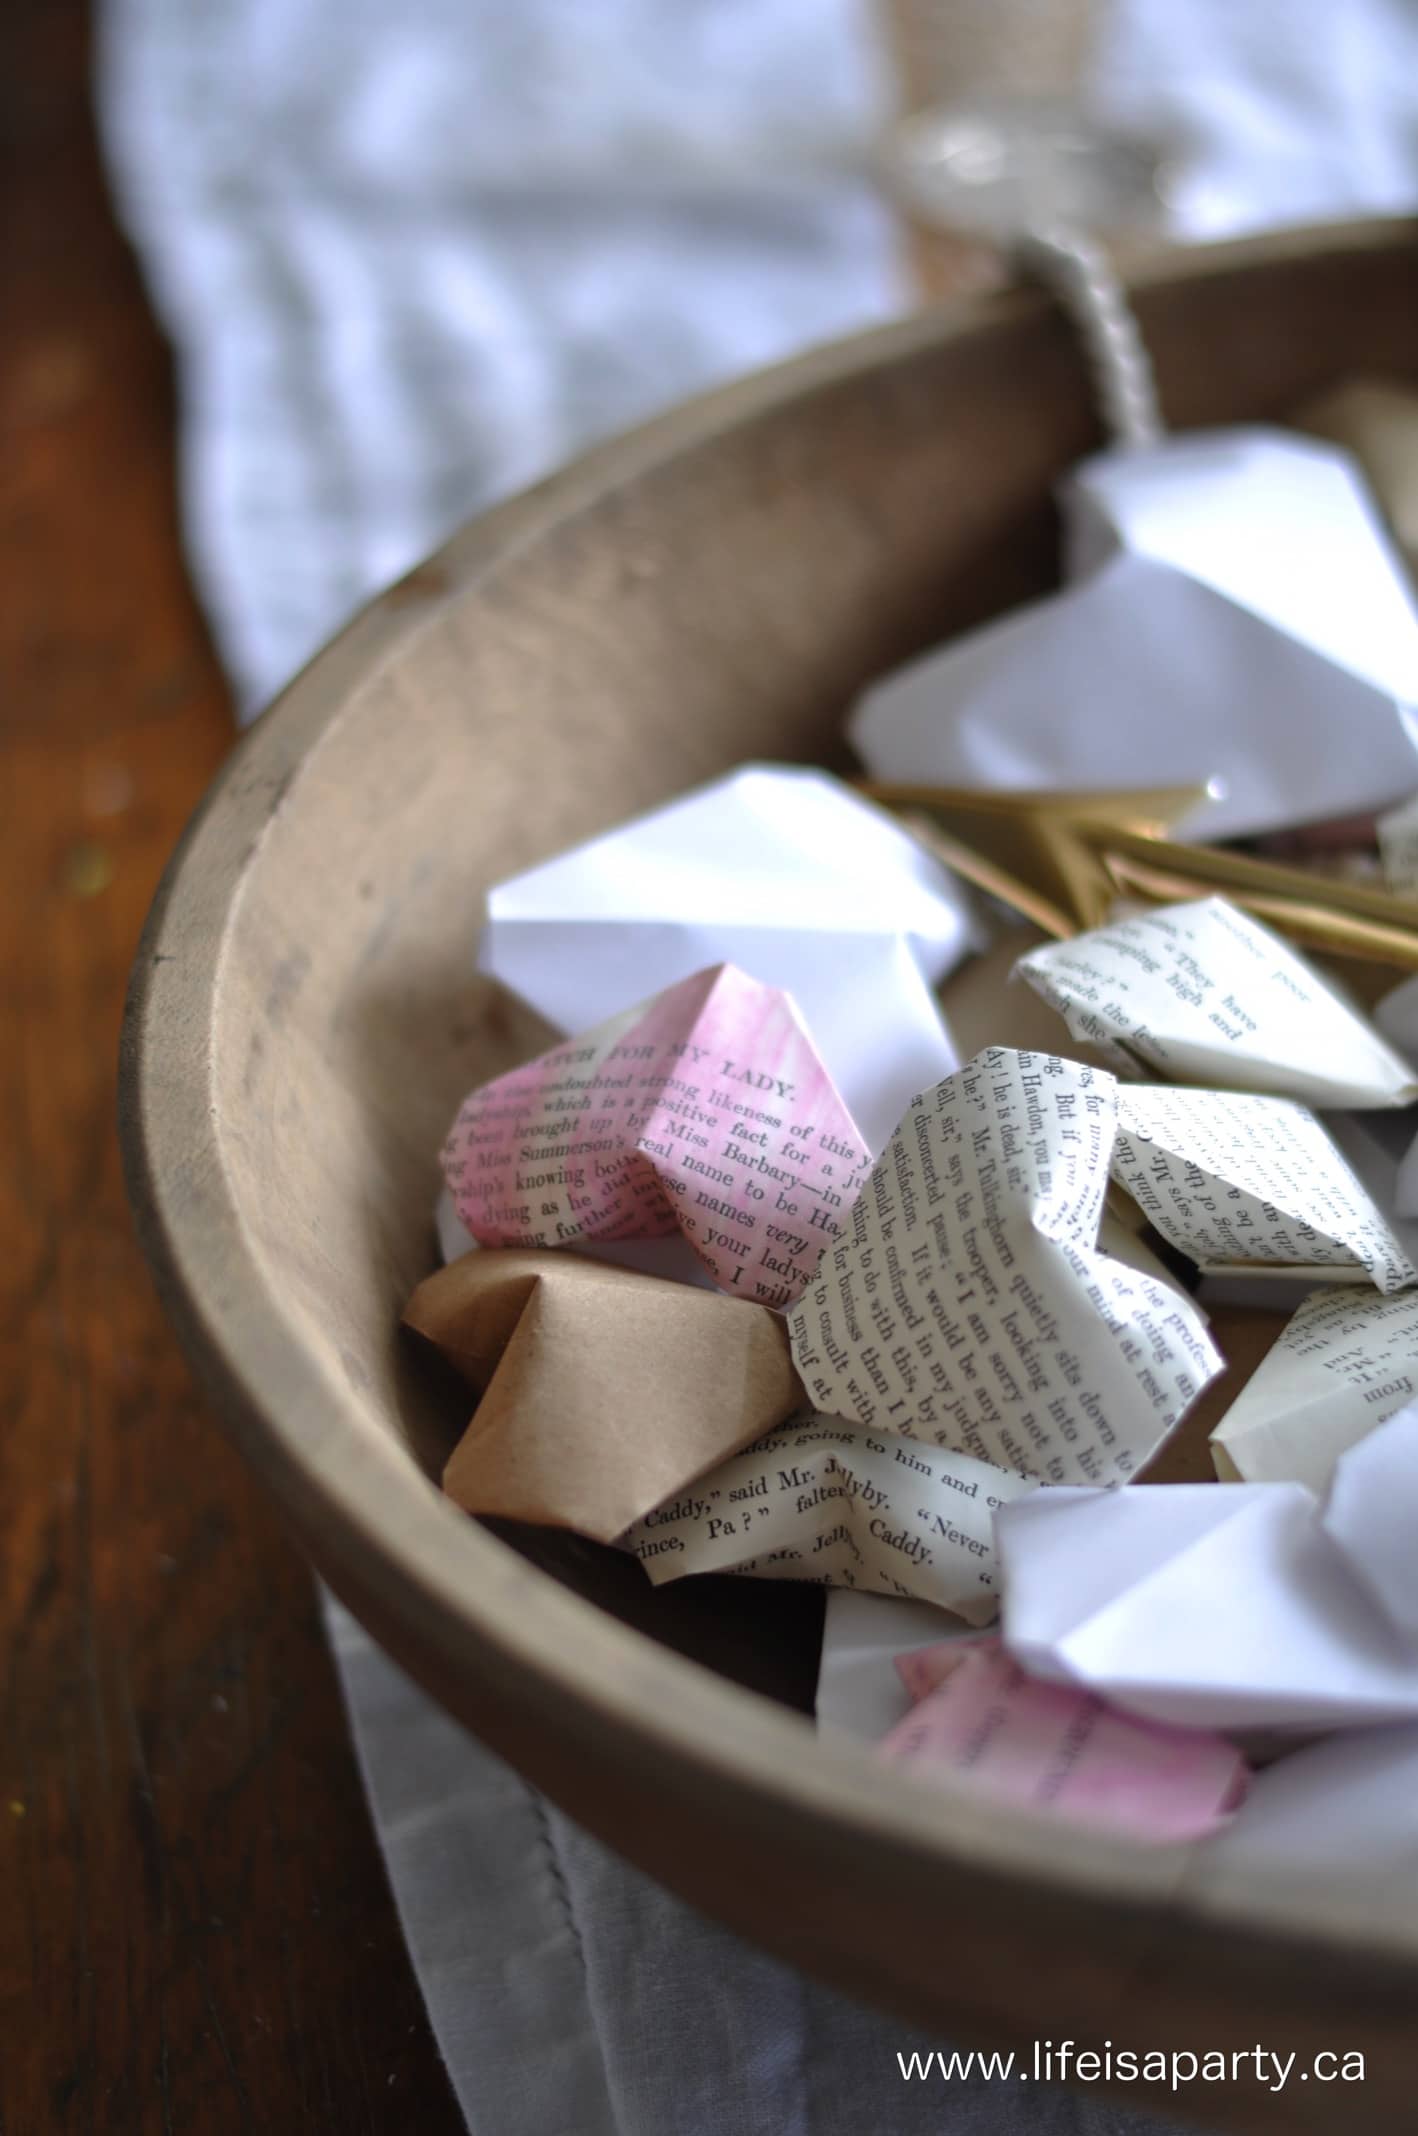
miniature polymer clay houses and mushrooms in a jar


Fairy Garden in a Jar Supplies:

  • Polymer Clay
  • straight pins
  • matchstick
  • moss
  • tiny rocks
  • small glass bottles
  • white glue

How To Make a Fairy Garden in a Jar:

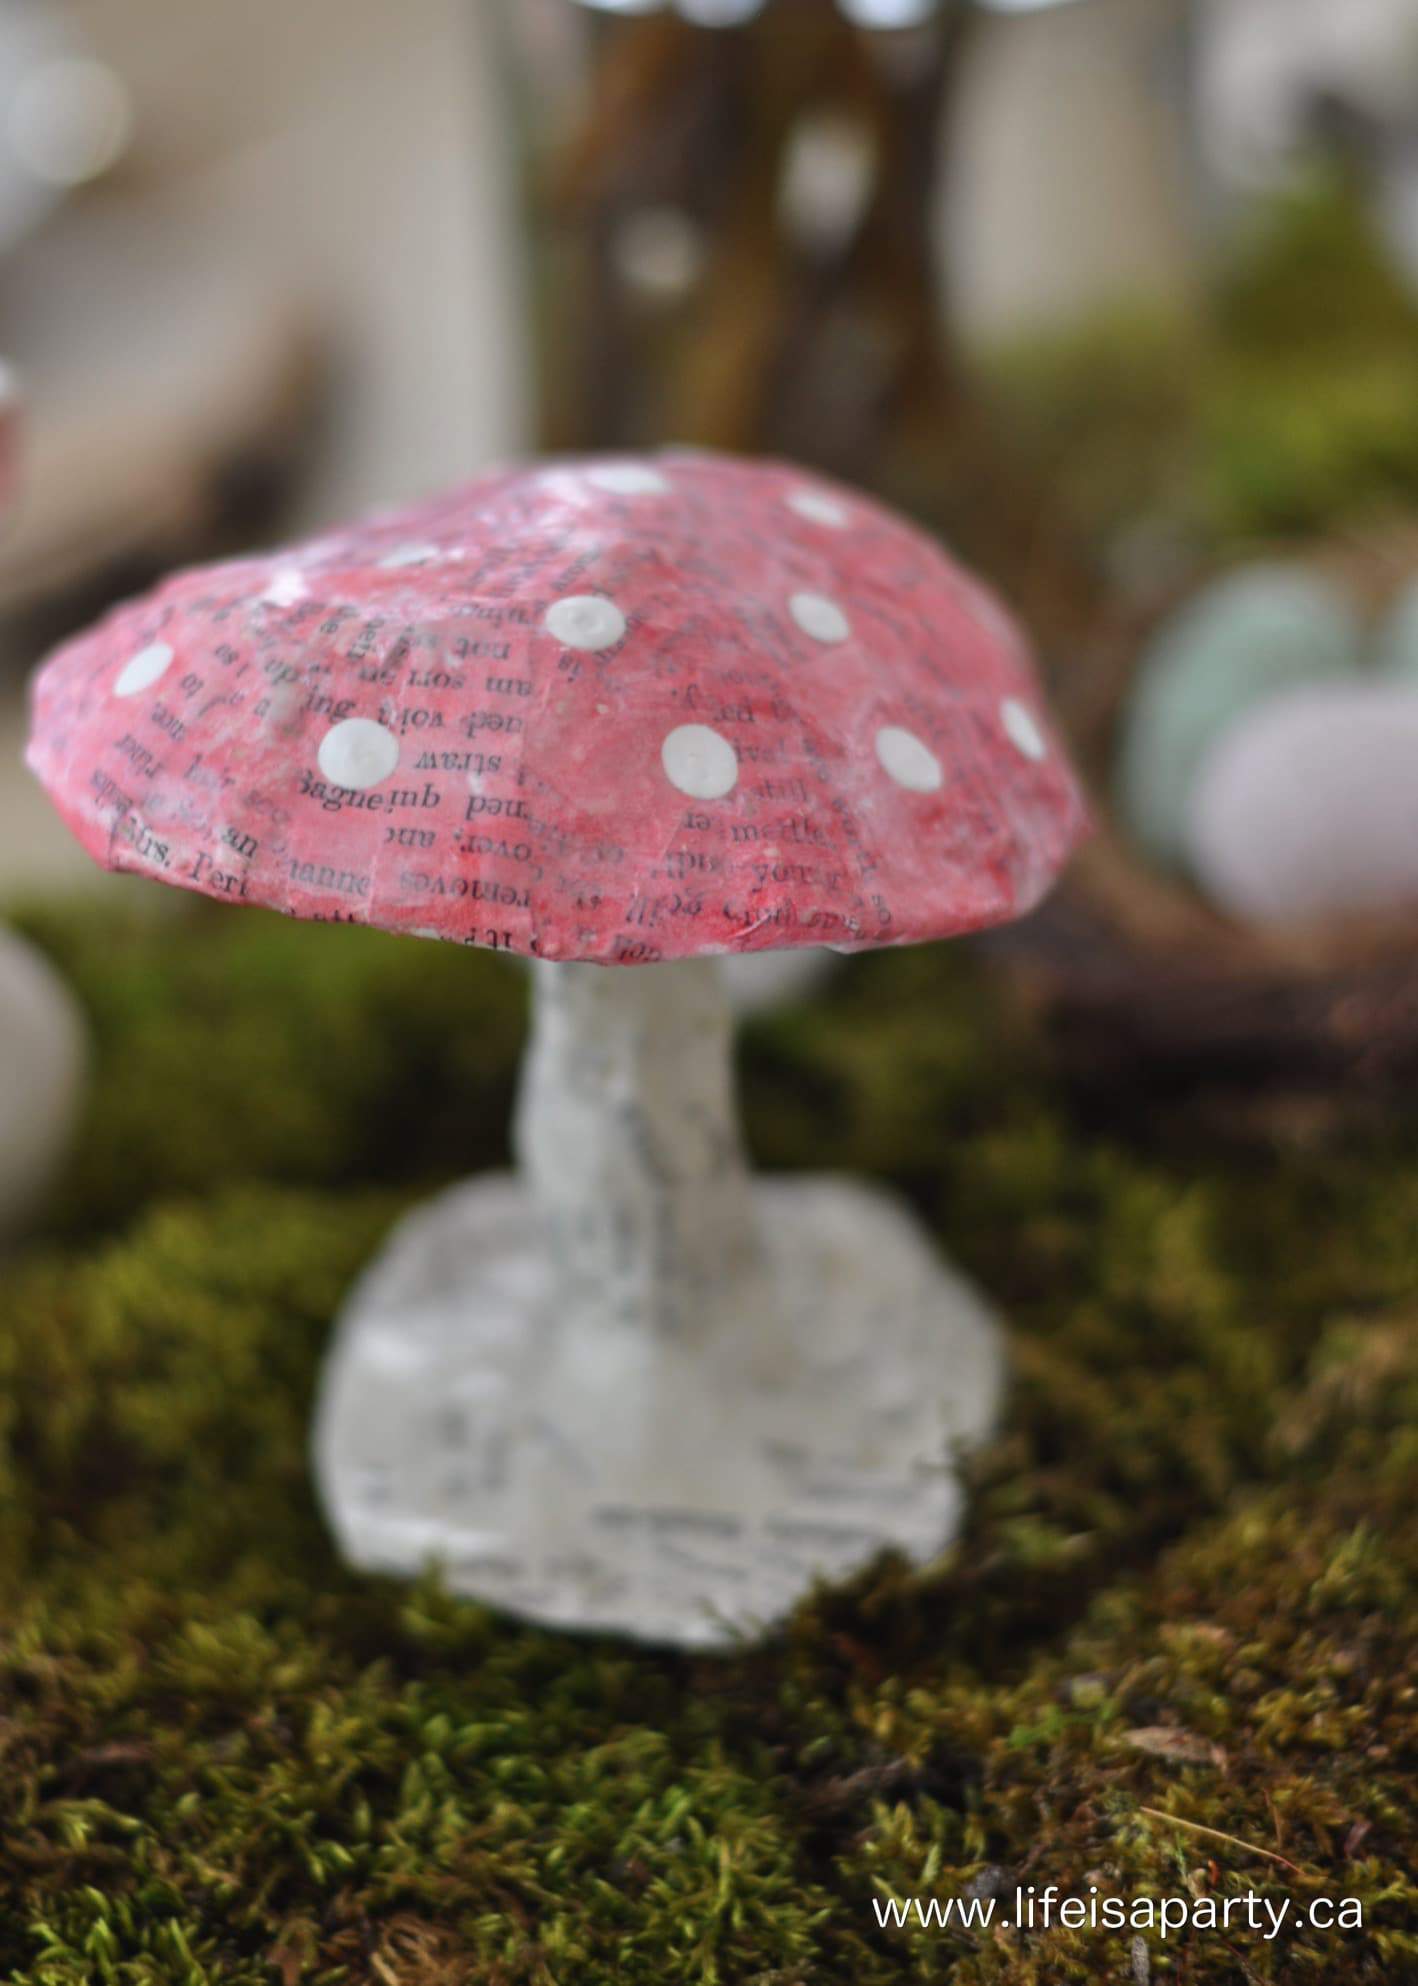
how to make a miniature fairy mushroom from polymer clay

Mushrooms

Start out with your polymer clay, we used red, white, beige, and pink made by combining red and white.  Knead your clay to soften it, and then use a very small amount to make the mushroom stem around the straight pin.  The straight pin will make the finished mushroom stronger and easier to work with.  Slowly work your clay around the pin, rolling and shaping it with your fingers.  Once the stem is made, make a little mushroom cap and press it onto the stem.  Feel free to change the shape, and colours of the mushrooms and even add spots of white clay to some.

Houses

The houses are made by making little rectangles, then an angled roof by pinching and shaping with your fingers.  Lastly use a matchstick's square end to make window and door indents.

how to make a fairy garden mushroom

We inserted our mushrooms into a piece of fruit to keep them upright while we baked them.  Bake your clay according to the manufactures directions, based on the thickness.  We did ours about 5 min.  Then let the baked clay pieces cool a little.  

Putting The Fairy Gardens Together

Next,  you're ready to put your garden together, with moss on the bottom as a little base.  We glued our houses in with white glue.  The mushrooms were a little long, so I used some wire cutters to shorten them a little.

DIY Fairy garden mushrooms

Fitting everything in the jar is a little fiddle-ly.  I found tweezers helpful for this step.

fairy garden in a jar

Remember it doesn't have to be perfect.  Add in some tiny rocks too, if you like.

How To Make A Miniature Fairy Garden In A Bottle


I also found the tweezers helpful to wipe the inside of the jar with a tiny piece of damp paper towel, to remove the moss residue at the top.
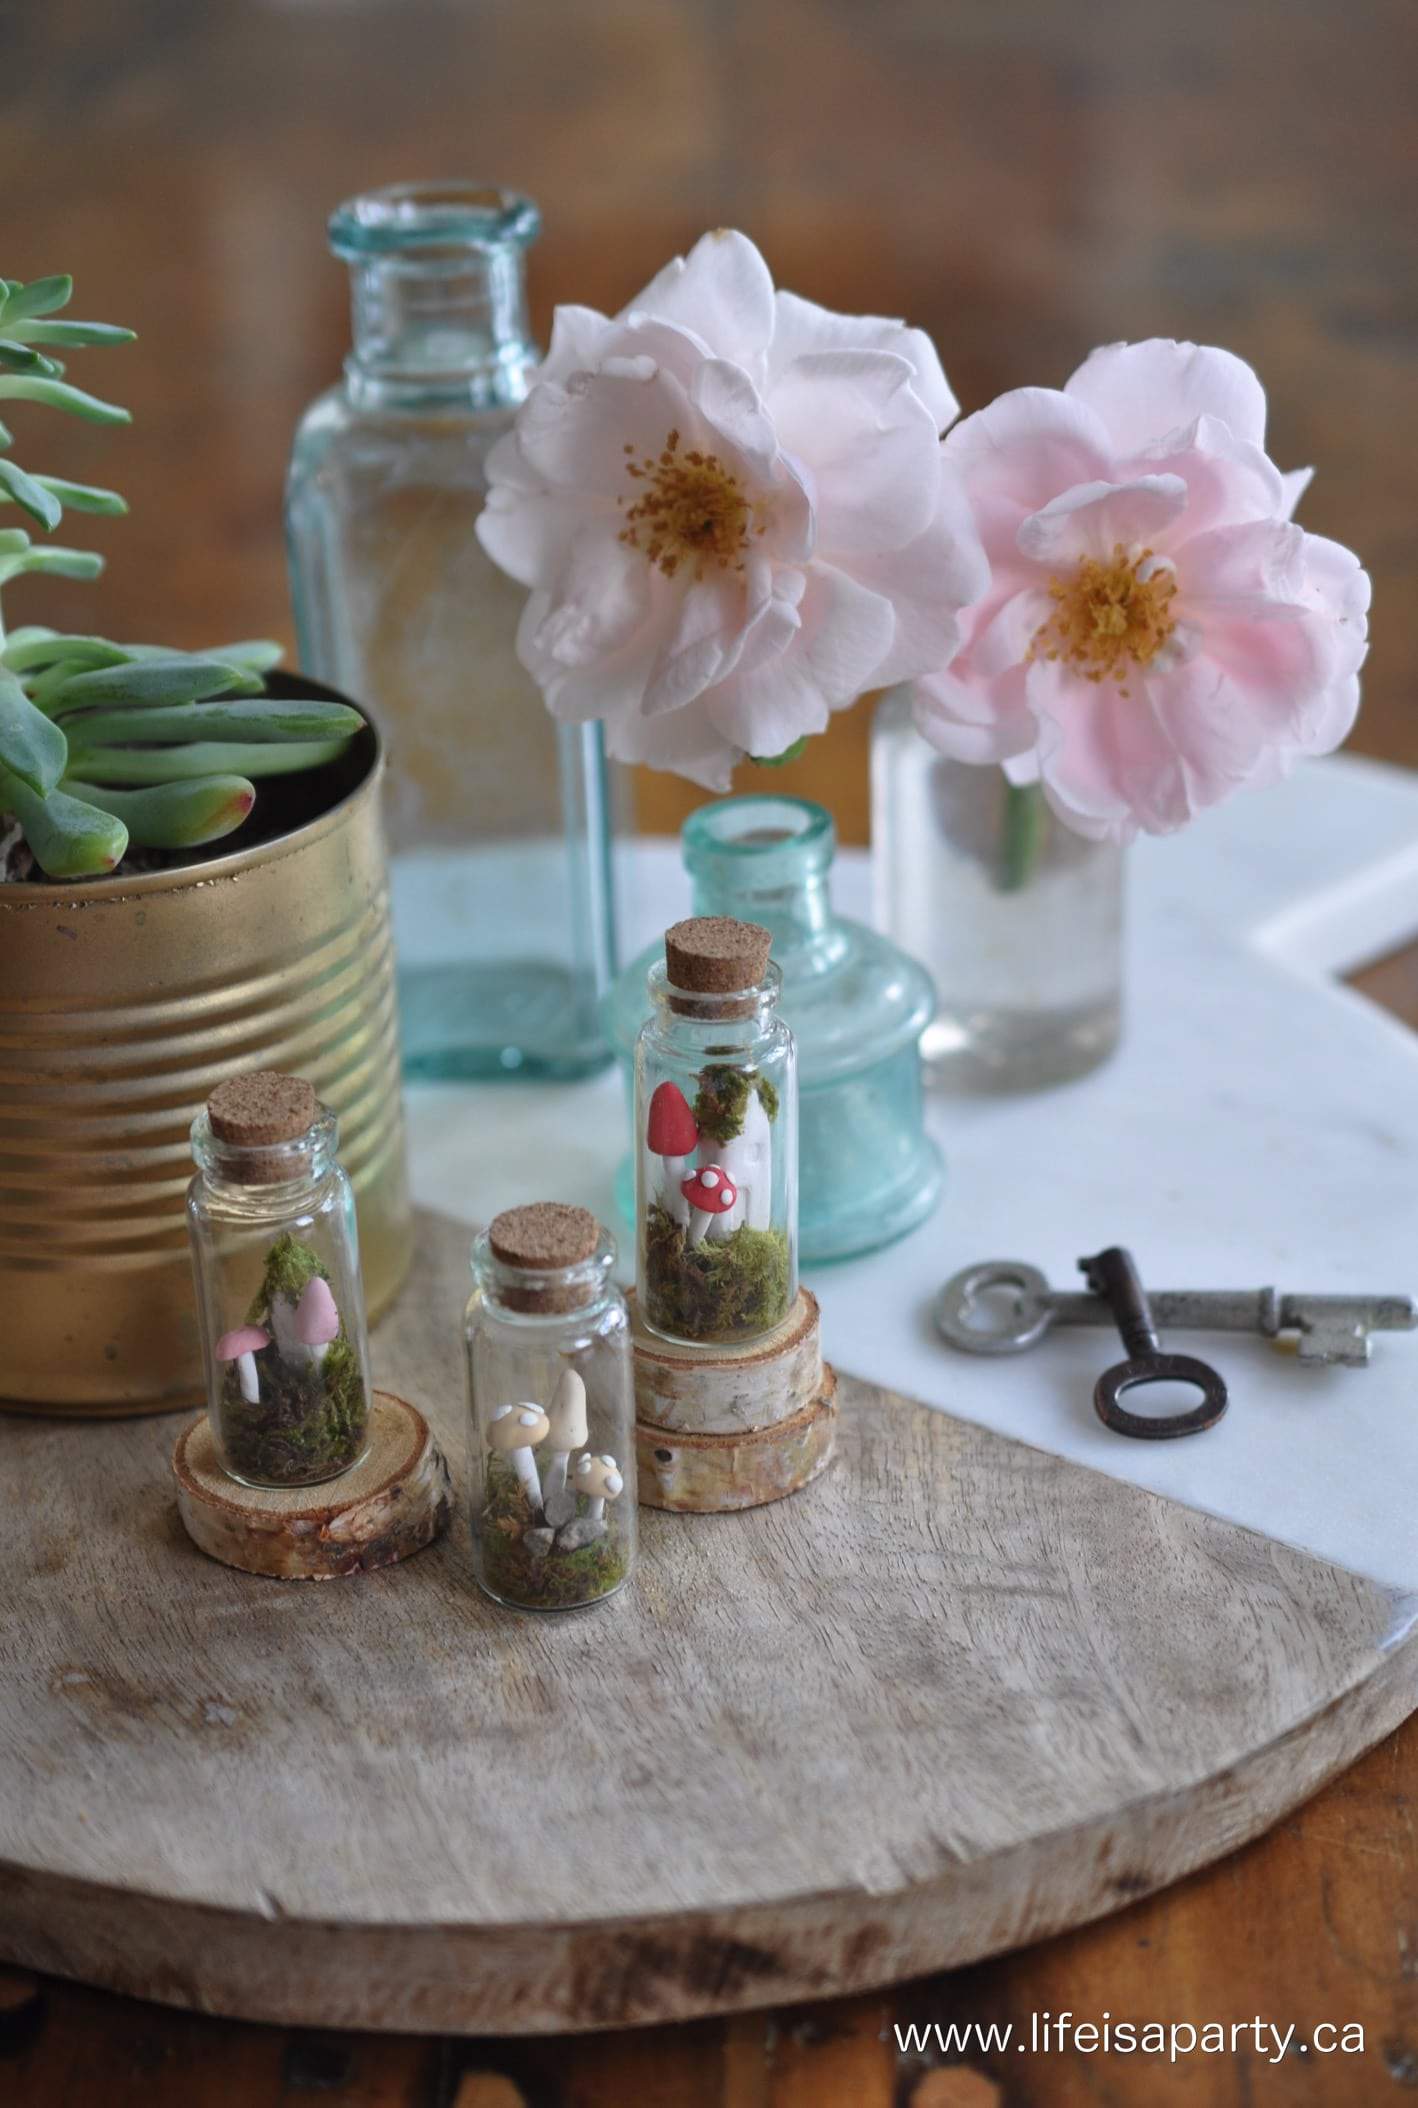
Miniature Fairy Garden In A jar

This is the perfect rainy day summer activity…or maybe just any day.

How To Make A Miniature Fairy Garden

With a sweet little Miniature Fairy Garden in a Jar, life really is a party!

More Inspiration

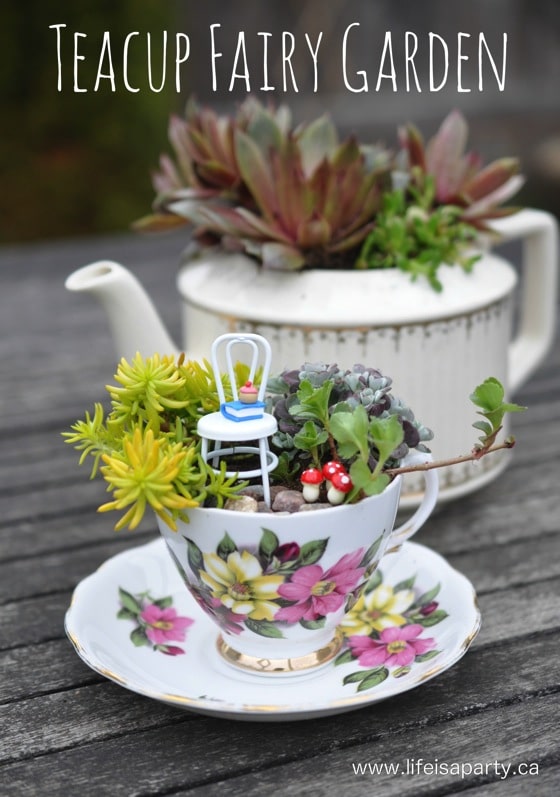
You might also like our Teacup Fairy Garden here.
Also check out our Felt Mushroom Tutorial here.
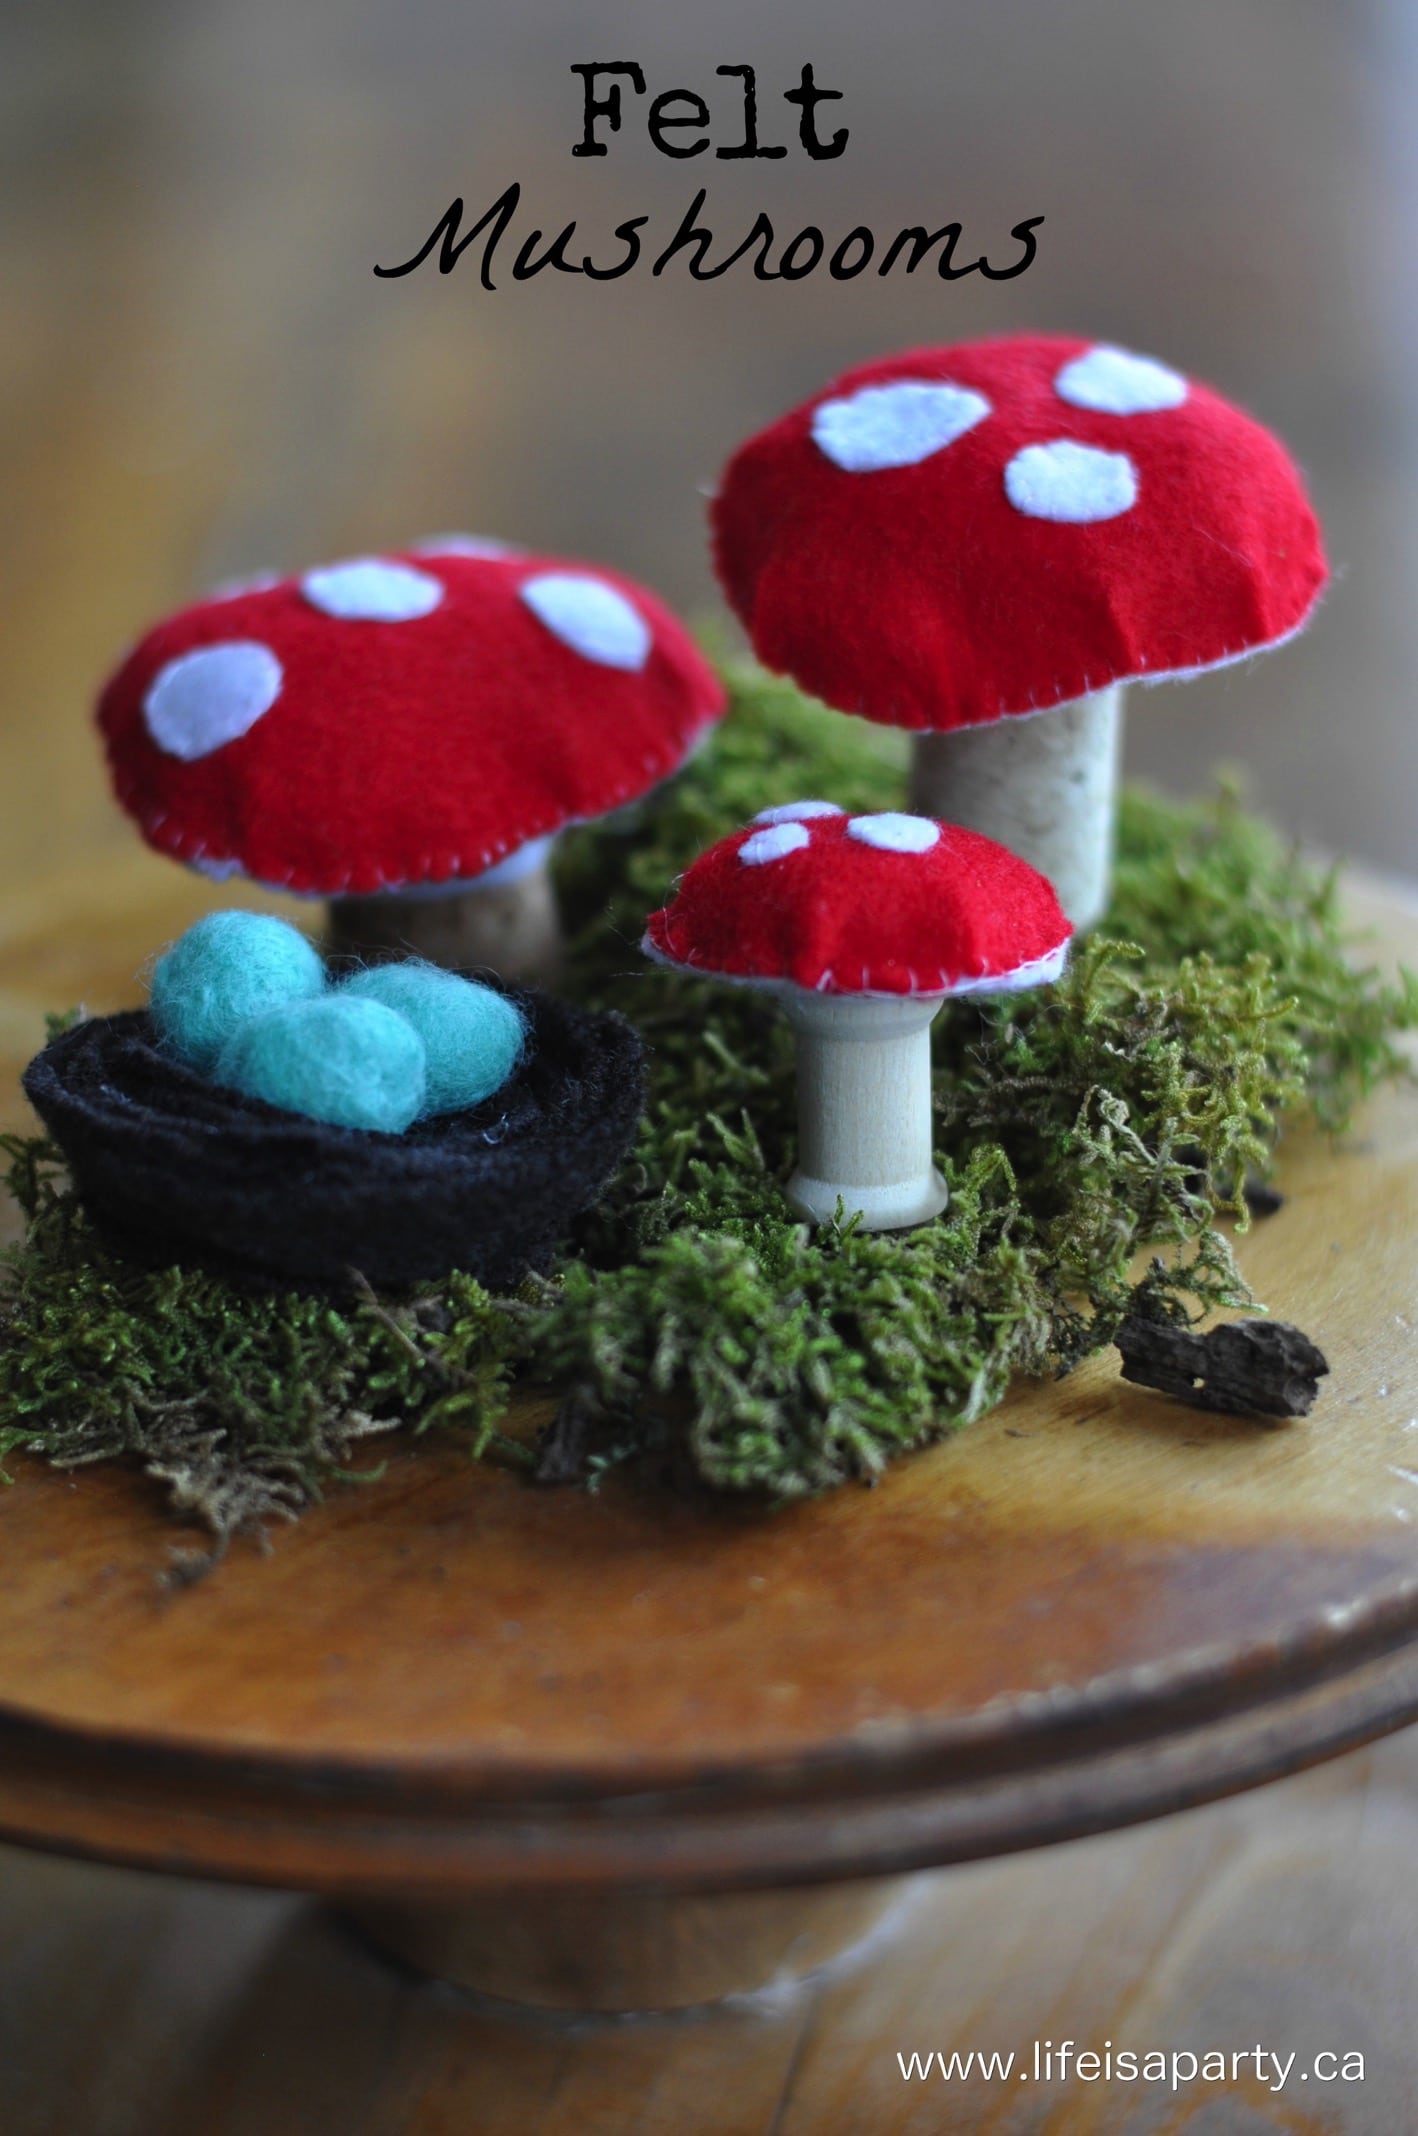
DIY Felt Mushrooms: easy to sew red and white polka dot mushrooms with felt, and cork and wooden spool stems. Perfect for your spring decor.

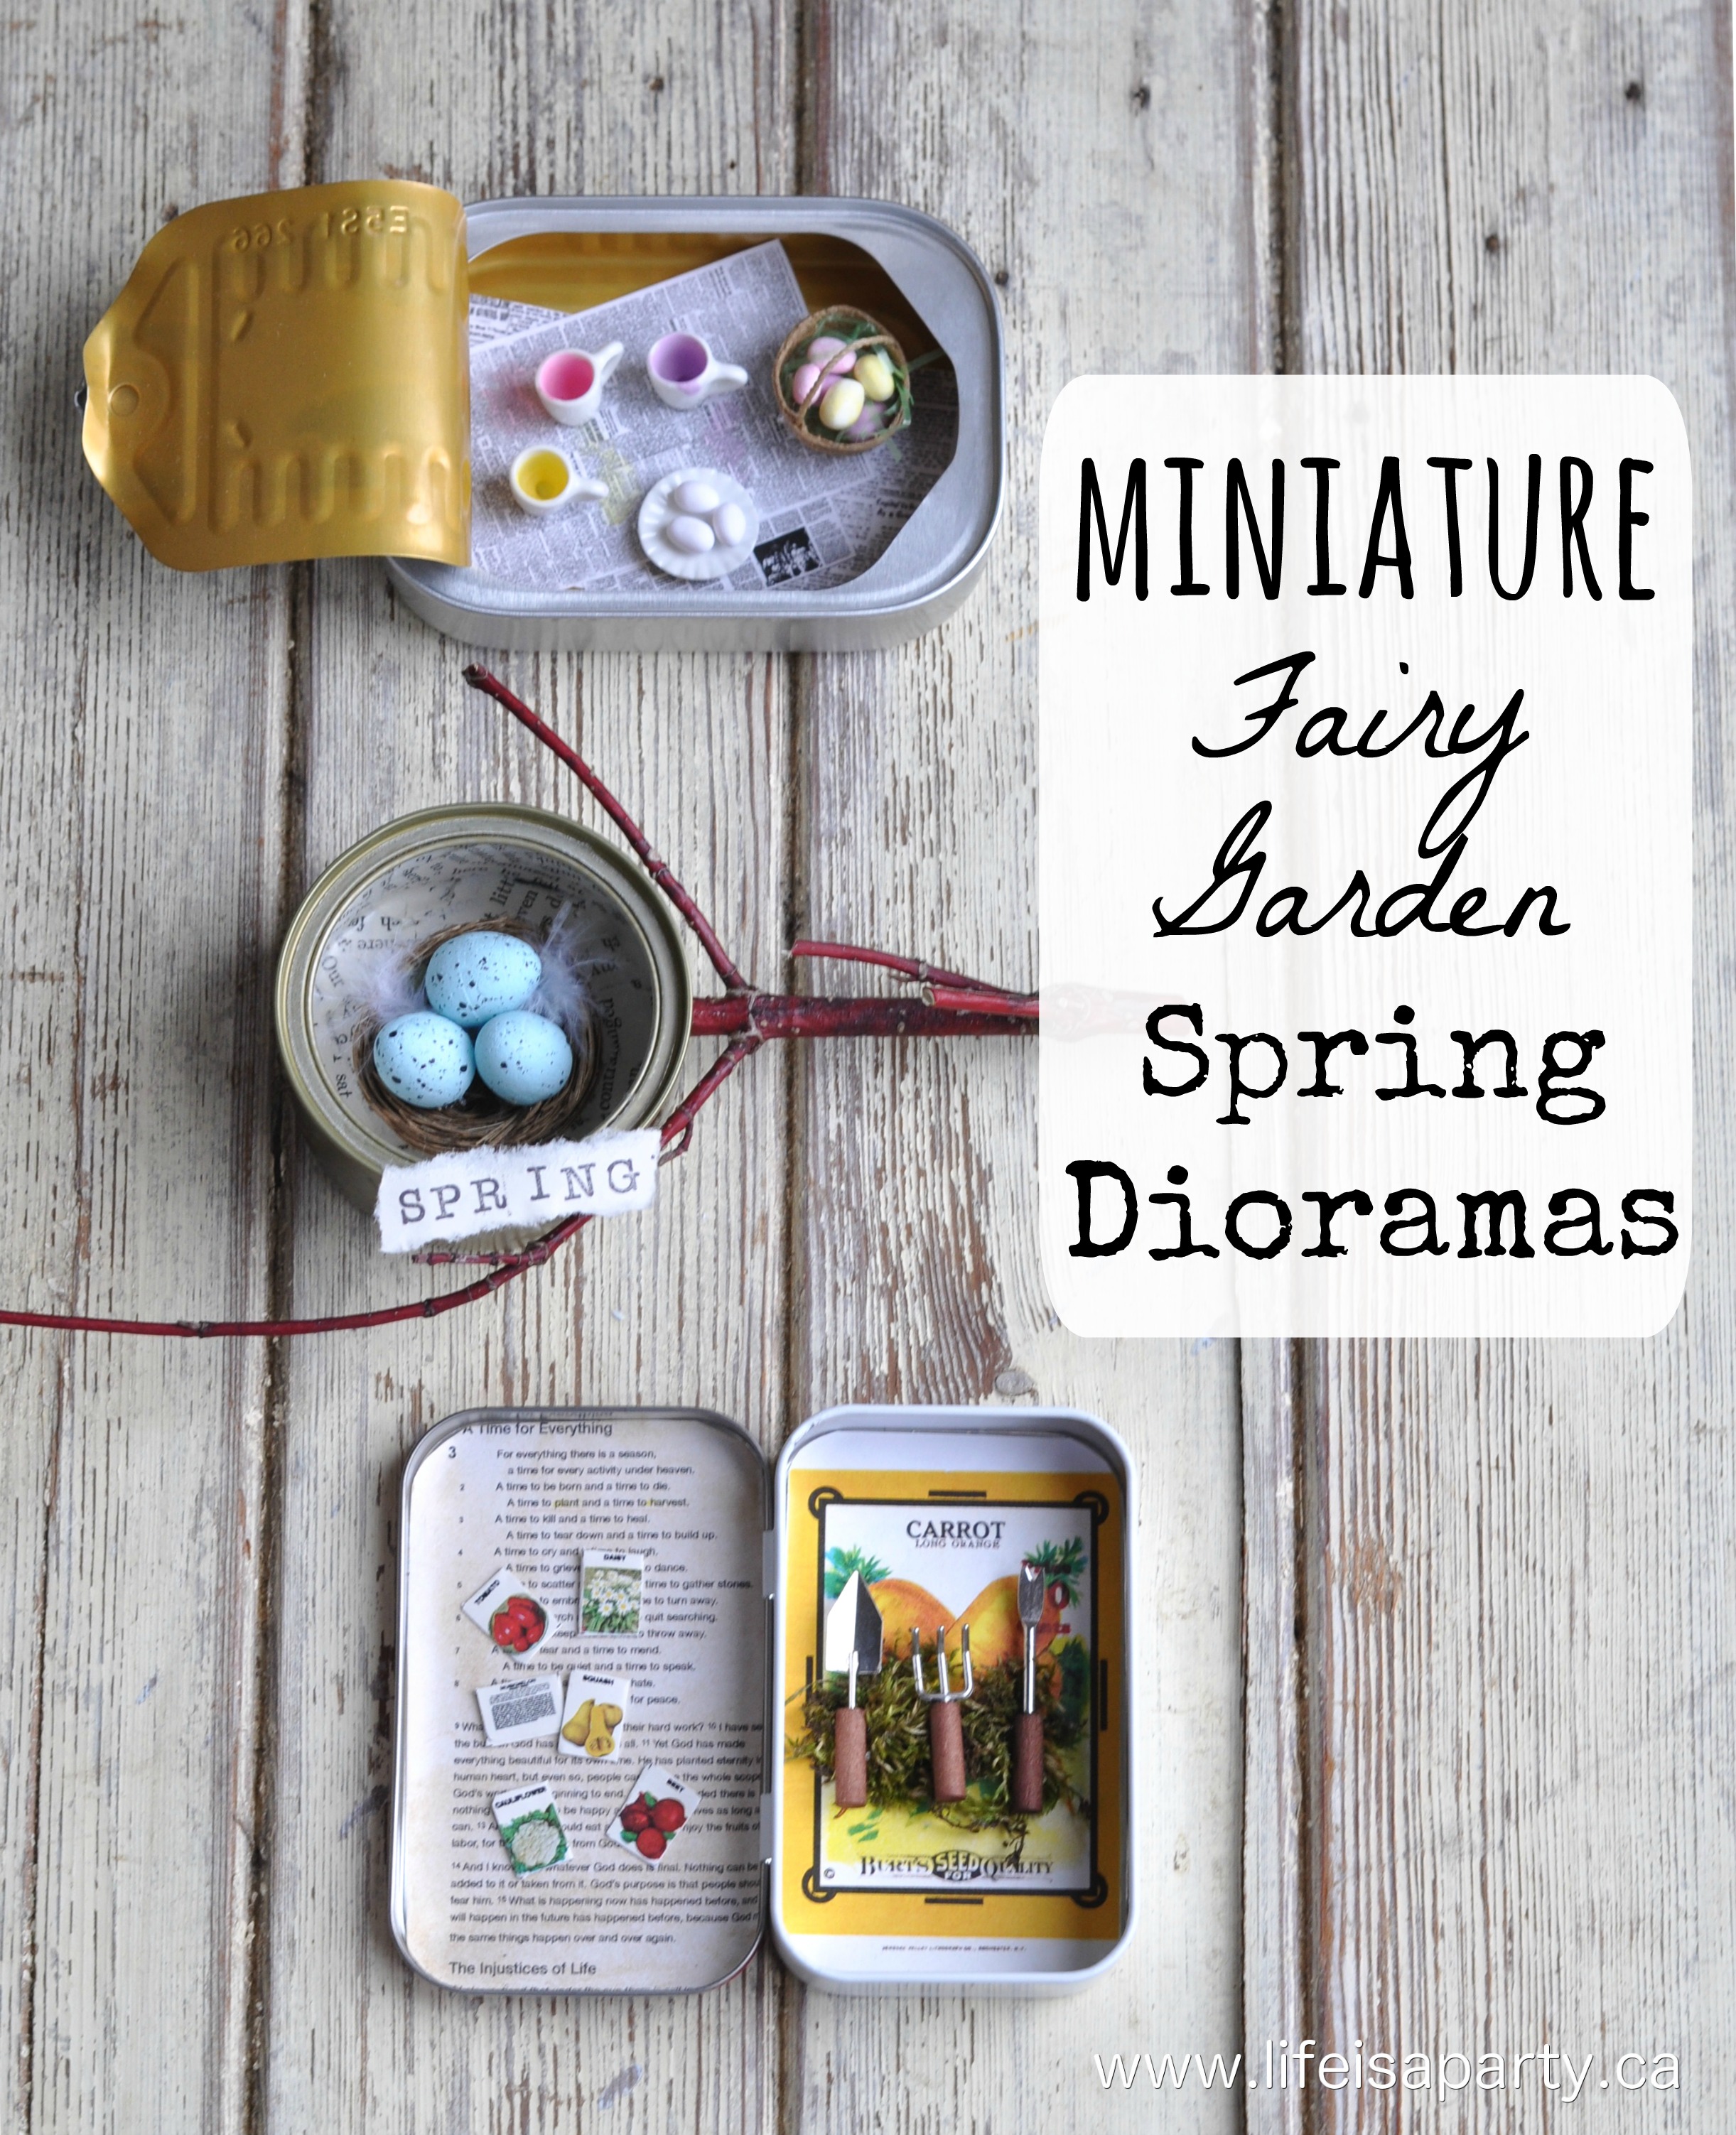
You might also enjoy our Miniature Fairy Garden Dioramas here.
 

Potato Print Geometric Pillows

Jul 12, 2016 · Leave a Comment

Potato stamped cushions.

Potato Print Fabric Pillows: Easy potato print triangle geometric pillows. A fun and inexpensive way to design your own fabric.

Potato stamped cushions.
[feast_advanced_jump_to]

Sometimes when you can't find exactly what you want the best thing to do is to just make it yourself.  These Potato Print Fabric Pillows were something I'd been thinking of for a while, but hadn't seen anywhere.  

They were the perfect finishing touch to my Spray Paint Wicker Chairs Makeover -see them here.  The pillows were really inexpensive to make, since I had the fabric, paint, and pillow inserts.  The only things I had to pick up were a few potatoes, lol.

how to potato print

Potato Print Supplies:

  • Potatoes
  • Craft Paint
  • Drop Cloth Fabric
  • Pillow Inserts
  • Sewing Machine
diy potato print fabric

How To Potato Print Fabric:

To begin with, cut your fabric to fit your pillow insert, adding a little for seam allowance.  I used simple, inexpensive drop cloth fabric.  It has a really great texture and colour -a little like linen, and of course, its price.  I had some scraps left over from other projects.

Potato print fabric

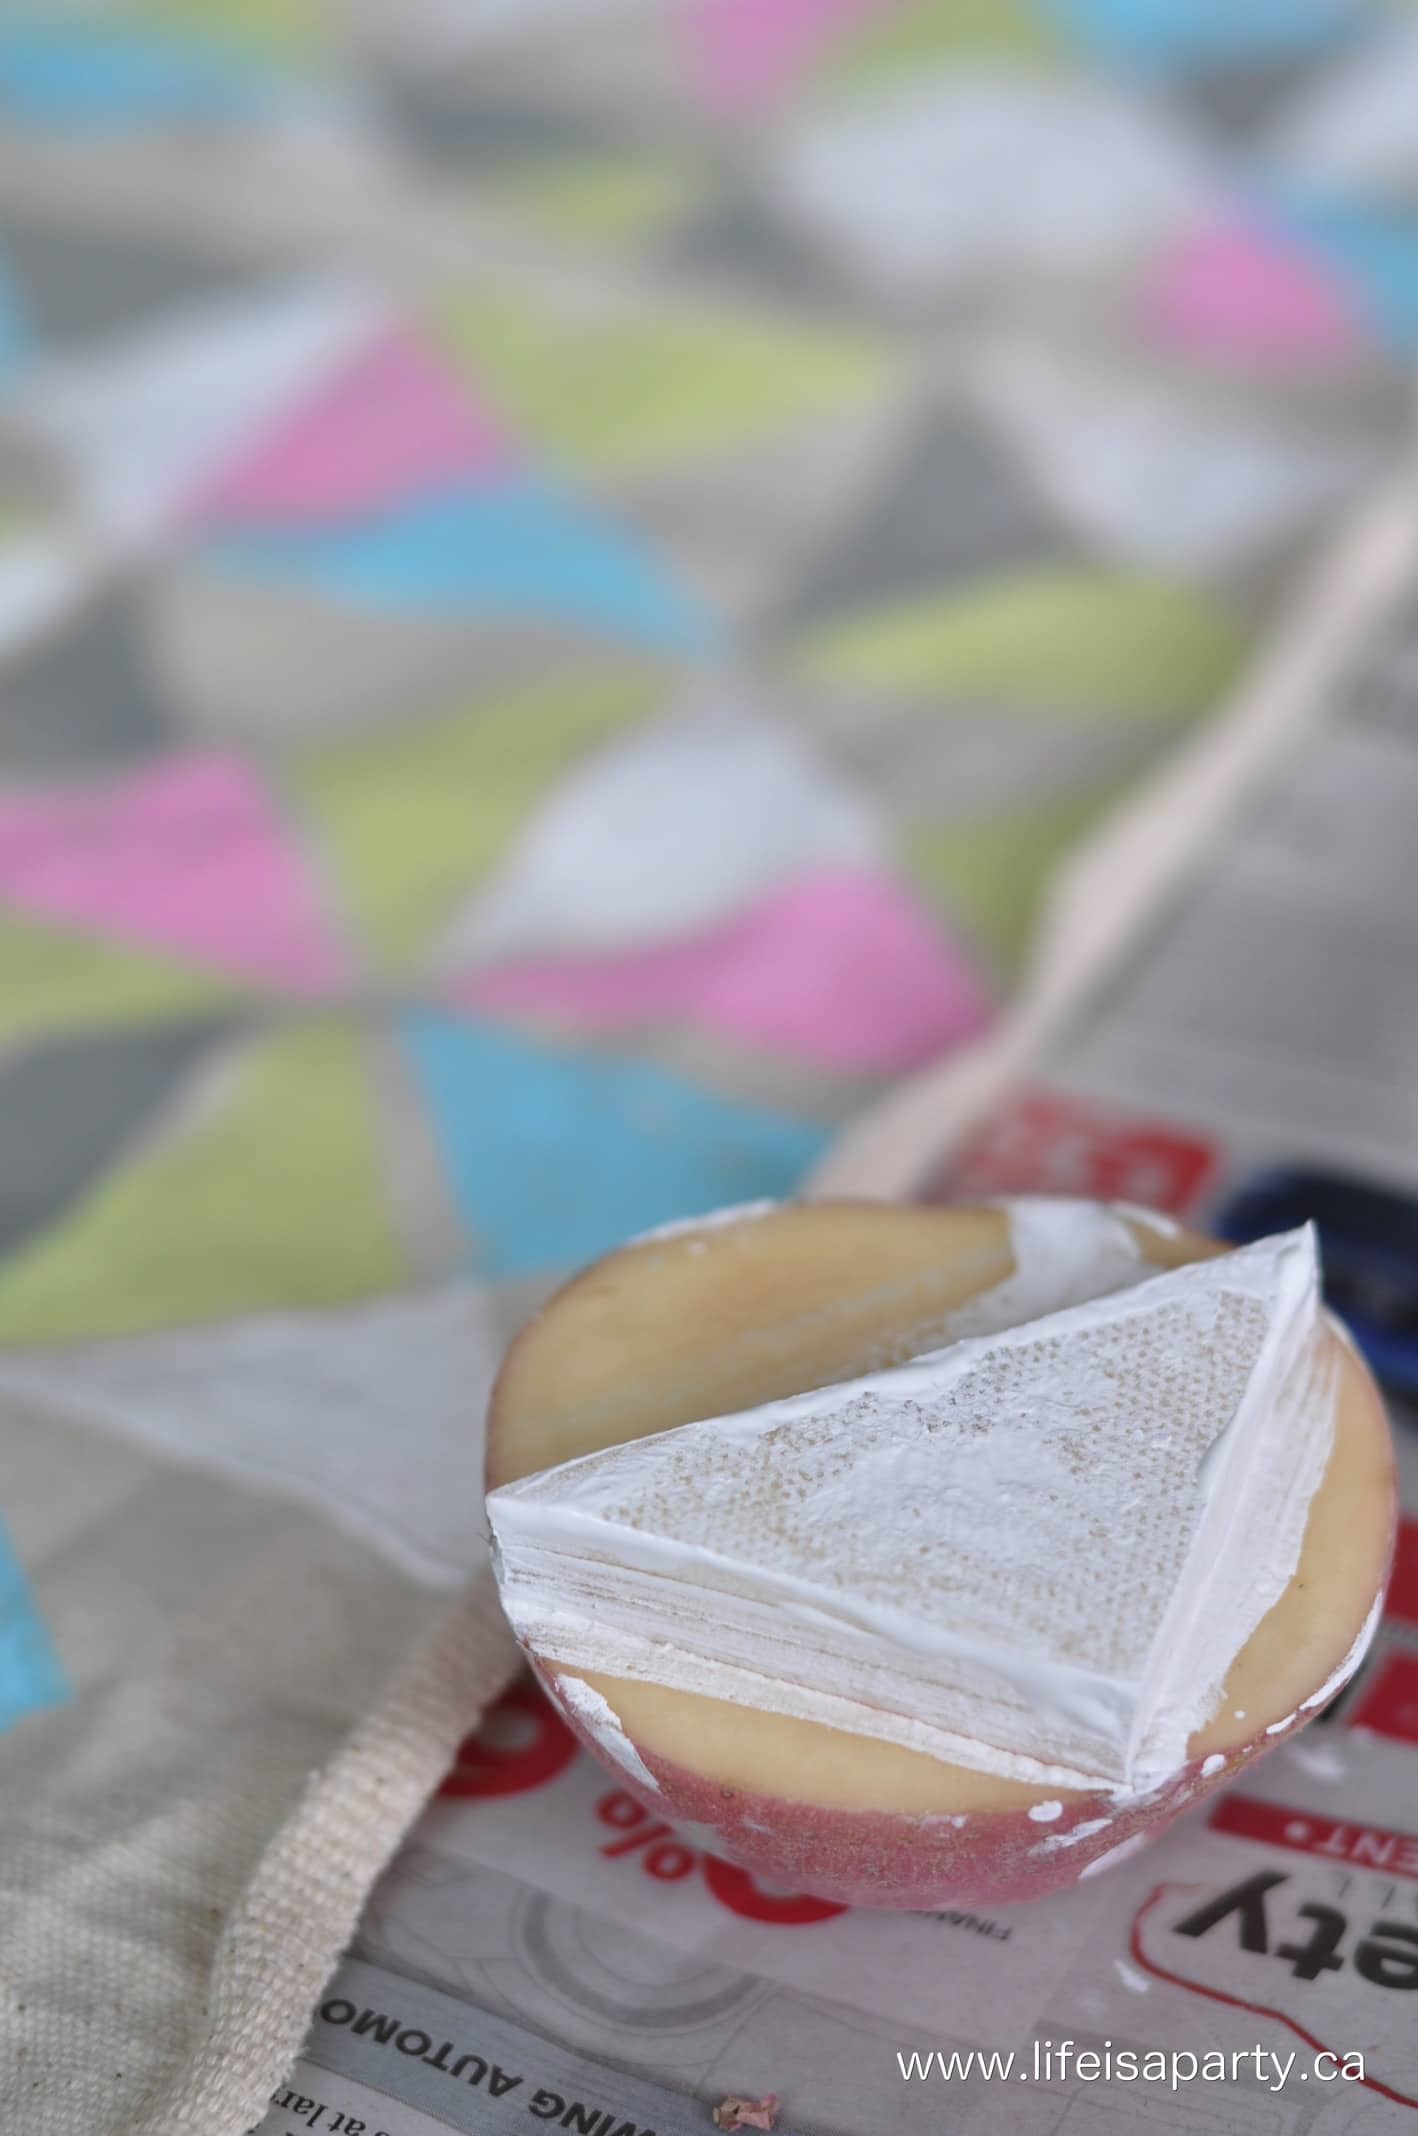
Next, cut out your stamps. I used a little paper pattern to make sure my triangles were all the same size.   It was easiest to cut one potato stamp for each colour of paint I used.  I used white, grey, aqua, lime green, and pink for mine.  You could use any colours you like.  I used regular craft paint.  You could also use fabric paint, or there is an additive for craft paint that you can buy and add to any craft paint to turn it into fabric paint.

potato print

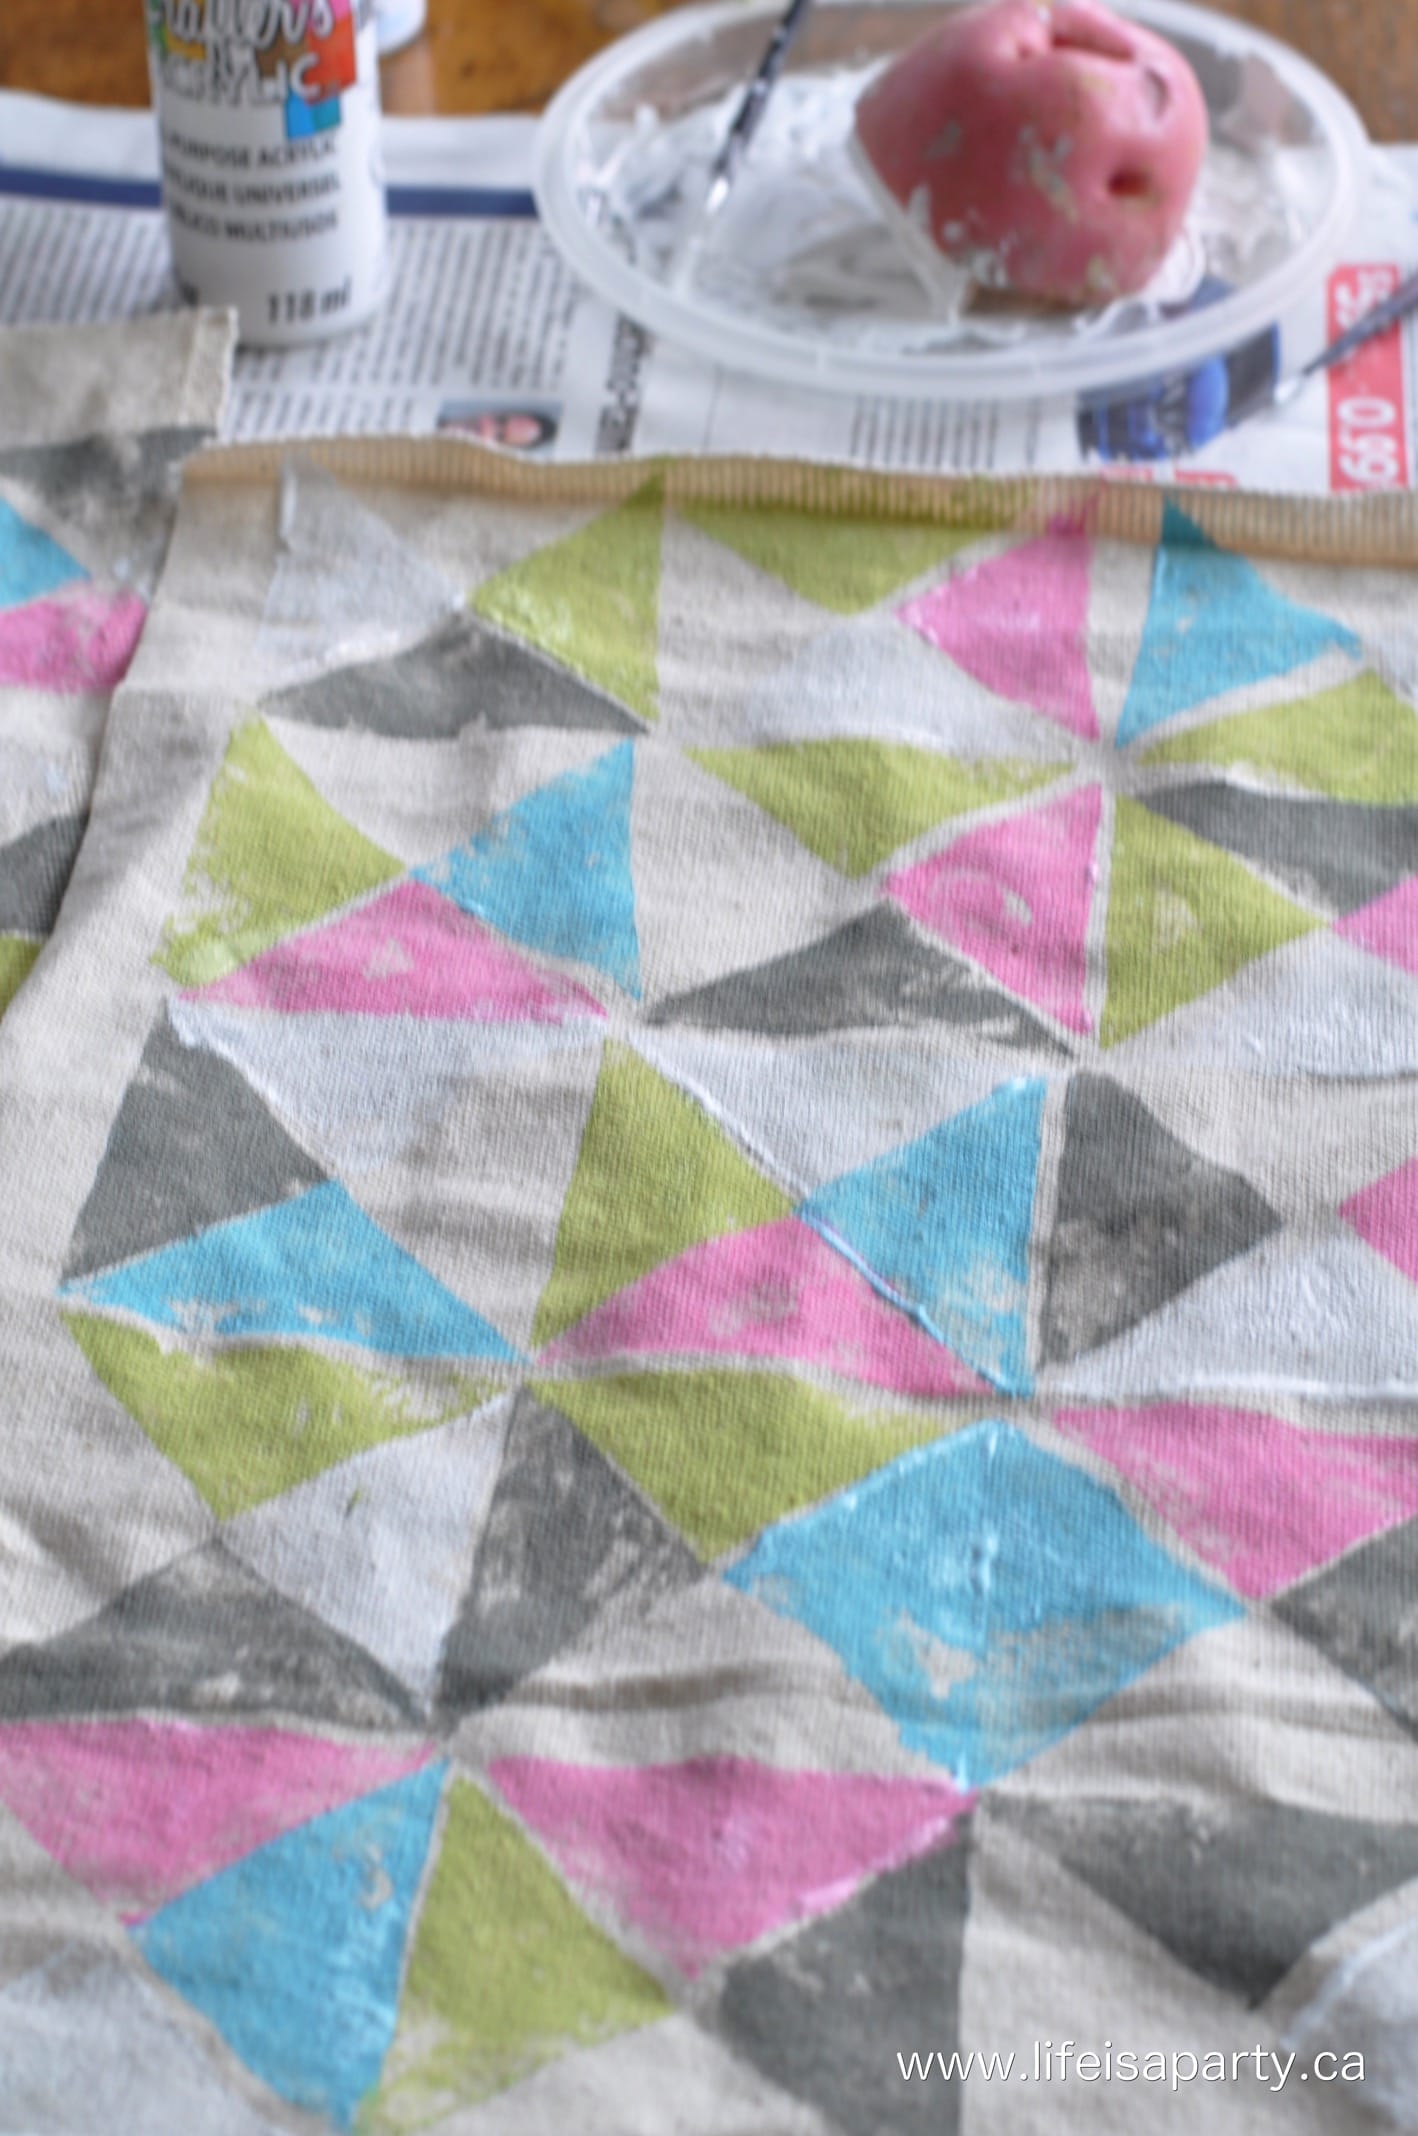
Then, it's time to get stamping.  I laid my fabric out on newspaper, and worked away in a random pattern.  I also left some spaces blank.  You can use a small paint brush to take off any excess paint from the edges of the potato.

Potato Print fabric Pillows

It doesn't need to be perfect.  Random is good, Handmade looking is good.  I tried to keep things as straight as I could, but it's not all lined up perfectly.  I kind of like the wonky-ness of it.  If you really wanted it straight, you could use a disappearing ink marker from the fabric store to measure out some straight lines of reference before you began.

how to make potato print fabric

After the fabric was all dry, I cut out the back pieces and sewed them into cushions.  Easy peasy.

I've been using them outside, but they're not weather proof, so I make sure I bring them in at the end of the day.  Inside my house is decorated in fairly neutral colours, so it's fun to be a bit more bold and colourful outside for summer.

Potato Print fabric Pillows

I love how this quick afternoon project turned out -adding bit of colour and pattern to the our summery space.

With Easy Potato Print Fabric Pillows, life really is a party!

More Inspiration

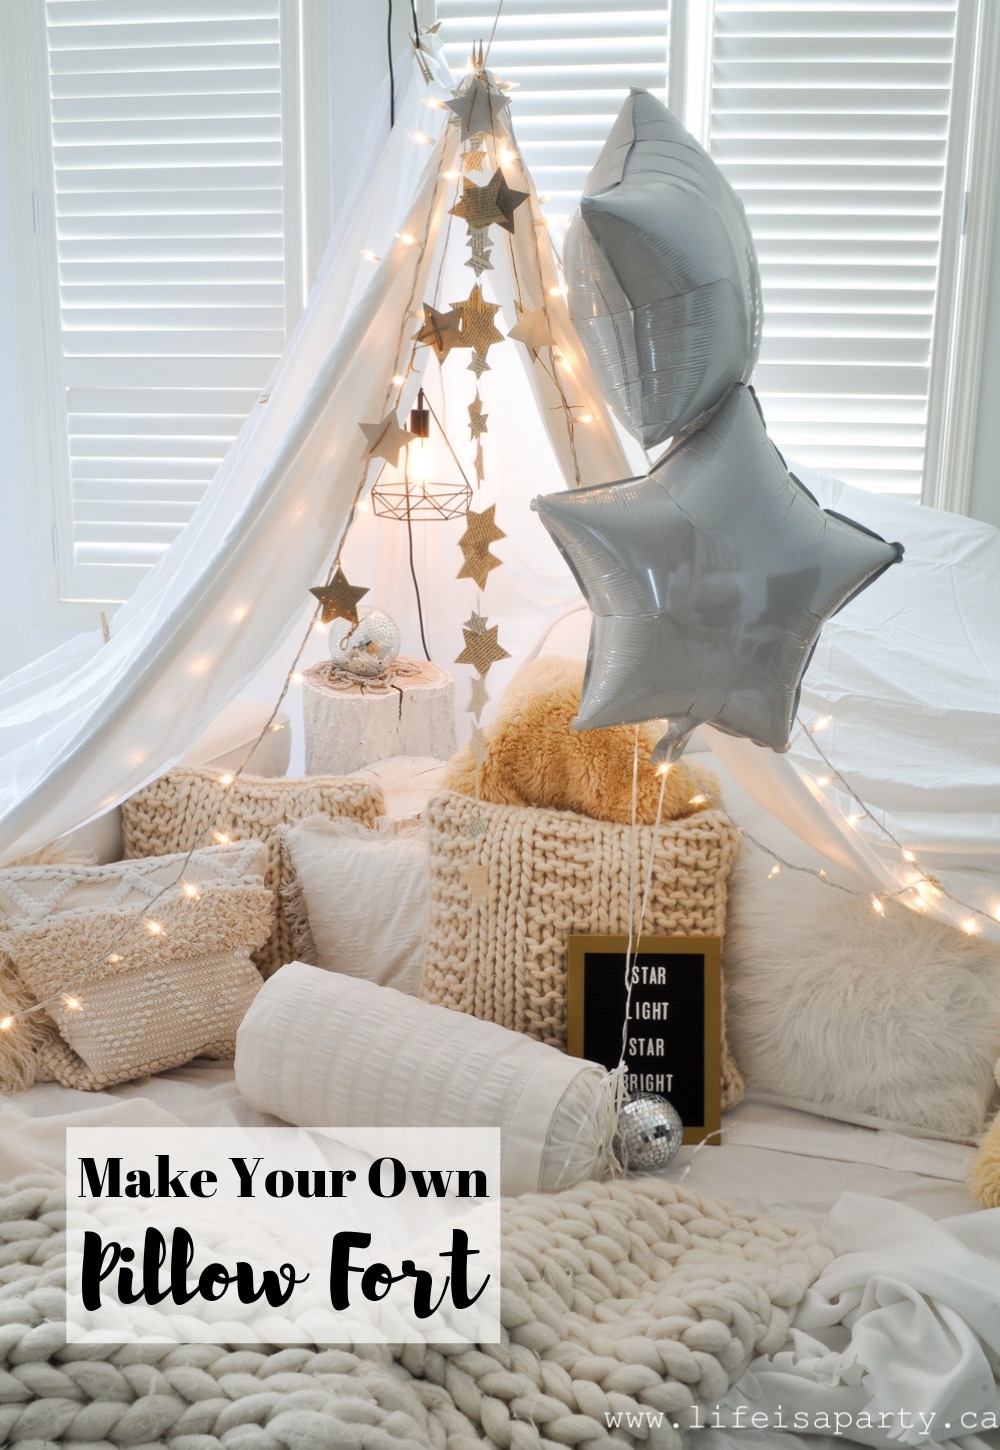
You might also like our Pillow Fort here.

How To Build A Pillow Fort -make a magical pillow fort with fairy lights and starry decorations, and star themed snacks for family night or date night.

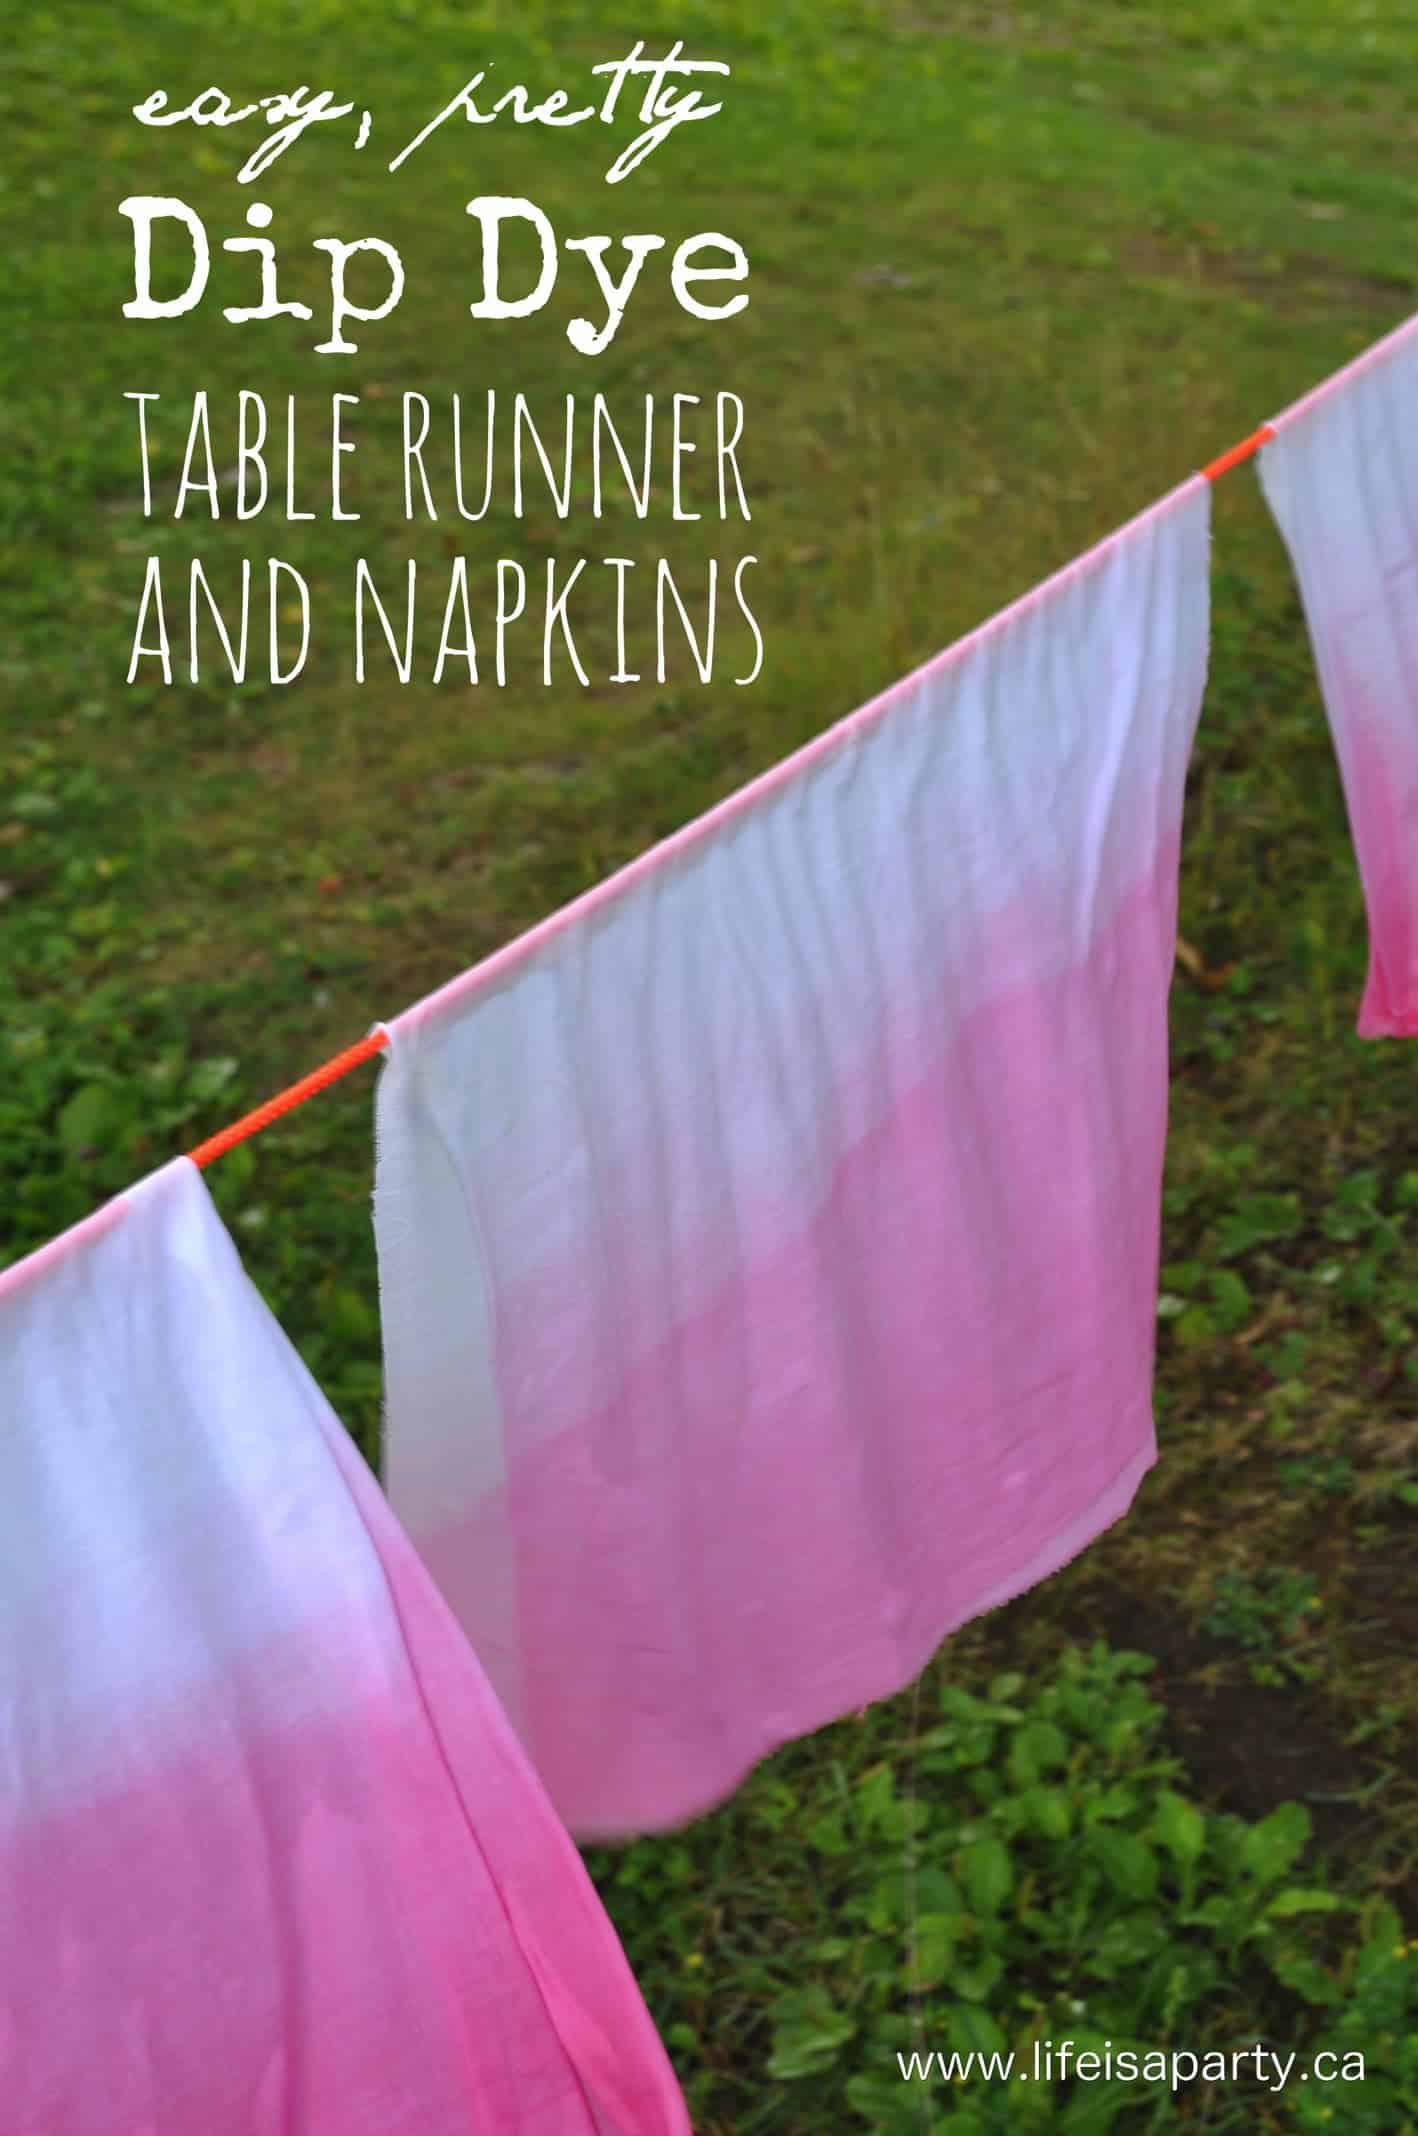
Also check out our Dip Dye Table Runner and Napkins here.

Dip Dyed Table Runner and Napkins: Easy how-to instructions to make your own napkin and table runner with a beautiful dip dyed ombre effect.

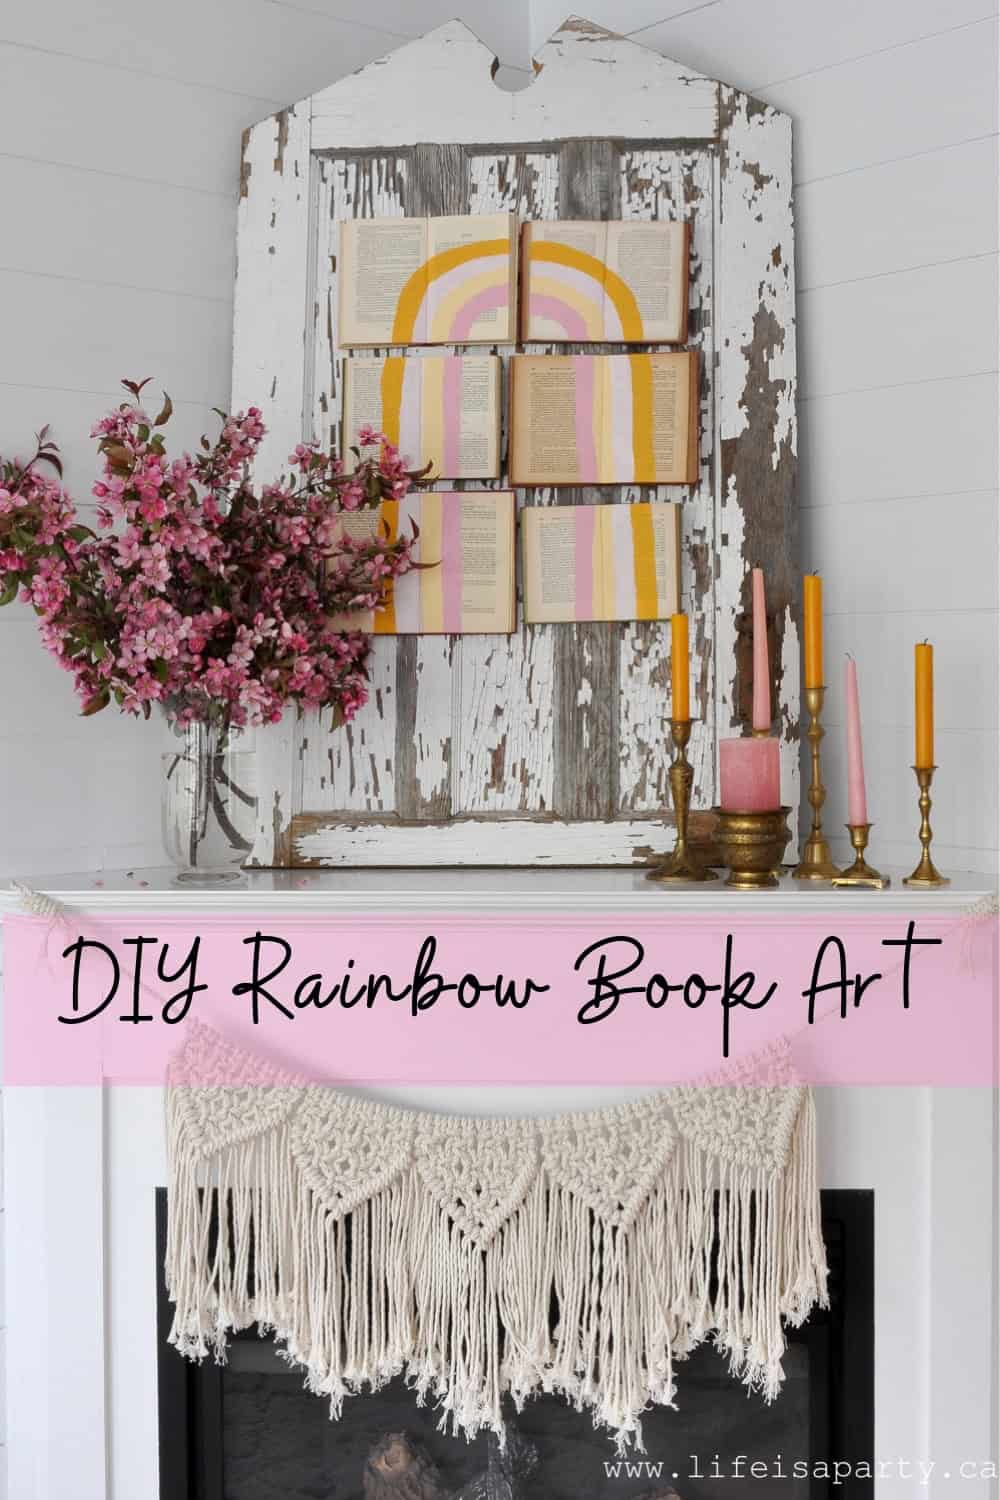
You might also enjoy DIY Rainbow Book Art here.

DIY Rainbow Book Art: Using old books as a canvas this DIY rainbow art in mustard yellow and pink is fun to make and inexpensive.

Fairy Garden Fish Hook Miniature Chandelier

Jul 7, 2016 · 2 Comments

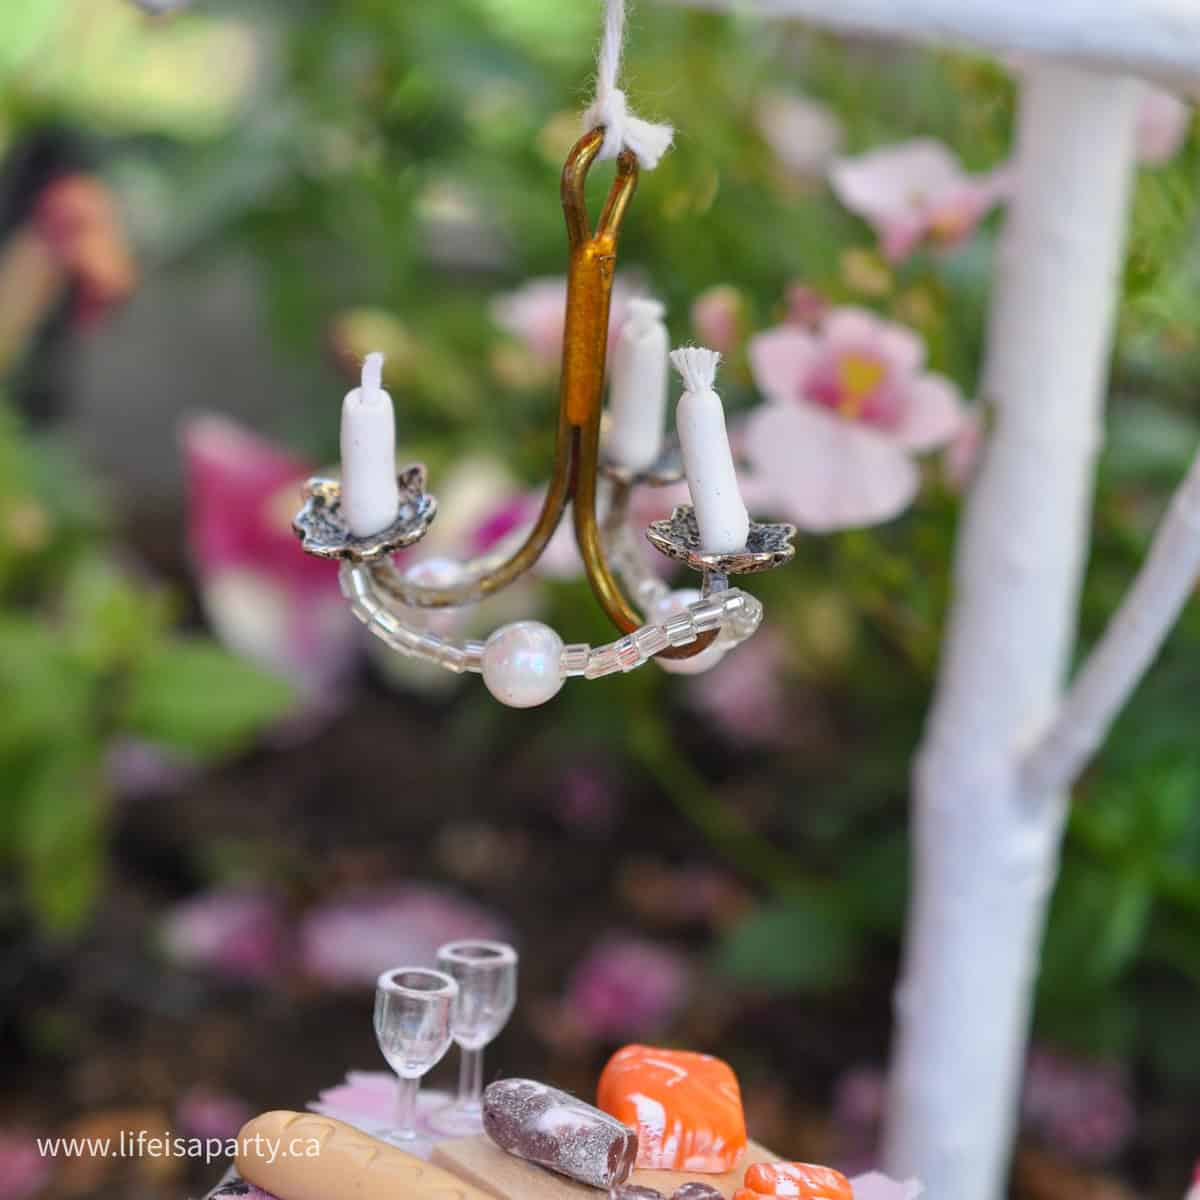
DIY miniature chandelier for a fairy garden.

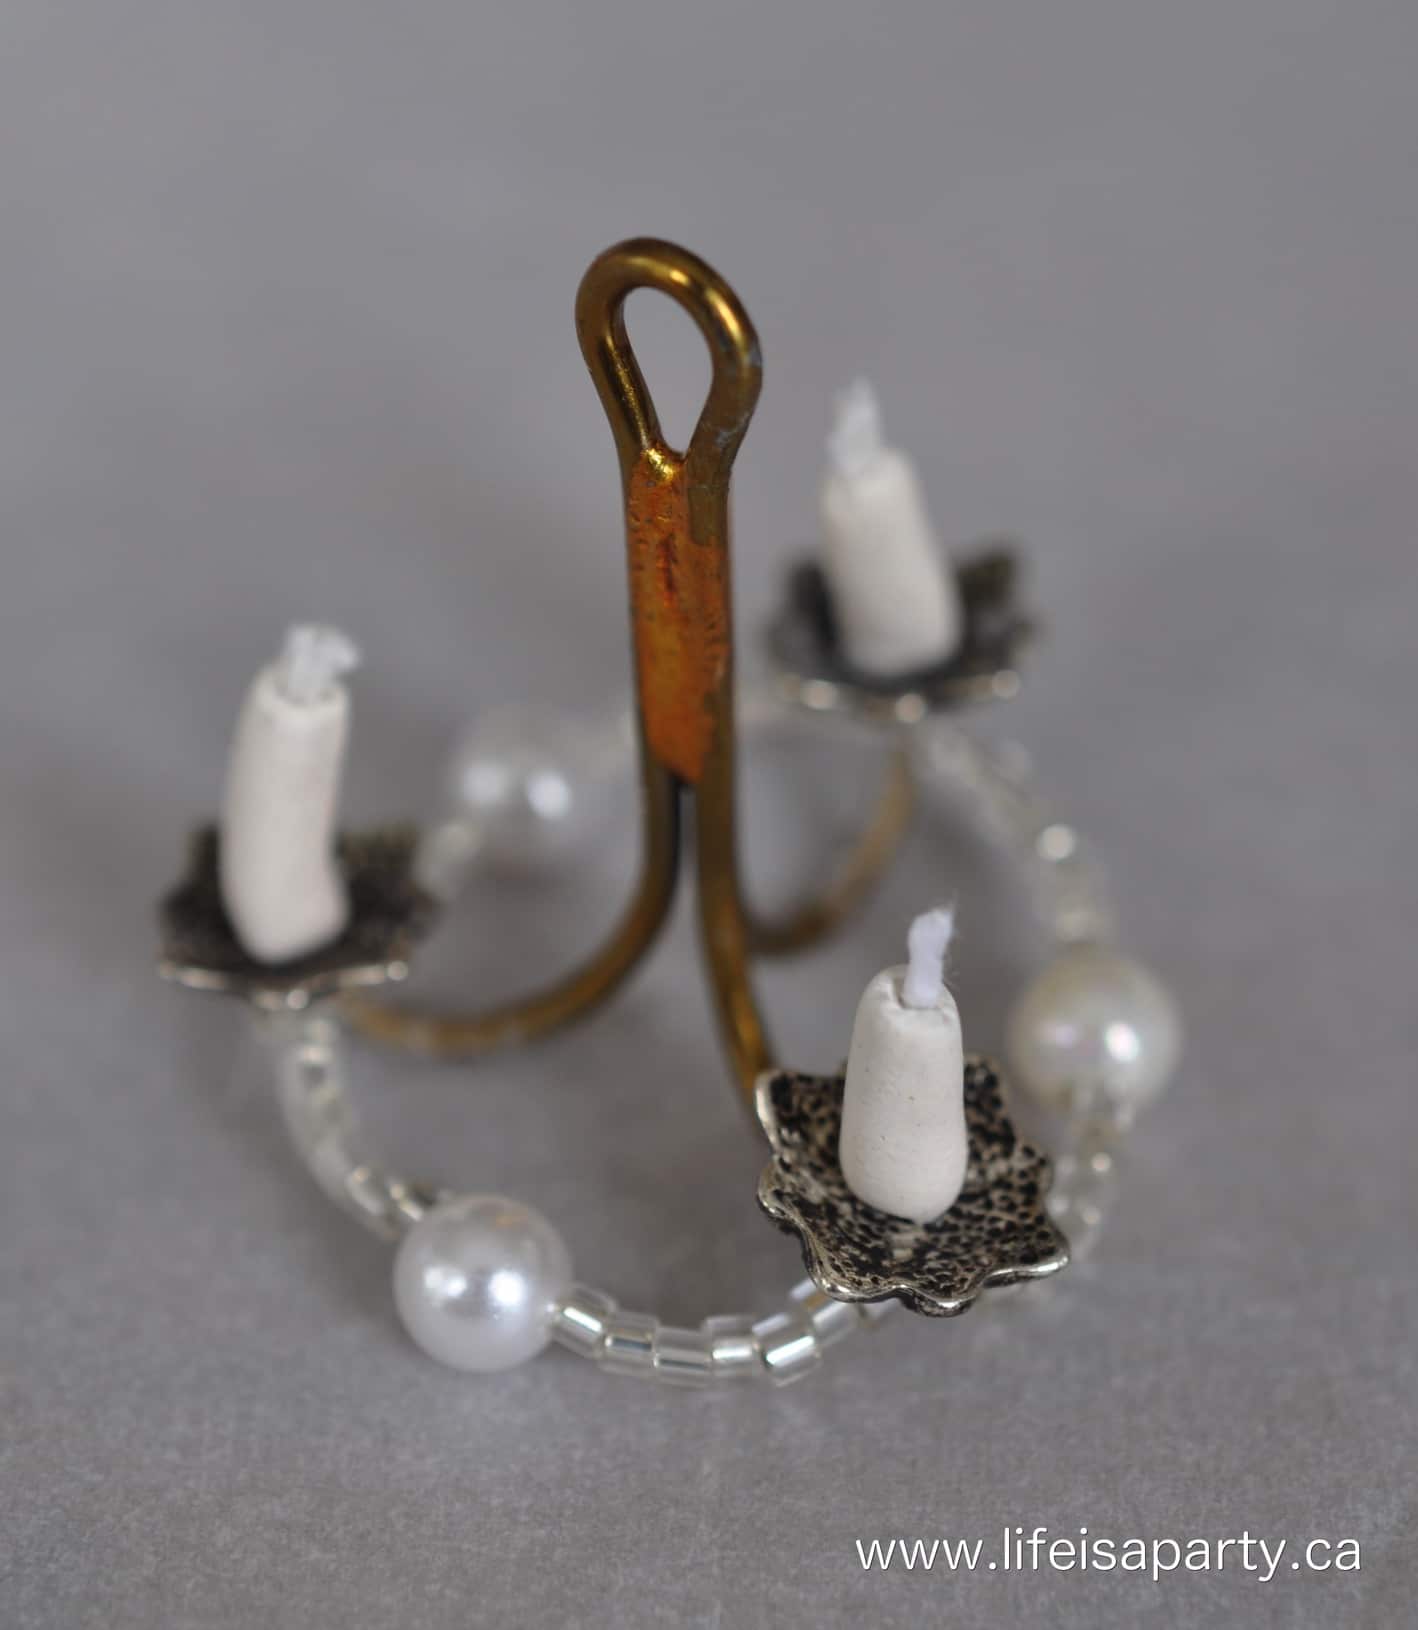
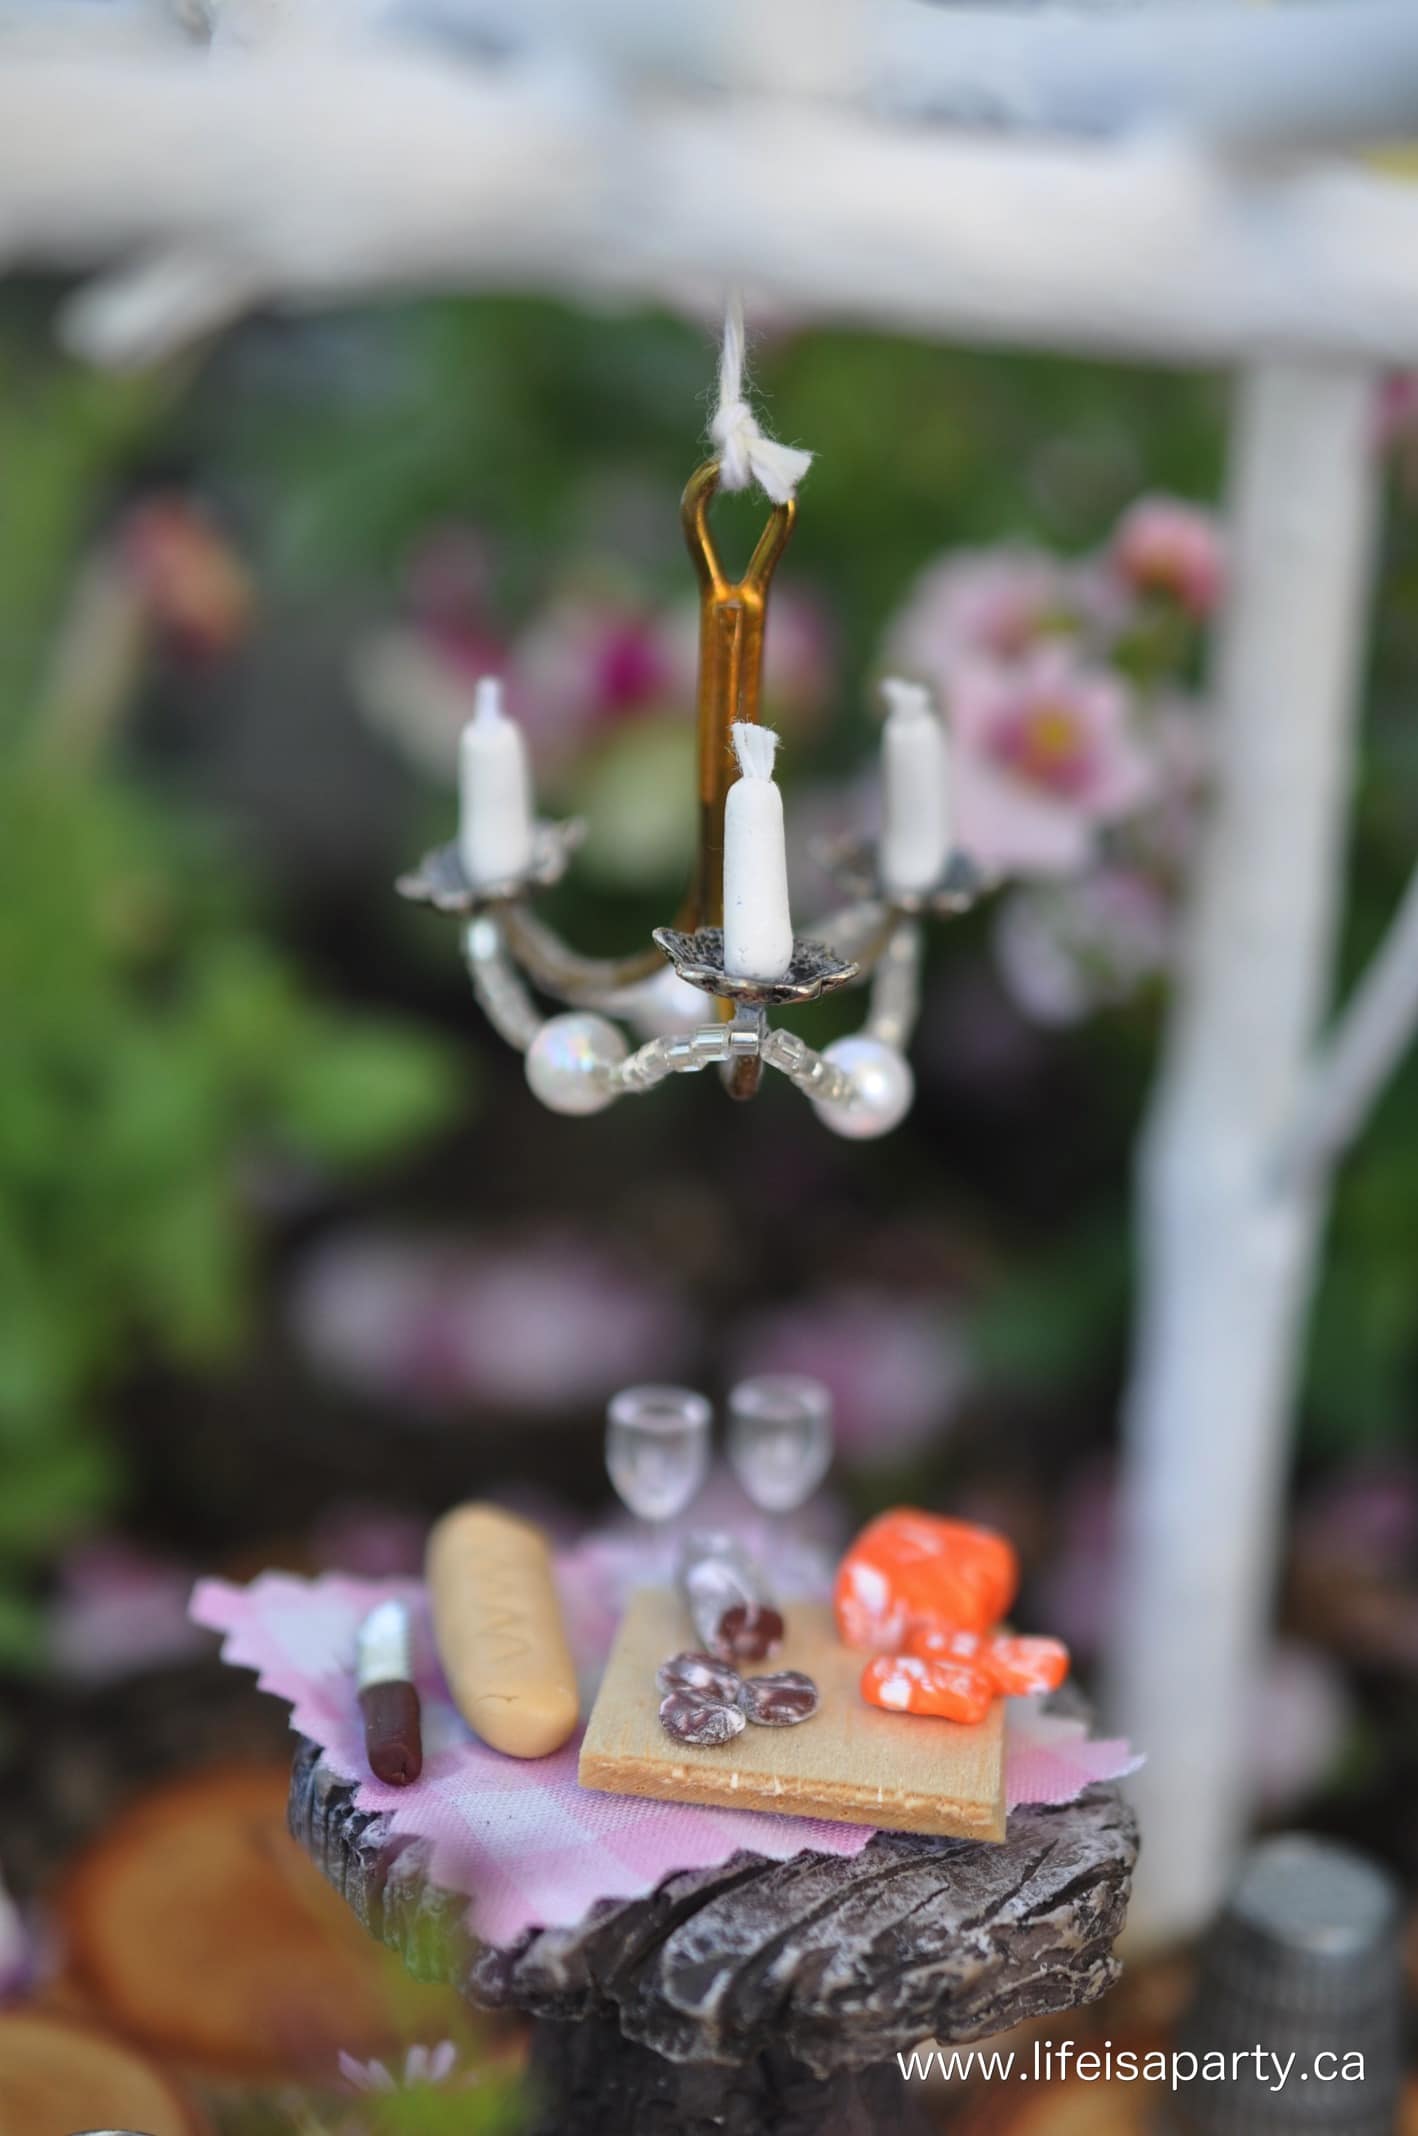
DIY Miniature Chandelier: how to make a miniature fairy chandelier out of a fish hook, polymer clay, and beads. Perfect for a fairy garden or doll house.

DIY miniature chandelier for a fairy garden.

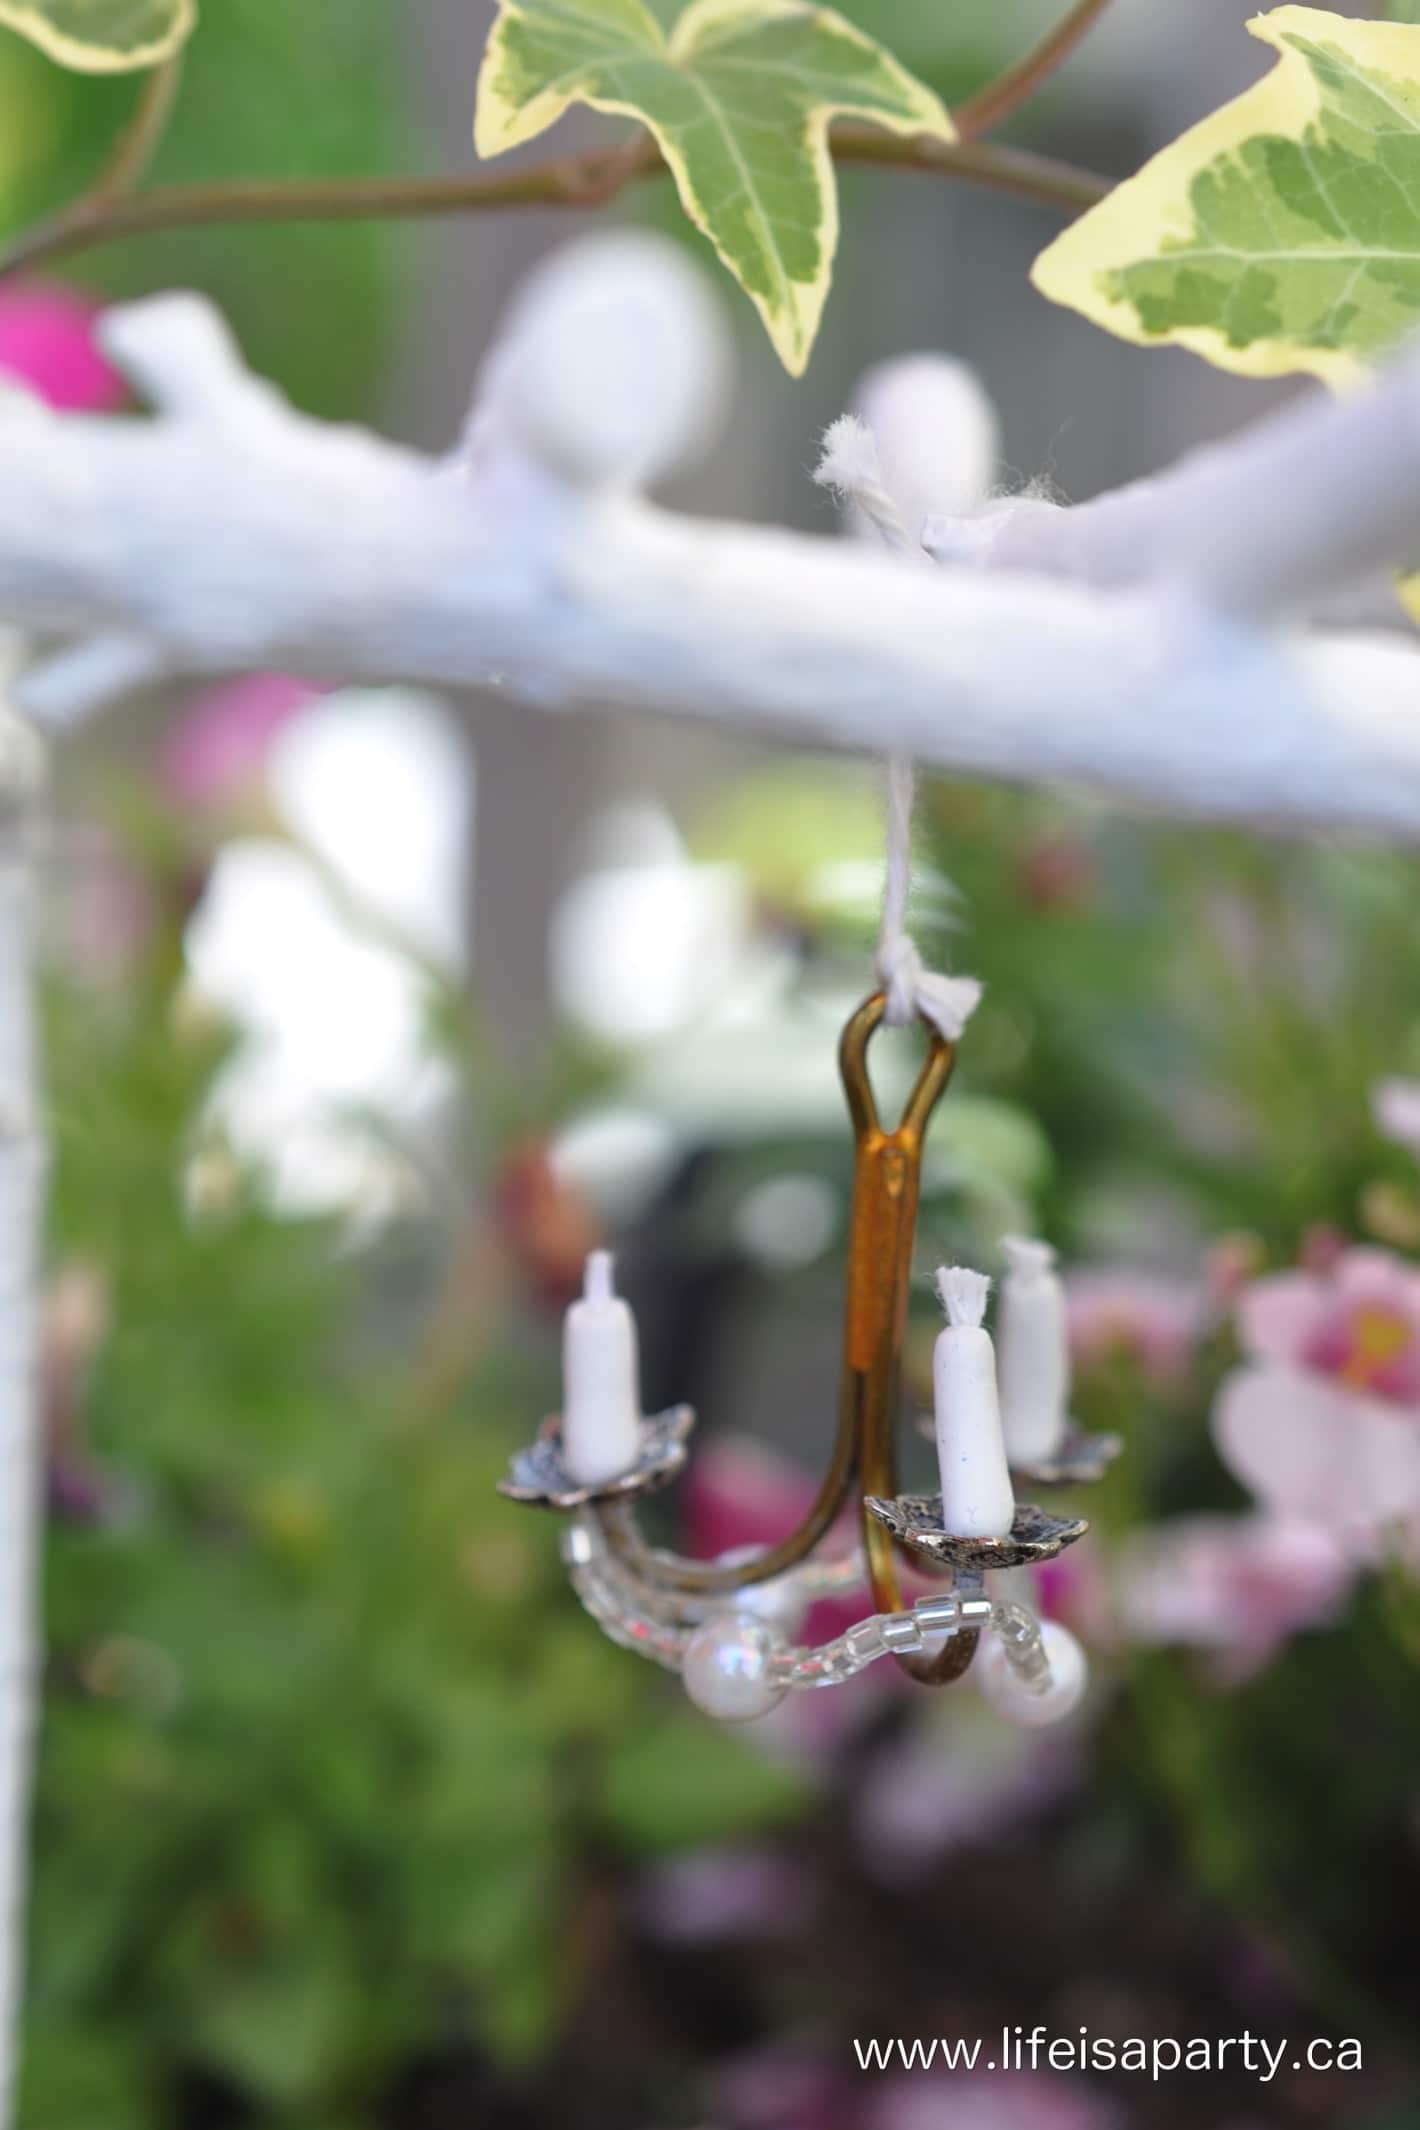
What does every Fairy Garden need?  A Miniature Chandelier.  And what does a fairy make a chandelier out of…a Fish Hook.

DIY Fairy garden miniature garden chandelier

The other day I shared our sweet little Miniature Fairy Pergola, and today as promised, is the tutorial to make your very own Fairy Garden Fish Hook Miniature Chandelier.

How to make a fairy garden miniature chandelier

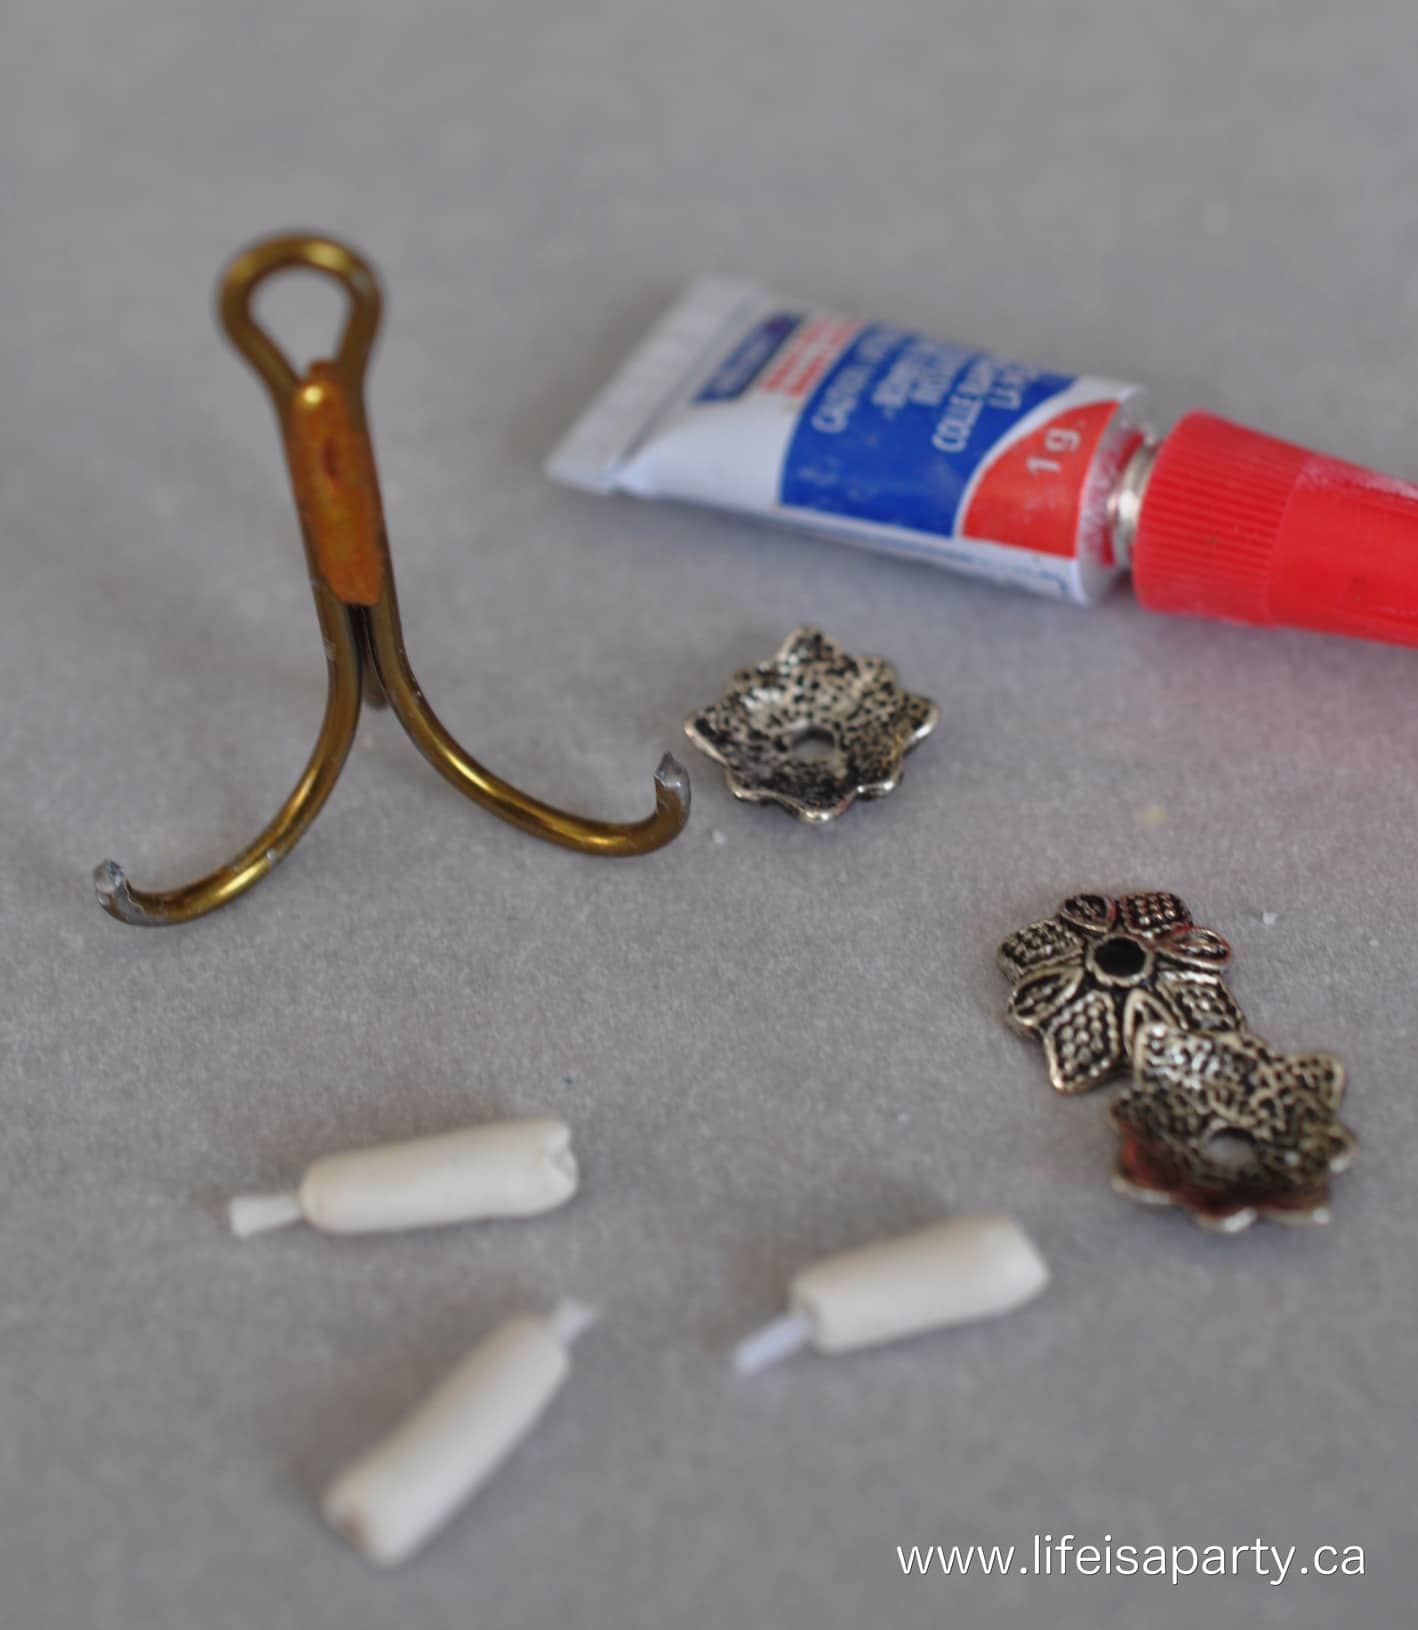
DIY Miniature Chandelier Materials:

  • Triple Hook Fish Hook
  • Pliers
  • Small Hack Saw
  • Birthday Candle
  • Polymer Clay -white
  • Bead Caps
  • Small glass beads and pearls
  • Fine Thread
  • Bead Needle
  • Super Glue
How to make a diy miniature chandelier

How To Make A Miniature Chandelier

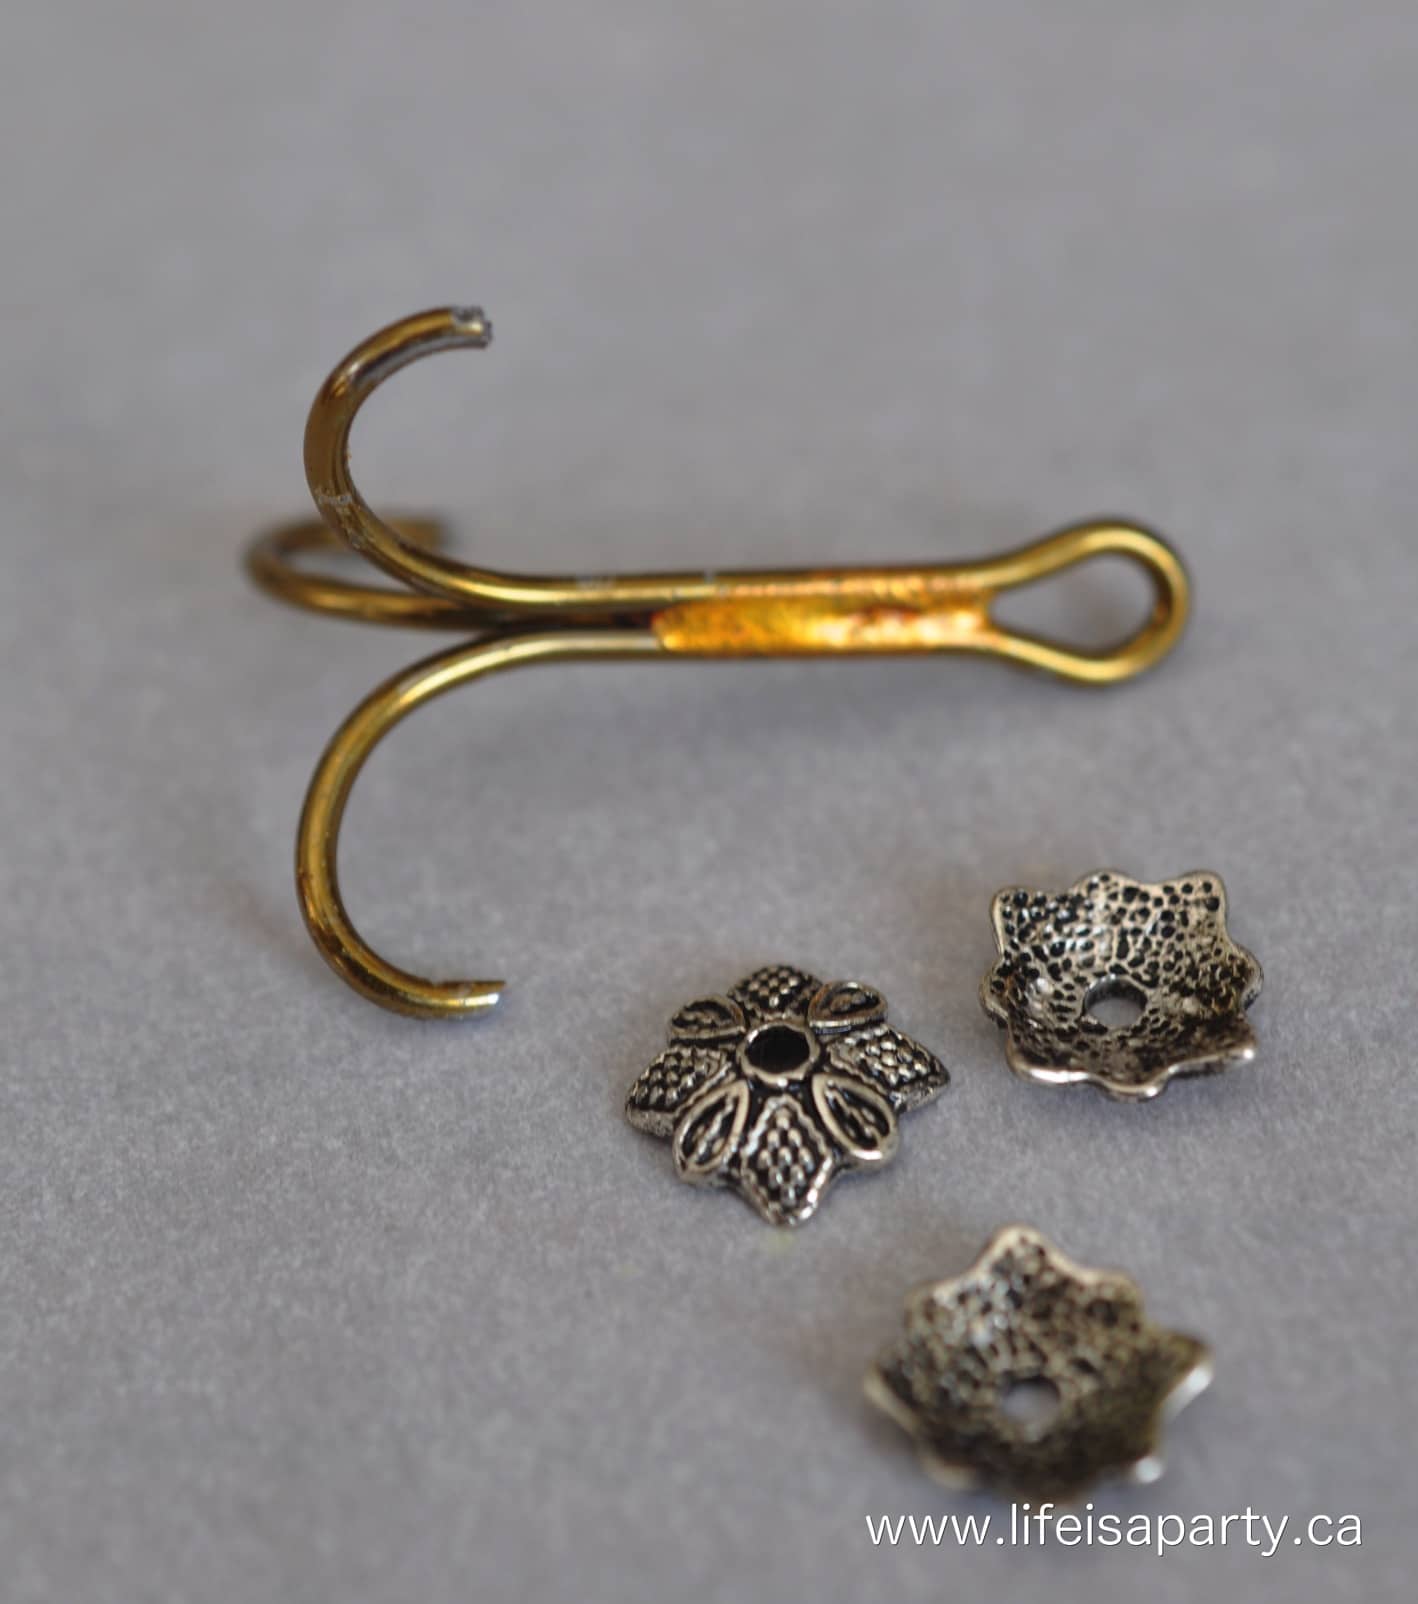
Remove Fish Hook Barbs

1. Begin with the fish hook, this is the hardest part of the project.  Use pliers to hold the hook, and a small hack saw to cut the barbs off of the hook.  

My husband helped me out with this.  If you weren't able to get the barbs off, I think you could make a small ball/bead with polymer clay, and bake it around the barb to cover it up and prevent it from poking anyone.

How to make a miniature candlelabra

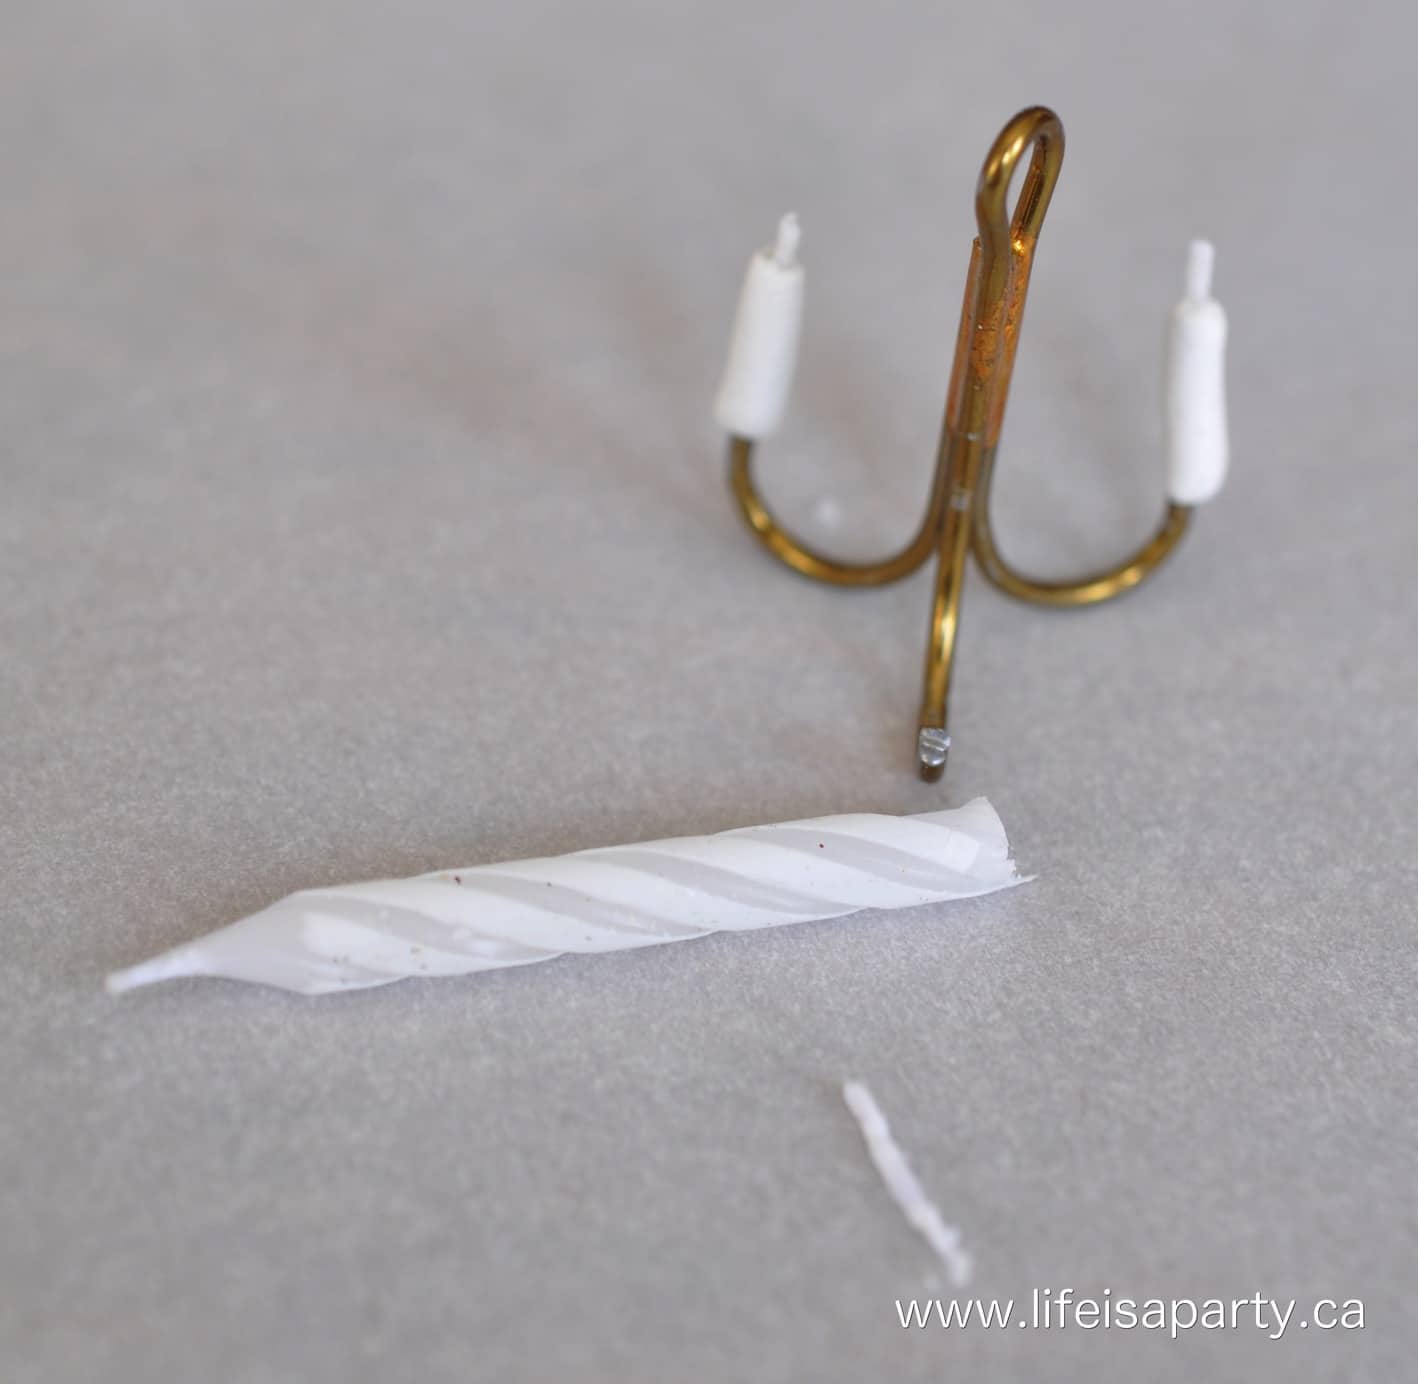
Make Candles

2. Next make the candles.  I used a real birthday candle and used the wick from it.  Then, I formed a candle shape from polymer clay.  I made sure to place it on the top of the hook to make a small indentation which made it easier to glue afterward.  

Once the polymer clay is formed into the candles, bake it according to the package directions to make it hard.

diy Miniature doll chandelier candelabra

Once the clay is baked it's time to glue it together.  Make sure to put the end bead first, then glue on the candle, and glue the end bead underneath it.  Super glue is a little tricky, so be careful of your fingers!

diy Miniature doll house chandelier candelabra

Chandelier Beading

3. The last step is to add the hanging beads to the chandelier.  I used small glass beads, and fine plastic thread.  Tie the thread right under the end bead, and use enough beads to make a nice swag.

DIY Fairy garden accessories

I tied the chandelier onto our little Miniature Fairy Garden Pergola and set up the sweetest little Fairy Picnic underneath -see how to make the fairy garden picnic food here.

DIY Fairy garden decor

With a sweet Fairy Garden Fish Hook Miniature Chandelier, life really is a party!

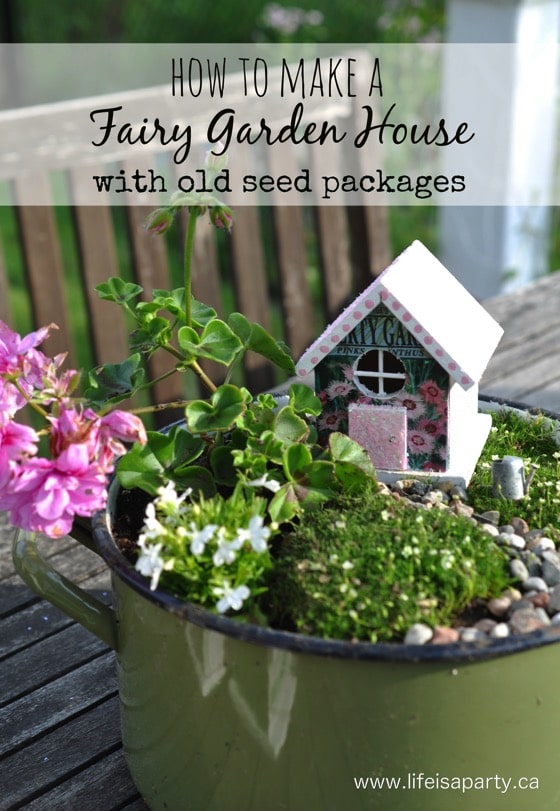
You might also like our How To Make a Fairy Garden House tutorial here.

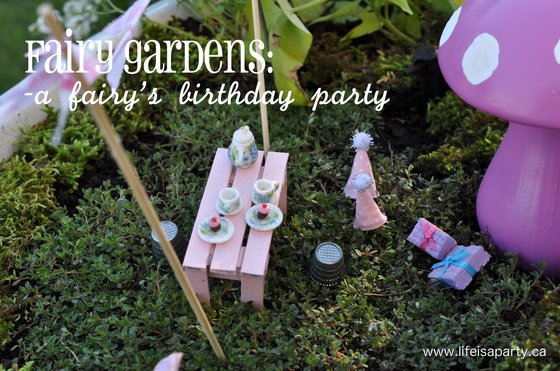
Also check out our Fairy Garden Birthday Party here.

Also check out our Fairy Garden in a Teacup here.


Fairy Pergola

Jul 5, 2016 · Leave a Comment

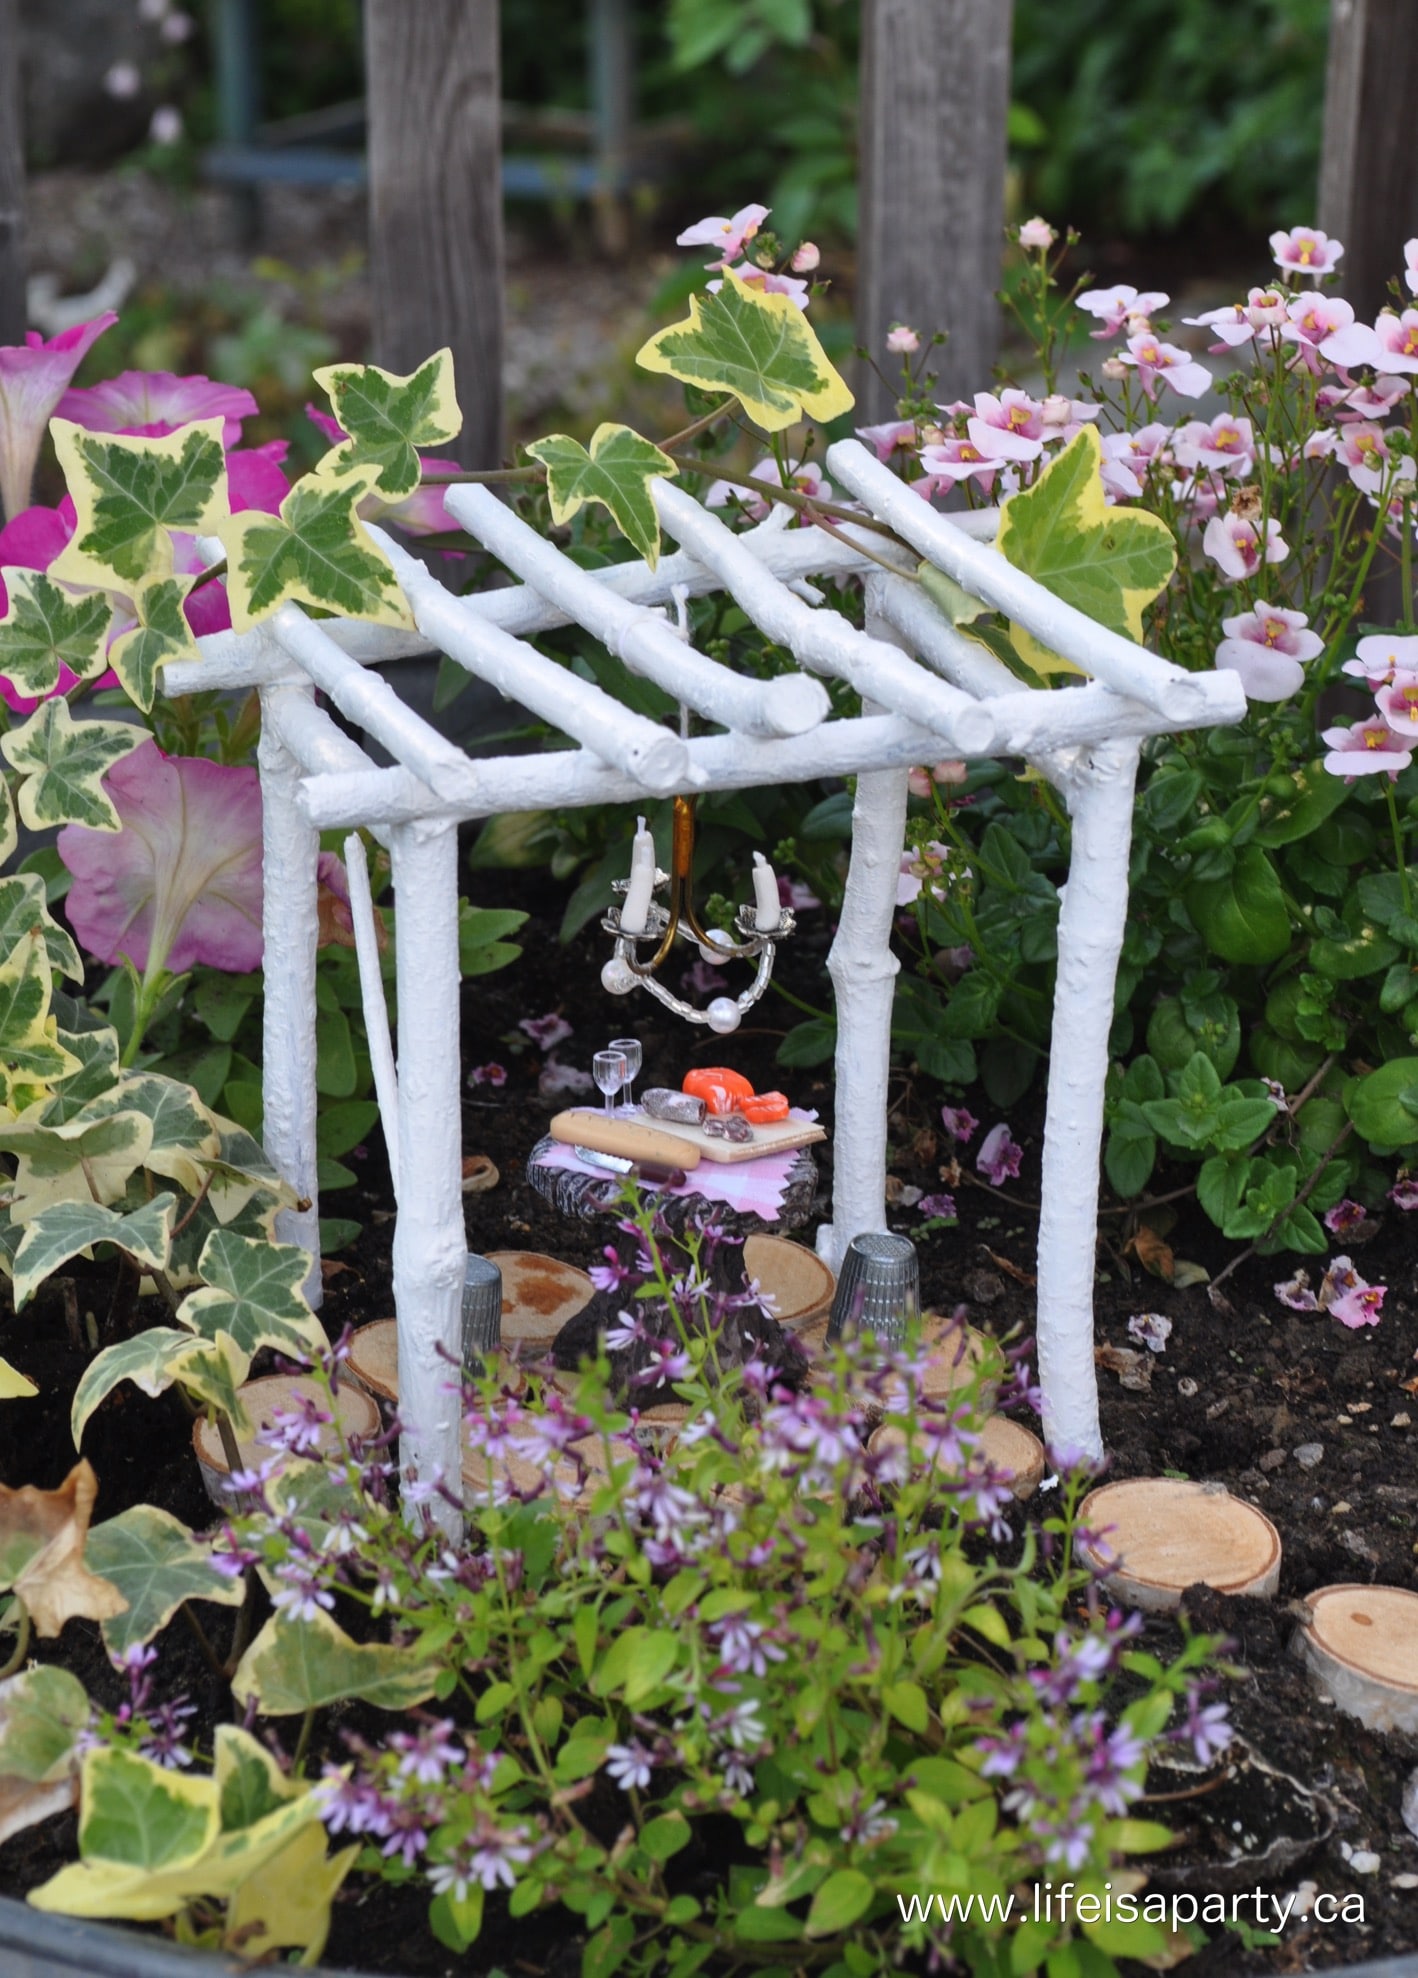
DIY miniature fairy garden pergola.

DIY Fairy Garden Furniture: easy how to instructions to make a miniature twig pergola/gazebo/arbor for a fairy garden using twigs, glue, and paint.

DIY miniature fairy garden pergola.


Last week I gave you a tour of my Summer Deck Makeover, and a little sneak peek of our Fairy Gardens.  Today I want to share how easy it is to make your own DIY Fairy Garden Furniture with this fun fairy garden pergola or arbor or gazebo.  What ever you call it it sure is cute.

how to make fairy garden furniture

Fairy Gardens have become a fun little hobby, and this year I thought it might be cute to make a some mini fairy garden sized furniture.  I settled on a fairy pergola / arbor / gazebo, to kind of match our large pergola in the back yard.

backyard pergola

I was inspired by the twig houses I made here.

The Fairy Gazebo turned out so sweet, and it was really easy to put together.

how to make a fairy garden gazebo

Materials:

  • Sticks -I used some dogwood branches
  • Glue -hot glue, or gorilla glue for a stronger finished product
  • White Paint

How To Make A Fairy Garden Gazebo

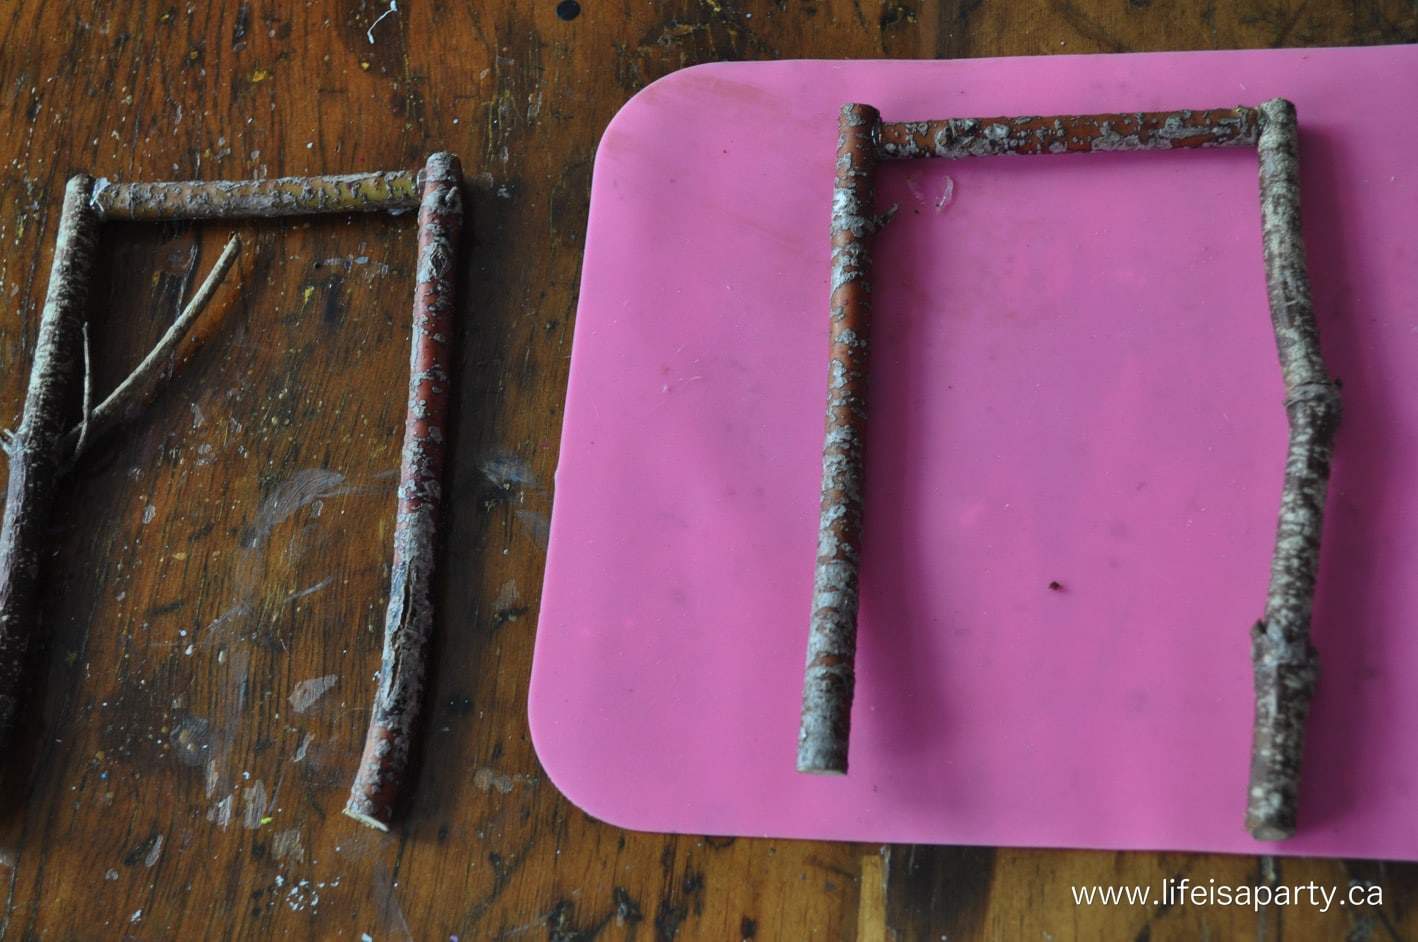
Start out with some straight sticks and use your garden clippers to cut them to the right length pieces.  I didn't give you measurements because this really doesn't need to be very precise.

diy fairy garden pergola

First make one side of the gazebo structure, and then make the other side to match.  I used hot glue here, but something like gorilla glue would make the finished gazebo even stronger.

You want to make your gazebo a little extra tall, so that you can push the posts into the dirt to secure it in your fairy garden.  So keep that in mind when you decide on the height.

Once the sides are glued together, use two pieces the same length each to create the gazebo structure.  You want to create the characteristic gazebo overhang on the ends.

how to make a fairy garden arbor

Now for the fun part, cut about 5 or 6 pieces so that they will be a little longer for some overhang and evenly space them along the top.

Now paint with some white exterior paint, I gave mine a few coats.

how to make an fairy garden arbour


I used my gazebo as the centrepiece of this little fairy garden.  We added some birch rounds to make a patio underneath it.  Click here to see the sweet little fairy chandelier tutorial, and the gazebo is the perfect structure to hang it off of.  Underneath, I set up the sweetest little fairy picnic.  I hope the fairies love it!

fairy garden miniature gazebo how to

With a Fairy Garden Gazebo, life really is a party!

Easy Strawberry Cream Cheese Pie

Jun 30, 2016 · Leave a Comment

Strawberry cream cheese pie.

Fresh Strawberry Cream Cheese Pie: Easy recipe with no-fail, no-roll crust, a creamy cream cheese cheesecake layer, and fresh strawberries.

Strawberry cream cheese pie.
[feast_advanced_jump_to]

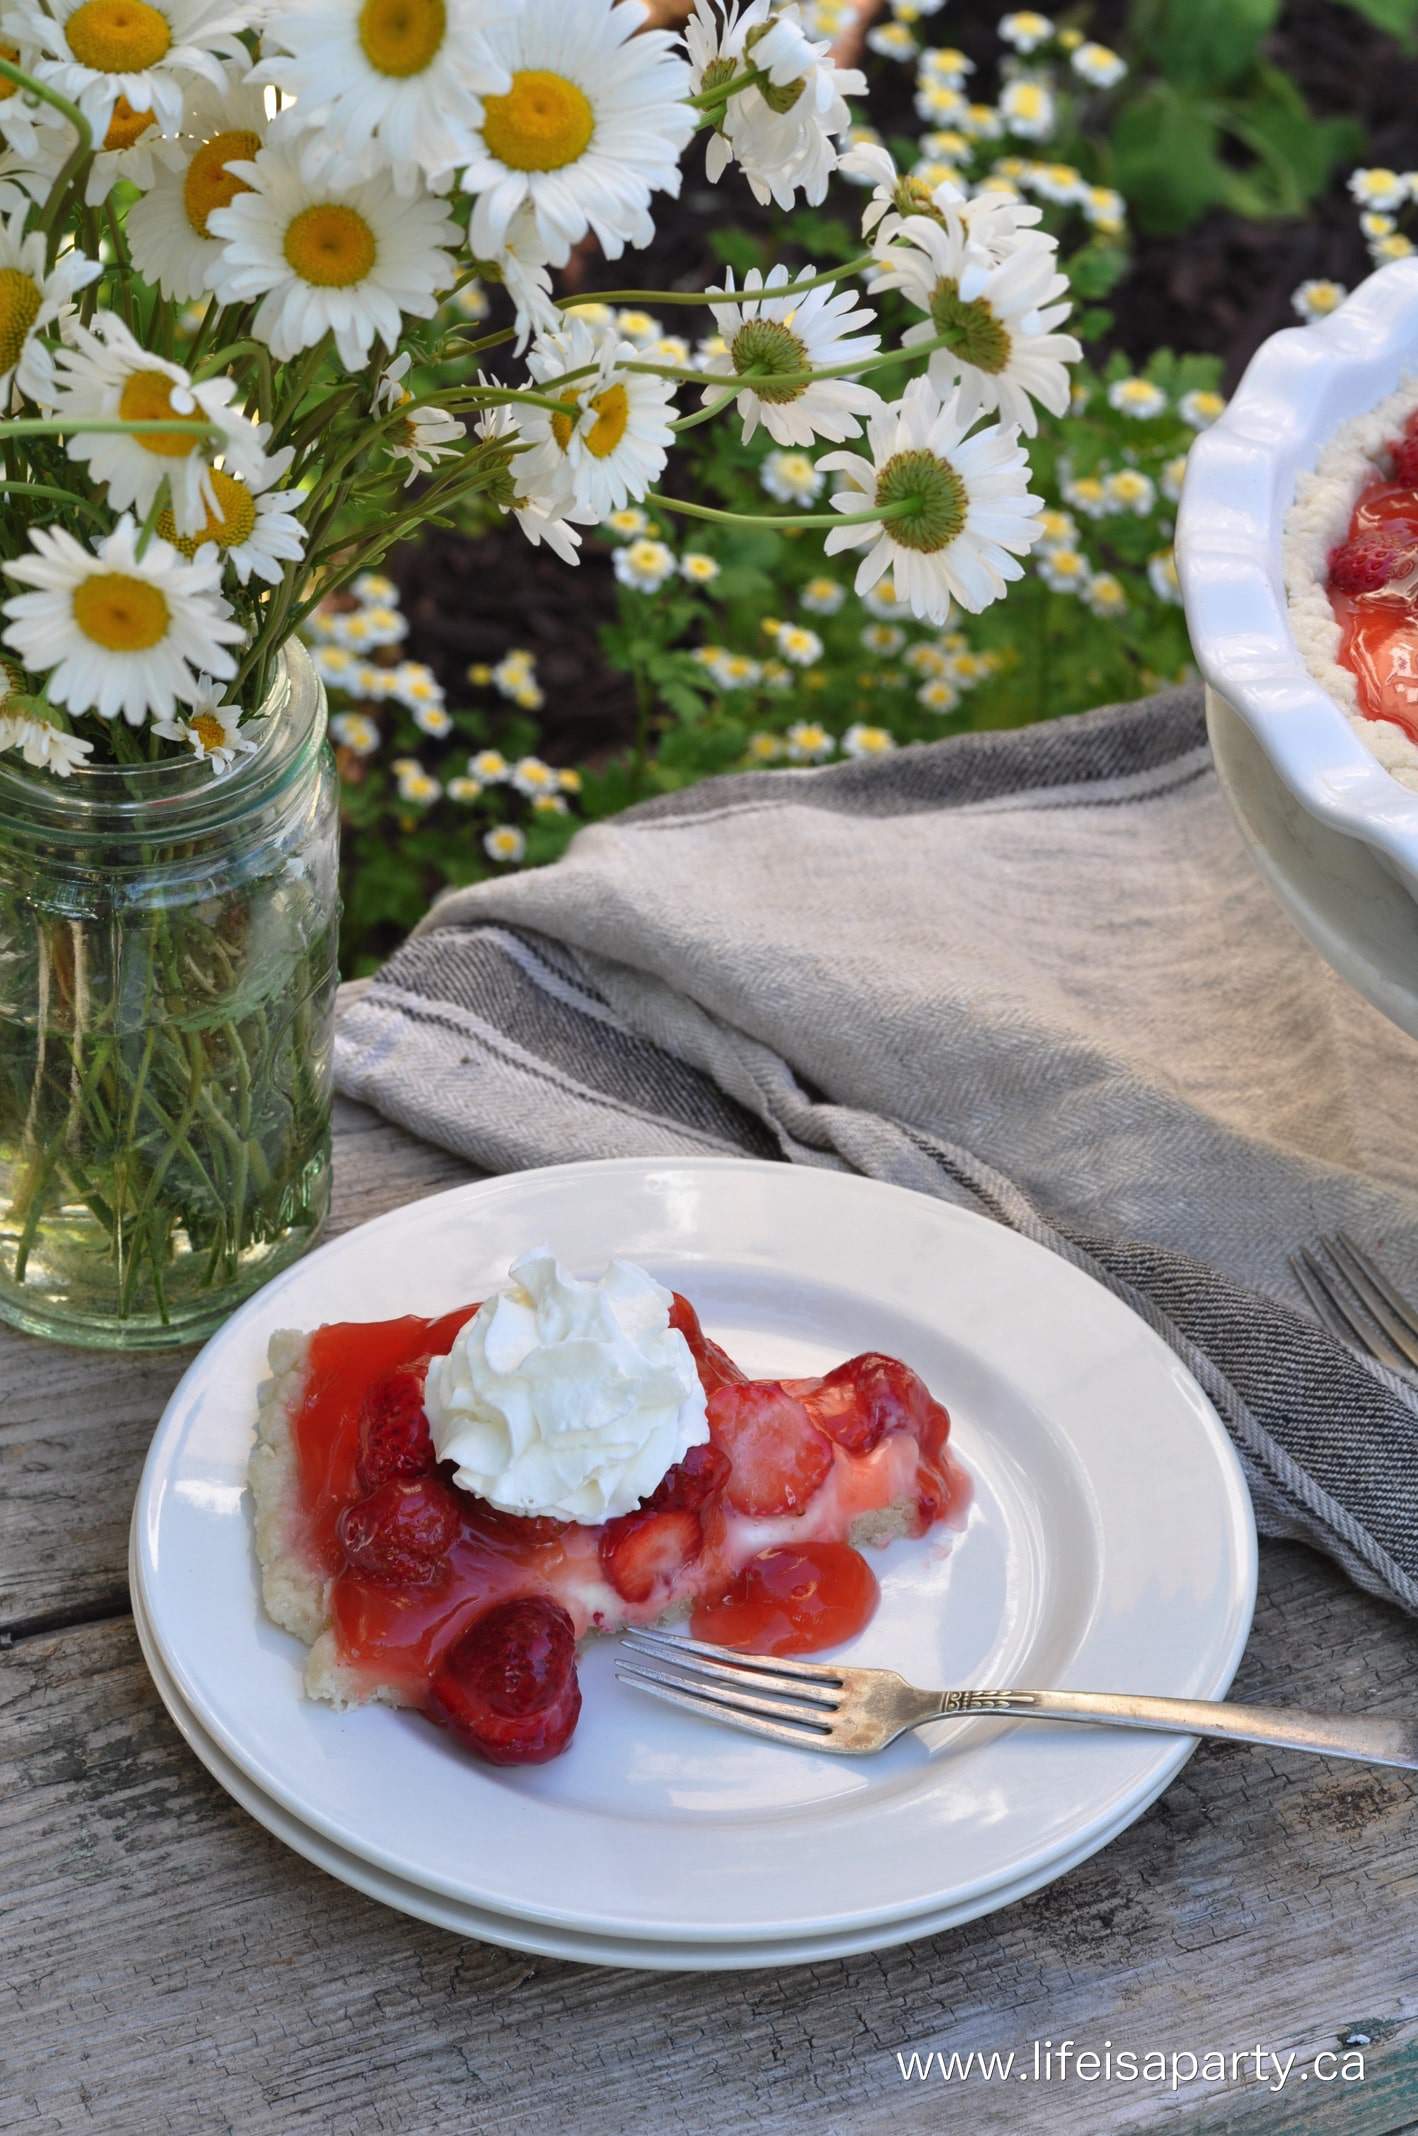
It's strawberry season here, and time to make strawberry cream cheese pie.  This is one of those strawberry desserts that I look forward to this time of year.  With fresh seasonal strawberries topped in a sweet glaze, a creamy filling of no bake cheesecake, and an easy no-roll pastry crust you'll want to add this strawberry cream cheese pie recipe to your recipe collection too.

This is the perfect treat to enjoy in the garden on a warm summer day.  Serve the strawberry cream cheese pie with whipped cream for the perfect summer fruit dessert.  This homemade pie is quick and easy to make, and always a hit with strawberry lovers.

Strawberry Pie with Fresh Strawberries and Cream Cheese

Fresh Strawberries

This pie is made with fresh strawberries.  It's best with local in season sweet strawberries.  The strawberries are sliced and covered with a sweet glossy glaze on top.  If you're looking for a great strawberry dessert to use up remaining strawberries after a day of picking, this recipe is perfect.  It's sure to become a favorite summer dessert.

Cheesecake Filling

This no-bake cream cheese filling is creamy and sweet and delicious.  We prefer to use full-fat cream cheese in this recipe as it gives the best creamy texture to the pie.  You can substitute low fat cream cheese in this recipe if you prefer to but it will be a slightly different texture.   The cream cheese combined with sugar and almond flavoring creates a cream cheese mixture that is light and delicious.  The cream cheese layer combines perfectly with the cookie like crust, and tart sweet glazed strawberries.  

This filling includes almond extract which gives it a unique and delicious flavor.  If for some reason, like a nut allergy you can not use almond, feel free to substitute vanilla extract for a different but delicious flavor.

Easy No-Roll Pie Crust

Unlike a no-bake strawberry pie, this one has a quick and easy pie crust that needs a few minutes in the oven to bake.  It's more like a cookie dough than a traditional pastry crust.  It's mixed together and then pushed into the bottom of the pie plate to form the crust, with your fingers.  No difficult pie pastry crust to form and roll out with a rolling pin.  Just mix this quick crust together, press into the pie plate, and bake for 10 min.

Allow the pie crust to fully cool before adding in the layer of cream cheese pie filling, to avoid it melting.  Then top with strawberries and glaze and let it all set in the fridge for a few hours.

Whipped Cream

Serve this pie with some whipped cream on the side.  To make homemade whipped cream, add 237mL of heavy whipping cream to a stand mixer and whip until stiff peaks form.  Add 1 teaspoon of vanilla extract, and 3 teaspoon sugar, and mix to combine.

Strawberry Cheesecake Pie

Store this strawberry pie in the in an airtight container or wrapped in plastic wrap, in the refrigerator.  

how to make a Strawberry cheesecake Pie

This strawberry pie recipe is particularly great since it has a simple no-roll homemade pie crust.  The crust comes together quickly, and then you just use your fingers to push it into the pie plate.  Easy Peasy, no-fuss, no-fail -my kind of pie!  I love the combination of the tart, fresh berries, and the sweet creamy cheesecake layer.  It's sure to be a crowd pleaser, and the perfect dessert during the summer months.  We love it for summer birthday celebrations.

Recipe

Strawberry cream cheese pie.

Strawberry Cream Cheese Pie

Creamy cheese cake filling and fresh strawberry topping make this the perfect pie for strawberry season.
No ratings yet
Print Pin Rate
Course: Desserts
Cuisine: American
Prep Time: 20 minutes minutes
Cook Time: 10 minutes minutes
Total Time: 30 minutes minutes
Servings: 8
Calories: 503kcal
Author: Dannyelle Nicolle-Ramjist

Ingredients

Pie Crust

  • 1 ½ cups all-purpose flour
  • 2 teaspoon sugar
  • ½ cup corn oil
  • 3 tablespoon cold milk

Cream Cheese Filling

  • 1 -8 oz. pkg. cream cheese room temperature
  • 1 teaspoon almond flavoring
  • ½ cup sugar

Strawberries and Glaze

  • 4 cups fresh strawberries sliced
  • ¾ cup water
  • 3 tablespoon cornstarch
  • 1 cup sugar
  • 1 teaspoon fresh lemon juice
  • whipped cream

Instructions

  • To make the pie crust, in a large bowl mix together the flour and sugar. Mix oil and milk in a separate bowl, then add to the flour and sugar mixture. Fully combine and press into a pie plate for form the pie crust. Bake at 400 degrees for 10 min., and then place on a wire rack to cool.
  • For the cream cheese filling, combine the cream cheese, sugar and lemon juice in the bowl of a stand mixer fitted with the paddle attachment and mix until smooth. Spread the mixture over the cooled pie crust.
  • Place 3 cups of sliced fresh strawberries on top of the cream cheese filling.
  • To make the glaze for the strawberries, combine 1 cup of sliced strawberries, water, cornstarch, 1 cup of sugar and lemon juice in a small saucepan and bring to a boil. Simmer for 3 min while stirring, and then remove from the heat. Allow to cool slightly, and then pour the strawberry glaze over the strawberry filling. Let the pie set in the refrigerator for several hours before serving. Serve with whipped cream.

Nutrition

Serving: 1g | Calories: 503kcal | Carbohydrates: 68g | Protein: 5g | Fat: 24g | Saturated Fat: 8g | Polyunsaturated Fat: 15g | Cholesterol: 30mg | Sodium: 96mg | Fiber: 2g | Sugar: 44g
Tried this Recipe? Tag me Today!Mention @LifeisaParty or tag #lifeisaparty!
Strawberry Cheesecake Pie with whipped cream

With fresh strawberry cream cheese pie, life really is a party!

More Strawberry Dessert Recipes

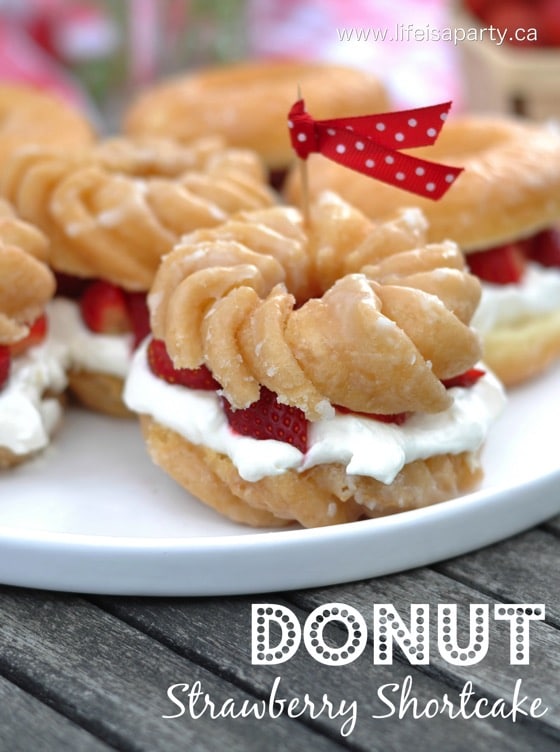
You might also like our Donut Strawberry Shortcake here.

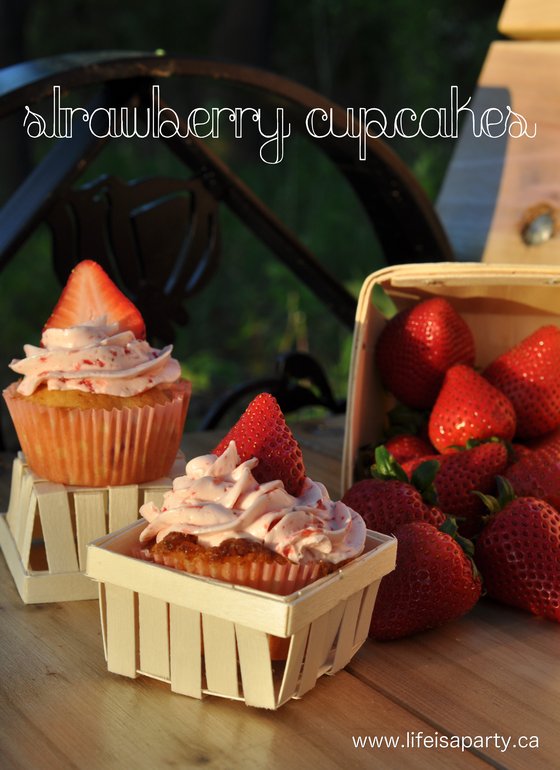
Also check out our Strawberry Frosting recipe here.

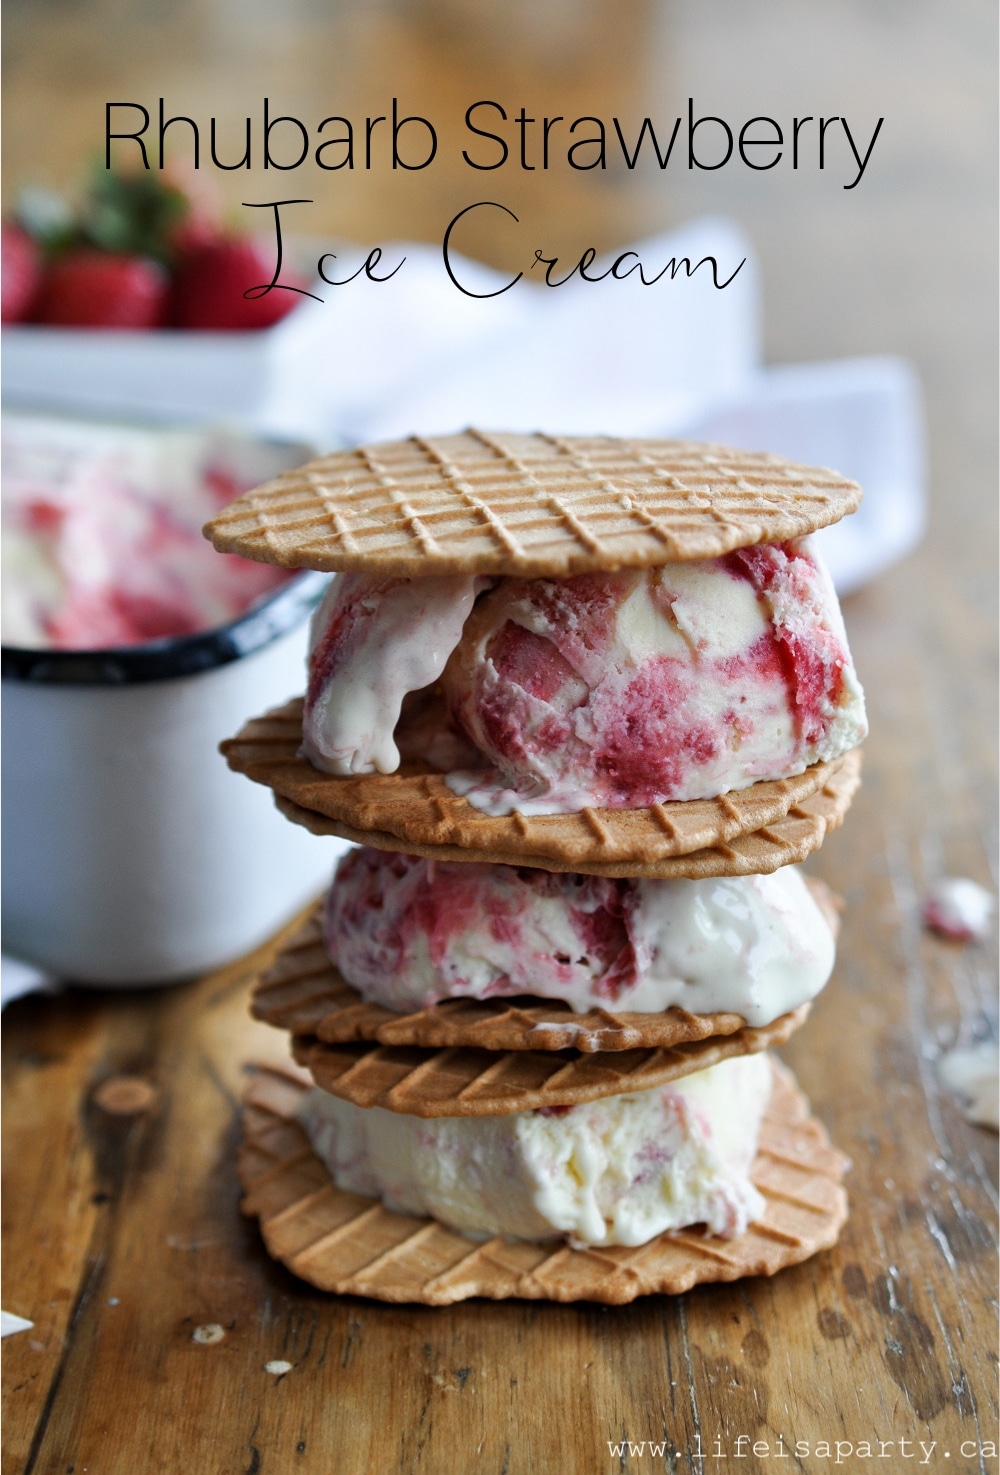
You might also enjoy our Strawberry Rhubarb Ice Cream here.Homemade Rhubarb and Strawberry Ice Cream Recipe: creamy vanilla base, with tangy rhubarb compote and sweet strawberry compote ribbons throughout.

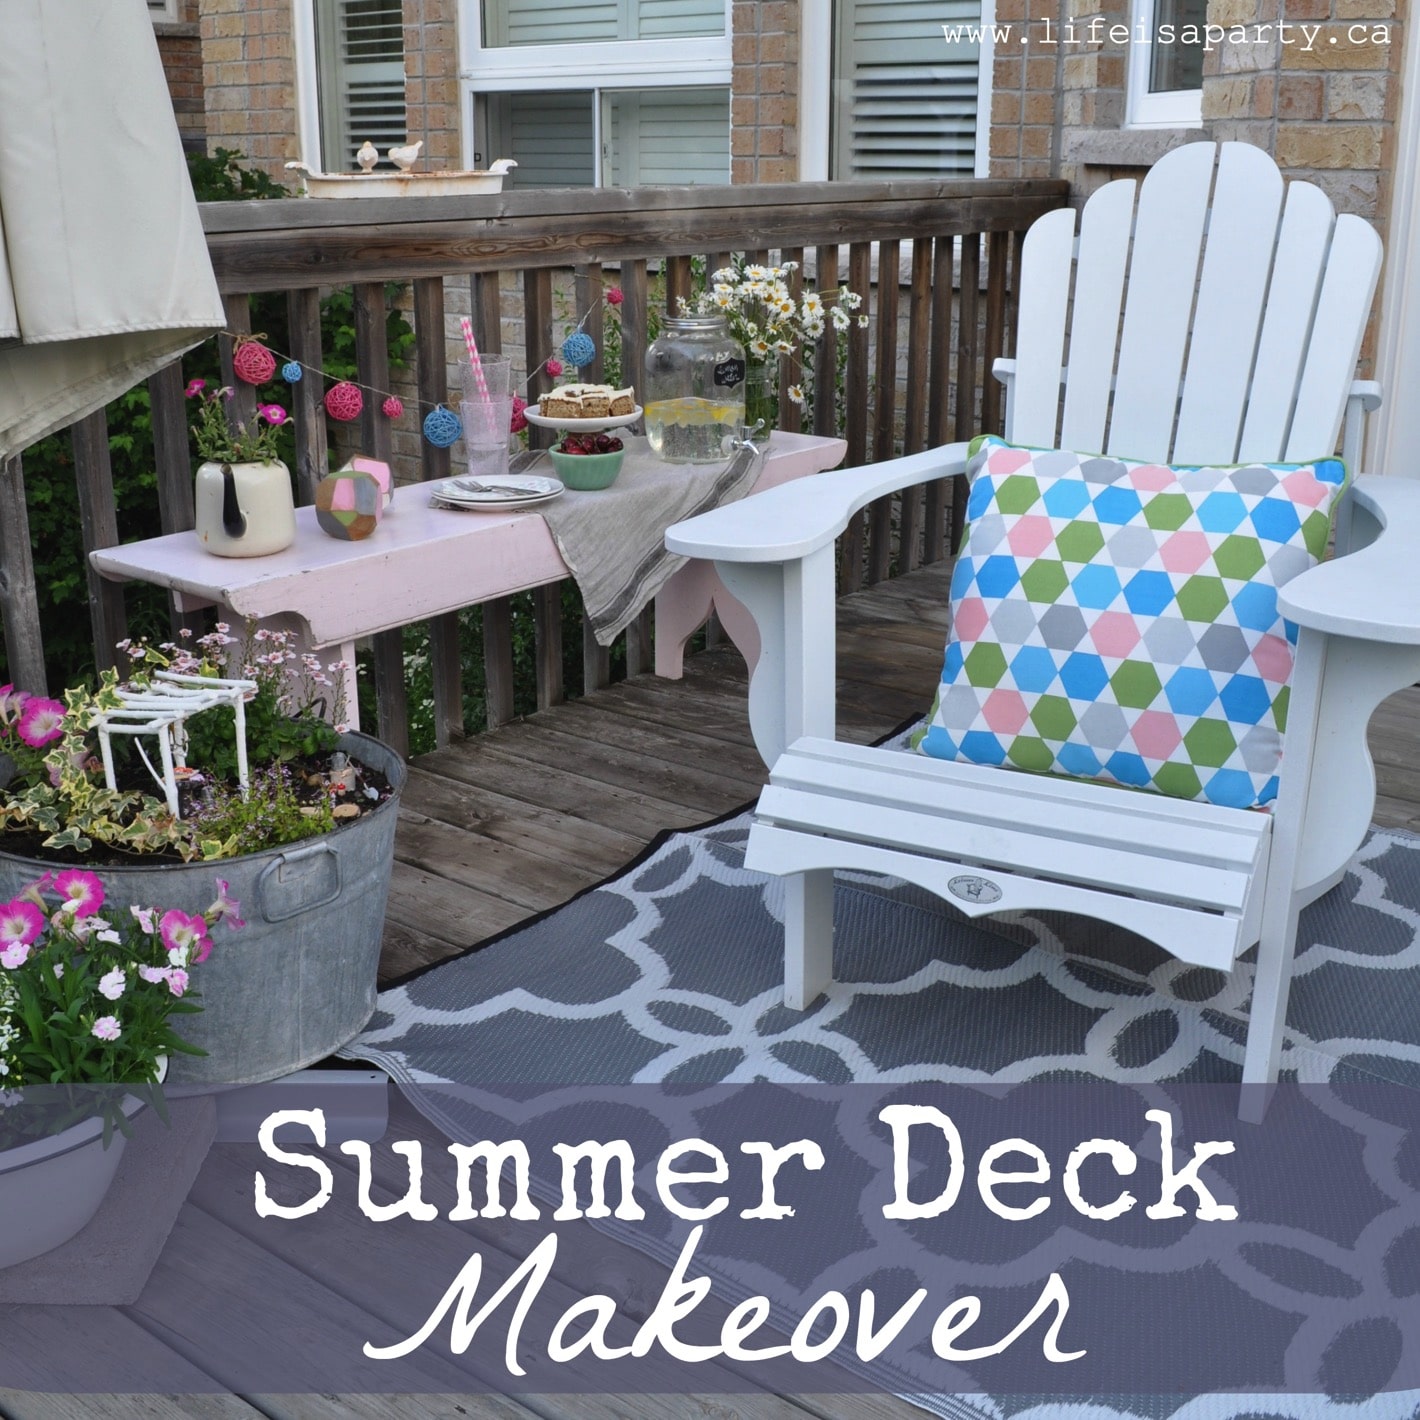
Summer Deck Makeover

Jun 29, 2016 · 11 Comments

Summer Deck Makeover: simple and pretty summer deck makeover ideas with a rug, outdoor pillows, flowers, and a snack area.

Summer Deck Makeover: simple and pretty summer deck makeover ideas with a rug, outdoor pillows, flowers, and a snack area.
Summer Deck Makeover: simple and pretty summer deck makeover ideas.

Today I'm sharing my Summer Deck Makeover for the Canadian Bloggers Summer Patio Tour.

Earlier this spring my poor old deck was looking a little rough, and a little barren.  Everything has to get packed up and put away for cold Canadian winters, so in spring, after the rain, it's time to bring it all out again.

deck before picture

You can see in this "Before" shot, the chairs and little bench are out, but that's about it.  My girls had been playing with their water table, and there were some very dead pansies in some containers.  Time for some sprucing up for sure!

deck makeover after picture

New Rug and Cushions

I started out with the pretty rug.  Since in my experience, they only last one summer, I shopped around for an inexpensive one.  I love the subtle pattern, and the grey colour, and it's so soft underfoot.

Summer Deck restyle

Next we moved our umbrella from the back corner.  We found that when we want to sit out the sun is on the far side, and it didn't really provide much shade where it was located.  It's much more usable now.

The chairs we bought to mark our very first wedding anniversary(15 years and counting) -well these are actually their replacements.  We had wood Muskoka chairs originally, but over the years, and a few coats of stain, they had definitely seen better days and I was so tired of repainting them every few years.  Two years ago my husband convinced me to replace them with these zero maintenance ones, and they have been great, and I'll never have to worry about restaining or decay with them again.

New for this year are the pretty cushions.  I like pink, and it hasn't been around for a few years, so when I saw these with  a little pink, and the trendy geometric pattern,  I thought they'd be a nice addition.  They're made for outside, so if I forget to bring them in one night, it's no big deal.  I love the colours they bring in and how they help update some of the older pieces.

Deck Makeover

Snack Area

The little pink bench is one I've had for years.  It's so handy here, it can be extra seating for a party, or a serving area -great for a few summer refreshments.

Deck snack area

lemon water

There's nothing better on a hot summer day than a bowl of cold cherries.

deck picnic

I was inspired by the colours in the cushions to add some colour to the string of lights.  I picked up an inexpensive string at the dollar store, removed the rattan balls, and spray painted them with some left over pink and aqua paint to match the cushions.

rattan ball string of lights

They're so pretty at night, and a pop of colour in the day.

flowers planted in an old teapot

The cushions and their colours also inspired these fun geometric wooden blocks.  They're made with some fence post off cuts.  My brother-in-law made them for me by sawing off the edges to create the geometric shapes,  I painted them to match the cushion colours, and gave them a coat of mod podge to seal them.  I love the mix of the modern geometrics and the old thrifted teapot with flowers.

Summer Deck styling ideas

Flowers

Down the stairs I added more pots of flowers.  I love using vintage containers for flowers, just be sure to add some holes in the bottom for drainage.

flowers in galvanized buckets on a deck

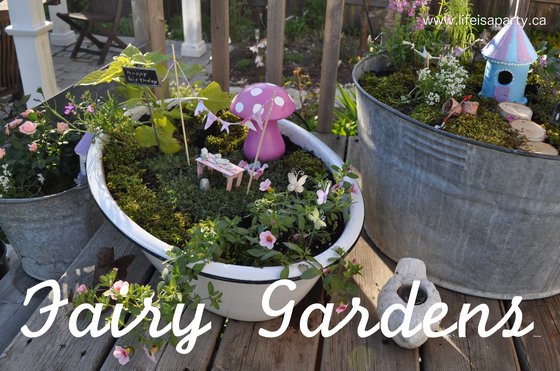
And, if you look carefully at these pots, you might notice that I have fairies living in my garden.

fairy garden

There's a few pretty houses in my neighbourhood.

fairy garden in a deck pot

And a new fairy pergola that's very similar to our grown up version.  See how I built the fairy pergola here.

fairy garden

The deck is a favourite spot to sit in the evening and look out on the beautiful forest we have behind our house, and I'm so glad that I invested in a new rug and pillows, did a few DIY's, moved the umbrella, and planted the pots.  I'm looking forward to a summer of enjoying it all.

deck looking onto forest

With a Summer Deck Makeover to enjoy, life really is a party!

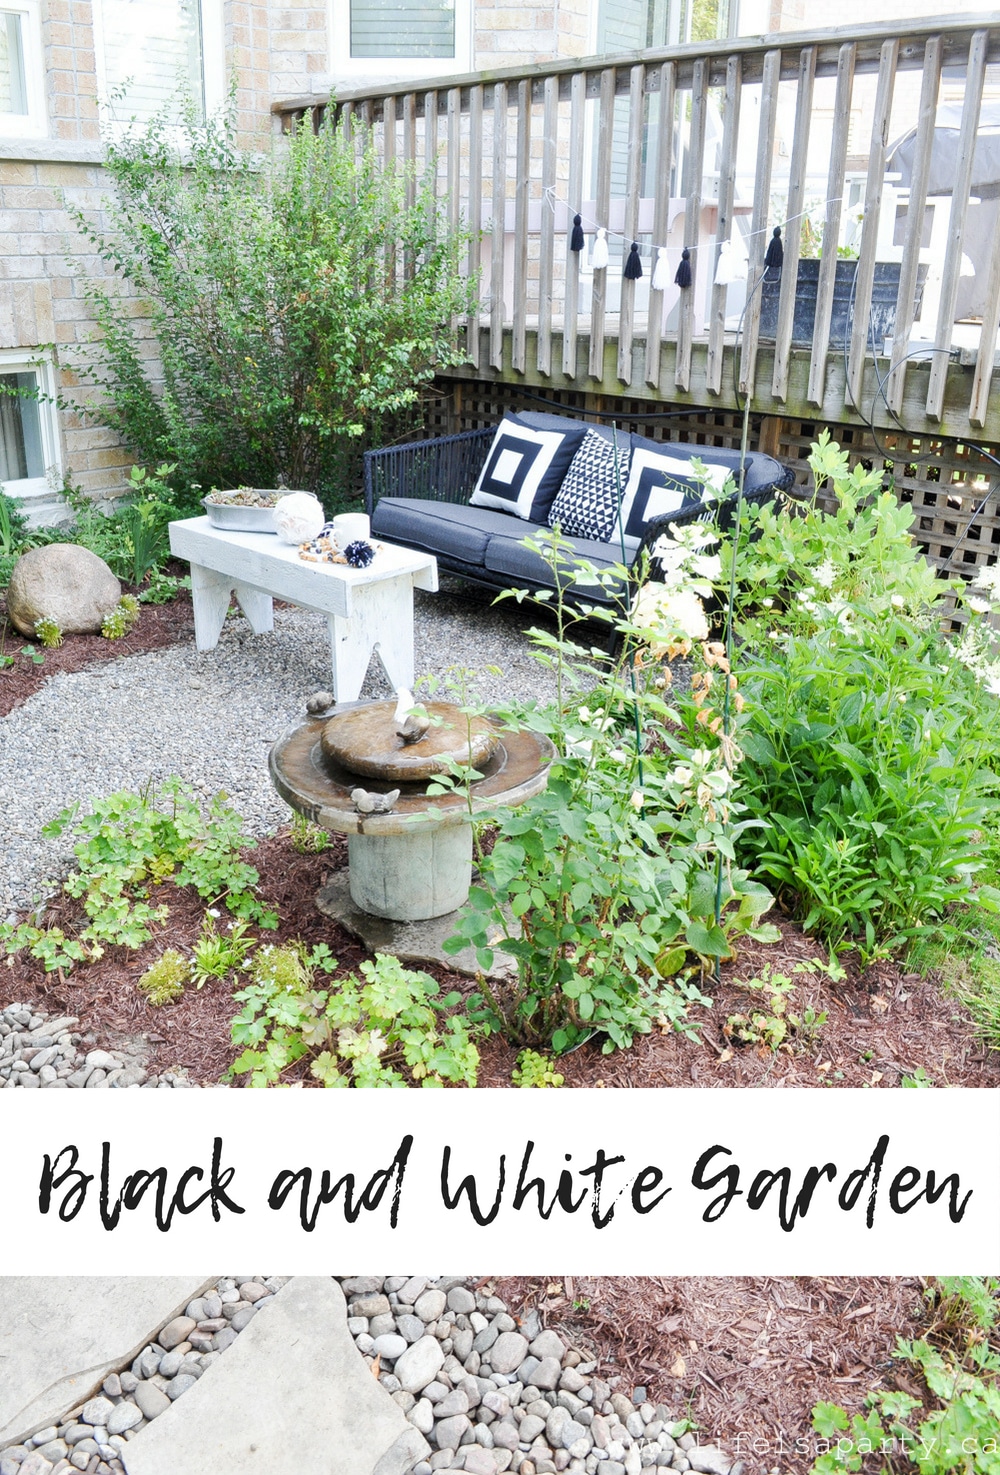
You might also like our Black and White Garden here.

Black and White Garden -an old garden is refreshed with a new pea gravel seating area, and lots of black and white accessories and plants, including a garden of all white plants.

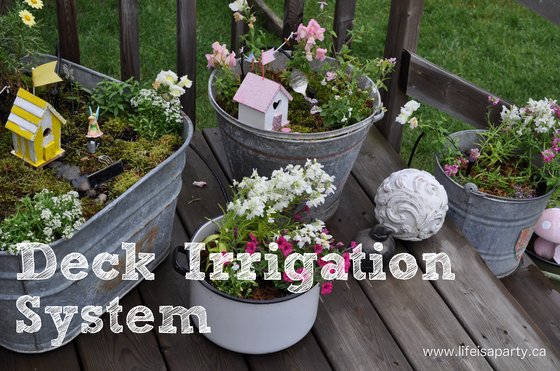
Also check out our Deck Irrigation System post here.

You might also enjoy Fairy Gardens for Kids here.

Fairy Gardens For Kids: kids can paint their own fairy houses, choose plants, and create their own fairy garden containers to grow and play with all summer.

How to Make an Ice Cream Sundae Kit Gift Basket

Jun 24, 2016 · Leave a Comment

Complete ice cream sundae gift basket with all toppings cones and accessories arranged and ready to give.

Create a thoughtful ice cream sundae gift basket with everything needed for the perfect sundae. Includes what to include, repackaging tips, and presentation ideas for any occasion.

Ice cream sundae making kit gift basket.

Quick Look

  • 🍦What: Ice Cream Sundae Kit Gift Basket
  • 🎁Perfect For: Teacher gifts, hostess gifts, birthdays, party favors, thank you gifts
  • 🕓Time to Assemble: 30 to 45 minutes
  • ✂️Difficulty: Easy
  • ⭐️Customizable: Highly adaptable to recipient preferences

Why You'll Love This

  • Universally loved: Everyone loves ice cream, making this a safe gift choice for almost anyone.
  • Easy to customize: Tailor the toppings and presentation to match the recipient's favorites or the occasion.
  • Budget friendly: You can create a beautiful gift without spending a fortune, especially when buying in bulk and repackaging.
  • Looks expensive: The repackaging and presentation make store-bought items look custom and premium.
  • Perfect for any occasion: Works for teacher gifts, hostess gifts, birthdays, party favors, and more.
  • Interactive gift: Recipients get to customize their own sundaes, making it more than just a typical gift.
[feast_advanced_jump_to]

Ice cream sundae kits are one of my favorite gifts to give because they're thoughtful, fun, and easy to personalize for any occasion. I've made these for teacher appreciation gifts, summer hostess gifts, birthday presents, and even party favors for ice cream themed celebrations. The best part? You can customize each kit based on the recipient's favorite flavors and toppings.

What makes these kits special is the presentation. By repackaging store-bought items in clear cellophane bags and arranging everything in a pretty basket or box, you can create a gift that looks expensive and custom made. The recipient just adds ice cream and they're ready for a fun sundae night at home.

Whether you're headed to a BBQ, cottage weekend, or need a thoughtful thank you gift, this ice cream sundae kit is always a hit. It's simple to put together, looks beautiful, and works for almost any occasion or age group.

If you love ice cream as much as we do, you'll also want to check out our complete guide to Ice Cream Party Ideas and our Ice Cream Charcuterie Board.

What to Put in an Ice Cream Sundae Kit

The key to a great ice cream sundae kit is variety. Include different options so recipients can customize their perfect sundae.

Ice Cream Cones

Ice cream sundae kit waffle cones, sugar cones, and waffle bowls.

It's fun to include a bunch of different ice cream cone options. I always include waffle cones, sugar cones, and waffle bowls so everyone can choose their favorite style. You can find all of these at the grocery store. For something extra special, look for chocolate dipped cones, Oreo cones, or other specialty varieties.

Pro Tip: Repackage cones in clear cellophane bags tied with twine or ribbon. This makes them look custom and protects them from breaking.

Sauces and Cherries

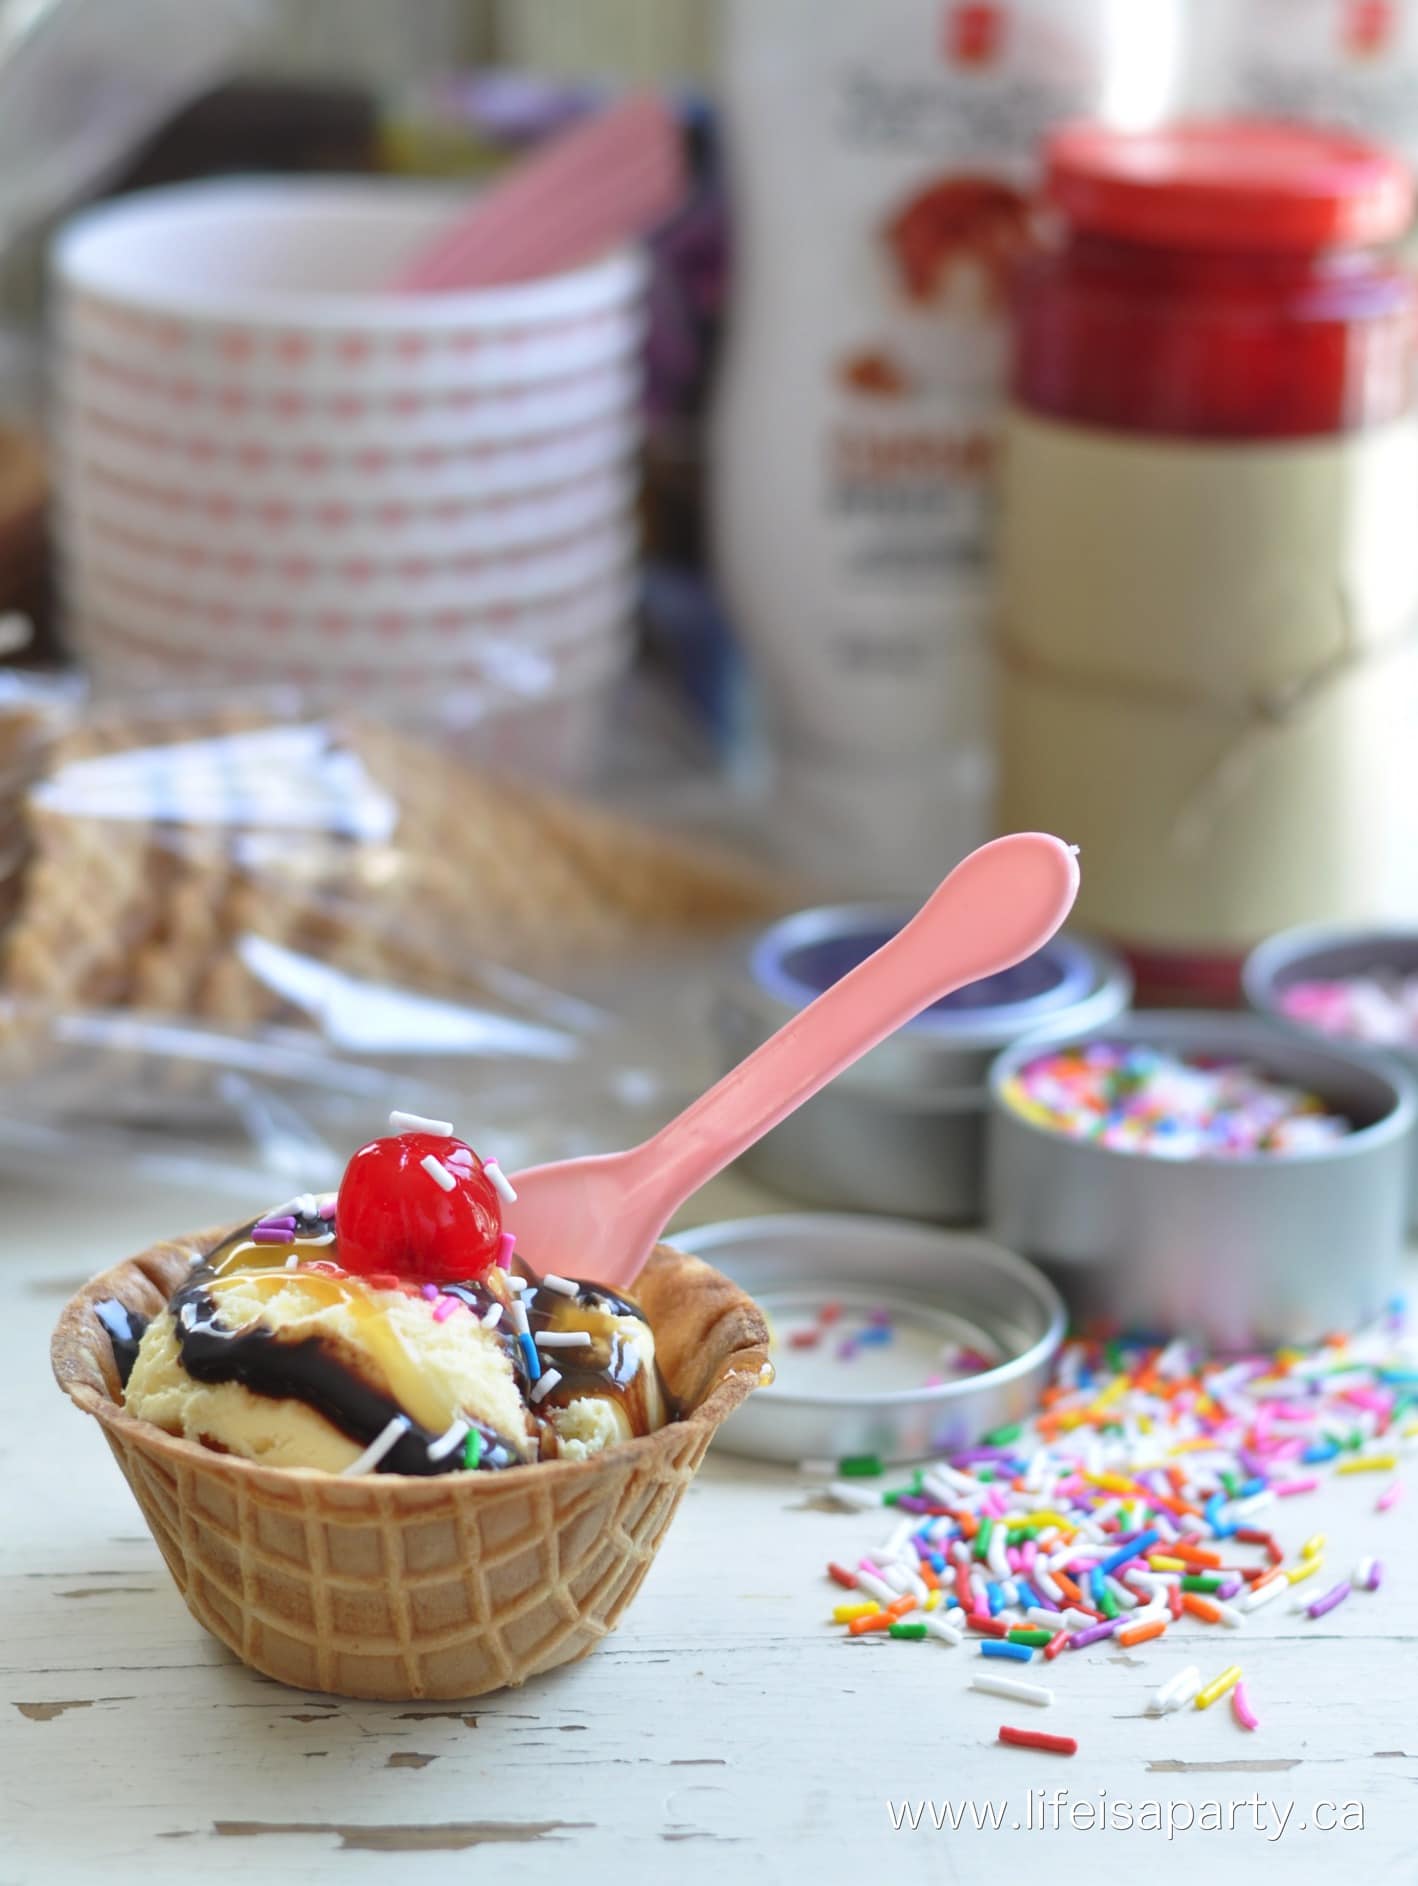
chocolate syrup, caramel syrup, maraschino cherries

I always include classic chocolate sauce and caramel sauce. Strawberry sauce is another great option. You could also look for magic shell (the kind that hardens instantly on ice cream) for something fun and different.

Don't forget the cherry on top! I wrap the cherry jar with a little kraft paper and twine and it looks so pretty. If you want to go the extra mile, you can make homemade hot fudge sauce and package it in a mason jar for a really special touch.

Fresh Fruit Option: Include fresh bananas for banana splits, though these should only be added if giving the gift immediately.

Bowls, Spoons, and Napkins

Ice Cream Sundae bowls, spoons, and napkins

The sweet little bowls and spoons are from the dollar store, and the ice cream napkins too. Don't they look cute tied with a little twine? Disposable wooden spoons would be a great choice too. Small plastic ice cream sundae bowls in pastel colors are really cute and reusable.

Keep your eye out for ice cream themed bowls and napkins at the beginning of summer and stock up when you see them. An ice cream scoop would be a great addition too, especially for a hostess gift or housewarming present.

Candy and Sprinkles

Ice cream sundae kit sprinkles, candies, marshmallows, and wafer cookies

I wanted to include a few candies and sprinkles for variety. I love colorful rainbow marshmallows, and a selection of favorite sprinkles. Chocolate candies like Smarties or M&Ms are always popular. I also included rolled wafer cookies because they're such a perfect addition to a bowl of ice cream. Look for them in different flavors like chocolate, vanilla, and hazelnut.

Other Great Candy Options:

  • Gummy bears
  • Mini peanut butter cups
  • Chocolate chips
  • Crushed cookies
  • Toffee bits
  • Candy coated chocolates
Ice Cream Sprinkles

I picked up sprinkles at the bulk store. The ice cream cone shaped sprinkles were the cutest! The containers are from the dollar store. I should have picked up more for myself because I love them. Small mason jars work beautifully for packaging sprinkles too.

If you're making your gift basket for a special occasion like Valentine's Day, Christmas, or Halloween, look for sprinkles in coordinating colors. Pink and red for Valentine's, orange and black for Halloween, red and green for Christmas. Shaped sprinkles (hearts, stars, holiday themes) add a festive touch.

Ice Cream

If you're giving your ice cream sundae kit immediately, and the recipent is at home and put the ice cream in a freezer you are welcome to include it. If including look for gourmet varieties, or interesting flavors. And of course you can't go wrong with classic vanilla and chocolate.

But if the recipent won't have access to a freezer immediately, it's best to leave the ice cream out. Add a not that says something like "just add ice cream and you're all set". It's also a great idea to include a grocery store gift card to cover the cost of the ice cream.

How to Assemble Your Ice Cream Sundae Kit (Step by Step)

The key to making this gift look special is all in the packaging. Here's how to create a professional looking ice cream sundae kit.

Step 1: Choose Your Container

Pick a basket, sturdy gift box, or gift bag with a cardboard bottom. The size depends on how many items you're including. For a full kit with multiple cone types, several toppings, and sauces, you'll want a medium to large basket. For party favors, smaller containers work perfectly.

Where to Find Containers:

  • Dollar stores (great selection at low prices)
  • Craft stores (look for sales)
  • Thrift stores (unique baskets at bargain prices)
  • Gift shops (for premium presentation)

Step 2: Gather Packaging Supplies

You'll need cellophane bags in different sizes, ribbon or twine, and optionally, labels or gift tags. All of these are available at dollar stores or craft stores.

Supplies Checklist:

  • Clear cellophane bags (various sizes)
  • Ribbon, twine, or raffia
  • Tissue paper or shredded paper filler
  • Gift tags (optional)
  • Labels (optional)
  • Scissors

Step 3: Repackage Bulk Items

This is the step that makes everything look custom and put together. Take items out of their bulky, commercial packaging and repackage them in clear cellophane bags. This is especially important for candy, sprinkles, and cookies.

How to Repackage:

  • Use different size bags for different items
  • Fill bags about two thirds full
  • Tie each bag tightly with ribbon or twine and make sure it's air tight
  • Group similar items together
  • Leave some items in original packaging if they look nice (like sauce bottles)

Why This Works: Breaking up large packages lets you create multiple gift baskets from one shopping trip, and it allows you to offer a little bit of everything in each basket. Plus, the presentation is so much prettier than commercial packaging.

Step 4: Arrange Items in Container

Place taller items (sauce bottles, cone packages) toward the back. Put shorter items (bags of candy, sprinkles in containers) in front. This creates visual interest and makes sure everything is visible.

Fill any gaps with tissue paper or shredded paper to keep items from shifting and to add color. I like using bright, fun colors that match the ice cream theme.

Arrangement Tips:

  • Create height variation
  • Group items by color for visual appeal
  • Make sure gift recipient can see everything
  • Balance the arrangement (don't put all heavy items on one side)

Step 5: Add Final Touches

If you're using a basket, you can wrap the entire thing in clear cellophane and tie it with a big bow. If you're using a gift bag, arrange items inside and add tissue paper on top.

Optional Additions:

  • Gift tag with recipient's name
  • Small card that says "Just Add Ice Cream"
  • Ribbon on the handle
  • Fresh flowers tucked in (if giving immediately)
Ice Cream Sundae Kit: Perfect for summer gift giving. Wrap up your favourite ice cream toppings, sauces, cherries, ice cream cones, and ice cream.

Perfect Occasions for Ice Cream Sundae Kits

One of the best things about ice cream sundae kits is how versatile they are. Here are my favorite occasions for giving these gifts.

  • Teacher Appreciation Gifts: This is the perfect sweet gift heading into summer. Teachers love receiving something they can enjoy with their families, and the timing is ideal since summer is ice cream season. I put these together as thank you gifts for my kids' teachers and they were a huge hit.
  • Hostess Gifts: Bringing an ice cream sundae kit to a BBQ, cottage weekend, or dinner party means you're bringing dessert and entertainment in one package. Everyone can customize their own sundae, which makes it interactive and fun. It's a welcome change from bringing wine or flowers.
  • Birthday Gifts: Works for kids, teens, and adults who love ice cream. You can customize the toppings based on the birthday person's favorites. Pair with a gift card to a grocery store if you want to help them buy the ice cream to go with it.
  • Party Favors: Make smaller versions as party favors for ice cream themed birthday parties. Include just 2 to 3 toppings, a cone or two, and a small sauce in a clear bag or box. Kids love taking home their own mini sundae kit.
  • Thank You Gifts: A thoughtful way to say thanks to neighbors, friends, babysitters, or anyone who's helped you out. The personal touch of repackaging and arranging everything shows you put thought into the gift.
  • Christmas: Red and green sprinkles, peppermint candies, candy canes
  • Valentine's Day: Pink and red sprinkles, heart shaped candies, strawberry sauce
  • Summer Holidays: Red, white, and blue sprinkles, festive napkins
  • Halloween: Orange and black sprinkles, candy corn, Halloween themed napkins

Tips for a Professional Look

These simple tricks make your ice cream sundae kit look like it came from a fancy gift shop.

Repackaging Secrets

  • Use Clear Bags: Clear cellophane bags let you see the colorful contents, which adds to the visual appeal. Stack items in bags so the colors show through layers.
  • Consistent Ribbon: Use the same ribbon or twine on all bags for a cohesive look. Natural twine, colorful ribbon, or raffia all work beautifully.
  • Remove Commercial Packaging: Taking candy out of branded wrappers and putting it in clear bags makes everything look more upscale.
  • Small Containers: Use small mason jars, spice jars, or dollar store containers for sprinkles. They look much better than plastic bags.

Presentation Tips

  • Color Coordination: Stick with a color scheme. Pastels (pink, mint, yellow) for spring/summer, or bright rainbow colors year round.
  • Label Everything: While not required, small labels on bags (chocolate chips, rainbow sprinkles, etc.) add a nice professional touch.
  • Odd Numbers: Arrange items in groups of 3 or 5 for the most pleasing visual arrangement.
  • Fresh Look: Make sure everything looks fresh and sealed. Replace any items that look damaged or crushed.

Ice Cream Sundae Kit Variations

For Kids

Focus on fun, colorful toppings:

  • Rainbow sprinkles
  • Gummy bears
  • Chocolate chips
  • Mini marshmallows
  • Colorful cones
  • Fun napkins with ice cream designs

For Adults

Include more sophisticated options:

  • Dark chocolate sauce
  • Caramel with sea salt
  • Nuts (pecans, almonds)
  • Wafer cookies
  • Coffee flavored toppings
  • Nice ceramic bowls instead of disposable

For Special Diets

Dairy Free Kits:

  • Include only toppings that are naturally dairy free
  • Add a note suggesting dairy free ice cream brands
  • Most sprinkles, many candies, and fruit toppings are dairy free

Nut Free Kits:

  • Skip all nut toppings
  • Check candy labels carefully
  • Focus on sprinkles, chocolate chips, gummies, marshmallows

Frequently Asked Questions

What should I put in an ice cream sundae kit?

nclude a variety of cones (waffle, sugar, bowls), sauces (chocolate, caramel, strawberry), sprinkles, candies (chocolate candies, gummies, marshmallows), cherries, bowls, spoons, and napkins. Everything except the ice cream itself.

Can I include ice cream in the kit?

Only if you're delivering it immediately and the recipient can freeze it right away. Most people give these kits without ice cream and include a note that says "Just Add Ice Cream" so the recipient can buy their favorite flavors fresh.

What's the best container for an ice cream sundae kit?

Baskets work beautifully and look classic. Sturdy gift boxes are good for shipping or mailing. Gift bags with cardboard bottoms are convenient for transport. Choose based on how many items you're including and your presentation preference.

How far in advance can I make these kits?

Most items are shelf stable, so you can assemble these 1 to 2 weeks ahead of when you need to give them. Store in a cool, dry place away from direct sunlight. This makes them perfect for making in batches.

Where should I buy supplies for ice cream sundae kits?

Dollar stores have great containers, cellophane bags, ribbon, bowls, and spoons. Bulk stores let you buy just the quantity you need for sprinkles and candy. Grocery stores have cones, sauces, cherries, and most toppings. Craft stores have pretty ribbons and gift packaging supplies.

How many servings does one kit make?

It depends on what you include, but most full sized kits make enough for 4 to 6 generous sundaes. You can also scale them down if you wish.

What if the recipient has dietary restrictions?

It's easy to personalize a kit like this and make it dairy free kit by including only toppings that don't contain dairy (most sprinkles, many candies, fruit based sauces). For a nut free kit, skip all nut toppings and check candy labels carefully. For gluten free, most toppings are naturally gluten free, but check labels on wafer cookies and candies, and cones or waffle bowls.

Can I make homemade sauces for the kit?

Absolutely! Homemade hot fudge sauce or caramel sauce adds a really special personal touch. Just make sure it's properly sealed in a clean jar, and be sure to mention it needs to be stored in the refrigerator right away.

More Ice Cream Inspiration

  • Ice cream charcuterie dessert board in the shape of an ice cream cone.
    Easy Ice Cream Sundae Charcuterie Dessert Board
  • Ice cream party sundae bar with colorful toppings in mason jars and DIY cone backdrop.
    Ice Cream Party Ideas: Sundae Bar, Activities & Decor
  • Easy 3 ingredient coconut ice cream recipe.
    Easy 3 Ingredient Coconut Ice Cream
  • homemade strawberry rhubarb ice cream
    Strawberry Rhubarb Ice Cream Recipe

If you use this Ice Cream Sundae Kit Gift Basket or any other ideas from the blog, please let us know in the comments below. Thanks for visiting Life is a Party today!

Geometric Pink and Gold Tablescape

Jun 21, 2016 · 4 Comments

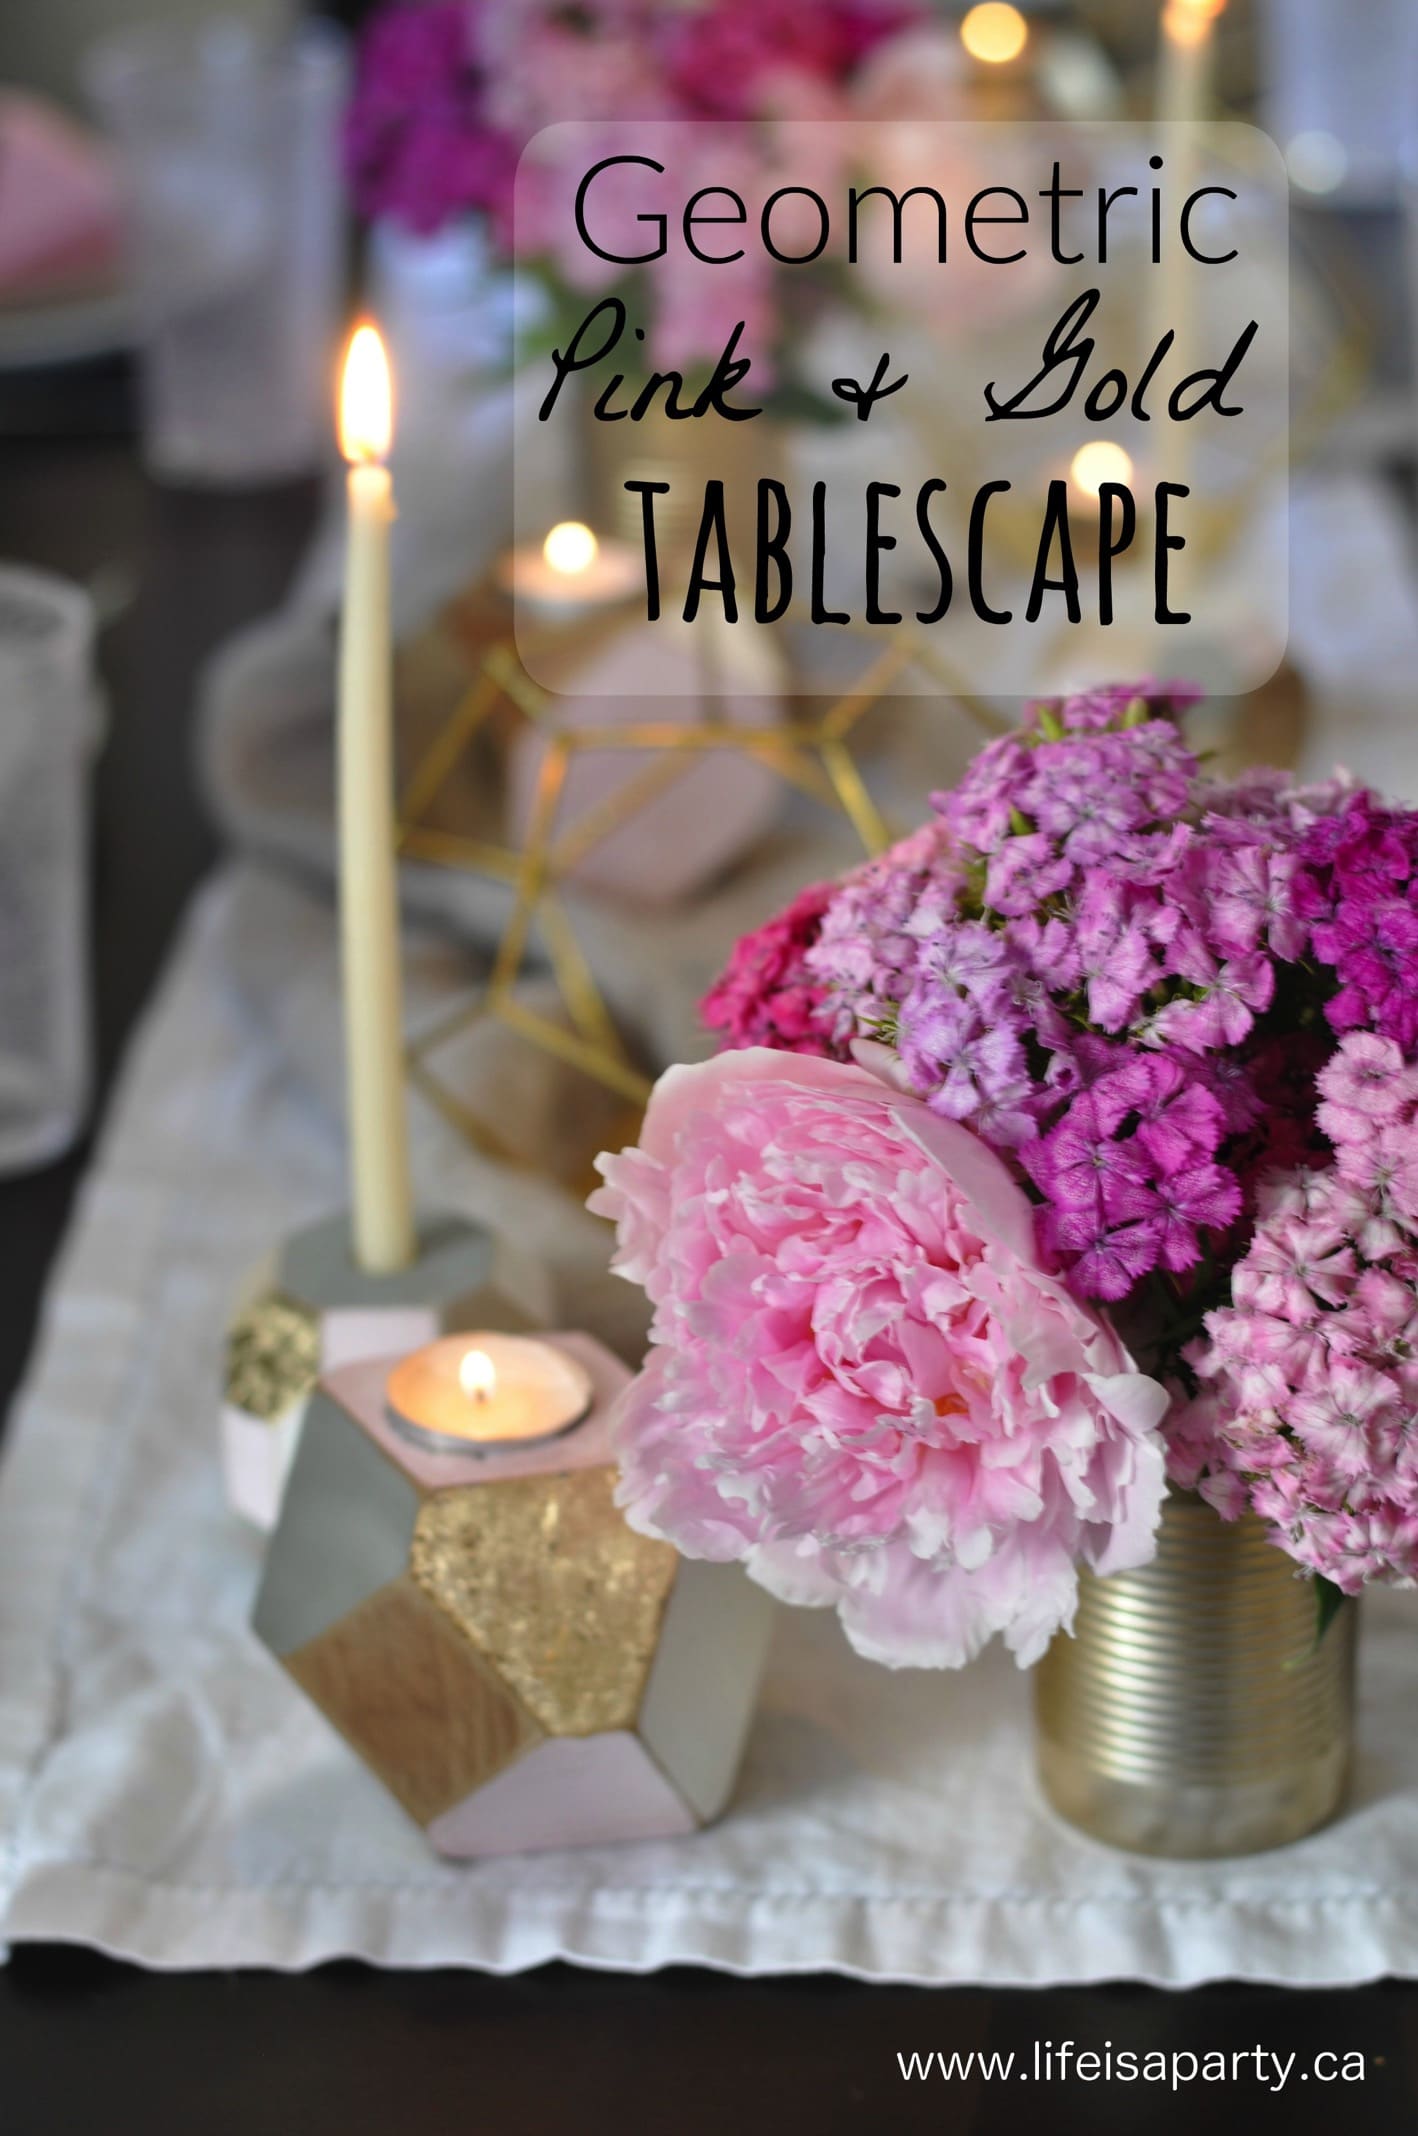
Geometric Pink and Gold Tablescape: pretty peonies, DIY candle holders, paper gems, and homemade napkins make a gorgeous and inexpensive tablescape.

Geometric Pink and Gold Tablescape: pretty peonies, DIY candle holders, paper gems, and homemade napkins make a gorgeous and inexpensive tablescape.
Geometric Pink and Gold Tablescape: pretty peonies, DIY candle holders, paper gems, and homemade napkins make a gorgeous and inexpensive table perfect for summer.

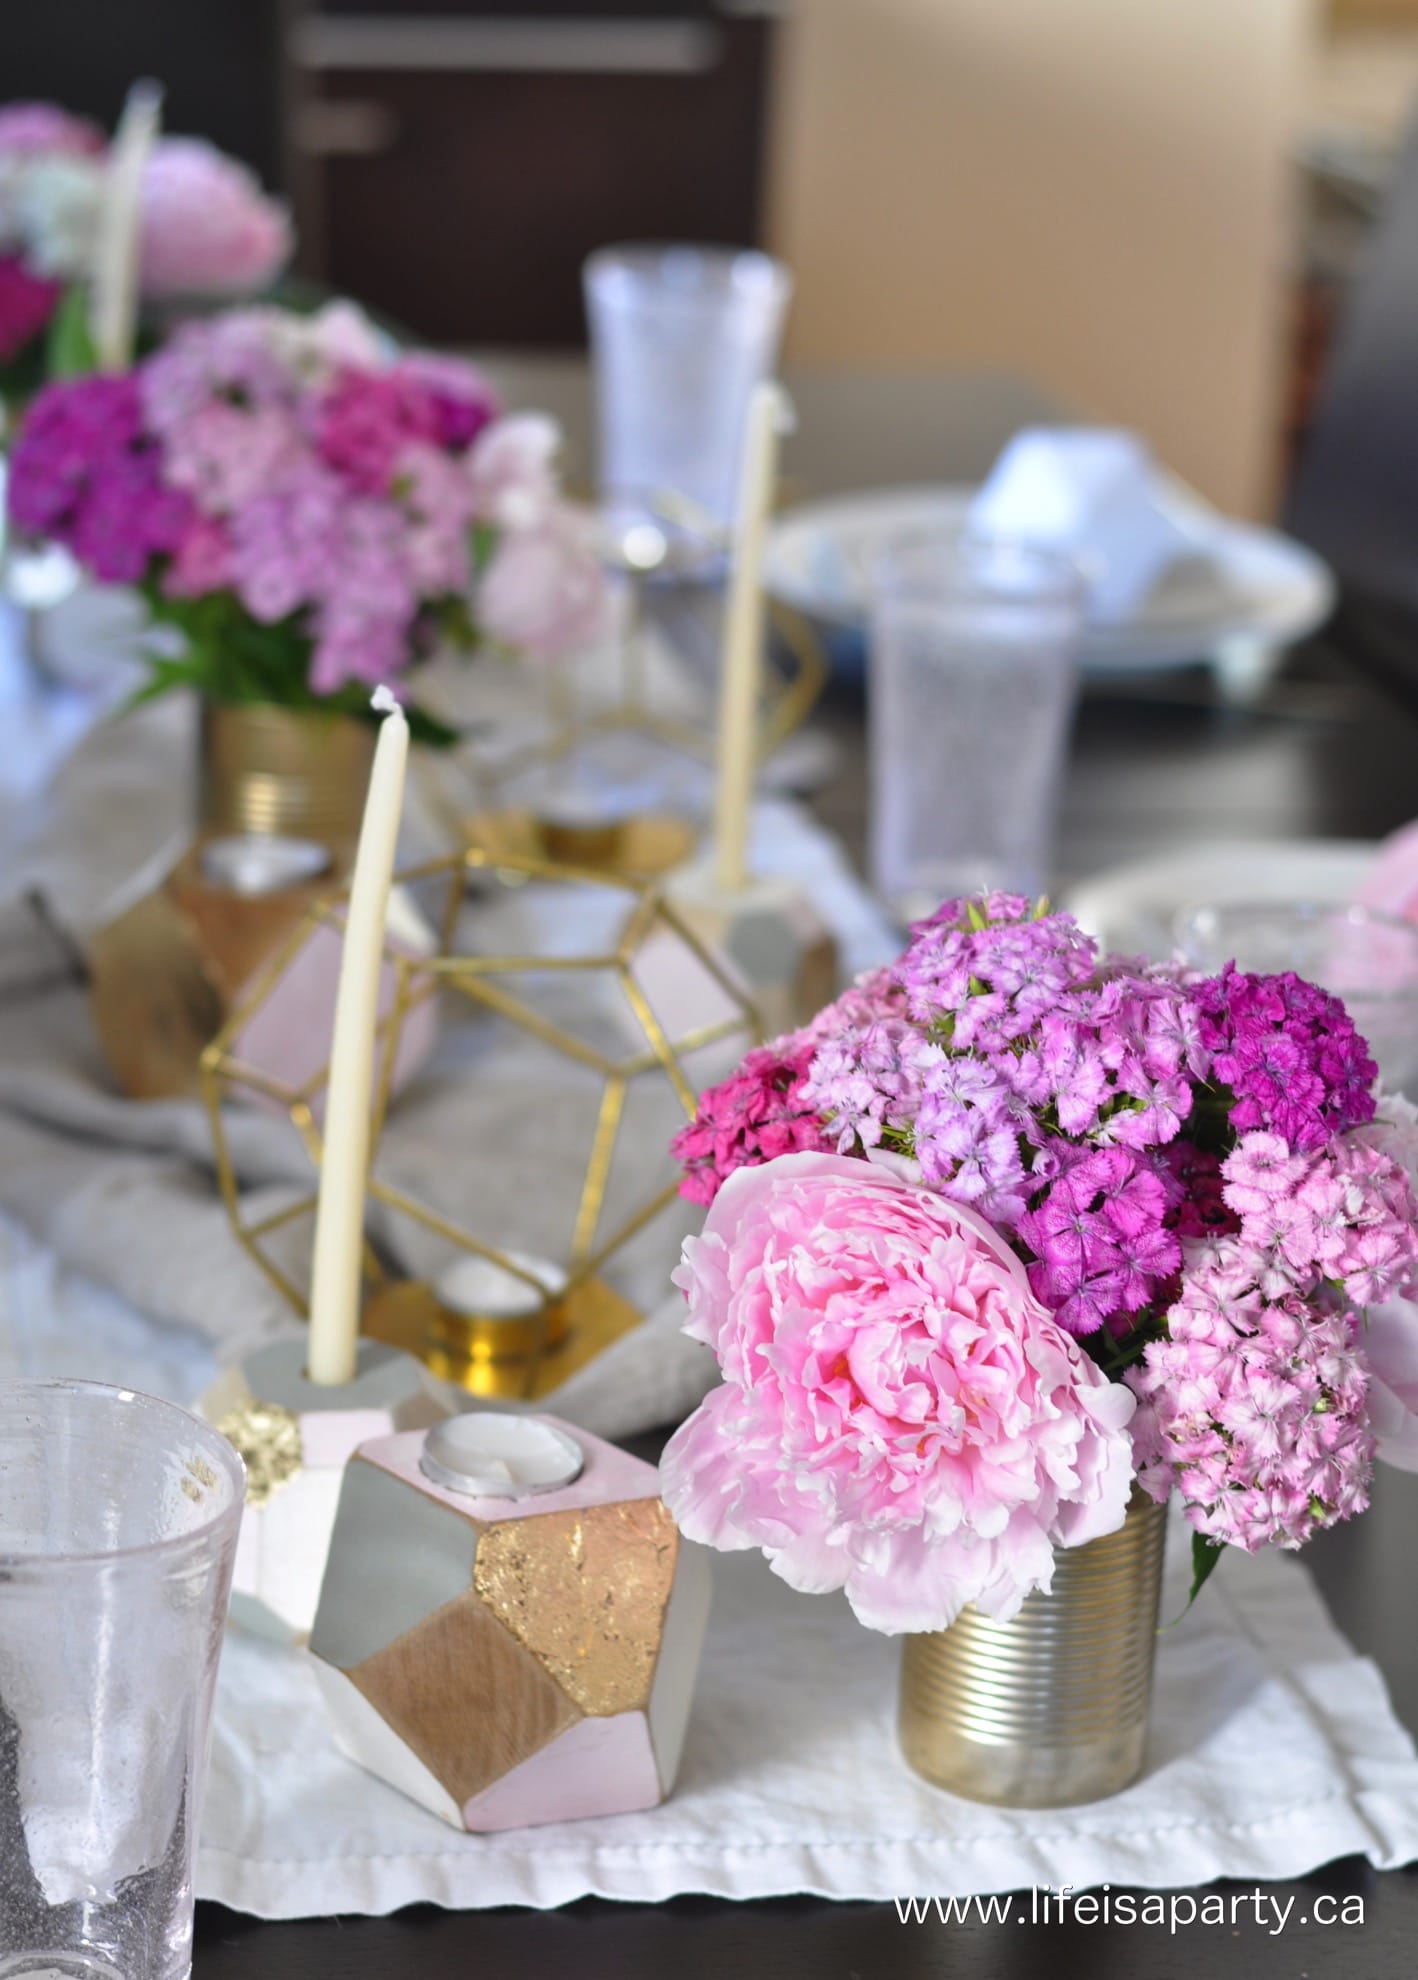
I always love pink and gold together.  Fresh pink flower peonies and sweet William couldn't be prettier along with a few DIY additions to this pretty pink and gold tablescape.

It's well into June, and today I'm sharing my #ayearoffeasting party for the month.  At the beginning of the year my husband and I decided that we wanted to have a little more fun this year, and connect and re-connect with our friends by hosting one get-together a month.  Some of them have been large, some small, some fancy, some casual, but all fun, and all times of real, authentic relationship building and fun.  It's fair to say we're already feeling so glad we took on this little challenge.

Pink and Gold Tablescape

And it's not too late for you join in too.  At this stage of life, with kids and now even a puppy, it's not as easy as it used to be to go out, and see our friends.  This challenge has helped us be intentional about having people over, and it's been great so far.

Pink and Gold Table

A Special Table In Pink and Gold

This month we re-connected with a few old and very dear friends.  I wanted to set a pretty and special table, to hopefully make them feel a bit special.  

We had an easy menu -a charcuterie board in the kitchen to start, a lovely summery salad with grilled flank steak for dinner, and one of our guests brought an amazing dessert.  Since the menu wasn't too tricky, I had a little more time to work on the table.

Geometric Pink and Gold summer table

The Flowers

The best part might have been the flowers.  I headed out early to the Friday farmer's market, about 20 mins. away from my house, hoping for some beautiful peonies for the table.  But they didn't have any.  I did find the last two bouquets of pretty pink sweet william, so I picked it up.  Then later, as I finished up grocery shopping, at my regular old discount grocery store I saw these beautiful pink peonies at the cash register.  They hardly ever have flowers, and I certainly wasn't expecting to find these beauties there, so I brought a bouquet of them home too.

I love how they look mixed together, and in simple tin cans painted gold.  I used an elastic on the stems to hold each arrangement together, which worked great.

pink and gold candles

Candles

The candle holders were a fun DIY I started last summer and finally finished up.  I love how they look with their light pink, grey, white, and gold leaf for sparkle.  When I was at the craft store I just happened to find a smaller version.  So I brought them home too and painted them up to match.

pink and gold table

I already had the pretty gold geometric candle holders.  

Linens

For linens I used a couple casual linen runners, and picked up some fabric at the dollar store that I used for the napkins.  I didn't even hem the edges, since I thought the frayed look was pretty and casual.

pink and gold summer table

Geometric Theme

With my geometric candle holders, I wanted to continue the geometric theme to each pacesetting.  So I made a simple paper gem for everyone's spot.   I found the pattern on-line, and printed them, cut them out, folded and glued them.  For a little sparkle, I added a little gold scrapbook paper to each one.

Geometric Pink and Gold Tablescape

Tips For An Inexpensive Tablescape

This pretty tablescape was a lot of fun to put together, and really inexpensive since I used what I had, and DIY'd a few projects.  Don't forget to "shop your house", use what's in season like the peonies, and look for things in unexpected places like my fabric pieces from the craft section of the dollarstore that I used for napkins.

Pink and Gold Table

With a pretty Geometric Pink and Gold Tablescape, life really is a party!

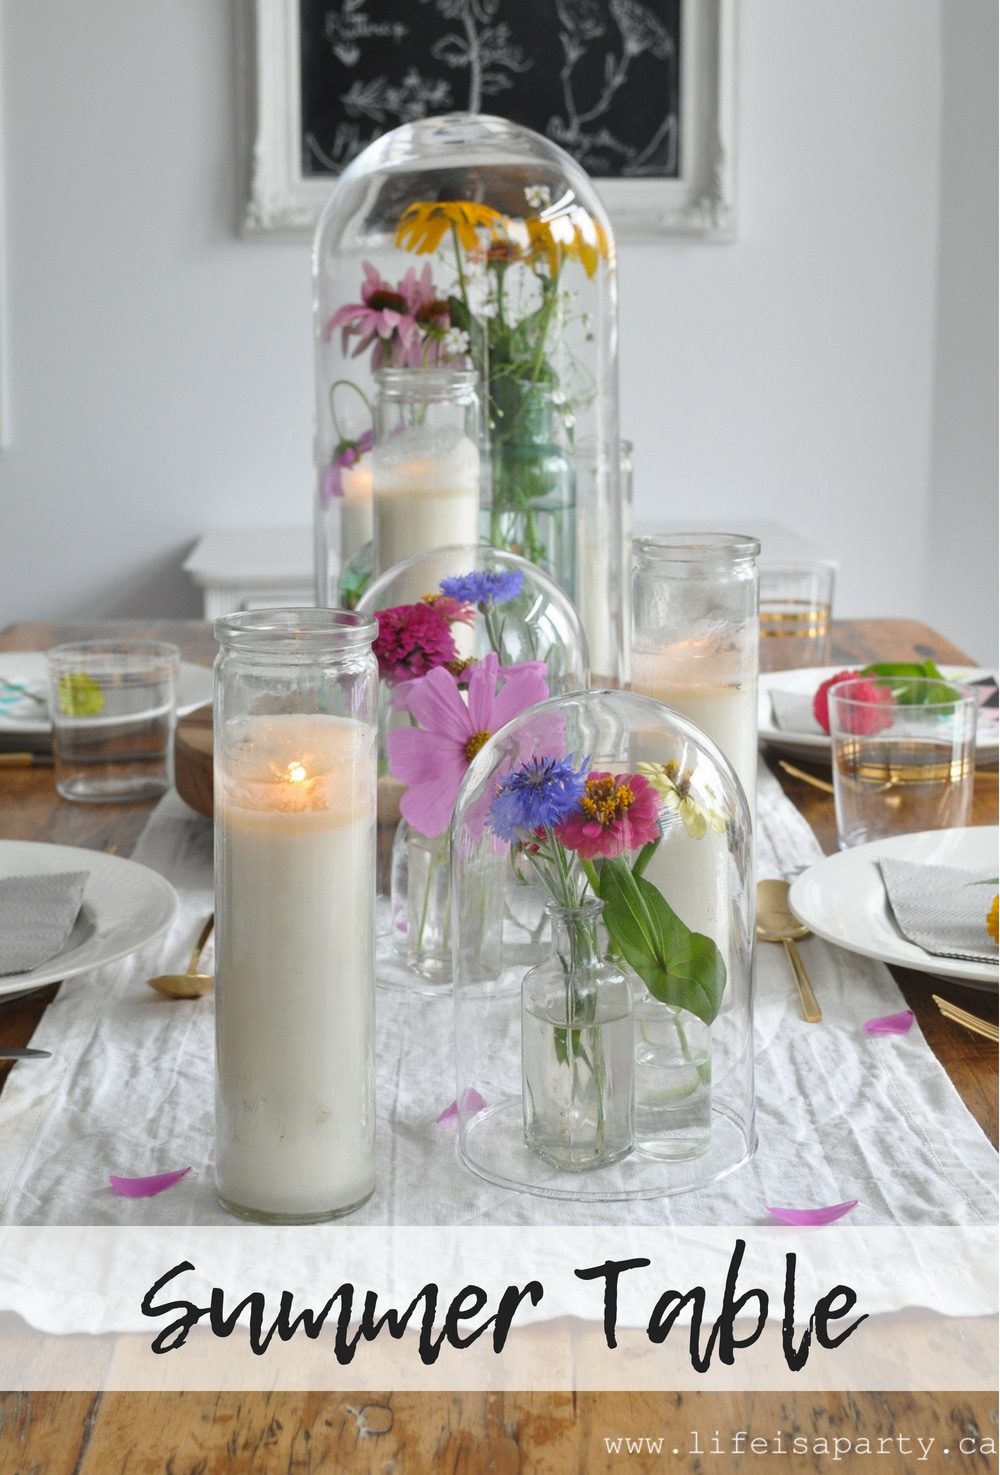
You might also like our Summer Table here.

Summer Tablescape -garden flowers in vintage bottles under glass cloches create a simple, easy summer time table for entertaining.

Also check out our Rustic Casual Tablescape here.

rustic casual table

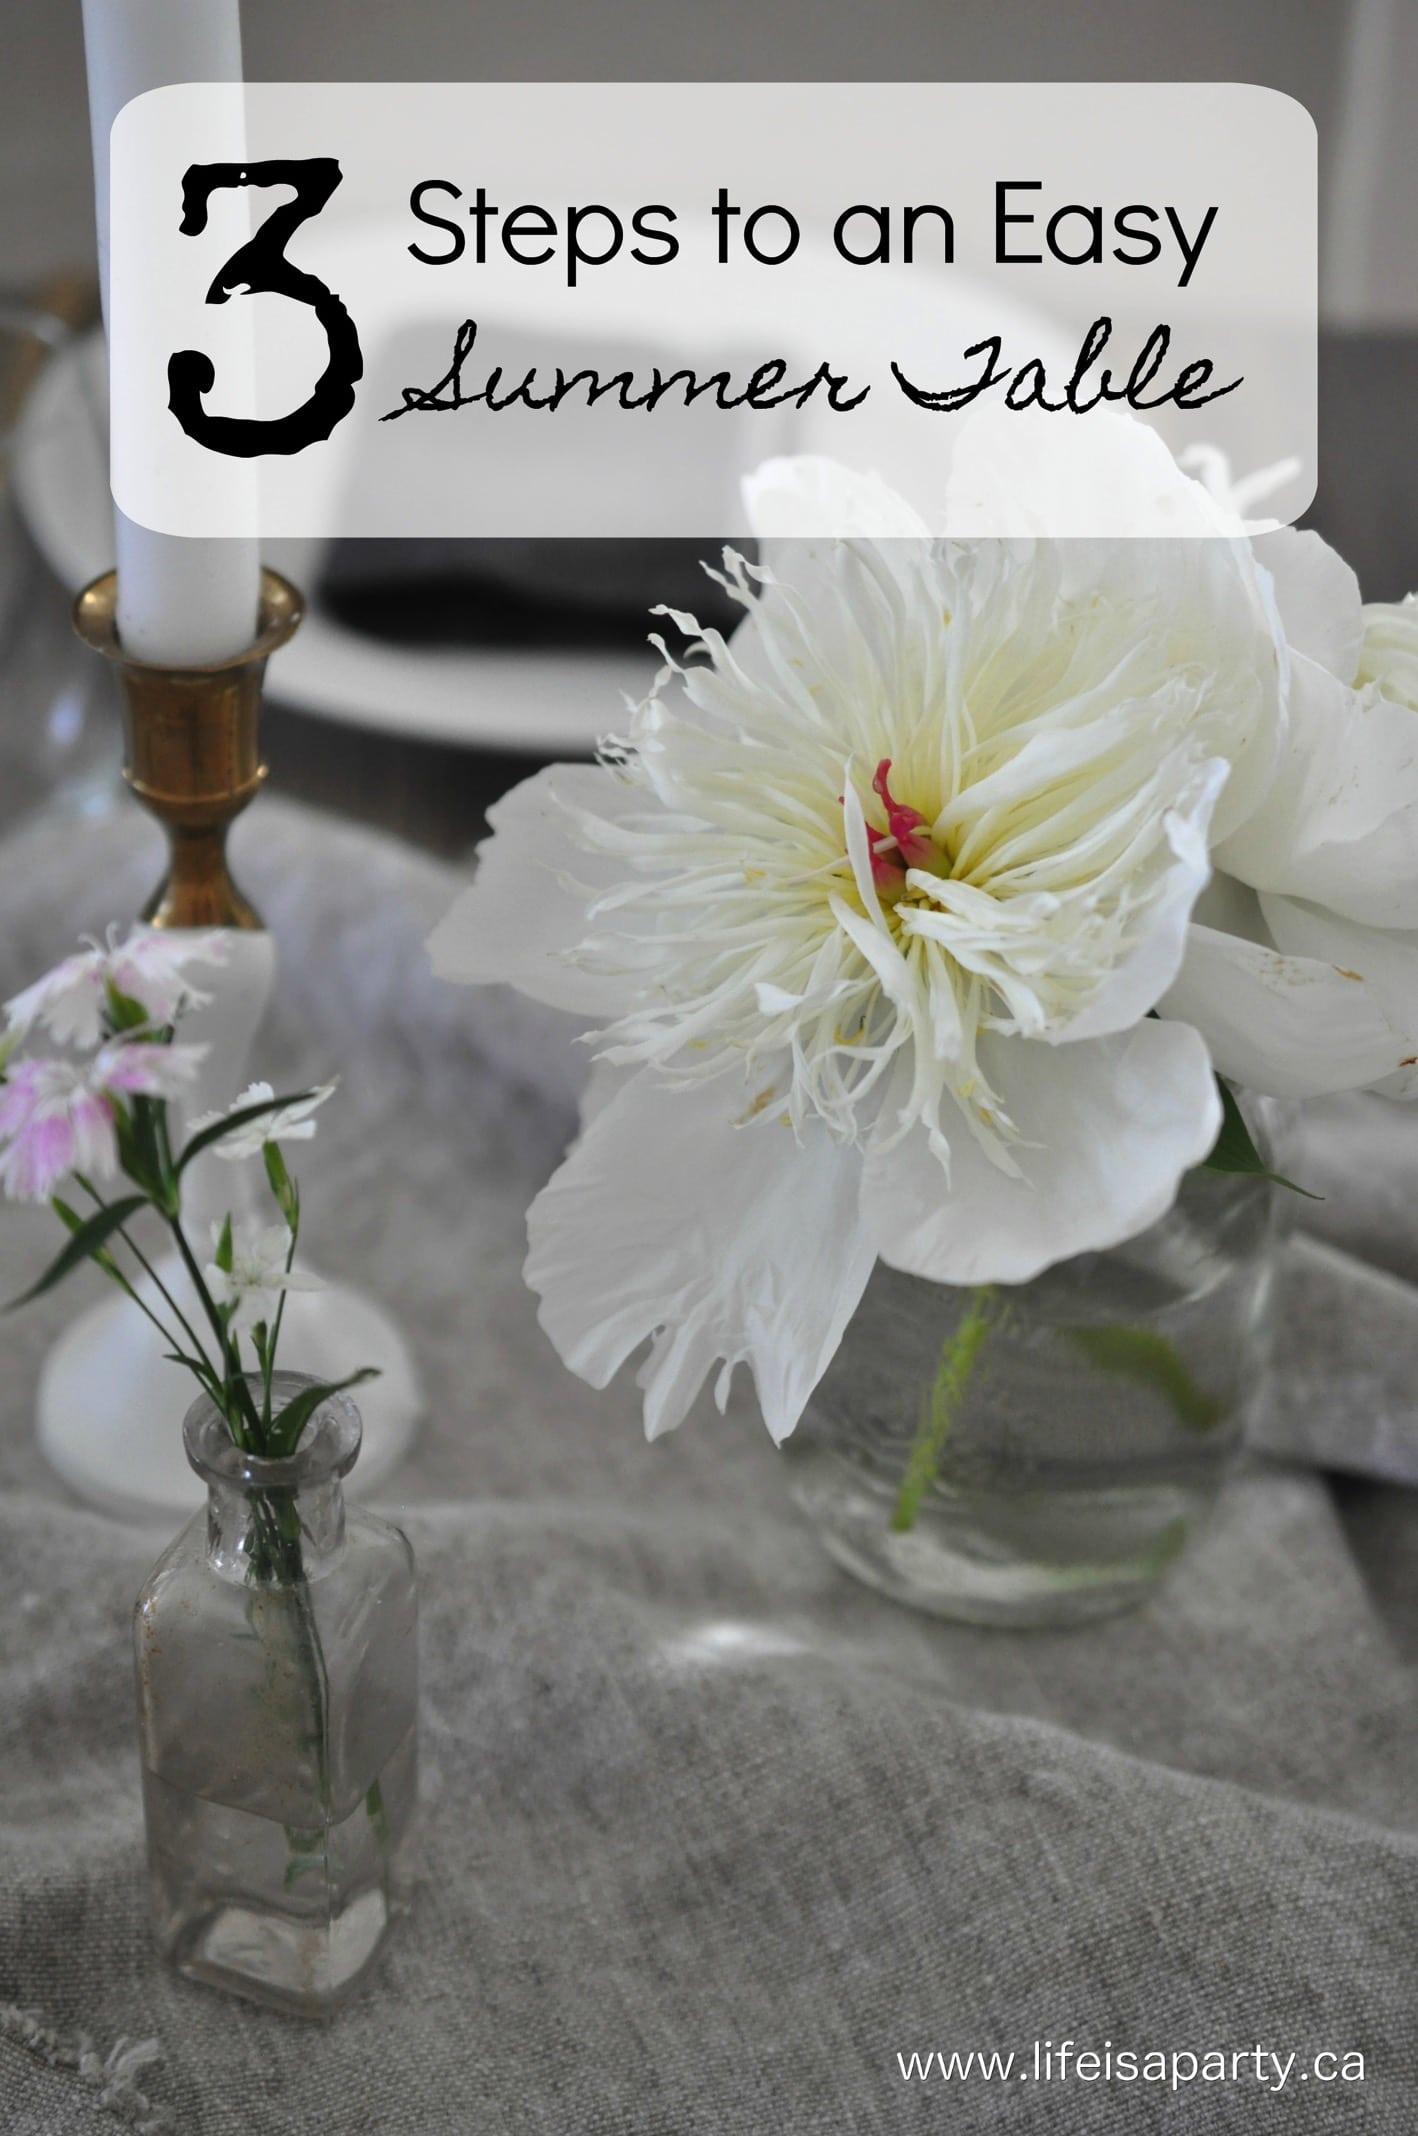
You might also enjoy our Three Steps To An Easy Summer Table here.

Three Steps to an Easy Summer Table: learn how to start with the basics, add items for interest, and look in unexpected places to set the perfect table.

Spray Paint Wicker Chair Makeover

Jun 15, 2016 · 8 Comments

How to spray paint wicker furniture.

Spray Painted Wicker Furniture Makeover: learn how to spray paint wicker furniture with tips for the very best results on this beginner level project.

How to spray paint wicker furniture.
[feast_advanced_jump_to]

Give new life to old wicker pieces with a fresh coat of paint. We used spray paint to give our outdoor furniture a makeover.  Learn how to spray paint wicker furniture.

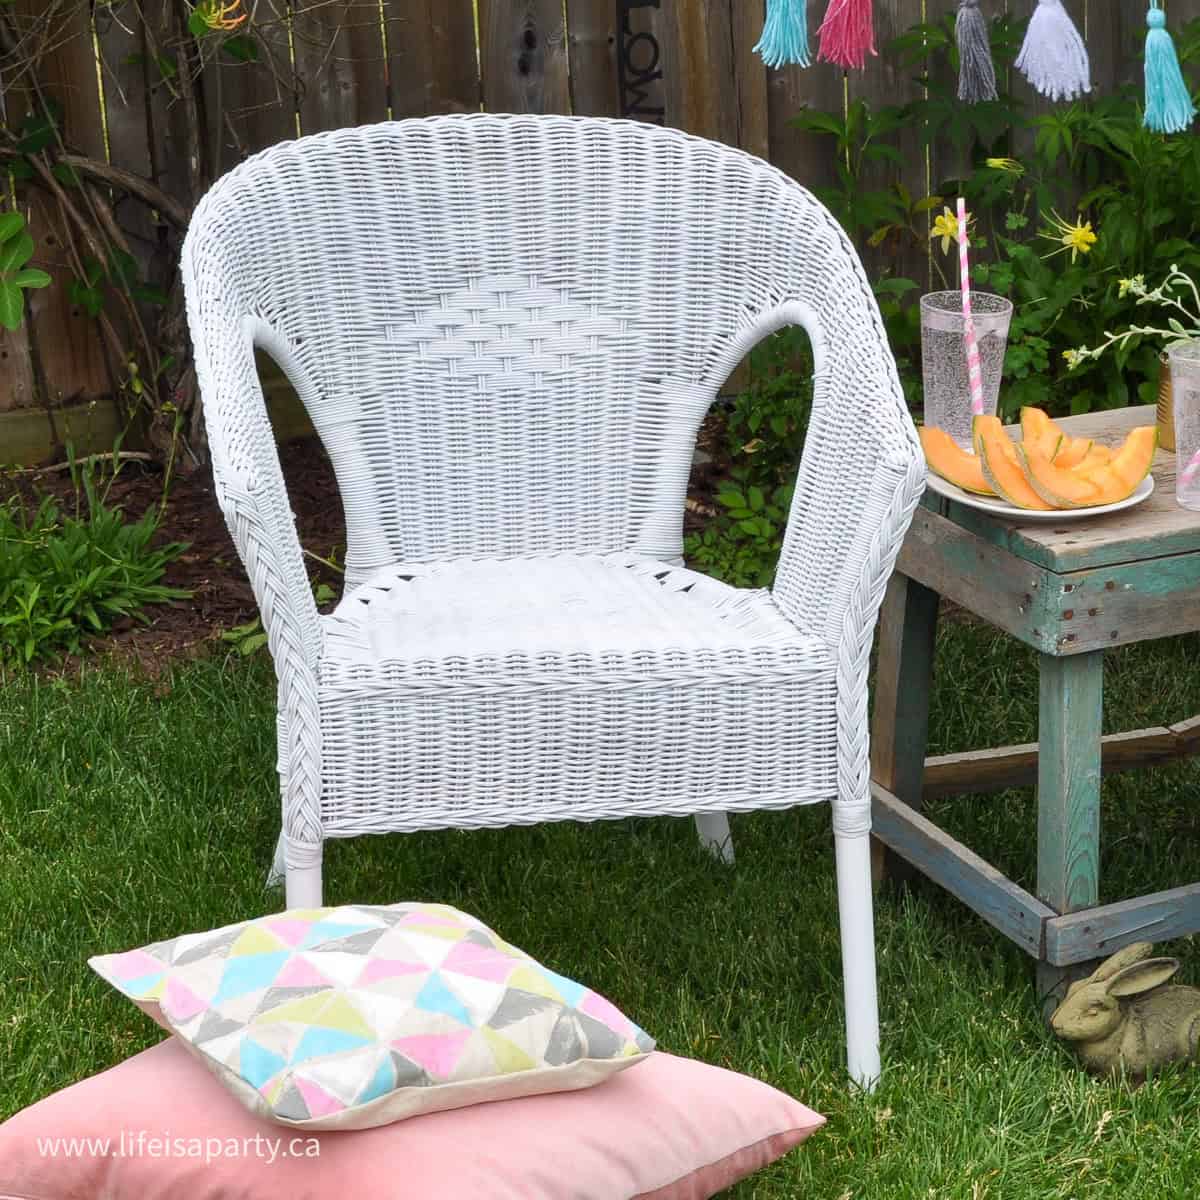
So one Tuesday morning, yes it was for sure a Tuesday since that's garbage day on my street, I noticed these poor abandoned wicker chairs. They were set out at the curb waiting for someone with a little vision…or the garbage truck. Lucky for them, I came by before the garbage truck and I saw the potential in this old rattan furniture. Sure they were a little discoloured, a little past their prime, but nothing a few cans of spray paint couldn't fix. I knew they'd be perfect for our #12MonthsOfDIY challenge for June -spray paint.

Spray Paint Wicker Chair Makeover: Easy how-to spray paint wicker.

I love spray paint, and these great little chairs are the perfect example of why spray paint is such an easy way to transform so many things.

Makeover Materials:

  • old wicker chairs
  • semi-gloss white spray paint

Spray Painted Wicker Furniture Makeover:

Getting Started and Prepping Your Surface

I didn't really need to do anything to prep these chairs. They were already weathered and a bit rough probably from being outside a long time. This natural wicker furniture had not been previously painted, so there was no old peeling paint to worry about.

If your piece of furniture was previously painted, your first step would be to make sure that there was no flaking paint. You might use a wire brush to remove any old paint, but take care not to damage the furniture piece.

If you're wicker garden furniture was dirty it might be a good idea to wash it with some warm water or use an air compressor as a great way to remove any loose dirt. If you have a lot of dust build-up you could also try washing it with a pressure washer, which could also help remove any old paint or loose dust. You don't want to paint wet wicker, so be sue to factor in some drying time.

Our chairs were in great shape, the wicker wasn't cracked or coming apart or broken anywhere. This is definitely something to consider before painting to make sure the project is worth it.

Why Spray Paint?

You can paint wicker furniture with different paints, so how do you choose your type of paint for the project?

Regular outdoor paint would work fine, but to get even coats of paint and an even finish you would need a stiff brush to get into all the nooks and crannies and a lot of patience. That's why we choose spray paint as the best option. Its the quickest and best way to get a great paint job on a surface like wicker. If you have a spray gun this would be a great project to use it for. But even without your own spray gun, you can use spray paint for a great finish.

Setting Up To Paint

Spray paint should be used in a well-ventilated area because of the paint fumes. You will also want cover the area under the furniture with a plastic drop cloth. And you may want to consider if there is a breeze in your work area. Spray paint can have what's called over spray where the paint marks things around it, or is carried onto the surfaces of things around what your painting by the wind. One of the first things you want to do before actually beginning spray painting is to make sure there's nothing in the area that can be damaged by over spray.

Many Light Coats of Spray Paint

One last thing before you begin painting, after prepping the actual outdoor wicker furniture surface, and after preparing the area is to shake your spray paint cans. There will be instructions on the side of the spray paint can telling you how long you need to shake the paint. Be sure to follow the manufacturer's instructions. A diy project can be ruined by skipping this simple but important step. Use your watch to actually time the three minutes, or whatever time is suggested to make sure you shake it long enough.

The name of the game when spray painting is many, many light coats rather than trying to do one heavy one. A heavy coat will create runs in the paint. So be patient, and do lots of light coats until you have the coverage you want.  Don't worry about the coverage of the first coat of spray-paint. Let the first layer dry and add more with a second coat, continuing until you're happy with the coverage, and being sure to give it some dry time in between each coat.

Spray Paint From Every Angle

Also with wicker because it is a woven material, you need to spray from lots of different angles to get into all the grooves. So flip them over, turn them on their side, and flip them around to get all the nooks and crannies with a good layer of paint.

Spray Paint Wicker Chair Makeover: Easy how-to spray paint wicker.

You will need more than one can of spray paint to give two chairs a new coat of paint. It took 4 cans of semi-gloss white to cover our wicker outdoor pieces. It was about $30 worth of paint, but all in all, since they were free, it was a pretty good investment. They still had an Ikea sticker on the bottom, they were originally $39 from Ikea.

Spray Paint Wicker Chair Makeover: Easy how-to spray paint wicker.

Cozy Outdoor Setting Area

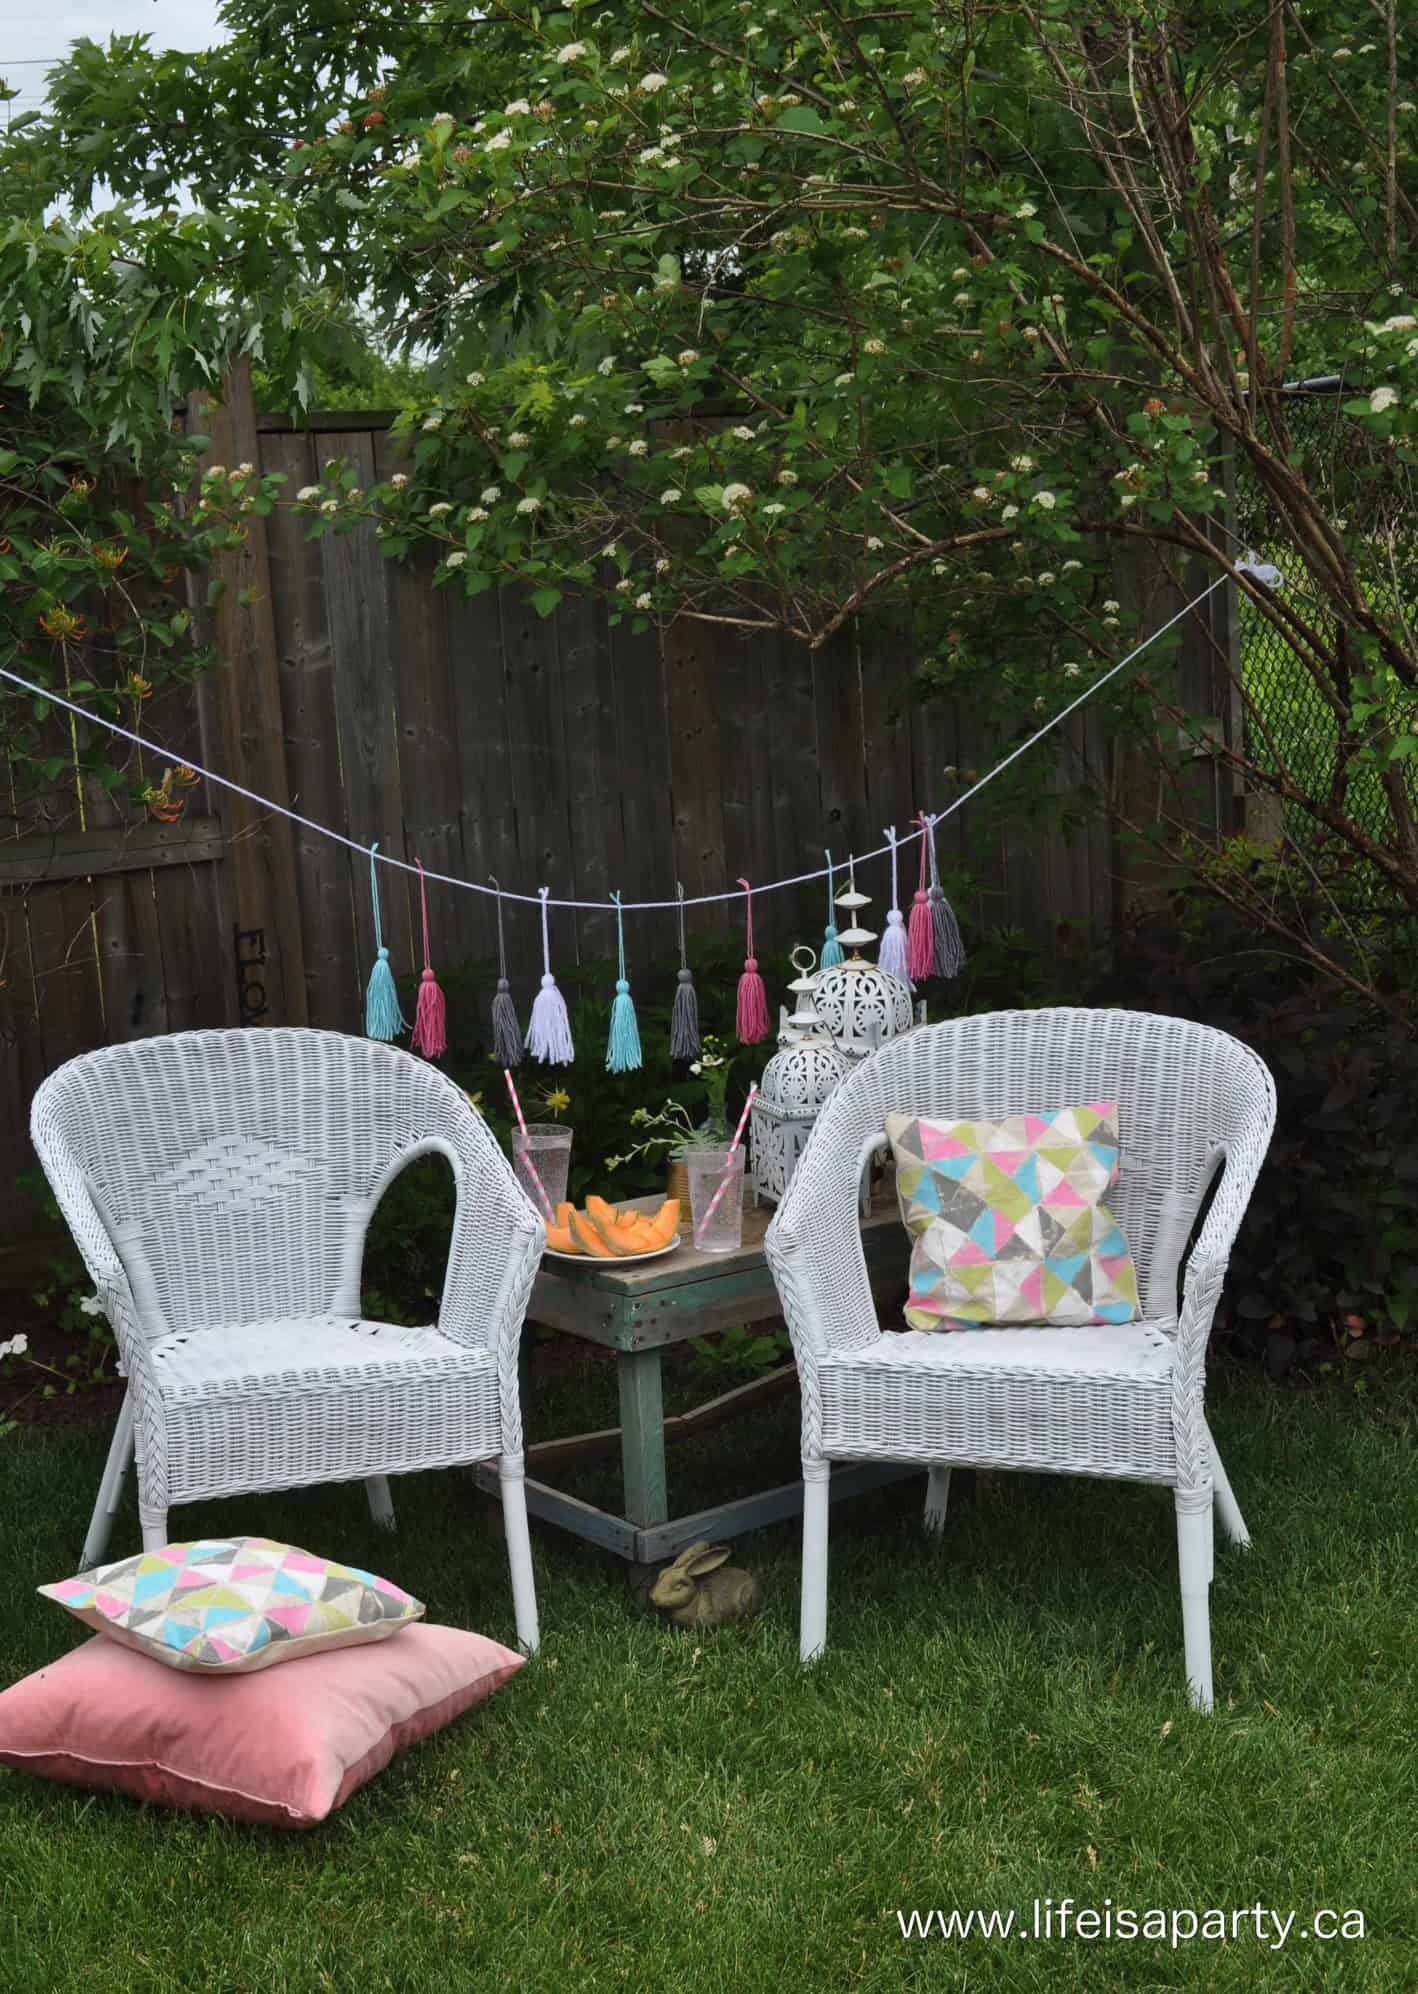
I put the chairs with their new paint job in the corner of my yard. I'm spending lots more time out here lately since we have a brand new puppy. I thought this was the perfect project to add him posing in the corner, so you could "meet" him, although he doesn't know "stay" yet so it was a little tricky, lol.

Havanese puppy

Oscar is a 10 week old Havanese puppy, who we've had with us for about a week and half now. We're busy training him…or at least trying, which means lots of time in the garden for potty breaks. This little corner has a bit of shade and these little chairs with their fresh paint are the perfect spot to sit when we're out there.

Spray Paint Wicker Chair Makeover: Easy how-to spray paint wicker.


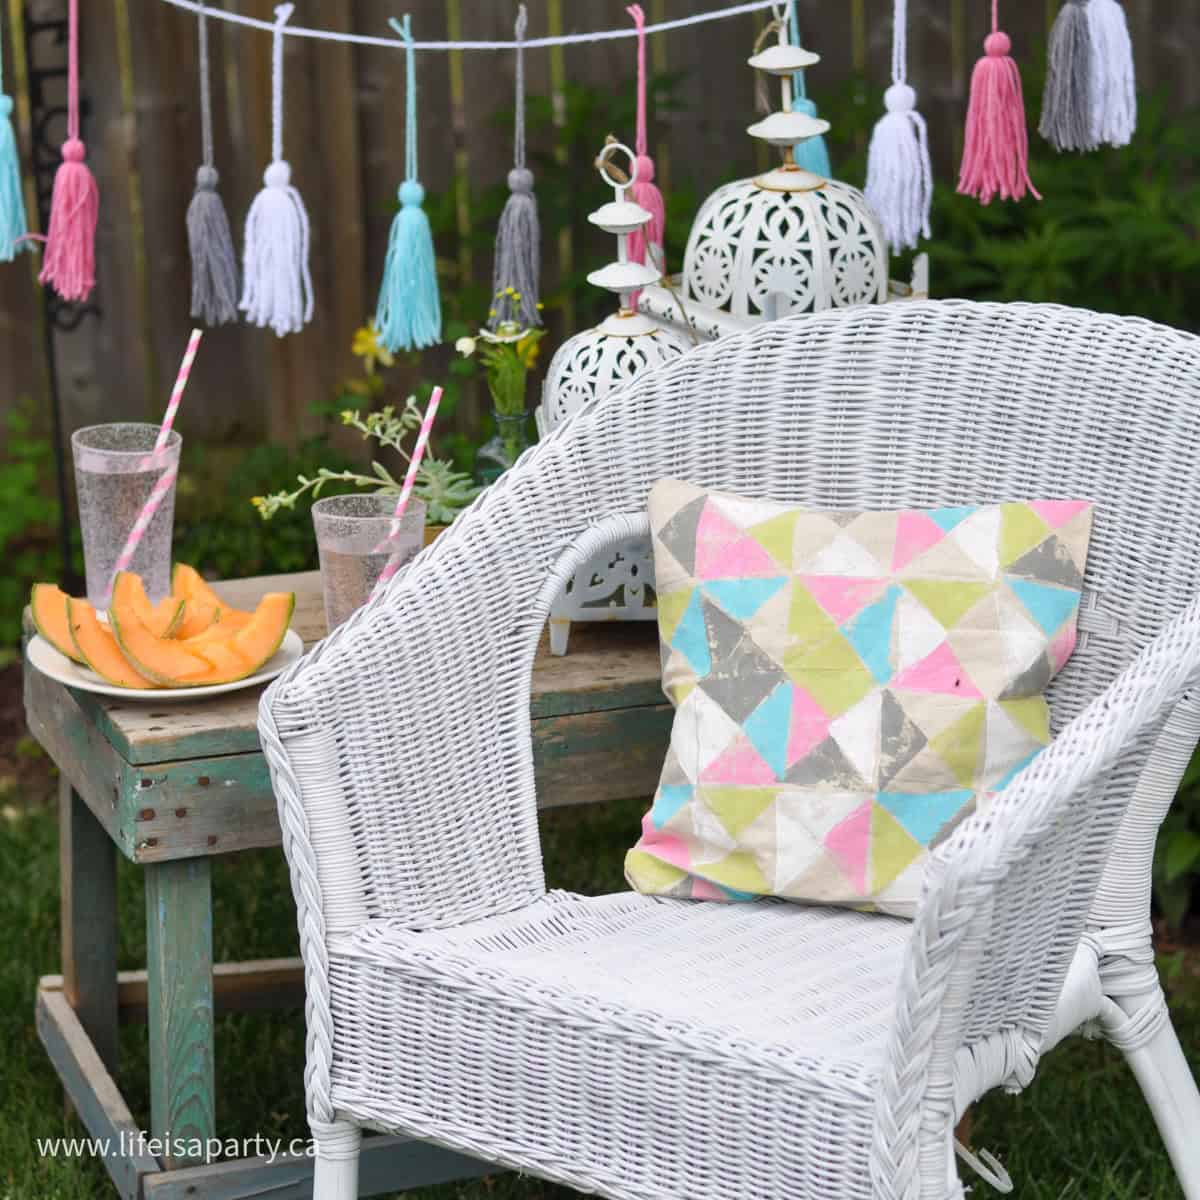
I added a simple yarn tassel bunting, and these pretty geometric stamped pillows -see how to make them here.  Now it's the perfect little spot to sit.

Spray Paint Wicker Chair Makeover: Easy how-to spray paint wicker.

With a Spray Paint Wicker Chair Makeover, life really is a party!

More Inspiration

You might also like our Spray Paint Cutlery and Vase Makeover here.

Spray Paint Cutlery and Vase Makeover: give inexpensive thrift store vases and cutlery new life with spray paint, perfect for entertaining.

Also check out our Black Paint Dipped Brass Candlesticks here.

You might also enjoy our DIY Concrete Side Table post here.

Homemade Montreal Steak Seasoning

Jun 13, 2016 · 6 Comments

Montreal steak seasoning recipe.

This homemade Montreal Steak Seasoning Recipe is easy to make and delicious. Plus check out our free printable labels for gift giving.

Montreal steak seasoning recipe with ingredients on a cutting board.
[feast_advanced_jump_to]

Why We Love This Recipe

  • It's delicious and takes your average steak up a notch in terms of flavor.
  • In our homemade version you can alter the spice and salt level to fit your personal taste.
  • It's really easy to make, and a great recipe to make with kids.
  • It is great for gift giving, especially if you're looking for a great Father's Day gift.

Montreal steak seasoning is a popular dry rub seasoning mix used to add flavor to steak and grilled meats.  Our homemade steak seasoning is the best way to season steak and perfect for grilling season.  This easy recipe is quick to prepare.  This flavorful steak seasoning is also a great gift.

It's almost Father's Day and after the success of my Homemade BBQ Sauce last year, this cashew coconut brittle, and this homemade hot sauce, I thought it might be nice to share a Montreal Steak Seasoning Recipe that I made for my husband this year.

Kid Friendly

We love this idea for Father's Day because it's super easy to make, so even the youngest kiddos could help put it together and it's really delicious.  I usually try really hard to avoid stereotypes, I'm sure not all husbands or dads are the main bbq-ers.  So it might work for your crew for Father's Day, or it might work for your peeps for Mother's Day.  Let me just say that if you're into steak, it's really yummy, and it's really easy to make.  So this homemade spice blend is ticking all the boxes on my list, tick, tick. 😉

DIY Montreal Steak Seasoning spice rub recipe

Montreal Steak Seasoning History

This popular Canadian steak seasoning has its origins as the recipe used to flavor Montreal smoked meats.  The spice rub traditionally includes garlic powder, coriander seeds, black pepper, cayenne pepper, herbs, and coarse salt.  

Ingredients

See the recipe card below for exact measurements.

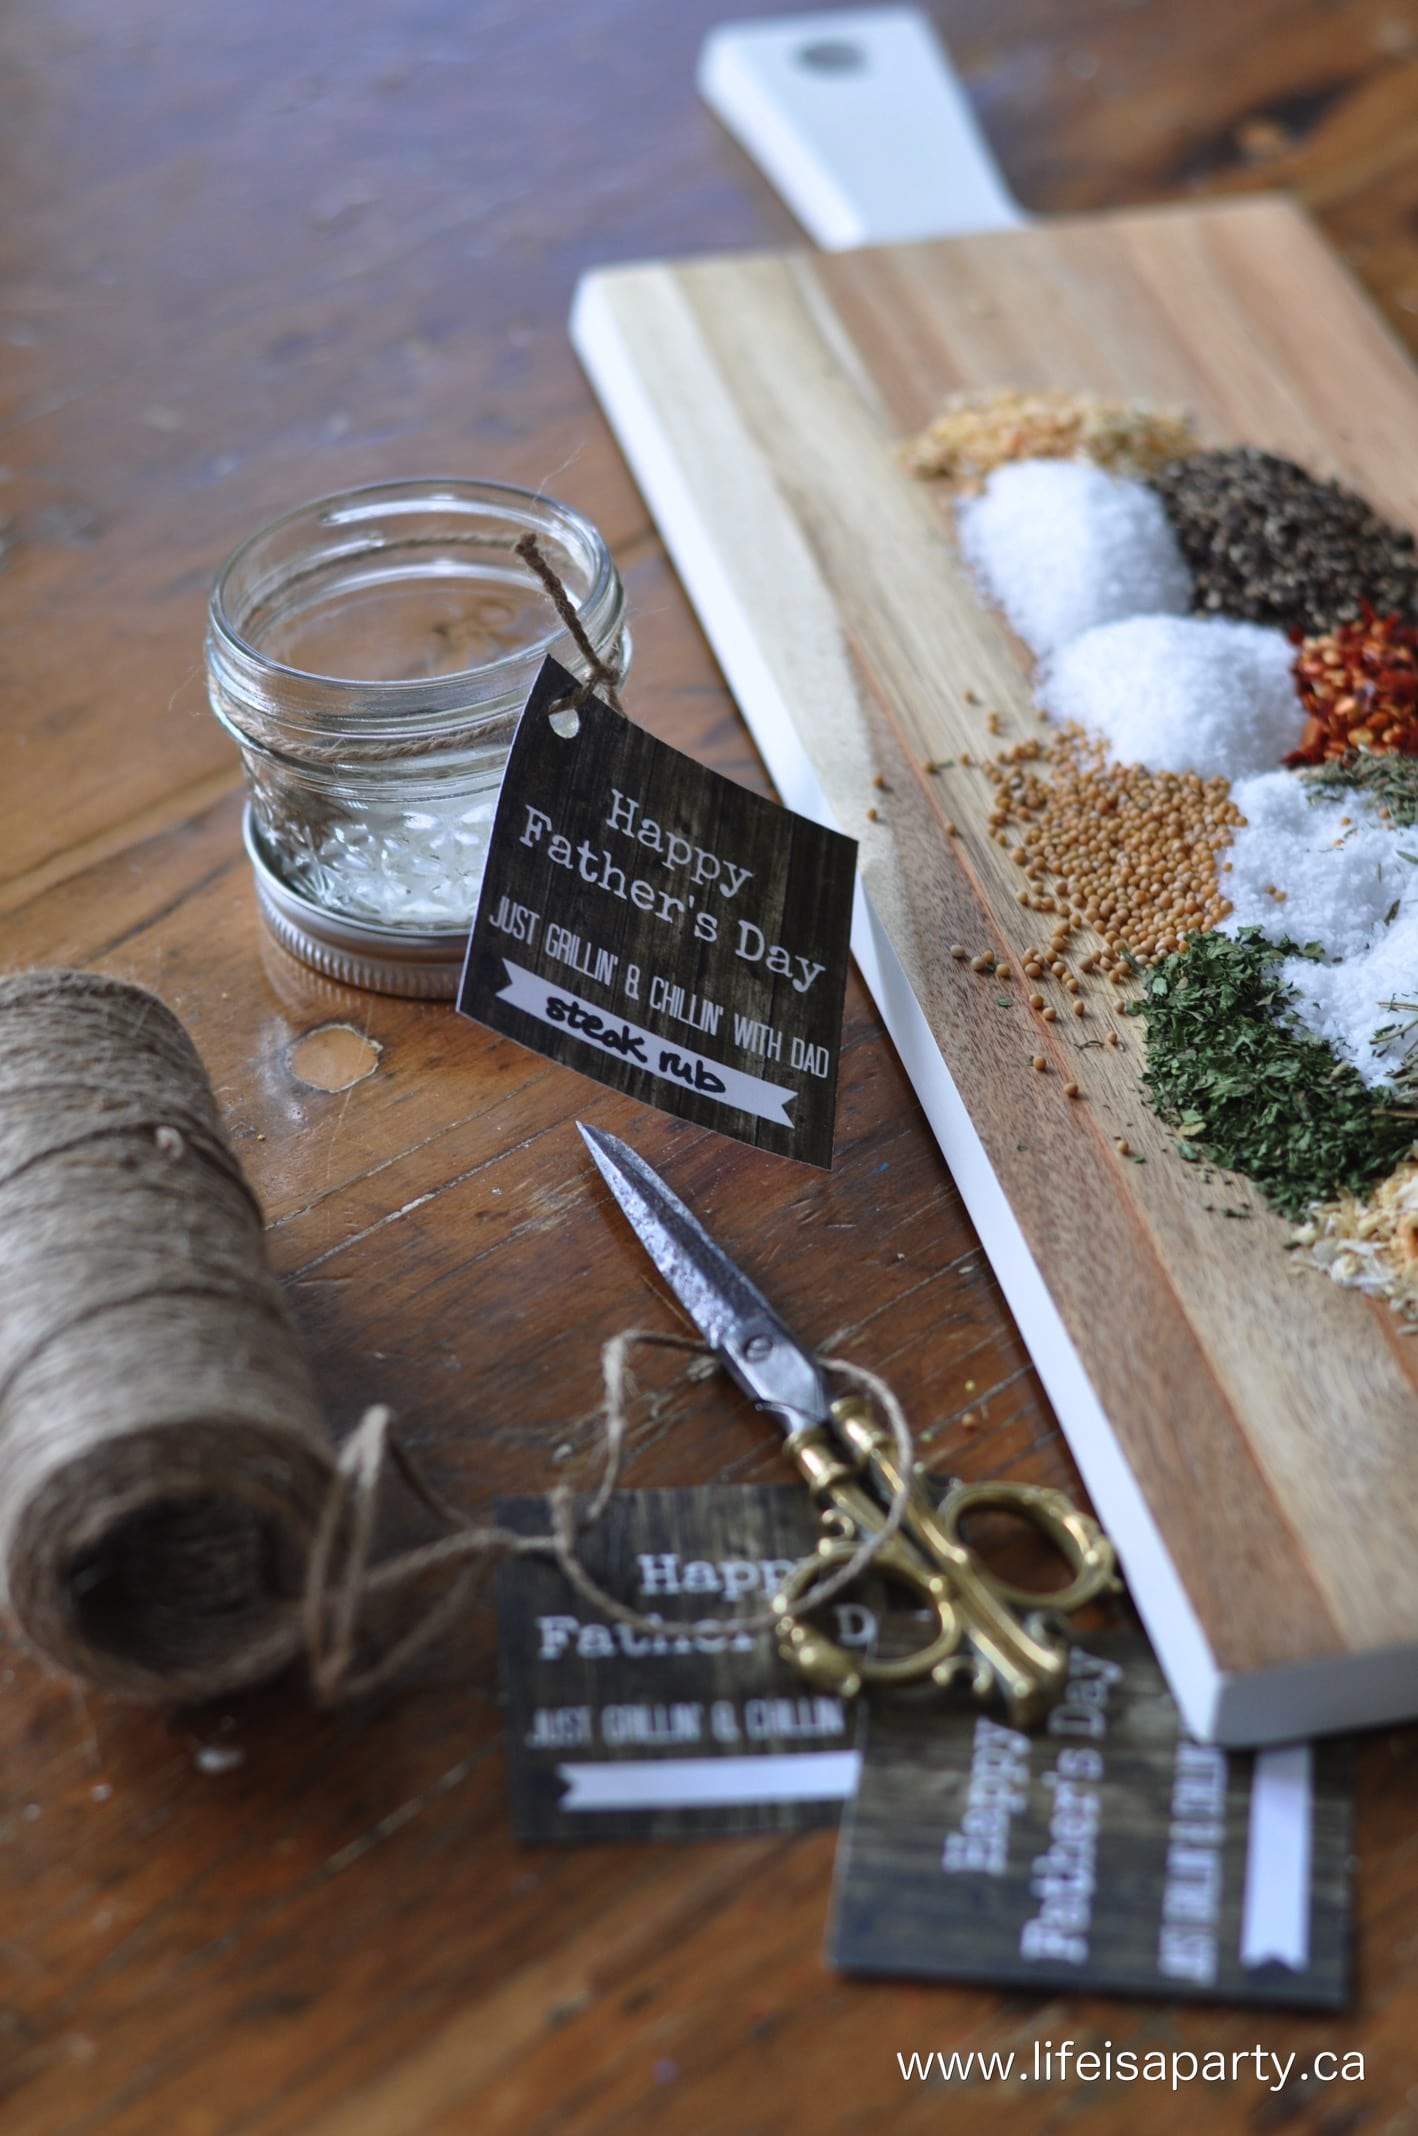
Montreal Steak Seasoning ingredients on a cutting board with labels.

You can use ground spices, or start with whole spices and grind your own in a coffee grinder or spice grinder for the freshest flavors.

Use this Montreal steak spice on any grilled meats.  It's the best steak seasoning, try on your favorite steaks, like filet mignon, flank steak, sirloin steak, chuck roast, and more.  You might even like on pork chops.

  • Salt

In general meat loves salt, having said that, this seasoning mix is quite salty.  I'm a big fan of it being on the salty side.  But you can start with a little bit, and add more if you feel it needs it.  

The beauty of making the homemade version, is that you can make it your own blend and customize it to your personal taste.

  • Fresh Cracked Pepper

Does having the pepper freshly cracked make a difference? Yes fresh is always best. But feel free to substitute ground black pepper if that's all you have.

  • Dehydrated Onion and Garlic

We prefer the dehydrated onion and garlic because they have a little more body to them. They'll rehydrate with the juices of the steak. You can susbitue onion powder or garlic powder if that's what you have on hand.

  • Coriander Seeds and Red Pepper Flakes

These seeds and spice add a little zip to the mix. Feel free to increase or decrease the amount of red pepper flakes depending on the level of spice you enjoy.

  • Dried Herbs

Dried thyme, rosemary, and coriander are the traditional herbs used in Montreal steak seasoning. The dried version of these makes the seasoning shelf safe, and they add so much flavor.

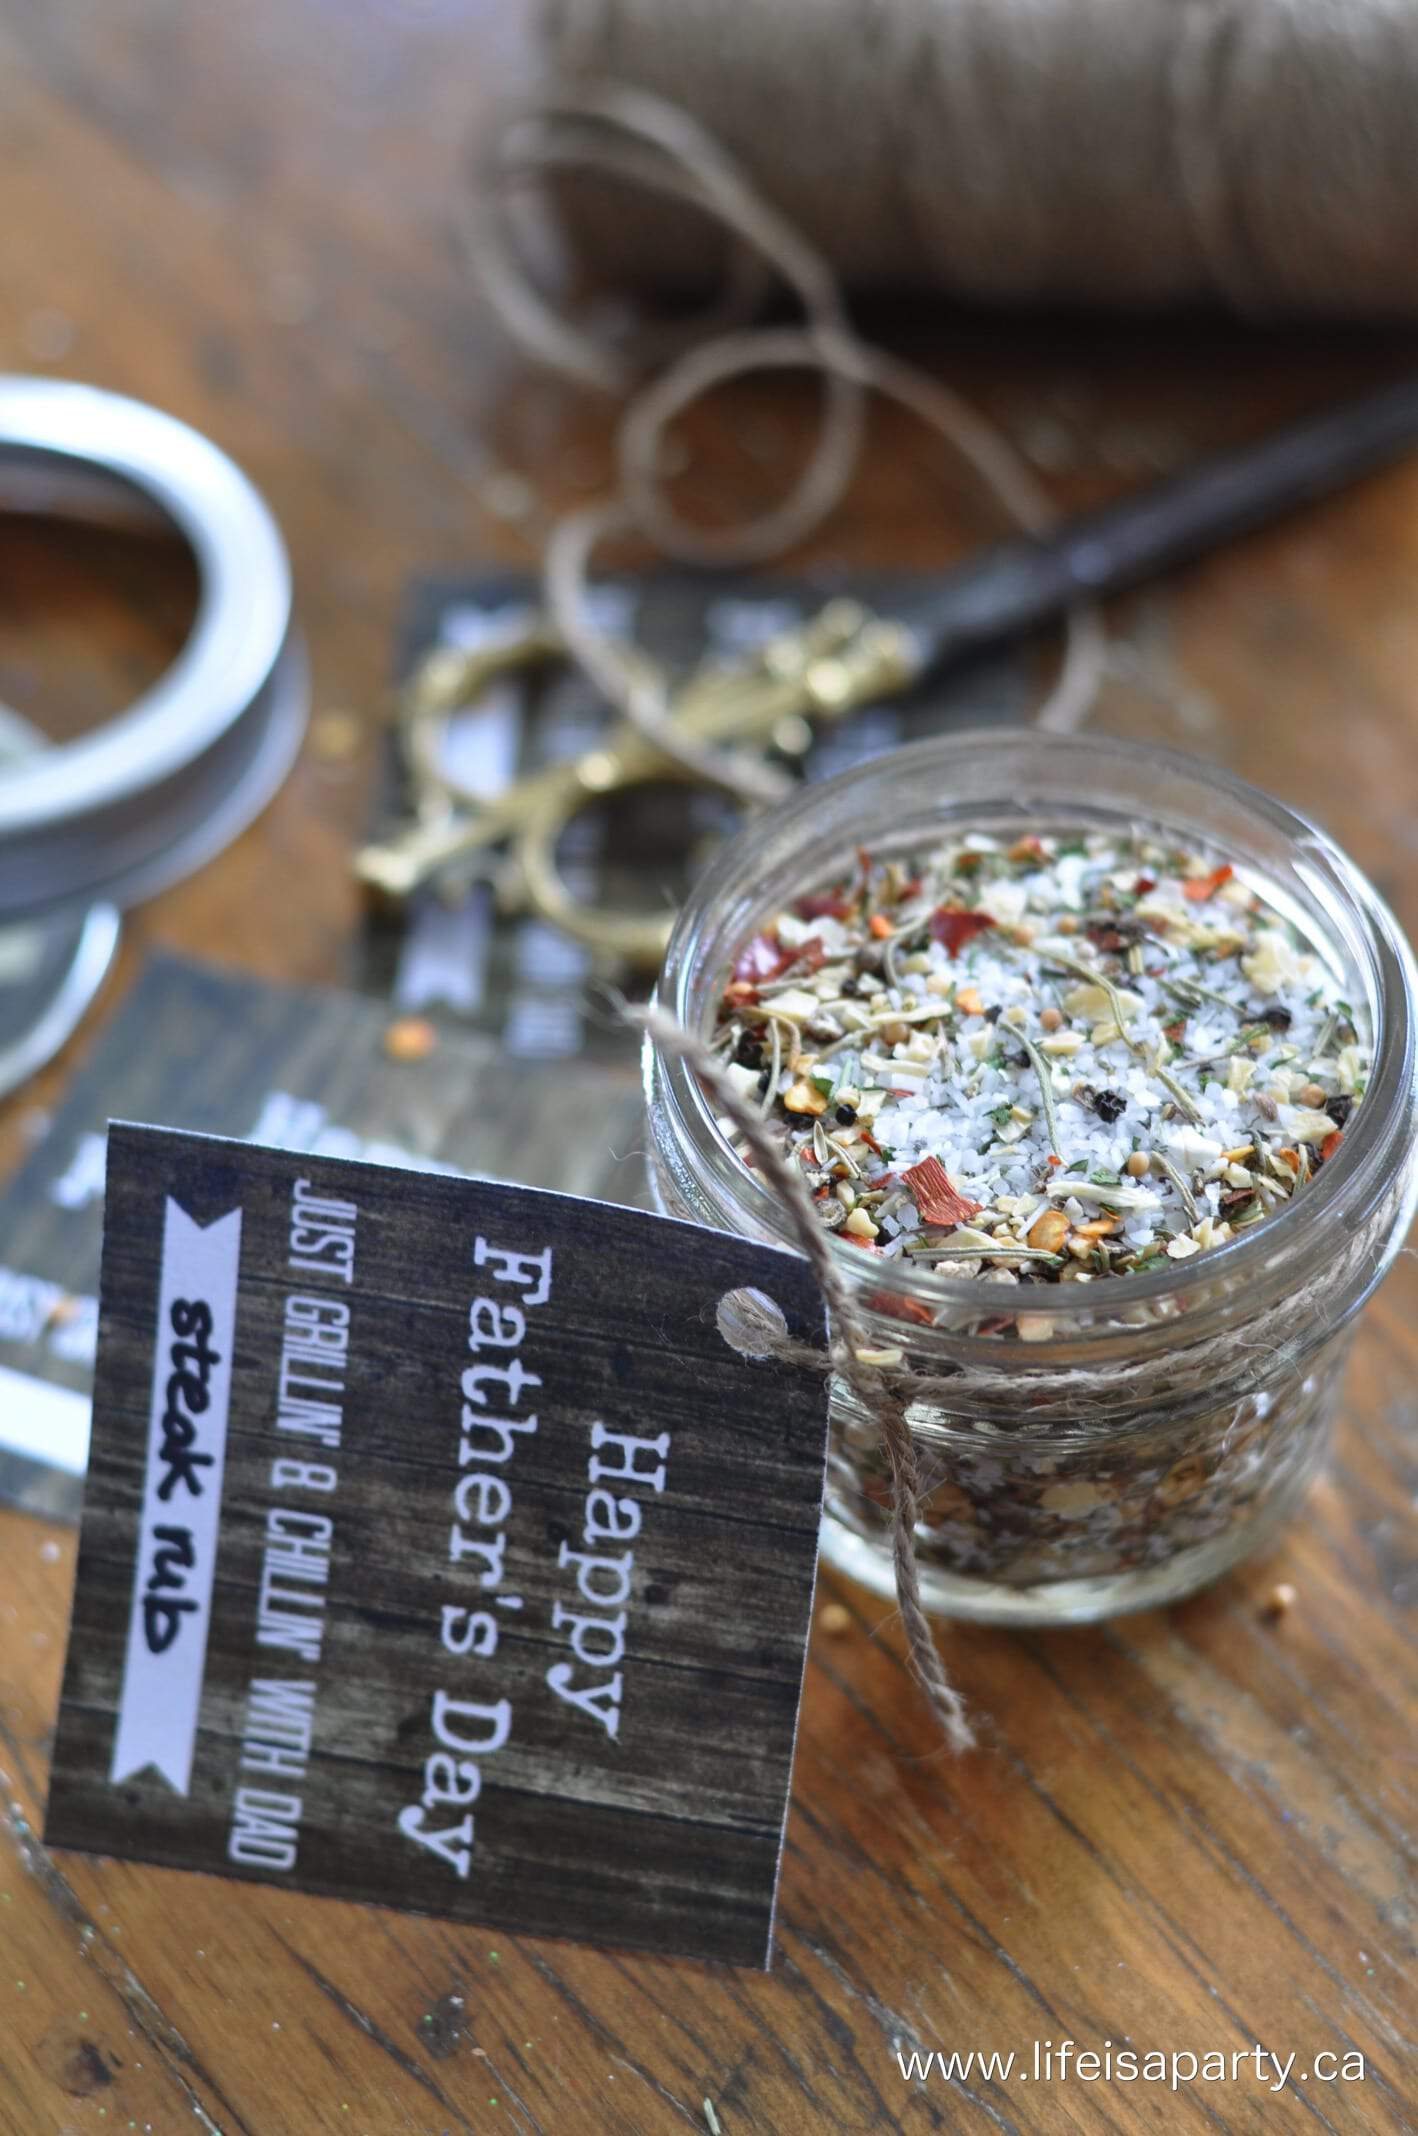
Homemade DIY Montreal Steak Seasoning in a mason jar

Instructions

1. This recipe is so easy to put together, just combine all the ingredients in a mixing bowl. Store in an airtight container.

How to make DIY Montreal Steak Seasoning

Free Printable Gift Tag

I packaged my delicious seasoning up along with a few other BBQ treats for a great DIY gift for my guy.  Store it in an airtight container at room temperature.  A mason jar, or spice jar. or any airtight jar works well for this flavorful seasoning mix.

You can download the free printable gift tag in our Free Resource Library.  It's free for subscribers, and you can subscribe below for instant access.

Homemade Montreal Steak Seasoning Father's Day gift
I included a jar of the Homemade BBQ Sauce -find our recipe here, the Montreal Steak Seasoning, a little bag of BBQ Ring-o's, a "Dad's" rootbeer, and a grill cleaning brush.  And, if you're giving this gift to someone, you should probably make sure there's a steak or two in the fridge. 😉

Frequently Asked Questions

Can I reduce the salt?

Yes, if you find it too salty, simply reduce the salt to your prefence.

Can I substitute garlic powder and onion powdered for dehydrated?

Yes, if you can't find the dehydrated garlic and onion, feel free to substitute them for the powdered version.

How long will it last for?

Your Montreal Steak Seasoning should be made with fresh seasonings and will last up to 6 months in a sealed container.

If you tried this Montreal Steak Seasoning Recipe or any other recipe on my blog please leave a star rating and let me know how it went in the comments below. Thanks for visiting today!

More BBQ Inspiration

  • No cook hot sauce recipe in small jars with homemade labels.
    No-Cook Homemade Hot Sauce Recipe
  • Homemade sweet beer bbq sauce.
    Homemade Sweet Beer Bbq Sauce Recipe
  • Mac and cheese with panko breadcrumb topping.
    Best Homemade Mac and Cheese with Panko Breadcrumb Topping
  • Easy and moist sweet cornbread pieces stacked together and spread with butter.
    The Best Sweet Cake-Like Cornbread Recipe

Recipe

Montreal steak seasoning recipe.

Homemade Montreal Steak Seasoning

This dry seasoning rub is easy to make and perfect for using with your favourite steak.
4.60 from 5 votes
Print Pin Rate
Course: Condiment
Cuisine: American
Prep Time: 10 minutes minutes
Total Time: 10 minutes minutes
Servings: 48
Calories: 3kcal
Author: Dannyelle Nicolle-Ramjist

Ingredients

  • 4 tablespoon coarse kosher salt
  • 1 tablespoon fresh cracked black pepper
  • 1 tablespoon dehydrated onion
  • ½ tablespoon dehydrated garlic
  • ½ tablespoon red pepper flakes
  • ½ tablespoon dried thyme
  • ½ tablespoon dried rosemary
  • ½ tablespoon dried coriander
  • 1 teaspoon mustard seeds

Instructions

  • Combine all the ingredients together, and store in a sealed container.
  • To use, rub on steak before grilling.

Nutrition

Serving: 1g | Calories: 3kcal | Carbohydrates: 1g | Sodium: 560mg
Tried this Recipe? Tag me Today!Mention @LifeisaParty or tag #lifeisaparty!


Homemade Honey Cruller Donuts

Jun 8, 2016 · 12 Comments

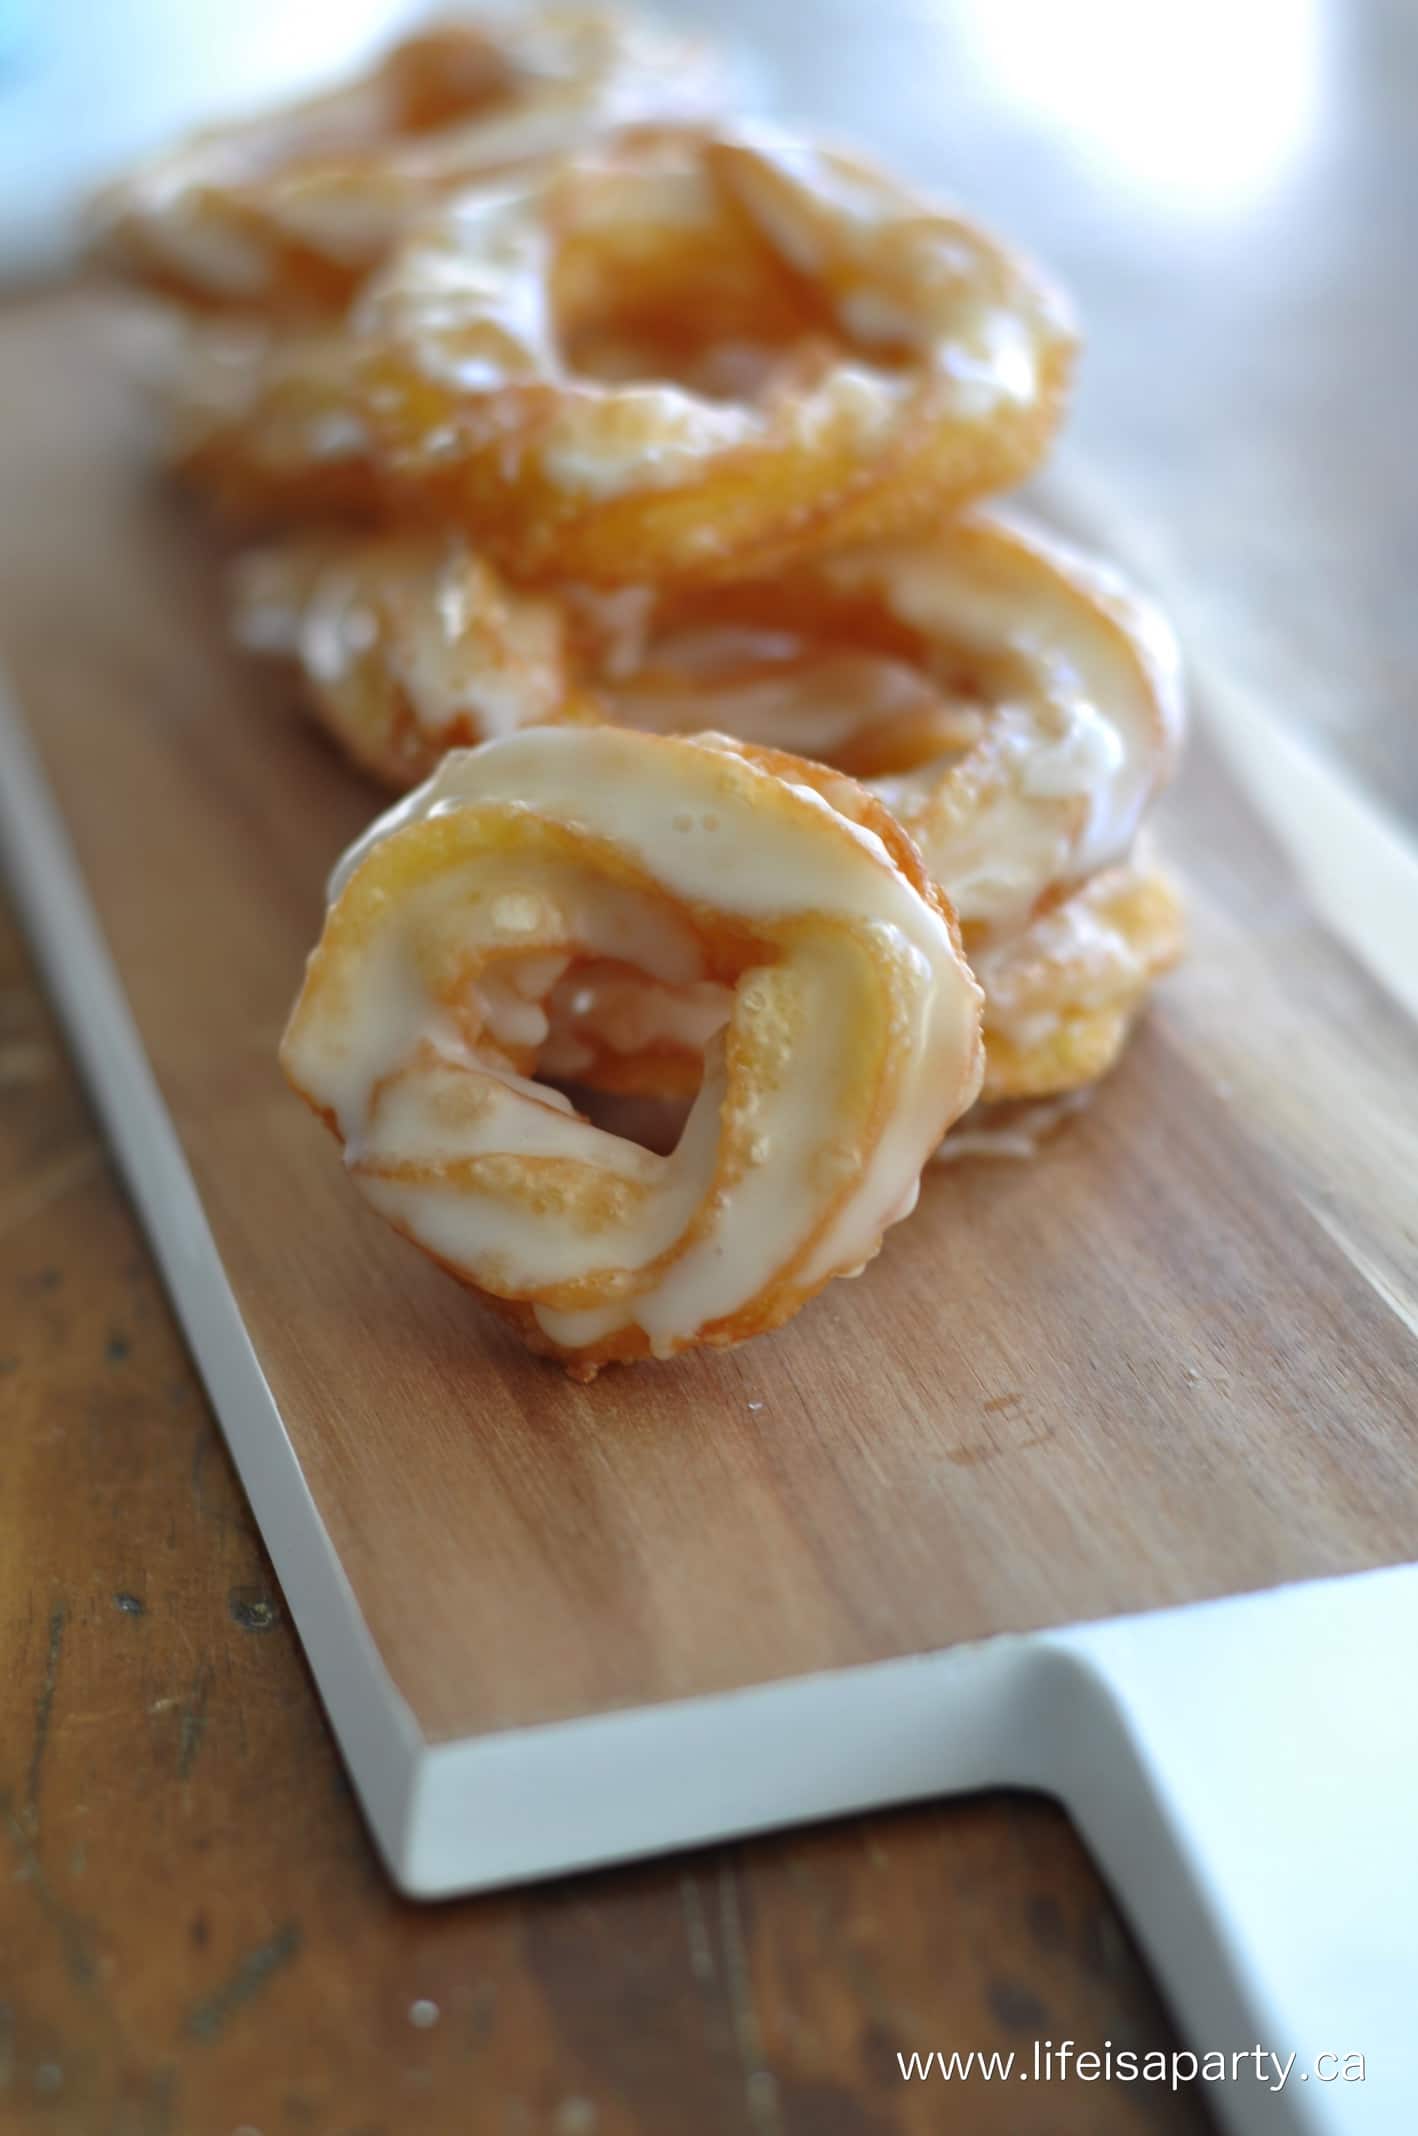
Homemade honey cruller donuts on a serving board.

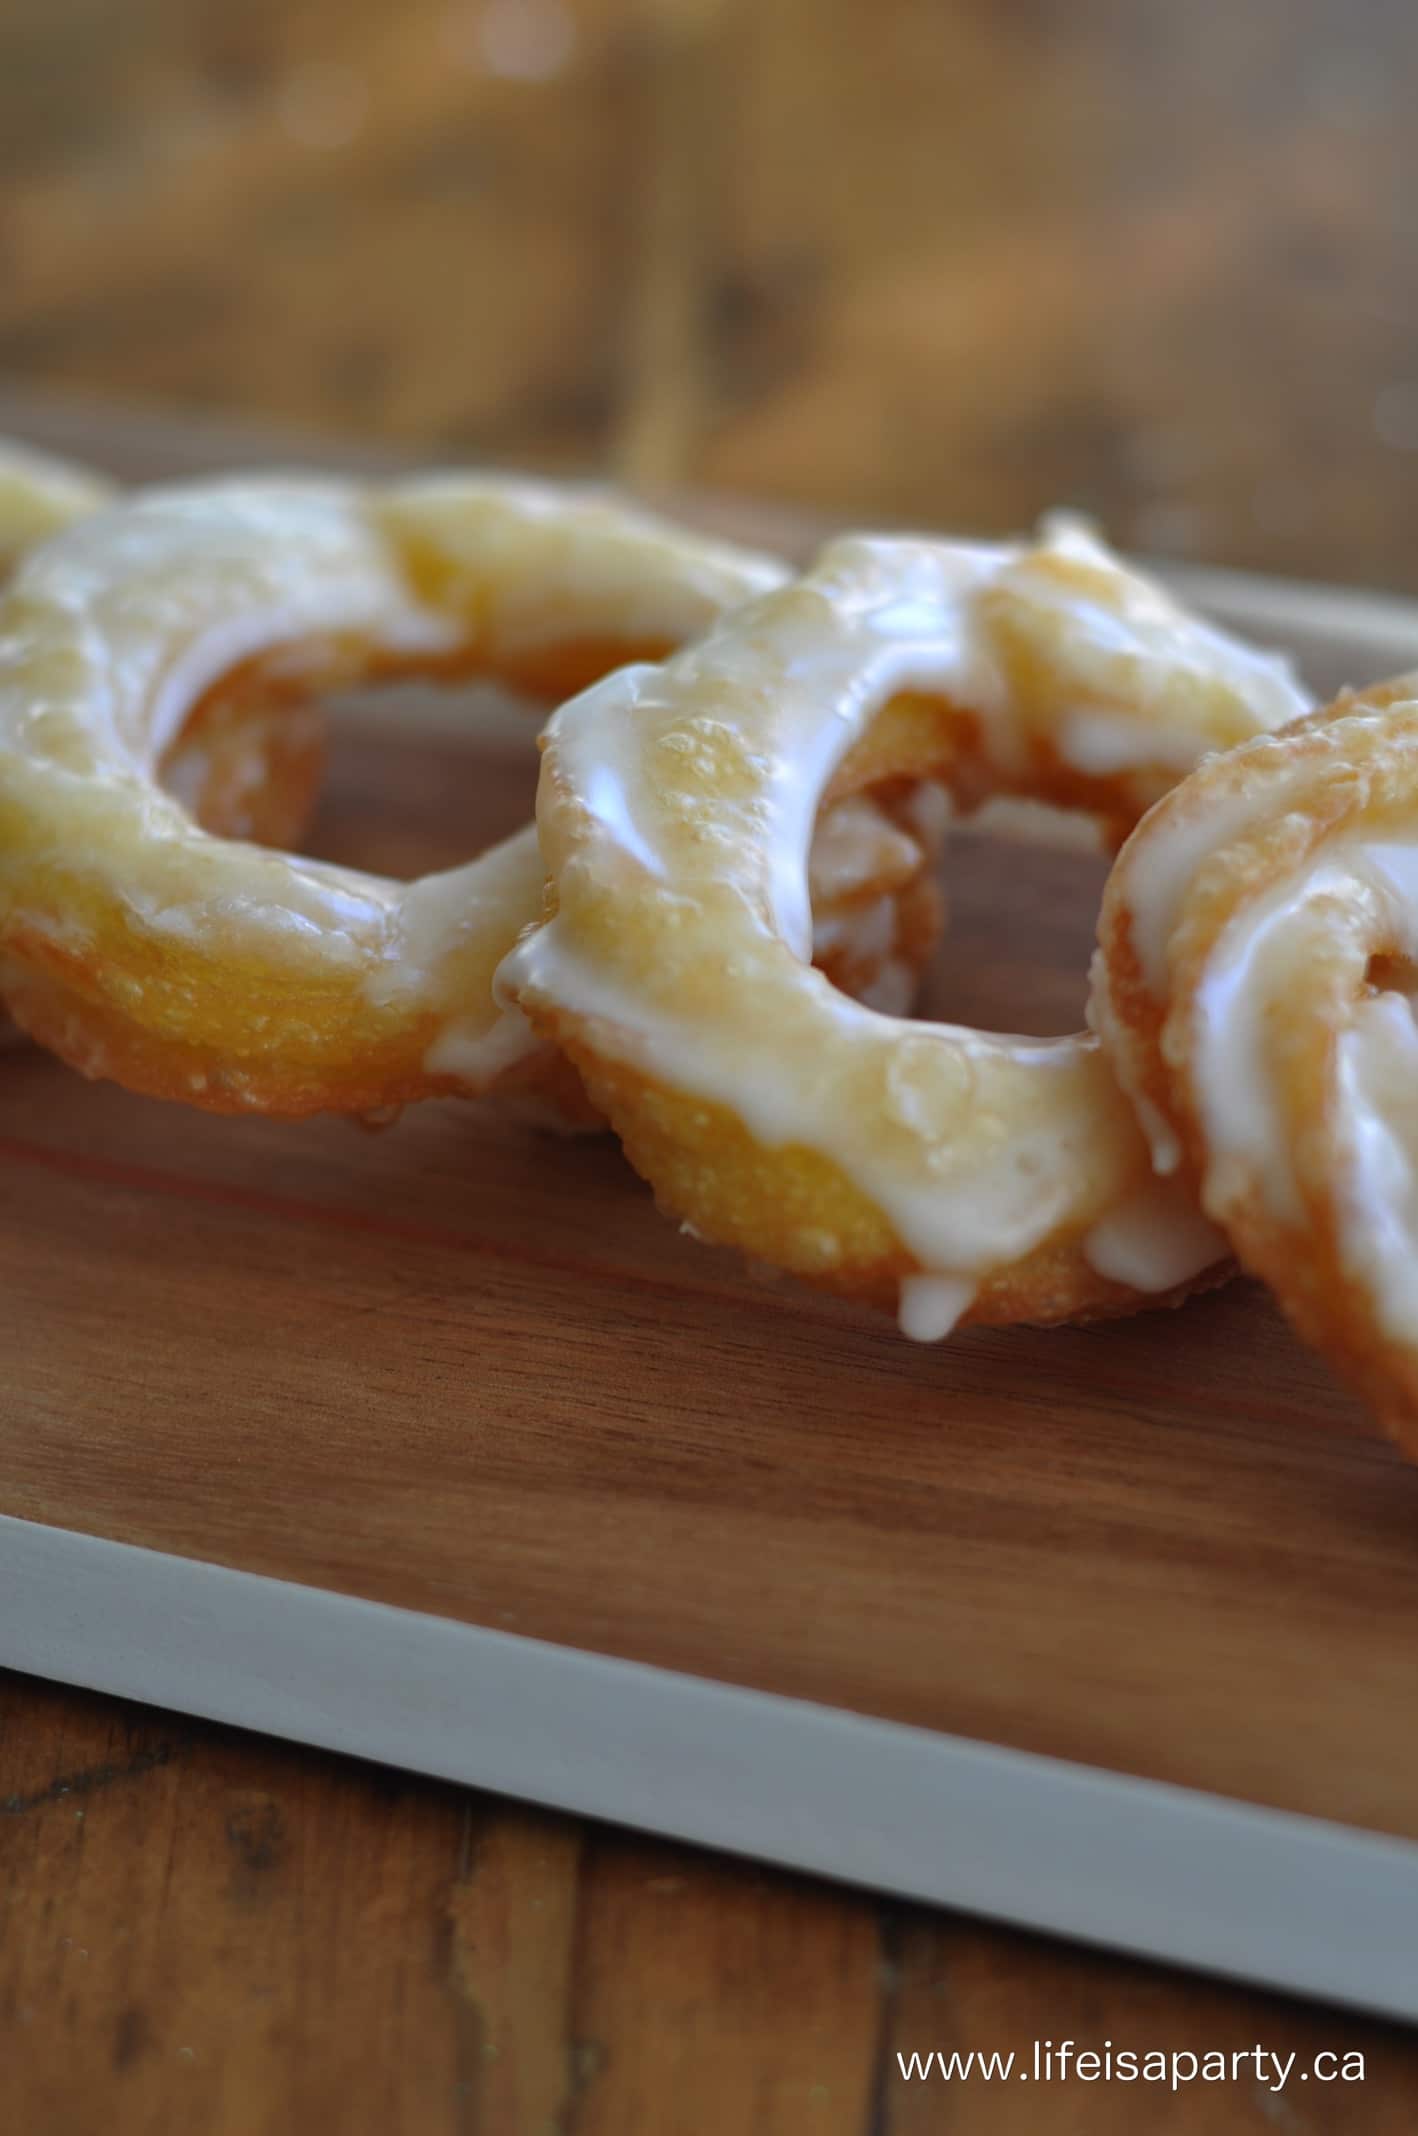
These homemade Honey Cruller Donuts are the perfect French Cruller recipe, made with choux pastry, and a honey glaze. If you're a cruller lover, you will love this homemade version.

French cruller donuts staked on a napkin.

A Quick Look At This Recipe

  • 📋 Recipe: Homemade Honey Crullers
  • ⏲️ Ready In: 35 minutes
  • 👪 Servings: Makes about 18 -great for company!
  • 🔪 Difficulty: This recipe involves making choux pastry, piping, and frying. Not difficult, but several steps involved.
  • 💭 Top Tips: Make sure your oil is at the right temperature to avoid soggy or burnt donuts. Don't overdo the glaze or they'll be too sweet. Best if eaten the same day they're made.

These were delicious and simple! -Nekane via Pinterest

Why You Will Love This Recipe

  • There's nothing like a fresh, and homemade donut. These are so good!
  • Crullers are light and airy, especially compared to a regular donut.
  • The honey glaze adds the perfect sweetness to this dessert.
[feast_advanced_jump_to]

One of the best things about having a blog is an excuse for me to do things like make Homemade Honey Cruller Donuts!

Homemade donuts are such a favourite like our Princess Tiana Homemade Beignets Recipe, or these Easy Bread Machine Jelly Donuts, or these Sour Cream Donuts. Also check out our Homemade Fair Funnel Cakes Recipe.

Turns out they're not that difficult to make, and certainly worth the effort. 

Sometimes called French cullers, they're made with a different type of dough then traditional donuts. Traditional crullers are made from choux pastry, like cream puffs or chocolate eclairs.

Unlike cream puffs or eclairs though, instead of being baked the French cruller donut recipe creates a fried pastry.

It's not difficult, but is a little time consuming.  It's worth it though because they're so good!

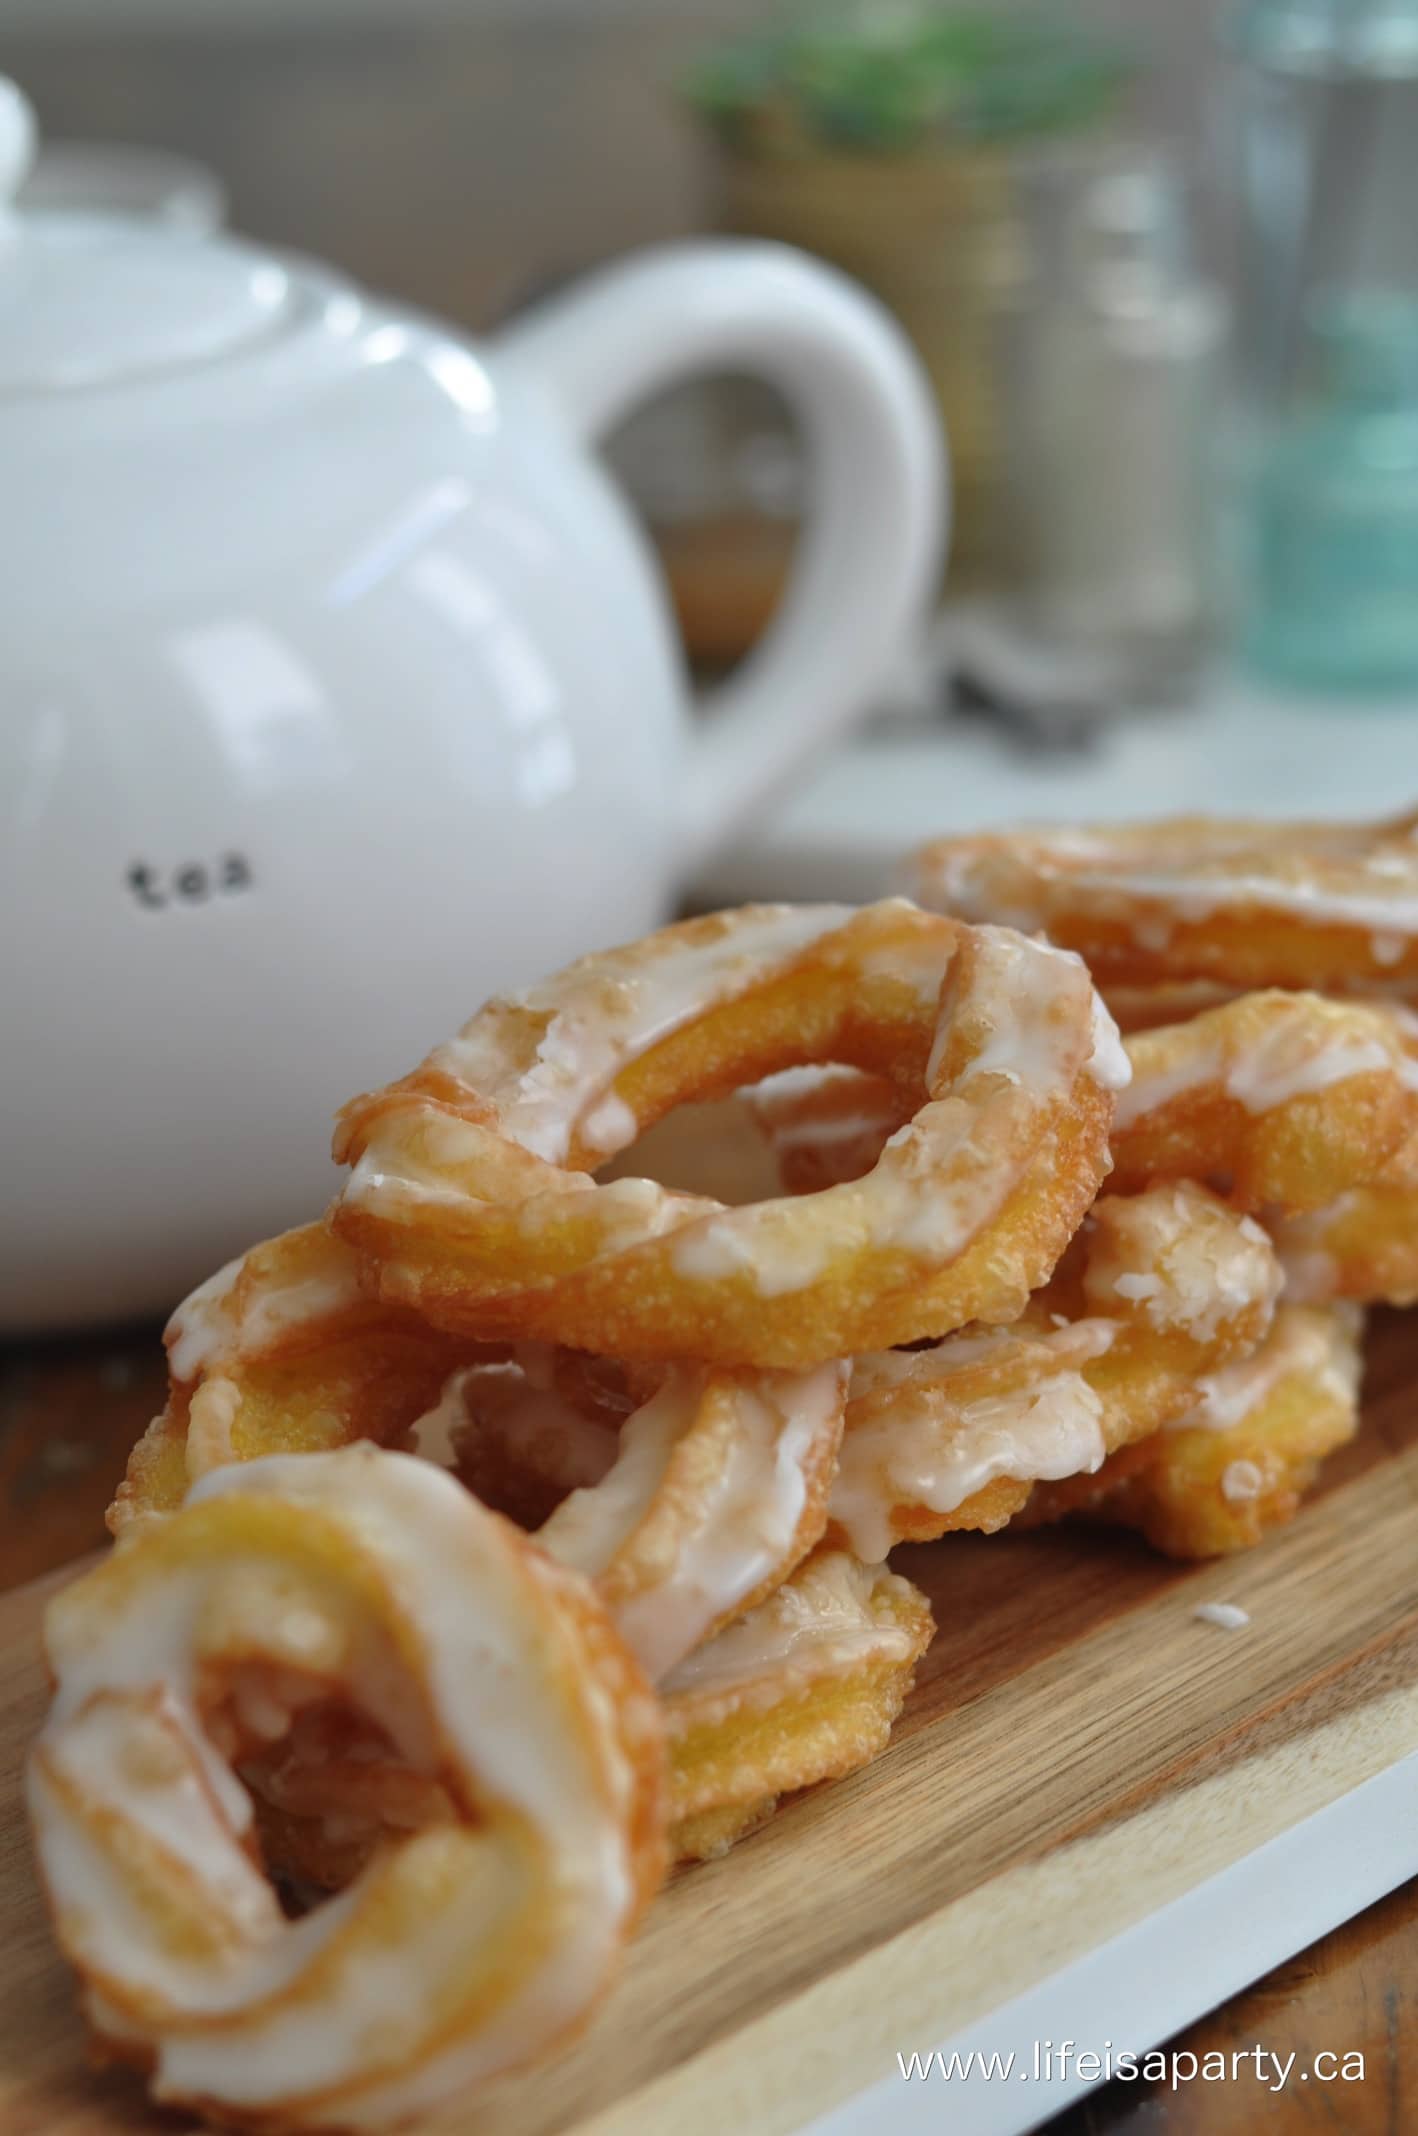
French cruller donuts staked on a serving board.

Homemade Is Always Better

I have found that in general, anything homemade is better than store bought -it was true of, the homemade graham crackers, the homemade marshmallows, the homemade bbq sauce, the homemade baked beans…I could go on. 

A solid belief based on rigorous at home testing. 

But the first time I made these, after I made the glaze, I dunked one in there, on both sides and tried to wait for the glaze to set. I tried, really I did, but I had to give them a try, in case they needed adjustment. With the glaze not quite set, I had my first bite of them and they were not as amazing as I'd hoped. They were way too sweet when drenched in the glaze.

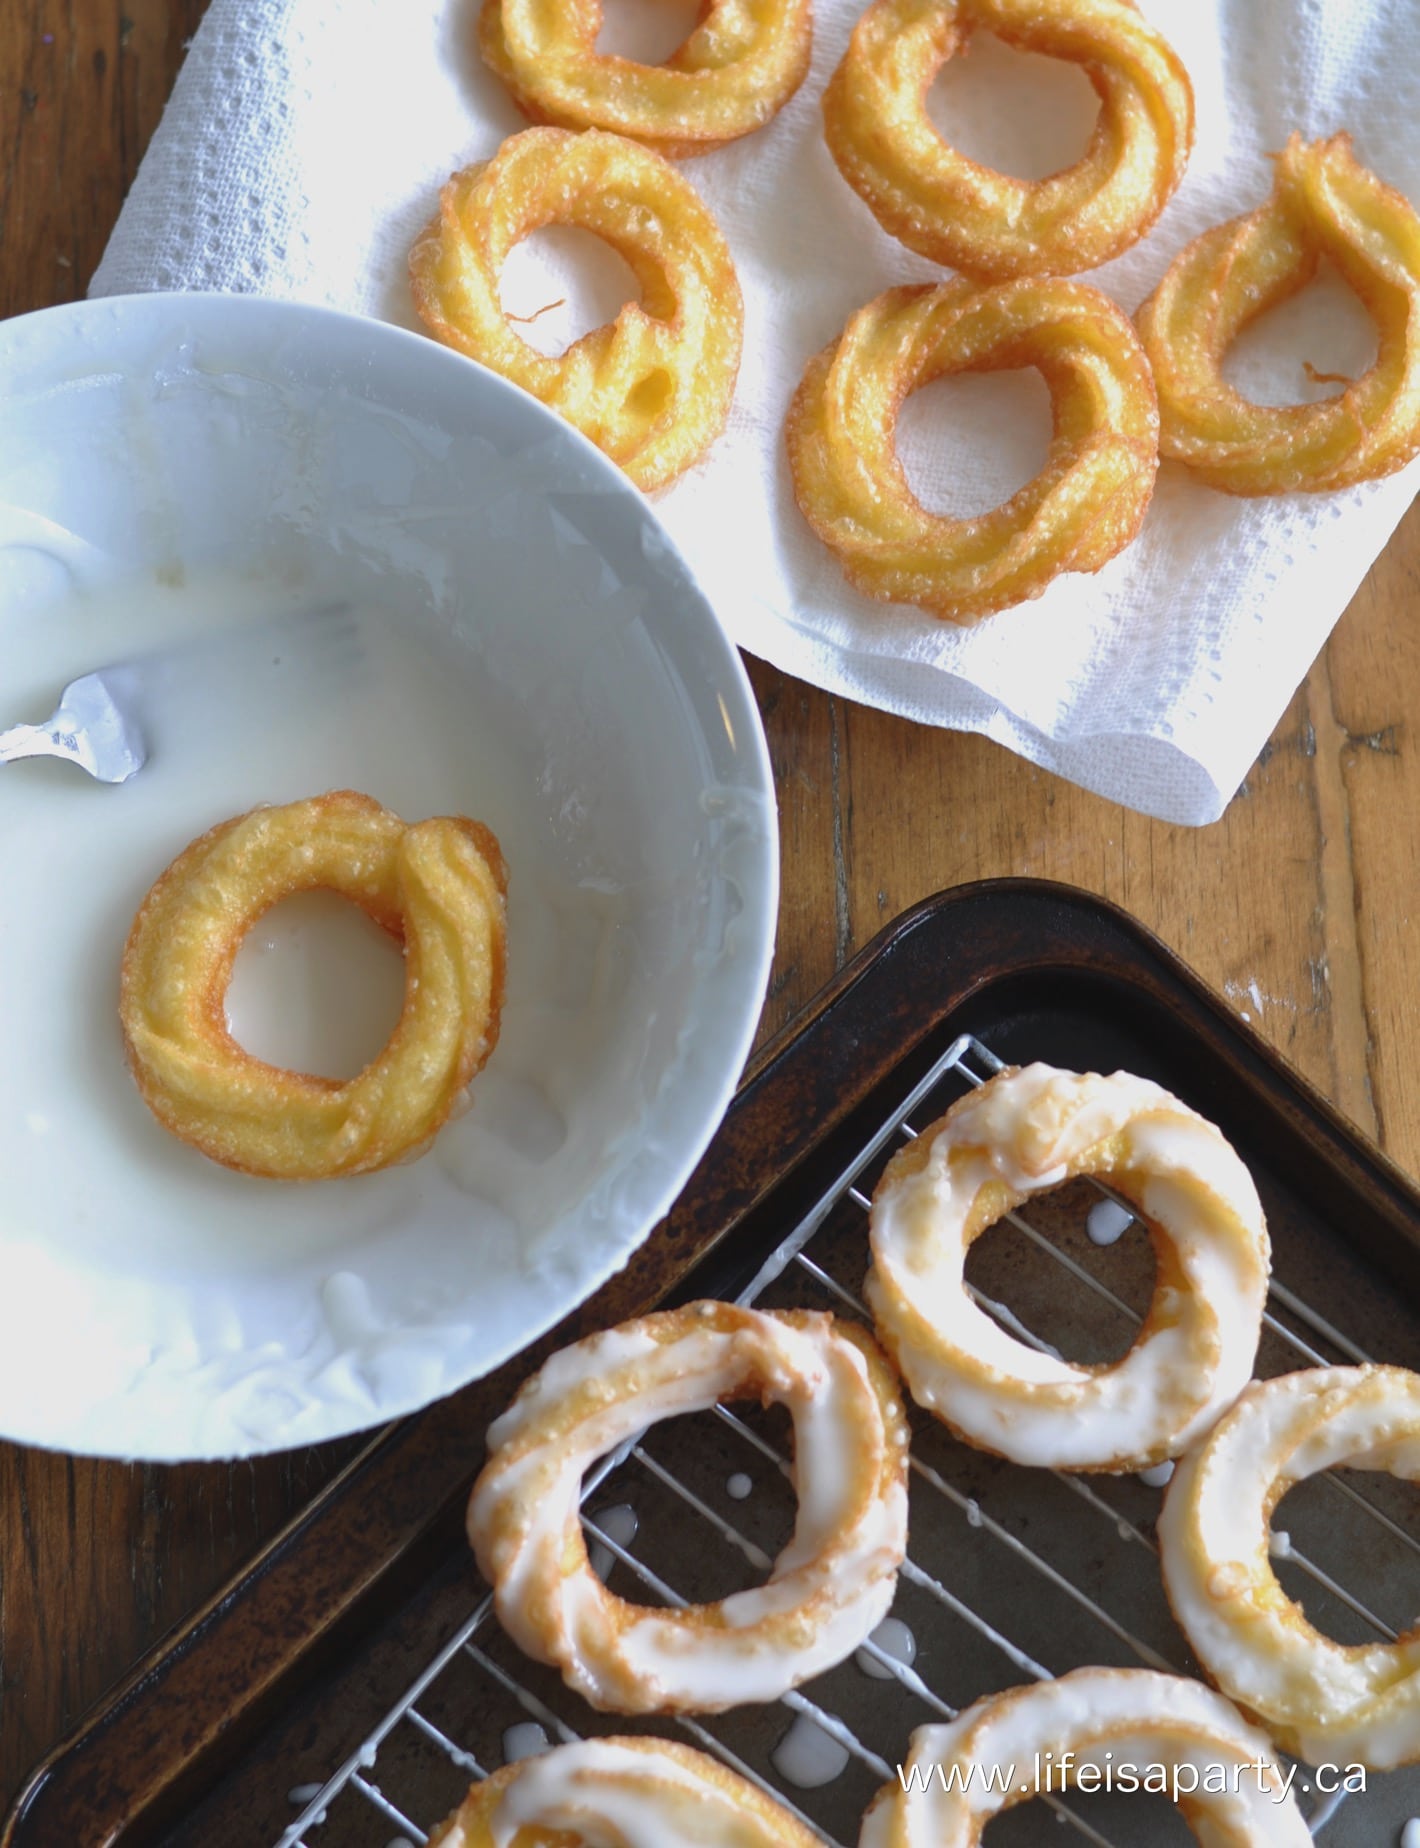
Dipping fried French cruller donuts into honey glaze.

Letting The Glaze Set

Next attempt, just dunk the tops in the honey glaze, and again patiently wait for them to set. This time I had to run some errands so I wasn't tempted to eat one before the glaze set.


easy French cruller donut recipe

When we tried them they were AMAZING, home run, how many of these French cruller donuts is it reasonable to eat in one sitting, kind of yumminess. 

And, indeed, further evidence that the homemade version is always better. And…you get to eat like a dozen of them or more (my batch made about 18 little-ish ones) because they're really better eaten the same day you make them -maybe invite some friends over, or if you have kids...

Ingredients

Ingredients to make honey cruller donuts on a wood table.
  • Eggs -these donuts are made with a choux pastry. It's made from flour, water, and butter that is cooked. Next the eggs are added to the cooked batter in a stand mixer. The eggs lighten up the batter and are beaten into it, just like a traditional choux pastry.
  • Vegetable Oil -these donuts are deep fried. It's the deep frying that makes them different from something like a eclair, or cream puff that is also made from a choux pastry.
  • Honey -the honey in the glaze adds a great flavor and gives these donuts their name of honey crullers.

Equipment

  • Deep Fryer: These donuts are fried. If you bake choux pastry you are making a cream puff. Donuts are fried. You can use a pot of oil on the stove and a thermometer to help you regulate the oil's temperature. It's much easier with a small deep fryer because the oil temperature is regulated for you. You can pick up a small one at a kitchen store very inexpensively, or even look for one at a second hand store.
  • Piping Bag and Star Tip: These donuts are piped, so you will need a piping bag for them. You will fit it with a star tip. The star tip forms the lovely ridges on a honey cruller. You will want to twist slightly as you pipe to create a bit of a swirl. The ridges look great, but also fry up nice and crispy and help hold the glaze.
  • Parchement Paper: You will pipe your donuts onto parchement paper. This makes it much easier than trying to pipe into the hot oil, and form a ring. Cut your parchement paper into squares 3 x 3 squres. You will drop the donuts into the oil, parchment paper side up, and with a few seconds the donut will detactch itself, and you can use some metal tongs to remove the paper.
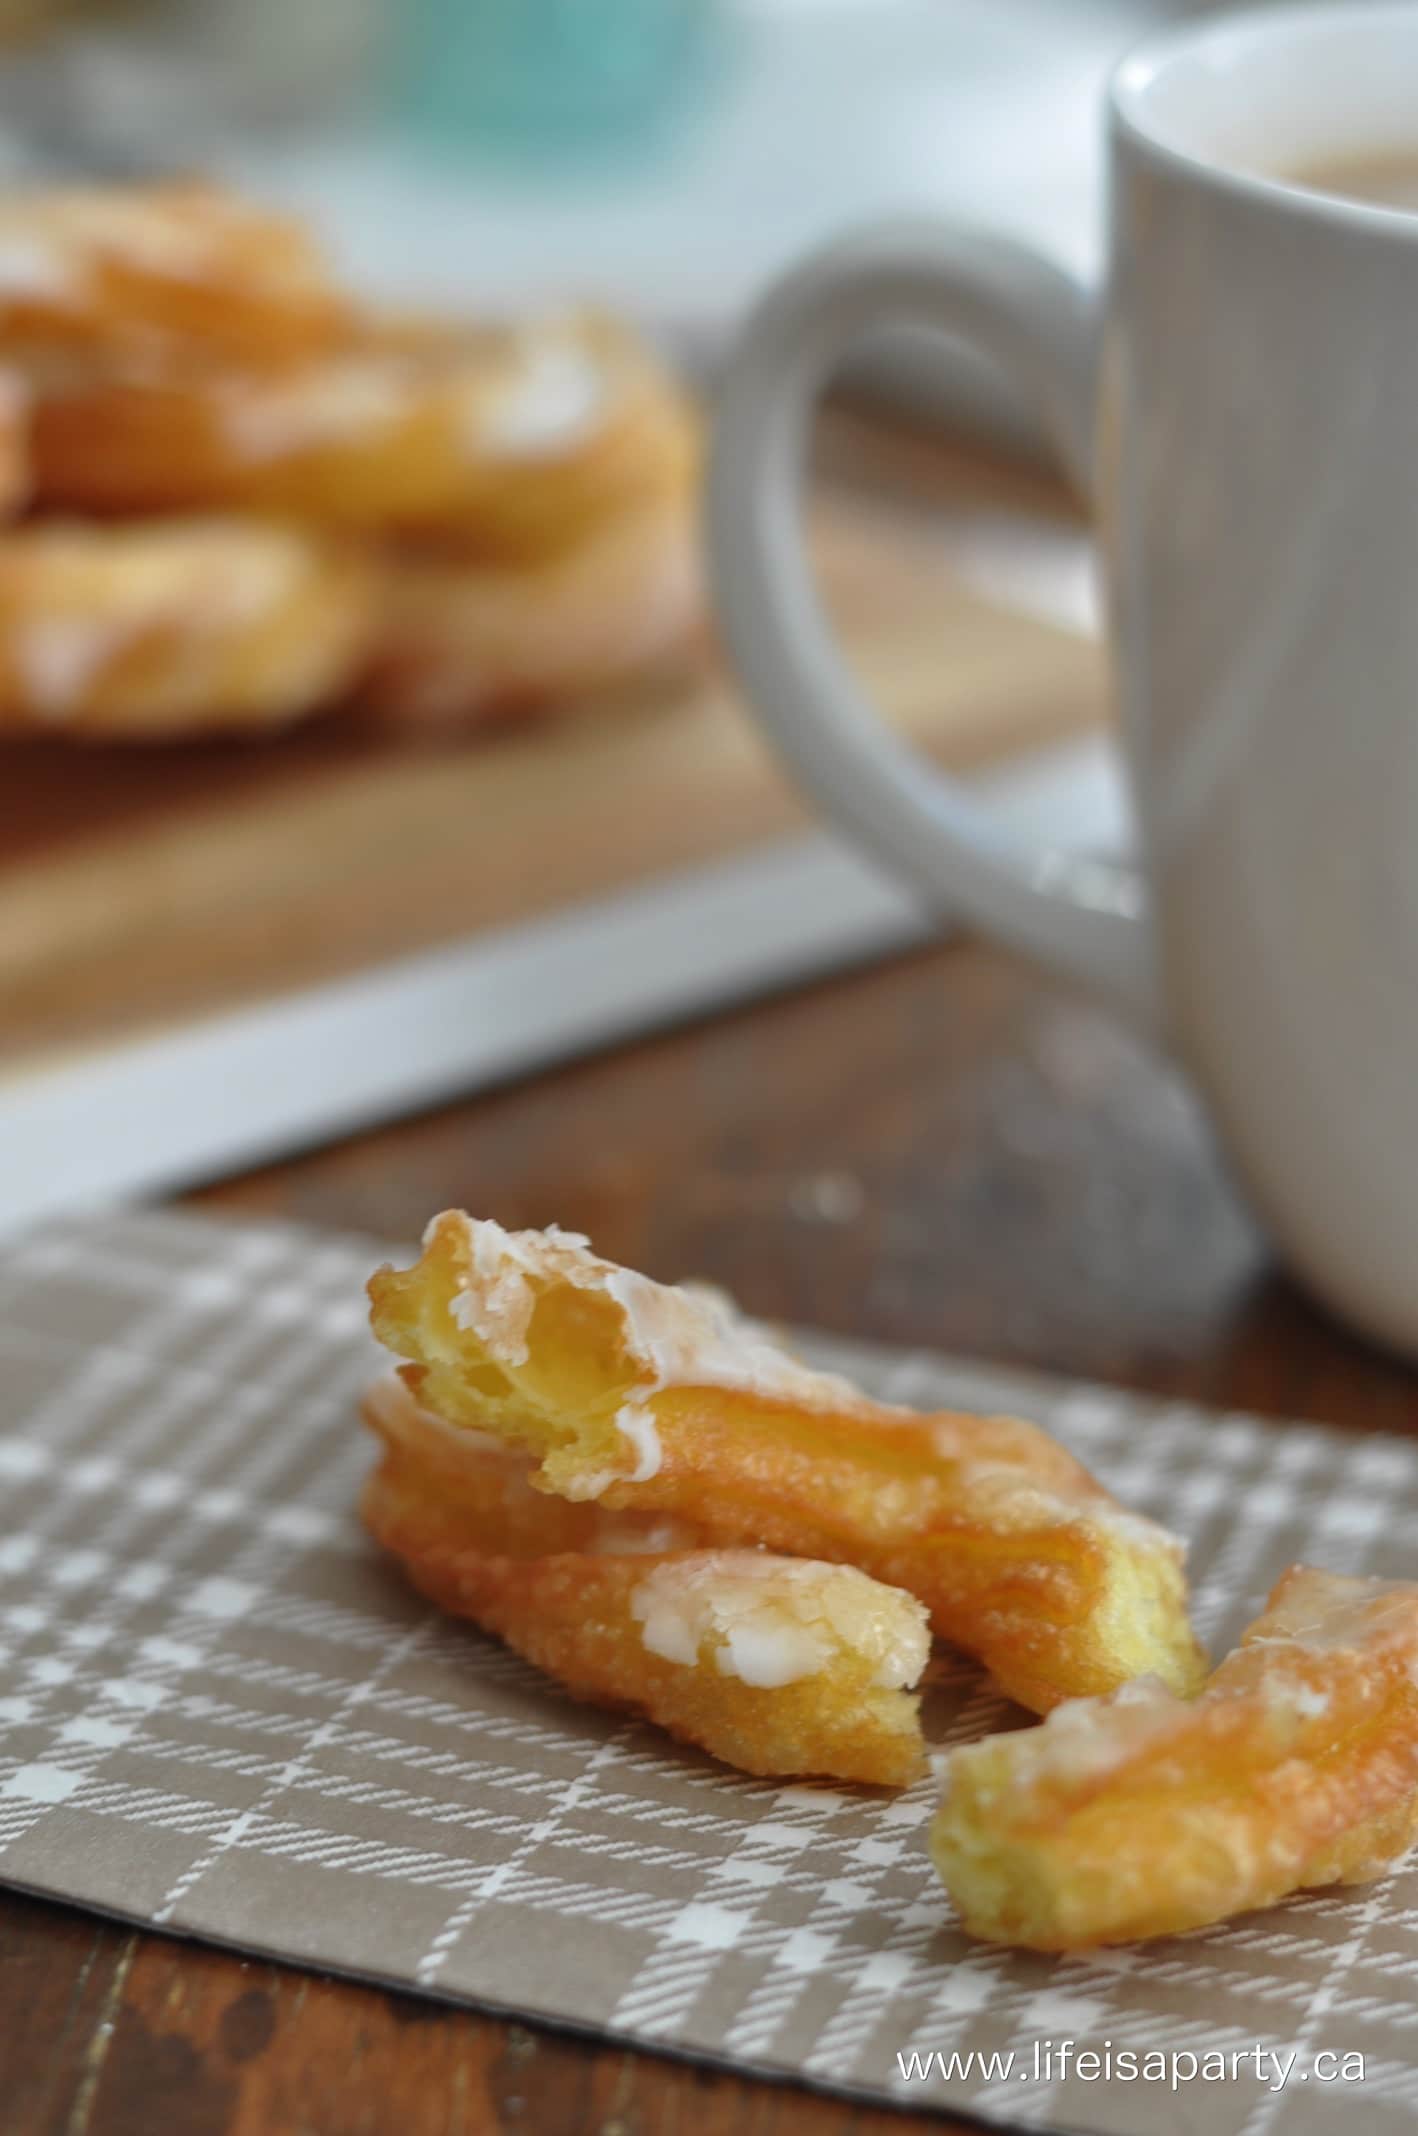
Homemade honey cruller donuts broken into pieces on a napkin.

How To Make Honey Cruller Donuts

Step 1. To begin with, bring the water, butter, and sugar to a boil in a small saucepan. Then, add in the flour and use a whisk to incorporate. Switch to a wooden spoon, and lower to medium heat. Stir the dough and cook until the bottom of the pan is covered in a thin film and the dough has dried out.

Making choux pastry for honey cruller donut batter.
Making choux pastry for honey cruller donuts in a white pan.
Whisking choux pastry together for honey cruller donuts.
Cooked honey cruller donut batter in a white pan.

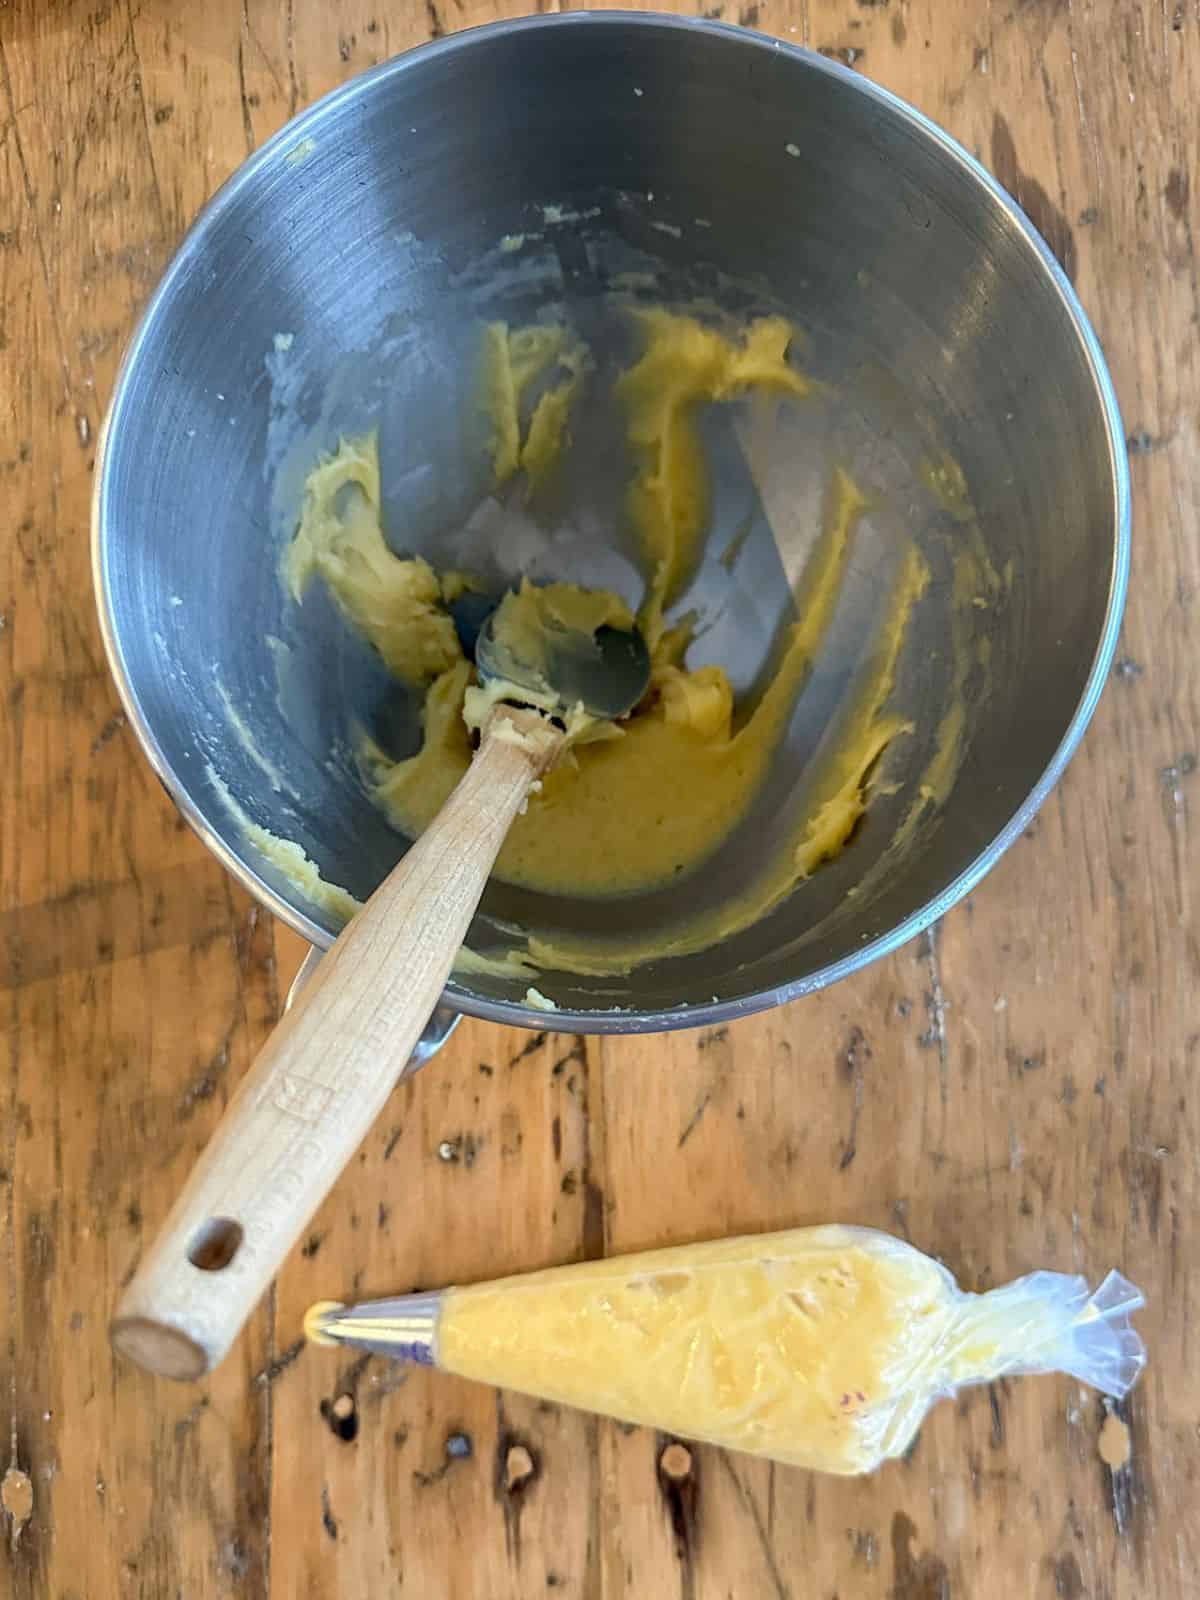
Step 2. Put the hot dough into the bowl of a stand mixer with a paddle attachment and mix on medium speed to cool the dough slightly. Add in the whole eggs one at a time and mix until fully incorporated.

Honey cruller donut batter  in a stand mixer bowl.
Honey cruller donut batter in a stand mixer bowl.

Step 3. Transfer the dough to a piping bag fitted with a large star tip. Cut out square 3 x 3 sheets of parchment paper (my batch made about 18 smallish donuts), and pipe donuts onto the parchment squares, being careful to pipe an even circle of dough without overlapping the beginning and end of the donut.

Piping honey cruller donuts onto squares of parchment paper.

Step 4. Heat oil to 375 degrees in a deep fryer. When the oil is hot, place one or two donuts, paper side up, donut down, into the hot oil. The donut will separate from the paper in a few seconds, and you can remove the floating paper with tongs. Allow the donut to fry until it is a deep golden brown, then flip over and do the same on the other side. (Test your first donut to make sure it's not doughy in the middle and adjust your cooking time if needed). To remove the cruller donuts from the oil, use tongs or a slotted spoon and allow the donuts to cool on a paper towel or cooling rack, and finish frying them all.

Frying honey cruller donuts in home deep fryer.
Fryed honey cruller donuts resting on paper towel on a baking sheet.

Step 5. To make the honey glaze, combine the powdered sugar, honey and milk in a small bowl and stir the glaze ingredients together. Dip the best side of the donuts, one at a time, into the glaze. Set on a wire rack to set completely. Enjoy!

Honey cruller donut glaze  in a mixing bowl.
Dipping honey cruller donuts into glaze.

Expert Tips:

  • Only dunk the donut into the glaze one side, otherwise it's too sweet and over powers the donut. Also, let the glaze set completely before serving them.
  • Make sure your oil is the right temperature for frying. Too cool and the donut will absorb oil and become soggy. Too hot and the donut will cook too quickly on the outside and be dough inside.
  • Let the glaze set before eating. It gives the donut the best texture and mouth feel.
  • Make sure to cook your choux pastry until a film develops on the bottom of the pan. This indicates that it's probably dried out, which helps the donuts to maintain their structure.

Storage

These donuts are best served the day that they are made, and best stored on an open plate to retain their crispness.

If you have leftovers you can store them in an airtight container at room temperature.

Frequently Asked Questions

Can I bake honey cruller donuts instead of frying them?

No, these are best fried. Baked choux pastry is a cream puff, not a donut.

Do I have to use a deep fryer to fry honey cruller donuts?

No, you don't have to use a deep fryer to make your honey crullers. You can use a large pot on a burner with a thermometer in it. It's a little harder to regulate the temperature of the oil and keep it even, so keep an eye on the thermometer and adjust the heat accordingly. Also take care not to overfill the pot with oil.

What's the difference between a honey cruller and French cruller?

There is no difference, they are the same. They are sometimes called honey crullers because of the honey in the glaze. They're also sometimes called French crullers because they are made with choux pastry which is a French baking method.

Why is my honey cruller donut soggy?

Make sure your oil is the right temperature for frying. If it's cooler than it should be the donut will absorb too much oil and become soggy. Also only glaze one side of the donut, and allow to the glaze to set. Don't cover your donuts once they're made. In an airtight container, they will lose their crispness and can become soft and soggy. These are best eaten they day they are made.

More Donut Recipes

  • Tiana's beignets from The Princess and the Frog covered in powdered sugar on a cake plate.
    Tiana's Beignet Recipe from The Princess and The Frog
  • Mini jelly donuts easy recipe.
    Easy Bread Machine Jelly Donuts
  • Bread machine donut holes with Nutella.
    Bread Machine Mini Nutella Filled Donut Recipe
  • Homemade honey cruller donuts on a serving board.
    Homemade Honey Cruller Donuts

If you try this Honey Cruller Donut Recipe or any other recipe on my blog please leave a star rating and let me know how it went in the comments below. Thanks for visiting today!

Homemade Honey Cruller Donuts on a serving board.

Recipe

Homemade honey cruller donuts on a serving board.

Homemade Honey Cruller Donuts

Video

These homemade French crullers are light and fluffy and sweet on the outside.
4.44 from 37 votes
Print Pin Rate
Course: Desserts
Cuisine: French
Prep Time: 15 minutes minutes
Cook Time: 20 minutes minutes
Total Time: 35 minutes minutes
Servings: 18
Calories: 131kcal
Author: Dannyelle Nicolle-Ramjist

Ingredients

  • 1 cup water
  • 6 tablespoon butter
  • 2 tablespoon sugar
  • 1 cup all purpose flour
  • 3 eggs
  • vegetable oil for frying
  • For the Glaze
  • 1 ½ cups powdered sugar
  • 1 tablespoon honey
  • 4 tablespoon milk

Instructions

  • To begin with to make the choux dough, bring the water, butter, and sugar to a boil in a small saucepan. Then, add in the flour and use a whisk to incorporate. Switch to a wooden spoon, and lower to medium heat. Stir the dough and cook until the bottom of the pan is covered in a thin film and the dough has dried out.
  • Put the hot dough into the bowl of a stand mixer with a paddle attachment and mix on medium speed to cool the dough slightly. Add in the whole eggs one at a time and mix until fully incorporated.
  • Transfer the dough to a piping bag fitted with a large star tip. Cut out square 3 x 3 sheets of parchment paper (my batch made about 18 smallish donuts), and pipe donuts onto the parchment squares. Be careful to pipe an even circle of dough without overlapping the beginning and end of the donut as you make your ring of dough.
  • Heat oil to 375 degrees in a deep fryer. When the oil is hot, place one or two donuts, paper side up, donut side down, into the hot oil. The donut will separate from the paper in a few seconds, and you can remove the floating paper with tongs. Allow the donut to fry until it is a deep golden brown, then flip over and do the same on the other side. (Test your first donut to make sure it's not doughy in the middle and adjust your cooking time if needed). To remove the donuts from the oil use tongs or a slotted spoon and allow the donuts to cool on a paper towel or cooling rack, and finish frying them all.
  • To make the honey glaze, combine the powdered sugar, honey and milk in a small bowl and stir the glaze ingredients together. Dip the good side of the donuts, one at a time, into the glaze. Set on a wire rack to set completely. Enjoy!

Notes

These donuts are best with only the top glazed.  Dipping the top and bottom of the donut into the glaze is too sweet and overwhelms the other tastes.
Allow the glaze to fully set before serving.
These donuts are best served the day they are made.

Nutrition

Serving: 1g | Calories: 131kcal | Carbohydrates: 19g | Protein: 2g | Fat: 6g | Saturated Fat: 3g | Polyunsaturated Fat: 2g | Cholesterol: 41mg | Sodium: 45mg | Sugar: 13g
Tried this Recipe? Tag me Today!Mention @LifeisaParty or tag #lifeisaparty!

Cherry Almond Coffee Cake

May 31, 2016 · 2 Comments

Cherry almond coffee cake recipe.

Cherry Almond Coffee Cake: I lovely not too sweet coffee cake, with cherries, almond, and streusel topping. Made with sour cream to keep it lovely and moist.

Cherry almond coffee cake recipe.
[feast_advanced_jump_to]

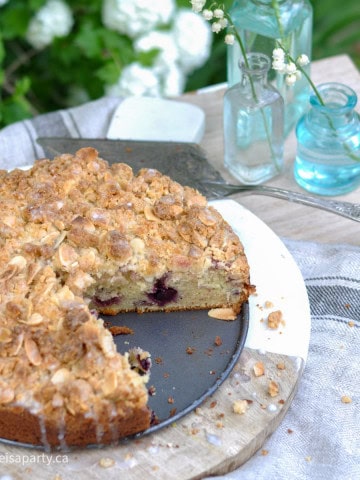
 love the combination of cherries and almonds and this cherry almond coffee cake with its streusel topping and icing drizzle is so good!  It's so perfect to enjoy with a cup of coffee.

This is the time of year, when there is nothing nicer than a little time to sit and enjoy the garden with a cup of tea or coffee and a lovely slice of cake.  It's also the time of year when you're more likely to spend all your time in the garden weeding, planting, mulching, and digging.

Cherry Almond Coffee Cake in the garden

I certainly have lots to do in my garden.  But even though it's not all done, even though there are weeds and things looking a little more wild than perfect, it's still worth some of my time to sit back and enjoy it.  And nothing could be better than to sit here and enjoy this cherry coffee cake recipe.

Cherry Almond Coffee Cake recipe

So last weekend, Maddie and I set up a little spot to enjoy an afternoon snack together, this lovely Cherry Almond Coffee Cake.  It's made with sour cream, which makes it lovely and moist.  The crumb topping is the perfect contrast of textures with the cake.  I think the addition of cherries makes this cake so much more exciting and delicious than traditional coffee cake.  To me this cake is a real taste of home.  It's a great idea to enjoy this recipe as a little something sweet to go with your coffee.  It's also one of my favourite breakfast cakes.  You can even serve it as a not too sweet dessert option.

Cherries

I have used frozen cherries in this recipe and they're delicious.  Add them to the batter while they're frozen.  You can also use fresh sweet cherries during cherry season, look for them at the grocery store or the farmer's market.  But, frozen maybe cheaper and easier to work with, since the pits are already removed.  If you are using fresh cherries you can remove the pits with a cherry pitter.

how to make Cherry Almond Coffee Cake
Coffee Cake recipe

This really is the perfect cake to enjoy during a little break in your day, whether enjoyed in the garden or not.  The cake is not too sweet with lovely plump tart cherries, almond, and the sweet crunch of the streusel topping.  The sour cream and cherries help make a nice moist cake.  Yum.  The little drizzle of glaze on top is the perfect addition and finishing touch to this delicious cake.  If you're a cherry fan this is sure to become one of your new favorite recipes.  And if you're serving this delicious cherry coffee cake as a dessert after a meal you might want to make it even more special by serving with whipped cream or a scoop of vanilla ice cream.

Cherry Almond flavoured Coffee Cake

This is the best coffee cake to enjoy with a hot drink, or serve to guests.  If you have any leftovers be sure to store it in an airtight container, or wrap your leftovers tightly in plastic wrap to keep the cake nice and moist and prevent it from drying out.

Recipe

Cherry almond coffee cake recipe.

Cherry Almond Coffee Cake

Sweet and moist coffee cake with cherries and almonds.
No ratings yet
Print Pin Rate
Course: Desserts
Cuisine: American
Prep Time: 15 minutes minutes
Cook Time: 50 minutes minutes
Total Time: 1 hour hour 5 minutes minutes
Servings: 12
Calories: 601kcal
Author: Dannyelle Nicolle-Ramjist

Ingredients

For the Cake

  • 6 tablespoons room temperature butter
  • ¾ cup white sugar
  • 2 large eggs
  • 1 teaspoon vanilla extract
  • 1 teaspoon almond extract
  • ⅔ cup sour cream
  • 1 ¼ cups all purpose flour
  • 1 teaspoon baking powder
  • ¼ teaspoon baking soda
  • 1 ½ cups frozen cherries

For the Streusel Topping

  • ½ cup butter melted
  • ¼ cup white sugar
  • ⅓ cup light brown sugar
  • ¾ cup sliced almonds
  • 1 ⅓ cups all purpose flour

For the Glaze

  • 5 tablespoons powdered sugar
  • ¼ teaspoon almond extract
  • 1 tablespoon milk

Instructions

  • Spray a 9 -inch springform pan with non-stick cooking spray, covering the bottom and the sides of the pan, and preheat oven to 350 degrees.
  • To make the cake, cream together butter and sugar in a large mixing bowl, or in your stand mixer. Once creamed, add in eggs, vanilla and almond extract and sour cream. Combine well.
  • Add in the dry ingredients of flour, baking powder and baking soda. Stir until combined, taking care not to over mix. Gently stir in the cherries.
  • Smooth batter into cake pan.
  • For the streusel topping, combine white and brown sugar, almonds, and flour. Stir in melted butter to make coarse crumbs. Sprinkle streusel over the top of the cake batter.
  • Cook 40-50 min at 350 degrees until a toothpick in the middle comes out clean.
  • Allow to cool. Meanwhile make the glaze by combining powdered sugar, almond extract and milk in a small bowl and whisking until smooth. Drizzle glaze over the cooled cake. Enjoy.

Nutrition

Serving: 1g | Calories: 601kcal | Carbohydrates: 75g | Protein: 9g | Fat: 31g | Saturated Fat: 16g | Polyunsaturated Fat: 13g | Trans Fat: 1g | Cholesterol: 111mg | Sodium: 288mg | Fiber: 3g | Sugar: 41g
Tried this Recipe? Tag me Today!Mention @LifeisaParty or tag #lifeisaparty!

With homemade Cherry Almond Coffee Cake, life really is a party!

More Recipe Inspiration

You might also like our Almond Cake with Raspberry Jam recipe here.

Also check out our Peach Almond Crumble Muffins here.

You might also enjoy our Raspberry Almond Thumbprint Cookies here.

Mexican Themed Party Ideas for a Backyard Fiesta

May 27, 2016 · 2 Comments

Backyard fiesta party ideas for decor and menu.

Mexican Themed Party Ideas: a backyard fiesta with DIY party decor, and an amazing menu, including dessert ideas.

Backyard fiesta party ideas for decor and menu.
[feast_advanced_jump_to]

It's that time of year when we love to get outside in the backyard and host family and friends, we hosted a fun Backyard Fiesta this week, turning your regular backyard BBQ up a notch!  We have lots of Mexican themed party ideas to share with you, including decor ideas, the menu, and easy recipes.  These ideas are great for any Mexican-themed party, birthday theme, Cinco de Mayo celebrations, or even just an amazing taco Tuesday.

Backyard Fiesta Party Decorations

When I think fiesta, I think yummy Mexican food, and bright, beautiful decorations.  We decided to go with a summery colour scheme of red, orange, and pink for our fiesta.  The party turned out colourful, fun, and delicious just like we had hoped so here's how we put it all together.  Hopefully you'll be inspired to host your own get together this summer!

how to throw a backyard fiesta

We set up our backyard fiesta under our pergola, and my girls pitched in to help…along with my sister's dogs who we were doggie sitting.  😉

Youtube video

DIY Papal Picada

Since we were under the pergola in our backyard, I thought it would be fun to use some pretty papel picado -the beautiful Mexican paper banners.  These make the best DIY Mexican fiesta party supplies.  We made our own Mexican decorations out of tissue paper in the vibrant colors of our color scheme.  

We used scissors and few different hole punches to create our DIY papel picado.  They're really easy to make.  Cut out your tissue paper into rectangles.  Keep the tissue paper stacked and cut out many at a time to make it easier.  Use hole punches in different shapes and sizes, and use scissors, folding the tissue paper over to make the cuts as easily as possible.  Once the designs are all created just separate the tissue paper into individual flags.  These were inexpensive and add so much to the decor.  It was a little breezy for our party, but even blowing around a little they sure were gorgeous and the best Mexican party decorations.

fiesta table ideas
backyard fiesta

We used a little twine to string them up over the table.  Ribbon or string would work well too.  This would also be the perfect spot to add some beautiful string lights.  They would look gorgeous with the papel picado also adding a glow to evening as it gets dark.

Table Setting

I wanted the table to feel really bright and festive.  We started with some orange fabric as a runner, and then layered on a few cutting boards for all the yummy food.  I didn't have an orange table runner, but I went to the fabric store and picked out some gorgeous and inexpensive orange fabric.  Instead of hemming the fabric, I just folded the edges over and it worked perfectly.  This is such a good trick when you're entertaining and struggling to find a table runner to fit your color scheme without breaking the bank.  Just buy some fabric at the fabric store and use it on the table.

fiesta decorations

At the place settings  we used our regular white everyday plates, and some beautiful gold cutlery.  We repeated the gold in a few different places to tie it all together.   We used some pretty cloth napkins in pinks, and oranges with the perfect gold dot details.  For glasses we used some pink recycled glass, that gave the perfect Mexican fiesta party vibes to our table settings. We also used these cute donkey pinatas that we picked up in the party supplies section of the store.  We filled them with a little candy.  These were such fun touches at everyone's seats.  They're a "sweet" take-home gift for guests and add lots of fiesta fun to the table.  Make them extra special by looking for Mexican candy at a speciality store, or online.

Backyard Fiesta

Centrepieces

On the table, we used some really inexpensive centrepieces.  I used old tin cans spray painted gold as the containers for the flowers.  You can save your empty tin cans to use them, or do what I did, and walk around your neighbourhood on recycling day.  Help yourself to empty cans in your neighbours recycling bins.  When you get home just clean them, and remove the paper labels.  Once they were dry I spray painted mine gold. They looked great, and were also really inexpensive.  

I filled the gold cans with water and then some flowers from my garden and bright orange, red, and pink carnations from the grocery store.  They were bright and fun and perfect for a fiesta.  I love how the bright colors look together.  They're a real focal point for the table, and add so much fun.

fiesta decorations

I also used some Old El Paso tin cans -from the delicious refried beans and green chilies we used for our taco bar.   For these ones I left the colorful fun labels on the cans.   I planted them with some cute cactus, and they added a real Mexican touch!  Be careful when you're replanting your cactus.  Wear gloves to protect yourself from the prickles, and also wrap the plant itself in newspaper, or use long salad tongs to handle the cactus safely.  These turned out so cute, and would also make great party favors.

Lastly we included some different lanterns and candle holders in our bright party colors.  These were from the dollar store, and worked perfectly.  They look so gorgeous at night as well.

Backyard Fiesta

Fiesta Drinks

Off to the side we set up a little drink cart.  This is such an easy way to serve drinks at a party, especially with a large crowd.  Even with smaller numbers, it's nice that guests can help themselves whenever they want throughout the party, and that having the drinks off to the side frees up more space on the main dinner table.  I made strawberry lemonade, by just adding some strawberry puree to regular lemonade.  It was quick and easy and so yummy!

strawberry lemonade

My fun little plastic donkeys had to make an appearance.  They're just from the dollar store, but such a fun touch for a fiesta and so perfect for our party theme.

fiesta decoration ideas

And since it was a hot sunny night, we also served some water in pretty glass bottles.  Another great option would be some Mexican beer with some fresh lime wedges.  Or a tequila tasting could be a great idea too.

water bottles

Backyard Fiesta Menu

Now on to the menu!  I wanted a casual feel for our party food, and guests to be able to help themselves, and eat and talk and eat and talk the night away.  So, I set up the taco bar down the centre of the table.  It was so delicious, that we really did sit and eat and talk, and eat and talk and eat again.  We had a great selection of party food that the guests all loved.

how to throw a fiesta

From the grill for our main course, we had some grilled peppers and mushrooms, along with grilled chicken and steak.  We used a little taco seasoning for a dry rub on the meat, and it was simple and so, so good.  We made sure everything was sliced and easy to add to plates before we served it.

Mexican themed party ideas menu

I also added lots of fresh veggies, like tomato, avocado, shredded lettuce, limes, and cilantro.  The food added lots of bright colour to the table, and looked so delicious arranged on the different cutting boards.

backyard Mexican fiesta ideas

I made some guacamole, and we had some chips too.

Mexican themed party ideas

We also had some Mexican rice, and refried beans, along with bowls of sour cream, salsa, caso cheese dip, and my homemade baked beans.  It was the perfect backyard menu, and fun being outside together grilling, and then feasting.

Backyard Fiesta Dessert

Mexican themed party ideas

For our Mexican party dessert table, I set up a fun ice cream sundae bar at the edge of the patio, with delicious Mexican inspired toppings.  We used a low bench that worked perfectly, so that everyone could easily help themselves.

fiesta dessert bar
Mexican themed party ideas

The bowls made amazing ice cream bowls, especially after we fried them in hot oil and coated them in cinnamon sugar!  They were crunchy and sweet and the perfect way to enjoy ice cream with grilled pineapple.  Everyone raved about them, and they're an easy recipe to make.

what to serve for dessert at a fiesta themed party

Recipe

Cinnamon sugar tortilla bowls and grilled pineapple sundaes.

Cinnamon Sugar Tortilla Bowls and Grilled Pineapple Sundaes

Crispy tortilla bowls covered in sweet cinnamon sugar and filled with grilled pineapple and ice cream.
No ratings yet
Print Pin Rate
Course: Dessert
Cuisine: Tex-Mex
Cook Time: 20 minutes minutes
Total Time: 20 minutes minutes
Servings: 12
Calories: 209kcal
Author: Dannyelle Nicolle-Ramjist

Ingredients

  • 12 Tortilla Bowls
  • oil for frying
  • ½ cup cinnamon sugar
  • 1 pineapple
  • ¼ cup brown sugar

Instructions

  • Begin by cutting up your pineapple into spears, and then place in a zip bag with brown sugar. Seal and shake to coat the pineapple in sugar, set aside until ready to grill.
  • Heat oil to 375 degrees, and place tortilla bowls in oil one by one, turning as needed and frying until golden brown. Immediately when the bowls are removed from the oil, sprinkle all over with cinnamon sugar, so that it will stick.
  • Grill pineapple on the bbq.
  • Serve the cinnamon sugar tortilla bowls with ice cream, grilled pineapple, and other toppings. Enjoy!

Nutrition

Serving: 1g | Calories: 209kcal | Carbohydrates: 41g | Protein: 3g | Fat: 4g | Saturated Fat: 1g | Polyunsaturated Fat: 3g | Sodium: 182mg | Fiber: 3g | Sugar: 18g
Tried this Recipe? Tag me Today!Mention @LifeisaParty or tag #lifeisaparty!
fiesta dessert ideas
grilled pineapple

Along with the cinnamon sugar tortilla bowls and grilled pineapple, we had a few other yummy additions.  You can't have an ice cream sundae bar without ice cream!  We had some coconut ice cream and vanilla ice cream, both flavors worked really well with the pineapple and cinnamon sugar.  To help keep the ice cream from melting, I didn't bring it out until serving time.  I used a metal pail and filled it with ice, and then placed the ice cream containers on top.  This really helped to keep it cold and helped keep it from melting.  

We also served some different toppings for the sundaes.  I toasted some coconut flakes in a dry skillet.  These went so well with the other flavors.  We also served some caramel sauce.  Use store bought or try our homemade caramel sauce recipe here.  And we also included some sprinkles in all our party colors of red, pink, and orange.  I picked these up at the bulk store, and they were a great colorful addition that the kids especially loved.  

Guests could help themselves to make their own ice cream sundae with whatever toppings they liked.  Everyone had a great time making their own sundaes, and even going back for seconds.  If you were celebrating a birthday party, you could add candles to the ice cream for the birthday boy or girl, or serve some birthday cake as well.

fiesta dessert station idea

It was a great way to finish off our fiesta theme party.

fiesta dessert ideas

This was the ultimate fiesta, with endless fun and great food.  I hope these Mexican party ideas have inspired you for your own Mexican fiesta theme party.  Whether it's birthday themed, or to celebrate Mexican culture, the festive colors and incredible food are perfect for celebrating and create such a happy atmosphere.  All that was missing was the mariachi band!  Thanks for coming on this figurative trip with us.  Viva la fiesta!

With an amazing Backyard Fiesta like this one, life really is a party!

More Inspiration

You might also like our Valentine's Day Fiesta here.  Check out the DIY party decor ideas, and fun Valentine's Day games, as well as an incredible fiesta menu with recipe links from this family friendly Valentine's Day party

valentines day fiesta

Also check out our Mexican Fiesta Dinner Party here.

You might also like our Backyard Pizza Party here.  Create a make your own pizza party in your own backyard using a gas outdoor pizza oven.  Different pizza ideas included, plus a dessert pizza idea you'll love.

Backyard Pizza Party: A gas outdoor pizza oven and a pizza charcuterie board for nibbling and to make-your-own-pizza is perfect for summer entertaining.

Geometric Pineapple Art

May 25, 2016 · 15 Comments

DIY geometric pineapple art.

DIY Pineapple Art: A tutorial for inexpensive art work, made with a dollar store wooden canvas, scrapbook paper, and Mod Podge -Pattern included.

DIY geometric pineapple art.
[feast_advanced_jump_to]

This summer I've spotted lots of pineapples in home decor, and I'm falling in love with them.  I especially love the bright colours I've been seeing them in.  This DIY pineapple art is a really inexpensive art piece.  It's perfect for a fun, colourful bit of summer whimsical decor.

Materials:

This month for the #12MonthsOfDIY challenge we got to work with Mod Podge, and that's what I used to create this piece. #MayModPodge

  • ModPodge
  • wood canvas
  • stain cloths
  • carbon paper
  • scrapbook paper in pinks and greens
  • ruler
  • scissors
  • pattern
how to make your own wall art

How To Make DIY Pineapple Art:

1. Staining the Canvas

I started out with a wooden canvas, from the dollar store.  To finish the wood, I applied a little stain to the unfinished wood.  I used a stain wipe, and they're great because you can use one and re-seal the package for another time.  They're easy to use, with no brush to clean up, just be sure to wear gloves -or wrap your hand in a plastic bag if you have no gloves, like me.  😉

2. Cutting the Scrapbook Paper

While your stain is drying, you can start cutting out your triangles.  Use the pattern I've supplied here -you'll need about 35 pieces for the bottom, and about 22 for the top.  I used different shades of green and pink, but any colour combo would work -traditional yellow, or maybe teal?

using carbon paper to transfer a pattern

3. Transferring The Pattern

Once the stain is dry, use your carbon paper (remember your teacher using these when you were a kid, to make worksheets before the days of photocopiers?).  Just tape it onto the wooden canvas, and tape the pattern on top.  Use tape instead of just trying to hold it so that it doesn't move at all when your tracing with it.  

Now, using the pattern, go over all the lines with a sharp pencil, and a ruler to transfer the pattern onto the wood.  Once you've traced it all, remove the carbon paper and the pattern, and the pineapple grid should be on the wooden canvas.

DIY Geometric Pineapple Art

4. ModPodge The Pieces

Now using the pattern as a guide, Mod Podge each triangle onto the wooden canvas.  

Use a brush to apply Mod Podge underneath the paper as a glue and over the top of the paper as a sealer.  The triangles aren't equal on all sides, so take care to line them up properly on the grid pattern.  Don't worry too much if there's a few gaps, or if things don't line up perfectly, it won't be that noticeable when you're all finished.  

I just applied the sealer top coat to the pineapple and not the wood around it, since I like the matte finish of the stain.

DIY Pineapple Art

I also used a bit of glitter paper in mine for a little added sparkle.

pineapple art and a succulent

This little pineapple art piece has summer written all over it!

Pineapple Art

With inexpensive DIY Pineapple Art, life really is a party!

More Inspiration

You might also like our Boho Painted Driftwood Sticks here.

DIY Boho Painted Driftwood Sticks: Easy tutorial using found driftwood sticks and paint to add a little boho to any room.

Also check out our Macrame and Felt Succulent Wreath here.

DIY Macrame and Felt Succulent Wreath: Easy Boho Wreath with Felt Succulents made with a Cricut, and simple Macrame hanger.

You might also enjoy our DIY Rainbow Wall Art here.

DIY Rainbow Book Art: Using old books as a canvas this DIY rainbow art in mustard yellow and pink is fun to make and inexpensive.

How To Make Giant Paper Flowers

May 18, 2016 · 12 Comments

Giant homemade paper flowers used to decorate a backdrop for a party.

How To Make Giant Paper Flowers: see how to turn regular paper into beautiful and inexpensive flowers, from large to small in a video tutorial. This easy DIY is perfect for a wedding, shower, or home decor.

If you've ever wondered about how to make giant paper flowers for yourself, or for a special event and worried that they're too hard to make, let me reassure you they're not, and show you how to make them.

I've made these a few times, and although time consuming for sure, they aren't difficult or expensive to create.  These DIY paper flowers are so perfect for creating big impact on a small budget.  With nothing more than paper and some hot glue, you can transform any space into a beautiful indoor garden.  We used ours to create a gorgeous backdrop for an event or as party decor.  It created great atmosphere, and was a really fun photo backdrop too.  You might want to create something similar for a wedding area, for bridal showers or for baby showers or for decor for any special events.

Petal Designs

Start by looking at images of real flowers and looking at the shape of an individual flower petal.  Let this shape inspire you.  Make all the petals on one flower the same basic shape, with only slight variation.  Each group of each size of petal will be the same basic shape, just smaller or larger.  Don't vary the basic shape of the petals on the same flower, only the size.

Different flowers can and should have slightly different shaped petals to add interest to your wall.  Try changing up the how round or pointy the petal is, if the edge is smooth or bumpy, or more heart shaped or rippled.  You can add slits along the edge of the flower petal shape to create a fringe, have large or small waves, or keep it smooth all to add variation to your different flowers.

Choosing Your Paper

We used lots of different papers and card stock for our flowers.  I suggest using one type of paper per flower.   Regular white copy paper works well and is inexpensive.  You can also use paint to add colour to the basic white paper for interest.  Try using water colours, or acrylic craft paint, either before or after the flower is constructed.

You can also use different colours of copy paper.  Try also using rolls of paper, or brown kraft paper as inexpensive options.  You can also upcycle book pages for a fun look too.  

Coloured scrapbook paper or cardstock works well too and can add a pop of color.  It's available in more colours and the weight of the paper makes the flowers a little more stiff.  If you're making a large flower wall the variation in textures adds interest.  It can be quite expensive to use scrapbook paper or cardstock, so it's a good idea to use these ones a little more sparingly if you're doing a large wall project, or buy it in bulk in large packs to save money.

Paper Flower Making Video

This process is easy to explain when you can see each step, so be sure to watch our step-by-step tutorial video below:

Youtube video

Recipe

Giant paper flowers in pinks and whites used as a big wall backdrop.

How To Make Giant Paper Flowers

No ratings yet
Print Pin Rate
Cook Time: 10 hours hours
Total Time: 10 hours hours
Author: Dannyelle Nicolle-Ramjist

Equipment

  • scissors
  • hot glue gun

Materials

  • paper
  • hot glue

Instructions

  • Cut Your Petals
    The first step is making your largest petals. Our large petals size was determined by the size of our 8 ½ x 11 paper size. We made the largest outer petals we could using the whole sheet of paper. Cut out 5-6 petals of that largest size. You can make one petal template of each size and cut the rest to match it.
    Next make a slightly smaller petal size, and again make 5-6 matching flower petals of that size.
    You're going to do this whole process for about 5 different sizes of petals, with some large petal sizes, medium petals, and smaller petals, making each one slightly smaller, and making 5-6 petals of each size, that will all be used to make one of the giant flowers. In the end you will have about 5 x 6 = 30 cut petals in total for one flower.
    Each petal should have a small slit cut in the centre of the bottom of the petals, this will allow us to add dimension to the petals when we glue them.
    Also cut out one large circle in the same paper, to use as the circle base of the flower to glue to.
  • Glue Each Petal To Create Dimension
    Now give each individual paper flower petal some dimension. Add a little hot glue to right beside the slit in the bottom edge of the petal, and then glue the other side, overlapped on top of it. Do this for each petal.
  • Gluing Your Flower Together
    Start creating the flower by hot gluing the largest set of petals to the outside of the circle base. Add a line of hot glue to the base of the petal and then add them to the circle base. Space them as evenly as possible all around the circle. Then glue the set of the next size down of petals to the base in a circle just inside the largest petal set. Do this all the way down to the second smallest petals. Depending on the center of your flower that you want to create, you may want to save the small petals for that.
  • Creating The Center of the Flower
    The simplest option for the flower center is to create some petals that look like they're just opening up. To do this take your smallest petals and cut the slit in the bottom of the petal a little deeper than the rest. This allows you to fold the paper really tightly together. When you put a few of these glued in an overlapping pattern in the center of your flower it will look like a beautiful rose center.
    You can also make something that looks more like a stamen in the centre. Use a rectangle of paper and cut long slits almost to the bottom all the way along, and then roll up the paper. You can use a pencil to curl the fringe and then glue this piece into the center of your paper flower. Try changing the width of the fringe for a different look, or the length of the fringe pieces, or the direction it's curled in.
  • As a final touch to the giant flowers, you may want to curl some of the edges of the petals, either inward or outward. You can use a pencil, or the handle of a wooden spoon to help with this step. Take care not to crease the paper as you work.

Creating A Paper Flower Wall

You will need a lot of paper flowers for your paper flower wall.  You can estimate if you have enough by laying the out together on a flat surface or table.  Be sure when you are making them to make them in various sizes.  Make some very large ones, and some smaller ones to add interest to the final display.  You will also want to vary the style and make different shapes of them, use different kinds of paper and cardstock, and use different colours.  Do choose colours and paper that go together and will create a cohesive look all together when you're finished.

If you're using your large paper flowers as a backdrop for an event like we did, then the final step is to set them up.  We transported our flowers carefully in large clear garbage bags.  We adhered our flowers to large sheets of paper and hung those on to the wall.  You can also try using poster board, or even a thin sheet of plywood that can be leaned against a wall.  The advantage of using  something other than a wall is that you can use hot glue to hang them and not worry about any damage.

If you're sticking your flowers directly to the wall as wall decor you can use a combination of masking tape and command strips which should leave no damage behind when you remove them.  

When you're arranging your flowers, start by placing your largest flowers first, and then fill in with smaller ones.  Tty to alternate with different styles of flowers, different sizes, and different colours of paper and cardstock.  We used a combination of pink, cream, book page and white flowers for our display.  Also, we tucked some sprigs of real baby's breath into our display and painted a few flowers on the paper background.

Should I Use A Cutting Machine For This Project?

I actually think it's easier to cut these giant flowers out by hand, rather than using a Cricut machine and svg files.  I love my Cricut, but it would actually take so much longer to load and unload the machine for this project than it would to just cut them out by hand.  Also the natural variation of cutting them out by hand actually makes the flowers look better and more natural.  The petals really don't have to be perfect, and in nature all the individual petals are slightly different.  You can find designs for smaller flowers in Cricut Design Space, but for these larger flowers I think it's actually much easier to just cut them out by hand.

Paper Flower Templates

I've resisted the urge to provide you with a template for this project because honestly you don't need one.  Your flowers will look more realistic with out a pdf template where every single petal is the same.  When you're making huge paper flowers, the variation and  in-perfect look is actually exactly what you want.  The basic petal shape is so basic that you really don't need a template.  Just play around until your happy with your basic shape, and then once you've made a few start making some variations.  Trust me, you don't need a template for this.  You can do it.

Other Ways To Use Giant Paper Flowers

These paper flowers really are a lot of fun to create, and a chance for you to get really creative with all kinds of different petal shapes, centres, and paper choices.  

And there are also lots of different ways to use them.  
How To Make Giant Paper Flowers: see how to turn regular paper into beautiful and inexpensive flowers, from large to small in a video tutorial. This diy is perfect for a wedding, shower, or home decor.

I love using the paper flowers to decorate for a party.  Here they are over a Valentine's Day Breakfast as a pretty backdrop to the buffet.

Giant paper flower backdrop behind a breakfast buffet.

And here I used them to make a rainbow backdrop for a Rainbow Unicorn Dessert Table for my daughter's birthday party.

Giant paper rainbow flower dessert table backdrop.

If you've ever wondered how to make paper flowers, now you know how easy it is!  And they are so versatile too.

With inexpensive and easy to make giant paper flowers, life really is a party!

More Inspiration

You might also like our paper flower spring mantel post here.

You might also enjoy our Gold Easter Table with Paper Flowers here.


Chocolate Chip Cookie Recipe with Shortening

May 13, 2016 · 2 Comments

Chocolate chip cookies made with shortening.

Chocolate Chip Cookies: Made with shortening not butter for a thicker and chewier cookie. Tried and true recipe.

Chocolate chip cookies made with shortening.
[feast_advanced_jump_to]

These Chocolate Chip Cookies are the best cookies.  If you know me in real life, then you've had them, because they're are a favourite, tried and true, go-to recipe around here.  I've made them hundreds and hundreds of times.  They're made with shortening, and other ingredients that I always have on hand.  Enjoy these as classic chocolate chip cookies, or add toffee chips as well for toffee chocolate chip cookies.  Either way they're the best chocolate chip cookies and sure to become a favorite if you're a fan of homemade chocolate chip cookies.

Toffee Chocolate Chip Cookies recipe

I first baked these when I was in high school, that's a little while ago, and they became my family's go-to chocolate chip cookie.  I over at a friends house and we decided we wanted to bake.  We made these and they were so much better than my mom's recipe -sorry mom.  I asked the friend for the recipe and I've been making the ever since.  Over the years I decided to try toffee bits and they quickly became my favorite to have them.  But if you love a classic chocolate chip cookie they are great that way too.

Shortening vs. Butter

What I love about these cookies is that they're slightly chewy cookies on the inside, and have crisp edges.  I think chewy chocolate chip cookies are the best.  Using shortening instead of butter in this recipe helps produce chewier cookies.  It gives the cookies more lift as they bake, and they don't spread out as much on the baking sheet.  It tends to result in thicker cookies with soft centers, and a more chewy texture, instead of thin and crisp cookies, with very crispy edges.  If you love a softer more chewy chocolate chip cookie, rather than a  crispier cookie, then this is the perfect chocolate chip cookie recipe for you, with the perfect texture.  The shortening version of chocolate chip cookies are a little bit thicker and chewier than a batch of cookies made with butter, if that's your personal preference than these are the perfect cookies for you.

Chocolate

A classic chocolate chip cookie recipe is usually made with semi-sweet chocolate chips.  It's a classic for a reason.  The semi-sweet chocolate isn't too sweet and balances out the sweetness of the cookie, with a very slight bitterness of the chocolate.  If you love a classic chocolate chip cookie, than semi sweet chocolate chips are a great way to go.

You can substitute milk chocolate chips in these cookies,  The over all sweetness of the cookie will be a little increased, but it's still a great option.  And with that added sweetness from the milk chocolate chips, you might also want to try a little sprinkle of flaky sea salt on top of the cookie to add a salty contrast to the sweet.

If you're a dark chocolate lover, or a white chocolate lover you can substitute dark or white chocolate chips.  You can also look for seasonal chocolate chips like the red, green, and white ones at Christmas, and try using them for a festive seasonal treat.

Other Add Ins

My favourite way to have these cookies is to add in toffee chips.  Look for them in the baking section of the grocery store with the chocolate chips.  I love using the skor toffee bits, and combining them with semi-sweet chocolate chips.  Just substitute half of the chocolate chips in the original recipe for the toffee bits.

You could also try adding peanut butter chips as a substitute for half of the chocolate chips, if you're a peanut butter chocolate lover.

Sea Salt

I also love to add some flakes of sea salt on top of the cookies as soon as they're baked and fresh out of the oven.  It gives you that great salty sweet combination, and if you've never tried it before you should.  It works great with the toffee chocolate chip version too, creating that salted caramel vibe, but with chocolate too.  Again, if you've never tried it just try it on a few cookies and see if you like it.  I like to use a the Maldon sea salt flakes for this.

chocolate chip cookies made with shortening

Cookie Size

I like to make these cookies with about 1 tablespoon of cookie dough each, but you can adjust the size of the cookies to your liking, and adjust the baking time accordingly.

Storing The Cookies

Store these cookies in an airtight container at room temperature.

how to make Chocolate Chip Cookies with shortening

Large Batch

Another thing I love about these cookies is that they make a big batch.  They're perfect for a party, or bake sale, or one of those occasions where you have to make cookies for church or a meeting or someone else because you'll have enough leftover cookies to leave a plate at home for your kiddos too.  They also freeze well as baked cookies or as cookie dough.  If you want a small batch of chocolate chip cookies, feel free to ½ the recipe.

chocolate chip cookie recipe with shortening

Recipe

Chocolate chip cookies made with shortening.

Chocolate Chip Cookies

Tender chocolate chip cookies made with shortening.
No ratings yet
Print Pin Rate
Course: Desserts
Cuisine: American
Prep Time: 20 minutes minutes
Cook Time: 10 minutes minutes
Total Time: 30 minutes minutes
Servings: 72
Calories: 140kcal
Author: Dannyelle Nicolle-Ramjist

Ingredients

  • 2 cups vegetable shortening
  • 1 ½ cup white sugar
  • 1 ½ cup light brown sugar
  • 3 eggs
  • 3 teaspoon vanilla extract
  • 4 cups all purpose flour
  • 1 ½ teaspoon baking soda
  • 1 ½ teaspoon salt
  • 2 ½ cups semi-sweet chocolate chips or 1 ¼ cups chocolate chips and 1 ½ cups toffee bits

Instructions

  • Cream shortening and sugars together in the large bowl of your stand mixer.
  • Add in eggs and vanilla and mix well.
  • Add flour, baking soda, and salt to the wet ingredients and mix until fully combined, but don't over mix the cookie dough.
  • Add the chocolate chips and toffee bits, and mix until even distributed.
  • Drop by tablespoonful or using a cookie scoop onto an ungreased cookie sheet, and bake at 350 degrees for about 10 min, until golden brown. Cool baked cookies on a wire rack.

Nutrition

Serving: 1g | Calories: 140kcal | Carbohydrates: 17g | Protein: 1g | Fat: 8g | Saturated Fat: 3g | Polyunsaturated Fat: 4g | Cholesterol: 11mg | Sodium: 80mg | Fiber: 1g | Sugar: 11g
Tried this Recipe? Tag me Today!Mention @LifeisaParty or tag #lifeisaparty!
Toffee Chocolate Chip Cookies recipe

These cookies make me want a cup of a tea, and comfy spot.  They're true comfort food.  I love that they use basic ingredients that I always have on hand so that I can anytime.  If you're looking for a good cookie recipe that never fails, these are them.

With fresh homemade chocolate chip cookies, life really is a party!

More Cookie Inspiration

You might also like our Oatmeal Cookies here.

Also check out our Jam Jam Raspberry Sandwich Cookies here.

You might also like our Chocolate Chip Shortbread recipe here.

Light Bulb Flower Vase

May 11, 2016 · 5 Comments

How to make a vase from an old lightbulb.

Use your old burnt-out light bulbs to make DIY Lightbulb Flower Vases with this great upcycle project. Remove the inners of the bulb and use them to display beautiful flowers with this unique and easy DIY.

How to make a lightbulb vase.
[feast_advanced_jump_to]

 Why You'll Love This Project

  • It's free since we're upcycling burnt-out light bulbs.
  • It's a great way to keep the lightbulbs out of landfill.
  • They're really pretty!

Making a  light bulb vase is an easy and free project.  They're perfect for adding a little bit of whimsy to your space.  They'd also be great as an inexpensive decoration for an event or party.

We love a craft that is a good upcycle. We reused materials to make these Mason Jar Oil Lamps, Book Page Paper Feathers, Easy DIY Eggshell Planters, and How To Make Rainbow Baby's Breath.

As a blogger, you sometimes find yourself doing unusual things.  Yesterday I was out for a morning walk and as I walked I was peeking into all my neighbours recycling bins, looking for their old tin cans for another project I'll share with you soon.  

As I looked I saw someone had three lightbulbs in their recycling (can you even recycle lightbulbs?) and I remembered a project that I'd always wanted to give a try -Light Bulb Flower Vases.  So, I grabbed them and brought them home.

Materials:

How to Make A vase out of an old lightbulb
  • Light Bulbs: We actually found these in our neighbour's recycling bin, it's a really great way to reuse them once they're burnt out. If you wanted to make a bunch of these vases you could ask your friends and family to save there's for you too.
  • Screw Driver: You will need this to help break out the inner parts of the light bulb.
  • Gloves and Safety Goggles: Saftey first, especially when working with tiny bits of broken glass.
  • Needle Nose Pliers: These pointy pliers will be easiest to get into the small opening at the base of the light bulb.

How to Make A Light Bulb Flower Vase

Step 1: The first step is to remove the bottom of the light bulb using pliers.  This project involves a fair bit of glass breaking, so it's a good idea to wear gloves, safety goggles, and work in a plastic bag for easy clean-up, since the glass pieces are so small.

light bulb vase how to

Step 2: Once the bottom is removed, it's time to break the thick black glass.  I looked at quite a few tutorials for this, and most recommended using the pliers or a screw driver to get inside the small hole, and break it that way.  

I used a metal skewer and twisted it around to try and crack the glass. Once I had it cracked, I worked the tip of the needle nose pliers in and tried to break it up so it would come out.  

This is the hardest part of the whole the project, since you're trying to work careful so as not to break the bulb itself.  Take your time and keep trying, bit by bit you'll get it broken up and removed.

Step 3: Next you need to break the inside glass part, I used a screw driver, again taking care not to break the bulb itself.  You'll need to use the pliers to break the little wires, and then shake it out of your opening.  

I found it easiest to work inside the plastic bag, since there's a lot of tiny pieces of glass.  Once you have the insides all out, you're nearly finished.

removing the inside of an old light bulb

Step 4: For my little vases, I used some twine to hang them from a branch in my dining room.

light bulb vases

I just picked a few pretty flowers from my garden and added a little water.

hanging light bulb vases

I love how they turned out.

How to Make A Light Bulb Flower Vase

So simple and so pretty.

hanging flower vase made from an old light bulb

With these pretty and inexpensive light bulb flower vases, life really is a party!

More Craft Inspiration

  • How to make mason jar oil lamps.
    Mason Jar Oil Lamps
  • How to make a ribbon wall hanging.
    Ribbon Wall Hanging
  • DIY twig houses.
    Twig Houses
  • How to build a pillow fort with pillows, blankets, and star decorations.
    How To Build The Ultimate Pillow Fort

Frequently Asked Questions

What kind of light bulbs can you use to make a light bulb flower vase?

This project works best with a clear glass light incandescent bulb. These also look great made out of vintage-style larger glass bulbs.

If I don't want to hang my light bulb vase, is there a way to stand it up?

Yes, use any kind of small ring on the bottom to rest the vase in, or use stiff wire to create a support for the vase.

If you try making these Light Bulb Flower Vases or any other idea on my blog please leave a star rating and let me know how it went in the comments below. Thanks for visiting today!

Recipe

How to make a vase from an old lightbulb.

Light Bulb Flower Vases

Make flower vases out of old burnt-out light bulbs.
5 from 1 vote
Print Pin Rate
Cook Time: 15 minutes minutes
Total Time: 15 minutes minutes
Author: Dannyelle Nicolle-Ramjist
Cost: free

Equipment

  • Screw Driver
  • Gloves
  • Safety Goggles
  • Needle Nose Pliers

Materials

  • Burnt-out Light Bulbs
  • Twine
  • Plastic Bag

Instructions

  • The first step is to remove the bottom of the light bulb using pliers.  
    This project involves a fair bit of glass breaking, so it’s a good idea to wear gloves, safety goggles, and work in a plastic bag for easy clean-up, since the glass pieces are so small.
  • Once the bottom is removed, it's time to break the thick black glass.  
    Use the pliers or a screw driver to get inside the small hole, and crack the glass. Once it's cracked, work the tip of the needle nose pliers in and break it up so it can come out. 
    This is the hardest part of the whole the project, since you're trying to work careful so as not to break the bulb itself.  Take your time and keep trying, bit by bit you'll get it broken up and removed.
  • Next you need to break the inside glass part, I used a screw driver, again taking care not to break the bulb itself.  You'll need to use the pliers to break the little wires, and then shake it out of your opening.
  • Since the light bulbs are round and won't sit on a flat surface, use some twine to hang them. Fill with water and flowers and enjoy.

Notes

Be sure to wear goggles, and gloves since you're working with broken glass for this project.  
Tip: Place your light bulb inside a plastic bag while you work to remove the insides, that way the tiny bits of glass will stay in the bag and make for easy clean up.

How NOT to Sew a Zippered Fold-over Clutch

May 6, 2016 · 2 Comments

How to make a fold-over clutch purse.

How NOT to Sew a DIY Clutch: Inexpensive, fairly easy, and really cute, learn from my mistakes and sew the perfect fold-over clutch.

How to make a fold-over clutch purse.
[feast_advanced_jump_to]

I wouldn't call myself a person who sews.  I do own my Grandma's old sewing machine, I can sew a straight line and I do have the web…so what more could you need to sew your own DIY clutch, right?  

Patience…the answer to that rhetorical question is patience.  

And indeed if you have an old sewing machine, can sew a straight line, have the Internet and patience you can sew your own fold-over clutch -even if you've never sewn one before.

I have a family wedding to attend in a couple of weeks, and it's an excuse for this stay at home mom to put together a cute outfit.  I ordered a cute little coral/pink dress with a flutter sleeve -I thought it'd be nice to wear a little colour for spring.  And once I saw the dress, I thought the outfit could use a little fun pattern to liven it up.  I had an old vintage pair of curtains that I bought years ago, at an auction and have used the fabric for a few projects over the years because it's so pretty, and bold, and vintage feeling.  I thought it would be the perfect hit of pretty pattern to go with the dress and decided I'd like to make it into a cute little fold-over clutch.

So, I did some research on-line to find out how to do it.  There are lots of great tutorials and videos on-line.  I knew I wanted a zipper, which I'd never sewn before, and for it to be a fold-over clutch.

how to make a DIY fold over purse

How To Add A Zipper To A DIY Clutch

Unfortunately, I couldn't find a chunky gold zipper in the right length -in fact chunky gold zippers were in rather short supply at the fabric store.  But I managed to find one that I thought would work, if I could shorten it.  I also picked up ½ meter of green cotton broad cloth at the fabric store to use as the purse liner.  Both items came to only about $5 so I figured I had nothing to lose. 😉

I looked at a few tutorials, but mainly used Rachel's from DIY in PDX.  The major difference was that she made her's from leather and mine was fabric.  I also made mine a little bit bigger -14x14 inches.

How To Shorten A Zipper

I searched for tutorials on how to shorten a metal zipper and found this one -and I liked her accent. 😉  I did what she said and succeeded in shortening my zipper to 14 inches.  And then I went on to Rachel's tutorial, and got ready to sew my zipper into the bag.  I found though, that my new zipper was too long, once I added the little end pieces onto it, like she had.  I realized I wanted my finished zipper piece to be 14 inches, so I  undid the end pieces, and re-shortened my zipper to about 13 inches, to accommodate the end pieces.  No problem, first attempt there's bound to be a few re-dos.

My real major mistake came next -and was a little comical.  I was ready to sew the zipper onto the fabric.  I sewed the zipper in and realized I'd done it backwards, so that the zipper pull was on the inside of the bag.  Whoops.  So I undid that and re-sewed it in the right direction.

how to sew a fold-over zippered clutch

The next step was to sew the sides of and the bottom of the bag and liner together.  I found it a little difficult to work out what to do with the edges of the zipper at the top.  You're supposed to tuck them into the liner side seam.  They didn't come out perfectly, but I guess they're ok for a first attempt.

Limp Clutch

At this stage the bag was almost finished.  I used the gap in the liner to turn the purse inside out.  It looked pretty good.  Except…it was limp.  Very limp, floppy in fact.

how to sew a liner into a clutch

I had read earlier on some tutorials about interfacing, but having never used it before I was a little unsure, and thought that the weight of the vintage fabric which was a little heavier and the liner together might be enough to do the trick.  Um, no.  Not enough.

I started racking my brain about how to make it stiffer.  I inserted some light weight cardboard for a try.  It kind of worked…except didn't because it was noisy and creased at the fold over, but it at least made me feel like this project was salvageable.

Fusible Interfacing

So off to the fabric store I went again.  I bought some fusible interfacing, the thickest one they had.  You iron it on, so I figured I could iron it inside, without having to re-sew the entire purse.  I got enough to line the vintage fabric and the liner, worried one thickness might not be enough.  It was about $7 for a .8 of a metre.  I cut it to fit the inside of the vintage fabric and ironed it on.  It was easy to do, and after doing just the vintage fabric and not the liner also like I planned originally, I felt like it was stiff enough.

DIY clutch

I felt really glad that it worked, and the green liner looked great too.

DIY lined zipped purse

DIY Clutch Finishing Touch

Last but not least, I added the finishing touch - a pretty gold metal tassel, from a necklace, but you could look for one in the jewelry making department of the craft store.

adding a tassels to clutch bag

I love it now that it's done.  I only cost me about $12 dollars to make and I still have about half of the materials left.

purse, necklace, bracelet

I also picked up a cute necklace, so now all I need is a cute pair of gold shoes.

how to sew a clutch bag

With a fun little DIY clutch finally finished, life really is a party!

More Inspiration

You might also like our Leather Cuff Bracelet here.

Also check out our Leather Feather Necklace here.

DIY Leather Feather Necklace: Use leather, gold leaf and some gold chain to create a simple and stunning leather feather necklace.

You might also enjoy our Cricut Infusible Ink Coasters and Tote Bag here.

Cricut Infusible Ink Coasters and Tote Bag: create a "you are my sunshine" tote bag, or rainbow coasters with Cricut's new Infusible Ink.

Best Chewy Large Flake Oats Oatmeal Cookies

May 3, 2016 · Leave a Comment

Large flake oatmeal cookies recipe.

Large Flake Oatmeal Cookies: The addition of almond extract and large flake oats make these not your average oatmeal cookies. Quick, easy, and sure to become a family favourite.

Large flake oatmeal cookies.
[feast_advanced_jump_to]

These Oatmeal Cookies are chewy, use large flake oats, and have a little almond extract in them, making them not your average oatmeal cookie.  If you love chewy oatmeal cookies than these are the ones for you.  This simple recipe is easy to make and so delicious.

I first tried these old-fashioned oatmeal cookies at a get together, and found myself thinking about them the next day…which sounds hilarious, and I promise is not one of my normal past times.  They were just different…memorable…special.  So I asked my friend Dawn for the recipe and they were just as great as I remembered.

I made them for a get together tonight…and I'm having a hard time to stop eating them all this afternoon.  What makes them so special?  There's a couple factors that make these oatmeal cookies extra special.

Oatmeal Cookies recipe

Large Flake Oats

Rather than your average oatmeal cookie made with quick oats, this oatmeal cookies recipe uses large flake oats.  Look for them with the other oats and porridge at the grocery store.  Large flake oats, sometimes called old-fashioned oats or rolled oats.  Large flake oats are steamed, rolled, and cut into large flakes.  The difference between quick oats and large flake oats are that the large flakes are cut into larger pieces, and therefore take longer to cook than instant oats.  This gives the cookies a unique texture that is so delicious.  The large flake oats help make these into a chewy cookie.  If you love a chewy cookie, than these really are the best oatmeal cookies.

Almond Extract

These cookies also include almond extract.  It enhances the nutty flavour of the oats.  Oatmeal cookies are often made with vanilla extract and warm spices like a hint of cinnamon and nutmeg.  This recipe is a little bit different with the use of almond extract instead, and it really elevates the cookie.

If you have a nut allergy or just prefer you can substitute vanilla extract for the almond extract in this recipe.

Add Ins

We love these cookies straight up.  The flavor of the oats and almond extract really shine through in this simple recipe.  And the texture is the really unique quality of these plain oatmeal cookies.

Can you add in raisins or chocolate chips to this recipe? Yes.  If you're a lover of oatmeal raisin cookies you can add in some raisins.  Add 1 cup of raisins to this recipe to turn them into chewy oatmeal raisin cookies.

You could also try turning these into oatmeal chocolate chip cookies by adding 1 cup of semi-sweet chocolate chips to the cookie batter before baking them.  Or for something different melt some chocolate and dip half of the baked cookie into the melted chocolate, then let them set on some parchment paper.  You could also try adding in white chocolate chips, milk chocolate chips, butterscotch chips, or dark chocolate chips if you prefer.

Oatmeal Cookies with almond extract and large flake oats
how to make large flake Oatmeal Cookies

Storage

Store these cookies in an airtight container at room temperature.  

Freeze baked cookies in an airtight container for up to 3 months.

You can also freeze the unbaked cookie dough to bake later.  Scoop out your cookie dough balls onto a large baking tray and put them in the freezer for a few hours.  Once they're frozen remove them from the baking sheet and store the frozen balls in zip-top bags in your freezer.  When you want fresh baked cookies remove as many individual balls from the freezer as you'd like and place them on a baking sheet to defrost.  When they're defrosted, use the back of a fork to press them down and baking regularity.  

These are really great cookies.  They have soft centers, and the perfect chewy texture, and a little hint of almond.  If you're looking for away to elevate a simple oatmeal cookie, this is it.  These are the perfect oatmeal cookie for anyone who likes them to be chewy.  They've become my go-to recipe, and I'm sure they'll become a favourite recipe of yours too as soon as you try them.

Recipe

Large flake oatmeal cookies recipe.

Chewy Large Flake Oatmeal Cookies

Chewy and delicious oatmeal cookies made with large flake oats.
No ratings yet
Print Pin Rate
Course: Desserts
Cuisine: American
Prep Time: 15 minutes minutes
Cook Time: 30 minutes minutes
Total Time: 45 minutes minutes
Servings: 36
Calories: 103kcal
Author: Dannyelle Nicolle-Ramjist

Ingredients

  • 1 cup butter softened
  • 1 cup brown sugar
  • 1 egg
  • 1 ½ teaspoon almond extract
  • 1 ½ cups all purpose flour
  • 1 teaspoon baking powder
  • 1 teaspoon baking soda
  • 2 cups large flake oats

Instructions

  • Preheat oven to 350°F.
  • Cream butter, and brown sugar in the large bowl of a stand mixer fitted with the paddle attachment, in a large bowl with an hand mixer.
  • Add in the egg, and almond extract and fully combine the wet ingredients together.
  • Next, add in the dry ingredients of flour, oats, baking soda, baking powder, and mix well, being sure to scrape down the sides of the bowl.
  • Roll a tablespoon full of dough into a ball and place onto a cookie sheet. Then flatten the ball of dough with a wet fork, creating the criss cross pattern.
  • Bake at 350°F for 6-9 minutes, until just golden brown. Cool the baked cookies on a wire rack.

Nutrition

Serving: 1g | Calories: 103kcal | Carbohydrates: 12g | Protein: 1g | Fat: 6g | Saturated Fat: 3g | Polyunsaturated Fat: 2g | Cholesterol: 19mg | Sodium: 93mg | Fiber: 1g | Sugar: 5g
Tried this Recipe? Tag me Today!Mention @LifeisaParty or tag #lifeisaparty!
Large Flake Oatmeal Cookie Recipe

With homemade chewy large flake oat oatmeal cookies, life really is a party!

More Recipe Inspiration

Also check out our Apple Crisp recipe here.

You might also enjoy our Oatmeal Bar Flapjack recipe here.

Cruise Themed Nautical Birthday Party

Apr 26, 2016 · 1 Comment

Cruise themed nautical party.

Cruise Themed Nautical Birthday Party: Great kids party theme where your guests sail away for the day with a house turned cruise ship!

Cruise themed nautical party.
[feast_advanced_jump_to]

When my youngest daughter Maddie turned nine, she decided on a Cruise Themed Nautical Birthday Party to celebrate!  We love theme parties and this idea was so fun.

If you love the nautcial themed too, check out our Nautical Party here with themed decor and dessert ideas.

We have been very fortunate and Maddie has enjoyed a cruise every winter for the last few years.  In fact, some of our happiest family memories have been created on board cruise ships, so it seemed like a very fun theme for a party, and a way for Maddie to share her love of cruising with her friends.

The Cruise Terminal -Boarding The Ship

Our intention was to make our guests feel like they were getting on a cruise ship and taking a mini cruise, with some of our very favourite cruise ship activities as part of the cruise themed party itinerary.

Cruise Themed Nautical Birthday Party: Great kids party theme where your guests sail away for the day with a house turned cruise ship!

I found some amazing printables that were perfect for our party.  I used picmonkey.com to add text.  If you don't know this site, it's great -easy to use and free, and will allow you to edit, and add text to images.  I used the large sign and added text to make signs.  We put a "Cruise Terminal" sign on the front door to set the tone for the party as soon as our guests arrives.  WE also had a "Ship Boarding" sign for our little check in area.  This was such a fun idea to greet our fellow passengers as they arrived.  One little girl even brought a real suitcase with her to get into the theme.

We used our console table as a check in area.

Cruise Themed Nautical Birthday Party: Great kids party theme where your guests sail away for the day with a house turned cruise ship!

Ticket Invitations

We sent guests a "ticket" invite for the party.  When they arrived they had to sign in with their ticket and get their sea pass, just like a real cruise.  We transformed our old sea pass cards into new ones for our party guests using Canva.  The homemade cruise ship party pass was complete with each guest's name and the date of the sailing... I mean party.  It's fun to use the name of specific ships you've sailed on as well.  This was such a great way to get the kids excited about our party theme before they even arrived.

Cruise Themed Nautical Birthday Party: Great kids party theme where your guests sail away for the day with a house turned cruise ship!

Checking In

At the sign in table they had to sign the registration sheet, and then they received their sea pass, which we hole punched and attached to a lanyard for them, just like they do on a real cruise.  Maddie had so much fun checking in all her guests and it was the best way to start off our party.

Cruise Themed Nautical Birthday Party: Great kids party theme where your guests sail away for the day with a house turned cruise ship!

Picture Time

As they signed in there was a ship photographer ready to snap a shot of them boarding, just like on a real cruise.  We set up a little photo booth backdrop of nautical party supplies.  For the photo booth decor we used a net, luggage, and an inflatable beach ball.  We also made an anchor and life preservers out of cardboard.  This was a quick and inexpensive project, that added a lot to our mega deck party vibe.  All that was missing were the palm trees!  We asked our guests to pose with a hat.  We picked up the captain and sailor hat at the party store and they were the perfect costume accessories.  

It's always so fun to include a photo booth at a special occasion.  After the party we shared all the photos with our guests.  It makes such a great keepsake from a party, and a happy memory to look back on.

My girls wore blue and white striped dresses for the party with white leggings underneath because it was a bit cold that day.  These simple nautical inspired outfits were perfect for the party.

Cruise Themed Nautical Birthday Party: Great kids party theme where your guests sail away for the day with a house turned cruise ship!

Welcome Aboard Drink

After the guests boarded it was time for a welcome aboard drink.  We picked up frozen pina colada mix at the grocery store and made mini virgin pina coladas for them with fun little umbrellas, which helped get everyone in the cruise mood.  The girls were all so excited about their fancy drinks and it was easy way to get the party started as soon as they arrived.

Sandbar Lounge

We decorated our living room party space with a few nautical decorations like the flag bunting from the party store, and some driftwood, sea shells, and starfish.  The cruise themed touches helped turn our living room into the "Sandbar Lounge".  It was perfect for a mocktail to start off our cruise on the high seas with a little bon voyage party.  Everyone had a good time dancing to music and saying cheers to one another with their fancy drinks as we started celebrating this special occasion.

Cruise Themed Nautical Birthday Party: Great kids party theme where your guests sail away for the day with a house turned cruise ship!

Napkin Folding Class

Our first activity at sea was a napkin folding class.  On the cruises we've been on there are always fun little classes on sea days run by the cruise director or other ship staff.  On the cruise your waiter is often an expert at napkin folding and loves to show the kids his or her tricks of the trade, and also the room steward often leaves amazing towel animals on your bed at night.  Cruising has come to mean fancy napkins and fancy towel folding for us.  So, when the classes are offered, Maddie enjoys going and learning how to do it too.  One time, we were given these great instruction sheets, which Maddie still had so we just photocopied for the party.

Napkin folding instructions

Maddie had a great time being the napkin folding instructor and teaching all her little friends, and grandparents how to fold the perfect napkin.

Cruise Themed Nautical Birthday Party: Great kids party theme where your guests sail away for the day with a house turned cruise ship!

Lunch In The Dining Room

After napkin folding class it was time for a fancy lunch in the main dining room.  Fancy lunches and dinners have become a real highlight of cruising for us.  In the early years the kids ordered from the kids menus.  We used to bring electronics to keep them entertained.  Now, the girls are becoming real foodies.  They've  really enjoyed trying out new things and ordering off of the adult menu sometimes.  Maddie had a lot of fun coming up with her three course menu.  We included lots of favourites from cruising.  Guests were given three choices for each course, and the waiters came around and took each of their orders for lunch.  We wanted the menu to feel fancy, but not so fancy that the kids didn't know what to order or enjoy their choices.  I tried to make sure there was something that everyone would enjoy, even our more picky eaters.  

Not included on the menu was the bread.  Every meal on the ship starts with a basket of delicious fresh made bread.  We didn't make our own bread, but we did include some really yummy choices that everyone seemed to really enjoy.

Menu:

Drinks

  • Chocolate Milk
  • Lemonade
  • Shirley Temple

Starters

  • Caprese Salad
  • Caesar Salad
  • Fruit Platter

Main Course

  • Gnocchi with Italian Sausage and Mushrooms
  • Mac and Cheese
  • Pepperoni Pizza

Dessert

  • Chocolate Glazed Donuts
  • Chocolate Fondue with assorted Dippers
  • Mini Brownie Madness Ice Cream Sundae

The menu items ended up being a great choice for kids.  Everyone found something they liked, and it was fancy enough to feel extra special, but not so fancy that they didn't like anything.  And we did serve a few people two desserts. 😉

We didn't do a birthday cake, but the birthday girl ordered the mini Brownie Madness Ice Cream Sundae,  and we put a candle in the brownie and sung happy birthday to her with it!

Cruise Themed Nautical Birthday Party: Great kids party theme where your guests sail away for the day with a house turned cruise ship!

My husband Roland and friend Heather were the waiters and I was the chef for the afternoon.  It was a lot of fun preparing a kid-friendly, but fancy meal.  Just like on the ship, you could even order two desserts, which has to be one of the best cruise highlights.

Cruise Themed Nautical Birthday Party: Great kids party theme where your guests sail away for the day with a house turned cruise ship!

Our boat theme table setting was perfect, with a blue and white color scheme and more cruise theme party decorations.  We used lanterns and nautical rope and seashells on the table.  We found the perfect nautical napkins at the party store.  At each place setting there was a menu.  And we marked the table with a place cards showing the table number, just like they do in the main dining room on a real cruise

Cruise Themed Nautical Birthday Party: Great kids party theme where your guests sail away for the day with a house turned cruise ship!

Staff Name Tags

I also made fun name tags for the "staff" with our names, and the countries we were from.  Just like on the real ship.  And we all wore our black and white "uniform".

Cruise Themed Nautical Birthday Party: Great kids party theme where your guests sail away for the day with a house turned cruise ship!

Karaoke

After lunch our guests headed back to the Sandbar Lounge for karaoke.  On our last cruise, with great friends of ours, there was family karaoke theme nights. Our girls were brave enough to give it a try.  They had such fun times singing karaoke together, all that was missing was a dance floor! After having the other activities, this was the perfect way to end the cruise party.  Our guests were a little shy at first, but we still had a lot of fun.

Sea Themed Loot Bag

One of my favorite things about themed parties is coming up with a themed goodie bag.  We sent our guest home with a little sea themed favor bag.  There were lifesavers, goldfish crackers, cracker jacks, and chips ahoy cookies.  I made a fun little label for our "ships ahoy" cookies.

Cruise Themed Nautical Birthday Party: Great kids party theme where your guests sail away for the day with a house turned cruise ship!

We had a great time celebrating our girl with her own little cruise.  Birthday parties are such a great excuse to do something extra special.  I hope you'll find some of these great ideas helpful if you're planning your own cruise themed party.

With a special Cruise Themed Nautical Birthday, life really is a party!

More Cruising Posts

You might also enjoy our cruise planning party where we got together with family to plan our next cruise adventrue.

Also check out our Cruising With Your Anxious Child post.

Paint Dipped Brass Candle Holders

Apr 20, 2016 · 16 Comments

Paint dipped candle sticks.

Paint Dipped Brass Candlestick Holders: upcycle your old brass by painting them for a modern look with this fun and easy candle holder craft.

Paint dipped candle sticks.
[feast_advanced_jump_to]

Lately I'm in love with brass and all things golden.  And of course, my love affair with white is still going strong.  So for our #12MonthsOfDIY challenge this month, with us all doing some kind of diy makeover on a thrift store item, I thought a candle holder craft these Paint Dipped Brass Candlestick Holders would be perfect.

how to paint brass candlesticks

I have to say that I really love how they turned out, and they were easy to make, and inexpensive -tick, tick, ticking all my boxes.

Paint Dipped Brass Candlestick Holders

Candle Holder Craft Materials:

  • assorted brass candlesticks (look for different heights and styles)
  • masking tape
  • craft paint

Shopping Second Hand

The candlesticks are from the thrift store -I went a couple of times, and found some that I really liked.  I love shopping second hand, it's like a treasure hunt to me!  And did you know that on average, North Americans throw out 81lbs of textiles each year -that's a lot of landfill!  Value Village is one of the biggest recyclers of used clothing in the world.  Shopping second hand, and donating your old housewares and textiles is a great way to love the earth, and the perfect way to celebrate Earth Day, this Friday.

brass candlestick makeover

I'm a firm believer that one girl's trash is another girl's treasure.  #RethinkReuse

Brass was hot in the 70's, but it's definitely making a come back.  And since I'm really into the whole geometrics trend right now, I tried to paint my candlesticks so that it looked like they'd been dipped in paint at an angle.

how to paint brass

How To Make Paint Dipped Brass Candlesticks

To start my project, I took the stickers off of the candlesticks, and washed them.  You could polish them if you wanted them really bright gold, I kind of like their patina, so I left mine un-polished,

Next, I used some masking tape to create an angled line where I wanted to paint.

I used Fusion Chalk Paint, for a matte finish.  It took about 4 quick coats to fully cover them.

When they were dry to the touch we removed the tape.  They were that simple.

paint dipped candlesticks

I displayed mine on the fireplace mantel.  I love the simplicity of them.  They're even making my brass fireplace trim, that I've been meaning to paint black for ages, look good.

white deer head

I thought about painting them in different pastels for spring, which I think would have worked really well too, but there's just something about simple, beautiful white.

brass candle holder craft

With this candle holder craft , life really is a party!

More Inspiration

You might also like our How To Make Wood Bead Garland with Yarn Tassels here.

Also check out our Mason Jar Oil Lamps here.

You might also enjoy our DIY Rainbow Art here.

DIY Rainbow Book Art: Using old books as a canvas this DIY rainbow art in mustard yellow and pink is fun to make and inexpensive.

Easy Mini No Bake Philadelphia Cheesecake in a Mason Jar

Apr 14, 2016 · 5 Comments

Mini no bake cheesecake with blackberries.

Mini No-Bake Cheesecake In A Mason Jar -the perfect cute, portable, easy treat! Top with any fruit you like best. Individual serving size.

Mini no bake cheesecake recipe in a mini mason jar.
[feast_advanced_jump_to]

This classic Philadelphia no bake cheesecake filling has been around a long time for a reason. If you're looking for an easy dessert, that you don't have bake in the oven, then this no bake dessert recipe is perfect.  We made ours mini individual sized, but you can use this same recipe to make on large on if you prefer.  This easy recipe is made with simple ingredients and crowd pleaser.  It starts with a classic graham cracker crust, then our no bake philadelphia cheesecake layer.  You can top these cheesecakes anyway you like, with the traditional cherry pie filling, or any of your favourite pie fillings or jams, or fresh fruit and whipped cream.  I love how easy and versatile this decadent cheesecake recipe is.

Since it's finally starting to feel like spring, these Mini No-Bake Berry Cheesecakes In A Mason Jar, are the perfect little treat.  They're great topped with fresh berries, and portable enough to bring on a spring picnic, weekend adventure, or enjoy for a backyard bbq.

Mini No-Bake Berry Cheesecake In A Mason Jar

Mini Cheesecakes

Mason jars are the perfect serving piece for these little individual cheesecakes.  The jars are cute, mini size, easy to serve and eat, and portable for adventures!  You could also make these in little ramekins, or even small drinking glasses.

This recipe can also be made one large no-bake cheesecake in an 8 x 8 baking dish if you prefer.  Or use a store-bought graham cracker crust for a pie and fill it instead.

Homemade Crust

The base of our mini cheesecakes is an easy homemade graham cracker crust.  We picked up some graham cracker crumbs at the grocery store.  You can also use whole graham crackers and if you have some and put them in your food processor to turn them into crumbs.  This graham cracker crust comes together in minutes, by mixing some butter with the graham cracker crumbs and then pressing the crumb into the base of the mason jars, or whatever container you're using to form the cheesecake base.

If you decide to make one large cheese cake instead of the mini versions you can also use a store-bought graham cracker pie crust instead of making your own.

how to make Cheesecake In A Mason Jar

Cheesecake Filling

This easy recipe is a no bake cheesecake recipe, which makes it very quick and easy to put together.  Unlike traditional cheesecake, this cheesecake doesn't require baking a water bath.  The simple ingredients for our philadelphia cheesecake recipe are simply mixed together and the cake or mini cakes are set in the refrigerator for the cream cheese filling to set.

This recipe works best if you use room temperature cream cheese.  It allows it to mix more easily and avoids the issue of the filling being lumpy.  This recipe uses sweetened condensed milk to add a wonderful sweetness and make this a creamy dessert.  Also be sure to use pure vanilla extract, as the artificial vanilla can have a slight aftertaste to it.

Mini No-Bake cheesecake

Flavor Ideas

You could make these cheesecakes in any flavor.  Go for the classic combination of cherry pie filling, or try a different flavor of pie filling like raspberry or blueberry.

For our blackberry cheesecakes, we used jam as the topping.  Jam is a little sweeter than pie filling, so you won't want quite as much jam as you would use pie filling.   I chose blackberry jam for mine this time, but any favourite jam flavour would be great.  There's lots of different options for your favorite toppings.  I'm thinking cherry jam, raspberry jam, or how about mango?  The sky's the limit.  Because the jam is a little on the sweet side I love to garnish it with some whipped cream and fresh fruit too.  The sweetness of the jam and tart fruit pair so well with the creamy filling of this easy cheesecake recipe.  

Cheesecake In A Mason Jar

Store your cheesecakes in the refrigerator.  If you made them in the mason jars, just add on the lids to create an airtight container, or cover them in plastic wrap.

Mini No-Bake Berry Cheesecake recipe

The perfect finish to these sweet little cheesecakes right before you serve them is some whipped cream, and a fresh berry!  I love these easy little decadent desserts.  They're always a hit with company and great make ahead for entertaining.  You could even make different flavors and let guests choose which one they'd like.  These are so much easier to make than a regular cheesecake, and so tasty.  This delicious dessert is the perfect choice for your next get together.

Recipe

Mini no bake cheesecake with blackberries.

Mini No-Bake Berry Cheesecake In A Mason Jar

Creamy and delicious mini cheesecakes with berry jam topping.
5 from 1 vote
Print Pin Rate
Course: Desserts
Cuisine: American
Prep Time: 15 minutes minutes
Total Time: 15 minutes minutes
Servings: 12
Calories: 350kcal
Author: Dannyelle Nicolle-Ramjist

Ingredients

  • 1 cup graham cracker crumbs
  • 3 tablespoon butter
  • 250 g cream cheese
  • 300 mL sweetened condensed milk
  • 2 tablespoon fresh lemon juice
  • 1 teaspoon vanilla
  • ¼ cup blackberry jam
  • 1 can spray whipped cream
  • 12 fresh blackberries

Instructions

  • Melt the butter and combine well with the graham cracker crumbs. Use a spoon and divide the crumb mixture between 12 -4oz. Mason Jars, and then press the crumbs down with the back of a spoon to create the cheesecake base.
  • Next, combine the cream cheese, sweetened condensed milk, lemon juice, and vanilla in a stand mixer with the paddle attachment, beating until the mixture is smooth and thoroughly combined.
  • Divide the cheese cake filling mixture between the 12 mason jars. Refrigerate the mason jars, until the cheesecake is set, about ½ hour.
  • Once the cheesecake is set, and able to support the jam topping, spoon about a teaspoon over the cheesecakes. Don't use too much, since jam is sweeter than pie topping which is usually used as a cheesecake topping.
  • Refrigerate until you are ready to serve. Just before serving, top each cheesecake with some whipping cream, and add a fresh berry. Enjoy!

Nutrition

Serving: 1g | Calories: 350kcal | Carbohydrates: 34g | Protein: 6g | Fat: 22g | Saturated Fat: 13g | Polyunsaturated Fat: 7g | Cholesterol: 68mg | Sodium: 167mg | Fiber: 1g | Sugar: 27g
Tried this Recipe? Tag me Today!Mention @LifeisaParty or tag #lifeisaparty!
blackberry Cheese Cake recipe

With Mini No-Bake Cheesecakes in a Mason Jar, life really is a party!

More Dessert Recipe Inspiration

You might also like our Classic Cheesecake recipe here.

Classic Cheese Cake -your new go-to Classic Cheese Cake recipe. It's baked, rich and dense. Add your favouarite topping for an easy and delicious dessert.

Also check out our Apple Crisp in a Mason Jar here.

You might also like our Caramel Apple Trifle in a Mason Jar here.

5 Tips To Create a Pinterest-Worthy Party On A Budget

Apr 12, 2016 · 2 Comments

Parties On A Budget: tips to save money like planning ahead, choosing the menu and time of day of the party wisely, and DIY decor ideas.

Parties On A Budget: tips to save money like planning ahead, choosing the menu and time of day of the party wisely, and DIY decor ideas.

[feast_advanced_jump_to]

Remember when Oprah lost all that weight and everyone was like "yeah I could do it too, if I had a personal trainer and a chef"?  And you know when you look at pinterest and think "yeah I could create a Pinterest worthy party too, if I had a party planner and a huge budget".  Well you can do it yourself and on a budget,...even a tight budget.  Today I'm sharing tips on how to throw a party on a budget.

Party On A Budget

These tips are especially helpful for  Birthday Parties -and this month we have two at our house.  For a birthday, I want things to be extra special, I want to think of a theme that suits the birthday girl or boy, get baking and decorating and crafting and pull out all my little tricks to make it extra special.  Every party I throw isn't "pinterest worthy" -and it doesn't have to be, but birthdays are a great excuse to really get your party on!

A question I sometimes get asked by friends and readers is how do you create a gorgeous, Pinterest-worthy party on a budget?  Today I'm sharing how I do it, with these 5 simple tips:

1.  Give yourself enough time.

Great parties, especially ones done on a  budget take time.  In fact, one of the main reasons I ever end-up spending more than I wanted to is because I'm running out of time.  It takes time to craft it, find it, bake it, and create it.  If you don't mind a few nights in front of the tv making decorations, or an afternoon of baking before the party, or keeping your eyes open over the next month while your out shopping, or ordering things on-line weeks before the party, you can stay on budget.  It takes time to find and create all the perfect little details, but those are the things that take a party from ordinary to being Pinterest worthy!  Give yourself time to plan ahead.

party on a budget

These paper mache mushrooms for our Spring Woodland Easter Brunch cost next to nothing to make -tinfoil, newspaper, flour, and paint and lots of time.  If you're going to get crafty to stay on budget, you've got to give yourself enough time to actually do the crafts.

2.  Choose a Theme and Colour Scheme.

how to plan a party on a budget

Rainbow party paper lanterns and flowers for the paint party.

A theme will help you create a party with real impact and help you narrow down your choices for all the little details.  We've all had that feeling of not knowing where to begin, a choosing a theme will help you find the starting place.

What Kind Of Party Is It?

The kind of party your having will help you choose a good theme.  A birthday party might have a theme based on the guest of honours interests, or favourite things.  A baby shower theme might be inspired by gender, or mom and dad's interests.  A dinner party might be based on a type of food, like a night in Paris or a Fiesta.  A summer bbq might be as simple as choosing a fun colour as theme.  There as many possibilities as you can think of, and truly anything can make a good theme for a party.

beautiful parties on a budget

The Pink Paris dessert table was so much fun to put together.

Colour Scheme

Once the theme is picked narrow it down to a colour scheme too.  This will help you select all the rest of the things for the party.  It could be as simple as a one colour or a mix.  It might come right out of your party theme, like brown and white for a chocolate party, or it might be the theme of the whole party, like an orange party.

cheap party ideas

For the Chocolate party, everything was brown, white, and chocolate-y!

3.  Pick a Menu.

Your menu will depend on and be connected to a few other factors:

  • Theme

Sometimes it's fun to theme the food for a party.  A tea party, Mexican Fiesta themed party, or pizza party have obvious menus implied.  But, other fun things might come to mind depending on your theme.  At a rainbow party a rainbow fruit party is a fun touch.  At a teddy bear party, teddy bear shaped buns are amazing.  So, put on your thinking cap and see what you can come up with related to your theme.

Teddy bear tea party dessert table.

The Teddy Bear Tea Party, with the sweetest tea cup cupcakes, and gummy bears!

  • Time of Day

Depending on when your party is will make a big difference to your menu.  Is it breakfast, brunch, lunch, dinner, snacks, dessert?  Sometimes this can help with budget too -an amazing breakfast will likely be cheaper to make than a dinner.

how to plan a party on a budget

A pretty breakfast party get together with coffee, pancakes, fruit, home made granola and smooth cottage cheese parfaits.

  • Budget

I'm convinced that even on a budget you can have great food.  A few budget choices that your guests won't even notice are try serving punch instead of cans of fancy pop.

Soup party drink cart with iced bottled water and punch with glasses and straws.

Fall punch made from peach juice and ginger ale.

Think about the cost of your protein and look for sale items.  The meat is always the most expensive part of the meal.  If you're trying to save money, don't plan on steak, instead think about what's on sale.  Purchase things in advance and freeze, or take advantage of price matching and find it on sale somewhere.

Pork was on sale, and made great mini pulled pork sliders for a Christmas party.

Think about cost effective items.  For example do a veggie and dip tray instead of a cheese tray -cheese can be expensive.  Also, make your fruit, and veggie trays, and salads yourself, it will be way cheaper than buying already made ones.  Also, plan on baking treats, and the cake yourself.  If it's too much prep for you the day before, make some a week before and freeze it.  Don't be afraid to ask close friends for family to help out by bringing something too.  Especially a family favourite is a great way for Grandma to feel like she's involved in a family birthday and help you out too.

Rainbow Dessert Table Rainbow Fruit Tray

Rainbow fruit tray from the rainbow paint party, that I made myself instead of buying all ready prepared.

  • What's in Season

Let what's in season guide you when your planning your menu.  You'll get what's freshest, and what's cheapest.  Win. win.

cheap party menu ideas

We picked our own strawberries and made these delicious donut strawberry shortcakes for a party.

4.  Make Your Own Decorations

It's amazing what you can do with some paper, and a glue gun!  Find some pretty scrapbook paper in your colour scheme and break out your scissors.

how to save money on a party

Hand made paper flowers, made from white paper, kraft paper, and old book pages.

You might think about possibly creating

  • a banner for the party
  • place cards
  • menu cards
  • food labels for a buffet
  • frameable quotes to match your theme
  • hanging decorations
  • bottle labels
  • cupcake picks
  • cutlery wraps
  • paper flower decorations
party on a budget

We used washi tape to make banners, cupcake pics, and paper chains for this Christmas gift wrapping party.

The list is really endless and you certainly don't need to make everything on this list, it's just to get you thinking.  Create your own, use printables from on-line, or add custom details to store bought party supplies.  Start with your theme and colour scheme and go from there.

party on a budget

Handmade menus for a summer dinner party.  The guests loved them so much they took them home for a keepsake.

5.  Invest in Good Party Neutrals

Another great way to stay on budget is to invest in good party basics.  If you like to entertain then an investment in things like neutral coloured platters, serving pieces and cloth napkins will pay off in the long run.

I remember the first dinner party my husband and I hosted,  when we were still just dating.  We invested in 12 white cloth napkins, and 12 nice wine glasses.  Some of the other pieces for that party were a bit of a hodge-podge, but those couple neutral sets are still going strong almost 15 years later, with the exception of a few broken wine glasses!

inexpensive party ideas

For this pretty Rustic Snowy Christmas Table Setting I used lots of good basics like a white table cloth, white plates, and the pretty cloches -all bought in sets of twelve when possible.

Buy In Sets Of 12

Another tip of mine, if your love to entertain is to never buy fewer than 12 of anything.  When you're young, you think 6 is a big set, by the time you have a family your perspective shifts a little.  My family is four, my friends are mostly that size too, so with just one additional family we're already at 8.  See what I mean?

Keep It Neutral

And lastly, keep it mostly neutral.  A few colourful pieces will add punch, but for the most party white platters, clear glass serving pieces, or plain metal trays all work together.

budget party planning

Lots of basic white serving pieces used here, that go with everything, and can be pulled out time and time again.

These are my 5 best tips for creating a truly pinterest-worthy party on a budget.  If you follow this advice of giving yourself lots of time, choosing a theme and colour scheme, choosing your menu, making your decorations, and investing in good party neutrals you have all the things you need to create something amazing and memorable without breaking the bank.

With great times of celebrating ahead, life really is a party!

More Inspiration

Also check out our 5 DIY Inexpensive DIY Party Decor Ideas here.
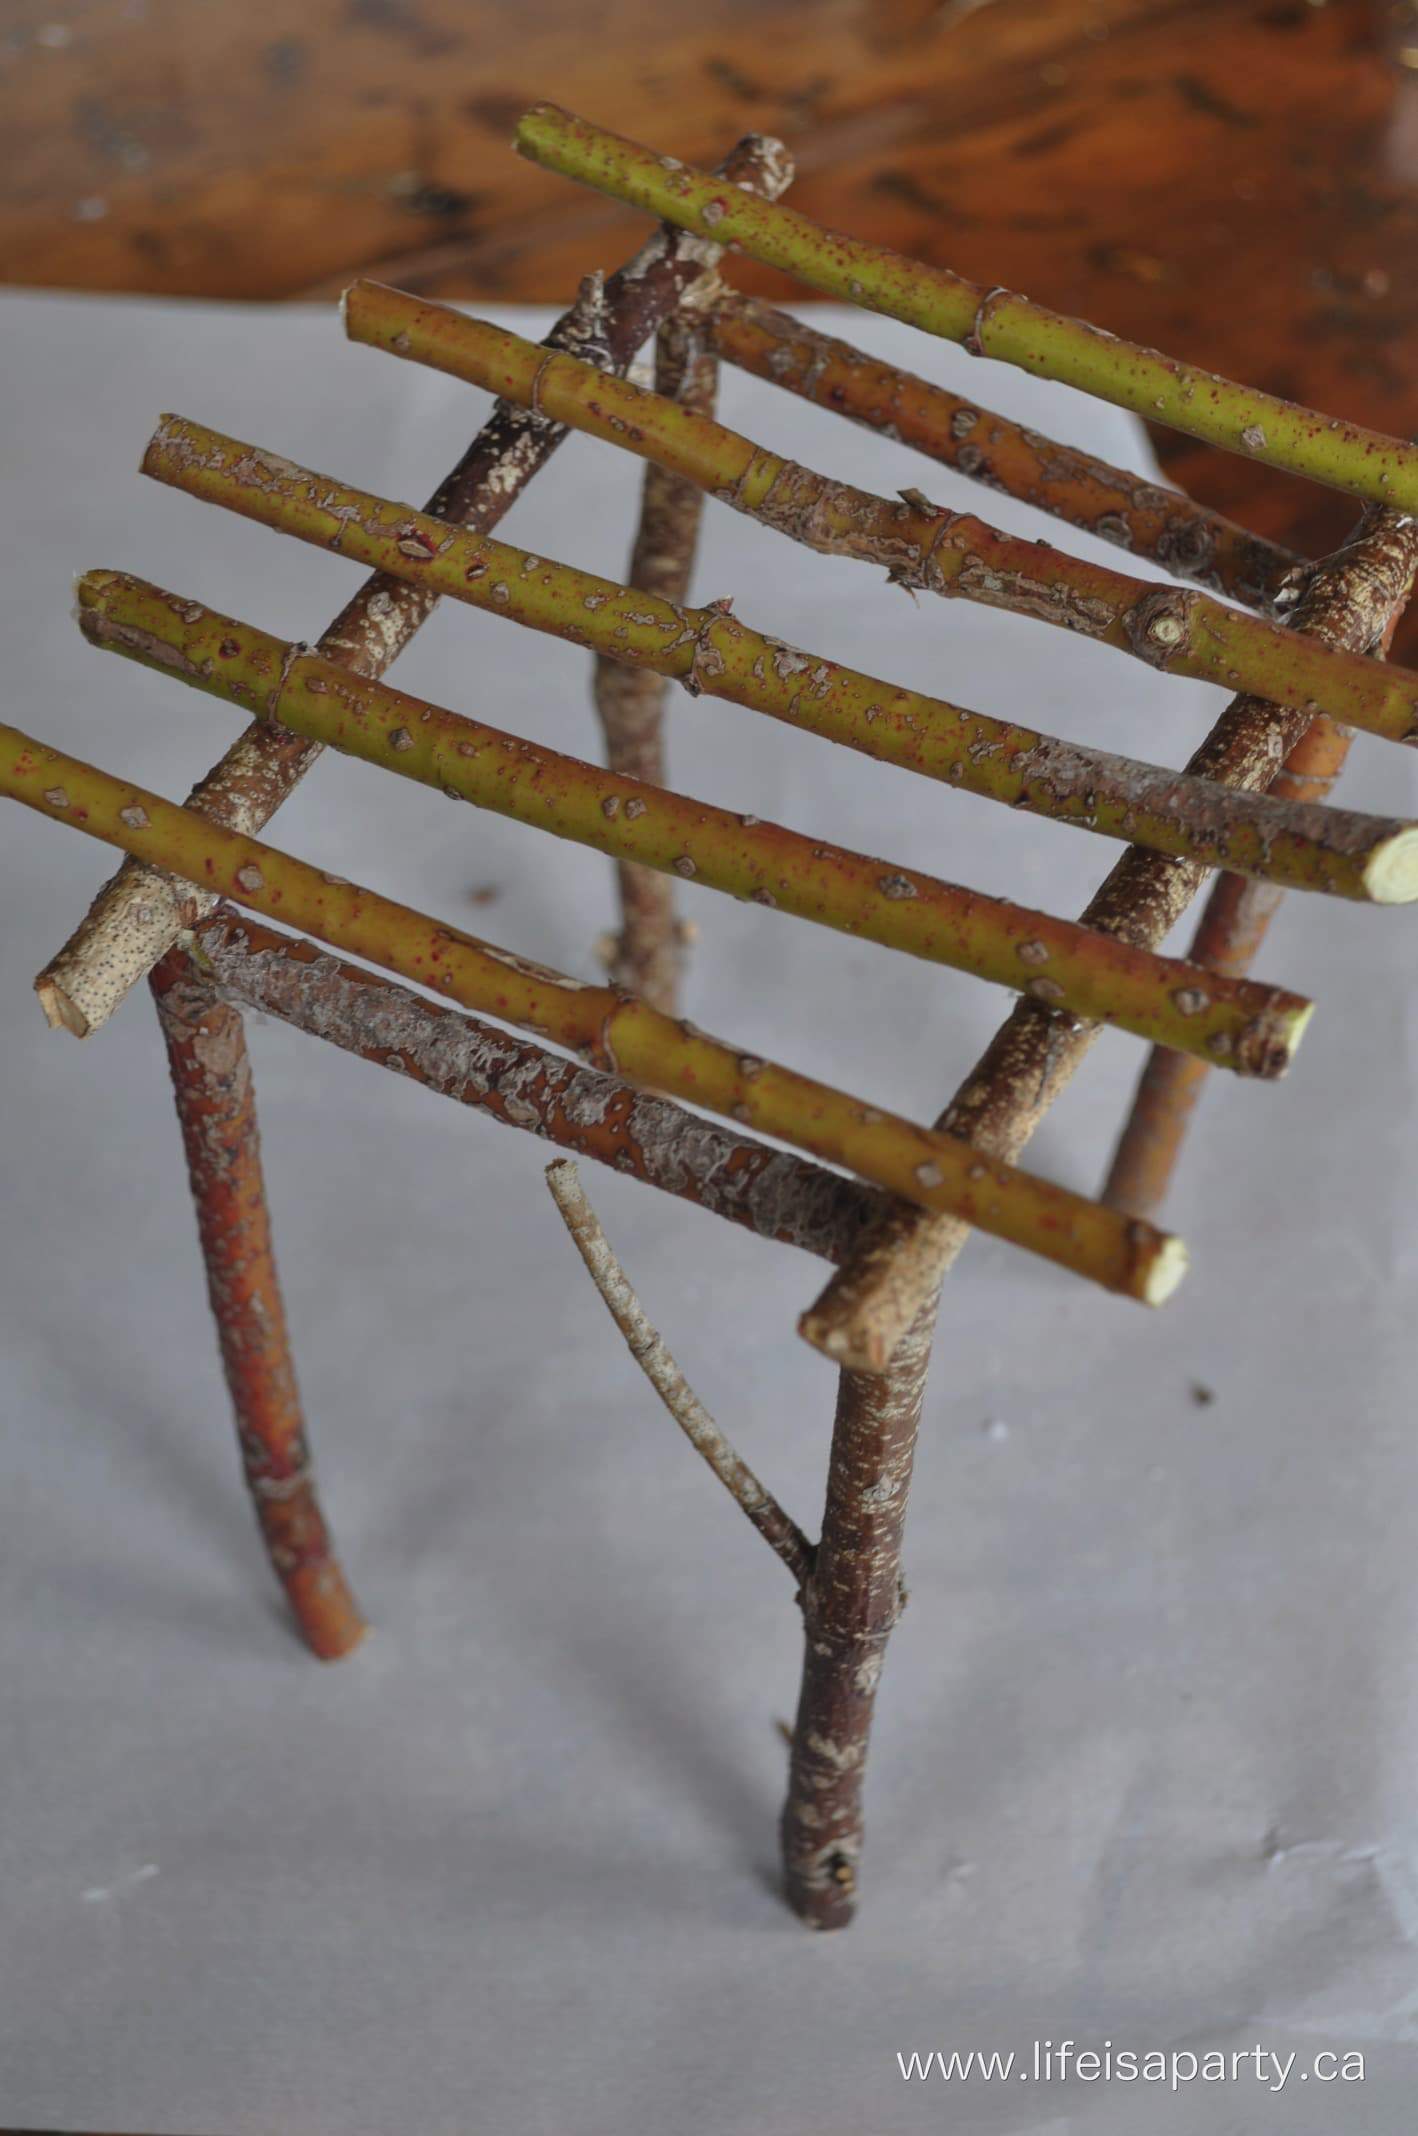
5 Inexpensive DIY Party Decor Ideas: Use wrapping paper, washi tape, scrapbook paper, and vintage bottles to create your own party decor.

Felt Mushrooms

Apr 4, 2016 · Leave a Comment

DIY felt mushrooms.

DIY Felt Mushrooms: easy to sew red and white polka dot mushrooms with felt, and cork and wooden spool stems. See how to make your own pattern.

DIY felt mushrooms.
[feast_advanced_jump_to]

It's spring, and April showers will not only bring May flowers, they may bring a new crop of felt mushrooms. If you're lucky, they might be made of old corks, wooden spools, and felt. These DIY felt mushrooms are perfect for attracting fairies. Use these mushroom ornaments as spring decor, or make them for Christmas. They look great as a hanging ornament on a Christmas tree too. Or you could even use these as mushroom pincushions. This is one of those fun and easy craft projects that older kids would love to make too, and with just a bit of sewing, would be a great sewing project for a beginner skill level.

DIY Wine Cork and Wooden Spool Felt Mushrooms

Felt Mushroom Materials List:

  • red and white felt
  • sewing needle
  • white thread
  • stuffing
  • old corks, or wooden spools
  • hot glue
  • hot glue gun
wood spools and wine corks

How To Make Felt Mushrooms

The Mushroom Top

1. Start my cutting out a rough circle from red felt, it can be a little wonky, as a real mushroom would be. Then, go around the edge and cut out several small V's, this will help create the mushrooms domed top. To also help with the dome effect, use your thumbs to slightly stretch the middle of the mushroom cap circle, taking care not to pull too hard, or create a hole.

2. Cut out some small white spots for your mushroom, and sew the small pieces of white felt circles onto the red felt piece using the blanket stitch.

how to make felt mushrooms

4. Cut a bottom for your mushroom out of white felt, making it slightly smaller than the top. I just eye-balled it, and adjusted it to fit perfectly by trimming it near the end if it was too big, or adding another V snip in the edge of the red top, if was too small. You could make a mushroom pattern, but this way every mushroom top is done in slightly different sizes, which is more fun, and more fitting for mushrooms.

5. Now you're ready to stitch your mushroom top and bottom together. Use the blanket stitch, drawing the V gaps together as you go, to create the mushroom dome out of the two felt pieces. Near the end, before you're completely finished going around, add in a little stuffing, and then finishing sewing it all the way around.

how to sew a felt mushroom

Adding The Mushroom Stem

6. The next step is to attach your mushroom top to a mushroom stem using hot glue at the top of the stalk, and the bottom of the mushroom cap. I made two finished mushrooms with cork stems, and one of my fabric mushrooms with a wooden spool stem.

DIY Felt Mushrooms

Create A Scene

I made three mushrooms for my little display, and hot glued the mushroom base of the stalk to cardboard circle so they would stand easily and then covered the cardboard with some pretty green moss.

red and white polka dot felt mushrooms

I also added in a pretty little nest. My sister, Heather, made the nest for Easter. She used an old felted sweater for the nest part. Just cut out a large spiral circle and then roll it up into a bowl shape to create the nest. Hot glue, or stitch it together, and add a solid circle to the back. 

The eggs are made from felted wool, which she dyed with a little food colouring and vinegar, and then used a felting needle to make the felted eggs. They're the perfect addition to this little scene.

DIY Wine Cork and Wooden Spool Felt Mushrooms: so easy to stitch together, add a little whimsy to your spring decor.

I set my little display up under a pretty cloche, although hard to photograph, it looks so sweet on the table for spring. I love the mix of larger mushrooms with the small mushroom. Look for different sizes of corks and old wooden thread spools to create different sizes of mushrooms. We used traditional red and white for our mushrooms, but you could make them in any colors. These would be sweet in pastel shades for an Easter or spring display too.

Christmas Ornaments

If you want to use these as Christmas ornaments, just sew a ribbon loop to the top of the mushroom cap with a piece of thread. The red cap pieces are perfect for Christmas. You could even add some faux snow and glitter to the stalk pieces at the end of the stem to make your finished ornament even more festive.

DIY Felt Mushrooms: easy to sew red and white polka dot mushrooms with felt, and cork and wooden spool stems. Perfect for your spring decor.

I wonder if I'll see any little spring fairies looking for a spring toad stool?

felt mushroom craft

I love how you can easily make your own pattern for these mushrooms so that they are all slightly different. With sweet little felt and wine cork or wooden spool mushrooms, life really is a party!

More Inspiration

You might also like our Mushroom Spring Wreath here. 

Mushroom Spring Wreath

Also check out our post on How To Make A Fairy Garden In A Bottle.

You might also like our Mushroom Christmas Ornaments here.


Chocolate Mousse Easter Eggs

Mar 26, 2016 · 1 Comment

Chocolate mousse filled Easter egg dessert.

Chocolate Mousse Easter Eggs -Easy Chocolate Mousse Recipe: the perfect Easter dessert, chocolate mousse piped into hollow chocolate Easter eggs.

Chocolate mousse filled Easter egg recipe.
[feast_advanced_jump_to]

These chocolate mousse Easter eggs are easy to make and so delicious.  They're a perfect little Easter dessert, sure to delight adults and children alike at your Easter table.  Any chocolate lover will love them.  They're also a perfect light finish to a big special occasion meal.  Not to mention how cute and adorable they are!  Spring is the perfect time to make them.  It's a great way to serve some Easter chocolate this year, that's a little bit different.

how to make Chocolate Mousse

Who doesn't love chocolate mousse, and it's made all the better here, piped into hollow chocolate Easter eggs for the cutest Easter presentation.

Chocolate Mousse in an Easter Eggs

The Hallow Easter Eggs

I picked up a package of hollow Easter eggs, and cut the tops off, so they were all ready to pipe the chocolate mousse into.  You will want to work carefully for this step, and maybe buy a few extras, just in case you have a little breakage.  I found a sharp serrated knife and a sawing action worked best.  Remember not to apply too much pressure when you're cutting the tops of hollow Easter eggs off because they are quite fragile.

Our cream mixture was enough to make 1 ½ dozen Easter eggs, but it will depend on the size of your chocolate eggs.  Look for large chocolate eggs about the size of a real large egg.  If you're filling less hollow chocolate eggs, just cut the chocolate mousse recipe in half.

Easter Eggs filled with chocolate mousse

Filling The Eggs

Use a piping bake or a ziplock bag with the corner snipped off to make it really easy to fill the eggs.  This was the perfect way to get the chocolate mousse down to the bottom of the inside of the egg and to fill it without making a mess.

Easter Egg dessert

How To Serve The Chocolate Mousse Easter Eggs

When we were ready to serve our little treats, we added the perfect little topping of whipped cream, and a teeny wee little chocolate Easter bunny.  I found the perfect little teeny, tiny bunny sprinkles at the dollar store, but regular sprinkles, or chocolate shavings would work really well too.

We served our chocolate mousse eggs in a ceramic egg holder.  You could also use the plastic egg holder that the chocolate eggs came packaged in.  You could also also serve them in individual egg cups.

Chocolate Mousse Easter Egg desert

Recipe

Chocolate mousse filled Easter egg dessert.

Chocolate Mousse Easter Eggs

Milk chocolate Easter eggs filled with creamy chocolate mousse.
5 from 1 vote
Print Pin Rate
Course: Dessert
Cuisine: American
Cook Time: 20 minutes minutes
Total Time: 20 minutes minutes
Servings: 18
Calories: 248kcal
Author: Dannyelle Nicolle-Ramjist

Ingredients

  • 2 oz. semi sweet chocolate
  • 2 oz. milk chocolate
  • 2 eggs -separated
  • 4 tablespoon sugar -separated
  • 1 teaspoon vanilla
  • ¾ cup whipping cream
  • 18 hollow milk chocolate Easter eggs
  • 1 cup whipped cream
  • ¼ cup mini Easter bunny sprinkles

Instructions

  • Chop the semi sweet and milk chocolate into small pieces. Use a double boiler, or a heatproof bowl set over a pan of small saucepan of boiling water to melt the chopped chocolate. Once completely melted set aside to cool slightly.
  • Separate 2 eggs, and beat whites in a clean bowl with an electric mixer at a high speed until foamy. Slowly add 3 tablespoon of sugar, and continue beating until you reach stiff peaks.
    Once the melted chocolate is slightly cool, stir the egg yolks into the chocolate and mix well.
  • Add a small amount of the egg whites into the chocolate mixture and stir to combine completely. Add the rest of the whites, folding to ensure the air stays in the egg whites.
  • Whip cream and add 1 tablespoon sugar, and vanilla.
  • Fold whipped cream into the egg white and chocolate mixture until fully combined.
  • Carefully cut the tops off of the hollow chocolate Easter eggs.
  • Put the chocolate mousse into a ziplock bag and pipe into the eggs. We filled 18 small hollow eggs, but it depends on the size of your eggs.
    Refrigerate the eggs until set.
  • Before serving, top with whipped cream, and a mini Easter bunny sprinkle.

Nutrition

Serving: 1g | Calories: 248kcal | Carbohydrates: 25g | Protein: 4g | Fat: 15g | Saturated Fat: 9g | Polyunsaturated Fat: 5g | Cholesterol: 50mg | Sodium: 41mg | Fiber: 1g | Sugar: 22g
Tried this Recipe? Tag me Today!Mention @LifeisaParty or tag #lifeisaparty!
Chocolate Mousse filled Easter Eggs

These the perfect Easter treat.  Your whole family will love them with their creamy texture and rich chocolate flavor.

With these easy and delicious Chocolate Mousse Easter Eggs, life really is a party!

More Inspiration

You might also like our Carrot Cake recipe here.
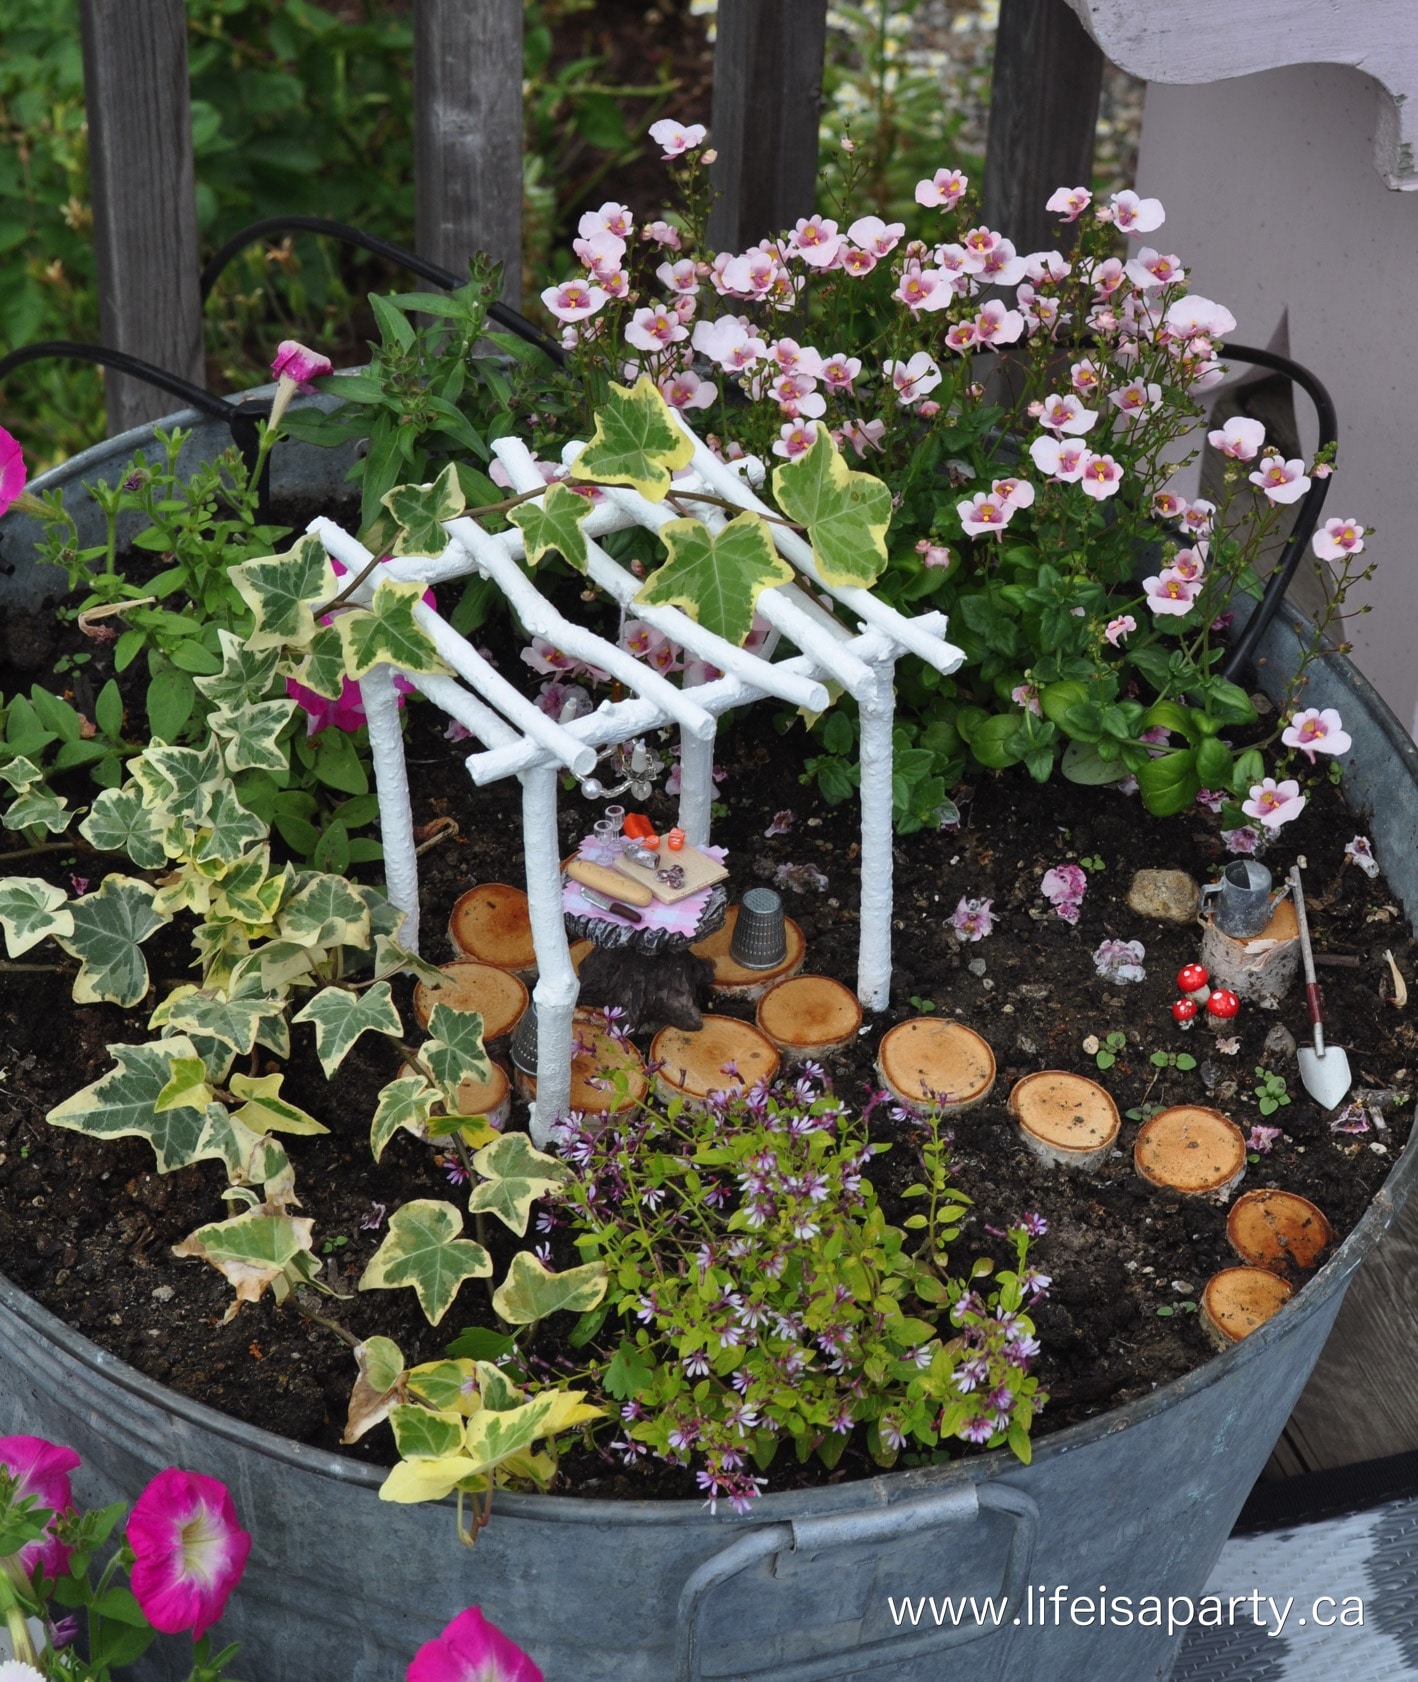
Also check out our Bunny Bait Easter Trail Mix here.

Bunny Bait Easter Trail Mix -trail mix, with some fun Easter additions like graham cracker bunnies, and Easter eggs, also a free printable Bunny Bait label.

You might also enjoy our Black Forest Cake in a Mason Jar recipe here.

Easter Brunch Menu and Decor Ideas

Mar 25, 2016 · 2 Comments

Easter woodland brunch.

Easter Brunch Menu and Decor Ideas: pretty spring woodland inspired Easter table and decor, and easy make-ahead Easter Brunch menu.

Easter woodland brunch.
[feast_advanced_jump_to]

This month for our #YearofFeasting we had a lovely little Spring Woodland Easter Brunch.  I was inspired by all things spring, and forest, like pretty green moss, and pussy willows.  Today I'm sharing ideas Easter brunch menu and decor ideas.

Woodland Spring Table

This table was so much fun to put together, with lots of sweet little details perfect for celebrating spring.

Easter Brunch Menu and Decor Ideas

DIY Moss Table Runner

The first thing I did to prepare for to prepare for hosting Easter brunch was to work on the table.  I wanted a moss runner so I went out to the forest and collected some moss.  It was a little wet, and I didn't want it to mark the dining room table, so I laid it out on newspaper for a few days inside to let it dry out.  By the time I set the table it was nice and dry, and I layered the moss table runner over some brown kraft paper, just in case there were any damp spots left.  If you don't have a forest nearby, you can buy a moss runner at the craft store.
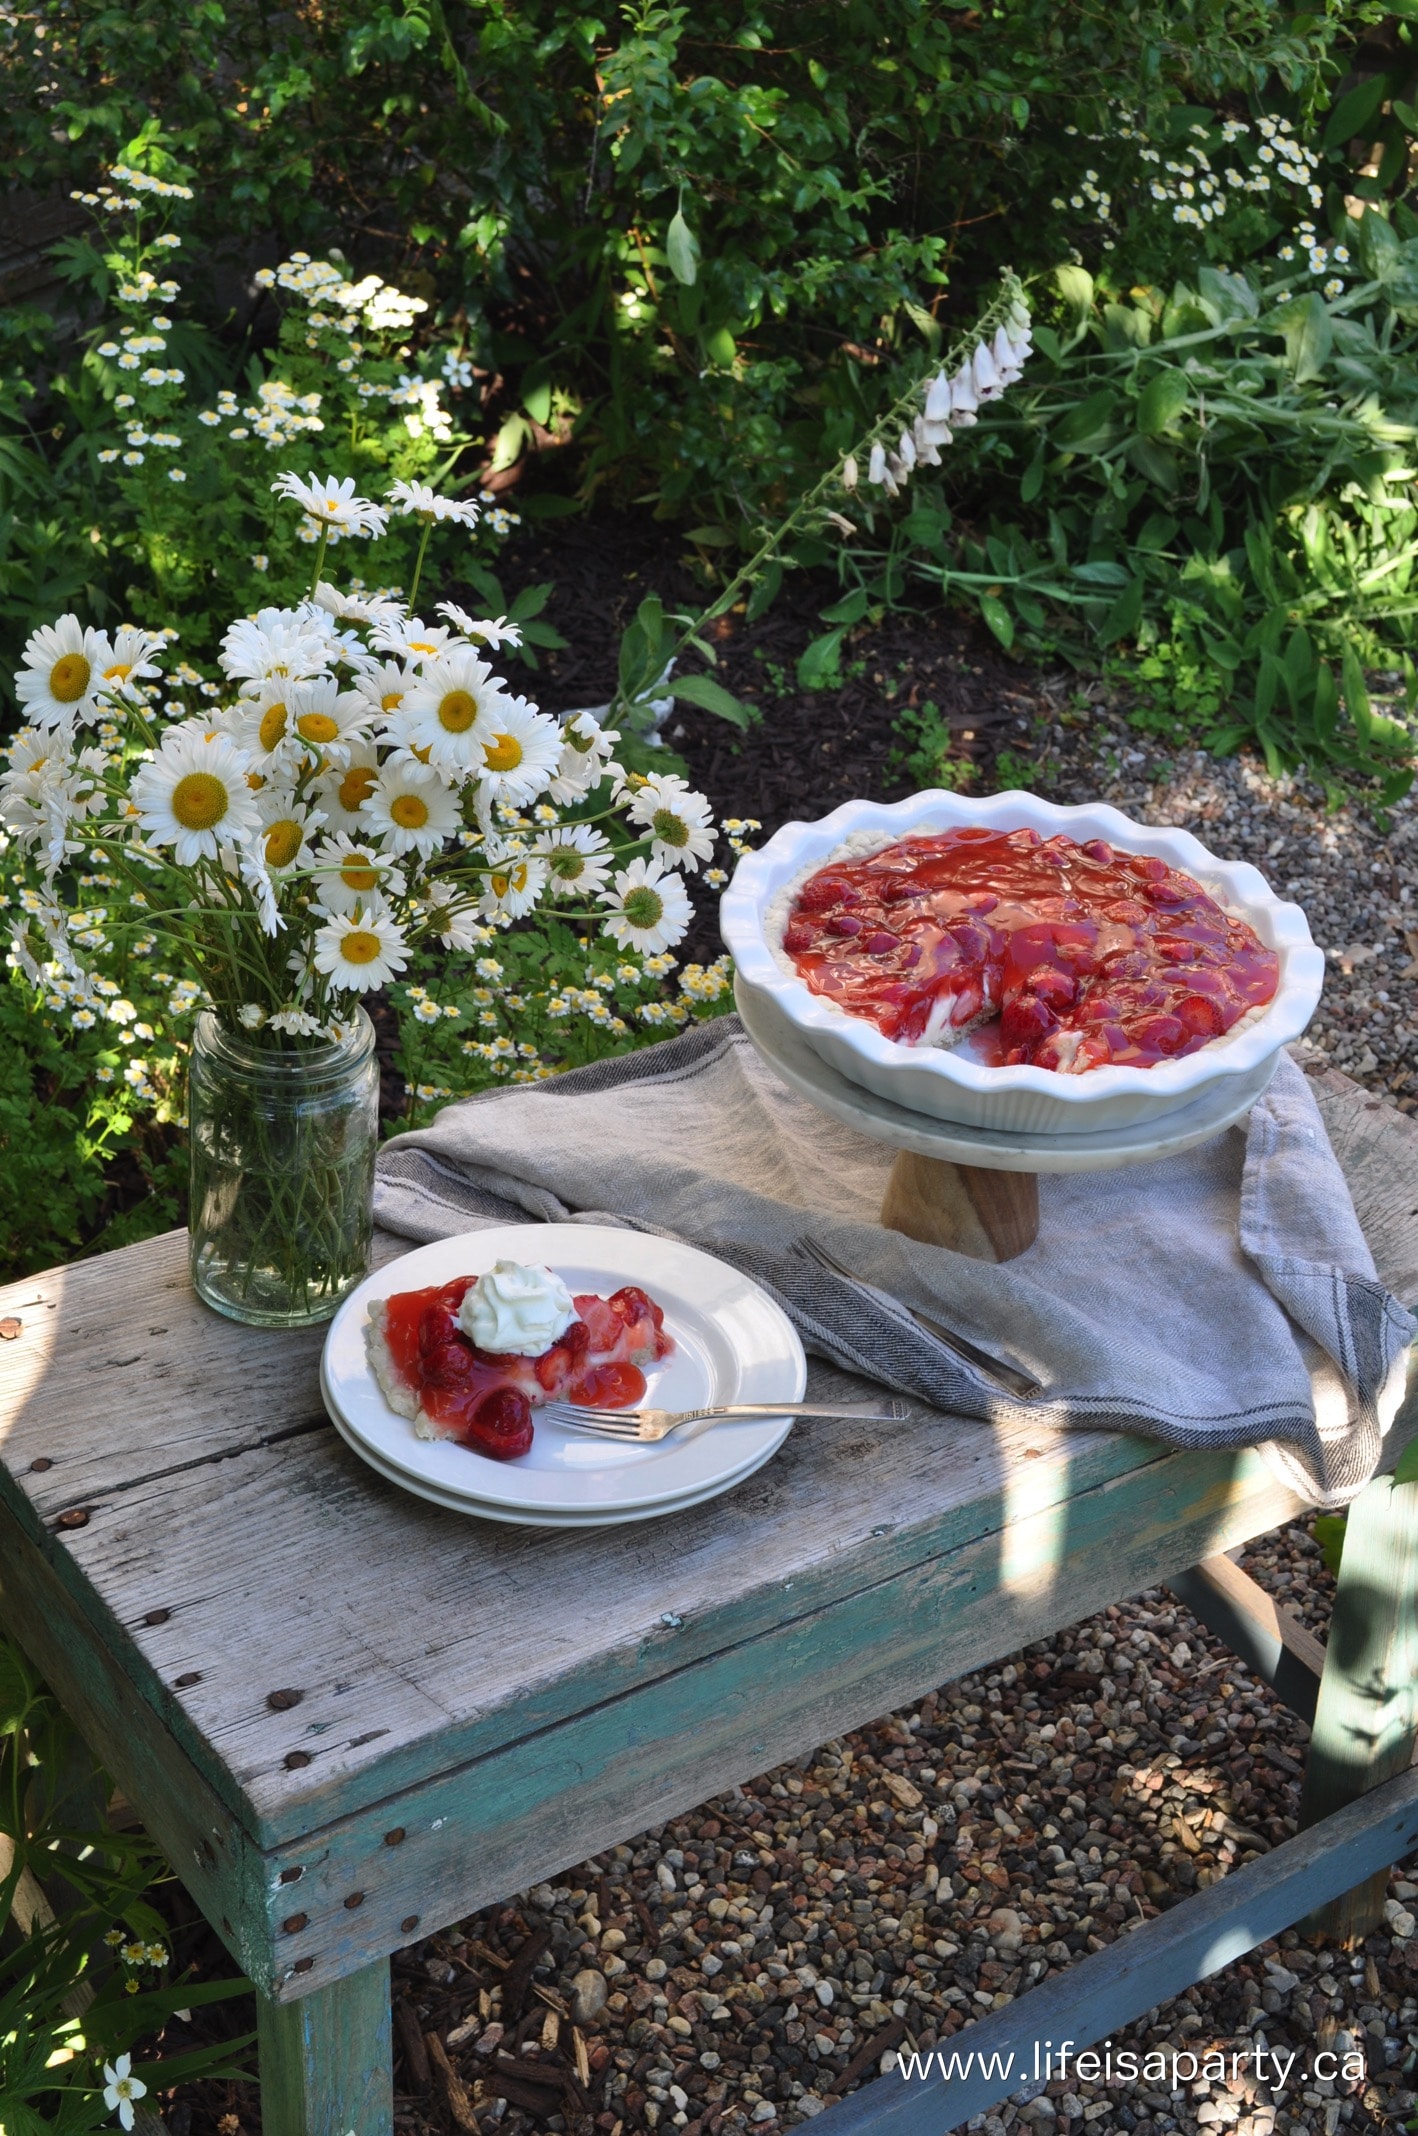
Forced Pussy Willows

While I was out foraging, I picked a few pussy willow branches.  They weren't out yet, so I brought them into the warm house and put them in a vase of water to force them.  I noticed yesterday though, after one warm day they were starting to come out outside too.

Spring Woodland Easter Brunch

Along with pussy willows, nothing says spring to me like tulips.  I picked up some and put them in simple mason jars.

Spring Woodland Easter Brunch

Paper Mache Mushrooms

To create more of the woodland feel, we made some paper mache mushrooms.

paper mâché mushrooms

I love the book pages for a whimsical look.  All the mushrooms I made are different sizes and colours.

woodland tablescape

Along with the mushrooms, I added in some sweet little bunnies I found at the dollar store.

Spring Woodland table

Cement Eggs

I also used my DIY cement Easter eggs -see how I made them here.  They add such a fun rustic look.
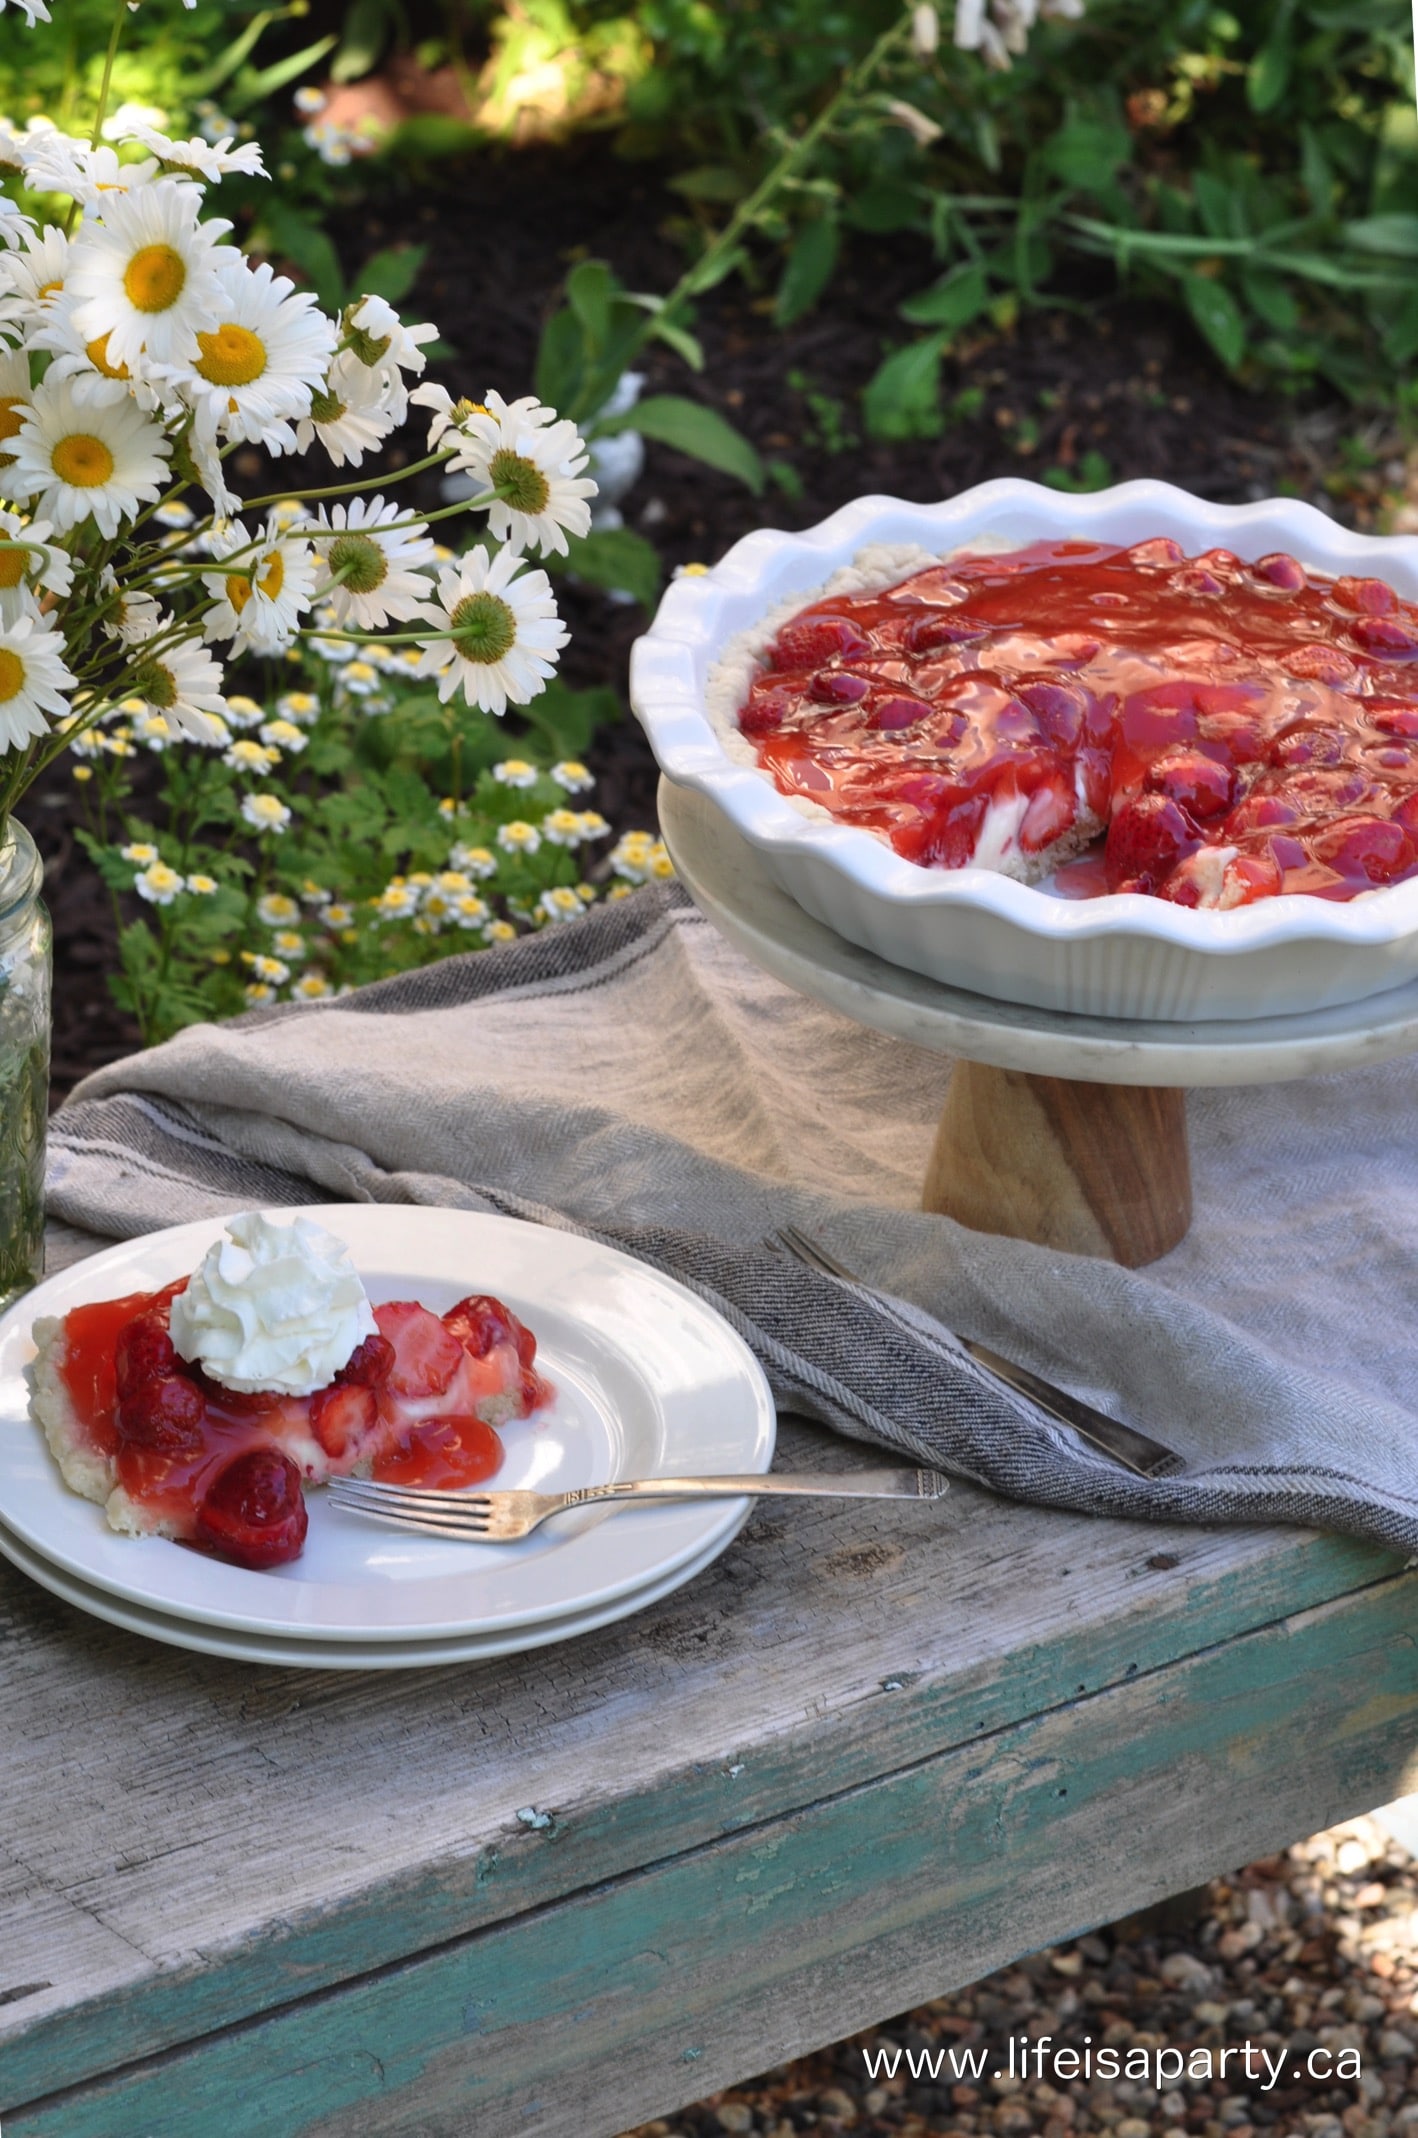
Easter woodland table

I also added a few pretty nests, a birdie, and some sweet butterflies -with the wire poked into the moss to make them fly. 😉

spring woodland table ideas

I had so much fun adding in little bits here and there, imagining spring in the woods.

Easter table

Placesettings

For the place settings, I started with some rustic wood chargers.

Easter brunch decor

At everyone's spot a special little spring treat -chocolate coconut nest cookies, find the recipe here.

Spring Woodland tablescape

Easter Brunch Menu

Once the scene was set, it was time to think about the menu for hosting Easter Brunch.

Easter brunch menu

This brunch menu is a real winner, with lots of easy make aheads, giving you time to enjoy the party too.

Easter brunch menu
  • quiche
  • ham
  • French toast casserole
  • fruit tray
  • hot cross buns
  • scones
  • nest cookies
  • moss bunny cookies
  • chocolate mousse Easter eggs

I made an easy quiche, I like this recipe (I find the filling is enough for two).  I made one broccoli cheddar, and one spinach and swiss.  They're quick to make and a real crowd pleaser.

Along with the quiche we served a ham, again a simple choice, and great leftovers.  

We also made French Toast Casserole. Find our French Toast Casserole recipe here. We love it and make it every year for Christmas Day.  We like to serve it with a custard sauce.

Easter Brunch menu

We also made a fruit tray, and I picked up some hot cross buns and scones at the bakery.

For a sweet treat we had the nest cookies and we were inspired by Semi Sweet Design's moss look bunnies.  I cheated with store bought gingerbread dough that we just had to roll out and decorate, and they turned out really cute, and definitely mossy looking.

Easter brunch menu

For our final special treat we made chocolate mousse Easter eggs, and they were so, so good.

Easter brunch menu

It was a feast indeed, and we had such a nice time connecting with some dear old friends, and lingering at the table.

Easter brunch menu

With hosting Easter Brunch, life really is a party!

Easy DIY Spring Easter Diorama Ideas

Mar 24, 2016 · 2 Comments

How to make a spring diorama.

Miniature Spring Easter Dioramas: Easy to make spring diorama in a mini tuna tin, Altoids tin, and sardine tin tutorial.

How to make a spring diorama.
[feast_advanced_jump_to]

Why is everything so much cuter when it's miniature?  These spring Easter dioramas are the sweetest.  I had so much fun creating these miniature scenes and they're such a fun craft idea.  They look adorable as part of your Easter decor.

I think miniature doll houses are on the rise, and have to admit I'm kind of into it.  Maybe it's fulfilling childhood fantasies, or maybe it's just that anything tiny is just so very, very cute.  I love these little dioramas since they're fairy size.  They make me think of little fairies getting ready for spring, but they're not too precious since they're made of old tins.  And you know, fairies really are master up-cyclers, ;). Once you start making these, you'll be looking at every little tin you see with a whole host of new opportunities for it to become the latest version of your diorama base.

So here is how I made them, they're pretty simple to put together, just a bit of gathering up supplies…which was pretty fun in itself.

Altoids Garden Diorama

The gardening diorama is made out of an Altoids tin, which I found at Shoppers Drug Mart, good news if you're Canadian and wondering where to get one.

Diorama in an altoid tin

I found the little garden tools at Michaels, and they inspired the gardening theme of this first little diorama.  You could also find them at a miniature doll house shop, it's a great place to look for craft supplies for dioramas.

how to make a diorama in an altoids tin

The background for this one is a free printable of an antique seed package…I chose carrots because of Easter.  You can play with sizing on your printer.  I think I printed this one at 60% for the perfect fit in the back of the diorama.

I'm loving moss right now.  It's so spring-y and perfect here behind the little hand tools.

how to make a diorama in a altoids tin

On the other side, I printed out a Bible page for the background.  Spring makes me think about seasons, and "a time to plant…"  Ecclesiastes Chapter 3 is where it's found.  I resized it, printed it, and then antiqued it with just a little brown paint rubbed in to make it look like it was a part of some vintage treasures.

The adorable fairy sized seed packages were found at a miniature store, and are really cute.  When I came home from that little shopping trip I realized I could have probably used a free printable like this one, so here's the link for you.  You can just print them, cut them out, and glue them together.  There's so many free digital designs like this available now for free personal use.  One of the best parts of making dioramas is making them full of little details like this.

Spring Diorama in a Altoids tin

I added in a little toy bunny, and his tiny carrot, these were a dollar store find in the toy section.  I think the fairies would approve.

Mini Tuna Can Spring Nest Diorama

The little nest diorama was inspired by some tiny Easter nests at the dollar store.  The nests had little yellow Easter chicks in them, I removed them and added some foam eggs I had, and a feather.

spring nest diorama

The nest is resting in a tuna tin.  Not a regular size one, a mini one.  Be sure to wash it in some warm soapy water to remove any lingering tuna scent.  I used white glue thinned with a little warm water to glue in a background of torn old book pages as layers of paper mache.  The spring banner is made with rubber stamps.  It's fun to make little handmade pieces like this to include.

miniature nest diorama

I found the perfect twig to hold my little nest and added it and the nest to the tin with my glue gun and some hot glue.  Lastly I added a little glue to the bottom of the egg and added them one by one into the nest. This was such a fun project.

sardine tin diorama

Sardine Tin Easter Egg Diorama

Lastly, and probably my favourite is the little Easter egg dying scene diorama.  I was inspired by something similar I spied at the miniature store.  Here is my DIY version.

I picked up the tiny cups, one plate, and the sweet little Easter basket there.

how to make a diorama

The eggs are made out of white polymer clay. I used paint on the front of the egg for some to make them to look dyed.   Also, I added some paint to the cups for the dye.  

A little mod podge added to the paint in the cups helps to make it a little more shiny.  The penny will give you an idea of the scale.  The Easter grass is regular Easter grass that I just cut to a smaller width and length.  I filled the basket with the Easter grass and each finished egg.  And the other eggs are waiting on the little plate for their turn in the dye.  I attached them to the plate with a little hot glue on the edge of the egg.

Spring Diorama in a sardine tin

The newspapers are a free printable from here.  Look for digital items like this online and print at home, resizing with your printer to get the perfect fit.  I added just a dab of the paint on some paper towel and added to the newspaper.  I thought it made the scene look more real, like the Easter egg dye had spilled on the newspaper a little.

This scene all takes place in an old sardine tin.  I have to confess I threw out the sardines, I just wanted the cute little tin.  I used extraordinary care to leave the lid attached and curled back for a cute effect.

Easter egg Spring Diorama in a sardine tin

Displaying Your Dioramas

These are definitely my favourite little project of late.  I love how tiny they are, how sweet, how detailed, and how spring like these dioramas turned out.  I found such special goods at the miniature shop for creating these special little scenes.

These are so little I would place them somewhere where they'll catch your eye.  I thought they looked great as a little grouping on the wall, or perhaps placed on a little shelf together, or even on the mantel.  For creative entrepreneurs they might make a great item to sell at spring craft fairs or as an etsy offer for creative small businesses as made-to-order items.  I hope the full details of the tutorial help you create your own Easter dioramas this spring.

spring dioramas tutorial

With Miniature Fairy Garden Spring Dioramas, life really is a party!

More Inspiration

You might also like our Fairy Gardens in a Jar tutorial here.

How To Make A Miniature Fairy Garden In A Jar: Tutorial using polymer clay to make adorable mushrooms and a fairy house, and then arrange in a teeny, tiny glass bottle.

Also check out our Mini Hearts in a Bottle here.

You might also enjoy our Felt Mushrooms tutorial here.

DIY Felt Mushrooms: easy to sew red and white polka dot mushrooms with felt, and cork and wooden spool stems. Perfect for your spring decor.

Twig Houses

Mar 22, 2016 · 16 Comments

DIY twig houses.

Twig Houses: Easy DIY with twigs, glue, and paint to make these decorative twig houses.

DIY twig houses.
[feast_advanced_jump_to]

This month for #12monthsofDIY our material is wood!  There's probably a million great DIY's you could do with wood, but I wanted to give these sweet little twig houses a try, and love, love, love how they turned out.  I first saw some on "The Block" an Australian decorating show that I might be slightly addicted to…anyway they're been on there a few times and I always thought they were really cute.  So I went looking for them and found these, gorgeous, and not available here.  What's a DIYer to do…have a go at them.  The originals are probably made with nails, but we're keeping it simple with gold old hot glue.  Here's how I made them.

forest with dogwood growing

Materials:

  • twigs
  • hot glue
  • paint

How To Make A Twig House:

First job is to find some twigs.  I used dogwood because there is lots growing in the forrest behind our house, and the branches looked pretty straight.

Cut your twigs into long pieces removing most of any twigs at the side.  I did choose to leave a few,  and I think they look really good with just a couple pieces like that.

Now, decide on how big you want to make your first twig house and cut out two matching side pieces, two roof pieces and a shorter piece for the bottom base.  Make sure the side pieces are cut on angle to create the roof slope, and then trim your roof pieces so they match up.  You don't need to get your protractor or anything here.  A little wonky-ness adds character.  Now use some hot glue to attach all your pieces together.

Then, make a copy of this house front for the back.

Next, decide on the length of the sides, and glue them in place on one side, and then to the side.  Now it's starting to look like a house.

Lastly, find a piece for the top roof piece, and then two more short ones for the sides at the top.  Glue them in place and your little house structure is done.

Twig Houses made of dog wood branches

To finish these sweet little houses off, I painted them with mineral paint.  It was my first time working with this paint and it was really nice to work with; great coverage, pretty colours, no bad smell, and easy clean up.  I gave my little houses two coats.

how to make a Twig House out of branches

You can make these in all different sizes, I did three, all slightly bigger than the next. They'd be perfect for some nesting dolls to live in.

diy Twig Houses

Variations:

You can see here how I left a few little twigs sticking out on some of the pieces, adds a little more character.

how to make a decorative Twig House

I love how the details of the wood show through, but how the paint colours make them look a little more modern.

make your own Twig House

Remember they don't have to be perfect, a little crocket works.

pretty diy Twig Houses decorative decor

I like the white and then just one pretty pinkish one.  These would be great done in bright spring colours too…think yellow, turquoise, the possibilities are endless.

Twig Houses: Easy DIY with twigs, glue, and paint to make these decorative twig houses.

With pretty DIY twig houses, life really is a party.

You might also like our DIY Mason Jar Oil Lamps here.

DIY Mason Jar Oil Lamps: Simple to make and so beautiful. Perfect for a party, wedding centerpiece, or just in your home.

Also check out our DIY Pampas Grass Wreath here.

You might also like our Black Paint Dipped Brass Candlesticks here.

How To Make Cement Easter Eggs

Mar 9, 2016 · 7 Comments

DIY cement Easter eggs.

How To Make Cement Easter Eggs: use some dollar store plastic Easter eggs, cooking spray, and cement for this easy and inexpensive DIY.

How to make cement Easter eggs.
[feast_advanced_jump_to]

I thought it would be fun to make some Cement Easter Eggs to add into my spring decor.  I love how they turned out, and they're pretty easy to make too.  So lately I've been loving cement, and I love it mixed with some vintage pieces for that rustic feel, that helps keep things a little edgy and not too sweet.  These are a great addition to any spring decor and they're really cute for Easter too.

Easter Egg Moulds

We used regular plastic Easter eggs from the dollar store as our cement moulds.  These are really inexpensive and easy to find.  It can be a little hard to get the set cement out of the plastic eggs.  To help with that you want to make sure you spray the inside of the mould well with some cooking spray to help it not to stick to badly.

Even with cooking spray though, some of our eggs were really tricky to get out.  We ended up breaking the plastic dollar tree eggs off of them, so don't count on being able to reuse the plastic eggs again after the un-moulding.

Using plastic eggs as the moulds also results in a ridge around the the centre of the egg, where the egg closes.  These rough edges aren't too hard to remove, when you first remove the egg from the mould, before the cement is set really, really hard.  There are a few different ways to remove the ridge, but they all require a little patience.  The easy way is to use the edge of crafting knife to chip it away.  You could also try using sandpaper.

How To Make Cement Easter Eggs: See how to use plastic Easter eggs as moulds to make your own cement eggs.

Materials:

  • Plastic Easter Eggs
  • Cement Mix
  • Drill
  • Baking Spray
How To Make Cement Easter Eggs: See how to use plastic Easter eggs as moulds to make your own cement eggs.

How To Make Cement Easter eggs:

1. Prepare Your Moulds

The first thing to do is to prepare your moulds.  We used standard plastic Easter eggs.  We began by drilling a large-ish hole in the top of the egg.  Do this for each egg.  I used an old egg carton to hold my moulds while we worked, since eggs don't have a flat bottom and won't stand up on their own.  

Once the small hole is drilled, spray both sides of the inside of the egg mould with baking spray, this will make it easier to get your egg out later.

2. Mix Cement

Once your moulds are prepped the next step is to mix up your cement, making sure to stir it well so it's fully combined, and always work in a well ventilated area.  You want your cement mixture to be not too dry, and not too wet of a consistency.  If it's too dry add a some extra water a little bit at a time.  If it's too much water it will be a goopy mess, so add some more cement mix to make it dryer.

3. Fill The Eggs

To fill your eggs start by filling each side of the mould separately, and then try to snap the bottom of the egg and the top of the top of the egg together.  Working with the pointy end of the egg with the hole in the top, gently tap your full egg on a hard surface to try and get any air bubbles out of the cement mix.  Now if there's any room at the top, use a plastic spoon to next pour a little more cement through the hole.  I also used a lollipop stick to push some more in the small opening at the top, and tapped it down.

How To Make Cement Easter Eggs: See how to use plastic Easter eggs as moulds to make your own cement eggs.

4. Un-Moulding

Now leave your full concrete Easter eggs to set overnight.  Overnight seemed to be a good length of time.  You want your cement to be set, but not set too hard yet.  Once your cement is set it's time to take them out of the plastic container moulds.

This was the hardest part of the job.

A few came out easily, others were a little more tricky.  Usually when you're opening these eggs, you squeeze it a little to pop it open, but when it's full of dry cement you can't squeeze it.  I used a knife in the crack and pried them open.  Two of the plastic egg moulds broke as I was removing them.  I did get all six of mine out, and they all turned out great, it just took a little elbow grease for some. 😉

How To Make Cement Easter Eggs: See how to use plastic Easter eggs as moulds to make your own cement eggs.

5.  Sand and Smooth

Once the eggs are out of the moulds, you might want to use a little sandpaper or the edge of a knife to smooth out the bumpy surface where the egg shape clicked together.  After a day of setting in the moulds the cement will still be soft enough when you take them out to scrap it smooth quite easily.

Recipe

DIY cement Easter eggs.

How To Make Cement Easter Eggs

No ratings yet
Print Pin Rate
Cook Time: 30 minutes minutes
Additional Time: 12 hours hours
Total Time: 12 hours hours 30 minutes minutes
Author: Dannyelle Nicolle-Ramjist

Equipment

  • Plastic Easter Eggs
  • Cement Mix
  • Drill
  • Baking Spray

Materials

  • Plastic Easter Eggs
  • Cement Mix
  • Baking Spray
  • Egg Carton

Instructions

  • Prepare the Moulds
    The first thing to do is to prepare your moulds. We used standard plastic Easter eggs. We began by drilling a large-ish hole in the top of the egg. Do this for each egg. I used an old egg carton to hold my moulds while we worked, since eggs don't have a flat bottom and won't stand up on their own.
    Once the small hole is drilled, spray both sides of the inside of the egg mould with baking spray, this will make it easier to get your egg out later.
  • Mix Cement
    Once your moulds are prepped the next step is to mix up your cement, making sure to stir it well so it's fully combined, and always work in a well ventilated area. You want your cement mixture to be not too dry, and not too wet of a consistency. If it's too dry add a some extra water a little bit at a time. If it's too much water it will be a goopy mess, so add some more cement mix to make it dryer.
  • Fill The Eggs
    To fill your eggs start by filling each side of the mould separately, and then try to snap the bottom of the egg and the top of the top of the egg together.  Working with the pointy end of the egg with the hole in the top, gently tap your full egg on a hard surface to try and get any air bubbles out of the cement mix.  Now if there's any room at the top, use a plastic spoon to next pour a little more cement through the hole.  I also used a lollipop stick to push some more in the small opening at the top, and tapped it down.
  • Un-Moulding
    Now leave your full concrete Easter eggs to set overnight. Overnight seemed to be a good length of time. You want your cement to be set, but not set too hard yet. Once your cement is set it's time to take them out of the plastic container moulds.
    This was the hardest part of the job.
    A few came out easily, others were a little more tricky. Usually when you're opening these eggs, you squeeze it a little to pop it open, but when it's full of dry cement you can't squeeze it. I used a knife in the crack and pried them open. Two of the plastic egg moulds broke as I was removing them. I did get all six of mine out, and they all turned out great, it just took a little elbow grease for some.
  • Sand and Smooth
    Once the eggs are out of the moulds, you might want to use a little sandpaper or the edge of a knife to smooth out the bumpy surface where the egg shape clicked together. After a day of setting in the moulds the cement will still be soft enough when you take them out to scrap it smooth quite easily.

You could also paint these with some acrylic paint, or tape off a section and paint it, or apply a sealer to the cement for more of a wet look.  I kind of like these ones with a rougher look with the raw cement, so i left mine as they were.

How To Make Cement Easter Eggs: See how to use plastic Easter eggs as moulds to make your own cement eggs.

I'm loving how the Cement Easter Eggs look mixed with a little moss or in this rustic vintage metal basket.  They're also really cute in a egg holder.  They make a great addition to your Easter table as well.  They could also be really cute in your garden for spring arranged with a garden bunny statue.

This is a pretty simple DIY project, and very inexpensive to make as well.  You could look for different sizes of plastic eggs to use as your moulds and make a whole array of these cement eggs for spring.

How To Make Cement Easter Eggs: See how to use plastic Easter eggs as moulds to make your own cement eggs.

With Cement Easter Eggs, life really is a party!

More Easter Egg Inspiration

Also check out our Nail Polish Marbled Easter Eggs here.

Nail Polished Marbled Easter Eggs: easy water marbling with nail polish is the perfect modern touch to your Easter eggs.

You might also like our Gold Leaf Easter Eggs here.


No-bake Chocolate Oatmeal Cookies

Mar 4, 2016 · Leave a Comment

Chocolate oatmeal no bake cookies.

No Bake Chocolate Coconut Oatmeal Nest Cookies: An easy no-bake cookie, perfect for Easter, made to resemble little nests and full of Easter eggs.

Chocolate oatmeal no bake cookies.
[feast_advanced_jump_to]

These No Bake Chocolate Coconut Oatmeal Nest Cookies are an old family favourite.

I grew up on these no bake cookies.  My mom called them Chocolate Drops, they're sometimes called Macaroons, or No-Bake Chocolate Coconut Oatmeal Cookies, or Chocolate Coconut Macaroons.  Whatever their name, they're delicious.

Easy

These cookies are so easy to make because they don't require any baking.  They come together on the stove top, where the sugar mixture is heated before adding in the other ingredients.  Then it's all quickly stirred together before the it starts cooling and the cookies start to set.  Finally these cookies are dropped by spoonful onto some parchment paper and left to set and harden.  They come together in less than 15 minutes and a good idea to make if you're looking for something easy to bake to that everyone will love.  

My grandma favored these cookies during summer months when the house was hot and she didn't want to have turn on the oven to bake and make the whole house even hotter.  If you're looking for some no bake treats for the same reason than this simple cookie recipe is perfect.

My mom almost always made this no bake cookie recipe on a weeknight after dinner since they're pretty quick and easy, so we could take some to school the next day for our lunch.  When she didn't have anything sweet in the house, this one of her favorite easy recipes to use.  I have many memories of opening up my wax paper package of these at recess for a real treat.  If you're looking for an easy cookie recipe, this delicious recipe is perfect.  It will only take you about 15 minutes to make a batch of these, and then another ½ hour for them to set.

Nest Cookies

I like making them in the spring and for Easter with the addition of some little Easter eggs that make them resemble the sweetest little nests.  But you can make them as regular cookies too.  Either way they're delicious.  And any one with a sweet tooth, or a who is a chocolate lover will love these no bake chocolate oatmeal cookies..

how to make Chocolate Coconut Macaroon Nest Cookies

Oats

These cookies are made with oats.  There are many different oats, so which kind of oats are best for these no bake cookies?  We use instant rolled oats for these cookies.  Instant rolled oats are made by steaming the oats and then rolling them flat between steel rollers.  This gives the oat a larger surface and therefore a quicker cooking time.  Finally instant oats are then pre-cooked, dried and chopped into smaller pieces.  This makes them cook in an instant, which helps these cookies to set quickly and makes them very tender.  You can also use quick oats or quick-cooking oats for this recipe, they'll just be slightly chewier.  I would not use large flake oats or old-fashioned oats for this recipe.

Coconut

This recipe has desiccated shredded coconut in it.  The coconut adds delicious flavor and texture to the cookies.  We've used sweetened coconut for this recipe, but you can also use unsweetened shredded coconut, since these cookies are already very sweet.  Sometimes unsweetened is a little harder to find in the grocery store, but either will work fine in this recipe.  I would not use coconut flakes for this recipe because the pieces are too large.  Desiccated coconut is coconut that has been dried.

Gluten Free

If you're looking for a gluten free cookie recipe than these are perfect.  None of the ingredients include gluten, including the mini eggs.  Any one with a gluten free diet is free to enjoy these delicious cookies.

Do make sure to check the label for gluten free oats.  While oats are naturally gluten free, in some factories they may come in contact with other grains, so do make sure to check your particular oats to make they are gluten free before using them is you're serving them to someone who suffers from celiac disease.

Troubleshooting

These cookies are very easy to make, but there are a couple common mistakes that sometimes happen.  Once your mixture comes to a boil, begin timing it and let it boil for 1 minutes, no shorter and no longer.  

If you don't boil the mixture long enough it can result in cookies that don't set properly and that are gooey and sticky because the sugar mixture did not get hot enough. 

If on the other hand you boil your sugar mixture for too long, the cookies will not set properly either and instead become crumbly and dry.

One other factor that can effect these cookies setting properly is the humidity.  If you make these cookies on a very humid day, you may need to let the sugar mixture a little extra so that they will set properly.  Up to an extra minute of boiling on a very humid day should help these cookies to set.

easy no bake nest cookies for spring or easter

Store these cookies in a airtight container at room temperature.

This classic recipe is such a favorite made with simple ingredients you probably have in your pantry.  These are sure to become one of your favorite no bake recipes.  I love the texture of the oatmeal and coconut together and the sweet chocolaty taste of this great recipe.  And they just might be the easiest cookie recipe ever too.

These no bake oatmeal cookies made into little nests are the perfect addition to any spring or Easter get together.  And your kids will love them, and the little Easter eggs inside of them.  This sweet treat looks great on an Easter cookie board or dessert table.  These are sure to become on of your favorite cookie recipes.

Chocolate Coconut Oatmeal Cookies recipe

Recipe

Chocolate oatmeal no bake cookies.

No-bake Chocolate Oatmeal Cookies

Easy no-bake oatmeal and coconut cookies.
No ratings yet
Print Pin Rate
Course: Desserts
Cuisine: American
Prep Time: 10 minutes minutes
Cook Time: 3 minutes minutes
Total Time: 13 minutes minutes
Servings: 36
Calories: 125kcal
Author: Dannyelle Nicolle-Ramjist

Ingredients

  • 2 cups white sugar
  • ½ cup shortening
  • ½ cup milk
  • 3 cups instant rolled oats
  • 6 tablespoon cocoa powder
  • 1 cup shredded sweetened coconut
  • 1 tsp. vanilla extract
  • ¼ teaspoon salt
  • 72 Cadbury mini eggs optional

Instructions

  • In a large mixing bowl combine the rolled oats, cocoa, and coconut. Set aside.
  • Combine the sugar, shortening, milk and salt in a medium saucepan.
  • Bring to a boil over a medium-high heat and boil 1 min, no longer.
    Remove from the heat and add vanilla. Then stir in the dry ingredients that you set aside earlier.
  • Stir well and quickly to combine everything. While the chocolate mixture is still hot, drop by tablespoon full onto parchment paper spread on a table. The mixture will be hot, so use two spoons, or a small cookie scoop. Be sure to work quickly before the mixture begins to cool and harden.
  • While the cookies are still hot, use the back of a spoon to create a nest indent and then press a few eggs into each. Allow to set completely and enjoy. Store in an airtight container. Makes about 3 dozen.

Nutrition

Serving: 1cookie | Calories: 125kcal | Carbohydrates: 18g | Protein: 2g | Fat: 6g | Saturated Fat: 3g | Polyunsaturated Fat: 1g | Monounsaturated Fat: 1g | Trans Fat: 0.4g | Cholesterol: 1mg | Sodium: 21mg | Potassium: 56mg | Fiber: 1g | Sugar: 13g | Vitamin A: 11IU | Vitamin C: 0.1mg | Calcium: 13mg | Iron: 1mg
Tried this Recipe? Tag me Today!Mention @LifeisaParty or tag #lifeisaparty!

With easy homemade No Bake Chocolate Coconut Oatmeal Nest Cookies, life really is a party!

More Easter Recipe Inspiration

Want another easy Easter recipe?  Check out these Chocolate Mousse Easter Eggs.

Also check out our Black Forest Cake in a Mason Jar recipe here.

You might also enjoy our No-Bake Cheesecakes in a Mason Jar here.

Lasagna

Feb 26, 2016 · 1 Comment

Lasagna recipe.

Easy Layered Lasagna Recipe: this is a great make-ahead, and it freezes well. Easy to put together, and sure to be a family favourite.

Lasagna Recipe.
[feast_advanced_jump_to]

My mom's been making this easy layered lasagna recipe ever since I can remember.  It's simple, delicious, a crowd pleaser, and a great make ahead.  Tick, tick, tick, ticking all the boxes.  It's perfect for these cold days of winter when everyone is longing for hearty, delicious comfort food.

Easy Lasagna with cottage cheese

Make Ahead

It's great as a make-ahead, and favourite of hers for company, since she can make it in the morning or the day before and not have to worry once the company arrives.

mom's easy lasagna

This lasagna also freezes great.  Just put it together, wrap it tightly in plastic wrap and freeze it un-baked.  When you want to have it, pull it out of the freezer and into the oven, adjusting the cooking time to a little longer if cooking from frozen lasagna.

What's The Order For Layering Lasagna?

This classic lasagna recipe has two layers.  It starts by adding a layer of savory meat sauce with vegetables to the bottom of the pan.  The next layer is the pre-boiled 3-4 lasagna noodles.  On top of that is grated mozzarella cheese, and the the layer of cottage cheese.  Then the process repeats for the second layer with the meat and vegetable tomato sauce, and final layer of pasta and mozzarella cheese.  There is no second layer of cottage cheese, and the dish is finished with the last layer of parmesan cheese sprinkled over the top. 

The cottage cheese is layered into the middle of the lasagna.  And the top layer is a the noodles covered in mozzarella cheese and parmesan cheese, so that it melts and browns on top perfectly.

This is the best lasagna recipe with the perfect ratio of meat and vegetable tomato sauce to the layers of noodles and different cheeses, and the cottage cheese in the middle adds creaminess and texture to the dish.  

Noodles

We like to pre-boil the noodles for this dish before layering them into the lasagna for this classic recipe.  It does add another step to boil noodles, instead of using the no boil lasagna noodles for your layers of pasta.  We've tried both ways and found the no boil noodles are never as tender, and tend to dry the lasagna out.  It only takes about 10 minutes to pre-boil your noodles for this dish and is definitely worth the effort when you're making homemade lasagna from scratch.  You can use the no boil lasagna noodles in this dish if you prefer, but we prefer to use the regular lasagna noodles and cook the pasta in boiling water first for more tender noodles.

how to make Lasagna with cottage cheese
Easy Lasagna with cottage cheese recipe

Store any leftovers in the refrigerator in a airtight container, or cover the baking dish with tightly with plastic wrap for the next day.

The smell of my Mom's easy lasagna cooking last night brought back lots of childhood memories, and anticipation of a great dinner.  We love to serve this dish with a big salad and some homemade garlic bread and little sprinkle of fresh basil.  Everyone always loves the corner pieces.  It's perfect for the next time you have a special occasion to celebrate.  We love that it's easy to put together and doesn't take a whole day to make, but is still so delicious.

Recipe

Lasagna recipe.

Mom's Easy Layered Lasagna

Easy layered lasagna with ground beef and cheese.
No ratings yet
Print Pin Rate
Course: Main
Cuisine: Italian
Prep Time: 30 minutes minutes
Cook Time: 1 hour hour
Total Time: 1 hour hour 30 minutes minutes
Servings: 8
Calories: 371kcal
Author: Dannyelle Nicolle-Ramjist

Ingredients

  • 1 lb. ground beef
  • 1 tablespoon olive oil
  • 1 green pepper diced
  • 1 medium onion diced
  • 2 cloves garlic minced
  • 8 oz. package of mushrooms sliced
  • 2 teaspoon olive oil
  • salt and pepper to taste
  • 650 mL jar spaghetti sauce
  • 28 oz can of tomatoes drained
  • 3 bay leaves
  • 7 lasagna noodles
  • 400 g package mozzarella shredded
  • 500 g container cottage cheese
  • 2 tablespoon parmesan cheese

Instructions

  • In a large pot of salted water, boil lasagna noodles for about 9 min. until they are al dente. And then drain the cooked pasta in a strainer and set aside.
  • In a large skillet, brown the ground beef over medium heat.
  • Remove the beef from the pan, and sauté the onions, peppers, mushrooms, and garlic in a olive oil. Add salt and pepper to taste. Sauté until the onions are transparent and peppers and mushrooms are softened.
  • Add the beef back into the pan with the sauteed vegetables, along with the jar of spaghetti sauce, drained tomatoes, and 3 bay leaves. Stir to combine, and then remove from the heat.
  • In a 9 x 11 baking dish, add half of the meat mixture as the bottom layer of the lasagna, to begin the layering process.
  • Next add a layer of lasagna noodles. Then grate half of the mozzarella cheese as the next layer.
  • Spoon the cottage cheese in an even layer as the next level.
  • Repeat the layers with the rest of the meat mixture, another layer of noodles and the second half of the grated mozzarella cheese layer. Finish my sprinkling the parmesan cheese over the top of the lasagna.
  • Bake in a 350 degree oven, for 40 - 60 min. Cover with aluminum foil for the first 30 min of baking, then remove for the last 10-30 min. of cooking so that the cheese gets browned and bubbly. (Remember to not eat the bay leaves -you should find three.)

Nutrition

Serving: 1g | Calories: 371kcal | Carbohydrates: 24g | Protein: 27g | Fat: 19g | Saturated Fat: 8g | Polyunsaturated Fat: 8g | Trans Fat: 1g | Cholesterol: 64mg | Sodium: 795mg | Fiber: 4g | Sugar: 8g
Tried this Recipe? Tag me Today!Mention @LifeisaParty or tag #lifeisaparty!
my mom's lasagna recipe

With my Mom's easy lasagna recipe, life really is a party!

More Recipe Inspiration

You might also like Gnocchi with and Italian Sausage.

Also check out our Unstuffed Zucchini recipe here.

Unstuffed Zucchini: the perfect quick and easy, one pot weeknight meal. We made cooking time quicker using zucchini zoodles.

You might also enjoy our Butter Chicken Pizza recipe here.

Butter Chicken Pizza: use frozen naan bread and jarred butter chicken sauce from the grocery store, for this quick and easy butter chicken pizza recipe.

Bunny Treat Bag With Free Pattern

Feb 24, 2016 · 10 Comments

Make your own bunny shaped treat bag sewing project for Easter.

Bunny Treat Bag: Linen Easter Bunny Drawstring Bag to sew, includes a free pattern and full tutorial on how to make it.

DIY bunny treat bag.
[feast_advanced_jump_to]

Easter is coming, and so for this month's #12MonthsofDIY Fabric Challenge, I thought it might be nice to make something for spring.

These adorable Bunny Treat Bags were a quick sewing project to put together, and are perfect for your Easter celebrations.

The Linen Fabric

I made them out of some lovely linen fabric.  Before I started sewing with the linen, I pre-washed it a couple of times in hot water with some white vinegar, and then I dried it in a hot dryer to soften it.  This method worked great, and made the fabric lovely and soft.  Also I love its rustic wrinkled look.  Here's how I made the Bunny Treat Bags.

Bunny Treat Bag Materials:

  • Linen Fabric
  • White Thread
  • Thin Ribbon
  • Black Embroidery Thread
  • Small Black Buttons

Instructions:

Free Bunny Treat Bag Pattern

1.  The free pattern for our adorable treat bags is available to subscribers in our free resource library. Just subscribe below for our instant access.

Print the free pattern and then cut it out.  Then pin it to the fabric and cut out two pieces for the bag, and four pieces for the ears.

Time To Sew

2.  Secondly, pin two of the cut out bunny ears  together and sew with a ¼" seam allowance, leaving the bottom open, so you can turn them right-side-out.  Next repeat with the other ear.  Then, use a pen or chopstick to help you turn the ears right-side-out.  (I used linen so there was no right side or wrong side of the fabric, if you use something else take care to sew the wrong sides together for the ears and the bag so that when you turn the seams to the inside of the pieces the good side of the fabric is showing.)

how to sew a bunny treat bag

3.  Next, pin the bag pieces together, and sew taking special care to not sew the top, as marked on the pattern, starting and stopping about an inch and a half from the top, on both sides.  This will be where we thread the drawstring through the bag.

sewing a bunny treat bag

4.  Then use an iron to press the ¼ inch seam open at the top of the bunny bags edges, and then stitch around it, on both sides of the bag.

Linen Easter Bunny Drawstring Bag

Add the Ears

9.  Now fold down the top of the bag, to create the channel for the drawstring.  Pin in place.  Then on one side, pin in place the ears that have been turned right-side-out already.  Next, carefully sew around the seam at the top of the bag.

how to a sew a drawstring bag

10. The next step is to turn the bag right-side-out.  Now cut two pieces of ribbon or twine for the drawstring.  Thread one through each side, and tie in a knot, using a safety pin to help you thread it through the channel.

how to make a drawstring bag

Add the Sweetest Bunny Face

11. Lastly, use the black embroidery thread to stitch an X for the little bunnies mouth, and sew on the two black buttons for eyes for the sweet bunny face.

Another option is to sew a cute pom pom on to the back as a bunny tail.

sew a bunny bag for easter

Recipe

Make your own bunny shaped treat bag sewing project for Easter.

Bunny Treat Bag With Free Pattern

No ratings yet
Print Pin Rate
Prep Time: 1 minute minute
Cook Time: 1 hour hour
Total Time: 1 hour hour 1 minute minute
Author: Dannyelle Nicolle-Ramjist

Equipment

  • Sewing Machine
  • iron

Materials

  • Linen Fabric
  • White Thread
  • Thin Ribbon
  • Black Embroidery Thread
  • Small Black Buttons

Instructions

  • Print the free pattern from our free resource library, and then cut it out. Pin it to the fabric and cut out two pieces for the bag, and four pieces for the ears.
  • Secondly, pin two of the cut out bunny ears together and sew with a ¼" seam allowance, leaving the bottom open, so you can turn them right-side-out. Next repeat with the other ear. Then, use a pen or chopstick to help you turn the ears right-side-out. (I used linen so there was no right side or wrong side of the fabric, if you use something else take care to sew the wrong sides together for the ears and the bag so that when you turn the seams to the inside of the pieces the good side of the fabric is showing.)
  • Next, pin the bag pieces together, and sew taking special care to not sew the top, as marked on the pattern, starting and stopping about an inch and a half from the top, on both sides. This will be where we thread the drawstring through the bag.
  • Then use an iron to press the ¼ inch seam open at the top of the bunny bags edges, and then stitch around it, on both sides of the bag.
  • Now fold down the top of the bag, to create the channel for the drawstring. Pin in place. Then on one side, pin in place the ears that have been turned right-side-out already. Next, carefully sew around the seam at the top of the bag.
  • The next step is to turn the bag right-side-out. Now cut two pieces of ribbon or twine for the drawstring. Thread one through each side, and tie in a knot, using a safety pin to help you thread it through the channel.
  • Lastly, use the black embroidery thread to stitch an X for the little bunnies mouth, and sew on the two black buttons for eyes for the sweet bunny face. Another option is to sew a cute pom pom on to the back as a bunny tail.

Ideas on how to use your Bunny Treat Bag

I liked the rustic, soft look of the un-ironed linen, but if you wanted a more crisp look you could iron the finished bag.

Linen Easter Bunny Drawstring Treat Bag: Quick to sew, includes a free pattern and tutorial on how to make it.

I thought these would be really sweet for an Easter table filled with Easter goodies and gifts.  What little girl or boy won't want to find one of these waiting for them…or grown up for that matter.

Easter Bunny Drawstring Treat Bag with free pattern

We filled ours with Easter treats, like chocolate and plastic eggs.  You could add gift tags with a names to use them as place cards for the table too.  They'd also be a really cute addition to any Easter basket.

Easter Bunny Treat Bag pattern

These would even be cute as a little purse for a little girl, and they're just the right size.

Linen Easter Bunny Drawstring Treat Bag

This step-by-step tutorial makes this a easy project for anyone who can sew.  

With a sweet little Linen Easter Bunny Treat Bag, life really is a party!

More Easter Inspiration

You might also like our Bunny Bait Easter Trail Mix here.

Bunny Bait Easter Trail Mix -trail mix, with some fun Easter additions like graham cracker bunnies, and Easter eggs, also a free printable Bunny Bait label.

Also check out How To Make Cement Easter Eggs here.

You might also enjoy Nail Polish Marbled Easter Eggs here.

Nail Polished Marbled Easter Eggs: easy water marbling with nail polish is the perfect modern touch to your Easter eggs.

Tortellini and Italian Sausage Soup

Feb 17, 2016 · 4 Comments

Tortellini and Italian sausage soup recipe.

Tortellini and Italian Sausage Soup: this hearty soup is a real crowd pleaser with tender pasta, loads of veggies, and delicious Italian sausage. Easy and sure to become a family favourite.

Tortellini and Italian sausage soup.
[feast_advanced_jump_to]

It's mid-February and snowy in our neck of the woods. It's soup season. This time of year, there's nothing better than a hot bowl of homemade soup, and this Tortellini and Italian Sausage Soup is a real family favourite.  I love to make a double batch of this and have it for a few days.  It's so good served with some nice fresh bread on a chilly day.  If you're looking for a hearty and delicious soup, this one is perfect.

This soup has a rich tomato broth base, and is filled with fresh vegetables, flavorful sausage, and tender cheese tortellini.  Your whole family will love it.  It's a complete meal in a bowl and pure comfort food.

how to make Tortellini and Italian Sausage Soup

Italian Sausage

We love to add italian sausage to this soup.  It's so flavorful and meaty, and adds so much to this soup.  We remove the casing from the sausage before frying it to create the ground sausage meat pieces.  

We usually use mild Italian sausage for this soup.  The sweet Italian sausage is a great kid friendly option, also great for anyone that doesn't like too much spice.  This pork sausage is full of flavor.  If you do like spicy foods, you can use hot Italian sausage for this recipe instead, and /or add some red pepper flakes to the soup for some more heat.

Tortellini

This soup is made with cheese-filled tortellini pasta.  The cheese flavor is a wonderful addition to the soup. I usually use frozen cheese tortellini for this soup, but you can use fresh tortellini if you prefer.  The fresh cheese tortellini will cook faster than the frozen, so check the instructions on the package for cooking times.  If I make a very large batch of this soup, I sometimes only add half of the tortellini at the beginning.  The tortellini floats to the top when it's cooked, so it's easy to serve it all on the first serving.  You can then cook cheese tortellini more separately to add it the next day.  If the pasta sits in the soup overnight it does sometimes become a little oversaturated with broth, and gets soggy.

Tomato Broth

The broth gets it tomato flavor from tomato paste and canned tomatoes.  Use diced tomatoes so that they're well distributed in the broth.  Combined with chicken stock and dry spices of salt, black pepper, garlic salt, and Italian herbs this delicious broth is full of flavor.  If you're on a low sodium diet, feel free to substitute low sodium chicken broth for the regular, and leave out the salt and garlic salt in the recipe.

Vegetables

This soup is full of veggies.  We've added carrots, zucchini, and corn for a great combination, along with onion and garlic for flavor.  We've used frozen corn for this soup, but if you're making it in late summer and corn is in season you can add fresh corn cut off the cob.

Italian Sausage Soup and Tortellini Soup

Store any leftover Italian sausage tortellini soup in a airtight container in the refrigerator.  

This soup is best the day it is cooked.  Stored in the fridge, the pasta can absorb the liquid from the soup and become soggy.  If you are making a large amount with leftovers, try only adding half of the pasta whey you cook it.  The pasta will rise to the top and be easy to eat in the first sitting.  The next day cook some tortellini separately and add it to the soup so that it isn't soggy.  If you still have leftover soup, store the cooked pasta that's been drained in a separate container in the fridge and add it to the other leftover soup before reheating each portion to avoid the soggy pasta problem.

Tortellini and Italian Sausage Soup recipe

If your kids love pasta as much as mine do…and I can only make spaghetti so often…then this flavorful tortellini soup is the perfect meal for your family, and it's packed with veggies and good stuff too.  It's easy enough to make even on busy weeknights and the perfect meal to look forward to after a long day.  This tortellini soup recipe is sure to be a family favorite.

Recipe

Tortellini and Italian sausage soup recipe.

Tortellini and Italian Sausage Soup

Tomato based soup with delicious pasta, Italian sausage, and vegtables.
5 from 1 vote
Print Pin Rate
Course: Soup
Cuisine: American
Prep Time: 15 minutes minutes
Cook Time: 40 minutes minutes
Total Time: 55 minutes minutes
Servings: 8
Calories: 678kcal
Author: Dannyelle Nicolle-Ramjist

Ingredients

  • 2 lbs Italian sausage
  • med. onion chopped
  • 2 cloves garlic minced
  • 3 med. carrots chopped
  • 1 can 28 oz. canned diced tomatoes
  • 8 cups chicken stock
  • 2 tablespoon Italian seasoning
  • 1 teaspoon garlic powder
  • 1 teaspoon salt
  • ¾ teaspoon fresh ground pepper
  • 2 small zucchini chopped
  • 2 cups frozen corn
  • 1 package 350 gram fresh or frozen cheese tortellini

Instructions

  • Remove the casing from the Italian sausage, and fry in a large soup pot over medium-high heat, Break up the sausage as it cooks into bite-sized pieces.
  • Once the sausage is browned, add in the chopped onion and garlic, and cook until the onion is transparent.
  • Add in the chopped carrots (I do rounds, cut in half again), the chicken stock, diced tomatoes, water, Italian seasoning, garlic powder, salt and pepper. Bring to a boil, and simmer with a lid for about 20 min.
  • Add in the chopped zucchini (again cut in rounds, and half again), and simmer for another 10 min.
    Lastly, add in your tortellini and frozen corn and cook according to the package directions -fresh is about 10 min., frozen is longer. Once the tortilla is tender the soup is ready to enjoy.

Nutrition

Serving: 1g | Calories: 678kcal | Carbohydrates: 49g | Protein: 36g | Fat: 38g | Saturated Fat: 14g | Polyunsaturated Fat: 27g | Cholesterol: 90mg | Sodium: 1696mg | Fiber: 4g | Sugar: 10g
Tried this Recipe? Tag me Today!Mention @LifeisaParty or tag #lifeisaparty!
Tortellini and Italian Sausage Soup

With a hot bowl of homemade tortellini and Italian sausage soup on a cold winter day, life really is a party!

More Recipe Inspiration

You might also like our Unstuffed Zucchini recipe here.

Unstuffed Zucchini: the perfect quick and easy, one pot weeknight meal. We made cooking time quicker using zucchini zoodles.

Also check out our Gnocchi with Mushrooms and Italian Sausage recipe here.

You might also enjoy our Easy Lasagna recipe here.

Easy Lasagna with cottage cheese: this is a great make-ahead, and it freezes well. Easy to put together, and sure to be a family favourite.

DIY Cement Heart Place Card and Photo Holders

Feb 11, 2016 · Leave a Comment

DIY cement photo holders.

DIY Cement Heart Shaped Place Card Holders or Photo Holders: easy and inexpensive to make, perfect for your table, wedding, or Valentine's Day.

DIY cement photo holders.
[feast_advanced_jump_to]

I love the look of cement and thought it might be fun to make some little DIY Cement Heart Place Card and Photo Holders.  There were simple to make and came out really well.  

I used them for our Valentine's Day Romantic Night In as place card holders, and then used them with some of my favourite pics of my little Valentines as photo holders.  I think they'd be really great as table number holders for a wedding too, or to hold food labels for a dessert table…the possibilities are endless.

Cement Photo Holders

So here's how I made them.

Materials:

  • Quick Drying Cement
  • Silicon Heart Muffin Tray
  • Baking Spray
  • Wire
  • Wire Cutters
  • Plastic Container
  • Something to stir with (like a paint stick)
  • Paint or Gold Leaf
  • Mod Podge
make your own Cement Photo Holders

Method:

1.  In a plastic disposable container (like an old ice cream container) combine your fast drying cement mix with water until you have a good consistency.  Be sure to mix very thoroughly.

DIY Cement Heart Place Card and Photo Holders

2.  Spray your baking tray (I picked mine up at the dollar store) with baking spray so that the cement won't stick to the mould.

3.  Cut lengths of wire, and wrap one end around a wooden spoon or dowel tightly three times to create the circle that will hold the paper.  Squeeze together tightly.  On the other end, make a large circle so that the wire will stand up, and won't pull easily out of the cement when it is finished.

DIY Cement Photo Holders

4.  Fill the heart baking tray a little ways with cement, then add in the wire, and fill up some more.  Use your mixing stick to press down the cement, and smooth out the top.

5.  Allow to set over night.

6.  Remove the cement hearts from the tray, and smooth out any rough spots on the top with a knife.  Tape off a section and paint it or apply gold leaf.  We did ours on a diagonal.

painting DIY Cement Photo Holders

7.  After the paint is dry or gold leaf is added, remove tape, and apply a coat of Mod Podge over the whole heart to seal it.

8.  Use to display photos, or as place card holders.

how to make Cement Photo Holders

More Ideas

They worked great as place card holders too.

how to make a Cement Heart Place Card holder

I really liked the rustic feel they added to our Valentine's Day table.

easy cement concrete project photo holder

I really liked the rustic feel they added to our Valentine's Day table.

We painted some with white and blush pink paint.  The other two we added gold leaf to -love the bit of sparkle against the rough cement.

These were really inexpensive to make, and you could quickly and easily make a large quantity if you needed to.

I think after Valentine's Day a few will find a home on my desk as message holders.

DIY Cement Photo Holder with gold leaf

With DIY Cement Heart Place Cards and Photo Holders, life really is a party.

More Inspiration

You might also like our post on How To Make Cement Easter Eggs here.

Also check out our Cement Star Christmas Ornaments here.

You might also like our Cement Garden Markers here.


Easy Chocolate Pavlova Recipe

Feb 10, 2016 · 1 Comment

Chocolate pavlova recipe.

Individual Heart Shaped Chocolate Pavlova: Easy chocolate pavlova, fill with any fruits. Perfect for Valentine's Day dessert.

Chocolate pavlova recipe.
[feast_advanced_jump_to]

I really like pavlova.  It's a meringue dessert, topped with whipped cream and berries.  Crunchy on the outside, and soft and marshmallow-y on the inside.  It's a nice light dessert, perfect after a big meal.  I often make it for Christmas Day. Since my sweet husband loves chocolate, I decided to make a chocolate version for Valentine's Day.  And since it was for heart day…I made them heart shape.  You can see our Valentine's Day Romantic Night In here, for more ideas. And to make them extra special, and into a "heart of gold" I added some edible gold leaf.  They were so, so yummy.  And I wanted to share the recipe with you, in case you're looking for a perfect Valentine's dessert for this weekend.

how to make Chocolate Pavlova

Pavlova

Pavlova is a dish that originates in New Zealand or Australia, there is some debate.  It is named after Russian ballerina Anna Pavlova.  It is a favourite in both New Zealand and Australia and often served there for special occasions, especially at Christmas.  Pavlova is traditionally a white meringue dessert served with whipped cream and berries, but we're updating it with the addition of chocolate.

Meringue vs. Pavlova

Meringue and Pavlova are very similar.  The difference between the two is in the texture.  Meringues are baked until they are dry and crisp.  Pavlova is also made from whipped egg whites, but it is dry and crips on the outside, but marshmallow like and chewy on the inside.Meringue usually takes the form of a cookie, but pavlova is a of the most gorgeous show-stopping desserts.  It's perfect for the next time you're entertaining, or have a special occasion.

Chocolate

We love tradition pavlova, but thought it would be fun to create a chocolate version -and it was!  If you are a chocolate lover than you will love this chocolate pavlova recipe.  The chocolate flavor is coming from the addition of unsweetened cocoa powder to the meringue base of the pavlova.  Then we added the traditional fresh whipped cream on top and fresh berries.  We used raspberries to make a chocolate raspberry pavlova, but you can use any berries you like.  Strawberries, or mixed berries would be a great choice also to go with the chocolate meringue base.  If you really wanted to up the chocolate factor you could use a chocolate ganache in place of the whipped cream here.  Or add some cocoa powder to your heavy whipping cream to make chocolate cream.  We wanted to add a little more chocolate to our dessert so we drizzled the top with some chocolate sauce.  You could also add chocolate shavings or chopped chocolate on top in milk chocolate or dark chocolate, whichever you prefer.  Or drizzle the top with some melted chocolate.

Lastly we dressed this gorgeous dessert with some edible gold leaf on the top of the pavlova, just for a little extra wow factor.

Mini Pavlovas

We made our chocolate pavlovas into mini heart shapes.  It's so nice to serve each person their own individual dessert.  Our batch made 8 individual sized portions.  If you want to make one large size pavlova, you can use this same recipe, and increase the baking time to 1 hour.  You can make one large heart, or a round circle pavlova base.

Individual Heart Shaped Chocolate Pavlova for Valentine's Day

Troubleshooting Pavlova

Pavlova is a delicious dessert, but she can sometimes be a bit of a diva.  There are some common problems that can arise when making a pavlova, so here are some of the things to watch out for and how to avoid some common mistakes that can occur.

  • Room-temperature egg whites whip best so try to remember to take your eggs out of the fridge and let them come up to room temperature before whipping for the best results.
  • Any egg yolk in your separated eggs can affect how well the egg whites whip.  They can also be affected by not using a clean bowl.  So be sure your bowl and whisk are clean and grease free, and your egg whites have no trace of yolk in them before beginning.
  • Add your sugar to the beaten egg whites mixture slowly, tablespoon by tablespoon.  This is so that the sugar has a chance to fully dissolve and doesn't make a gritty meringue mixture.  Some people like to use superfine sugar to help with this problem.
  • Take care not to over whip your egg whites. This can make the egg whites too dry and they can possibly curdle.
  • Pavlovas can crack if they are cooled too quickly.  Some people like to turn off the oven when they're done baking and let them cool inside the oven with the oven door open.
  • Humidity can really affect your pavlova.  Do not bake pavlova on a humid day.  If you do you might have issues with the crispy shell being too sticky and weeping sugar even after it's baked.
Chocolate Pavlova with fresh strawberries

Storing Pavlova

Pavlova is best served the day that it is made.  You can bake the meringue basses the night before and store them in an airtight container.  Do not assemble the pavlovas ahead of time.  Before serving add your heavy cream and fresh fruit and other garnishes.  If you have leftovers of the assembled pavlovas, be sure to store them in the fridge.

Heart Shaped Chocolate Pavlova

I really loved our heart shaped mini chocolate pavlovas for our own little Valentine's Day celebration.  But this is a great dessert for any time.  Make them mini, make one large one, just make them.  ;). Your family and friends will love it.  And for the chocolate lover, this chocolate easy version takes classic pavlova to the next level.

Recipe

Chocolate pavlova recipe.

Chocolate Pavlova

Crisp on the outside, soft in the middle chocolate pavlova, with fresh berries and cream.
5 from 1 vote
Print Pin Rate
Course: Dessert
Cuisine: British
Prep Time: 15 minutes minutes
Cook Time: 40 minutes minutes
Total Time: 55 minutes minutes
Servings: 8
Calories: 243kcal
Author: Dannyelle Nicolle-Ramjist

Ingredients

  • 4 egg whites
  • 1 ¼ cups white sugar
  • 1 teaspoon vanilla extract
  • 1 teaspoon white vinegar
  • 2 teaspoons cornstarch
  • 2 tablespoons cocoa powder
  • 1 pint of whipped cream
  • 2 tablespoons sugar
  • 1 teaspoon vanilla
  • 4 cups of fresh raspberries or other berries
  • 8 teaspoons chocolate sauce
  • edible gold leaf optional

Instructions

  • Preheat the oven to 300 degrees F. Line two baking sheets with parchment paper. On the underside of the parchment paper, draw 8 hearts, about 4 ½ by 4 ½ inches each.
  • In your stand mixer with the whisk attachment, beat the egg whites to stiff peaks, but not dry.
  • Gradually add in the sugar, tablespoon by tablespoon, while continuing to mix, until it's thick and glossy.
  • Add in the vanilla, white vinegar, cornstarch, and cocoa powder and combine well.
  • Using a spoon, carefully place the mixture on the parchment paper lined baking sheet, using the heart shape drawn on the other side of the parchment paper as a guide.
    Bake for about 40 min. until the outside is dry, but the inside is still soft. Let cool.
  • To make the whipped cream, add the whipping cream to your stand mixer and whip until it forms soft peaks. Add 2 tablespoons of sugar, and 1 teaspoon of vanilla and combine. Serve each chocolate pavlova with whipped cream, fresh berries (or any other fruit), a drizzle of chocolate sauce, and edible gold leaf on top.

Nutrition

Serving: 1g | Calories: 243kcal | Carbohydrates: 51g | Protein: 4g | Fat: 4g | Saturated Fat: 2g | Polyunsaturated Fat: 1g | Cholesterol: 10mg | Sodium: 34mg | Fiber: 5g | Sugar: 43g
Tried this Recipe? Tag me Today!Mention @LifeisaParty or tag #lifeisaparty!

With heart shaped chocolate pavlova, life really is a party!

More Recipe Inspiration

You might also like our Donut Strawberry Shortcakes here.

Also check our our Chocolate Charcuterie Board here.

Chocolate Charcuterie Snack Board: perfect for the chocolate lover, tips on building your board, and ingredient suggestions.

You might also enjoy our Black Forest Cake in a Mason Jar recipe here.

How To Make A DIY Fresh Flower Chandelier

Feb 9, 2016 · 2 Comments

DIY fresh flower chandelier.

DIY Flower Chandelier: Easy to make, perfect for special occasions, the fresh flowers dry beautifully too. Perfect for Valentine's Day, weddings, or showers.

DIY fresh flower chandelier.
[feast_advanced_jump_to]

A fresh flower chandelier is the perfect way to add some beautify and romance to any space.  They bring an effortless ambiance to any space.  And you can make them in any colours and with lots of different flowers for any special events.  Our fresh flower chandelier was one of my favourite details from our Valentine's Day Romantic Night In   It's quite simple to make, and makes a swoon-worthy display.  It's perfect for Valentine's Day, but would also be lovely for a bridal shower in anticipation of the big day, Mother's Day, a special birthday, or baby shower too.  We did just one, but you could make lots for a stunning display and group them for a wedding chandelier on your wedding day.

how to make a fresh flower chandelier

I hung the pretty fresh flower chandelier over our romantic fireside table for two.  And it was so beautiful with the fairy lights, and candles in the background.

DIY Flower Chandelier

Choosing Your Flowers

What could be more romantic than a shower of rose buds?  I love using roses for floral display.  They're readily available and come in lots of beautiful colors.  Roses were the right style for a romantic dinner.  For a different occasion you might want to mix your flowers or colors.  Smaller blooms like baby's breath would be gorgeous for a baby shower.   Wild flowers could be beautiful for a more casual display over a pretty dessert table, or for a rustic wedding style.  You could also incorporate some greens for a fuller more wild look.

Choose flowers that dry well.  The best part of this project is that you can let your fresh blooms dry and have it as a dried flower piece afterward.  Larger flowers will have more impact, but flower bunches of smaller flowers would be beautiful too.

Fresh Flower Chandelier

Timing

Since these fresh flowers are hanging without a water source, this is one of those last minute DIY projects.  If you didn't have time to prep this floral chandelier right before your party you could use some floral tubes on the end of the stems of each flower and carefully set the whole piece down on a table after it was made.  Right before the party, you could pop the floral tubes  off of the flowers and hang the chandelier.

Can I Use Faux Flowers?

We made our floral chandelier from fresh flowers and it looked so beautiful.  You can also try it with silk flowers.  The better the quality of your flowers the more realistic this will look.  The benefit of using faux flowers is that it will last forever, and you won't have to worry about making the floral chandelier at the last minute.  Dried flowers would be a good option as well.

Choosing Your Floral Chandelier Base

I used a gold wire ring for the base of my flower chandelier.  I loved the color and the size of it and it worked really well.  Look for these metal rings at the craft store with the wreath making supplies or with the macrame supplies.  They also come in silver.  You can also use an embroidery hoop.  These come in more sizes from small to very large.  If you're making a really large floral chandelier you can even use a hula hoop as the base of your chandelier.  Just spray paint it or wrap in in ribbon or floral tape to hide the base.

Multi-Tier Floral Chandelier

I made a simple one tier flower chandelier, but you can also make them multi-tiered.  Choose base rings that gradually get smaller.  Start with your largest ring as the top tier of your chandelier, and then work your way down to the smallest, staggering the hanging space between them to create the tier effect.  These work great to fill a larger space with a real statement piece.

Hanging Your Flowers

I choose to use sheer ribbon to hang my blooms, and cut my flower quite short, so not much of the stem was showing.  You can also leave the flowers long so that more of the stem shows.  Choose a pretty piece of ribbon in a coordinating color to hang your flower or clear pieces of fishing line that will disappear in the floral arrangements.  Both of these looks are really beautiful, so it's just a matter of which you prefer.  We also choose to stagger the lengths of the ribbon slightly so the flowers hung at slightly different heights.  You can do this, or make them all the same length for a more uniformed finished look.

DIY Flower Chandelier

Recipe

DIY fresh flower chandelier.

Fresh Flower Chandelier

No ratings yet
Print Pin Rate
Cook Time: 15 minutes minutes
Total Time: 15 minutes minutes
Author: Dannyelle Nicolle-Ramjist

Equipment

  • scissors
  • garden clippers

Materials

  • gold ring 10 inch diameter
  • ¼ inch wide sheer white ribbon
  • 12-14 fresh roses

Instructions

  • Cut three longish equal length ribbons and space an equal distance from each other around the gold ring and tie on. Then draw the ribbons up and tie all three together in a knot, and hang at a height that will be easy to work with.
  • Cut the roses with short stems, about 2 inches long.
  • Tie the roses on varying lengths of ribbon and tie on to the ring, spacing them somewhat evenly, and ensuring the ring balances as it hangs.
  • Hang in your desired location, and remember that since the flowers are hanging upside down, they will dry beautifully, so you can enjoy this as dried flowers afterward.
Fresh Flower Chandelier

I picked up the gold ring at the craft store, and the roses from Costco, so it was a fairly inexpensive project and had a lot of impact.  It looks so pretty from underneath too.

With a DIY flower chandelier, life really is a party!

More Inspiration

You might like How To Make Giant Paper Flowers here.

How To Make Giant Paper Flowers: see how to turn regular paper into beautiful and inexpensive flowers, from large to small in a video tutorial. This diy is perfect for a wedding, shower, or home decor.

You might also enjoy our Valentine's Day Wreath Ideas here.
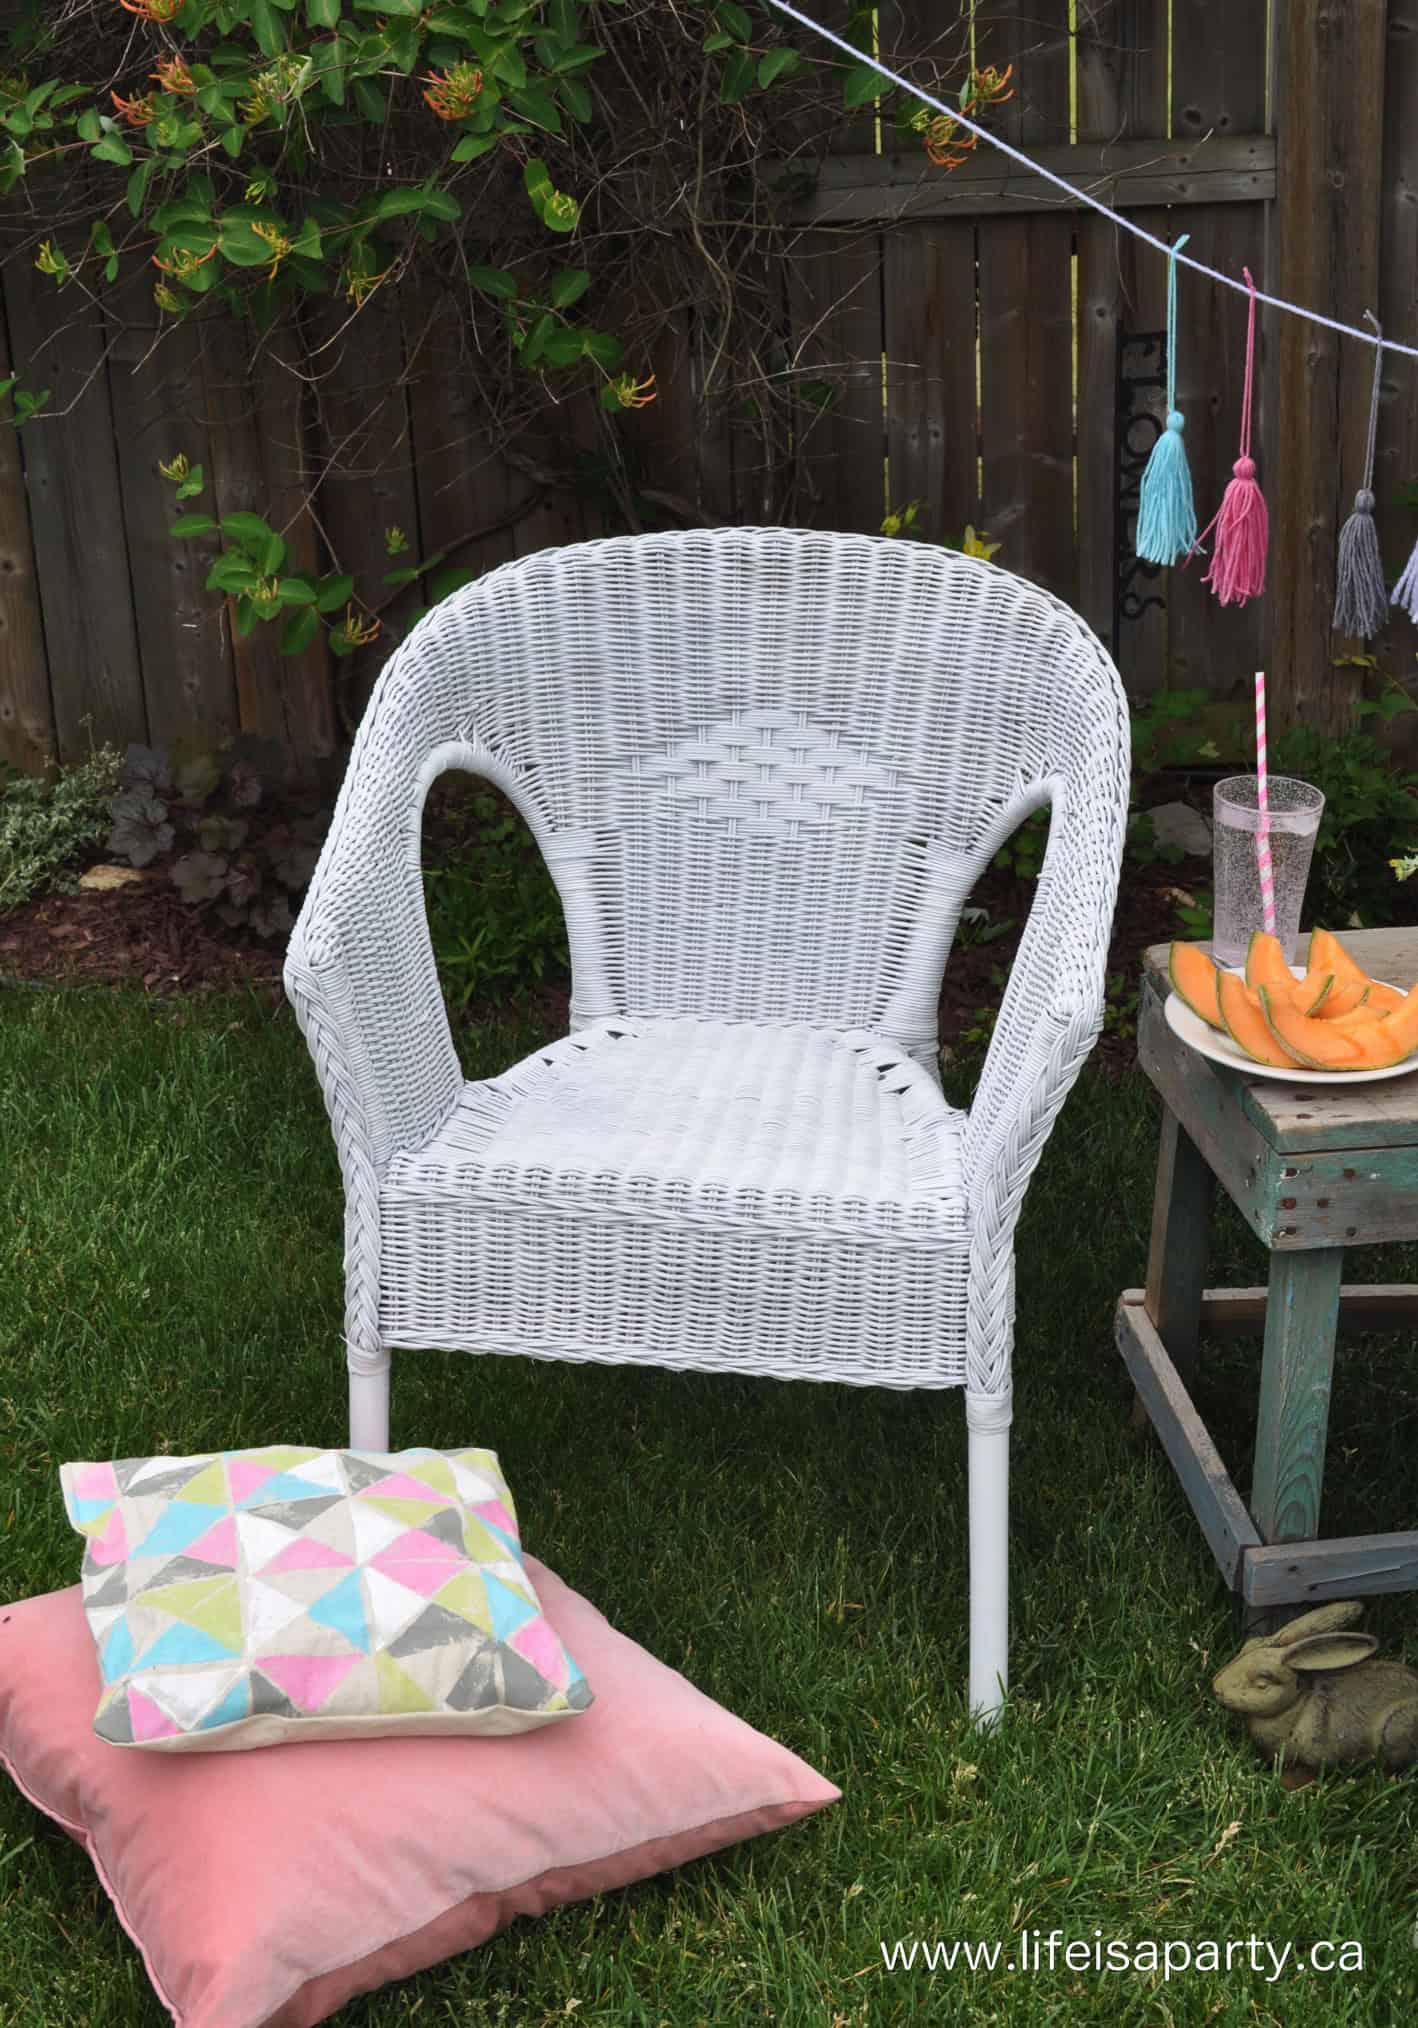
Valentine's Day Wreath Ideas: wood embroidery hoops, brass rings and birch, decorated with pink pom poms, tassels, greens, and velvet hearts.

Valentine's Day Romantic Night In

Feb 8, 2016 · Leave a Comment

Valentine's Day romantic night-in.

Valentine's Day Romantic Night In: skip the expensive and crowded restaurant and enjoy a fireside romantic three-course dinner intimate night in.

Ideas for a romantic Valentine's Day date at home.
[feast_advanced_jump_to]

This month for our #YearOfFeasting, where we're hosting 12 feasts in 12 months in an effort to up the fun factor around here, and be a little more intentional about making great connections with great people over great food, we kept things a little more intimate.  Since connecting with each other should always be at the top of our list, our Valentine's Day feast was a romantic dinner for two in front of the fire at home.

Valentine's Day Romantic Night In: Fireside romantic three-course dinner, perfect for an intimate night in.

Fireside Dinner

I thought it would nice and cozy in these winter months to set up dinner in front of the fire.  Keeping with the Scandi feel I've been loving these days, we kept things pretty neutral with just enough soft pink.

Valentine's Day Romantic Night In: Fireside romantic three-course dinner, perfect for an intimate night in.

In front of the fire I set up a cozy little table for two.

Valentine's Day Romantic Night In: Fireside romantic three-course dinner, perfect for an intimate night in.

To create a sweet Valentine feel, I filled some pretty lanterns with some heart fairy lights.

Valentine's Day Romantic Night In: Fireside romantic three-course dinner, perfect for an intimate night in.

Flower Chandelier

Above the table, and my favourite addition for the party, was a pretty hanging flower chandelier -see the tutorial on how to make it here.

Valentine's Day Romantic Night In: Fireside romantic three-course dinner, perfect for an intimate night in.

On the table, a simple linen runner, white plates, and pretty cement heart placard holders -see how I made them here.

Valentine's Day Romantic Night In: Fireside romantic three-course dinner, perfect for an intimate night in.

Valentine's Day Cocktail

We started out with one of my favourite special drinks, kir royal.  It's made of sparkling wine with a little cassis, black currant liqueur in it.  It's sweet and fizzy and perfect for Valentine's Day, especially with the perfect arrow stir sticks.

Valentine's Day Romantic Night In: Fireside romantic three-course dinner, perfect for an intimate night in.

Valentine's Day Dinner

For our starter we tried a new recipe, which is always a lot of fun.  We made Delicious.net's Bang Bang Shrimp.

Valentine's Day Romantic Night In: Fireside romantic three-course dinner, perfect for an intimate night in.

Our''s was a little on the mild side, so we added a little extra hot sauce for the bang bang. 😉

Valentine's Day Romantic Night In: Fireside romantic three-course dinner, perfect for an intimate night in.

These were a perfect start to the evening and we really enjoyed them.

Romantic valentine s day dinner for two menu

For our main course, we made a real comfort food -Steak, Guinness, and Mushroom Pie.

Valentine's Day Romantic Night In: Fireside romantic three-course dinner, perfect for an intimate night in.

To make it a little more romantic, we made them in individual heart shape dishes.

Valentine's Day Romantic Night In: Fireside romantic three-course dinner, perfect for an intimate night in.

And for a yummy side a caprese inspired salad of lettuce, mini bocconcini mozzarella balls, grape tomatoes, pesto, and balsamic reduction.  Simple and delicious.

Valentine's Day Romantic Night In: Fireside romantic three-course dinner, perfect for an intimate night in.

This main was perfect for a cold and wintry night by the fire.

Valentine's Day Romantic Night In: Fireside romantic three-course dinner, perfect for an intimate night in.

Valentine's Day Dessert

And then it was time for something sweet.  A cup of tea and heart shape pavlova.

Valentine's Day Romantic Night In: Fireside romantic three-course dinner, perfect for an intimate night in.

This was a lovely ending to the dinner -since it's nice and light.  I love pavlova with mixed berries.

Valentine's Day Romantic Night In: Fireside romantic three-course dinner, perfect for an intimate night in.

For my sweetie though - real chocolate lover, chocolate pavlova -recipe here.

Valentine's Day Romantic Night In: Fireside romantic three-course dinner, perfect for an intimate night in.

We had such a nice afternoon of cooking.  While our stew cooked away we watched Breakfast At Tiffany's -a classic.  I was surprised to find out my sweetie had never watched it.  I'll be singing "Moon River" for days.  It really was  a perfectly romantic night.  It was fun to do something special for one another.  We had fun talking and planning our menu together, and spending time with each other in the kitchen.

With a cozy romantic dinner at home together with your Valentine, life really is a party!

Book Page DIY Heart Garland

Feb 4, 2016 · 1 Comment

Book page heart garland.

Book Page DIY Heart Garland: How to make a DIY watercolour book page heart garland with an old book and a sewing machine that's easy and inexpensive to make.

Book page heart garland sewn together with a sewing machine.
[feast_advanced_jump_to]

This sweet book page DIY heart garland is a quick and easy project to make, and perfect for Valentine's Day.

I love how simple and neutral it is, with just a touch of watercolour pink.  I've used it as part of my Valentine's Day decorations.  It would be lovely in a little girl's room anytime of year.  I also think it could be very sweet as decor for bridal showers, or baby showers.  We've made ours pink, but you can change the color to suit your decor or the occasion.  How fun would this be in soft pink and blue for a gender reveal?

You might also like our paper 3D Origami Hearts.

Paper

I used some old books from the thrift store for this project.  Some people hate to cut up an old book, but actually so many old books end up in landfill that this is really a great upcycle project.  I love how the book page paper looks for this project, but you could also use any other kind of paper.  Scrapbook paper would be a great choice, and is available in so many beautiful colors and textures.  You could also try using sheet music or old vintage maps for another really beautiful look and a great idea.  You could even try cutting your hearts out of paint chips.  This could help you create a beautiful ombre effect in any color for your Valentine's day garland.

Cutting Out Your Hearts

I used a large heart hole punch to cut out my paper hearts.  It's a great time saver, and every heart comes out exactly the same size.  The heart shape punches come in different sizes you can find them for making small, medium or larger hearts.  I just used one and kept all my hearts the same size, but you could mix the sizes if you prefer.  I found this was the quickest and easiest way to cut the hearts out for our simple paper heart garland.  You'll find lots of different options in Cricut Design Space for different shapes of hearts.

You could also use a cutting machine to cut our your hearts.  A silhouette cameo or a Cricut machine are a great option if you have one.  With one of these machines you might even make a fancier heart with a scalloped edge.

You can also cut out your hearts by hand.  You might want to use a pattern on piece of cardboard to make the all matching sizes.  You could also try using pinking shears to make a decorate edge of the hearts.

Book Page Heart Garland

Painting With Watercolours

I wanted to add a little soft pink to my hearts so I used some watercolours on the finished heart garland and painted individual hearts.  One trick is that you must paint each side of the heart, or the paper will curl up as it dries.  I love the watercolour effect, and the variations in the pink, it also allows you to still see the book page writing through it, creating a cool effect.  You could of course do this in any color or series of colors.  We choose pink for Valentines day but red could be a good choice too if you prefer.  You could also create a really fun project by painting the hearts rainbow colors.

how to make a Heart Garland

Sewing Machine

You may not have none that you can sew paper.  Treat the paper just like you would regular fabric. No great sewing skills required.  You just need to know how to sew a straight line with sewing machine to make this fun craft. Use regular thread.  The sewing creates a really cool effect on the paper.  We used white thread for this project, but you could also choose pink, or red, or even metallic thread for a really interesting look as well.

If you don't have a sewing machine, you can of course just glue and string to make this simple heart garland.  If you're gluing your hearts on to a piece of string, or baker's twine, put your craft glue or hot glue near the top of the heart, and glue another heart onto the back.  You could also punch small holes into the hearts and string them on to your string, or piece of twine or narrow ribbon.  This will create a different look but also be really pretty if you don't have a sewing machine.

diy Heart Garland

Recipe

Book page heart garland.

Book Page DIY Heart Garland

5 from 1 vote
Print Pin Rate
Prep Time: 20 minutes minutes
Cook Time: 10 minutes minutes
Total Time: 30 minutes minutes
Author: Dannyelle Nicolle-Ramjist

Equipment

  • paint brush
  • Sewing Machine

Materials

  • old book
  • heart punch
  • watercolors
  • thread

Instructions

  • To get started, you need to cut out some hearts from and old thrift store book. I used a craft punch, which was super fast, but you could just cut them out by hand too.
  • Once the hearts are all cut out, add some watercolour to just a few. I like pink for Valentine's Day, but you could do red, or any colour to fit your decor, or wedding, or nursery colour. When one side is dry, be sure to flip the heart over and do the other side. Painting both sides of the hearts will help keep them from curling up, and also make the garland pretty from both sides.
  • Next, once the paint is dry it's time to stitch the hearts into a garland. Just feed the paper hearts through your sewing machine just like you would with regular fabric. To create the spaces just run the machine for a second between feeding the hearts in to create the gap. Try and your gaps as even as possible.

YouTube Video

In case you've never sewn paper with your sewing machine, I thought a video might help, so watch below to see how really easy it is.

Youtube video

This garland really is the perfect pretty, inexpensive decoration for heart day.  It's really easy to make and will be a great Valentine's Day decoration to use year after year.

Book Page Heart Garland

With a book page DIY heart garland, life really is a party!

More Valentine's Day Inspiration

Love this idea, check out our DIY Origami Hearts too.

3D Origami Hearts -create your own origami hearts out of old book pages. Perfect for Valentine's Day decor, wedding decor, or a baby nursery.

You might also like our Yarn Hearts here.
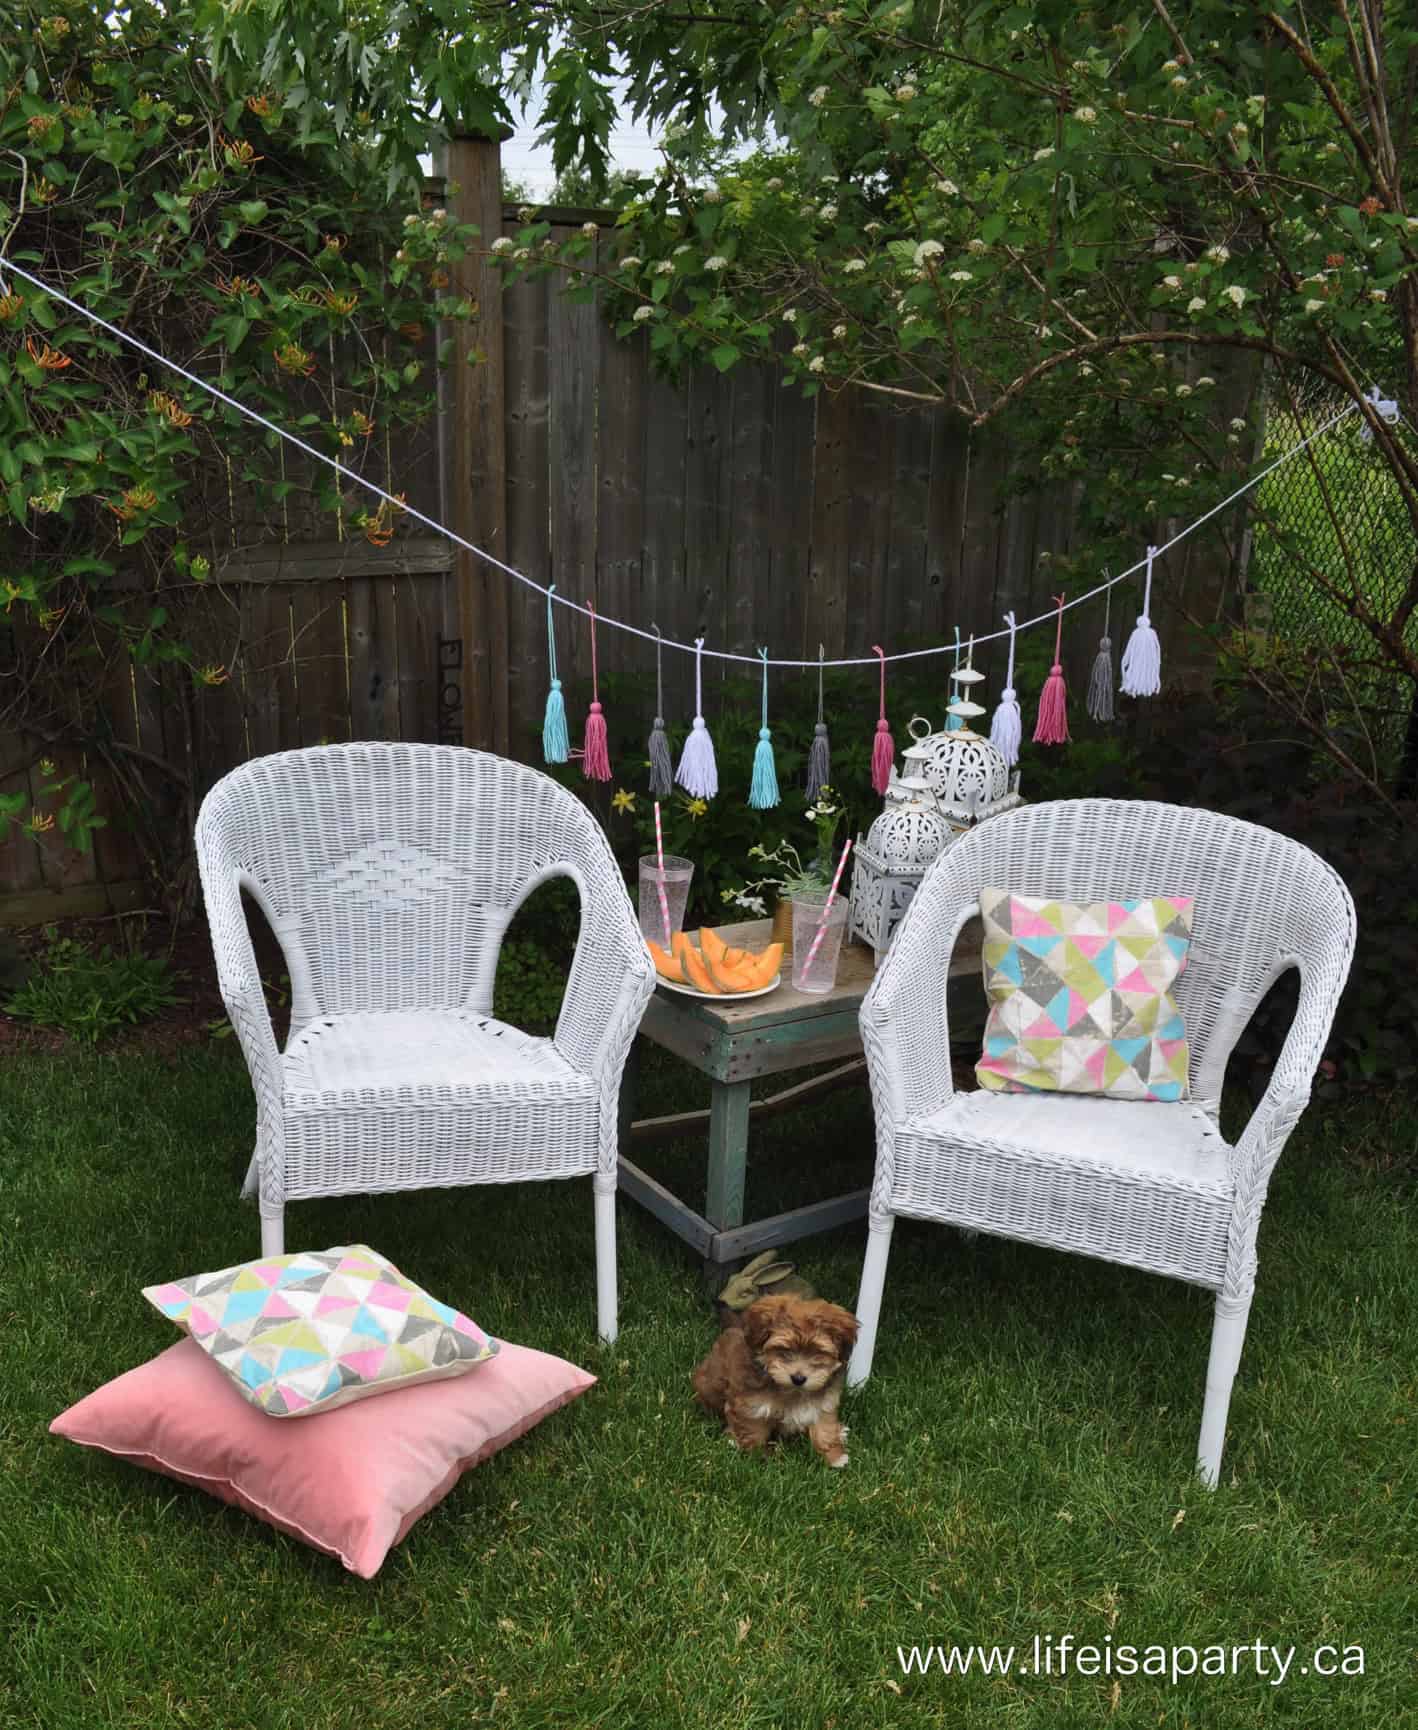
Also check out our Nail Polish Marble Hearts here.

Nail Polish Marble Hearts Valentine's Day Craft: use nail polish to water marble wooden hearts for Valentine's Day in any colour combination you like!

Slow Cooker Russian Beef Stroganoff Recipe

Jan 28, 2016 · Leave a Comment

Beef stroganoff recipe.

Slow Cooker Russian Beef Stroganoff Recipe -easy, perfect for a busy weeknight, made with all fresh ingredients (no canned soups), and delicious.

Beef stroganoff recipe.
[feast_advanced_jump_to]

I love a good slow cooker recipe, especially on a busy week night when we're all in a rush around here.  We get home from after school gymnastic practise right at dinner time every Wednesday night, and walking in to this all ready in the slow cooker is great.  This slow cooker Russian Beef Stroganoff is a real favourite.  My kids love it, and I do too.  It's delicious and super easy, a I know anyone who loves who loves a creamy beef dish will love this recipe.

Slow Cooker Beef Stroganoff recipe

What is beef stroganoff?

Beef stroganoff is a Russian dish originally created by the French chef of the Stroganov family.  Count stroganoff was know to be a food contasour.  At the time the beef stroganoff was created in the late 19th century, French cuisine was very popular among the Russian upper classes in the Russian empire and this dish is a marriage of French and Russian influence.  

The original recipe contains beef, onion and mushroom in a rich creamy sauce made with mustard as influenced by the French and sour cream as influenced by the Russians.  The authentic Russian beef stroganoff recipe appeared in a popular Russian cookbook in 1871, and has been made by Russian cooks ever since.

Slow Cooker

We've created a version of classic beef stroganoff that cooks all day in the slow cooker.  This traditional beef stroganoff recipe is easy to put together in the morning.  It cooks for hours on a low heat and smells amazing when you return home to it.  We add the sour cream at the end and then serve this delicious tender beef dish full of beef pieces, and flavorful mushrooms on a bed of white rice, or egg noodles.

Beef

You can make this dish with any cut of beef.  We usually use a rump steak.  You can also use beef tenderloin, or sirloin steak.  A more tender best quality cut of beef gives the most tender results, but a less tender cut of beef benefits from cooking for many hours in our slow cooker version of the recipe and can stretch your budget for beef recipes, especially for big groups.  

Some People also like to use ground beef and make meatballs, but the classic dish uses strips of beef.  The beef is typically cut into long strips for this dish.  An interesting fact is that it was originally a quick dish typically made with steak that was sliced into long thin slices for quick cooking.  Our version is made in the slow cooker and cooked many hours, but still uses the traditional stips of beef from the original recipe.

Dijon Mustard

Not every recipe you find includes mustard in the stroganoff sauce, and it's often left out of the United States version of the recipe.  This is a part of the traditional recipe and one of the  essential ingredients for Russian beef stroganoff.  It brings a tanginess and richness to the dish, and shows the French influence by the original French chef and creator of the dish.  You can use dijon mustard or grainy dijon mustard for the classic Russian dish.  We like the grainy dijon for flavor and texture.

how to make Beef Stroganoff in a slow cooker
Crock pot Beef Stroganoff

If you have any leftovers store them in an airtight container in your refrigerator.  This recipe reheats beautifully the next day.

Serving Suggestions

We love to have our beef stroganoff on buttered noodles, and this is the traditional way of eating the dish.  You can also enjoy your classic beef stroganoff recipe served over a bed of rice, rice pilaf, or even mashed potatoes or french fries.  This dish is usually served over a starch that can soak up all the rich gravy.  

It's also often accompanied with a green salad, or vegetables.  The slow cooker stroganoff dish is very rich, and often accompanied by something lighter.  We like to serve it with steamed green beans.  It also is great with roasted carrots, or steamed broccoli.  

How do you  keep the sour cream from curdling?

If you add your sour cream to the very hot beef stroganoff it can sometimes curdle on you.  The key to adding the sour cream to the dish without if curdling is to make sure the beef mixture isn't too hot when you add in the sour cream.  Our recipe advices turning the slow cooker off and letting the slower cooker sit for at least 10 minutes before adding the sour cream to help prevent it from curdling.  Another tip is to temper the sour cream.  Start by adding some of the hot liquid into the sour cream and stirring it together, before adding it all back into the stroganoff.

Why does the sour cream curdle sometimes?  When the sour cream comes right out of the fridge and then into the hot stroganoff liquid it can shock the proteins in the sour cream.  This shock can cause the sour cream proteins to clump together creating the curdled effect in your sour cream sauce.  Although it doesn't look pleasant, if this happens to you, the dish is still completely safe to eat and won't make you sick.

Crowd Favorite

You will definitely want to add this easy slower cooker stroganoff recipe to your repertoire.  It's made with all fresh ingredients.  There are no canned soups in this one.  It's quick to put together for a busy weeknight, and the perfect comfort food for cold winter nights.  

But this isn't just a good weeknight dish.  If feel special enough to serve to company, or to make for a Sunday super.  It's always well received by guests, and often they ask for the recipe.  I love serving a slow cooker recipe when I'm entertaining.  It gives me time to work on other details for the dinner party like setting a beautiful table or making a special dessert.  When guests arrive just prepare your noodles, rice or potatoes and your main course is done and ready to serve.  This gives you the chance to spend more time with your guests.  And clean up is easy too, since there is just one slow cooker insert to wash up from this dish.

This dish is also a good option to bring to a potluck dinner.  Bring a side dish to serve it with and watch it disappear from the buffet table every time.

Recipe

Beef stroganoff recipe.

Slow Cooker Russian Beef Stroganoff Recipe

Easy to make slow cooker beef and mushroom stroganoff that's rich and satisfying comfort food.
No ratings yet
Print Pin Rate
Course: Main
Cuisine: Russian
Prep Time: 15 minutes minutes
Cook Time: 8 hours hours
Total Time: 8 hours hours 15 minutes minutes
Servings: 8
Calories: 277kcal
Author: Dannyelle Nicolle-Ramjist

Ingredients

  • 1 lb top round beef steak cut into bite size strips
  • 1 onion chopped
  • 1 8 oz package of mushrooms sliced
  • 1 tablespoon dried parsley flakes
  • 1 tablespoon grainy dijon mustard
  • 1 teaspoon salt
  • ½ teaspoon black pepper
  • 3 cloves garlic minced
  • ⅓ cup flour
  • 1 cup beef broth
  • 225 mL sour cream
  • ¼ cup fresh chopped parsley for serving optional

Instructions

  • In a small bowl combine the flour and beef broth slowly, and combine with a whisk to remove any lumps.
  • Add the flour and beef broth to the slow cooker, along with the beef, onions, mushrooms, dried parsley, mustard, salt, pepper, and garlic and stir to combine.
  • Cook on high for the first hour, then switch to low for 7 hours, or until the beef is tender.
  • When it's finished, turn off the slow cooker, let stand 10 min. Temper the sour cream by adding some of the hot beef stroganoff liquid into the sour cream, before adding that mixture into the slow cooker to help prevent the sour cream from curdling. Finish by adding the fresh parsley and serve over noodles, rice or potatoes.

Nutrition

Serving: 1g | Calories: 277kcal | Carbohydrates: 8g | Protein: 27g | Fat: 15g | Saturated Fat: 6g | Polyunsaturated Fat: 6g | Cholesterol: 92mg | Sodium: 500mg | Fiber: 1g | Sugar: 2g
Tried this Recipe? Tag me Today!Mention @LifeisaParty or tag #lifeisaparty!

With this Slow Cooker Beef Stroganoff Recipe, life really is a party!

More Recipe Inspiration

You might also like our Butter Chicken Pizza recipe here.
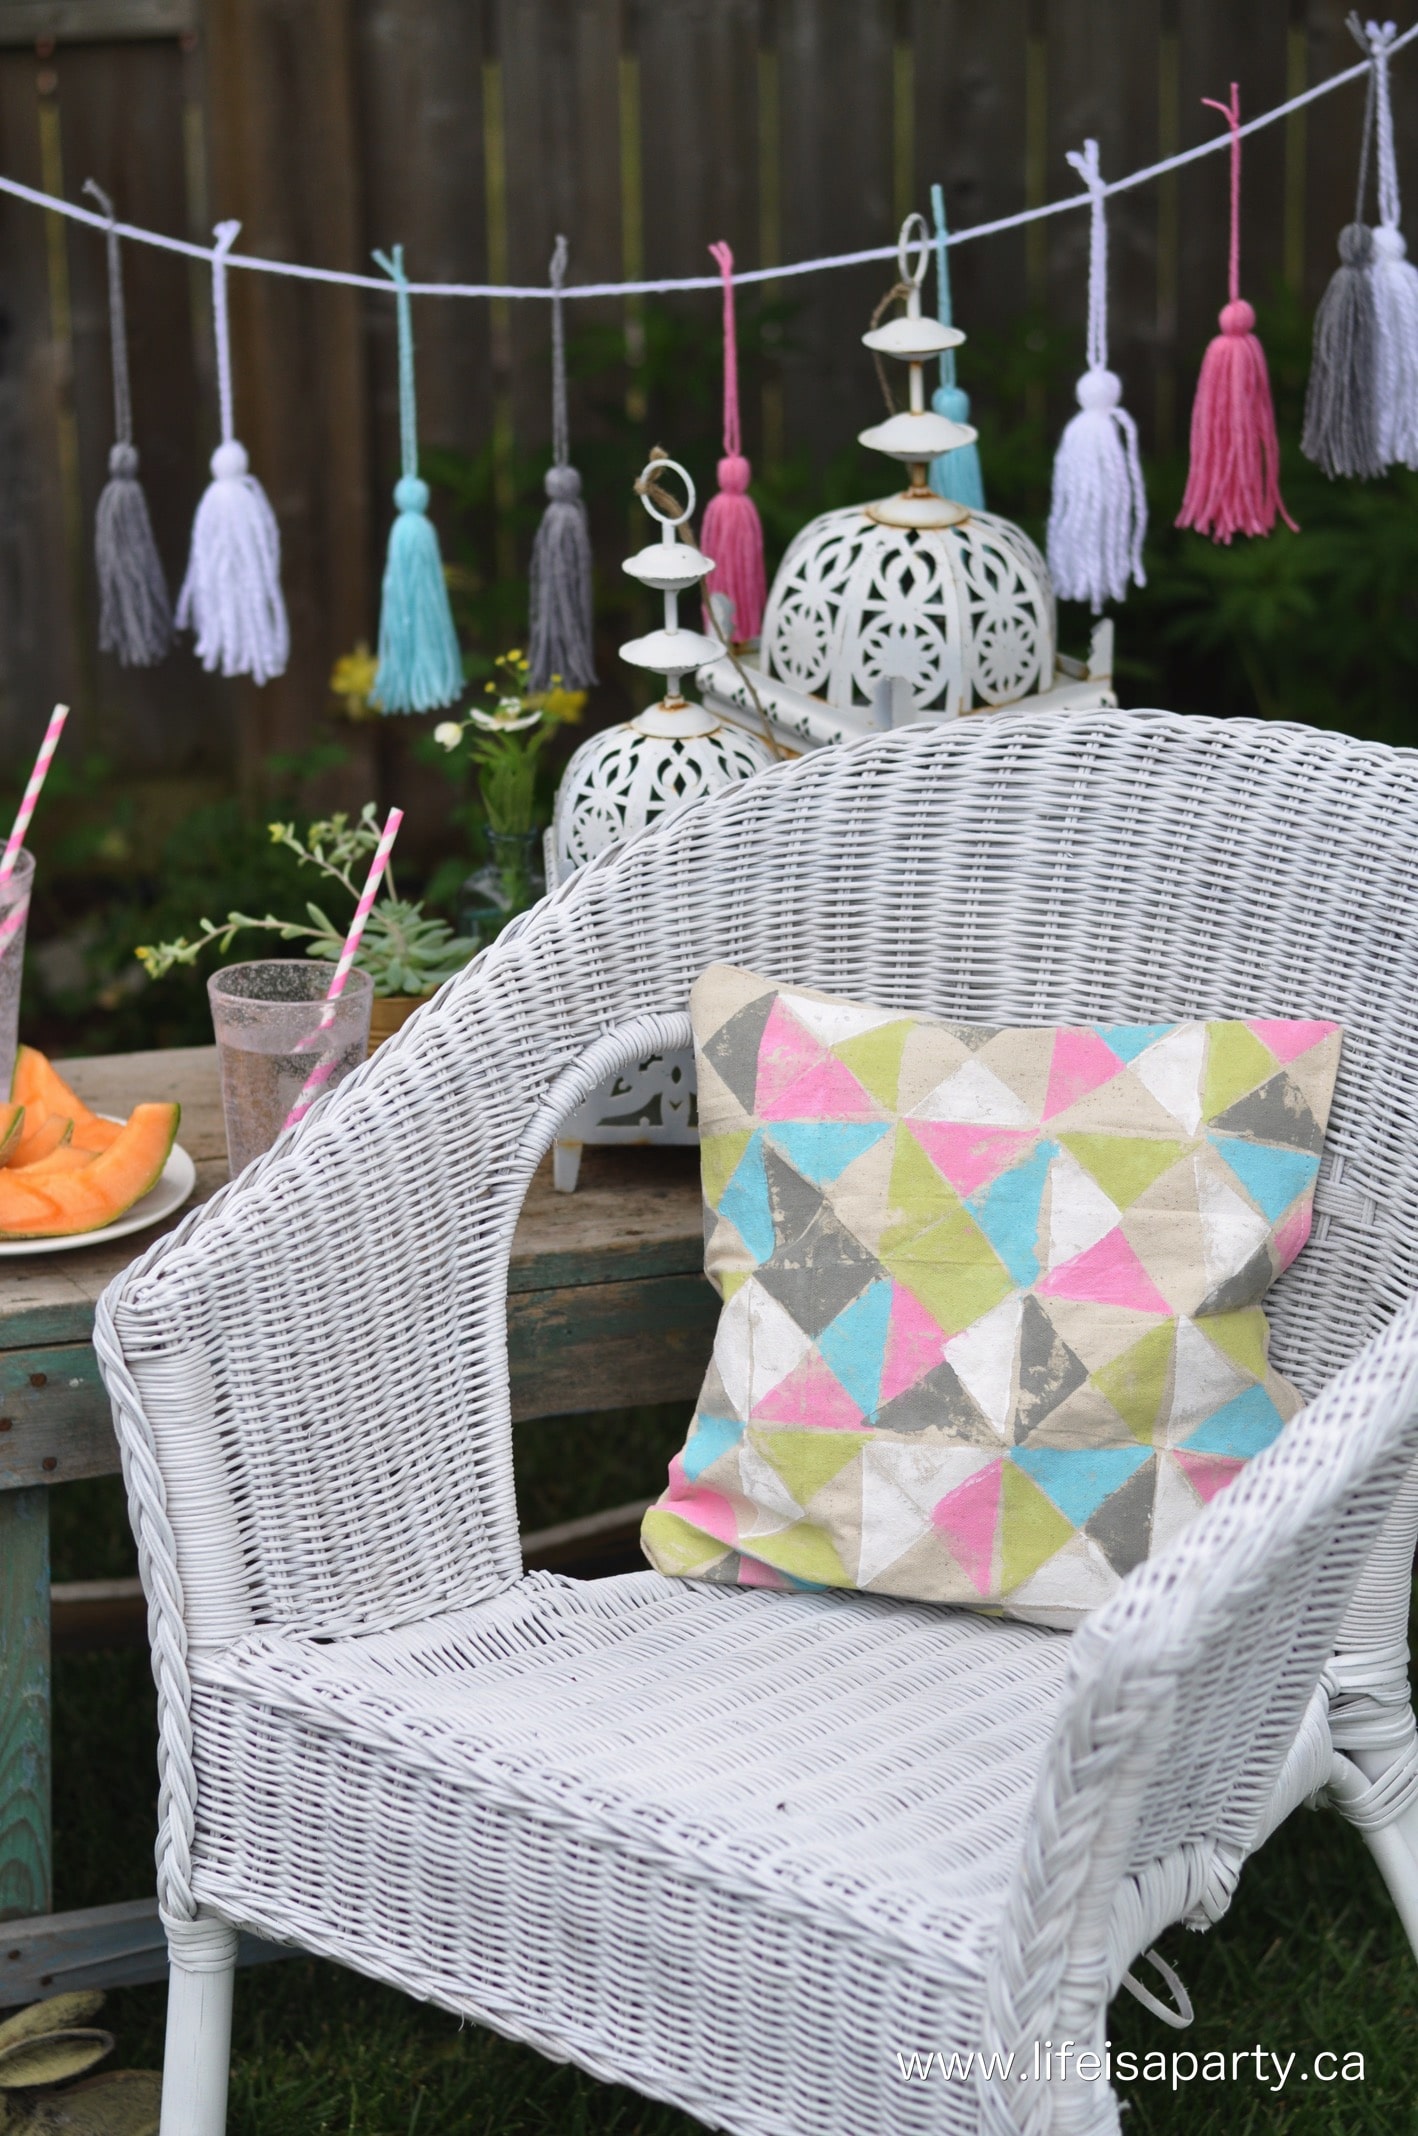
Butter Chicken Pizza: use frozen naan bread and jarred butter chicken sauce from the grocery store, for this quick and easy butter chicken pizza recipe.

Also check out our Tortellini and Italian Sausage Soup recipe here.
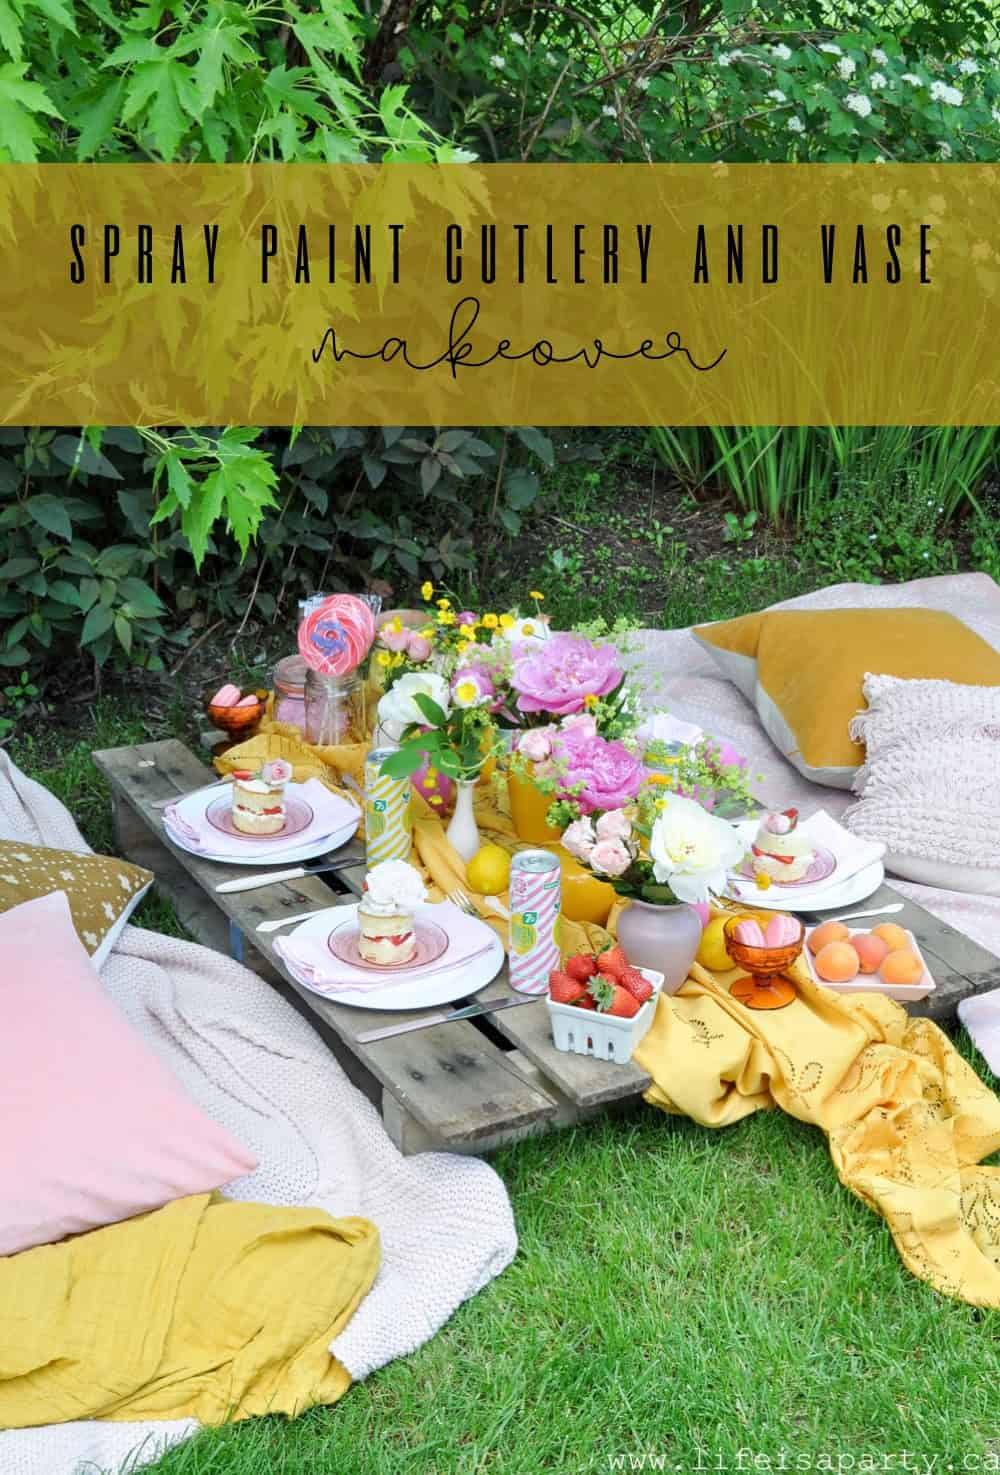
You might also enjoy our Unstuffed Zucchini recipe here.
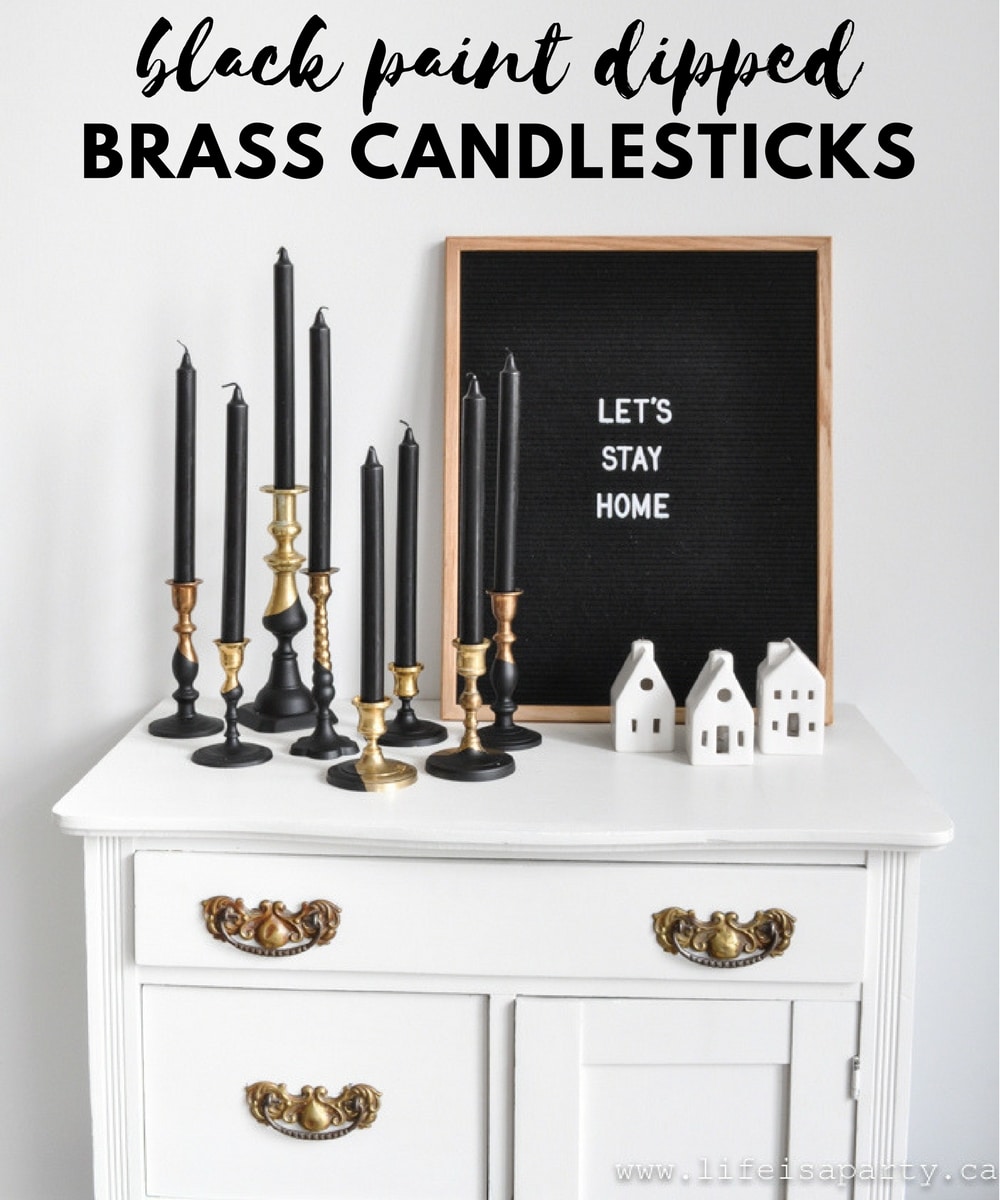
Unstuffed Zucchini: the perfect quick and easy, one pot weeknight meal. We made cooking time quicker using zucchini zoodles.
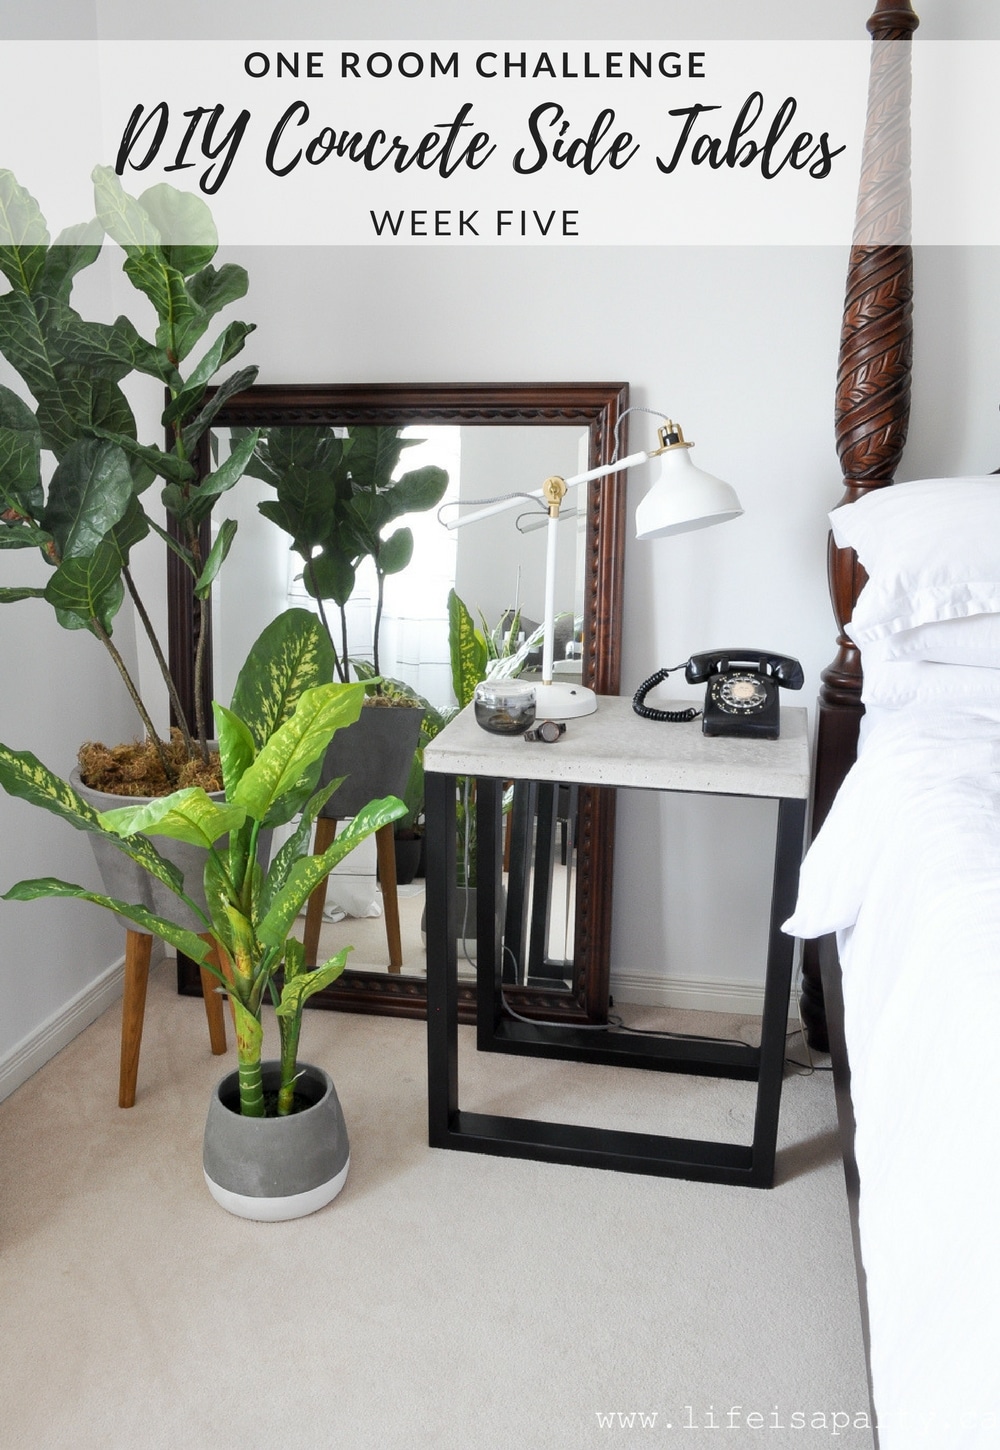
3D Origami Hearts

Jan 25, 2016 · 26 Comments

Wooden bowl full of homemade 3D origami hearts.

Make these 3D Origami Hearts out of any paper, like white paper, coloured paper, or old book pages. Perfect for Valentine's Day decor, wedding decor, a baby nursery, or for gifting to your sweetheart.

3D origami hearts.
[feast_advanced_jump_to]

What We Love About This Craft

  • All you need is some paper for this craft -which makes it really inexpensive.
  • The fact that they're 3D makes them extra special.
  • They're really easy to make, once you get the hang of it.
  • They make the cutest decor, especially for Valentine's Day.

What's better than a bowl full of hearts for Valentine's Day? Nothing. I love adding cute neutral Valentine's Day decor to my home to celebrate the season of love. These yarn hearts and Book Page Heart Garland are more favourites.

These 3D Origami Hearts are super easy to make. Origami is the Japanese art of paper folding. These small trinkets of folded paper are often given as origami gifts. You may have seen origami cranes in the past, but you can also make a 3D puffy heart out of paper too.

An easy origami heart is the perfect lovely heart project to give to your Valentine this year, use for decor, or incorporate into your party decor. You might also like our 20 At Home Valentine's Day Ideas.

Materials:

For this project, I made lots and lots of the 3D Origami Hearts out of

  • Paper: I used white paper, brown kraft paper, and old book pages for my hearts, but you can use any paper you like, as long as it's not too thick.
  • Watercolours: Some of the book pages were painted with pink watercolours before I folded them, for a little bit of pretty colour. 
A 3D origami heart made with a book page that has been water colored pink.

Variations:

You can make your hearts as big or small as you like.

Cute origami paper would be a really good choice too. If you're making this for decor, use any color paper or scrapbook paper that matches your home or party.

A wooden bowl full of paper 3d origami hearts, and a gold arrow.

Top Tip:

You could use any square piece of paper for this project, as long as it's not too thick, since thicker paper can be difficult to fold precisely. Card stock is not the best choice for this craft.

A 3d origami heart made from an old book page.

Origami Heart Instructions:

1. To begin our origami heart tutorial, we must start with a square paper. If you have a rectangle, fold one corner down to meet the opposite side, then cut off the bottom to leave a triangle. Next, unfold the paper to reveal a square.

You can make a paper origami heart in any size, but to begin with I wouldn't make it too small or too big. Our paper here is about 4 inches square.

The first step is to fold the paper in half and create a center crease in it, then unfold it.

Folding paper to make a 3D origami heart.

2. Next, turn the sheet of paper so that it is open with the fold crease line running vertically. Fold up the bottom of the paper about ¼ of an inch. Then use that new folded edge as the new bottom of the paper, and fold the paper in half horizontally.

3. Making sure the open part of the fold is at the top, fold the top right corner to the bottom edge, bottom corner, to form a triangle on one side.

4. Do the same on the other left side with the top left corner folded down to the bottom edge to form a matching triangle on the other side. The whole paper now looks a bit like the roof of a house.

Folding book page paper into a 3D orgaimi heart.

5. Working with the top layer of paper, take the bottom middle corner of the triangle on the right side and fold it so that the edge lines up with the top triangle edge. Do the same on the other side, creasing hard. Then unfold both of those folds leaving the crease marks.

6. Starting with the lower left tip of the paper, fold it to meet up with the crease line you just created, on the middle edge. Do the same with the other side.

Folding a 3D orgami heart out of an old book page.

7. Next, open up the open edge of the triangle you just created on top, and tuck the piece of paper from underneath into it. Crease it hard. Do the same on the other side.

How to fold a square peice of paper into a 3D origami heart.

8. Then fold in the edges of the top four corners just slightly to make the whole shape more heart shaped.

9. Lastly you're going to blow some air with your mouth into the bottom point of the heart to inflate it, while using your finger to gently push down the centre and form the heart shape.

Step by step folding an 3D orgami heart out of paper, how to inflate it.
The edge of a large wooden dough bowl filled with paper hearts in white, brown and soft pink.

How To Make A 3D Origami Heart Video

Origami is one of those things that is easier to explain in video tutorials than in writing.

Youtube video

With a bowl full of hearts for Valentine's Day, life really is a party!

Frequently Asked Questions:

Can I use any kind of paper for my origami heart?

You can use any paper for this craft, like regular copy paper, scrapbook paper, origami paper, brown kraft paper, or old book pages. We don't recommend using card stock for this craft as it's too stiff and thick, which makes it hard to work with.

Are 3D origami hearts a good craft to make with kids?

The folds are a little tricky at first, but once you get the hang of it, these 3D origami hearts aren't too hard to make. Most 7 -12 year olds should be able to make these.

What can you use these 3D origami hearts for?

We used ours as Valentine's decor in a large bowl. They'd also be cute for a wedding shower or baby shower as decor. They're also cute for gift giving, especially around Valentine's day.

What do I need to make a 3D origami heart?

All you need is one square of paper to make a 3D origami heart.

More Valentine's Day Inspiration

  • Cricut Valentine's Day card free SVG
    Cricut Valentine Card
  • hot chocolate valentine and free printable
    Hot Chocolate Valentine with Free Printable
  • DIY Valentine's Day wreaths
    DIY Valentine's Day Wreaths
  • How to nail polish marble.
    Marbled Hearts

 If you try these 3D Origami Hearts or any other ideas on my blog please leave a star rating and let me know how it went in the comments below. Thanks for visiting today!

Recipe

Wooden bowl full of homemade 3D origami hearts.

3D Origami Heart

Easy 3D puffy heart made from paper.
5 from 1 vote
Print Pin Rate
Cook Time: 10 minutes minutes
Total Time: 10 minutes minutes
Servings: 1
Author: Dannyelle Nicolle-Ramjist
Cost: $ .25

Equipment

  • 1 Pair of Scissors

Materials

  • 1 piece paper any color or pattern

Instructions

  • To begin our origami heart tutorial, we must start with a square paper. If you have a retangle, fold one corner down to meet the opposite side, then cut off the bottom to leave a triangle. Next, unfold the paper to reveal a square. 
    The first step is to fold the paper in half and create a center crease in it, then unfold it.
  • Next, turn the sheet of paper so that it is open with the fold crease line running vertically. Fold up the bottom of the paper about ¼ of an inch. Then use that new folded edge as the new bottom of the paper, and fold the paper in half horizontally.
  • Making sure the open part of the fold is at the top, fold the top right corner to the bottom edge, bottom corner, to form a triangle on one side.
  • Do the same on the other left side with the top left corner folded down to the bottom edge to form a matching triangle on the other side. The whole paper now looks a bit like the roof of a house.
  • Working with the top layer of paper, take the bottom middle corner of the triangle on the right side and fold so that the edge lines up with the top triangle edge. Do the same on the other side, creasing hard. Then unfold both of those folds leaving the crease marks.
  • Starting with the lower left tip of the paper, fold it to meet up with the crease line you just created, on the middle edge. Do the same with the other side.
  • Next, open up the open edge of the triangle you just created on top, and tuck the piece of paper from underneath into it. Crease it hard. Do the same on the other side.
  • Then fold in the edges of the top four corners just slightly to make the whole shape more heart shaped.
  • Lastly you're going to blow some air with your mouth into the bottom point of the heart to inflate it, while using your finger to gently push down the centre and form the heart shape.

Notes

You can make a paper origami heart in any size, but to begin with I wouldn't make it too small or too big. Our paper here is about 4 inches square.
Top Top:  You could use any square piece of paper for this project, as long as it's not too thick, since thicker paper can be difficult to fold precisely. Card stock is not the best choice for this craft.
 
  • « Go to Previous Page
  • Page 1
  • Interim pages omitted …
  • Page 11
  • Page 12
  • Page 13
  • Page 14
  • Page 15
  • Interim pages omitted …
  • Page 21
  • Go to Next Page »

Primary Sidebar

Welcome!

Life is a Party is all about helping you celebrate everyday with great food, entertaining and party inspiration, and seasonal crafts and home decor inspired by the holidays.

More About Dannyelle

Trending Recipes

  • Mac and cheese with panko breadcrumb topping.
    Best Homemade Mac and Cheese with Panko Breadcrumb Topping
  • Homemade iced capps in glasses on a wood table.
    Tim Hortons Copycat Iced Capp Recipe
  • Dirt Pudding no cream cheese in glasses with candy rocks, and fresh mint that looks like a little plant.
    Easy Dirt Pudding Recipe without Cream Cheese
  • Easy 3 ingredient coconut milkshake recipe.
    Easy Coconut Milkshake Recipe
  • Easy food processor scones on a plate with jam.
    Easy Food Processor Scones
  • Fluffy small batch pancakes for two ready to serve on a plate with syrup.
    Easy Small Batch Pancakes For Two Recipe

Fall Ideas

  • Pumpkin shaped dinner roll recipe, with a herb stem.
    Pumpkin Shaped Dinner Rolls
  • Fall breakfast board
    Fall Breakfast Charcuterie Board
  • Halloween witch decorations
    Witch Halloween Decor
  • fall home decor
    Fall Decorating Ideas -Home Tour
  • Modern Boho fall mantel ideas.
    Modern Boho Fall Mantel Ideas
  • Homemade pink candy apples on a cutting board.
    How To Make Pink Candy Apples

Entertaining Ideas

  • Adult mermaid party table set on the beach with cake and shells.
    Adult Mermaid Party Ideas: A Beach Picnic Goodbye to Summer
  • Overhead view of tomato party table with pizza and appetizers.
    The Ultimate Tomato Party: A Tomato Girl Summer Garden Gathering
  • Camp themed party table with green gingham tablecloth, wildflowers, and Welcome to Camp banner.
    The Ultimate Camp Themed Party for Adults
  • Garden party table set under white pergola with vintage floral tablecloth, pink peony centerpiece in wooden tool caddy, white wicker chairs, and climbing white roses in background.
    Garden Themed Party
  • Complete mimosa bar setup on white console table with vintage silver ice bucket, labeled colorful juice bottles, small glass garnish bowls, and ribbon-tied champagne flutes on white lace tablecloth with flower wall backdrop.
    How to Set Up a Beautiful Mimosa Bar
  • Breakfast for dinner party table styled like a bed with star quilt tablecloth, gingham pillows, and cloud installation above.
    Breakfast for Dinner Party: Brinner Under the Stars
  • Recipe Index
  • Parties & Entertaining
  • Fall
  • Subscribe
  • Free Resource Library

Footer

back to top

as seen in:

Better Homes and Garden Logo
American Farmhouse Style logo.
Apartment Therapy logo.

About

  • Privacy Policy
  • About

Subscribe

  • Sign Up! for emails and updates

Contact

  • Contact

As an Amazon Associate I earn from qualifying purchases.

Copyright © 2025 Life is a Party

Share
Pin
Post
Share
Pin
Post

Rate This Recipe

Your vote:


A rating is required
A name is required
An email is required