• Skip to primary navigation
  • Skip to main content
  • Skip to primary sidebar
Life is a Party
  • Recipe Index
  • Parties & Entertaining
  • Fall
  • Subscribe
  • Free Resource Library
menu icon
go to homepage
  • Recipe Index
  • Parties & Entertaining
  • Fall
  • Subscribe
  • Free Resource Library
subscribe
search icon
Homepage link
  • Recipe Index
  • Parties & Entertaining
  • Fall
  • Subscribe
  • Free Resource Library
×
Home

Mason Jar Oil Lamps

Mason Jar Oil Lamps

Jan 20, 2016 · 32 Comments

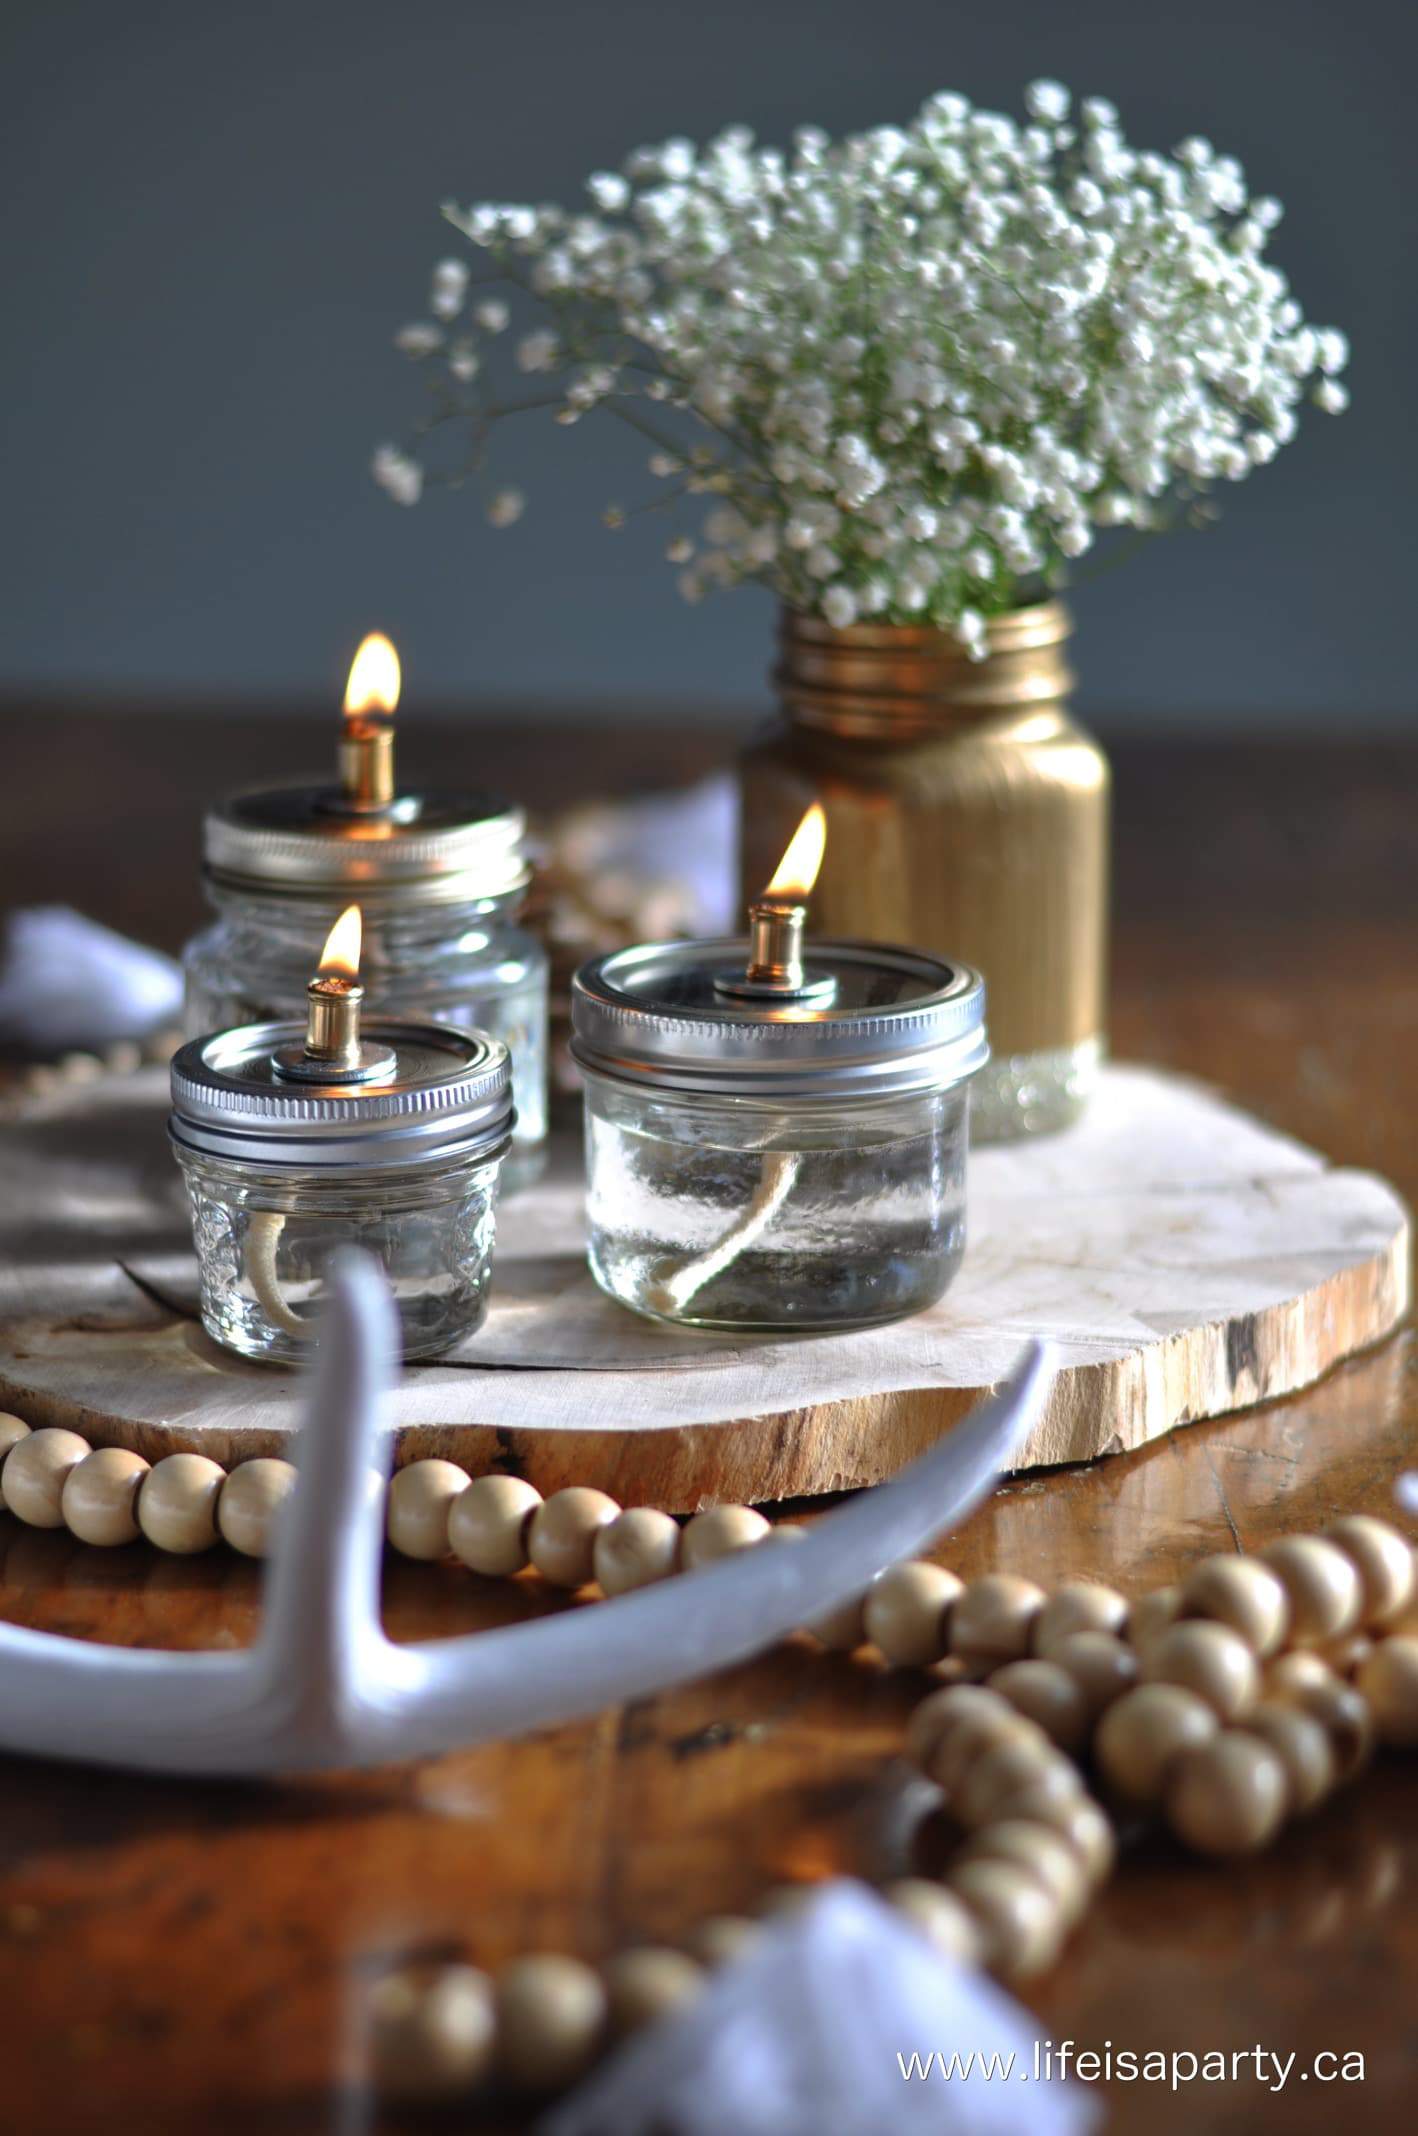
How to make mason jar oil lamps.

Make these easy and beautiful DIY Mason Jar Oil Lamps. They're simple to make and perfect for a party, wedding centrepiece, or just in your home as decor.

How to make mason jar oil lamps.
[feast_advanced_jump_to]

Why You'll Love This Craft

  • They're simple and inexpensive to make.
  • The finished oil lamps make a beautful centerpiece or home decor.
  • The oil lamps are made from easy to find materials, including any size mason jars.

During the dark days of winer, I thought a little light filled project would add some warmth and brightness. These Mason Jar Oil Lamps are pretty simple to put together, and are really, really pretty. They make a lovely gift for someone. These mason jar oil candles are also perfect for a romantic atmosphere or dinner date setting. They're also perfect for outdoor use.

You might like our Toy Felt Cookies, Ribbon Wall Hanging, or How To Paint A Buffalo Check Feature Wall.

Mason Jar Oil Lamp Materials:
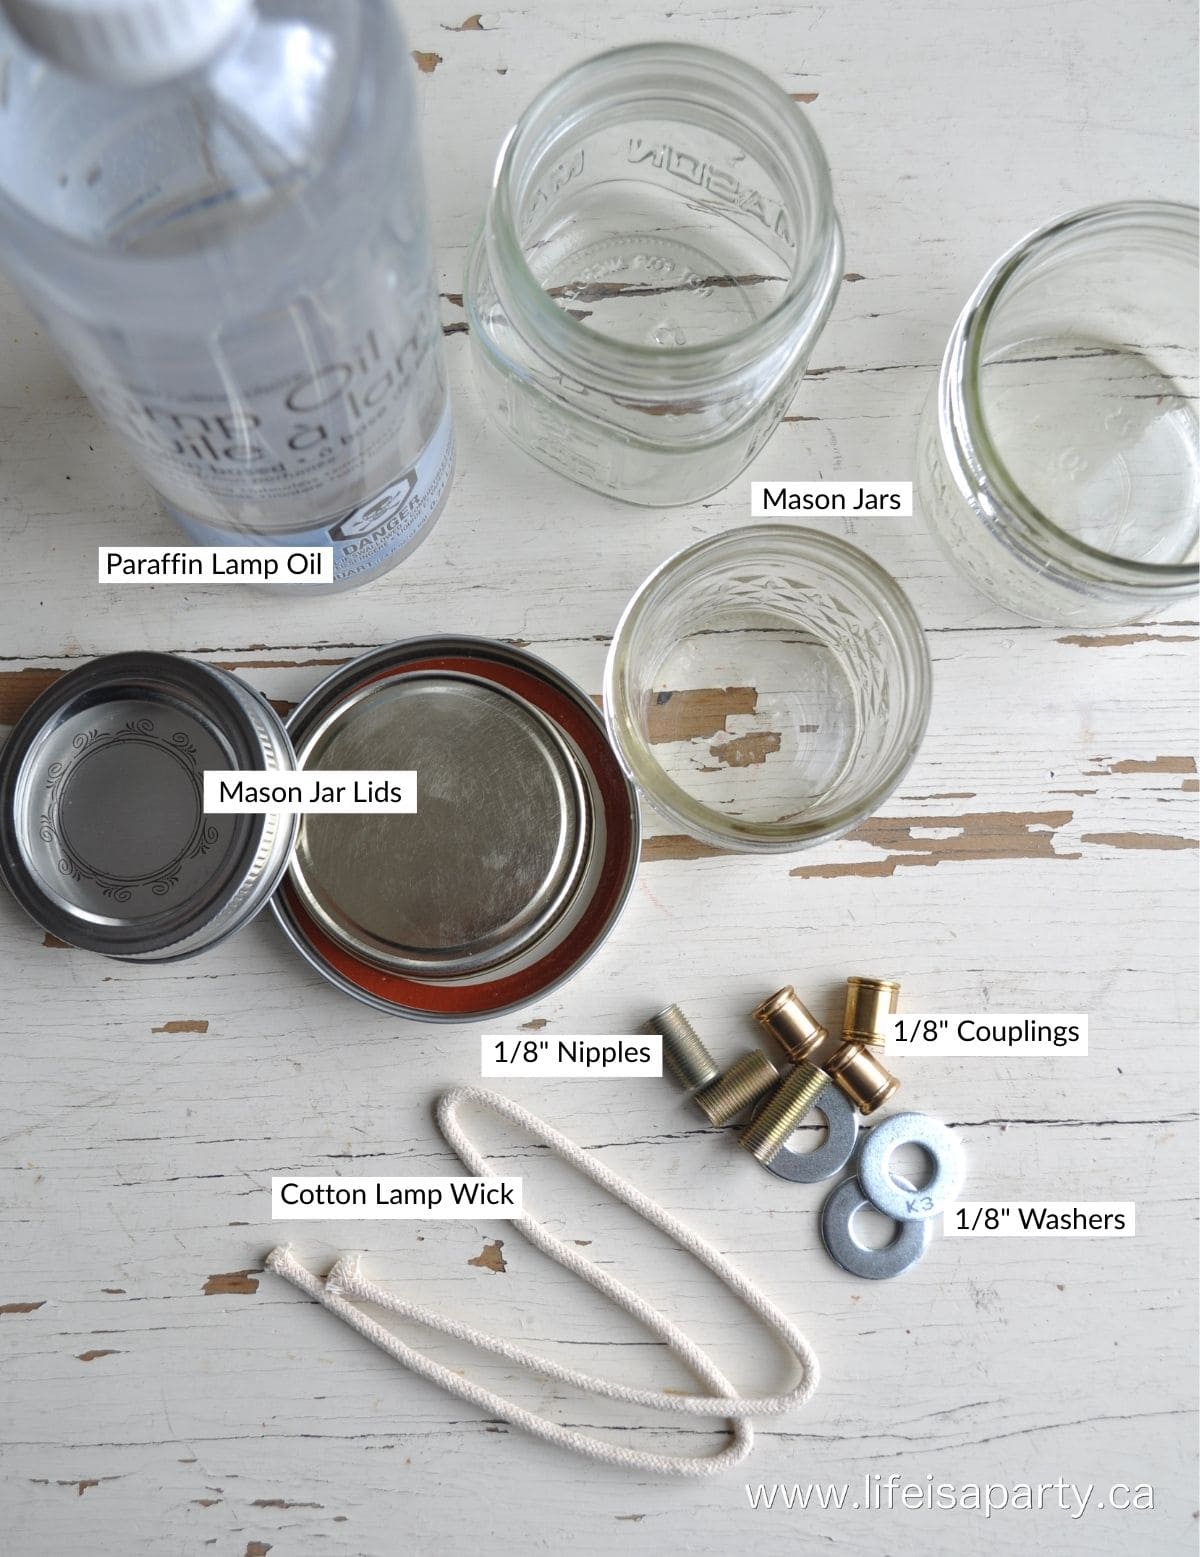
Materials to make DIY mason jar oil lamps, including lamp oil, wick, and mason jars.
  • 3 Different Small Mason Jars With Lids: You can use any size or make of mason jar for this craft, just make sure you have a lid that fits. We used 3 different sizes for interest.
  • Paraffin Lamp Oil: We found ours at the hardware store.
  • Cotton Lamp Wick: These are usually found with the camping supplies, or in the candle making section of the craft store.
  • Nipples ⅛": Look for the nipples in the lighting supplies section of the hardware store.
  • Couplings ⅛": Look for the couplings also in the lighting supplies section of the hardware store.
  • Washers ⅛"

Variation

You could use coloured lamp oil in your mason jar, to give the project some color.
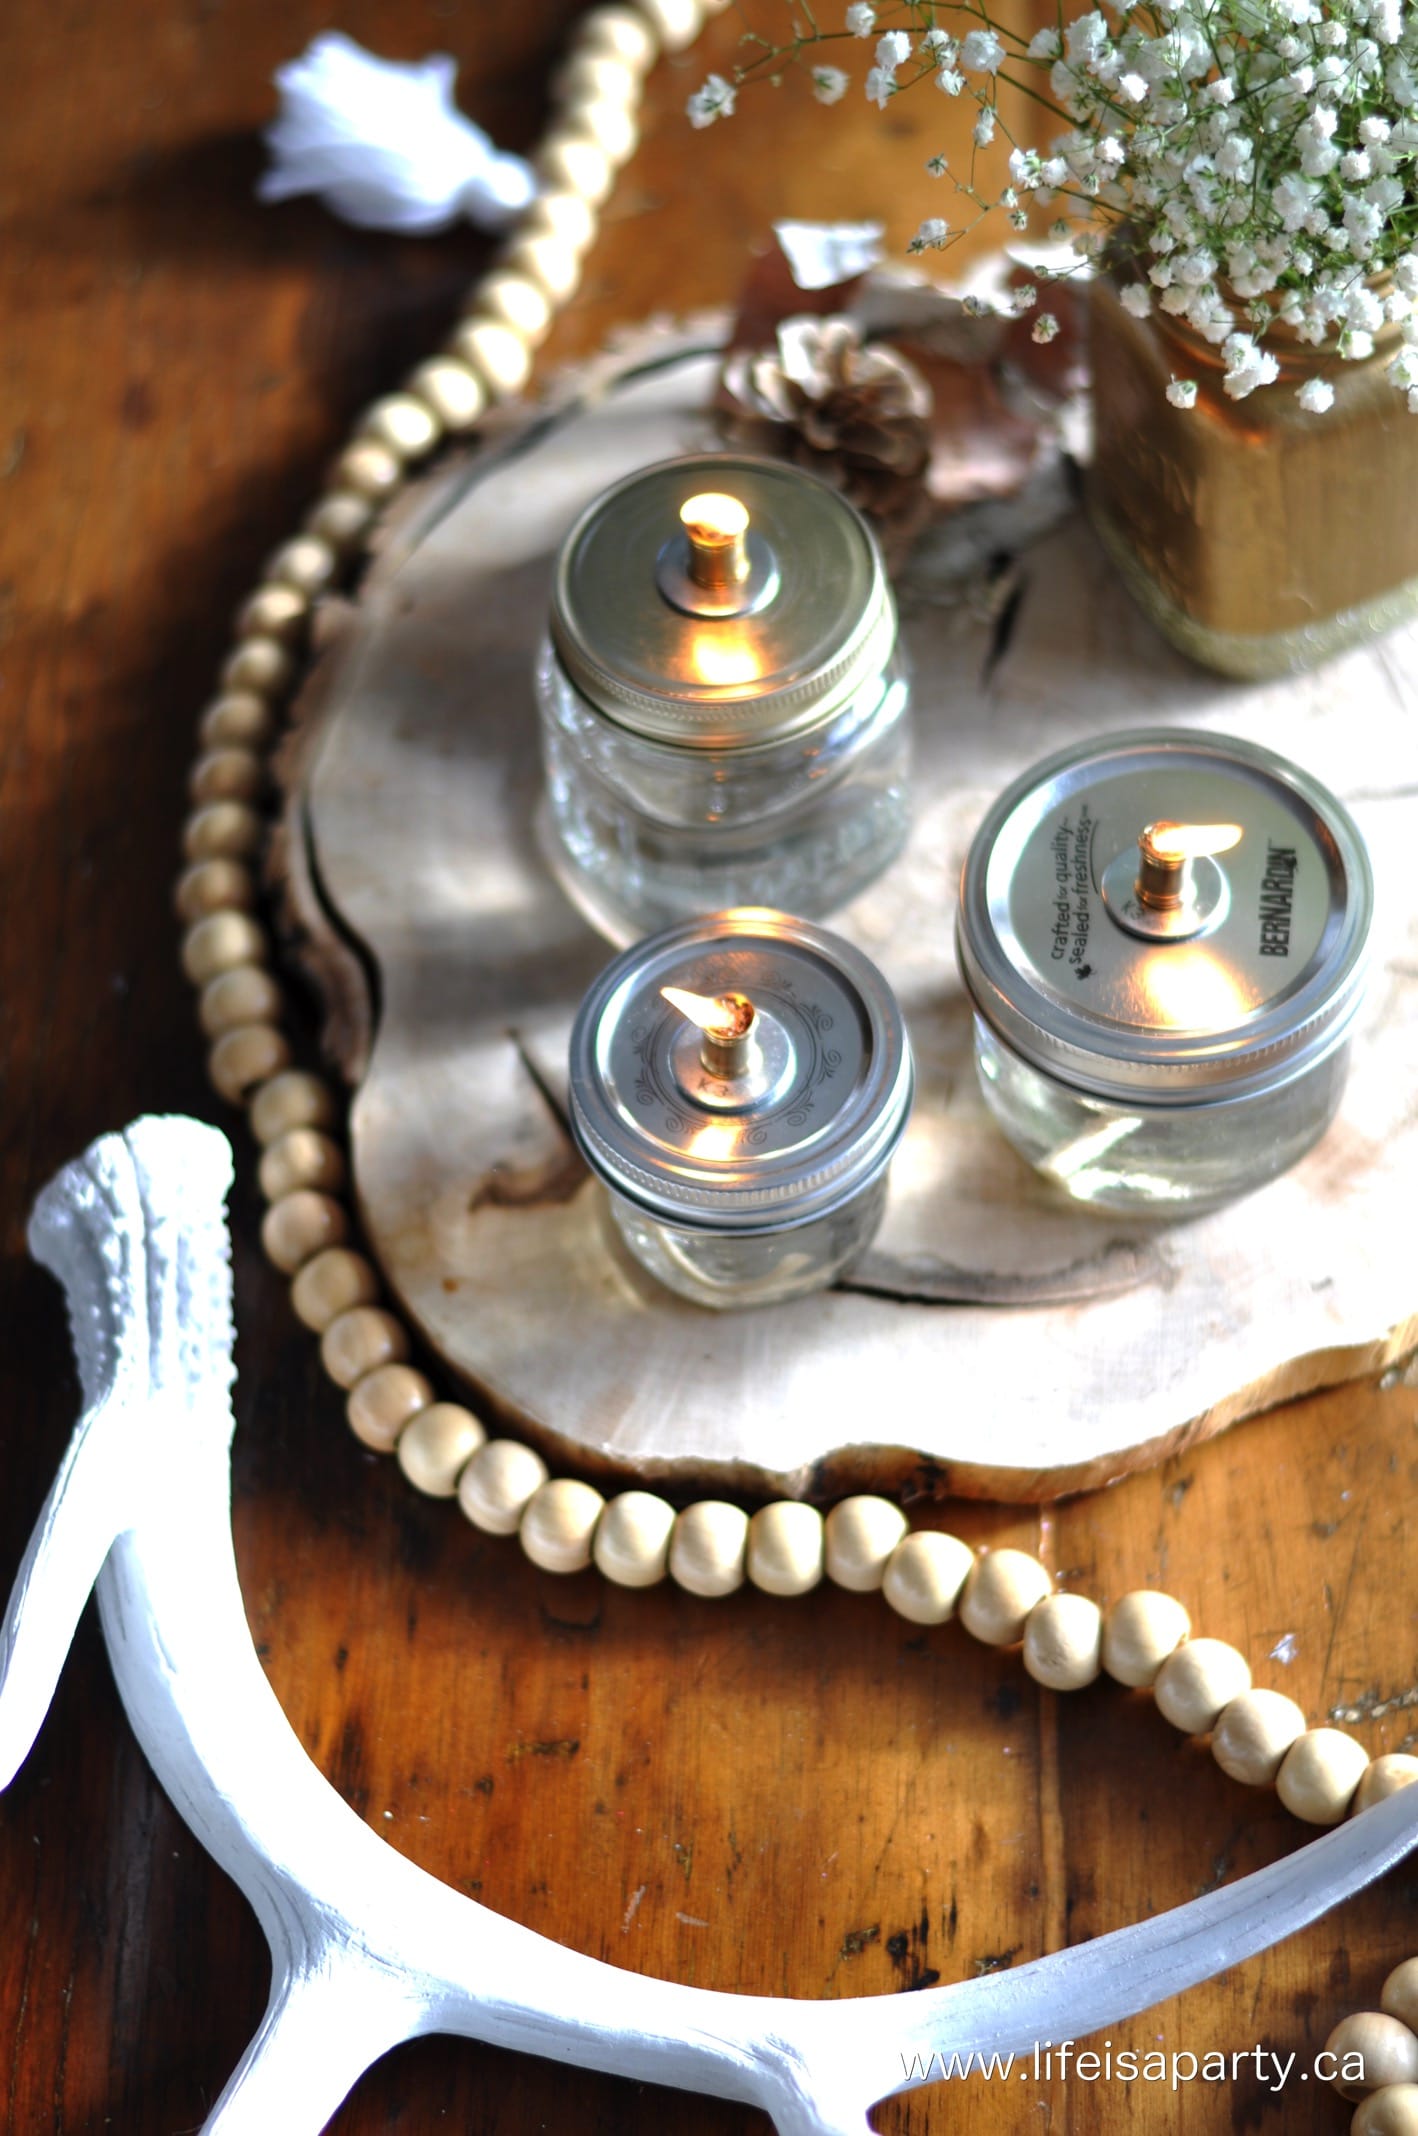
Mason Jar Oil Lamps

Choosing Your Lamp Oil

There are different options when it comes to choosing the type of lamp oil to use in your mason jar oil lamp burner. We went paraffin lamp oil as it's a clean burning oil. It's also quite easy to find at any hardware store.

If you were using these lamps in an outdoor space and wanted to keep the bugs away with a scented flame you could also use citronella oil in them.

You can also alter the smell of your oil by adding drops of essential oil, such as lavender essential oil, cinnamon oil, peppermint oil, or any of your favourite essential oils.

Can You Use Olive Oil In A Mason Jar Oil Lamp?

Olive oil and vegetable oil has been used for thousands of years as a lamp fuel. Cooking oils are easily available and burn very cleanly.

The problem with using it here is that the olive oil is thicker than lamp oil and doesn't absorb up the wick as well. A floating wick works better with vegetable or olive oil because it floats on the surface and doesn't have to travel up the wick. Olive oil isn't flammable like lamp oil, so that the wick can float on the surface.

It might be fun to experiment with different designs to try modify our design to work with a floating wick.

Safety Note:

Never leave a mason jar oil lamp unattended. Keep away from children, pets, and flammable materials.

Instructions:

Step 1: The first step in making your mason jar oil lamp is to drill a hole in the canning jar lid. 
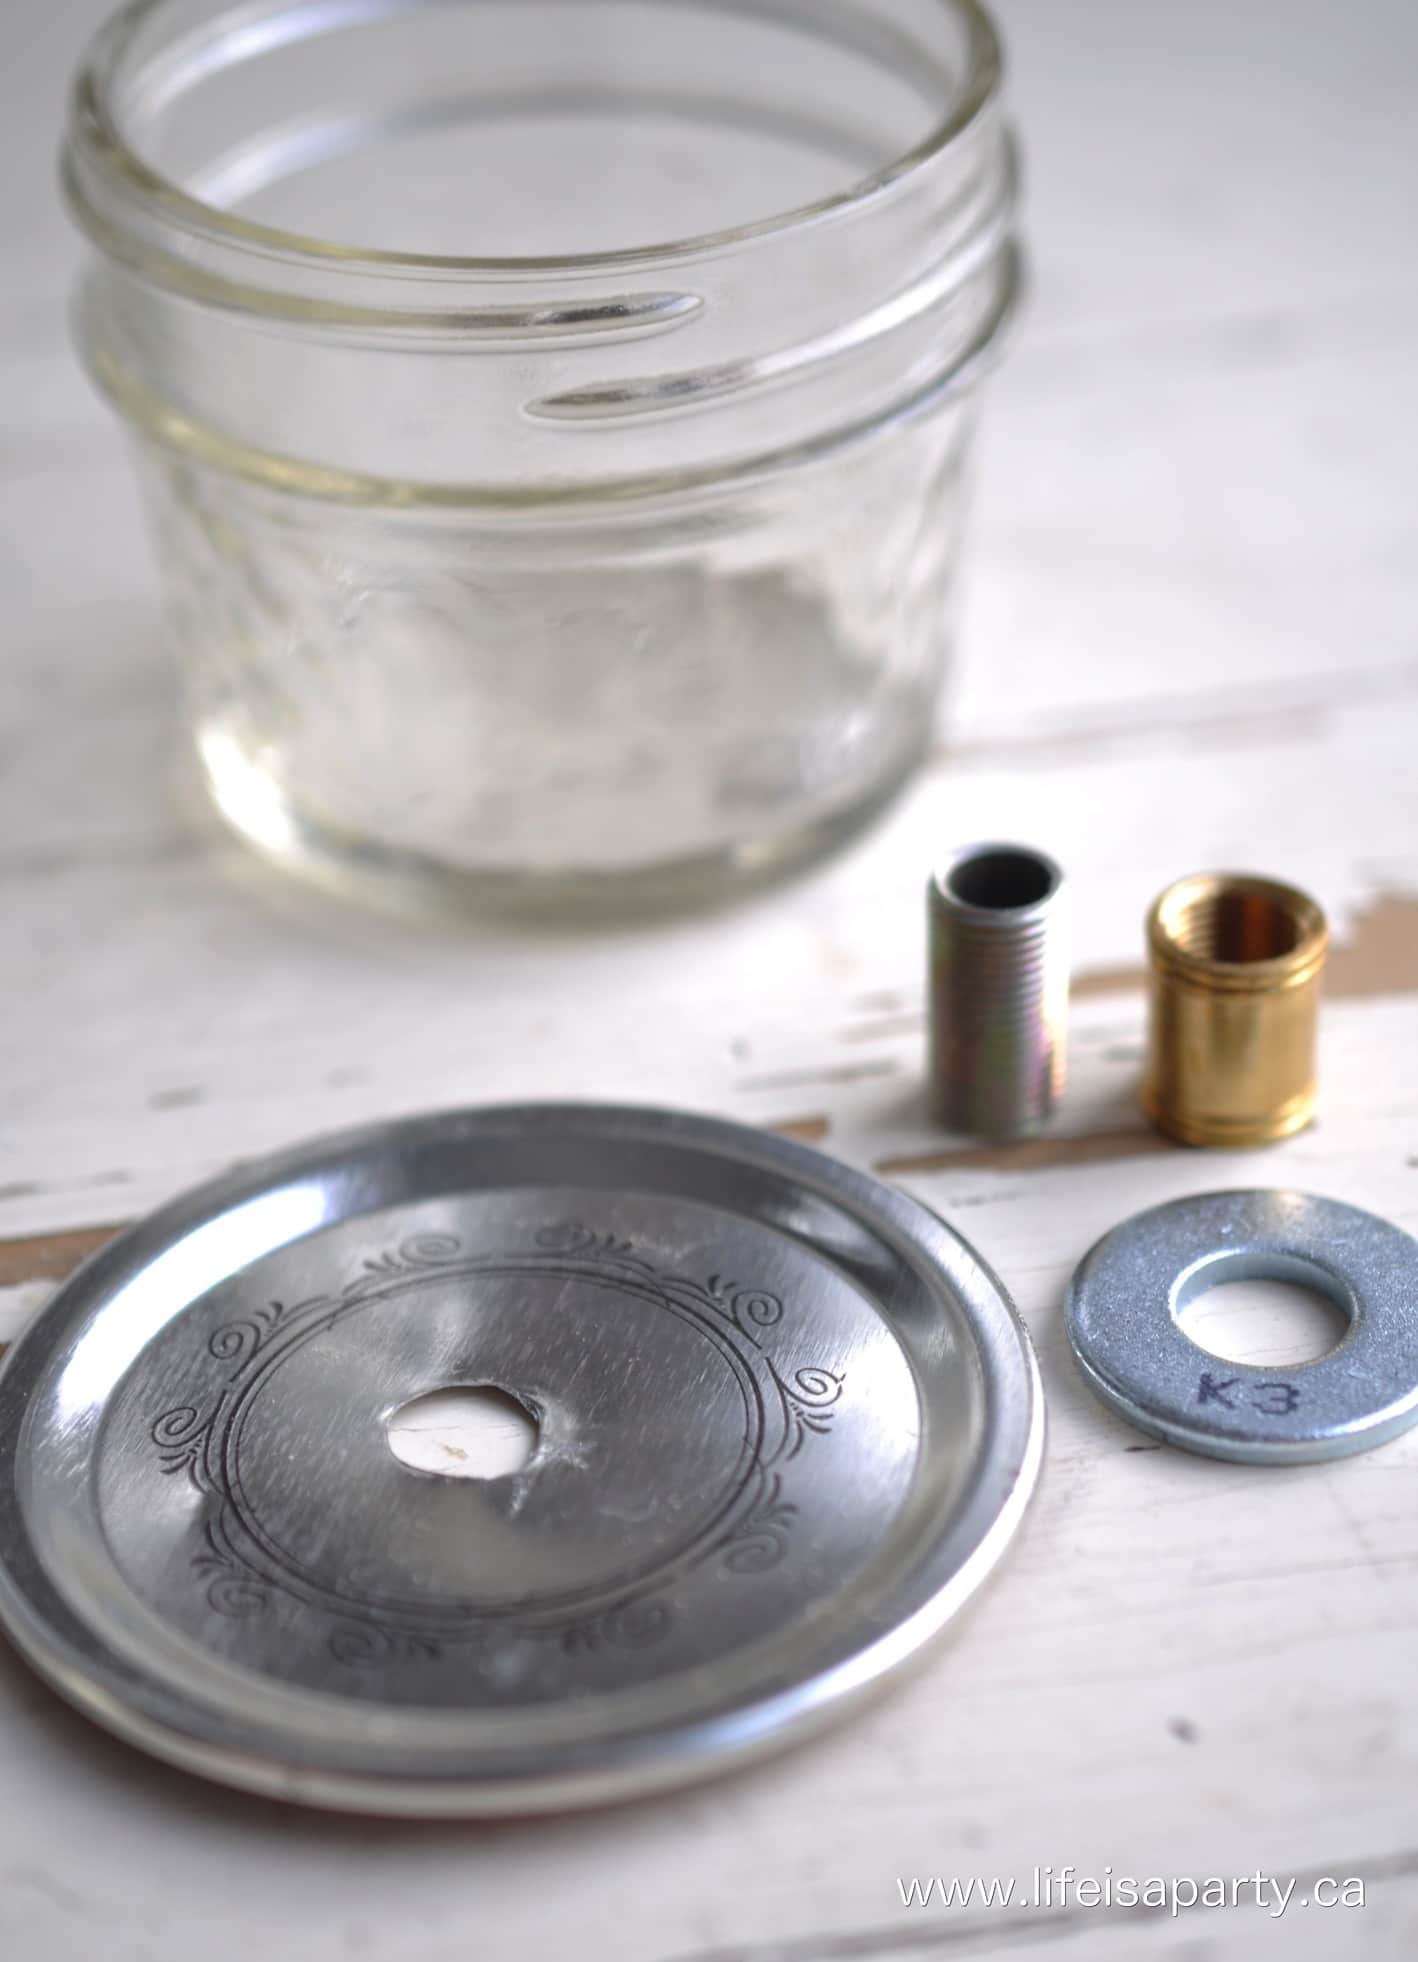

how to make an oil lamp

I found it a little tricky to get it in the center of the lid, and found drilling a small pilot hole first, and then the larger ⅛" one worked best. It still isn't perfect, but it doesn't need to be, so don't worry.

Once you've done your first jar lid, repeat this process for the rest of the lamps you're making.
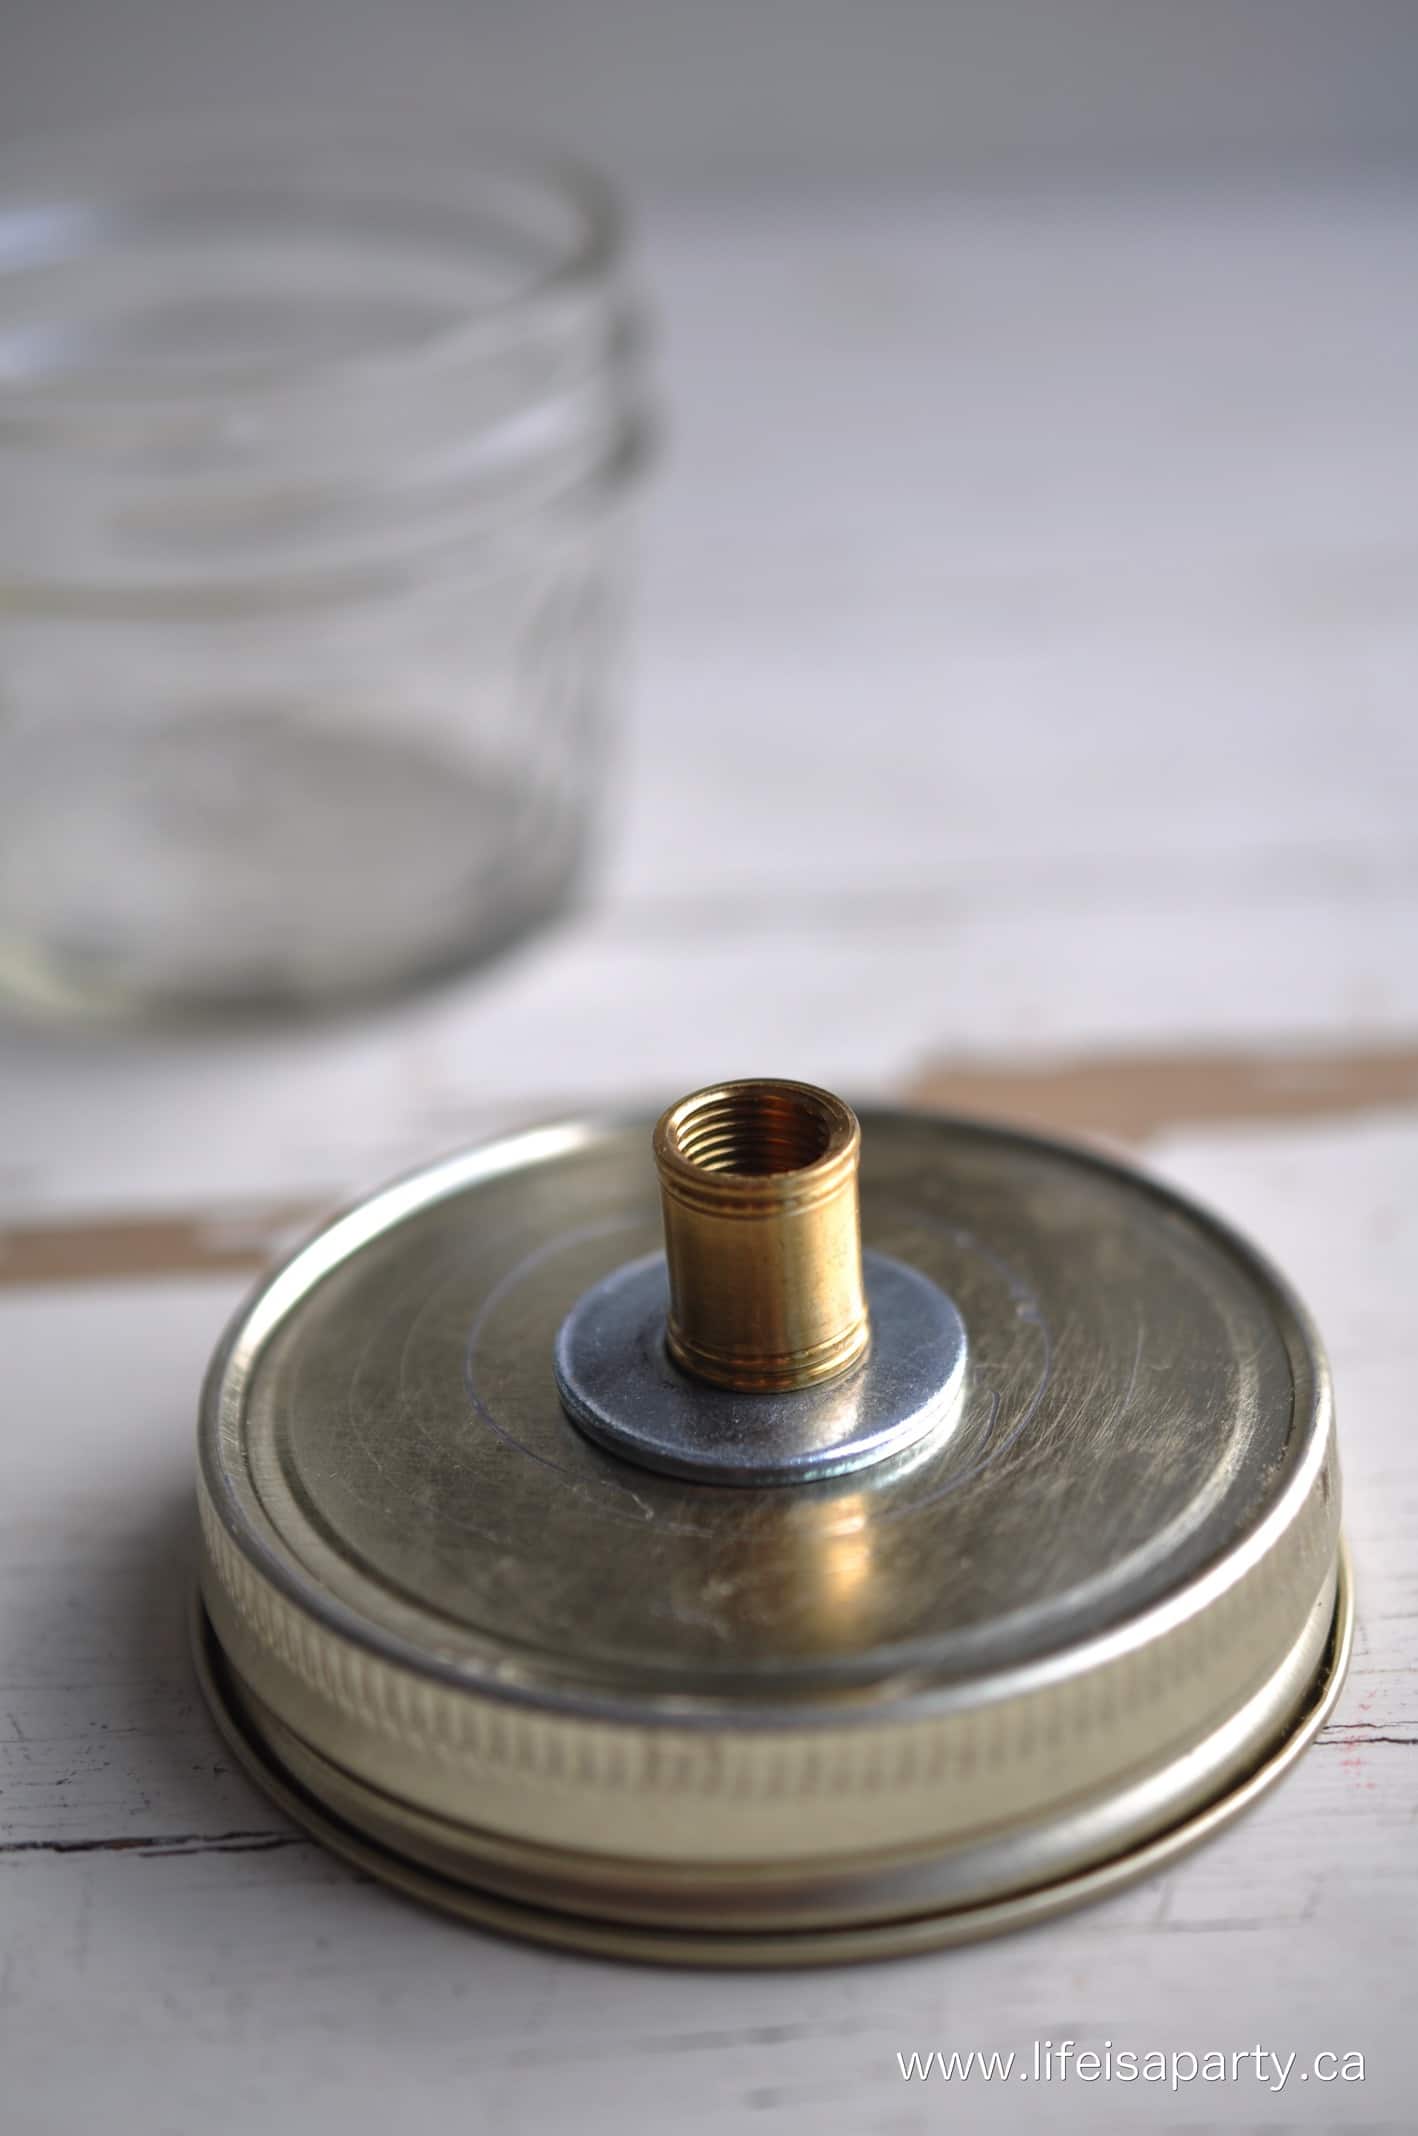
how to make an oil lamp

Step 2: Next, you thread the nipple through the hole, so it's about half way through each side, and then add the washer and screw the coupling onto the top of the lid.
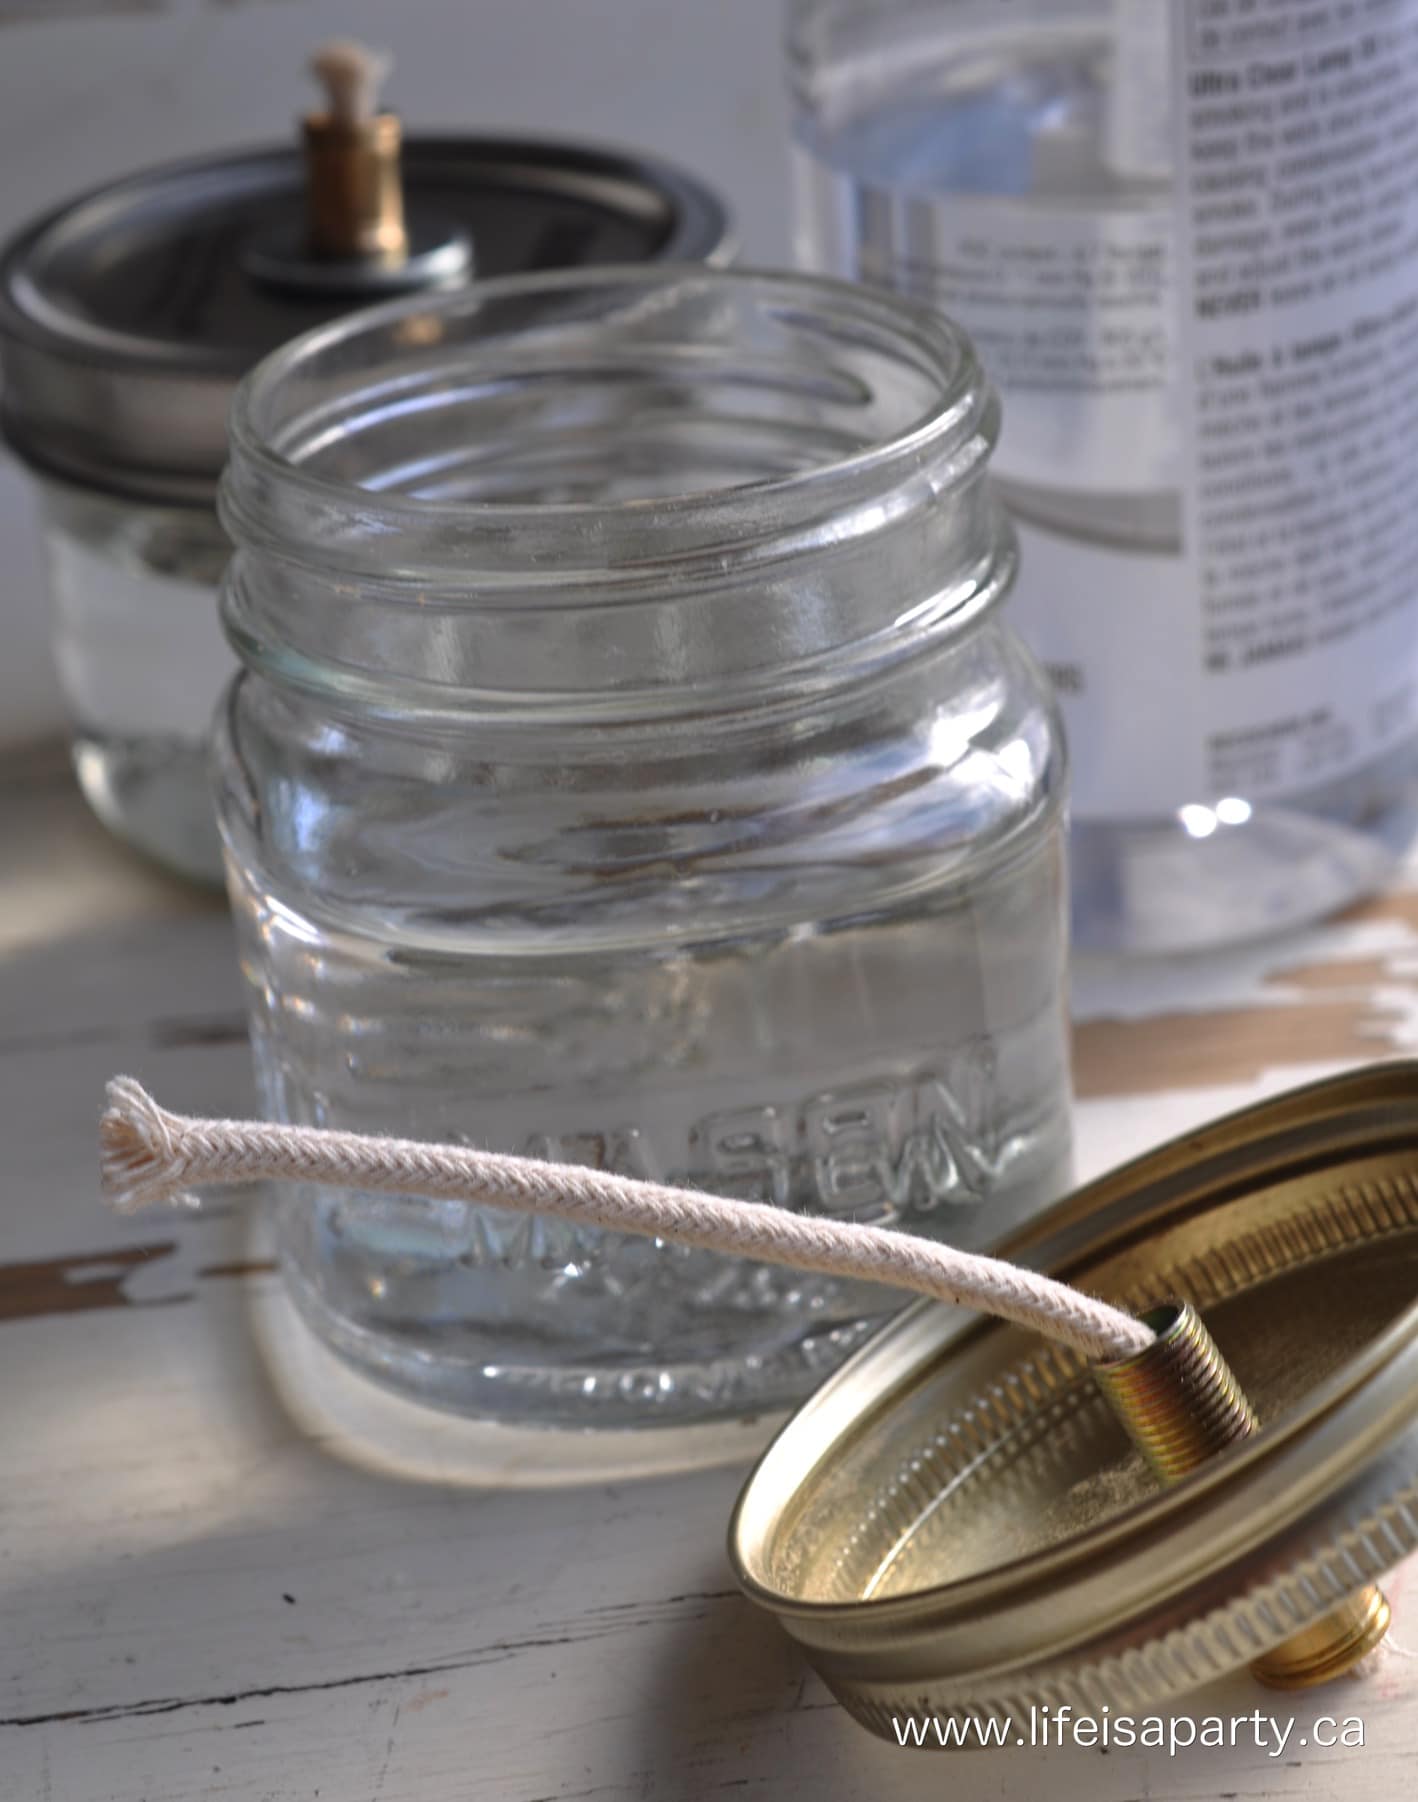
diy oil lamp

Step 3: Cut a piece of the cotton wick with enough length of wick so that it is a little longer than the depth of your jar and thread it through the mason jar lid. 

Fill up your mason jar with lamp oil.

The remaining length of the wick will rest on the bottom of the jar, and you can pull it up as necessary. Save your remaining lamp wicks that you've cut off to use as extra wicks in the future.
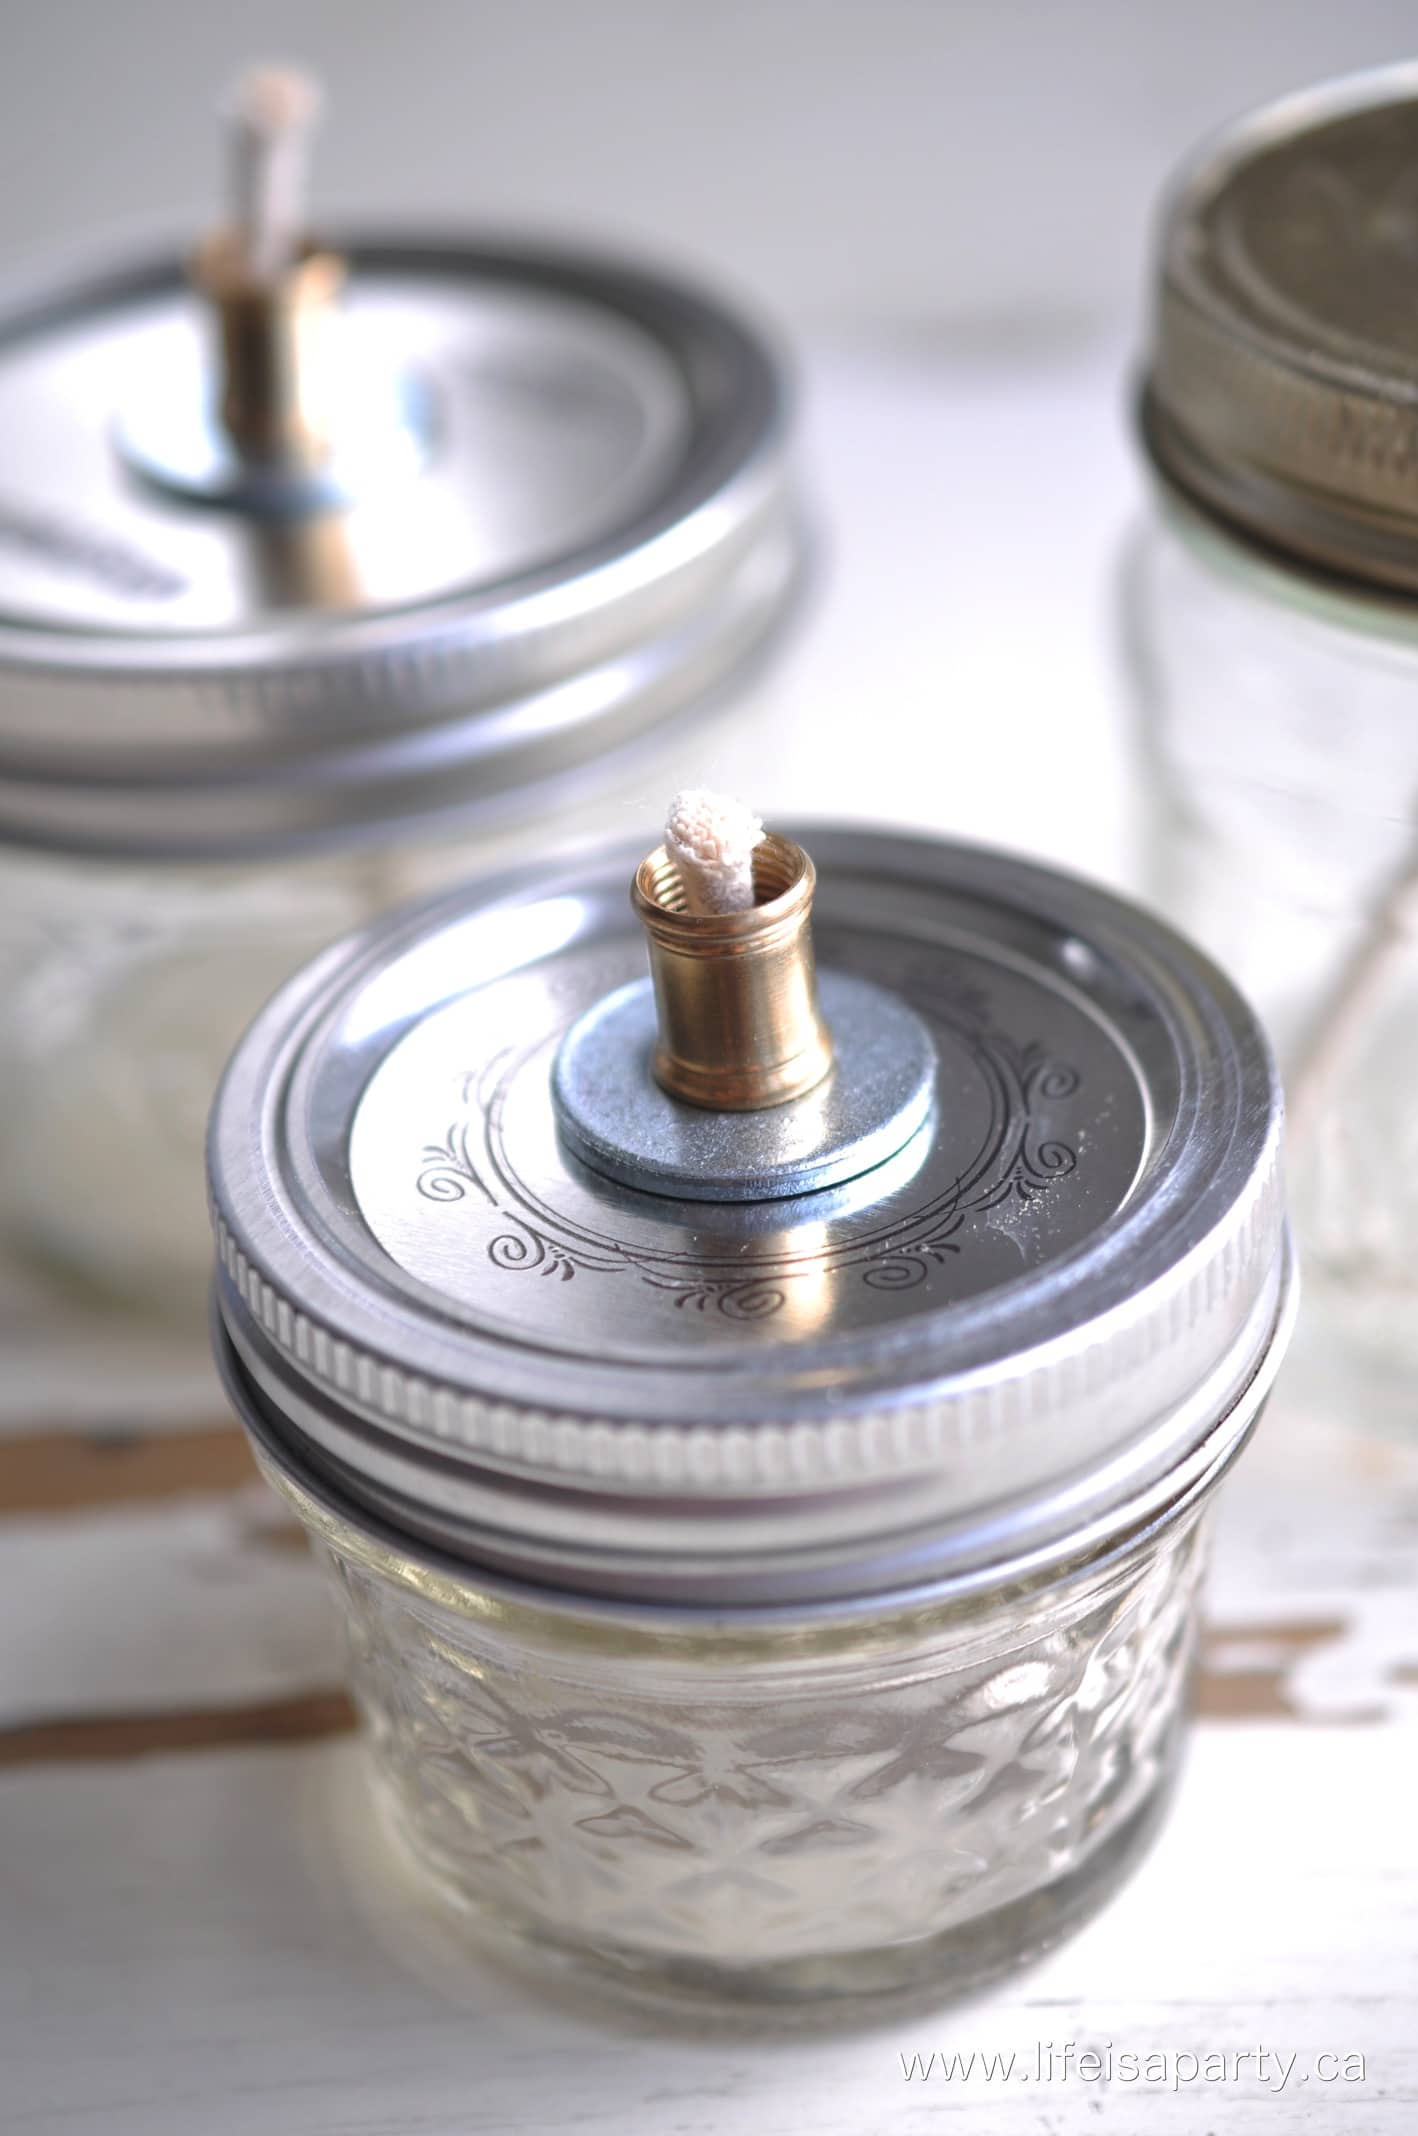
DIY Mason Jar Oil Lamps

Step 4: Now, screw on the lid on to the top of the jar, with just a little wick at the top. 

Give the wick a bit of time to soak up the oil before lighting it for the first time.

Expert Tip: If the wick is too long, it will cause the lamp to smoke, in which case you can trim it shorter, or push it down to make it shorter. 
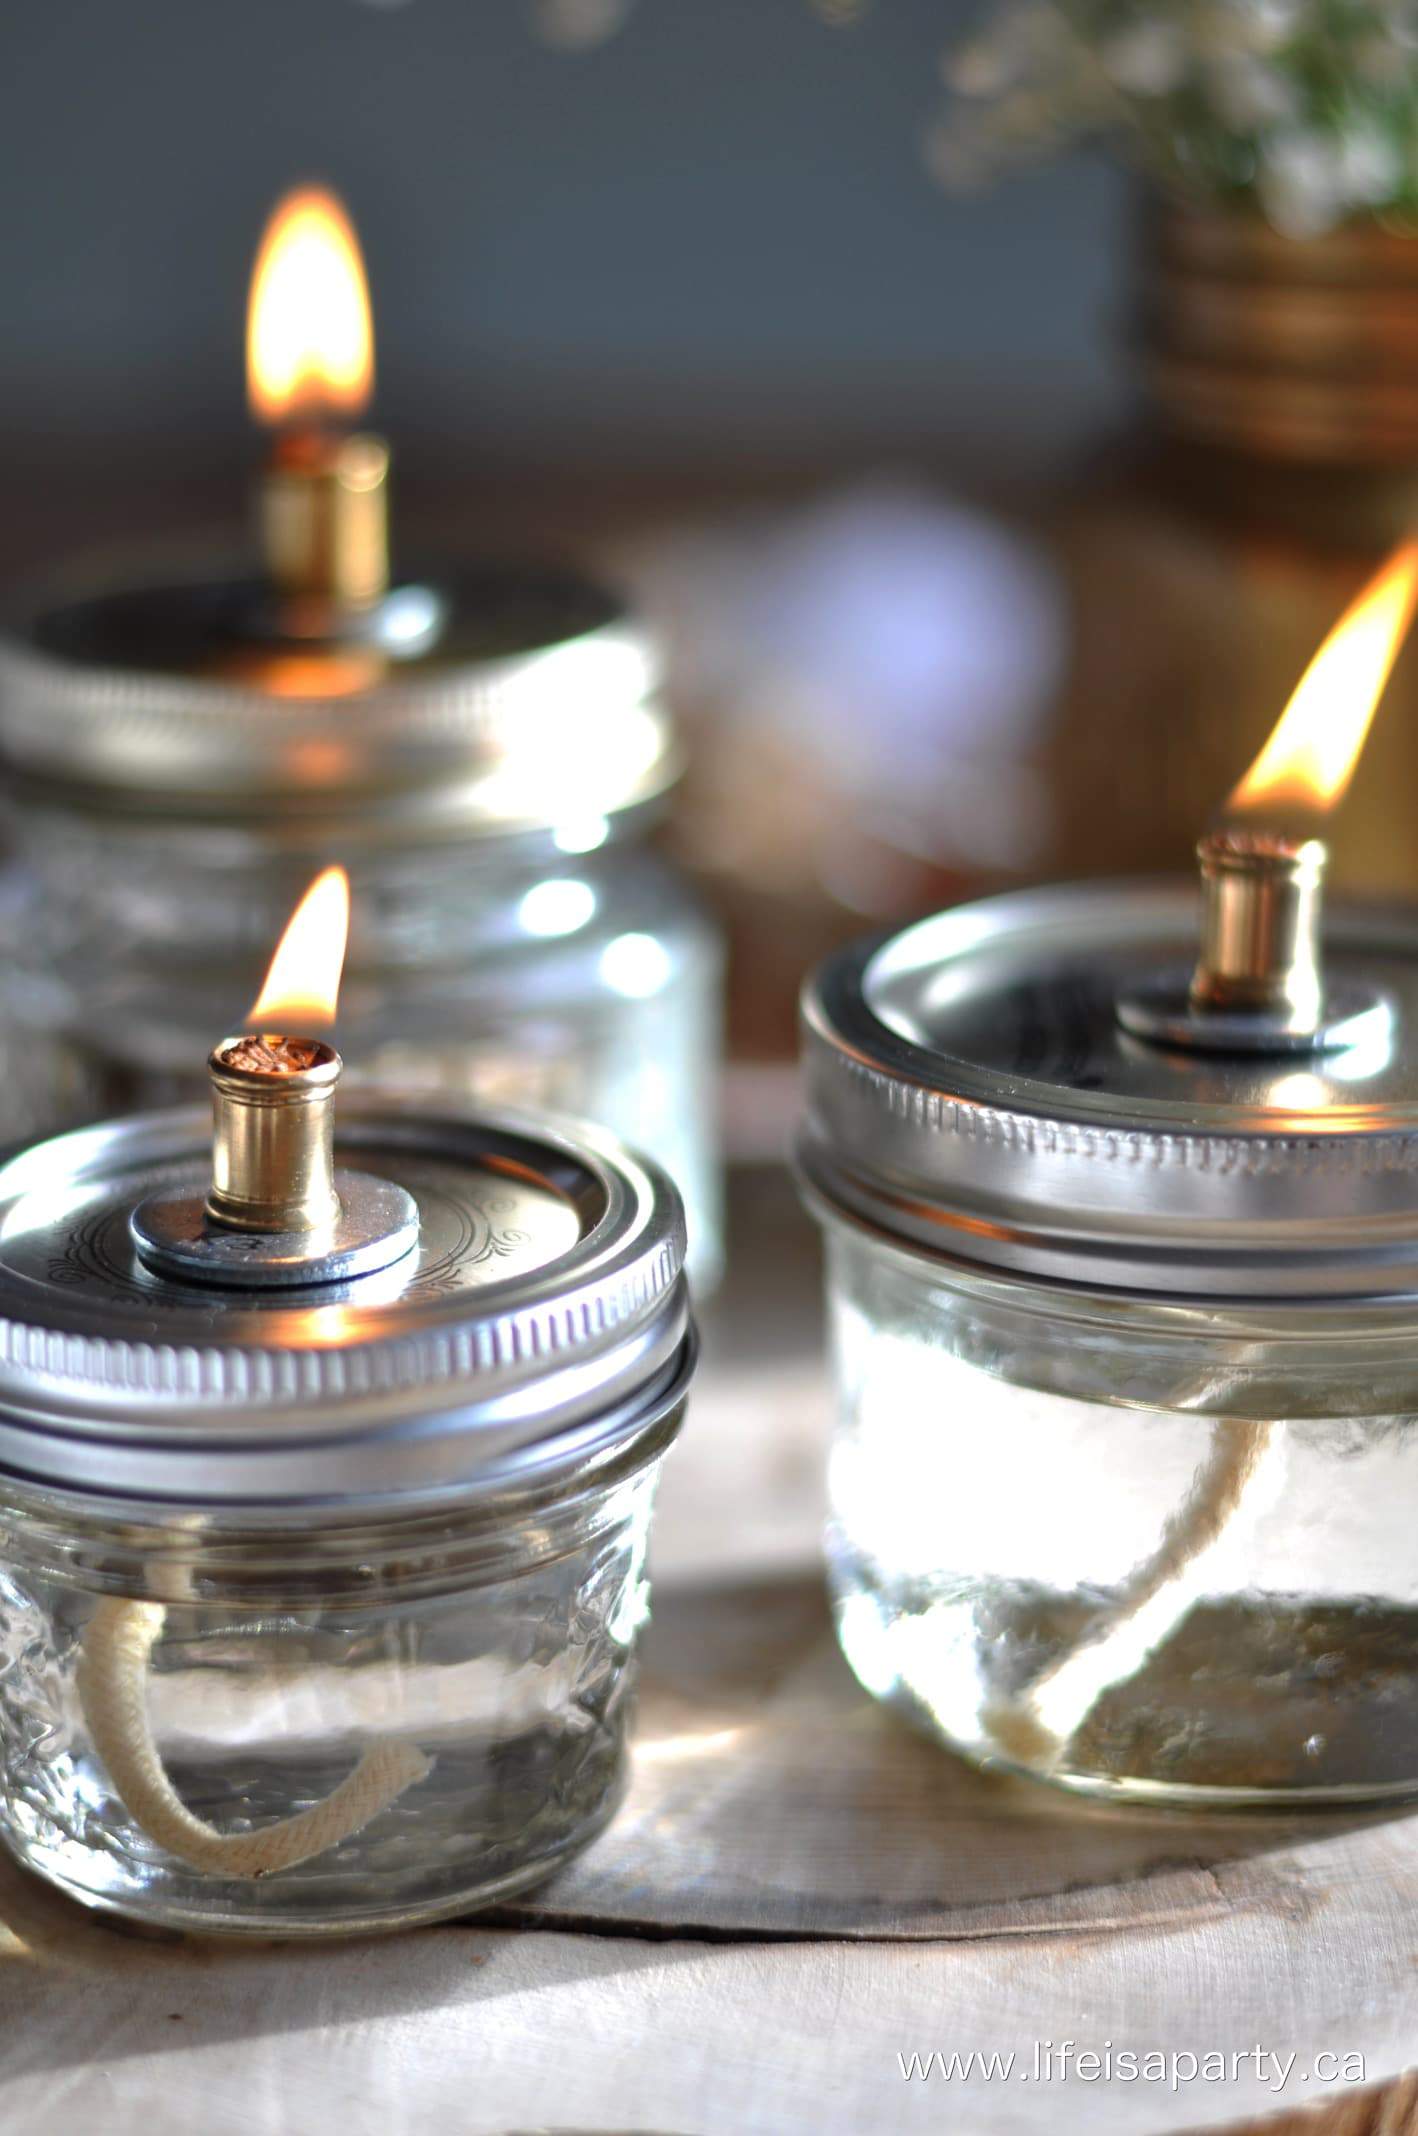
DIY Mason Jar Oil Lamps

I think they'd be really lovely as wedding centrepieces, and I think I'll use mine for an upcoming party.

These should help me get through some of the long nights of winter a little more easily, with their warm cozy light.

With DIY Mason Jar Oil Lamps, life really is a party!

More Craft Inspiration

  • Everlasting gingerbread houses made from gingerbread salt dough.
    Easy Salt Dough Gingerbread Recipe for Houses and Ornaments
  • Cricut gingerbread decor felt gingerbread house banner and gingerbread canister with vinyl gingerbread houses
    DIY Gingerbread Decor Ideas To Make With Your Cricut
  • DIY paper Christmas cloche cricut
    DIY Paper Christmas Cloche Lantern with Free Cricut Pattern
  • DIY velvet acorn
    How To Make DIY Velvet Acorns

Frequently Asked Questions

Are mason jar oil lamps safe indoors?

Yes. Remember to never leave a mason jar oil lamp unattended. Keep away from children, pets, and flammable materials.

Why is my mason jar oil lamp smoking?

Your wick is too long. Extinguish your lamp, and trim the wick shorter or pull it down to adjust it before relighting.

How do you extinguish a mason jar oil lamp?

Blow out the flame, or use a candle snuffer to extinguish your mason jar oil lamp.

How long will a mason jar oil lamp burn?

How long a mason jar oil lamp burns depends on several factors. We recommend using paraffin lamp oil, which burns most effectively. Your burn time will depend on your type of oil, size of the mason jar, the thickness of the wick, and length of the wick. In general, 1 cup of lamp oil should burn between 3-12 hours.

If you try our tutorial on How To Make to Make A Mason Jar Oil Lamp or any other ideas on the blog please let me know how it went in the comments below. Thanks for visiting today!
how to make a Mason Jar Oil Lamps

Recipe

How to make mason jar oil lamps.

Mason Jar OIl Lamps

Make beautiful and inexpensive mason jar oil lamps with simple materials.
5 from 1 vote
Print Pin Rate
Cook Time: 20 minutes minutes
Total Time: 20 minutes minutes
Servings: 3
Author: Dannyelle Nicolle-Ramjist
Cost: $15

Equipment

  • Drill with ⅛" Drill Bit
  • scissors

Materials

  • 3 Mason Jars
  • Paraffin Lamp Oil
  • Cotton Lamp Wick
  • 3 ⅛ " Nipples
  • 3 ⅛" Couplings
  • 3 ⅛" Washers

Instructions

  • The first step in making your beautiful mason jar oil lamp is to drill a hole in the canning jar lid. I found it a little tricky to get it in the center of the lid, and found drilling a small hole first, and then the larger ?" one worked best. It still isn't perfect, but it doesn't need to be, so don't worry. Once you've done your first jar lid, repeat this process for the rest of the lamps you're making.
  • Next, you thread the nipple through the hole, so it's about half way through each side, and then add the washer and screw the coupling onto the top of the lid.
  • Cut a piece of the cotton wick with enough length of wick so that it is a little longer than the depth of your jar and thread it through the mason jar lid. Fill up your mason jar with lamp oil. The remaining length of the wick will rest on the bottom of the jar, and you can pull it up as necessary. Save your remaining lamp wicks that you've cut off to use as extra wicks in the future.
  • Now, screw on the lid on to the top of the jar, with just a little wick at the top. If the wick is too long, it will cause the lamp to smoke, in which case you can trim it shorter, or push it down to make it shorter. Give the wick a bit of time to soak up the oil before lighting it for the first time.

Notes

We like using Paraffin Lamp Oil because it's clean burning and easy to find in any hardware store
Safety Note: Never leave a mason jar oil lamp unattended. Keep away from children, pets, and flammable materials.
 

The Ultimate Butter Themed Party —A Toast Dinner

Jan 8, 2016 · 3 Comments

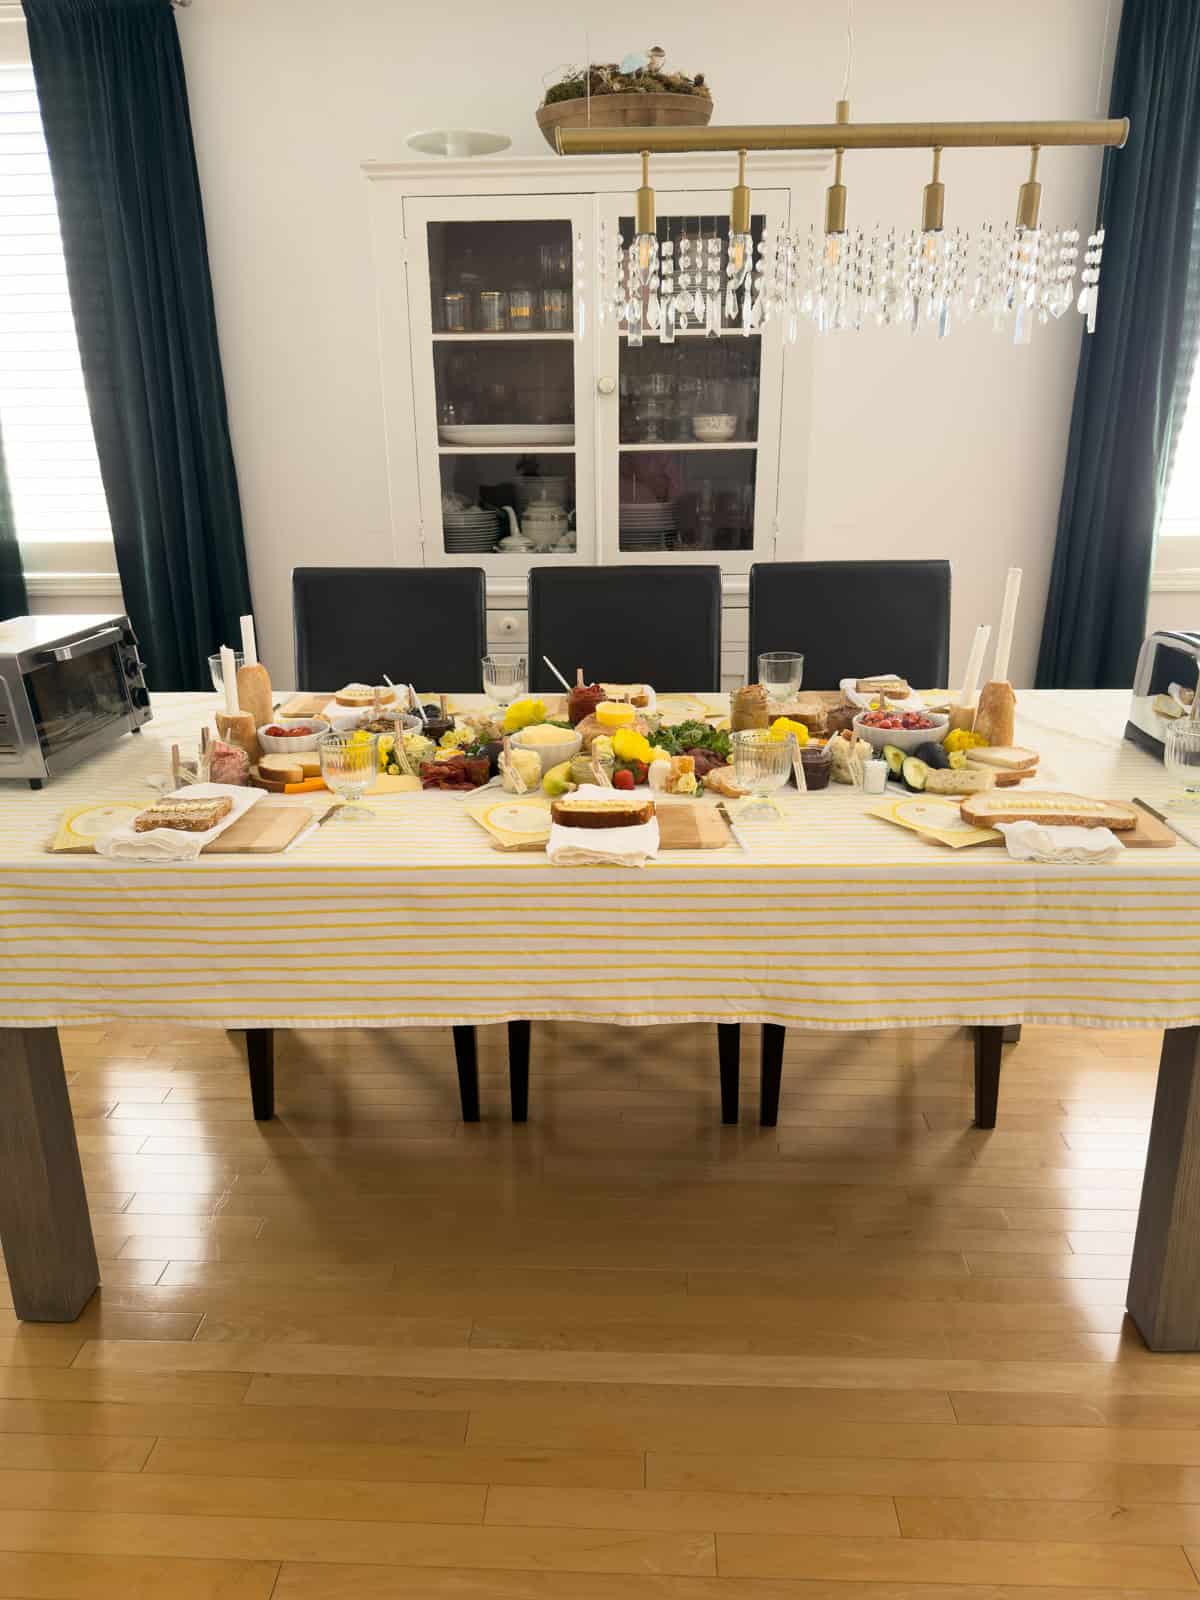
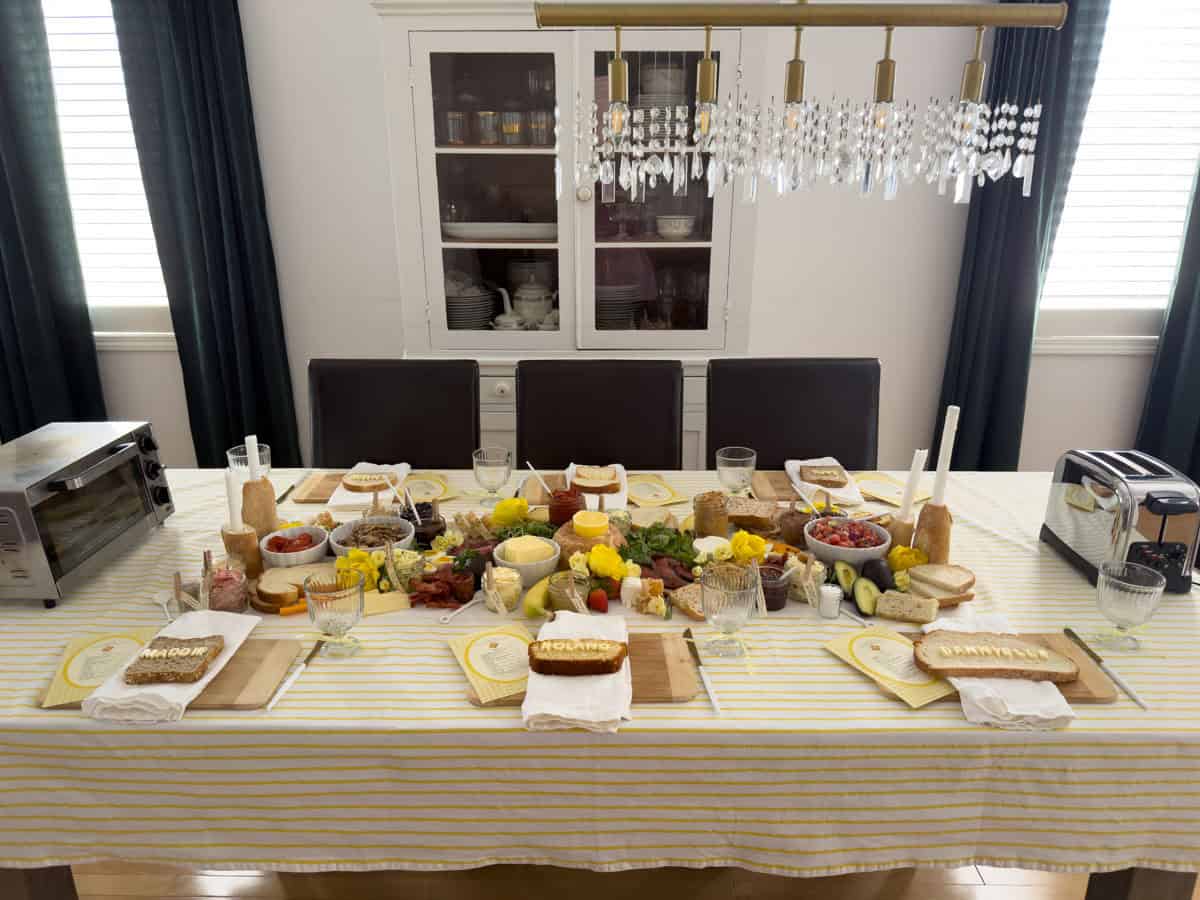
Butter themed toast party dining table set with yellow striped tablecloth, compound butter grazing runner down the center, baguette candle holders, and toasters at each end, white hutch and crystal chandelier in background.

If you are looking for the most fun and delicious butter themed party you have ever hosted, this is it. Toast for dinner sounds almost too simple, but when you build a gorgeous compound butter grazing table down the centre of your dining room, dress your guests in butter yellow, and use real baguettes as candle holders, it becomes one of the most joyful and memorable dinner parties you will ever throw. I have hosted this party multiple times and it never gets old.

Butter themed toast party dining table set with yellow striped tablecloth, compound butter grazing runner down the center, baguette candle holders, and toasters at each end, white hutch and crystal chandelier in background.

Quick Look

🍞 Party: The Ultimate Butter Themed Party - A Toast Dinner
👪 Best For: 6 to 12 guests
⏲️ Prep: Mostly make-ahead
🔪 Difficulty: Easy
💭 Top Tip: Ask every guest to bring their own toaster and their favourite sliced bread. It gets everyone invested before they even arrive, means you have enough toasters for the whole table without buying a single one, and creates the most delightful arrival energy when everyone shows up carrying their appliances.

Why You Will Love This Butter Themed Party

  • The compound butters are made ahead and become the most talked about element of the whole evening.
  • Once everything is on the table the host gets to sit down and enjoy the evening alongside guests.
  • The interactive toast format keeps everyone at the table for hours making round after round.
  • The butter yellow dress code makes your guests part of the party decor.
  • It is genuinely one of the most whimsical and fun dinner party themes you will ever try. Think fondue, but better.
[feast_advanced_jump_to]

The Best Dinner Party You Have Never Tried

I served toast for dinner. That was the whole menu. Just toast. And nobody wanted to leave.

The idea for a toast party came to me years ago when I realized that great bread and really good butter might be one of life's most underrated pleasures.

Why not build an entire dinner party around that? Think of it like a fondue party, but better. Everyone gathers around the table, the toasters are going, and the whole evening is spent building incredible toast and butter combinations and sharing their favourites.

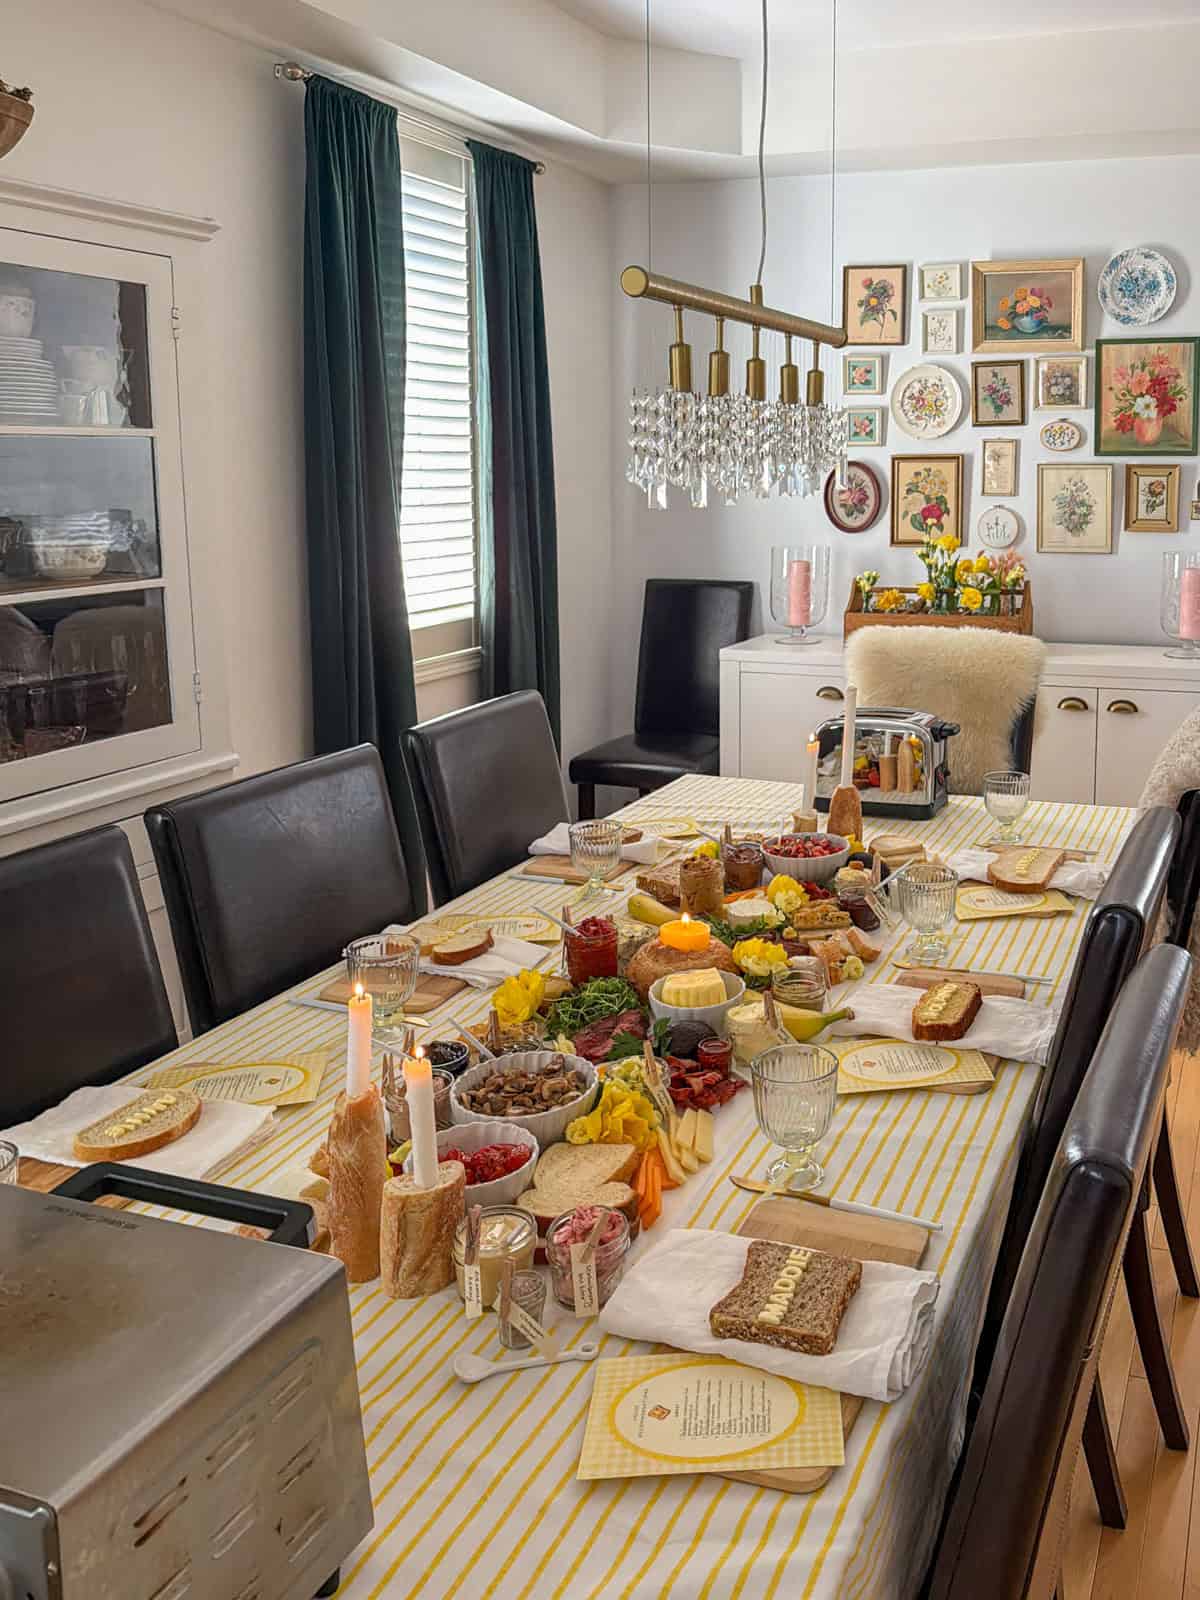
Dining room set for a butter themed toast party with yellow striped tablecloth, lit candles, compound butter grazing board, and gallery wall of botanical prints in background.

This most recent version is the most elevated and beautiful iteration I have done and it earned its name as the ultimate butter themed party. The secret upgrade is homemade compound butter. Instead of plain butter on the table we made six fully flavored compound butters in beautiful labeled jars. The butter was the undisputed star of the evening.  

YouTube Video of Butter /Toast Party

Youtube video

If this kind of interactive grazing-style entertaining speaks to you, you will love our butter board recipe which uses many of the same compound butters as a stunning appetizer spread. Our compound butter recipes guide covers all six butters we made for this party with tested recipes and make-ahead timelines. And if you love a themed dinner party format you might also enjoy our circus themed dinner party for a more theatrical gathering.

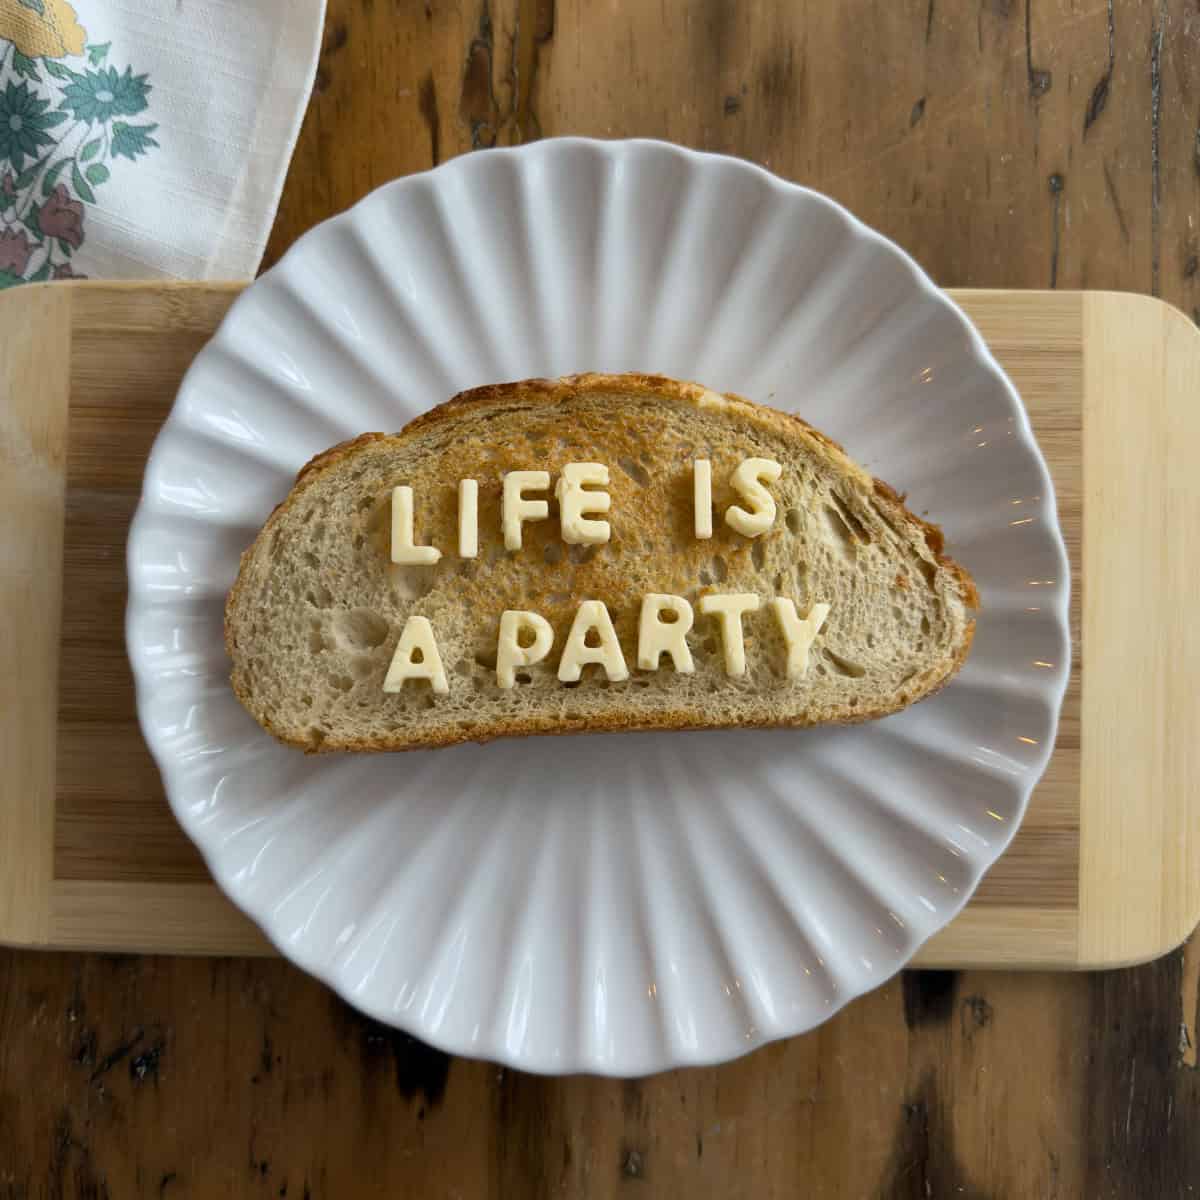
Slice of toasted sourdough bread on a white scalloped plate spelling out LIFE IS A PARTY in butter letter tiles on a bamboo cutting board.

Free Printable Butter Party Invitations

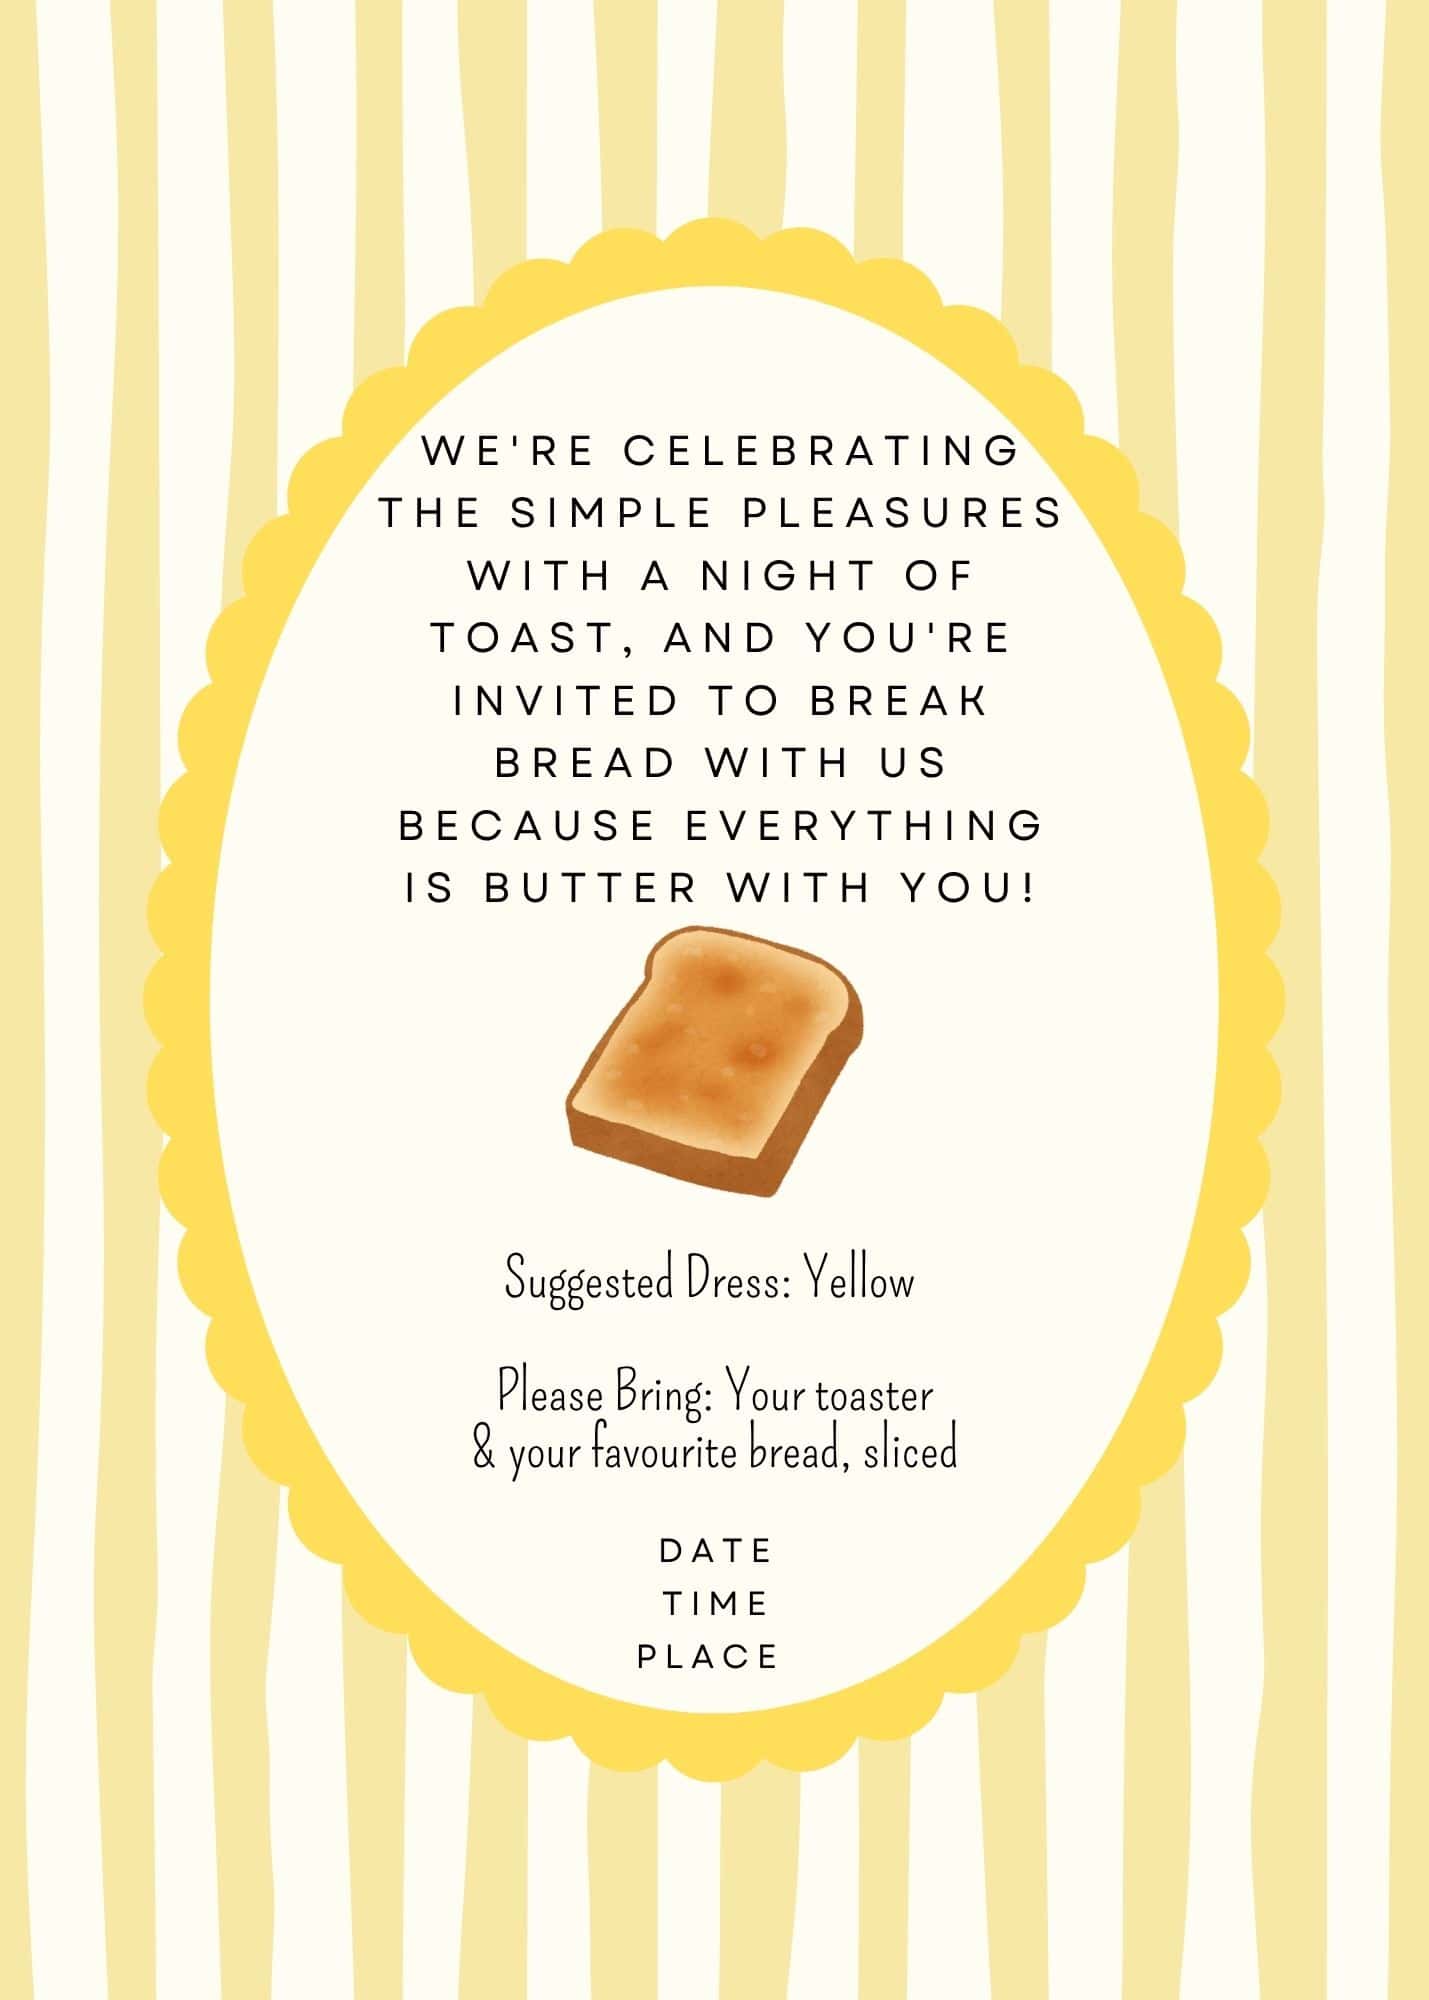
The invite for this butter themed party writes itself.

"We are celebrating the simple pleasures with a night of toast, and you are invited to break bread with us - because everything is butter with you. Wear yellow, bring your toaster, and bring your favourite sliced bread."

Free Editable Butter /Toast Party Invitation in yellow.
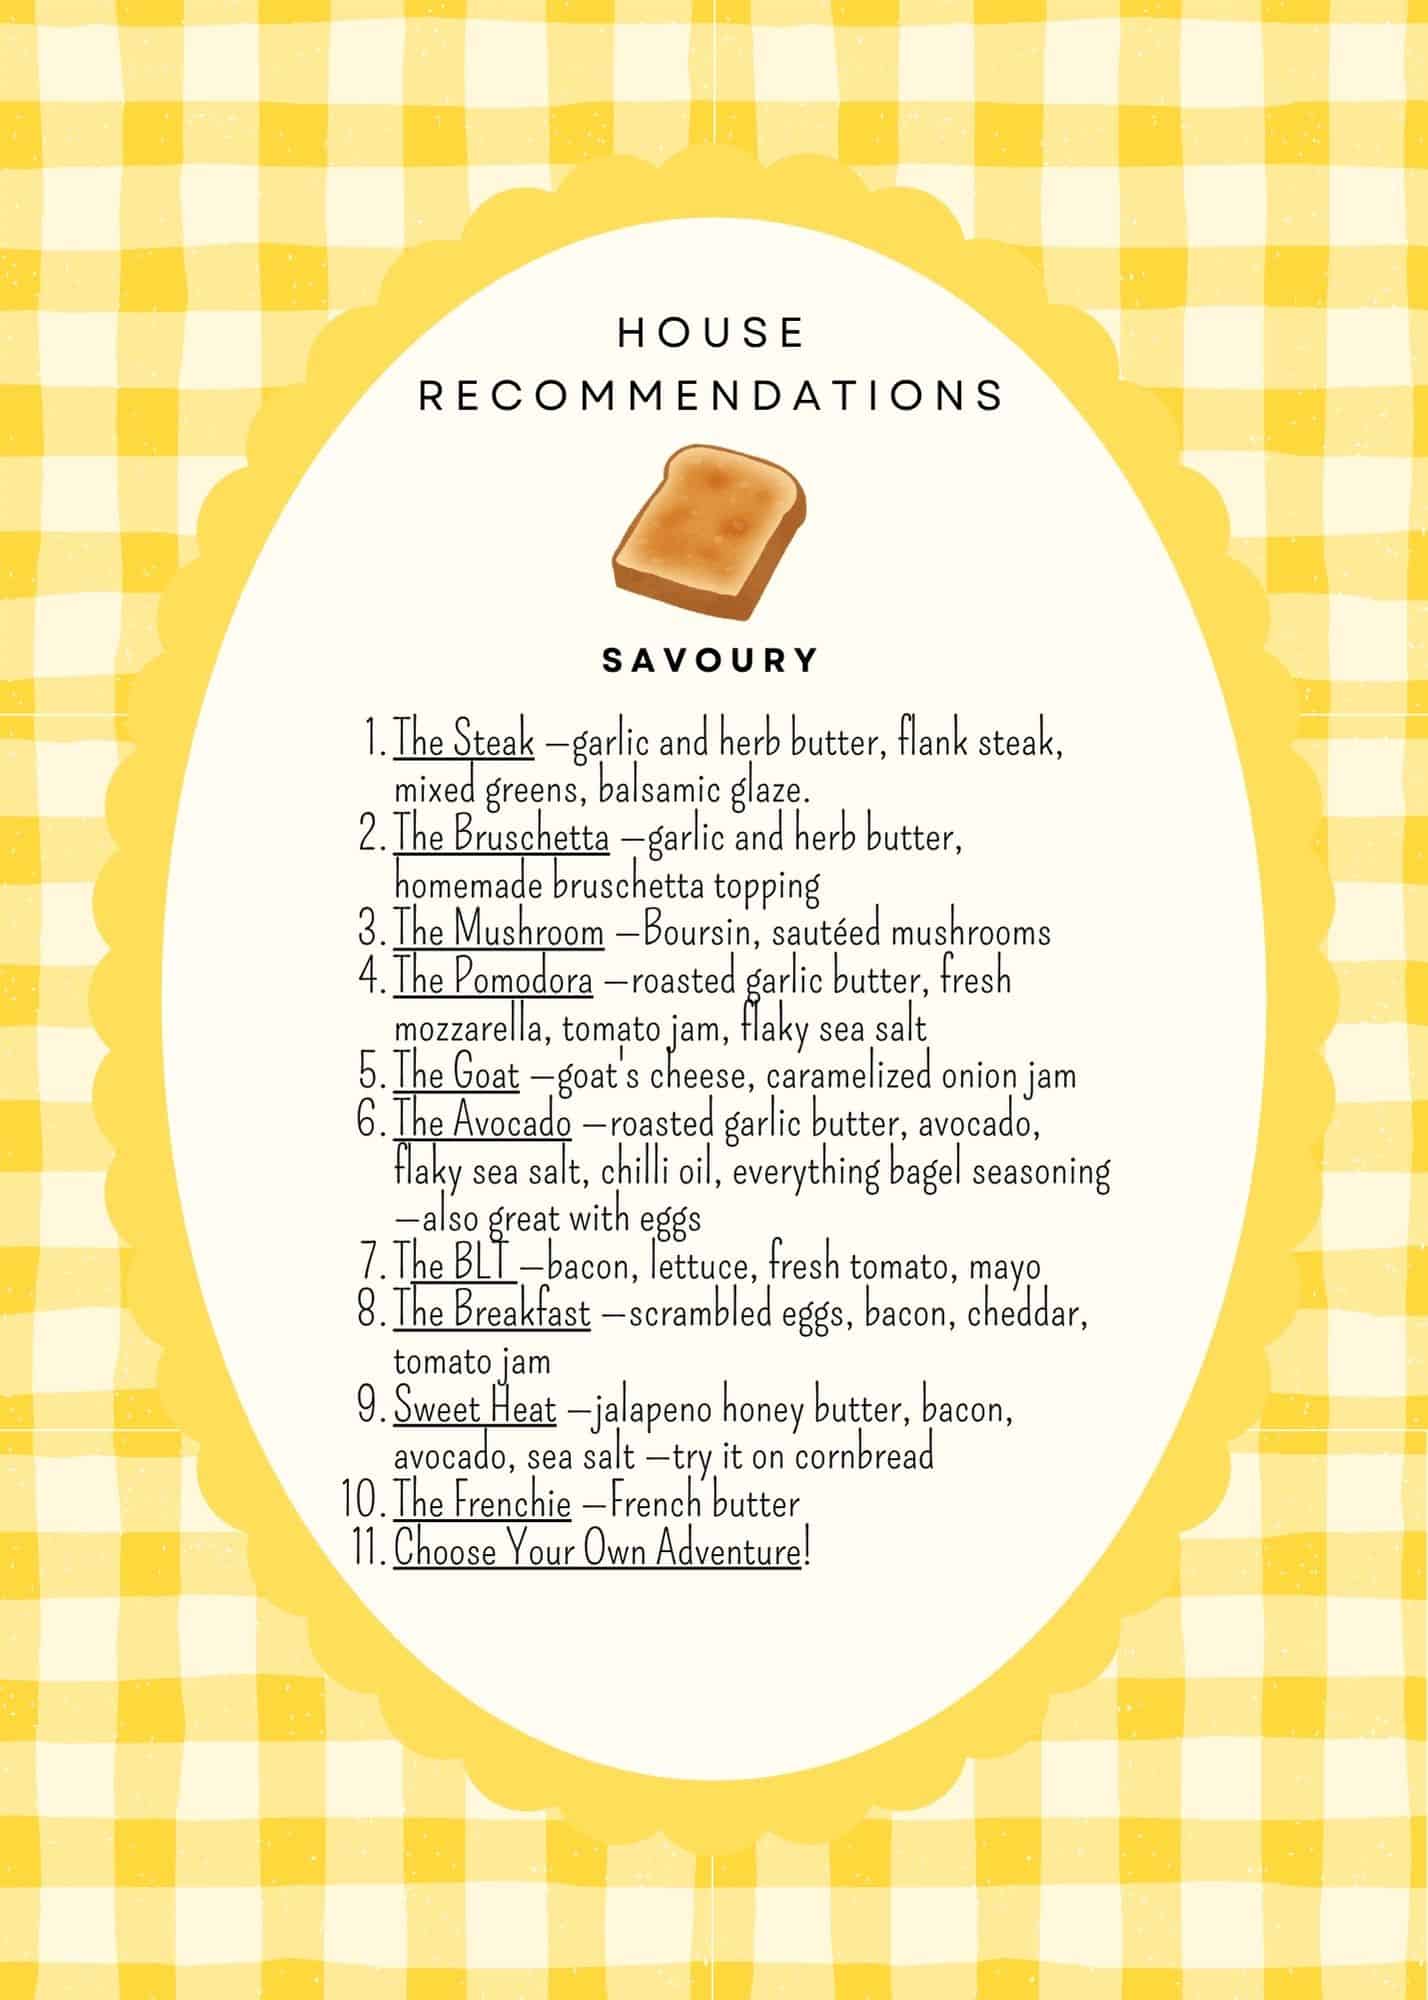
Free editable toast /butter party menu with suggestions for toast topping combinations, in yellow.

A few things worth noting about the invite:

  • Asking guests to bring their favourite sliced bread means everyone has a stake in the menu and creates a fun conversation starter as they arrive.
  • The dress code does so much work for you. Asking guests to wear yellow means your table is surrounded by warm golden colour that photographs beautifully and immediately creates a cohesive party atmosphere.
  • "Bring your toaster" is the most intriguing three words you can put on an invitation. Guests arrive already curious and excited about what is going to happen.

We designed matching gingham menu cards, a French-style butter label for the party favors, and favor tags to complete the printable set. Grab our free editable invites, menu, and favor tags. Subscribe below and find it in our Free Resource Library for subscribers, and we'll send you the password for access immediately.

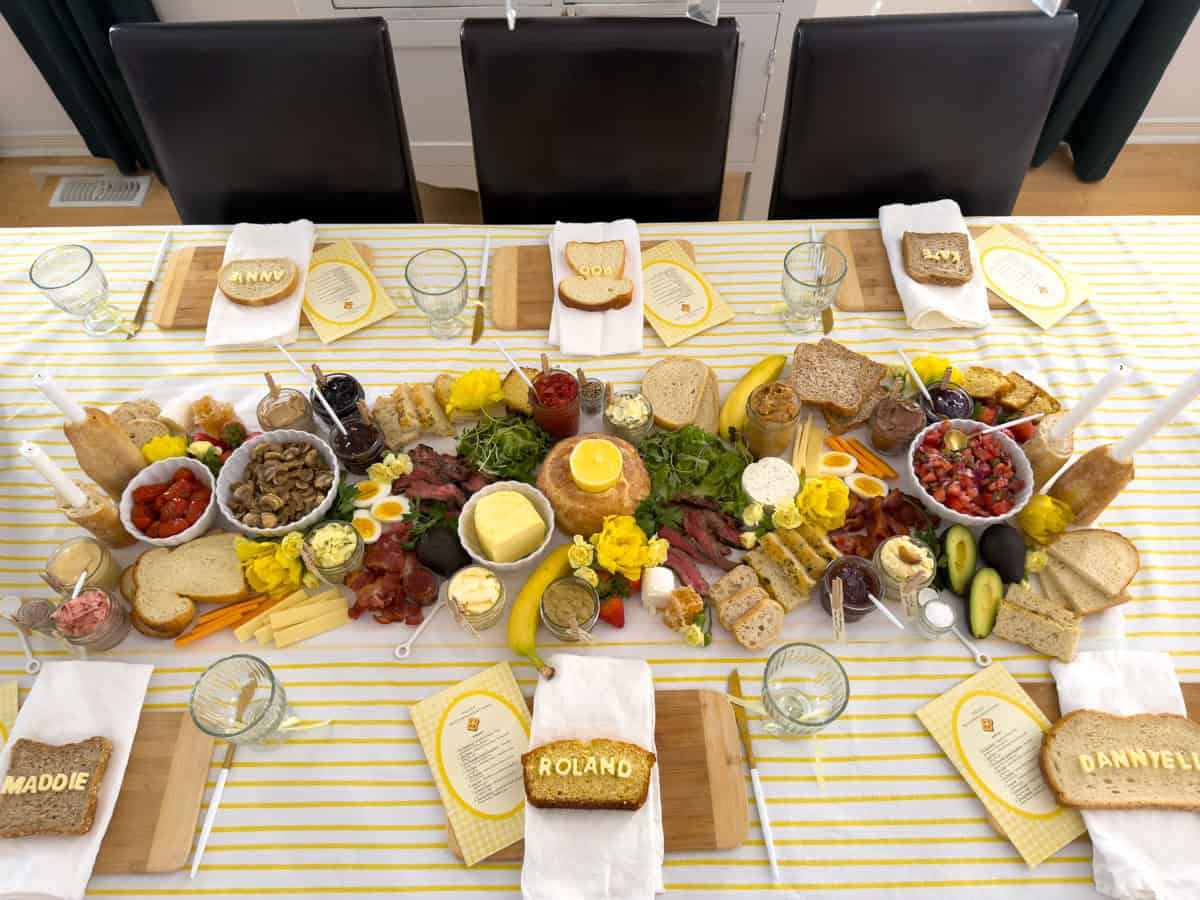
The Butter Themed Party Table

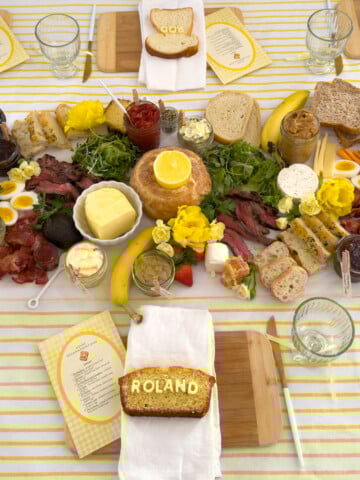
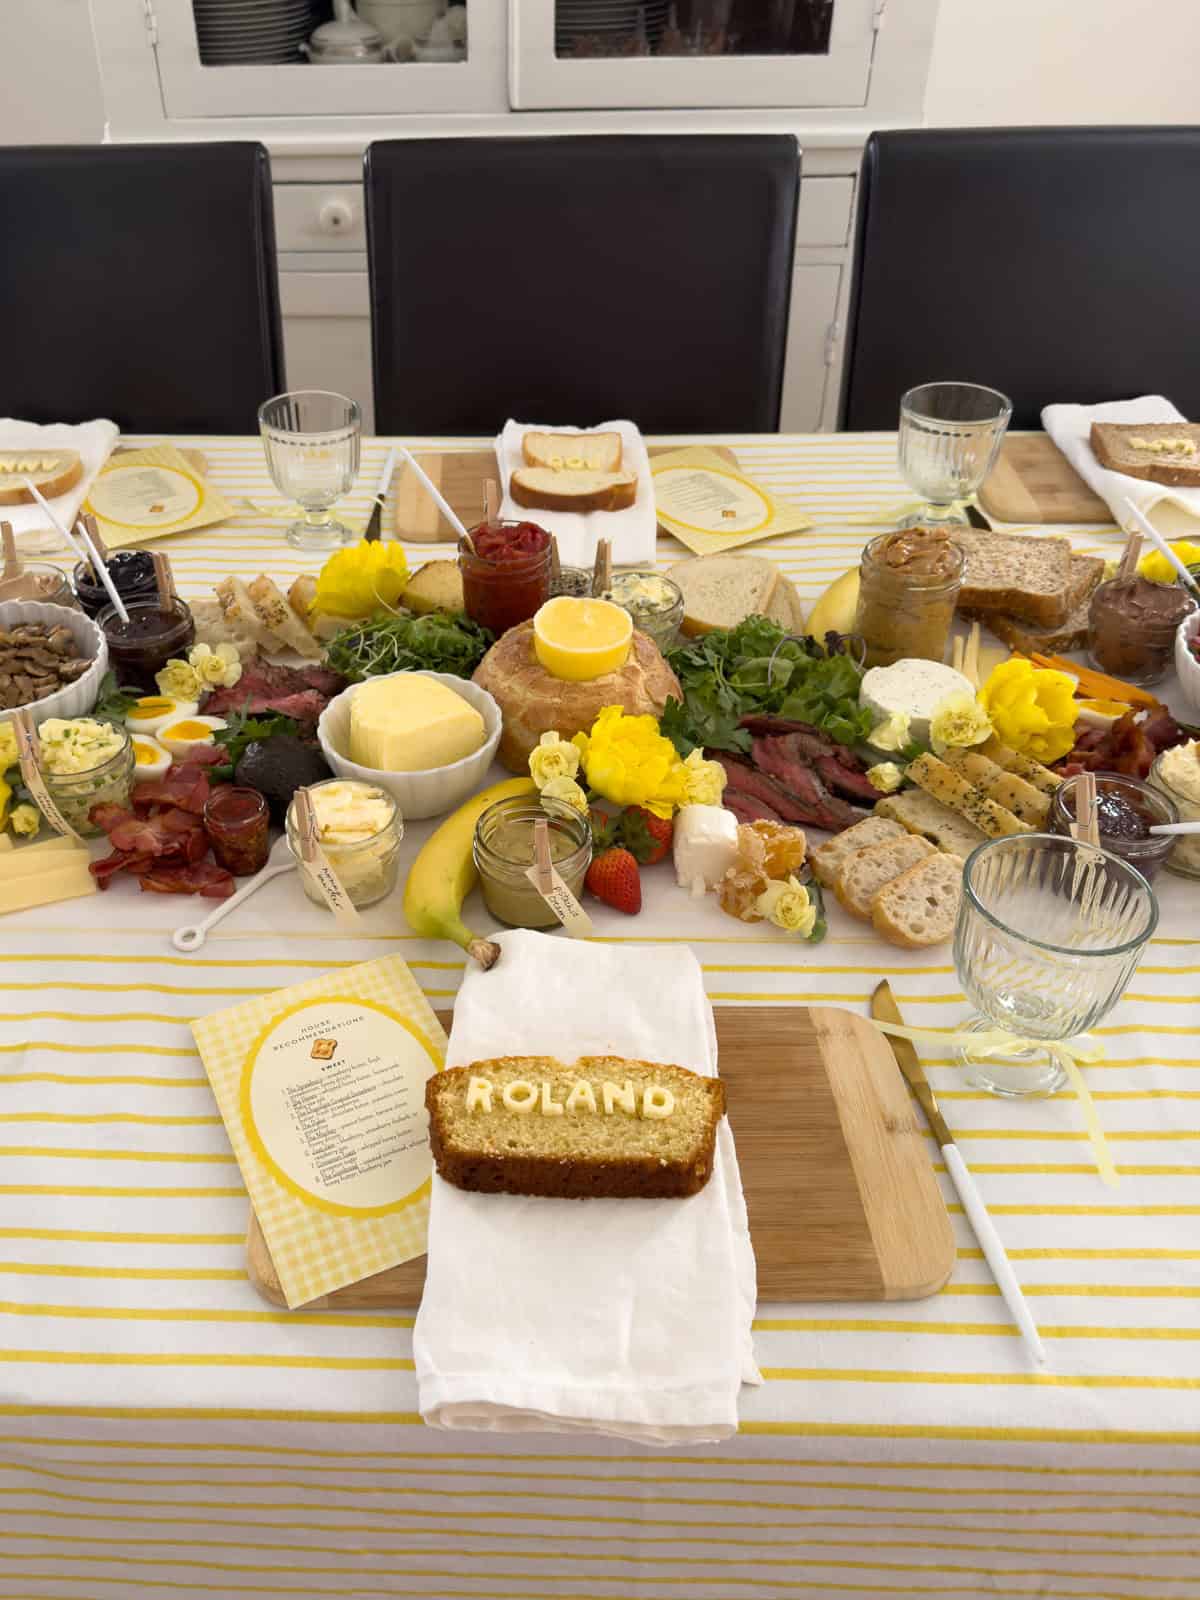
Butter toast dinner party table set for six with Roland cornbread name bread in foreground, full grazing spread with butter block, steak, flowers, and labeled jars stretching the length of the table.

The table for this party is one of the most satisfying things to build and style. Here is exactly how we put it together.

  • The Tablecloth: A white and yellow striped tablecloth gives the whole table a warm, charming, slightly bistro-adjacent feel that perfectly suits the bread and butter theme.
  • The Grazing Runner: We laid foil down the centre of the table and covered it with parchment paper to create one long continuous grazing surface. All the food, jars, and toppings sit directly on the parchment which looks beautiful, keeps the table protected, and makes cleanup much easier.
  • The Toasters: Each guest brings their own toaster which we space out along the table. Two toasters at each end keeps the whole centre clear for food. For a larger group one in the middle works well too.
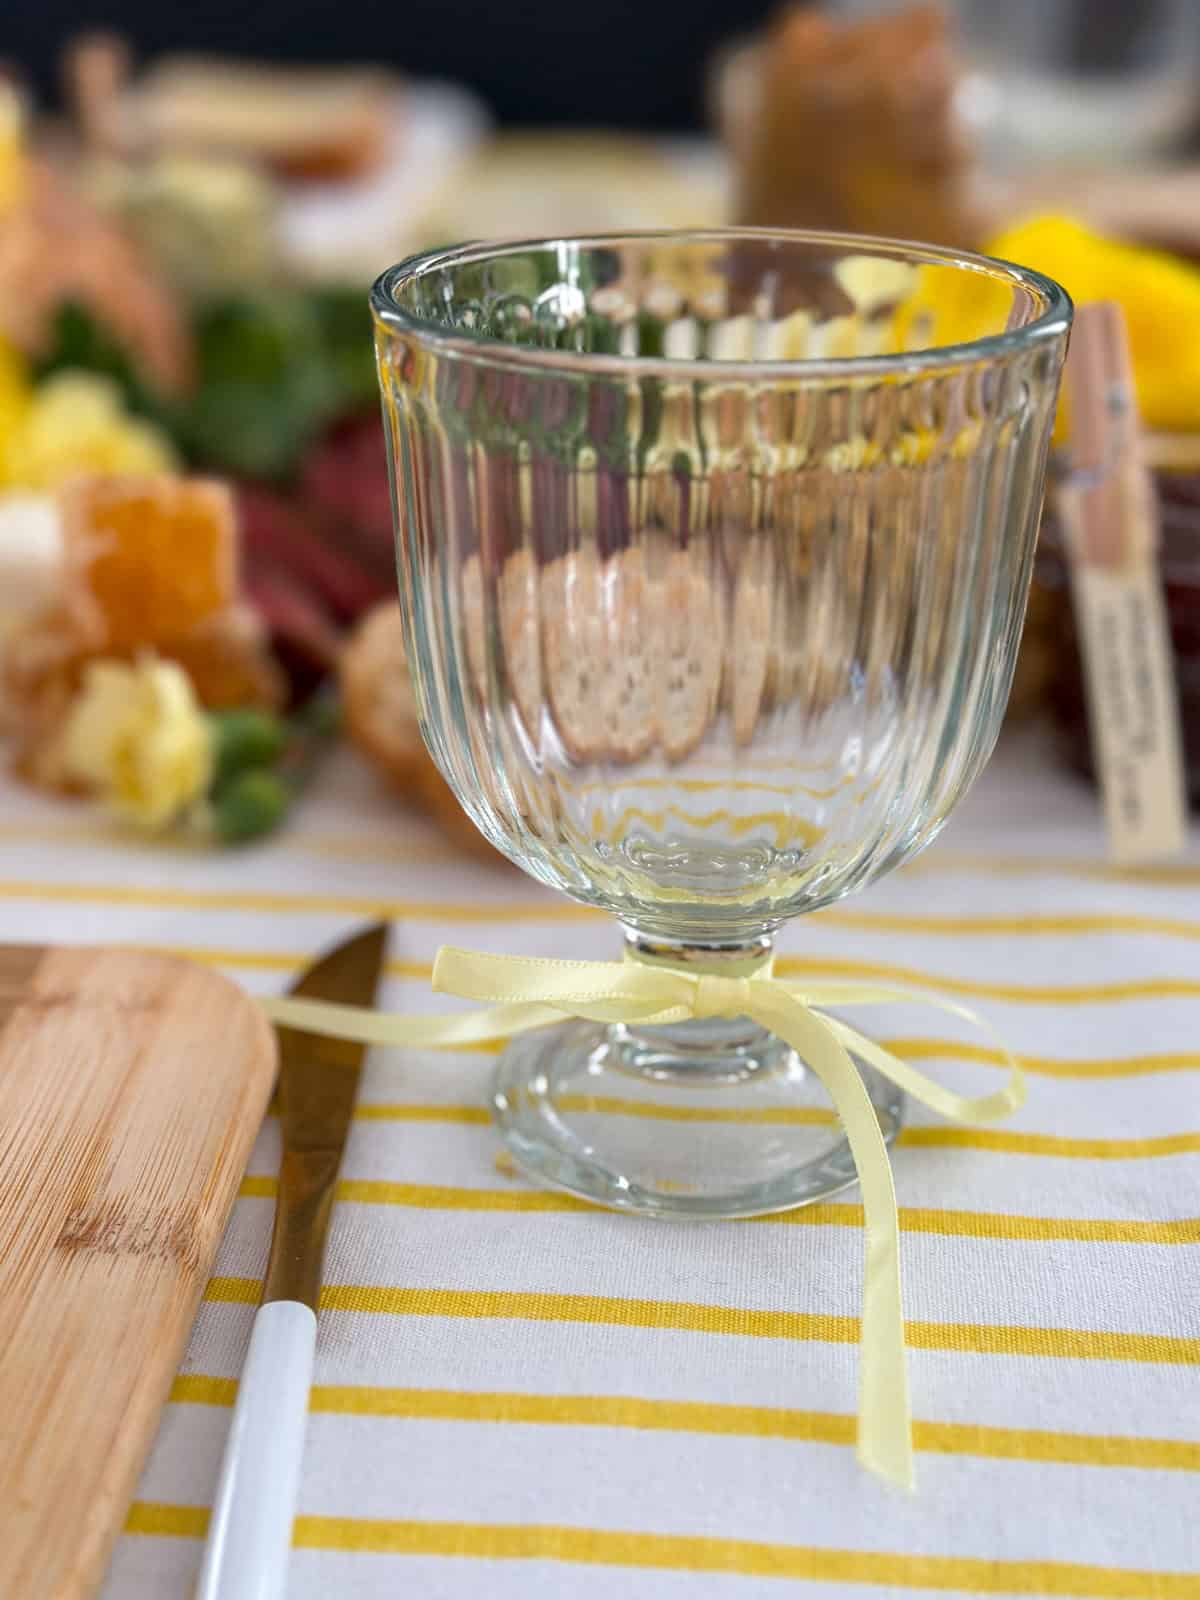
  • Place settings: Each guest gets a small bamboo cutting board as their plate, napkin, knife, and a glass with a butter yellow bow tied on it.
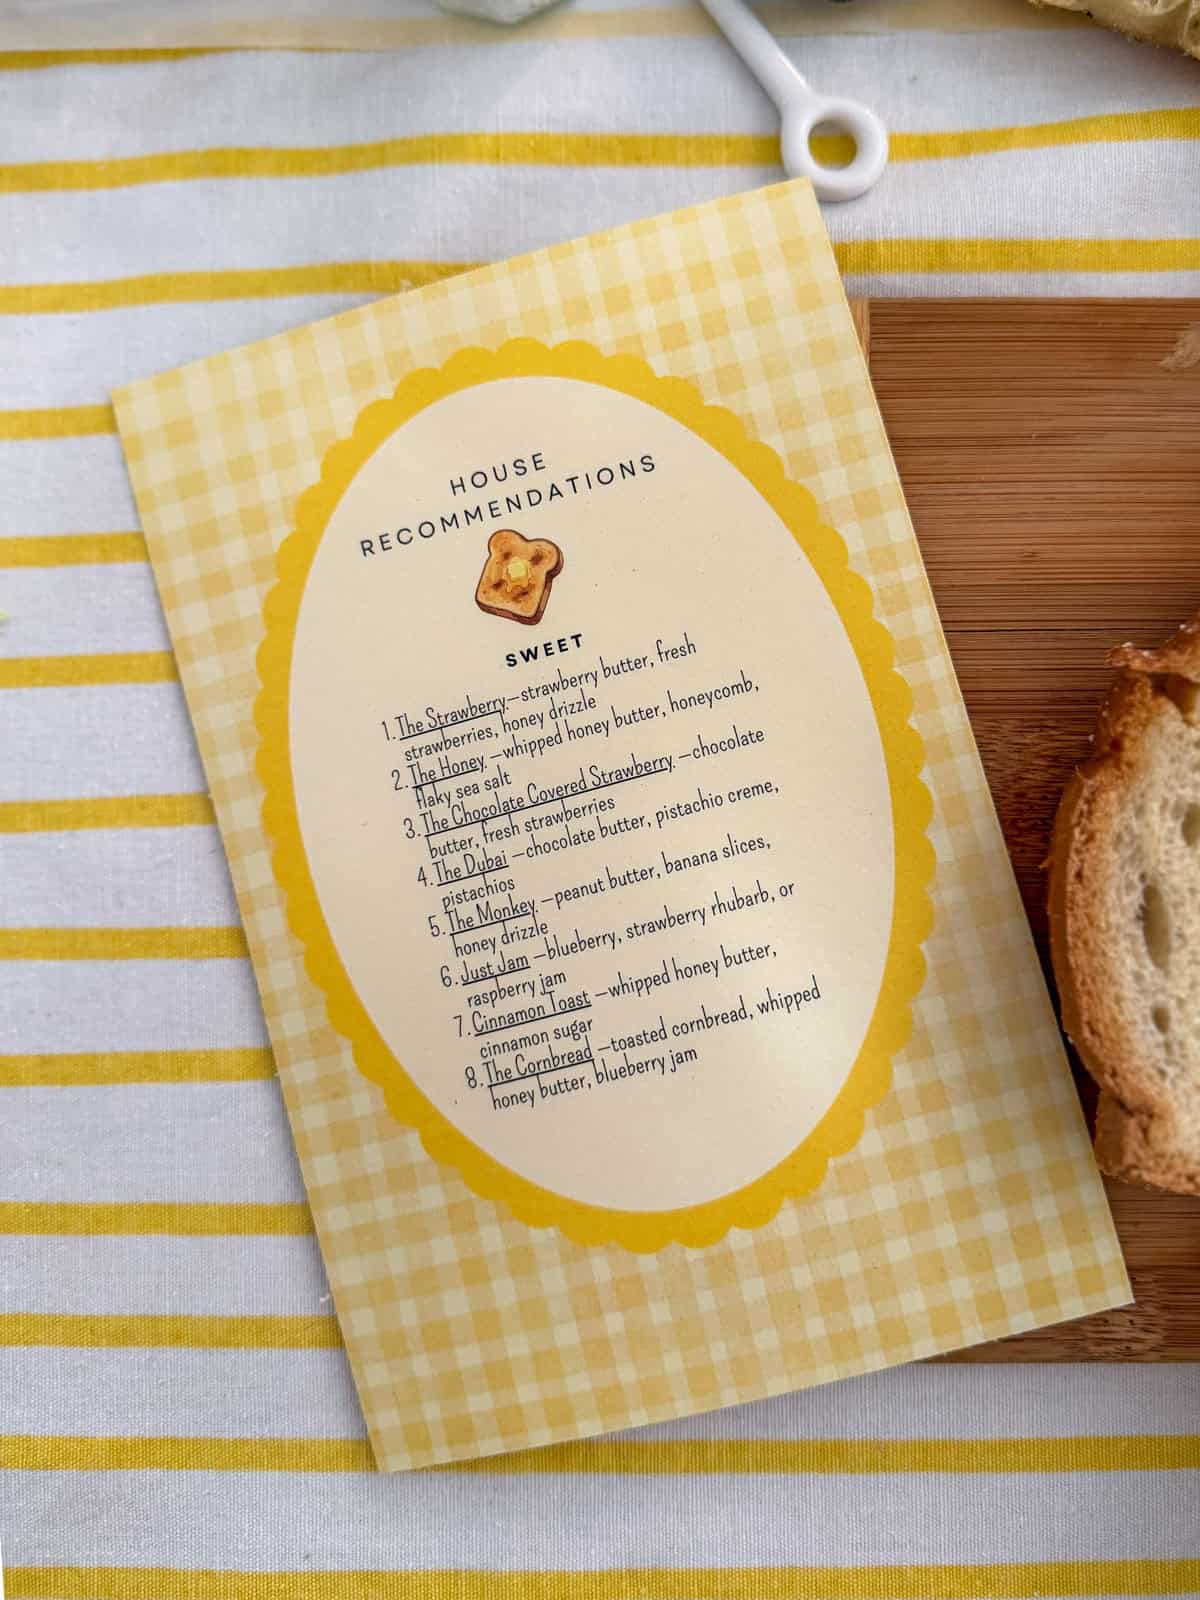
  • Menu Card: We gave everyone a house recommendations menu card printed double-sided, with savory suggestions on one side and sweets on the other, to help get everyone started.
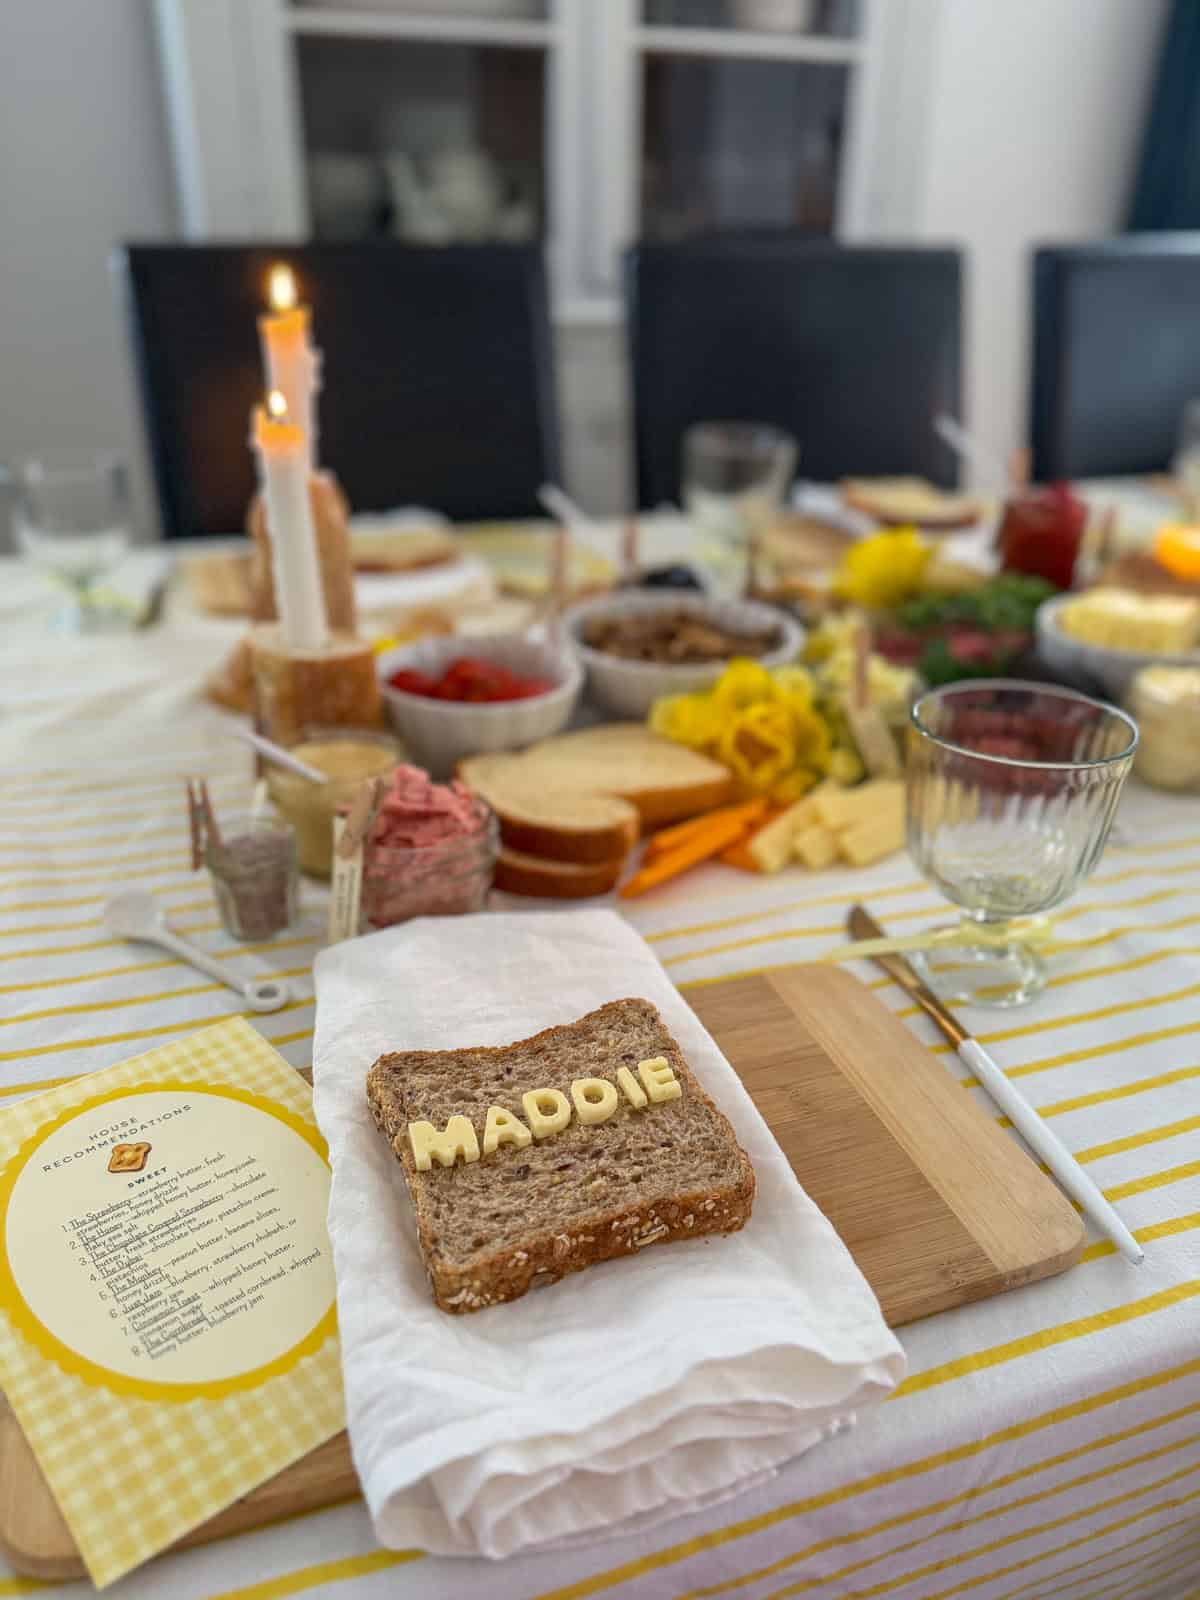
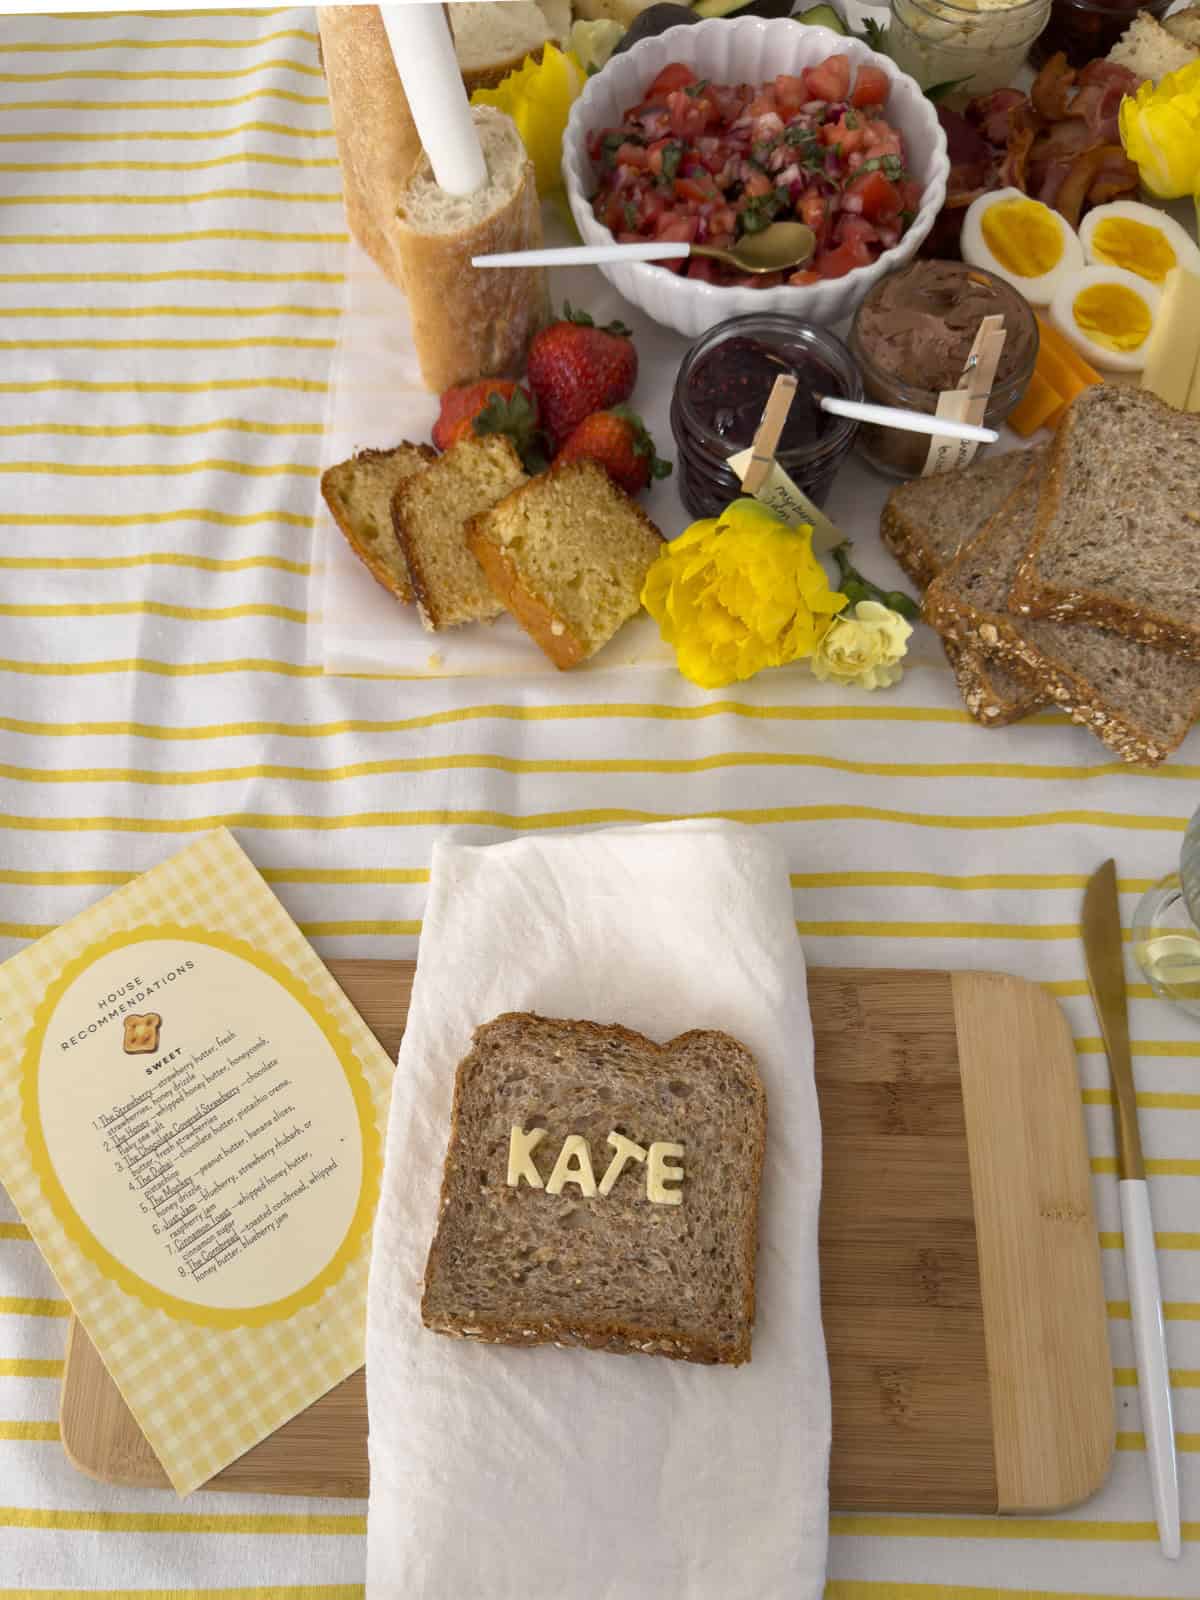
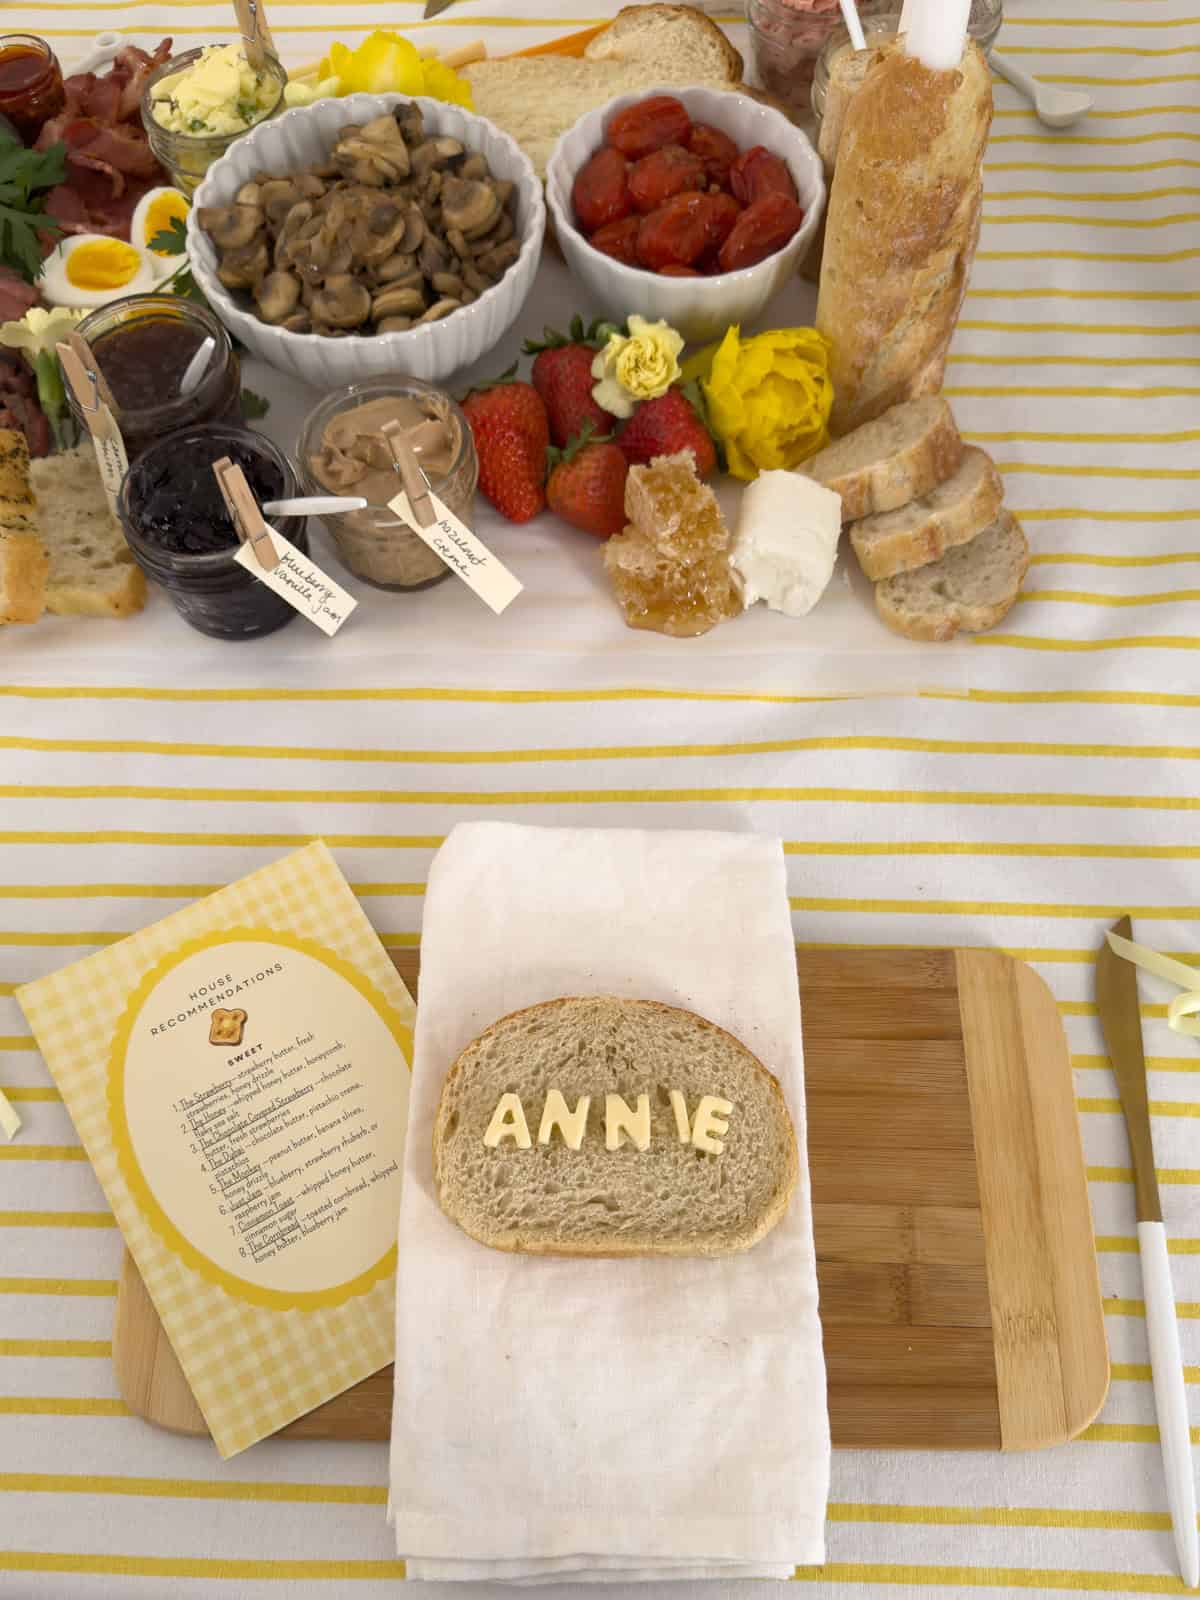
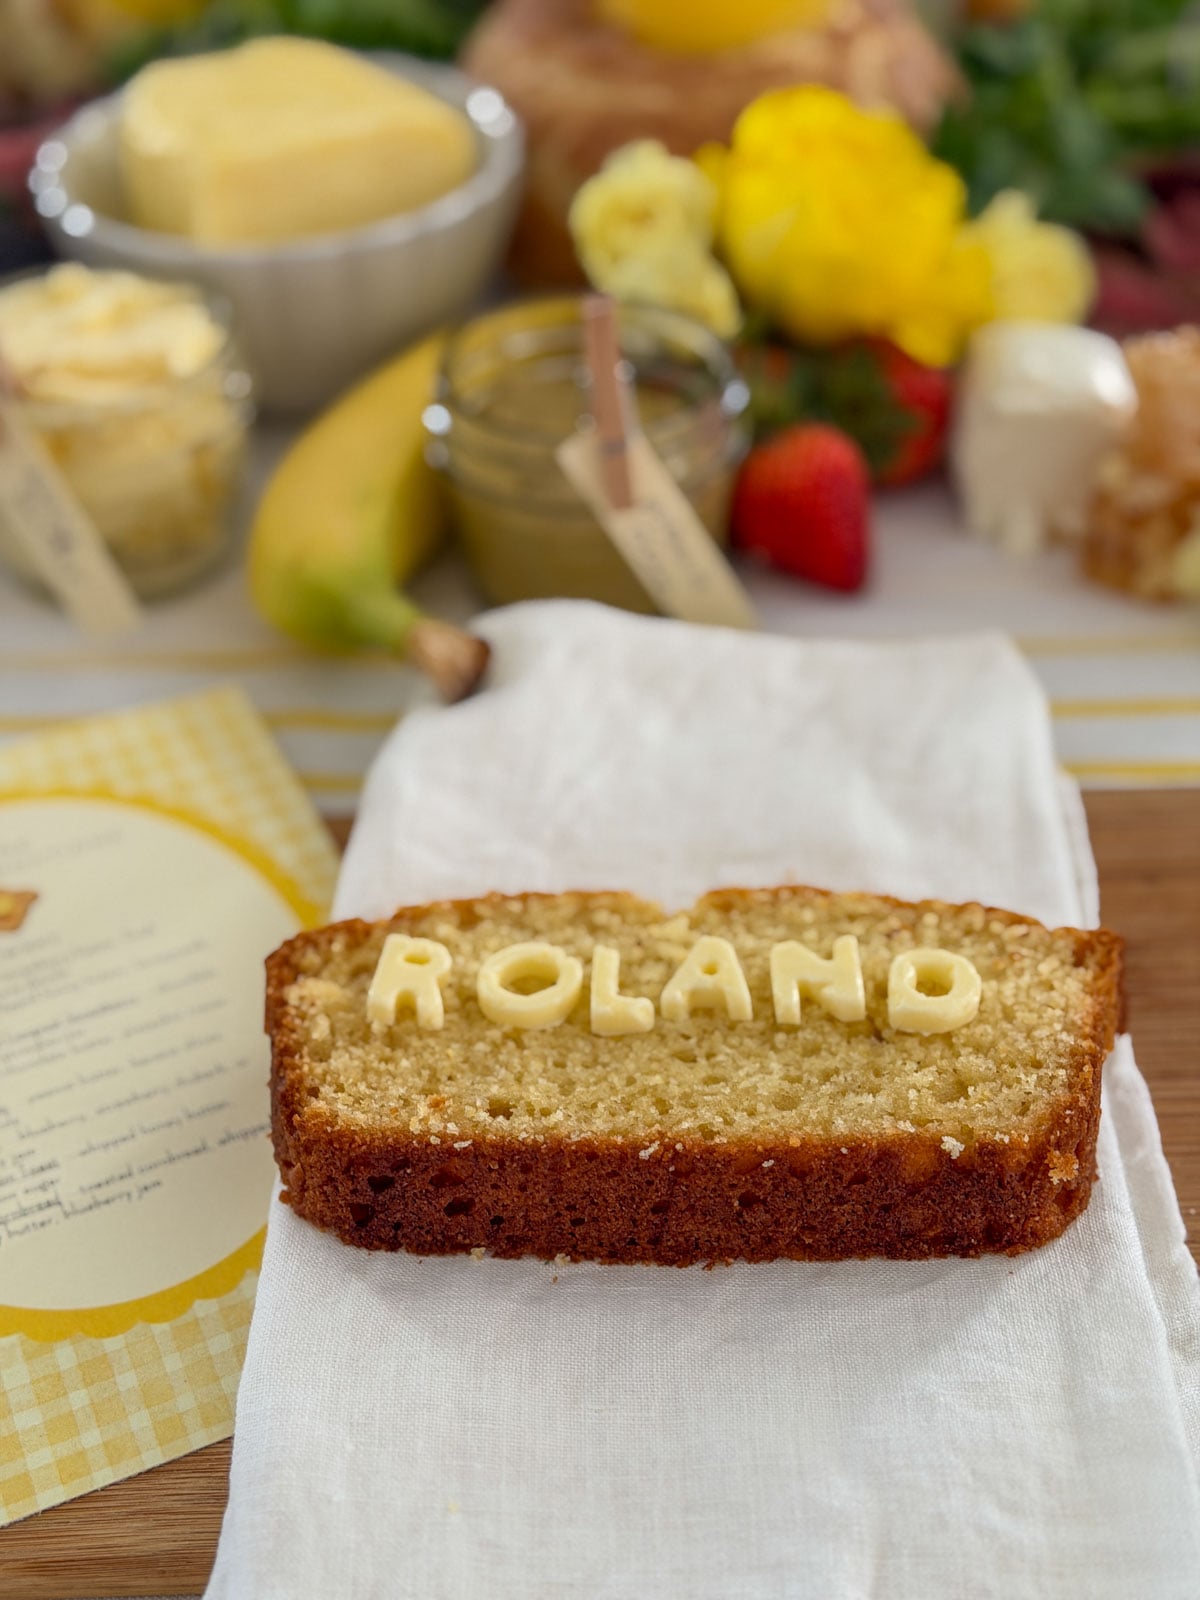
  • The butter placards: For each guest we used a letter mold to spell out their name in butter and place it onto a slice of bread. To make the names press softened butter in to the letter molds, then place in the freezer until frozen and pop out. Store in the freezer until your ready to use, then transfer to each slice of bread.
  • The Flowers: Instead of vases, we tucked yellow flowers throughout the grazing spread. Do look for flowers that are edible, like the double tulips and carnations that we used.
  • Candles: To add some candle light to our table, we used baguette candle holders and real butter candle. More details below.
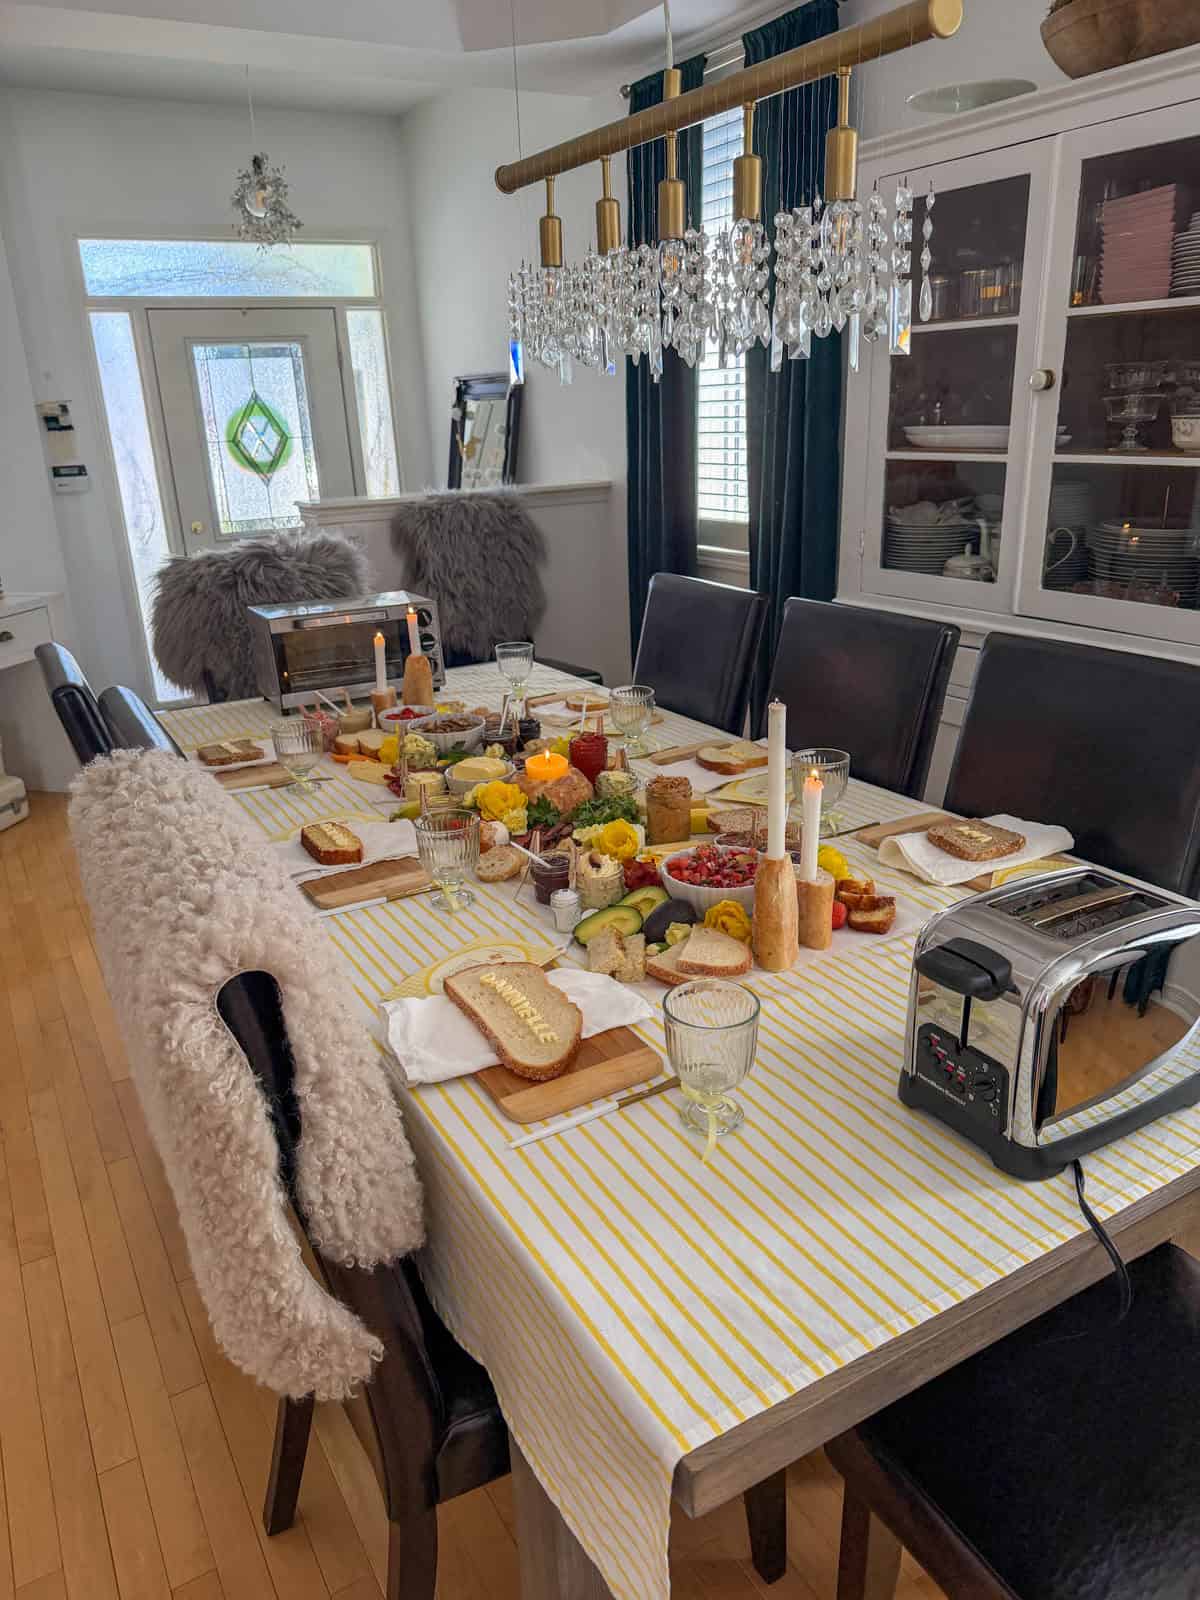
Butter themed toast party dining table set for six with yellow striped tablecloth, compound butter grazing spread down the center, lit taper candles in baguette holders, butter candle in sourdough boule, name bread place settings, and gallery wall of botanical prints visible in background.
House Recommendations sweet side menu card with yellow gingham border listing eight toast combinations including The Strawberry, The Honey, The Chocolate Covered Strawberry, The Dubai, The Monkey, Just Jam, Cinnamon Toast, and The Cornbread.
Slice of whole grain bread with butter letter tiles spelling MADDIE used as a name card place setting on a bamboo cutting board with lit taper candles in baguette holders, strawberry butter jar, and compound butter grazing spread glowing in candlelight in background.
Kate butter letter name bread place setting with house recommendations menu card on bamboo cutting board beside grazing board with bruschetta topping bowl, strawberries, cornbread slices, and yellow flowers.
Overhead view of Annie butter letter name bread place setting on bamboo cutting board with house recommendations menu card, blueberry vanilla jam jar, hazelnut creme jar, roasted cherry tomatoes, fresh strawberries, honeycomb, sliced baguette, and yellow tulip visible on the grazing table behind.
Slice of cornbread with butter letter tiles spelling ROLAND used as a name card place setting on a white linen napkin with house recommendations menu card, banana, and grazing board spread in background.
Clear ribbed goblet wine glass with a yellow satin ribbon bow tied at the stem on a yellow striped tablecloth with the compound butter grazing table in soft focus behind.

The Baguette Candle Holders and Butter Candle

These two details added so much fun and whimsy to our butter themed party and they are both so easy to make.

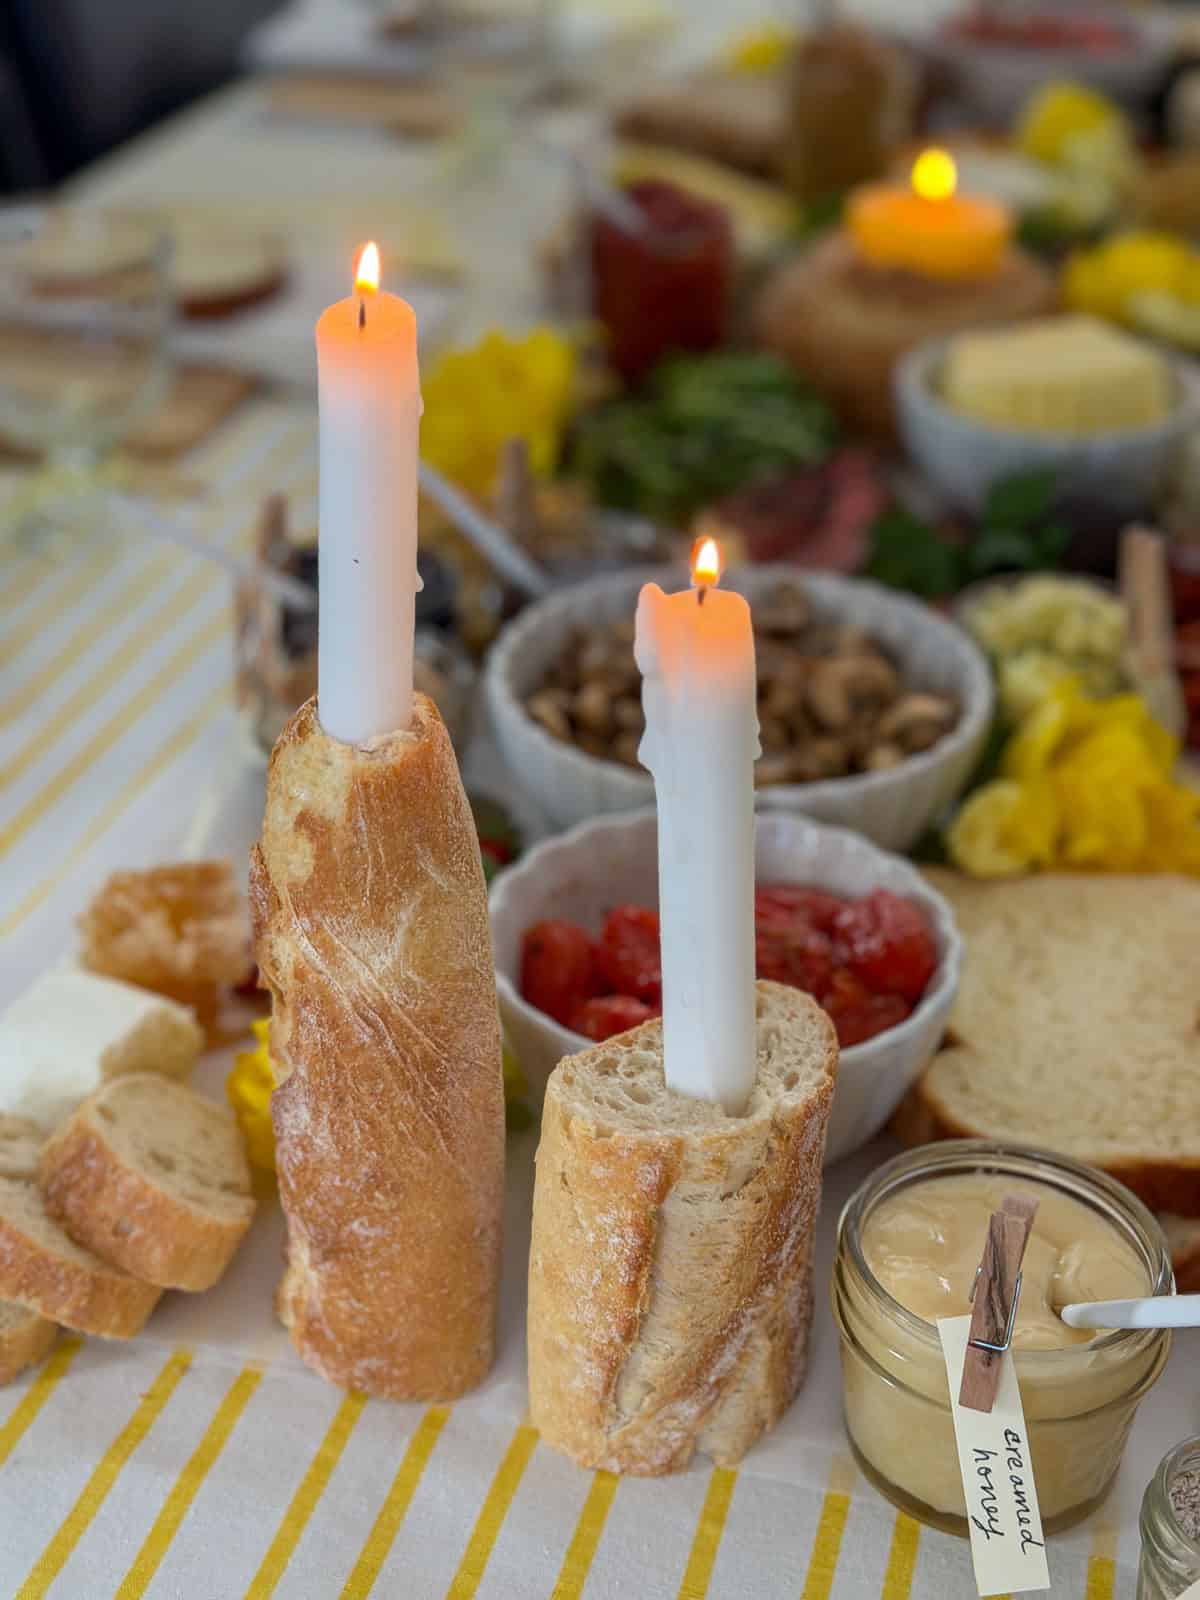
  • Baguette Candle Holders: Cut your baguette to create sections that are slightly different heights. Then push a taper candle directly into each section of baguette and place them in groupings along the table. The reaction when guests notice them is exactly what you hope for. They are charming, slightly absurd in the best way, and completely on theme.
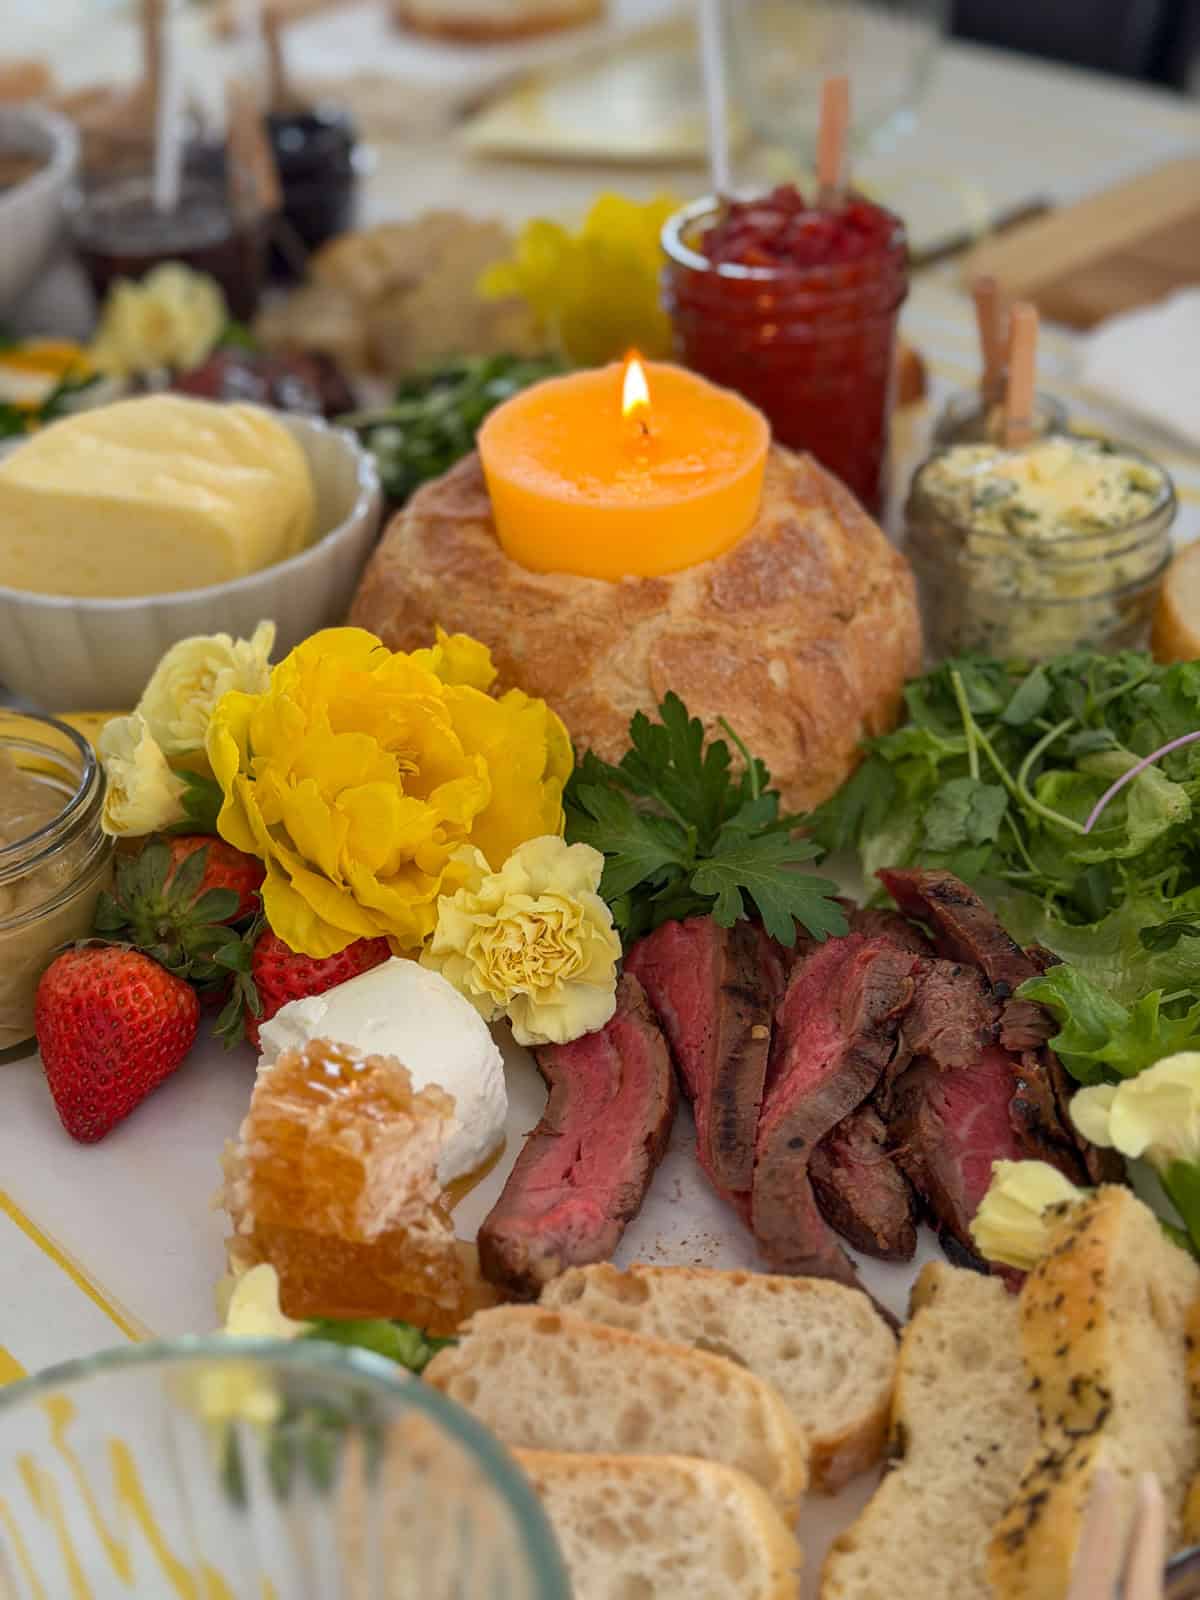
  • Butter Candle: Tie a piece of cotton kitchen string (food safe) onto a knife or chopstick and cut it to fit the length of a small paper cup, or paper cupcake holder. Pour melted butter into the small paper cup and rest the chopstick over the edge to hold the wick in the middle. Let it set in the fridge. Hollow out a small loaf of bread or dinner roll just enough to nestle the butter candle inside. When you light it at the start of the evening a melted butter pool forms around the wick and guests can tear pieces of the bread and dip them directly into the warm melted butter. This candle was a genuinely beautiful and whimsical centrepiece moment that got so many comments.
Two baguette sections used as taper candle holders on a white parchment grazing runner with roasted cherry tomatoes, sauteed mushrooms, strawberries, and honeycomb visible behind.

The Compound Butters -The Star of the Show

This is the element that elevates this from a fun quirky dinner into something genuinely extraordinary and makes it the ultimate butter themed party. Six homemade compound butters presented in beautiful labeled jars, each one a different flavour, each one a different colour.

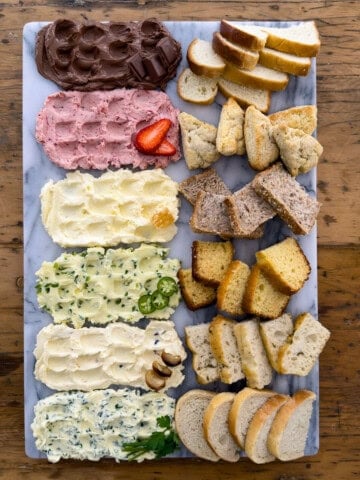
Together on the table they are stunning. Pale pink strawberry butter, golden honey butter, dark chocolate butter, golden jalapeño honey butter, rustic roasted garlic butter, and herb flecked garlic herb butter. All with handwritten yellow cardstock labels and little clothespin tags.

Savoury butters:

  • Roasted Garlic Butter - A full head of garlic roasted until deeply caramelised and golden, then mashed into salted butter. Sweet, rich, and extraordinary on almost every savoury toast combination.
  • Garlic Herb Compound Butter - Fresh garlic, flat leaf parsley, chives, and thyme mixed into salted butter. Bright, fresh, and the perfect base for the steak and bruschetta toasts.
  • Jalapeno Honey Butter - Fresh jalapeño, honey, and salted butter. The sweet heat combination that surprised everyone and disappeared fastest.

Sweet butters:

  • Strawberry Butter - Fresh strawberries cooked to a thick jammy reduction, folded into whipped butter with maple syrup. Pale pink, light, and fluffy.
  • Whipped Honey Butter - Just salted butter and creamed honey whipped to a cloud-like texture. Simple, golden, and the first thing everyone reached for all evening.
  • Chocolate Butter - Melted semi-sweet chocolate and bloomed cocoa whipped into salted butter. Rich, smooth, and deeply chocolatey without being too sweet.

All six butters can be made a few days ahead and stored in sealed jars in the refrigerator. This is the biggest hosting advantage of building a party around compound butter, the most impressive element is completely done before party day.

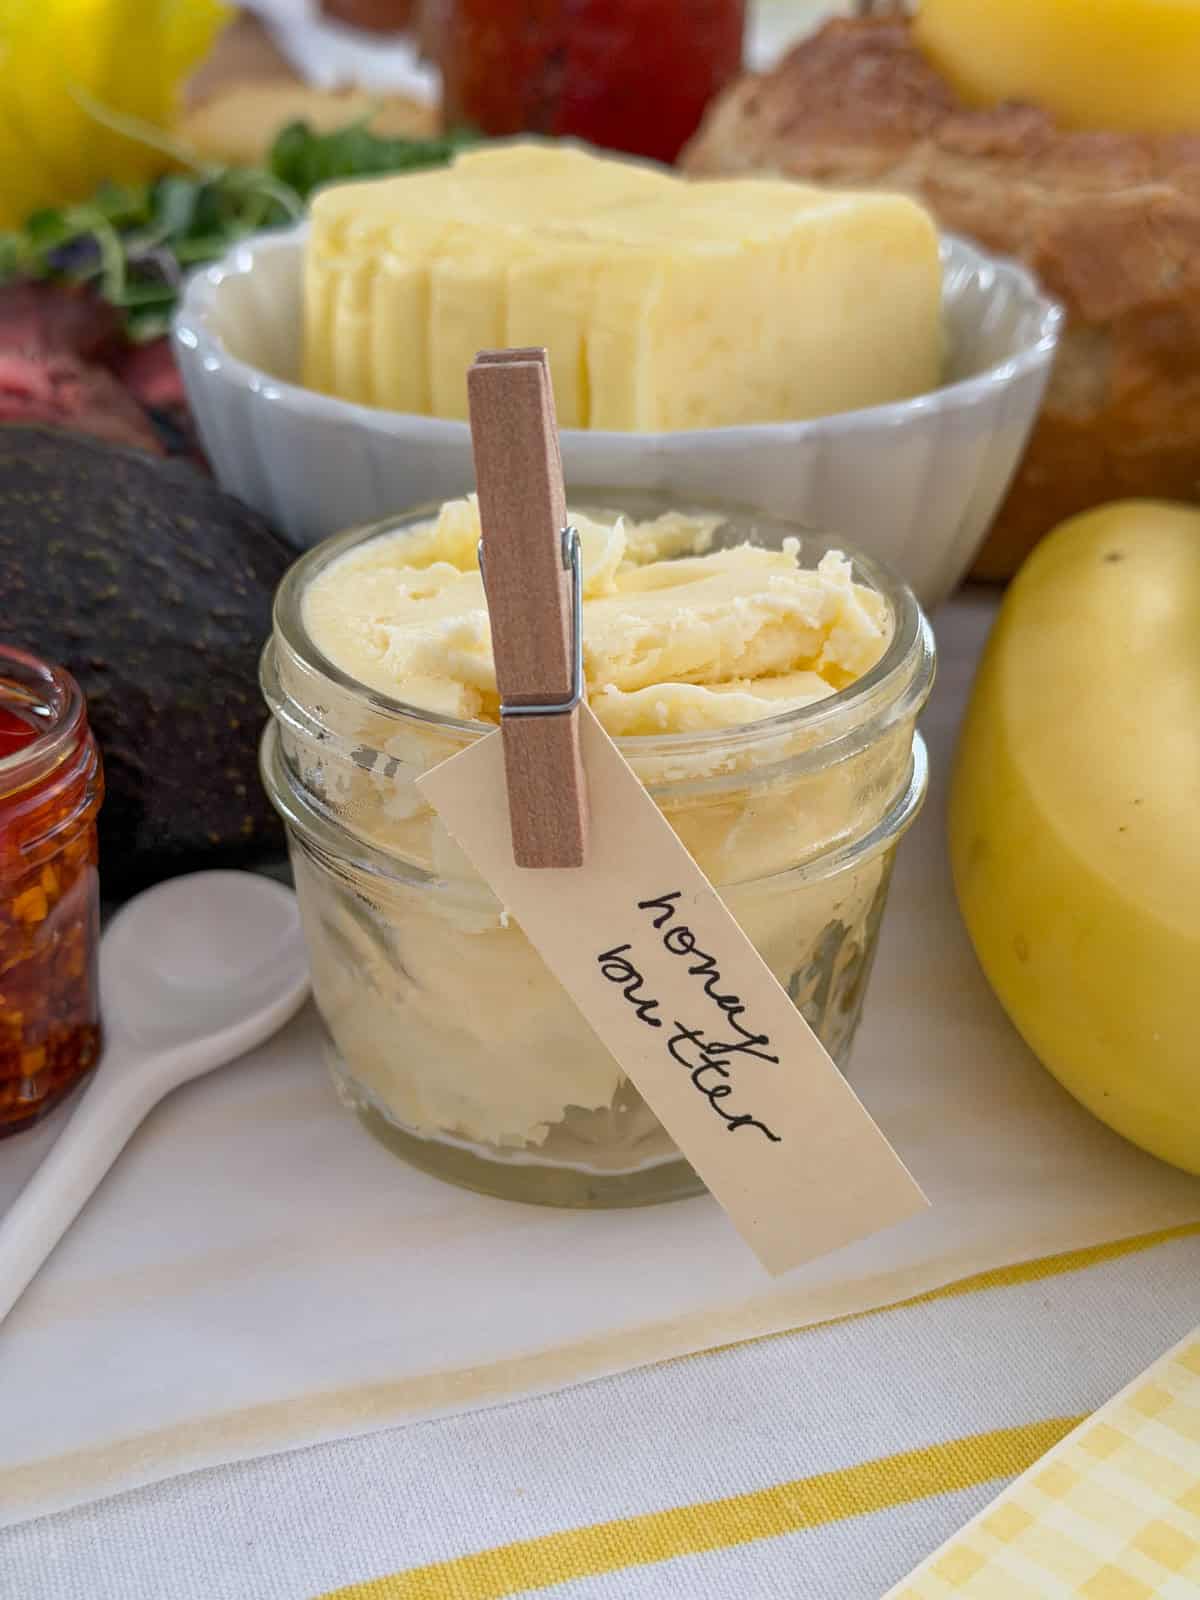
Jar of whipped honey butter with a clothespin label on a white parchment grazing surface with a block of sliced French butter in a white scalloped bowl behind.
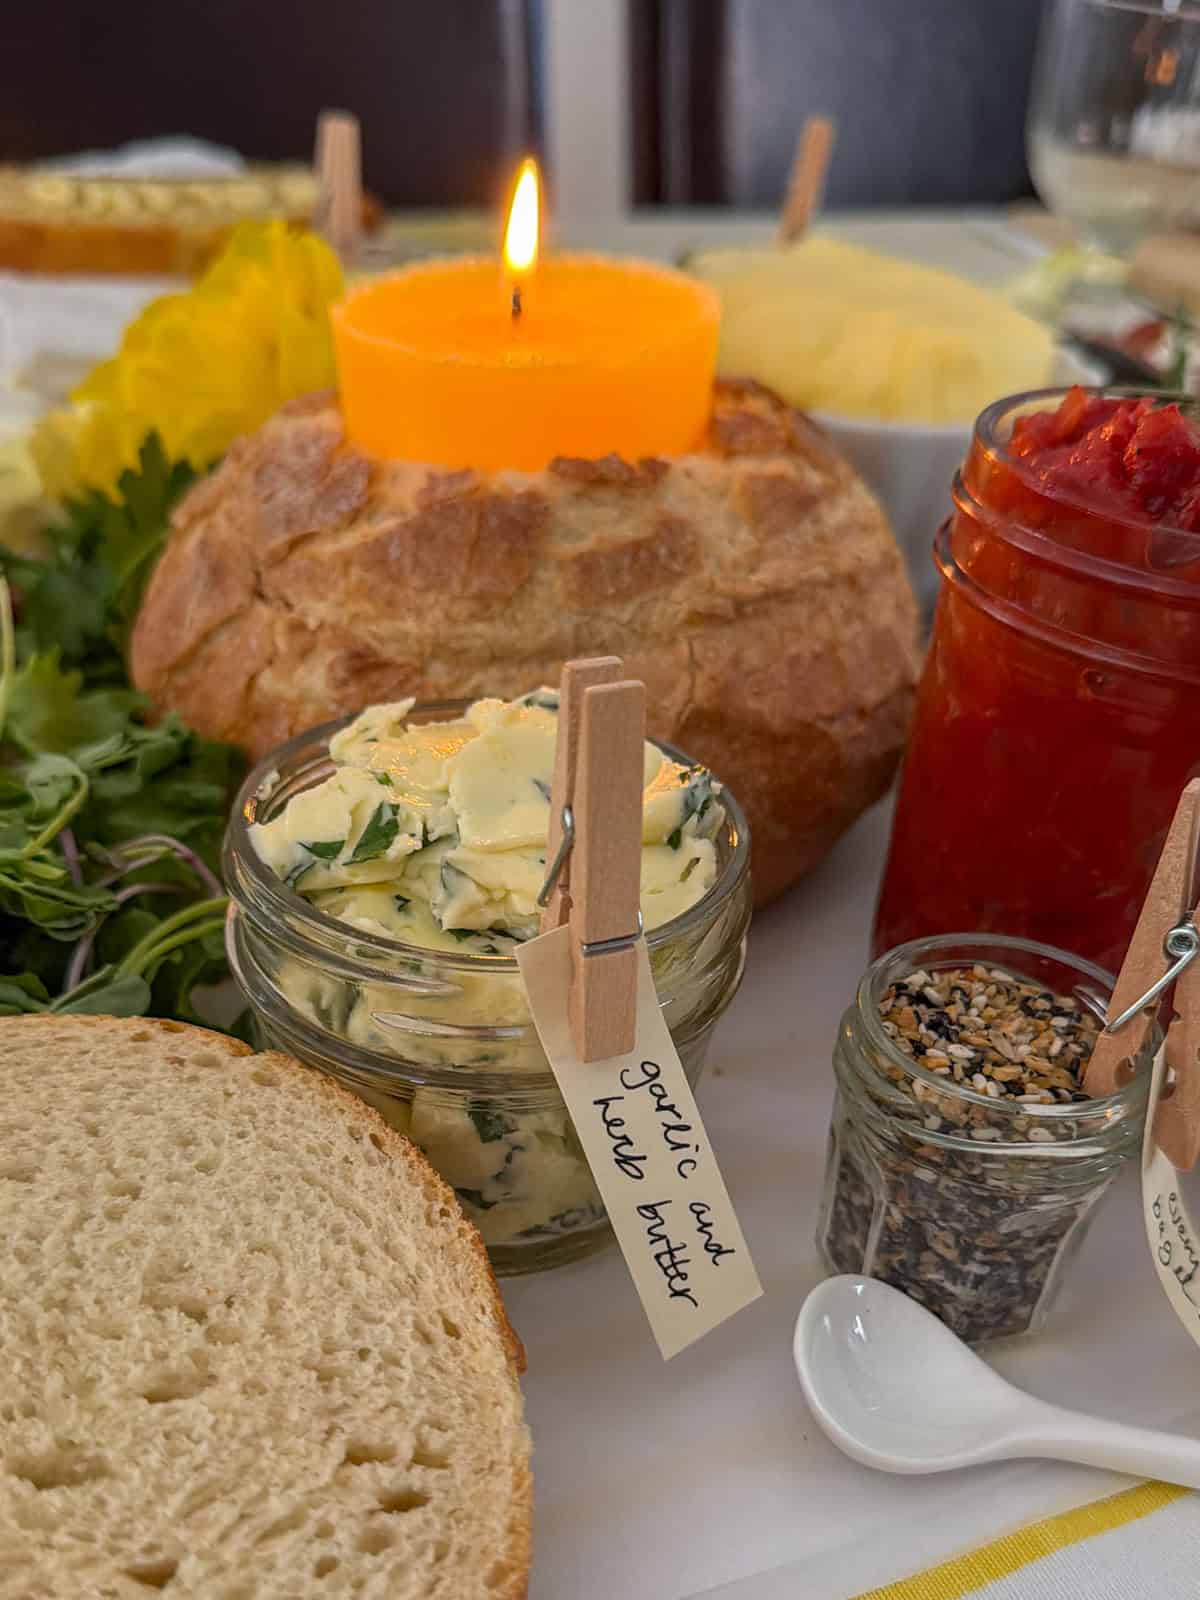
Jar of garlic herb compound butter with a handwritten clothespin label in the foreground with a burning butter candle in a sourdough boule, tomato jam jar, everything bagel seasoning jar, fresh mixed greens, and sliced sourdough bread visible around it on the grazing table.
Small glass jar of roasted garlic compound butter with a handwritten clothespin label beside a jar of flaky sea salt on a white grazing surface with avocado and bruschetta topping in the background.
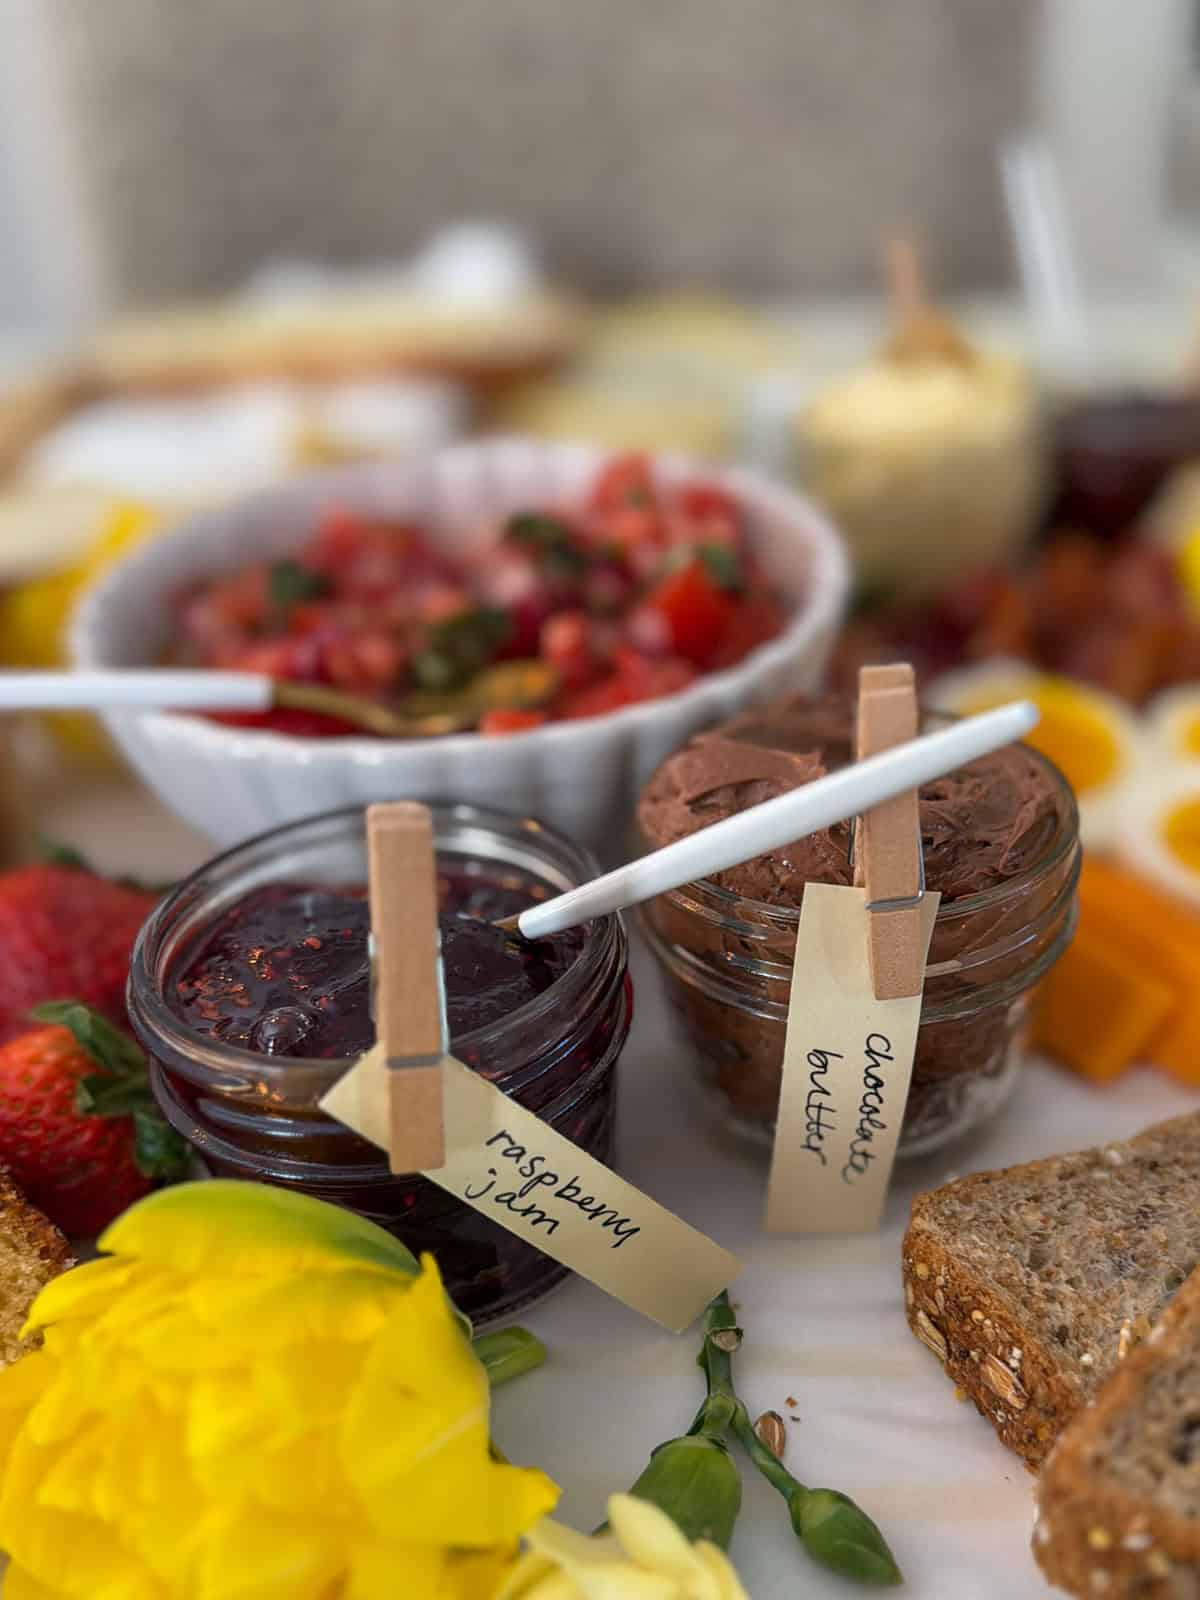
Small glass jar of chocolate compound butter with a handwritten clothespin label beside a jar of raspberry jam on a white parchment grazing surface with fresh strawberries, yellow tulip, sliced whole grain bread, bruschetta topping bowl, and soft boiled egg visible in background.

The House Recommendations Menu Card

One of the most important practical elements of a butter themed toast party is the house recommendations card at each place setting. Without some guidance guests can feel overwhelmed by the options. The double-sided card solves this completely - savoury suggestions on one side, sweet on the other.

Once guests work through a few recommendations they naturally start experimenting and inventing their own combinations. By the end of the evening people were calling out their favourite discoveries across the table.

Savoury recommendations:

  • The Steak - garlic and herb butter, marinated flank steak, mixed greens, balsamic glaze. Consistently the most popular toast of the evening.
  • The Mushroom - Boursin cheese, sautéed mushrooms. A close second in popularity.
  • The Pomodoro - roasted garlic butter, fresh mozzarella, homemade tomato jam, flaky sea salt.
  • The Avocado - roasted garlic butter, avocado, chili oil, everything bagel seasoning. Also great with eggs.
  • The Sweet Heat - jalapeño honey butter, avocado, bacon.
  • The Goat - goat's cheese, caramelized onion jam.
  • The BLT - bacon, lettuce, fresh tomato, mayo.
  • The Breakfast - scrambled eggs, bacon, cheddar, tomato jam.
  • The Frenchie - French butter, thinly sliced radishes. More on the French butter story below.

Sweet recommendations:

  • The Strawberry - strawberry butter, fresh strawberries, honey drizzle.
  • The Honey - whipped honey butter, honeycomb, flaky sea salt.
  • The Dubai - chocolate butter, pistachio cream, chopped pistachios. A nod to the viral Dubai chocolate trend.
  • The Monkey - peanut butter, banana slices, honey drizzle.
  • The Cornbread - toasted cornbread, whipped honey butter, blueberry jam.
  • Cinnamon Toast - whipped honey butter, cinnamon sugar.

A note from experience: guests eat five to seven rounds of savoury toast and maybe one or two rounds of sweet. Keep the sweet side lighter than you think you need and invest your effort in the savoury toppings.

The Full Toppings Spread

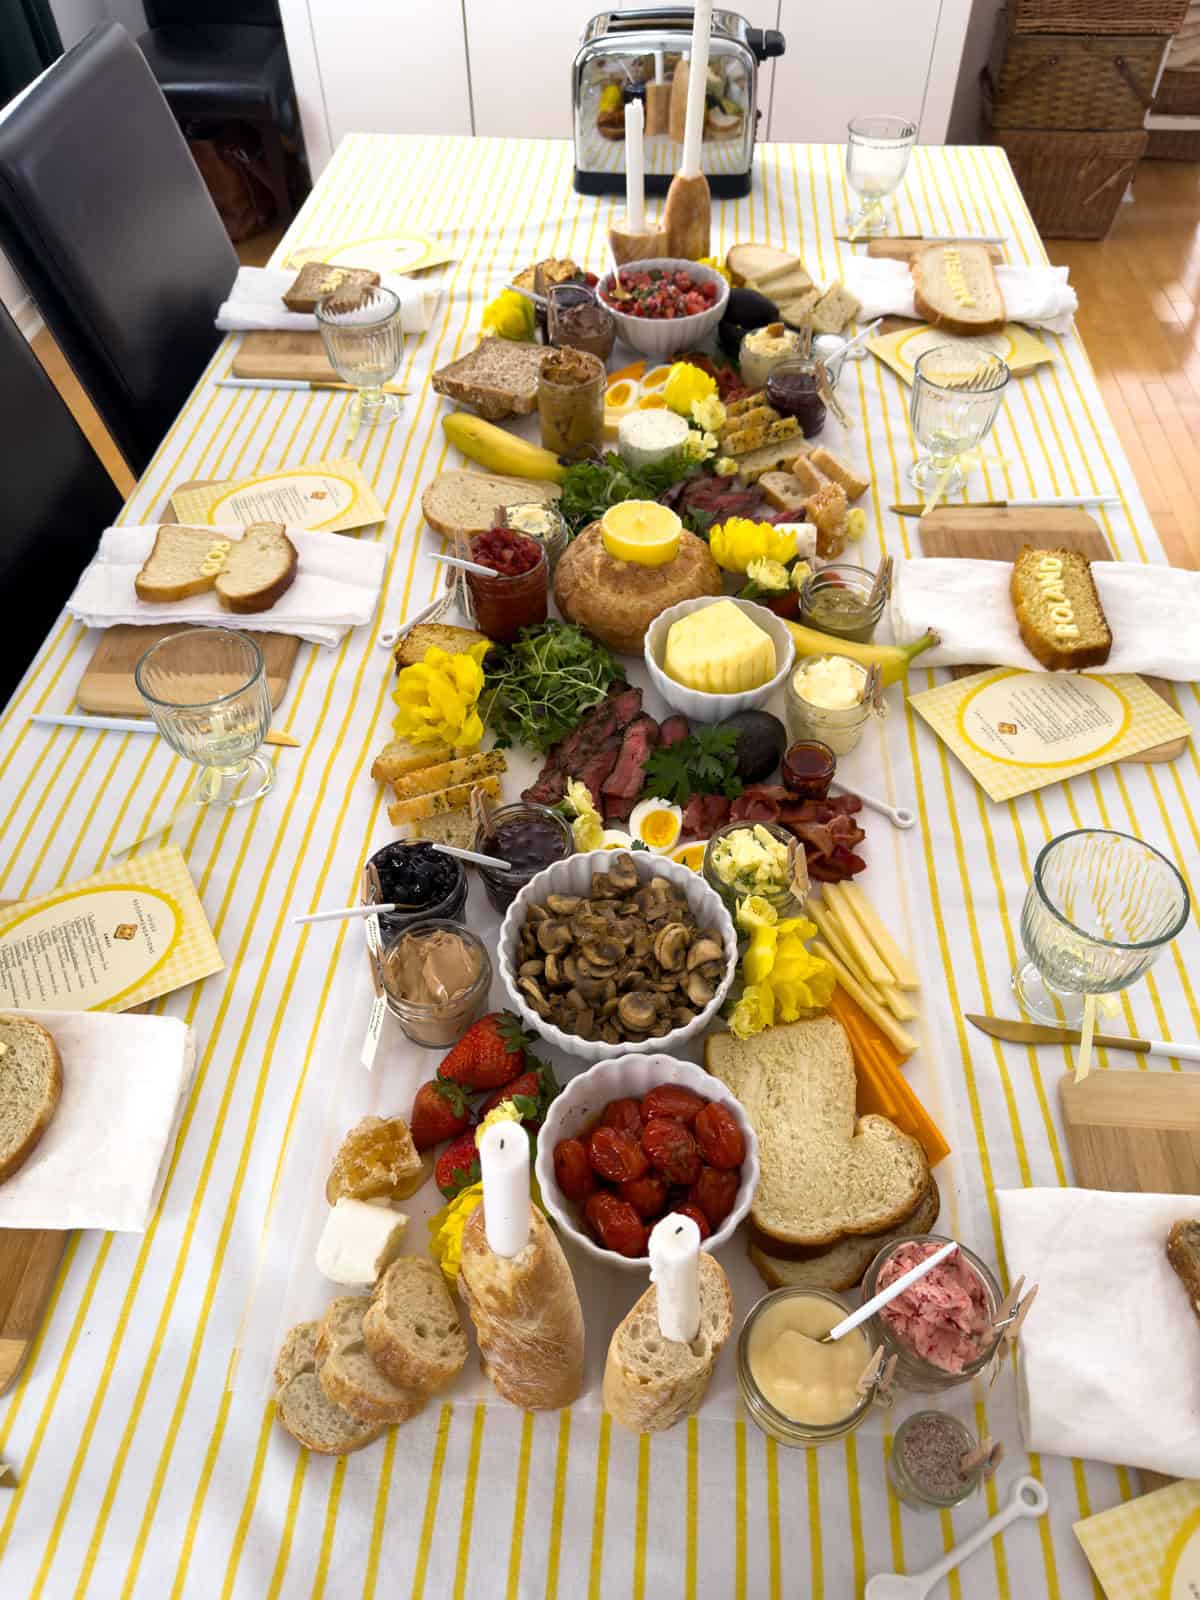
Overhead view of butter themed toast party dining table with yellow striped tablecloth showing full compound butter grazing spread, Roland cornbread name bread and Dannyelle sourdough name bread place settings, butter candle in sourdough boule centerpiece, baguette candle holders, and toaster at the far end.

Beyond what is in the house recommendations, here is everything we put on the grazing table. You do not need all of this. Choose what appeals to you and your group. Leftovers from jars and condiments are easy to use up so there is no real waste in being generous.

Savoury Toppings

  • roasted garlic butter
  • garlic and herb butter
  • jalapeno honey butter
  • flank steak slices
  • sautéed mushrooms
  • hard boiled eggs
  • bacon
  • Boursin cheese
  • goat's cheese
  • cheddar cheese
  • fresh mozzarella cheese or burrata
  • bruschetta topping
  • tomato jam
  • avocado slices
  • mixed greens
  • caramelized onion jam
  • roasted tomatoes
  • mayo
  • ketchup
  • chili oil
  • hot honey
  • balsamic glaze
  • everything bagel seasoning
  • flaky sea salt and pepper

Sweet Toppings 

  • whipped honey butter
  • chocolate butter
  • strawberry butter
  • peanut butter
  • pistachio cream
  • hazelnut creme, or Nutella
  • creamed honey and honeycomb
  • fresh strawberries
  • banana slices
  • blueberry jam
  • raspberry jam
  • strawberry rhubarb jam
  • cinnamon sugar
  • toasted pistachios
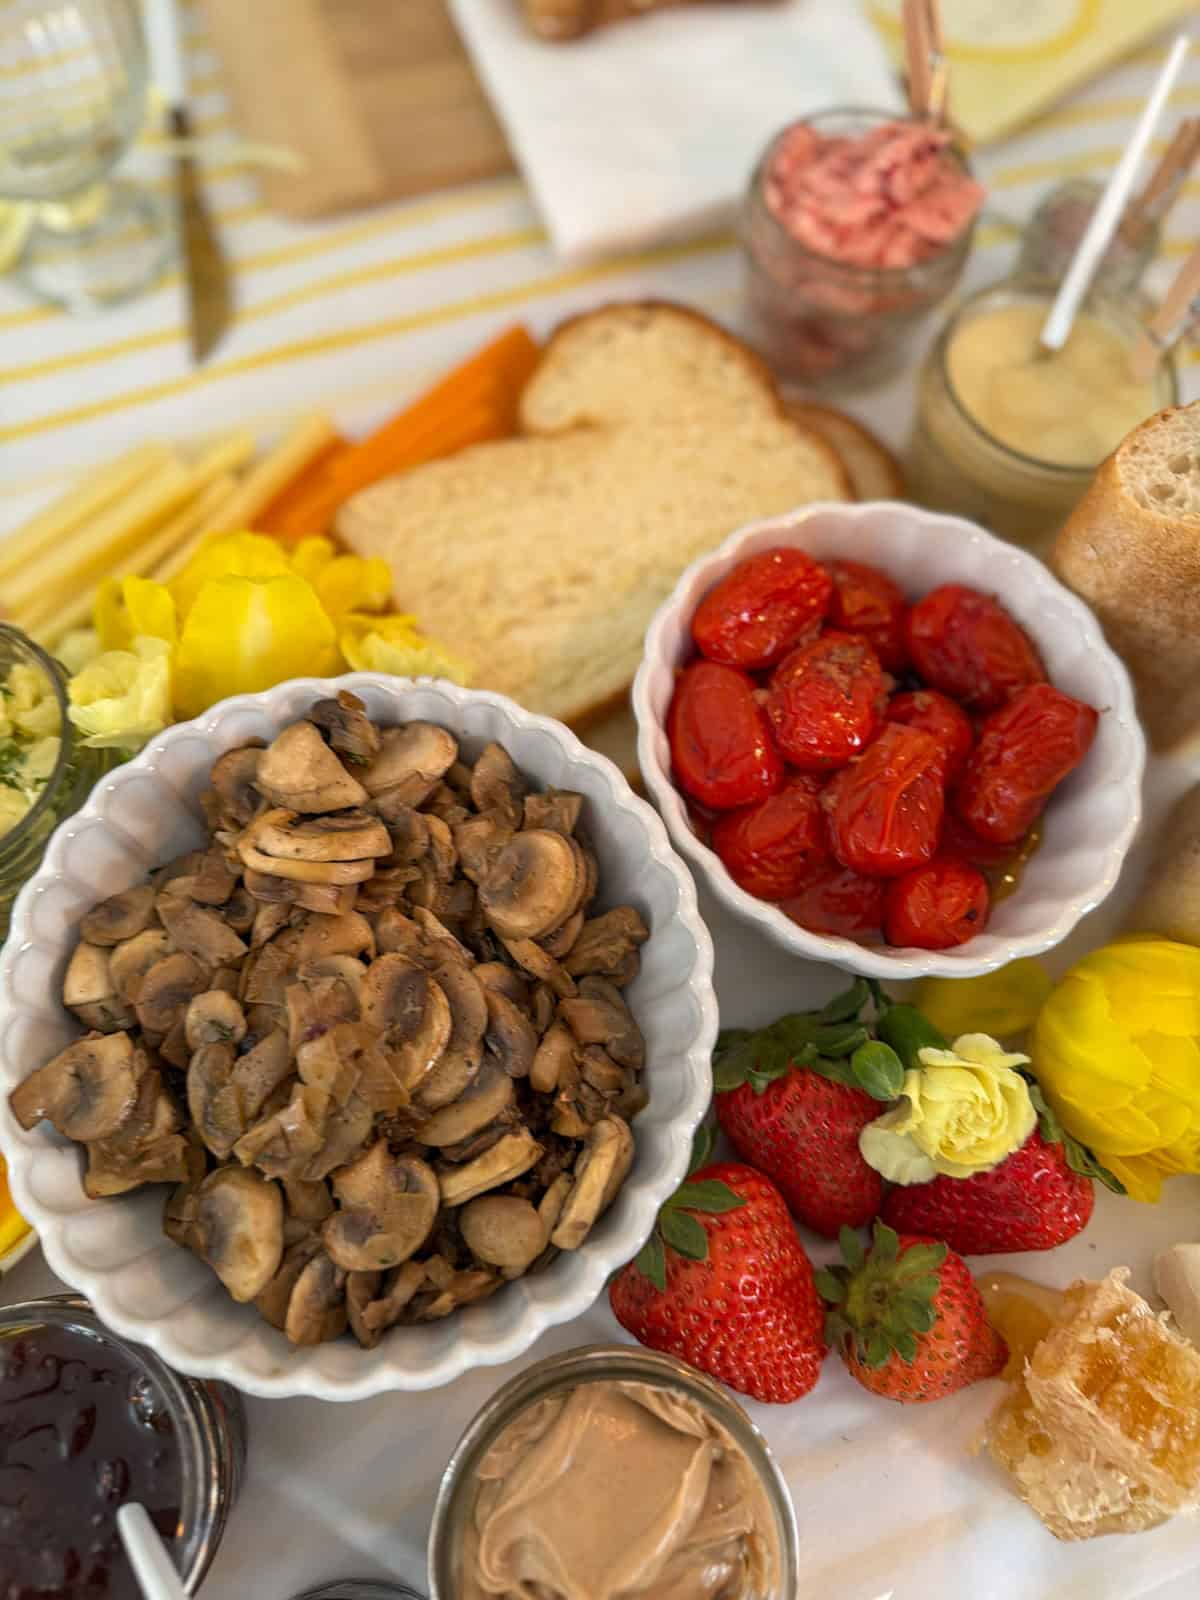
Overhead close up of white scalloped bowl of sauteed mushrooms and white scalloped bowl of roasted cherry tomatoes on a white parchment grazing surface with fresh strawberries, yellow roses and tulips, honeycomb, peanut butter jar, strawberry butter jar, and sliced bread visible around them.
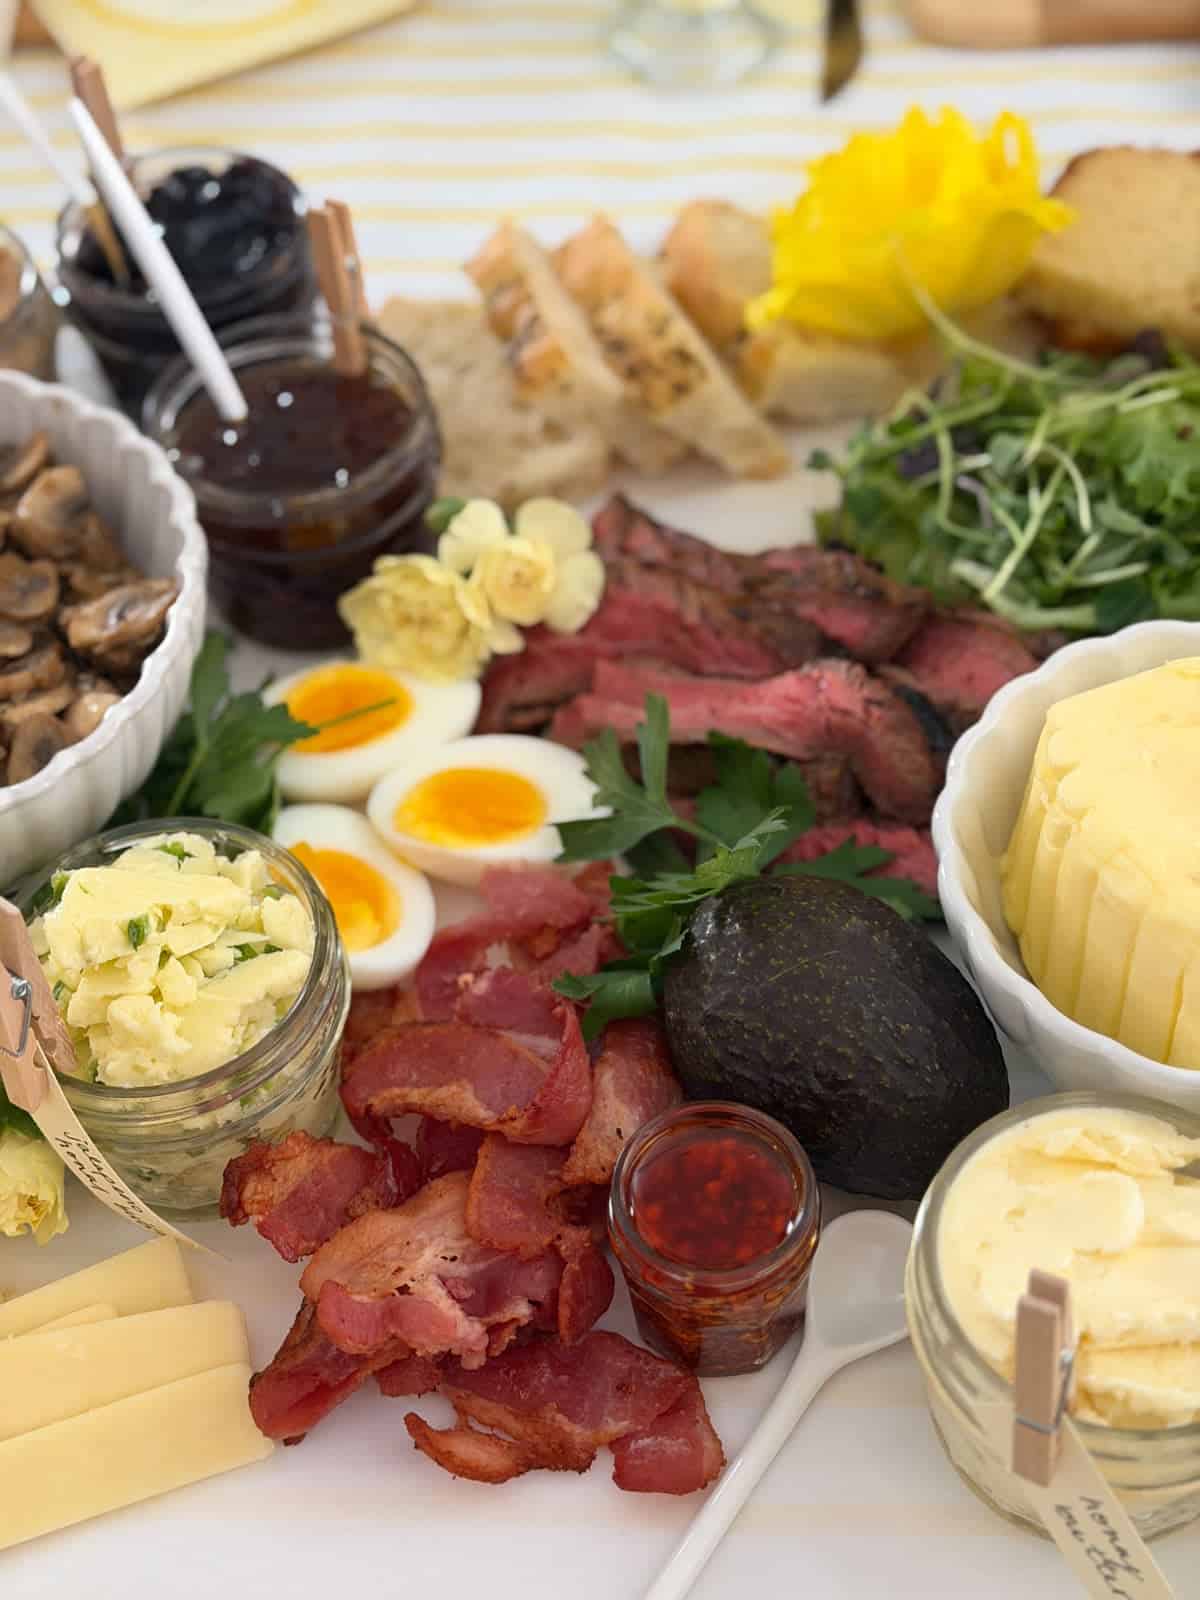
Overhead view of compound butter toast party grazing board with sliced flank steak, sauteed mushrooms, caramelized onion jam, blueberry vanilla jam, hazelnut creme, roasted cherry tomatoes, hard boiled eggs, fresh strawberries, and honeycomb.
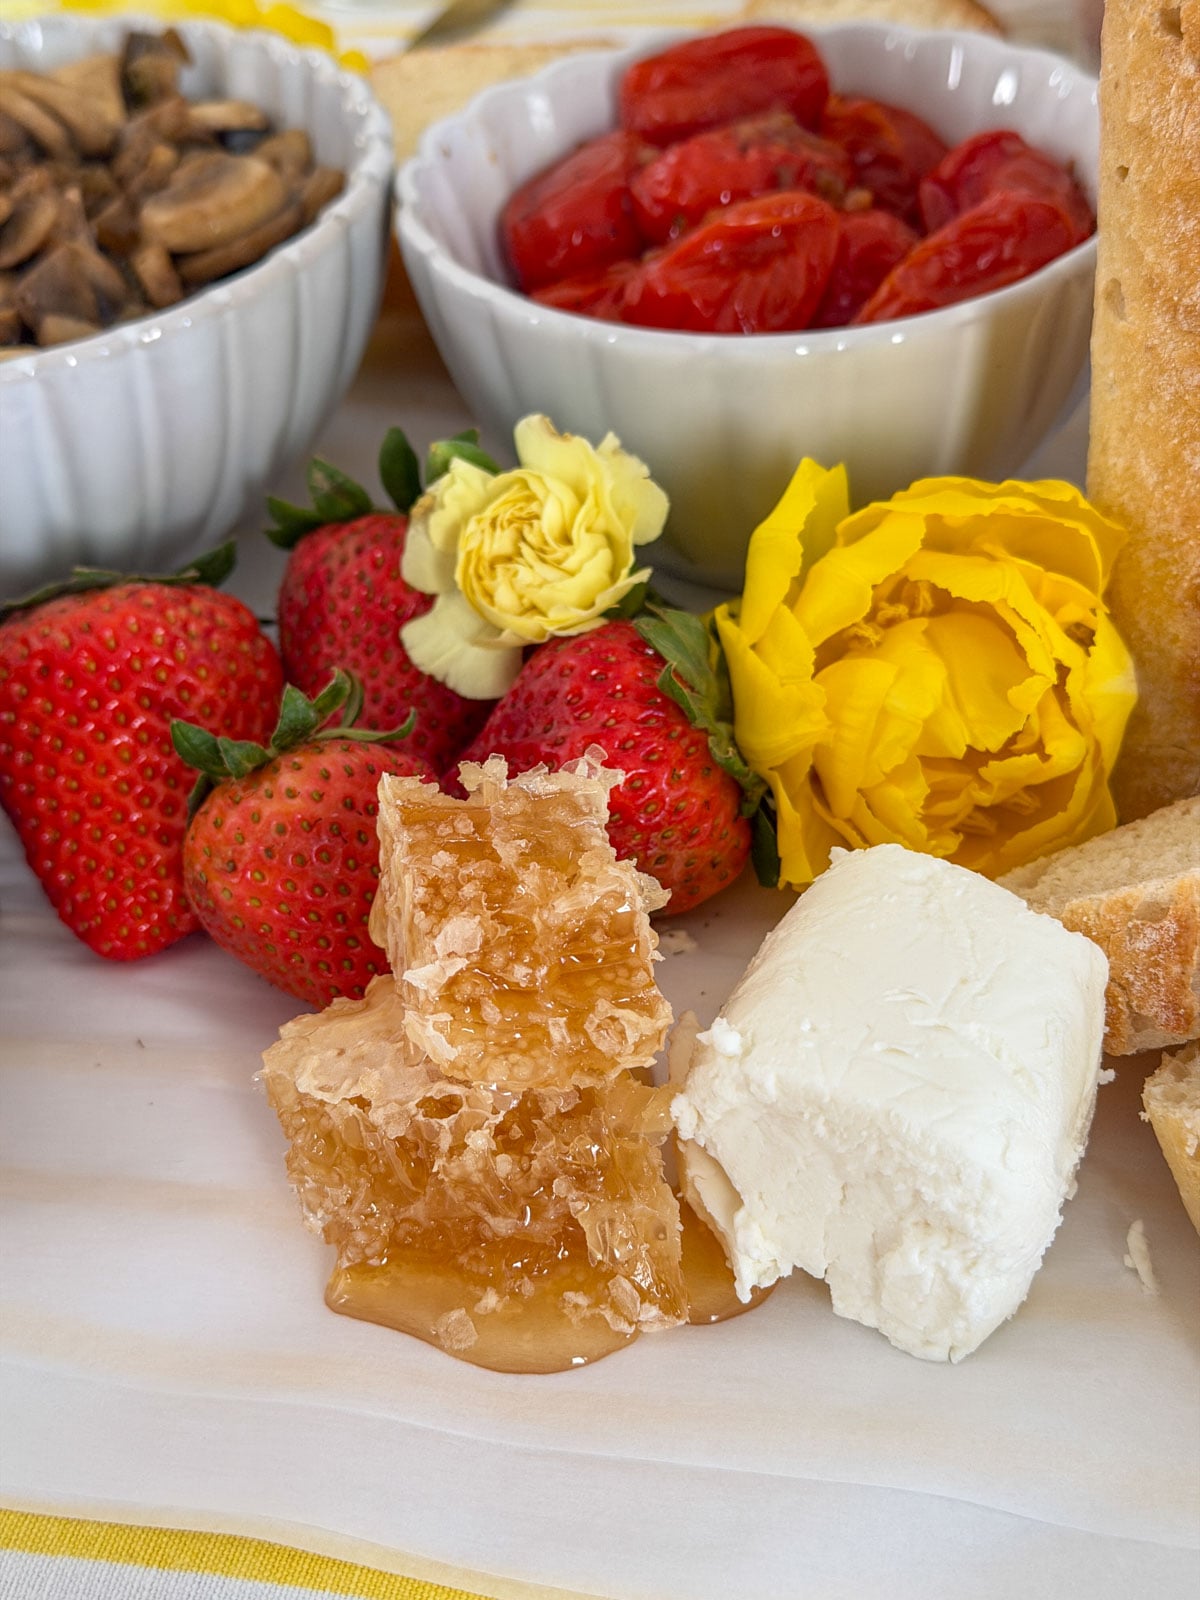
Compound butter toast party sweet side grazing board with honeycomb, cream cheese, fresh strawberries, yellow roses and tulips, roasted cherry tomatoes, sauteed mushrooms, and sliced baguette.
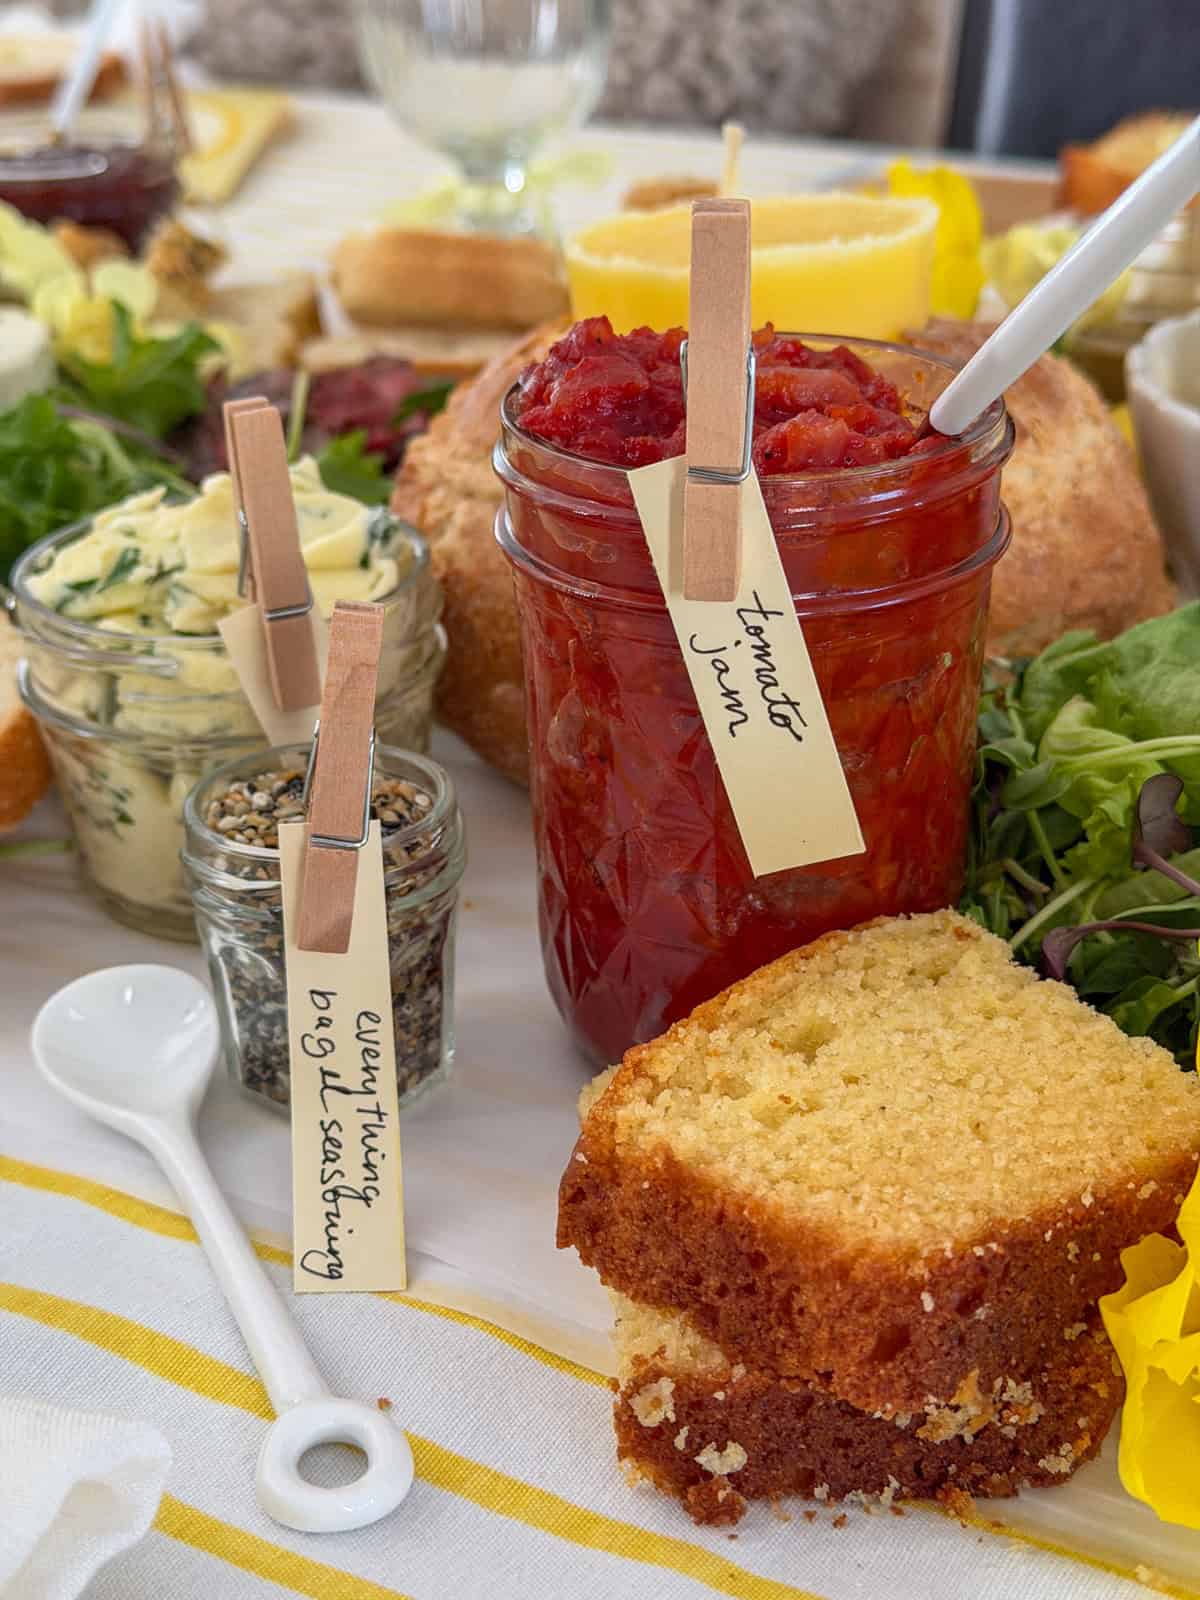
Close up of tomato jam mason jar with handwritten clothespin label beside a jar of everything bagel seasoning on a white parchment grazing surface with garlic herb butter jar, slice of cornbread, yellow tulip, and butter candle in sourdough boule visible in background.

The Bread Selection

We asked our guests to each bring their favourite bread. But we also wanted to have a variety of breads so we picked up some too. Two guest brought sourdough, and one brought French bread, so we were glad we had a few other options, admittedly though, we had too much bread.

  • sourdough bread
  • French bread
  • whole grain oat bread
  • baguette
  • ciabatta bread
  • brioche bread
  • cornbread
  • scones

The Drinks

We had a pitcher of homemade punch ready as the non-alcoholic option - frozen lemonade concentrate, Sprite, and lemon slices which sounds almost too easy, and it got more comments than anything else.

A note for hosts: plan your punch for the colour palette if you can. We accidentally bought pink lemonade instead of regular and our vision of the beautiful butter yellow punch with fresh lemon slices garnishing became bright pink instead. Whoops. Our guests responded by saying "we can pretend it's yellow" and we all laughed about it for the rest of the evening. Sometimes the mistakes become the best moments.

Don't Blow A Fuse

The most important practical tip for hosting a toast party and the one I learned the hard way years ago.

Butter themed toast party dining table set with yellow striped tablecloth showing toaster oven at the left end and chrome toaster at the right end flanking the full compound butter grazing spread with name bread place settings, bamboo cutting boards, and crystal chandelier above.

Toasters draw significant power. Multiple toasters on the same circuit will blow a fuse on your first round of toast. The solution is simple, run extension cords from each toaster to different outlets in different rooms so each toaster draws from its own circuit. You can then run them all simultaneously without any power issues.

Since everyone is seated at the table there are no tripping hazards. Just tuck the cords safely when the evening is done.

A toaster oven is a wonderful optional addition. It gives guests the option to melt cheese on their toast which is always popular.

The Party Favors

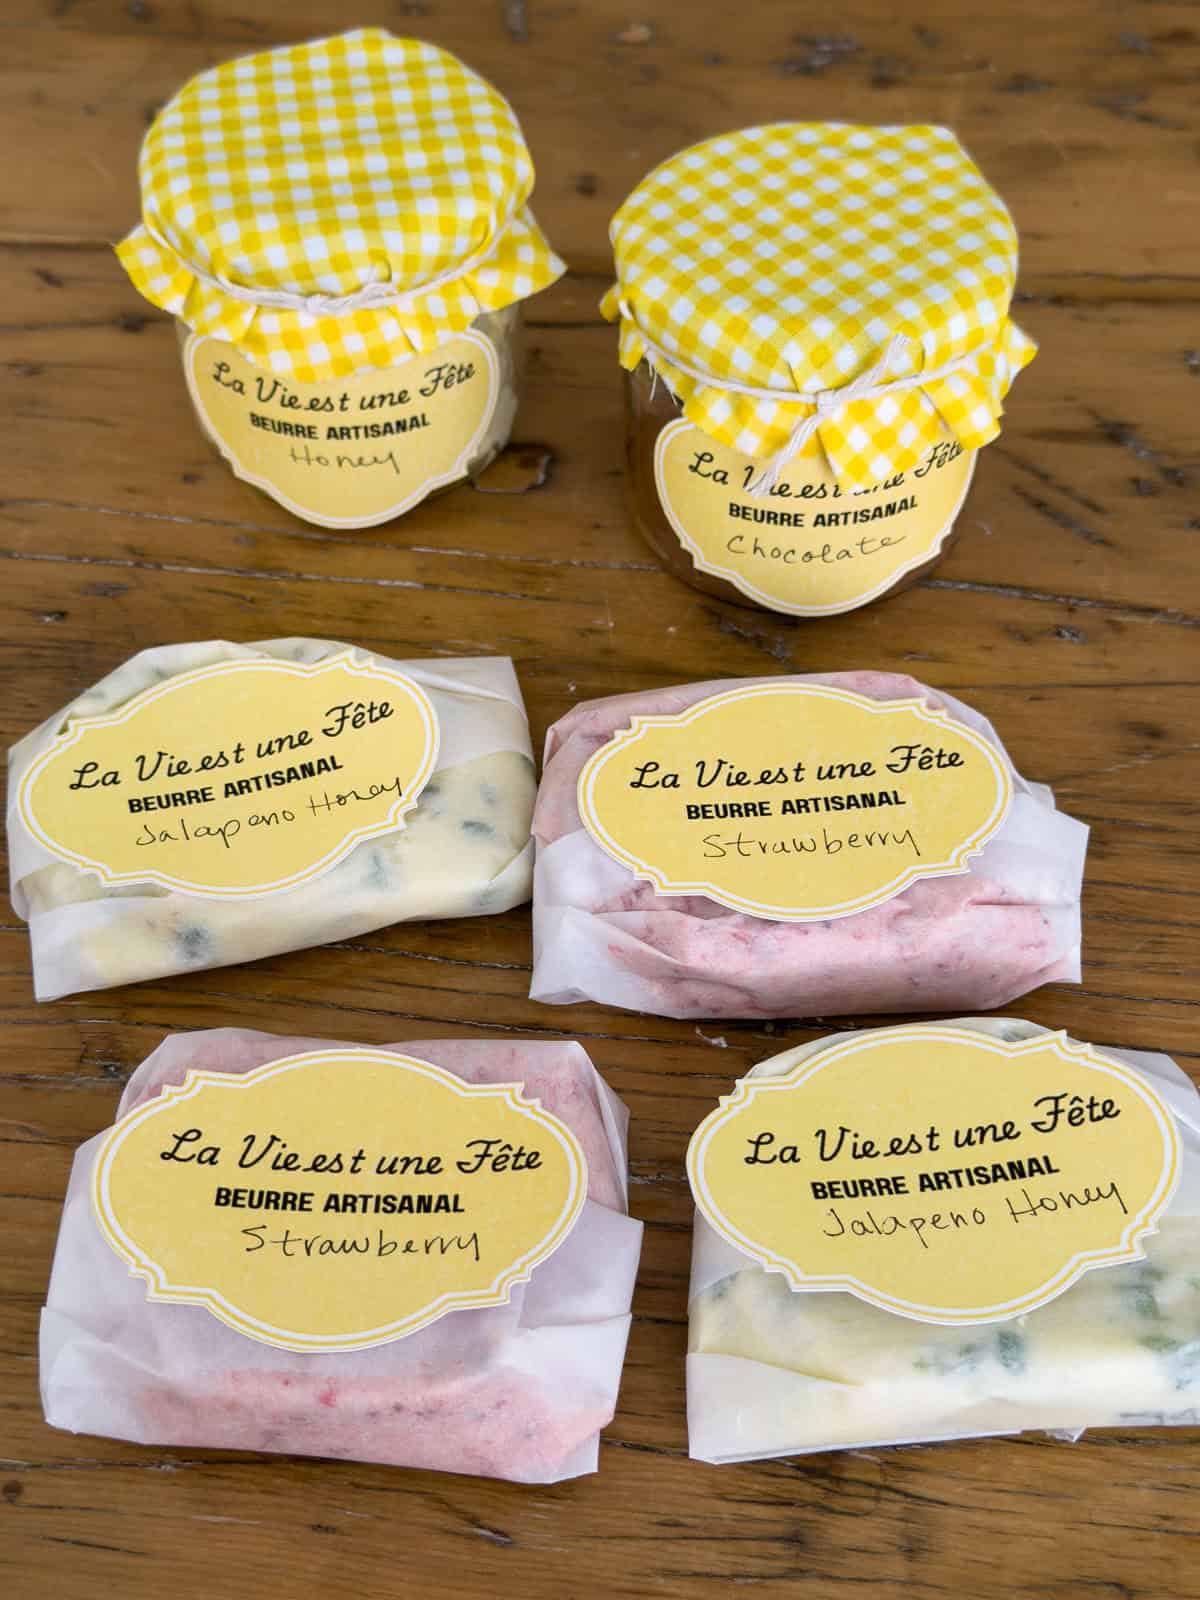
We sent each guest home with three homemade compound butters wrapped in parchment paper, or in a mason jar, with our own handmade French-style label reading La Vie est une Fête - Beurre Artisanal in a script font -which means "Life is a Party". We wrote the name of each butter by hand underneath in Sharpie. Each bundle was tied with twine and thank you tag reading "Everything is butter with you." Will it was meant to, but I forgot to add the favor tag in the rush of getting ready. You can grab it in our free resource library and add it to yours at your own butter party.

Compound butter party favors including two mason jars with yellow gingham fabric lids labeled Honey and Chocolate, and four parchment-wrapped butter portions labeled Jalapeno Honey and Strawberry with La Vie est une Fete Beurre Artisanal labels.

The story behind the label: we spent one day in France on a river cruise last year and I made a pilgrimage to a grocery store specifically to buy French butter. I brought a few pounds home in my suitcase, shared most of it with the people I love, and saved the last portion for a special moment. This party was that moment.

I thought it would be fun to send guests home with our own homemade butters wrapped to look like the beautiful, famous French butter from Paris. It was the perfect ending to a perfect evening.

We don't always get to Paris. But we can always make our own version of beautiful.

Butter toast party dining table from the side showing place settings with name breads, baguette candle holders, lit taper candles, and yellow flower arrangements along the grazing runner.

Frequently Asked Questions

What makes a good butter themed party?

The key elements are compound butters as the centrepiece, a butter yellow color scheme throughout the decor and dress code, and details that celebrate butter as the hero of the evening. Baguette candle holders, a butter candle, butter place cards with guests' names, and beautiful butter party favors all contribute to the theme in ways that feel intentional and cohesive rather than forced.

How many toasters do you need for a toast party?

One toaster per two to four guests is ideal. Ask every guest to bring their own and you will have more than enough. A toaster oven as one of the options is a wonderful bonus for anyone who wants to melt cheese on their toast.

What bread should you serve at a butter themed toast party?

Variety is key. Anchor the table with three or four varieties you choose yourself including a sourdough, a whole wheat or seeded bread, a brioche or challah for the sweet toasts, and a good crusty loaf. Ask guests to bring their own favourite sliced bread as a fun contribution. Having it pre-sliced means everything goes straight into the toasters.

How far in advance can you make compound butters?

All of our compound butter recipes can be made up a few days ahead and stored in sealed jars in the refrigerator. This is the biggest hosting advantage of a compound butter party because the most impressive element is completely done before party day.

How do you prevent blowing a fuse with multiple toasters?

Run each toaster's extension cord to a different room so each one draws from a different circuit. This is the single most important practical tip for hosting any toast party.

How much food do you need for a toast party?

Plan generously on the savoury side and modestly on the sweet side. From experience guests eat five to seven rounds of savoury toast and maybe one sweet round. The toppings that consistently disappear first are the steak, the mushroom Boursin combination, and the bacon.

More Party Ideas You'll Love

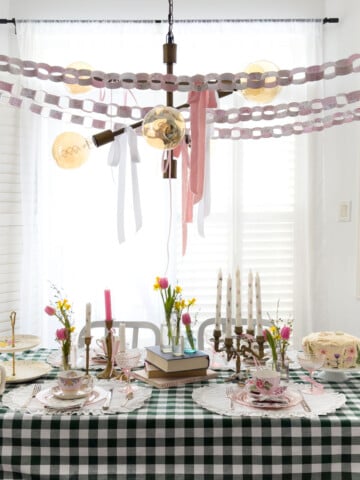
  • Green gingham tablecloth with vintage teacups, candelabra, tulips and daffodils set for a Little Women party.
    Little Women Party: A March Sisters Vintage Tea Party
  • Overhead view of a compound butter board with six flavored compound butters in a row including chocolate, strawberry, whipped honey, jalapeño honey, roasted garlic, and garlic herb, each paired with its own bread on a marble board.
    The Ultimate Butter Board: 6 Flavored Butters and Bread Pairings
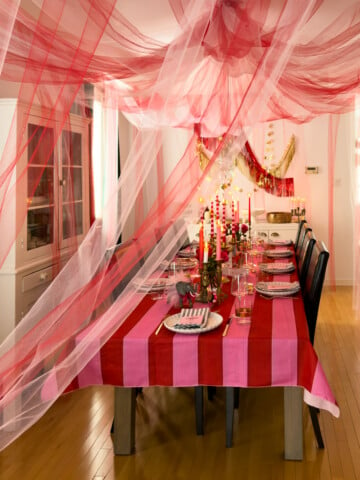
  • Circus themed dinner party dining room transformed into a big top, with a dramatic DIY pink and red tulle tent ceiling draping from floor to ceiling, fully set dinner table with red and pink striped tablecloth, lit brass candlesticks, and the hot dog buffet backdrop visible in the background.
    Circus Party Ideas: Elevated Dinner Party
  • Daisy themed summer picnic party table with yellow and white striped tablecloth, daisy cake, daisy deviled eggs, floral pizza, and fresh daisy flower arrangements.
    Daisy Themed Party Ideas

If you try this butter themed party or any other party ideas on my blog please let me know how it went in the comments below. Thanks for visiting today!

Best Homemade Jam Jam Cookie Recipe

Dec 22, 2015 · 12 Comments

Jam Jam cookie recipe, with cookies laying on a marble serving tray.

Jam Jams: this old fashioned sandwich cookie recipe is an old family favourite, tried and true, and so delicious.

Jam Jam cookie recipe, with cookies laying on a marble serving tray.
[feast_advanced_jump_to]

These jam jam cookies are an old-fashioned cookie recipe.  It has a soft, slightly chewy, mild tasting cookie filled with delicious jam.  These cookies are more crisp when you first make them, and then they soften up and take on some delicious flavor of the jam after they're sandwiched together.  They're the most delicious sandwich cookie that you will love.

Growing up I had a cookie Grandma.  She loved cookies, and it felt like she always had some fresh baked cookies in the cookie jar when we visited. especially at Christmas time.

Jam Jams: Grandma's Raspberry Jam Sandwich Cookies

Jam Jams An Old Family Favourite

Jam jams were a family favourite, a tried and true recipe.  We called them Jam Jams, they're a Jam Sandwich Cookies, similar to Linzer Cookies, they might be called a Jammy Dodger or strawberry jam cookies.  Totally delicious, whatever name you use.  You can use any jam you like.  They're sometimes made with a delicious strawberry jam, but raspberry is my personal favorite.

When my mom was a little girl, she said my Grandma made a double batch of these cookies every other week, and alternated them with another family favourite, brown sugar cookies.  These cookies are easy to make, use basic ingredients that they always had on hand, and are so delicious.  My Grandma won't have thought of these as Christmas cookies.  These won't have been special enough for Christmas, these were just a work a day kind of a cookie -especially on the farm where people put in long days in the fields and barns, and these were the kind of cookies that would appear after a big lunch, before people headed back out to work and needed sweet treats.

Grandma's Raspberry Jam Jams Sandwich Cookies

Christmas Cookies

But since we don't live on a farm, nor make cookies every week, it seems right that Jam Jams should make an appearance at Christmas, especially since I've made them with a Christmasy star in the middle and dressed them up with a sprinkling of icing sugar, which she never did, but I'm sure she would approve of.

And they're perfect to make at Christmas now, since we never seem to make them anymore, and they are such a happy familiar taste, that bring back lots of childhood memories for me.

My Grandma probably made these hundreds of times…my mom as well, and I feel like I've been making them myself since I was a kid…I'm sure I've eaten them hundreds of times.  They are certainly a tried and true recipe.  I highly recommend.  They are perfect with a cup of tea, really any time of the year.

jam jam cookies with star centre cutouts and sprinkled with powdered sugar

Jam Filling

For the jam filling in these cookies, you could fill them with any kind of jam.  Raspberry jam is my favourite, but I've had them often with strawberry too.  My youngest daughter thought they might be nice with Nutella…she's probably right.  You could also use apricot jam if you like.  Really any of your favourite jams would probably work really well.  The cookie is quite a mild tasting one, so any fruit jam should pair with it well.  Try it with any of your favorite jams.  If you have homemade jam it's a great choice, but any store-bought jam will also work great.

Recipe

Jam Jam cookie recipe, with cookies laying on a marble serving tray.

Jam Jams

Tender cookies sandwiched with raspberry jam.
4.50 from 2 votes
Print Pin Rate
Course: Desserts
Cuisine: American
Prep Time: 20 minutes minutes
Cook Time: 15 minutes minutes
Total Time: 35 minutes minutes
Servings: 30
Calories: 104kcal
Author: Dannyelle Nicolle-Ramjist

Ingredients

  • ½ cup brown sugar
  • ½ cup salted butter
  • 1 egg
  • 3 tablespoon corn syrup
  • 1 teaspoon vanilla extract
  • 1 teaspoon baking soda
  • 2 cups all-purpose flour
  • ¾ cup raspberry jam
  • ¼ cup powdered sugar

Instructions

  • Cream together sugar and butter in the large bowl of a stand mixer.
  • Add the egg, corn syrup, and vanilla and combine until fully mixed.
  • In another large mixing bowl combine the baking soda and flour, and whisk to remove any lumps. Gradually the dry ingredients add to the wet ingredients in the mixer until fully combined and a soft dough forms.
  • Wrap the dough in plastic wrap and chill dough in refrigerator.
  • To make the cookies, roll out the dough on a floured surface with a rolling pin, to about ⅛ inch thick, and cut a solid circle bottom piece and top piece with a hole in the middle.
  • Bake on a cookie sheet at 350 degrees, until golden brown, about 5 min. depending on the size of your cookie cutter.
  • Let cool completely on a wire rack, then sprinkle the top piece with powdered sugar, and spread the bottom with about 1 teaspoon of jam and sandwich together.
  • Makes about 2 ½ dozen sandwich cookies. Store in an airtight container. (Recipe can be easily doubled.)

Nutrition

Serving: 1g | Calories: 104kcal | Carbohydrates: 17g | Protein: 1g | Fat: 3g | Saturated Fat: 2g | Polyunsaturated Fat: 1g | Cholesterol: 14mg | Sodium: 74mg | Sugar: 9g
Tried this Recipe? Tag me Today!Mention @LifeisaParty or tag #lifeisaparty!
Jam Jams: Grandma's Raspberry Jam Sandwich Cookie recipe, easy to make, perfect for the holidays.

With home made Jam Jams, life really is a party.

More Cookie Recipes

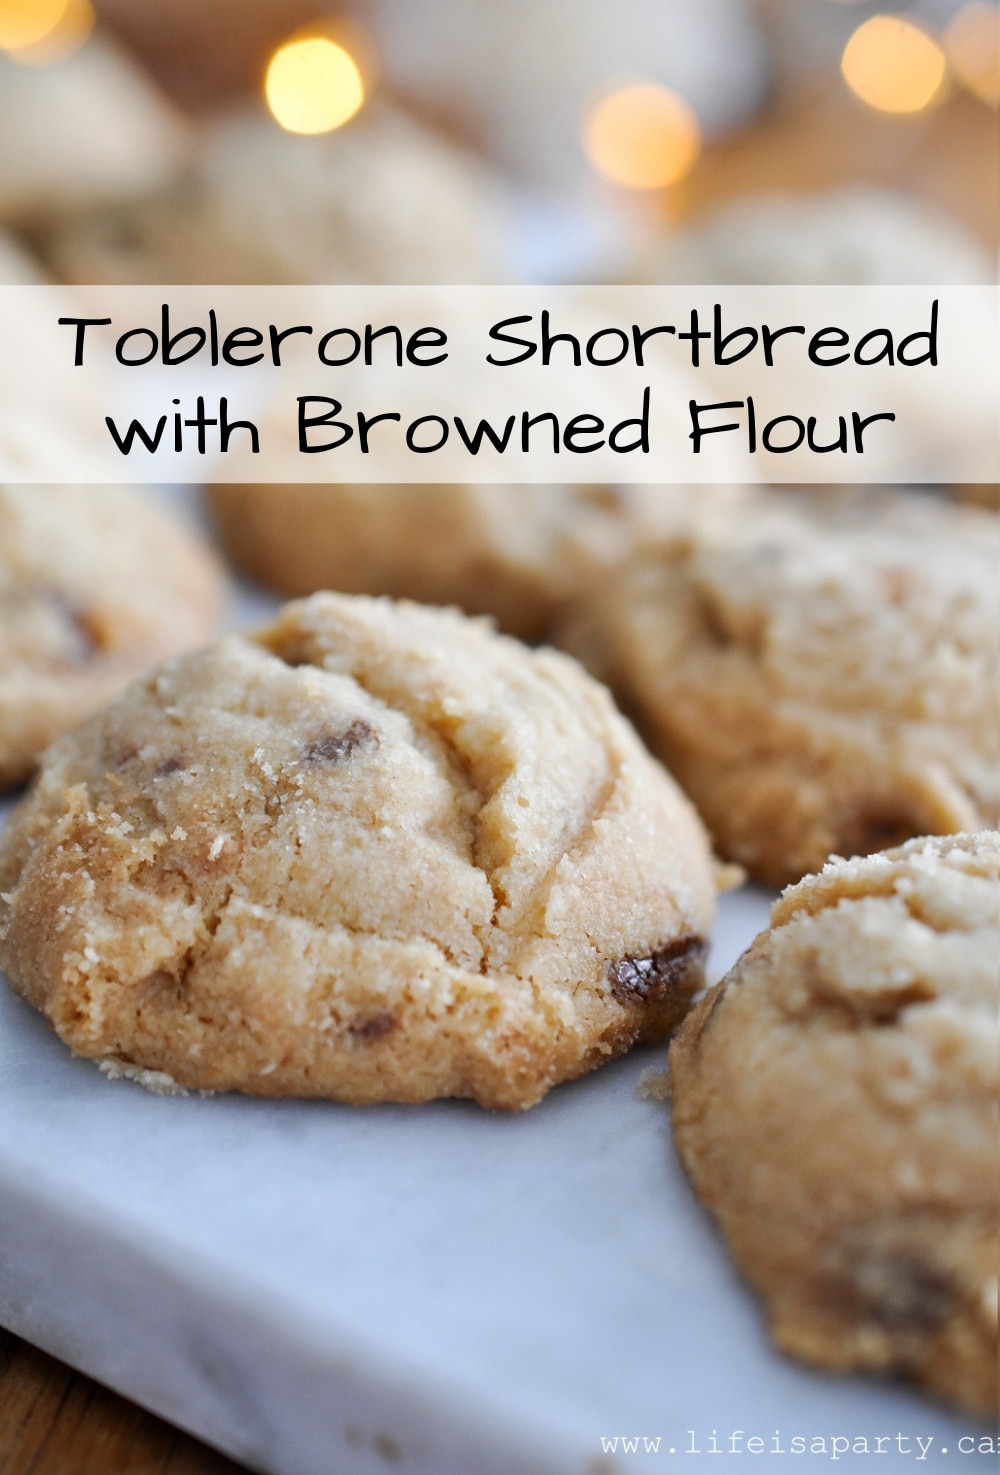
You might also like these Toblerone Shortbread Cookies with Browned Flour.

Toblerone Shortbread with Browned Flour -The "Famous Phipps Shortbread" with roasted flour, and Toblerone chocolate bar chunks.

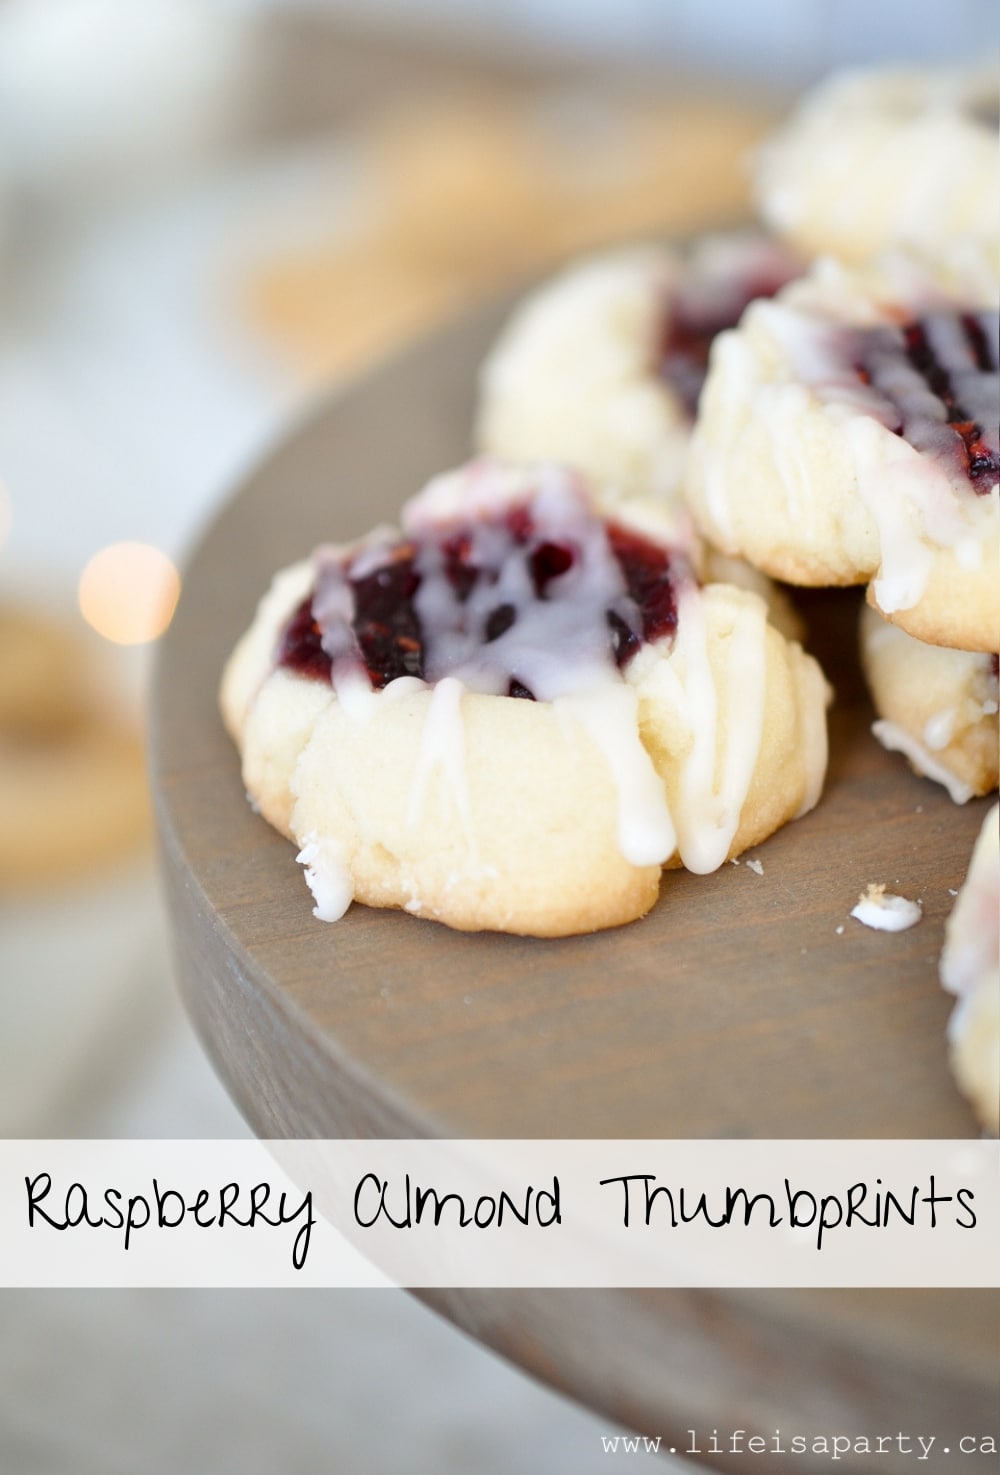
Check out our  Raspberry Almond Thumbprint Cookies recipe.

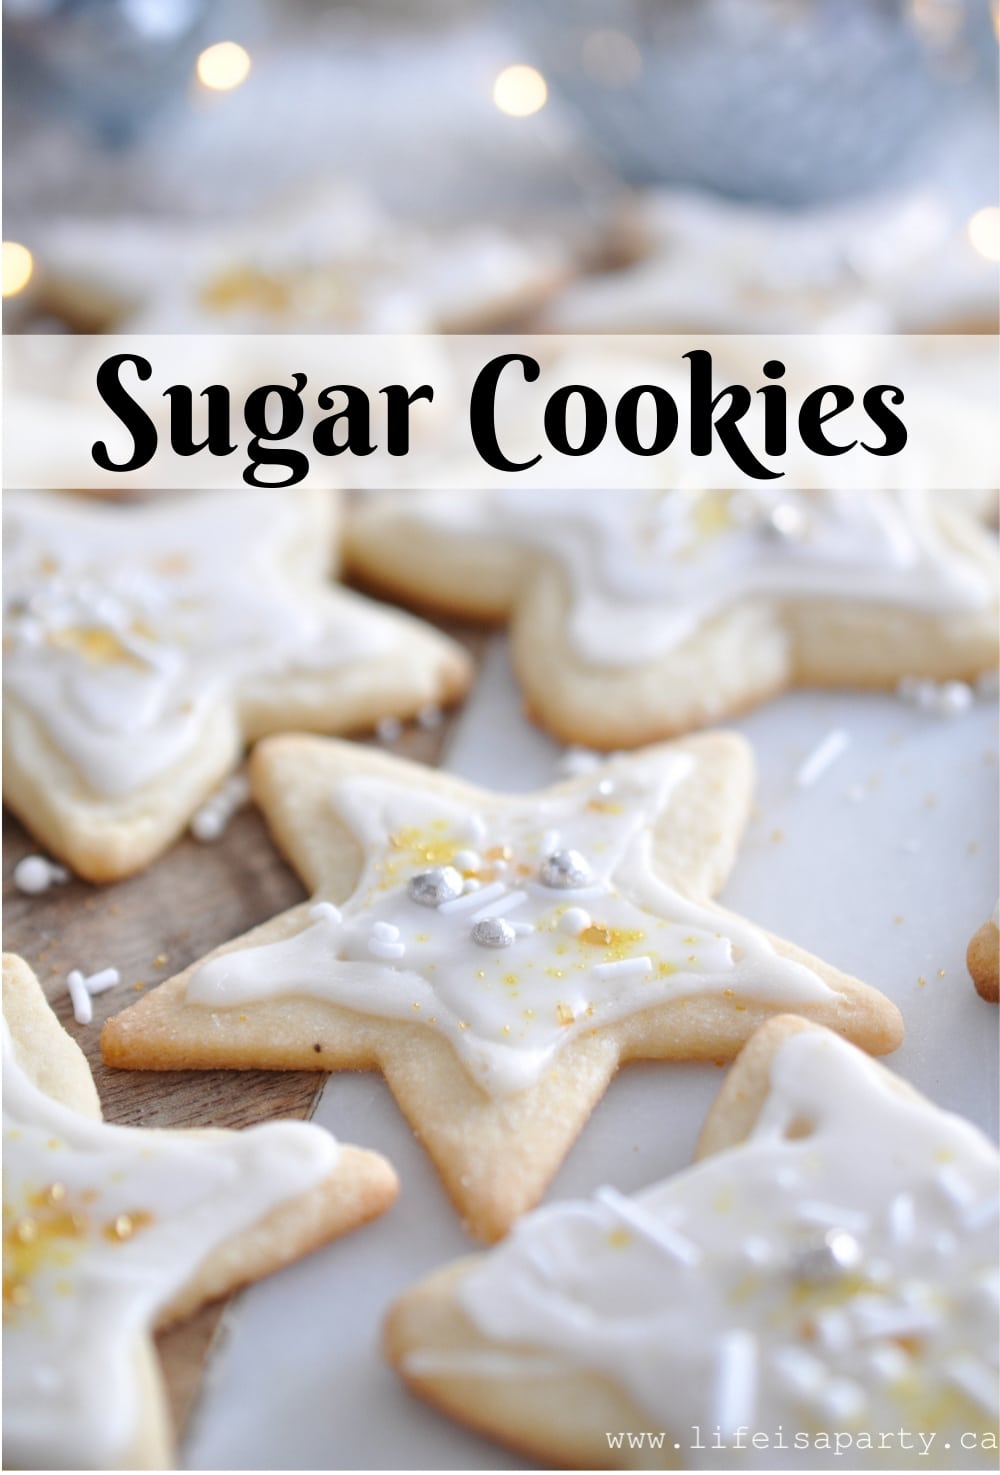
You might also like our Sugar Cookie Recipe here.

Sugar Cookies: Grandma's tested and true recipe will become your go-to recipe for soft and tender cut out sugar cookies you can decorate with icing.

DIY Christmas Wall Art

Dec 18, 2015 · Leave a Comment

DIY Christmas art.

DIY Christmas Wall Art: a great tutorial, and with free printables to create your own inexpensive wood Christmas wall art signs.

DIY Christmas art.
[feast_advanced_jump_to]

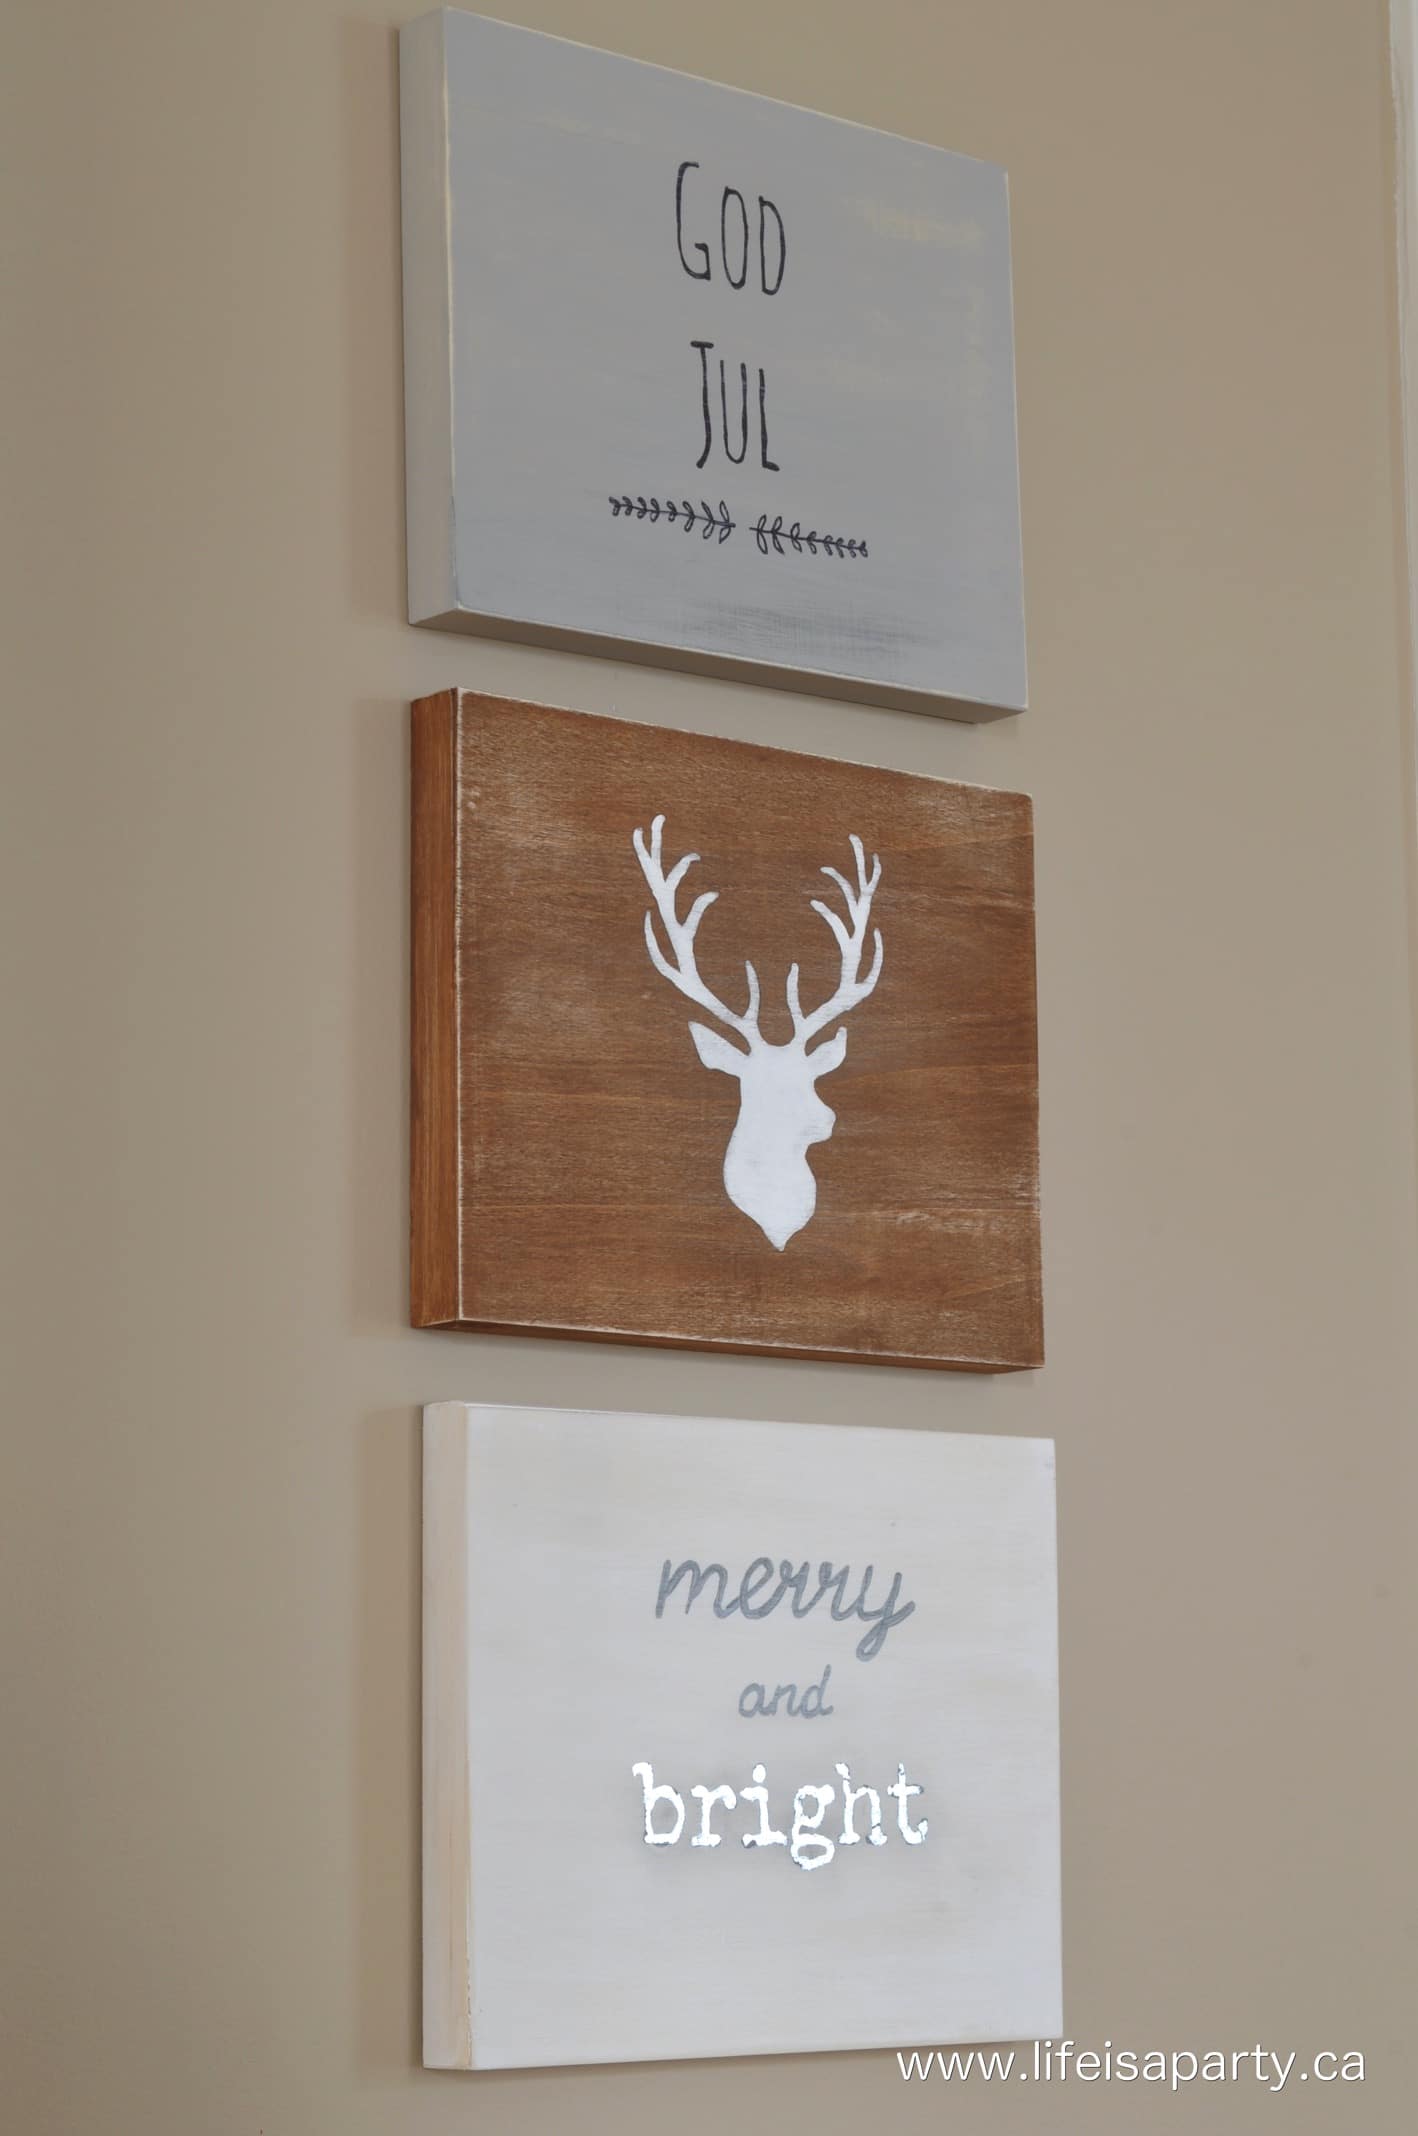
This is a really inexpensive little Christmas project that turned out really great.  If you're looking for some DIY Christmas wall art I think you'll love it.  These little pictures are great for around the house, and would also be a really sweet gift.

It all started one day in the dollar store…as these things often do.  I noticed they had some small wooden canvases, and thought they'd be perfect for a little Christmas art project.

The method I used is really, really easy.  It does have a few steps, but none of them are difficult.  I promise.  And the result is really pretty great.

DIY Christmas Wall Art Materials:

  • Three Wood Canvases
  • Craft Paint -I used white, grey, and silver
  • Carbon Paper
  • Wood Stain
  • Sand Paper
  • Permanent Black Marker
  • Silver Leaf
  • Silver Leaf Adhesive
  • Fine Paint Brushes

How To Make DIY Christmas Wall Art:

1. Prepping Your Canvases

The first step is the background colour on the wooden canvases.  I started off by using some wood stain on one canvas.  I had a wood stain wipe, so I used it. It was super easy to use, but regular stain would work great to.  

The other two canvases were painted; one solid grey and the other with a bit of a white washed finish -using very little paint, and wiping if off slightly.  Let those dry completely.

easy to use stain wipes

2.  Choosing Your Christmas Art and Phrases

Meanwhile, decide on an image or text for your art piece.  I found a deer head image on-line, and created the text -you can download the free printables I designed "Merry and Bright" and "God Jul" -which means Merry Christmas in Swedish.  Use your printer settings to make sure it's printed the perfect size for your wooden canvases.

using carbon paper to transfer an image to a canvas

3.  Transferring Your Image

Use the carbon paper to transfer the image to your wooden canvas.   You can find the carbon paper at an office supply store.  To use it place a piece between the canvas and the printed image you want to use, then go over the lines with a sharp pencil, which will leave the outline on your wood canvas.

DIY Christmas Wall Art

4.  Painting Your Canvas

Using a paint brush, fill in the image, or go over the text.  Don't worry about getting it perfect, we are going to give this a rustic look so we'll be able to go over any non-perfect spots with a little sandpaper later.  The deer head image needed two coats for me to get good coverage.  For the "God Jul" one, I used a permanent marker instead of paint.  This worked great for the finer font.  Use any combo of marker, paint or one or the other you like.

5. Adding Silver Leaf  

For the "bright" I used some silver leaf.  I painted it first with silver paint and let it dry.  Then I painted the silver leaf adhesive over the top, being very careful to stay in the lines.  After it sat about 10 min. (or according to your package instructions) I put the silver leaf over top, and pressed it down firmly, going over it a few times with my fingers and a dry paper towel.  Then, once it was all stuck, I gently rubbed away the excess, and the silver leaf remained where the adhesive was.

how to make Christmas wall art

6.  Sanding For A Rustic Look

Finally, after the paint is all dry, you can go over the canvases with a fine sandpaper, creating a slightly rustic distressed look, especially on the edges and corners.  Don't sand your silver leaf, just work around it.  Then, hang and enjoy.

DIY Christmas wood sign

Such an easy project, a few steps involved but really not hard to do.  Since I already had everything but the canvases, this project cost me just $3 per wood canvas.  If you didn't want to invest in the silver leaf, you could try a gold paint pen, or just a metallic paint.

I'm loving how the finished product looks with my Scandi inspired Christmas decor this year.

DIY Christmas Wall Art

These would make a really lovely Christmas gift too.

wooden Christmas art.

With these easy DIY Christmas Wall Art pieces, life really is a party!

More Inspiration

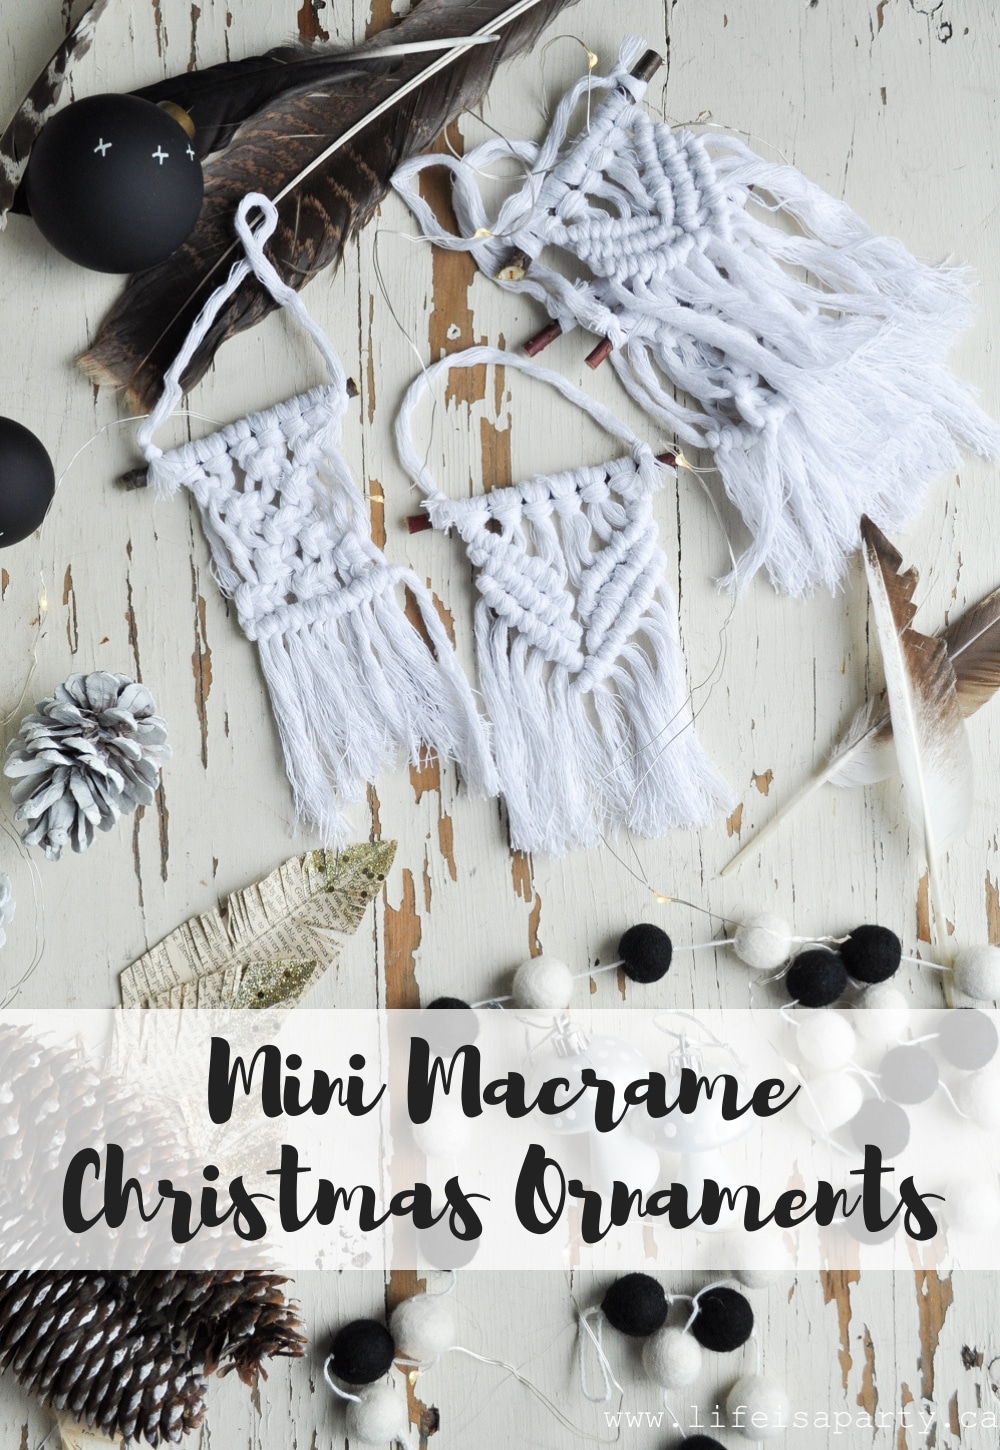
You might also like our Mini Macrame Ornaments here.

Mini Macrame Christmas Ornaments: Easy DIY Macrame Ornament tutorial, perfect for the beginner. No macrame experience required.

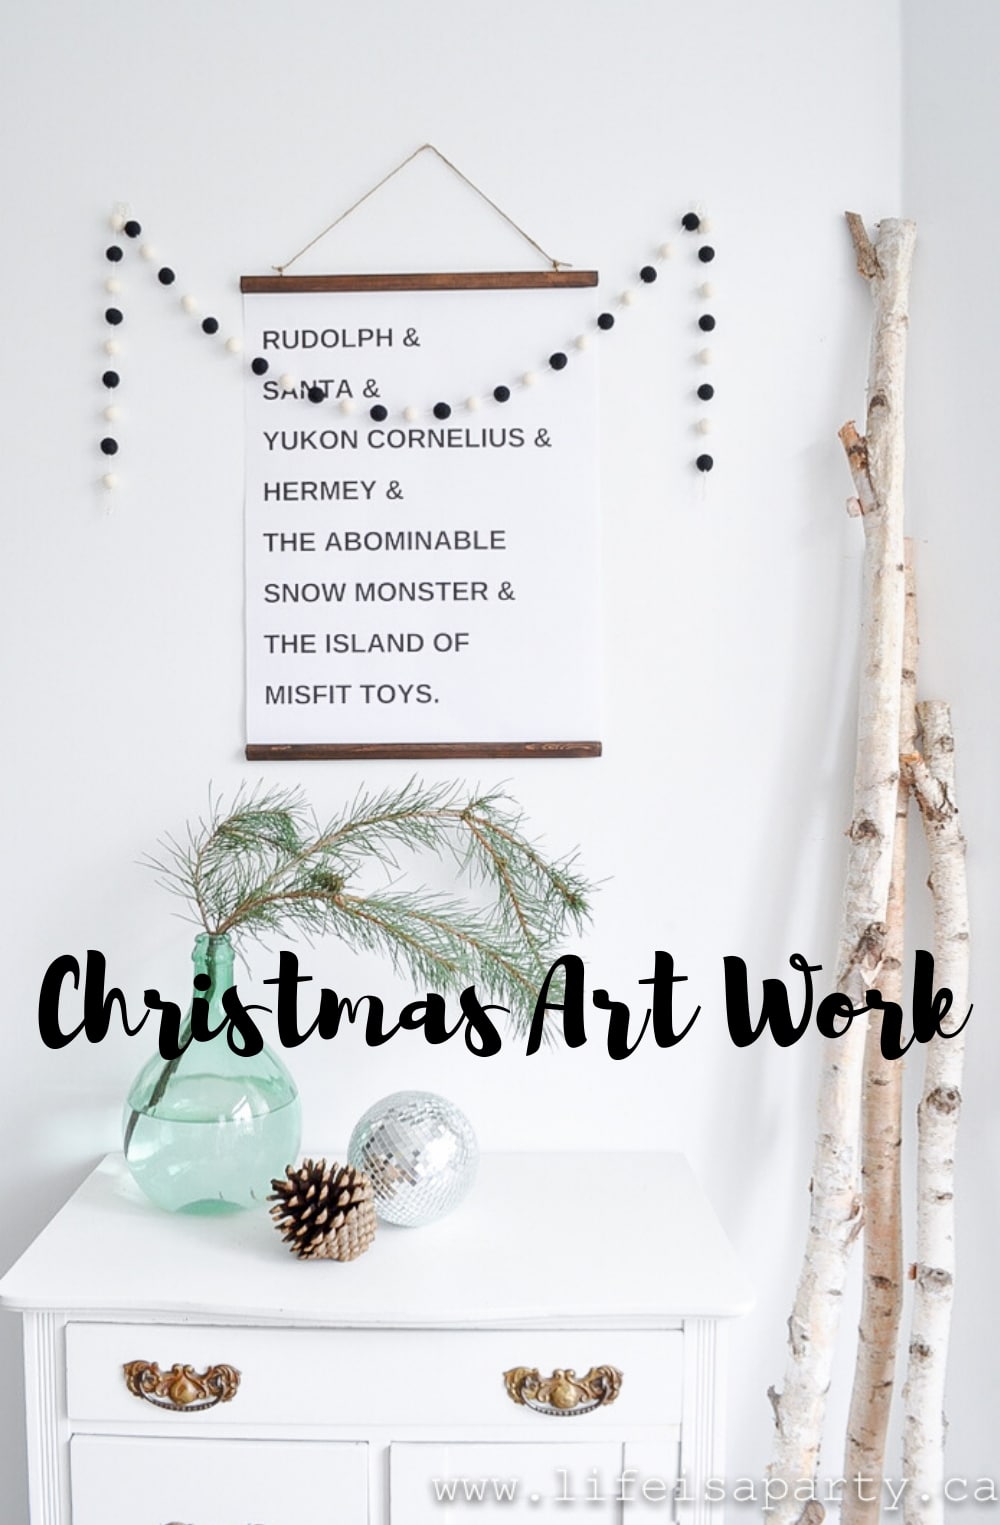
Also check out our Christmas Art Work here.

Printable Christmas Art -large and inexpensive printable engineer prints and a DIY wood hanger makes the perfect Chrsitmas Art Work on a budget.

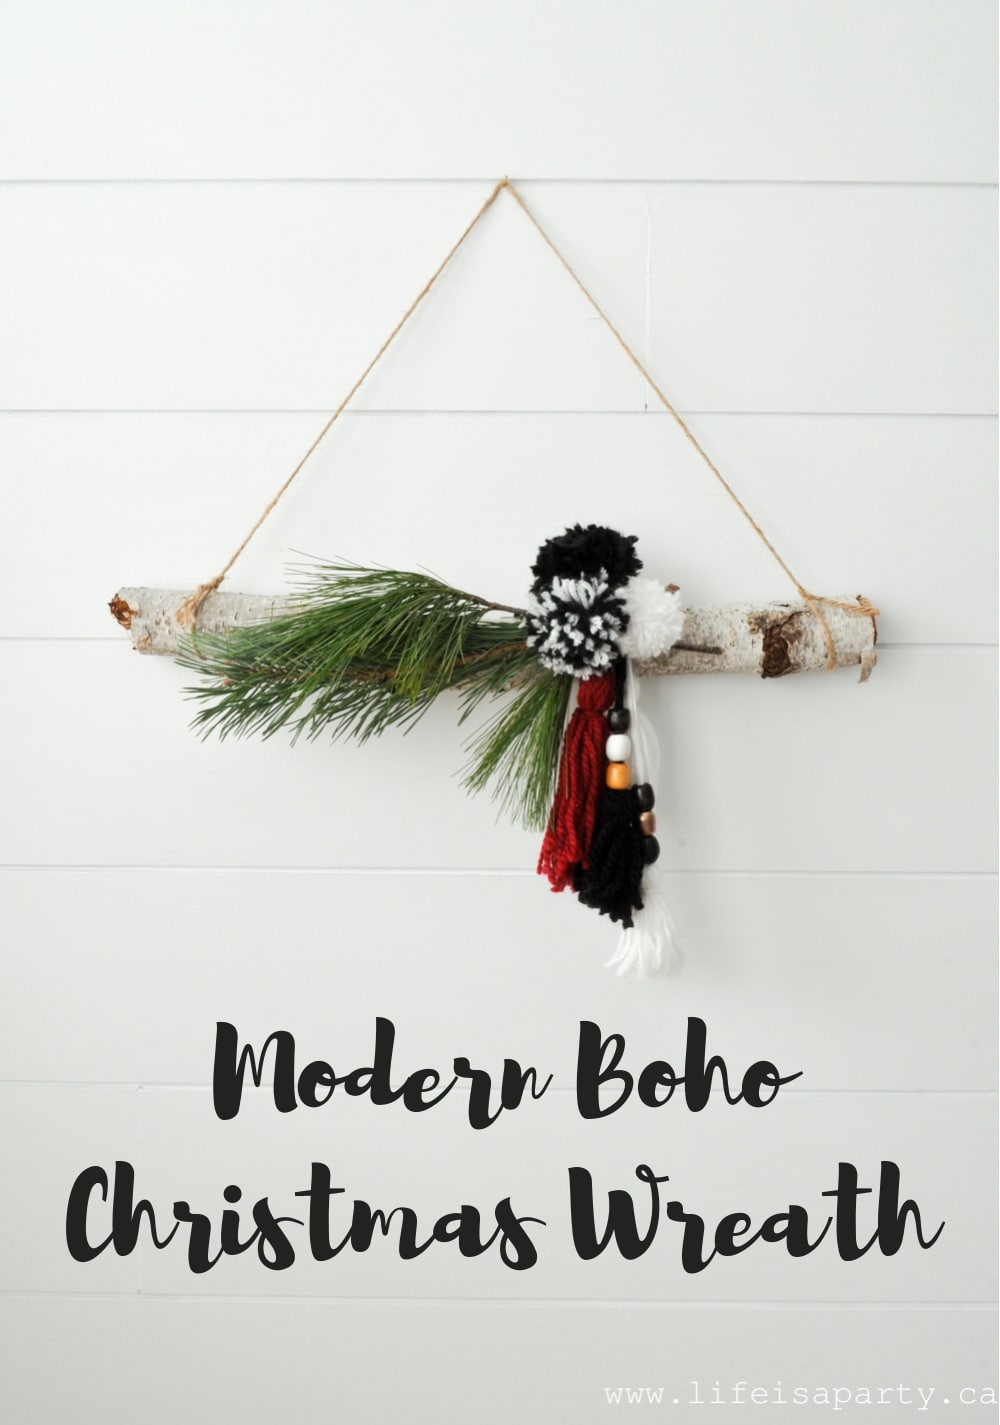
You might also enjoy our Modern Boho Christmas Wreath here.

How To Make Scented Bleached Pinecones

Dec 16, 2015 · Leave a Comment

How to beach pinecones.

Scented Bleached Pinecones -use simple household bleach to whiten and brighten natural pinecones, and then add any scent to them you like.

DIY bleached and scented pinecones.
[feast_advanced_jump_to]

Scented Bleached Pinecones are the perfect way to create lighter coloured pinecones for decor and add beautiful scent to a room.  They're easy and fun to make too.

Sometimes the simple little DIY's are the sweetest, and this little project fits in that category.

A pinecone, all on it's own is beautiful.  But, add some paint, or group various kinds together, or bleach some and the simple beauty it has all on its own is magnified.  Natural elements are a such a great addition to any home decor.

DIY Scented Bleached Pinecones

Here's how to make your own Scented Bleached Pinecones

Materials:

  • Pinecones
  • Bleach
  • Large Bucket
  • Something to use as a Weight (I used a cutting board and some rocks)
  • Cookie sheet lined with parchment paper
  • Essential Oil
  • Ziplock Bag

The first thing you'll need for this craft project is some pinecones.  Look for pine trees, and you will usually find some pine cones on the ground nearby.  Pinecones drop from trees in the fall, so that's the best time to look for them.

To Make Scented Bleached Pinecones:

Place your pinecones in a large plastic container or bucket, and then fill with enough bleach mixture to cover the pinecones.  I did about 1:1 ratio with one part bleach to one part water.  Using equal parts of bleach and water worked well for us, but you can go all the way up to 2 parts bleach to 1 part water, or somewhere in-between

bleaching pinecones in a bucket

Put something over your pinecones to weigh them down and hold them in the bleach water solution, since they float.  I used a cutting a board with a few rocks on top, you could place bricks on top as well.

how to bleach pinecones

Let sit, outside or in the garage if you're able because of the bleach smell you'll want to do this in a well-ventilated area.  Leave the pinecones in the beach solution for about 24 hours.  After one full day in the bleach solution, don't worry if the pinecones still look kind of dark and are closed up.  The pinecones naturally close up when they are in water.  Once they're removed from the bleach bath and they dry, the pinecones will open back up and as they dry they'll look lighter.

The next day, drain the pinecones and rinse them with water a couple of times to remove all the bleach.

Bleached Pinecones ready to dry

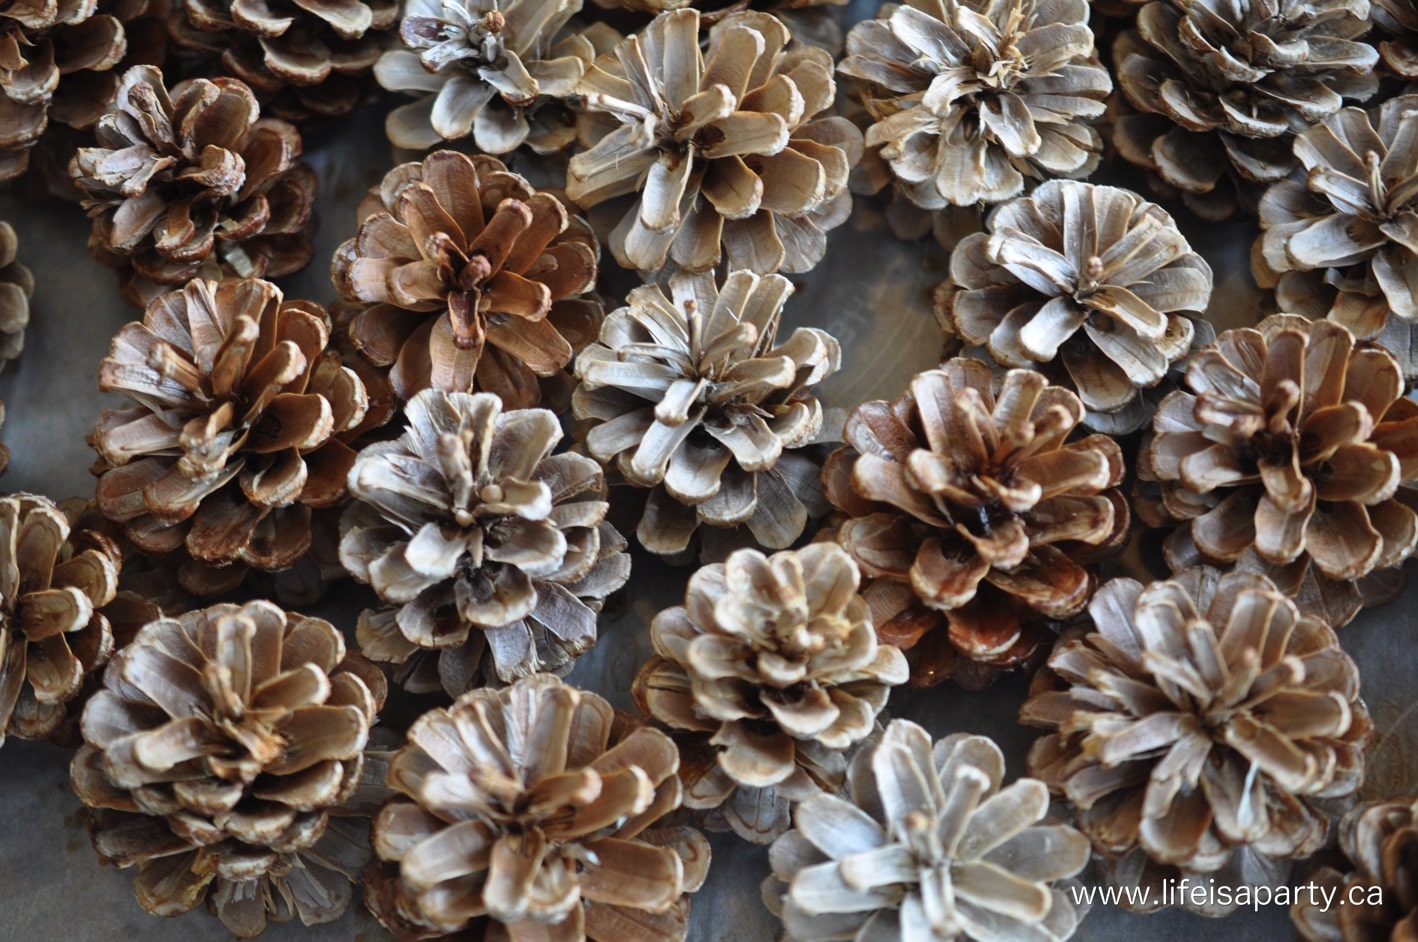
Next place them on a parchment paper lined baking sheet in a single layer for the drying process.  To dry out the pinecones place the baking sheet in a 200 degree oven for a few hours until the pinecones  are open again and they look dry.

Bleached Pinecones

Lastly, place pine cones in a ziplock bag and add some essential oil -any scent you like we used apple pie.  Seal the bag and let them sit a few days or up to a week.  When you open them up all the bleach smell will be gone, and they will smell like your oil.

This step is optional, but it makes such a nice addition.  You can use any essential oil scent that you like, and refresh it years later if the scent wears off.

Recipe

How to beach pinecones.

Scented Bleached Pinecones

No ratings yet
Print Pin Rate
Cook Time: 15 minutes minutes
Additional Time: 1 day day 2 hours hours
Total Time: 1 day day 2 hours hours 15 minutes minutes
Servings: 24 pinecones
Author: Dannyelle Nicolle-Ramjist

Materials

  • 24 Pinecones
  • Bleach
  • Large Bucket
  • Something to use as a Weight
  • Cookie sheet lined with parchment paper
  • Essential Oil
  • Ziplock Bag

Instructions

  • Place your pinecones in a large bucket, and then fill with enough bleach mixture to cover the pinecones. Use between a 1:1 ratio with one part bleach to one part water, all the way up to 2 parts bleach to 1 part water, or somewhere in-between.
  • Put something over your pinecones to weigh them down and hold them in the bleach water solution, since they float, like a cutting a board with a few rocks on top.
  • Let sit, outside or in the garage, you want it to be in a well ventilated area. Leave the pinecones in the beach solution for about 24 hours. After one full day in the bleach solution, don't worry if the pinecones still look kind of dark and are closed up. The pinecones naturally close up when they are in water. Once they're removed from the bleach bath and they dry, the pinecones will open back up and as they dry they'll look lighter.
  • The next day, drain the pinecones and rinse them with water a couple of times to remove all the bleach.
  • Next place them on a parchment paper lined baking sheet in a single layer for the drying process. To dry out the pinecones place the baking sheet in a 200 degree oven for a few hours until the pinecones are open again and they look dry.
  • Lastly, place pine cones in a ziplock bag and add some essential oil -any scent you like we used apple pie. Seal the bag and let them sit a few days or up to a week. When you open them up all the bleach smell will be gone, and they will smell like your oil.


pinecones after they've been bleached

How To Use Your Bleached Pinecones

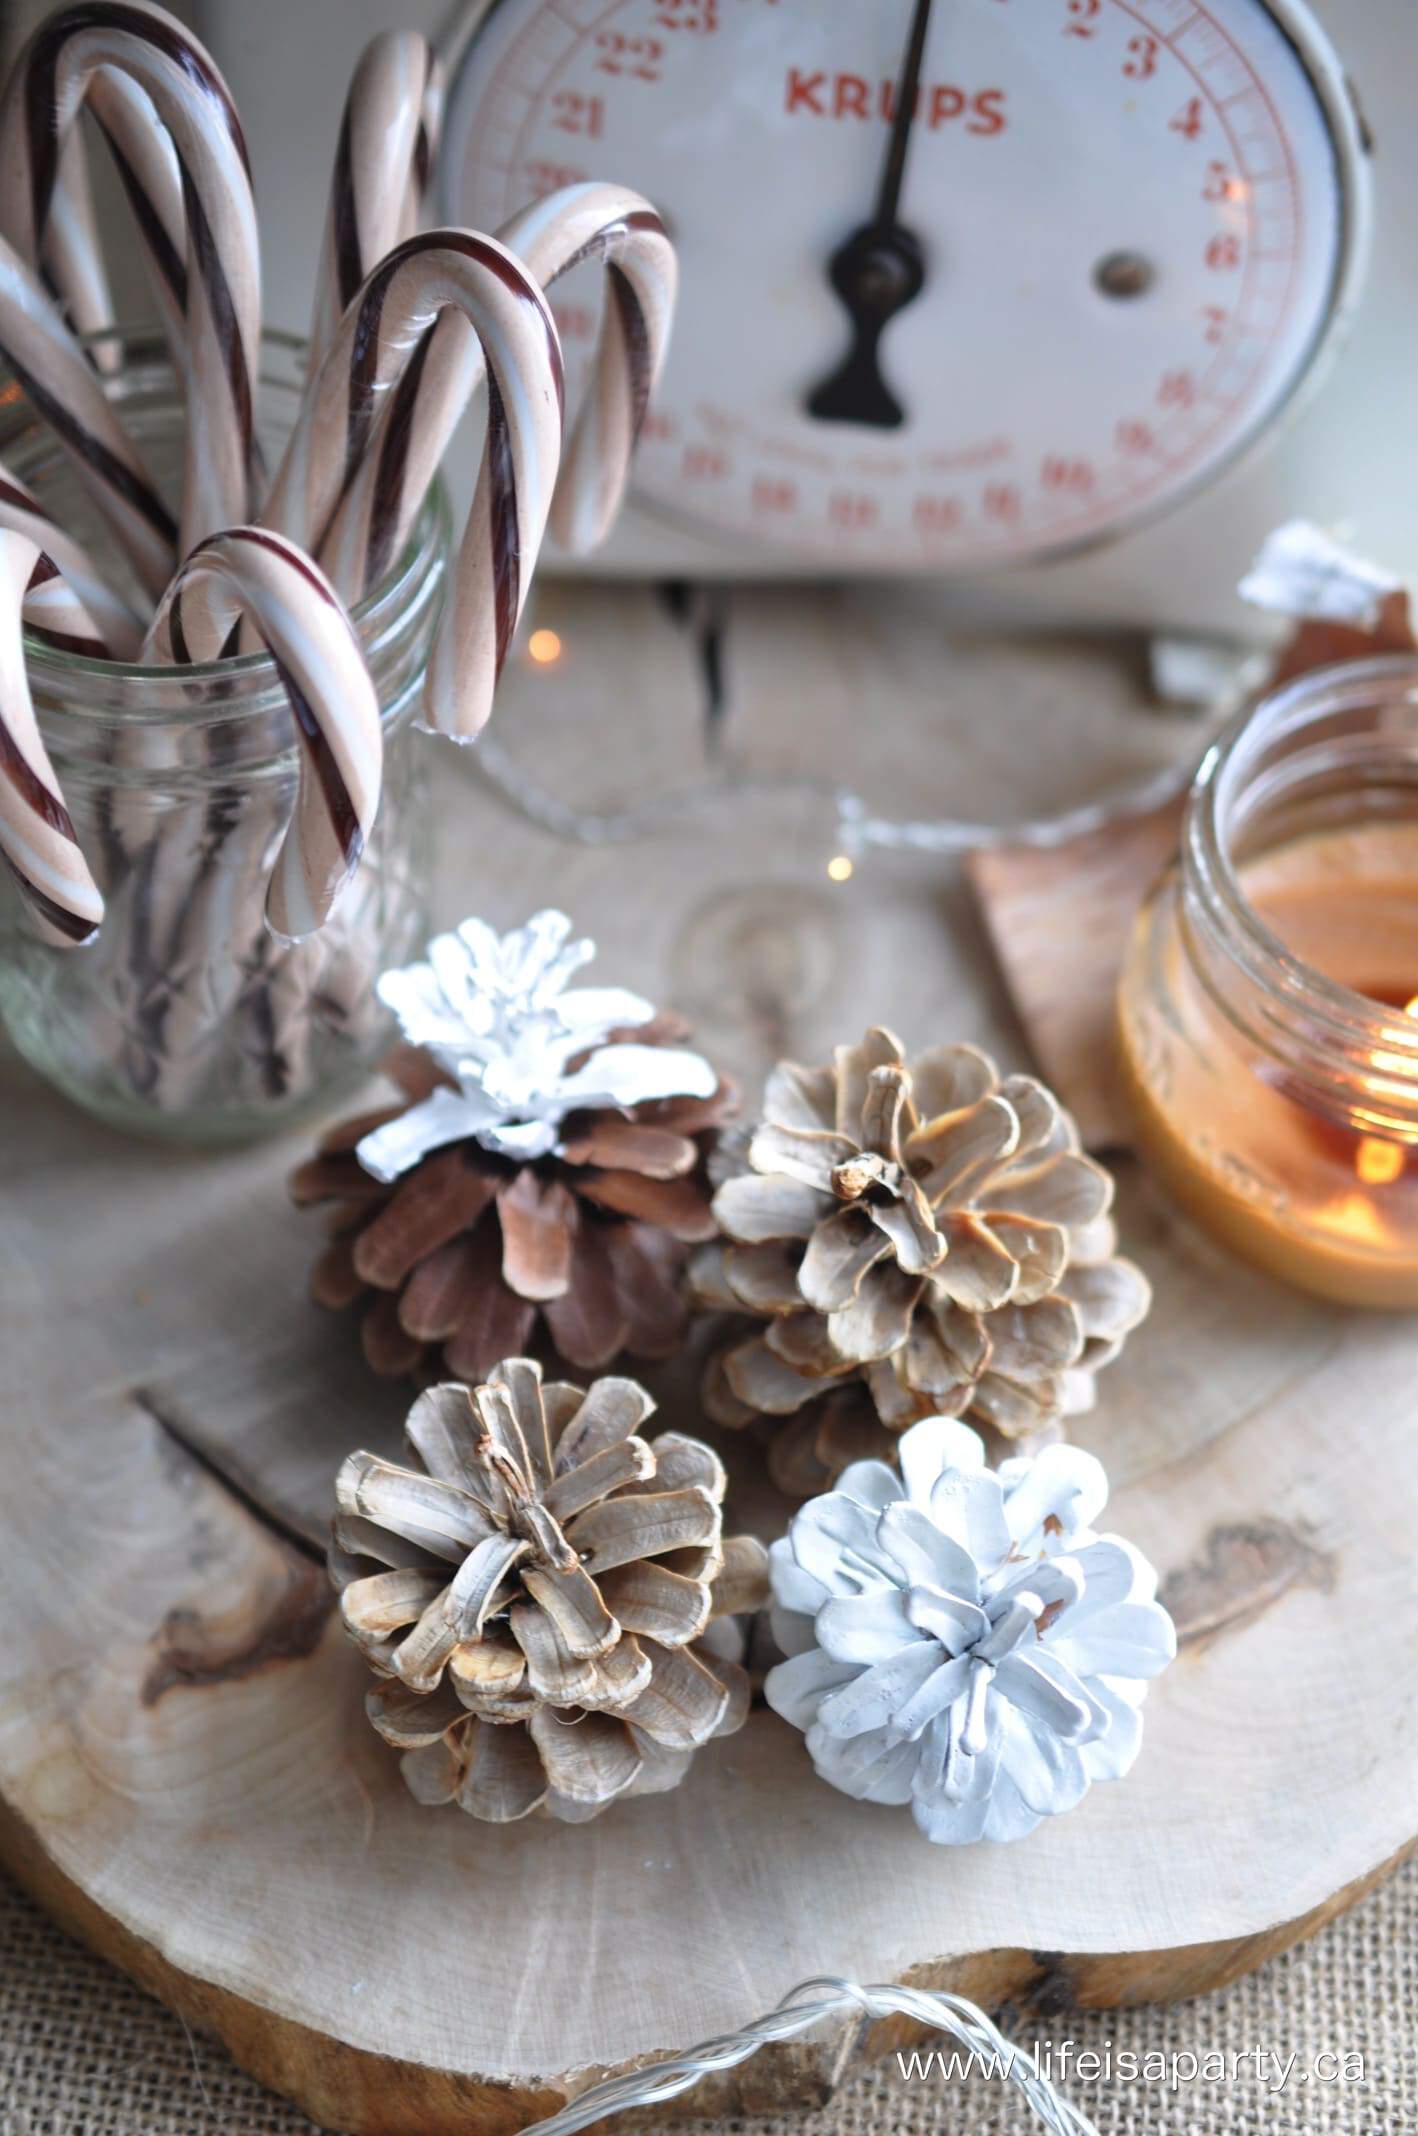
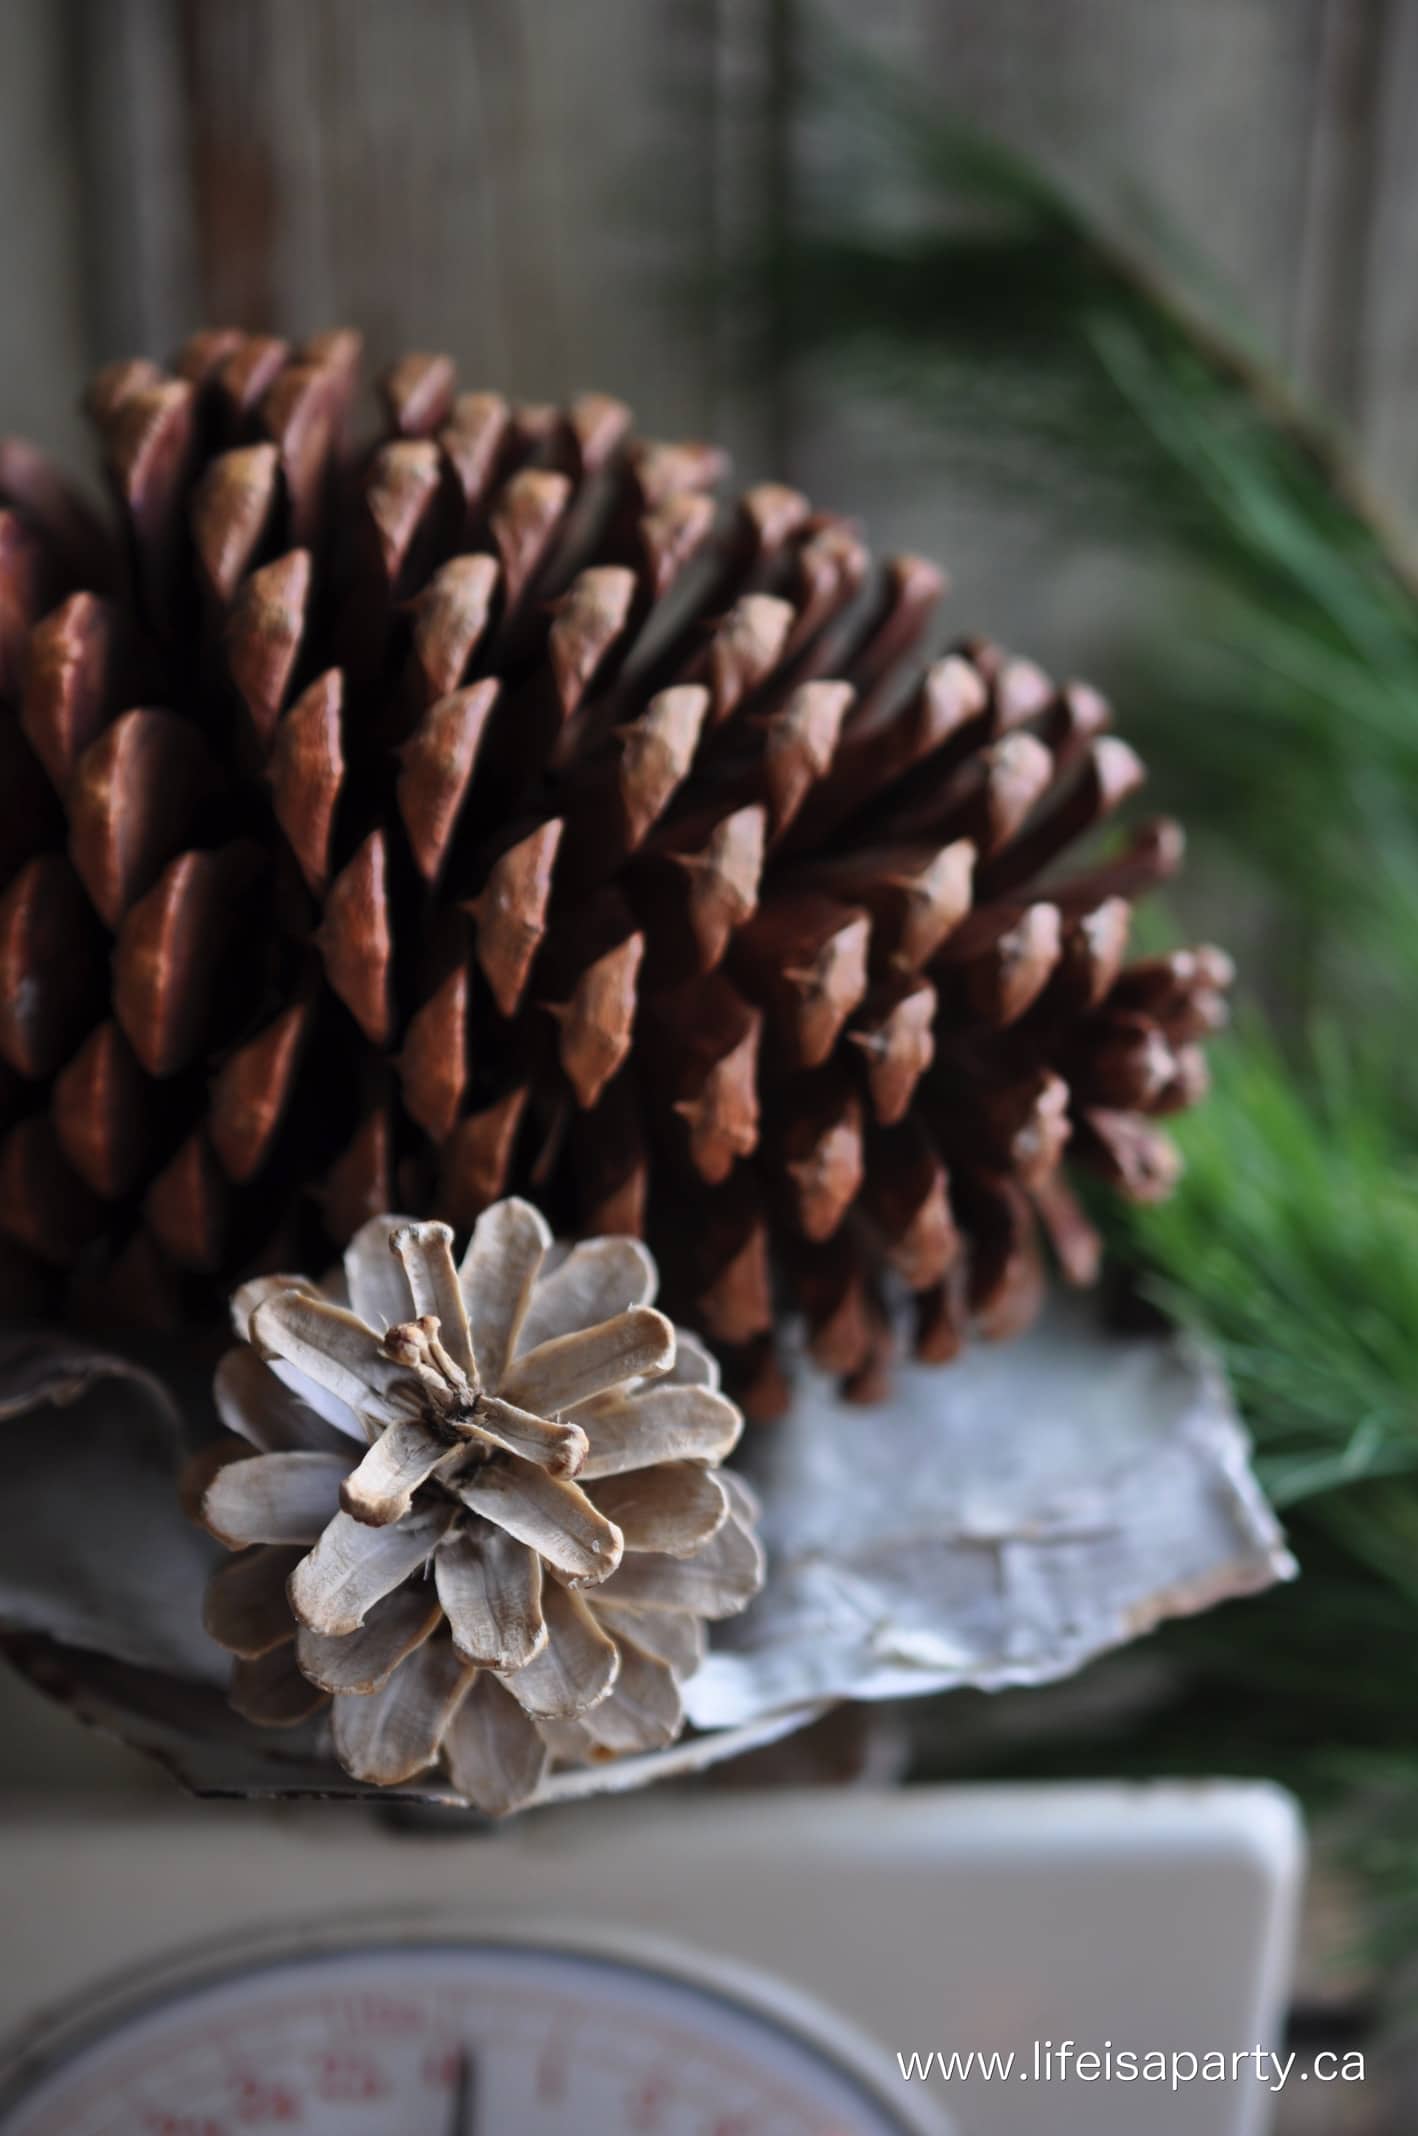
I've used the pinecones all over the house, and grouped them with different varieties, shapes and sizes, and even a few painted ones.  I love all the texture of the dry pine cones.  They're perfect for Christmas and adding to your Christmas decor.  Add them to your Christmas trees, use floral wire to add a bunch of pine cones to wreaths, or even hot glue them to presents as an easy way to make a gift topper.

They'll also perfect for fall and winter decor.  And, they smell so nice and sweet from the essential oil

scented Bleached Pinecones used in Christmas decor

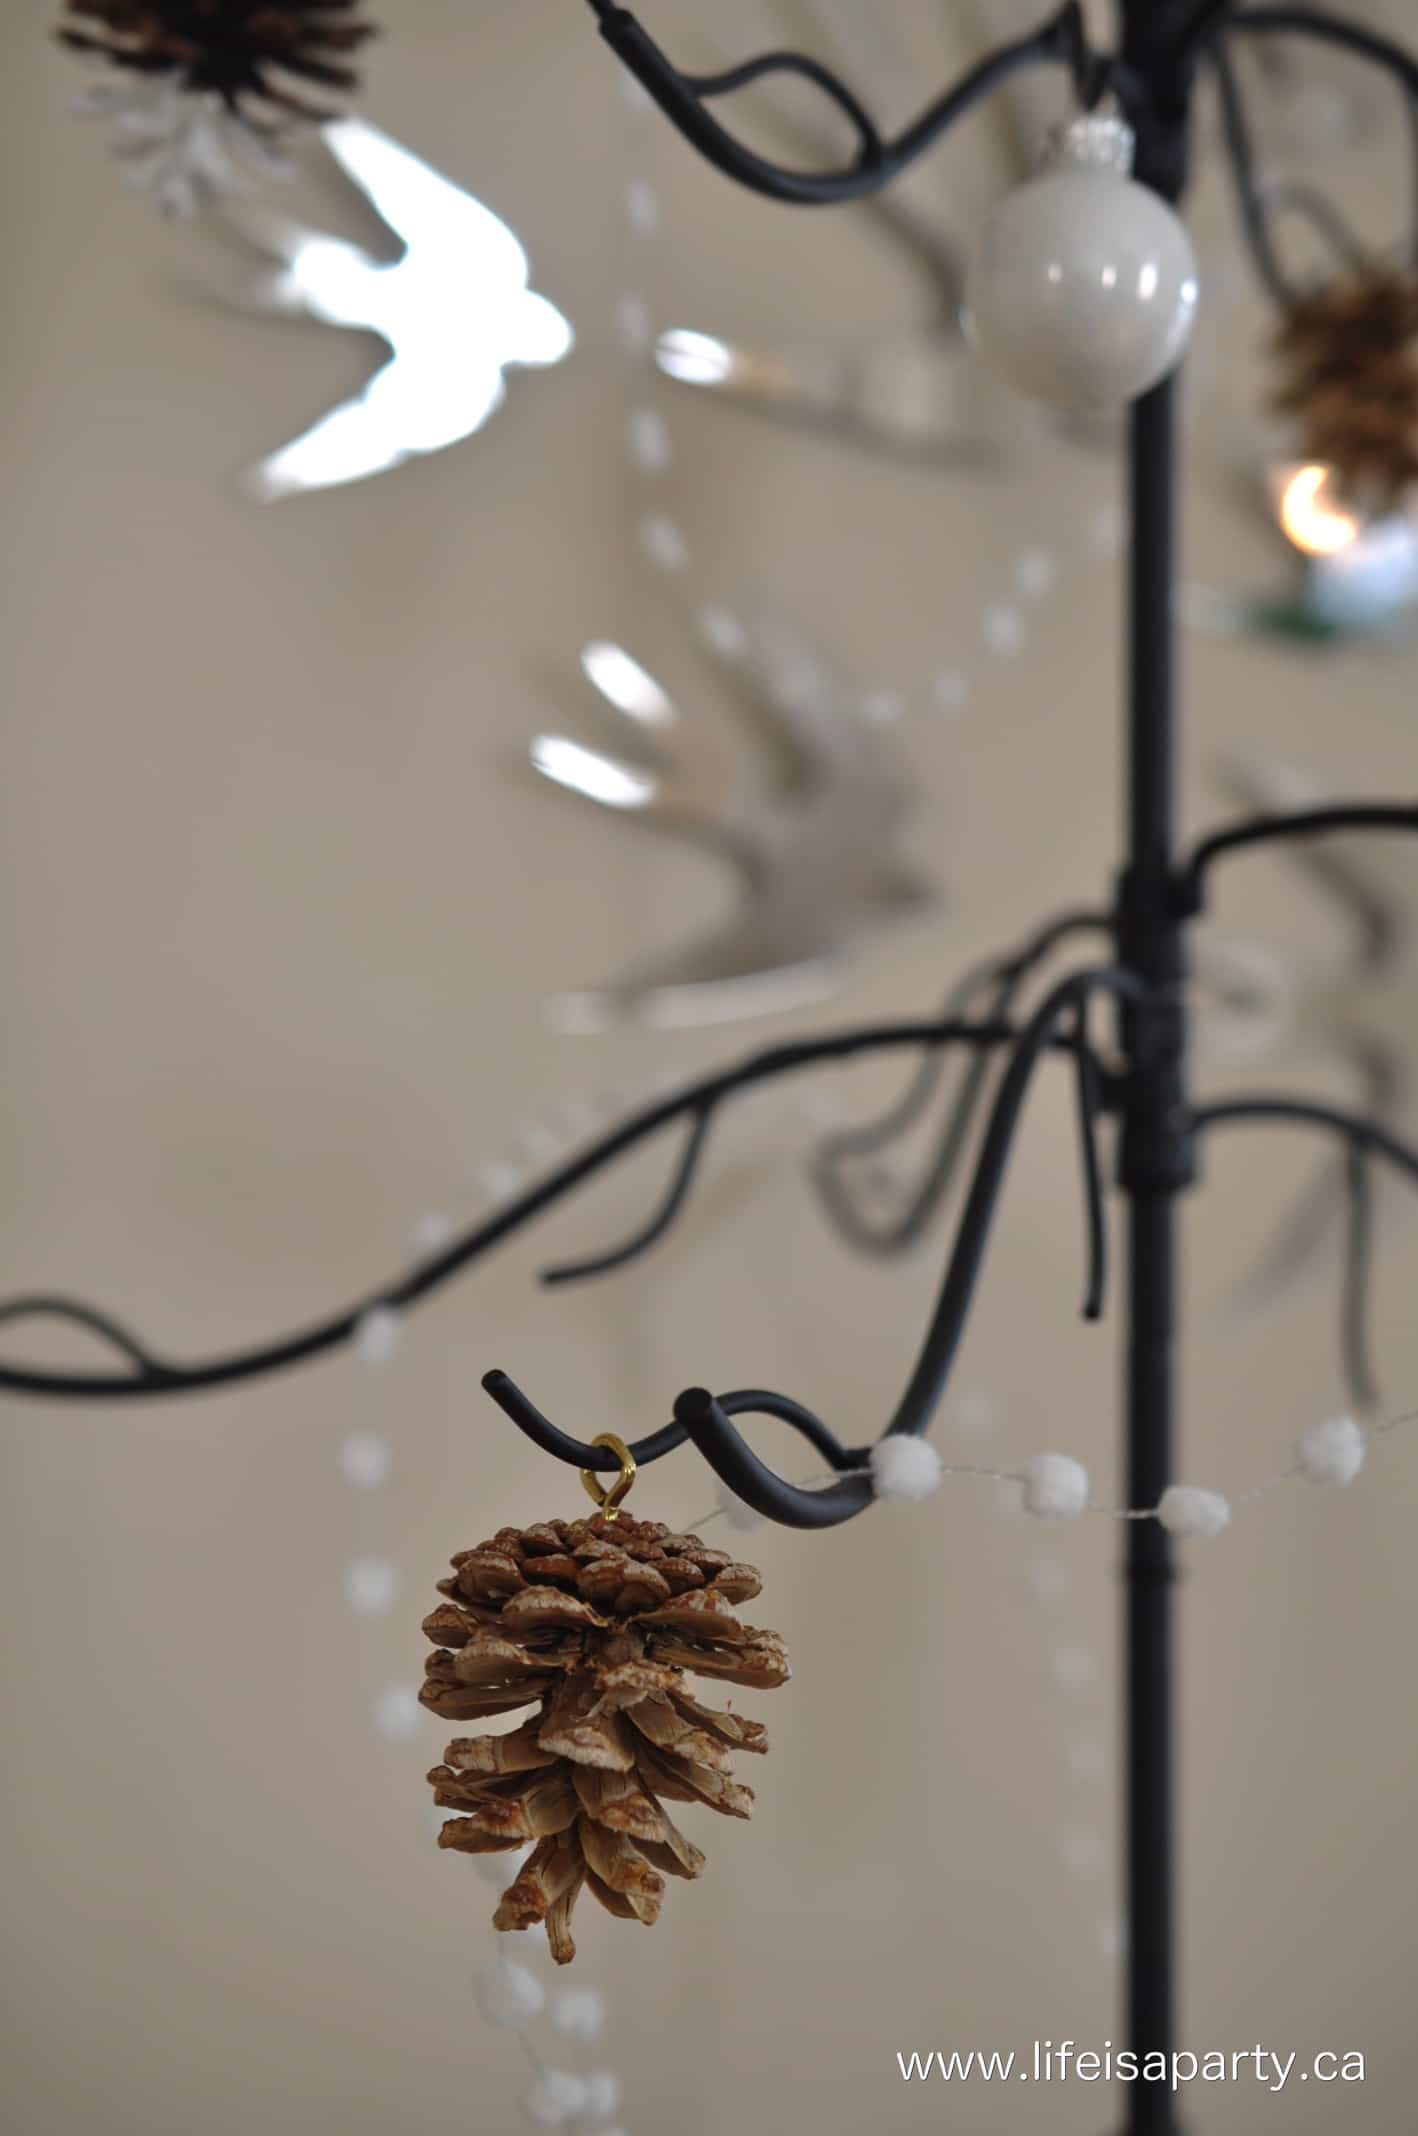
I added some little screw in eye hooks to some and used them as ornaments.

bleached pinecone Christmas ornament

I really love how they turned out.

DIY Scented Bleached Pinecones

So simple and so pretty.

How to make your own scented bleached pinecones

With Scented Bleached Pinecones, life really is a party.

More Inspiration

  • Finished DIY pinecone wreath with white spray paint and ribbon for fall or Christmas décor.
    How To Make A Pinecone Wreath
  • How to make an acorn out of an Easter egg fall craft.
    DIY Acorn Craft
  • DIY velvet mushroom craft in pink and white.
    DIY Velvet Mushroom Craft
  • DIY felt mushrooms.
    Felt Mushrooms

Top 10 Family Christmas Movies

Dec 15, 2015 · 2 Comments

Christmas family movie night.

Top 10 Best Family Christmas Movies: The best holiday movies that the whole family will love. Perfect to enjoy a family movie night this Christmas.

Christmas family movie night.
[feast_advanced_jump_to]

I love a good movie, and especially around the holidays.  When it's a little colder outside, and all warm and cozy inside, I love nothing better than a great holiday movie with my family.  My girls are 8 and 11, and this is our list of best family Christmas movies.  Some love one more than others, but overall there are some really good choices here, sure to get you in the holiday spirit.  We tend to be a Friday night in, homemade pizza and a movie kind of family, especially through the winter months, so just picture me curled up with my littles after a long week, enjoying one of these.

10.  The Santa Clause

Top 10 Family Christmas Movies: The best holiday movies that the whole family will love.  Perfecct to enjoy a family movie night this Christmas.

It's a good one, classic Christmas theme of overworked man who doesn't spend enough time with his family discovering the true meaning of Christmas -well practically becoming Christmas.  And, I'm a sucker for a happy ending.  The Santa Clause 2 and 3 are fun too.

9.Home Alone

Top 10 Family Christmas Movies

What child doesn't like to see a kid outsmart an adult?  It's funny, cute, and again has that true meaning of Christmas message, in this case being with family.  I also really liked Home Alone 2 -the change of setting helped make it not just feel like a repeat of the first one.  I think most kids will really like both.

8.  Dr. Seuss' How The Grinch Stole Christmas

favourite holiday movies for families

We love the Grinch around here…in fact my darling husband may or may not get teased often about being the Grinch/Scrooge/Oscar the grouch at times, so this one is a real favourite around here, lol.  The animated one is great too, a real classic, but this is one of those cases where the newer one with real people is just as good

7.  A Charlie Brown Christmas

Best Christmas movies

If your kids are into the new Peanuts movie, here's a chance to show them the version you watched when you were a kid.  Love the old Charlie Brown tree, and his search for the true meaning of Christmas, which leads to the manger scene.  It's so sweet, and profound at the same time, love it.

6. Curious George A Very Monkey Christmas

Top 10 Family Christmas Movies

You might not know this one.  I have one little who loves Curious George, and lets face it he is one smart monkey.  Your going to find yourself singing "Christmas Monkey, Christmas Monkey, everyone loves a Christmas Monkey"…you've been warned…I can't believe that hasn't become a classic carol…yet. 😉

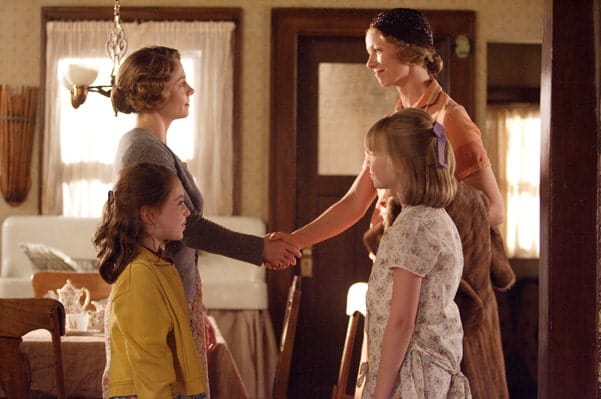
5.  Booky and the Secret Santa

the best Christmas movies

This is such a sweet little Christmas movie, set in my home city of Toronto.  If you were an Anne of Green Gables fan you might love this too, since it has Megan Follows in it, but this one is set during the Depression.  Lovely story about a financially struggling family and how they get through the holidays.

4.  It's a Wonderful Life

top 10 family Christmas movies

They don't come more classic than this one.  This might be my personal fav. on the list, but it is in black and white and an old, old movie for the littles.  It might not top their list…yet, but they'll hopefully still enjoy it.

3.  Little Women

Family Christmas Movies

Who doesn't  love a story set in "the olden days", especially at Christmas.  You might not think of this one as a Christmas movie, but there are several lovely Christmas scenes in the movie.

2.  The Muppet's Christmas Carol

favourite Christmas movies


Okay again a holiday must see.  Love the Muppets, love the humour, and love the classic story of A Christmas Carol.  This movie has it all.

1.  Elf

favourite Family Christmas Movies

This probably won't be number one on my own personal list, but my kids LOVE this movie, and I do like it too.  It's funny, and sweet, and quotable…."Smiling is my favourite."  We watch this movie every year while we trim the family tree, and we all look forward to it.

A couple honourable mentions to add to the list, One Magic Christmas.  I haven't actually watched this one with my girls yet, but it's on my list for this year.  I can remember watching it as a kid with my Dad, and I remember really enjoying it, and him too.  And one I also really like, and my kids liked it too, Christmas with the Kranks.  It's funny and sweet, and again has that classic true meaning of Christmas message, in this case family.

Am I missing any great ones?

With a great list of the best family Christmas movies, life really is a party!

You might also like this post, 20 Non-Cartoon Family Movies That Parents Will Actually Enjoy Too:  

top-family-movies-1.jpg

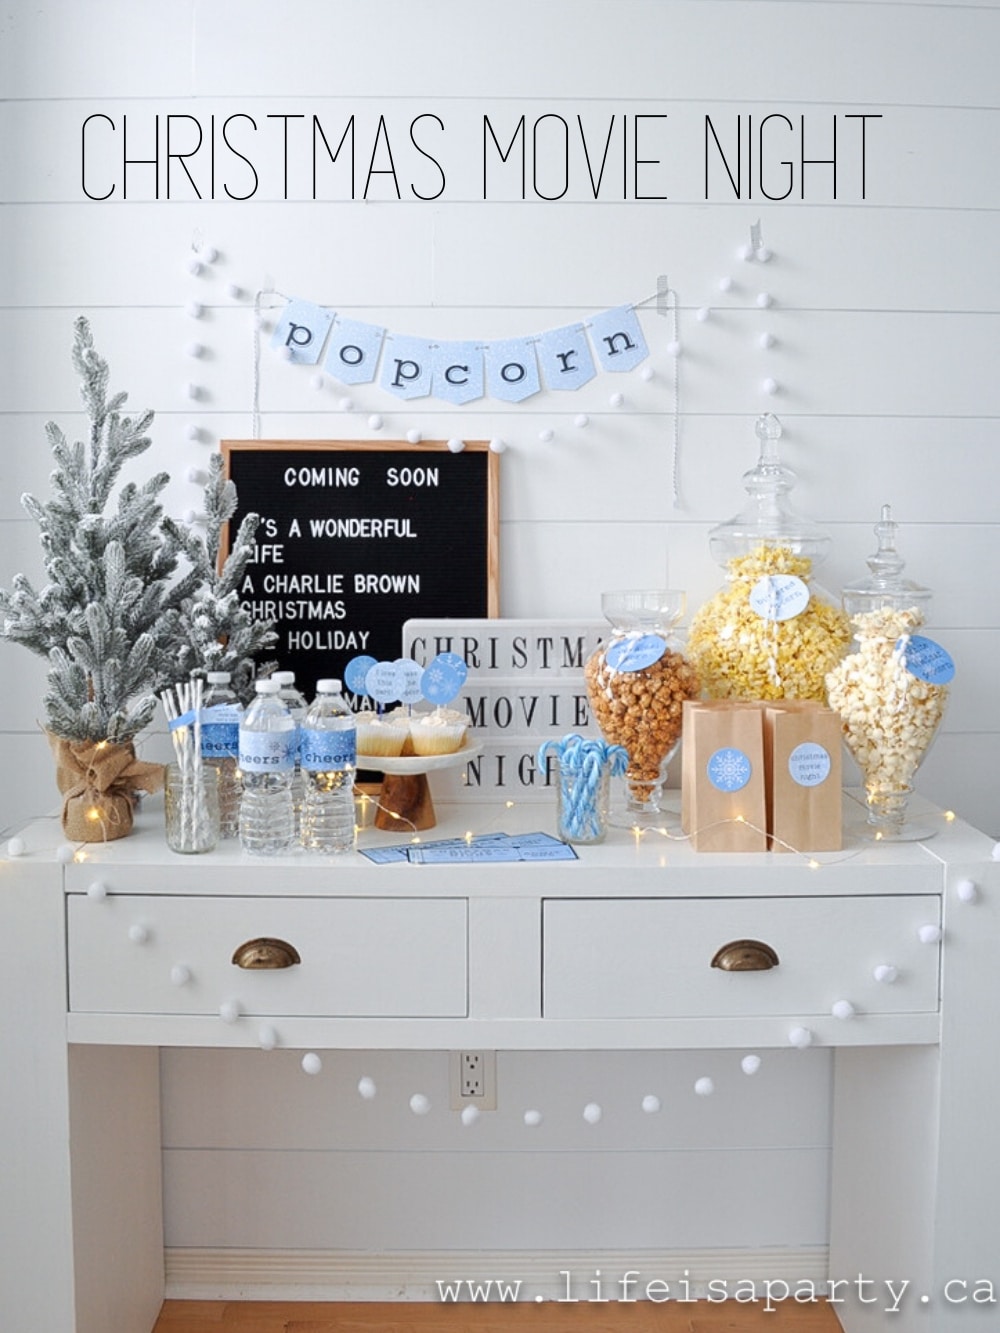
Also check out our Christmas Movie Night here.

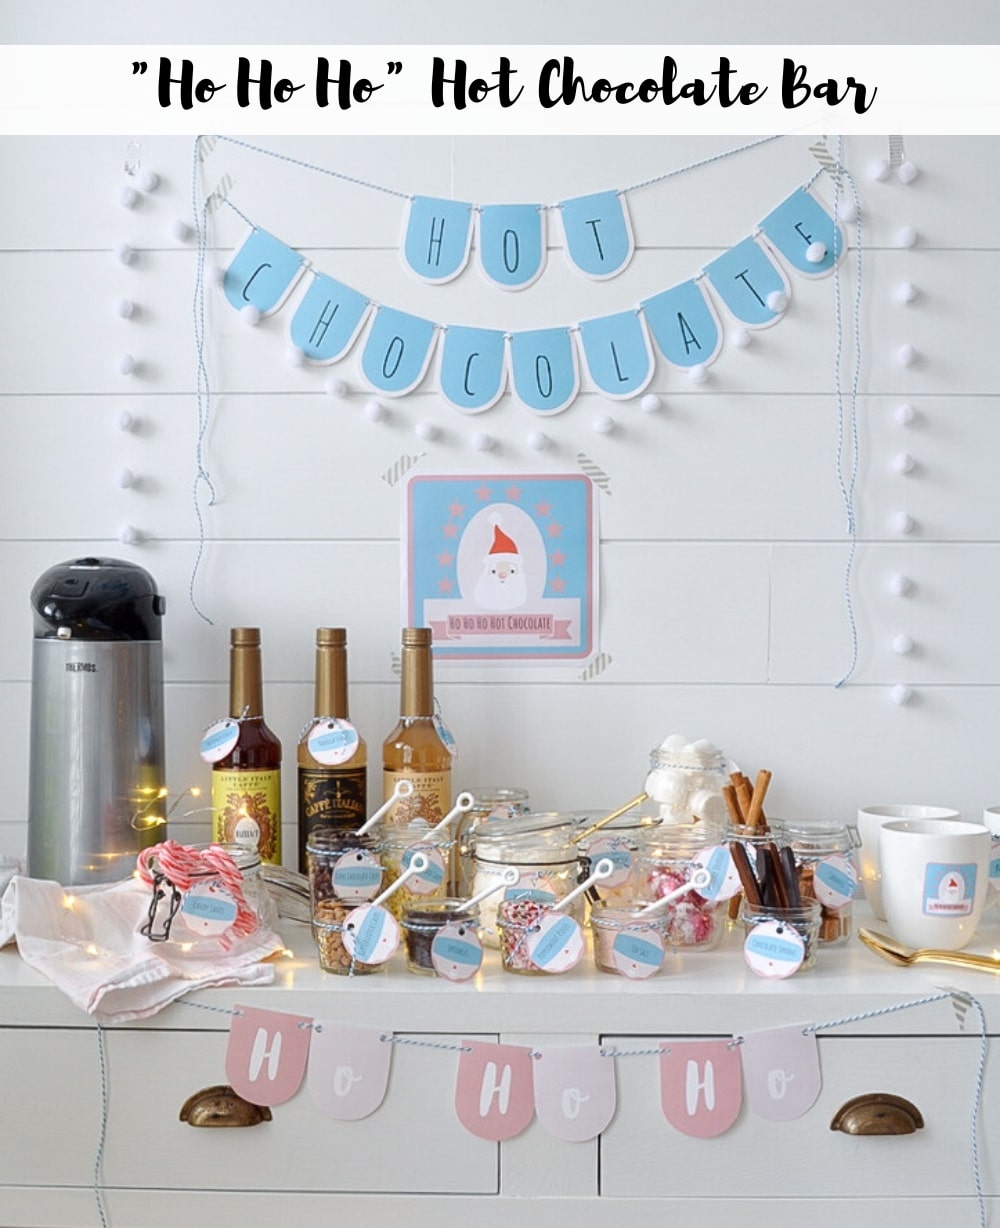
You might also like our Ho Ho Ho Hot Chocolate Bar here.

Ho Ho Ho Hot Chocolate Bar: set up the perfect Christmas hot chocolate bar with our printable package that includes labels, poster, bunting, and more.

DIY Wood Ball Christmas Ornaments

Dec 14, 2015 · 3 Comments

Easy DIY wooden ball Christmas ornaments, with a candy cane.

Make stunning wood ball ornaments in just 20 minutes with craft store supplies and paint. These Scandinavian-inspired decorations cost about $1 each, won't shatter like glass, and look beautiful on any Christmas tree.

Easy DIY wooden ball Christmas ornaments, with a candy cane.
[feast_advanced_jump_to]

A Quick Look At This Craft

📋 Craft: DIY Wood Ball Ornaments
⏲️ Ready In: 20 minutes
✂️ Difficulty: Easy
💰 Budget: Under $15 (makes 12-15 ornaments)
🎨 Style: Scandinavian, Minimalist, Natural
💭 Top Tip: Use washi tape instead of masking tape for cleaner lines and easier removal with no sticky residue!

Why You'll Love These Wood Ball Ornaments

  • Practically indestructible unlike glass ornaments that shatter.
  • Budget-friendly at about $1 per ornament or less.
  • Quick to make in just 20 minutes for a batch.
  • Kid and pet safe for worry-free decorating.
  • Timeless Scandinavian style that never goes out of fashion.
  • Fully customizable colors to match any decor scheme.
  • Perfect for gifting as handmade presents

Hunting for the perfect minimalist ornaments that won't break the bank or shatter on the floor? These DIY wood ball ornaments are the answer. With simple craft store supplies, a bit of paint, and about 20 minutes, you can create beautiful Scandinavian-inspired ornaments that look expensive but cost just a few dollars to make.

Unlike glass ornaments that require careful handling and storage, wooden balls are practically indestructible. They're perfect for homes with kids, pets, or anyone who wants beautiful decor without the stress. The natural wood grain shows through the paint, creating that warm, organic look that defines Scandinavian Christmas style. Plus, you can customize the colors to match any decor scheme, from traditional red and green to modern metallics or soft neutrals.

If you love minimalist Christmas crafts, you might also enjoy our Mini Macrame Christmas Ornaments with their simple boho style, our DIY Velvet Acorns for natural decor, or our Little House Christmas Wreath for more Scandinavian inspiration.

Wooden Ball Christmas Ornaments: simple DIY to turn craft store wooden balls into Christmas tree ornaments.

Materials

wood craft balls and eye screws to make ornaments

This project uses basic craft supplies you can find at any craft store. The beauty is in the simplicity.

  • Wooden Balls -Unfinished wooden craft balls in your chosen size. We recommend 2-inch diameter balls for a classic look that's not too heavy for tree branches. Find these at Michaels, Hobby Lobby, or Amazon. For variety, mix 2-inch and 3-inch sizes. A bag of 12-15 balls typically costs $8-12.
  • Screw Eye Hooks -Small screw eye hooks (size #216 works well) to attach hanging string. One pack contains enough for dozens of ornaments. About $3-4 per pack.
  • Masking Tape or Washi Tape -For taping off sections before painting. Washi tape removes more cleanly and leaves no residue, but masking tape works fine too. If using masking tape, remove it while paint is still slightly tacky to prevent peeling.
  • Acrylic Craft Paint -Choose colors that match your decor. White creates classic Scandinavian style. Metallics like gold or copper add subtle shine. Any acrylic craft paint works beautifully. One bottle paints many ornaments. About $1-2 per color.
  • Paint Brush -A small to medium brush for applying paint. Foam brushes work well for smooth coverage.
  • Hanging String -Gold twine, ribbon, yarn, or thin rope for hanging. Choose something that complements your paint colors. About $2-3 per spool.

Optional But Helpful

  • Wood Stain -For staining balls before or instead of painting
  • Pencil or Small Dowel -For leverage when installing eye hooks

Where to Buy

  • Craft Stores: Michaels, Hobby Lobby, and JoAnn carry unfinished wooden balls in the wood crafts section.
  • Online: Amazon has multi-packs at good prices. Etsy sellers offer various sizes.
  • Budget Tip: Buy in bulk or use 40-60% off coupons at craft stores to save even more.
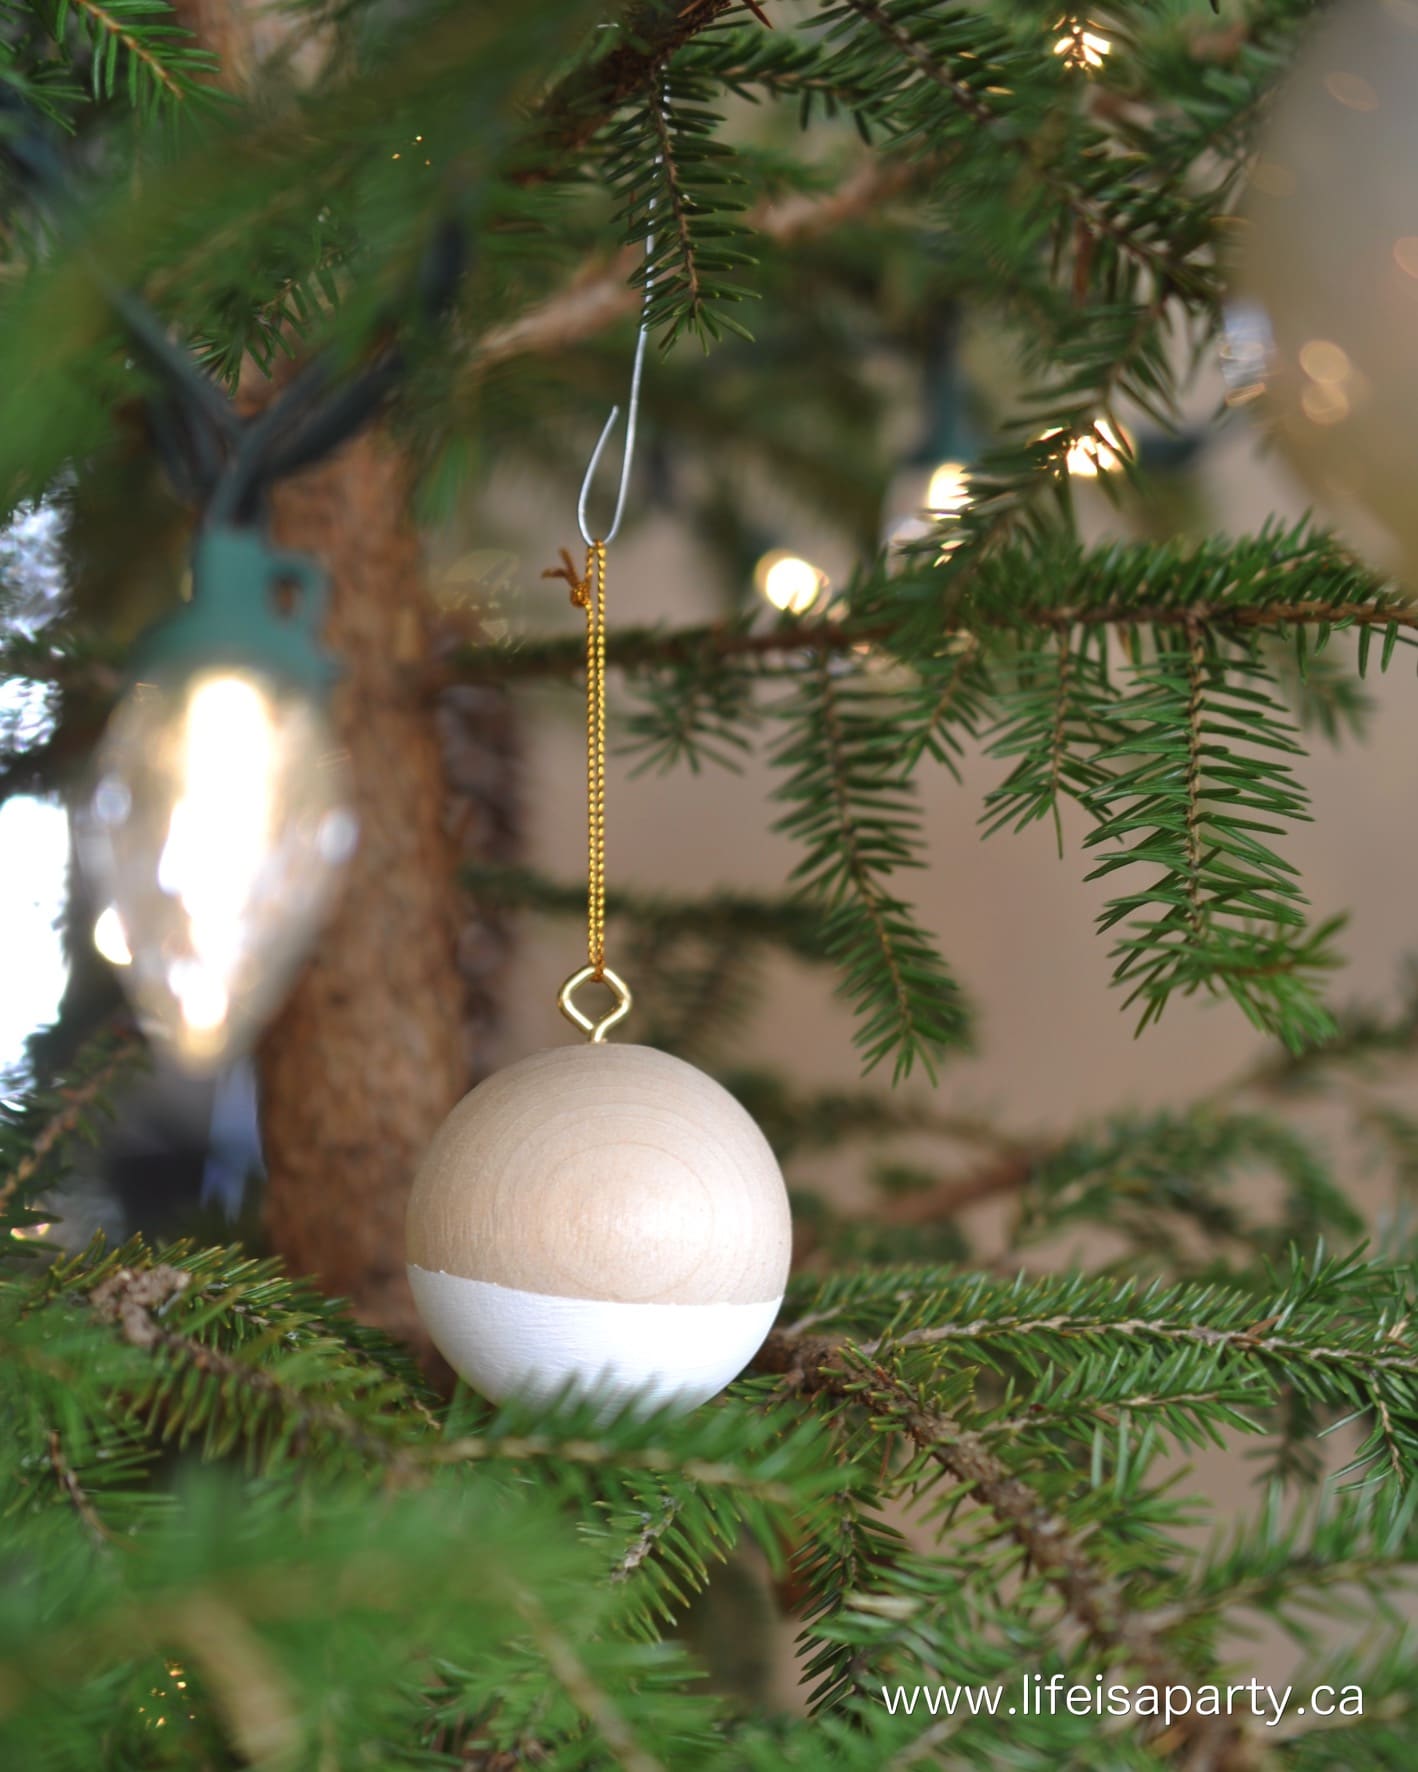
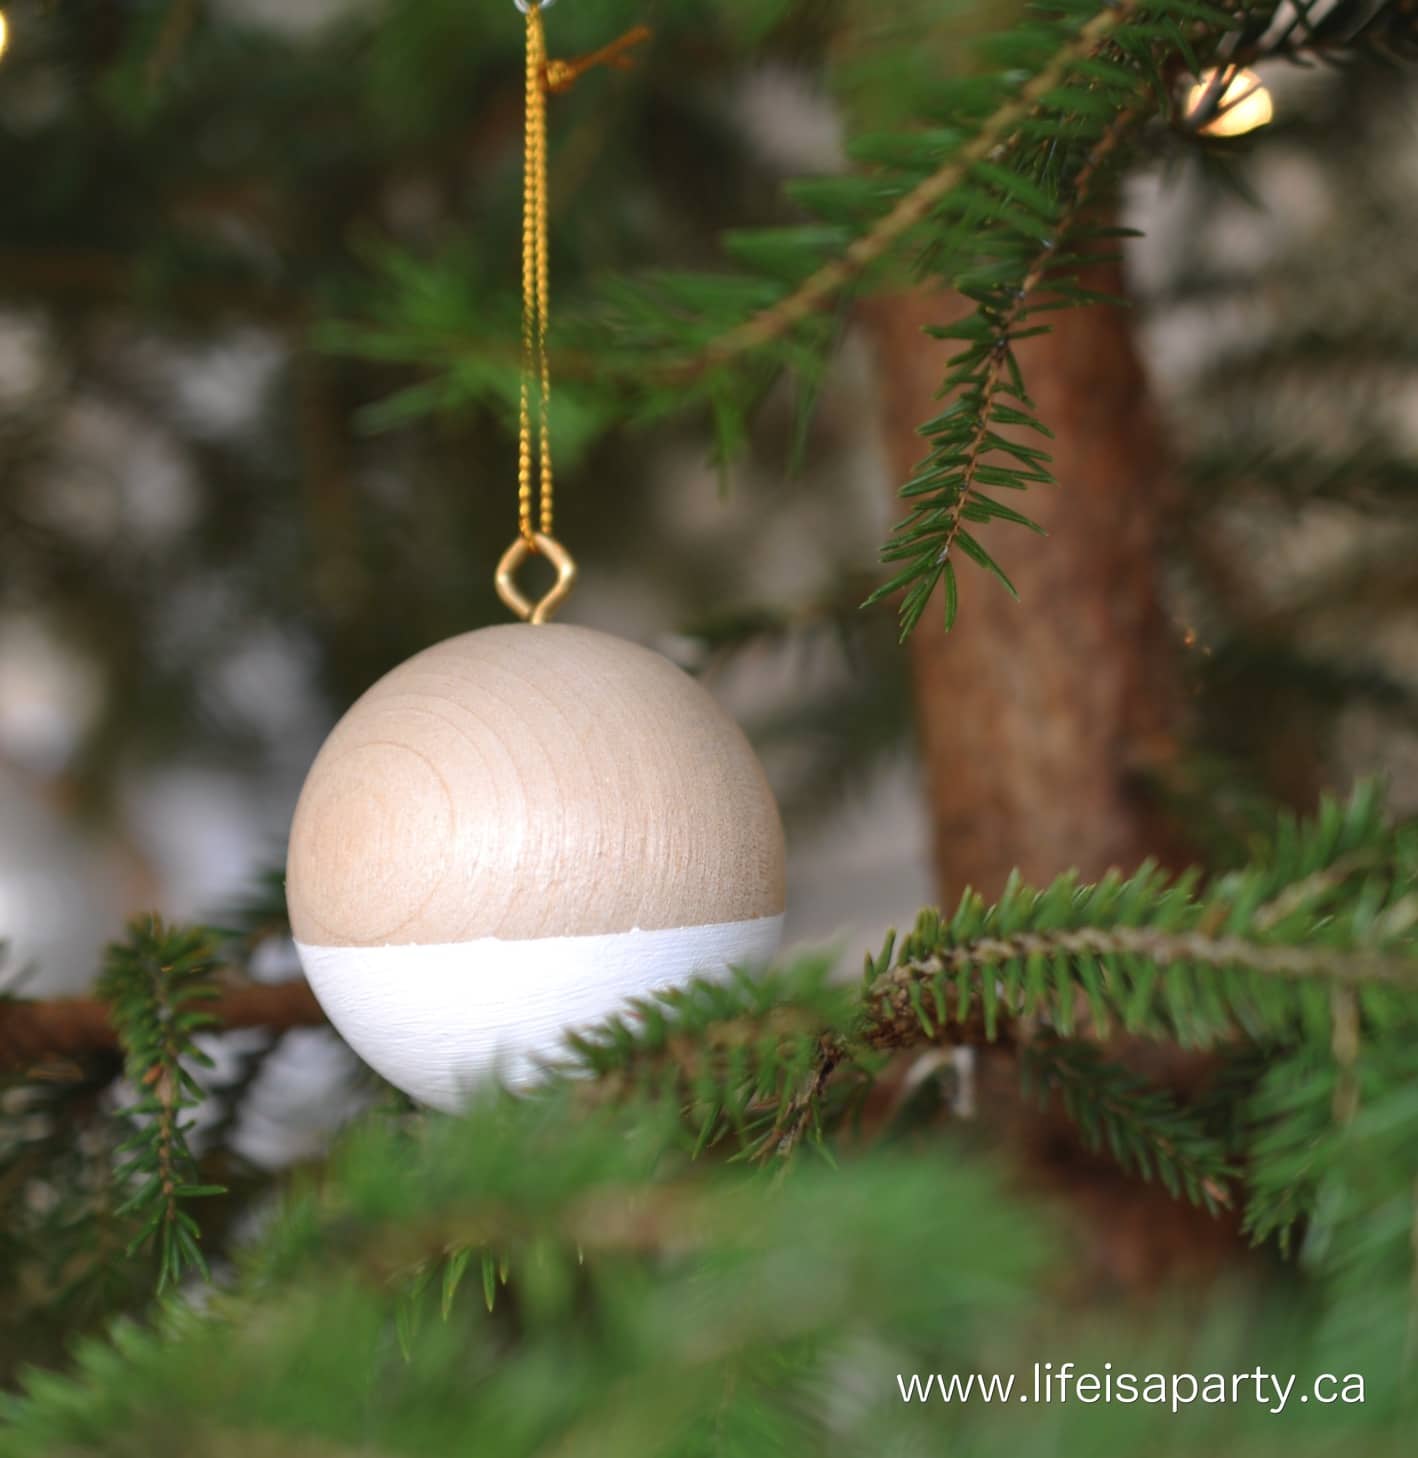
painted wood ball ornament hanging on a Christmas tree

Size Guide

  • 1-inch balls -Delicate, lightweight, great for filling in gaps in the Christmas tree
  • 2-inch balls -Perfect standard size, most versatile
  • 3-inch balls -Statement pieces, use sparingly as they're heavier
  • 4-inch balls -Very large, only for sturdy branches or mantel display

For most trees, stick with 2-inch balls or a mix of 2-inch and 3-inch for variety without excessive weight.

How To Make Wood Ball Ornaments:

These simple steps create professional-looking ornaments. The technique is forgiving and perfect for beginners.

Step 1: Install Eye Hooks

Start by screwing the eye hooks into the top of each wooden ball. Push the pointed end into the wood while turning clockwise. You'll need some finger strength to get it started. Once it catches, keep turning until the eye hook is secure and flush with the ball.

Pro tip: If you're having trouble, stick a pencil or small paintbrush handle through the eye hook loop and use it as a lever to turn more easily. For very hard wood, you can create a tiny pilot hole with a small nail or a drill first, but this usually isn't necessary.

Install eye hooks in all your balls before moving to the next step. This assembly-line approach saves time.

Step 2: Tape Your Design

For plain natural wood ornaments, skip this step and go straight to adding hanging string.

For painted ornaments, use masking tape or washi tape to tape off the section you want to paint. We taped off about one-third to one-half of each ball with a straight line across for clean, modern look. Press the tape down firmly so paint doesn't seep underneath.

You can create different looks by taping at various angles or taping off multiple sections. Experiment with diagonal lines or geometric patterns.

painted wooden ball

Step 3: Paint and Dry

Apply paint to the exposed section. You'll likely need two coats for full coverage. Let the first coat dry completely (about 20-30 minutes) before applying the second.

Drying method: We rested out balls paint side up in the rolls of washi tape, you can also use small drinking glasses, or hang them from the eye hooks to dry.

Remove the tape once the paint is dry to the touch but not completely cured (about 30 minutes after final coat). This prevents the paint from peeling off with the tape. Peel slowly at a low angle for the cleanest edge.

Step 4: Add Hanging String

Cut a 6 to 8-inch piece of hanging string, ribbon, or yarn. Thread it through the eye hook and tie the ends together in a knot to create a loop. Trim any excess string.

Your ornaments are ready to hang! Display them on your tree, use them in garlands, or package them as gifts.

Expert Tips for Best Results

  • Eye Hook Installation -The wood may feel hard initially. Apply steady pressure while turning, and don't worry if it takes some effort. Once it catches the wood grain, it will screw in more easily.
  • Tape Choice Matters -Washi tape creates the cleanest lines because it removes easily without residue. If using masking tape, choose painter's tape quality and remove it while paint is slightly tacky.
  • Paint Application -Thin coats work better than one thick coat. Let each coat dry fully before adding the next. Two thin coats give more even coverage than one thick layer.
  • Weight Considerations -If making very large ornaments (3-inch or bigger), use them sparingly and hang them on stronger interior branches rather than delicate outer ones. A mix of sizes creates the most visual interest.
wood Christmas ornament hanging in Christmas tree

Design Ideas and Variations

The basic technique opens up endless creative possibilities. Here are ideas to make these ornaments your own.

Paint Variations

  • Classic Scandinavian -White paint on natural wood (what we made)
  • Metallic Glamour -Gold, copper, or silver paint for subtle shine
  • Bold Colors -Traditional red or green, or modern navy and blush
  • Multiple Colors -Paint different sections in coordinating colors, or stripes
  • Ombre Effect -Gradually fade from painted to natural wood
  • Angled Lines -Tape diagonally instead of straight across

Natural Options

  • Plain Wood -Leave balls completely natural with just eye hooks and string
  • Stained Only -Apply wood stain for richer color while showing grain
  • Half-Stained, Half-Painted -Combine stain and paint for contrast

Beyond Paint

Wood Burning -Add designs with a wood burning tool
Vinyl Decals -Apply cut vinyl designs or monograms
Glitter Dipped -Dip painted section in glitter while wet
Script -Hand-letter with paint pen once base paint dries

Wood Bead Alternative

Can't find solid wooden balls? Use large wooden beads instead. Thread ribbon or yarn through the bead hole and add a tassel, smaller beads, or felt balls on the bottom end. This creates a different hanging ornament style that's just as beautiful. The hole becomes a design feature rather than something to hide.

Frequently Asked Questions

What size wooden balls should I use?

Two-inch diameter balls are the most versatile size. They're substantial enough to make an impact but not so heavy they weigh down branches. Mix in some 3-inch balls for variety if desired, but avoid going larger than 3 inches for tree ornaments.

Are wooden ball ornaments too heavy for my tree?

Two-inch wooden balls weigh about the same as standard glass ornaments and work fine on most trees. Hang them on interior branches rather than delicate outer tips. If you're concerned, stick with 2-inch or smaller sizes.

Where can I buy unfinished wooden balls?

Michaels, and Hobby Lobby carry them in the wood crafts section. Amazon sells multi-packs. Etsy has various sizes and quantities. Look for "unfinished wooden balls" or "wood craft balls."

What type of paint works best?

Regular acrylic craft paint works beautifully. Any brand from the craft store will do. You don't need special wood paint. Two thin coats give better coverage than one thick coat.

How do I prevent paint from bleeding under the tape?

Press your tape down very firmly, especially at the edges. Paint thin coats rather than thick ones. Remove the tape while paint is still slightly tacky (about 30 minutes after final coat) rather than waiting until it's completely dry.

What if the eye hook won't screw in?

Apply firm, steady pressure while turning. Use a pencil through the loop as a lever for better grip. If the wood is very hard, tap a small nail into the spot first to create a pilot hole, or use a drill, then screw in the eye hook.

If you make these wood ball ornaments or any other craft on my blog, please let me know how it went in the comments below. Thanks for visiting today!

More DIY Christmas Ideas

  • Boho Christmas decor ideas in black and white.
    Boho Christmas Decor Ideas: Complete Guide with DIY Projects
  • DIY mini macrame Christmas ornaments.
    Mini Macrame Christmas Ornaments: Easy DIY Tutorial for Beginners
  • DIY birch wreath made with fresh greens and birch logs.
    DIY Birch Wreath
  • DIY book page feather.
    DIY Paper Feathers

Recipe

Easy DIY wooden ball Christmas ornaments, with a candy cane.

Wooden Ball Christmas Ornaments

5 from 1 vote
Print Pin Rate
Cook Time: 20 minutes minutes
Total Time: 20 minutes minutes
Author: Dannyelle Nicolle-Ramjist

Materials

  • Wooden Balls
  • Eye Hooks
  • Washi Tape or Masking Tape
  • Paint Brush
  • White Paint
  • Gold String Ribbon, or Yarn

Instructions

  • Start by screwing the eye hooks into the top of the wooden balls.
  • For the plain ones, just attach a string and your ready to hang them.
  • For the painted ones, use masking tape to tape off the section you want painted.
  • Apply the paint, you might need to do two coats to really cover it.
  • Remove the tape once the paint is dry and add the string for hanging.

Notes

Eye Hook Installation - The wood may feel hard initially. Apply steady pressure while turning, and don't worry if it takes some effort. Once it catches the wood grain, it will screw in more easily.
Tape Choice Matters - Washi tape creates the cleanest lines because it removes easily without residue. If using masking tape, choose painter's tape quality and remove it while paint is slightly tacky.
Paint Application - Thin coats work better than one thick coat. Let each coat dry fully before adding the next. Two thin coats give more even coverage than one thick layer.
Weight Considerations - If making very large ornaments (3-inch or bigger), use them sparingly and hang them on stronger interior branches rather than delicate outer ones. A mix of sizes creates the most visual interest.

Christmas Sugar Cubes

Dec 9, 2015 · 1 Comment

DIY Christmas sugar cubes.

Christmas Sugar Cubes: easy, quick, and oh so sweet Christmas. Make Christmas Sugar Cubes from regular sugar cubes, and edible markers.

DIY Christmas sugar cubes.
[feast_advanced_jump_to]

Some Christmas projects are hard, and expensive, and time consuming…and some are easy.  This one is easy...and quick, and inexpensive too.  It would even be a fun one to do with the kids.

how to make Christmas Sugar Cubes

All you need are some sugar cubes -find them at the grocery store with the sugar, and some edible ink food markers -find them at a craft store.

  • white sugar cubes
  • edible food markers
how to decorate sugar cubes.

The food markers work just like a normal marker, but are safe to eat.

Christmas Sugar Cubes for a Christmas tea party

All you do to make the Christmas Sugar Cubes, is colour a pretty Christmas design on one side of your sugar cube with the edible markers.  Try to stick to fairly simple designs.  I had good luck with stars, wreaths, holly and berries, little Christmas trees, hearts, and snowflakes.  The words are a little trickier, just try to think of short words.  I did joy, love, and Noel.

Christmas Sugar Cubes for a tea party

Do a few practise ones, and if they don't turn out try another side…and then throw them in your coffee or tea. 🙂  Great excuse to enjoy a cup as you work.

I think these would be the perfect addition to a Christmas tea party.

Christmas Sugar Cubes DIY Gift idea

Or, wrap them up in a little cello bag and add to a hostess gift -how great with a bag of good coffee?  I think I'll get my girls to make some after school, and we'll add them to the Breakfast in Bed Baskets we're making for their teachers this year.

With easy and oh so sweet Christmas Sugar Cubes, life really is  a party!

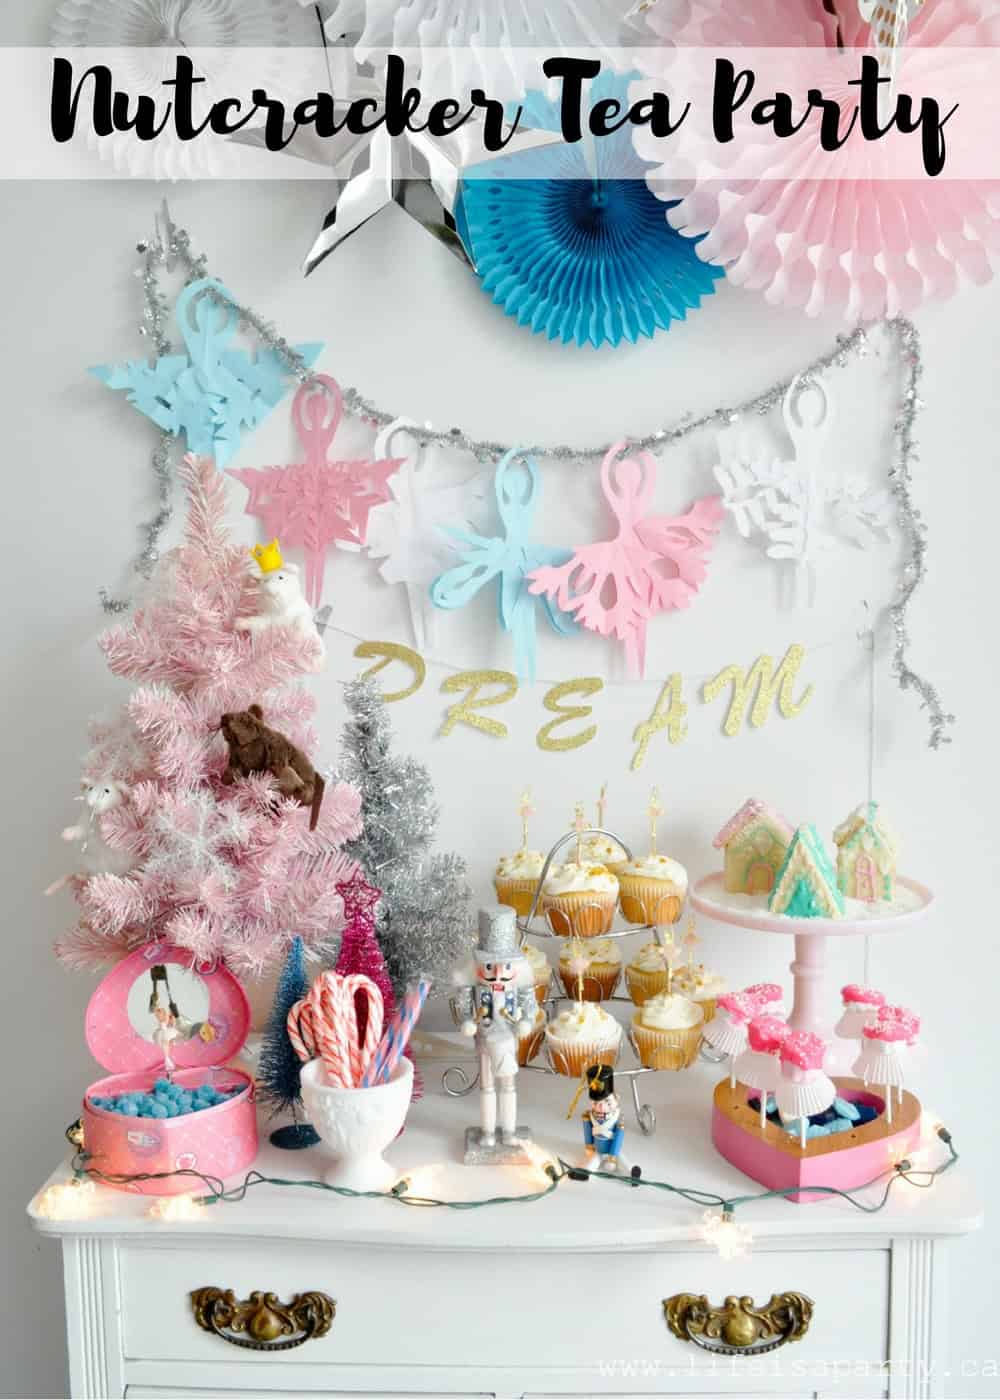
You might also like our Nutcracker Christmas Tea Party here.

Also check out our Christmas Tablescape here.

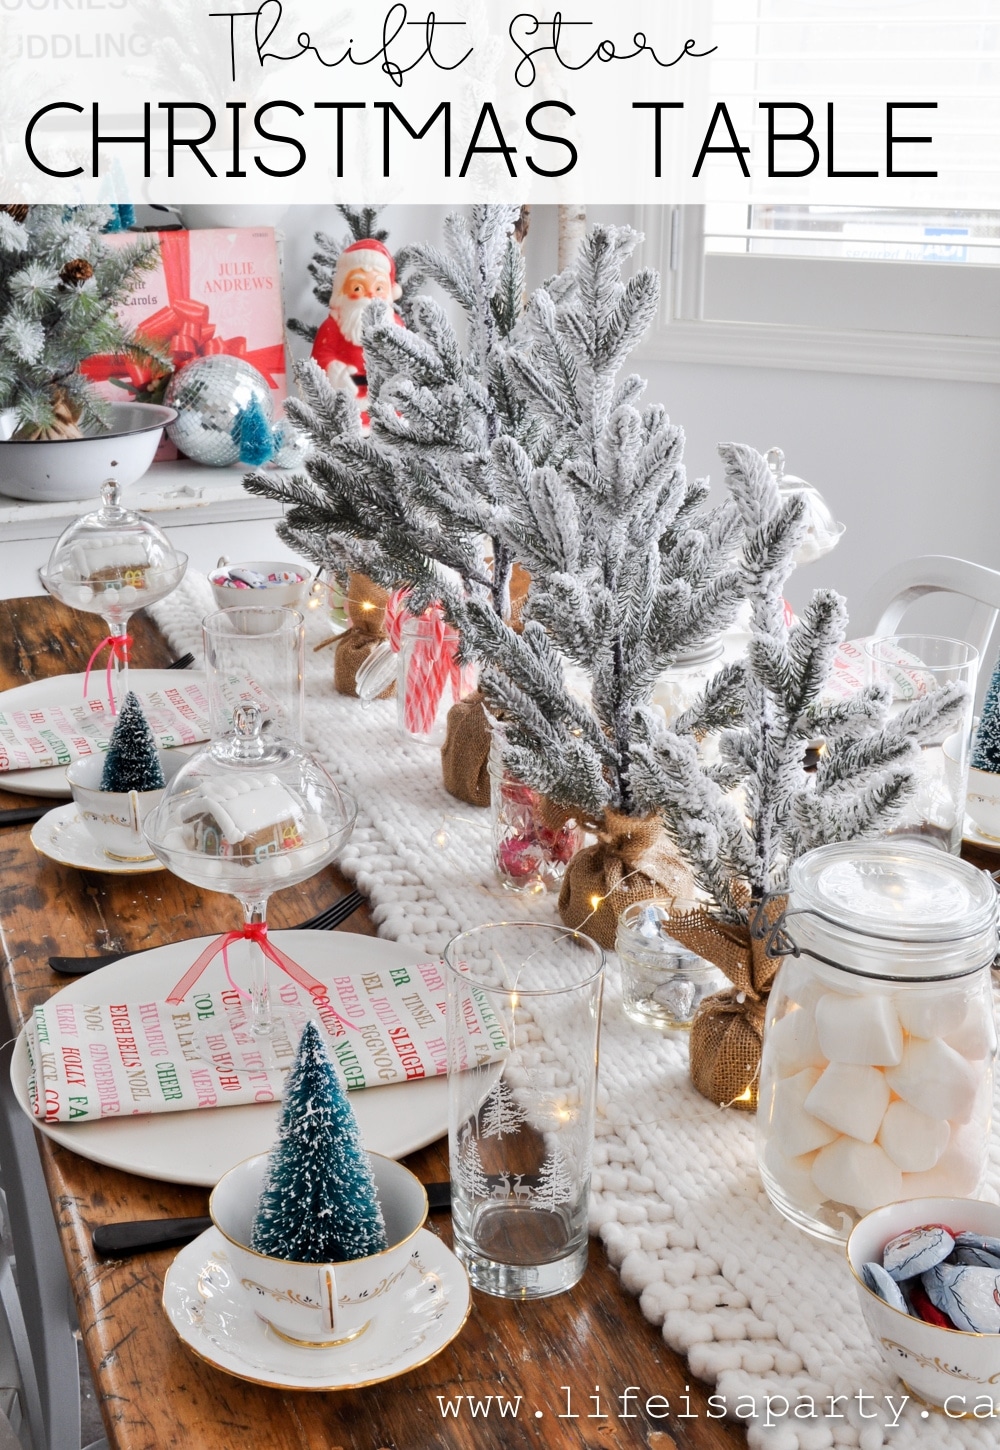
Thrift Store Christmas Table and Thrift Store Tips: beautiful Christmas table put together with thrift store finds, and 9 tips for thrifting.

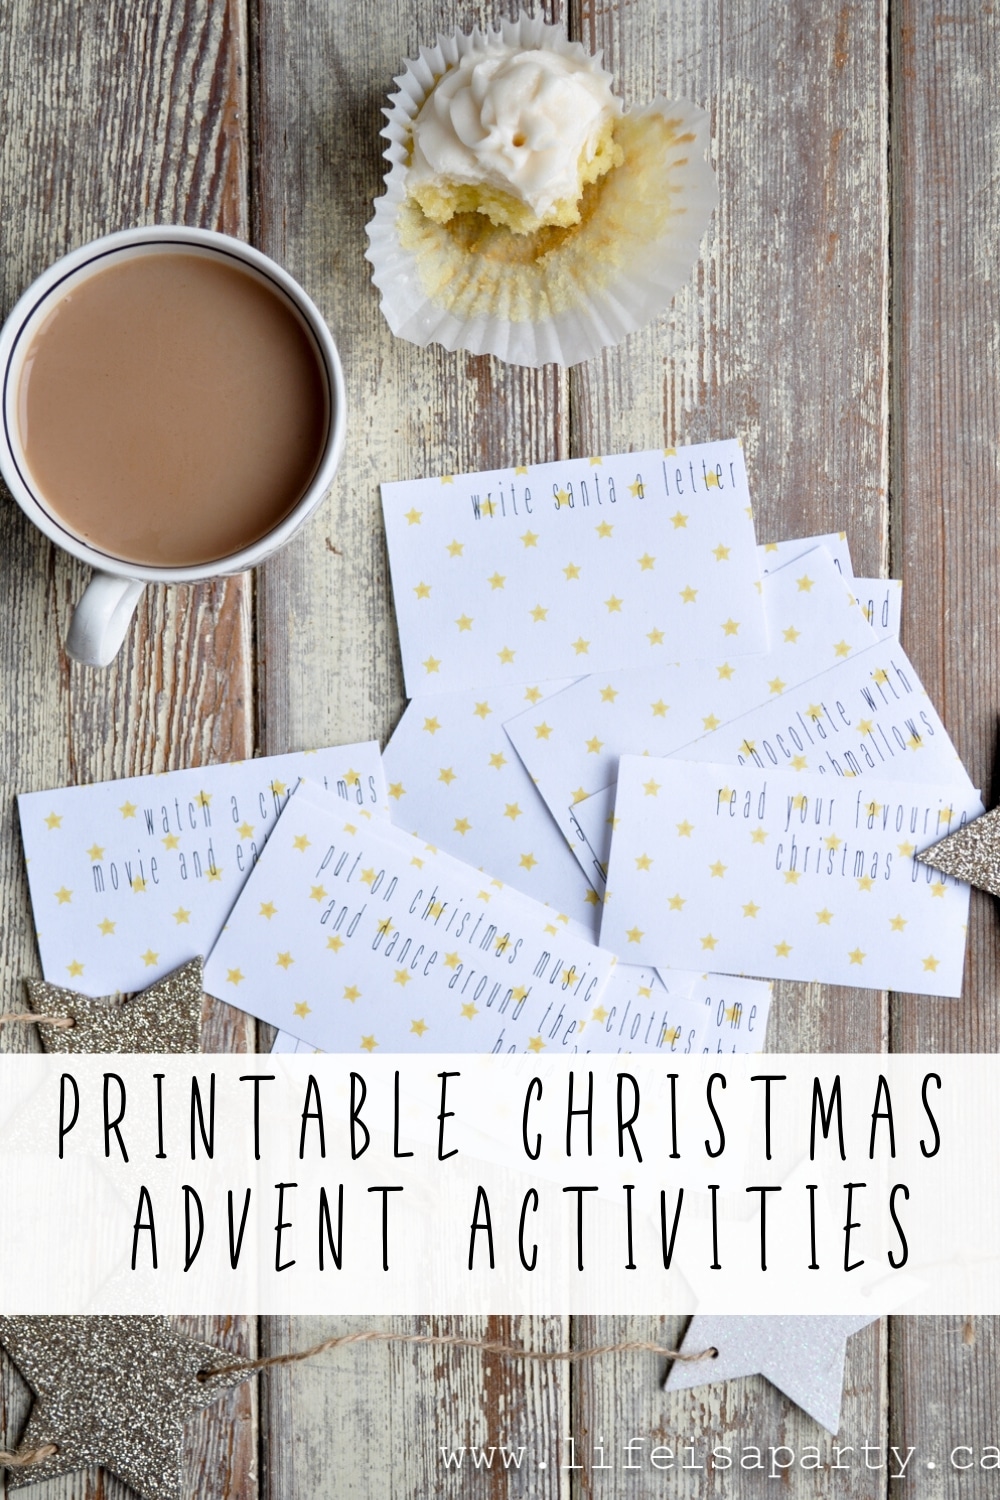
You might also enjoy our Printable Christmas Advent Calendar Activities here.

Printable Christmas Advent Calendar Activities: with over 60 different activities to choose from pick 24 and make some special memories with your family this Christmas.

Scandinavian Inspired Christmas Home Tour

Dec 7, 2015 · 7 Comments

Rustic Scandinavian Inspired Christmas Home Tour: Simple, rustic, white, and Scandi inspired Christmas decor with lots of fresh greenery.

Rustic Scandinavian Inspired Christmas Home Tour 2015: Simple, rustic, white, and Scandi inspired Christmas decor.

Rustic Scandinavian Inspired Christmas Home

Merry Christmas!  I'm so excited to invite you in to have a peek at our Scandinavian inspired Christmas Home Tour.  Grab a cup of tea and come in, you are most welcome.

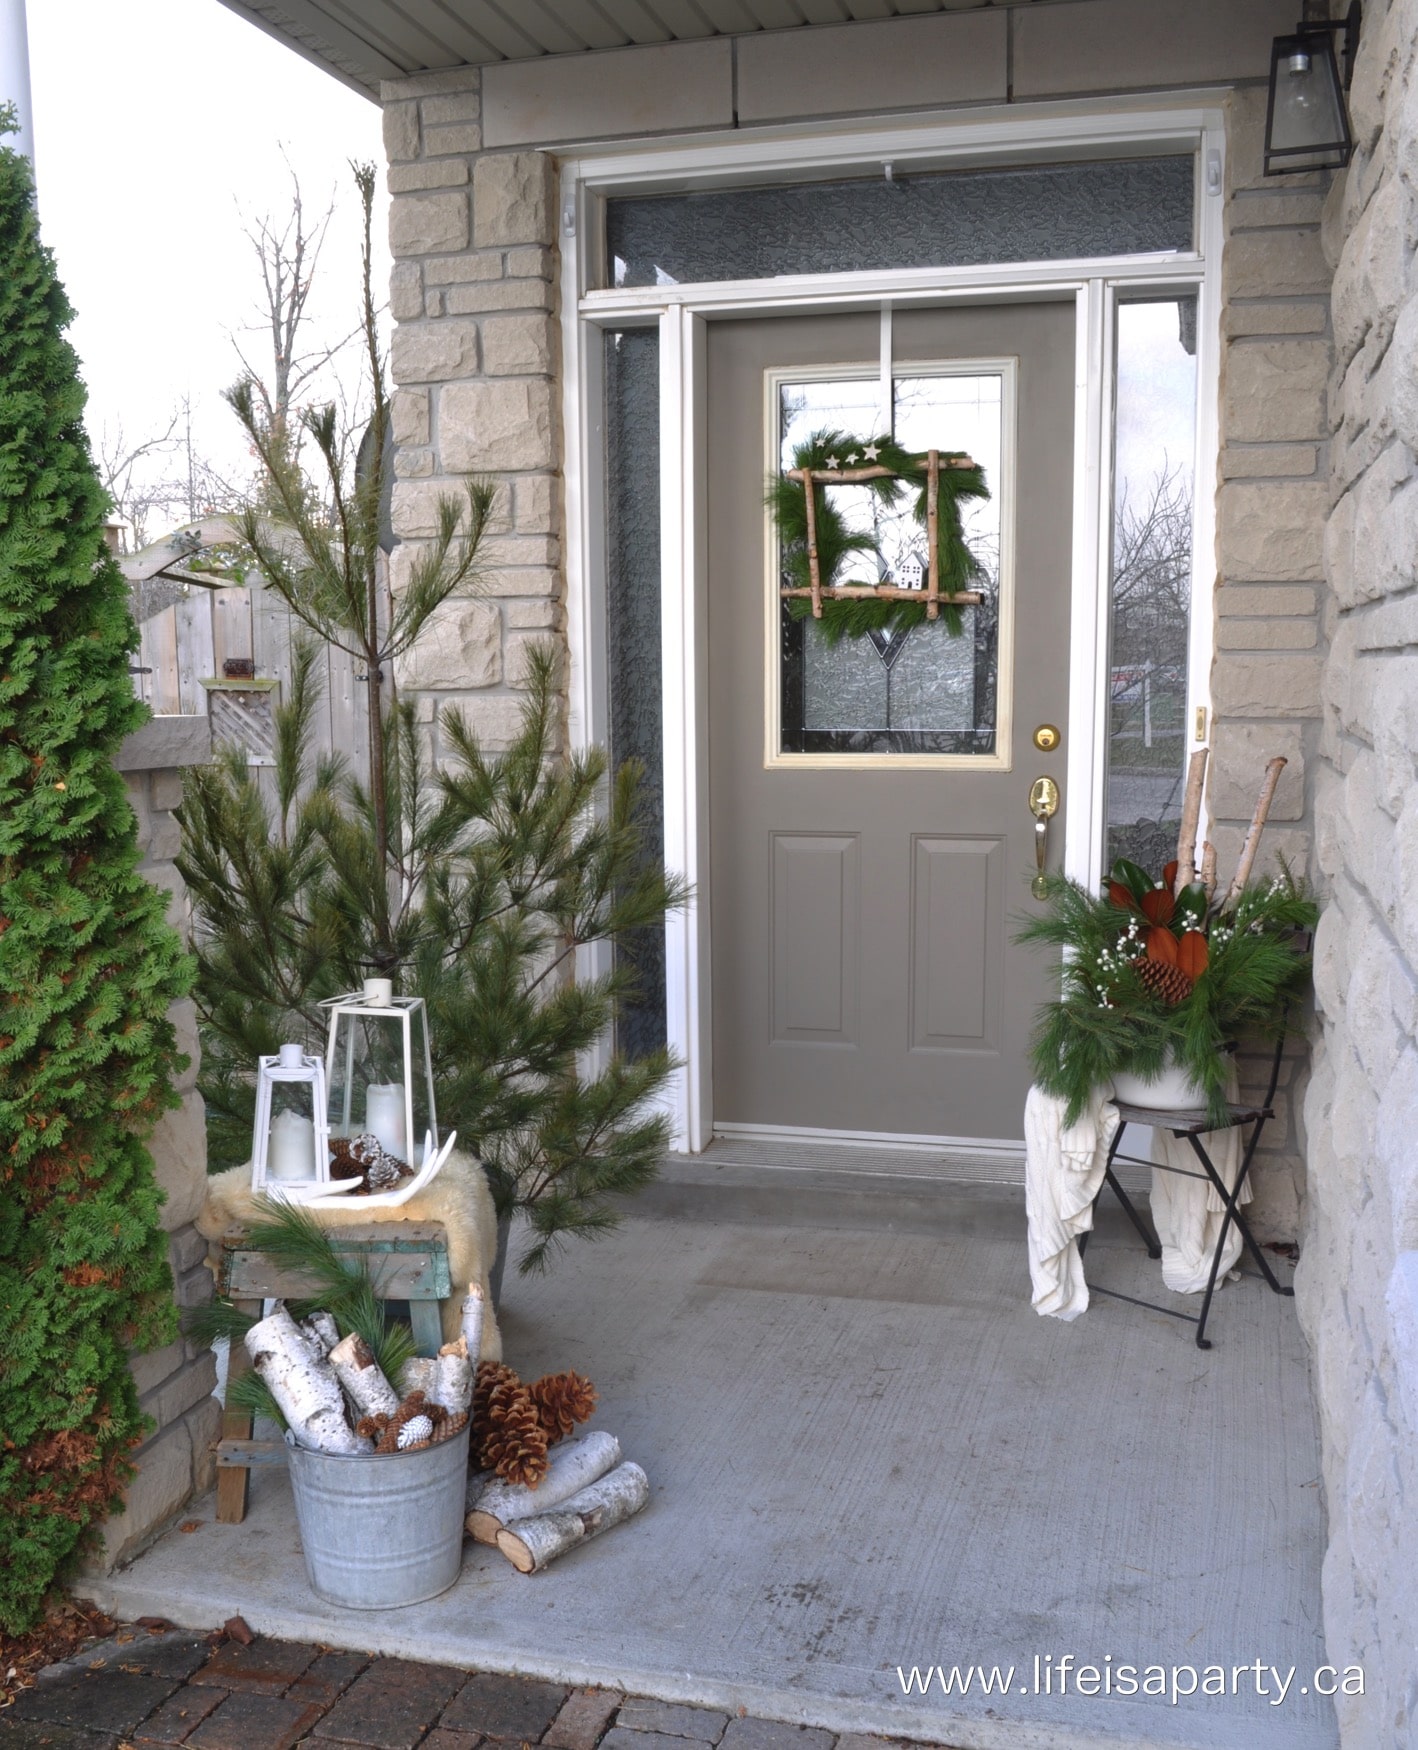
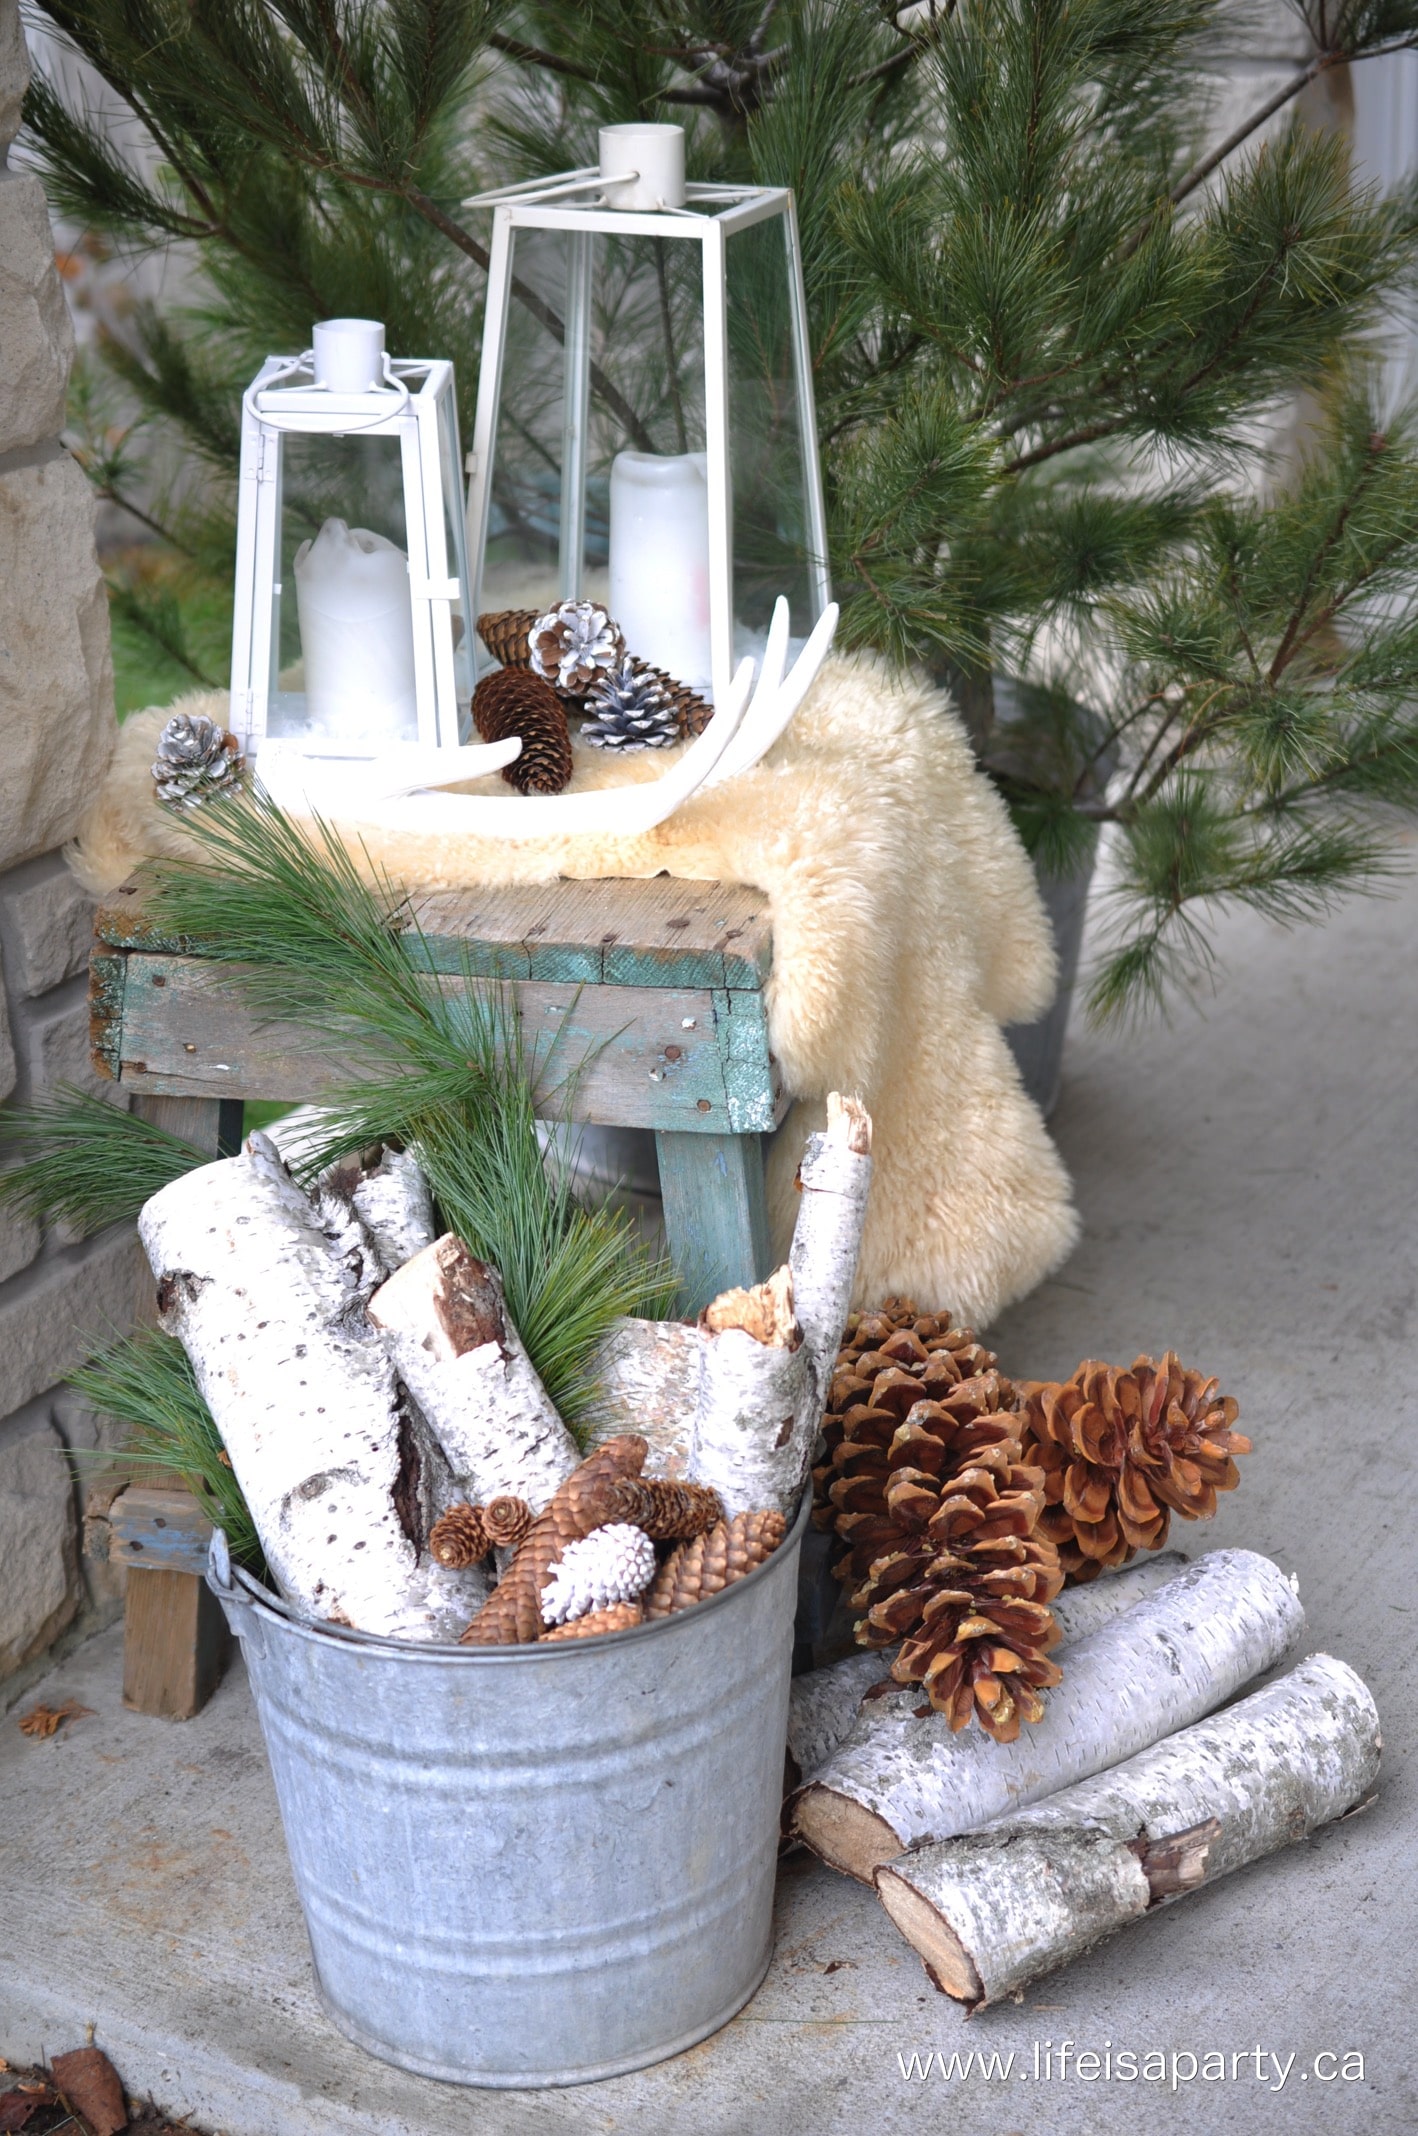
Scandinavian Inspired Christmas front porch

Front Door

Outside we've gone with a rustic natural Scandinavian inspired look, in keeping with our theme this year. Find out how to make the Little House Wreath here.

Christmas front porch

It's been so fun to put this years Christmas decorations together.  I've been inspired this year by all things Scandinavian, and tried to bring that airy, white, rustic, kind of minimalist feel into our home for Christmas.  It's so relaxing and easy to live with.

Rustic Scandinavian Inspired Christmas Home Tour

Scandinavian Inspired Christmas Dining Room

The hardest part about trying to do a Scandi influenced look this year was knowing when to stop -but the simplicity is certainly part of it's charm.

Christmas dinning room

We've incorporated lots of white, sheep skin, antlers and candles, candles and more candles.  We're celebrating the light in these dark and short days.  And we've tried to bring the outdoors in, with lots of greenery, pinecones, and birch.

Christmas dinning room

Our little console table has a pretty black metal tree, with a few simple ornaments on it.

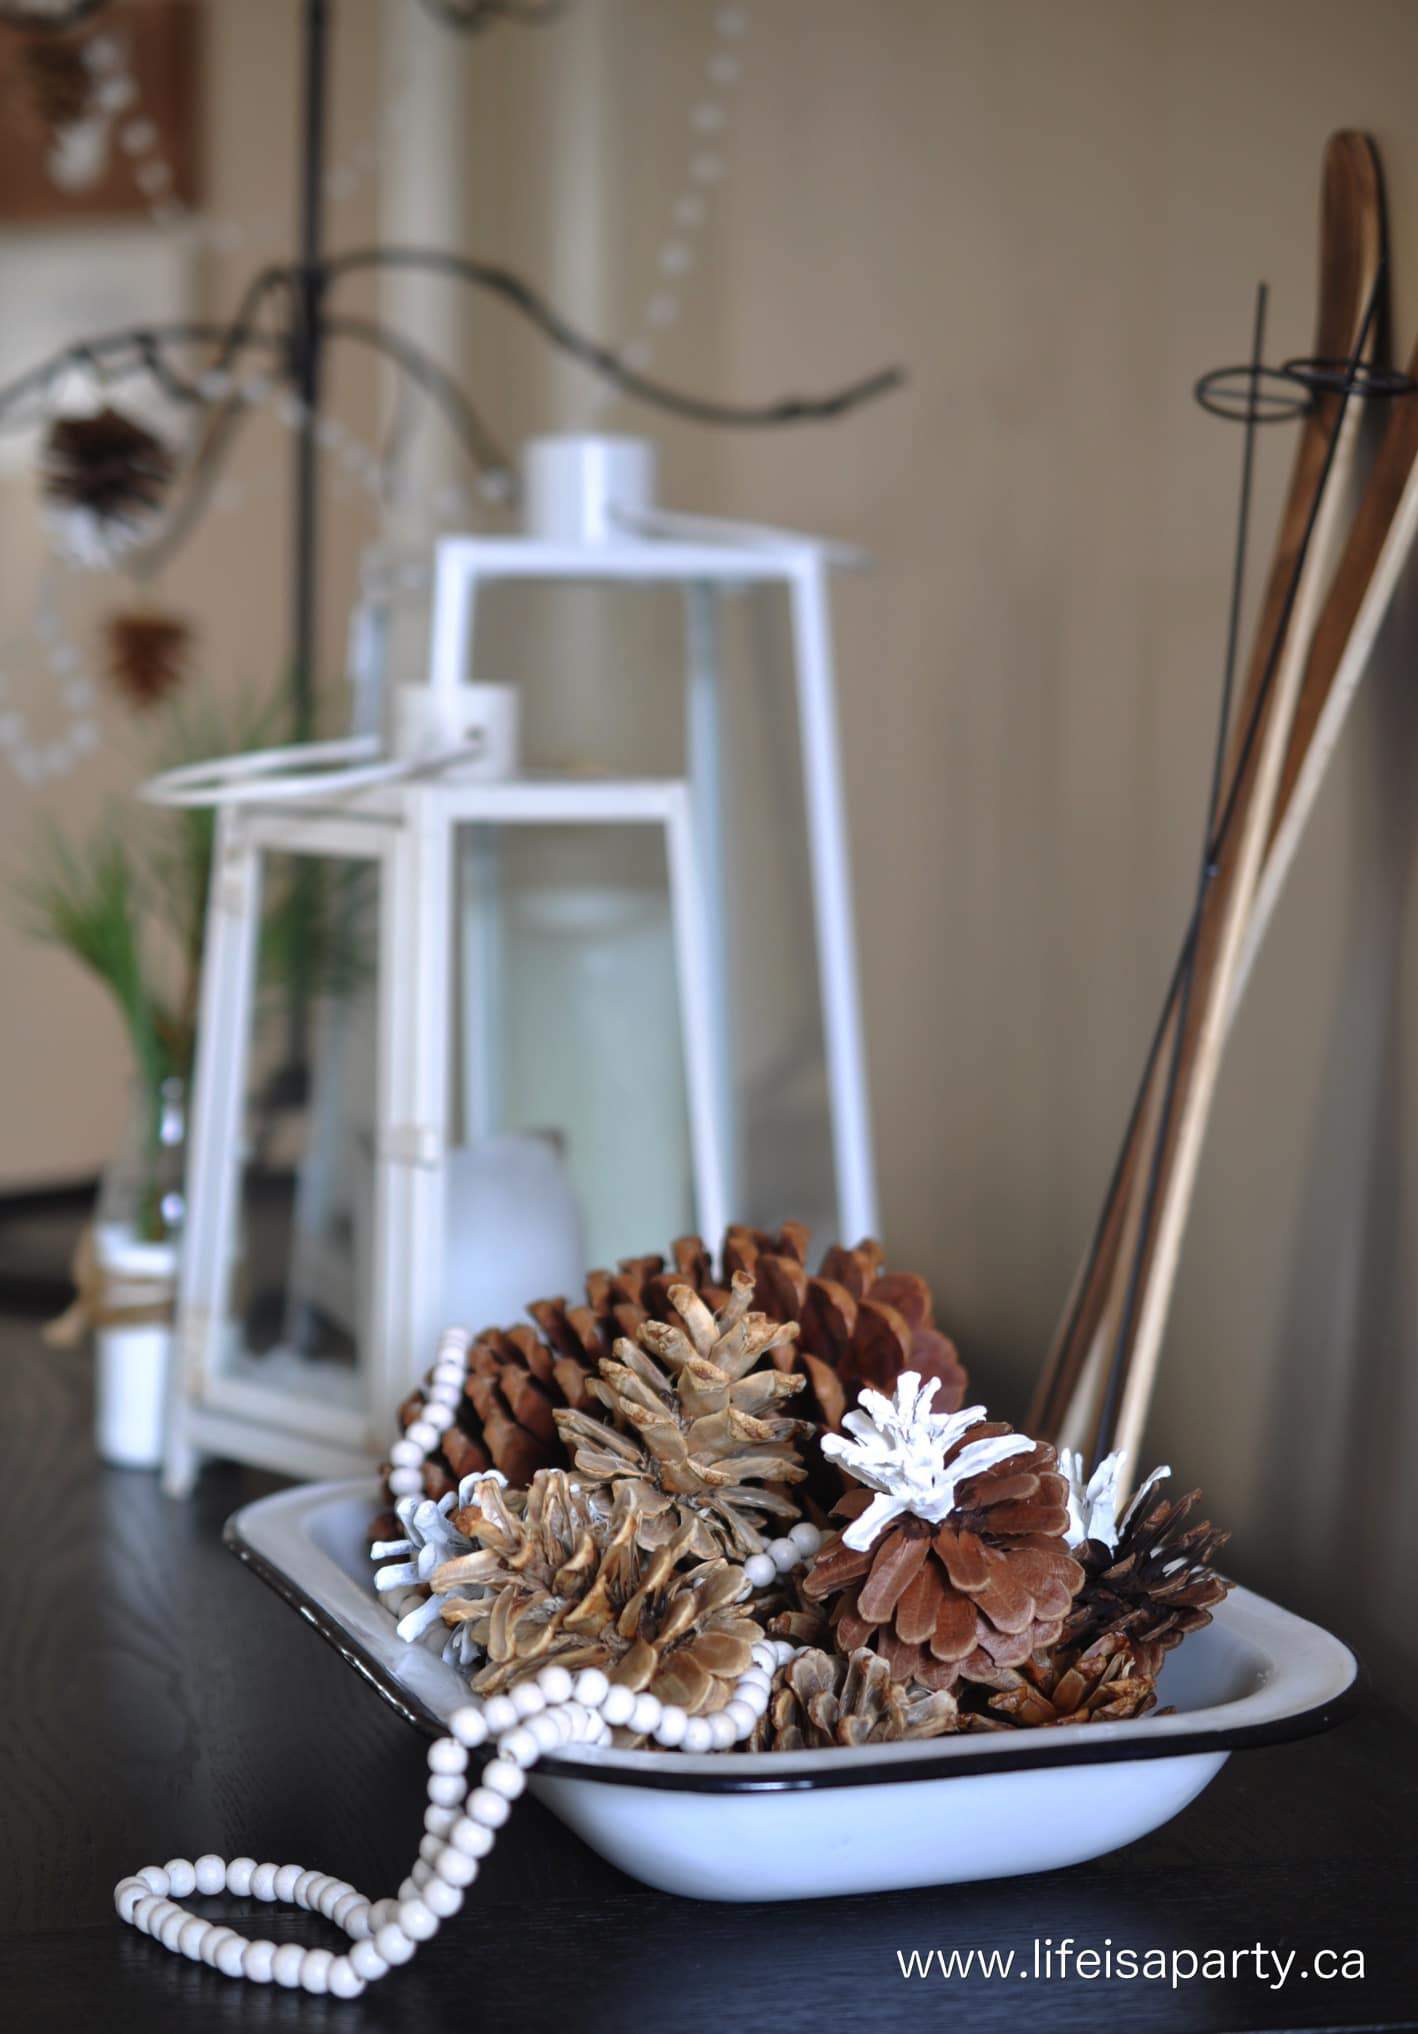
pinecone Christmas decoration

Lots of pretty pinecones this year -including these bleached ones -find the whole tutorial to make your own bleached pinecones here.

Rustic Scandinavian Inspired Christmas decor

And, lots of fresh pine, gathered on afternoon walks in the woods behind our house -lots of fun exploring for me.

Scandinavian Inspired Christmas decor

Bar Cart

Our little bar cart is set up for Christmas visitors.

Scandinavian Inspired Christmas decor

I had fun incorporating some tissue balls this year…and a few disco balls.  Love the contrast of the rustic and simple with the sparkle of the mirrored balls.

Christmas bar cart

And I've also had fun incorporating some pretty geometrics -to keep things up to date.

Buffet

Scandinavian Inspired Christmas Home Tour

The wall hanging is a simple birch branch and wire lights.  I made a few wool tassels for it.

yarn tassels and birch

I made a simple little Advent candle wreath, with more fresh pine.

teacup candle advent wreath

My wooden dough bowl -a fun find at a fall antique show, is dressed up for it's first Christmas with us, and has definitely become a new favourite.

Scandinavian Christmas decor

Dining Room Table

The dining room table has a pretty rustic 100 year old plank as it's centrepiece.  You can see it all set for Christmas dinner here, I removed the cloth and dishes and left the runner for a casual everyday look over the holidays.

Rustic Scandinavian Inspired Christmas Home Tour

Scandinavian Inspired Christmas Living Room

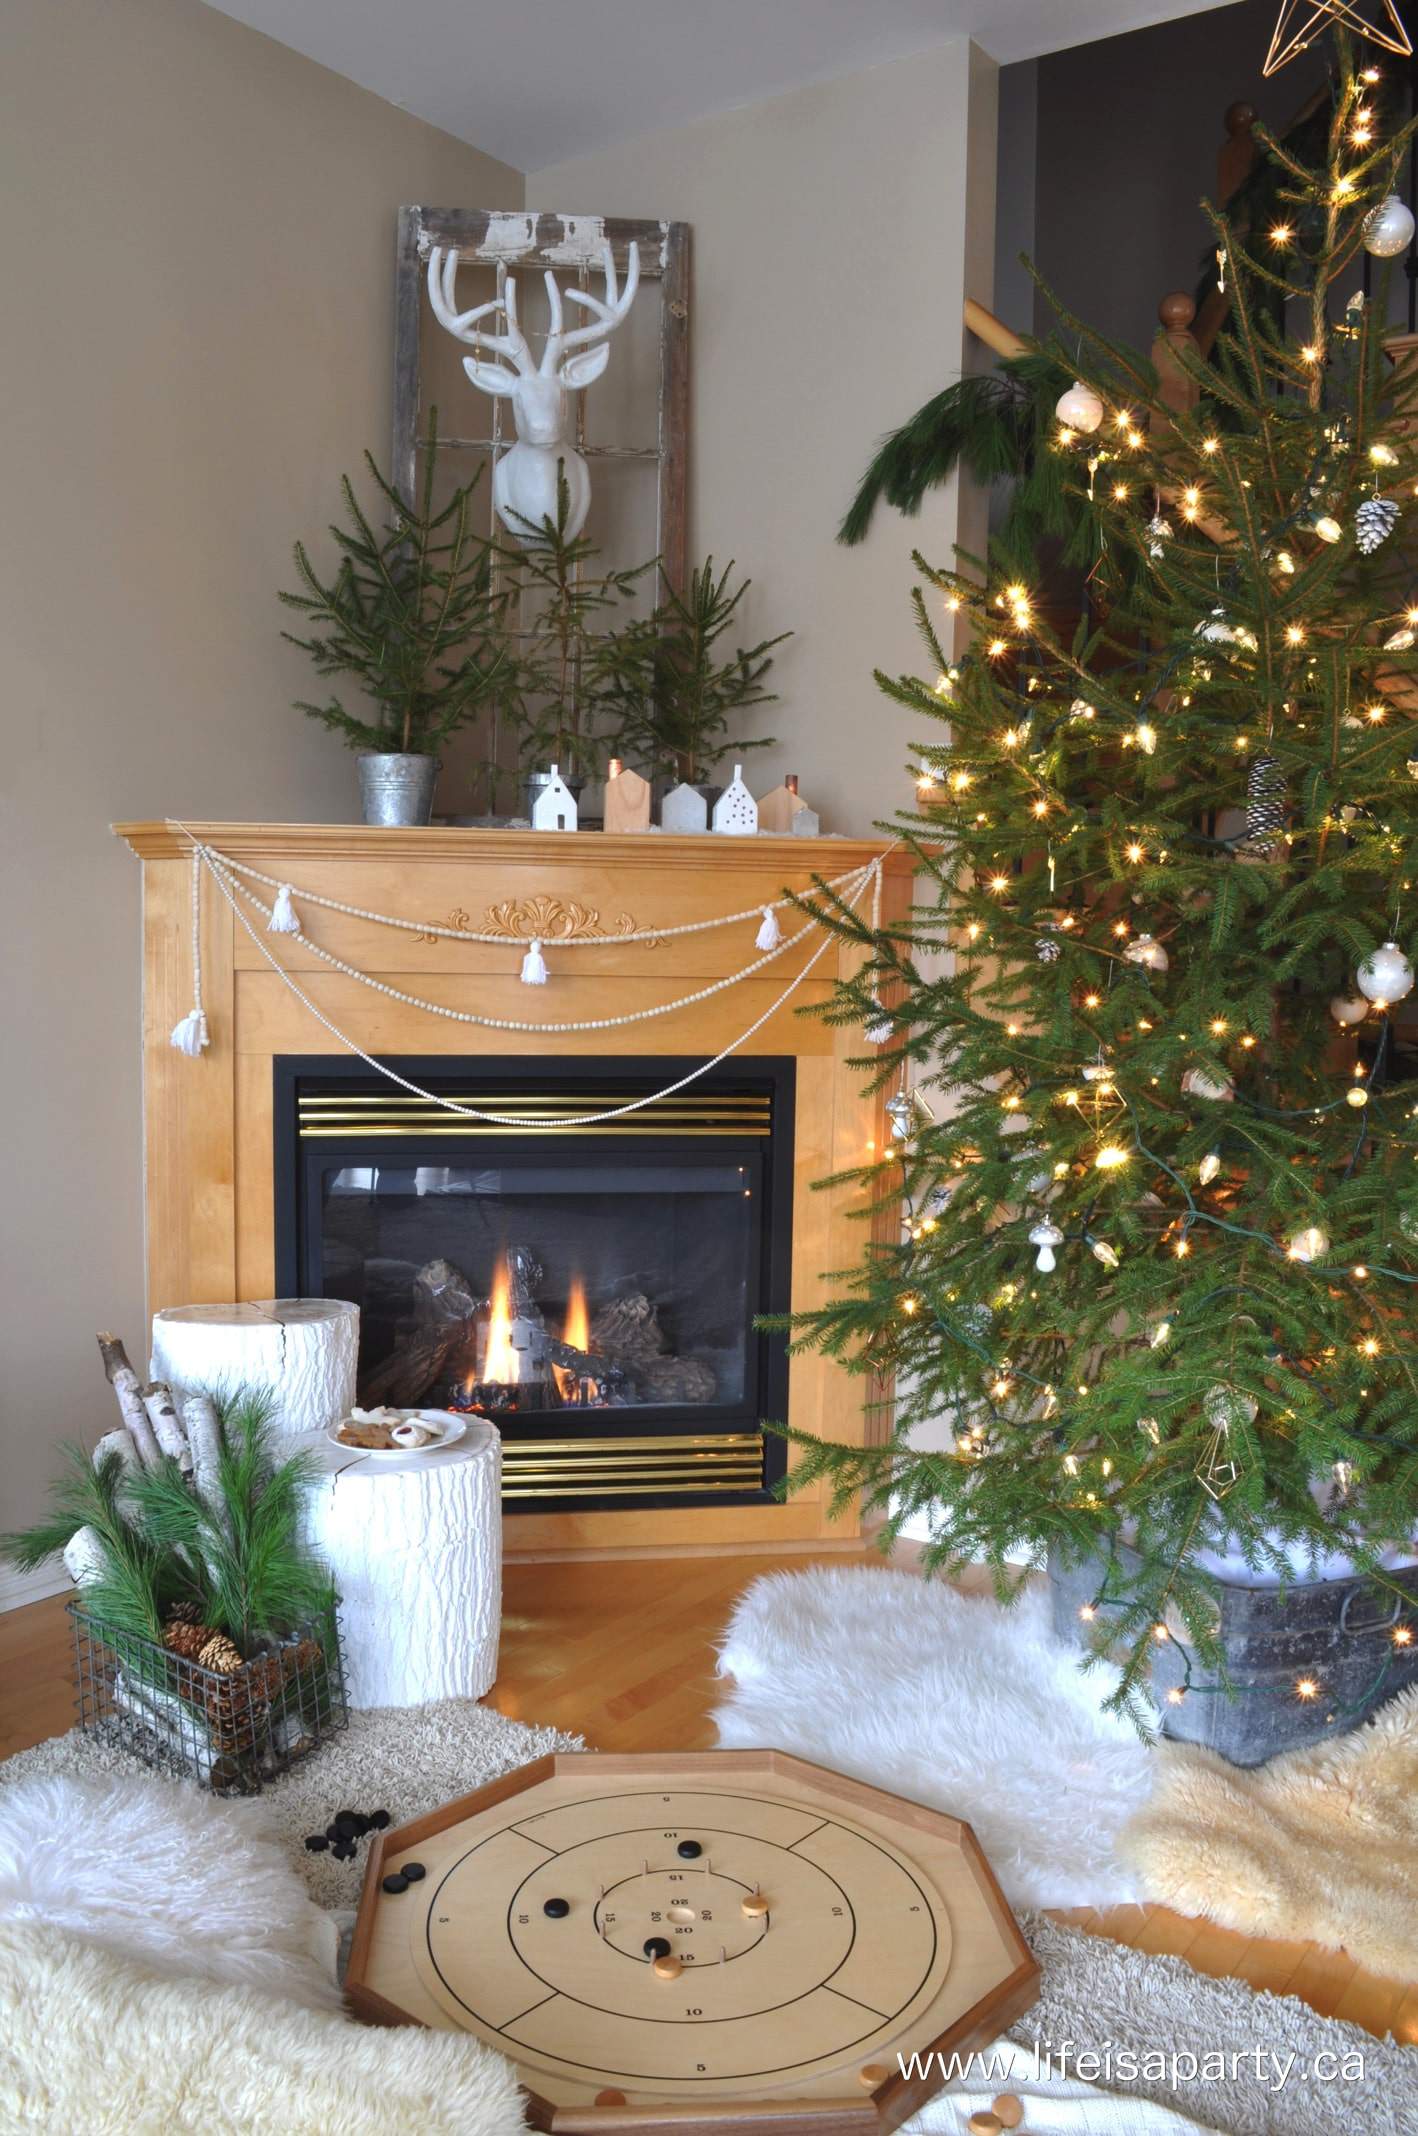
The dining room leads into the living room.  I've dressed the stairs with a simple fresh pine garland.  And this year, for the first time since I was a kid, we have a real tree.

Scandinavian Christmas tree

Scandinavian Inspired Christmas Tree

I think I'd forgot how perfectly imperfect a real tree is.

Going for that Scandi feel, I've tried hard not to over do it on the tree.  No garland this year, in a simple galvanized pail, and surrounded by some sheep skins.

The decorations are white glass balls, pretty pinecones, some woodsy mushrooms, and rustic wooden balls.  On the top, a simple geometric star, I made out of some straws, wire, and gold paint.

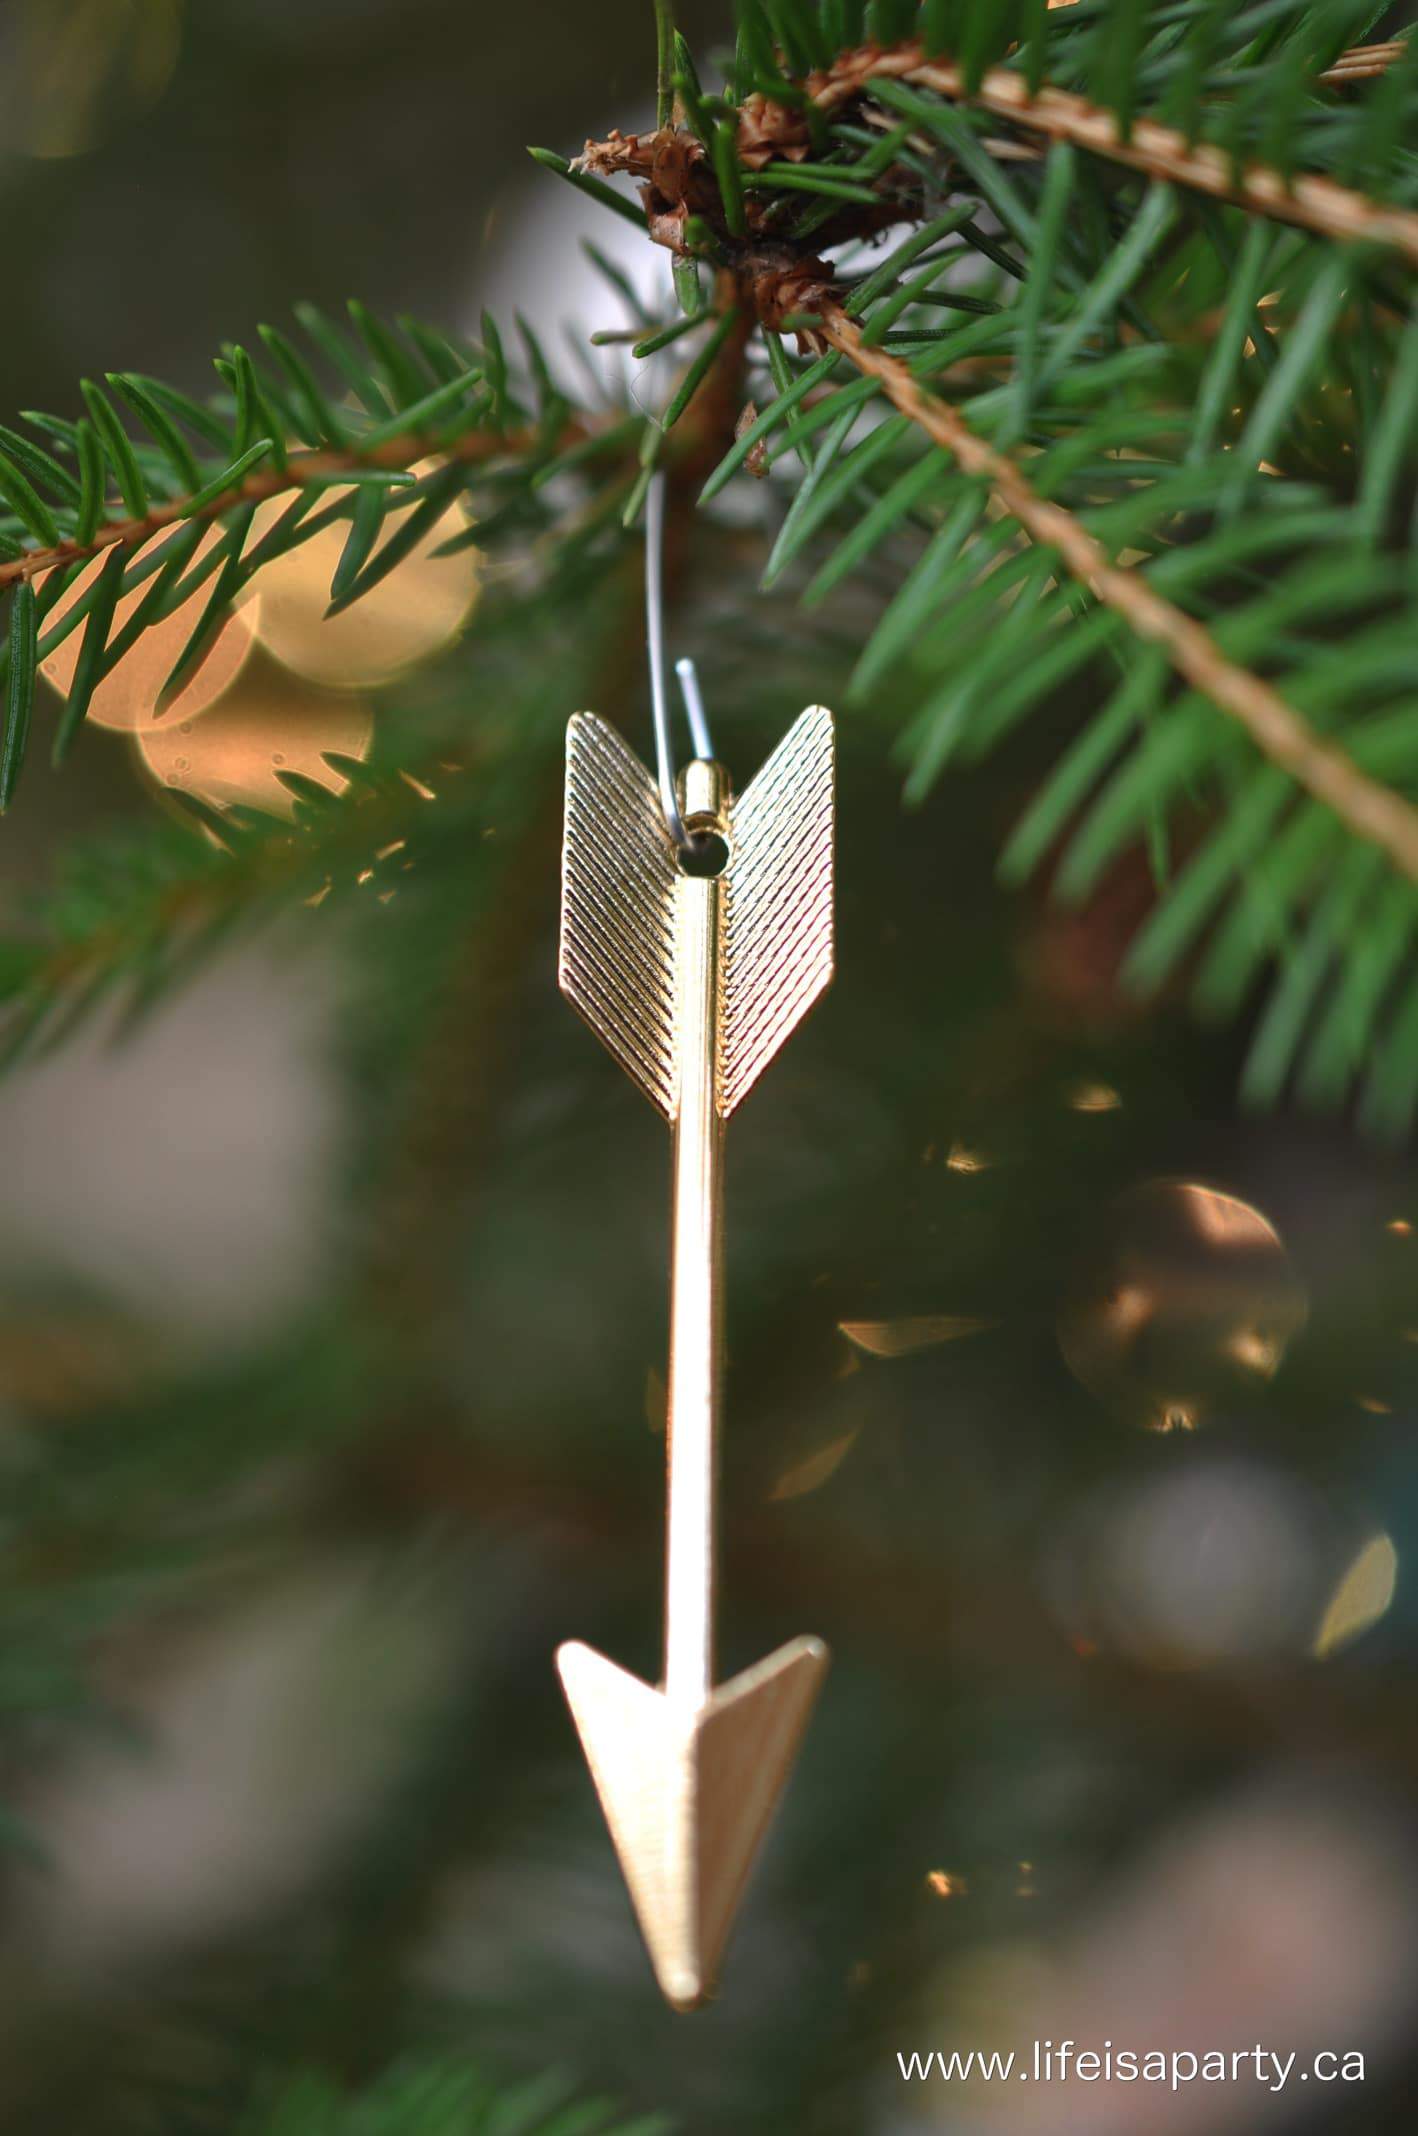
I also picked up these pretty gold arrows, in the scrapbook embellishment section of the craft store and turned them into Christmas decorations.

arrow Christmas tree decoration

My favourite on the tree are these pretty metal geometric ornaments -a garland from Target that I took apart and used as individual ornaments.

geometric Christmas tree ornament

Christmas Mantel

I love the simple Christmas mantel too.

Scandinavian Christmas mantel

Sometimes simple is best.

Scandinavian Christmas decor

What could be nicer than curling up by the fire on a cold winter's night, under the glow of the Christmas tree?  Nothing.

Scandinavian Inspired Christmas Home Tour

Especially with some Christmas cookies and a family board game.

Christmas fireplace
Christmas fireplace

Over on the couch, a collection of pillows and a good book await.

Scandinavian inspired Christmas living room

This pretty tray has become a bit of a favourite too.  I love lighting the candles in the evening.  I picked up the candles as a little birthday gift to myself last month, and I'm loving them.

Christmas home tour

Advent Calendar

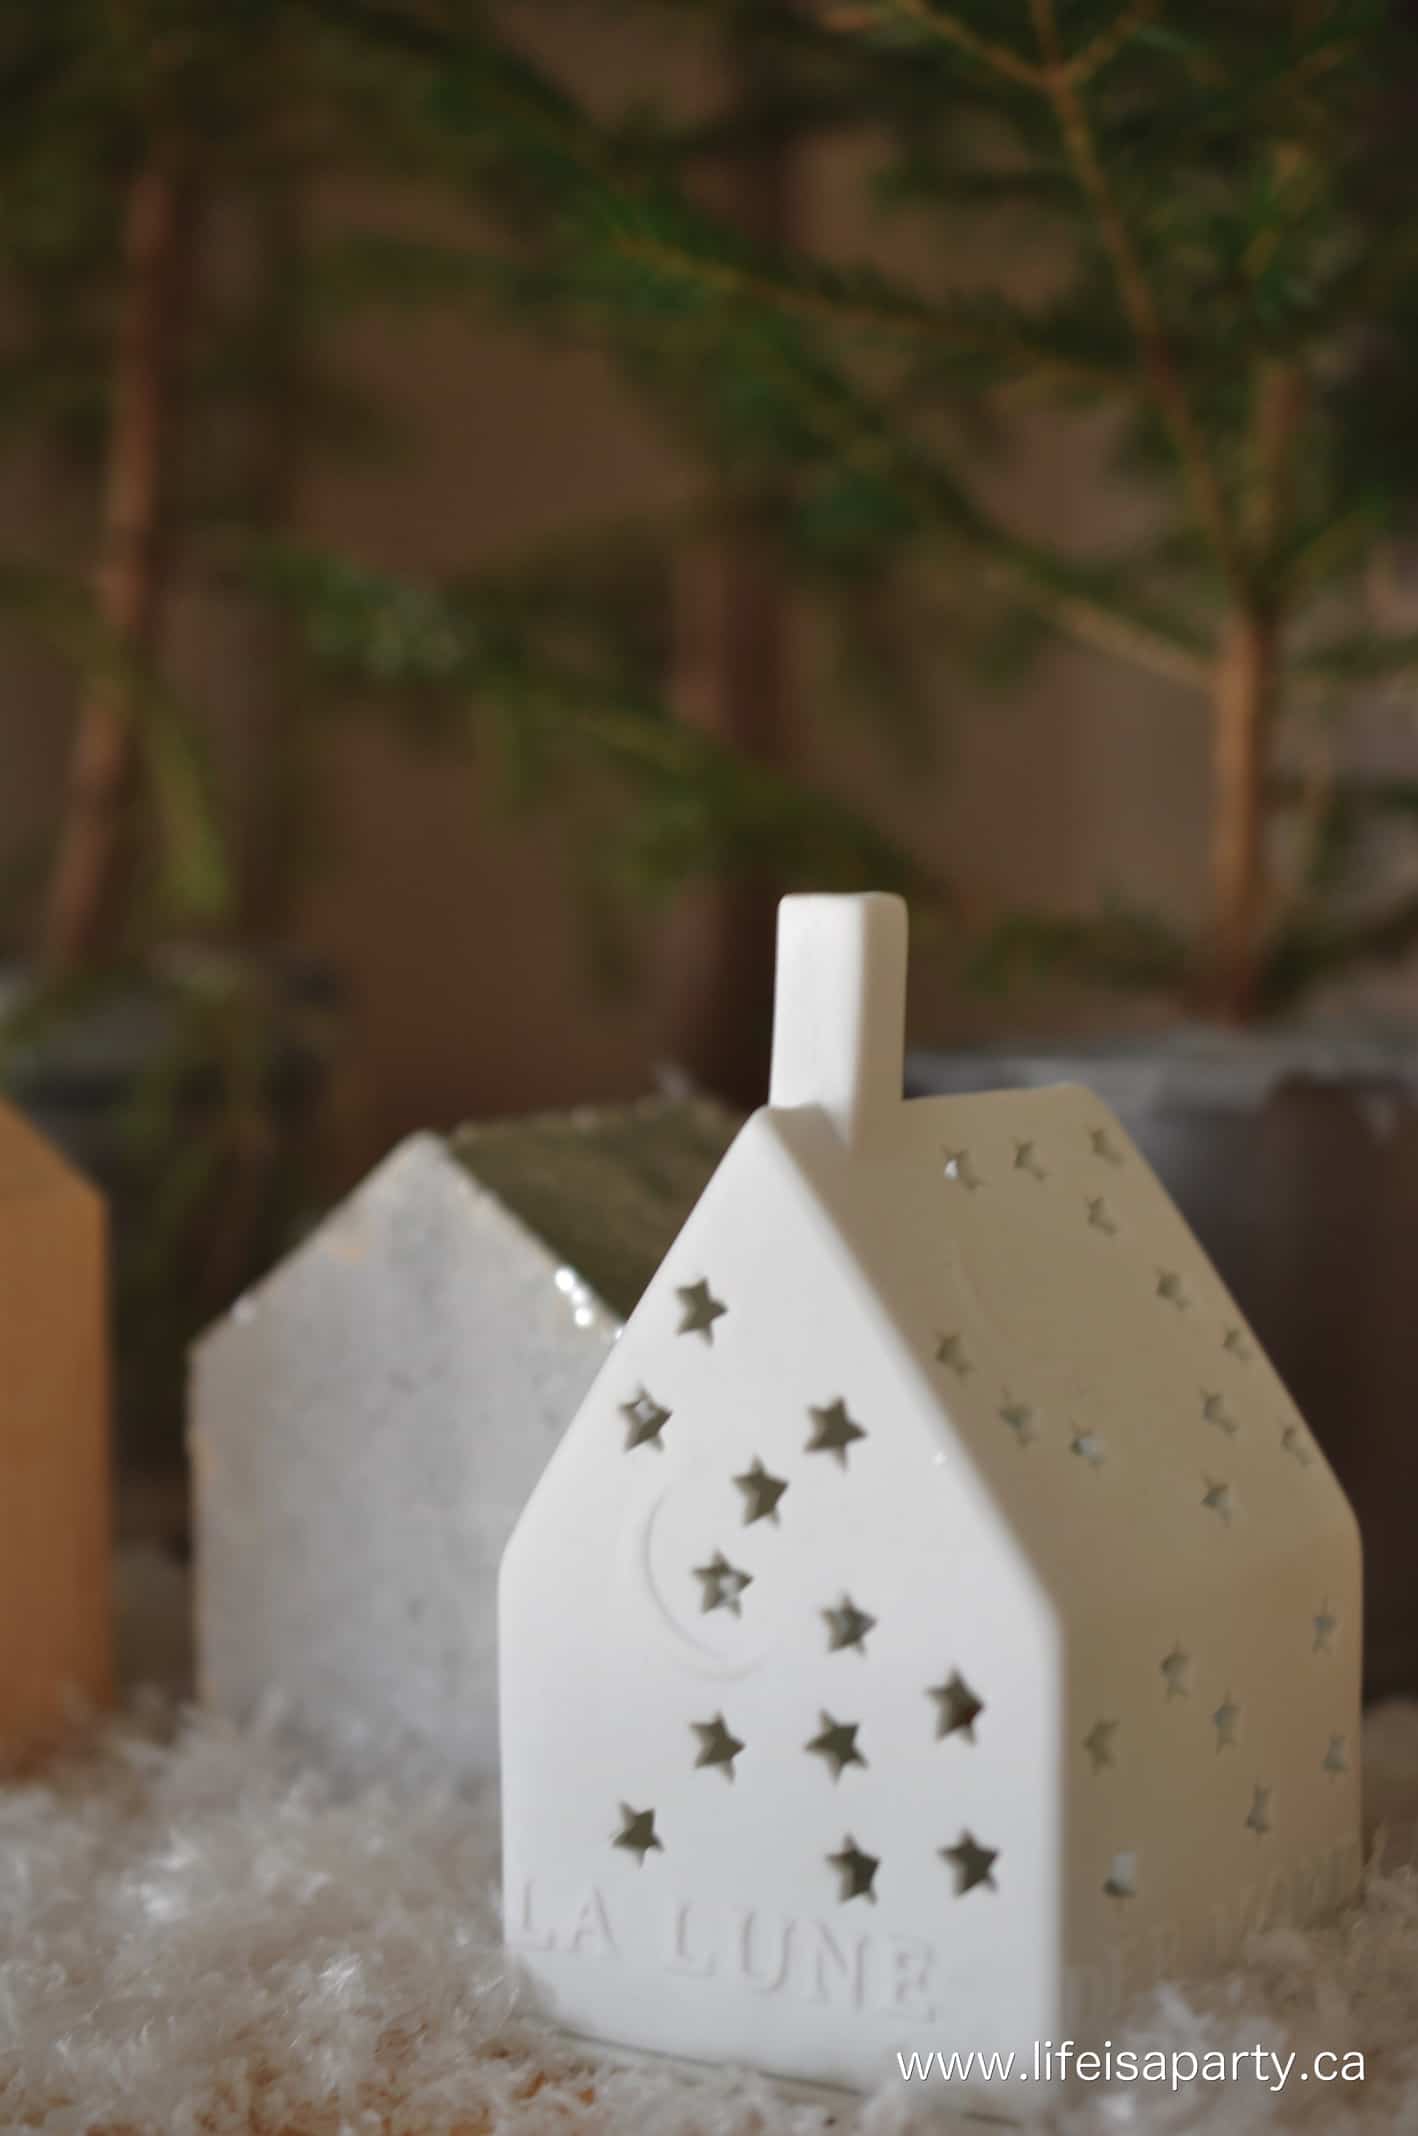
Across the room is the pretty little paper village Advent calendar I made for my girls.

Scandinavian Christmas art work

They are enjoying finding a little joke and Christmas riddle each day.

DIY advent calendar

Above the table, a new little project; some simple wooden Christmas art -see the tutorial to make your own here.

Scandinavian Inspired Christmas art work

"God Jul" is Merry Christmas is Swedish.

Kitchen

And last but not least, our sunny little kitchen.

Scandinavian Inspired Christmas kitchen

A simple reminder on the chalk board to "Have yourself a Merry little Christmas" -written by my youngest daughter.

Christmas chalk board art

And on the table, a collection of some pretty plants -because it's so nice to have something green and living this time of year, and the paper whites smell so pretty when I come down in the morning.

Scandinavian inspired Christmas kitchen

The view out the kitchen widow is to the forest behind our house, and the birch trees that look so beautiful this time of year.

Scandinavian Inspired Christmas Home

Thanks so much for coming by, and having a peek at my Scandi inspired simple Christmas tour.

I truly hope you and your family have a blessed Christmas, celebrating the light that's come into our darkness.

With the house all ready to receive our friends and family over the holidays and full of Scandinavian inspired Christmas decor, life really is a party!

You might also like our Scandinavian Christmas Home Decor Tour 2018 -Party I here.

Christmas Home Tour 2018 -Black and White Scandinavian design with a little boho. Lots of natural elements, cozy texture and Christmas twinkle lights.

Also check out our Scandinavian Christmas Decor Home Tour 2018 -Part II here.

Scandinavian Christmas Decor Home Tour 2018 -Part II: Rustic Scandi design, lots of white and natural elements with some vintage Xmas pieces.

You might also enjoy our Scandinavian Christmas Home Tour 2016 here.

Scandinavian Christmas Home Tour: Woodland Rustic Scandinavian Christmas decorations with lots of nature and forest inspired decor.

Crunchy Granola Recipe

Dec 4, 2015 · 2 Comments

Granola recipes.

This crunchy granola recipe makes the most satisfying chunky clusters you have ever had from a homemade batch. The secret is two things nobody else is doing: butter instead of oil for a richer, more indulgent flavor, and a simple oat flour technique that binds everything into big, crunchy clusters that hold together beautifully.

Granola recipes.
[feast_advanced_jump_to]

Quick Look

  • 📋 Recipe: Crunchy Granola Recipe
  • ⏲️ Ready In: 1 hour 45 minutes (15 minutes prep, 90 minutes baking)
  • 👪 Servings: 16
  • 🔪 Difficulty: Easy
  • 💭 Top Tip: Do not over-stir during baking or you will break up all the chunky clusters. Stir gently to keep big pieces intact.

Why You'll Love This Crunchy Granola Recipe

  • Real chunky clusters: The oat flour technique creates satisfying crunchy clusters that hold together beautifully.
  • Butter instead of oil: Richer, more deeply flavored, and more indulgent than any oil-based granola you have tried.
  • Three flavor variations: Choose from gingerbread spice, cranberry fruit and nut, or chocolate coconut.
  • Perfect for gifting: Package in mason jars for an impressive homemade hostess gift.
  • Make ahead friendly: Stores for weeks, perfect for planning ahead.

I developed and tested this crunchy granola recipe back in 2013 and have made it easily 100 plus batches since. My family requests it all the time, friends specifically ask for jars as gifts, and it has never failed me. The secret to perfect clusters is two things: minimal stirring during baking, and the oat flour technique that helps everything bind together without any extra ingredients. You can customize it with cranberries and dried fruit for a festive holiday version, or go rich and indulgent with chocolate chips and coconut. Or mix with anything you love. Either way, the result is the crunchiest, most flavorful homemade granola you will ever make.

Using butter rather than oil is what makes this recipe different from most. Butter creates a richer, deeper flavor that you simply cannot get from coconut oil or vegetable oil. It is the reason people ask for this recipe after trying it once.

I love using this as the granola on our yogurt parfait board. If you love easy breakfast recipes, you might also enjoy these jelly donut pancakes, easy food processor scones, easy overnight French toast casserole, or pumpkin waffles.

Ingredients

Crunchy granola ingredients laid out on wooden table including rolled oats, brown sugar, butter, vanilla, cinnamon, nutmeg, salt and mixed nuts.
  • Quick rolled oats: Half gets ground into oat flour to create binding power for chunky clusters. The other half stays whole for texture. Substitute a quarter with large flake oats for even more texture.
  • Raw nuts: Choose any combination totaling 3 cups. Almonds, walnuts, and pecans are our go-to, but pistachios, macadamia nuts, pumpkin seeds, or sunflower seeds all work beautifully.
  • Brown sugar and butter: This is the combination that sets this recipe apart. Butter creates a rich, deeply flavored coating that oil cannot match, and together with brown sugar it produces clusters with a genuinely indulgent taste.
  • Warm spices: Cinnamon and nutmeg bring cozy flavor to the base recipe. Adjust for your variation of choice.
  • Dried fruit and chocolate: Added after baking so they stay soft and do not get too crunchy. Cranberries, figs, raisins, coconut, and chocolate chips all work beautifully.

The Oat Flour Technique for Perfect Clusters

Most granola recipes rely on behavioral tricks to get clusters: press it down, do not stir, let it cool without touching it. Those tips help, but they are not enough on their own.

The real solution is structural. Grinding half the oats into oat flour before mixing creates a natural binding agent that holds everything together from the inside out. It is the reason this crunchy granola recipe produces big satisfying clusters consistently, batch after batch, without any special equipment or extra ingredients.

Three Flavor Variations

Gingerbread Granola

For a real gingerbread flavor, increase the cinnamon to 1½ teaspoons, add ¾ teaspoon ground ginger, and a pinch of cloves to the base recipe. The warm spices make your kitchen smell incredible while baking. This is the version we make every Christmas and it never lasts long.

Chocolate and Coconut Granola

After the granola cools completely, add chocolate chips and coconut flakes. Try white chocolate chips, milk chocolate chips, semi-sweet, or dark chocolate chips based on your preference. This version is always a huge hit and makes a beautiful holiday gift.

Cranberry Fruit and Nut Granola

Add dried cranberries along with other dried fruit like chopped dried figs, raisins, and flaked coconut after baking. You can use any combination of dried fruit you prefer. This version is festive and beautiful in a mason jar.

Expert Tips

The key to great crunchy granola with clusters is to not over-stir during baking. After the first 30 minutes, stir the granola gently so the top and edges do not burn. Keep some big chunks intact on that first stir. You will stir the mixture several more times during the 90 minute baking time, but always stir gently to preserve those satisfying clusters.

The oat flour technique does the heavy lifting for cluster formation. The gentle stirring and long, low bake does the rest.

How To Make Crunchy Granola

  1. Step 1: Put half the rolled oats in a food processor and grind into oat flour.
  1. Step 2: Combine the oat flour, remaining quick oats, nuts, cinnamon, and nutmeg in a large bowl and stir to combine.
  1. Step 3: In a small pan combine sugar, butter, and water and heat over medium heat until it boils, stirring occasionally. Remove from the heat and stir in the salt and vanilla.
  1. Step 4: Pour the butter mixture over the dry ingredients and stir to fully combine. Let it sit for 10 minutes. This step is important and helps form those crunchy clusters.
  1. Step 5: Pour the granola mixture onto a large baking sheet in an even layer. Bake at 300 degrees for 25 to 30 minutes. Stir gently and continue baking for a total of 1½ hours until crunchy and dry, stirring gently every 15 minutes so the edges do not burn. Be careful not to over-stir as you want to preserve those chunky clusters.
  1. Step 6: When finished baking, let the granola cool completely before adding dried fruit and chocolate chips. Store in an airtight container.
homemade chocolate chip and coconut granola

Gifting and Packaging

  • When to make for gifting: Bake up to 2 weeks ahead and store in airtight containers. Making it the first week of December and packaging 3 to 5 days before giving ensures peak freshness and crunch when recipients open their jars.
  • Mason jar presentation: Fill clean mason jars with granola, tie festive ribbons around the neck, and attach handmade tags. Recipients can reuse the jars after enjoying the granola, which makes it feel even more thoughtful.
  • Cellophane bags: Package granola in clear cellophane gift bags tied with festive ribbons for a simpler presentation. Add a gift tag with the recipient's name for a personal touch.
  • Recipe card addition: Include a printed recipe card with your gift so friends can make their own batch. It is one of those gifts people genuinely use.
  • Hostess gift idea: Bring a jar when attending holiday parties instead of flowers or wine. A beautifully packaged homemade food gift shows real thoughtfulness and is always appreciated.

Serving Suggestions

Christmas granola recipe

Serve this crunchy granola with yogurt, honey or maple syrup, and fresh fruit for an easy brunch. It is also delicious with smooth cottage cheese or simply with milk as a cereal. Try it as an ice cream topping for a simple but impressive dessert, or enjoy it by the handful as a snack.

For a complete brunch spread, use it as the centerpiece of a yogurt parfait board, or pair it alongside small batch pancakesor Baileys French toast.

Yogurt and granola breakfast board with yogurt, fresh fruit, and dried fruit.

More Breakfast Inspiration

  • Valentine breakfast board with heart-shaped waffles, heart-shaped eggs, bacon, sausage, fresh berries, and toppings on marble platter.
    Valentine Breakfast Board
  • Fluffy small batch pancakes for two ready to serve on a plate with syrup.
    Easy Small Batch Pancakes For Two Recipe
  • Old fashioned bear claw pastries with almonds on a cake plate.
    Old Fashioned Almond Bear Claw Pastries Recipe
  • Yogurt parfait board with fresh berries, granola, honey, peanut butter, dried fruit, and edible flowers on a wooden lazy Susan board.
    Yogurt Parfait Board

Frequently Asked Questions

How do I store granola?

Store completely cooled granola in an airtight container like a glass jar. It will keep fresh for up to 3 weeks at room temperature.

Can I make this granola ahead of time?

Yes! This granola is perfect for making ahead. Bake it up to 2 weeks before you need it and store in airtight containers until ready to gift or serve.

Why is my granola not chunky?

There are two keys to getting the perfect chunks. First, make sure you let the granola sit for 10 minutes before spreading it onto the baking sheet to bake. The liquids will absorb into the oat flour and bind it all together to form the chunks in the first place. And secondly, don't over-stir. Stir gently and keep large chunks intact.

Can I use quick oats instead of rolled oats?

Yes. I've made this with quick oats, instant oats, and rolled oats, and it always turns out fine. Use what you have.

What other dried fruits work in this granola recipe?

Try raisins, chopped dates, dried apricots, dried cherries, or any dried fruit that you like. Just be sure to add them after baking so they stay soft, not crunchy.

How do I package this as a gift?

Fill mason jars or cellophane bags with cooled granola. Tie with festive ribbons and add handmade tags. One batch fills approximately 4 pint-sized mason jars.

Can I make this granola gluten free?

Yes, use certified gluten free oats to make this recipe gluten free.

Why is my granola not crunchy?

The most common reason is under-baking. The full 90 minutes at 300 degrees is required to create that crunch. The long, and low bake is what drives out the moisture and develops real crunch. The granola should be golden brown and smell toasty when it is ready. It will firm up more as it cools.

If you try this crunchy granola recipe or any other recipe on my blog please leave a star rating and let me know how it went in the comments below. Thanks for visiting today!

Recipe

Granola recipes.

Crunchy Granola Recipe

The crunchiest homemade granola you will ever make, with big satisfying clusters thanks to a simple oat flour technique and butter instead of oil.
5 from 3 votes
Print Pin Rate
Course: Breakfast
Cuisine: American
Prep Time: 15 minutes minutes
Cook Time: 1 hour hour 30 minutes minutes
Total Time: 1 hour hour 45 minutes minutes
Servings: 16
Calories: 293kcal
Author: Dannyelle Nicolle-Ramjist

Ingredients

  • 1 lb. quick rolled oats or 12 oz of quick rolled oats and 4 oz large flake oats
  • 3 cups chopped raw nuts almonds, walnuts, and pecans or any you like
  • 1 teaspoon ground cinnamon
  • ½ teaspoon ground nutmeg
  • 1 cup brown sugar
  • ½ cup butter
  • ⅓ cup water
  • ½ teaspoon salt
  • 2 teaspoon vanilla extract
  • dried fruit and chocolate chips cranberries, chopped figs, raisins,flaked coconut are all good options

Instructions

  • To start with put half your quick oats (8 oz.) in a food processor and grind into oat flour.
    1 lb. quick rolled oats
  • Combine in a large bowl the oat flour, quick oats, nuts, cinnamon, and nutmeg and stir.
    3 cups chopped raw nuts, 1 teaspoon ground cinnamon, ½ teaspoon ground nutmeg, 1 lb. quick rolled oats
  • In a small pan combine sugar, butter, salt, and water and heat over a medium heat until it boils, stirring occasionally. Remove from the heat and stir in the vanilla.
    1 cup brown sugar, ½ cup butter, ⅓ cup water, ½ tsp salt, 2 tsp vanilla extract
  • Pour the melted butter wet ingredients mixture over the dry ingredients, and stir to fully combine. Let it sit 10 min.
  • Pour granola mixture onto a large cookie sheet in an even layer, and cook in a 300 degree oven for 25-30 min. Stir the mixture and keep cooking for a total of 1 ½ hours, until crunchy and dry, making sure to stir every 15 min. so the edges don't burn. Be careful not to over stir, you want to have some chucky clusters of granola.
  • When it's finished cooking, let it cool completely, and then add in the dried fruit, and/or chocolate chips. Store in an airtight container, like a glass jar.
    dried fruit and chocolate chips

Notes

  • The oat flour technique: Grinding half the oats into flour is what creates big chunky clusters. Do not skip this step.
  • Do not over-stir: Stir gently and infrequently to preserve cluster size. Stirring too aggressively breaks up the clusters before they set.
  • Storage: Store in an airtight container at room temperature for up to 3 weeks, or freeze for up to 3 months.
  • Gifting: Bake up to 2 weeks ahead for holiday gifting, so recipients have plenty of time to enjoy it at its freshest.
  • Gingerbread Version: Increase cinnamon to 1½ tsp, add ¾ teaspoon ground ginger, and a pinch of cloves for authentic gingerbread flavor.

Nutrition

Serving: 1g | Calories: 293kcal | Carbohydrates: 30g | Protein: 7g | Fat: 17g | Saturated Fat: 4g | Polyunsaturated Fat: 11g | Cholesterol: 12mg | Sodium: 101mg | Fiber: 4g | Sugar: 11g
Tried this Recipe? Tag me Today!Mention @LifeisaParty or tag #lifeisaparty!

About the Recipe Developer

I'm Dannyelle, a trained celebrant and former teacher who's been creating memorable celebrations for 15+ years. I developed and tested this granola recipe back in 2013, and have made easily 100+ batches over the years! My family requests it, friends ask for jars, and it's never failed. My work has been featured in Better Homes & Gardens and Country Living for party styling and seasonal entertaining. More about Life is a Party →

Rustic Snowy Christmas Tablescape

Dec 1, 2015 · 3 Comments

Rustic Snowy Chrismtas Tablescape: with faux snow, fresh greens, and winter berries and personalized DIY snow globe place cards.

Rustic Snowy Chrismtas Tablescape: with faux snow, fresh greens, and winter berries and personalized DIY snow globe place cards.

My project for Merry Mag is a pretty Rustic Snowy Christmas Tablescape, perfect for Christmas.
Merry mag holiday 2015 cover

I'm so excited to be contributing to Merry Mag this year!  It's an inspiring collection of holiday recipes, decor, crafts, and diy's to get you excited about Christmas.  Follow along on social media with #MerryMag  Special thanks to Melissa at The Sweet Escape for putting this all together, such a special project to be a part of.

Scandinavian Inspired Christmas

I'm going for a Scandinavian inspired look this Christmas so I piled lots of soft sheep skins and pillows on the chairs.  I wanted to keep things feeling light and bright, so the white tablecloth worked well as the foundation for the table.

Rustic Snowy Christmas Tablescape

Rustic Snowy Centre Piece

I wanted to create a layered effect so on top of the tablecloth, I added faux snow, and then this amazing old piece of hundred year old hemlock. salvaged from an old barn.

Christmas centre piece

On top of the plank table runner, I laid some boughs of white pine, and a few sprigs of pretty fresh snowberries.

vintage glasses as candle holders

I used some pretty gold candle holders, since Christmas is the season to celebrate the light.  The patterned glasses are some vintage juice glasses turned into votives.

I love the mix of the traditional gold, and vintage pieces, with the more modern geometrics.

DIY snow globe place cards

Rustic Christmas Place Settings

I set the table with simple white plates, and pretty gold cutlery.  The dot napkins and glasses add to the feel of snow.

rustic Christmas Tablescape

DIY Snow Globe Place Cards

My favourite detail of the table is the pretty little snow globe inspired place markers.  I started with some rustic wood coasters.  I added some more faux snow, and a little Christmas tree to each one, a few also got a sweet little plastic deer from the craft store.

Rustic Snowy Christmas Table

On top of each little scene I placed a mini cloche -from a set of cupcake holders that I had.

DIY snow globe place cards

Each little "snow globe" was turned into a place marker, by adding each guest's name, and a few pretty snowflakes.  I used a Crayola Window Writer marker in white to add the detail, and it washed off easily afterward with soap and water.

Christmas table ideas

The names are so subtle and pretty -and you could customize this idea to any message, and any colour scheme, since the markers come in a whole range of colours.

I love how simple and pretty the table turned out, great for Christmas, or as just a winter table.  Perfect for a cozy night in enjoying the warmth of good food, good drink, and good friends or for a Christmas celebration.

With a Rustic Snowy Christmas Tablescape like this, life really is a party!

Be sure to check out lots more amazing holiday ideas at Merry Mag!

More Inspiration

You might also like our Winter Tablescape here.

Also check out our Rustic Christmas Table here.

You might also enjoy Black and White Christmas Table here.

Christmas Gift Wrapping Party

Nov 30, 2015 · 1 Comment

Christmas Gift Wrapping Party: DIY personalized party decorations, dessert table, party drinks and DIY gift tags and gift wrapping ideas.

Christmas Gift Wrapping Party: Easy ideas for personalized party decorations, dessert table, and gift wrapping ideas.

Christmas Gift Wrapping Party: DIY personalized party decorations, dessert table, party drinks and DIY gift tags and gift wrapping ideas.

Over the weekend I had a little Christmas Gift Wrapping Party with some girl friends, and I’m excited to share all the details with you, and hopefully inspire you as we head into a busy season of entertaining.  This party is a great excuse to get together, and practical too, since we all have some gift wrapping to do in the next month.

Gift Wrapping Party DIY Decor

Let’s start with the pretty dessert table I set up for my guests to enjoy throughout the party. I used the lots of washi tape to create fun and easy party decorations.  My favourite little project was the sweet little deer treat jars.

DIY Christmas treat jars

Materials:

  • Super Glue
  • Mason Jars
  • Mini Plastic Deer (or other animals)
  • Gold Spray Paint
  • Gold Glitter Tape
To Make the Jar:
  1. I started out with the mason jars, and super glue.  I used some cute little plastic deer from the craft store, and glued them to the lids.
  2. Once the glue was dry, I spray painted the lids and deer with gold paint.
  3. When the paint was dry I cut a piece of gold tape to size, and wrapped it around the edge for the perfect finishing touch.

DIY treat jars

For the party, I filled the jars with chocolate covered almonds, a real favourite around here.  They were such an adorable addition to the dessert table, and everyone loved them.  They’d also be perfect for gift giving over the holidays, filled with any sweet treat.

DIY deer treat jars

Merry Christmas Bunting

I wanted to add a Merry Christmas bunting to the background of the dessert table, and made the “Merry” bunting by using a paper punch to make the large circles, and a hole punch for the top.  The gold is a piece of tape, that I added to the cardboard and trimmed to shape.  It looked great with the lights; perfect little bit of sparkle for the holidays.

gift wrapping party ideas

Paper Chains

I thought it’d be fun to add some old fashioned paper chains to the table too.  I used some thin brown cardboard (from the inside of some wrapping paper) to create the strips, and then used the washi tape to secure them.  I love the contrast of the simple brown paper and the glitz of the glitter tapes.

Christmas gift wrapping party

Washi Tape Bunting

I also made some bunting with the washi tape, by folding it over string and cutting the edges into a “V” shape.  Simple and so, so pretty.

Christmas gift Wrapping Party

Water Bottles and Straws

I wanted to give my guests a few drink options at the party.  I picked up some mini water bottles, and decorated some straws with tape, the washi tape are easy to write on with a marker -so I added a little “cheers” here.

washi tape party decorations

Hot Chocolate Bar

I also set up a fun hot chocolate bar.

Christmas Gift Wrapping Party

I made some hot chocolate and served it in a thermos.

washi tape party decorations

I loved the detail of the decorated spoons.

hot chocolate bar

I added in lots of flavoured marshmallows: chocolate, peppermint, mini vanilla, chocolate peppermint, and gingerbread, along with some chocolate santa sprinkles, whip cream and chocolate candy canes.

hot chocolate bar buffet

Food Labels

In addition to drinks, I offered some easy treats, and made simple labels with some cardstock and more washi tape.

Christmas dessert table

Cupcake Picks

I wanted to serve a few simple sweet treats for my guests.  I started with cupcakes, because nothing could be sweeter than cupcakes, especially with these adorable cupcake pics.

Christmas Gift Wrapping Party

A few vanilla, a few chocolate.

washi tape cupcake flags

Gift Wrapping Party Dessert Table

I also picked up some donuts, and set them up on a pretty milk glass cake plate, along with another cute mini bunting.

Christmas Gift Wrapping Party

Christmas dessert table

I  included some yummy popcorn, and some of my Cashew Coconut Brittle -get the recipe here.

Gift Wrapping Ideas

Once everyone had a treat…or two, it was time for some Christmas wrapping crafting.

I set up a table with lots of little gift wrapping projects on it.

gift Wrapping Party

Decorating Gift Bags

There were gift bags to decorate.  I liked keeping it simple with a stripe or two of pretty washi tape.  The perfect sparkle, and so many pretty colours and patterns to choose from.

Gift Wrapping Party

Gift Tags

I also made some gift tags out of cardboard, and we decorated those with more washi tape, and added some rubber stamp decorations.

Gift Wrapping Party

Gift Wrapping Party

Gift Tag Clips

Before the party, I painted some regular clothes pins with gold spray paint, and we added strips of washi tape to the side, perfect for clipping a gift tag, or ornament to a gift bag or package.

Christmas Gift Wrapping Party ideas

My last fun idea, was to add washi tape to a simple paper clip, and write a festive message.  Then we used the clips to attach gift tags to bags.

Christmas Gift Wrapping Party Ideas

So many simple ideas, that are easy to do, and add so much fun and sparkle to holiday wrapping.

Christmas Dessert Table

I had so much fun putting this little party together.  It was full of simple ideas that really created a special, personalized party.  I love that you could create the party decorations in any colour to match your holiday decor, and it was an inexpensive way to add big impact.

With a fun Christmas gift wrapping party, life really is a party.

More Inspiration

You might also enjoy our Christmas Fondue Party here.

Also check out our Merry and Bright Christmas Party here.

Merry and Bright Christmas Party Set: these party printables include menus, place cards, straw flags, conversations starters, cupcake picks, and a banner.

You might also enjoy our Christmas Dessert Party here.

Little House Advent Calendar

Nov 25, 2015 · 2 Comments

DIY paper house advent calendar.

DIY House Advent Calendar: A pattern for 3 sizes of paper houses, and printable number labels to make your own advent calendar village.

DIY paper house advent calendar.
[feast_advanced_jump_to]

I always like to do a little advent calendar for my girls.  This years house advent calendar might just be my favourite ever.

December mornings they're excited to get downstairs after they're dressed and beds are made, to open their advent calendar before breakfast.  My mom usually makes sure they each have a traditional chocolate advent calendar, and I've used all kinds of different advent calendar ideas with them over the past couple of years.  There have been Advent activity calendars with printable activity cards to do each day, lego, or play mobile to open,  and candles to burn to a certain point.  We loved doing a Children's Story Book Advent Calendar too. This year, since they're getting a little older I went with these sweet little houses for our Christmas countdown.

I think advent calendars are such a fun way to celebrate the holiday season.  These little houses are made of paper.  They're a simple way to make a little Christmas village.  They look so cute, and filled with a little surprise or fun activity they're sure to be lots of fun and a hit with kids of all ages.

how to make a house advent calendar

Materials:

  • white paper
  • old book pages
  • printed patterns 
  • printed numbers
  • scissors
  • glue

How To Make The House Advent Calendar

Free Printable Template

You can find the free printables to make your own house advent calendar in our Free Resource Library.  Subscribe below for free instant access.  

To make the fun advent calendar with little houses, start by printing out our free template for the houses from the Free Resource Library.

Use the free printable template to trace out 24 houses on to your paper.  We used regular copy paper, and also some old book pages.  Use a book from the thrift store for your book pages. You could also use scrapbook paper, or brown kraft paper too.  The printable advent calendar village has three different sizes;  small houses, medium houses, and slightly larger houses.  

Cut them out with a pair of scissors, and fold and glue them together. I used a glue stick to glue them together.  You could also use hot glue, or double-sided tape.

Next, print the free printable advent calendar numbers from the Free Resource Library, and cut them out and glue them to the houses.  One of the easiest ways to cut out the numbers is to use a large circle hole punch, if you have one that is the right size.

And lastly, fill your little houses with small items for each day, starting on December 1st.

I sat one night and watched a Christmas movie on tv while I snipped, folded and glued, in-between cups of tea.  In the morning the girls were all ohs and ahs when they saw their own little Christmas advent village.

DIY paper advent calendar

Setting Up Your Christmas Village

I set the houses up on our little side table, and added some cute wooden Christmas trees, and a sprinkling of snow.  These little additions are so much fun.  Mini bottle brush trees would work well too.  You could also add some fairy Christmas lights.

DIY house advent calendar Christmas village

What To Put Inside

Treats

Of course my girls wanted to know what was inside.

Is it candy?

Or is it mini toys or treasures?

Is it activities?

All of the above would be great choices.  Any small treats and small gifts would be great.  The houses are quite small, so look for small treats like a mini candy cane or very small toys, small Christmas decorations, or Christmas stickers would be a great thing to put inside.  A traditional chocolate would be a great idea also.

how to make your own advent calendar

Other Ideas For Advent Calendar Fillers

But this year I filled our Christmas calendar with jokes and Christmas picture puzzles.  It should make for a fun start to the day.  I found some online, printed them up and then rolled them and held them together with a little gold washi tape, or you could tie them with a little baker's twine.

Other ideas are to add different bible verses for each day, or a series of readings from the Christmas story.  

Another great option is to add a different random act of kindness for each day of the month of December.  Each day you have a different act to perform for a stranger by the end of the day.

Another great way to fill the countdown calendar is with different Christmas activities to do each day.  I think this idea is especially nice for younger kids.  Each day you do different fun activities right up to Christmas day.  I love this Christmas tradition because I think it helps kids realize that there's a lot more to the Christmas season than just Santa and gifts on Christmas morning.  It helps focus on advent activities for the whole family to do together, and shifts the focus from just material items to family togetherness in a fun and wonderful way.  I know doing an activity a day can seem a little overwhelming to parents, but I always suggest filling the fun Christmas activity calendar with really simple and easy activities that aren't too overwhelming.  If you need ideas, check out our printable advent activity cards with lots of great ideas.

I love how this little DIY advent calendar turned out.  It looks so, so pretty in the living room.  It's a delightful way to count down our way to the big day.

diy paper advent calendar

With a pretty little house advent calendar like this, life really is a party.

You might also like our Printable Christmas Advent Calendar Activities here.

Printable Christmas Advent Calendar Activities: with over 60 different activities to choose from pick 24 and make some special memories with your family this Christmas.

More Advent Ideas

Also check out our Children's Story Book Advent Calendar here.

storybook advent calendar

Cashew Coconut Brittle

Nov 23, 2015 · 14 Comments

Cashew coconut brittle recipe.

Cashew Coconut Brittle is the most delicious brittle recipe. This combination is so good. It makes the perfect homemade gift. You could substitute any other nut or nut combination. And, this recipe is quick, you can prepare it in about 15 minutes.

Cashew coconut brittle recipe.
[feast_advanced_jump_to]

What I Love About This Recipe

  • The classic brittle crunch and sweetness is so delicious.
  • The combination of cashew and coconut is a bit unexpected and it's so good!
  • If you love sweet and salty, just sprinkle a little flaky sea salt on top of the brittle before it sets.
  • It makes the perfect homemade gift that everyone loves and asks for again and again.
  • It keeps for weeks.
  • It's quick to make, it only takes about 15 minutes, plus set time.

I've made homemade brittle with peanuts many times, and it's very good.  But this combo, of coconut and cashews is AMAZING, worth the effort, and should secure the praise and admiration of your friends and family.  (Oversell?  Well, let's just say this coconut cashew brittle really is good then.)

Homemade Candy for Gift Giving

I love making homemade candy for gift giving.  This Butternut Crunch Toffee Recipe is one of my old standbys, that everyone loves. You might also like our Homemade Sponge Toffee. And another absolute favorite is our Homemade Caramel Apples, with the best caramel coating. Also try our Coconut Ice, and our Chocolate Walnut Fudge.

brittle pieces on a cutting board

Ingredients

Cashew cocnut brittle ingredinets in bowls on a table.

The star of the show for this cashew coconut brittle is of course, the cashews and the coconut. I just love the cashew flavors with the intense coconut flavor.

  • Cashews: You can use roasted or raw cashews in this recipe, whichever is your preference. Pieces or whole cashews are fine. I used unsalted cashews, but if you only have salted cashews, just omit the salt later in the recipe. That sweet salty combo is pretty great.
  • Coconut: This recipe is made with unsweetened flakes. Feel free to use sweetened coconut if that's what you have, and flaked or shredded coconut can be used interchangeably here.
  • Corn Syrup: Using corn syrup in brittle helps guard against the sugar crystallizing and creating a grainy brittle. Corn syrup helps create a smooth and never grainy coconut cashew brittle texture.
  • Salt: Add a pinch of salt to the brittle mixture to help balance out the sweet. Love the salty and sweet combo? Try using salted cashews or add a sprinkle of sea salt over the warm coconut cashew brittle.

Expert Tip

Make sure to pre-measure the cashews and coconut, and have your vanilla and baking soda nearby. When the brittle reaches the right temperature you will want to quickly add the last ingredients.

Substitutions

You can substitute any nuts for the cashews and coconut. You want the total to equal 2 ½ cups. You may use salted cashews in place of unsalted cashews, just remove the salt from the recipe.

Variations

Try using some other nuts and combinations for different flavor variations. Feel free to play around or even go with the classic peanuts. It's as simple as swapping out the 2 ½ cups total (I did 1 ¼ cashews and 1 ¼ coconut here) with any nut of your choice.

Use all cashews and no coconut for cashew brittle.

Use peanuts for peanut brittle

Try using almonds, or any other nut or combination of nuts equaling 2 ½ cups total.

Equipment

You will need a candy thermometer for this recipe. Attach it to the side of pan, making sure that it doesn't rest on the bottom of the pan so that it's an accurate reading.

Also, use a pastry brush dipped in cold water to brush down the sides of the pan to help prevent recrystallization during the cooking process of the brittle.

tin of brittle for Christmas gift giving

Storage

Store your finished brittle at room temperature in an airtight container. It lasts up to a month.

It's perfect for gift giving a small tin or wrapped in a cellophane bag.

cashew coconut brittle pieces close up

How To Make Cashew Coconut Brittle

Cashew brittle ingredents in a white pan.
  1. Step 1: Spray a 9 x 13 baking tray with cooking spray, and set aside. In a medium saucepan combine the sugar, corn syrup, water and salt.
Cashew coconut brittle ingredients boiling in a pan.
  1. Step 2: Bring to a boil over a medium-high heat, stirring until the sugar is dissolved.
Adding coconut and cashews to homemade brittle mixture during cooking.
  1. Step 3: Cook, swirling occasionally, until the mixture reaches 238 degrees on a candy thermometer, brushing the sides of the pan down with a pastry brush dipped in a cup of water, occasionally to prevent re-crystallization. When the temperature reaches 238 degrees, mix in the coconut and cashews, and stir frequently to combine cashews and coconut and to prevent the nuts from burning, cooking until the mixture turns to a golden amber colour.
Homemade cashew brittle in pan.
  1. Step 4: Add the vanilla and baking soda to the mixture and stir to combine, it may foam up slightly.
Spreading homemade brittle in a pan to set.
  1. Step 5: Quickly spread onto the baking sheet, using a spatula sprayed with cooking oil to smooth it.
Homemade brittle recipe in a glass baking dish.
  1. Step 6: Let the brittle cool completely, then break into pieces. Store in an airtight container at room temperature for up to a month.
nut brittle stack close up

Frequently Asked Questions

Why put baking soda in brittle?

The baking soda reacts and creates carbon dioxide. This aerates the caramel making it less dense and helping to create the characteristic brittle snap of the candy, and guarding against it being soft and chewy.

Why is my brittle grainy?

Your sugar may have recrystallized, causing a grainy texture. to help prevent this use a pastry brush dipped in cold water and brush down the sides of the pan several times as it cooks to help prevent this problem.

Why didn't my brittle set?

If your brittle didn't set you may not have cooked it long enough. Be sure that it reaches 238 degrees on a candy thermometer before removing it from the heat.

More Homemade Candy Recipes

  • Close up of pink heart-shaped strawberry marshmallows dusted with coating.
    Homemade Strawberry Marshmallows with Freeze Dried Strawberries
  • Soft, fluffy homemade rainbow marshmallows with beautiful pastel layers.
    Rainbow Marshmallows
  • Easy chocolate walnut fudge made in the microwave with sweetened condensed milk, cut into squares.
    Easy Chocolate Walnut Fudge -Mrs. Weasley's Recipe
  • Homemade pink and white coconut ice recipe, cut into squares on parchment paper.
    Coconut Ice Recipe (Pink & White Coconut Candy)

If you tried this Cashew Coconut Brittle Recipe or any other recipe on my blog please leave a star rating and let me know how it went in the comments below. Thanks for visiting today!

Recipe

Cashew coconut brittle recipe.

Cashew Coconut Brittle

Video

Sweet, brittle candy with cashews and coconut.
5 from 2 votes
Print Pin Rate
Course: Candy, Desserts
Cuisine: American
Cook Time: 15 minutes minutes
Total Time: 15 minutes minutes
Servings: 20
Calories: 162kcal
Author: Dannyelle Nicolle-Ramjist

Ingredients

  • 1 ½ cups sugar
  • ½ cup light corn syrup
  • ¾ cup cold water
  • pinch of salt
  • 1 ¼ cup cashews
  • 1 ¼ coconut or replace the cashews and coconut for 2 ½ cups total of another nut or combination of nuts
  • 1 teaspoon vanilla
  • 1 teaspoon baking soda
  • cooking oil spray

Instructions

  • Spray a 9 x 13 baking tray with cooking spray, and set aside.
  • In a medium saucepan combine the sugar, corn syrup, water and salt.
  • Bring to a boil over a med.-high heat, stirring until the sugar is dissolved.
  • Cook, swirling occasionally, until the mixture reaches 238 degrees on a candy thermometer, brushing the sides of the pan down with a pastry brush dipped in a cup of water, occasionally to prevent re-crystallization.
  • When the temperature reaches 238 degrees, mix in the coconut and cashews, and stir frequently to combine cashews and coconut and to prevent the nuts from burning, cooking until the mixture turns to a golden amber colour.
  • Add the vanilla and baking soda to the mixture and stir to combine, it may foam up slightly.
  • Quickly spread onto the baking sheet, using a spatula sprayed with cooking oil to smooth it.
  • Let the brittle cool completely, then break into pieces. Store in an airtight container at room temperature for up to a month.

Notes

Make sure to pre-measure the cashews and coconut, and have your vanilla and baking soda nearby. When the brittle reaches the right temperature you will want to quickly add the last ingredients.
Store in an airtight container.
Optional: love the combination of sweet and salty?  Before the brittle sets in the baking dish, while it's still warm, sprinkle the top with a little flaky sea salt.

Nutrition

Serving: 1g | Calories: 162kcal | Carbohydrates: 27g | Protein: 1g | Fat: 6g | Saturated Fat: 2g | Polyunsaturated Fat: 4g | Sodium: 145mg | Fiber: 1g | Sugar: 24g
Tried this Recipe? Tag me Today!Mention @LifeisaParty or tag #lifeisaparty!

DIY Breakfast Gift Basket with Homemade Pancake Mix

Nov 16, 2015 · 28 Comments

Breakfast gift basket filled with coffee beans, homemde pancake mix, pastries and more.

Looking for a thoughtful homemade gift? This breakfast gift basket includes everything for a perfect morning meal, including homemade pancake mix, maple syrup, pastries, and coffee. Perfect for teacher gifts, hostess gifts, or holiday giving!

Breakfast gift basket filled with coffee beans, homemde pancake mix, pastries and more.
[feast_advanced_jump_to]

A Quick Look At This Gift

📋 Gift: DIY Breakfast Gift Basket
⏲️ Assembly Time: 15 minutes (plus pancake mix prep)
🎁 Perfect For: Teachers, hostesses, neighbors, new parents
💰 Budget: $25-40 depending on items chosen
💭 Top Tip: Include real maple syrup and package your homemade pancake mix in a vintage mason jar for an extra special touch!

Why You'll Love This Breakfast Gift Basket

  • Thoughtful and personal with homemade pancake mix recipe included.
  • Perfect for any occasion from holidays to thank you gifts.
  • Budget-friendly at $25-40 depending on items you choose.
  • Mostly non-perishable so it can be assembled ahead of time.
  • Actually useful giving practical breakfast items people will enjoy.

This breakfast gift basket is the perfect thoughtful gift for the holidays and beyond. A bottle of wine is nice, flowers are sweet, but I really love giving something practical yet special and more personal. Everyone would love a gorgeous breakfast basket like this one. This basket makes a great teacher gift or hostess gift during the holidays.

I love writing on the card for dinner party hosts: "You made dinner, so I took care of breakfast." It's the perfect hostess gift. But really any breakfast lover would appreciate this basket full of gourmet treats. These beautiful goodies turn a lazy Sunday into a glorious morning.

If you're looking for more gift ideas, you might also enjoy our Small Batch Pancakes For Two Recipe, Holiday Hostess Wine and Cheese Gift Basket, or Printable Christmas Gift Card Holders.

What to Put in a Breakfast Gift Basket

The key to a great breakfast gift basket is including a mix of homemade and store-bought items. Here's what we included in our basket:

Essential Items

  • Homemade pancake mix (recipe below) in a vintage mason jar
  • Real maple syrup (not pancake syrup, the real stuff!)
  • Gourmet coffee (we used Starbucks Holiday Blend)
  • Fresh pastries from a local bakery
  • Pretty basket or container to hold everything

Optional Add-Ins

  • Butter or whipped cream (if delivering locally)
  • Scented candle for ambiance
  • Cloth napkins in holiday colors
  • Fresh berries (if gifting immediately)
  • Flavored syrups or preserves
  • Hot chocolate mix
  • Tea bags for non-coffee drinkers
Breakfast gift basket ideas

Choosing Your Basket Items

The Pancake Mix

My favorite part of this basket is the homemade pancake mix with real maple syrup. You could substitute with store-bought pancake mix or waffle mix, but homemade is special. As a Canadian, we had to include real maple syrup for that classic combination. You could also add flavored syrups or strawberry preserves.

I grew up on store-bought pancake mix. Then my husband started making pancakes from scratch, and they're amazing. These are worth the tiny bit of effort. Once you've tried these, you'll never go back. We used a vintage mason jar to package our pancake mix, but any pretty jar, canister, or clear cellophane bag works well.

For chocolate lovers, include dark chocolate chips or milk chocolate chips. Add them right into the dry pancake mix or pop a bag into the basket.

Breakfast in Bed Gift Basket ideas

The Pastries

Breakfast pastries are one of life's greatest pleasures. It's like permission to start your day with dessert! We went to our local bakery and picked up a few fruit-filled pastries. You'll want to give these in a timely manner so they're still fresh for the recipients.

Best pastry options:

  • Homemade banana bread wrapped in parchment
  • Danish or almond croissants
  • Scones or muffins
  • Cinnamon rolls
  • Chocolate croissants for chocolate lovers
  • Chocolate chip muffins

Looking for a non-perishable option? You could include a baking mix for muffins or scones.

The Coffee

We couldn't make a breakfast basket without coffee. Any coffee lover would never start the day without a cup or two. We added holiday blend for a nod to the season.

Other great options include tea, or hot chocolate mix (see our homemade hot chocolate mix recipe).

A beautiful set of porcelain coffee mugs makes a great addition too.

The Basket

We found a pretty wire basket as our base. A wicker basket works beautifully too. You might also turn your basket into a bed tray gift using a bamboo bed tray with fold-out legs. Pile your gifts on top and wrap the whole thing in cellophane for a perfect breakfast in bed gift tray.

Our wire basket is lined with pretty cloth napkins, with all the treats piled in. It's nice to include a variety of colors. Classic red and green work perfectly for holidays. We used fresh greenery and berries on the front, tied with baker's twine for a festive seasonal look.

How to Assemble Your Breakfast Gift Basket

breakfast in bed basket

Step 1: Make the Pancake Mix

Combine the dry ingredients from the recipe below. Package in a pretty mason jar or container. Attach the free printable with instructions for the wet ingredients.

Step 2: Choose Your Container

Select a sturdy basket, mixing bowl, or bed tray that's big enough to fit all your items. Line the bottom with tissue paper, crinkle paper, or cloth napkins.

Step 3: Arrange Your Items

Start with the tallest items in the back (coffee bags, syrup bottles).
Place medium items in the middle (pancake mix jar, pastry boxes).
Position smaller items in front (candles, small jars).
Fill gaps with tissue paper or shredded paper to keep everything secure.

Step 4: Add Finishing Touches

Tie a ribbon or baker's twine around the handle. Add fresh greenery, berries, or a small ornament for seasonal flair. Attach a gift tag with your personal message.

Step 5: Wrap for Gifting

If transporting, wrap the entire basket in clear cellophane and tie at the top with a big bow. This keeps everything secure and looks polished.

Homemade Pancake Mix Recipe

DIY pancake mix

This homemade pancake mix is simple to make and seriously delicious. The pancakes turn out fluffy and light every time.

For Gift Giving

Combine the dry ingredients, put them in a pretty container, and attach our free printable with the wet ingredient instructions. The printable is available in our Free Resource Library. Subscribe below for instant access. Check your email for the password. Don't see it? It might have gone to your junk folder by mistake, so check there too.

To Make the Pancakes

If you're making these for yourself, combine the wet ingredients in another bowl. Stir dry and wet together until just combined. Be careful not to overmix. Cook on a hot, greased griddle or frying pan until golden brown, flipping once little bubbles appear.

Creative Breakfast Gift Basket Ideas

Theme Variations

  • New Parent Basket: Focus on grab-and-go items: granola bars, instant oatmeal packets, protein bars, travel mug, and coffee. New parents will appreciate quick breakfast options during sleepless nights.
  • Brunch Basket: Include champagne or sparkling juice, fresh berries, croissants, jam, and mimosa mix for a special brunch celebration.
  • Coffee Lover Basket: Feature multiple coffee varieties, flavored syrups, biscotti, coffee mug, and a small french press or pour-over setup.
  • Family Breakfast Basket: Include kid-friendly items like chocolate chip pancake mix, fruit, juice boxes, cereal, and family-sized portions.
  • Healthy Breakfast Basket: Focus on nutritious options: homemade granola, steel-cut oats, honey, fresh fruit, green tea, and Greek yogurt (if delivering locally).
  • College/University Student Care Package: Send exam survival essentials: instant oatmeal packets, coffee or energy drinks, granola bars, pop-tarts, easy mug muffin mix, and a gift card to their favorite coffee shop.

Seasonal Adaptations

  • Christmas Morning Basket: Red and green colors, peppermint hot chocolate mix, gingerbread pancake mix, holiday blend coffee, candy cane stirrers.
  • Easter Basket: Spring colors, lemon pastries, berry preserves, herbal tea, fresh flowers.
  • Mother's Day or Father's Day: Personalize with their favorite coffee, special pastries, and a handwritten note about lazy Sunday mornings.
  • Teacher Appreciation: Include an apple-themed item, school colors, and a note thanking them for all they do.

Expert Tips for the Perfect Breakfast Gift Basket

  • Use real maple syrup. The authentic stuff makes a huge difference. Skip the imitation pancake syrup and invest in real maple syrup for a truly special gift.
  • Package homemade items beautifully. Use mason jars, tie with twine or ribbon, and place the pastries in a clear celophane bag.
  • Mix homemade and gourmet store-bought. You don't need to make everything. Combine your homemade pancake mix with high-quality purchased items for the best of both worlds.
  • Consider shelf life. Most items in our basket are non-perishable, so you can assemble it ahead of time. Only add fresh pastries or berries if gifting immediately. Change these for non-perishable items if you need to.
  • Think about your recipient. Does the teacher prefer tea over coffee? Is your neighbor gluten-free? Personalize based on what you know they'll love.
  • Don't overfill. A thoughtfully curated selection looks more elegant than a crammed basket. Quality over quantity.
  • Include the recipe card. If you're giving homemade pancake mix, be sure to include our free printable with the wet ingredients needed and instructions.

Budget-Friendly Shopping Tips

  • Hit the dollar store for baskets, tissue paper, and basic items. Many dollar stores carry surprisingly nice containers.
  • Shop sales and clearance. Stock up on coffee, syrup, and packaged goods when they're on sale. Store for future gift giving.
  • Buy in bulk for multiple baskets. If you're making several baskets, buy pancake mix ingredients, coffee, and other staples in larger quantities.
  • Use what you have. That pretty bowl or basket in your cupboard makes a great container. Repurpose what you own.
  • Make your own mixes. Pancake mix, hot chocolate mix, and granola are all easy to make at much lower cost than gourmet versions.

Frequently Asked Questions

What should I put in a breakfast gift basket?

The essentials include a main breakfast item (pancake mix, granola, or muffins), a beverage (coffee or tea), toppings (syrup, jam, or honey), and something sweet (pastries or treats). Add personal touches based on what you know the recipient loves.

How much does it cost to make a breakfast gift basket?

A basic breakfast gift basket costs $20-40 depending on items chosen. You can keep costs down by making items like pancake mix, granola, or baked goods yourself. Buying ingredients on sale and shopping dollar stores for the basket and filler helps too.

Can I make a breakfast basket ahead of time?

Yes! Most items in a breakfast gift basket are shelf-stable. You can assemble it weeks ahead if using non-perishable items like coffee, syrup, and packaged mixes. Only add fresh pastries or berries on the day you're giving it, or skip these items and add more non-perishable items instead like dried fruit, and muffin or scone baking mix.

What container should I use for a breakfast basket?

Wire baskets, wicker baskets, mixing bowls, bed trays, or even a decorative crate all work beautifully. Choose something the recipient can reuse. A mixing bowl with a pouring spout is perfect for someone who'll actually use it to make the pancakes! We love the vintage look and used a vintage wire basket.

How do I package a breakfast gift basket for transport?

Wrap the entire assembled basket in clear cellophane, gather at the top, and tie with a large ribbon or bow. This keeps items secure during transport and looks polished. Add a gift tag to the outside. Or keep it just tucked in the basket for a simpler look, like we did.

Can I include refrigerated items in my breakfast gift basket?

If you're delivering locally and the recipient can refrigerate immediately, yes! Items like butter, cream cheese, bacon, fresh berries, and yogurt make great additions. Just note on the card that items need refrigeration.

What's the best way to present homemade pancake mix?

Package the dry pancake mix in a mason jar, clear container, or cellophane bag tied with ribbon. Be sure to attach the free printable tag with wet ingredients and instructions listed.

How long does homemade pancake mix last?

Stored in an airtight container, homemade pancake mix keeps for 2-3 months at room temperature. You could Include a "use by" date on your gift tag so recipients know it's fresh.

Can I make this basket gluten-free or vegan?

Absolutely! Use gluten-free pancake mix, include dairy-free milk and butter alternatives, and choose pastries from a gluten-free bakery. Many items like coffee, syrup, and jam are naturally allergen-friendly.

breakfast gift basket

More Thoughtful Gift Ideas

  • DIY hot chocolate mix recipe in a mason jar.
    DIY Hot Chocolate Mix Gift Idea
  • Granola recipes.
    Crunchy Granola Recipe
  • DIY wine and cheese basket with wine bottles, wrapped cheese, fruit, nuts and crackers in wire basket.
    Wine and Cheese Basket: Easy DIY Guide
  • Cashew coconut brittle recipe.
    Cashew Coconut Brittle

If you create this breakfast gift basket or any other ideas from my blog, please let me know how it went in the comments below. I'd love to hear who you gifted it to! Thanks for visiting today!

Recipe

Breakfast gift basket filled with coffee beans, homemde pancake mix, pastries and more.

Homemade Pancakes

Fluffy and light homemade pancakes with this simple to make pancake mix.
5 from 1 vote
Print Pin Rate
Course: Breakfast
Cuisine: American
Prep Time: 15 minutes minutes
Total Time: 15 minutes minutes
Servings: 12
Calories: 122kcal
Author: Dannyelle Nicolle-Ramjist

Ingredients

Dry Ingredients

  • 1 ½ cups all-purpose flour
  • 3 tablespoons sugar
  • 1 ½ teaspoons baking powder
  • ½ teaspoon salt

Wet Ingredients

  • 1 ½ cups milk optional: substitute buttermilk for regular milk
  • 2 eggs
  • 3 tablespoon melted butter
  • ½ teaspoon vanilla

Instructions

  • Whisk all the dry ingredients together in a bowl, and then pour into a pretty container for gift giving, and be sure to attach the rest of the ingredients and instructions with our free printable.
  • If you're making them for yourself, combine the wet ingredients in another bowl. Stir dry and wet together until just combined, be careful not to over mix. Cook on a hot, greased griddle or frying pan until golden brown -flipping sides once little bubbles begin to appear. Enjoy!

Nutrition

Serving: 1g | Calories: 122kcal | Carbohydrates: 17g | Protein: 4g | Fat: 4g | Saturated Fat: 2g | Polyunsaturated Fat: 2g | Cholesterol: 41mg | Sodium: 198mg | Sugar: 5g
Tried this Recipe? Tag me Today!Mention @LifeisaParty or tag #lifeisaparty!

How To Dry Herbs

Nov 12, 2015 · Leave a Comment

How To Dry Herbs -easy hanging method anyone can do at home. Enjoy garden herbs year round by drying them to use in the winter.

How To Dry Herbs -easy hanging method anyone can do at home. Enjoy garden herbs year round by drying them to use in the winter.
How To Dry Herbs -easy hanging method anyone can do at home.  Enjoy garden herbs year round by drying them to use in the winter.

If you've ever wonder how to dry herbs, it's easier than you might think.  And it's the perfect way to preserve them and enjoy them all winter long.

This fall has been so nice, and so warm (she said with fingers crossed not wanting to jinx anything) that last week there was still time to clip a few herbs from my garden.

fresh sage plant

I ran out of dried sage a little while ago, and realized I had better pick some and hang it up to dry for my sage and onion stuffing on Christmas day.

It's very simple to dry your own herbs.

bundles of herbs for drying

Collect Your Herbs and Tie In Bundles

Just clip some herbs from your garden, and tie in small bundles.  While I was getting the sage, I thought I may as well dry a little thyme and oregano too, since winter is coming.

hanging herbs to dry

Hang To Dry

Once you've tied your bundles, just find somewhere to hang them.  It will take a few weeks for them to dry out.

sage hanging to dry

How Do You Know When They're Dry

You'll be able to tell when the herbs are dry by touching them -they won't be flexible anymore.

Storing Dried Herbs

Store your dried herbs in an airtight container and enjoy them in your cooking all winter.

dried sage in a mason jar

With dried herbs from your garden this winter, life really is a party.

You might also like our Tin Can Herb Garden here.

Getting the Garden Ready For Winter and A Tin Can Herb Garden: dig up some herbs at the end of the garden season and bring them in to enjoy indoors.

Also check out our Teacup Fairy Village Garden here.

Teacup Fairy Village Gardens -use teacups and teapots to create these whimsical miniature fairy gardens with polymer clay houses and mushrooms.

You might also enjoy How To Make A Fairy Garden House here.

Homemade Sponge Toffee Candy Recipe

Nov 9, 2015 · 23 Comments

Homemade sponge toffee recipe.

Homemade Sponge Candy Recipe: How to make sponge toffee, including some failed attempts and all the tricks to make it a success. The perfect gift to make for friends and family.

Homemade sponge toffee recipe.
[feast_advanced_jump_to]

I thought I'd share a homemade sponge candy recipe, because if your peeps are anything like mine the homemade gift they really want is something super yummy they can eat.  Sponge toffee goes by lots of different names.  It's sometimes called honeycomb toffee, hokey pokey, puff candy, buffalo sponge candy, seafoam candy, cinder toffee, or angel food candy.  Most of the names come from the unique texture of the candy.  It's a crunchy toffee but also an airy candy, because the toffee is full of bubbles.  It's sticky and crunchy but also has an airy texture.  This delicious candy is made from simple ingredients and is the perfect treat for gift giving.  Serve it as is, add a sprinkle of fleur de sel, or dip it in melted chocolate and package it in a beautiful bag or tin as a gift.

My First Attempt At Sponge Candy

I've never made a sponge candy recipe before, but broke out my trusty candy thermometer and decided to give it a try for the first time.  As with any candy recipe, the directions are really specific.  It's science after all, so no "a little bit of this, a little bit of that"  it's more like a controlled chemistry experiment.
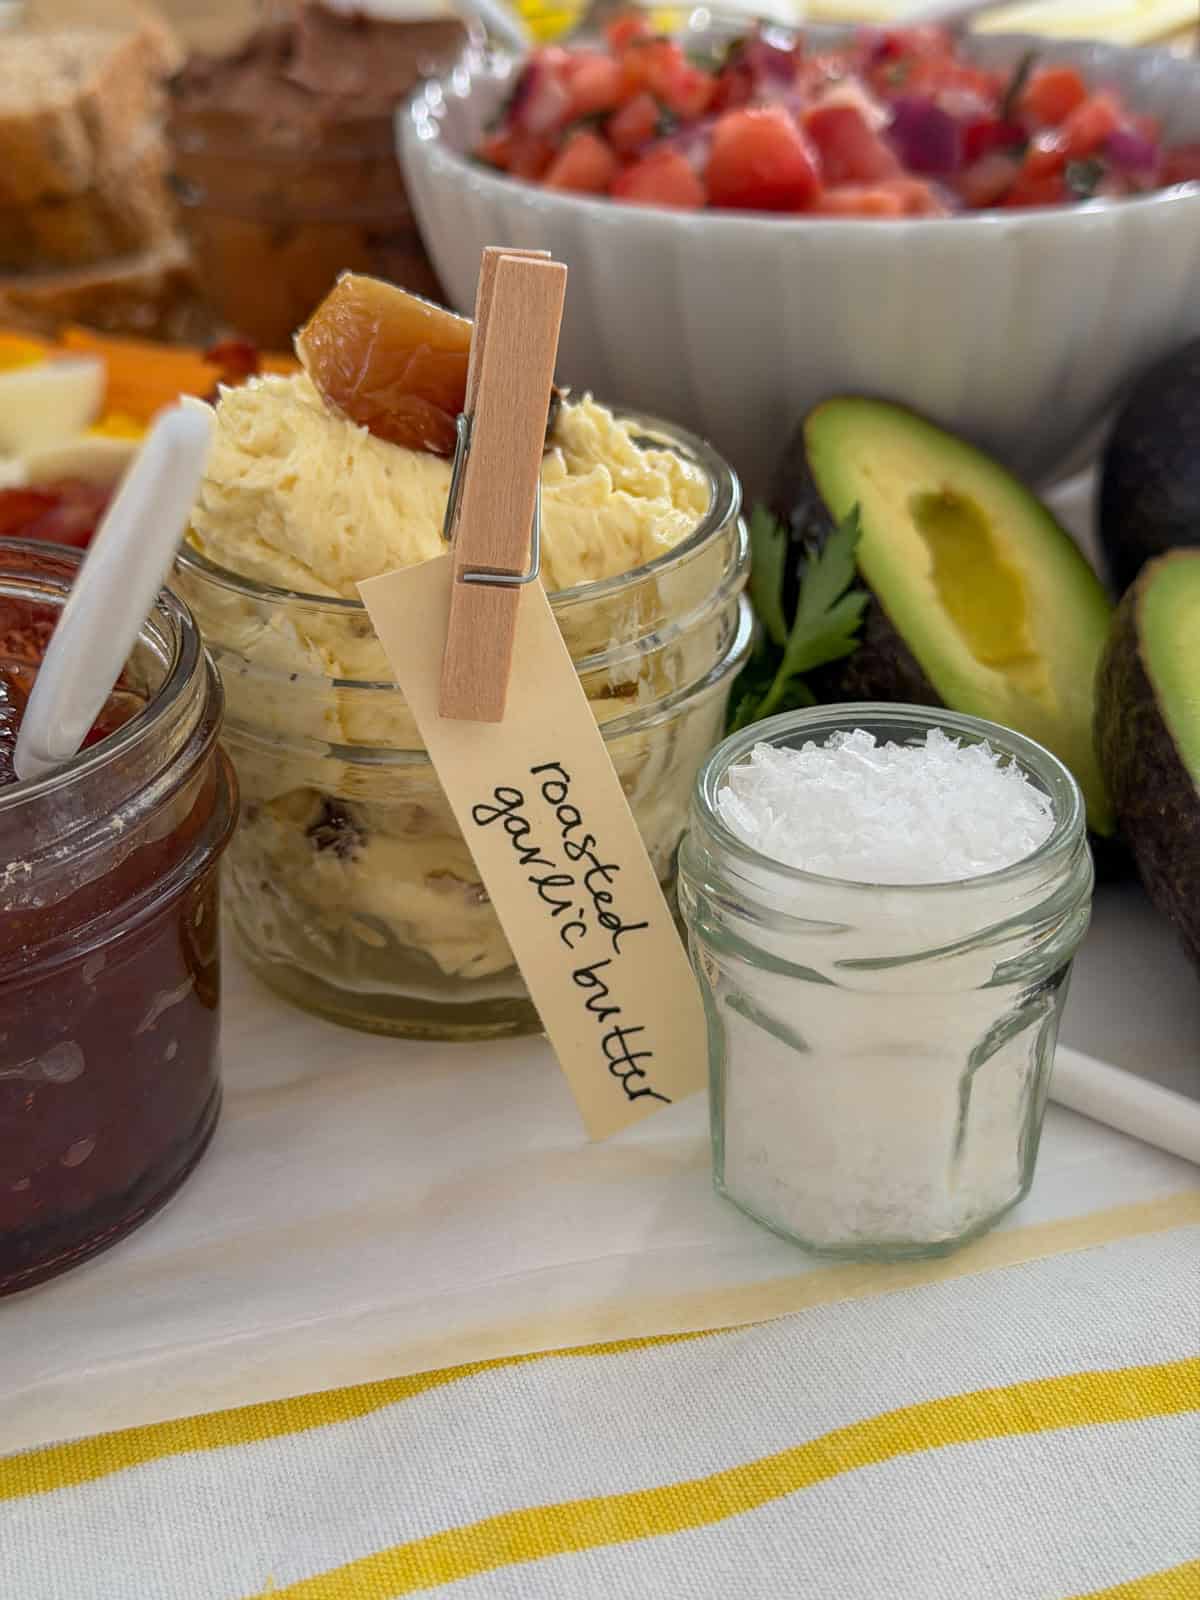
It was all going so well.  I made the candy after much research and followed all "the rules":  300 degrees, no stirring after the sugar is dissolved, add in the baking soda but don't over stir.  I tasted a tiny little bit I'd put aside as a tester and thought it was perfect.

The candy takes a couple of hours to set, so after it was finally ready I tried a little of the edge, it was so, so good.  Sweet, crispy, lots of bubbles -exactly what we were going for.

So, since the candy was for this blog post and I needed to get a photo in for the collage I set about dipping it in chocolate, setting up a picture, and working away.  As I worked away, I just might have nibbled away.  And as I nibbled the burnt taste of caramelized sugar gone too far became more and more pronounced.  I burnt it.

But, hey it was my first attempt.  Try, try again.

Sponge Candy Attempt Number Two -Practise Makes Perfect

I had to run some errands so when I got home that night I attempted another batch.  This time I was super careful about the sugar -because it's tricky to get it to 300 degrees (hard crack stage) without burning the sugar first.  And you have to get it up to 300 so that the toffee will set properly and be crispy.  The second time I turned the heat down a little and watched it like a hawk.  I even calibrated my thermometer.  I couldn't recommend a recipe to you on the blog that didn't work, so I had to figure this thing out.

Second batch and the mixture was still mostly clear by the time it got to 300, and tuned a little amber with the addition of the baking soda, just like my research told me it should and definitely not burnt this time.

But…you knew there was a but coming, it didn't foam up like the first batch.

Sponge Candy Attempt Number Three -Third Time's A Charm

So, the next day when I got home that night I attempted batch number three.  It came out pretty much the same as the first batch.  Nice big bubbles and burnt.

I had the ingredients to do one more batch, so it was back to try, try again.

Sponge Candy Attempt Number Four -Last But Not Least

Batch number four I again cooked at a much lower heat, and again succeeded in not burning it, but again not as big of bubbles.

Here's a side by side comparison, with the over done, slightly burnt batch on the left, and the better one on the right.

two stacks of sponge candy, one slightly over cooked

What Am I Doing?  The Doubting Stage

After attempt number four I was starting to doubt myself.  In fact I was thinking that after one full bottle of corn syrup and a bag of sugar that I should really be writing to you to save your time, and effort and invest the money for my four batches into a few Crunchie chocolate bars from the store -and if necessary rough them up a little, break them into pieces, tuck them into a cello bag with some ribbon and try to pass them off as your own to your friends and family.

But...

Friends Taste Test

I brought my attempts over to some friends and they loved it -batches two and four that is.  They all really, really liked it, and declared it a win rather than a fail.  So you see it only takes one bottle of corn syrup, one bag of white sugar, and eight hours to make a lovely Christmas treat for your loved ones -haha.

close up of a pice of sponge candy dipped in chocolate

What I Learned About Making Sponge Candy

Seriously though, just turn down to a medium heat after the sugar is dissolved and you'll be fine -perhaps there's a life lesson here for someone like me who's always in a hurry, got a speeding ticket recently, and only cooks on high most of the time.  Patience is a virtue.

sponge candy stacked up in a pink tea cup
a vintage white scale with a stack of sponge candy on it, and a pink tea cup in front with more toffee in it

More Options

This homemade candy is delicious on its own, but you can also dip it into melted chocolate, if you're a chocolate lover.  We dipped some of ours into milk chocolate, but semi sweet chocolate or dark chocolate are also a great choice.  Once the candy is set and you break it into bite-sized pieces, just dip them into the melted chocolate and let it set on parchment paper.

If you're a big fan of the salty sweet candy combination, and love salted caramel, you can also add some sea salt to your sponge toffee.  When your making it, after you have it in your baking pan, but before it sets, sprinkle the toffee with a little sea salt on top.

We made our sponge toffee for gift giving, and broke it into bite sized pieces, but it's also a great ice cream topping.  Break it up into quite small pieces and sprinkle over top of ice cream, for a great chewy, crunchy addition.

Recipe

Homemade sponge toffee recipe.

Sponge Candy

Crunchy sweet and delicious homemade sponge candy.
4.75 from 4 votes
Print Pin Rate
Course: Candy, Desserts
Cuisine: American
Cook Time: 20 minutes minutes
Additional Time: 2 hours hours
Total Time: 2 hours hours 20 minutes minutes
Servings: 18
Calories: 146kcal
Author: Dannyelle Nicolle-Ramjist

Ingredients

  • 2 ½ cups white sugar
  • ⅓ cup water
  • ⅔ cup white corn syrup it's important to use white
  • 4 teaspoon baking soda make sure it's fresh
  • Optional -melted chocolate for dipping

Instructions

  • Measure and sift the baking soda into a small bowl and set aside. Line a 9x13 baking dish with parchment paper and spray with cooking oil, and set aside.
  • Combine sugar, water, and corn syrup in a very large saucepan. (When you add the baking soda at the end, the mixture will increase in volume and be very, very hot so a large pan is essential to keep it from overflowing.)
  • Cook over a high heat, and use a wooden spoon to stir the mixture until the sugar dissolves fully.
  • Reduce the heat to medium-low and stop stirring the mixture. Occasionally brush down the sides of the pan with a pastry brush dipped in cold water to keep the mixture from crystallizing. Clip a candy thermometer to the side of the pan, and cook until it just reaches 300 degrees F or hard crack stage. Be careful not to burn the sugar, if it starts to turn amber coloured at all, turn the heat down.
  • When it comes to 300 degrees F, remove it from the heat and stir in the baking soda until just combined. Be careful not to over stir and deflate the mixture. The candy will have a chemical reaction, and foam up creating wonderful bubbles. Pour the hot candy into the prepared baking dish -taking care as it's very, very hot. Do not smooth it out, or push down the mixture with the spoon as it will deflate it and push all the air bubbles out.
  • Let set for about two hours at room temperature, until the candy cools and is hard. Remove from the baking dish, and use a sharp knife to break the candy into large pieces.
  • Optional -dip the candy into melted dark chocolate or milk chocolate.
  • Be sure to store the candy in a sealed airtight container, it should last for several days to a week.

Nutrition

Serving: 1g | Calories: 146kcal | Carbohydrates: 38g | Sodium: 288mg | Sugar: 38g
Tried this Recipe? Tag me Today!Mention @LifeisaParty or tag #lifeisaparty!

With a homemade old fashioned sponge candy recipe, life really is a party!

More DIY Christmas Gift Ideas

You might also enjoy our Butter Crunch Toffee recipe here.

Also check out our Homemade Caramel Apples here.

Caramel Apple Recipe: Easy, homemade Caramel Apples, perfect for Christmas gift giving, or anytime of year. Add your favourite toppings.

You might also like our Homemade Caramel Corn here.

DIY Birch Wreath

Nov 3, 2015 · 30 Comments

DIY birch wreath made with fresh greens and birch logs.

Looking for a beautiful and unique holiday wreath? This DIY Birch Wreath combines fresh greens, rustic birch logs, and a cozy little house accent for the perfect Christmas decoration. The square shape sets it apart from traditional round wreaths, and it's easy to make using simple materials like coat hangers, branches, and wire. Whether you hang it on your front door, over a mantel, or use it as part of a Scandinavian-inspired Christmas theme, this birch wreath adds natural texture and festive charm. In this tutorial, I'll show you step by step how to make your own birch wreath so you can create a holiday piece that looks stunning and costs very little.

DIY birch wreath made with fresh greens and birch logs.

Why You'll Love This Craft

  • It's beautiful and the perfect holiday wreath for your door.
  • The square shape and birch logs add interest and texture.
  • The fresh greens smell and look beautiful.
  • Most of the items we forged for making it very inexpensive to make.

"I made it. Gathered natural elements. It turned out very nice." -Garry via Pinterest

[feast_advanced_jump_to]

It's November, and already time to start thinking about Christmas!  This birch wreath is the perfect touch to your door this Christmas.  

This year I'm planning on going for a white Christmas look at my house, which got me thinking how pretty some birch branches would be.  I also knew I wanted to use some traditional Christmas greens.  So, off to the woods I went with my little pruning shears.  

Nothing gets you into the Christmas spirit like the smell of fresh cut pine…and there may or may not have been a little, tiny bit of Christmas music involved, but I promise I wasn't into the Christmas cheer yet. 😉

You might also like our Gingerbread Salt Dough Recipe, Easy DIY Star Garland, DIY Christmas Diorama, and Mini Macrame Christmas Ornaments.

Birch Wreath Materials

Full list of materials in How-To Instructions below.

  • Wire Coat Hanger for Wreath Form: We bent two wire hangers into our wreath base. These are inexpensive. You could use a wire wreath frame instead.
  • Mixed Fresh Greens: We used some pine, cedar, and fir branches for our wreath. Any combination of fresh greens will work.
  • Birch Pieces: Look for birch pieces that have nice white bark. You don't want them to be too big around. We cut ours to length. If you don't have access to birch, look for it at crafts stores, or anywhere that sells fresh Christmas decorations.
  • Small Wooden Stars: We found these at the craft store.
  • Old Book Pages: We upcycled an old book and used a book page to add some interest and texture to your wood stars.
  • Glitter: Since it's Christmas, we added a little glitter to our stars. You can omit this if you prefer.
  • Little House Lantern: This metal house is perfect for an outdoor wreath, since it won't be affected by water. The little windows are perfect for letting the light out.
  • Battery Powdered Tea Light with Remote: The little candle lights up the house. The remote makes it easier to turn off and on, you could also use a strand of fairy lights inside instead.

Variations

  • Faux Greens: If you want your wreath to be everlasting you can use faux greens instead. Look for them at the craft store.
  • Ribbon: We love the simple Scandinavian style of this wreath, but you can add a holdiay bow if you prefer.
  • Pinecones: You can also add some decorative pinecones to the wreath.
  • Different Branches: If you don't have access to birch, you can use any wood branches for this wreath.

HowTo Make A Birch Wreath

1. Creating the Wire Wreath Base

I wanted to make this simple wreath out of inexpensive things around the house so I used a few coat hangers for the base.  Using pliers helped to un-twist them, and then form them into a rectangle shape.  I used two to make the form a little sturdier.

how to make a birch wreath

2. Add Fresh Greens

To put the greens on to the wire form, just cut little pieces, and create small mixed little bundles of three or so pieces.  I used a combination of pine, fir, and cedar, but whatever you can find will work. Next, take your little bundle, and use thin wire to attach it to the wreath.  Just lay your greens on the wire wreath form where you want them, and wind the wire around the bundle and the form to secure it.  Then, create another bundle of greens, and over lap it over the previous bundle, and wrap with the wire again working your way all the way around the wreath.  Easy peasy.  Although…a little prickly so you might want to wear some gloves for this part.

Expert Tip: For longer life, mist your wreath every few days.

DIY Square Christmas wreath

Once you've worked all the way around the wreath secure your wire, and the base is done.

3. Add The Birch Logs

The next layer is the birch logs.  I had some, and just used a hand saw to cut them to length.  I attached the birch to the wreath with some more thin wire.  For the top birch piece, I used white wire so it would blend in.

square Christmas wreath

4. Add The Metal House

The next step is decorating.  I think I'm developing a thing for little tiny houses.  Remember my little house village from last year?  Well they'll be making a reappearance this year…along with some friends.  When I saw this little white metal house at the craft store months ago, I thought it would look so sweet in a wreath with little battery operated light inside.

Little House Christmas Wreath

I kind of love how it turned out.

5.  Add The Stars

I wanted to keep it simple, but couldn't help myself from adding one more sweet little detail, some stars.  I used some wooden stars and added some book page paper to the front, and then added a little glitter.  You know since it's Christmas and I'm now officially allowed to glitter everything.

wood stars decorated with book pages and glitter

To attached the stars to the wreath, I just hot glued some little wires to the back and wired them into the wreath.

birch wreath tutorial

I'm loving this simple, rustic Christmas wreath, and the little house is so sweet lit up at night with a battery operated tea light.

Scandinavian Christmas wreath

With a birch wreath like this one, life really is a party!

Frequently Asked Questions

Where can you get the birch to make this birch wreath?

If you don't have access to birch logs, purchase them at the craft store, or anywhere that sells fresh items for Christmas decorating.

What is the best way to attach birch logs to a wreath?

Because birch logs can be heavy, choose small ones for wreath making. Attach them to the wreath using white wire.

Where can you buy birch branches for crafts?

Look for birch branches or small birch logs at craft supply stores or hardware stores during the holidays.

More Christmas Inspiration

  • DIY paper stars Christmas
    How To Make DIY Paper Christmas Star Decorations
  • Pink crescent moon shaped Christmas wreath.
    DIY Moon Shaped Christmas Wreath
  • DIY Christmas star garland made from polymer clay and gold wire.
    Easy DIY Star Garland
  • DIY polymer clay miniature village
    Polymer Clay Christmas Village Tiny Houses

If you try this Birch Wreath or any other ideas on my blog please leave a star rating and let me know how it went in the comments below. Thanks for visiting today!

Recipe

DIY birch wreath made with fresh greens and birch logs.

DIY Birch Wreath Tutorial

DIY square birch wreath, with fresh greens, decorated with a small house and stars for the holidays.
5 from 1 vote
Print Pin Rate
Cook Time: 30 minutes minutes
Total Time: 30 minutes minutes
Servings: 1 wreath
Author: Dannyelle Nicolle-Ramjist
Cost: $10

Equipment

  • scissors
  • Wire Cutters
  • Glue Gun and Glue
  • Small Hand Saw

Materials

  • 2 Wire Coat Hanger
  • Mixed Fresh Greens
  • Black Spool Wire
  • 4 Birch Logs
  • Small Wooden Stars
  • Old Book Page
  • Mod Podge
  • Glitter
  • Small Metal House
  • White Wire
  • Battery-Powered Tea Light With Remote

Instructions

  • Using pliers open the two wire coat hangers, and bend into a square base for the wreath.
  • Next, add the greens to the wire base. Begin by cutting little pieces of greens, and creatin small mixed bundles of three or so pieces. Then, take your little bundle, and use the spool wire to attach it to the wreath.  Just lay your greens on the wire wreath form where you want them, and wind the wire around the bundle and the form to secure it.  Then, create another bundle of greens, and over lap it over the previous bundle, and wrap with the wire again working your way all the way around the wreath, without cutting the wire in-between. When your finished filling in the wreath, cut the wire and secure it at the back.
  • The next layer is the birch logs.  If they aren't the right length, use a hand saw to cut them to length.  Attach the birch to the wreath using white wire.
  • Next, use some more white wire to attach the house with the light inside to the bottom right of the wreath.
  • Trace the wood stars onto the book page paper, and cut them out. Then use mod podge to add the paper to the stars. You can also add some glitter. After they dry, use hot glue to attach a wire to the back of each star, and then use the wire to attach the stars to the wreath in a grouping.

Notes

We found our birch pieces and fresh greens in the forest, but you could also purchase them.  
The small metal house and wood stars are from the craft store.
This wreath should last well outside where it's cool.  Inside the greens will dry out fairly quickly.  If you wanted it to last longer, you could use faux greens instead of real ones.

How To Host A Pie Party

Nov 2, 2015 · 6 Comments

Pie party buffet.

The Pie Party: pies, pie pops, pie fruit dip, pie toppings and beautiful decor make the perfect outdoor fall pie party for family and friends.

Pie party pie buffet bar.
[feast_advanced_jump_to]

I'm so excited to share with you this fun Pie Party, that I put together for my family and friends.  It's the perfect idea for the holidays.  I love to entertain, and homemade pies or store bought pies are the perfect dessert to create a fun pie buffet.

Want more party inspiration? Check our soup party here.

outdoor fall pie party

We set up our pie buffet for a fall Thanksgiving pie party.  This is a great idea for the holidays.  It would also be a really fun birthday party idea.  Any pie lover would really enjoy this idea.

We stuck with sweet dessert pies and made a dessert buffet.  You could also include a some savoury main course pies like meat pies to make entire meal from the pie bar.  Beef pies, chicken pot pie, and pattie style pies would be delicious options. This would be a great idea as a supper club event.  It would also be so much fun for celebrating pi day.

outdoor fall pie party

Backyard Pie Buffet

We set up our pie party outside on our back patio, to take advantage of the last of the colourful fall leaves.  It was a beautiful day and perfect for enjoying outside with a slice of pie and warm drink.  We started out with setting up our beautiful table.  Our colour scheme was inspired by fall colors.  We used gold, brown and copper.   As a tablecloth for our pie buffet I used a cozy plaid blanket.

Metallic paper tissue tassels

Bunting

Before the party I made an easy bunting that said "PIE", and some tissue paper tassels, out of plaid, copper, and gold tissue paper.  We hung them up behind the table for some easy decor.

They looked so pretty in the breeze.

Tissue paper tassels

After that I set up the rest of the table. For a rustic look we used wood cake stands, and wood slice pieces to create different levels on our buffet table.  Be sure to have knife and pie servers available so guests can help themselves.  Some people may want big slices of their favorites or small slices to try a variety of pies.  Since our party was in the fall we also decorated the table with various pumpkins of different sizes to add some different heights to our display.  Flowers would be a great option too.  

I used some disposable plates for our pie, pretty matching napkins, and wooden cutlery so there would be no dishes after the party.  A sweet pumpkin made the perfect paper weight to ensure our napkins didn't blow away.

outdoor fall party decor

We decorated some of your pies with some cute paper bunting.  The bunting is made out of string and some scrapbook paper.  I used wooden skewers to put them into the pies and they look so fun and festive.

pie with bunting

Pie Time

The main attraction was, of course, the pie!

The Pie Party: pies, pie pops, pie fruit dip, pie toppings and beautiful decor make the perfect outdoor fall pie party for family and friends.

We served a lot of different kinds of pie including:

  • pumpkin pecan streusel pie
  • razzleberry mixed berry pie
  • cherry pie
  • apple pie
  • Dutch apple pie

Other ideas of different types pies to include sweet potato pie, peanut butter pie, lemon meringue pie, chocolate pie, or berry pies like strawberry rhubarb pie, blueberry pie, or raspberry pie.  It's nice to include some seasonal options, depending on the time of year it is.  Along with different pies, it can also be nice to offer some mini pies or tarts.  Make tarts in muffins tins, or try making mini hand pies as another option.

I served store bought pies, some of which were bake at home ones.  You could also bake your own homemade pies, or do a combination.  You can also look for pies at your favorite bakery.  Another great idea is to have potluck for your pie party.  Ask all your guests to bring their favorite pie, or plan out specific pies for each person.  This can be a lot of fun, and sometimes gets your friends baking their own pies and trying new things.

outdoor pie buffet

It would be hard to choose a favorite pie out all these yummy options.

fall pie buffet party

But…if I had to choose, my favorite kind of pie is always cherry.

cherry crumb pie with whipped cream

Pie Topping Buffet

A fun addition to the pies was a little pie topping buffet.

pie party pie buffet dessert table

Guests could add chocolate sauce, caramel sauce, nuts, sprinkles, and whipped cream to their pie in whatever combination their heart desired.  This was a big hit with everyone and fun way to take classic pie to the next level.  Vanilla ice cream or chocolate ice cream would be a great addition too.

pie topping buffet for a pie party

Apple Pie Cheesecake Fruit Dip

I also thought it would be nice to include some fresh fruit for the party, and came up with a fun apple pie cheesecake fruit dip.  I love fun ideas like this to add a new spin to an old favorite.

apple pie cheese cake fruit dip

Recipe

The Pie Party: pies, pie pops, pie fruit dip, pie toppings and beautiful decor make the perfect outdoor fall pie party for family and friends.

Apple Pie Cheesecake Dip

Fruit dip made from apple pie and cream cheese.
5 from 1 vote
Print Pin Rate
Course: Dessert
Cuisine: American
Cook Time: 10 minutes minutes
Total Time: 10 minutes minutes
Servings: 12
Calories: 212kcal
Author: Dannyelle Nicolle-Ramjist

Ingredients

  • ¼ apple pie
  • 8 oz container cream cheese softened
  • ½ cup sweetened condensed milk
  • 2 sliced apples

Instructions

  • Combine the cream cheese and sweetened condensed milk in a mixer until smooth and fully combined.
  • Use ¼ of an apple pie, and chop into large pieces, then add to the cheese cake dip and stir to combine.
  • Serve dip in a bowl, with sliced apples for dipping. Tip: Best served right away, while the pie crust bites are still crispy.

Nutrition

Serving: 1g | Calories: 212kcal | Carbohydrates: 20g | Protein: 4g | Fat: 13g | Saturated Fat: 8g | Polyunsaturated Fat: 5g | Cholesterol: 36mg | Sodium: 147mg | Fiber: 1g | Sugar: 16g
Tried this Recipe? Tag me Today!Mention @LifeisaParty or tag #lifeisaparty!

This recipe was easy and delicious -and a great way to get the kids to eat some extra fruit.

Pie Pops

Next I also wanted to combine two pies for some delicious pie pops to add to our pie table.   These are a really fun twist on traditional pie.   I began with some store-bought pies.  I used a Pecan Pie and a Pumpkin Pie to make my Pumpkin Pecan Pie Pops.

pumpkin and pecan pie pops

We used the push pop as a cookie cutter to cut a circle of pumpkin pie for the bottom and pecan pie for the top.  Then, I layered the pies in the push pop, using whip cream in the middle, and as a topping.  

The little flag to decorate the top is made from some washi tape and a toothpick.  The Pumpkin Pecan Pie Pops were delicious, easy and a real hit with the kids.  The combination of pumpkin, pecans, and whip cream was perfection.  These were such a great addition to our pie bar.

how to make a pie pop

Drinks

Next we served our guests warm apple cider to drink, perfect for a crisp fall day.  It stayed nice and warm in a large thermos and was really wonderful for an outside party.  It was nice to have a warm drink that kids and adults would all enjoy.

It's also a great idea to include some water bottles.  Tea and coffee would be a great choice too.

outdoor party drinks thermos with hot apple cider

Take Home Pies

We had so much fun eating pie, and pie, and more pie!  We didn't want the fun to end.  So, lastly we sent all the families home with their very own pie.  Send them with a whole pie like we did, or let them choose a few slices of pie from the leftovers and give everyone bakery boxes to bring them home in.

take home pies for a pie party

Free Pie Printables

We wrapped up our pies with a little kraft paper and this fun printable.  We also made matching labels for our pies.  Find the free printables in our Free Resource Library.  Subscribers receive free instant access.  Subscribe below for access.

take home pies for a pie party

We really had a great time together, and our friends loved the take-home pies, so the sweet treats could continue.  This might be the first of many more pie parties.

pie buffet dessert table

With a pie buffet to share with friends and family, life really is a party.

More Inspiration

You might also like our Father's Day Pie Party here.

Also check our our easy banana cream pie recipe here.

You might also like our Strawberry Pie with Fresh Strawberries and Cream Cheese.

Pumpkin Fairy House Jack-O-Lanterns

Oct 27, 2015 · 5 Comments

DIY Fairy pumpkin house village lit up with candles at night.

These real Pumpkin Fairy House Jack-O-Lanterns are the cutest things Halloween has ever seen! We had so much fun carving your pumpkins into fairy houses, and creating a whole pumpkin fairy house villiage. And our favorite part was seeing the warm glowing light through the windows at night -the trick or treaters loved them too!

DIY Fairy pumpkin house village lit up with candles at night.
[feast_advanced_jump_to]

Why We Love These

  • They are so cute!
  • They're quite easy to make, and since you're probuably making a jack-o-lantern anyway, why not make it a pumpkin fairy house?
  • The little fairy garden accessories are the perfect size and so fun to add.
  • One is adorable but a whole village is our idea of perfection.
Pumpkin Jack-o-lantern fairy house.

Halloween is coming very soon, and this year I have the cutest idea for you, or any fairy loving children you might live with -Pumpkin Fairy House Jack-O-Lanterns.

We love a good fairy garden around here. You might like our How To Make A Fairy Garden post here, How To Make A Fairy Garden House, or our Teacup Fairy Garden. And our Fall Fairy Garden would match perfectly with these pumpkin fairy houses.

how to make a pumpkin fairy house

These pumpkin fairy houses really could not be any sweeter.  And, I think I've seen a few fairies fluttering in and out of them tonight too, so they're a hit all round.  If you're a fan of fairy gardens, then you will love putting together a fairy house pumpkin.

Supplies

  • Pumpkins: We started out with an assortment of pumpkins; some big pumpkins,  some small pumpkins, some orange pumpkins, some white pumpkins, some in-between.  We used real pumpkins to make our little houses.
  • Twigs: Small twigs work best that are easy to snap to the perfect size.
  • Cloves: We found whole cloves made perfect door handles.
  • Fairy Garden Accessories: We had fun with some fairy sized accessories creating a little miniature world for the fairies.  We found the sweetest mini straw bales at the craft store. We also found little brooms, and even a fairy sized bike.  Look for cute little accessories to use in the dollhouse or fairy garden section of your craft store, or on-line.
  • Polymer Clay: We made fairy sized pumpkins out of polymer clay, so the fairies could have a tiny faux pumpkin outside their door too.
  • Battery Powered Tea Lights: These pumpkin fairy houses are so cute lit up at night. You can just imagine a fairy family in there together.
  • Dried Flower, Moss, and Leaves: You can add some beautiful details to your pumpkin fairy houses by gluing on dried flowers, moss and leaves as decorations.

Variation

You can use faux craft pumpkins for this project. The benefit of this is that the pumpkin fairy houses will be everlasting, and you can enjoy them year after year. The disadvantage of using faux is that you can't find as much variation in shape, color, and size as real ones.

Pumpkin Fairy House Carving

1. Start by cutting the bottoms off of your pumpkins, and scooping out all the guts and seeds. Cutting the bottom off rather than the top makes it a little less noticable on your finished pumpkin fairy house -but either way works.

You can also snap off the pumpkin's stem and stack some pumpkins one on top of the other for a cool effect.

Pumpkin Fairy House Jack-O-Lantern

2. Carve your doors, windows, and steps.

how to make a Pumpkin Fairy House

We carved lots of different windows, some were had large windows, square windows, curved window frames, and one had a circular window. We also added in window sills, and dormers, an arched doorway, and stairs -in every combination we could think of for adorable pumpkin fairy houses.

3. Add details like window frames and doorknobs.

Pumpkin Fairy House

We used some little twigs to make our window frames.  Just snap some sticks to size and poke some small holes inside of the pumpkin window.  

We also used some little cloves as fairy door knobs on some of the front doors.  Little twigs pushed into the pumpkin door work as a doorhandle too.

Fairy House Jack-O-Lantern

Any natural materials are a great addition, like pine cones, or acorn caps, dried flowes and leaves and moss. Use hot glue to attach them when needed.

Another time when I made these, I added lots of dried moss, flowers, and leaves with hot glue and it was so pretty, so I've included a few of the pictues as inspiration.

Pumpkin Fairy House tutorial

4. Add your fiishing details, like little fences, ladders, pumpkins, and accessories from the craftstore.

Pumpkin Fairy House Jack-O-Lanterns

To make the polymer clay pumpkins shape them out of orange, white, and brown clay and bake in the oven, according to the instructions on the package.

For the ladders, we used small twigs and hot glue to make them.

fairy garden pumpkins polymer clay
fairy garden bicycle

5. When they're all finished be sure to add a battery powered tea light (remote control ones are even easier to operate) and light them up.

Pumpkin Fairy House Jack-O-Lanterns for Halloween

We had a ball coming up with all these fun ideas.  This is a great project for the whole family to do together.

We had fun setting up the little village.  I used a cute little outdoor chair and a bale of hay to give our adorable little fairy house collection some height.  This was great to because it was at a great height for little trick-or-treaters to see and admire all the fun details, or to welcome guests to a Halloween party.

Pumpkin Fairy House village

Frequently Asked Questions

Can you make these out of faux pumpkins so they last?

Yes. You won't find different shapes and sizes quite as easily, but you can find some varation. And then you can use them year after year.

How far in advance can you make these?

Carved pumpkins will last 3-4 days outside, depending on the weather. Then they'll start to break down, wrinkle, and eventually rot. If you want to them to last, you can make them out of faux pumpkins.

Where did you get the little ladders and pumpkins?

We made them. Use small sticks and hot glue to make the ladders the perfect height for your doors. The pumpkins are homemade also out of polymer clay baked in the oven according to to the package directions.

More Halloween Inspiration

  • Harry Potter DIY Decor & Free Printables used to create this Potions Classroom.
    Harry Potter DIY Decor and Free Printables
  • DIY Cricut Halloween Cloche: use dollar store materials to make this haunted house, and graveyard silhouette cloche for Halloween.
    Spooky DIY Cricut Halloween Cloche
  • DIY Crescent Moon Wreath with homemade grapevine base, and decorations.
    DIY Cresent Moon Wreath
  • Cricut Halloween Trick or treat bag made with infusible ink.
    Cricut Halloween Trick or Treat Bag

If you try these Pumpkin Fairy House or use any other idea on the blog please leave a star rating and let me know how it went in the comments below. Thanks for visiting today!

Recipe

DIY Fairy pumpkin house village lit up with candles at night.

Pumpkin Fairy House Jack-O-Lanterns

Carve a real pumpkin into a pumpkin fairy house jack-o-lantern for Halloween.
5 from 1 vote
Print Pin Rate
Prep Time: 15 minutes minutes
Total Time: 15 minutes minutes
Servings: 1 Pumpkin Fairy House Jack-O-Lanterns
Author: Dannyelle Nicolle-Ramjist
Cost: $15

Equipment

  • serrated knife for carving
  • hot glue gun

Materials

  • pumpkin
  • twigs
  • cloves
  • hot glue
  • fairy accessories
  • battery powdered tea light

Instructions

  • Start by cutting out the bottom of your pumpkin and scooping out the pumpkin seed and guts.
  • Add a combination of windows, window sills, doors, and steps to your pumpkin.
  • Add details like twig window frames, and clove door knobs.
  • Create ladders with twigs and hot glue.
  • Add accessories like paths to the front door, miniature pumpkins, miniature hay bales, bicycle, ladders, and fences.
  • Turn on the battery powered tea light and put it into the finished fairy pumpkin house and enjoy.

Video

Notes

Optional: You can also decorate your pumpkin fairy house with dried flowers, leaves, and moss.  Use hot glue to attach it.

Mini Apple Crisp In A Jar

Oct 21, 2015 · 2 Comments

Apple crisp in a mason jar.

Get ready for the cutest fall dessert ever! These mini apple crisps in a mason jar are perfectly portioned, super easy to make, and ideal for dinner parties or cozy family nights. And they only take about 15 to put together.

Individual apple crisp in a mason jar.
[feast_advanced_jump_to]

A Quick Look At This Recipe

  • 📋 Recipe: Mini Apple Crisp in a Mason Jar
  • ⏲️ Ready In: 35 min.
  • 👪 Servings: 10
  • 🔪 Difficulty: Easy
  • 💭 Top Tip: Serve warm with vanilla ice cream or custard sauce.

Why You'll Love This Mini Apple Crisp Recipe

  • Perfect individual portions. Each jar gets exactly the right amount of apples and topping. Your guests will love having their own personal dessert, and you'll love not having to serve and portion at the table.
  • Simple pantry ingredients. No fancy stuff needed here. Just apples, butter, oats, brown sugar, and basic spices you probably already have.
  • Foolproof texture every time. The apples get perfectly tender and the topping stays crispy and golden.
  • Make ahead friendly. Assemble these earlier in the day and pop them in the oven when you're ready. They also reheat beautifully.
  • Flexible baking options. Use mason jars for the cute factor, ramekins for safety, or make one big crisp in a baking dish. The recipe works perfectly all three ways.
  • Ready in 35 minutes. Just 15 minutes of hands-on time, then let the oven do its thing while you finish dinner.

I've been making my mom's apple crisp recipe since I was seven years old, but turning it into mini apple crisp in a mason jar was a total game-changer. Suddenly, this simple dessert went from everyday treat to dinner party-worthy presentation. This recipe makes 10 adorable individual servings that look absolutely charming and make entertaining so much easier. No scooping, no serving, ready to serve when you are.

These mini desserts pack all the cozy fall flavors you love. Tender tart apples and a buttery sweet oat crumble come together in perfectly portioned jars. They're ready in 35 minutes, use basic pantry ingredients, and you can make them in mason jars, ramekins, or even a regular baking dish if that's what you have on hand.

Looking for fall recipes? You might also like our Pumpkin Spice Rice Krispie Treats, Caramel Apple Trifle, Caramel Apple Fondue, or Pink Candy Apples.

Apple Crisp in a Mason Jar Recipe

Apple crisp always one of my favorite things as a kid.  When I was in grade two, I had to bake a snack for an after school girls club.  Running short on time, I had to come home from school for lunch the day I needed it and quickly make it.  My mom had carefully pre-measured all the ingredients out for me, and prepared all the apples already for me when I got there.  All I had to do was mix together the pre-measured crisp ingredients and put it together.  

That night after the club meeting, she asked me how the apple crisp turned out.  I replied "it was so good Mom, way better than when you make it."  She's reminded me of it just about every time we've had apple crisp since.  What can I say Mom, I've always been a great cook. 😉

Crisp vs. Crumble

You might hear these terms used interchangeably, but there is actually a difference. Both are baked fruit desserts with a streusel-type topping, but a crisp contains oats in the topping and a crumble does not. Since this recipe uses quick oats, it's technically a crisp. Now you know!

Ingredients

Mini apple crisp ingredients in bowls on a table.
  • Apples: I love using MacIntosh apples because they're my favorite cooking apple. They hold their shape nicely while still getting tender and have the perfect sweet-tart balance. Other great options include Granny Smith, Honeycrisp, Cortland, or Gala. You can even mix varieties for more complex flavor. Avoid an eating variety like Red Delicious.
  • Brown sugar: Light or dark brown sugar both work great. You can substitute regular white sugar in a pinch, but you'll lose some of that rich caramel taste.
  • Oats: I use quick oats in this recipe, but you can use old fashioned, or even instant if that's what you have on hand.
  • Butter: Use real butter, not margarine. The butter needs to be soft enough to mix easily but not melted. Leave it on the counter for about 30 minutes before you start.
  • Spices: Cinnamon is a must, and nutmeg adds warmth. These two spices pair perfectly with apples.
  • Salt: Just a little salt helps balence out the sweet.

Mason Jars, Ramakins, or Baking Dish

Mason jars look adorable and make serving super easy. We've used them many times without issues. However, mason jar manufacturers don't officially recommend baking in their jars since the glass isn't designed for oven use. There is a small risk of breakage.

Ramekins are the safest option. They're the same size as 4 oz mason jars and they're specifically made for baking. If you're nervous about using mason jars in the oven, grab a set of ramekins instead. They work perfectly and you can still get that cute individual serving presentation.

One large baking dish works too. If you don't want to fuss with individual servings, you can make this as one big apple crisp. Put all the apples in an 8x8 inch baking dish, top with all the crumble mixture, and bake at 350°F for about 30 minutes. Easy!

A note about safety: If you do use mason jars, always place them on a baking sheet, don't preheat the jars, and let them cool gradually after baking. Never put cold jars into a hot oven or hot jars onto a cold surface.

How To Make Mini Apple Crisps in a Mason Jar

Dry ingredients for apple crisp topping in a mixing bowl beside some apples.
  1. Step 1: In a mixing bowl combine brown sugar, flour, quick oats, cinnamon, nutmeg and salt, and stir to mix well.
Apple crisp topping in a mixing bowl, before adding it to the apples.
  1. Step 2: Add in the butter and use a pastry cutter, or your fingers to combine with the dry ingredients until the butter is well incorporated and the mixture turns into coarse crumbs. Set aside.
Apples peeled and slice for apple crisp.
  1. Step 3: To prepare the apple, wash, peel and slice them, then sprinkle with the lemon juice.
Sliced apples divided into  mini mason jars to make individual apple crisps.
  1. Step 4: Divide the apple slices between the 10 mini mason jars (4 oz), and top with the crumble topping.
Mini apple crisps made in a mason jar with apple slices covered in crisp topping before baking.
  1. Step 5: Place the jars on a baking sheet to bake, at 350 for about 20 minutes, until the tops are golden brown, and the apples are soft. Use a sharp knife poked through through the dessert into the apples to test. Or make one large apple crisp by placing all the apples in the bottom of a 8 x 8 baking dish, and top the apple mixture with the crisp topping and bake at 350 for about 30 min.
Easy Apple Crisp Recipe

Expert Tip

Don't skip the lemon juice. It prevents browning, adds brightness, and tartness, and helps balance all the sweetness. Fresh lemon juice works best, but bottled is fine.

Serving Ideas

I love to serve this mason jar apple crisp warm with a scoop of vanilla bean ice cream. The cold ice cream melting into the warm apples is absolutely perfect.

Other delicious toppings include freshly whipped cream, a drizzle of caramel sauce, salted caramel ice cream, or my very favorite warm custard sauce. Custard sauce is a traditional British way to serve this dessert and we love it. You can even sprinkle some chopped pecans or walnuts on top for extra crunch.

Serve at room temperature if you prefer. They're still delicious when they've cooled completely.

Perfect for entertaining because they're already portioned. Just set them out on a dessert table or place one at each seat. Your guests will love how cute they are, and you'll love not having to serve and plate dessert after cooking and serving a whole dinner.

Make-Ahead, Storage, and Freezing

To make ahead: Assemble the apple crisps in their jars up to 4 hours before baking. Cover each jar with plastic wrap or their lid, and keep them in the fridge until you're ready to bake.

Storing leftovers: Let the jars cool completely, then pop the lids on and store them in the fridge for up to 4 days. The topping will soften a bit in the fridge, but they'll still taste great.

Reheating: Remove the lid and microwave individual jars for 30 to 45 seconds, or place them back in a 350°F oven for about 10 minutes until warmed through. The oven method will crisp the topping back up nicely.

Freezing: You can freeze baked apple crisps for up to 3 months. Let them cool completely, and then cover with their lids. Thaw and then reheat in the oven. I don't recommend freezing unbaked apple crisps because the apples release too much liquid as they thaw.

Frequently Asked Questions

What size mason jars do I need?

You can also use 8 oz jars for larger servings (you'll get about 5 servings instead of 10), just increase the baking time by about 5 minutes, and check the apples for doneness with the tip of a sharp knife. They should be soft and tender when the crisp is fully baked.

Can I use canned apple pie filling in my apple crisp?

You can, if you're short on time. Keep in mind though that the pie filling will be sweeter. We don't add any sugar to the apples, and their tartness helps balence the sweet topping. With pie filling you may want to reduce the sugar in the crisp topping.

Do I have to peel the apples for my apple crisp?

Yes, I recommend peeling the apples. The texture of the apple layer is meant to be soft, and the peels will not break down and become soft the way the apples do.

Can I make this with other fruits?

 Yes! Try pears, peaches, or berries, or a combination.. You might need to adjust the sugar depending on how sweet your fruit is. Mixed berry crisp is especially delicious.

What's the best way to reheat these? 

The oven is best for maintaining that crispy topping. Reheat at 350°F for about 10 minutes. The microwave works great too, about 30 - 60 seconds

Apple Crisp in a mason jar

More Apple Dessert Recipe Inspiration

  • apple dumplings
    Easy Apple Dumplings Recipe
  • slow cooker apple butter
    Slow Cooker Apple Butter
  • Caramel apple trifles made in mason jars.
    Caramel Apple Trifle
  • Smooth cottage cheese apple dip with fresh apple slices.
    Smooth Cottage Cheese Apple Dip

If you try these Mini Apple Crisps in a Mason Jar or any other recipe on my blog please leave a star rating and let me know how it went in the comments below. Thanks for visiting today!

Recipe

Apple crisp in a mason jar.

Mini Apple Crisp in a Mason Jar

Video

Mini apple crisp with a sweet buttery topping.
5 from 3 votes
Print Pin Rate
Course: Desserts
Cuisine: American
Prep Time: 15 minutes minutes
Cook Time: 20 minutes minutes
Total Time: 35 minutes minutes
Servings: 10
Calories: 257kcal
Author: Dannyelle Nicolle-Ramjist

Ingredients

  • ¾ cup brown sugar
  • ¾ cup all-purpose flour
  • ¾ cup quick oats
  • ½ teaspoon cinnamon
  • ¼ nutmeg
  • ¼ salt
  • ½ cup soft butter
  • 3 cups apples
  • 4 teaspoon lemon juice

Instructions

  • In a mixing bowl combine brown sugar, flour, quick oats, cinnamon, nutmeg and salt, and stir to mix well.
  • Add in the butter and use a pastry cutter, or your fingers to combine with the dry ingredients until the butter is well incorporated and the mixture turns into coarse crumbs. Set aside.
  • To prepare the apple, wash, peel and slice them, then sprinkle with the lemon juice.
  • Divide the apple slices between the 10 mini mason jars (4 oz), and top with the crumble topping.
  • Place the jars on a baking sheet to bake, at 350 for about 20 minutes, until the tops are golden brown. Or make one large apple crisp by placing all the apples in the bottom of a 8 x 8 baking dish, and top the apple mixture with the crisp topping and bake at 350 for about 30 min.

Nutrition

Serving: 1g | Calories: 257kcal | Carbohydrates: 36g | Protein: 2g | Fat: 12g | Saturated Fat: 7g | Polyunsaturated Fat: 4g | Cholesterol: 31mg | Sodium: 132mg | Fiber: 2g | Sugar: 21g
Tried this Recipe? Tag me Today!Mention @LifeisaParty or tag #lifeisaparty!

Easy Pumpkin Spice Waffle Recipe

Oct 13, 2015 · 4 Comments

Pumpkin waffles.

Homemade Pumpkin Spice Waffles -easy recipe for pumpkin waffles, perfect morning treat, and easy to freeze extras for a quick weekday breakfast later.

Pumpkin spice waffles.
[feast_advanced_jump_to]

If you love all things pumpkin and pumpkin spice favor, then you will love these homemade pumpkin spice waffles.  They're full of all your favorite fall spices and flavors and perfect for pumpkin season.  Serve these fresh waffles with maple syrup, toasted pecans, and whipped cream the next time you want a great way to start your day.

We've been making these pumpkin waffles for years, and they've become a family favourite during the fall season.  I say we, but actually my husband is the one who usually makes breakfast on the weekends.  This pumpkin waffle recipe is so yummy that he usually makes a double batch of them.  If you love all things pumpkin and the warm species of pumpkin spice, then you'll love them too.

Homemade Pumpkin Waffles Recipe

These are the perfect fall treat, easy to make, and the taste of pumpkin that every autumn should include.  If you didn't have a waffle maker, you could make these into pumpkin pancakes instead.

Pumpkin Spice

We choose to add individual spices to this recipe instead of using pumpkin pie spice which is a combination of cinnamon, nutmeg, allspice, ginger, and cloves.  This recipe calls for the warm spices of ground cinnamon, nutmeg, and ginger.  They give all the flavor of traditional pumpkin spice and are perfect for these fall waffles.

Pumpkin Puree

Not only are these easy pumpkin waffles full of pumpkin spice, they also have real pumpkin in them.  Look for pumpkin purée in the baking aisle of your grocery store.  Be carefully not to pick up the pumpkin pie filling, which usually looks very similar and is in the same section.  Canned pumpkin pie filling contains sugar and pumpkin pie spice, and other ingredients.  This recipe calls for pure pumpkin puree.  The real pumpkin adds so much fall flavor to this dish.

Pumpkin Waffle Toppings

We love to serve these fluffy pumpkin waffles with our favorite toppings of toasted pecans, whip cream, and maple syrup.  You may be tempted to skip the pecans, but they do really add so much to the dish.  And also be sure to toast them,  It makes them more crisp and enhances the nutty flavor.  It only takes a few minutes to do in a dry frying pan.  Just be sure to watch the pan carefully and flip them as soon as you see them turning golden brown.  They can burn very quickly.  Definitely stay with the pan while they're cooking and don't walk away from it.

We love real maple syrup on pancakes, but you can use whatever syrup you prefer.  And the whipped cream is a really delicious addition, even if it's not homemade.

If you're a chocolate lover, you can add some chocolate chips to your waffle batter and have chocolate chip pumpkin spice waffles.  And for double chocolate add a drizzle of chocolate syrup on top.

Waffle Iron

We used a regular waffle iron to make these waffles.  When most waffle irons are first plugged in they need a few minutes to preheat.  After the waffle iron is preheated and ready to go there is often a green light that comes on.  Some waffle irons have a light that indicated when the waffle is finished cooking.  Other waffle have the light come on when the waffle iron comes back up to temperature, and has nothing to do with if the waffle is cooked yet.  If you're waffle iron doesn't have a light so show when it's done, you can use a timer, or look for signs like no more steam coming out of the waffle maker, and crisp waffle edges to know if your waffle is done cooking.

how to make Pumpkin Waffles

Store any leftover waffles in an airtight container in your refrigerator.  You can also freeze any extra waffles.

We sometimes make extra. The extras get individually frozen on a cookie sheet.  Lay the cooked waffles out in a single layer on a parchment lined baking sheet and set in the freezer.  As soon as they are frozen remove the tray and place the individual waffles in a ziplock bag in the freezer. These are great for breakfasts on a busy school day morning.  

Just take one out of the freezer and warm it up in the toaster or toaster oven.  How to make your Monday morning a little bit better.

Recipe

Pumpkin waffles.

Easy Pumpkin Spice Waffle Recipe

Fluffy and soft waffles with pumpkin and pumpkin spice.
5 from 2 votes
Print Pin Rate
Course: Breakfast
Cuisine: American
Prep Time: 10 minutes minutes
Cook Time: 15 minutes minutes
Total Time: 25 minutes minutes
Servings: 18
Calories: 118kcal
Author: Dannyelle Nicolle-Ramjist

Ingredients

  • 2 cups all-purpose flour
  • ¼ cup sugar
  • ½ teaspoon baking soda
  • 2 teaspoon baking powder
  • 1 teaspoon ground ginger
  • 1 teaspoon ground nutmeg
  • 1 tablespoon ground cinnamon
  • 3 large eggs
  • 1 ½ cups milk
  • ¾ cup canned pumpkin puree
  • 2 tablespoon butter melted
  • non-stick cooking spray
  • ⅓ cup pecans chopped
  • whip cream
  • maple syrup

Instructions

  • To make your homemade waffles, begin by preheating your waffle iron.
  • In a large bowl combine flour, sugar, cinnamon, baking powder, ginger, nutmeg and baking soda. Mix the flour mixture together well and set them aside.
  • In a separate bowl, whisk together eggs, milk, pumpkin puree and melted butter.
  • Stir in the dry ingredients into the wet ingredients until a slightly lumpy waffle batter forms.
  • Spray the waffle iron with non-stick cooking spray, pour the batter in, and cook until the waffles are set and golden brown, about 2 minutes.
  • Toast pecans in a dry frying pan on a medium heat, watch carefully so they don't burn. Chop.
  • Serve waffles sprinkled with chopped pecans, whip cream and drizzled with real maple syrup.

Nutrition

Serving: 1g | Calories: 118kcal | Carbohydrates: 17g | Protein: 3g | Fat: 4g | Saturated Fat: 2g | Polyunsaturated Fat: 2g | Cholesterol: 36mg | Sodium: 122mg | Fiber: 1g | Sugar: 5g
Tried this Recipe? Tag me Today!Mention @LifeisaParty or tag #lifeisaparty!
easy Pumpkin Waffle recipe

With these yummy pumpkin spice waffles to enjoy on a cool fall morning, life really is a party.

More Pumpkin Recipe Inspiration

You might also like our Pumpkin Bread Pudding recipe here.

Pumpkin Bread Pudding: this recipe is easy and delicious, perfect for Thanksgiving and the holidays.

Also check out our Pumpkin Cream Puff recipe here.

You might also enjoy our Caramel Pumpkin Butter recipe here.

Caramel Pumpkin Butter: This easy recipe is only 3 ingredients, and you can make it one pan. Perfect for fall, try it on toast, or on s'mores.

Rustic and Neutral Thanksgiving Table

Oct 8, 2015 · 8 Comments

Rustic and neutral Thanksgiving table.

Rustic Thanksgiving Table Setting: Beautiful Thanksgiving table decorated with wildflowers, little mini animals, tree stumps and white pumpkins.

Rustic and neutral Thanksgiving table ideas.
[feast_advanced_jump_to]

This weekend is Thanksgiving in Canada, and it's time to think about a beautiful table.  This year I went with a rustic neutral Thanksgiving table setting, and I really love how it turned out.

It was super easy, and inexpensive to put together, since I shopped the house, and went foraging for the vines and flowers.  I hope it inspires you.

Rustic and Neutral Thanksgiving Table

Layered Table Runners

I started out with some simple white table runners that I had picked up on clearance at Ikea ages ago, and tucked away.  When I took them out of the packaging and unrolled them, I got a disappointing surprise.  My plain white runners had a pattern all the way down the middle.  Boo.  In my excitement I hadn't looked carefully at them.  I hummed and hawed for a while, and came up with the solution to layer burlap over them to cover up the pattern down the middle.

It actually worked really well, and in the end I liked the layered effect it helped create.

how to set a Thanksgiving table

Rustic Thanksgiving Place Settings

On top of the runners, I layered the wood slice chargers that my brother-in-law cut for me last year.  They aren't perfect…there's a few cracks in them, and the bark is coming off of some, but I think it all just adds character.

rustic thanksgiving table setting

This year I used simple white plates (which makes clean up easy since they can go in the dishwasher), and layered on the "give thanks" plates I made a few years ago.  You can find the tutorial on how easy they are to make here.

Place Cards

On each plate I made a little placard out some brown paper cut into a leaf and the sweetest little squirrels.

rustic thanksgiving table setting ideas

The squirrels were a fun craft store find a few months ago that I tucked away for Thanksgiving.  And the squirrels inspired the other animals.

Animals

Did you spot them?

They're nestled is different spots down the centre of the table.

woodland Thanksgiving table

The animals are tucked into a grouping of pumpkins and,  pretty tarnished silver julep cups filled with wildflowers, and some wild grapevine willed with grape clusters.

wildflower thanksgiving table

Wild Flowers

The vines and flowers were gathered on a morning walk -pretty white fall asters, and the last of the Queen Anne's Lace.

rustic thanksgiving centrepiece

And last but not least, white pumpkins -lots of them, in all different shapes and sizes.

white pumpkin thanksgiving table

What could be prettier than a row of big white pumpkins.

neutral thanksgiving table decor

With a pretty and easy rustic Thanksgiving table setting like this one, life really is a party.

You might also like our Neutral Thanksgiving Table here.

Also check out our Rustic Thanksgiving Table here.

Rustic Thanksgiving Table: set with diy wood chargers, candles, bittersweet, pumpkins, vintage pieces, and a pinecone garland.

You might also enjoy Black and White Farmhouse Thanksgiving Table here.

Black and White Modern Farmhouse Thanksgiving Table: White pumpkins, black cutlery, and DIY macrame napkins rings make the perfect Thanksgiving table.

Pumpkin Spice Play Dough

Oct 6, 2015 · Leave a Comment

Pumpkin Spice Play Dough: Great recipe for pumpkin pie scented play dough. Lots of ideas for a fun fall sensory centre for children.

Pumpkin Spice Play Dough: Great recipe for pumpkin pie scented play dough. Lots of ideas for a fun fall sensory centre for children.

The other day little Miss Maddie and I came up with a fall activity that is so much fun I had to share.  I can’t remember why but we decided it was time to make some play dough, and one thing led to another and we had the wonderful idea to make it into pumpkin spice play dough by adding in some orange food colouring and some spices.

It turned out great, and smells just like fall to me.

homemade Pumpkin Spice Play Dough

Recipe

Pumpkin Spice Play Dough: Great recipe for pumpkin pie scented play dough. Lots of ideas for a fun fall sensory centre for children.

Pumpkin Spice Play Dough

No ratings yet
Print Pin Rate
Author: Dannyelle Nicolle-Ramjist

Ingredients

  • ½ cup salt
  • 1 cup flour
  • 1 tablespoon cream of tartar
  • 1 tablespoon oil
  • 1 cup water
  • food colouring yellow + red = orange
  • 2 tablespoon ground cinnamon
  • 1 ½ teaspoon ground ginger
  • ¼ teaspoon ground nutmeg
  • ¼ teaspoon ground cloves

Instructions

  • Combine ingredients in a saucepan.
  • Heat gently, stirring all the time.
  • When the dough has a good consistency, take it off the heat and allow to cool.
  • Store in a sealed container to keep it from drying out.
Tried this Recipe? Tag me Today!Mention @LifeisaParty or tag #lifeisaparty!
fall play dough children's sensory centre

Of course new play dough meant we needed to dig out some fall cookie cutters, and then we needed pie plates, and then we started to think of other fun things we could add to the fun.

Fall sensory bin play dough

We got a little carried away, to both of our delight.  It was so much fun coming up with fun things to add to our play dough for fall.  

We added mini popsicle sticks, some foil fall leafs from the dollar store, cookie cutters, buttons, fall cupcake picks, fall coloured pompoms, fall coloured craft feathers, some star anise and whole cloves, large and small cupcake liners, cinnamon sticks, silk sun flowers, and silk leaves.  The possibilities really are endless…and so is the fun.

  • mini popsicle sticks
  • foil fall leaf confetti
  • cookie cutters
  • buttons
  • fall cupcake picks
  • pompoms
  • feathers
  • star anise
  • whole cloves
  • large and small cupcake linners
  • cinnamon sticks
  • silk flowers
  • silk leaves

Pumpkin Spice Play Dough

A real favourite was playing with the real whole spices.  The star anise make such a pretty patterns in the play dough, and the cloves and cinnamon sticks are perfect stems, or eyes, or just about anything really.

how to make pumpkin spice play dough for fall

It was so much fun that we even made a set for a friend.  I think it would be the perfect sweet gift for any littles in your life this weekend, since it’s Thanksgiving here in Canada.

pumpkin spice play dough recipe

With homemade pumpkin spice play dough, life really is a party!

You might also like our Kid's Thanksgiving Table here.

Kids Thanksgiving Table: a leaf mobile, painted pumpkins, velvet pumpkins, and leaf crowns create a special spot for special guests.

Also check out our Cricut Halloween Trick or Treat Bag here.

Cricut Halloween DIY Trick or Treat Bag: Less Tricks More Treats free Cricut pattern to create the cutest bag for trick or treating and all fall long.

You might also enjoy our How To Make A Fall Fairy Garden here.

Fall Fairy Garden: How to make a sweet little Fall themed Fairy Garden with an easy to make fairy house, mushrooms, pumpkins, and miniature fall leaves tutorial.

Fall Home Decorating Ideas

Oct 1, 2015 · 6 Comments

Fall home decor ideas.

Fall Home Decorating Ideas: tour our home all decorated for fall and full of ideas for easy DIY fall decor you will love.

Fall home decor ideas.
[feast_advanced_jump_to]

I'm really happy to share a little Fall Home Tour with you today.  I've been working away adding lots of pumpkins and natural elements, candles and cozy throws to give you lots of fall home decorating ideas.  So grab a coffee and come in and have a peek.

neutral fall front porch

Just inside the front door this year, I've added a few cozy touches like this pretty throw -a great garage sale find this summer.  I've also strung lots of wooden beads and added them here and there for some pretty texture.

fall front entry ideas

Dining Room

Our main floor is very open concept, the first room is the dining room.

fall home decorating ideas

I think my very favourite fall decoration this year is this new wooden dough bowl filled with faux pumpkins.  The bowl was my big purchase at a recent antique fair, and the pumpkins are from the dollar store, painted in soft grey, beige and cream with craft paints.

wood dough bowl full of white pumpkins

Fall Gallery Wall

I've put up another fun fall gallery wall in the dining room.

fall gallery wall

I found this great arrow garland at the craft store one day, and love how it looks hanging in the deer antlers.

white deer head

Another fav. addition is this gold wreath.  I made it with the directions from Vintage Revival, it was quite easy and quick to put together.  It's made of cocktail straws and wire, after it was all put together I spray painted it gold.  What would a home tour be without a little spray paint, lol.

fall gallery wall

Fall Bar Cart

Looking back towards the door is my little bar cart, all set up for fall.

fall bar cart

I made a little "Cheers" message with some fun cork letters.  I love the little leaf patterned paper straws for fall, mixed in with some pretty gold ones, and lots of beautiful vintage glasses.

fall bar cart ideas

And on the other side of the dining room , is the console table.

fall home decorating ideas

The little message on the type writer: "Dear Fall, I missed you.  Welcome back."  I think fall truly is my favourite season of the year.  Sunshiny days, not too hot, pretty leaves, cool nights, and pumpkin pie.

The Living Room

From the dining room, it's into the living room.

fall home decorating ideas

I love this little white chippy table at the bottom of the stairs.  Simple and pretty.

happy fall

The littlest pumpkin is another faux one that I painted, I added the herringbone pattern with a gold marker, I love easy diy.

In the living room, it's feeling warm and cozy for fall.

fall home decorating ideas

Just a few recipes out, contemplating Thanksgiving dinner.

fall decorating ideas

A few scented candles have the room smelling like fall too.

copper pumpkins

Here's my new geometric pumpkin.  It's made out of cocktail straws and a fun DIY.  The copper pumpkins are echoing the mantel.

copper fall decor

What's prettier than copper and white pumpkins?

copper and white pumpkins

The Kitchen

And into the kitchen, our simple harvest table with the fun oversized modern light is dressed up for fall too.

neutral fall kitchen

The chalkboard announces autumn.

neutral fall decor ideas

You can see how I made the stitched paper leaf garland here, and the felted acorns are a new addition.

felted acorns

On  the table some black wire pumpkins, rustic wood cake stands, and simple pinecones dipped in white paint.

neutral fall decor ideas

Basement Family Room

That's the main floor, should we head down to the family room in the basement.

fall family room tour

This is a favourite spot for movie watching, especially as the nights get cooler.

fall home decorating ideas

I've added a few touches of traditional orange down here.

minimalist fall decor ideas

The fireplace is so nice on a chilly night.  I've kept the mantel really simple this year.  My favourite part is the pine cone garland.

minimalist fall fireplace mantel

I used a few more of them on the table, in the pretty enamel ware tray.

fall home decorating ideas

Master Bedroom

And now I've got one more room to share, our master bedroom, with a few pretty fall touches, upstairs we go.

fall bedroom decor

I've added in few more cozy pillows -see how easy to make they were here, and a pretty plaid throw.

fall bedroom decor ideas

My husband and youngest daughter have just started the Little House on the Prairie series, which makes for perfect bedtime reading.

how to decorate your bedroom for fall

I've added my Fall Subway Art, a project from a few years ago.  I love it up here.

fall master bedroom ideas

And what could be more perfect than a little reading and cup of tea on a fall day.

Thanks so much for coming by, I hope you've enjoyed all our fall home decorating ideas.  With you here for a fall home tour, life really is a party!

More Inspiration

You might also enjoy our Fall Home Tour 2019 here.

Fall Home Tour: Full of autumn decor ideas for Vintage Botanical Scientific Decor with Boho Maximalist Influence with lots of plants, insects, and pumpkins.

Also check out our Fall Home Tour 2018 here.

Fall Home Tour: With a nod to science this botanical scientific vintage decor brings the outdoors in, with lots of neutrals and mustard yellow.

You might also enjoy Fall Home Tour 2017 here.

How to make Wood Bead Garland with Yarn Tassels

Sep 29, 2015 · Leave a Comment

DIY wooden bead strands and tassels.

How to make Wood Bead Garland with Yarn Tassels: easy DIY for tassels and garland. Great way to add texture to home decor.

DIY Wood bead strands and yarn tassels.
[feast_advanced_jump_to]

This is a really simple project, but really, really beautiful.  As is so often the case.  I want to share with you how to make a wood bead garland with yarn tassels.  It's the perfect addition to your home decor.  This easy craft adds texture and interest to your farmhouse decor.  It's perfect for styling your coffee table, dining table, or using on a shelf or tiered trays.  There's so many great different ways to use these garlands.  They look great swaged over a mirror or fireplace mantel.  Also try them as garland on your Christmas tree.  Not only do the wood garland look great, they also just might be the easiest craft project ever.

How to make Yarn Tassels

Choosing Your Beads

We had fun choosing a bunch of different wood beads for this DIY project.  Look for them at places like dollar tree or hobby lobby.  I made several versions of our wooden bead garland using different sizes and styles of wooden beads.  I think the garlands look great layered together.  For some of the garland we used unfinished beads, and others had different colors of stain or varathane on them.  We also used some very small beads about ¼ inch in diameter and then larger ones up to ¾ of an inch.  Some of our beads were round, and then some were more oval is shape.  I did use one kind of bead for each garland and didn't mix them together in one bead garland. 

If you wanted to you could also stain your unfinished wood beads.  Use a small amount of wood stain on lint-free cloths and rub it on to the beads.  Add more layers for a darker look.  If you're stain doesn't have a sealer in it you can add a spray version of a sealer to the stained beads for more glossy look if you wish.

Tassels

We also added yarn tassels to some of our wood garlands.  You can add these to the ends, or space them out throughout your farmhouse wood bead garland.  These add even more texture and interest to your beaded garland.  I used yarn to make my tassels.  The softness of the yarn against the hard wood beads is a great juxtaposition of materials.

I wanted to keep to my entire project neutral, so I used white yarn for my tassels, but you can use your choice of colors.  This would be a great way to add pastel colors for spring, or pink for Valentine's Day, or red and green at Christmas.  Or use yarn colors that match your home decor.  Look for yarn at thrift stores for an inexpensive source.

You can also use jute twine for your DIY tassels for a more farmhouse look.  

How to make a Yarn Tassel

Recipe

DIY wooden bead strands and tassels.

How to make Wood Bead Garland with Yarn Tassels

No ratings yet
Print Pin Rate
Cook Time: 1 hour hour
Total Time: 1 hour hour
Author: Dannyelle Nicolle-Ramjist

Equipment

  • scissors

Materials

  • small piece of cardboard
  • yarn
  • assorted wooden beads
  • kitchen twine
  • large darning needle

Instructions

  • The first step is to string your wood beads together. We used some kitchen twine and darning needle. Tie the first bead at the end to secure it and then keep going until you've used all your beads, or it's at your desired length. We made ours about 3 feet long, but you can make your own garland as long or as short as you like. If your using a different kind of string and it's too thick to use with a darning needle, you can try adding some tape to the end of the string to make it stiff enough to easily thread the beads on, or even use a wooden skewer to help push it through the beads. When you get to the end of the garland, tie a knot around the final bead to secure it.
  • To make the tassels, I used a small piece of cardboard and wrapped a piece of yarn around about 18 times. The size of your cardboard will determine your tassel's length, and the number of times you wrap it around will determine the fullness of the tassel.
  • Once it's snipped use another small piece of yarn, about ½ inch from the top to bundle them all together. Tie the yarn bundle with a tight knot and your first tassel is finished.
  • To add your tassels to the garland, just tie the top piece of yarn to the wood bead garland string with a knot and cut off the access string. We did about 6-8 tassels on the garland, evenly spaced throughout. You could also make larger tassels and place them just at the ends of the garland.
diy tassels
how to make wood bead garland

Making your own DIY wood bead garland with tassets is a really fun and easy project.  It was rather therapeutic.  It's also an easy way to personalize your decor by varying the sizes of beads, the yarn you choose, and the size of the tassels, and the finish of the beads.  There's so many fun variations, it's the perfect DIY project.

easy wood bead garland
how to make wooden bead garland
DIY Wood bead garland with tassels
How to make Wood Bead Garland
DIY Wood bead garland

This is a really great watching tv project, since string the beads takes a little while.  We made a lot of different variations, with all different beads.  I love the look of them as garland, or just adding interest to a centerpiece on a table.  They make a great addition to your decor, and they're really easy to make.

With DIY Wood Bead Garland with Yarn Tassels, life really is a party.

More Inspiration

You might also like our DIY Twig Houses here.

DIY twig houses.

Also check out our Ribbon Wall Hanging here

You might also enjoy our DIY Mason Jar Oil Lamps here.

How to make mason jar oil lamps.


Neutral Fall Front Porch

Sep 24, 2015 · Leave a Comment

Fall front porch decor.

Neutral Fall Front Porch: peachy-pink and white mums, light pink pumpkins and vintage touches are part of this beautiful fall front porch decor.

Fall front porch decor ideas.
[feast_advanced_jump_to]

Yesterday was the first day of fall, glorious fall!  I love fall.  I love the cooler temps, the pumpkin flavoured everything, the leaves changing colour, and all the beautiful fall front porch decorations.  Today I'm sharing my front porch all dressed up for fall.

I do like orange pumpkins and all the fall colours, but there's just something about neutral fall decor.  All the white pumpkins, and straw, and white mums keep calling my name this year.

neutral fall mums in vintage containers

Fall Mums

I few weeks ago for my daughters Pink Paris themed birthday party, I sent my sweet husband out to buy some white and pink mums for outside.

Since they were just starting to come out, covered in buds but not really open it was tricky for him to tell the exact colour.

cream and white mums

We ended up with three white and one cream and two sort of peachy, pinky, white.  They aren't pink, but they are super pretty and inspired this neutral with a little peachy pink colour scheme.  It was a happy accident, because I love it.

peach mums and pumpkins

To go with the mums I went searching for and actually found (a rare and wonderful event) pink pumpkins.

fall mums in a galvanized bucket

Straw

I also added in some pretty white pumpkins and some straw -with a mini straw bale, and a simple straw wreath for the door.   The wreath tied in so well with the mini straw bale.  I picked up the plain wreath at the craft store, and tied an easy satin ribbon on.  Sometimes simple is best.

simple straw fall wreath

Vintage Details

I also, just happen to have the perfect vintage wool blanket.

pumpkin stack and a vintage wool blanket

If you follow me on instagram  you know that I was at a great antique fall market the weekend before last.  I came home with a couple treasures and this wool blanket was one of them.  My mom came to the sale for the first time, and I might have dropped a few strategic hints that this would make a great birthday present…and that I'd be willing to hang on to it for her until the end of Nov. when she might want to wrap it up.

The other fun vintage additions are the pots that the mums are in.  I used an old enamelware tub, and a few galvanized buckets.  I love how much character they add.

stacked pumpkins

Pumpkins

I just love my little mini tower of pumpkins too.  The top one is a fake…I had that moment at the farm like you do, where you're figuring out how much those amazing $5-10 white pumpkins are going to add up to, and you remember there's a coupon for the craft store today and they're on sale.  They still cost too much, but let's call it an investment in future falls to come.

neutral fall decor ideas

I'm really happy with how it all turned out…now if I can just remember to keep watering the mums.

neutral fall front porch decor

With a pretty neutral fall front porch, life really is a party!

More Inspiration

You might also like our Ombre Pumpkin Tower here.

You might also like our Fall Back Deck here.

You might also enjoy our White Fall Outdoor Planter here.

Copper Pot Scrubber Wreath

Sep 22, 2015 · 14 Comments

DIY copper scrubber wreath.

Copper Pot Scrubber Wreath: Simple DIY for a beautiful copper wreath made from dollar store pot scrubbers.

DIY copper scrubber wreath.
[feast_advanced_jump_to]

This copper wreath is easy to make make and fun to put together.  It's the perfect addition to your fall decor.

I wanted to make a copper wreath, and you probably couldn't guess what I used to make it.  It's made from copper pot scrubbers.

Copper's been hot for about a year -and it's still going strong!

Materials:

  • Copper Pot Scrubbers (I used about 30)
  • Foam Wreath Form
  • Hot Glue
  • Ribbon for Hanging

How To Make a Copper Pot Scrubber Wreath

I started out with a foam wreath form from the craft store, and copper pot scrubbers.  I picked up the pot scrubbers at the dollar store, they come in packages of three so I used 10 packages for this wreath -they're just $1 a package, so this little project won't break the bank.

how to make a copper wreath

To make the wreath, use your fingers to open up the middle of the pot scrubber so it looks like a donut.  Then snip with strong scissors.  Once you have it snipped, wrap it around your wreath, and glue in place with hot glue -work your way all around the wreath.

DIY copper wreath

I wanted to keep my wreath quite simple and modern looking so I simply hung it with a ribbon, but if you wanted another look you could certainly embellish it some fall pics.  It would look great with some small Christmas balls for Christmas, just like the one I made before with silver coloured pot scrubbers.

copper wreath

I love simple diy projects that transform everyday items.

DIY fall wreath

I used mine for my fall mantel this year, and added in some pumpkins and few other copper finds.

copper accents for fall

The little copper cups were a thrift store find, I just love them.

wheat in a copper kettle

And, the pretty copper kettle is looking great holding some wheat for fall.

how to make a copper wreath

With a pretty copper pot scrubber wreath, life really is a party!

More Inspiration:

  • DIY mushroom wreath
    Mushroom Spring Wreath
  • Pampas grass wreath DIY
    Easy DIY Pampas Grass Wreath
  • DIY butterfly wreath with book page butterflies and moss wreath.
    BookPage Butterfly Spring Wreath
  • DIY Valentine's Day wreaths
    DIY Valentine's Day Wreaths

Paris Birthday Party -The Food

Sep 17, 2015 · 3 Comments

Paris themed birthday party French food ideas.

This Paris French Party Food Menu is full of easy ideas of what to serve at your Paris themed party, from baguettes to macarons, and kid-friendly! Start out with savoury and then move to a Paris inspired dessert table.

[feast_advanced_jump_to]

I just shared with you all the details of the Paris themed decorations, games and activities from my daughter's 11th birthday -A Paris themed party!  Today I want to share the fun French themed menu we put together for the occasion.

If you love French food you might also like our French inspired picnic, our Beauty and Beast themed dinner and movie night, or our fondue date night at home.

Kid Friendly French Party Food Menu

After some party activities, it was time for lunch, and we went with some real French classics.

Paris Party Food -A French Themed Menu Great ideas of what to serve at your Paris themed party, from baguettes to macarons! Beautiful and delicious!

French Inspired Paris Lunch Menu

You think France and you think wine and cheese…but not so much the wine for a group of 11 year olds, so we went with cheese.  

Nothing too exotic considering they were kids, just some cheddar, marble, swiss and brie.  We served them with sliced baguette -of course and crackers, along with a little fruit, and some chutneys.

There was also pate, and some cured meats -mild = kid friendly.

A favourite little detail was the tiny French mustard pot I found at a second hand store a few weeks ago.

Paris Party Food -A French Themed Menu Great ideas of what to serve at your Paris themed party, from baguettes to macarons! Beautiful and delicious!

We served some veggies and dip, and thought they looked pretty in different heights of mason jars.

We also made sandwiches -think enjoying the sights of Paris and stopping for a baguette with ham and cheese for lunch on the banks of the Seine river, sweet memories of an incredible city.

Paris Party Food -A French Themed Menu Great ideas of what to serve at your Paris themed party, from baguettes to macarons! Beautiful and delicious!

There was ham and swiss cheese, or roast beef and havarti with lettuce.  We made half on baguette and half on croissants. And we added the cute little party flags that said "Ooh La Lah".

We also put out a plate of fresh croissants and some jam and butter, just in case some of the kids like things a little plainer.

French Party Food Menu

  • Cheese -brie, cheddar, marble, swiss
  • baguette
  • fruit -grapes, plums, apple slices, pear slices
  • chutneys
  • pate
  • cured meats
  • veggies and dip -cucumber, peppers, carrots, cherry tomatoes
  • roast beef, havarti, and lettuce sandwiches on baguette or croissant
  • ham and Swiss cheese sandwiches on baguette or croissant
  • plain croissants with butter and jam

This was the perfect easy and delicious menu.  It was low key and easy to put together after a trip to the bakery on the morning of the party, and there was really something for everyone.

Paris Party Food -A French Themed Menu Great ideas of what to serve at your Paris themed party, from baguettes to macarons! Beautiful and delicious!

French Inspired Drinks

For drinks, we made a simple sparkling pink lemonade punch, and I just happened to have Eiffel tower glasses already, so they were perfect for the occasion.

Mix equal parts pink lemonade and gingerale, and garnish with some lemon slices.

Paris Party Food -A French Themed Menu Great ideas of what to serve at your Paris themed party, from baguettes to macarons! Beautiful and delicious!

After the yummy lunch it was time for dessert!

French Inspired Paris Dessert Table

  • Macarons
  • Eiffel Tower Sugar Cookies
  • Cupcakes
  • Eclairs
  • Cream Puffs
  • Chocolate Eiffel Tower Lollipops
Paris Party Food -A French Themed Menu Great ideas of what to serve at your Paris themed party, from baguettes to macarons! Beautiful and delicious!

We set up the dessert table in the dining room, and it looked amazing. The kids could not wait to enjoy it after lunch.

Paris Party Food -A French Themed Menu Great ideas of what to serve at your Paris themed party, from baguettes to macarons! Beautiful and delicious!
Macarons

The big deal of the dessert table was homemade macarons.  If you know these cookies you know how famously French they are, and how notoriously difficult they are to make.

I've made them before, with mostly good results.

For this party we knew we wanted to have a few different kinds, so that meant several batches.  I had mixed results again.  I did think to myself at one point, they're just cookies, it's not rocket science.  Rocket science is probably easier.  In hind sight, I maybe should have just picked some up at the bakery, but they're so expensive it seemed worth it to give them a try.  

I made vanilla, chocolate, raspberry, and attempted peach -although only a few of those seemed worthy to make it to the dessert table.  

They were much enjoyed by the guests, and I even sent some home with a few of the them too -so all things considered a success.

Paris Party Food -A French Themed Menu Great ideas of what to serve at your Paris themed party, from baguettes to macarons! Beautiful and delicious!

Most of my energy went into making the macarons, so the rest of the dessert table was pretty easy.

Eiffel Tower Sugar Cookies

My good friend Heather kindly made the Eiffel tower sugar cookies, which looked and tasted amazing.  

We've kind of got into the habit of baking something special for each others parties.  It really is such a big help.  If you have a baking buddy, I highly recommend it.  It's a great help the day before a party you're hosting to have one less thing to worry about.  And it's not too big a deal when you're reciprocating the favour, since it's only one thing to worry about.

Paris Party Food -A French Themed Menu Great ideas of what to serve at your Paris themed party, from baguettes to macarons! Beautiful and delicious!

Cream Puffs, Eclairs, and Cupcakes

We wanted to go with as many French inspired items as we could, so we thought cream puffs and eclairs would be a good addition.  

We actually just picked up some frozen ones at the grocery store and they were delicious and kid friendly, and obviously super easy.

Paris Party Food -A French Themed Menu Great ideas of what to serve at your Paris themed party, from baguettes to macarons! Beautiful and delicious!

I also picked up a dozen cupcakes at my favourite cupcake spot.  I added in the picks to match the rest of the party decor.

Paris Party Food -A French Themed Menu Great ideas of what to serve at your Paris themed party, from baguettes to macarons! Beautiful and delicious!

Chocolate Eiffel Tower Lollipops

Lastly, I picked up a chocolate Eiffel tower lollipop mold and used some pink chocolate to make some.  

The kids really, really liked these.  

They were fairly easy to make.   Once I figured out the trick of banging the mold on the table to get any little air bubbles out it went even better.  They were a great addition to the loot bags too.

So there's our French themed menu, pretty easy to put together and a huge hit with the guests -not to mention how much I enjoyed the leftovers…think Mommy with a glass of wine, cheese, crackers and Netflix after the kids went to bed that night.

With a yummy Paris Birthday Party French Food Menu, life really is a party!

And just incase you missed it, be sure to check out Part One of this party, which features all the decor and activities.

paris-party-1.3.jpg

More Party Inspiration

  • Princess and the frog party table with food and decorations.
    The Best Birthday Party Home Decoration Ideas
  • Teddy bear breakfast party with teddy bear themed food.
    Teddy Bear Breakfast Party Ideas
  • Beauty and the Beast party table with food and decorations.
    Beauty and the Beast Party -Themed Dinner and Movie Night
  • Cinderella Party table with Cinderella inspired food and DIY party decor.
    Cinderella Party -Dinner and Movie Night

Frequently Asked Questions

Where did you buy the Eiffel tower chocolate mold?

We found ours at a local candy supply store. You could also look online for one, just be sure to check the sizes.

Where are all the little Eiffel towers from?

I used to collect these, so they're from all over, including Paris. Search for them online if you're looking for something similar.

Can you make the food ahead of time?

Yes, some of it. The macarons are best made a few days ahead. I made the lollipops days ahead. Make the sandwiches the morning of the party on fresh croissants and baguettes.

If you try any of these Paris Themed French Party Foods for your own party, or any other ideas on my blog please let me know how it went in the comments below. Thanks for visiting today!

Paris Themed Birthday Party with Party Activities and Decorations

Sep 15, 2015 · 26 Comments

Paris themed birthday party activities and games.

This Paris Themed Party is full of great ideas for activities, games and party decorations. We built pipe cleaner Eiffel Towers, made our own truffles, and created designer fashion. This kid friendly party was full of fun acitivies everyone enjoyed, as well as cute DIY decor, and more.

Paris themed birthday party activities and games.
[feast_advanced_jump_to]

Why We Love This Party

  • Does it get better than Paris? If we can go there, we can at least pretend to be there for the day!
  • We love the Eiffel Tower!
  • French chocolate making was so much fun.
  • No one does fashion like the French... unless it's a bunch of little girls armed with pink ruffles.
  • A French lunch menu is always a good idea!

Last week, my eldest daughter, Paige, turned 11 and we had a Paris themed party to celebrate.  I'm excited to share all our Paris themed birthday party activities, games, and decorations with you today.

If you love all things French too, check out our French inspired party food menu from the party here. You might also enjoy our French inspired picnic, or our Fondue date night at home.

Paris Party Invitations

We ordered some great party invites, that had a little passport and boarding pass in them, so as guests arrived we welcomed them at the "Passport and Customs Check" which I decorated with a little vintage luggage and some fun old Paris luggage tags attached.

Paris Themed Birthday Party Activities, Games and Decorations -build a pipe cleaner Eiffel Tower, make your own truffles, and create designer fashion

I had a fun Paris stamp to mark everyone's passport as they entered.

Paris party passport check in

The girls loved the idea of arriving in Paris, and we planed our party activities imagining we were in the city for the day.

Make An Eiffel Tower

The first stop, was the Eiffel Tower!

make your own Eiffel Tower

This was a fun little activity to work on as the guests were arriving.  We used pink and silver glittery pipe cleaners to build our own version of the famous tower!

Chocolate Truffle Making

When you think of Paris, you think of what the city is famous for -food and fashion!  So, our next stop was to the Truffle Shop.

Paris themed party make your own truffle shop

We set up a little Truffle shop in the kitchen for everyone to make their own truffles.

Paris party game make your own truffles

Ahead of time, I made the truffle centres -see my recipe here, so that all I had to do was scoop up the little balls -a mini ice cream scoop worked great for this, and then let the kids choose their toppings to roll them in.

We had sprinkles, coconut, nuts, mini marshmallows, graham crackers, mini white chocolate chips coco powder, icing sugar, and coarse sugar, and the girls had lots of fun making their choices and fun combinations.

make your own truffles

When they were done, we put them in little pink wrappers, and everyone put theirs into a cute bakery take out box to take home with them.

make your own truffles

This was a really easy activity that the kids really enjoyed doing.

Fashion Studio

Next up, on our tour of Paris for the day was the Fashion Studio.

children's make your own paper dress activity

We put out lots of different colours of tissue paper, tape, washi tape, ribbon, and pretty ruffled streamers.  The ruffled streamers are easy to make on the sewing machine, and were a real favourite with the girls.

We divided the girls into two groups and then they each picked one person to be a model.  They had a great time creating tissue paper dresses and decorating them with streamer ruffles and washi tape accents.  It was adorable, and so much fun to see their creativity.

making paper dresses out of tissue paper game

The next activity involved another thing Paris is famous for…food!  You can see all the details of the French inspired lunch and dessert table here.

Paris Themed Party Decorations

Along with the fun Paris inspired activities from the party I wanted to share some of the easy decorations too.

Paris Birthday Party decorations

Fresh Flowers and Eiffel Towers

We went to the farmers' market the day before and picked up a bunch of pretty bouquets of pink flowers.  I just loved them.  

We also scattered Eiffel Towers everywhere.  I just happen to have a collection of them, so we had pretty much everything to make our pink Paris party decorations.

Paris Birthday Party decorations

We did pick up this giant Eiffel Tower at a thrift store, and Paige has moved it to her room since the party.  

Birthday Girl Photos

Maddie made the pretty bunting of photos of her big sister, printing one for each year.  I know it's not a new idea, but we had actually never done it for a party before and seeing those photos over the eleven year span reminded of how beautiful my girl is, and how quickly she has grown!

Vintage Bicycle

One other fun little detail, remember Maddie's vintage bike makeover from the spring?  Well, it seemed like the perfect French accessory, so we set it up in the dining room, with a baguette in the basket.  Perfect, oui?

vintage bike with baguette.

Paris Themed Loot Bags

I actually found it really hard to come up with a favour for our little guests.  I wanted something that fit our theme, but that little girls would enjoy.  Here's what I came up with for our goodie bags;  we sent them home with their little box of 6 homemade truffles, a Paris chocolate lollipop, and a sweet little Eiffel Tower necklace.  Perfect.

Paris party loot bags favours

The birthday girl had a great time with her friends, and we had a great time celebrating her!

Paris Birthday Party -Part One: Party Activities and Decorations -Great ideas for activities for little girls at a Paris themed birthday party, like build a pipe cleaner Eiffel Tower, make your own truffles, and create designer fashion from tissue paper and washi tape -every little girls dream birthday party!

Food

We also had a great French themed lunch. You can check out all the details of our French themed party food here. We started out with cheese, charcuterie, veggies, fruit and French inspired sandwiches.

French inspired lunch with cheese, crackers, charcuterie, and sandwiches.

And the we finished it all off with an amazing French inspired dessert table.

Paris party dessert table with Eiffel tower art backdrop.

With a pink Paris birthday, life really is a party!

More Birthday Party Inspiration

  • Snow White Party with themed food and party decor.
    Snow White Party -Dinner and A Movie
  • The Princess and the Frog party food table set up with food from the mvoie and DIY decor.
    The Princess and The Frog Party -Dinner and A Movie
  • Free movie night printables including a free ticket, popcorn banner, food labels, and signs.
    Free Movie Night Printables
  • space themed party star moon
    Pink Outer Space Themed Party

Frequently Asked Questions

Where did you get the party invite passports and other printables?

The shop is no longer offering this set, but look for something similar on Etsy. Usually you can purchase and print at home, or your local print shop.

How did you make the ruffle streamers?

Look for a how to video online, but essentially you are going to run to streamers that are overlapped through a sewing machine, with a long stitch, at the highest tension, and even holding your spool of thread to increase the tension even more. This will make the streamers ruffle up as you sew them together.

Which activity did the kids love best at the Paris party?

Definitely the truffle making. They loved it! And it was quite easy to prep for with simple ingredients. The take home boxes made it extra special for them.

If you try any of the ideas from this Paris Themed Party or any other ideas on my blog please let me know how it went in the comments below. Thanks for visiting today!

First Day of School Dinner

Sep 10, 2015 · 2 Comments

Back to school dinner ideas.

First Day Of School Dinner: celebrate back to school with a family dinner, with school themed decorations, and delicious menu ideas.

Back to school themed party.
[feast_advanced_jump_to]

It's become a lovely family tradition for us to have a special first day of school dinner -just the four of us, to celebrate, and hear all the details of the day.  I hope your inspired by all our first day of school dinner ideas.

Check out last years back to school dinner here, and the year before that's back to school party here. My youngest kept asking me over the weekend if we were having a first day of school diner this year, and I tried to give vague answers like "we'll see, I'm not sure if we'll do it again this year" to help keep a bit of surprise in the air.  I set it all up while they were at school, and when they got home they saw the table all prepared.

Back to School Dinner

Vintage Inspired Back To School Table

I'd been collecting some fun little things to use for the past month or so.  I filled the centre of the table with lots of fun school supplies, all with a bit of a vintage feel.

At the end of the room, a little "first day" banner, and some first day of school photos from over the past few years, printed in black and white and hung on some baker's twine with mini clothespins.

The globes were some I've found at garage sales over the last year.  And what says "back to school" more than a big container of apples.

I also used some old books, and some pretty flowers from the garden.

first day of school dinner

The little metal school bus is one Paige received as a baby, and I keep it around to make an appearance at back to school each year.  I also picked up a few fall scented candles -apple pie and cinnamon buns.

Back to School family traditions

Back To School Place Settings

I had fun with the place settings.  These sweet little bags held our cutlery and napkins, and the giant paper clips were a fun touch too.

The place cards are chalkboard gift tags, held by some pretty school themed clothespins.

back to school party

In the bottles, we had apple cider, and tied on some pretty paper straws with some ruler ribbon.

first day of school dinner

Dinner Menu

For dinner we had a yummy soup with lots of veggies.  It's a favourite of ours and you can find the recipe for the Tortellini and Italian Sausage soup here.

back to school themed party

And, in these sweet lined paper bags, nice crusty rolls to dip in our soup.

first day of school party

For dessert, we always have something apple flavoured.  This year we had our fun apple truffle pops -see how I made them here and easy apple turnovers.

Back to School Dinner

We had a great time celebrating another new school year together.  Can't believe how quickly they are growing up, so thankful to be building memories with them!

Hope the first day was a good one at your house.  With a first day of school dinner, life really is a party!

More Back To School Ideas 

You might also like our Back To School Free Printables here.

Also check out another Back To School Dinner here.

Back to School Dinner Ideas: a wonderful family tradition of a special Back to School dinner to celebrate the first day of school and hear all about it.

You might also enjoy our Back To School Party Ideas here.

Back to School Apple Truffle Pops

Sep 8, 2015 · Leave a Comment

Apple truffle back to school dessert snack.

Back to School Treats Apple Truffle Pops -chocolate truffle centres, dipped in red chocolate and decorated with liquorice stems and mini M&M leaves.

Apple truffle back to school dessert snack.
[feast_advanced_jump_to]

It's the first day of school!  My girls are super excited, and I have to say that fall really is my fav. time of year.  I thought it might be fun to make some little back to school treats for them as a treat on their first day.  Since apples always make me think of back to school I made apple shaped truffle pops to celebrate.

homemade Back to School  treats

I started out making the homemade truffles.  The recipe is easy.  It's just chocolate and heavy cream, with a bit of vanilla.  Once that set, I used a small ice cream scoop to scoop out balls of the mixture so they'd all be the same size.  Once they were rolled in perfect little balls, I inserted a lollipop stick, and put them into the freezer to get really cool and hard.

apple themed truffle pops

Then, I melted some red candy melts and dipped them in.  Top Tip:  if your candy melts are too thick when melted, use a little vegetable shortening or vegetable oil to thin it out a bit.

Back to School party treats
Back to School party ideas

I used a little bit of green liquorice to create a stem, and a little mini green M &M for a leaf.

The sweet little "Back to School" flag is a free printable from Catch My Party -so cute, find it by clicking here.

Love how these back to school treats turned out.  I packaged up a few for some friends and my girls in little cello bags.

Back to School treats Apple Truffle Pops

Hoping the first days of school go smoothly for you and yours.

Recipe

Apple truffle back to school dessert snack.

Back to School Apple Truffle Pops

Apple shaped truffles with chocolate inside.
No ratings yet
Print Pin Rate
Course: Dessert
Cuisine: American
Prep Time: 15 minutes minutes
Additional Time: 30 minutes minutes
Total Time: 45 minutes minutes
Servings: 12
Author: Dannyelle Nicolle-Ramjist

Ingredients

  • 12 oz milk chocolate
  • ⅓ cup heavy cream 35% whipping cream
  • 1 teaspoon vanilla extract
  • 1 cup red chocolate candy melts
  • 2 pieces green liquorice
  • 12 mini green M&Ms

Instructions

  • Melt the milk chocolate, and the cream together in a double boiler (or in a metal mixing bowl over a pot of swimming water), until completely melted and combined.
  • Stir in the vanilla and pour into a metal mixing bowl and let it set.
  • Scoop out hardened chocolate mixture, and roll into balls. Insert lollipop sticks and put into the freezer to completely harden.
  • Melt red candy melts in a double boiler, if the melted chocolate is too thick, thin with a small amount of vegetable oil, or vegetable shortening.
  • Dip the truffle in the red chocolate coating, and let any access drip off. Just before completely set, add a liquorice stem and M and M leaf.
Tried this Recipe? Tag me Today!Mention @LifeisaParty or tag #lifeisaparty!
Back to School Truffle Pops

With Back to School Treats like Apple Truffle Pops, life really is a party!

You might also like our Back To School Sugar Cookies here.

Notebook Paper Sugar Cookies for Back To School: The perfect treat to celebrate Back To School. Full instructions on how to make them.

Also check out our Back to School Marshmallow Pencil Snacks here.

You might also enjoy our Homemade Caramel Apples here.

Caramel Apple Recipe: Easy, homemade Caramel Apples, perfect for Christmas gift giving, or anytime of year. Add your favourite toppings.

Dip Dye Table Runner and Napkins

Aug 27, 2015 · Leave a Comment

Dip dye table linens.

Dip Dyed Table Runner and Napkins: Easy how-to instructions to make your own napkin and table runner with a beautiful dip dyed ombre effect.

DIY dip dye table linens.
[feast_advanced_jump_to]

These easy dip dyed napkins and table runner are perfect for any entertaining and really fun project to work on.  Use your favourite colour to create these ombre effect pieces.

I've been loving the dip dyeing I've seen around lately, and thought  a cottage afternoon was the perfect occasion to try my fair hand at it.  

Materials:

  • white cotton fabric
  • fabric dye
  • basin or bucket 
  • spoon

How To Make Ombre Dip Dyed Napkins and Table Runner

1. Making the Napkins and Runner

I used some old white fabric, a thin white cotton, and ripped it into the right sized pieces.  The runner was 27 x 80 and the napkins were around 16 x 19 inches, and I was able to get 8 napkins out of my fabric.  

You don't need to be super precise with the sizes, we're going for a hand crafted, one-of-a-kind, very relaxed look.  I didn't even finish the edges, just ripped the fabric along the length, and then tried to make straight cuts for the width (because it doesn't tend to rip straight).  I kind of love the frayed edge that it left.

If you prefer, you could use plain store bought white cotton napkins and a table runner to start with.

how to dip dye

2. Dip Dying

After your fabric is ripped to the right size, wet it with hot water and set aside.  

Next I made the dye bath according to the package instructions.  I used the Rit powdered dye, since it was a bit cheaper than the liquid dye.  In hindsight, I probably should have bought the liquid dye.  My dye bath made with the powder had a few undissolved little bits in it, that stuck to the fabric when I dyed it  in a few spots and made dark spots…we'll call it character, but if you're doing it I'd go with the liquid to avoid this little problem.

I used a spoon, and folded the wet fabric in half over it.  Then, dip away, making sure to leave the top portion white, and gradually moving the rest out of the fabric to create the ombre effect.  Of course the longer you leave a section, the darker it will be.  If you leave a section a fair while, and then move it, you will have a line.  So, if you want the colour to be completely graduated, keep the fabric moving.

I was wearing a dark bathing suit -which worked great, or you might want to wear an old shirt.  I also wore some latex gloves so I wouldn't end up with pink fingers.

To dye the runner, you just have to gather the fabric slightly so it will fit over your spoon, and into the bucket, and then use the exact same method.  It's a good idea to start with the napkins, and work your way up to the runner, keeping in mind though, that the hotter the liquid is the more quickly and darker it dyes the fabric, so don't wait too long.

dip dye ombre effect

4. Hang To Dry

I did mine at the cottage, using the picnic table and the hose -which worked out perfectly and meant no mess inside.  Once I was happy with my piece, I hung it over the clothes line, taking care to make sure it was lined up in the middle so the wet dye won't drip onto the white section.  Then, I used the hose to rinse it, while it hung on the clothesline -easy peasy.  Once they were all rinsed, I just left them on the line to dry.

Dip Dyed Napkins and Table Runner

When they were all finished, I used them for the pretty picnic I shared yesterday.  Love how the frayed edges, and ombre effect looked when they were all done.

how to make Dip Dyed napkins and Table Runner

The first time I washed them, I made sure to wash them separately from anything else, used a cold water setting, and even added a cup of salt to help the dye really set.  I love the pink for summer, but they'd look great in any colour…imagine a burnt orange for your fall table?

With an easy, pretty, dip dyed napkins and table runner, life really is a party!

More Inspiration

You might also like our Spray Paint Cutlery and Vase Makeover here.

Spray Painted Vase Cutlery and Makeover: give inexpensive thrift store vases and cutlery new life with spray paint, perfect for entertaining.

Also check out our DIY Rainbow Wall Art here.

DIY Rainbow Book Art: Using old books as a canvas this DIY rainbow art in mustard yellow and pink is fun to make and inexpensive.

You might also enjoy our Kool-aid Dip Dyed Tassels.

Picnic Lunch

Aug 25, 2015 · Leave a Comment

Pretty Picnic Lunch: Individual picnic boxes, wild flowers, tissue paper tassels, and a delicious menu make this the perfect picnic lunch.

Pretty Picnic Lunch: Individual picnic boxes, wild flowers, tissue paper tassels, and a delicious menu make this the perfect picnic lunch.

This picnic lunch was so much fun with individual picnic boxes for everyone and yummy picnic lunch menu to enjoy.

I'm savouring these last weeks of summer.  The weather is so beautiful outside, and before we know it we may just be back to boots and coats and shovels. Boo.  So before I start pulling out my fall decor, like so many other bloggers, I'm savouring these last summer days (although I may or maynot be pinning fall decor already on pinterest).  I thought I might inspire you too, with a simple and oh so pretty picnic.

Individual Picnic Boxes

While we were away at the lake, I decided one day we should have a pretty picnic lunch.  I picked up the great cardboard boxes so everyone could have their own individual picnic box.

Individual picnic boxes

I decorated each one with some pretty geometric washi tape, which set the colour scheme for the picnic.  I also added a sweet tassel to each one in pink or peach.

Everybody also got their own bottle of pink lemonade with a pretty straw attached.

Pretty Picnic lunch ideas

Table Setting

I set up the picnic table with a dip dyed table runner and rustic matching napkins, you can see how I made them here.  It was an easy fun project and I love how they turned out.  We also had a few citronella candles in some pretty tea light holders, and wild flowers in vintage mason jars.

pink and orange tissue paper tassels

Above the table, between two trees I strung up some colourful tissue paper tassels.  They looked so pretty blowing in the breeze.  I used a little of the washi tape that inspired the colours on them as well.

picnic lunch ideas

Picnic Menu

  • cold chicken
  • Asian noodle salad
  • blueberries
  • brownies
  • lemonade

On the menu for picnic was some cold grilled chicken -see the recipe here, and a great little Asian noodle salad.

 Individual picnic boxes

I used waxed paper to wrap the chicken, and put the salad in a mason jar for easy transport.  Just loved how cute the wooden forks looked with a little washi tape to tie them into everything else.

Individual picnic boxes

And then it was time for dessert.

 Individual picnic lunch boxes

We had yummy chocolate brownies with a shortbread base, and fresh blueberries.  The brownies traveled well in a little paper bag, and the blueberries were great in a mini mason jar.

picnic lunch ideas

What's more fun than an afternoon picnic by the lake?  Nothin.

picnic lunch

With a pretty picnic like this to celebrate the last days of summer, life really is a party!

More Inspiration

You might also like our Woodland Forest Party here.

Also check out our Beach Campfire Picnic here.

Summer Beach Campfire Picnic: A fun menu of hotdogs, smores, and campfire baked apples, along with some simple decor make the perfect beach campfire picnic.

You might also enjoy our Breakfast Picnic here.

Woodland Forest Party Food Ideas

Aug 20, 2015 · 12 Comments

Woodland forest party food ideas.

Easy to put together woodland forest themed party food ideas with store-bought ingredients that are cute and delicious. Plus ideas for easy decorations.

Woodland forest party with themed food ideas.
[feast_advanced_jump_to]

Why We Love This Party

  • The treats were store bought and really easy to put together.
  • It's the perfect fun theme for a party.
  • Everything look so adorable and the kids had a great time.
Last week we were away with friends at the lake.  It's such an inspiring place, because it's so beautiful.  Before we left I had the idea that it'd be fun to put together a little woodland themed  party for the little girls.  They loved it, and it was really, really easy to put together, since I used all easy store bought treats.  This is my kind of party, with easy store bought treats.

You might also like our Winter Ice Skating Party Ideas or our Camp Smore Camping Birthday Party.

Easy Woodland Forest Party

The Woodland Setting

We found the perfect spot beside the lake and started out with setting up this little tent.  I used an old quilt for a picnic blanket, and hung up a pretty mosquito netting, we had from Ikea.  It made the perfect little magical tent for them.

Easy Woodland Forest Party

A few cushions gave them a soft spot to sit, and an old wooden box was the perfect party table, and spot to rest their treats.

Woodland Forest Party

I had fun decorating with easy wildflowers in mason jars, and a few fun little woodland creature toys as table decorations.  

Easy Woodland Forest Party food ideas

I had so much fun setting up their little treat table.  I used a rag curtain that I already had as a backdrop, and hung it from a tree branch.  This made such a pretty and easy backdrop for our food table.

woodland party food ideas

Forest Themed Party Food Ideas

I wanted all the food to feel like the fairies could have found it in the forest -but really I found it all at the supermarket.  I had a great time perusing the aisles and trying to think like a fairy and come up with fun ideas. Here's the food items I came up with to fit our forest theme.

On the menu was:

  • lemonade
  • twig cookies
  • mixed nuts
  • maple leaf cookies
  • acorn cookies
  • mixed berries
  • s'more trail mix
Easy Woodland Forest Party
  • Pink lemonade is always a hit, and so pretty in these little bottles, with pretty straws attached.  Apple cider would be a great option too.
  • The nuts were an easy addition, and looked sweet in little candy cups.  They felt like the perfect forest treat.
Woodland twig cookies
  • The twig cookies are Pocky Almond Crush Biscuit Sticks.  

I love how they looked like sticks from the forest, and the girls thought they were really yummy.  If you can't find the pocky, you could use pretzel sticks or pretzel rods dipped in chocolate and nuts to create your own version.

woodland party food ideas

I couldn't resist using a few toy woodland animals on the tables, like momma and baby moose.

what to serve at a woodland forest party
  • We also had some s'mores trail mix, find the recipe here.  It's super easy to make and the kids LOVE it.  It might be fun to include some teddy grahams in it to go with the theme.  This is the perfect woodland trail mix.
s'mores trail mix
  • We also had a few mixed berries, the blueberries were from home and the tiny raspberries and blackberries were collected in the woods by my little helpers, Tara and Maddie. (Just make sure to check any wild berries before the kids eat them.)  If you don't have any wild berries nearby you can of course pick them up at the grocery store.
woodland party food ideas
  • I remembered, as a kid, my Grandma always having Maple cookies, and thought they'd be the perfect addition to our woodland forest treat table to fit our cute theme.  They're so nostalgic.
what to serve at a woodland forest party

I used my DIY wood slice dessert stands for the cookies. The tree stumps were the perfect rustic decor to go with our theme for the dessert table.

maple leaf cookies

Some helpful forest animals were willing to hold down the napkins, in case of a breeze.

woodland forest party ideas

How To Make Acorn Cookies

  • Our final little treats were acorn cookies.
acorn cookies

These chocolate acorns usually made with mini nilla cookies, but I couldn't find them here in Canada, so I improvised with mini oatmeal chocolate chip cookies and think they came out really well.  You can also use mini nutter butters, or any mini cookie for the top of the acorn.

how to make an acorn cookies

I just used a little melted chocolate to attach a Hershey's Kiss to the bottoms of the cookies, and a chocolate chip to the tops.  Easy peasy and so cute.

Woodland Forest Party food ideas

It turned out so, so pretty, and as you can see all the little treats were super easy to put together.

The girls loved it.

woodland party

And, I loved them loving it.  They had such a great time.

Woodland Forest Party food ideas

The best part was that long summer days are made for making memories, and this will be a special one for us.

Woodland Forest Party menu ideas

I hope you like our woodland party food ideas and that they help you with your party planning.  These would also be perfect for a woodland-themed baby shower, or a woodland birthday party.  They'd be especially sweet for a first birthday party.  This is such an adorable way to celebrate your next party.  Any birthday girl or boy would love it.

With an easy woodland theme get together like this,  life really is a party!

More Inspiration

  • S'mores charcuterie board with graham crackers, marshmallows and chocolate for summer entertaining.
    S'mores Charcuterie Board
  • Teddy bear breakfast party with teddy bear themed food.
    Teddy Bear Breakfast Party Ideas
  • Easy s'more trail mix in a glass jar, with a gift giving bag and white flowers.
    S'mores Trail Mix
  • Magical animal adoption agency party.
    Magical Animal Adoption Agency Party

Frequently Asked Questions

Can you make the food ahead of time?

Yes. You can prep your s'mores trail mix, and acorn cookies days in advance of your party and store in an airtight container unitl you're ready to serve.

Where are the reusable glass bottles from?

Look for them at a kitchen store, or online. Wash and reuse for all your parties and get togethers.

How do you make the backdrop?

We shoped to vintage sheets with pastel florals at the thrift store. Wash your sheets, and then tear them into long strips. Tie them onto a ribbon to make your backdrop.

If you tried any of these Forest Themed Food Ideas or any other ideas on my blog please let me know how it went in the comments below. Thanks for visiting today!

Felt S'mores Play Food

Aug 18, 2015 · Leave a Comment

DIY felt food s'more kit toy.

Felt S'mores Play Food: these easy homemade toy DIY felt s'mores for children to use as play food are simple to put together and adorable for dramatic play.

[feast_advanced_jump_to]

Felt Smores are so much fun for kids to play with and really easy to make yourself.

I love making felt play food.   These felt smores are perfect for pretend play all summer.  We were staying at a cottage on the lake with friends last week and they all loved playing with these sweet felt smores.

how to make Felt S'mores Play Food homemade toys

Materials For Felt Smores:

  • White Felt
  • Light Brown Felt
  • Dark Brown Felt
  • Stuffing
  • Pinking Shears
  • Wooden Skewers
  • White Thread
  • Light Brown Thread
  • Dark Brown Thread
  • Needle
DIY Felt S'mores Play Food around a pretend campfire

How To Make Felt Smores Graham Crackers:

  1. Create a paper pattern that is 6 x 5.5 cm.  Pin the pattern to two pieces of light brown felt, and cut out two rectangular pieces at the same time with the pinking shears to create the zig-zag edge.
  2. Sew the two pieces together on three sides using a simple running stitch about .5 cm from the edge.  Before sewing the fourth side, insert a small, even layer of stuffing, and then close the fourth side.
  3. To make the dots on the graham cracker, space two lines of three dots as evenly as you can, and stitch through several times, then tie off in a knot for each one.

How To Make Felt Smores Chocolate Bars:

  1. Create a paper pattern that is 5 x 4.5 cm.  Pin the pattern to two pieces of dark brown felt, and cut out the two rectangular pieces to make the chocolate bar.
  2. Sew the two pieces together on three sides using dark brown thread, and a blanket stitch.  Before sewing the fourth side, insert a small even layer of stuffing, and then close the fourth side -just like you did with the graham cracker.
  3. To create the chocolate pieces detail, stitch one line through the centre using a simple running stitch, and two dividing it to create six small rectangles, just like a real chocolate bar.

How To Make A Felt Melted Marshmallow:

  1. Cut out two matching pieces of white felt into a melted marshmallow shape.
  2. Sew the two pieces together with white thread, using a blanket stitch, just before finishing insert some stuffing, and then complete the edge.

To Make A Felt Marshmallow On A Stick:

  1. Use a plastic soda lid, or another circle about 2.5 cm in diameter to trace two circles on to white felt. (I found it helpful to use a disappearing marker, so there'd be no dark marks on the marshmallow afterward, if you don't have one just use a light pencil mark.)  Also cut one rectangle that is about 4 x 9 cm.
  2. Use white thread and the blanket stitch to sew one white circle onto the long side of the white rectangle.  If the rectangle is a little too long, don't worry we will trim it later.  Do the same with the other white circle attaching it to the other long side of the rectangle to create a cylinder.
  3. Stuff the marshmallow with stuffing, trim the edge of the rectangular piece if necessary, and then stitch the two short ends of the rectangle together to close the cylinder.
  4. Gently insert the skewer into the bottom of the marshmallow, wiggling to create a small hole in the marshmallow so that it looks like a marshmallow on a roasting stick.
pretending to roast a felt marshmallow for felt smores children's play food

We set up a little faux campfire to play with our felt smores, which would work really well indoors too.

make your own Felt S'mores Play Food tutorial

The only problem with this fun little toy set is…it might make you hungry.

With easy felt smore play food, life really is a party!

You might also enjoy our Felt Food Christmas Cookies tutorial here.

Also check out our Felt Chocolate Chip Cookies here.

felt food cookies.

You might also like this post on Making Kids Aprons from Tea Towels.

Easy S'mores Fondue Recipe

Aug 10, 2015 · 2 Comments

S'more milk chocolate fondue.

S'mores Fondue Dip -an easy recipe for indoor s'mores with fondue dip. Serve warm with graham cracker and marshmallow dippers for the perfect new fun twist on an old favourite.

S'more milk chocolate fondue.
[feast_advanced_jump_to]

S'mores fondue is the perfect treat for any big s'mores fan.  The amazing and easy chocolate fondue has marshmallows and graham crackers dipped into it for the best fondue ever!  This fun dessert is easy to make and delicious.  Any chocolate lover will love this fondue.

Happy National S'mores Day!  If you're a regular reader around here, you know we love a good s'more, so we couldn't let the National Day go by without a little treat to celebrate.  And this time we made a little s'mores fondue.

S'mores Fondue Dip

Easy Recipe

The s'mores fondue dip is an easy one with just two simple ingredients of melted milk chocolate and sweetened condensed dip.  This recipe is foolproof.  Melting the chocolate with the sweetened condensed milk helps keep it from burning without needing a double boiler, and makes a wonderfully smooth and sweet fondue perfect for dessert.

Individual Fondues

I served it up in individual little mason jars, so my little guests could enjoy all the double dipping they wanted!  If you're serving a crowd this is an easy way to give everyone some.  It's also great for anyone who isn't so sure about sharing a fondue pot with others.  Everyone gets their own so no double dipping worries.

If you prefer though, you can also serve this up in a traditional fondue pot, and give everyone their own fondue fork for dipping. 

Melting Pot

If you've ever had s'mores fondue at the melting pot and want to make a copycat version at home start with our basic and easy fondue and then add in a few tablespoons full of marshmallow crème.  Just swirl the marshmallow creme into the top, and place graham cracker crumbs over the top as well.  

S'more Fondue Dippers

We love the classic s'mores vibe of dipping regular and mini marshmallows and graham cracker sticks but any favorite fruit is also excellent.  It won't be s'mores fondue without marshmallows and graham cracker halves, but they aren't the only things that are fun to dip in this fondue.  We like to dip apple slices, pineapple, strawberries and bananas.  You can also try cookies, pound cake or even pretzels if you like a salty sweet combo, or plain mini cream puffs, or vanilla cheesecake.

how to make S'mores Fondue

We love making homemade graham crackers for dipping in smores fondue.  This is the graham cracker recipe we used.

S'mores Dip

We not only used regular marshmallows but we used some chocolate and vanilla ones -so, so yummy!  Look for different flavors of marshmallows at the grocery store in the baking aisle.

S'mores Chocolate Fondue

Gluten Free

If you're making this s'mores fondue for someone who is gluten free you can use gluten free graham crackers so it's safe for everyone to enjoy this delicious recipe.

At Home S'mores Fondue

Store any leftovers in the refrigerator in a an airtight container and reheat in a microwave-safe bowl.  You can also reuse your leftover fondue as a hot fudge sauce on chocolate ice cream, if you're looking for a delicious way to use it up.

This easy fondue recipe is so much fun.  It was such a hit with guests.  Who doesn't love melted chocolate with a graham cracker and marshmallow?  It's a match made in heaven.  Our fondue version of s'mores is perfect for anytime you want the delicious taste of traditional s'mores without the campfire.  

Recipe

S'mores Fondue Dip -an easy recipe for indoor s'mores with fondue dip. Serve warm with graham cracker and marshmallow dippers.

S'mores Fondue

Milk chocolate fondue with graham cracker and marshmallow dippers.
No ratings yet
Print Pin Rate
Course: Dessert
Cuisine: American
Prep Time: 2 minutes minutes
Cook Time: 10 minutes minutes
Total Time: 12 minutes minutes
Servings: 10
Calories: 294kcal
Author: Dannyelle Nicolle-Ramjist

Ingredients

  • 1 ½ cups milk chocolate
  • 300 mL can sweetened condensed milk

Instructions

  • In a saucepan combine sweetened condensed milk and milk chocolate. (I used chocolate bars, broken into small pieces, chocolate chips would be great also.)
  • Heat on the stove top over low heat, while staring until the chocolate melts completely and is combined with the sweetened condensed milk.
  • Serve while warm in individual ramekins, or place the warm chocolate mixture in a fondue pot and serve with marshmallows, and graham crackers as dippers.

Nutrition

Serving: 1g | Calories: 294kcal | Carbohydrates: 34g | Protein: 4g | Fat: 16g | Saturated Fat: 10g | Polyunsaturated Fat: 5g | Cholesterol: 14mg | Sodium: 50mg | Fiber: 2g | Sugar: 30g
Tried this Recipe? Tag me Today!Mention @LifeisaParty or tag #lifeisaparty!

With a warm, sweet, oh so yummy s'more fondue like this one, life really is a party!  Happy S'mores Day!

More S'more Recipe Inspiration

You might also like our S'more Charcuterie Board here.

S'more Charcuterie Board: this s'more themed dessert board is perfect as a summer treat around a campfire, or for your camping themed party.

Also check out our S'more Trail Mix recipe here.

You might also like our S'more Pizza here.

S'mores Pizza: For this smores pizza recipe use nutella, marshmallows and graham crackers on your pizza for a perfect summer treat.

Cupcakes in a Jar -5 Different Flavor Ideas

Aug 4, 2015 · 1 Comment

How to make cupcakes in a jar.

Cupcakes in a Mason Jar -Perfect for your next picnic or bbq, 5 Flavours your guests will love; Peach, strawberry, chocolate, lemon, and blueberry all made from a base of one batch of vanilla cupcakes, vanilla icing, and whip cream.

Cupcakes in a jar, five different flavours.
[feast_advanced_jump_to]

Layers of cupcakes with delicious icing and other fun add-ins in a mason jar are the perfect individual sized and portable treat.  Our mason jar cupcakes are so fun to make and even more fun to eat.  We made five different flavors, make a mix like us or choose your favourite.

Summer is the perfect time for bbq's, picnics, and beach days.  These cupcakes in a mason jar are great for bringing along anywhere.  They travel amazingly, are super yummy, and totally cute.  We made ours for a family get-together and they were a big hit.  These would also be a great addition to a care packages for a friend.  If you've ever dropped off a dinner for a sick friend and wanted a portable easy dessert, this would be perfect.  Just remember that these do need to be refrigerated, since they contain whipped cream and fresh fruit..

how to make Cupcakes in a mason jar

We made our cupcake jars with vanilla cupcakes, and then made all different kinds of fillings and icing.  Start by making a batch of your favourite vanilla cupcakes -from your favorite cupcake recipe or a cake mix, and then get creative.  Our cake mix made 24 cupcakes, which we baked the cupcake batter in the oven using regular muffin tins and cupcake liners.  Then to make our cupcakes in a jar, we just removed the cupcake liners from each traditional cupcake and cut each one in half layering the top and bottom in the jar with our other ingredients.  We found the regular-sized cupcakes were perfect for a small mason jar.

If you prefer, you could make one large thin cake and use the jar itself or a cookie cutter to cut out the cake into rounds to fit into the jars easily.

Mason Jars

The mason jars make this sweet treat perfectly portable.  These are so great for bringing to a picnic or to special occasions.  Once your mason jar cake is all prepared, just put the lid on the jar and you're ready to go.  We used 8 oz jars for our cupcakes and they worked out perfectly.  Another added benefit to the canning jars make for really moist cupcakes, because the jars are an airtight container with the lid on.

lemon Cupcakes

Lemon Cupcakes in a Mason Jar

These were actually for my mother-in-laws birthday and she loves all things lemon.  We decided to make a lemon version with homemade lemon curd -but store bought would work just as well, look for it with the jam in the supermarket.  

We started our cupcakes in a mason jar, by cutting the vanilla cupcake in half and putting the bottom half into the bottom of the mason jars.  Then we added a layer of our lemon curd, followed by some whipped cream.  Use a spoon, a piping bag, or even a ziplock bag with the corner snipped off to add the jam, cream, and icing layers to the jars.  Then we added the cupcake top and, frosted it with vanilla icing, and added some yellow sprinkles for fun.

  • vanilla cupcake
  • lemon curd
  • whipped cream
  • vanilla icing
  • yellow sprinkles
blueberry Cupcakes

Blueberry Cupcakes in a Mason Jar

Next we made blueberry mason jar cakes.  We again started by cutting our vanilla cupcake in half, and putting the bottom into the mason jar.  I added a layer of whipped cream, then some fresh blueberries and a little blueberry jam, followed by the top of the cupcake, and vanilla icing.  We topped them off with a few more fresh berries.  Make sure to not make the cakes to high in the jar when your assembling them, so that you can easily put the lid of the jar on the top.

  • vanilla cupcake
  • whipped cream
  • blueberry jam
  • fresh blueberries
  • vanilla icing
chocolate and vanilla chocolate bar Cupcakes

Chocolate and Vanilla Cupcakes in a Mason Jar

One of my daughters loves all things chocolate, so we came up with an easy chocolate version too.  We layered vanilla cupcake, whipped cream, chopped toffee chocolate bar, vanilla cupcake, chocolate icing, and more chocolate bar pieces.

  • vanilla cupcakes
  • whipped cream
  • toffee chocolate bar pieces
  • chocolate icing
Cupcakes in a mason jar

Base Ingredients

To make the whole process easier, I whipped up a whole bowl of cream that we used for all of them, and a batch of vanilla icing.  Then, we added flavours to the vanilla base; cocoa powder to make chocolate, pureed strawberry for strawberry icing, and peach jam -with a drop of red and yellow food colouring, to make peach icing.

Strawberry cupcakes in a jar.

Strawberry Cupcakes in a Mason Jar

The strawberry cupcakes in a jar were made by layering vanilla cupcake, whipped cream, fresh sliced strawberries, cupcake, and strawberry icing.  These might have been my fav., like strawberry shortcake, but sweeter.

  • vanilla cupcakes
  • whipped cream
  • fresh strawberries
  • strawberry icing
peach Cupcakes

Peach Cupcakes in a Mason Jar

Last, but not least we made peach cupcakes in a jar.  We layered vanilla cupcake, whipped cream, fresh sliced peaches, cupcake, and peach icing.  So yummy, especially this time of year, with peaches in season here.

  • vanilla cupcakes
  • whipped cream
  • fresh peaches
  • peach vanilla icing

After we had the cupcakes in jar all ready for the party, I packed them up in an old coke crate, along with some flowers and headed to the party.

Cupcakes in a mason Jar for a picnic

Storing

Because our cupcakes have fresh fruit and whipped cream in them they need to be stored in the fridge.  Put the lids on the glass jars for storage.  And be sure to serve these with a fork or spoon for eating.

I love the five flavors that we came up with using our vanilla cupcakes. You could use any of your favorite flavor cupcake flavors and icing to make these.  These are delicious as just two layers of cake with icing as well.  Try making red velvet cupcakes and layering them with cream cheese frosting.  Peanut butter cupcakes layered with jam, or chocolate icing would be a great combinations too.  You could also try a s'more inspired combination with chocolate cupcakes, marshmallow fluff, chocolate icing, and graham cracker crumbs.  The possibilities for these cupcakes in jar are endless.

We had a few left over, so the next day I decided I should try out another flavour, only to discover that they were all gone all ready.  The early bird gets the worm cupcake.  These were a special treat and everyone really enjoyed them.  These are such a great way to serve cupcakes.

With cupcakes in a mason jar this yummy, life really is a party!

More Inspiration

You might also like our Breakfast Picnic here.

Also check out our Beach Picnic here.

summer beach picnic

You might also enjoy our Backyard Picnic here.

Summer Backyard Picnic -beautiful table setting ideas with lily of the valley placecards, and mason jar flower arrangements and an easy, no fuss menu.

Marinated, Grilled, Flattened Chicken Recipe

Jul 28, 2015 · Leave a Comment

Marinated grilled flattened chicken recipe.

Marinated, Grilled, Flattened Chicken Recipe -Spatchcocked Chicken: The perfect recipe for marinated grilled flattened chicken, easy, moist, and ingredients you have on hand. 

How to make marinade for flattened grilled chicken.
[feast_advanced_jump_to]

This Flattened Chicken, or Spatchcock Chicken is a real summer favourite of ours, that the whole family enjoys. We've made this great recipe many, many times and perfected our method. 

Marinated Flattened Chicken Recipe

It's perfect for summer entertaining, best cooked on a low bbq for an hour our so, perfect for an afternoon of enjoying a few drinks and appetizers on the patio with guests while it cooks. It's delicious, and makes very moist and juicy chicken with tender meat. This recipe is perfect if you have some white meat and some dark meat lovers. Cut up the chicken and let the white meat lovers enjoy the chicken breasts and wings, while the dark meat lovers enjoy the chicken thighs and legs. And try our easy zucchini pancakes recipe as a great side dish. The step by step instructions make it easy to put together this butterflied chicken recipe, that's sure to be a crowd pleaser.

Marinated, Grilled, Flattened Chicken -Spackcocked Chicken: The perfect recipe for marinated grilled flattened chicken, easy, moist, and ingredients you have on hand. Perfect for freezer cooking, prepare marinade with chicken, freeze, de-frost while it marinades, and grill.

Make Ahead and Freeze

We started trying out this recipe when we were first married. There was a local gourmet butcher, and they sold marinated flattened chickens, vacuum packed and ready for grilling. We loved them, but we didn't love the gourmet price. 

So, we started playing around with our own recipe. We've found over the years, that this one of our favorite easy recipes for freezer cooking too. 

I often buy a few extra chickens when they're on sale, make up the marinade and flatten the chicken and put it in a ziplock bag and pop it in the freezer. It's the perfect way to meal prep ahead of time. On the morning of the day I want to cook it, I take it out of the freezer and let it de-frost and marinade at the same time, by dinner it's defrosted and beautiful marinated. Just make sure it's up to room temperature before cooking.
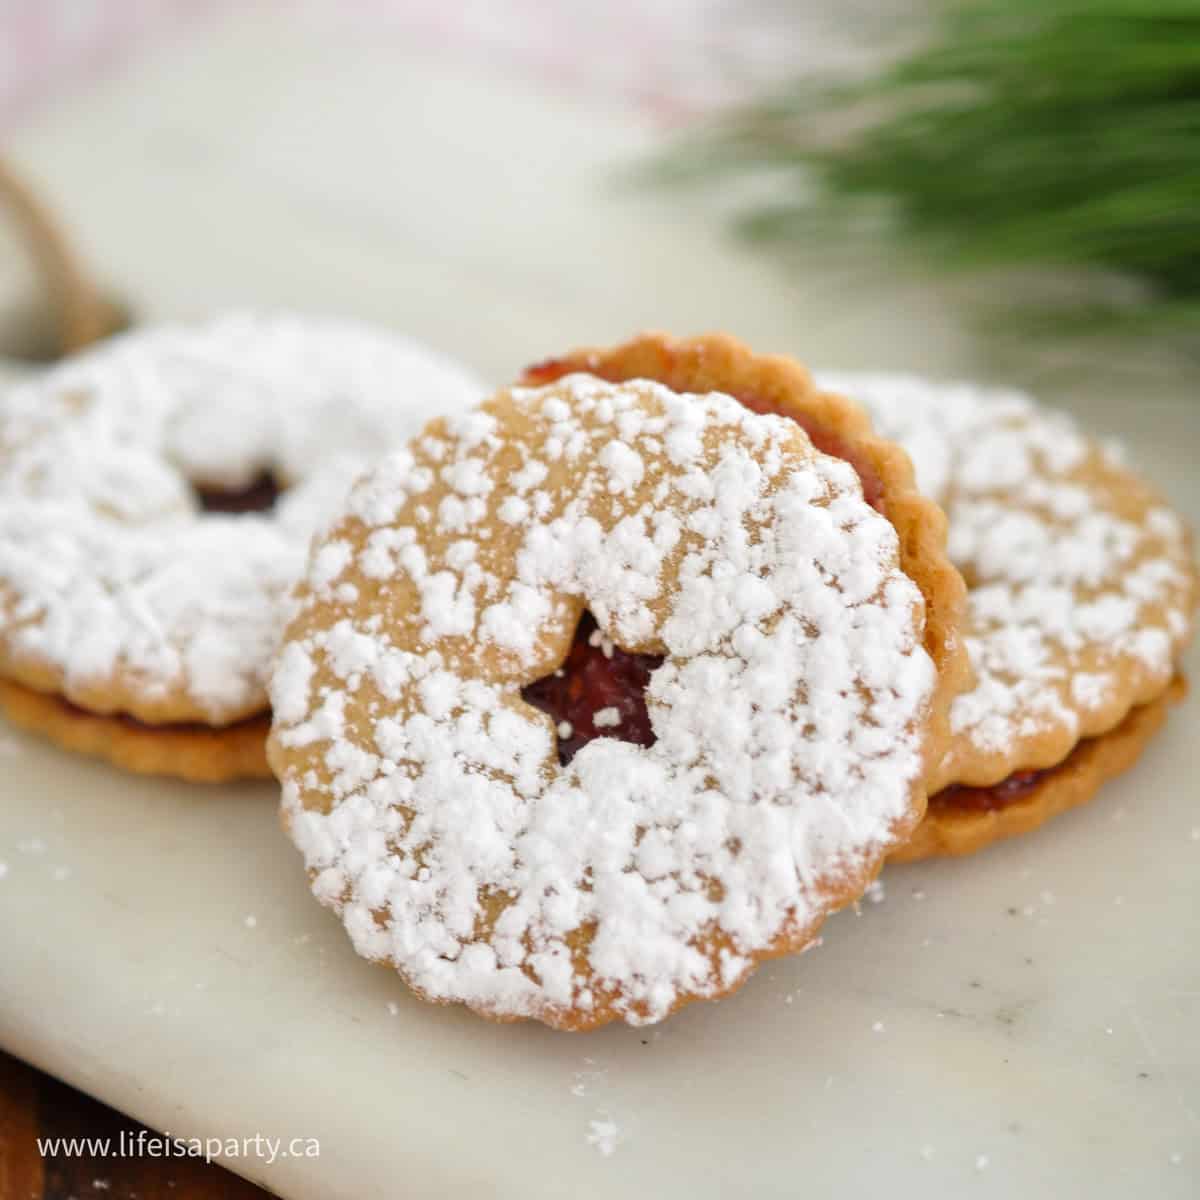
This is one of the most delicious recipes for preparing chicken. It always results in flavorful chicken with juicy white meat, which can be challenging sometimes when cooking a whole chicken. It's easy enough to be a great weeknight meal, but delicious enough to be a great recipe for company and entertaining too.

Recipe

Marinated grilled flattened chicken recipe.

Marinated, Grilled, Flattened Chicken Recipe

Simple marinate recipe to make flattened grilled chicken that's moist and tender.
5 from 1 vote
Print Pin Rate
Course: Main
Cuisine: American
Prep Time: 15 minutes minutes
Cook Time: 1 hour hour
Additional Time: 12 hours hours
Total Time: 13 hours hours 15 minutes minutes
Servings: 8
Calories: 759kcal
Author: Dannyelle Nicolle-Ramjist

Ingredients

  • ¾ cup vegetable oil
  • 6 tablespoon soy sauce
  • ¼ cup Worcestershire sauce
  • ¼ cup red wine vinegar
  • 3 tablespoon lemon juice
  • 1 tablespoon dry mustard
  • ½ teaspoon salt
  • 1 teaspoon black pepper
  • 1 whole chicken

Instructions

  • To begin, flatten the chicken. To do this remove the backbone of the chicken by slicing down either side of the backbone with a sharp knife or sharp kitchen shears to remove it. Discard the backbone, and flatten the chicken, pushing down on the breast bone, and chicken's legs with the palm of your hand.
    In a ziplock bag (opened inside of a large bowl to keep it from spilling) combine all the rest of the ingredients to make the marinade.
  • Mix together the marinade, add in the butterfly chicken, and seal, taking care to remove as much air as possible.
    At this point, either marinade for several hours or up to 12 hours, or freeze for another day. If freezing, on the day you'd like to cook the chicken, remove it from the freezer in the morning and allow it to defrost in the ziplock bag as it marinades.
  • The best way to cook the flat chicken, is to use in-direct heat, by lighting one side of the grill, but placing the chicken on the opposite side of the grill. Place the whole bird out flat, skin side up, and discard any left over marinade. Cook for approximately one hour at medium heat, depending on the size of the chicken. Cook until the chicken has crisp skin and is golden brown, and the chicken reaches an internal temperature of 165 F. Test the temperature with a meat thermometer placed in a thick area of the chicken, like the breast meat, or the thickest part of the thigh. Avoid cooking at a high heat, which will cause the outside to burn before it's cooked through, and dry out the meat.
  • Let the whole roast chicken rest on a cutting board or baking sheet covered in aluminum foil for 10 minutes, before cutting into pieces and serving.

Nutrition

Serving: 1g | Calories: 759kcal | Carbohydrates: 6g | Protein: 43g | Fat: 62g | Saturated Fat: 9g | Polyunsaturated Fat: 49g | Trans Fat: 1g | Cholesterol: 132mg | Sodium: 1904mg | Fiber: 1g | Sugar: 2g
Tried this Recipe? Tag me Today!Mention @LifeisaParty or tag #lifeisaparty!
Marinated, Grilled, Flattened Chicken -Spackcocked Chicken: The perfect recipe for marinated grilled flattened chicken, easy, moist, and ingredients you have on hand. Perfect for freezer cooking, prepare marinade with chicken, freeze, de-frost while it marinades, and grill.

With a easy, delicious, and super moist marinated, and grilled flattened chicken on the bbq, life really is a party!

You might also enjoy our Homemade BBQ Sauce Recipe here.

Also check out our Homemade Baked Beans recipe here.

You might also enjoy our Homemade Montreal Steak Seasoning recipe here.

Beauty and the Beast Party -Part II "The Games and Activities"

Jul 16, 2015 · 6 Comments

Beauty and the Beast party games and activities for kids.

Beauty and the Beast Party Games and Activities -Five great Beauty and Beast themed party activities with inexpensive and easy to find materials that every kid would love.

Beauty and the Beast party games and activities for kids.

Yesterday I shared all the amazing decorations and food from Allie's Beauty and the Beast Birthday Party, and today I want to share the fun Beauty and Beast Party Games and Activities.  

Allie's mom, Heather did a great job thinking up some really great, and simple ideas that tied into the movie really well.  It's not a really obvious theme when it comes to activities so she really had to put her thinking cap on and get creative.  I think she did a great job.

decorate a enchanted beauty and the beast mirror craft

There were five fun activity centres set-up for the kids in the backyard.

Decorate An Enchanted Mirror

The first activity station was to "Decorate An Enchanted Mirror".  Remember the enchanted mirror in the movie that Belle uses to see her Father?  Heather found some clear plastic mirrors at the dollar store, and then had some glitter glue, stick on gems, ribbons, and letter stickers.  They all had great fun personalizing their mirrors.

  • dollar store mirrors
  • glitter glue
  • gem stickers
  • ribbon
  • letter stickers
beauty and the beast enchanted mirror craft

Chip's Bubbling Tea

The next activity was "Chip's Bubbling Tea".  Remember the part in the movie where Chip, the little teacup shows Belle his trick, of blowing bubbles in his tea?  

Heather used a drink-dispenser jar with a pouring spout, and filled it with bubbles.  Such a great idea to cut down on the mess!  The kids filled up plastic disposable plates, and then blew bubbles until their hearts were content.

  • drink dispenser filled with bubble formula
  • small paper plates
  • bubble wands
beauty and beast bubble blowing activity


child blowing bubbles

I love the look of wonder on Allie's face as she watched the giant bubbles - it was wonderful.

Beauty and the Beast Party Activities -5 great Beauty and Beast themed party activities with inexpensive and easy to find materials that every kid would love. Set-up stations in your backyard and have the best party ever!

Gaston's Target Practise

The next activity was "Gaston's Target Practise", again from a scene in the movie where Gaston is practising with his bow and arrow.

Gaston's Target Practice sign

Heather picked up a few toy nerf bow and arrow sets, and set up a picture of the Beast for target practise.  The kids loves this game.

  • nerf bow and arrow sets
  • beast target
Beauty and the Beast Party Game

Make A Teacup Bird Feeder

The next activity was to "Make a Teacup Bird Feeder", based on the scene in the movie where Belle and the Beast feed the birds in the garden.

Make a teacup bird feeder poster

The teacups were all hung in the tree, and everyone picked one out that they liked -it looked so pretty!

tea cup bird feeders hanging in a tree

To make the bird feeder, Heather super-glued the cup to the saucer.  The glued cup and saucer could be filled with bird seed for the birds.  These were sent  home in the favour bag, along with a little container of bird seed.

  • tea cups
  • ribbon
  • super glue
  • small containers of bird seed
teacup bird feeders hanging in a tree

Maurice's Inventions

The final activity was "Maurice's Inventions" centre.  Belle's father Maurice was an inventor, and always working on his inventions in the movie.  
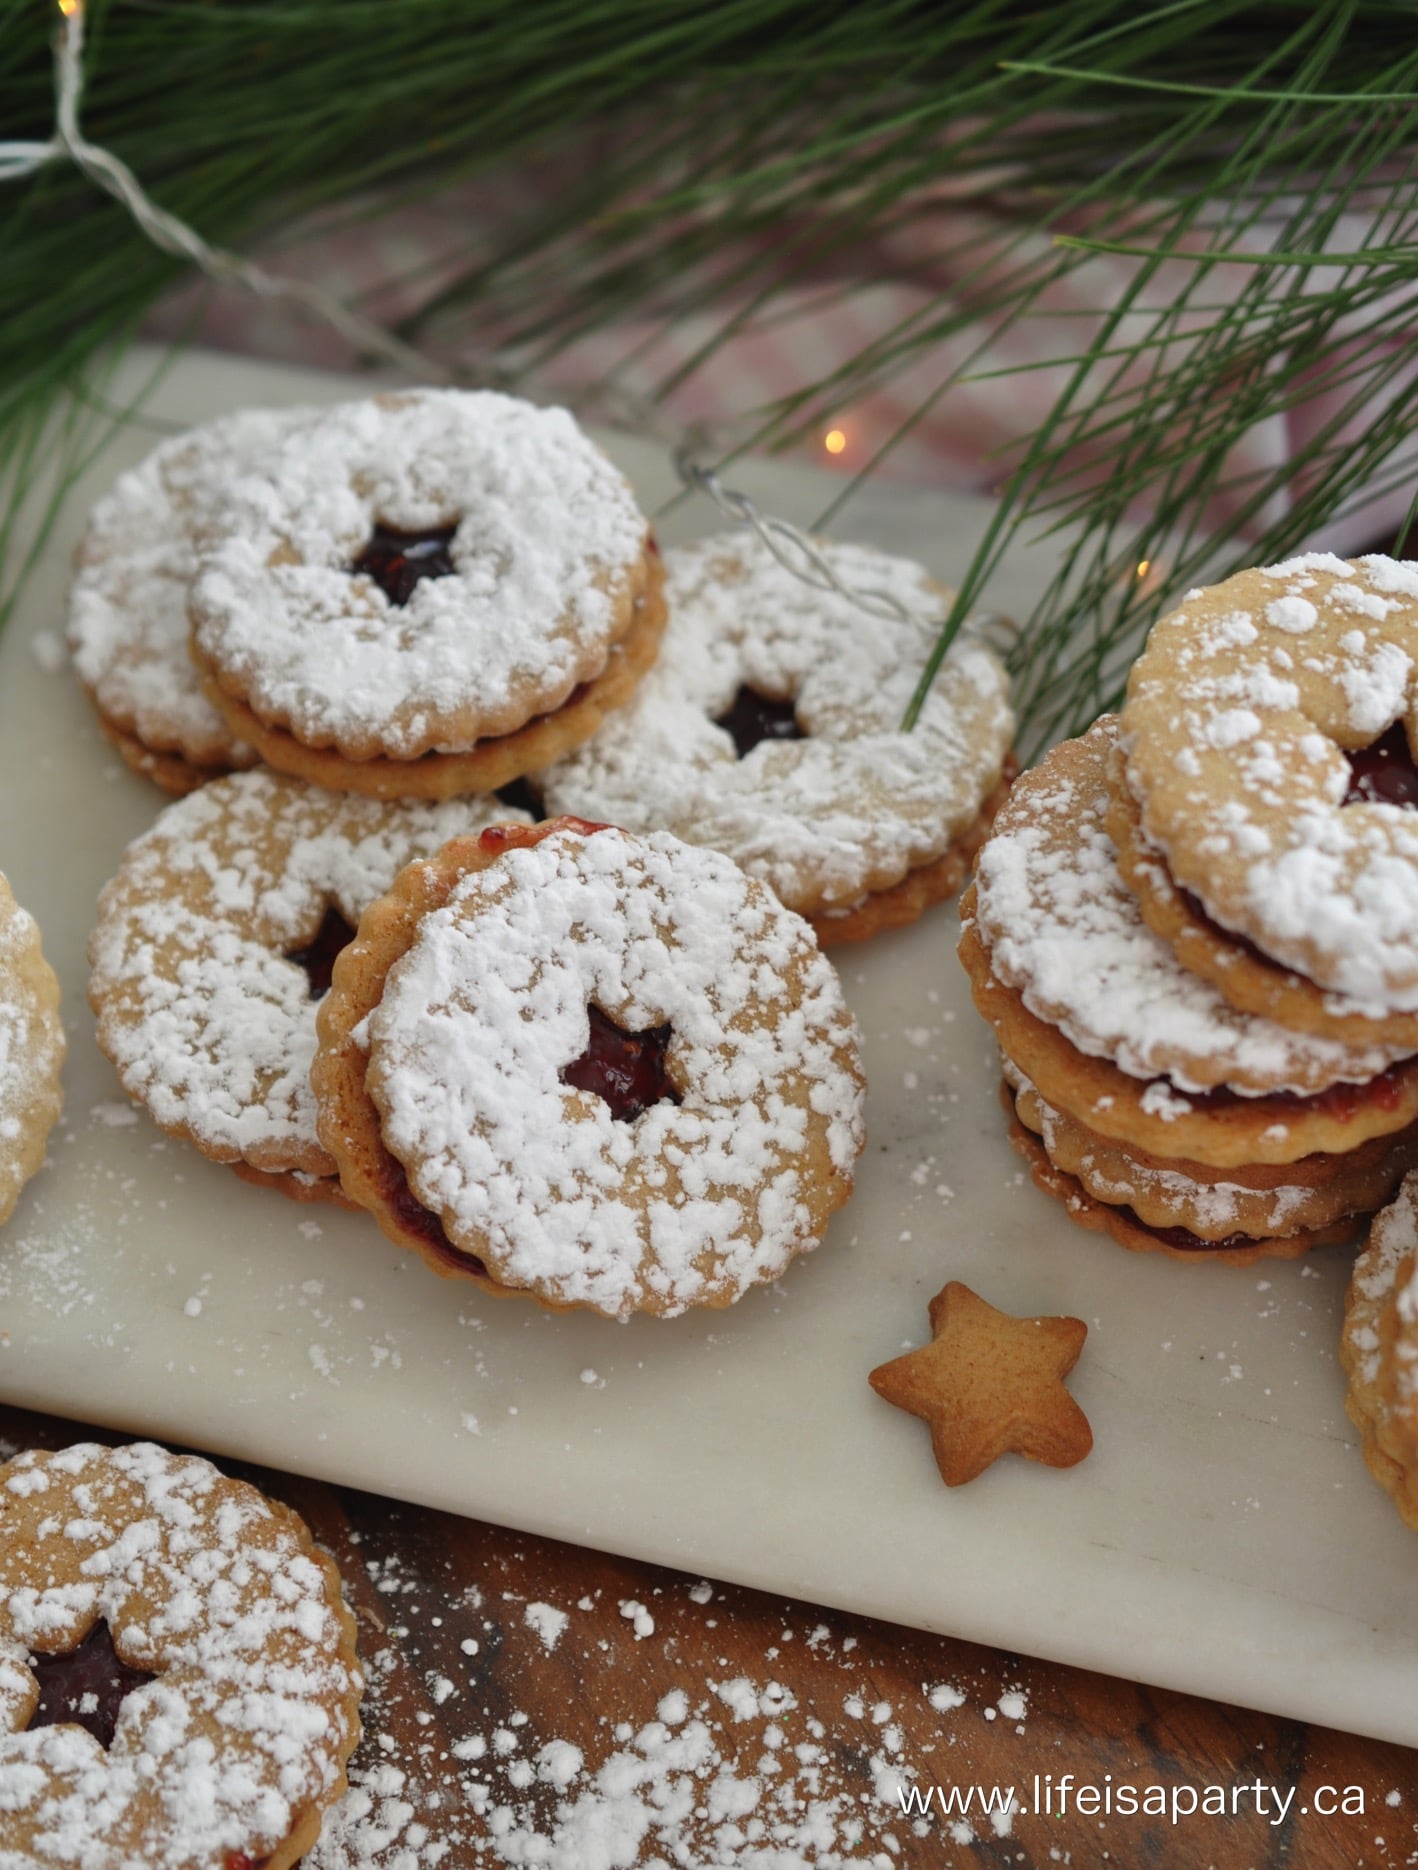
Heather set up the table with lots of fun things, and open ended materials.  There was construction paper, egg cartons, felt, tin foil, wire, tape, glue, markers, pencil crayons, and pipe cleaners.

  • construction paper
  • egg cartons
  • felt
  • tin foil
  • wire
  • tape
  • glue
  • markers
  • pencil crayons
  • pipe cleaners
  • scissors
  • note books and pencils
  • styrofoam balls
  • coloured string
  • old bottle caps
  • wood cubes
  • toothpicks
  • skewers
  • popsicle sticks
inventors child's play station


There was also a tray of fun bits and bobs, like styrofoam balls, coloured string, old caps, wooden cubes, wooden buttons, toothpicks, skewers, and different sizes of popsicle sticks.

invention children's play station with craft materials
Everyone had a little notebook, to work out their invention ideas, and then they could make whatever they liked.  Some of the kids made a quick invention and then went off to play.  Others, lingered at the table for a long time, and kept thinking of new things to make.  It was the perfect last station, so the kids who loved it could say there as long as they liked.

Come and Go As You Please

All the stations stayed open throughout the party, so at the end, the kids could return and play where ever they wanted.  The bubbles, target practise, and inventions were re-visited over and over.  It was a wonderful party, enjoyed by all.  The birthday girl was well celebrated, with a joyful afternoon.  Happy Birthday Miss. Allie!

With an afternoon of creative and fun Beauty and the Beast Party Games and Activities, life is really a party!

Don't forget to check out the Beauty and the Beast Party Part I -Food and Decor Ideas here.

Beauty and the Beast party ideas

You might also like our Sleeping Beauty Slumber Party post here.

  • « Go to Previous Page
  • Page 1
  • Interim pages omitted …
  • Page 12
  • Page 13
  • Page 14
  • Page 15
  • Page 16
  • Interim pages omitted …
  • Page 21
  • Go to Next Page »

Primary Sidebar

Welcome!

Life is a Party is all about helping you celebrate everyday with great food, entertaining and party inspiration, and seasonal crafts and home decor inspired by the holidays.

More About Dannyelle

Trending Recipes

  • Mac and cheese with panko breadcrumb topping.
    Best Homemade Mac and Cheese with Panko Breadcrumb Topping
  • Homemade iced capps in glasses on a wood table.
    Tim Hortons Copycat Iced Capp Recipe
  • Dirt Pudding no cream cheese in glasses with candy rocks, and fresh mint that looks like a little plant.
    Easy Dirt Pudding Recipe without Cream Cheese
  • Easy 3 ingredient coconut milkshake recipe.
    Easy Coconut Milkshake Recipe
  • Easy food processor scones on a plate with jam.
    Easy Food Processor Scones
  • Fluffy small batch pancakes for two ready to serve on a plate with syrup.
    Easy Small Batch Pancakes For Two Recipe

Fall Ideas

  • Pumpkin shaped dinner roll recipe, with a herb stem.
    Pumpkin Shaped Dinner Rolls
  • Fall breakfast board
    Fall Breakfast Charcuterie Board
  • Halloween witch decorations
    Witch Halloween Decor
  • fall home decor
    Fall Decorating Ideas -Home Tour
  • Modern Boho fall mantel ideas.
    Modern Boho Fall Mantel Ideas
  • Homemade pink candy apples on a cutting board.
    How To Make Pink Candy Apples

Entertaining Ideas

  • Adult mermaid party table set on the beach with cake and shells.
    Adult Mermaid Party Ideas: A Beach Picnic Goodbye to Summer
  • Overhead view of tomato party table with pizza and appetizers.
    The Ultimate Tomato Party: A Tomato Girl Summer Garden Gathering
  • Camp themed party table with green gingham tablecloth, wildflowers, and Welcome to Camp banner.
    The Ultimate Camp Themed Party for Adults
  • Garden party table set under white pergola with vintage floral tablecloth, pink peony centerpiece in wooden tool caddy, white wicker chairs, and climbing white roses in background.
    Garden Themed Party
  • Complete mimosa bar setup on white console table with vintage silver ice bucket, labeled colorful juice bottles, small glass garnish bowls, and ribbon-tied champagne flutes on white lace tablecloth with flower wall backdrop.
    How to Set Up a Beautiful Mimosa Bar
  • Breakfast for dinner party table styled like a bed with star quilt tablecloth, gingham pillows, and cloud installation above.
    Breakfast for Dinner Party: Brinner Under the Stars
  • Recipe Index
  • Parties & Entertaining
  • Fall
  • Subscribe
  • Free Resource Library

Footer

back to top

as seen in:

Better Homes and Garden Logo
American Farmhouse Style logo.
Apartment Therapy logo.

About

  • Privacy Policy
  • About

Subscribe

  • Sign Up! for emails and updates

Contact

  • Contact

As an Amazon Associate I earn from qualifying purchases.

Copyright © 2025 Life is a Party

Share
Pin
Post
Share
Pin
Post

Rate This Recipe

Your vote:


A rating is required
A name is required
An email is required